Monthly Archives: June 2022

Restoring and Restemming a Burl King Freehand Bowl


Blog by Steve Laug

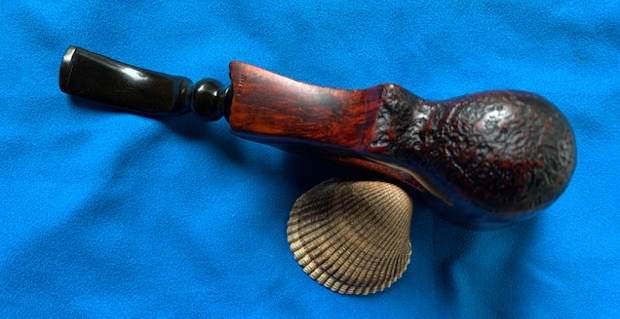
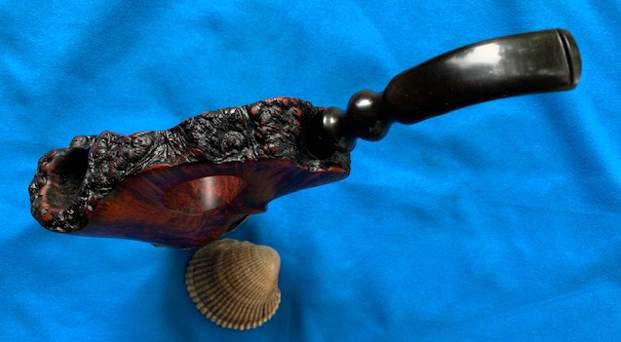
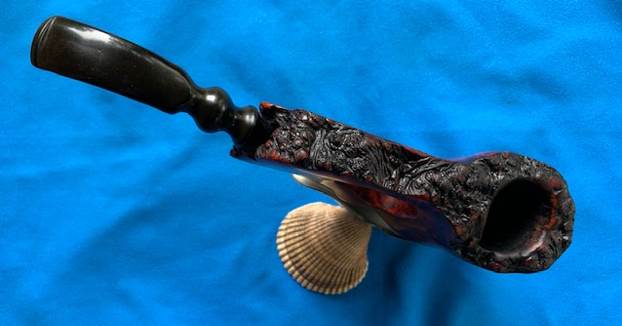
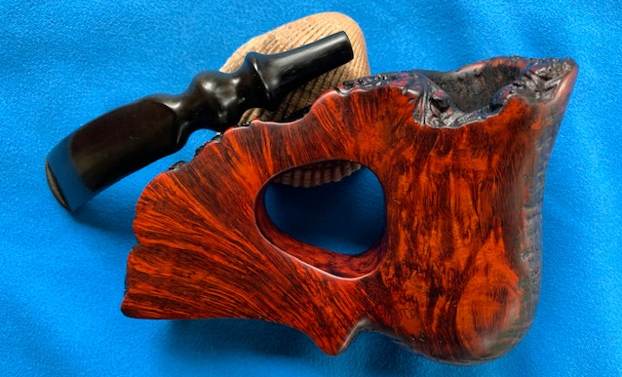
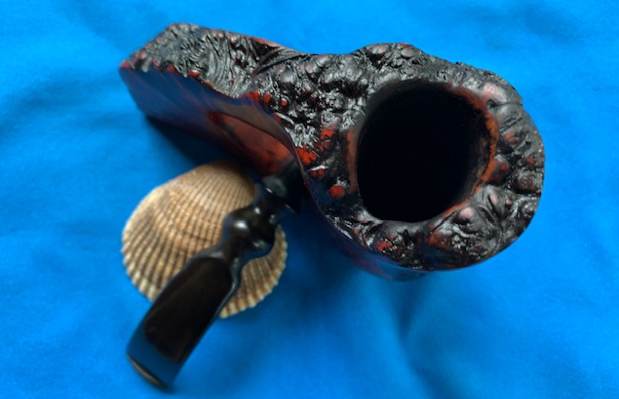
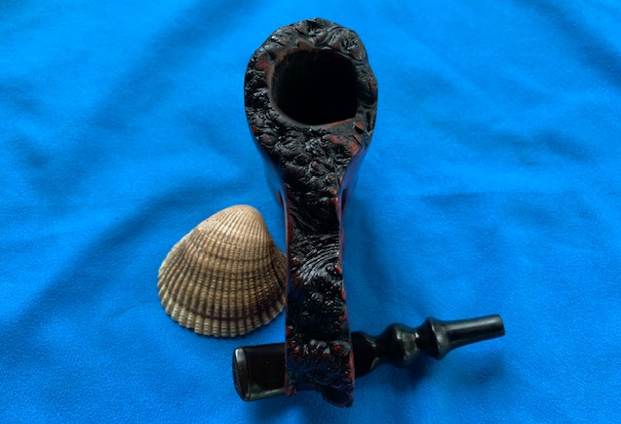
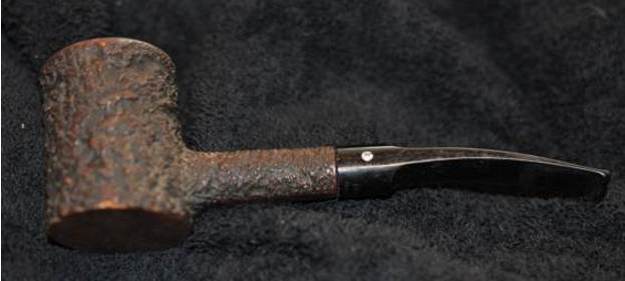
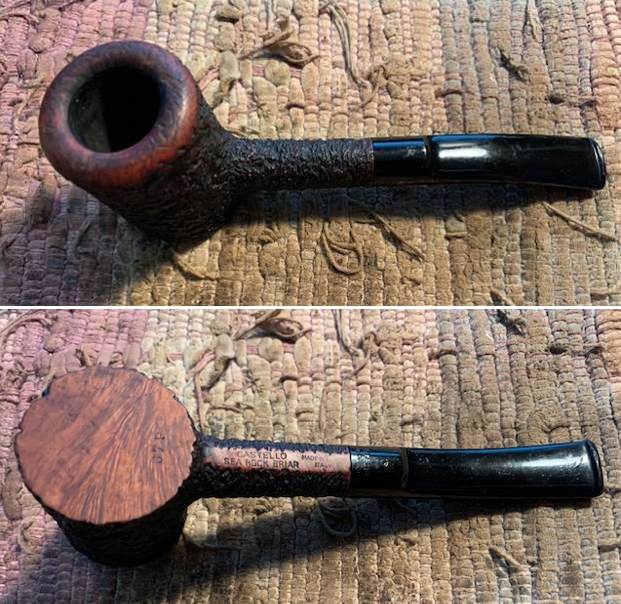
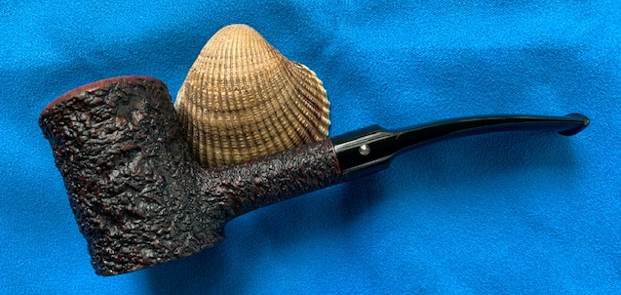
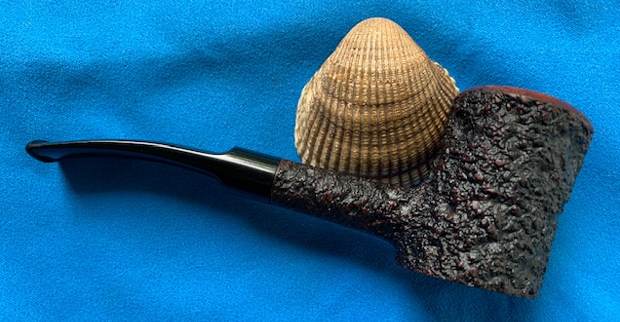
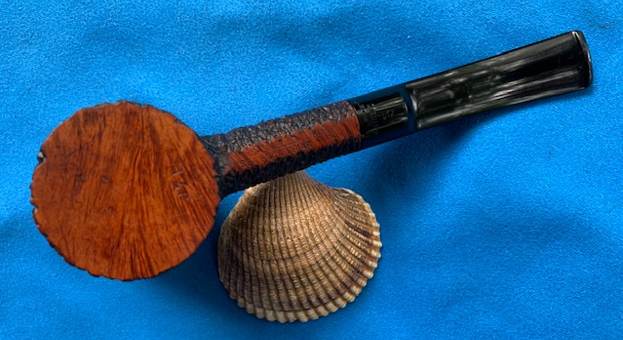
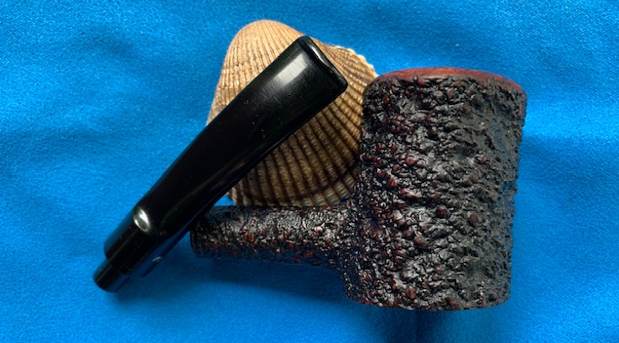
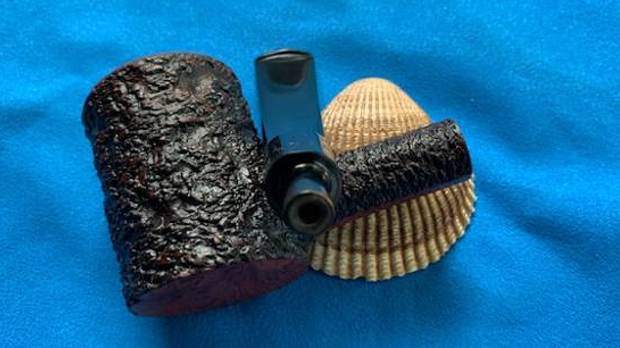
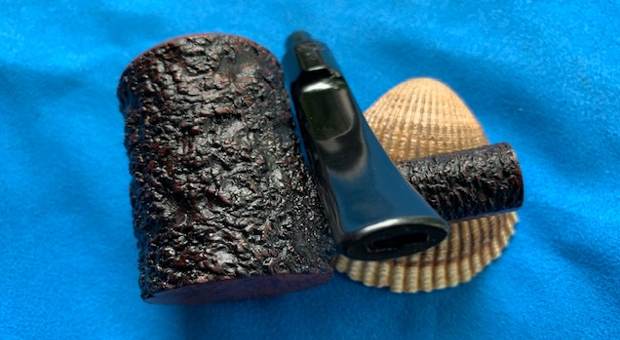
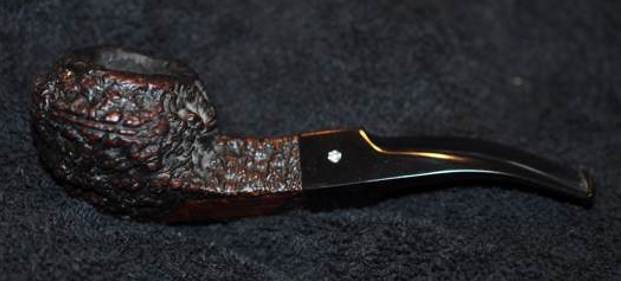
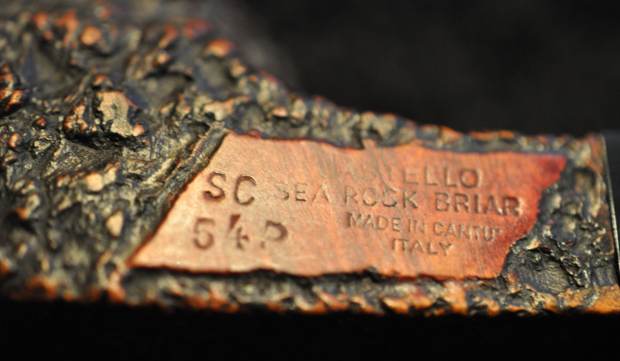
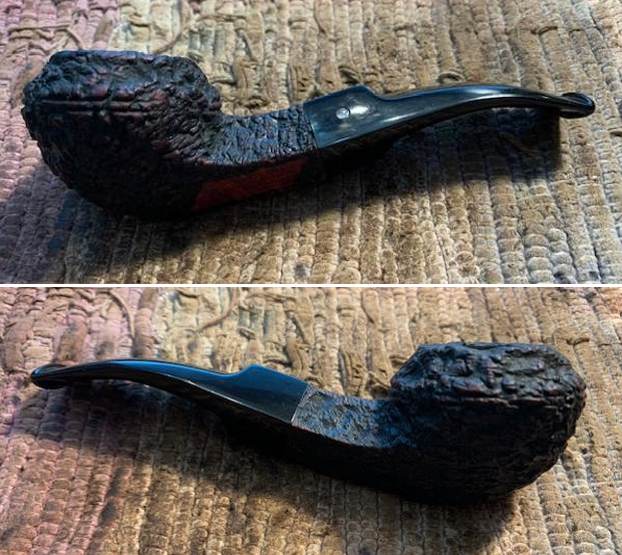
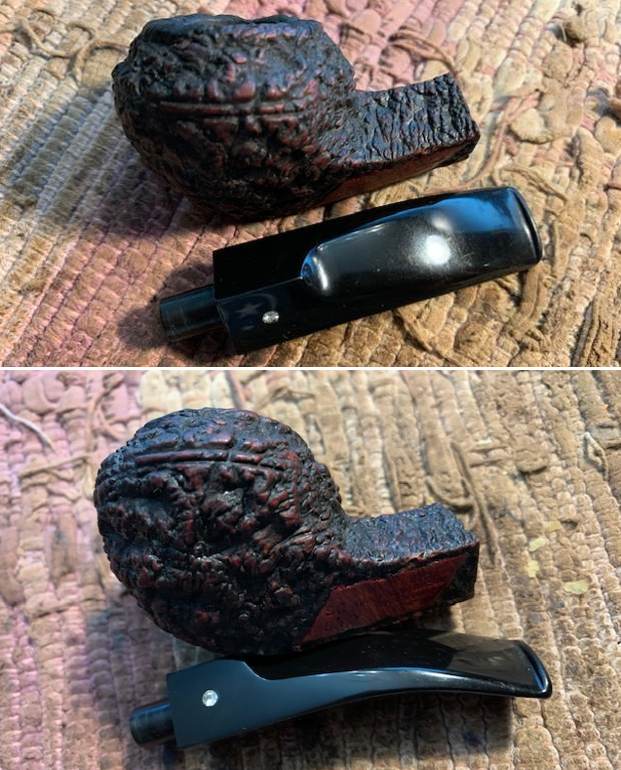
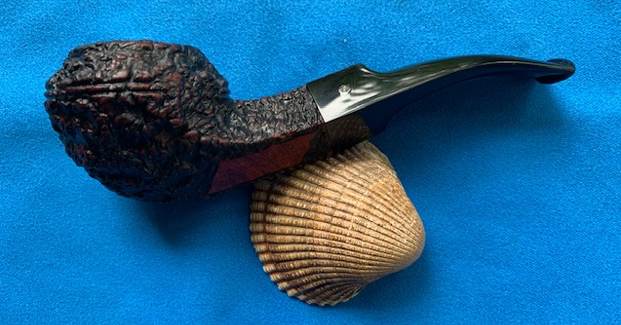
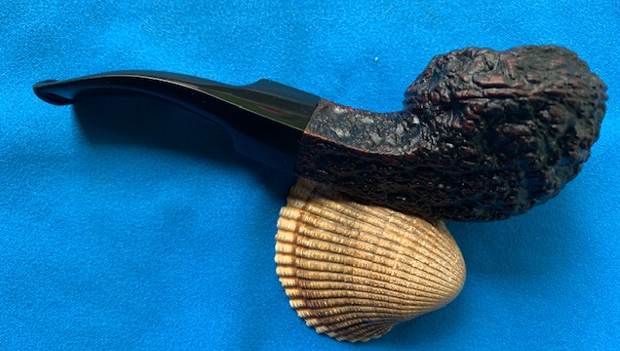
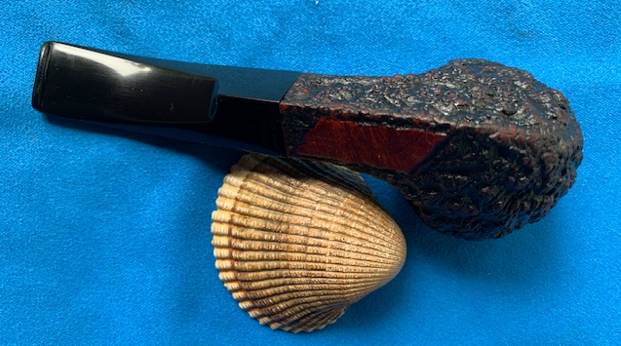
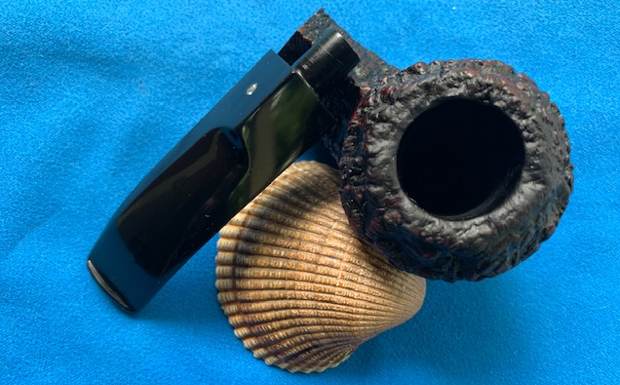
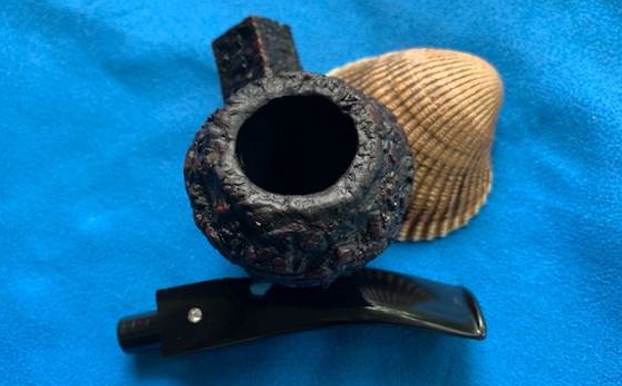
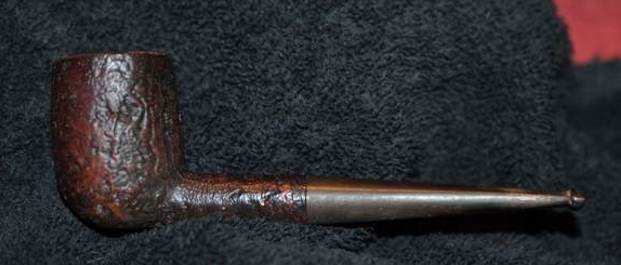
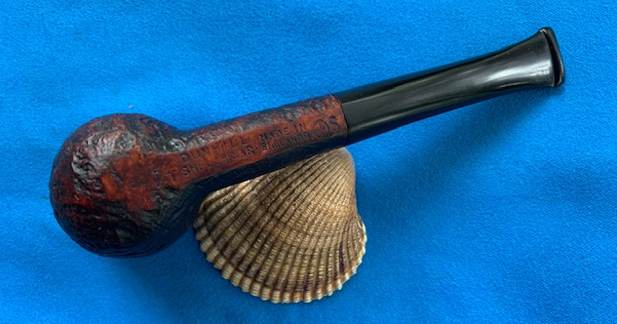
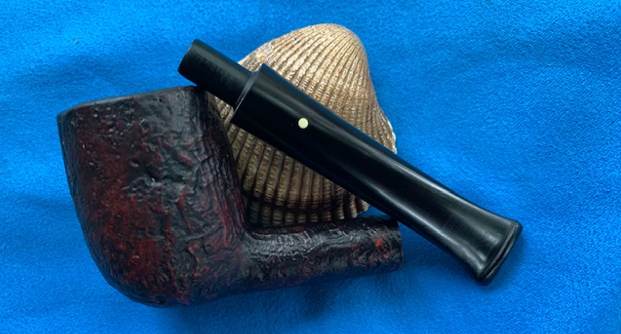
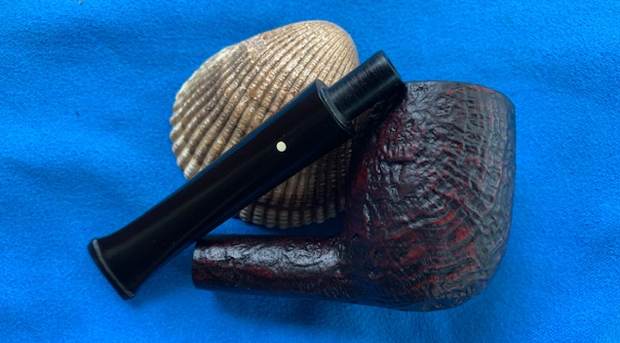
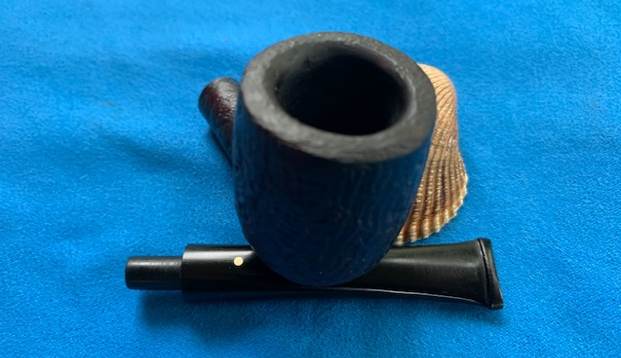
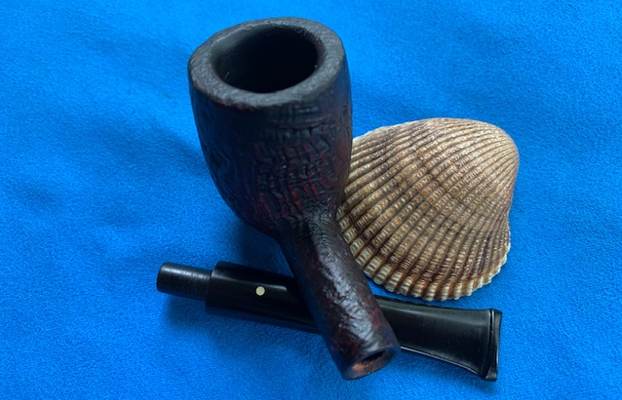
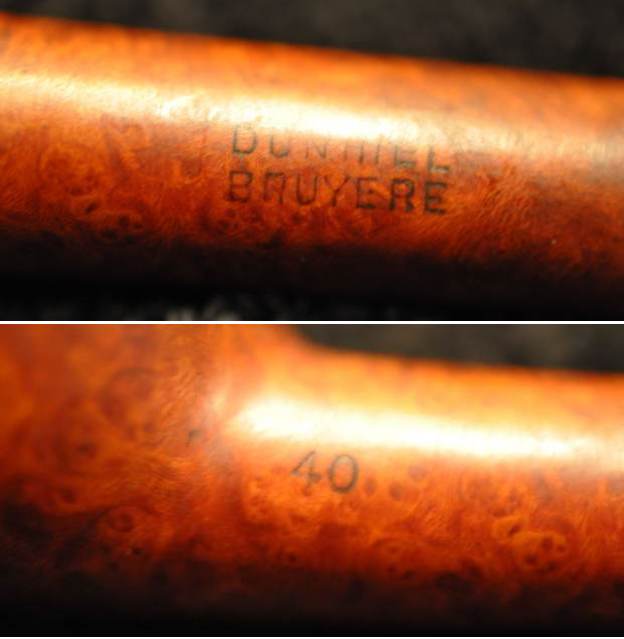
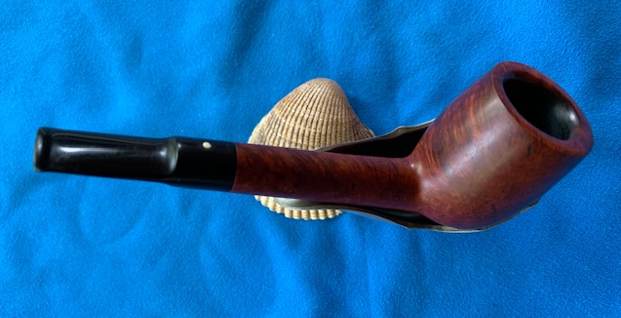
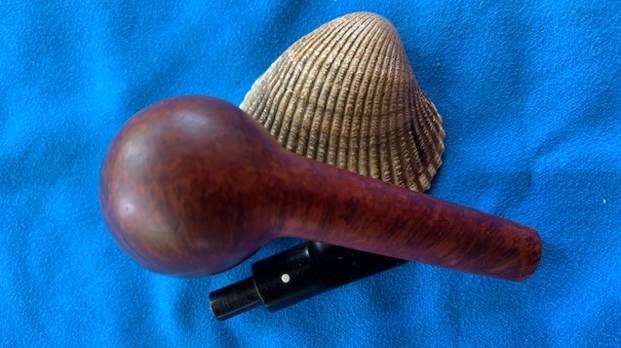
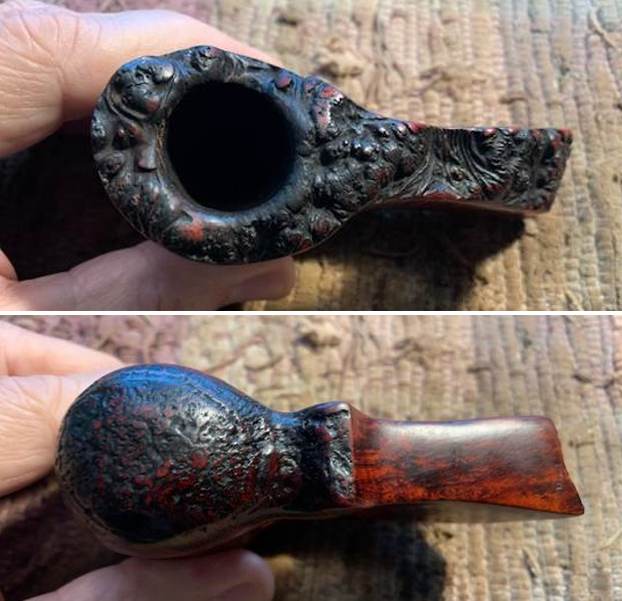
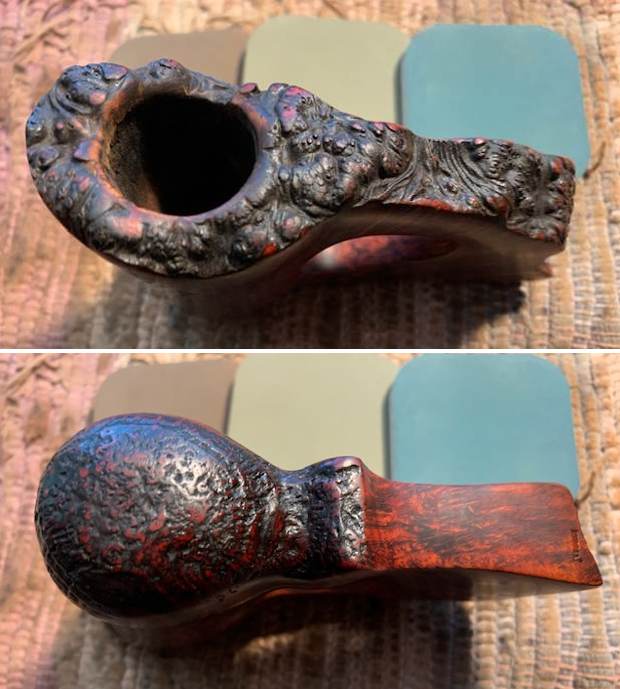
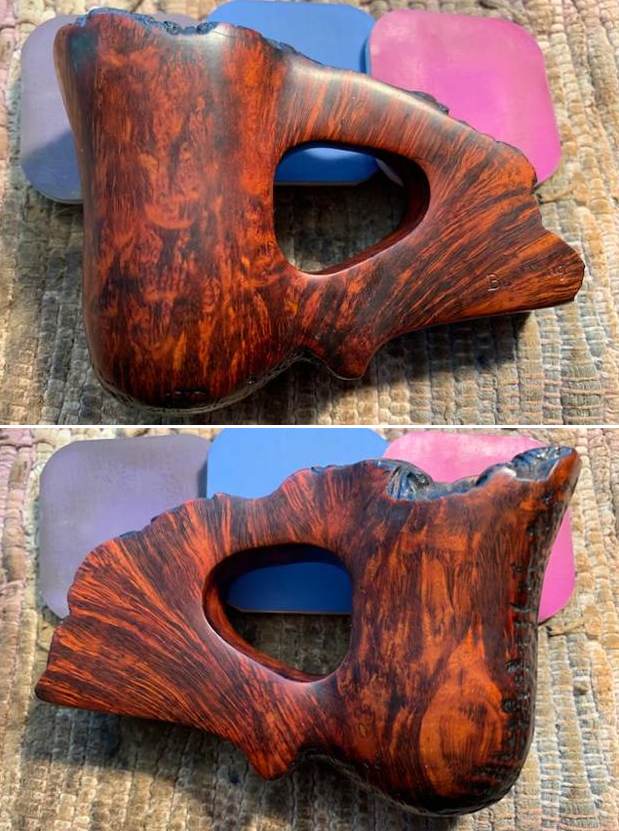
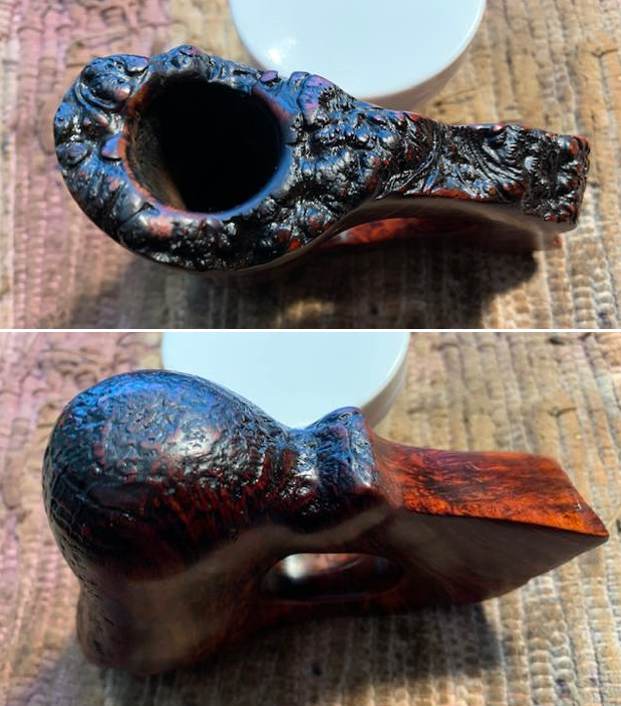
The next pipe in the queue came to us in August, 2020 from an Antique Mall in Logan, Utah, USA.  It is an interesting Freehand bowl that has a bridge over the top of the shank that forms a hole for the thumb when smoking. It has a smooth finish with a plateau on the top of the shank and bowl. I would need to find a fancy turned stem that would work with the bowl. The pipe is stamped on the left corner of the shank and clearly reads Burl King. On the underside of the shank it is stamped Israel. I think that this will be another nice looking piece once it is cleaned up and restemmed. The bowl is thickly caked with an overflow of lava on the rim top. The right side of the bowl toward the front and the heel were sandblasted. The top and edges of the bowl look good but I would be more certain once I reamed and cleaned it. The exterior of the briar was dirty with grime and dust. Jeff took photos of the pipe before my cleanup work. They tell the story and give a glimpse of the promise that we see in this pipe. 
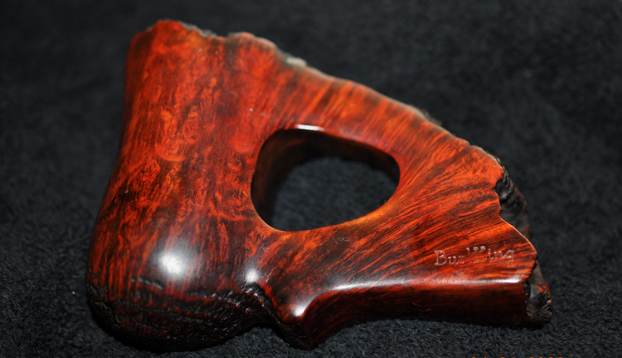
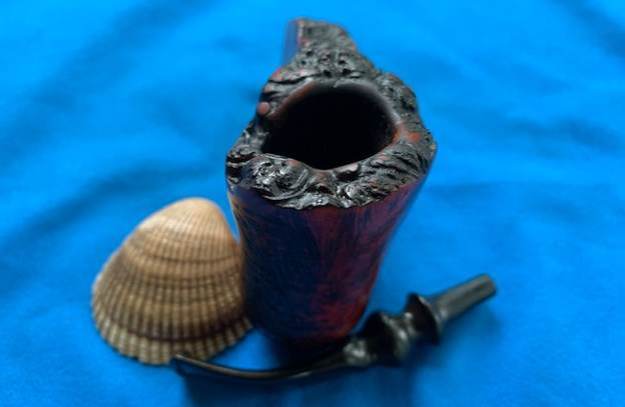
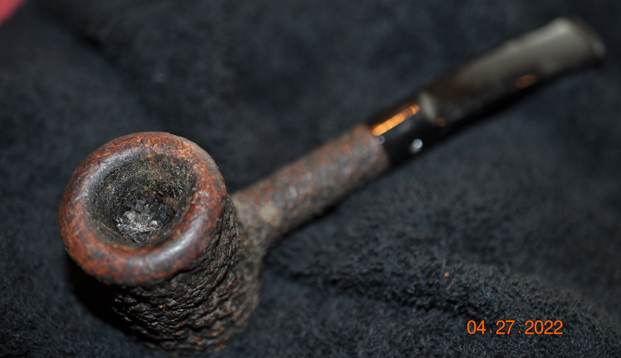
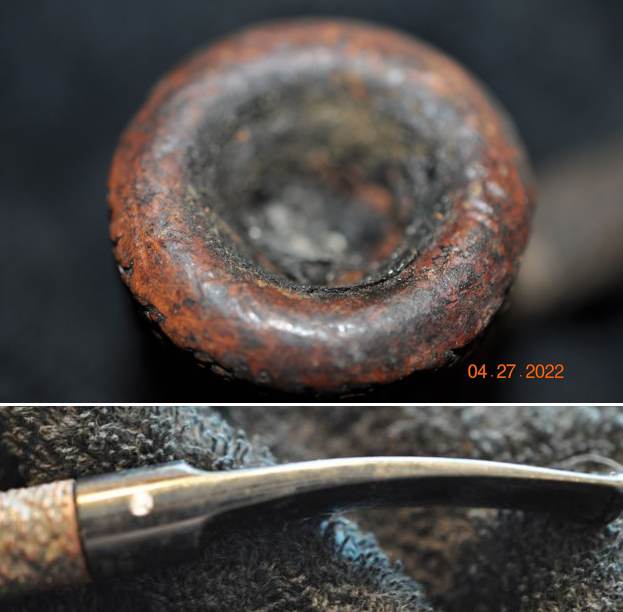
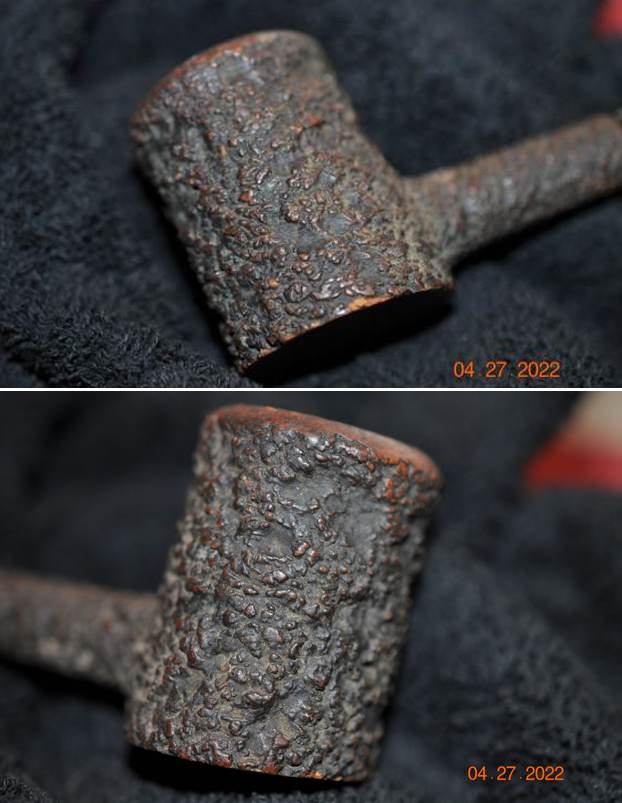
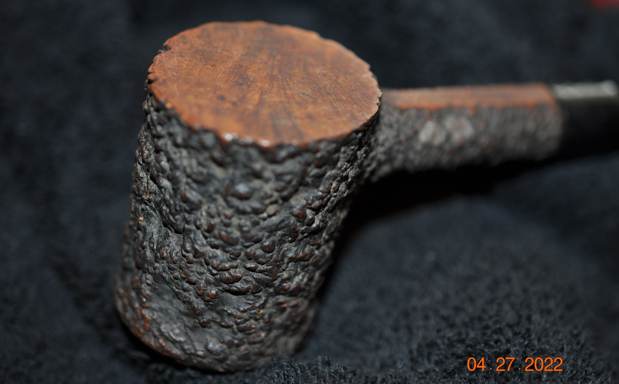
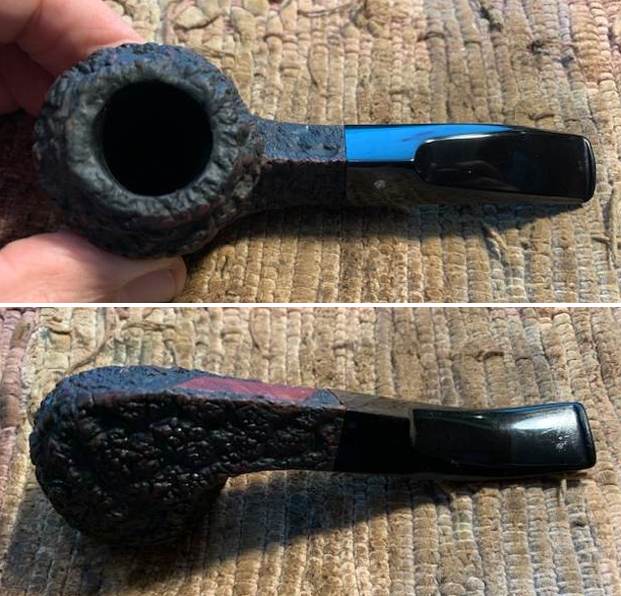
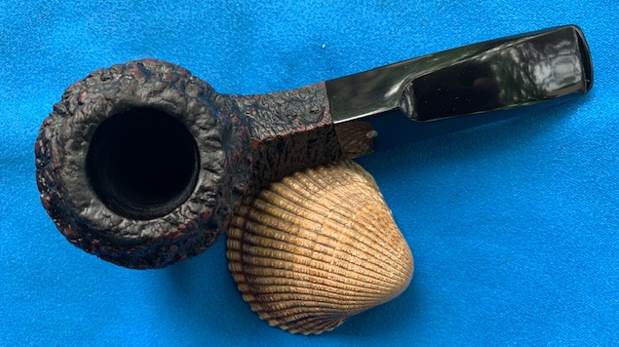
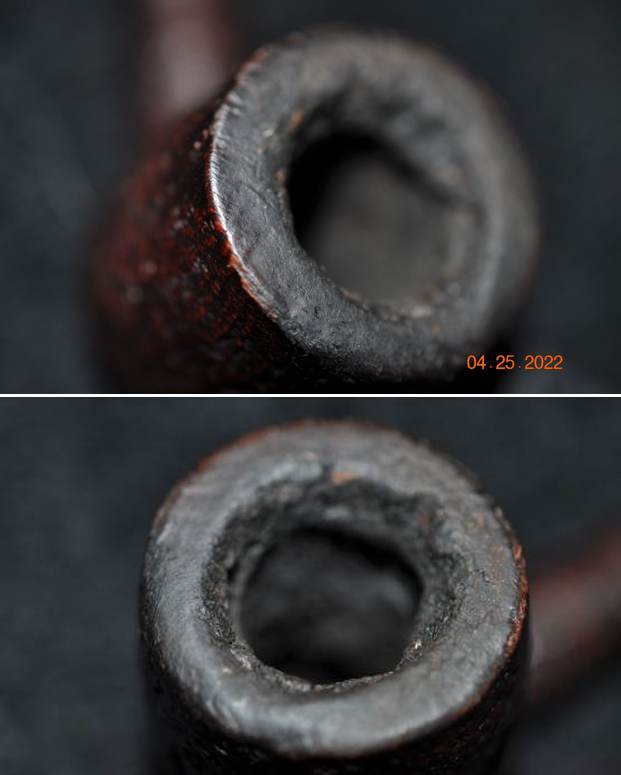
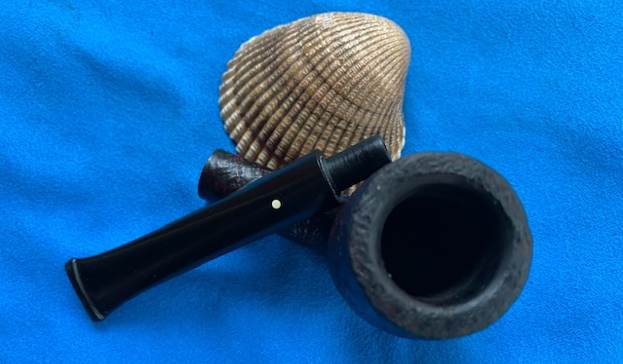
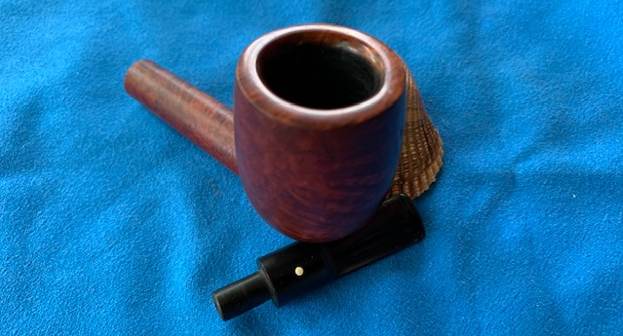
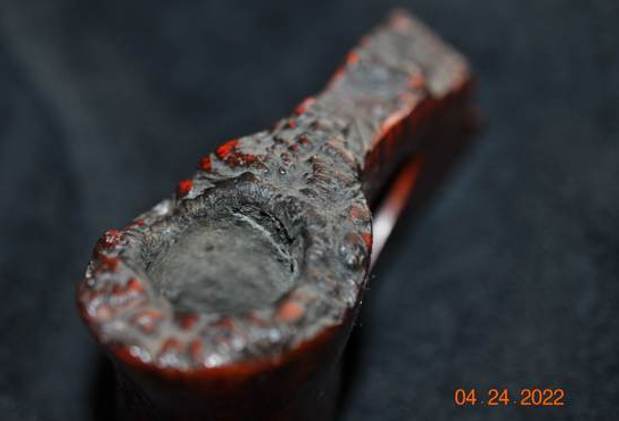
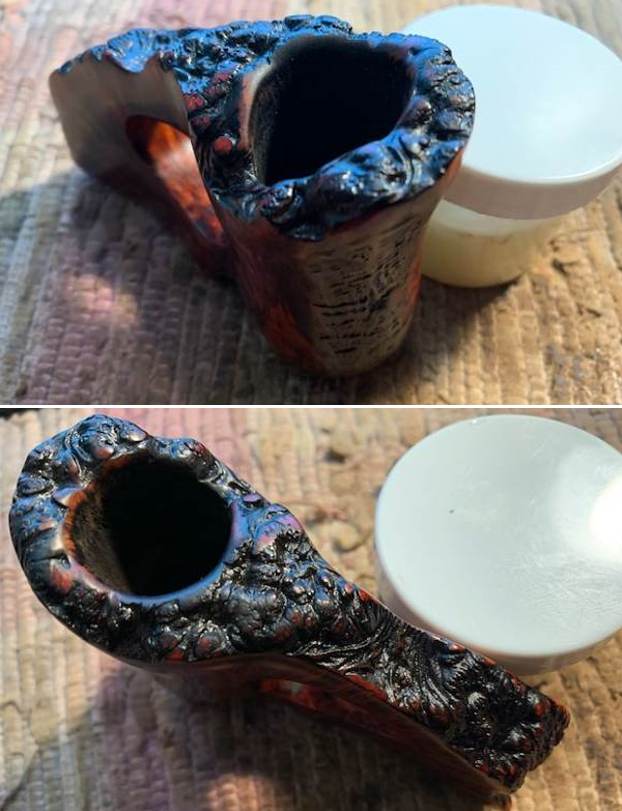
He took photos of the plateau rim top to show the cake in the bowl, the lava on the rim top and the inner edge. 
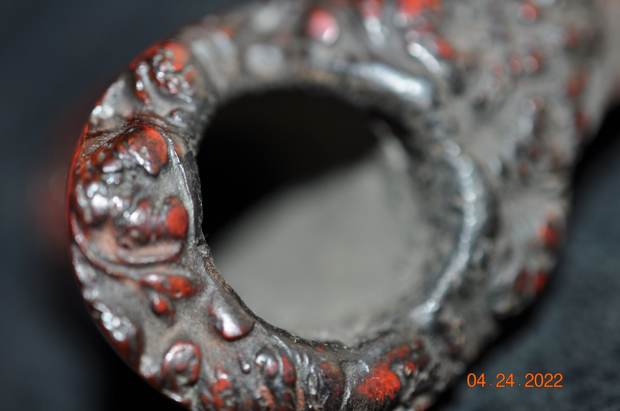
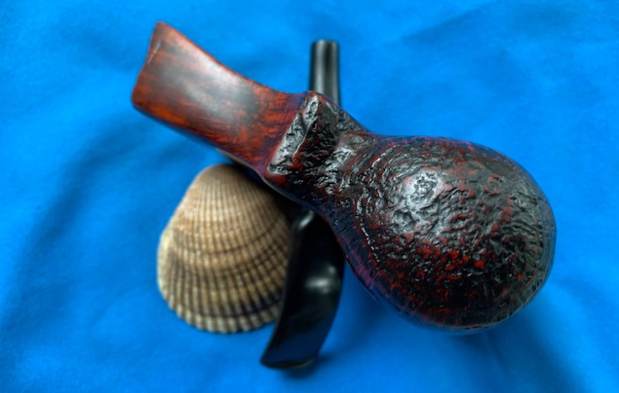
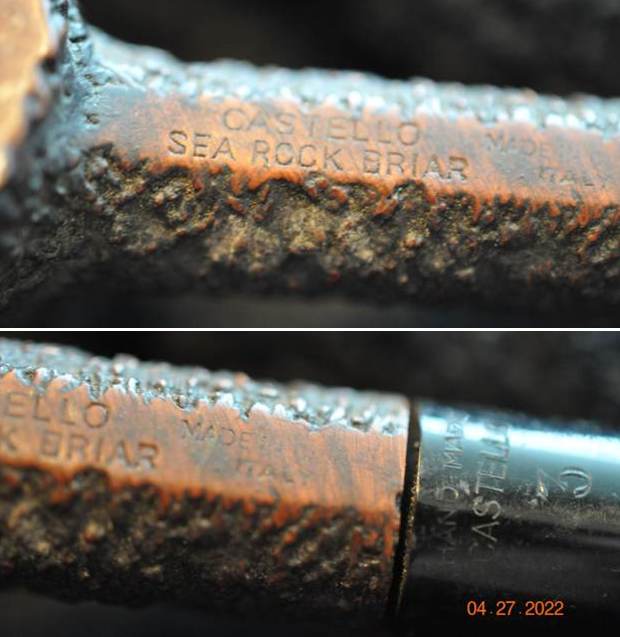
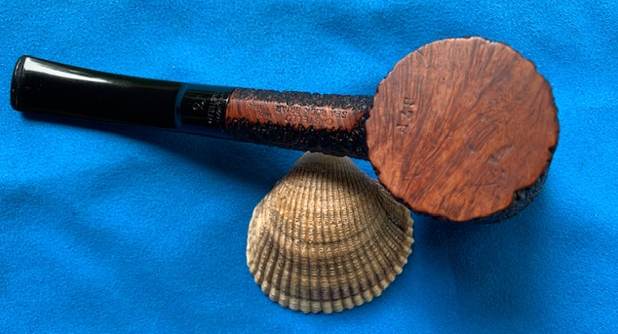
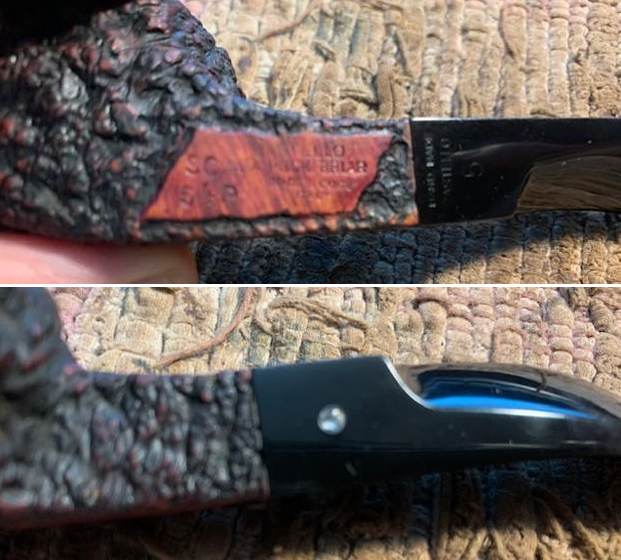
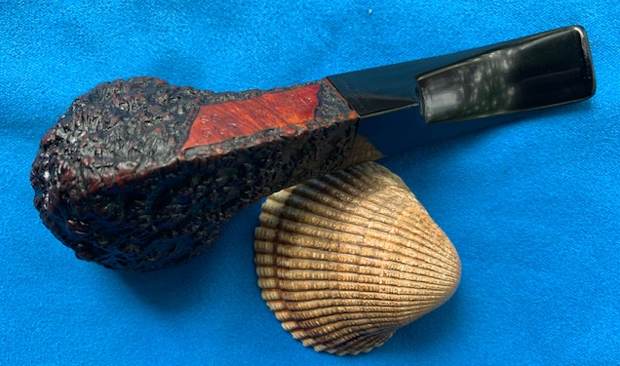
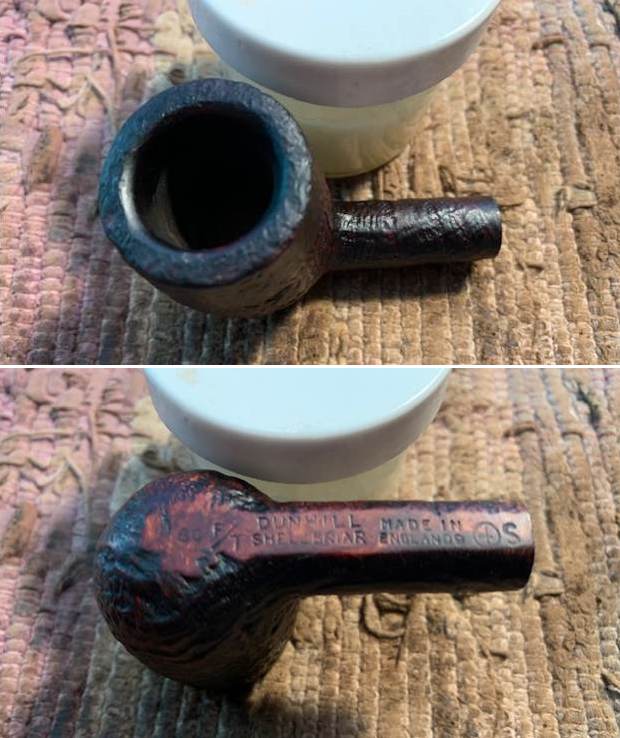
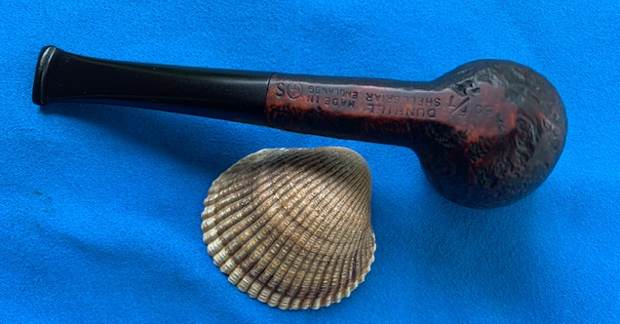
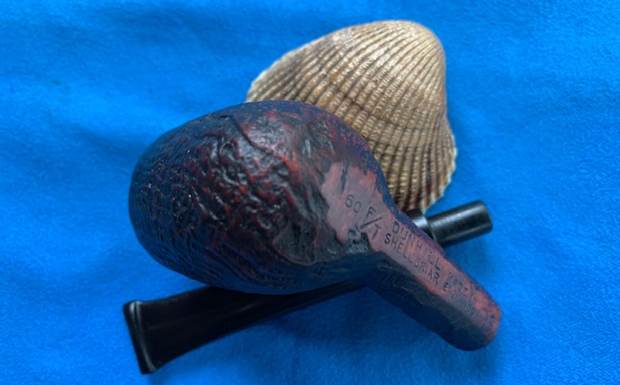
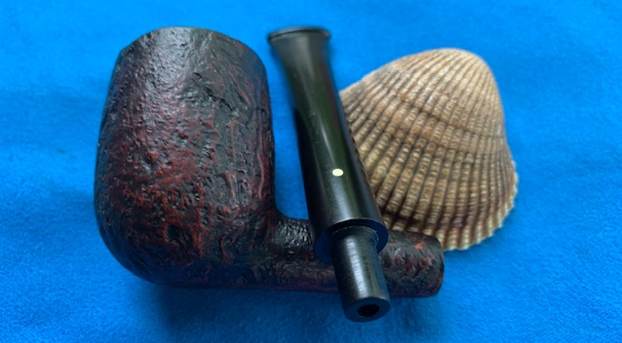
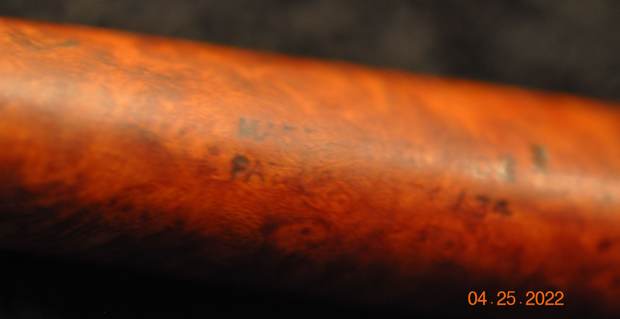
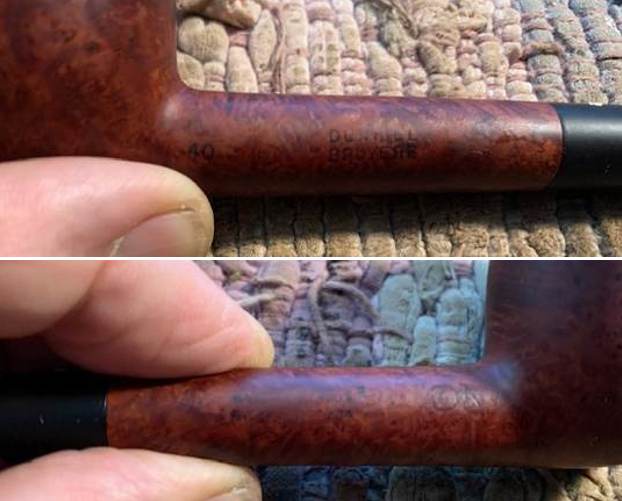
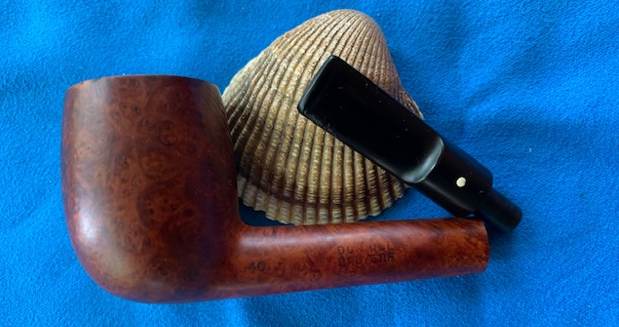
He took photos of the stamping on the left corner of the shank and the underside. It is faint in spots but readable as noted above.Before working on the pipe I wanted to remind myself of the history and background of the brand. I remembered that I had restemmed and restored a Burl King stummel previously so I turned to the blog I had written. Here is the link to the previous blog and the pipe I had restored and restemmed (https://rebornpipes.com/2020/09/20/restemming-and-rebirthing-a-burl-king-freehand-bowl/).

From the blog I quote the following information on the brand and who made it. I find it interesting to note the various companies included in the manufacture and distribution of the pipe.

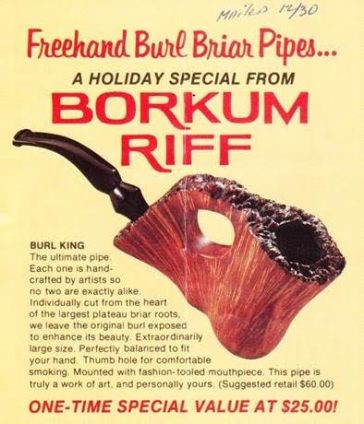
I turned to Pipedia to read about Burl King pipes (https://pipedia.org/wiki/Burl_King). I quote the entirety of the article and have included the advertisement that connects the pipe to Borkum Riff tobacco.

We need more information about Burl King. We can confirm that it was at one time a pipe used for promotion of Borkum Riff tobacco, as reported by Bob Taylor of the Seattle Pipe Club, who mailed in a coupon and received the pipe with a Postmark of Jan. 11, ’78, and a return address of Sparta, N. C., which indicates it may have come from the Dr. Grabow/Sparta Industries plant.

Bob recently noticed his “Burl King” was also marked, made in Israel, so it was likely made by the Shalom Pipe Factory, though apparently distributed through Sparta Industries. The box shipped for 50 cents and the return address said “After 5 days return to P. O. Box 21882 Greensboro, N. CC. 27240.” So apparently these pipes were made by Shalom, but distributed for Borkum Riff by Sparta Industries.

Others have indicated Burl King pipes were also made by Wally Frank.

I love the description as it truly captures the shape and beauty of this freehand pipe. The article above stated that the pipe is handcrafted by artists so that each one is a unique piece. It is cut from the plateau to leave that exposed on the top of the rim and down the shank to the end. It has a thumb hole cut for comfort in holding it while smoking. It is suggested that pipe sold for $60. Now to work on the pipe.

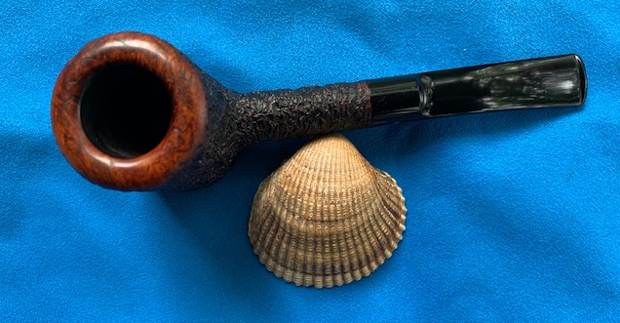
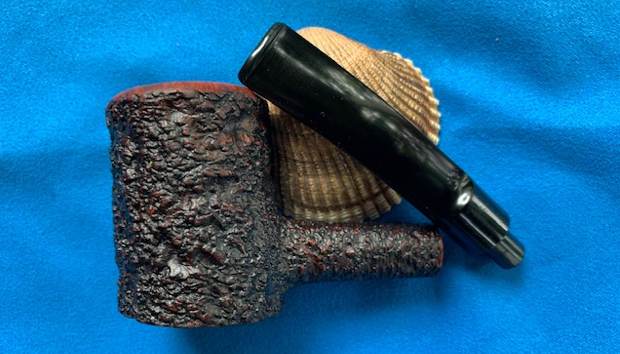
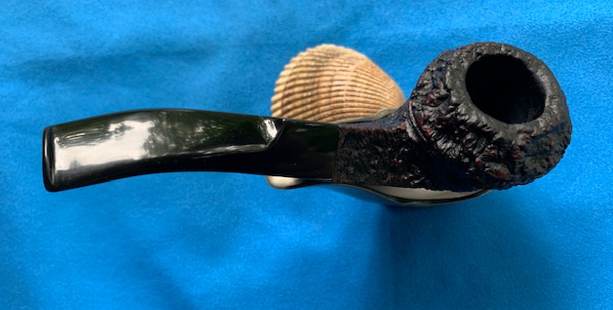
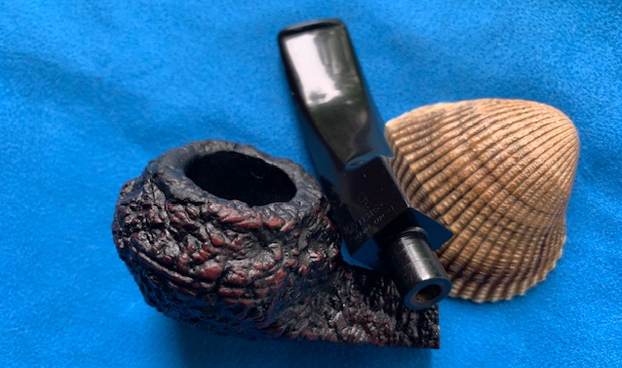
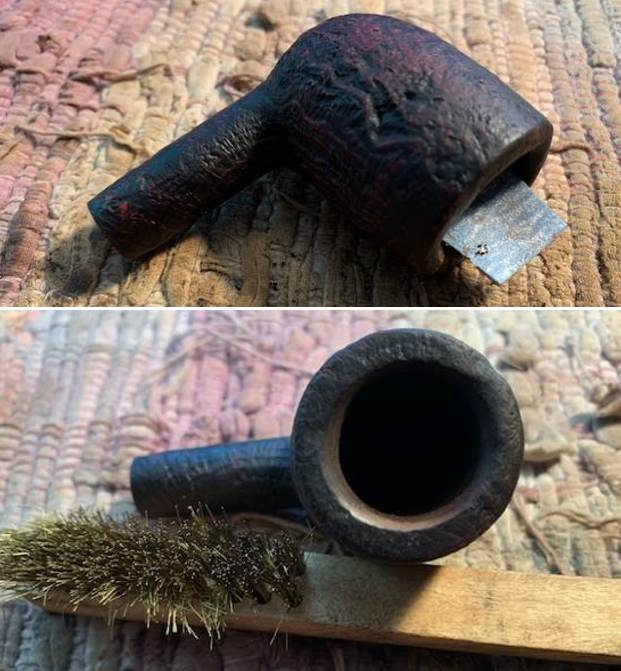
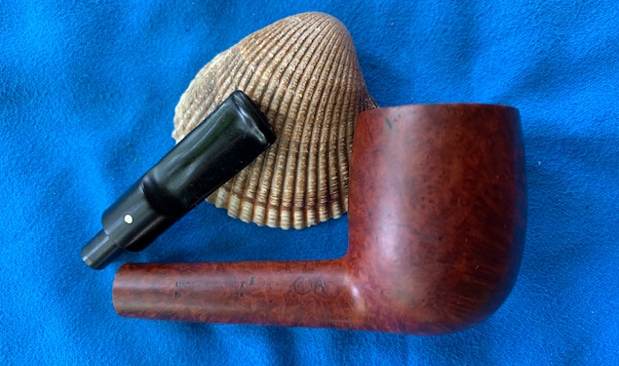
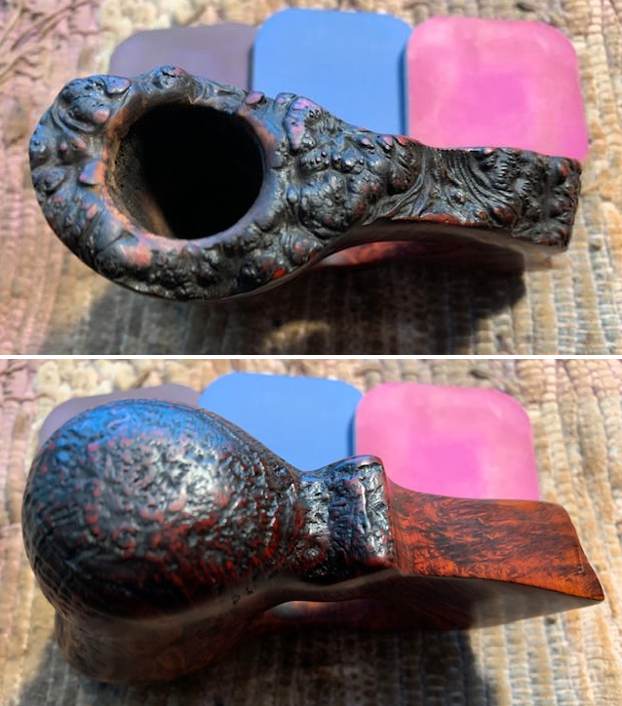
Jeff had cleaned up the pipe with his normal methods. He reamed the pipe with a PipNet pipe reamer and removed the rest of cake with a Savinelli Fitsall Pipe Knife.  He scrubbed the bowl with undiluted Murphy’s Oil Soap with a tooth brush. He rinsed it under running warm water to remove the soap and grime. He cleaned out the inside of the shank and the airway into the bowl with alcohol, cotton swabs and pipe cleaners. I took photos of the pipe once I received it. 
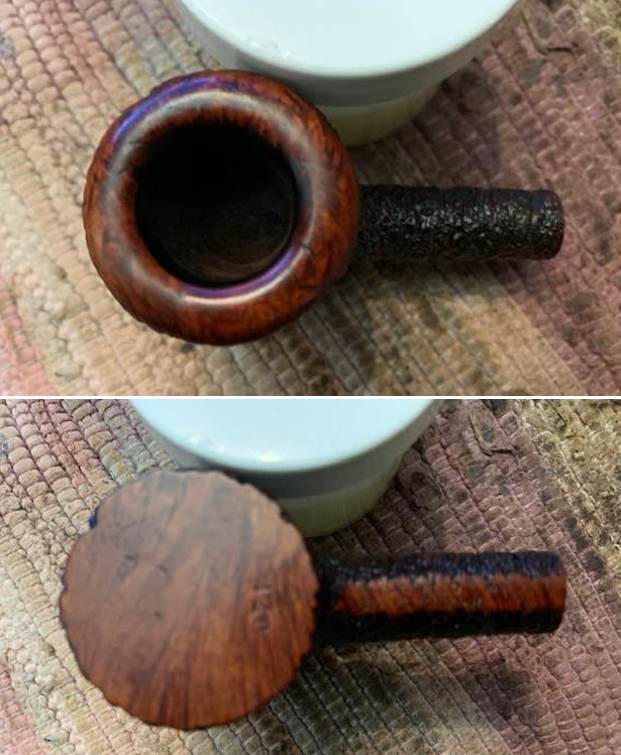
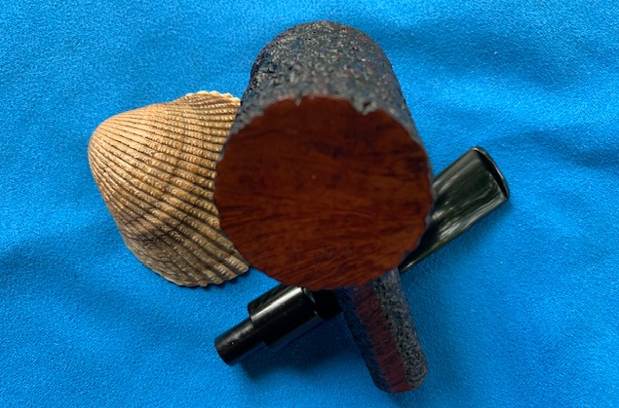
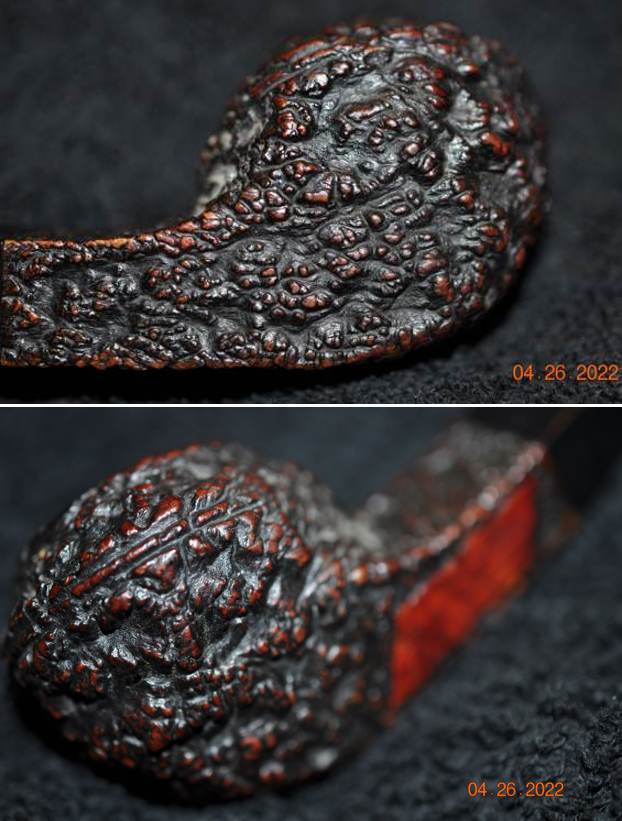
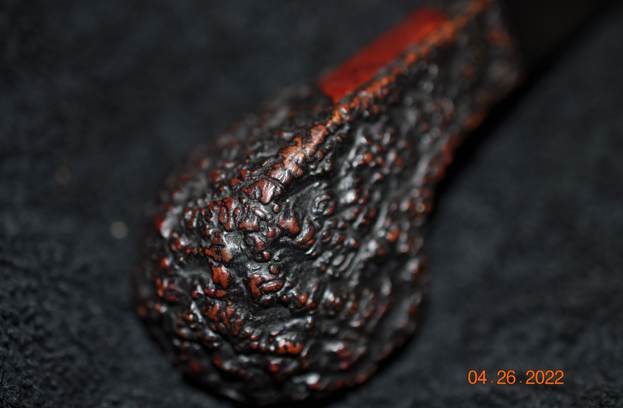
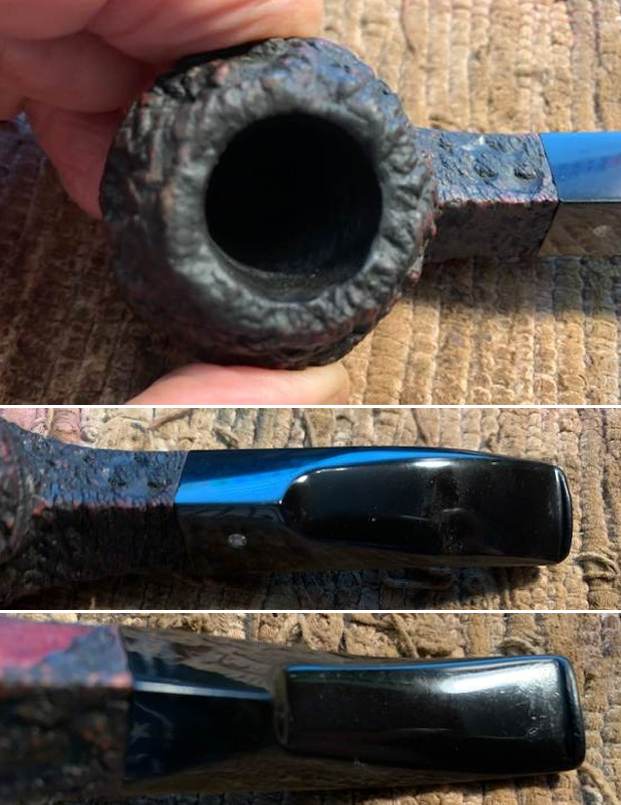
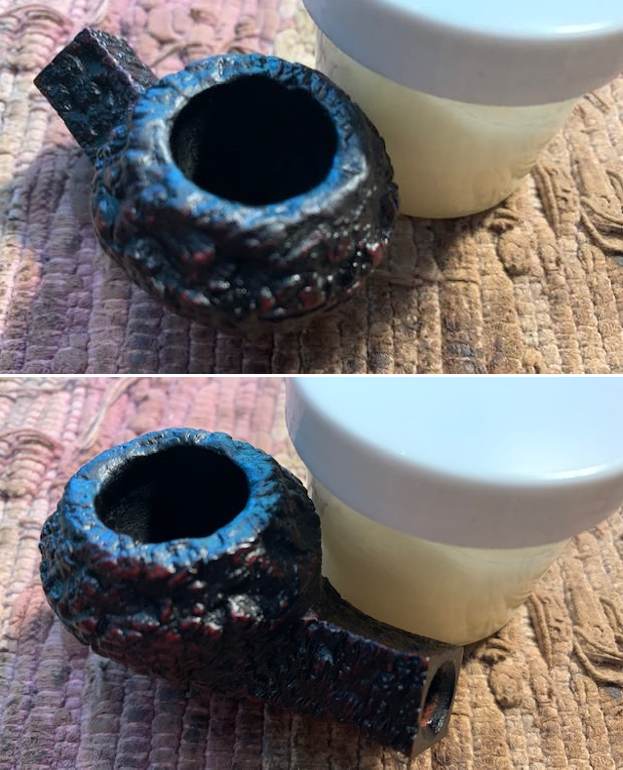
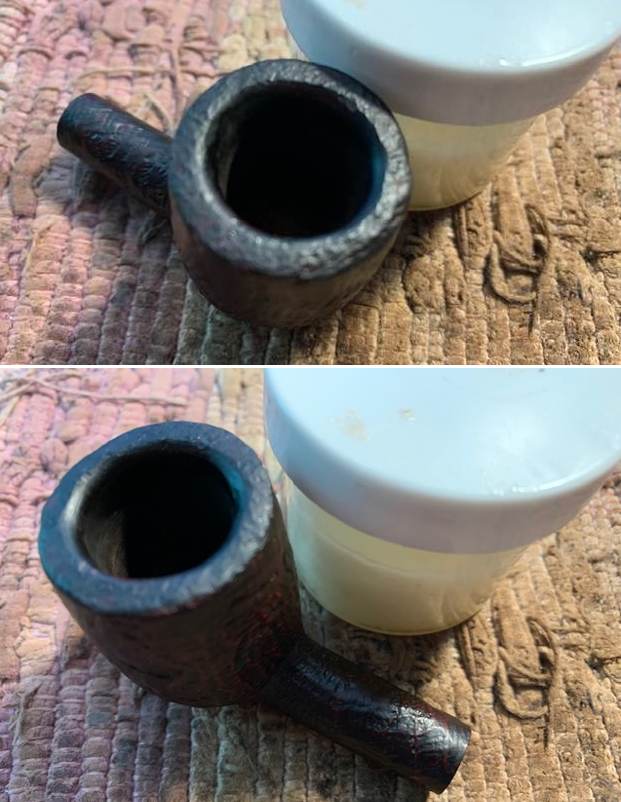
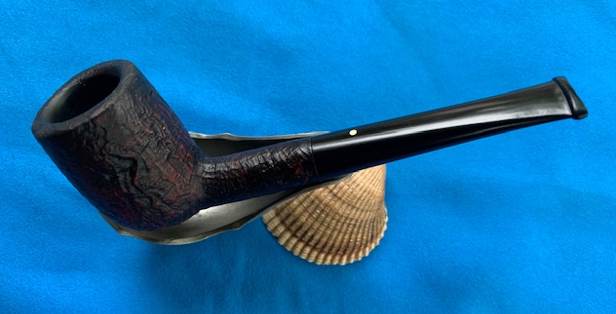
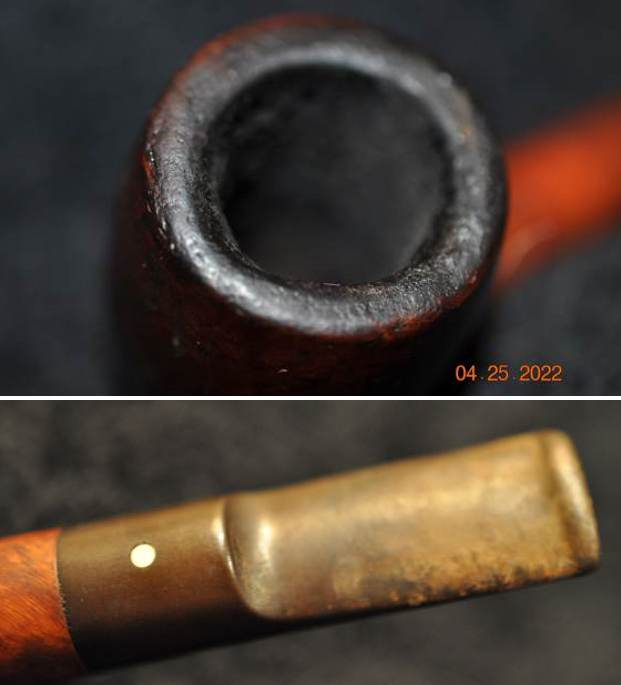
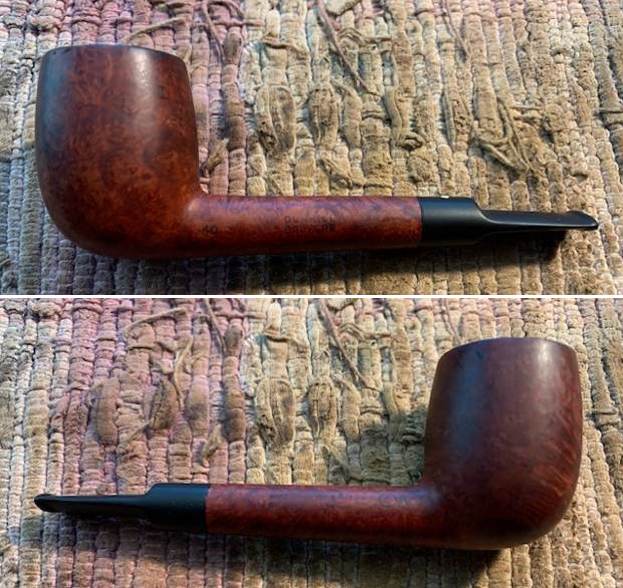
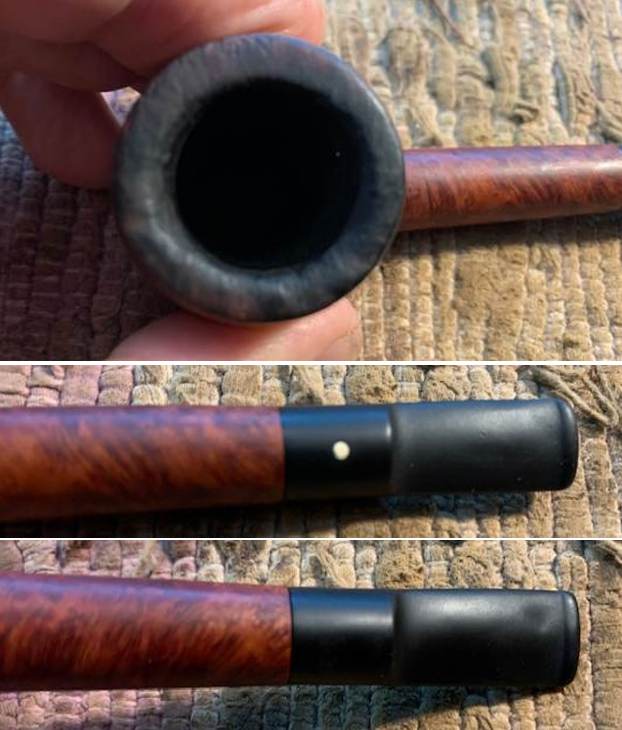
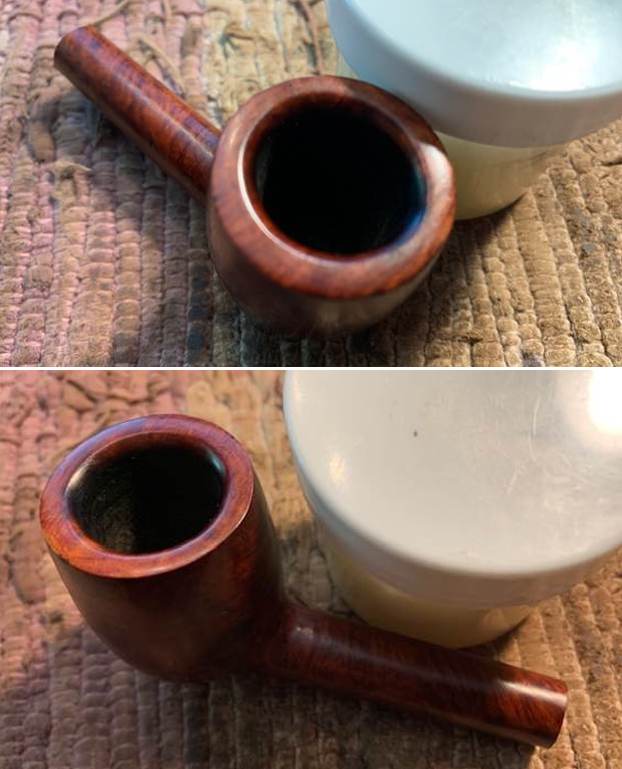
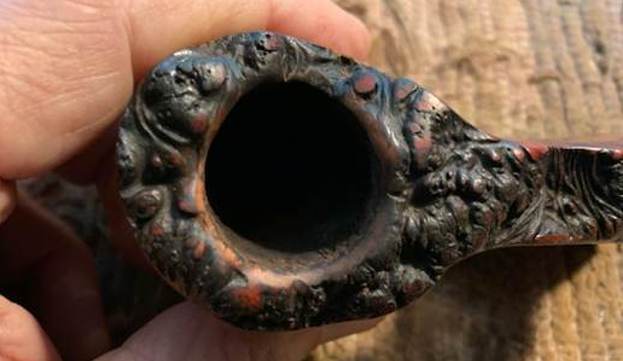
I took a close up photo of the rim top to show the general condition. You can see the darkening around the inner edge and some remaining lava in the crevices of the plateau but otherwise it looks good. The plateau extends all the way down the shank bridge and ends at the mortise end.
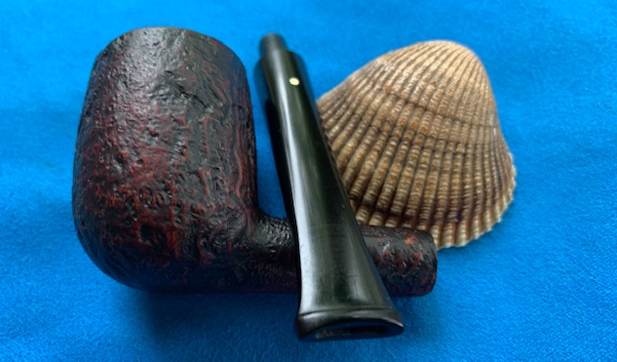
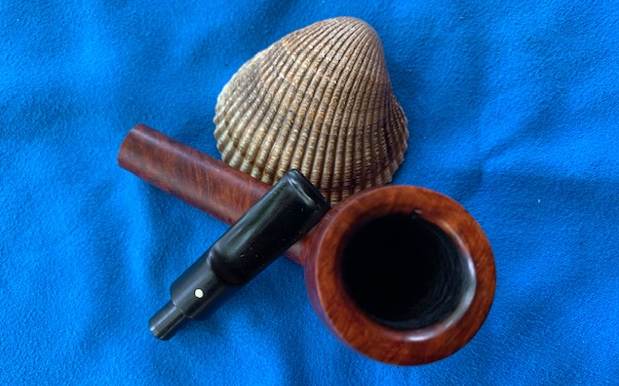
I took photos of the stamping and though they are faint in spots in the pictures they are readable as noted above.
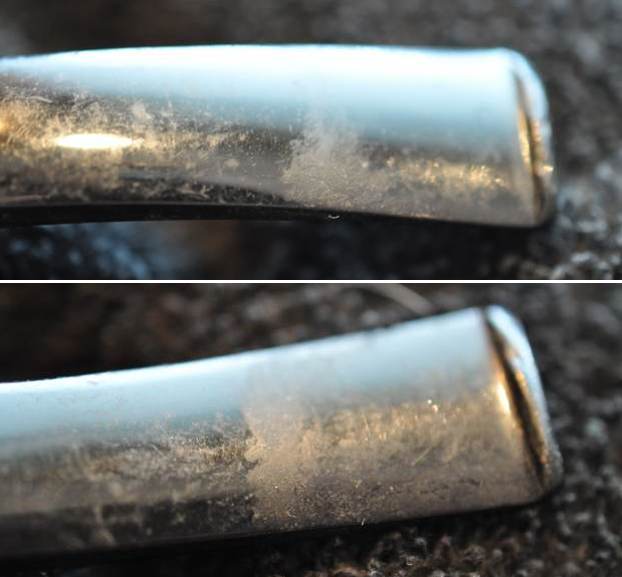
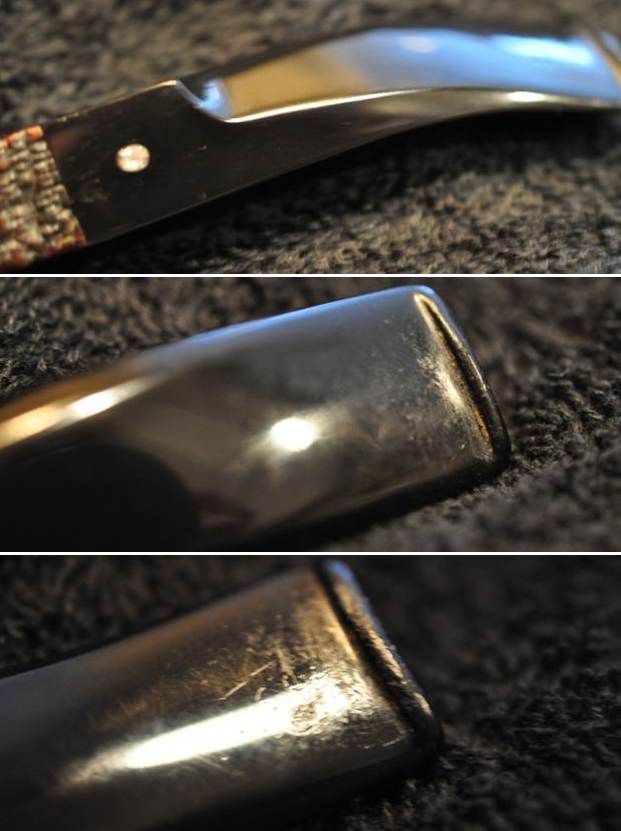
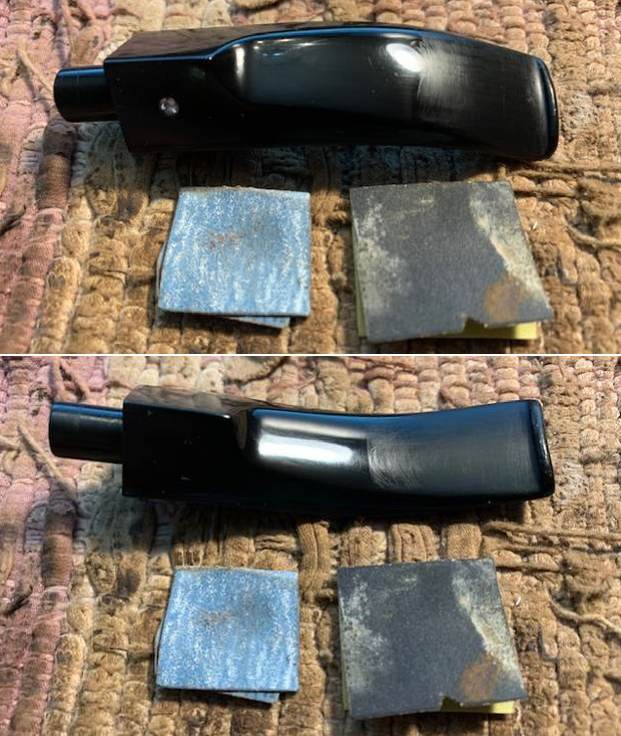
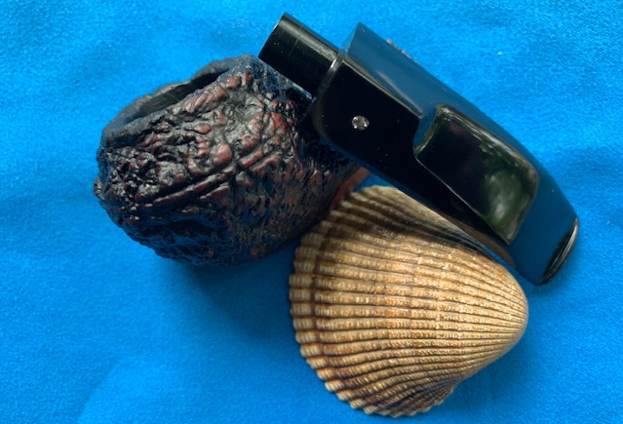
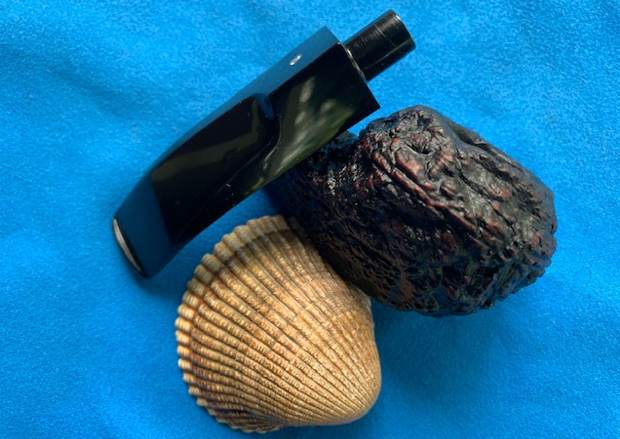
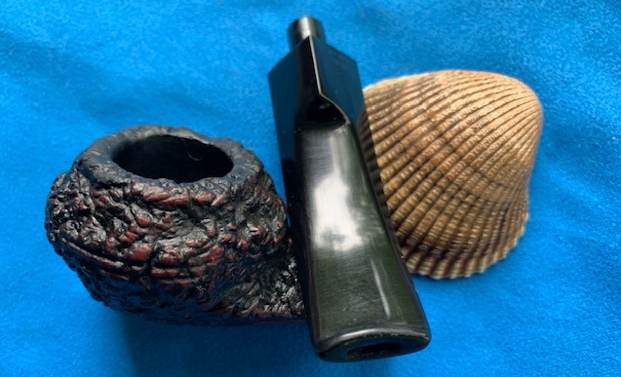
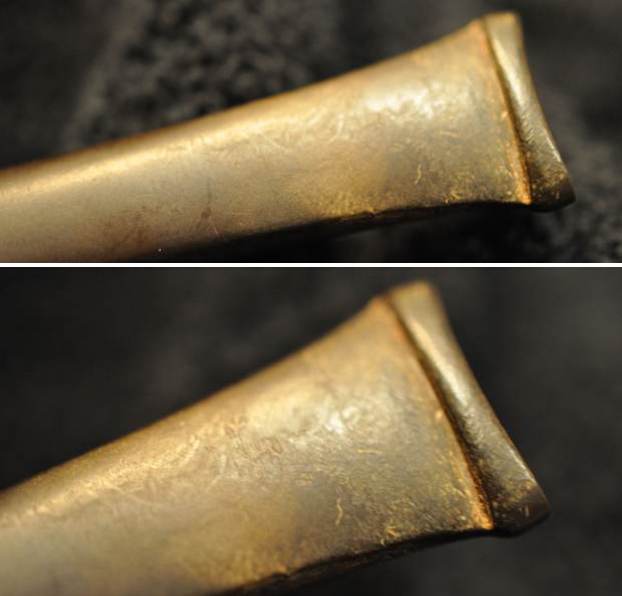
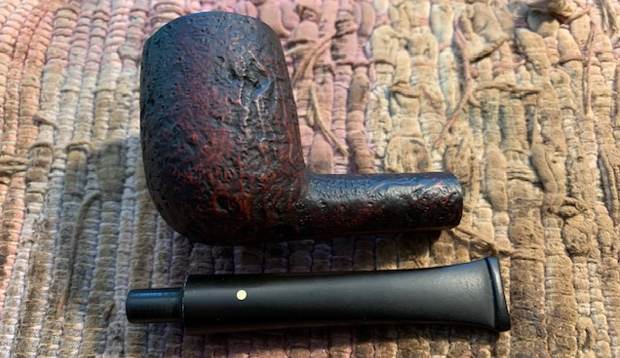
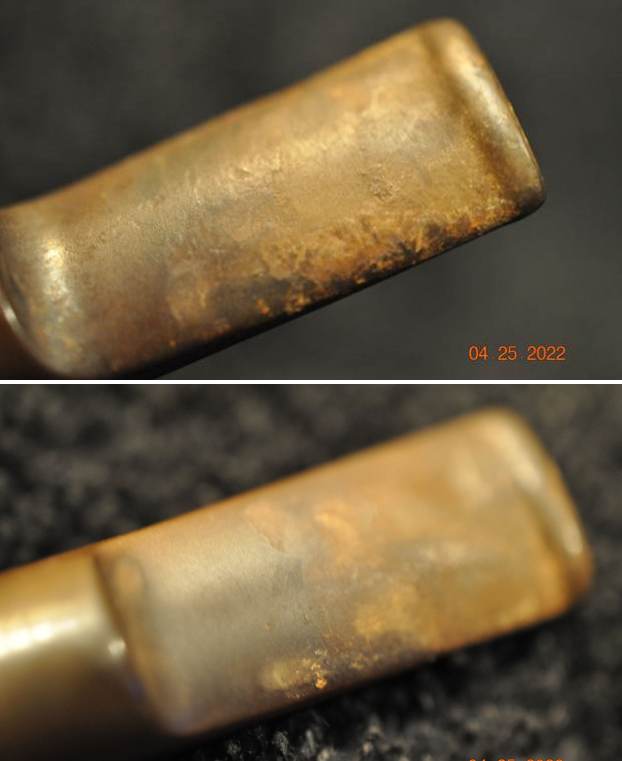
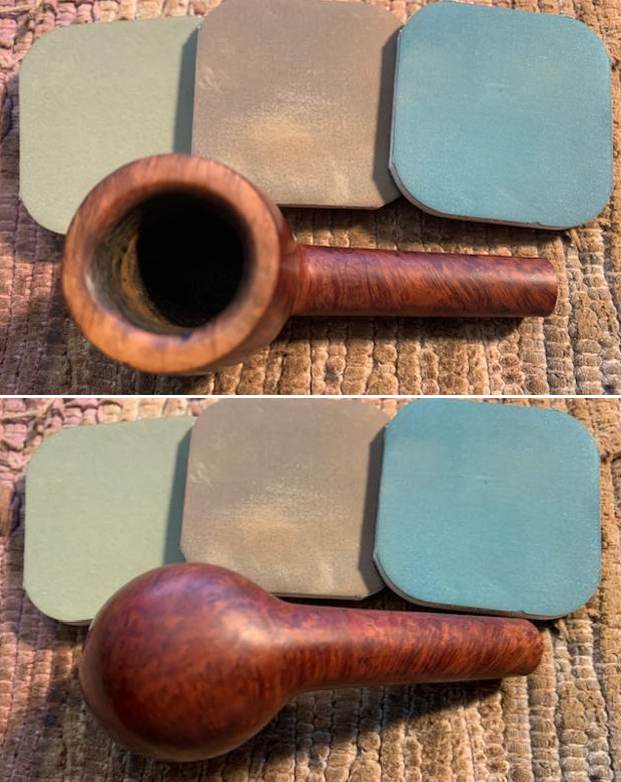
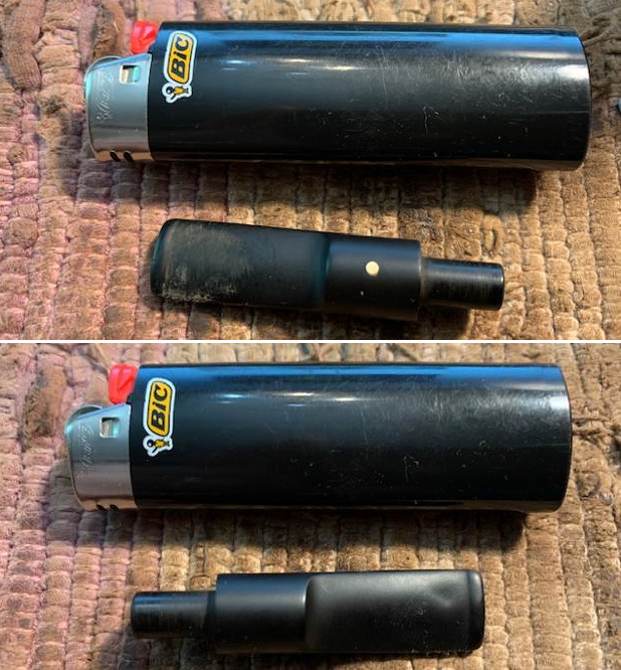
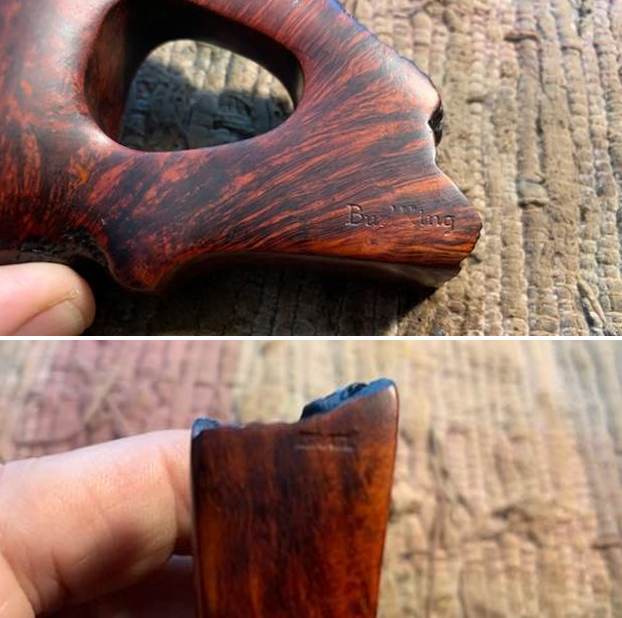
I found a turned stem in my stem can that was a potential candidate for the pipe. The tenon on it was just a little bit to big in diameter and would need to be shaped to sit in the mortise properly. I used my Dremel and sanding drum to take off a little bit of the diameter until the fit was snug in the shank. Once I had the tenon adjusted I inserted it in the mortise and took photos of the pipe at this point. I set the stem aside and turned my attention to the bowl.
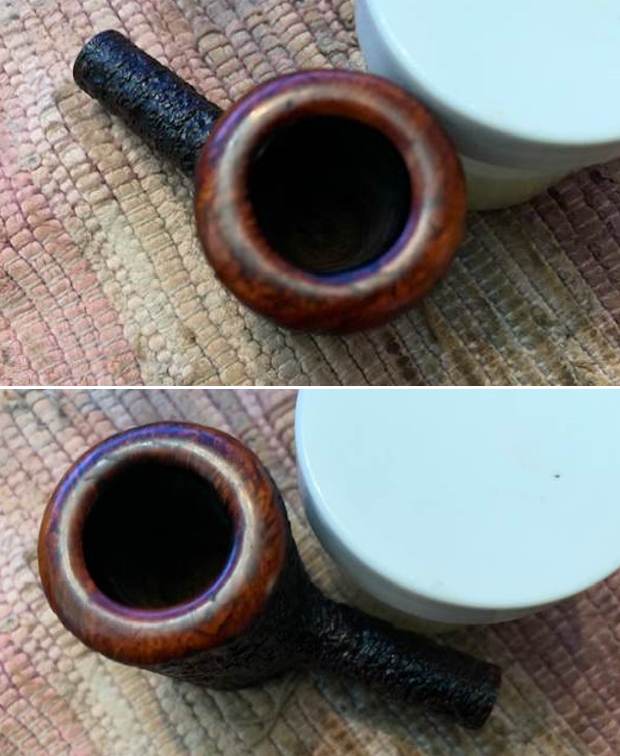
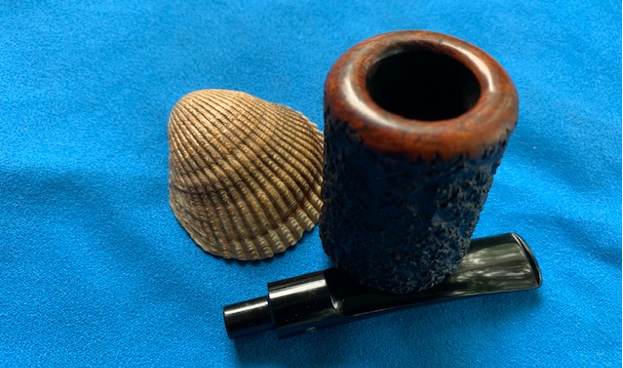
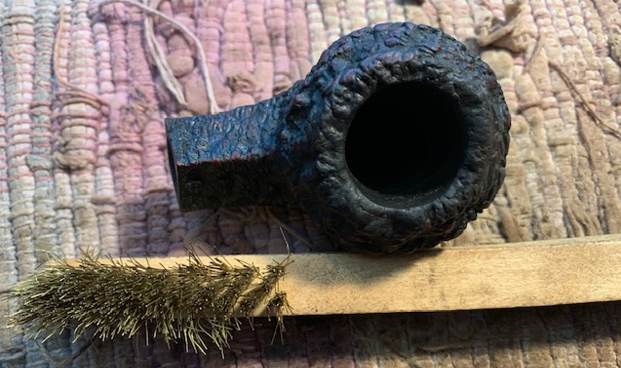
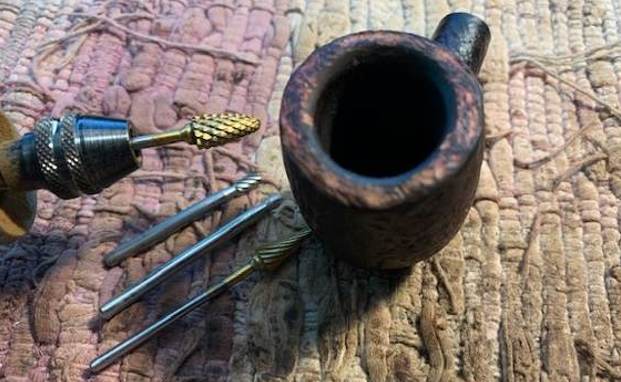
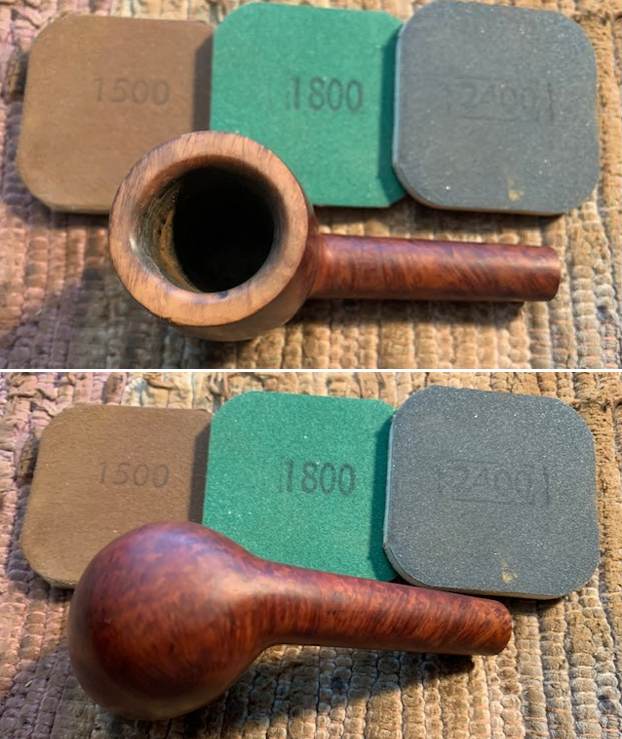
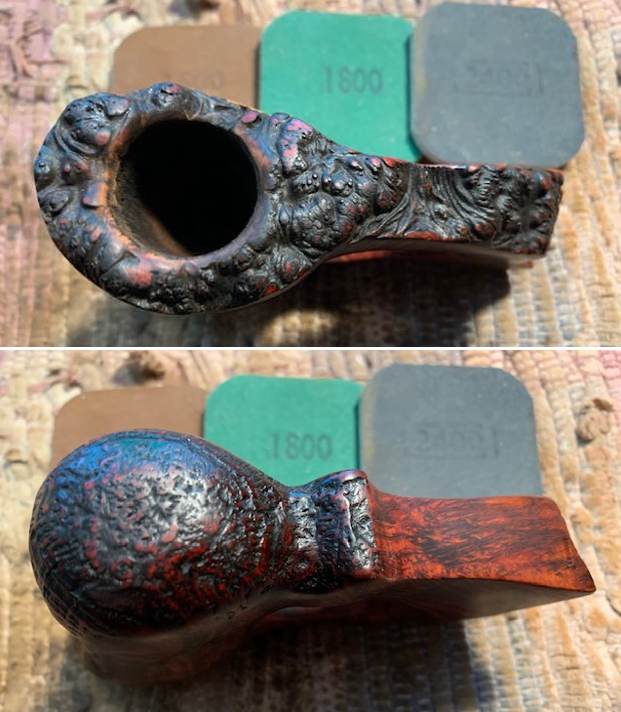
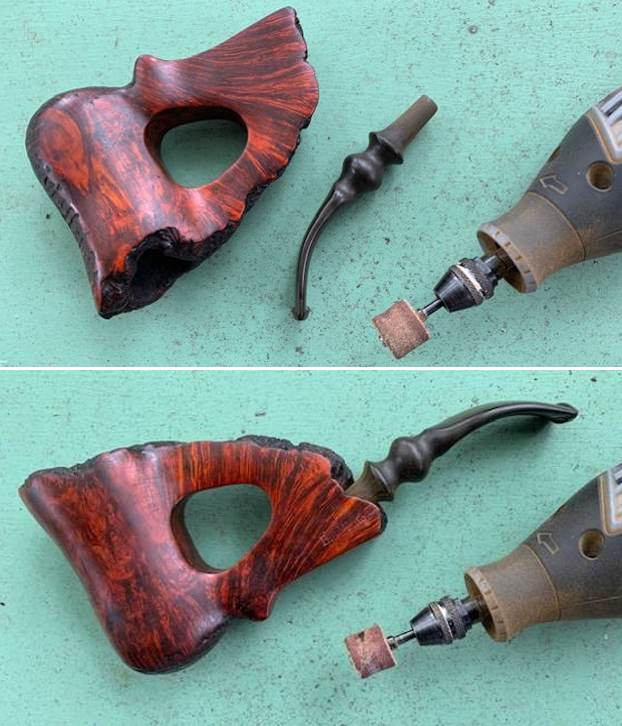
I cleaned up the residual lava on the rim top with a brass bristle wire brush. I worked over the crevices in the plateau carefully to remove the debris. I used a folded piece of 220 grit sandpaper to sand the inner edge of the bowl and smooth it out. 
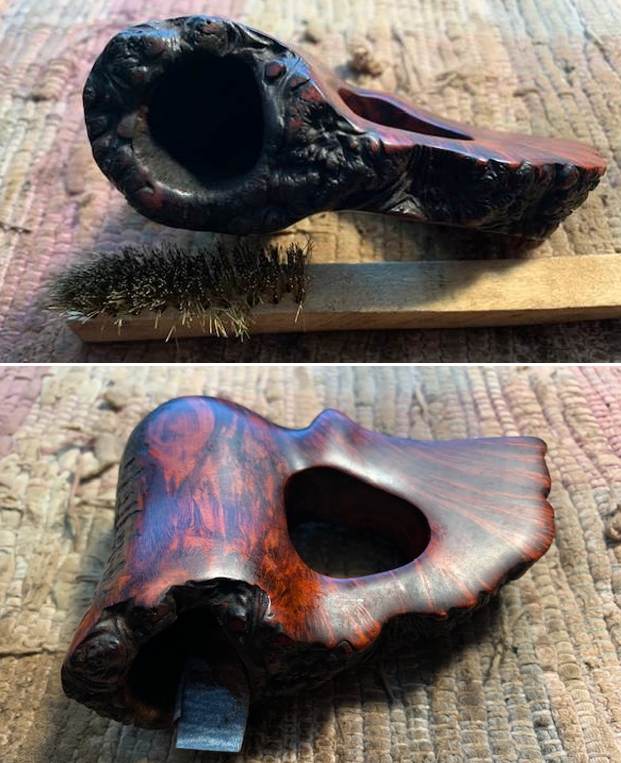
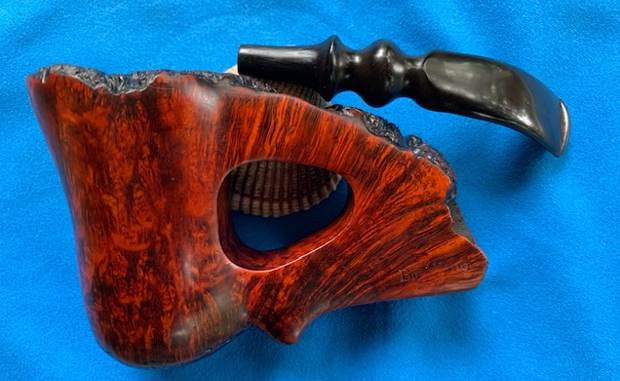
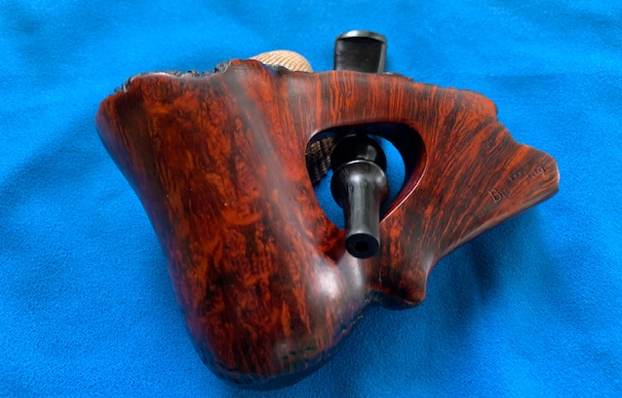
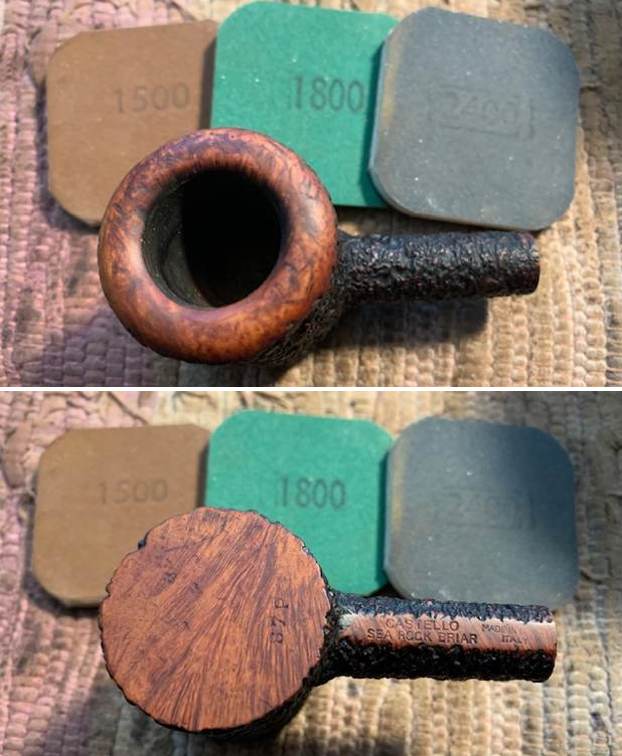
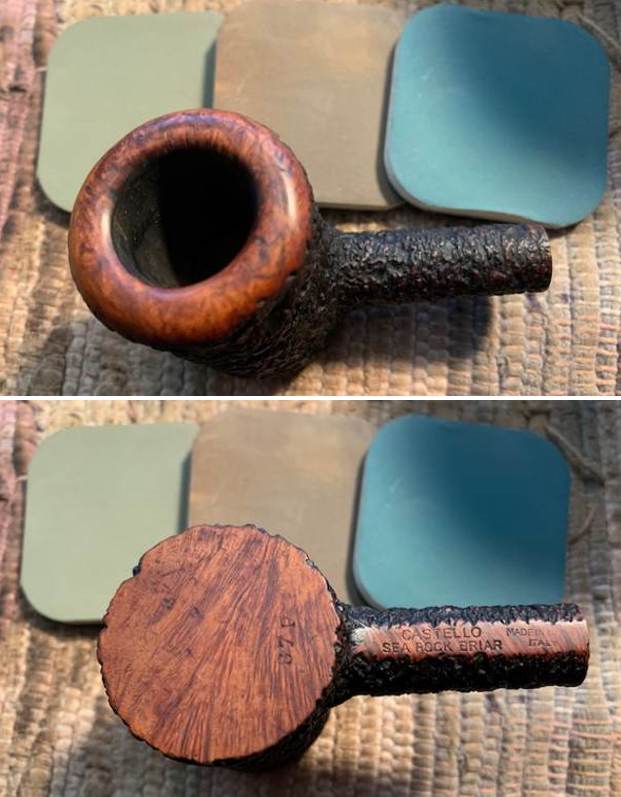
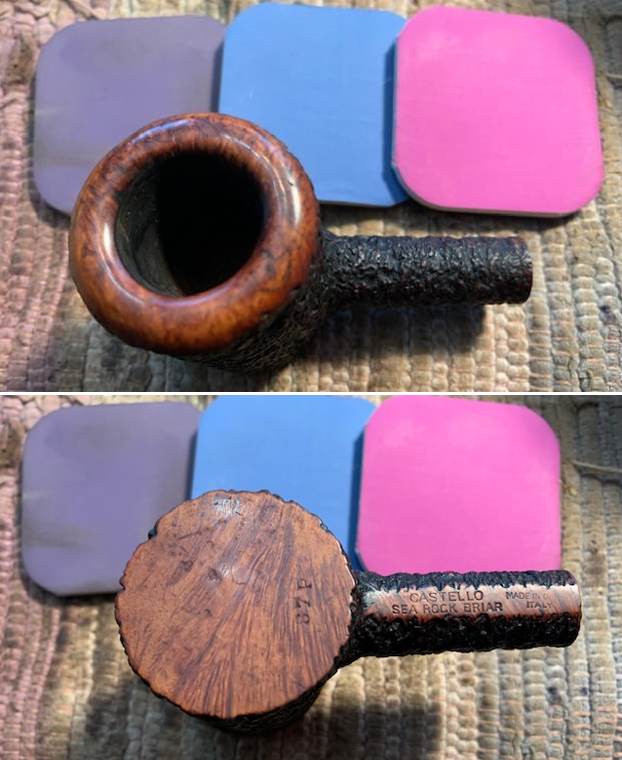
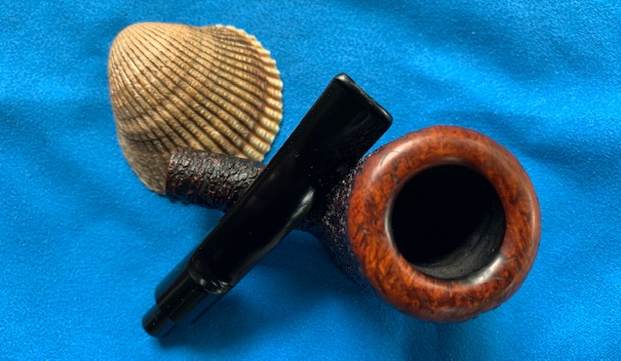
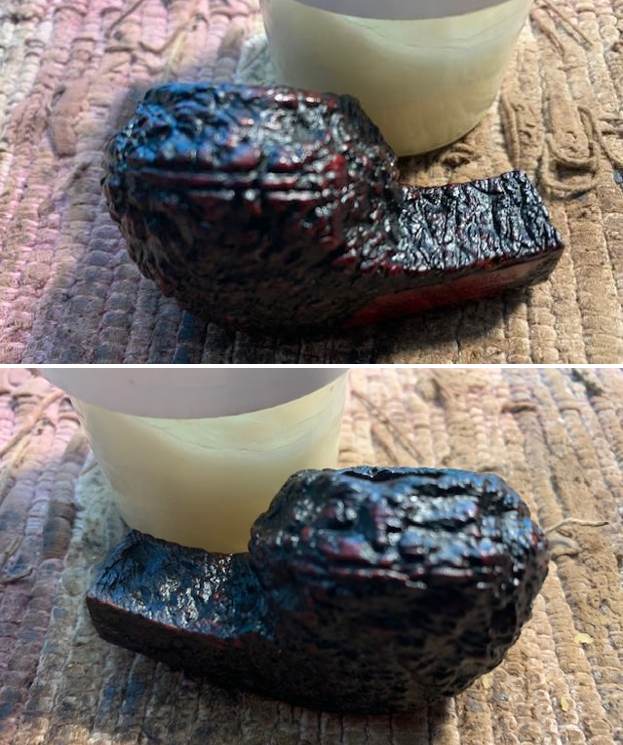
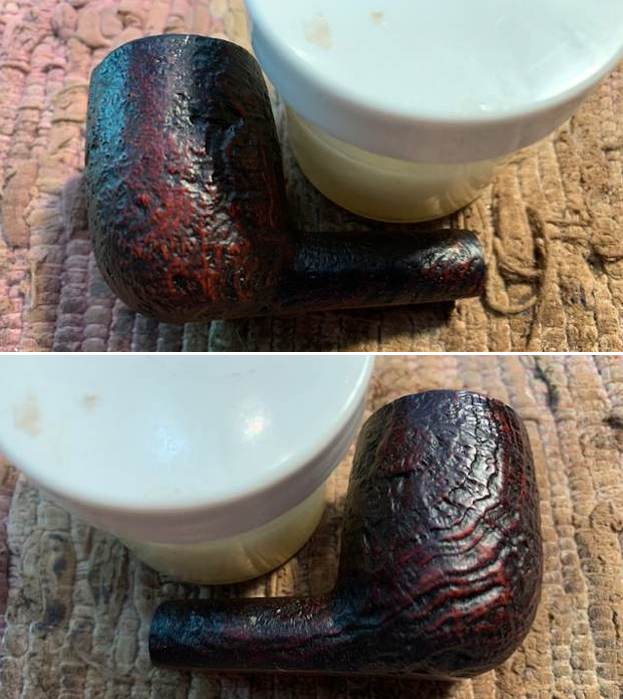
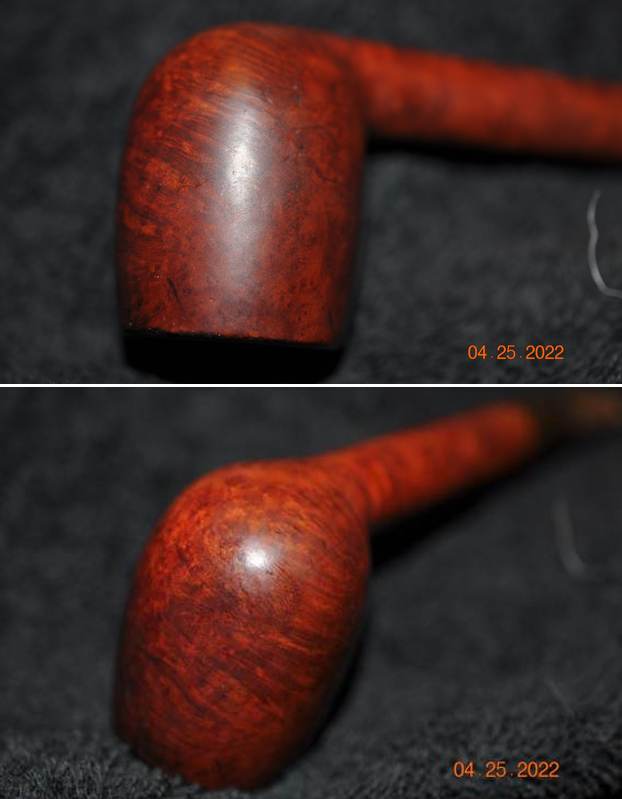
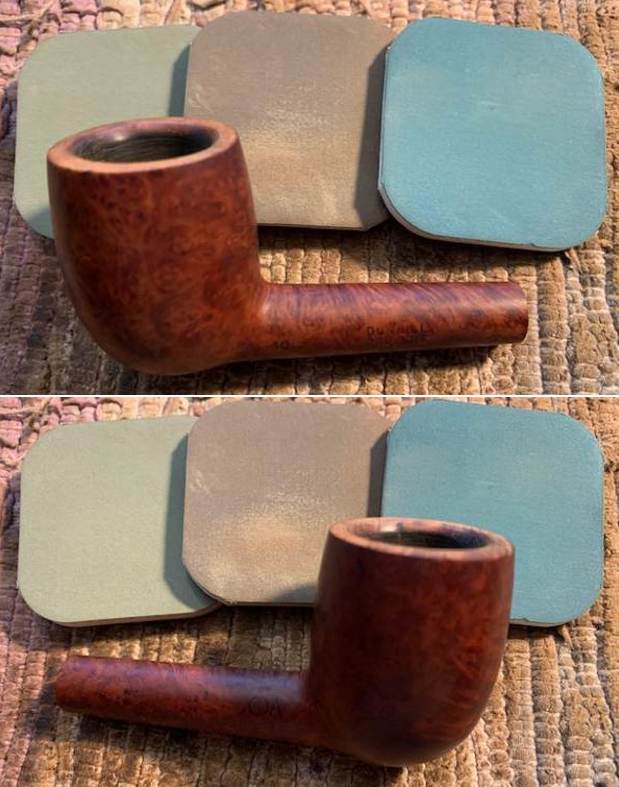
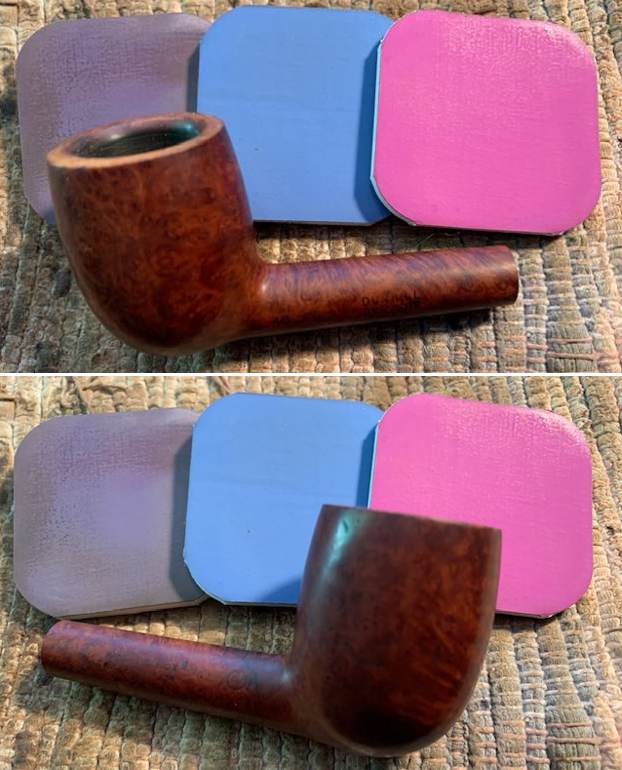
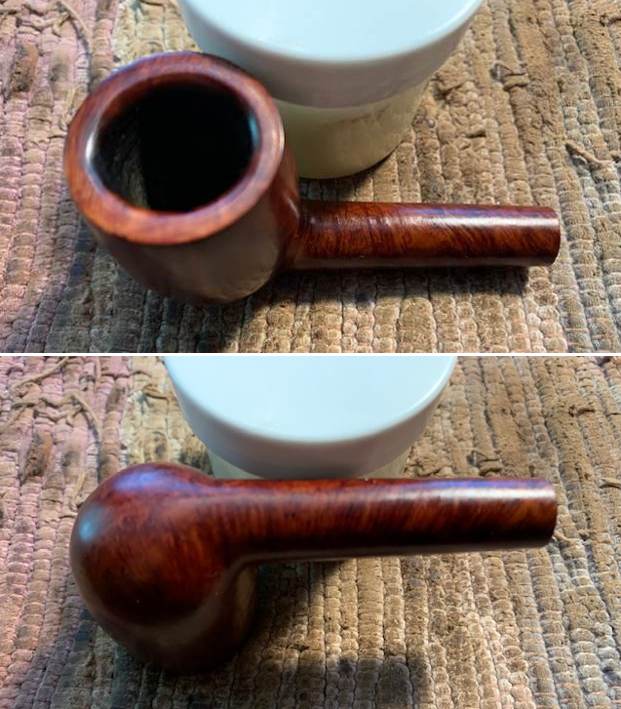
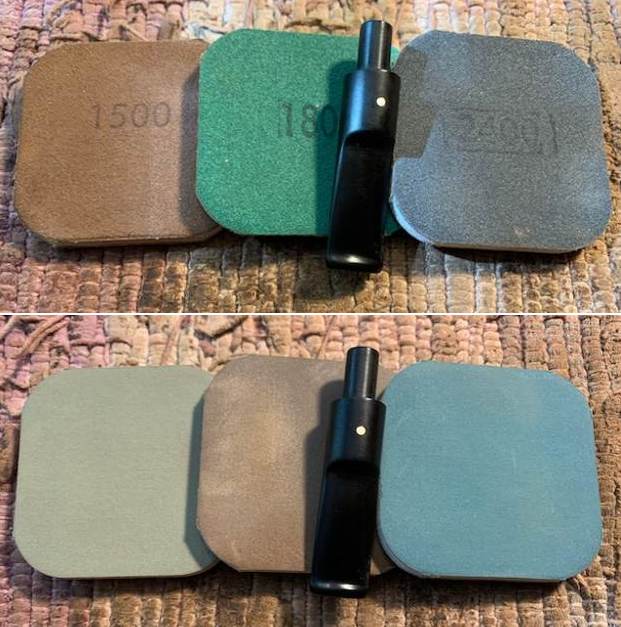
I polished the briar with micromesh sanding pads to clean up the finish and give it a shine. I wet sanded with 1500-12000 grit pads and wiped the bowl down after each pad with a damp cotton cloth. The photos tell the story. 
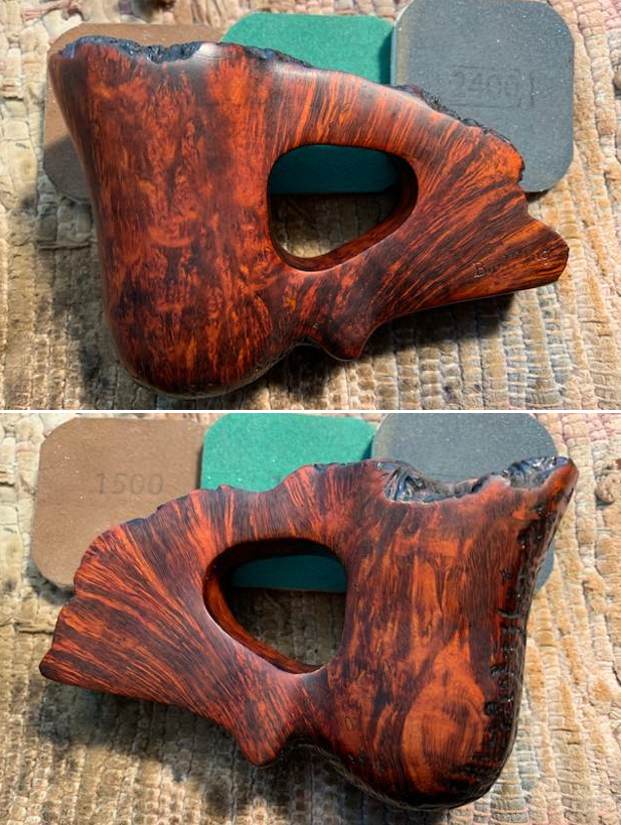
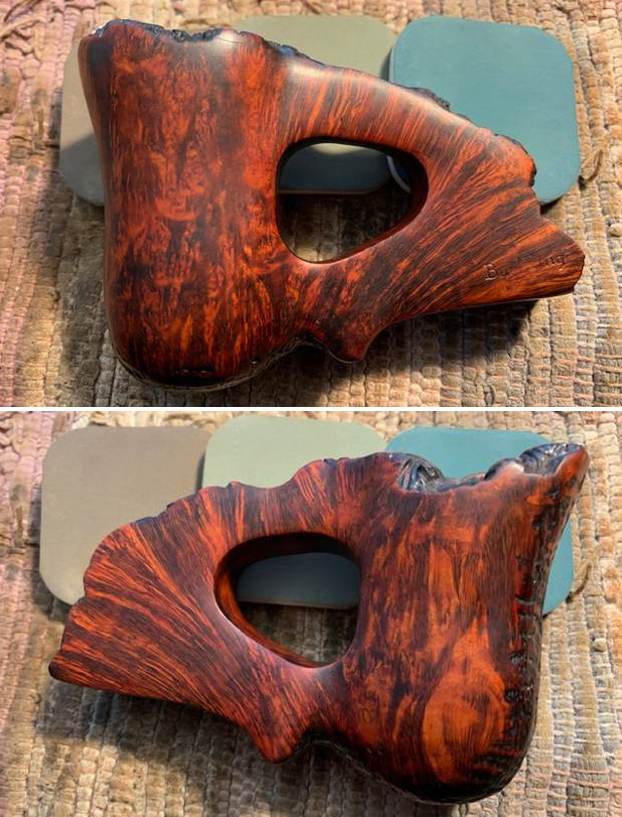
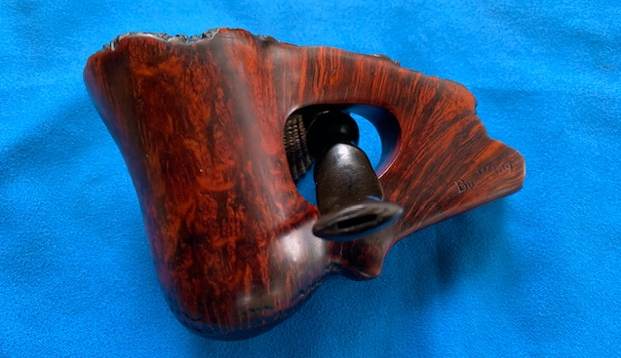
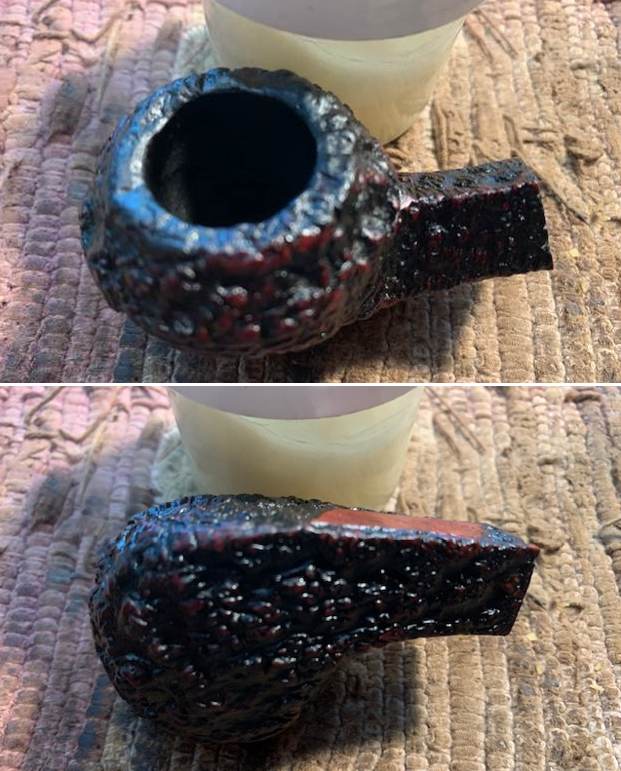
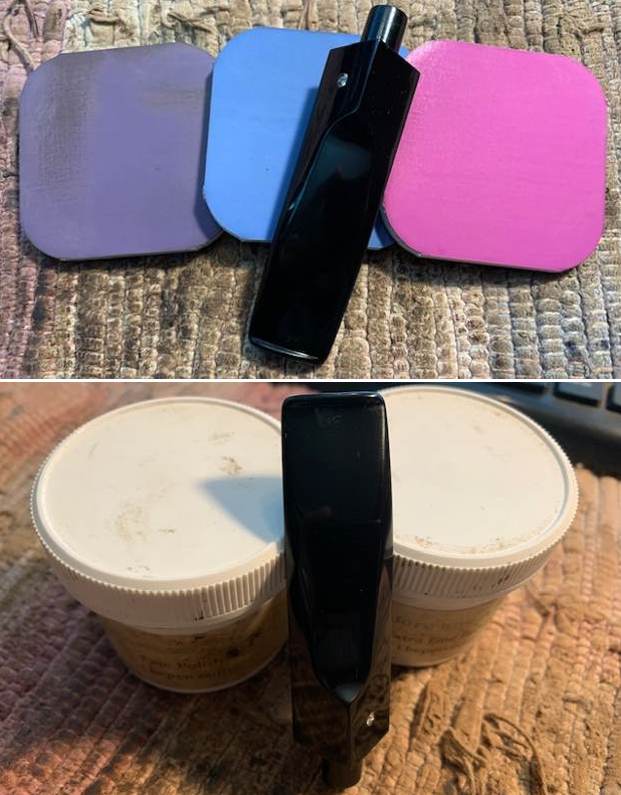
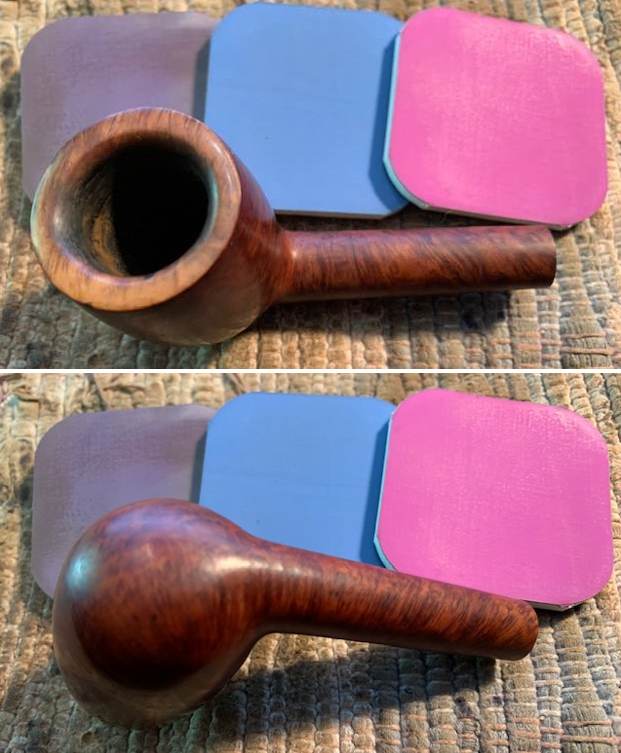
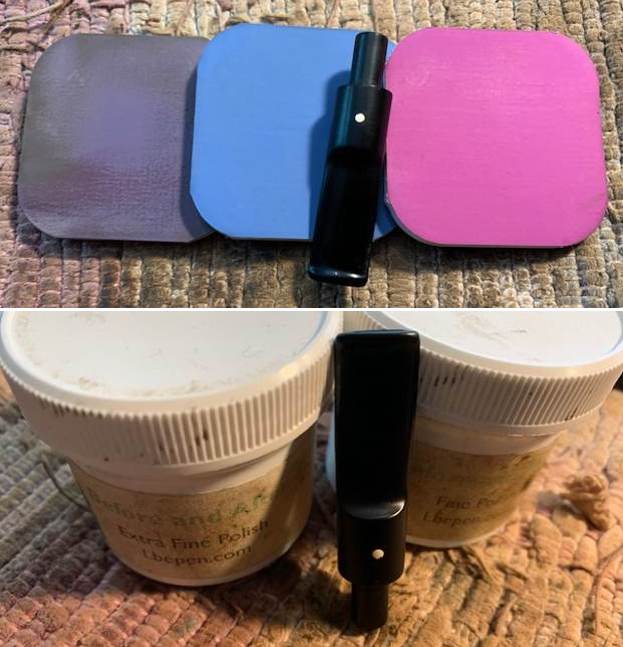
I worked some Before & After Restoration Balm into the surface of the briar with my fingertips and a horse hair shoe brush to clean, enliven and protect it. I let the balm sit for a little while and then buffed with a cotton cloth to raise the shine. 
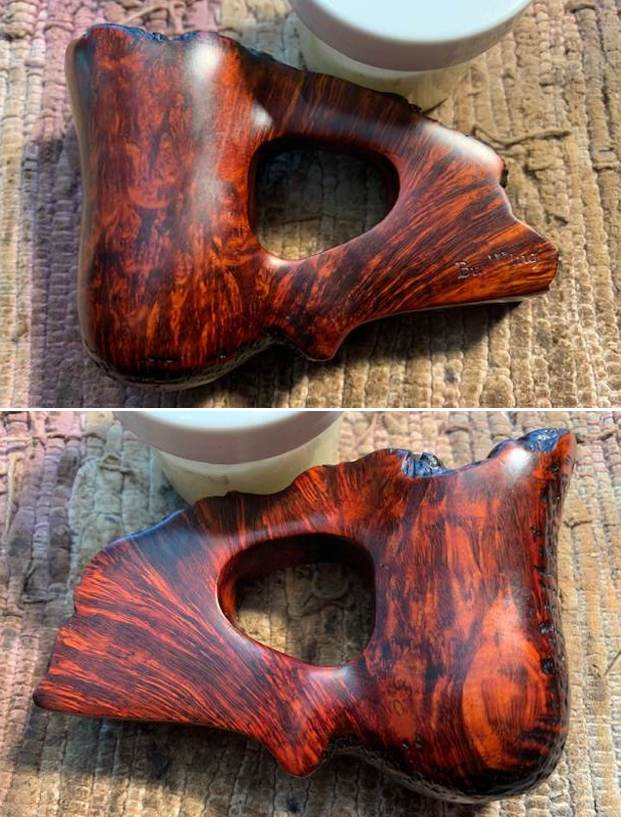
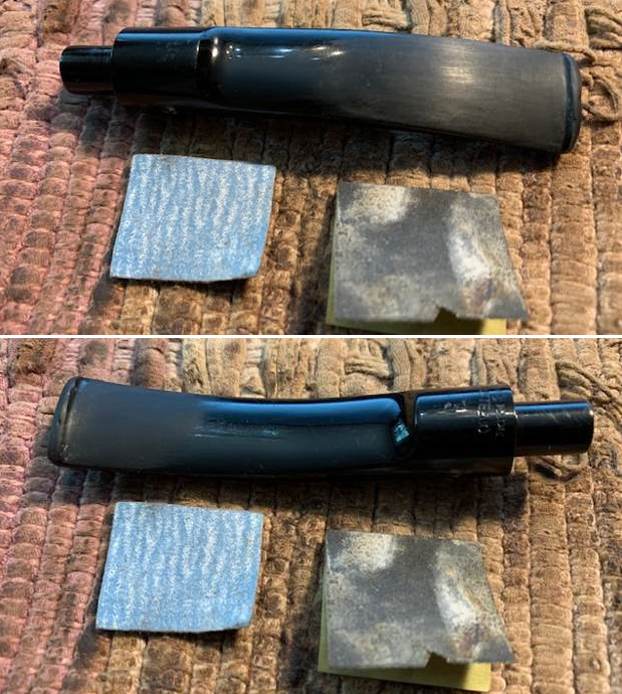
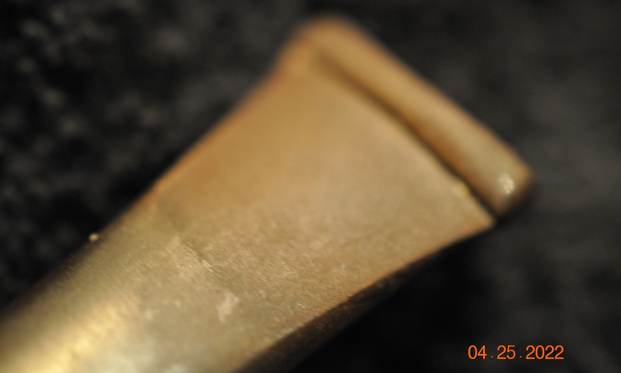
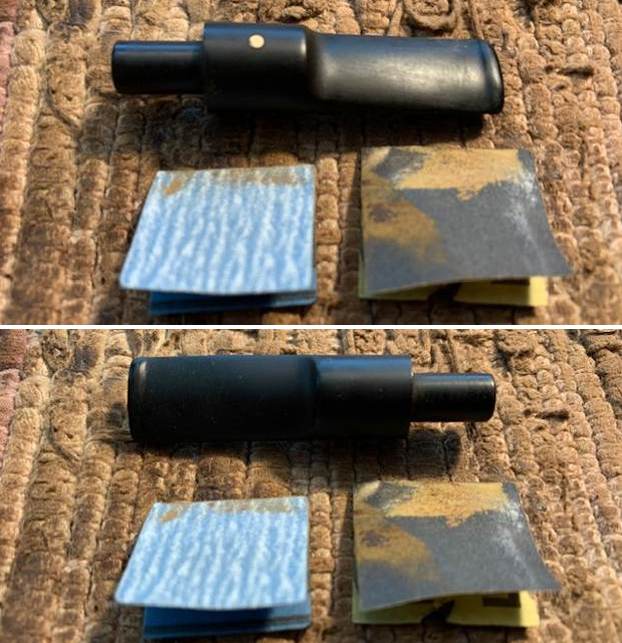
I shaped the tenon end with 220 grit sandpaper to fine tune the fit in the shank. I still needed to polish it with 400 grit wet dry sandpaper to smooth out the marks left behind by the Dremel but it was getting there. 
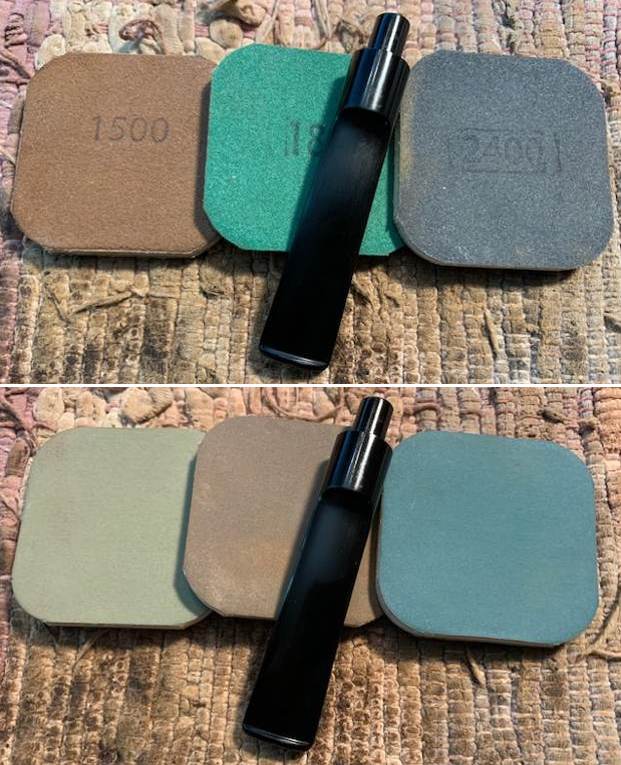
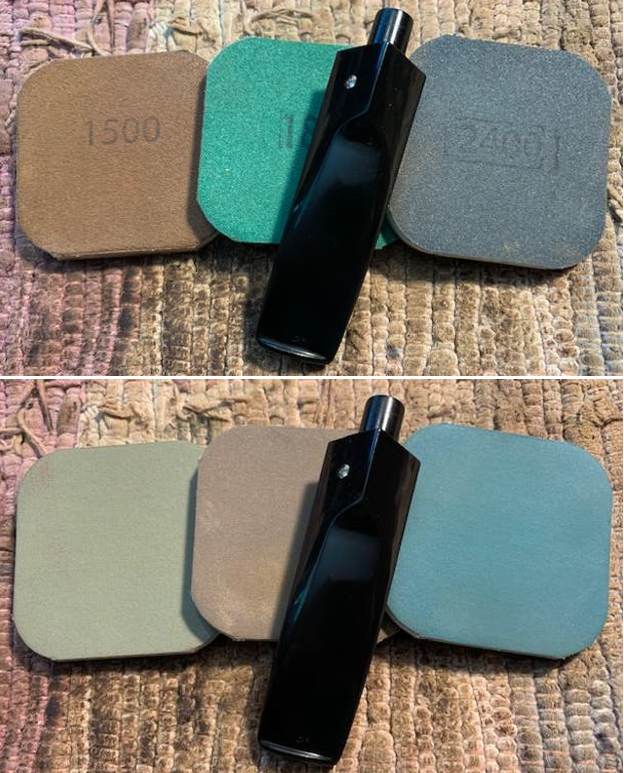
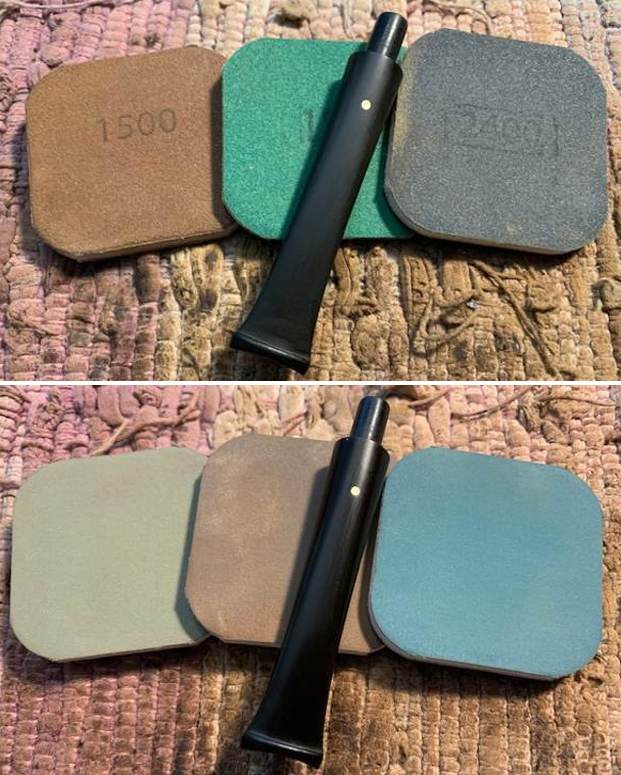
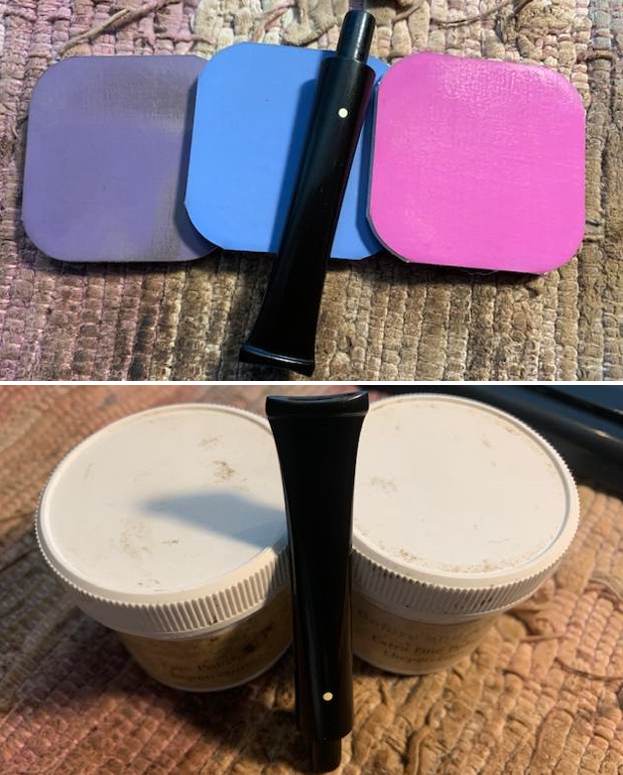
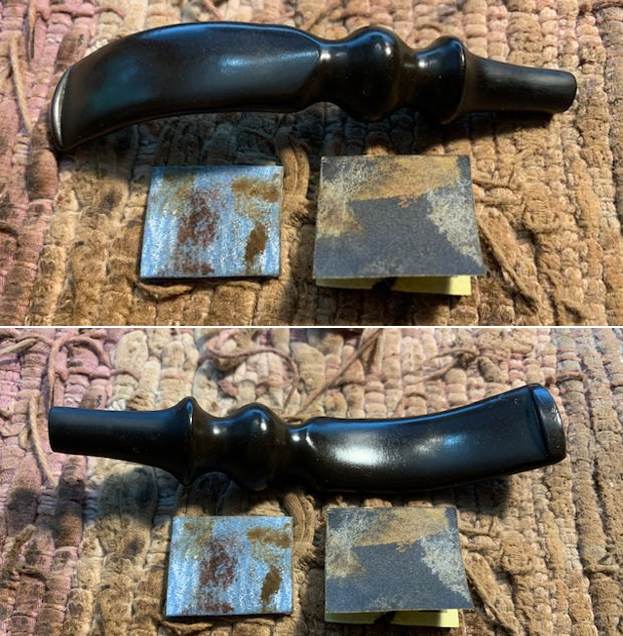
I polished the vulcanite with micromesh sanding pads – 1500-12000 grit pads. I wiped it down with Obsidian Oil after each sanding pad. I used Before & After Pipe Polish – both Fine and Extra Fine to further polish the stem. 
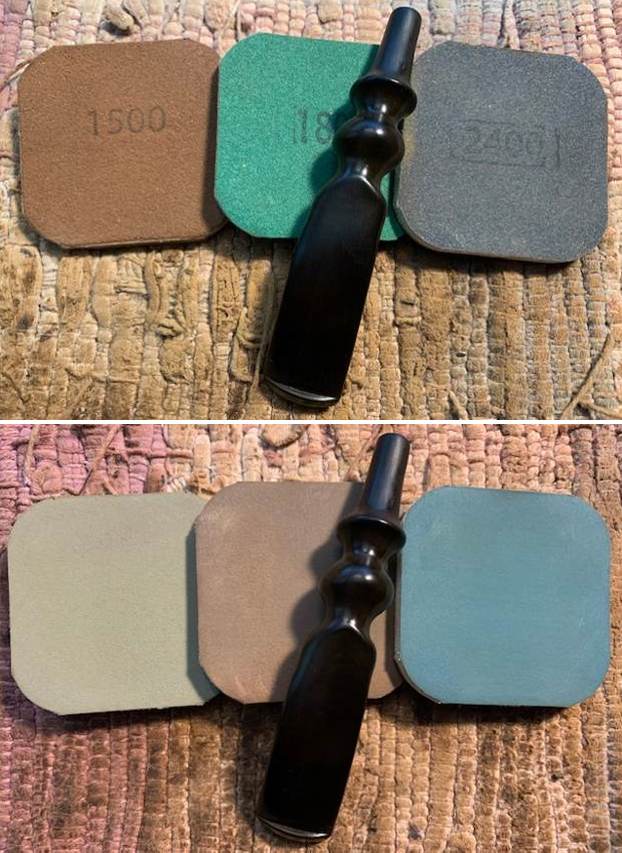
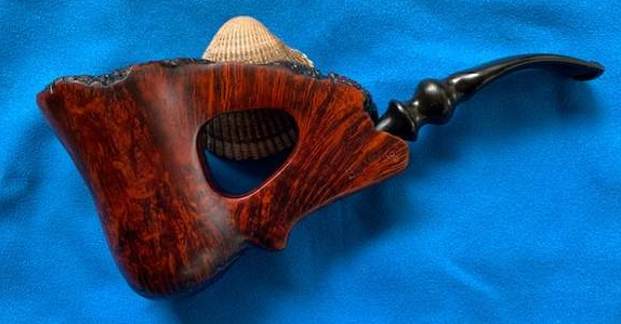
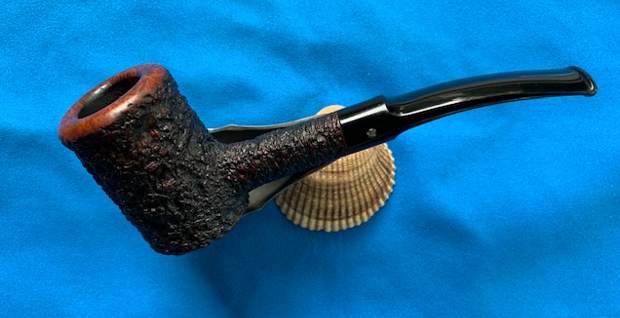
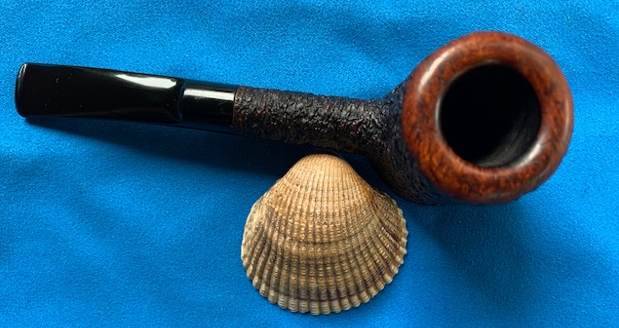
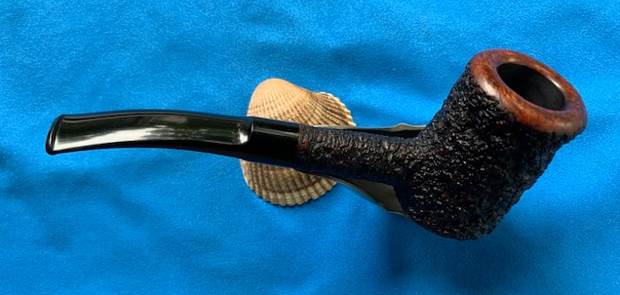
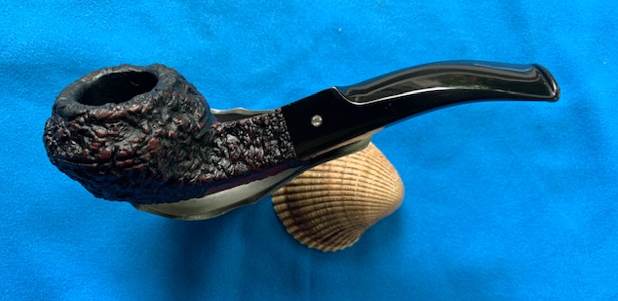
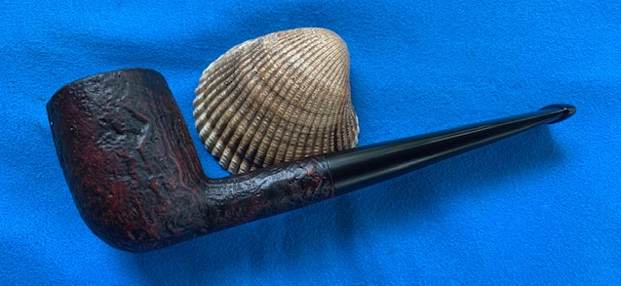
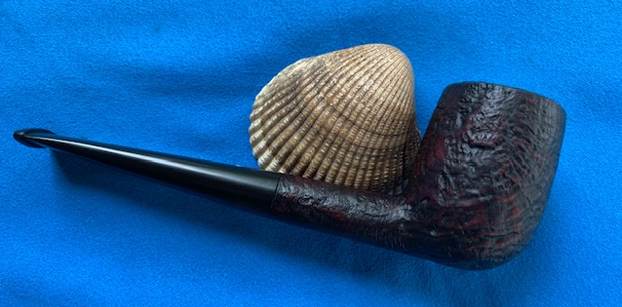
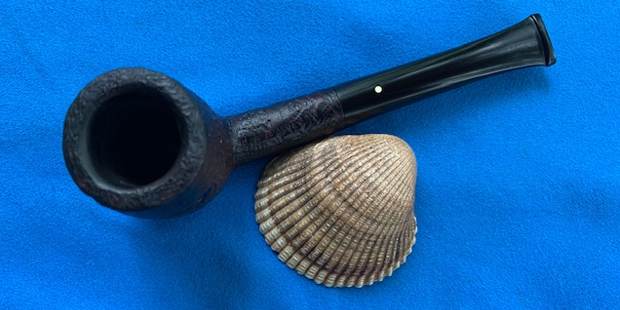
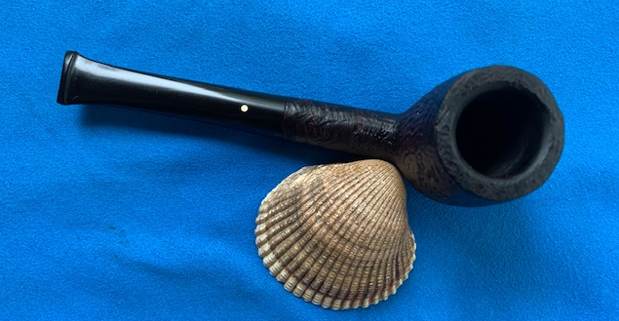
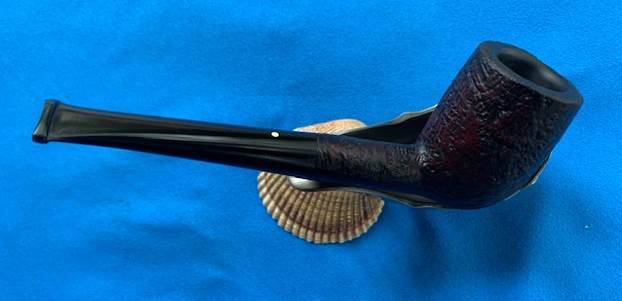
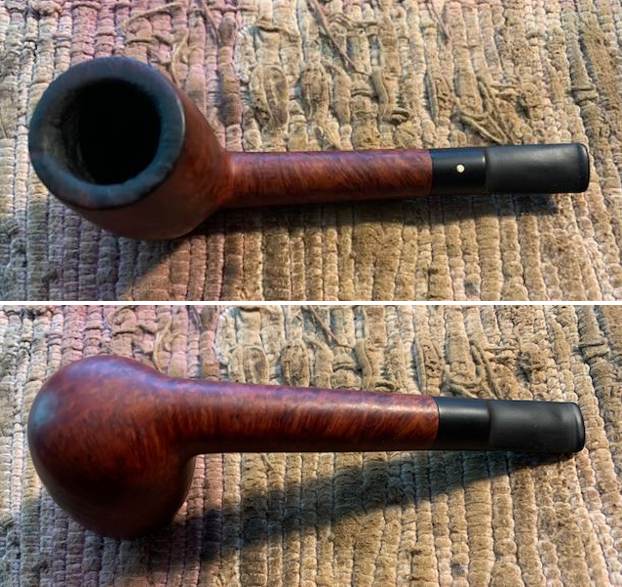
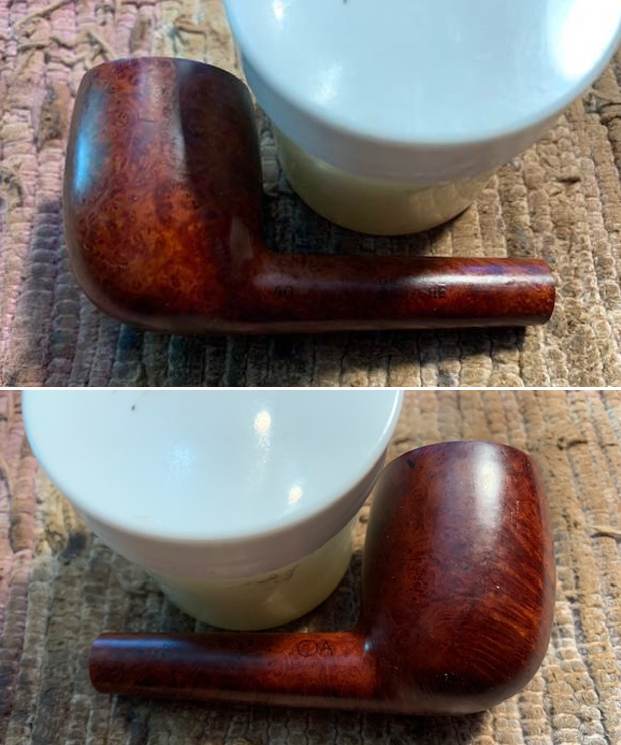
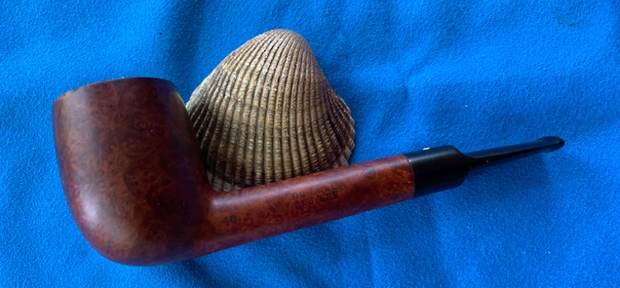
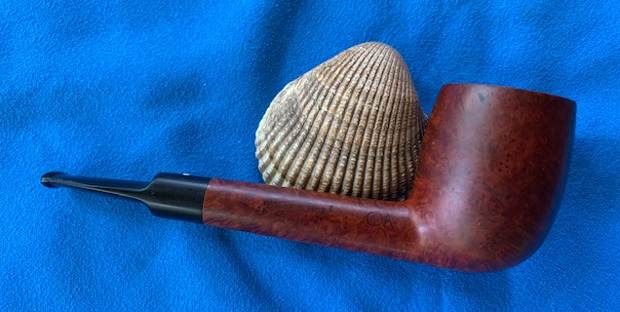
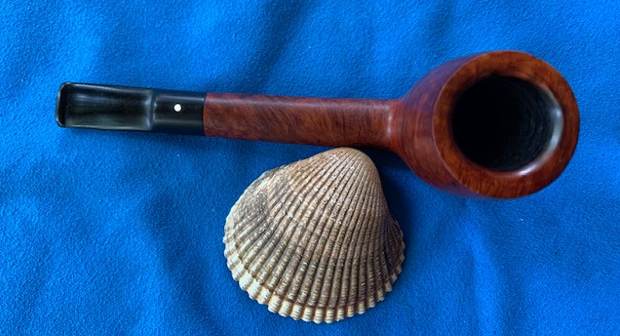
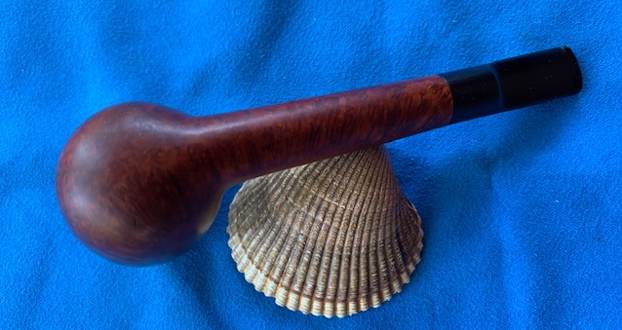
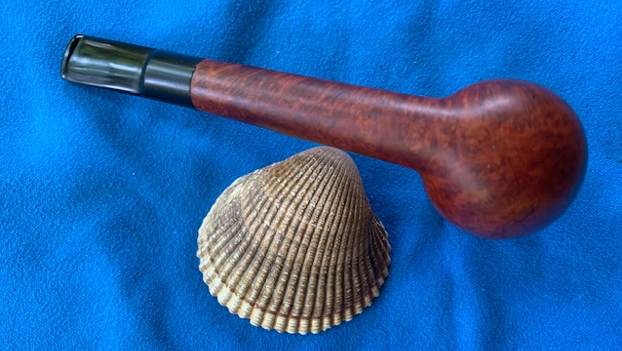
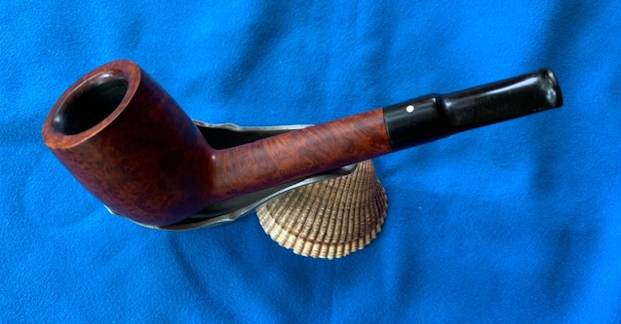
With both parts of this unique Burl King Freehand finished, I polished the bowl and the stem with Blue Diamond polish on the buffing wheel. I gave the bowl and the stem multiple coats of carnauba wax. I buffed the pipe with a clean buffing pad to raise the shine. I hand buffed it with a microfiber cloth to deepen the shine. The pipe polished up pretty nicely. The mix of grain on the bowl came alive with the buffing. The finish on the briar works well with the polished black vulcanite stem. The finished pipe is a well-proportioned, nicely grained Burl King Freehand. Have a look at it with the photos below. The dimensions are Length: 7 ½ inches, Height: 3 inches, Outside diameter of the bowl: 1 ¾ inches, Chamber diameter: ¾ of an inch. This is a large pipe and weighs 102 grams/3.60 ounces. I will be putting this interestingly made Freehand in the American Pipe Maker Section of the rebornpipes store very soon. If you would like to purchase it and carry on the legacy of the previous pipe smoke send a message or an email to me. Thanks for walking through the restoration with me on this older Freehand collaboration between Shalom Pipe Factory, Israel, Borkum Riff Tobacco and Dr. Grabow.

Restoring a Castello Sea Rock Briar 87P Poker


Blog by Steve Laug

The next pipe on the table is a beautiful Castello Sea Rock Briar Poker. I love the Sea Rock Briar finish and this was one that is quite exemplary of the finish. It has a less rugged and more refined rustication that is still tactile and I think will be a great smoker. It is a pipe that we purchased in September 2020 from a fellow in Los Angeles, California, USA.

This Castello Sea Rock Poker is stamped on the heel and the underside of the shank and reads 87P on the heel of the bowl. That is followed on the shank by Castello [over] Sea Rock Briar followed by Made in Cantu [over] Italy. The numbers and stamping tell me that the pipe is a Sea Rock rusticated finish and it is a Poker. The underside of the Lucite stem also had stamping that read Hand Made over Castello [over] the number 3. The finish was incredibly dirty with spots of grime and debris ground into the crevices and valleys of the rustication. The bowl had a thick cake in the and a heavy lava overflowing onto the smooth rim top. The rim top appeared to rough and beat up with dents. The inner and outer edge of the rim looked very good. The acrylic stem had tooth marks and chatter on both sides ahead of the button and on the button itself. Jeff took photos of the pipe before he started his clean up work on it. My brother took some close up photos of the rim top and the cake in the bowl to show what it looked like when we received it. You can see how thick the cake is and how much of the rim rustication has filled in with the overflow. The photos of the stem show the faux diamond logo on the top left side of the saddle. You can see the tooth marks and chatter near the button on both sides of the stem. Jeff took photos of the rusticated finish around the bowl sides and heel. It is nice looking if you can see through the grime and dust ground into the rugged, deep rustication.   He took a photo of the stamping on the left underside of the diamond shank. The stamping is readable but filthy. It reads as noted above. I recently wrote a blog on the Castello Sea Rock Briar Bulldog SC 54P. I reread the information and quote from a 54P Blog I wrote earlier (https://rebornpipes.com/2016/12/18/an-estate-sale-find-a-castello-sea-rock-sc-54p-bulldog/). It gives a short summary of the information I found.

Before I worked on the pipe I wanted to do a bit of research to see if I could shed some more light on the pipe I had in hand. I learned from the pipephil website that the rhinestone logo was originally on pipes for the US market. There was no hint as to why that was done only that it was and that it is occasionally still used http://www.pipephil.eu/logos/en/logo-castello.html

I have an older article called PCCA’s Castello Grade & Style Guide. It was written by Robert C. Hamlin (c) 1988, 1992, 1994. Robert gathered some remarkable information on the Castello lines and I have often used his guide in the past to give me pertinent data. There I found more information regarding the shiny logo on the side of the stem.

“American logo’d Castello pipes use a small round “Diamond” (referred to and looking like, but it is NOT actually a diamond) inlaid into the mouthpiece. This was originally done so that the standard Castello white bar logo did not conflict with another brand and logo that was sold by Wally Frank called the “White Bar Pipe” (in the 1950’s).”

The above quote and the remainder of those following come from the same article by Robert Hamlin. You can read the full article at the following link: http://www.pipes.org/BURST/FORMATTED/196.016.html

I read further in the article to help me understand the stamping on the underside of the shank. My knowledge of Castello pipes is pretty limited so when I get one to restore I resort to this article and others to try to make heads or tails of the stamping.

I learned that the Sea Rock Briar stamp also signified something and told me more about the pipe. Robert pointed out:

“SEA ROCK [Carved Black or dark brown]: This is the lowest grade of the Castello line and is the most common in the USA. Sea Rocks are produced by taking a smooth bowl that has not been “final finished” and surface carving the finish with tools. This “carved” finish is then evened out using a steel wire brush, stained and then waxed. The Natural Vergin carved finish is left unstained and unwaxed as a rule, although we have seen waxed and partially waxed “Vergins”.” 

The remaining mystery for me was the meaning of the stamping on the stem. I of course understood the Hand Made and the Castello stamping but the number 3 was a mystery to me. I was not sure what it referred to. So once again Robert’s article gave me the information I needed to understand that last piece of the mystery.

“#2: All Castello standard shaped pipes have a number (3, 4, 5 or 6) stamped on the mouthpiece or sometimes on the Lucite ferrule. What does this number mean? Not much really, it is the number of the size for the proper straw tube or reed that fits the shank and stem of the pipe. These straw tubes are rarely used in the United States. The Castello reed is considered superfluous and useless to most, but with this number you will always know which one fits (the different numbers have to do with length, not diameter).”

Armed with that information I turned to work on the pipe itself. Before he sent it to me, Jeff had done an amazing job cleaning the pipe. It almost looked like a different pipe after his work. He reamed the pipe with a PipNet pipe reamer and removed the rest of it with a Savinelli Fitsall Pipe Knife.  He scrubbed the bowl with undiluted Murphy’s Oil Soap with a tooth brush. He rinsed it under running warm water to remove the soap and grime. He cleaned out the inside of the shank and the airway in the stem with isopropyl alcohol, cotton swabs and pipe cleaners. Even though the stem was acrylic he soaked the stem in Briarville’s Pipe Stem Deoxidizer and then rinsed it off with warm water. It really works well to remove internal and external grime and tars. He scrubbed the stem with Soft Scrub and a tooth brush and rinsed it off with warm water. It looked amazing when I took it out of the package of pipes he shipped me. I took photos of the pipe before I started my part of the restoration work.   The rim top was much cleaner and the edges looked good. However, the surface of the rim had been used as a hammer and it was in rough condition. Fortunately none of them were too deep – probably thanks to the think overflow of lava. It would take some work to clean up but it had great potential. The stem surface looked good but visible tooth marks and chatter showed clearly on either side of the stem. I took photos of the stamping on the underside of the bowl, shank and stem. It is clear and readable as noted above.I took the stem off the shank and took photos of the parts of the pipe. It is a great looking rusticated Poker. I worked on the rim top and the heel of the bowl to minimize the scratches and marks on both. I used micromesh sanding pads and wet sanded with 1500-12000 grit pads. I was fortunate that the scratches were not deep so I was able to polish them out and remove them. The rim top looked amazingly better and it is a pretty looking pipe. The bowl looked good at this point so I rubbed it down with Before & After Restoration Balm. I worked it into the surface of the bowl and shank with my fingertips and a horse hair shoe brush to clean, enliven and protect the briar. I let the balm sit for about 10-15 minutes and buffed with a cotton cloth to raise the shine. I set the bowl aside and turned my attention to the stem. I sanded the tooth marks out on both sides of the stem at the button using 220 grit sandpaper and also sanded the damage to the button surface itself. I started polishing the stem with 400 grit wet dry sandpaper.   I used micromesh sanding pads to polish the newly sanded areas on the Lucite stem surface. I dry sanded it with 1500-12000 grit pads and wiped it down with the damp pad after each sanding pad. In doing so I was able to remove all signs of the damage to stem in those spots along the edge and top of the button. I put the stem in place in the shank and  looked this beautiful Castello Sea Rock Briar 87P Poker. I lightly buffed the bowl on the buffing wheel. I buffed the stem with Blue Diamond polish on the buffing wheel I waxed the stem with carnauba wax on the wheel. I waxed the bowl with Conservator’s Wax and buffed the entire pipe with a clean buffing pad to raise the shine. I hand buffed it with a microfibre cloth to deepen the shine. The finished Castello Sea Rock Briar Poker is shown in the photos below. It is truly a beautiful little Poker. The dimensions of the pipe are Length: 5 ¾ inches, Height: 2 inches, Outside diameter of the bowl: 1 ½ inches, Chamber diameter: ¾ of an inch. The weight of the pipe is 45 grams/1.59 ounces. The shape and the rustication make it a pleasure to hold in the hand. It fits snug with my thumb curled around the back of the bowl and the rest of the fingers holding the bowl. The finish is extremely tactile and should be interesting in hand as the bowl heats up during smoking. I can testify to how well Castellos smoke. I will be adding it to the Italian Pipe Makers Section on the rebornpipes store soon. Thanks for walking with me through the restoration process.

Restoring a Castello Sea Rock Briar SC 54P Bulldog


Blog by Steve Laug

The next pipe on the table is a beautiful Castello Sea Rock Briar Bulldog. I love the Sea Rock Briar finish and this was one that is quite exemplary of the finish. It has a rugged and deep rustication that is very tactile and I think will be a great smoker. It is another pipe from the group of pipes which Jeff and I purchased on 04/26/2022 from a woman who contacted us from Cleveland, Ohio, USA. They had belonged to her husband’s father. We spent time chatting with her and arrived at a price and she sent the pipes to Jeff. It included 28+ pipes along with this one.

This Castello Sea Rock Bulldog is stamped on the left underside of the shank and reads SC [over] 54P. That is Castello [over] Sea Rock Briar [over] Made in Cantu [over] Italy. The numbers and stamping tell me that the pipe is a Sea Rock rusticated finish and it is a bent Bulldog. The underside of the left side of the Lucite stem also had stamping that read Hand Made over Castello [over] the number 5. The finish was very dirty with spots of grime and debris ground into the crevices and valleys of the rustication. The bowl had a thick cake in the and a heavy lava overflowing onto the rim top into the grooves. The rim top appeared to be in very good condition with no damage to the inner edge. The acrylic stem had tooth marks and chatter on both sides ahead of the button. The button itself appeared to be in good condition. Jeff took photos of the pipe before he started his clean up work on it. My brother took some close up photos of the rim top and the cake in the bowl to show what it looked like when we received it. You can see how thick the cake is and how much of the rim rustication has filled in with the overflow. The photos of the stem show the faux diamond logo on the top left side of the saddle. You can see the tooth marks and chatter near the button on both sides of the stem. Jeff took photos of the rusticated finish around the bowl sides and heel. It is nice looking if you can see through the grime and dust ground into the rugged, deep rustication. He took a photo of the stamping on the left underside of the diamond shank. The stamping is readable but filthy. It reads as noted above.I remembered that I had written a blog on the same shaped Castello that now was in my rotation and did a quick search on rebornpipes for the link to see if I could remind myself of the information that I had collected there. I found the link, reread the information and quote from it below (https://rebornpipes.com/2016/12/18/an-estate-sale-find-a-castello-sea-rock-sc-54p-bulldog/).

Before I worked on the pipe I wanted to do a bit of research to see if I could shed some more light on the pipe I had in hand. I learned from the pipephil website that the rhinestone logo was originally on pipes for the US market. There was no hint as to why that was done only that it was and that it is occasionally still used http://www.pipephil.eu/logos/en/logo-castello.html

I have an older article called PCCA’s Castello Grade & Style Guide. It was written by Robert C. Hamlin (c) 1988, 1992, 1994. Robert gathered some remarkable information on the Castello lines and I have often used his guide in the past to give me pertinent data. There I found more information regarding the shiny logo on the side of the stem.

“American logo’d Castello pipes use a small round “Diamond” (referred to and looking like, but it is NOT actually a diamond) inlaid into the mouthpiece. This was originally done so that the standard Castello white bar logo did not conflict with another brand and logo that was sold by Wally Frank called the “White Bar Pipe” (in the 1950’s).”

The above quote and the remainder of those following come from the same article by Robert Hamlin. You can read the full article at the following link: http://www.pipes.org/BURST/FORMATTED/196.016.html

I read further in the article to help me understand the stamping on the underside of the shank. My knowledge of Castello pipes is pretty limited so when I get one to restore I resort to this article and others to try to make heads or tails of the stamping. First of all I had no idea what the SC stamped ahead of the Sea Rock Briar stamping meant. I had seen Castello’s with the signature of Carlo Scotti on them but not this stamping. Robert gave me the information I needed.

“Older Castello pipes will usually include the “REG No.” and have the letters “SC” stamped as a part of the nomenclature. The SC stamp was for Scotti, Carlo (in Italy all names are listed last, first). Today the full name of Carlo Scotti, contained in a small oval, has replaced the SC stamp.”

I learned that the Sea Rock Briar stamp also signified something and told me more about the pipe. Robert pointed out:

“SEA ROCK [Carved Black or dark brown]: This is the lowest grade of the Castello line and is the most common in the USA. Sea Rocks are produced by taking a smooth bowl that has not been “final finished” and surface carving the finish with tools. This “carved” finish is then evened out using a steel wire brush, stained and then waxed. The Natural Vergin carved finish is left unstained and unwaxed as a rule, although we have seen waxed and partially waxed “Vergins”.” 

The remaining mystery for me was the meaning of the stamping on the stem. I of course understood the Hand Made and the Castello stamping but the number 5 was a mystery to me. I was not sure what it referred to. So once again Robert’s article gave me the information I needed to understand that last piece of the mystery.

“#2: All Castello standard shaped pipes have a number (3, 4, 5 or 6) stamped on the mouthpiece or sometimes on the lucite ferrule. What does this number mean? Not much really, it is the number of the size for the proper straw tube or reed that fits the shank and stem of the pipe. These straw tubes are rarely used in the United States. The Castello reed is considered superfluous and useless to most, but with this number you will always know which one fits (the different numbers have to do with length, not diameter).”

Armed with that information I turned to work on the pipe itself. Before he sent it to me, Jeff had done an amazing job cleaning the pipe. It almost looked like a different pipe after his work. He reamed the pipe with a PipNet pipe reamer and removed the rest of it with a Savinelli Fitsall Pipe Knife.  He scrubbed the bowl with undiluted Murphy’s Oil Soap with a tooth brush. He rinsed it under running warm water to remove the soap and grime. He cleaned out the inside of the shank and the airway in the stem with isopropyl alcohol, cotton swabs and pipe cleaners. Even though the stem was acrylic he soaked the stem in Briarville’s Pipe Stem Deoxidizer and then rinsed it off with warm water. It really works well to remove internal and external grime and tars. He scrubbed the stem with Soft Scrub and a tooth brush and rinsed it off with warm water. It looked amazing when I took it out of the package of pipes he shipped me. I took photos of the pipe before I started my part of the restoration work.  The rim top was much cleaner and the rustication was in good condition. The inner and outer edges of the bowl looked very good. The stem surface looked good but visible tooth marks and chatter showed clearly on either side of the stem. I took a photo of the stamping on the left underside of the shank and stem. It is clear and readable as noted above. I also took a photo of the faux diamond in the top left of the saddle stem. It is also in good condition.I took the stem off the shank and took photos of the parts of the pipe. It is another great looking Rusticated Bulldog with twin rings around the cap of the bowl.I did a quick work over of the rim top grooves with a brass bristle brush to clean up the small particles that still remained in the grooves of the rustication. It did not take too much to remove what was left and leave the rim clean. It really is a pretty looking pipe.The bowl looked good at this point so I rubbed it down with Before & After Restoration Balm. I worked it into the surface of the bowl and shank with my fingertips and a horse hair shoe brush to clean, enliven and protect the briar. I let the balm sit for about 10-15 minutes and buffed with a cotton cloth to raise the shine. I set the bowl aside and turned my attention to the stem. I sanded the tooth marks out on both sides of the stem at the button using 220 grit sandpaper and also sanded the damage to the button surface itself. I started polishing the stem with 400 grit wet dry sandpaper. I used micromesh sanding pads to polish the newly sanded areas on the Lucite stem surface. I dry sanded it with 1500-12000 grit pads and wiped it down with the damp pad after each sanding pad. In doing so I was able to remove all signs of the damage to stem in those spots along the edge and top of the button. I put the stem in place in the shank and  looked this beautiful Castello Sea Rock Briar 54P Bent Bulldog. I lightly buffed the bowl on the buffing wheel. I buffed the stem with Blue Diamond polish on the buffing wheel I waxed the stem with carnauba wax on the wheel. I waxed the bowl with Conservator’s Wax and buffed the entire pipe with a clean buffing pad to raise the shine. I hand buffed it with a microfibre cloth to deepen the shine. The finished Castello Sea Rock Briar Bulldog is shown in the photos below. It is truly a beautiful little bulldog. The finished Castello Sea Rock Briar Bulldog is shown in the photos below. It is truly a beautiful little bulldog. The dimensions of the pipe are Length: 5 ¼ inches, Height: 1 ½ inches, Outside diameter of the bowl: 1 ¾ inches, Chamber diameter: ¾ of an inch. The weight of the pipe is 41 grams/1.45 ounces. The shape and the rustication make it a pleasure to hold in the hand. It fits snug with my thumb curled around the back of the bowl and the rest of the fingers holding the bowl. The finish is extremely tactile and should be interesting in hand as the bowl heats up during smoking. I can testify to how well both Castellos and this shape smoke. I will be adding it to the Italian Pipe Makers Section on the rebornpipes store soon. Thanks for walking with me through the restoration process.

Restoring a 1969 Dunhill Shell Briar 60F/T 4S Billiard


Blog by Steve Laug

The next pipe on the table is another Dunhill Group 4 Shell Briar Billiard with a taper stem that is proportionally well done. It has a two digit the shape number that I will define below. This is another pipe from the group which Jeff and I purchased on 04/26/2022 from a woman who contacted us from Cleveland, Ohio, USA. They had belonged to her husband’s father. We spent time chatting with her and arrived at a price and she sent the pipes to Jeff. It included 28+ pipes along with this one.

This Dunhill Billiard is stamped on the underside and reads 60F/T on the heel of the bowl followed by Dunhill over Shell Briar followed by Made in England9 (two lines with the 9 the same size as the letter D). A circle 4 followed by S is stamped next to that. The numbers and stamping tell me that the pipe is a Shell Briar and the size is a Group 4. The F/T refers to the Fish Tail style stem. The finish was very dirty with spots of grime and debris stuck on it. The bowl had a thick cake in the bowl and heavy lava overflowing onto the rim top. The rim top appeared to have burn on inner edge. It was hard to know what was under the lava at this point. The stem had calcification, oxidation and tooth marks and chatter on both sides ahead of the button. The button itself appeared to be in good condition. Jeff took photos of the pipe before he started his clean up work on it. He took photos of the bowl and rim top to show the condition. You can see the thick cake in the bowl and rim top and edges. The lava is so thick that is hard to know what the edges and top look like underneath. The sandblast on the rim top is also completely filled in with tar and lava. The stem was heavily oxidized, calcified and has tooth marks and chatter on both sides ahead of the button. Overall the pipe is a real mess. Jeff took a photo of the sandblast finish around the bowl side and heel. It was nice looking if you can see through the grime ground into the blast. He took photos of the stamping on the underside of the bowl, shank and stem. The stamping is readable but filthy. It reads as noted above.Now it was time to begin to work on the stamping on the pipe. Because I had just finished working on another Shell Briar I used the information that I had dug up on that one. I quote below.

Pipedia had some great information on the Root Briar finish and dates and how the finish was made (https://pipedia.org/wiki/Dunhill#Bruyere). The first quote below give the short version of the finish. I quote from both below.

Shell – A deep craggy sandblast with a black stain finish (usually made using Algerian briar) – the color of the stain used has varied over the years. Although there is some doubt as to them being the first to sandblast pipes, Dunhill’s Shell pipes, and the sandblasting techniques developed to create them are considered one of Dunhill’s greatest and most lasting contributions to the art of pipe making.

The documented history of Dunhill’s inception of the Shell is largely limited to patent applications — there are no catalog pages or advertisements promoting blasted pipes at the time. The preliminary work on the English patent (No. 1484/17) was submitted on October 13, 1917. The patent submission was completed half a year later, on April 12, 1918, followed by the granting of the English patent on October 14, 1918. This was less than a month before the end of The Great War on November 11th.

In 1986 Dunhill released a line of premium Shell finish pipes – “RING GRAIN”. These are high-quality straight grain pipes which are sandblasted. Initially only Ring Grain, but now in two different finishes. In 1995 the “Shilling” was introduced with Cumberland finish – it is an extremely rare series. These pipes exhibit a deeper blast characteristic of that of the 1930’s – mid-1960’s (and the limited ‘deep blast’ pipes of the early 1980s) and show a fine graining pattern. These are considered the best new Dunhills by many enthusiasts today and are very rare. The finish is sometimes described as tasting like vanilla at first, with the taste becoming more normal or good as the pipe breaks in.

With that information clear for me I wanted to identify the shape number and try to pin that down (https://pipedia.org/wiki/Dunhill_Shape_Chart). I turned to the section on the older 3 digit Shape Numbers and read it. I quote it below.

Early Days – 2 digits/letters – The original skus/model numbers from the 1920’s until the early 1970’s stood for very specific shapes and bowls. For example, the codes 31, 34, 59, 111, 113, 117, 196, LB, LBS… were all different types of Billiard shaped pipes and there were about 50(!), such codes for the Billiard shape alone. On top of those are a large variety of other shapes.

With the information on the 2 digit stamp not making clear enough the meaning of the number I turned to another link on Pipedia (https://pipedia.org/wiki/Dunhill_Shapes_List) to a shape list that Eric Boehm put together for Dunhills. It is amazing to see the sheer number of variations on the Billiard shape. I copied the four of the two digit numbers in the list as it includes the shape 60 Billiard.

I knew that the pipe shape number locked in a time period between 1920-1970 – a large time span that I needed to narrow down more clearly. I turned to another link on Pipedia (https://pipedia.org/wiki/Dunhill_Shapes_List) to a shape list that Eric Boehm put together for Dunhills. I copied the two 2 digit numbers on Billiards from the list. The shape 60 was in the list.

59 Billiard, tapered bit 4 5¾” 1928, 50, 69 3

60 Billiard, tapered bit 4 5½” 1928, 50, 60, 69 3 (This is the pipe I am working on. It is a tapered bit Billiard with an F/T or Fish Tail bit.)

I turned next to dating the pipe. There is a 9 following the D in ENGLAND on the underside of the shank. The 9 is the same size as the D in England. I turned to the dating chart on Pipephil to pin down the date on this twin (http://pipephil.eu/logos/en/dunhill/cledat-en1a.html). I did a screen capture of Part 2 of the Dunhill Dating Key and included it below. I drew a red box around the section dating this pipe. It is clear that the pipe was made after 1954 so that is why I went to Part 2. Once again, because the year suffix is a 9 that is the same size and on line with D in England that tells me that the pipe was made in 1960+9 for a date of 1969.Armed with that information I turned to work on the pipe itself. Before he sent it to me, Jeff had done an amazing job cleaning the pipe. It almost looked like a different pipe after his work. He reamed the pipe with a PipNet pipe reamer and removed the rest of it with a Savinelli Fitsall Pipe Knife. He scrubbed the bowl with undiluted Murphy’s Oil Soap with a tooth brush. He rinsed it under running warm water to remove the soap and grime. He cleaned out the inside of the shank and the airway in the stem with isopropyl alcohol, cotton swabs and pipe cleaners. He soaked the stem in Briarville’s Pipe Stem Deoxidizer and then rinsed it off with warm water. He scrubbed the stem with Soft Scrub and a tooth brush and rinsed it off with warm water. It looked amazing when I took it out of the package of pipes he shipped me. I took photos of the pipe before I started my part of the restoration work. The rim top was cleaner and the inner and outer edge of the bowl showed some damage. The rim top had smooth spots that would need to be worked on and the sandblast surface had been worn off. The stem surface looked good with the oxidation gone and light but visible tooth chatter on either side of the stem.I took a photo of the stamping on the underside of the shank. It is clear and readable as noted above.I took the stem off the shank and took a photo of the parts of the pipe. It is another great looking Dunhill Shell Briar.I started my portion of the work on this pipe by addressing the damage to the inner edge of the bowl. I used a folded piece of 220 grit sandpaper to smooth out the edge and give it a slight bevel to deal with the chipping and cutting on the inner edge. I used a brass bristle wire brush to knock off any residual grime on the rim top. With the bevel and wire brush it looked better but there were still flat spots on the rim top where the blast had worn away. I used a series of burrs on my Dremel to copy the finish that was on the good spots on the rim and sides. I took a photo of the burrs and the rim top once I had finished the rustication process. It looked better and once stained to match the bowl it would look very good.I used a Mahogany and a Walnut Stain Pen to restain the rim top and the inner bevel of the rim edge. Once it dried I buffed it with a cotton cloth and the match was very good. It looked much better with the work on the rim edge.The bowl looked good at this point so I rubbed it down with Before & After Restoration Balm. I worked it into the surface of the bowl and shank with my fingertips and a horse hair shoe brush to clean, enliven and protect the briar. I let the balm sit for about 10-15 minutes and buffed with a cotton cloth to raise the shine. I set the bowl aside and turned my attention to the stem. I polished the vulcanite stem with micromesh sanding pads – dry sanding with 1500-12000 grit pads. I wiped it down with Obsidian Oil after each sanding pad. I used Before & After Pipe Polish – both Fine and Extra Fine to further polish the stem and gave it a final coat of Obsidian Oil to finish it.  This Sandblasted 1969 Dunhill Shell Briar 60F/T Taper Stem 4S is a great looking pipe now that it has been restored. The rich Shell Briar sandblast finish that highlights the grain and works well with the polished vulcanite stem. I put the stem back on the bowl and carefully buffed the pipe with Blue Diamond on the buffing wheel using a light touch on the briar. I gave the bowl and the stem multiple coats of carnauba wax on the buffing wheel and followed that by buffing the entire pipe with a clean buffing pad. I hand buffed the pipe with a microfiber cloth to deepen the shine. The finished Dunhill Shell Briar 60F/T Billiard is a Group 4 size pipe that will be a great smoker. Give the finished pipe a look in the photos below. The dimensions of the pipe are Length: 5 ¼ inches, Height: 1 ¾ inches, Outside diameter of the bowl: 1 ¼ inches, Chamber diameter: ¾ of an inch. The weight of the pipe is 32 grams/1.13 ounces. I will be adding the pipe to the British Pipemakers Section of the rebornpipes store shortly. If you are interested in adding it to your collection be sure to let me know. I take a moment to remind myself and each of us that we are trustees of pipes that will outlive us and the lives of many other pipe men and women who carry on the trust of their care and use. Thanks for reading this blog and my reflections on the pipe while I worked on it.

Restoring a  Patent Era Dunhill Bruyere 40 Lovat


Blog by Steve Laug

The next pipe on the table is a Dunhill Group 4 Bruyere Lovat that is proportionally well done. It has a two digit the shape number that I will define below. Jeff and I purchased a group of pipes on 04/26/2022 from a woman who contacted us from Cleveland, Ohio, USA. They had belonged to her husband’s father. We spent time chatting with her and arrived at a price and she sent the pipes to Jeff. It included 28+ pipes including this one.

This Dunhill Lovat is stamped on the left side and reads 40 followed by Dunhill over Bruyere. On the right side it is stamped Made in England2 3 (double date stamp) [over] Pat. No. 417574/34. A circle 4 followed by A is stamped on the right side next to the bowl/shank junction. The numbers and stamping tell me that the pipe is a Bruyere and the size is a Group 4. The 2 digit shape number makes it an older pipe as does the Patent No. stamp under Made in England. The double date stamp says the pipe was made one year and sold the next. The finish was very dirty with spots of grime and debris stuck on it. The bowl had a thick cake in the bowl and heavy lava overflowing onto the rim top. The rim top had burned area on the left front top and inner and outer edges. There was darkening and burn damage on the inner edge all the way around. There were burn marks toward the back of the rim top. The stem had calcification, oxidation and tooth marks and chatter on both sides ahead of the button. The button itself appeared to be in good condition. Jeff took photos of the pipe before he started his clean up work on it. He took photos of the bowl and rim top to show the condition. You can see the thick cake in the bowl and rim top and edges. The lava is so thick that is hard to know what the edges and top look like underneath. The stem was heavily oxidized, calcified and has tooth marks and chatter on both sides ahead of the button. Overall the pipe is a real mess.Jeff took photos of the grain and the finish around the bowl sides and heel. It was nice looking if you can see through the grime ground into the surface.He took photos of the stamping on the sides of the shank. The stamping is faint but readable. It reads as noted above. Now it was time to begin to work on the stamping on the pipe. I turned first to Pipedia as I remembered they had some great information on the Bruyere finish and dates and how the finish was made (https://pipedia.org/wiki/Dunhill#Bruyere). The first quote below give the short version of the finish. The second link goes into more detail. I quote from both below.

Bruyere – The original finish produced (usually made using Calabrian briar), and a big part of developing and marketing the brand. It was the only finish from 1910 until 1917. A dark reddish-brown stain. Before the 1950s, there were three possible finishes for Dunhill pipes. The Bruyere was a smooth finish with a deep red stain, obtained through two coats, a brown understain followed by a deep red.

https://pipedia.org/wiki/Dunhill_Bruyere

Initially, made from over century-old briar burls, classified by a “B” (denoted highest quality pipe); “DR” (denoted straight-grained) and an “A” (denoted first quality), until early 1915. After that, they became a high-end subset to the Dunhill ‘Bruyere’. The DR and B pipes, a limited production, they should be distinguished as hand-cut in London from burls as opposed to the Bruyere line which was generally finished from French turned bowls until 1917, when the Calabrian briar started to be used, but not completely. Only in 1920 Dunhill took the final step in its pipe making operation and began sourcing and cutting all of its own bowls, proudly announcing thereafter that “no French briar was employed”.

Bruyere pipes were usually made using Calabrian briar, a very dense and hardy briar that has a modest grain but does very well with the deep red stain.

“Before the 1950s, there were three possible finishes for Dunhill pipes. The Bruyere was a smooth finish with a deep red stain, obtained through two coats, a brown understain followed by a deep red. The Shell finish was the original sandblast with a near-black stain (though the degree to which it is truly black has varied over the years). Lastly, the Root finish was smooth also but with a light brown finish. Early Dunhill used different briars with different stains, resulting in more distinct and identifiable creations… Over the years, to these traditional styles were added four new finishes: Cumberland, Dress, Chestnut and Amber Root, plus some now-defunct finishes, such as County, Russet and Red Bark.”

With that information clear for me I wanted to identify the shape number and try to pin that down (https://pipedia.org/wiki/Dunhill_Shape_Chart). I turned to the section on the older 3 digit Shape Numbers and read it. I quote it below.

Early Days – 2 digits/letters – The original skus/model numbers from the 1920’s until the early 1970’s stood for very specific shapes and bowls. For example, the codes 31, 34, 59, 111, 113, 117, 196, LB, LBS… were all different types of Billiard shaped pipes and there were about 50(!), such codes for the Billiard shape alone. On top of those are a large variety of other shapes.

I knew that the pipe shape number locked in a time period between 1920-1970 – a large time span that I needed to narrow down more clearly. I turned to another link on Pipedia (https://pipedia.org/wiki/Dunhill_Shapes_List) to a shape list that Eric Boehm put together for Dunhills. I copied the four 2 digit numbers on Lovats from the list. The shape 40 was in the list.

Lovats:

37 Lovat, short, thick, saddle 1928 11

38 Lovat, long shank, saddle bit 3 4¾” 1928, 50, 60, 69 11

40 Lovat, long shank, saddle bit 4 5″ 1928, 1950, 1969 11

481 Lovat, long shank, saddle bit 1 5″ 1950, 1969 11

I turned next to dating the pipe. There is a superscript underlined 2 followed by superscript underlined 3 a little higher and to the right of the first superscript. The numbers follow the D in ENGLAND on the right side of the shank. I turned to the dating chart on Pipephil to pin down the date on this twin (http://pipephil.eu/logos/en/dunhill/cledat-en1a.html). I did a screen capture of Part 1 of the Dunhill Dating Key and included it below. I drew a red box around the section dating this pipe. It is clear that the pipe was made prior to 1954 as it includes a Patent Number. I drew a red box around the pertinent section that narrows the date down to between 1921 and 1954. It also had a link to further narrow down the dating.I followed the link to narrow it down and it took me to Page 2. The pipe has the patent number listed at the top of the chart – 417574/34. I followed the tree down the yes path to the part where it reads DUNHILL stamping aligned with SHELL. My pipe has BRUYERE aligned with DUNHILL. Again I followed the yes path to two options 1950 or 1940 + suffix (2-9). Since the pipe has a superscript 2 followed by a slightly higher superscript 3 told me that the pipe was made in 1942 and later sold in 1943. It was an old timer.Armed with that information I turned to work on the pipe itself. Before he sent it to me, Jeff had done an amazing job cleaning the pipe. It almost looked like a different pipe after his work. He reamed the pipe with a PipNet pipe reamer and removed the rest of it with a Savinelli Fitsall Pipe Knife. He scrubbed the bowl with undiluted Murphy’s Oil Soap with a tooth brush. He rinsed it under running warm water to remove the soap and grime. He cleaned out the inside of the shank and the airway in the stem with isopropyl alcohol, cotton swabs and pipe cleaners. He soaked the stem in Briarville’s Pipe Stem Deoxidizer and then rinsed it off with warm water. He scrubbed the stem with Soft Scrub and a tooth brush and rinsed it off with warm water. It looked amazing when I took it out of the package of pipes he shipped me. I took photos of the pipe before I started my part of the restoration work. The rim top was cleaner and the inner edge of the bowl looked rough. The rim top was chipped and damaged with the edges carved. There was burn damage all the way around but heavier on the front and the back of the bowl on the top and inner edge. The bowl was slightly out of round. The stem surface looked good with the oxidation gone and light but visible tooth chatter on either side of the stem.  I took a photo of the stamping on the sides of the shank. It is faint but is still readable as noted above.I took the stem off the shank and took a photo of the parts of the pipe. The overall look of the pipe is quite nice.I started my portion of the work on this pipe by addressing the damage to the rim top and the inner edge of the bowl. I topped the bowl on a topping board with 220 grit sandpaper to remove the damage to the rim top and minimize it on the edges. I used a folded piece of 220 grit sandpaper to smooth out the edge and give it a slight bevel to deal with the chipping and cutting on the inner edge. It cleaned up remarkably well. With polishing and buffing it would look even better. I polished the bowl and rim top with micromesh sanding pads – dry sanding with 1500-12000 grit sanding pads. I wiped the briar down with a damp cloth after each pad to remove the debris and sanding dust. I used an Maple Stain Pen to restain the rim top and the inner bevel of the rim edge. With the darkening on the edges and the top still present the Maple stain worked well to mimic the stain on the rest of the bowl and shank. Once it dried I buffed it with a cotton cloth and the match was very good. It looked much better with the work on the rim edge. The bowl looked very good at this point so I rubbed it down with Before & After Restoration Balm. I worked it into the surface of the bowl and shank with my fingertips and a horse hair shoe brush to clean, enliven and protect the briar. I let the balm sit for about 10-15 minutes and buffed with a cotton cloth to raise the shine. I set the bowl aside and turned my attention to the stem. I “painted” the surface of the vulcanite stem with the flame of the lighter. I was able to lift almost all of the tooth marks and chatter except one on the top side that I needed to fill in with drop of black CA glue. I sanded the repair and the remaining tooth chatter with 220 grit sandpaper. I started polishing the stem with 400 grit wet dry sandpaper to start the polishing. I polished the vulcanite stem with micromesh sanding pads – dry sanding with 1500-12000 grit pads. I wiped it down with Obsidian Oil after each sanding pad. I used Before & After Pipe Polish – both Fine and Extra Fine to further polish the stem and gave it a final coat of Obsidian Oil to finish it. This Beautiful Patented 1942/43 Dunhill Bruyere 40 Lovat is a great looking pipe now that it has been restored. The rich Bruyere finish that highlights the grain and works well with the polished vulcanite stem. I put the stem back on the bowl and carefully buffed the pipe with Blue Diamond on the buffing wheel using a light touch on the briar. I gave the bowl and the stem multiple coats of carnauba wax on the buffing wheel and followed that by buffing the entire pipe with a clean buffing pad. I hand buffed the pipe with a microfiber cloth to deepen the shine. The finished Dunhill Bruyere 40 Lovat is a Group 4 size pipe that will be a great smoker. Give the finished pipe a look in the photos below. The dimensions of the pipe are Length: 5 inches, Height: 1 ¾ inches, Outside diameter of the bowl: 1 ¼ inches, Chamber diameter: ¾ of an inch. The weight of the pipe is 35 grams/1.23 ounces. I will be adding the pipe to the British Pipemakers Section of the rebornpipes store shortly. If you are interested in adding it to your collection be sure to let me know. I take a moment to remind myself and each of us that we are trustees of pipes that will outlive us and the lives of many other pipe men and women who carry on the trust of their care and use. Thanks for reading this blog and my reflections on the pipe while I worked on it.