Blog by Steve Laug
It has not happened to often to me but it has happened more than once! I am not looking for a particular pipe and low and behold in a lot of pipes Jeff and I purchase we come on one that is absolutely a pipe that is not often seen. In this case it was an All Briar Kaywoodie. I have worked on several older Kaywoodie All Briar pipes over the years and always been intrigued with them. There was just something about the idea of a briar stem and a briar bowl. I think that everyone of them has had issues with chewed off and broken off pieces of briar from the stem. They have taken a lot of work to rebuild and reshape. The briar stems just did not handle chompers and biters well so that when they arrived at my desktop the bowls were ok and the stems were all but destroyed. Then Jeff and I were given the opportunity to pick up a rare example of one of these All Briar Kaywoodies and if you can believe it – the pipe was brand new and unsmoked. We swooped for it and paid the price. I don’t even recall when it arrived. It was in a nondescript brown paper box so we looked it over and were pleased with the find. But I have to be hones and tell you that at least I promptly lost track of it in the sheer volume of pipes that I have here in need of restoration. I put it in a drawer with other unsmoked pipes that would one day get my attention and totally forgot about it.
Last evening I opened the drawer where I had put it. I have worked through all of the pipes in the drawer and posted them or put them on the rebornpipes store. This was the last box in the drawer. You can see that nothing about the plain paper box announced what was inside of it. It was literally a worn paper box with no stamping or marks. I brought it to my desk and took a photo of it. I have learned that when I have something like this that I have held onto I generally have a reason for it. Here is what I saw.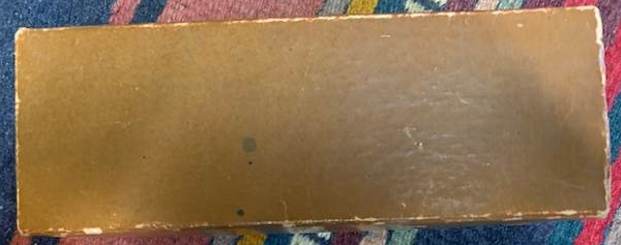 I carefully opened the lid of the hinged box and this is what I saw on the inside. The lid of the box is covered with a gold foil and reads in nice script – Kaywoodie – Connoisseur. Under that to the right it reads Kaywoodie Company over New York – London. The bottom of the box also had the gold foil lining. Sitting on top of that was a light blue Kaywoodie Pipe Sock that read KAYWOODIE [over] Reg. U.S. Pat. Off. No. 154986 (It is very hard to read as the ink has blurred on the fabric. I cannot find anything listed with anything near this number on the US Patent Search site). [over] Connoisseur [over] The World’s Best Smoking Pipe. Underneath is a Cloverleaf logo. Inside the pipe sock was the pipe pictured below – a beautiful All Briar Dublin.
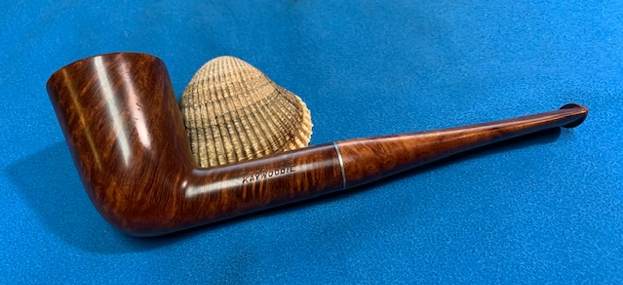
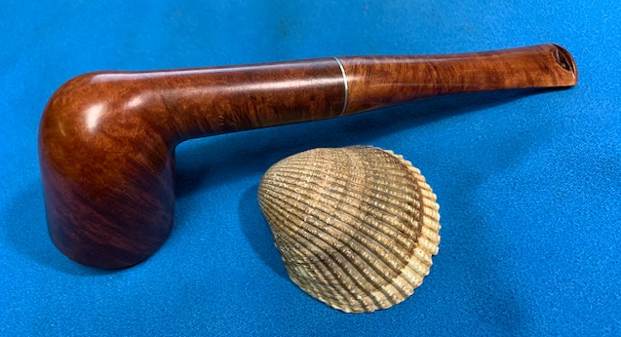
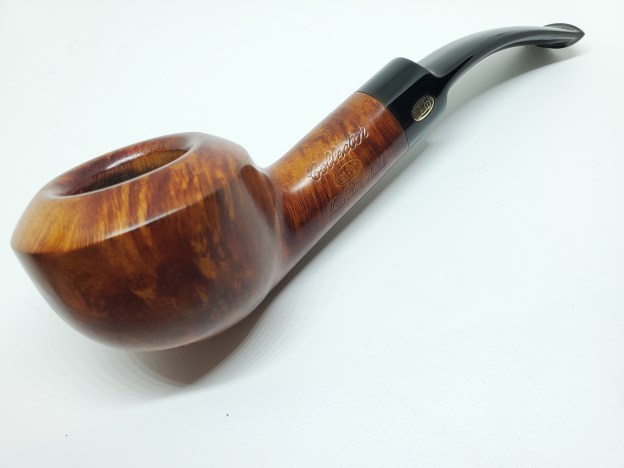
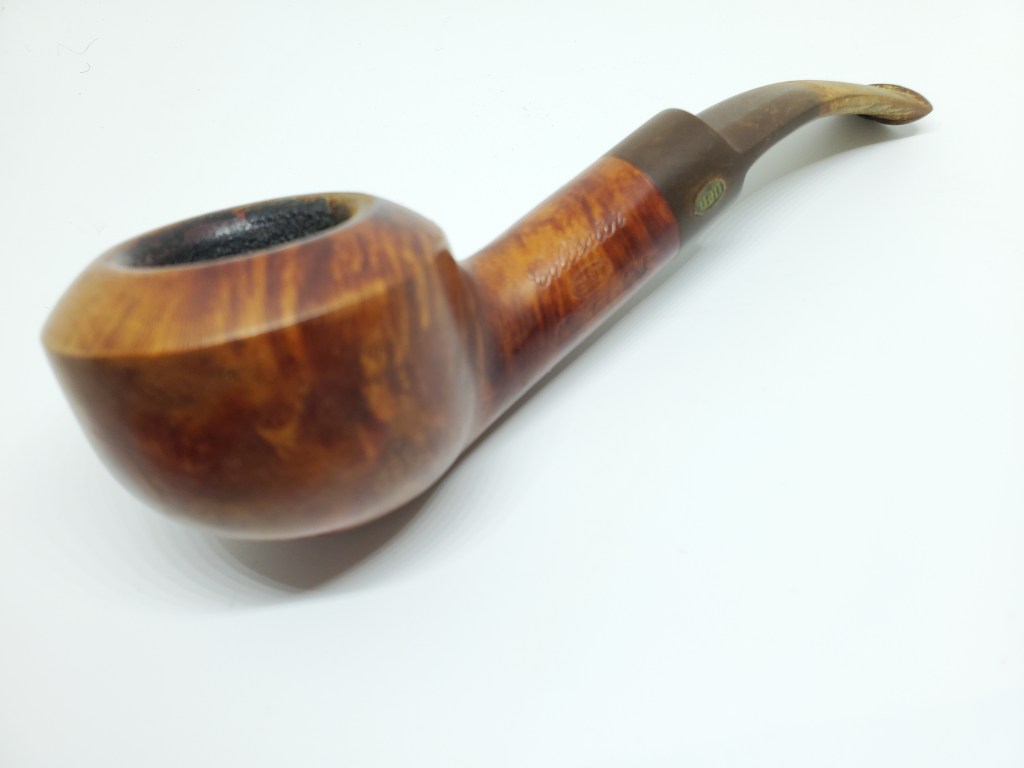
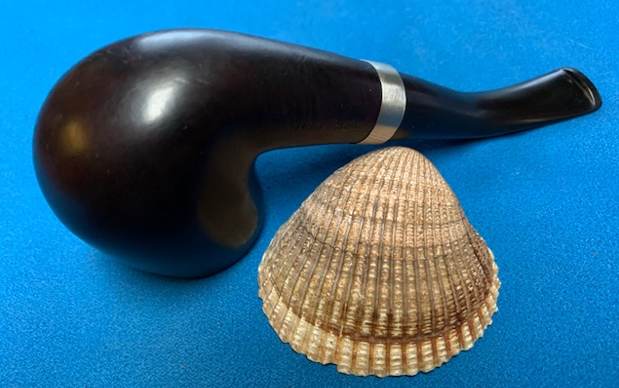
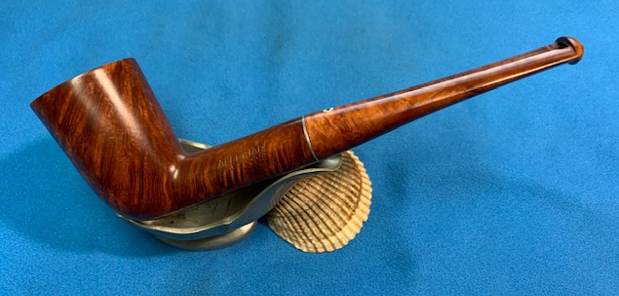
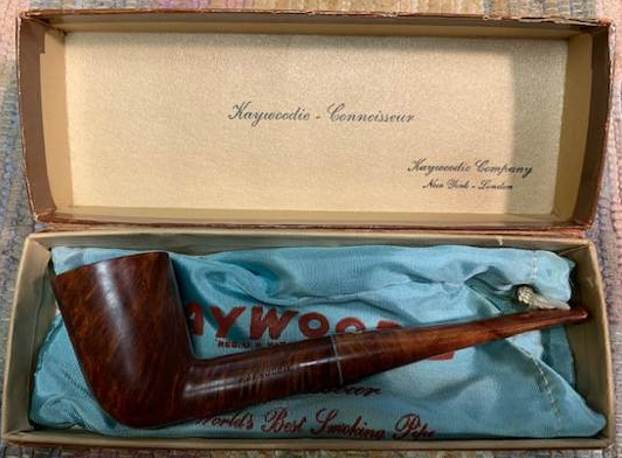 I took the pipe out of the box and took photos of it to try and capture what I saw while I looked at it. It is really a beautiful pipe. It was made between 1952-1955 which appears to the only time frame that these pipes were produced – so it is amazing that it remains unsmoked and in flawless condition some 70+/- years later (https://pipedia.org/images/3/3d/Kaywoodie_Pipe_Names.pdf).
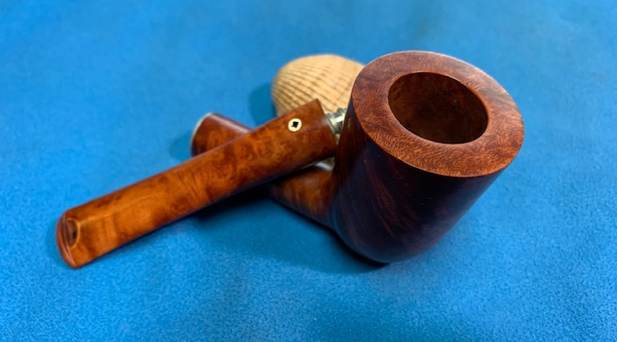
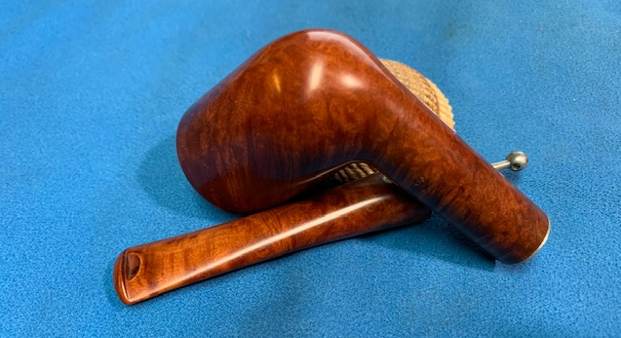
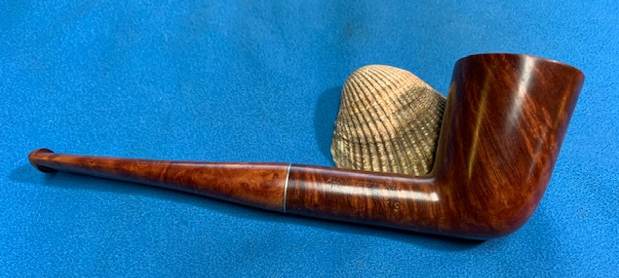
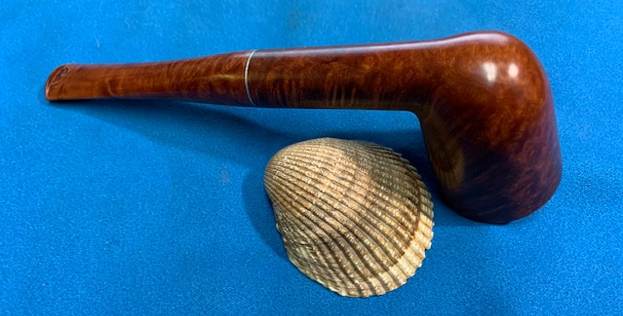
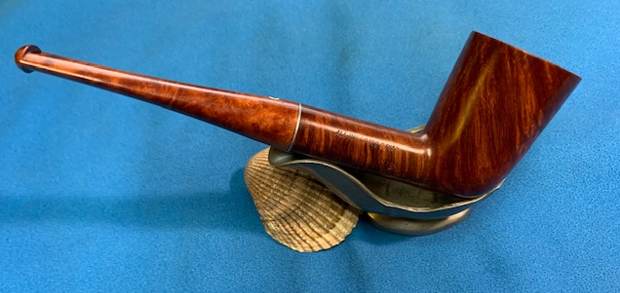
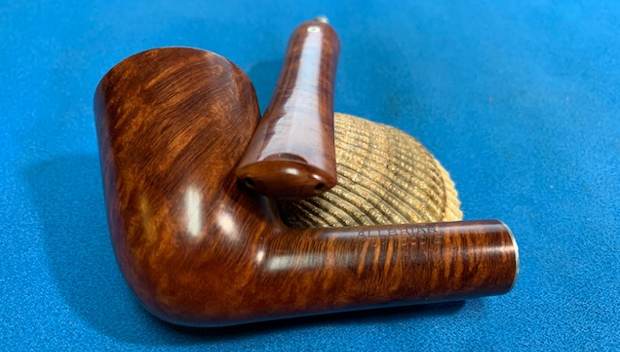
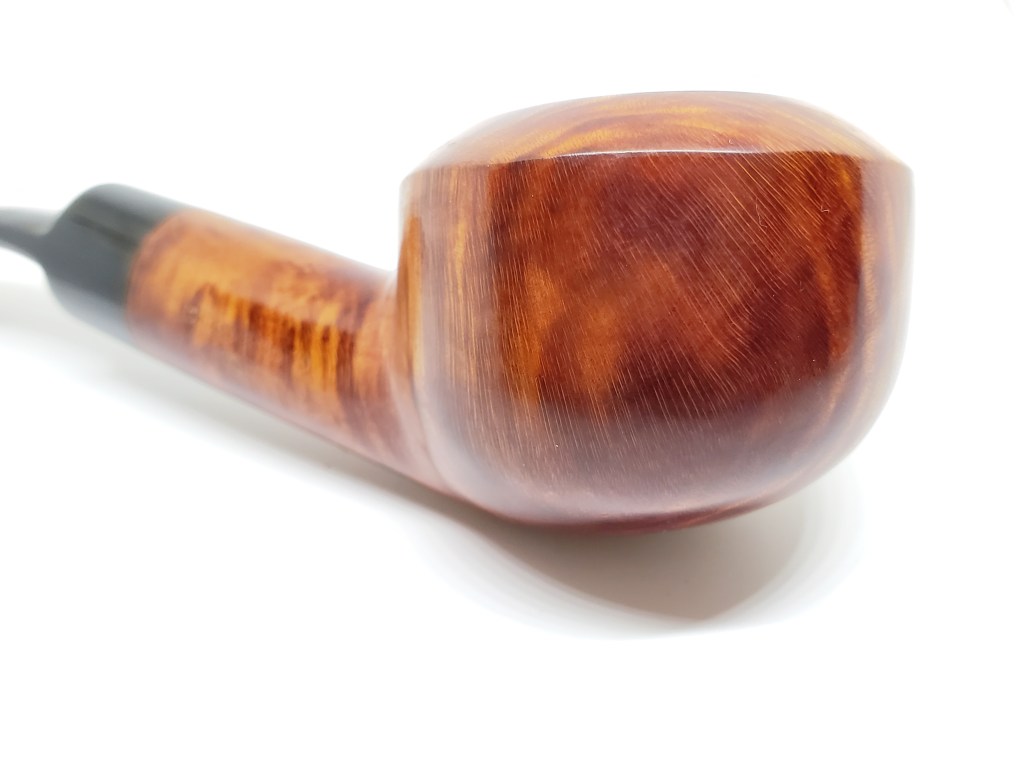
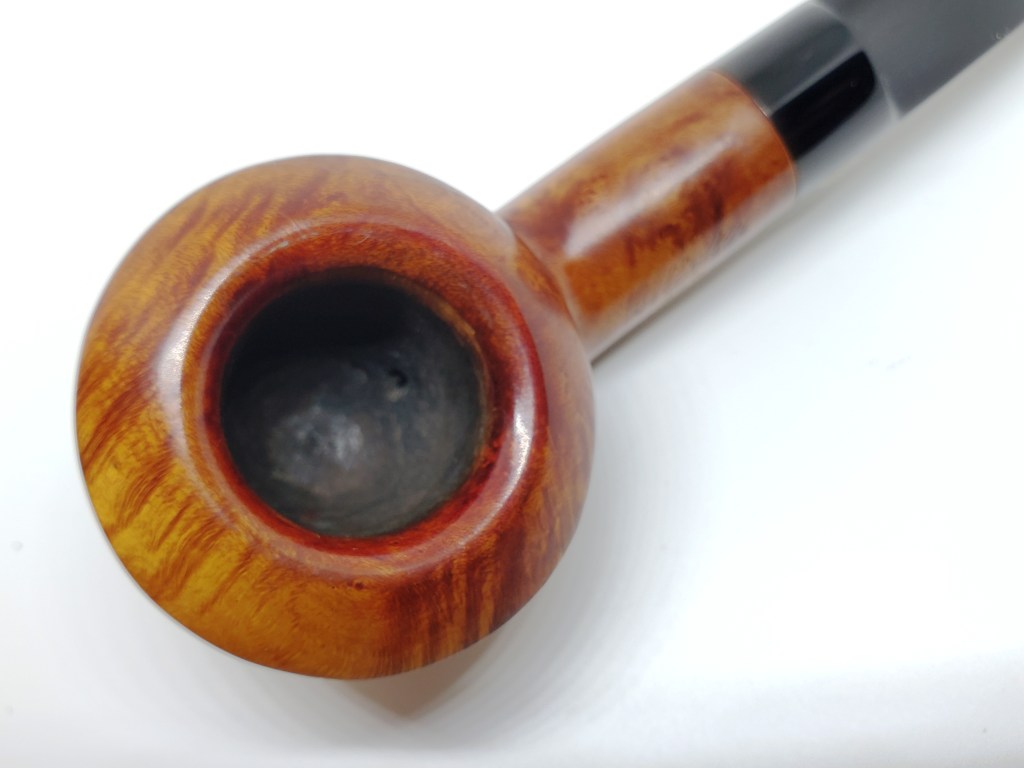
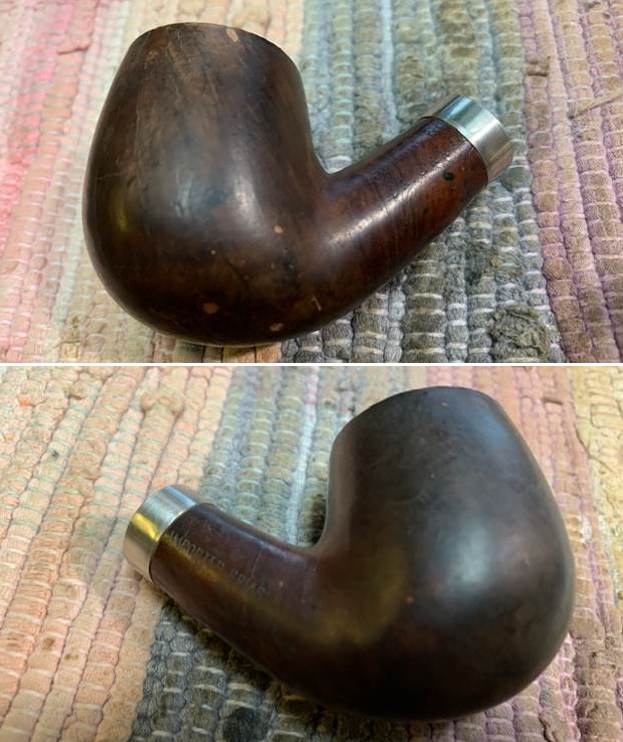
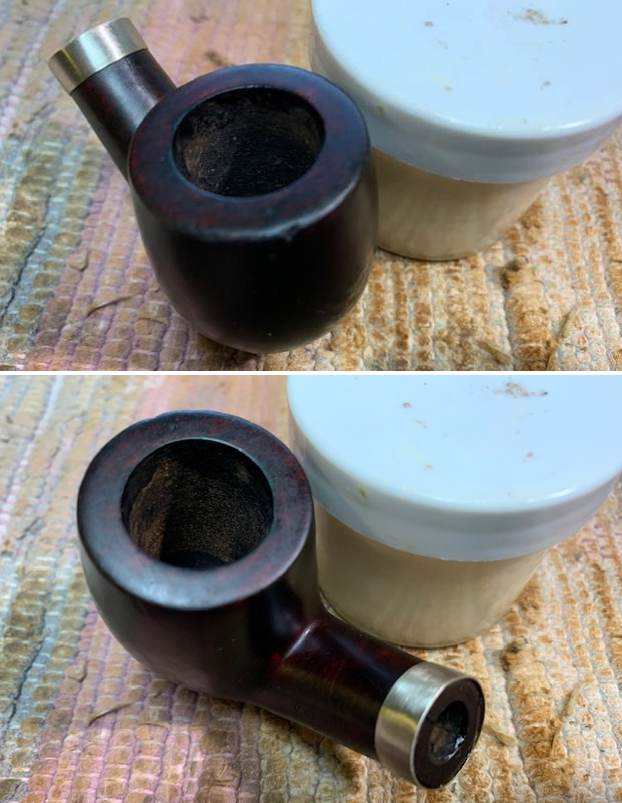
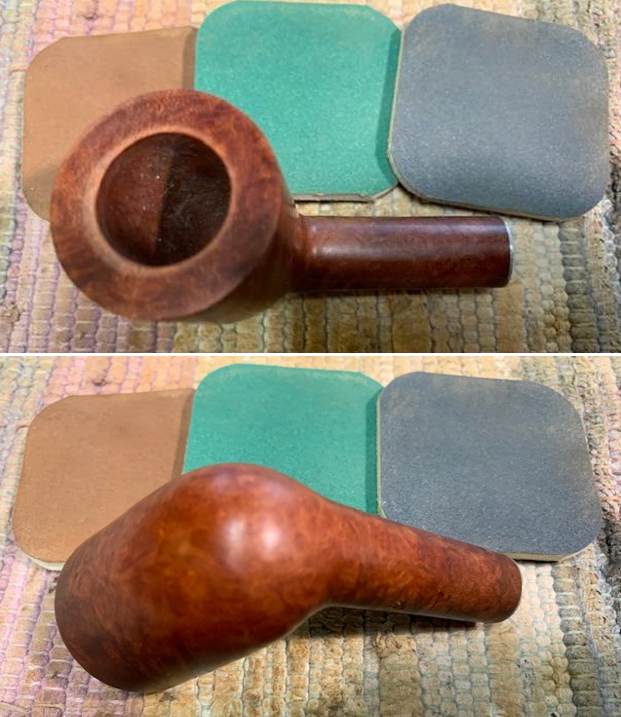
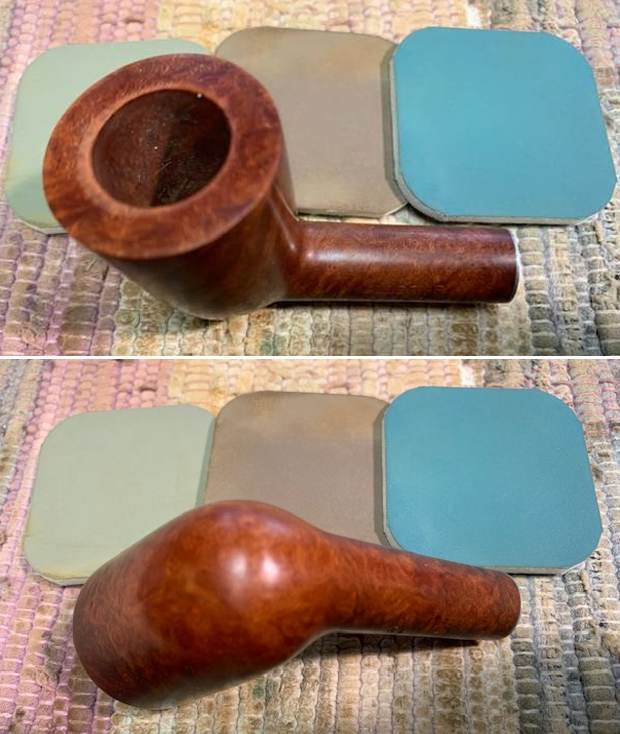
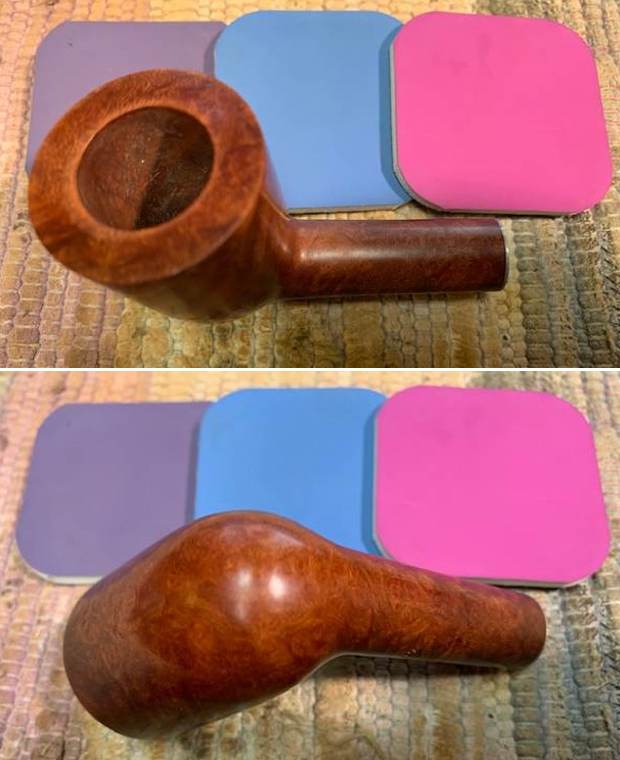
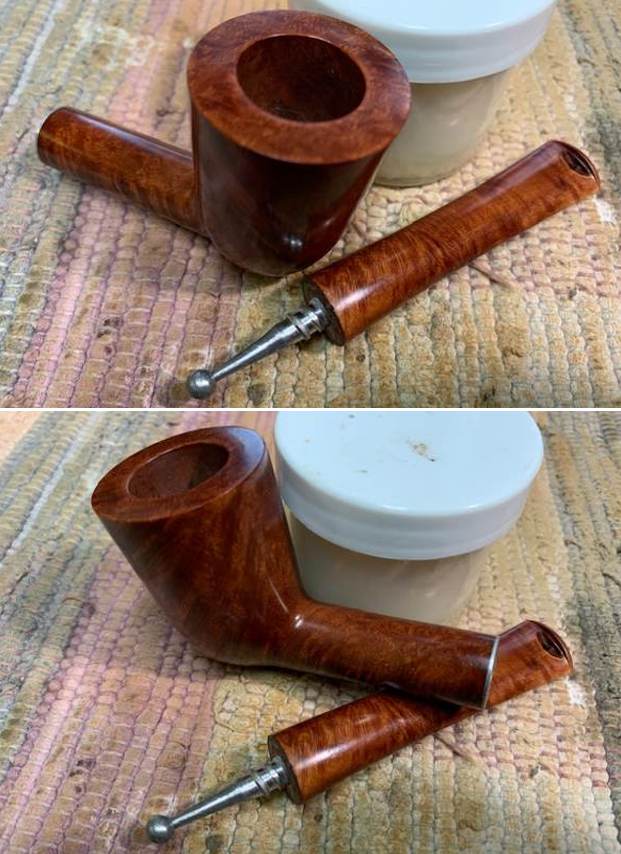
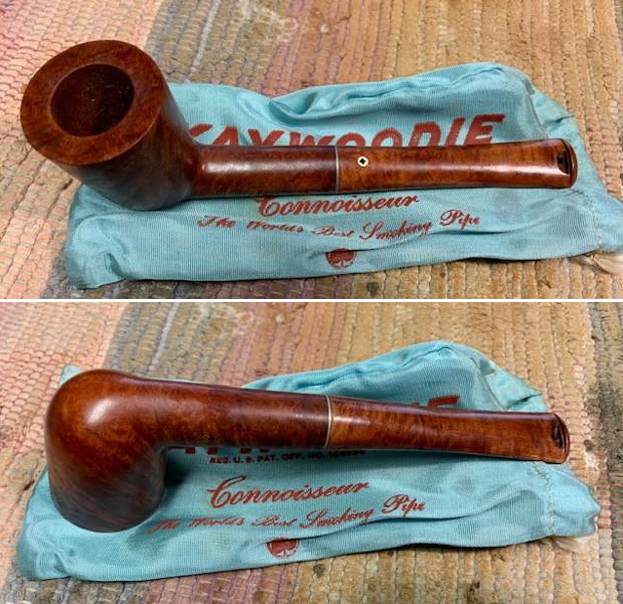 I took photos of the rim top, bowl and the stem surfaces to show the condition of this beautiful unsmoked pipe.
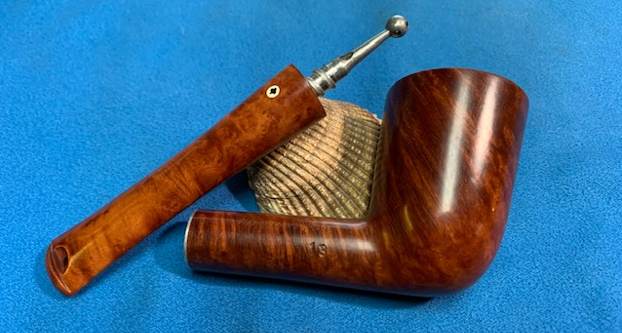
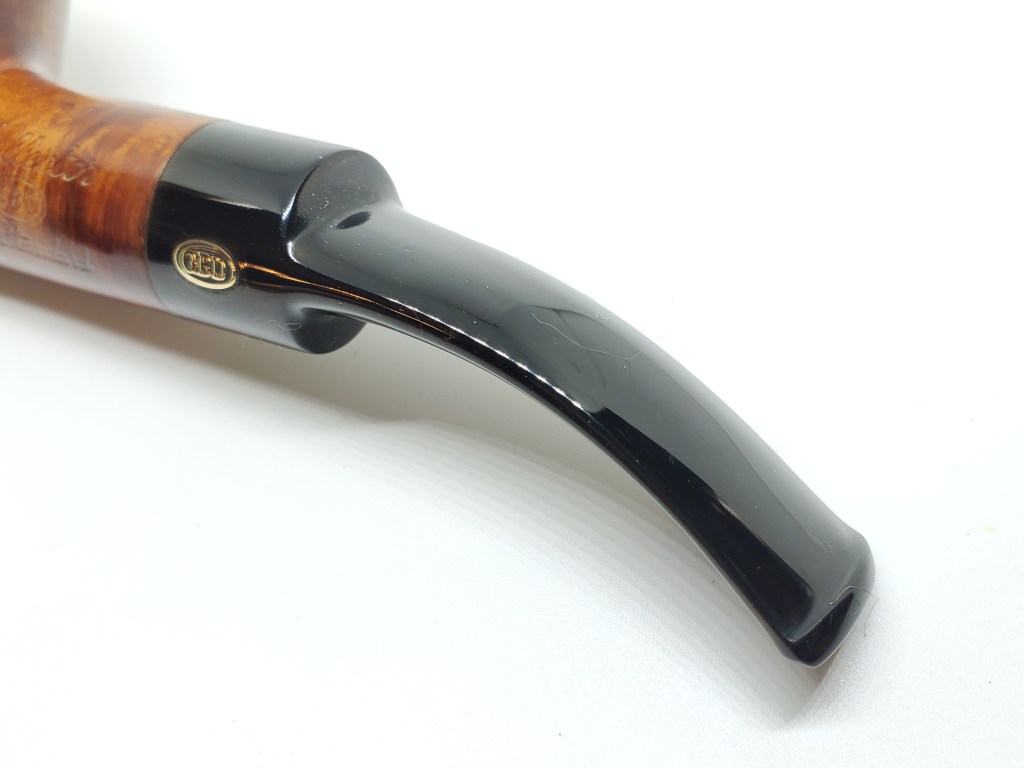
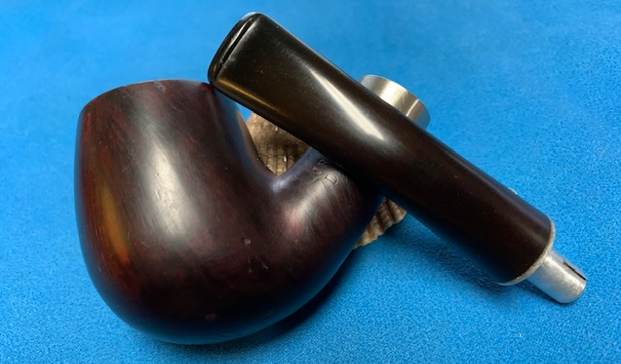
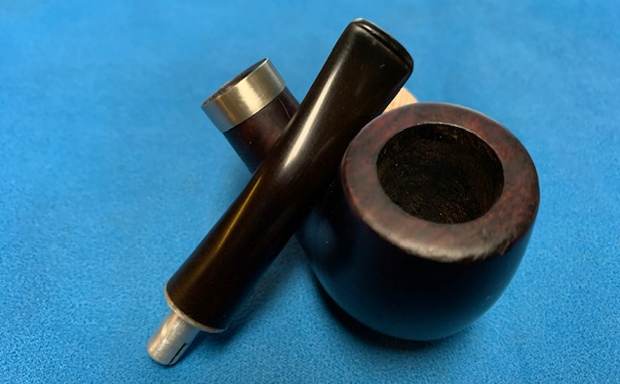
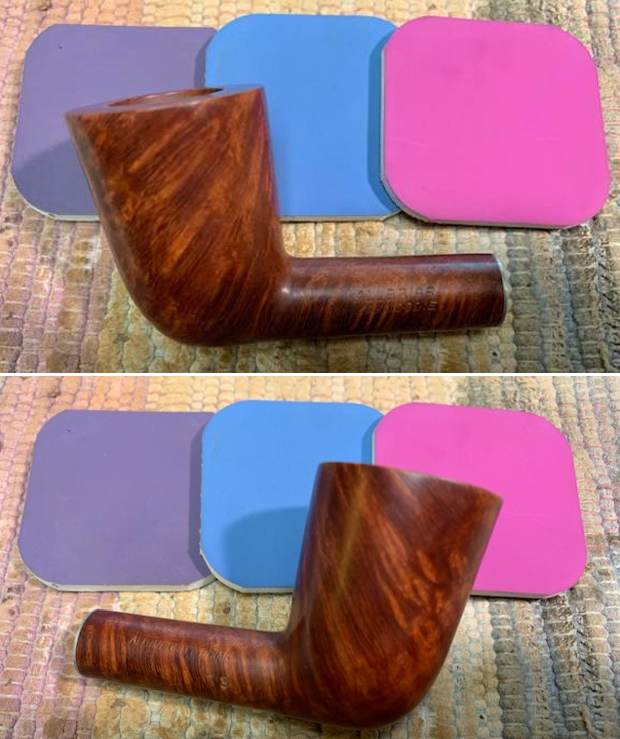
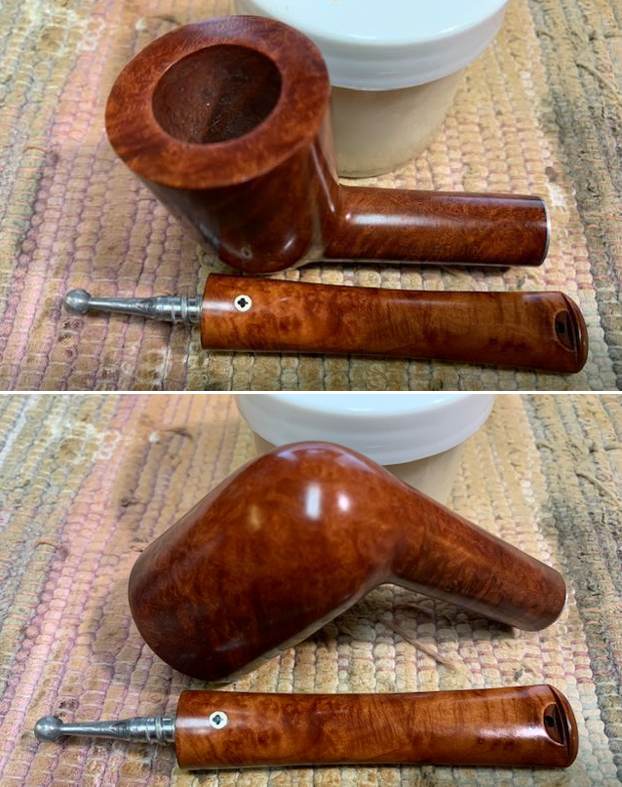
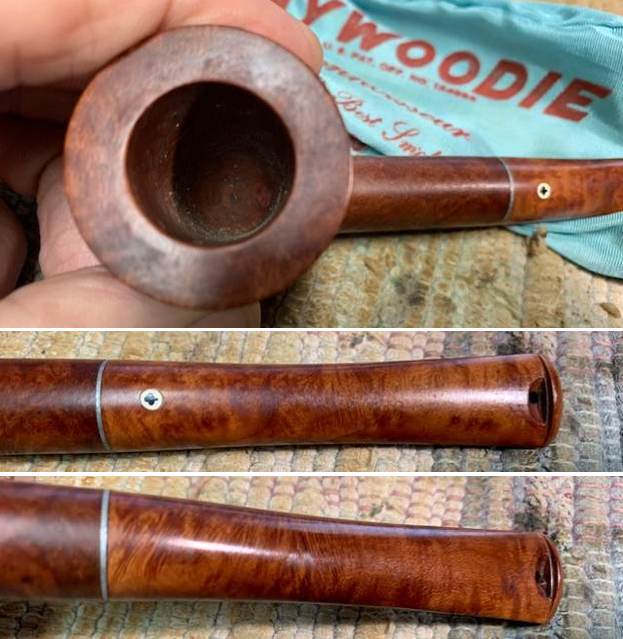 I took photos of the clear stamping on the shank sides. On the left it read ALL BRIAR [over] Kaywoodie. On the right it read ALL-IMPORTED BRIAR [over] the shape number 13. On the top of the briar stem is an inlaid black cloverleaf in a white circle.
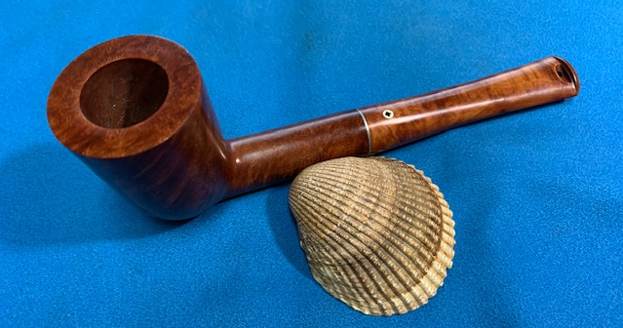
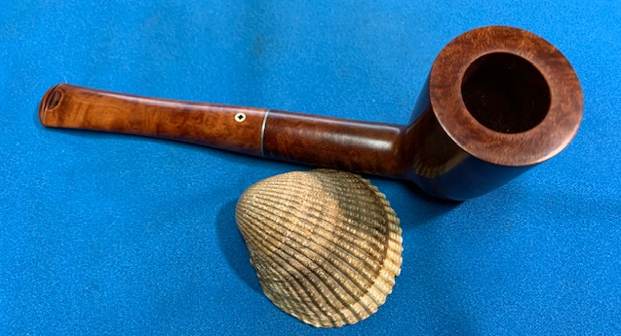
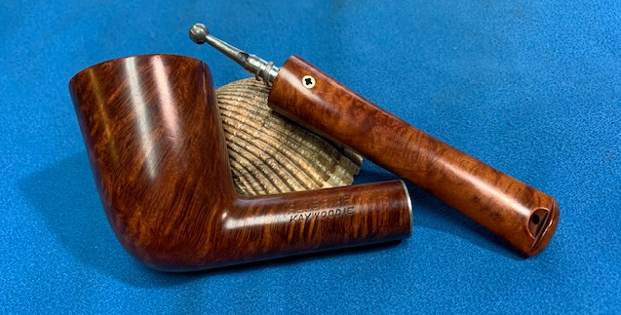
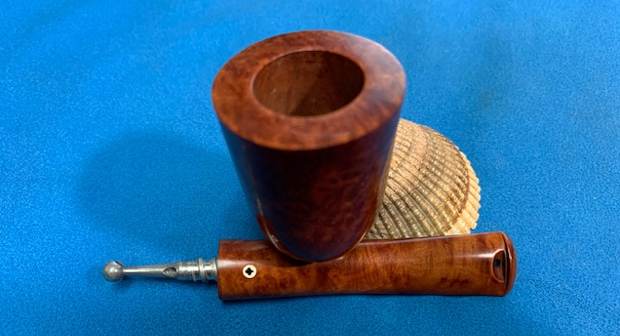
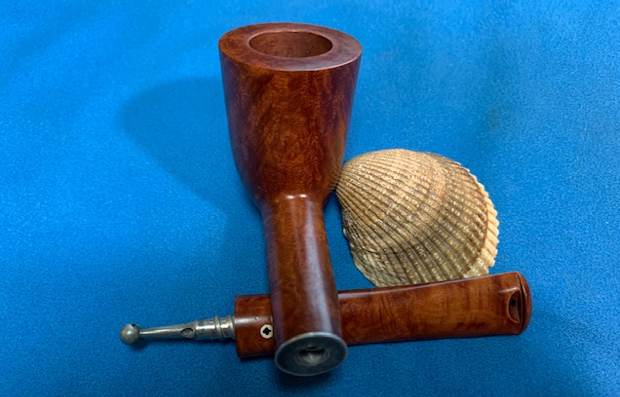
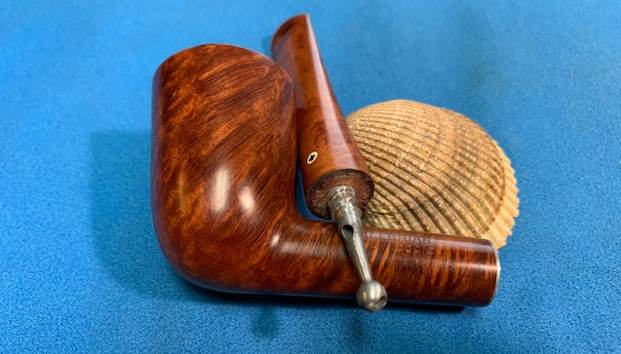
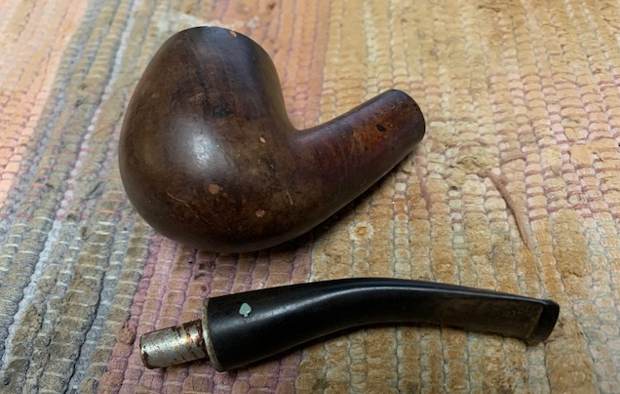
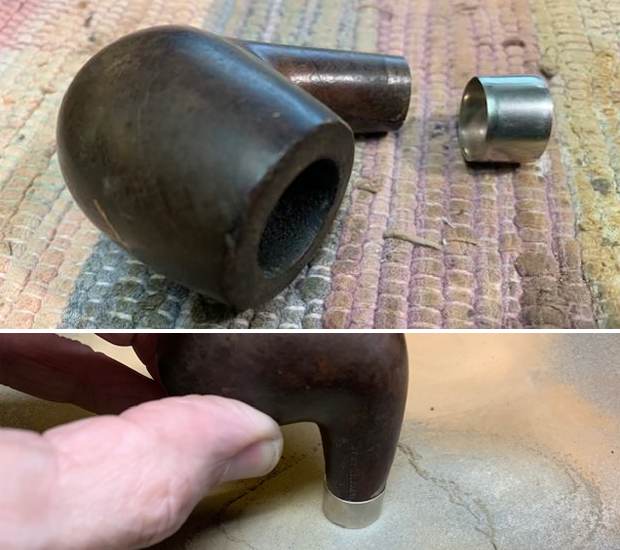
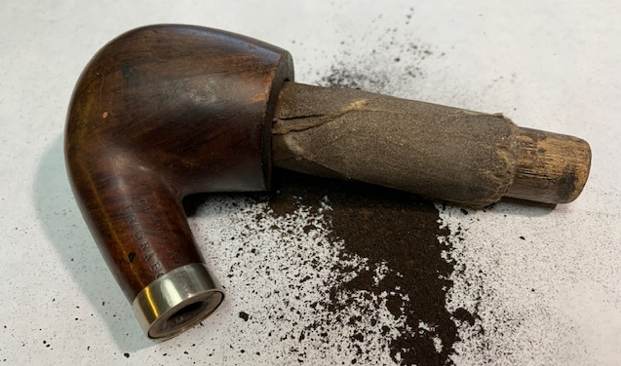
 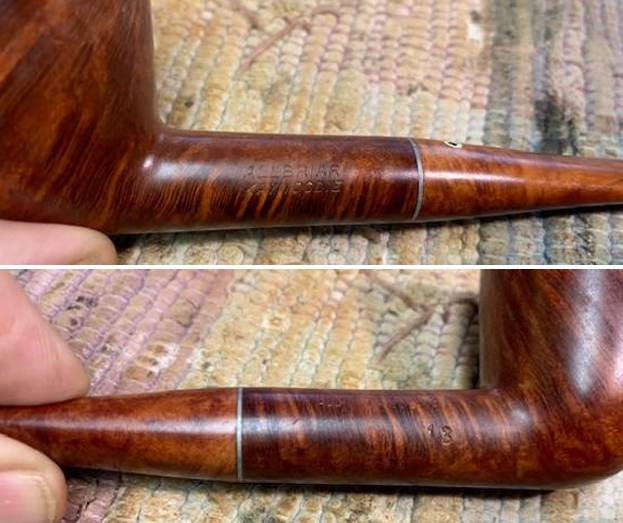 I unscrewed the stem from the shank and took a photo of the pipe. The aluminum is lightly oxidized but will polish up and look great. It is a stunning looking pipe.
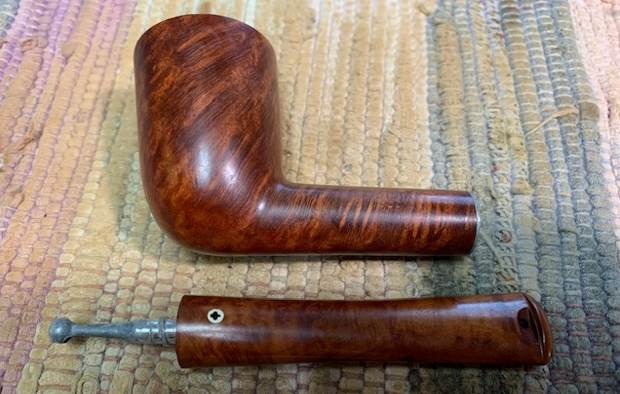 I have read a lot of information in the past on other Kaywoodie pipes I have worked on and spent time on the Kaywoodie Collectors Forum to help educate myself on the various lines and historical periods of Kaywoodie production. On Pipedia.org there is a helpful summary of the history of the brand that has been condensed in one place. It is called the Collectors Guide to Kaywoodie Pipes (https://pipedia.org/wiki/Collector%27s_Guide_to_Kaywoodie_Pipes). I found the All Briar line of pipes included in the section of the Guide for 1955. I quote here the pertinent sections with the references to the All Briar pipe underlined and highlighted in bold.
The line-up of pipes in the 1955 catalog (Table 3 below) was more extensive than in previous years. The catalog presented an expanded line of meerschaum pipes and introduced a 4-pipe set of Matched Grain Pipes, as well as several pipes with “special features”. The number of shapes available… was not substantially different from the number offered in the 1947 catalog…
The Twin-Bowl Kaywoodies were available in an all-meerschaum model (two removable inner bowls of meerschaum) and a meerschaum and Flame Grain model (outer bowl of flame grain briar and removable inner bowl of meerschaum). Other meerschaum pipes presented in the 1955 catalog included the Gourd Calabash; the Coral (“dimpled”) Meerschaum; the All Briar (briar bit) and Flame Grain pipes with inlaid meerschaum bowls; and the “Doctor’s” pipe…
Included in the guide was a helpful list of pipe grades and prices. I have included the list below and noted the pipe I am working on by highlighting it in bold print and underlining the reference. It is in this list that I found confirmation that Kaywoodie made an All Briar with a meerschaum bowl insert and an All Briar without the meerschaum insert. The All Briar I am working on is not meerschaum lined. It is fascinating for me to see that the addition of a meerschaum bowl was only $2.50 in 1955. The pipe I have is marked as Connoisseur which I have highlighted in red below in the list and as an All Briar Stembiter (also highlighted).
Table 3. 1955 Kaywoodie Pipe Grades and Prices
Meerschaum Character Pipes: $100.00
Block: 15.00-50 (According to size)
Meerschaum Twin Bowl: $35.00
Meerschaum/Flame Grain Twin Bowl: $25.00
Sandblasted “Doctor’s” Pipe: $25.00
Centennial: $25.00
Coral Meerschaum: $20.00-25 (According to size)
Gourd Calabash: $15.00-25 (According to size)
Ninety-Fiver: $20.00
Oversize: $10.00-25(According to style and finish)
Connoisseur: $15.00
All Briar w/Meerschaum Inlaid Bowl: $12.50
Flame Grain (Meerschaum Inlaid) $12.50
Export Pipes: $5.00-15 (According to grade)
All Briar (Briar Bit): $10.00
Flame Grain: $10.00
Fit Rite: $10.00
Silhouette: $10.00
Carburetor: $7.50
Relief Grain: $7.50
Chesterfield: $5.00-15 (According to grade)
Chinrester: $5.00-10 (According to grade)
Stembiter: $5.00-10 (According to grade)
Streamliner: $4.00-10 (According to grade)
Super Grain: $5.00
Carved Super Grain: $5.00
White Briar: $5.00
Standard: $4.00
Filter Plus: $4.00
Drinkless pup: $3.50
Drinkless Tuckaway: $3.50
Drinkless In-Between: $3.50
Two-Pipe Companion Setsb: $10.00-25 (According to grade)
Matched Grain Set (4-Pipes): $50.00
Matched Grain Set (7-Pipes): $125.00
Further reading on Pipedia under the general listing for Kaywoodie Pipes provided me with a magazine advertisement that included the All Briar pipes. It is a great Father’s Day Ad and the bottom items in the ad show the All Briar line. I have included both the link and a copy of the ad for your reading pleasure (https://pipedia.org/wiki/Kaywoodie)
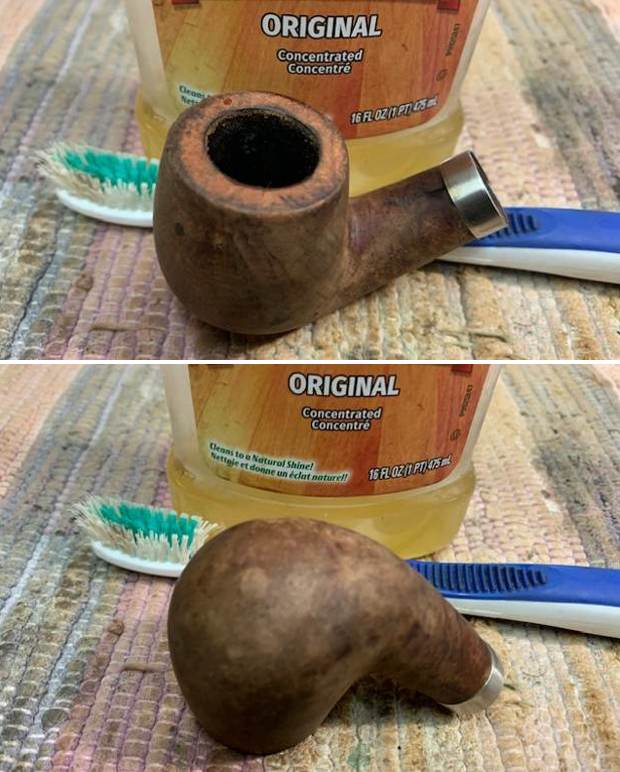
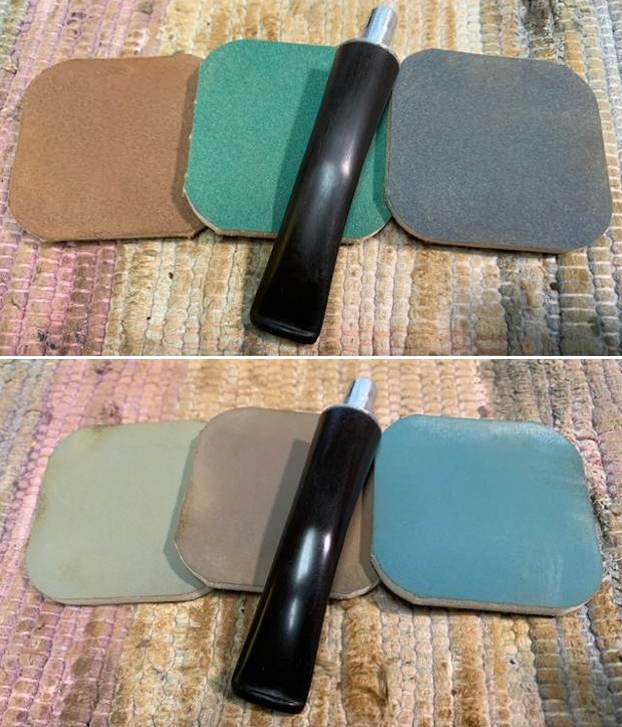
The finish on the briar was clean and good but was a bit rough to touch from the time spent in storage. I polished it with micromesh sanding pads and wiped it down with a damp cloth after each pad. It really is a nice piece of wood.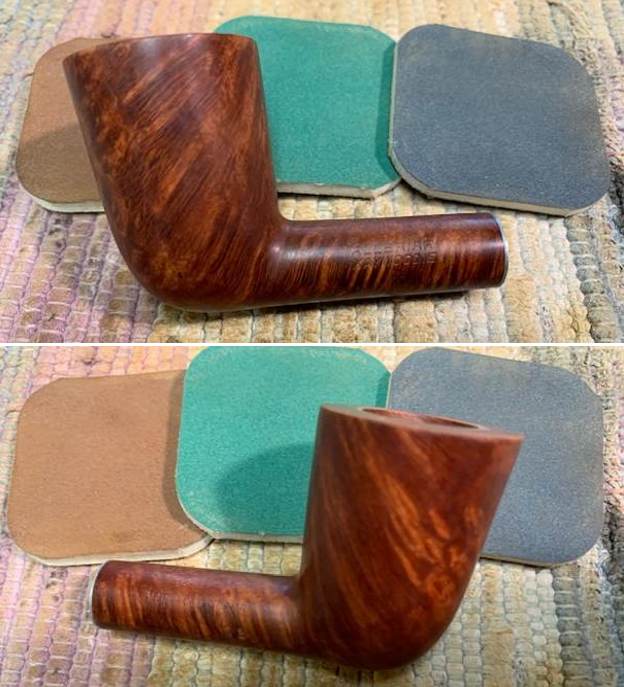

 I decided to look on my other go to site – PipePhil (http://www.pipephil.eu/logos/en/logo-kaywoodie-1.html) to see what added information I might garner from his site. Under the Kaywoodie All Briar listing it said that the pipe had a twin-bore stem, meaning that instead of a slot in the button there were twin holes that formed a Y with the airway in the stem itself. The pipes were made between 1952 – 1955. It included a series of pictures of a typical briar Kaywoodie stem that showed a vertical hole near the button that was an innovation that they called Stembiter to prevent a stem biter from gnawing through the stem. The Stembiter innovation came out in the early 1950s as well so now I had confirmation of the period when the pipe was made.
 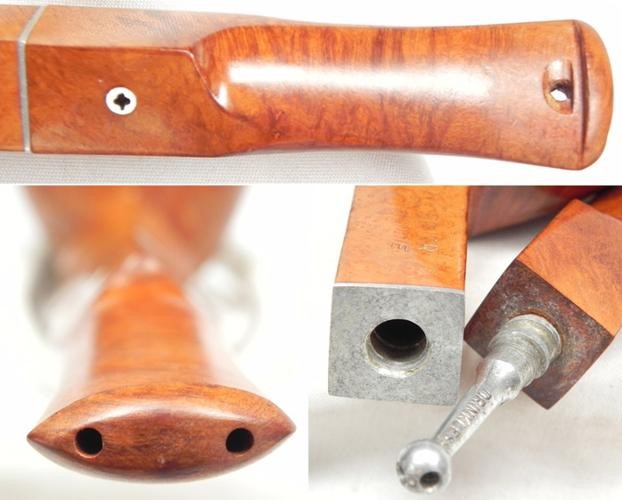 I have included an advertisement for the Stembiter innovation following the photo below. I know that at present I will not be able to reproduce this feature on the stem when I rework it.
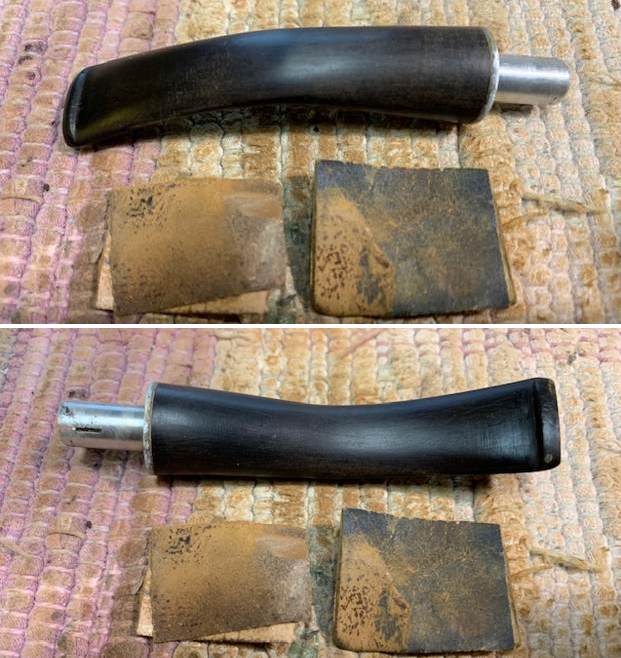
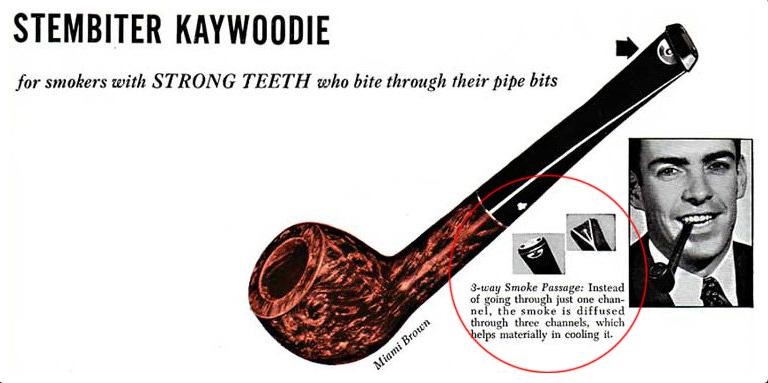 Now that I had a clear picture of the drilling and the function of the set up of the All Briar stem I polished it with micromesh as well. I dry sanded it with 1500-12000 grit pads and wiped it down after each sanding pad with a cloth impregnated with Obsidian Oil. After each pad the pipe stem took on new shine and depth. I also polished the oxidized aluminum four hole stinger at the same time. I polished the entirety with Before & After Pipe Stem polish – Fine and Extra Fine. I gave it a final rubdown of Obsidian Oil and let it sit to dry.
 I rubbed some Before & After Restoration Balm into the briar of the bowl and stem. I worked it into the surface with my fingertips. It works to clean, protect and preserve the briar and I figured this was a piece worthy of doing that! I let the Balm sit for 15 minutes and then buffed it off with a soft cotton cloth. The Balm seems to work magic with dry briar.
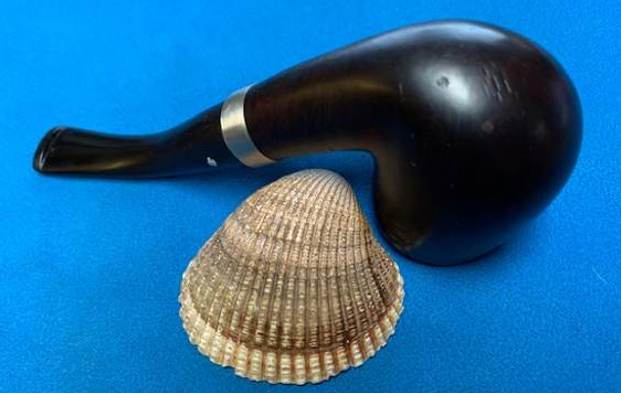
 With the polishing work done on the All Briar Kaywoodie Connoisseur Dublin, I put the pipe back together again and gave it a quick buff with Blue Diamond on the wheel and then gave the entire pipe multiple coats of Carnauba Wax. I buffed it with a clean buffing pad on the wheel and then a hand buff with a microfiber cloth to deepen the shine. It is a beautiful pipe. The grain and the lines of the pipe are eye catching. The dimensions of the pipe are Length: 6 inches, Height: 2 inches, Outer Bowl Diameter: 1 3/8 inches, Chamber Diameter: ¾ of an inch. The weight of the pipe is 34 grams/1.16 ounces. This is one that I plan on adding to my own collection as it is a great addition. I am still undecided if I will fire it up and enjoy a smoke in it. We shall see. Thanks for walking through my meanderings as I worked on this old timer. Much appreciated!