Blog by Steve Laug
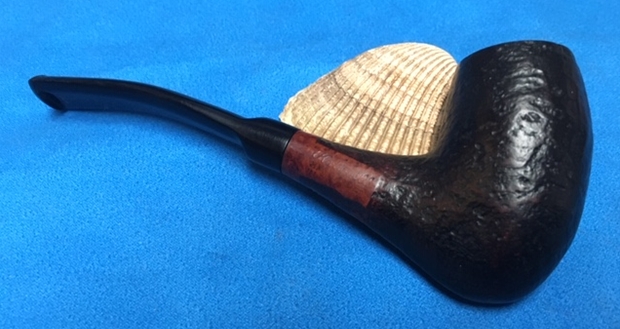
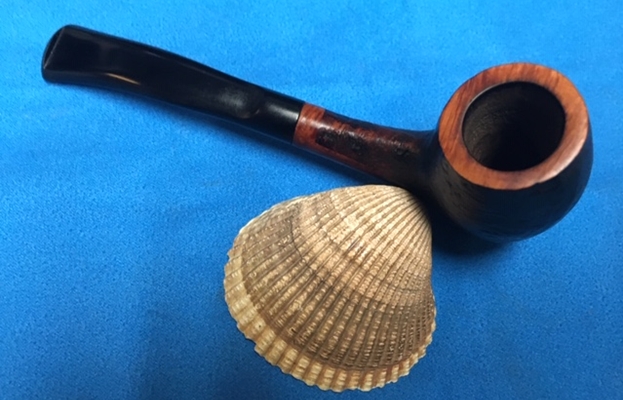
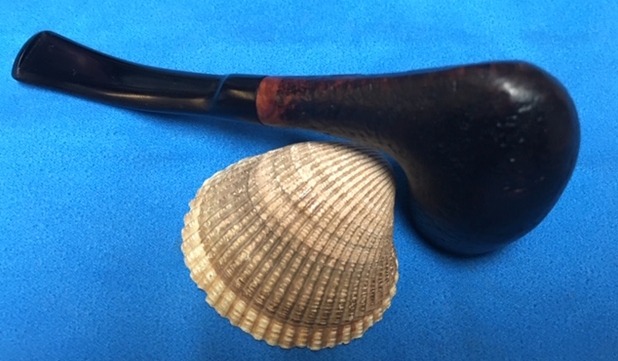
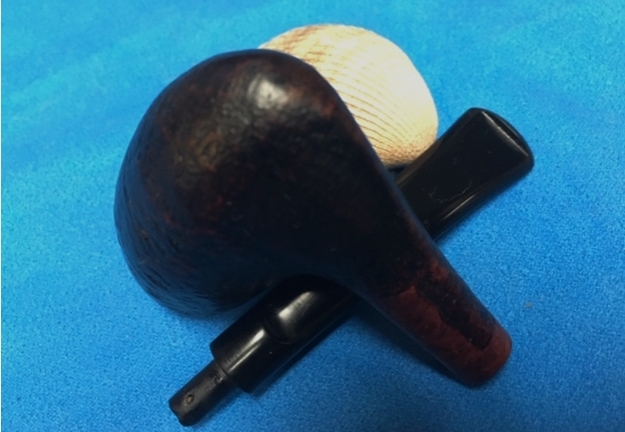
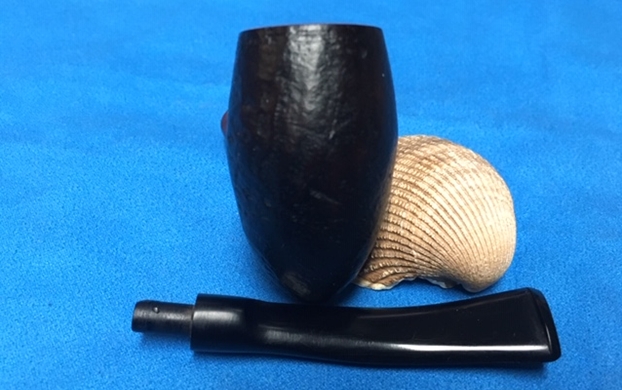
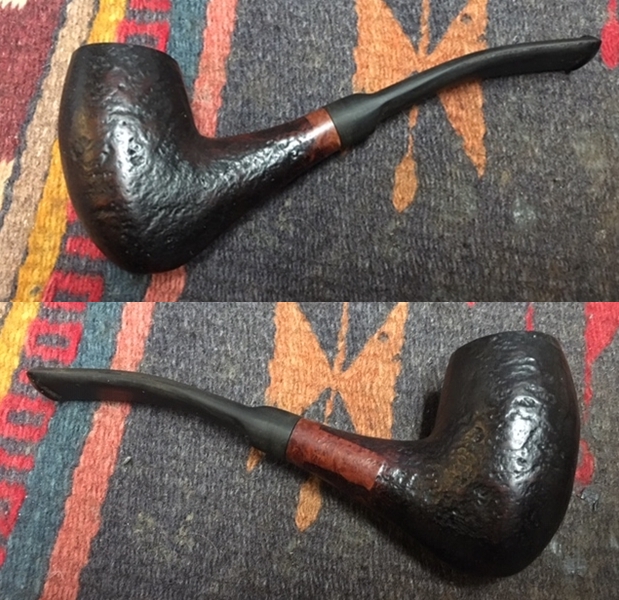
The next pipe in the queue is from a group of pipes that Paresh purchased from a rag picker in Mumbai, India. The fellow had found a large number of pipes as he was going through rubbish bins and contacted Paresh. This is a tired and worn looking Kriswill. I knew looking at it even before the stamping was checked that this was a Kriswill because there is something distinctive about the shapes. The pipe is stamped (though it is faint now from wear) Kriswill Hand Made in Denmark. The pipe was filthy and unusable. I think it was from the generation who smoked a pipe to death and then pitched it. The finish on the pipe is very dirty and the sandblast is almost worn smooth. There is a thick cake in the bowl and a lava overflow on the rim top. I can see some damage to the inner edge of the rim but because of the cake and tars it is hard to know what the inner edge looks like. The stem was broken at the tenon and there was a very strange set up keeping the pieces together. I took photos of the pipe before cleaning it. The photos give a pretty clear picture of the shape of the pipe and its general condition when I received it. 
 At first glance I thought that the tenon was broken off in the shank but as I examined it I came to believe it was even worse. It looked like someone had glued something in the shank and Gerry-rigged a connection to the stem. The photo below shows what I saw. What is not clear in the photo was a piece of metal in the centre of the mortise area. It looked like a tube but when I tried to push air through the shank it was absolutely plugged.
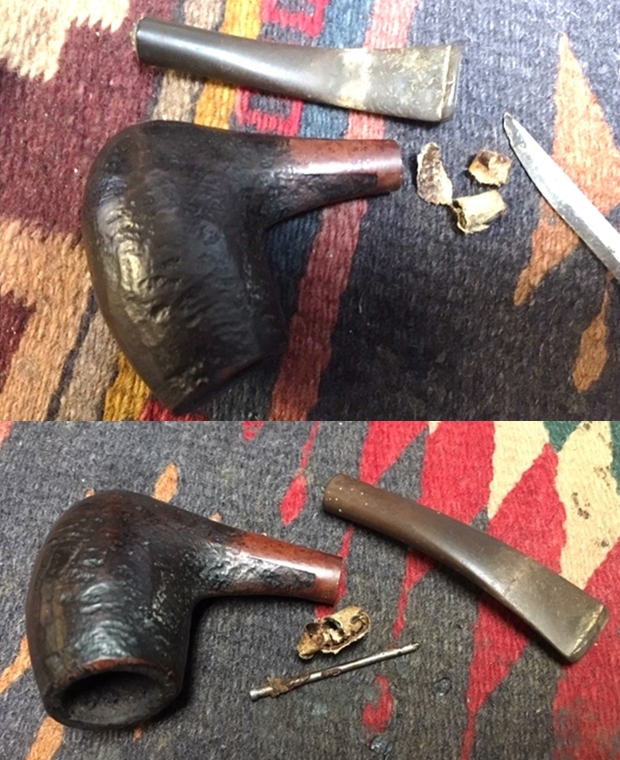
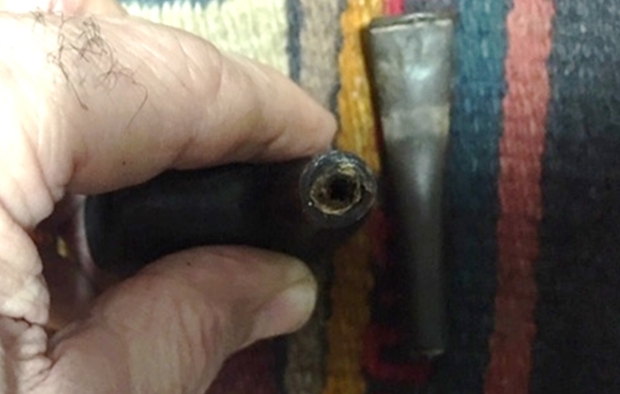 I was going to have to try to drill out the shank but before I did that I examined the shank and stem more closely. The stem had been hacked pretty seriously so that the diameter was not even close to the diameter of the shank. In the centre of the mortise the metal tube turned out to be a 2 inch long finishing nail. It appears that the nail was used to keep the stem in place in the shank. For what? I don’t have an answer for that as it was utterly unsmokable. Once I removed the nail with a pair of needle nose pliers I was able to blow air through the shank. It was at least clear. I used a drill bit slightly larger than the mess in the shank and carefully drilled the shank. It did not work to clear out the shank! However, it was clear what was there – it was a tube made of masking or painters tape! I took a pen knife and twisted it into the mortise and was able to pull the tube free of the shank. The last photo shows everything that had been in the shank to hold the stem in place on the shank.
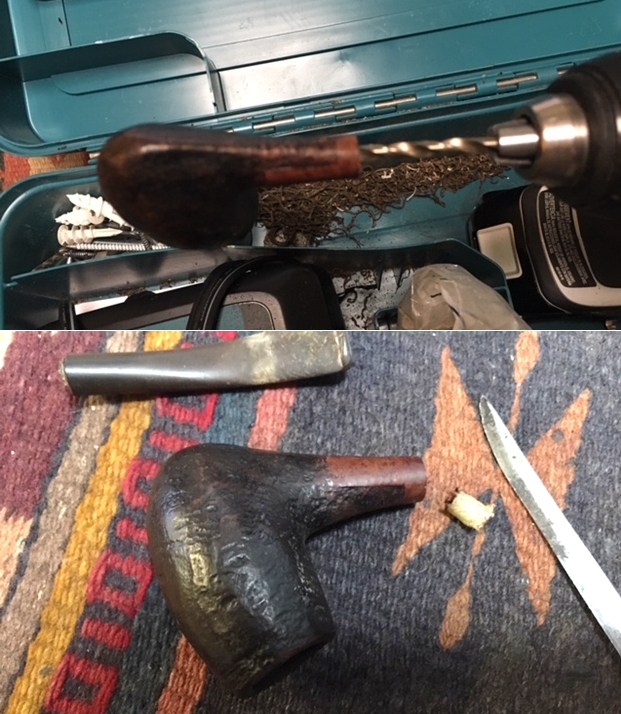
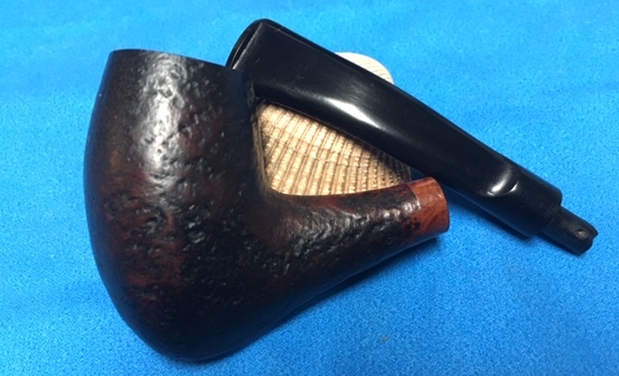
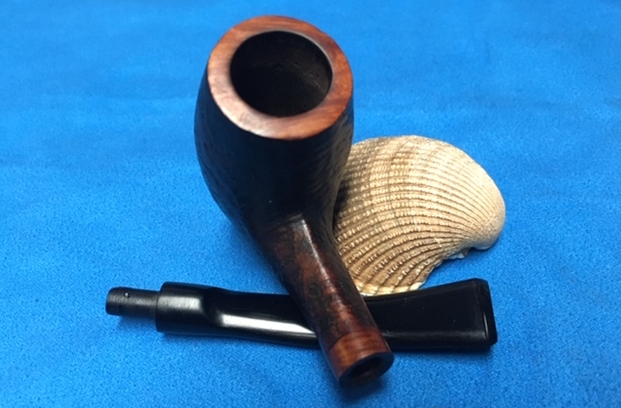
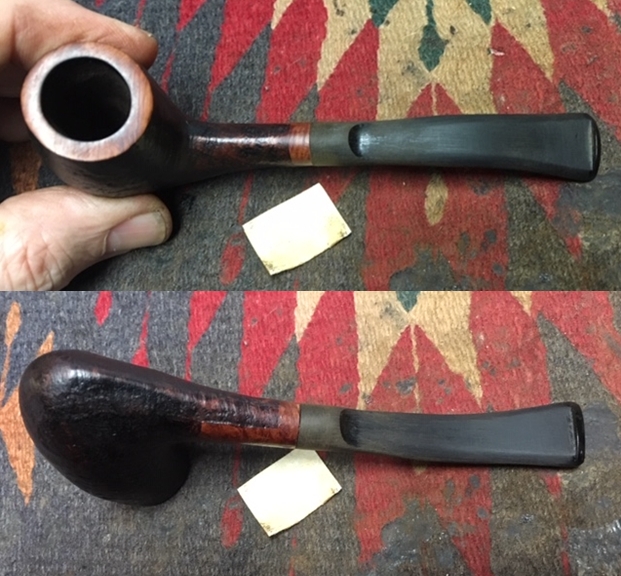
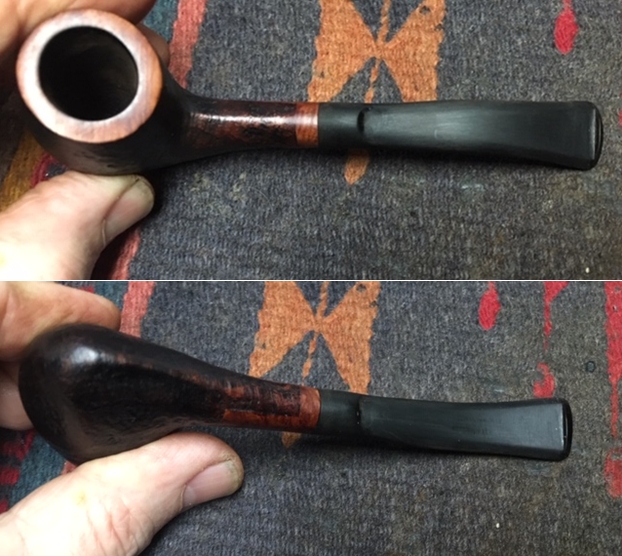
 I could surmise from the length of the stem what I would need for a replacement stem. I went through my can of stems and found one that had the right sized tenon and was the same length and width as the broken stem. It was a saddle stem instead of a taper but I liked the look of it on the pipe. I pushed it in place and took the following photos. I would need to reduce the diameter of the saddle, bend the stem and do a general cleanup, but it was a keeper.
 I took a photo of the stamping on the shank to show that it reads Kriswill. Underneath it says Hand Made in Denmark but that stamping is faint and only readable in a bright light or with a lens.
 With the stem chosen I set it aside to work on the bowl. I really hate working on dirty pipes! I can’t say enough how much I appreciate my brother Jeff doing the lion’s share of the reaming and cleaning before I even work on pipes… It is these few that I have to clean up that make me thankful and realize how much work he does before I get them here to restore. Thanks Jeff. The bowl had a thick cake and a heavy overflow of lava. It was obviously someone’s favourite pipe.
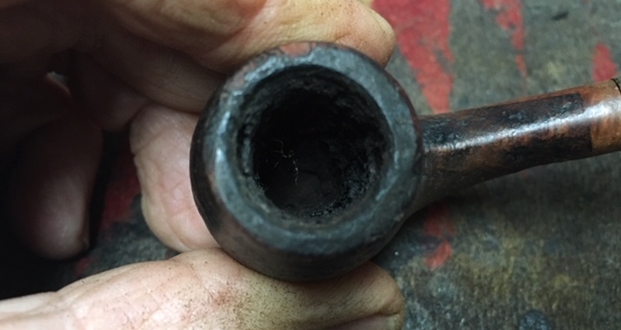 I reamed the bowl with a PipNet pipe reamer using the smallest cutting head. The bowl on these old Kriswill pipes is conical so the PipNet only goes so far down the inside. I reamed out the bowl as far as the reamer would reach and then used Savinelli Fitsall pipe knife to finish the project. I scraped the rim top with the pipe knife to remove the majority of the lava and could see that the rim edges and top were damaged with burn marks.
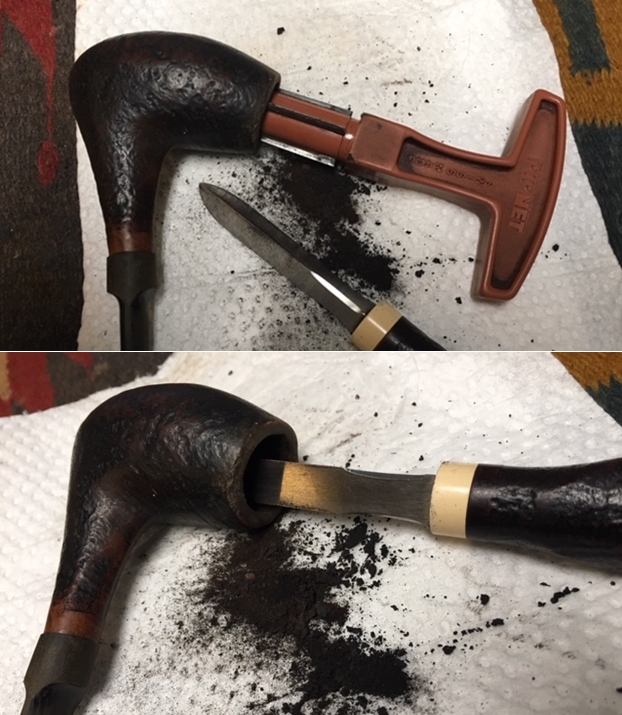 To remove the damage to the top of the rim I topped it on a topping board with 220 grit sandpaper. I worked on it to remove the burned areas and the damage to the inner edge of the rim as much as possible. I am happy with how it turned out.
 I lightly beveled the inner edge of the rim with a folded piece of 220 grit sandpaper to give it a cleaner look. The look of the bowl at this point is far better than when I started the rim clean up. I will still need to polish the rim and match the stain to the shank end smooth portion. Fortunately for me this old Kriswill originally had a smooth rim top so it will look like new.
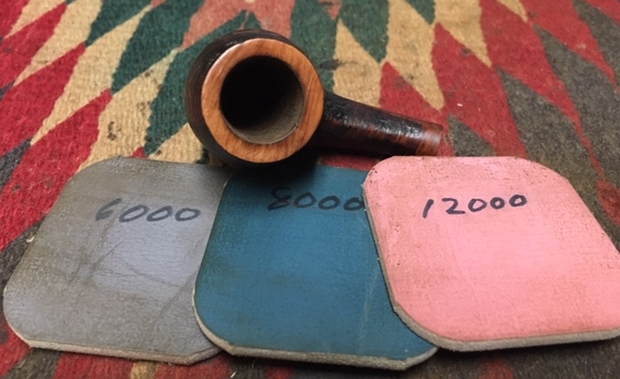
 I polished the topped bowl rim with 3200-12000 grit micromesh sanding pads. With each successive grit of micromesh the grain stood out more and gave a good finished look to the pipe. I liked what I saw when I looked at it.
 There was a little variation in stain colour between the rim top and the shank end so I decided to stain both to get a good blend. I used an Oak stain pen to match the colour of the shank and smooth spot where the stamping was. Once the stain had cured for that time I moved on to the next step in the process.
 It dawned on me at this point that I had been so intent on getting the plug out of the shank and topping the bowl that I forgot to clean out the shank! I normally do that right after reaming the bowl but forgot. It goes to show you that if you vary an habitual pattern even a bit you will leave steps out. I stopped the process and went back and cleaned out the shank and airway to the bowl with pipe cleaners, cotton swabs and isopropyl alcohol until the pipe was clean and smelled fresh.
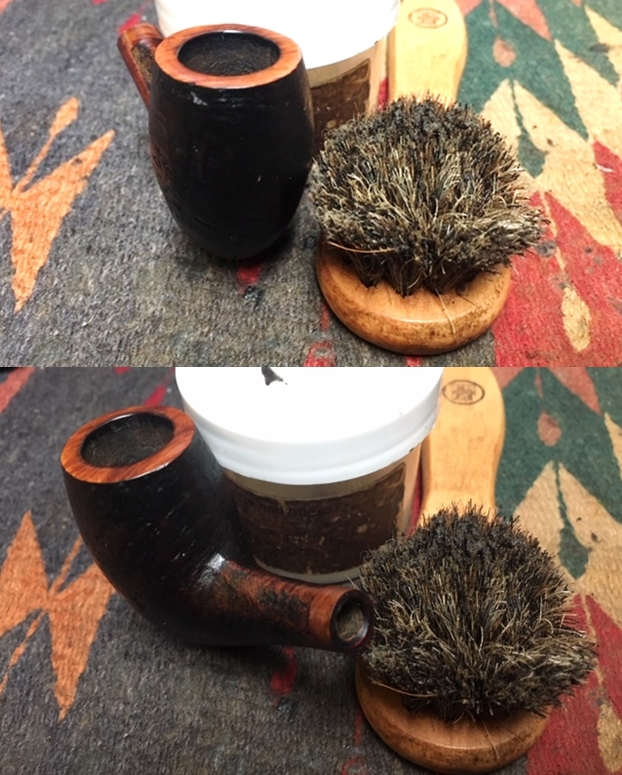
 With the rim top and bowl polished and the shank and airway CLEAN, I worked some Before & After Restoration Balm into the surface of the briar with my fingertips to clean, enliven and protect it. I let the balm sit for a little while and then buffed with a cotton cloth to raise the shine. The following photos show the bowl at this point in the restoration process. The bowl and the rim top look really good and the darkening and lava are gone. The finish looks very good with the contrast between the rich, dark brown and the Oak stain on the rim and shank end. I am very happy with the results.
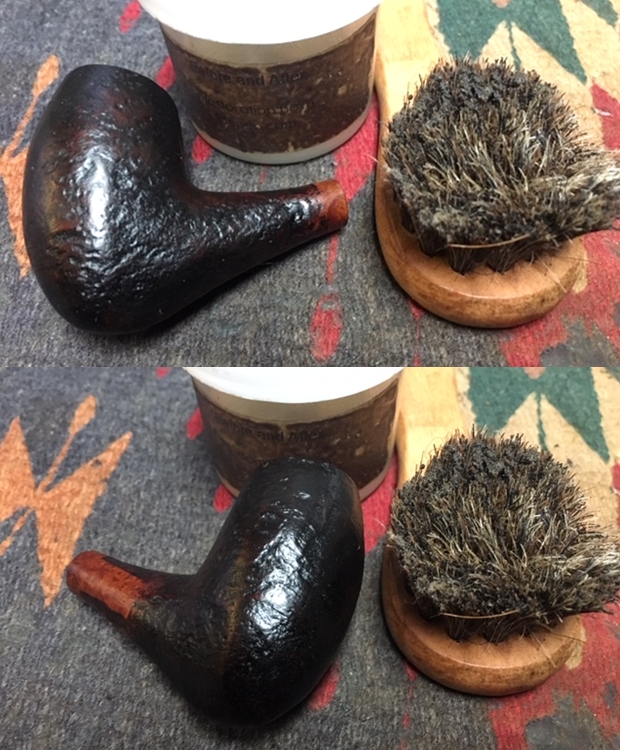

 With the bowl finished I set it aside and turned my attention to the stem. I used a file and a folded piece of 220 grit sandpaper to shape the diameter of the saddle portion of the stem to fit the diameter of the shank. It took a lot of filing and sanding to get it to this point but there is a lot of fine tuning work to do.
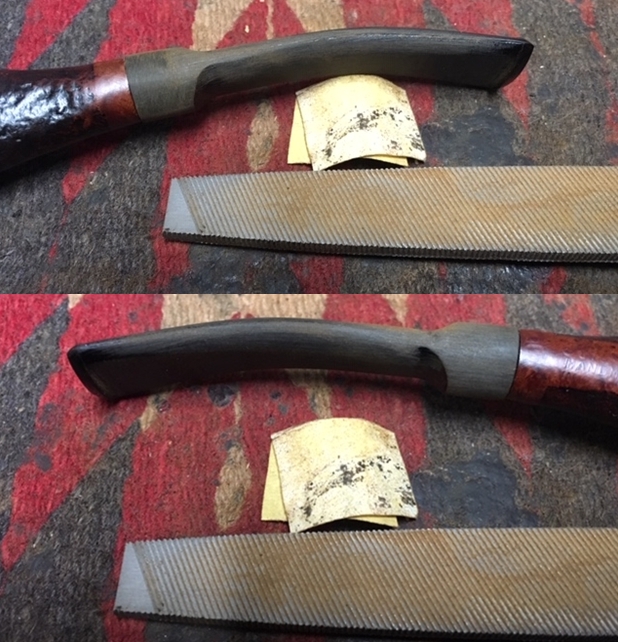
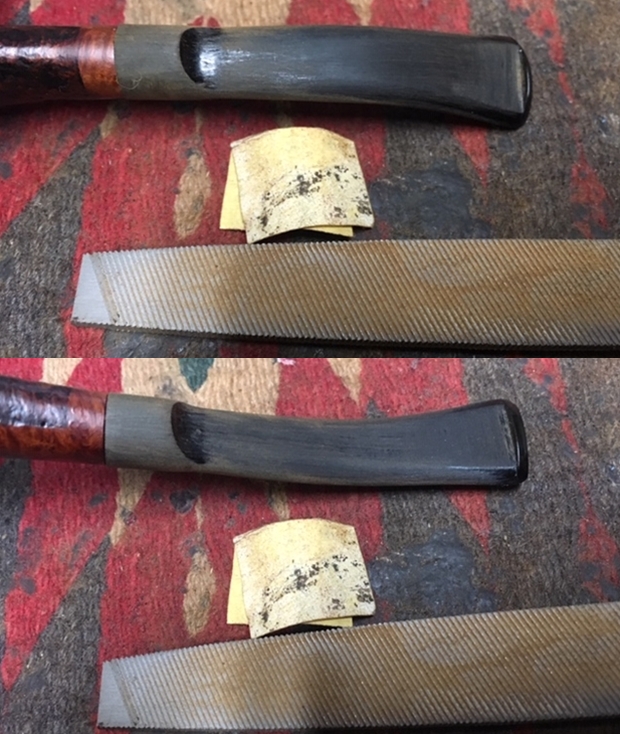 The shank is not round but it is more of a vertical oval in shape so the stem will need to match it to have a seamless fit. It is a lot of hand shaping work to get the two to match. I sanded the scratches and the tooth marks on the stem with 220 grit sandpaper to bring the shank and saddle portion into line.
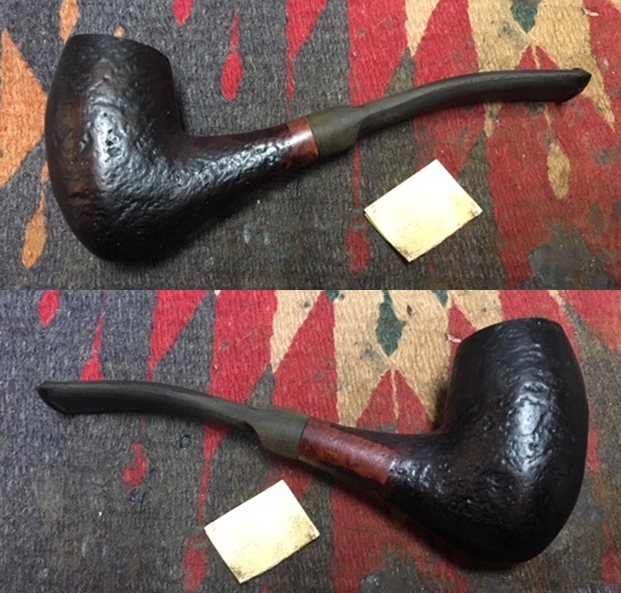
 I further sanded and shape it with 400 grit sandpaper to remove the scratches. This is the beginning of the polishing process on the stem. I wiped the stem down with Obsidian Oil and put it back in the shank to take progress photos.
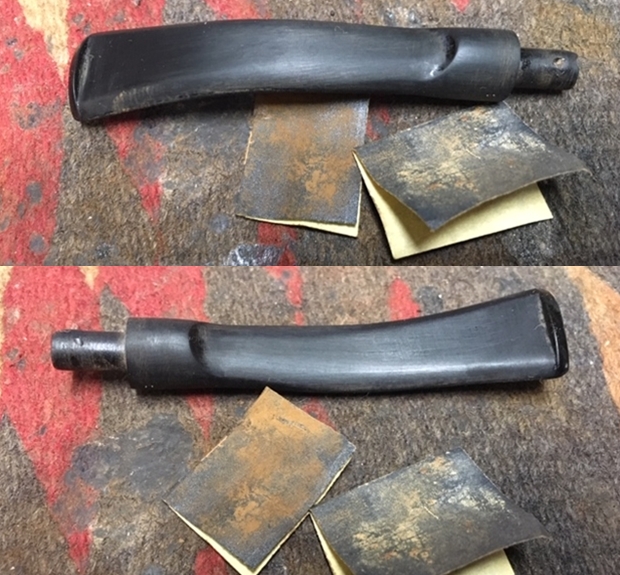
 I polished the stem with micromesh sanding pads – wet sanding it with 1500-2400 grit pads and dry sanding it with 3200-12000 grit pads. I wiped the stem down with Obsidian Oil after each pad. I further polished it with Before & After Pipe Polish – both Fine and Extra Fine. I gave it a final coat of Obsidian Oil and set it aside to dry.
 This pipe has had quite a journey to this point in time and space. It somehow traveled from Denmark where it was made to Mumbai, India. There is was found abandoned, binned and found by a rag picker who then sold it to Paresh in another region of India. From Paresh it traveled to me in Vancouver, Canada. In April it will travel to Nepal with me and back Paresh in India. I only wish that it could tell its story. All I know is that I have extended its life of usefulness and given its purpose back as it was intended.
I polished stem with Blue Diamond polish on the buffing wheel. I gave the bowl multiple coats of Conservator’s Wax and the stem multiple coats of carnauba wax. I buffed the pipe with a clean buffing pad to raise the shine. I hand buffed it with a microfiber cloth to deepen the shine. The pipe polished up pretty nicely. The contrasting grain came alive with the buffing. The rich contrasting browns and black colouring works well with the new, polished black vulcanite stem. The finished pipe is a beauty and feels great in the hand. Have a look at it with the photos below. The dimensions are Length: 5 ½ inches, Height: 2 inches, Outside diameter of the bowl: 1 inches, Chamber diameter: 5/8 of an inch. I will be taking this pipe with me to India soon and giving it back to Paresh. Thanks for walking through the restoration with me on this battered and weary Kriswill.