Blog by Paresh Deshpande
I had completed the refurbishing of LANE ERA CHARATAN’S MAKE “SPECIAL” and thoroughly enjoyed the process. Apart from preserving memories, the thing that I enjoy the most while refurbishing/ restoring my inherited (and some purchased) pipe collection, is the transformation of the pipe that unfolds before your eyes as you progress. It is something akin to a flower bud that gradually blooms and opens itself in all its beauty for you to feast your eyes upon. This is what I love when I work on a pipe.
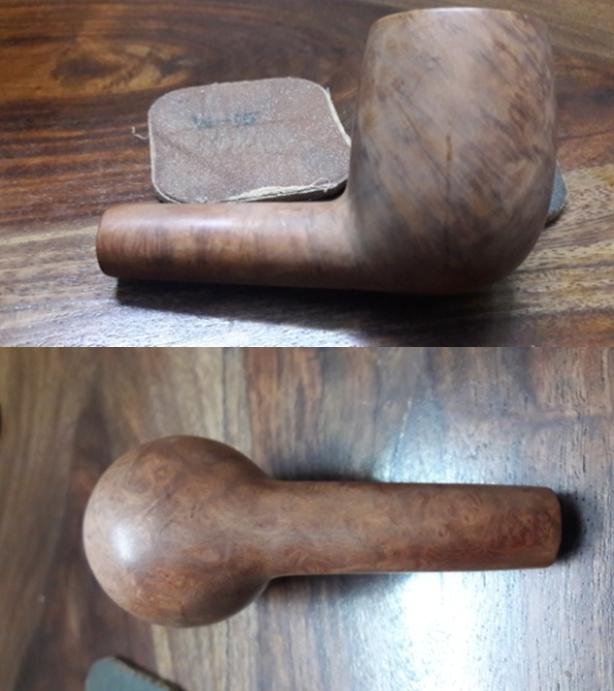
While rummaging through the large box with an equally large number of my inherited pipes with my younger 10 year old daughter, she laid her hands on a pair of pipes with “SHINING SUN”, as she liked to call it, on its stem. With the selection of next two projects decided by her, I had a closer look at these pipes. These were a pair of KRISWILLS, one stamped as “CHIEF” and the other as “GOLDEN CLIPPER”. The first thing that struck me was that there was something amiss with the way the stems sat into the shank of each pipe. The “CHIEF” did not have its stem sitting flush with the shank. Also, the shank’s outer diameter appeared larger than that of the stem. The “GOLDEN CLIPPER” had its stem flush with the shank; however the diameter of the stem was larger than that of the shank. The following picture will clarify what exactly I was faced with……

CLIPPER

CHIEF
As I was wondering what could be done to address this issue and surfing the net for buying new/ used original stems for these pipes, Abha, my wife who was having a closer look at both these pipes simply interchanged the stems and surprise of all surprises, the stem that was on the “CHIEF”, sat flushed and perfectly matching with the shank of the “CLIPPER”. However after considerable effort, though the stem that was on the “CLIPPER” sat flushed with the shank of the “CHIEF”, the diameter of the shank was larger than that of the stem. So now what we have is a KRISWILL “GOLDEN CLIPPER” with a perfectly matching and fitting original stem and a KRISWILL “CHIEF” with a fitting, but mismatched stem diameter.

KRISWILL “CHIEF”

KRISWILL “GOLDEN CLIPPER”
I discussed with Abha and it was decided that since the “CLIPPER” has a perfect stem match, I would work on the “CHIEF” and make the shank match the stem. With this decision made, I kept the CLIPPER aside and took the “CHIEF” into my hands.
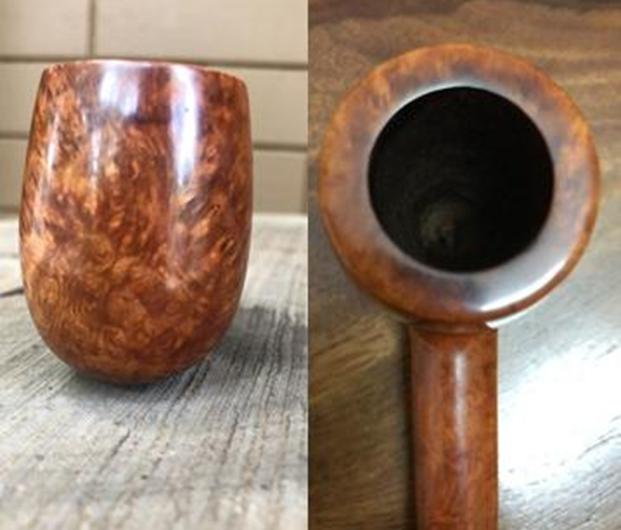
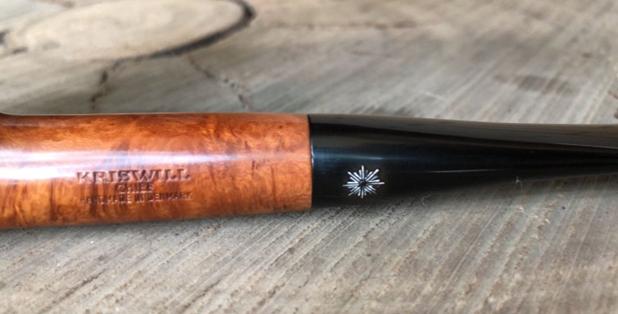
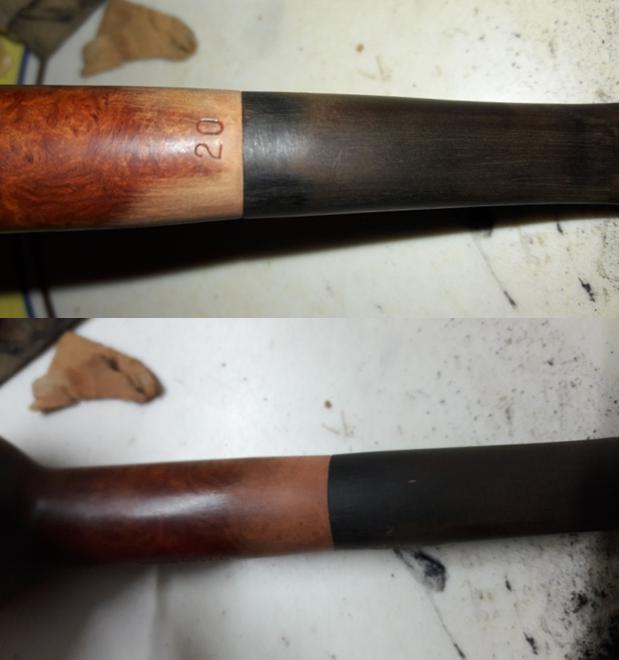
The CHIEF has a nice, deep bowl and nicely fills the hand. The size, weight and heft of the pipe is just beautiful. Beautiful cross grains adorn the sides and the back of the bowl while the front of the bowl boasts lovely mixed grains of swirls, flame and Birdseye. It is stamped “KRISWILL” over “CHIEF” over “HANDMADE IN DENMARK”. At the bottom of the shank where it meets the stem, is the numeral “20” and yes…. this positioning of the number did cause me a great deal of grief during the process of sanding!!! All the stamps are crisp and clear.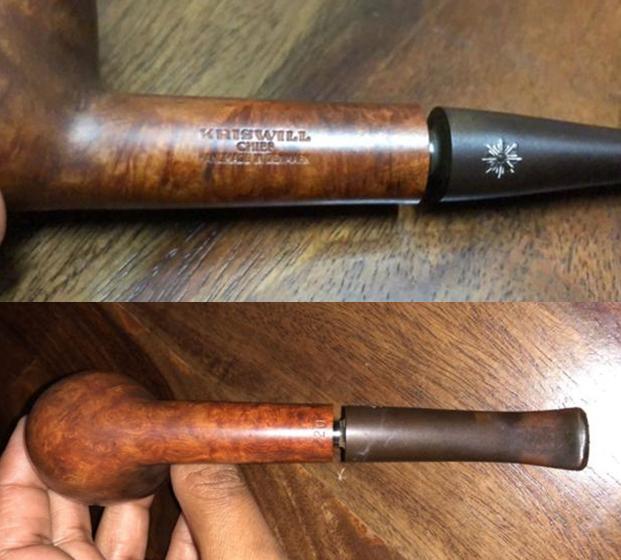 I was curious to know about the history, geography and carvers for Kriswill while attempting to date this pipe. While referring to “Pipephil” I came across this information which I have reproduced below verbatim (http://www.pipephil.eu/logos/en/logo-k3.html)
“Kriswill is a brand of Kriswork Briar Trading, in Kolding (Denmark) established about 1955. Some of Kriswill pipes were designed by Sigvard Bernadotte, Swedish prince and brother to the late Queen Ingrid of Denmark. He collaborated with his Danish partner Acton Bjørn. When the company went bankrupt in the late 1970s it was on a level with Stanwell. Dan Pipe Cigar & Company (Hafenstrasse 30 D-21481 Lauenburg/Elbe, Ge) bought the rights to use the name and it is Holmer Knudsen and/or Poul Winsløw who make the Kriswill line. Nørding, on its side, bought the plant and introduced a Kriswell line”.
Prior to 1970 the stampings are in script letters on the shank and on the mouthpiece. The star on the stem and block letters on the shank were introduced from that date on.
While researching for more information on Kriswill pipes on “Pipedia”, I came across this additional information which is reproduced below:
Kriswill was one of the large pipe manufacturers in Denmark during the 1960s and 1970s, and I believe closed around 20 years ago. Their catalog cover read “By Appointment to the Royal Danish Court, KRISWILL, Kriswork Briar Trading, Briar Pipes Hand Made in Denmark.”
Thus, from the above information, it is safe to assume that this pipe is post 1970.
INITIAL VISUAL INSPECTION
As with all other pipes, the CHIEF, too is covered in dust, oils and grime of all past years, though comparatively to a lesser extent. The chamber is heavily caked with lava overflowing on to the top of the rim. A few small dents and dings, though minor, are visible on the outer edge of the bowl. The condition of the inner edge and that of the inner surface of the chamber will be ascertained once the bowl has been reamed and the lava removed from the rim top. The airway in the shank is blocked and air does not flow through the shank. Close observation of the shank revealed presence of debris in the mortise. This needs to be cleared and cleaned. Maybe this will also help in a smooth and snug fit of the stem into the mortise.
 The stem shows calcification near the button and deep oxidation all along the stem. There are bite marks near the button and some deep tooth chatter. The button has been bitten and will need to be reconstructed.
 THE PROCESS
Since this would be the first time I would be attempting to undertake the process of adjusting the fit of the tenon and matching the diameter of the shank with that of the stem, I Face timed with Mr. Steve who advised me to, firstly, be very careful during the sanding of the shank so as not to lose too much briar making the shank diameter too small, secondly, he told me to ensure that the entire shank should be sanded such that the taper at the shank end is not abrupt and blends well into the overall shape of the pipe. Thirdly, it is most important to exercise a lot of patience and diligence while working and check very frequently the fit, finish and shape of the shank and the stem.
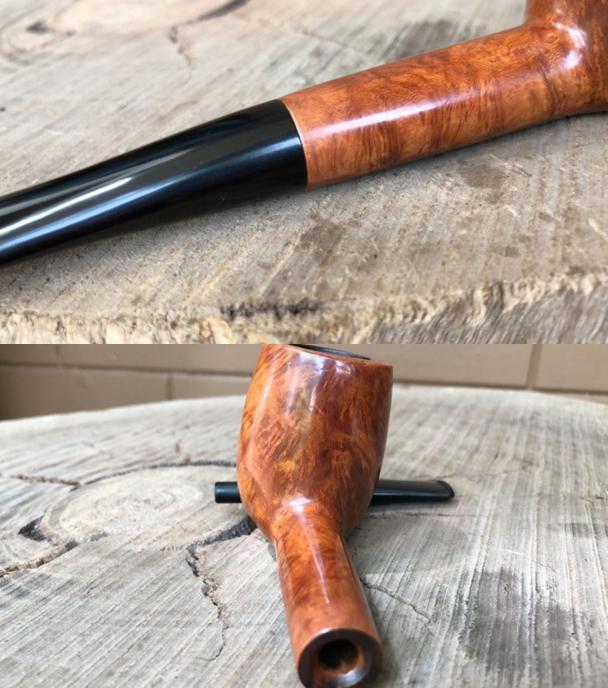
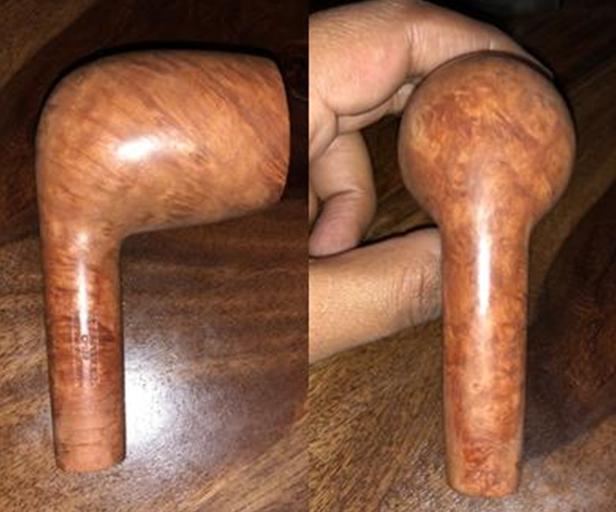
I started with cleaning the shank of all debris using a dental spatula, pipe cleaners, cue tips and isopropyl alcohol. I was surprised to see the amount of gunk that was removed from the shank. I tried to fit the stem on to the shank. Though the tenon has inched further in to the mortise, a prominent gap is clearly visible between the shank end and the stem.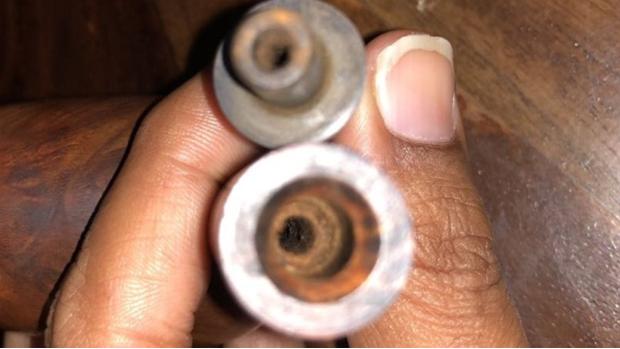 Using a 220 grit sand paper, I very carefully began the process of sanding down the tenon, checking ever so frequently for the fit of the tenon into the mortise. Finally I was able to achieve a perfect fit of the stem and the shank with all the right noises!!!!
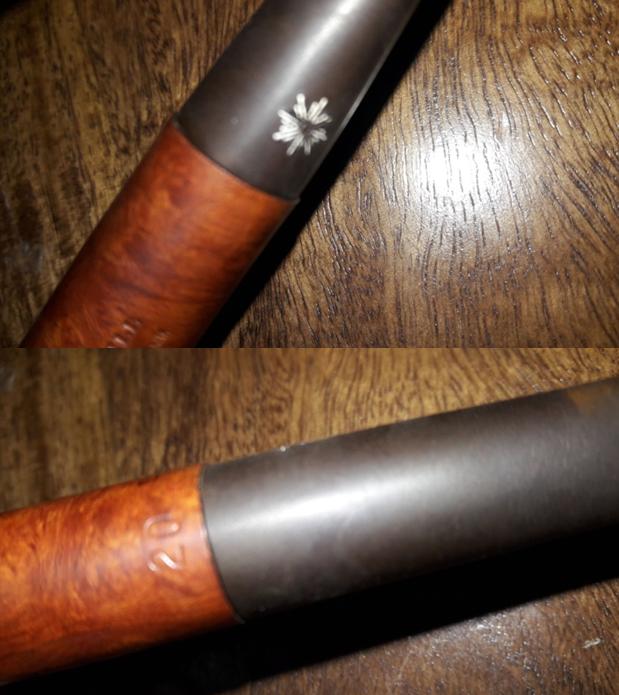 Now that the issue of fit of the stem into the shank has been addressed, I turned my attention to match the size of the diameter of the shank with that of the stem by sanding down the shank. I started this sanding using a 220 grit sand paper. This process was made difficult and uneven at the bottom of the shank due to the stamped number “20” being very close to the shank end.
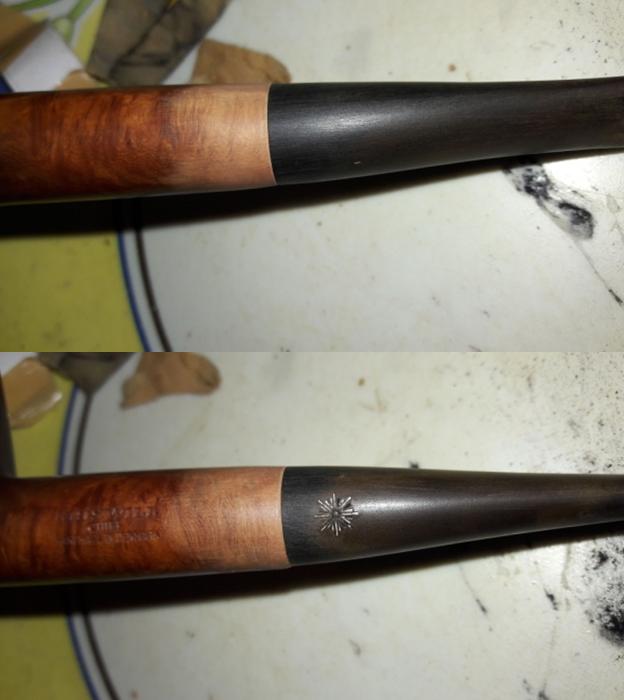 I took care so as not to sand off the stampings on the shank and stem by masking them. Once I was satisfied with the results of sanding with 220 grit paper, I switched to sanding with a 440 grit sand paper to further blend the shank and stem. Mr. Steve’s advice of being very diligent and frequent checking was always ringing in my ears as I progressed towards the goal of matching the shank with that of the stem. A word of caution for first timers like!!!!!!!! During the process of sanding you may notice a considerable dip at the shank end.
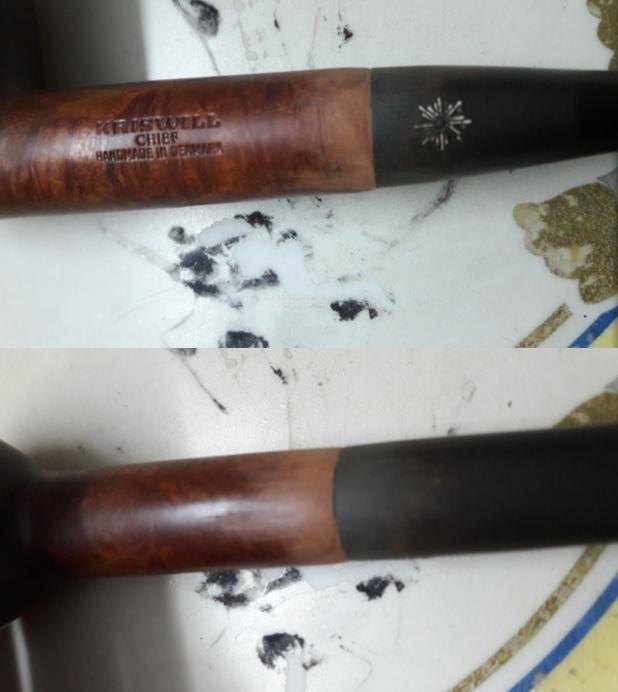 This signifies that the sanding of the shank end is excessive and thus sanding needs to be done from further up the shank and a bit over the stem too. This will ensure a seamless joint between the shank and the stem.
Using a 220 grit sand paper, I sanded the shank to match the dip at the shank end and also a little of the stem end, all through taking care of the stampings on the shank and stem. I further evened out the shank and the joint with 600 and 800 grit sand paper. Once I was satisfied with the seamlessness of the joint, I showed it to Abha, my wife and she too approved of the job done. Thereafter, I further blended and merged the entire shank and the stem through the joint using micromesh pads, wet sanding with 1500 to 2400 pads and dry sanding with 3200 through to 12000 pads. I wiped the sanded area with alcohol after each pad to remove the sanding dust. Boy!! Was I pleased with the results, hell YEAH!!!! I shared pictures of the end result with Mr. Steve on What’sApp and he too approved of the seamless joint. 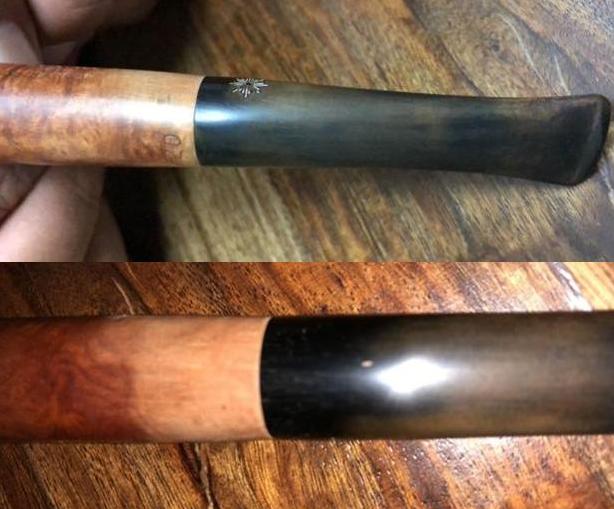
 Next I turned my attention to the stem and painted the surface of the stem with the flame of a Bic lighter to raise the tooth chatter and minor bite marks. The deeper tooth bites with a mixture of activated charcoal and clear CA superglue and let it cure for 24 hours. Using a flat head file needle, these fills were blended into the surface of the stem. For a better blending of the fill, I further sanded the entire stem with 220 followed by 400 and 800 grit sand paper. This helps to reduce the sanding marks left behind by the more abrasive 220 grit paper. To bring a deep shine to the vulcanite stem, I went through the complete set of micromesh pads, wet sanding with 1500 to 2400 grit pads and dry sanding with 3200 to 12000 grit pads. I wiped the stem with alcohol after each pad and rubbed it down with Extra Virgin Olive oil. The internals of the stem was cleaned out using alcohol and pipe cleaners. The finished stem is shown below.
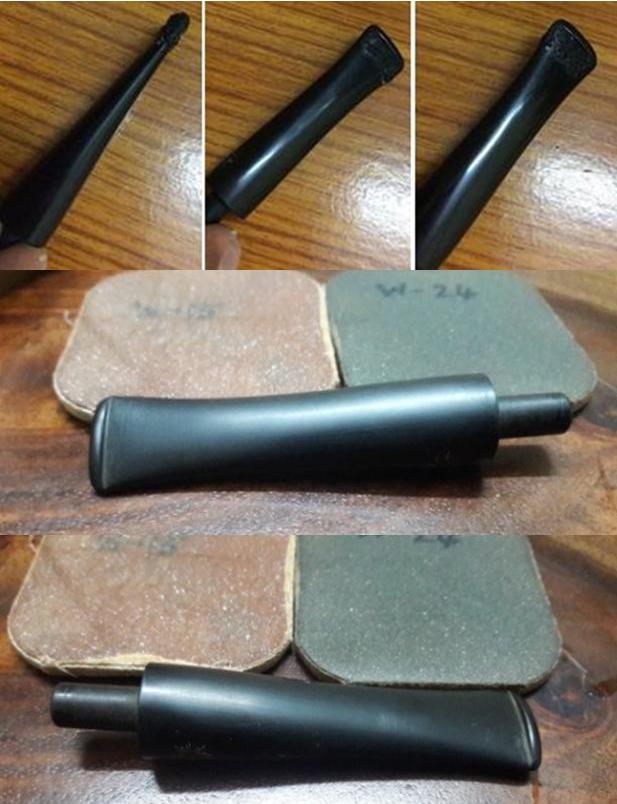 With the stem taken care of, I once again turned my attention to the stummel. The sanded shank was lighter hued as compared to the rest of the stummel. Since I was still awaiting my stain pens, which have been held back in custom clearance for the last 50 odd days and also since I have not yet graduated to use of aniline stains/ dyes, I was contemplating what could be done to blend the finish of the shank with that of the stummel. Being the intelligent of the two, Abha suggested that the bowl could be sanded using micromesh pads to match the finish of the shank. That decided, Abha reamed the chamber using Kleen Reem pipe tool and with the fabricated pipe, she removed the remaining cake from the chamber.
 With the same knife, she gently removed all the overflow of lava, oils and tars from the rim surface. She further sanded the interiors of the chamber with a 220 grit sand paper to get rid of the last traces of the remaining cake. She also topped the rim on 220 grit sand paper and evened out all the remaining lava and minor dings and dents that were revealed after the lava was removed.
 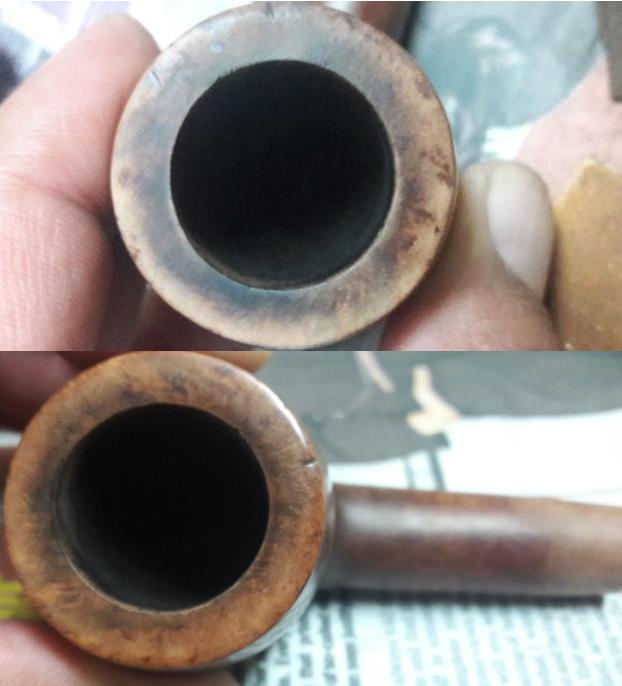 Using isopropyl alcohol, hard bristle and normal pipe cleaners, she completely cleaned out the internals of the shank.
 I cleaned the external surface of the bowl with undiluted Murphy’s Oil soap and tooth brush to remove all the grime and dirt and rinsed it under running water. I took care that no water enters the chamber and the shank. Using paper napkins and soft cotton cloth, I completely dried the surface. Thereafter began the entire process of sanding down with micromesh pads as enumerated while working on the shank. I also worked on the rim top to match it with the rest of the bowl. The bowl has some interesting grains and patterns.
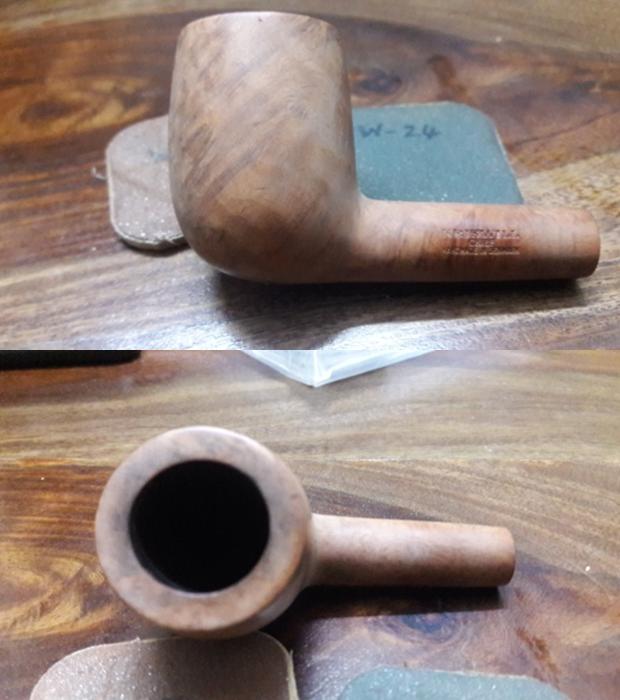
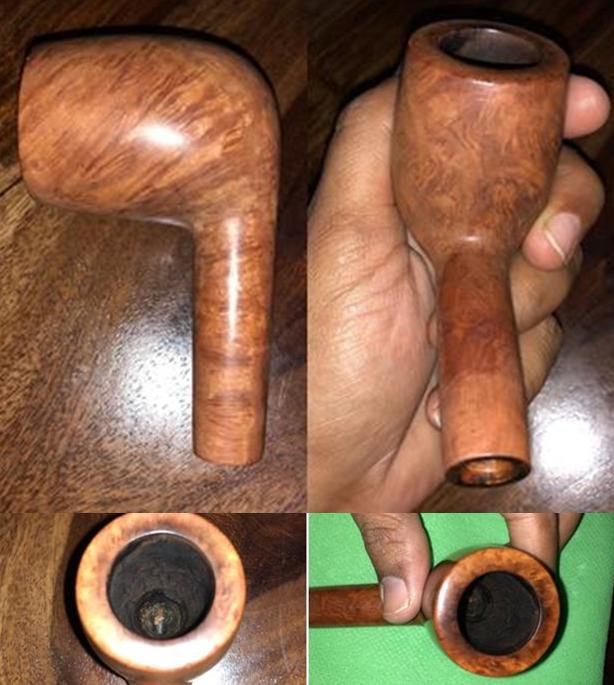 I rubbed in some Before and After Restoration balm in to the briar to bring out the shine and enliven the briar. After a few minutes, I rubbed and polished the bowl with a soft cloth. Finally, I finished the pipe by rubbing a small quantity of Paragon wax and polishing it using raw and undiluted muscle power and a microfiber cloth.
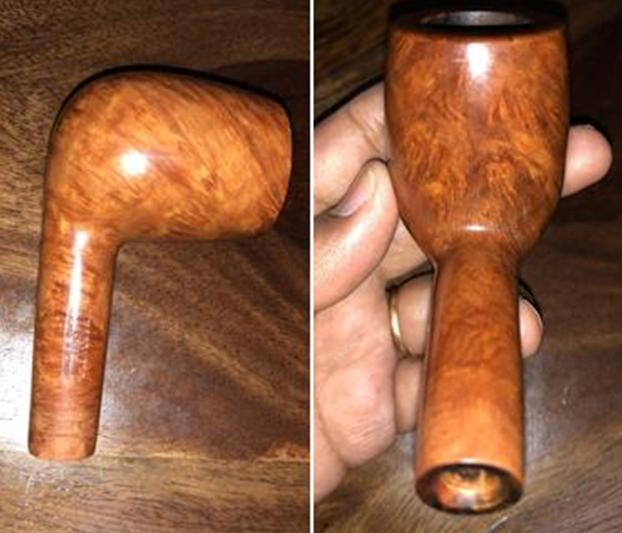
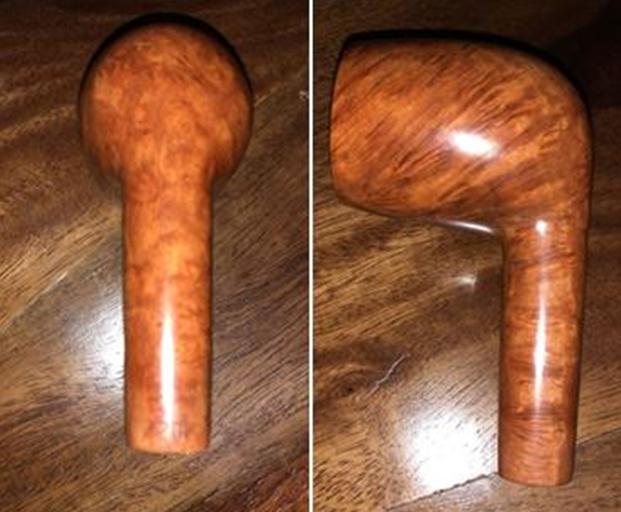 I am very pleased and happy with the way the complete project has turned out. It was an exhilarating experience to be able to appreciate the transformation and a sense of accomplishment that accompanied it. I must thank Abha and Mr. Steve for walking with me through this project. Here are the pictures of the finished pipe.