Blog by Dal Stanton
When I came across this classic half bent billiard while I was trolling through 100s of offerings on eBay’s auction block, I paused. The first thing that claimed my attention was its size. If there was ever a ‘meat lovers sized’ pipe, to use the American burger sound bite, this would be it. The UK seller simply described it as a ‘superb large bowl’. When the pipe arrived, I measured it and it is: length 6 5/16 inches, height 2 3/8 inches, chamber diameter 7/8 inches, chamber depth 1 13/16 inches, and the full stummel width is 1 3/4 inches – 68 grams for those who weigh pipes. A fist-full of stummel! Here is the eBay picture of the Billiard.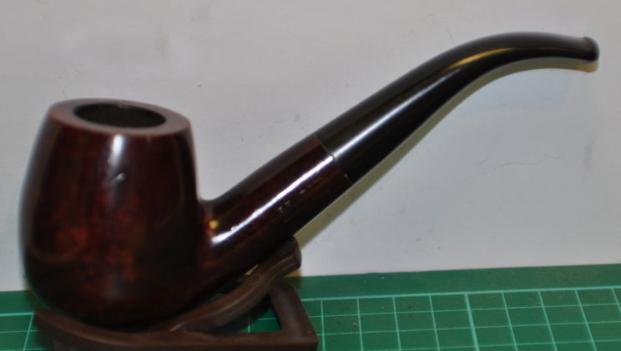 The other interesting thing about the eBay offering was its marking. The left shank side reads “REJECT” over “LONDONMADE”. The only lead I found for this “REJECT” stamping was in ‘Who Made That Pipe?’ by Herb Wilzak and Tom Colwell, which provided only one reference to “Reject” as belonging to the W. H. Carrington Co. started in 1891 by William Henry Carrington in Manchester, England. This came from the brief Pipedia article which also states that after a century of operation it went out of business. I found more information in a Pipes Magazine Forum thread but the source of the information was not cited.
WH Carrington as an entity dates back at least to the late 1880s. It continued to exist for about a century, with liquidation notices appearing in the London Gazette in 1987. Whether or not the business remained in the family that whole time is another matter; I doubt it, but have no evidence one way or the other.
Most threads I read commenting on WHC pipes were about earlier turn of the century pipes with hallmarks – a much earlier vintage. I came up empty finding information that would confirm that the Reject before me is indeed a WHC pipe except for Wilczak and Colwell’s reference. With a very nice looking Reject on my work table now, I take additional pictures to fill in the gaps.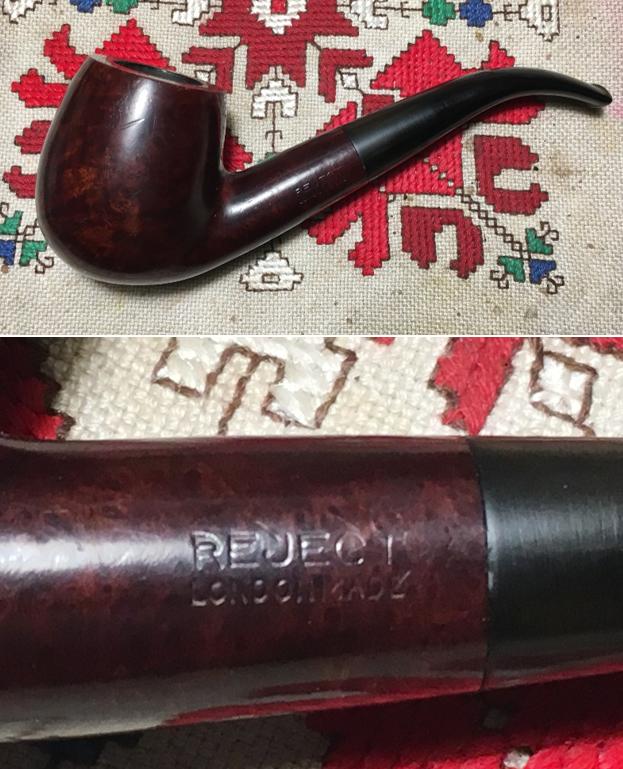


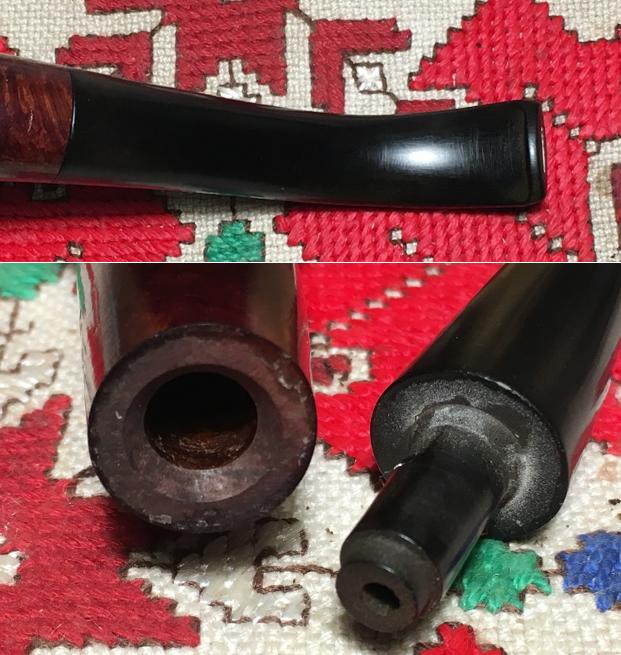
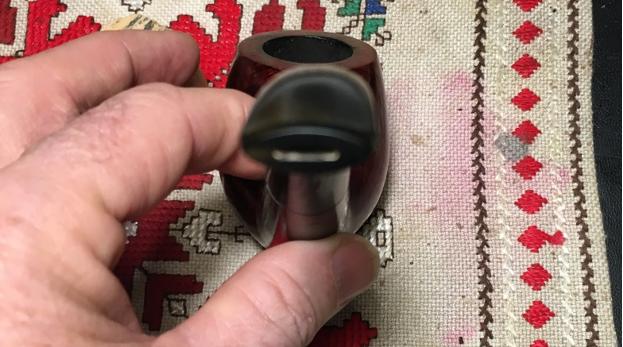 The question that begs asking is what is ‘Reject’ about this pipe? Overall, it’s in good shape. The chamber has very mild cake build up, and the stummel surface shows some small fills and usual dents of wear. The stem has been cleaned, it seems, very little chatter or oxidation. I only detect two issues as I look at the Reject London Made. First, the finish on the stummel is shiny and acrylic-like, which, to me, hides the natural briar. It is cloudy and I’ll remove it and work on the broad landscape of this stummel real estate to bring out the briar. I like this challenge! The other issue is the stem – it is under-clocked and a bit catawampus. I will heat the vulcanite and restore a good bend in alignment with the pipe. The reason this pipe was stamped ‘Reject’ coming out of the factory is a mystery to me unless it was destined to be a higher end pipe and the briar had too many imperfections…. Only conjecture and I would appreciate anyone’s input on this.
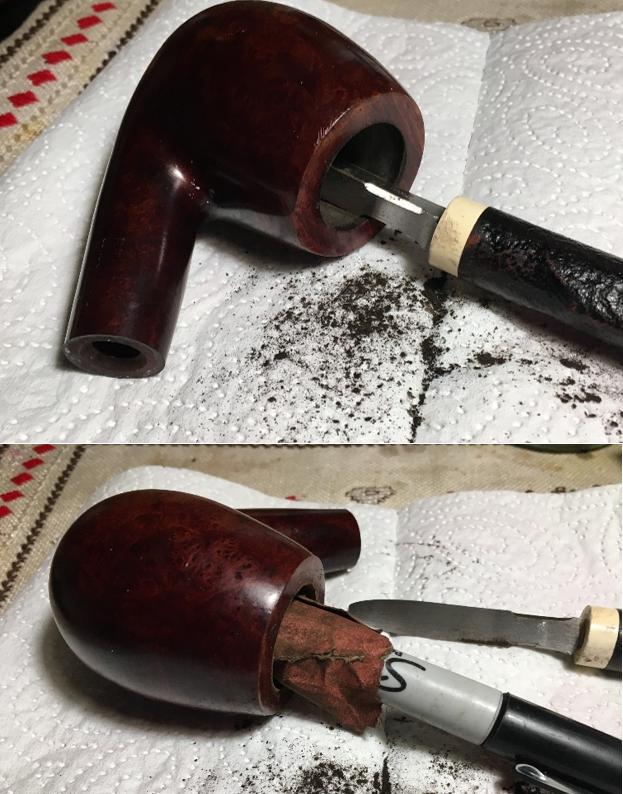
I begin by plopping the stem in an Oxy-Clean bath even though the oxidation seems very light. While the stem is in the bath, I use the Savinelli pipe knife to clean up the chamber walls which takes little time. I follow by sanding the chamber wall with 240 grit paper wrapped around a Sharpie Pen. To clean the carbon dust residue, I wipe the chamber with a cotton pad wetted with isopropyl 95%. The pictures show the progress.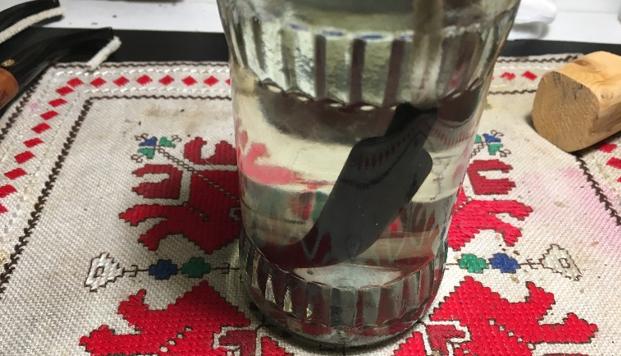

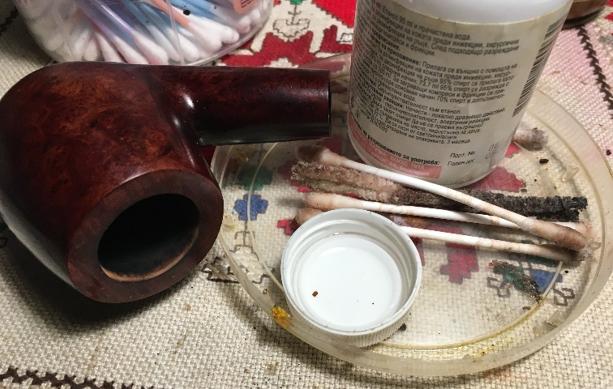
 I like working on a clean pipe so I work on the internals using cotton swabs and pipe cleaners dipped in isopropyl 95%. With very little effort the mortise and draft are clean.
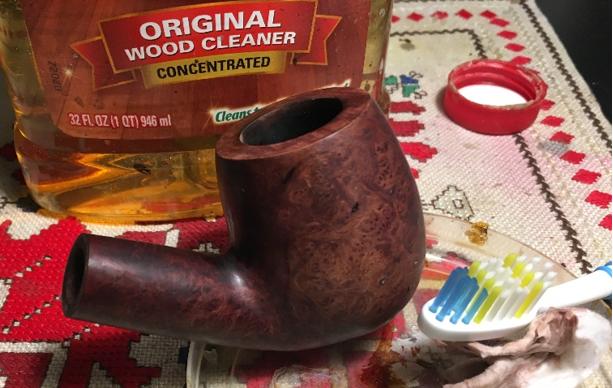
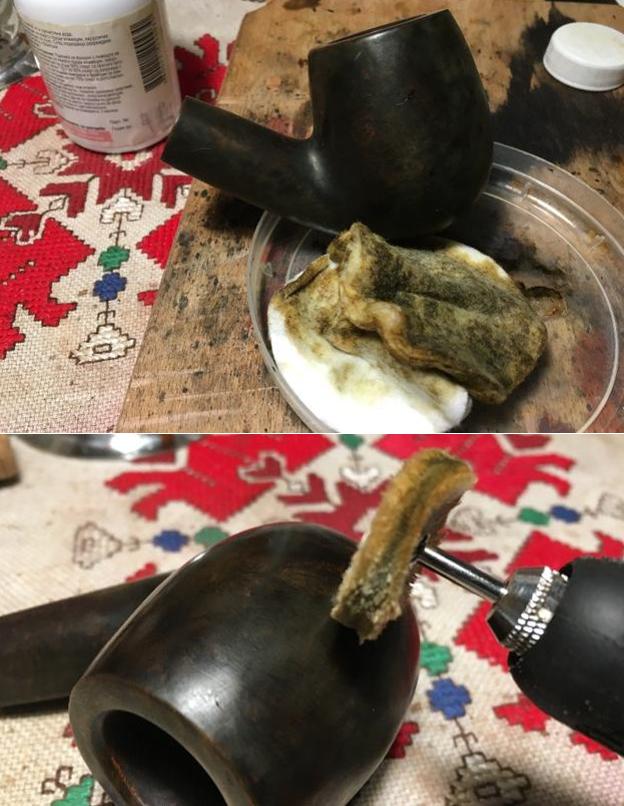
 Moving to the external stummel surface, I use Murphy’s Soap undiluted with cotton pads and a bristled tooth brush to clean the grime off. The Murphy’s Soap does a good job removing the old shiny finish.
 Looking closely at the surface, the dent I saw earlier I want to remove using the iron approach, that I have yet to try, but this dent looks like a good candidate. I’ve read several other restorations where this method was used. Using a heated clothes iron, I use a wet wash cloth and lay it over the dent area and then I apply the iron to that point. The concept is based upon the water content of wood being heated and absorbing the water and expanding the dented area – wood is a sponge-like material when wet. I apply the iron several times and gradually I see the severity of the dent lessening with each heat application. I can still see the dent but it should be more easily removed using a sanding sponge.
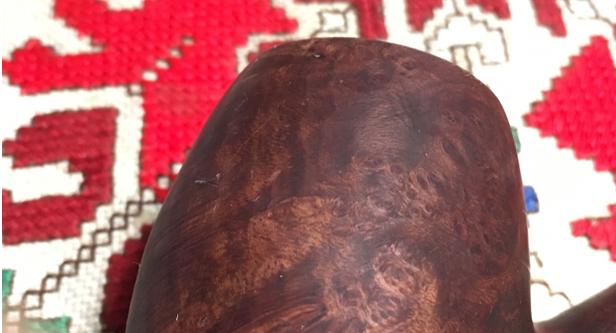 Using a medium and light grade sanding sponge I work on the stummel to remove the minor wear nicks and dents on the surface. I like a softer edge on the inner rim lip so I introduce a gentle bevel both to give it a softer look and to remove some scorched areas. I think an inner bevel adds a bit of class as well. I first use a coarser 120 grit paper to cut the bevel then I follow with 240 grit and 600 grit paper to smooth and blend the bevel. The pictures show the progress.
 I now turn to the micromesh pad cycles. Using pads 1500 to 2400 I wet sand the stummel followed by dry sanding with pads 3200 to 4000 and then 6000 to 12000. Throughout the sanding, I’m careful to avoid the Reject markings. The grain is looking good. The pictures show the progress.
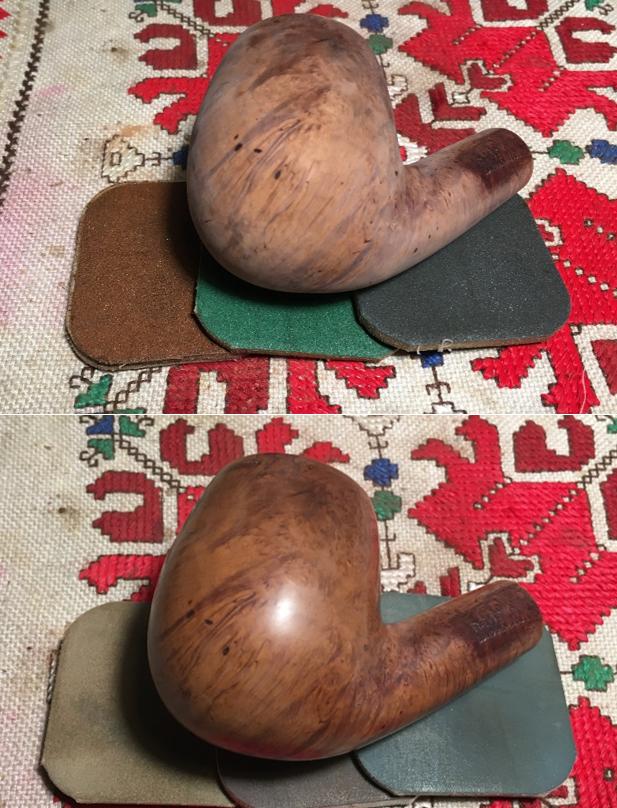
 I put the stummel aside and fish the stem out of the Oxy-Clean bath. Very little oxidation has surfaced. I use 600 grit paper and wet sand the stem followed by sand buffing the stem with 0000 steel wool. The pictures show the progress.
 Before I proceed further with the internal cleaning of the stem and the external polishing, I want to correct the bend of the stem. With great difficulty, I am able finally to pass a smooth pipe cleaner through the stem. The pipe cleaner helps to maintain the airway integrity while I heat and re-bend the stem. Using the heat gun to heat the stem, I turn the stem to apply the heat evenly over the stem to soften the vulcanite making it pliable. I then straighten both the stem clock-wise to correct the under-clocking. While still pliable I re-establish the bend over a block of wood and set the new shape under cool tap water. The first time around, the button was still not ‘clocked’ to my satisfaction. I reheated and made the additional adjustment and again, set the shape under cool tap water. I reattach stem and stummel to eyeball things and the newly aligned stem bend and clocked button look good. I take pictures to chronicle the progress with the stem.
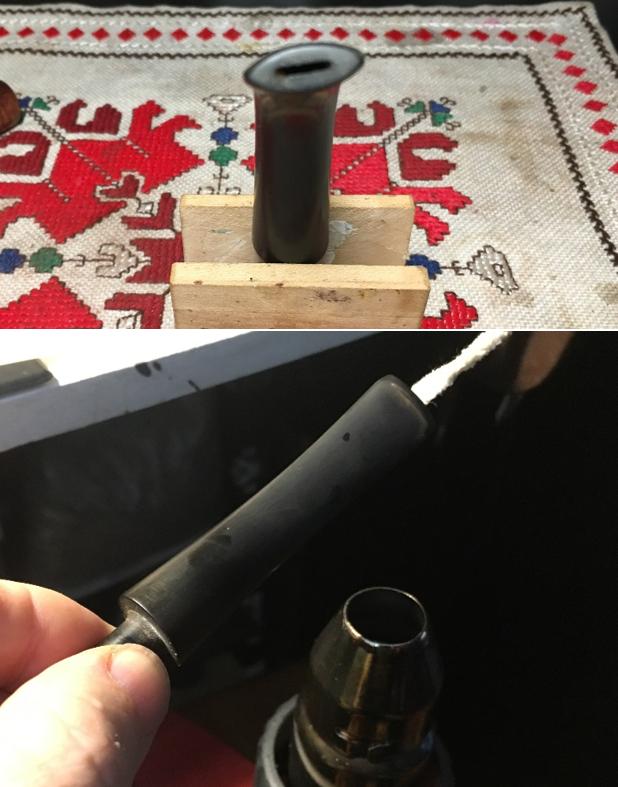
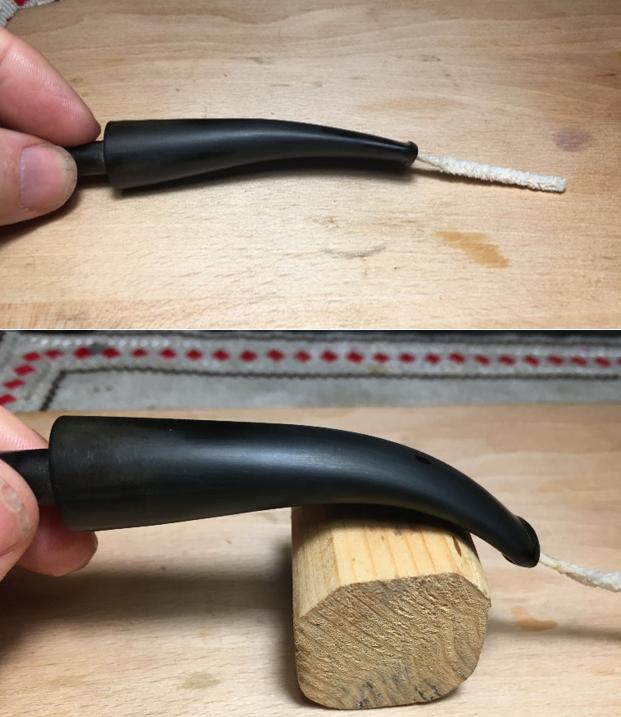
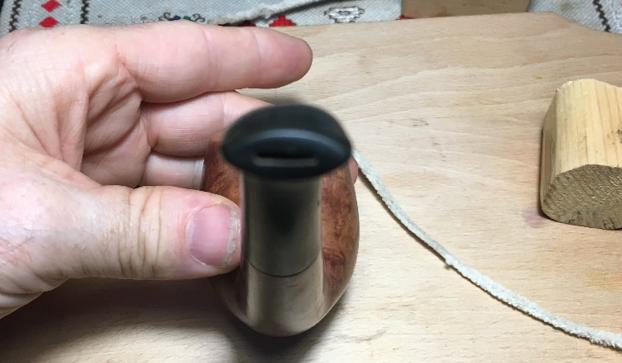 I now clean the internals of the stem using pipe cleaners dipped in isopropyl 95%. The stem is clean but I find that even though I’ve re-bent the stem the pipe cleaners will not move through the bend of the stem. I decide to open the slot area with a round pointed needle file moving it back and forth in the slot. After this, I take a drill bit, smaller than the slot opening, and insert it into the airway rotating it against the edges of the airway hoping to expand the internal airway area as it enters the slot. This seems to help yet the bend is still tight on the pipe cleaners, but they are passing through. The stem is clean. The pictures show the progress.
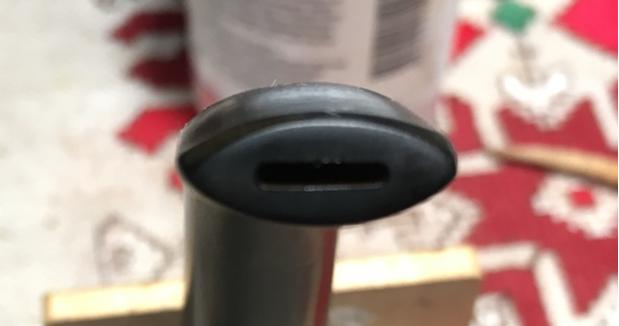
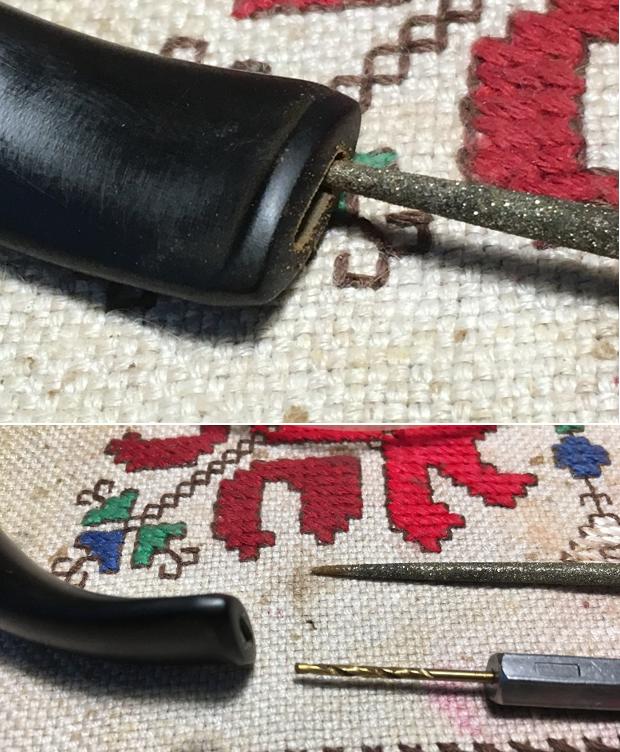
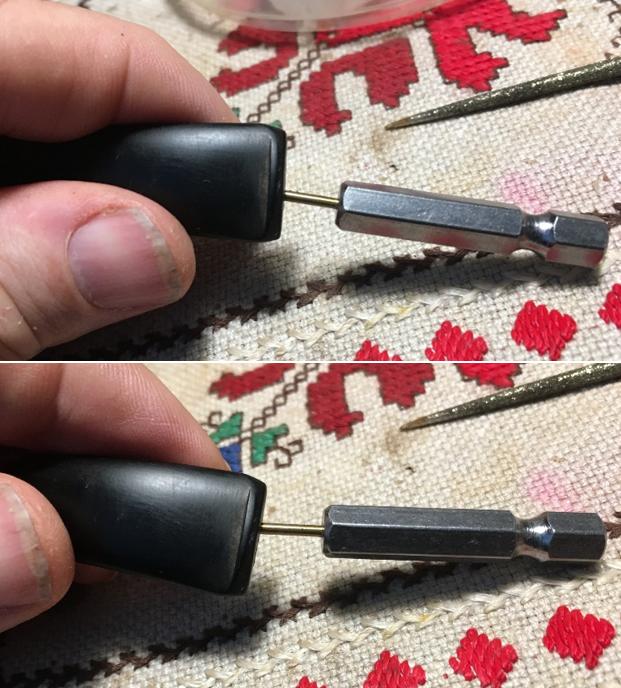
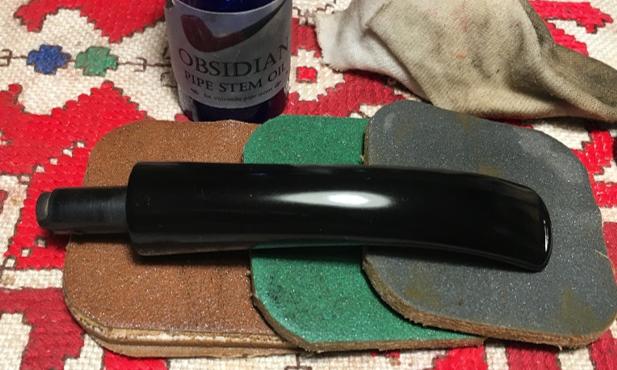
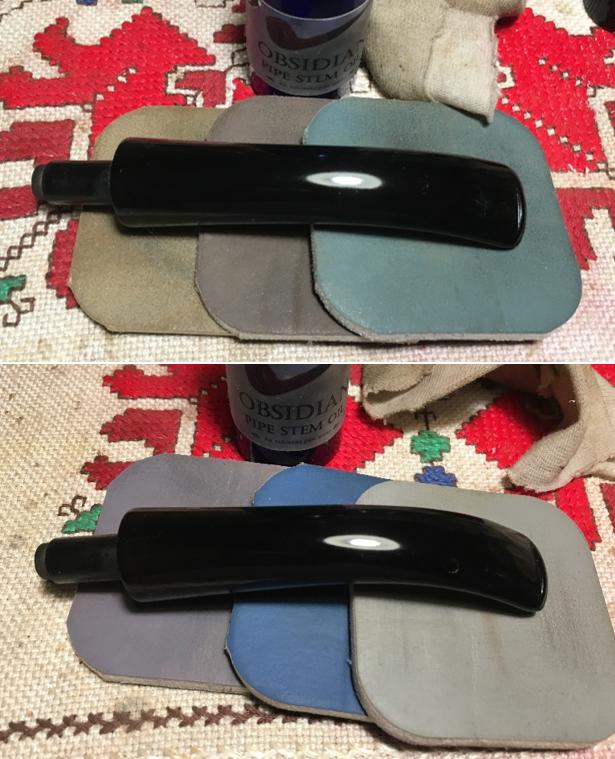
 Time to bring out the micromesh pads to finish the stem. With pads 1500 to 2400 I wet sand the stem. I follow by dry sanding with pads 3200 to 4000 and then 6000 to 12000. With each set of 3 I apply Obsidian Oil to the stem to revitalize the vulcanite, and I love to see the pop of the vulcanite as it moves through the micromesh cycles! I put the stem aside to dry. The pictures show the progress.
 Turning back to the stummel, I decide to apply Fiebing’s Dark Brown Leather Dye to the Reject London Made to emulate the darker hues of the original finish. Since it is an aniline dye, I can lighten the finish to taste by wiping the stained stummel with cotton pads wetted with isopropyl. The large stummel has a lot of briar real estate to show off with a smattering of different grains – pleasing to the eye and a handful of stummel to boot! I just acquired Fiebing’s Black Leather Dye and I decide to experiment. I will add a touch of it to the dark brown to create the blend. The first snag I run into is that this is the largest stummel I’ve worked on and my usual corks that I use to prop the stummel on the candle stick during the staining process were too small. I rummaged through our cork supply and found only one large enough. I warm the stummel to expand the briar enabling the dye to absorb better into the grain. I apply the dye liberally over the surface with a pipe cleaner folded over. Then I fire the wet dye and the alcohol content burns off setting the stain. I repeat the process again to assure total coverage and set the stummel aside to rest.
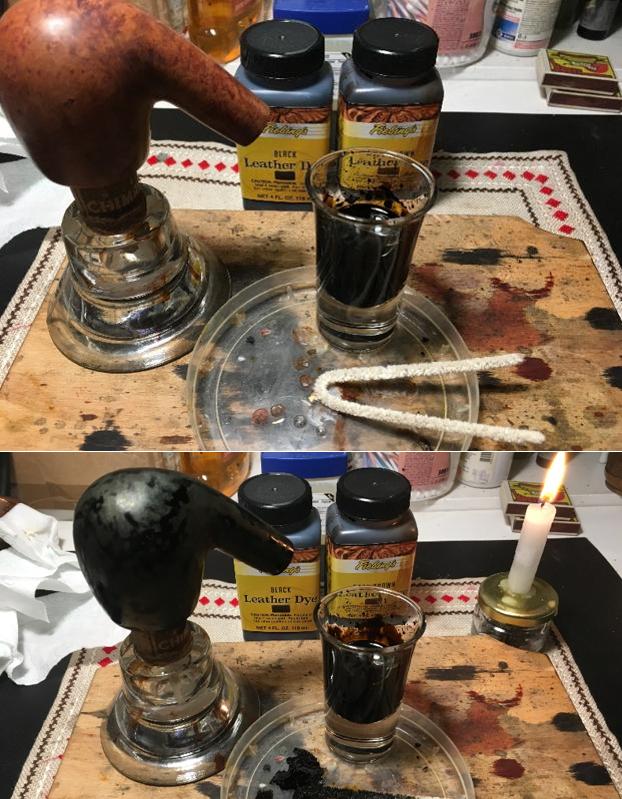
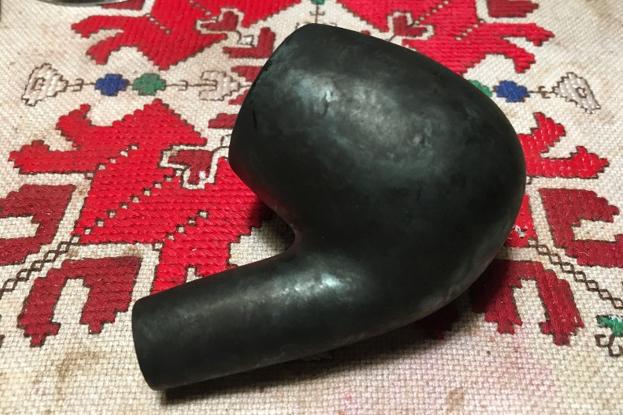 After several hours, I ‘unwrap’ the fired stummel using the Dremel mounted with a felt buffing wheel. With the Dremel at its slowest speed, I move methodically over the stummel applying Tripoli compound to remove the crusted fired surface. I don’t apply too much downward pressure on the briar but I allow the RPMs and the compound to do the work for me. After completed, I use cotton pads wetted with alcohol to wipe down the stummel to lighten the stained finish and to blend the dye. After this, I mount a cotton cloth wheel on the Dremel and apply Blue Diamond compound and methodically work the wheel over the entire surface. After completed, I again wipe the stummel with cotton pads wetted with isopropyl 95%. I follow this by doing another quick tour over the stummel with the Blue Diamond. The use of black dye with the dark brown has the effect of darkening the grain which I’m liking as I see the grain surfacing through the compound cycles. The pictures show the progress.
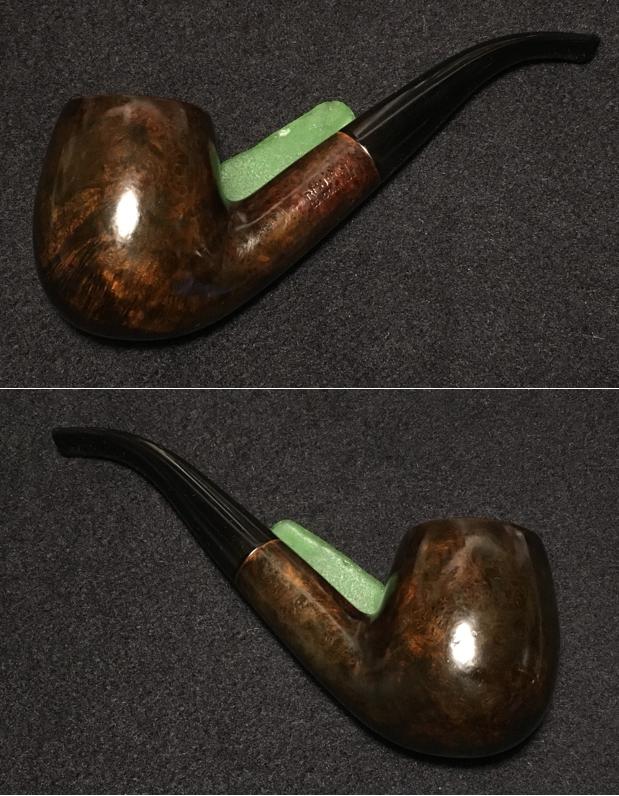
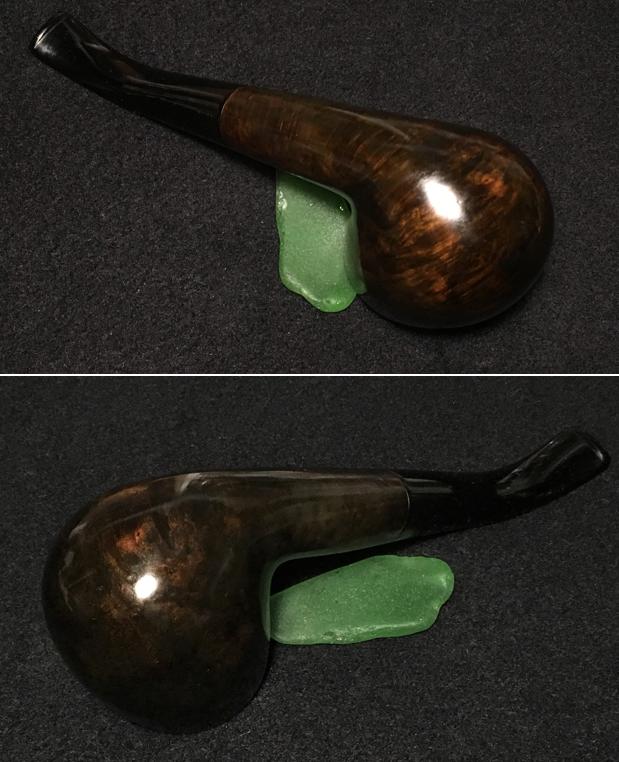
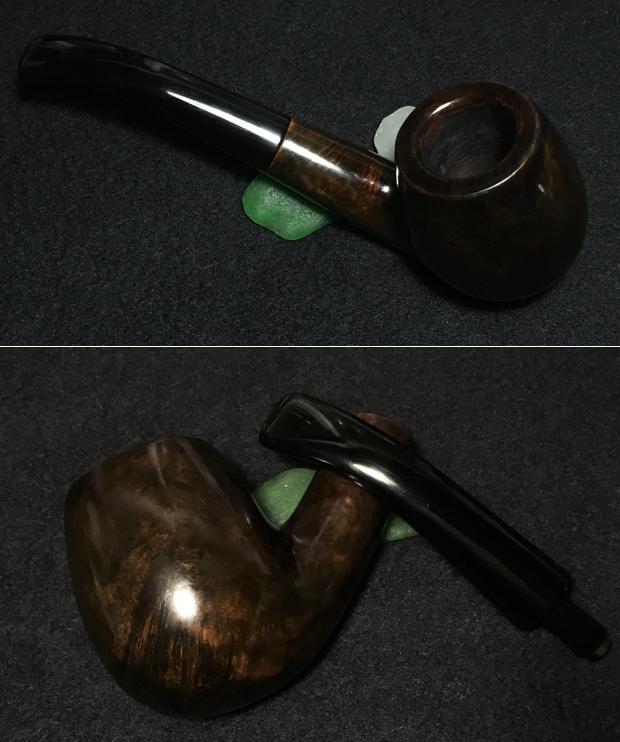
 To remove the compound dust, I hand buff the stummel with a flannel cloth. After mounting the Dremel with a cotton cloth wheel and increasing the speed to 2, one notch over the slowest, I apply several coats of carnauba wax to the stummel and reattached stem. I follow this with a rigorous hand buffing with a micromesh cloth. When I experimented by adding black dye to the dark brown I didn’t anticipate the unique hue that would result. The briar grain veins seem to have latched on to the black and the lighter grains came out with a golden/copper kettle blend that is striking – very interesting and attractive. If this REJECT – LONDON MADE is a product of the W. H. Carrington Co., I cannot say why it received this factory stamp. For those who like huge pipes that fill the hand, this big boy, bent billiard fits the bill and needs a new steward! All the profits of pipes I sell help the Daughters of Bulgaria, an organization we work with that helps women and children who have been trafficked and sexually exploited. If you’re interested in this REJECT, hop over to my blog site, The Pipe Steward. Thanks for joining me!


Your pipe was almost certainly made by Charatan.
LikeLike
Hi Jay – thanks for weighing in on this – it’s great that after more than a year these write ups are still being accessed! How are you so sure about the Charatan? Appreciate your input.
LikeLike
I had concluded the great Reject was a BBB based on the fact that BBB had “London Made” pipes and a photo like this BBB Own Make at http://pipesmagazine.com/forums/topic/bbb-own-make. But Charatan sounds like a good possibility, also. To me, Dal’s Desirable Rejct and the BBB London Made billiard I found before and the one at the site above are so identical they seem like brothers. BTW, would someone tell me how to copy/paste or otherwise include photos in these replies?
LikeLike
I just realized I saved the first BBB London Made I found, a brandy, and traced it to http://estatebriarpipes.dk/the%20pipes/bbb.html. It’s the second pipe in the top row.
LikeLike
Robert you can link a picture to your comment. You can also post a photo from a photo sharing platform.
LikeLike
Oh, cool! I just posted two links, but if I have a photo on Flickr, for example, I can share it in a post here. Thanks!
LikeLike
I happened to buy a very similar pipe, if not the same, on Allegro (polish e-bay). The very same shape, dimensions and stain, the only difference being the stamps. Mine reads ‘BRISTOL’ on one side of the stummel, and ‘MADE IN LONDON ENGLAND’ on the other. The briar is very nice, flame grain and a little birdseye, but with a few tiny fills which don’t really impact the overall appearance and are hard to notice.
The previous owner claims to have it bought in the 80’s here in Poland.
In fact I love it, it fits my hand perfectly and is a favorite for longer smoking sessions (1,5 hours is no problem at all with this cutie), although it tends to smoke very wet, no matter what tobacco I use.
LikeLike
Thanks for your description. Though this pipe has gone to its new steward, it too, felt great in the hand. I’m sorry I didn’t have the opportunity to try it before passing it on!
LikeLike
You did an excellent restoration on this beautiful pipe, with amazing grace in more than one sense of the term. I learned so much from your blog that I intend to incorporate into my own work that I can’t list all of it, but the highlights are your use of Murphy’s Oil on the old finish and the iron method to reduce the dent in the bowl. I like it so much I sent you an offer to buy it directly from my address to yours. If you don’t see it, check your junk mail, but it should go to your inbox. I couldn’t get the PayPal method to work, possibly because I don’t know the postage to add. Please let me know — believe it or not, I’ve always wanted a good Reject!
LikeLike
I just paid for the pipe and look forward to receiving it. I can’t wait to become the “Reject’s” new steward and look forward to its arrival so I can begin enjoying the beauty for years to come, with great care to preserve your excellent work.
LikeLike
Thanks for the purchase of the Reject, Robert! I appreciate it. As I mentioned to you, when I return to to Bulgaria after the biathlon is finished here in Norway, I’ll be sending the pipe your way. Thanks!
LikeLike
In the early 1970’s I worked part-time at a pipe shop in DC while going to school. Picked up one of their Charatan “rejects” which was a huge beauty. Couldn’t find any fills, etc. The briar smoked then, and now, deliciously. Why marked “reject”? As we New Yorkers (don’t hold that against me, ok?), “go figure.”
LikeLike
Hey Todd, I hear you – I think New Yorker sentiment definitely holds true in this case too. I would love to give this Reject a try, but I put him in the store!
LikeLike
Dal, I just looked at your website. Your organization does much-needed work for women and children. God bless you.
LikeLike
Thanks Todd! Appreciate it a lot!
LikeLike
Anxious to get this REJECT posted, I misspelled the link for the Daughters of Bulgaria at the end of the post – Ugh. Until Steve graciously makes the change, it is: http://www.daughtersofbulgaria.org, in case you tried it it goes nowhere!
LikeLike
It has been changed Dal.
LikeLiked by 1 person
As a bona fide grain junky, I appreciate very much your treatment with the dye combination. It has such depth and just…glows!
LikeLike
Jill, I’m a fellow junky, and it doesn’t get much better than this! I was surprised by the results being my first time using the black dye. The briar seems to have a will of its own when it comes to the results. Thanks for reading!
LikeLike
I think your particular results have something to do with heating the stummel itself before applying the stain, another lesson I will adopt.
LikeLike
I like the touch of the bevel on the bowl top – nice!
LikeLike
Yes, thanks, Al. I agree about bevels and they make a good investment for little effort!
LikeLiked by 1 person
Reblogged this on The Pipe Steward.
LikeLike
Nice work as always, Dal. Sometimes I think the quality of briar available to the craftsmen years ago had to have been head and shoulders above what is available now if pipes like this one got labelled as rejects.
LikeLike
Very true Charles, i got unmarked and inexpensive American brand pipes from the 20’s-40’s that would be considered near top or top of line briar today.
LikeLiked by 1 person
Thanks, Charles. It would seem so, but my head is still trying to understand why this pipe had a factory reject. It’s a beautiful piece of briar with very few fills – and they were very small pinhole fills that I didn’t bother with. The Reject stamp now almost adds value to the pipe – ugly ducking becomes the beautiful swan!
LikeLiked by 1 person
I read somewhere a fine account of the heyday of pipe making, I think in the 1940s-1950s, when the quality of briar wood was at its height. “The quality of briar available to the craftsmen years ago” indeed has decreased. Trying to find the article I read some time back, this is all I could find on the subject.
https://pipedia.org/wiki/What_Makes_a_Good_Briar_Pipe
LikeLiked by 1 person
Thanks for this lead, Robert!
LikeLike