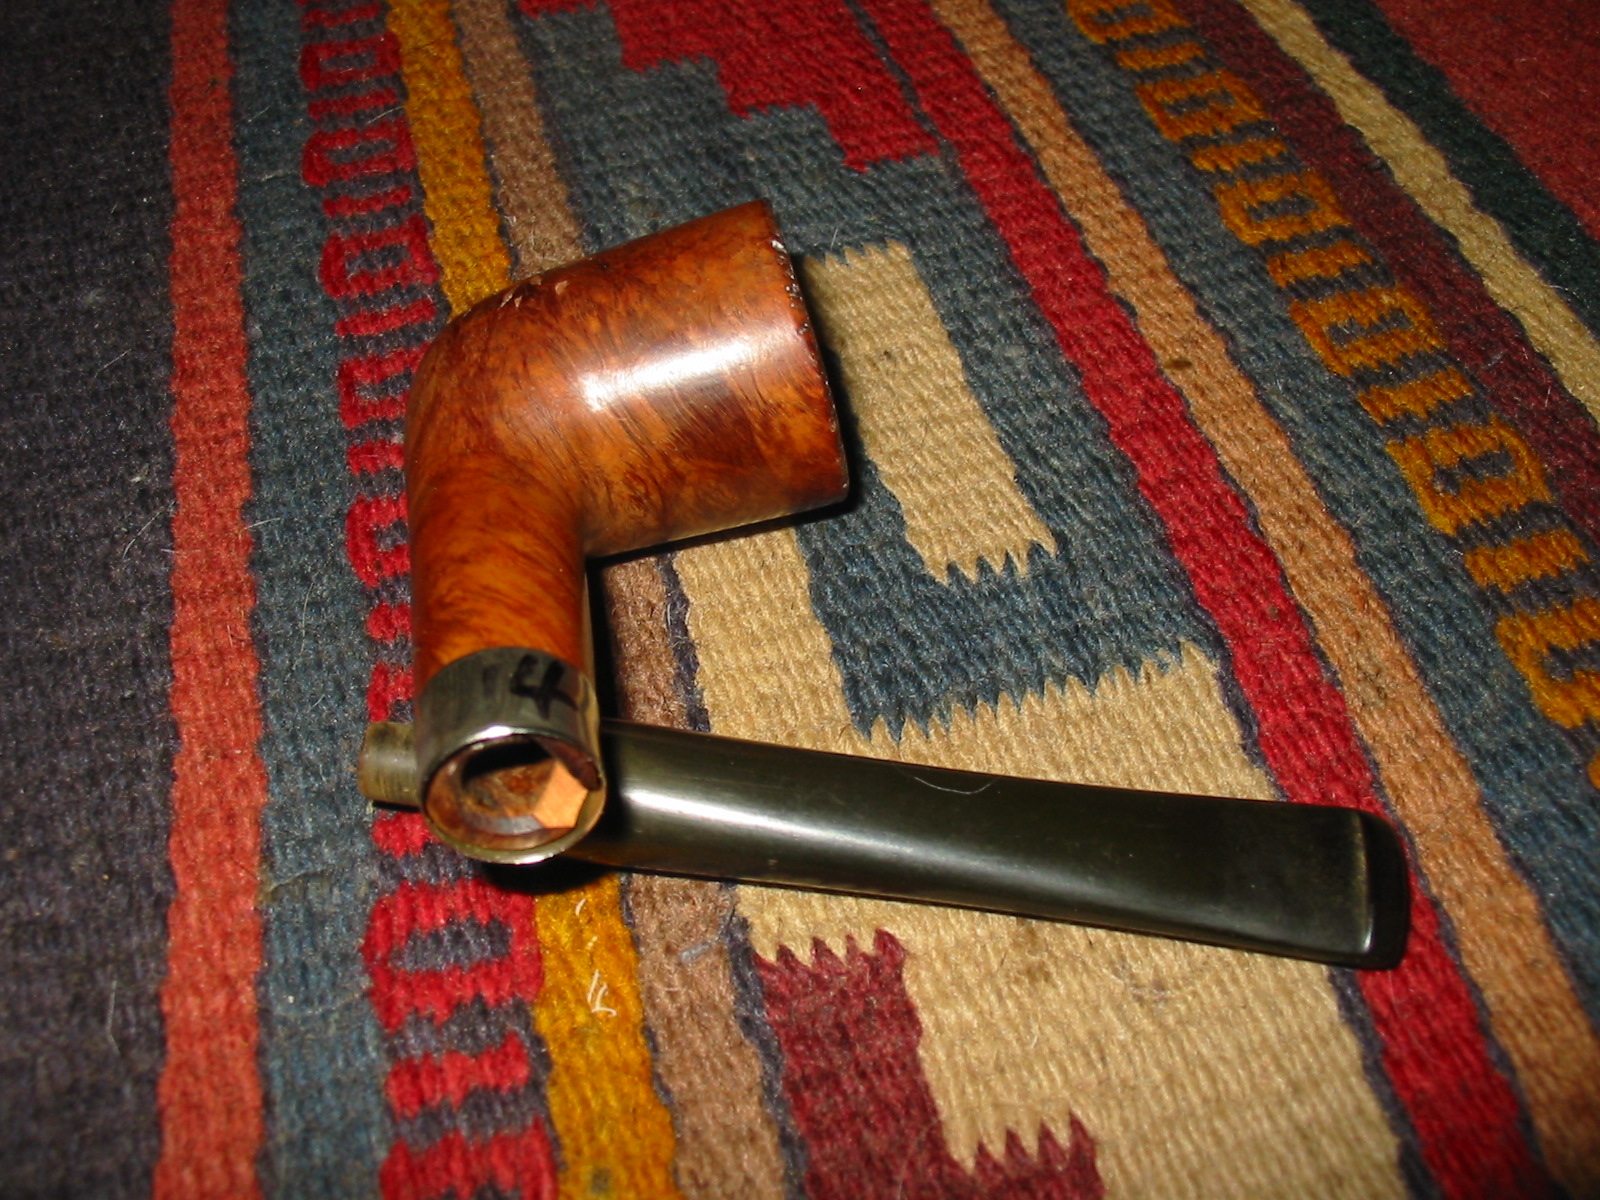
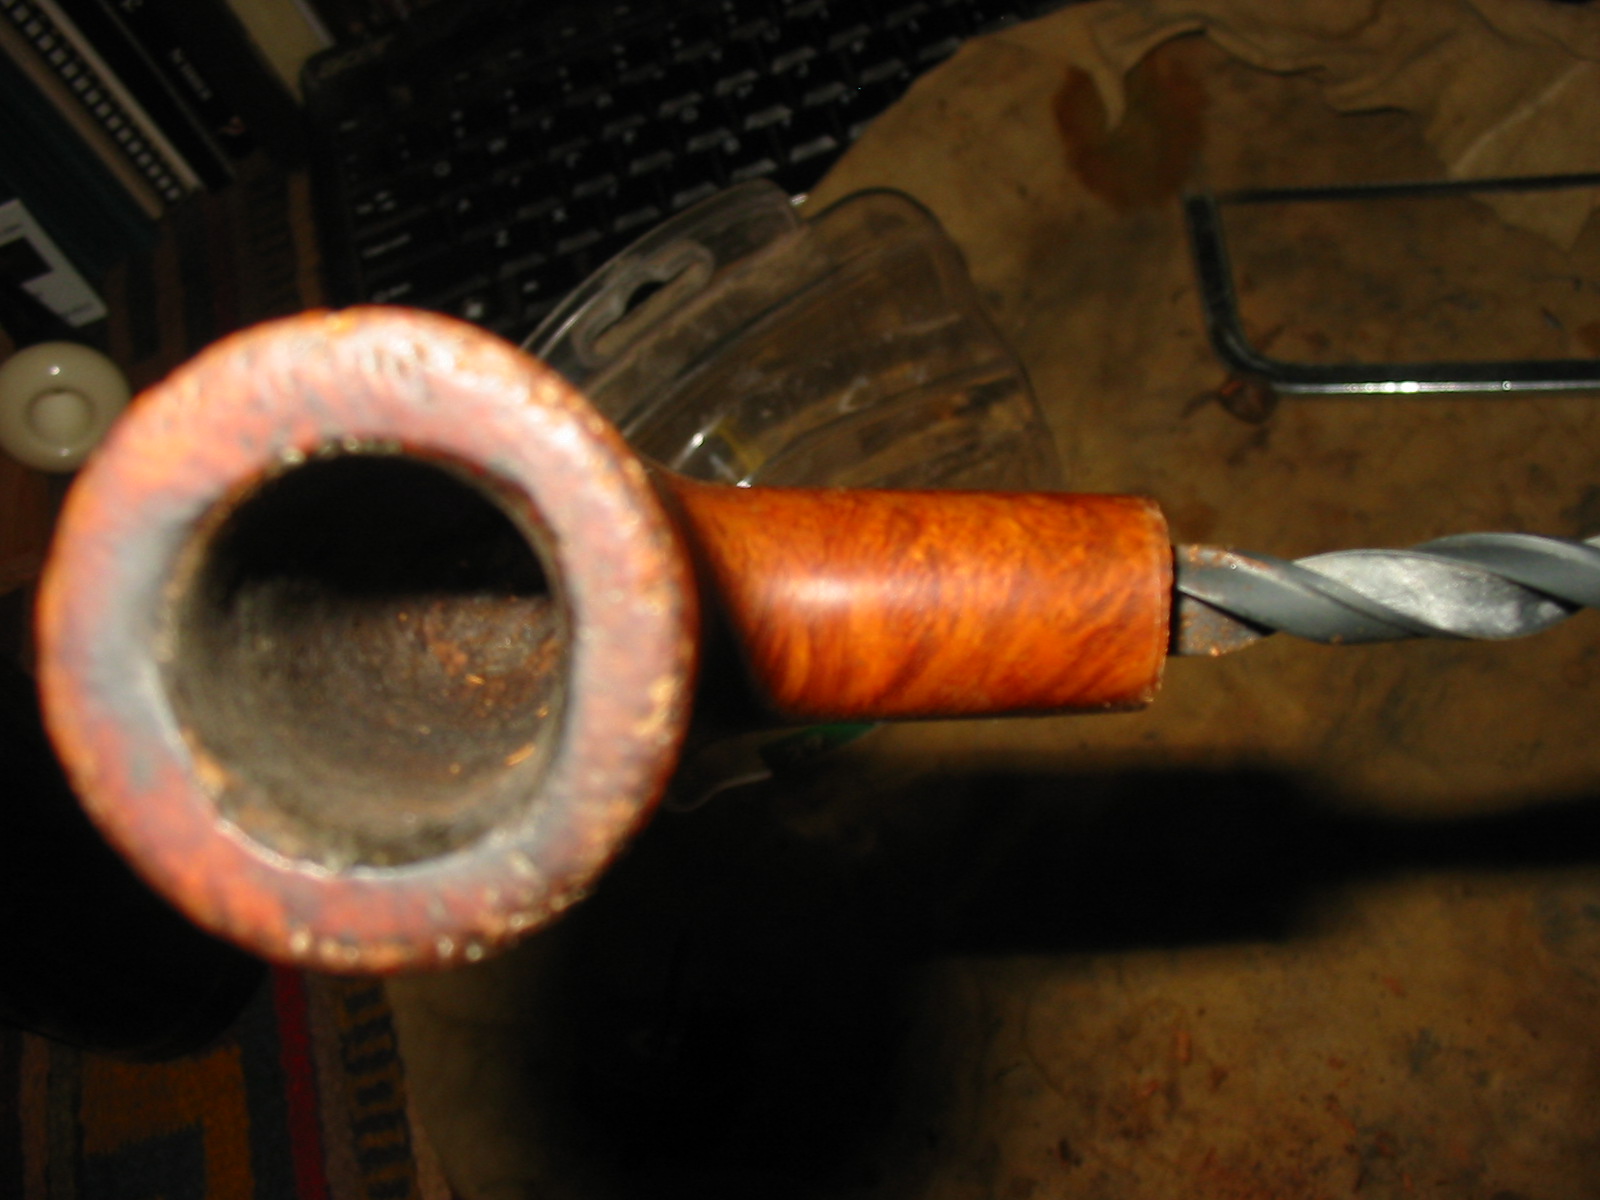
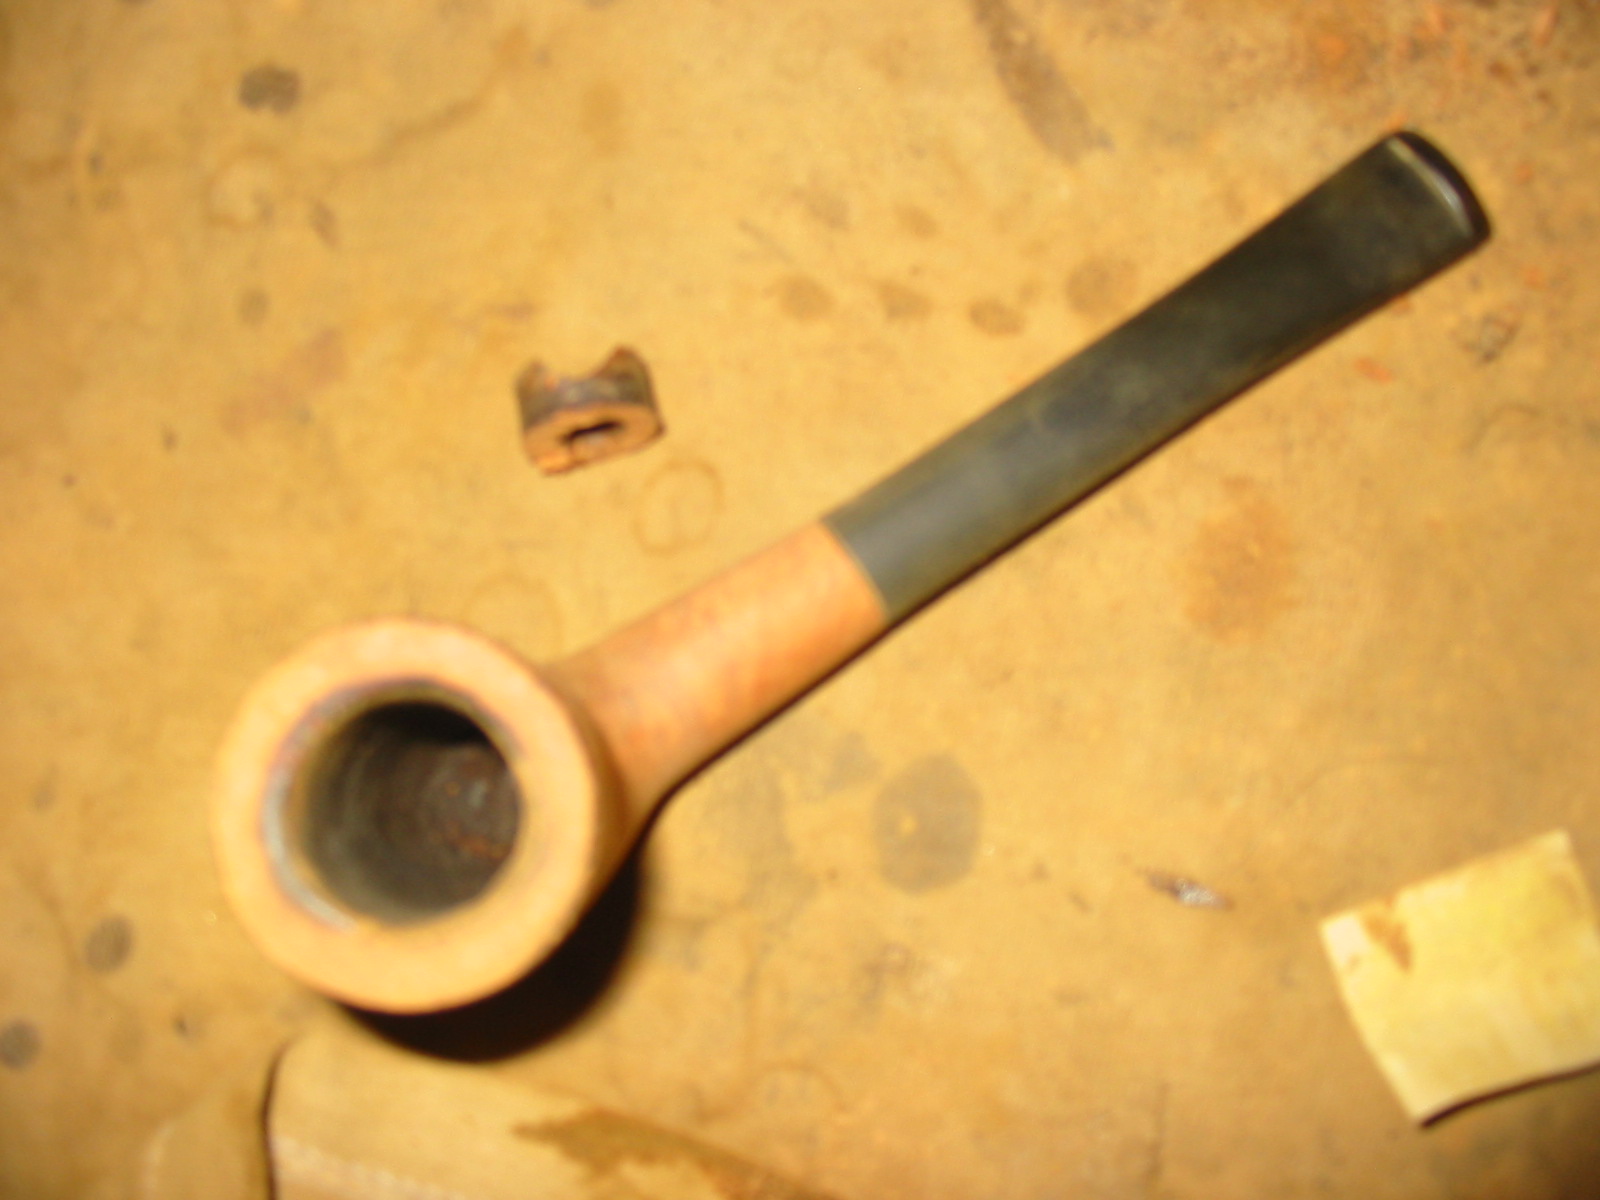
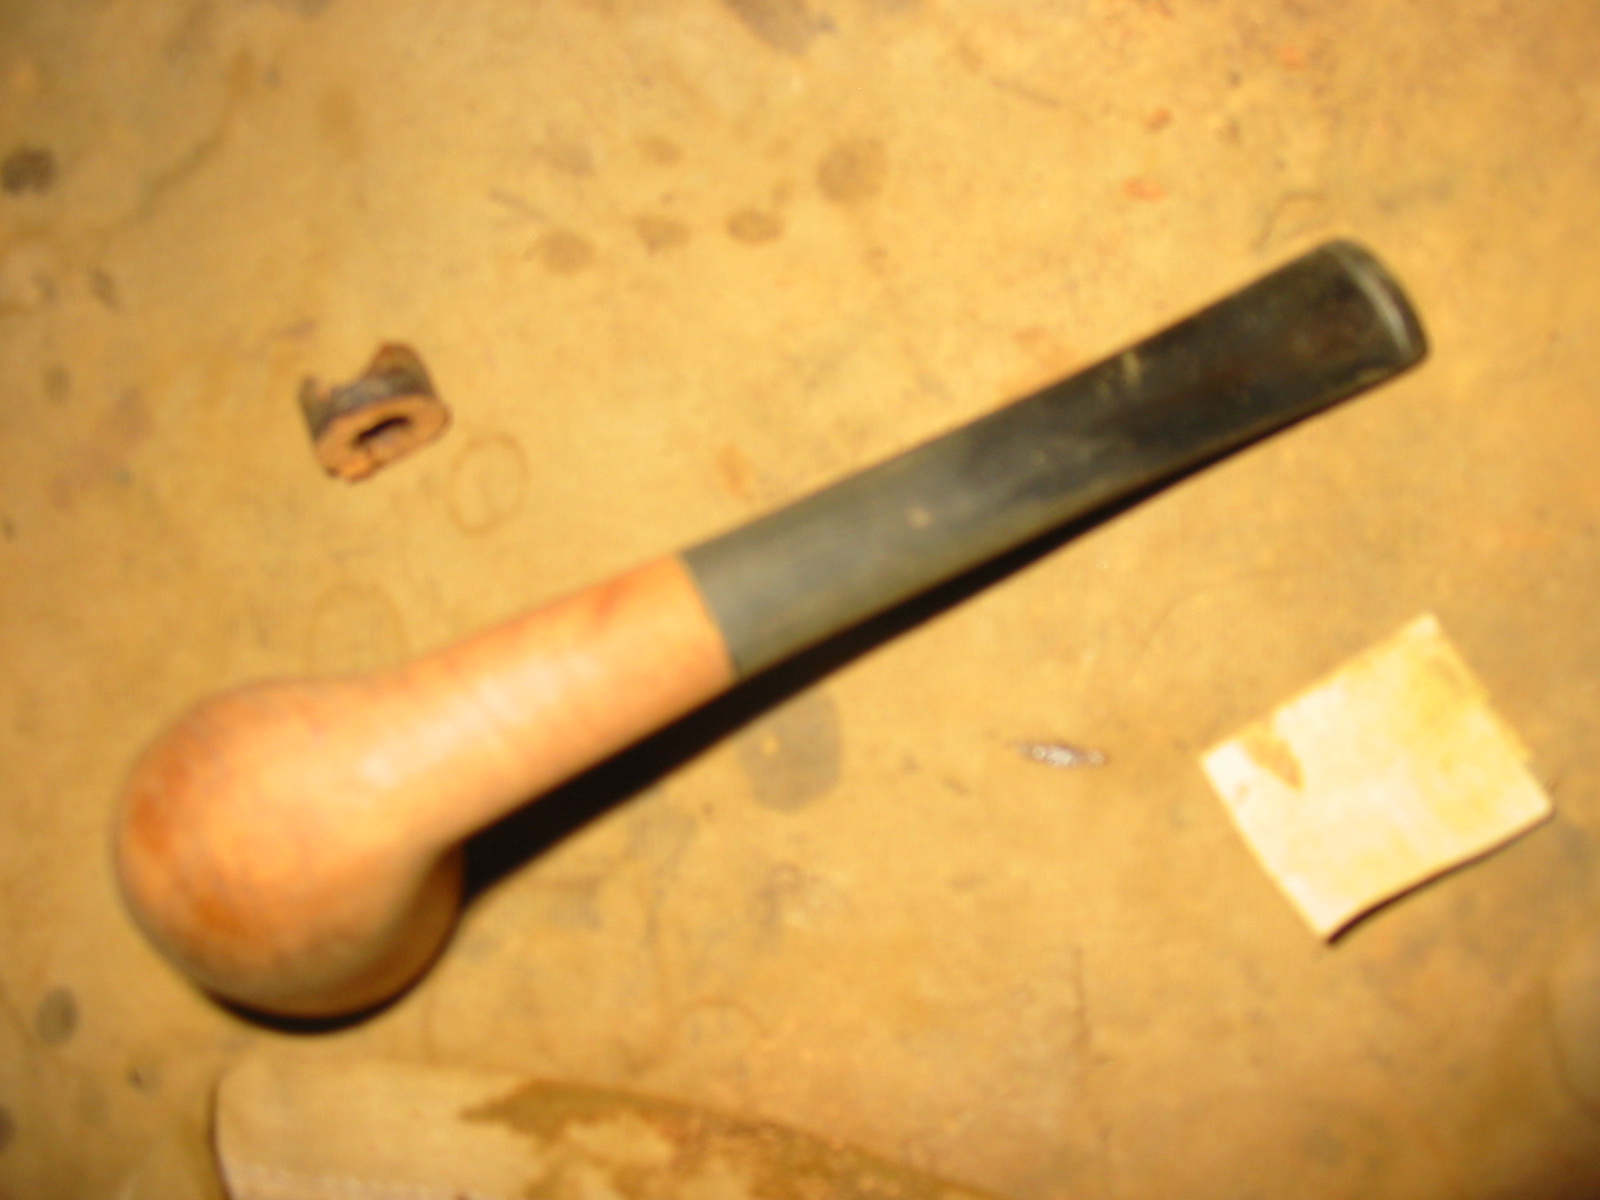
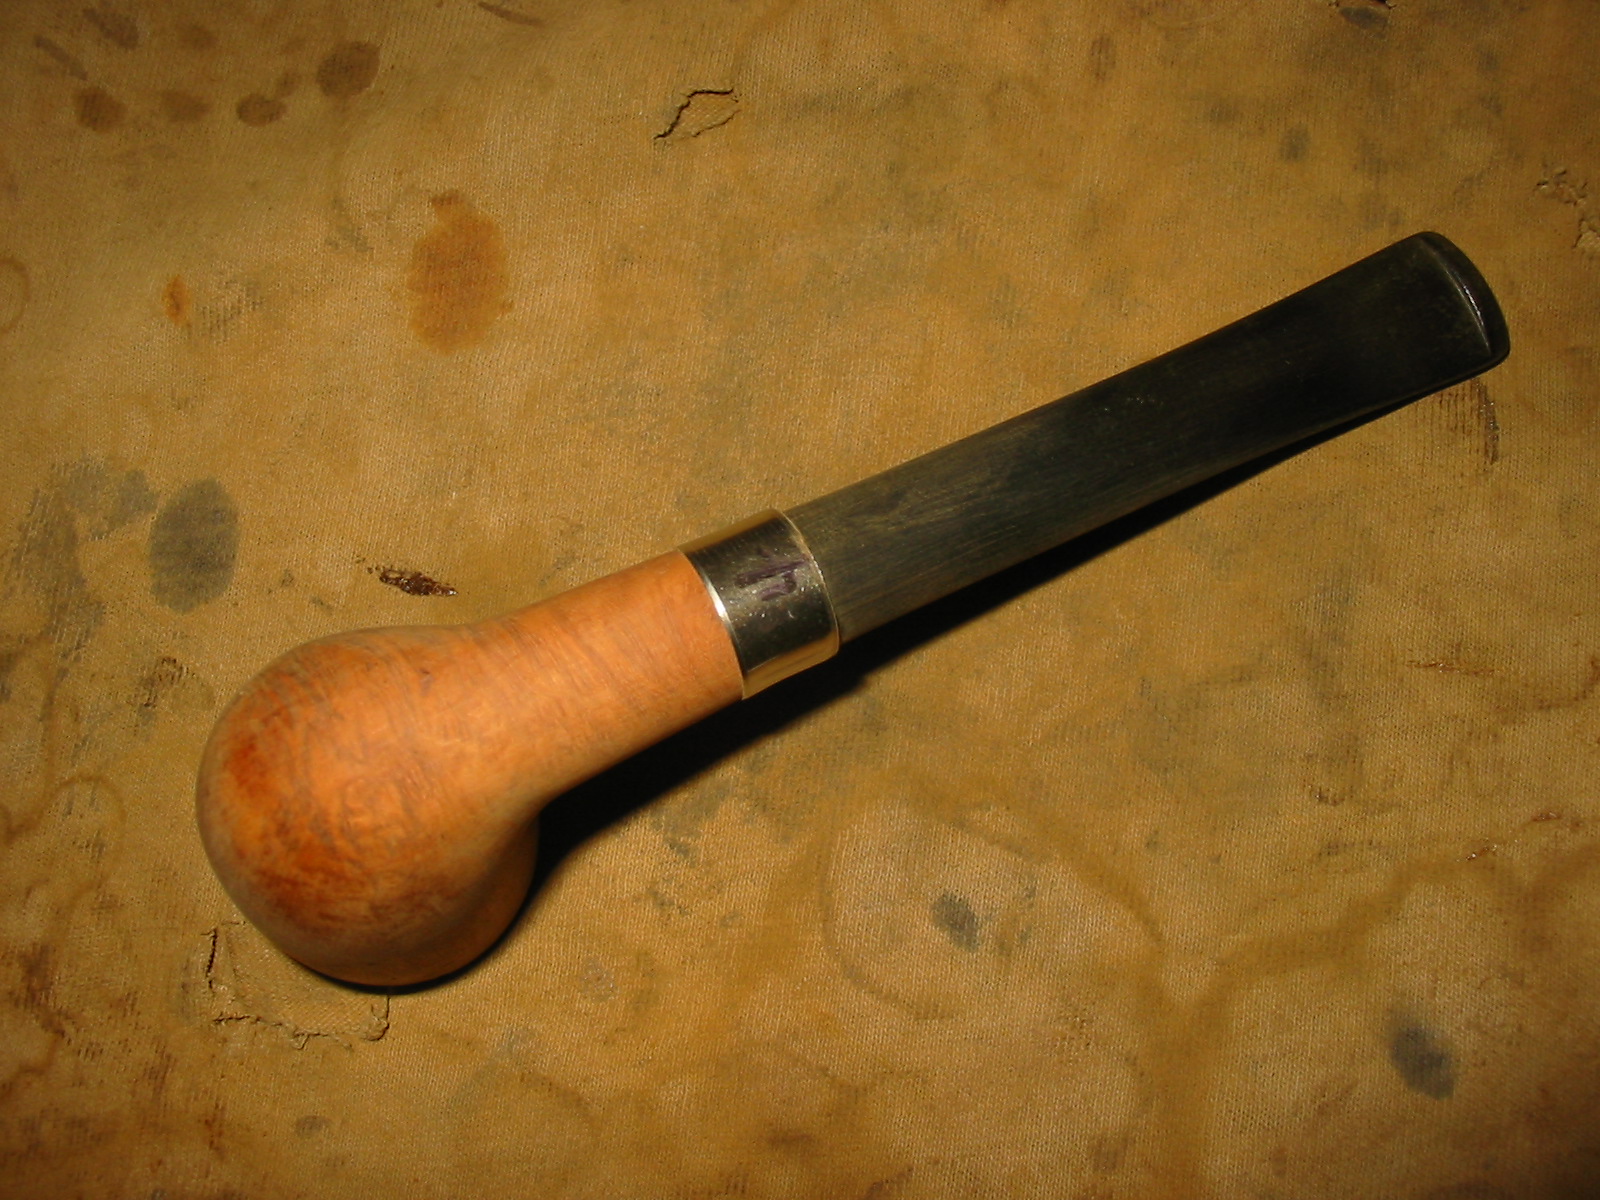
In keeping with the theme of my last few posts about my recent pipe restorations the pipe I took on in this repair/restoration was in fairly bad shape. The rim was damaged on the top and the outer edge had been beaten badly and was rough to the touch. The inner edge had been reamed out of round somewhere in the distant past of its life. The bowl finish was “finished”. It was in rough shape. The left side had many fills and divots on the surface. It looked as if it had been dropped on concrete or rocks. The shank was much the same but worse in that the end on the top right side had a large chunk of briar missing. It did not have a stem but that was the least of the concerns at the moment.

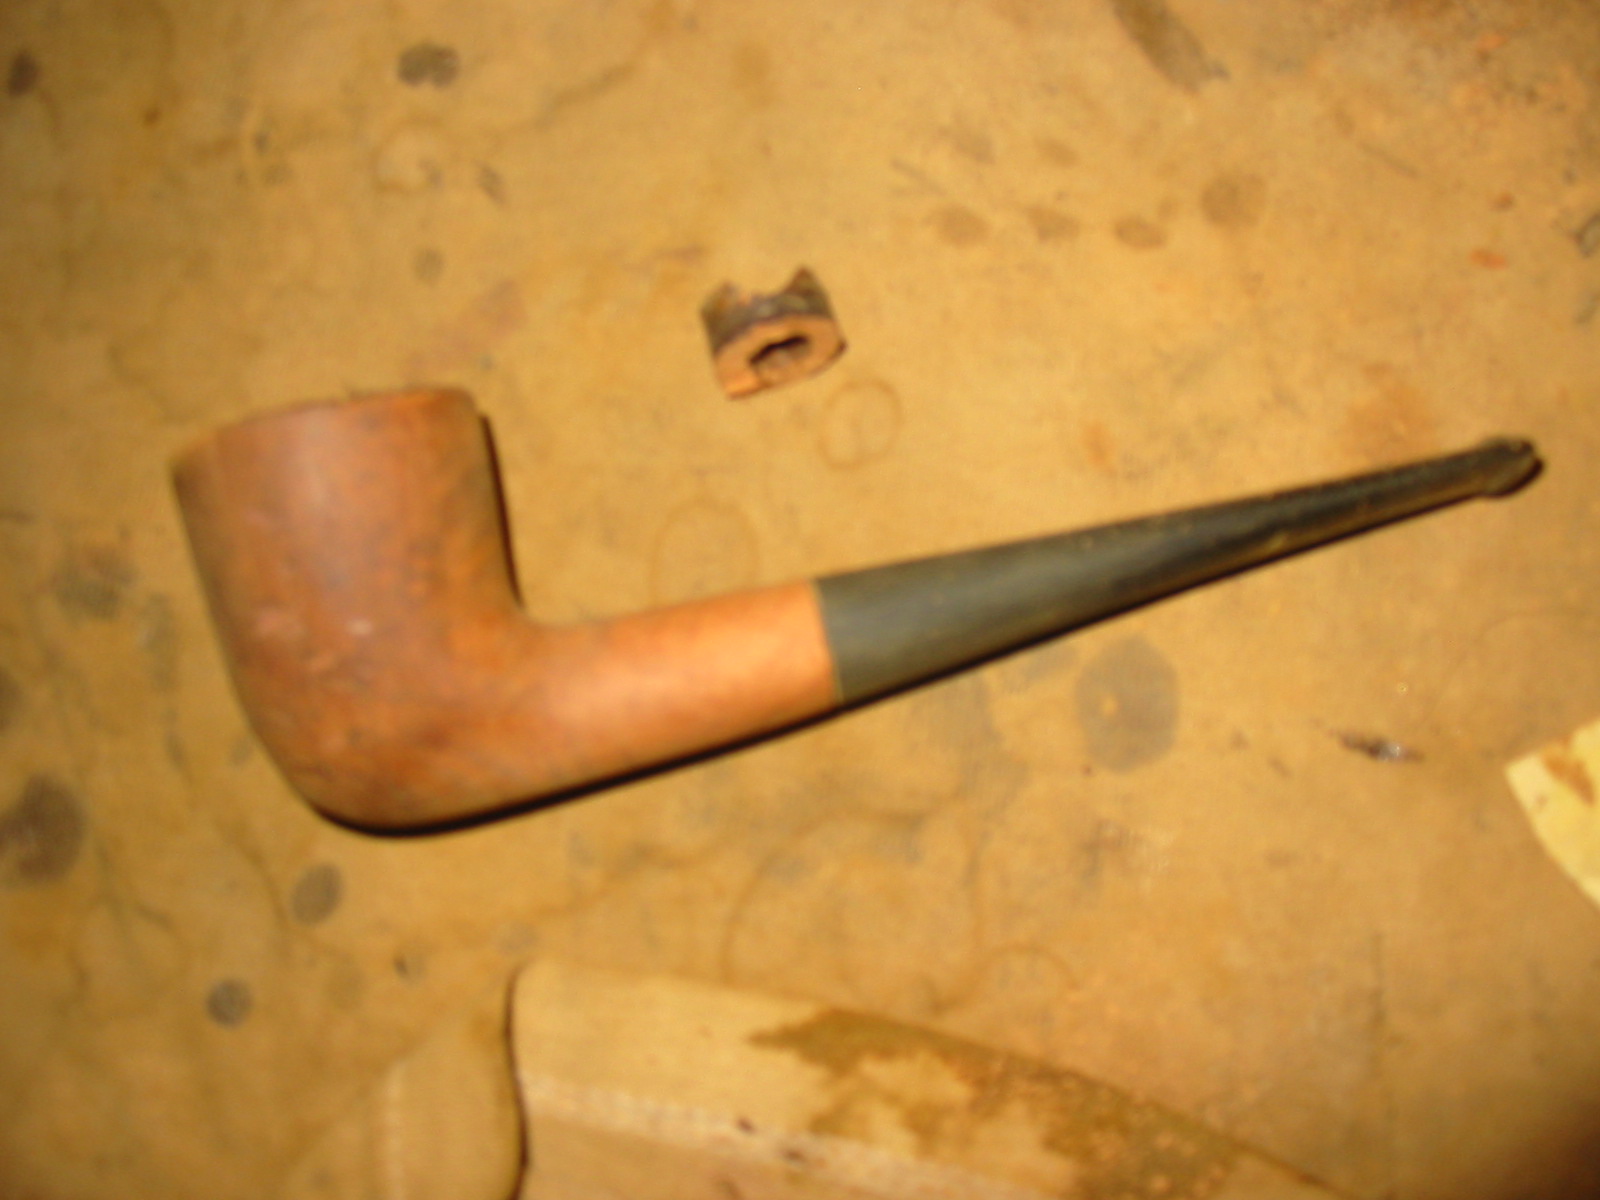
I went through my can of stems and found one that would work. The diameter and length were correct for this size pipe. However I had to decide what to do with the missing chunk of briar. I could band it and cosmeticly hide the missing piece under the band or I could cut back the shank, shorten it and then band and restem the pipe.

I removed the band – this is slightly harder than the simple words sound. It really involved cutting the metal and peeling it off the shank. I was not happy with the look so I decided to cut off the damaged end of the shank. What made this a happy solution to me was that the shank itself was not cracked. There were no cracks radiating from the area of the missing piece of briar.
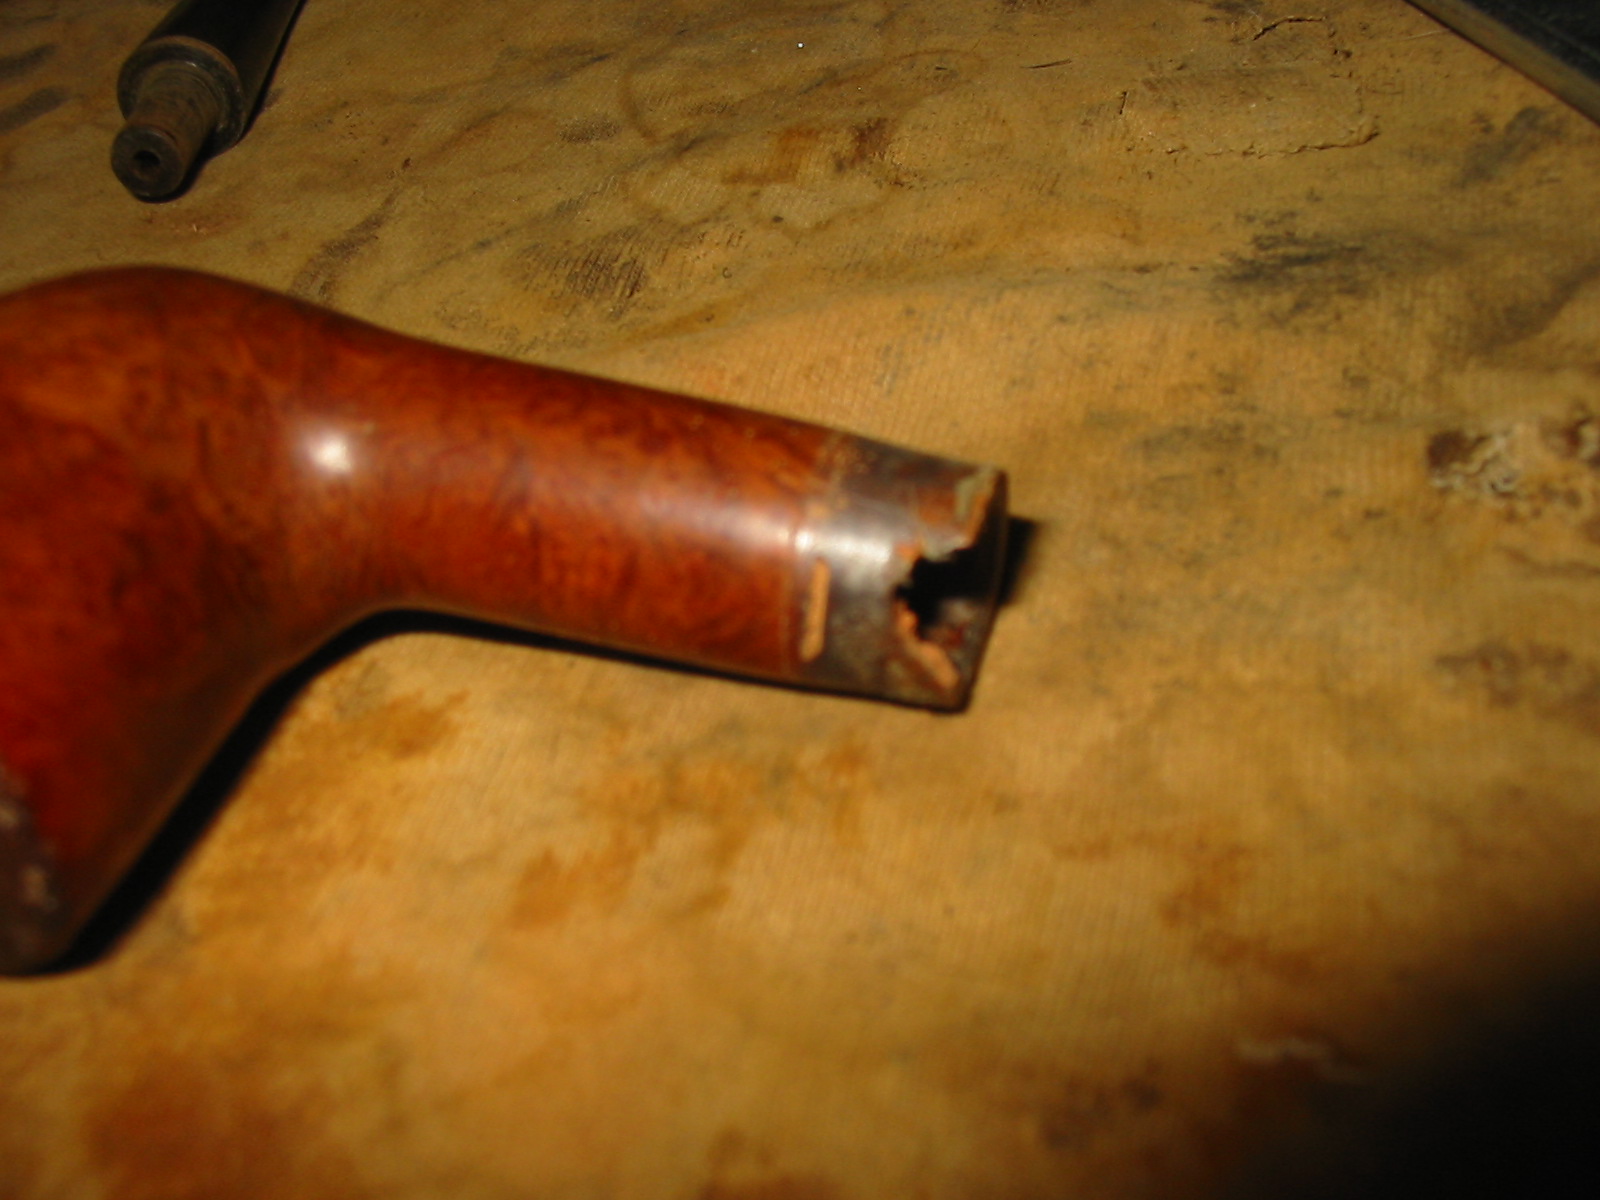
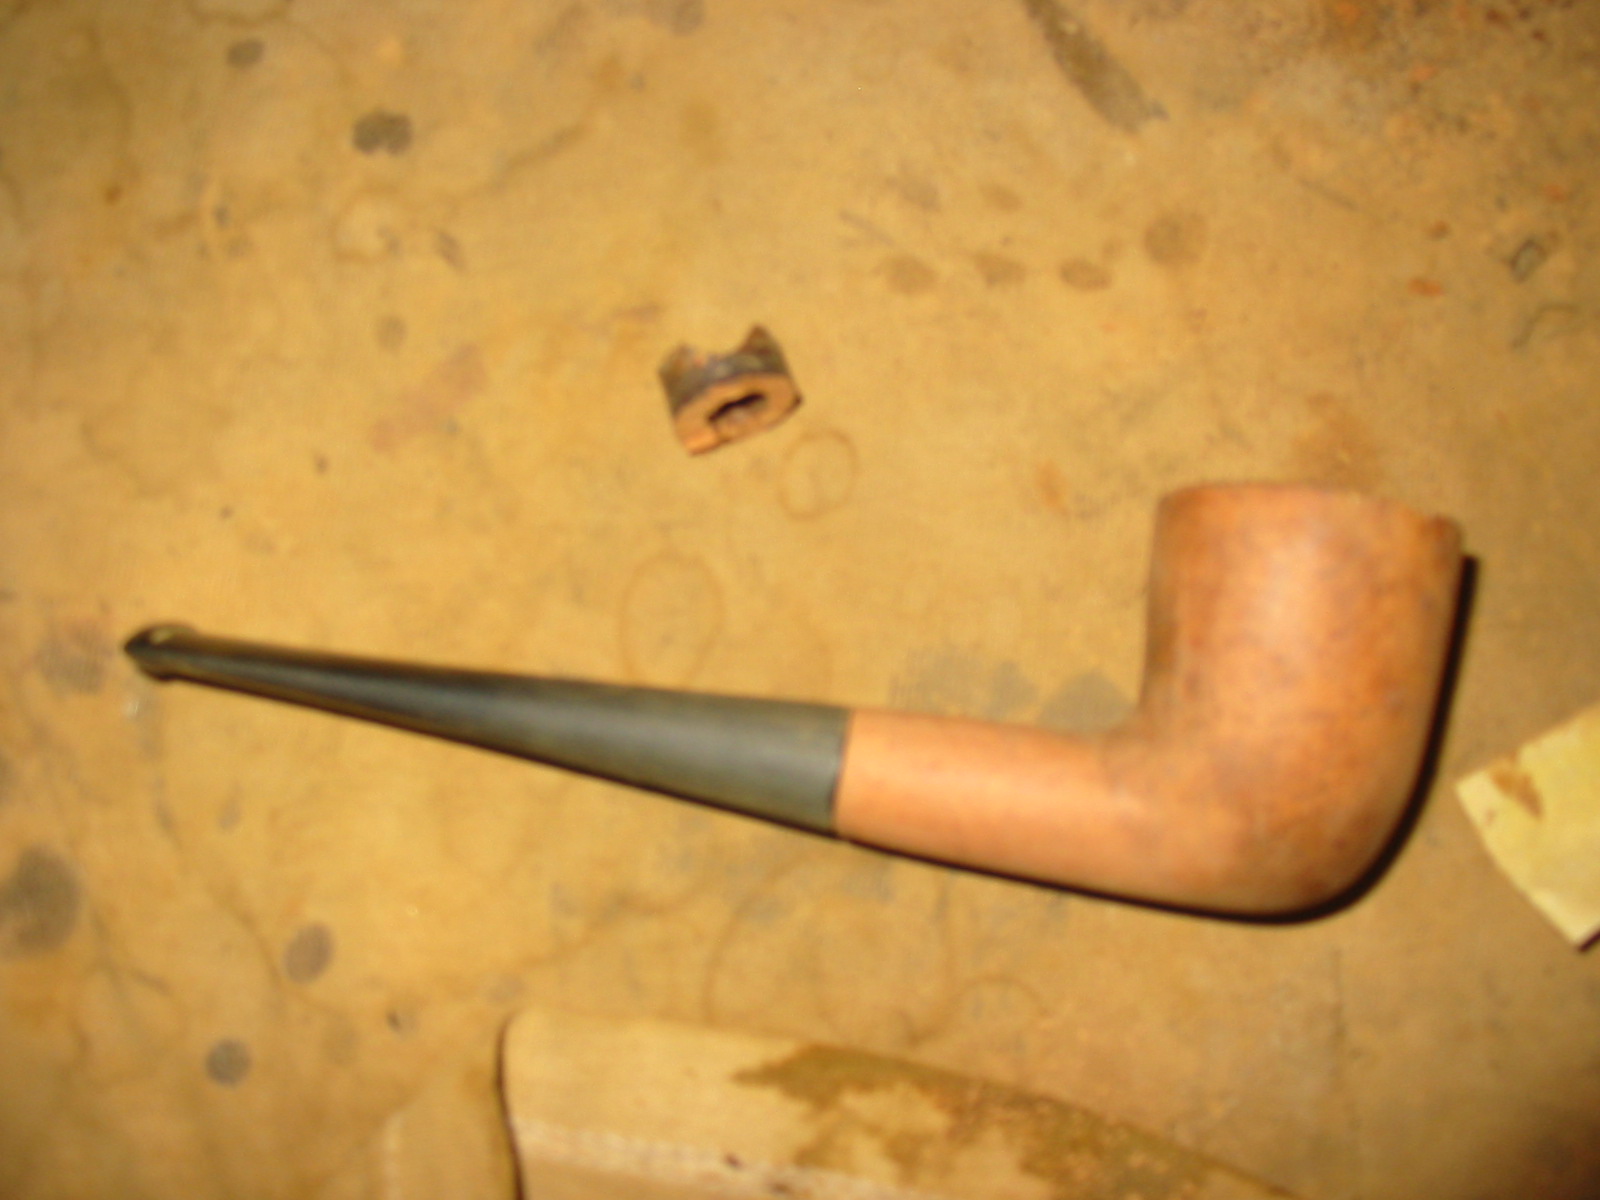
When cutting back a shank I use a small hack saw with a fine toothed blade to do the work. I am limited to hand tools as I do not have a shop. The problem with this method is that it is very difficult to get a good, clean, straight cut with a hand saw. I followed the scoring left behind by the band as I sawed around the shank.
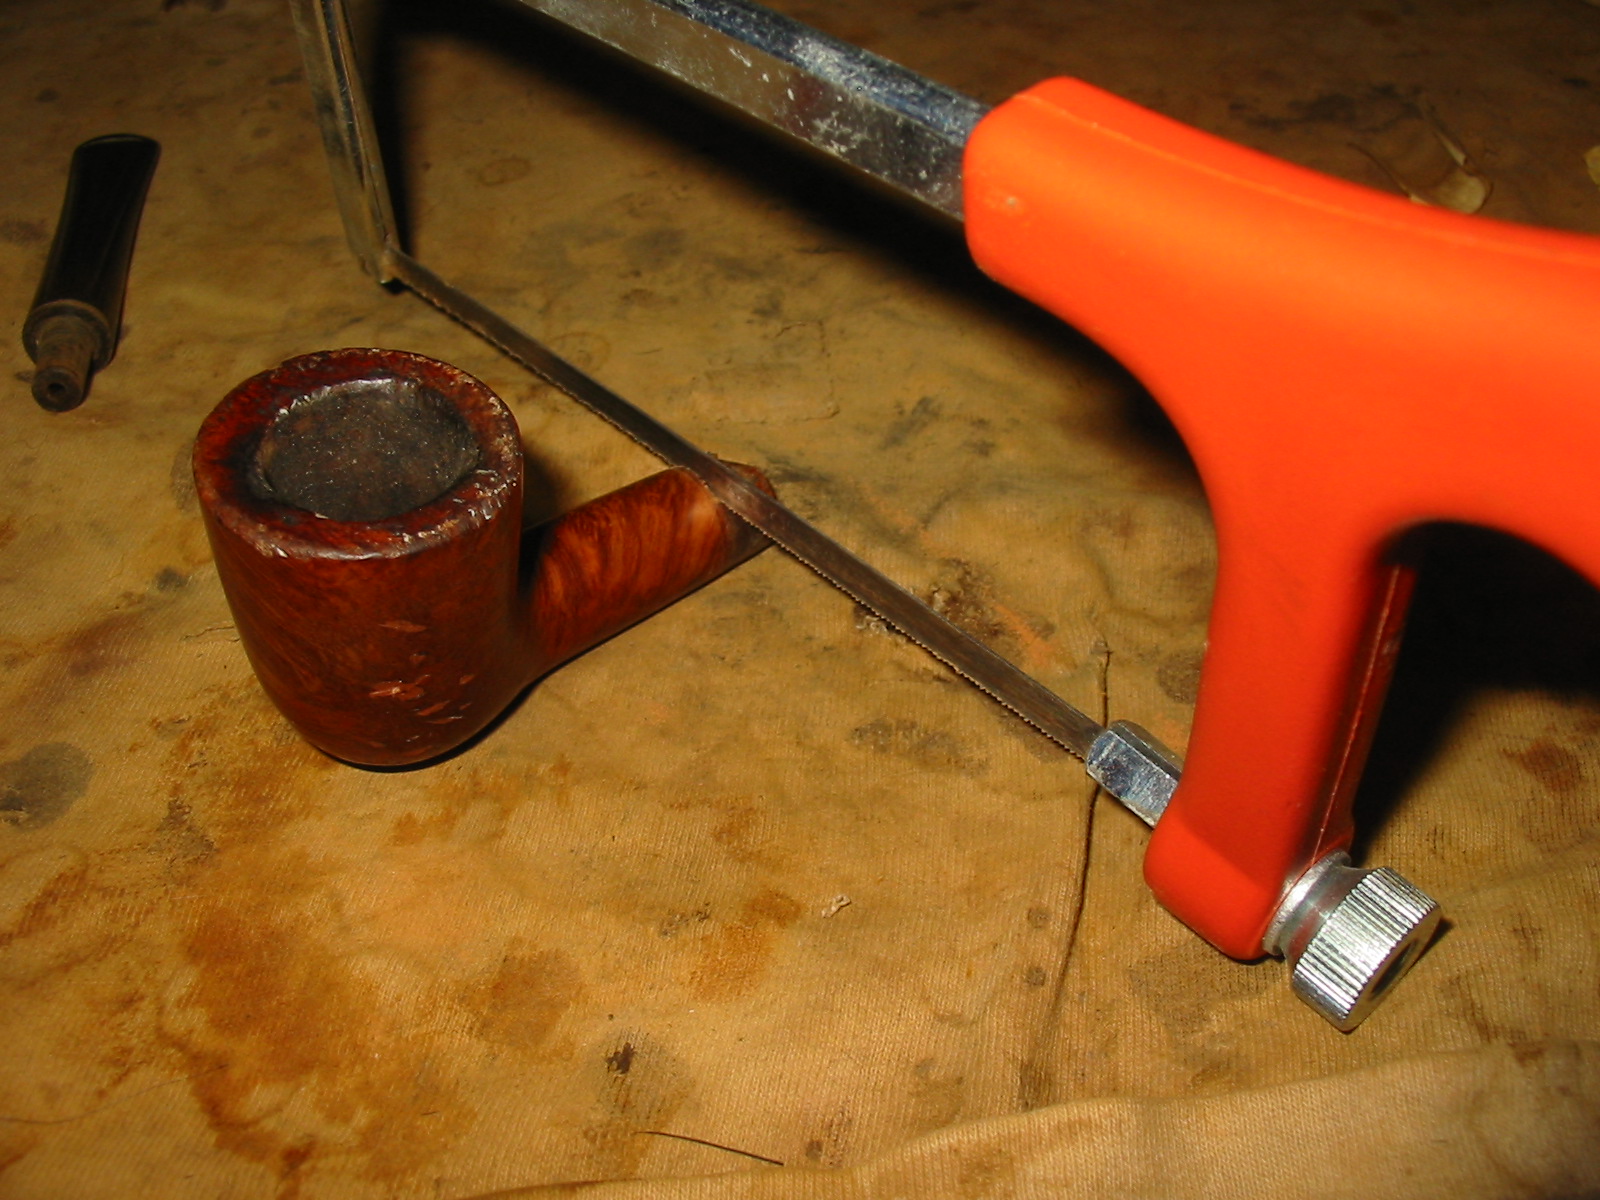
Even in being careful and working slowly the shank end was not perfectly square. That would have to be dealt with later.
I needed to deepen the mortise area as I had removed a major piece of it by shortening the shank. I started with a drill bit that fit well in the existing mortise and turned it in by hand. I worked up to the correct size bit – each time anchoring the bit in my hand drill and turning the bowl onto the bit by hand. I did not want to risk using the power and having the bit go right through the bowl. I have a pin vise but it was not large enough to hold a bit this size so I improvised.

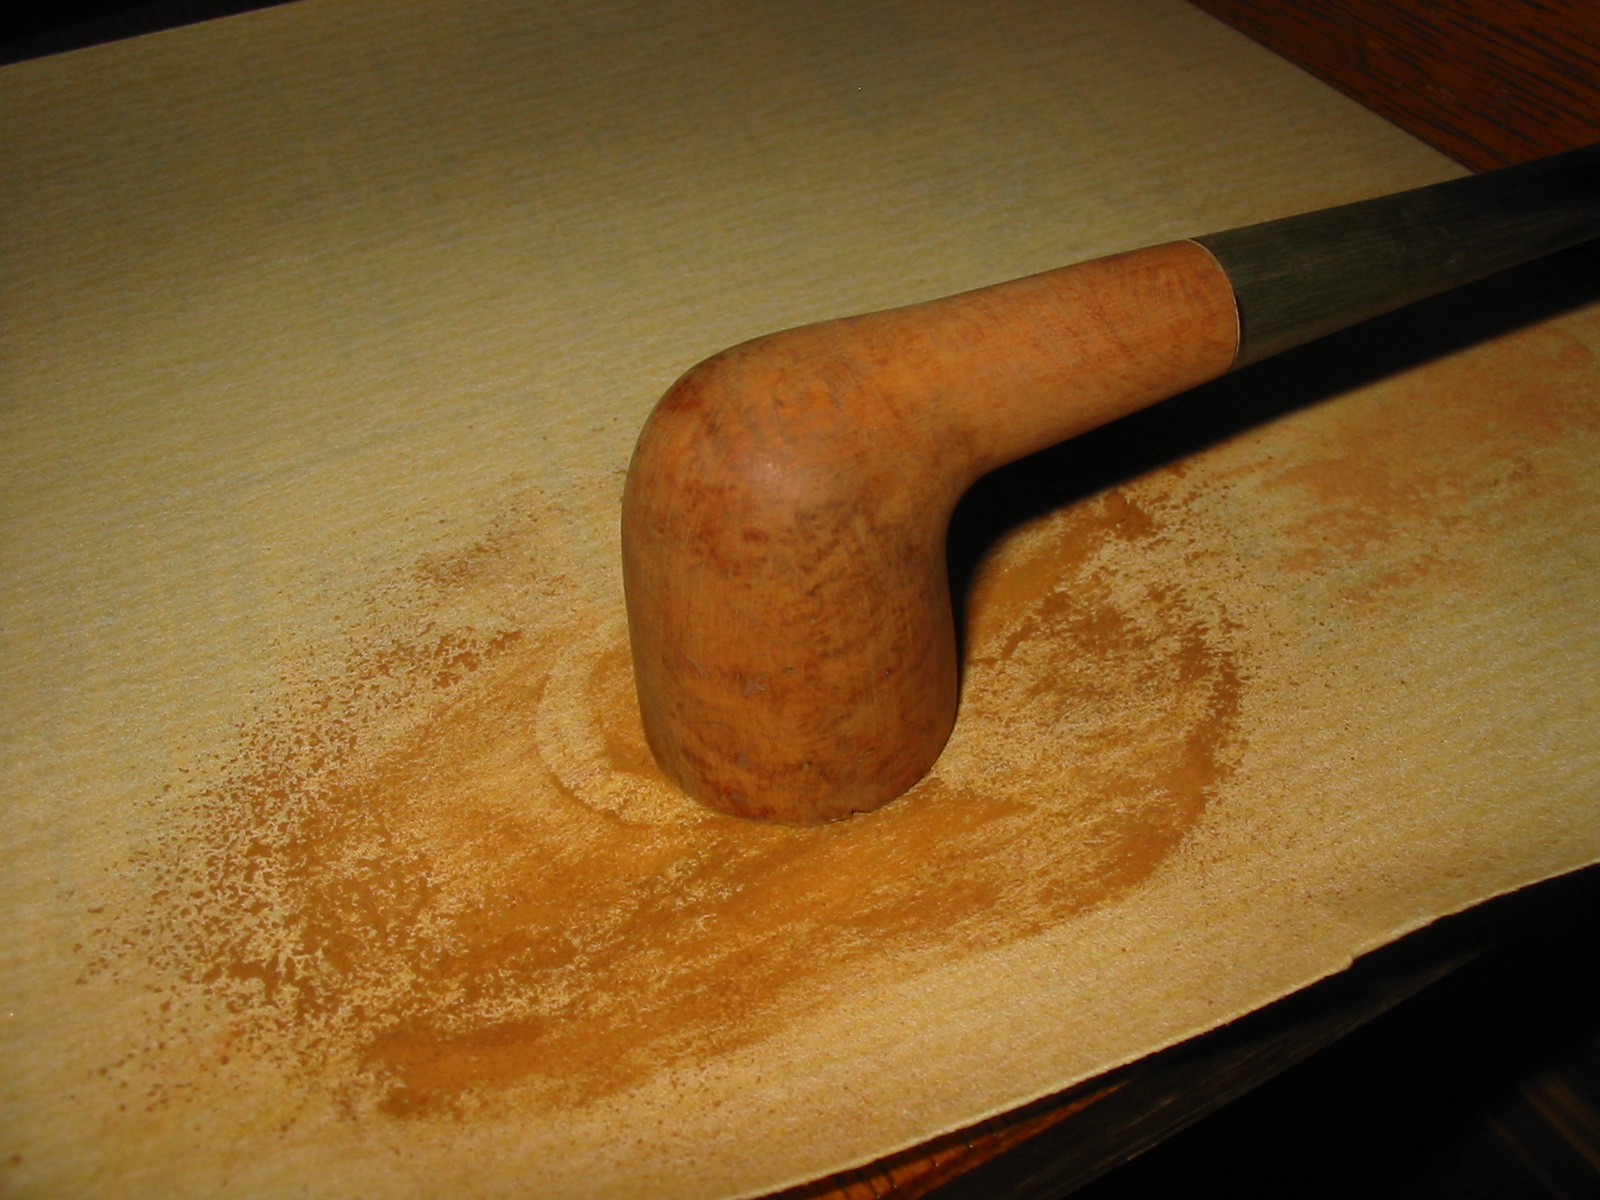
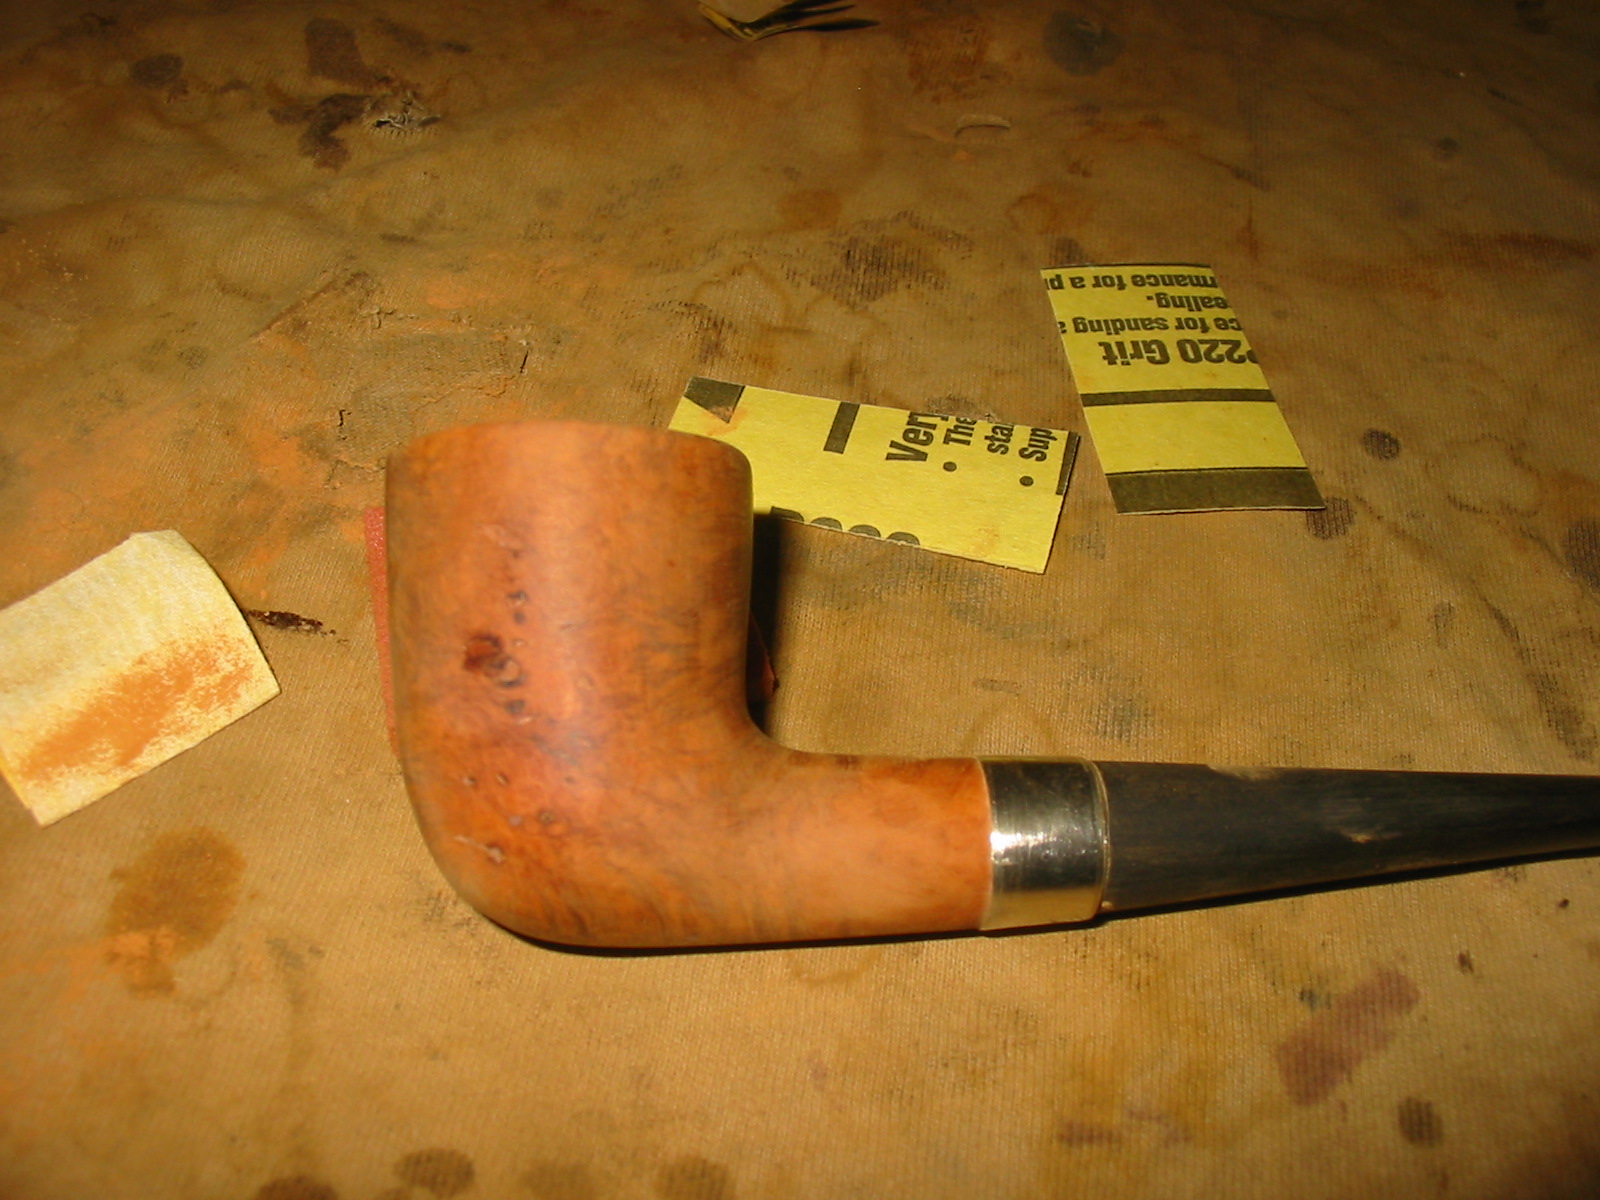
Once I had the airway drilled in the shank I set up a topping board to sand down both the end of the shank and the rim. I started with the shank end hold the bowl against the sand paper and making sure that it was straight up and down vertically and sanded the end of the shank to face it. I also topped the damaged rim to remove the damage to the surface and the edges of the bowl. I sanded the bowl down with sandpaper in preparation for the topping. The shank needed to be re-tapered to match the diameter of the stem and to give it more of a flow from the bowl to the stem. I used 220 grit sandpaper to taper the shank and to sand the bowl.
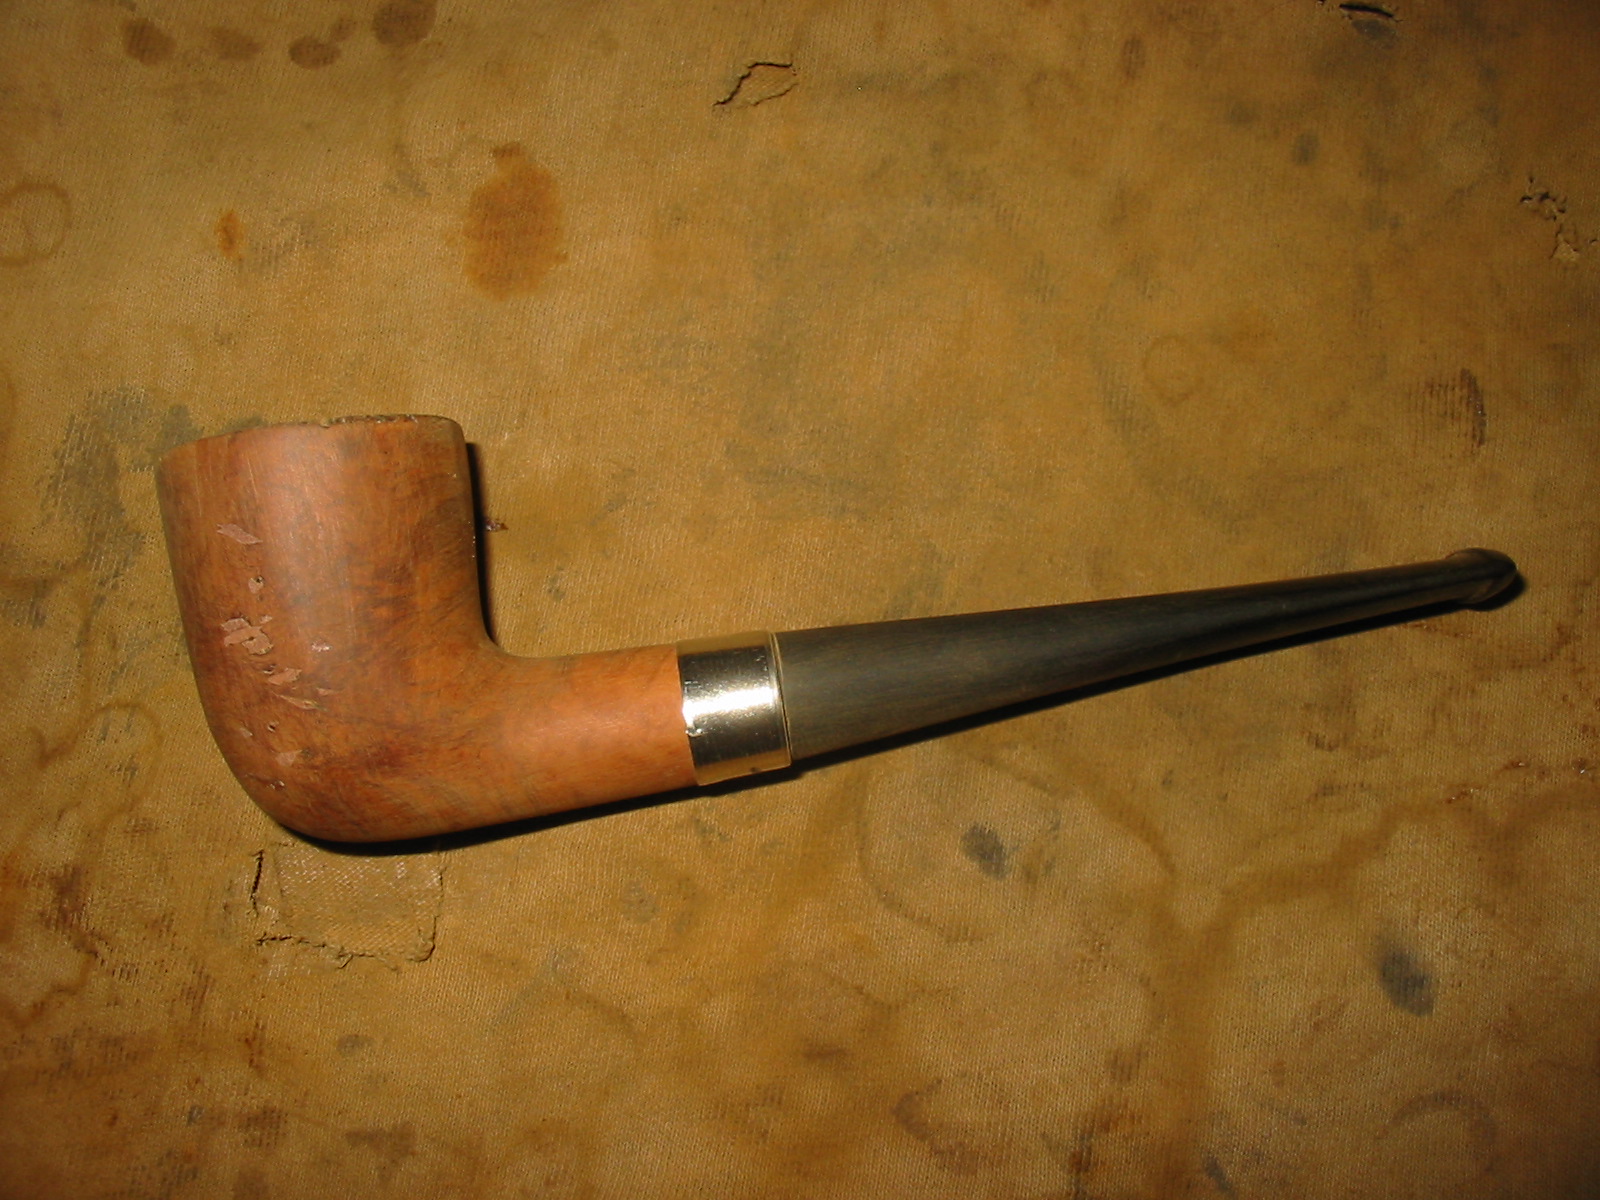
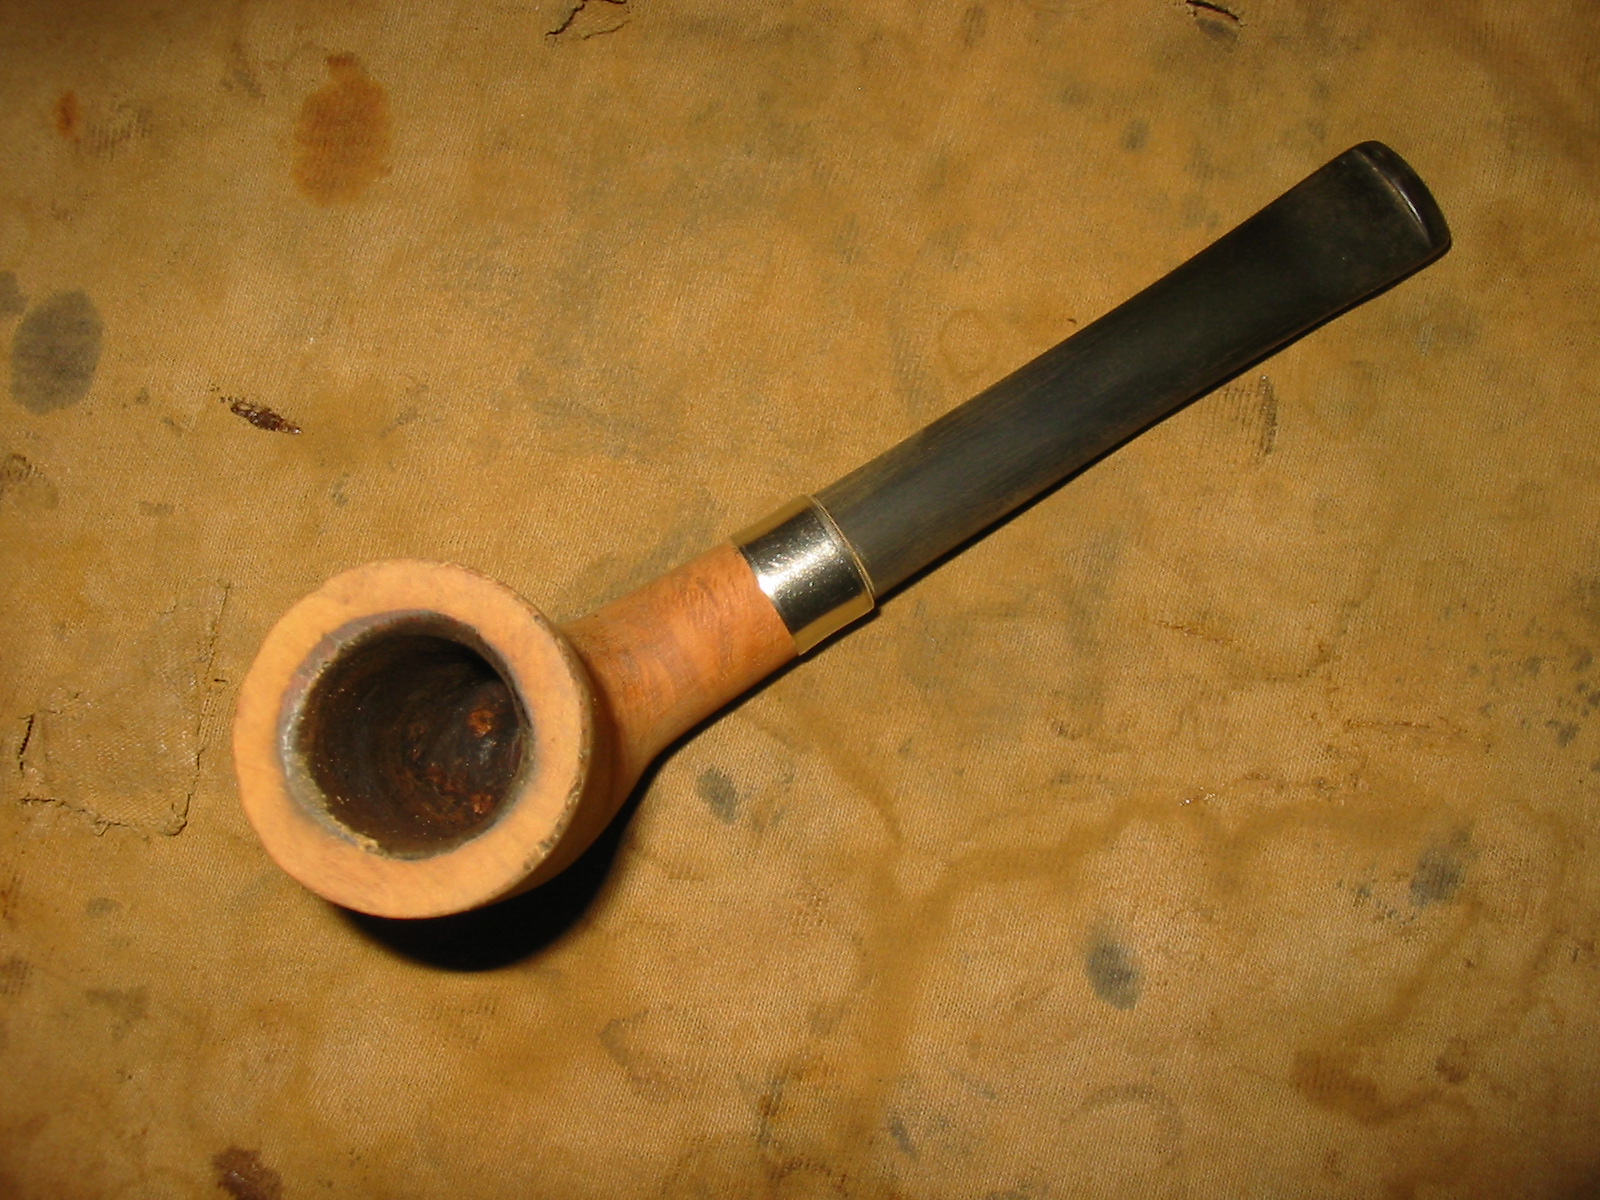
Once I had a good fit on the stem and the shank and the bowl was topped and the finish cleaned up I decided to put a band on the shank. I thought that the shiny bling of the band would be a nice contrast to the stain I intended to use. I heated the band and pressed it onto the shank.

With the band in place and the stem fitting well it was time to address the finish of the briar. The left side damage needed to be cleaned up and repaired. I picked out the loose fill material with a dental pick. I washed down the surface of the bowl with acetone on cotton pads to remove dust and clean up any loose pieces of fill material. I roughened the edges of the divots and crevices on the briar and then filled them with briar dust and superglue.
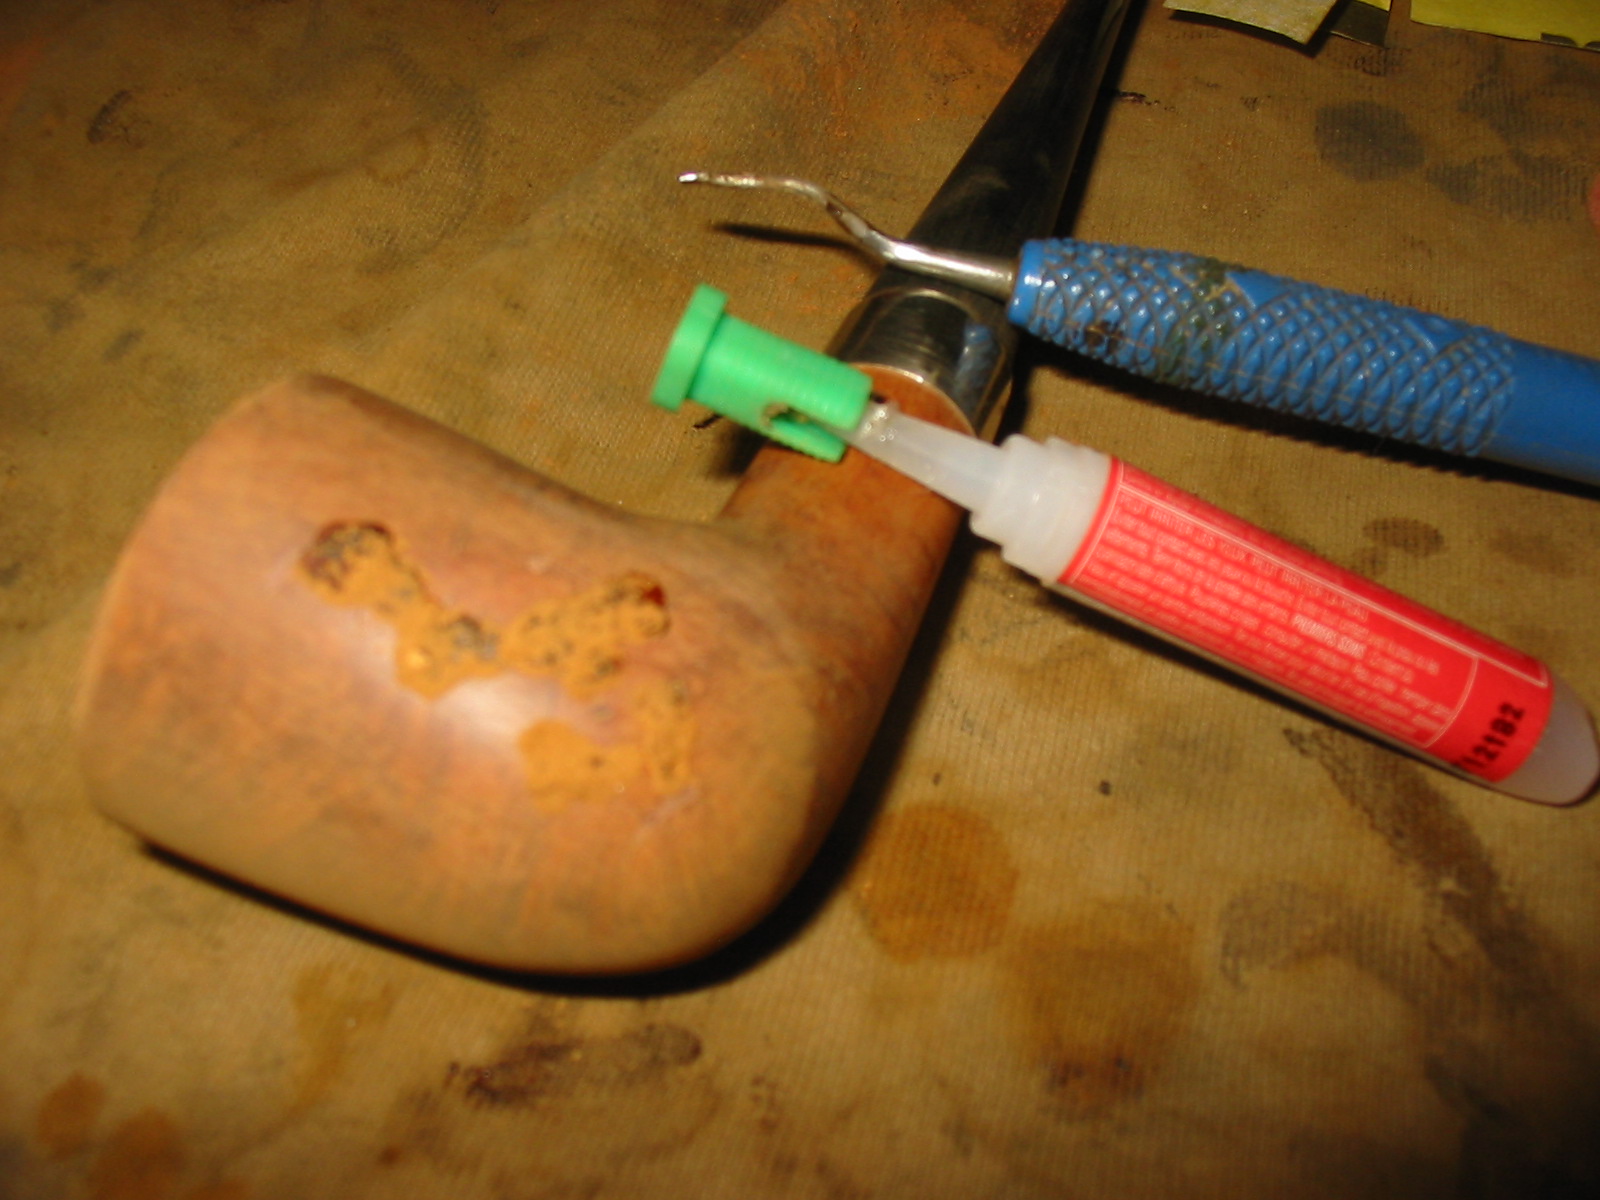
I sanded the repaired area with 220 grit sandpaper to remove the excess material and smooth out the surface of the bowl.
I sanded the bowl with medium and fine grit sanding sponges to remove the scratches and prepare the surface for staining. I wiped it down with isopropyl alcohol on a cotton pad to pick up any surface dust before staining. I am continuing to experiment with contrast stains so I gave the bowl a heavy coat of black aniline stain. I flamed it and heated it to set the stain deep in the grain of the bowl. This particular bowl had some really stunning birdseye on the sides and great cross grain on the front and back and underside of the shank and bowl. I wanted to highlight that grain and make it pop.
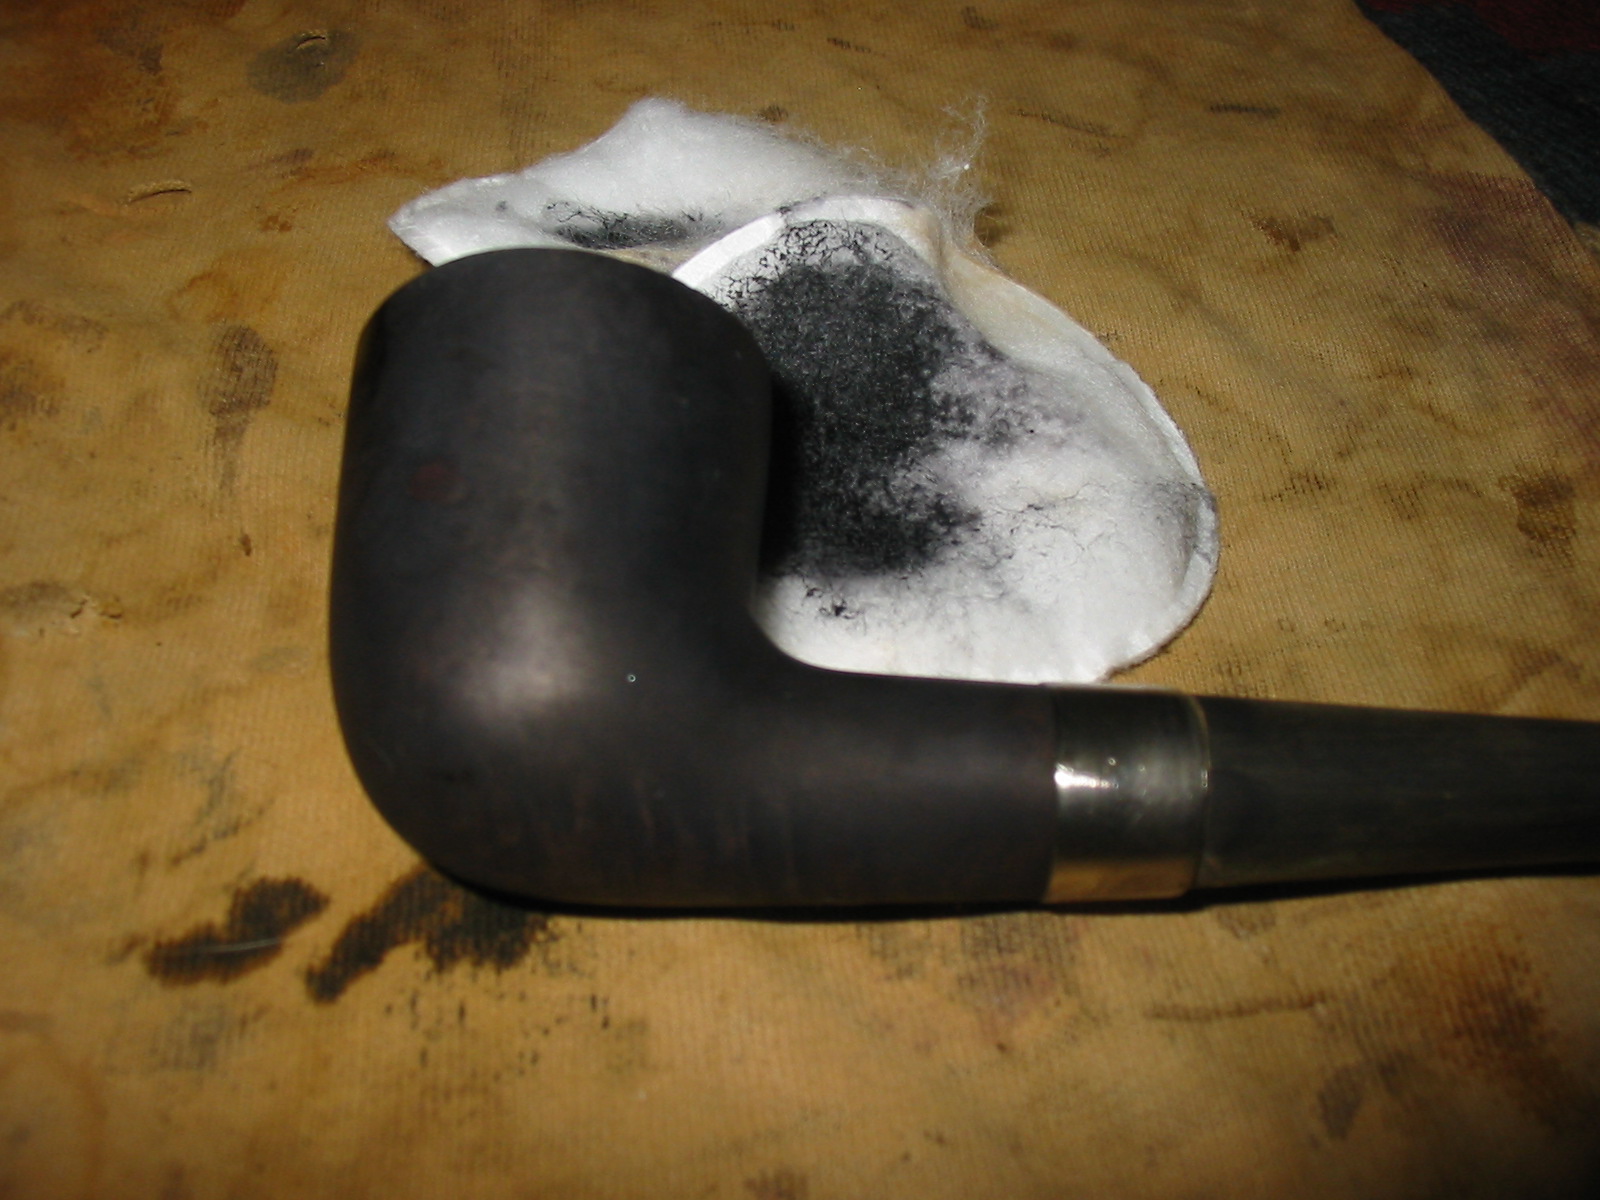
Once the stain was dried I wiped the bowl down with acetone on pads to remove the surface stain and then buffed the pipe with red Tripoli. I wanted to remove as much of the stain on the surface as possible while leaving it in the grain and around the birdseye. I sanded the bowl with medium and fine grit sanding blocks and sponges to get the surface down to the place the grain was highlighted. I then rubbed the bowl down with olive oil and buffed it with White Diamond to make the bowl shine.

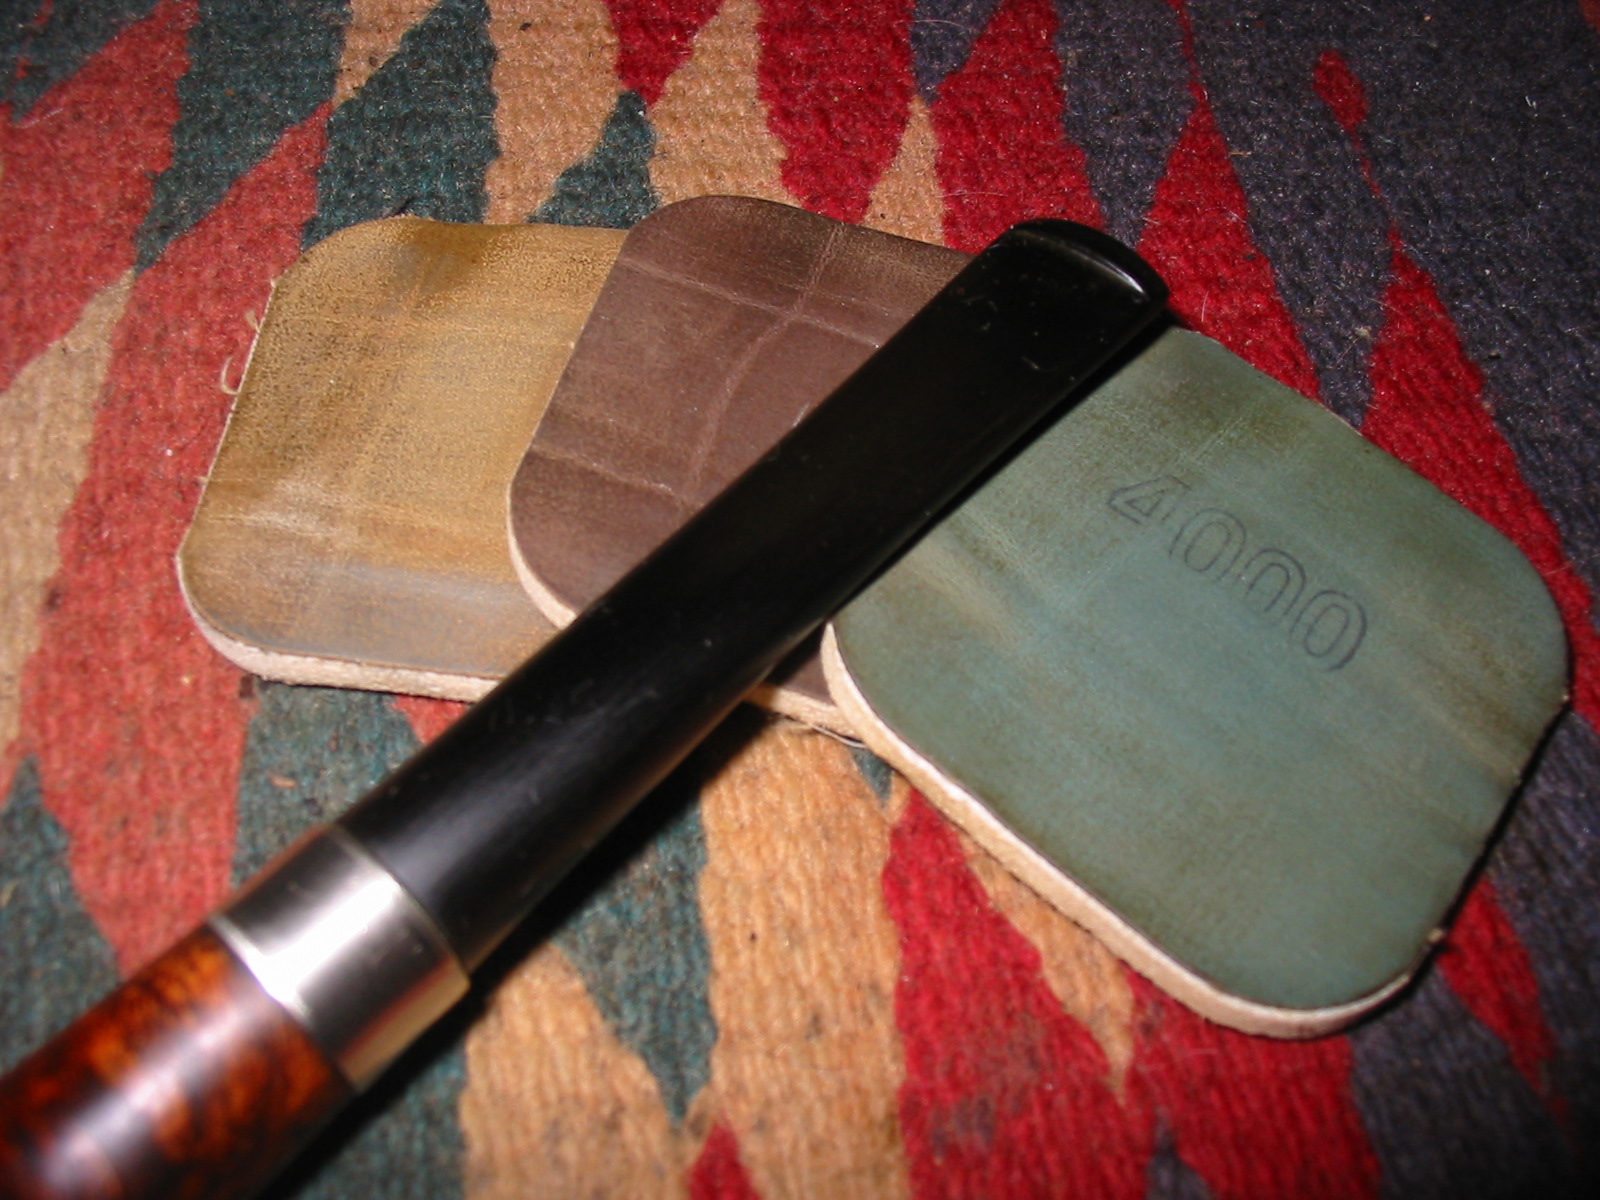
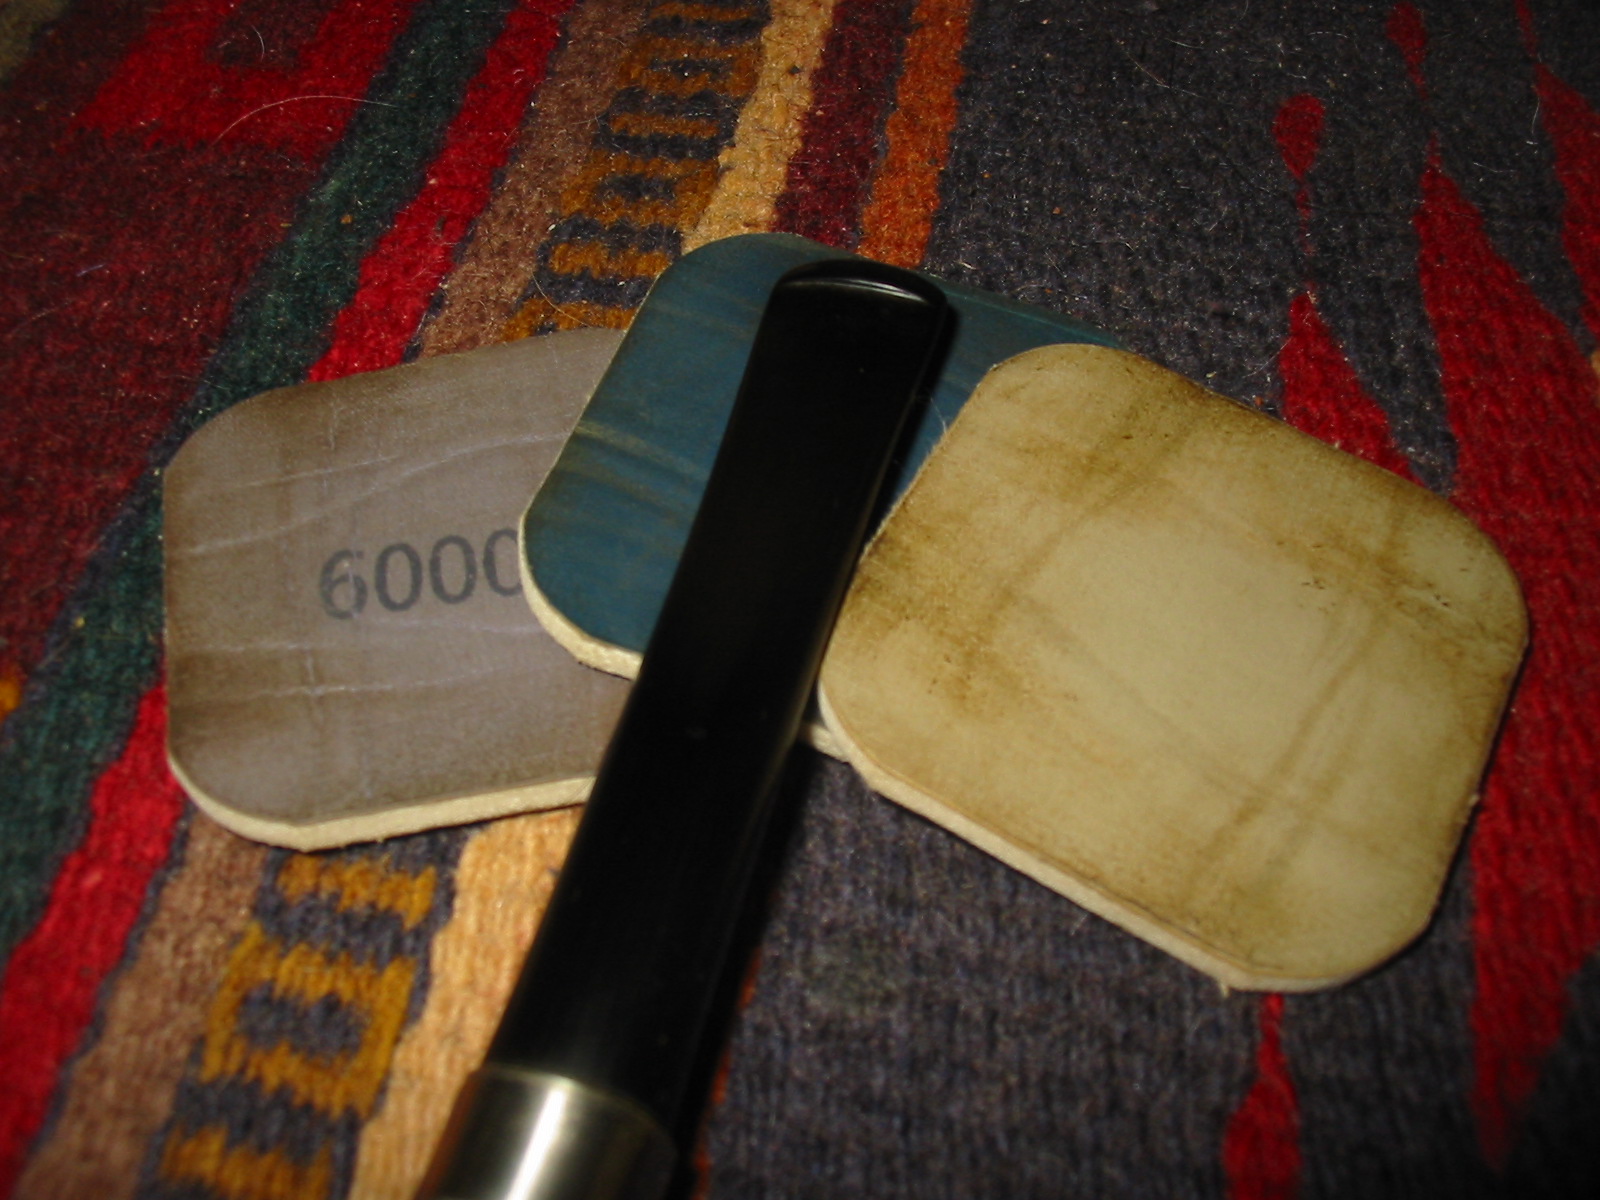
I was happy with the contrast on the contrast stain and the look of the bowl at this point but now needed to work on the stem and the band. I sanded the stem with medium and fine grit sanding sponges to remove the scratches. I sanded the band with a fine grit sanding sponge as well. I then sanded the stem, band and the bowl with micromesh sanding pads. I wet sanded the stem with 1500-2400 grit pads and dry sanded the bowl with the same grit pads. I dry sanded the bowl and the stem with 3200-12,000 grit pads to finish polishing them both. I rubbed the stem down with Obsidian Oil and then when dry I buffed the bowl and stem with White Diamond.
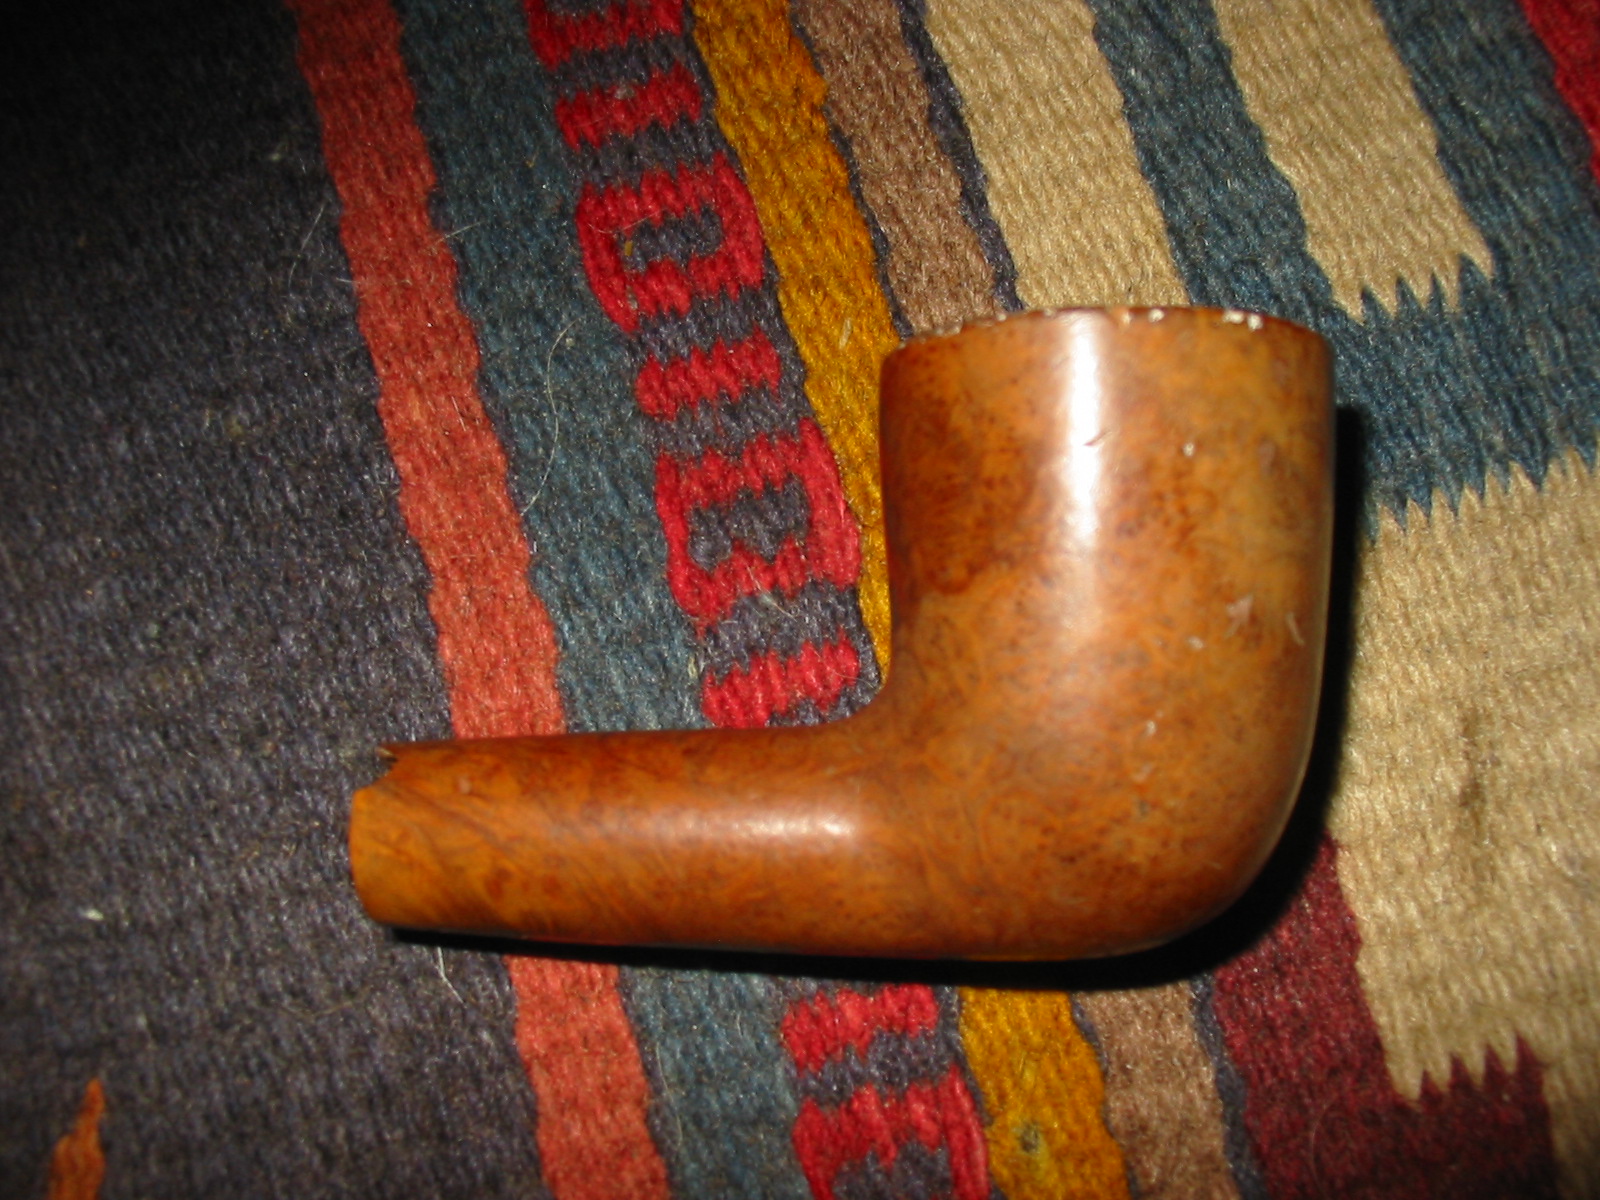
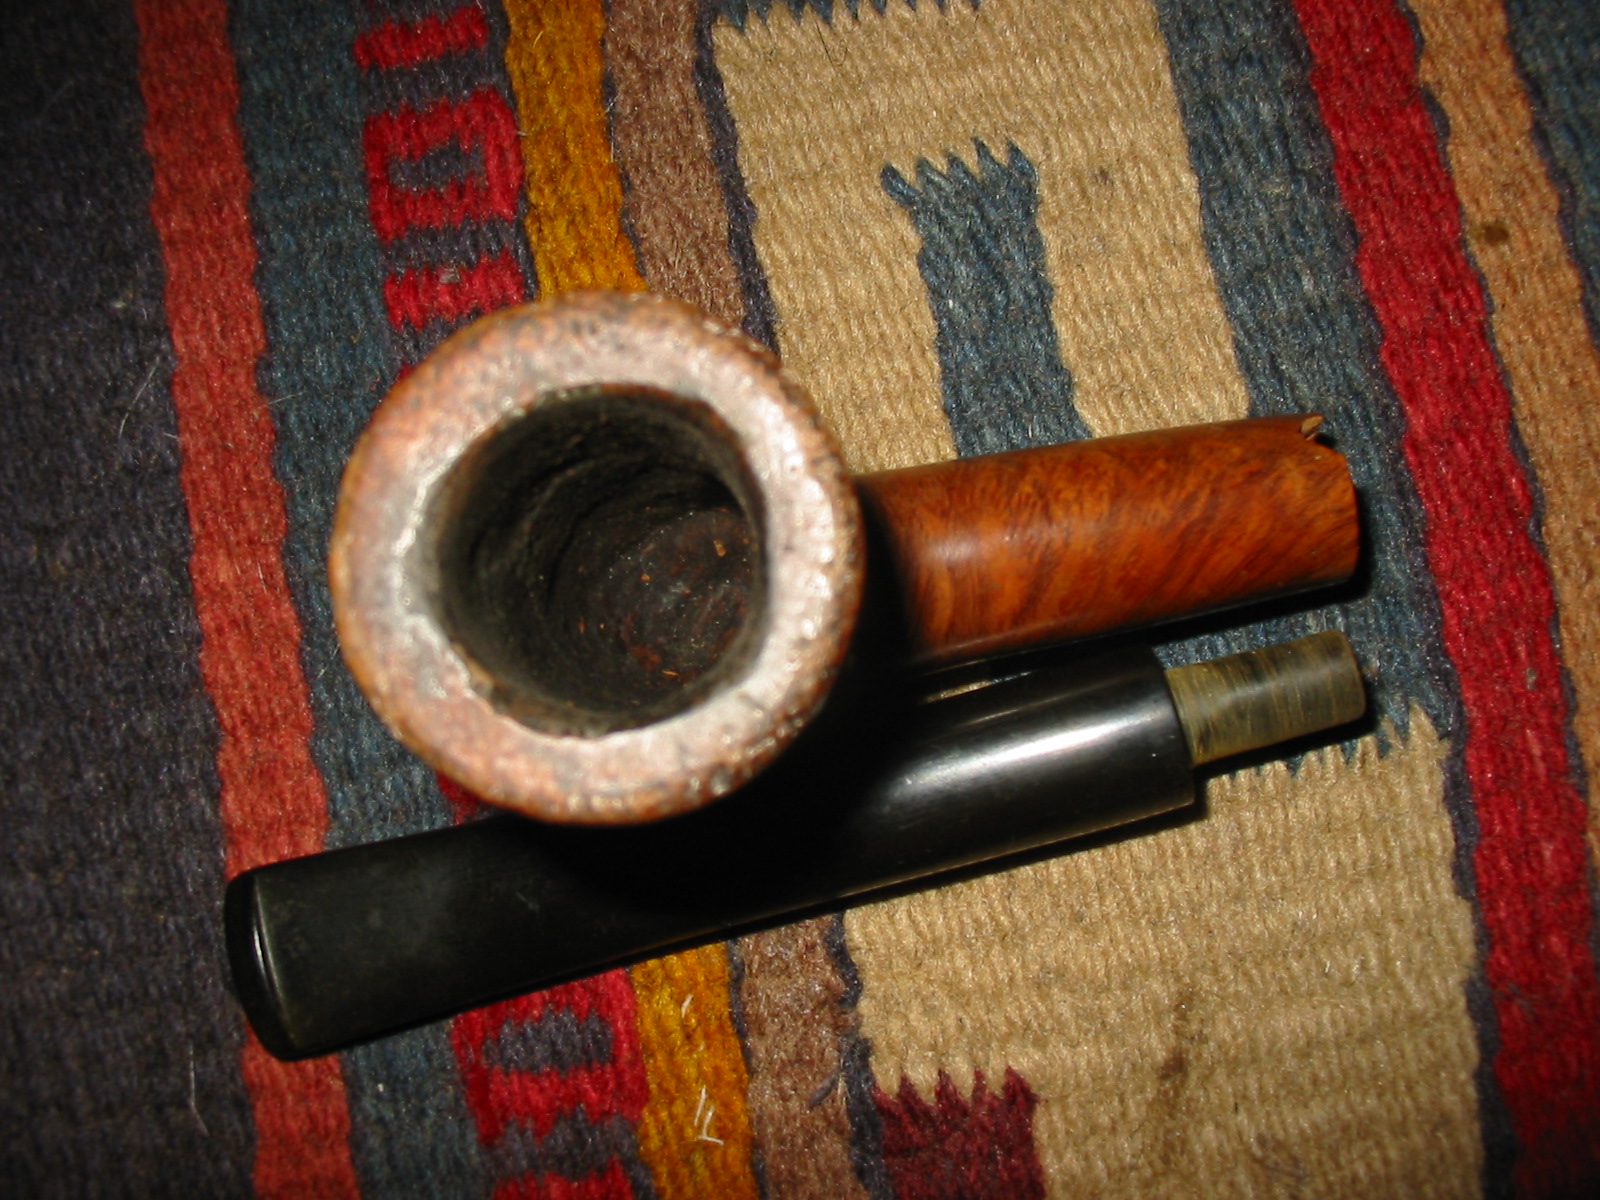
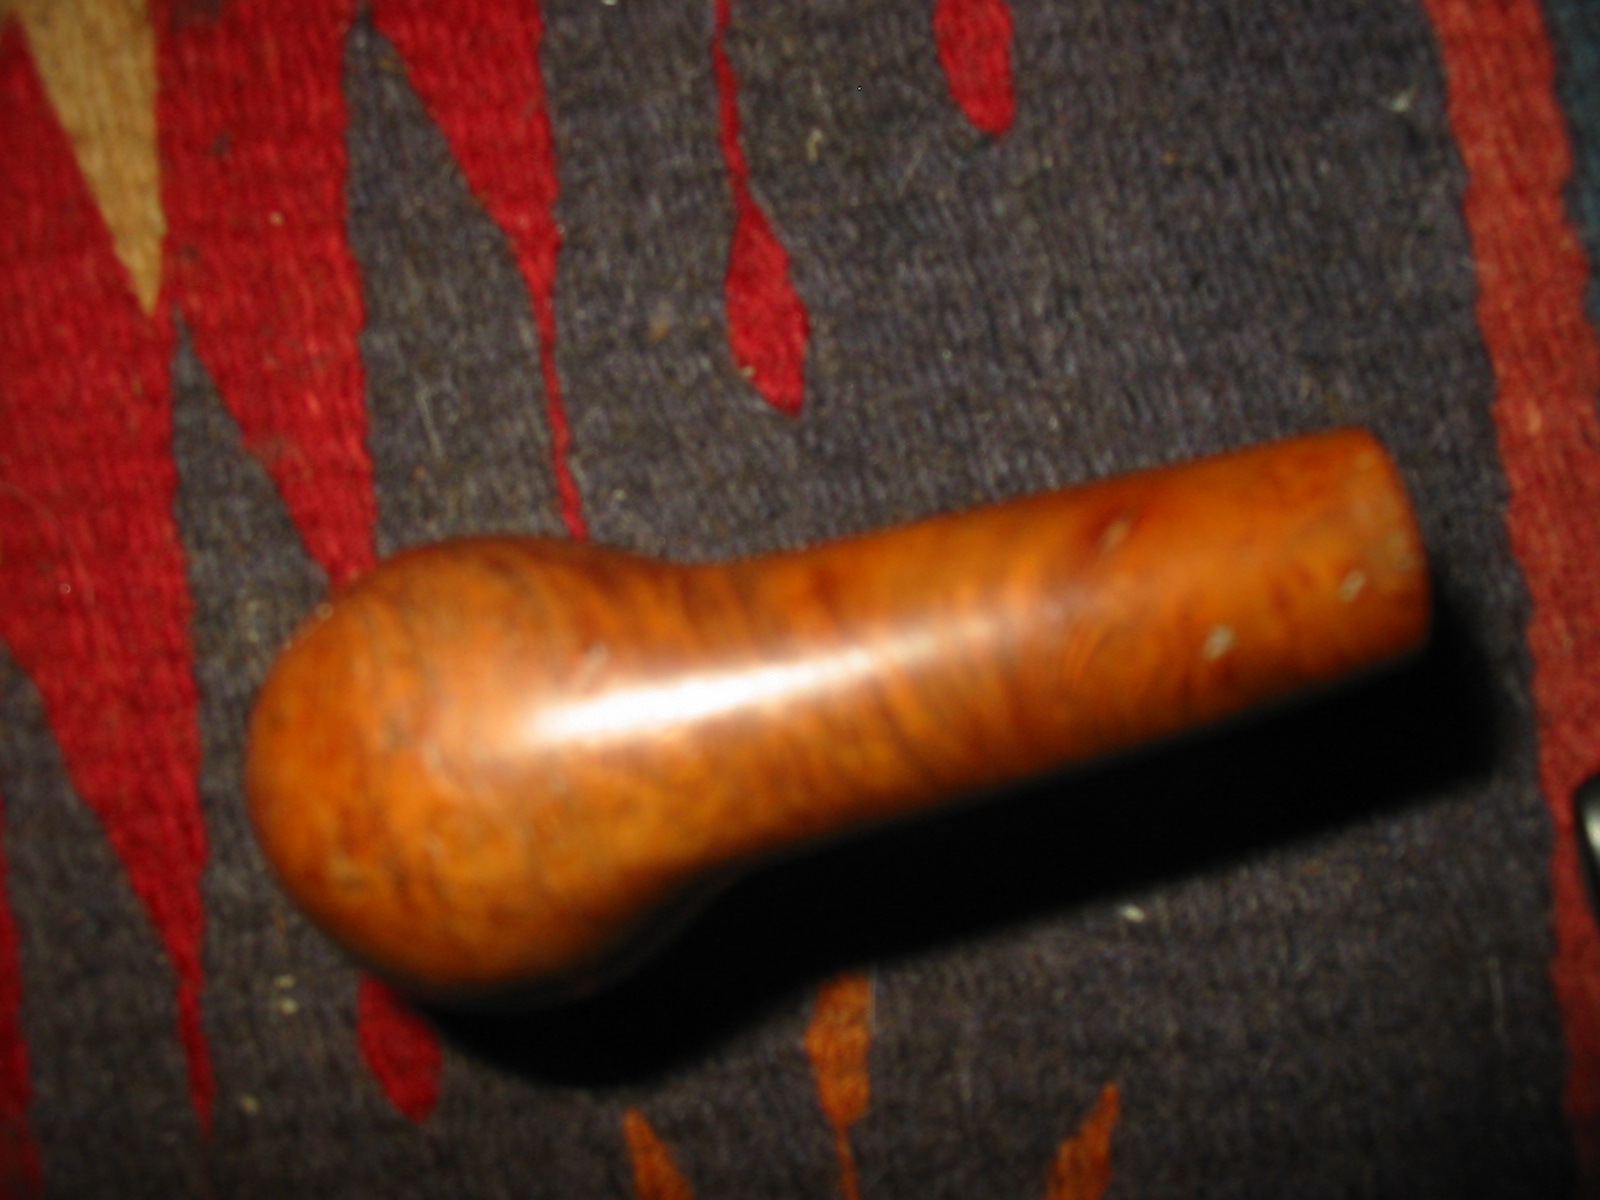
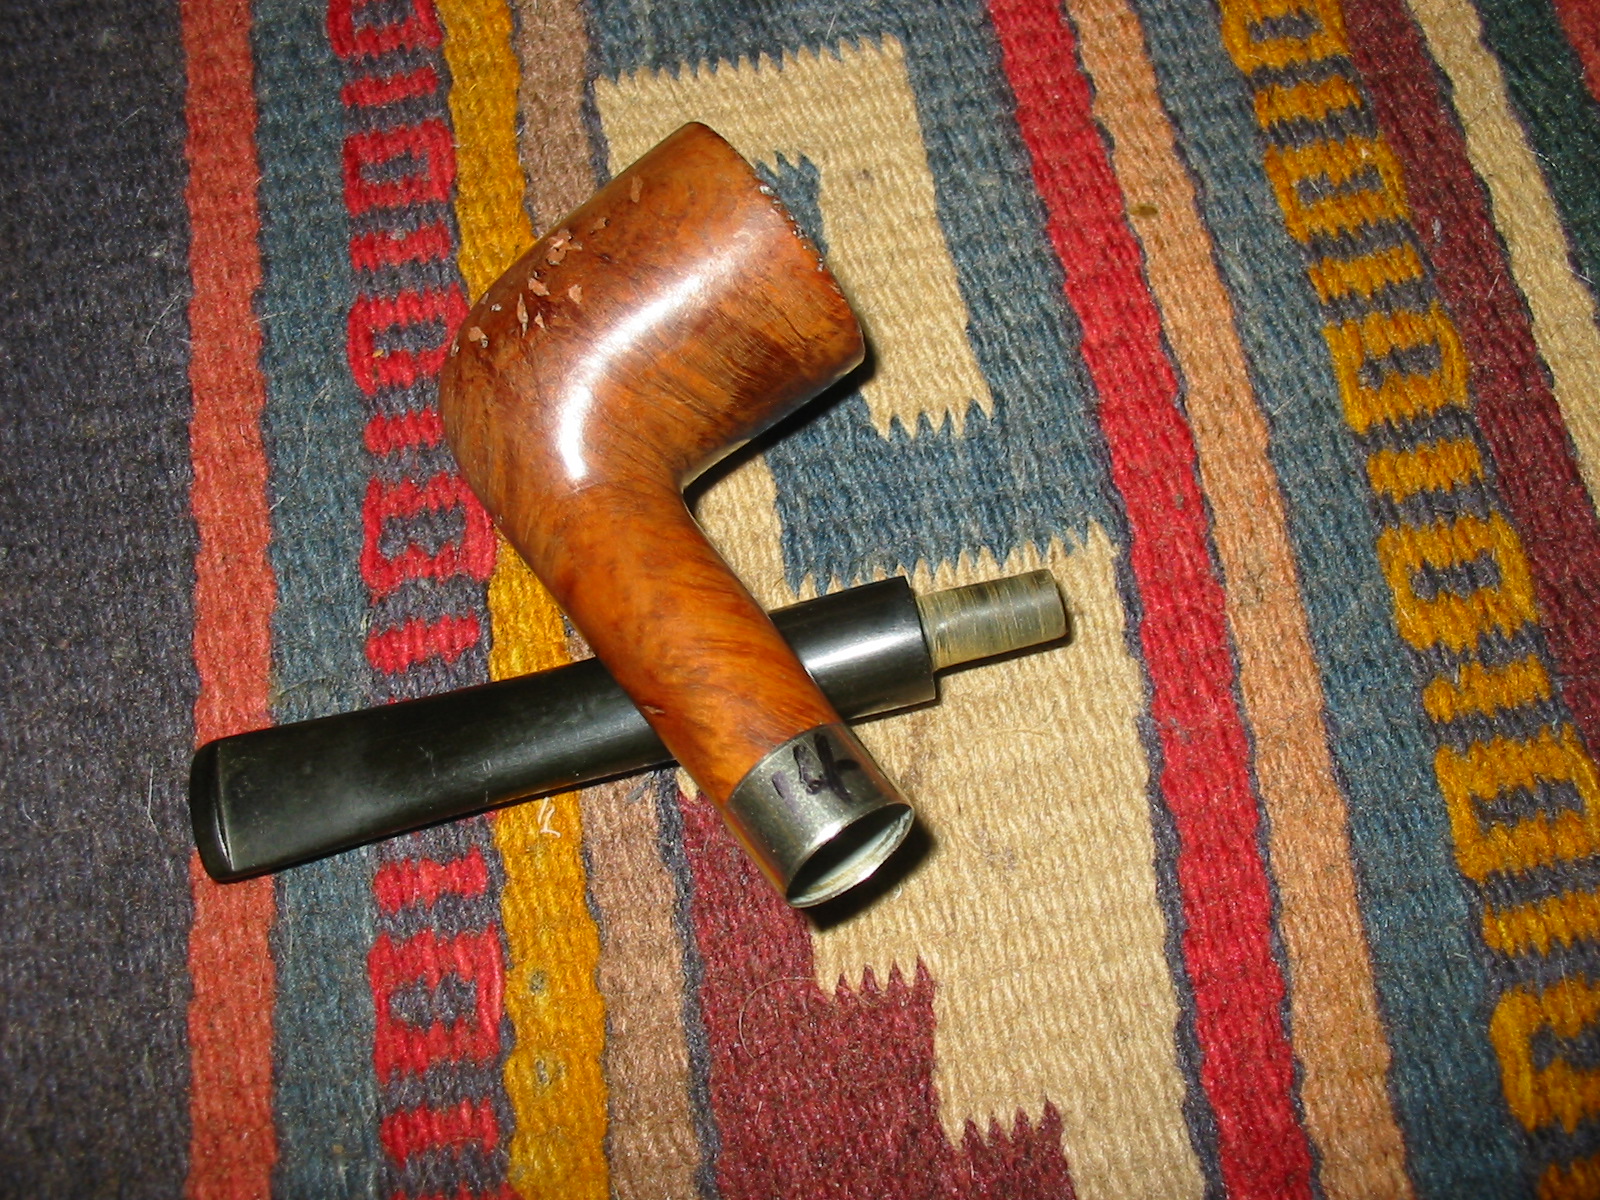
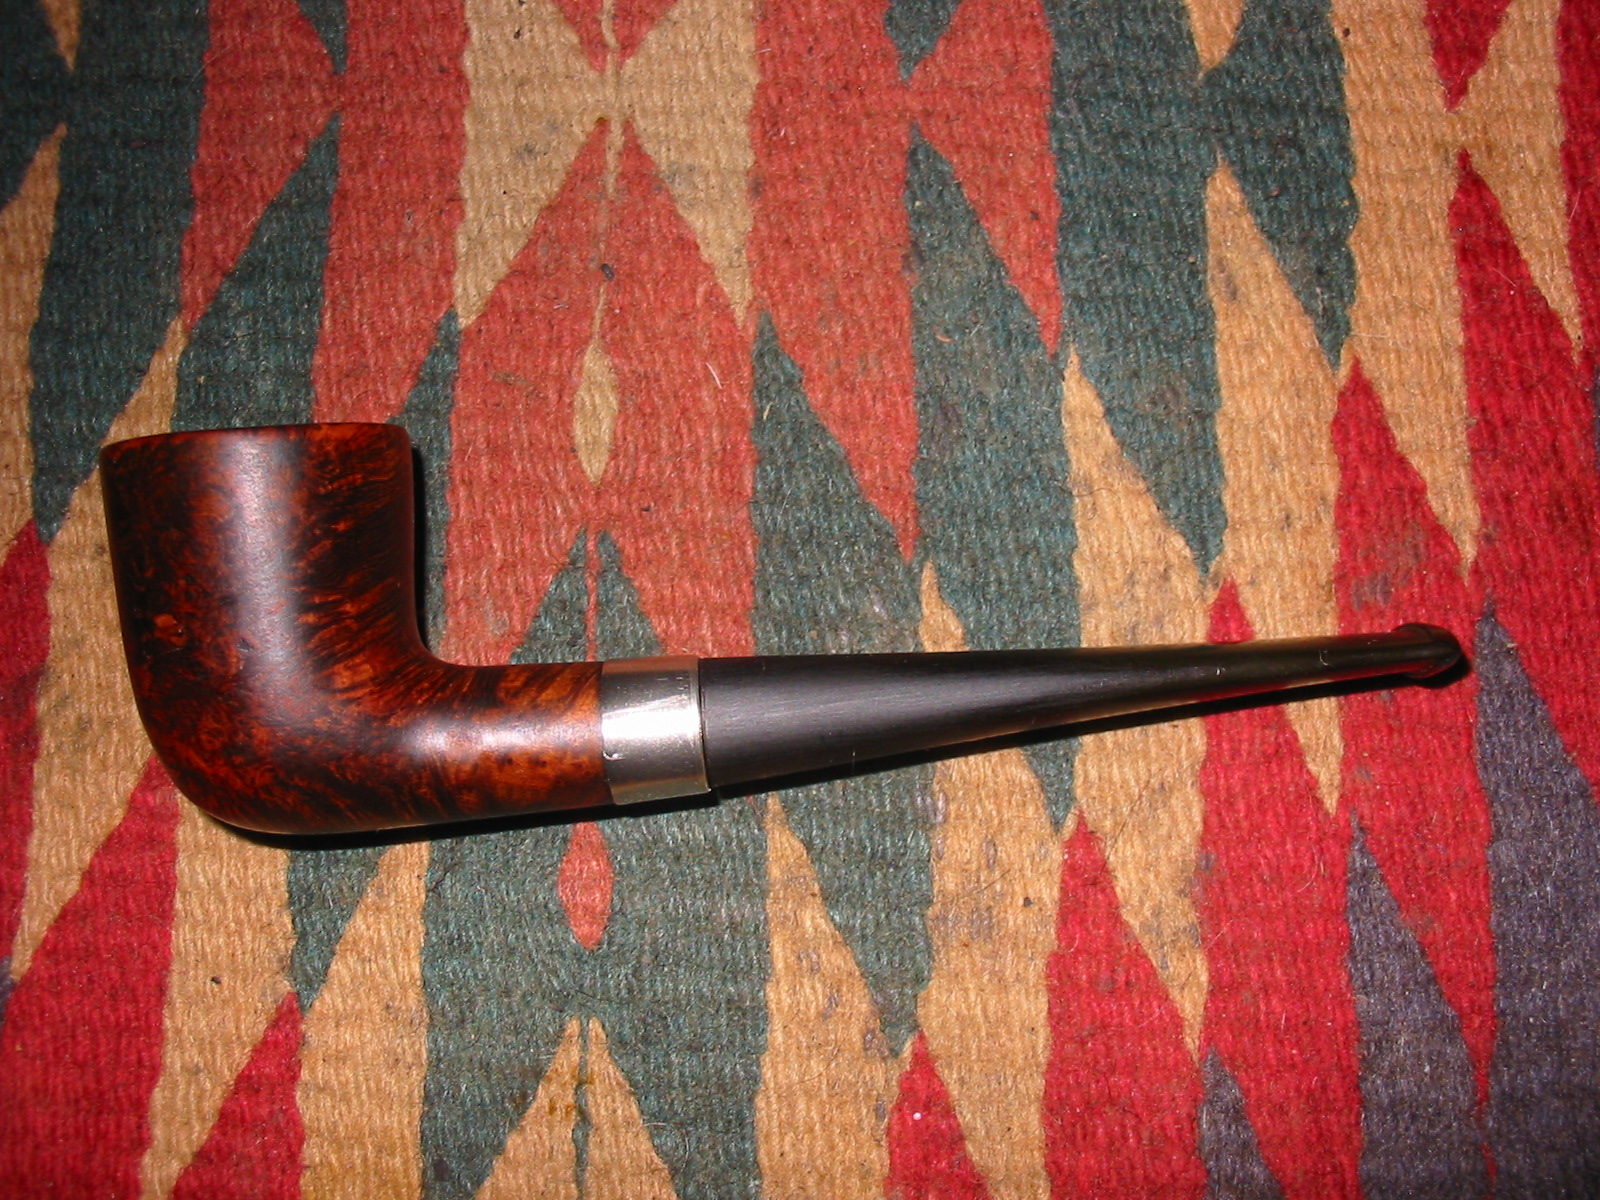
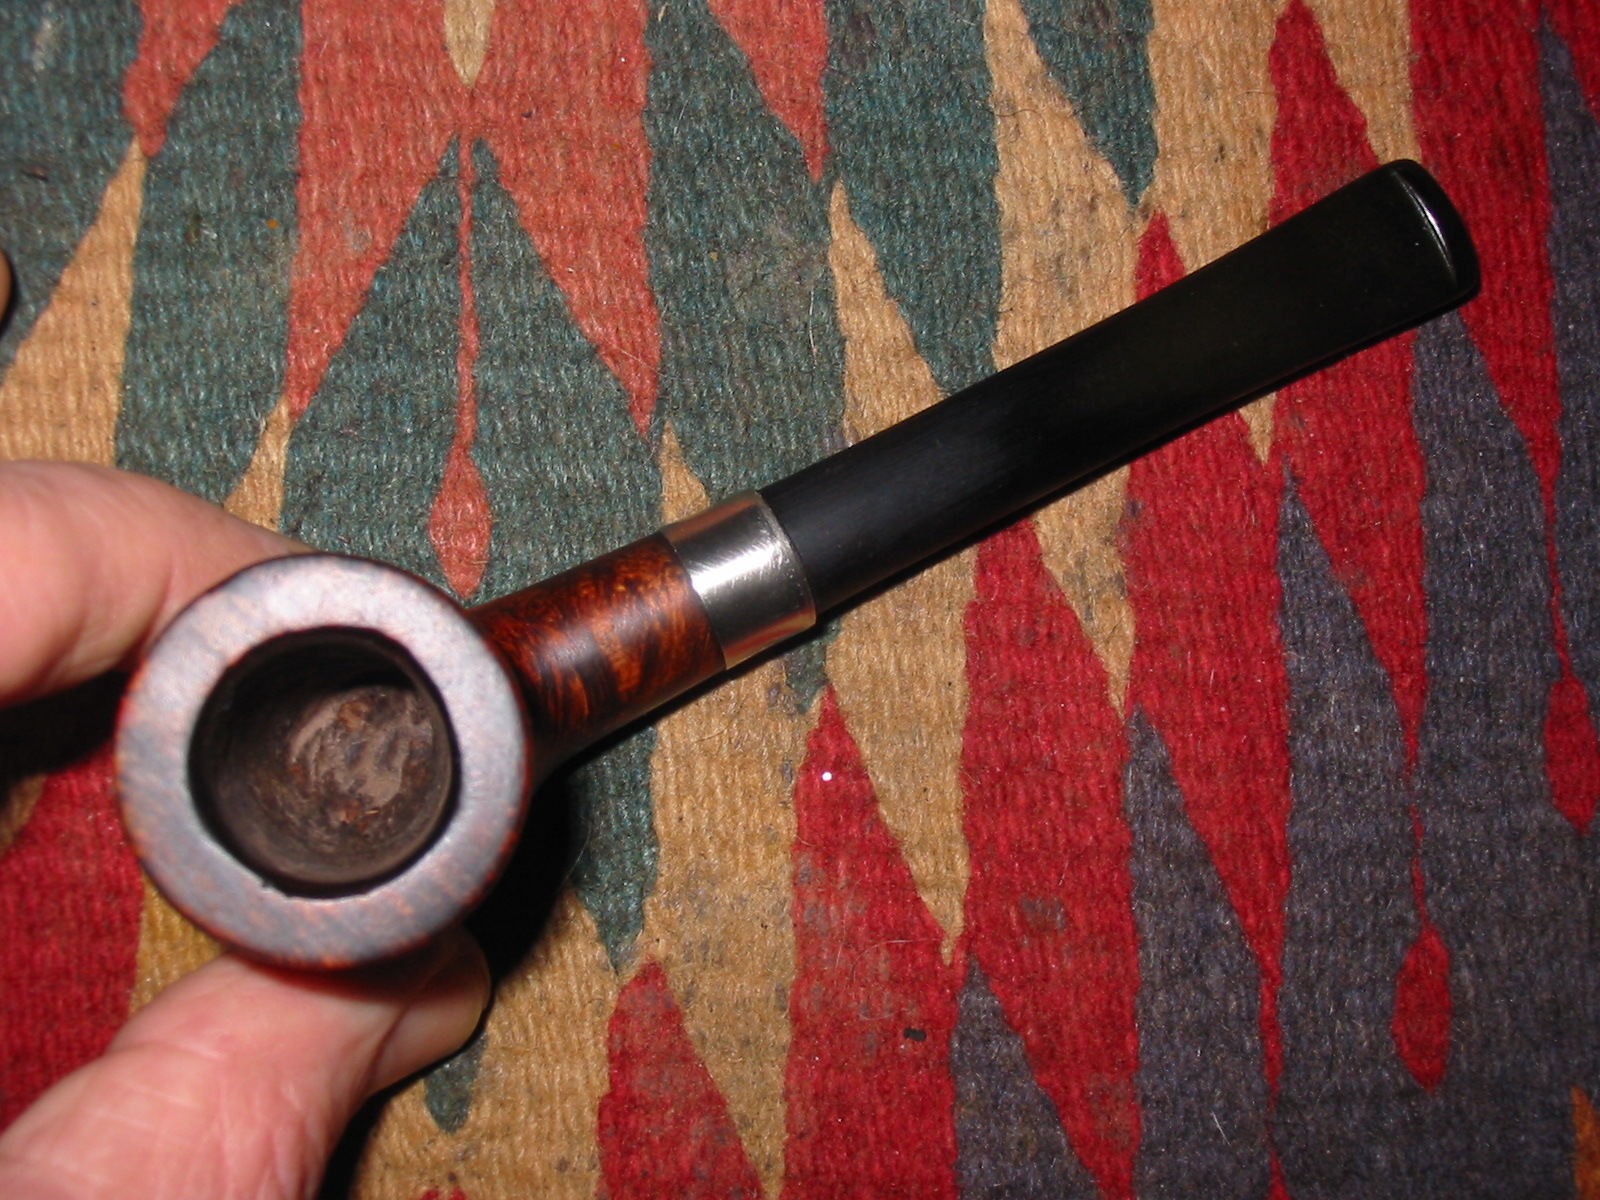
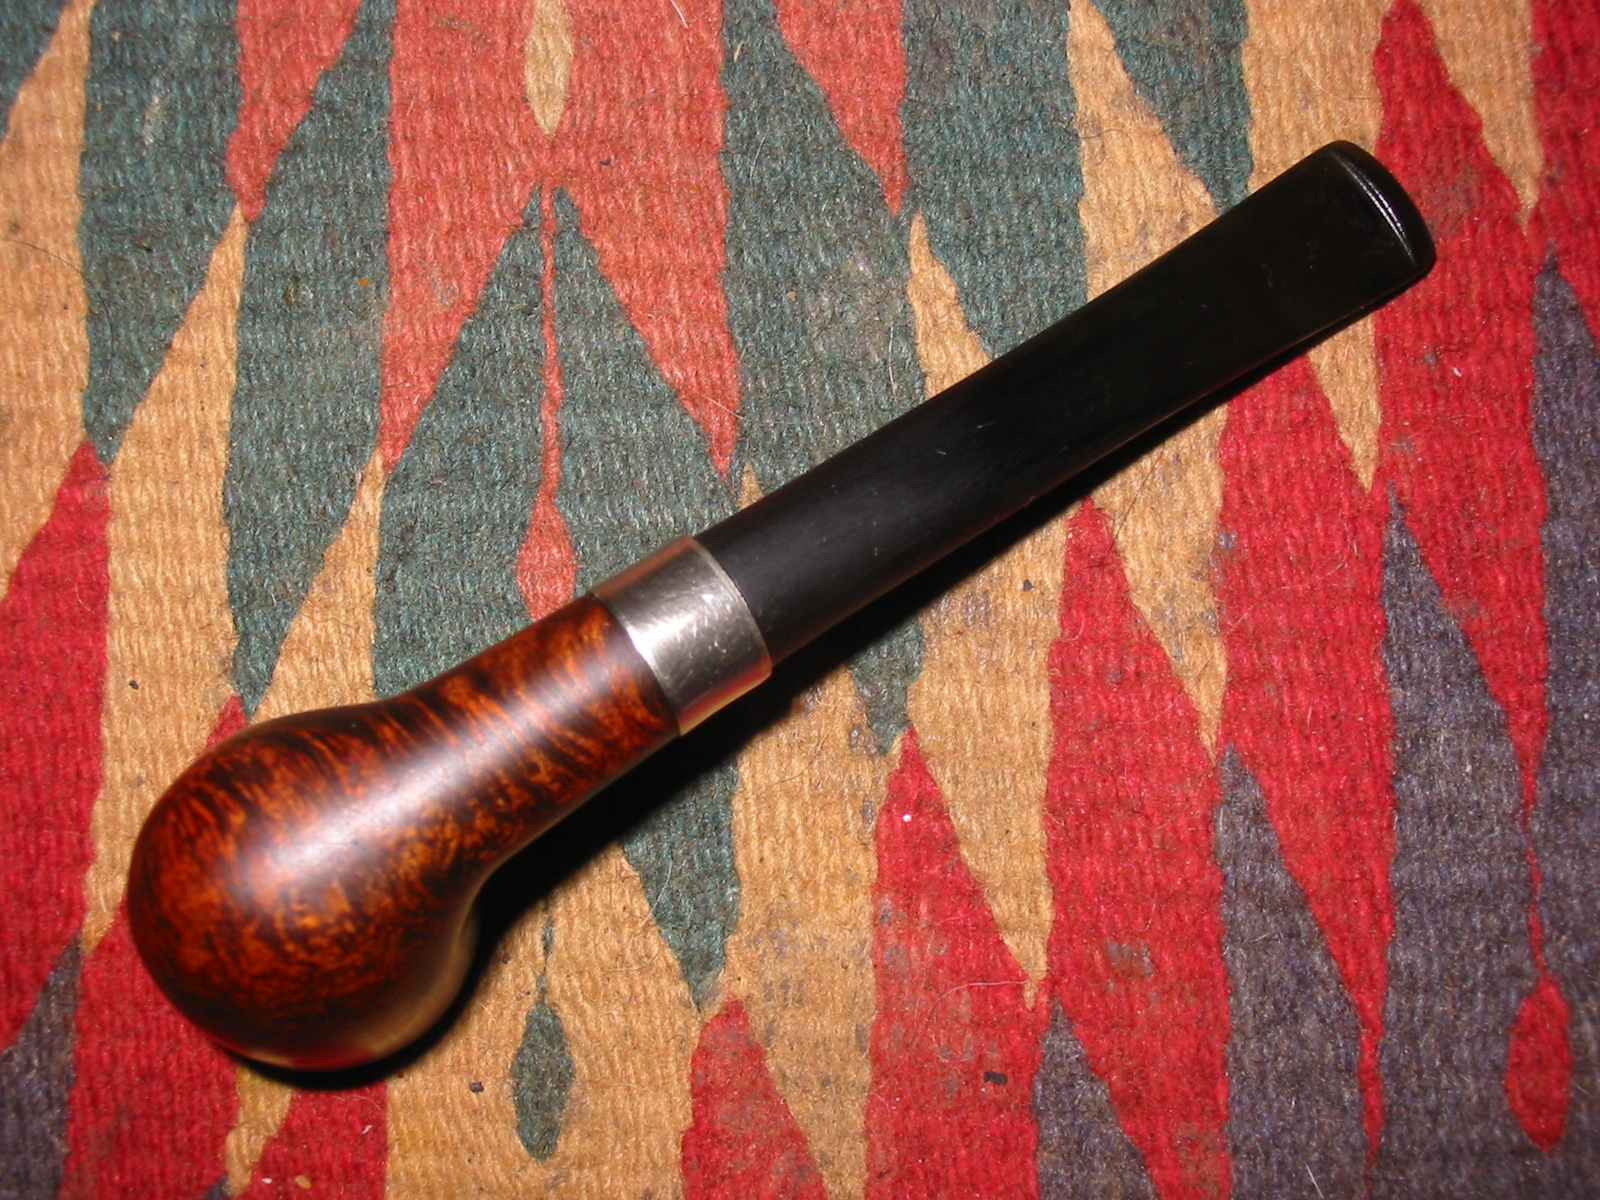
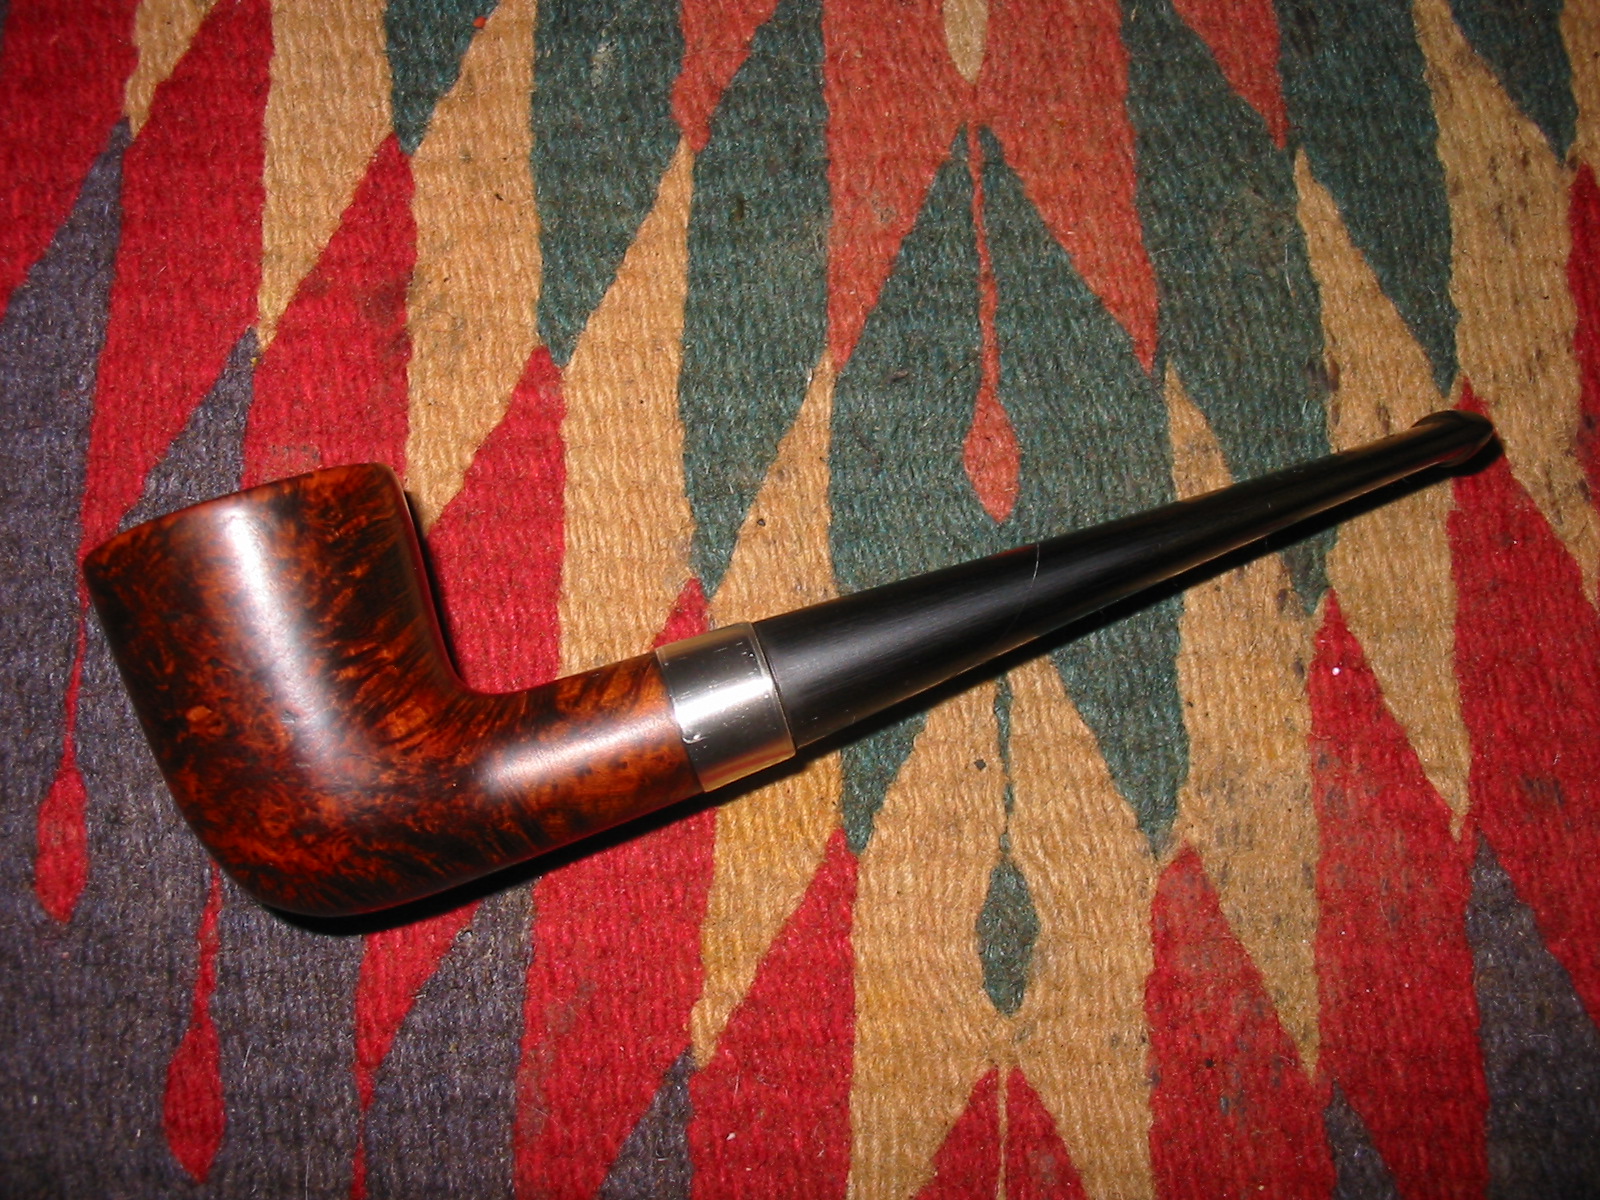
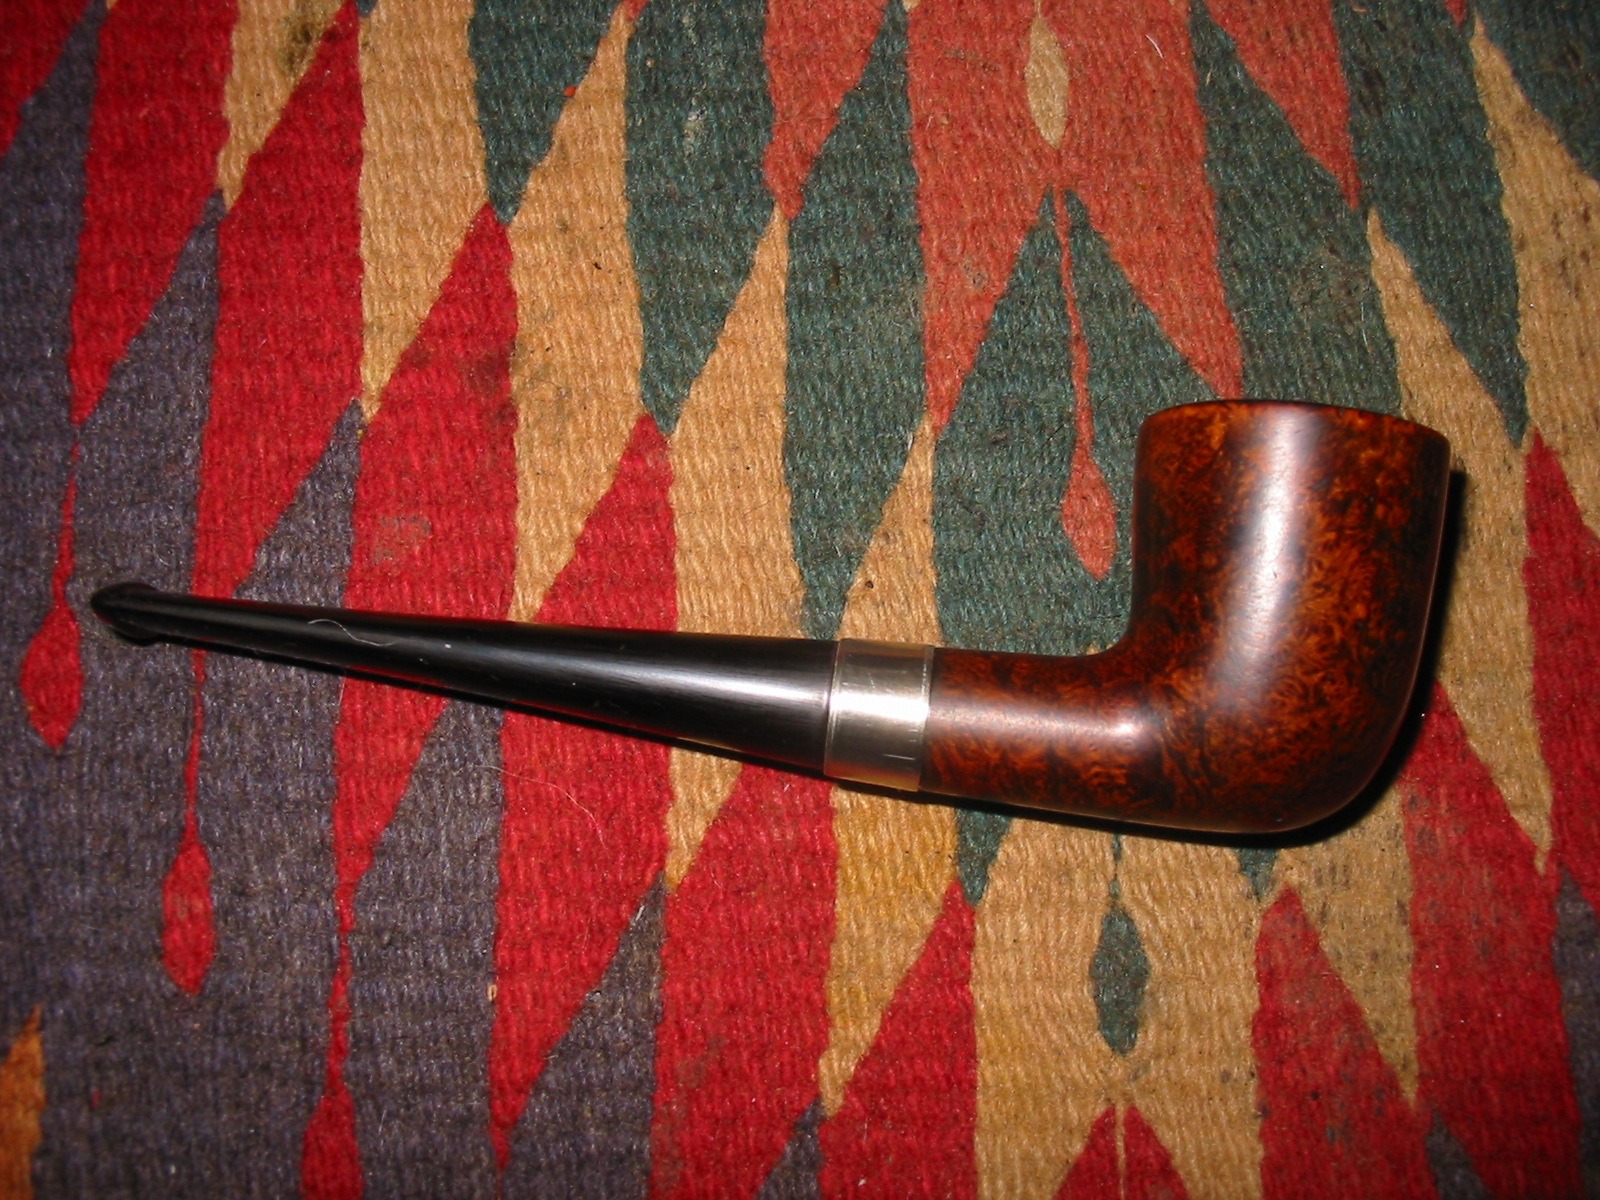
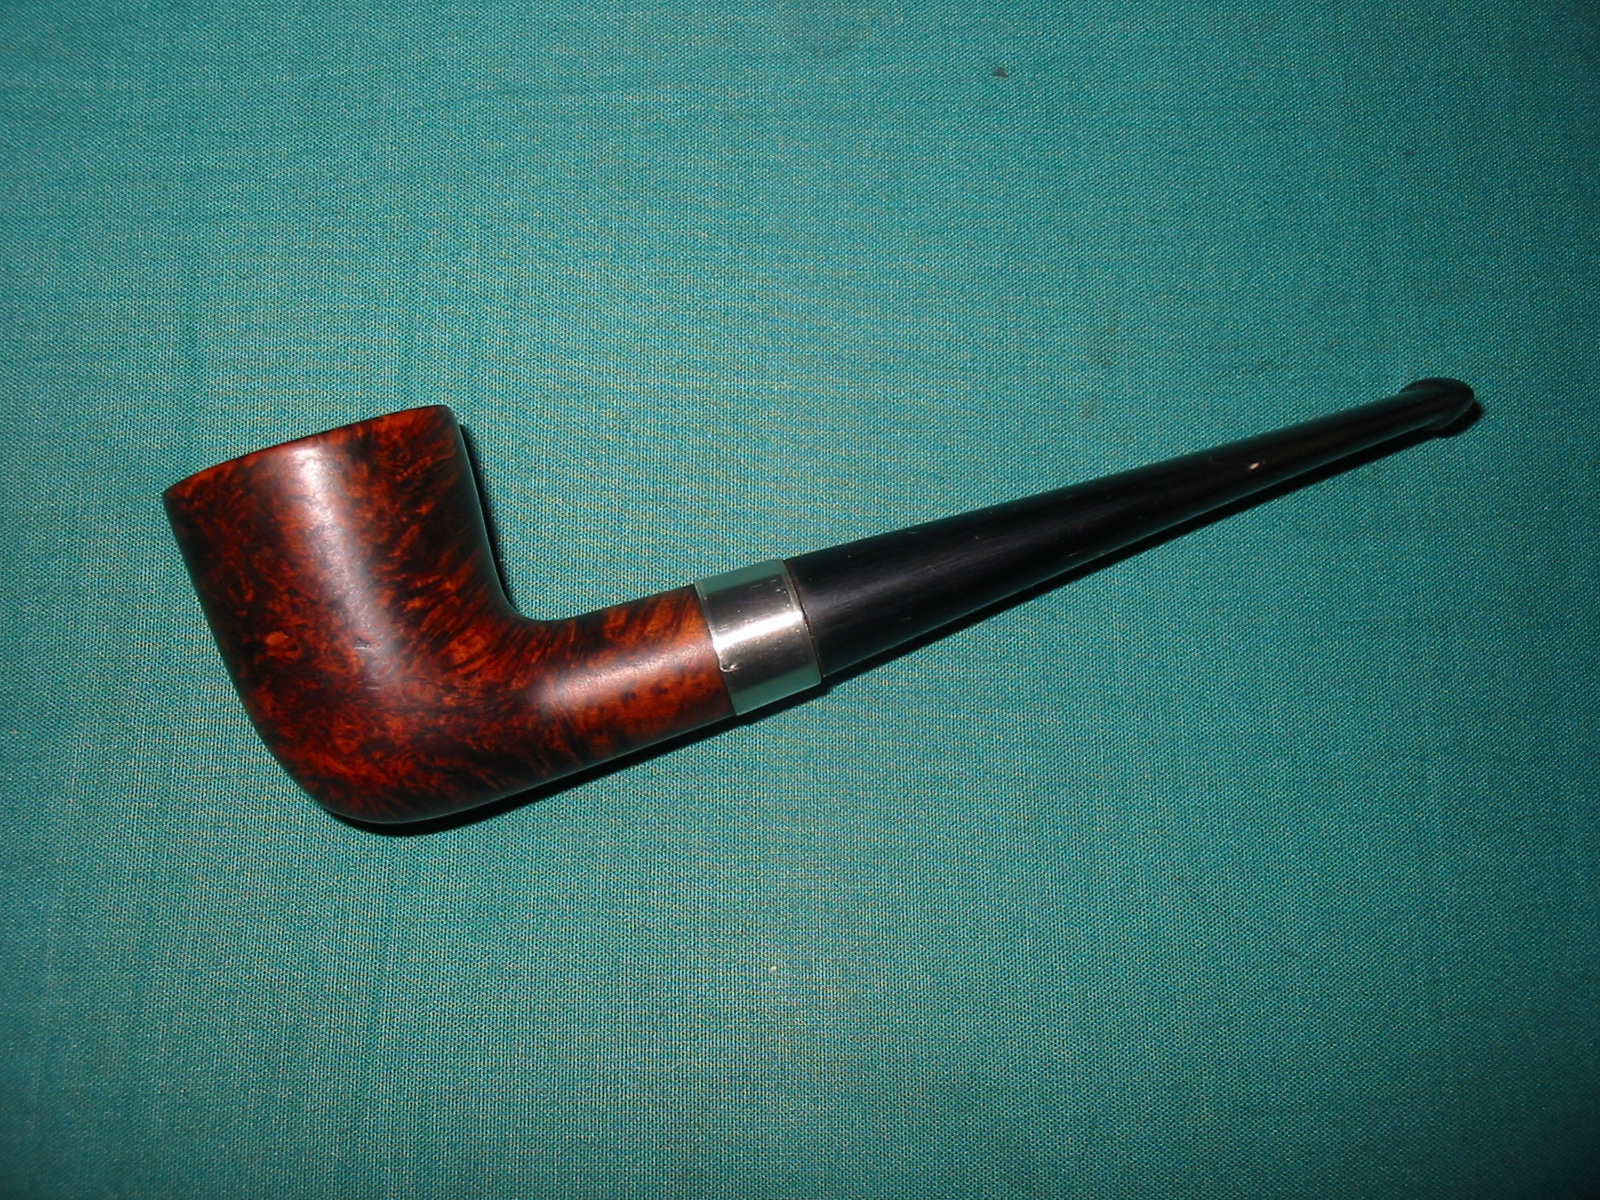
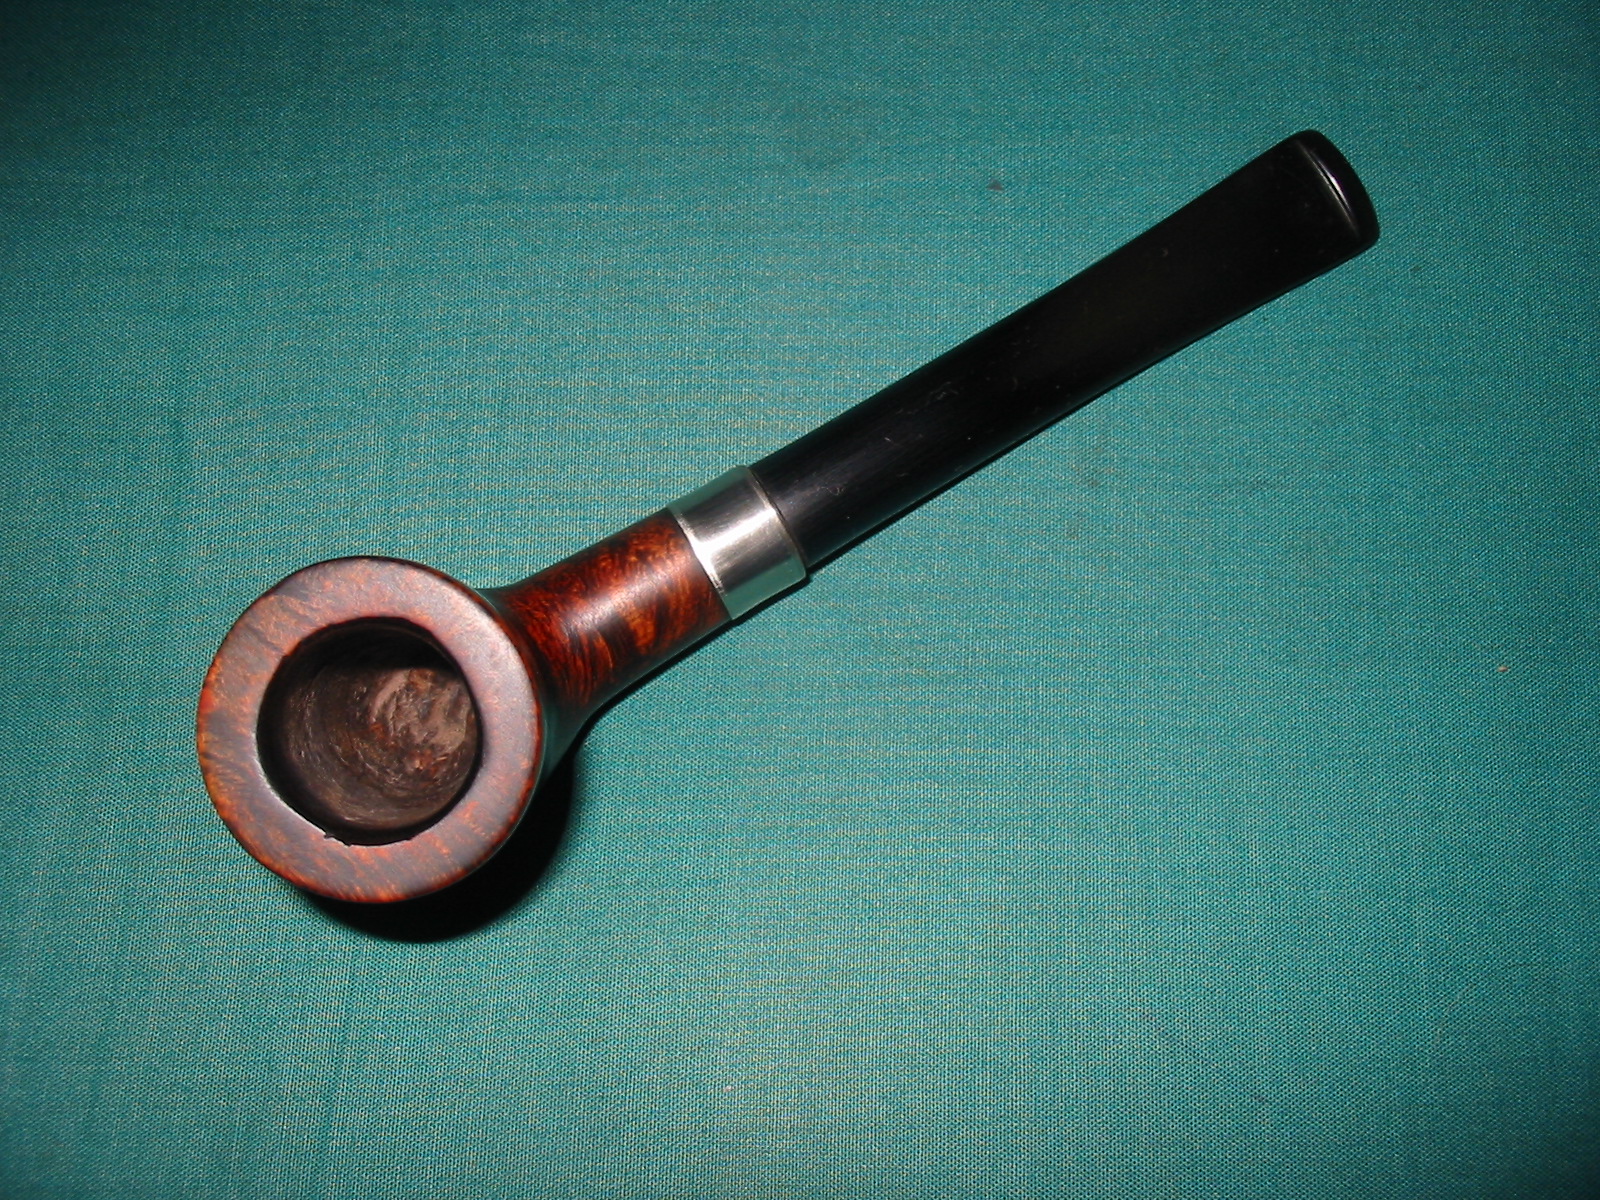
The series of four photos below show the bowl and stem after sanding with the micromesh sanding pads. The finish on the bowl is exactly what I was aiming for. The translucency of the finish was perfect. The fills and damage on the left side of the bowl all but disappeared – not just hidden by the finish by smooth to touch as well.
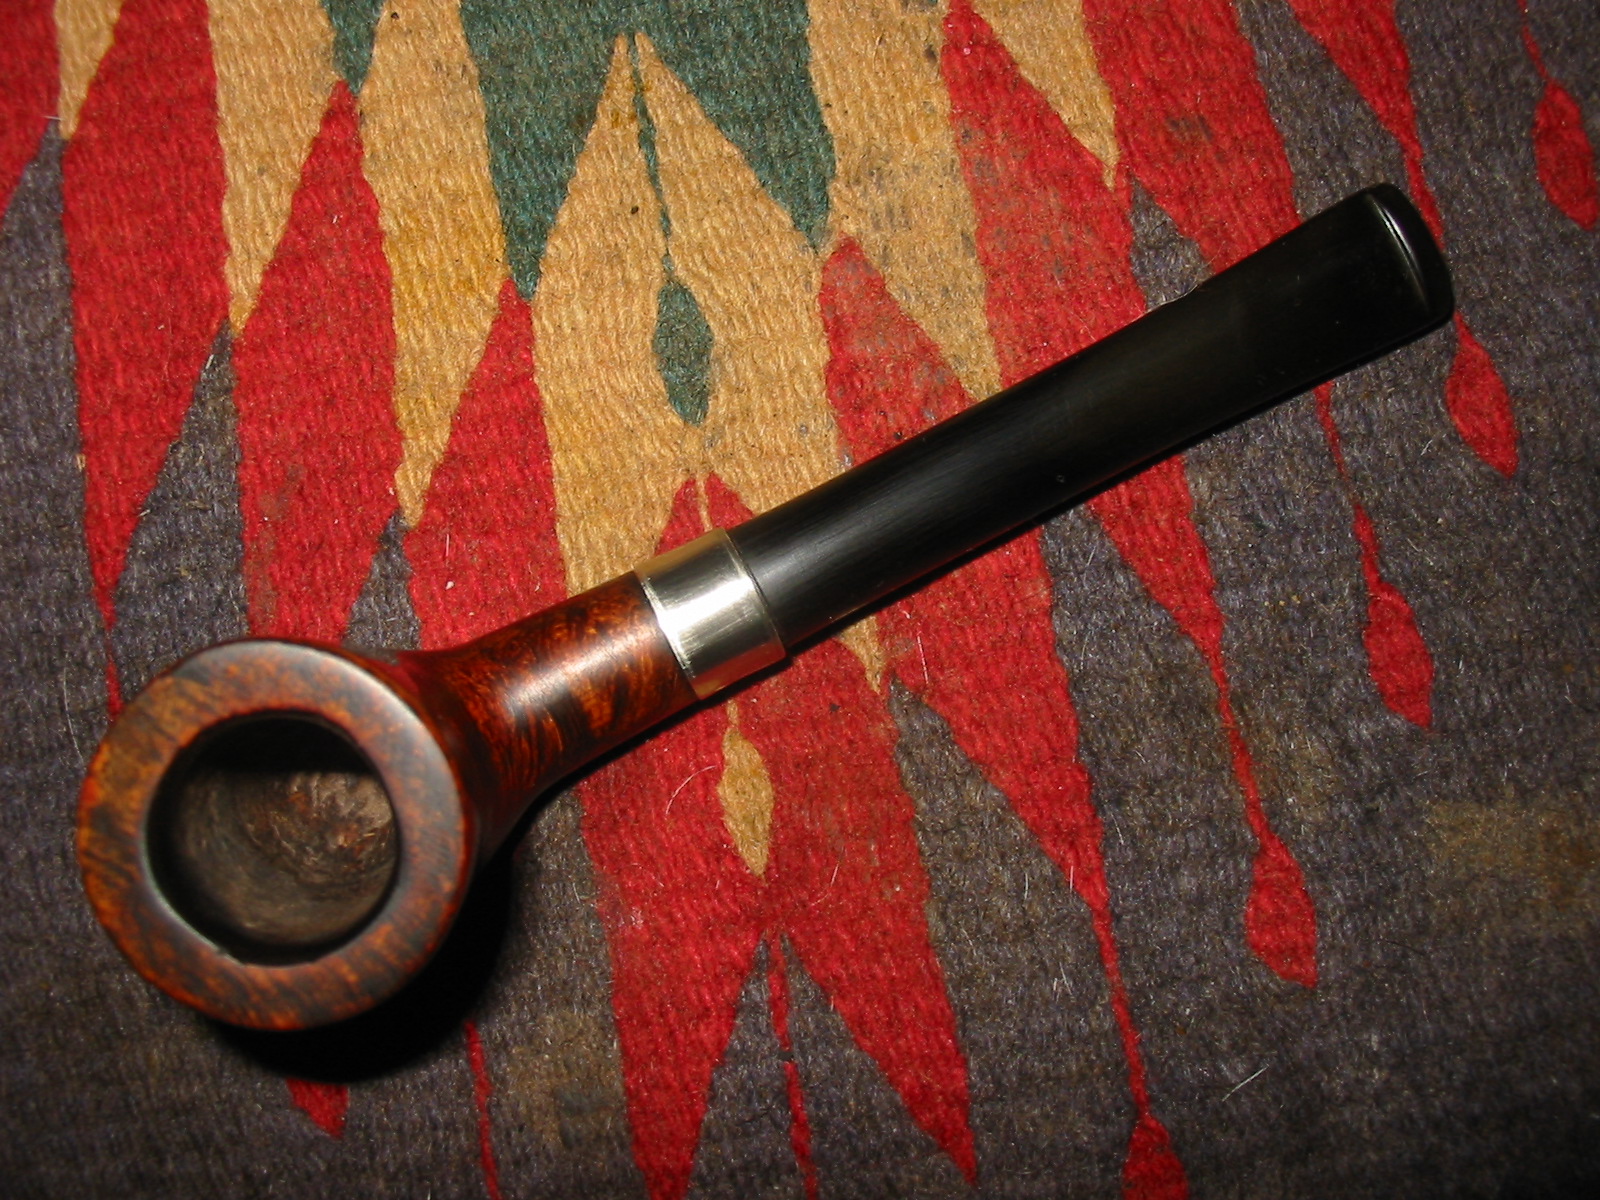
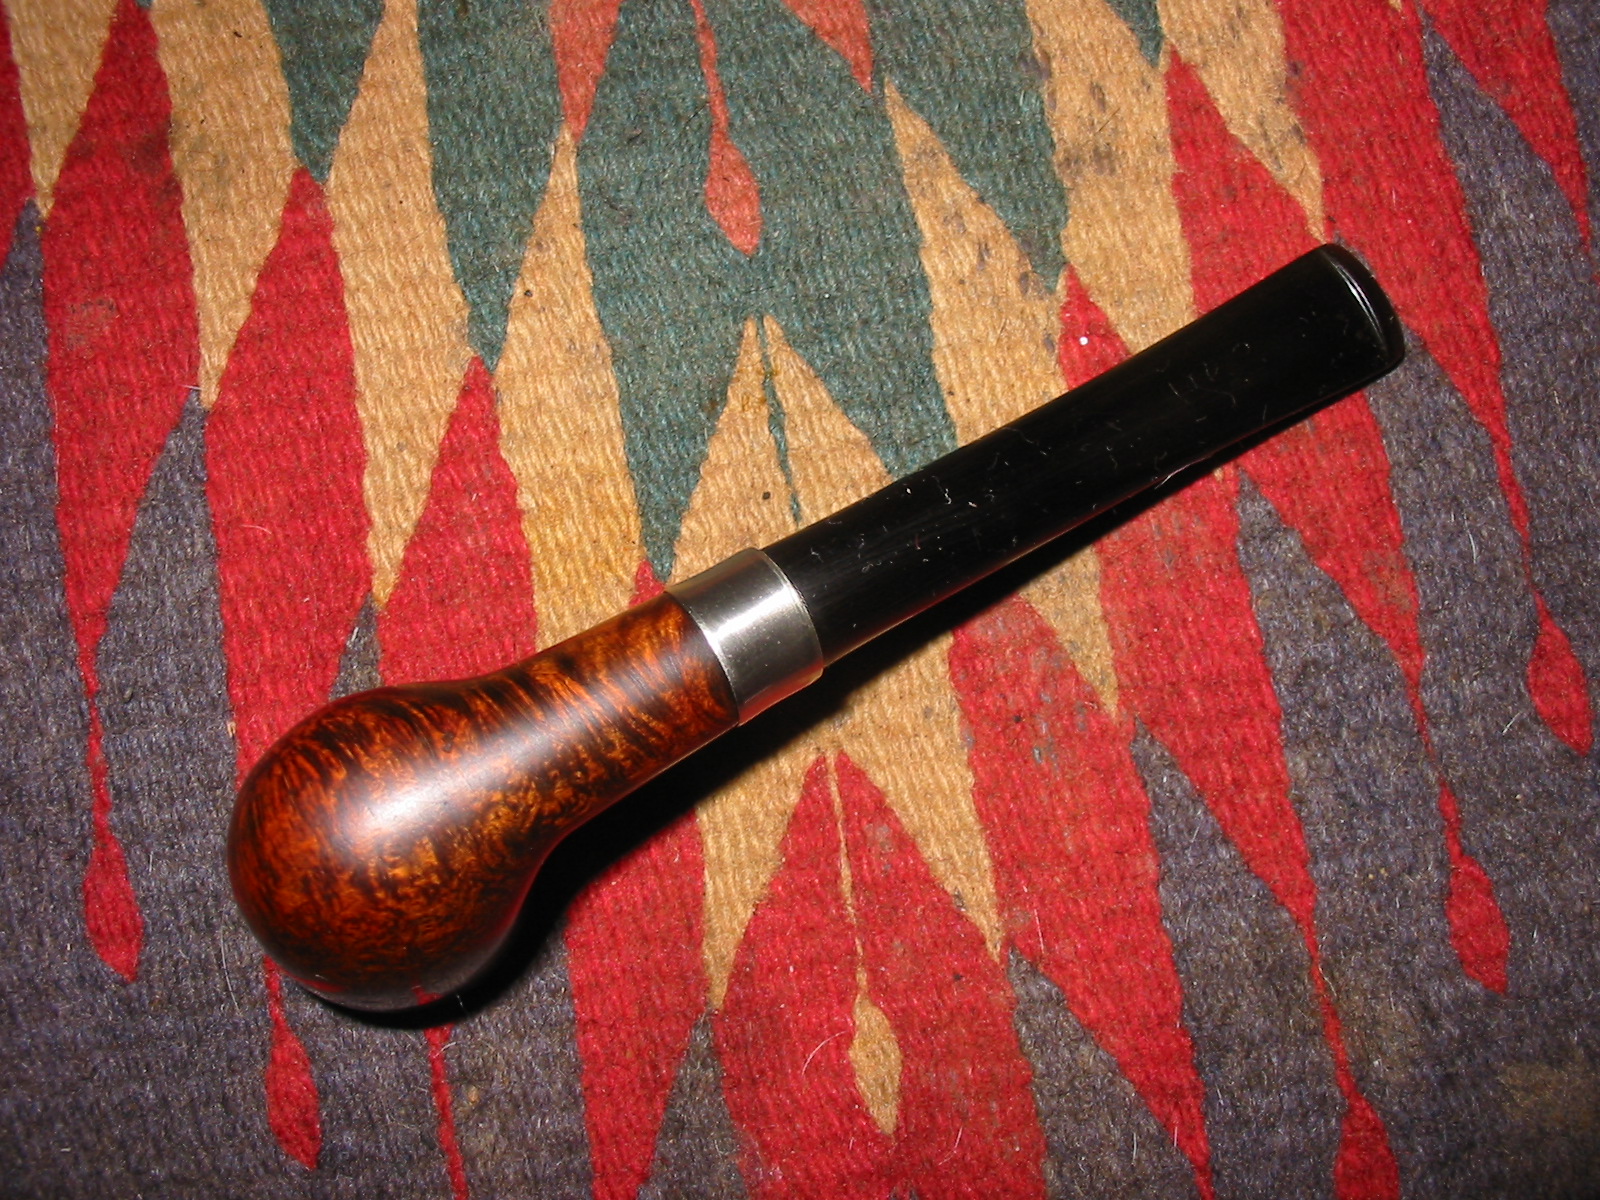
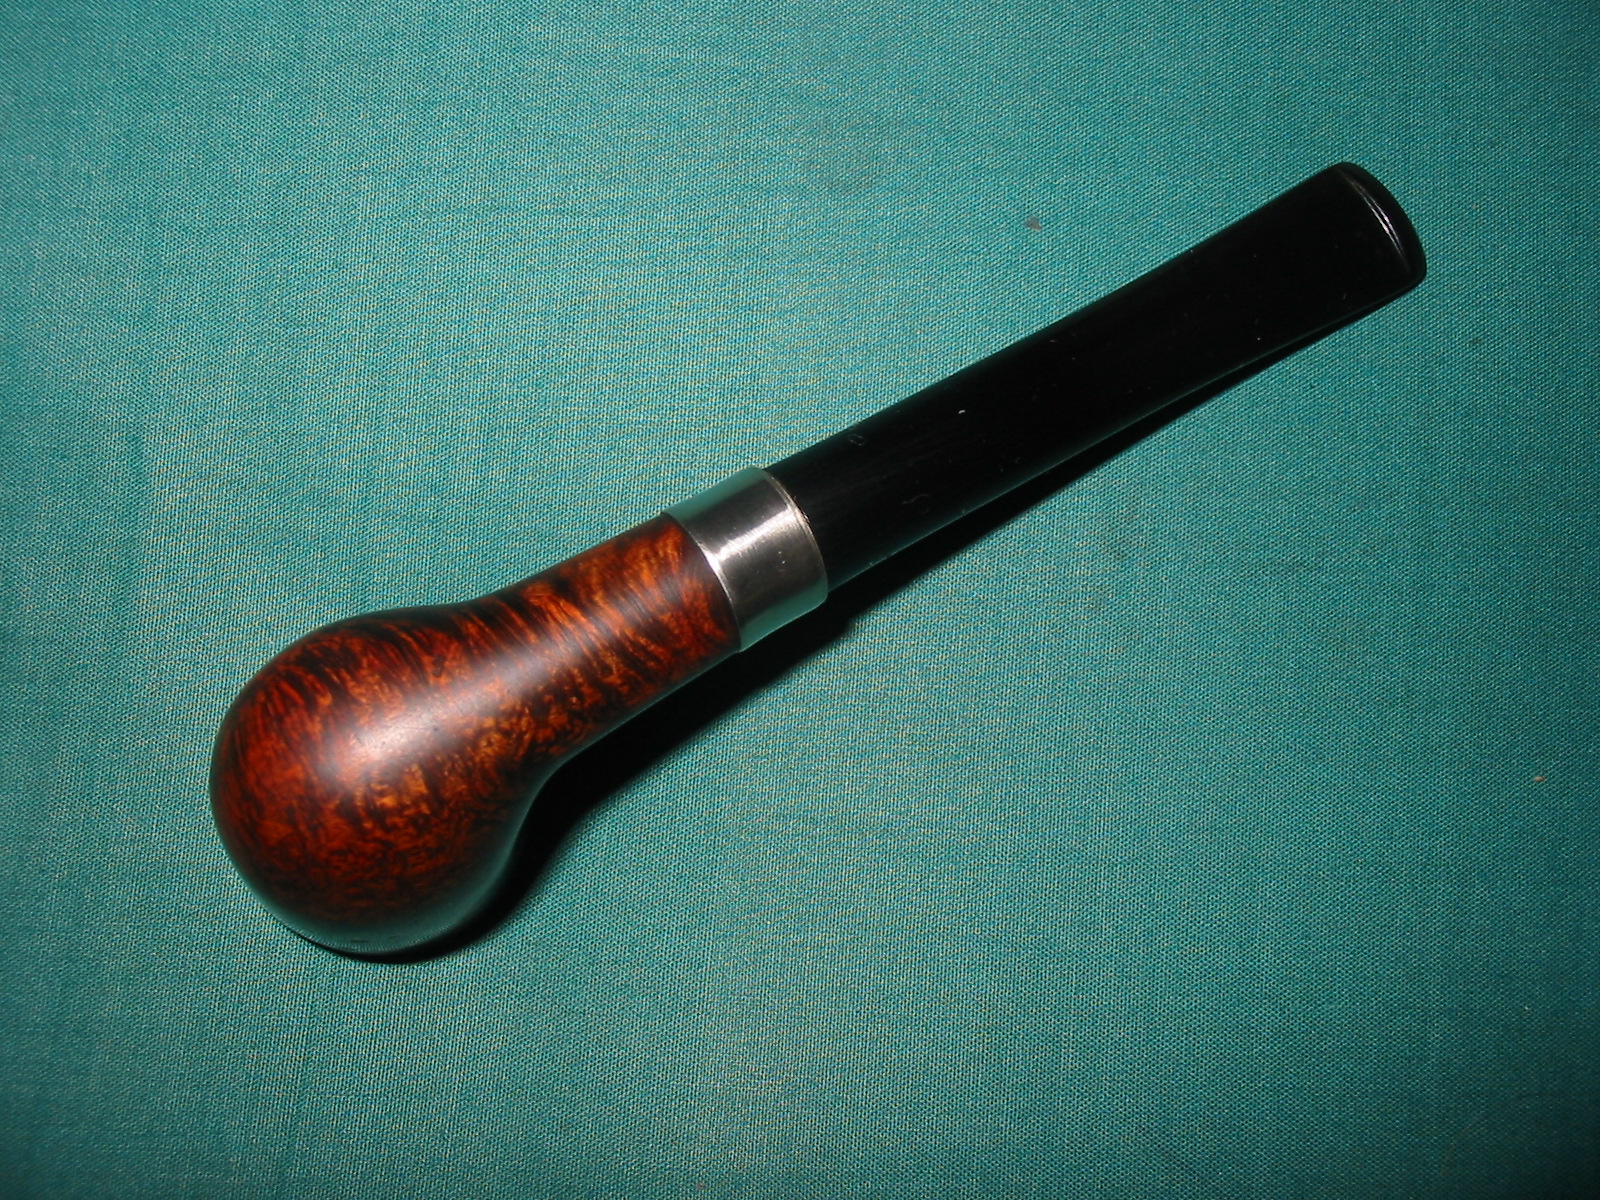
I buffed the pipe one last time with White Diamond and then gave the bowl and stem multiple coats of carnauba wax to polish and protect it. I finished by buffing with a clean flannel buff to lift the shine. The finished pipe is shown below and is ready for its inaugural smoke. The bowl and pipe came out well in my opinion and should last a long time in the hands of the person whose rack it eventually will grace.

I just reworked the inner rim of the bowl. I did a write up on the process and posted it here: https://rebornpipes.wordpress.com/2014/03/28/repairing-an-out-of-round-bowl/

Fantastic job Steve. The stain technique you used is magic. It not only covered the significant flaws, but brought out the cross grain, and birds eye. The shortend shank, band, and new stem look like it should have when new.
LikeLike
A remarkable transformation Steve, the re-colouring work is magnificent.
LikeLike
Nice work as usual! Love the contrasting stain! Gonna have to try olive oil myself.
LikeLike
Thanks Chiz. Now I am going to rework that inner edge on the rim a bit! Thanks for noticing that! 😉
LikeLike