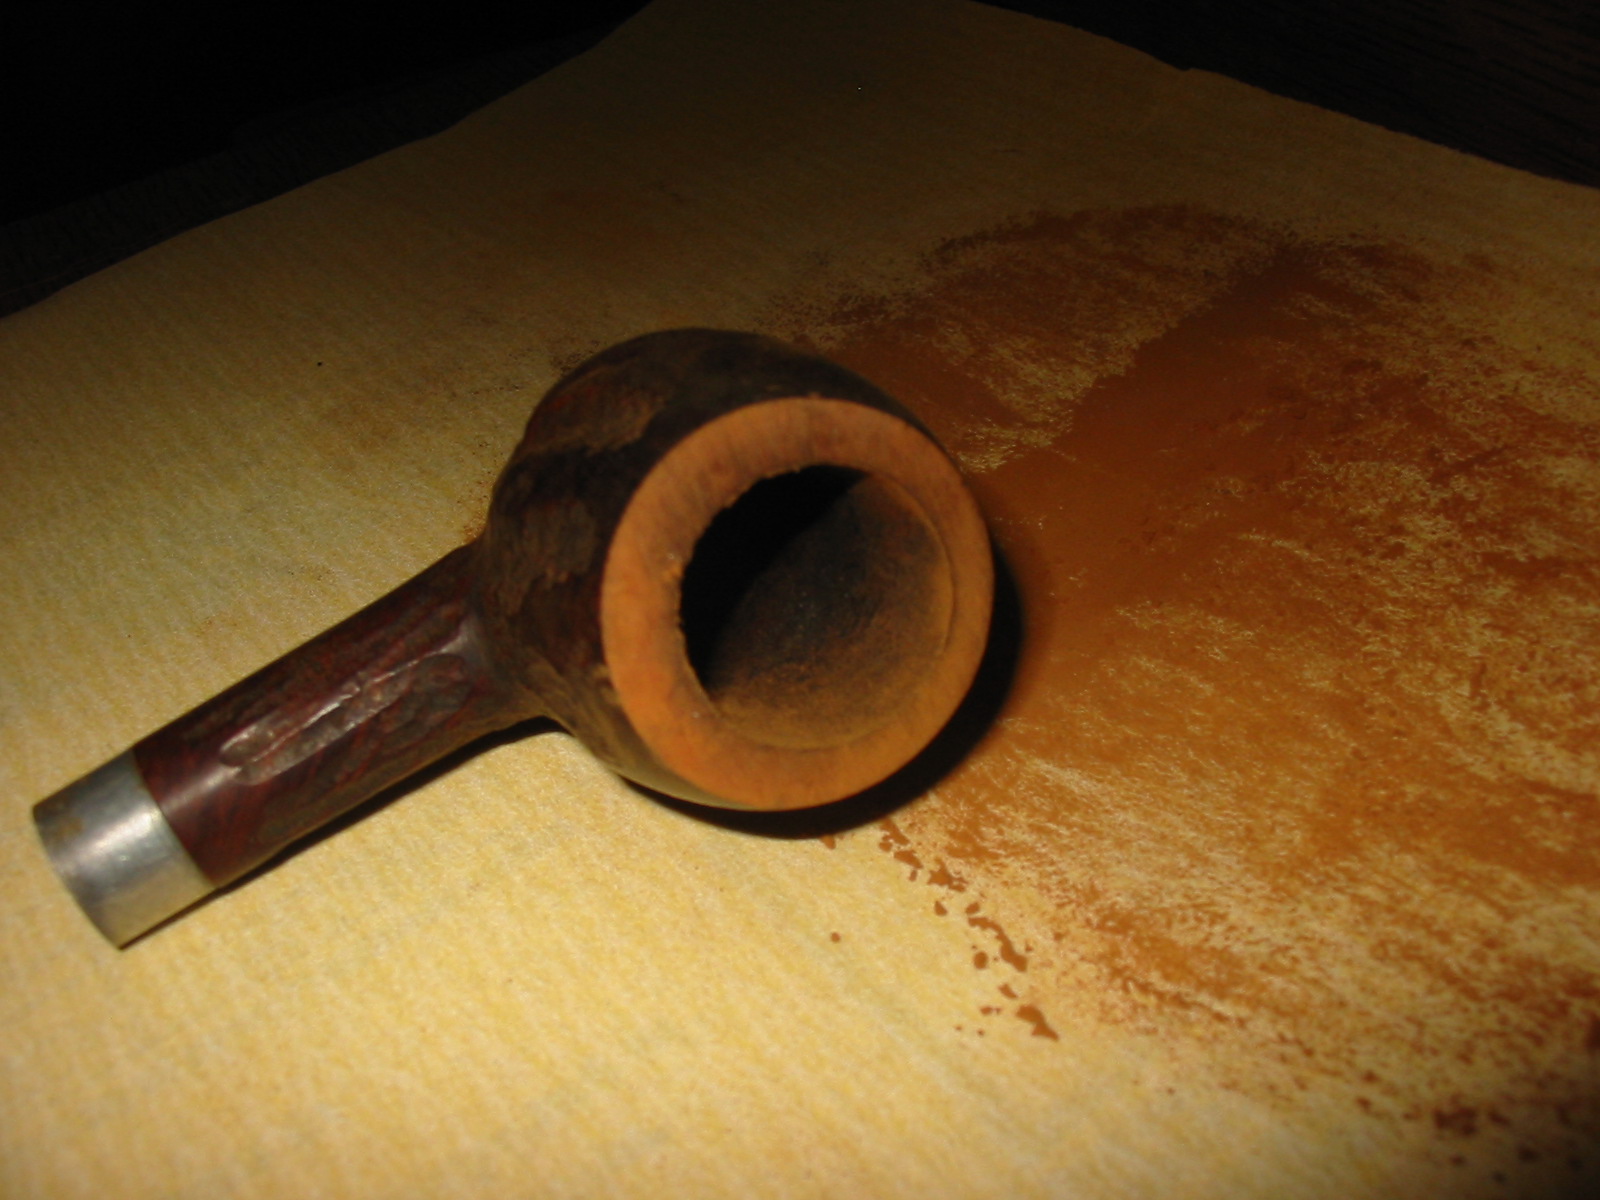
This Earl of Essex pipe bowl was in bad shape. I had received the bowl without a stem so I would need to restem it if I was going to refurbish it. The bowl rim was angled down toward the front and was worn and rough. It appeared to be thinner in the front than the back of the bowl and had burn marks and rough patches on the front. The finish was shot and the aluminum insert in the shank was oxidized. The bowl had an uneven cake and was crumbling. There were several red spots on the surface of the rustication. What interested me in this old bowl was the rustication. The top of the bowl had almost a wax drip look to it with rustication between the drips of “wax”. The drip pattern is smooth briar as was the rim at one time. The end of the shank and the high spots on the shank were also smooth.


The aluminum inset mortise took a screw in tenon and I did not have any metal screw in tenon stems. I would have to drill it out to fit a new stem. I decided to try my hand at opening up the mortise with a drill. I started with a drill bit slightly larger than the mortise and then moved up with bigger drill bits until the mortise was smooth and open enough to take a new push stem.


I started to top the bowl but stopped mid stream and reamed the bowl with a PipNet reamer to clean out the cake. I wanted the bowl clean so that as I topped it I would be able to see how deep the damage to the bowl went.

Once reamed, I took it back to the topping board and sandpaper. I used 220 grit sandpaper and twisted the bowl top into the sandpaper in a clockwise pattern. With the bowl topped and the shank opened the bowl was ready to clean up.


I wiped down the bowl with acetone on cotton pads to remove the finish from the bowl and clean up the grime that was built up in the grooves of the rustication. There was a bright red pigment in the grooves on two sides of the bowl. I scraped at it with a dental pick to clean it up. At first I thought it might be putty but as I scraped it, it came off like a red pigment. I am not sure what the red material was. I wiped it down after scraping it.


I decided to stain the bowl with a contrast to set off the rusticated portion from the smooth portion of the bowl. I used a cotton swab and black aniline stain to stain the rusticated portions of the bowl. I wanted the black to highlight the areas between the smooth drip portions of the bowl. I stained and flamed it and repeated the process until it was a good even colour around the bowl. I sanded the smooth areas of the bowl with a medium and a fine grit sanding block and sponge to remove scratches and clean them up for the next coat of stain that would be used on the smooth areas.


I had several stems in my stem can that would fit the shank of the drilled out mortise. I tried a BBB stem first. It fit very well in the shank. The look was exactly what I wanted but I did not want to waste a BBB stem with the logo intact on an experiment.


So I used the second stem I had from the can. It was a saddle stem with a bite through on the top of the stem. I decided to cut it back and then reshape the button until it was a new stem.

I cut it back with a Dremel and a sanding drum until it was smooth, solid and straight across.


Before working on cutting the new button in the stem I stained the top portion of the bowl with a light walnut stain on the smooth parts of the bowl. I buffed the bowl with White Diamond to give it a shine.


I worked on the button with needle files cutting in the straight line of the inner edge of the button and then smoothed out the button itself with the files. I carved away the surface of the stem tapering it from the saddle to the button. Once it was cut with the files I sanded the new taper with 220 grit sandpaper and then with a medium and fine grit sanding sponge to remove the scratches on the vulcanite.


I sanded the stem with my usual array of micromesh sanding pads. I wet sanded the stem with 1500-2400 grit pads and dry sanded with 3200-12,000 grit pads. I rubbed down the stem with Obsidian Oil and buffed it with White Diamond.


I buffed the bowl lightly with White Diamond and buffed the stem with it as well. I gave it multiple coats of carnauba wax and buffed it with a soft flannel buff to give it a shine. The finished pipe is shown in the photos below. The bowl top is clean and new, the finish is redone and the wax drip look is highlighted with the stains. The new stem and the newly cut button fit the pipe well. The experiment of drilling out the aluminum shank insert to take a push stem was a success. The metal polished well and looks like a shank band. Overall the final product is nice looking pipe that will make a good addition to someone’s rack in the future.


