Monthly Archives: February 2014

Repairing a Tinderbox Monza that Easily Could Have Been Firewood


Blog by Steve Laug

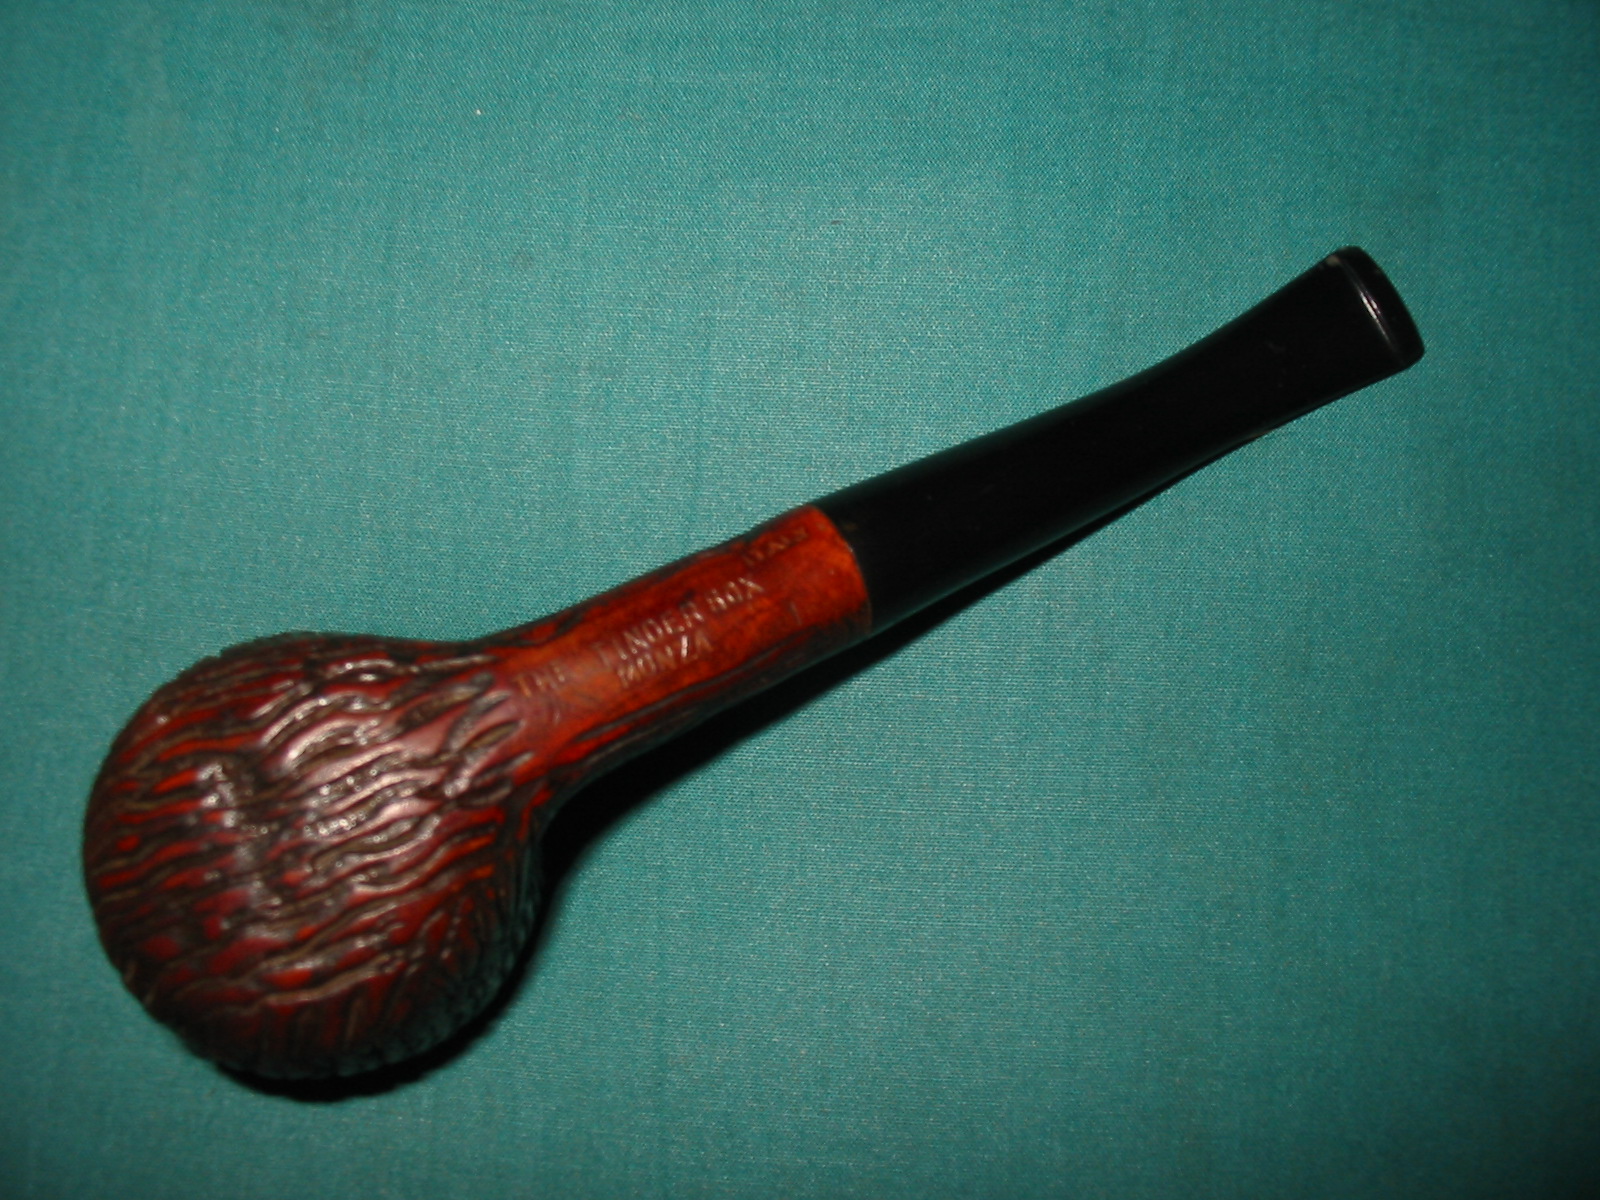
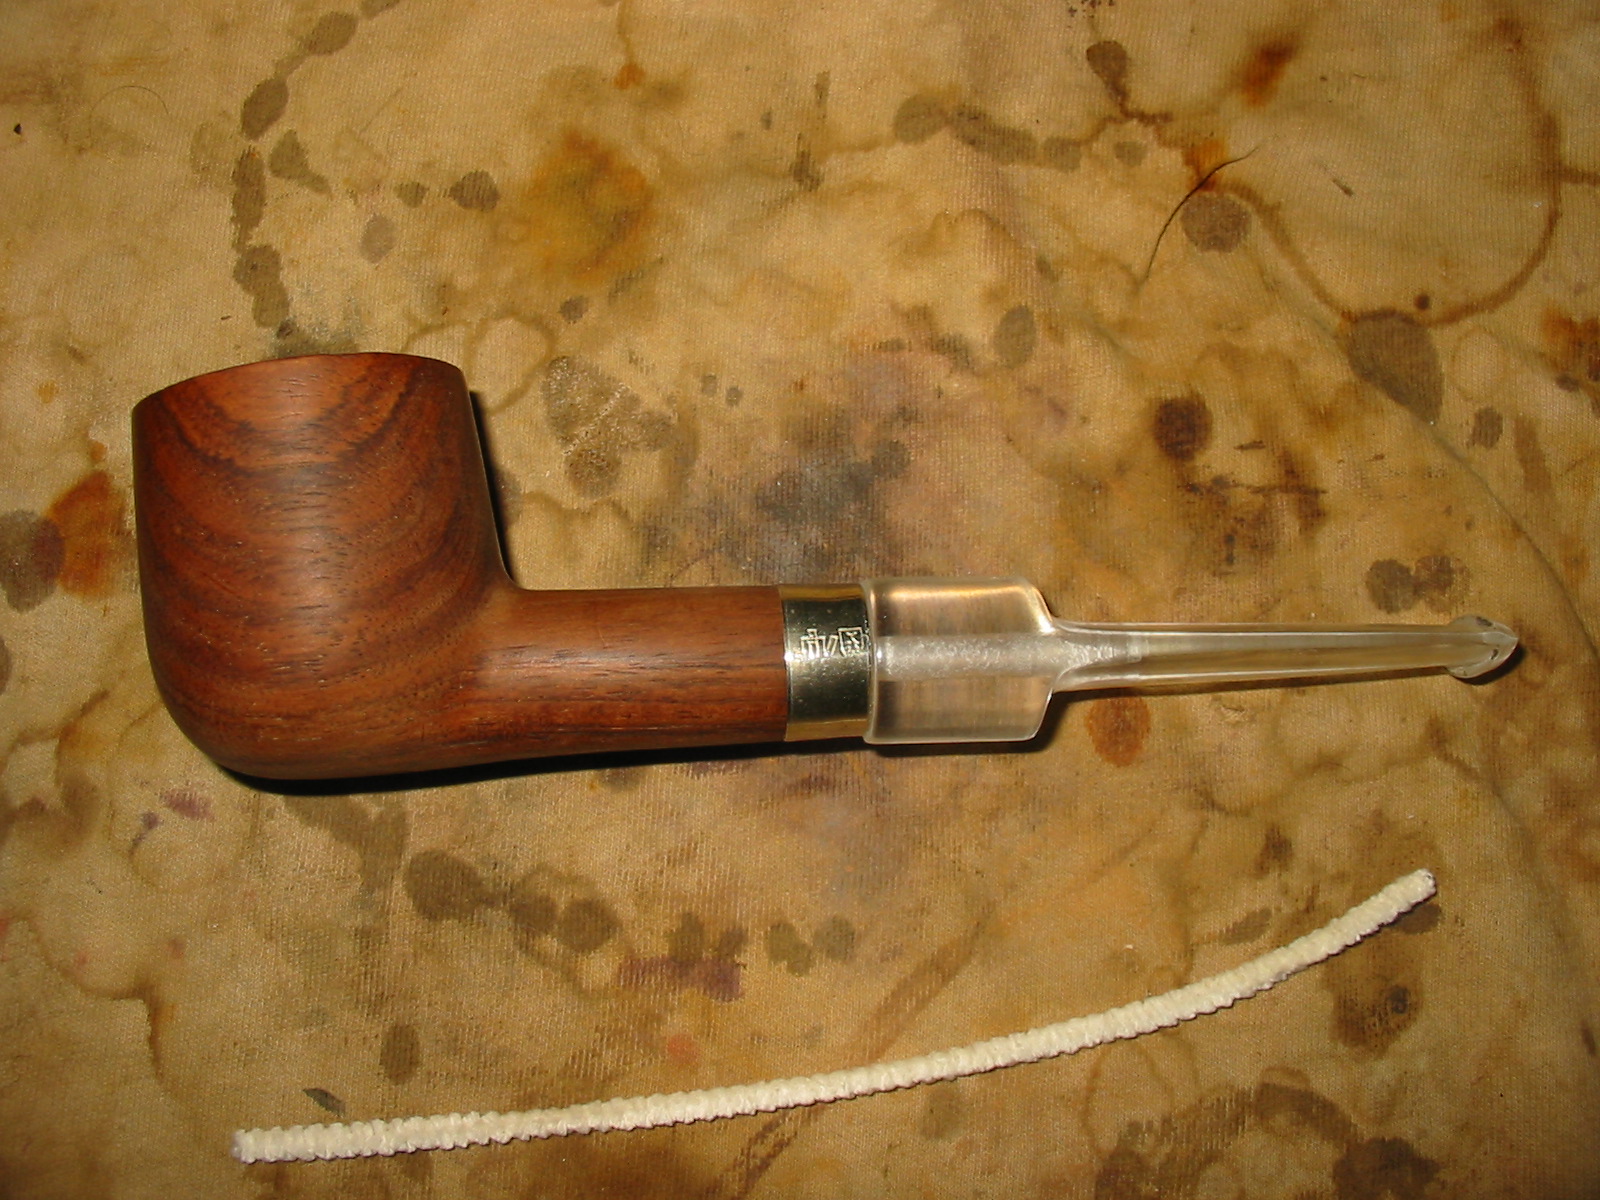
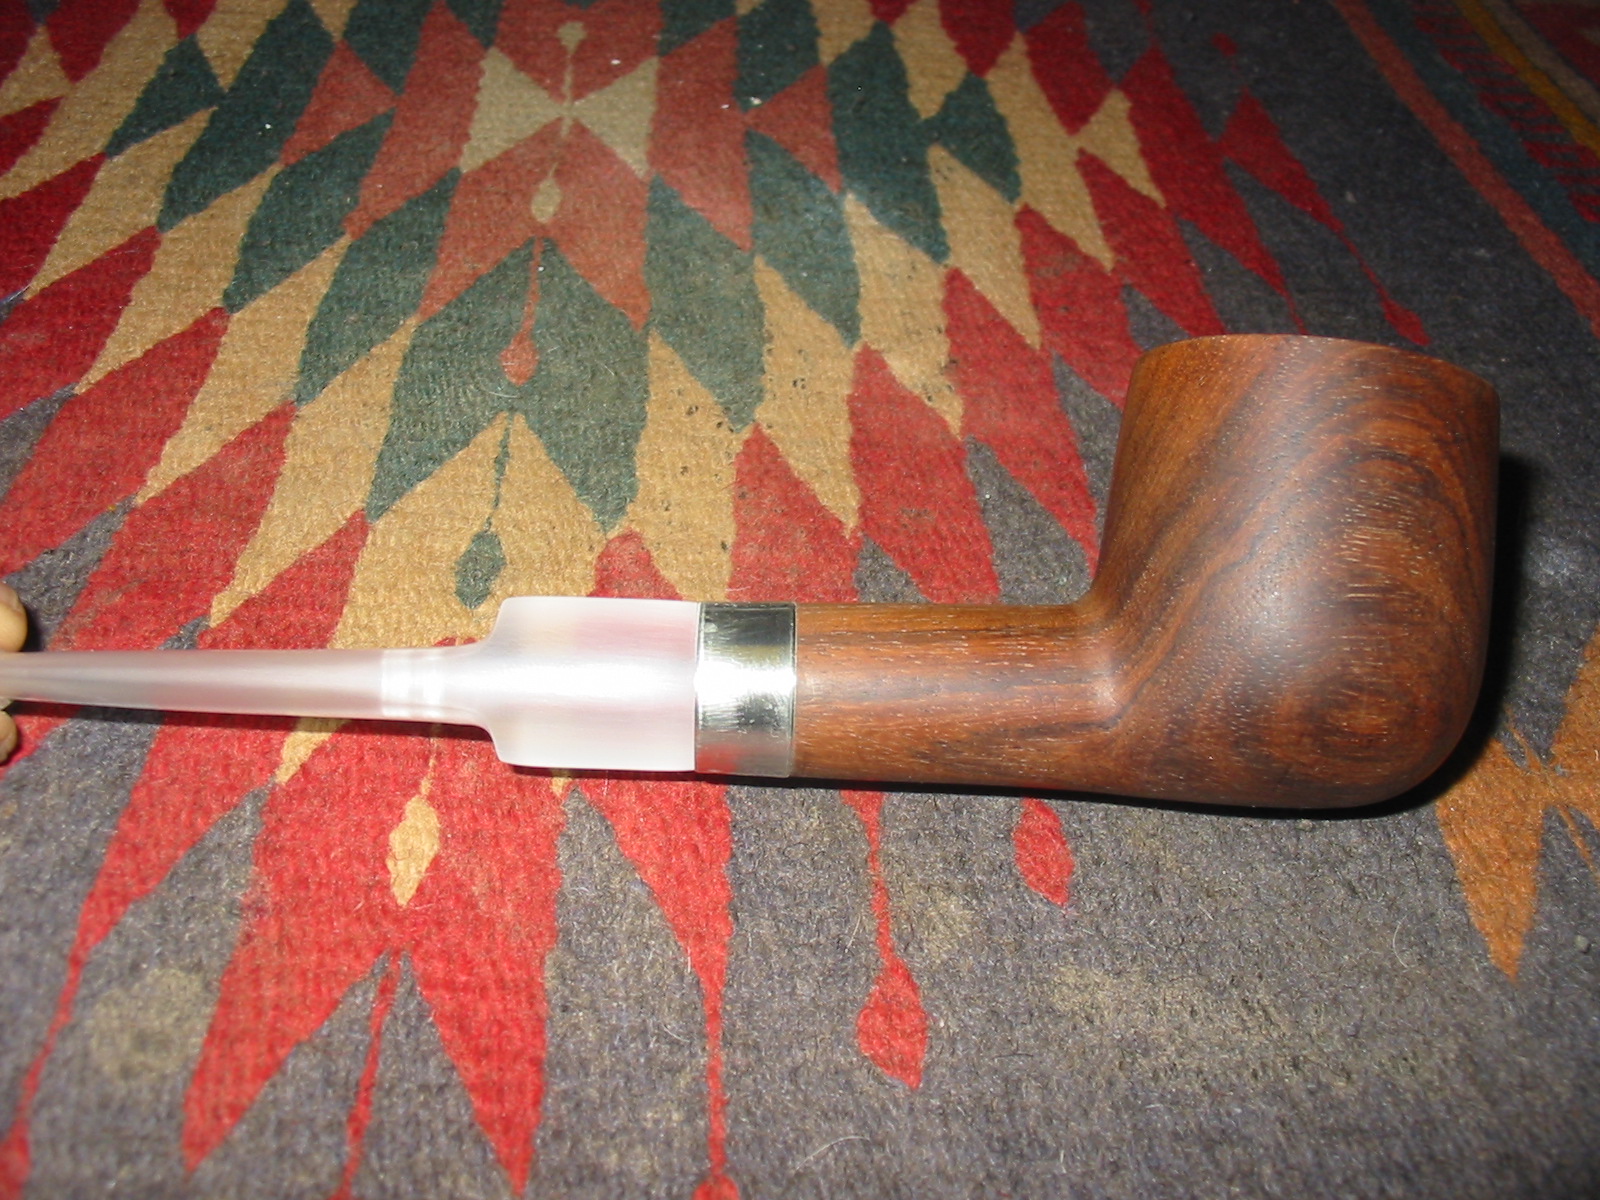
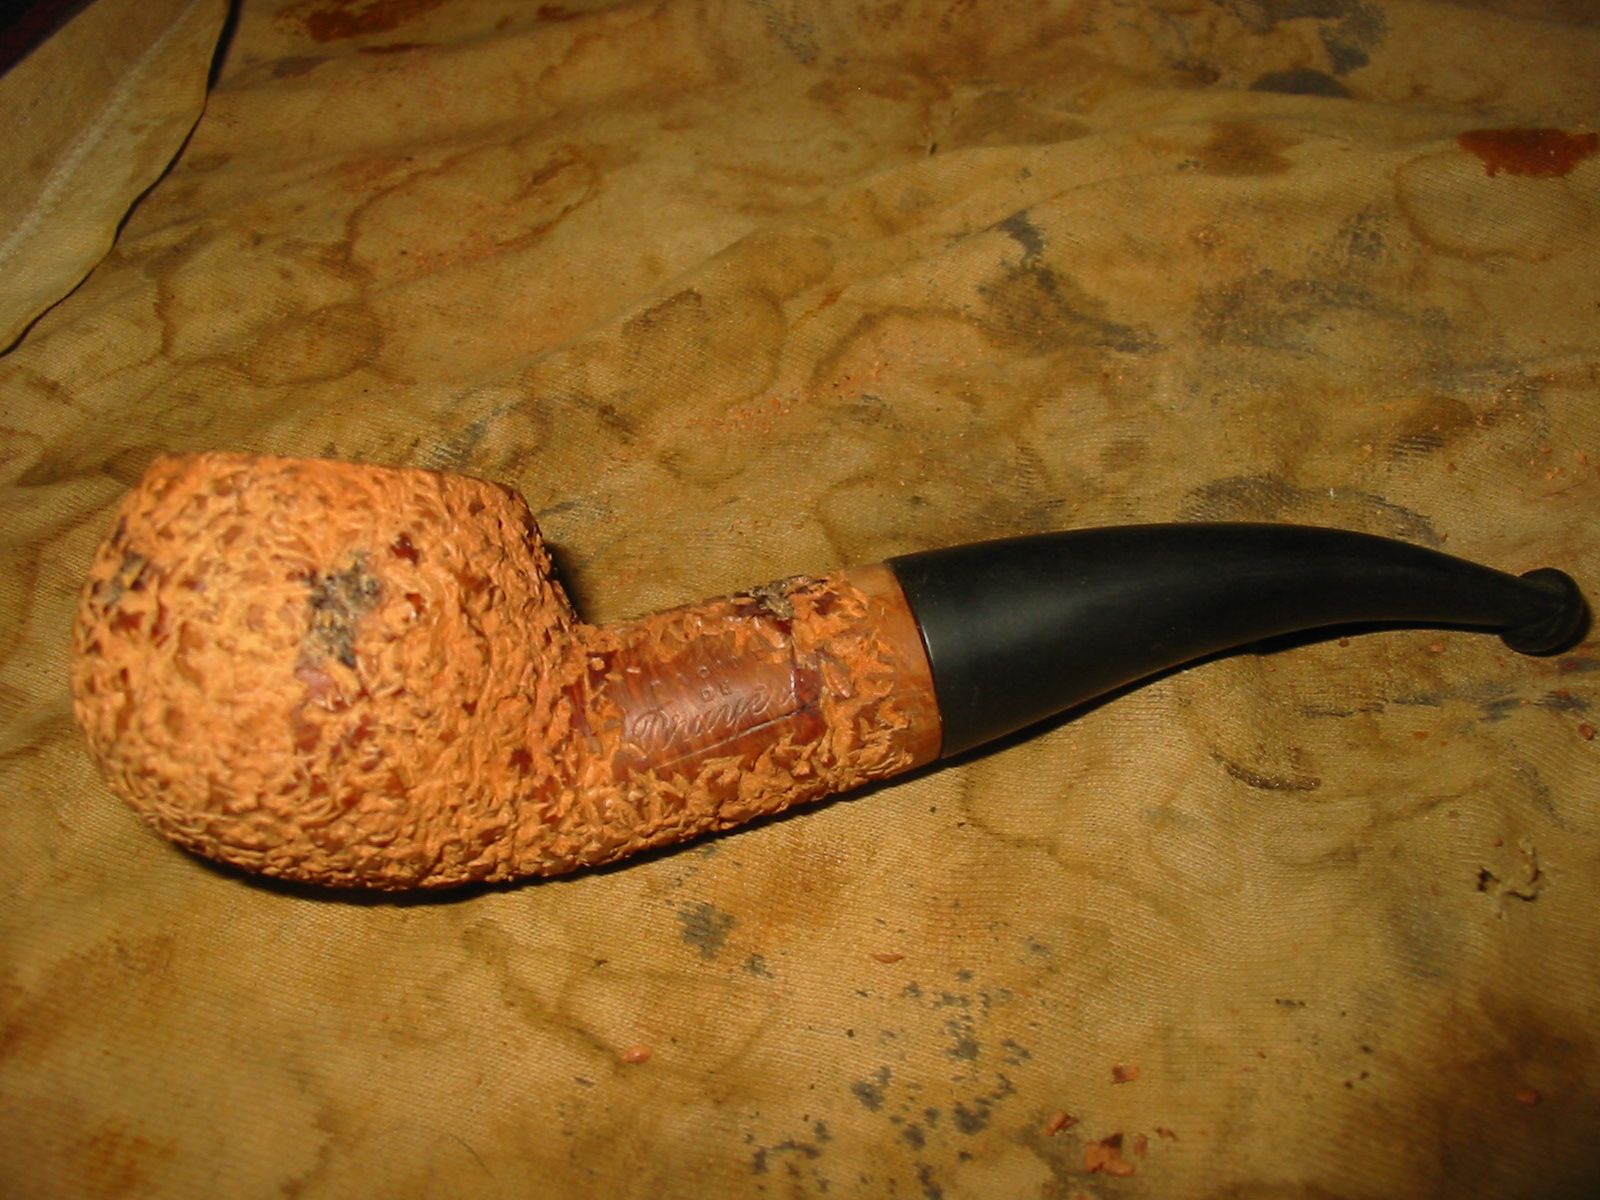
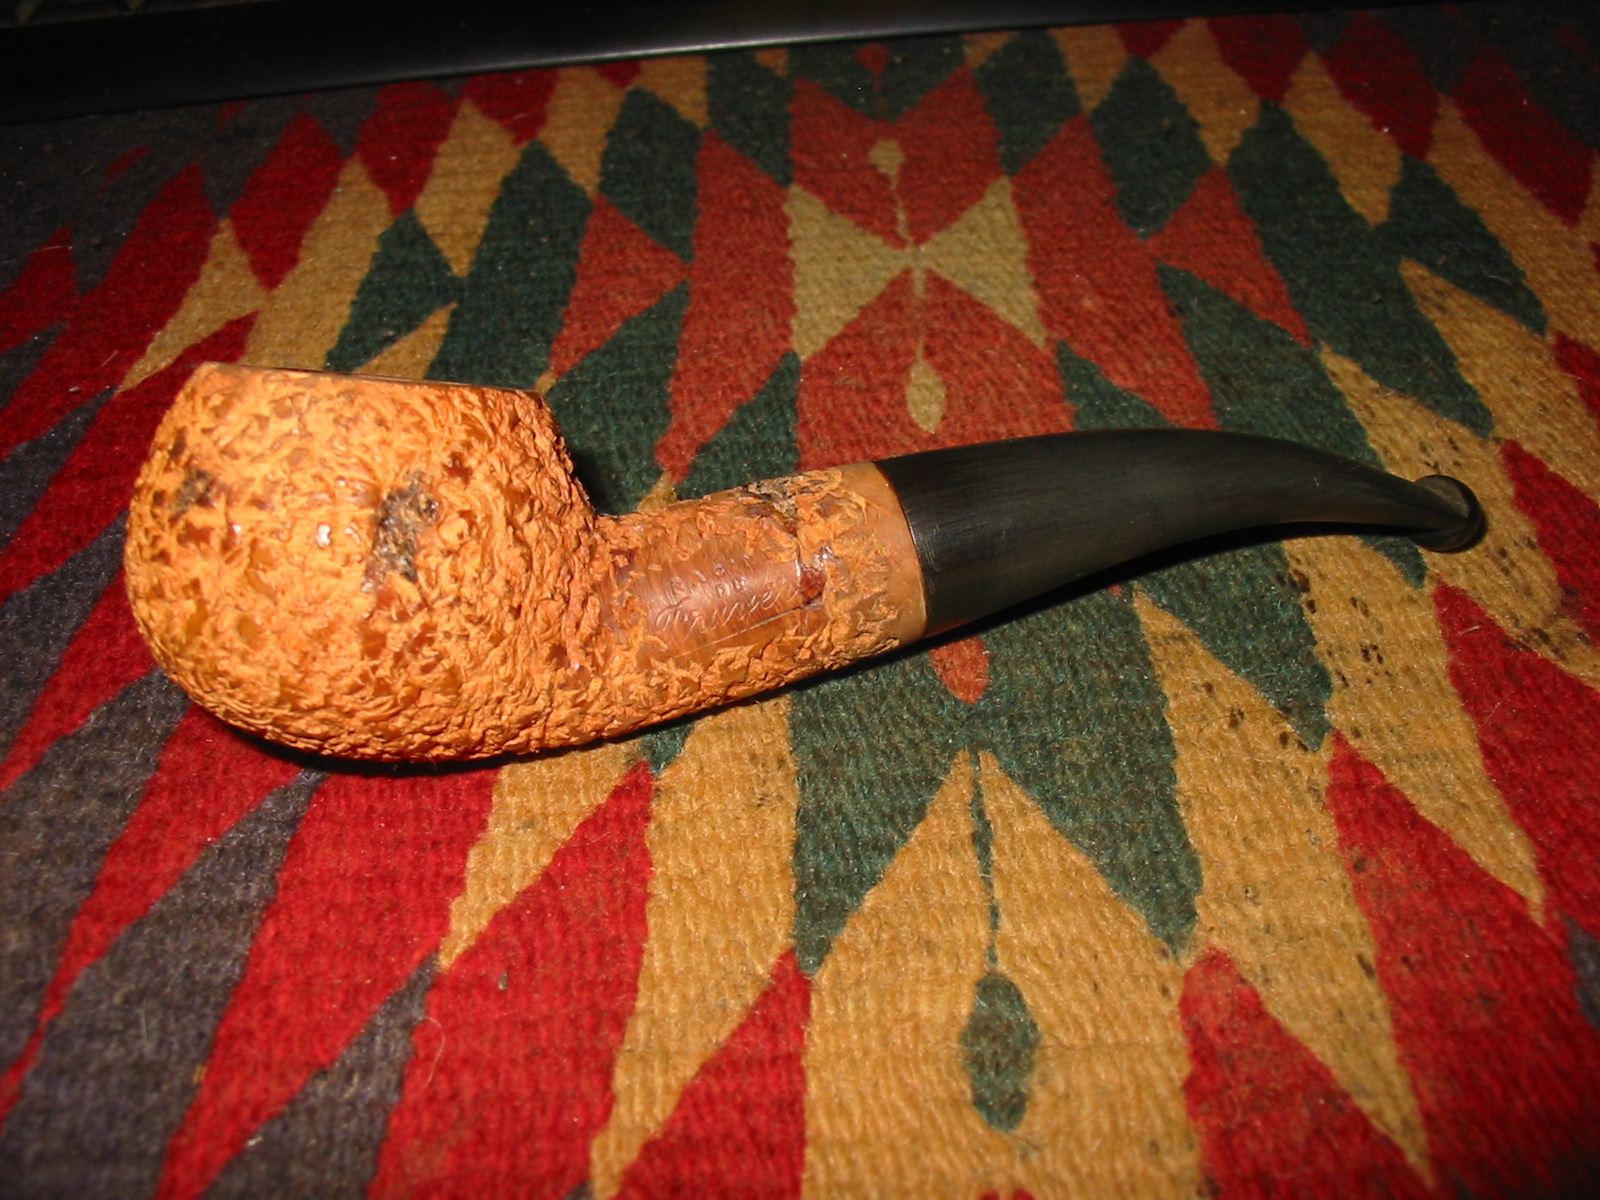
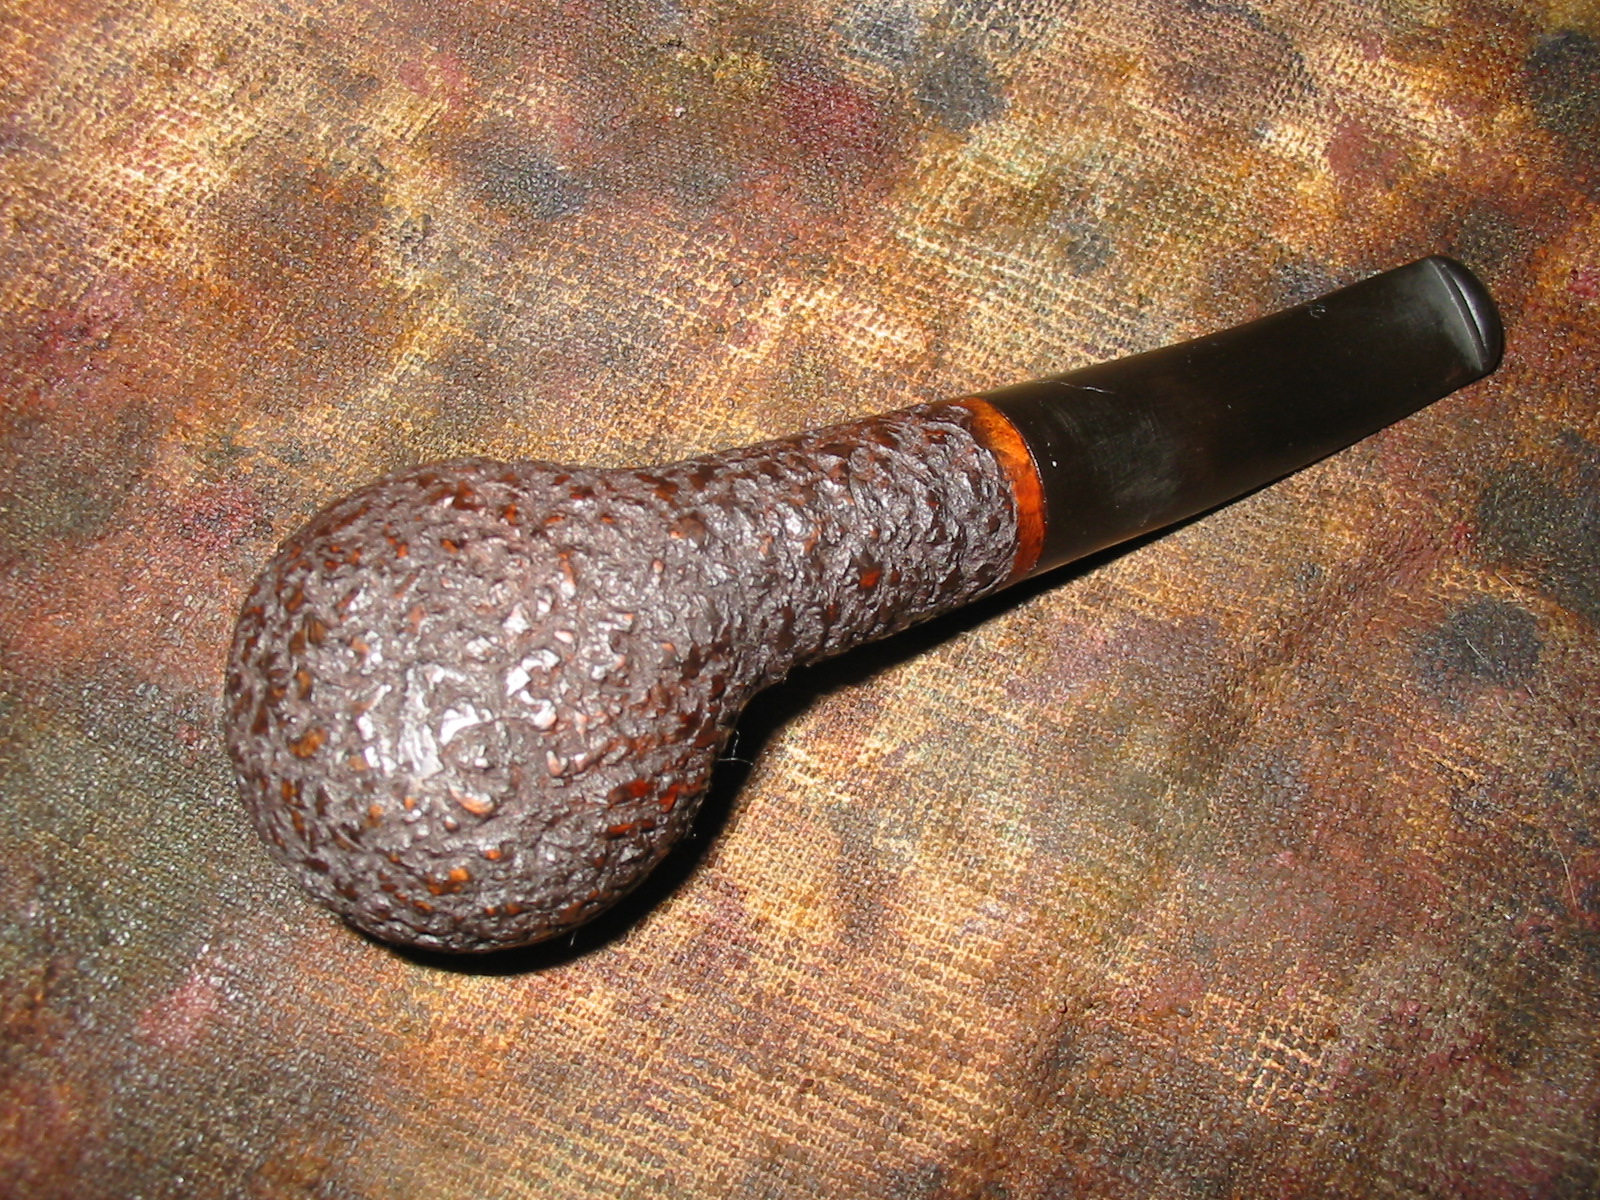
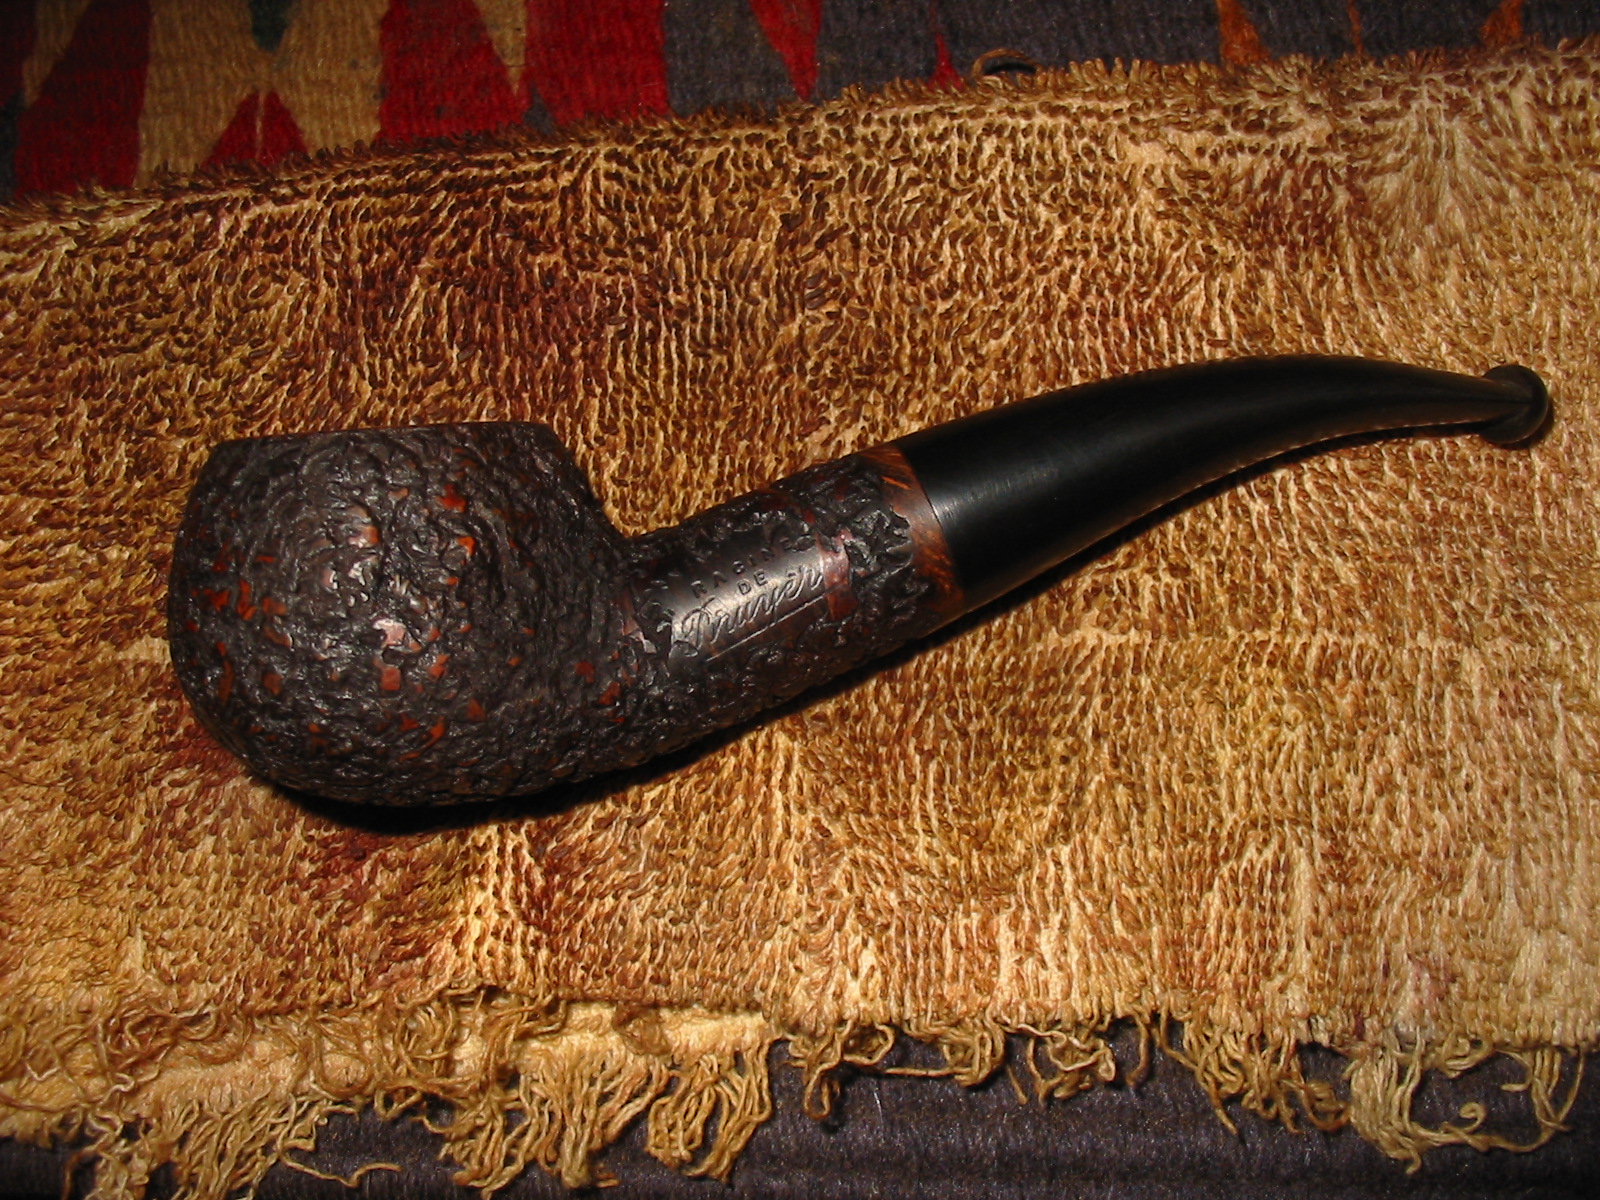
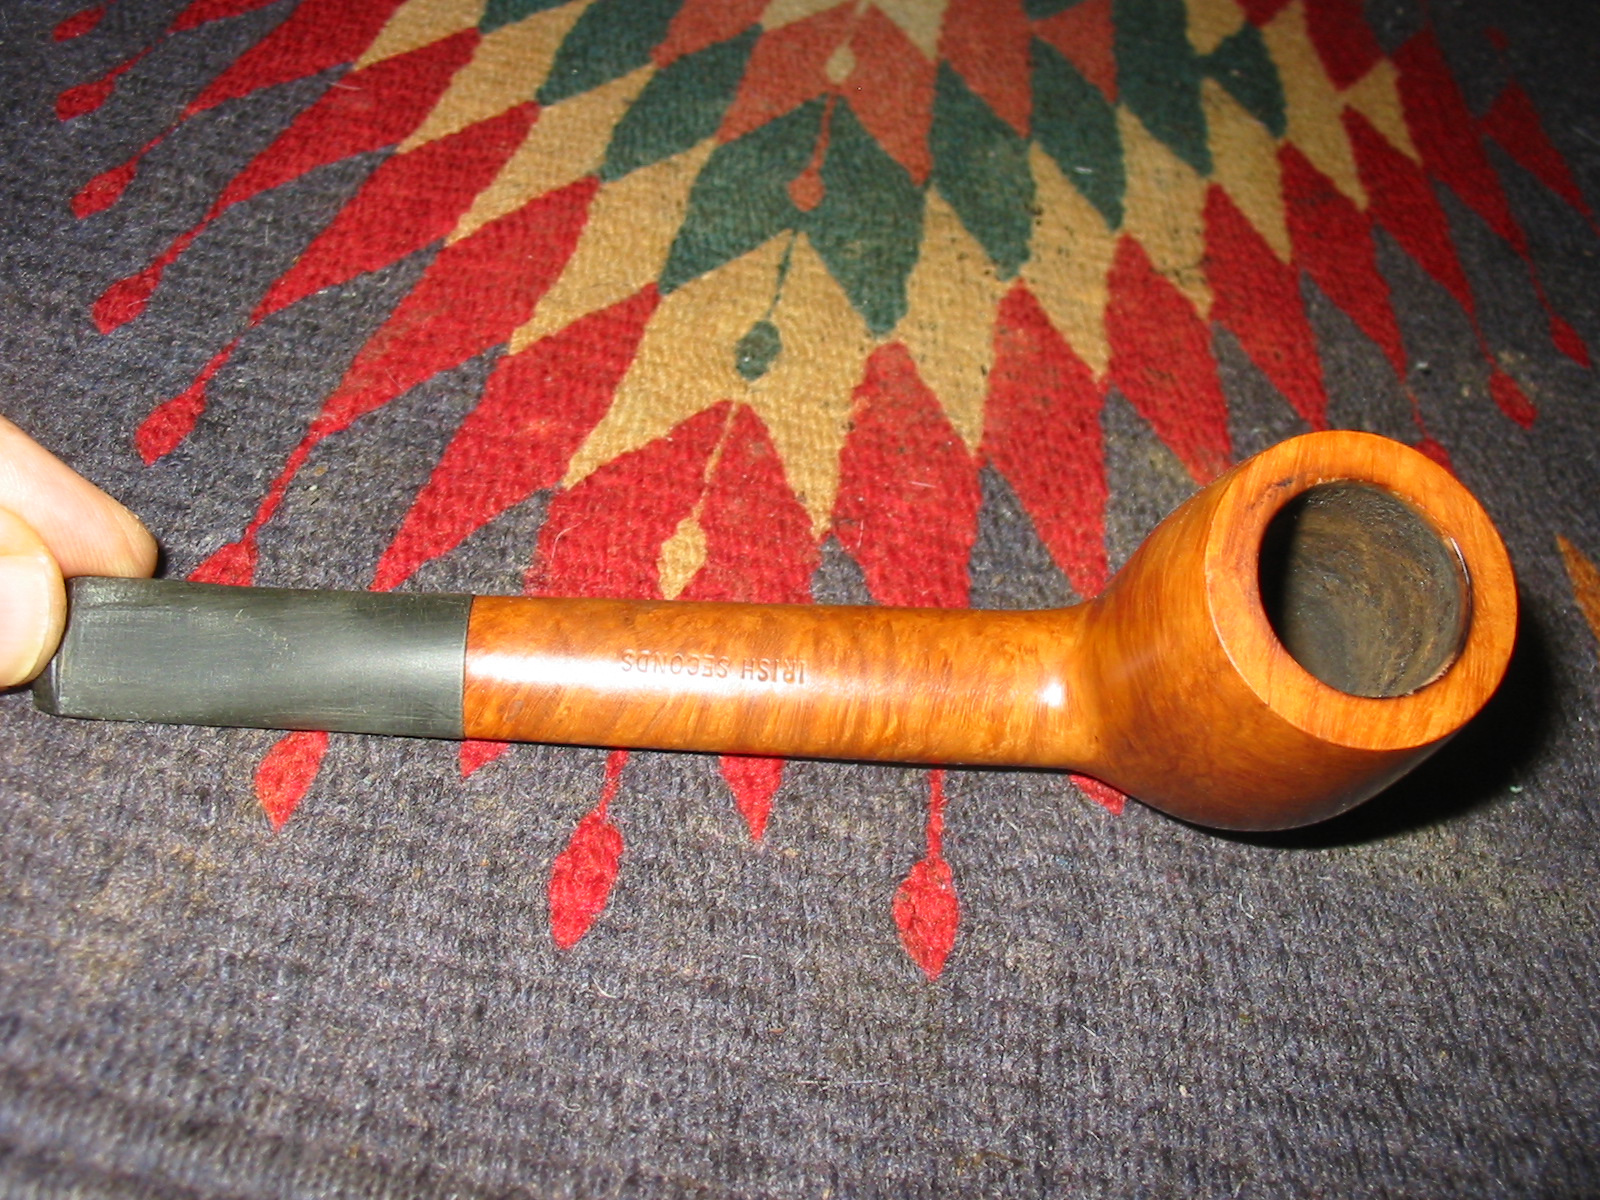
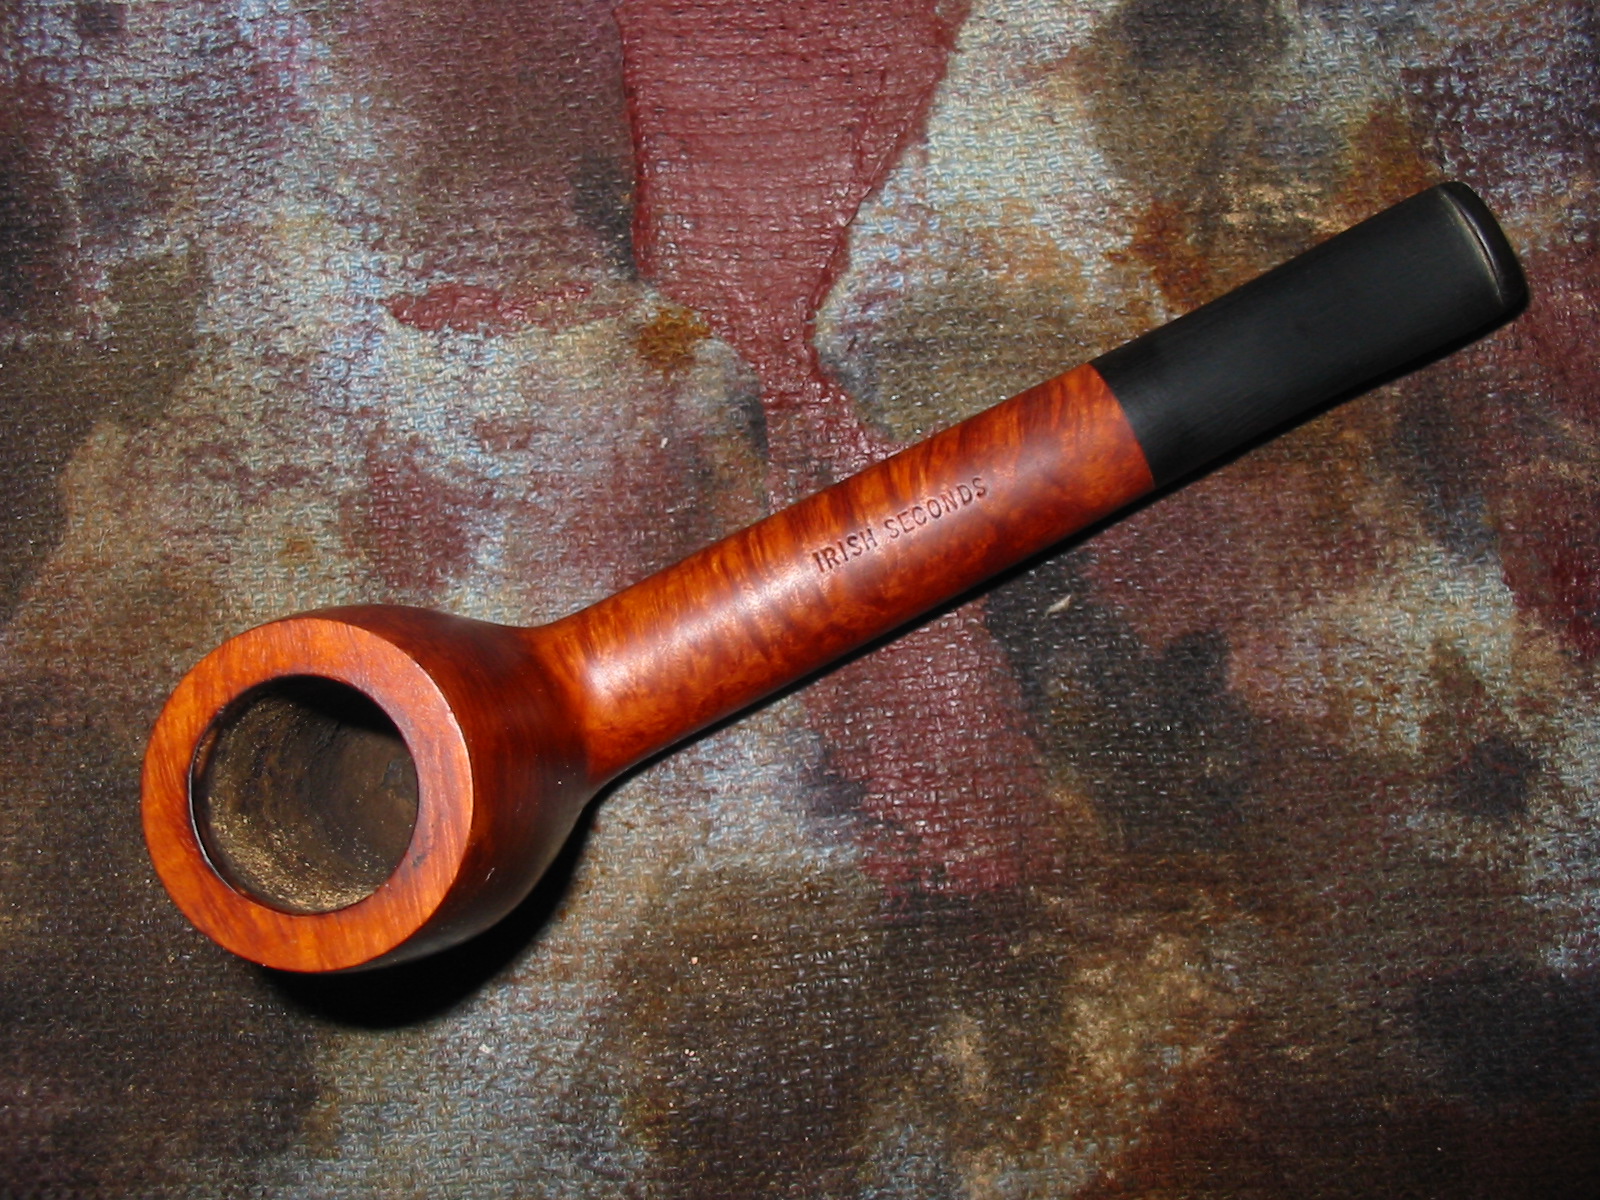
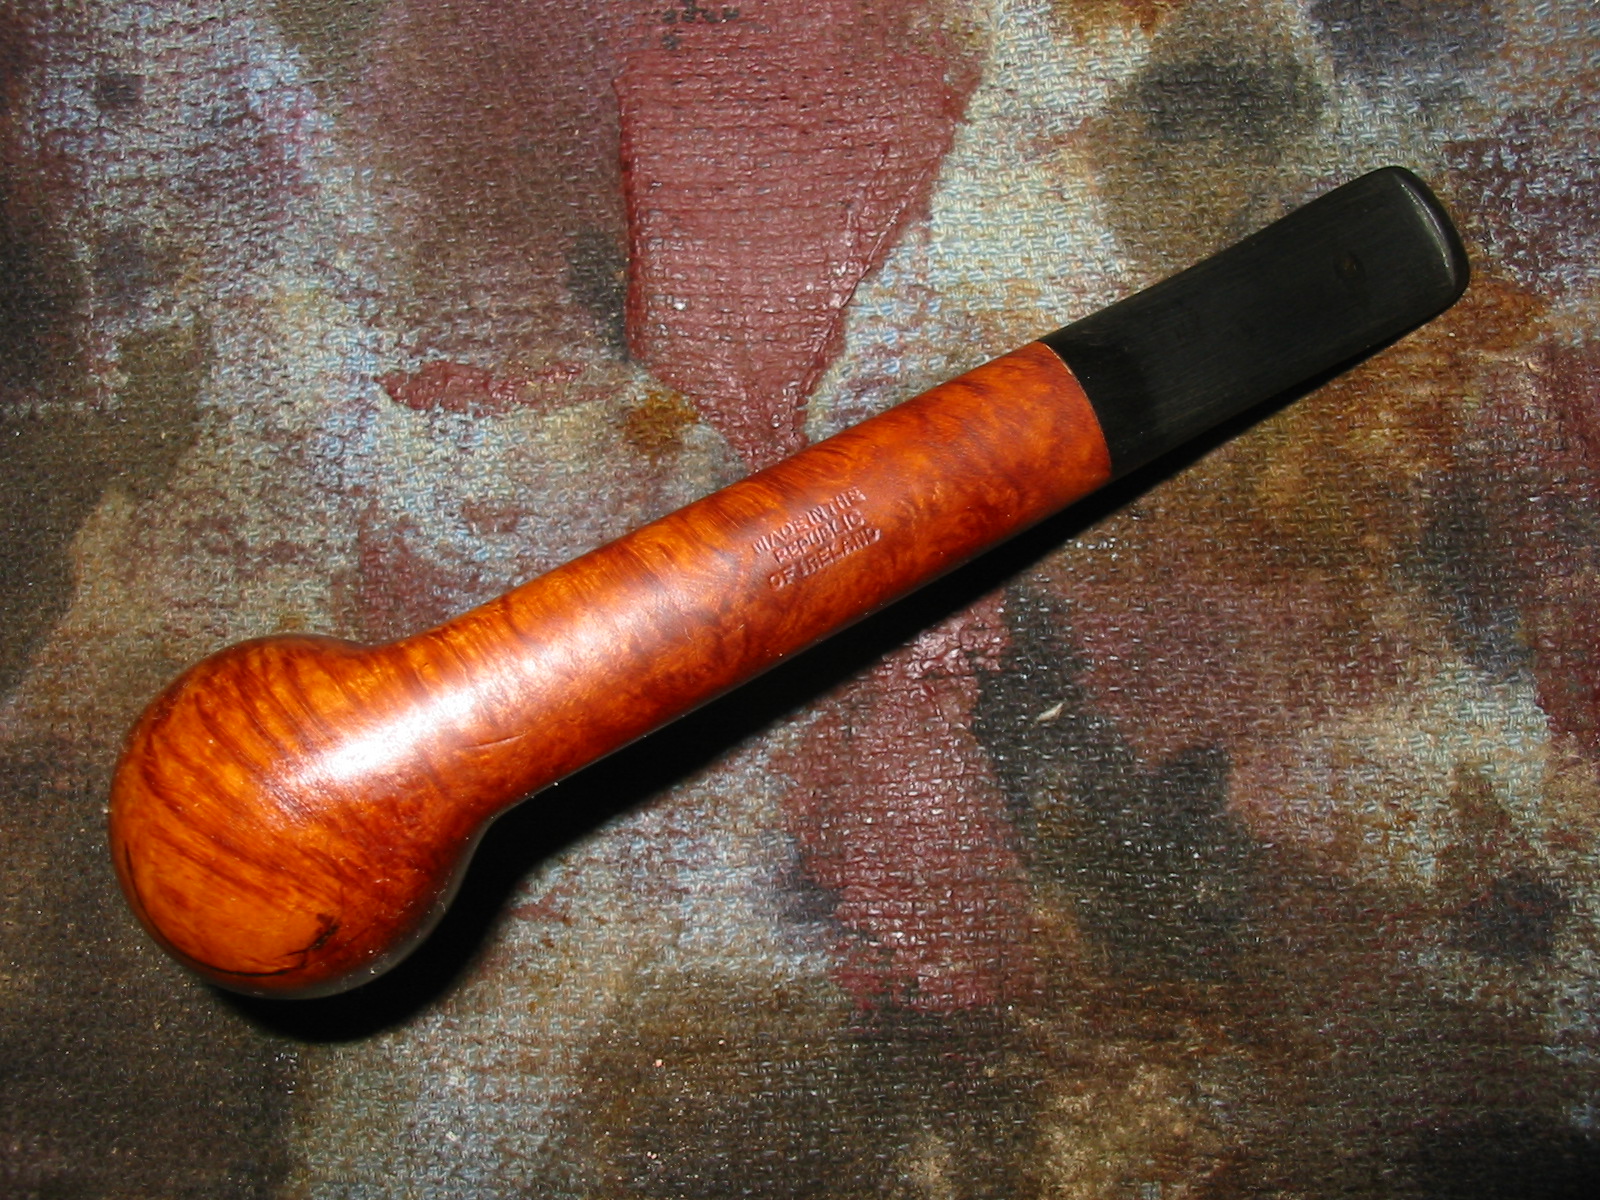
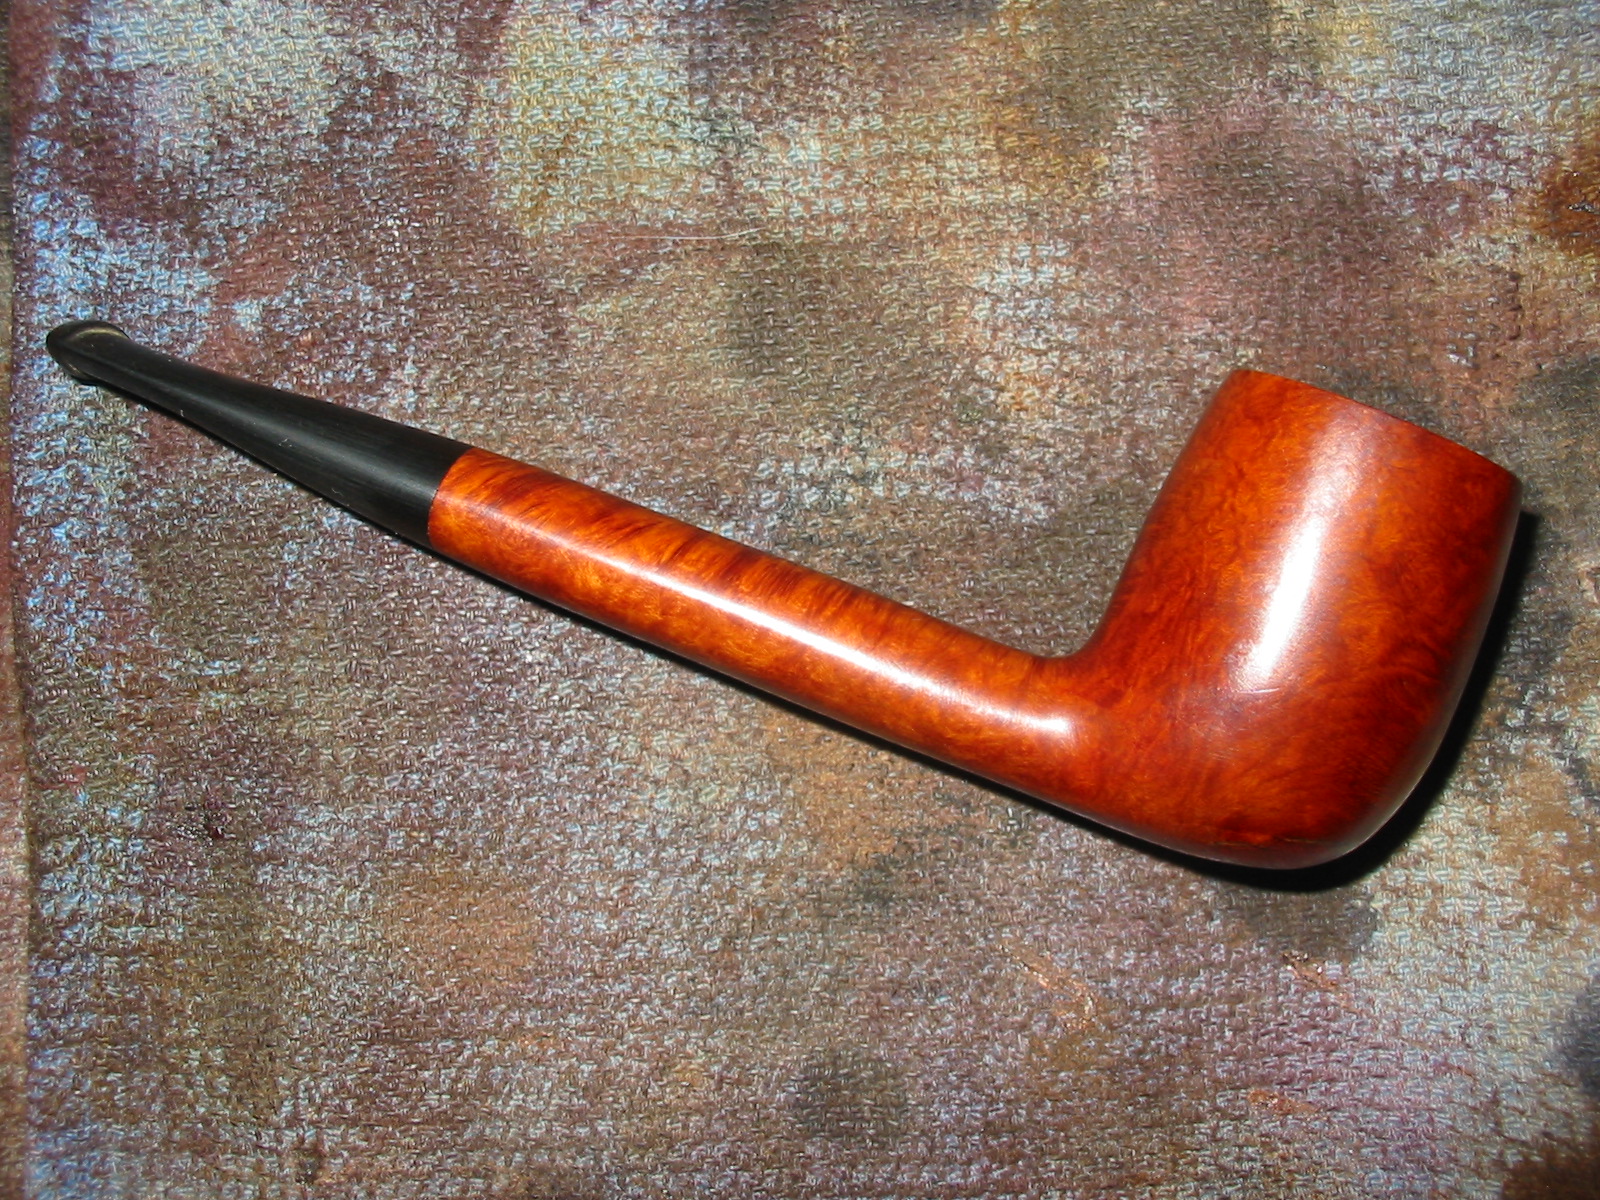
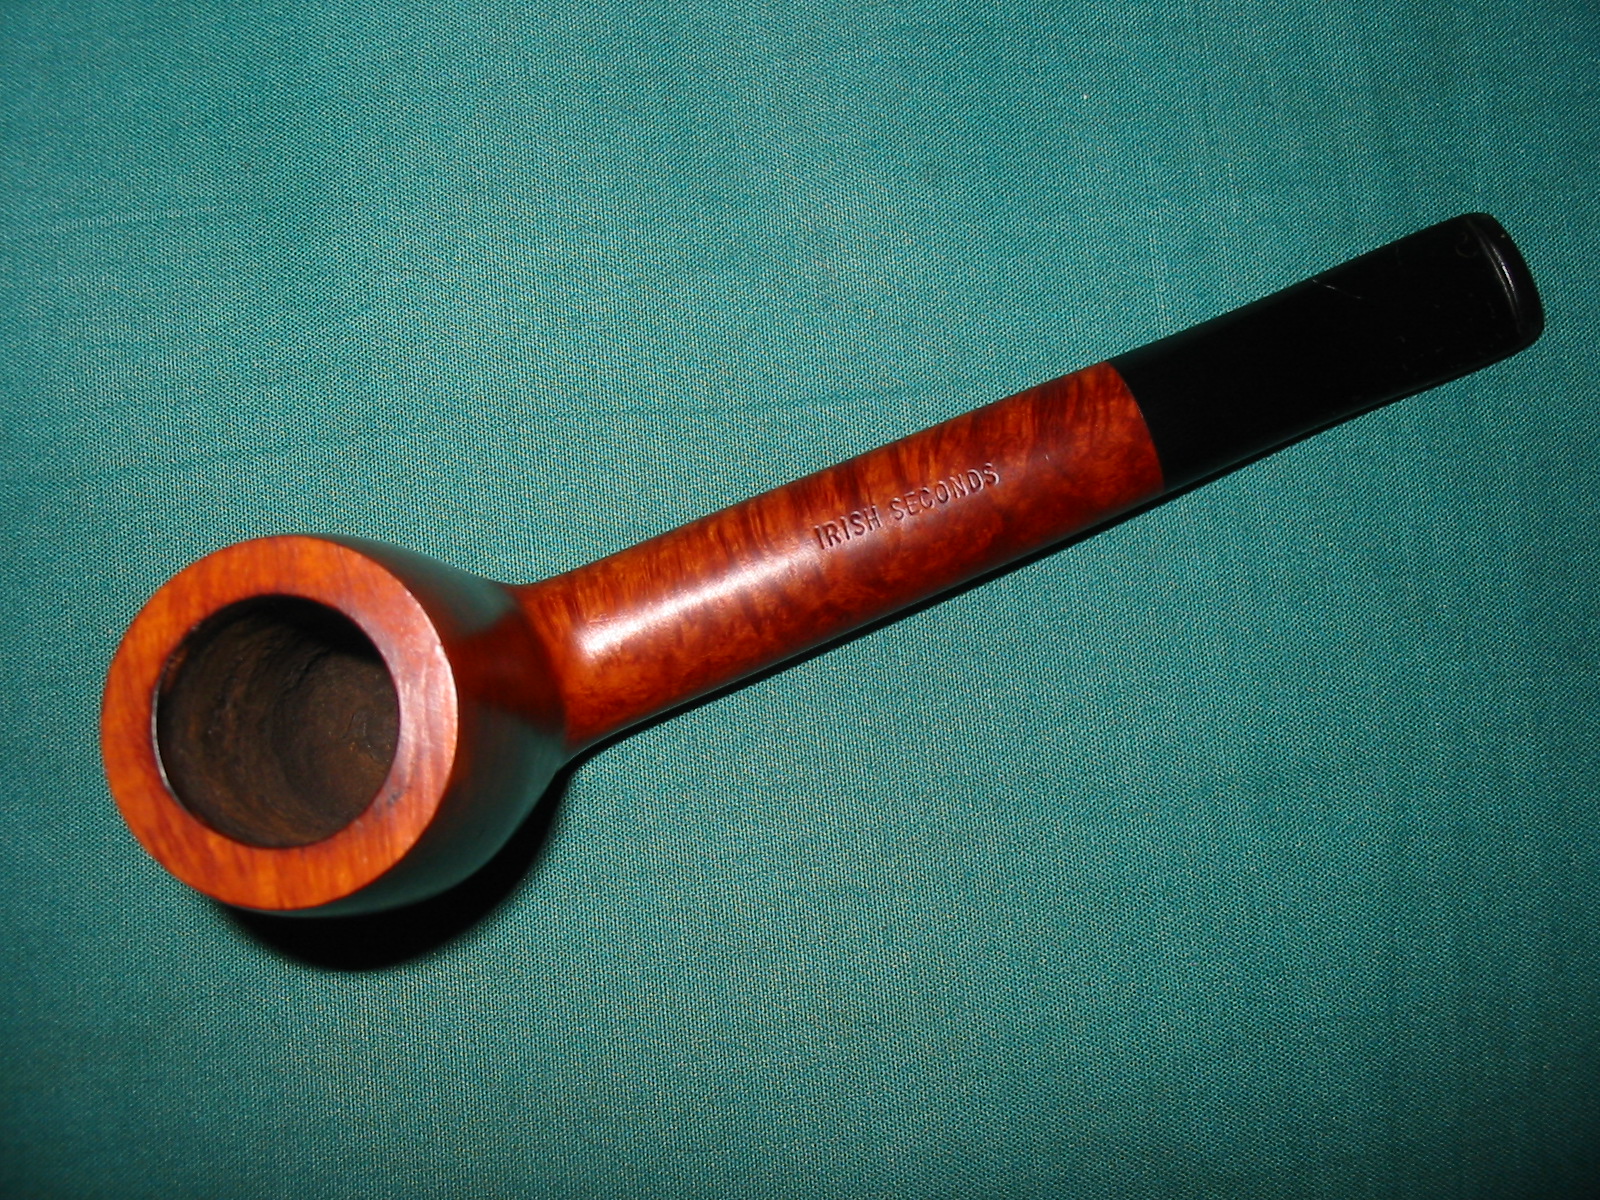
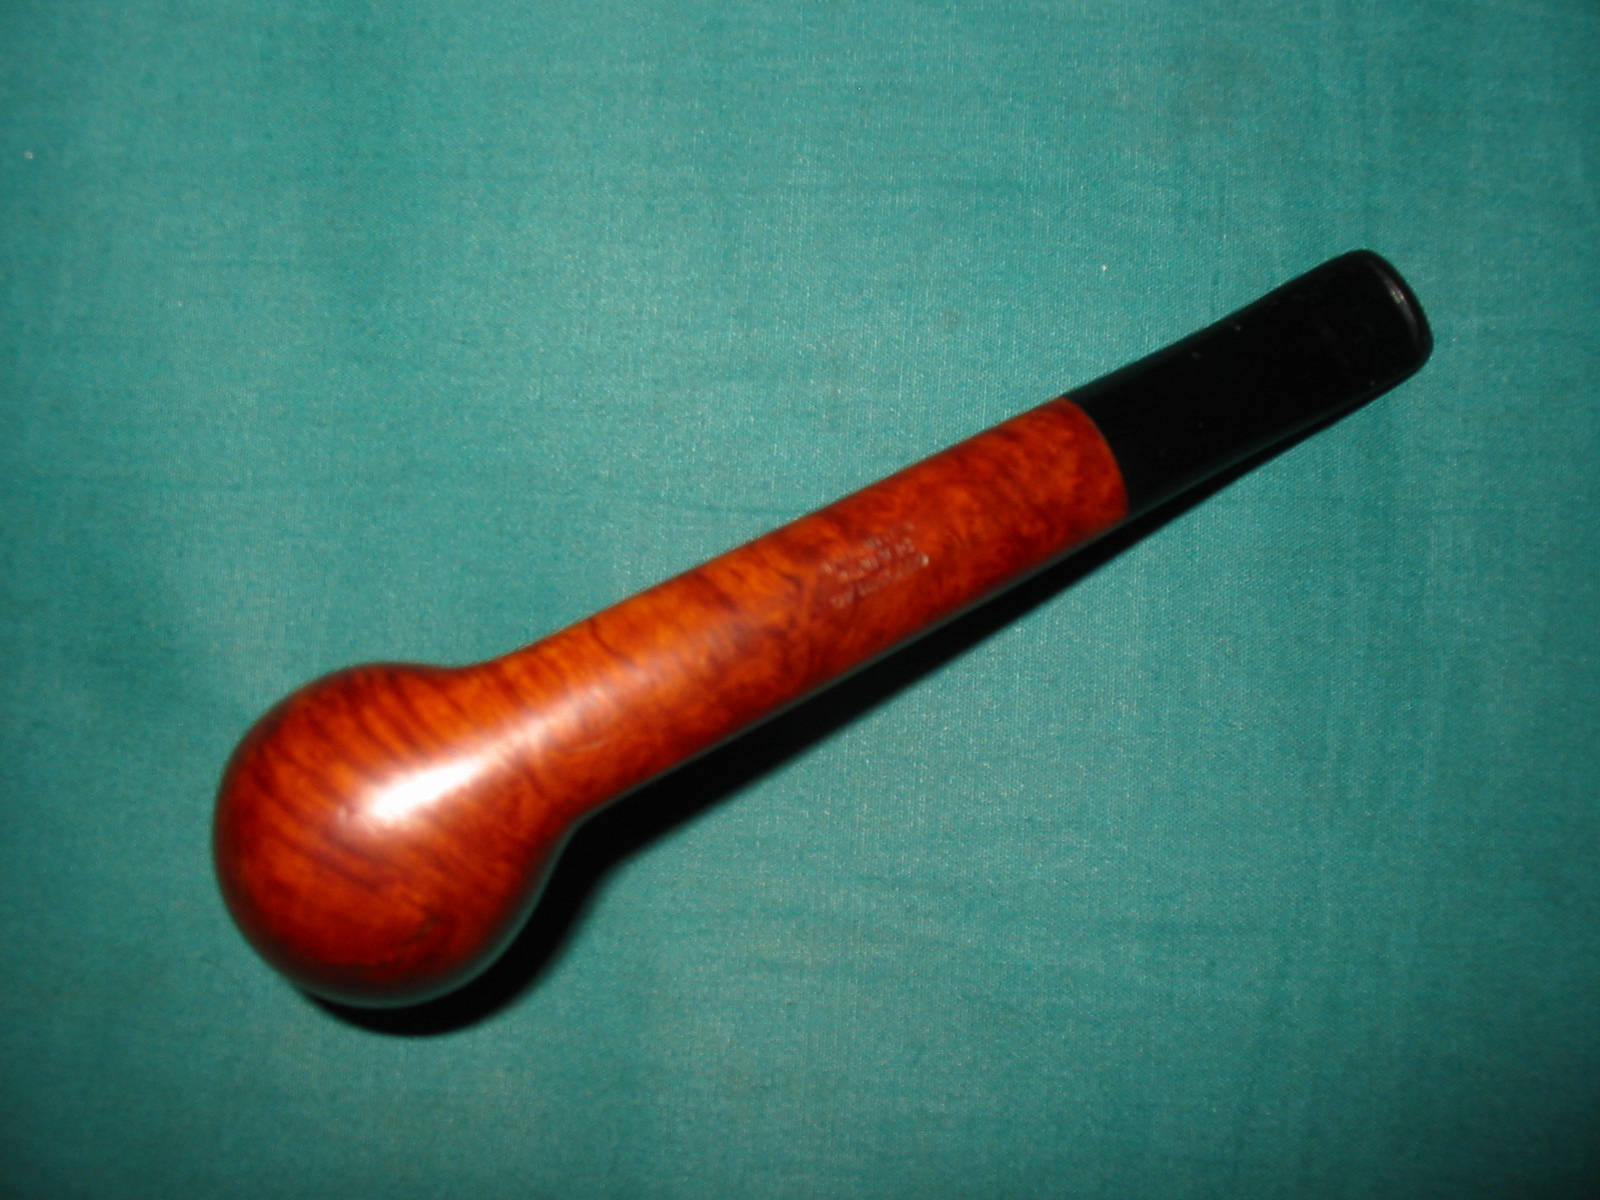
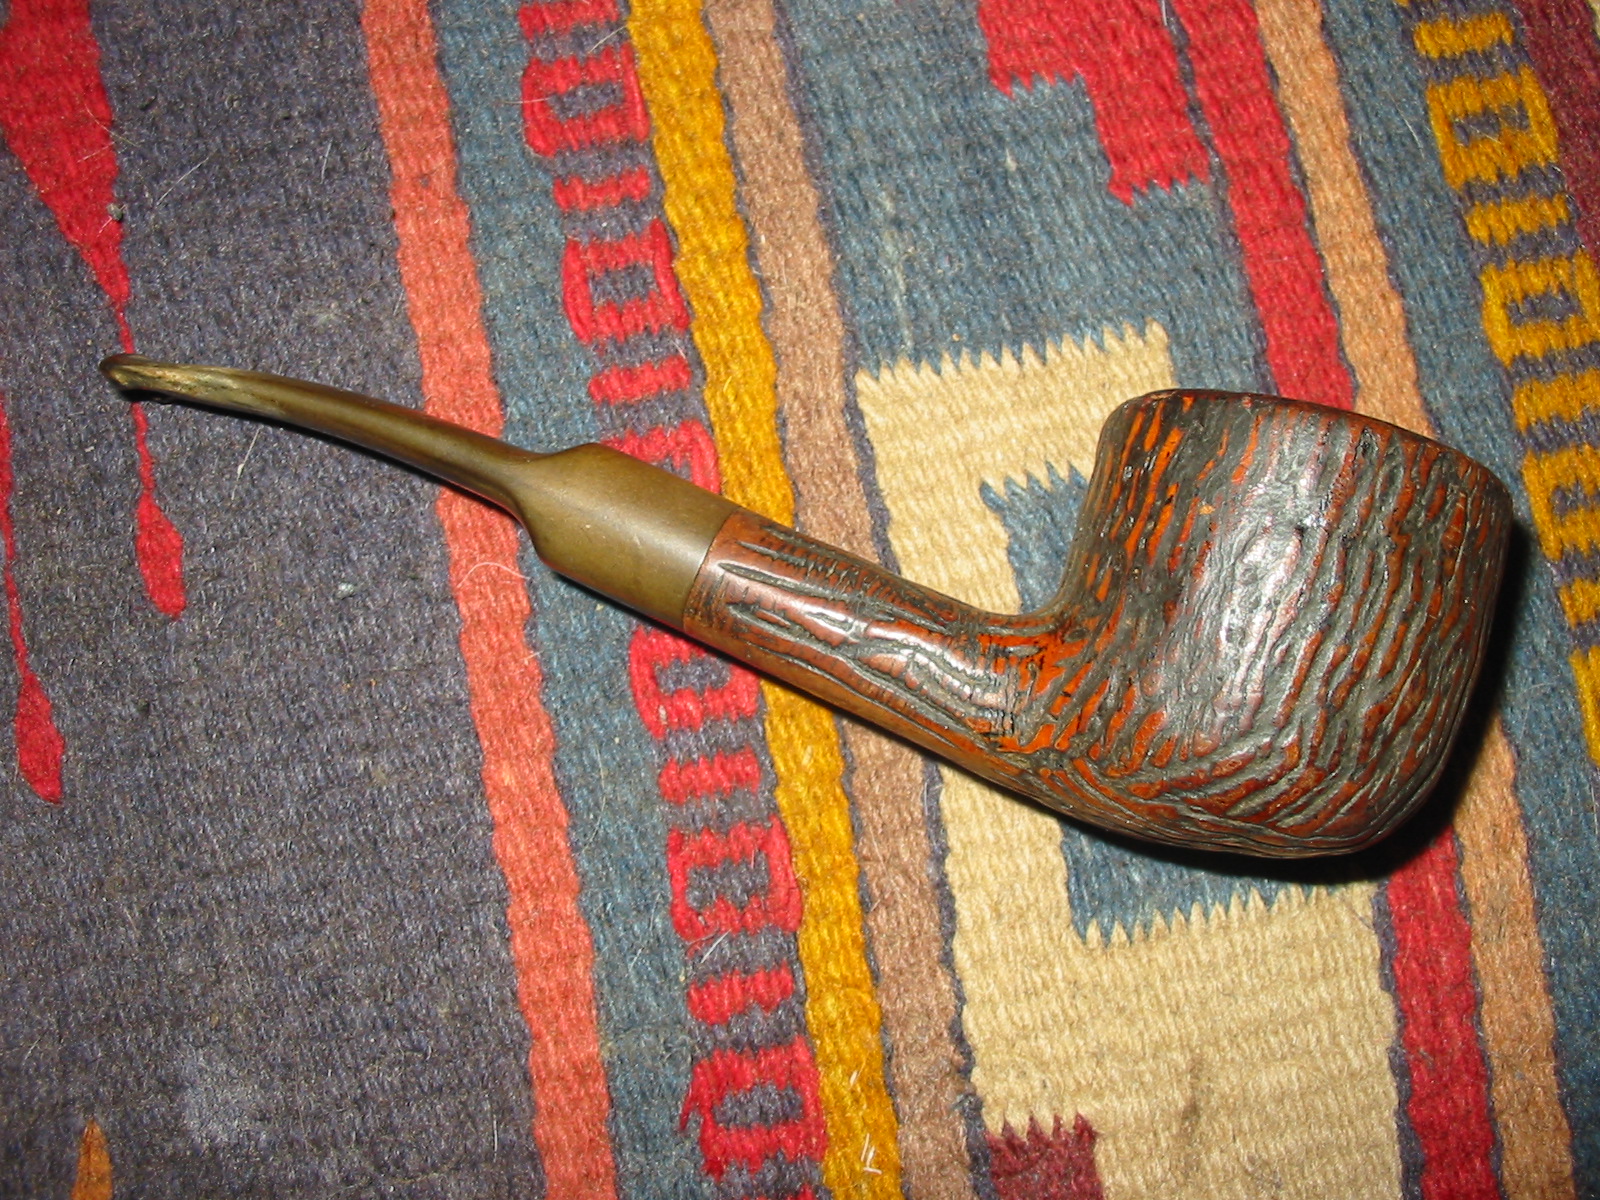
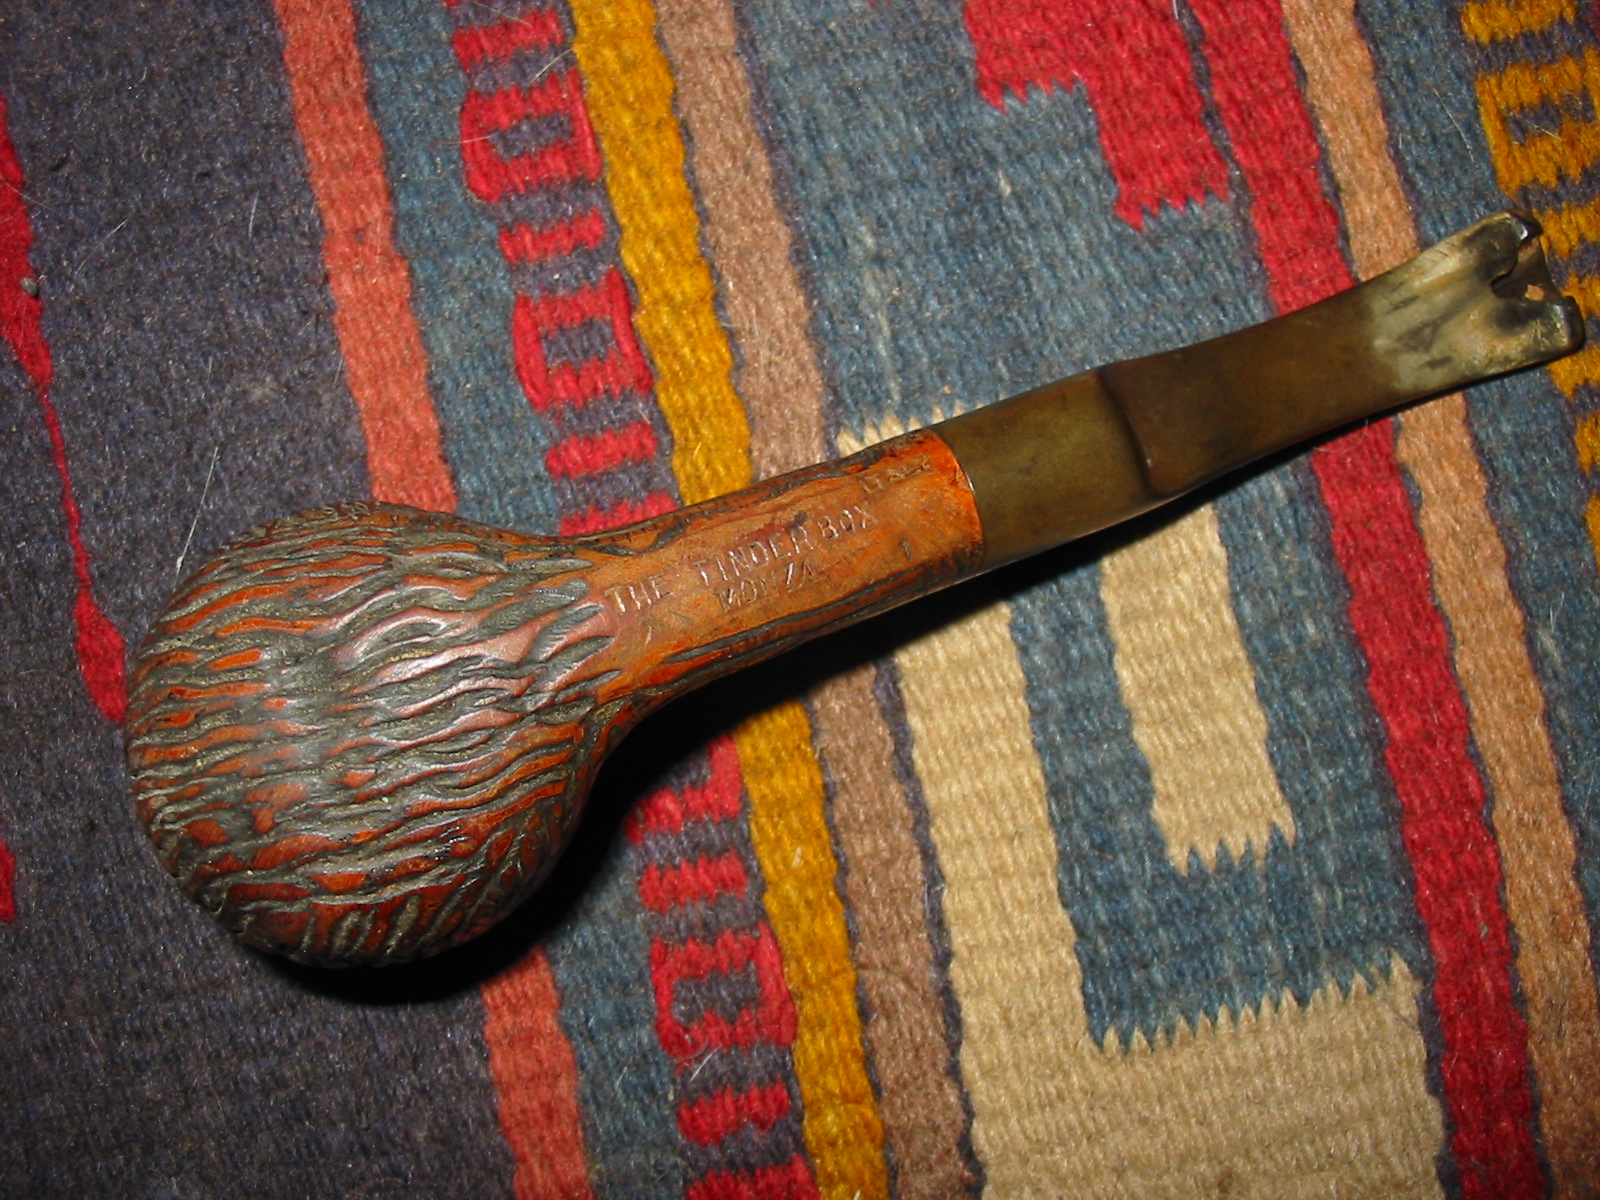
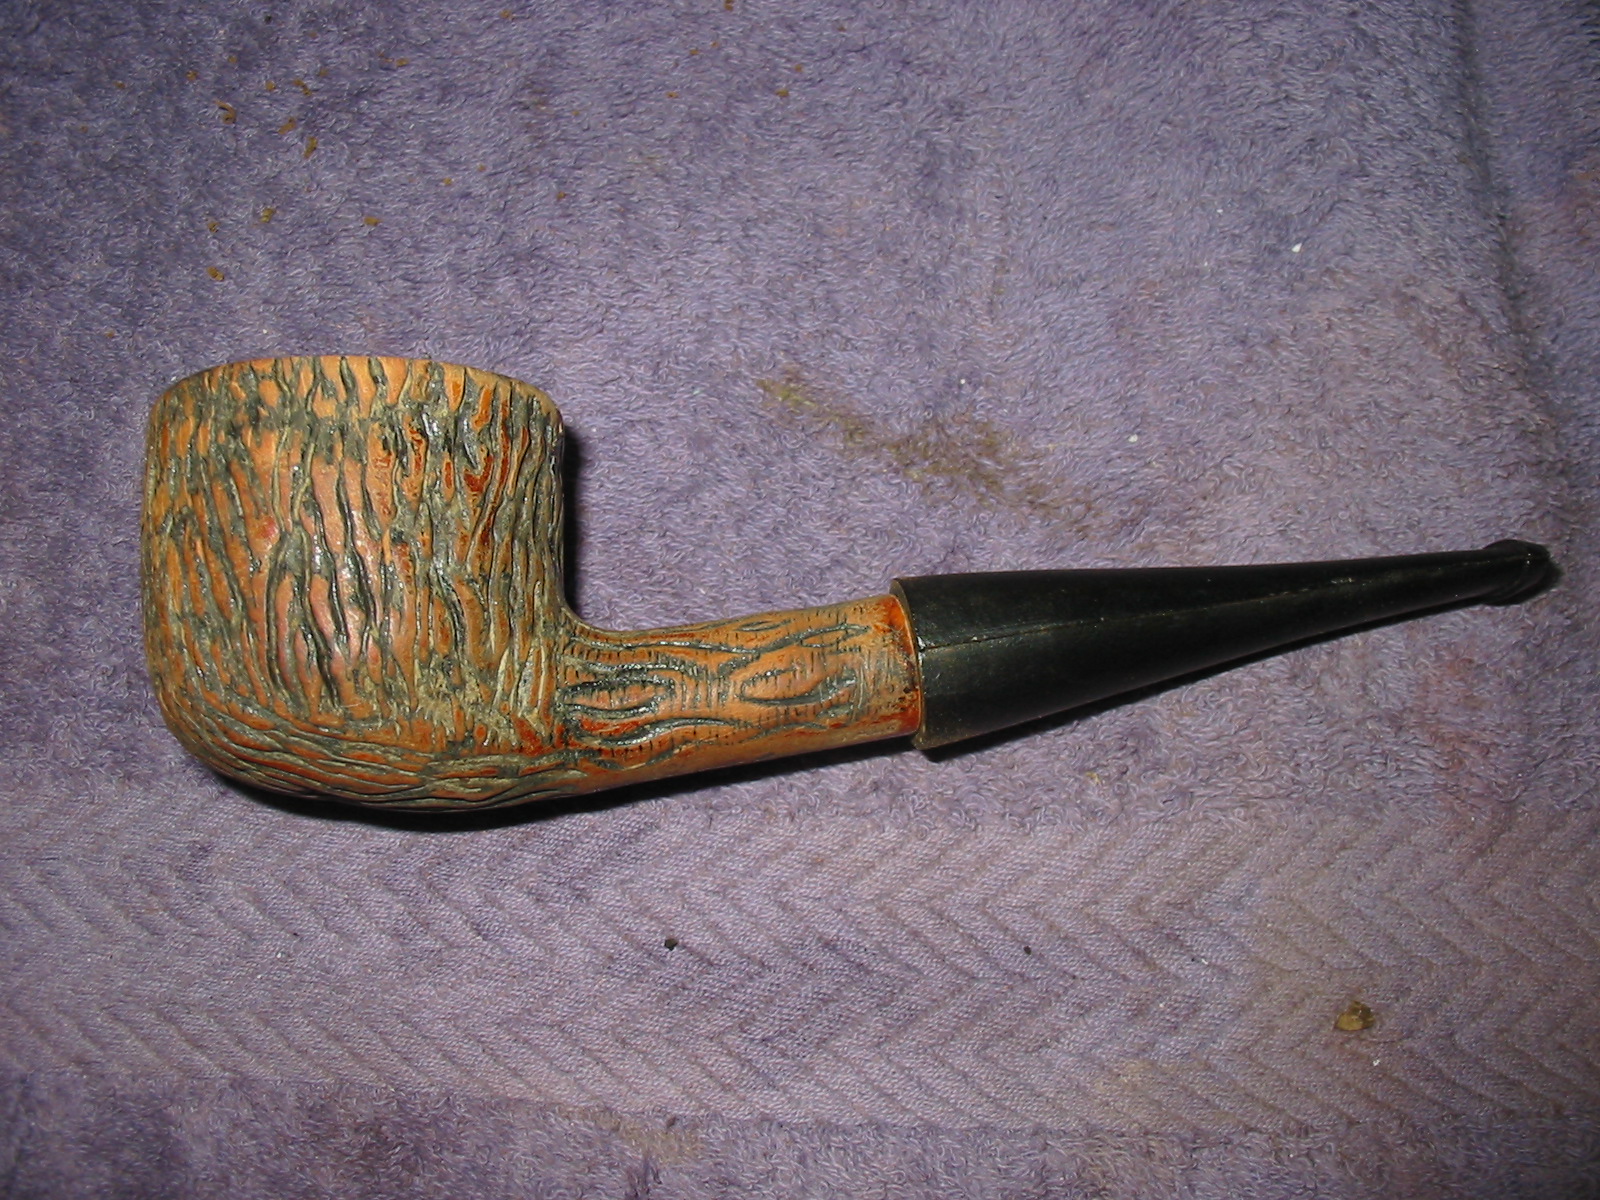
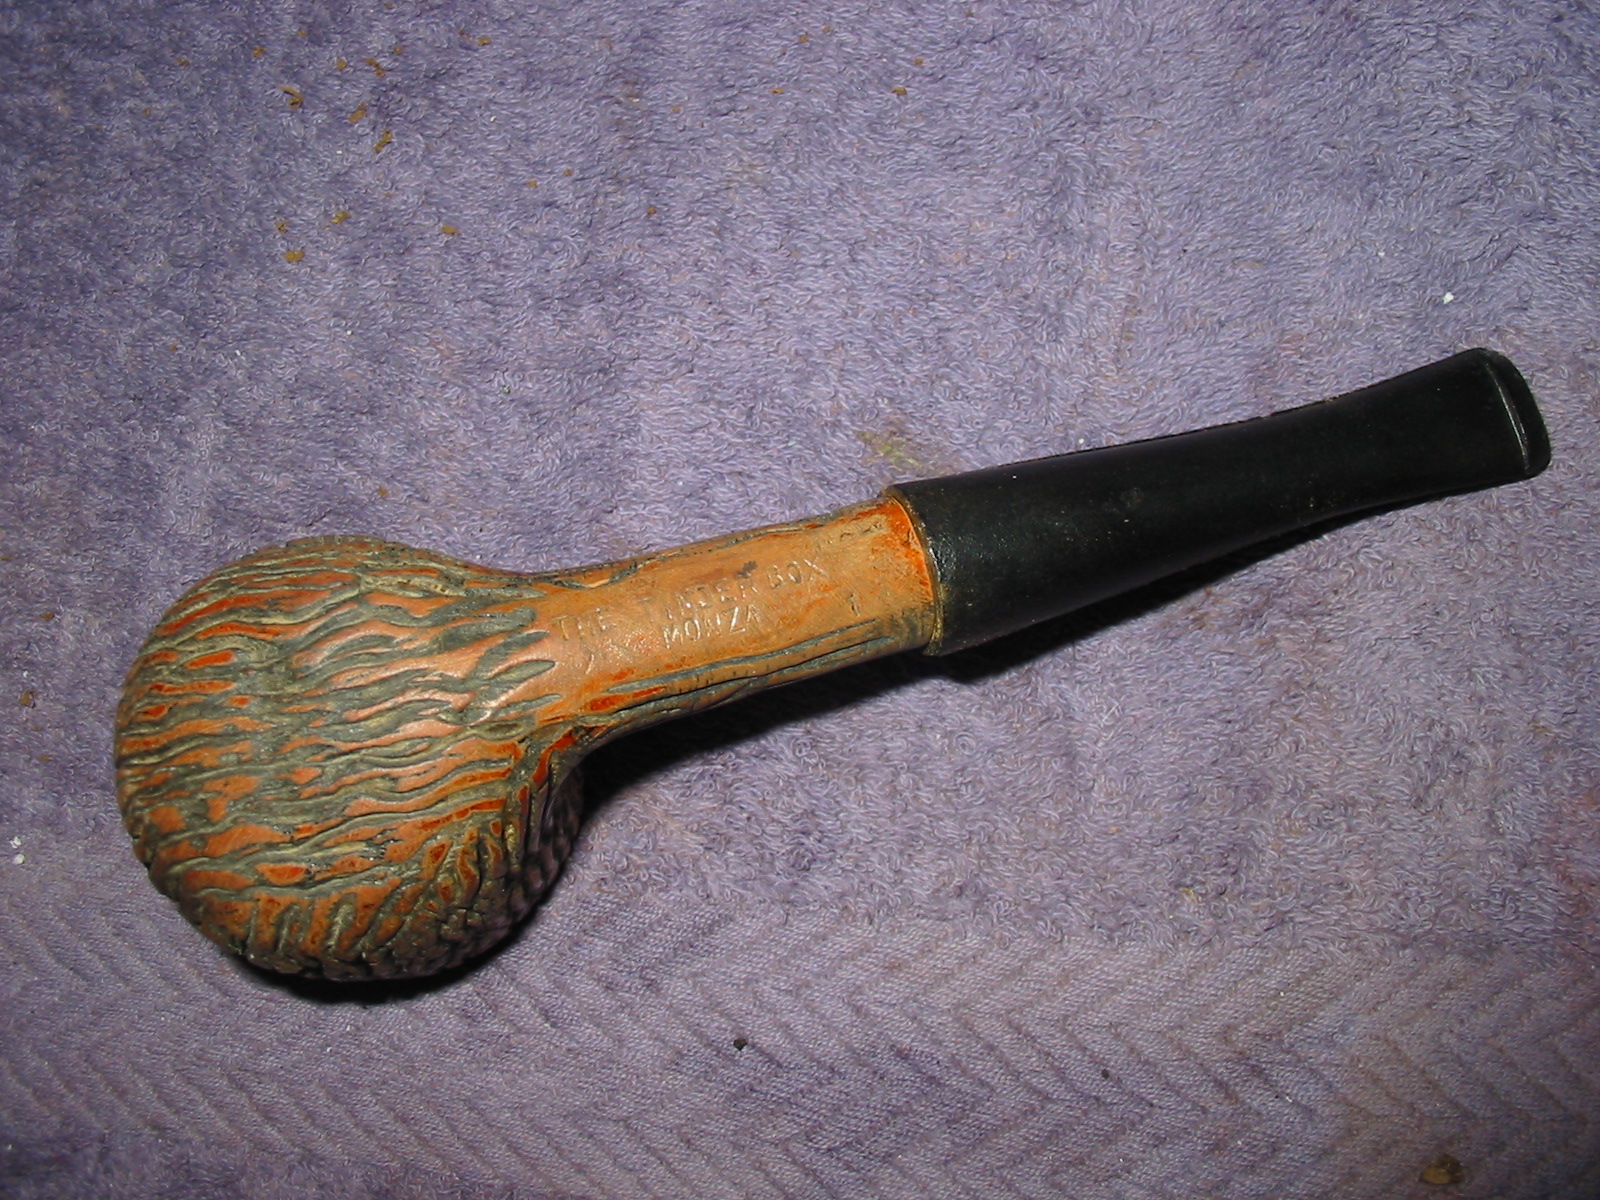
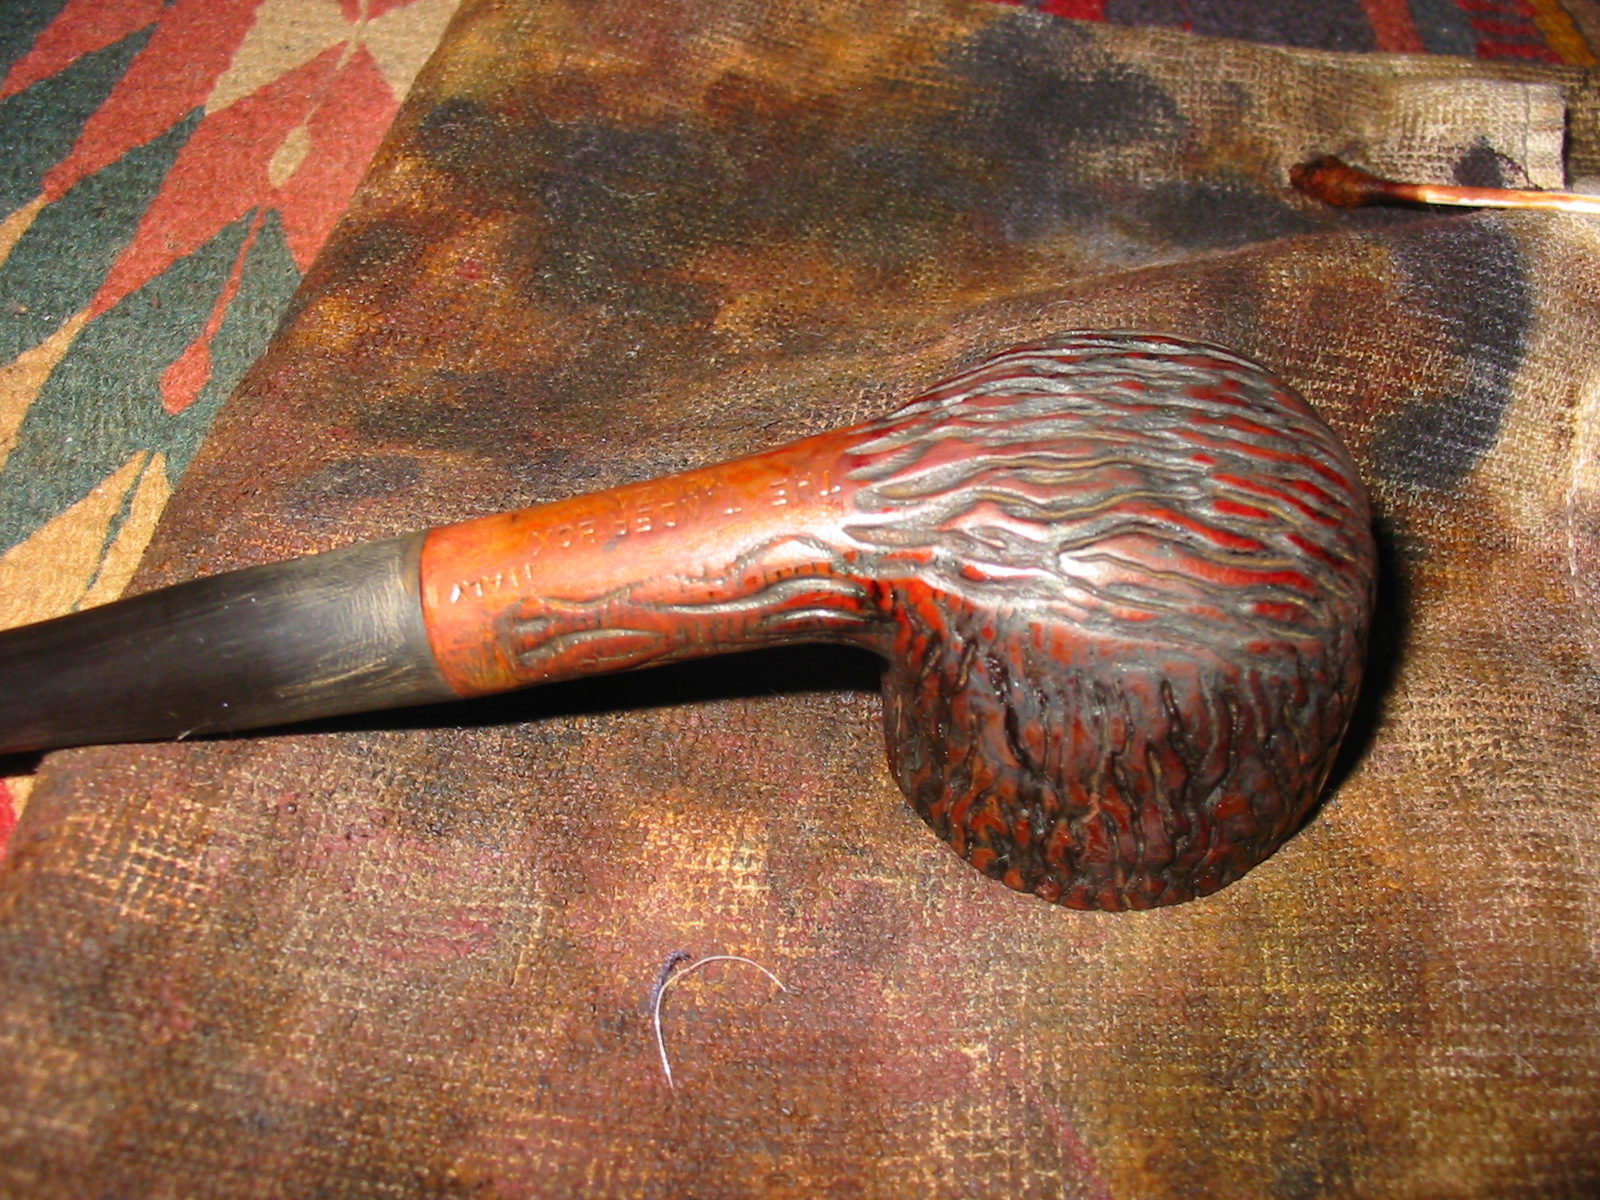
The pipe I repaired today was the one I wrote about earlier entitled When is a Pipe Not Worth Repairing https://rebornpipes.wordpress.com/2014/02/10/when-is-a-pipe-not-worth-repairing/ It was stamped Tinderbox Monza and according to a 1974 catalogue on Chris Keene’s site it originally sold for $15. It could be purchased in a matte finish smooth or a hand rusticated version. The shapes were varied and the sizes also varied. I have repaired one other pipe that had the same rustication but no stamping on it so I would imagine it also is a Monza. Monza pipes were made by Lorenzo for Tinderbox. They were a house line of Italian made affordable pipes during the 70’s.

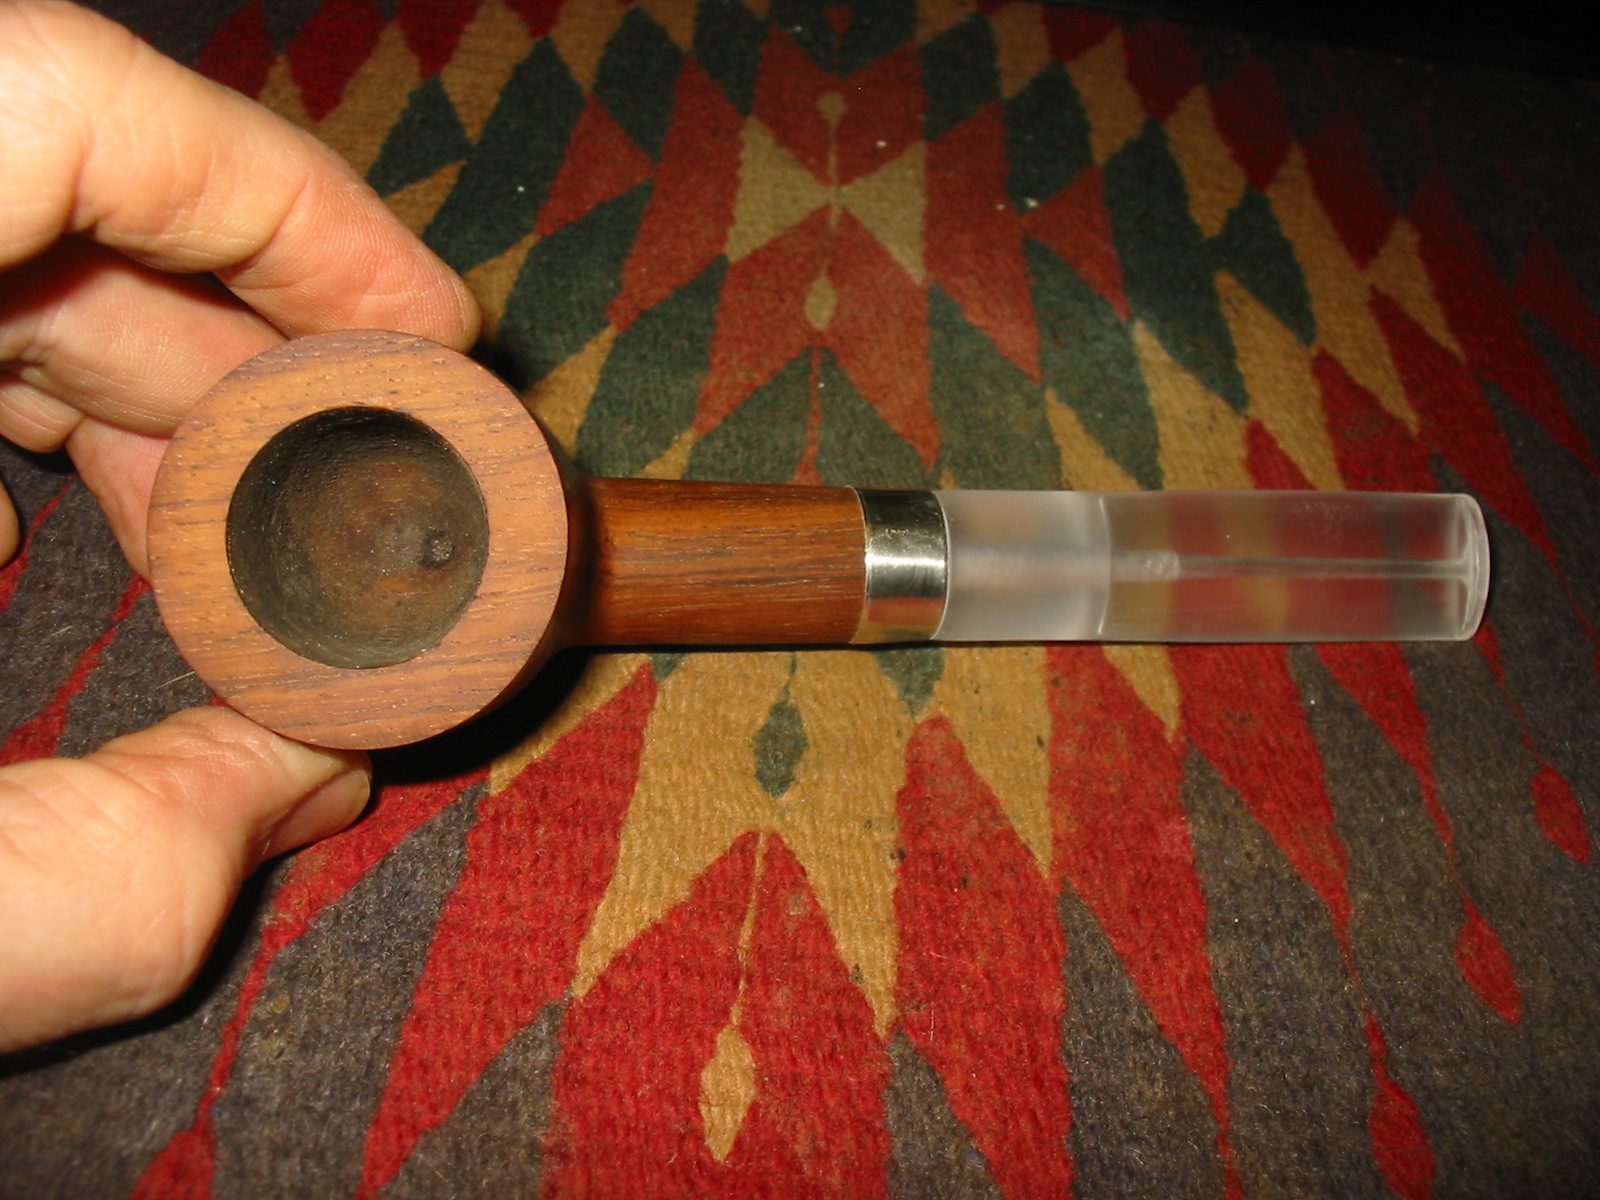
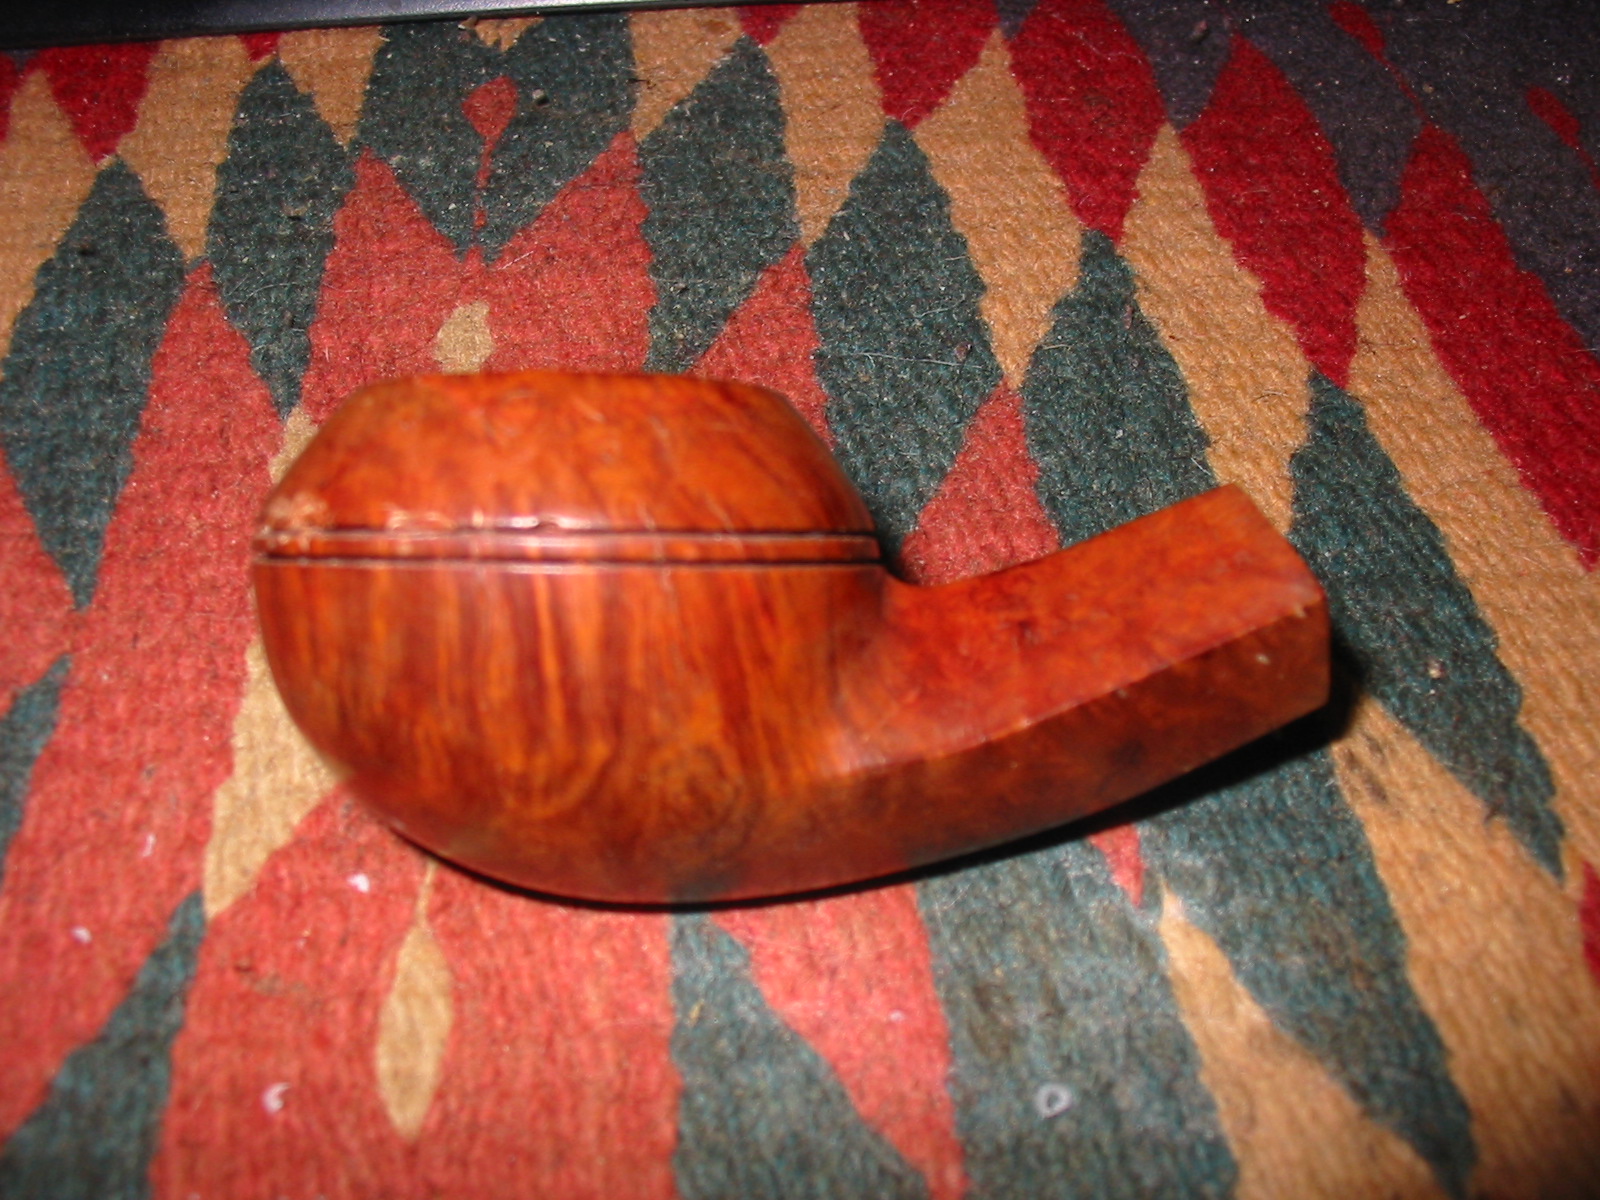
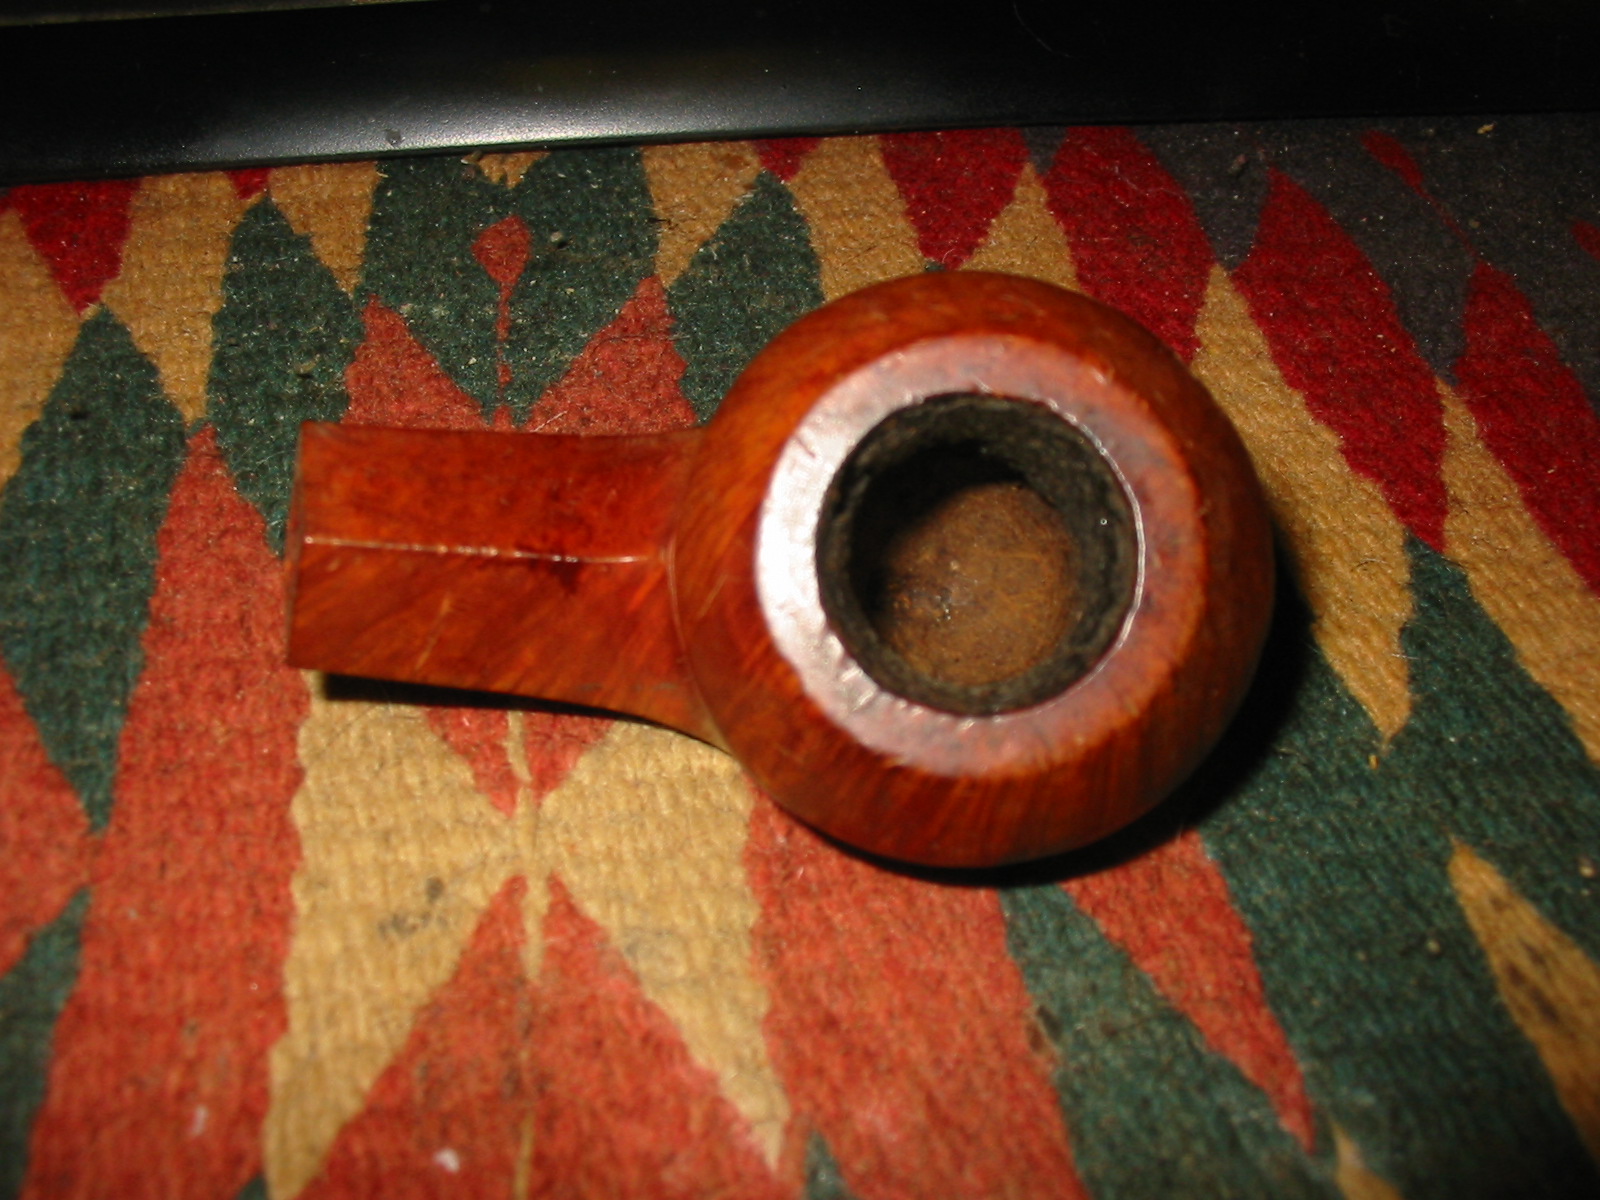
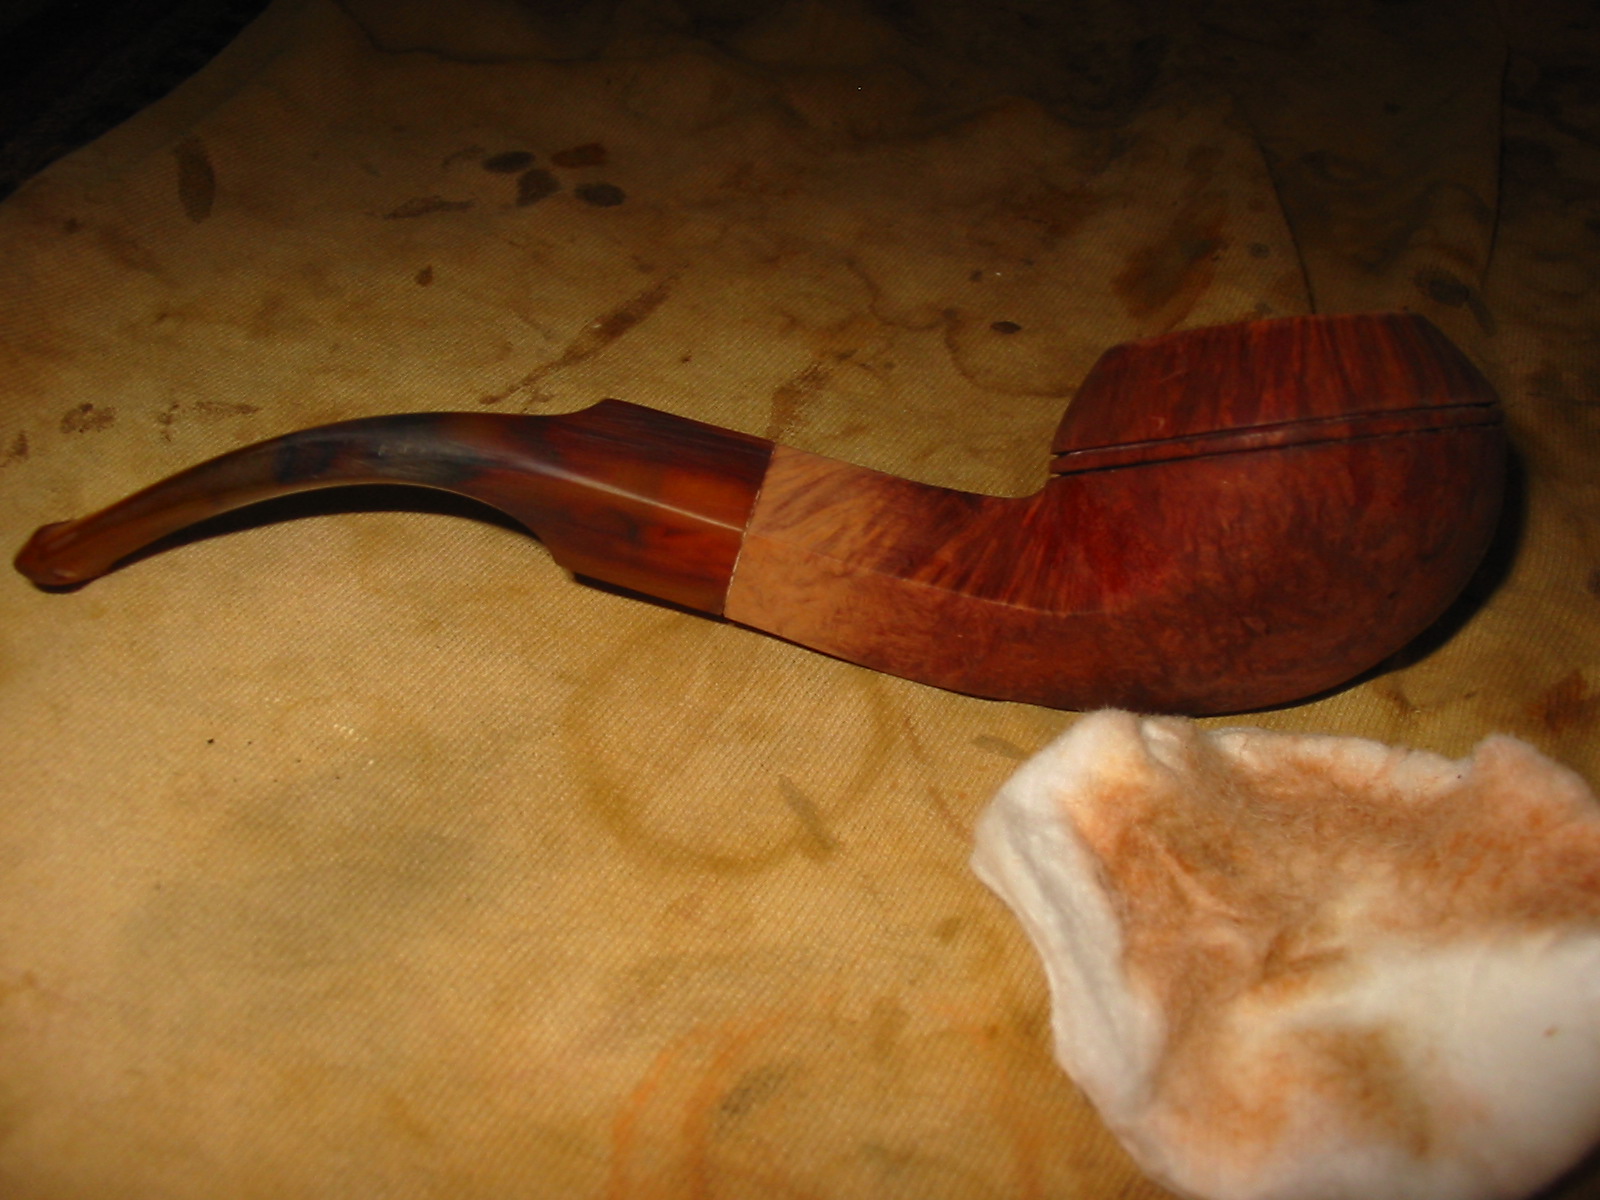
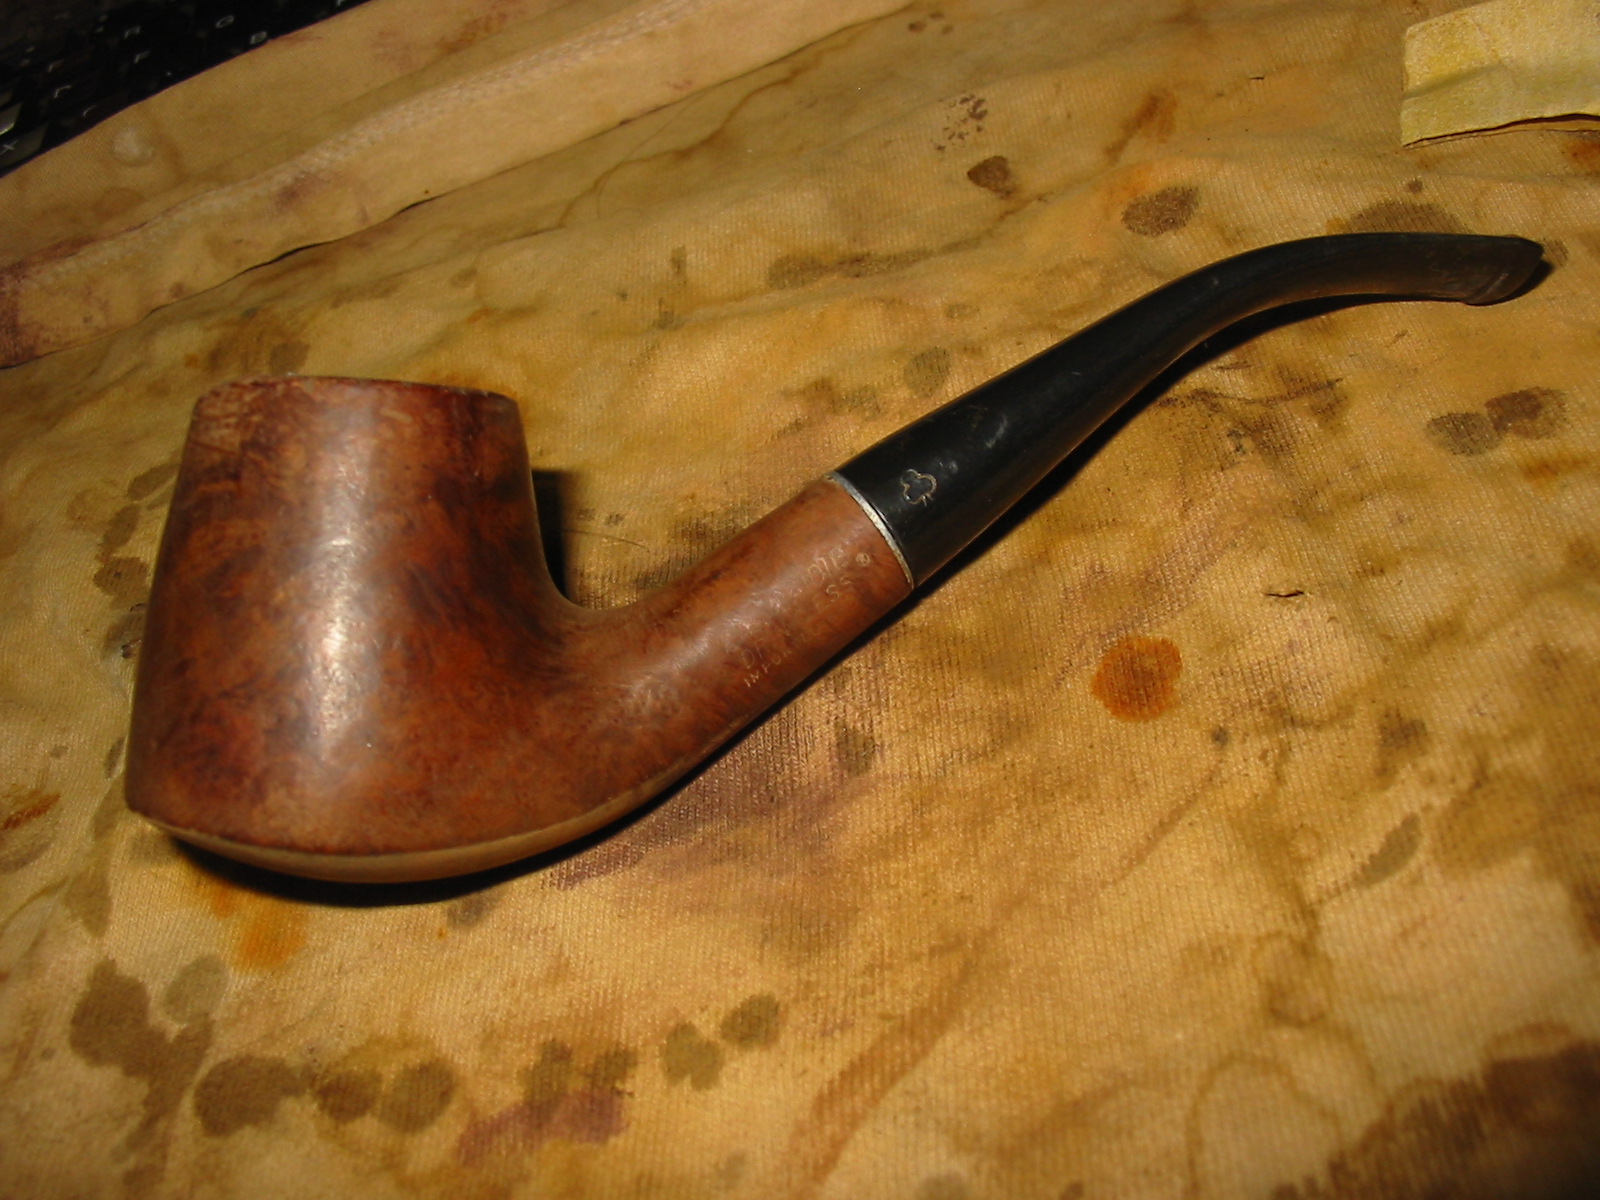
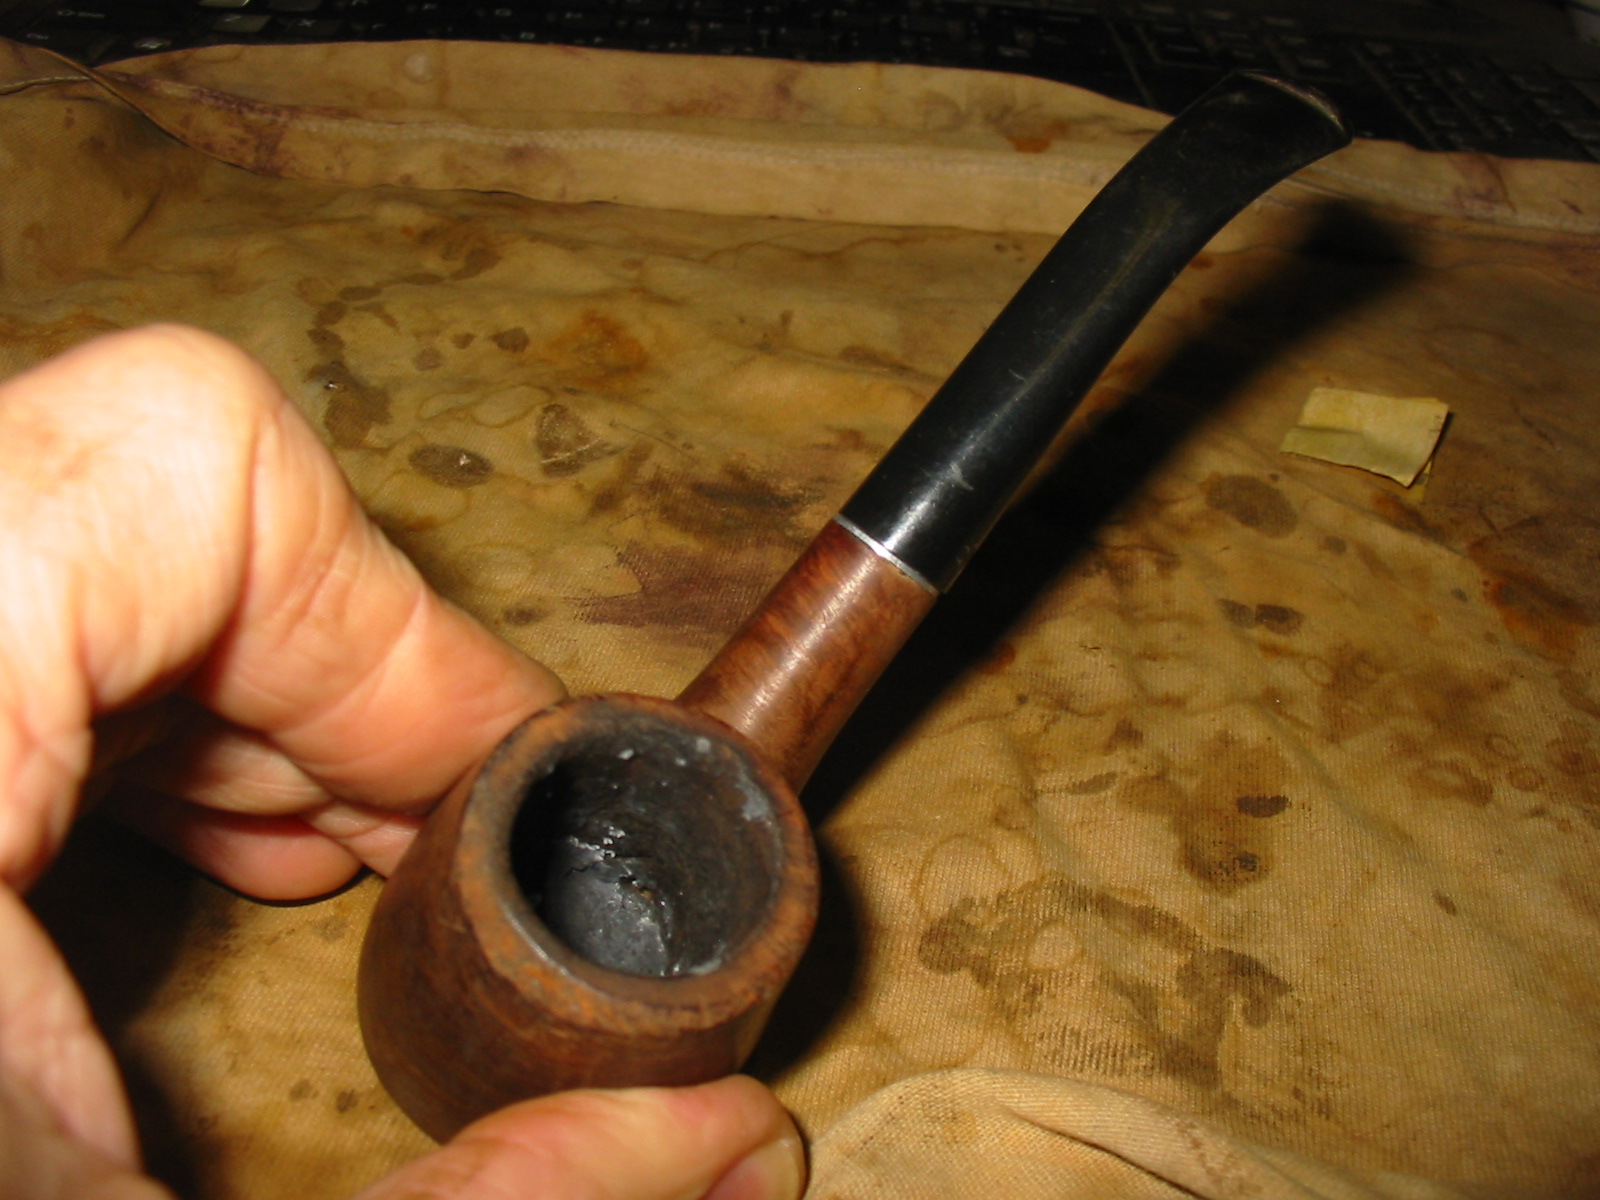
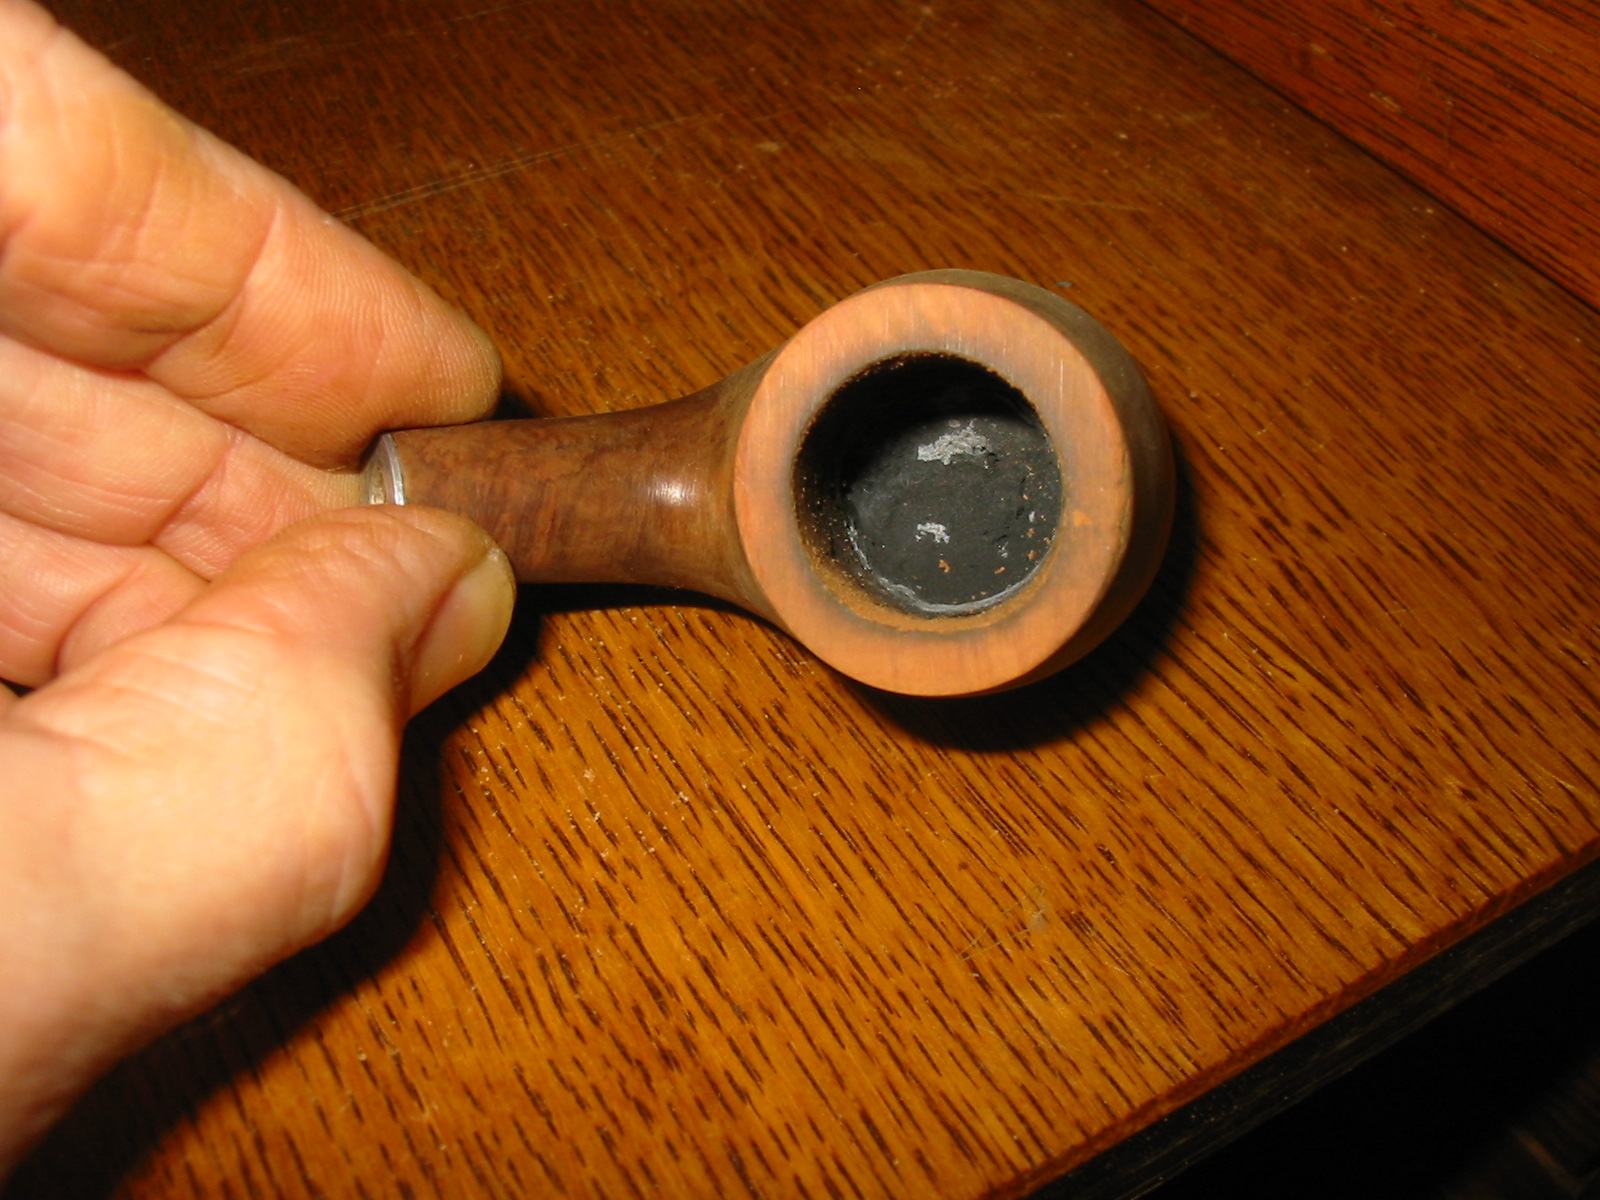
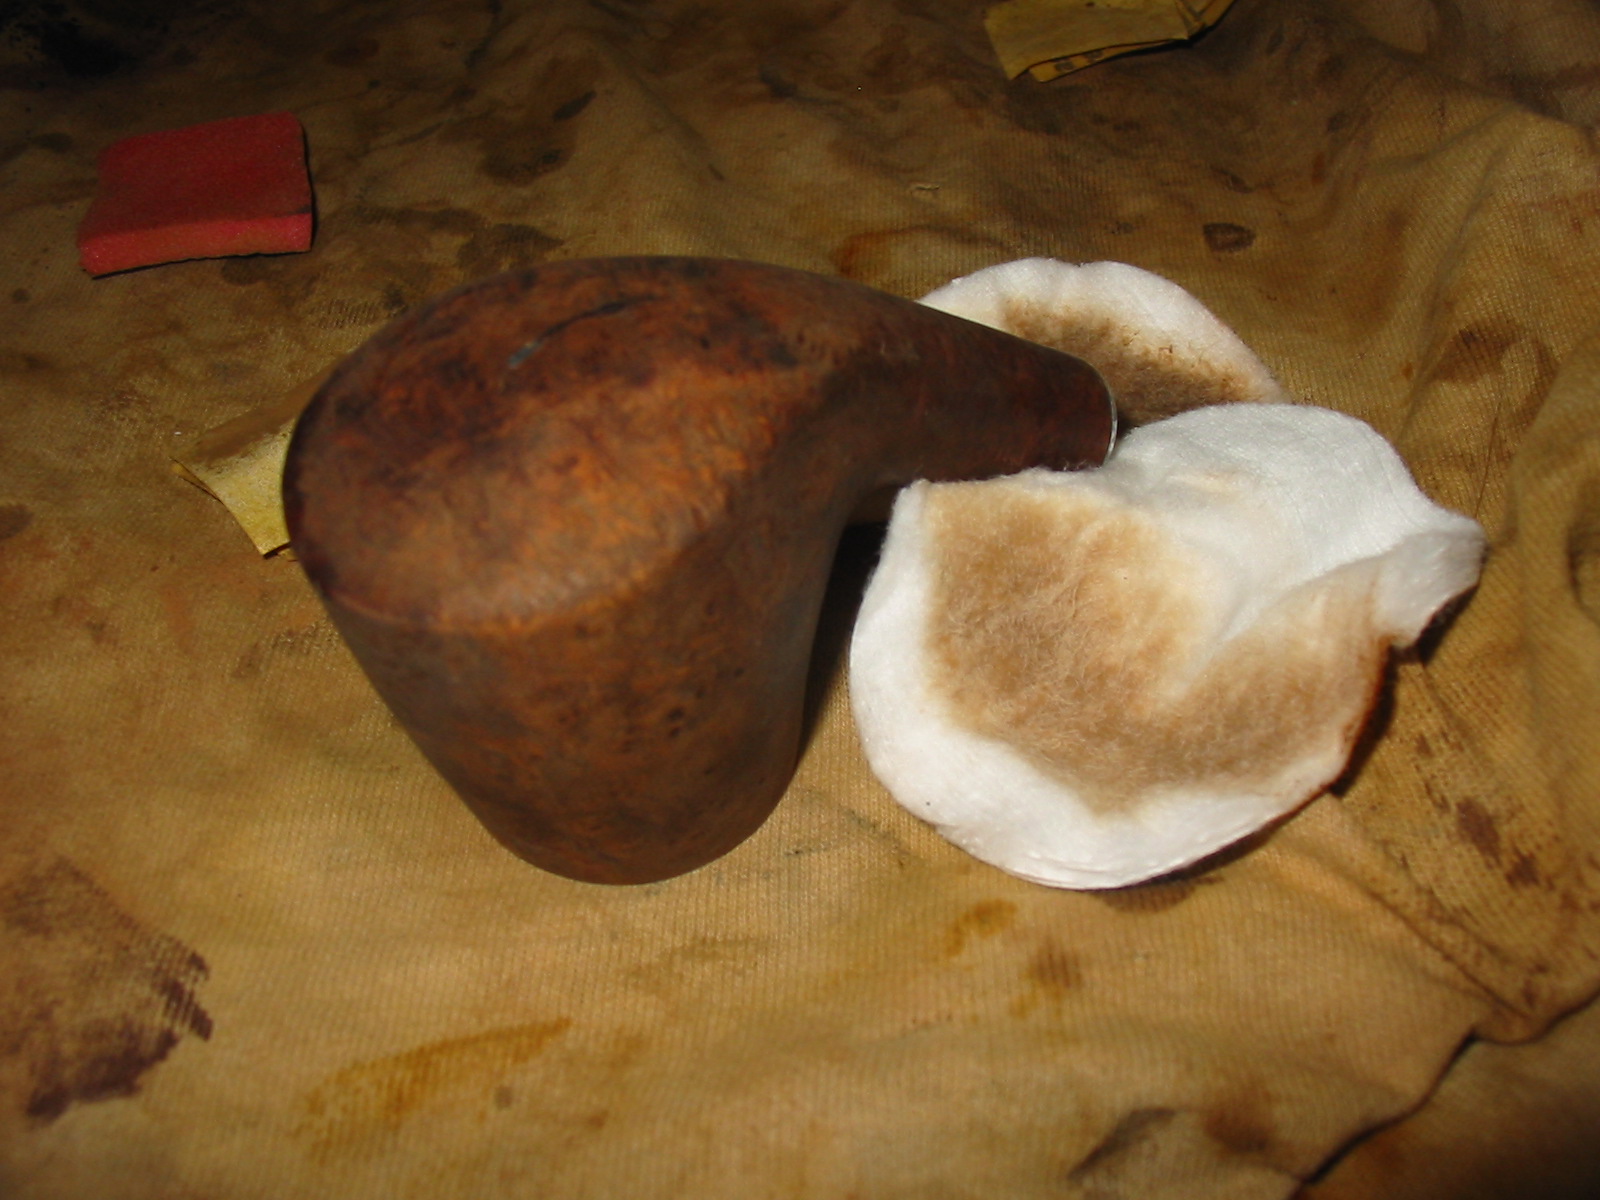
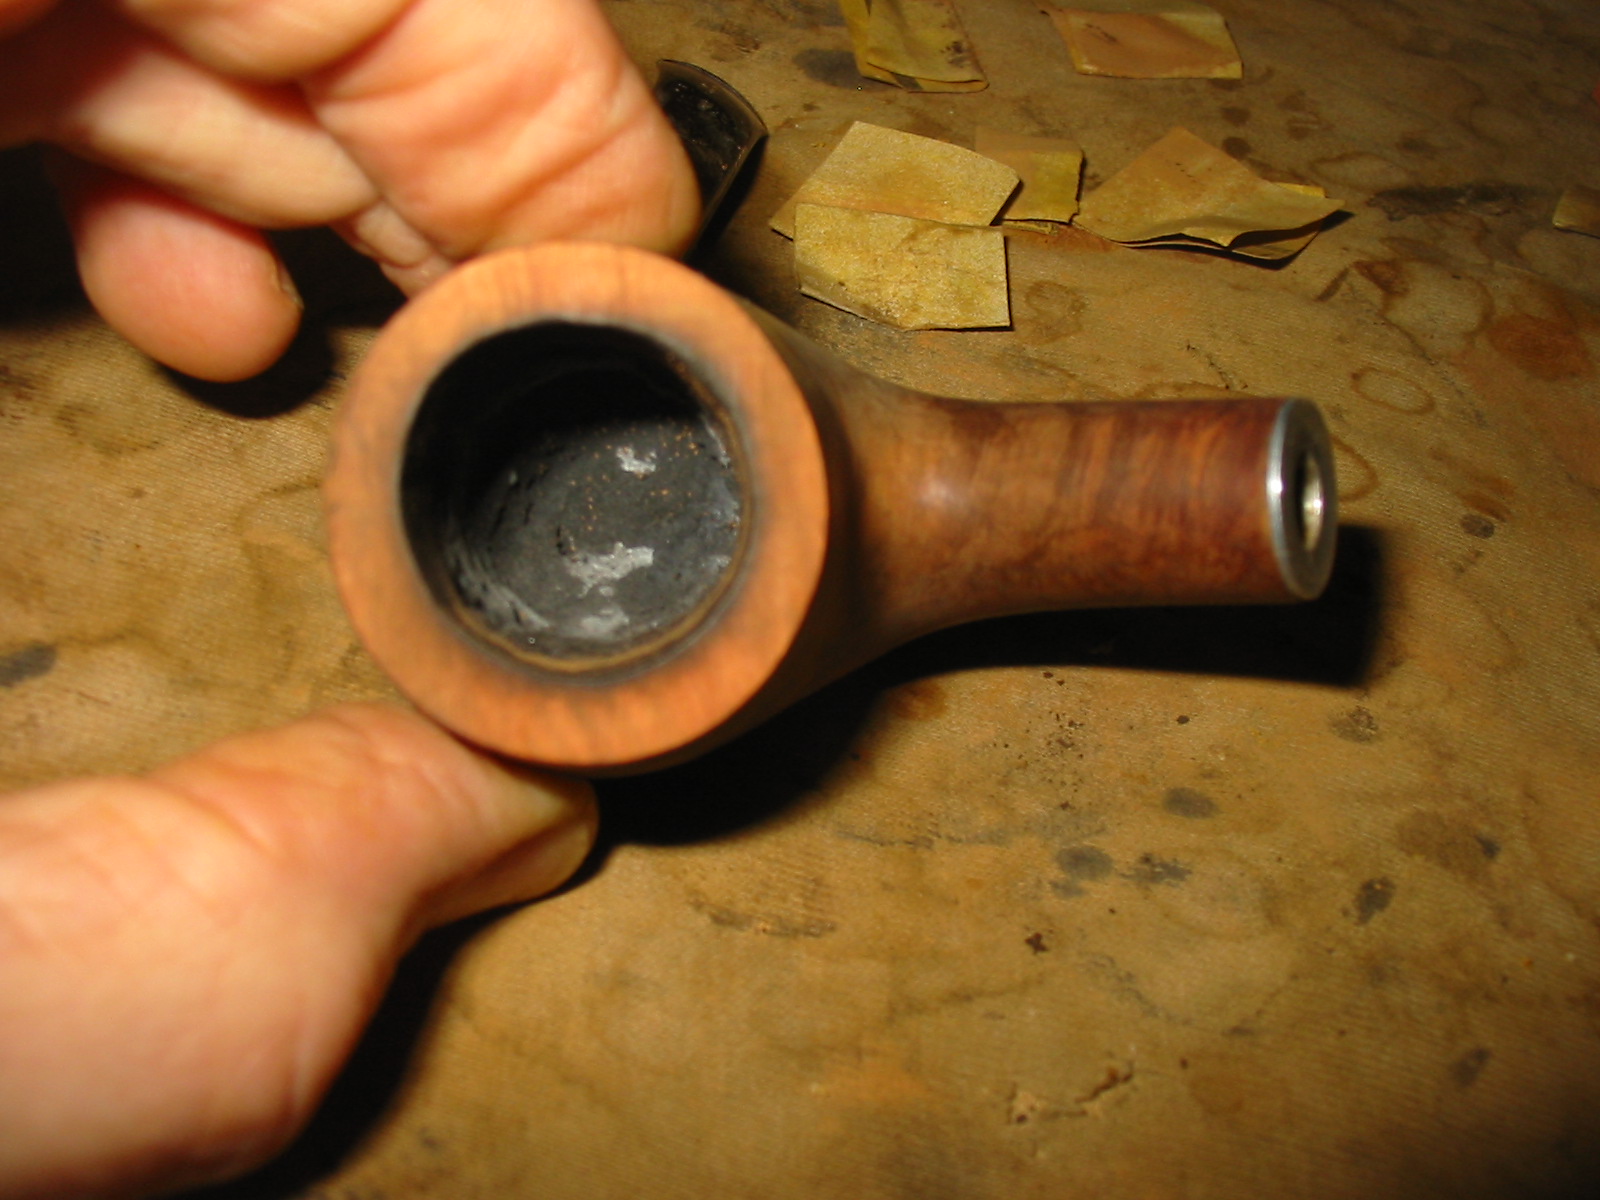
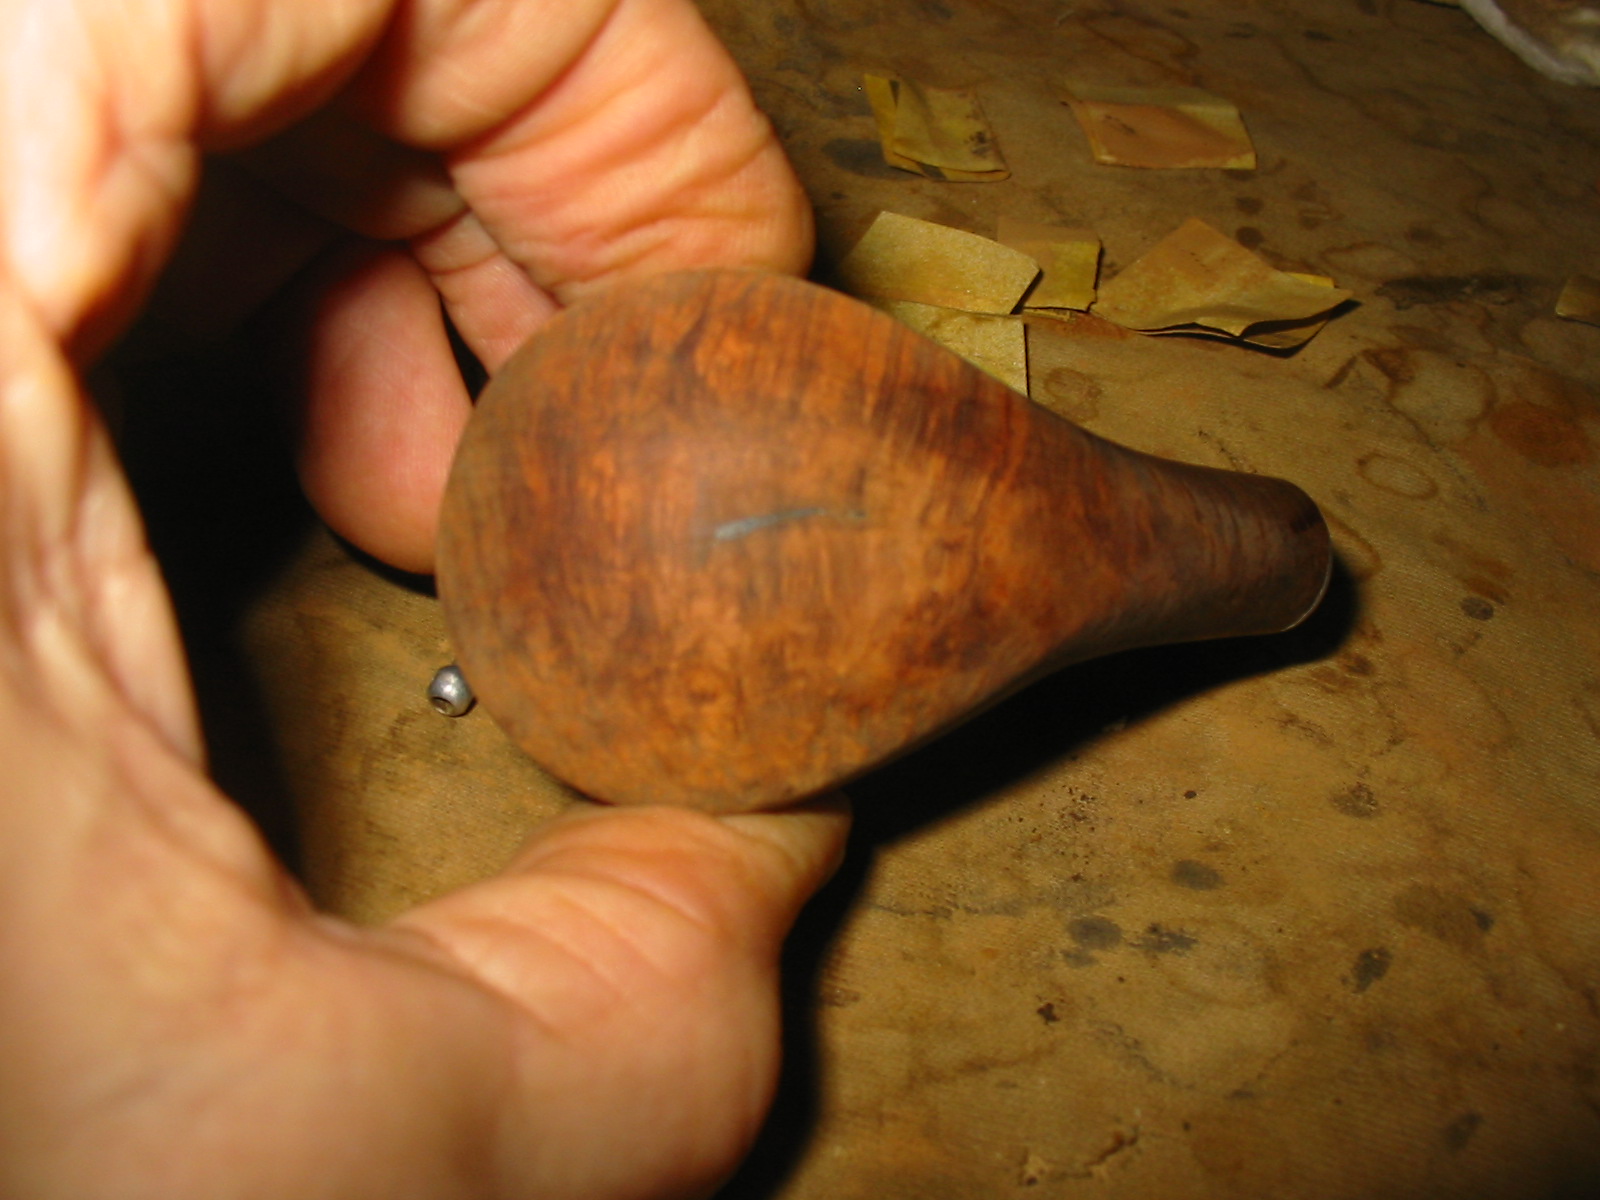
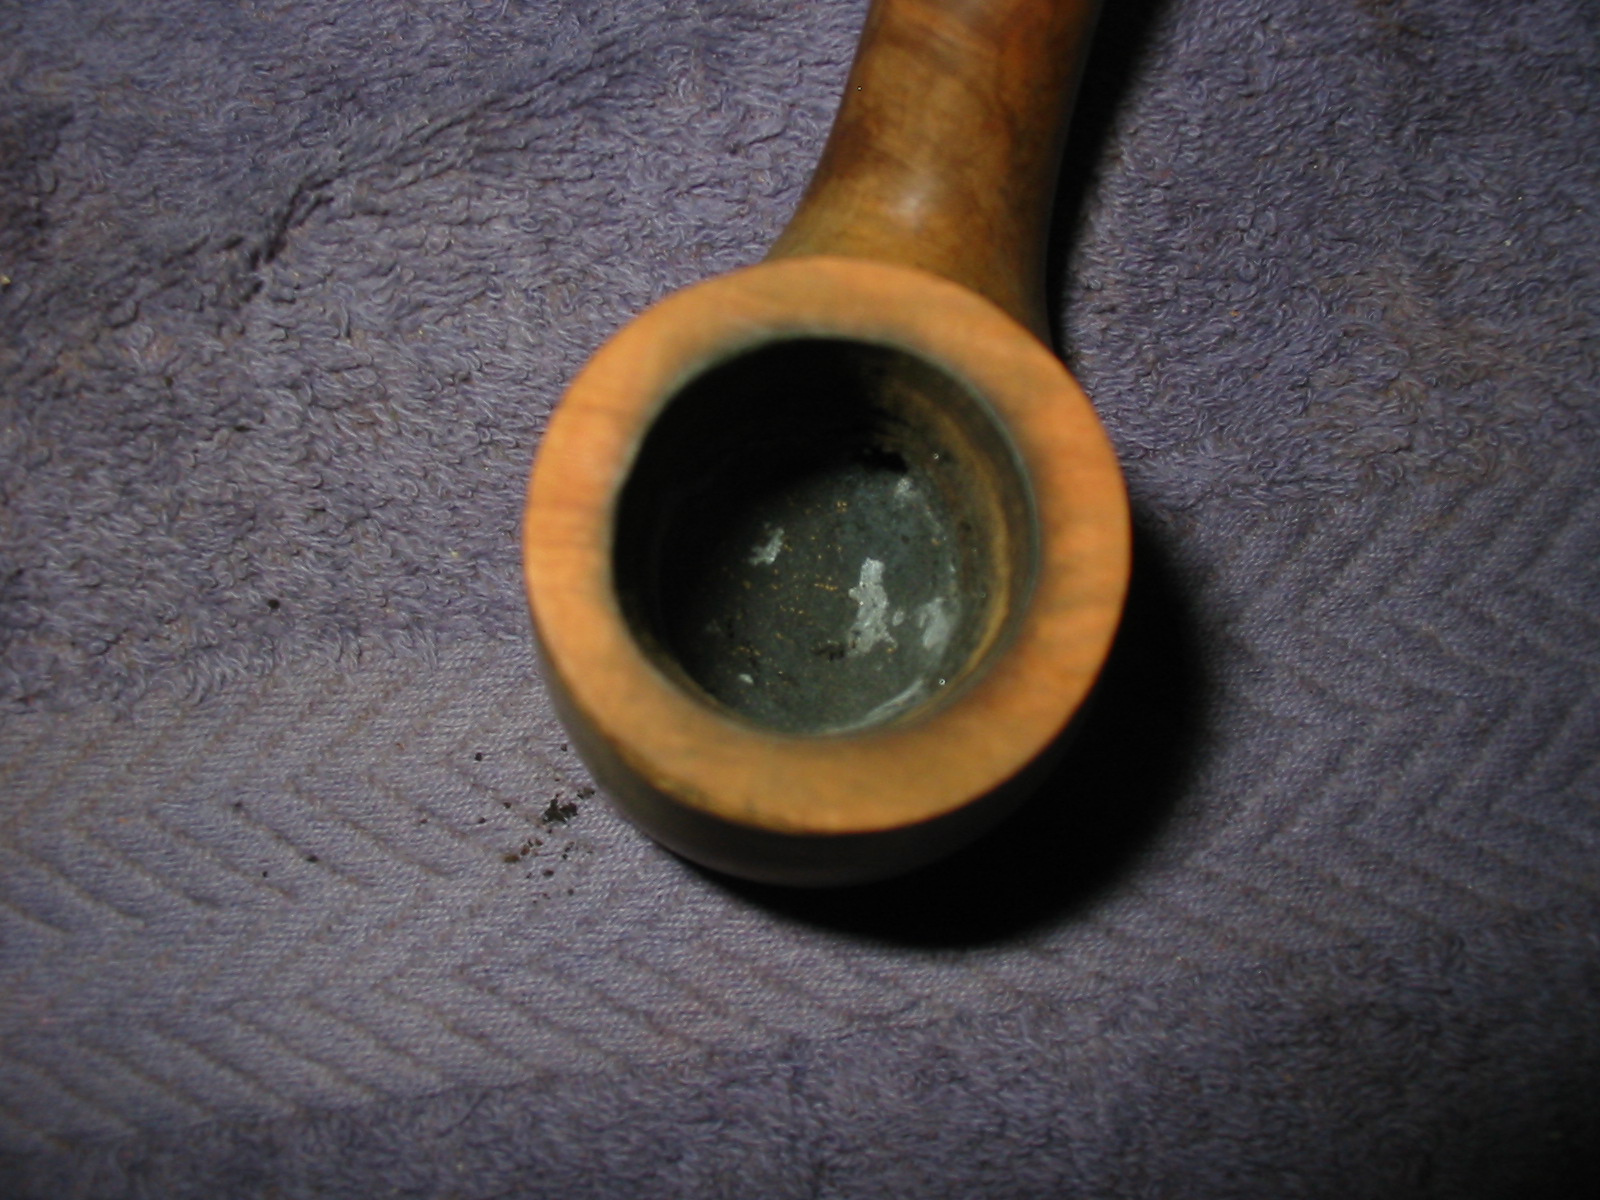
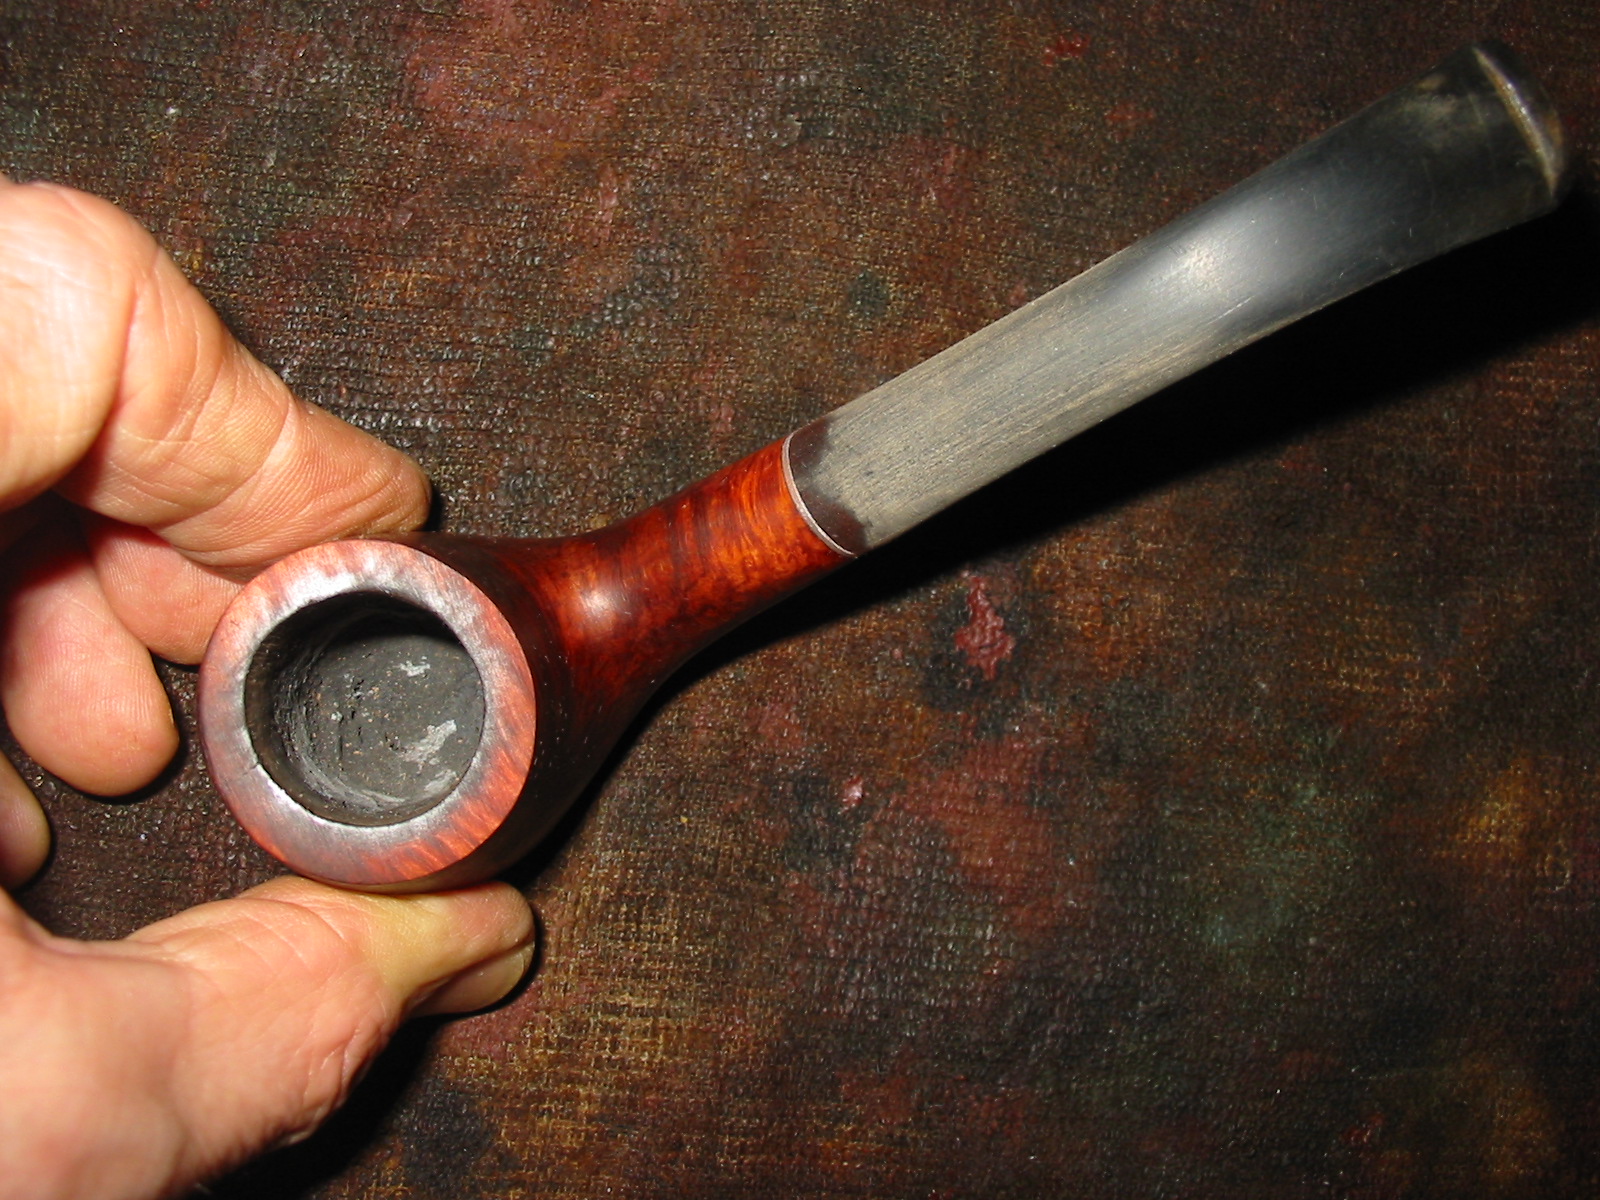
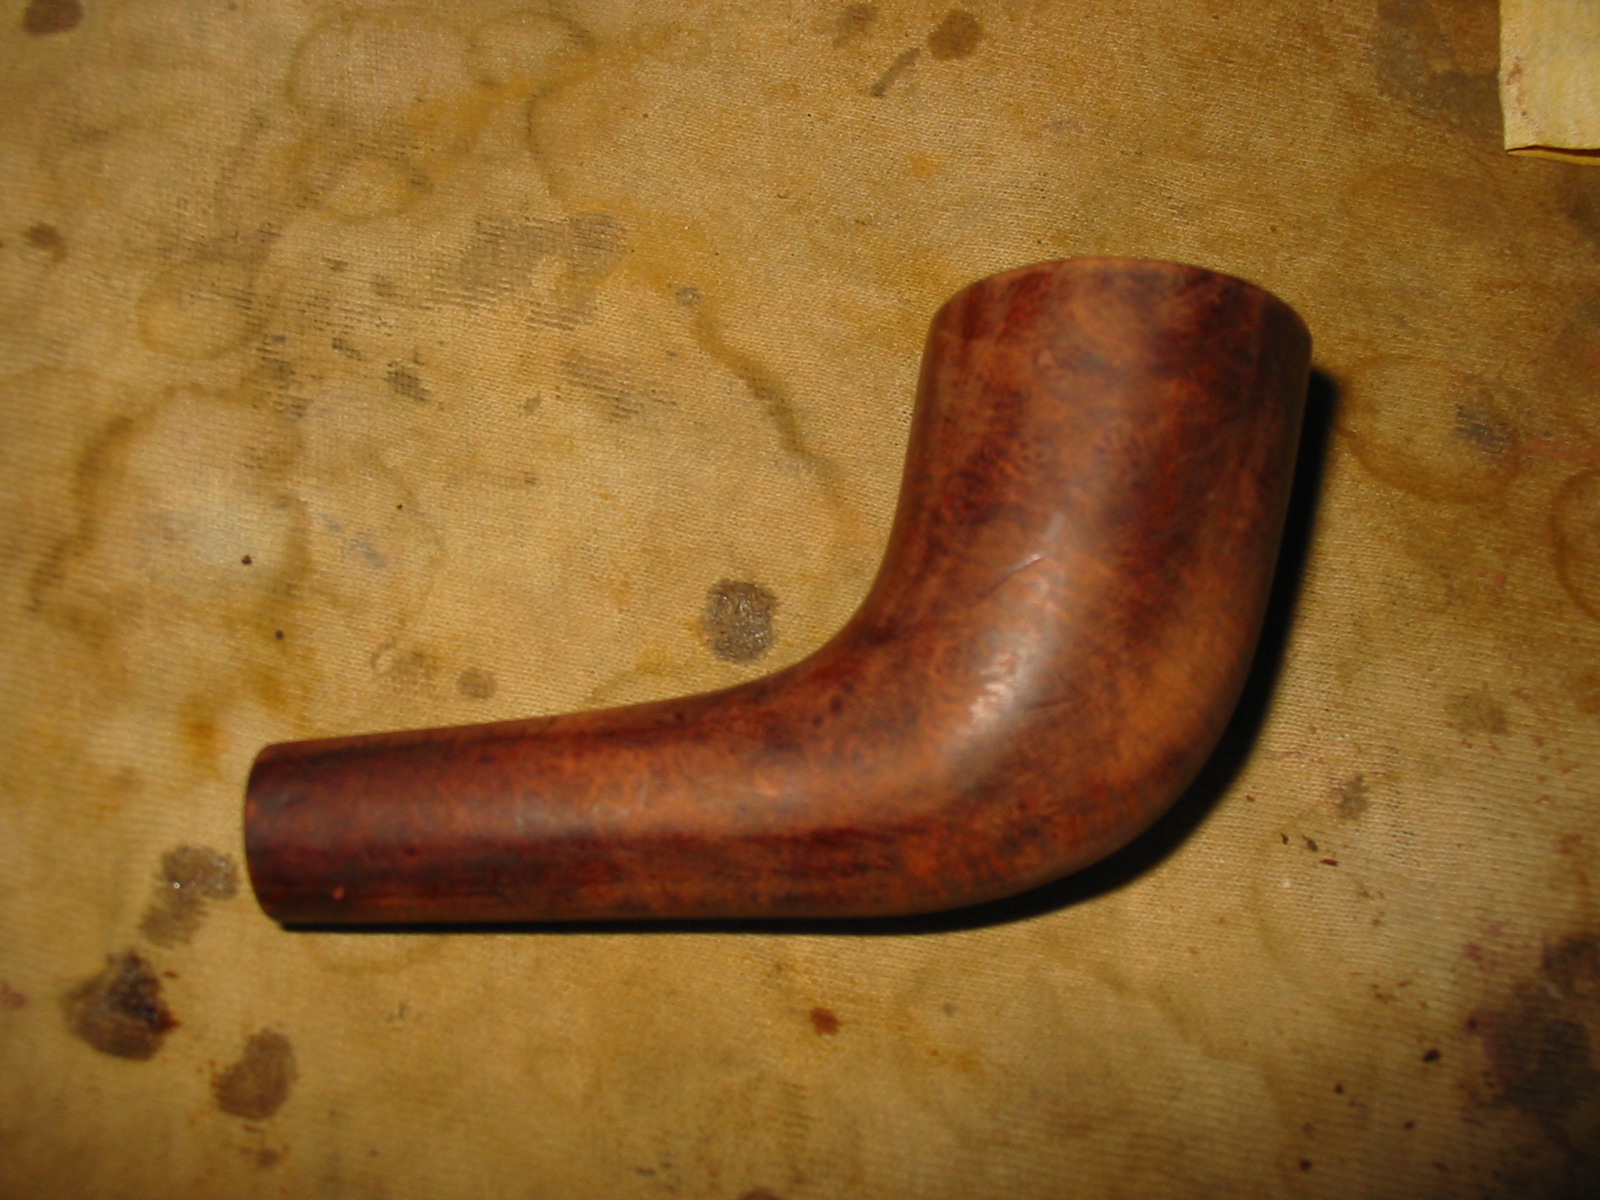
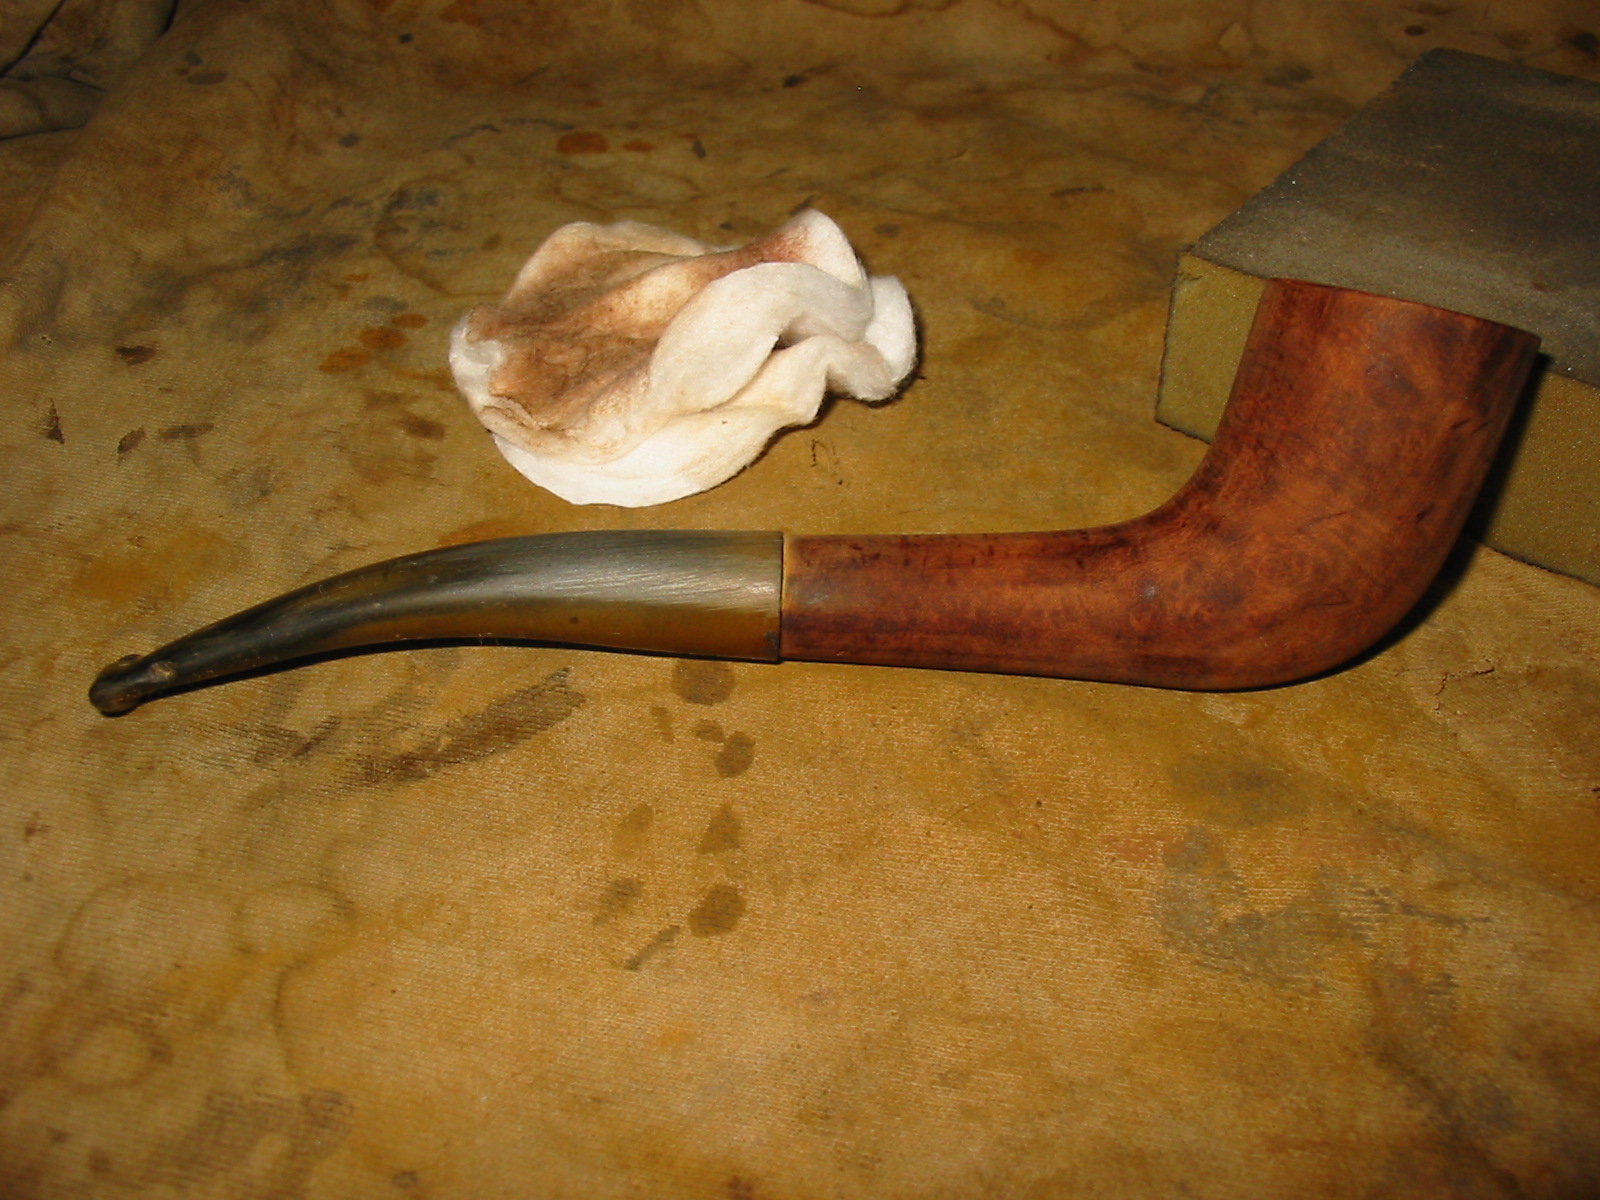
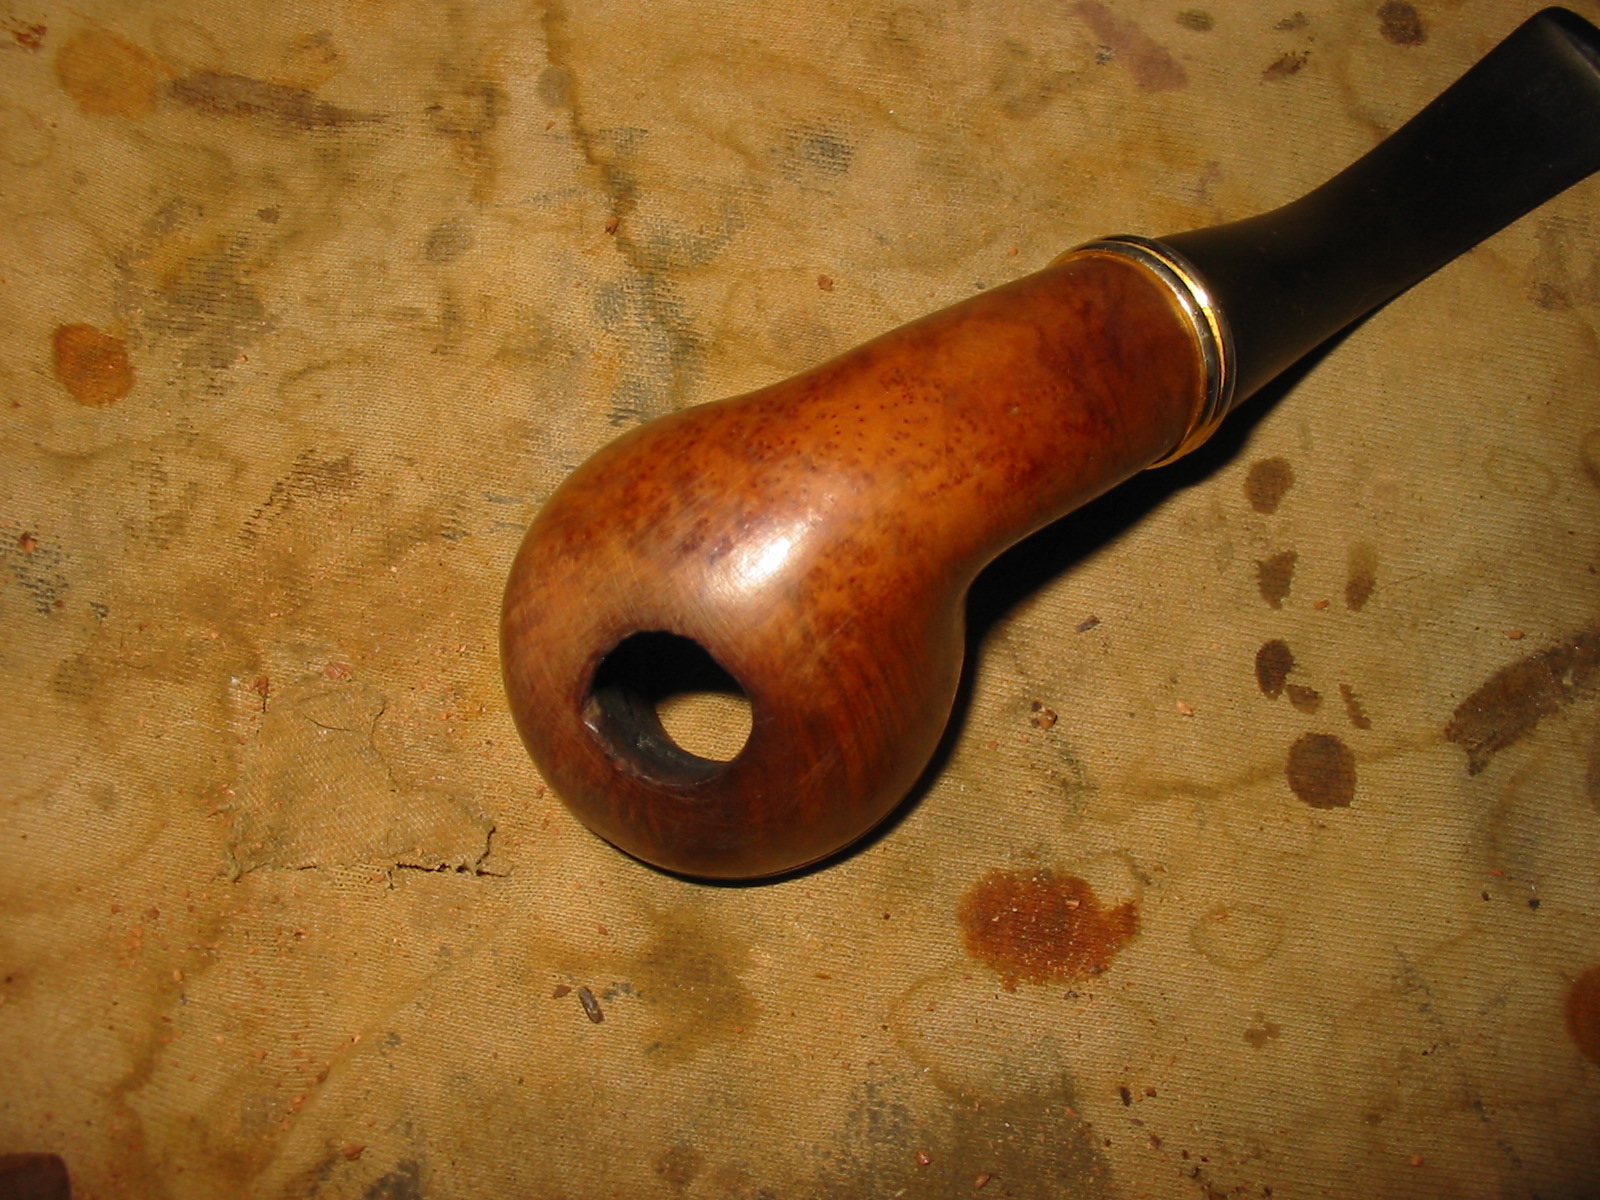
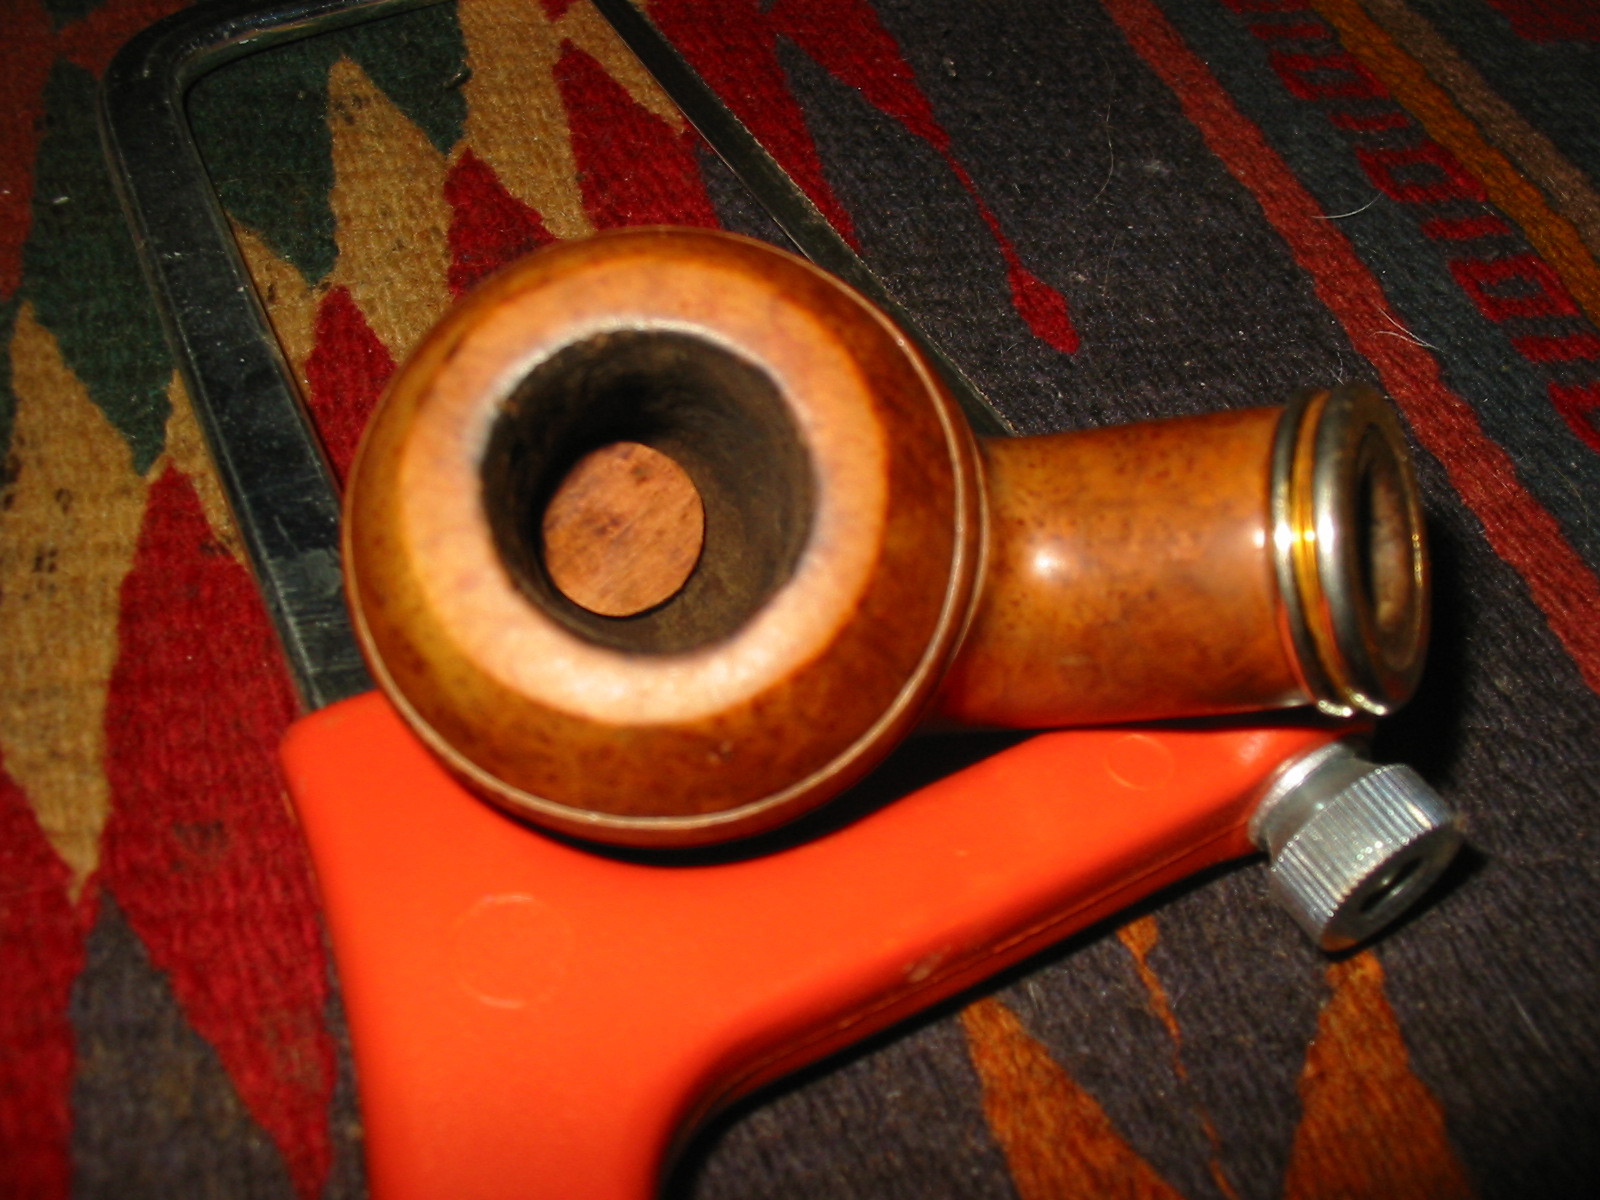
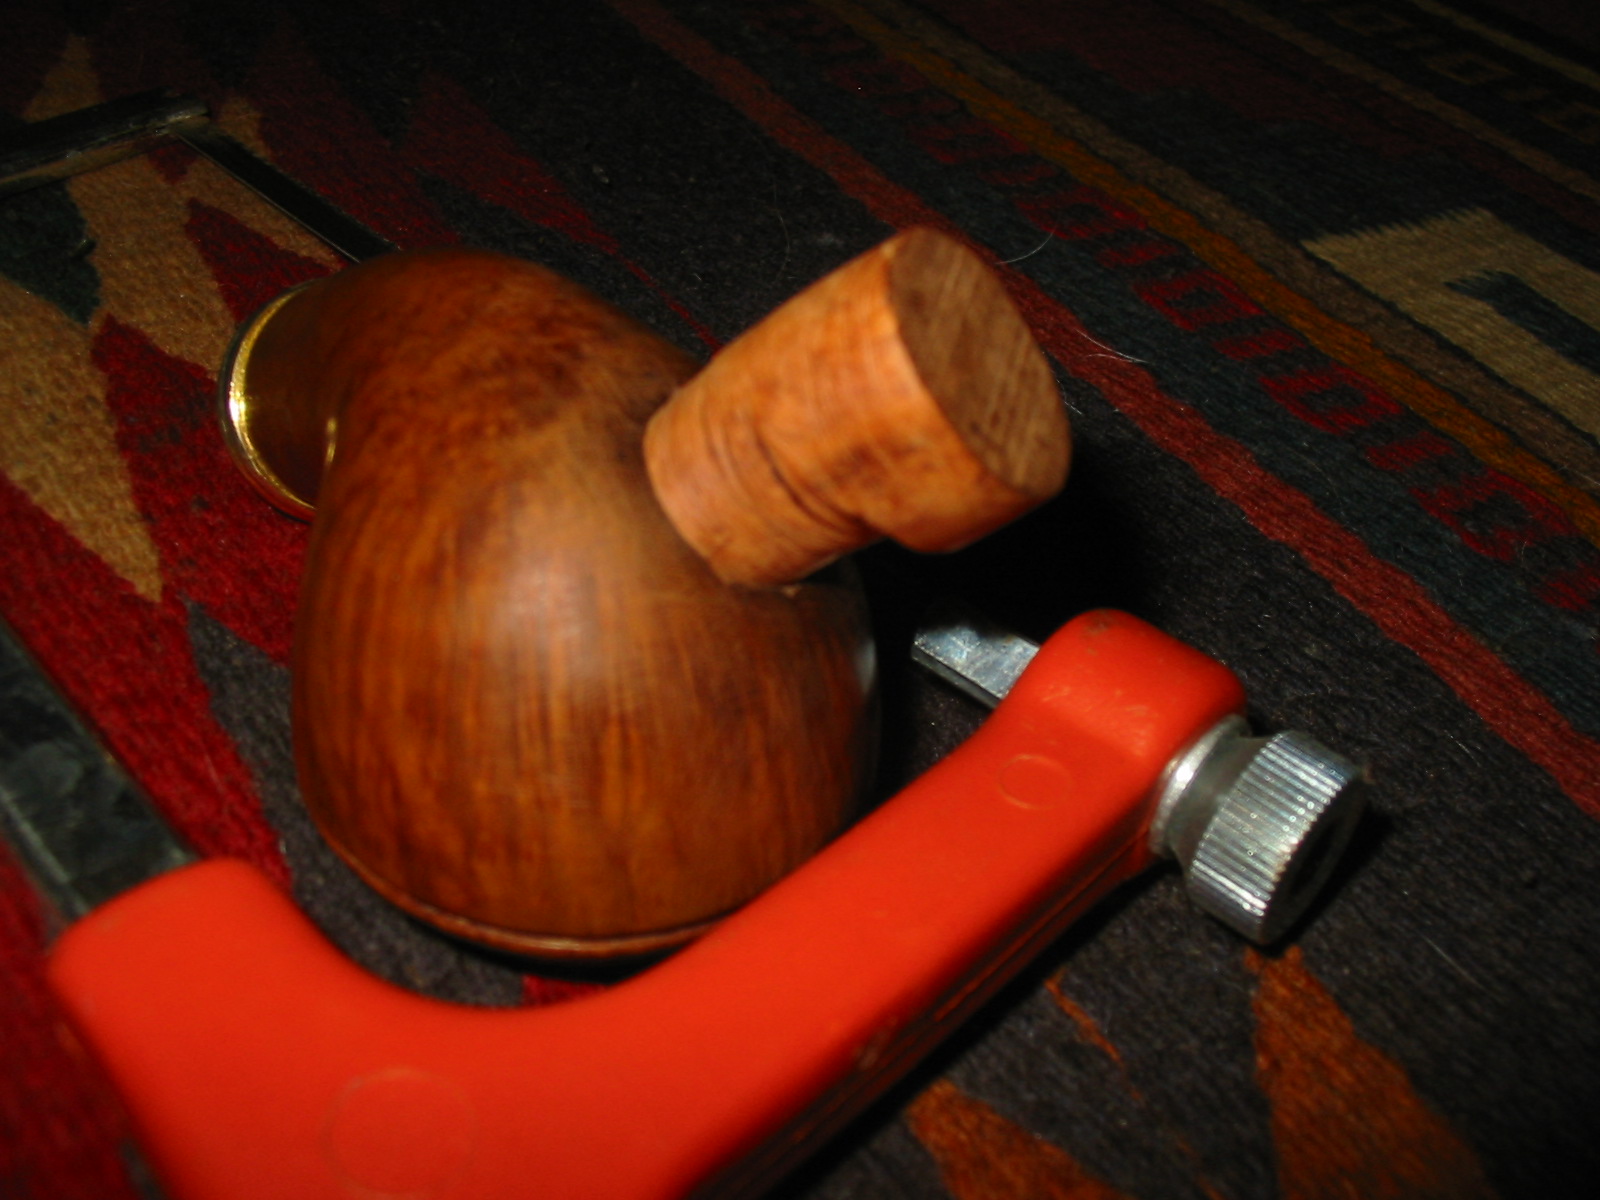
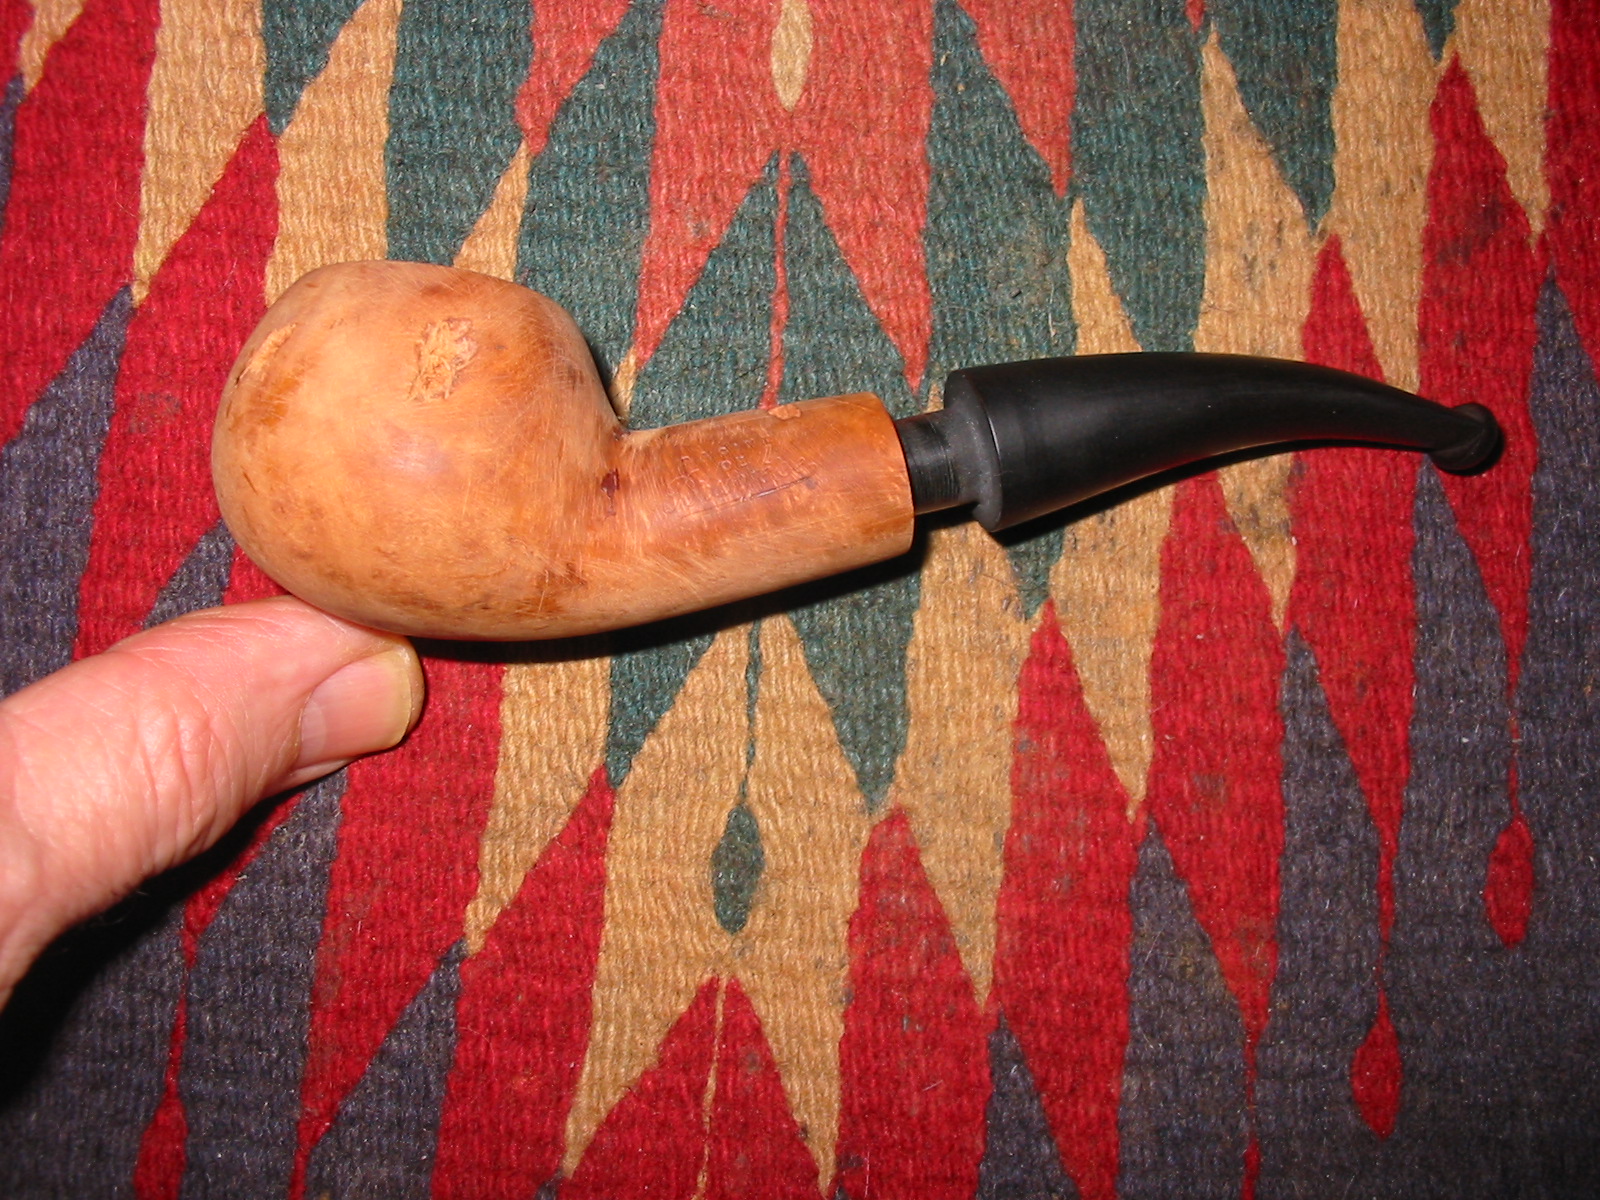
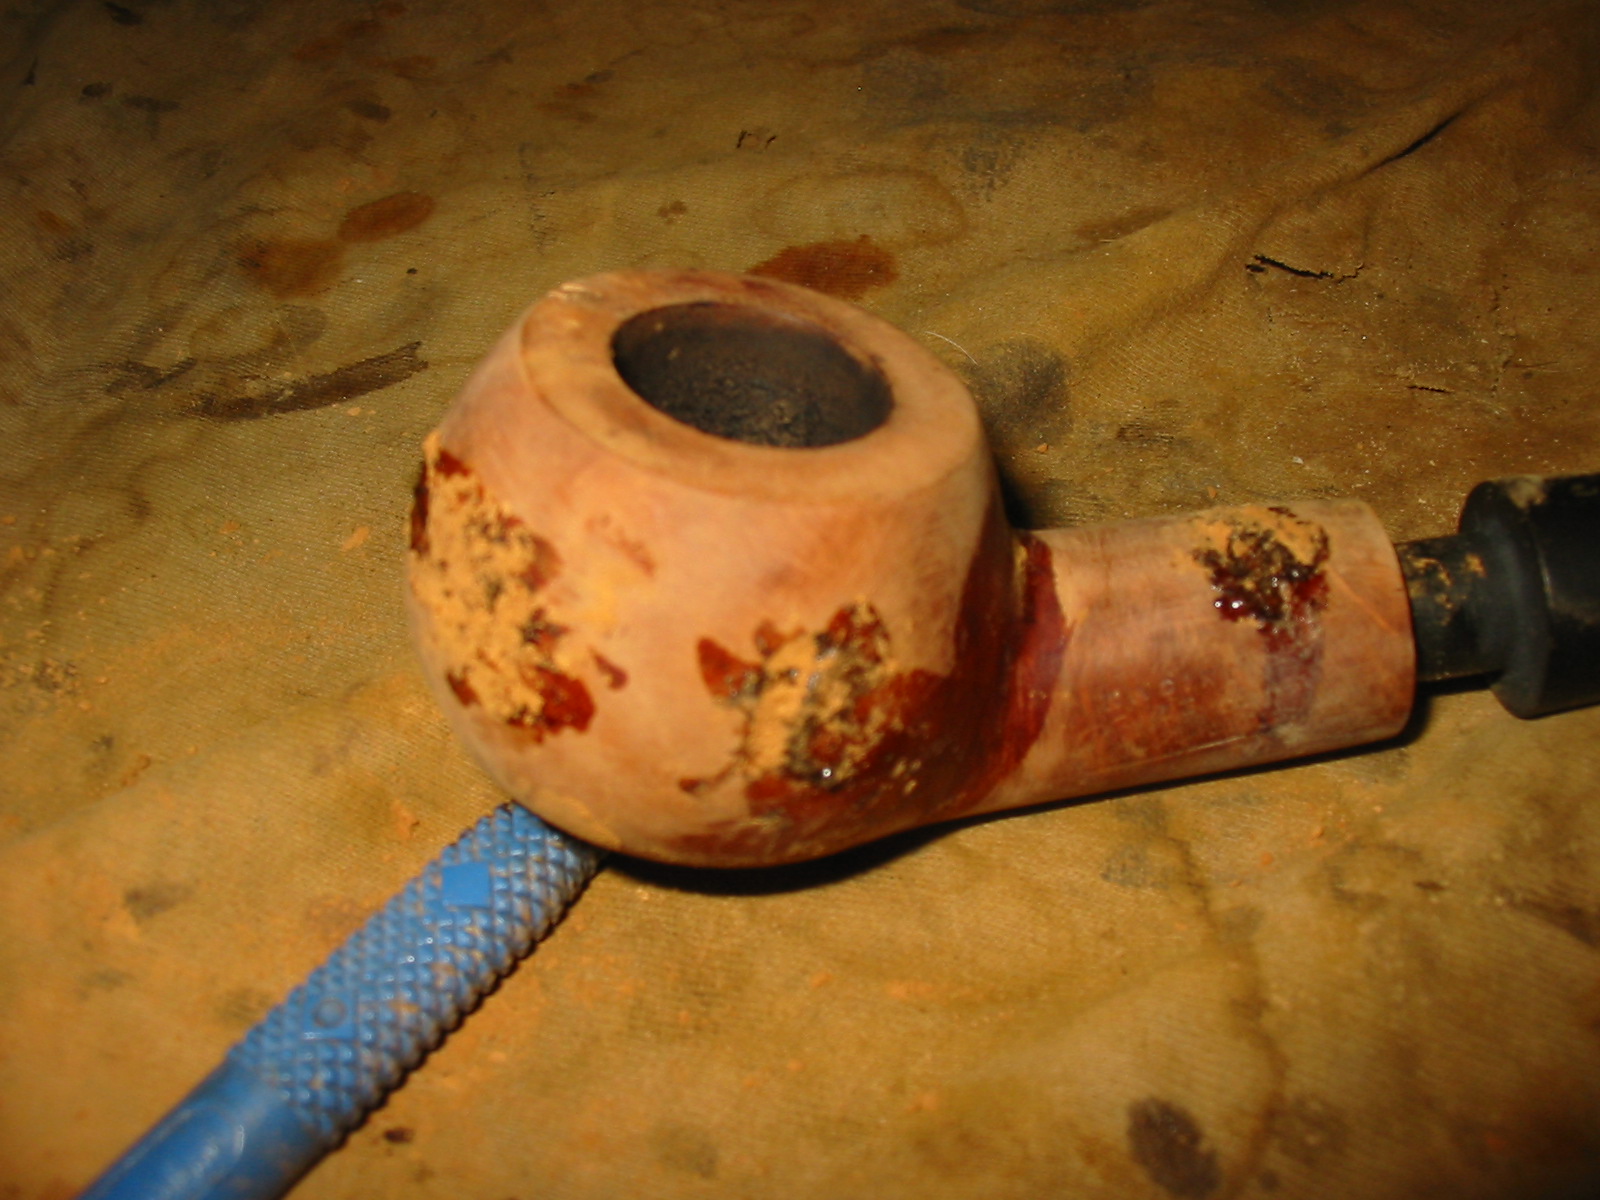
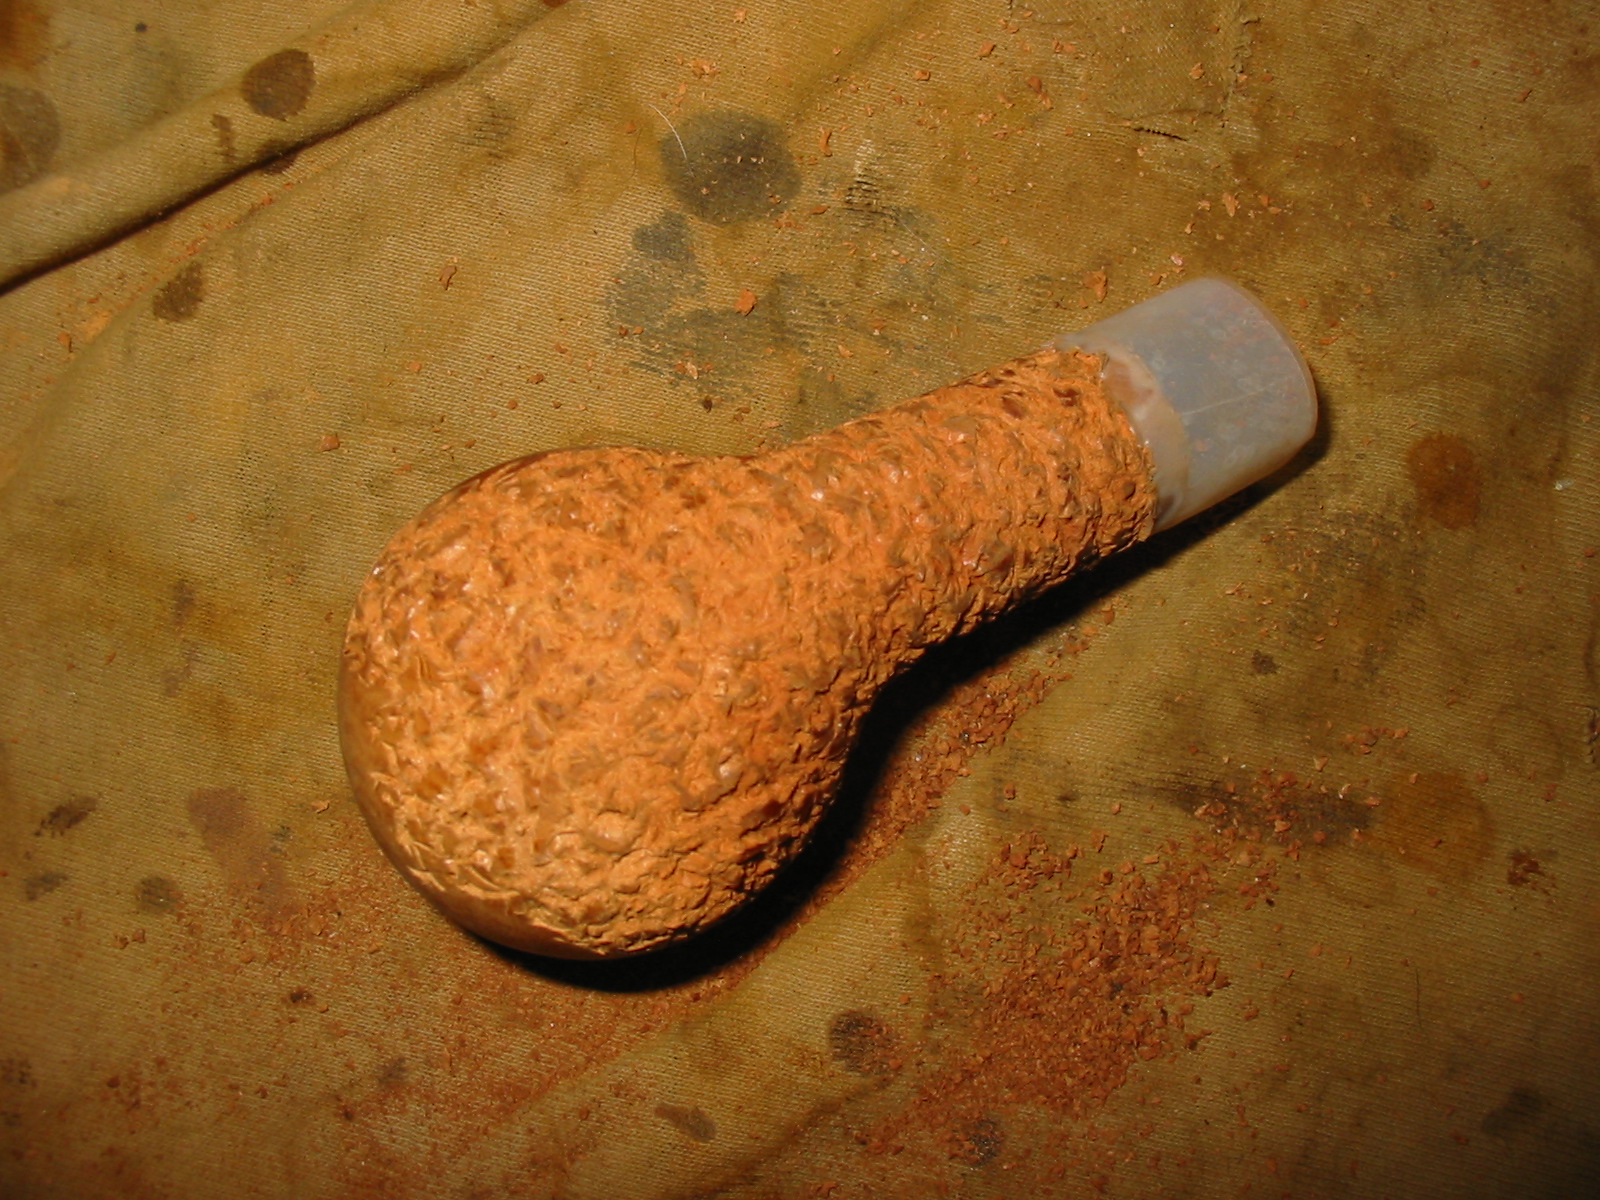
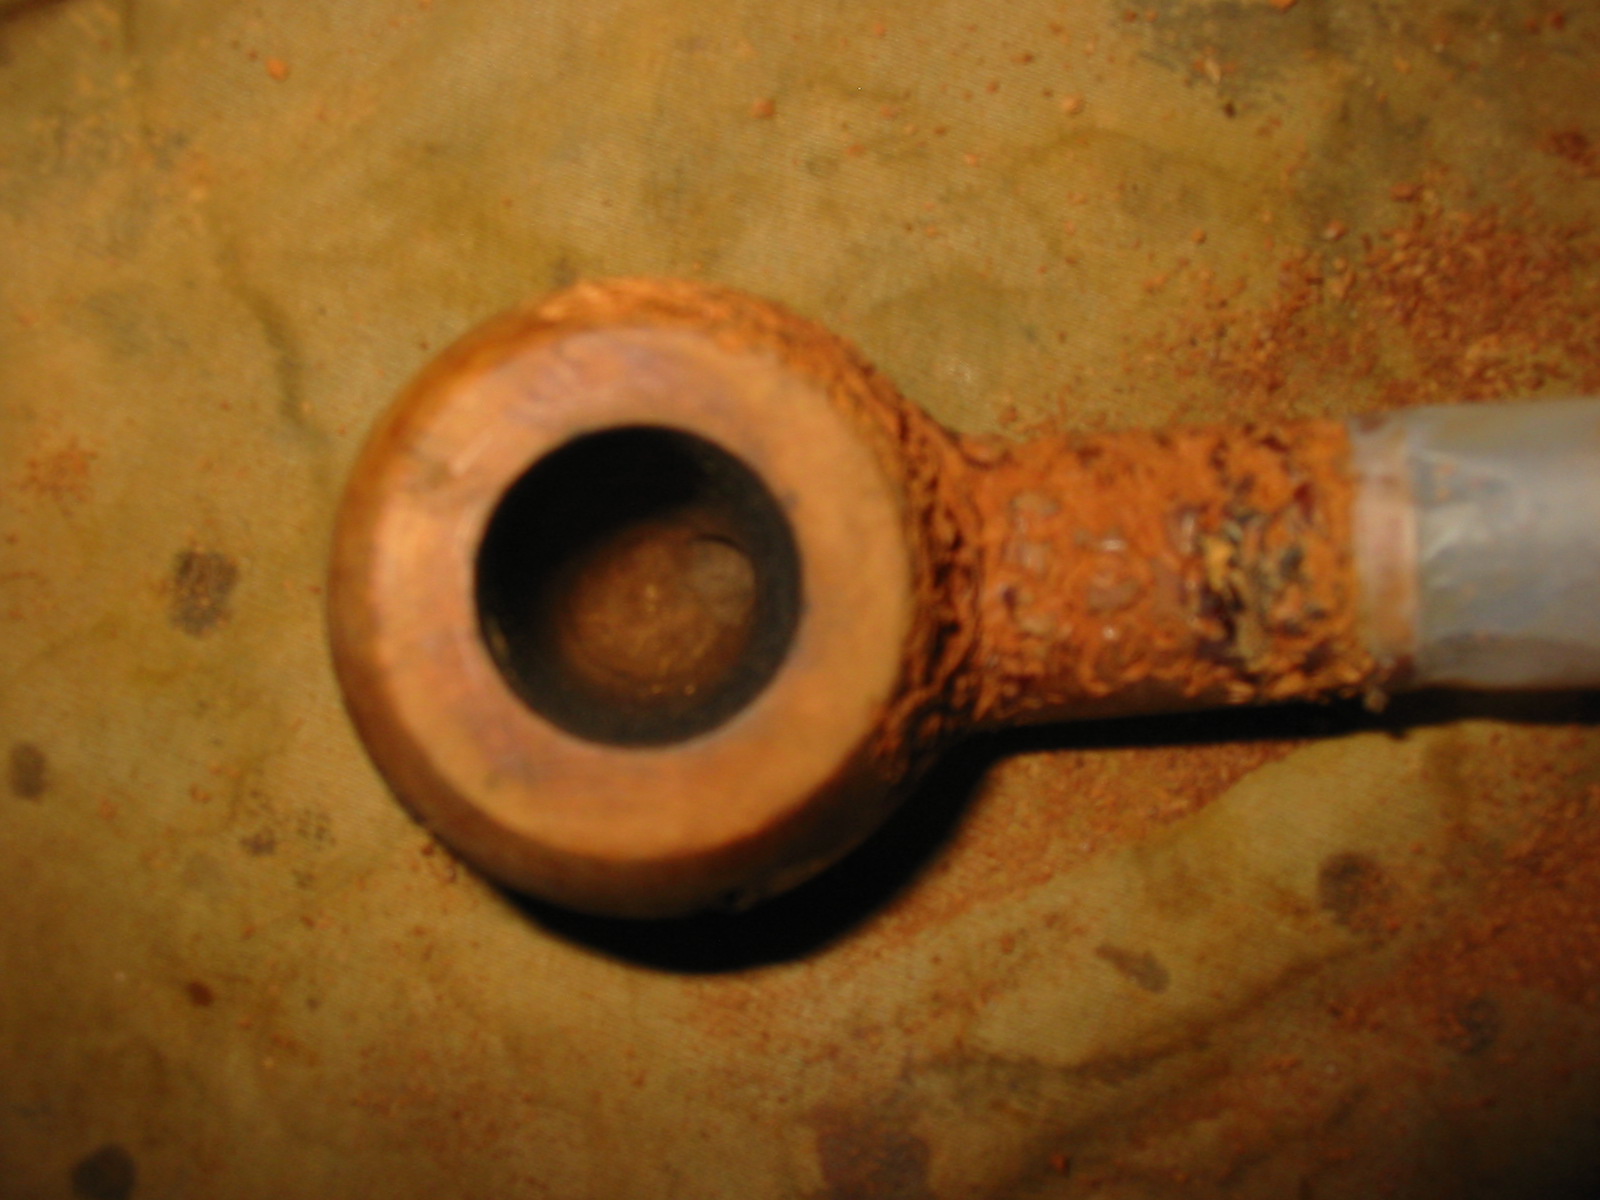
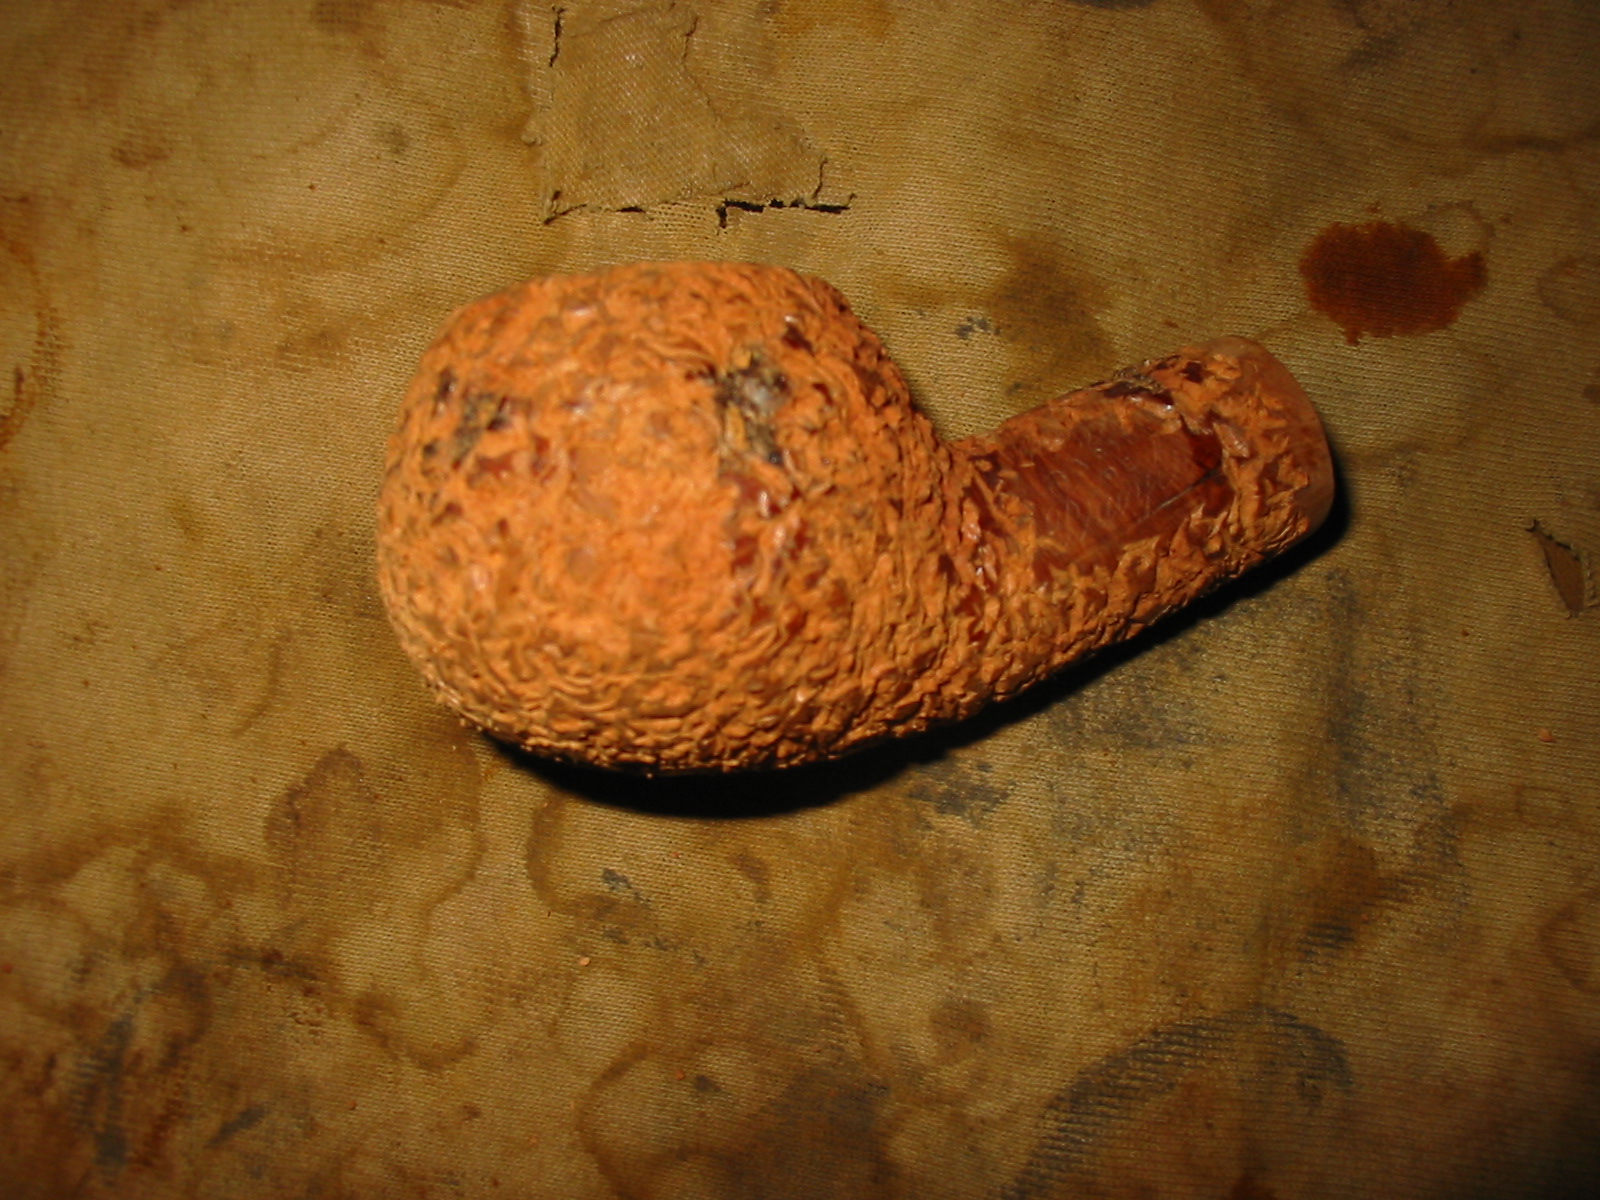
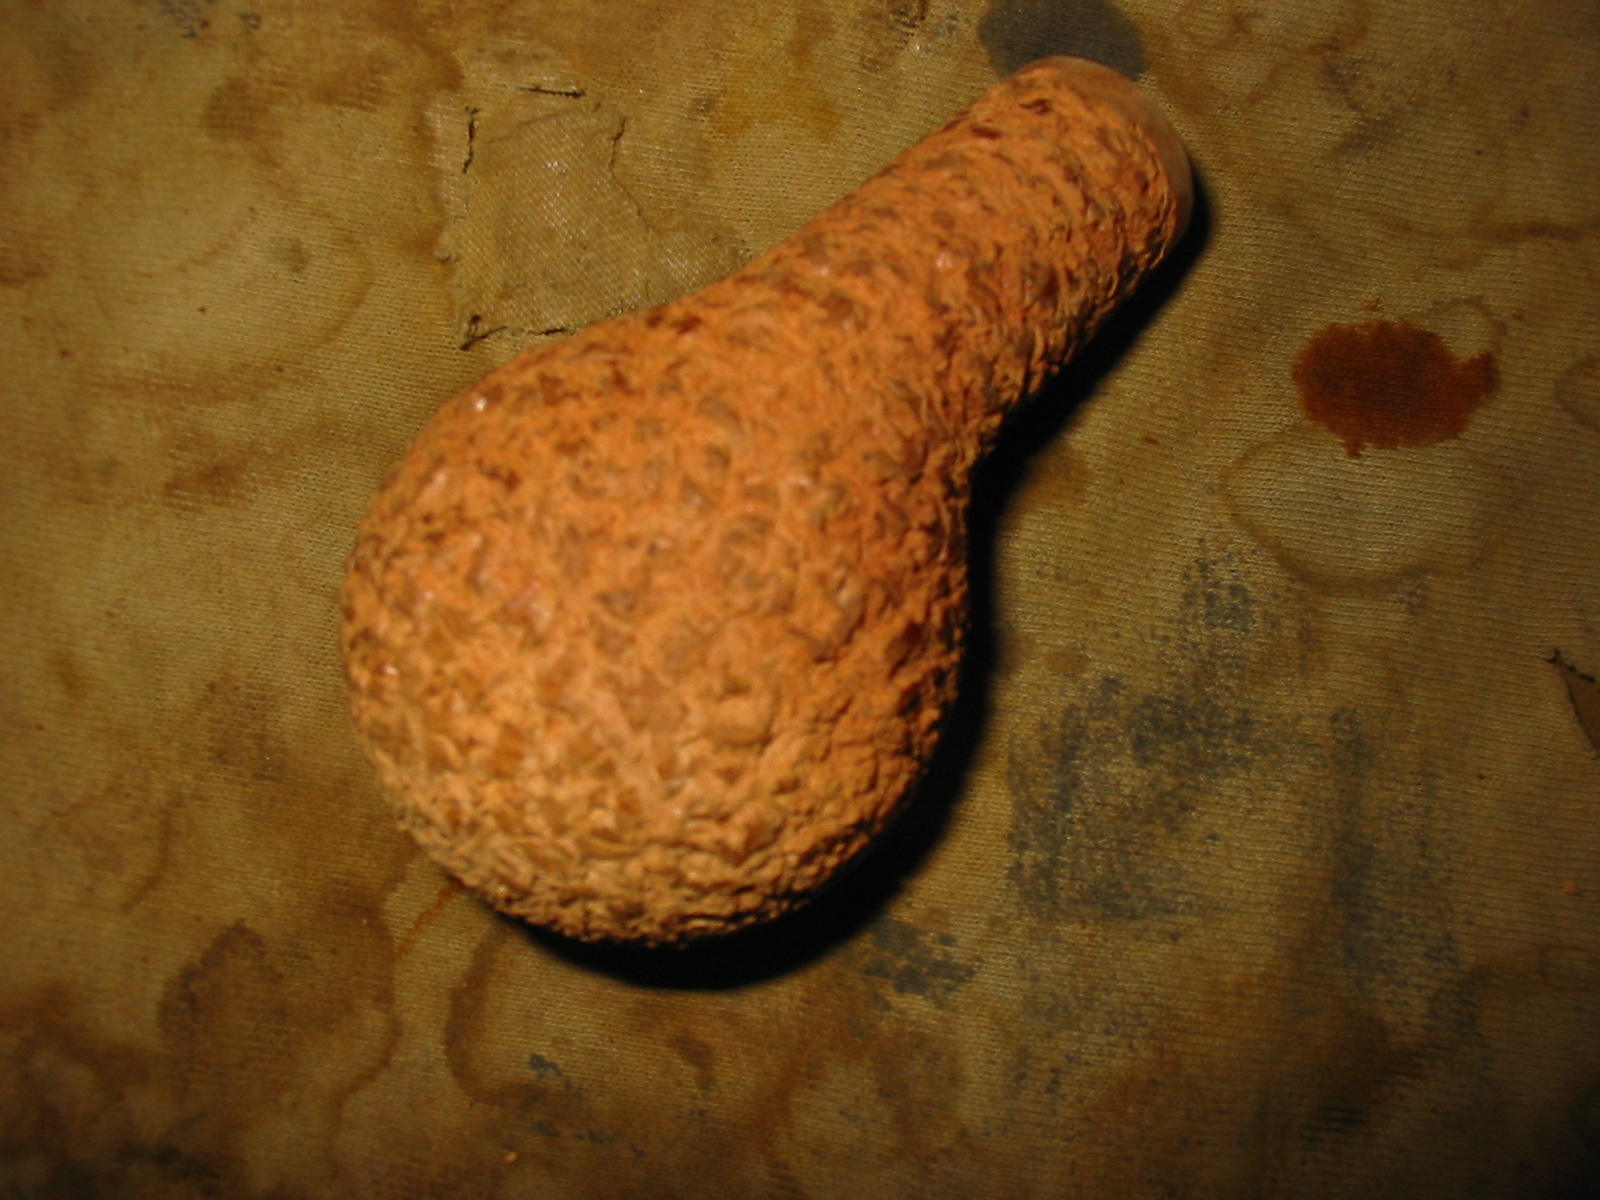
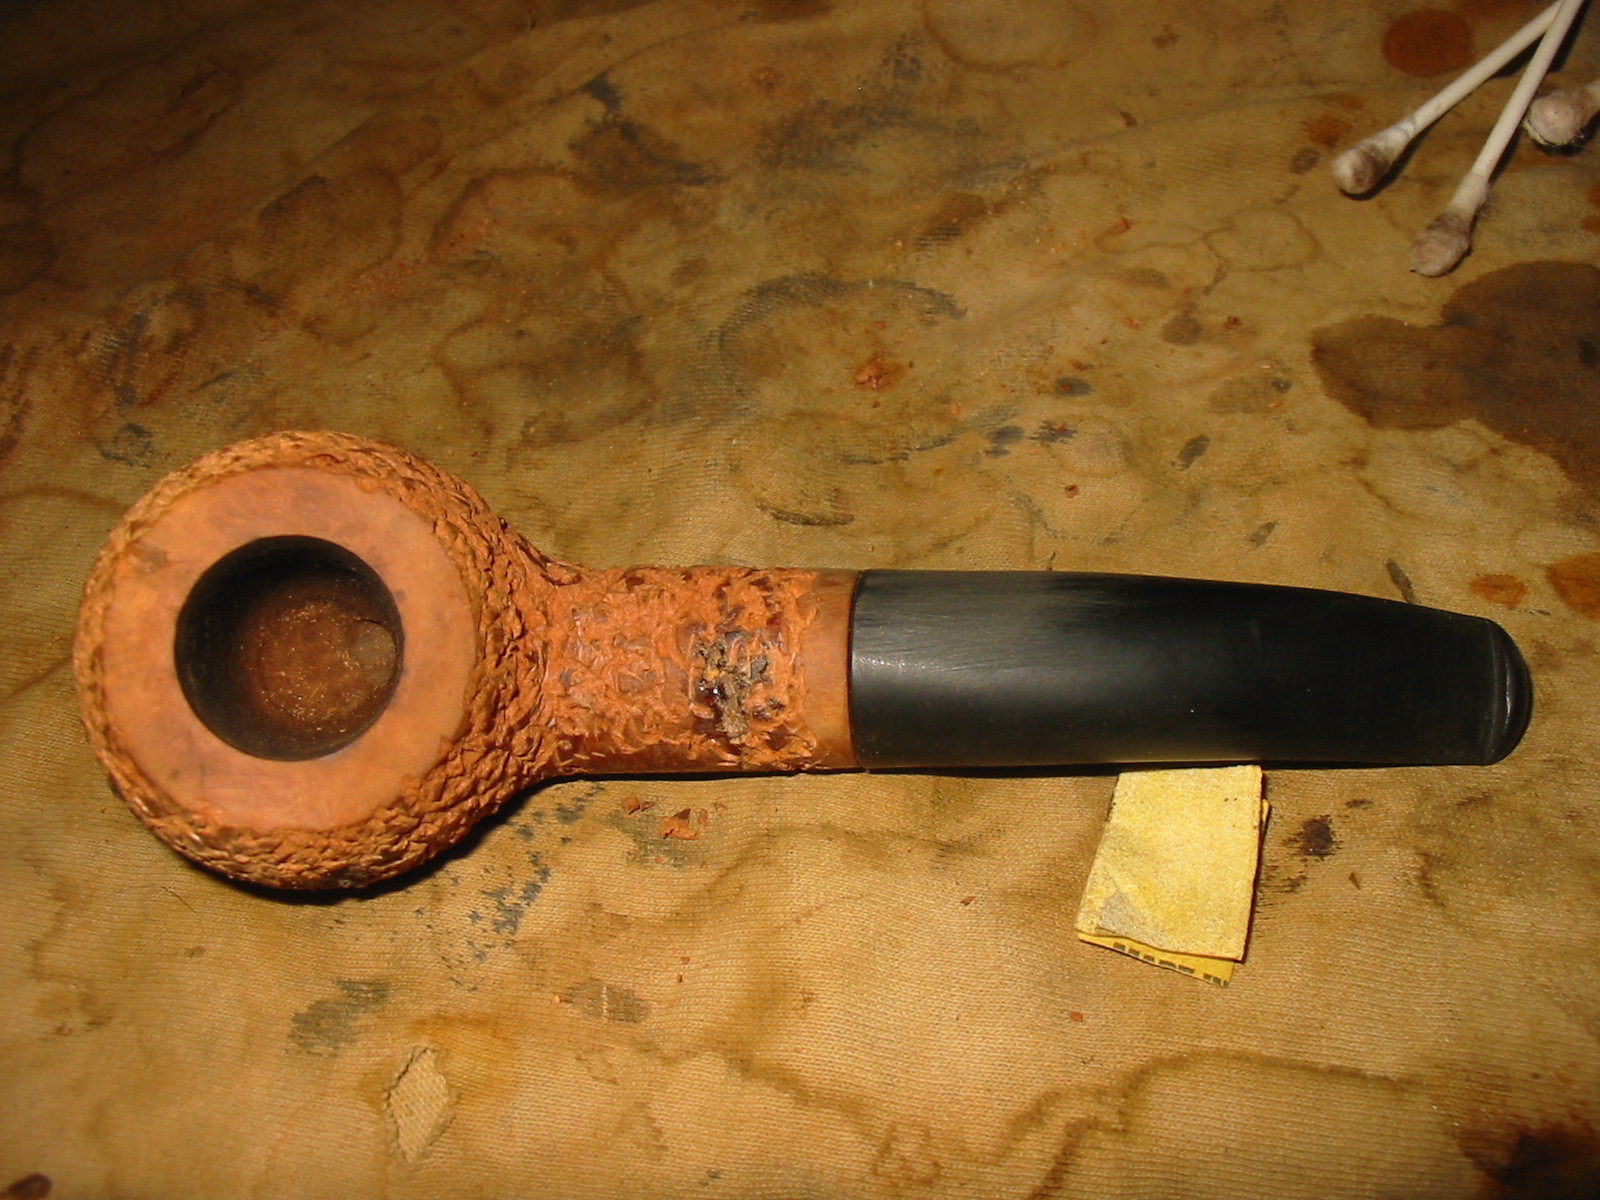
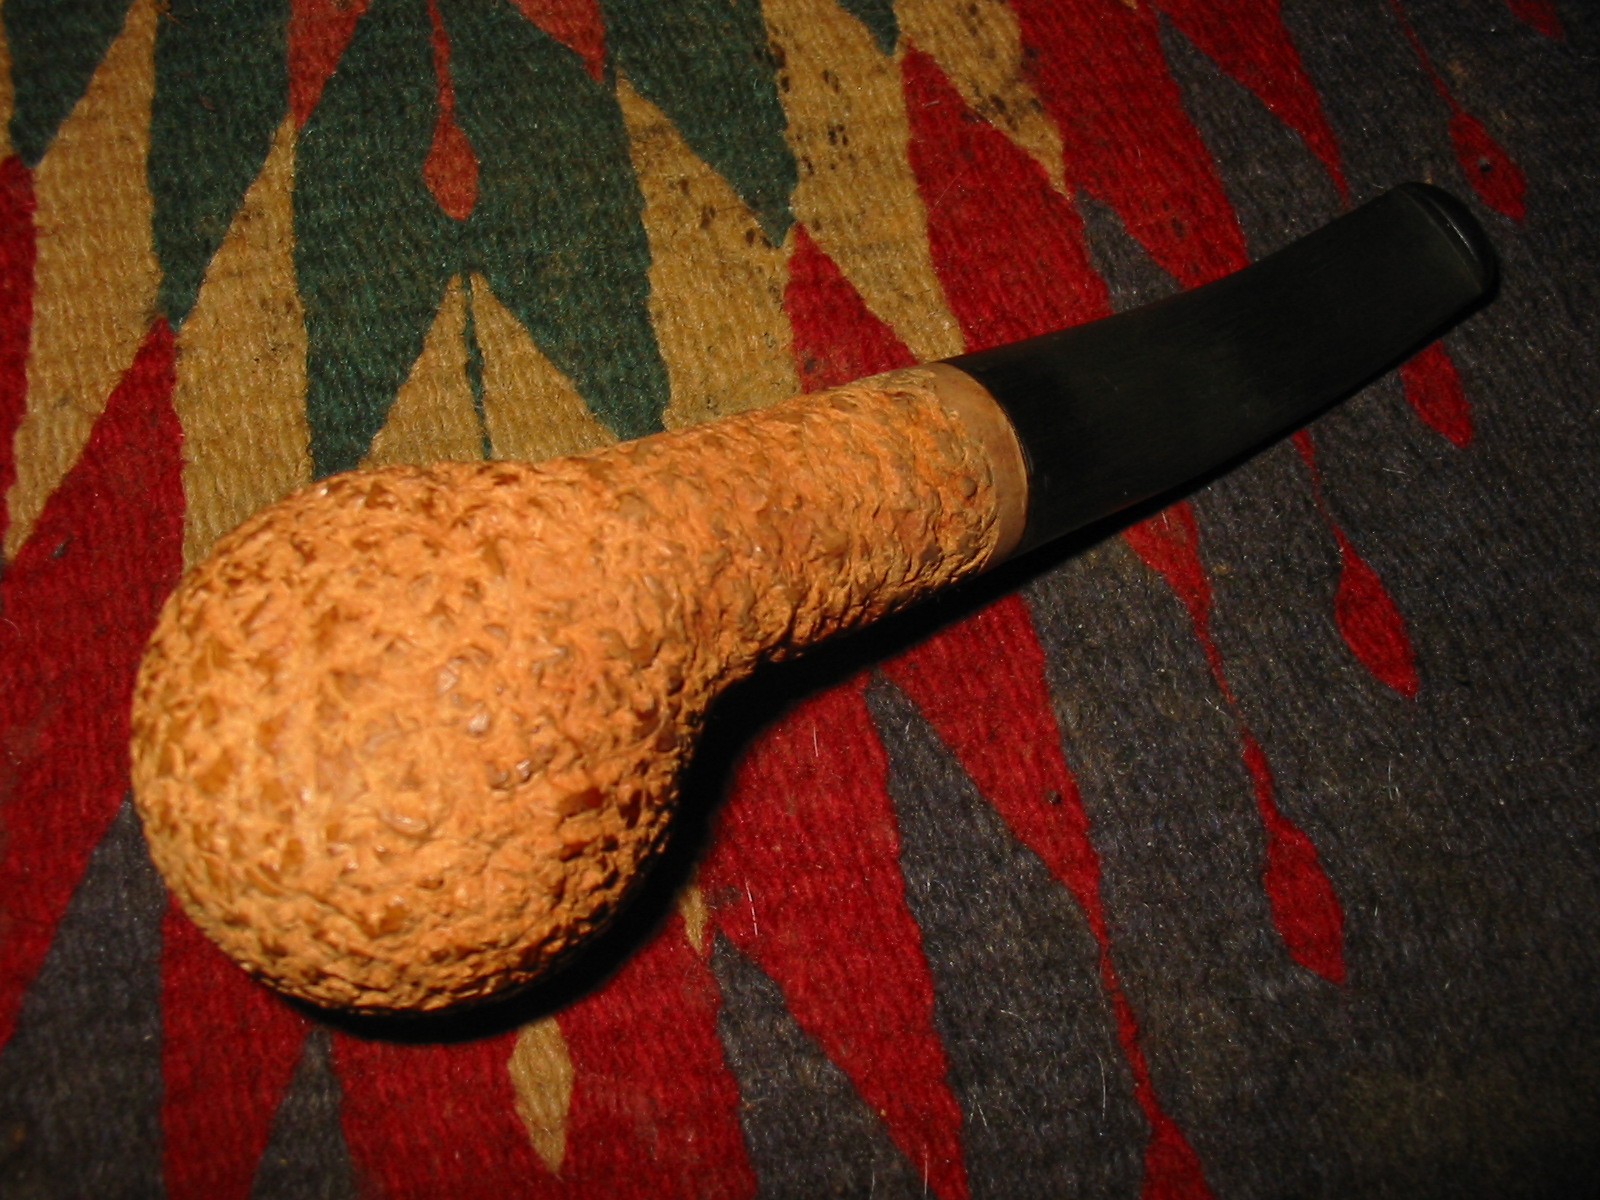
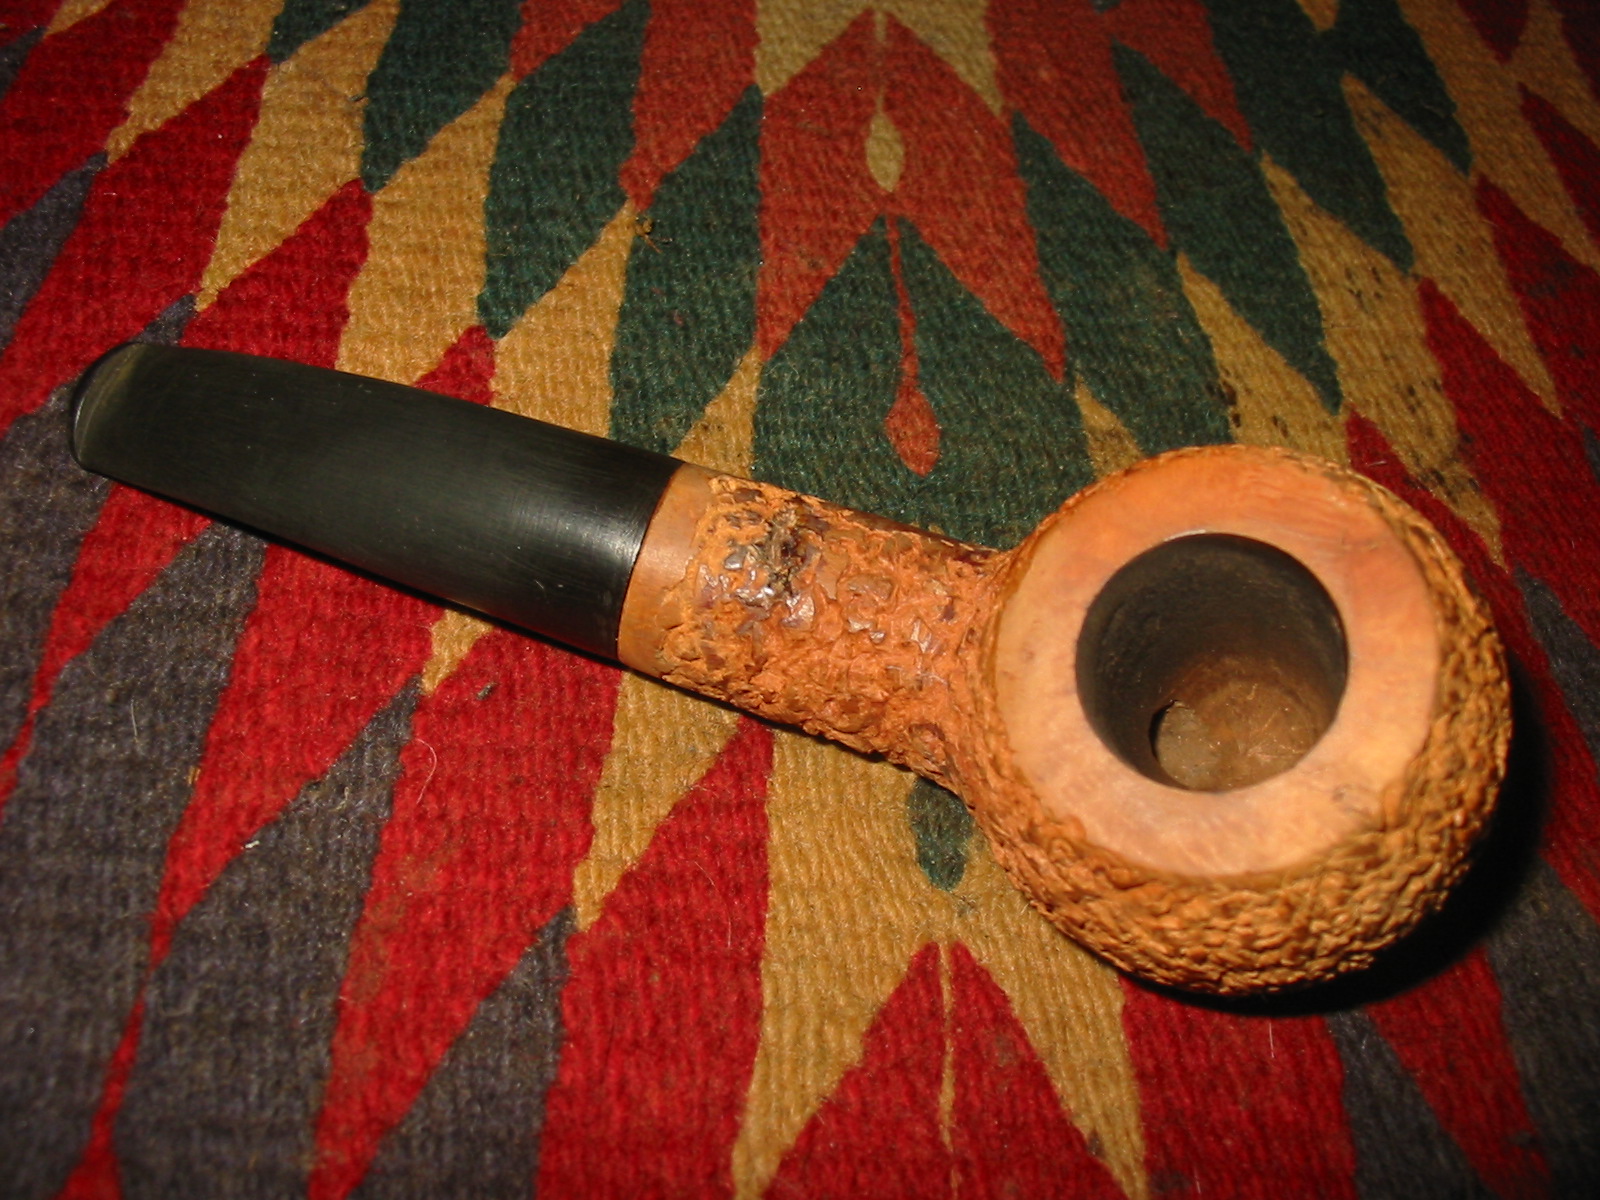
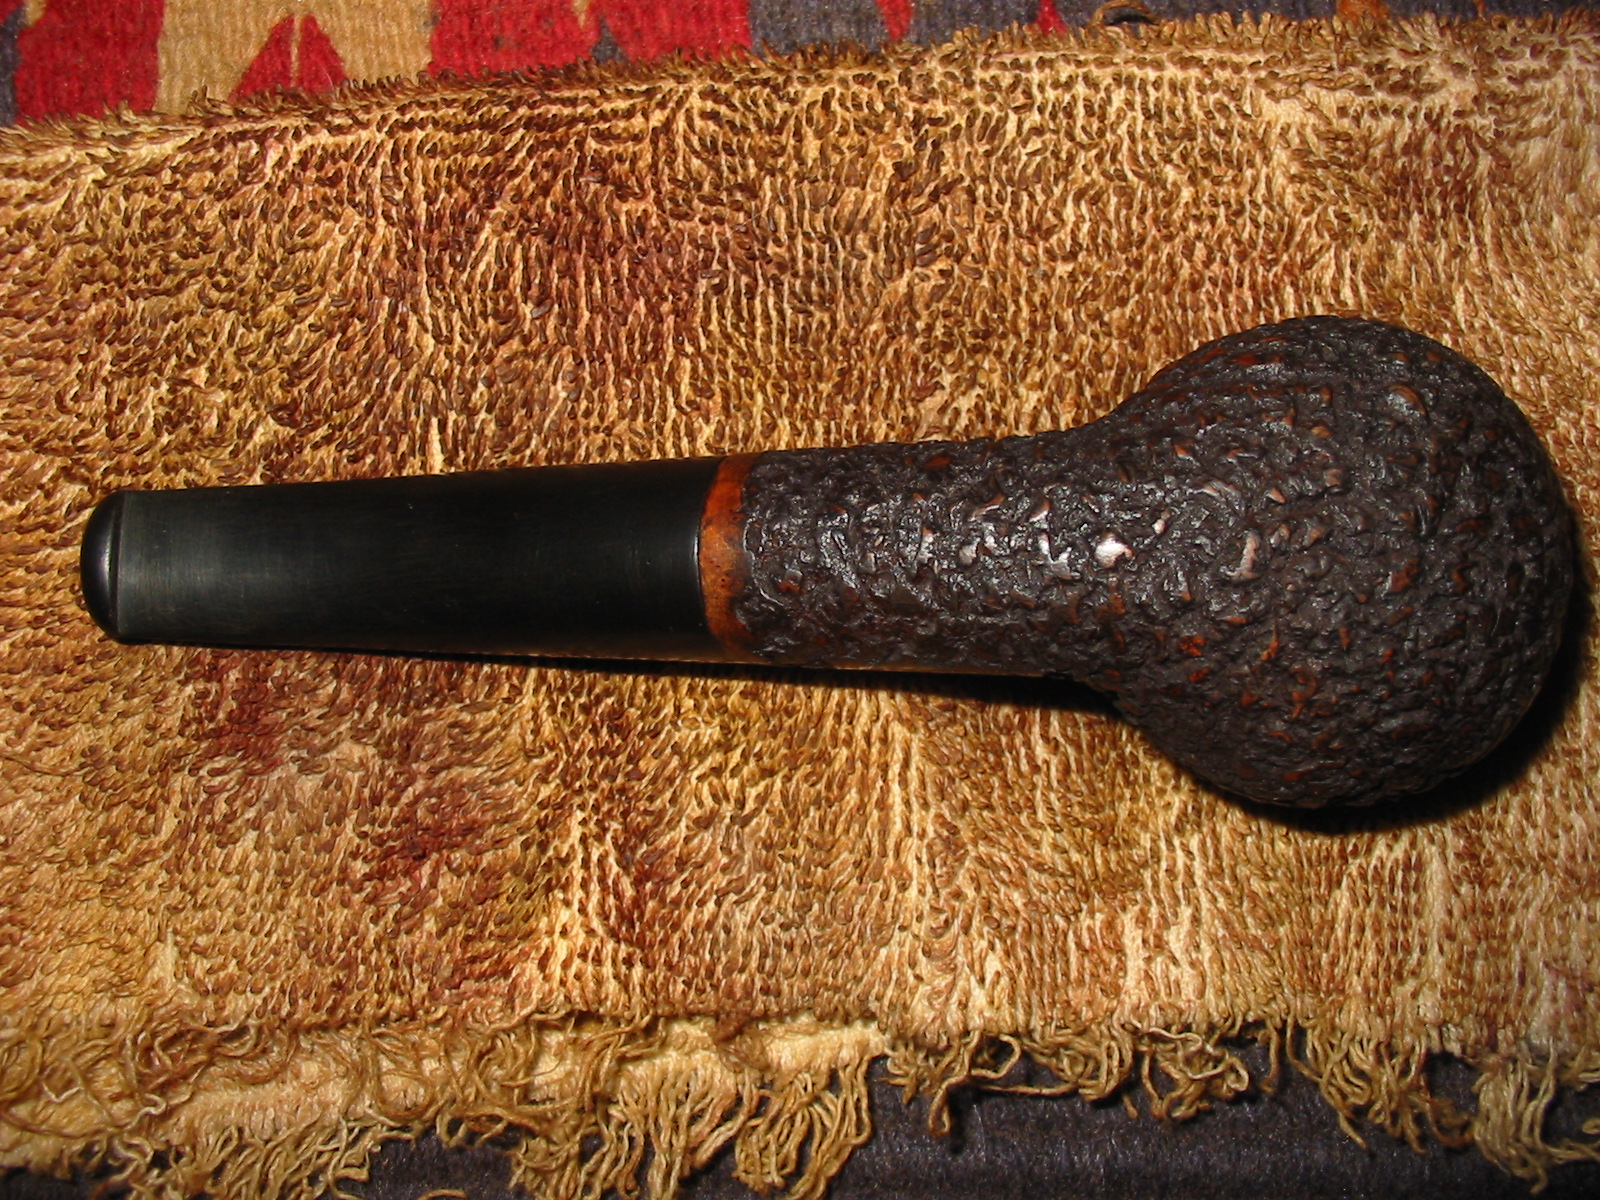
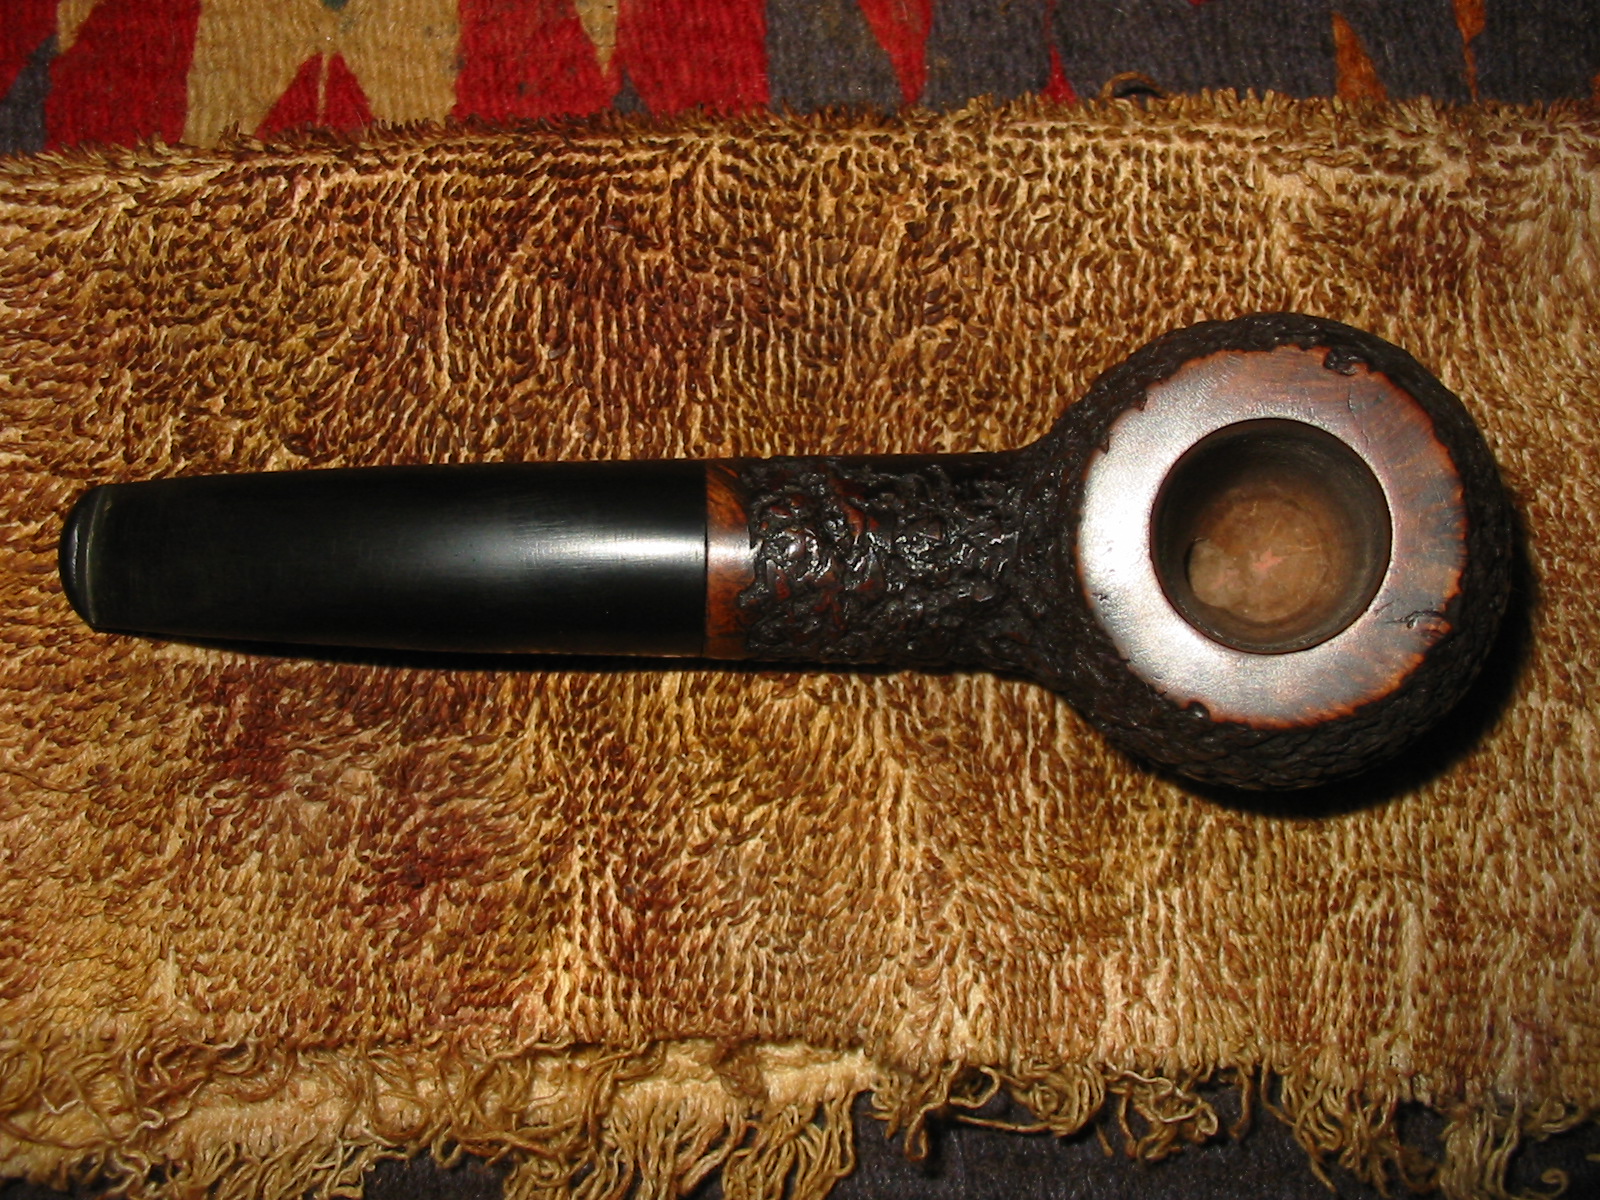
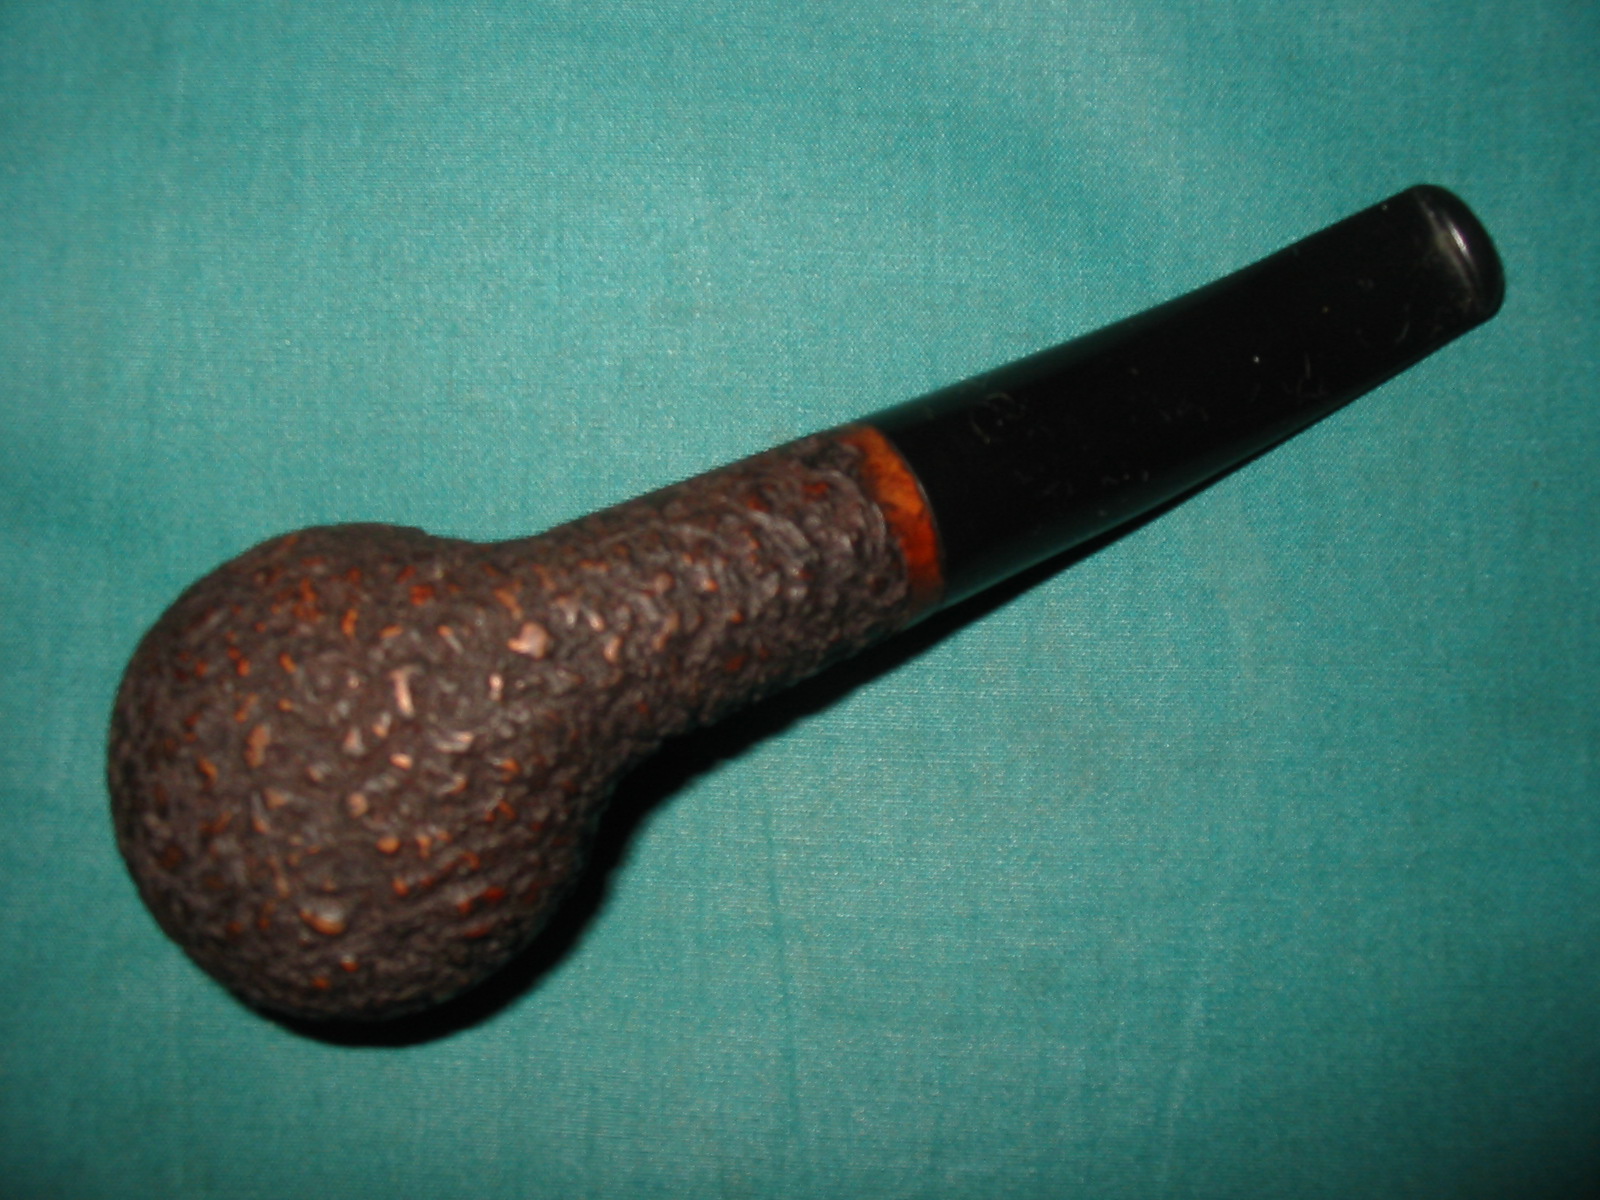
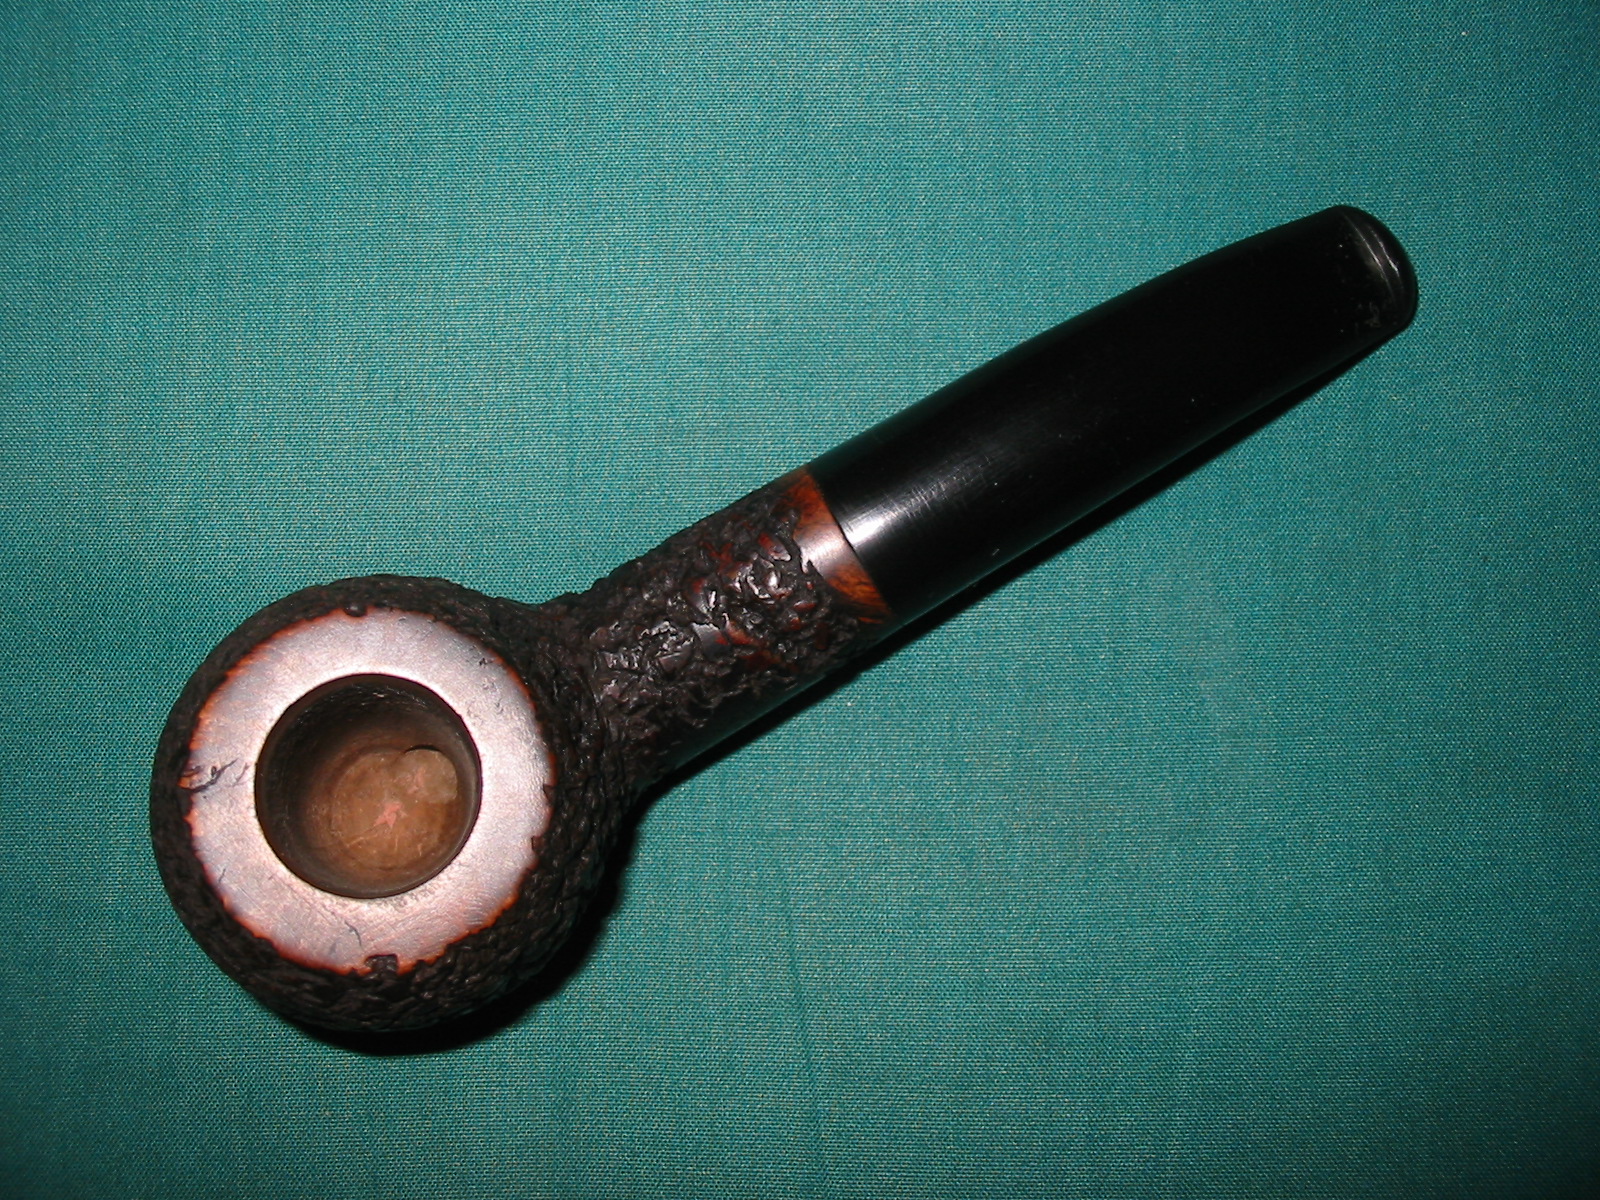
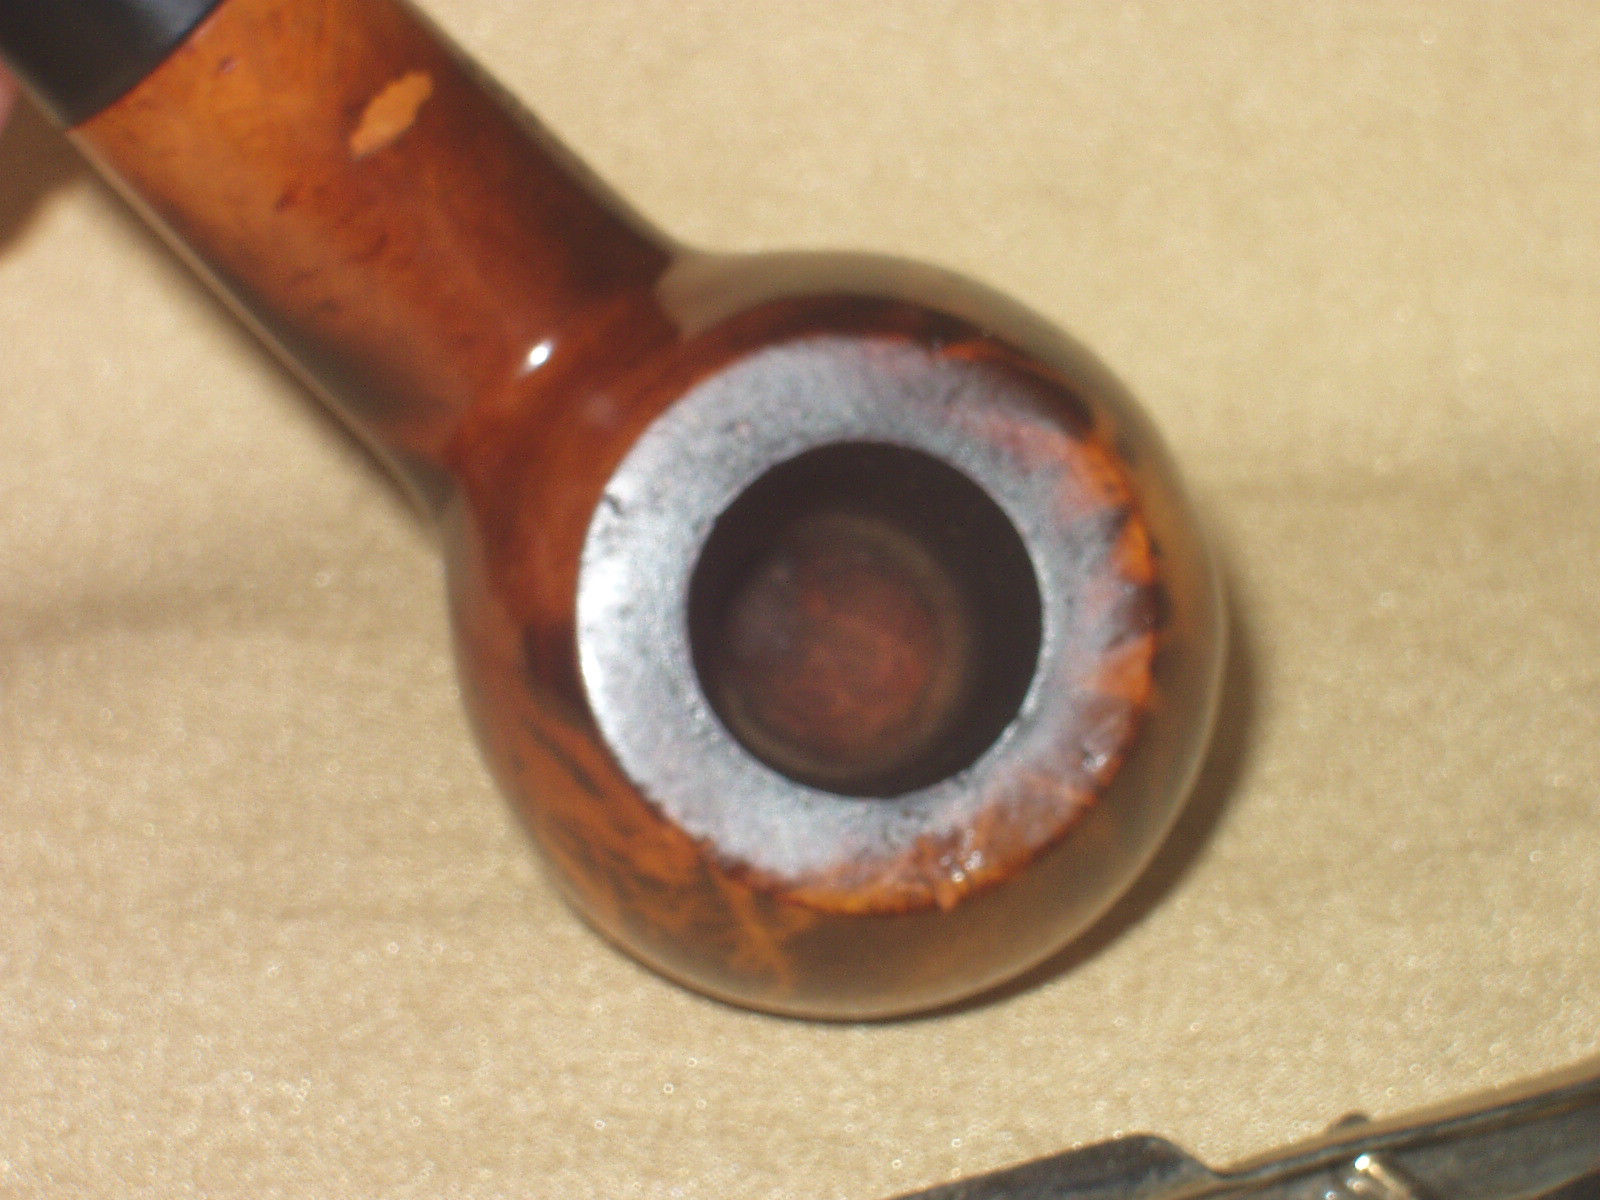
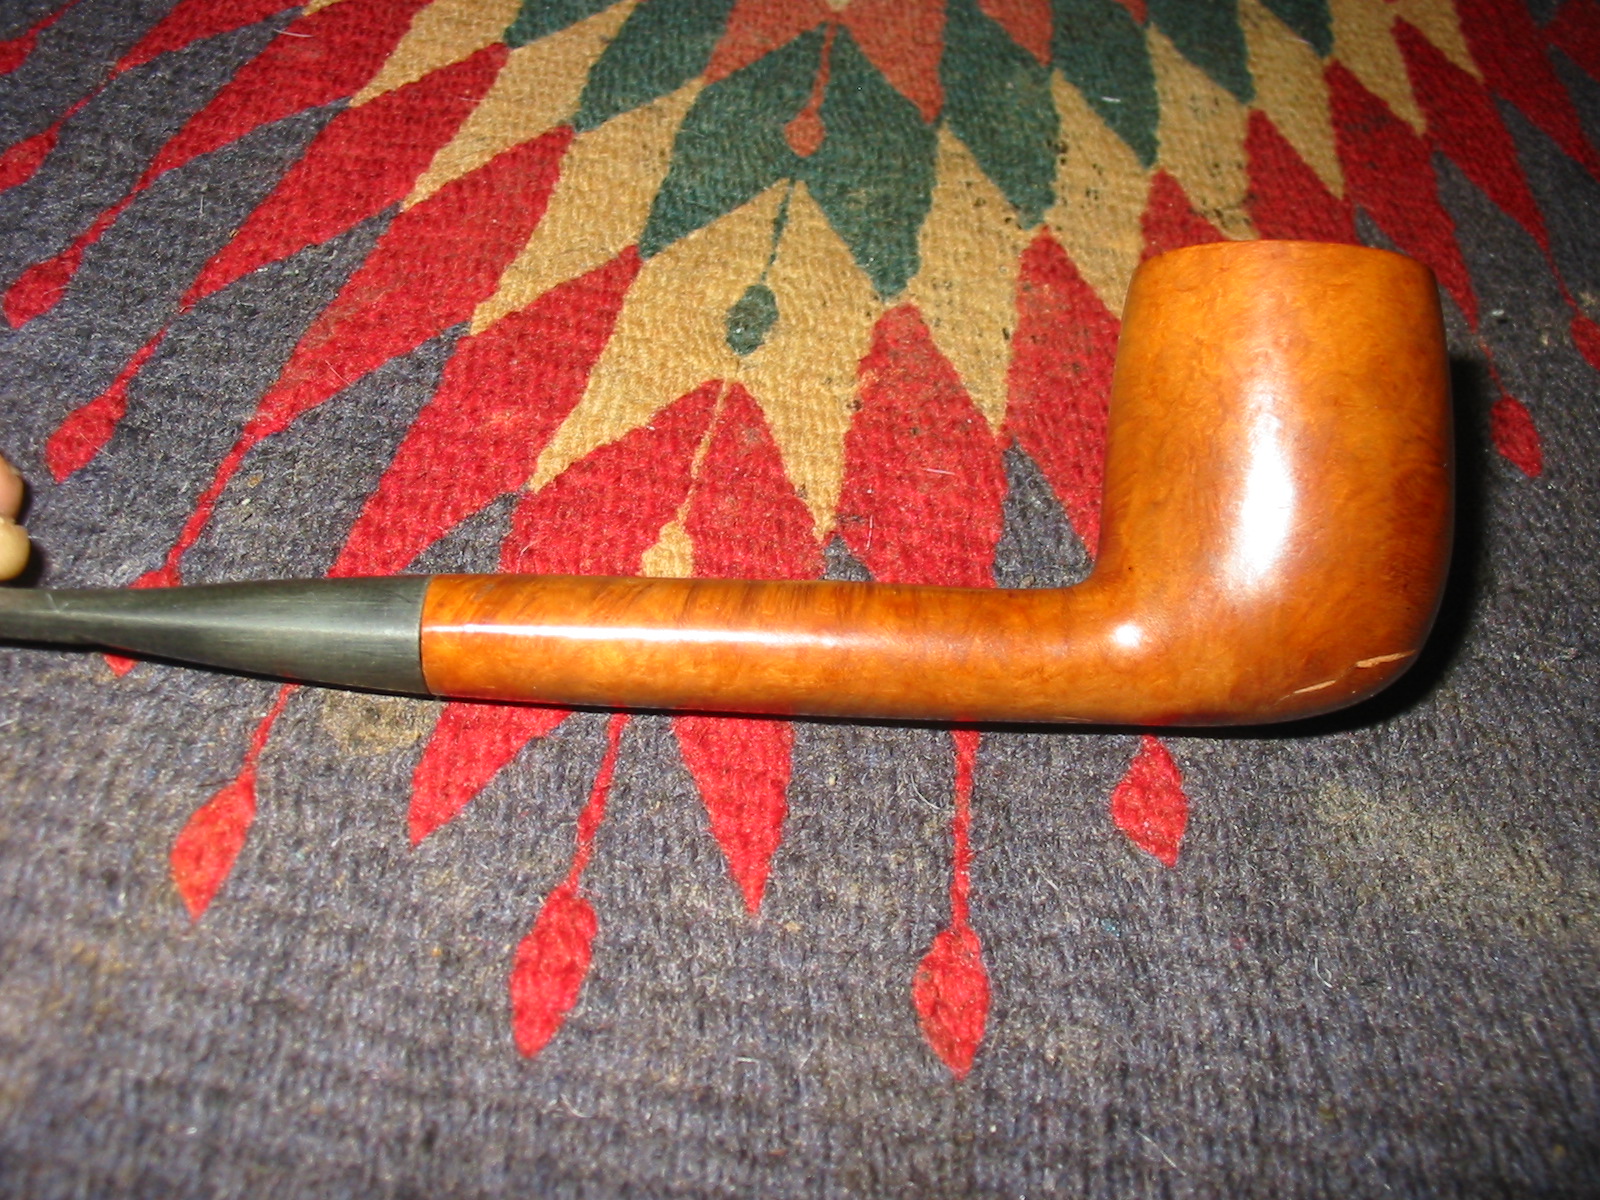
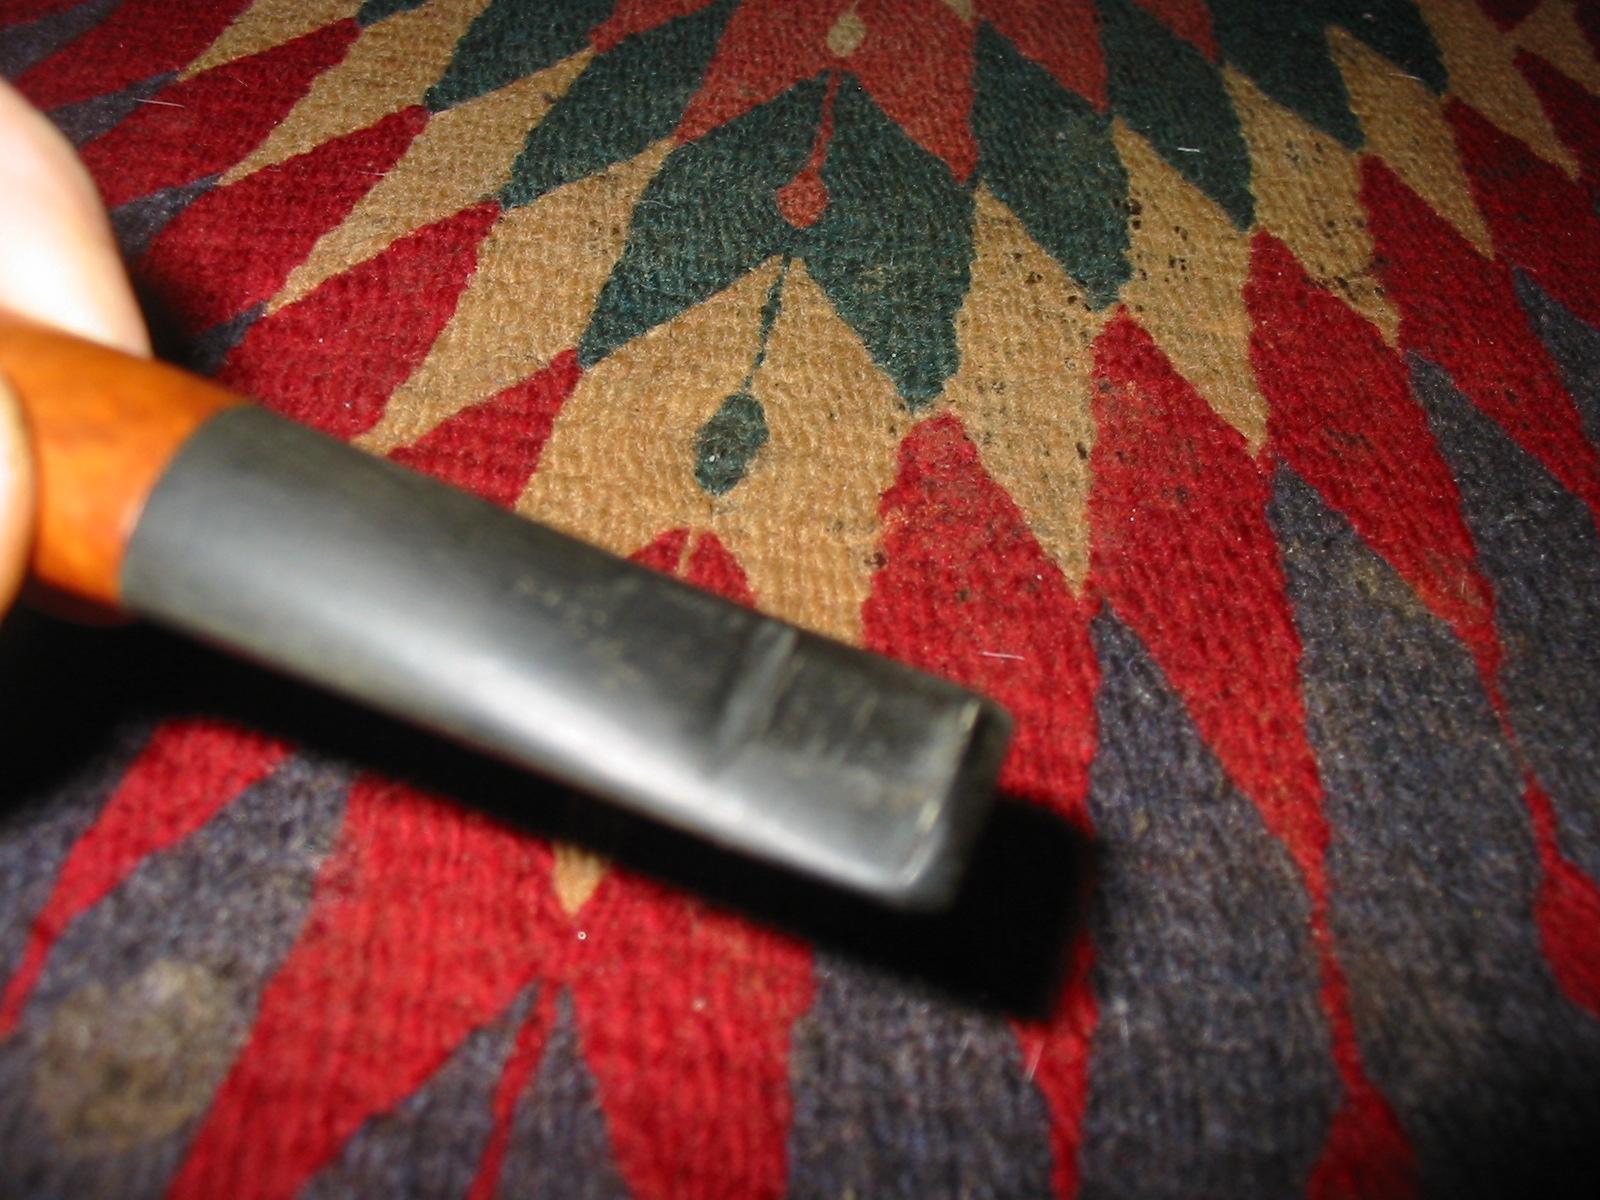
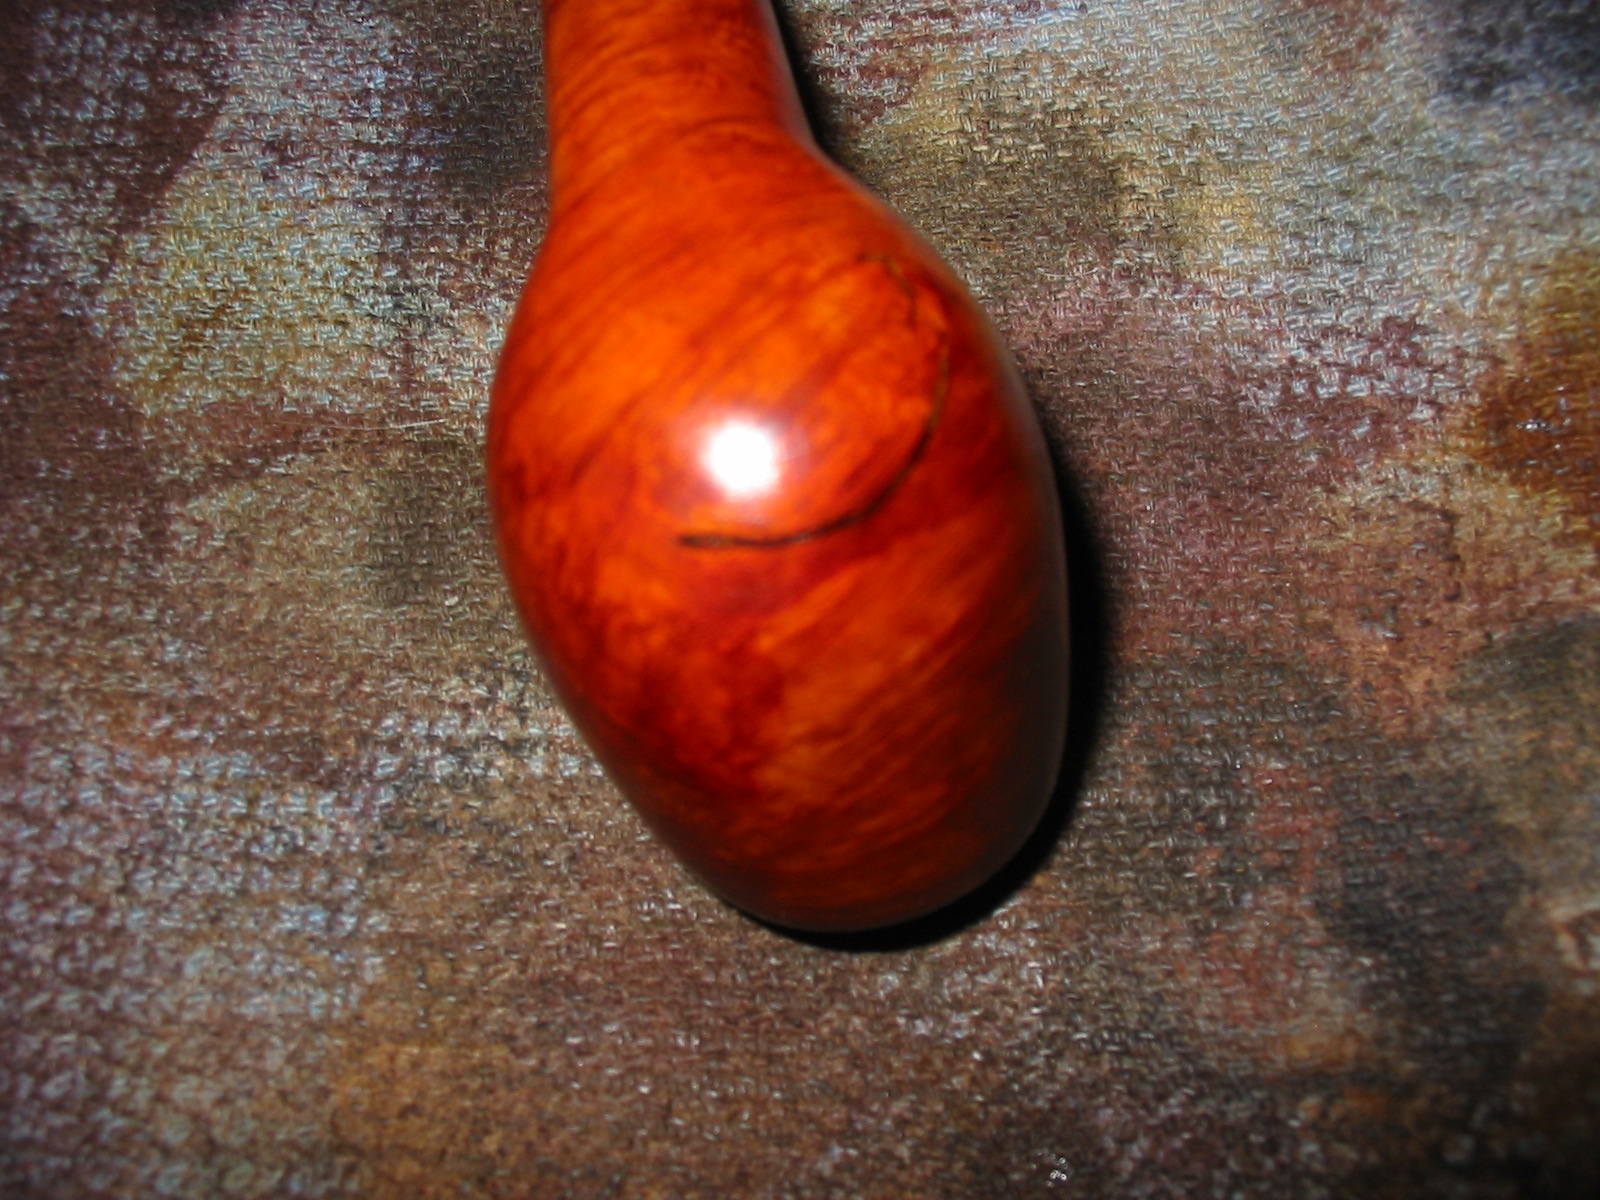
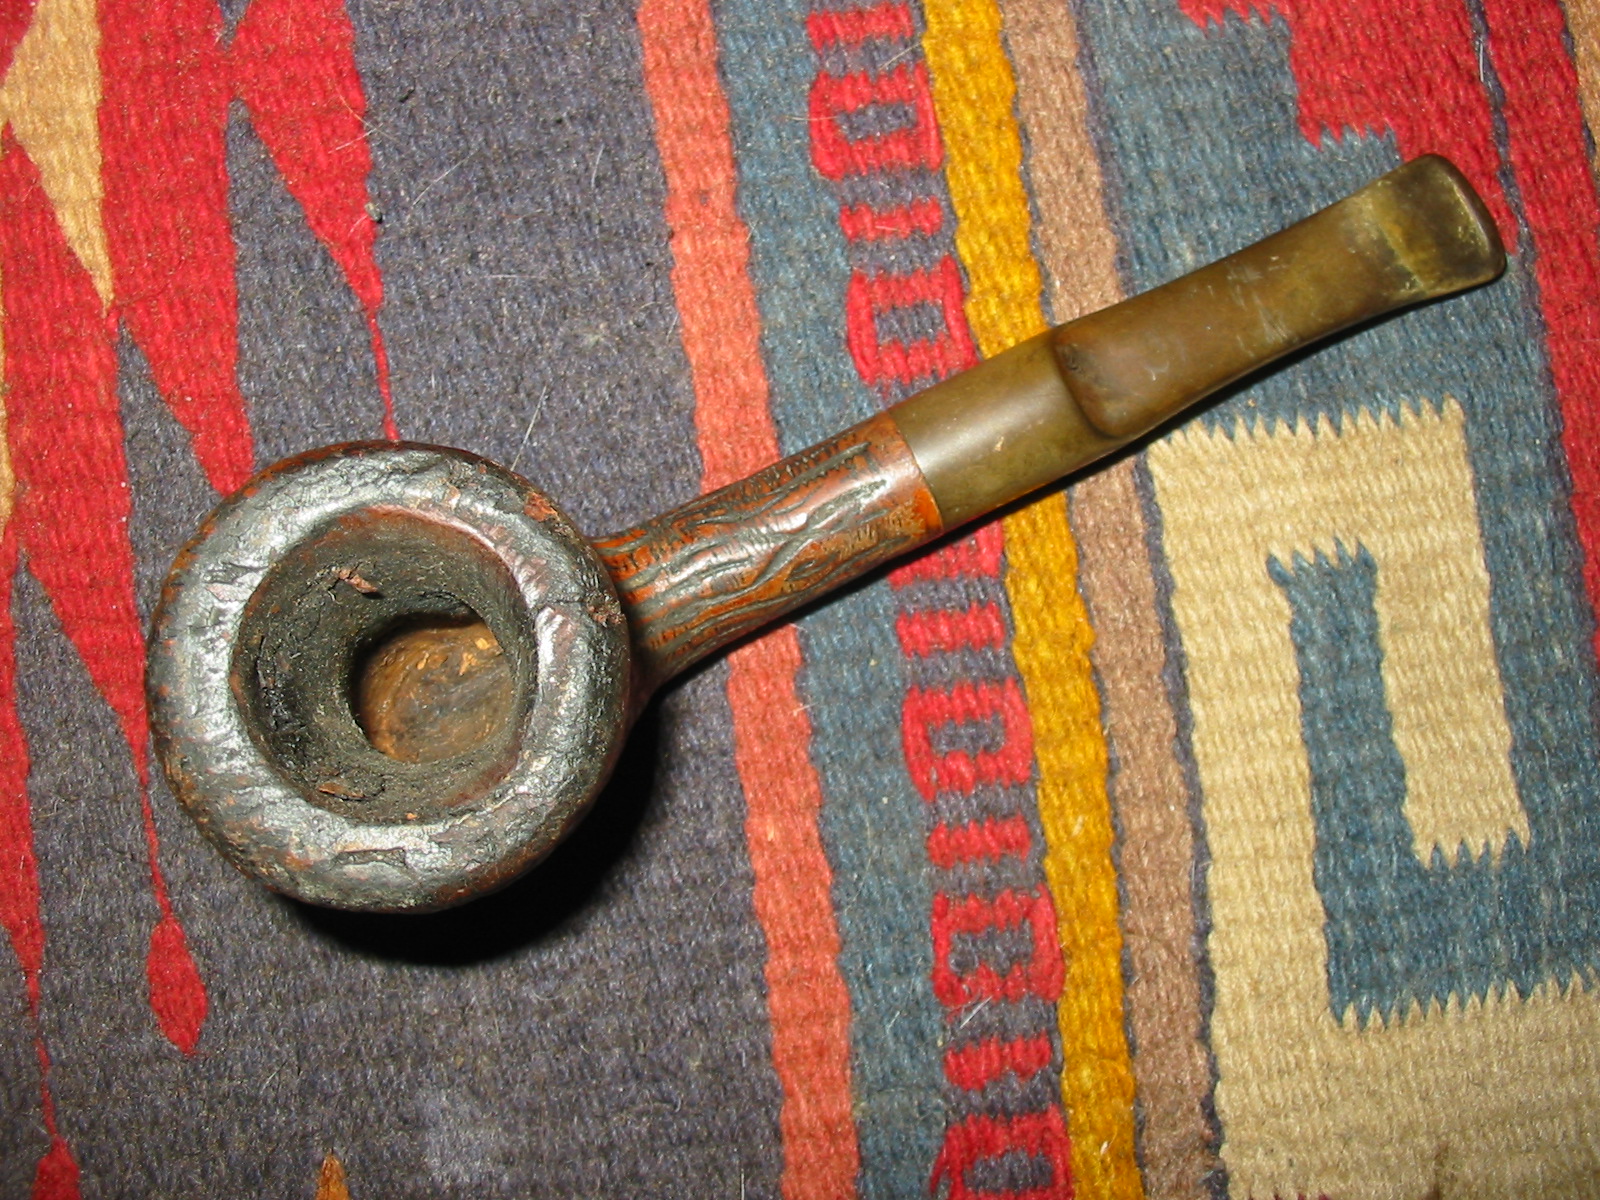
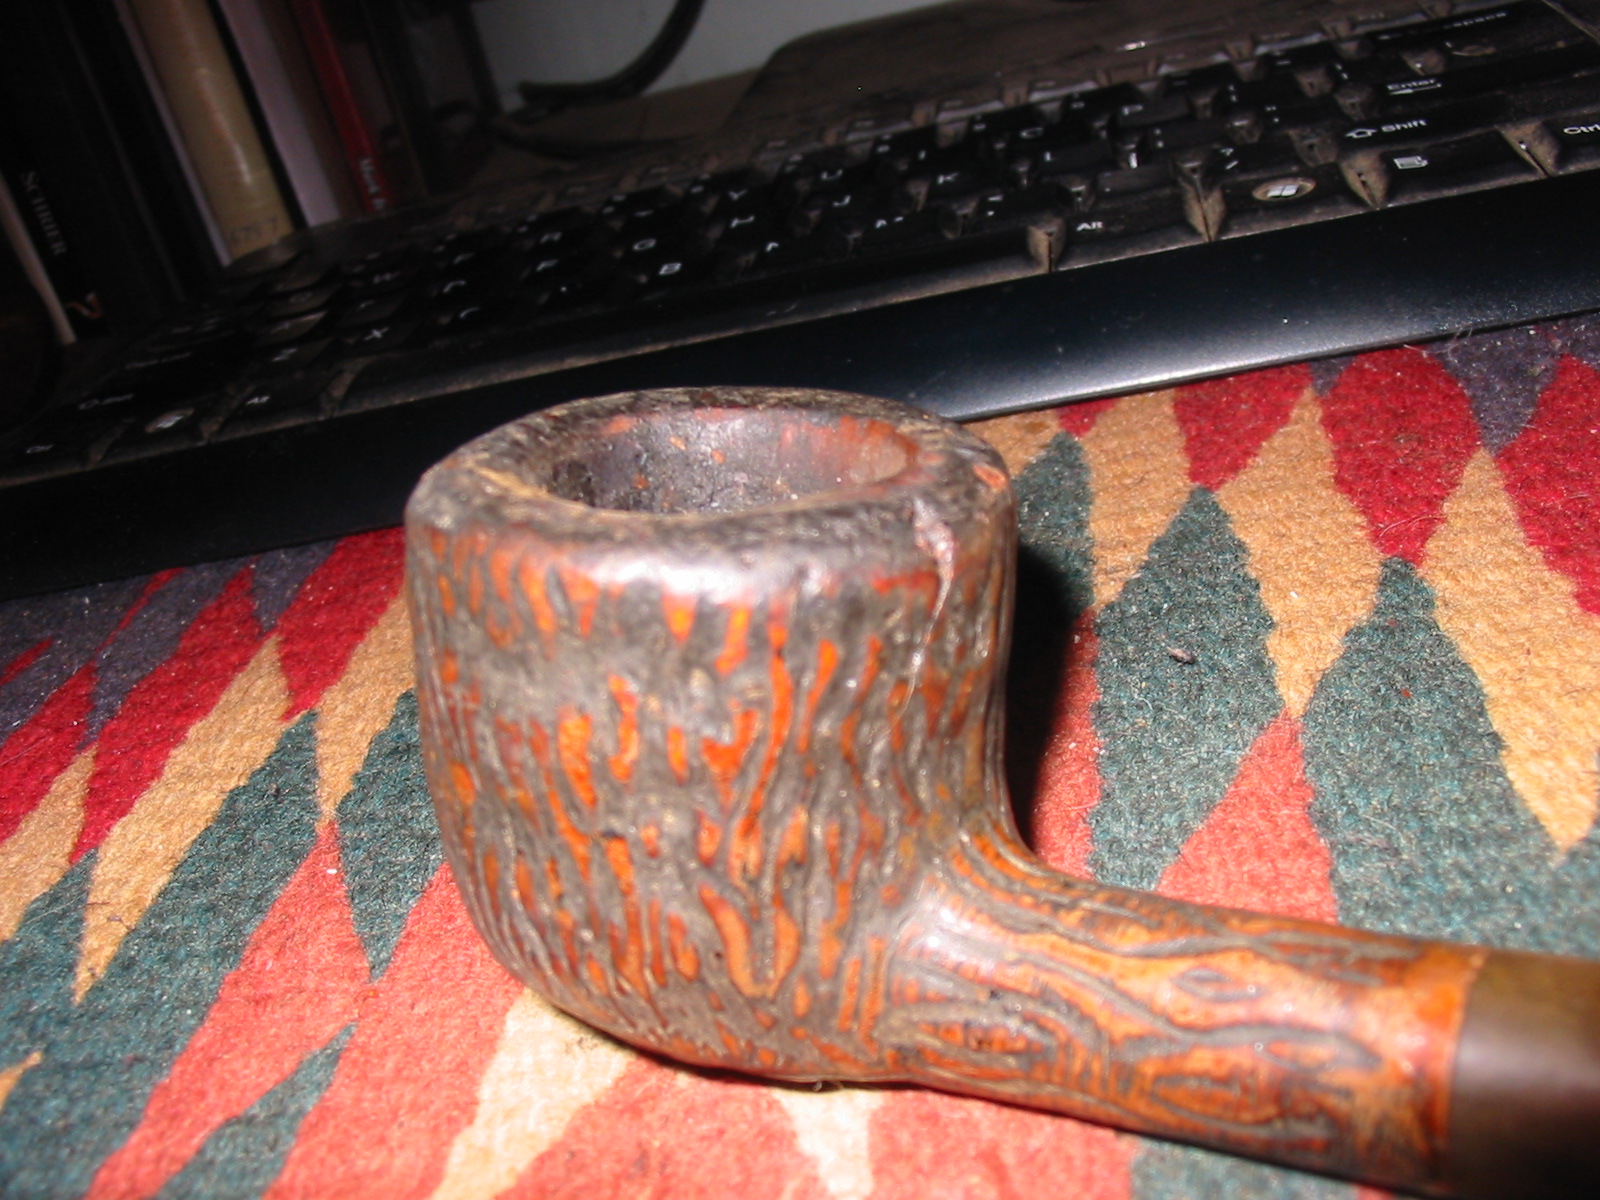
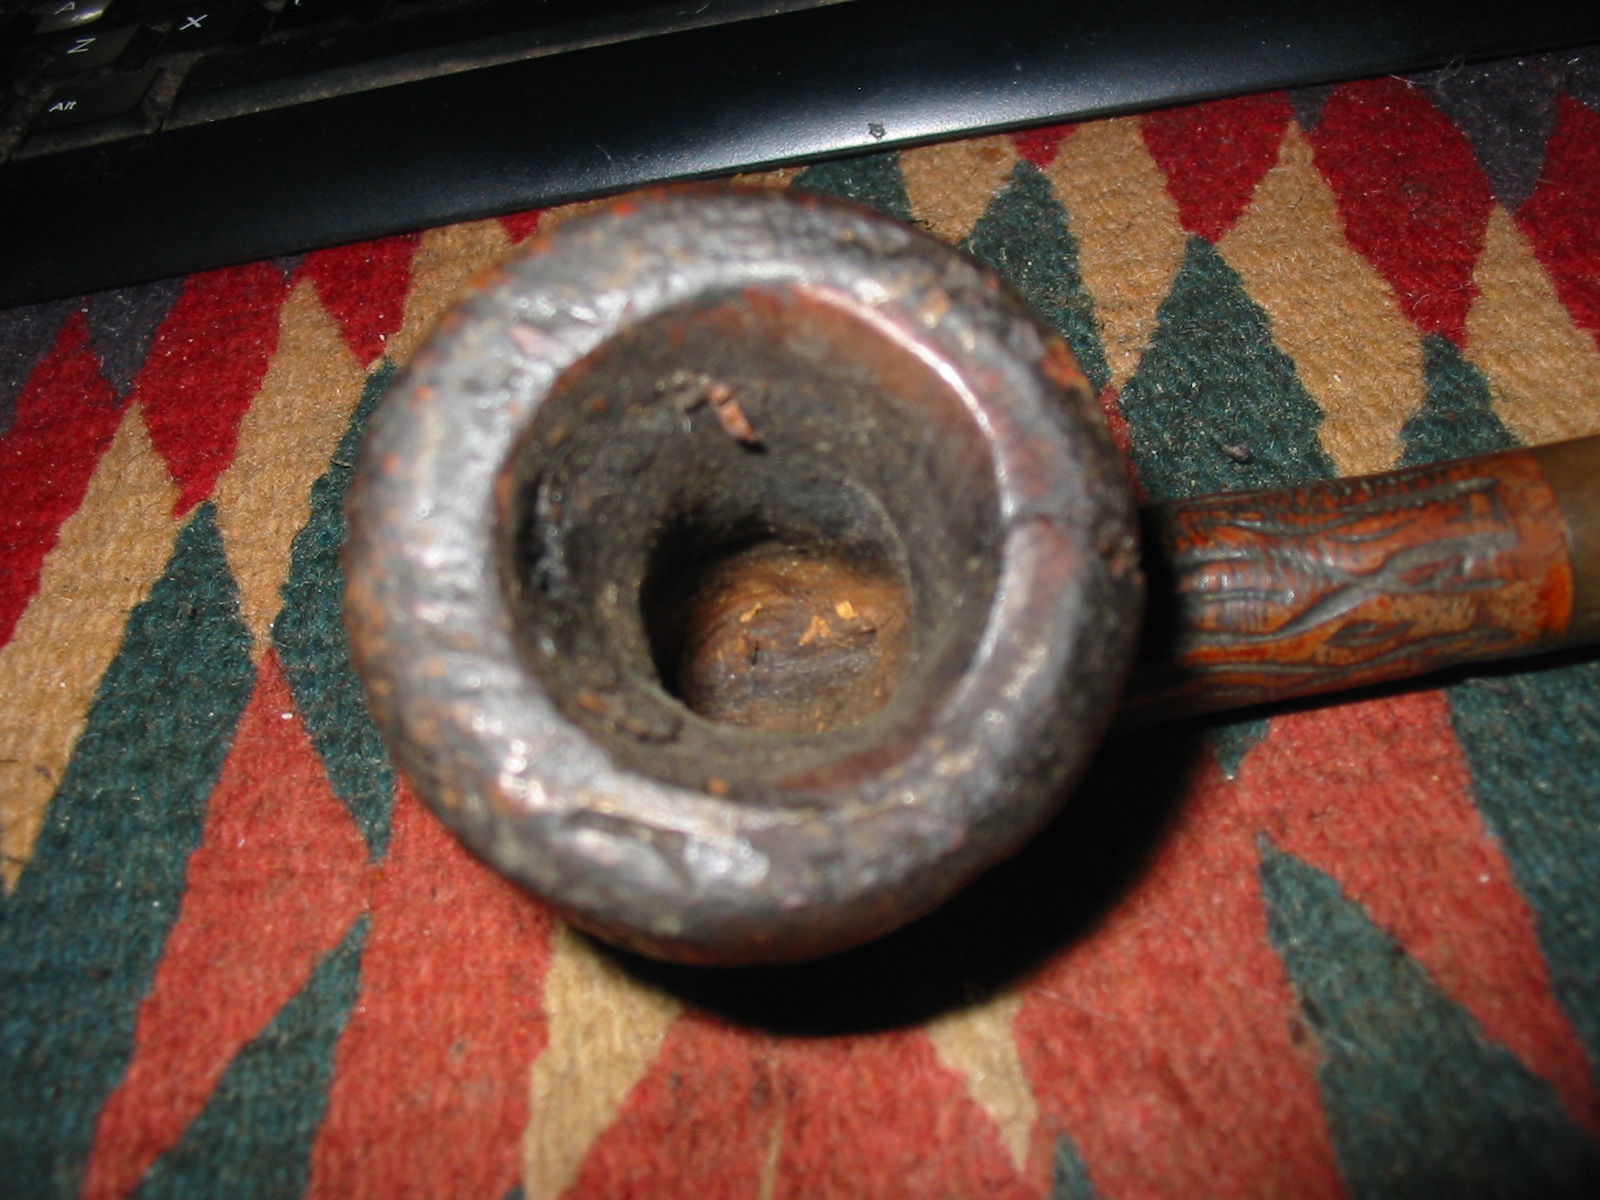
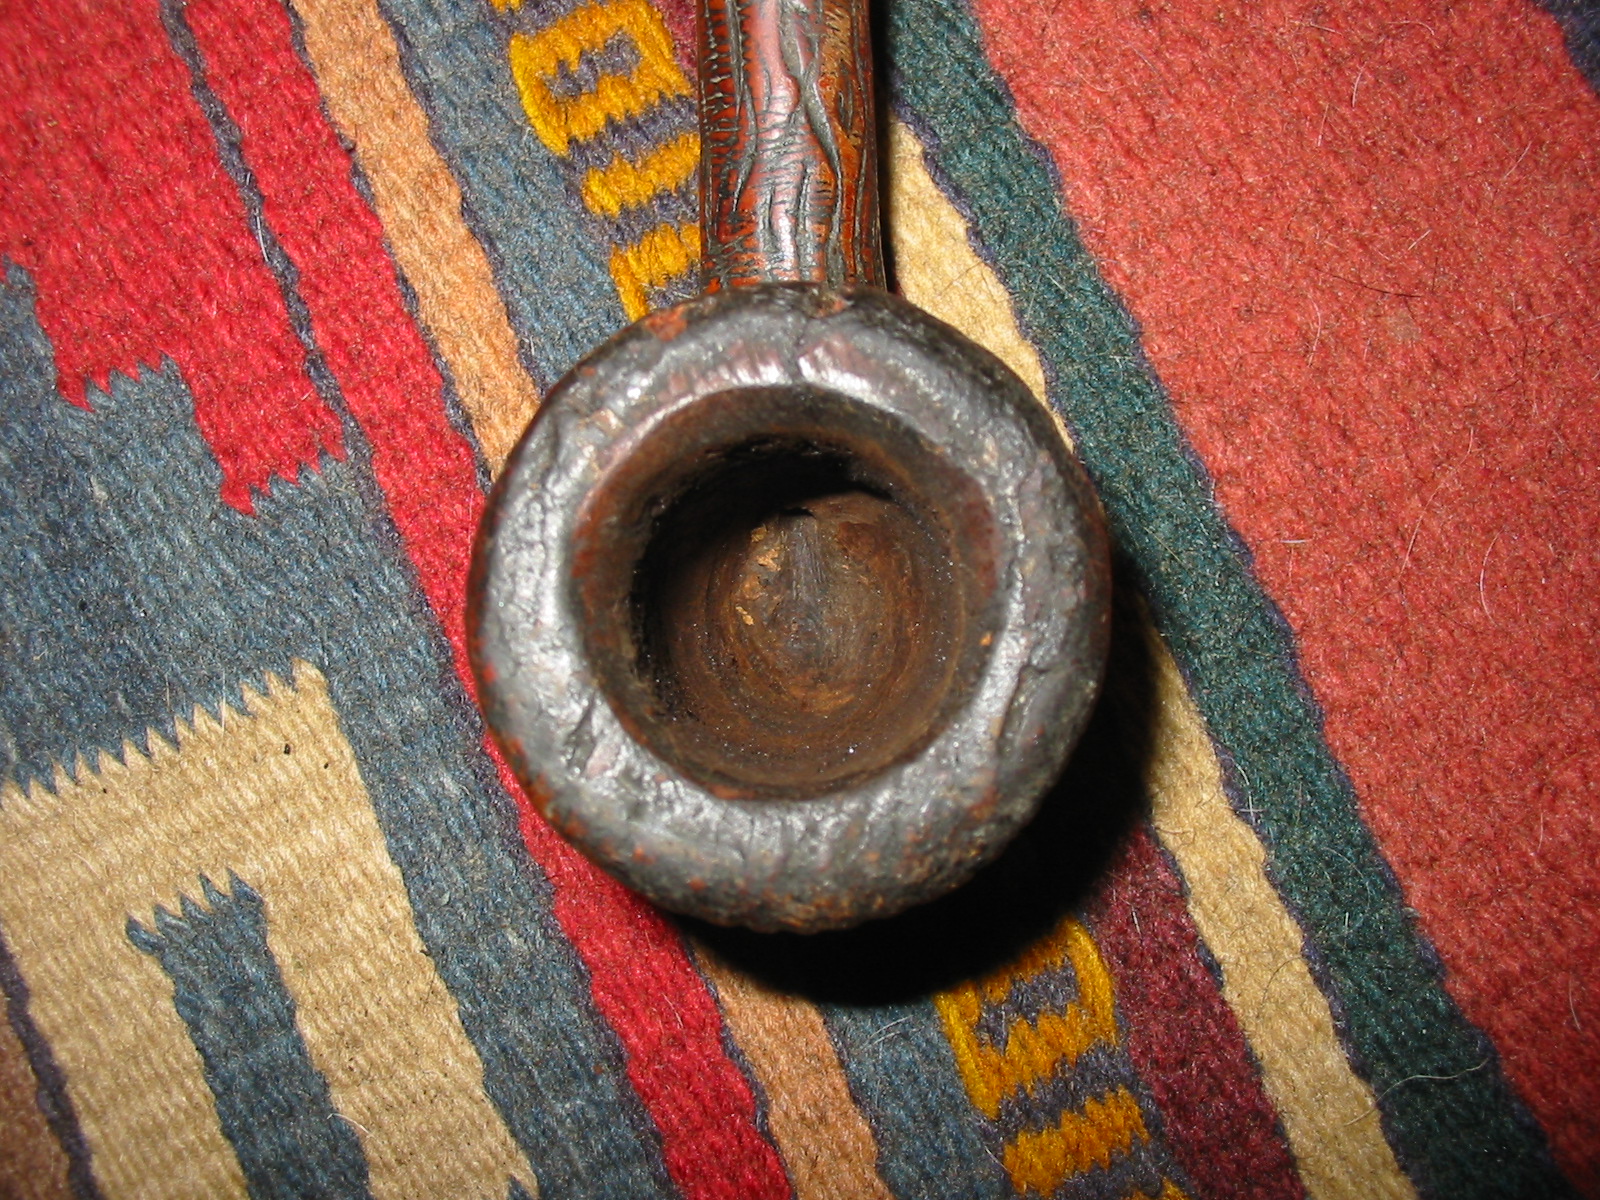
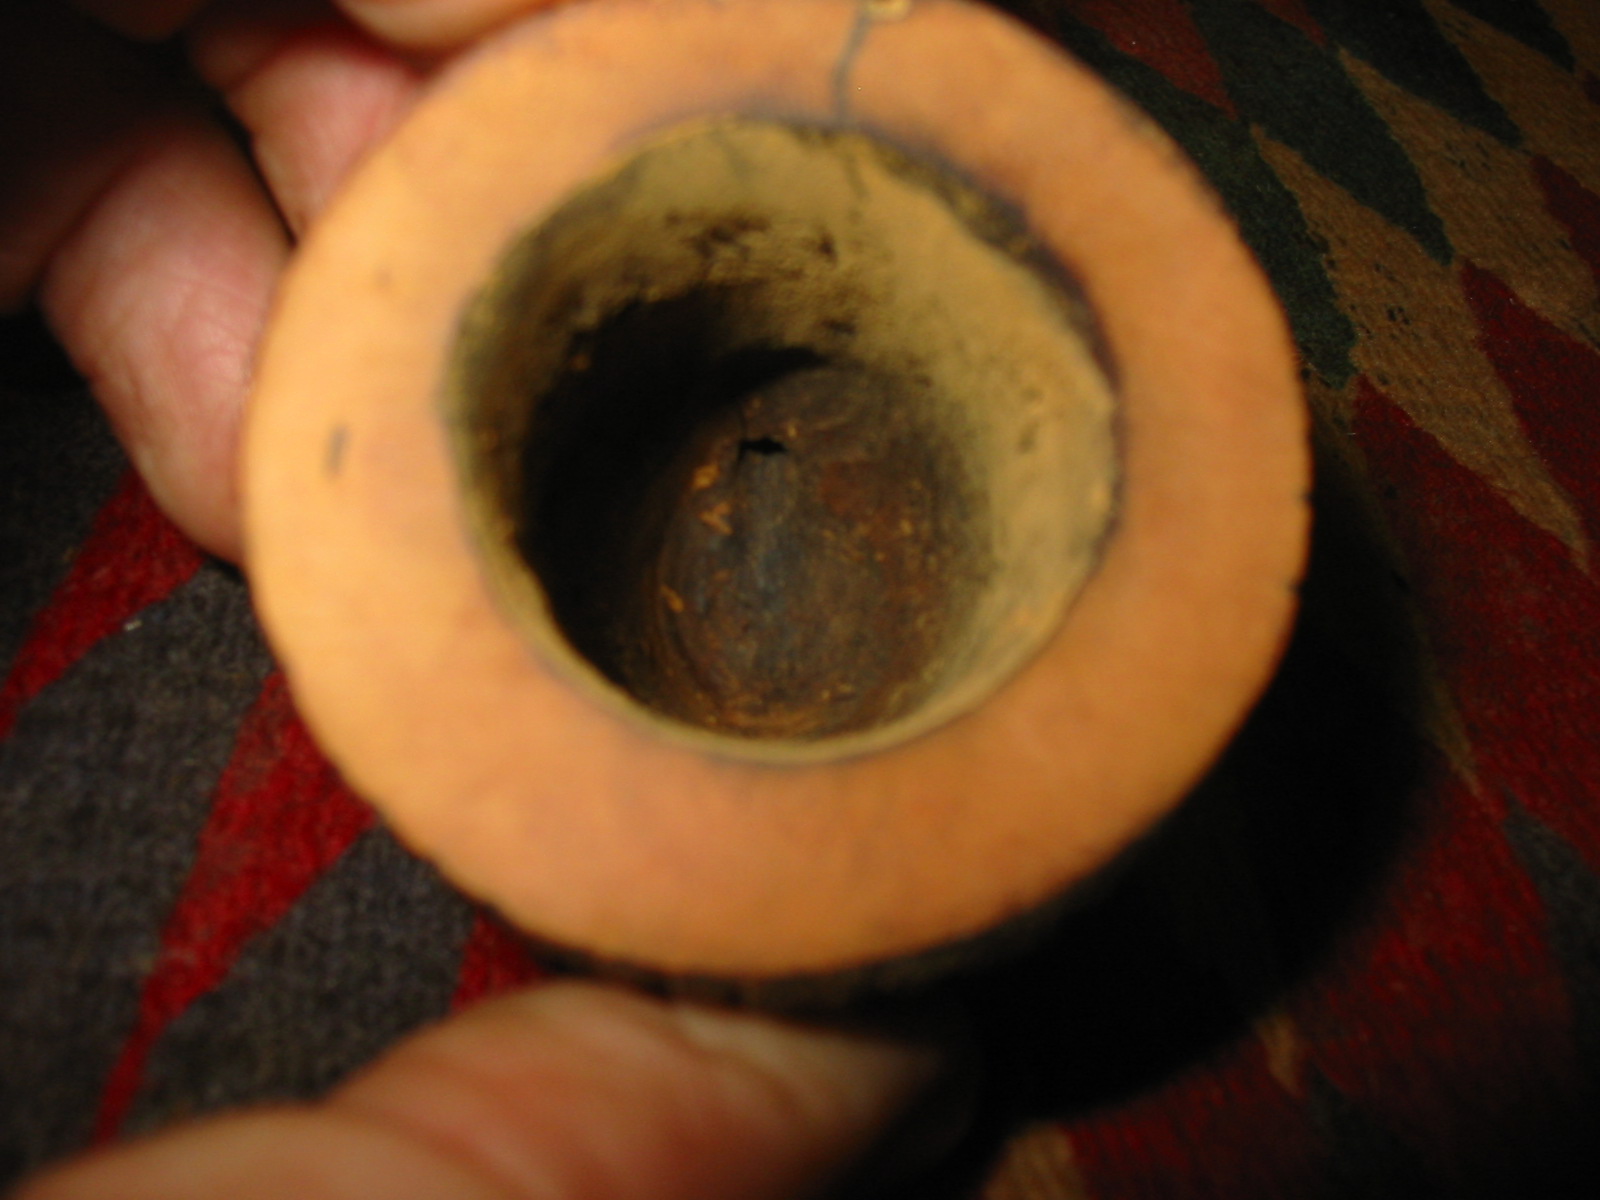
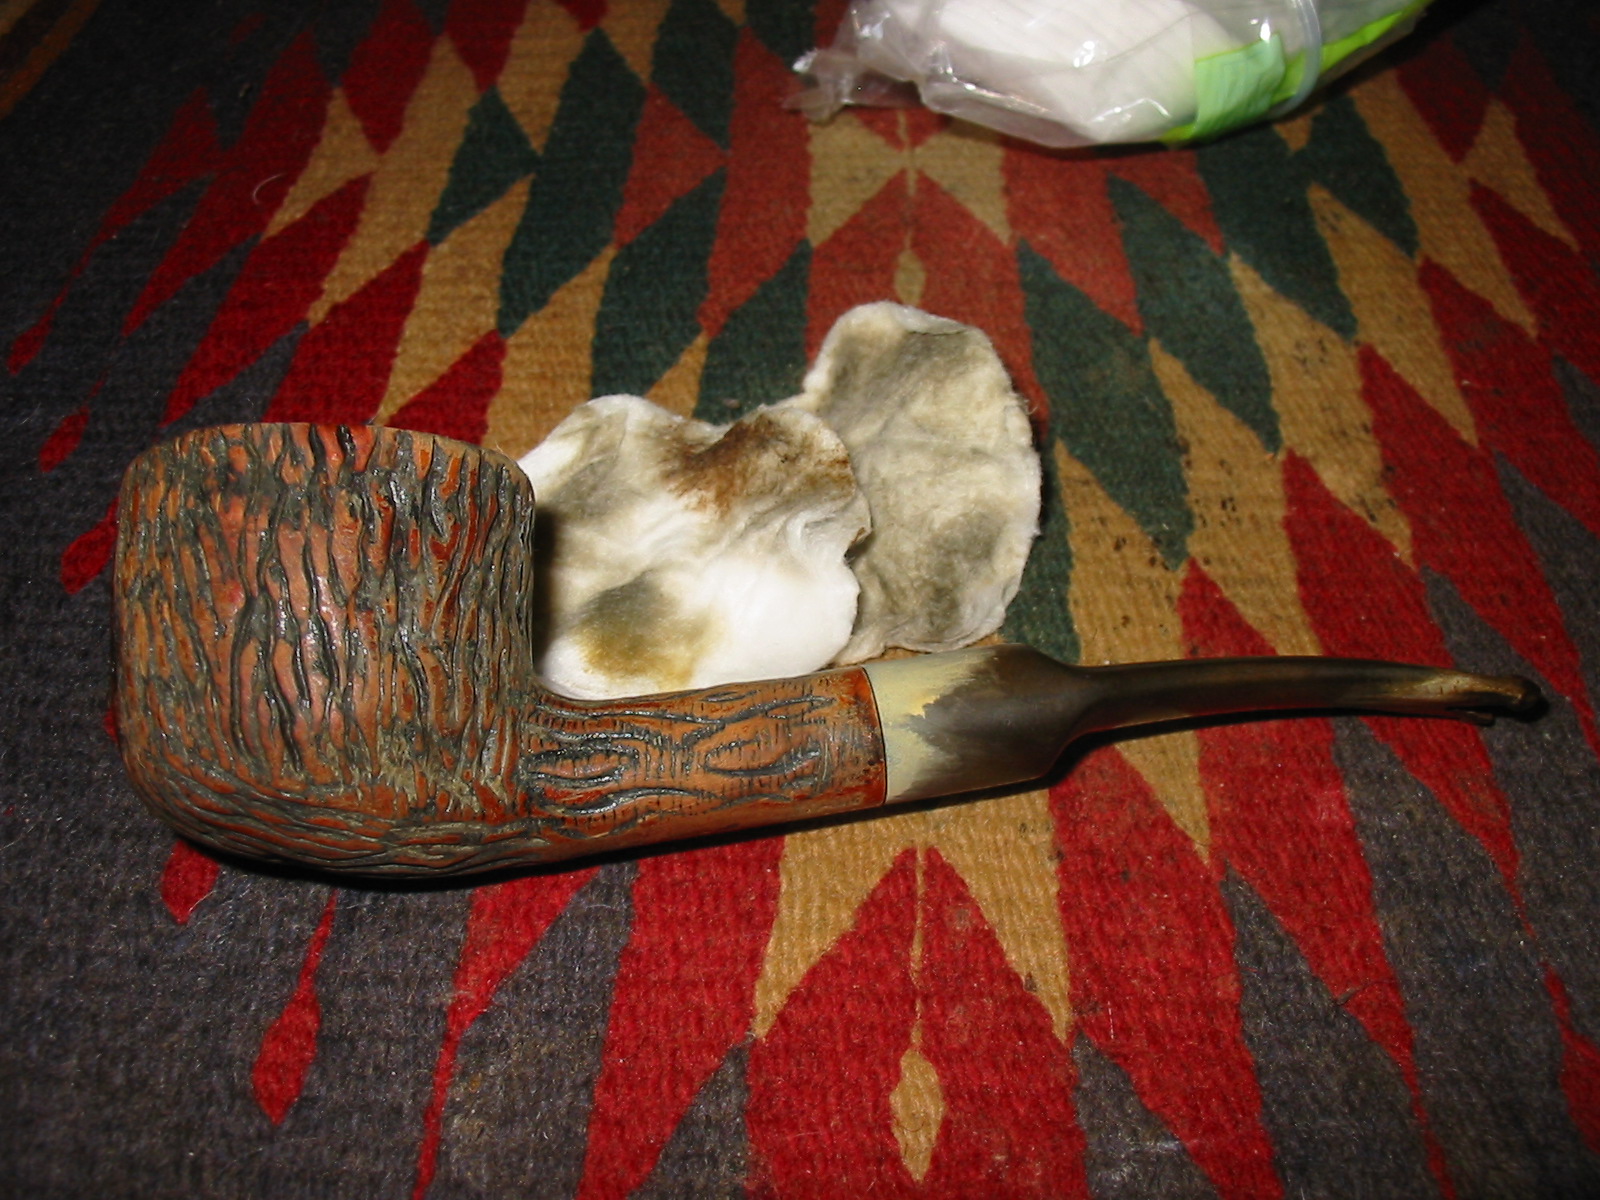
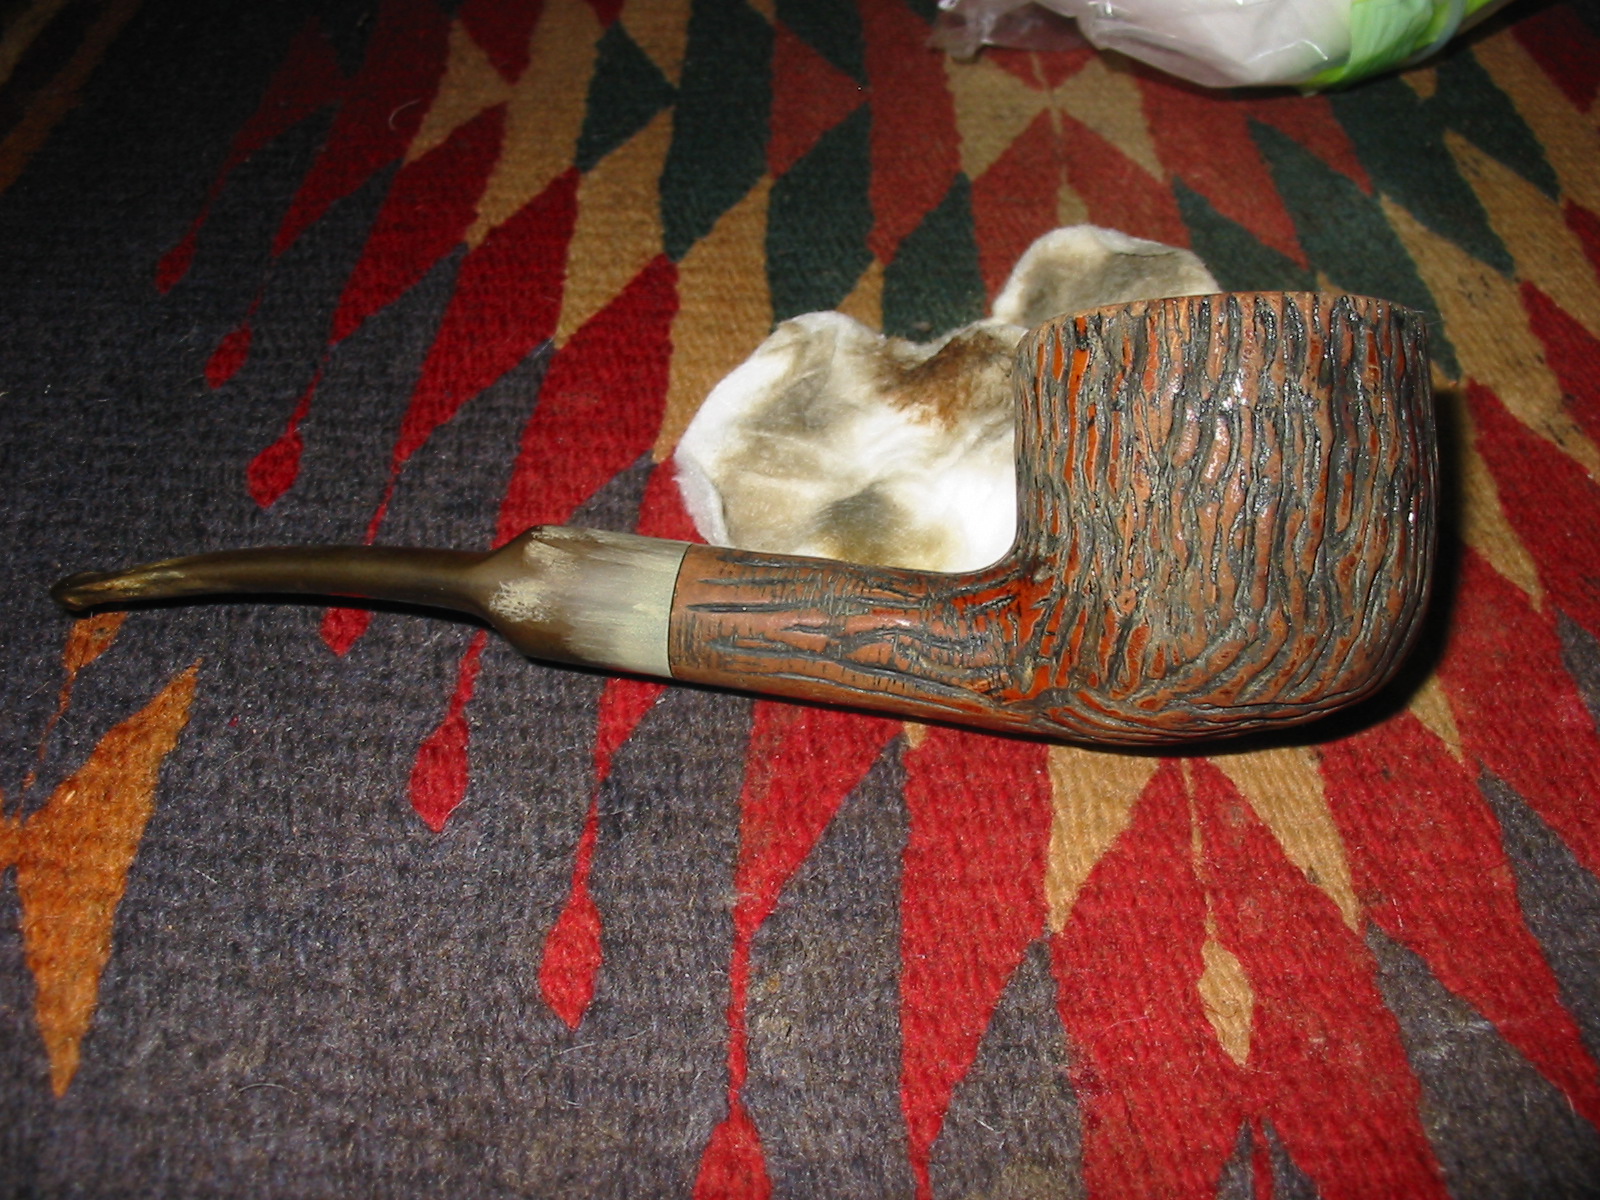
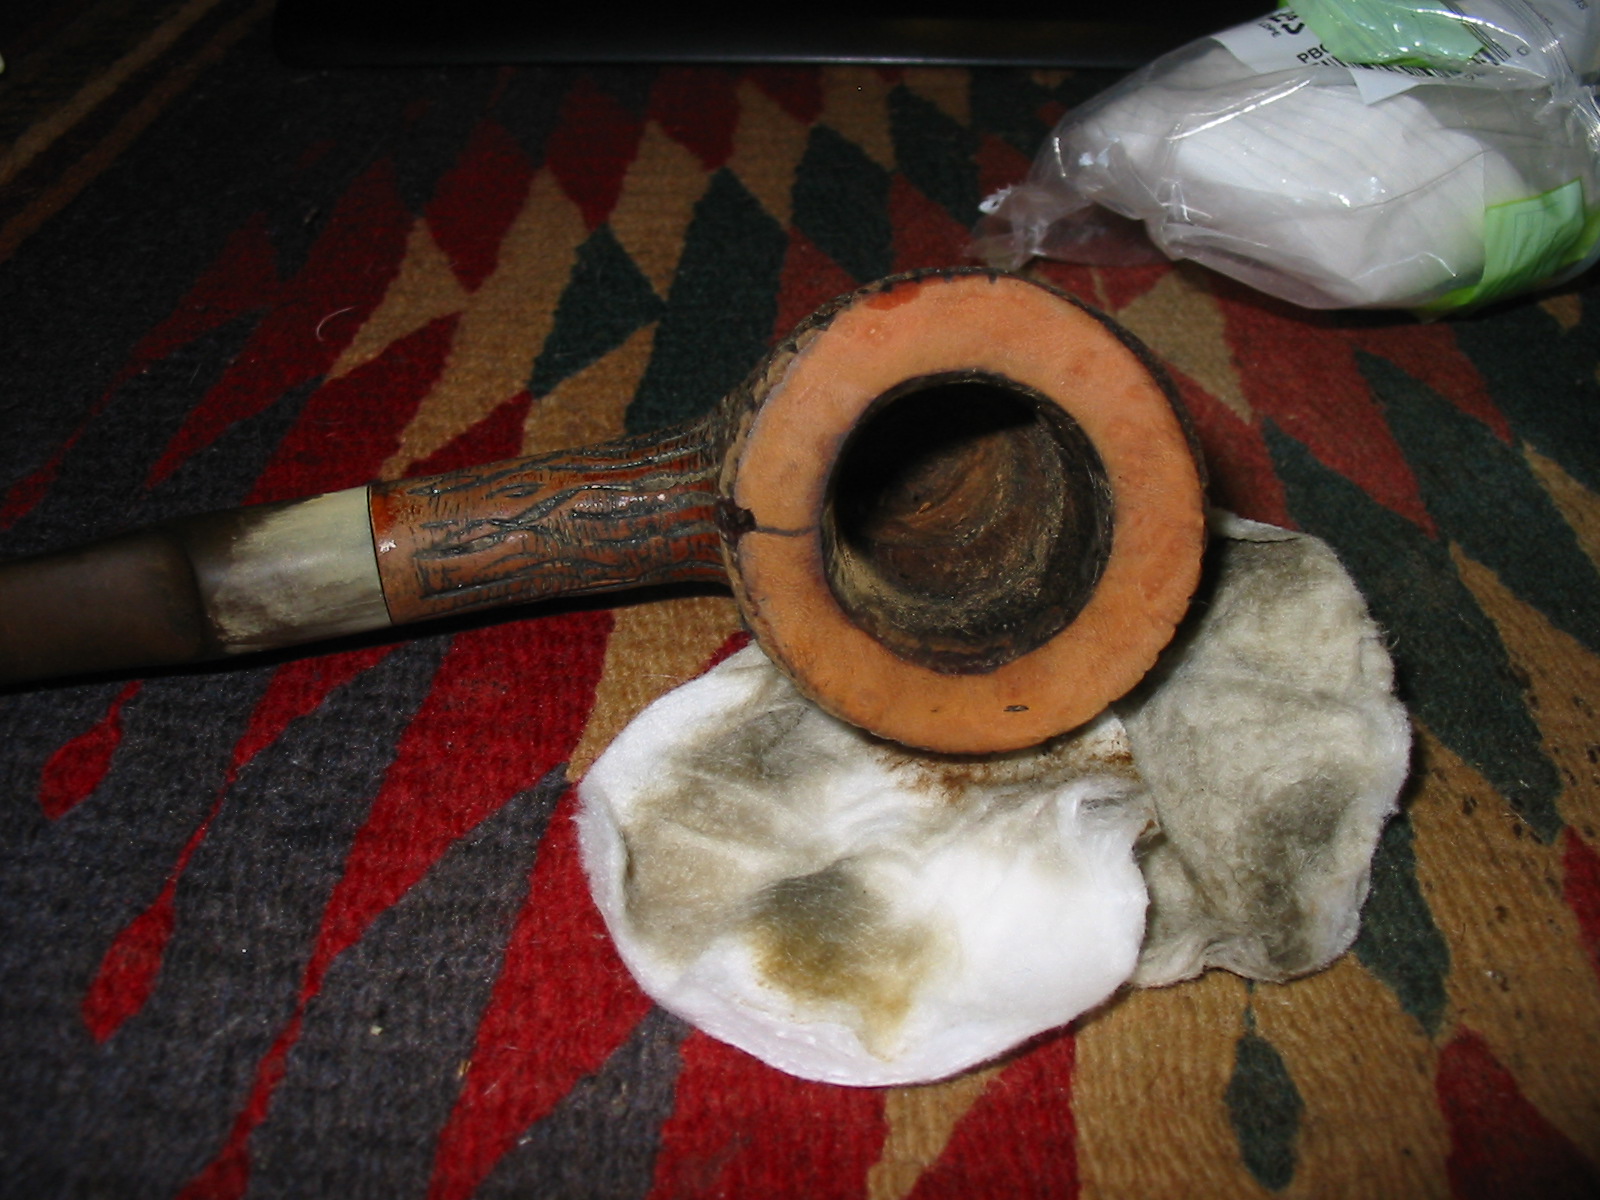
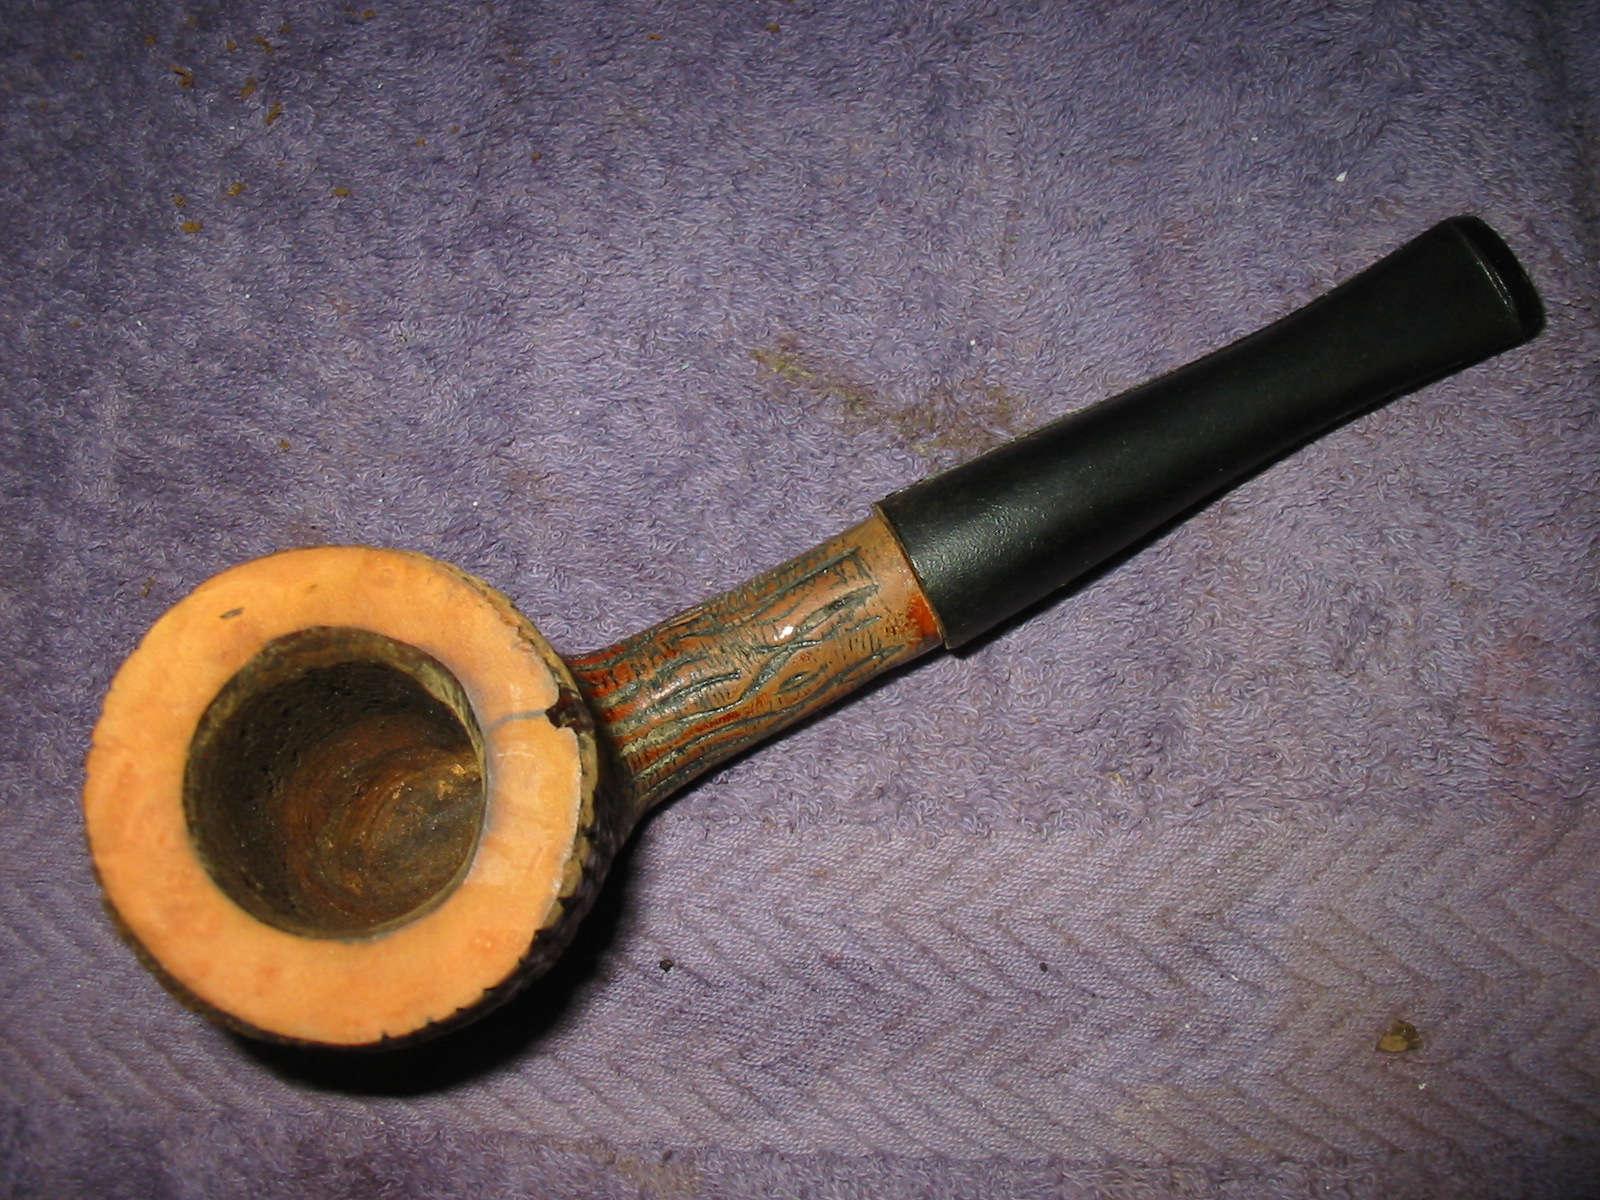
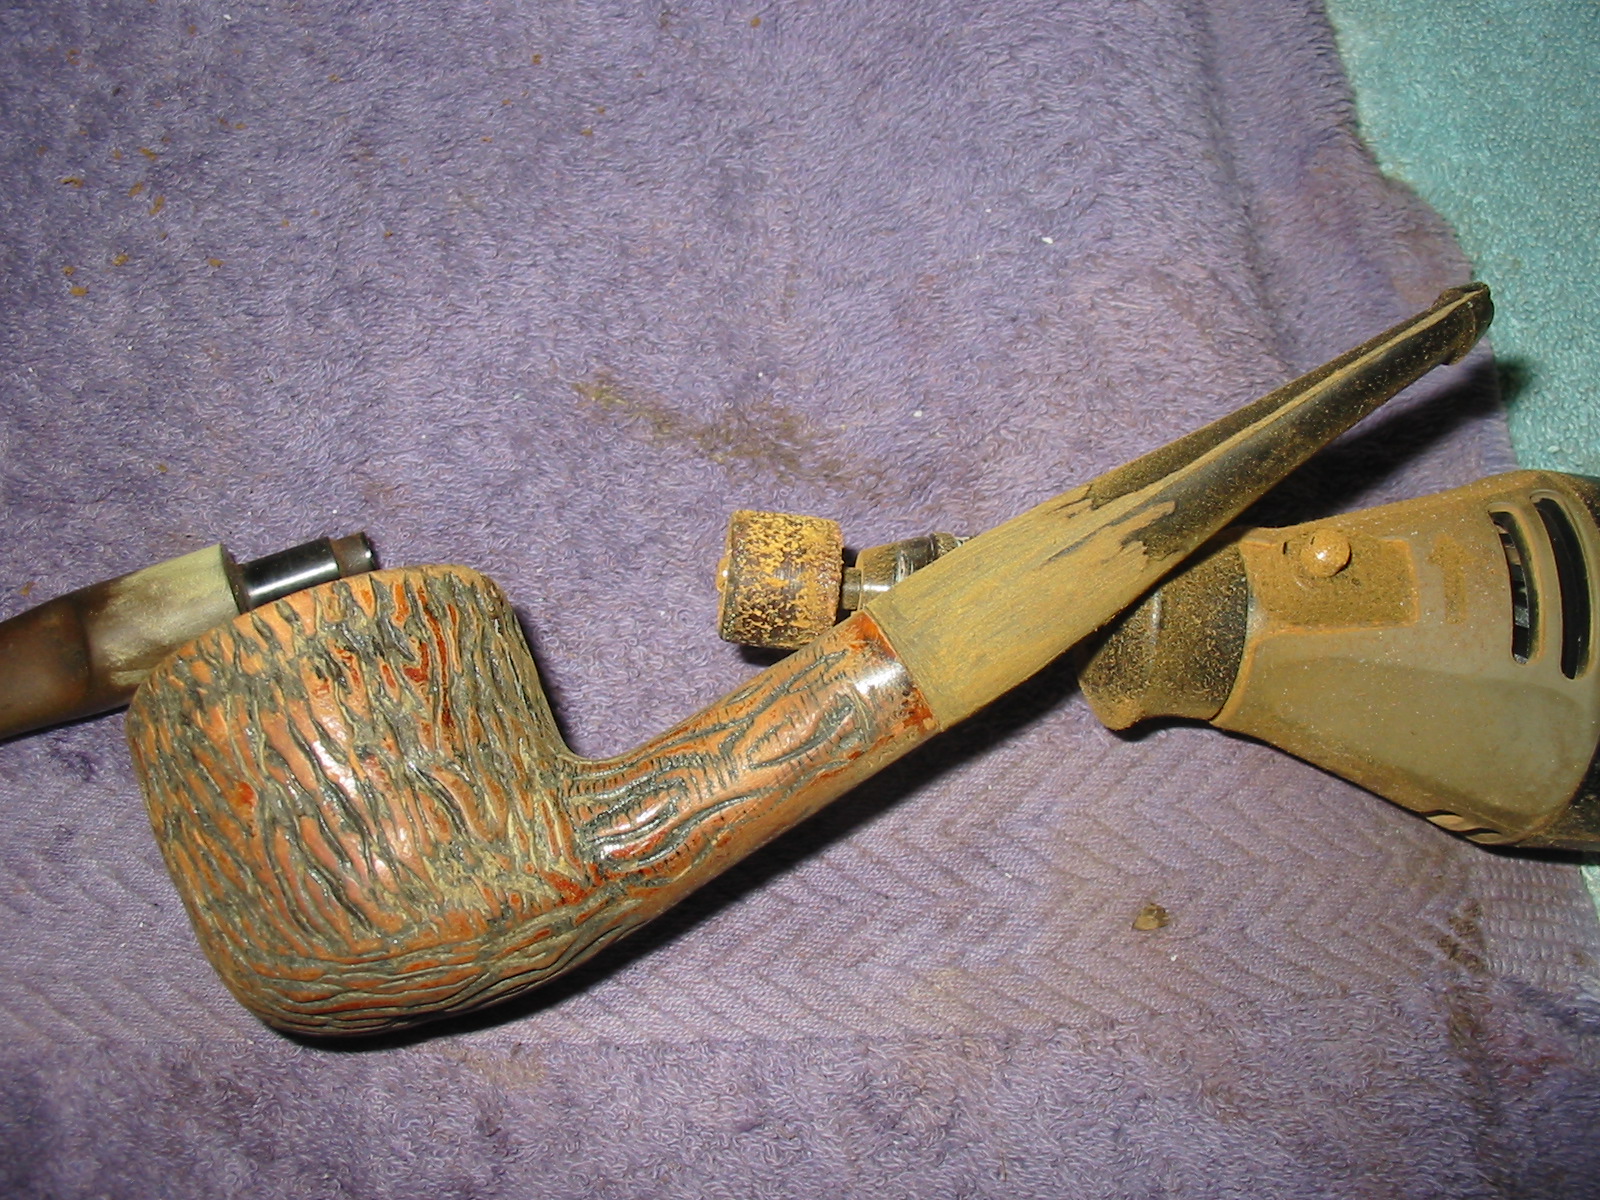
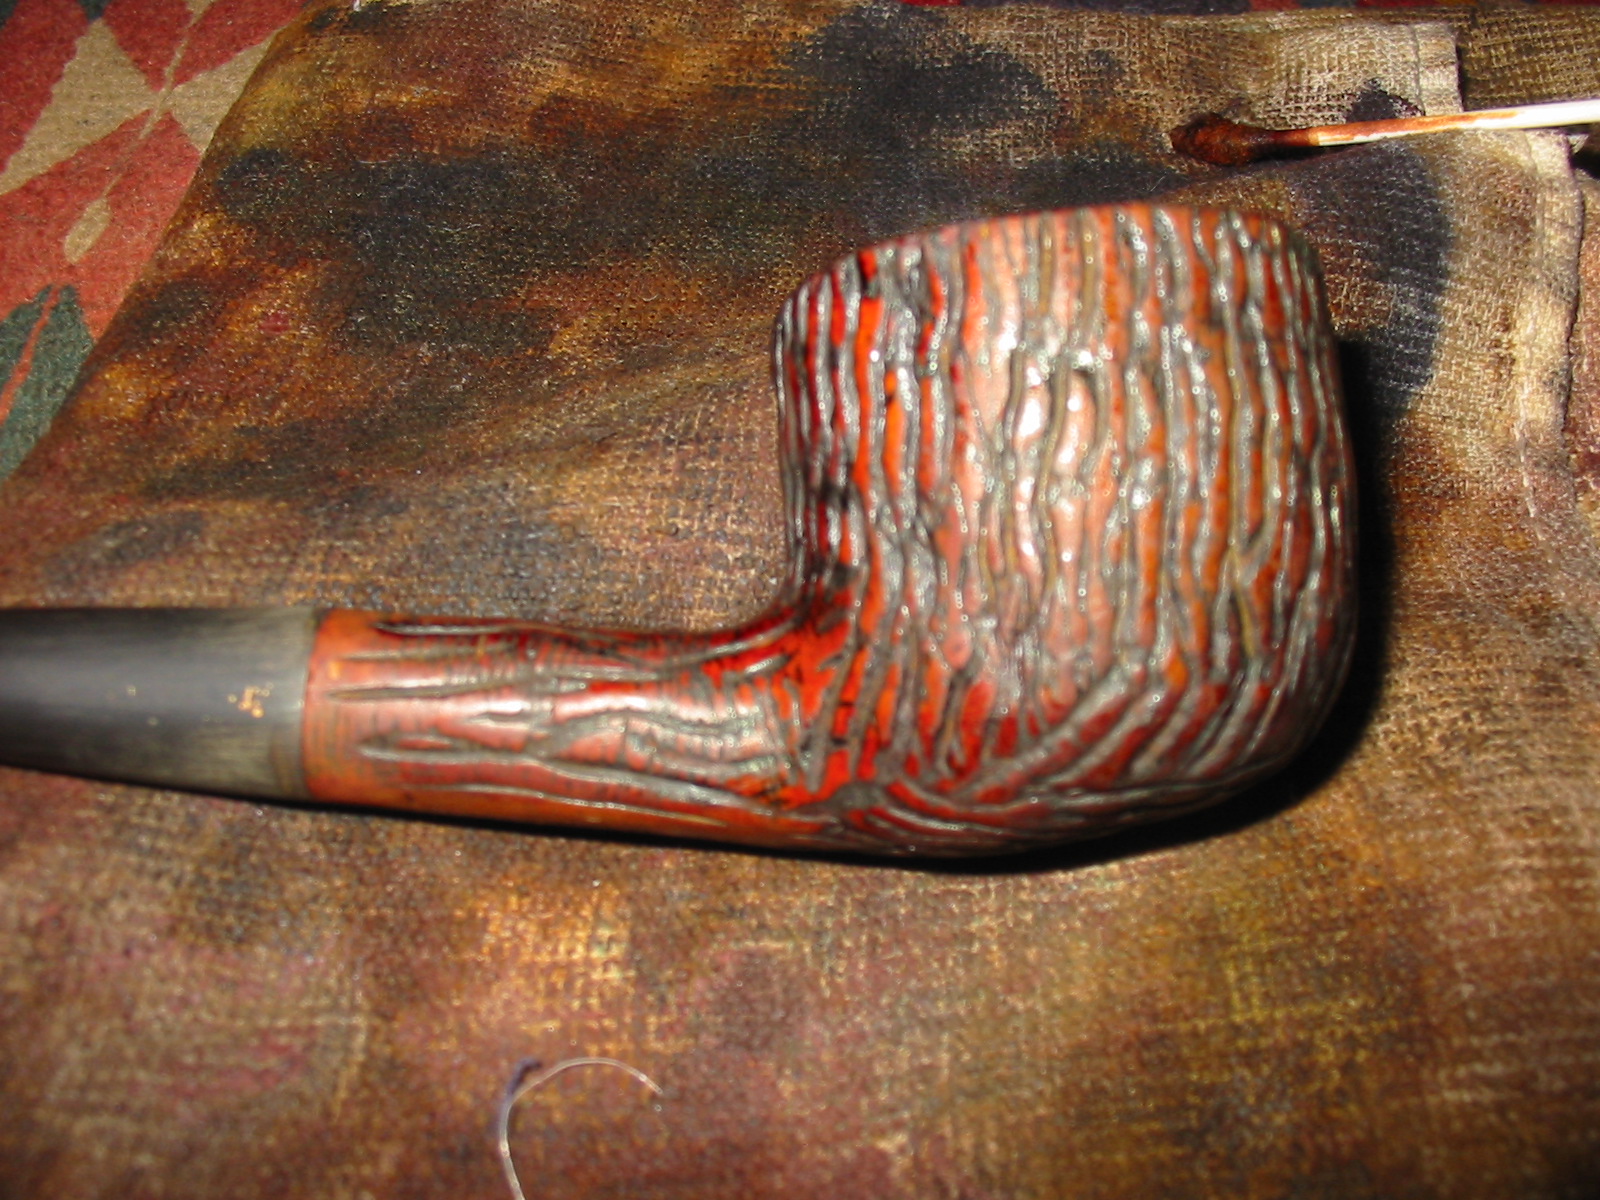
This particular Monza had seen better days. I described it in my earlier essay as being virtually ready for the scrap heap. The bowl was badly caked and the one inch diameter bowl had been reduced to a hole small enough that I could barely squeeze my little finger in the bowl. The top portion of the cake had been carved or hacked away with a knife and the bottom portion had also been hacked away. This left a solid girdle of carbon cake around the middle of the bowl. The bottom of the bowl had been gouged at and the right side of the bottom had a huge “smile” carved in it. The rim had been hammered into rough shape so that the outer edge was ruined. The lava build up on the rim was very thick and it totally covered striated rustication that had been present when the pot was new.

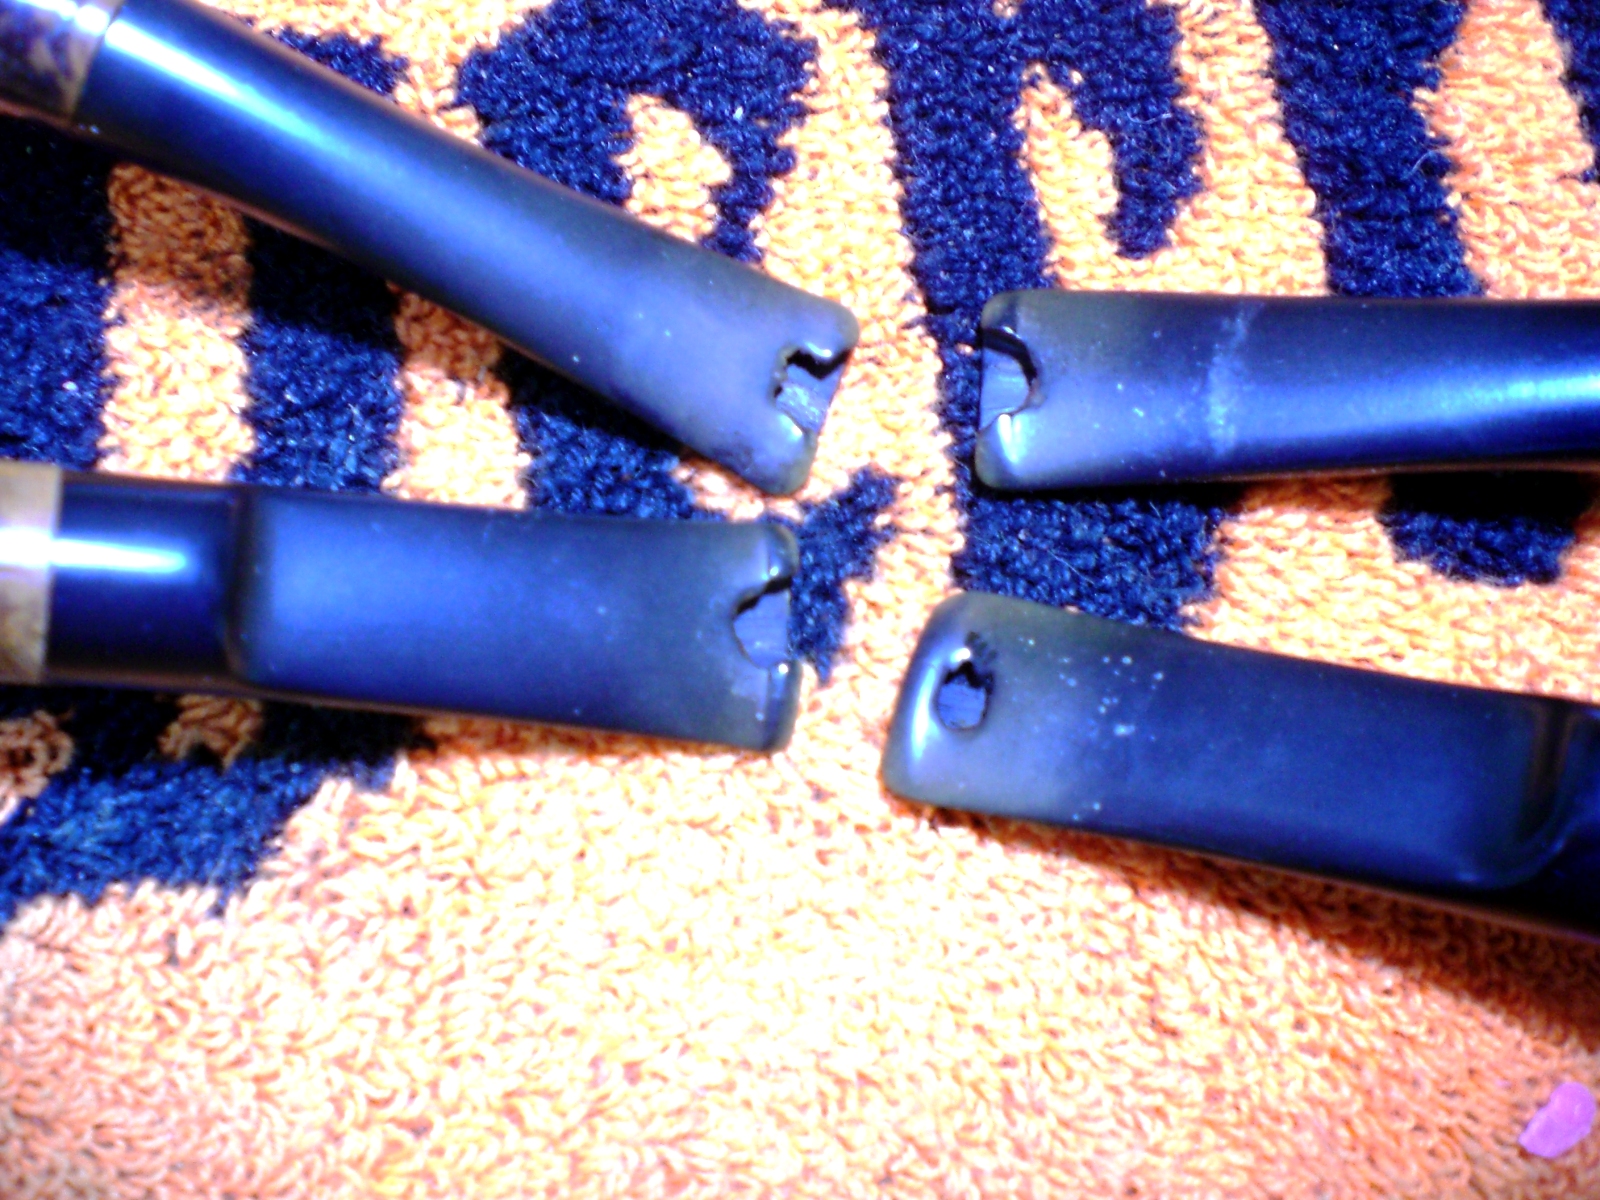
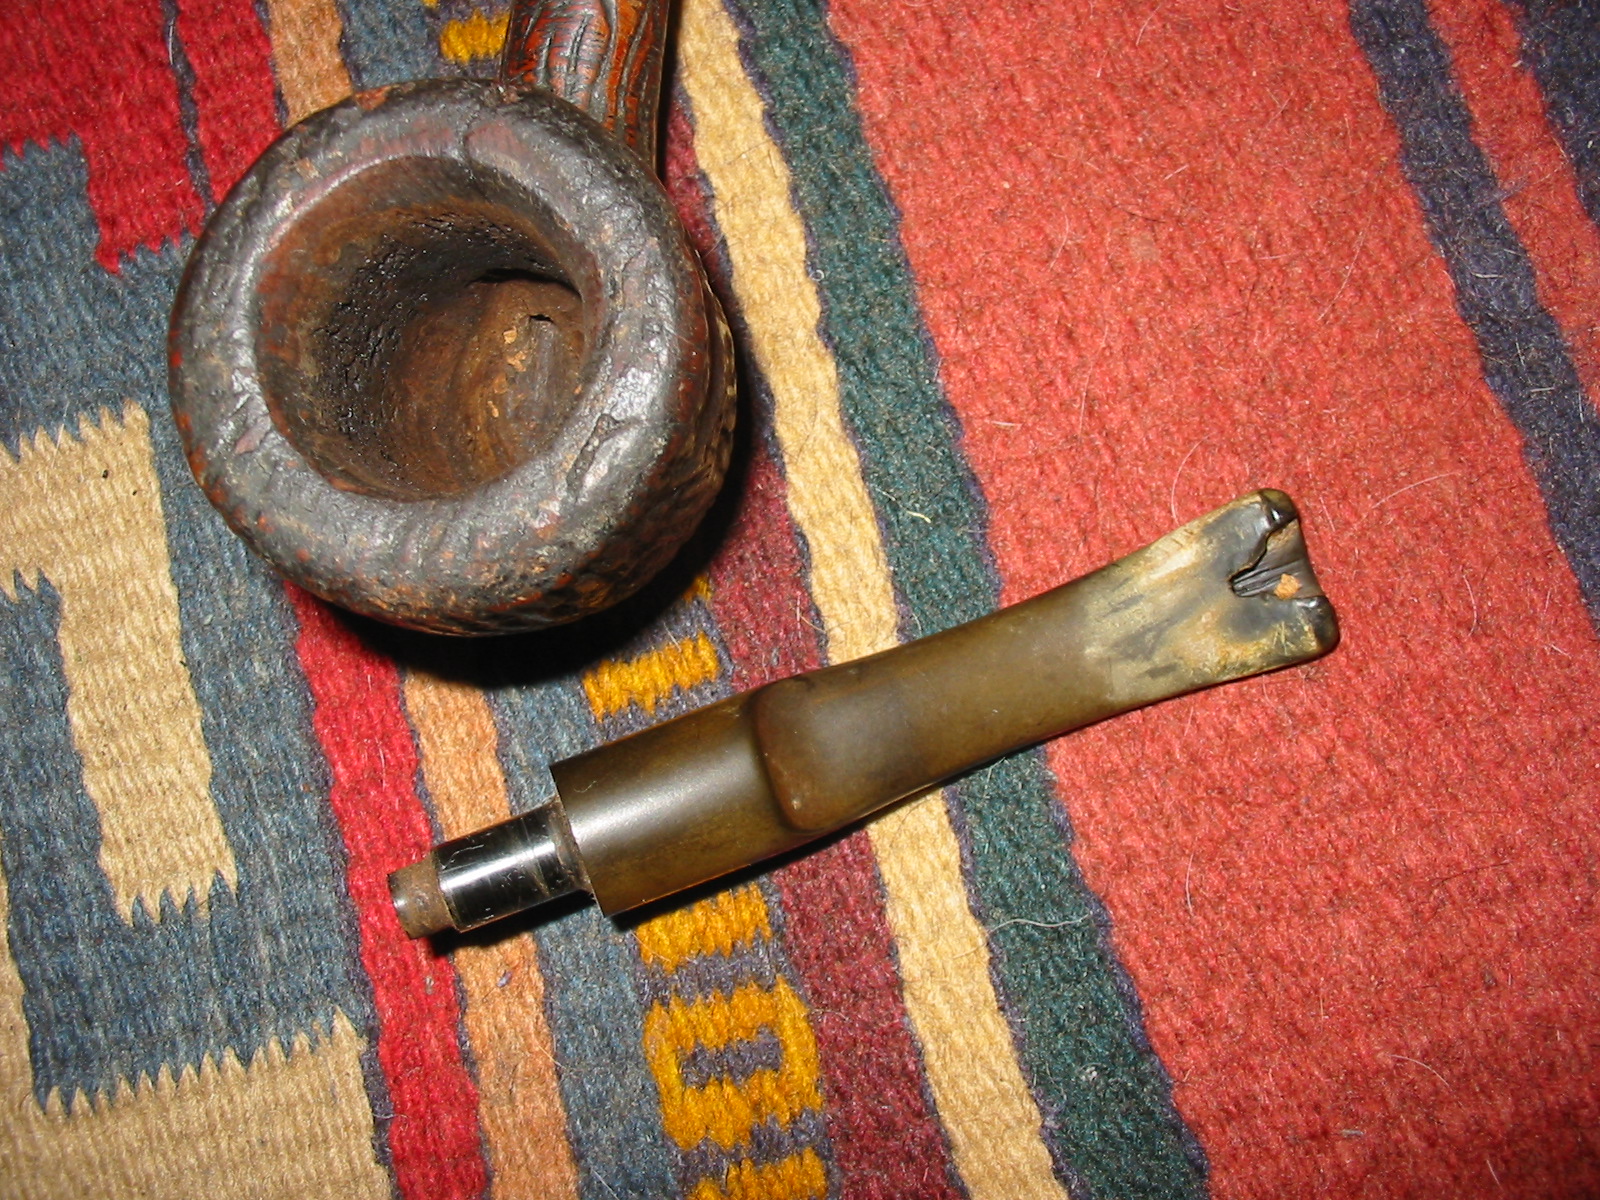
The stem was chewed and carved with a huge chunk out of the underside making it non-repairable. The stem had then been covered with a softy bit and left to calcify on the stem. The pipe was a mess. Once I removed the stem I could see that the airway had been left immaculate. There were no tars, no oils, no dirt – it literally shined it was so clean. The inside of the stem was the same. This pipe had been cared for in a functional way and probably smoked to death by the original purchaser. It was the clean airway that tempted me to give this pipe a remake. It must have been someone’s favourite pipe for him to go to the extremes that this pipe had seen in terms of treatment. Every action the fellow carried out on this pipe only made sense in a utilitarian sense of prolonging the purpose the pipe was made for.
IMG_5028

IMG_5029

IMG_5030

IMG_5031

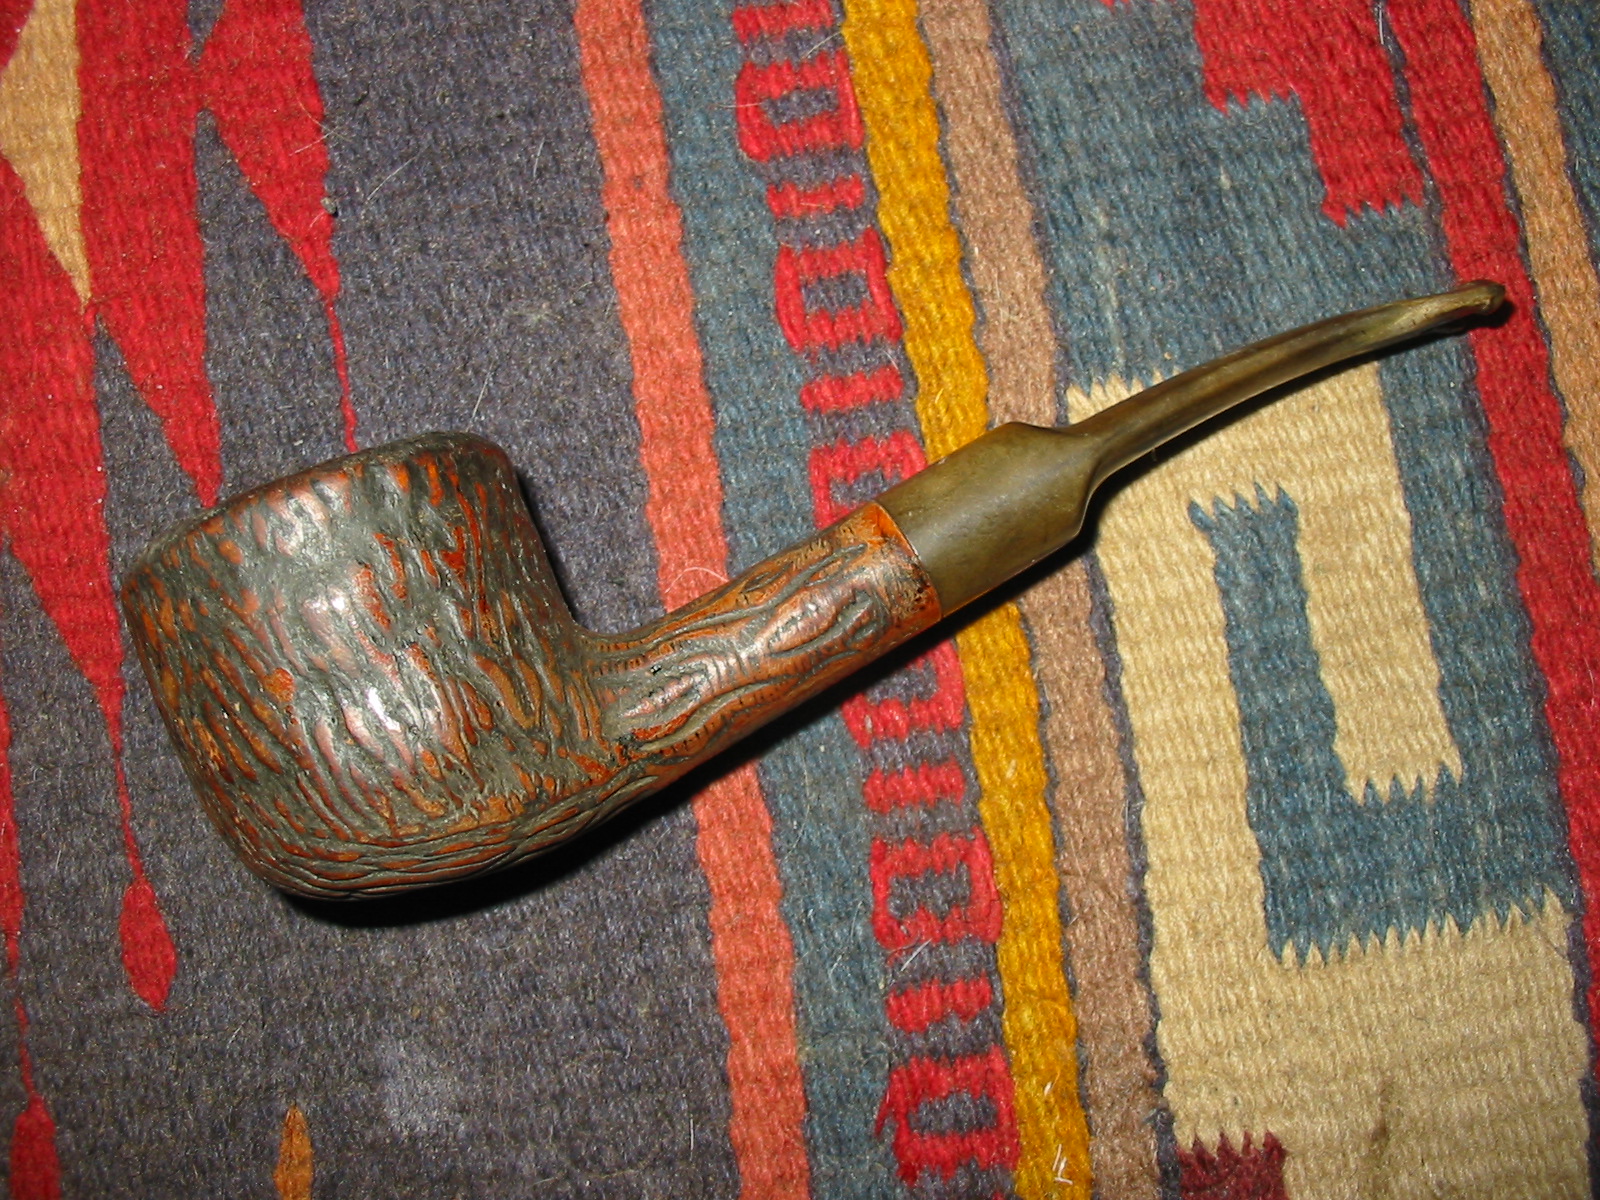
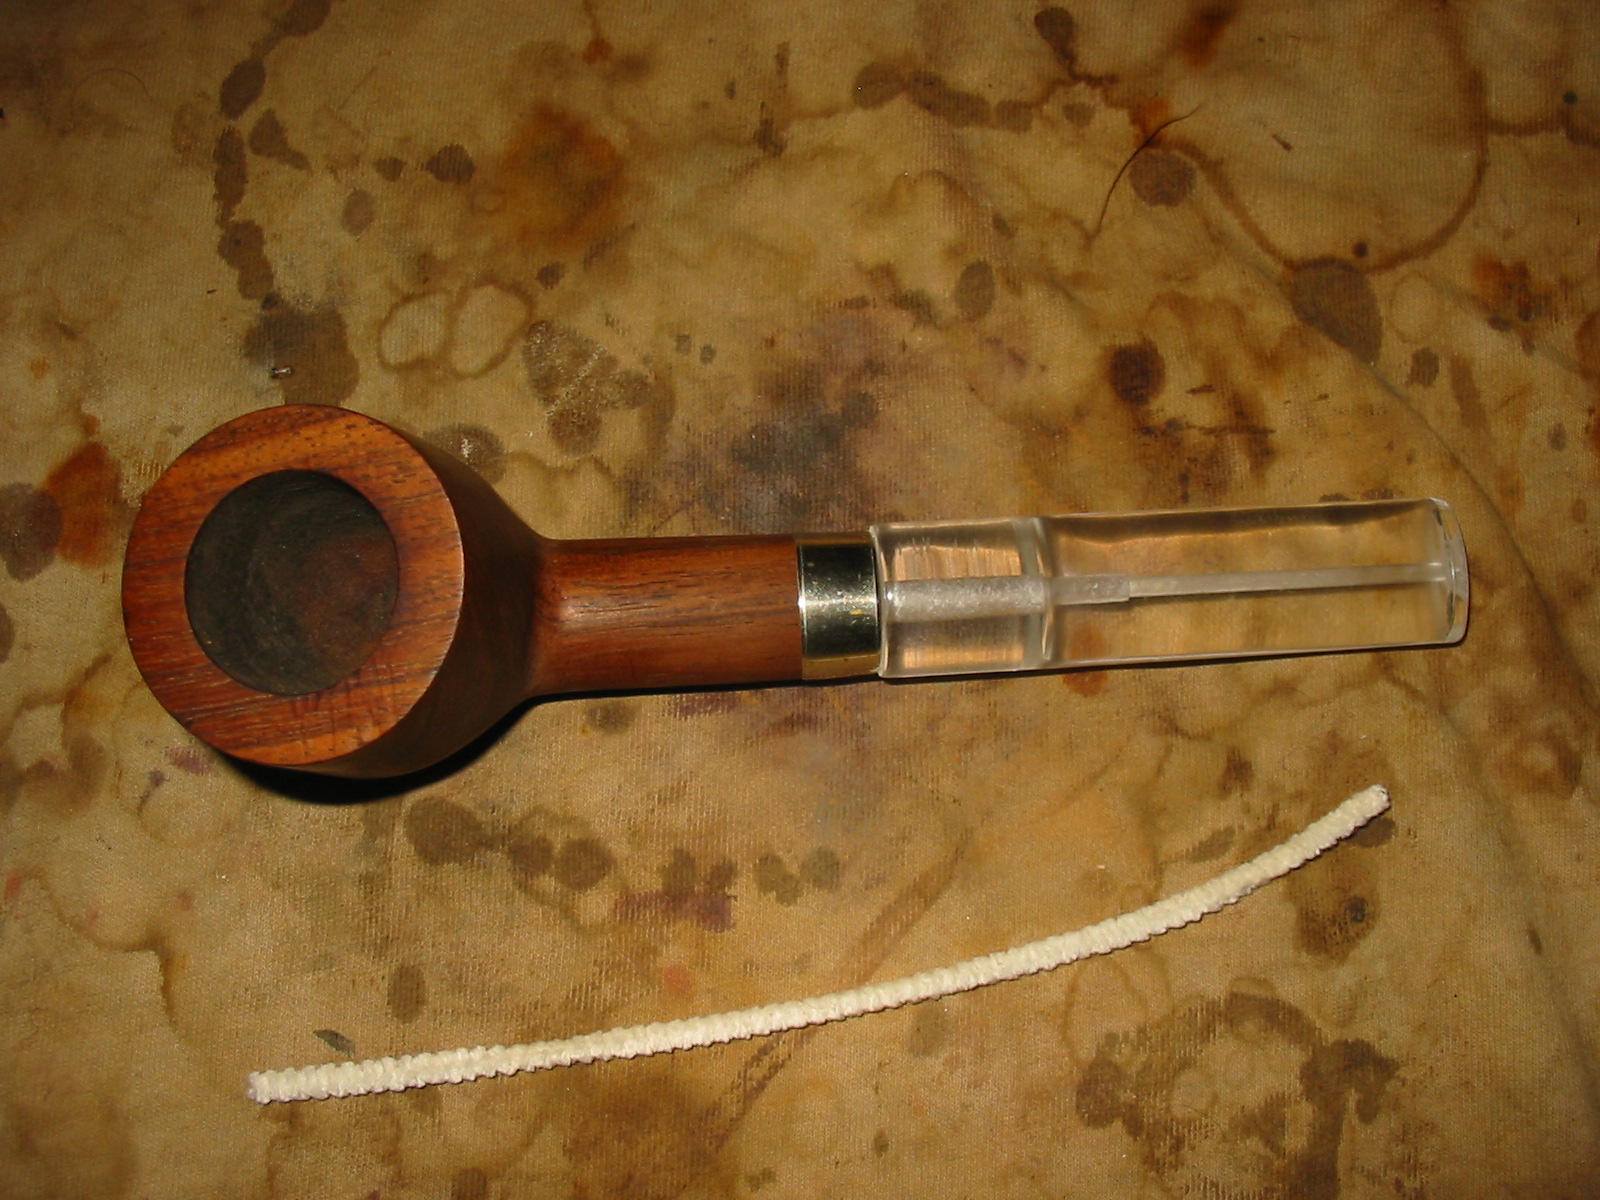
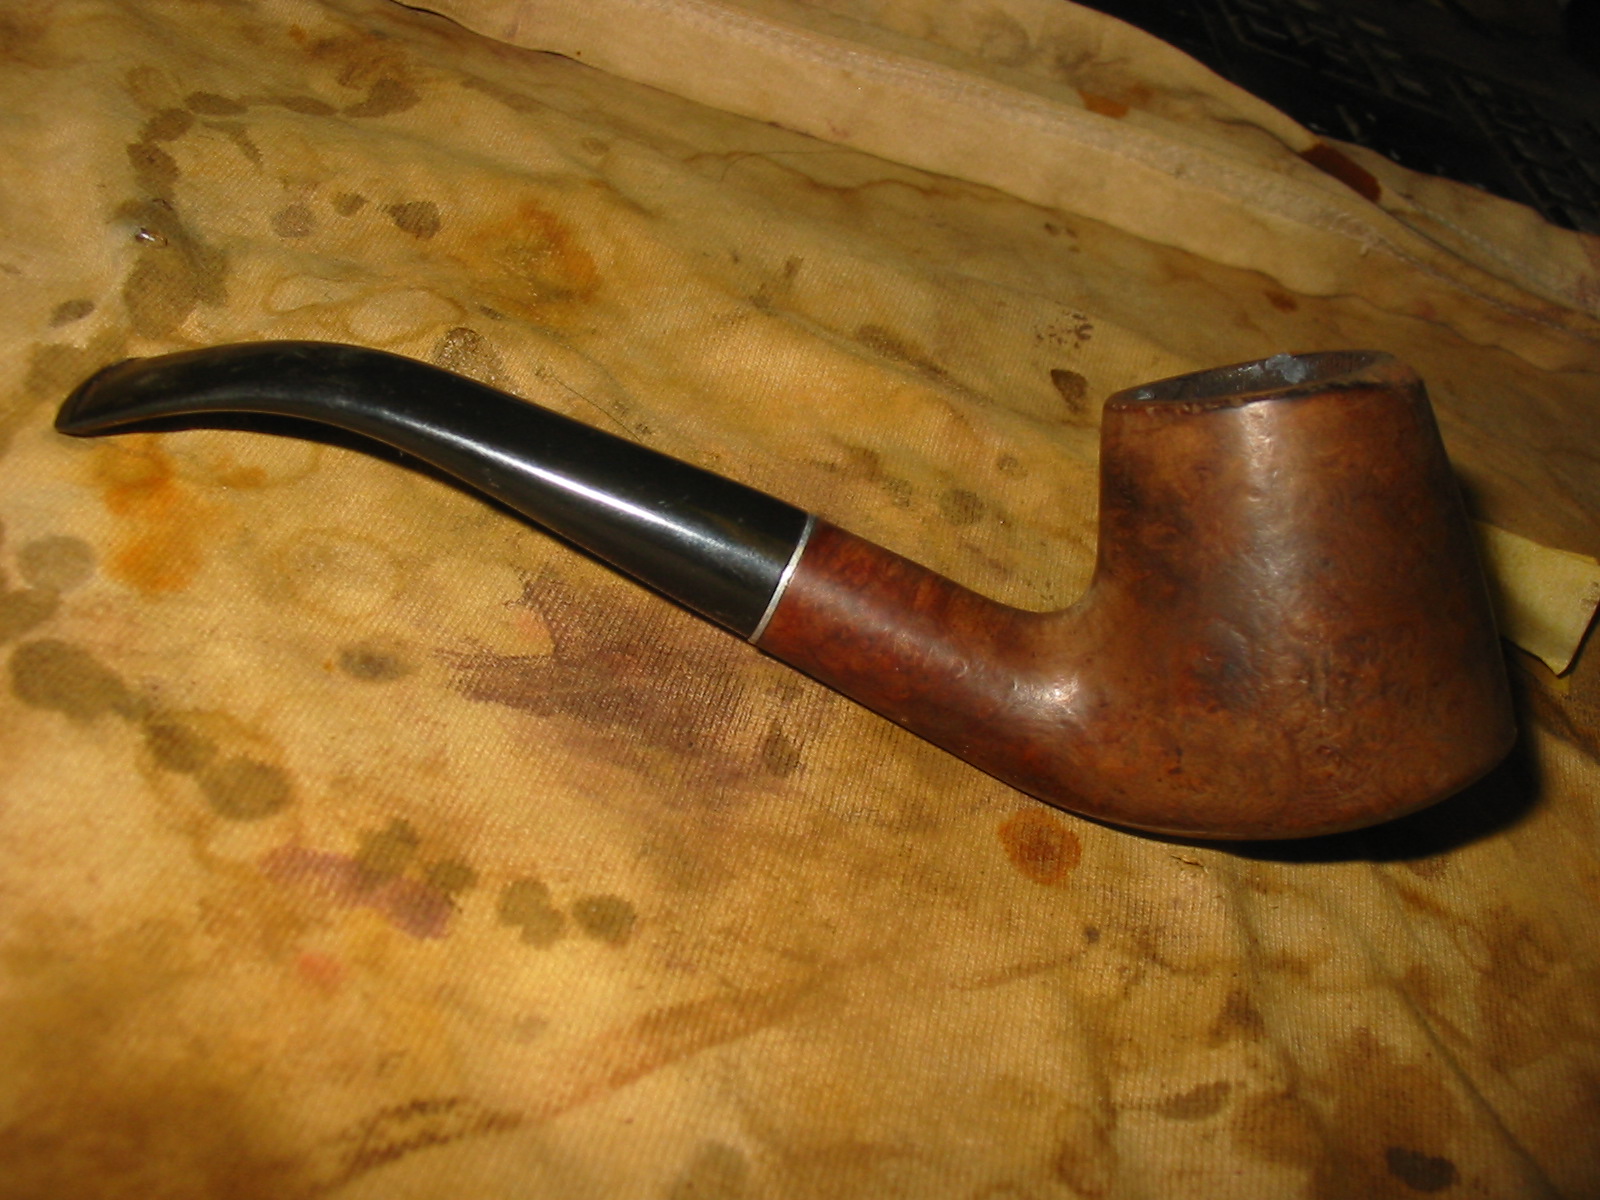
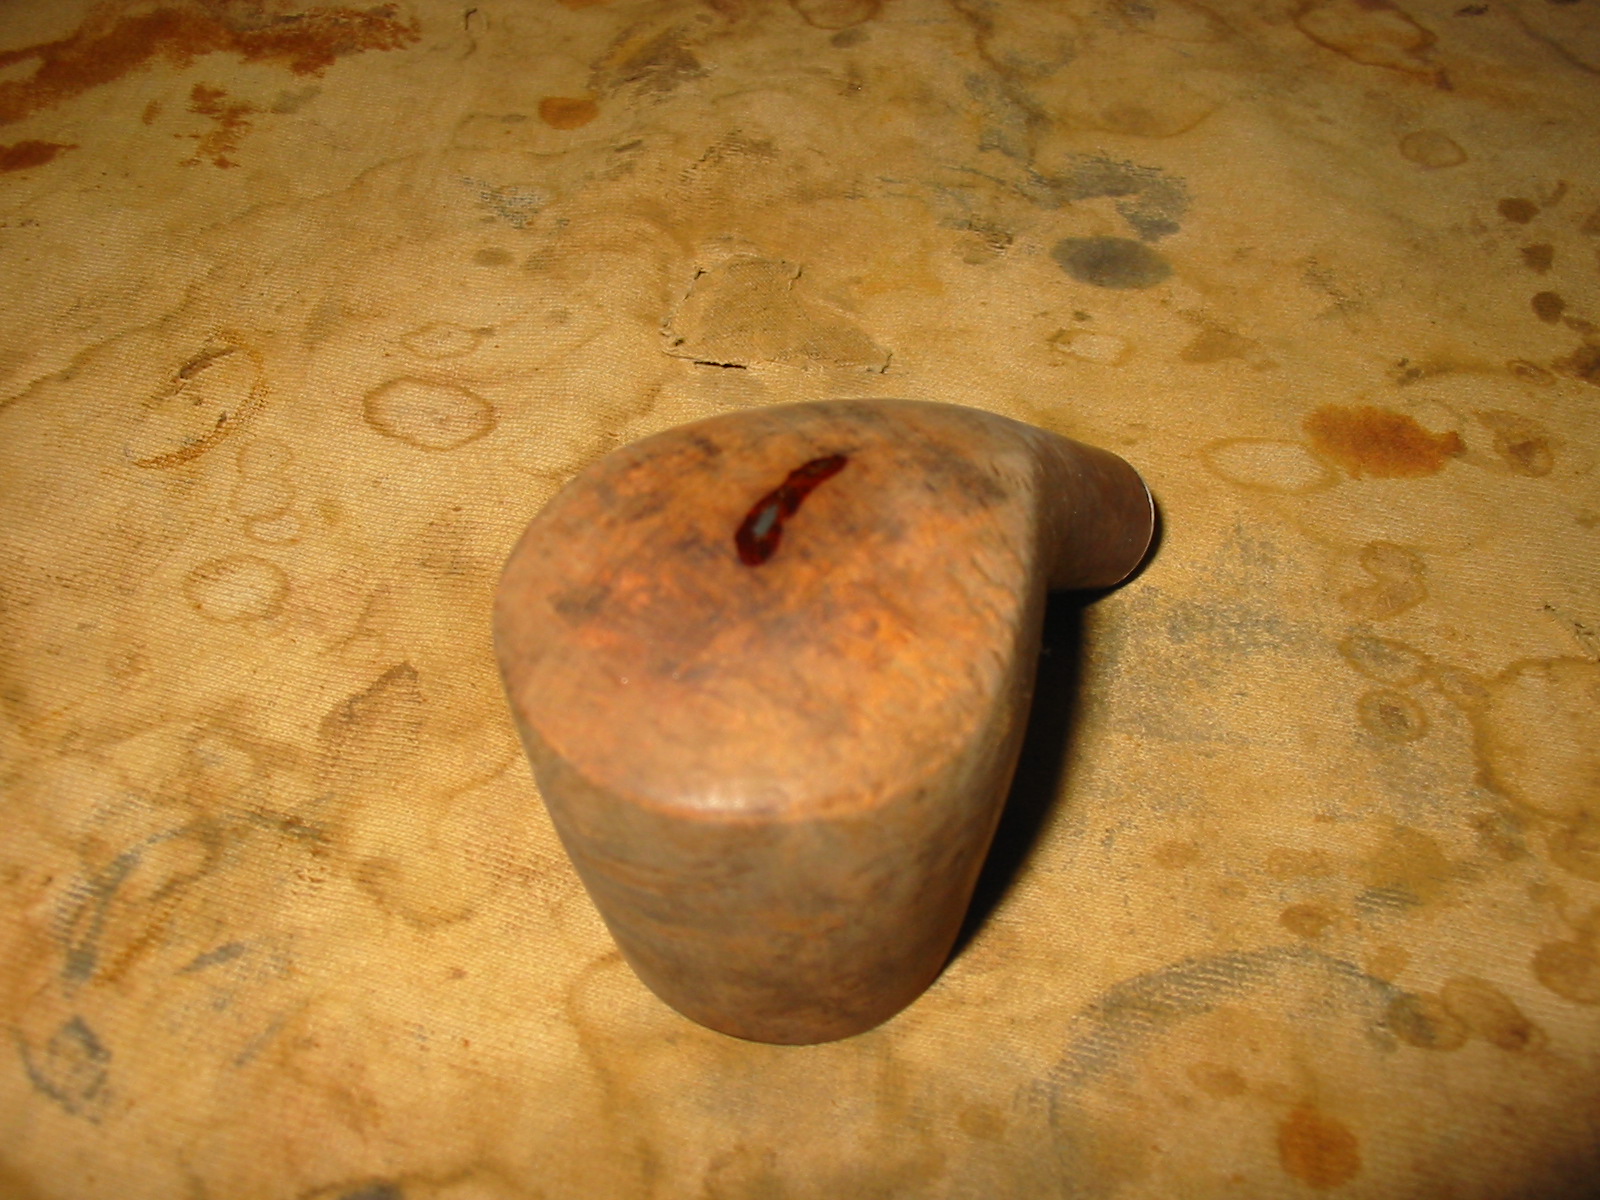
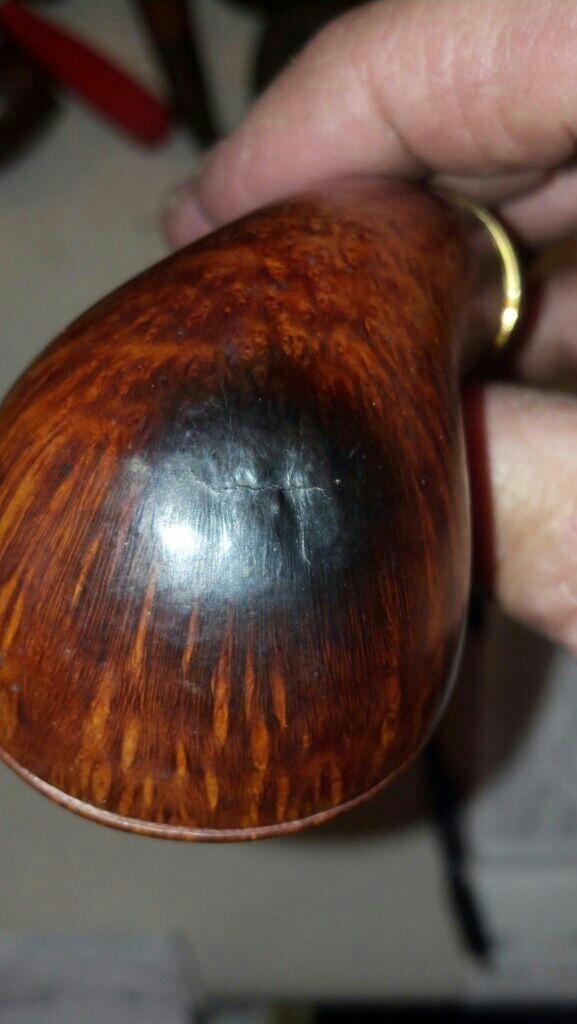
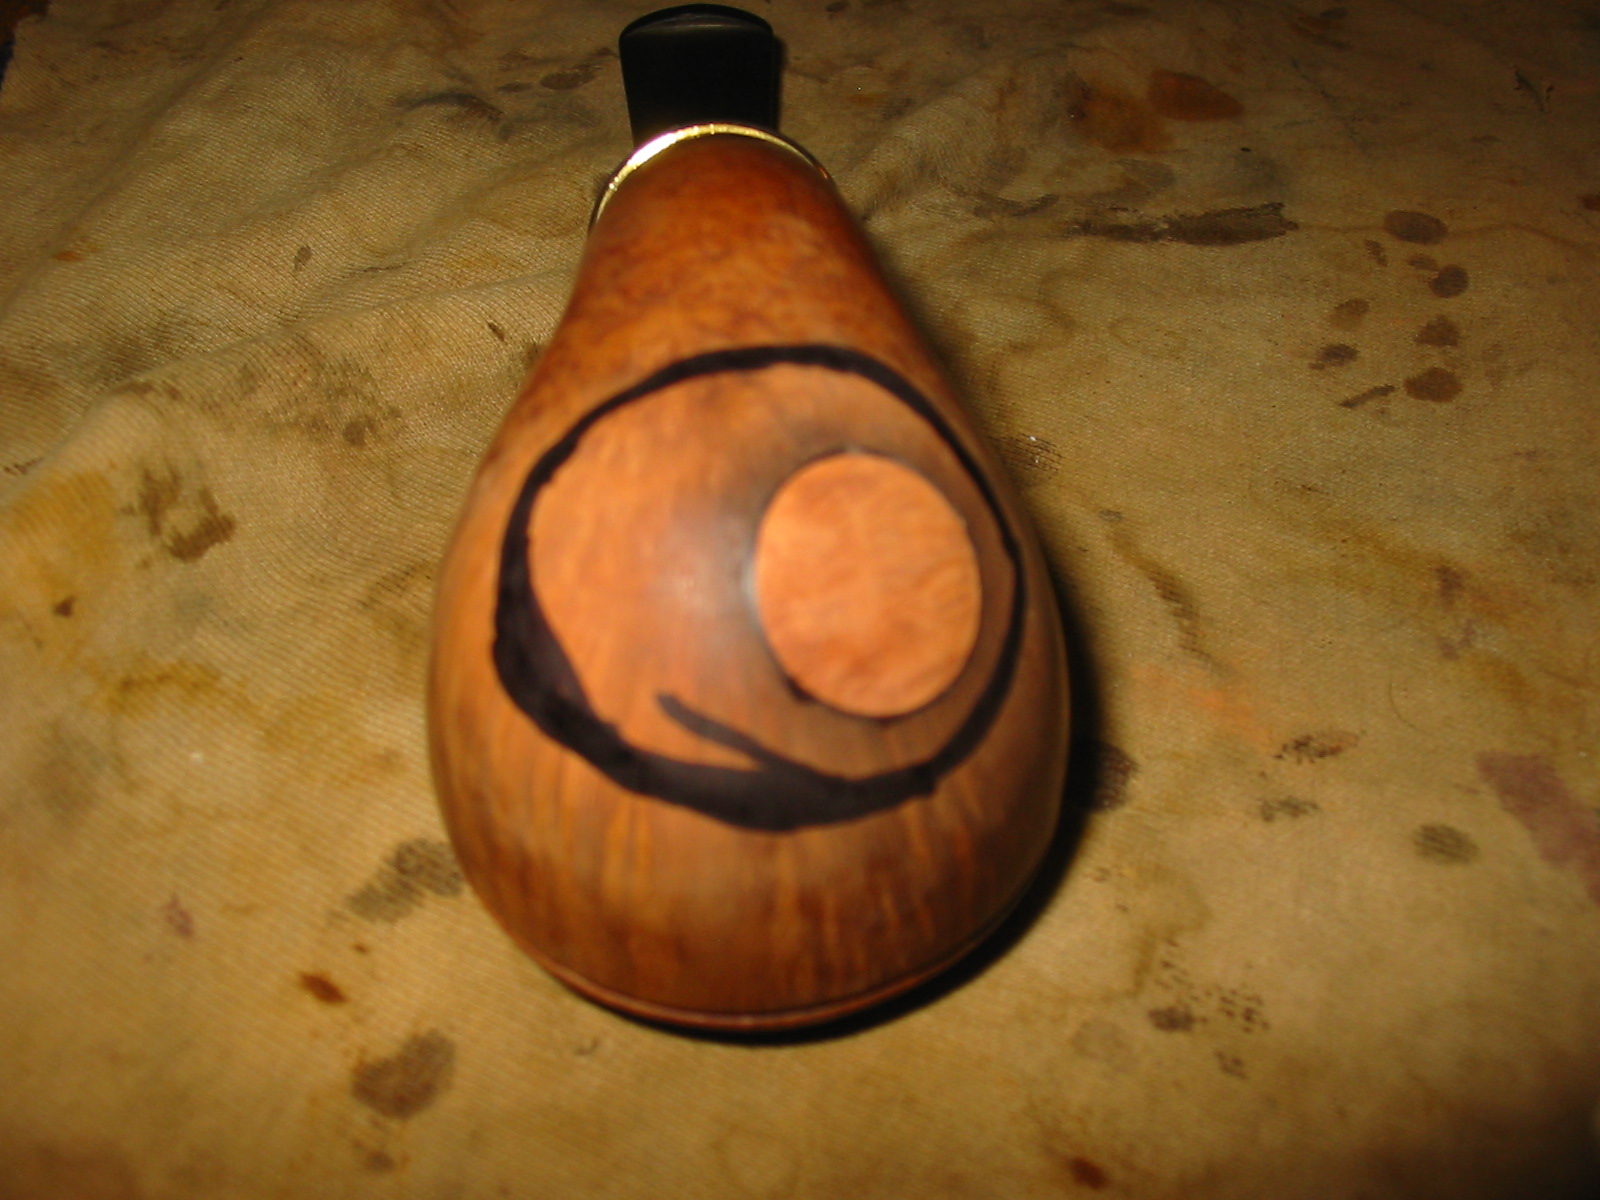
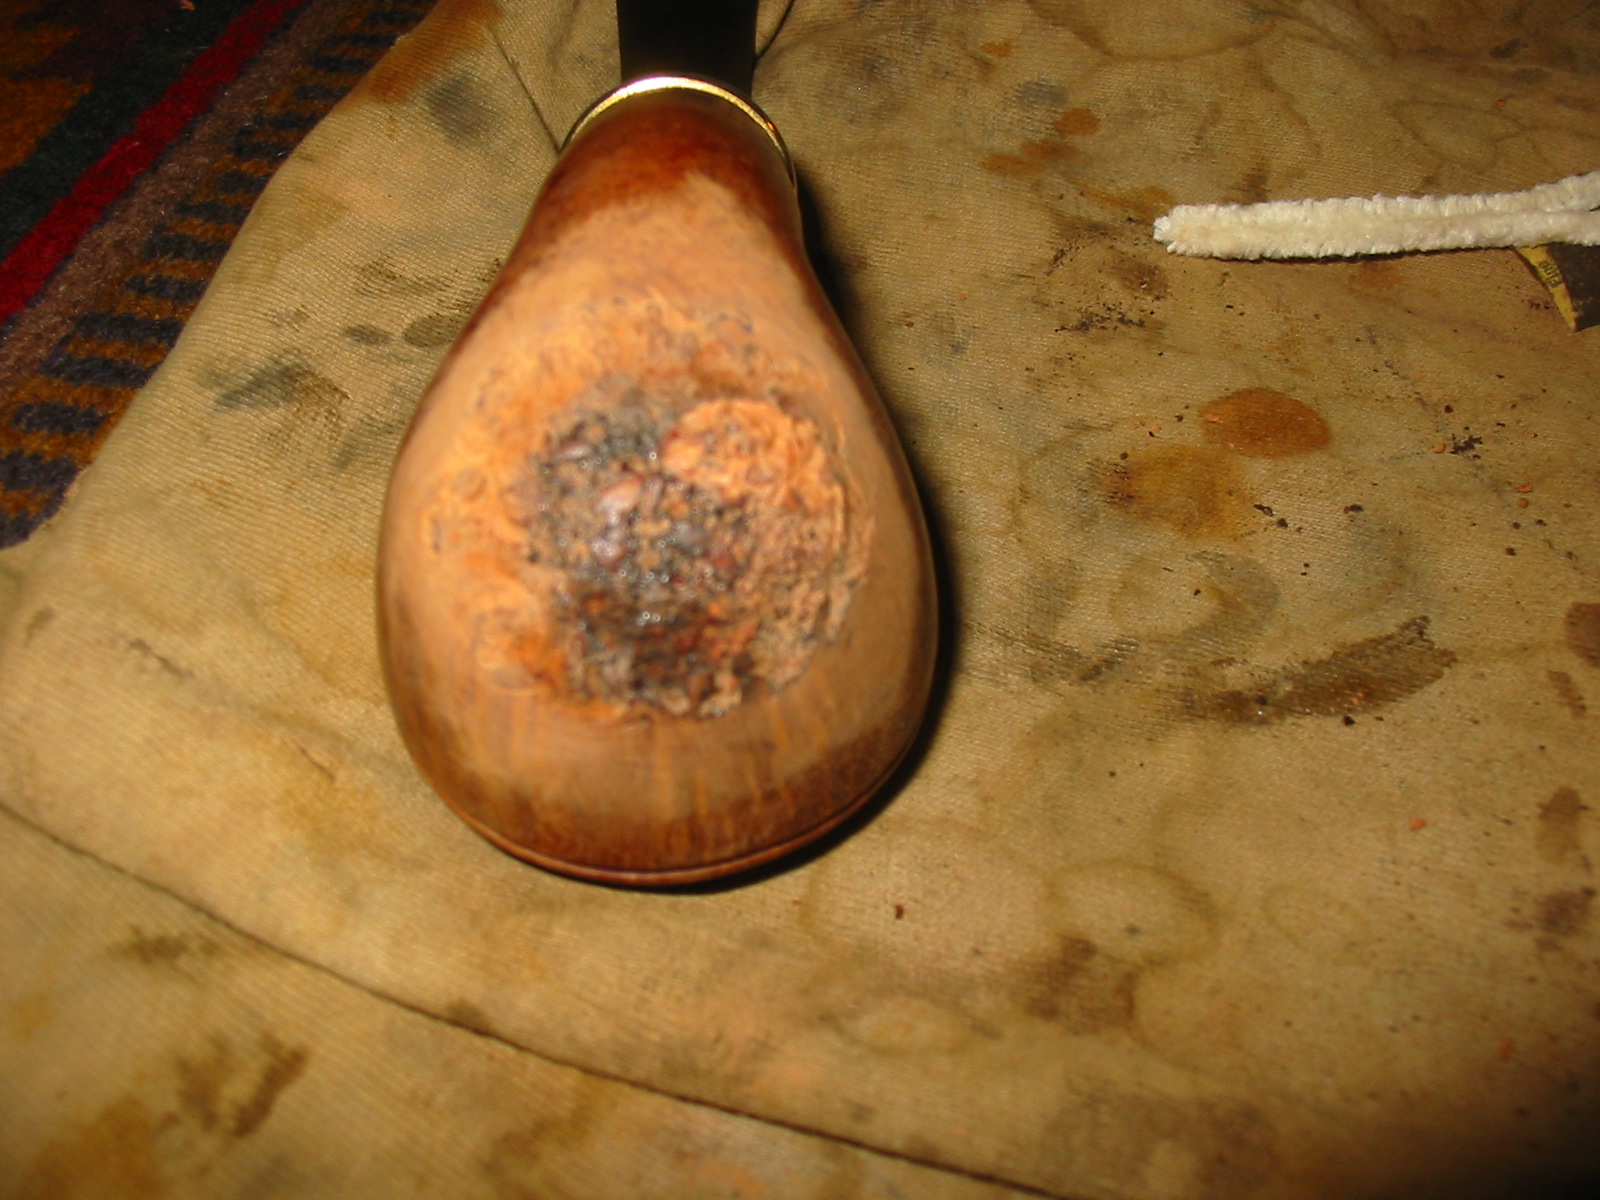
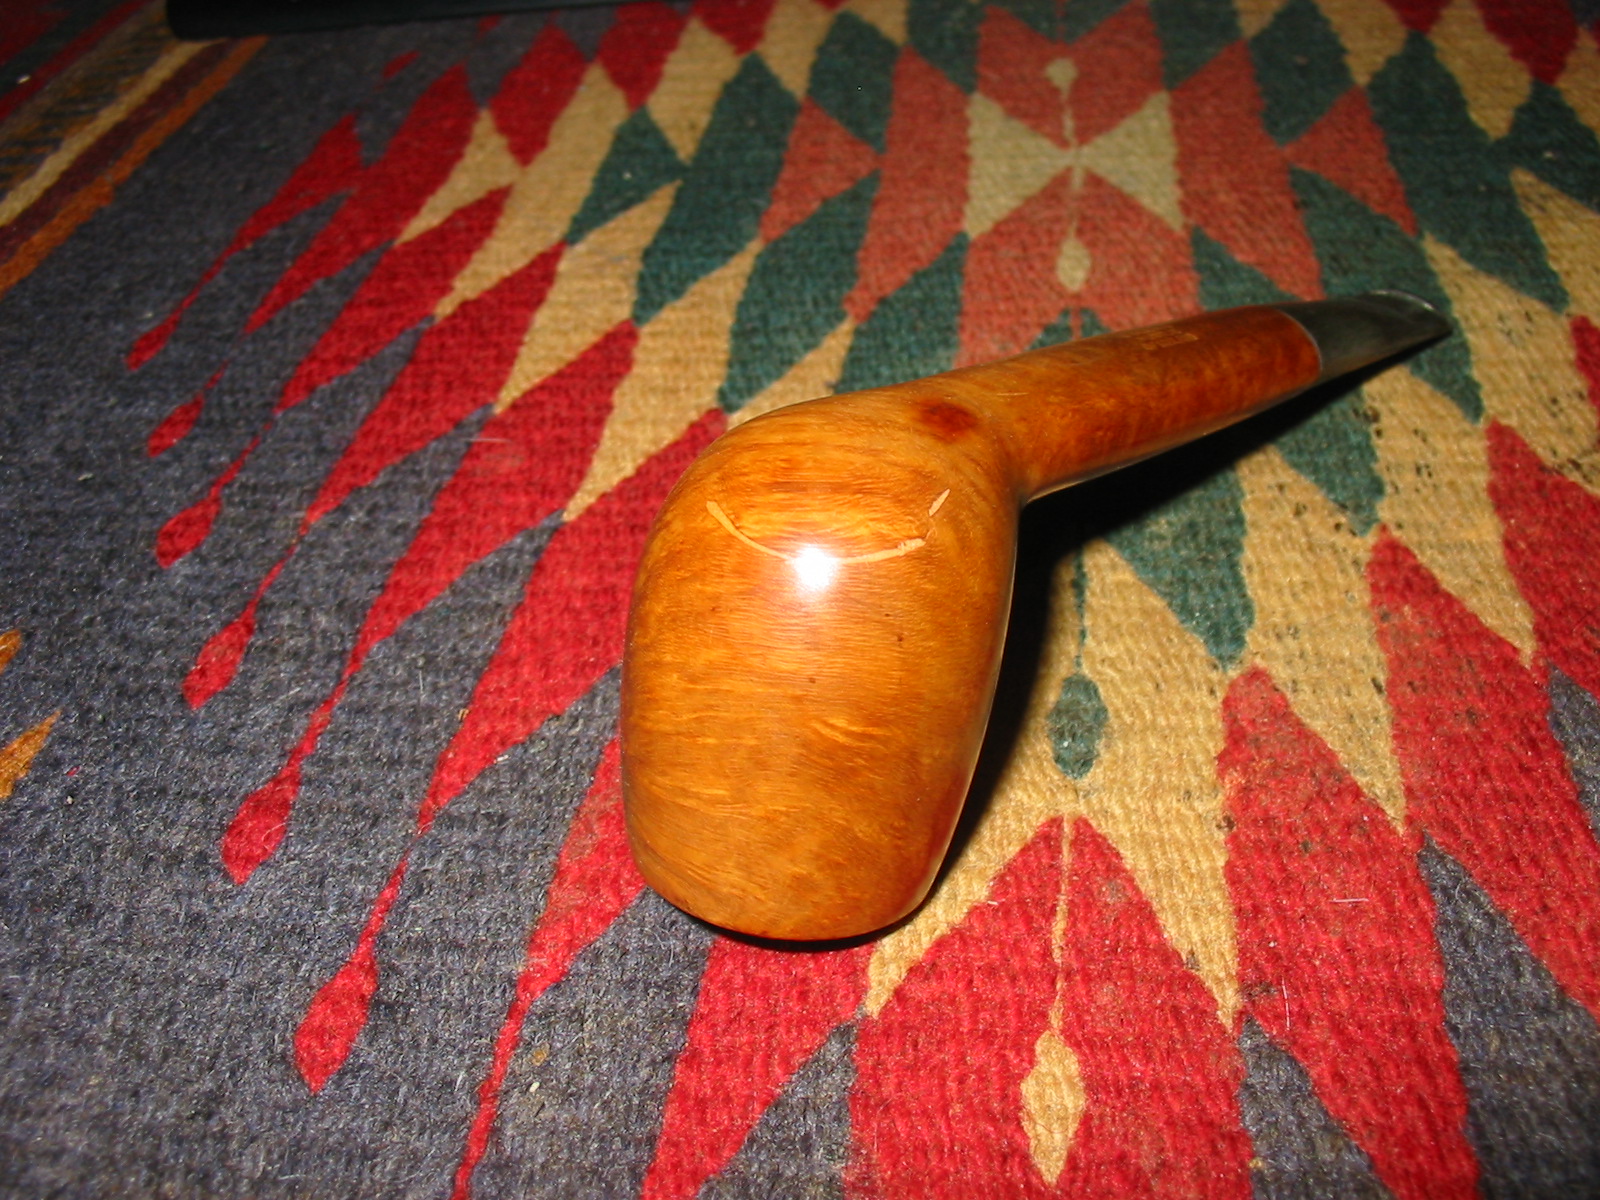
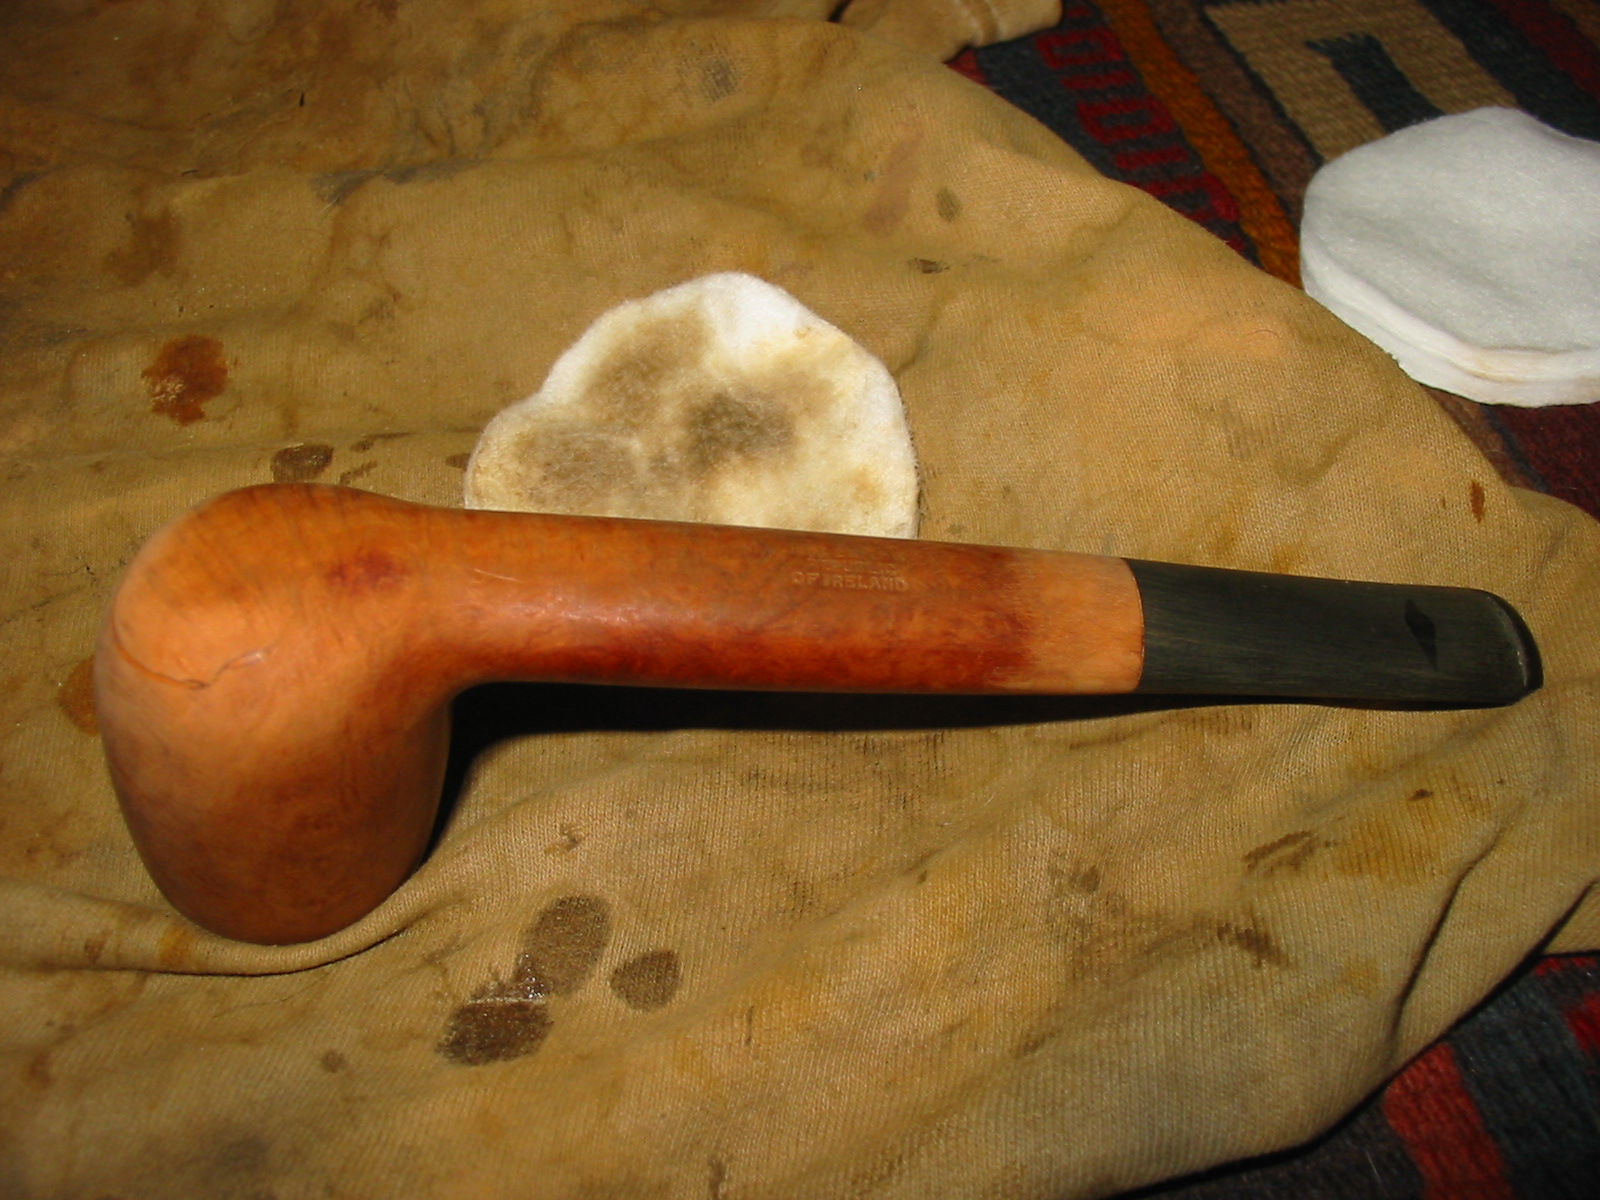
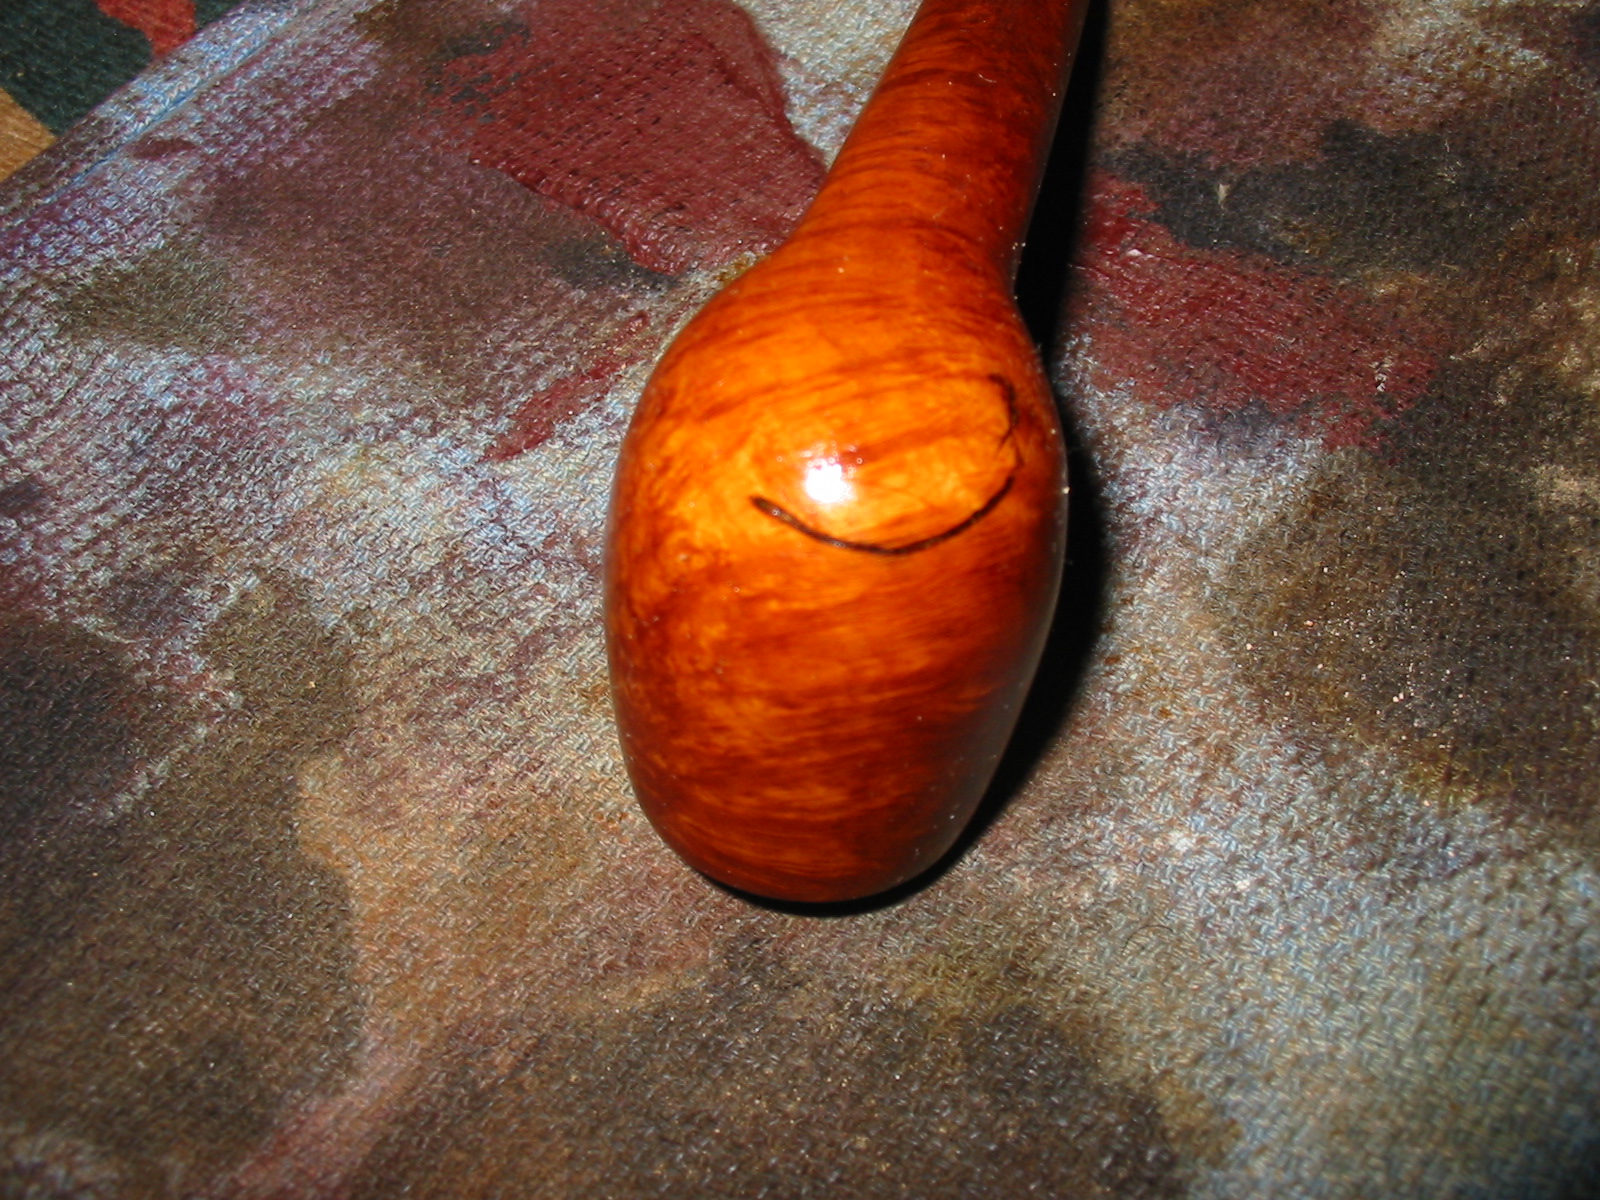
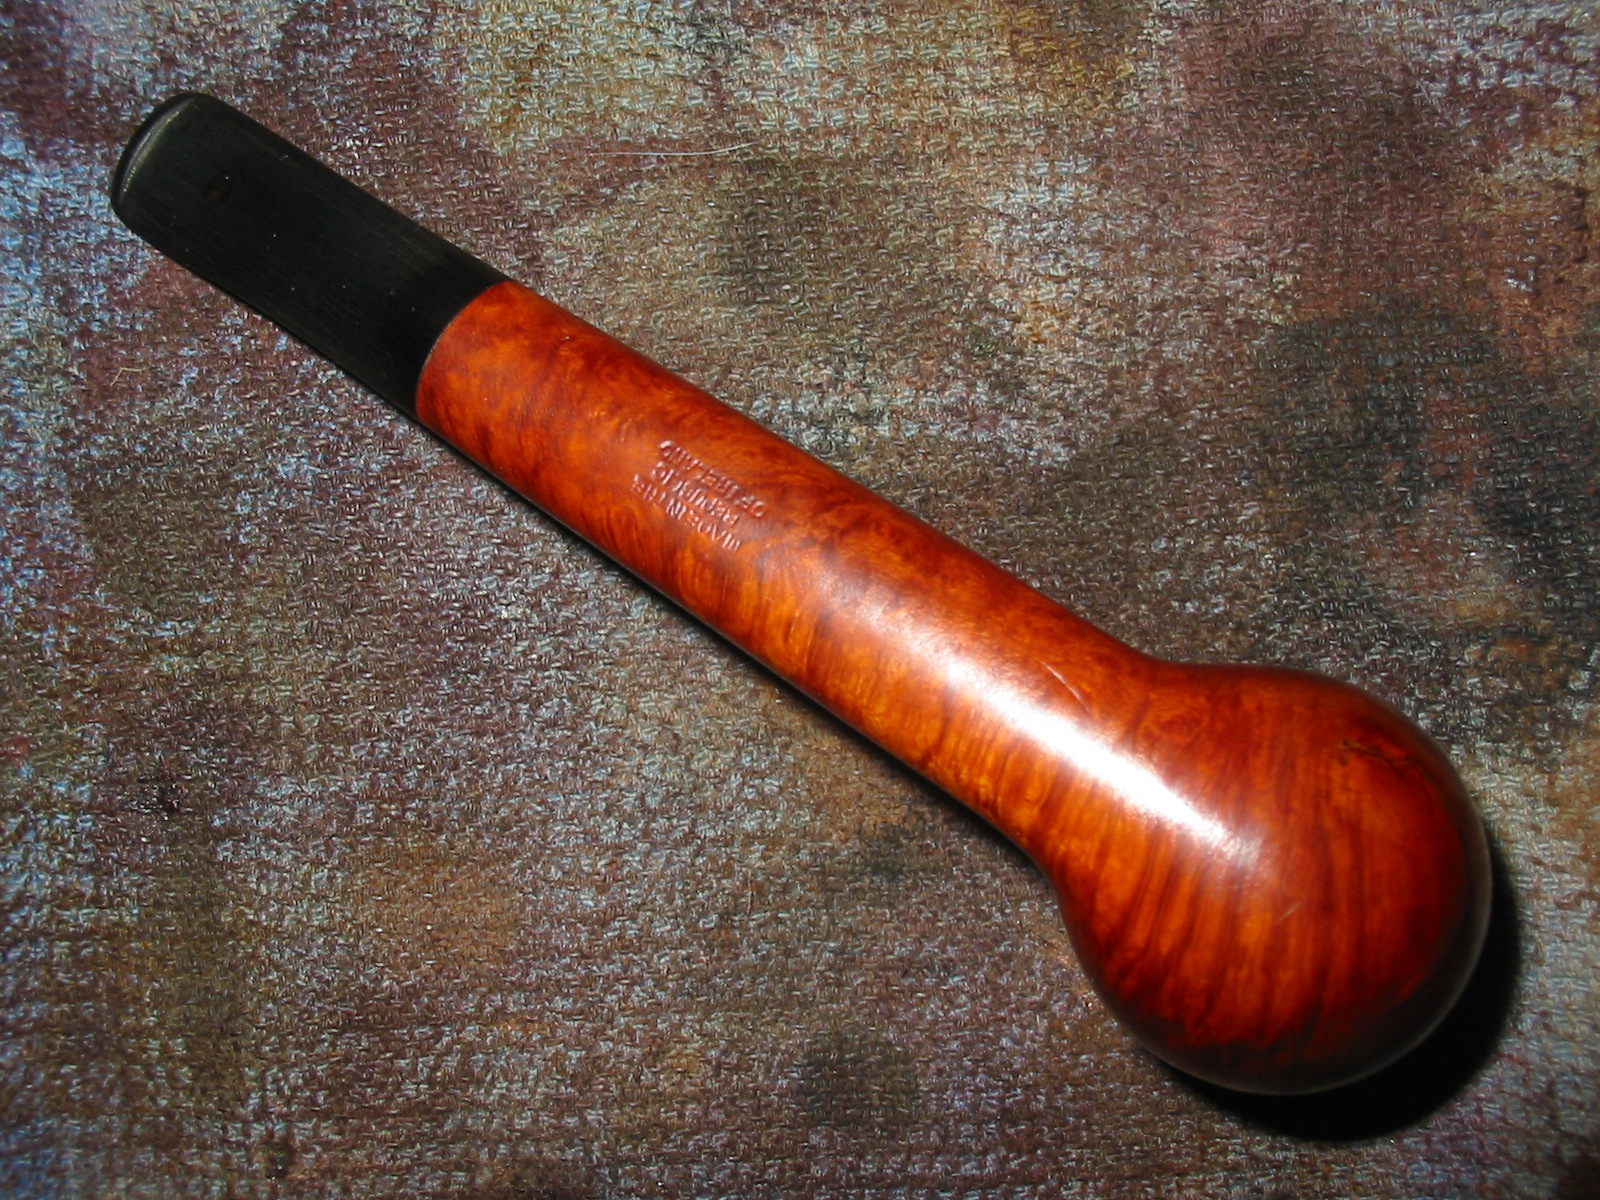
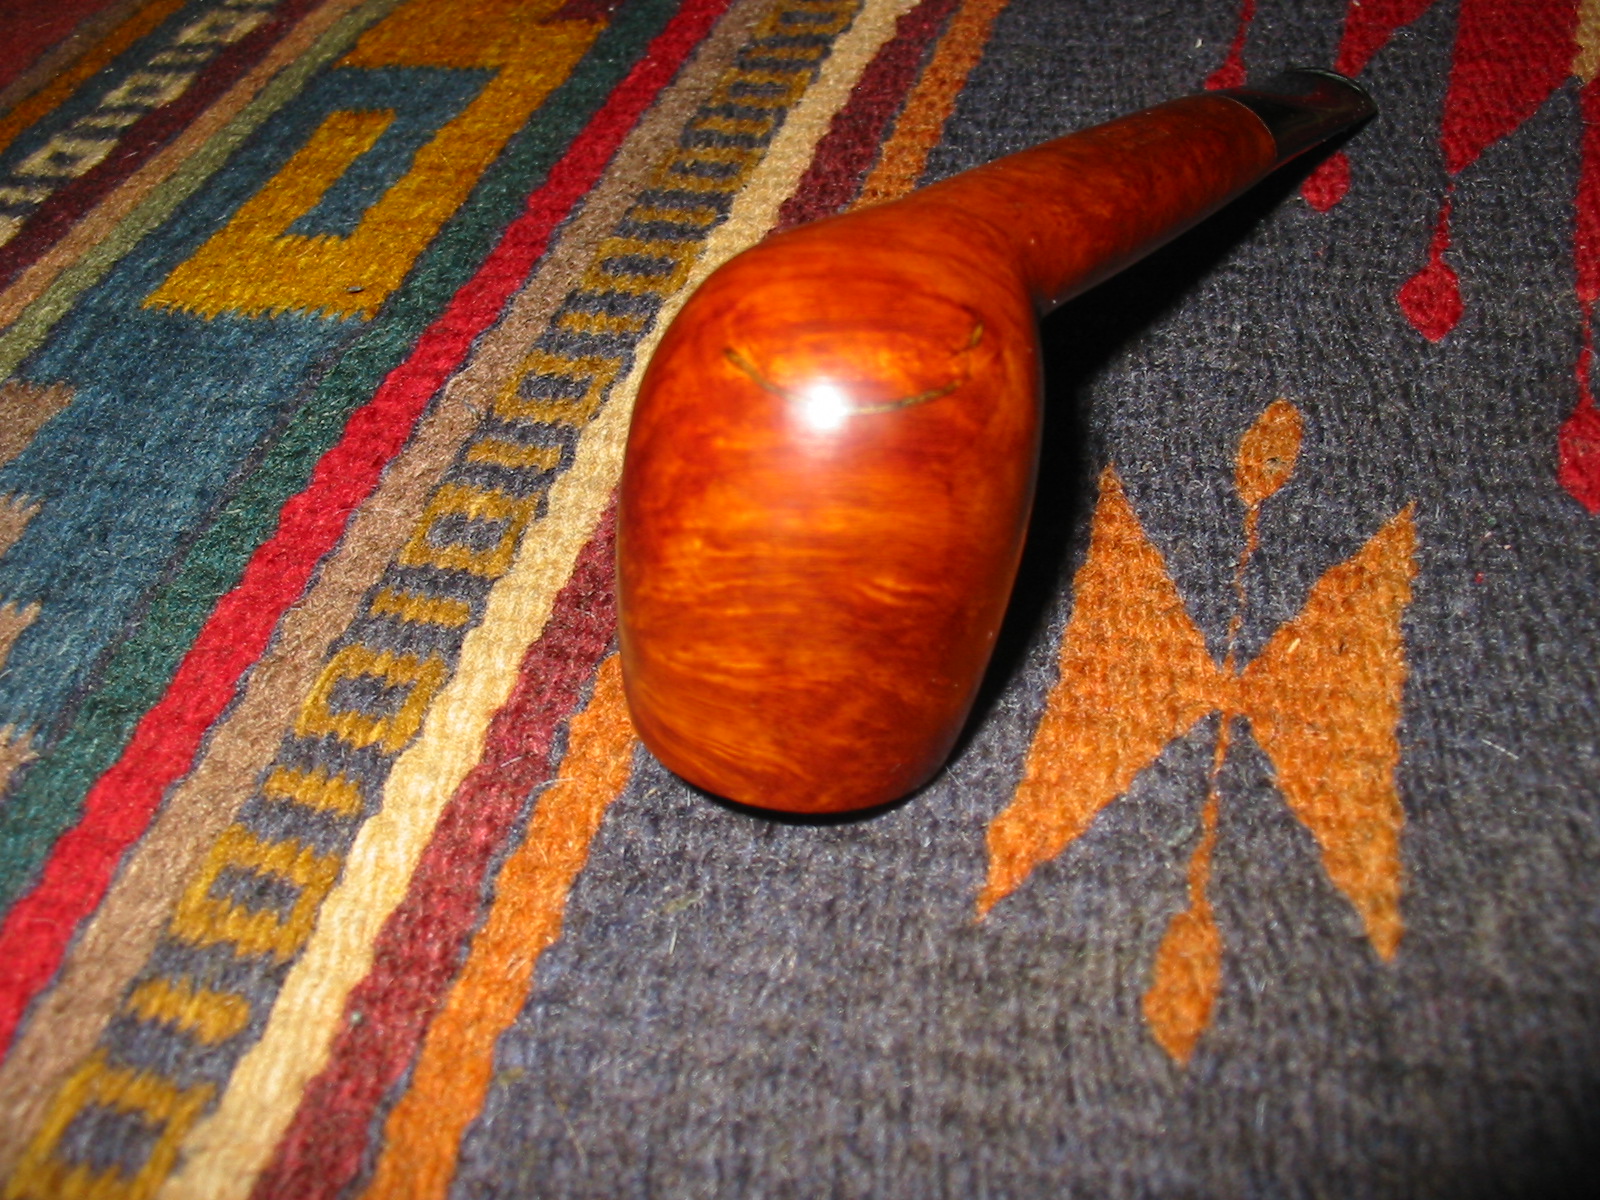
The outer edge of the rim on the back of the bowl had a chunk missing and a crack running down the outside of the bowl. It also ran on the top of the rim and had yet to break through on the inside of the bowl. The crack ran down along one of the striations carved in the bowl for about ½ inch. It was not very deep once it moved away from the chip at the top edge of the bowl.
IMG_5032

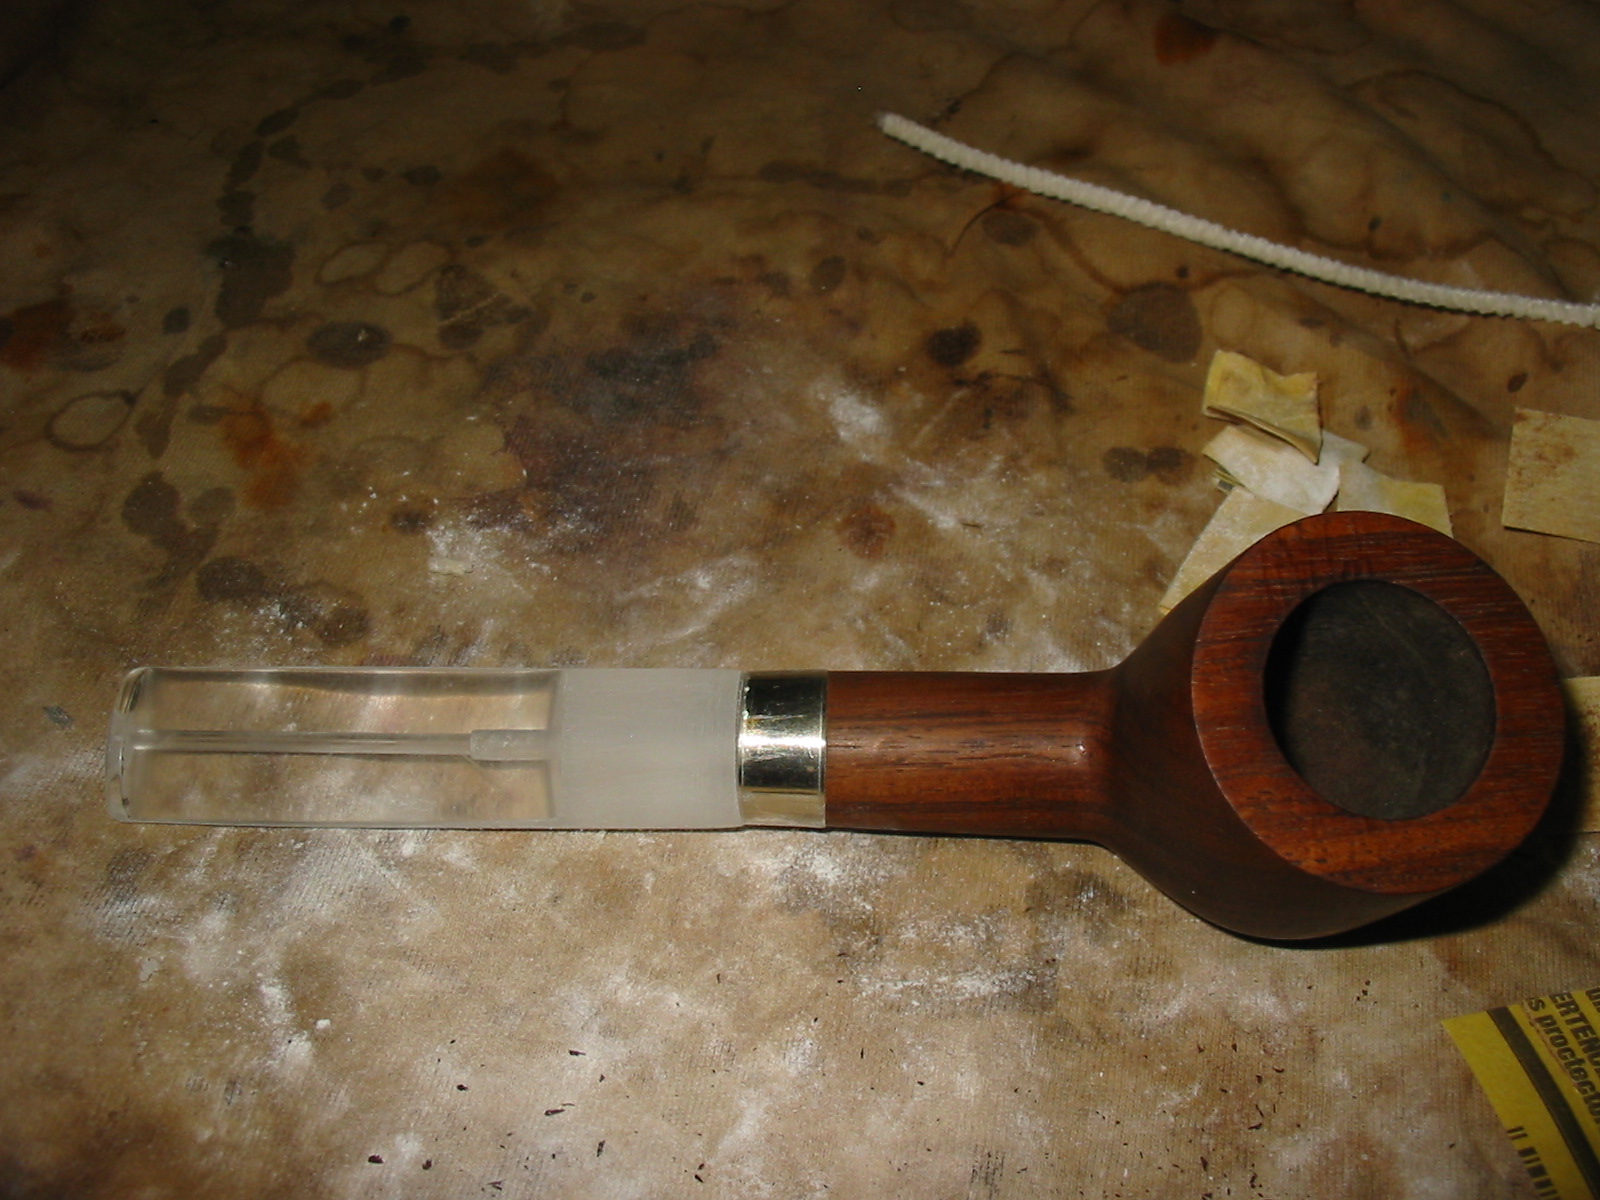
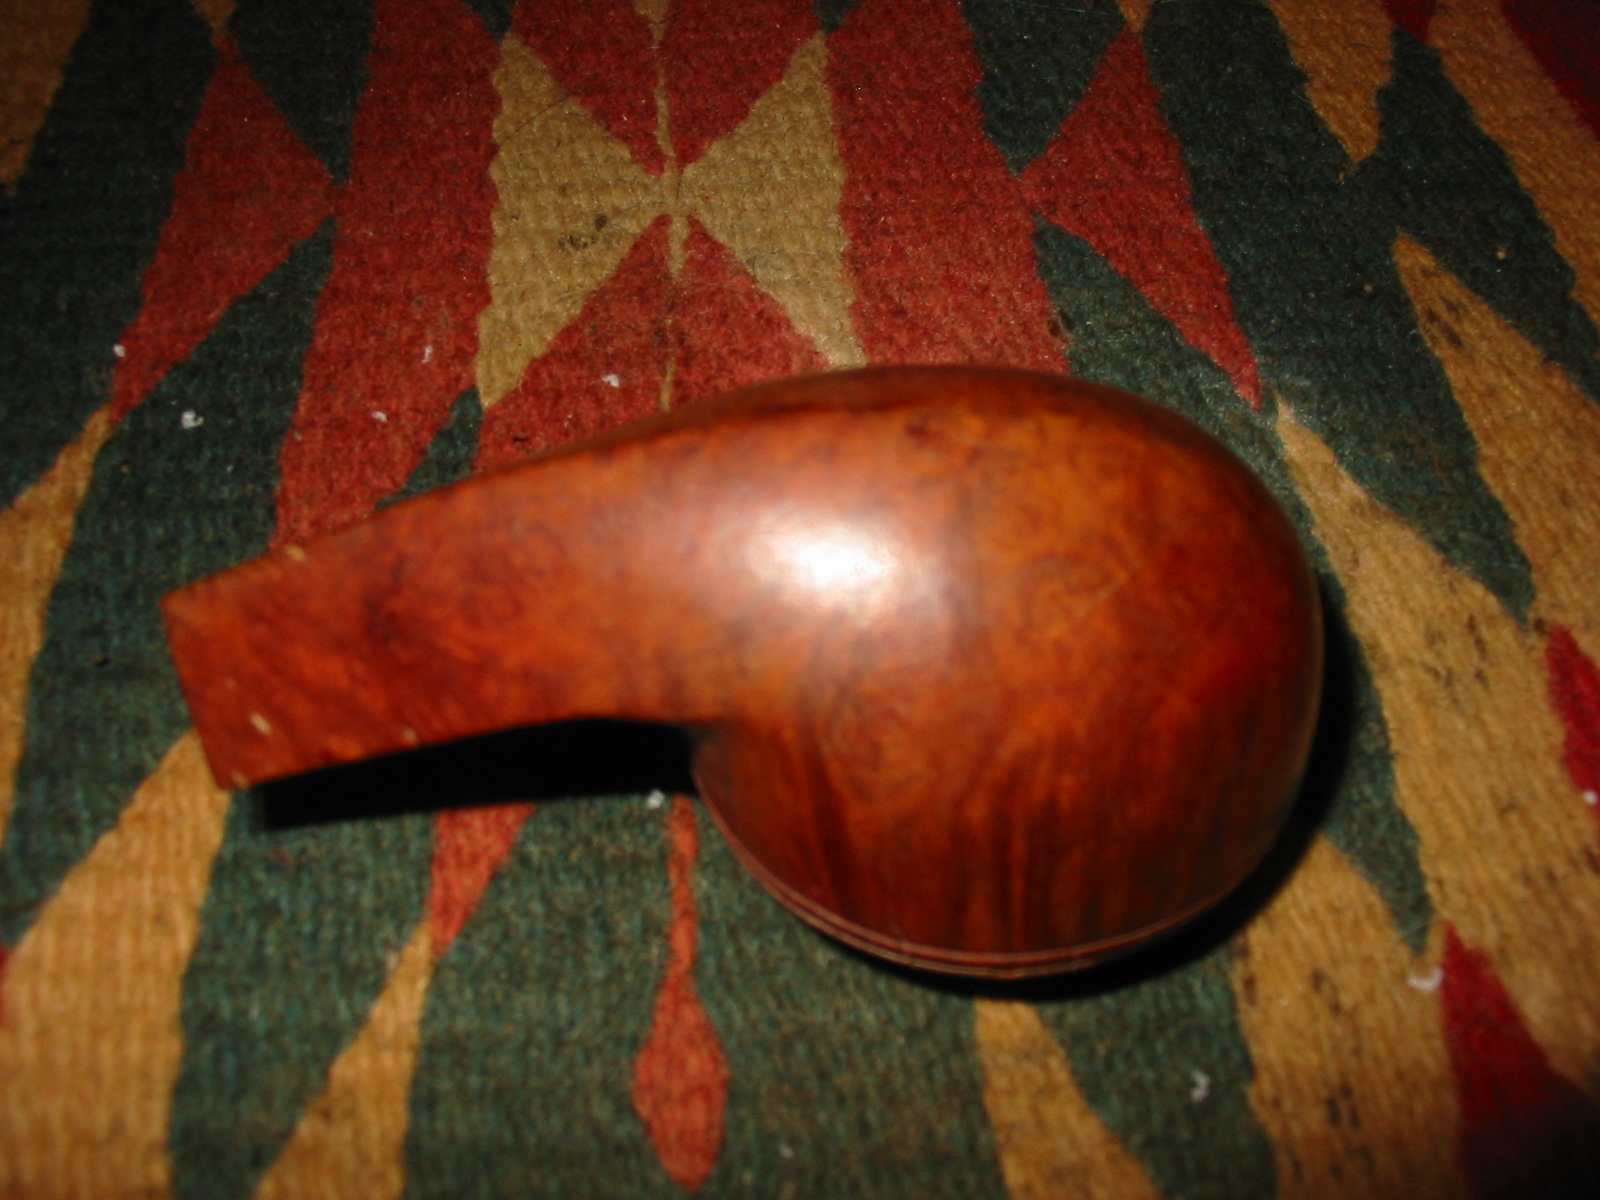
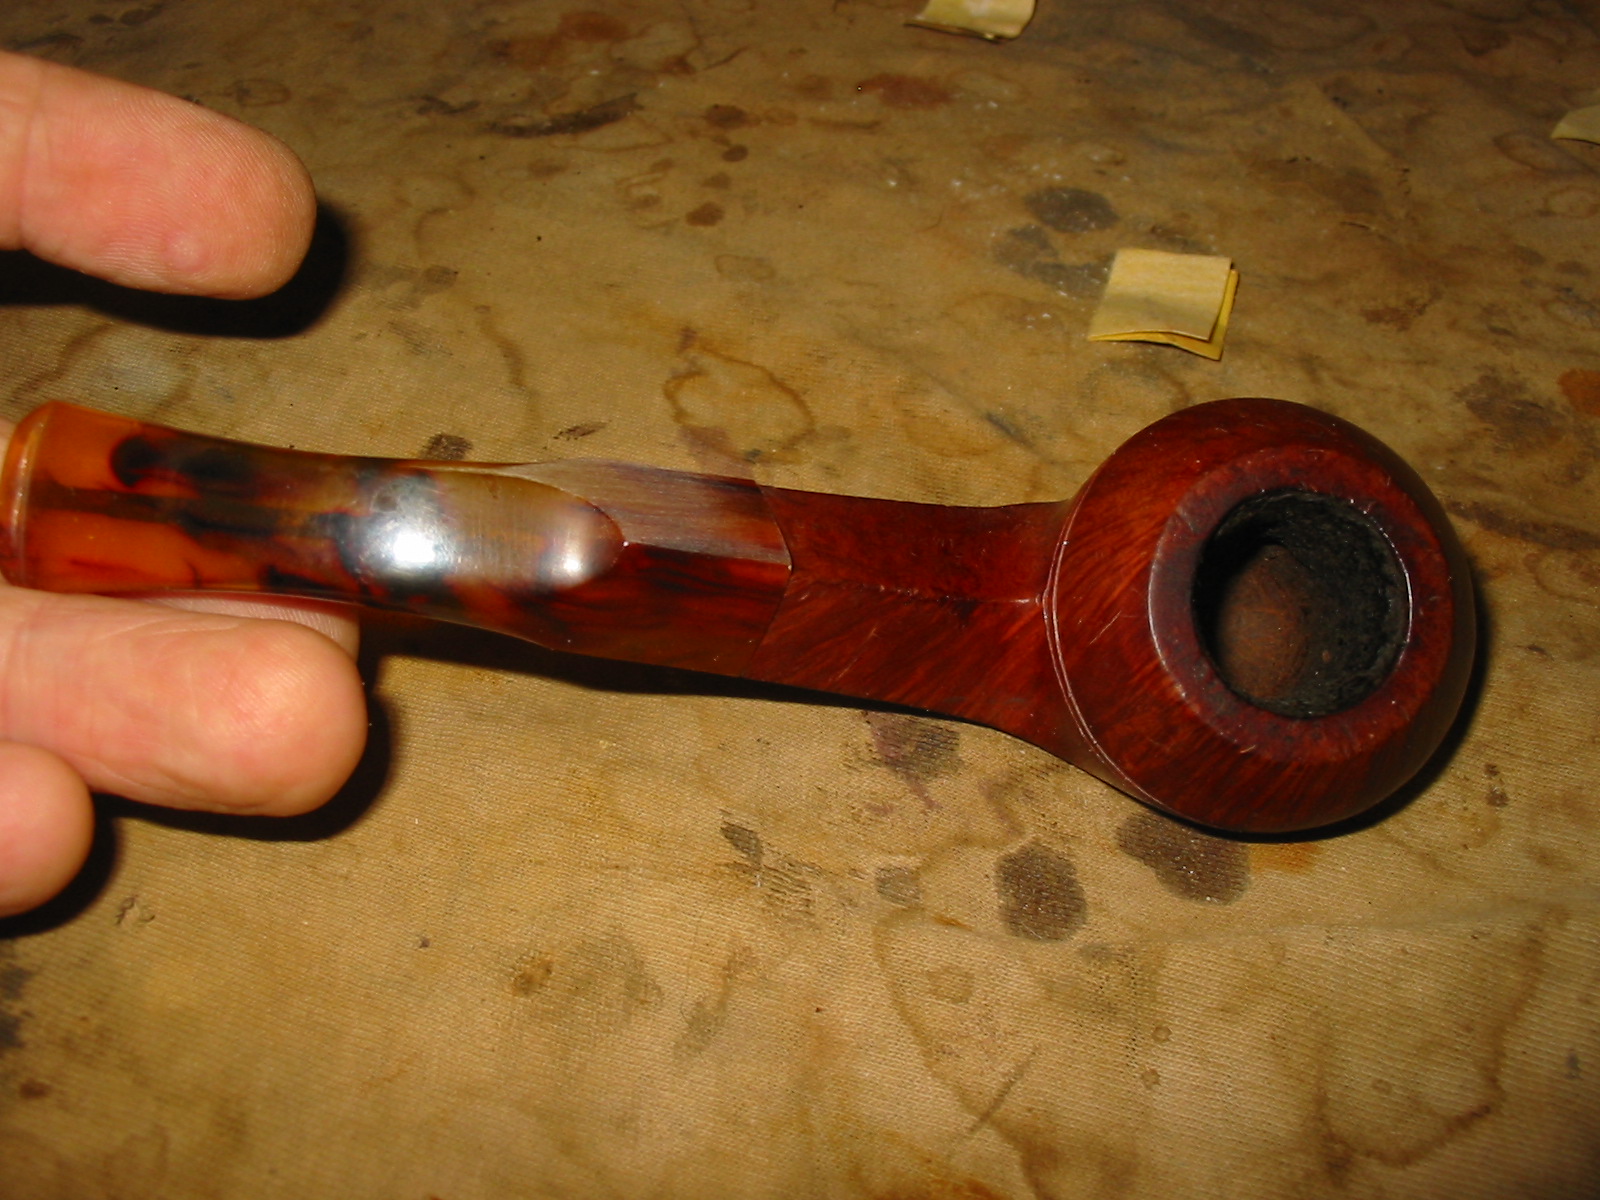
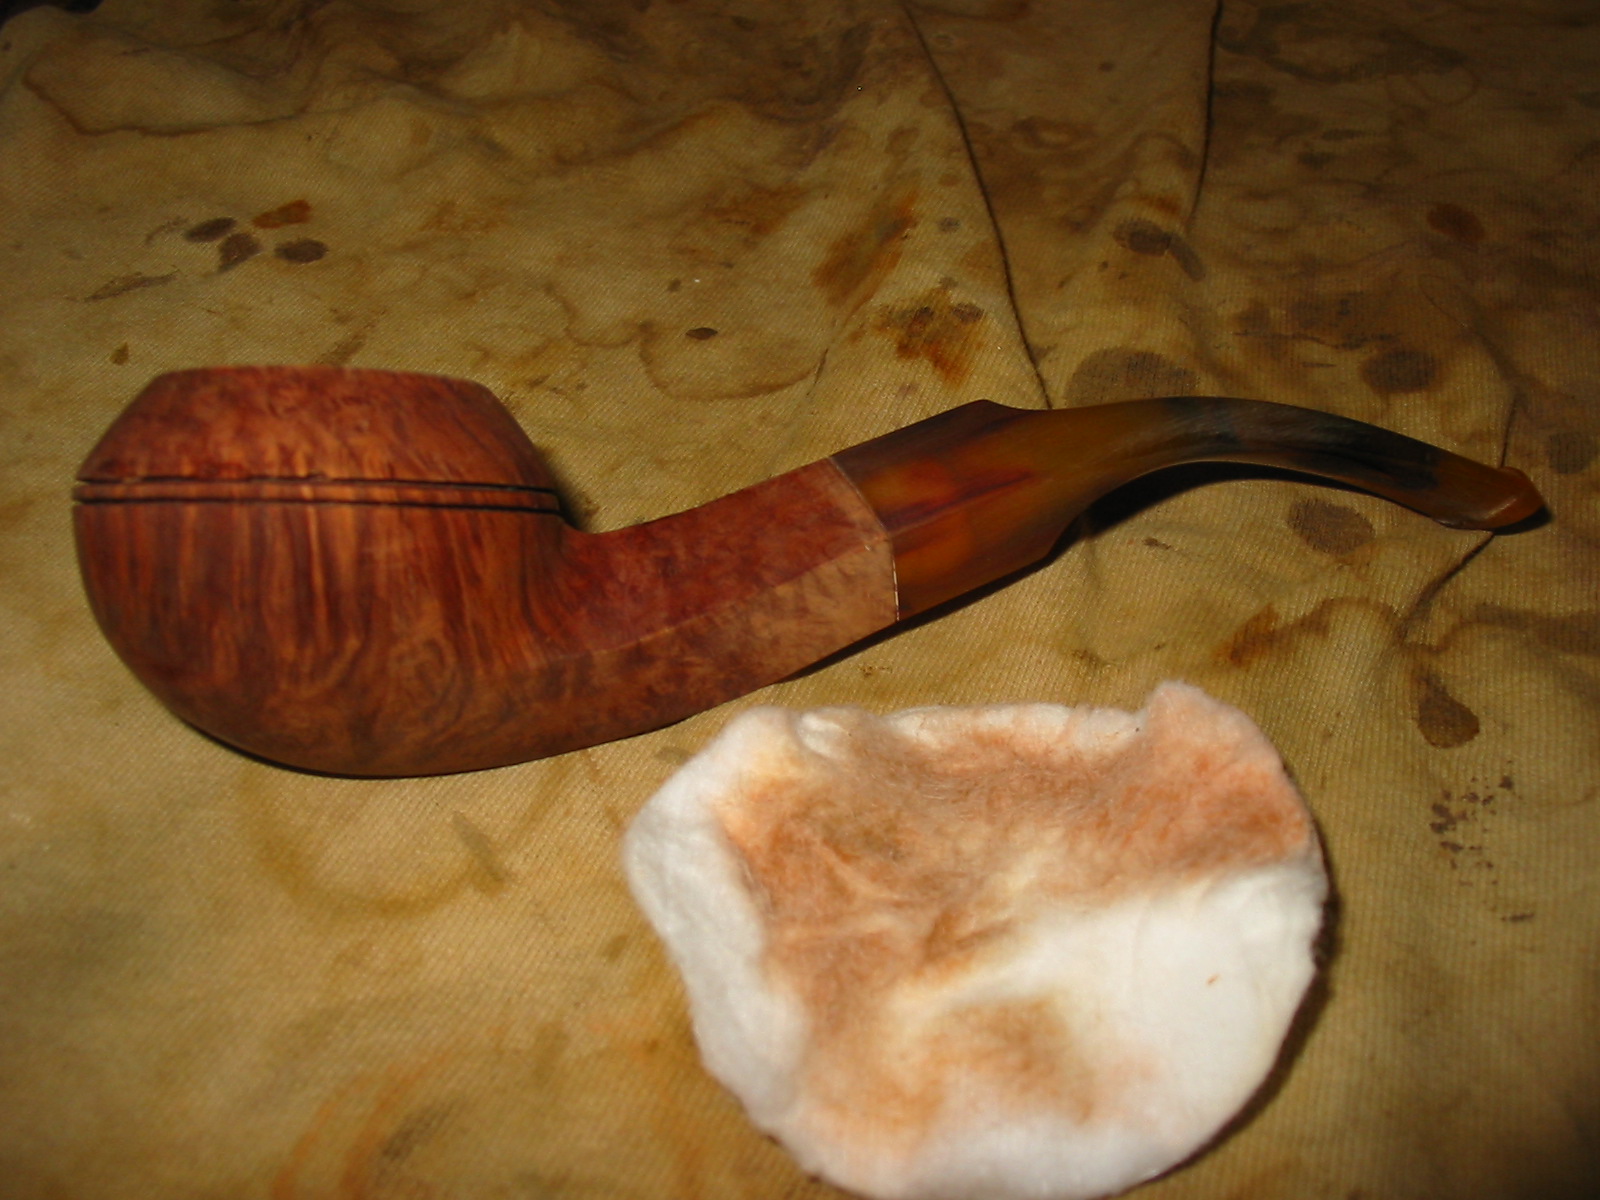
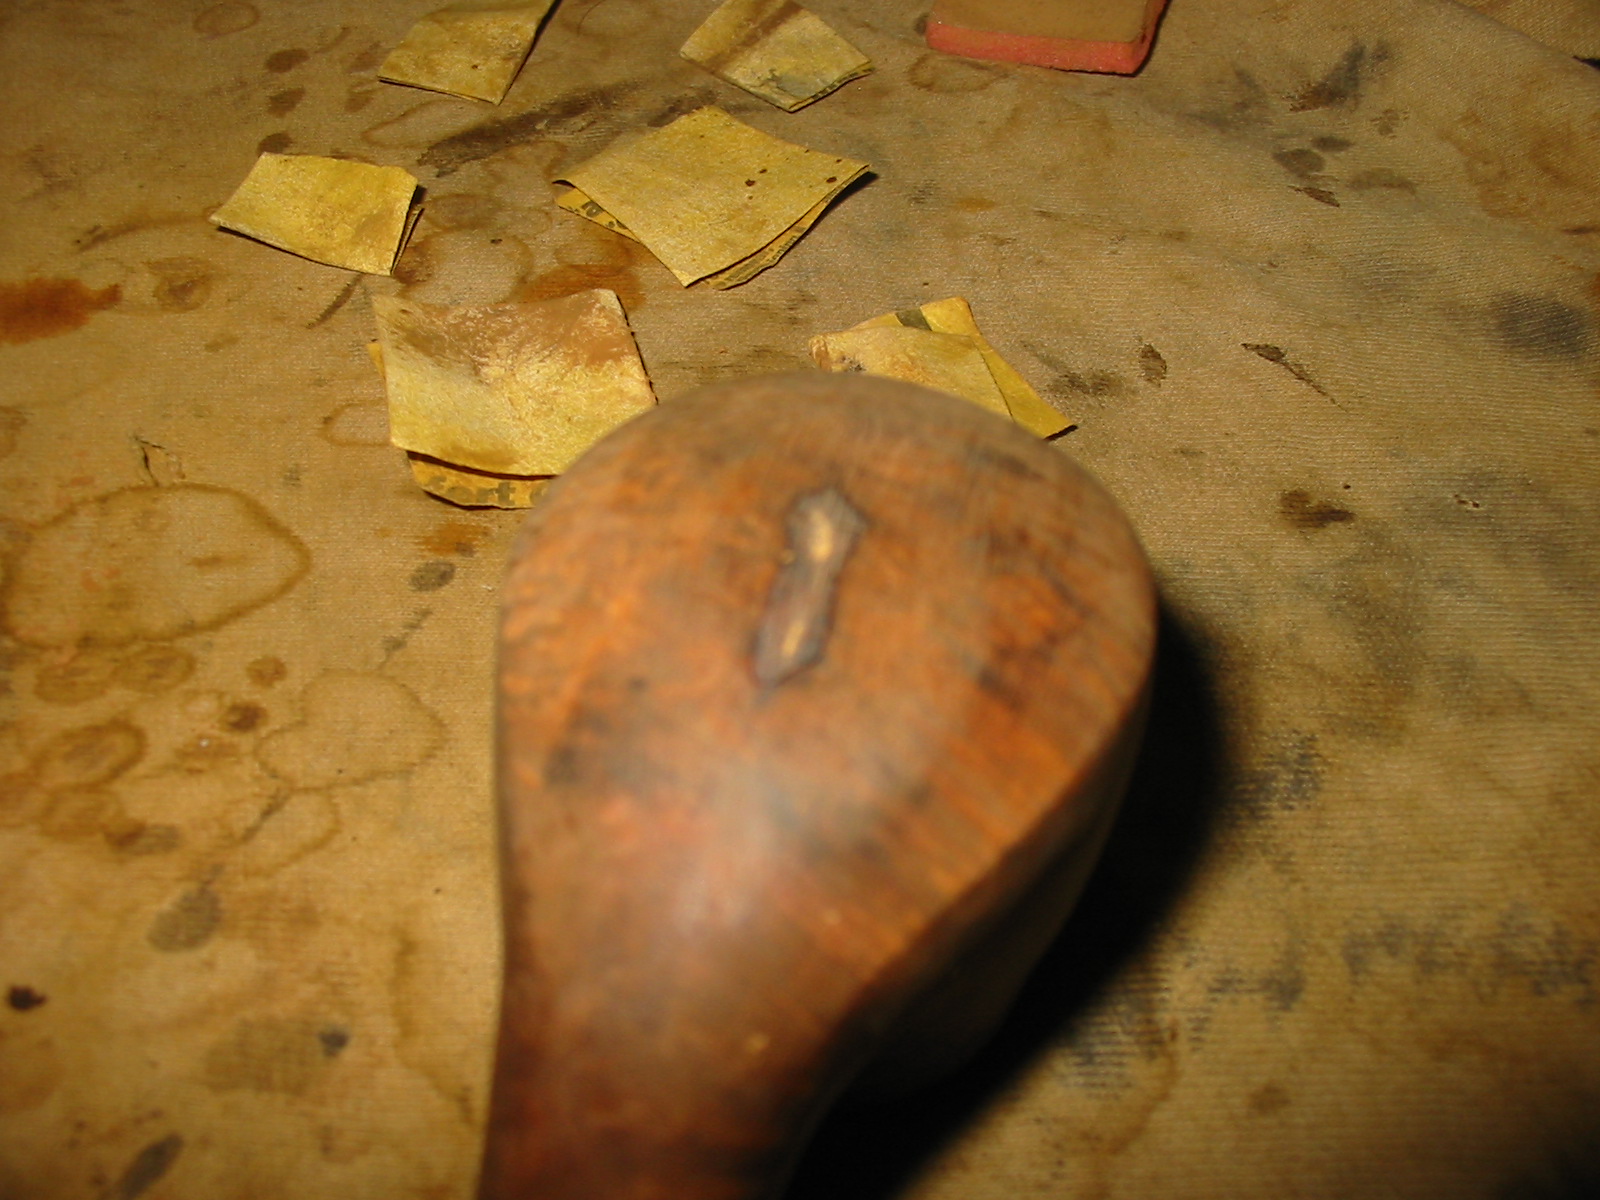
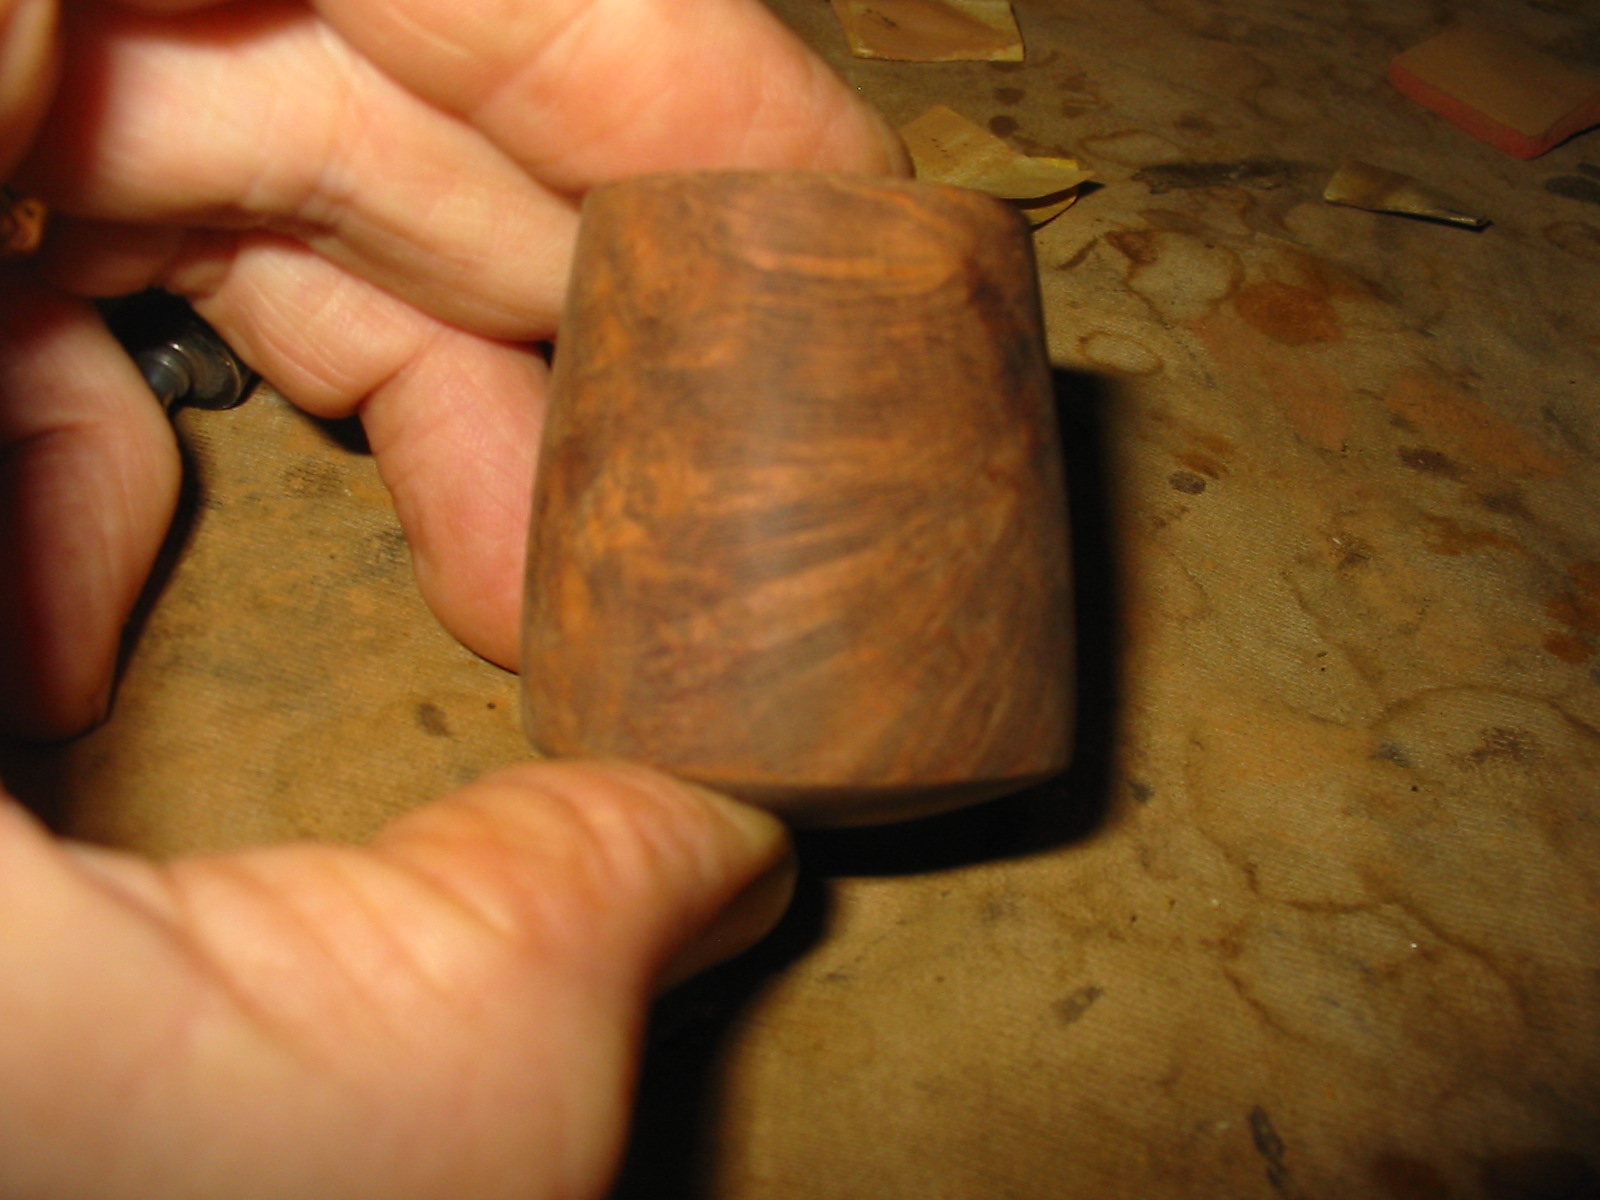
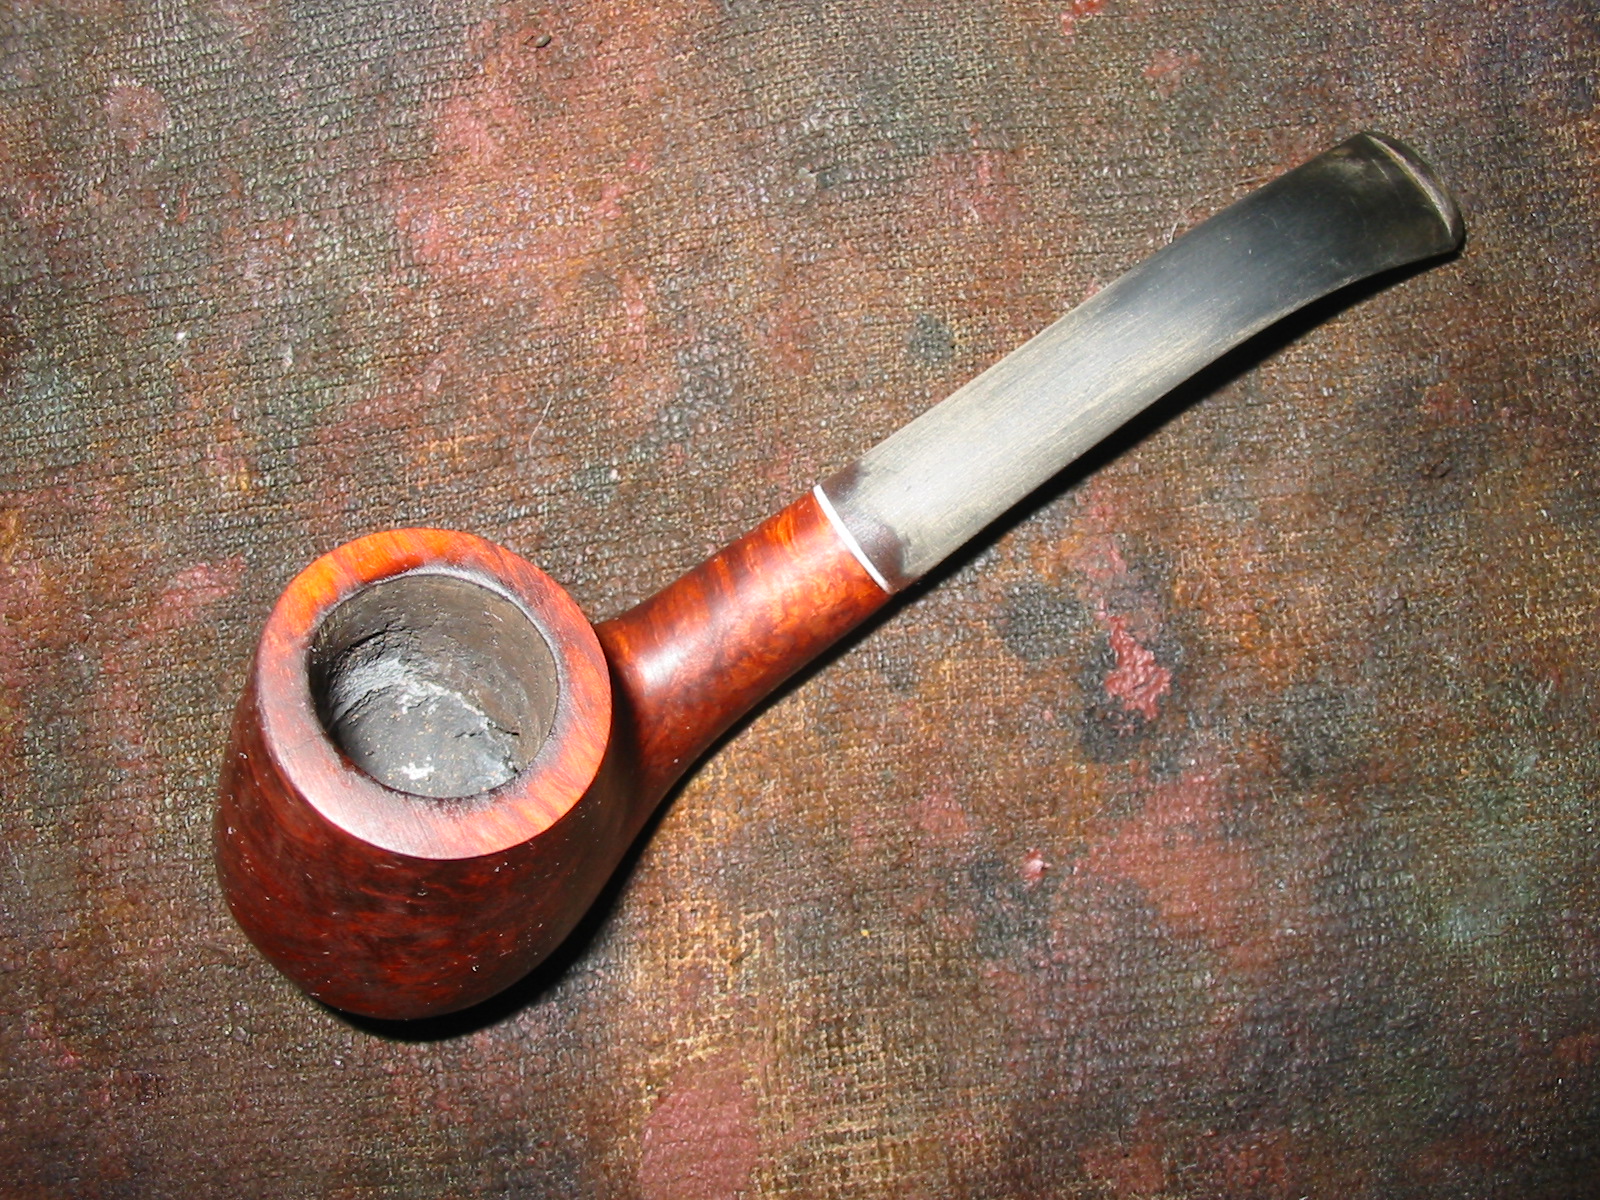
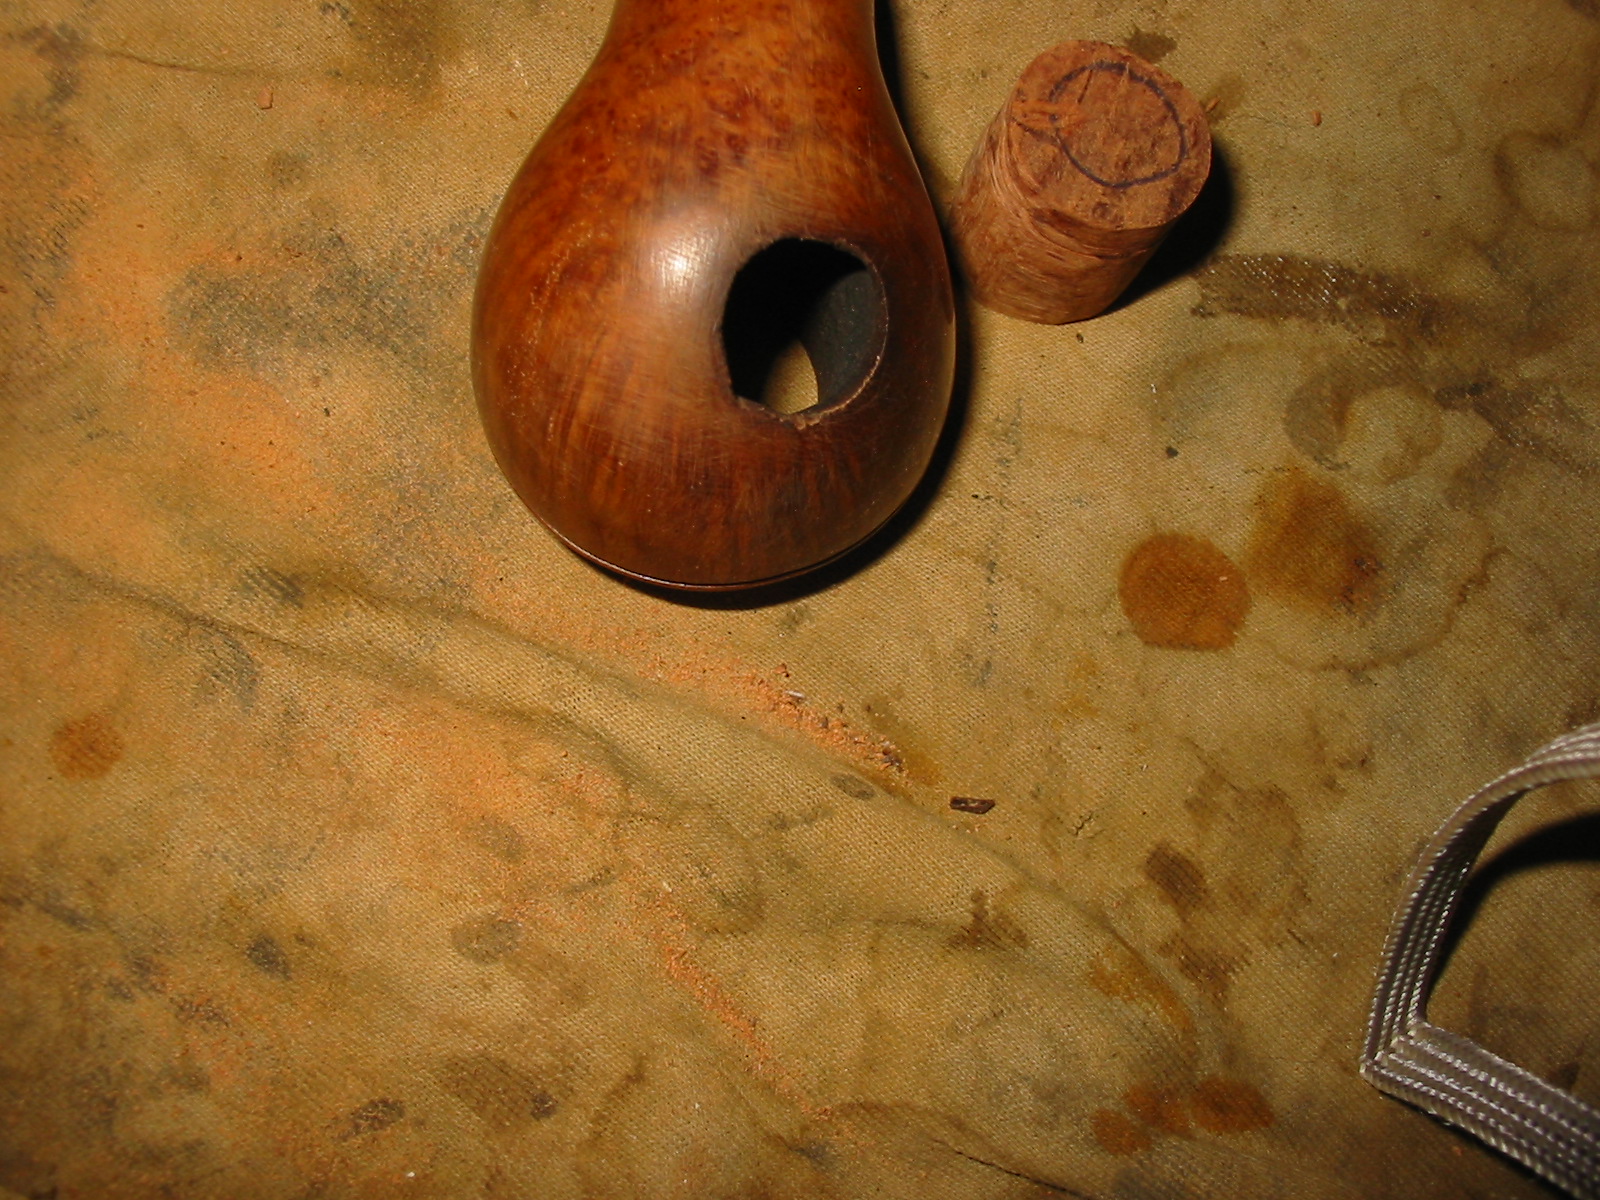
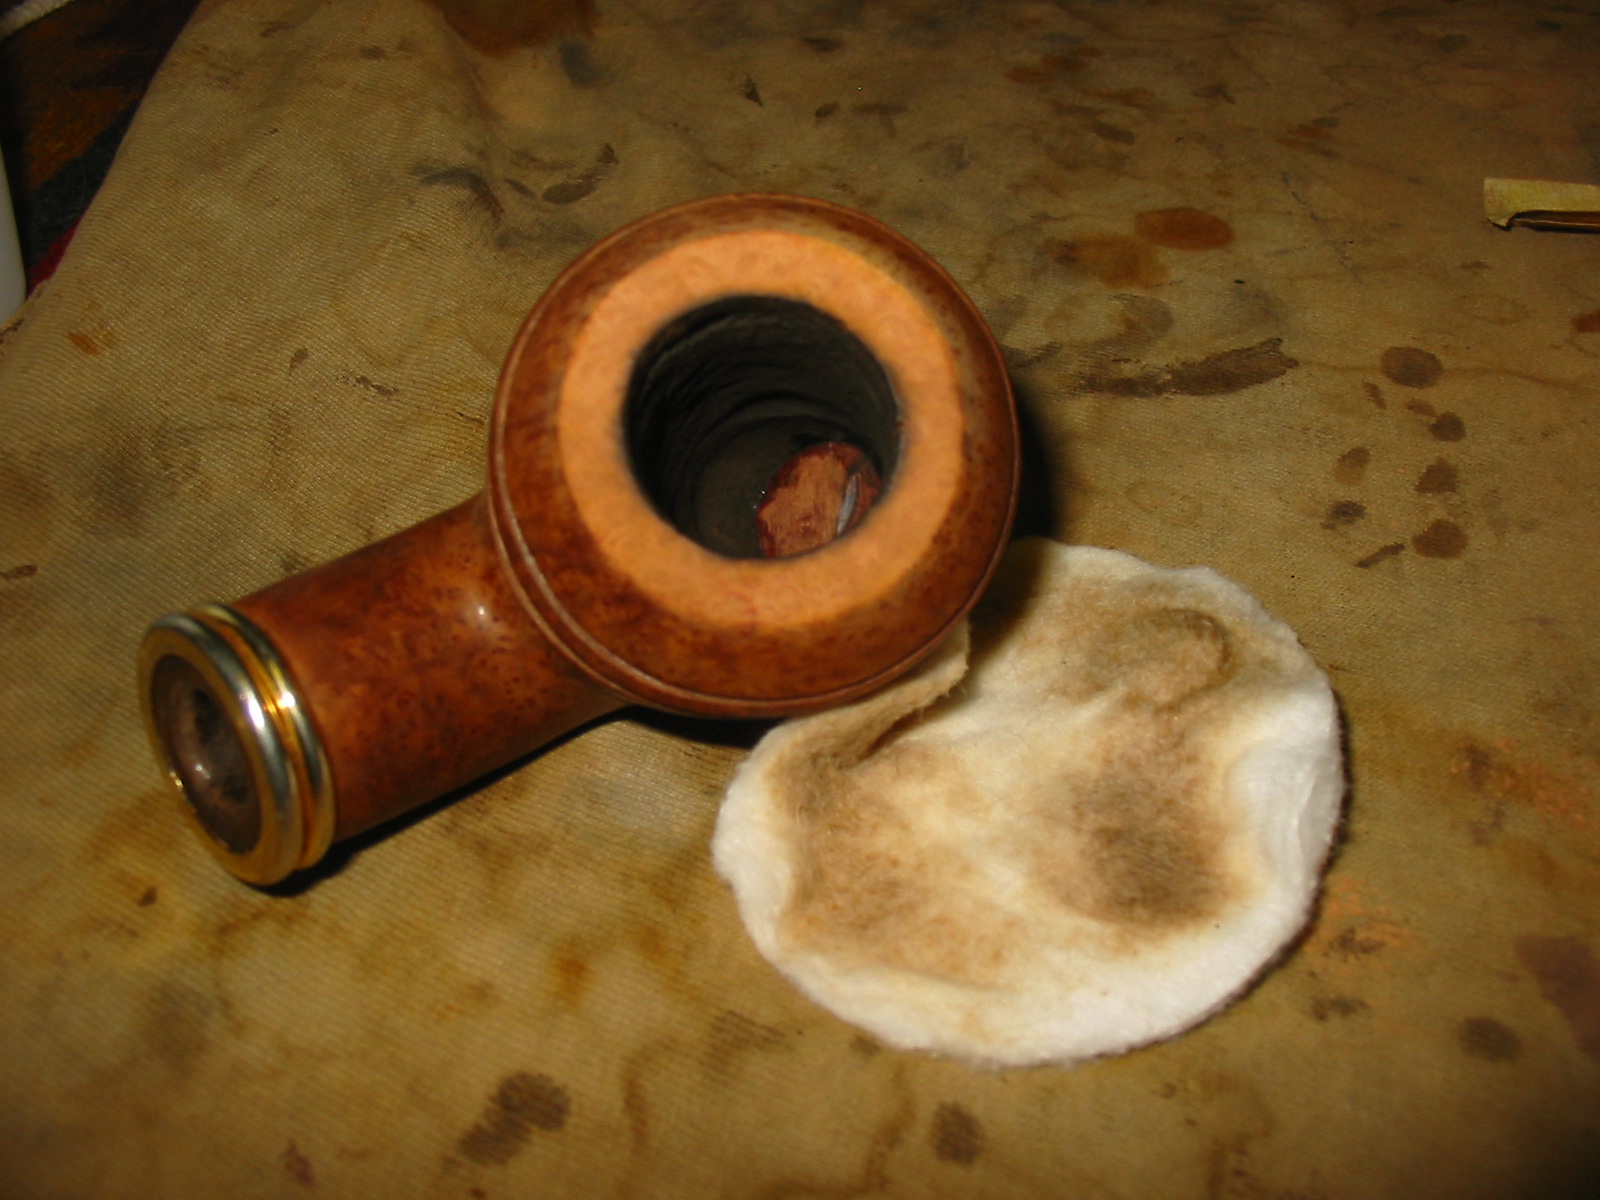
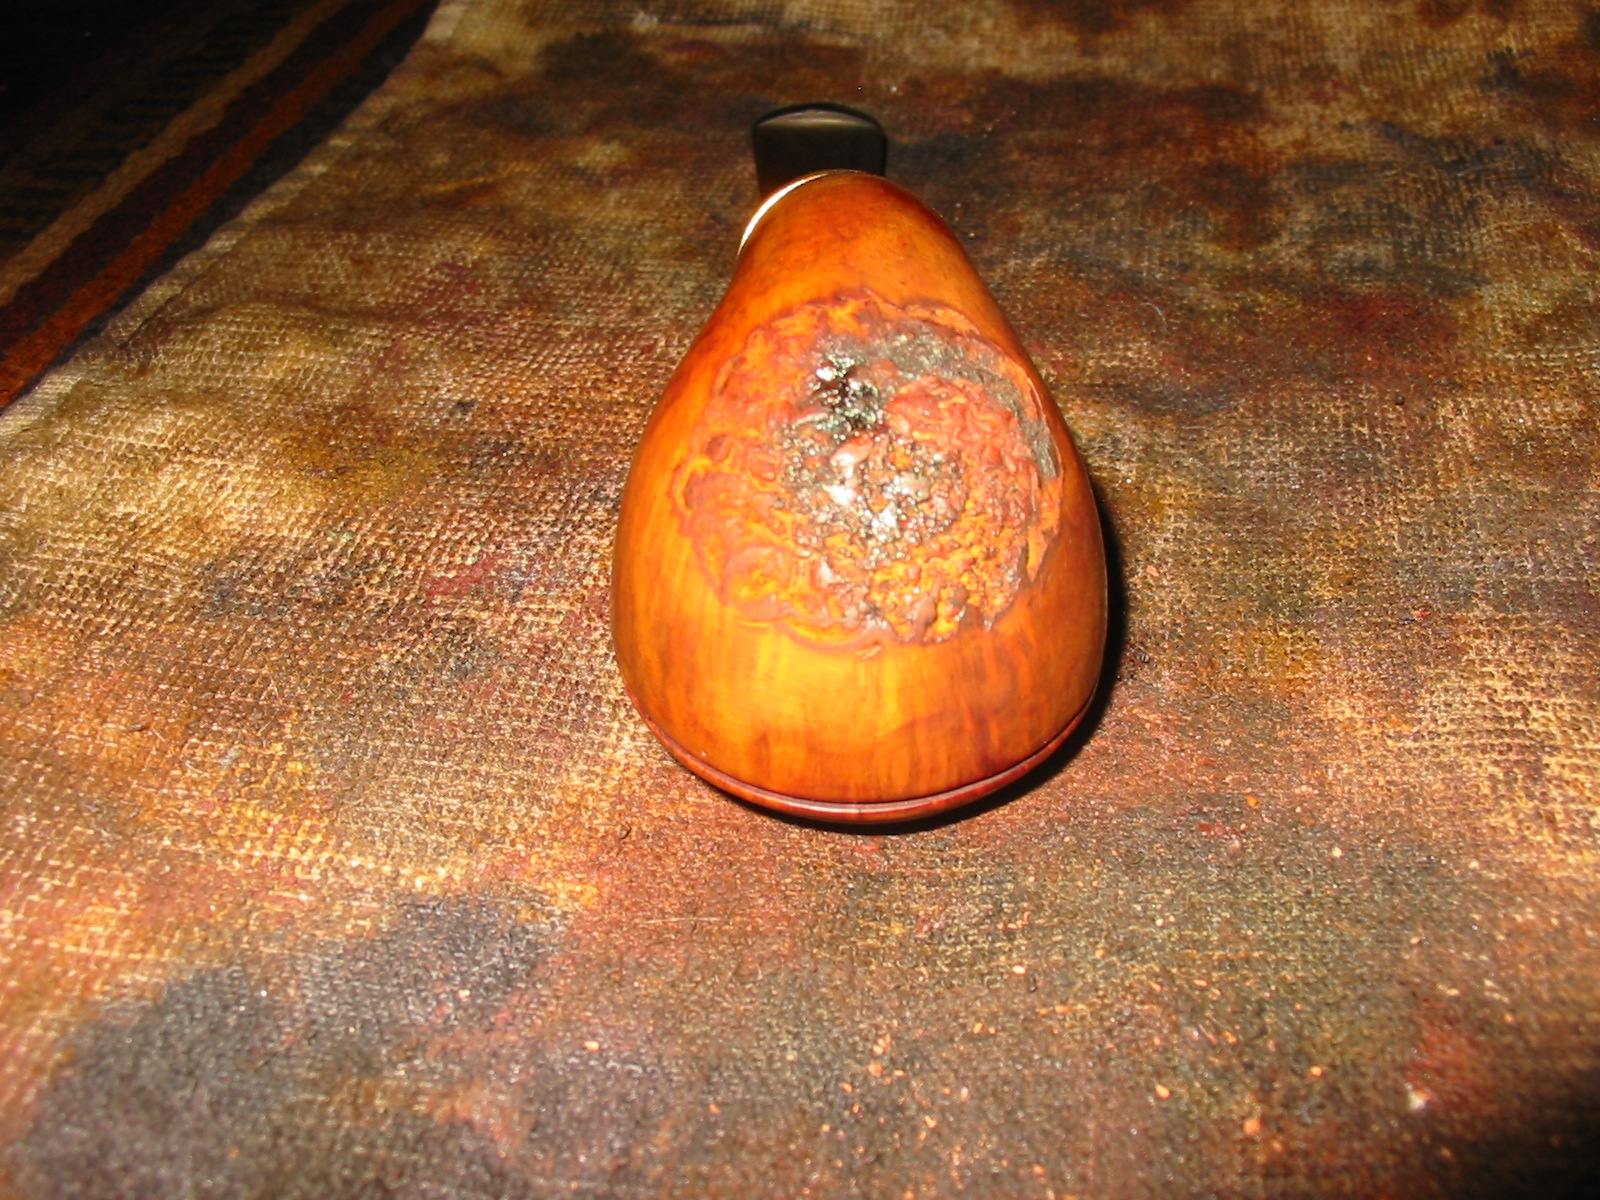
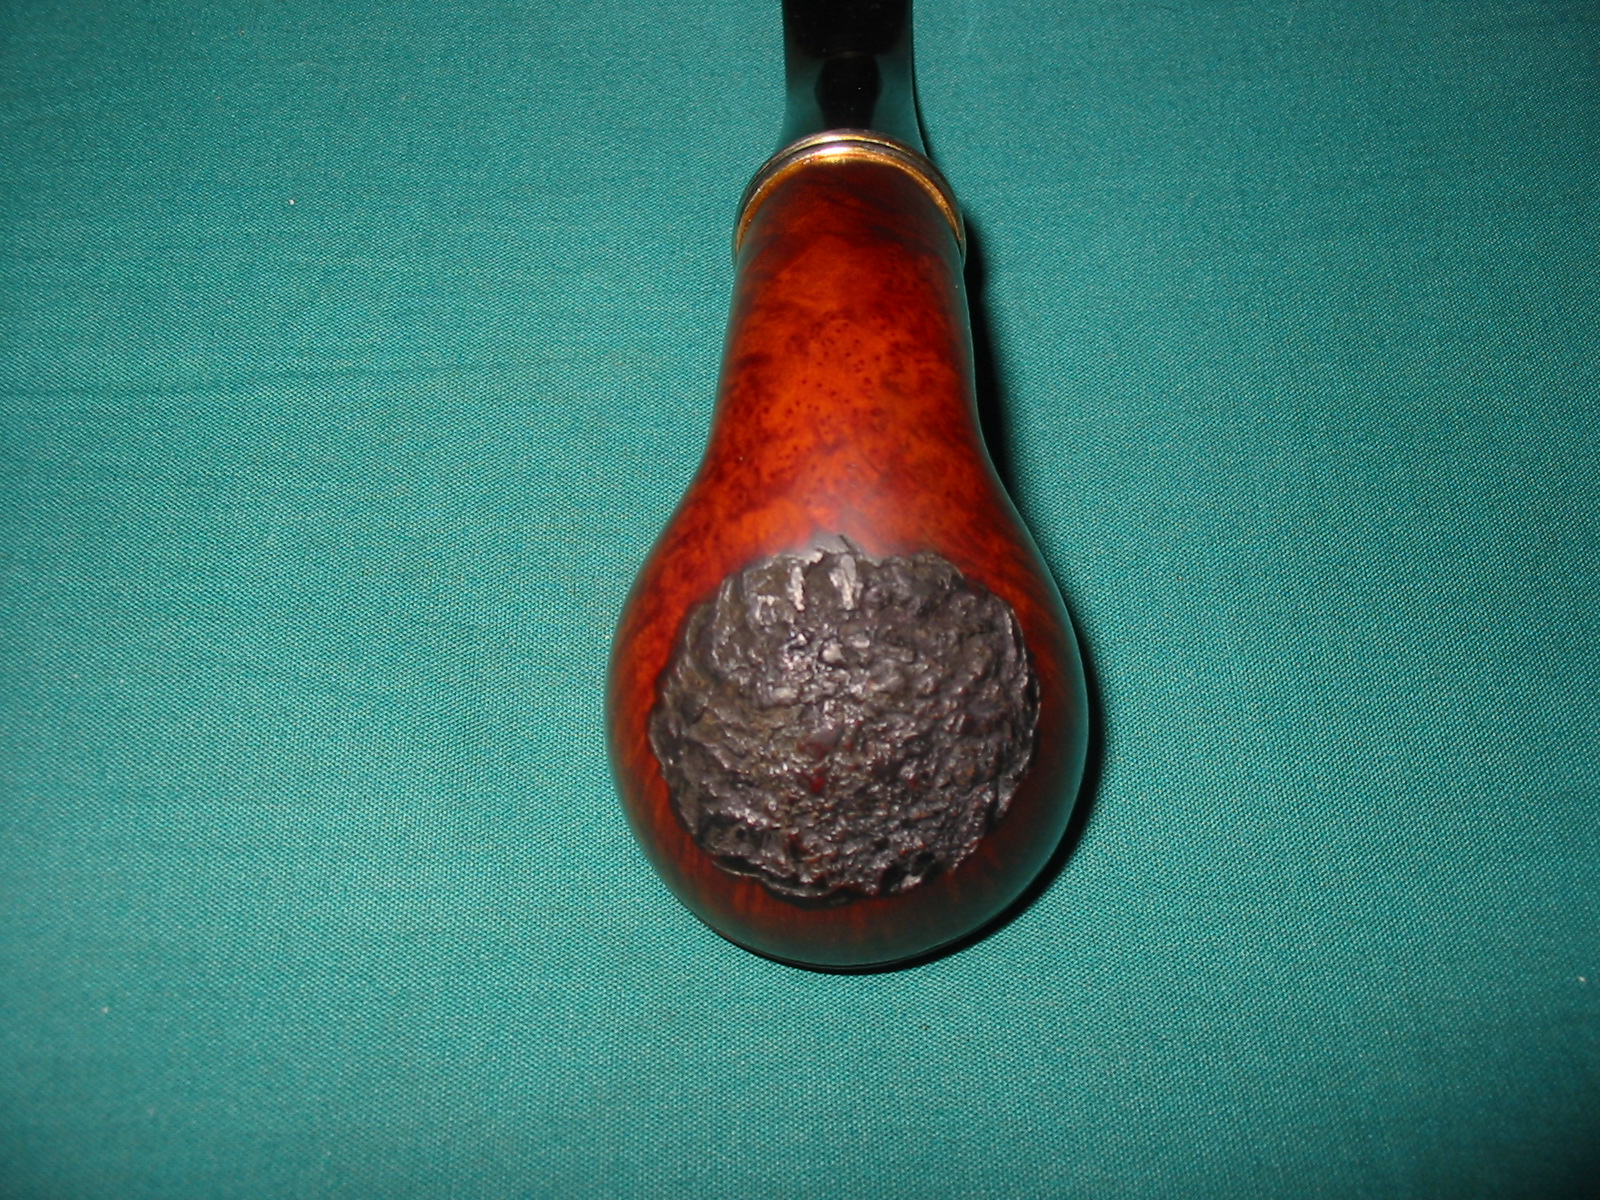
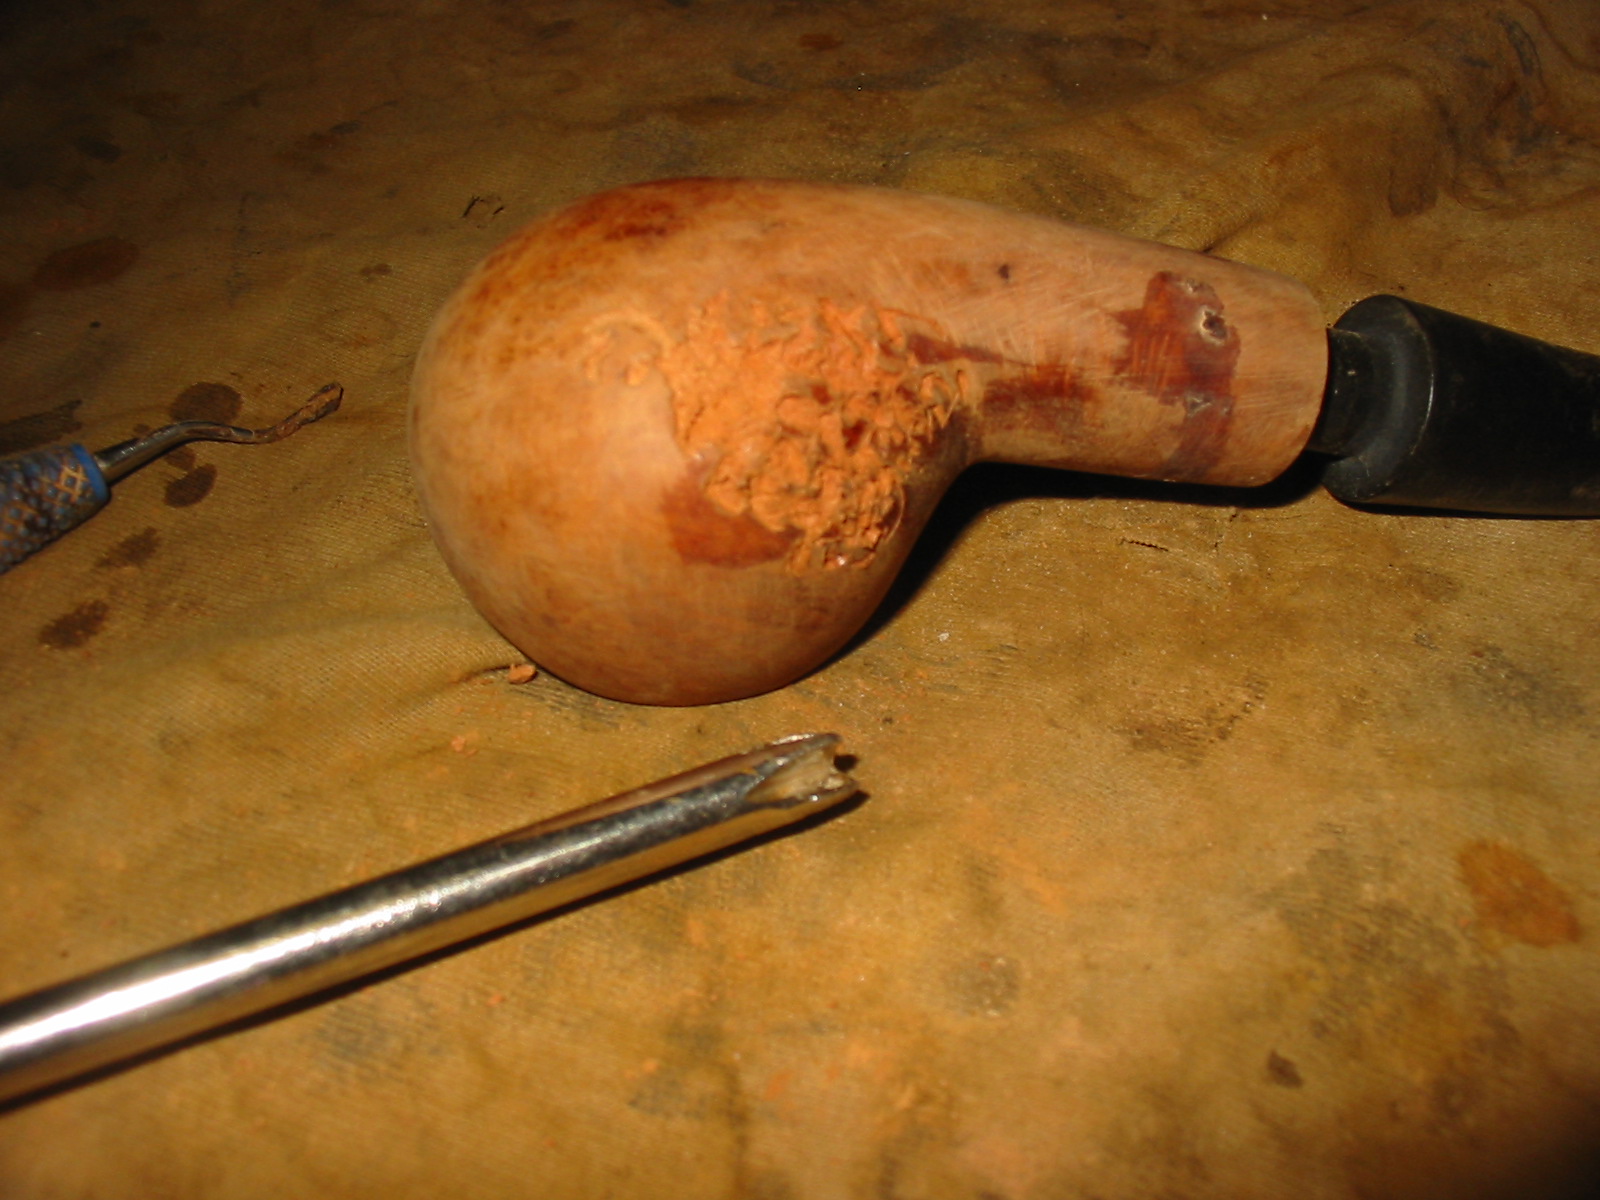
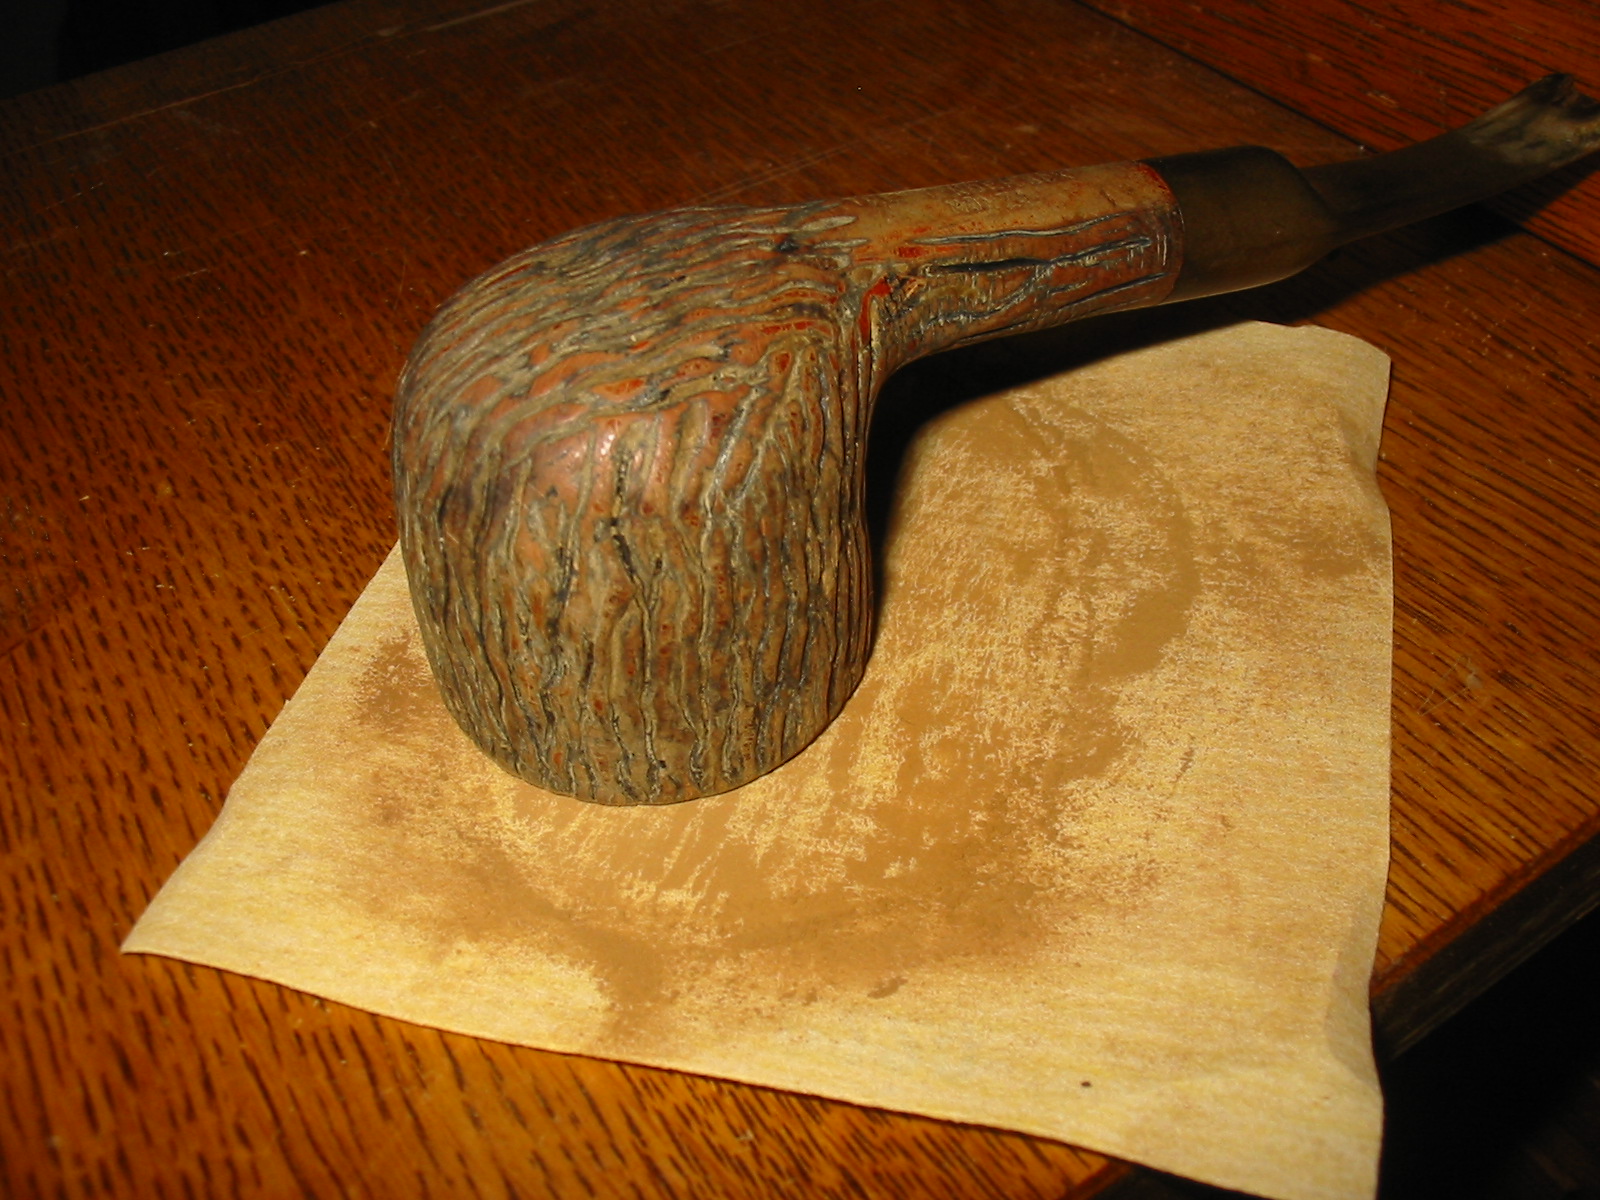
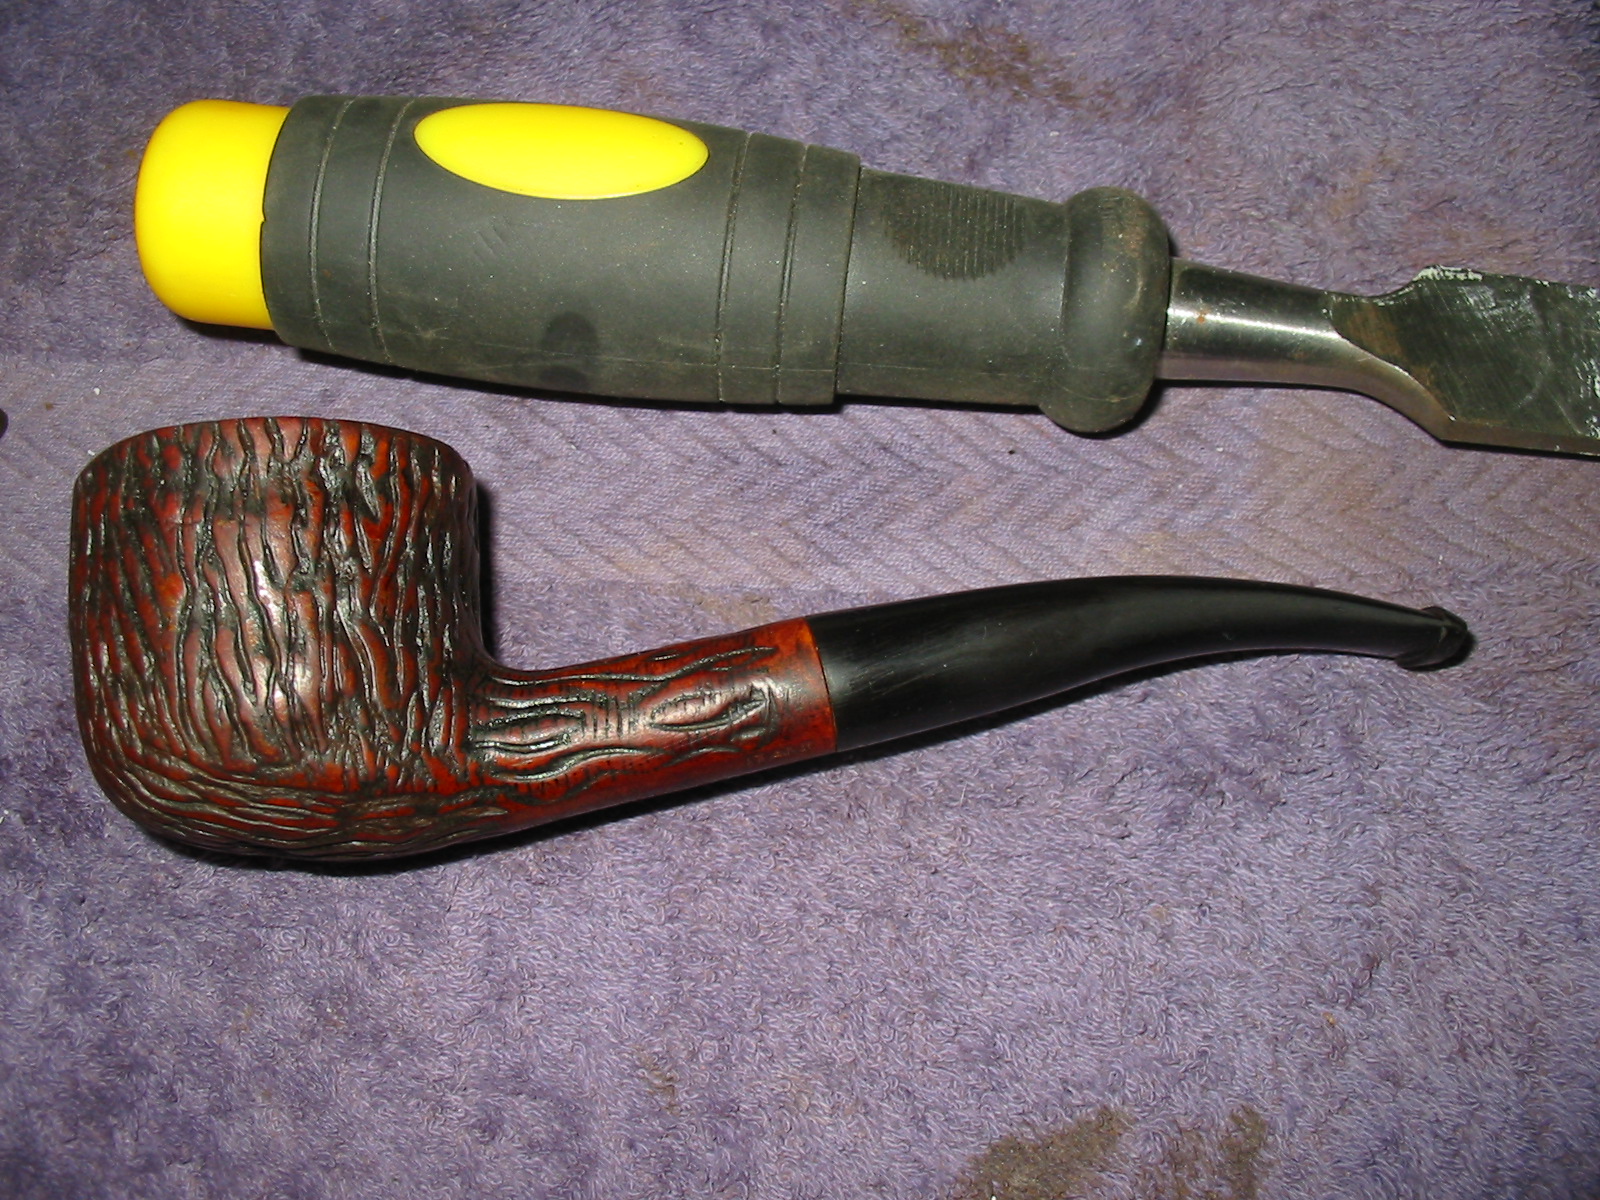
The close up photo below shows the cake that forms a ridge around the centre of the bowl. The top had been carved away and the below the ring of cake it had also been carved away. The bowl bottom visible on the top of the photo below shows the gouge that had been carved on that side of the bottom. The other side remained intact and hard.
IMG_5033

The front edge of the bowl had been hammered hard or scraped against something and the outer edge was worn and rough feeling.
IMG_5034

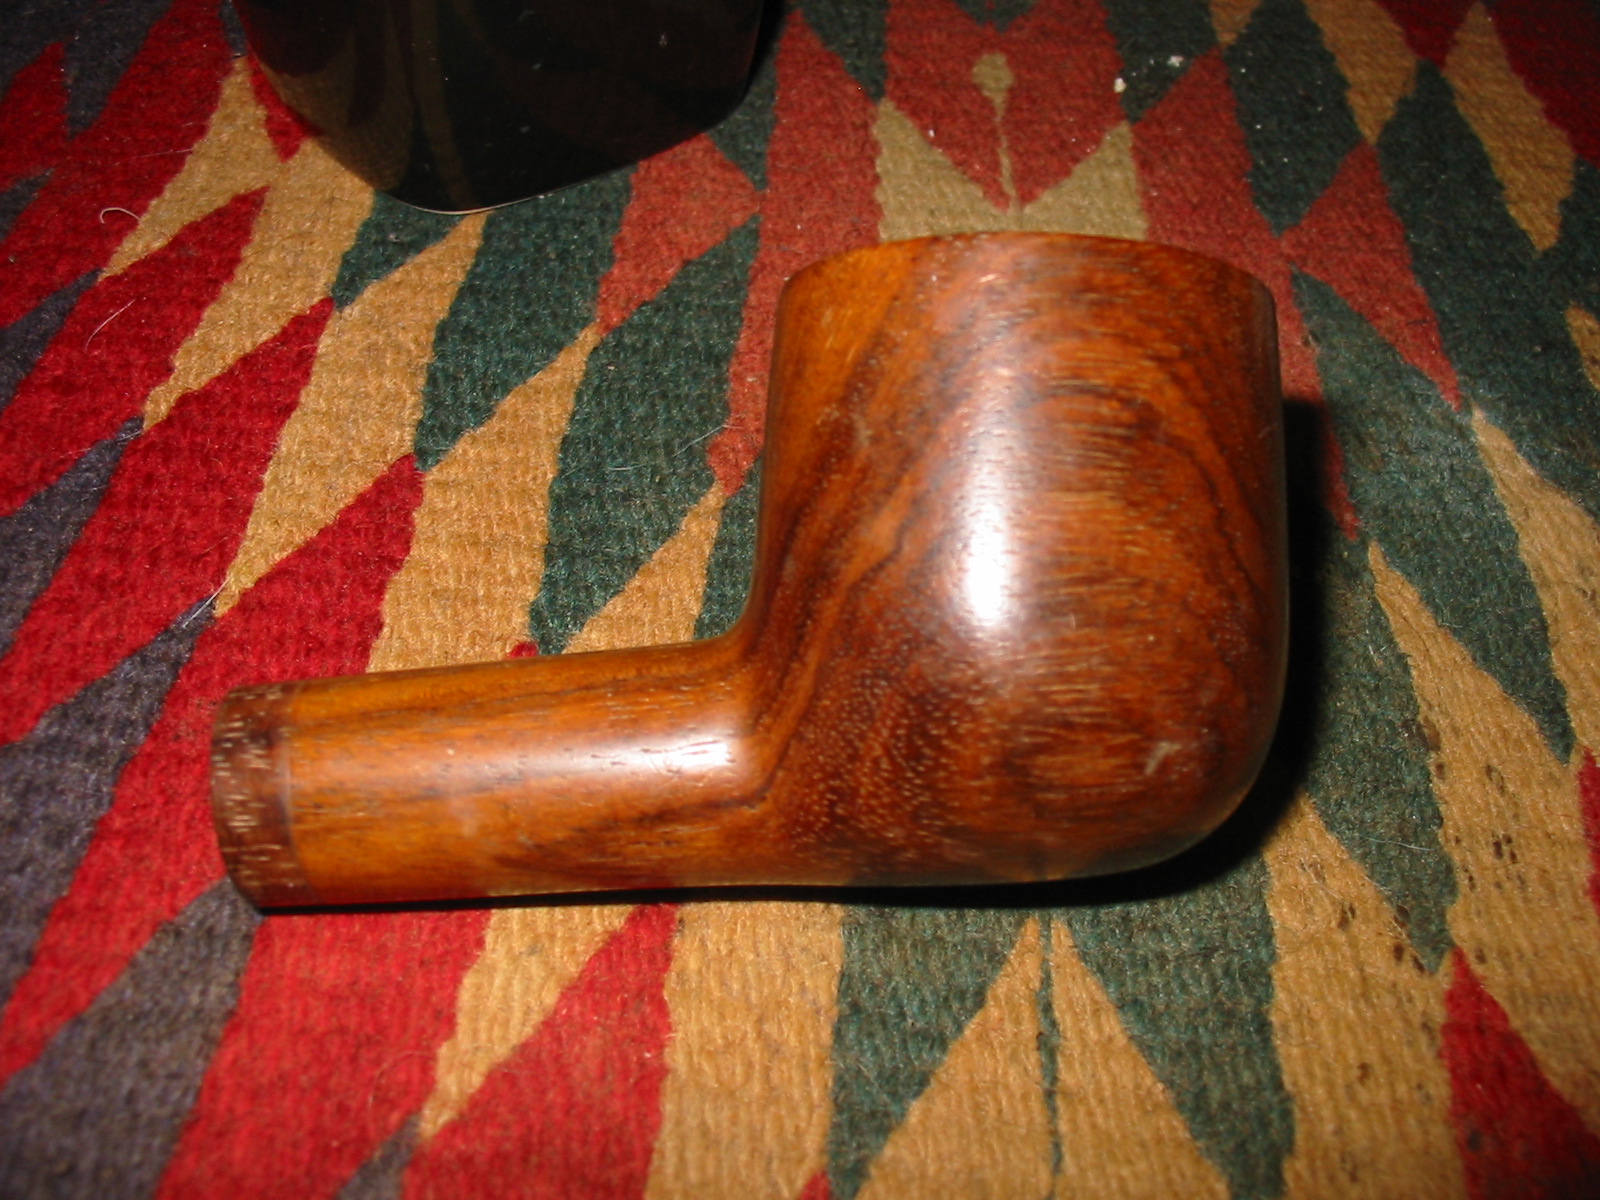
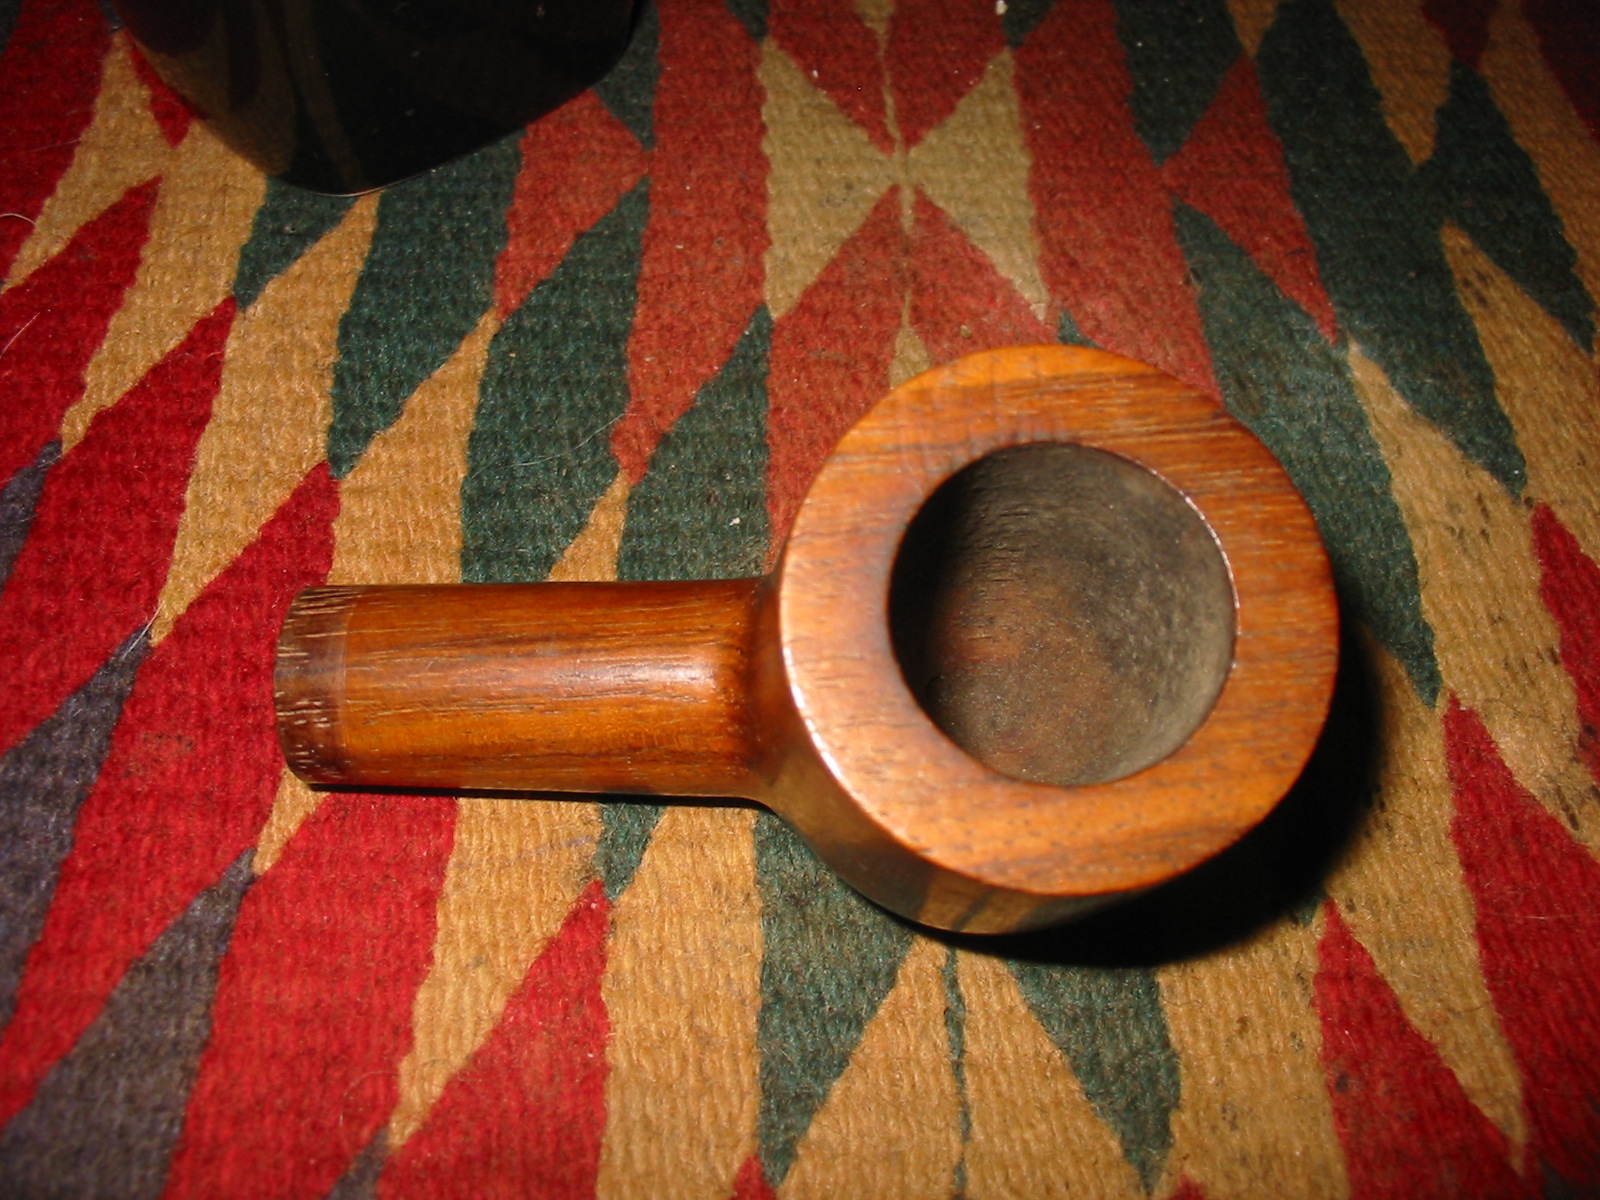
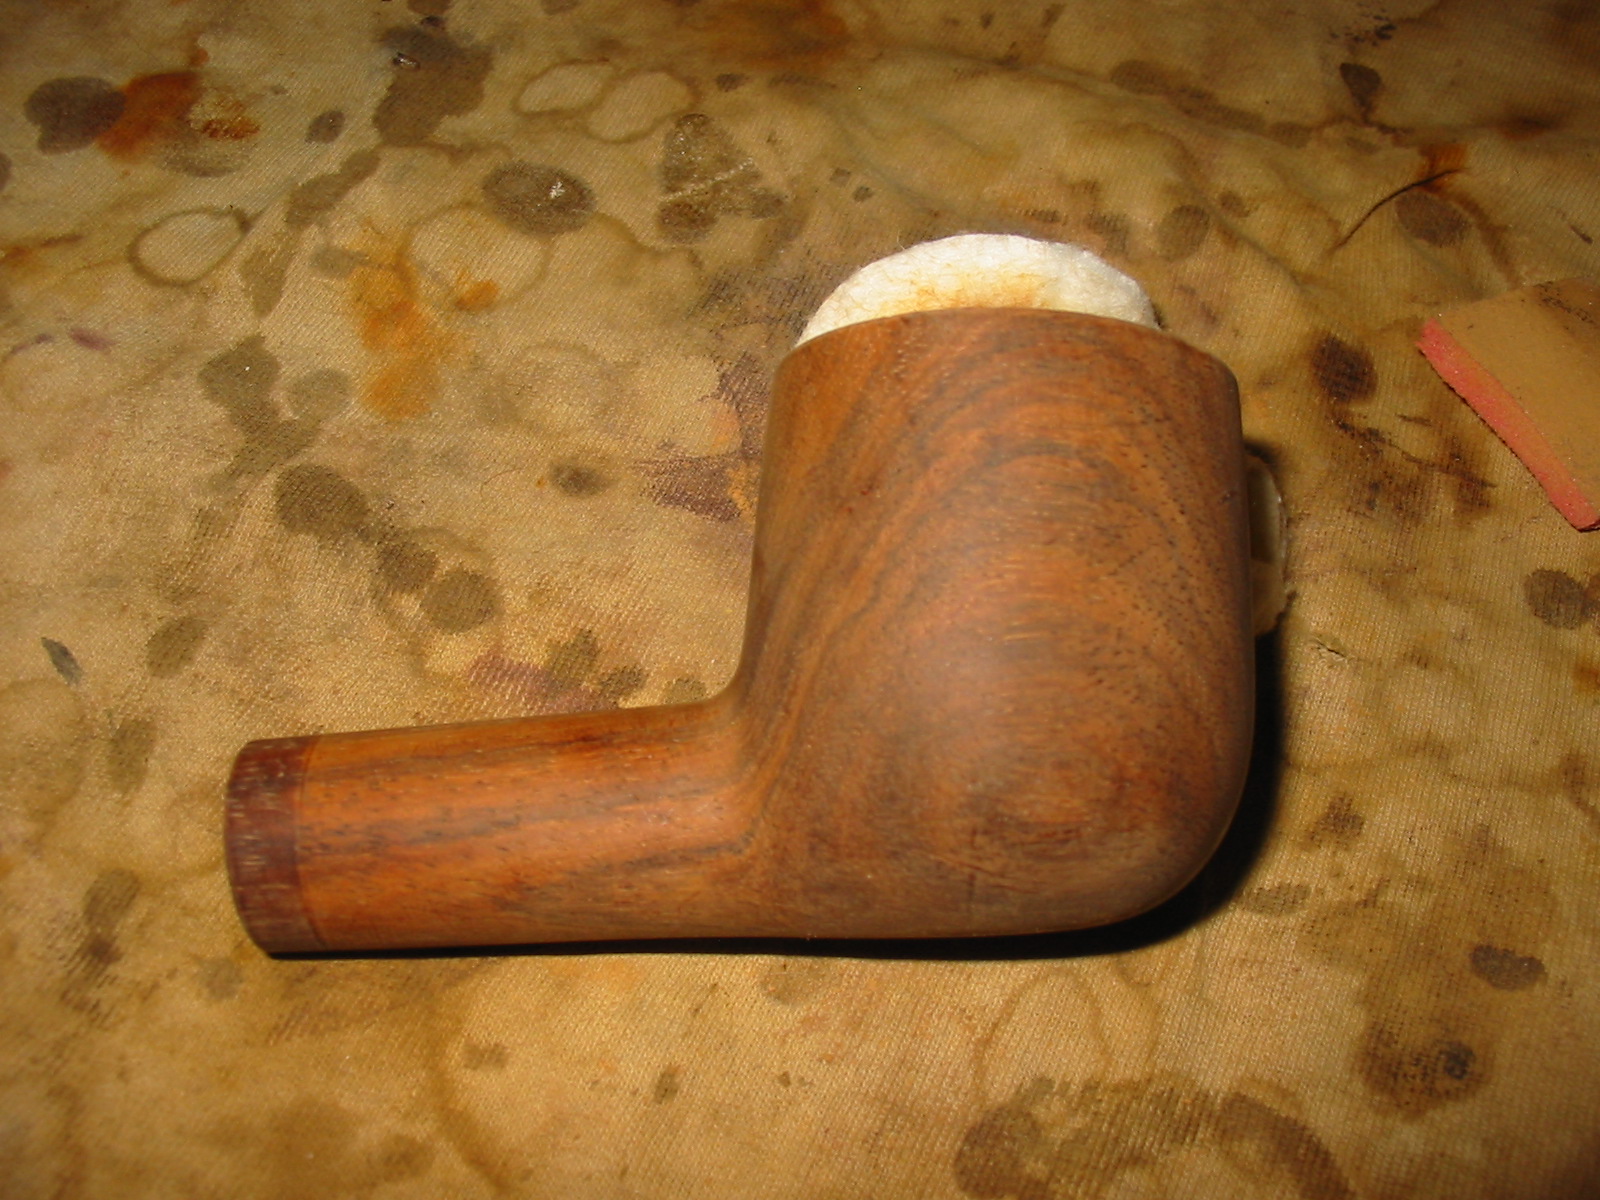
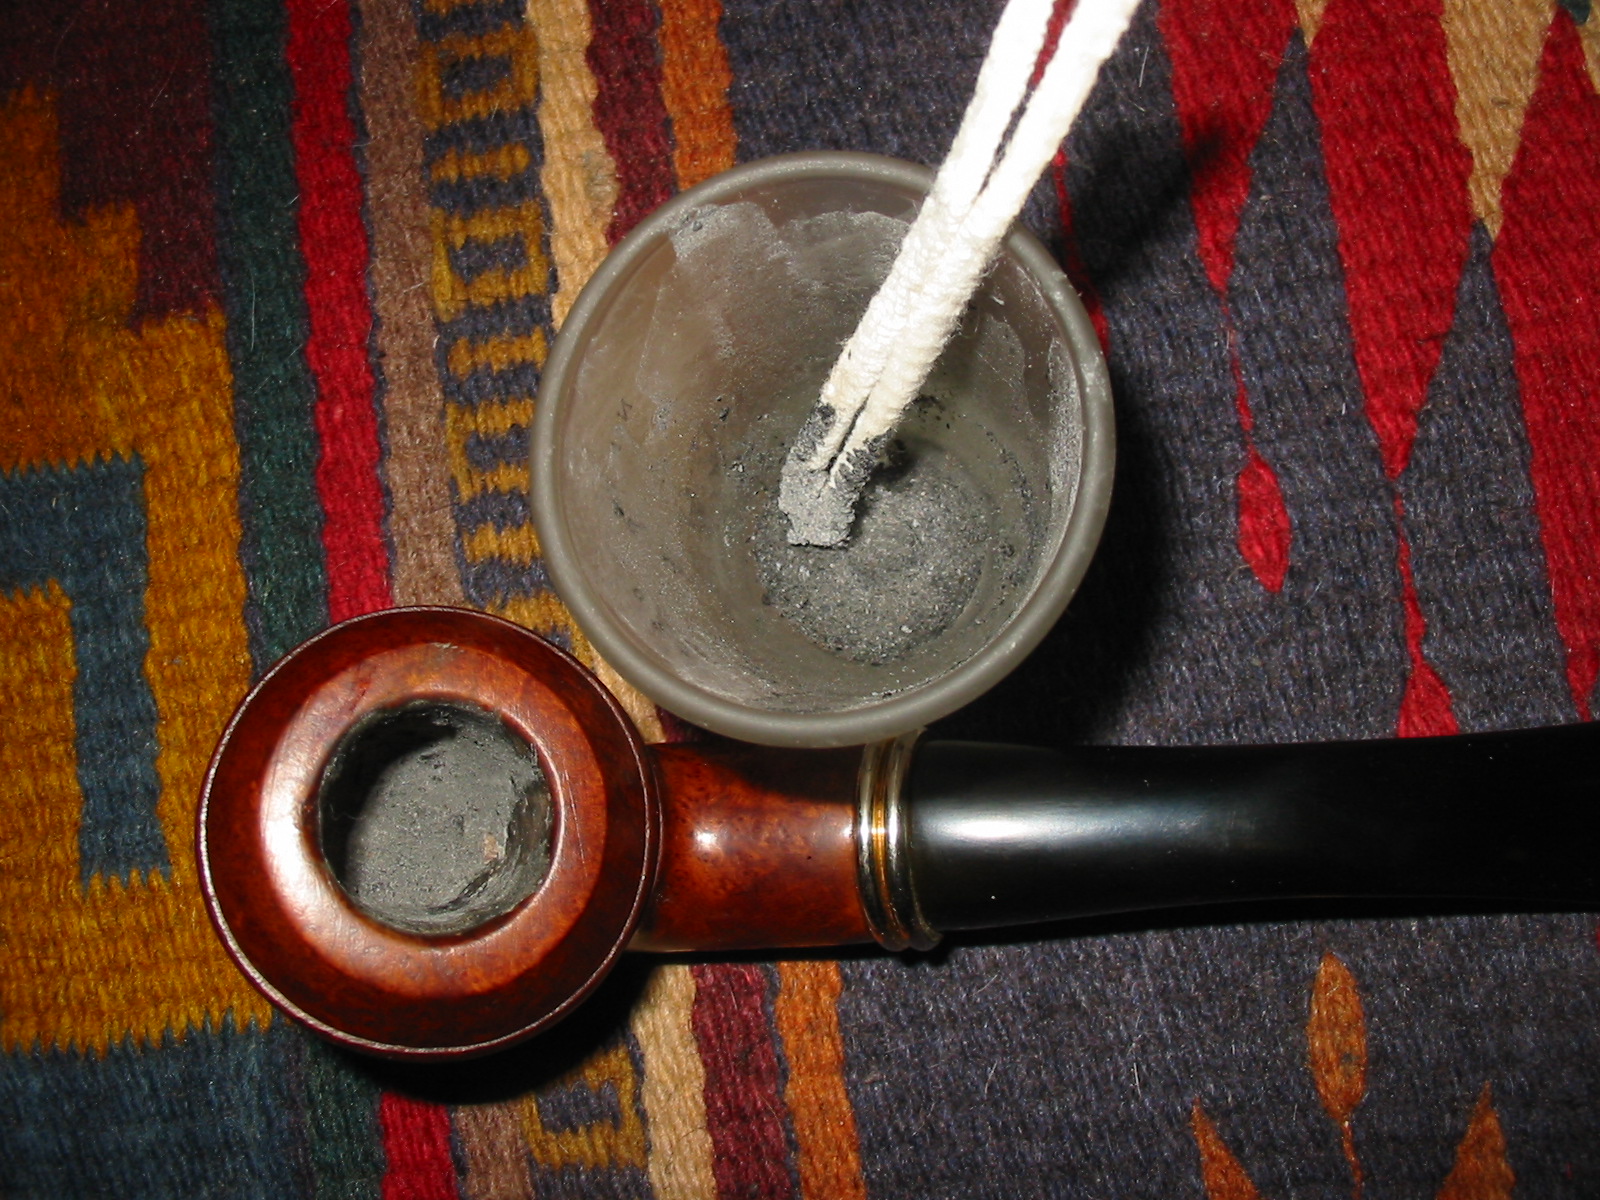
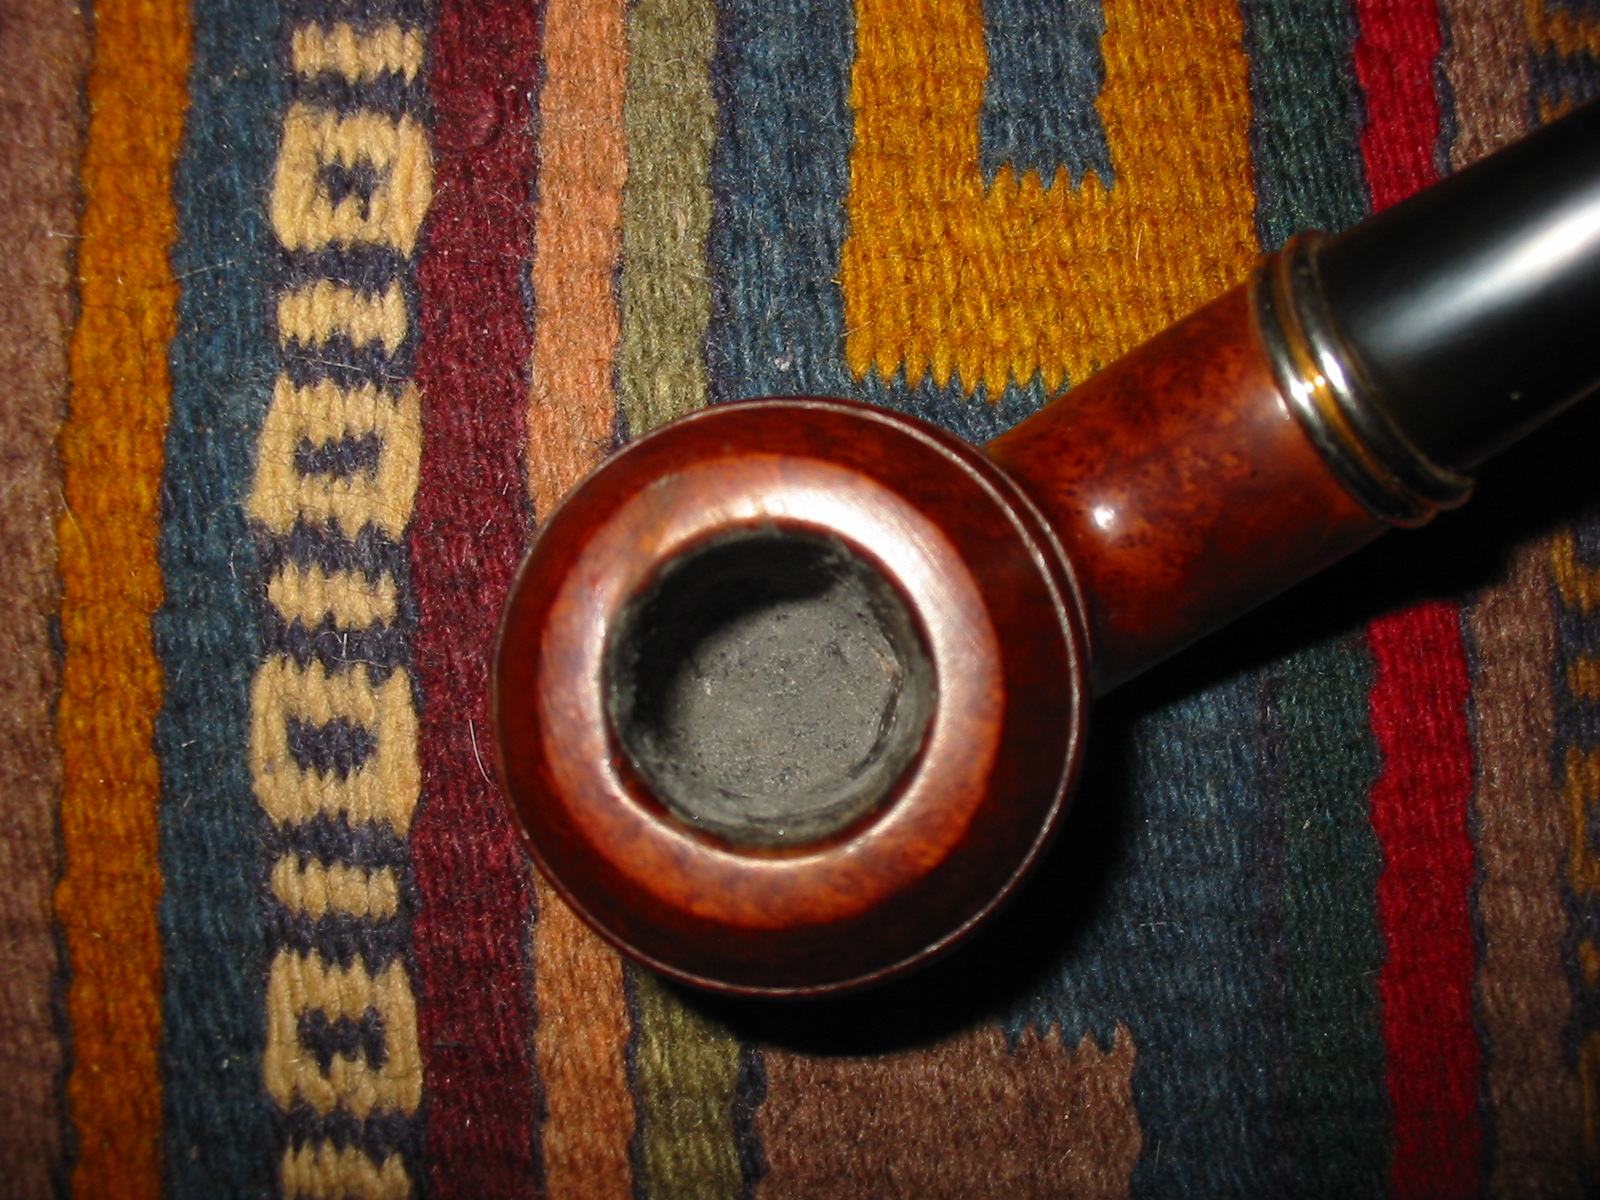
I reamed the bowl with the largest PipNet reamer cutting head in the set and was able to scrape the cake back to the wood. I wanted to see if the walls of the bowl were charred or burned. I further scraped it with a knife blade and found that the walls were solid under the cake. The wood did not have burned or charred portions.
IMG_5035

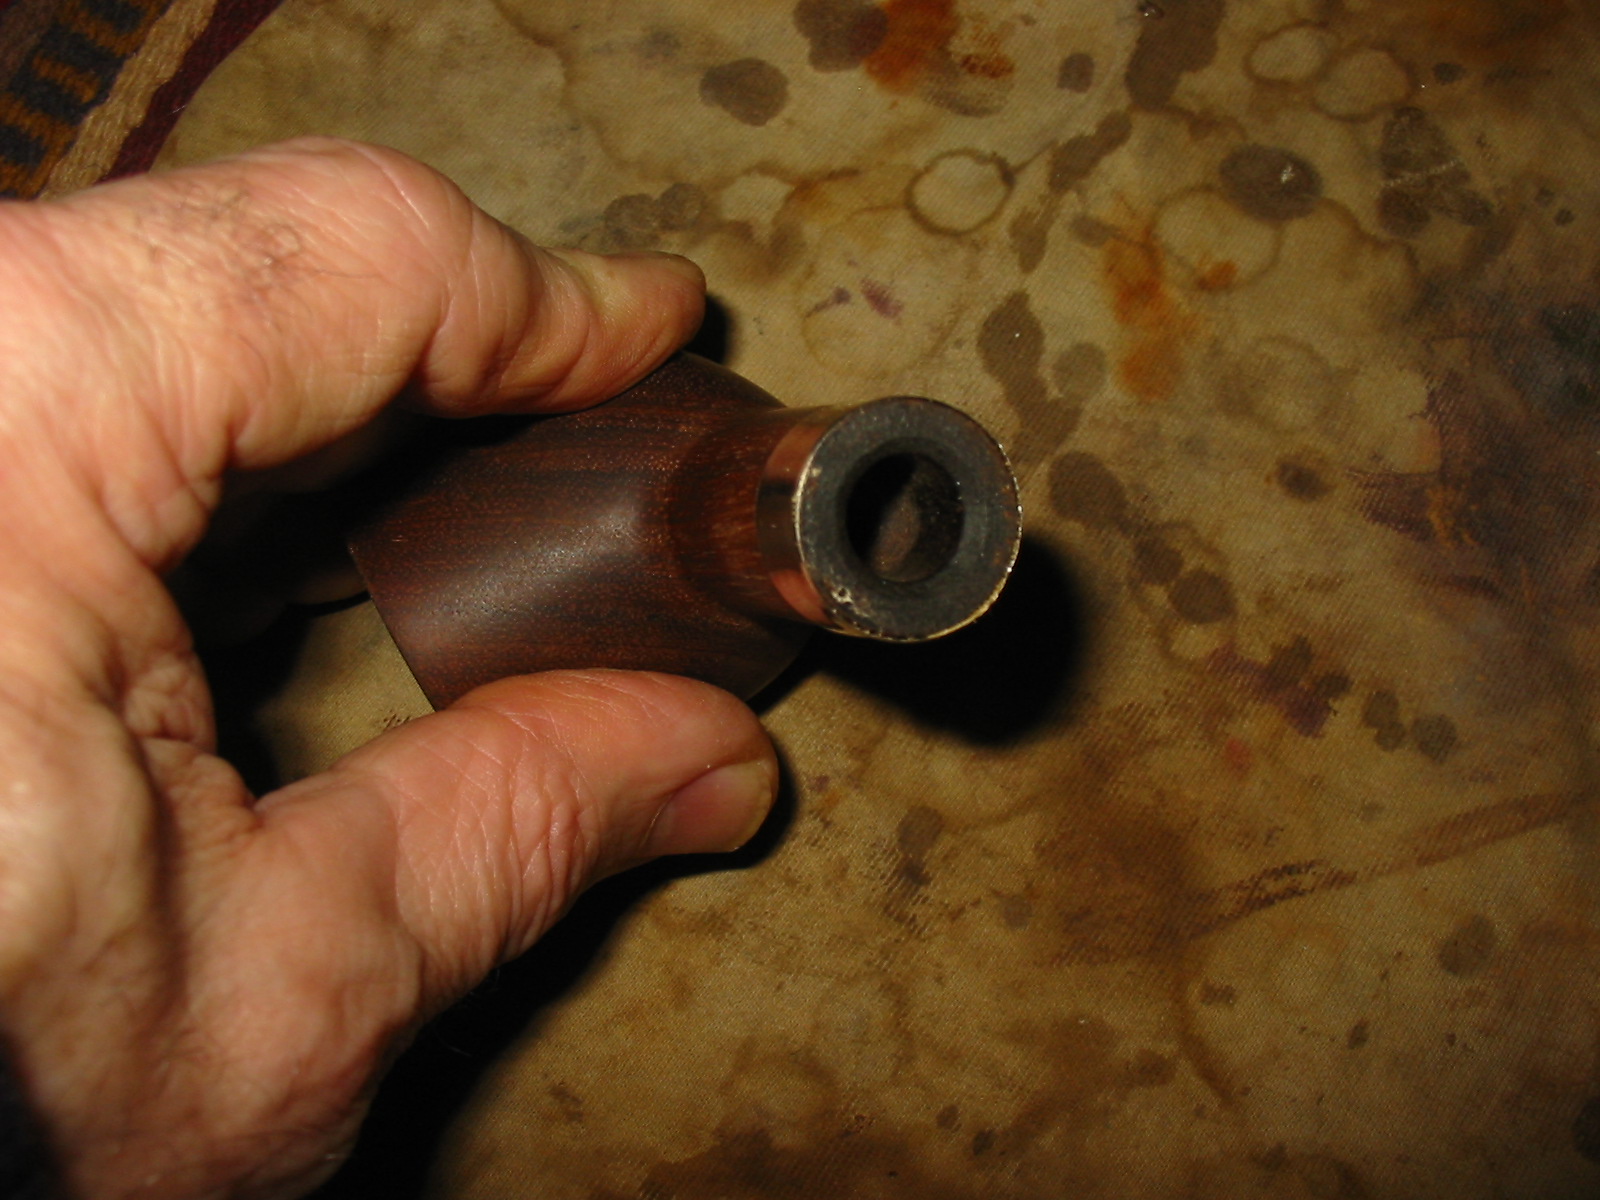
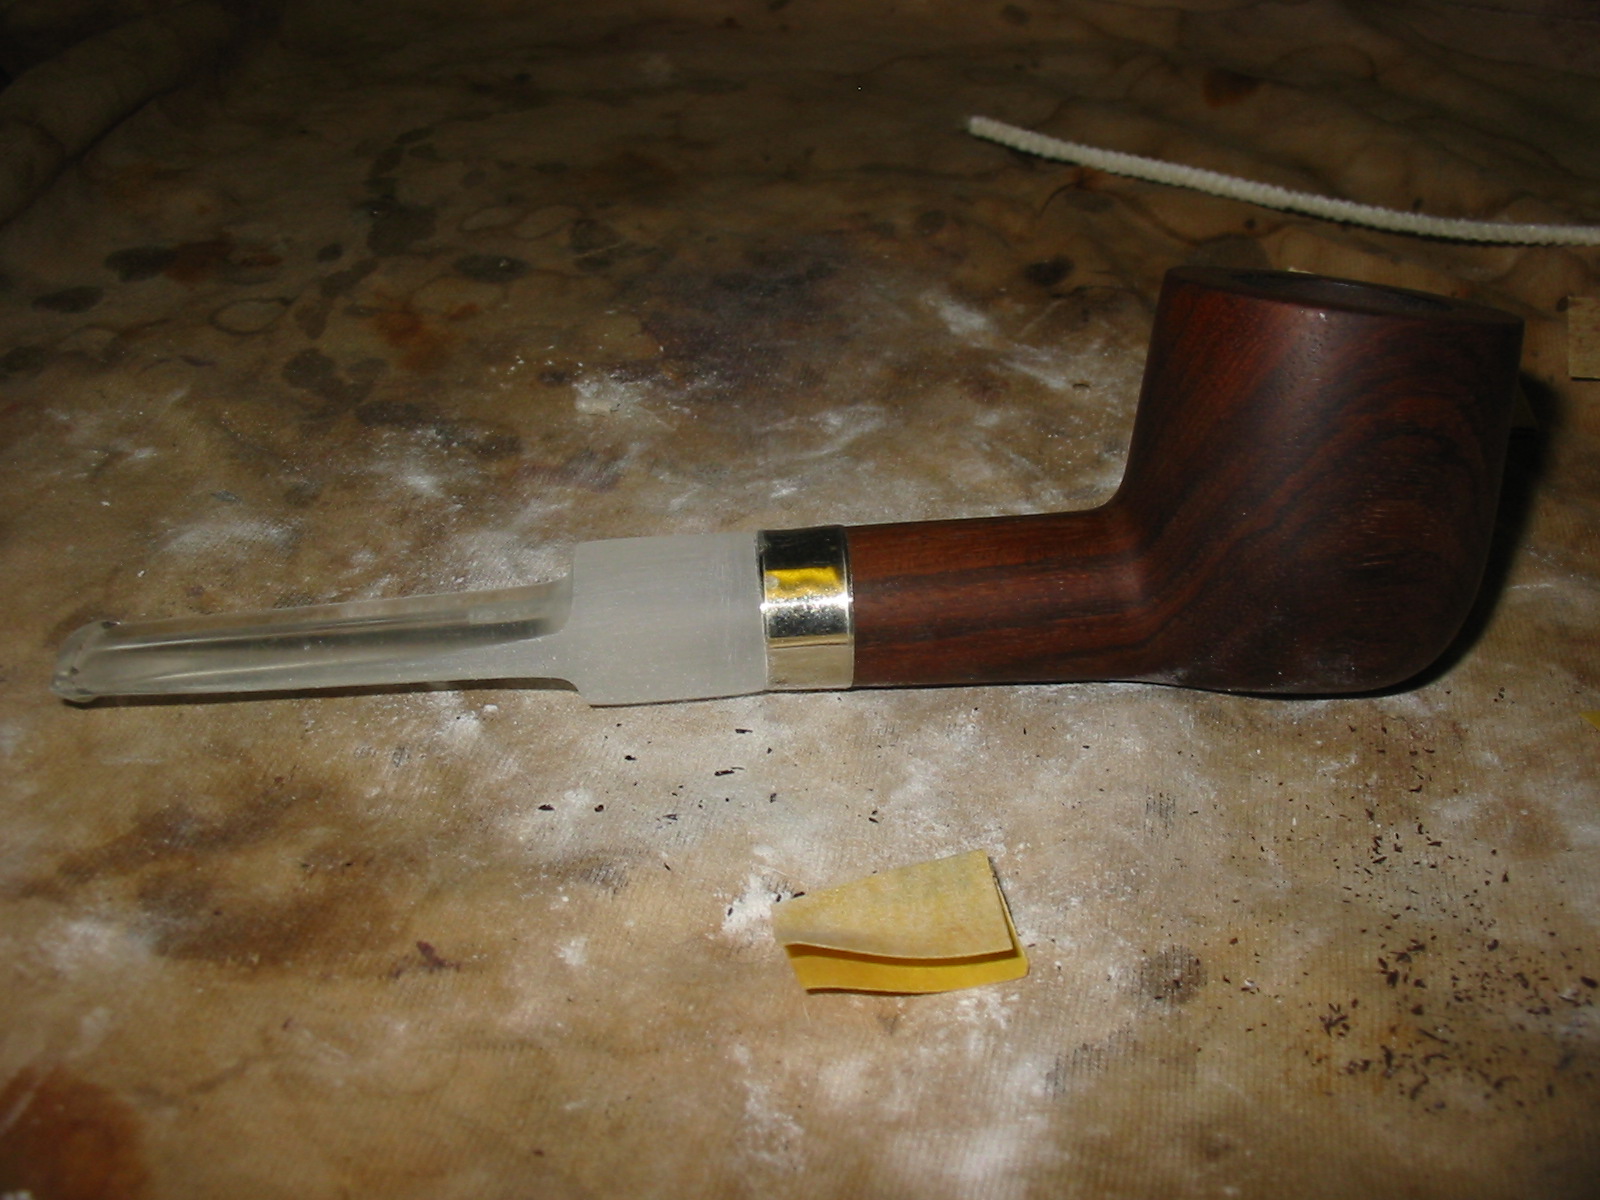
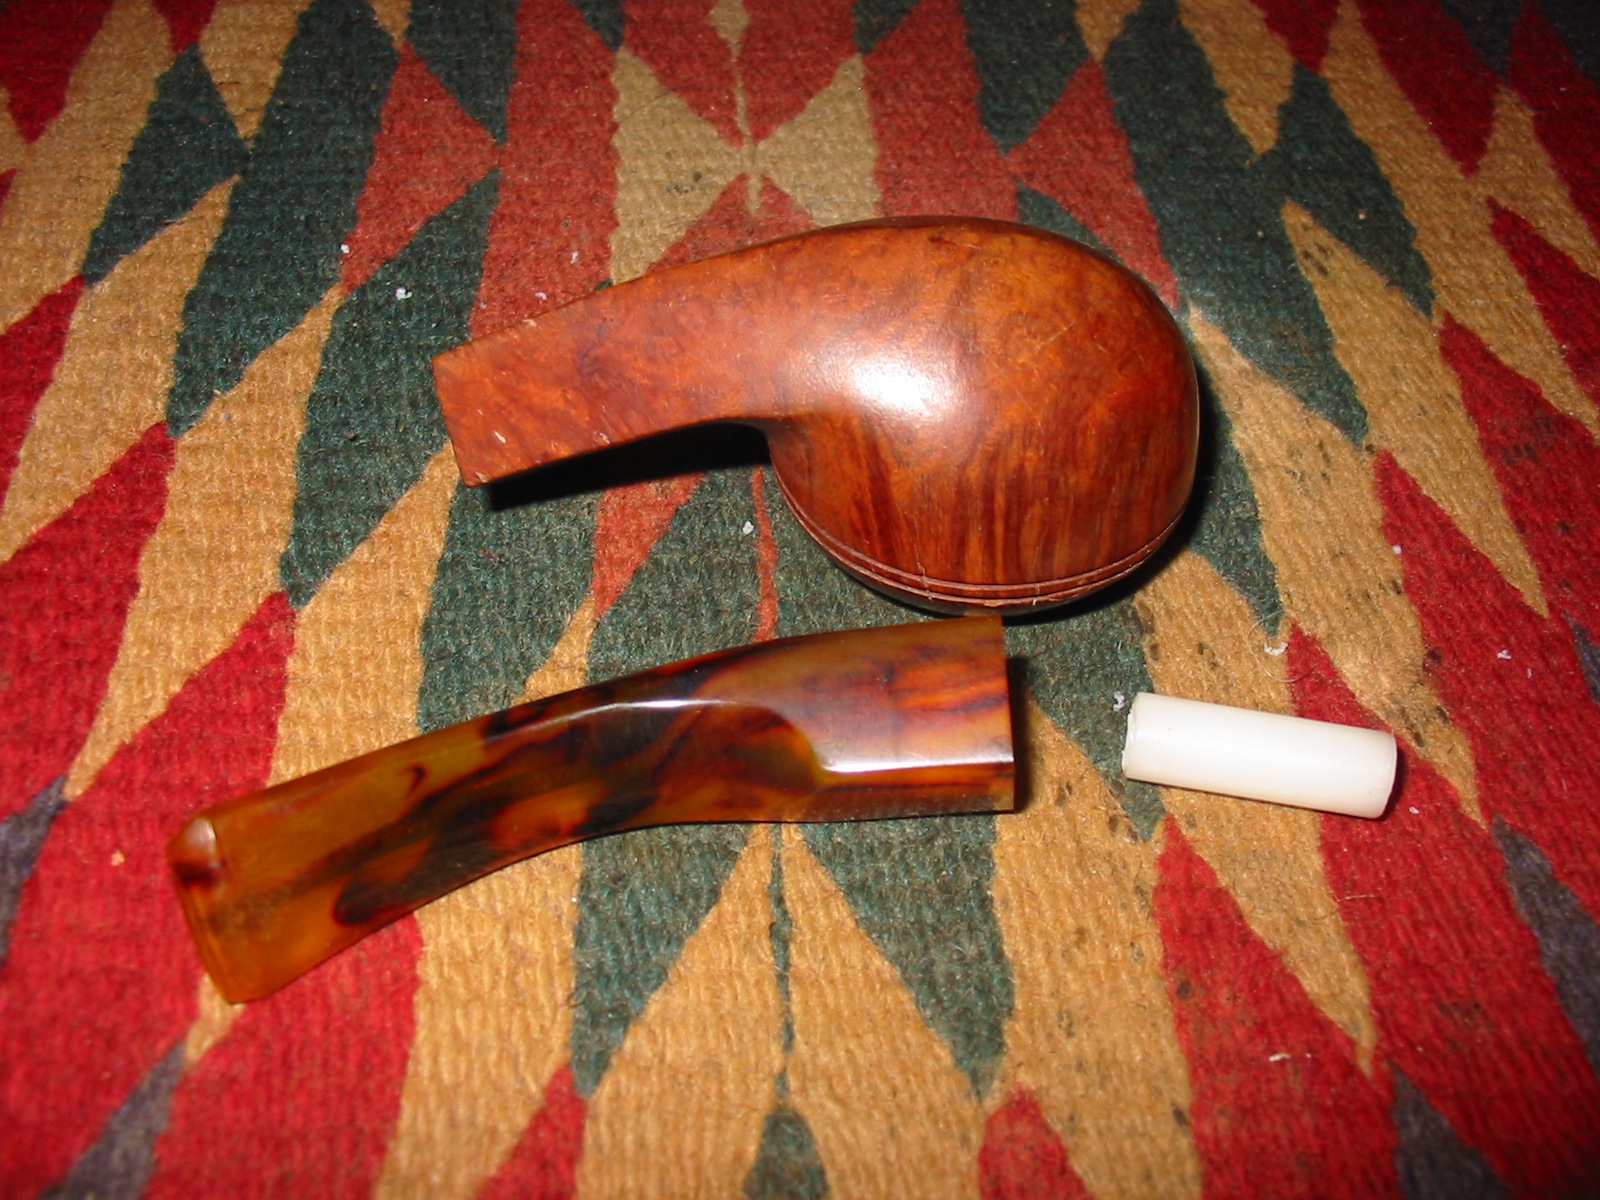
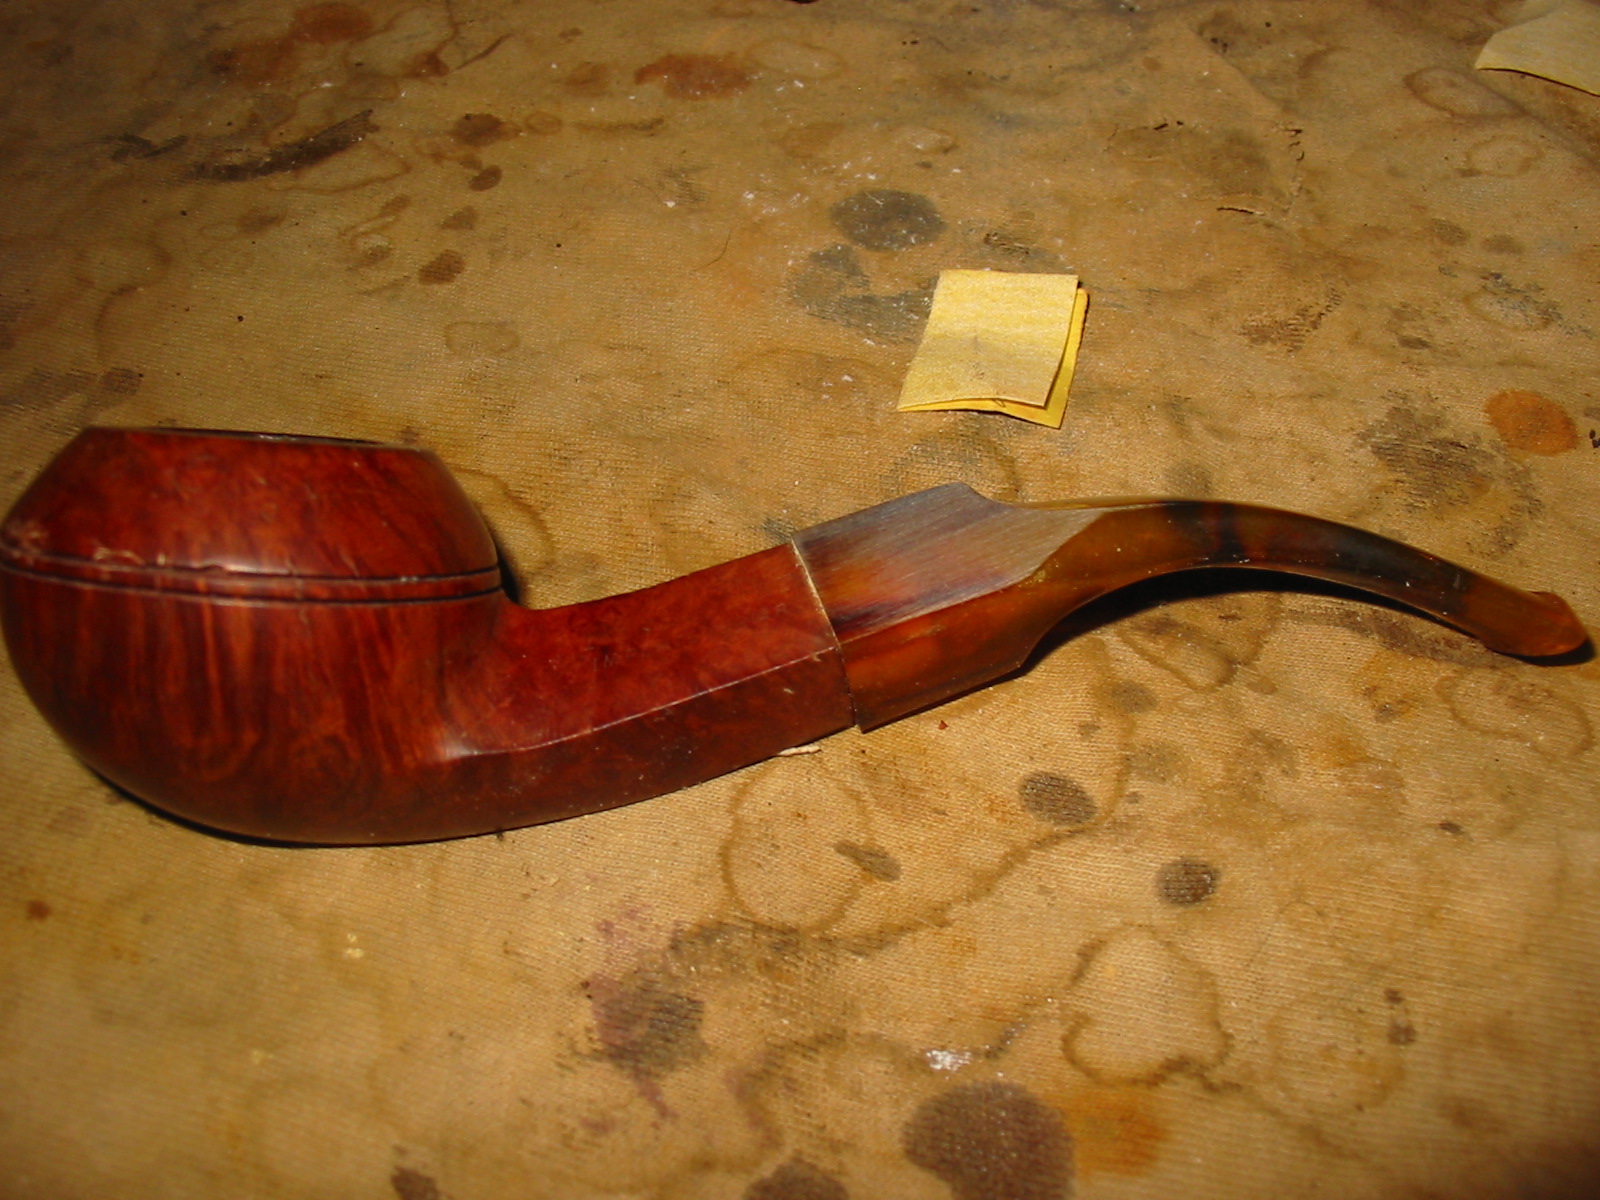
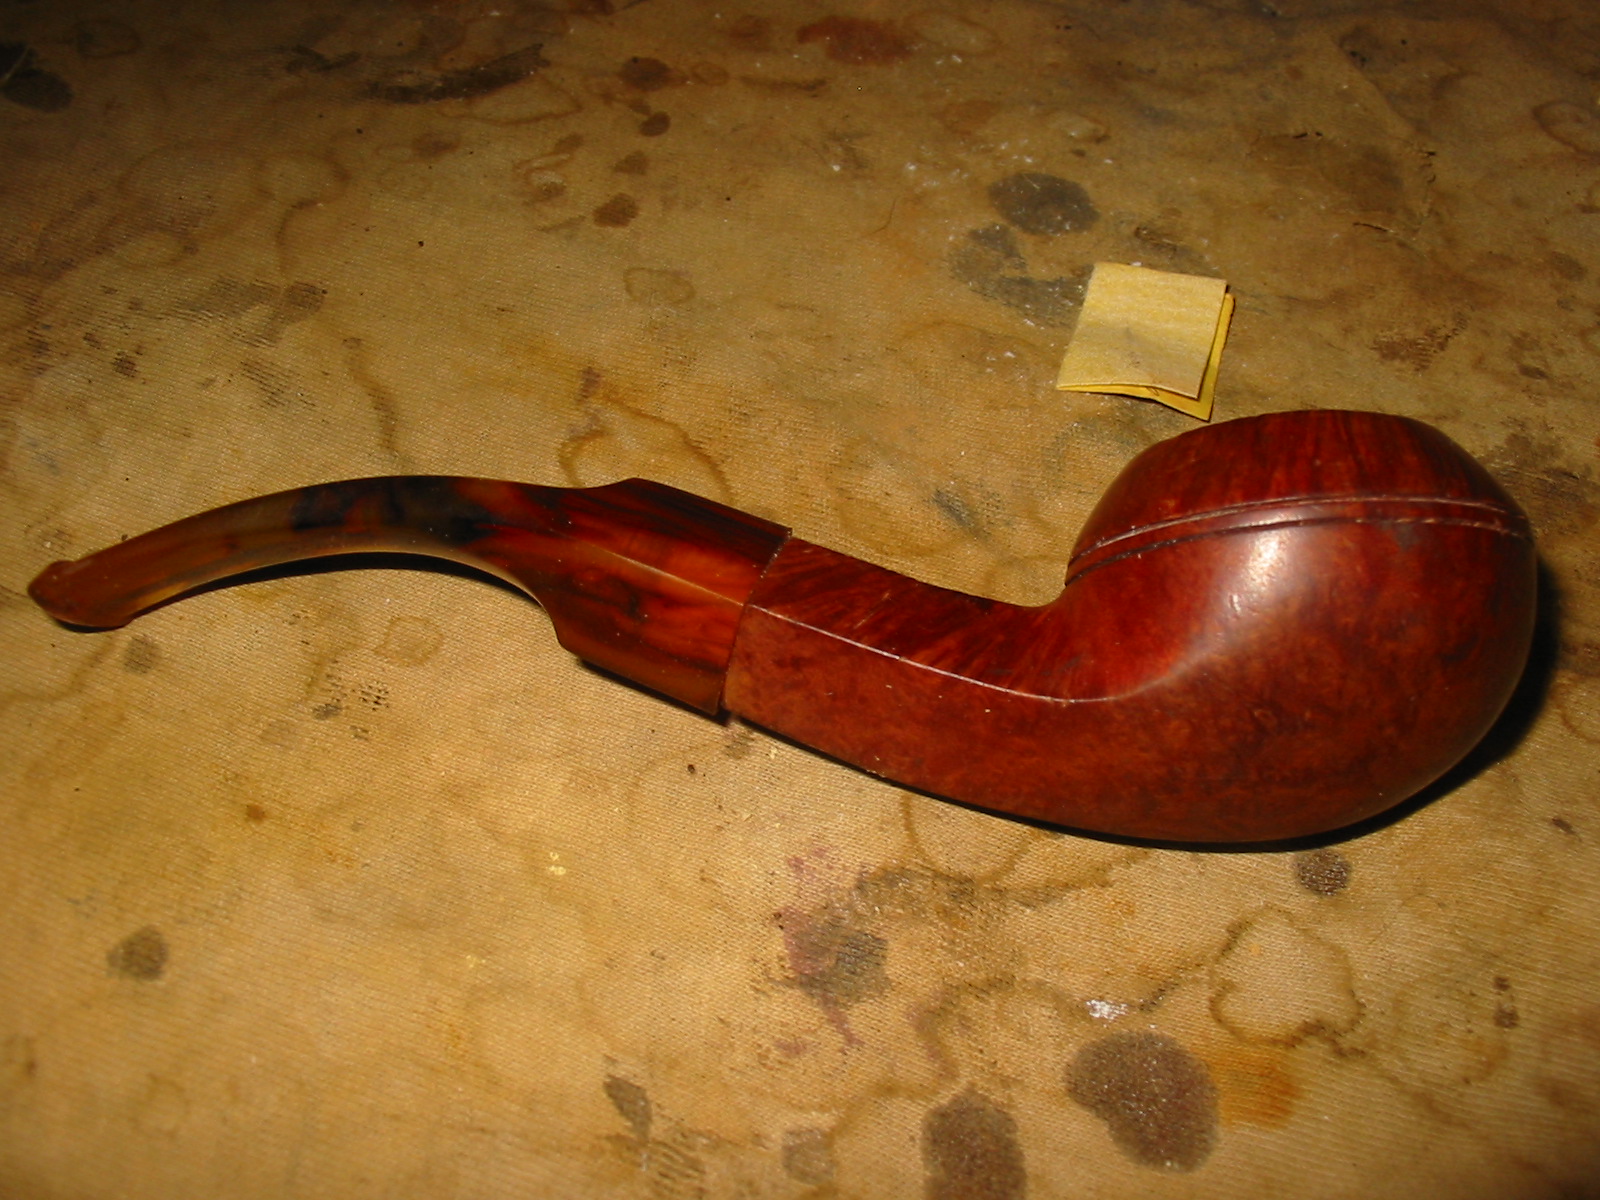
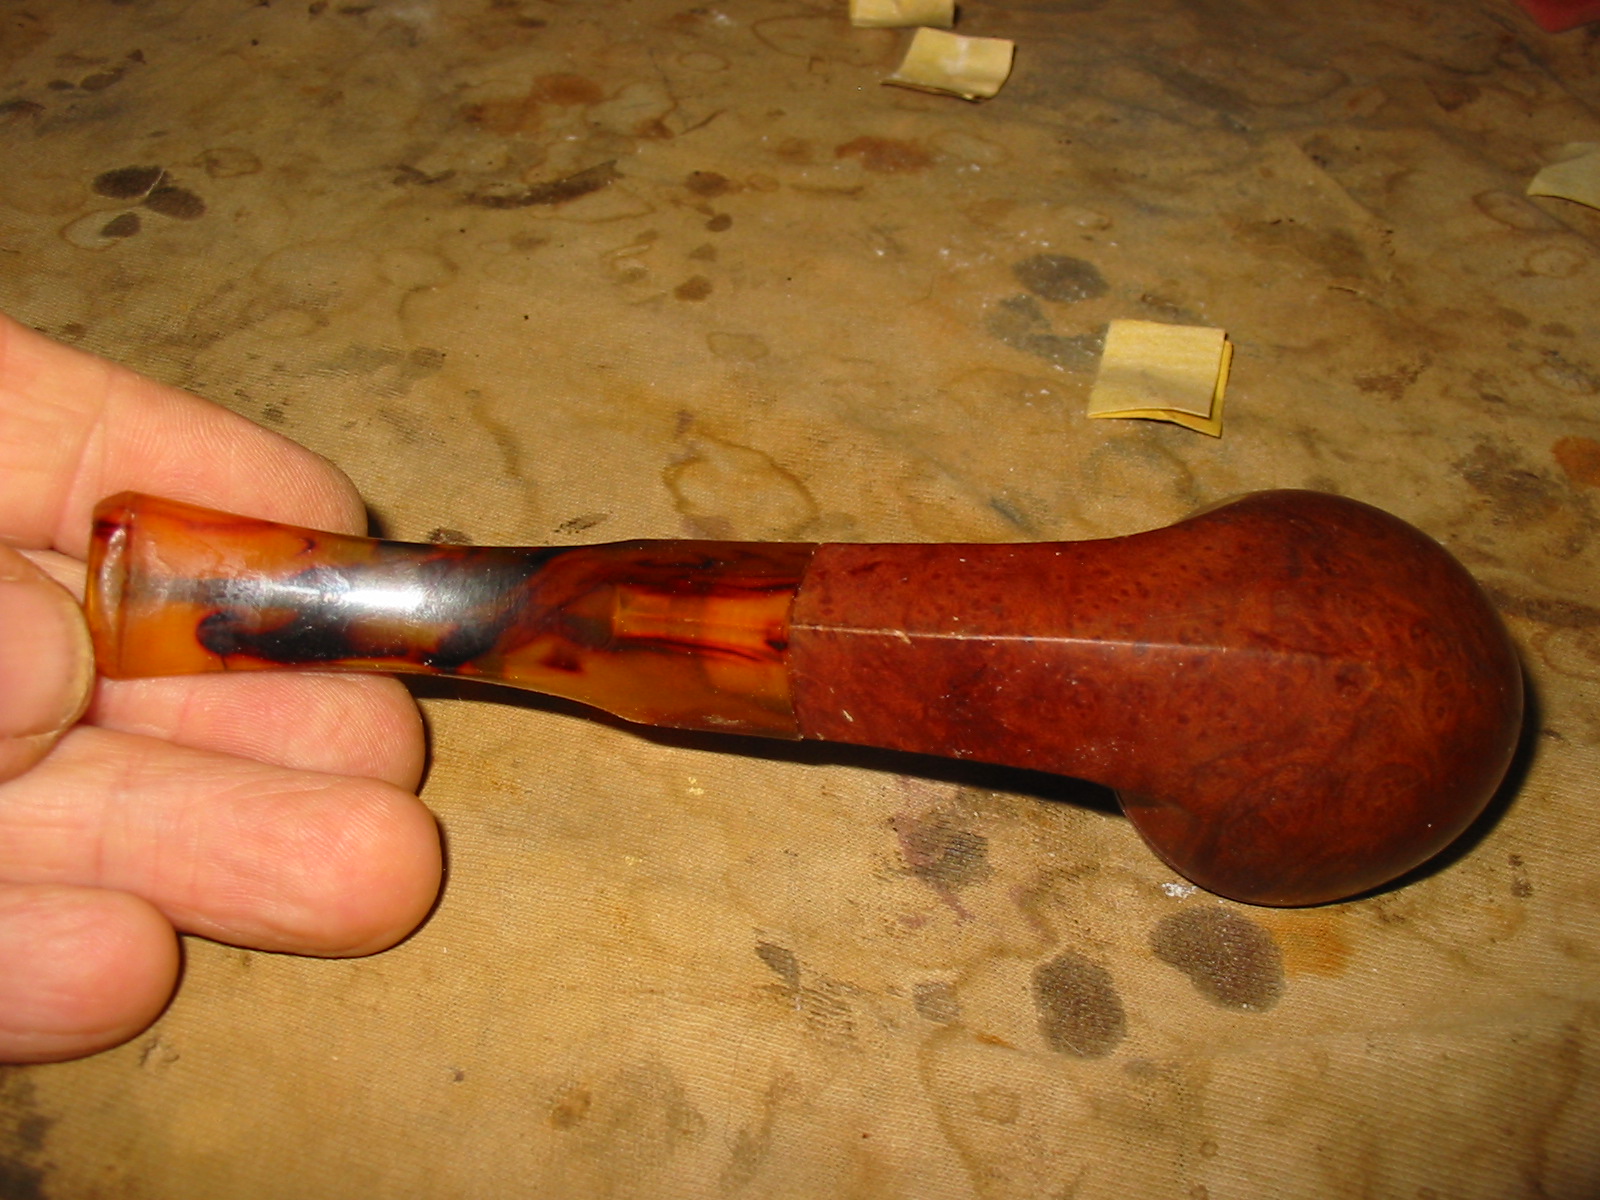
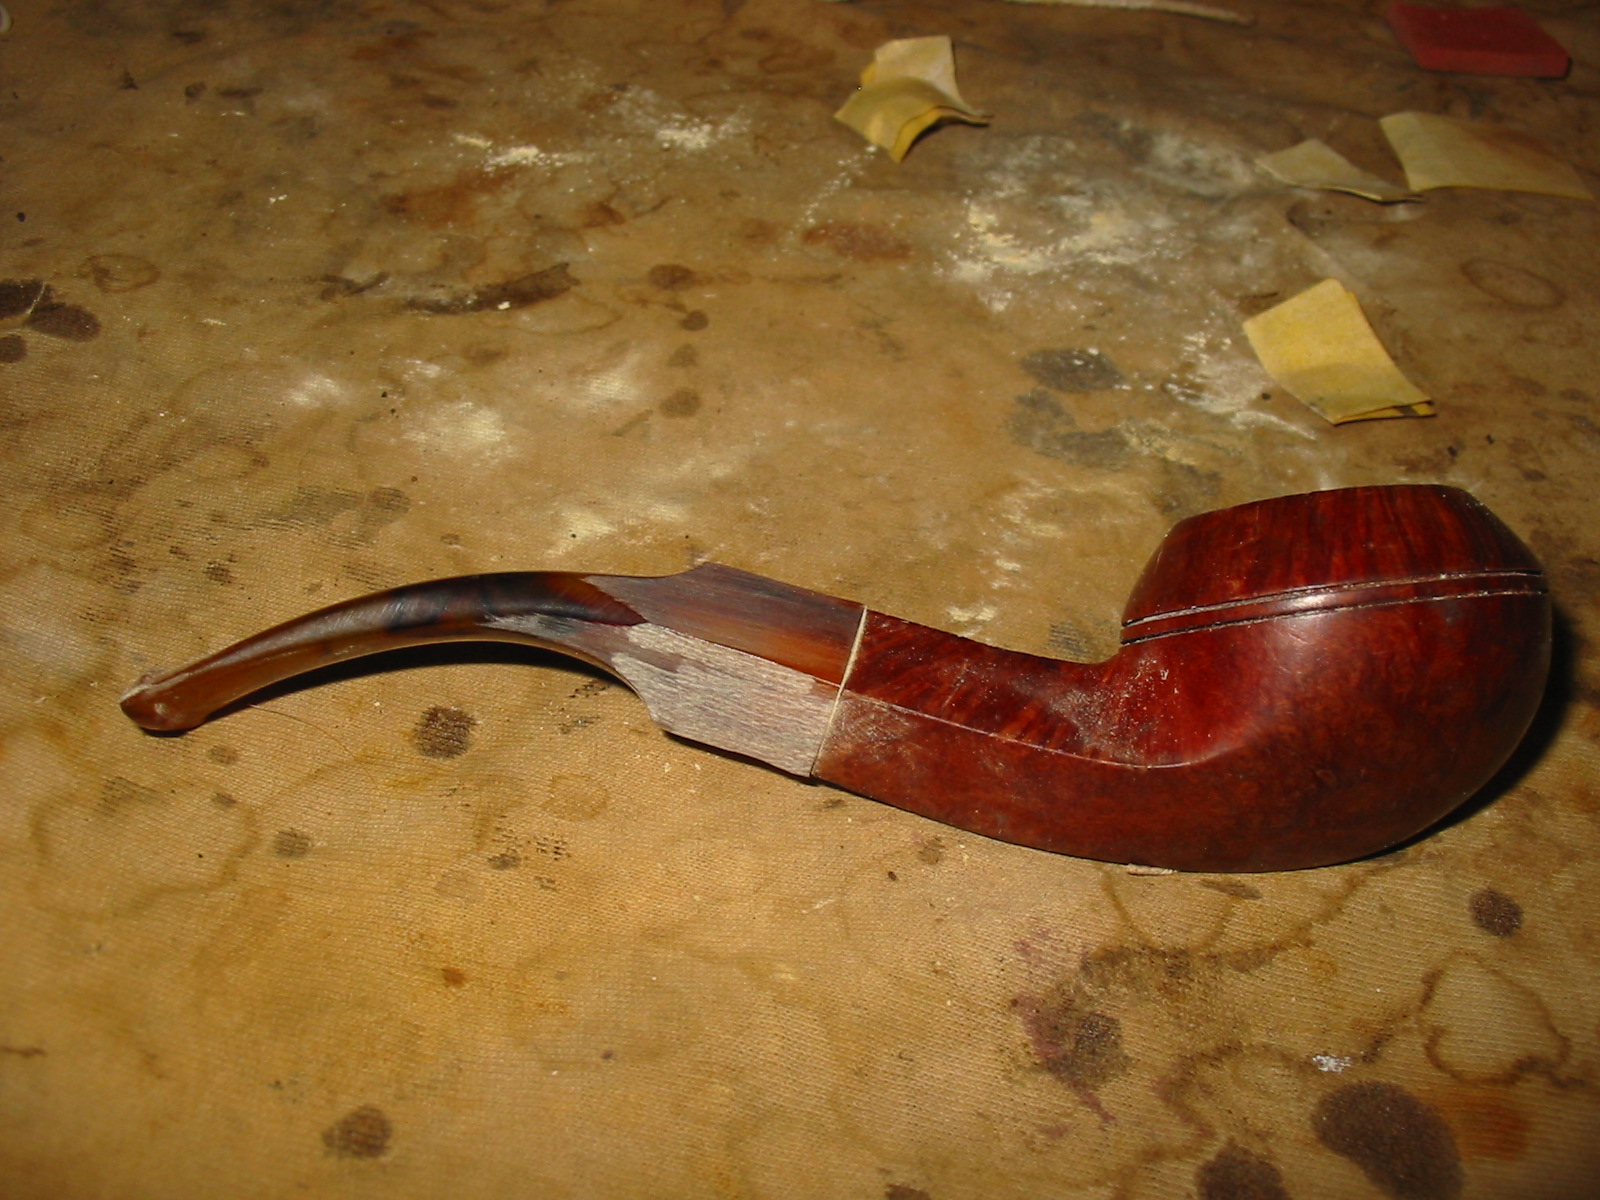
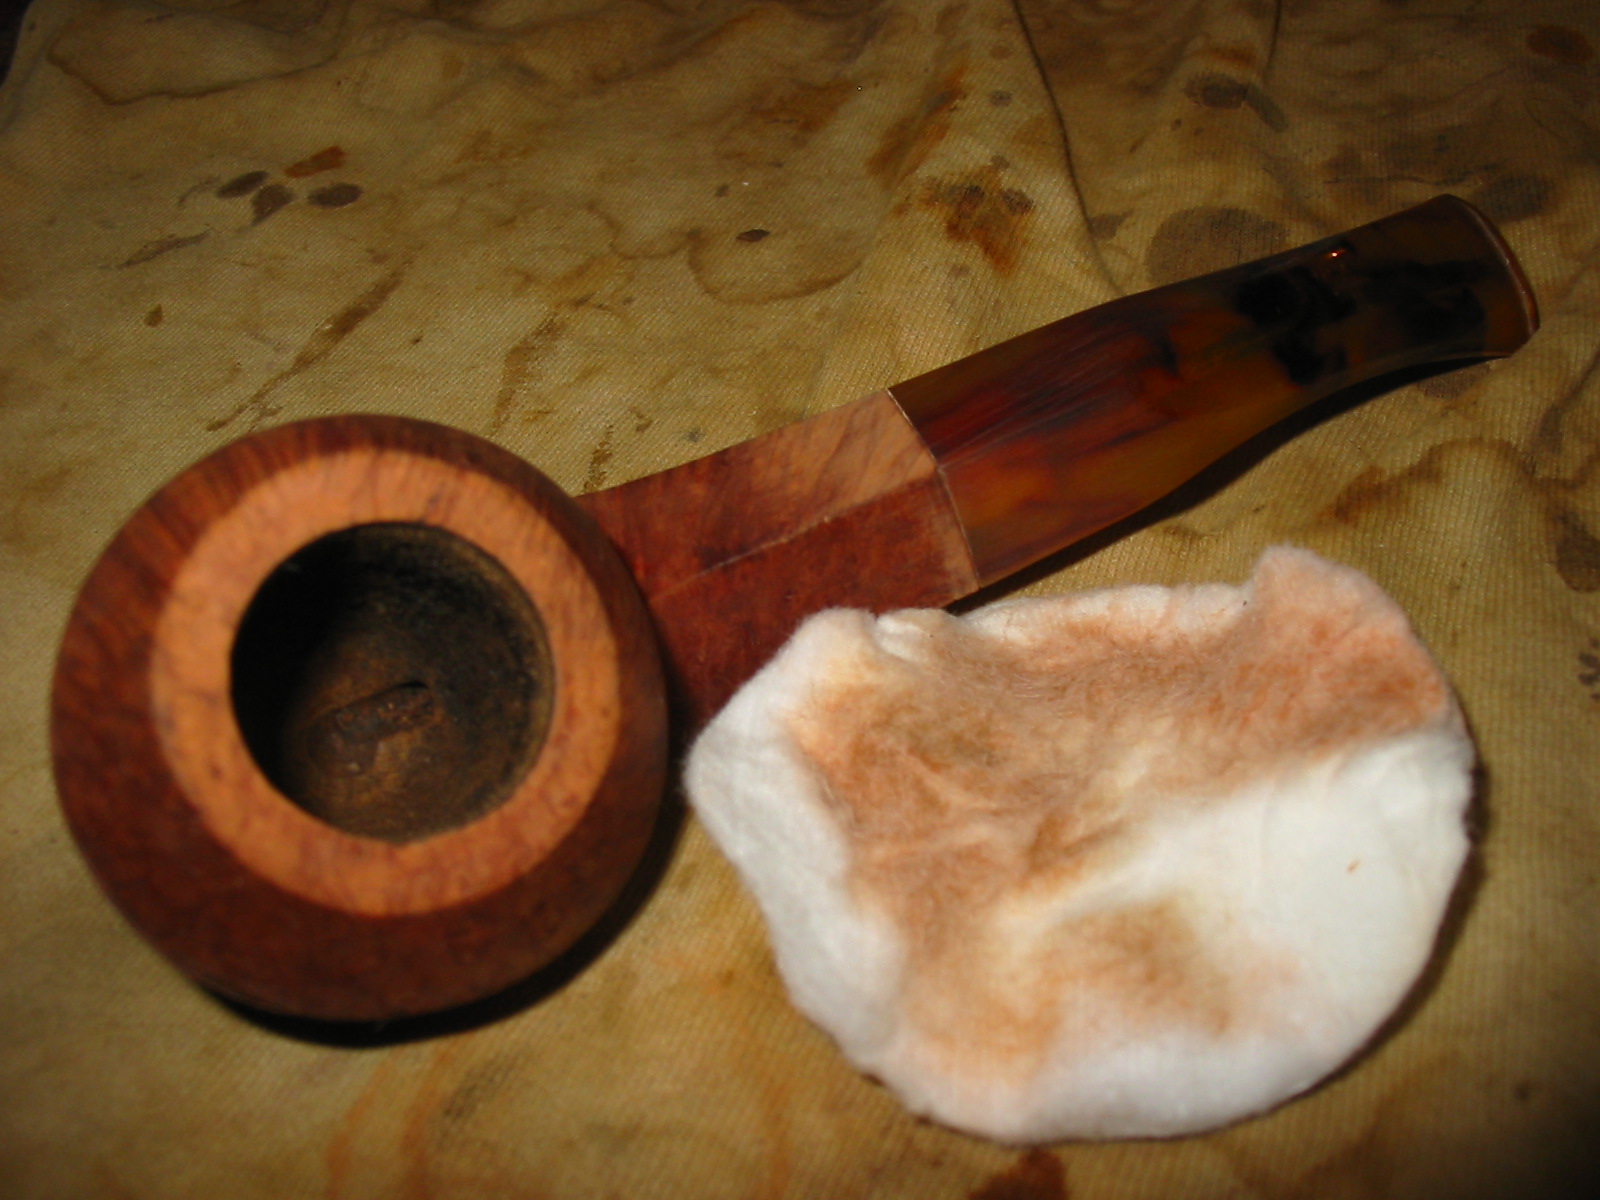
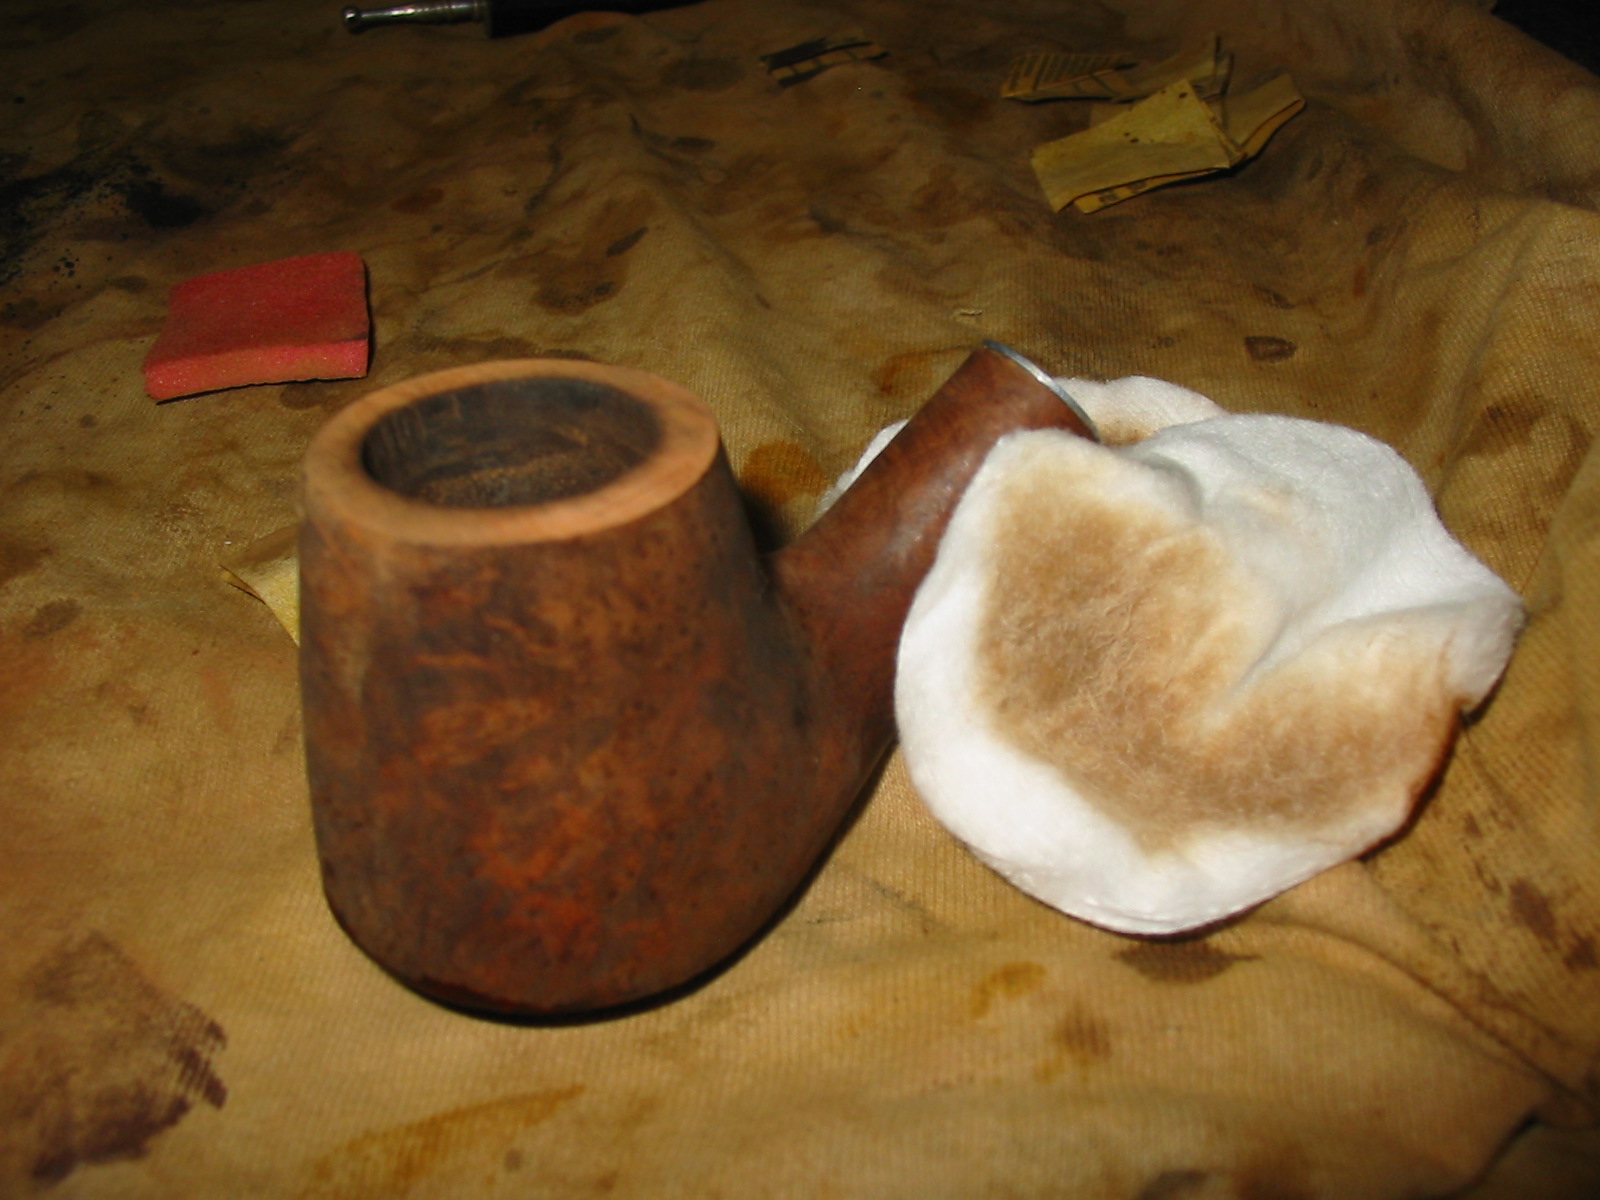
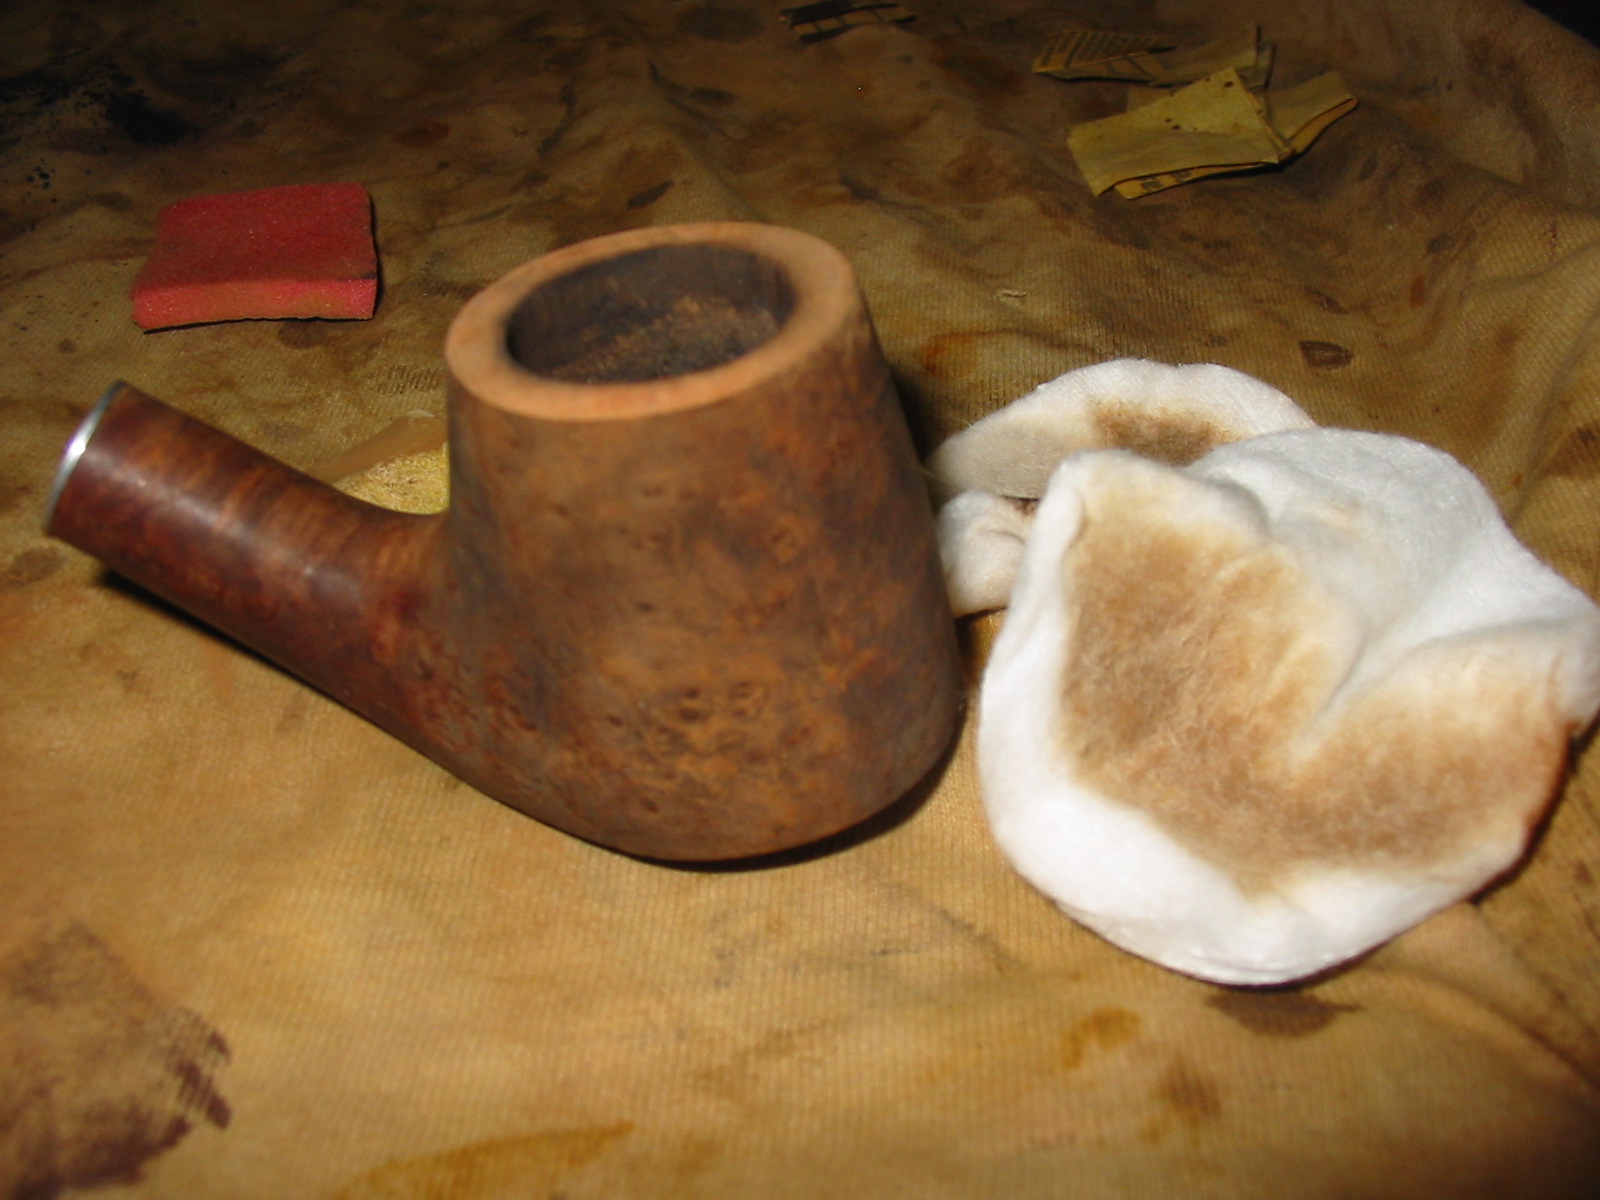
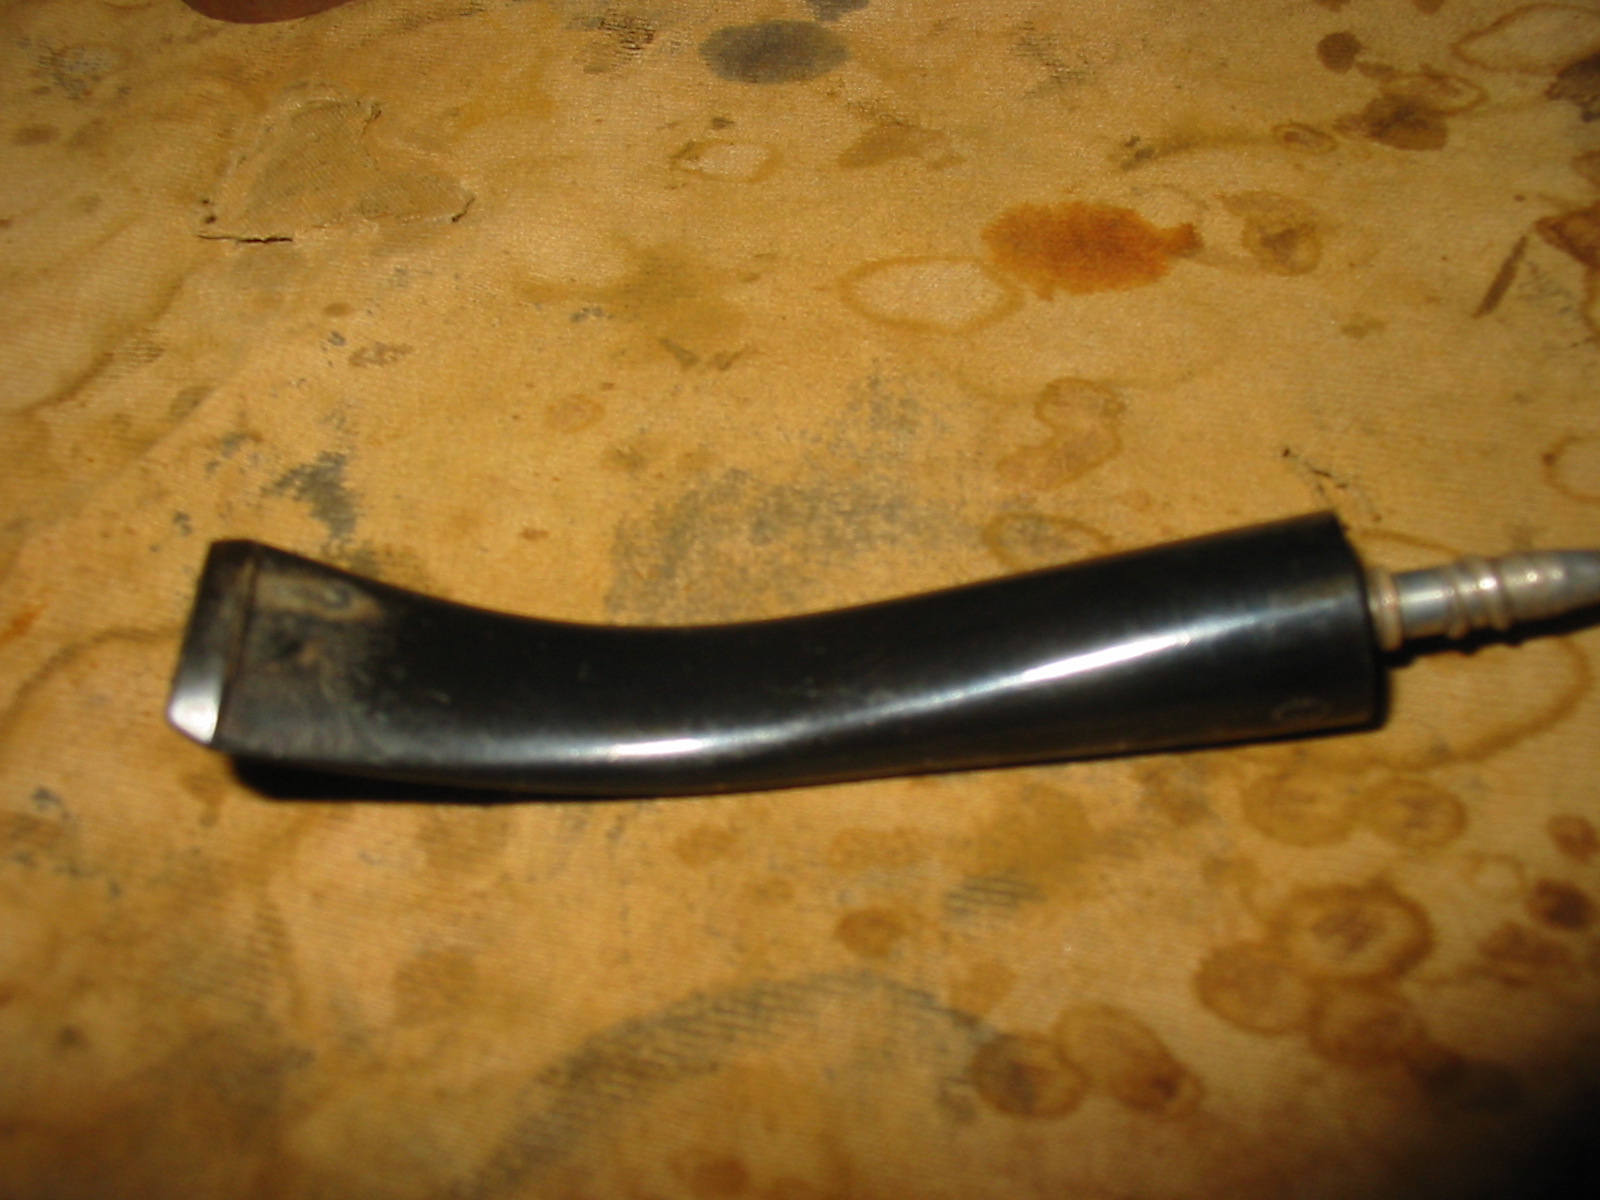
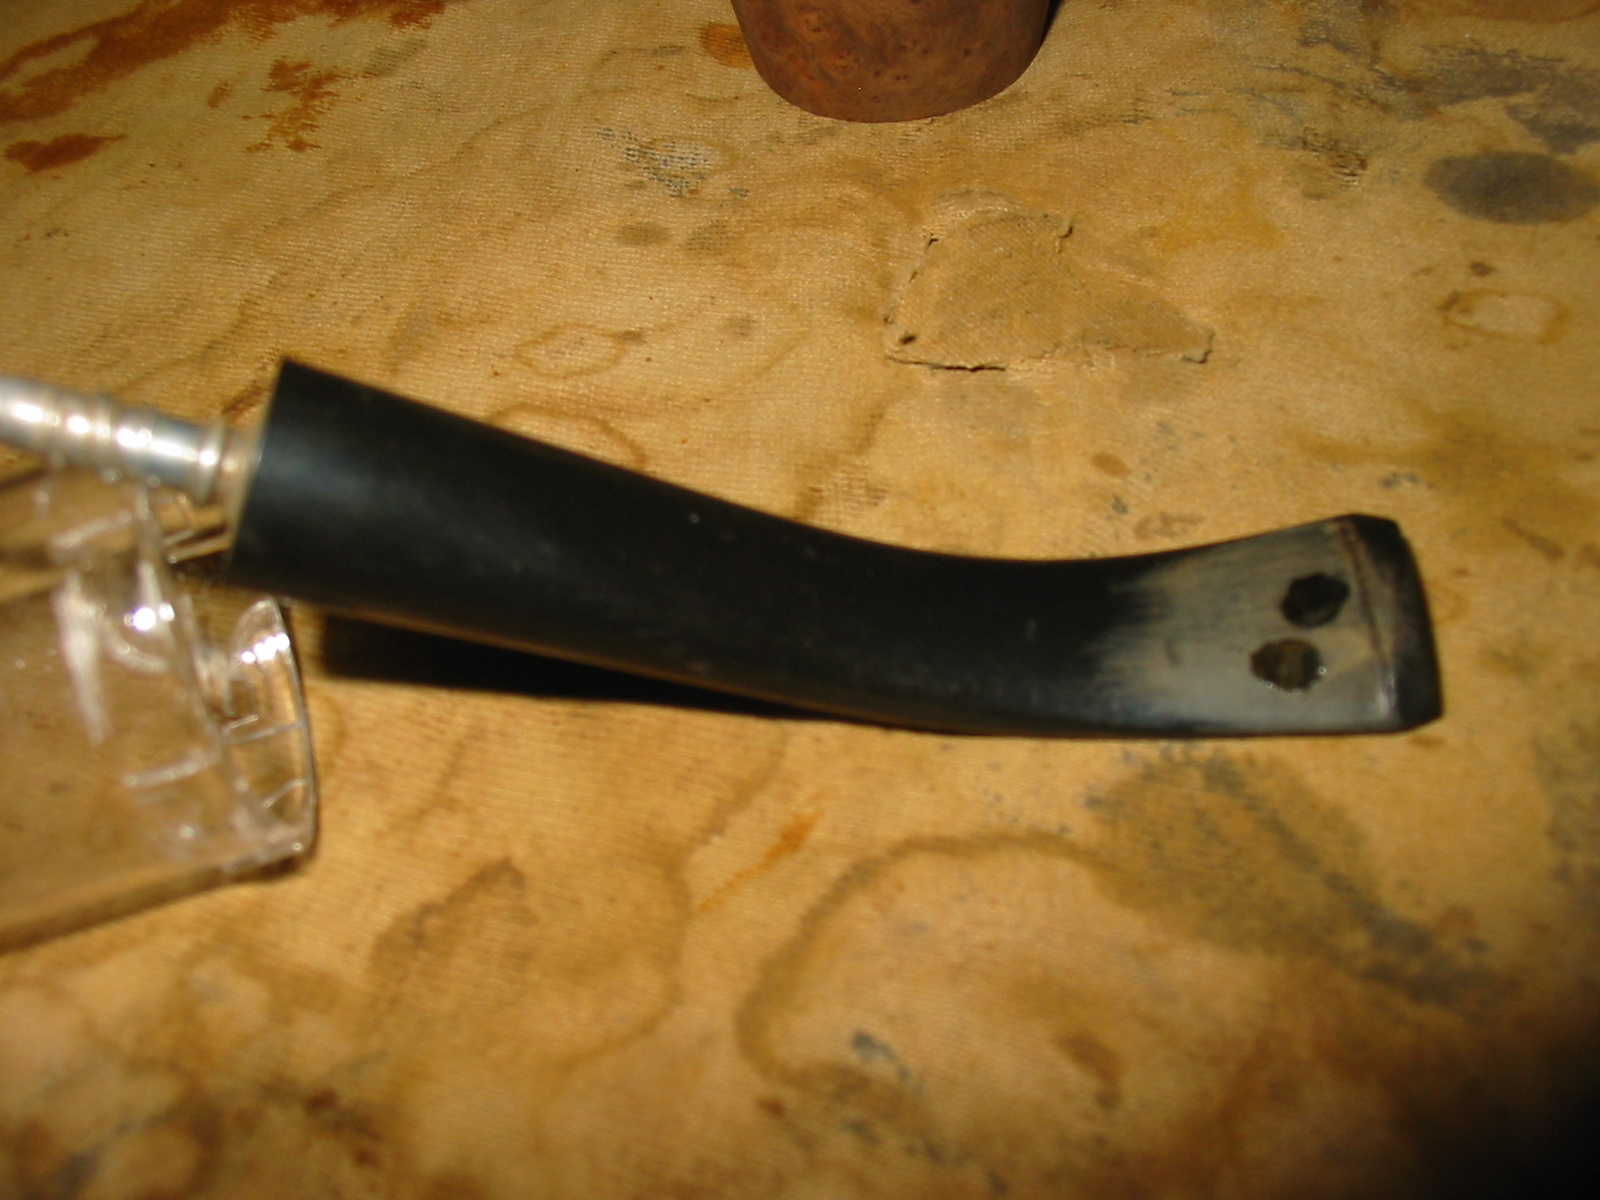
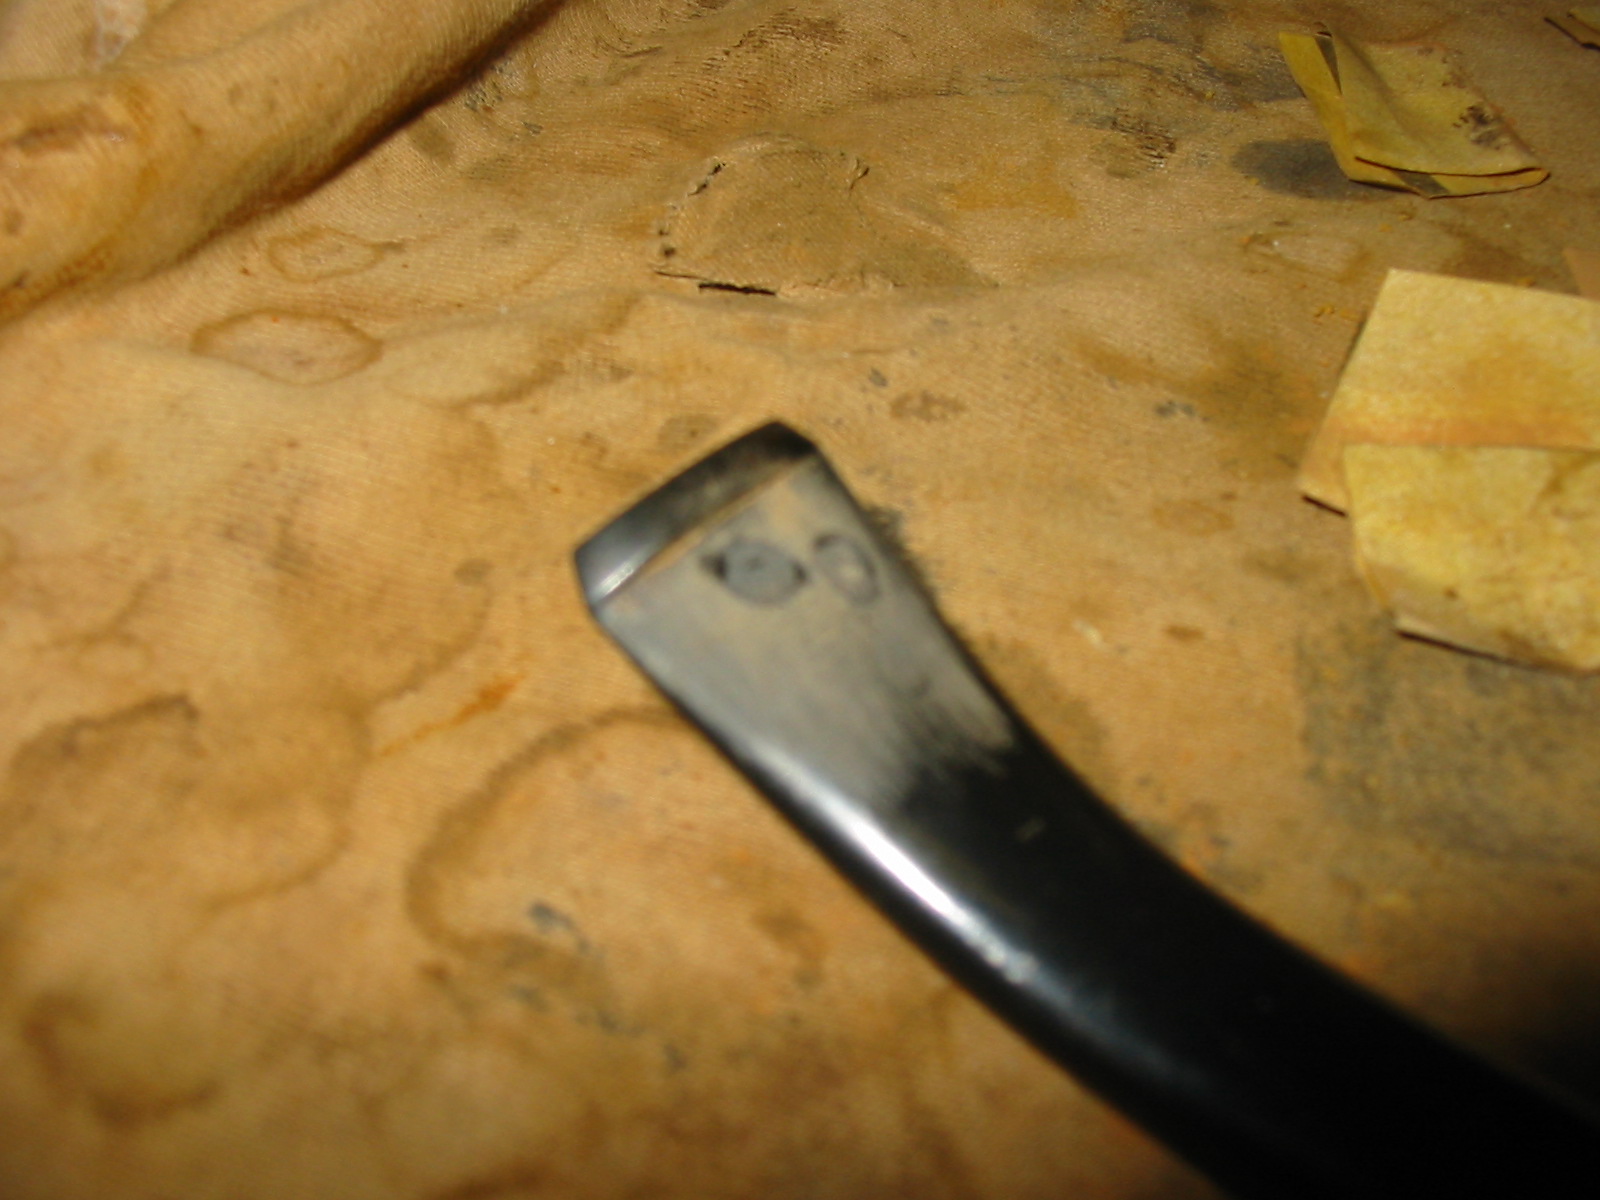
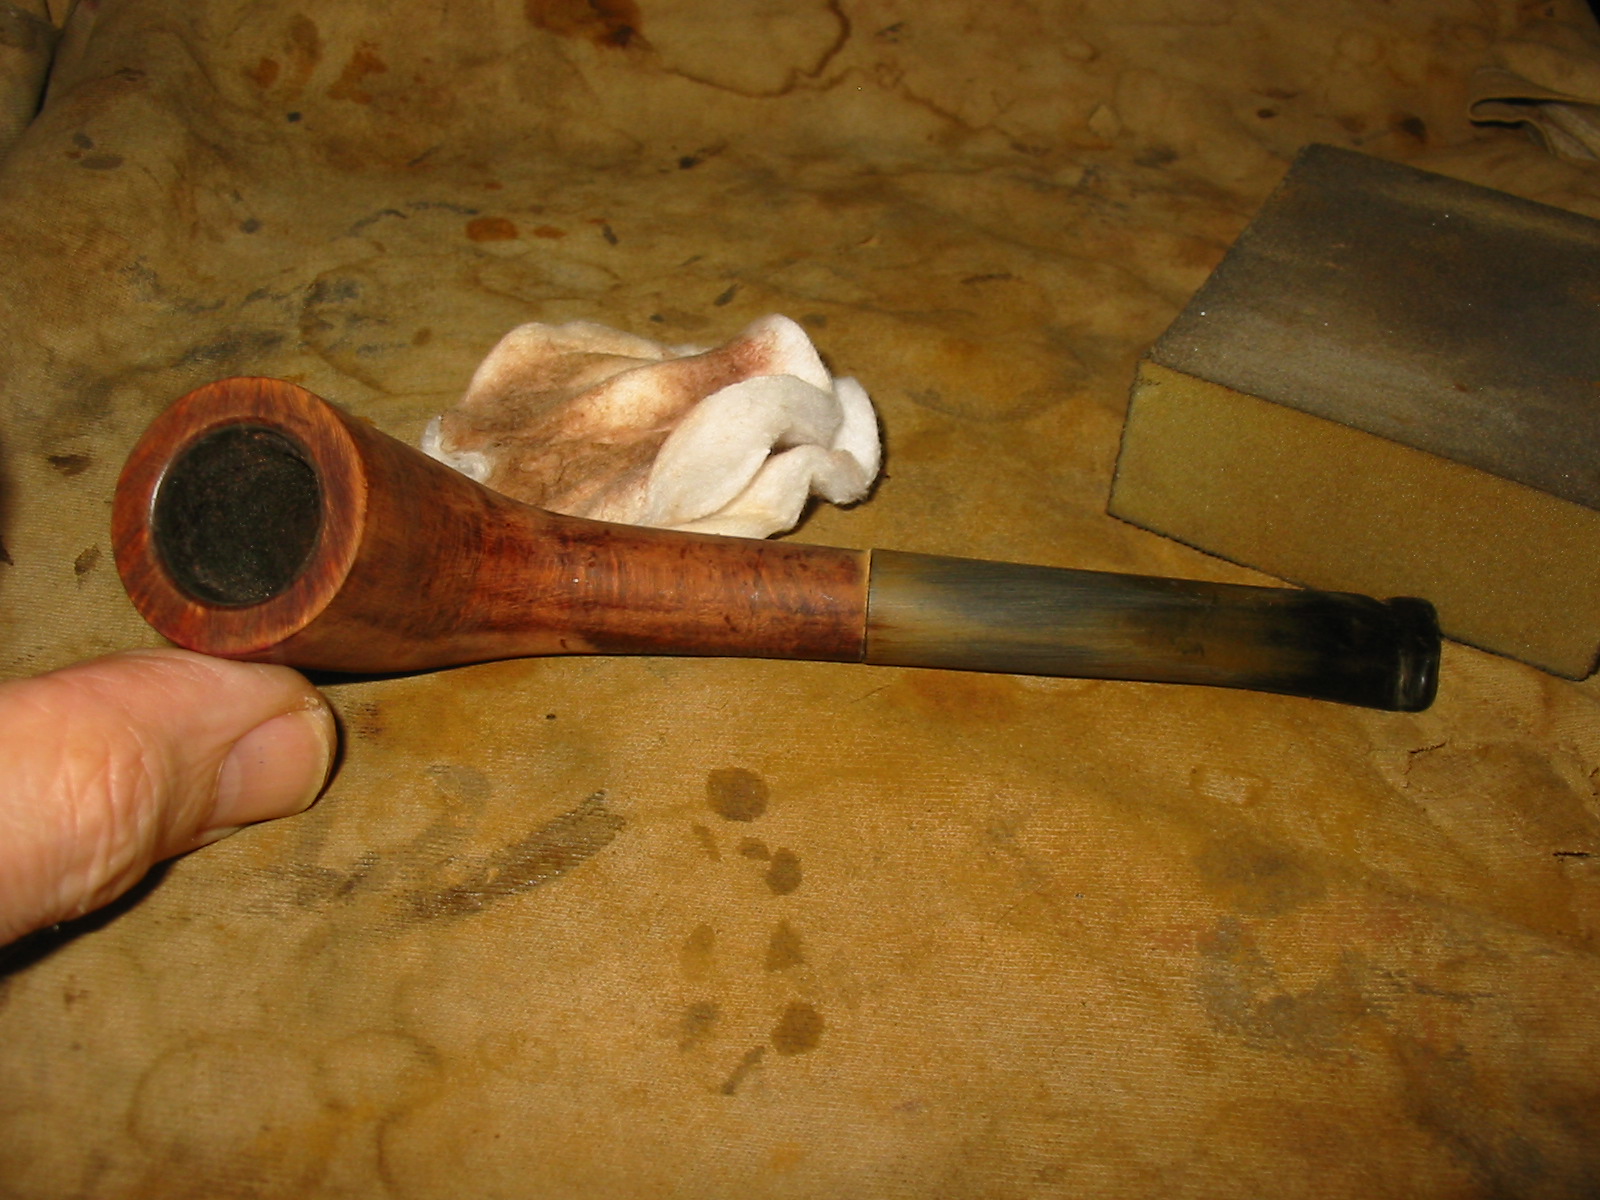
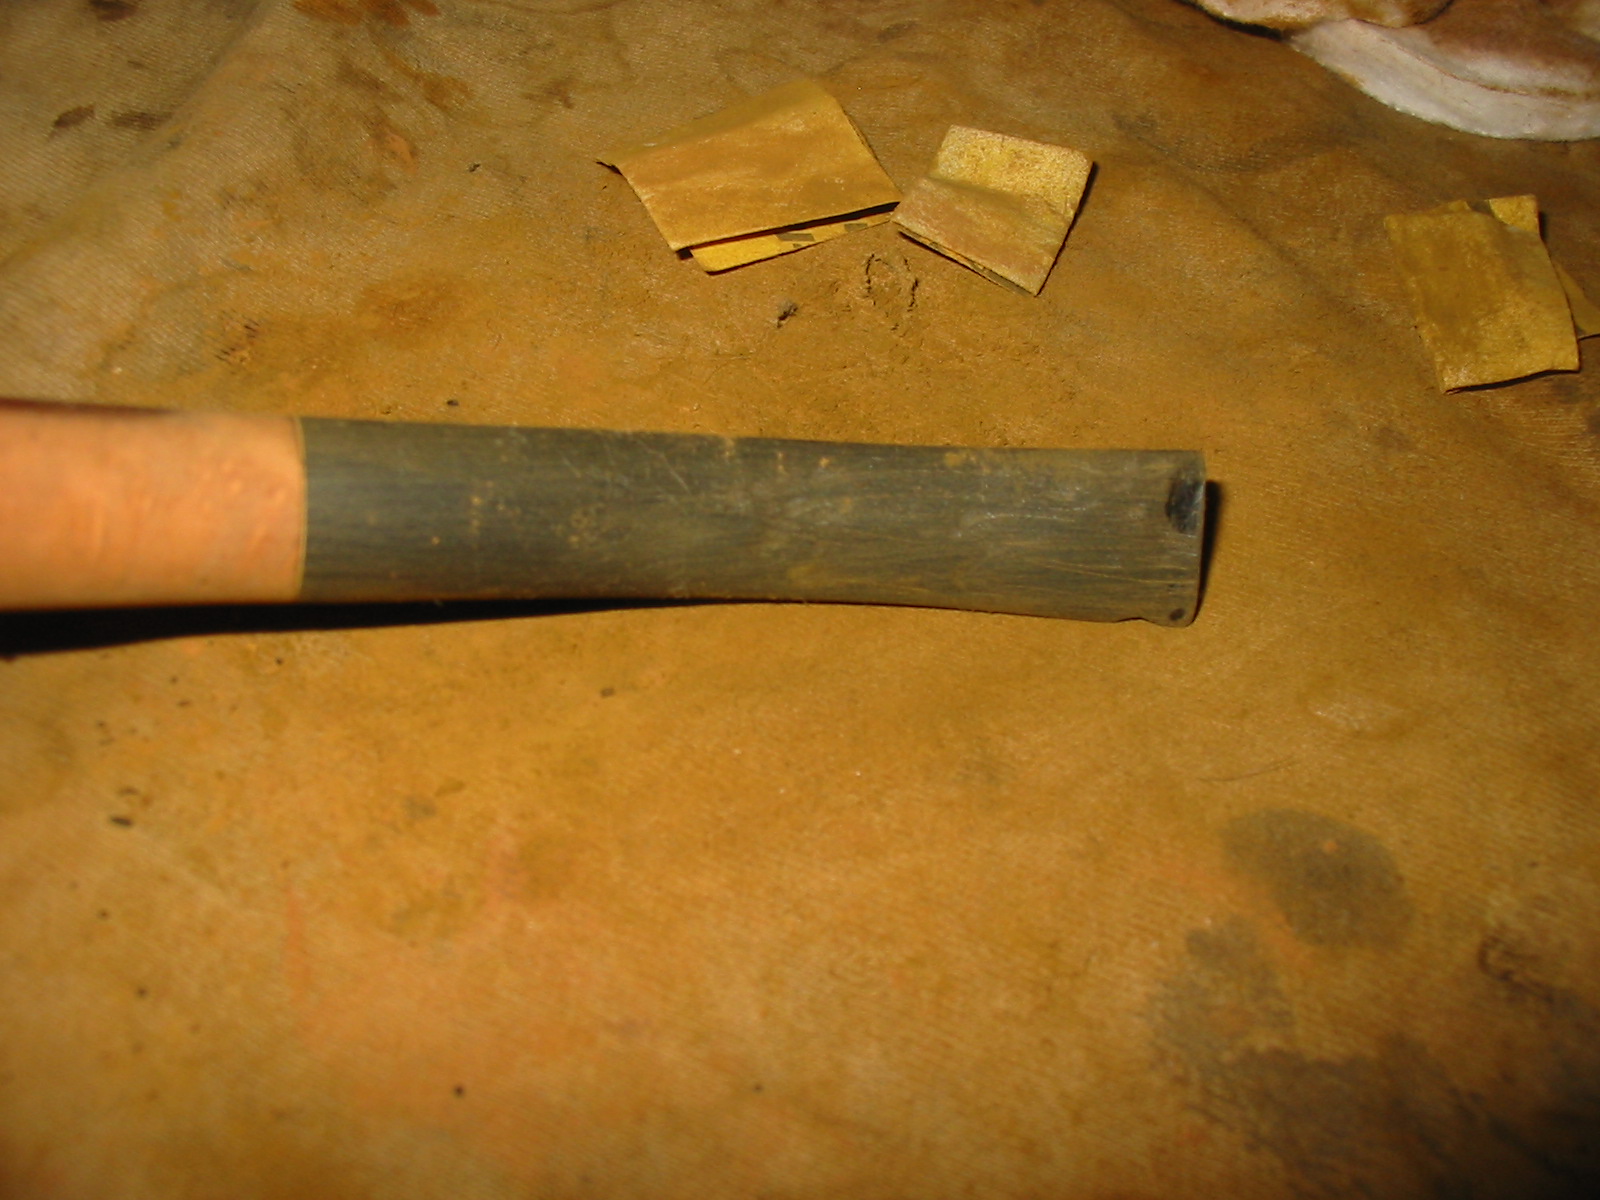
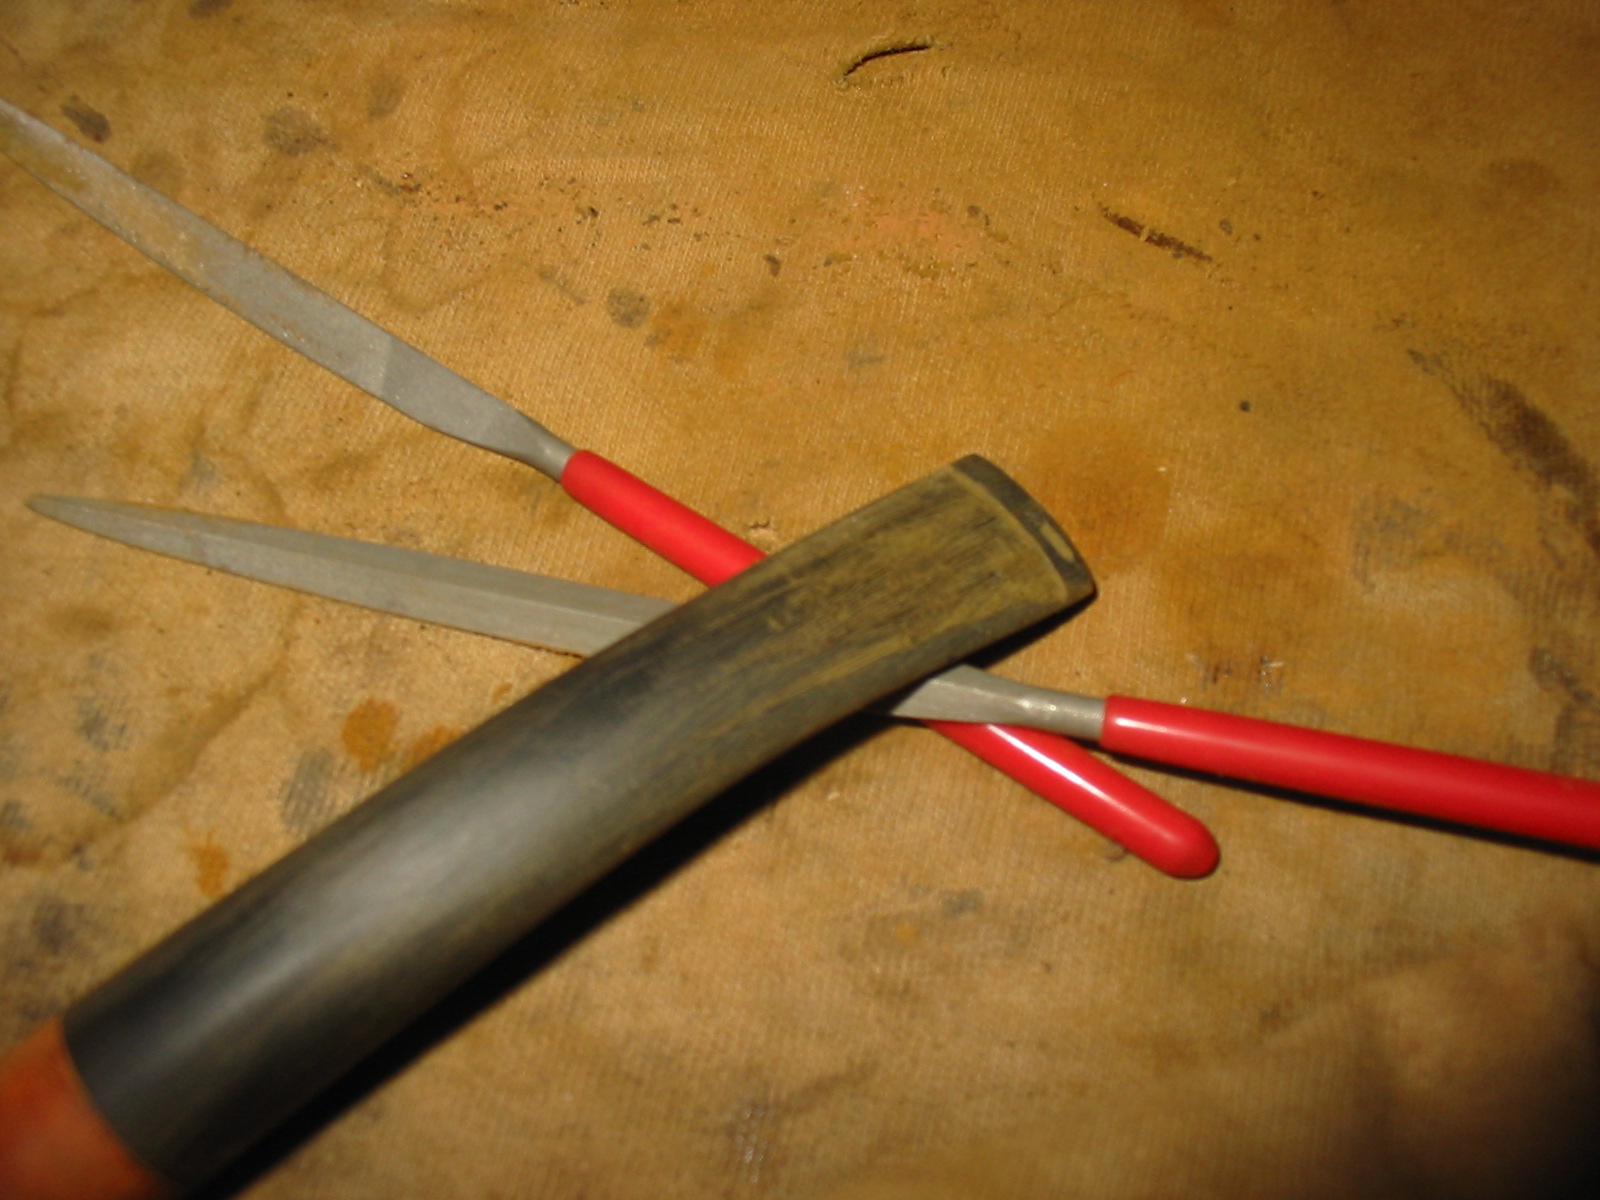
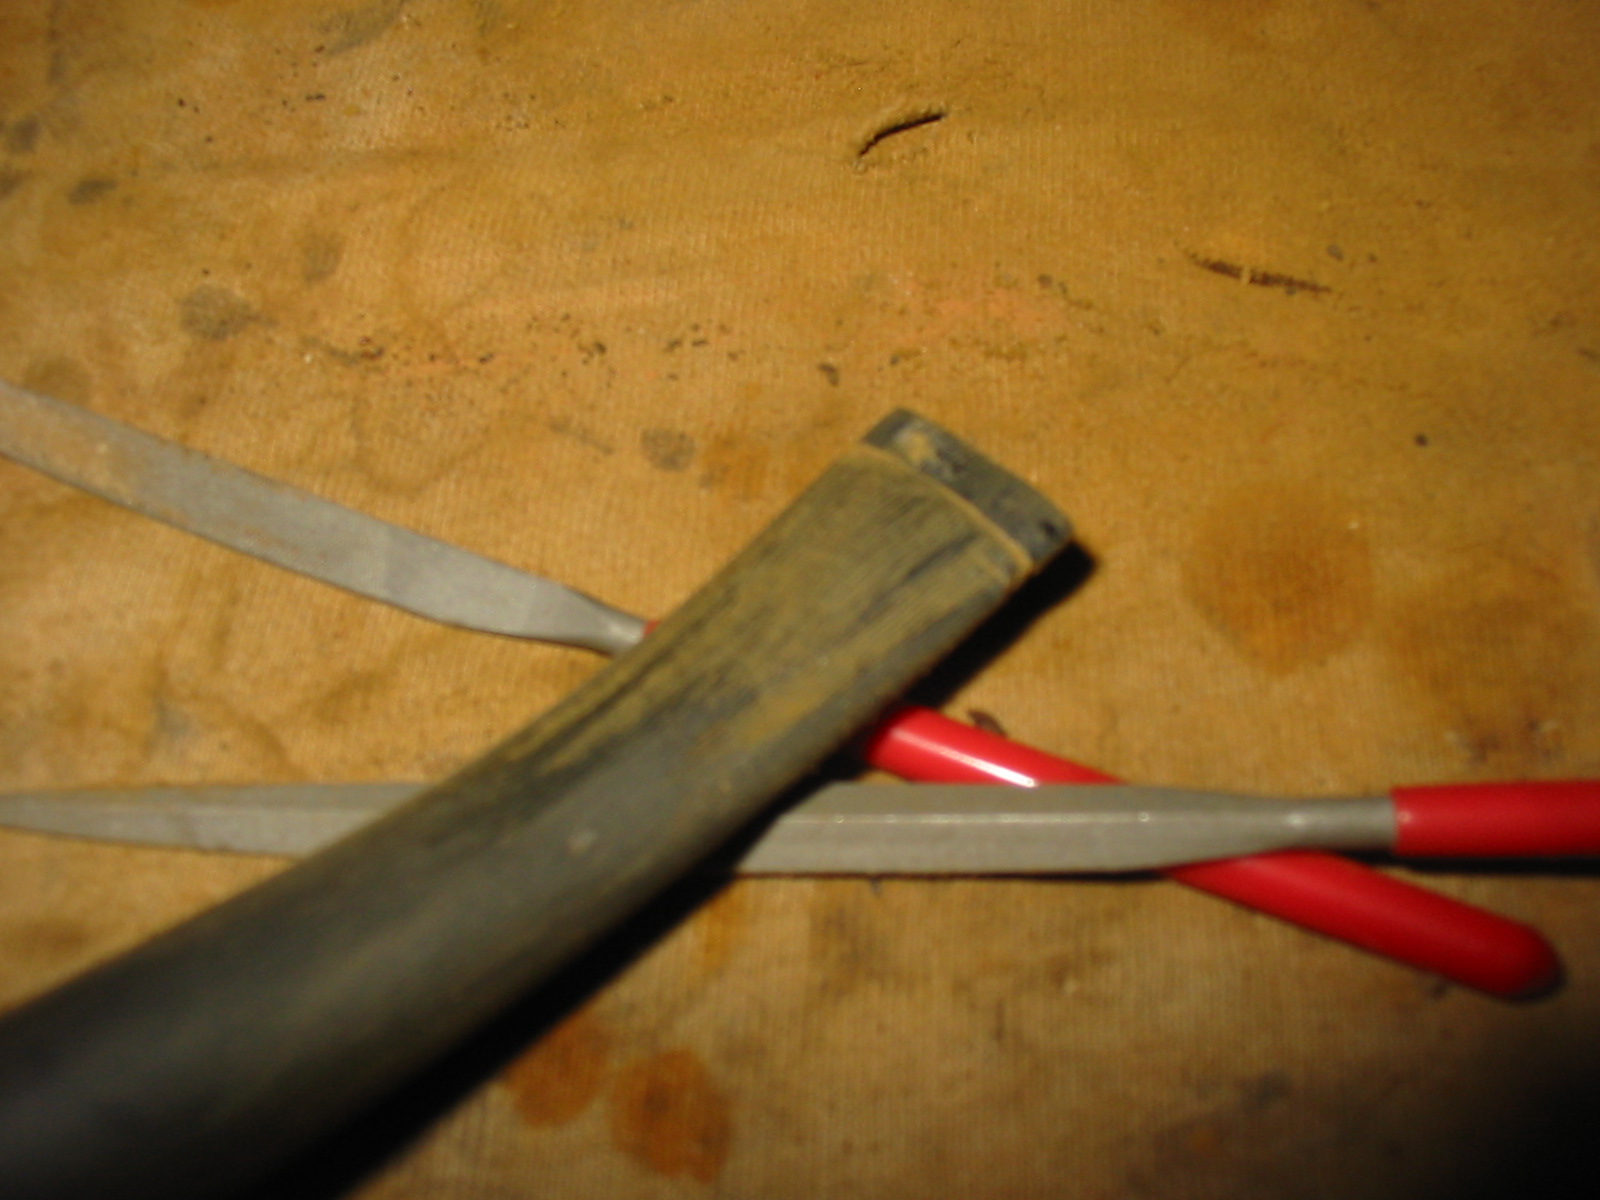
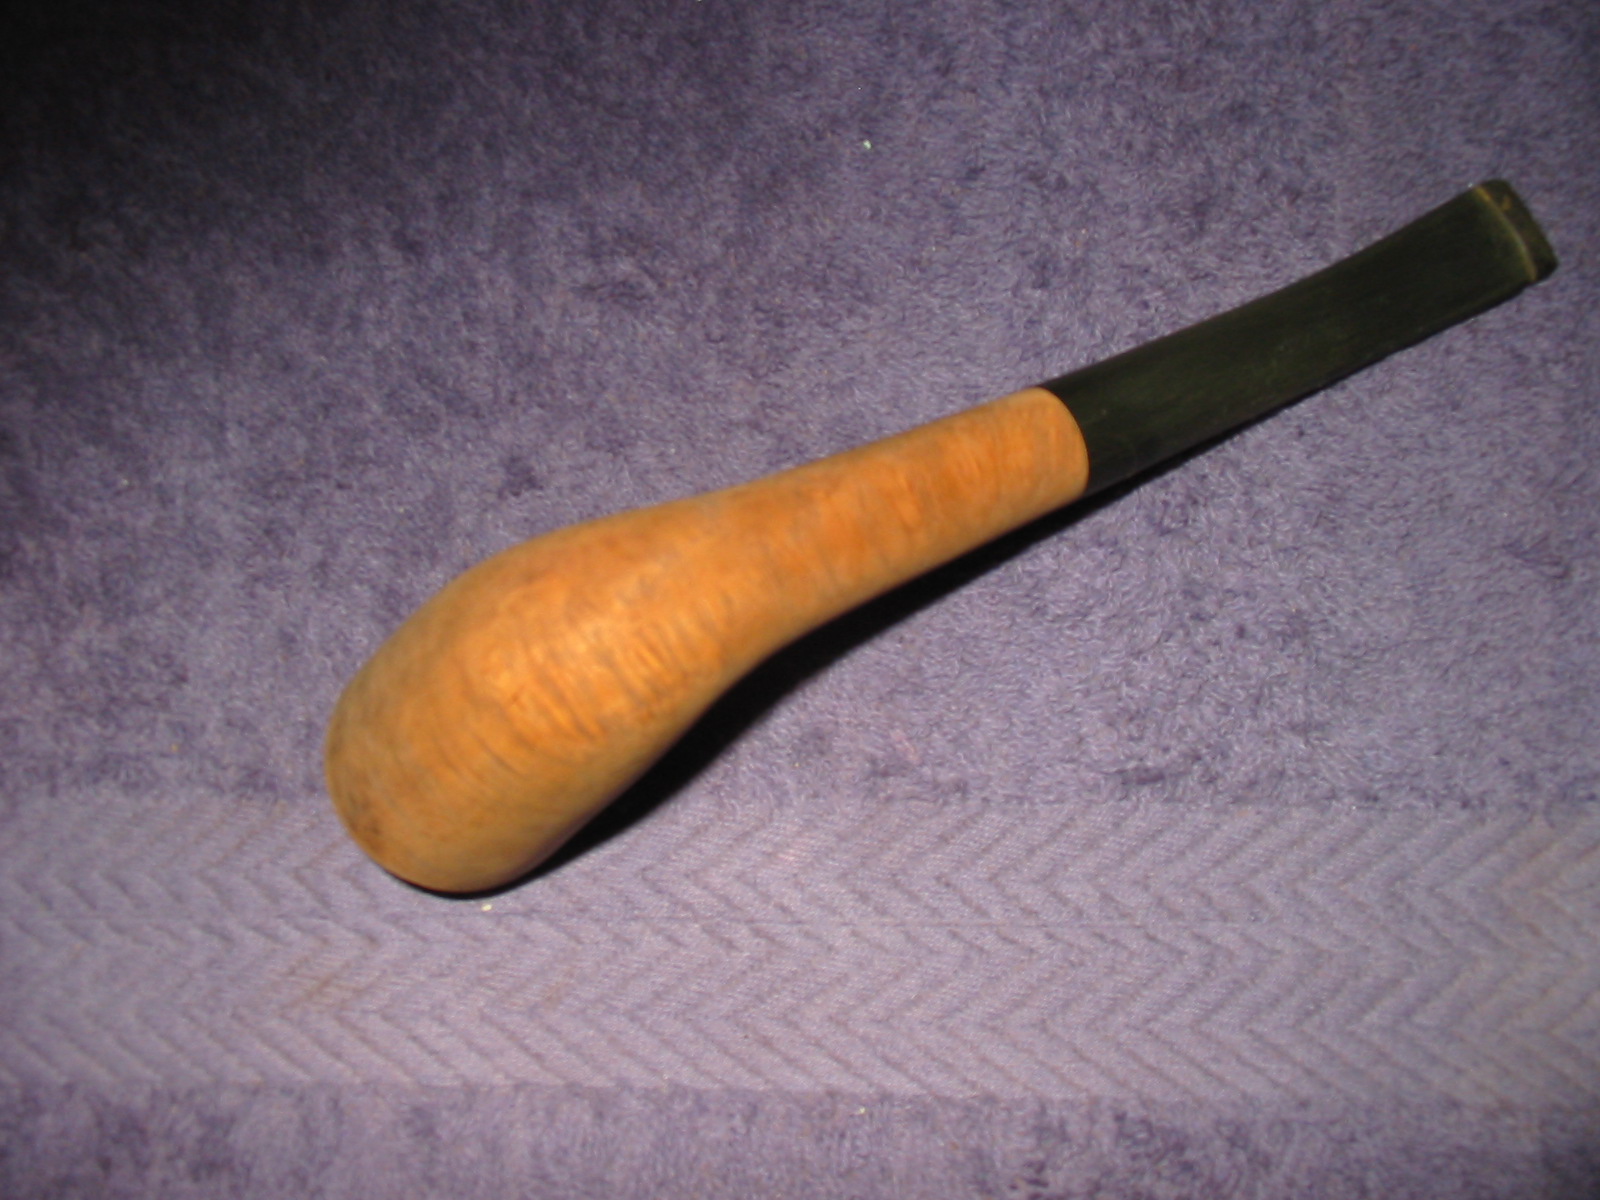
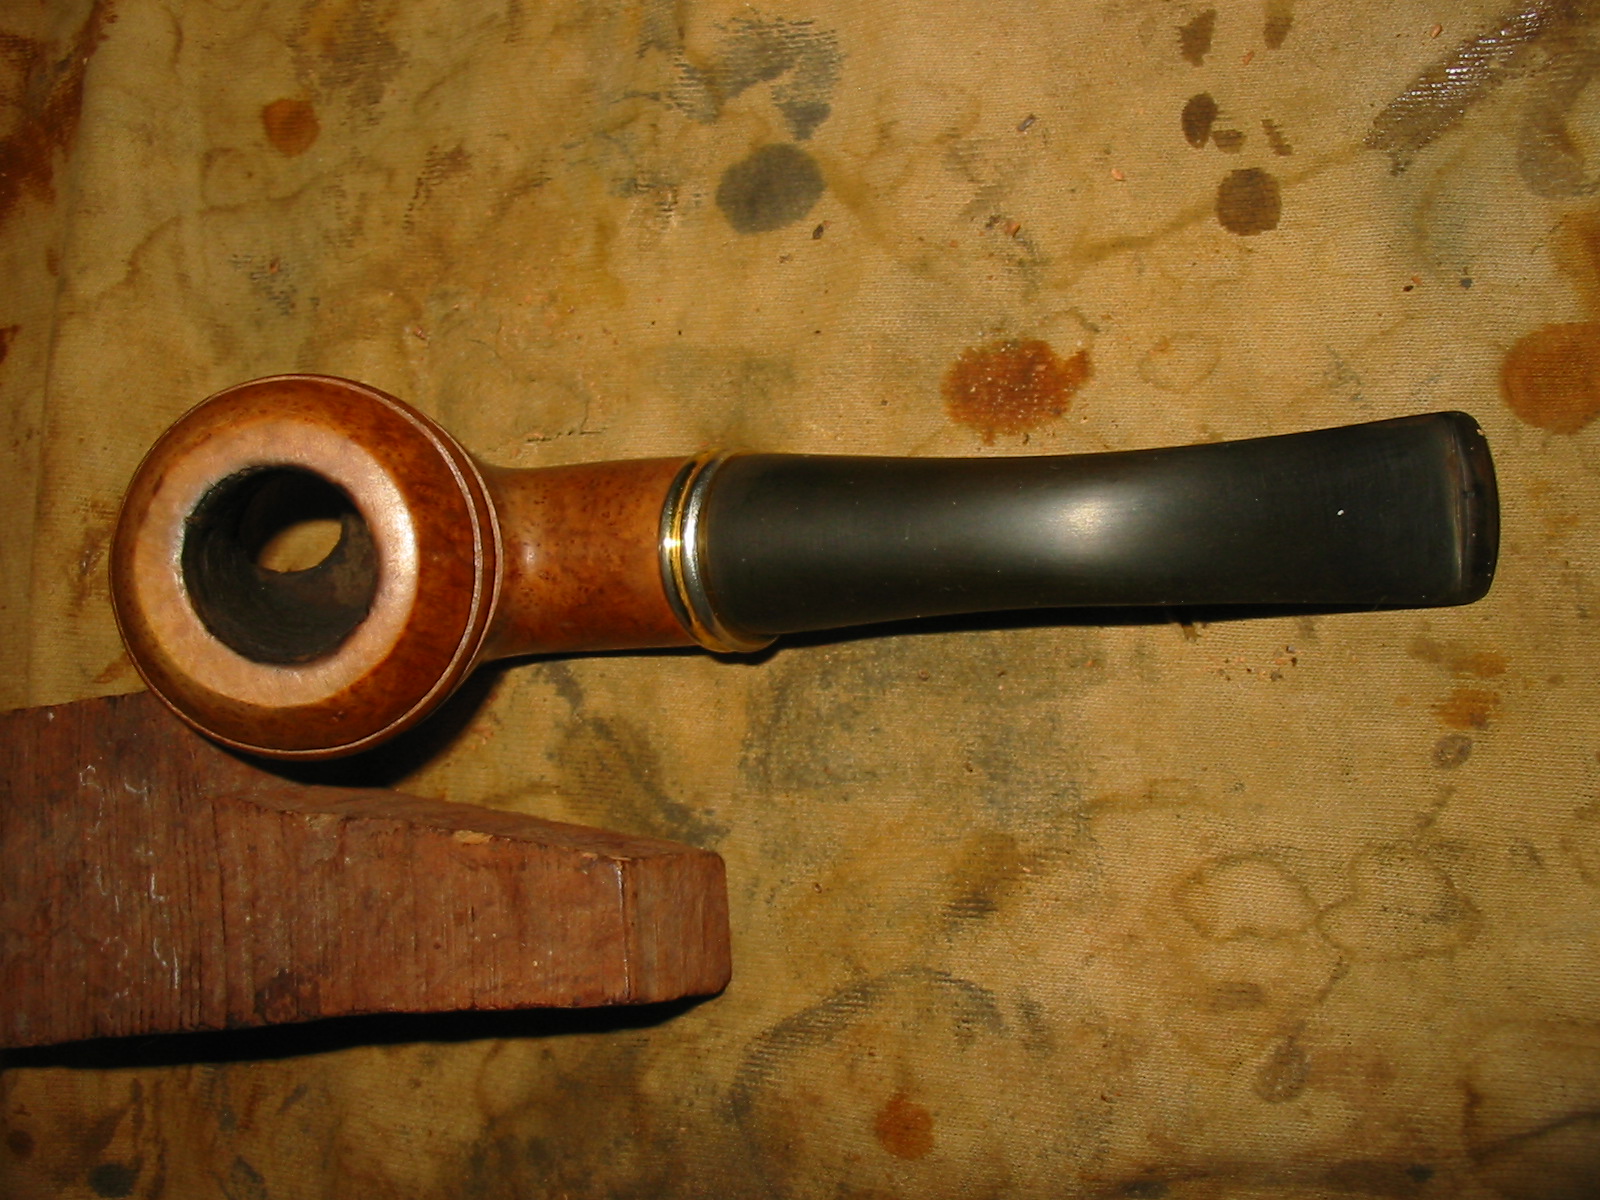
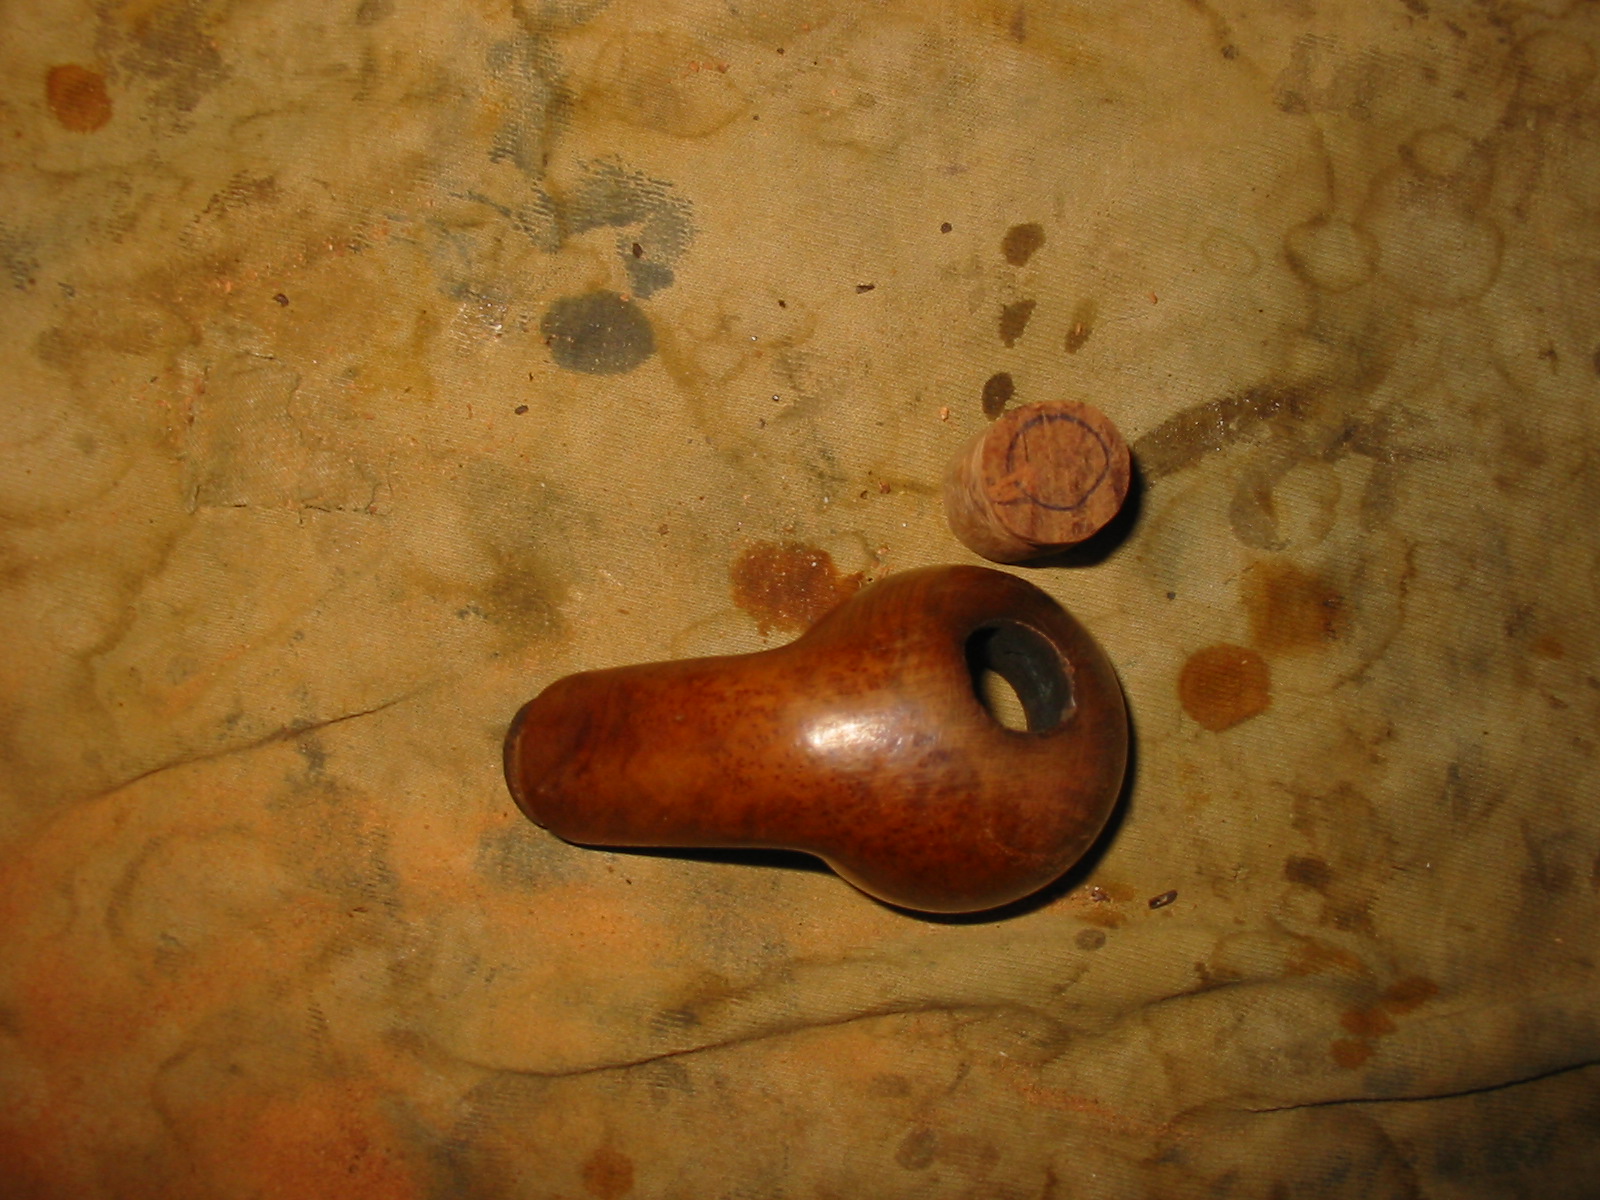
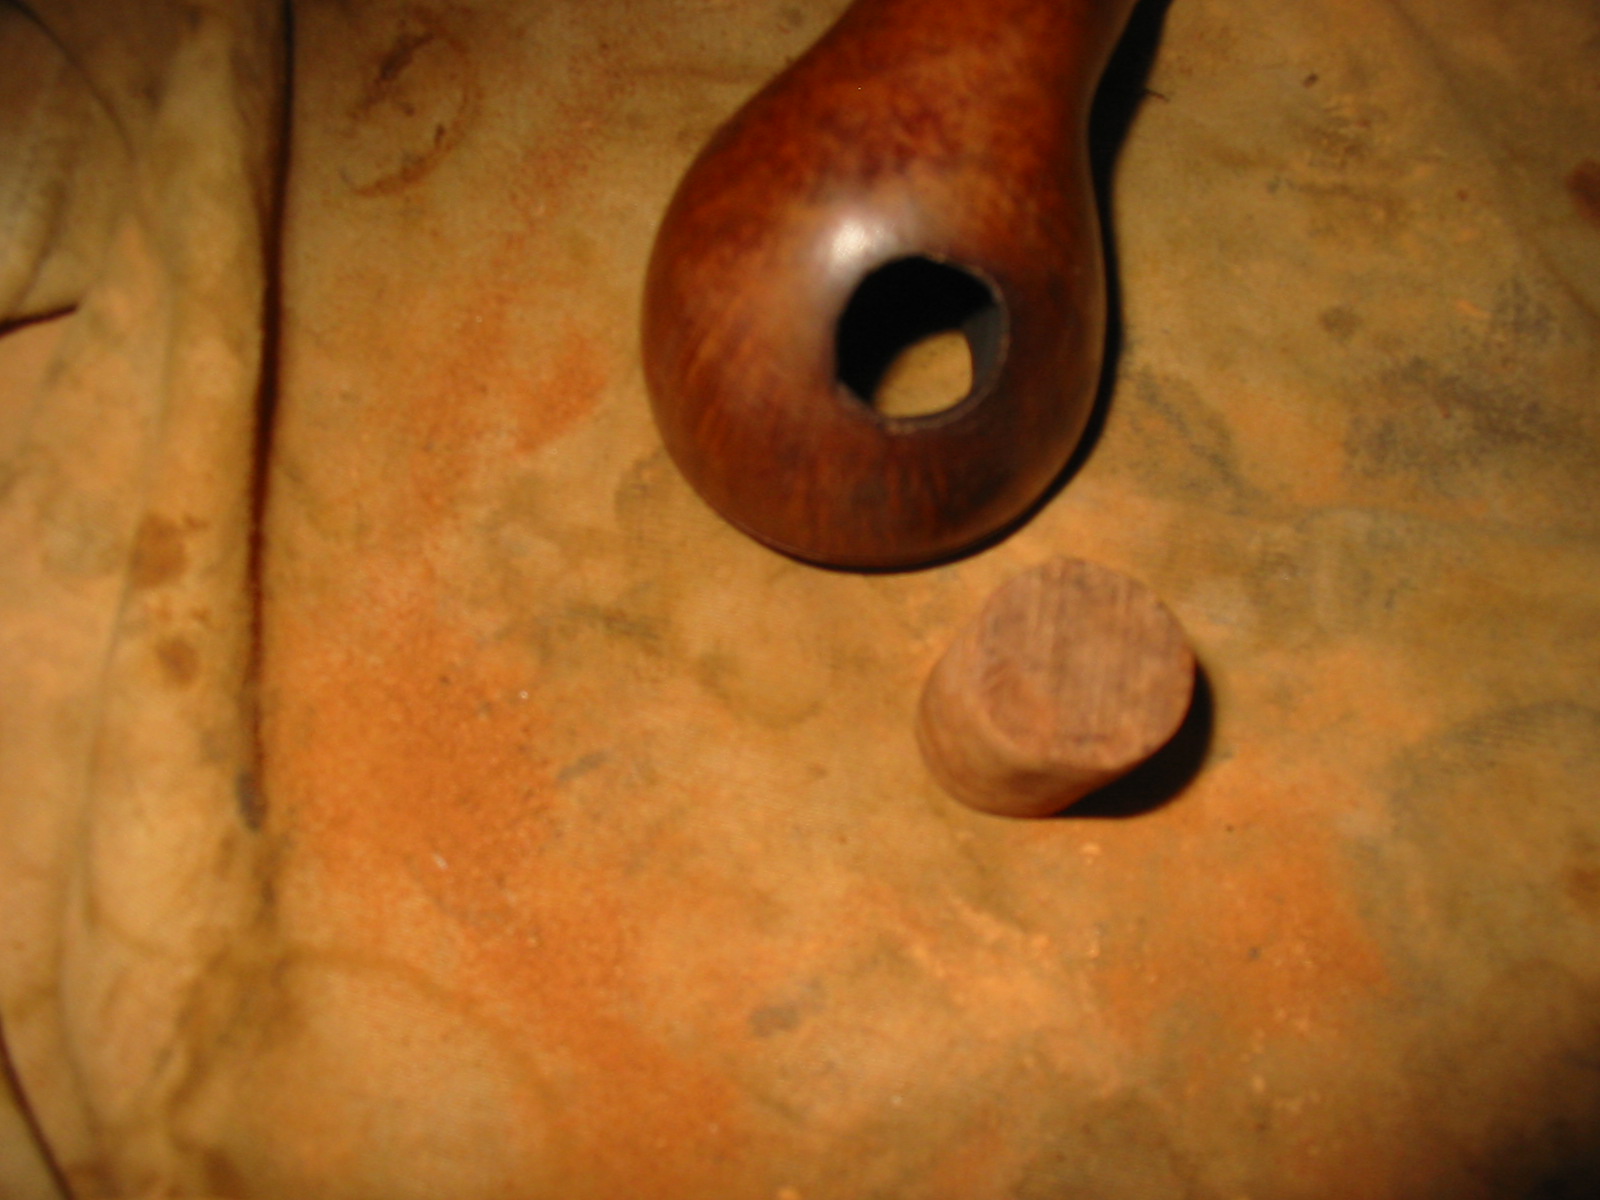
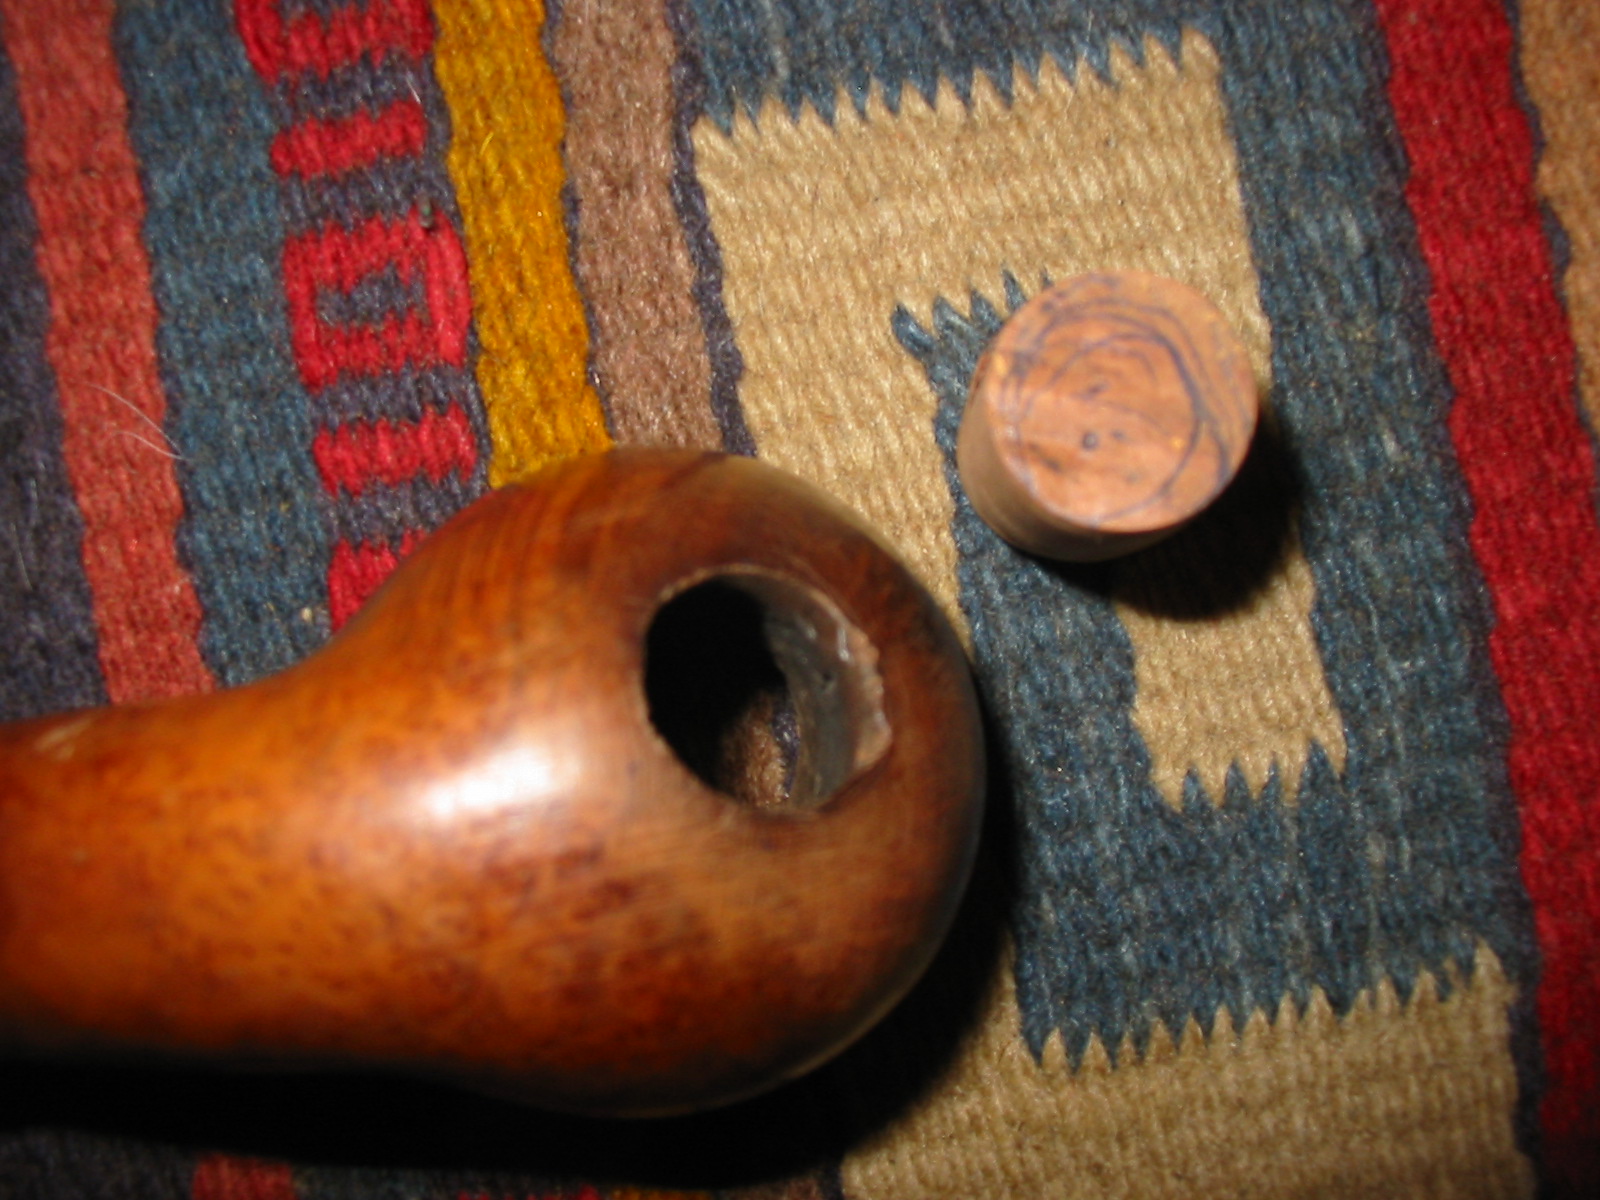
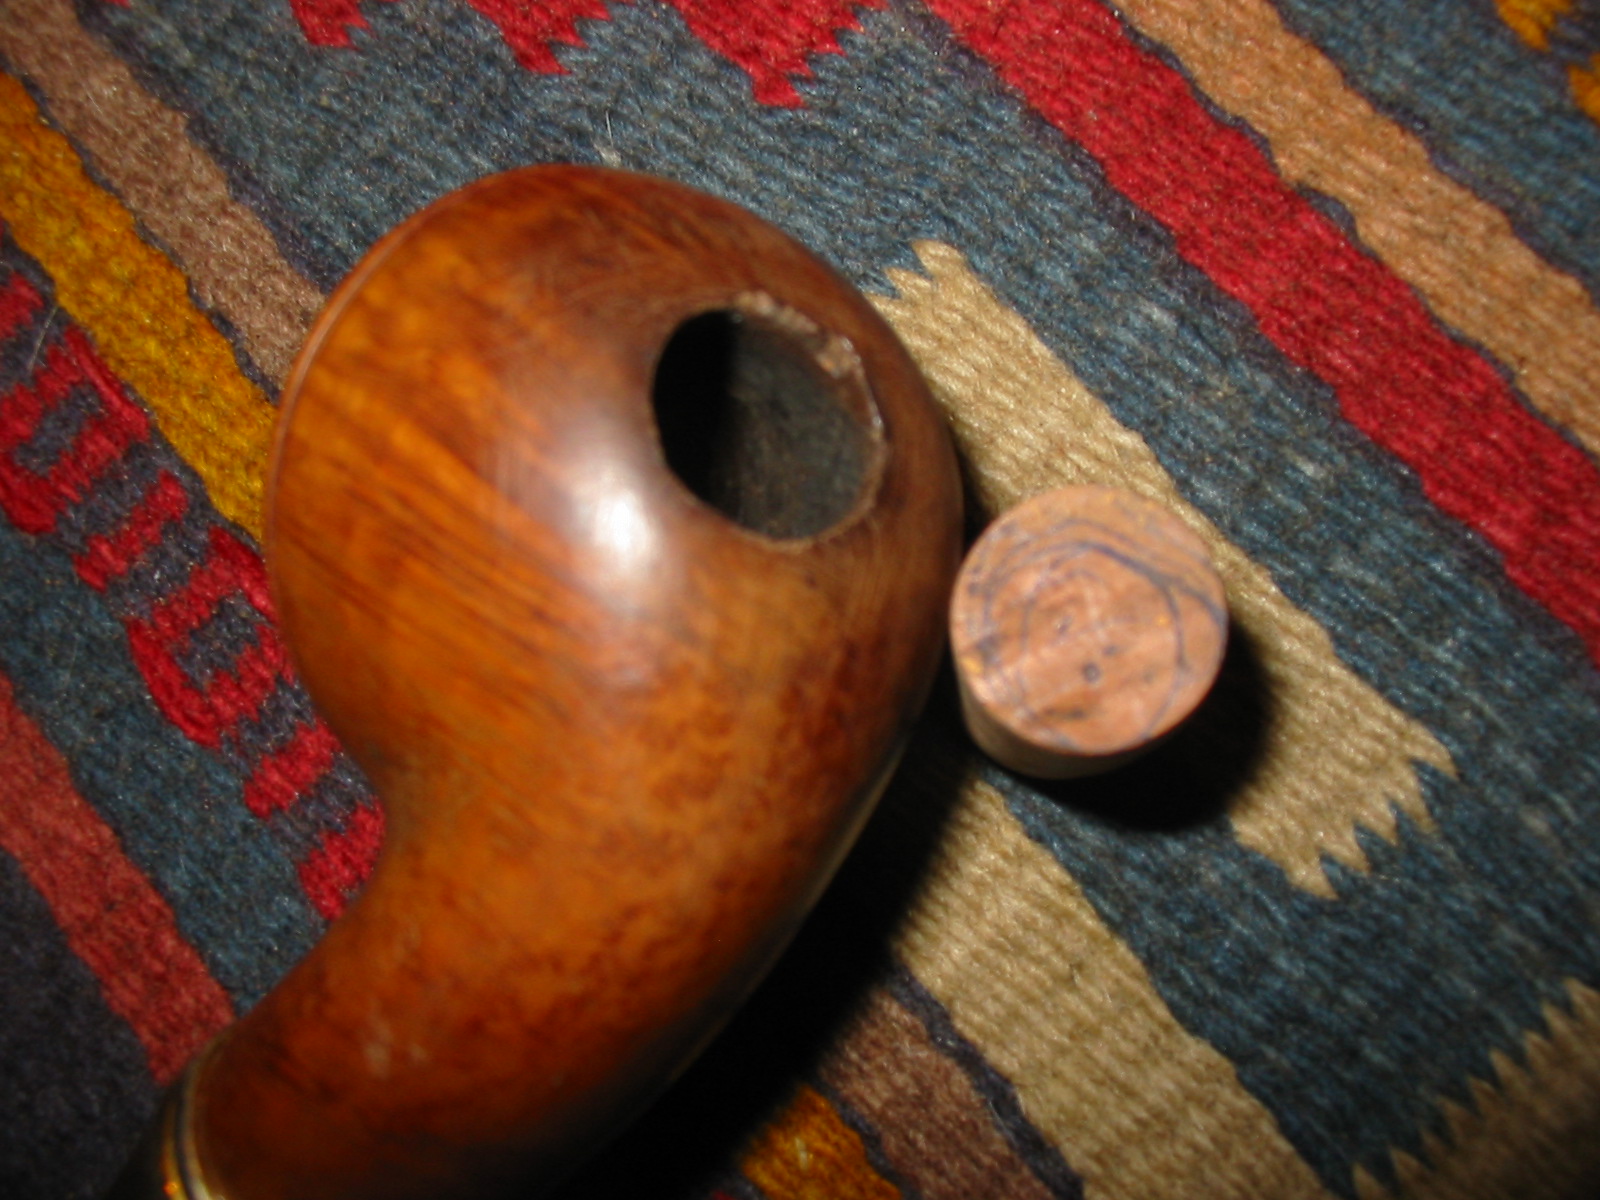
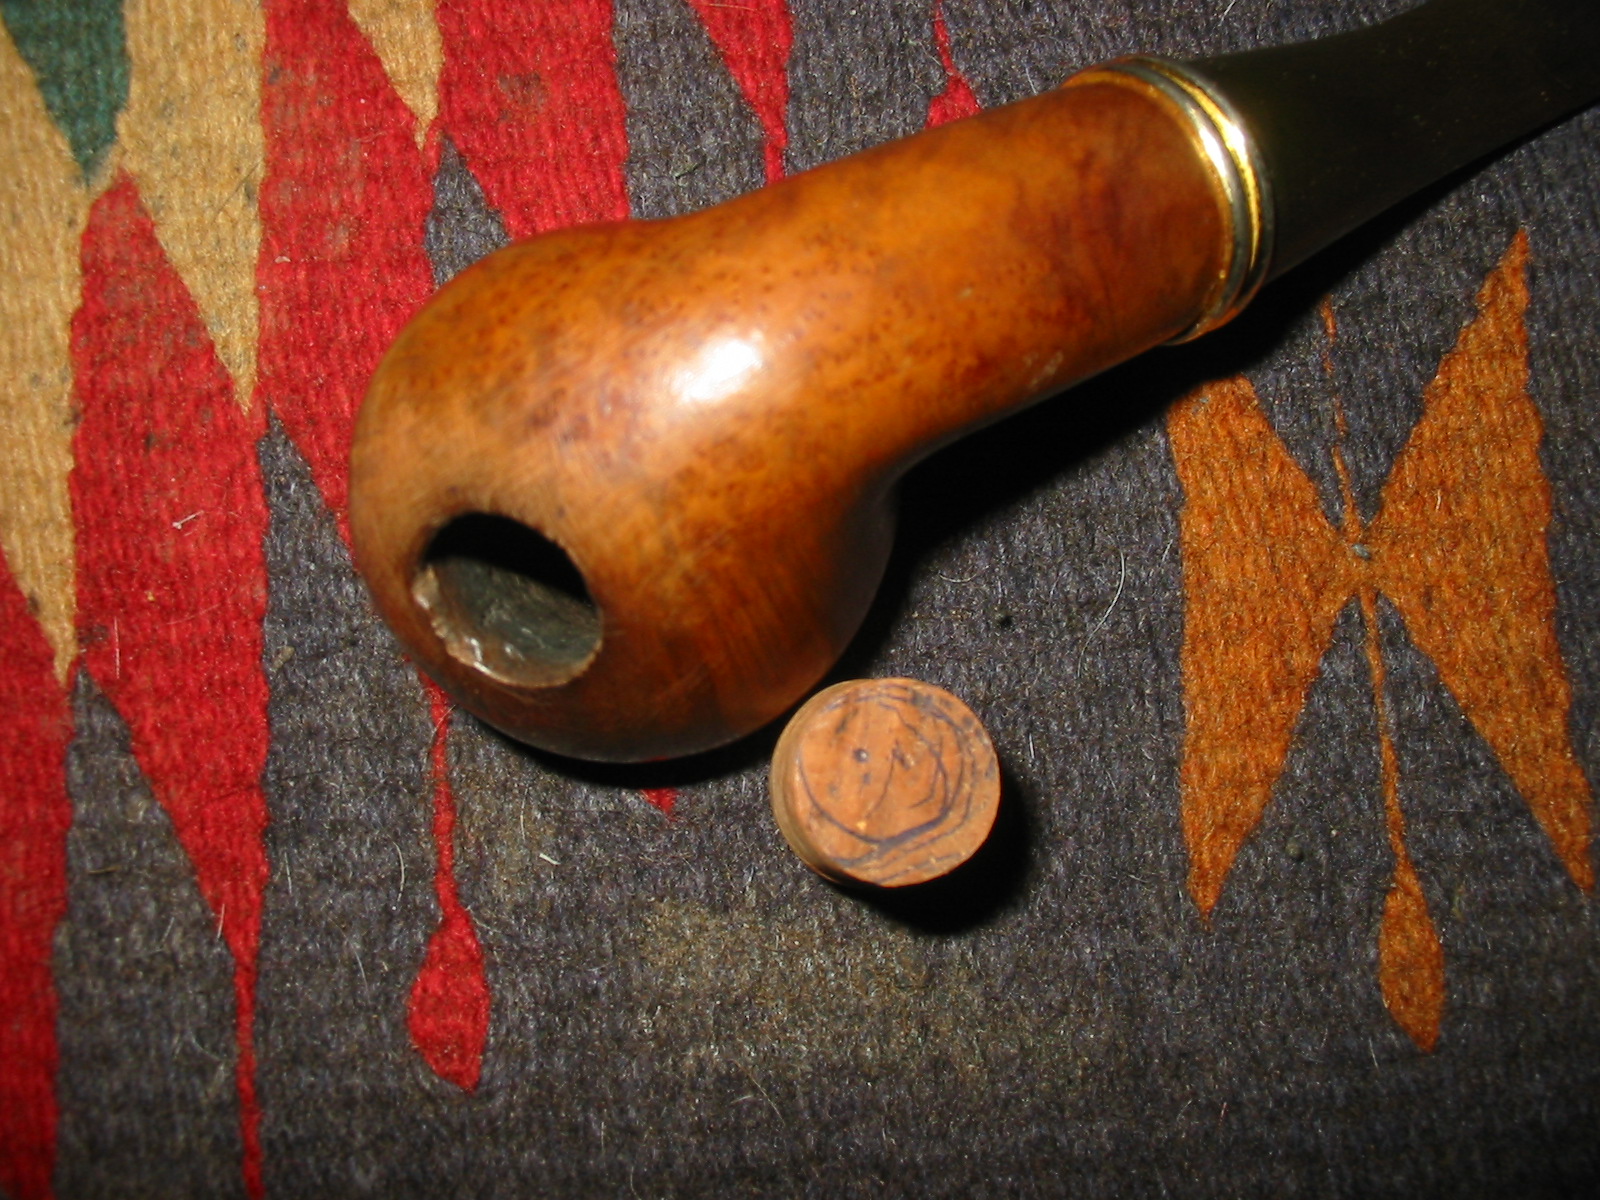
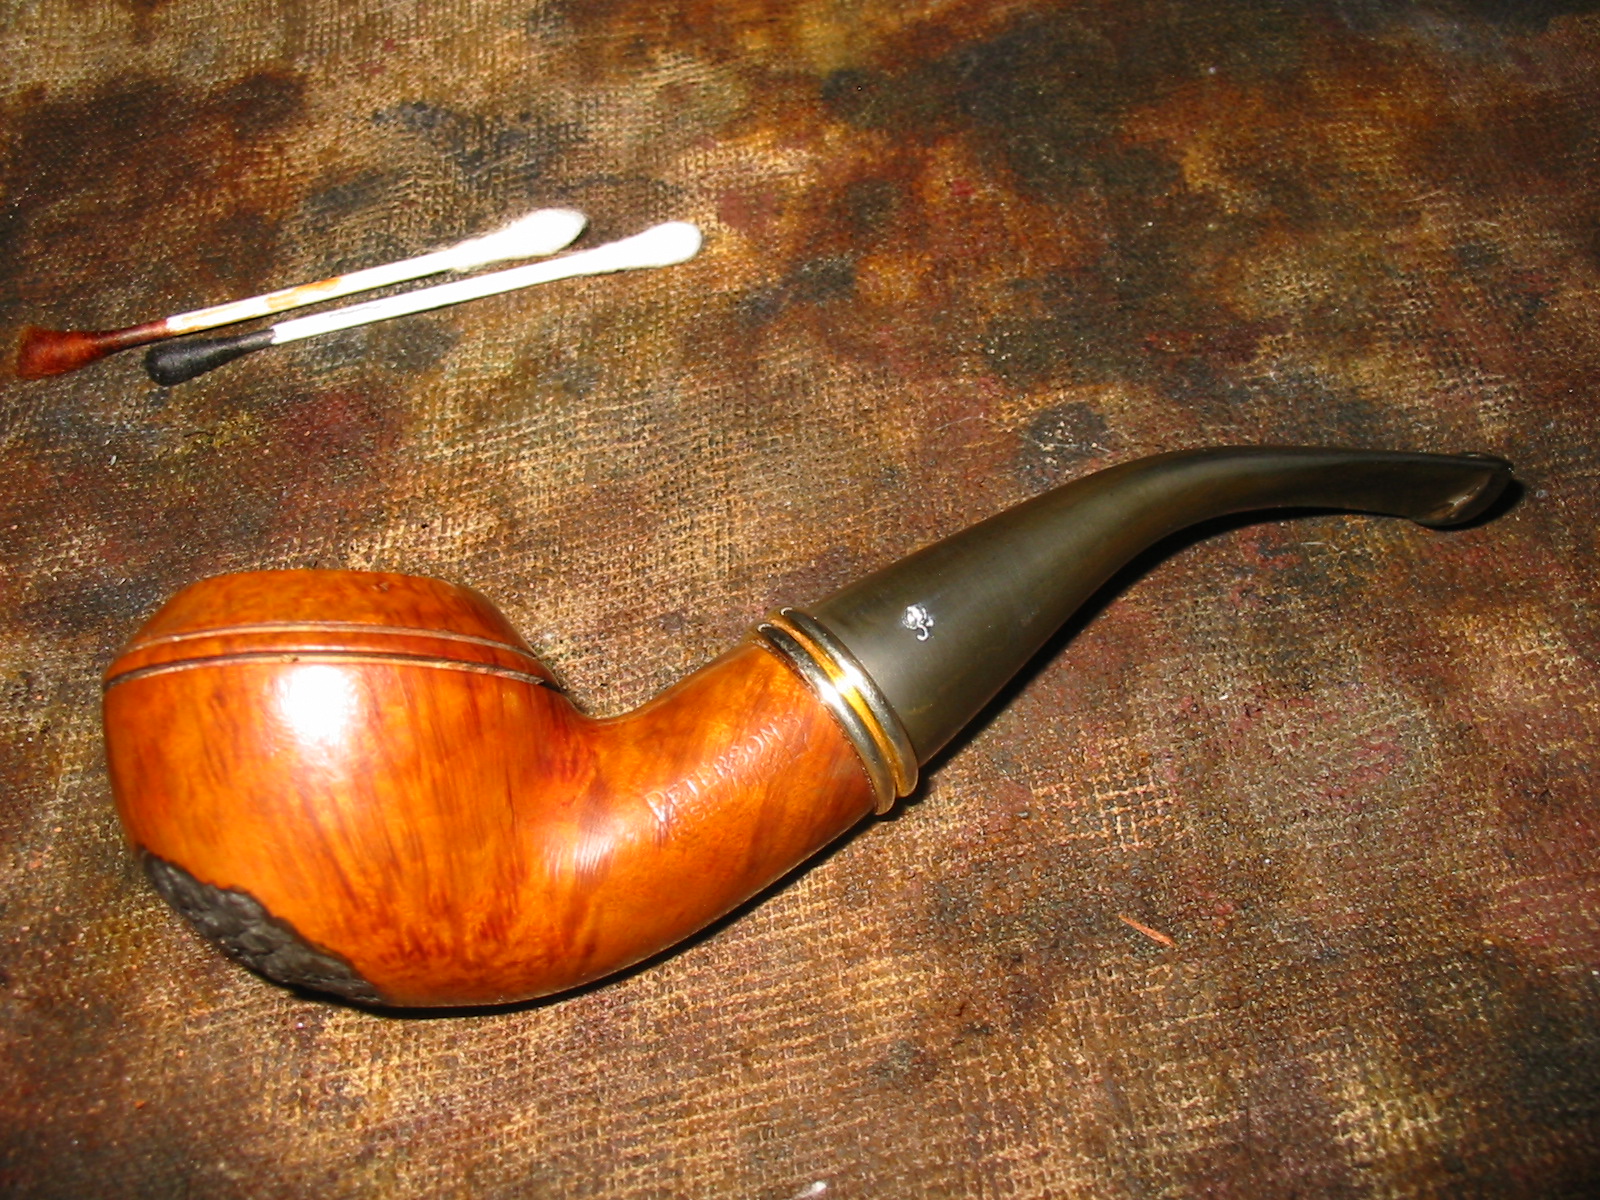
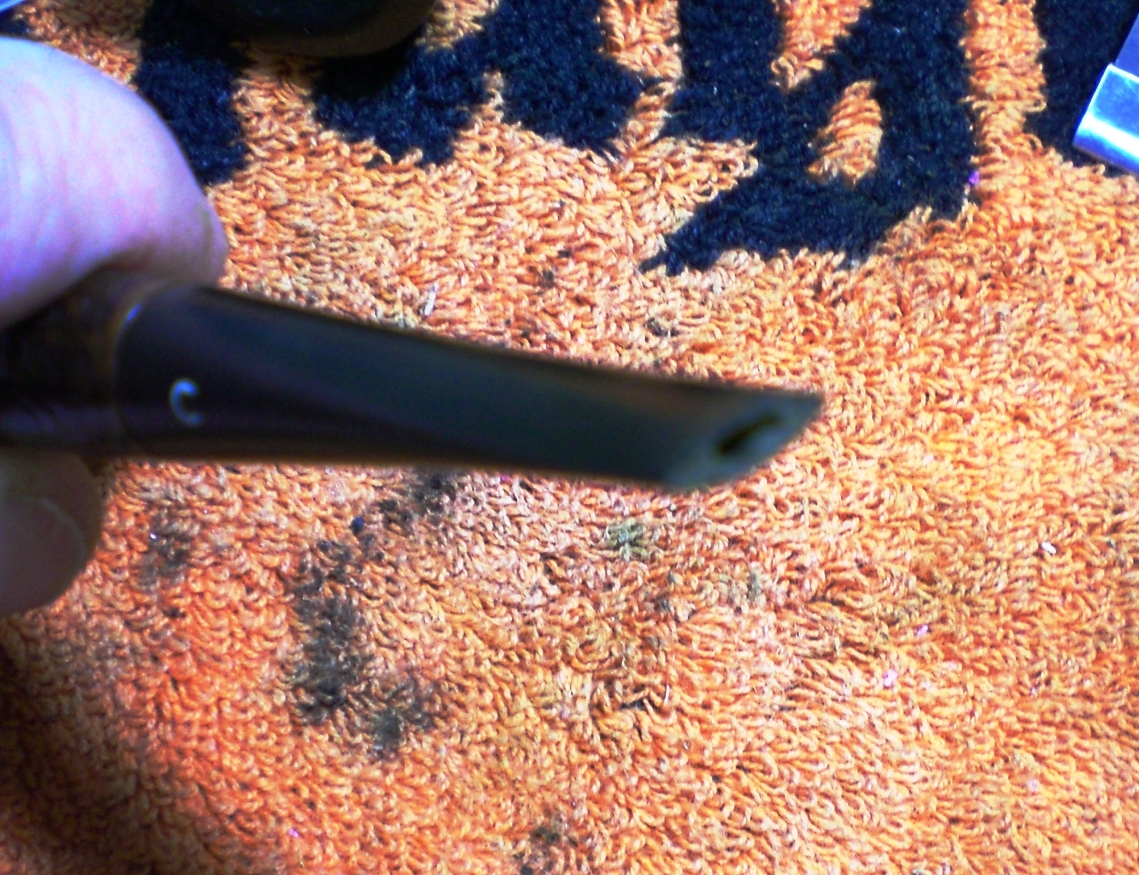
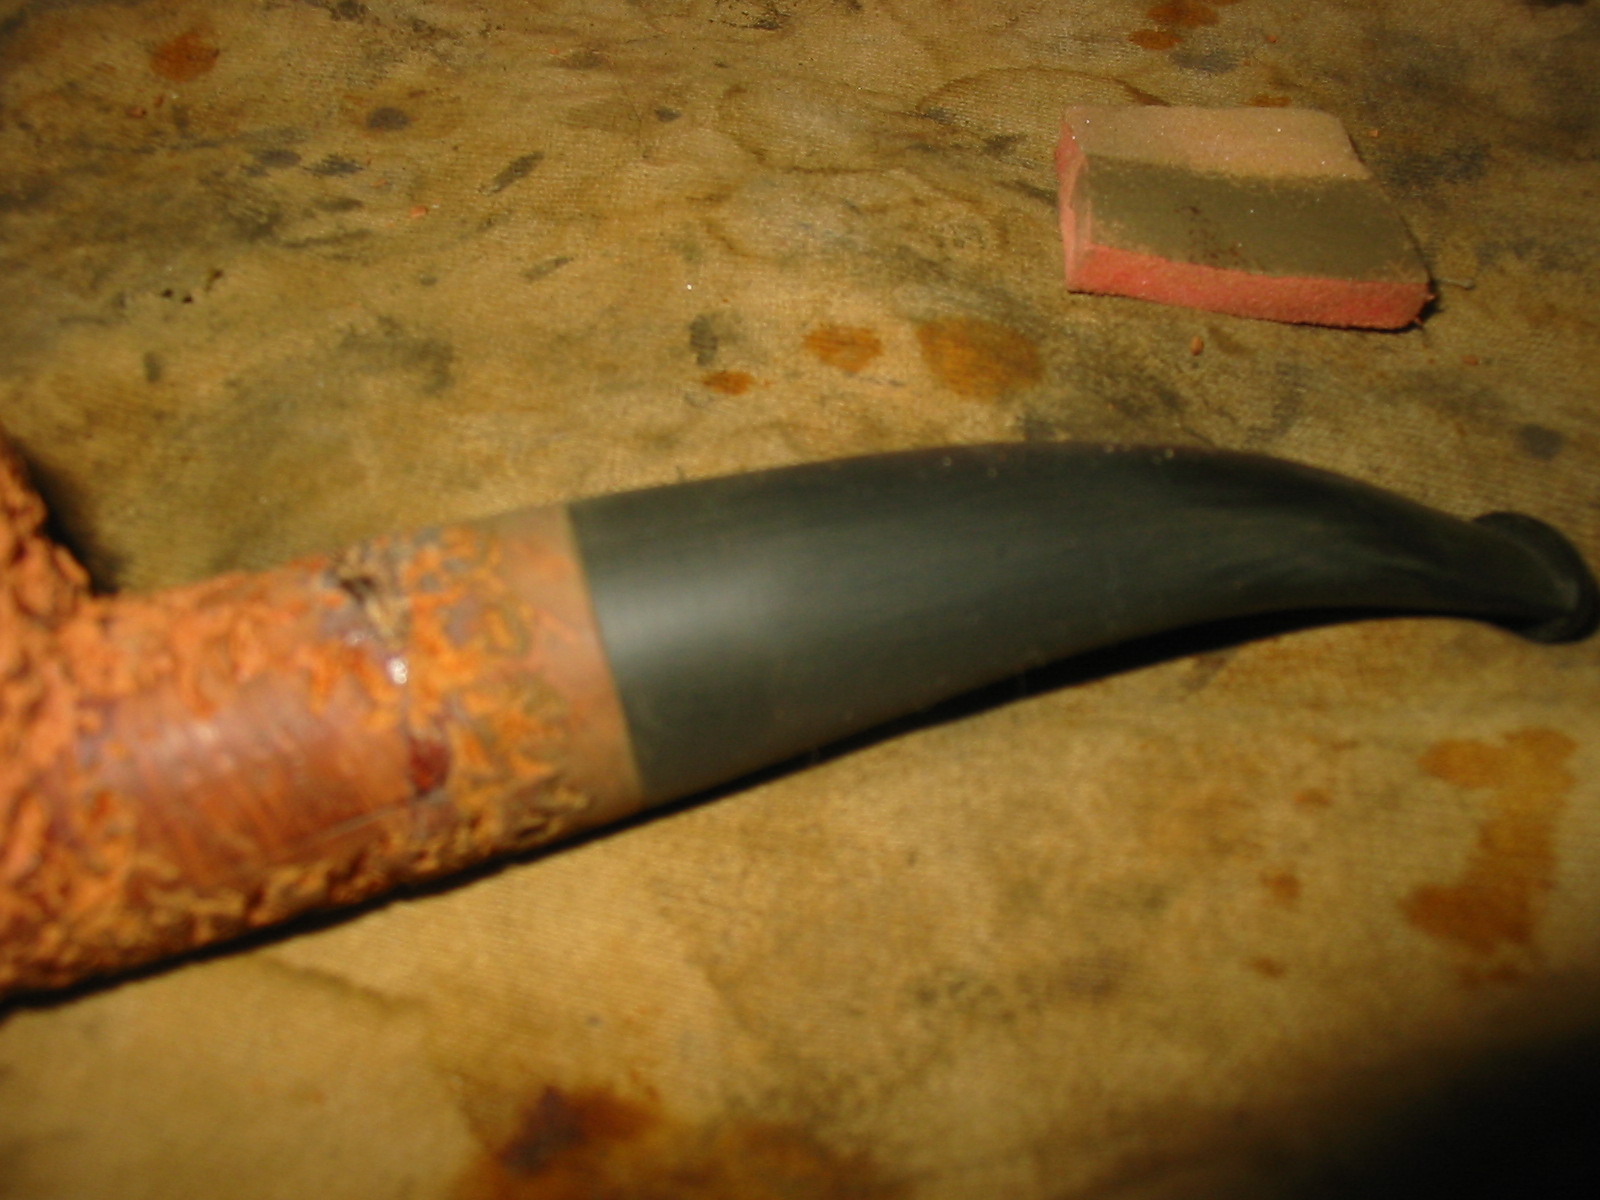
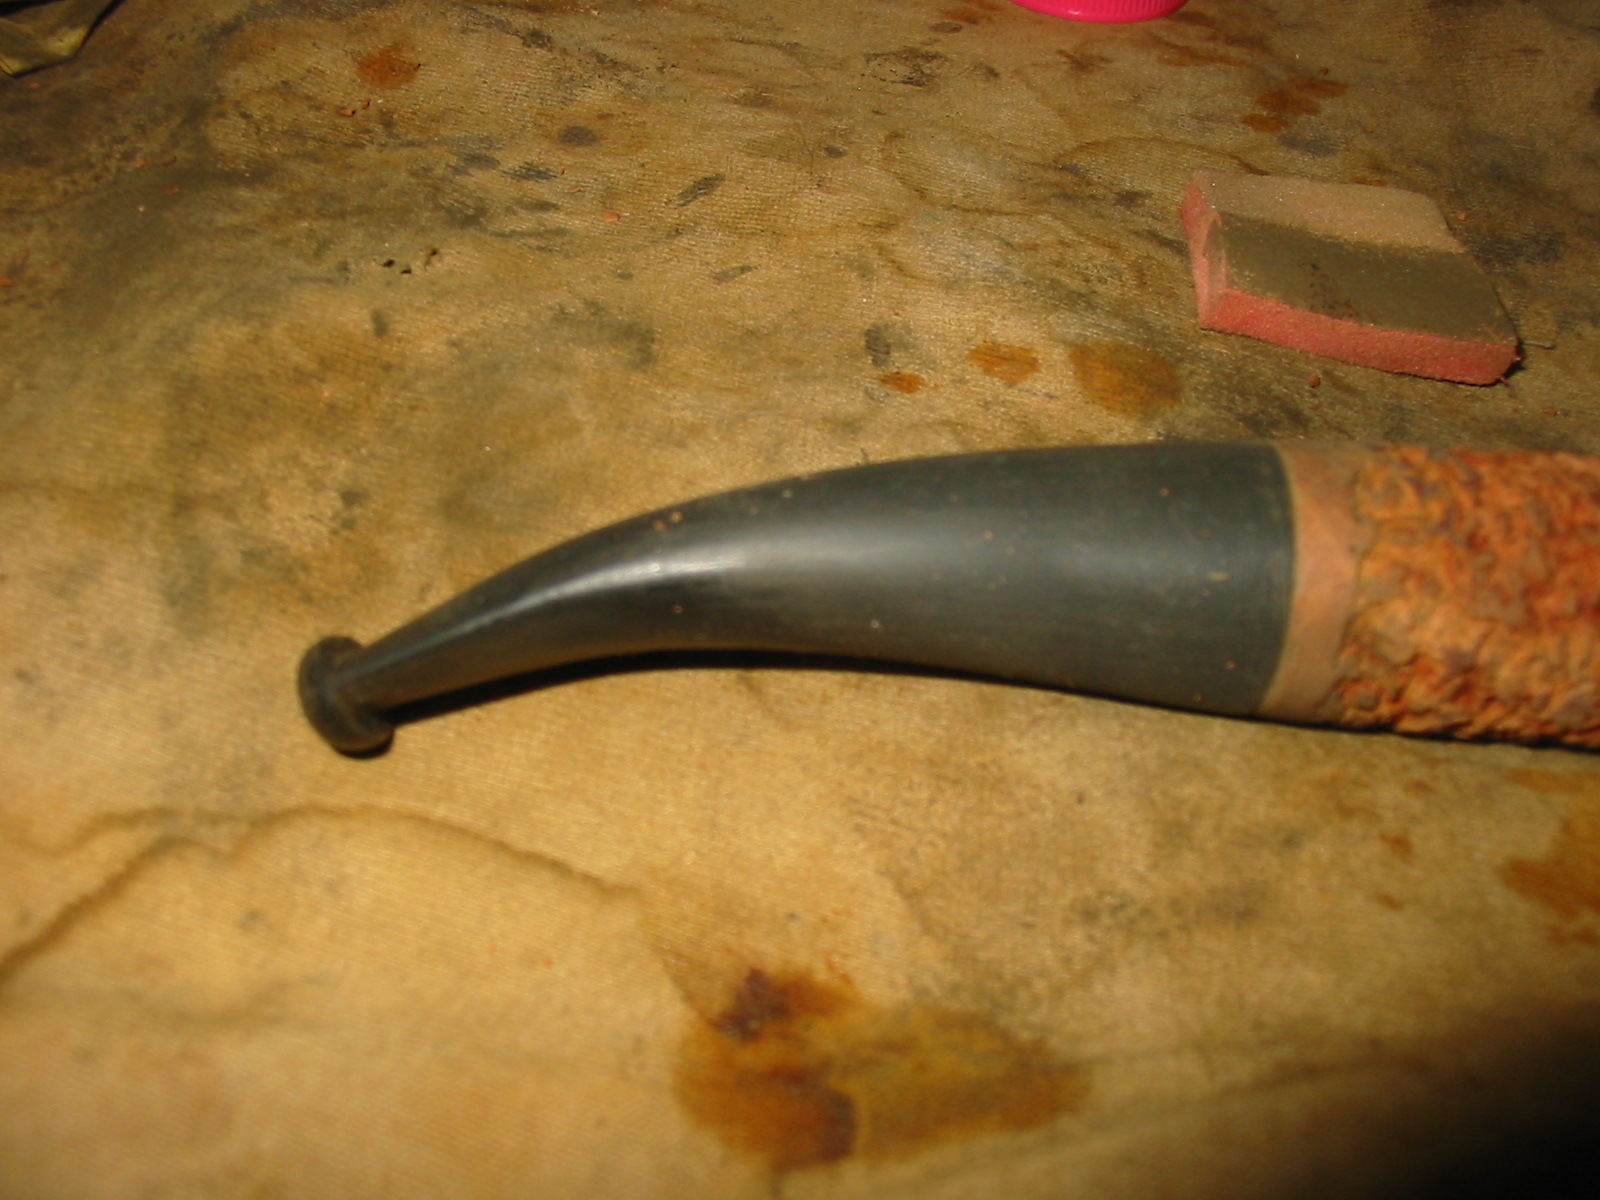
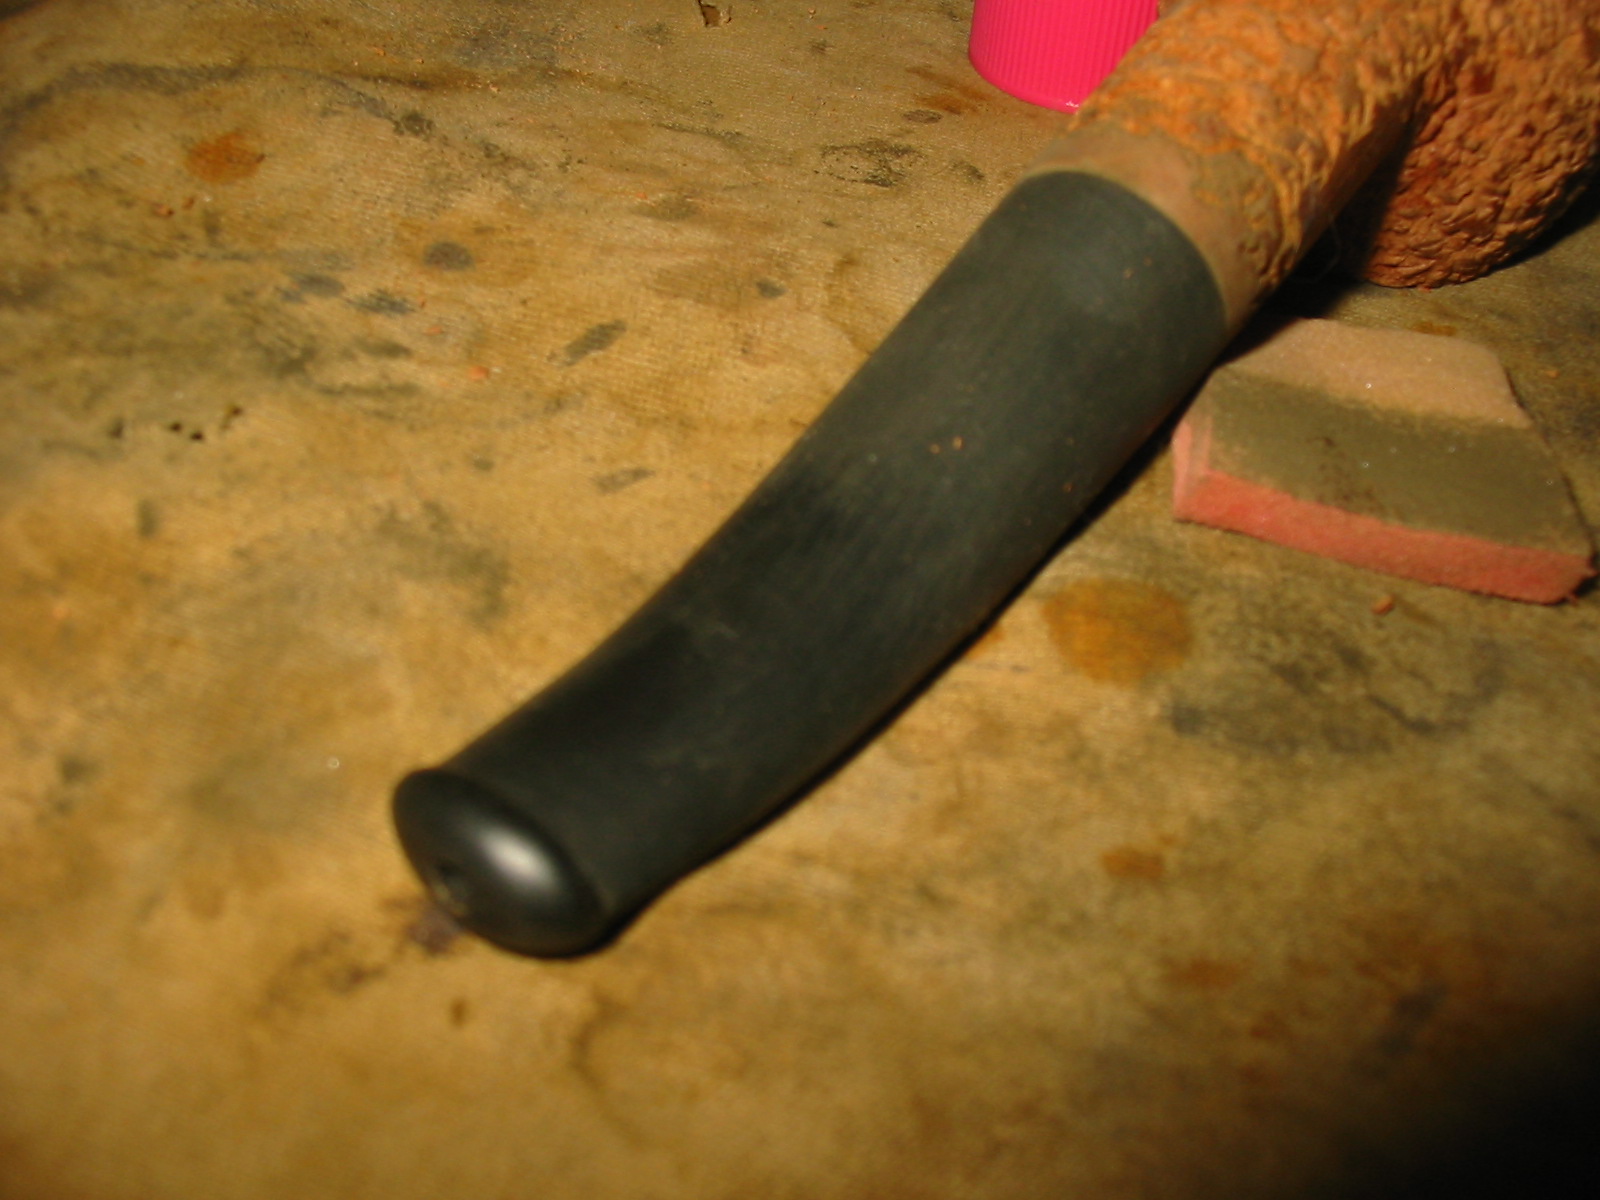
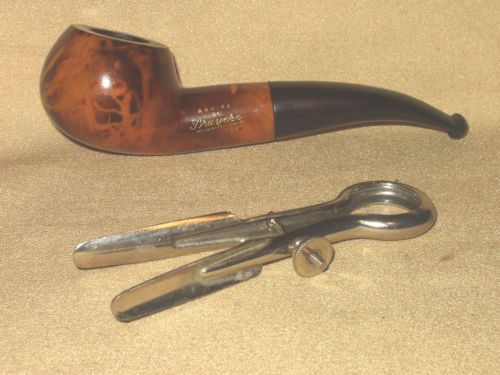
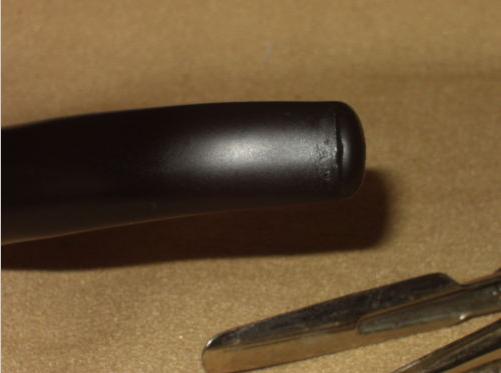
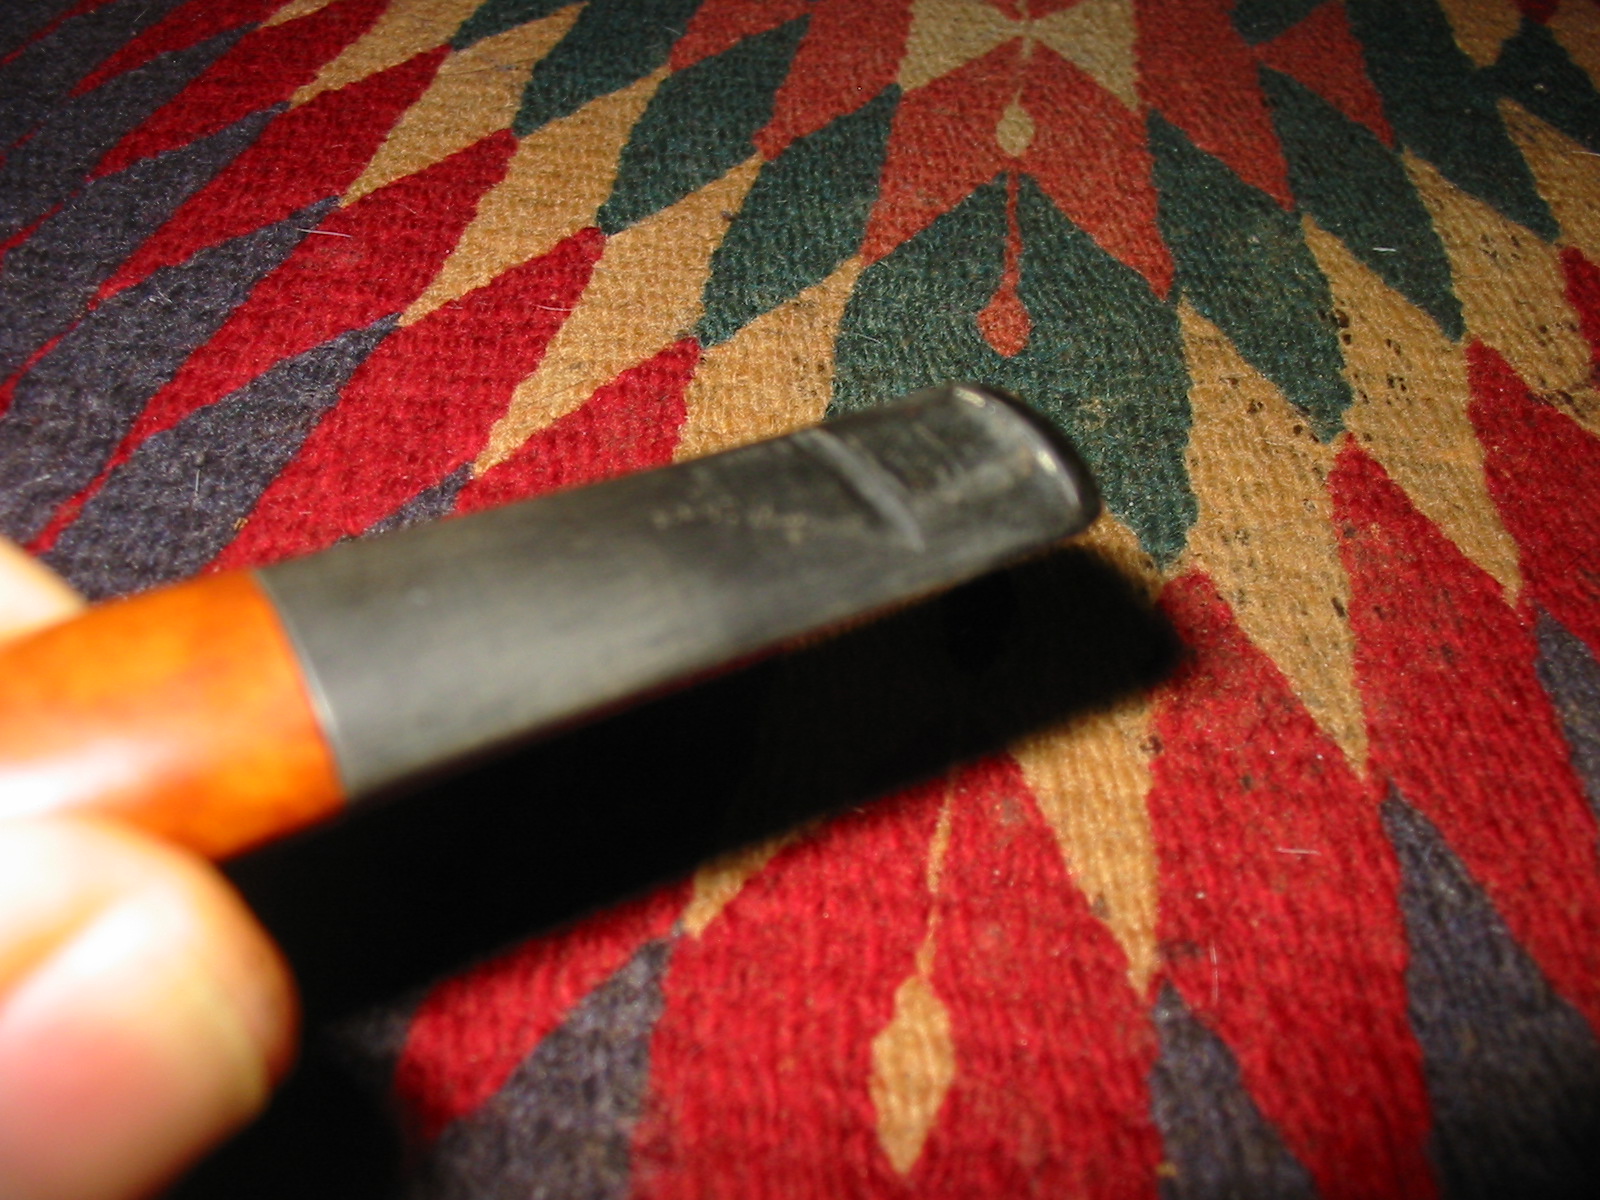
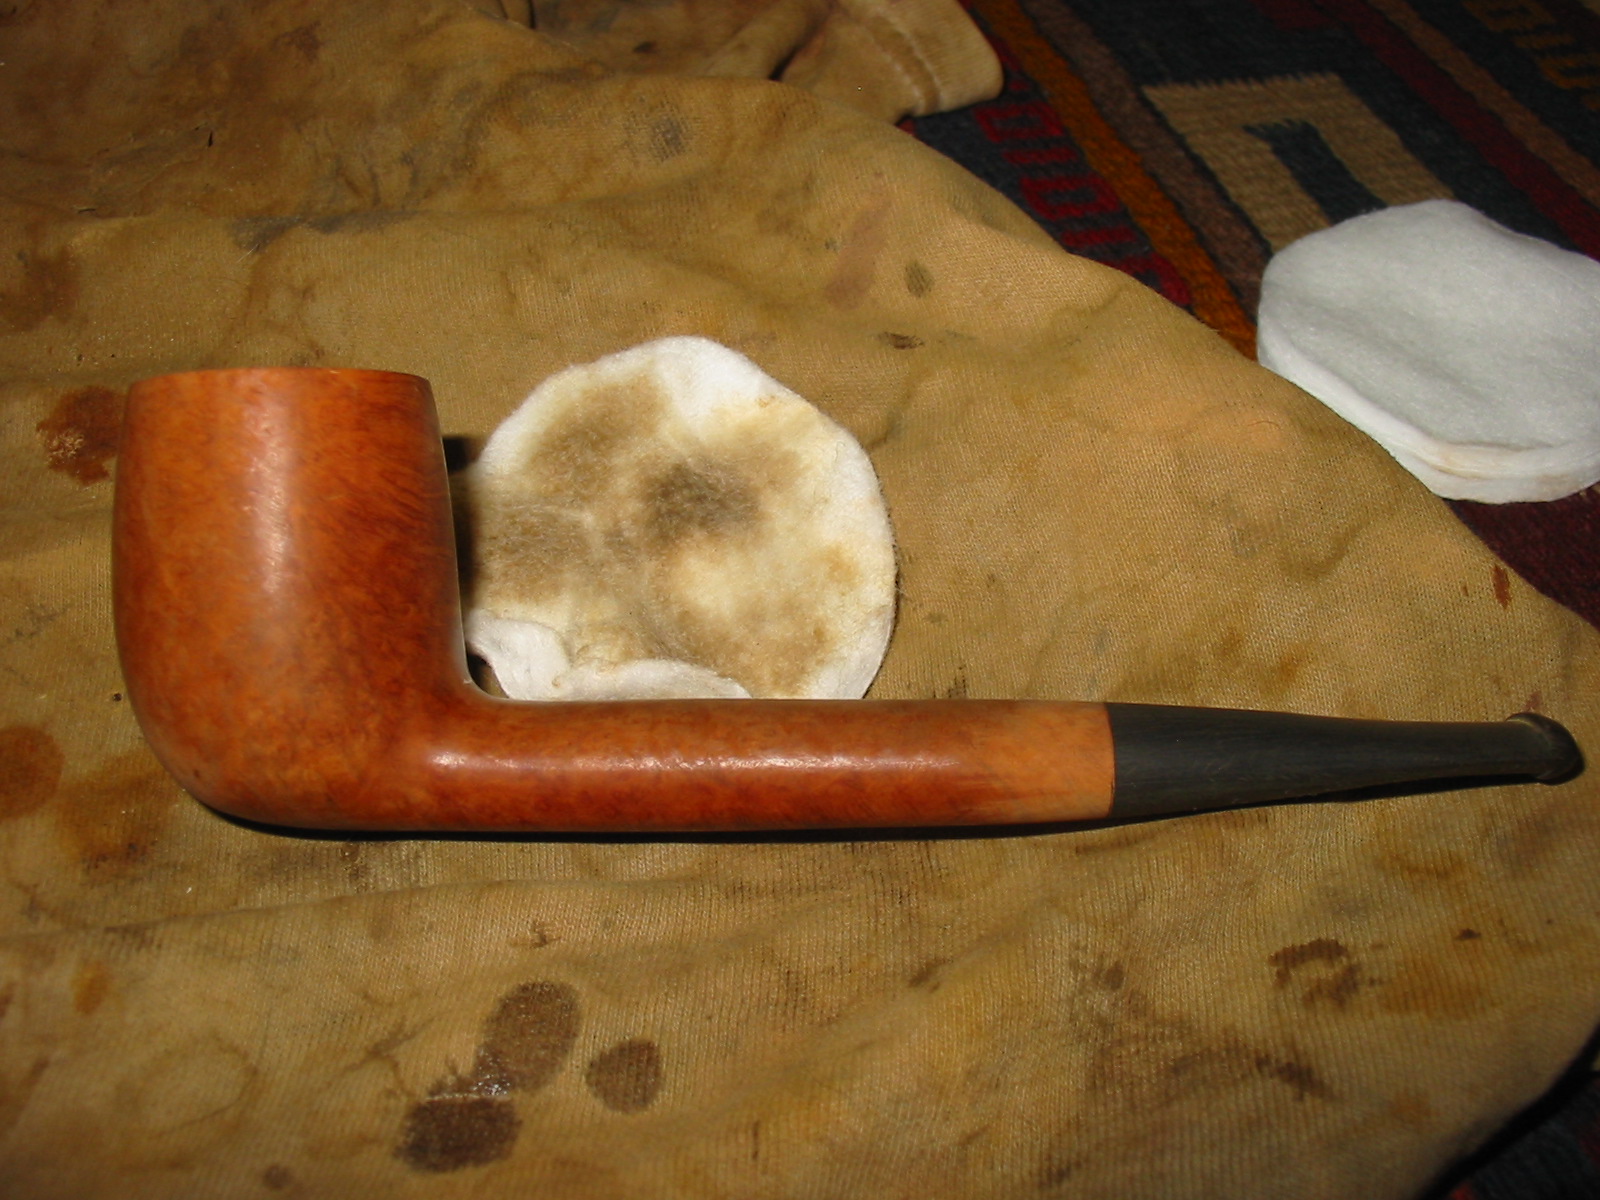
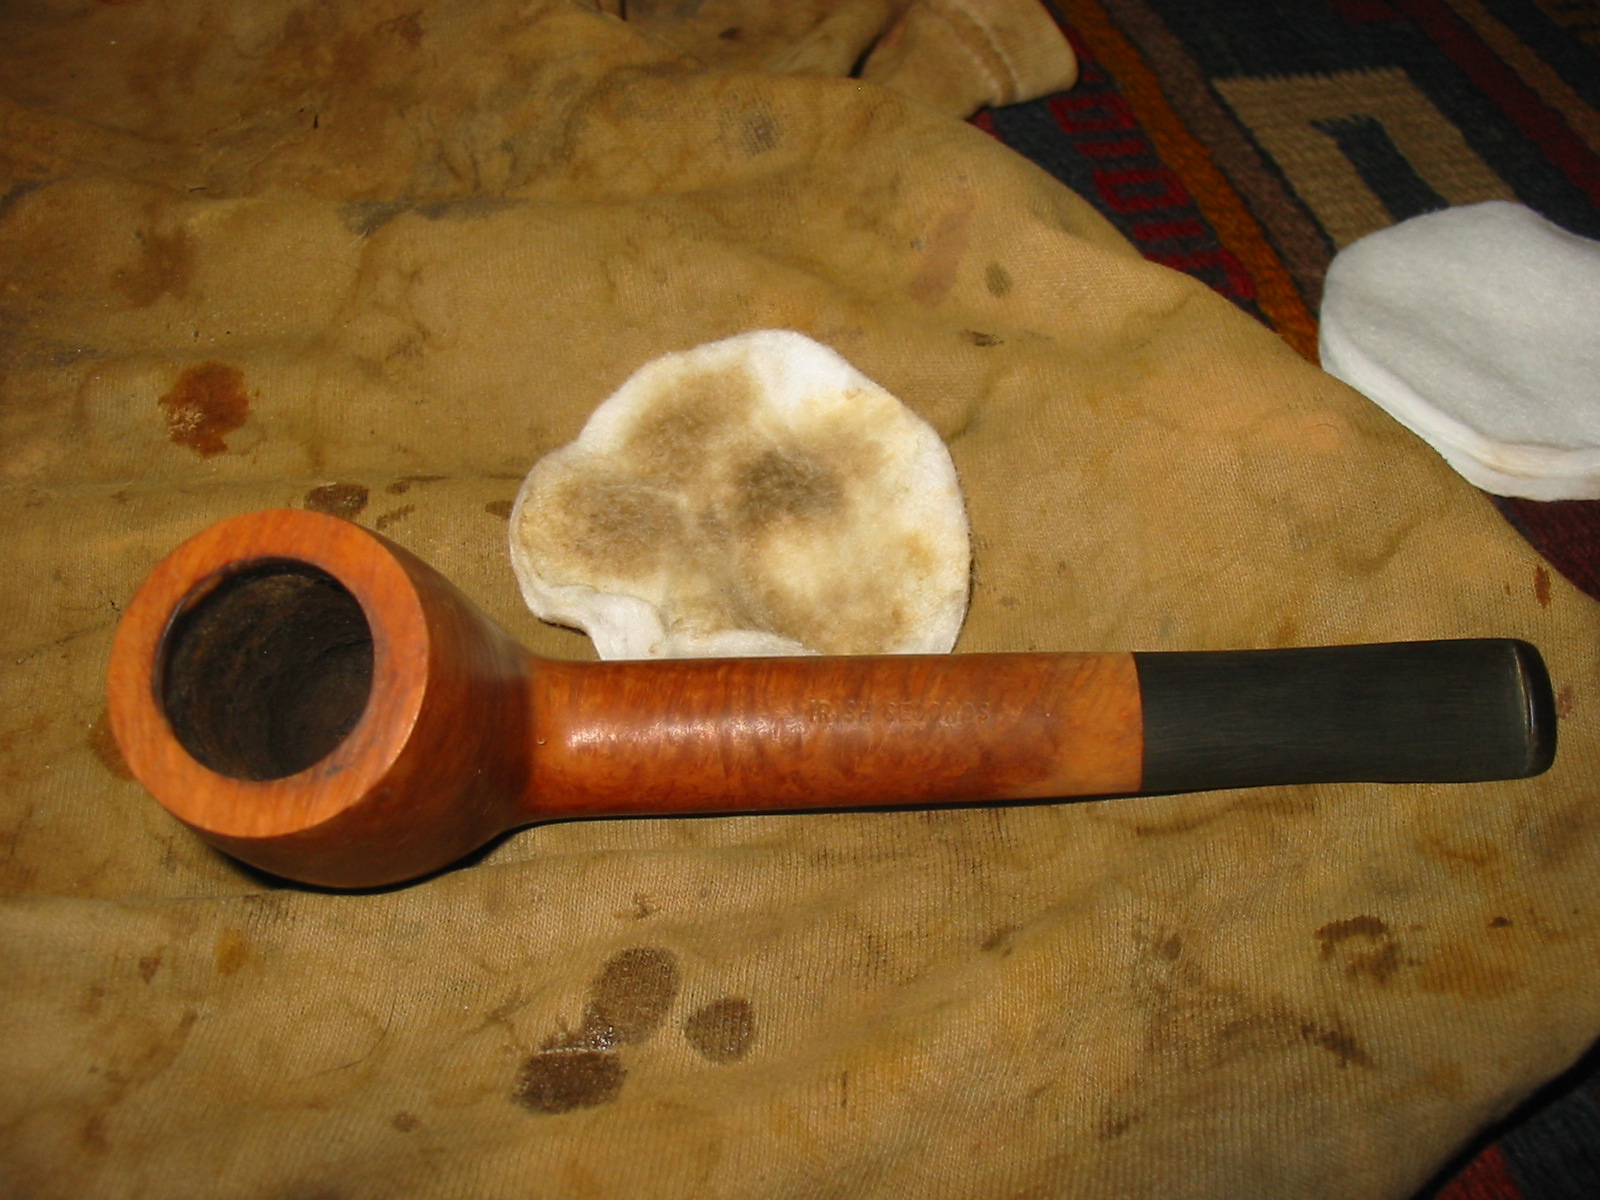
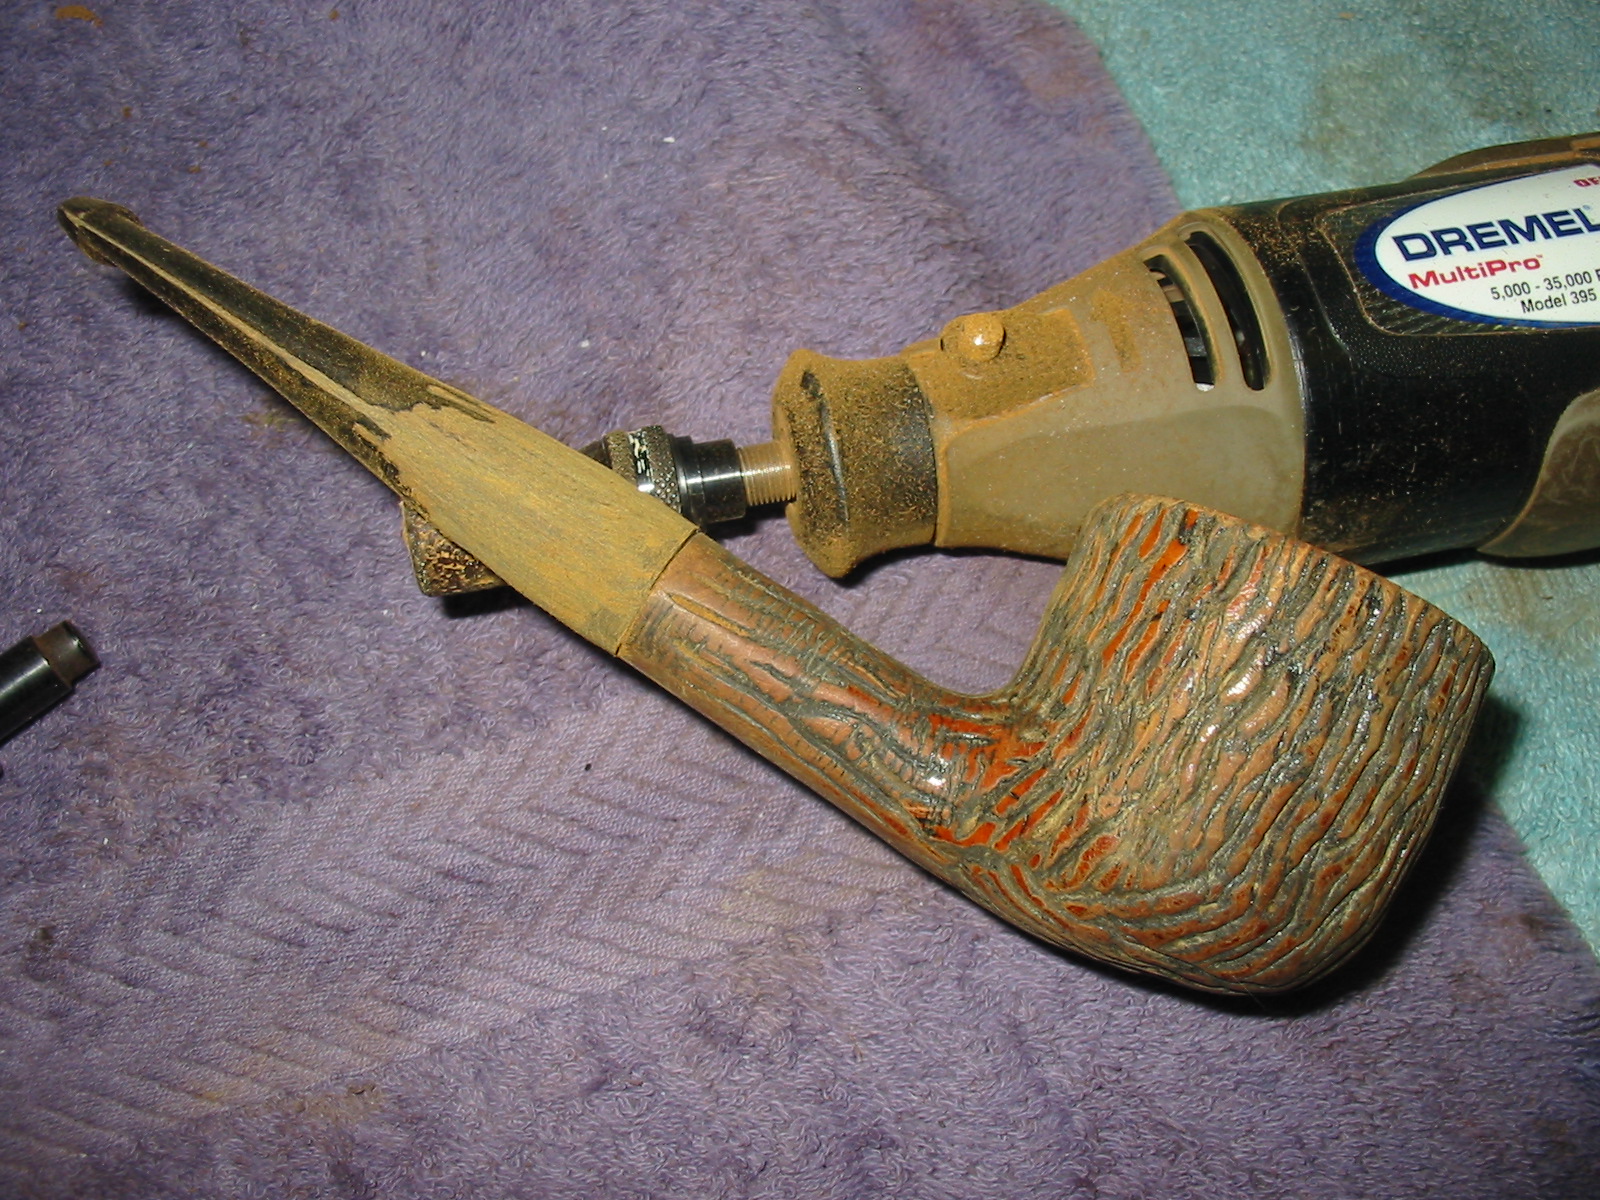
The stem was ruined as can be seen in the photo below. The bottom side was missing a large triangular shaped chunk that went almost from side to side. I thought about cutting off the end and reshaping the button but the damage was extensive and the previous owner had carved the airway in the broken portion so the material left behind on the top and bottom of the stem was scored and very thin. I would need to fit and shape a new stem.
IMG_5036

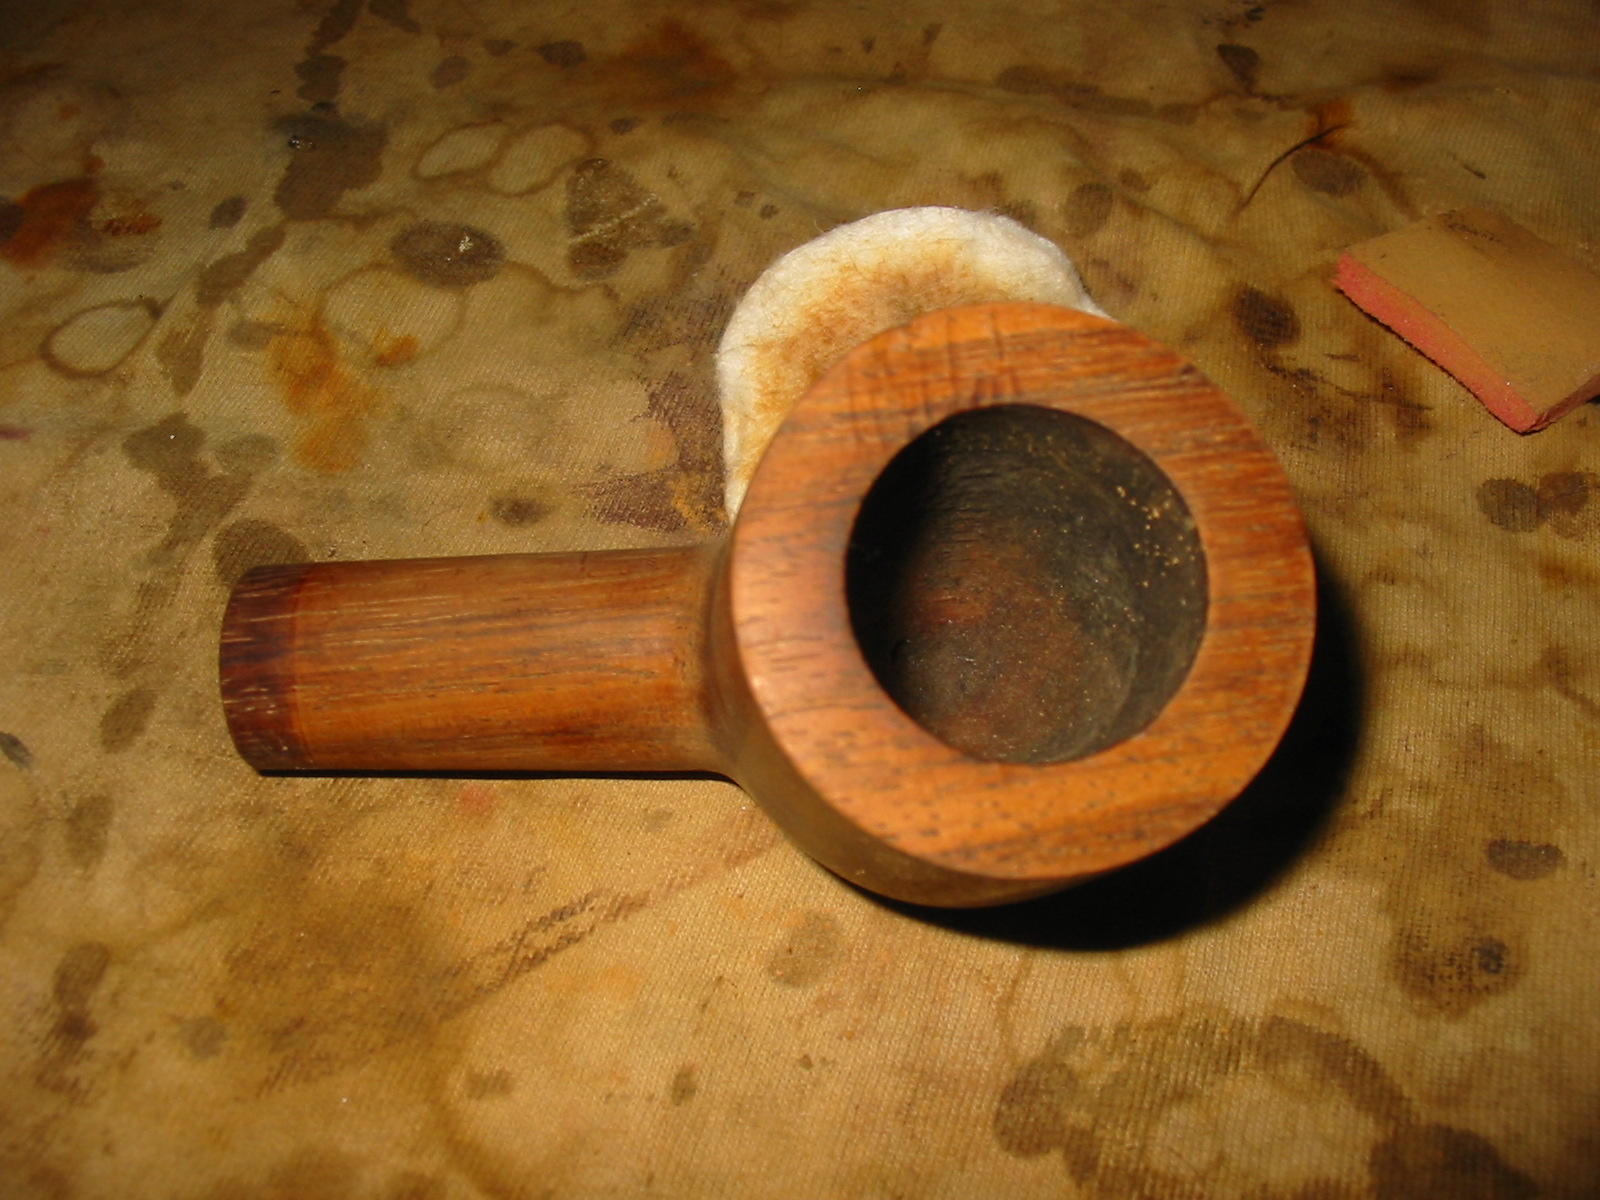
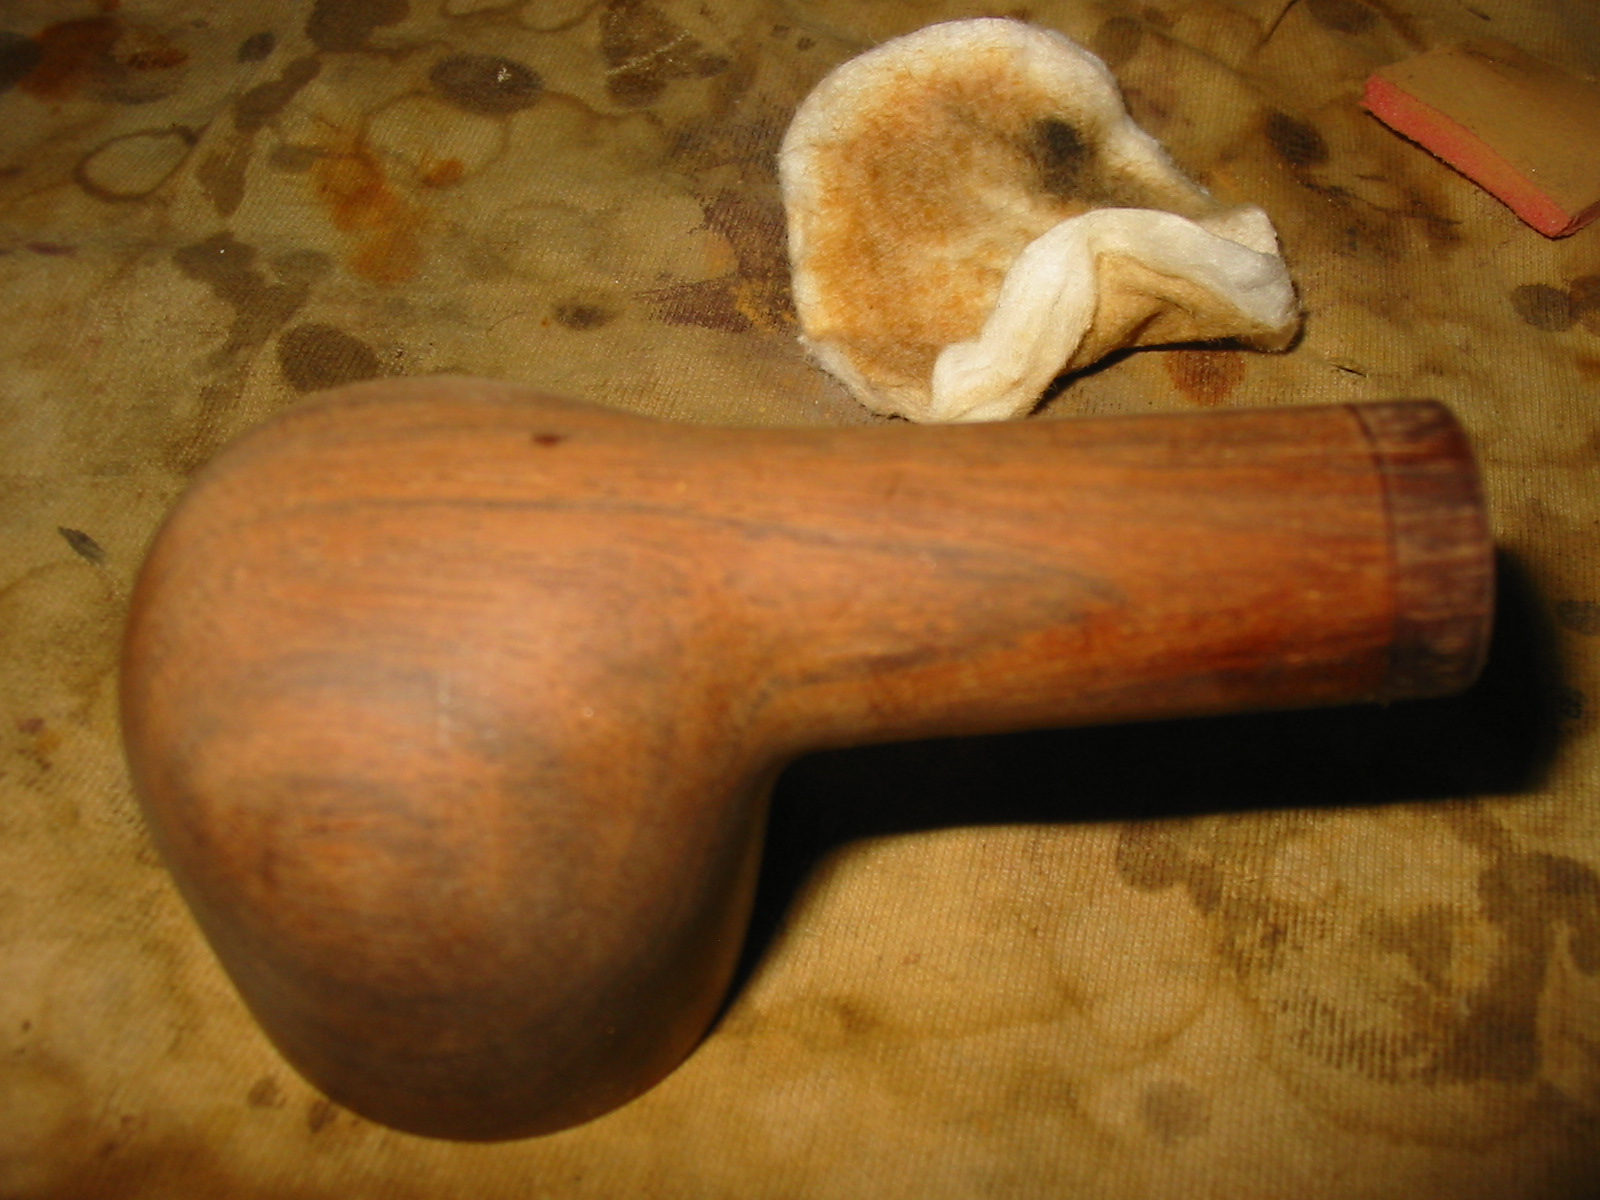
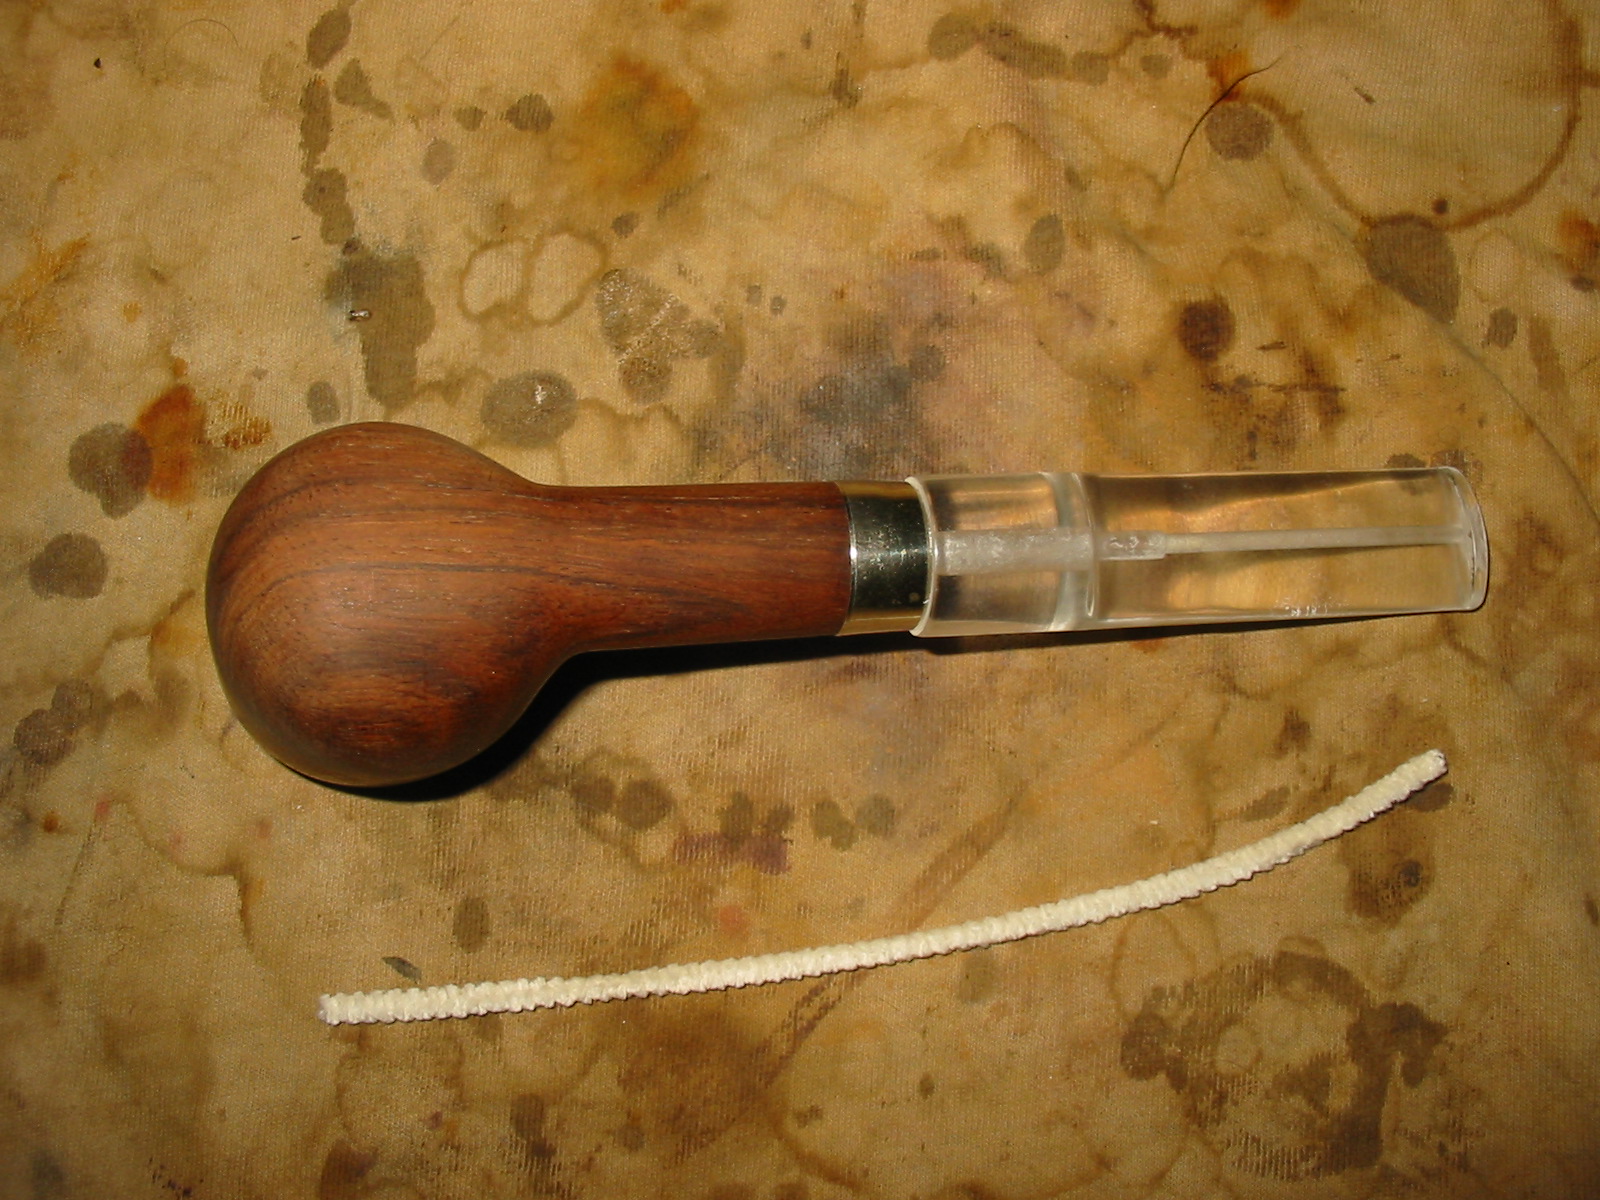
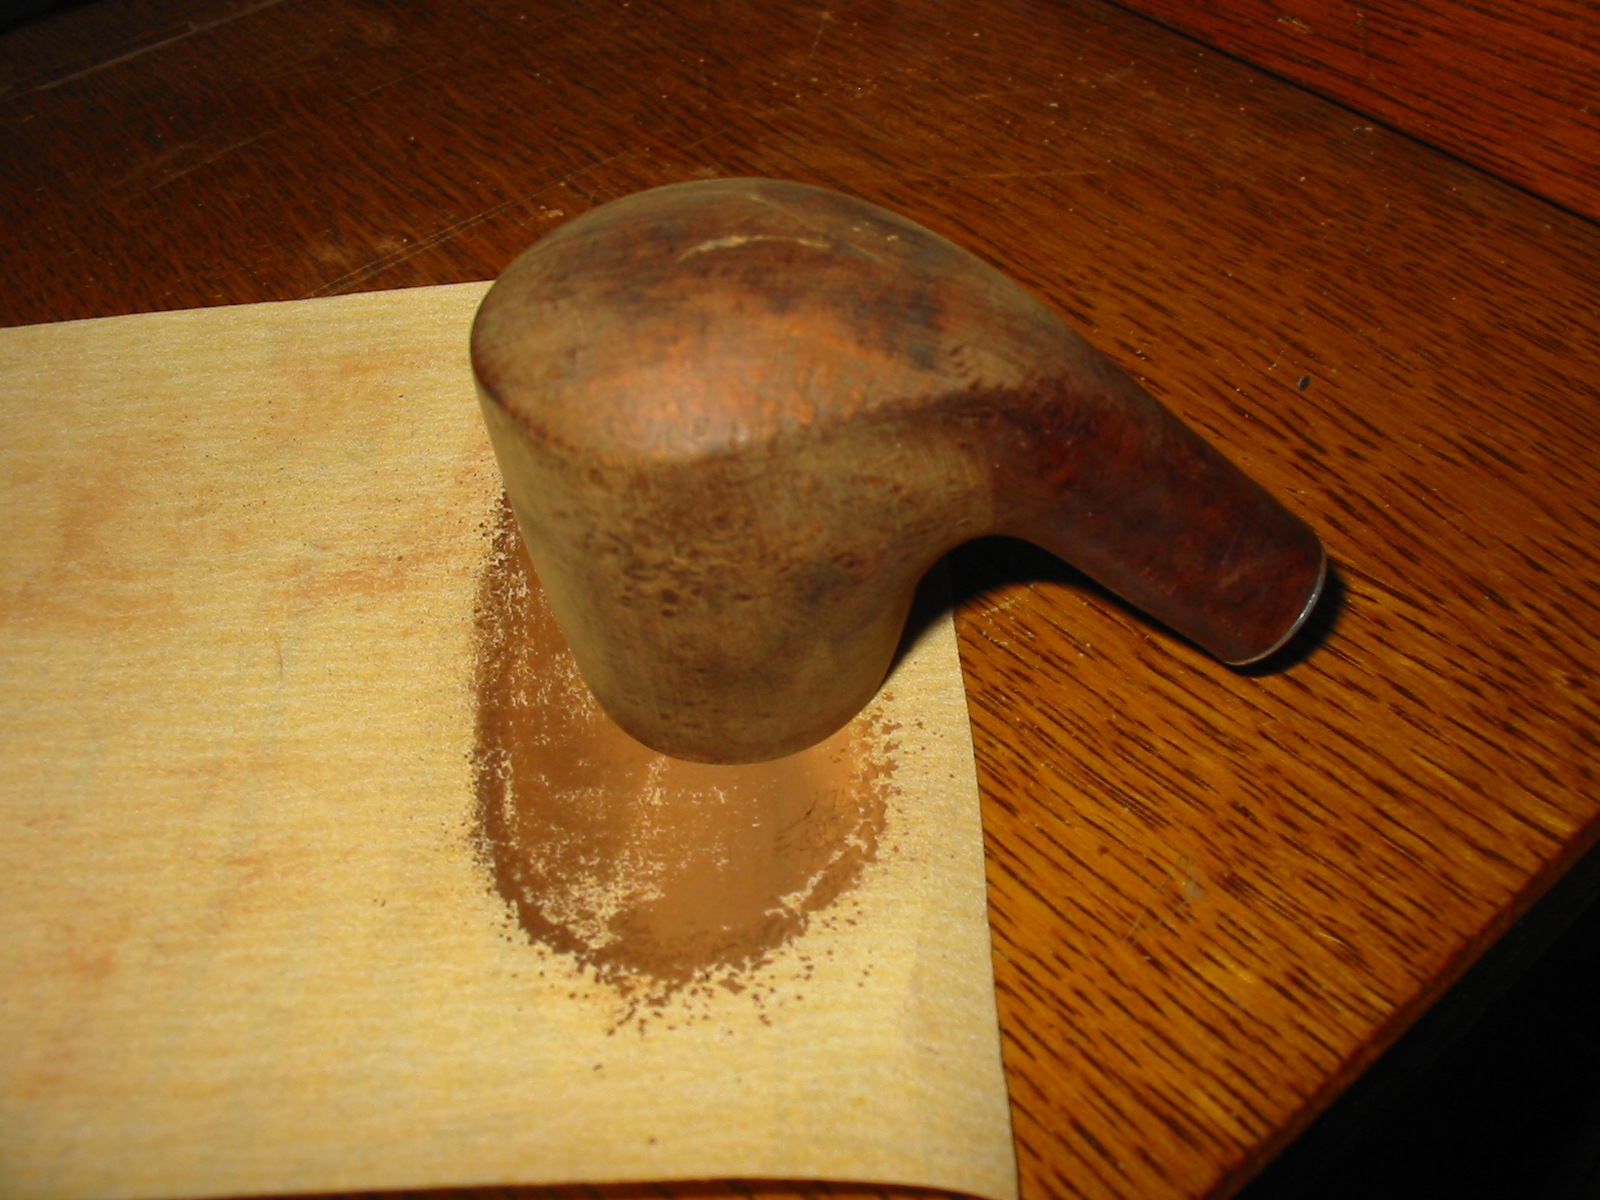
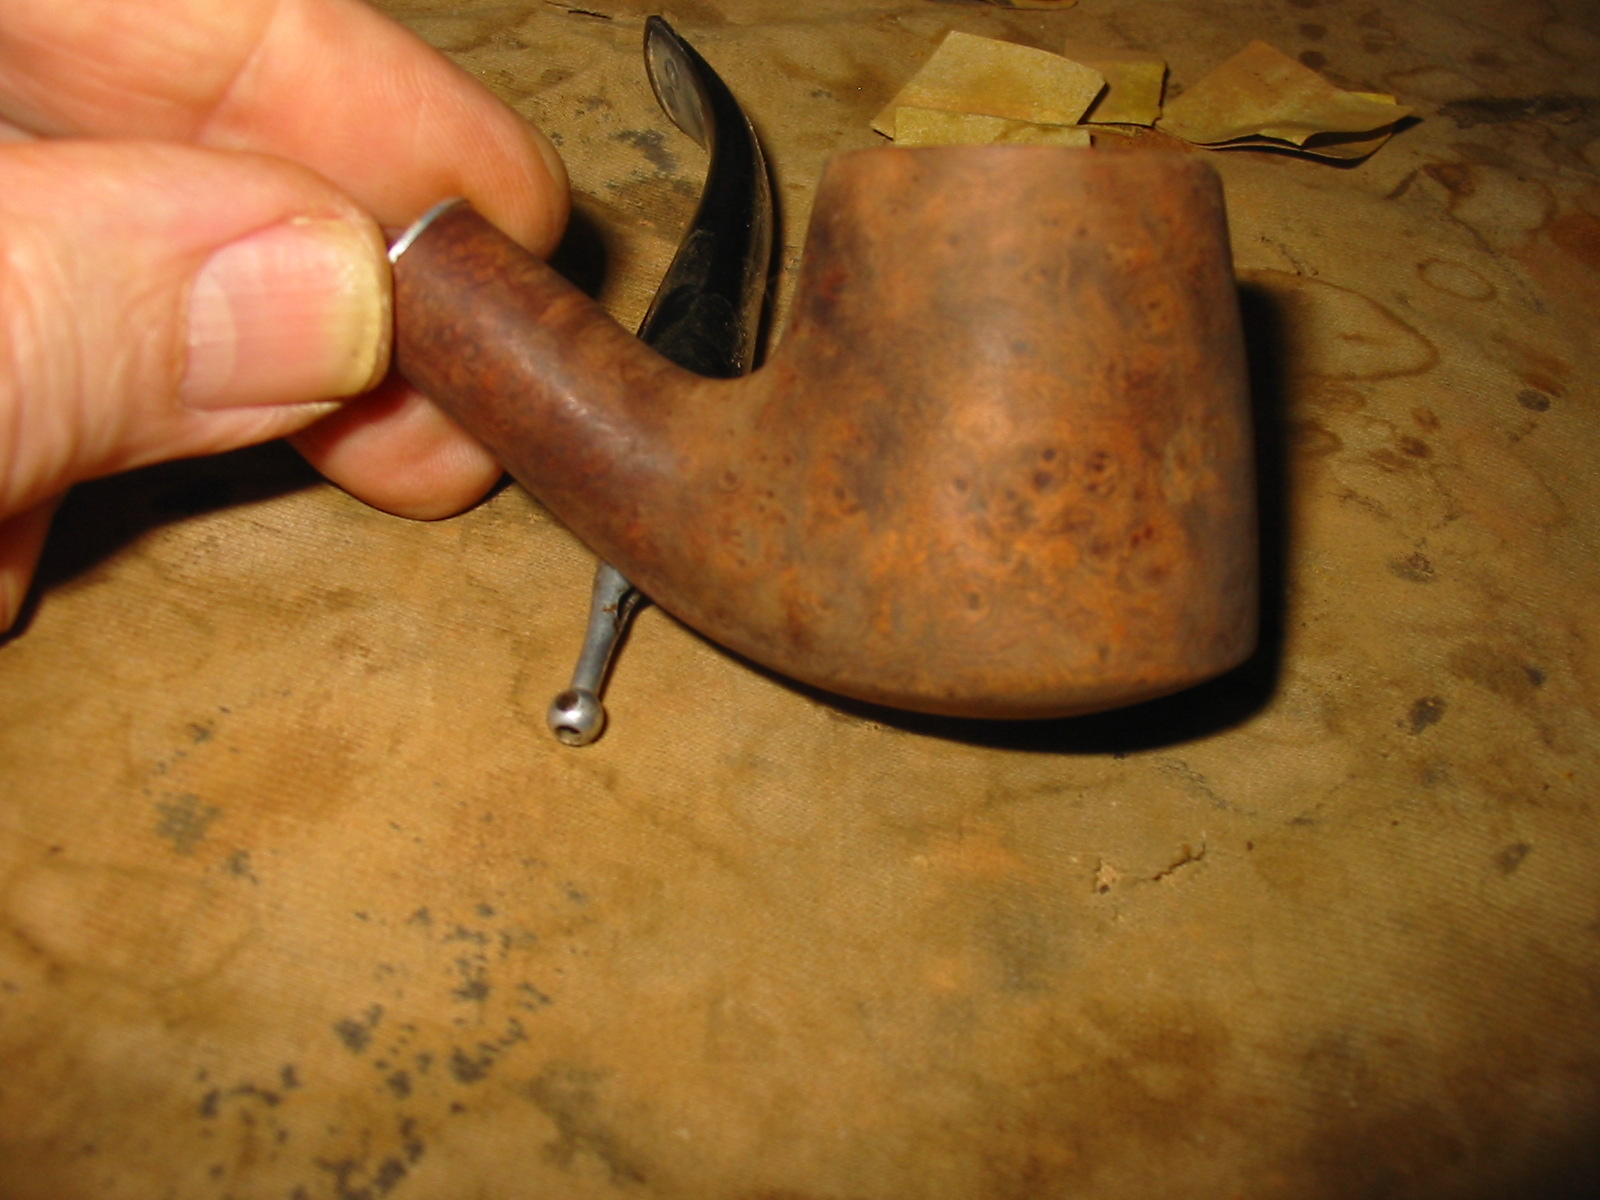
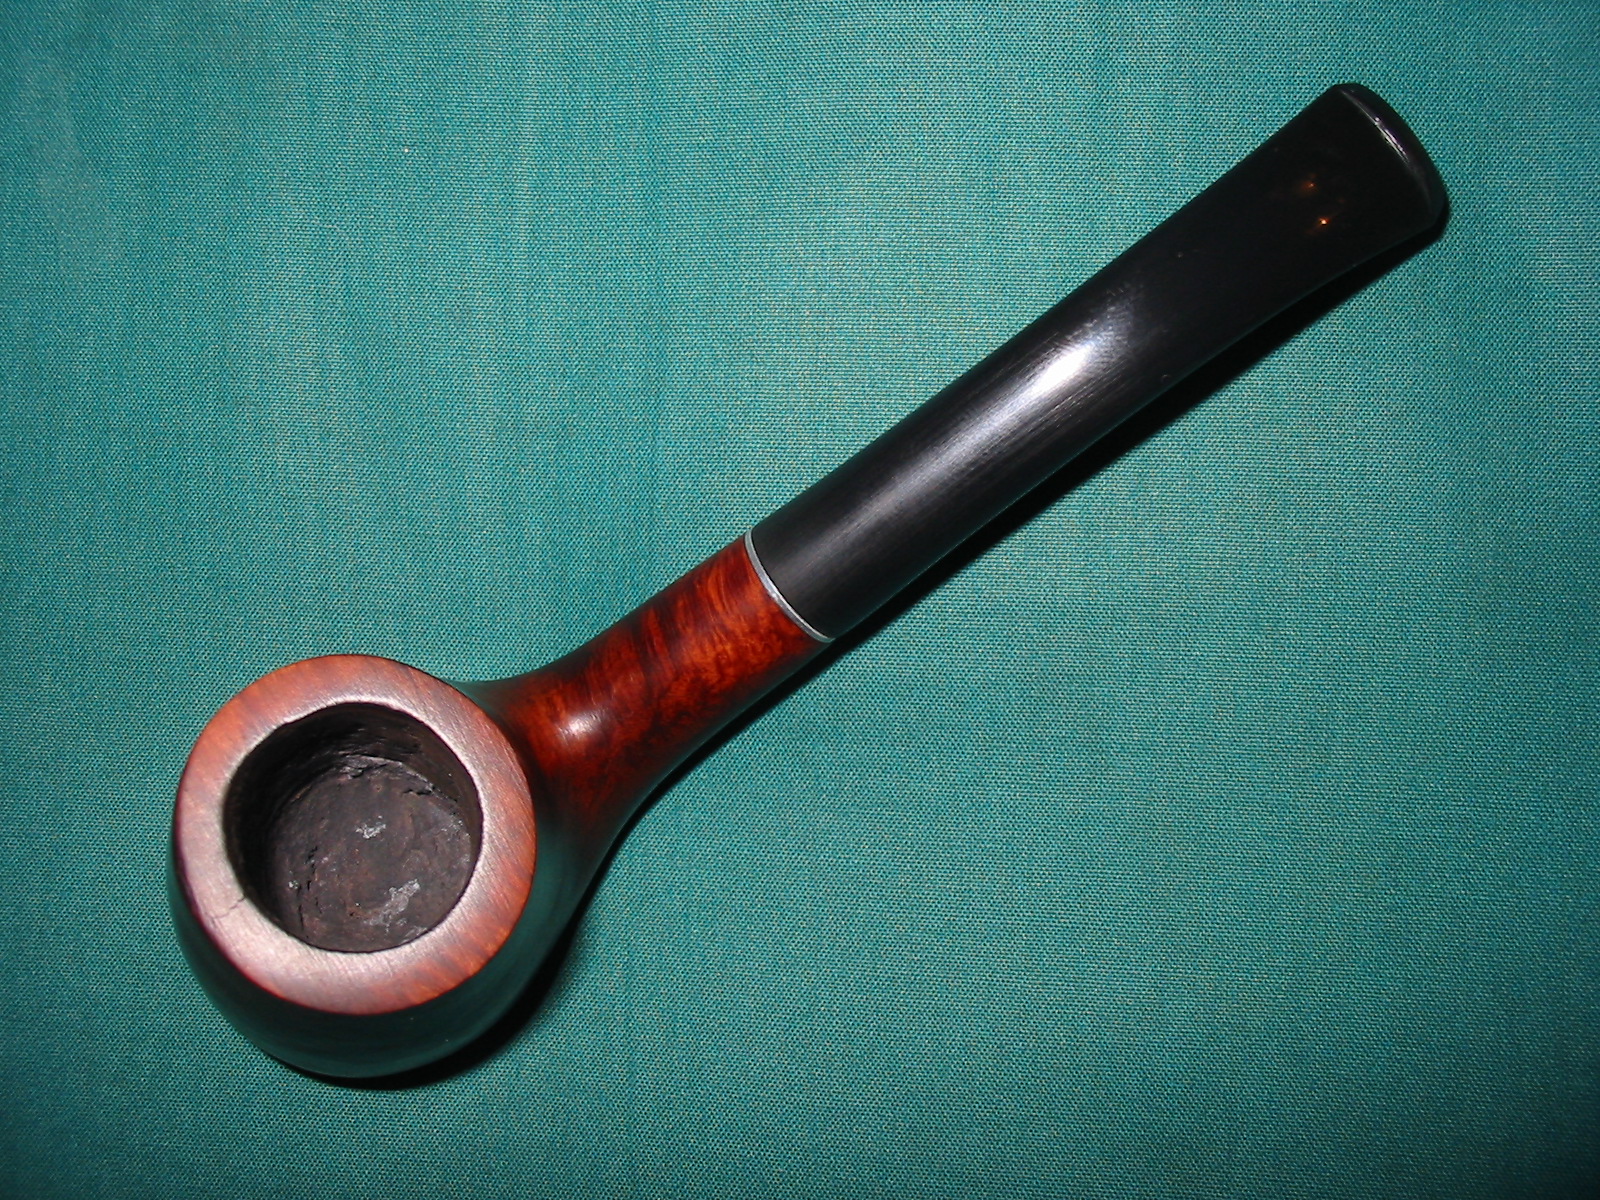
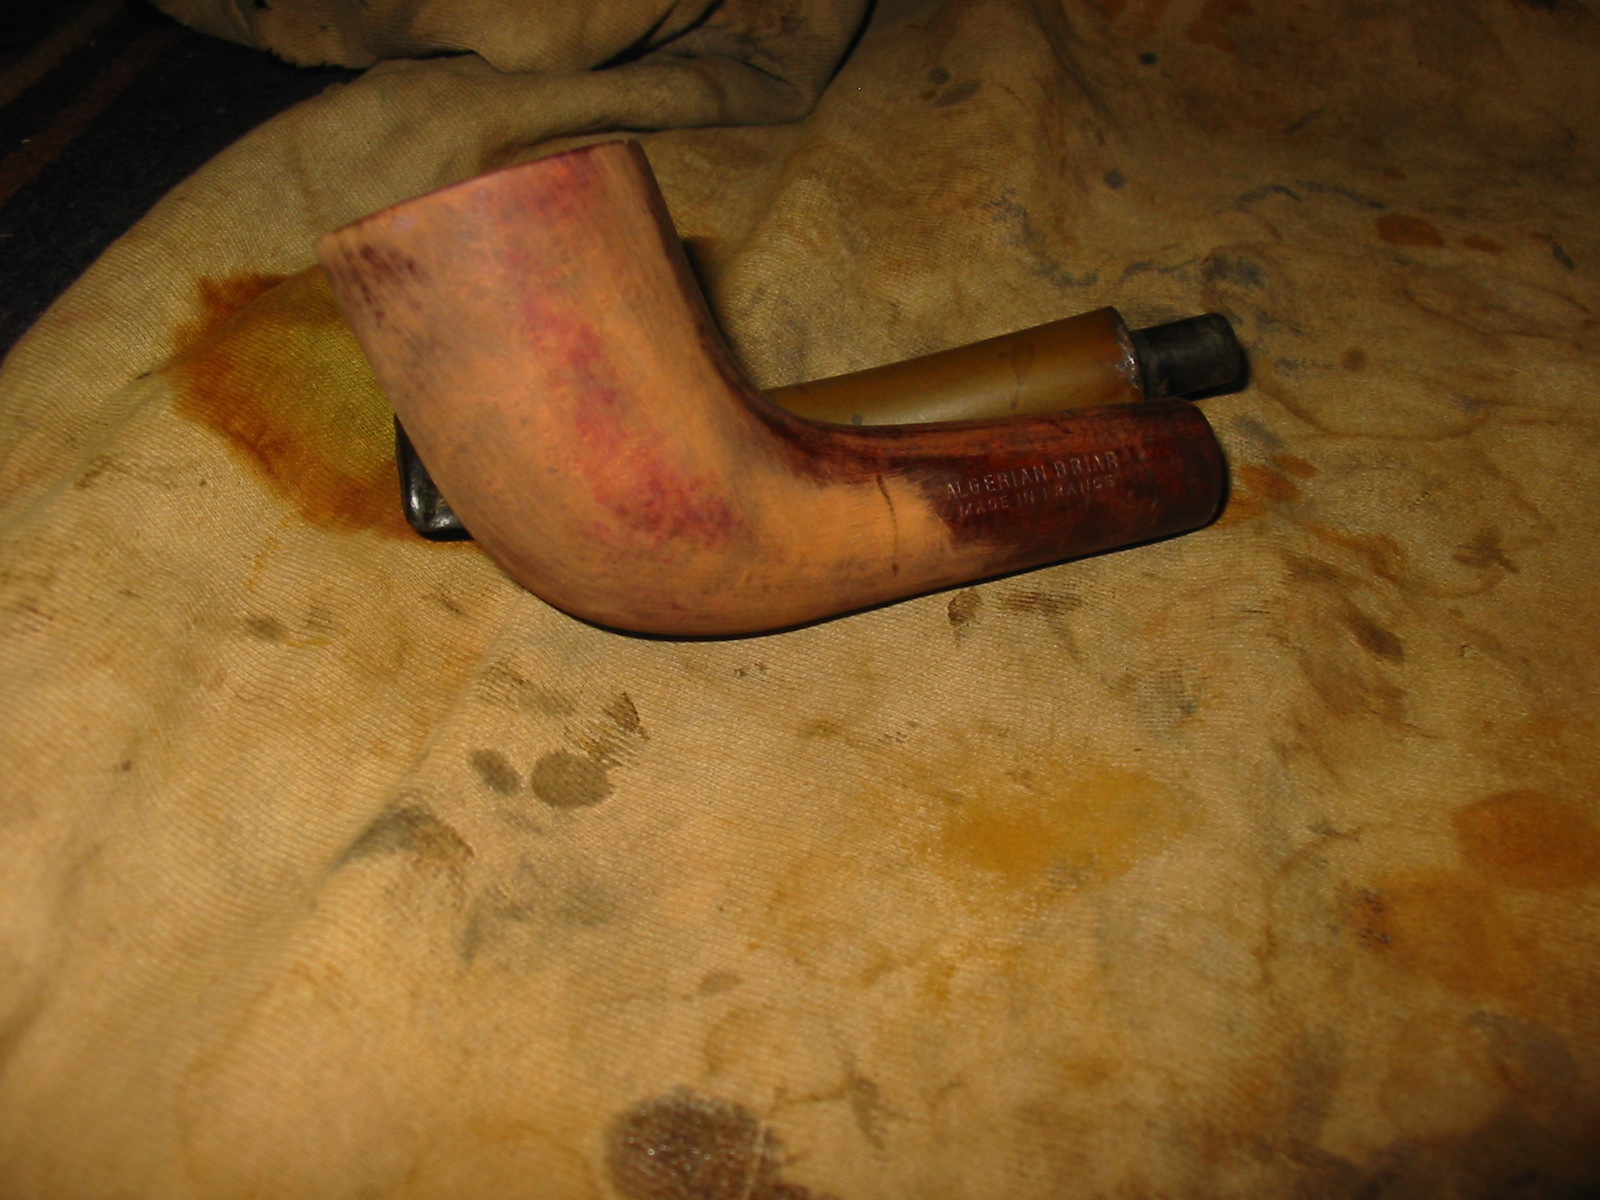
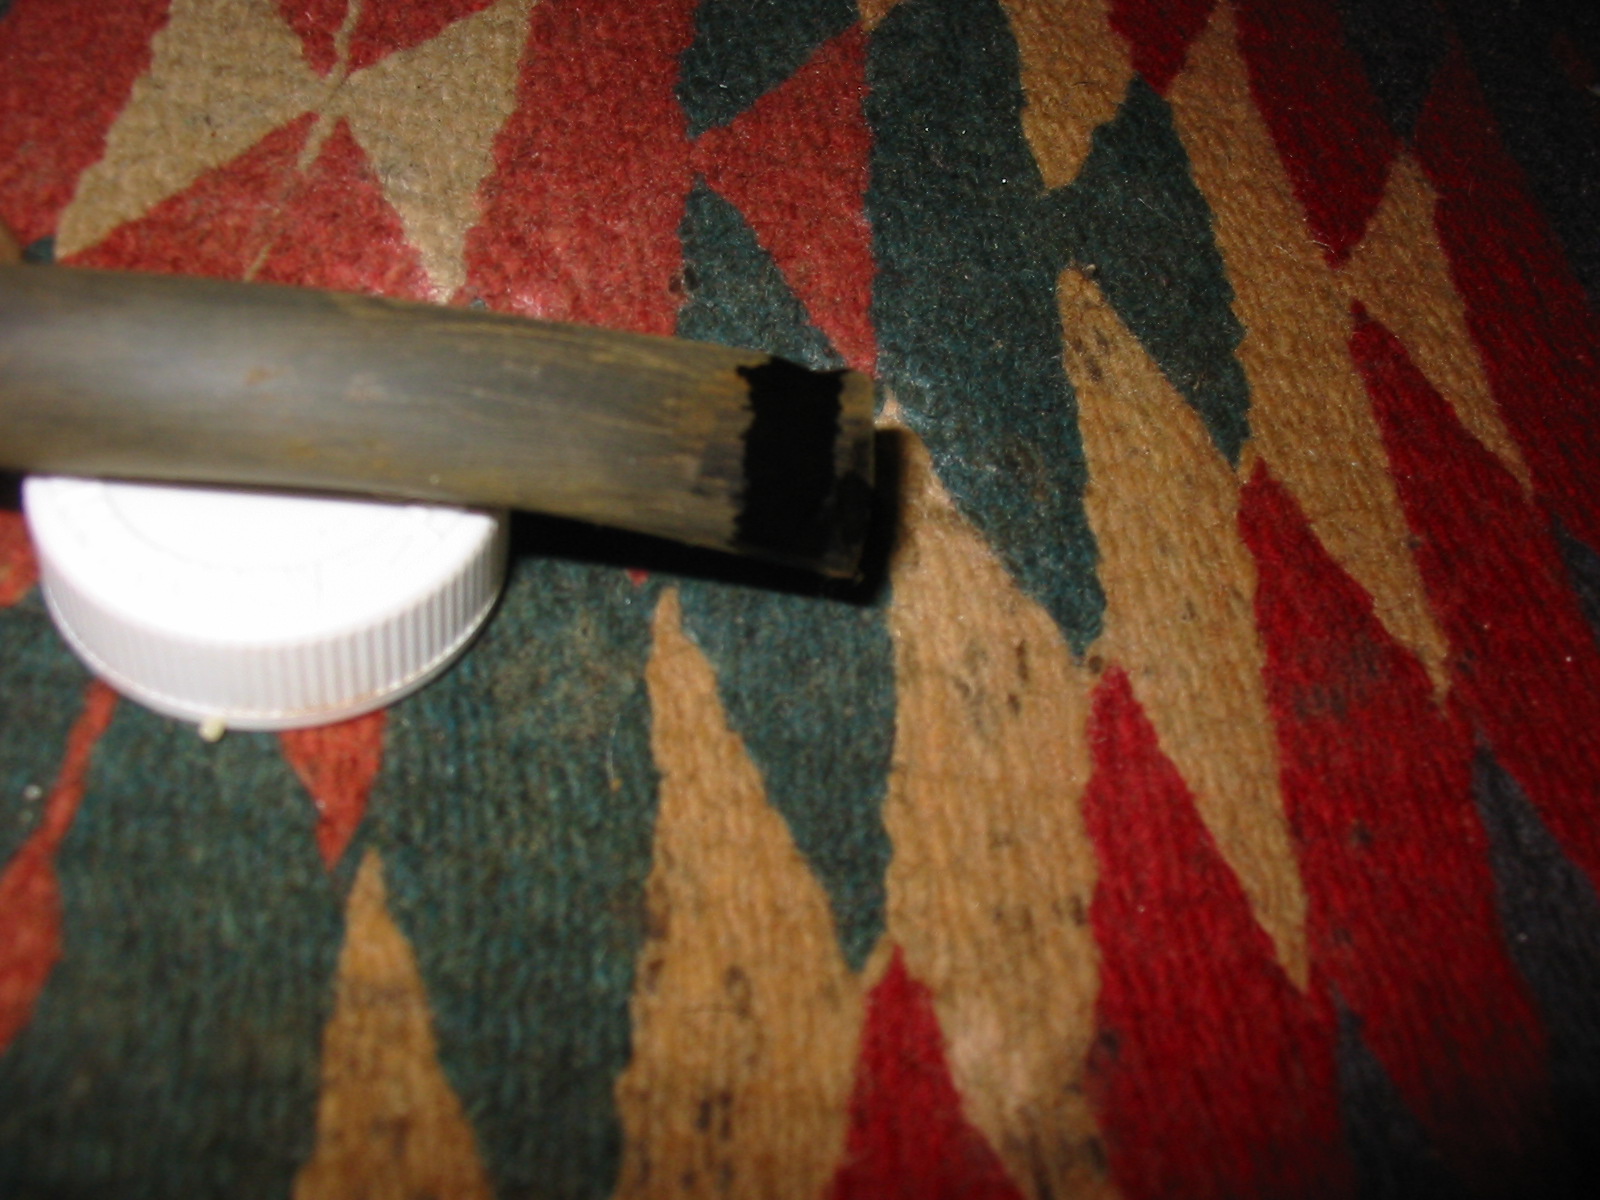
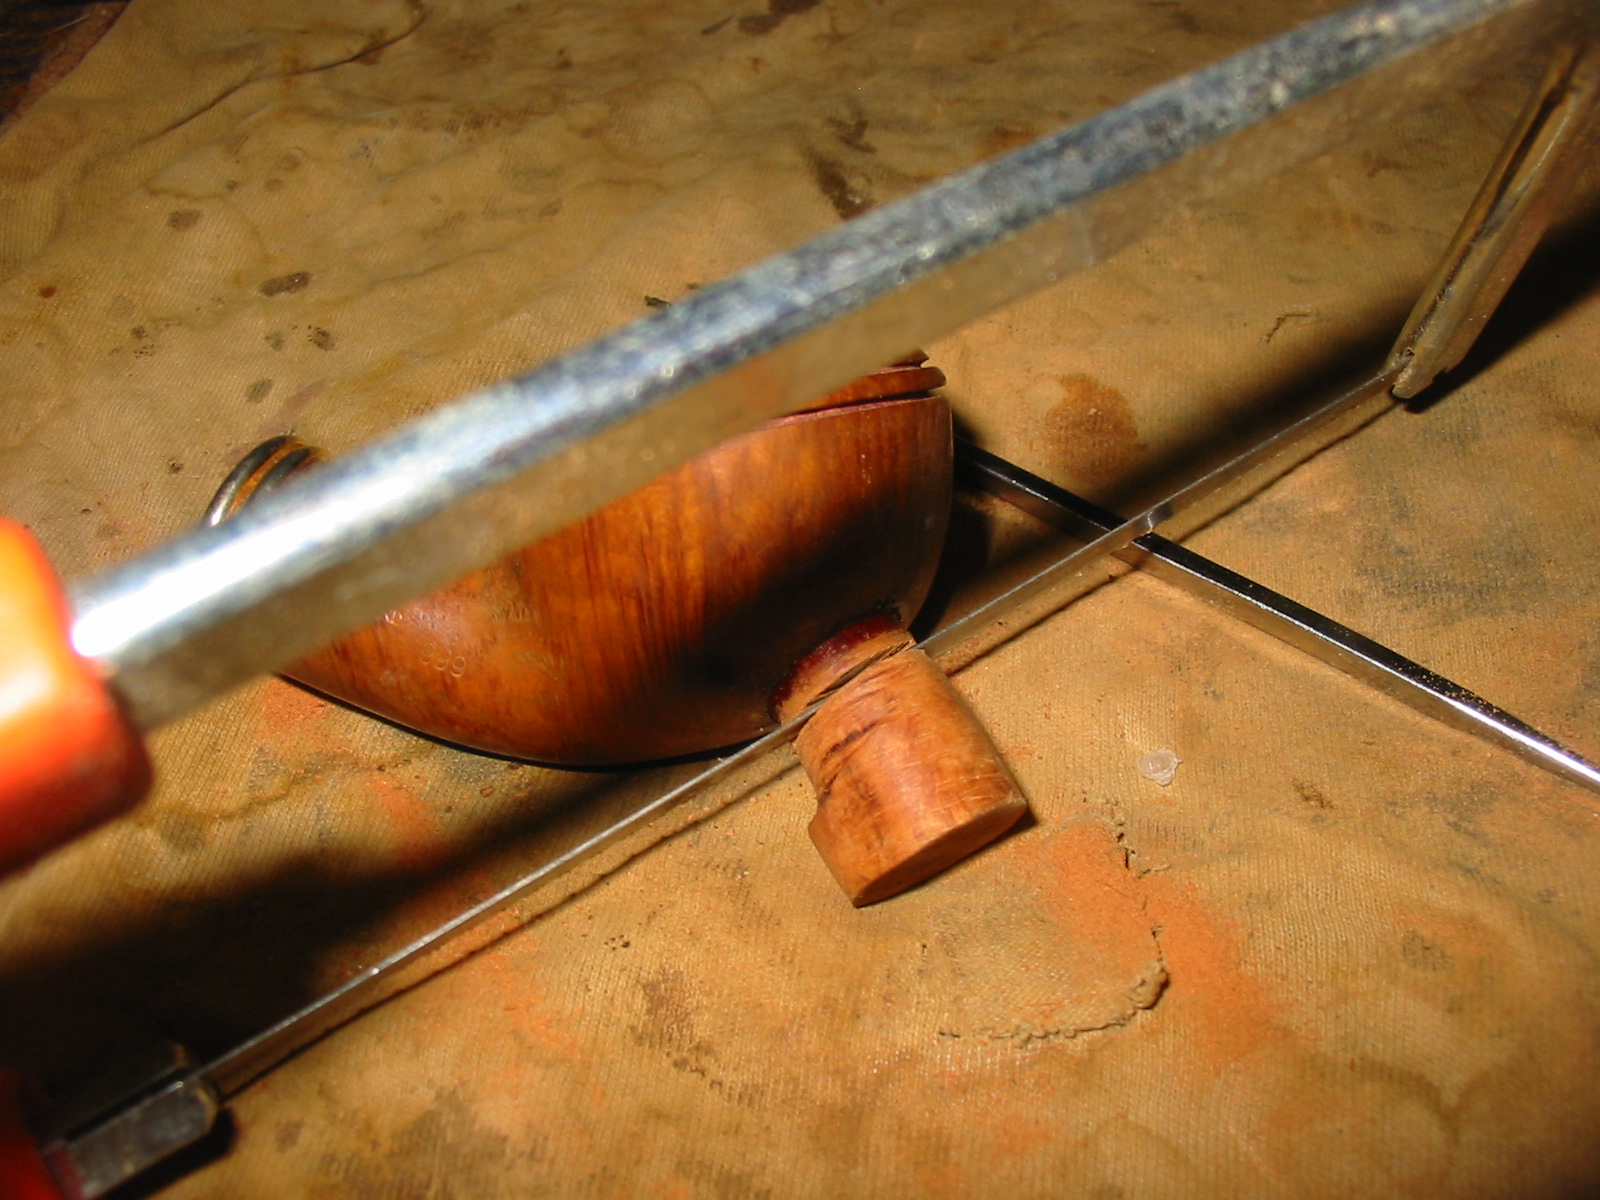
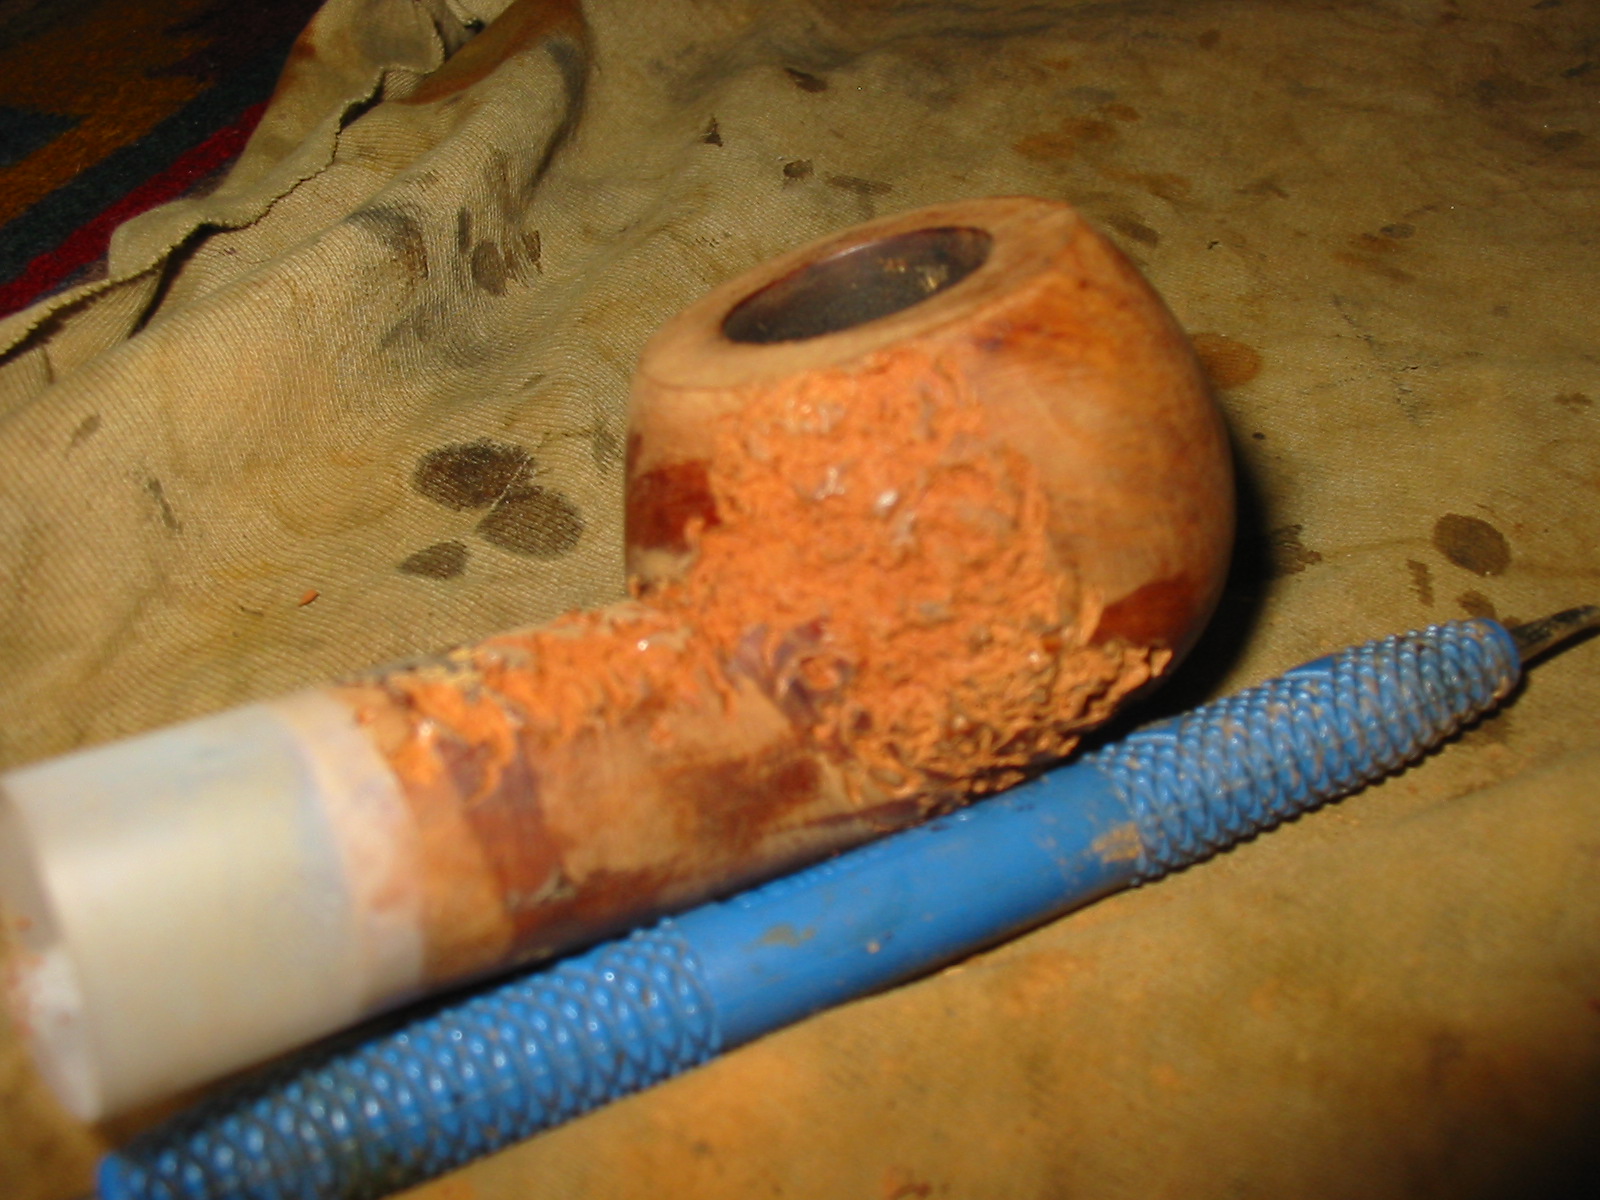
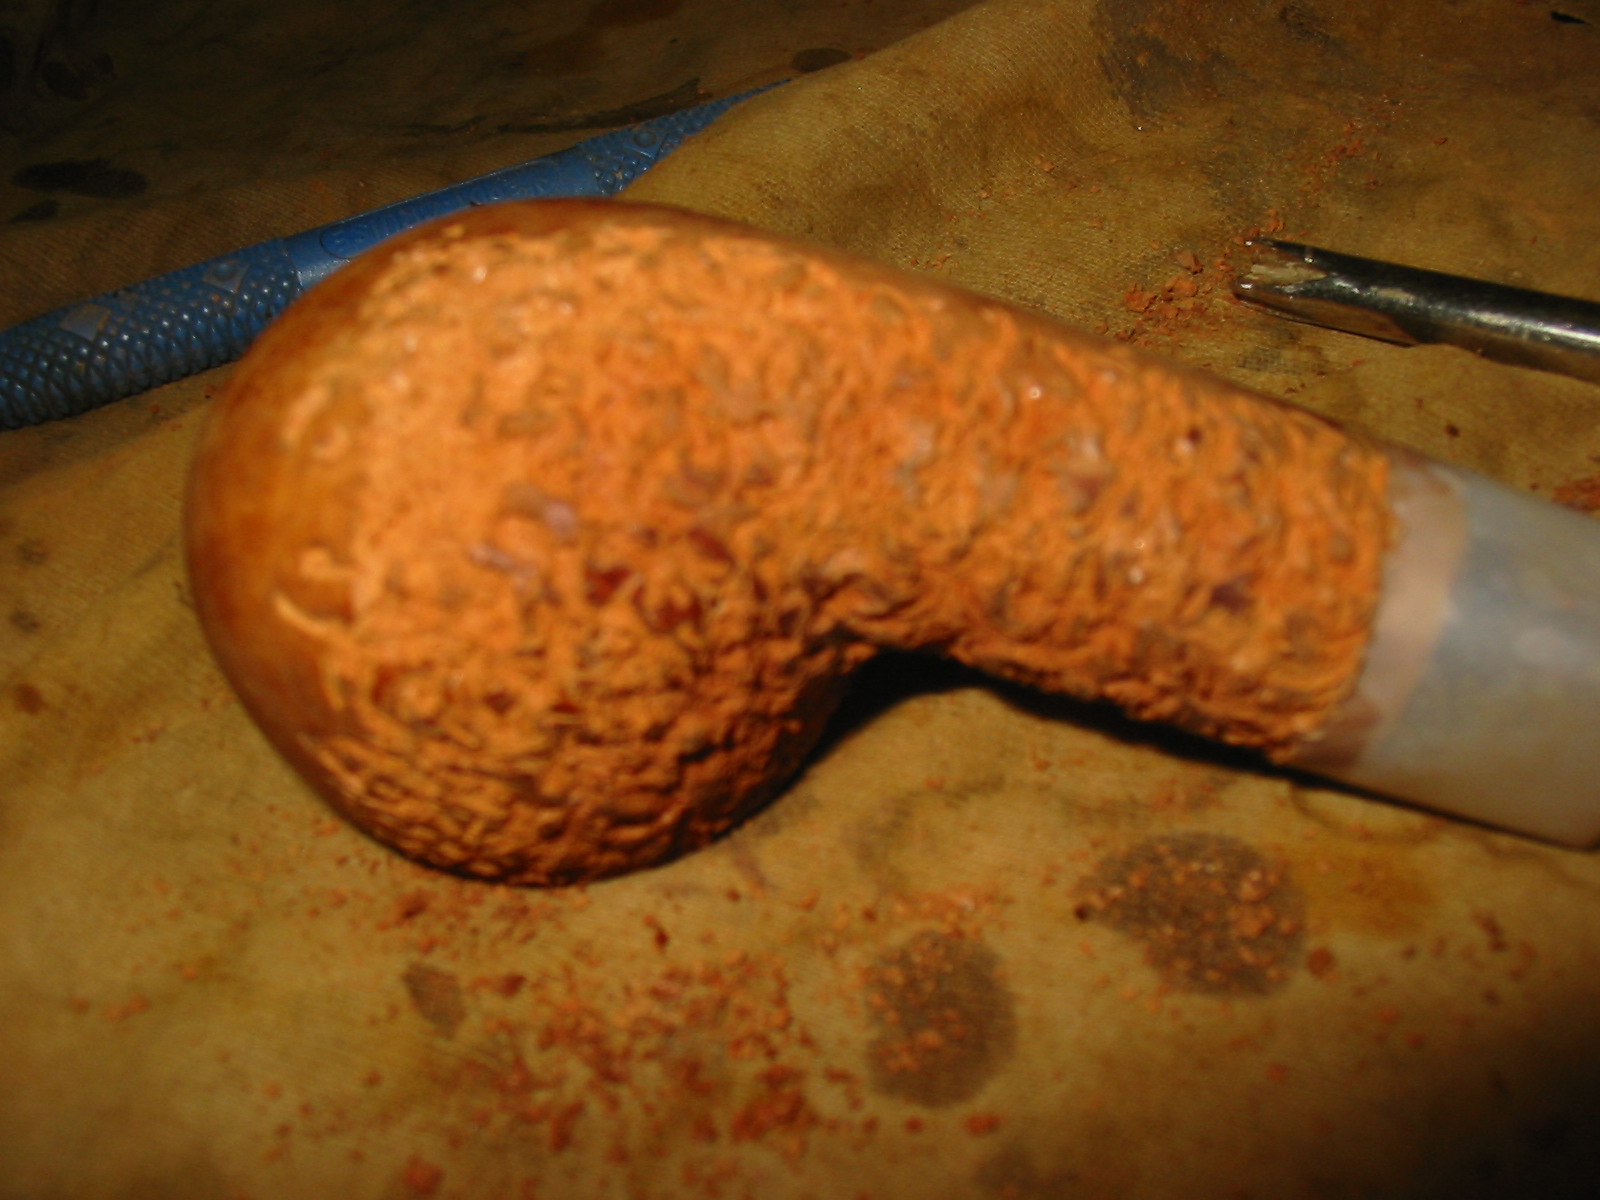
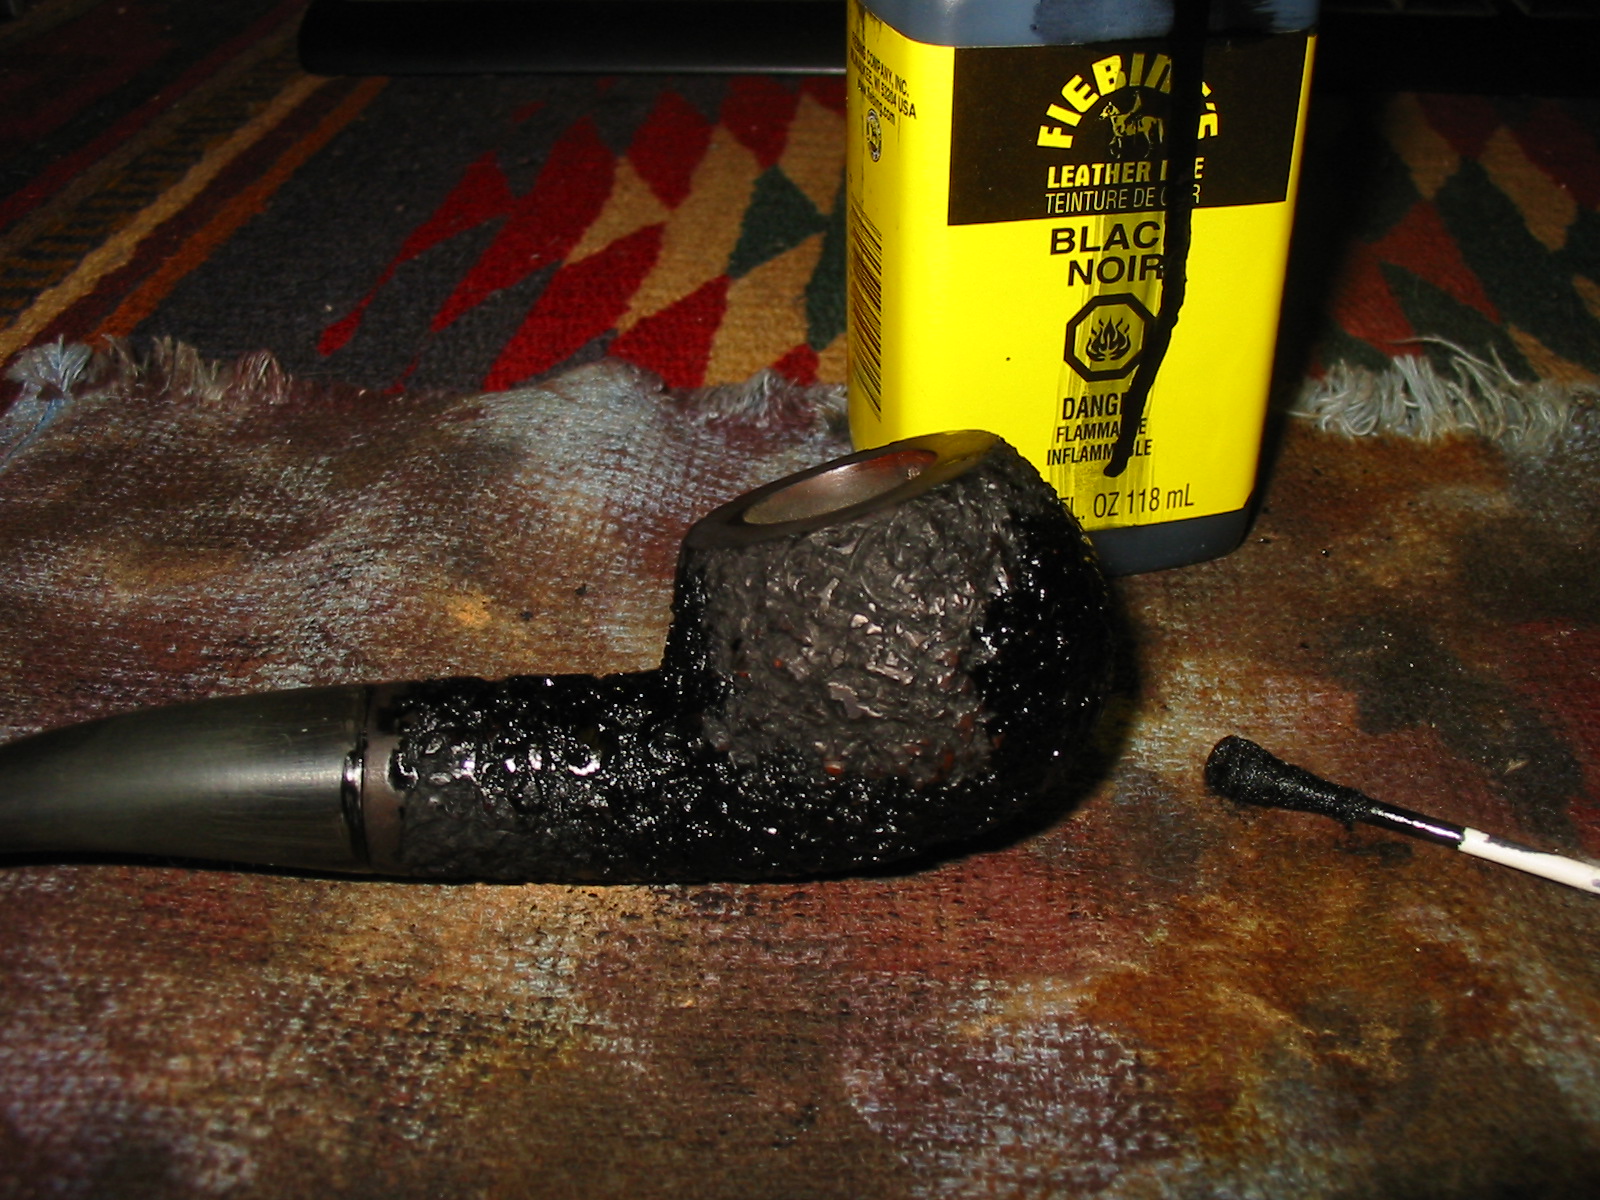
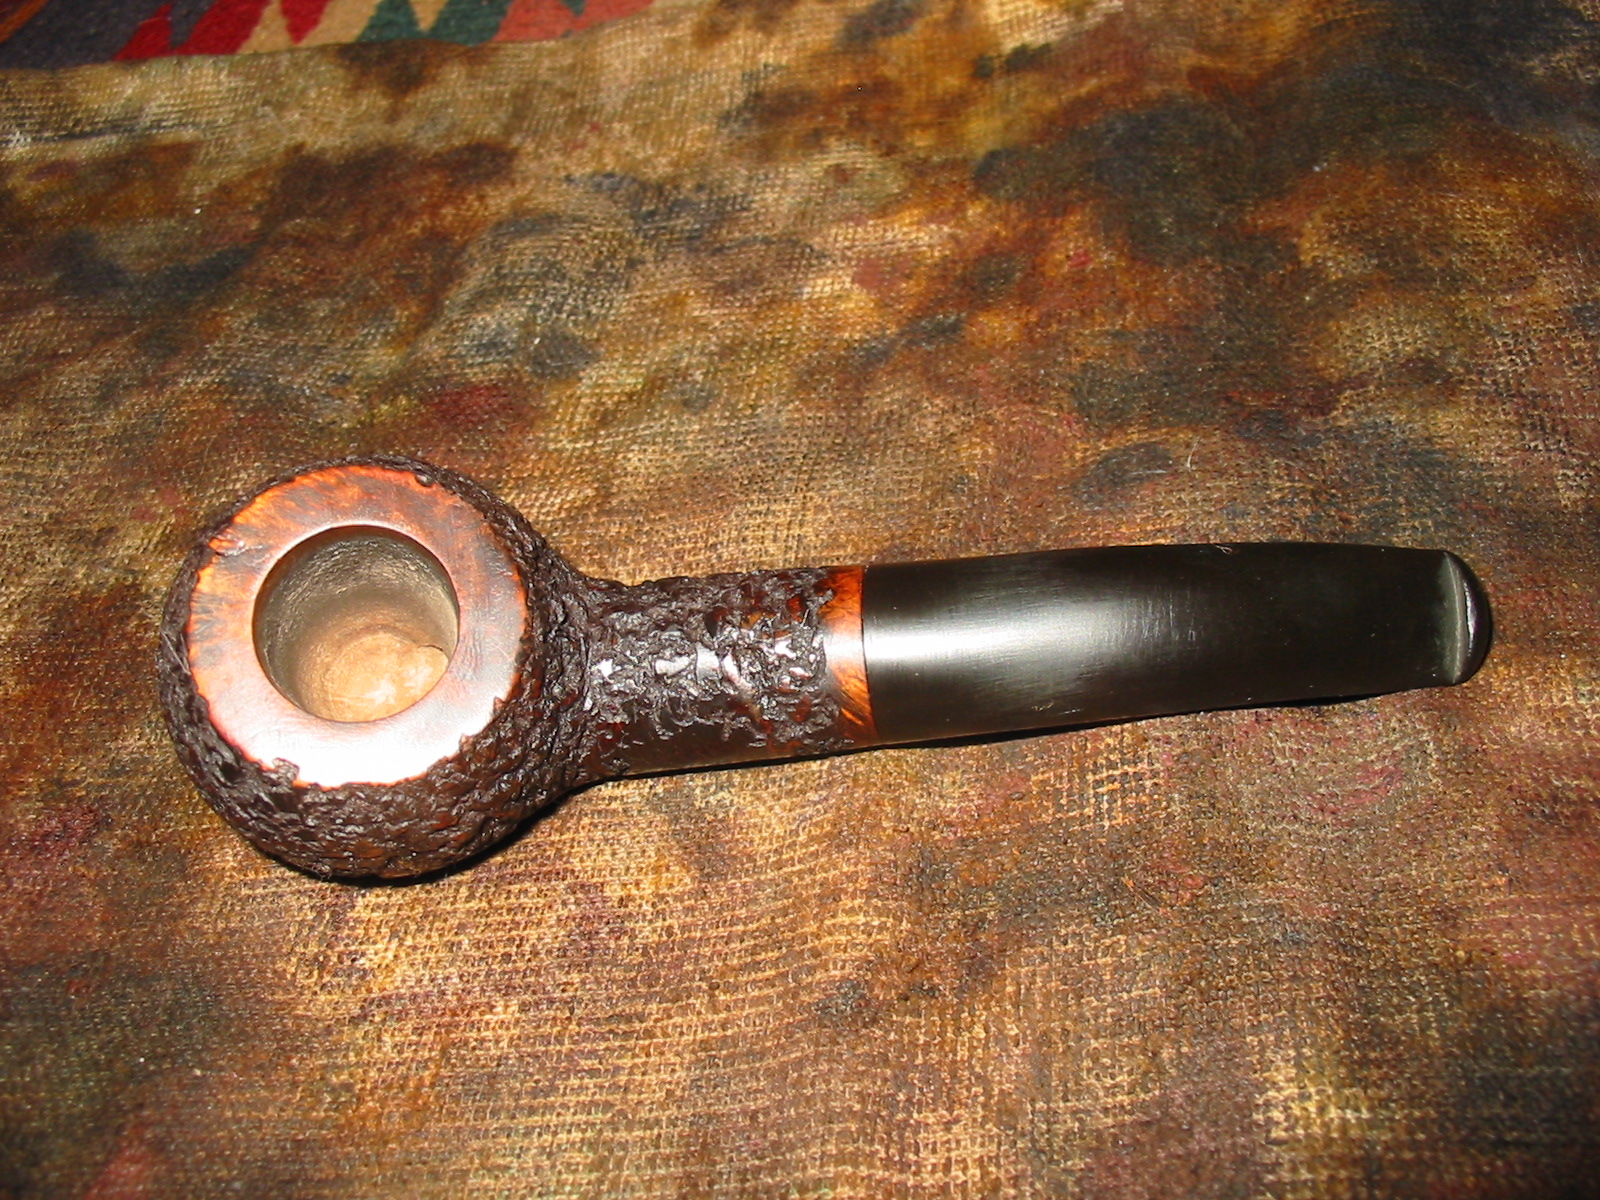
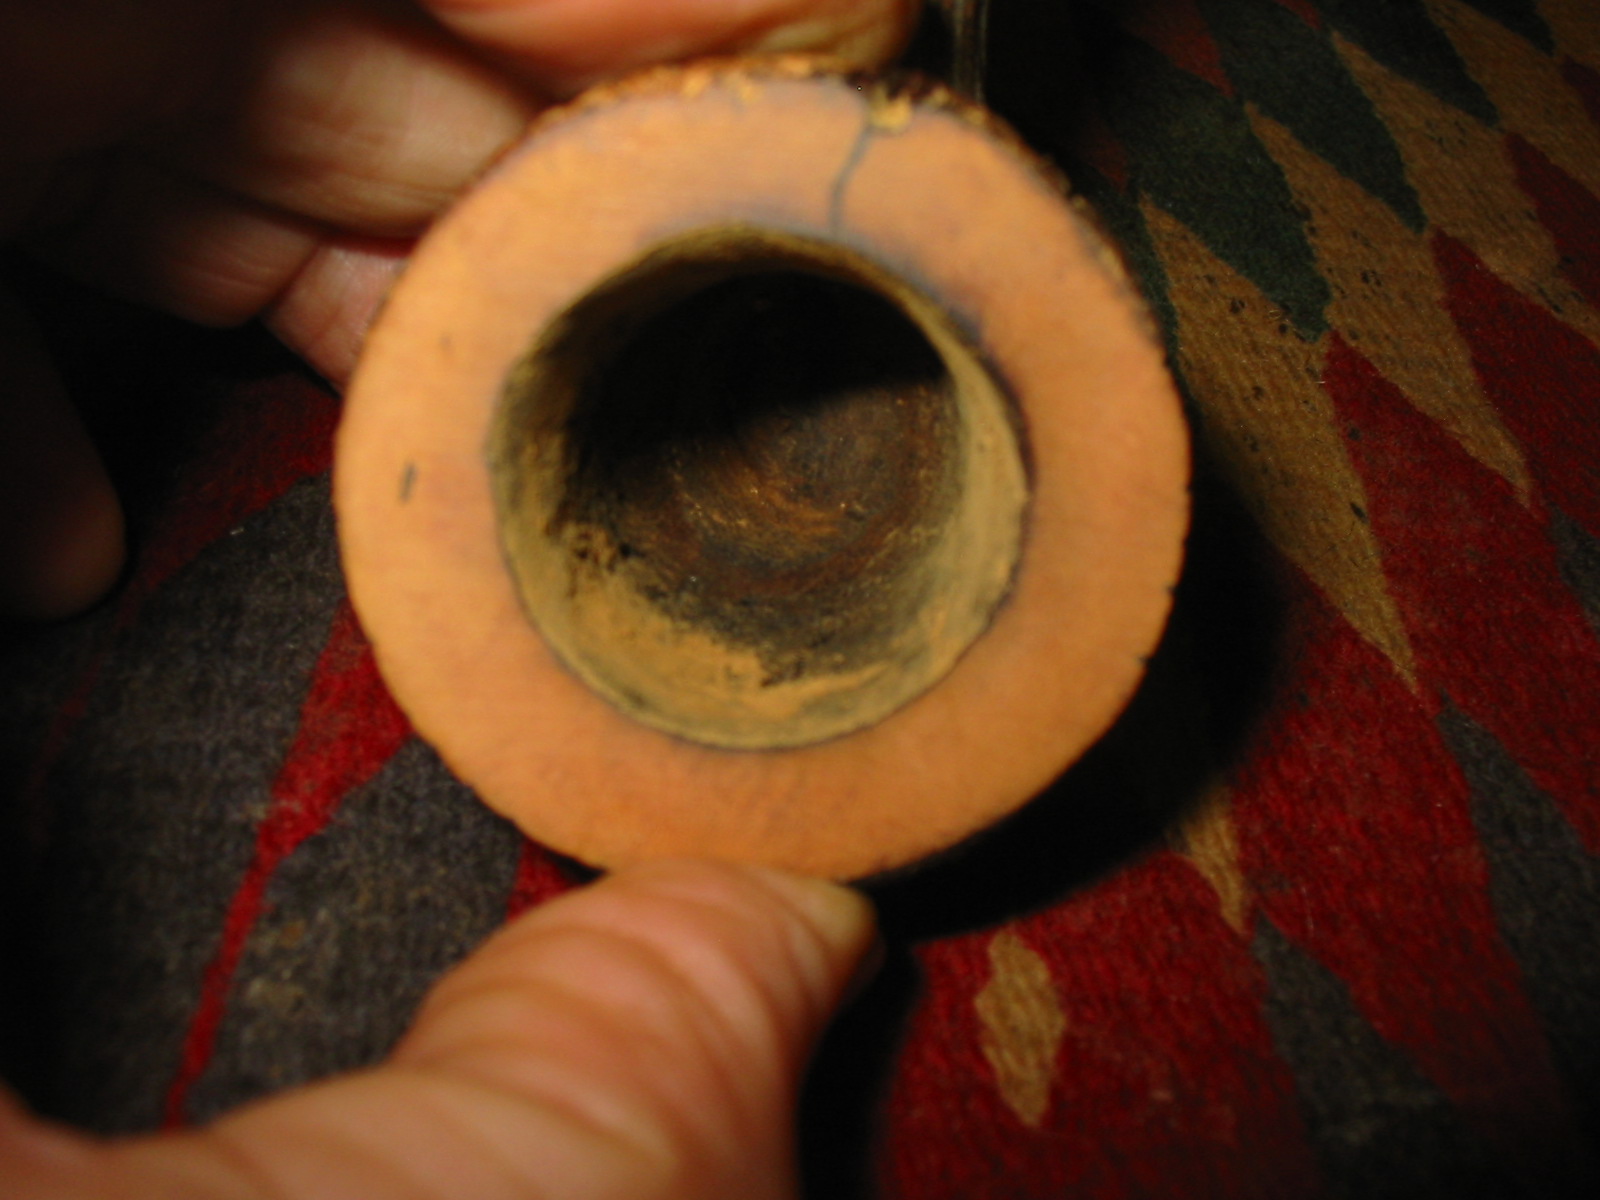
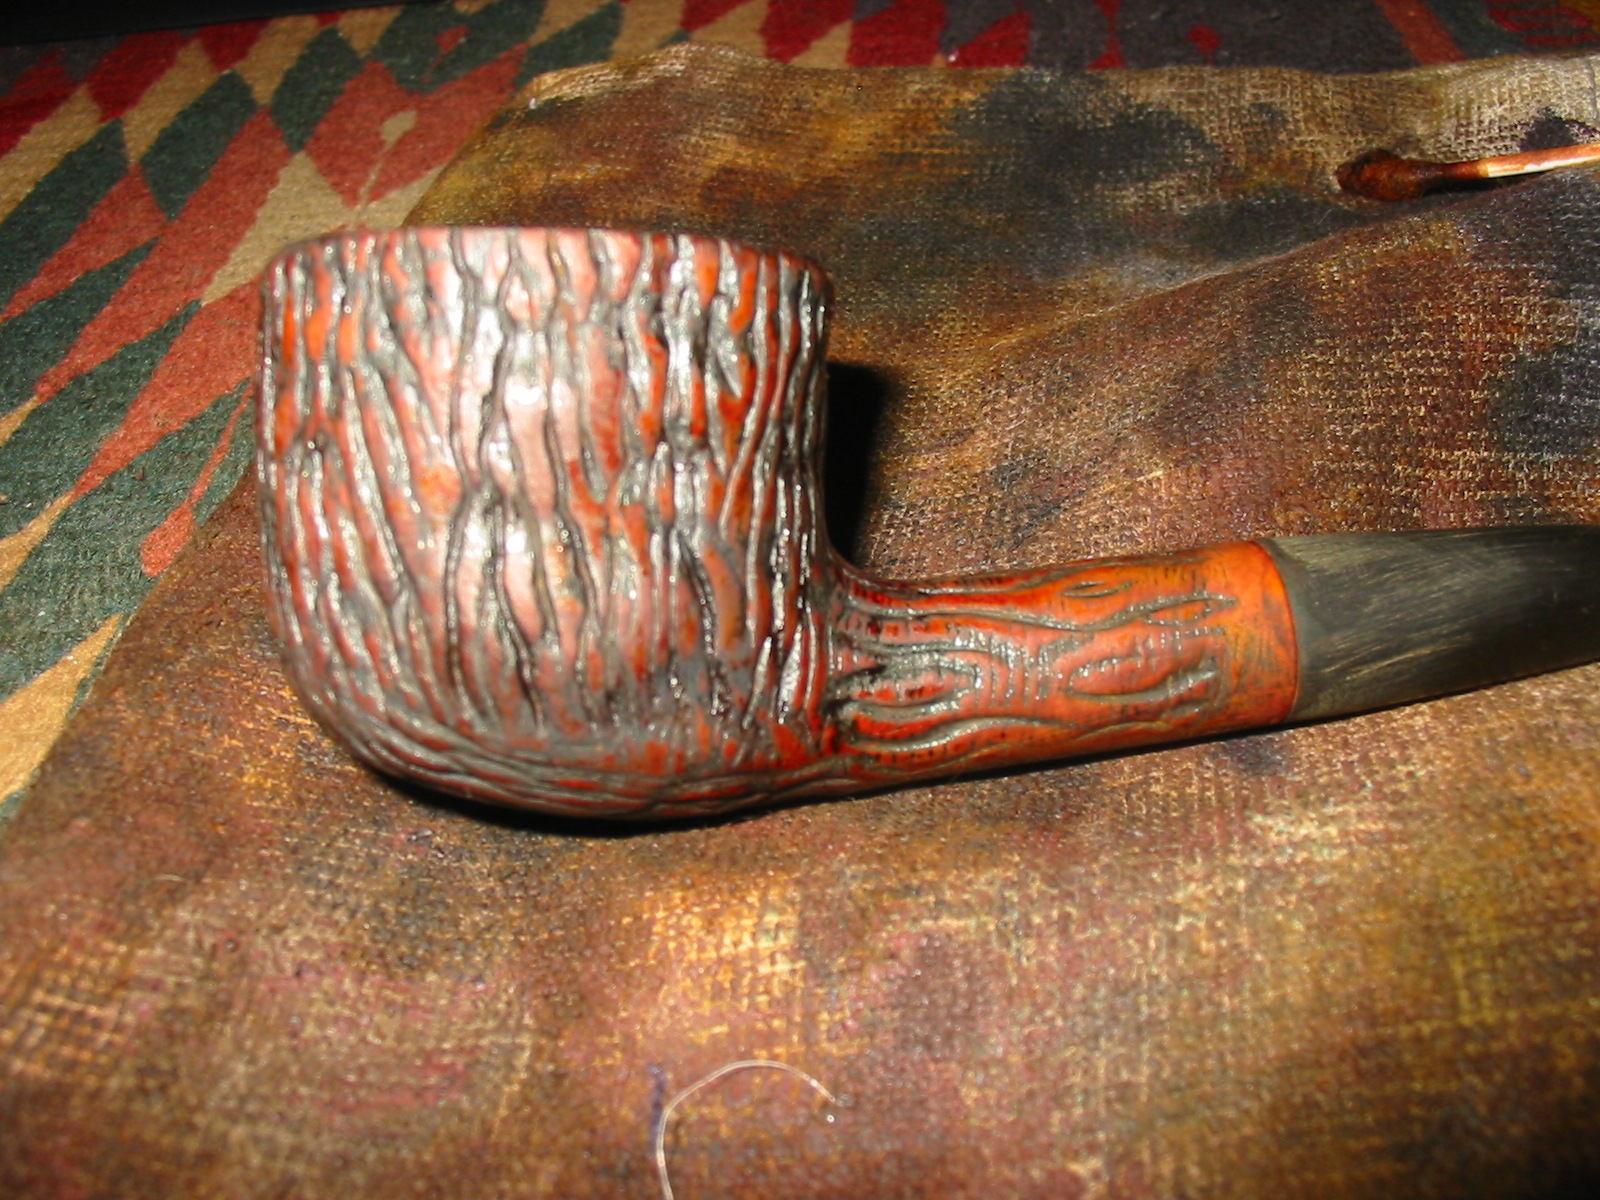
I picked at the surface of the rim with the dental pick and could see it was not going to work so I topped the bowl. I decided to make a smooth rim to match the smooth band on the shank and the bottom of the shank. They would set each other off well when the pipe was restained. I set up my topping board and a piece of 220 grit sandpaper and twisted the bowl into the sandpaper until I had removed the damaged portion of the rim. The crack on the surface looked as if it had been filled already with some sort of glue and it was solid. This is visible in the photos below.
IMG_5037

IMG_5038

IMG_5039

IMG_5040

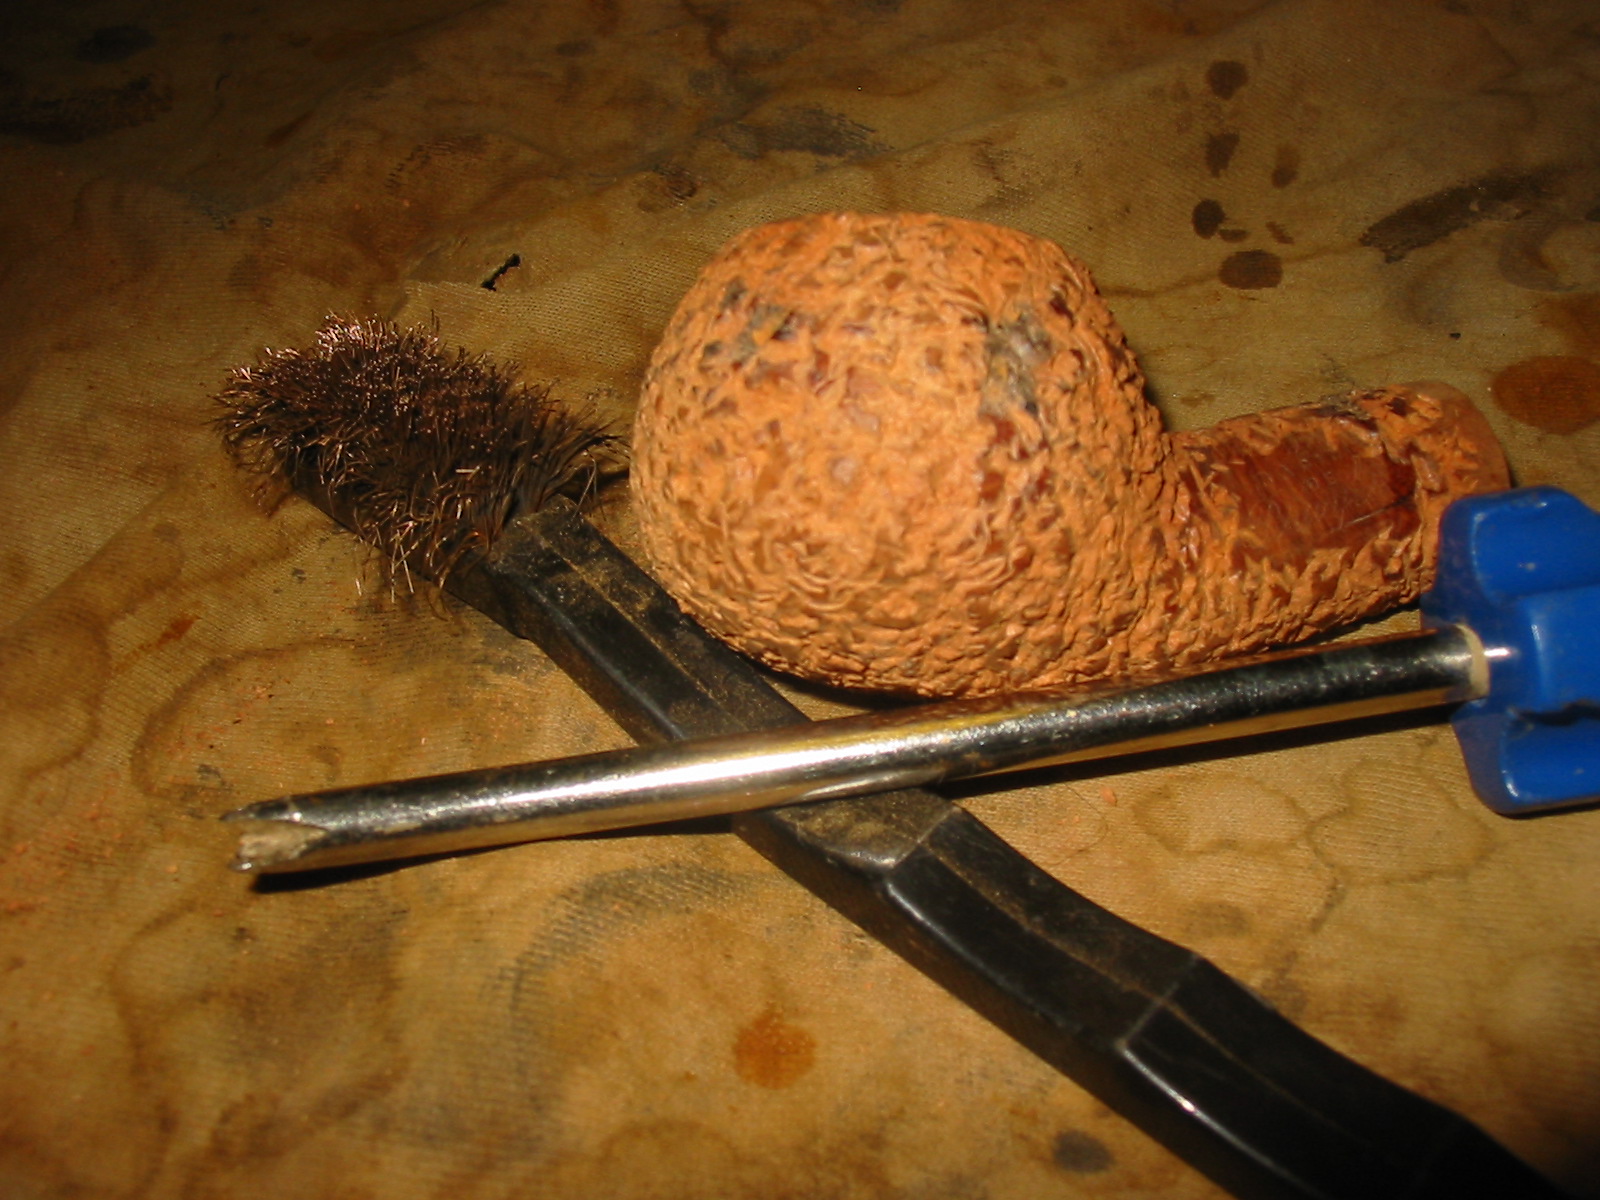
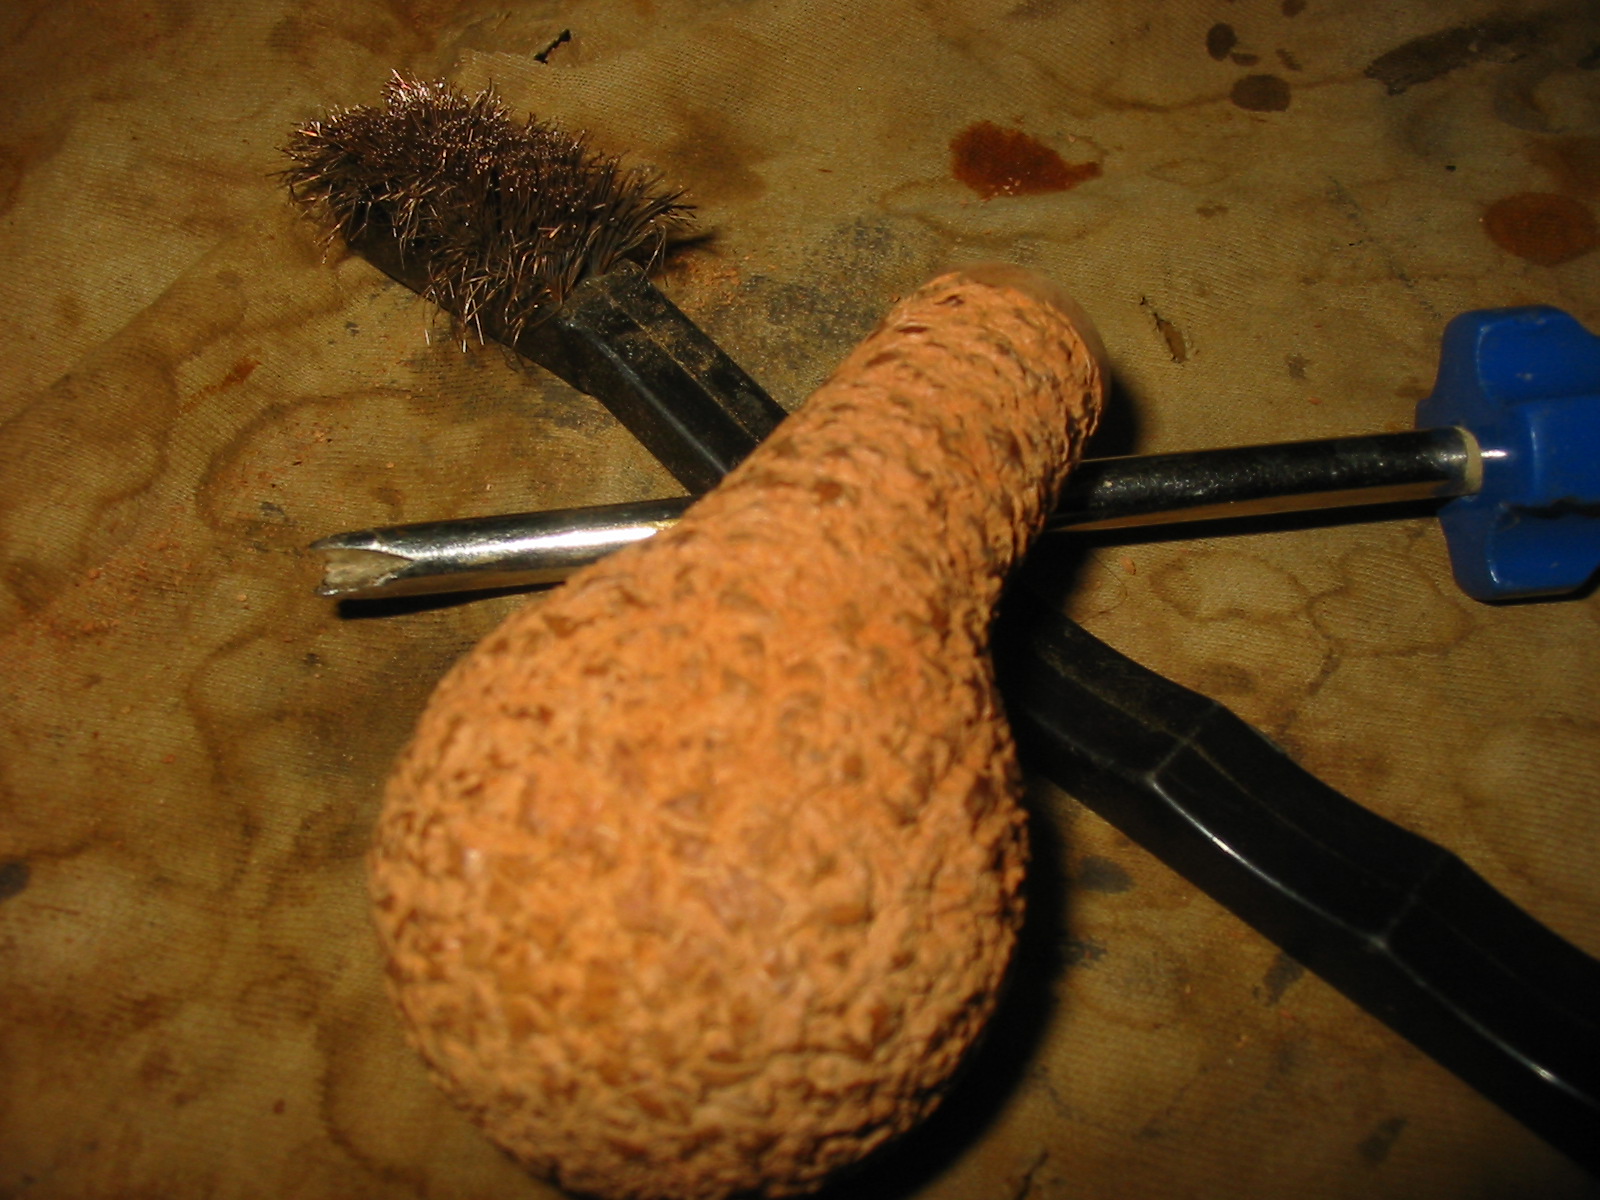
Once the bowl was topped I dropped it in the alcohol bath to soak and loosen the grit and grime that filled all of the rustication on the sides of the bowl. It was a sticky and tarry mess and I wanted to soften it. I soaked it for about an hour and then scrubbed it with a brass tire brush. I picked out all of the grooves with the dental pick and then put it back in the alcohol bath for yet another hour. Once it came out of the bath I scrubbed a final time with the brush and then picked out any remaining grit in the grooves. I then wiped the bowl down with acetone on cotton pads to remove the softened finish and the remaining grime.
IMG_5041

IMG_5042

IMG_5043

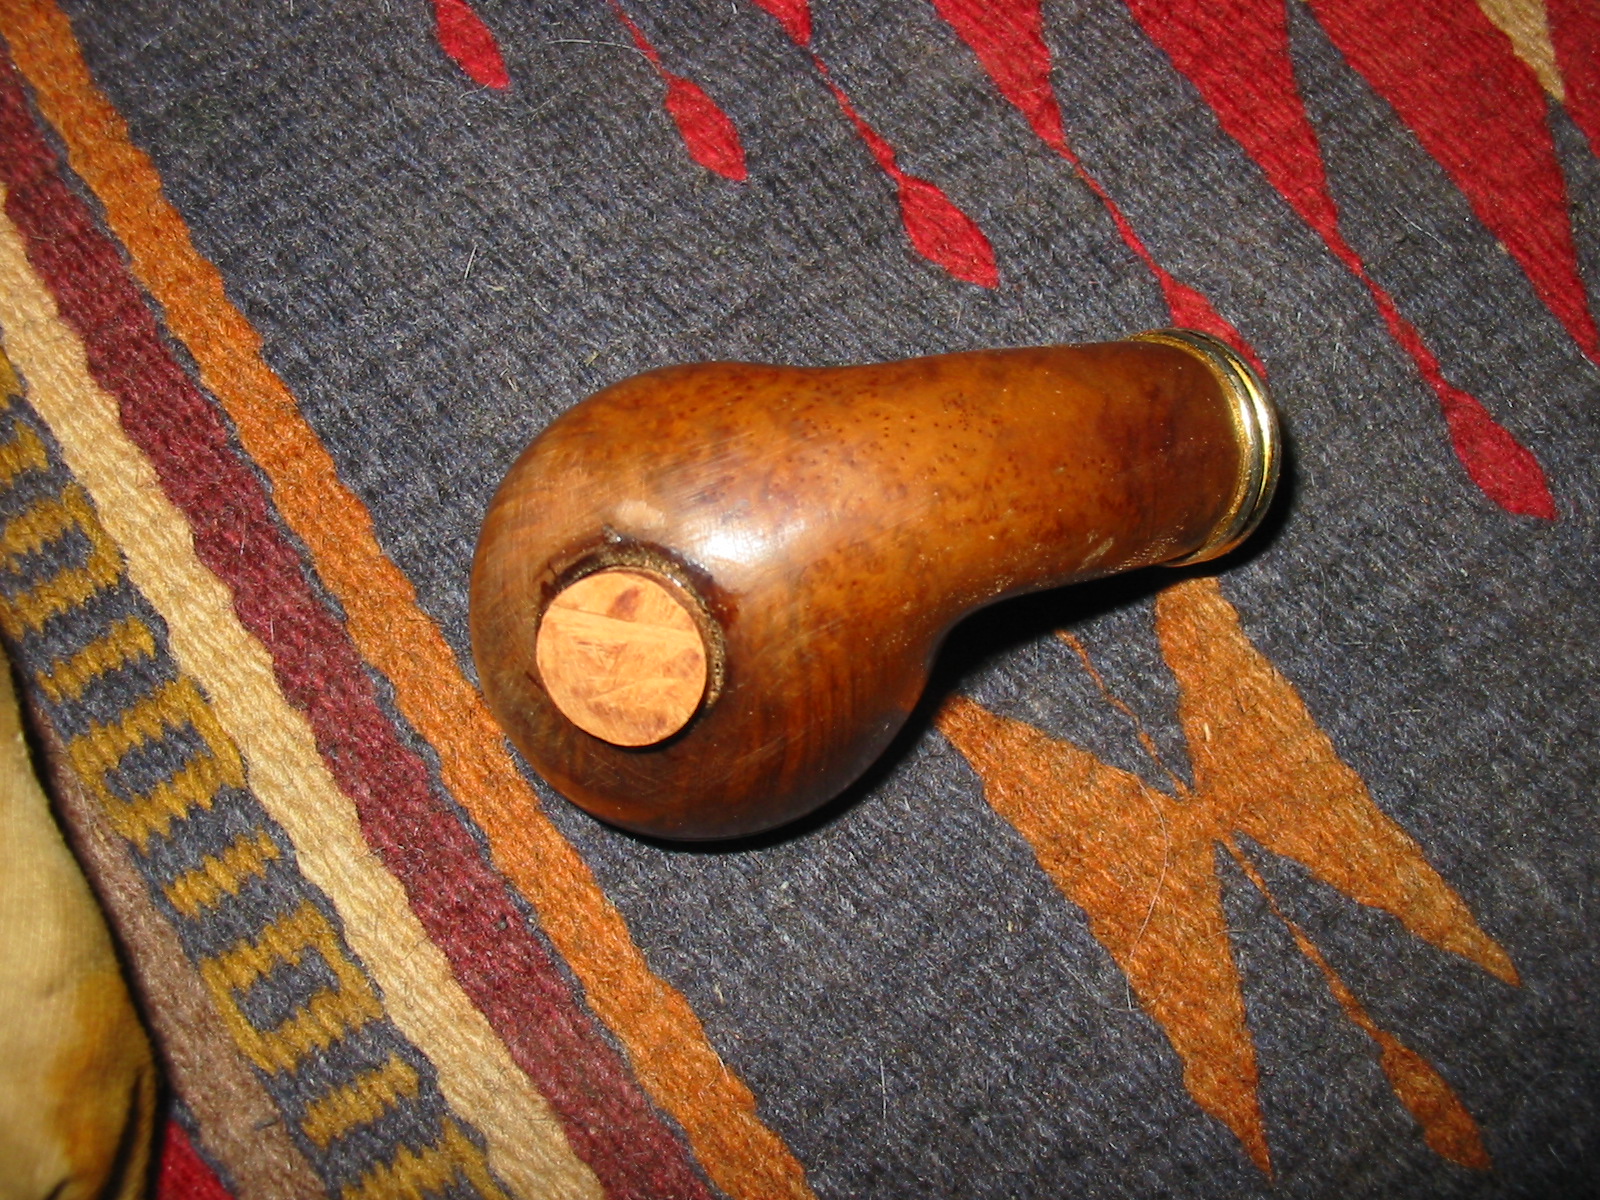
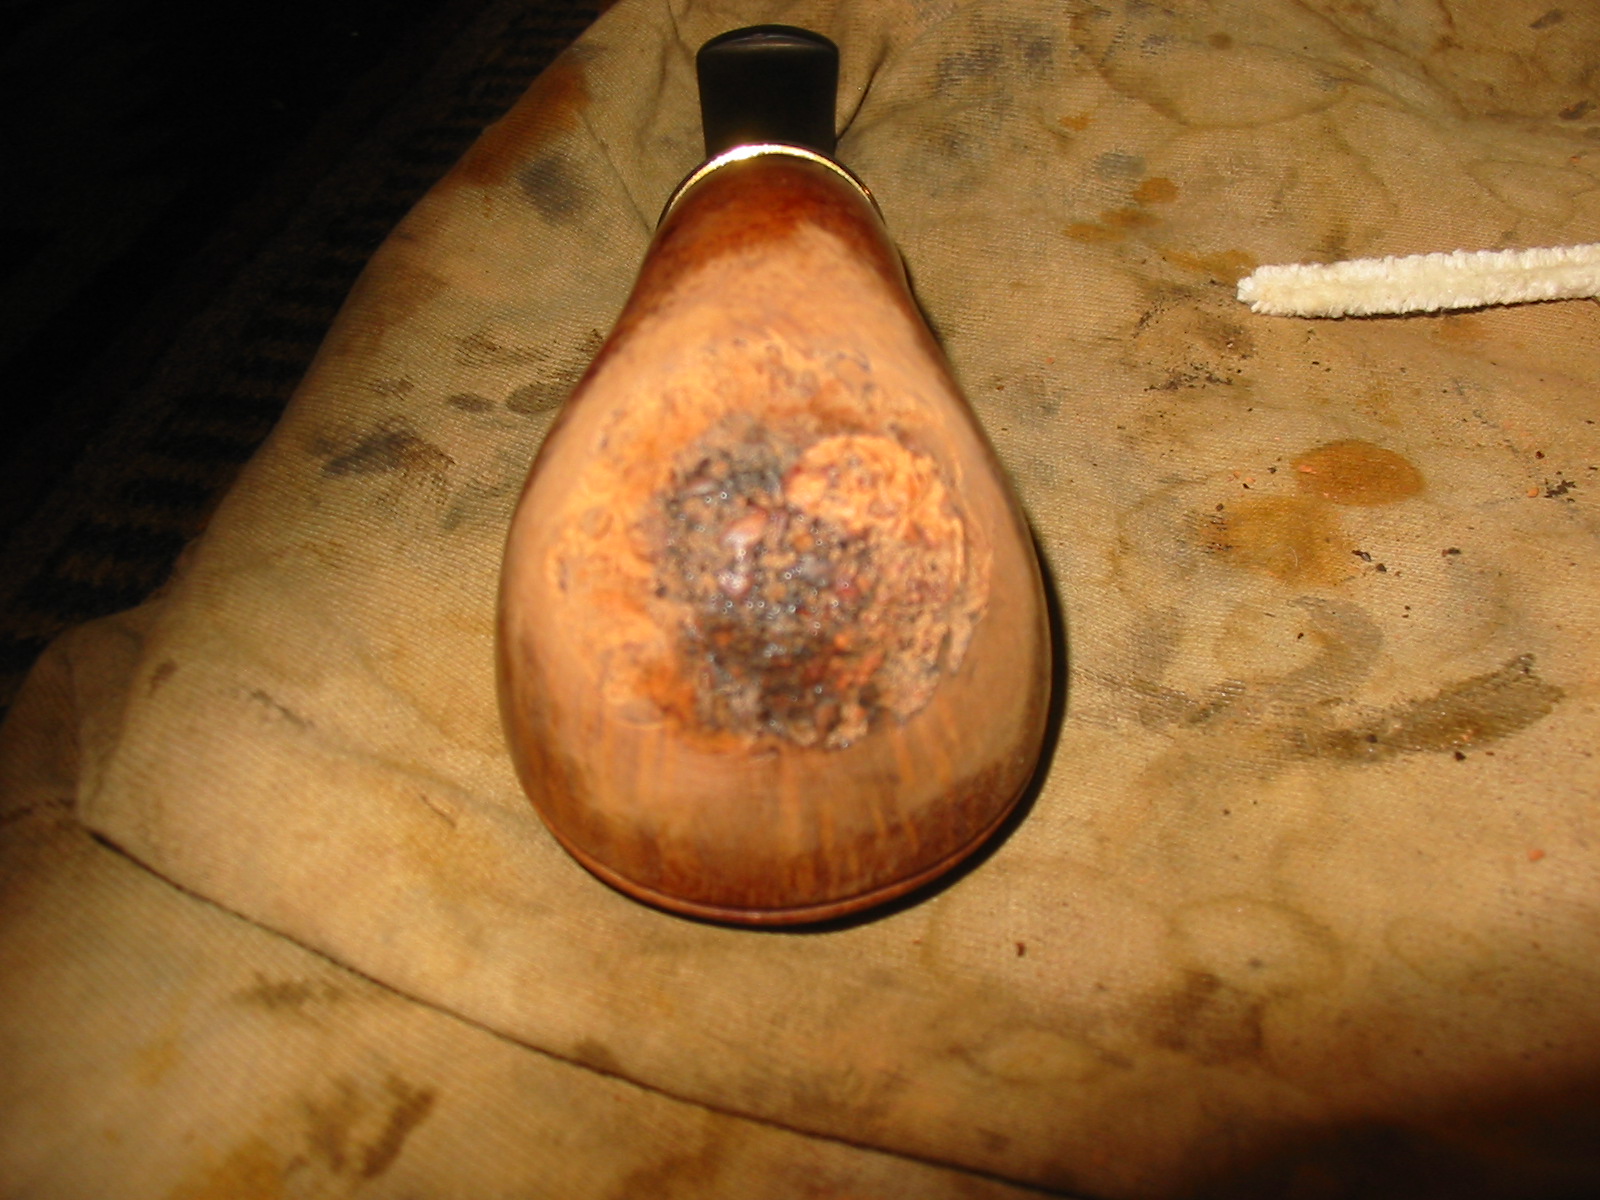
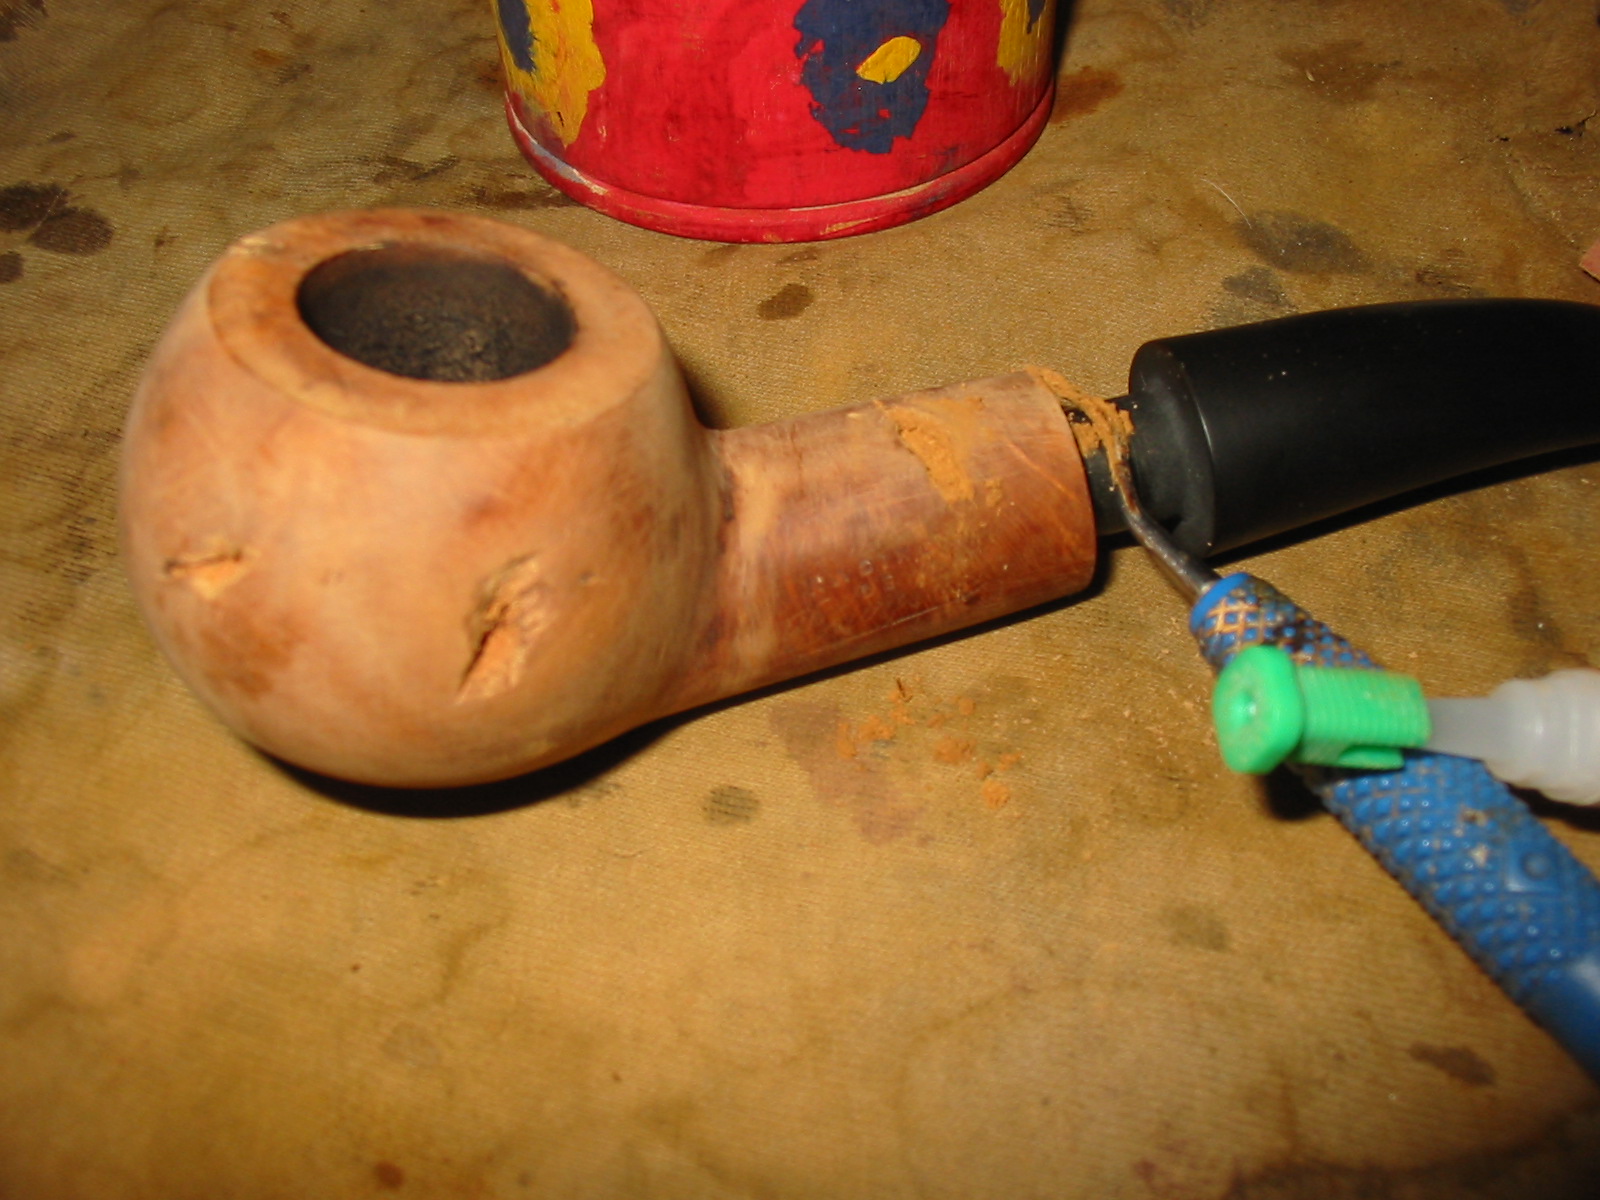
I used super glue and briar dust to fill the divot/chip on the outer edge of the bowl and make it less ragged looking.
IMG_5044

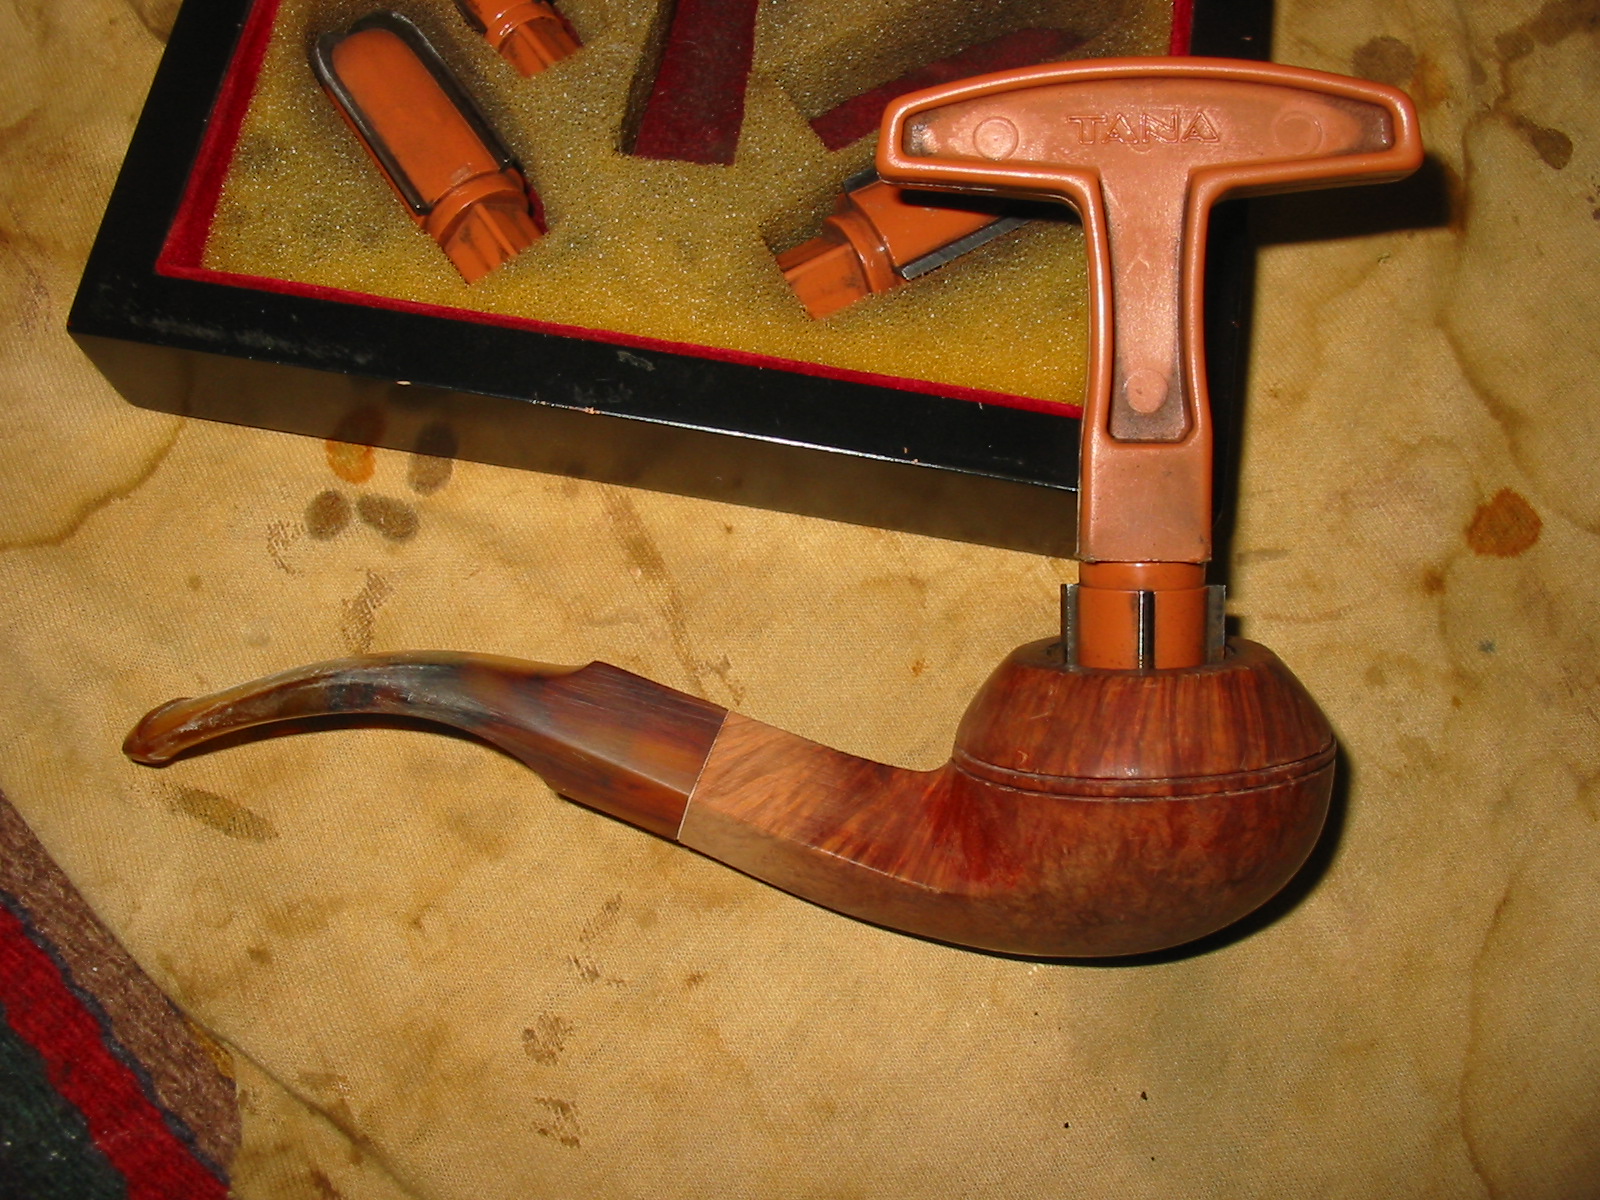
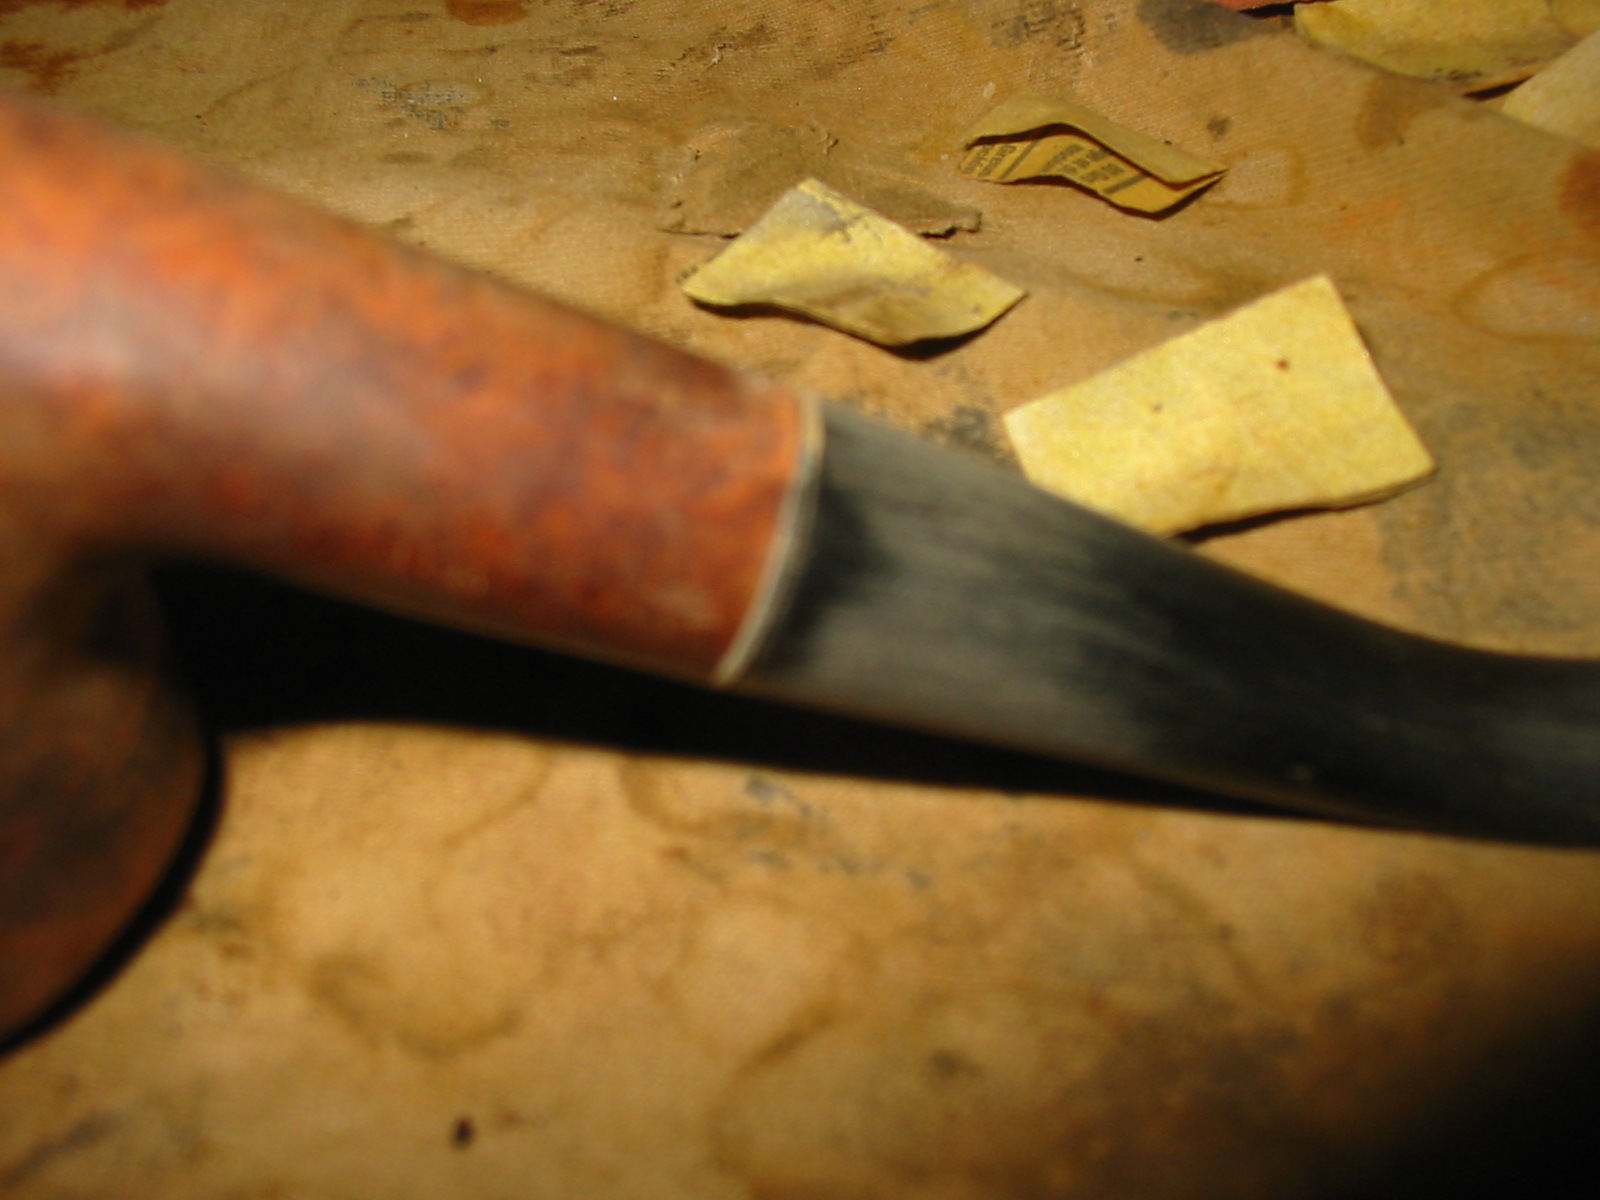
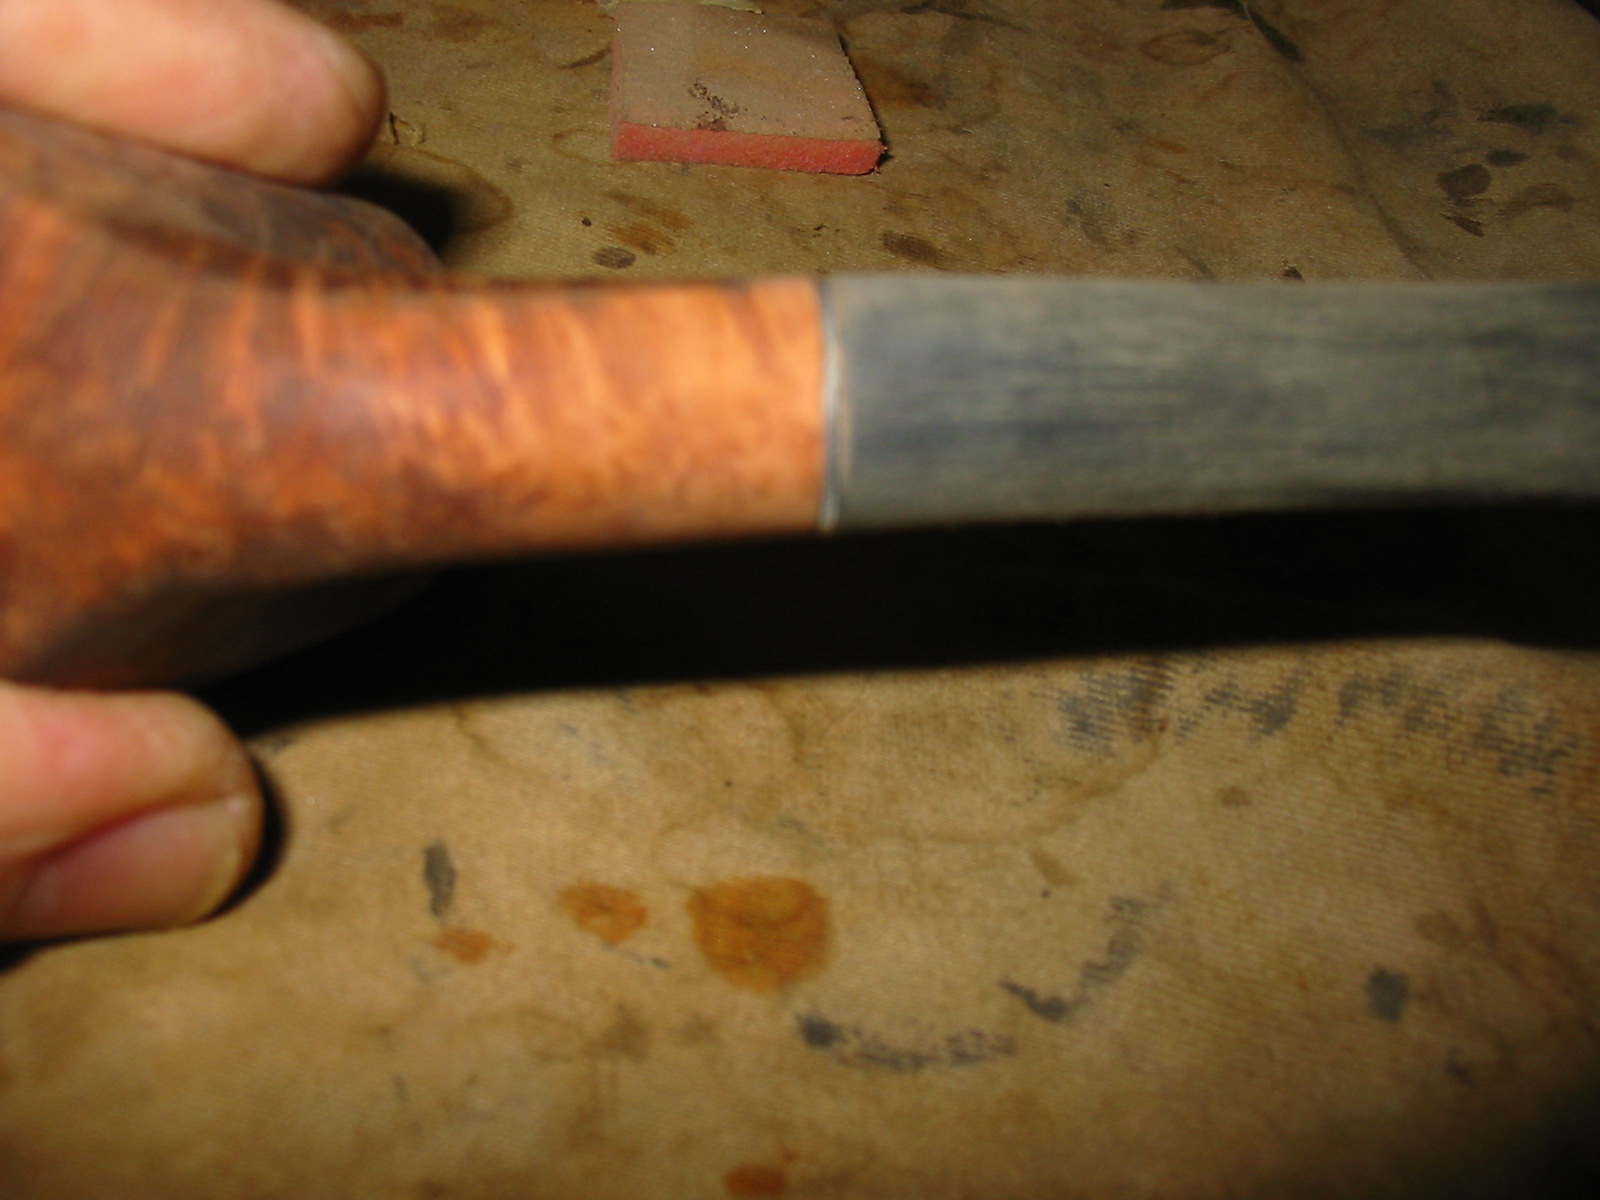
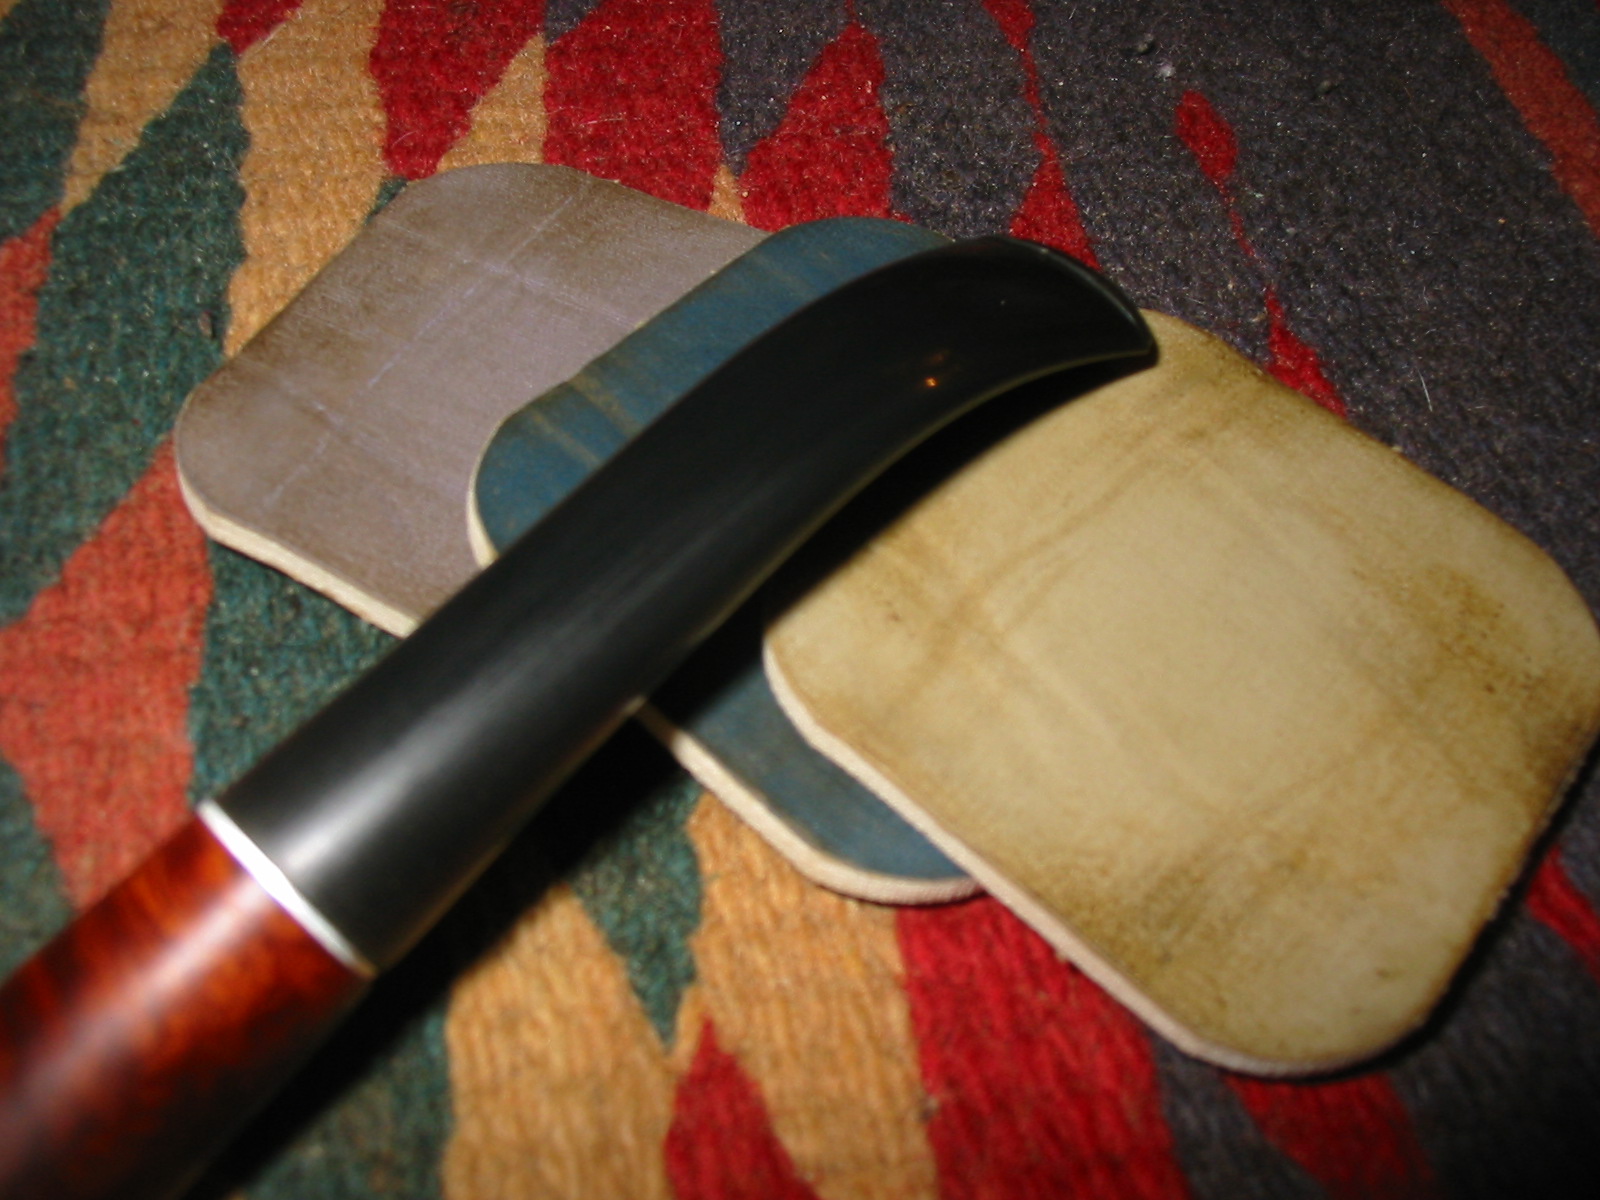
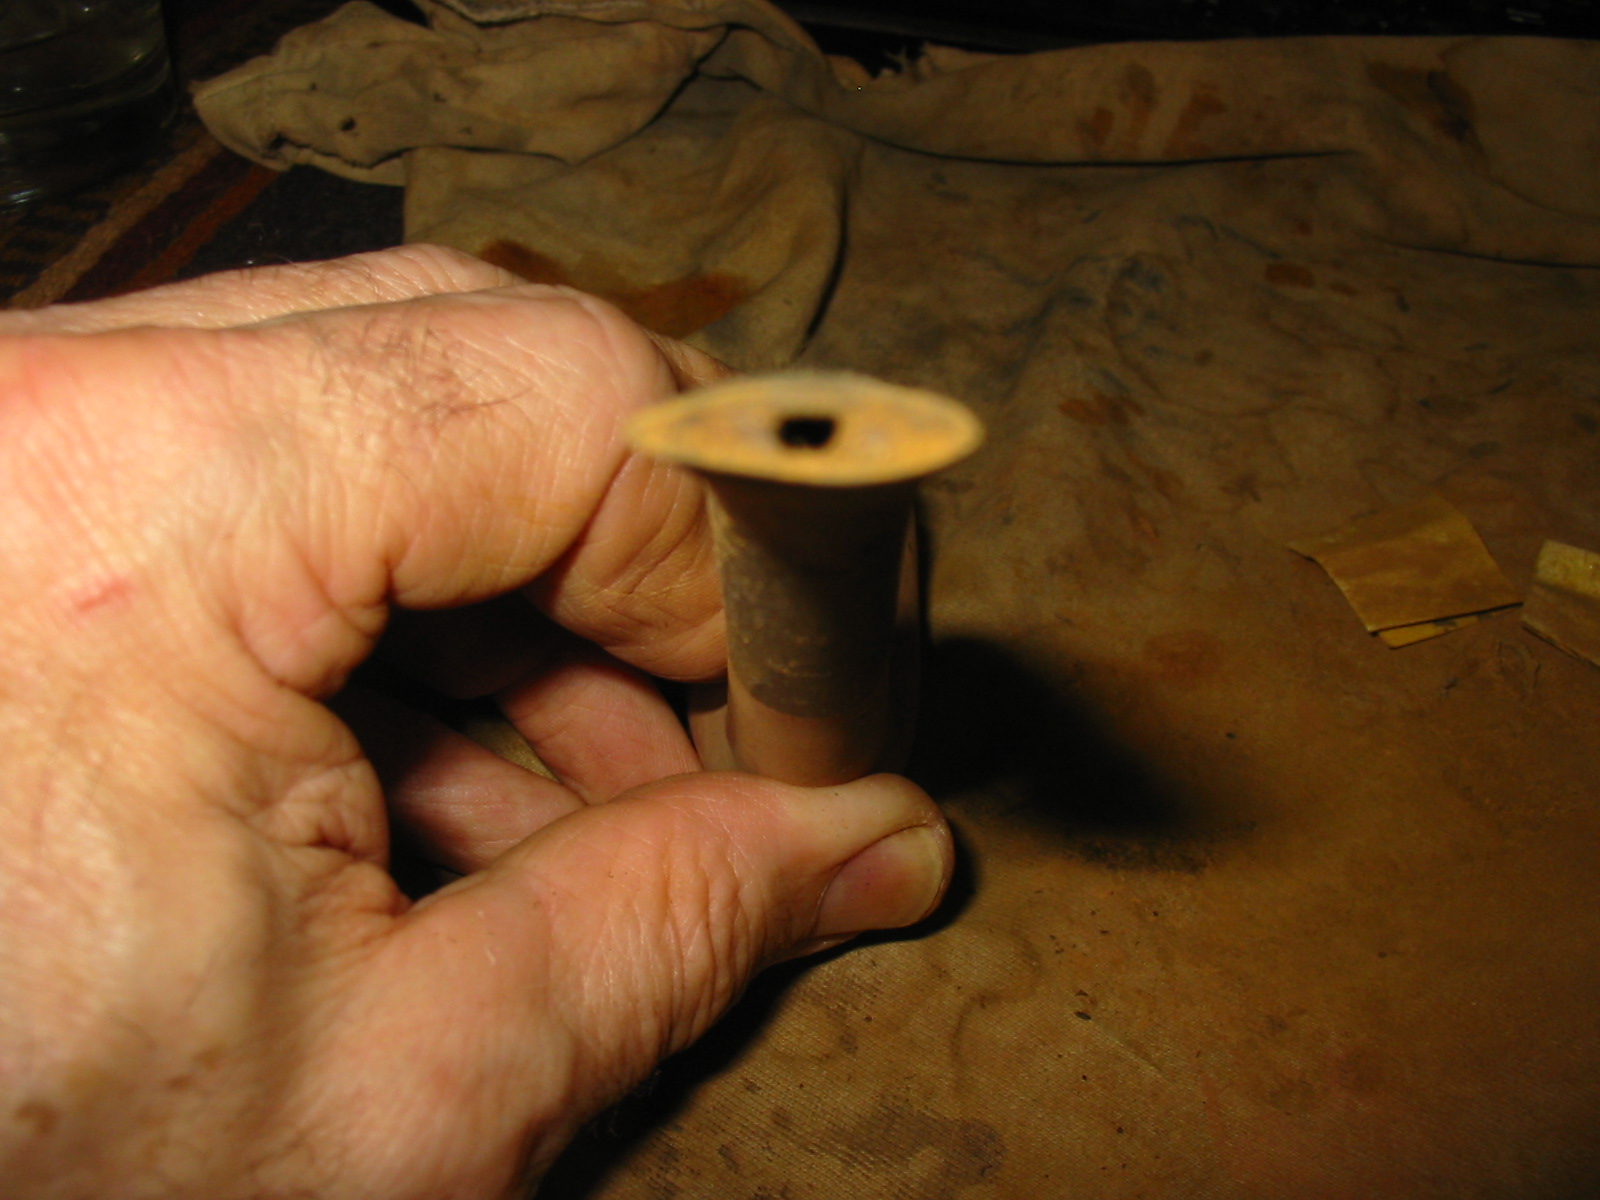
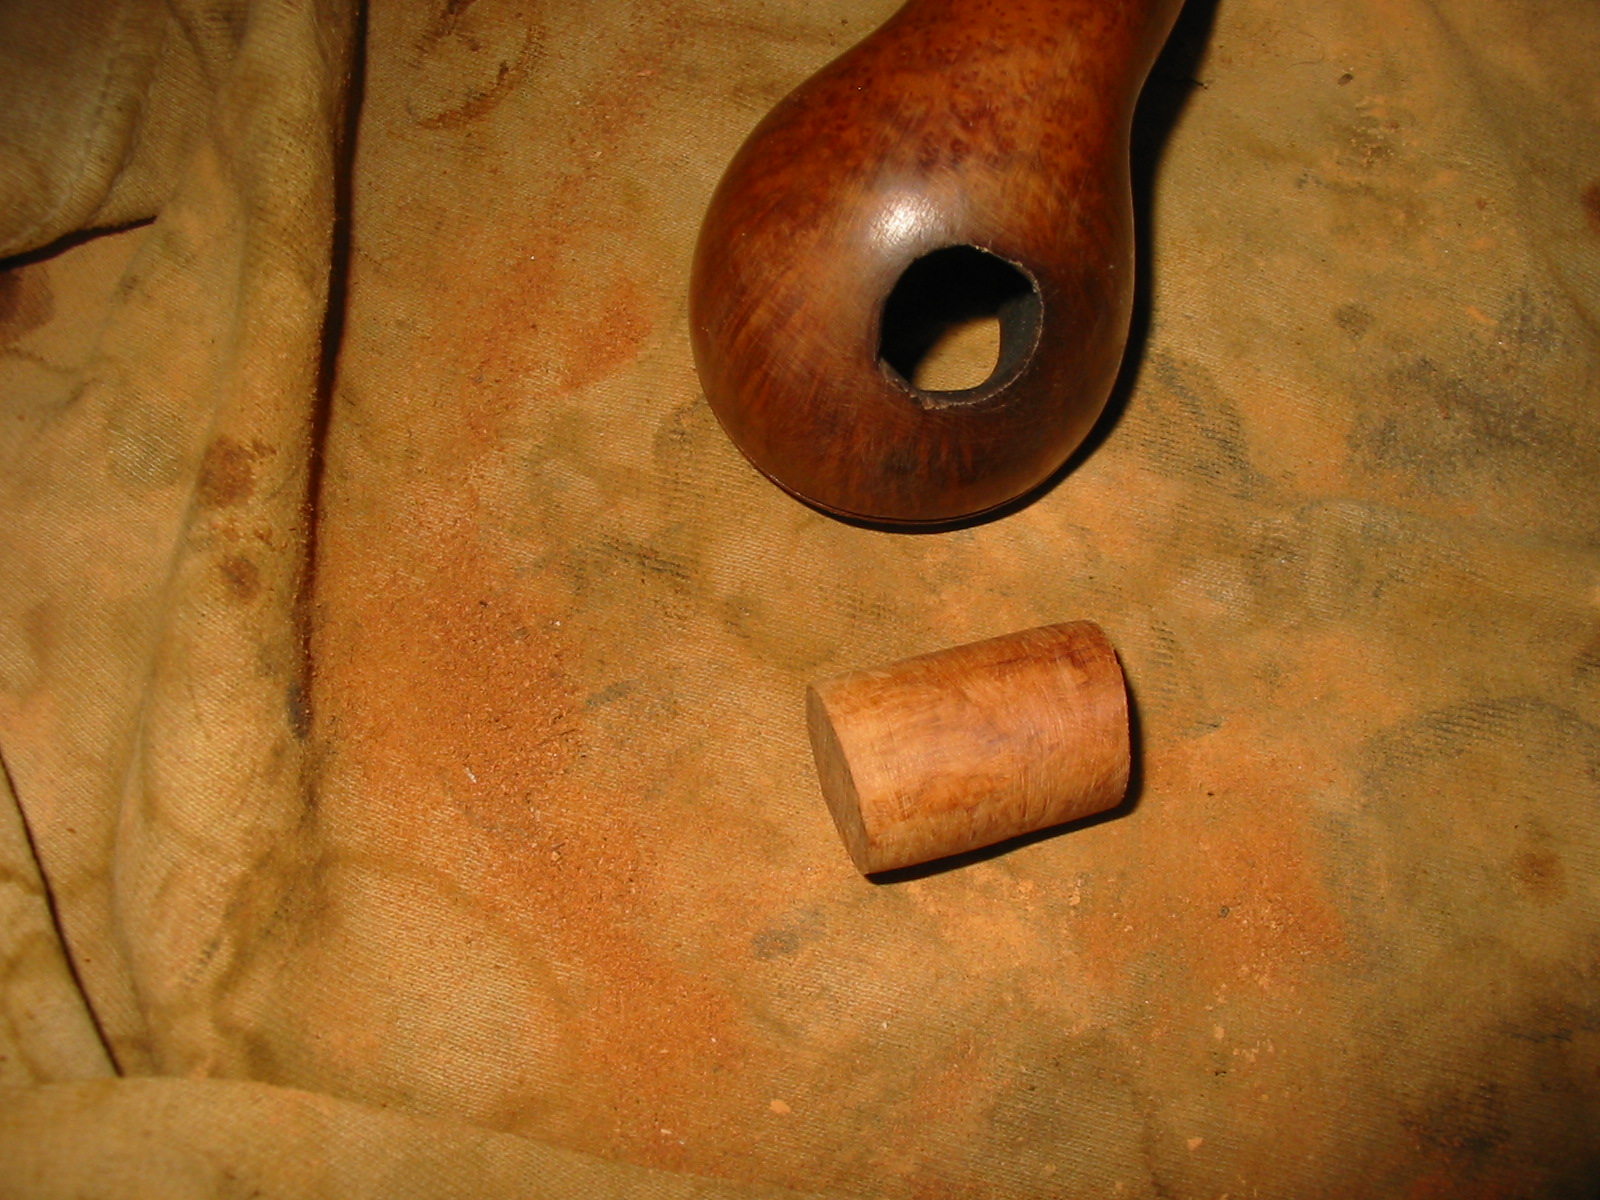
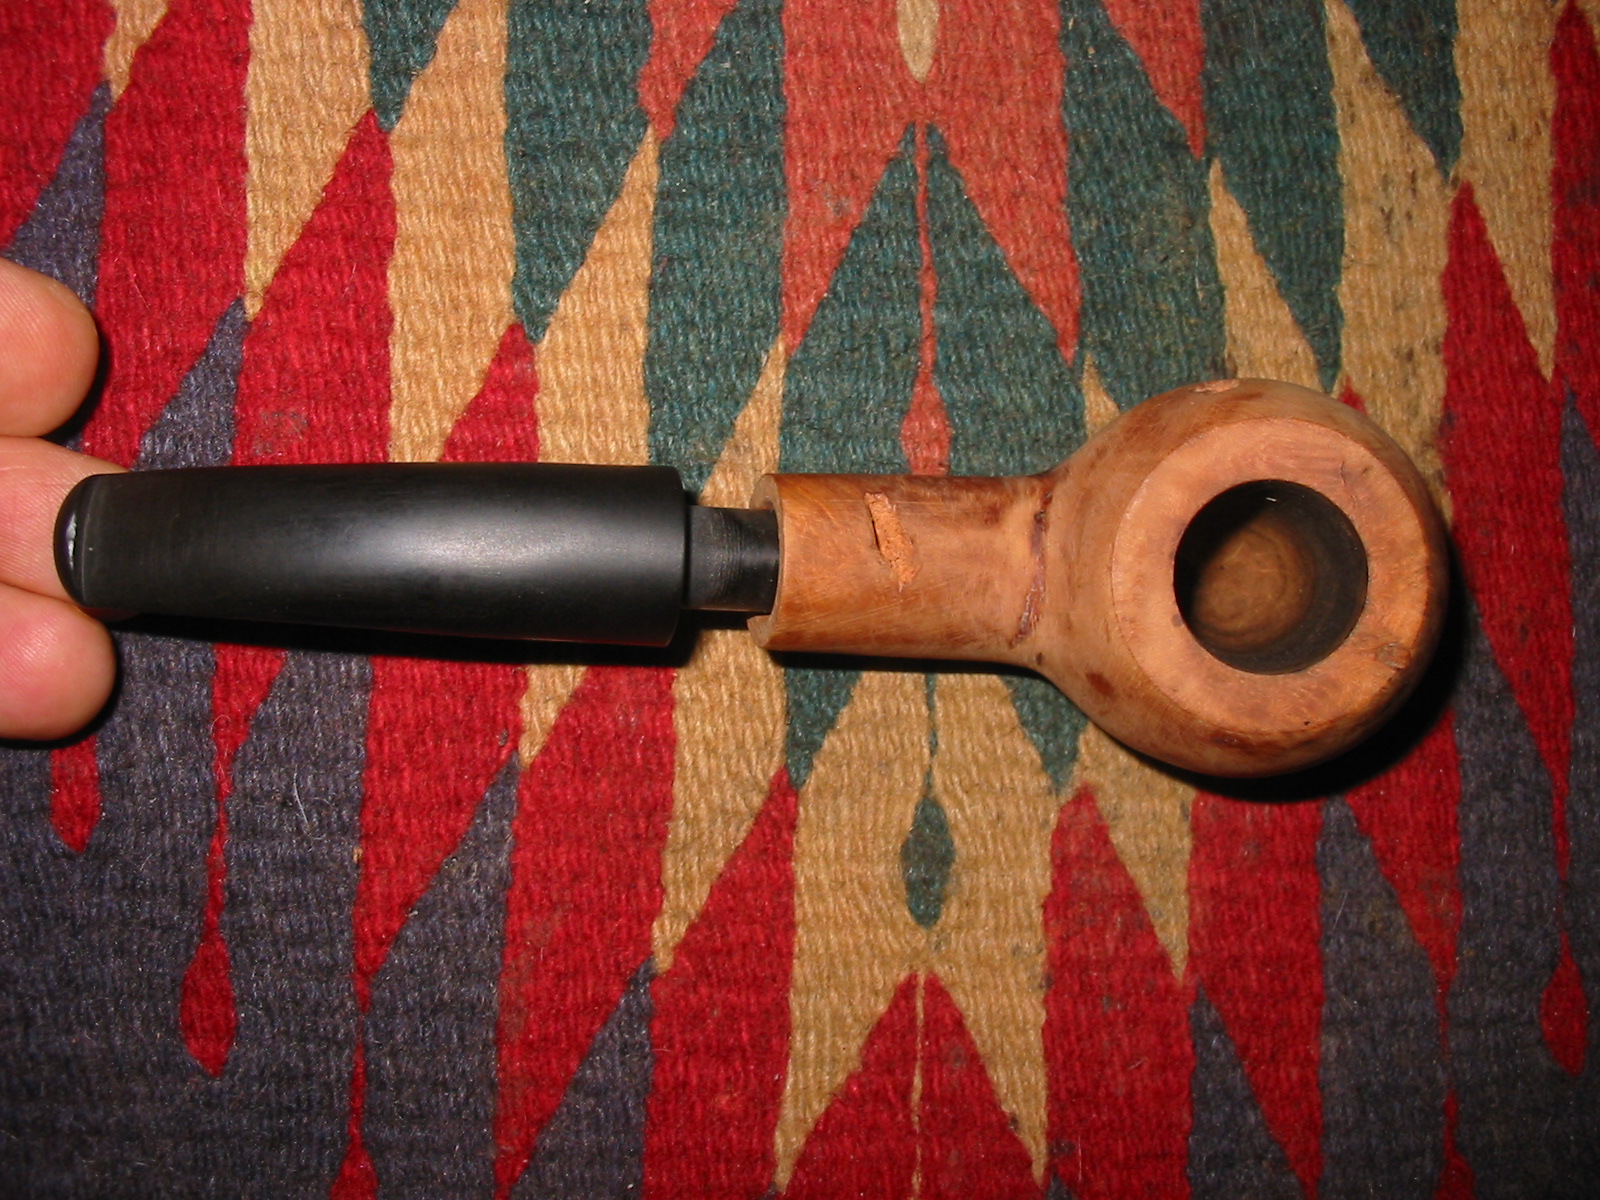
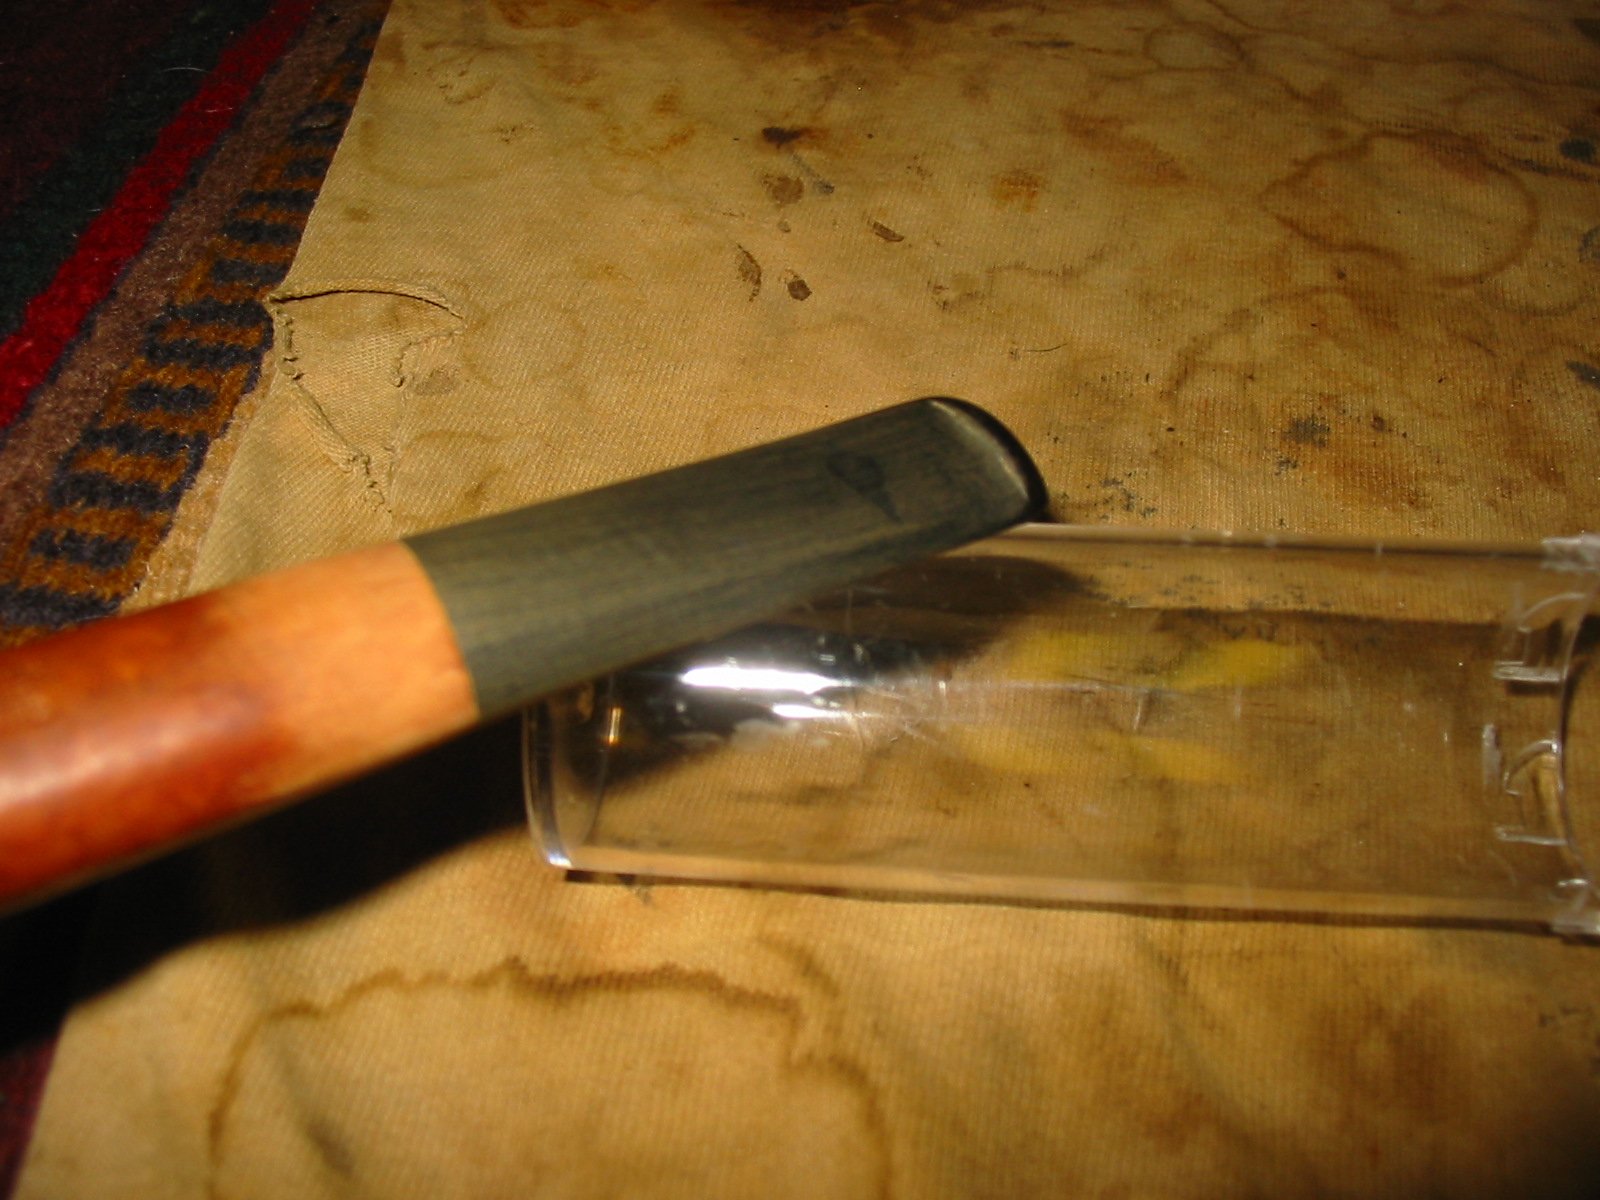
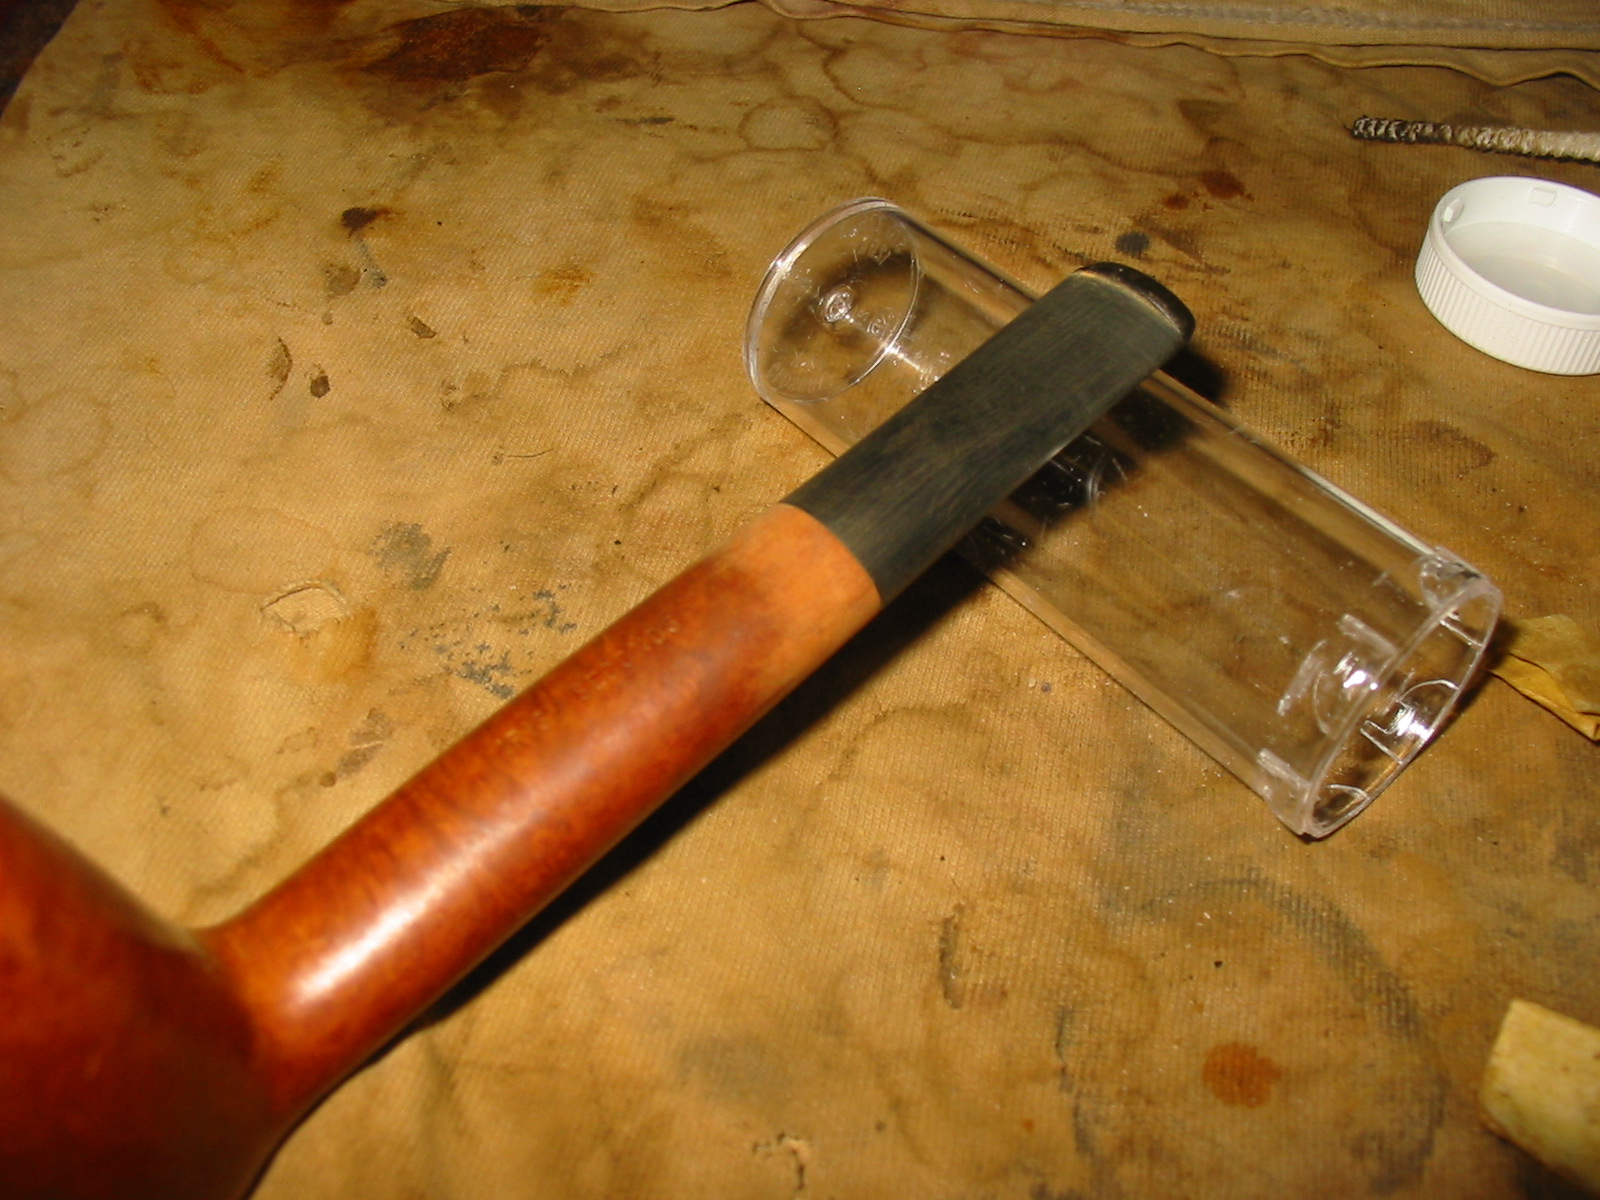
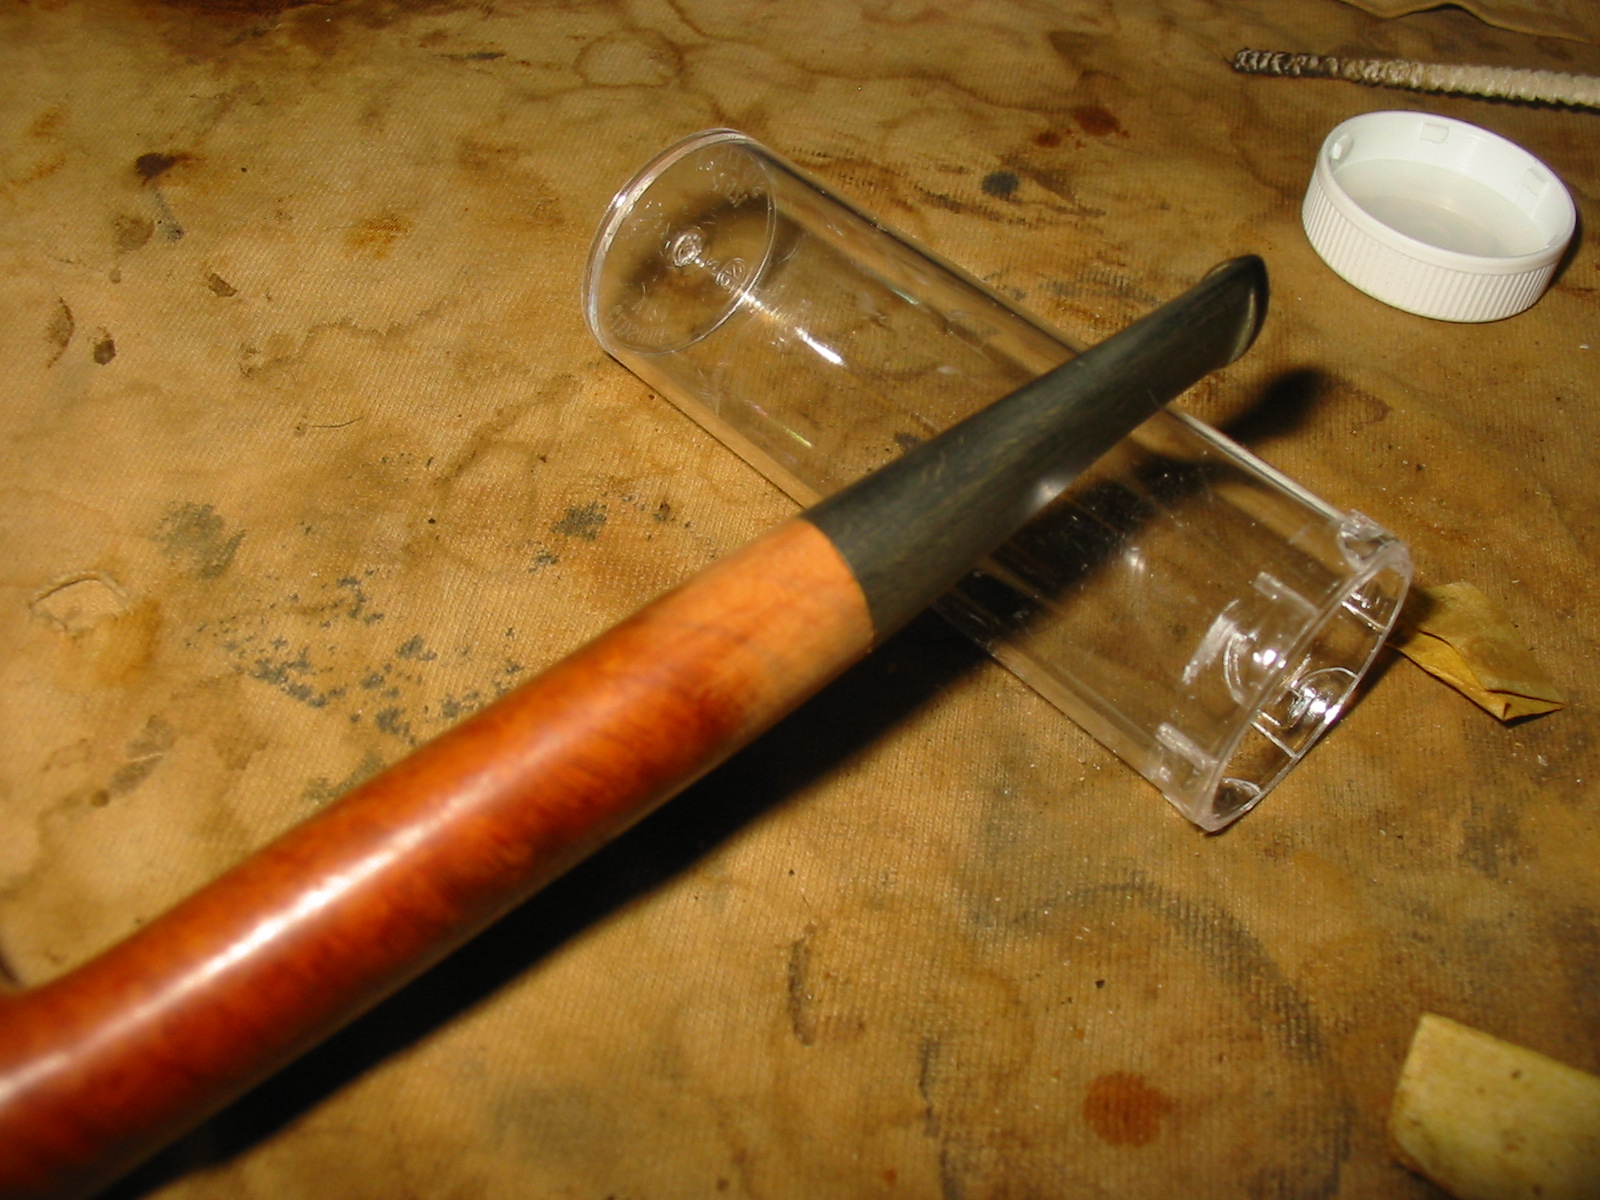
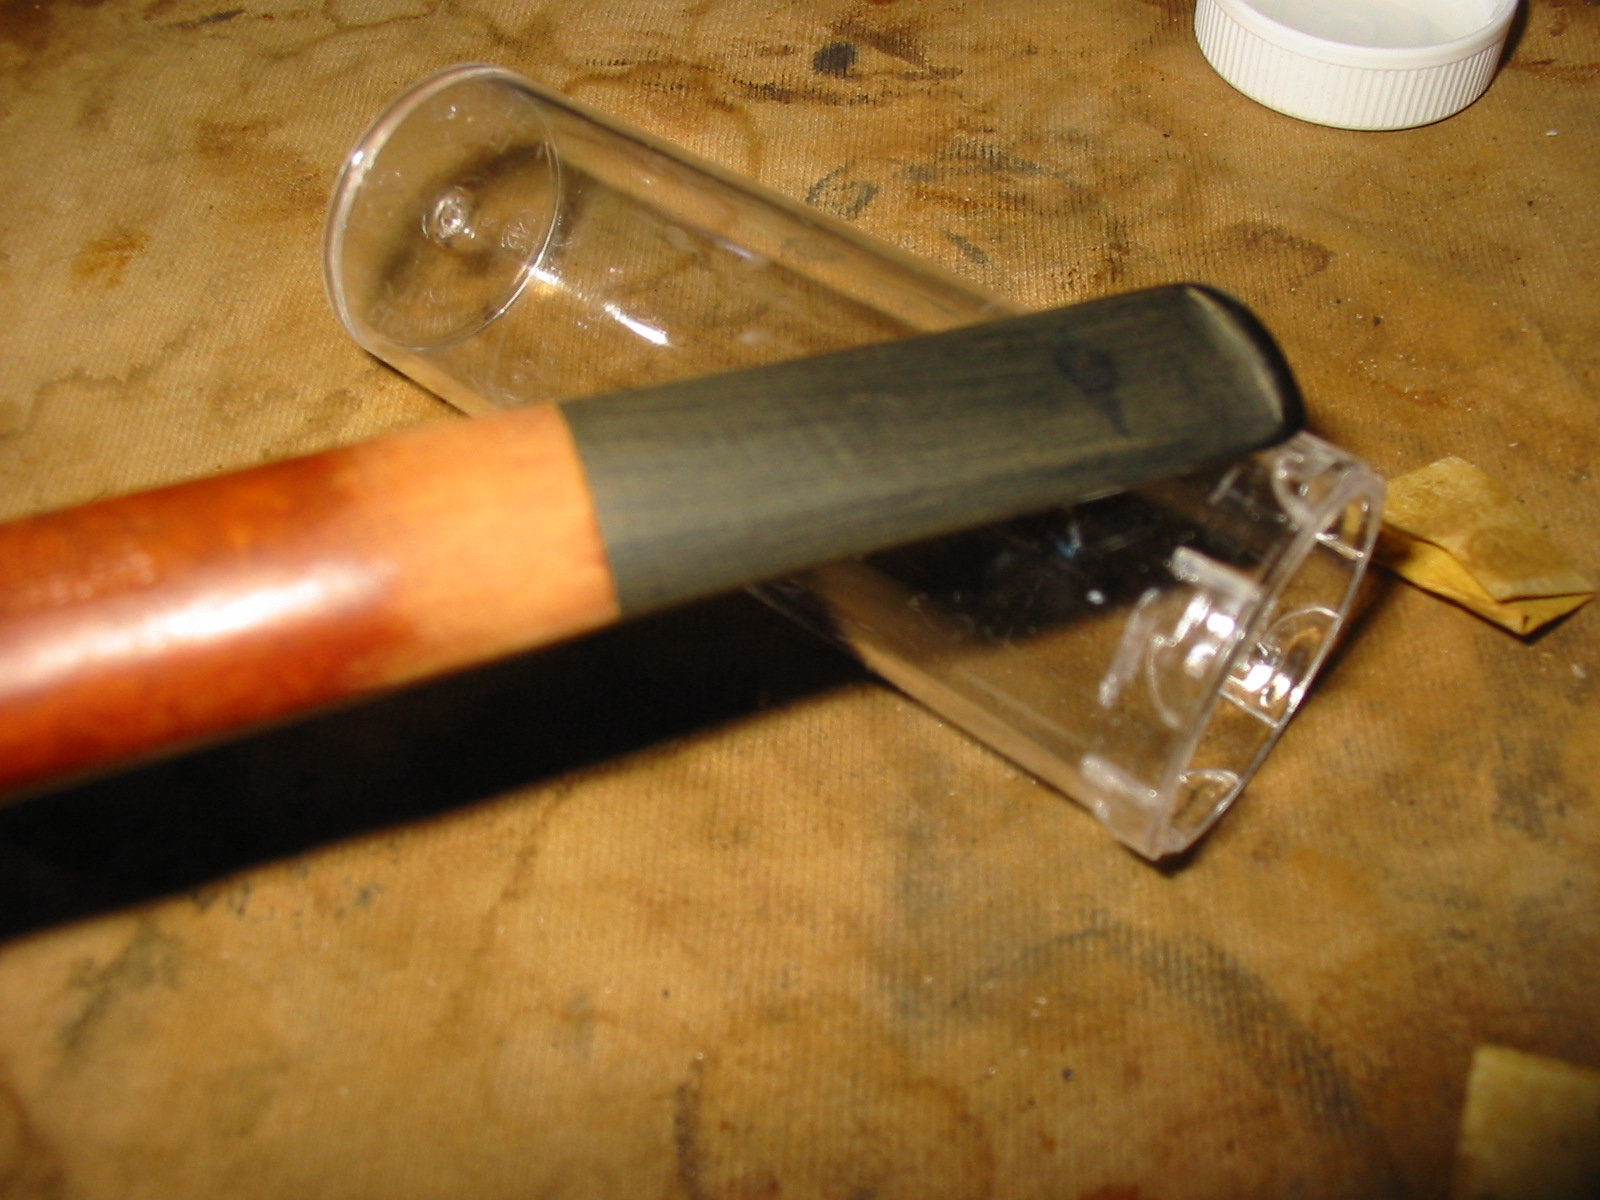
I found an old stem blank in my can of blanks that would work with the pipe. It was not a saddle stem like the original one but it would work well. It was considerably larger in diameter than the shank of the pipe so not only would I need to use the PIMO tenon turner to fit it in the shank but I would also need to remove the excess vulcanite and match it to the shank.
IMG_5045

IMG_5046

IMG_5047

IMG_5048

IMG_5049

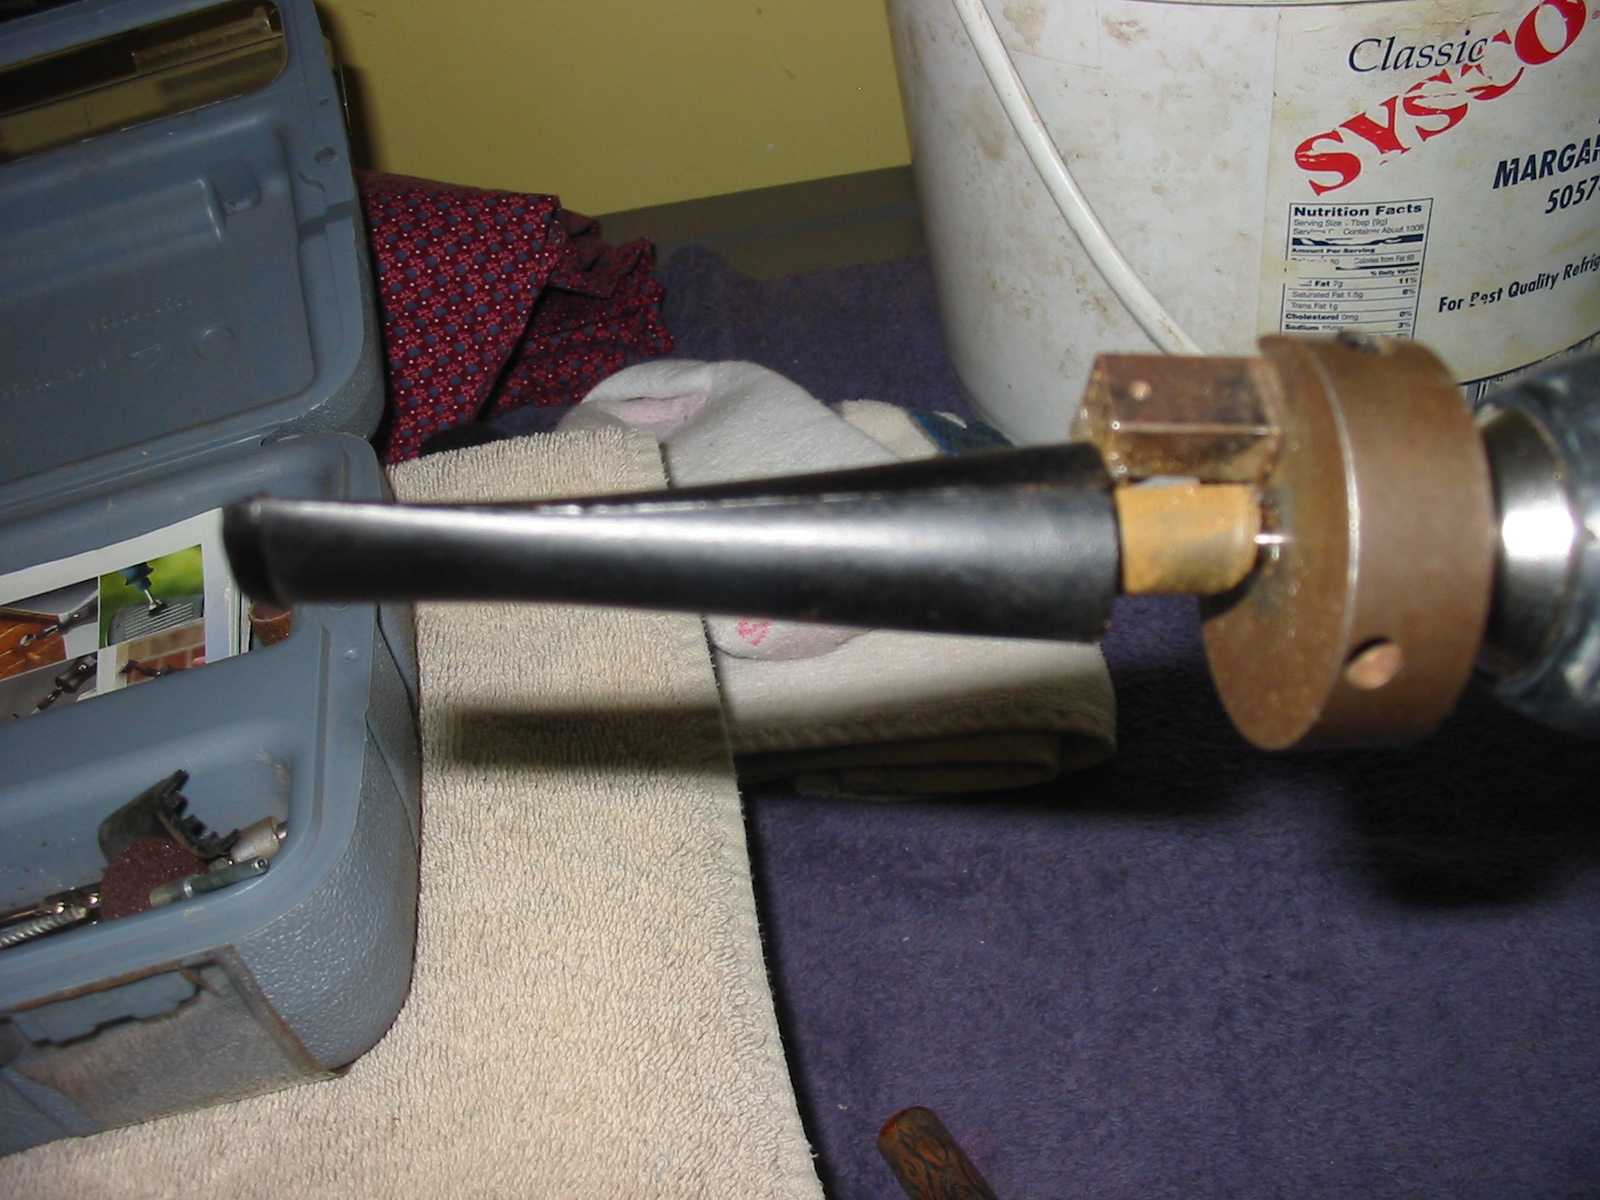
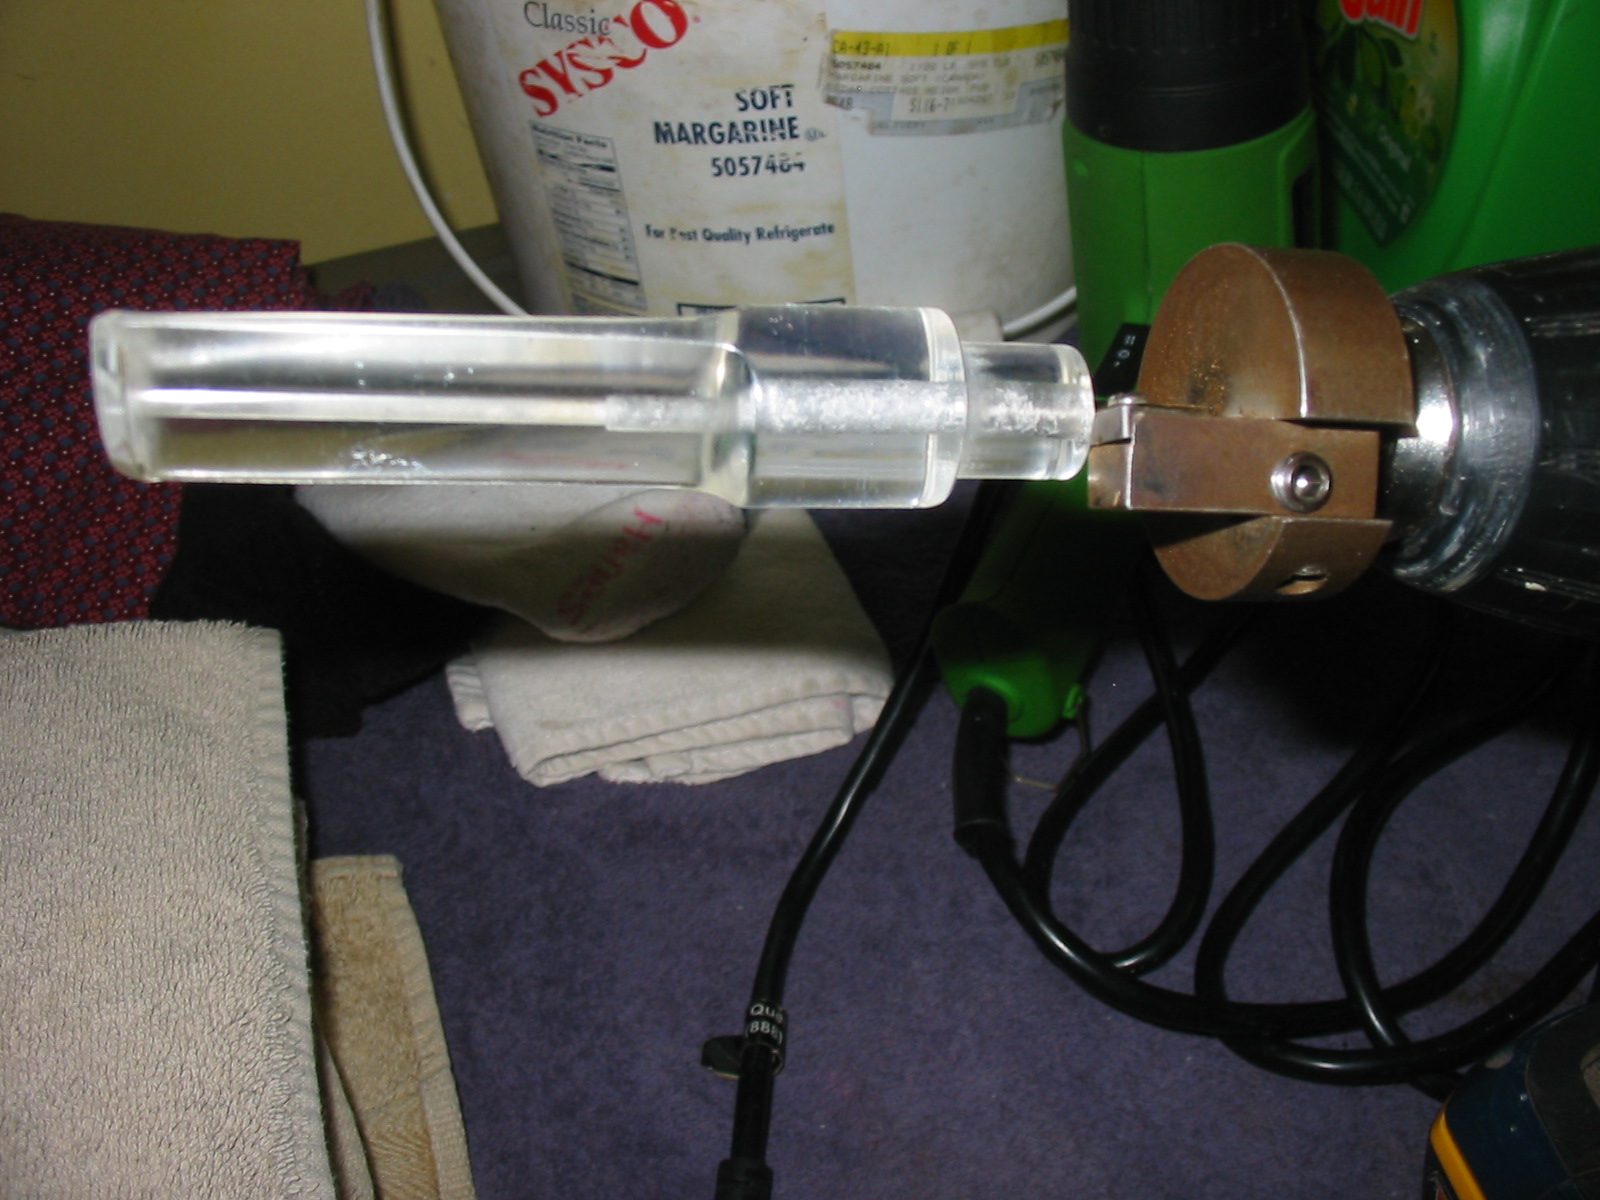
I used the Dremel with the larger sanding drum that comes with the set to cut back the vulcanite and shape the stem. This takes time and a steady hand to keep it from nicking the briar and causing more damage than help.
IMG_5050

IMG_5051

IMG_5052

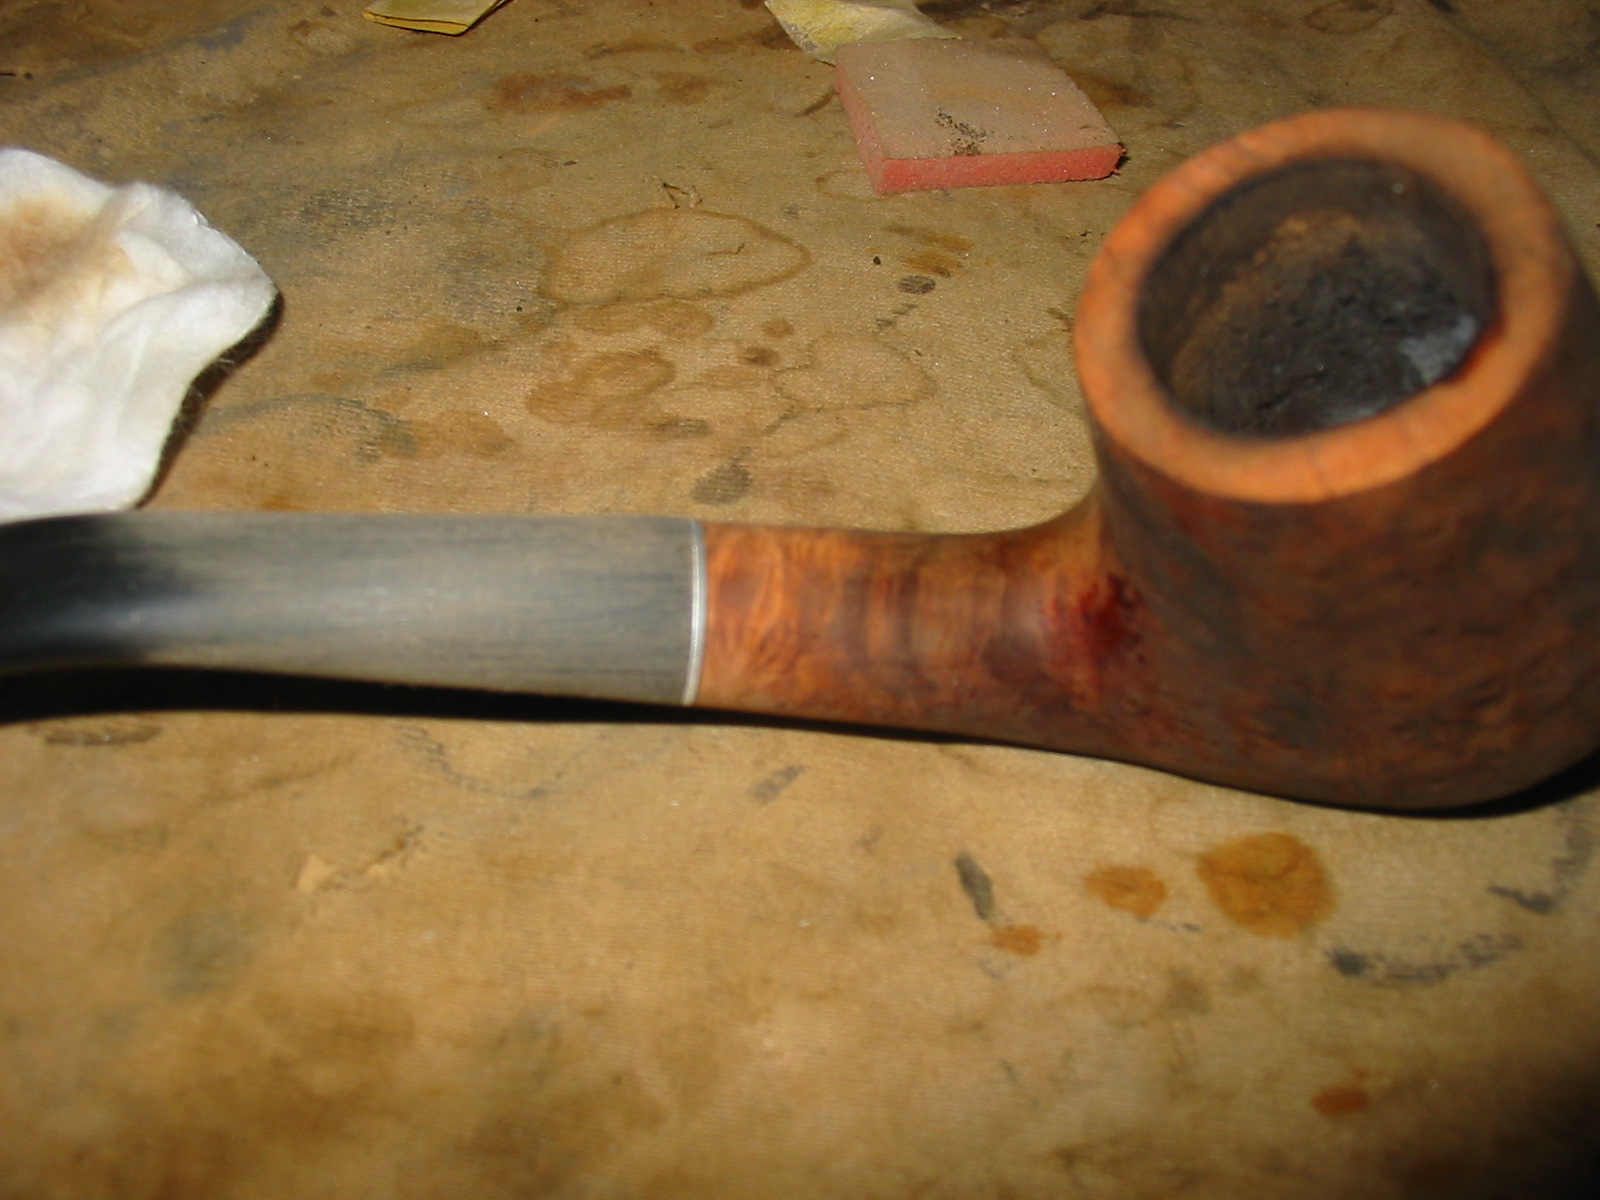
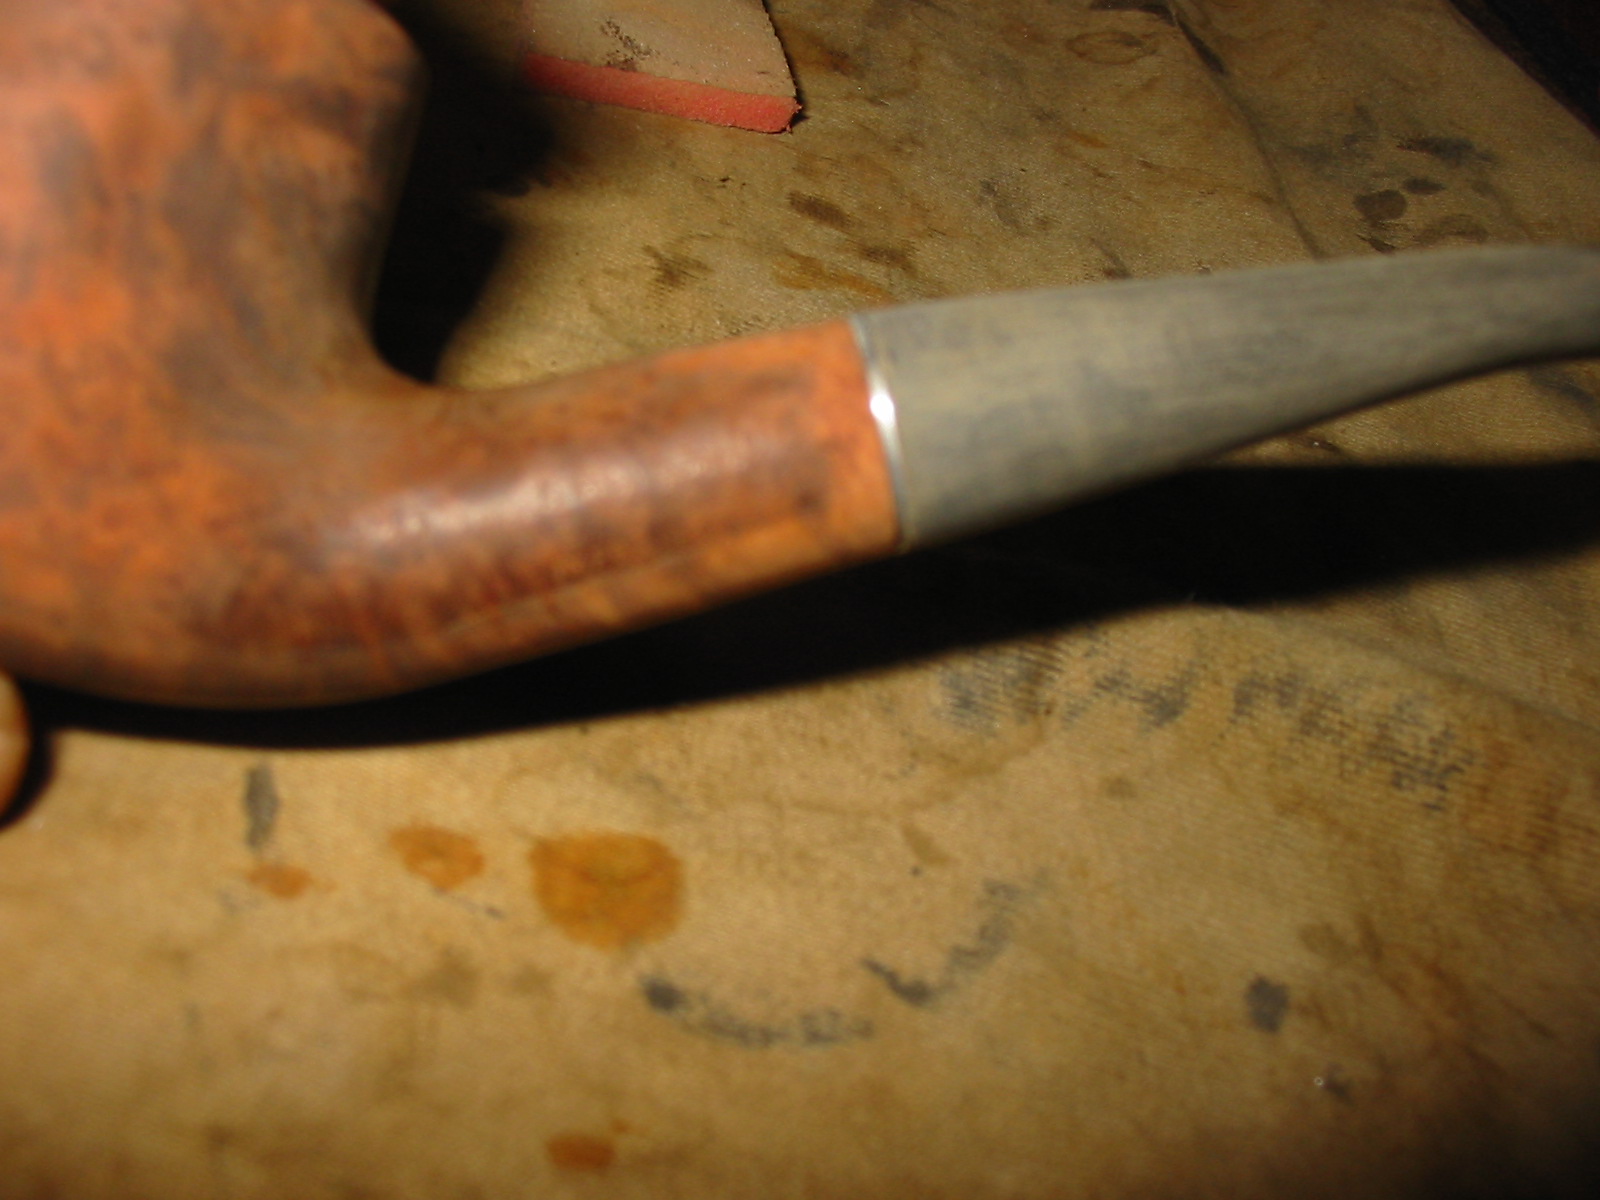
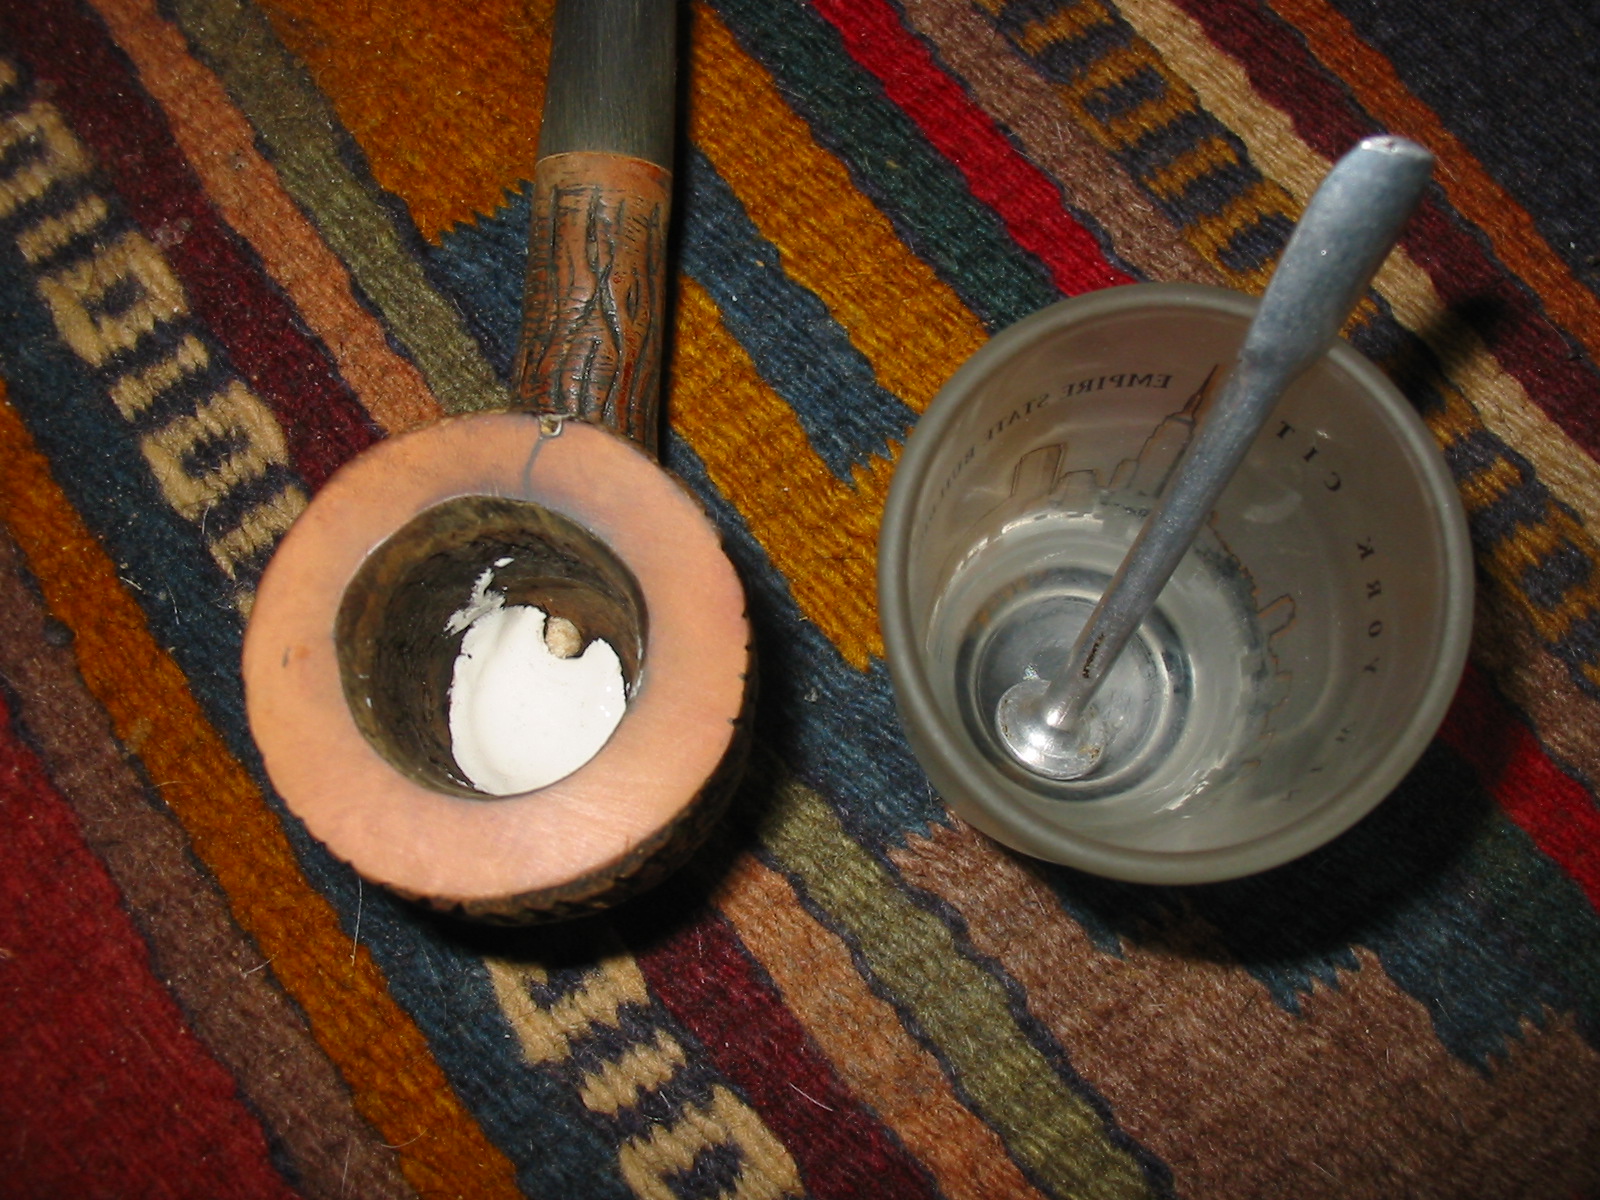
Once I had the stem close to the diameter of the shank I took it back to the work table and hand sanded it with 220 grit sandpaper to finish the fit. I sanded it until the transition between the shank and the stem was seamless. My fingers needed a break from sanding at this point so I decided to repair the gouged out bottom half of the bowl. I inserted a pipe cleaner in the airway to keep any of the plaster mix getting into the airway. Then I mixed up some plaster of Paris in a shot glass and used the spoon end of a pipe nail to put it in place in the bottom of the bowl. I tamped it with the tamper head of the nail and smooth it out.
IMG_5054

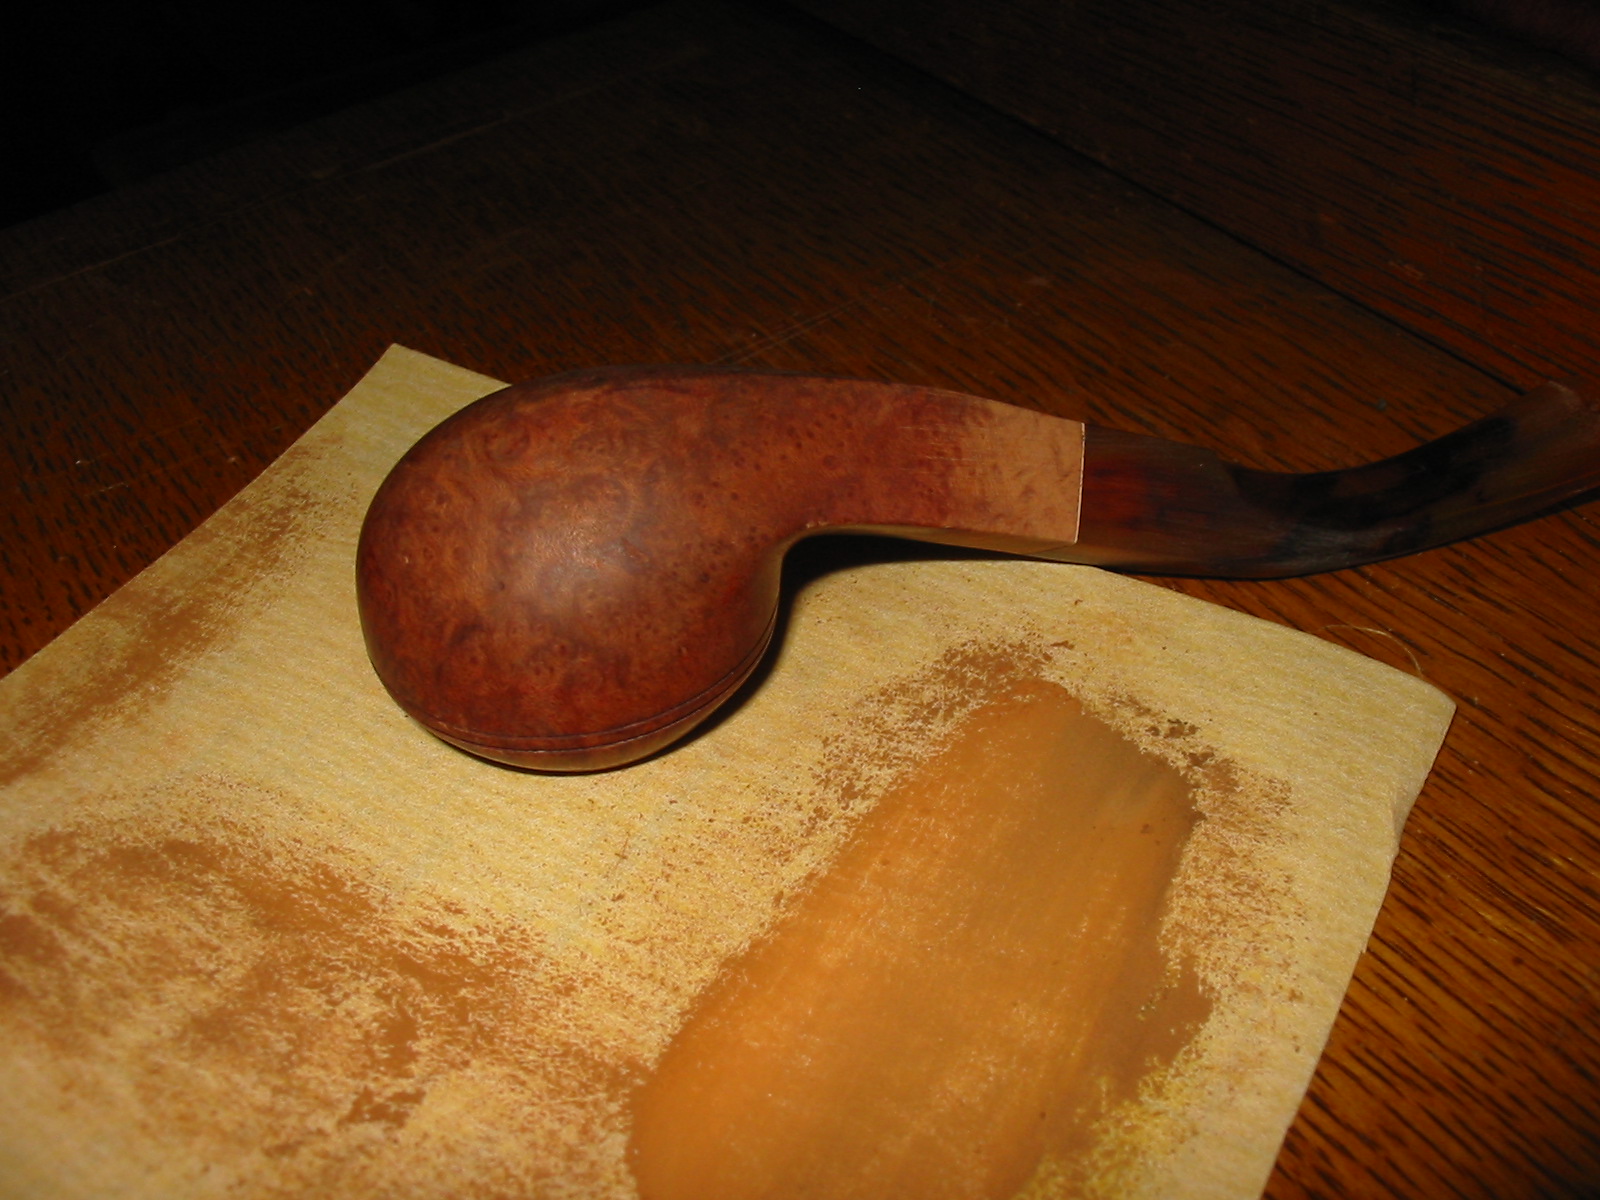
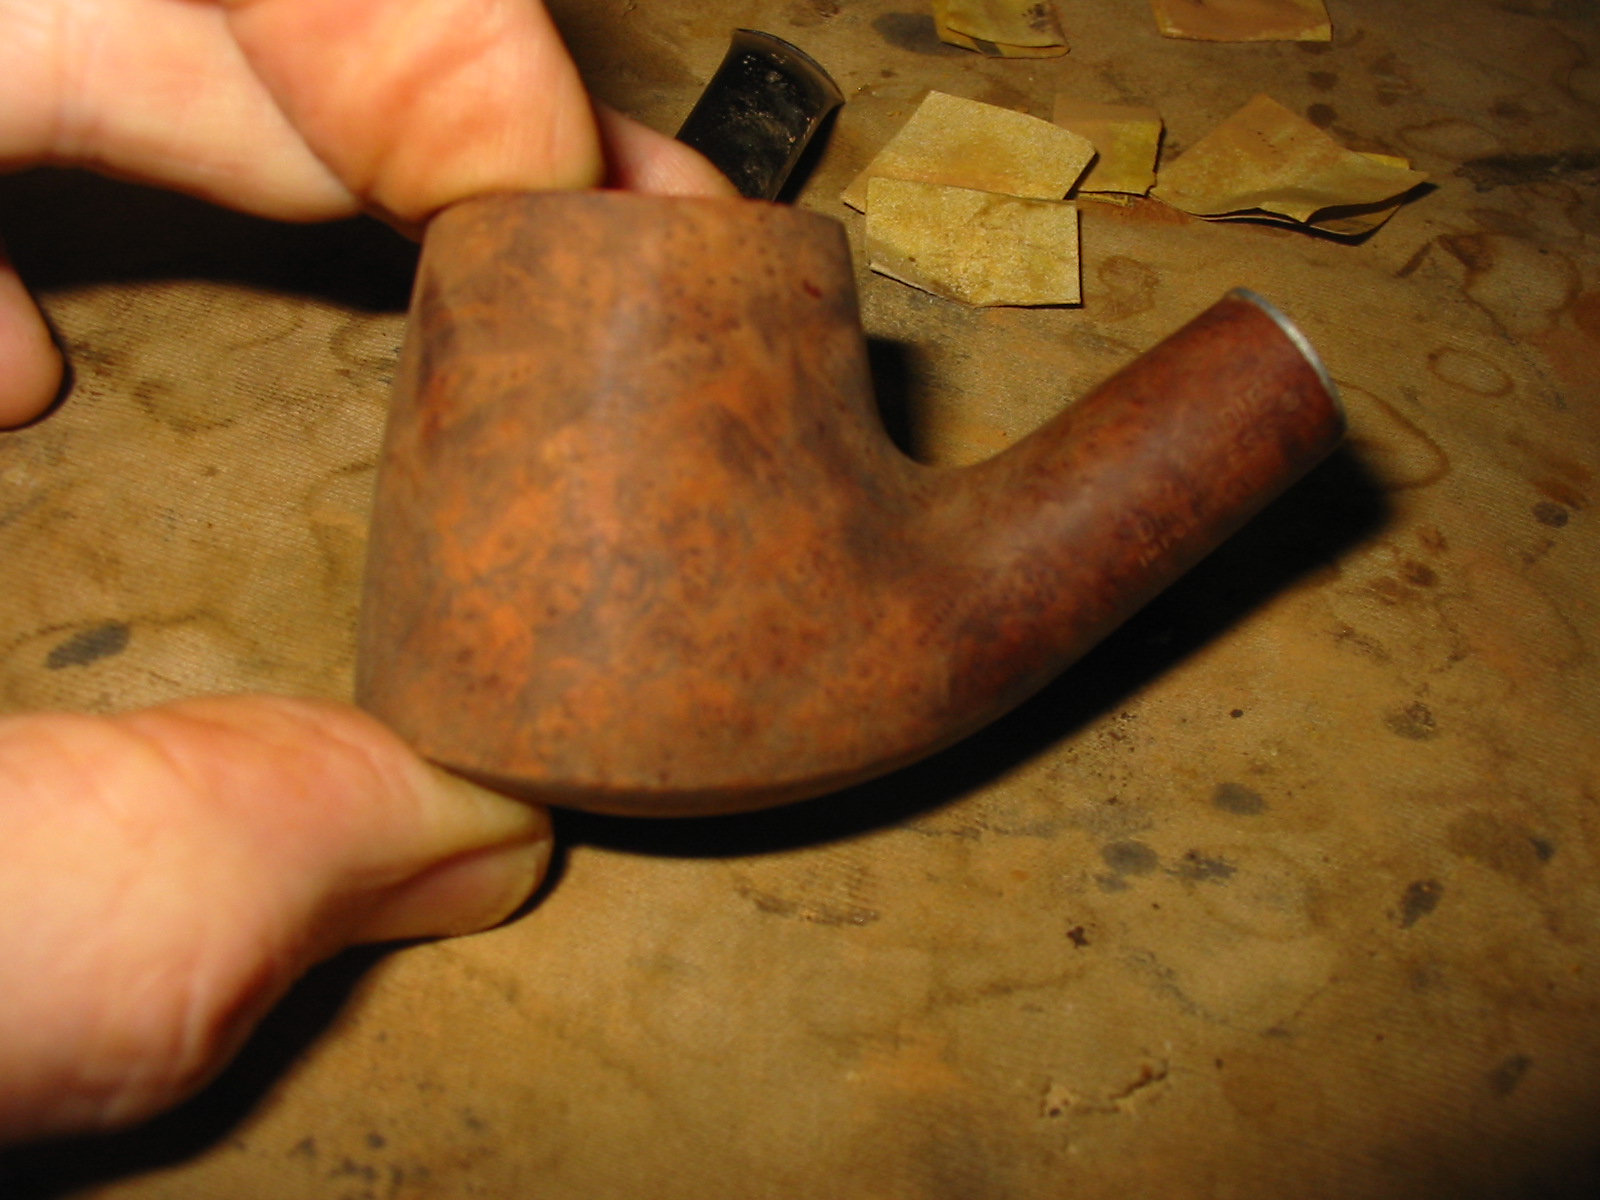
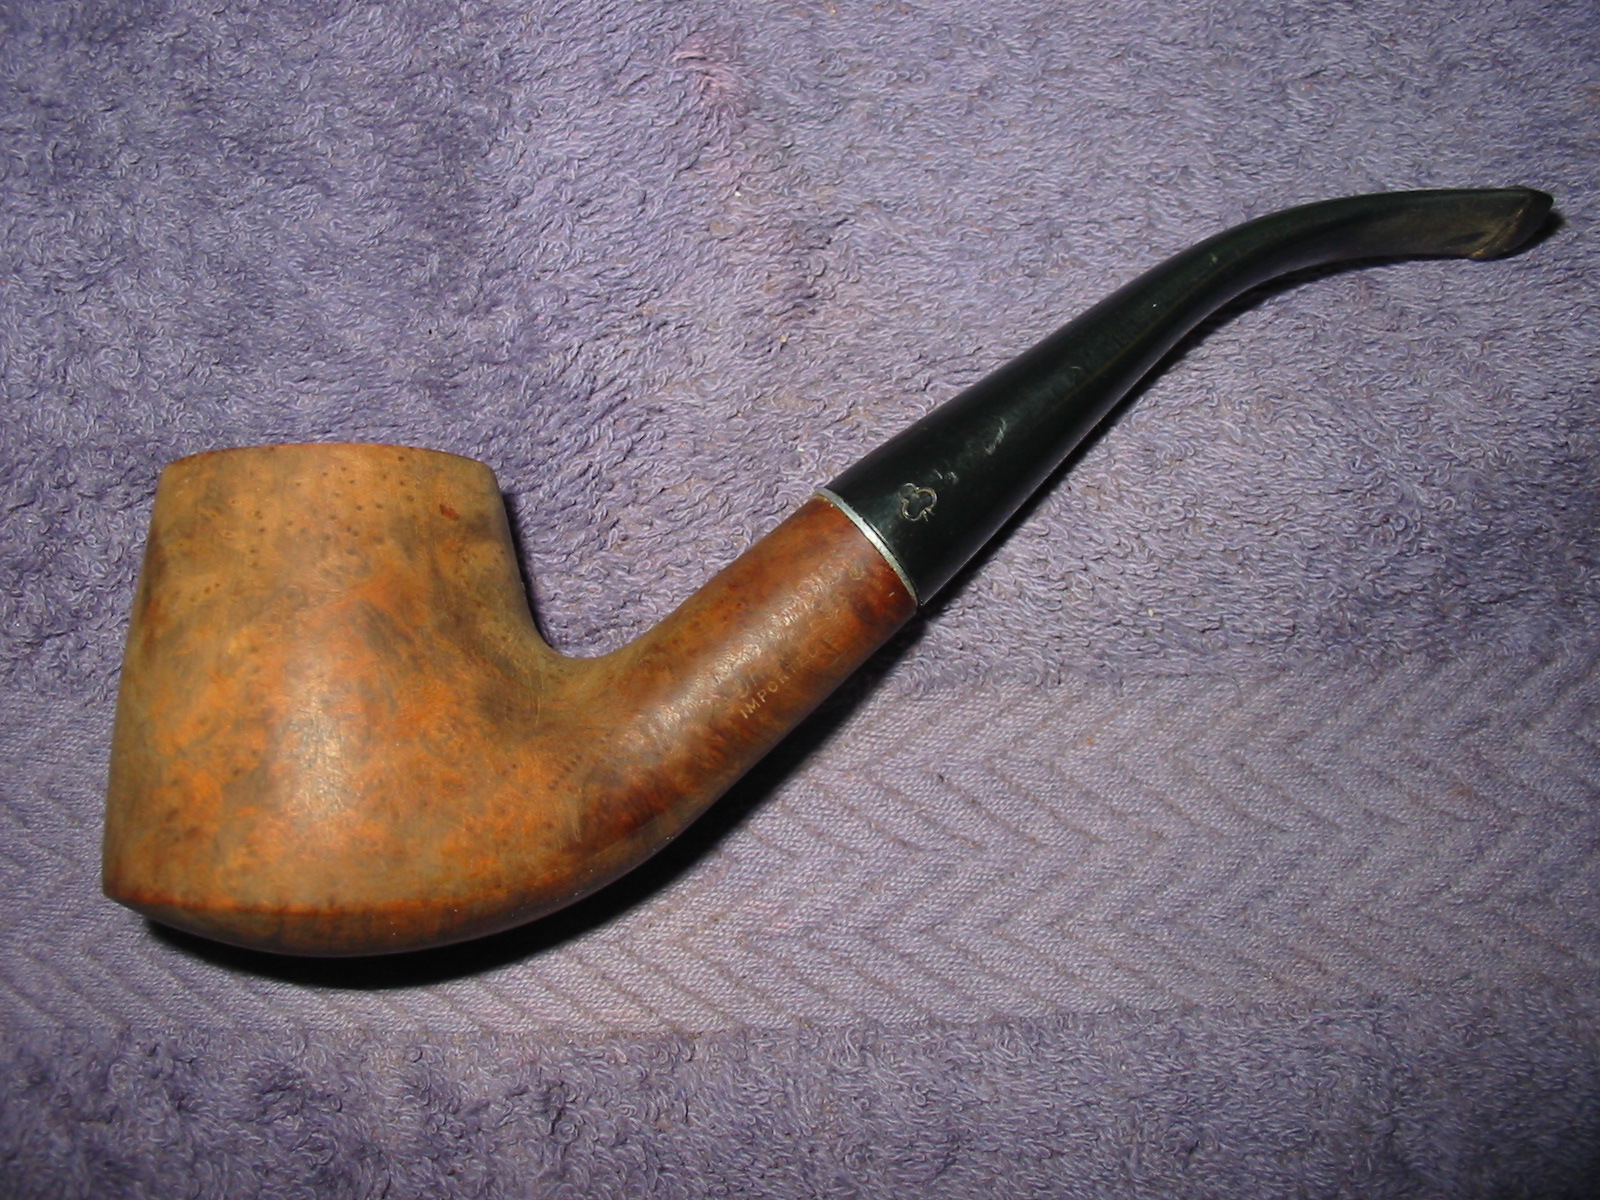
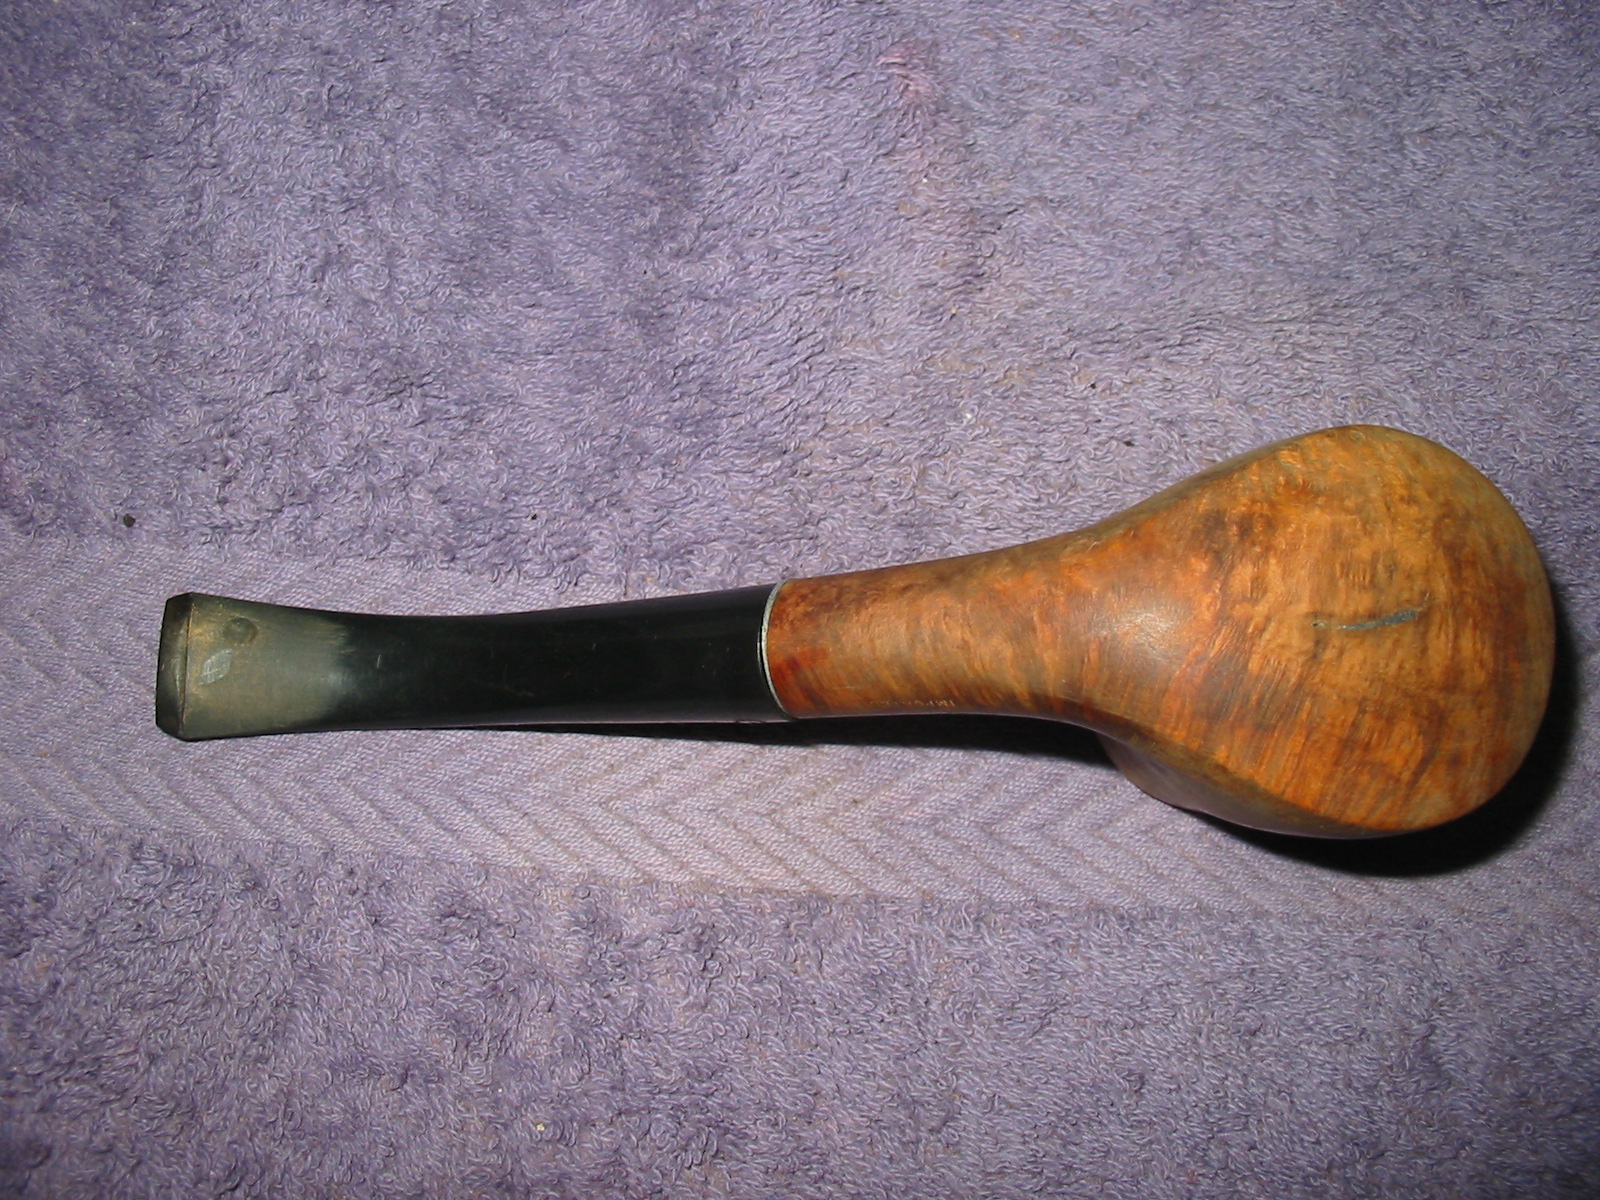
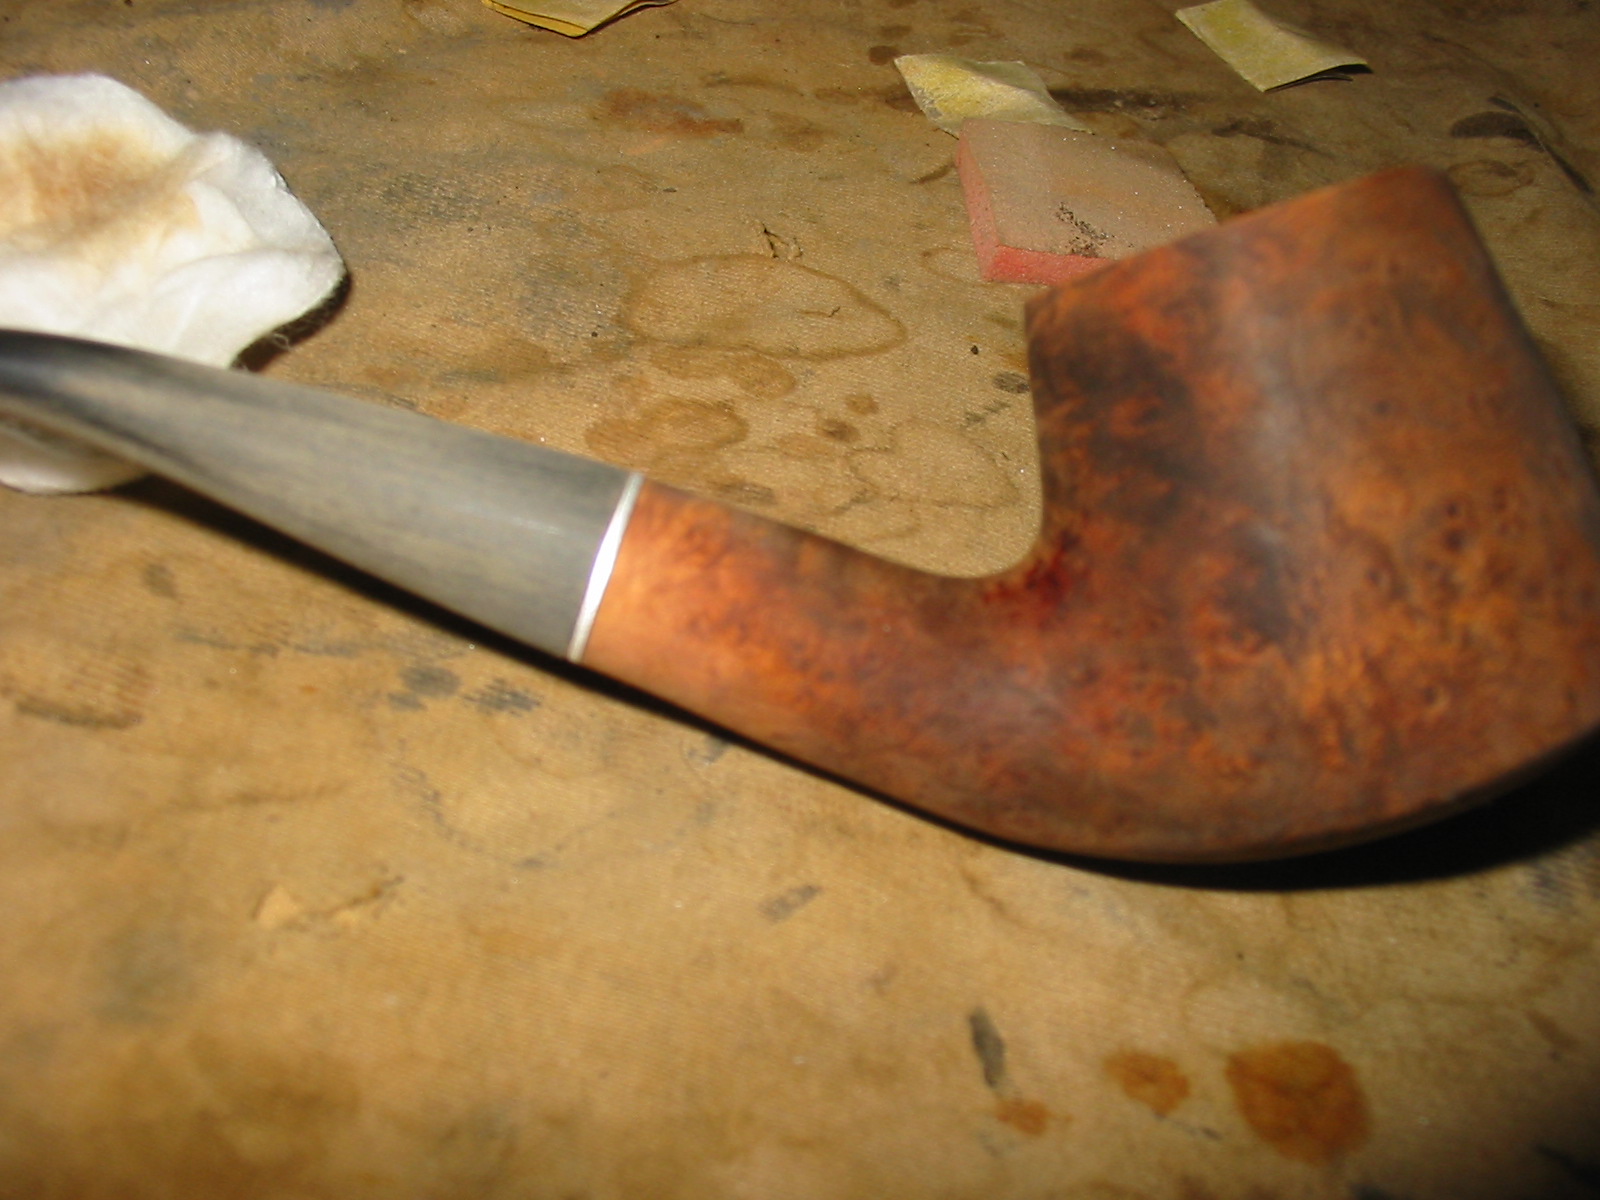
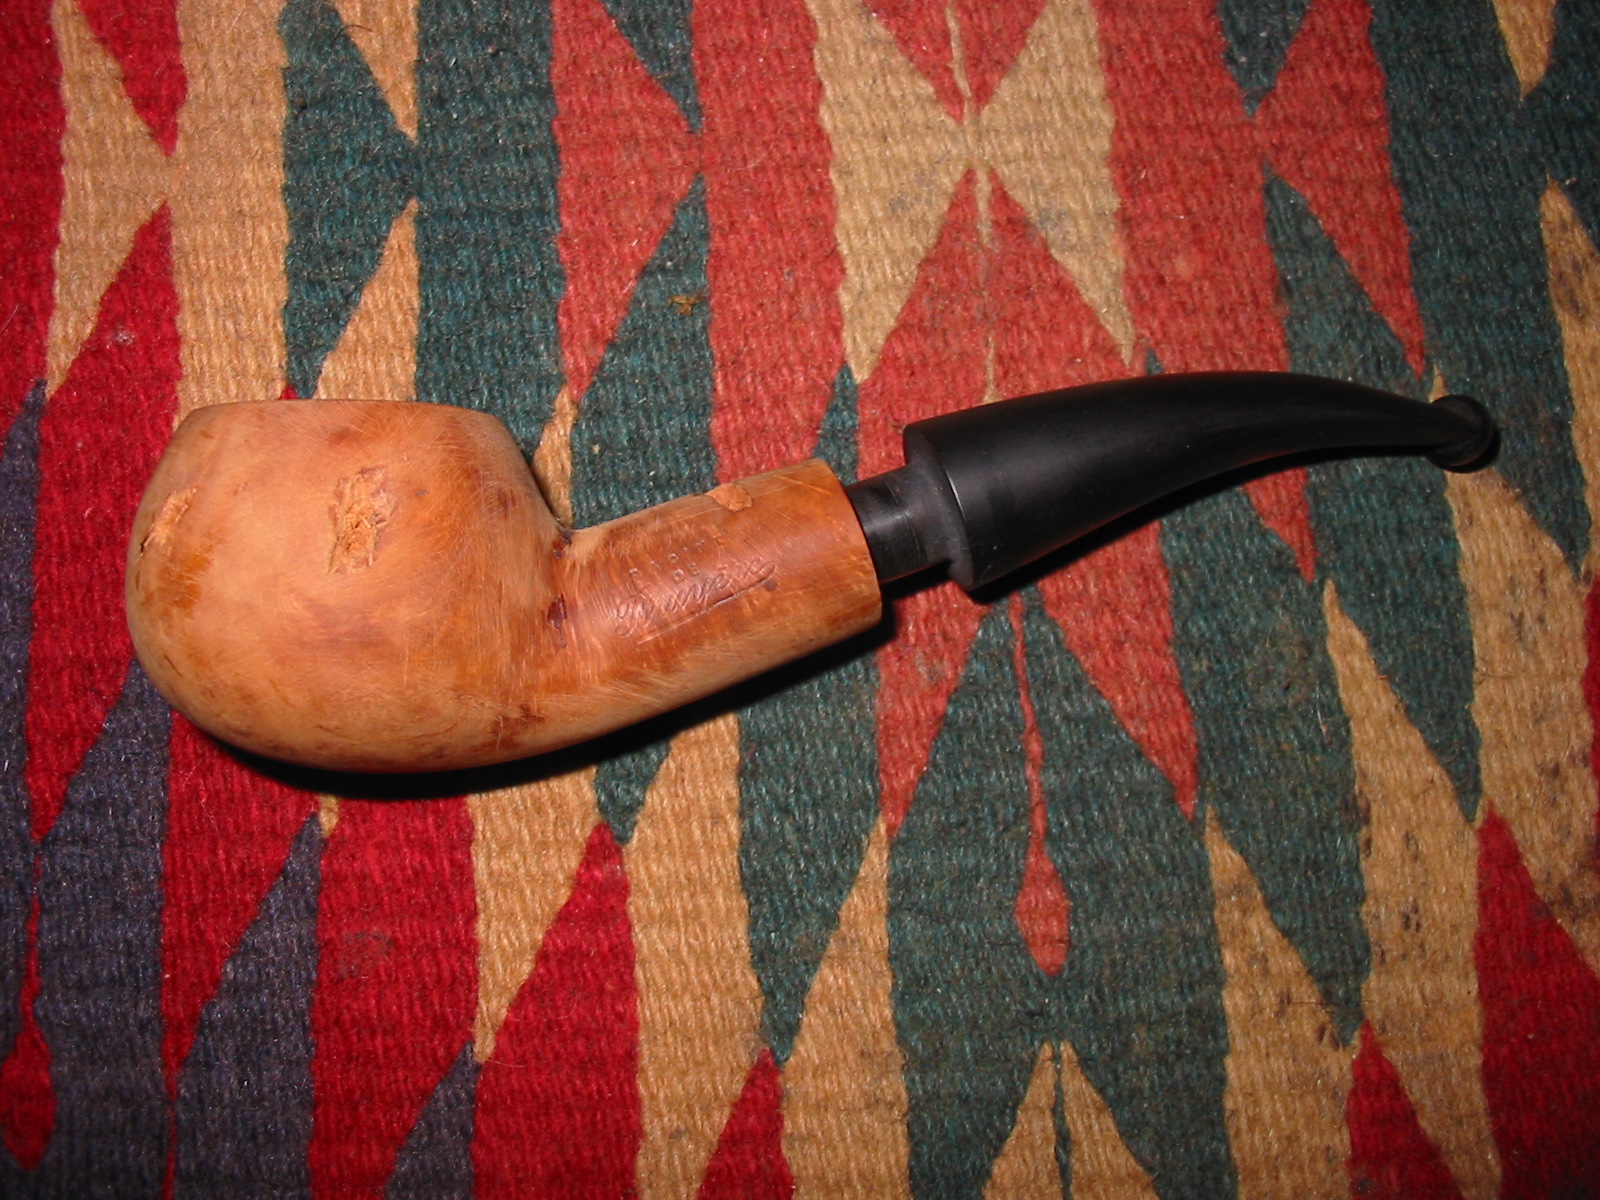
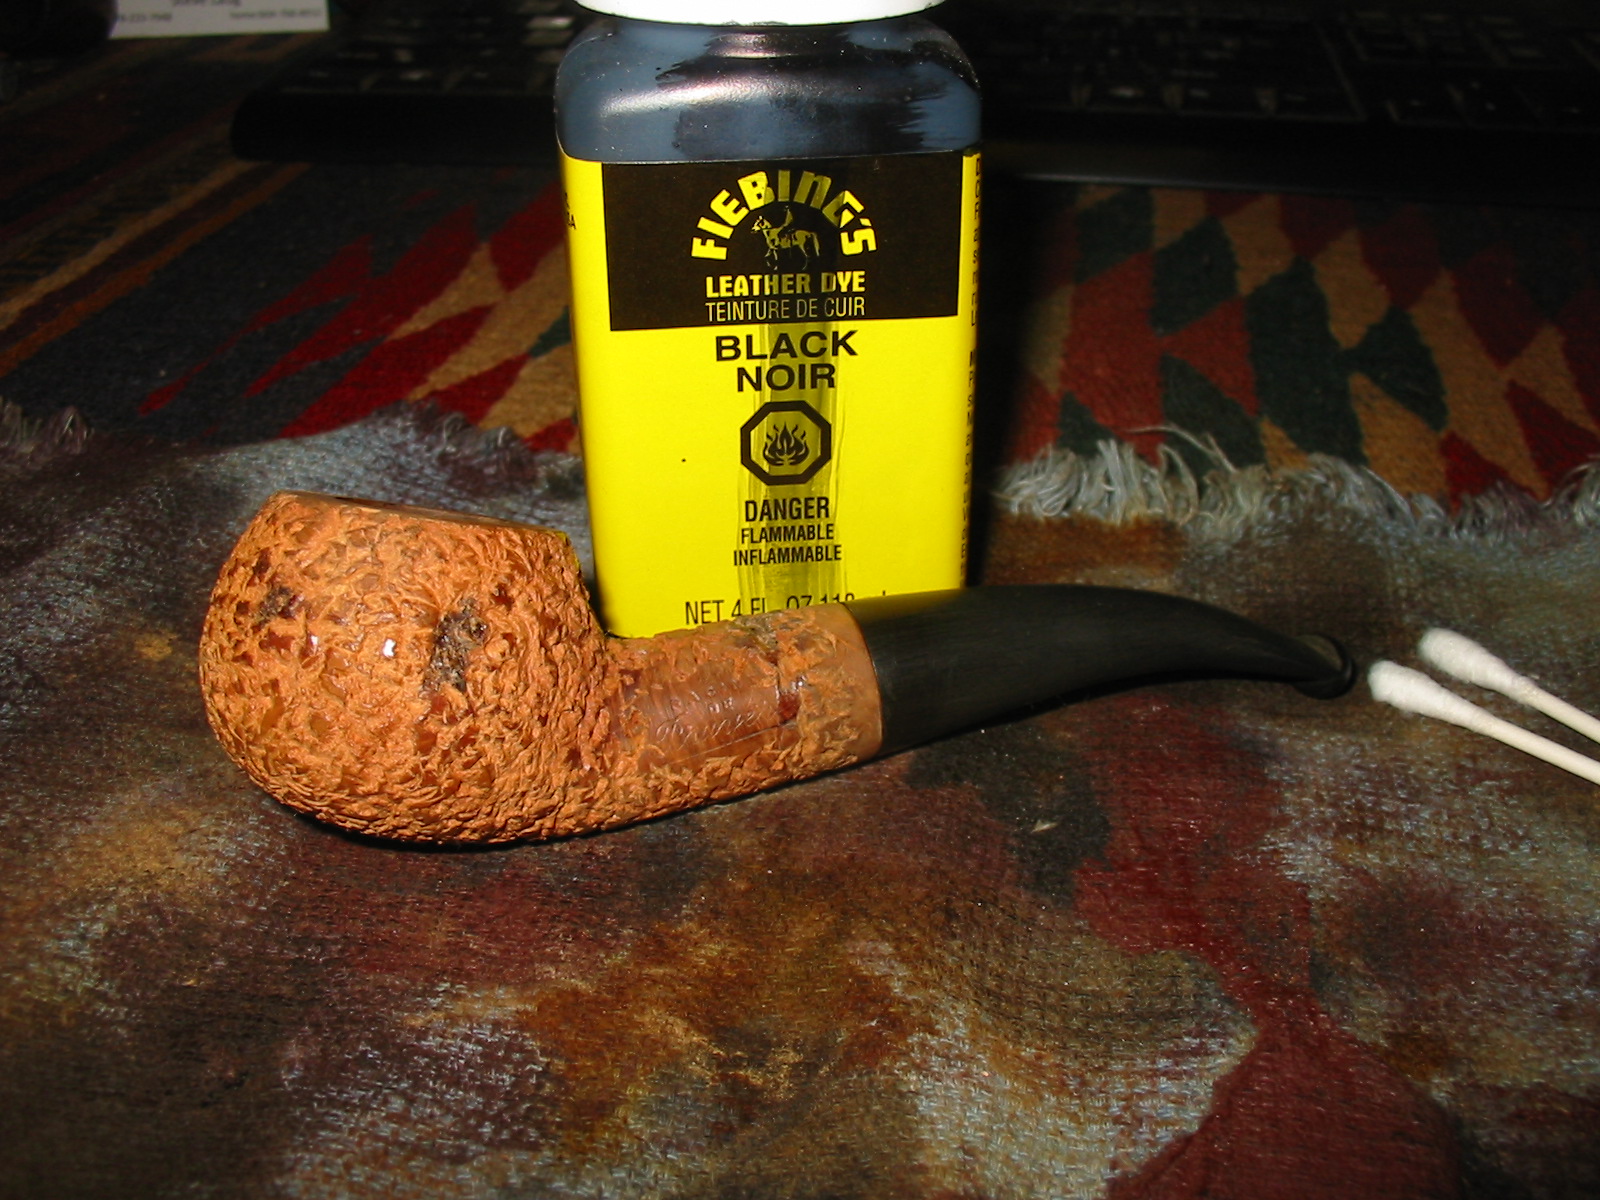
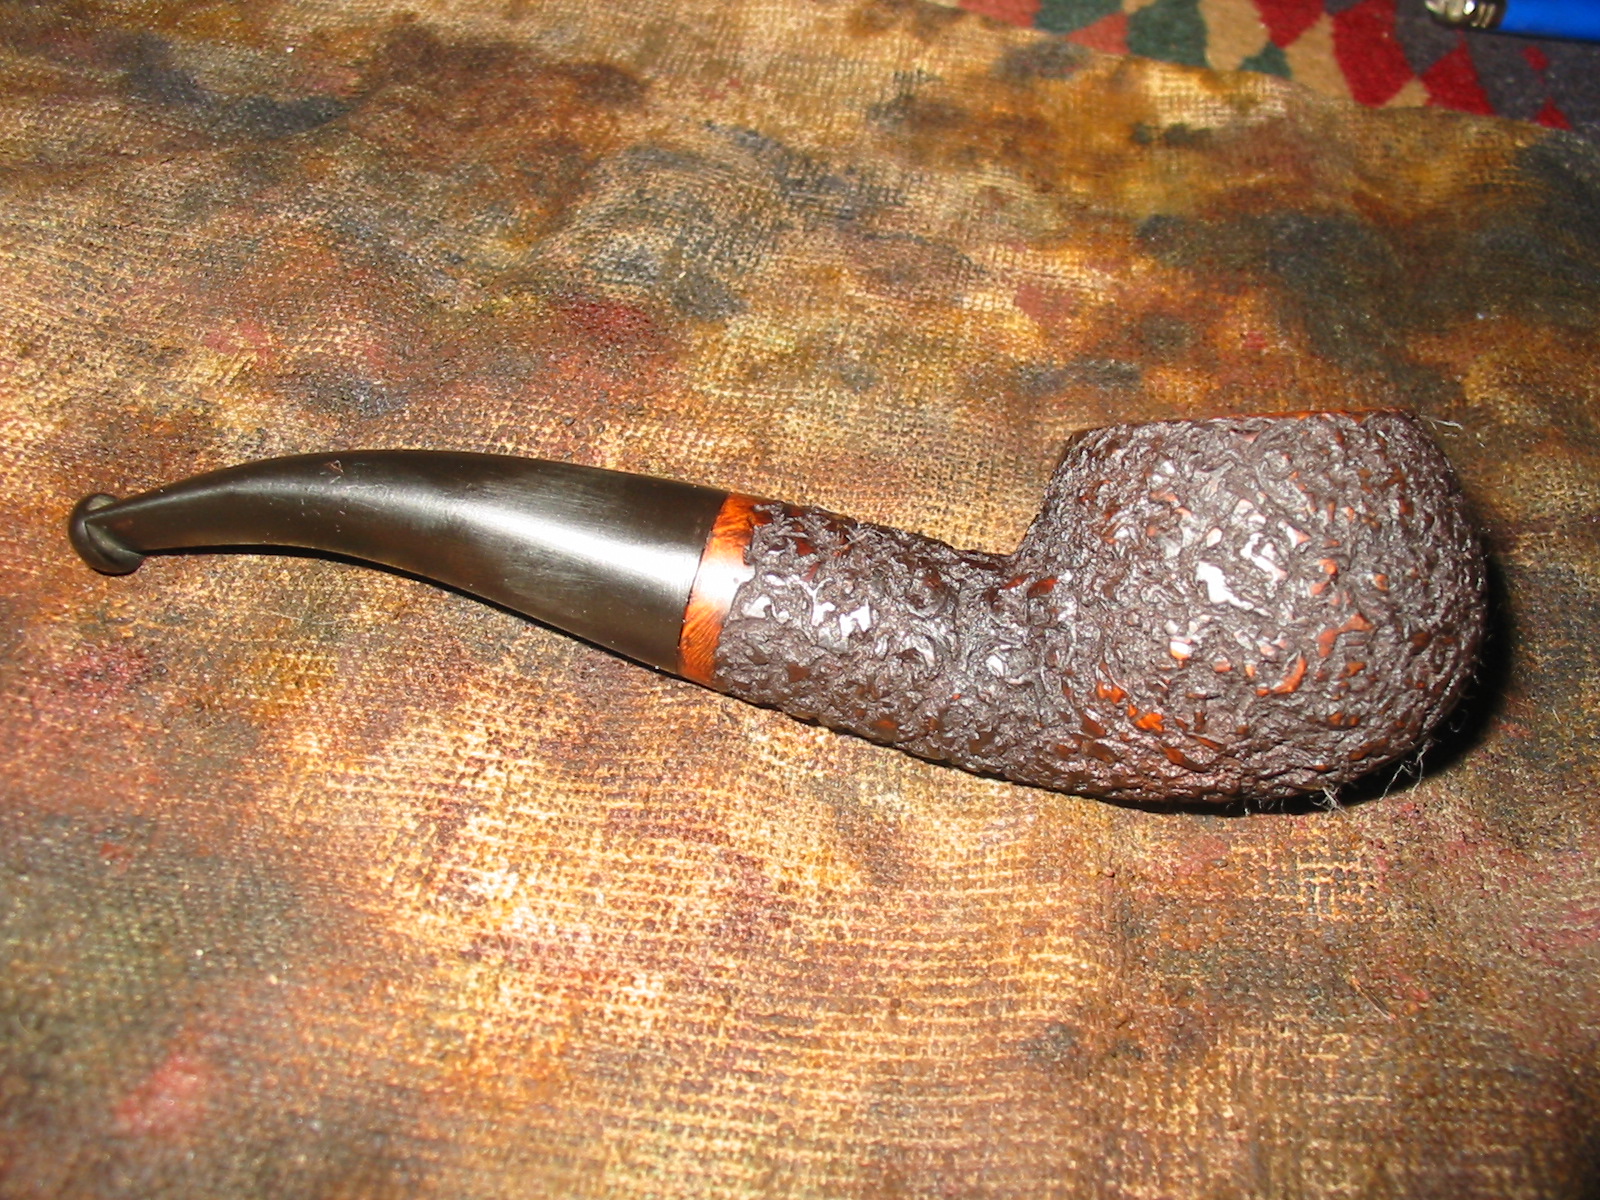
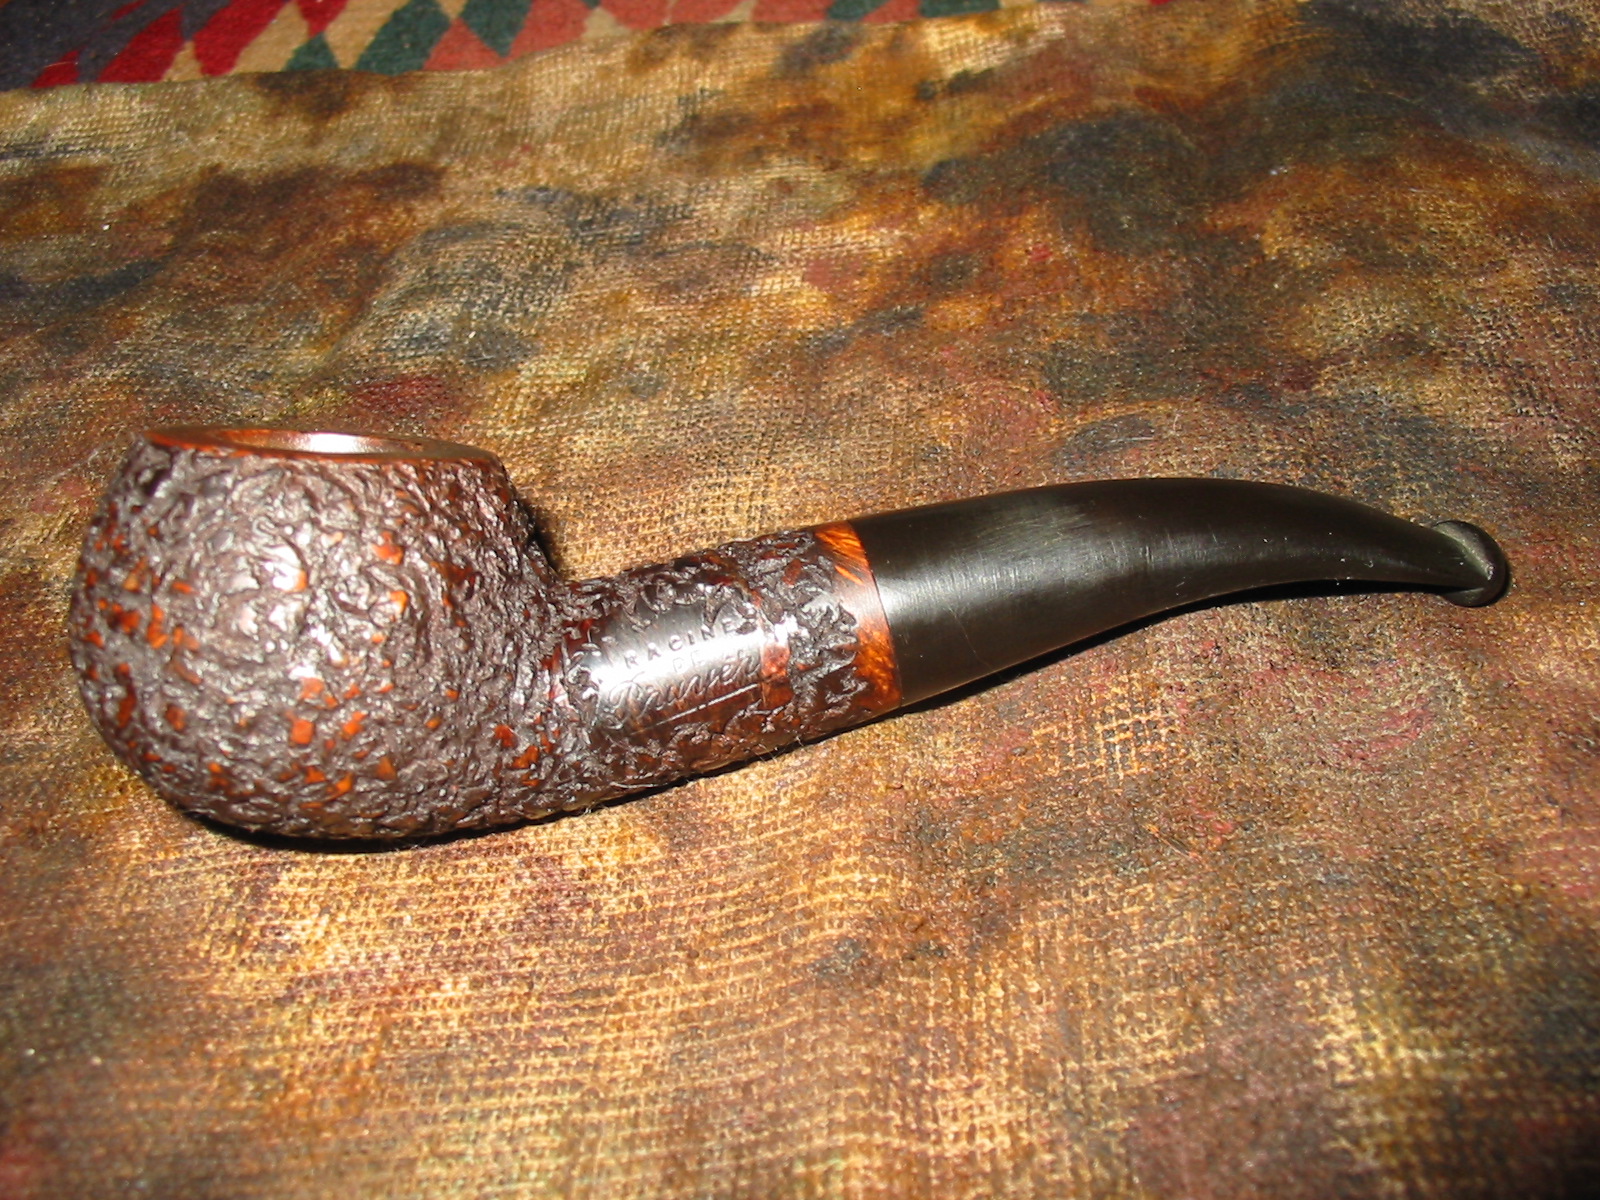
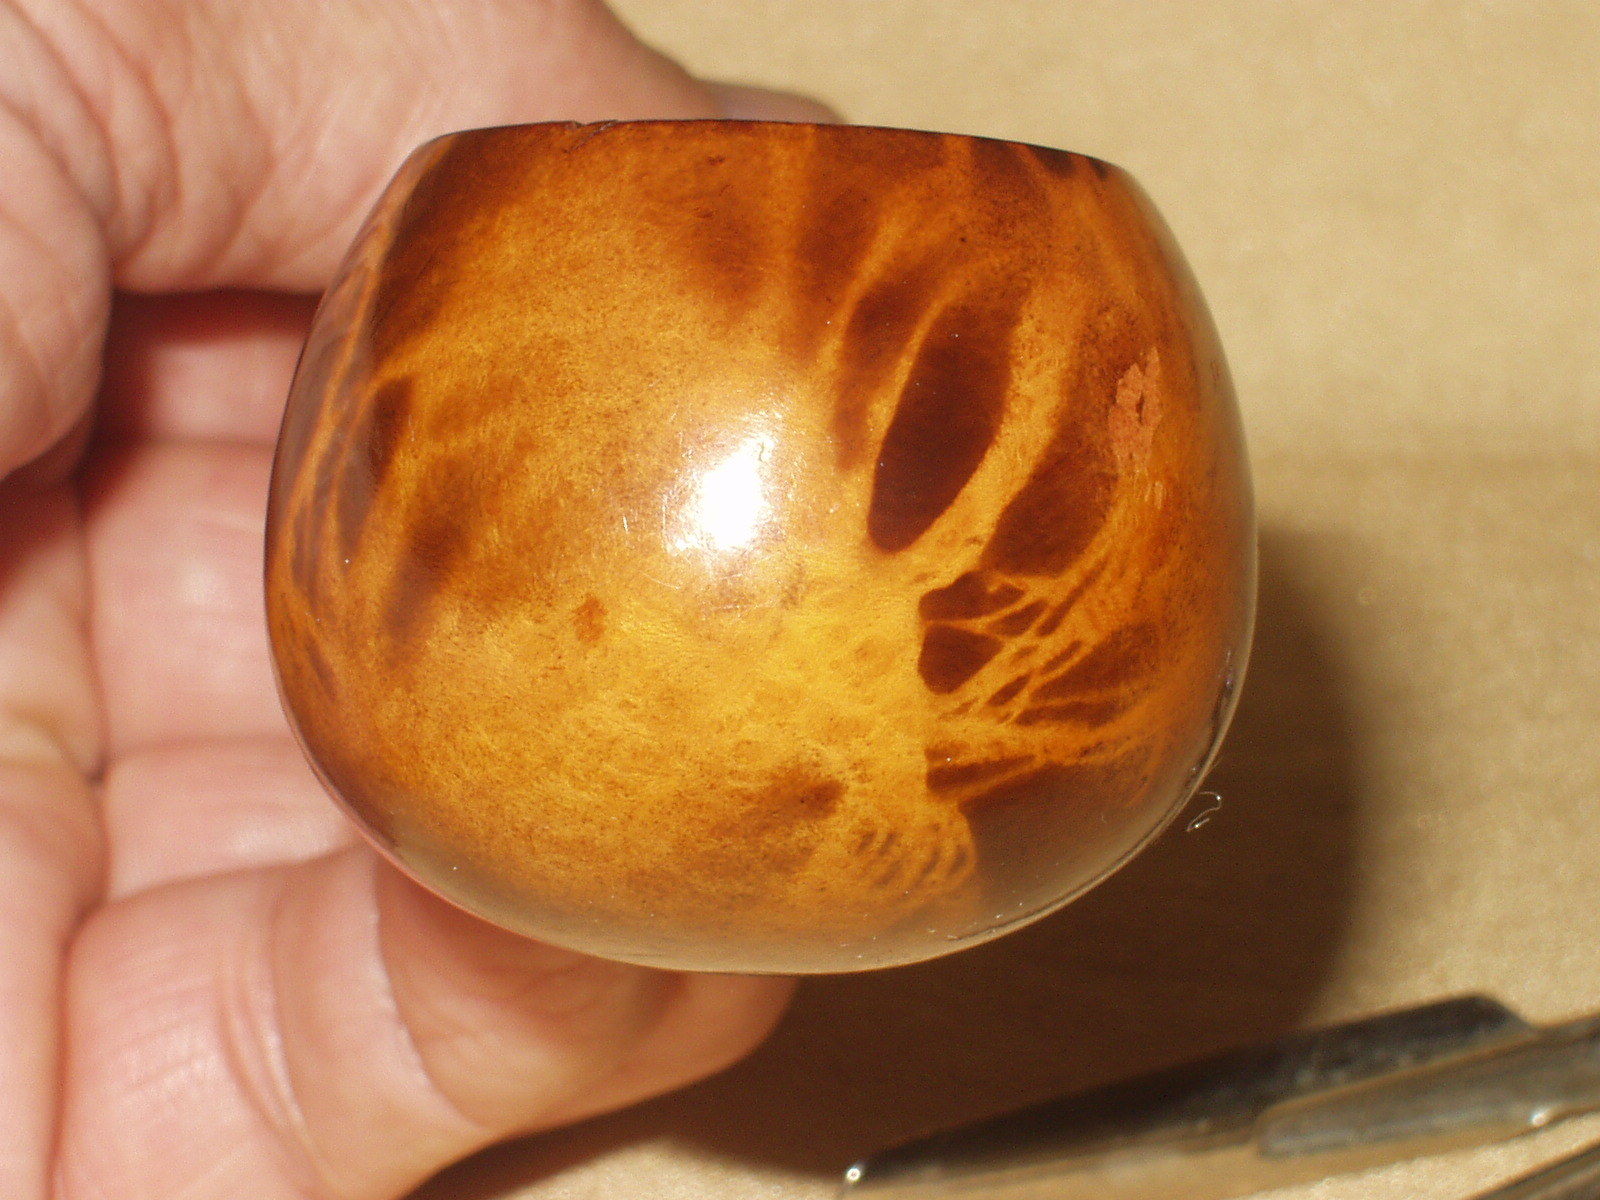
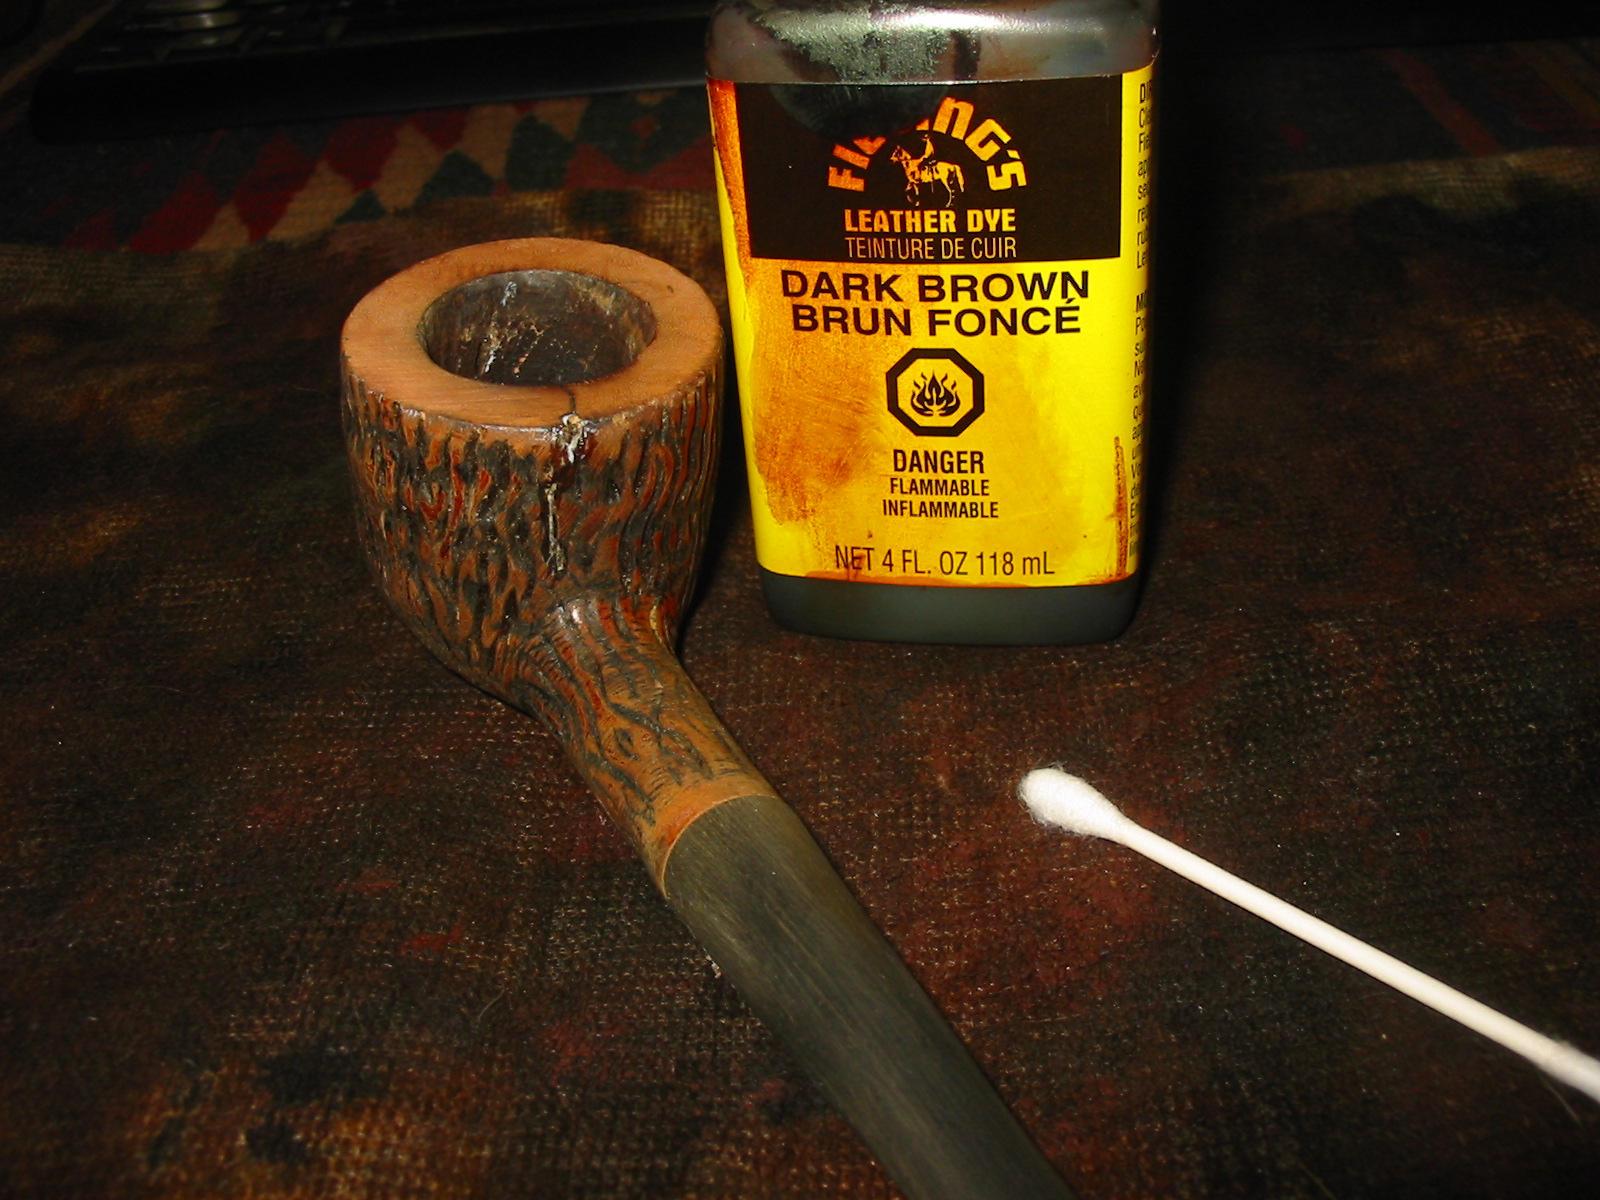
When the plaster had set I stained the bowl with a dark brown aniline stain mixed 2:1 with isopropyl alcohol. I wanted the dark stain in the striations to come through the stain coat and give some contrast to the coloration of the bowl. I applied the stain with a cotton swab, flamed it and reapplied and reflamed it until the coverage was even across the bowl. I worked to get the rim and the smooth portions of the shank to match in colour.
IMG_5055

IMG_5056

IMG_5057

IMG_5059

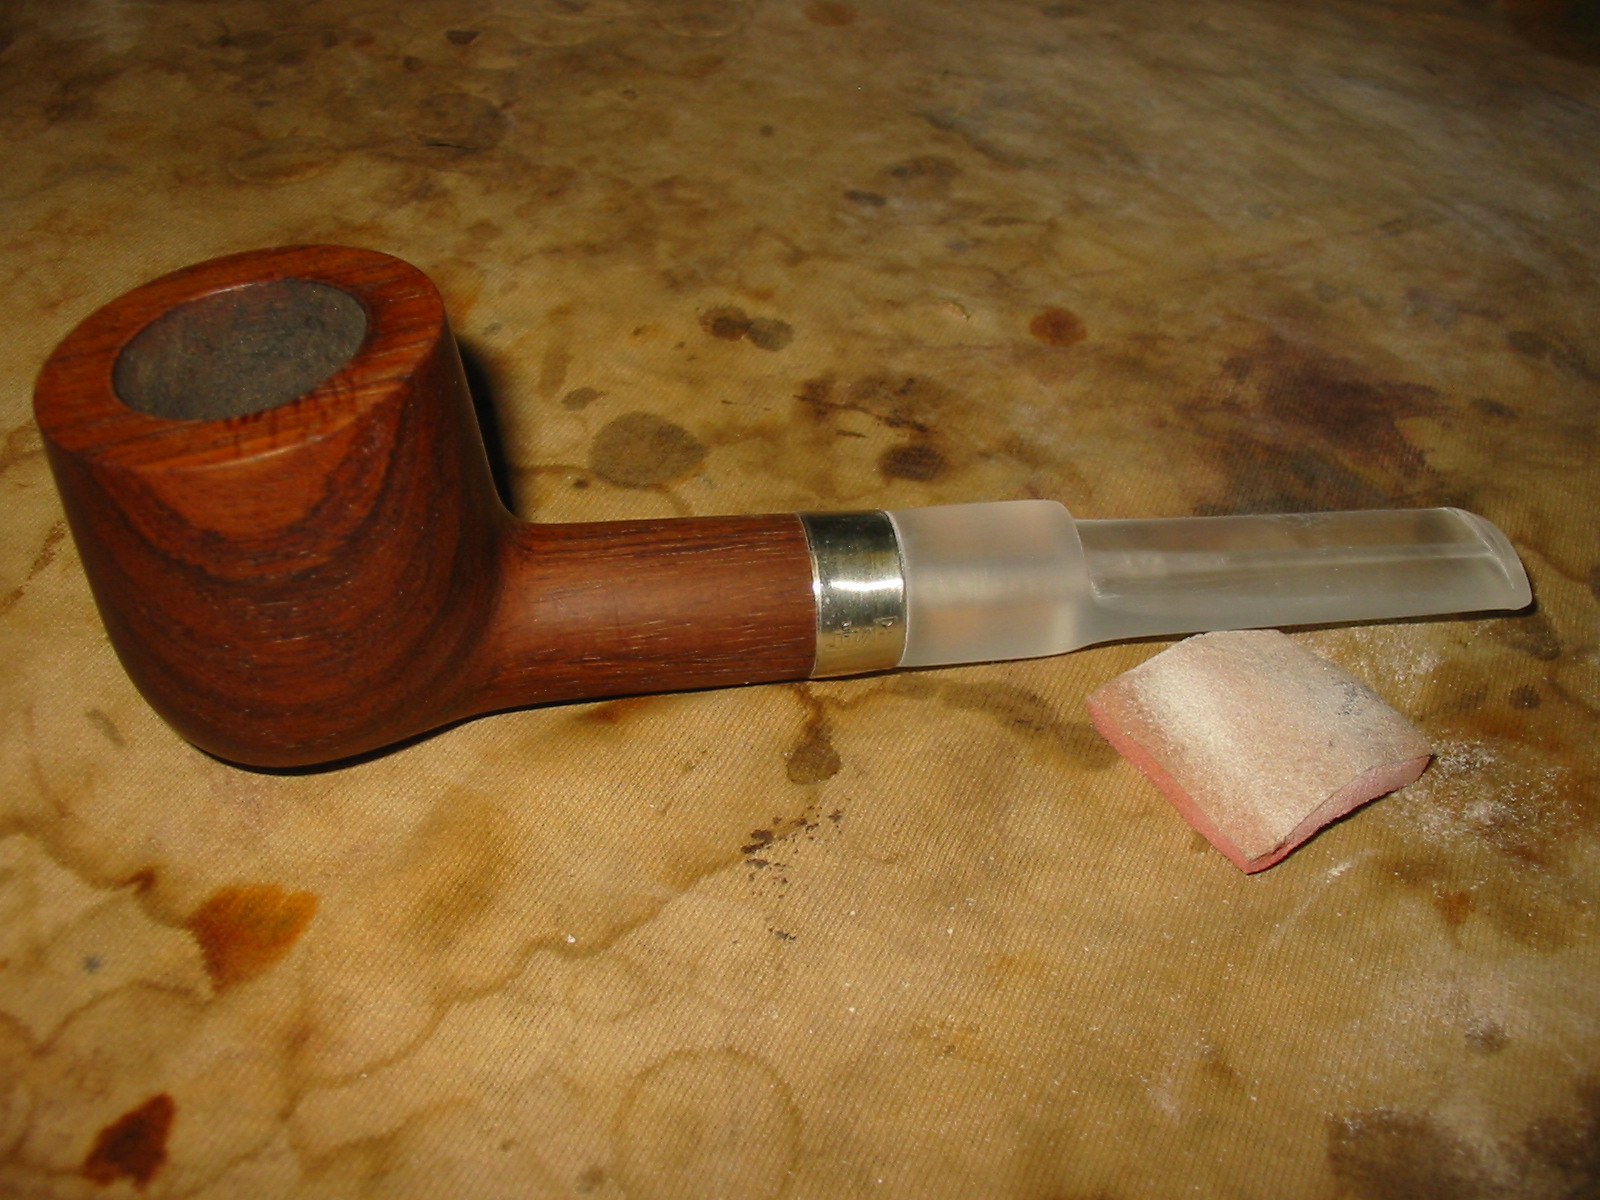
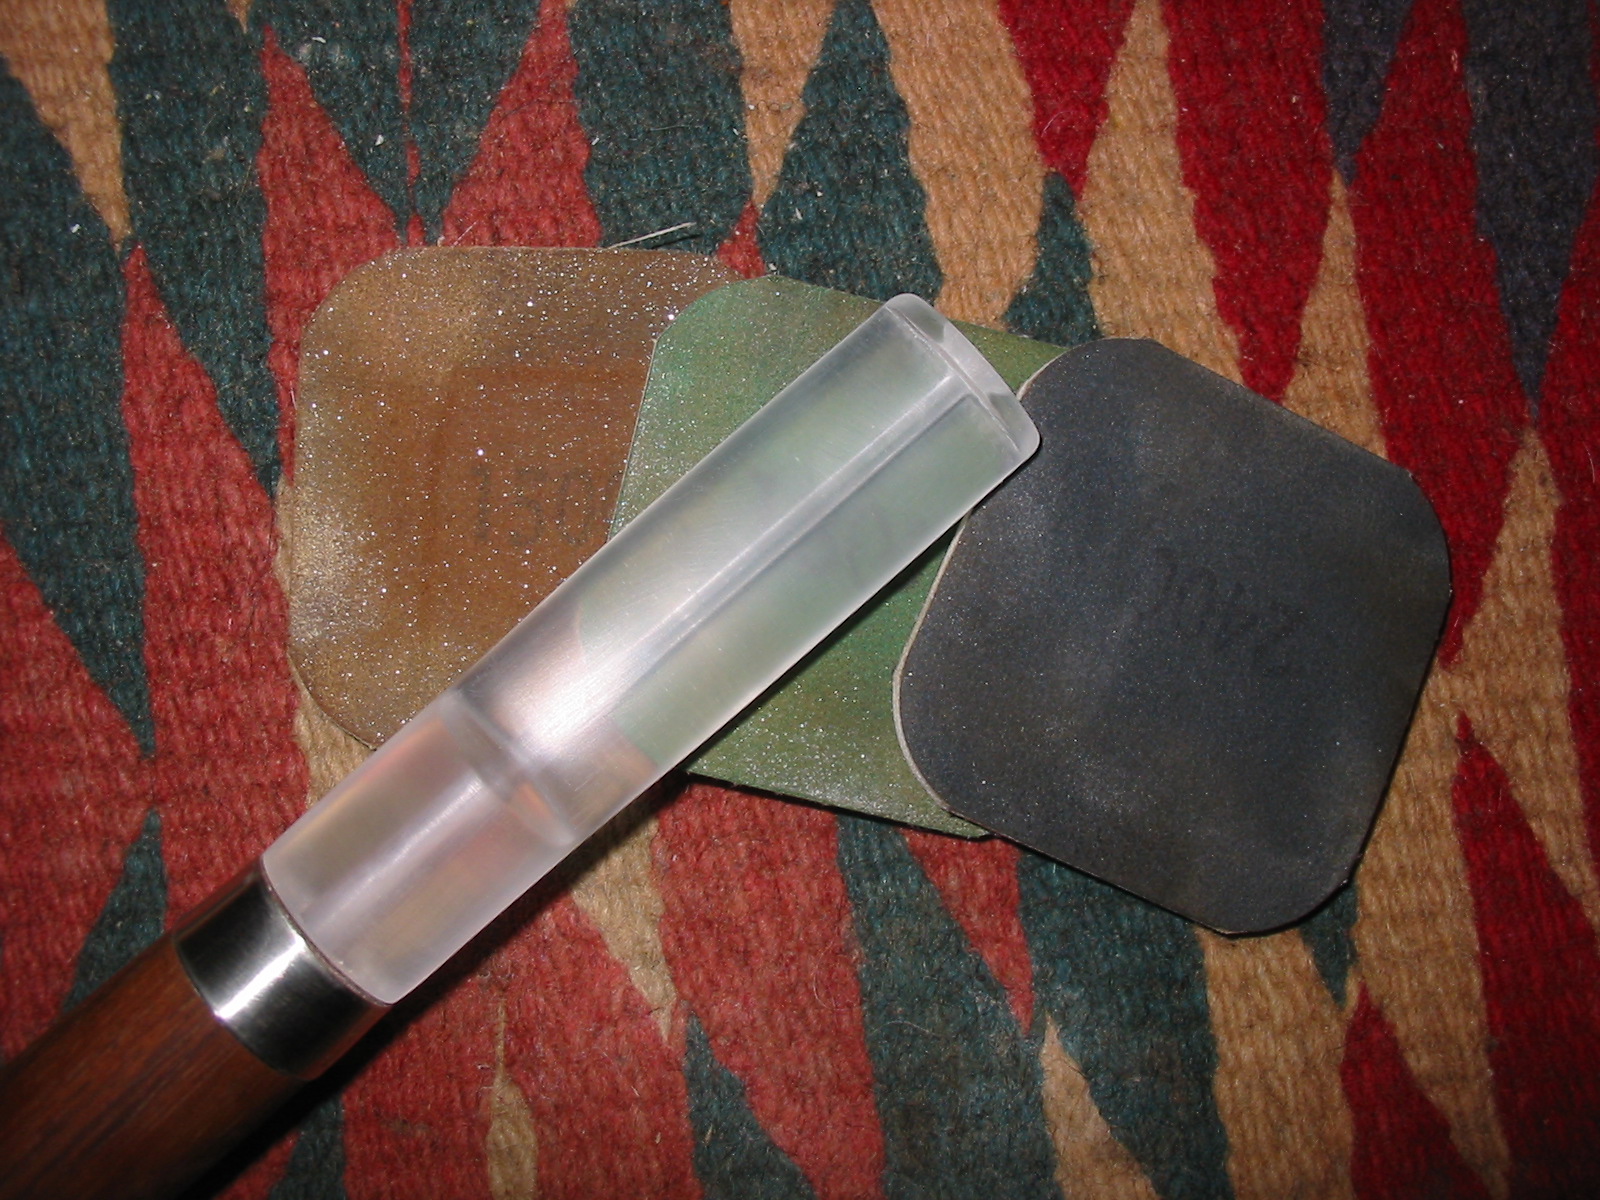
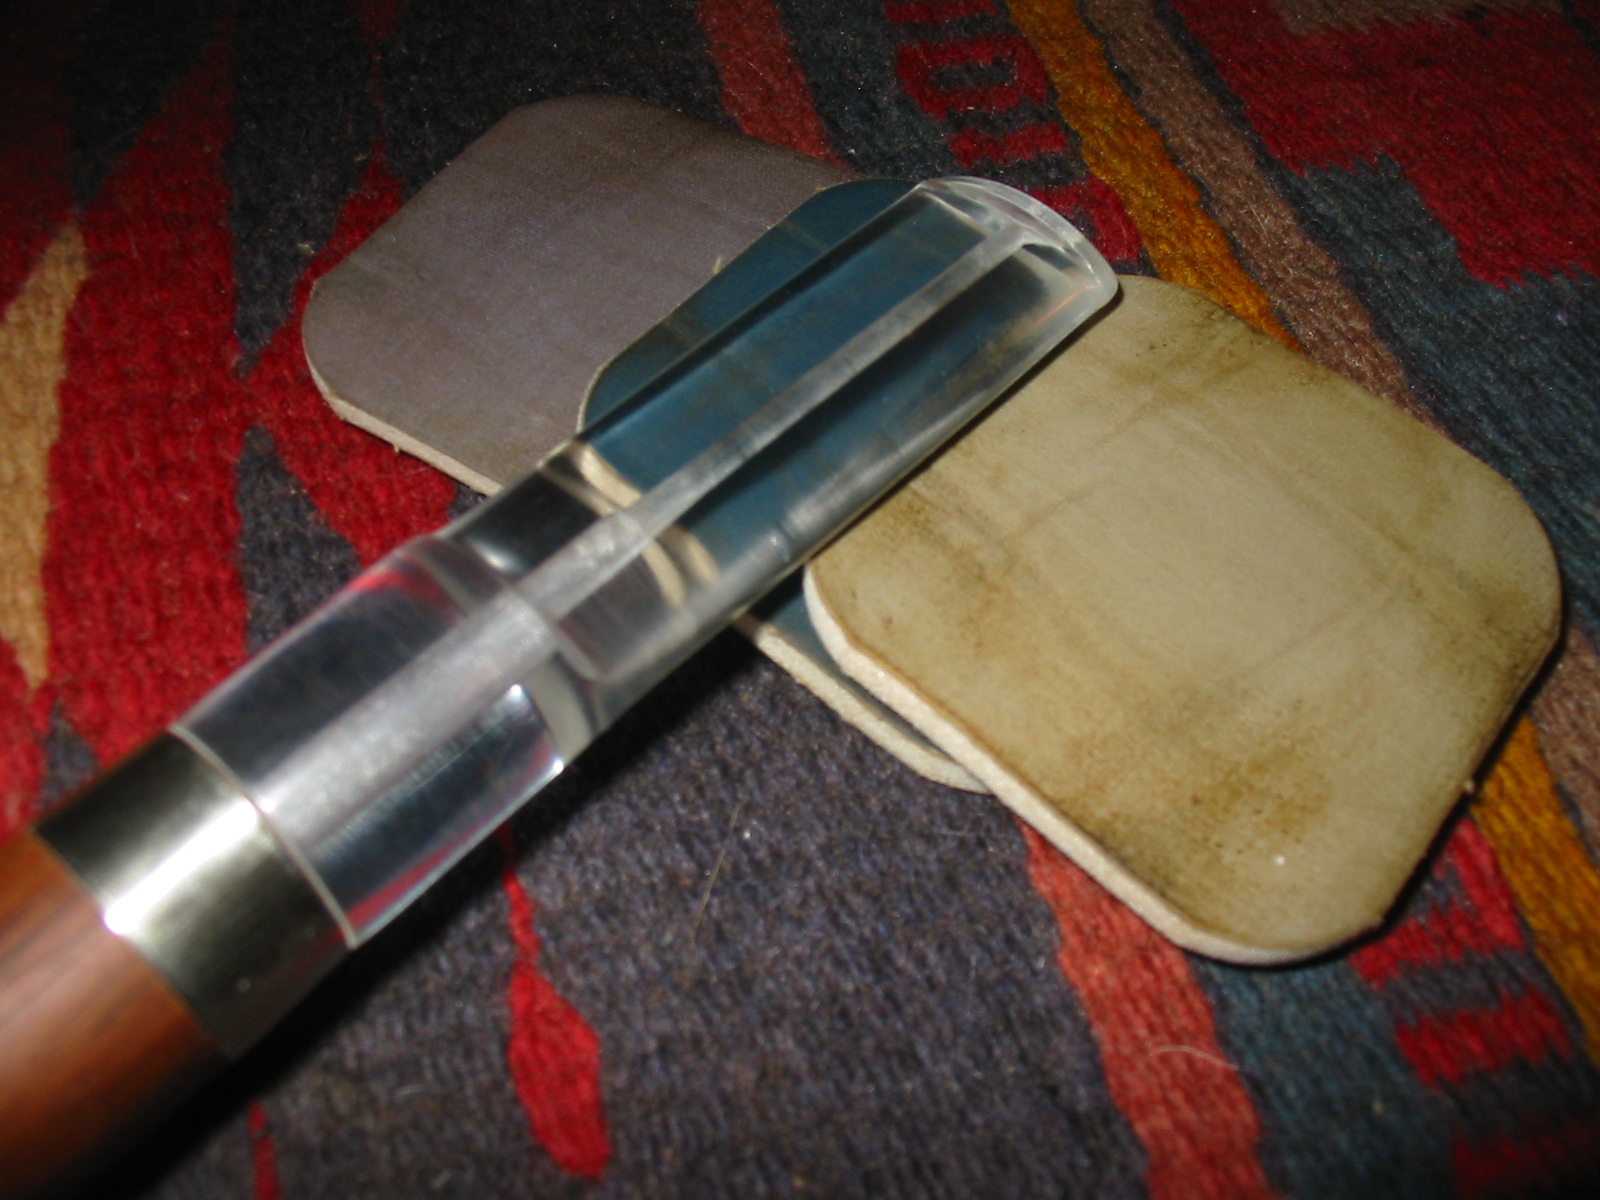
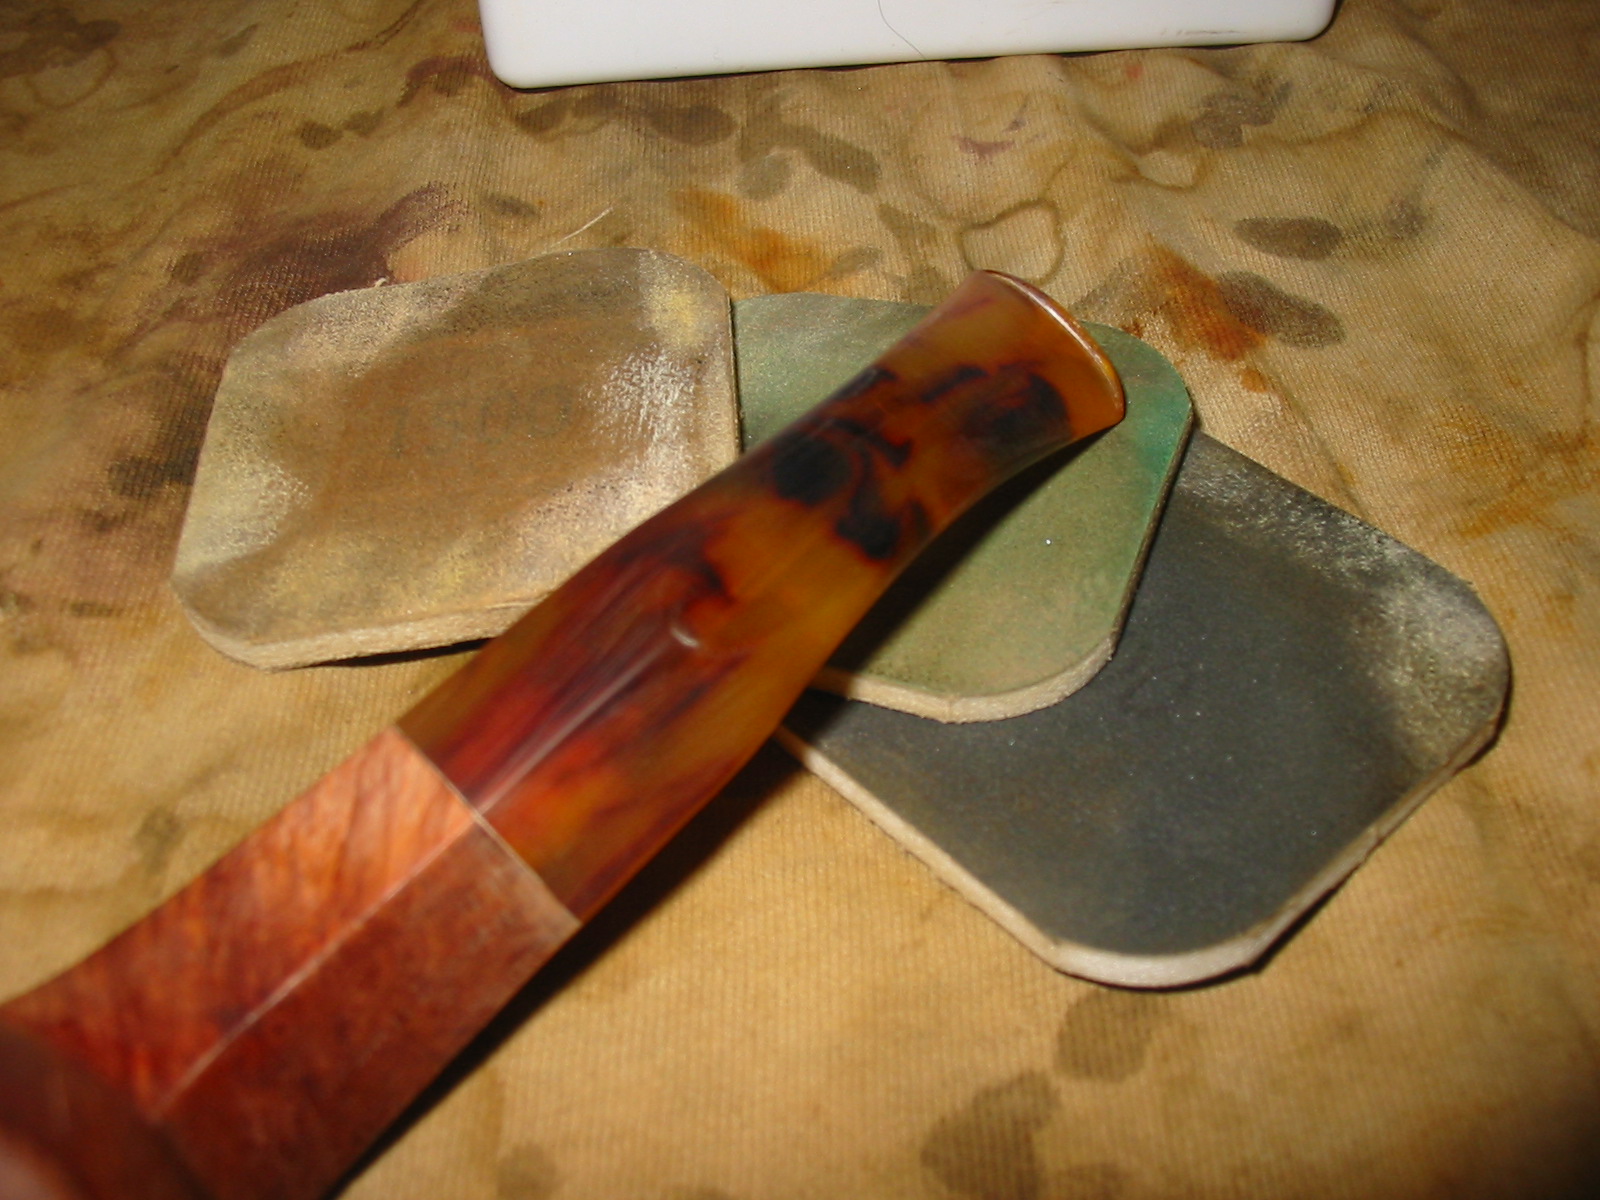
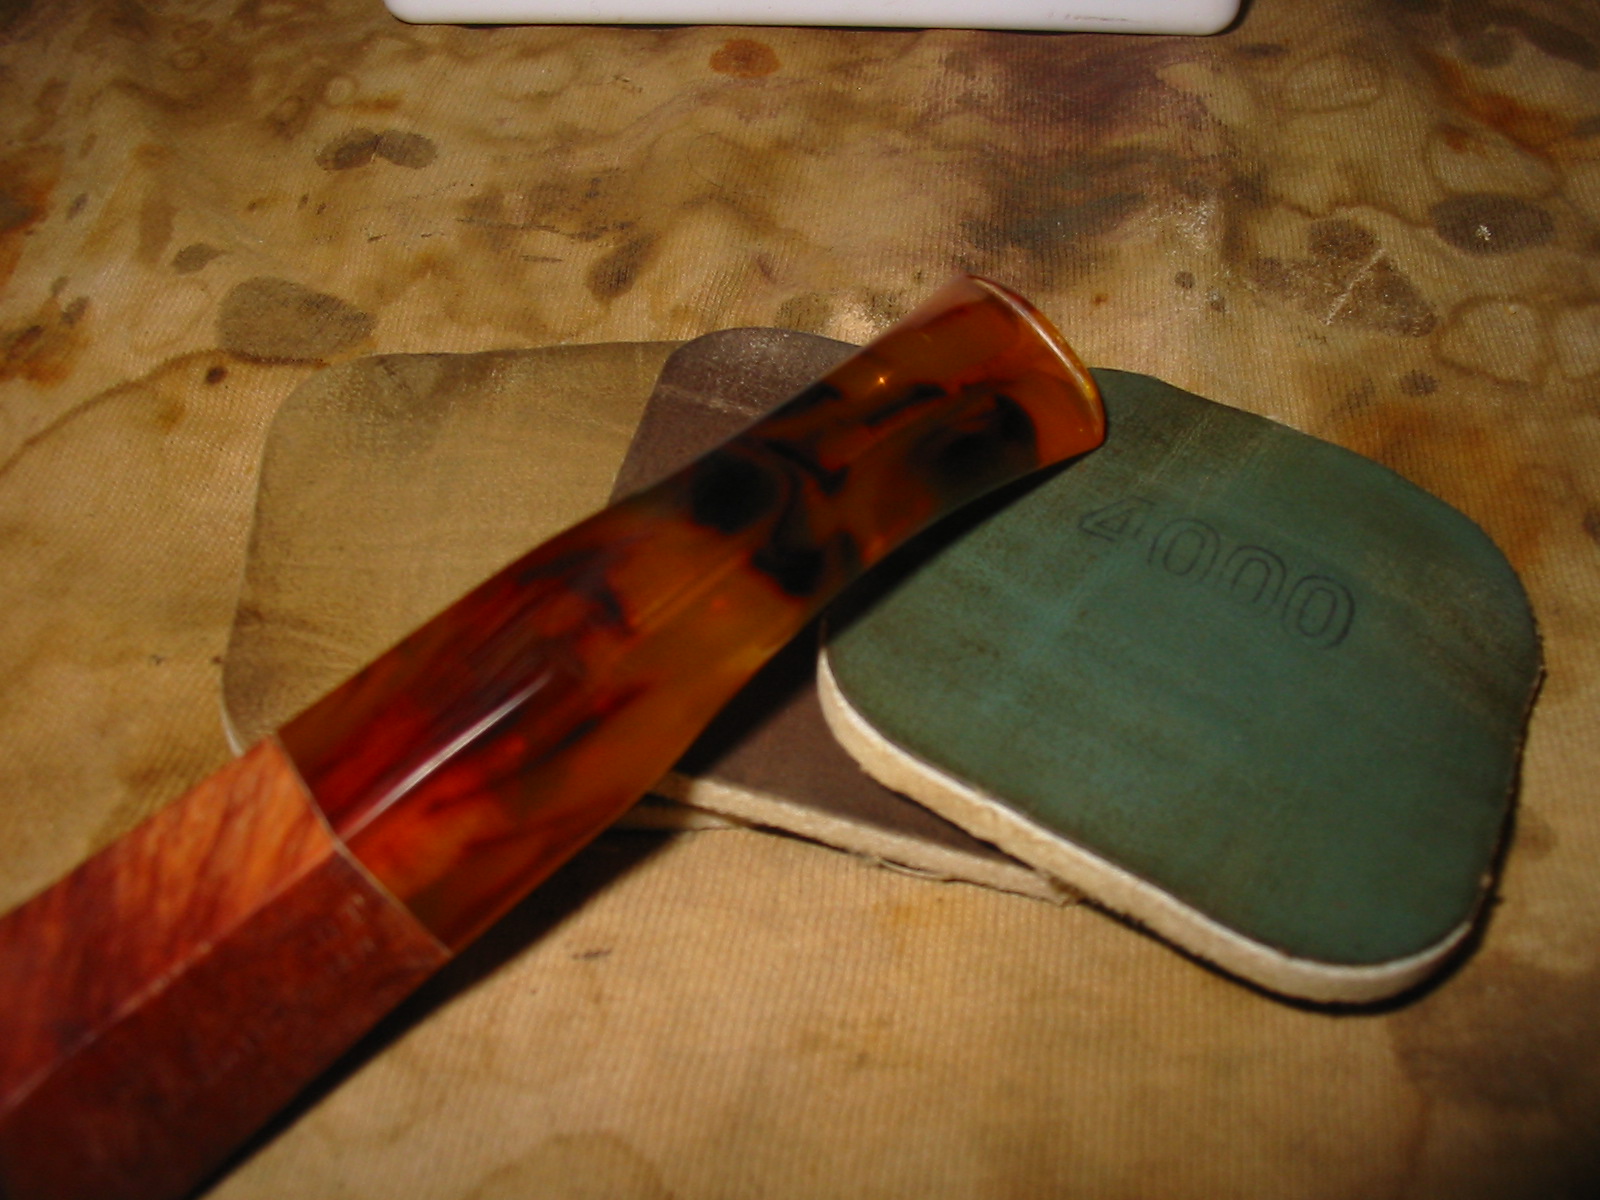
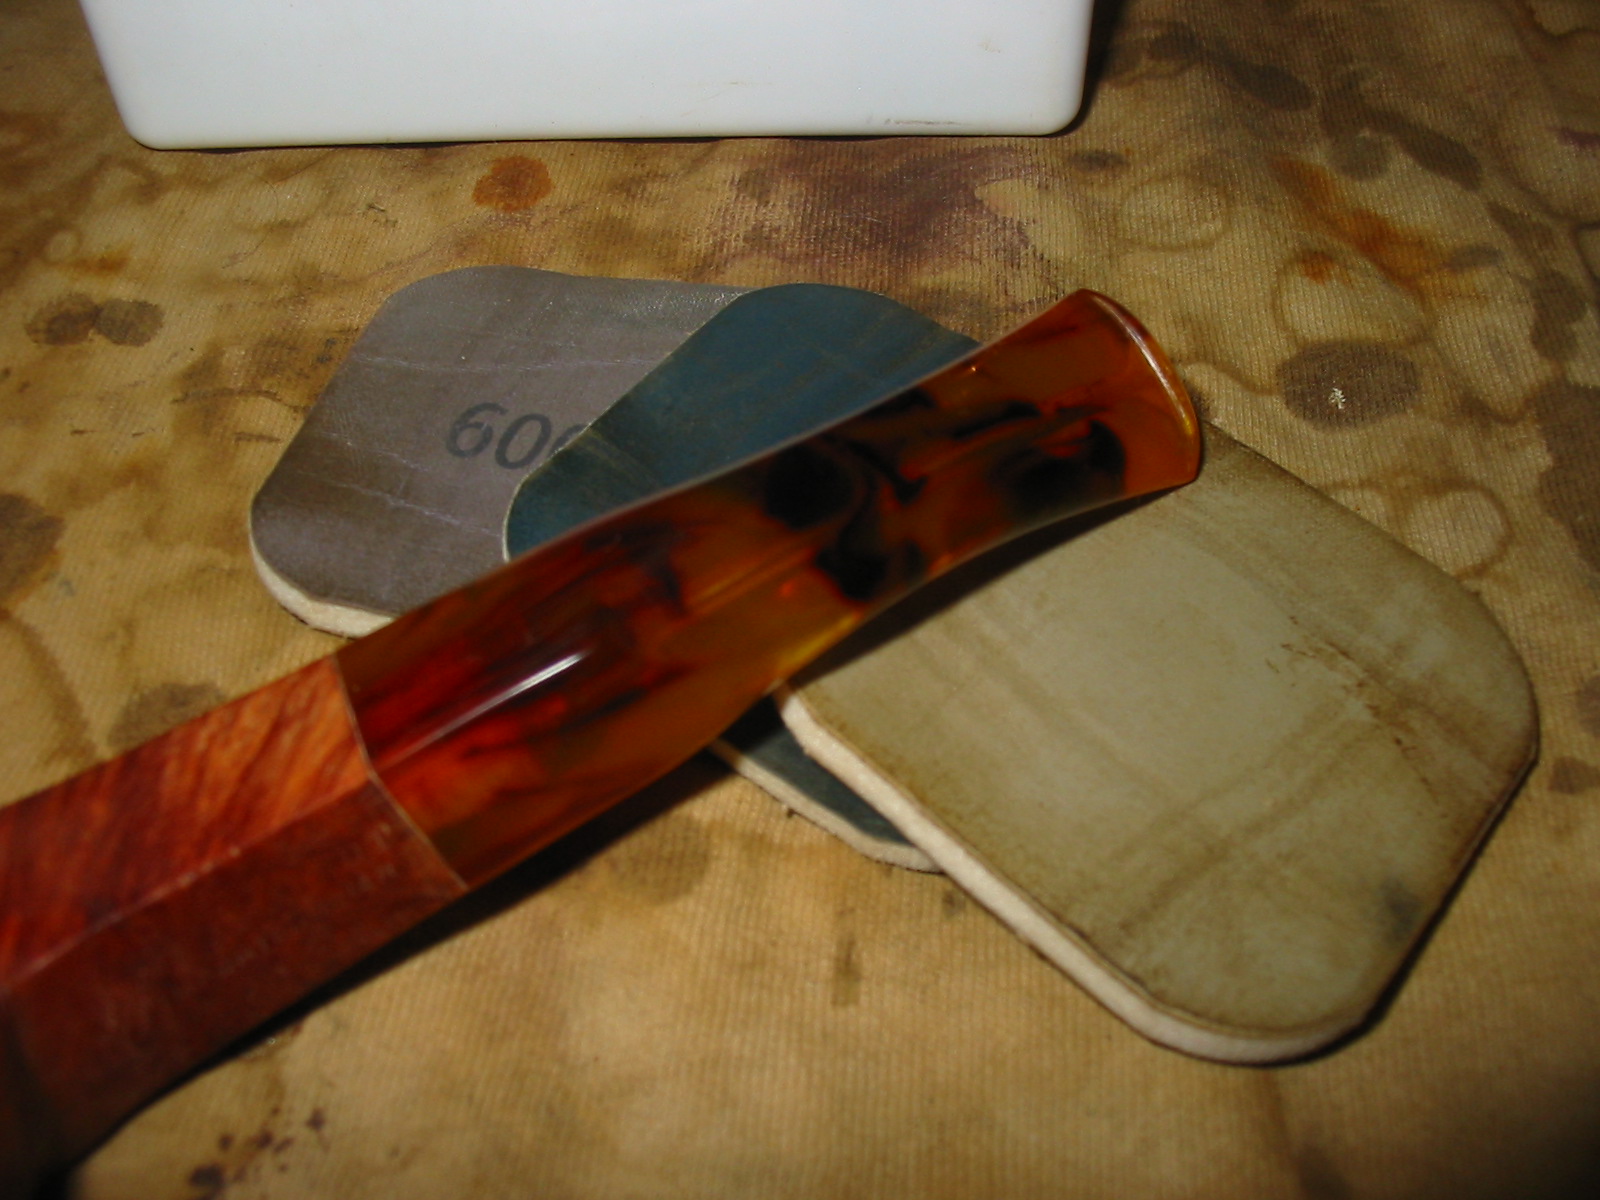
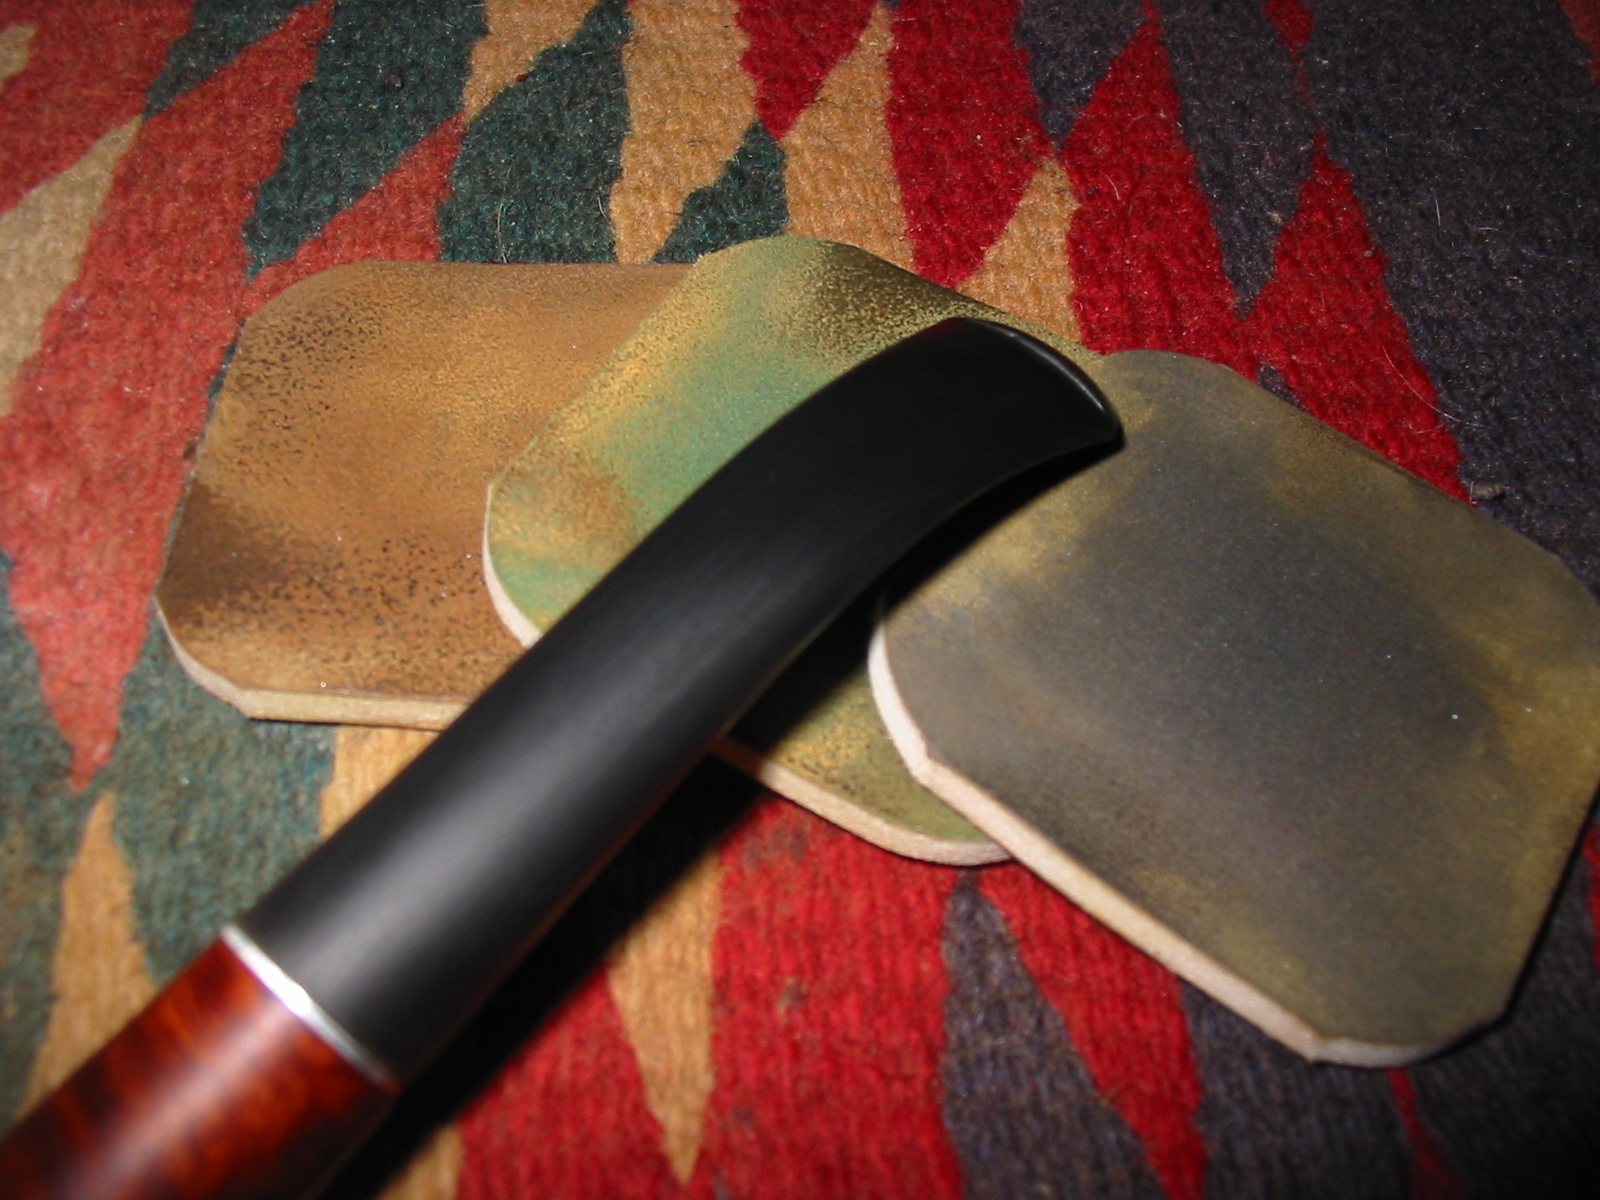
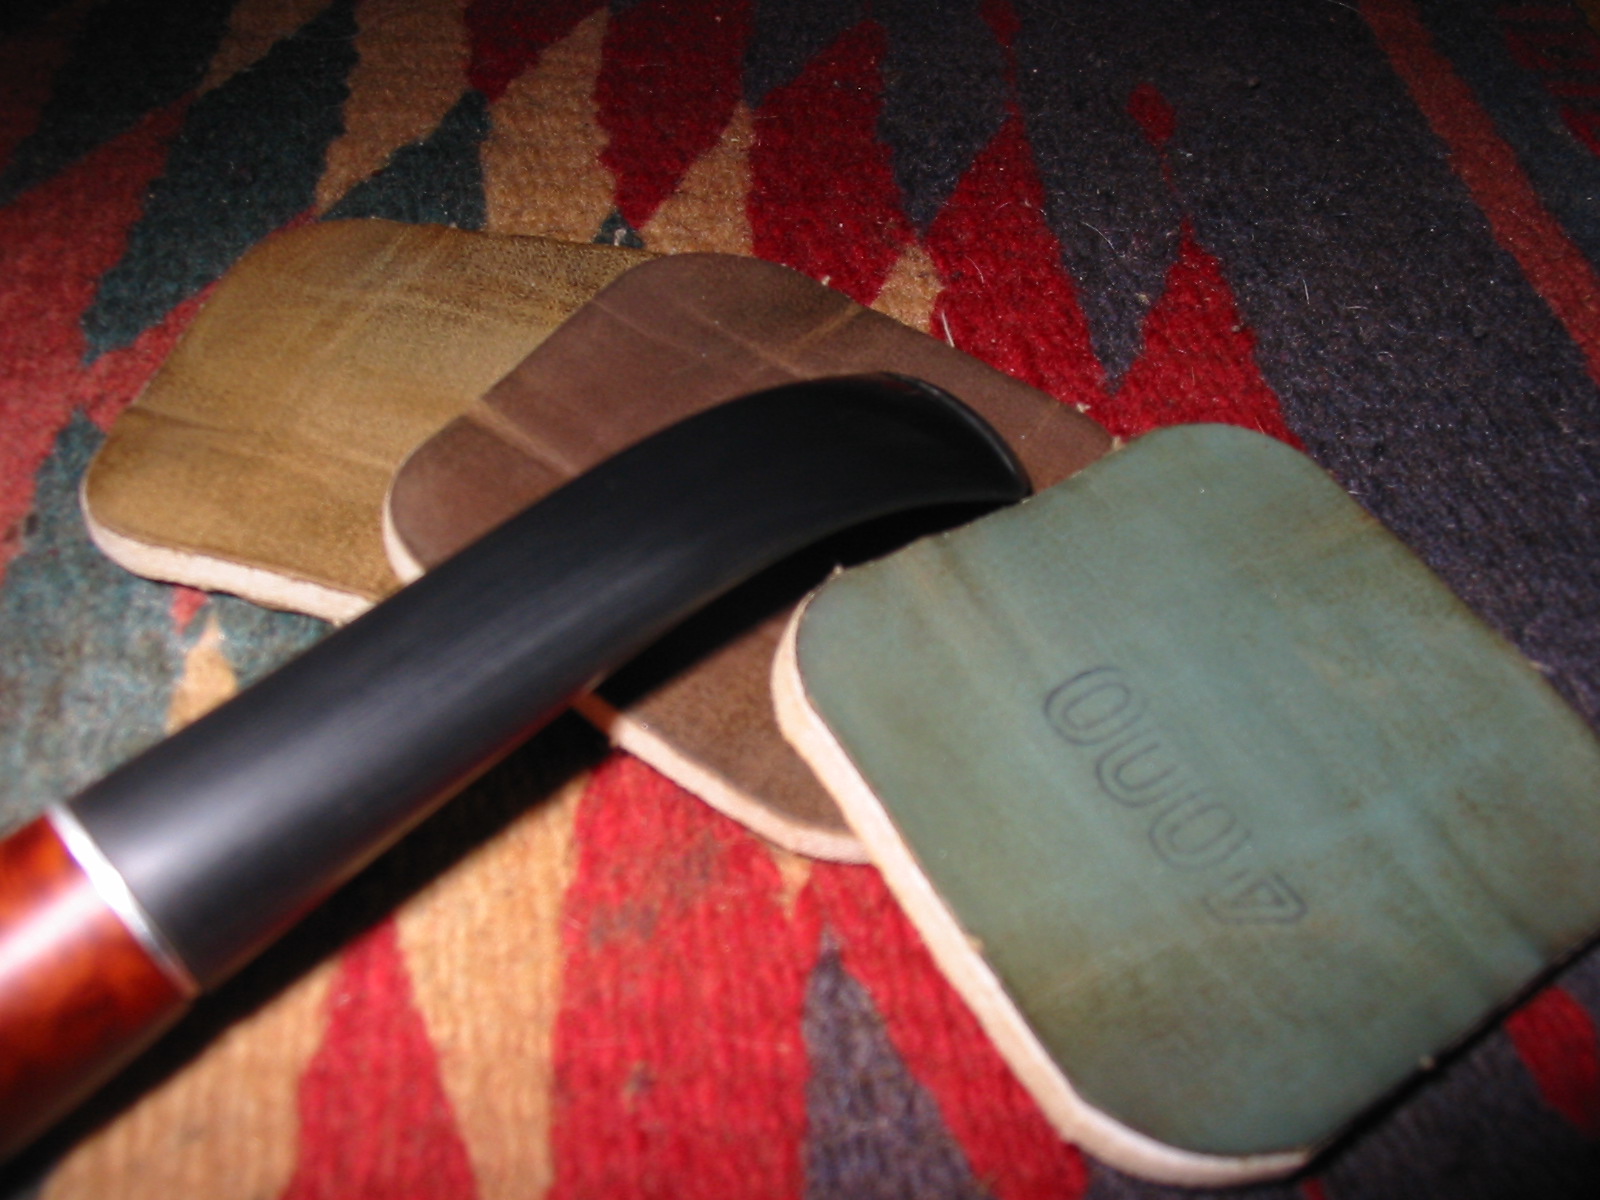
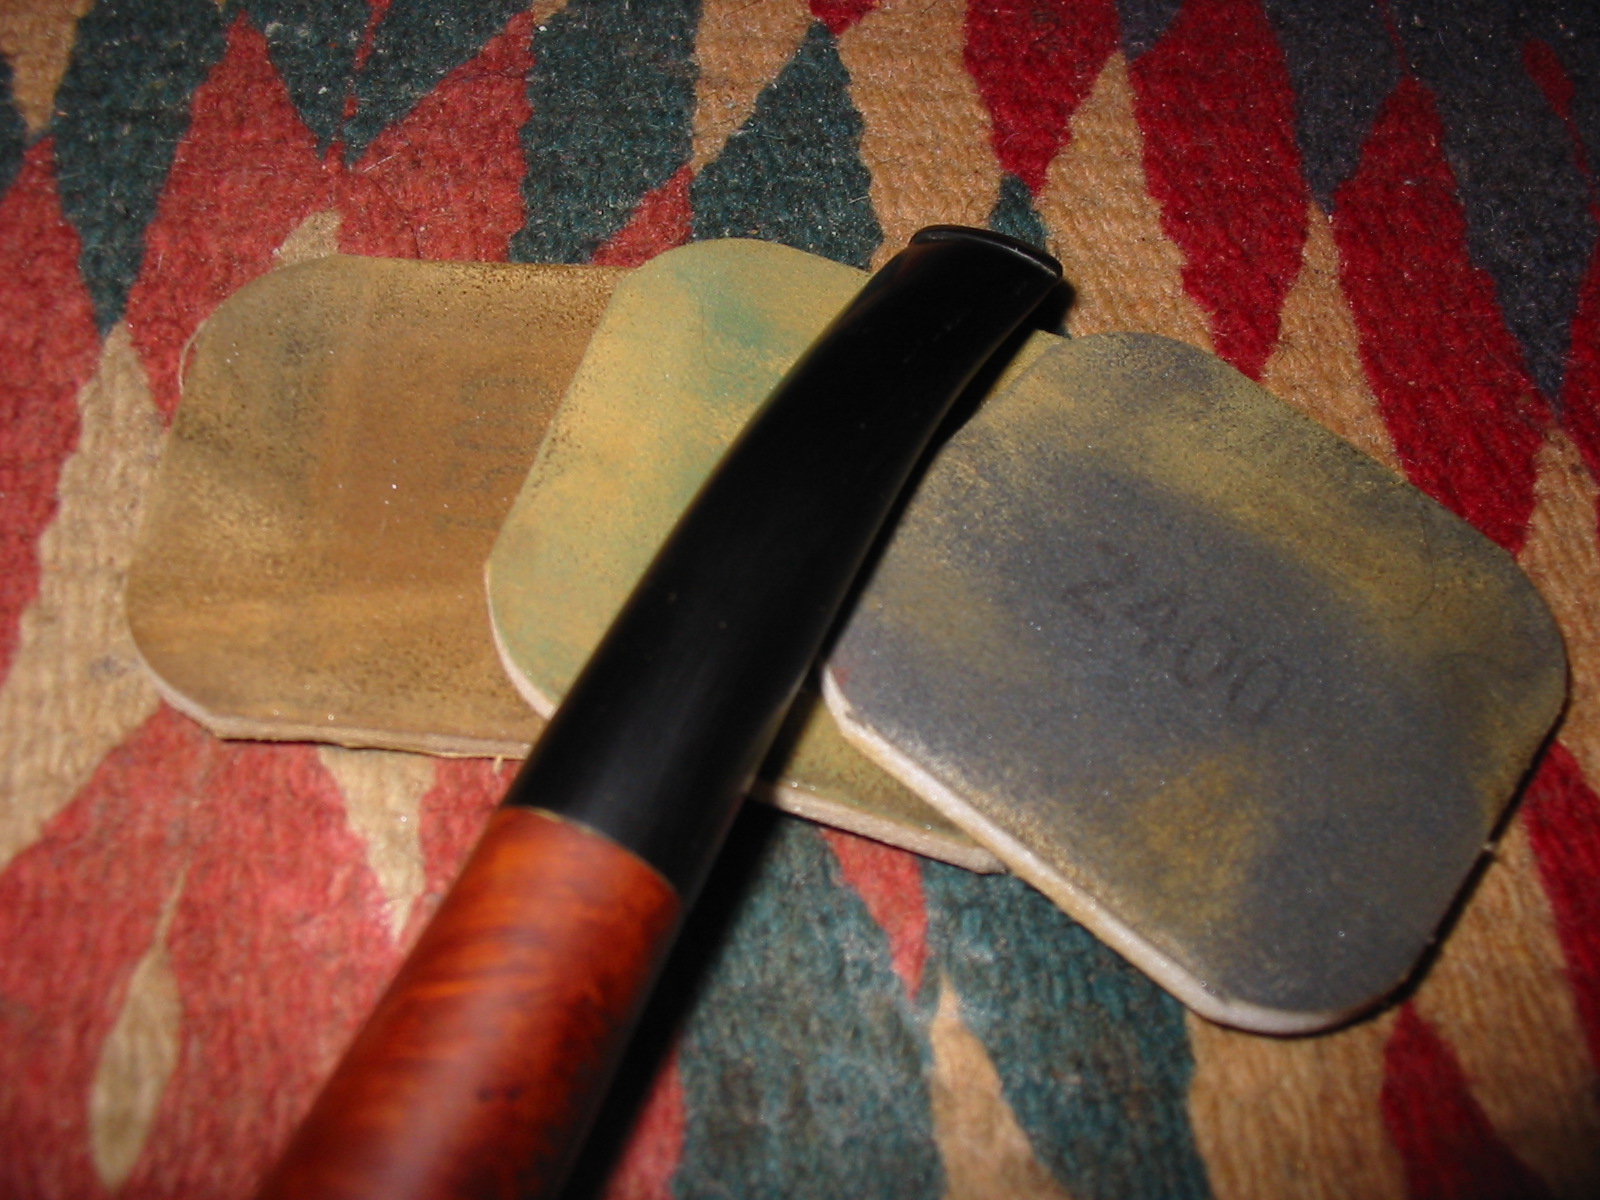
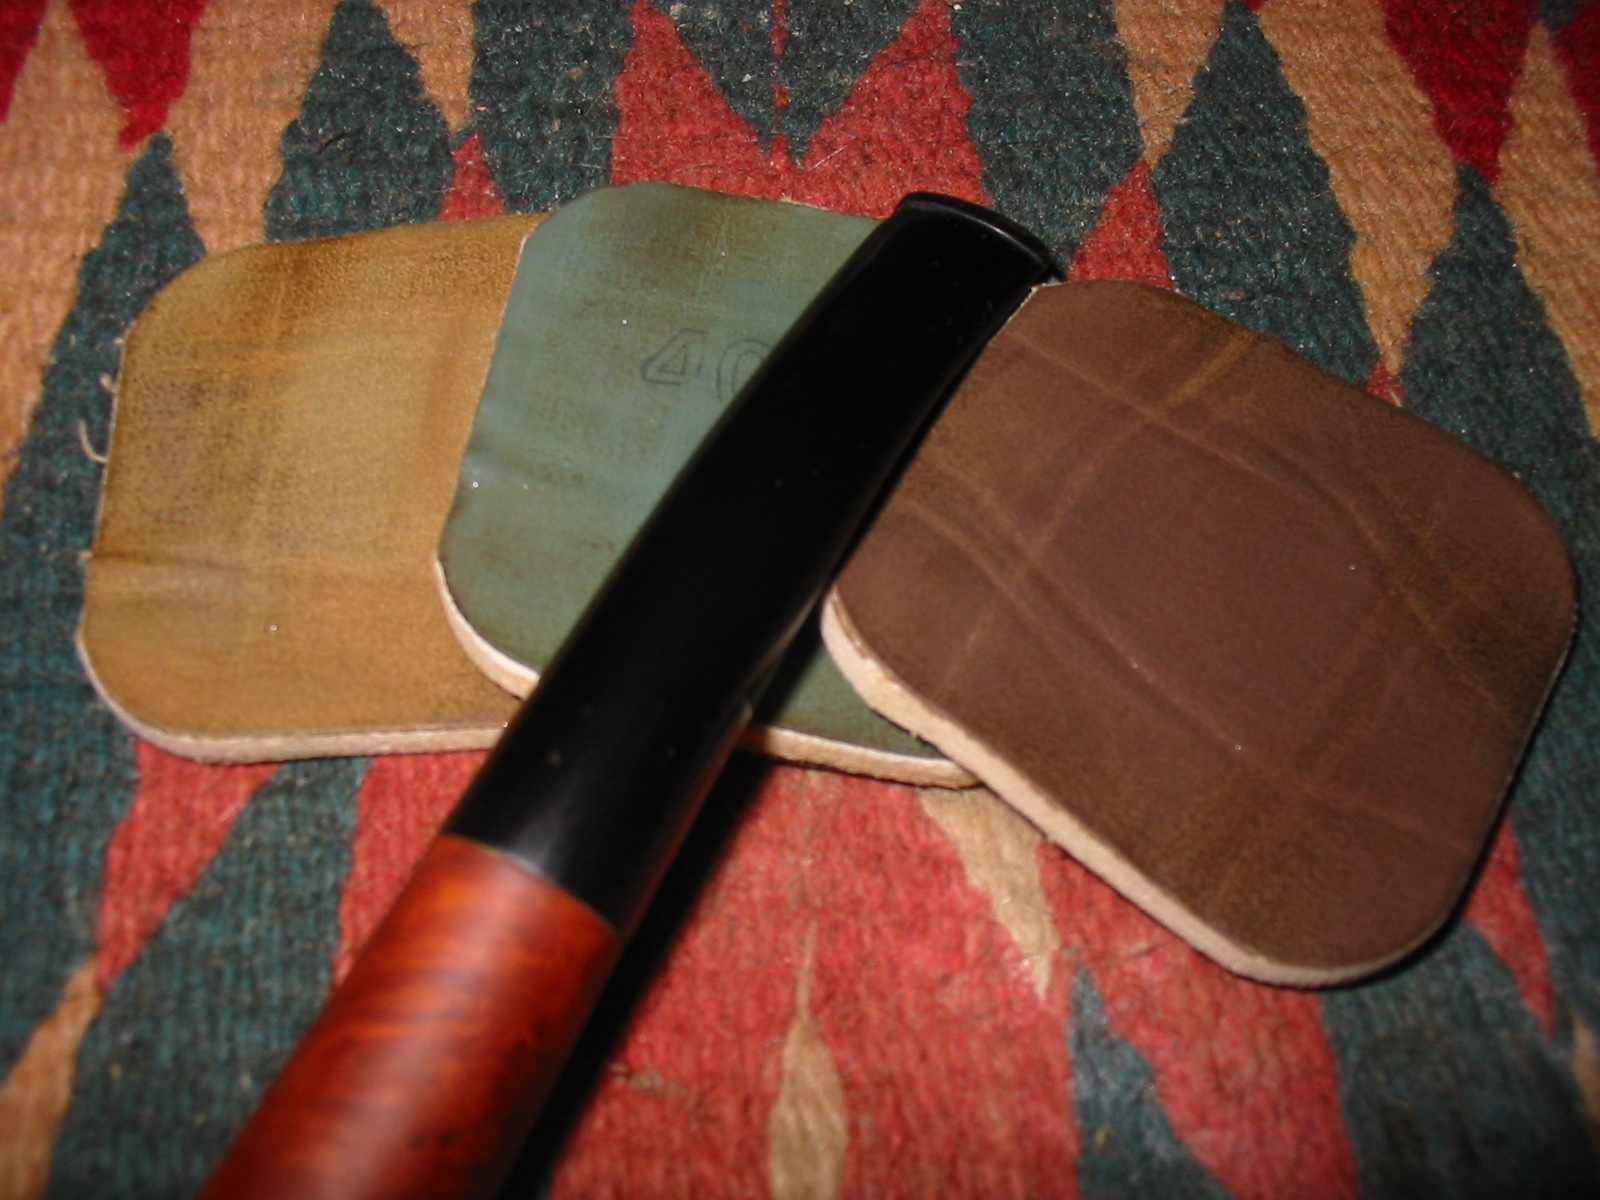
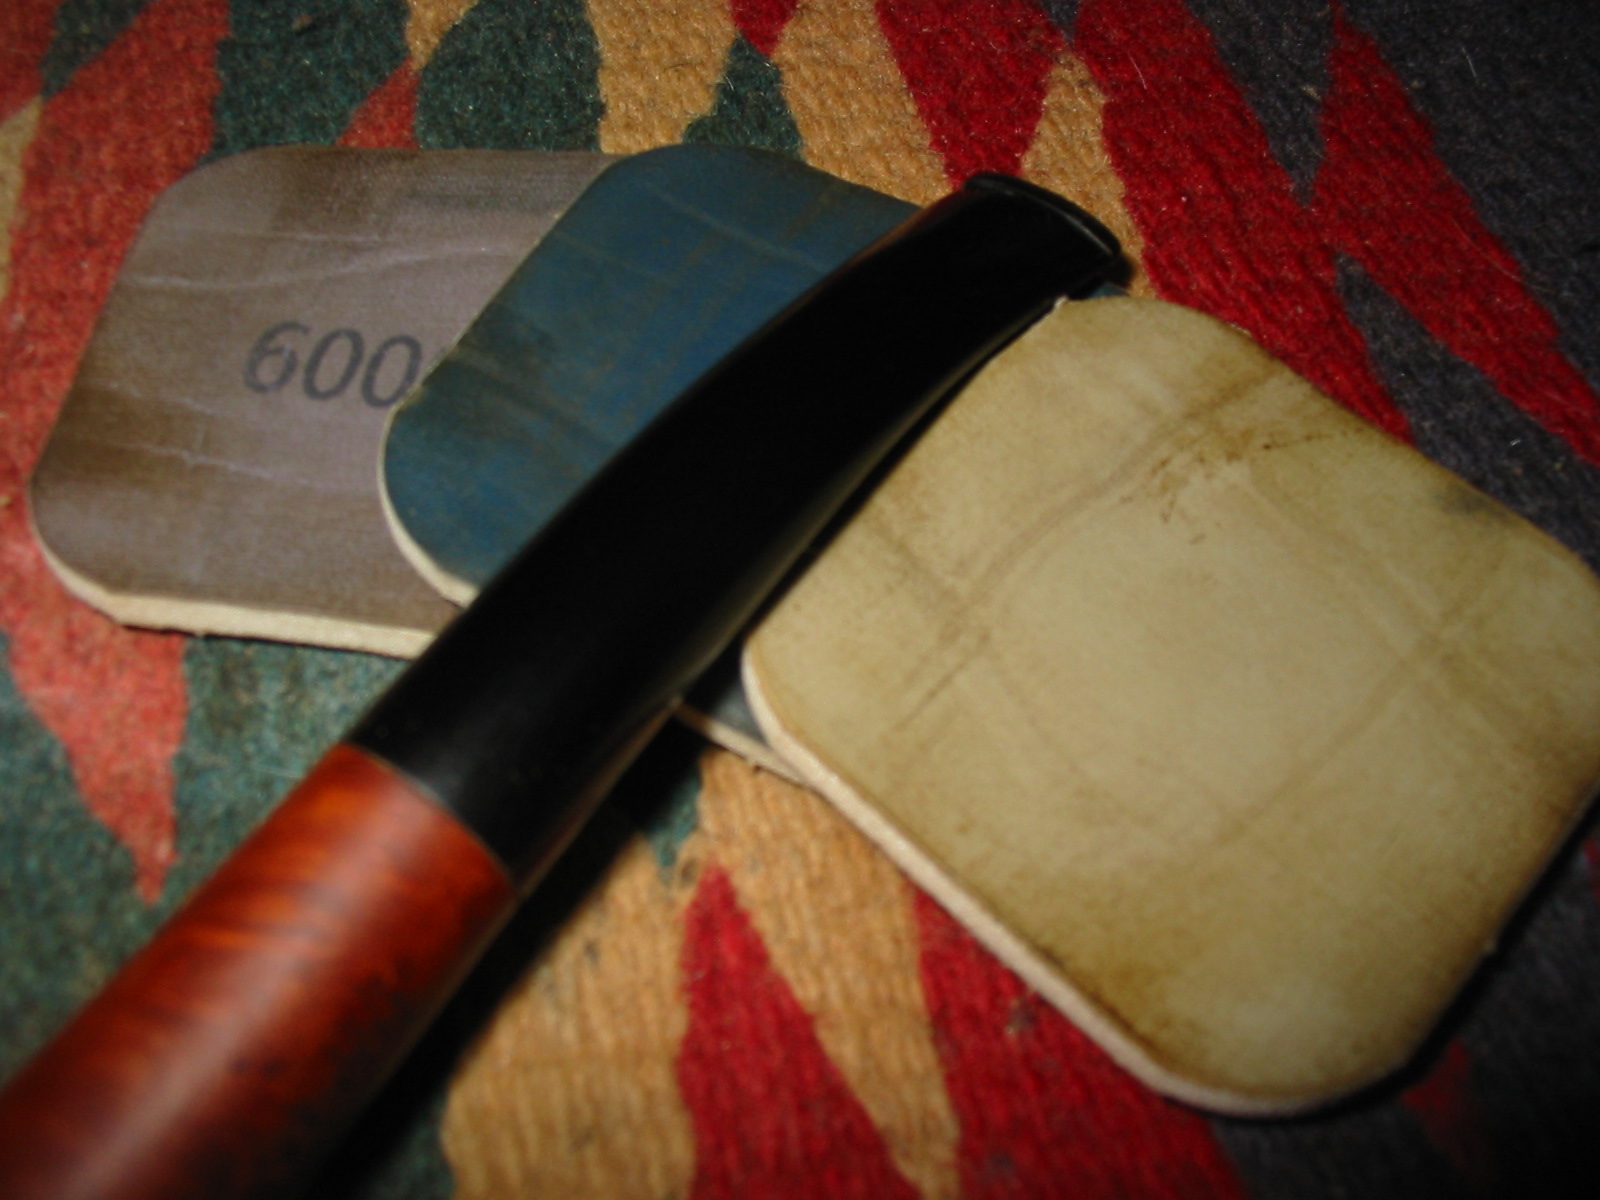
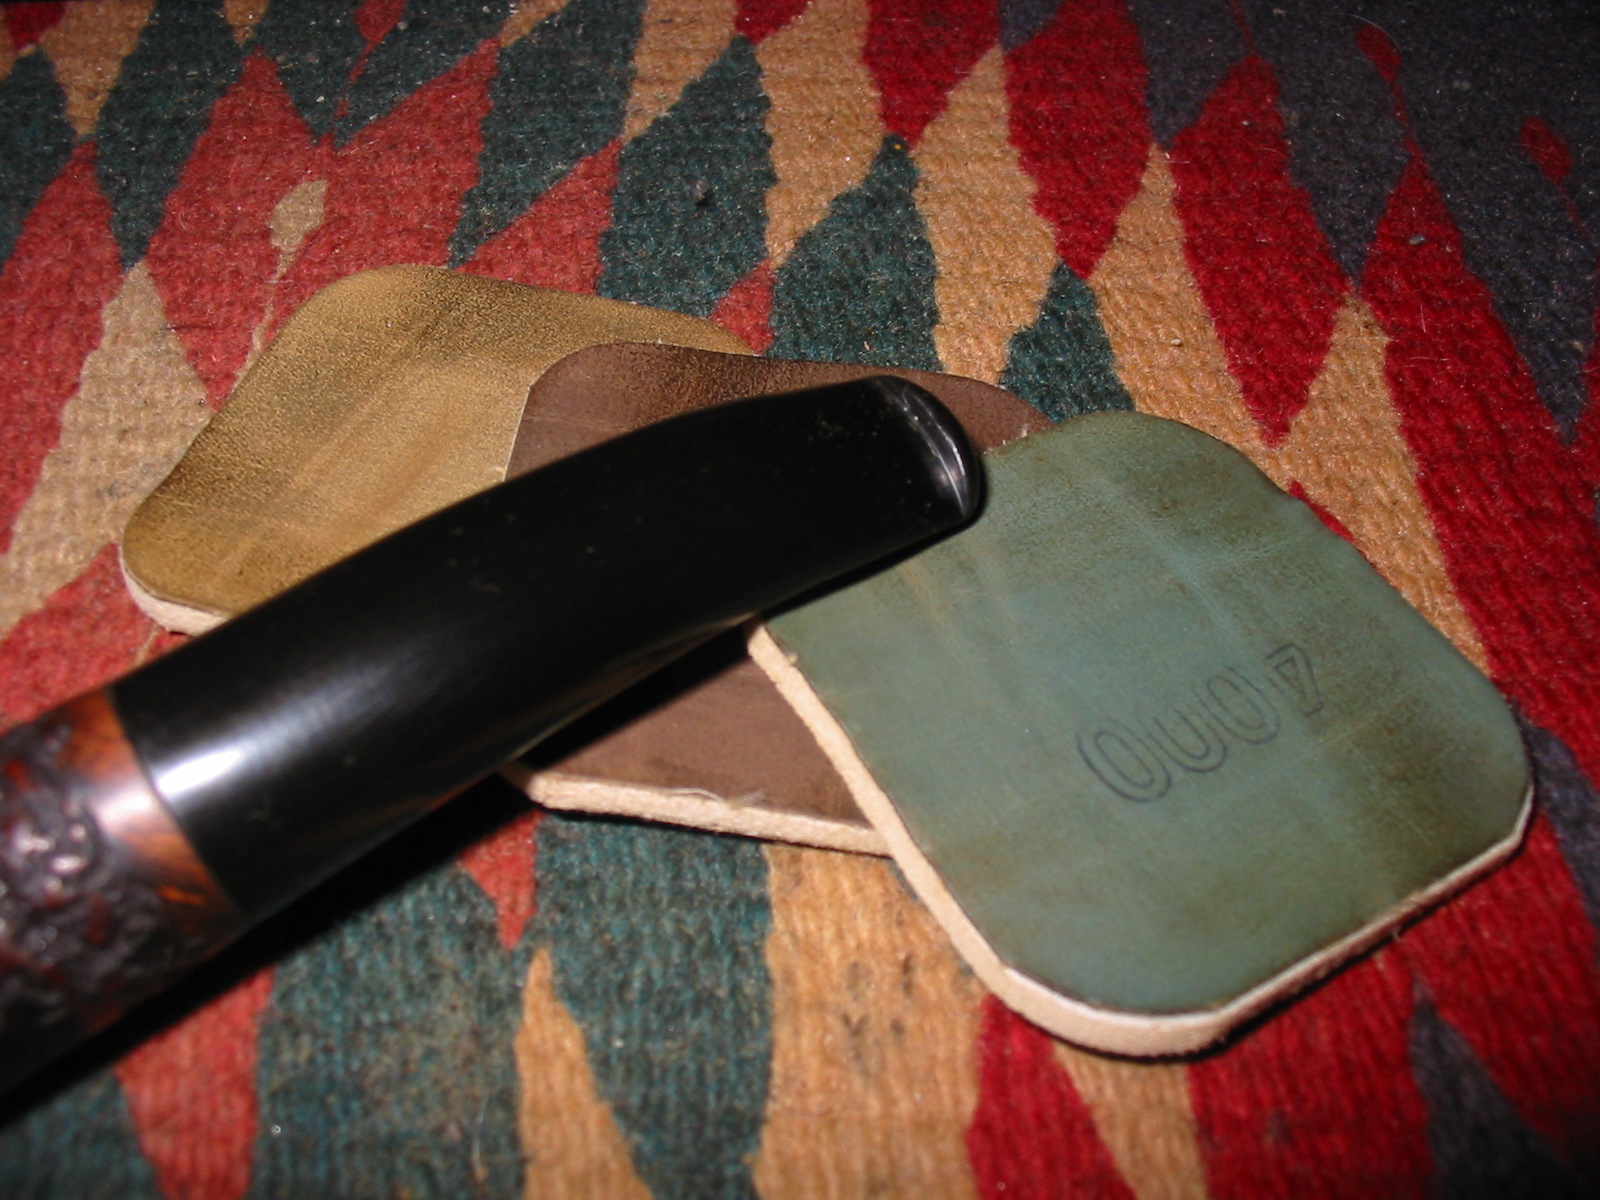
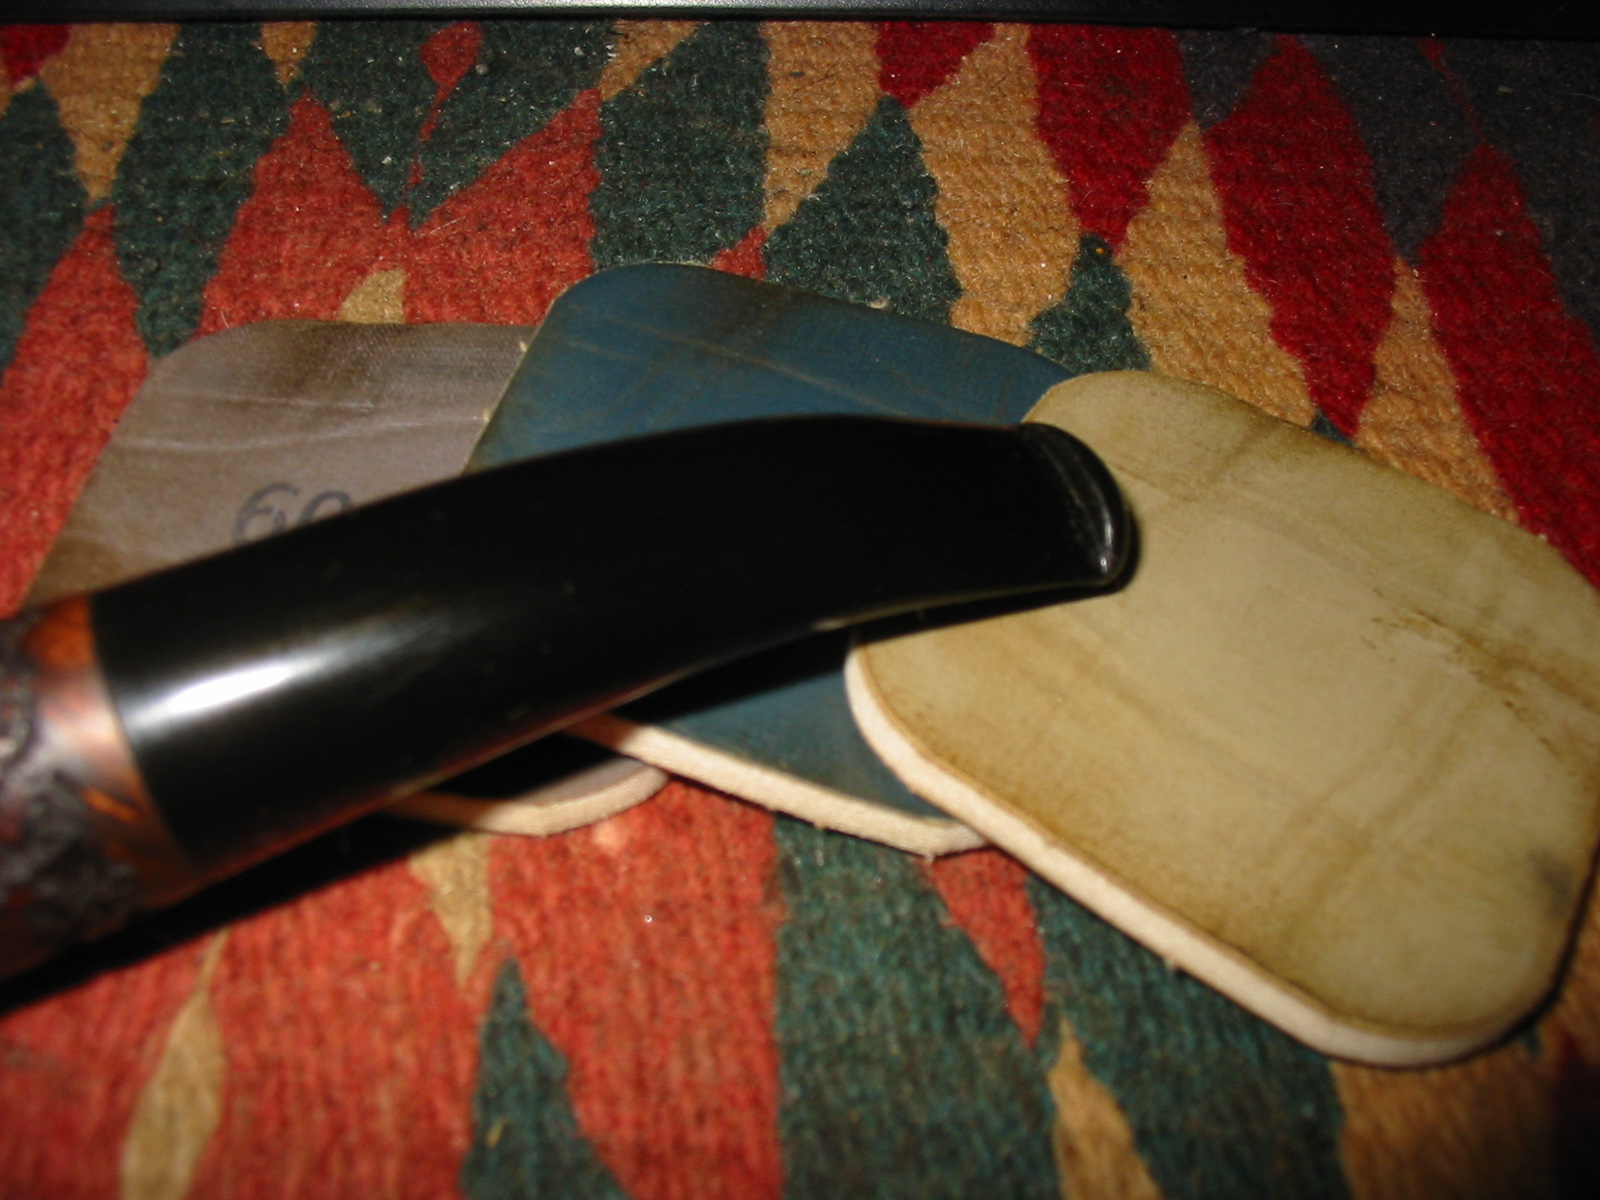
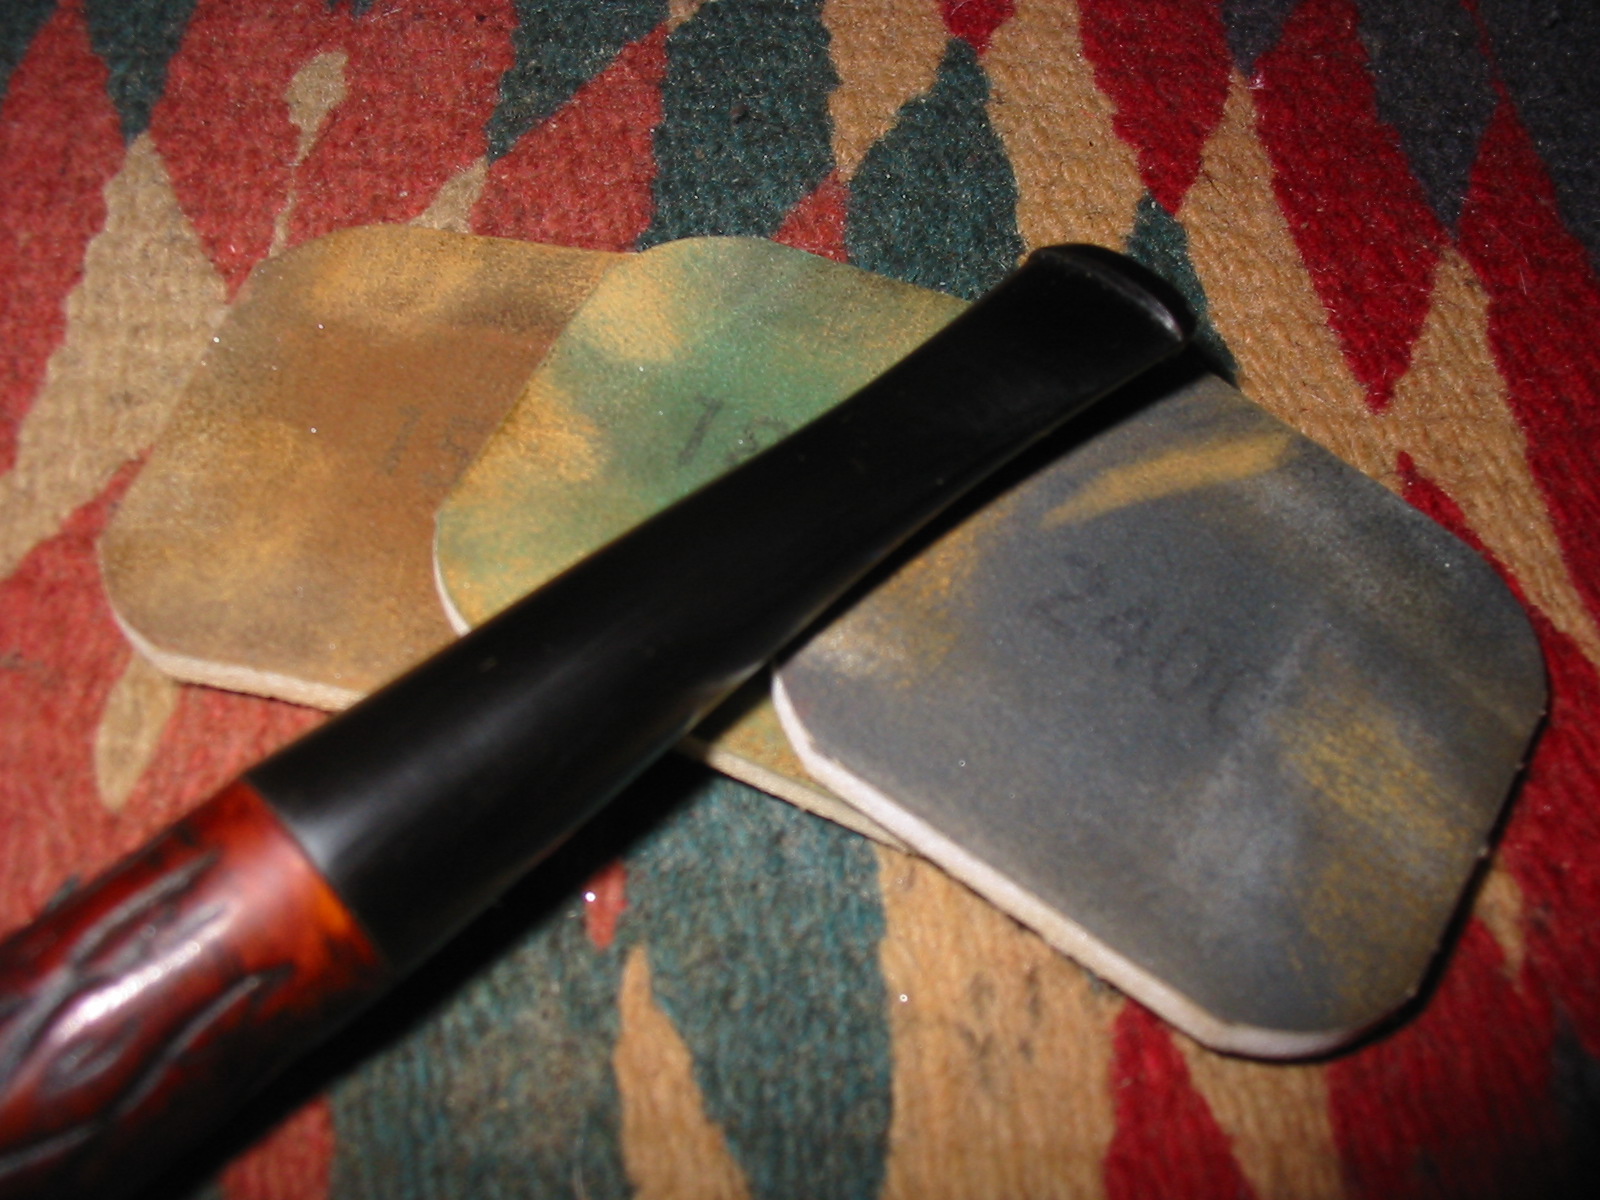
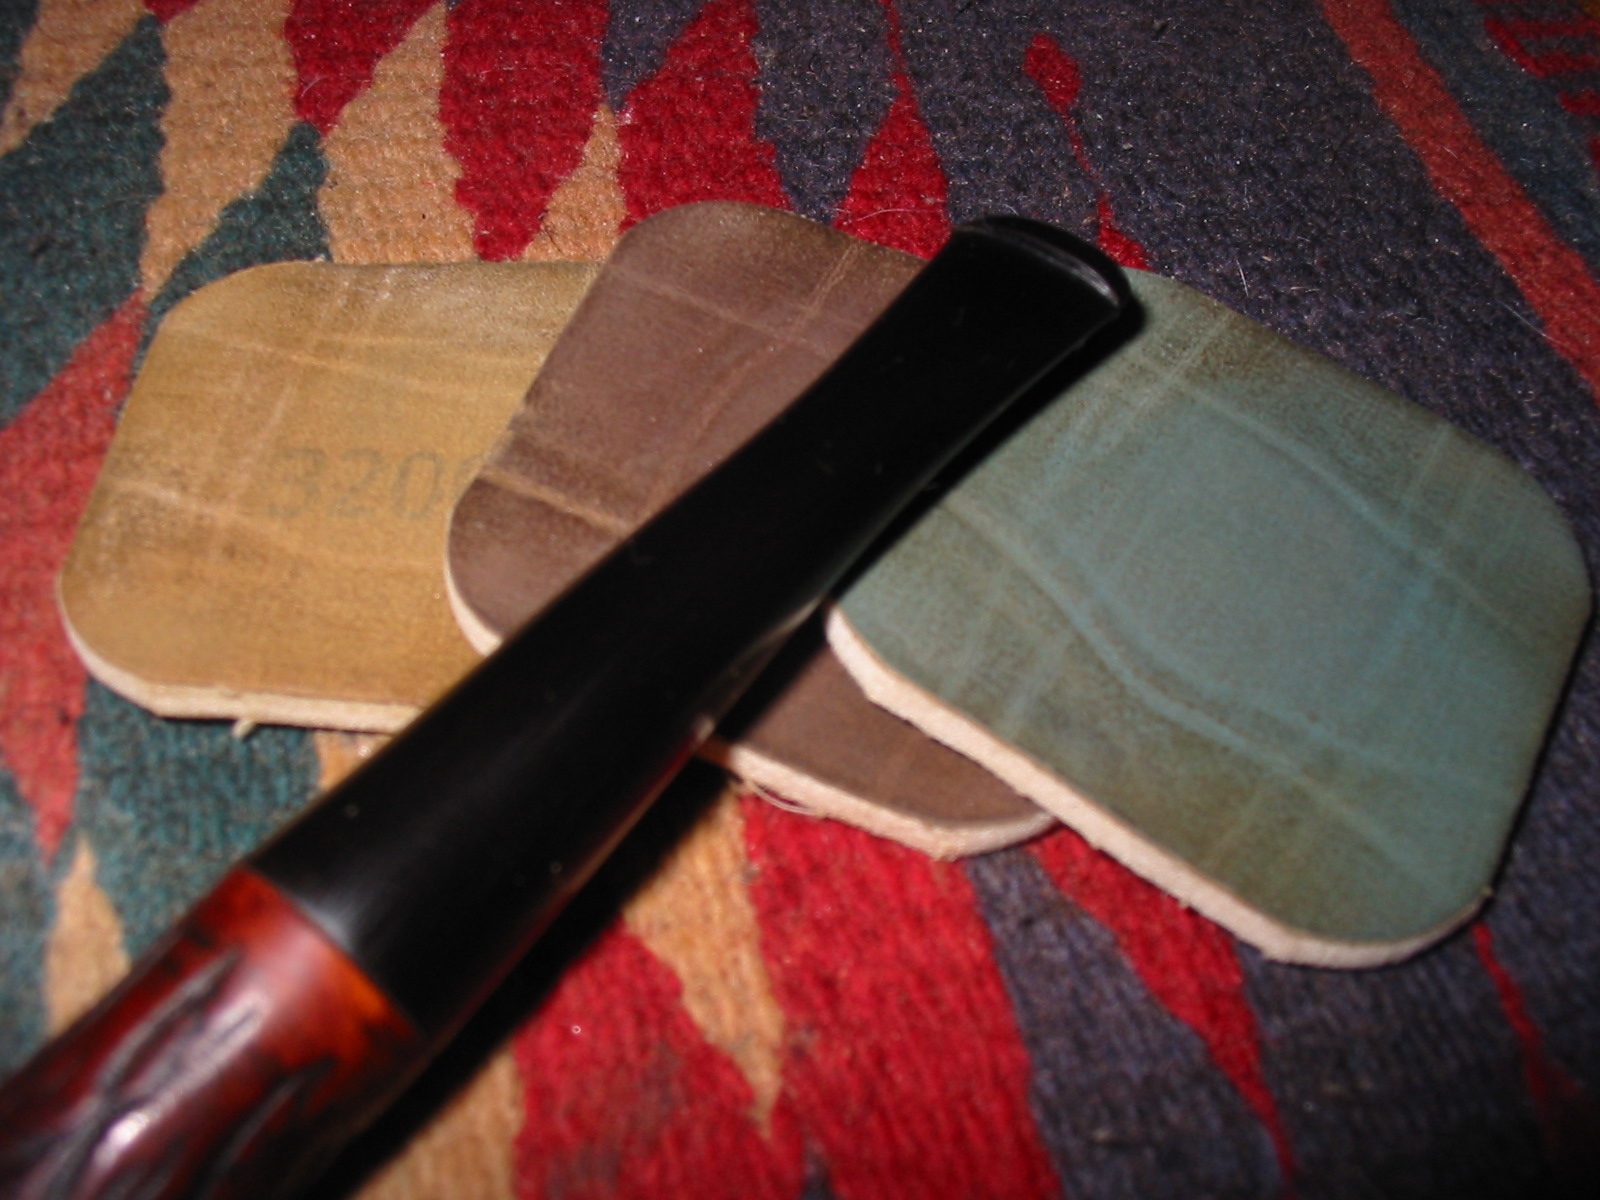
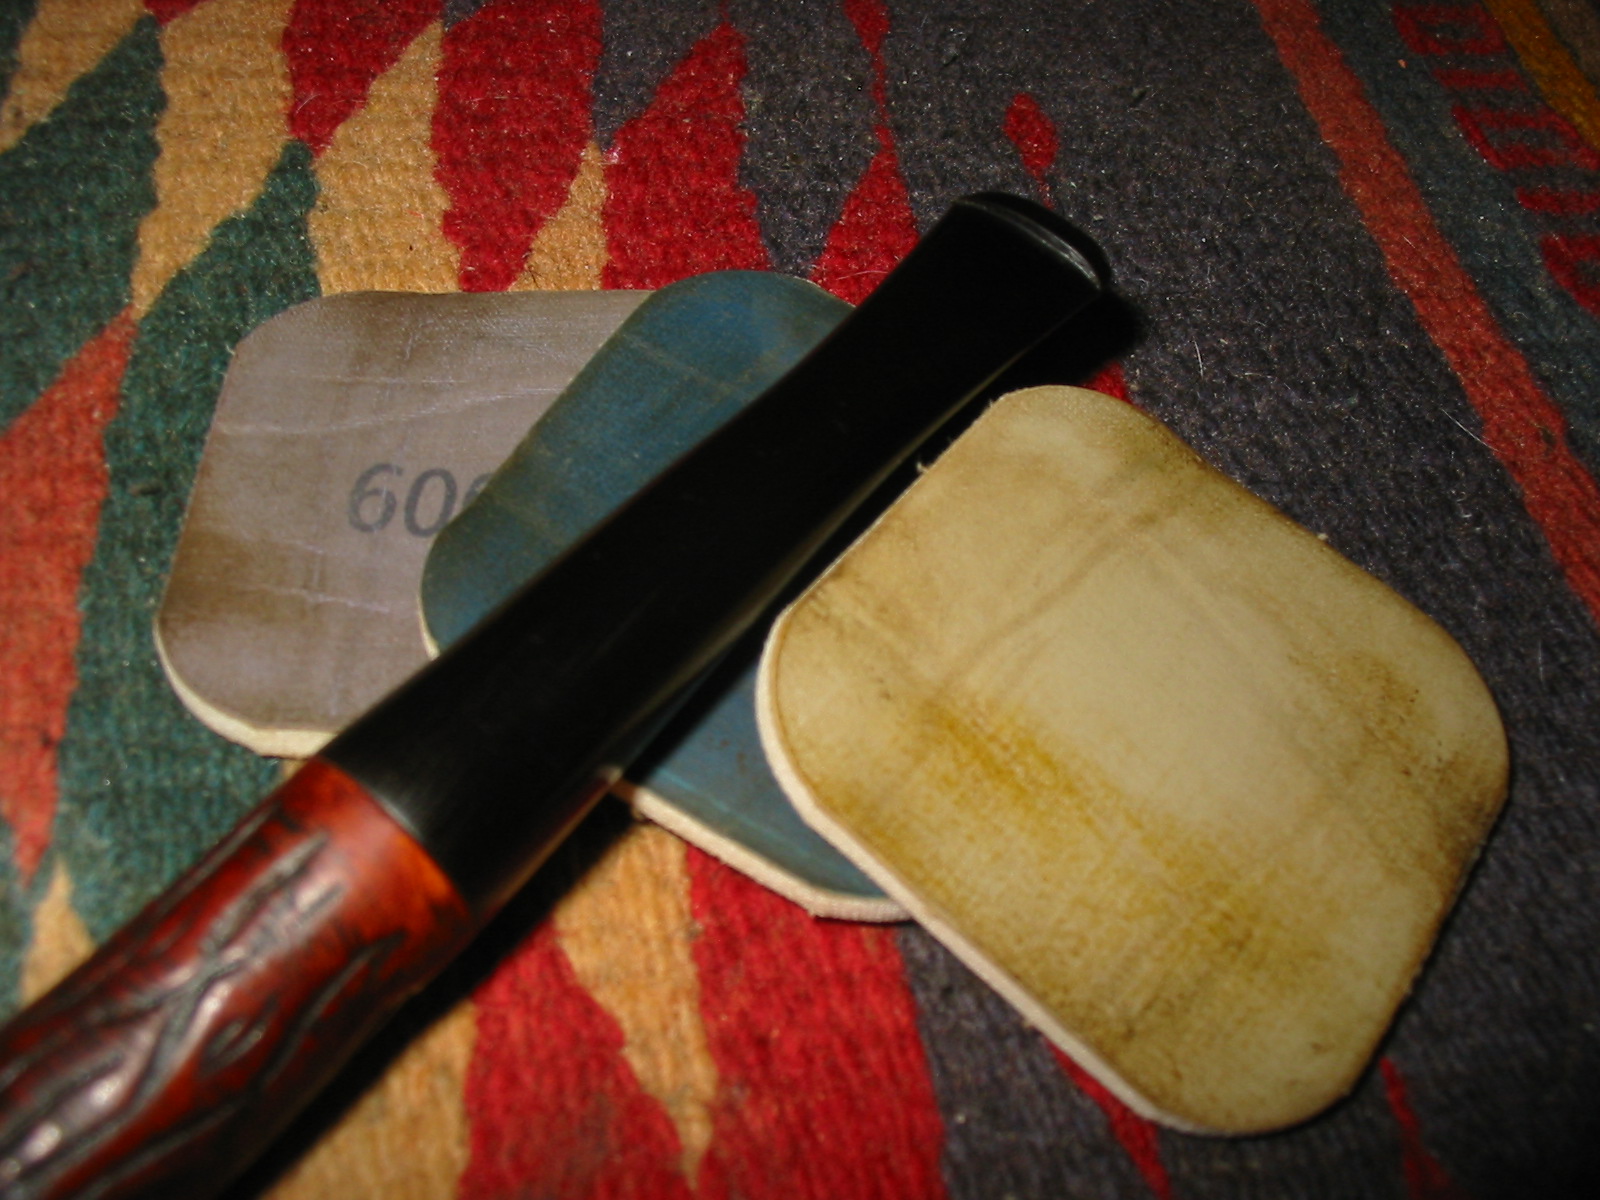
I sanded the stem with a medium and a fine grit sanding sponge to remove the scratches left behind by the 220 grit sandpaper. I followed that by sanding with micromesh sanding pads – wet sanding with 1500-2400 grit pads and dry sanding with 3200-12,000 grit pads. I rubbed the stem down with Obsidian Oil when I had finished and then buffed it with White Diamond.
IMG_5060

IMG_5061

IMG_5063

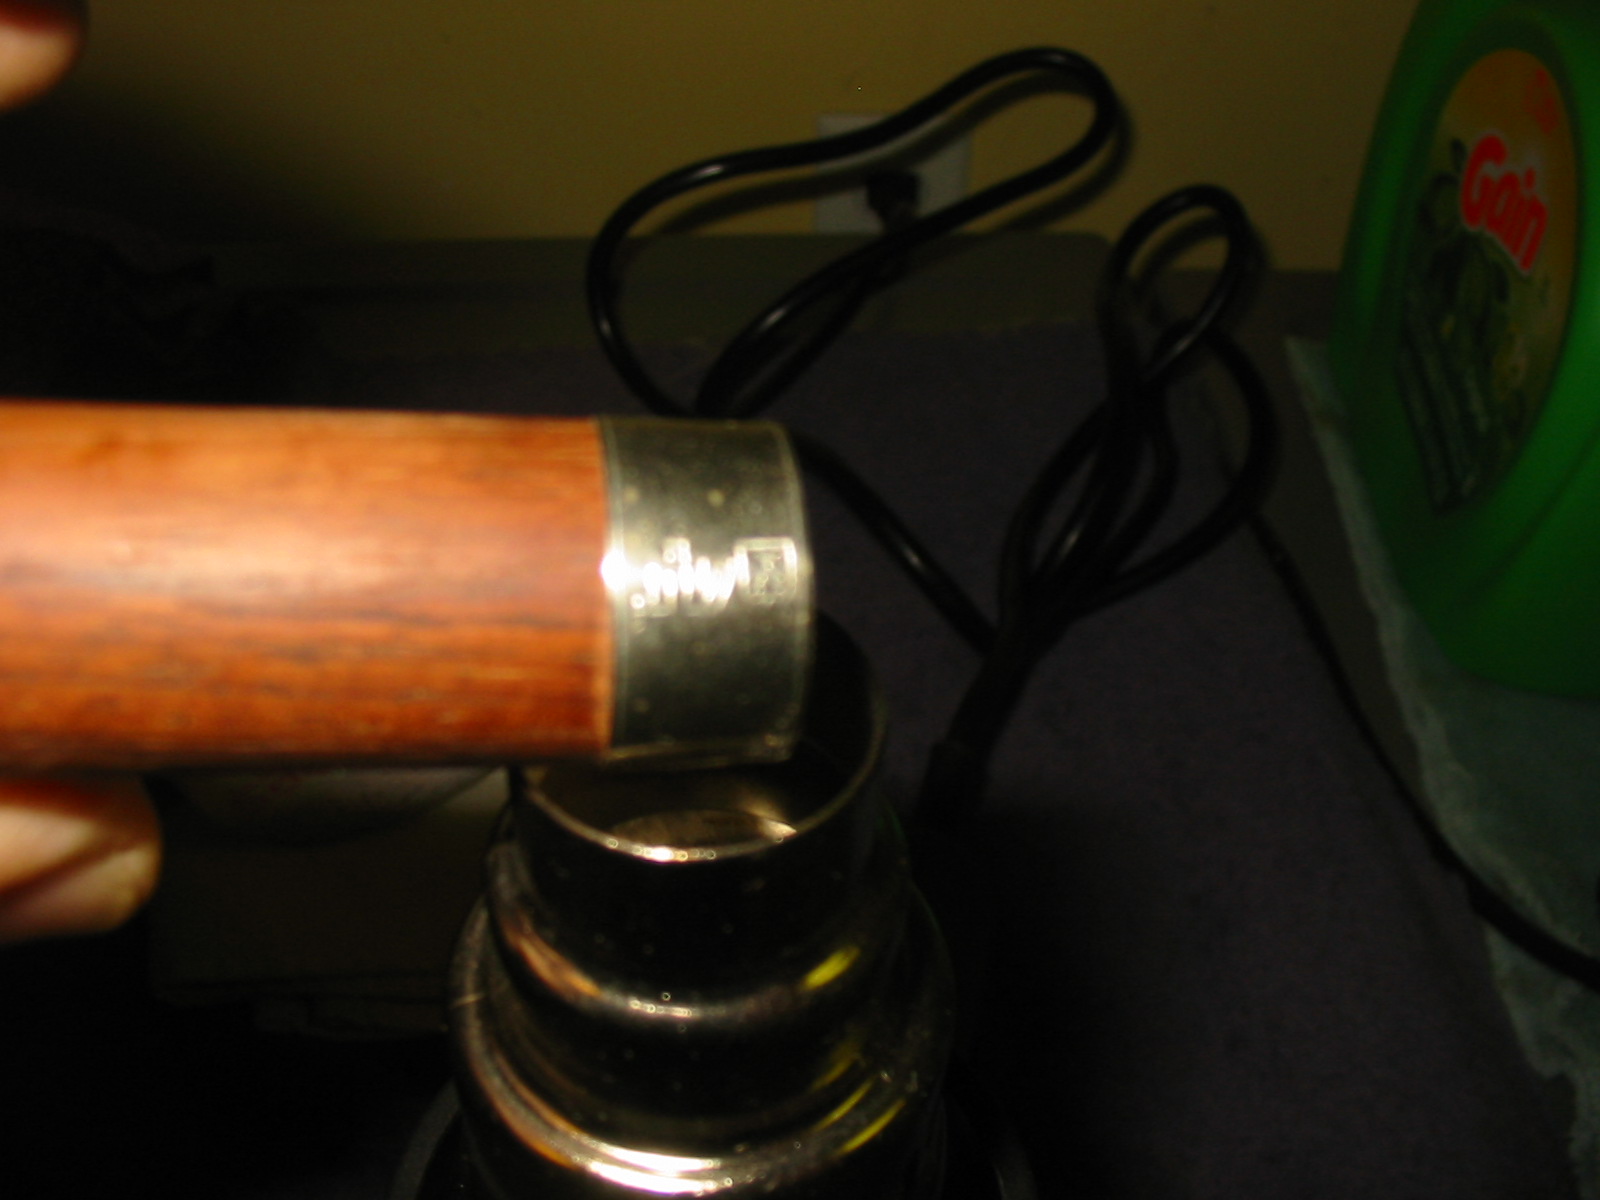
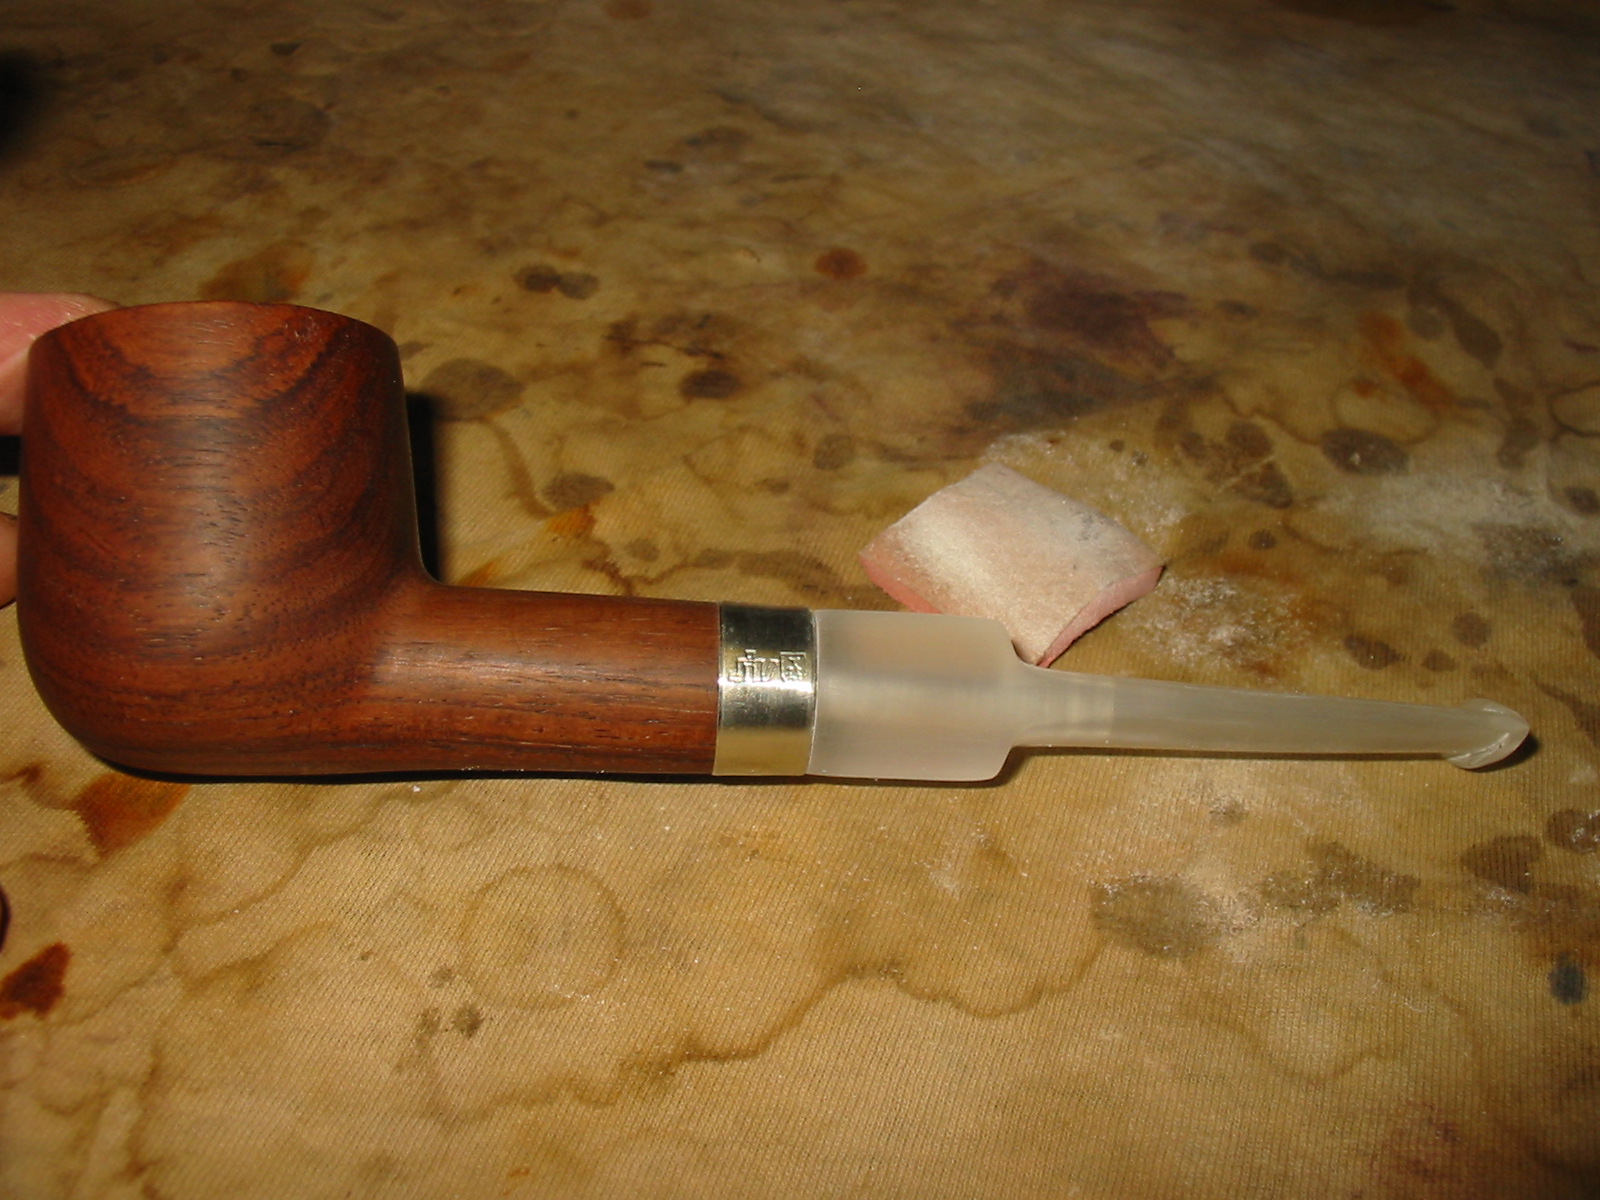
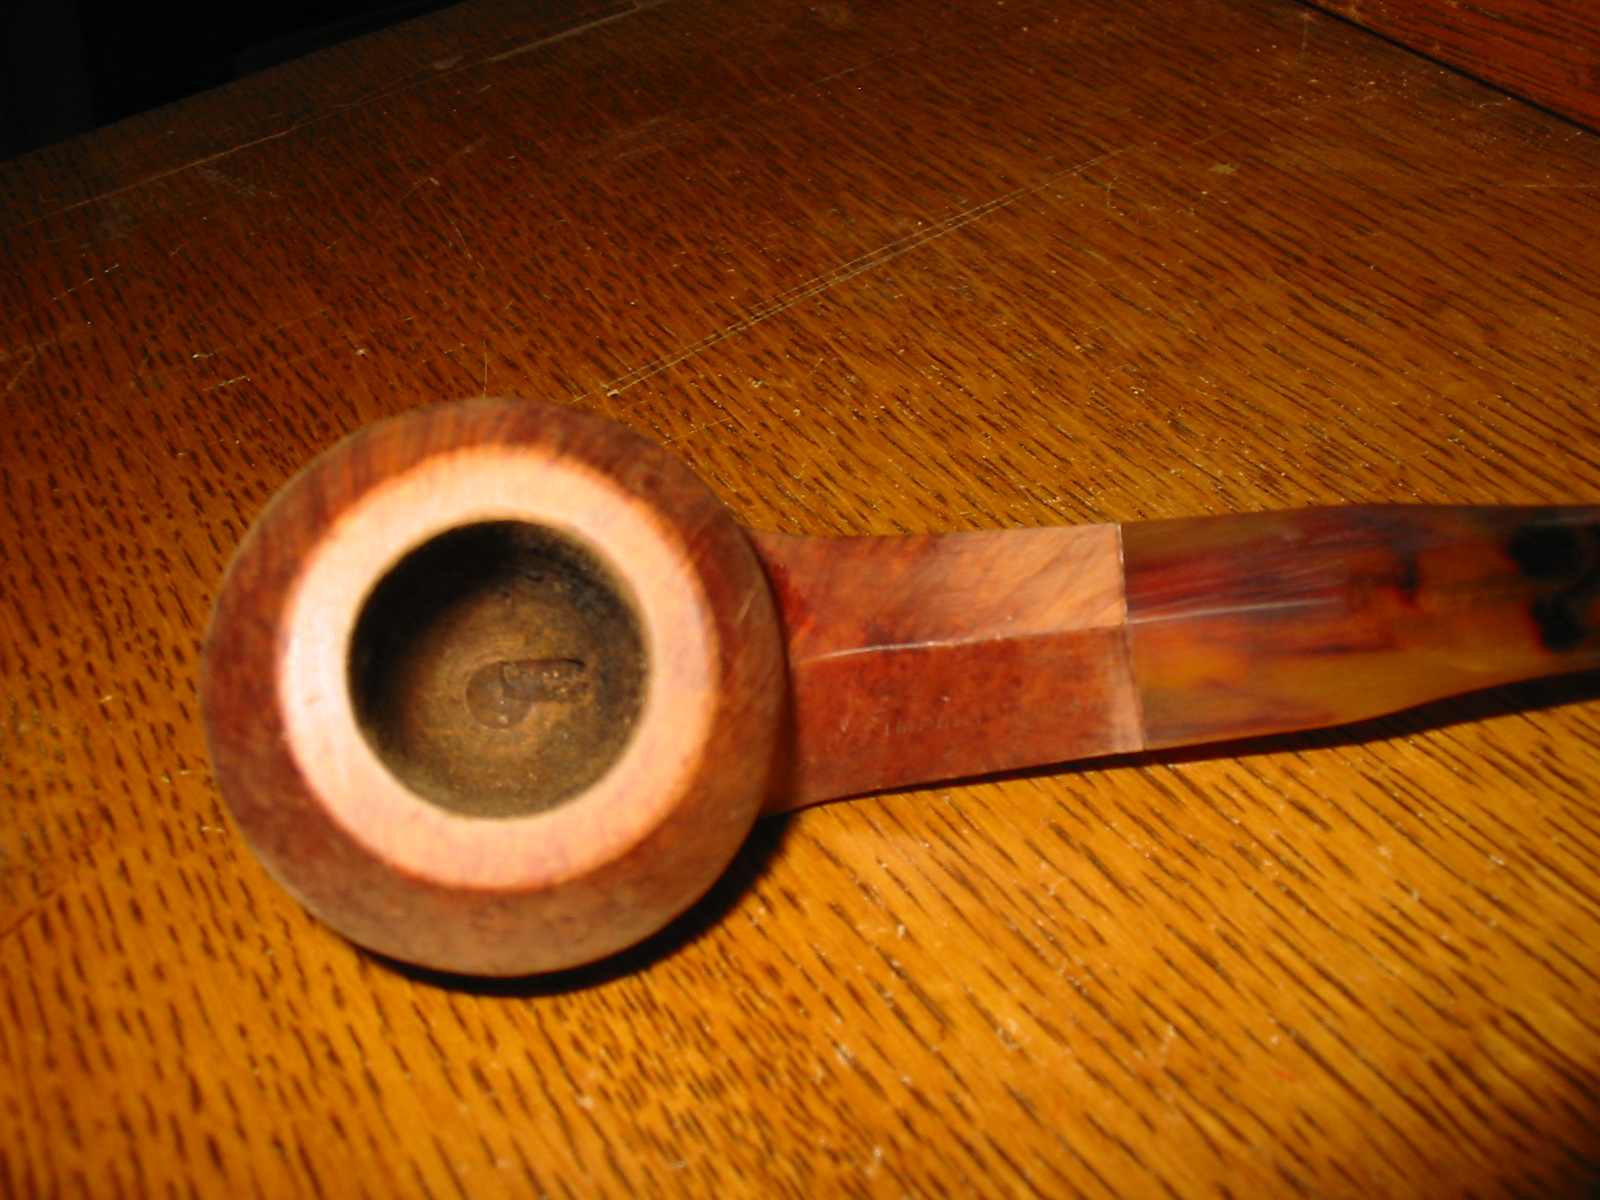
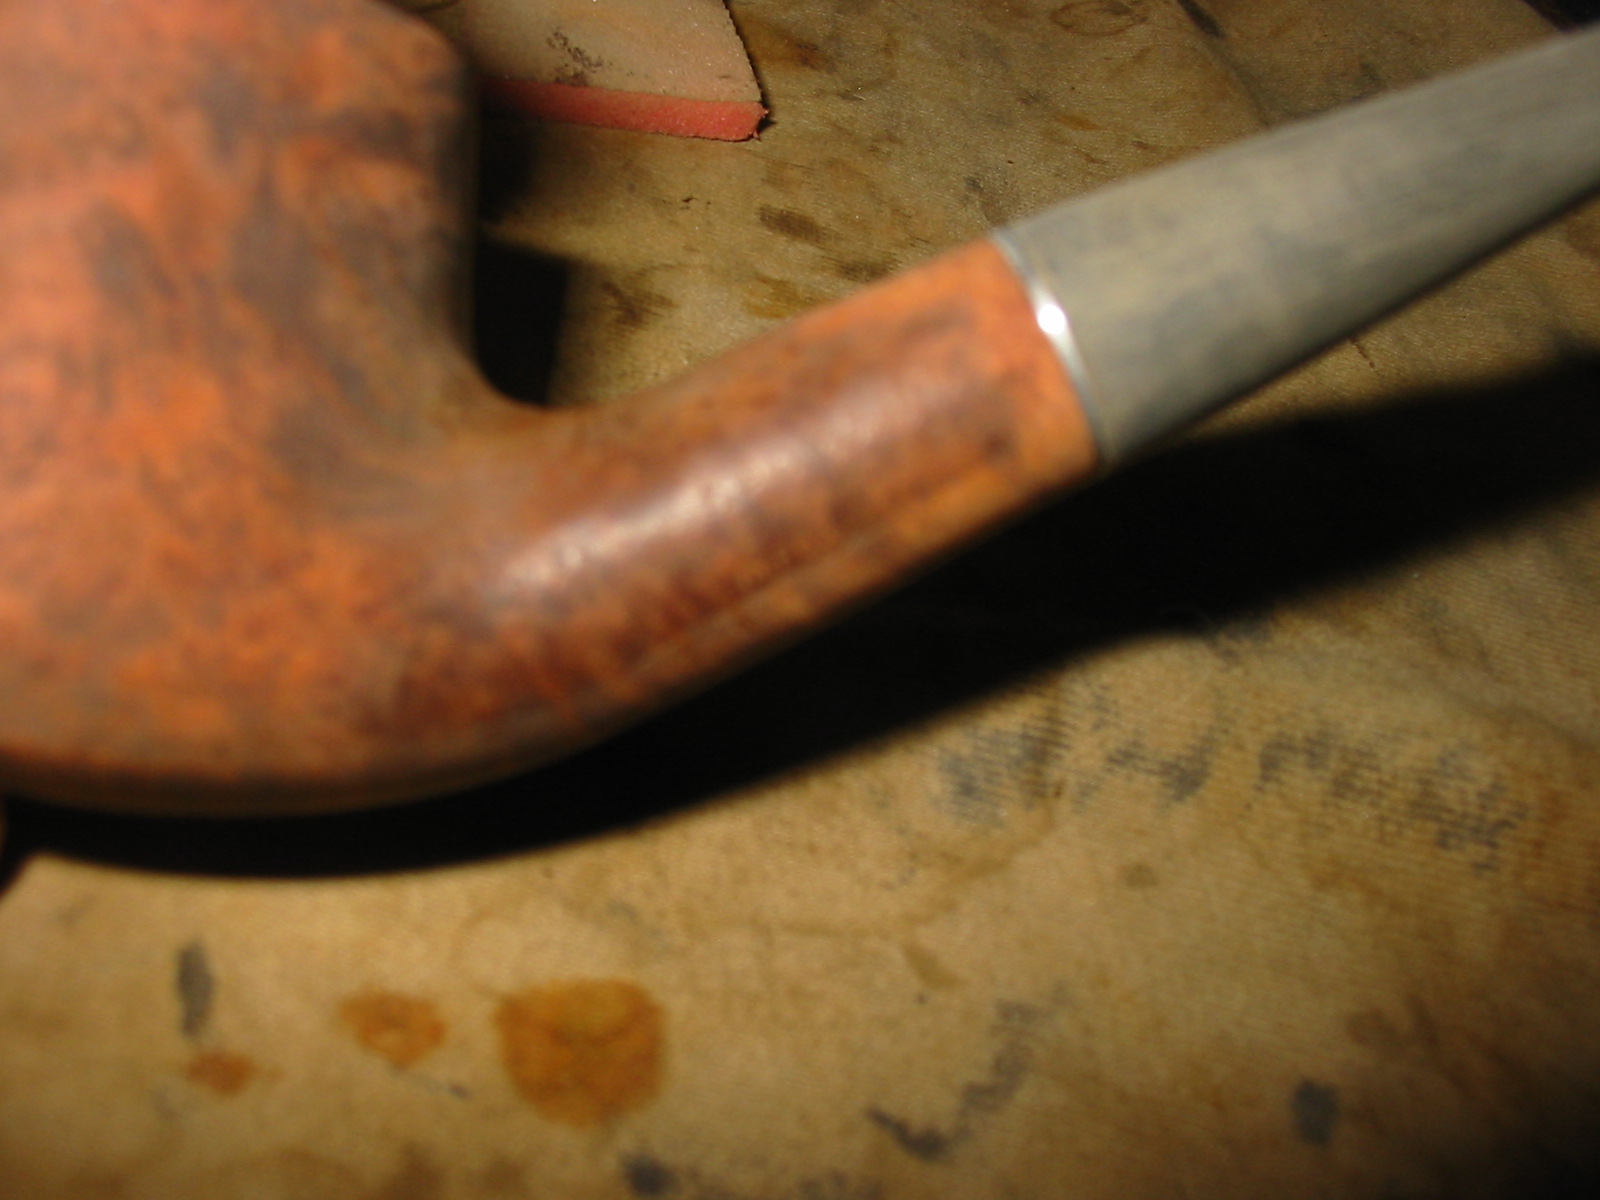
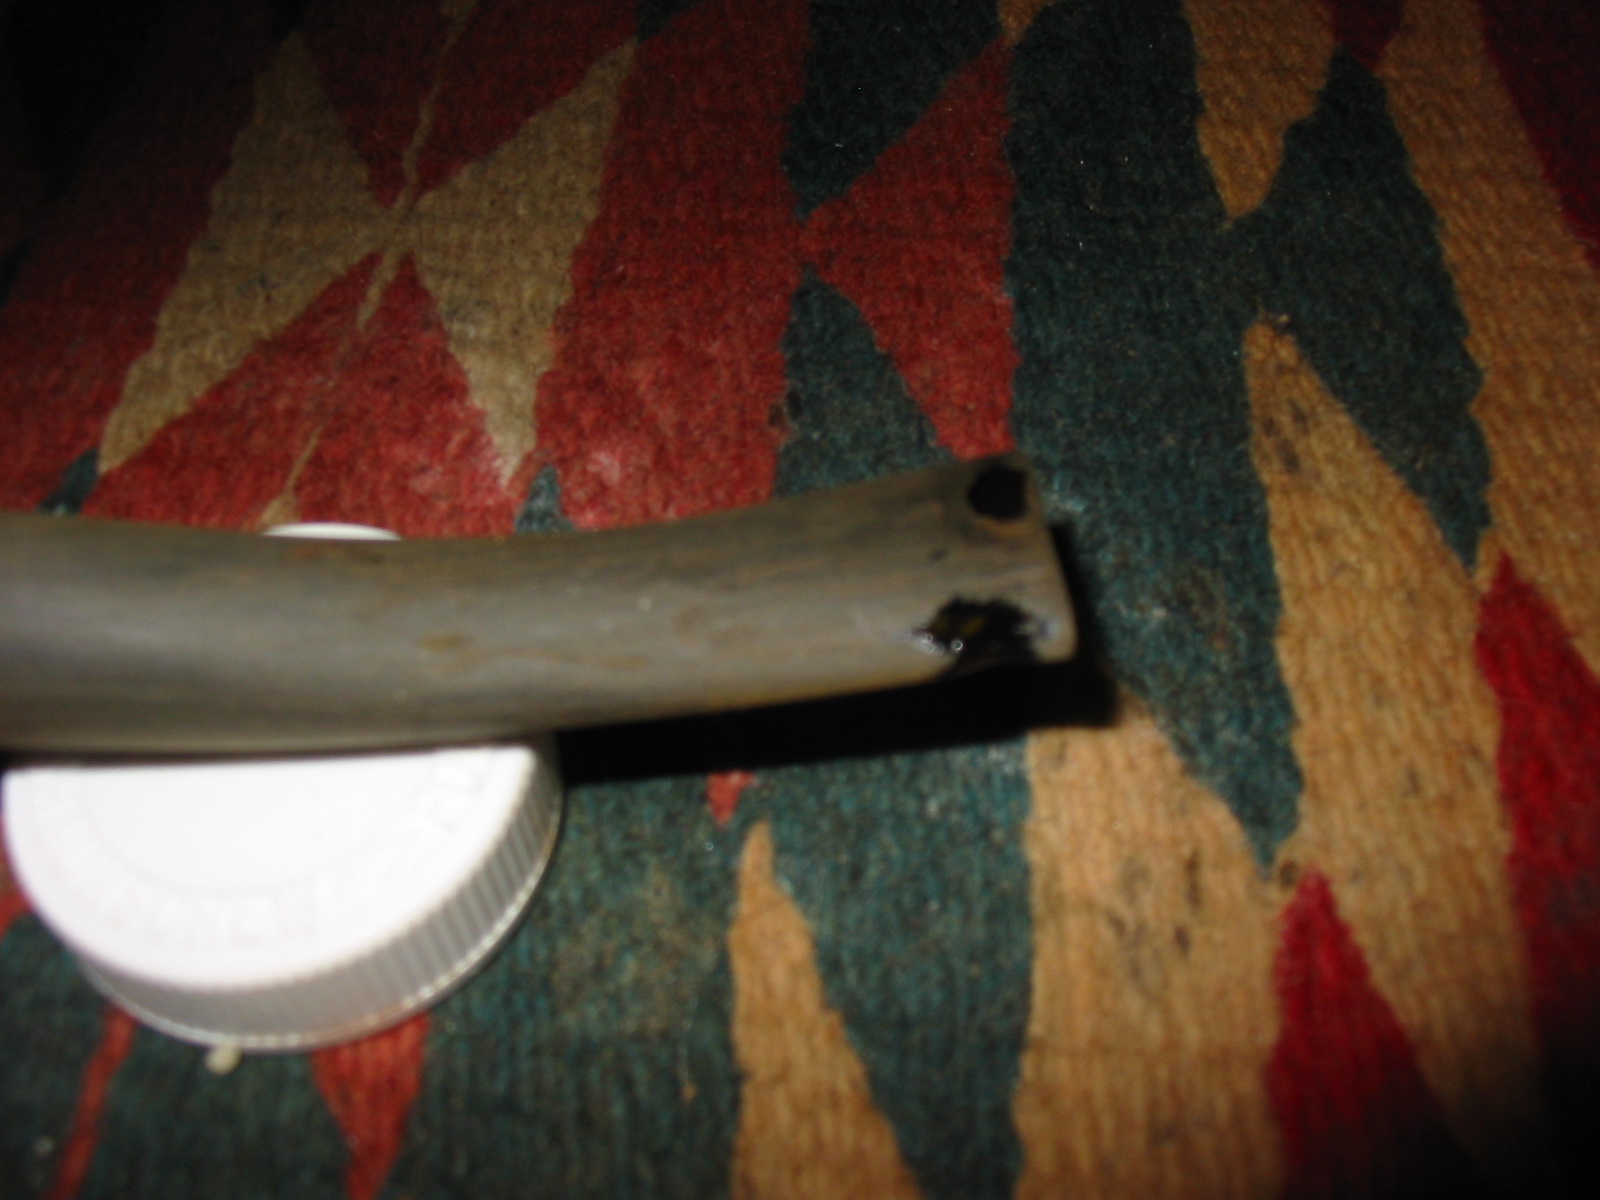
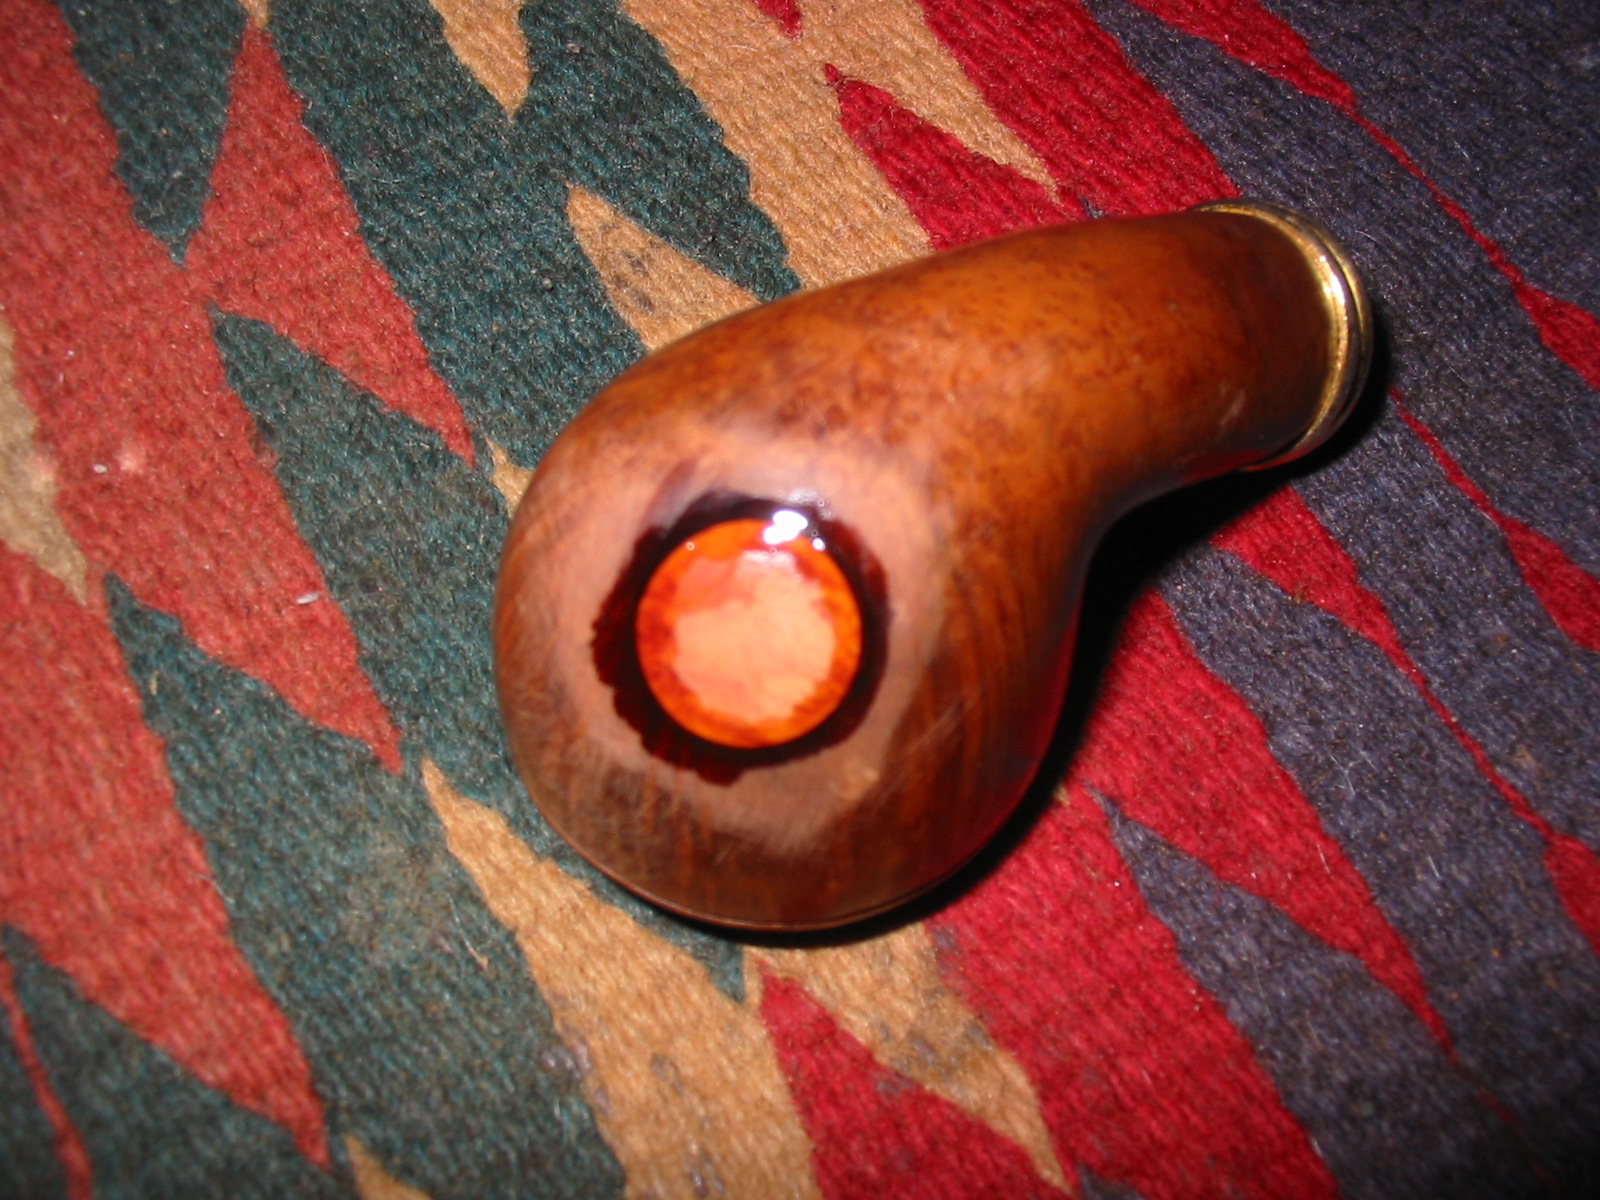
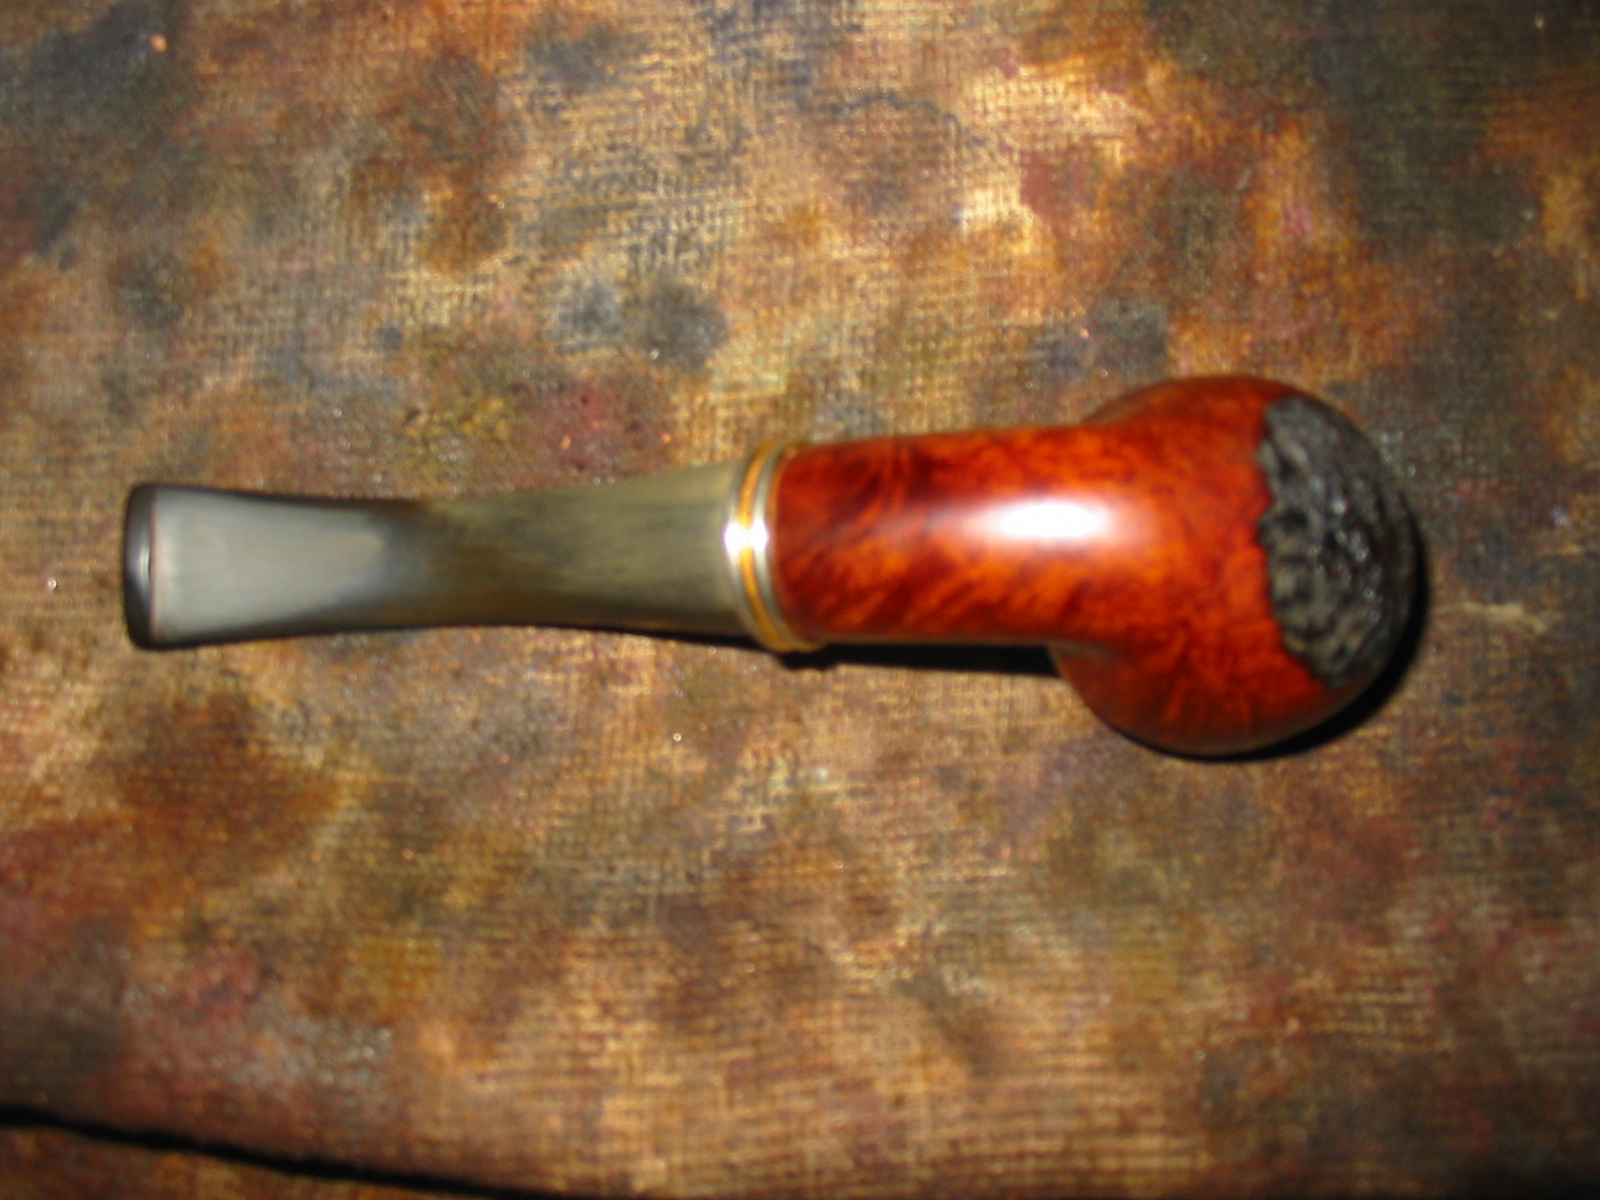
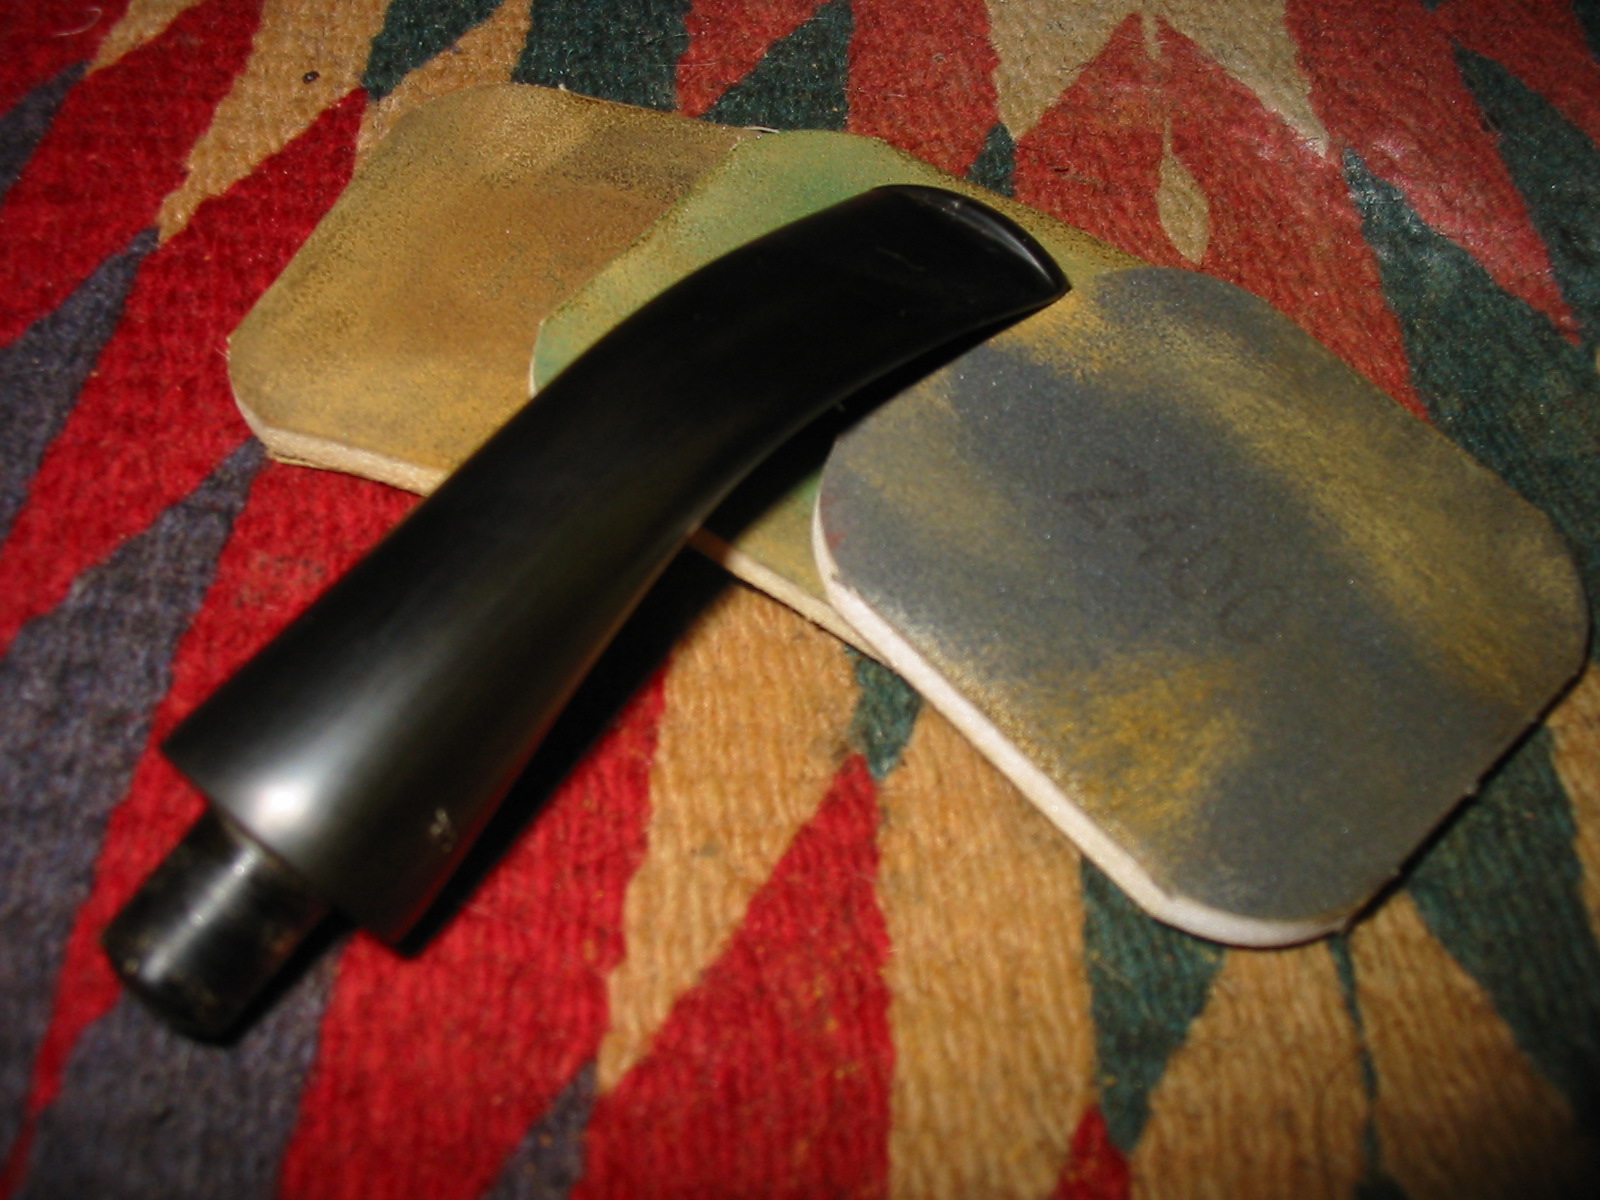
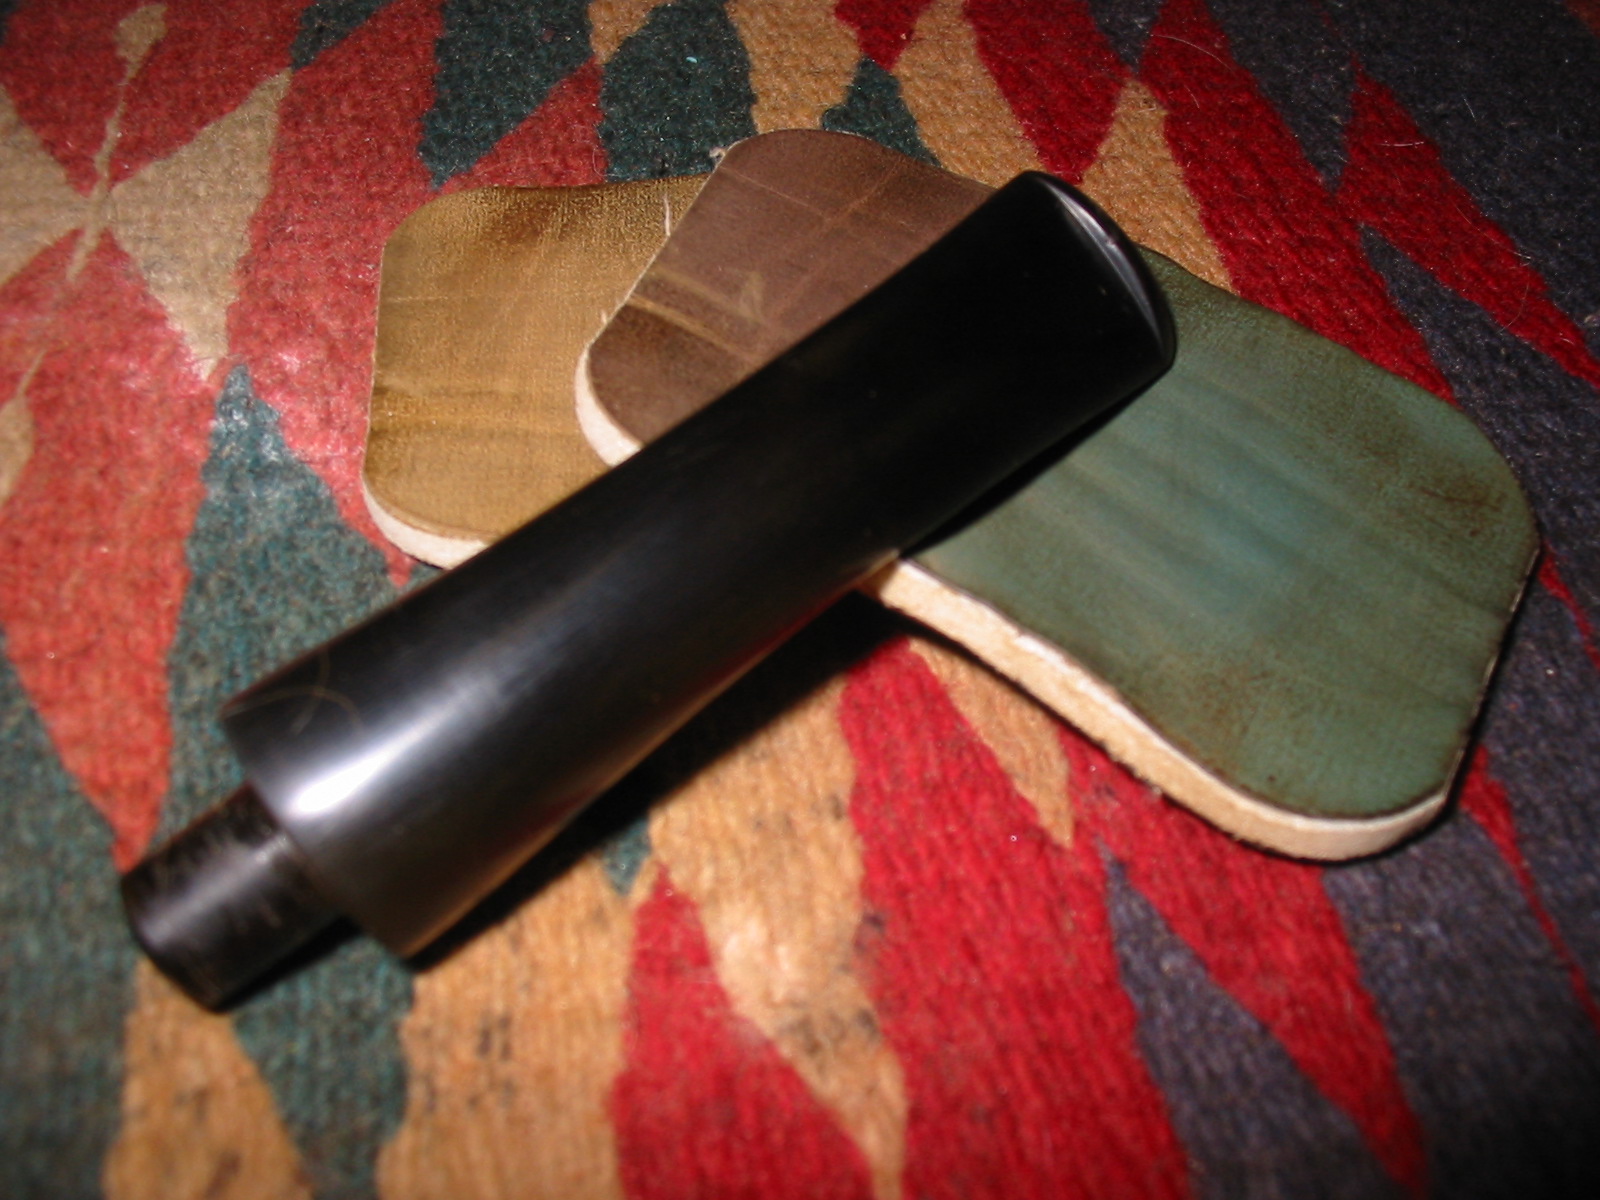
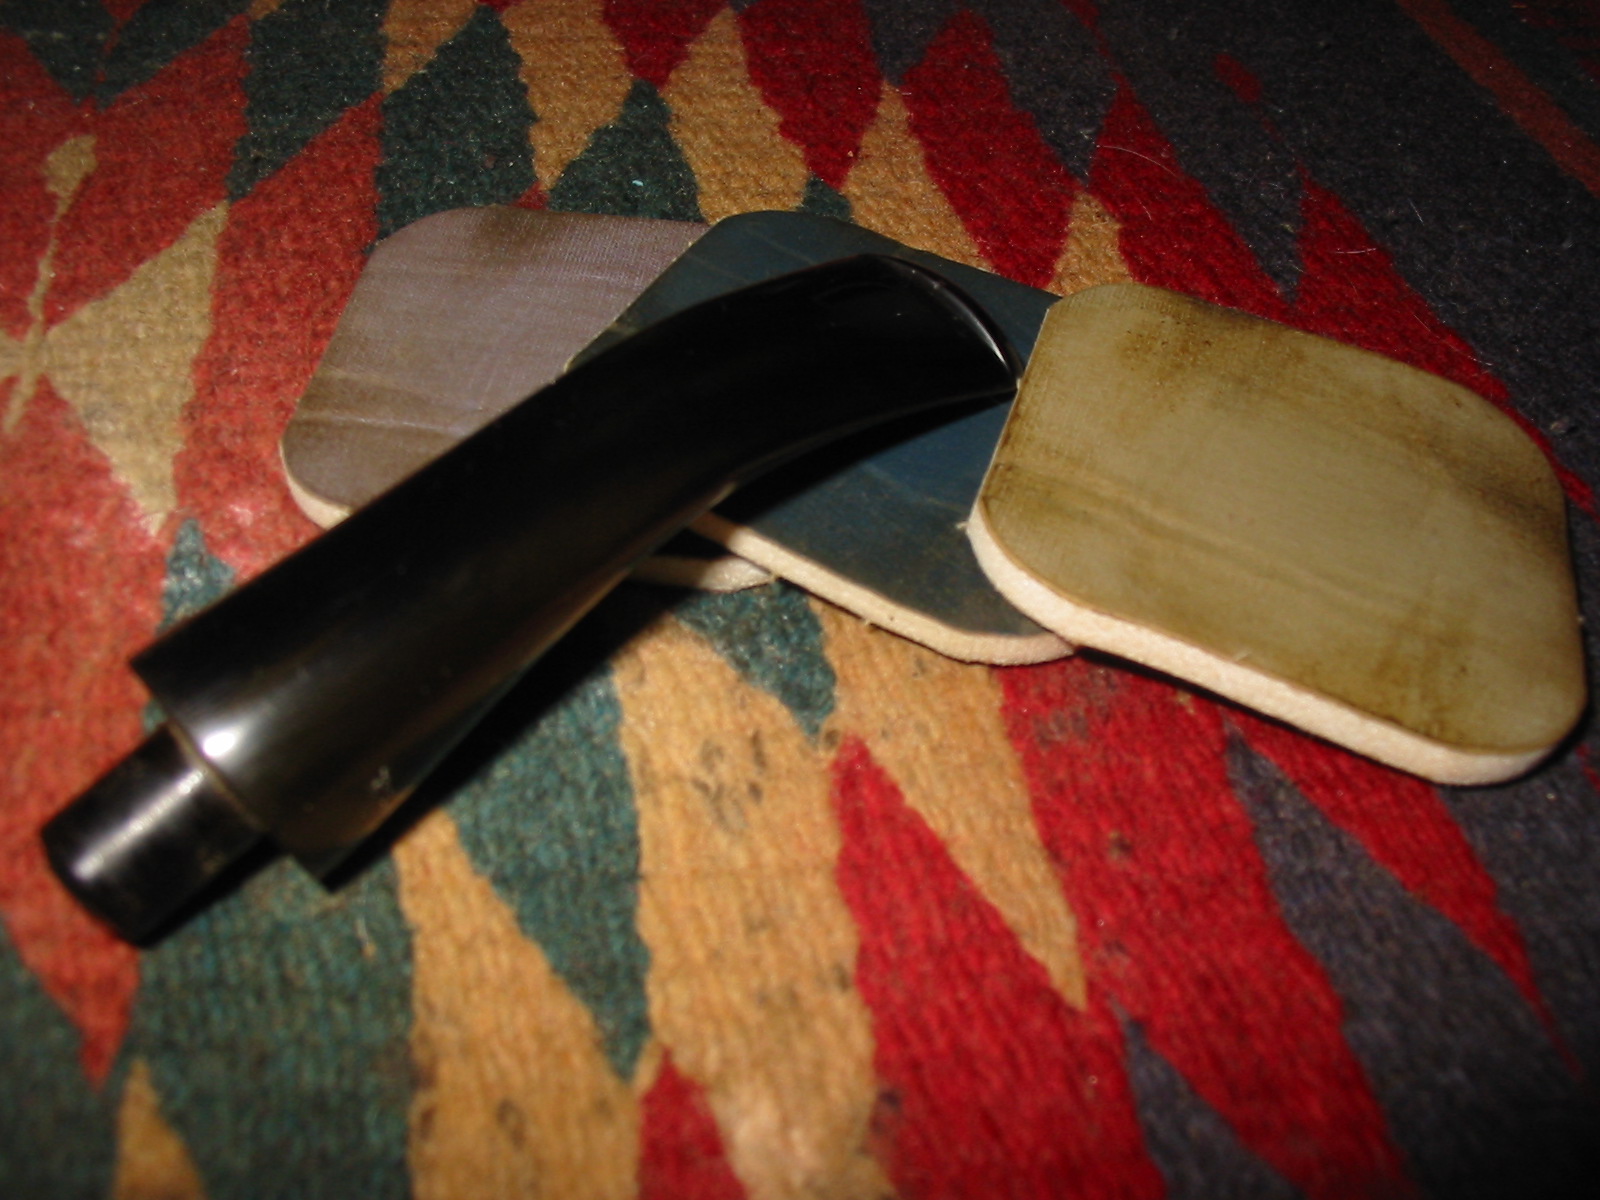
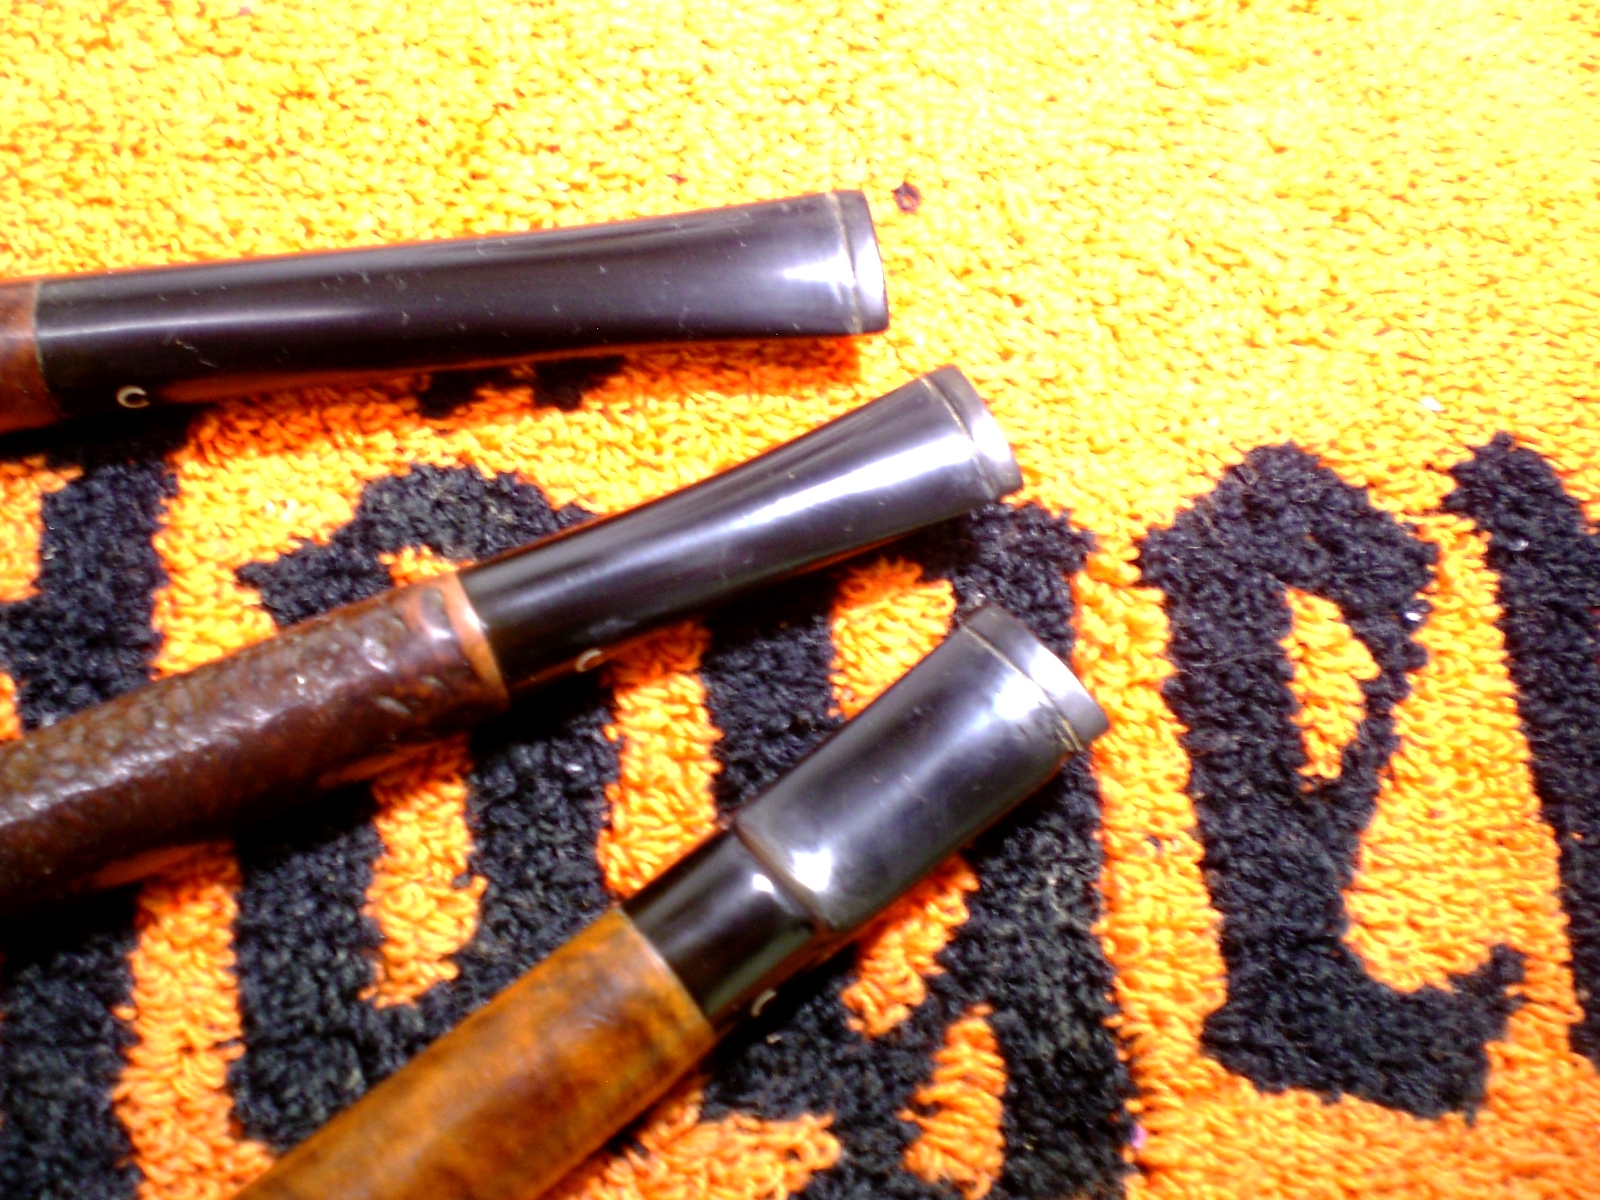
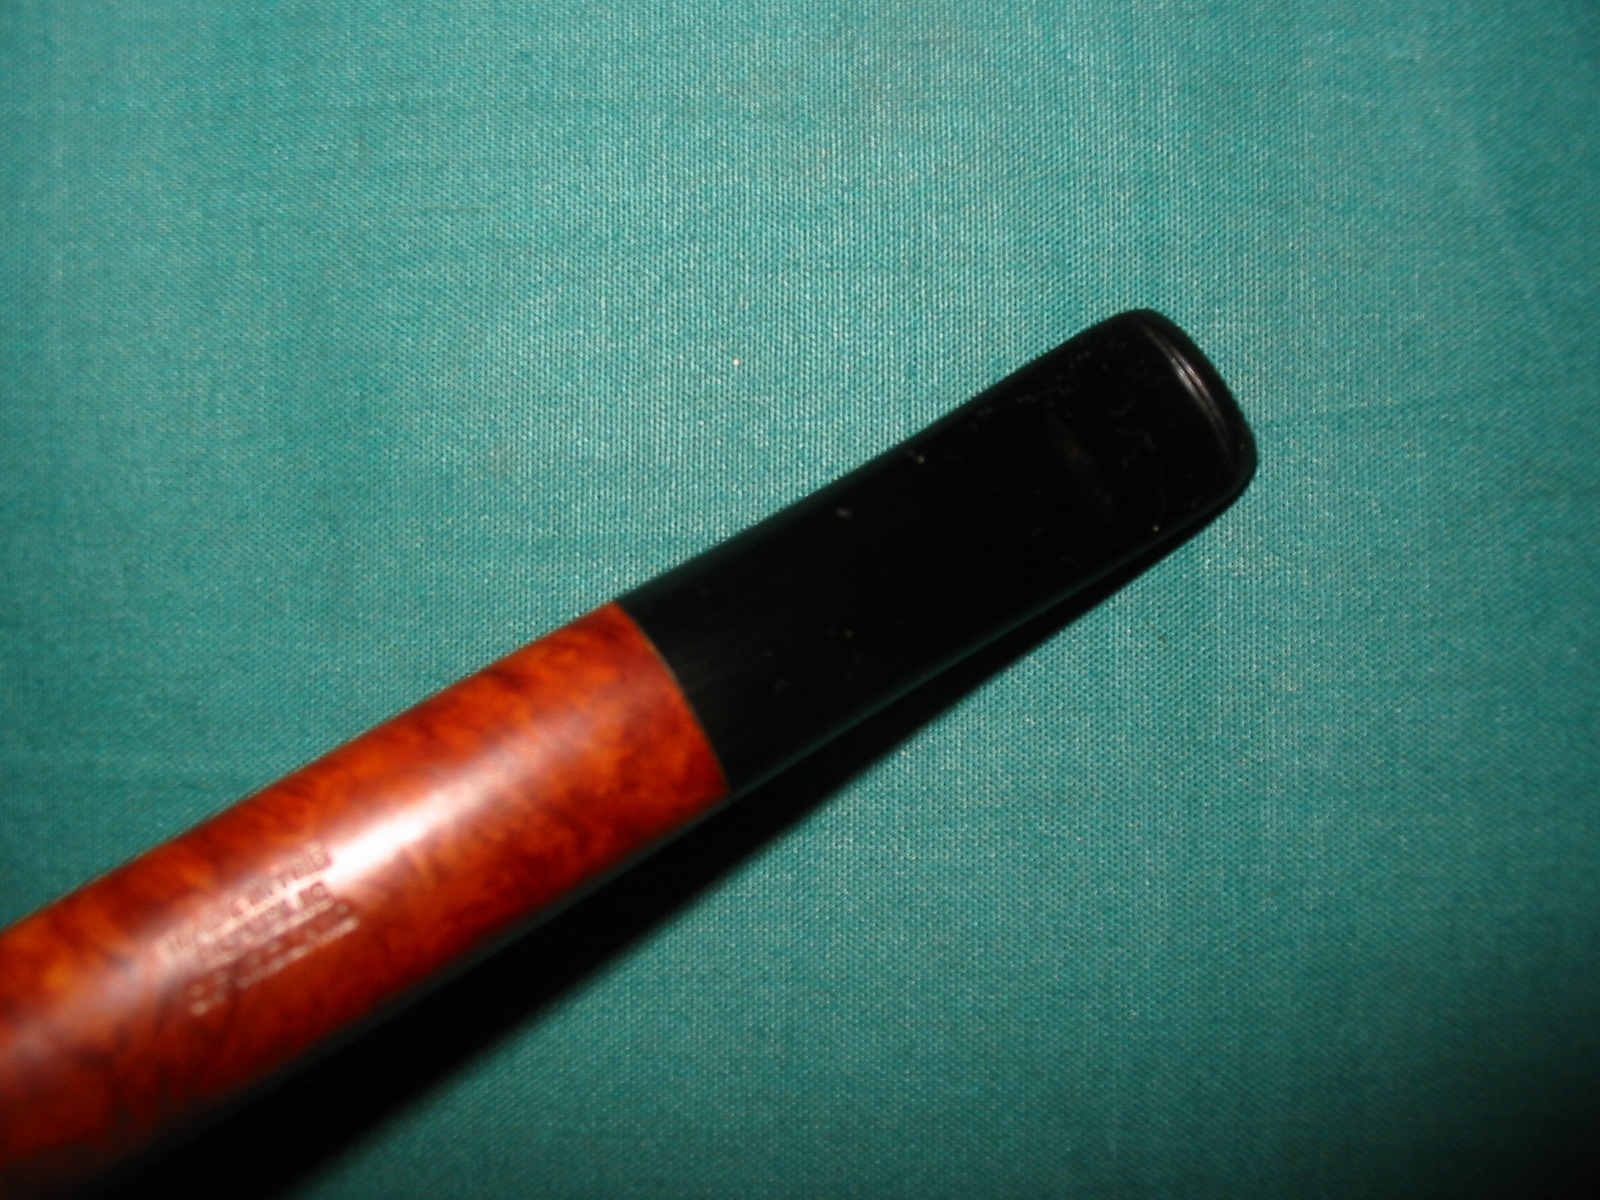
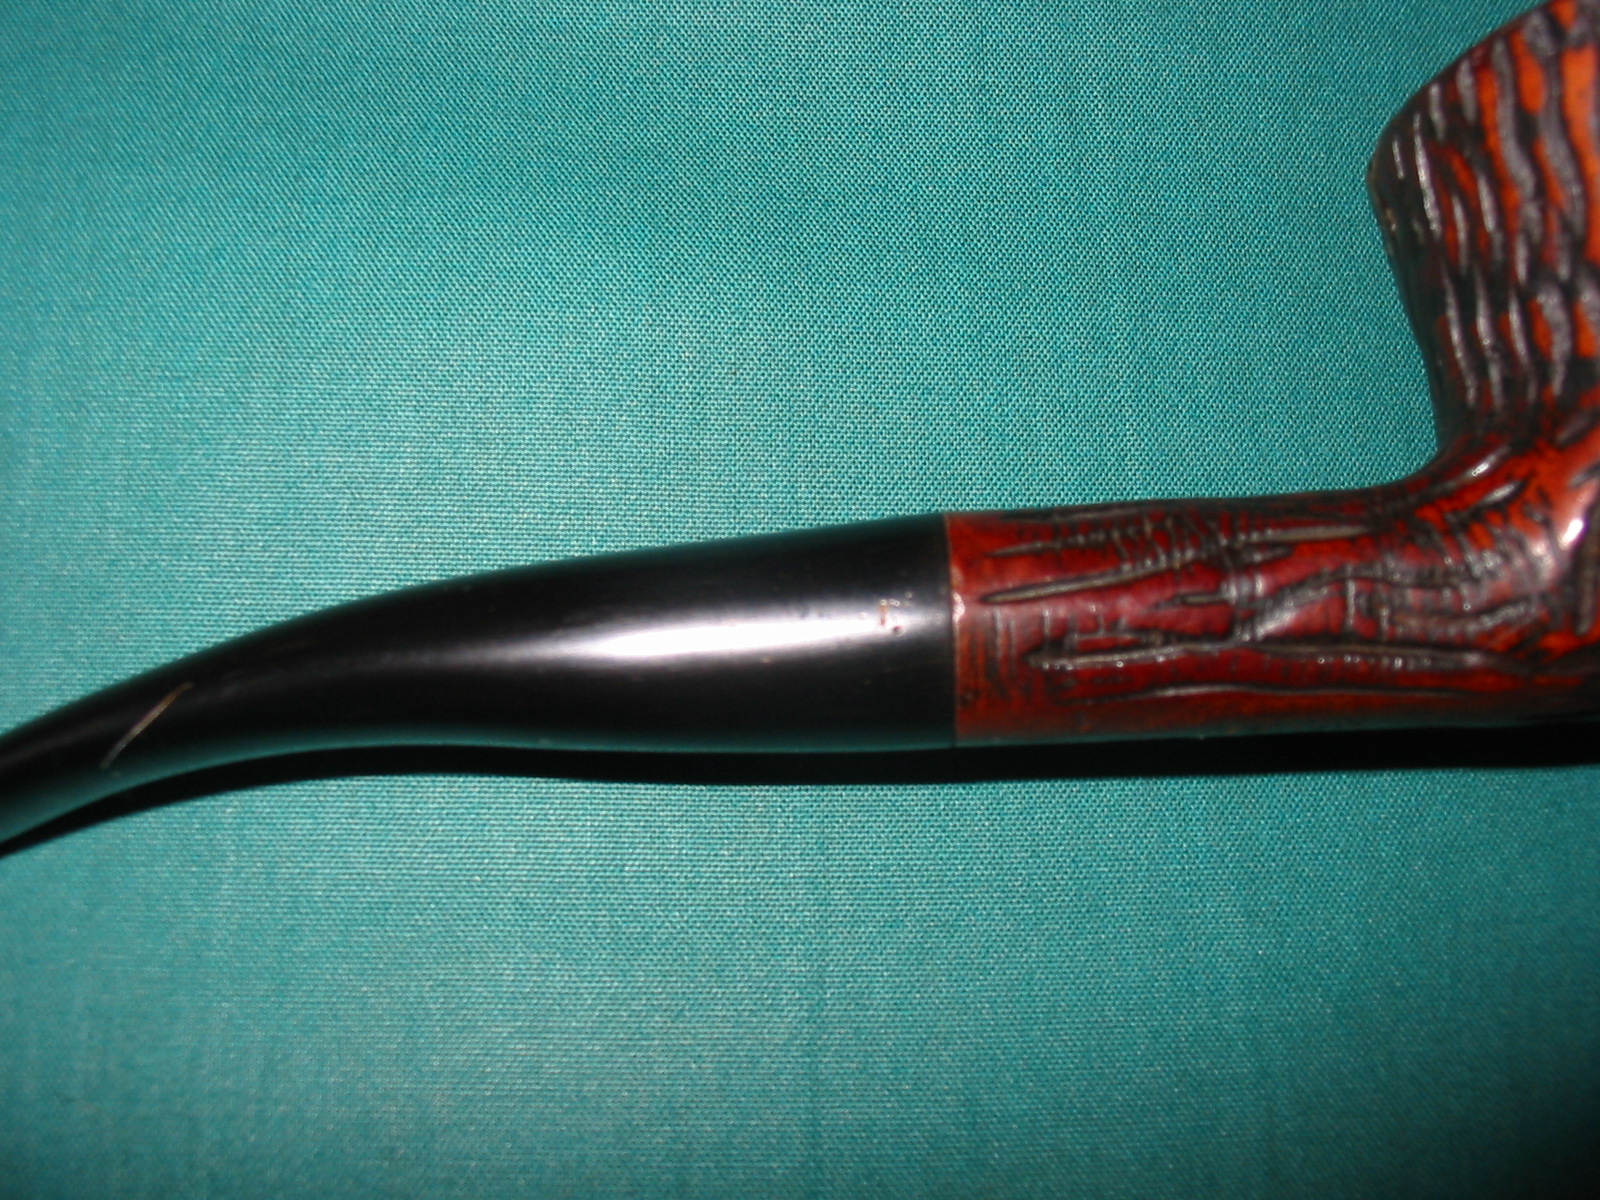
The vulcanite stem blank I used was an older one and must have come out during the war years. I had read that in those times there was often piece of metal found in the vulcanite of the stem material. This particular stem had a nice bunch of it on the right side of the stem near the shank. It almost looks like the remnants of a stamp on the stem but it is not. It appeared as I sanded the stem down to fit the shank. The photo below shows it about midway between the top and bottom of the stem near the shank junction. The glare of the flash highlights it as well.
IMG_5071

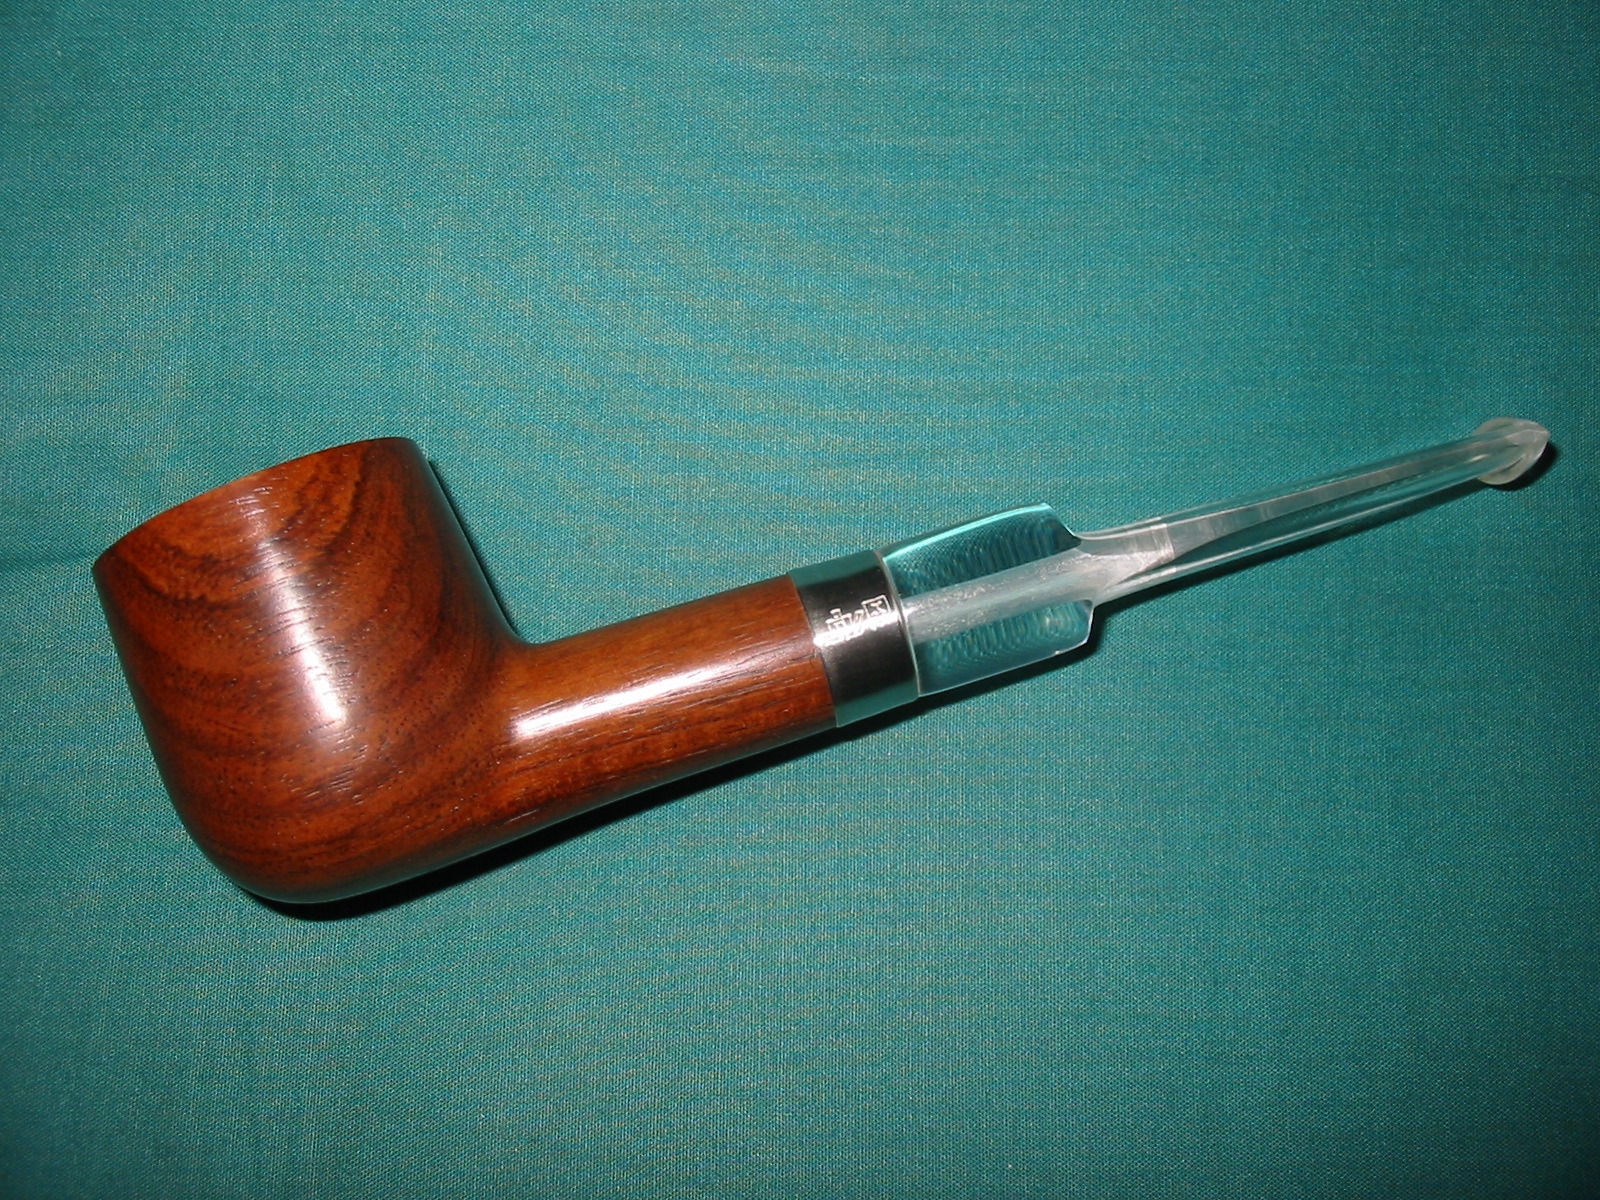
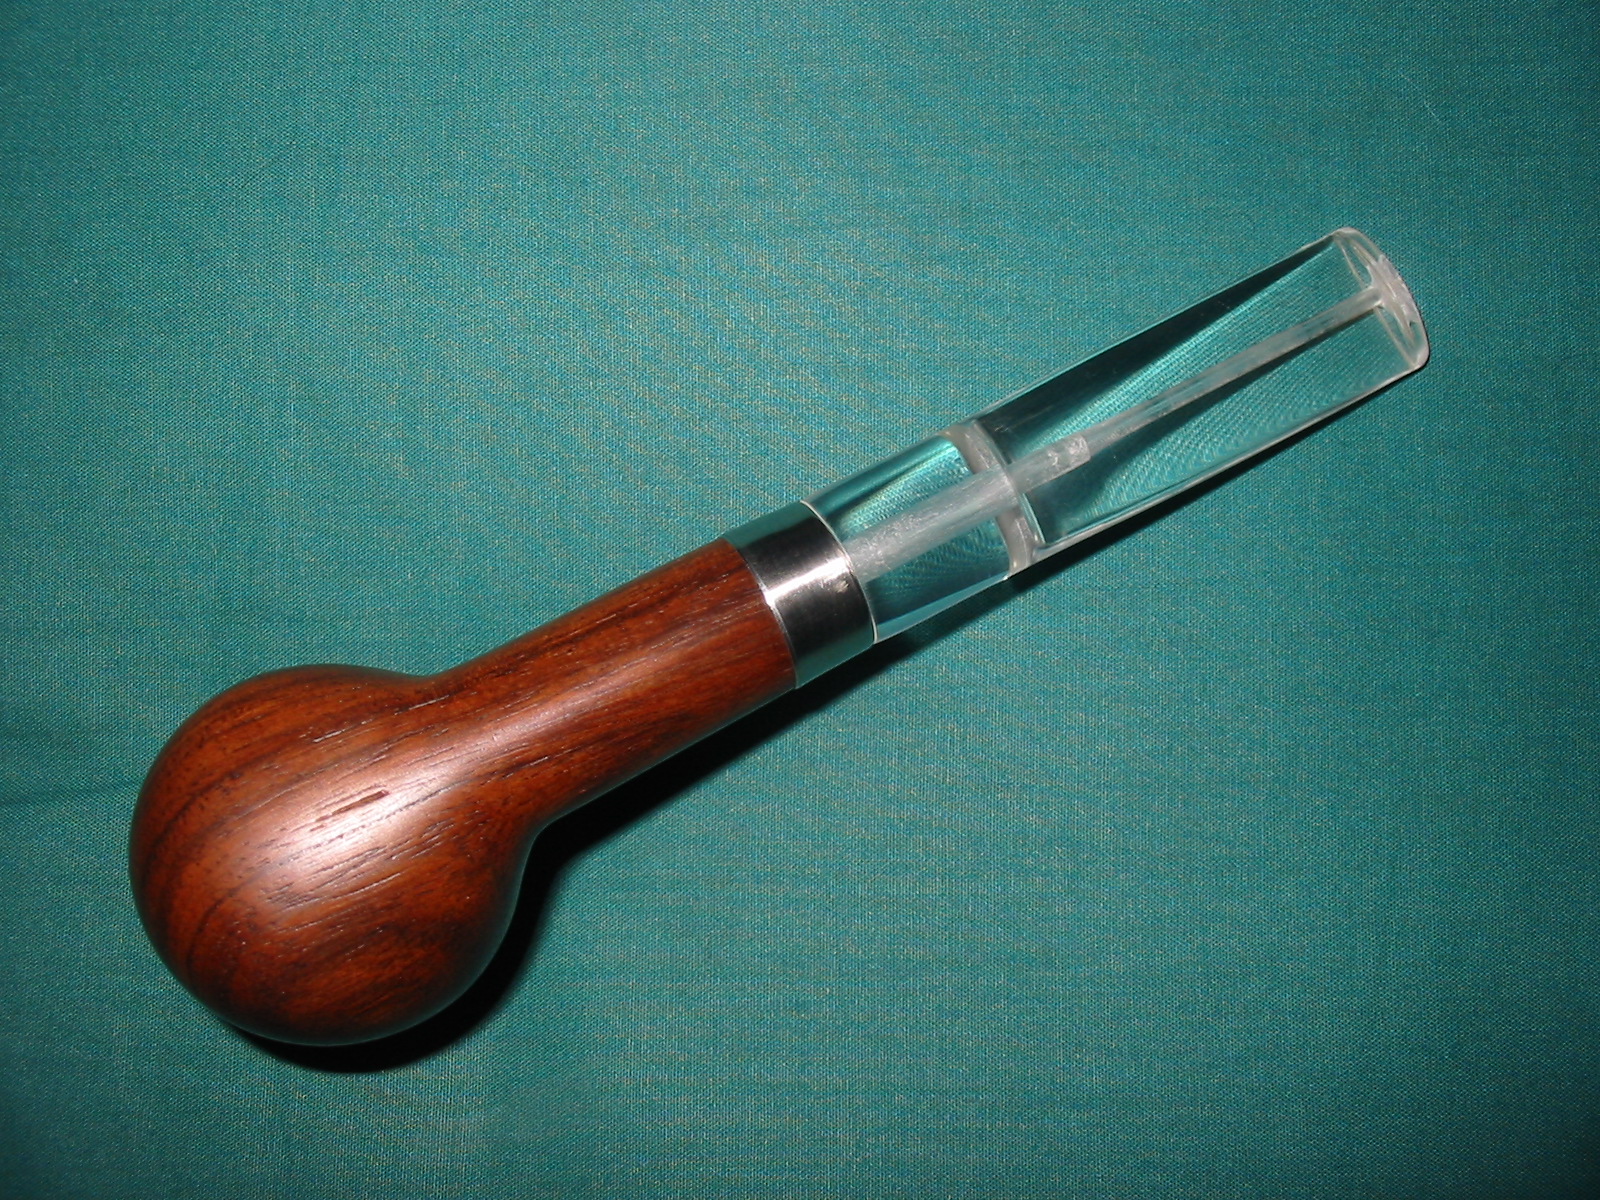
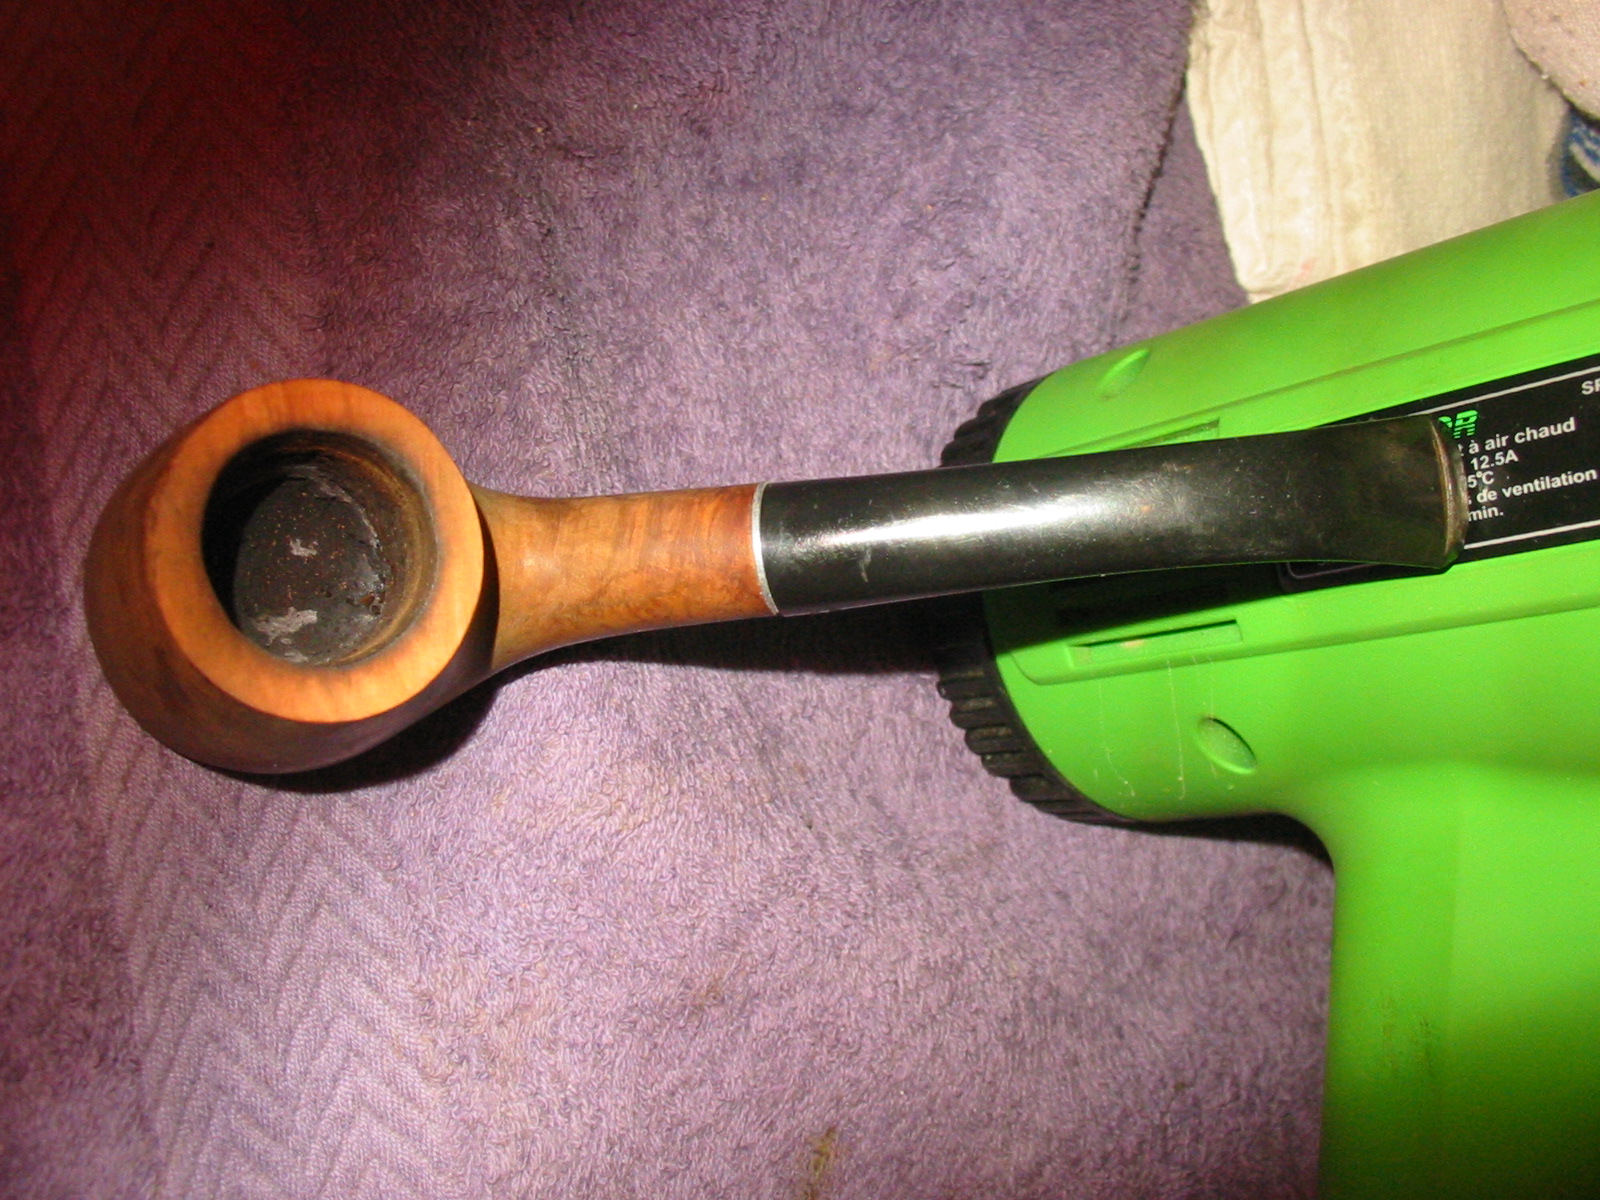
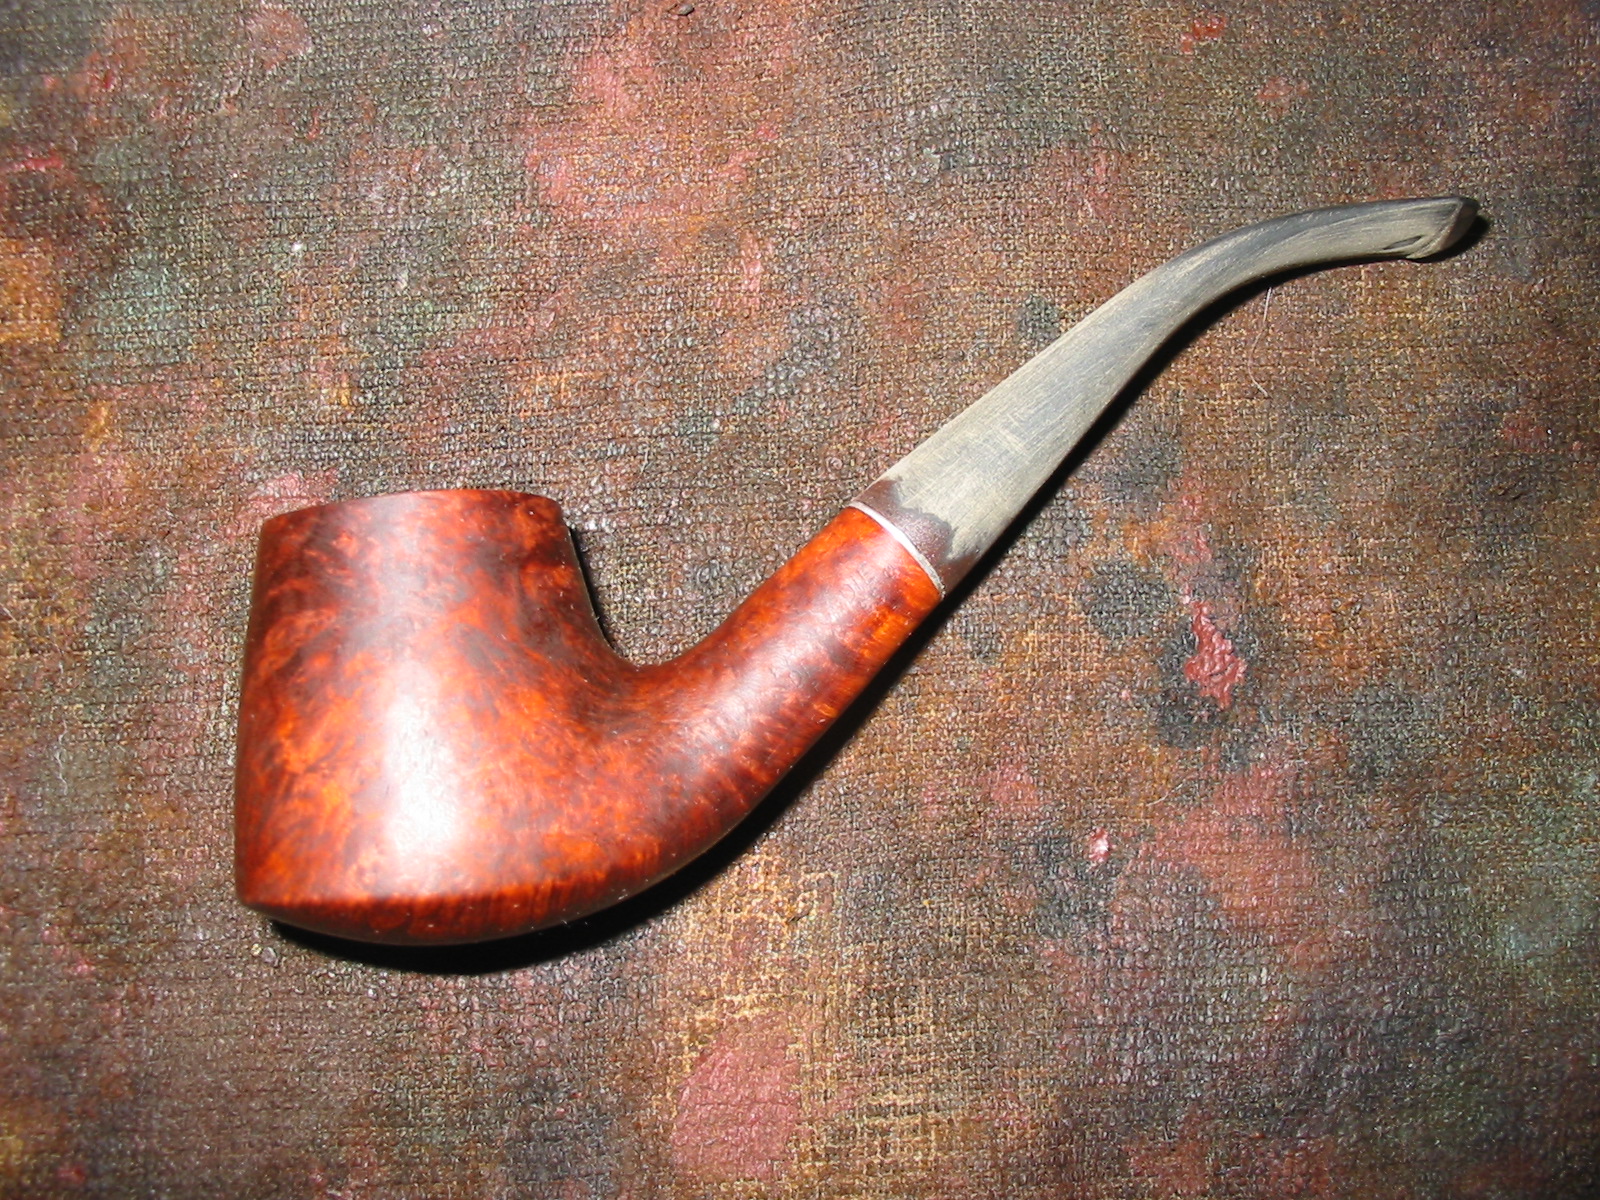
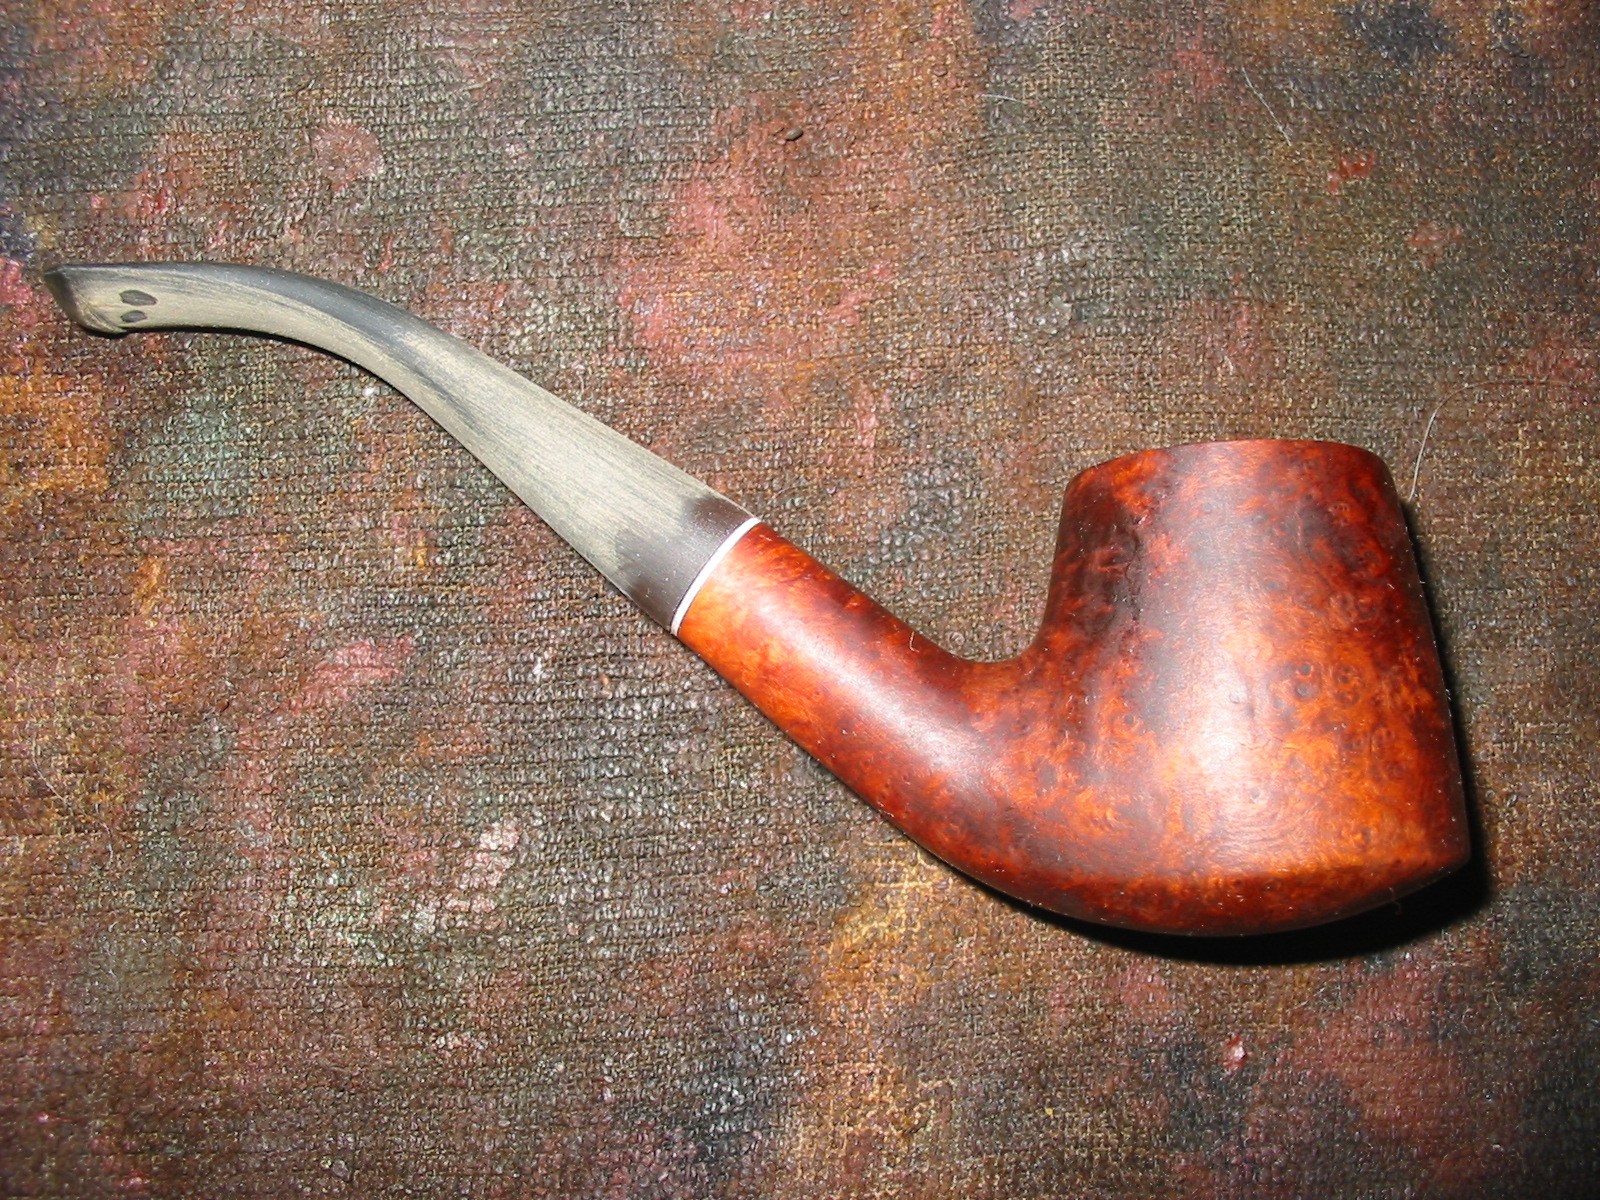
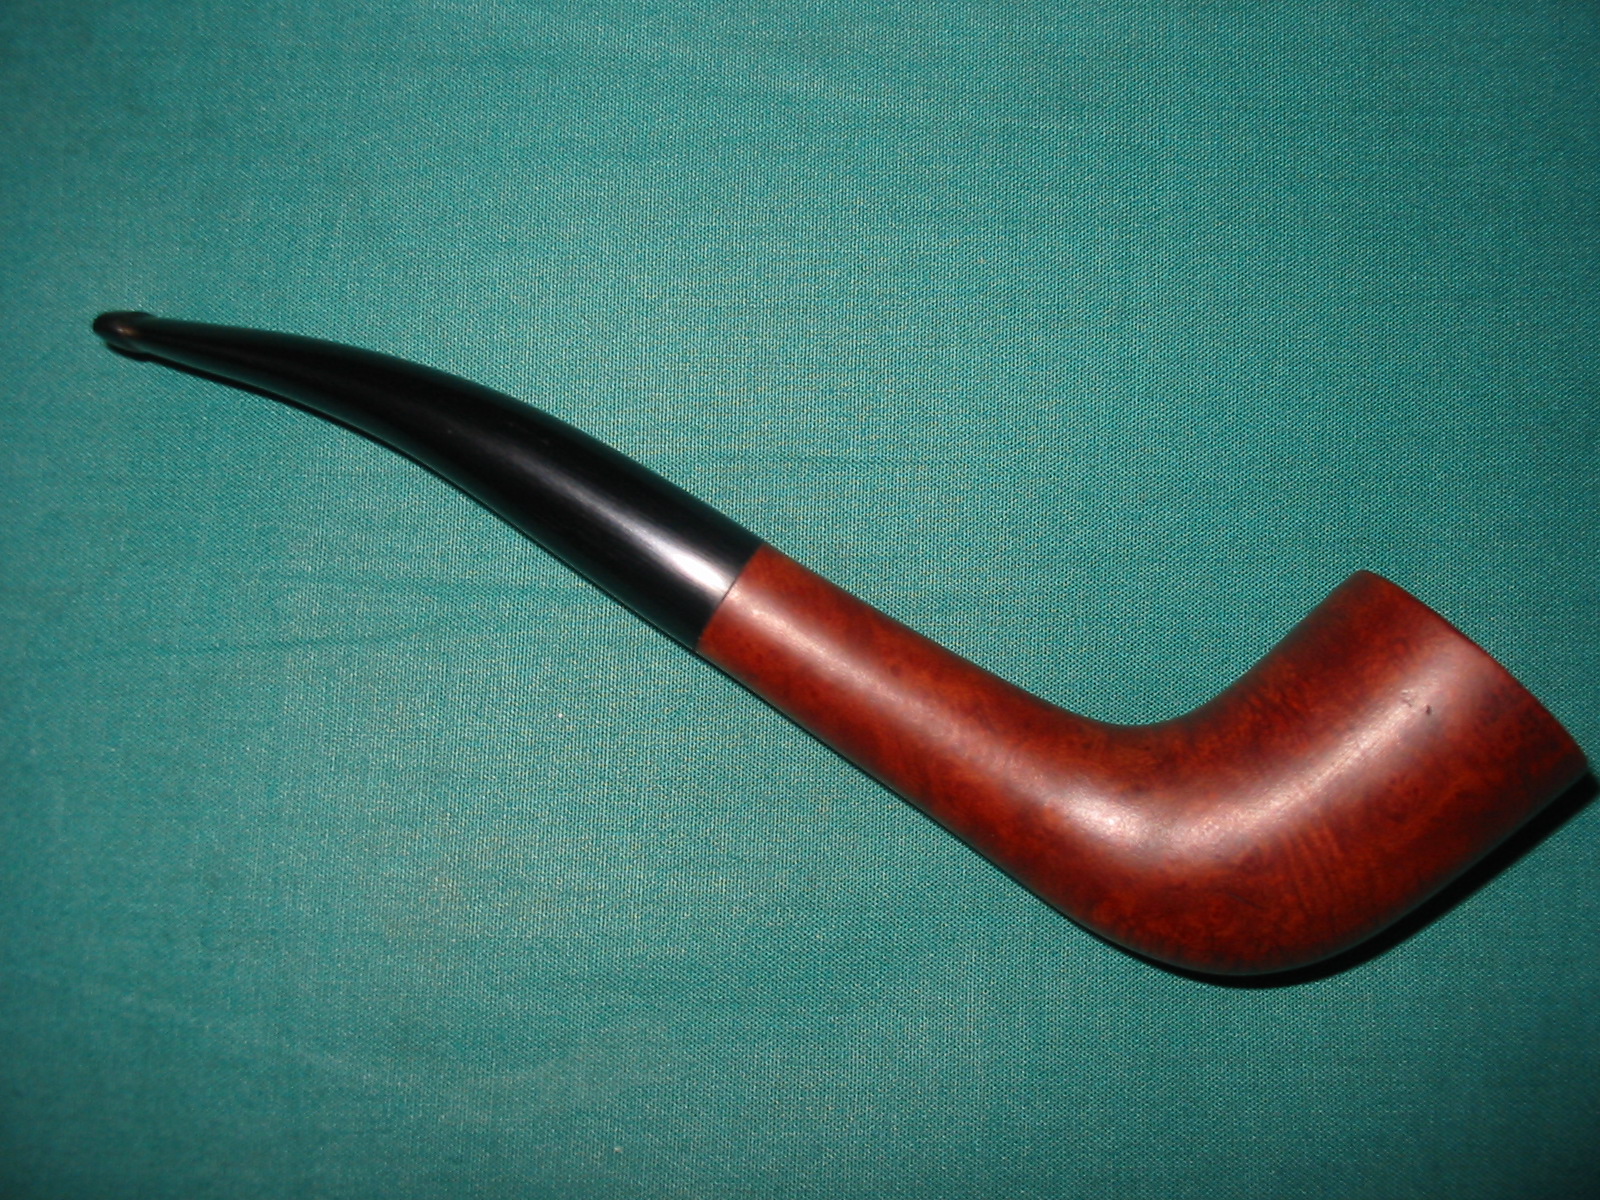
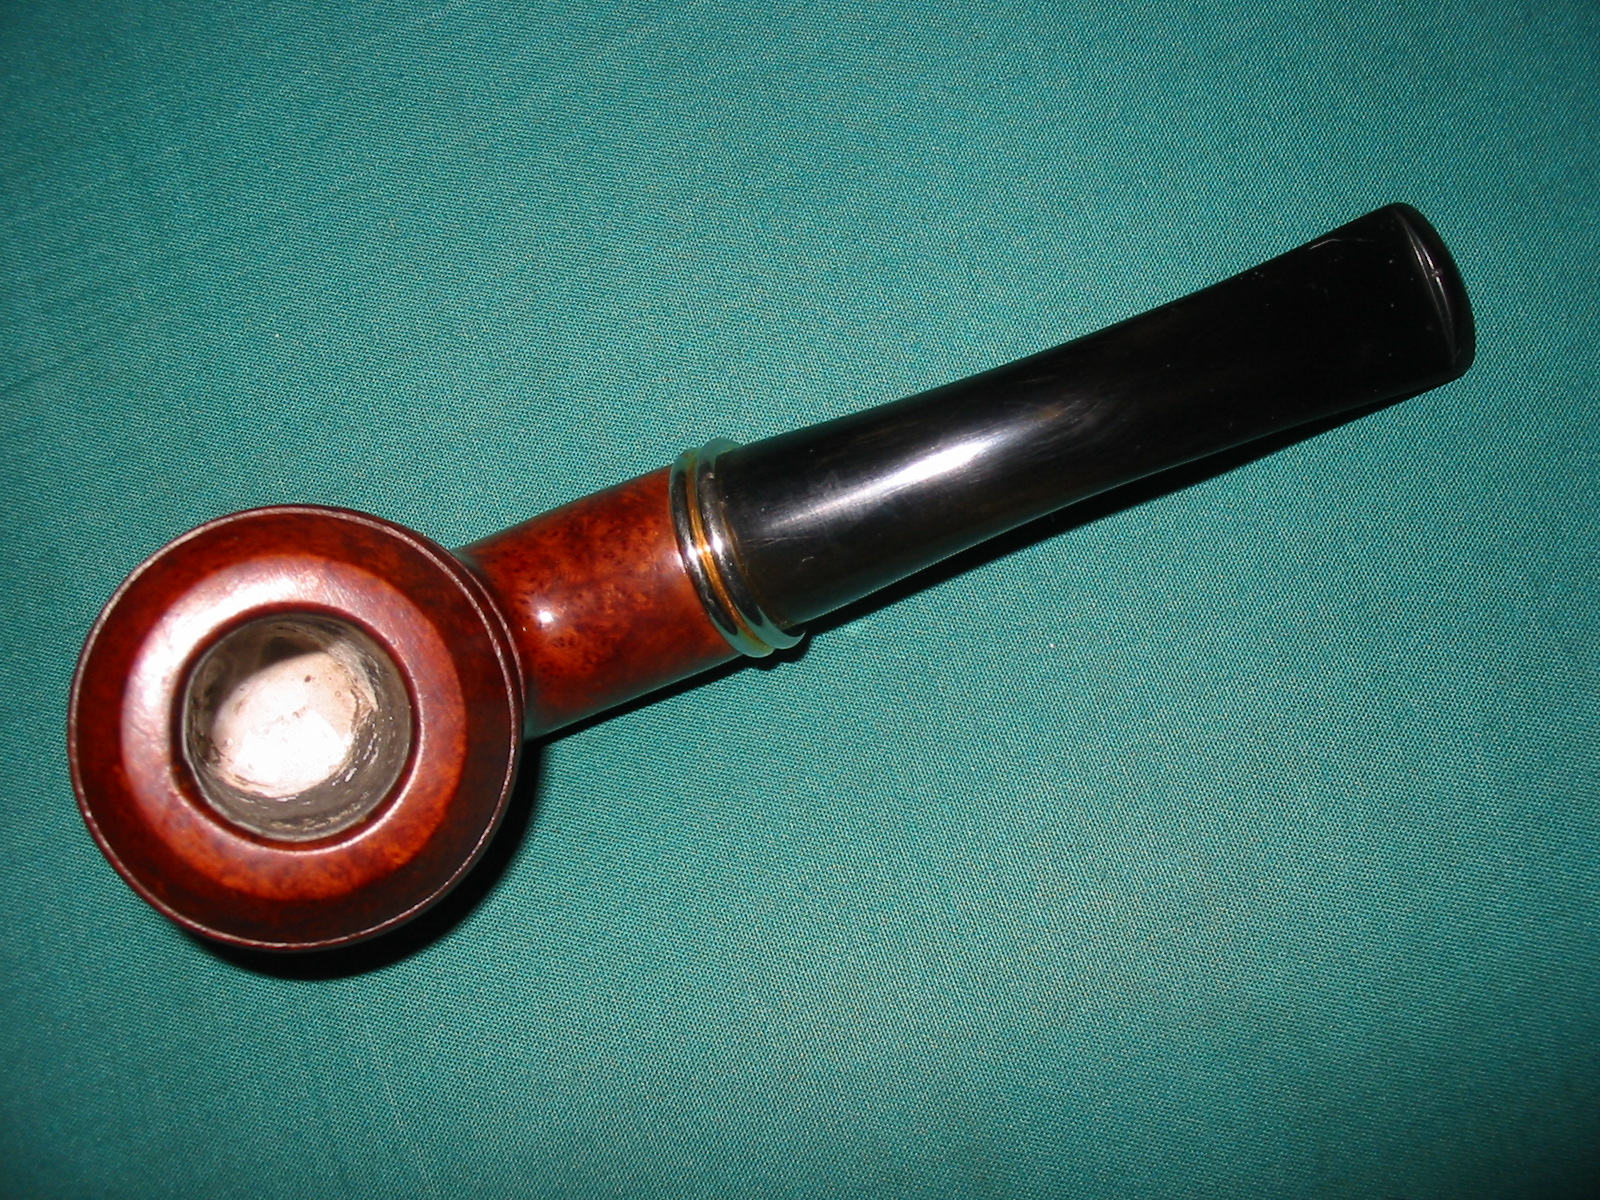
With the stem polished and ready and the pipe stained it was time to bend the stem. I used a heat gun to heat up the stem until it was pliable and then bent it over the round handle of a chisel that I had on the workbench. I used the original stem as a pattern to determine how far to bend the stem.
IMG_5064

IMG_5065

IMG_5066

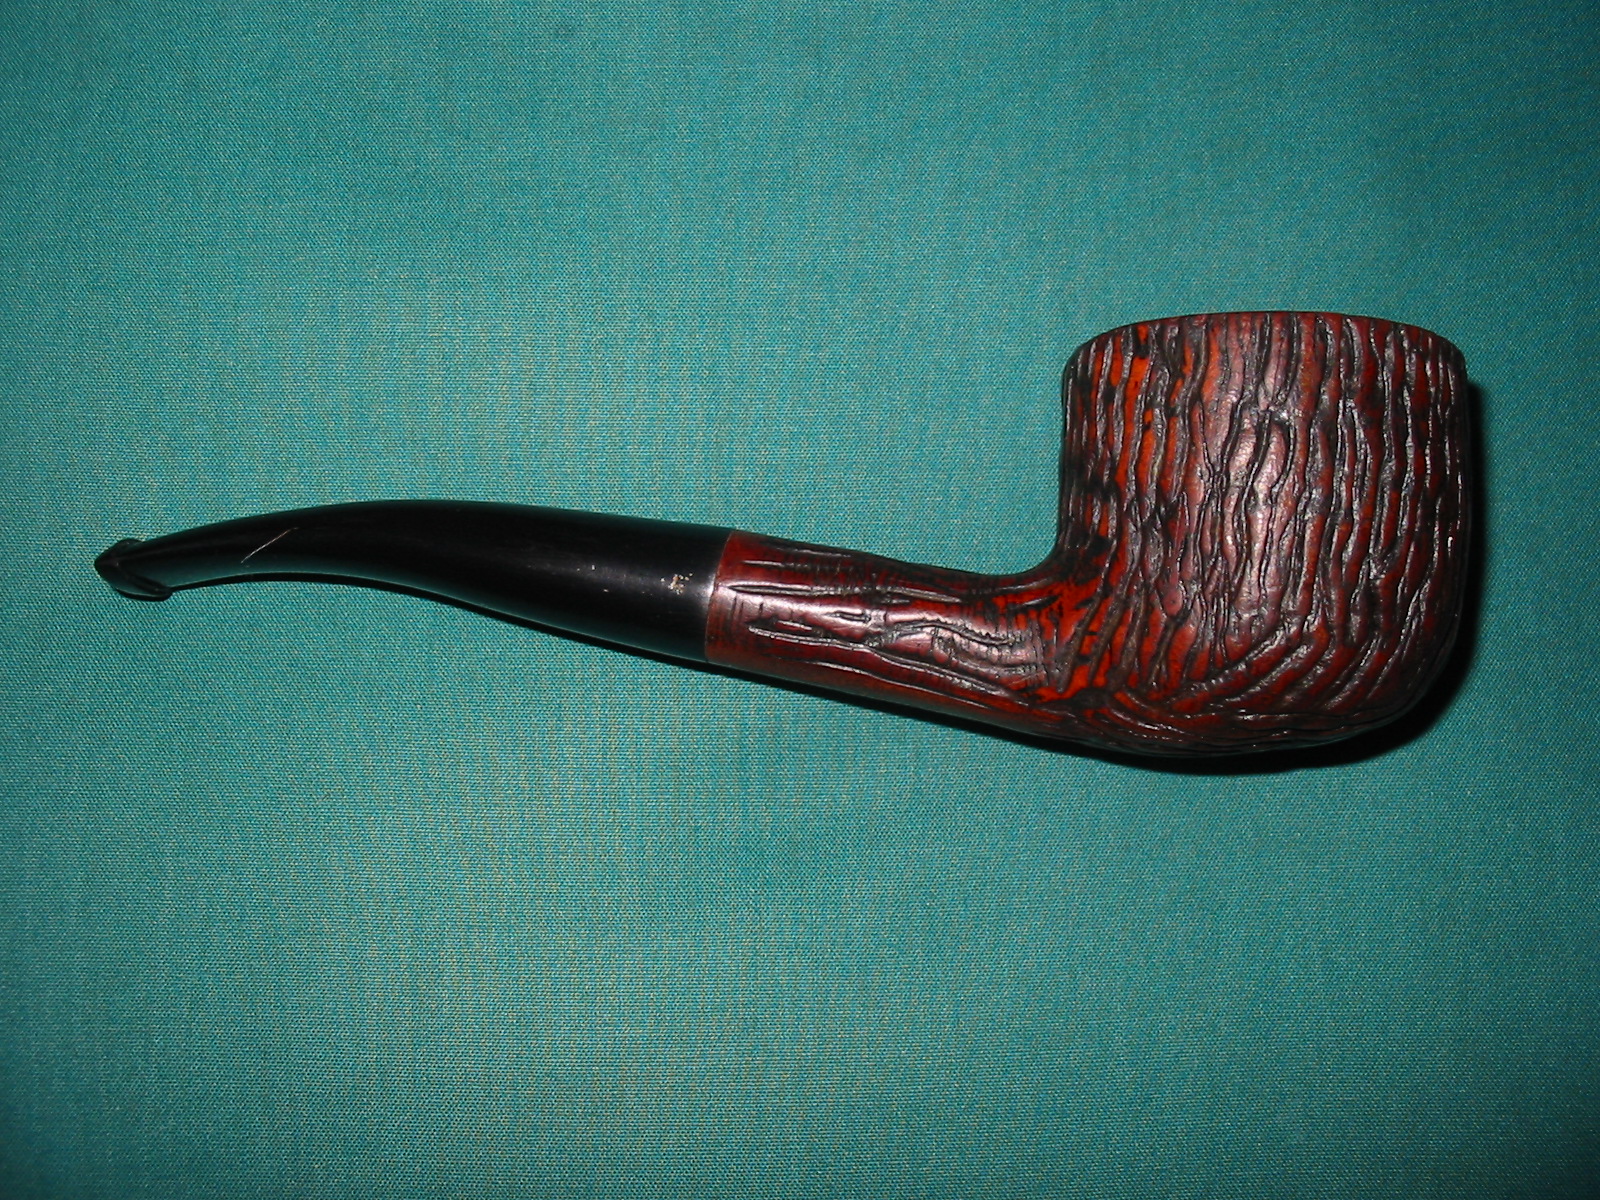
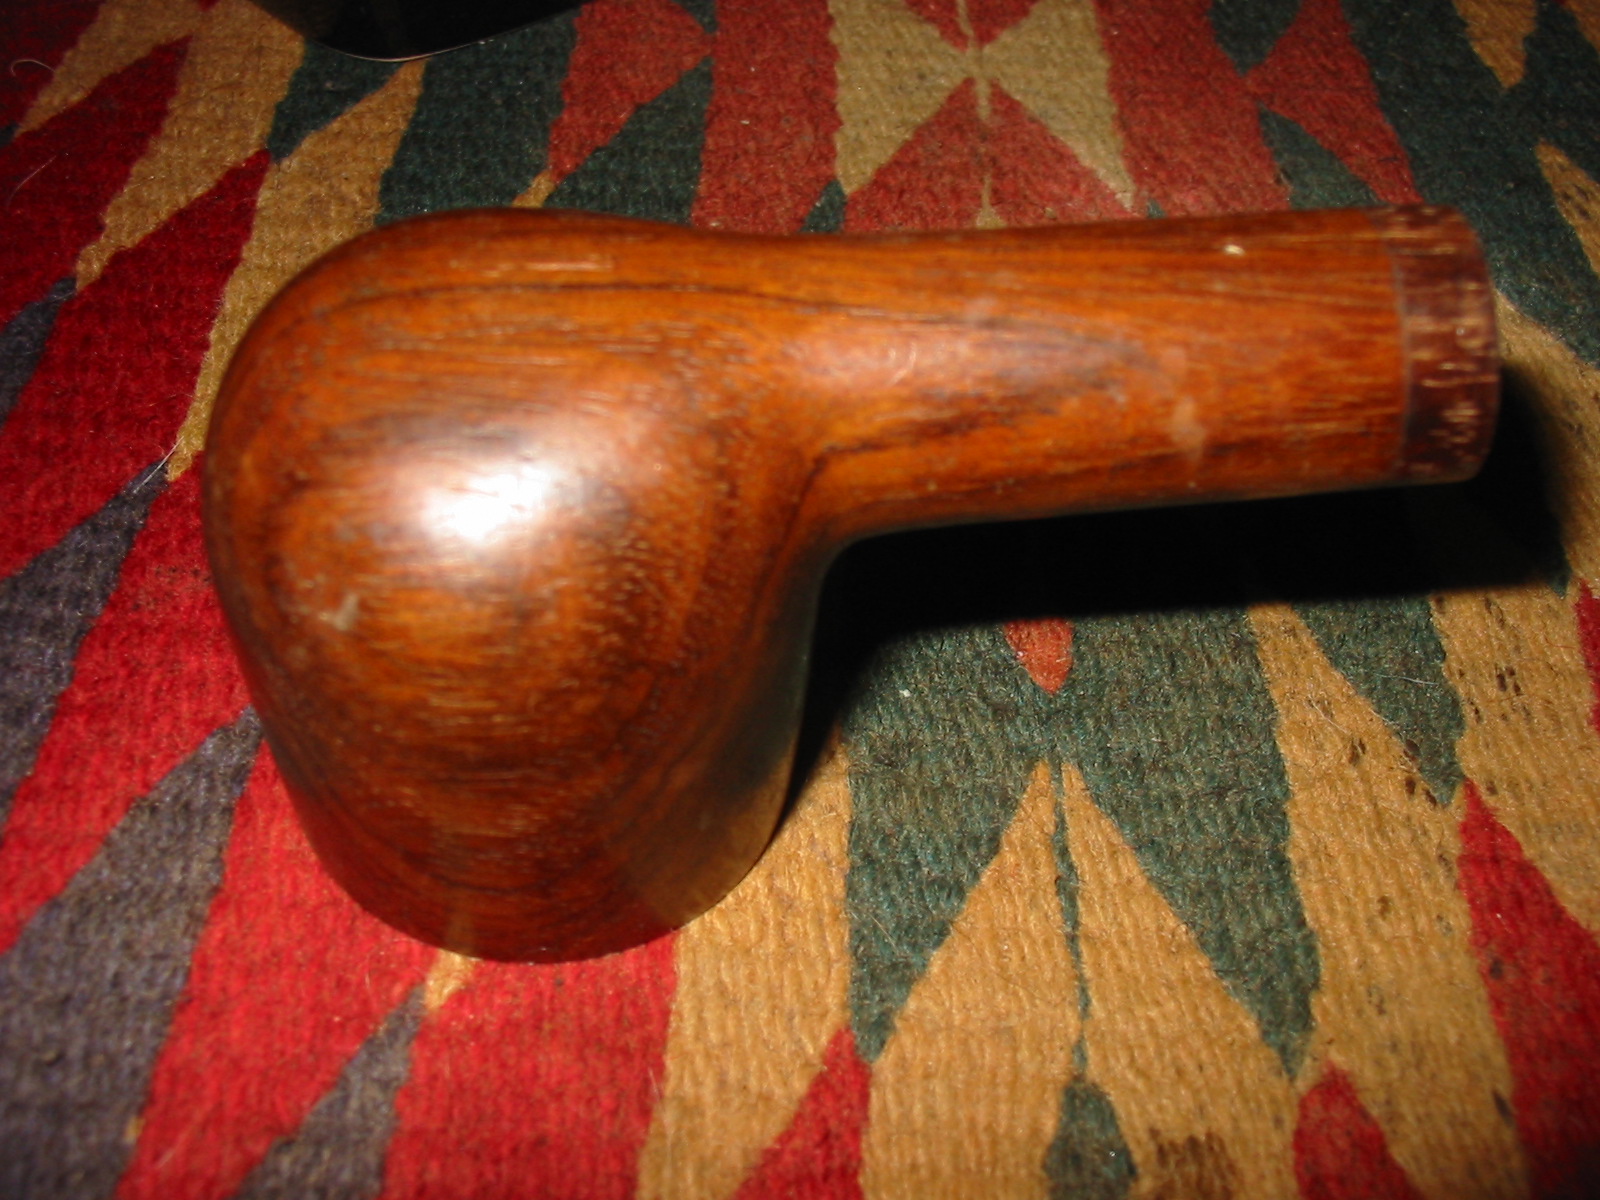
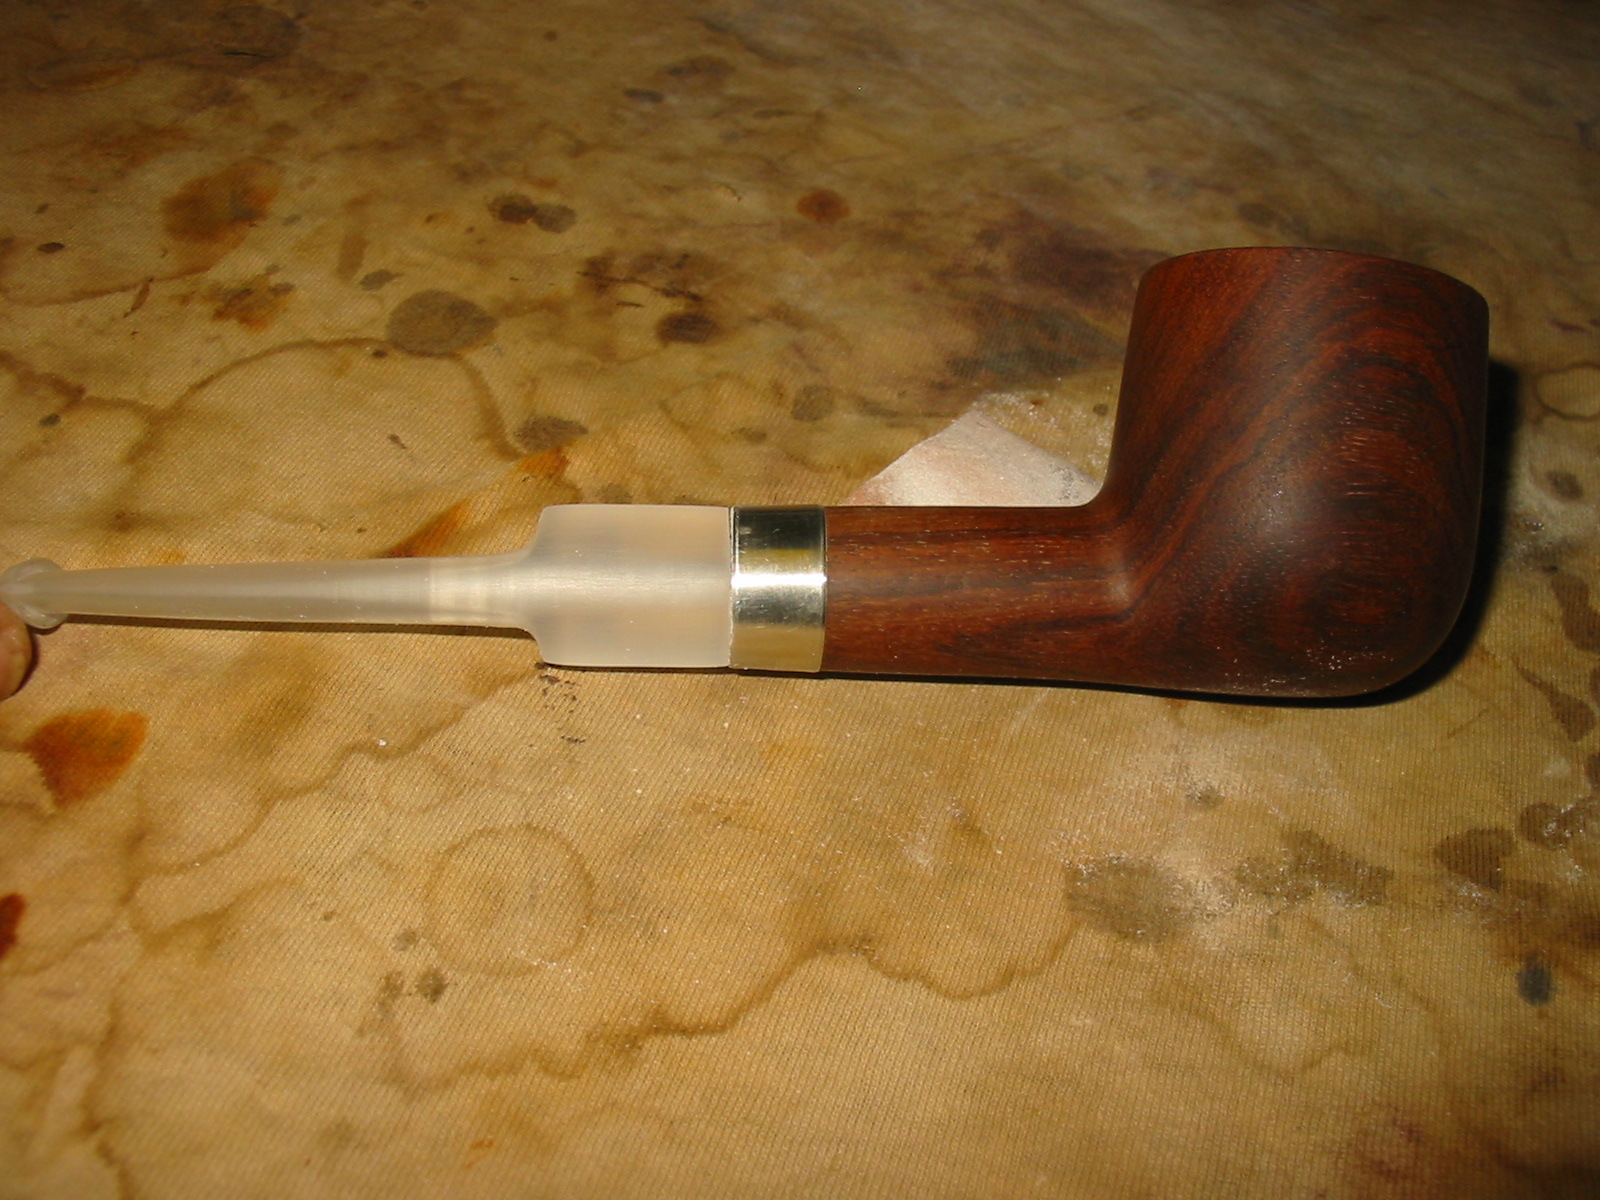
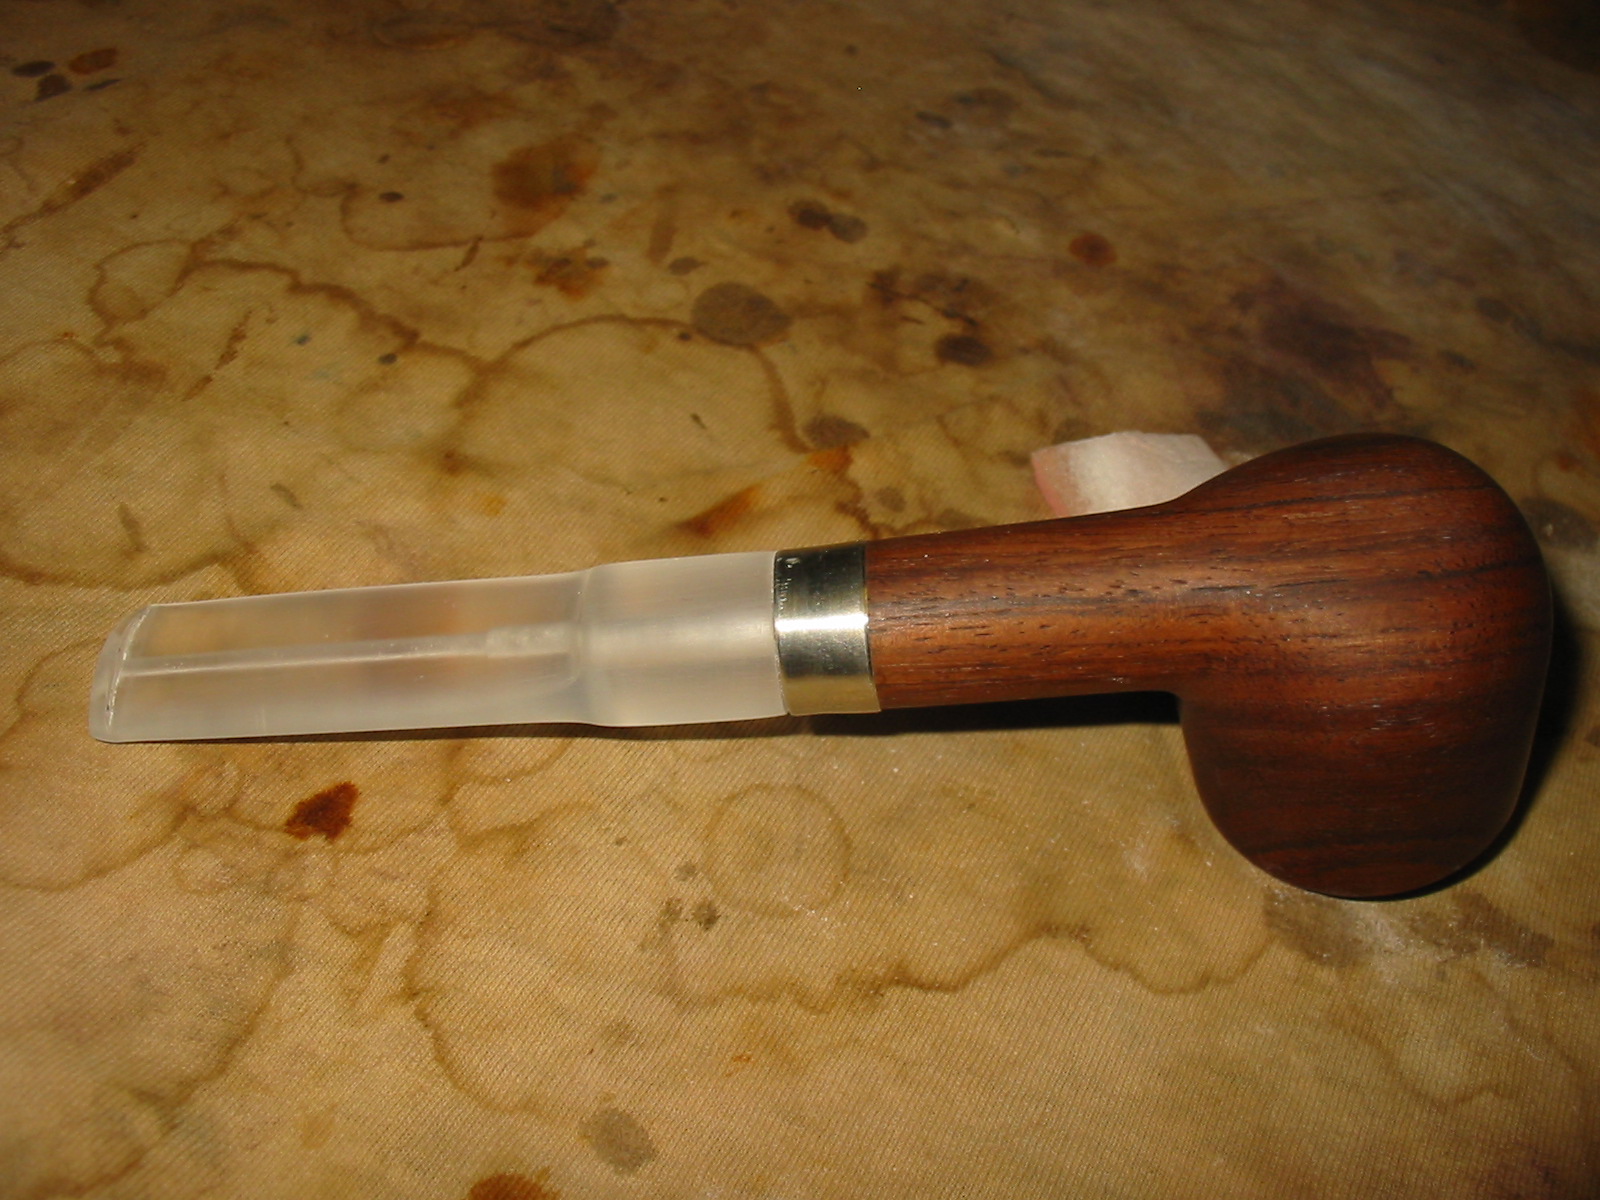
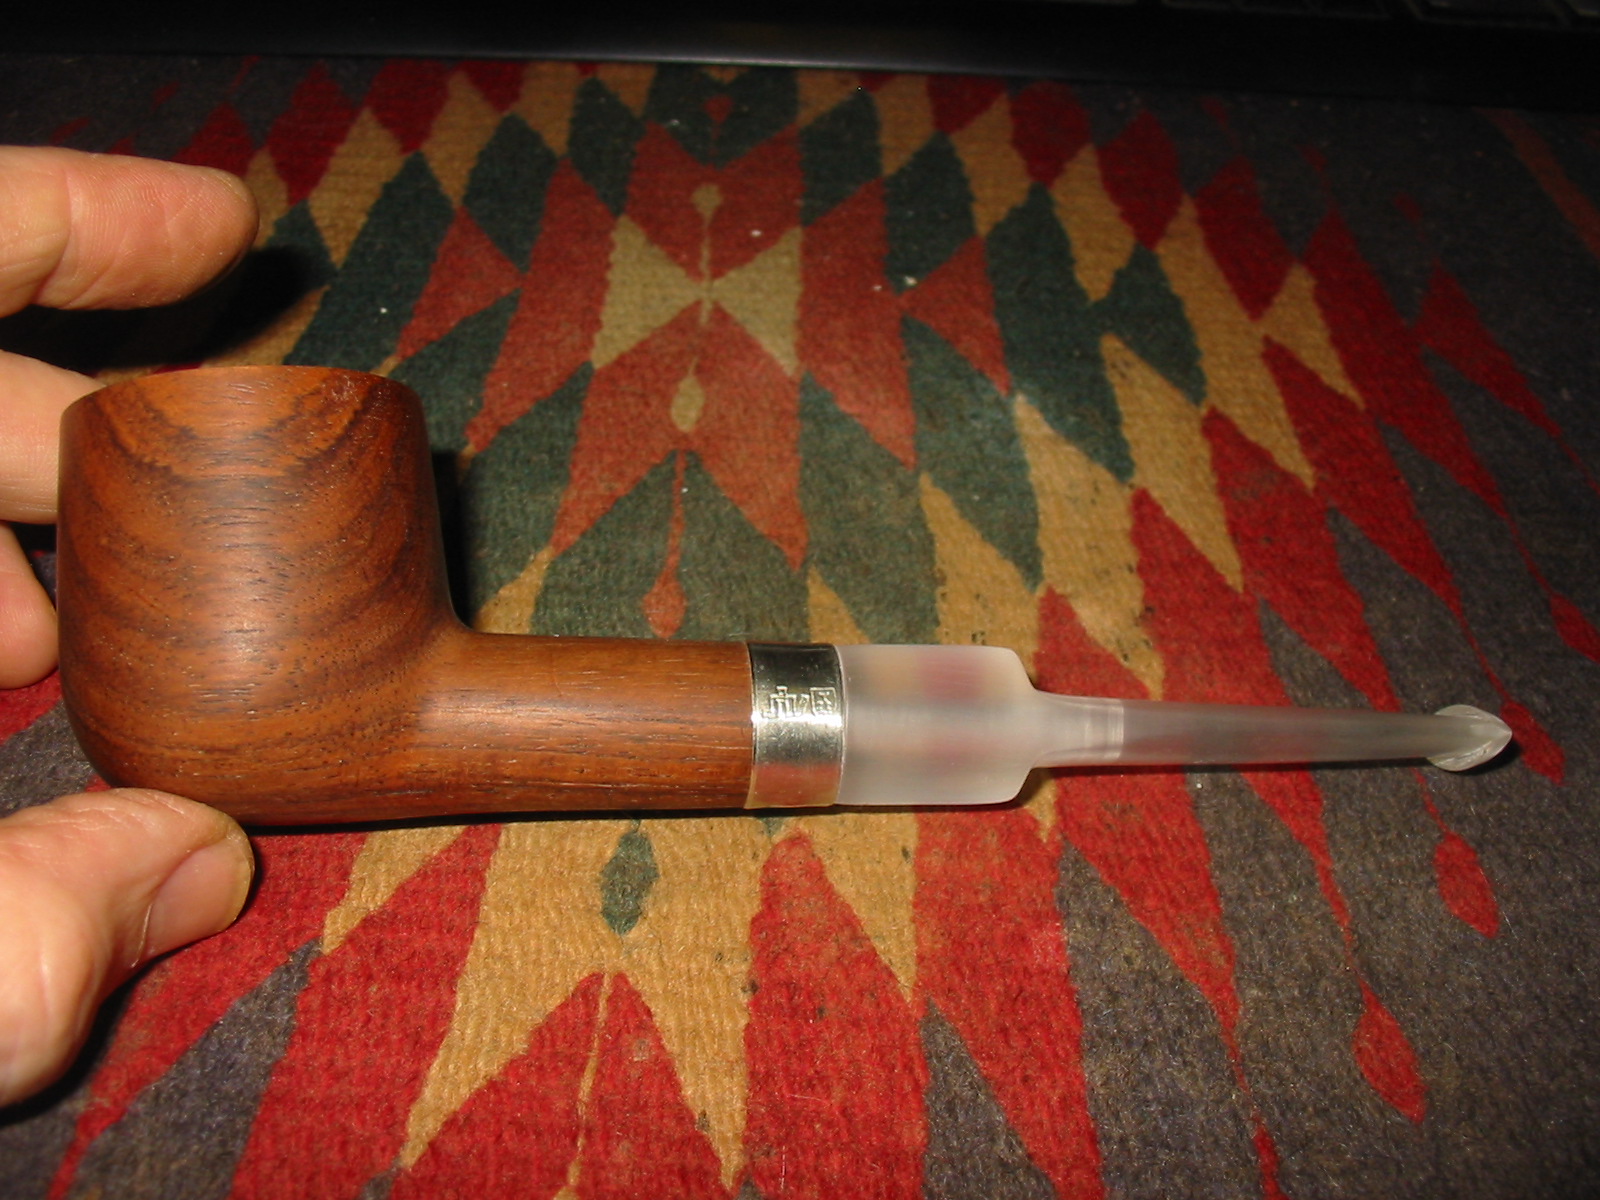
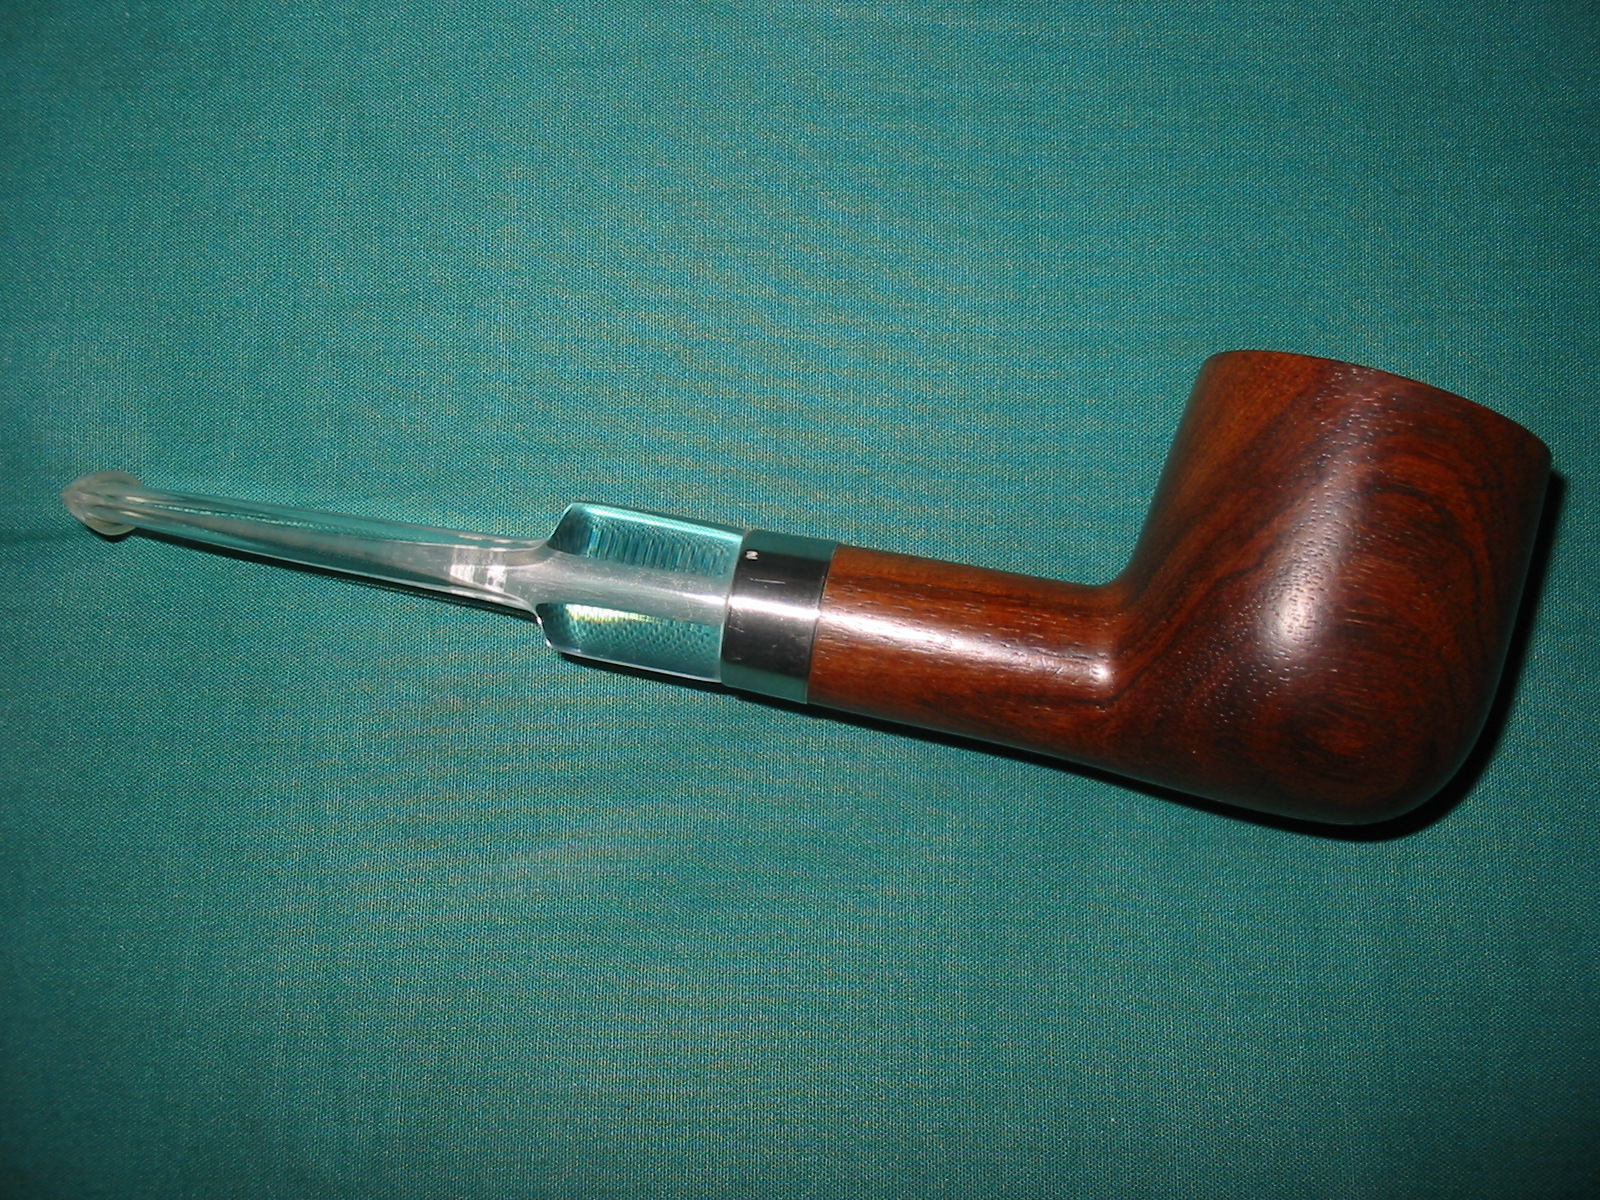
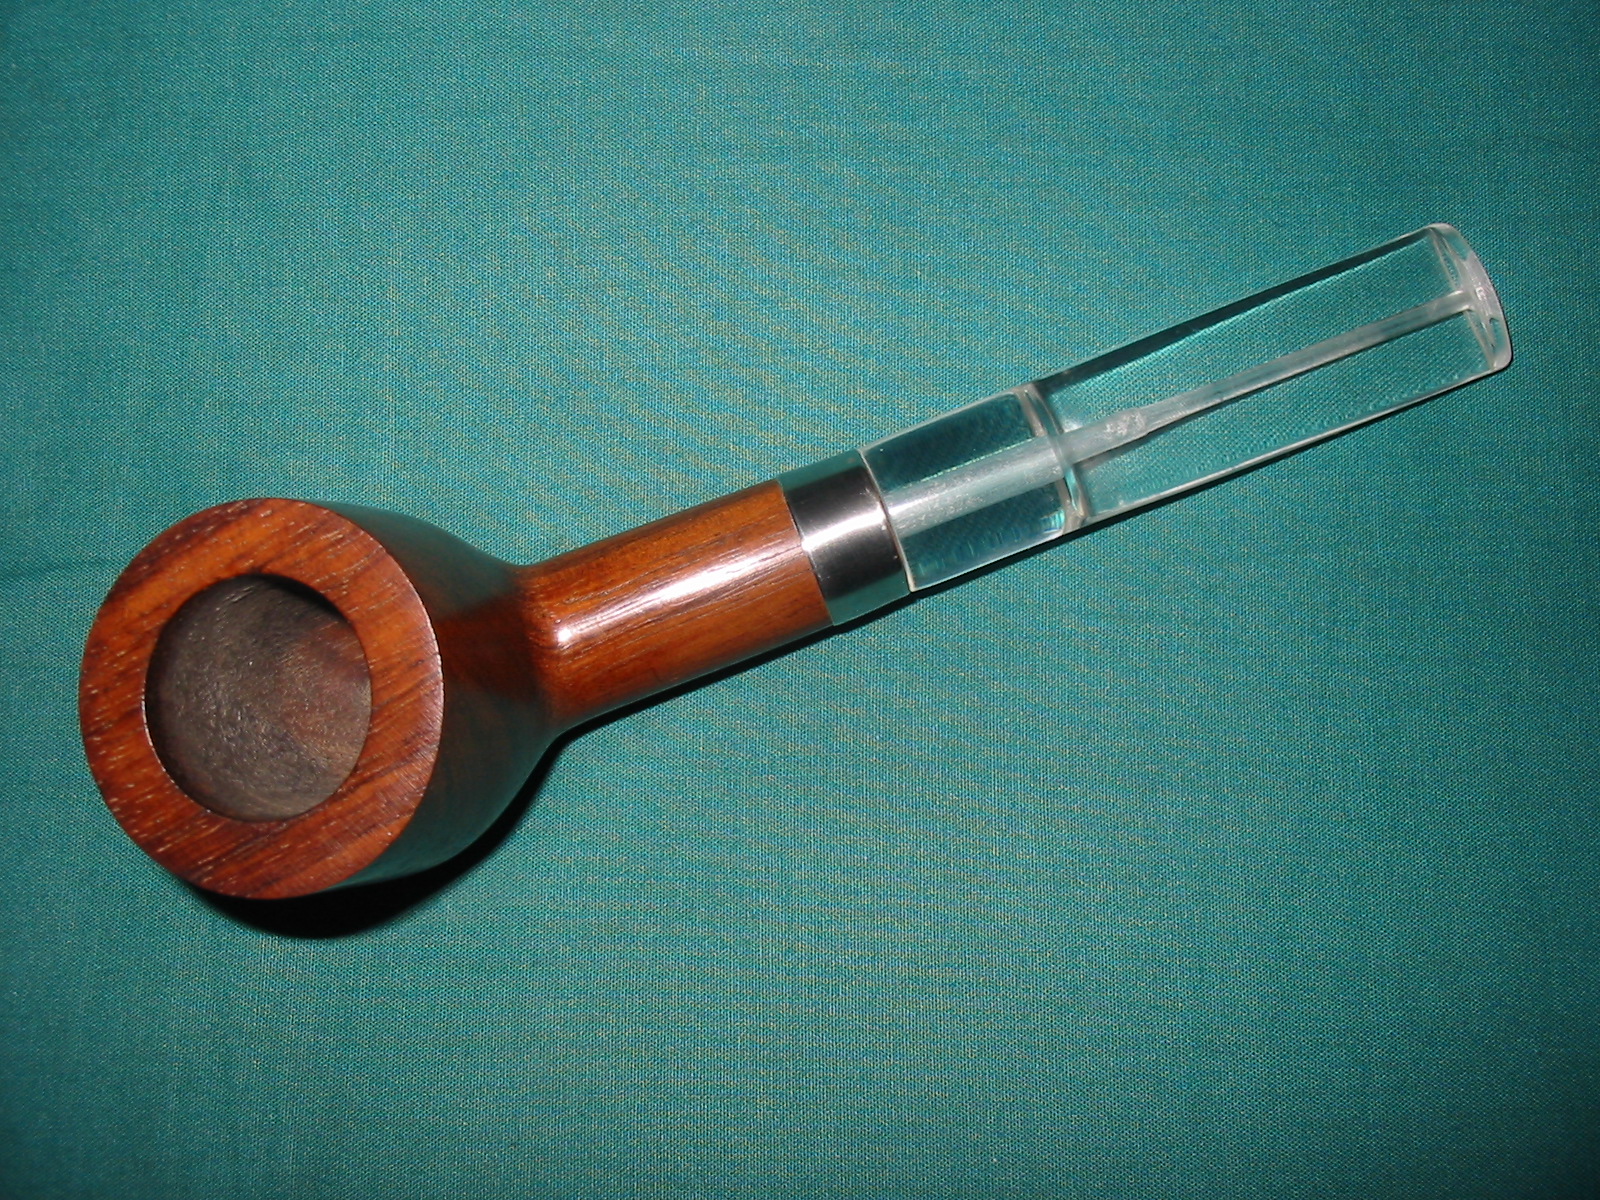
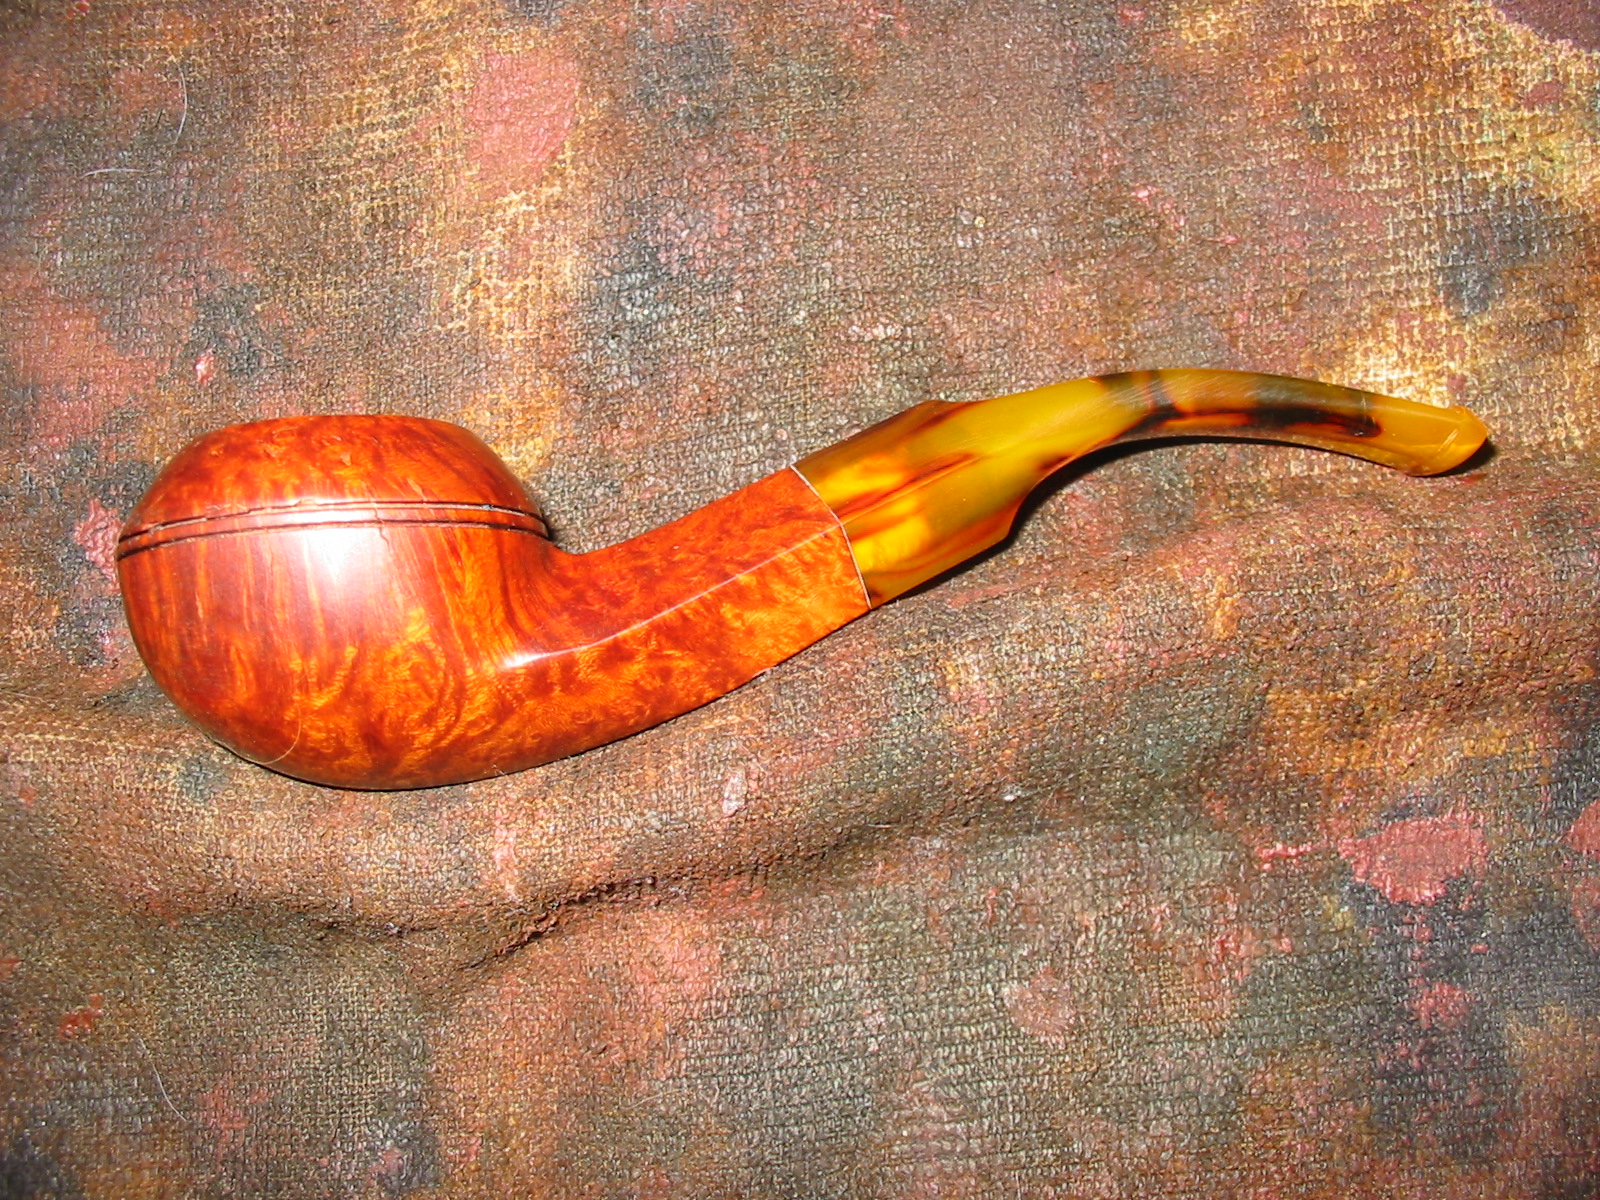
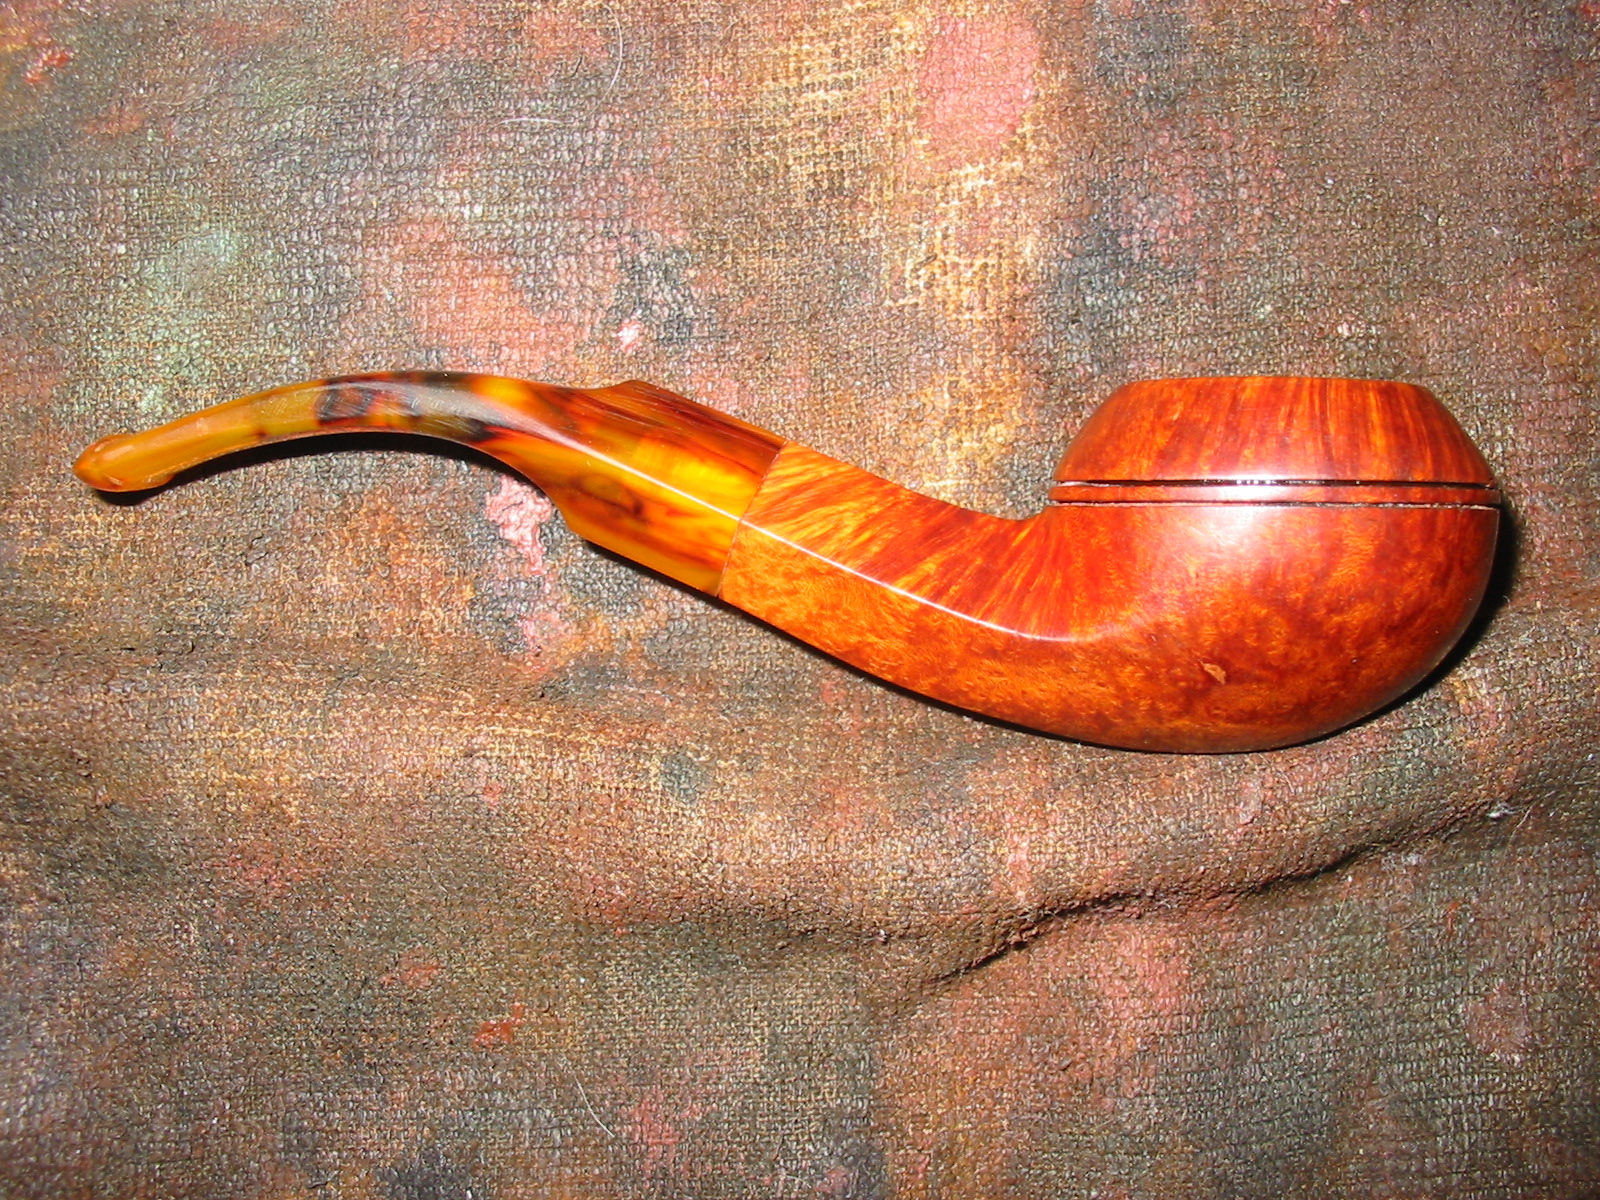
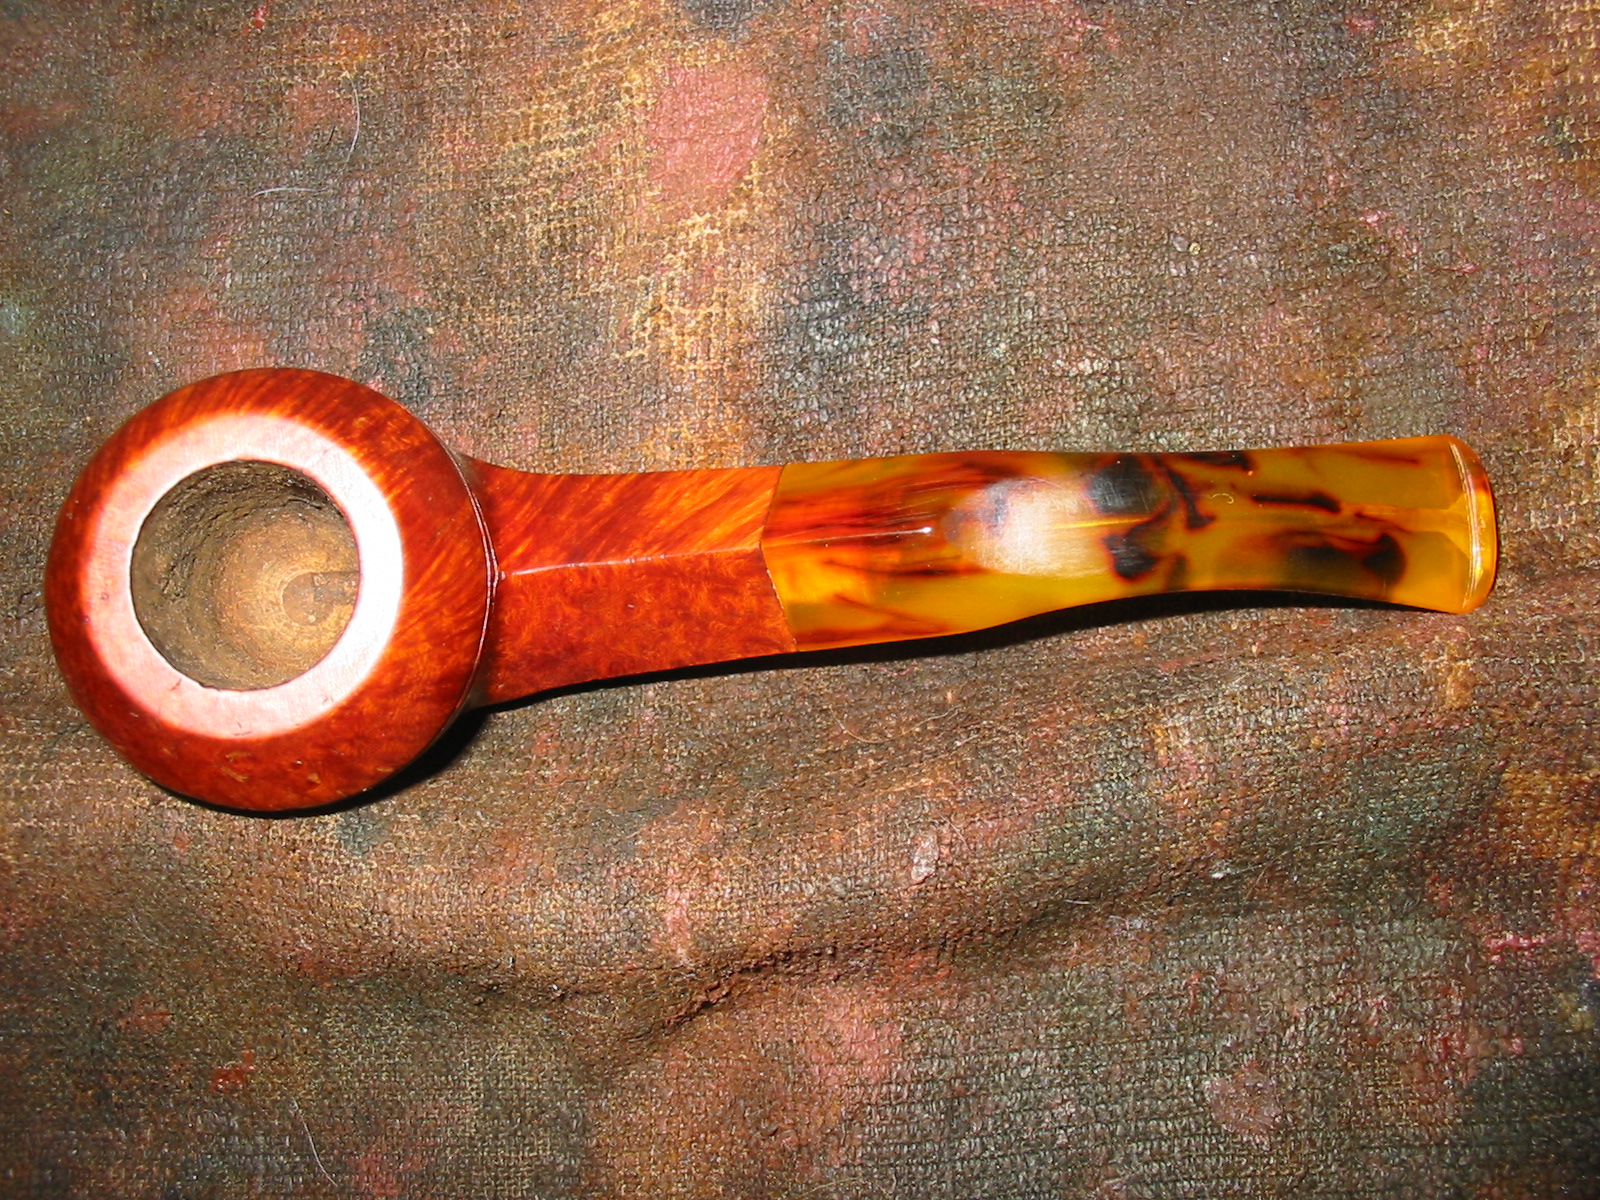
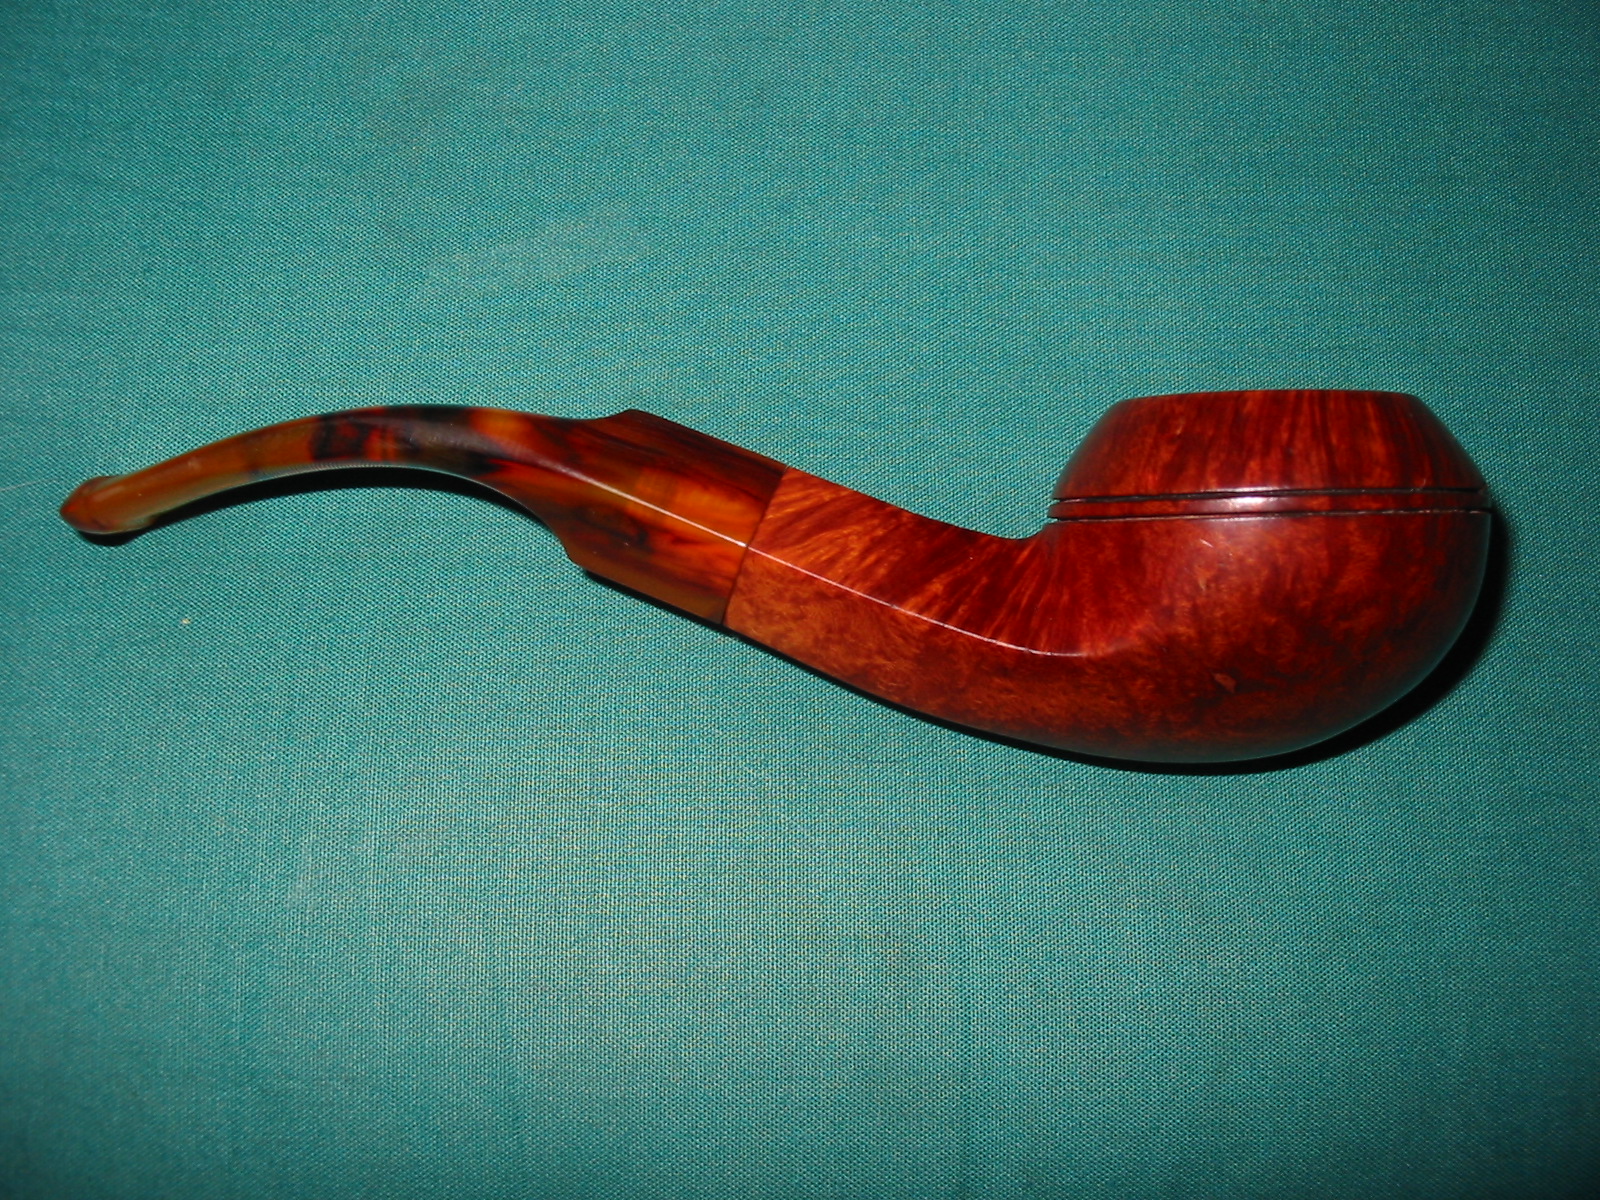
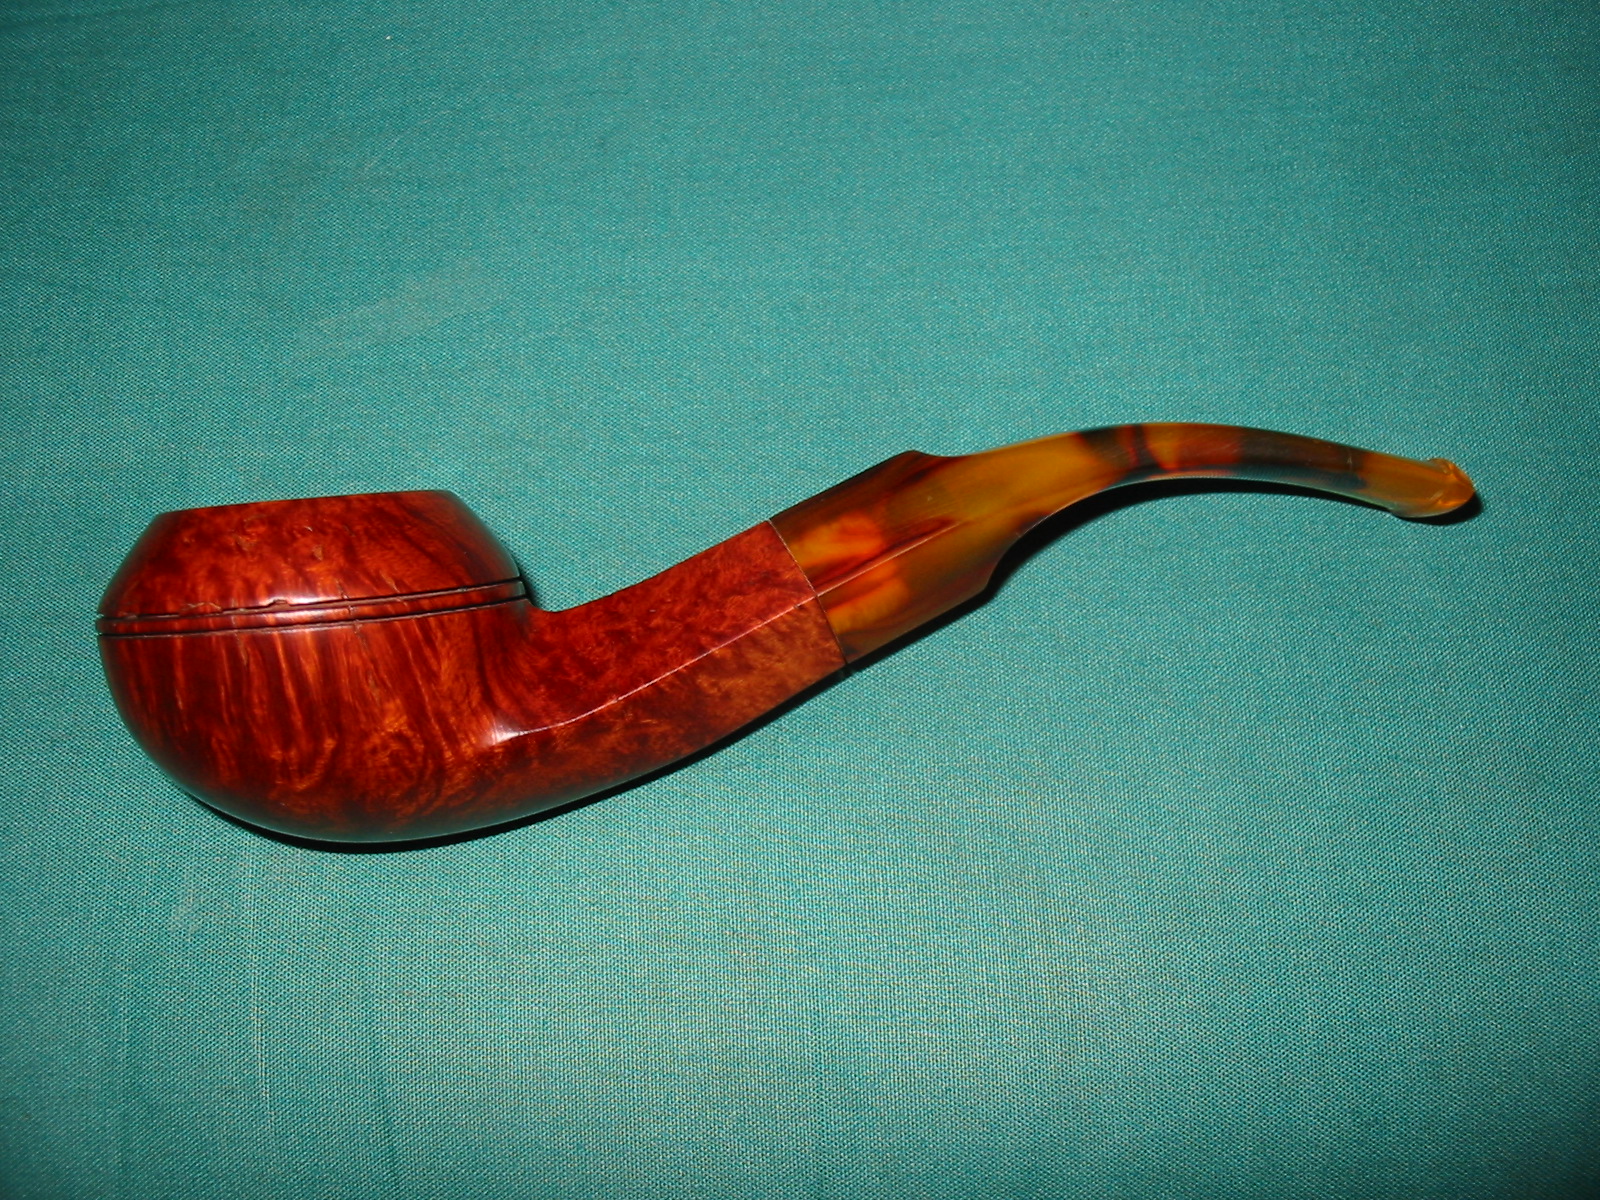
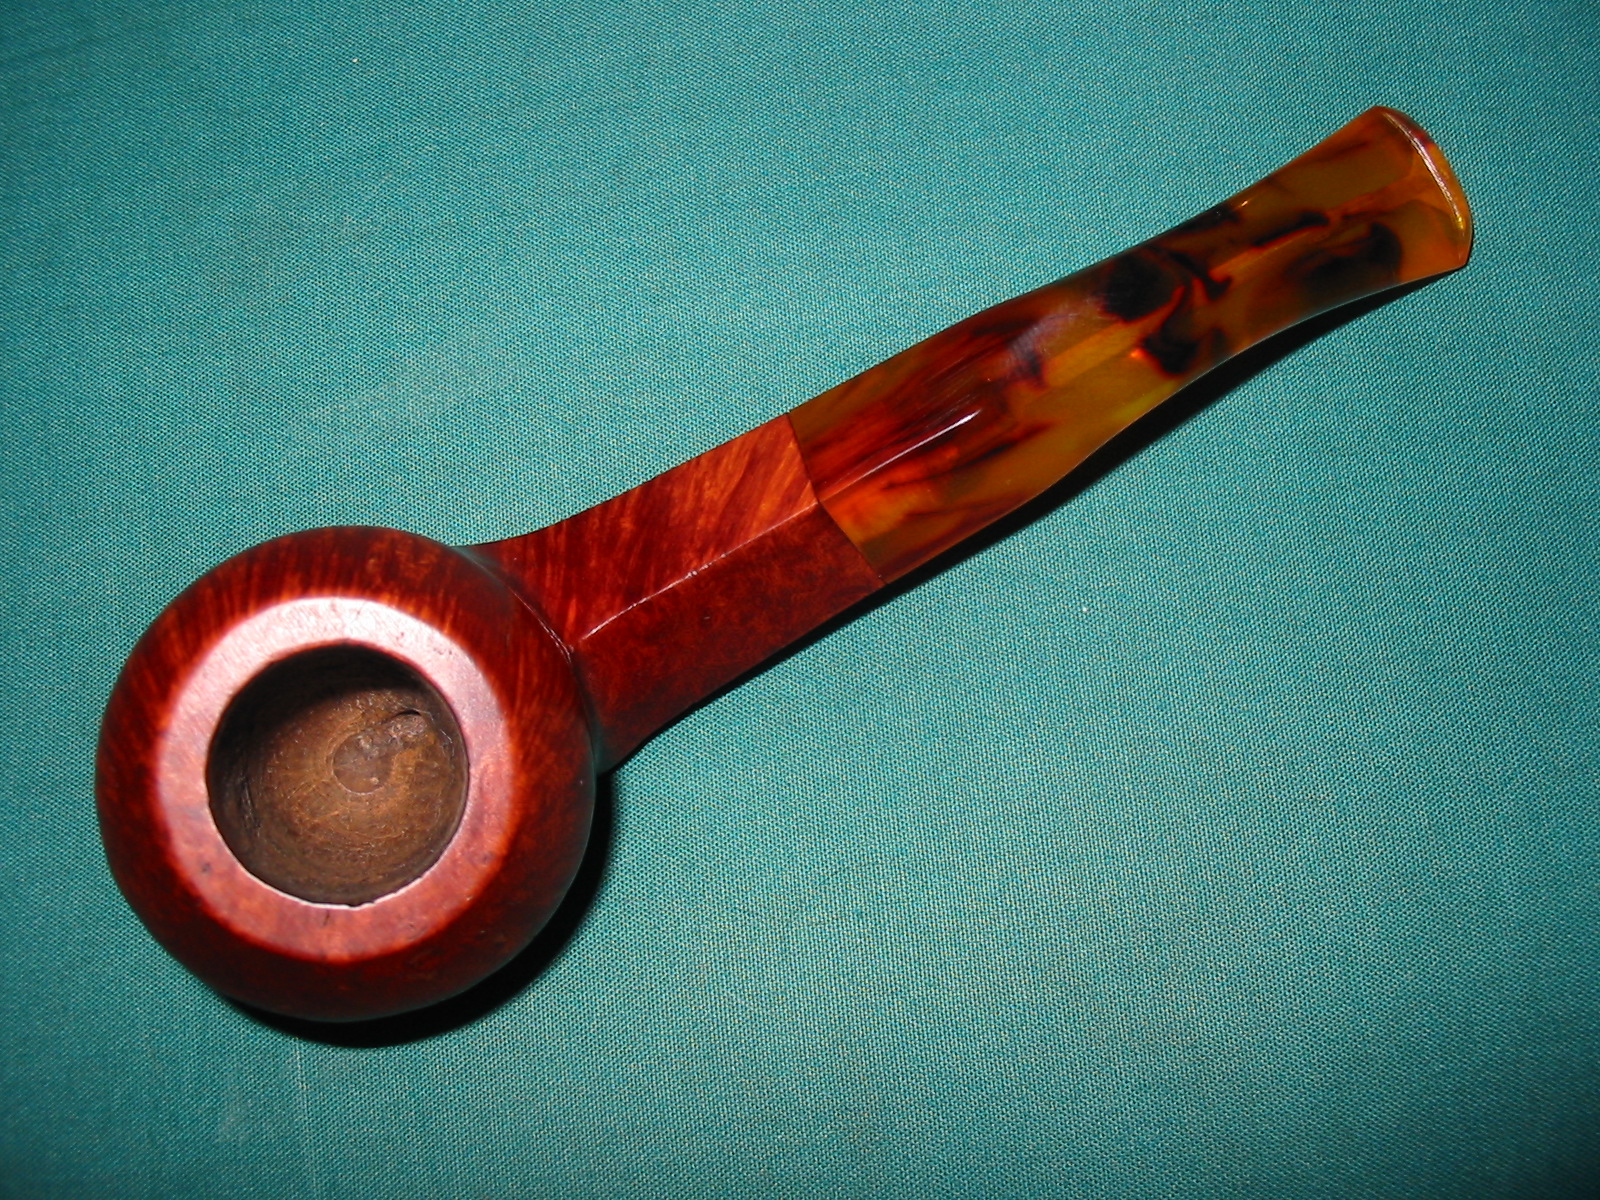
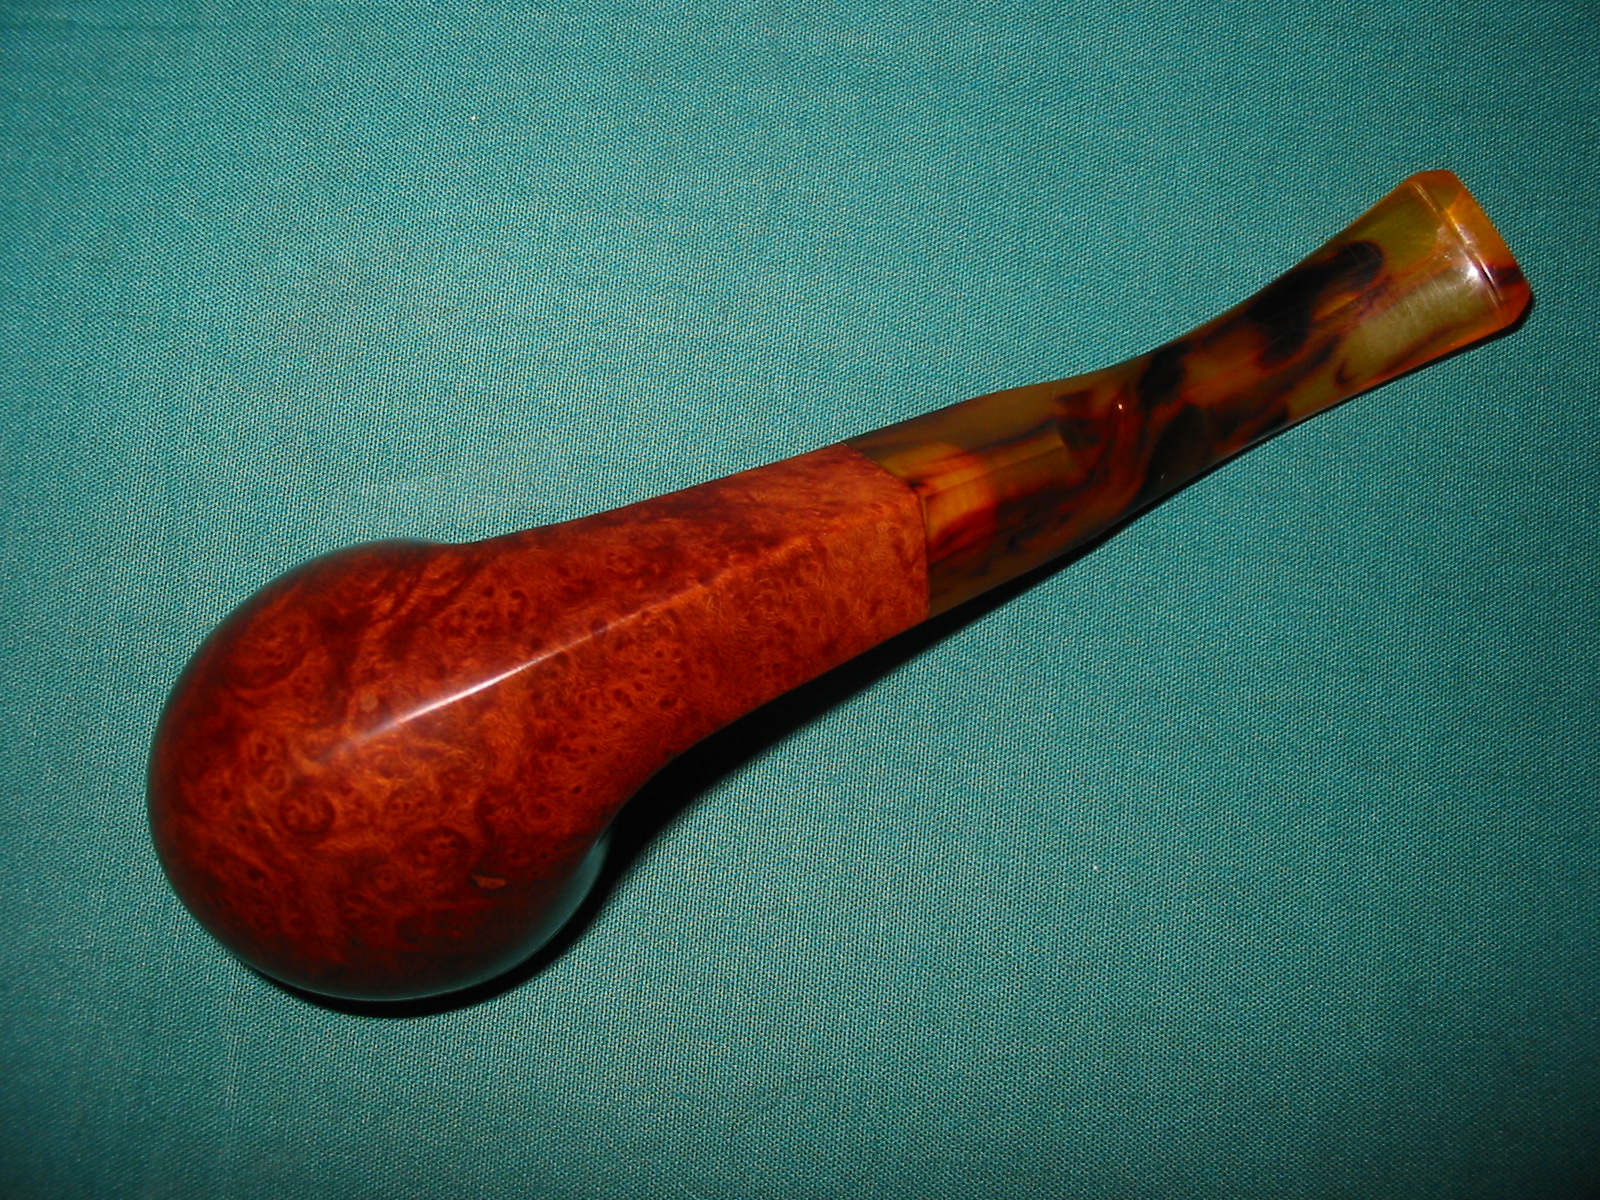
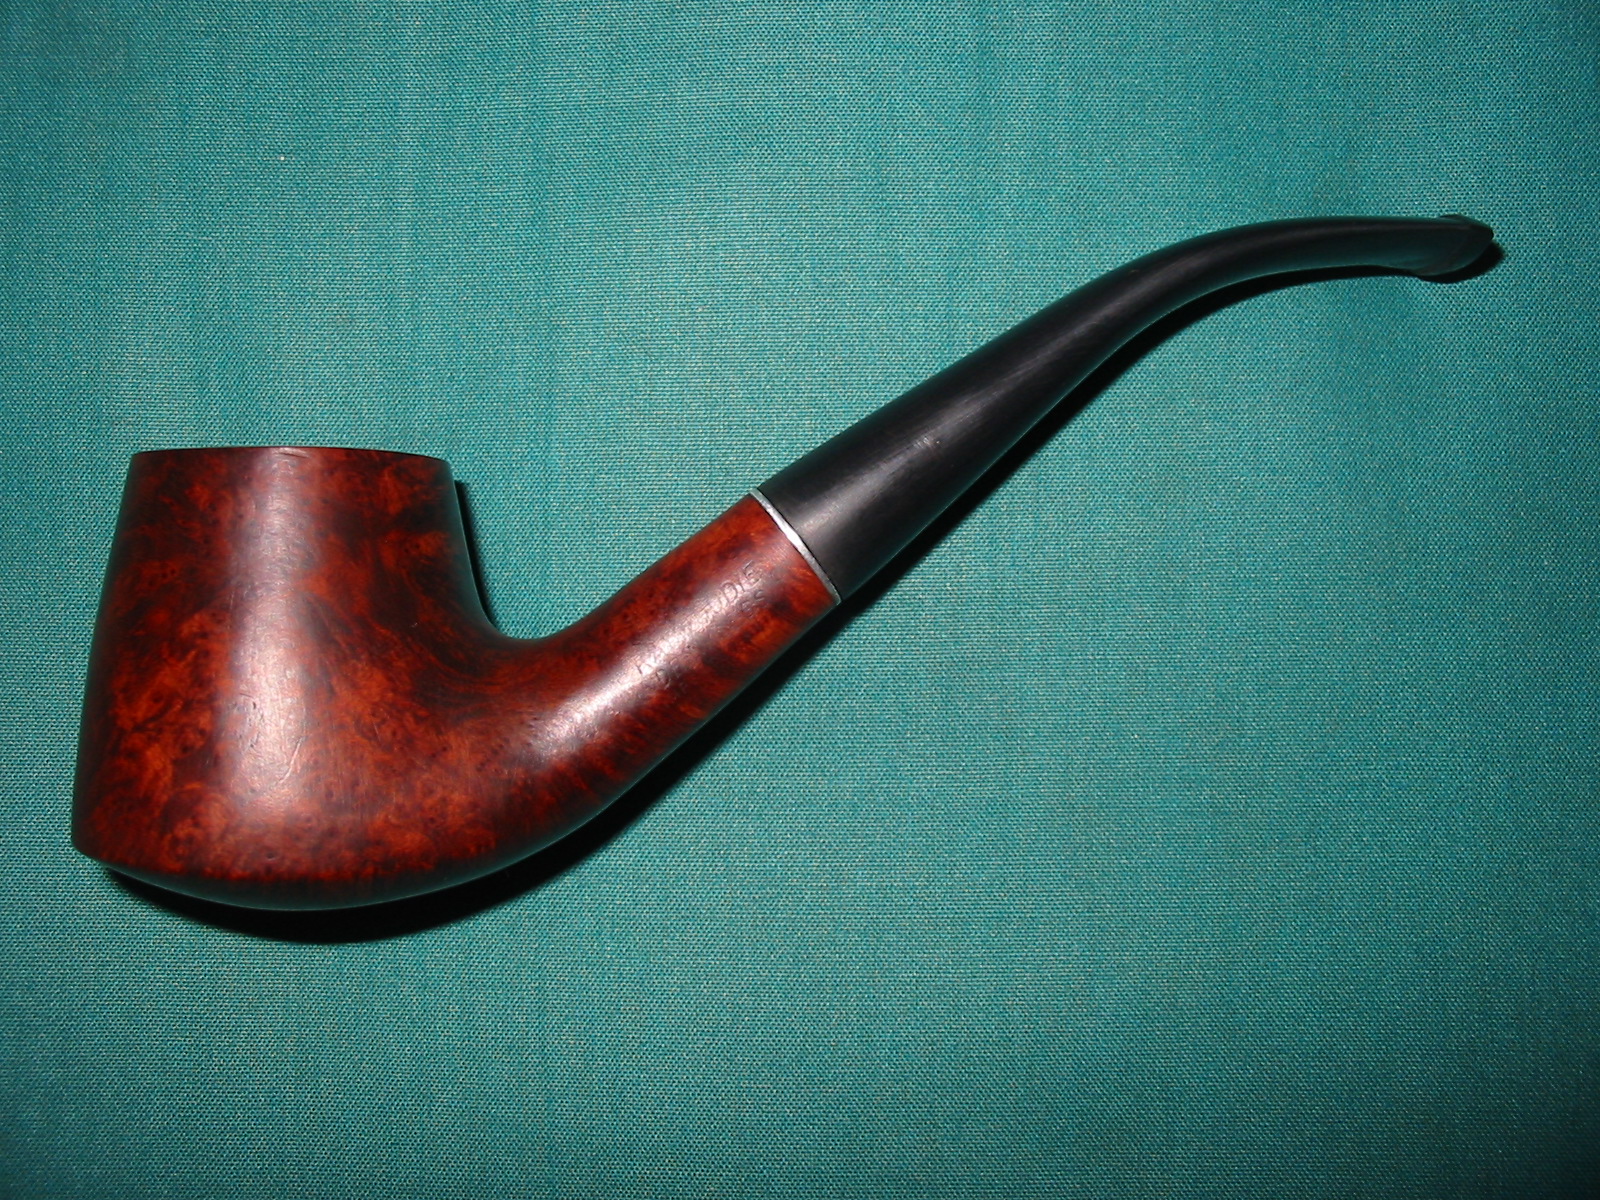
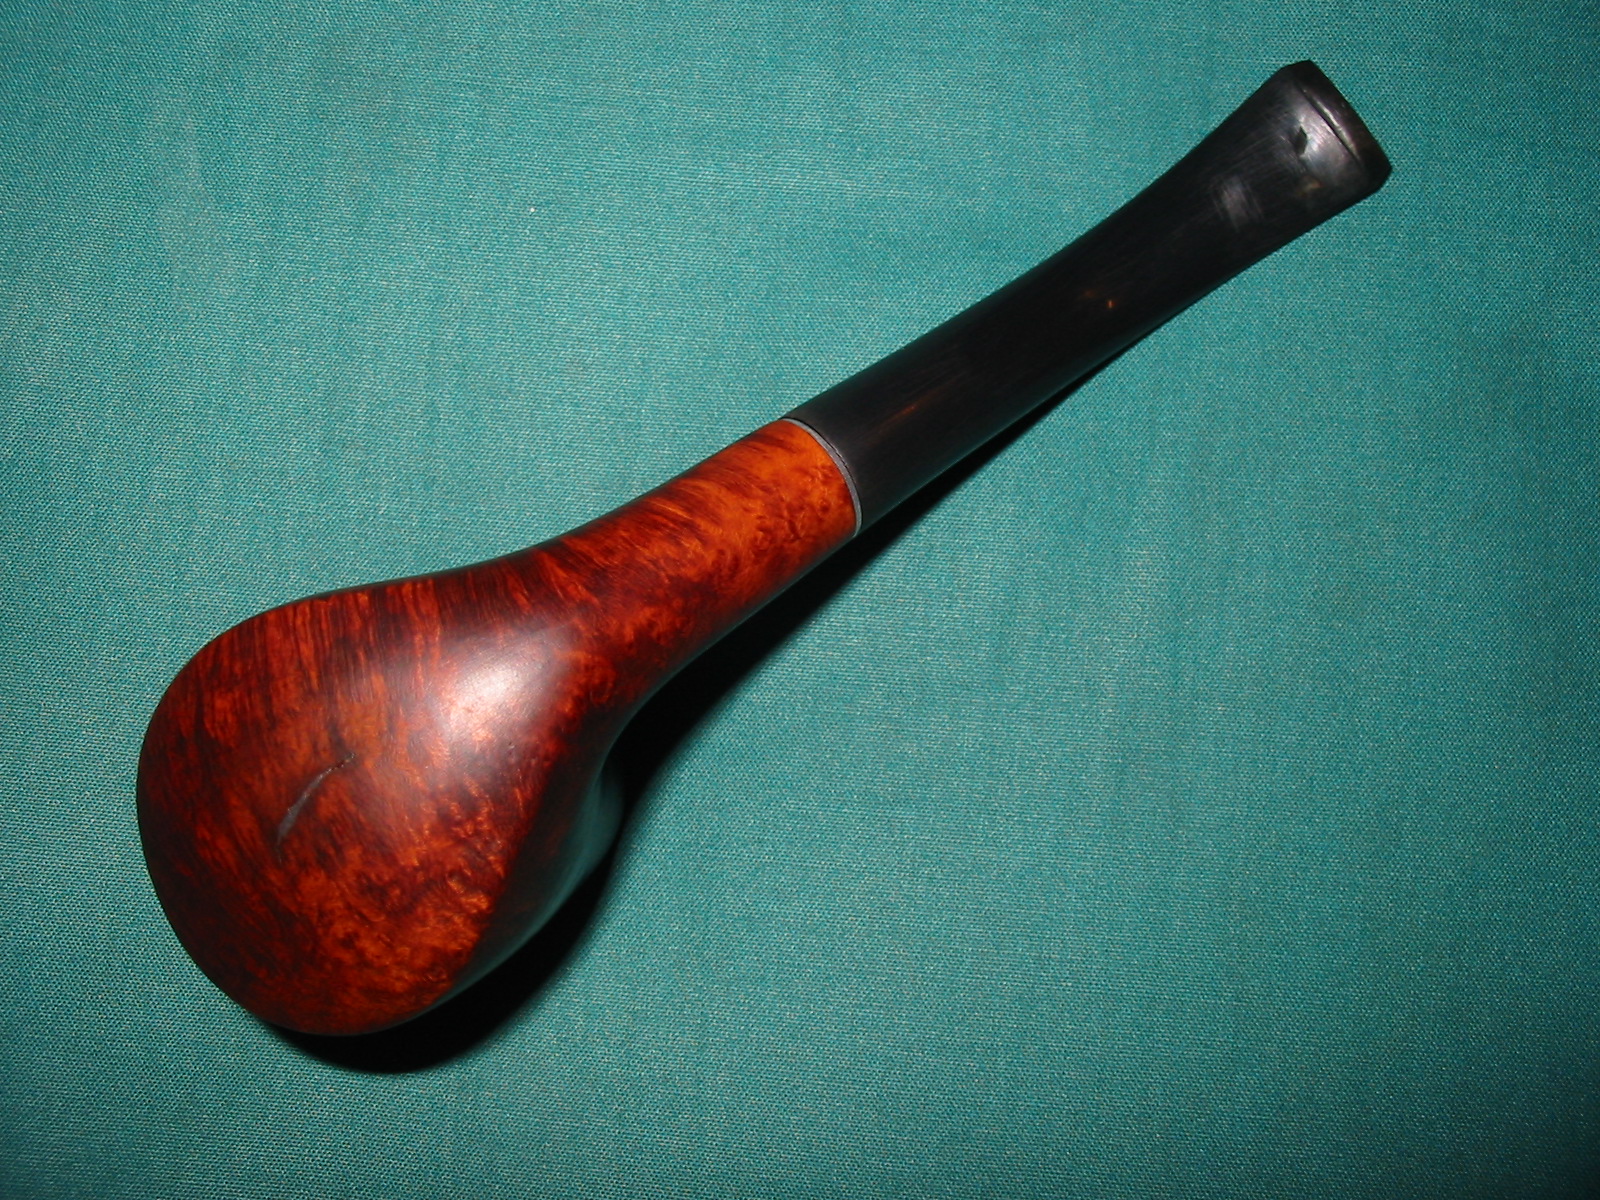
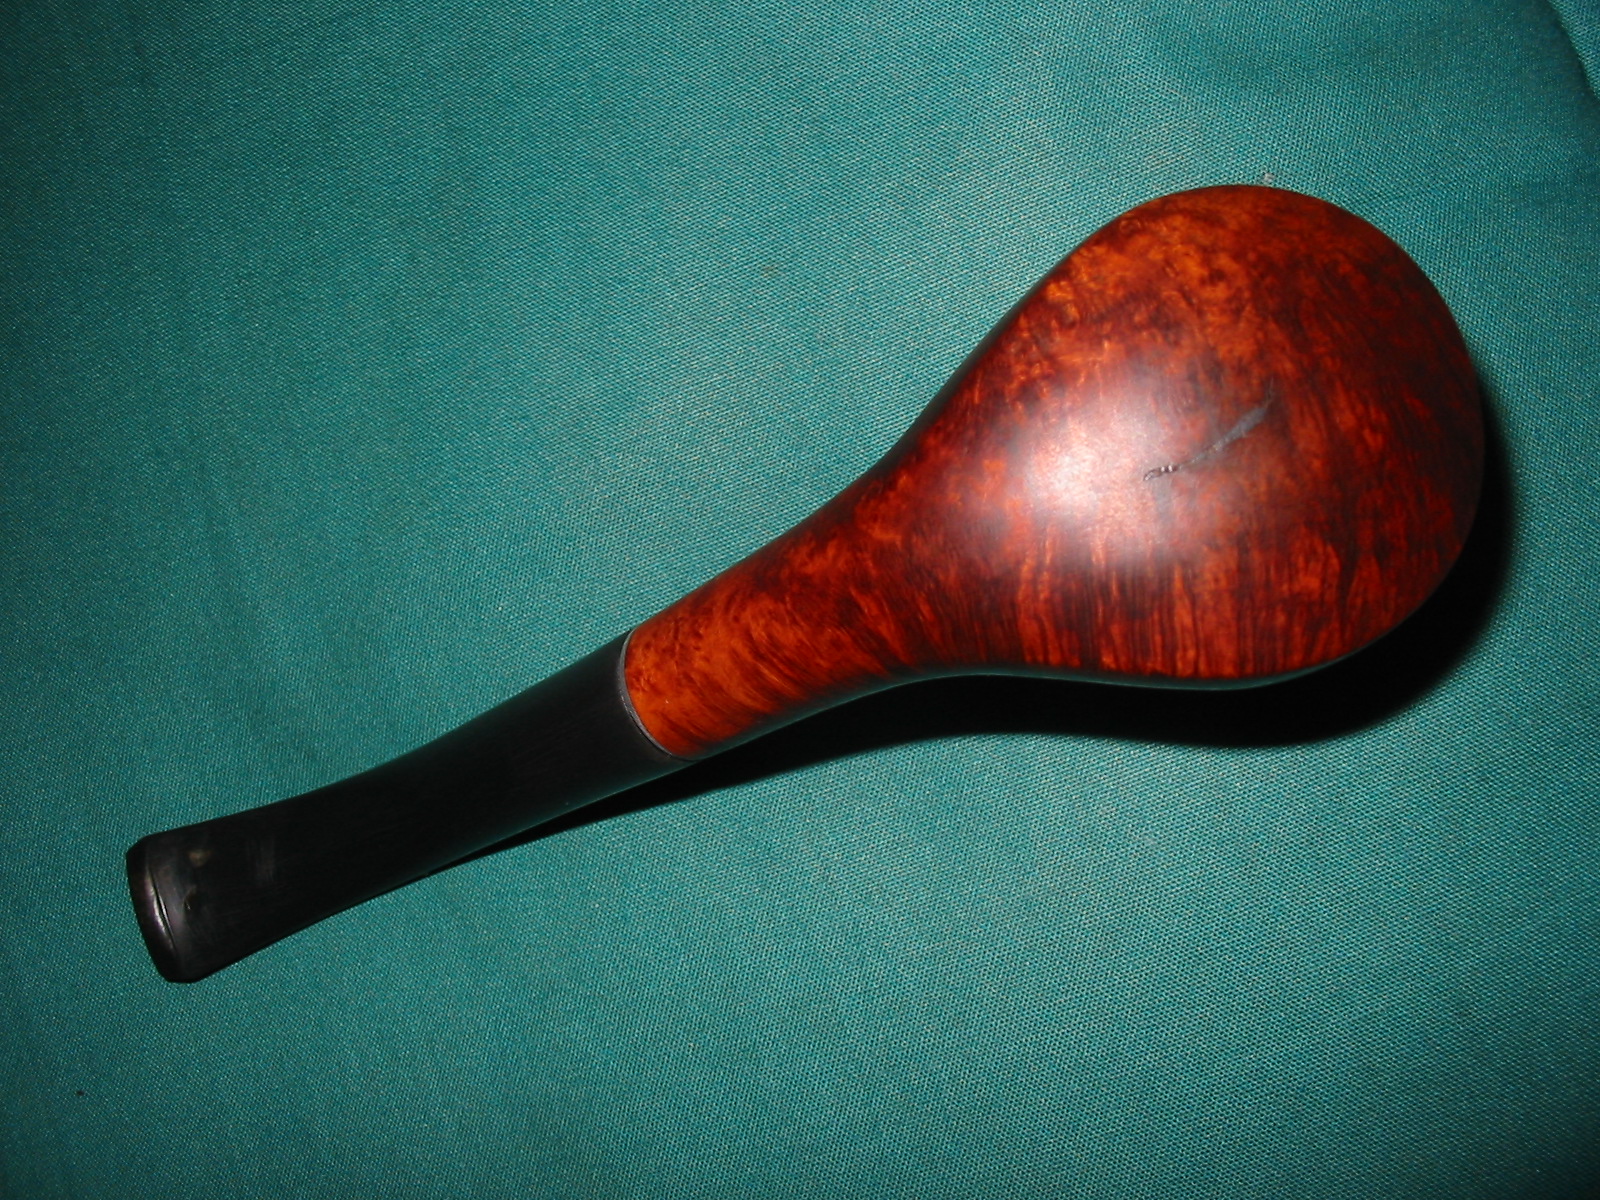
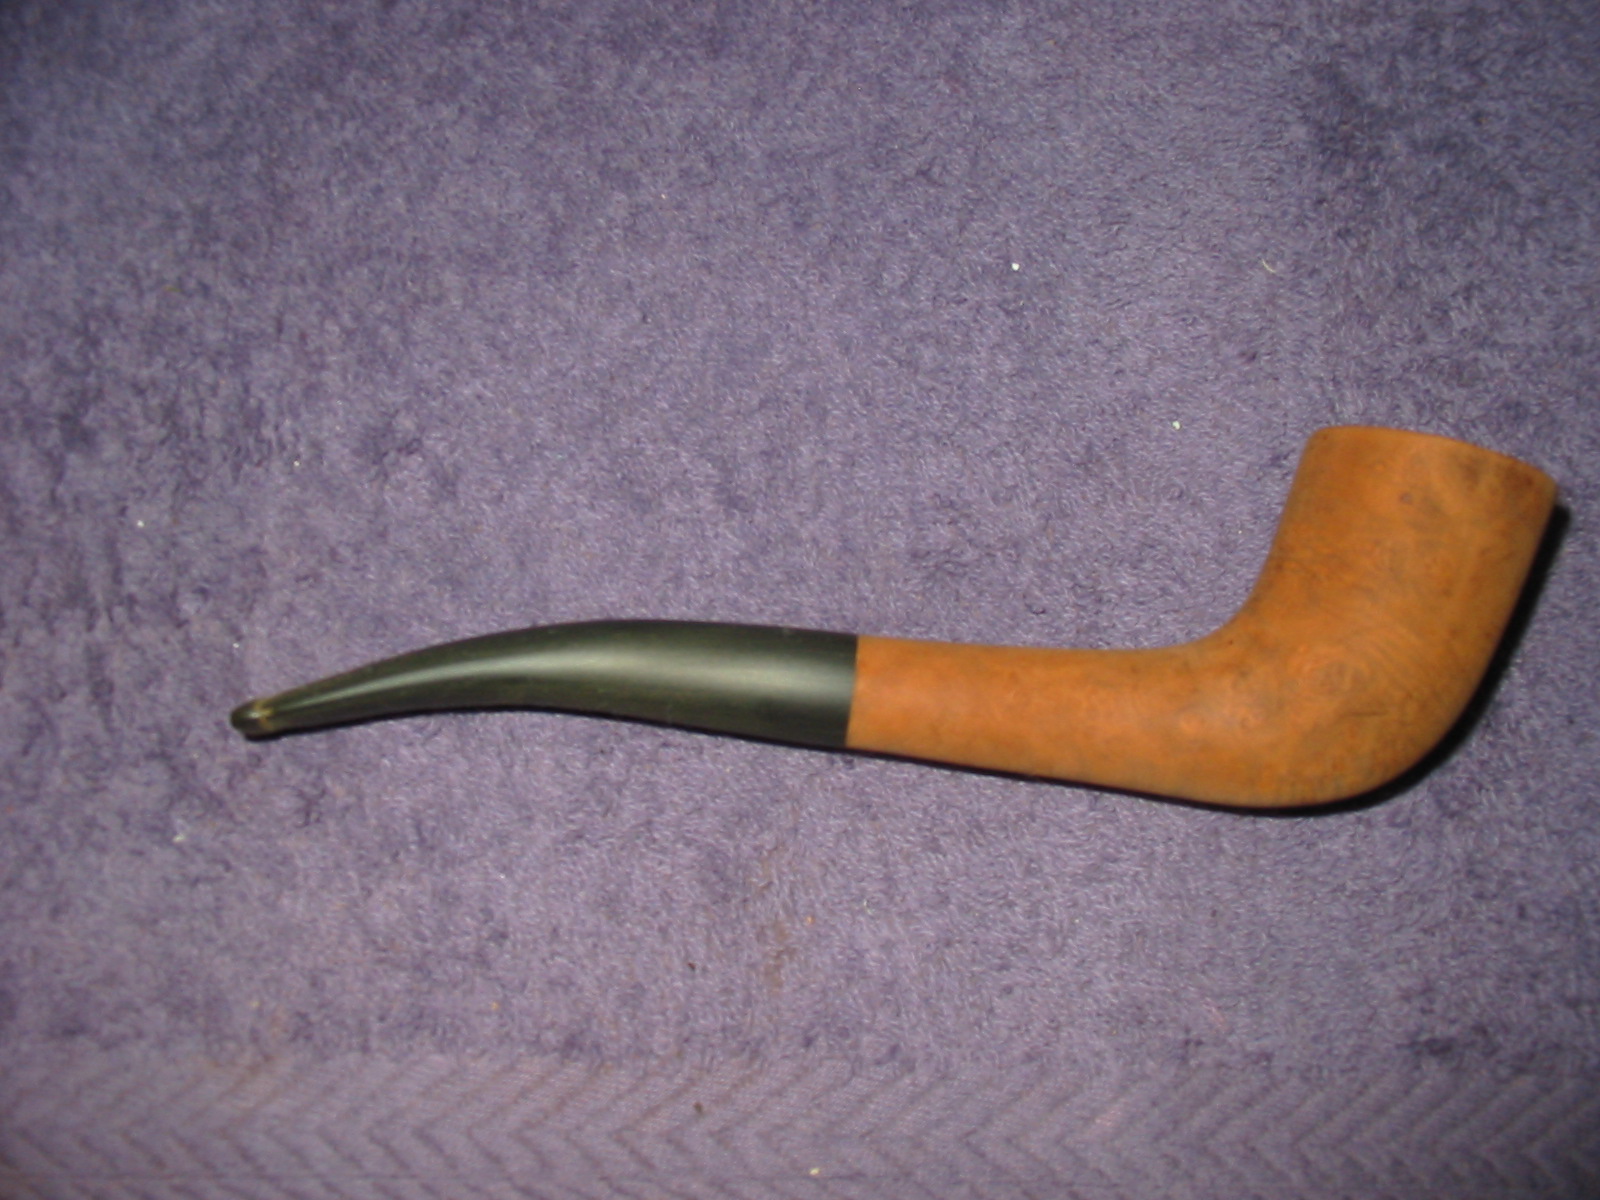
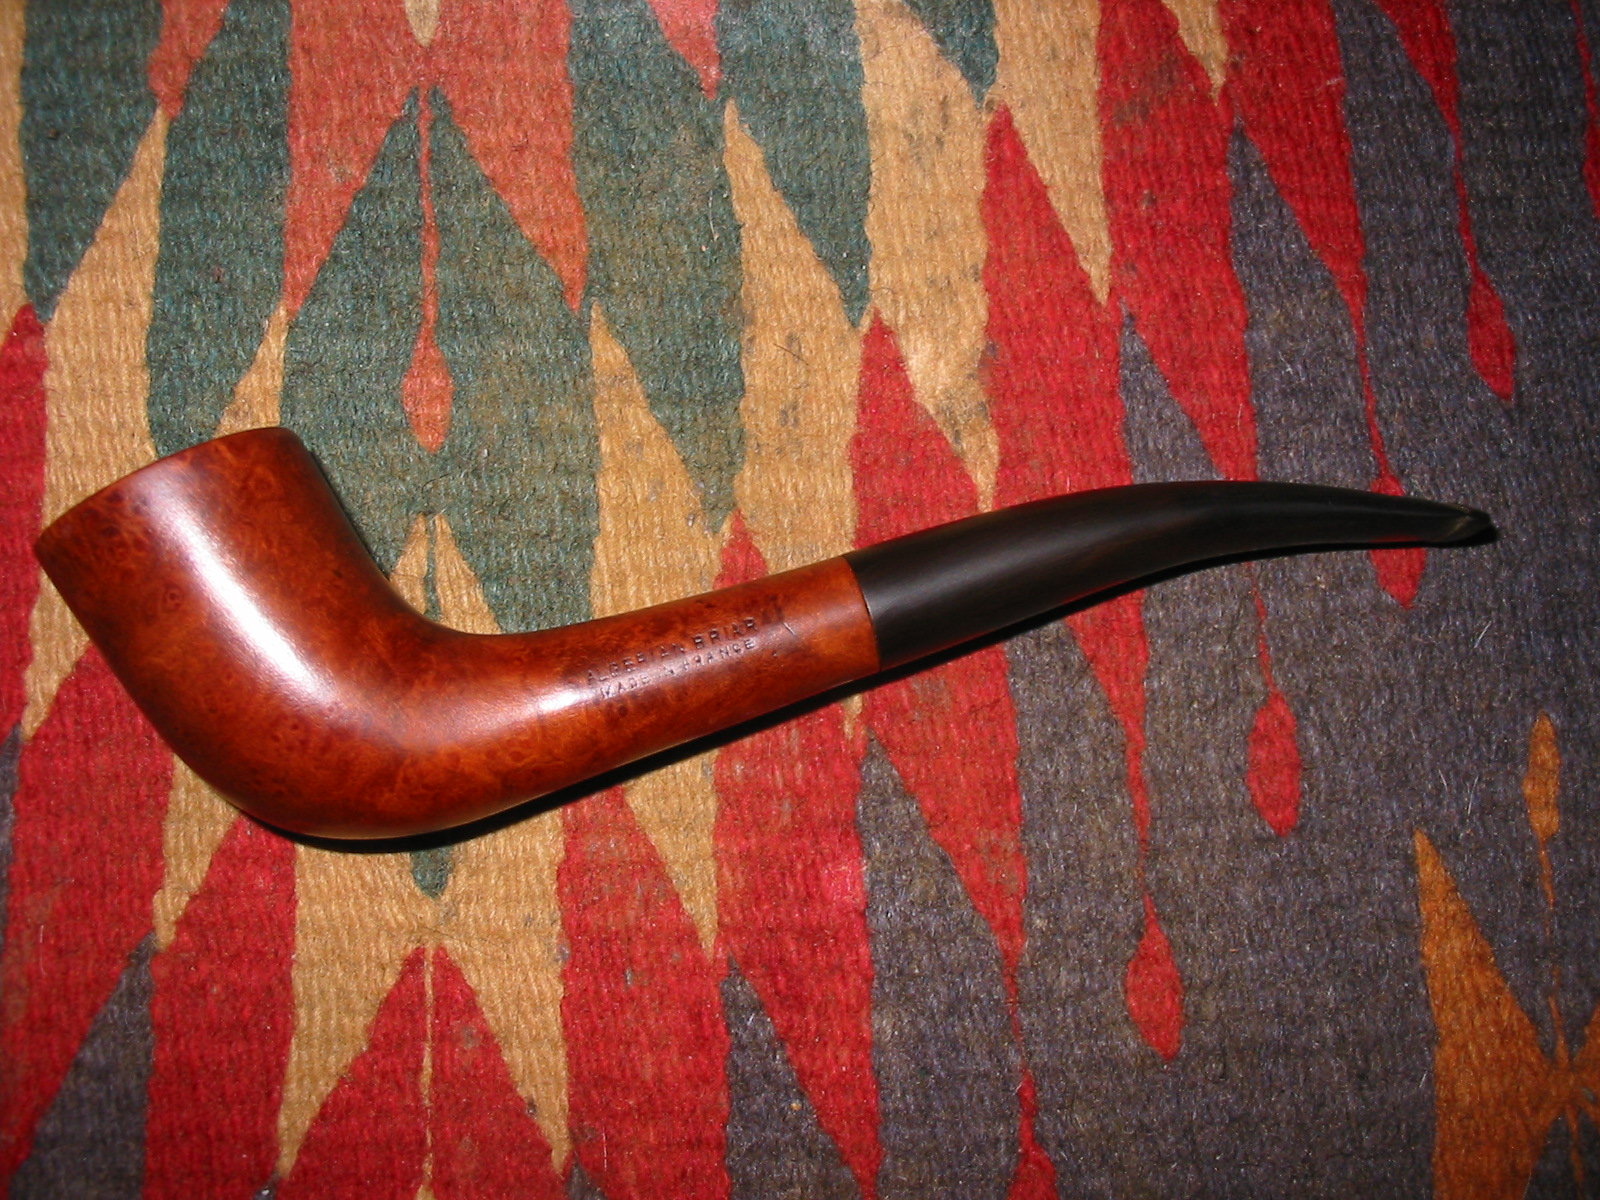
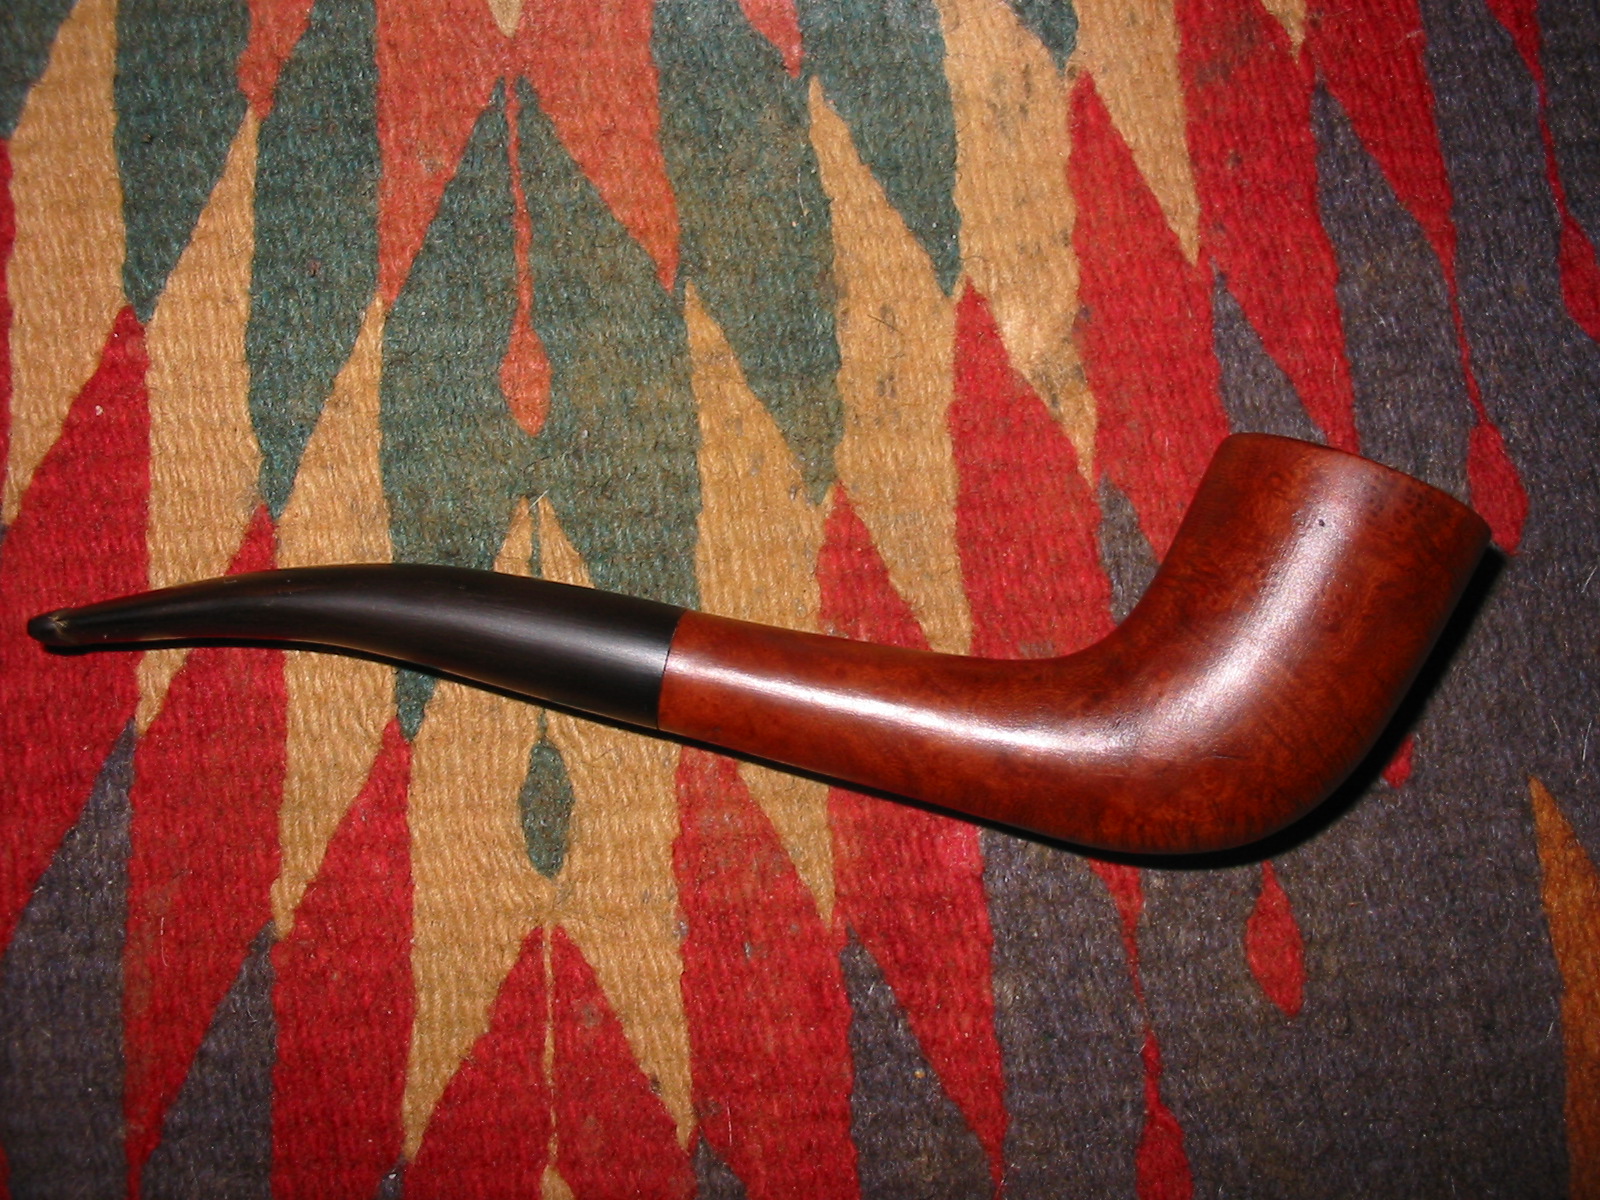
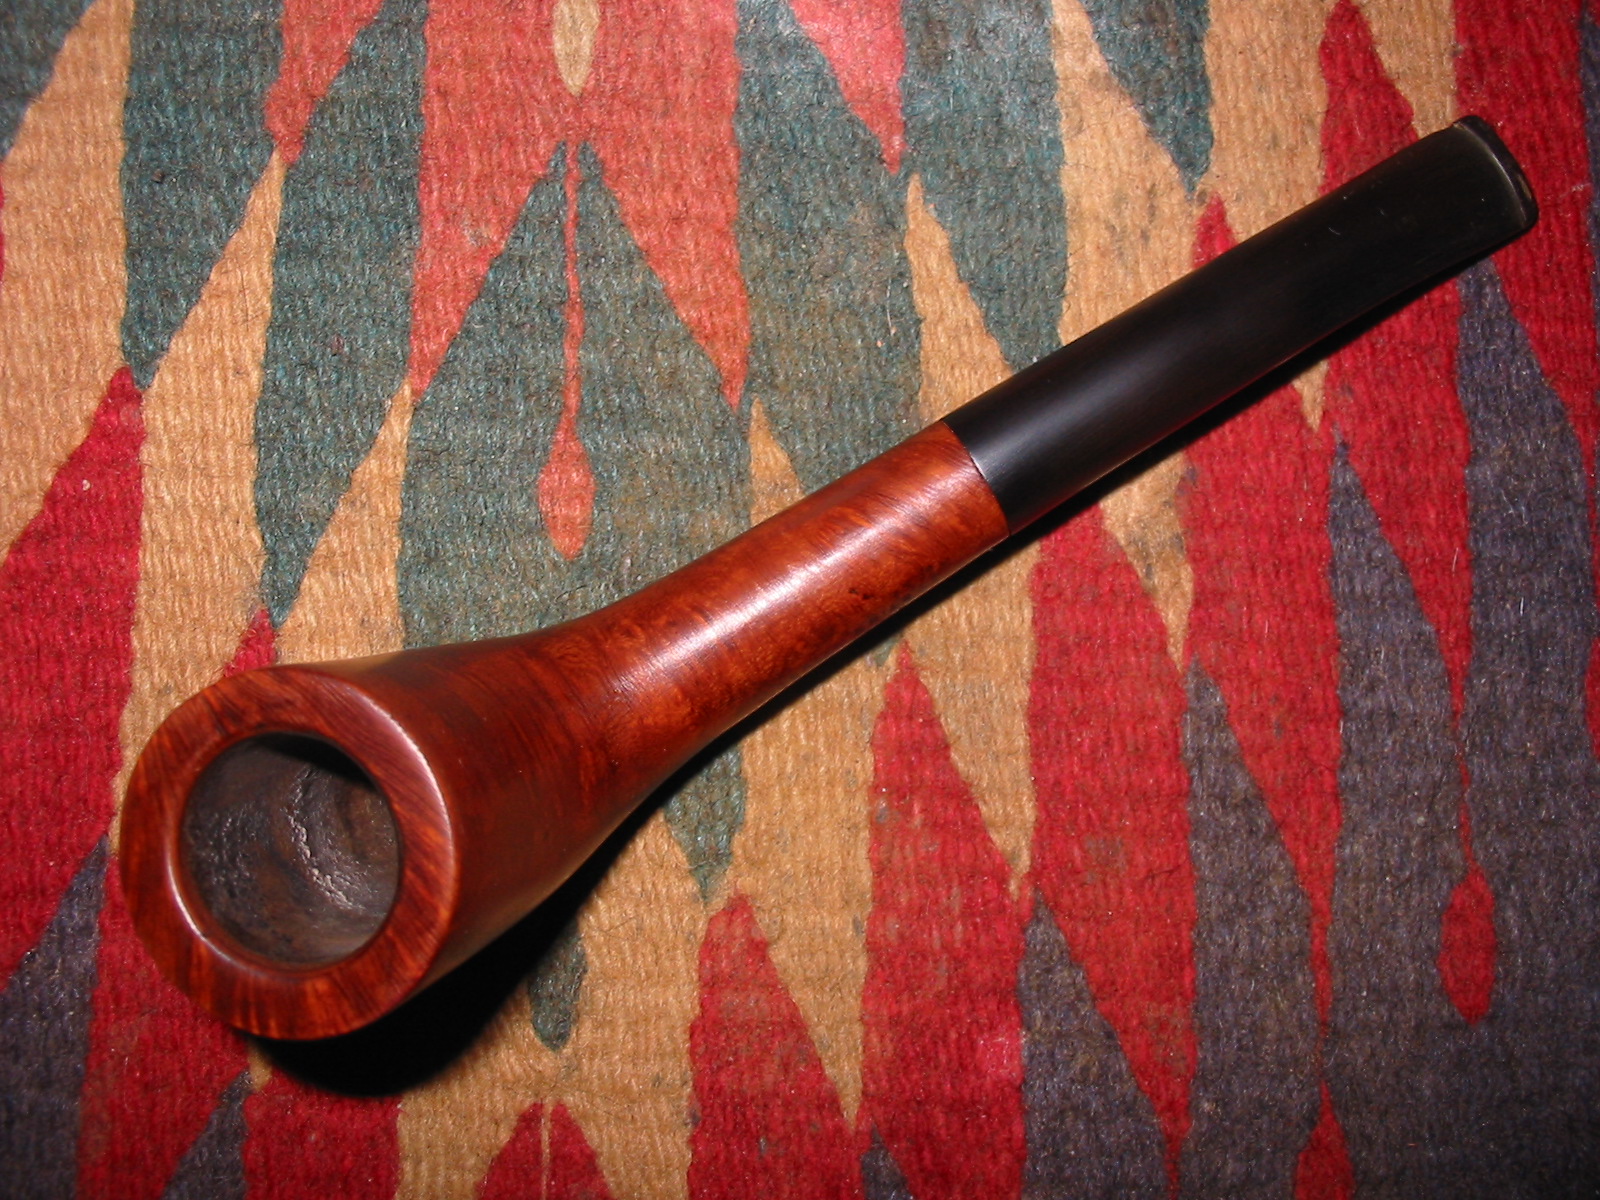
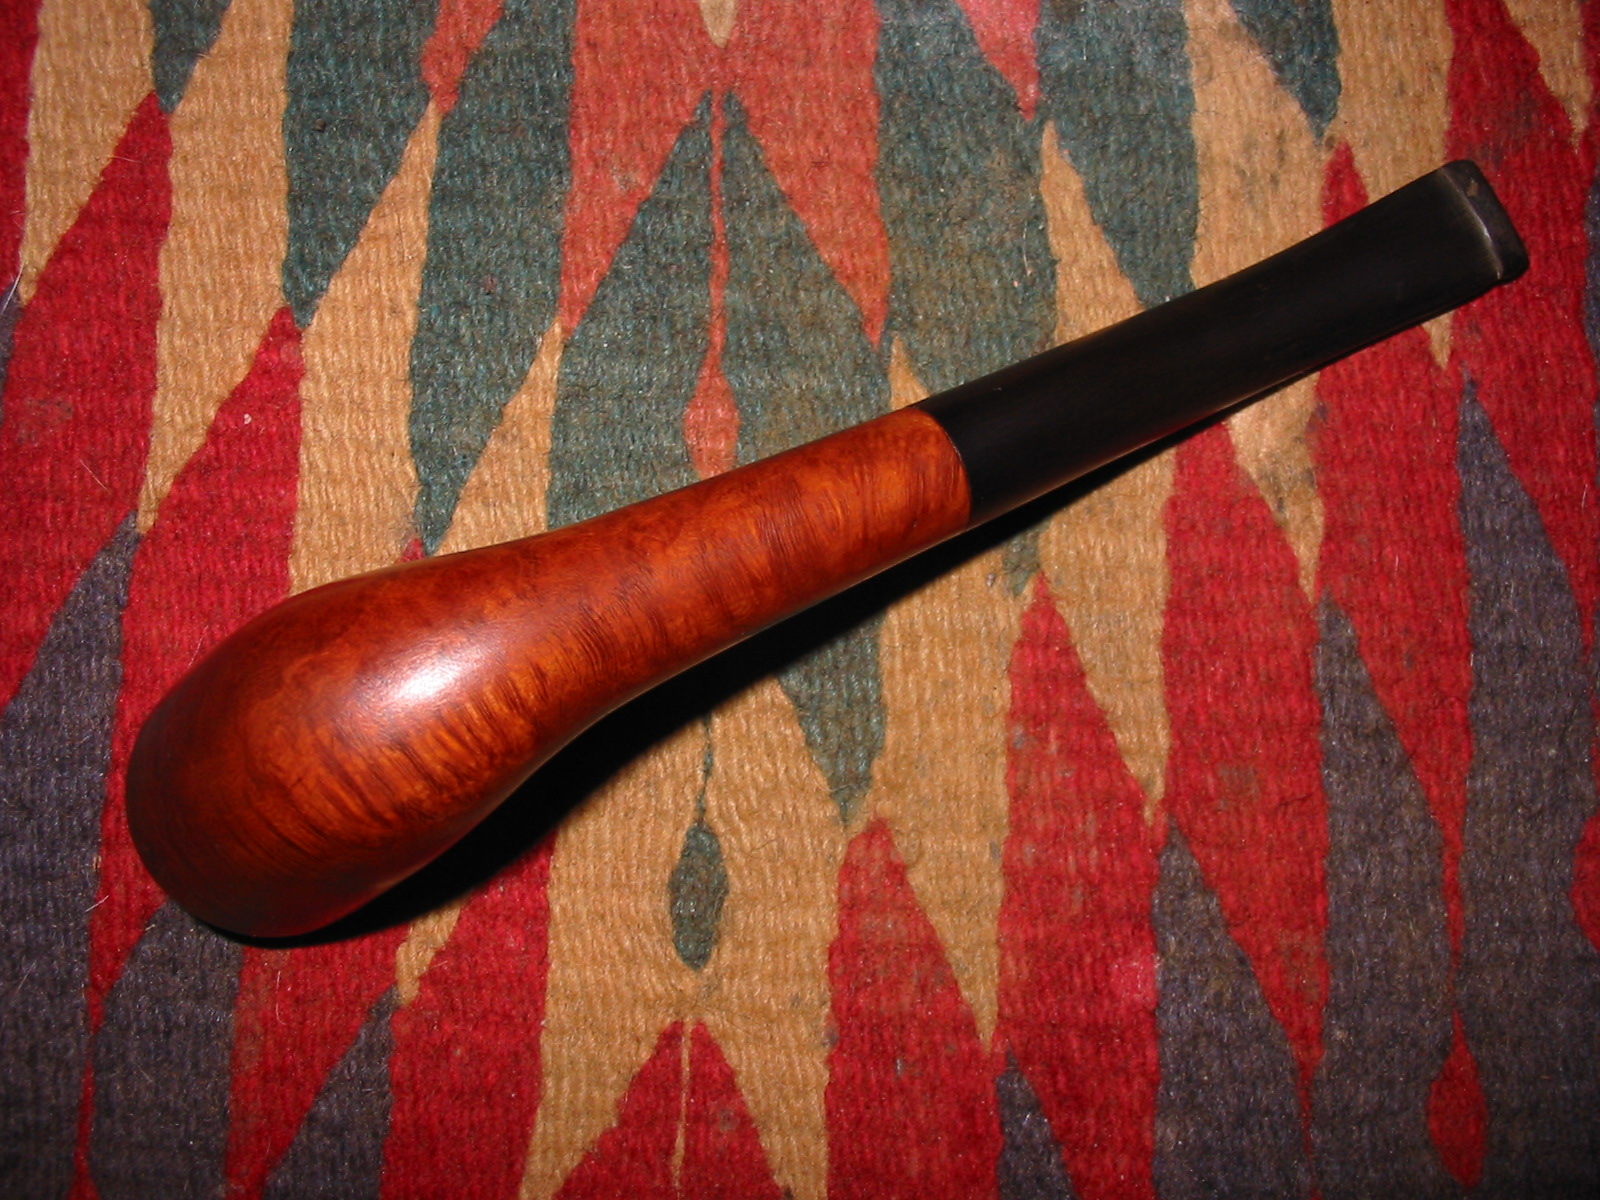
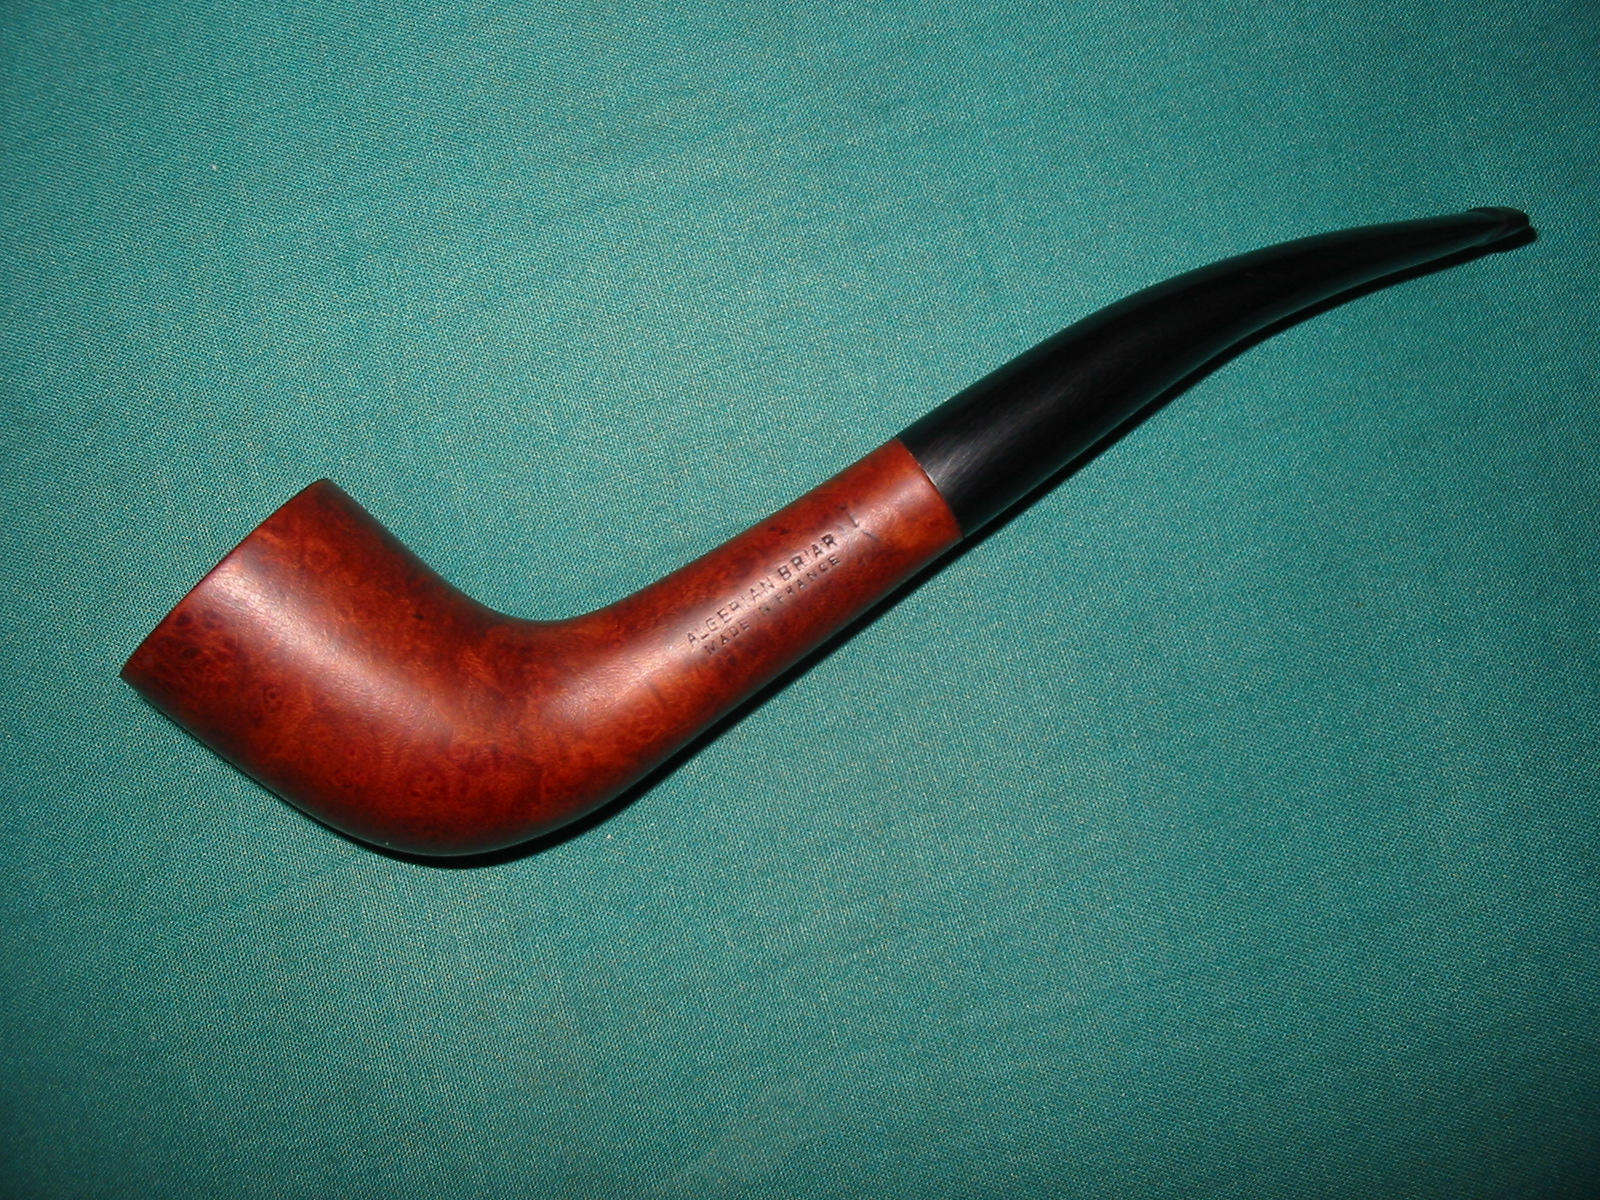
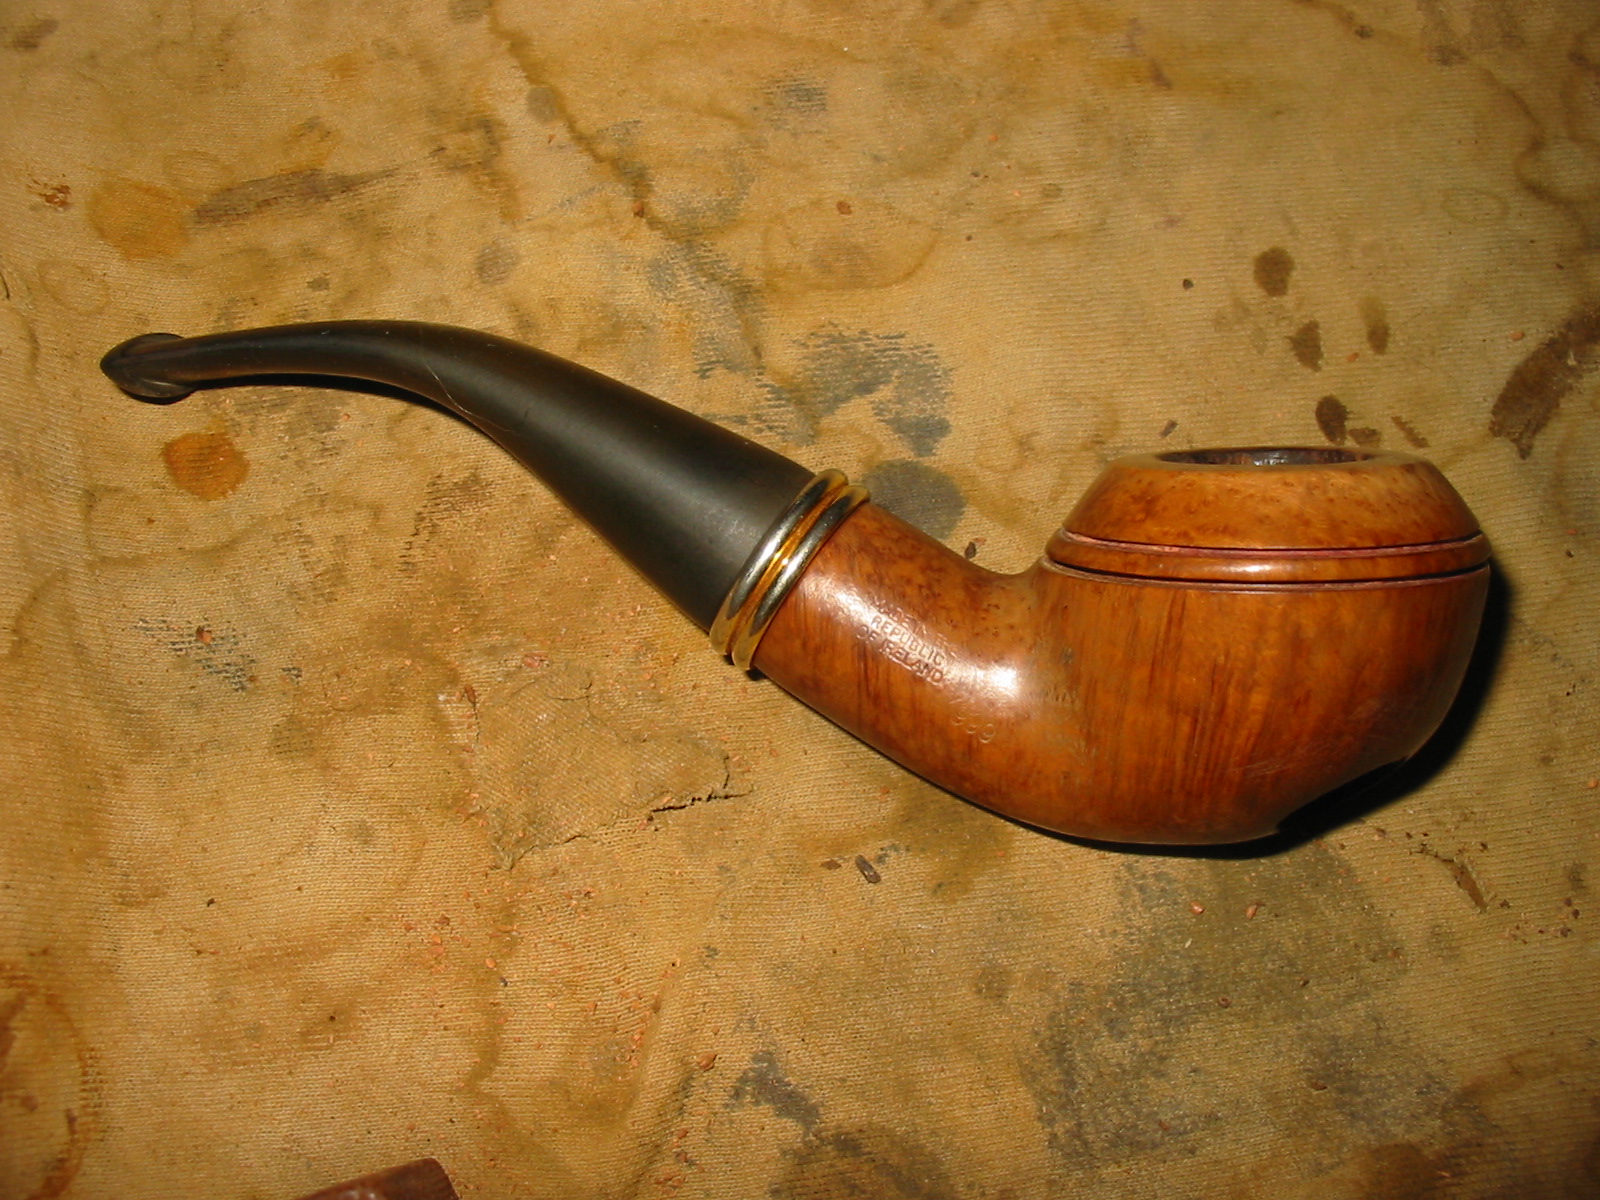
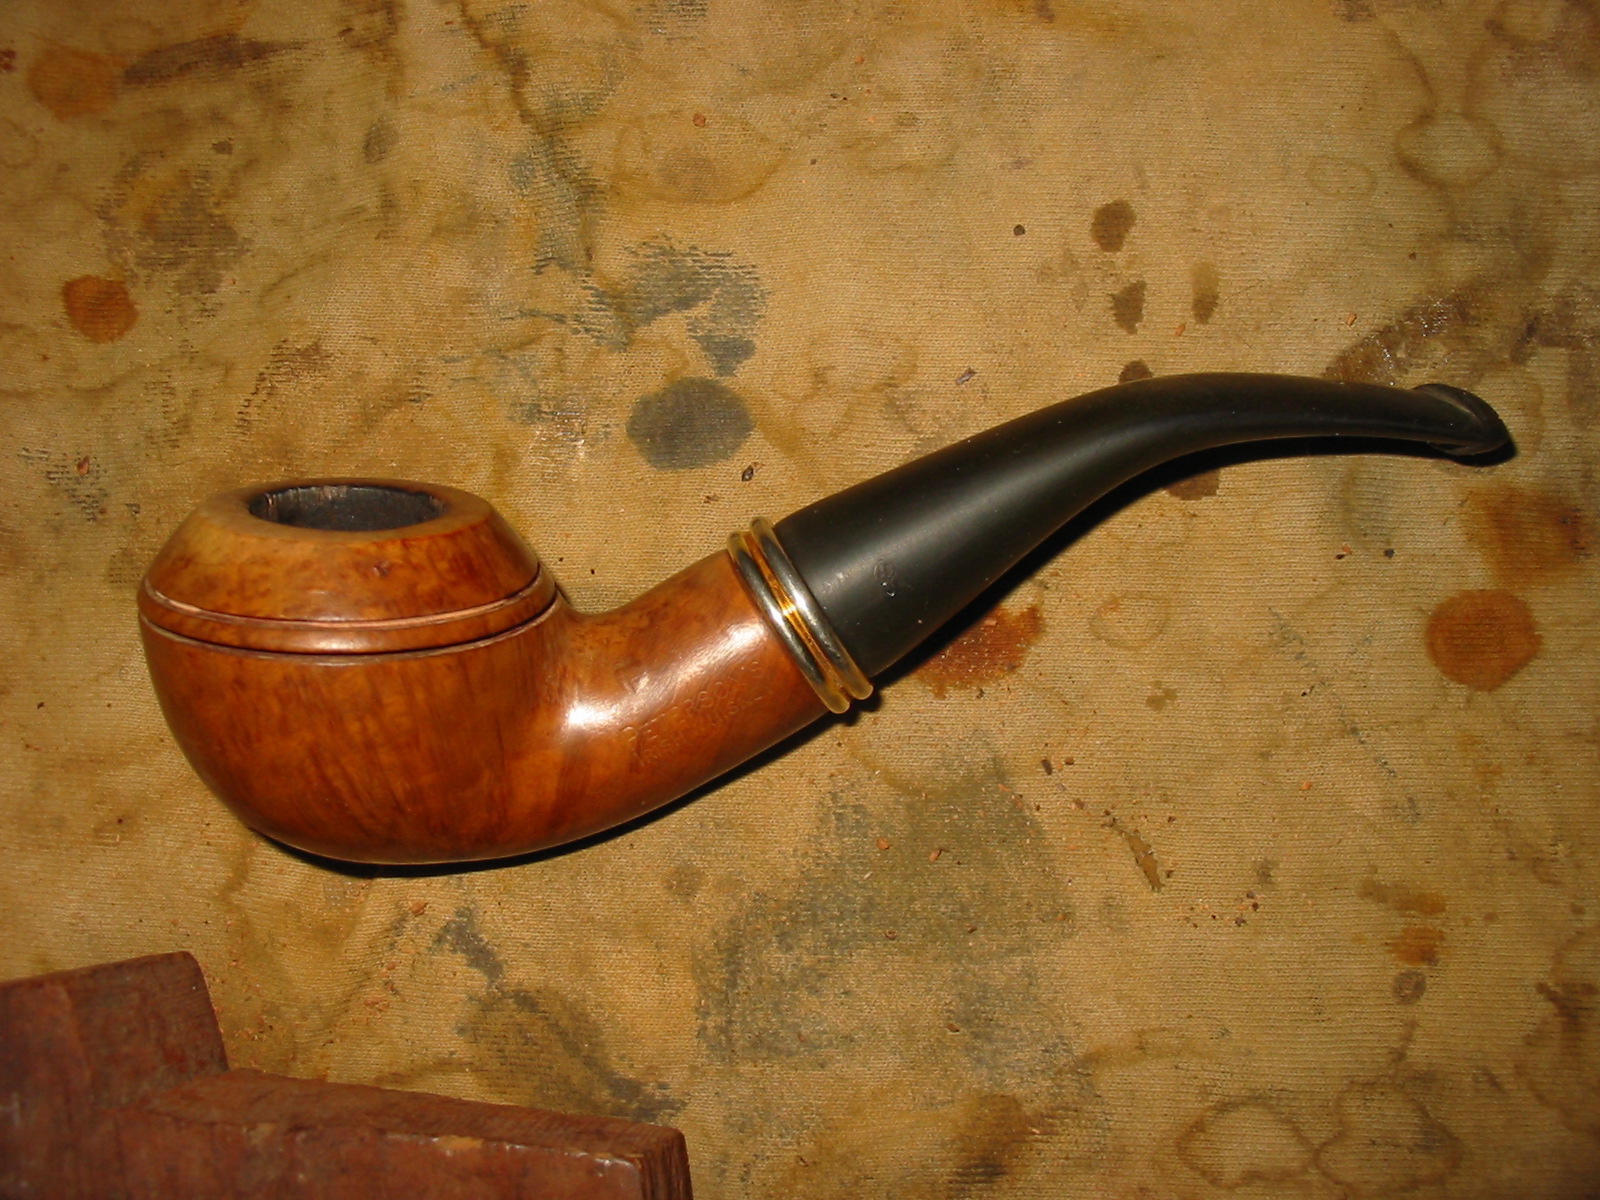
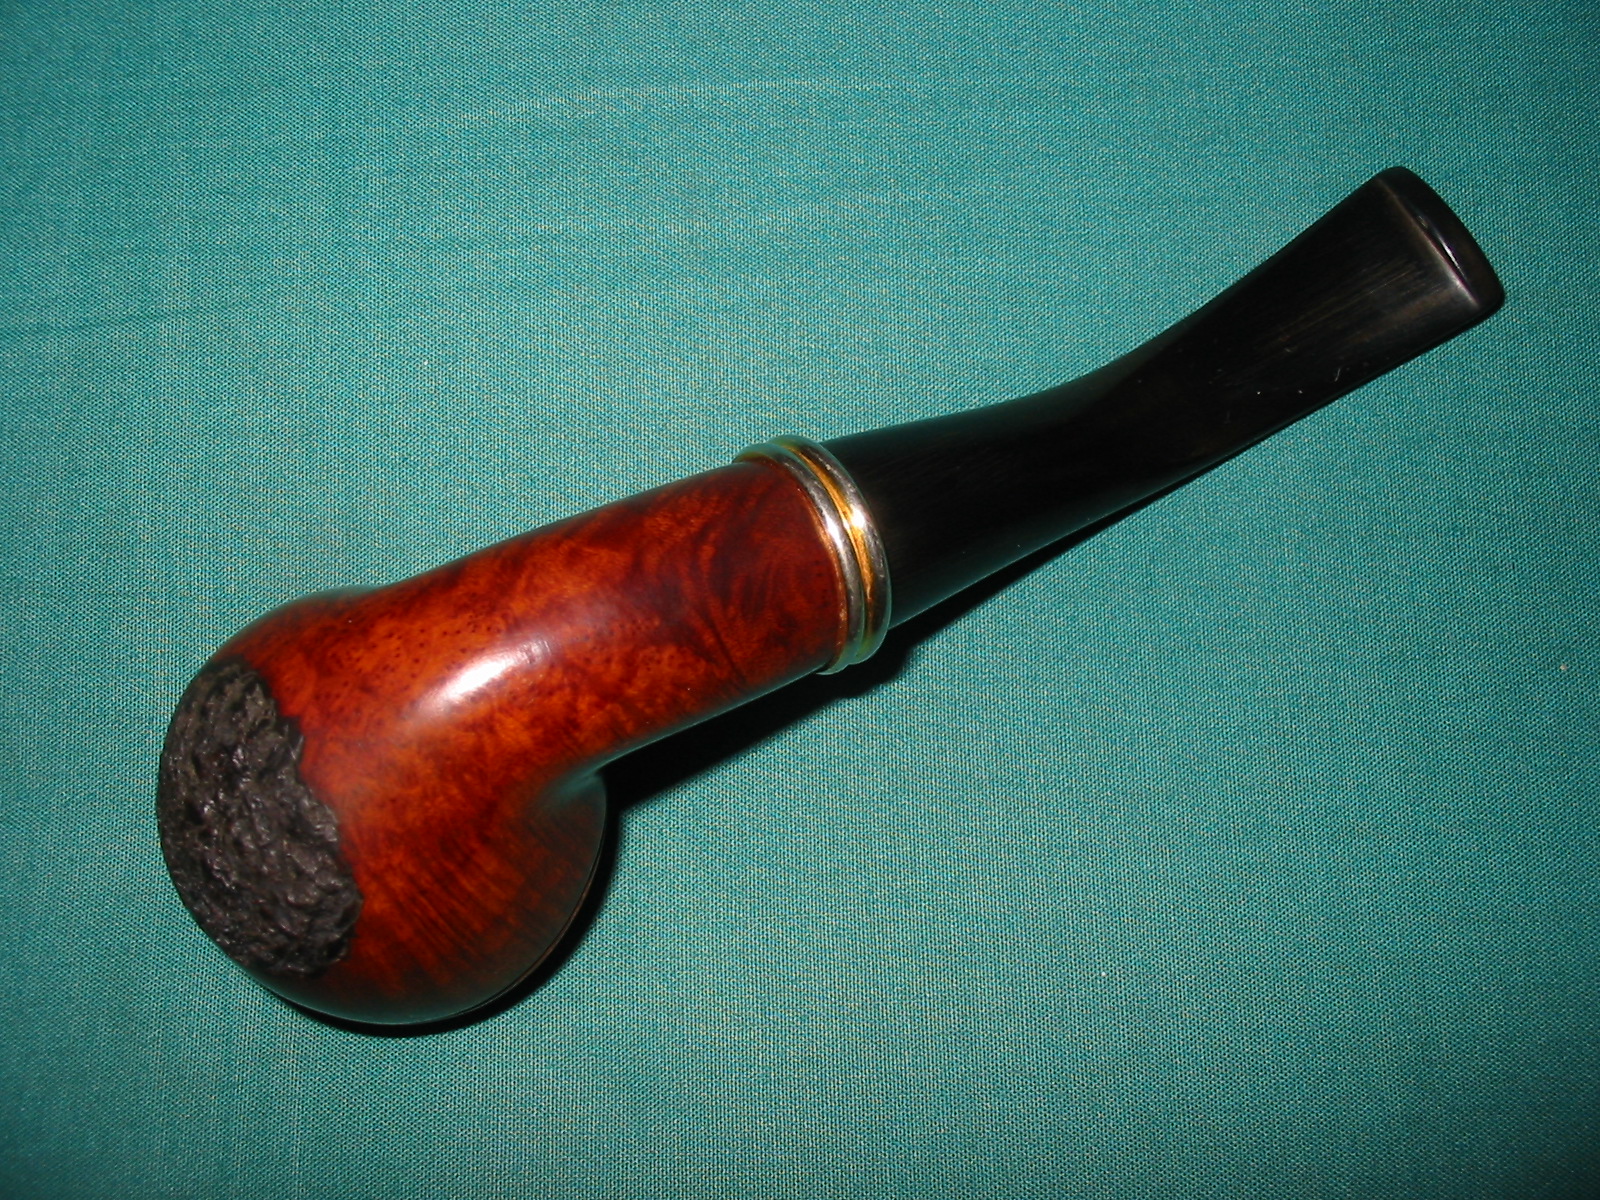
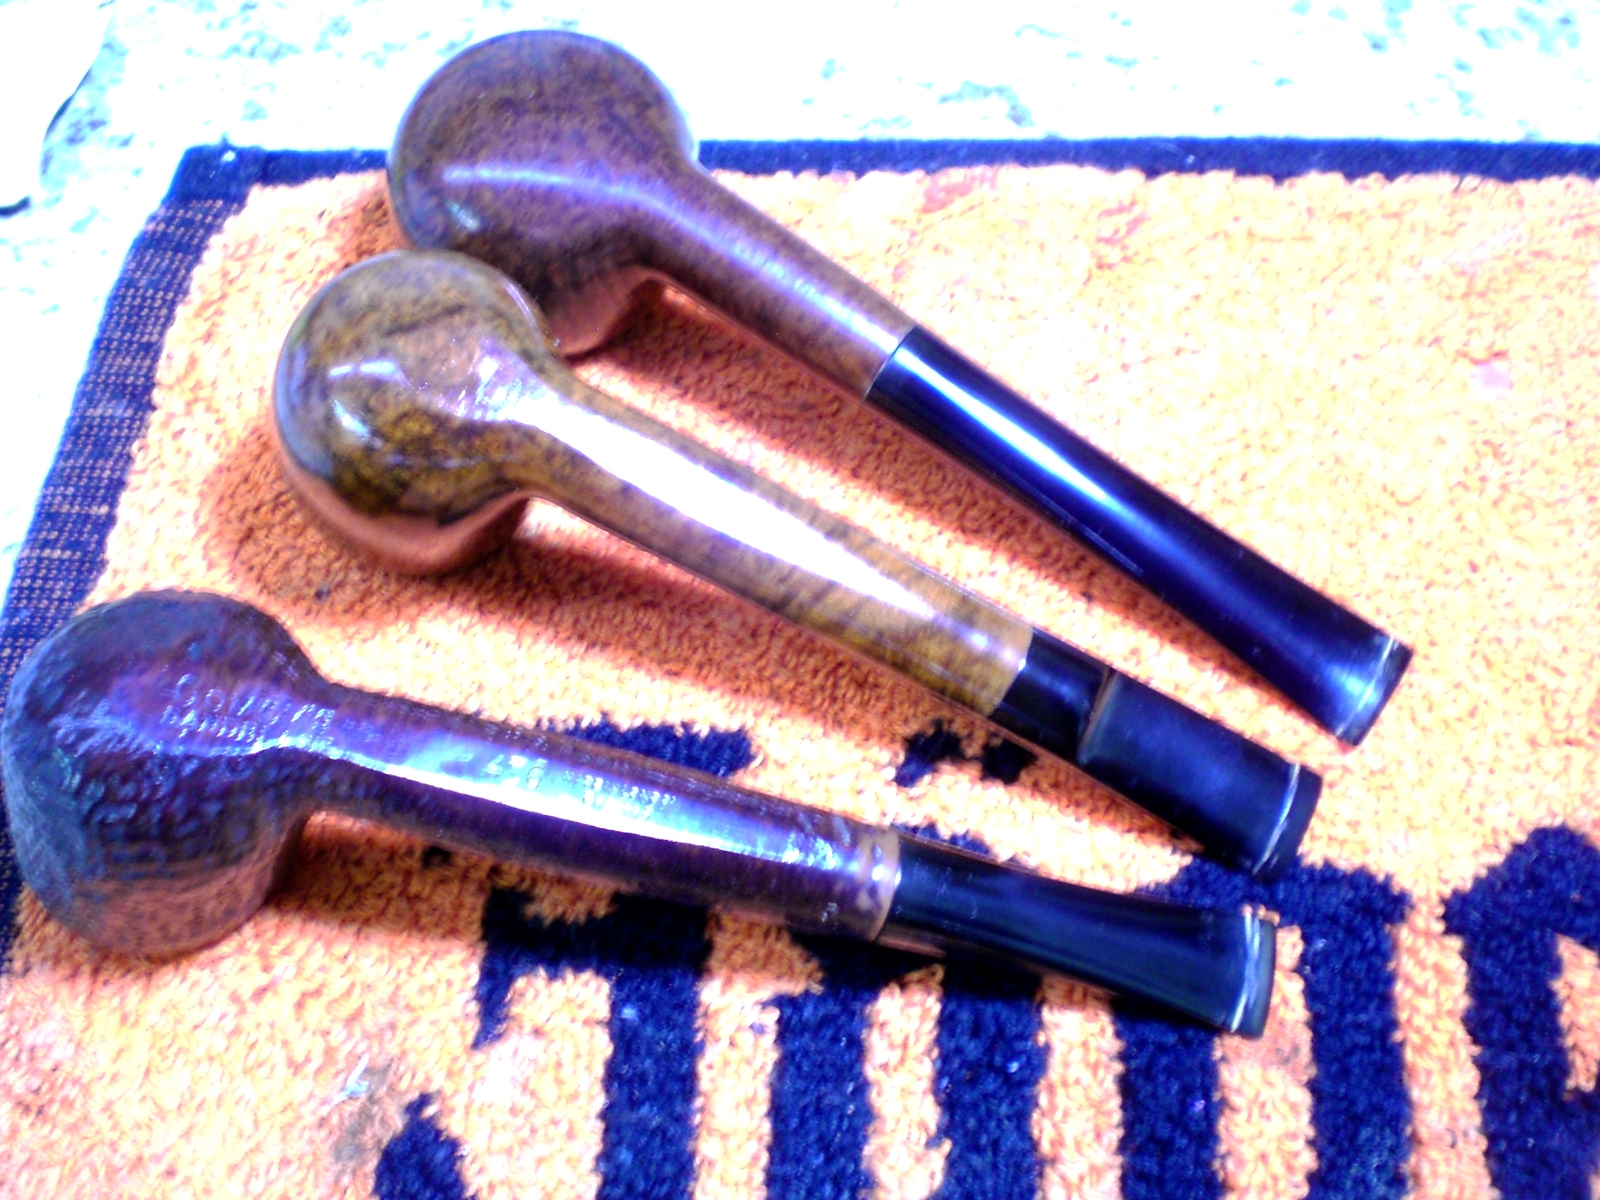
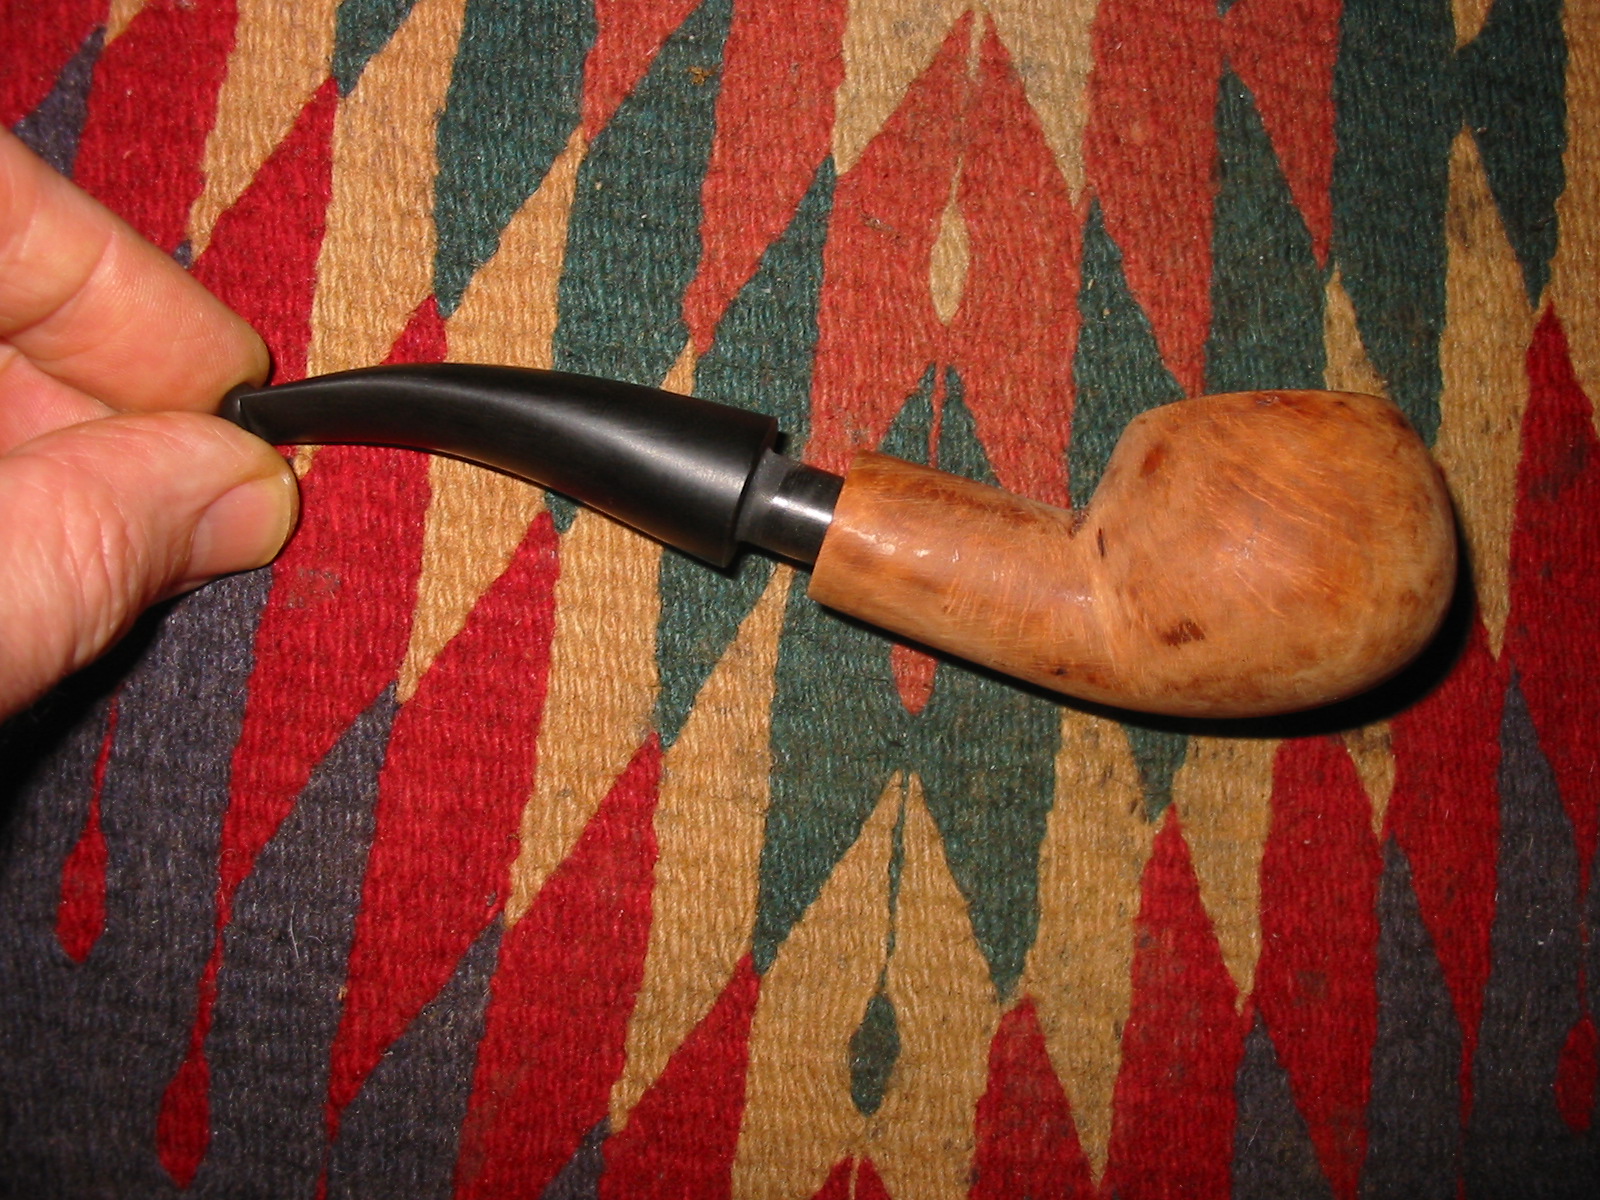
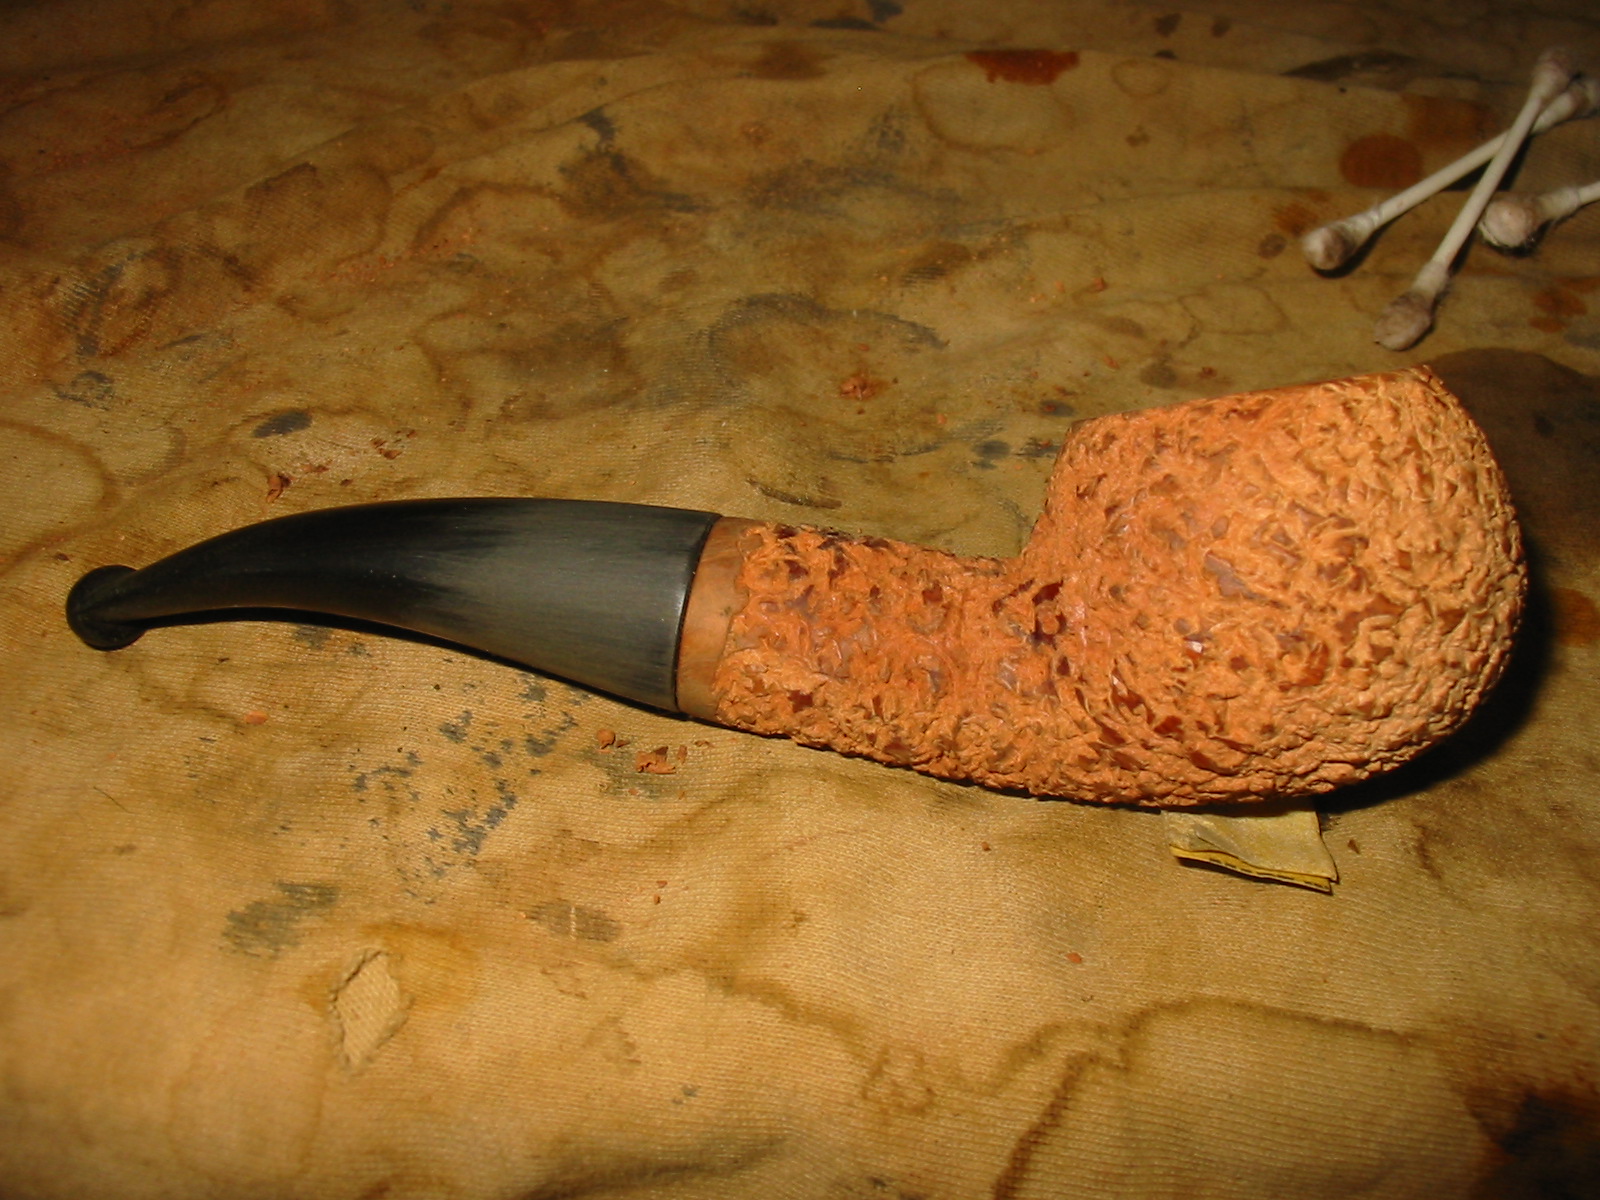
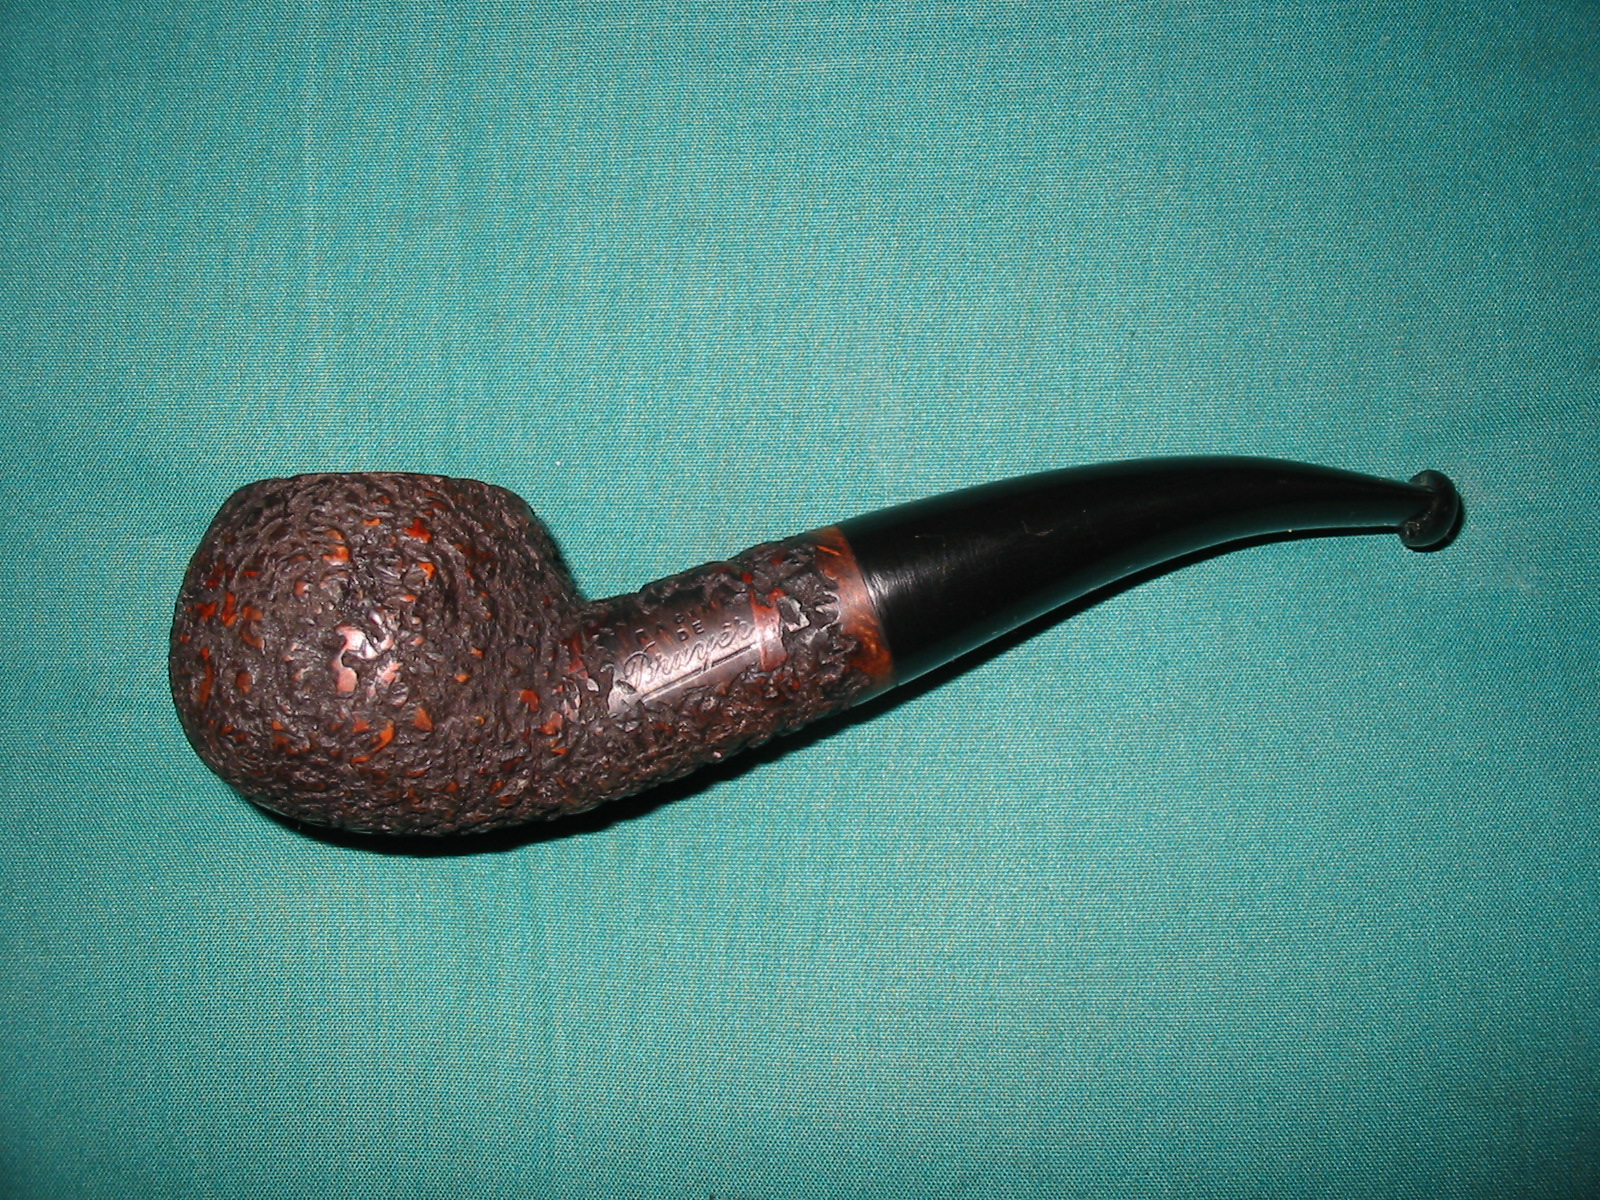
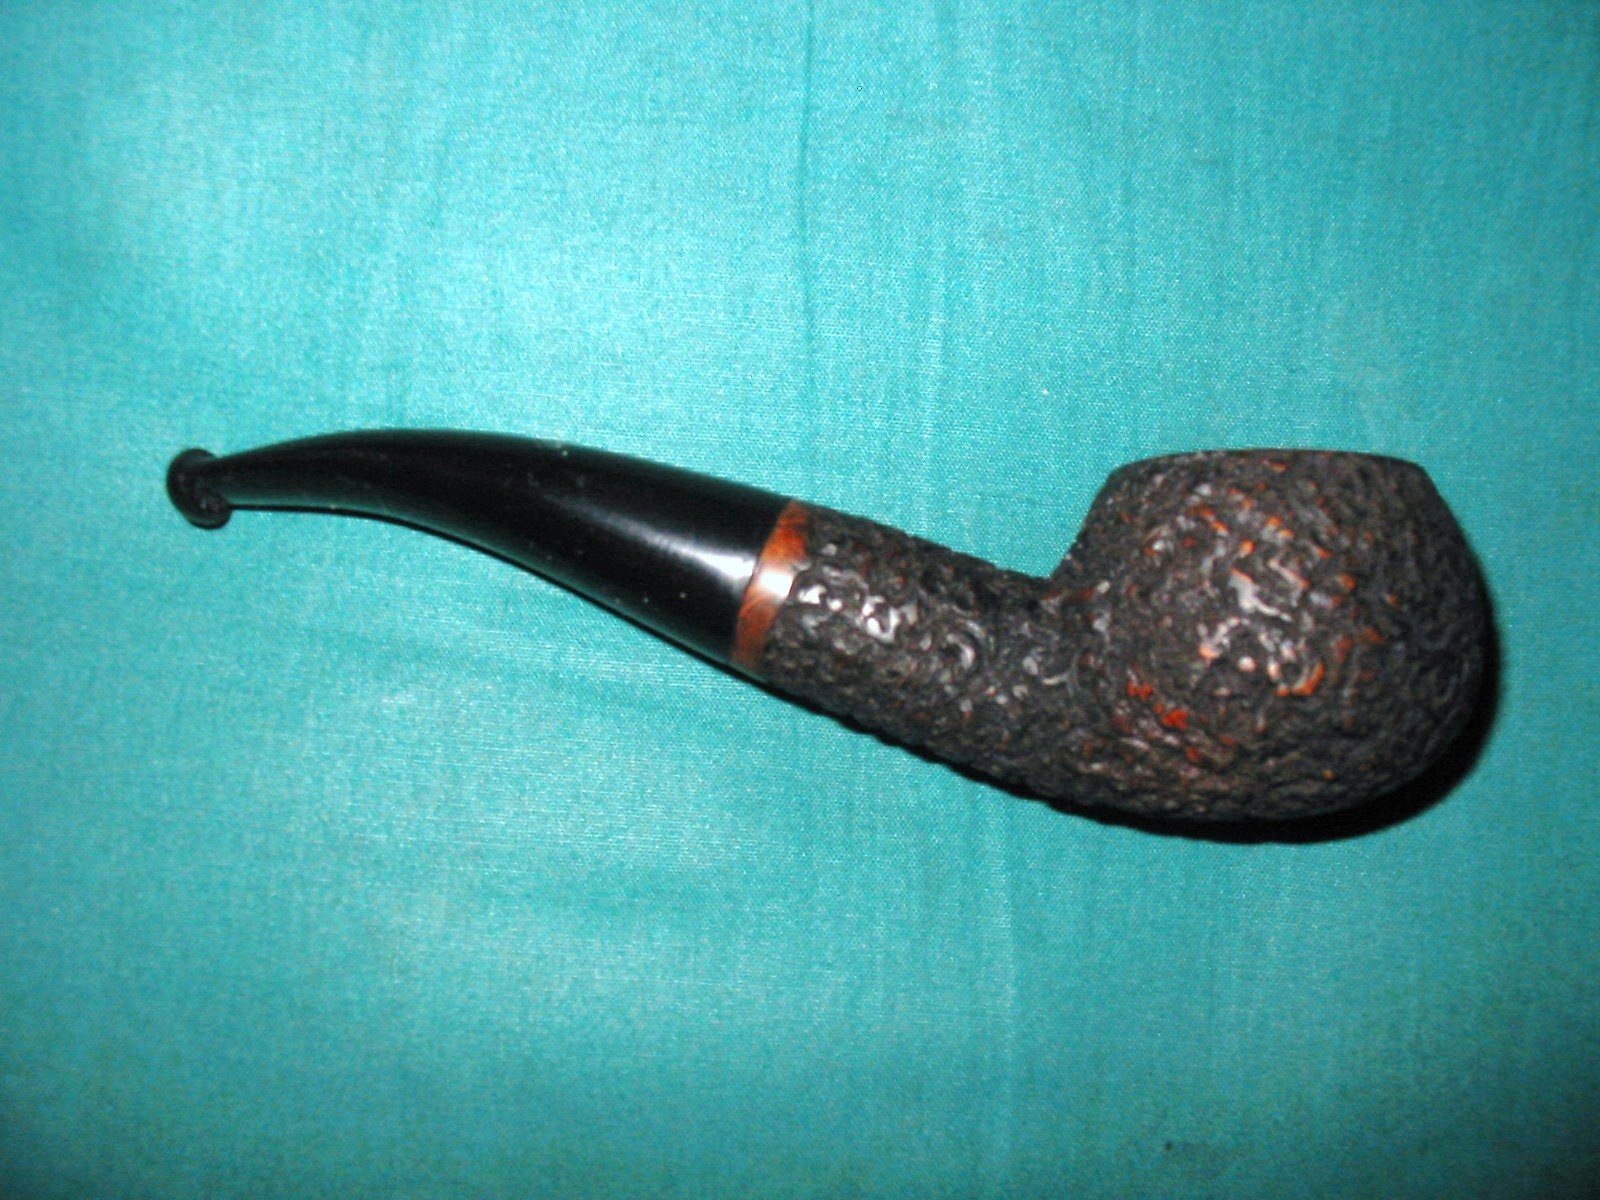
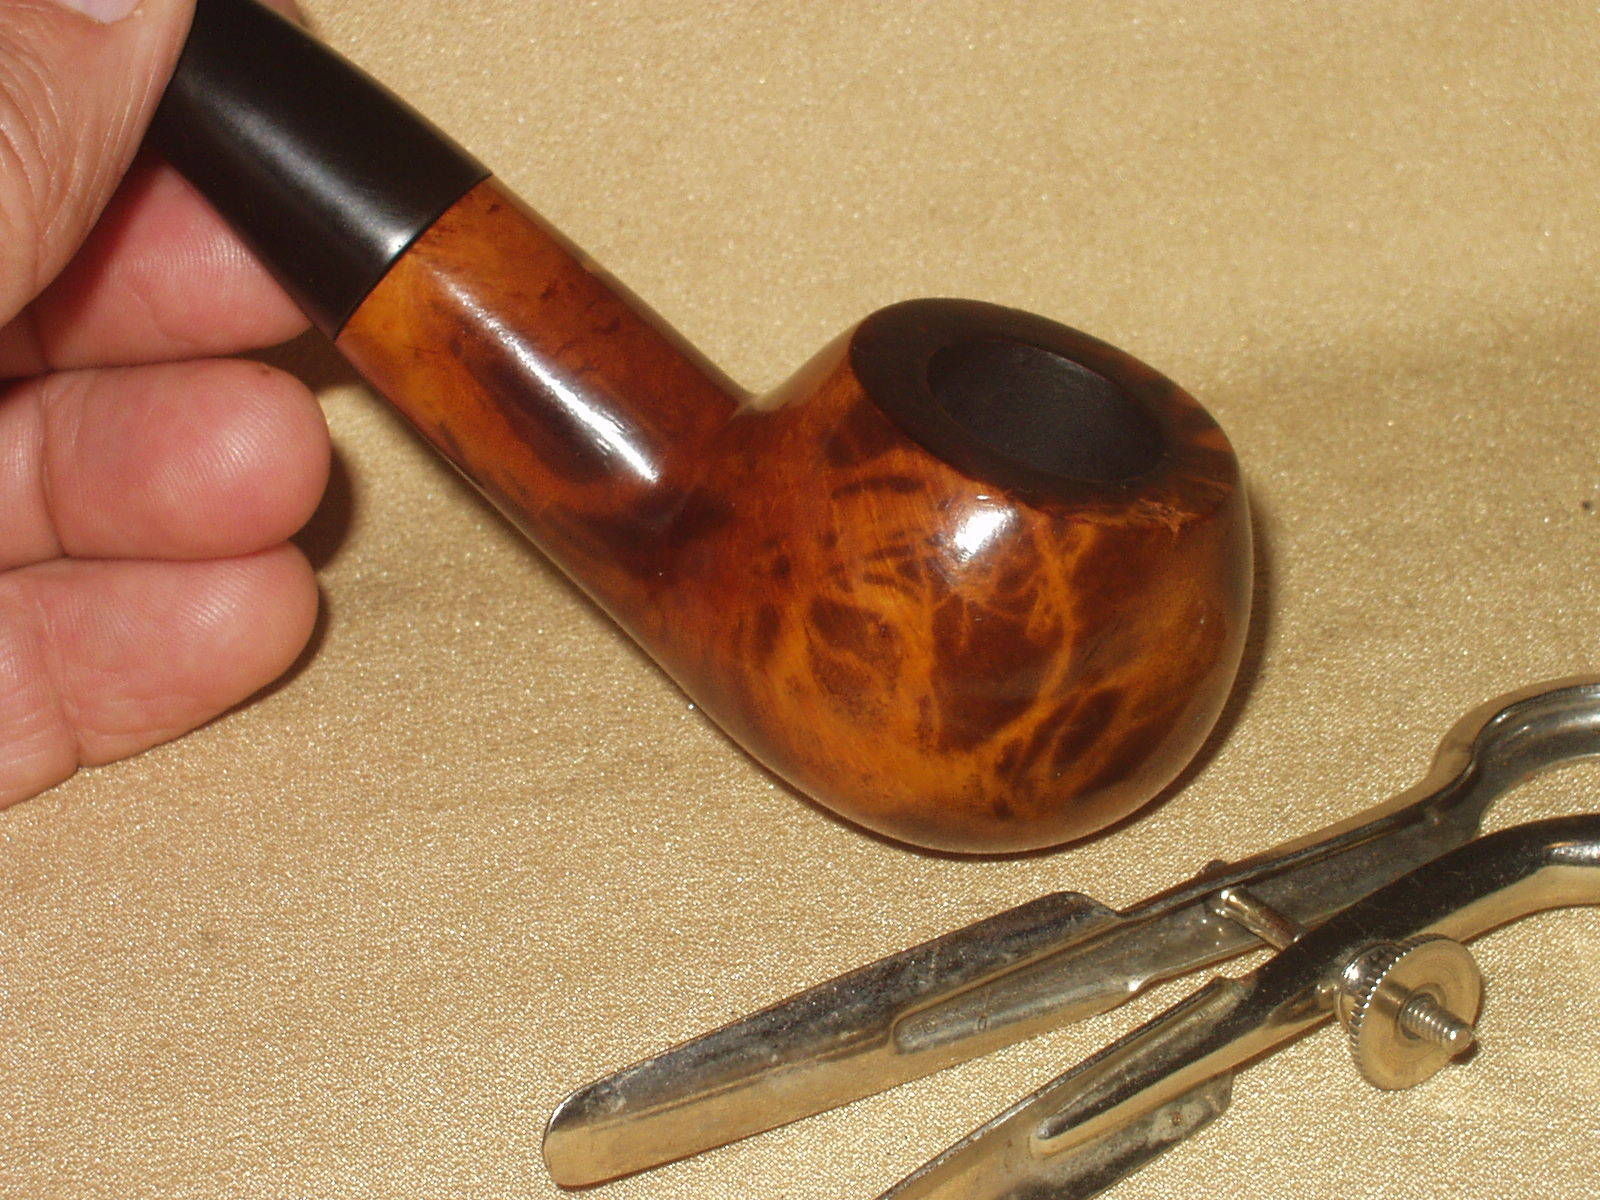
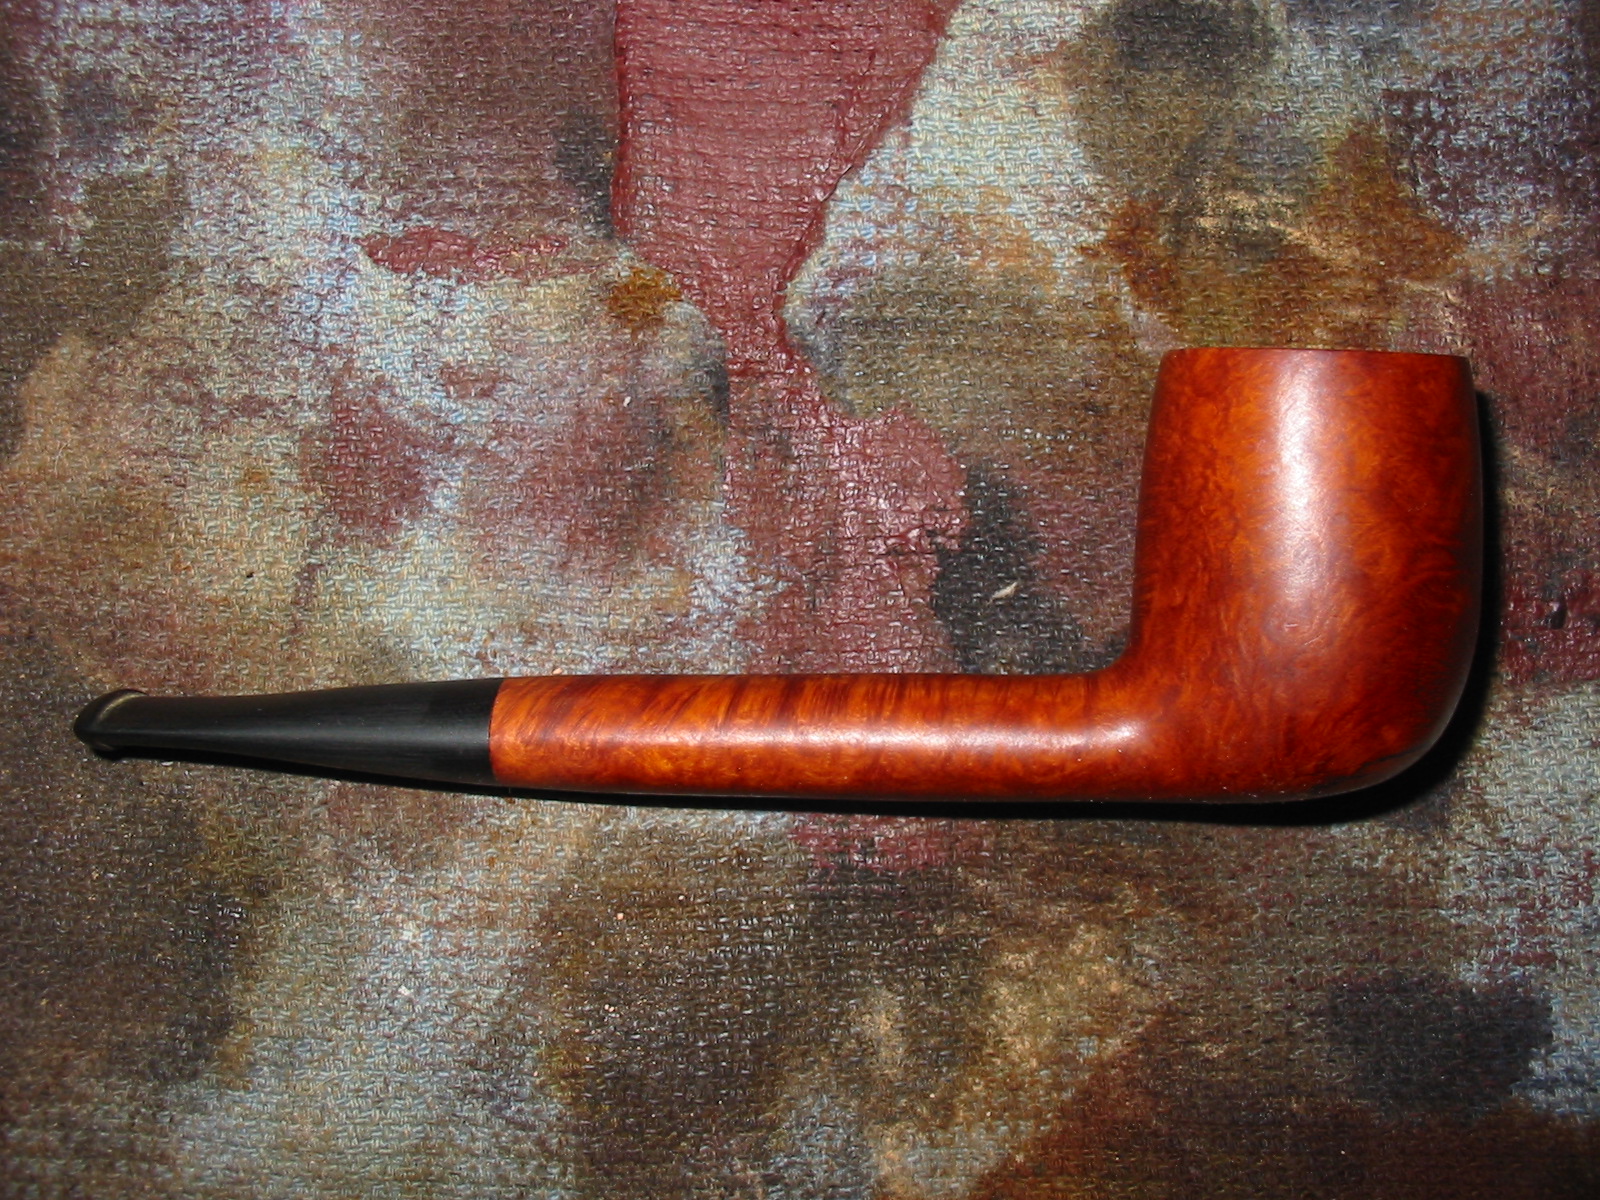
I rubbed the stem down with Obsidian Oil a final time and then buffed the pipe and stem with White Diamond to give it a shine. I then gave the stem multiple coats of carnauba wax and applied the wax to the bowl with a light touch on the buffing wheel. I finished with a buff with a soft flannel buffing wheel. The finished pipe is shown in the pictures below. I think it will last a few more years and yet again deliver a good smoke. In fact I would not be surprised at all if it does not last longer than I will.
IMG_5067

IMG_5068

IMG_5069

IMG_5070

When is a Pipe Not Worth Repairing?


This morning I am asking that question because sitting on my work table is an old Tinderbox Monza, made in Italy by Lorenzo. This old pipe has definitely seen better days. The bowl is over an inch in diameter and the cake in the bowl had choked it down to the point that I could not get my little finger in the bowl. The rim looked as if the pipe had been used as a hammer to the point that it had a chunk out the rear outside edge and a crack that went down the outside of the bowl with a visible fissure across the top of the rim and beginning to drop into the inner rim. The top half of the bowl looked like someone had carved at the cake with a knife and done a poor job of it. Fortunately the cake was as hard as rock so it did not do too much damage to the bowl. All of those issues are not enough for me to pitch a pipe and not work on it.

But the damage on this Monza did not stop there. The bottom of the bowl had been victimized by the self same knife wielder and he had carved over half of the bottom of the bowl away in his poor attempt at cake removal. The bottom of the bowl now flowed from the airway at a steep 30 degree angle with a jokerish gash along the front right bottom edge. At that point the bottom of the bowl is dangerously thin. You see the cake was all around the middle of the bowl like a girdle choking off the pipe but the top and bottom somehow had been miraculously purged of the cake by the knife wielding pipe abuser. This bottom of the bowl gives me pause – I could drill out the bottom of the bowl and insert a bowl plug or I could fill the bottom with a plaster of Paris fill to level it out and then coat the bottom with pipe mud. But would it be a waste of time? Would it be worth the effort?

I am not done enumerating the damage on this old pipe. The exterior of the bowl, the finish was ravaged. The front edge of the bowl was worn down like the heel on a hard playing boy’s pair of shoes. The angle and extent of the damage covered the entire front of the bowl. The striated finish, which was meant to look like tree bark was totally filled in with grit and grime to the point that it was almost smooth. It felt sticky to the touch and the smell was atrocious. I am surprised that my bride let me have it in the house. The striations on the shank were as filled in as those on the bowl so the true shape of the pipe and its finish were absolutely hidden.

But I am still not finished. The stem looked as if it was clean other than minimal oxidation… things were looking up. Maybe I would at least be able to cannibalize a stem out of this disaster. But no, it was not to be. I turned the stem over and it had a gaping hole – a chunk taken out of it that went back almost a half inch into the surface of the stem. The entire button was missing and the gap went from one side of the stem to the other – left to right. But that was not all of the damage to that poor stem – it looked as if the opening had been further opened with the self same knife. Yes the mad knife wielder had carved a slot into the airway at the bottom of the hole. The carving left the bottom of the airway paper thin. It looked as if after doing this “master” surgery the fellow had put a rubber bit protector on the stem as the calcification line on the stem was thick. Doing that after the surgery is like closing the door after the horses have left the barn!

All of these wonderful discoveries met my eye as I examined the pipe before I even considered working on it. I took the pipe apart at this point in my examination and put on the rubber gloves to probe the internals. I was pretty concerned at what would greet me when I took off the stem – if it would come off at all. With the goop that was all over this pipe it was a fair chance that the stem was “welded” in place. But to my great surprise it twisted off quite easily – no drama in this process. I peered down the shank with a penlight to see what creatures and mayhem awaited me inside the shank. I fully expected to see the interior carved by the knife wielder as he sought to make the pipe work “better” after his surgical excavations. But I literally had the wind knocked out of me when I saw a pristine shank. The shank was actually clean! The wood had a veritable glow to it as the light reflected back to me. It was not only clean but there were no tars and oils in it. This totally did not match what the condition of the bowl and externals had led me to expect. What an anomaly. Why was this so? What was going on here? These were just a few of the questions that ran through my mind as I held the bowl, sans stem in my hand.

With that discovery my thoughts regarding the fellow who had so drastically carved up this poor pipe and virtually ruined it took a turn. Rather than seeing him as some sadistically sick individual who took obvious evil delight in so ruining this old pipe to make it questionable if it could ever be restored; I began to soften in my assessment of him. I looked again at the externals of the pipe and stem. I looked at the carved and cracked bowl, the carved and ruined stem, the left over remnants of the rubber softie bit and I began to wonder if what was in my hands was the old pipe smoker’s favourite pipe. As it became harder and harder to smoke he took more drastic measures to make it last. Mind you they are not the same measures that you or I might take but they nonetheless obviously worked for him. Maybe rather than see the fellow as a pipe butcher I should see him as someone who loved this old pipe. He was going to smoke it until it truly gave up the ghost.

I began to wonder if he was not of the old school of pipe smokers who had one pipe and smoked it literally to death and threw it away and started on a new one. This one must have been a grand smoker to have been put through the trauma that it showed in it body. You can see now the tact that my mind was taking me. It would be inevitable that I clean up this old pipe – it would be an act of honouring the old briar and the old pipe smoker who had inflicted so much damage to just get the last bit of life out of his pipe. So it is with this in mind that I reamed the bowl, soaked it in an alcohol bath, scrubbed the finish with a wire brush and topped the bowl to begin the process of bringing it back to life. I have it sitting on my desk next to me now – I will need to fit a new stem on it and then refinish the bowl but it will once again deliver at least one smoke for me to explore my new theory.

So you might ask me, “When is a pipe not worth repairing?” I honestly don’t know the answer to that question. Even an hour ago I would have said this one was a goner. But now, I have “heard” the story of the pipe as I examined it looking at all of the abuse that had been inflicted on it. Now I see with different eyes. You see, that is the problem with pipe refurbishing. When others see a pipe as irreparable there is something that catches my eye that says to give it a try. I guess I have only met a very few pipes that were so damaged that they could not be brought back to life for a new season. And to be honest I still have several of them in my cupboard “seasoning”. I guess I truly don’t know the answer to the question I posed in the title.

Alternative Woods: Refurbishing and Restemming a Black Walnut Pot


I received this pipe bowl as a gift from a friend in exchange for some work I did on one of his pipes. I took it out of the box and put it in the refurbishing box without giving it much of a look. Today I took it out of the box and looked it over. It is well made; the airway is drilled straight and comes out the bottom of the bowl. The drilling is accurate and clean. The mortise is smooth and clean. The bowl has been smoked very little as the bottom half is still fresh wood. The shank is clean and there are no tars. The wood is clean with a few dings and dents. There seems to be a slight finish on the bowl – varnish or something. It also appeared to have a band on the shank originally as there is a stain from the metal on the end of the shank. It came to me without a stem. Today I will take care of that.
IMG_4987

IMG_4988

IMG_4989

IMG_4990

I wiped down the bowl with acetone and cotton pads to remove the finish and sanded it with a medium grit sanding sponge. I wiped and sanded until the finish was gone from the bowl and then wiped it down a final time. The smell of the sanding dust as well as the grain told me that I was dealing with a well made walnut, probably black walnut pipe. This one would clean up very nicely.
IMG_4991

IMG_4992

IMG_4993

IMG_4994

Since I could not remove the stain left behind by the previous band I decided to reband the pipe. I found a nickel band in my band collection that would be a perfect fit. I heated it with the heat gun and the pressed it into place on the shank. I cleaned up the shank end of the pipe once the band was in place and widened the bevel on the inside end of the mortise to fit the new stem that I would fit for the pipe.
IMG_4995

IMG_4996

IMG_4997

IMG_4998

I went through my can of stems and found three different stems that would work with this pipe. Two of them were vulcanite and one was a clear acrylic. I have not done much work with clear acrylic and never turned the tenon to fit a pipe so this one seemed to be the way to go. Each pipe has to be a bit of a learning experience. Besides I liked the way the clear acrylic looked with the walnut bowl and the silver band.
IMG_4999

I drilled the airway in the stem to fit the end of the PIMO tenon turning tool and then put the tool on my drill and slid the stem in place. I adjusted the cutting head on the tool to cut off enough material to get a close fit on the stem. The tool is touchy in terms of accurate adjustments so I eyeball it close and then sand it by hand until it fits the shank.
IMG_5000

I pushed the stem in place on the walnut bowl and set it down to look at the overall appearance of the pipe. The clear stem was going to work well once I had shaped it to fit. The walnut was already darkening from the oils in my hands. This was going to be a beauty once it was finished.
IMG_5001

IMG_5002

IMG_5003

IMG_5004

The diameter of the stem and that of the shank were different. The stem was significantly larger than the shank of the pipe. I used a Dremel with a sanding drum to sand off excess acrylic material. I proceeded with that slowly and carefully as I did not want to nick the band or damage the pipe bowl.
IMG_5006

IMG_5007

I took the material down as close as possible with the Dremel and then did the rest of the sanding by hand with 220 grit sandpaper. It took quite a bit of time and several return trips to the Dremel before I had the shank and the stem diameter matching. The following photos show the progress on the stem with each one taking it a step closer to the finish.
IMG_5008

IMG_5009

IMG_5010

IMG_5011

When I finally had the fit correct with the 220 grit sandpaper I switched to a medium grit sanding sponge to further refine the fit and to remove the scratches left behind by the sandpaper. I finished sanding with the medium grit and used a fine grit sanding sponge to sand the stem again. When finished the stem looked opaque and the shape was done. All that remained was to polish the stem.
IMG_5012

IMG_5013

IMG_5014

IMG_5015

Before sanding it further I used a needle file to smooth out the transition in the airway between the stem airway and the place where the drill bit ended when I worked on the tenon. I was able to even out the transition and taper it for a smooth and seamless transition. The walnut was continuing to darken from my hands as I worked on it. I also stopped and sanded the rim of the pipe to remove the deep scratches that were present when I received it.
IMG_5016

IMG_5017

IMG_5018

IMG_5019

I wet sanded the stem and the band with 1500-2400 grit micromesh sanding pads and then dry sanded with 3200-12,000 grit pads. I wiped the stem down between each grit of micromesh with a damp cloth to remove the sanding dust and to further polish the stem.
IMG_5020

IMG_5021

IMG_5022

After I finished sanding the stem and the band with the micromesh pads I took the pipe to the buffer and buffed it with White Diamond to further polish it. I rubbed the stem down with Obsidian Oil and when it was dry gave the pipe and the stem multiple coats of carnauba wax and a final buff with a soft flannel buff. The finished pipe is shown below. The bowl has only been given a wax coat and no stain. The finish is natural and I believe that it will continue to darken as it picks up the oils from my hands when I smoke it.
IMG_5023

IMG_5024

IMG_5025

IMG_5027

Restemming and Reworking a Rembrandt Bulldog


Blog by Steve Laug

Another bowl that was sent to me was a nice bent bulldog shape that needed a stem. It was in good shape. The bowl needed to be reamed and the top of the rim lightly topped. It was stemless so I needed to make a stem for it. It was stamped on the left side of the shank Rembrandt over Imported Briar. In researching it on the web I found that the company that made the pipe was The National Briar Pipe Co. It was homed in Jersey City, New Jersey. They produced several brands that I have seen over the years: Biltmore, Forecaster, Honeybrook, King Eric, Kleenest, Mayflower, Rembrandt, Sir Sheldon, The Doodler (created and formerly produced by Tracy Mincer, †1966). Typically the original stem of Rembrandt pipes bore a logo on the left side of the stem – a capital “N” in italics. This bowl had some ding marks on the cap on the left side. There was some damage to the briar between the double rings on the cap.

IMG_4952

IMG_4953

IMG_4954

IMG_4955

I sorted through my stem can and found a nice amberoid acrylic stem that would look great with the bulldog bowl. It needed a tenon so I used a piece of white Delrin that was a perfect fit in the hole in the stem. I scored the Delrin with a hack saw so that the glue would have a surface to stick to. I swabbed then tenon down with superglue and pressed it into the stem.
IMG_4956

IMG_4958

Once the glue had set in the stem and the tenon was firmly in place I sanded the tenon down with a folded piece of sandpaper to get a snug fit. I pushed it into the shank and it fit nicely against the shank. The diamond shank was smaller than the diamond saddle on the stem so I needed to sand it down to fit the shank.
IMG_4959

IMG_4960

IMG_4961

IMG_4962

I used 220 grit sandpaper to start the process of shaping the stem and then a sanding drum on a Dremel to bring down the sides of the diamond close to the shank dimensions. I finished the fit with sandpaper and a sanding sponge.
IMG_4963

IMG_4964

IMG_4966

I sanded the stem and the shank with sandpaper and a sanding block until the transition between them was smooth to touch. I reamed the bowl with a PipNet reamer and took the cake back to the wood.
IMG_4967

IMG_4968

I set up my topping board and sandpaper and lightly topped the bowl to remove the nicks and cuts in the surface of the rim. I followed up on the sanding board with a sanding block laid on the board and once again turned the bowl into the sanding block to smooth out the scratches left behind by the sandpaper.
IMG_4969

IMG_4970

I wiped the bowl down with acetone and cotton pads to remove the finish and make the restaining of the bowl more consistent. I have found that when I have sanded the shank and the rim it is easier to remove as much of the finish as possible before I restain the pipe.
IMG_4972

IMG_4973

IMG_4974

IMG_4975

I sanded the stem with my usual array of micromesh sanding pads – wet sanding with 1500-2400 grit pads and dry sanding with 3200-12,000 grit pads. I rubbed the stem down with Obsidian Oil and then did some more work on the bowl.
IMG_4976

IMG_4977

IMG_4978

I stained the bowl with a dark brown aniline stain thinned 2:1 with isopropyl alcohol. I stained and flamed the stain and repeated the process until the coverage on the shank and the rim matched the bowl. I hand buffed the pipe with a soft cotton cloth to see where I stood with the finish on the bowl.
IMG_4979

IMG_4980

IMG_4981

IMG_4982

I gave the pipe another coat of the stain and then took the pipe to the buffer and buffed the bowl and stem with White Diamond. When I had finished I buffed it with multiple coats of carnauba wax and then with a soft flannel buff to finish the shine. The completed pipe is shown in the photos below. I really like the way the stain and the striations in the stem work together. I think that this one may well stay I my own collection!
IMG_4983

IMG_4984

IMG_4985

IMG_4986

Restoring a Kaywoodie Drinkless Volcano


I was gifted this Kaywoodie Drinkless Volcano with a three hole stinger by Andrew, a reader of the blog. He wrote me an email about the pipe as follows:

Steve, I have this Kaywoodie Volcano shape with a 3 hole stinger, so probably 70’s or newer. It was burned out when I got it. I ended up slopping some fireplace cement in the bottom of it trying to fix it but it didn’t come out well as I was trying to form it with a pipe tool and it is rough. The stem is over turned as well. I figure this might “challenge” you as far as trying to bring it back to life somehow. Is this is something you might be interested in trying to some how to fix? — Andrew

I wrote back that would gladly see what I could do with it so he sent it out to me to work on. When it arrived I saw that he had begun the work on it already and had reamed and cleaned the bowl. He had mentioned that when he bought it there was a small burn out area on the bottom of the bowl. When I got it the inside of the bowl was actually quite alright. His repair looked quite good. A little cleanup of the bowl would bring things in order. The fireplace cement needed to be cleaned off the walls and rounded a bit in the bottom of the bowl but it was not bad.

Besides the obvious damage to the bowl there was some other damage to the pipe as well. The outer edge of the rim was damaged on the front and the inner edge was slightly out of round. The external bottom of the bowl had a half-inch long crack that had been cleaned out and repaired but there was still a slight groove in the crack. The sides of the crack had been joined and repaired so what remained was cosmetic. The stem was overturned and slightly out of round in comparison to the round metal insert in the shank. The stem had a partial stamp of the KW cloverleaf but was in bad shape in terms of appearance.
IMG_4899

IMG_4900

IMG_4901

IMG_4903

I set up my topping board and topped the bowl of the pipe to remove the damaged portion of the inner and outer edge of the rim. I sanded the top of the bowl, pressing it against the board and turning it in a clockwise direction until the damaged briar was removed. I used a PipNet reamer with a cutting head that fit the bowl diameter and turned it against the cement until it was removed from the sides of the bowl and the bottom of the bowl had a slight indentation.
IMG_4904

IMG_4905

IMG_4906

I wiped down the bowl with acetone and cotton pads to remove the remaining finish on the bowl and to clean up the partial repair to the bottom crack. I continued to wipe it down until the briar on the bowl was almost the same colouration as the sanded rim of the pipe.
IMG_4907

IMG_4908

IMG_4909

I scratched out the surface of the crack with a dental pick and packed in some briar dust that I had left from sanding the rim of the pipe. I tamped it and then dripped some superglue into the briar dust until it formed a bubble over the crack. I always overfill the crevices and fills to make sure that when they dry they do not shrink and make a second fill necessary. When the glue had dried I sanded it with 220 grit sandpaper and also with a medium and fine grit sanding sponge to smooth out the bubble and blend it into the surface of the bowl.
IMG_4910

IMG_4915

IMG_4916

On the bottom of the stem there were also two very deep tooth indentations that would not lift when heated with a heat gun. I sanded the area around the dents and dripped clear superglue into the dents. I chose clear superglue as the stem did not appear to be vulcanite. When I sanded it the dust was grey rather than brown. I have found that the clear glue blends very well on this material. When it dries and is sanded it blends in quite well to the surrounding stem material.
IMG_4911

IMG_4913

IMG_4917

I wiped down the bowl again with acetone and sanded the whole bowl with a medium and fine grit sanding sponge.
IMG_4918

IMG_4919

IMG_4920

IMG_4921

IMG_4922

The overturn on the stem is something that is easily corrected. I heated the stinger with a heat gun until the glue holding it in place was softer and then turned it in the metal inserted mortise until it lined up correctly with the bowl. I was almost a quarter turn to the right so I needed to turn it all the way around. Once it was aligned I laid it aside to cool. The final photo gives a clear view of the inside of the bowl. The repaired bowl bottom with the minor adjustments I had made with the PipNet reamer are visible.
IMG_4923

IMG_4924

IMG_4925

IMG_4926

IMG_4927

IMG_4928

With the stem aligned it was evident that the diameter of the stem was different than that of the shank. In looking at the stem from the stinger end I could see that the left side was slightly larger than the right side. There was an overhang passed the metal insert in the shank. The next photos show that the left side would need to be sanded to fit properly.
IMG_4929

IMG_4930

I sanded the stem and shank with 220 grit sandpaper folded and was careful to not sand the stamping on the left side of the shank. I wanted the transition to be perfectly smooth to the touch. I sanded it with medium and fine grit sandpaper to smooth out the scratches left behind by the sandpaper.
IMG_4932

IMG_4933

IMG_4934

IMG_4935

IMG_4936

IMG_4937

I stained the bowl with an aniline oxblood stain. I applied it and flamed it and reapplied it and flamed it again until I had a good even coverage across the bowl. I hand buffed the finish with a soft cloth.
IMG_4938

IMG_4939

IMG_4940

IMG_4941

IMG_4942

I sanded the stem with medium and fine grit sanding sponges and then followed up with my usual array of micromesh sanding pads – wet sanding with 1500-2400 grit pads and dry sanding with 3200-13,000 grit pads.
IMG_4943

IMG_4944

IMG_4945

I rubbed the stem down with Obsidian Oil and then sanded it a final time with the 4000-13,000 grit pads. I lightly buffed the stem with White Diamond. I screwed the stem back into the shank and then buffed the entirety with White Diamond and then gave the pipe multiple coats of carnauba wax. I buffed it with a clean flannel buff for the final shine and protection. The finished pipe is pictured below and is ready for more years of service. The bowl repair done by Andrew provides a solid base in the bowl and the external repair and stem repair makes the pipe cosmetically more pleasing. Thanks Andrew for a good challenge. The pipe is ready for its inaugural smoke. I am sure it will last far longer than I do!
IMG_4946

IMG_4947

IMG_4948

IMG_4949

IMG_4950

IMG_4951

Refurbishing an Old Zulu Bowl


I was gifted a few pipe bowls that needed to be restemmed and refurbished by a friend. The first of these that I decided to clean up and restem was an old Zulu bowl. It is stamped Algerian Briar over Made in France on the left side of the shank and no other identifying marks. Thus the maker remains a bit of a mystery that I am not sure can be solved. The bowl itself was in fair shape. The cake in the bowl was not thick but it was particularly crumbly and soft. The finish on the pipe was also shot. The varnish coat was gone and the stain was streaked and damaged. There were a cut groove next to the left side of the stamping and a smaller one on the right side of the stamping. The shank was filthy and caked with oils and tars. The rim was in great shape with no damage to either the inside or outside rim. The grain under the stain coat looked promising with cross grain on the front and back of the bowl and the top and bottom of the shank and mixed birdseye on the sides of the both.
IMG_4862

I had a stem in my can of stems that fit almost perfectly. It was damaged and would need some work but the fit and bend was perfect for the Zulu shape.
IMG_4863

IMG_4864

I fit the stem in place and wiped down the bowl with acetone on cotton pads to remove the remaining finish on the pipe. I reamed the bowl with a PipNet reamer and took the cake back to bare wood. I cleaned out the shank and the bowl with cotton swabs and Everclear.
IMG_4866

IMG_4867

IMG_4868

IMG_4869

I sanded the stem until the transition between the shank and the stem was smooth. I used both 220 grit sandpaper and medium and fine grit sanding sponges to smooth it out. The end of the stem was badly damaged and the button was ruined. I decided to trim off the damaged end of the stem and rework the button. Once it was cut back I cleaned out the stem with Everclear and pipe cleaners. The stem was badly plugged with tars so I had to use a bent paper clip to push through the airway. I used shank brushes and pipe cleaners to remove the tarry build up and open up the stem once again.
IMG_4870

IMG_4872

The airway was still wide and open so I did not need to reshape it. The top and bottom of the button were thin so I could not remove any further material. I reshaped the externals as best as possible by rounding the ends of the stem and making the button more oval in external shape.
IMG_4873

The slight dents in the stem that remained would not lift with heat so I filled them with superglue until they were level with the surface of the stem.
IMG_4874

IMG_4875

I cut the new button with needle files and shaped the end of the stem to have a better flow and taper to the new button. This involved removing some of the thickness of the stem and making the taper more angled. I used files and sandpaper to reshape the stem.
IMG_4876

IMG_4877

With the new button cut I sanded the stem and the entire pipe with 220 grit sandpaper to remove the remaining finish and make sure the flow of the stem was correct to the angles of the pipe. I also sanded it with a medium and fine grit sanding sponge to remove scratches in the briar and vulcanite.
IMG_4879

IMG_4880

IMG_4881

IMG_4882

IMG_4883

IMG_4884

The stain around the stamping on the left side of the shank was very set and stubborn. I lightly sanded it to break through the top coat and then scrubbed it with acetone on cotton pads to match it as much as possible to the unstained briar. I stained the bowl with an oxblood aniline stain, flamed it and restained and reflamed until I had an even coverage on the bowl. I hand buffed it with a soft cloth. I took the pipe to the buffer and buffed the stem and bowl with red Tripoli and White Diamond. The photos below show the pipe after the buffing.
IMG_4885

IMG_4886

IMG_4888

IMG_4889

I sanded the stem with my usual array of micromesh sanding pads – wet sanding with 1500-2400 grit pads and dry sanding with 3200-12,000 grit pads. I rubbed the stem down with Obsidian Oil and when it dried hand buffed the stem.
IMG_4890

IMG_4891

IMG_4892

I buffed the pipe with White Diamond and then gave it multiple coats of carnauba wax. I finished by buffing it with a clean soft flannel buffing pad. The finished pipe is pictured below. It is ready to go into service again. I like the flow of the lines on this pipe. The shape and matte like finish work well together.
IMG_4893

IMG_4894

IMG_4896

IMG_4897

Plugging a Burnout on a Peterson’s Irish Whiskey 999


Blog by Steve Laug

Lately several of the pipes that I have refurbished were part of a trade with Mark Domingues for work on this pipe. It is a beautifully grained Peterson’s Rhodesian 999 – one of my favourite shapes. The grain on this thing is beautiful. The photo below shows what drew Mark to bid on this pipe in the first place. What the photo does not show however, is the incredibly horrible shape that this pipe was in when it came to Mark.
IMG_20131124_082613_134_zps6ef902eb

The problem with the pipe became obvious when Mark took it out of the shipping package to enjoy the “new” Peterson that he had purchased. The pipe had a serious burn through on the front right side of the bowl toward the bottom. That damage was quite extensive and either the pipe could be thrown away or the burn through drilled out and the damaged briar replaced with a briar plug.
IMG_20131125_123925_638_zps0ff2fe98

Mark decided to drill out the damaged portion of the bowl. We talked back and forth via email about the steps to take to fix it. He toyed with it and then one day asked if I wanted to do the work on it. He would send the pipe, a chunk of briar some pipes that he thought I might enjoy working on in exchange for the repair. After emailing back and forth we agreed to the terms and he sent the bowl on to me to do the repair in exchange for a few pipes for my refurbishing box. Here is what the pipe looked like when it arrived in Vancouver. Mark had cleaned up the exterior of the pipe and also the interior and drilled out the burnout. The brass/gold band on the shank was loose and the stem was in decent shape with two minor tooth marks.
IMG_4808

IMG_4809

IMG_4810

The top view of the pipe, shown in the photo below, also highlights several others issues with the pipe. First, the bowl itself was not drilled straight into the briar but at a slight angle from left to right. Second, the stem was totally out of round and the right side of the stem fit against the band far differently than the left side. Looking at the stem from the tenon end it was clear that the stem was not round but rather oblong. The small block of briar in the photo was sent along by mark for me to use in cutting a plug for the bowl.
IMG_4811

I used a small hacksaw to cut off a small chunk of briar. I then shaped the briar chunk into a cylinder. I always cut the plug long to give me something to hold onto when I am shaping it. I am sure others do it differently but I shape the plug with a Dremel by hand and I hold the piece of briar with my fingers while I shape it. The next series of eight photos show the progressive shaping of the cylinder to fit the drilled out hole in the bowl of the pipe.
IMG_4814

IMG_4815

IMG_4818

IMG_4819

IMG_4821

IMG_4822

IMG_4823

IMG_4824

The next four photos show the final shape of the cylinder. I left a slight handle on the top of the plug to hold onto while I turned the cylinder with the Dremel. I tapered the plug slightly so that it would fit into the hole but not extend to far into the bowl itself. Once I had the shape correct and the piece extending into the bowl smoothed to fit the shape of the bowl I glued it in place with superglue.
IMG_4825

IMG_4826

IMG_4827

IMG_4828

I used the hacksaw to trim off the excess briar in the plug as close as possible to the surface of the bowl.
IMG_4829

IMG_4830

Once I had it trimmed back to that place I used the Dremel and sanding drum to sand it down to the surface and then hand sanded with 220 grit sandpaper to make the surface of the plug and the bowl match. I used superglue around the circumference of the plug to hold it tightly in place.
IMG_4831

I washed down the surface of the bowl with acetone on cotton pads to remove the grit and the remaining finish on the bowl. I also sanded the plug and the rim with 220 grit sandpaper and then medium and fine grit sanding sponges to smooth out the scratches. I sanded the inner rim with a folded piece of sandpaper to remove the damage to that portion of the bowl. In the photos below the fit and finish of the plug is clearly visible. The grain on the plug and that on the bowl did not match but the fit was nearly perfect.
IMG_4832

IMG_4833

IMG_4834

IMG_4835

Mark and I had talked about rusticating the whole bowl but I could not bring myself to do that to such a beautiful piece of briar. I marked the area that I planned on rusticating with a black permanent marker to give myself an outlined area that I would rusticate. I find that setting up parameters and boundaries for the rustication helps me to keep it in a defined space more easily.
IMG_4836

I used the modified Philips screwdriver with the four points to rusticate this part of the bowl. The next two photos show the rusticated portion of the bowl. The area of the older briar showed dark spots in the rustication and the new fresh plug showed almost white after rustication.
IMG_4837

IMG_4838

I decided to try and use a dark brown aniline stain thinned 2:1 with isopropyl alcohol on the whole pipe to see what would happen with the rustication. I wanted to see if the dark areas on the rustication would blend into the briar of the lighter parts. I did not really expect it to work but thought I would give it a try.
IMG_4840

IMG_4841

IMG_4842

IMG_4843

The dark portions of the old briar still showed dark after staining. I decided to use a black aniline stain on the rusticated portion of the bowl and leave the smooth part of the bowl the brown colour. I applied the stain with a cotton swab and flamed it, reapplied it and reflamed it until the coverage was even.
IMG_4844

IMG_4845

IMG_4846

The inside of the bowl then needed to be addressed. The drilling of the bowl was not only angled from left to right but the airway entered the bowl over 3/8 inches above the bottom of the bowl. Whether this was caused by drilling or over reaming is not clear to me. My problem was that the angle of the patch on the side did allow me to shape the patch to provide a new bottom for the bowl. I could have cut another piece of briar and inserted it into the bottom of the bowl but the strange angles of the bowl made that a task that I did not want to tackle. I opted to build up the bottom of the bowl with Plaster of Paris instead of pipe mud because of the depth of the buildup. My fear was that the pipe mud would have to be almost ½ inch thick and I was not sure if it would hold. I have used Plaster of Paris to repair meerlined pipes and it is durable and gives a solid base. I intend to use pipe mud on top of the repair and also reshape the bowl sides.

I glued the band on the shank with wood glue before I restained it with another coat of the medium brown aniline stain. I flamed it and then buffed it with White Diamond. I gave the smooth portions of the bowl several coats of carnauba wax and hand buffed the rusticated portion with Halcyon II wax.
IMG_4850

IMG_4851

IMG_4852

IMG_4853

I sanded the tooth marks and chatter out of the stem with 220 grit sandpaper and a medium grit sanding sponge. I reshaped the stem to fit more proportionally against the band. I made it round instead of oblong so that the fit against the band was even all the way around giving it a more finished look. I then sanded it with my usual array of micromesh sanding pads – wet sanding with 1500-2400 grit pads and dry sanding with 3200-12,000 grit pads. I rubbed the stem down with Obsidian Oil and when it was dry buffed it with White Diamond. I gave the stem multiple coats of carnauba wax to finish and protect it.
IMG_4854

IMG_4855

IMG_4856

The next series of five photos show the finished exterior and stem of the pipe. The stain and the patch rustication are completed. The interior of the bowl still only bears the plaster repair. Once it cures for several days I will give it a coating of pipe mud to finish the job.
IMG_4857

IMG_4858

IMG_4859

IMG_4860

IMG_4861

The pipe is finished other than the pipe mud and soon it will go back to Mark for its inaugural smoke. I am looking forward to hearing his response once the pipe is in his hands and he has smoked it.

UPDATE: I applied the pipe mud to the bowl last evening. It was a great day to fire up a Cohiba Habana and save the ash to mix. I use a shot glass to collect the ash and add the water with an ear syringe. Once the mix is the right consistency I apply it with a folded pipe cleaner. I apply it and let it set and then follow up with a second or third coat as necessary.
IMG_5172

For this particular pipe mud application I built up the right side of the bowl toward the bottom to compensate for the angular drilling of the bowl. I was able to smooth out the wall and that side is as straight as possible.
IMG_5173

Comoys Stems – New Buttons


Blog by Al Jones

Walt, a member of the BrothersOfBriar pipe forum asked me if I could repair the stems on this quartet of Comoy’s pipes. One of the pipes is a Blue Riband. The stem damage was pretty severe and he wanted to save the original Comoy’s stems. All four have the 3 piece, drilled “C” logo of a pre-Cadogan era Comoy’s.

Beyond the holes, the stems were in remarkably good condition with only dull vulcanite.

Comoys_Buttons (1)

Comoys_Buttons

I didn’t think the Super-glue repair technique would hold up across those open areas, so I decided to cut off the damaged section and reshape a new button. I have a small, fine tooth “hobby saw” that I used to carefully cut off the broken button.

Comoys_Buttons- Cut & Cropped

Comoys_Buttons (2)

I used a small, round needle file to “funnel” the buttons for better air flow.

Cutting the new button creases was a nerve-racking job as the Comoy’s stems were so thin. I didn’t want to weaken the stem. Using a sharp knife, I made a slight cut across the stem, about 2 mm in width. I then used a small flat needle file to give the button some height, but was careful not to go too deep. I used some 800 grit paper to taper the stem towards the new button then smoothed out the file marks with 1500 and 2000 grit paper. I used the 2000 grit paper on the rest of the stem, to remove the mild oxidation. The entire stem was polished with 8000 and 12000 grit micromesh paper and then buffed with white diamond.

On the briar, I removed the top layer of tars build-up and gave the pipes a light buff with white diamond and then a few coats carnuba wax.

The new buttons required they have a slim profile, but I think they will hold up to many more years of use.

Comoys_Buttons (6)

Comoys_Buttons (7)

Comoys_Buttons (8)

Comoys_Buttons (9)

Walt graciously gave me one of the four pipes and I chose the Sandblast Canadian. Repairing that stem will be a future project.

Rustication & Rebirth of a Racine de Bruyere Author


Another pipe that Mark included in the trade was stamped Racine de Bruyere. I have no idea about the maker or the time period of the pipe. The stem is an older style orific button (round hole in an end cap style button). Ron had stripped the finish off of the bowl and also had picked out the fills. The flaws in the briar that remained behind sans fills were deep crevices. The stem was stuck in the shank and would not insert the whole way. The stem itself was in great shape – good, hard older vulcanite. There was minor tooth chatter at the button on the top and the bottom of the stem. Once I had removed the stem the tenon was in great shape with a Dunhill style inner tube that extended all the way from the tenon into the airhole in the bowl. The photos below show the extent of the damage to the bowl in terms of the serious flaws in the briar. On top of the shank, on the left side and on the front of the bowl there were deep holes. There were also minor holes in other areas around the bowl. The shape is actually one of my favourite shapes so it would of course be worked on and brought back to life.
IMG_4748

IMG_4749

IMG_4750

IMG_4751

IMG_4752

IMG_4753

I used a dental pick to scrape away the debris in the pits. There were loose bits of briar and dust build up. I wiped the bowl down with acetone on a cotton pad to remove surface grit. I packed briar dust in layers alternating with superglue into the pits. Once they were filled to the top I tamped them down and then dripped superglue into the briar dust. I added more briar dust and also more superglue.
IMG_4754

IMG_4755

The sandpits, even with the fills, were large and there were many other small pits around the bowl. It made it an easy decision to rusticate the bowl. I used the modified Philips screwdriver to rusticate the bowl. I wrapped several layers of tape around the end of the shank so that I could leave a smooth band there making a stem fit more simple. I also put a piece of tape over the stamping on the left side of the shank. The next series of thirteen photos shows the progressive rustication of the bowl. I decided to do a deep rustication so I worked the tool deep into the wood of the bowl.
IMG_4756

IMG_4757

IMG_4758

IMG_4759

IMG_4760

IMG_4761

IMG_4762

IMG_4763

IMG_4764

IMG_4765

IMG_4766

IMG_4767

IMG_4768

When the rustication was complete I used a brass tire brush on the surface of the briar to knock off the sharp points and loose pieces of debris from the work of the tool. My aim was to leave behind some smooth spots that would end up have a contrast stain on them when I was finished.
IMG_4769

IMG_4770

IMG_4771

In order to get the stem to seat properly in the shank I used a knife and beveled/chamfered the inside edge of the mortise so that the stem would sit well. I also found in measuring the tenon that it was slightly too long for the mortise and the original manufacturer had left the end slightly at an angle so that it did not seat well in the mortise. I used a file to reseat the tenon and then put the stem in place. The fit was good, but the diameter of the stem was slightly more than the diameter of the smooth band on the shank so I sanded the band and the stem with 220 grit sandpaper. I was able to remove the excess diameter and bring the stem into line with the shank. I finished sanding it with a medium and fine grit sanding sponge to remove scratches.
IMG_4772

IMG_4773

IMG_4774

IMG_4775

IMG_4776

IMG_4777

IMG_4778

With the sanding finished the fit was tight and the transition was smooth. I scrubbed down the shank and the stem with some Everclear on a cotton pad to get rid of the sanding dust from the stem. With that done the pipe was ready to stain.
IMG_4779

IMG_4780

IMG_4782

IMG_4783

I decided to use a black aniline stain as the undercoat of the pipe. The stain would hide the repaired flaws well as they were also dark. I applied the stain with a cotton swab and made sure that it went into all the nooks and crannies of the briar.
IMG_4784

IMG_4785

IMG_4786

IMG_4787

IMG_4788

Once the stain was applied I flamed it with a lighter to set the stain and then took it to the buffer to see if I could buff away the stain on the higher parts of the rustication. I used red Tripoli to do the buffing. I kept a pretty light touch as I did not want the Tripoli to build up in the rustication. With that done, the finish was closer to what I was aiming for. I still wanted a few more of the high spots showing.
IMG_4790

IMG_4791

IMG_4792

IMG_4793

I wiped the bowl down with Everclear on a soft cloth to remove some more of the black and then buffed it with White Diamond. I then gave it a top coat of oxblood stain to bring out the contrast and highlight the high portions of the rustication. I buffed it again with White Diamond.
IMG_4794

IMG_4795

IMG_4796

IMG_4797

To remove the tooth chatter and the scratches from fitting the stem to the shank I used my usual array of micromesh sanding pads. I wet sanded with 1500-2400 grit pads and dry sanded with the 3200-12,000 grit pads. I rubbed the stem down with Obsidian Oil and let it dry.
IMG_4798

IMG_4800

IMG_4802

Once the stem was done I used 2400 grit micromesh sanding pads and dry sanded the high spots on the rustication on the bowl and the shank to further accentuate the contrast. I buffed the bowl lightly with White Diamond and then buffed the pipe as a whole with White Diamond yet again. Once it was done, I gave the stem multiple coats of carnauba wax. I also gave the bowl a very light buff with the carnauba wheel – too heavy a touch and the wax fills in the crevices of the rustication. I then hand buffed it with a shoe brush to finish the shine. The completed makeover is shown in the photos below. The pipe is ready to enter into a new chapter of its life.
IMG_4803

IMG_4804

IMG_4806

IMG_4807

Since posting this I have found out some information about the stamping. Racine de Bruyere means Genuine Briar. It was stamped on pipes coming out of St. Claude. The stamping does not define the maker but the region. The pipe was probably made in late 20’s to early 30’s. I found the original eBay sale description that showed the pipe as it was when Mark received it. I have included those pictures below. Note the gold leaf/paint in the stamping.
Racine2

Racine3

Racine4

Racine5

Racine6

Racine7

Racine8

Racinea

Reworking a Peterson’s Irish Seconds Canadian


Blog by Steve Laug

This pipe was another one I got in my trade with Mark, an Irish Seconds made by Peterson. It is stamped on the top of the shank, IRISH SECONDS and on the underside of the shank, Made in the Republic of Ireland. There is no shape number or other stamping on the pipe. The briar is actually very nice except for a flaw that ran around the bottom of the front of the bowl like a smile. It had been filled with white putty that had shrunk and left a shallow groove its entire length (from side to side of the front). The finish was non-existent and I am not sure it ever had been stained. The stem was evidently a replacement and did not fit well against the shank. The diameter of the oval on the shank and that of the stem did not match. The stem was also lopsided at the junction. On the underside of the stem there was a trough carved about ½ inch from the button that functioned as a groove to make the stem a dental bit. It too was poorly executed and was rough. The dimensions on this pipe are diminutive – its length is 5 ¼ inches, height is 1 5/8 and outer diameter of the bowl is 1 ¼ inches. It fits well in the hand and is very light in weight. I suspect that if it were not for the flaw noted above this would have been a higher grade Peterson.
IMG_4708

IMG_4709

IMG_4710

IMG_4711

The next photo shows the extent of the flaw and the white fill material on the bottom front of the bowl. This is the only flaw on the bowl.
IMG_4712

The next two photos below shows the groove that had been cut in the stem to make it function as a dental bit.
IMG_4713

IMG_4714

I used a dental pick to remove the white fill material in the flaw and then wiped it clean with acetone. The groove was not deep but it was long and quite wide. I used a combination of briar dust and superglue to replace the fill. I packed the area with briar dust using a dental pick and then dripped superglue into place. While the glue was still wet I quickly put more briar dust on top of the glue and packed it in place as well.
IMG_4715

I sanded the stem with 220 grit sandpaper and then a medium grit sanding sponge. I wiped it down with Everclear and then filled the remaining groove with clear superglue until it was a bubble on the surface of the stem. I sanded it with 220 grit sandpaper once it was dry. I sanded the stem shank junction with 220 grit sandpaper to smooth out the transition and make the fit more seamless. I followed that by sanding with a medium and a fine grit sanding sponge to remove the scratches. I was careful in sanding the shank to make the flow of the shank into the stem a gradual incline rather than an abrupt change. I have found that in doing this the stem and shank flow look as close to original as possible.
IMG_4716

IMG_4717

IMG_4718

IMG_4719

IMG_4720

I sanded the front of the bowl with 220 grit and also with the medium and fine grit sanding sponges. The fill still had spots that needed more work.
IMG_4721

I wiped the bowl down with acetone on cotton pads to clean up the finish. I am very happy with the transition from the shank to the bowl.
IMG_4722

IMG_4723

IMG_4724

IMG_4725

IMG_4726

I did more sanding on the fill on the front of the bowl and refilled the spots that needed work. I stained the bowl with a dark brown aniline stain thinned 2:1 with isopropyl alcohol. I have been using this mixture since I opened the bottle of stain several months ago and now am at the bottom of the bottle so it may be slightly darker.
IMG_4727

IMG_4728

IMG_4729

IMG_4730

The stain went into the new fill material but it turned very dark. I continued to apply the stain to the area and flame it repeatedly until the blend was better.
IMG_4731

I buffed the pipe with red Tripoli and the White Diamond to see where I stood with the staining.
IMG_4732

IMG_4733

IMG_4734

IMG_4735

The fill still stood out as can be seen from the photo below. I decided to continue to apply stain to the surrounding area on the bowl to darken the bottom of the bowl a bit. My thinking was that if the entire bottom of the bowl was slightly darker the fill would blend in better with the briar.
IMG_4736

IMG_4747

I sanded the stem with my usual array of micromesh pads – wet sanding with 1500-2400 grit sanding pads and dry sanding with 3200-12,000 grit sanding pads. I rubbed the stem down with Obsidian Oil to protect the vulcanite and set is aside to dry.
IMG_4737

IMG_4738

IMG_4739

I buffed the pipe and stem with White Diamond. The photo below shows the finished stem after buffing. The repair of the trough is not visible in the photo and is barely visible when held in the light. I am happy with the repair.
IMG_4745

I buffed the entire pipe with White Diamond a final time and then gave it multiple coats of carnauba wax to protect it. I did not want a high gloss on the pipe but rather a slight matte finish. The photos below show the finished pipe. It is ready for many more years of service.
IMG_4740

IMG_4741

IMG_4742

IMG_4744