Daily Archives: January 11, 2014

Topped, Reshaped and Restored a Kolding Old Briar 17


This old Kolding Old Briar is also one of the pipes that belong to the Vancouver Pipe Club lot. It is stamped Kolding over Old Briar on the top of the shank and Made in Denmark over 17 on the underside of the shank. I have a very similar pipe to this one made by Stanwell – same overall shape and oval flat saddle stem. Mine is a great smoking pipe. This one appears to have been much-loved as well. As with the others in this lot it was in dire need of attention. The briar had been given the standard coat of varnish that is on all of them. The varnish is put over the top of some buildup on the rim and some significant rim damage to the top and the edges of the bowl. There was a small piece of briar missing from one spot on the left front side of the bowl’s outer rim. The inner rim also was rough. The bowl had been coated with a black rubbery bowl coating. The stem was in very good shape with no tooth marks or damage and no oxidation.
IMG_4204

IMG_4205

IMG_4206

IMG_4207

The close up photo below shows the rim damage – both burning, buildup and marks that went quite deep and broke the grain of the briar. Steaming would not work to lift the damage on this rim as it was compromised.
IMG_4208

Topping this bowl would be far more involved than the previous bowls I had topped. It needed to be topped to remove the damage to the surface, flattened to take care of the deep cuts in the briar, and then the inner edge beveled and the outer edge rounded. I set up my topping board and sandpaper and began to sand the top of the bowl.
IMG_4209

I took it down far enough to remove the damaged portions of the rim and then worked to bevel the inner edge with a folded piece of sandpaper. I sanded the rim and the inner bevel with a medium and then a fine grit sanding block. I also used the block to reshape the curve of the outer edge of the rim into the flow of the bowl.
IMG_4210

IMG_4211

IMG_4212

IMG_4214

I wiped the pipe down with acetone on cotton pads to remove the varnish and the finish on the remainder of the pipe in preparation for the new coat of stain.
IMG_4215

IMG_4216

IMG_4217

IMG_4218

I decided to use two different colours of stain to restain the pipe. The first stain was a MinWax Medium Walnut stain. I rubbed it on and then rubbed it off. I buffed the pipe with White Diamond to polish the briar before giving it the second colour of stain.
IMG_4219

IMG_4220

IMG_4222

IMG_4223

For the second stain I used MinWax Red Mahogany stain. I rubbed it into the bowl and then rubbed it off. I polished the pipe with a soft cloth. I rubbed down the stem with Obsidian Oil and hand buffed the stem.
IMG_4224

IMG_4225

IMG_4227

IMG_4228

I buffed the bowl and stem with White Diamond again and then gave the bowl and stem multiple coats of carnauba wax. I gave it a final buff with a clean flannel buffing pad. The finished pipe is shown below. It will now join the others in the Pipe Club box until I finish those that remain. I love the rounded look of the bowl top and the bevel on the rim as it adds to the feel of the pipe. I think this one will also bring a good return for the club.
IMG_4231

IMG_4232

IMG_4236

IMG_4238

Topping and Refinishing a Dansk Handvaerk Thorshammer Bruyere


This is yet another one of the Vancouver Pipe Club lot – it is stamped on the left side of the long shank Thorshammer over Bruyere. On the right side it is stamped Dansk Handvaerk. On the underside of the shank is an interesting stamping next to the stem shank junction – it reads A/ES with the / being the image of a pipe. It also has the shape number 5 on the underside. The shape is either a long shanked billiard or a long stemmed lumberman or Liverpool. When I took it out of the box the finish had a coating of varnish that had the fingerprints of the varnisher imprinted in them. The pipe has a small band of light briar near the stem. I thought that maybe this was done when the pipe was restemmed, but upon examination I believe the stem is the original. The light band could also have been a thin silver band or such but that was missing. The rim was a mess as with the majority of the pipes I am doing for the club box. The outer edge had burn marks on the right side and had been badly beaten against whatever the smoker used to empty his bowl. It was missing chunks of briar and steaming would not bring out the damage. The finish was also spotty under the varnish so I decided to strip the bowl and start over.
IMG_4180

IMG_4181

IMG_4183

IMG_4184

The picture below gives a fairly good view of the damage to the rim. In later photos of the topping process I show a few more of the damaged areas of the rim.
IMG_4185

I set up my topping board and sandpaper and began to top the bowl. I checked often to make sure that I would stop at the right point in the process. I wanted to remove as little of the height of the bowl as possible while smoothing out the damaged areas.
IMG_4186

The next two photos show the outer edge damage after a little bit of sanding on the board. It was really quite rough to the touch as I ran my fingers around the bowl.
IMG_4187

IMG_4189

I continued to sand the top of the bowl until the damage was minimized. I sanded it with a fine grit sanding block afterwards to smooth out the scratches left behind by the sandpaper. I also beveled the inner edge of the rim with a folded piece of sandpaper to smooth out that area as well. This will become visible in the later photos.
IMG_4190

I wiped the bowl down with acetone on a cotton pad to remove the varnish and the stain. I sanded the bowl with a fine grit sanding sponge to remove the stubborn varnish areas and then scrubbed it down with acetone again. Once I had the finish removed the bowl was ready to be stained.
IMG_4191

IMG_4192

IMG_4193

For ease of use, since I have a lot of these to do for the pipe club stash, I am using MinWax stain. On this one I gave it a coat of Red Mahogany stain followed by a coat of Medium Walnut stain. I rubbed them on and off to get the colour I wanted. The area at the stem junction stubbornly refused to take much of the stain no matter how much I coaxed it and heated it. In the photos below the lighter area at that point is better though still visible to me.
IMG_4194

IMG_4195

IMG_4196

IMG_4199

I rubbed down the stem with Obsidian Oil and rubbed it into the vulcanite. Once it was dry I buffed the pipe with White Diamond and then gave it multiple coats of caranauba wax to protect and give it a shine. The rim came out exceptionally well and the stain coat looks far better than when I started. The red Mahogany stain kept the red undertones that were present in the original stain coat. I finished buffing with a clean flannel buff to give it a shine. The finished pipe is shown in the photos below. It is ready to go back in the box of finished pipes for the Pipe Club. Still a few more pipes to fix and work on before I send them back to the club for sale or their fund-raising use.
IMG_4200

IMG_4201

IMG_4202

IMG_4203

Kaywoodie Super Grain 07C Restored (Unsmoked)


I found this unsmoked Kaywoodie Super Grain 07C on Ebay. It has a four-hole, “Drinkless” stamped stinger. That and the three digit shape number help identify the timer period when it was made. Hacker sais the 07C bulldog was made from 1947 and that style stinger was discontinued by Kaywoodie in 1954.

Kaywoodie_07C_Before (1)

Kaywoodie_07C_Before (3)

Kaywoodie_07C_Before (4)

The bowl top had some dings from handling or bouncing around someones drawer for 50 plus years.

Kaywoodie_07C_Before (6)

Using a propane torch, old butter knife, and a small piece of wet cloth, I was able to steam out all of the dents on the bowl top. I heat the knife tip until it is glowing orange, than place the wet cloth (folded over twice) on the dent, then press the hot tip into the cloth. This causes the damp cloth to steam, which usually makes the dents spring back nicely.

Kaywoodie_07C_Finished (11)

The stem was oxidized but mint. The “Drinkless” engraving on the four-hole stinger was also like new. I removed the oxidation with 800 grit paper. I use a Popsicle stick to maintain the angles on the bulldog stem. Working around the logo was a little tricky. Then, I finished the stem with 2000 grit paper, followed by the 8000 and 12000 grade micromesh sheets. I then lightly buffed the stem with white diamond rouge and an automotive plastic polish.

The briar only needed a light buff with white diamond and then a few coats of carnuba wax. The bowl has several visible fills. Removing the oxidation revealed some “freckles” in the vulcanite, which I’ve learned is not uncommon on Kaywoodie or Doctor Grabow stems of that era.

Kaywoodie_07C_Finished (2)

Kaywoodie_07C_Finished (5)

Kaywoodie_07C_Finished (7)

Kaywoodie_07C_Finished (8)

Kaywoodie_07C_Finished (10)

First Experience Refurbishing – Working on Granddad’s Pipes – Cody Huey


I am following Cody on Twitter and yesterday when he posted the final picture in the article on the before and after on these pipes and a teaser on where they came from I wanted to know the whole story. I wrote and asked him if he would be willing to write-up the story and the refurb for rebornpipes. He quickly replied and soon sent the piece below. I am happy to have Cody write for the blog. Some of you will remember the name with the Moustache Man tamper piece I wrote a while ago. You can read about it at the link below. https://rebornpipes.wordpress.com/2013/11/22/a-review-a-cody-huey-moustache-men-pipe-tamper/ Cody has posted his contact information after the blog post. Have a look at his website store for the tampers he carves. Thanks Cody for being willing to write this up for us. It is great to have you here. Without further ado here is the article.

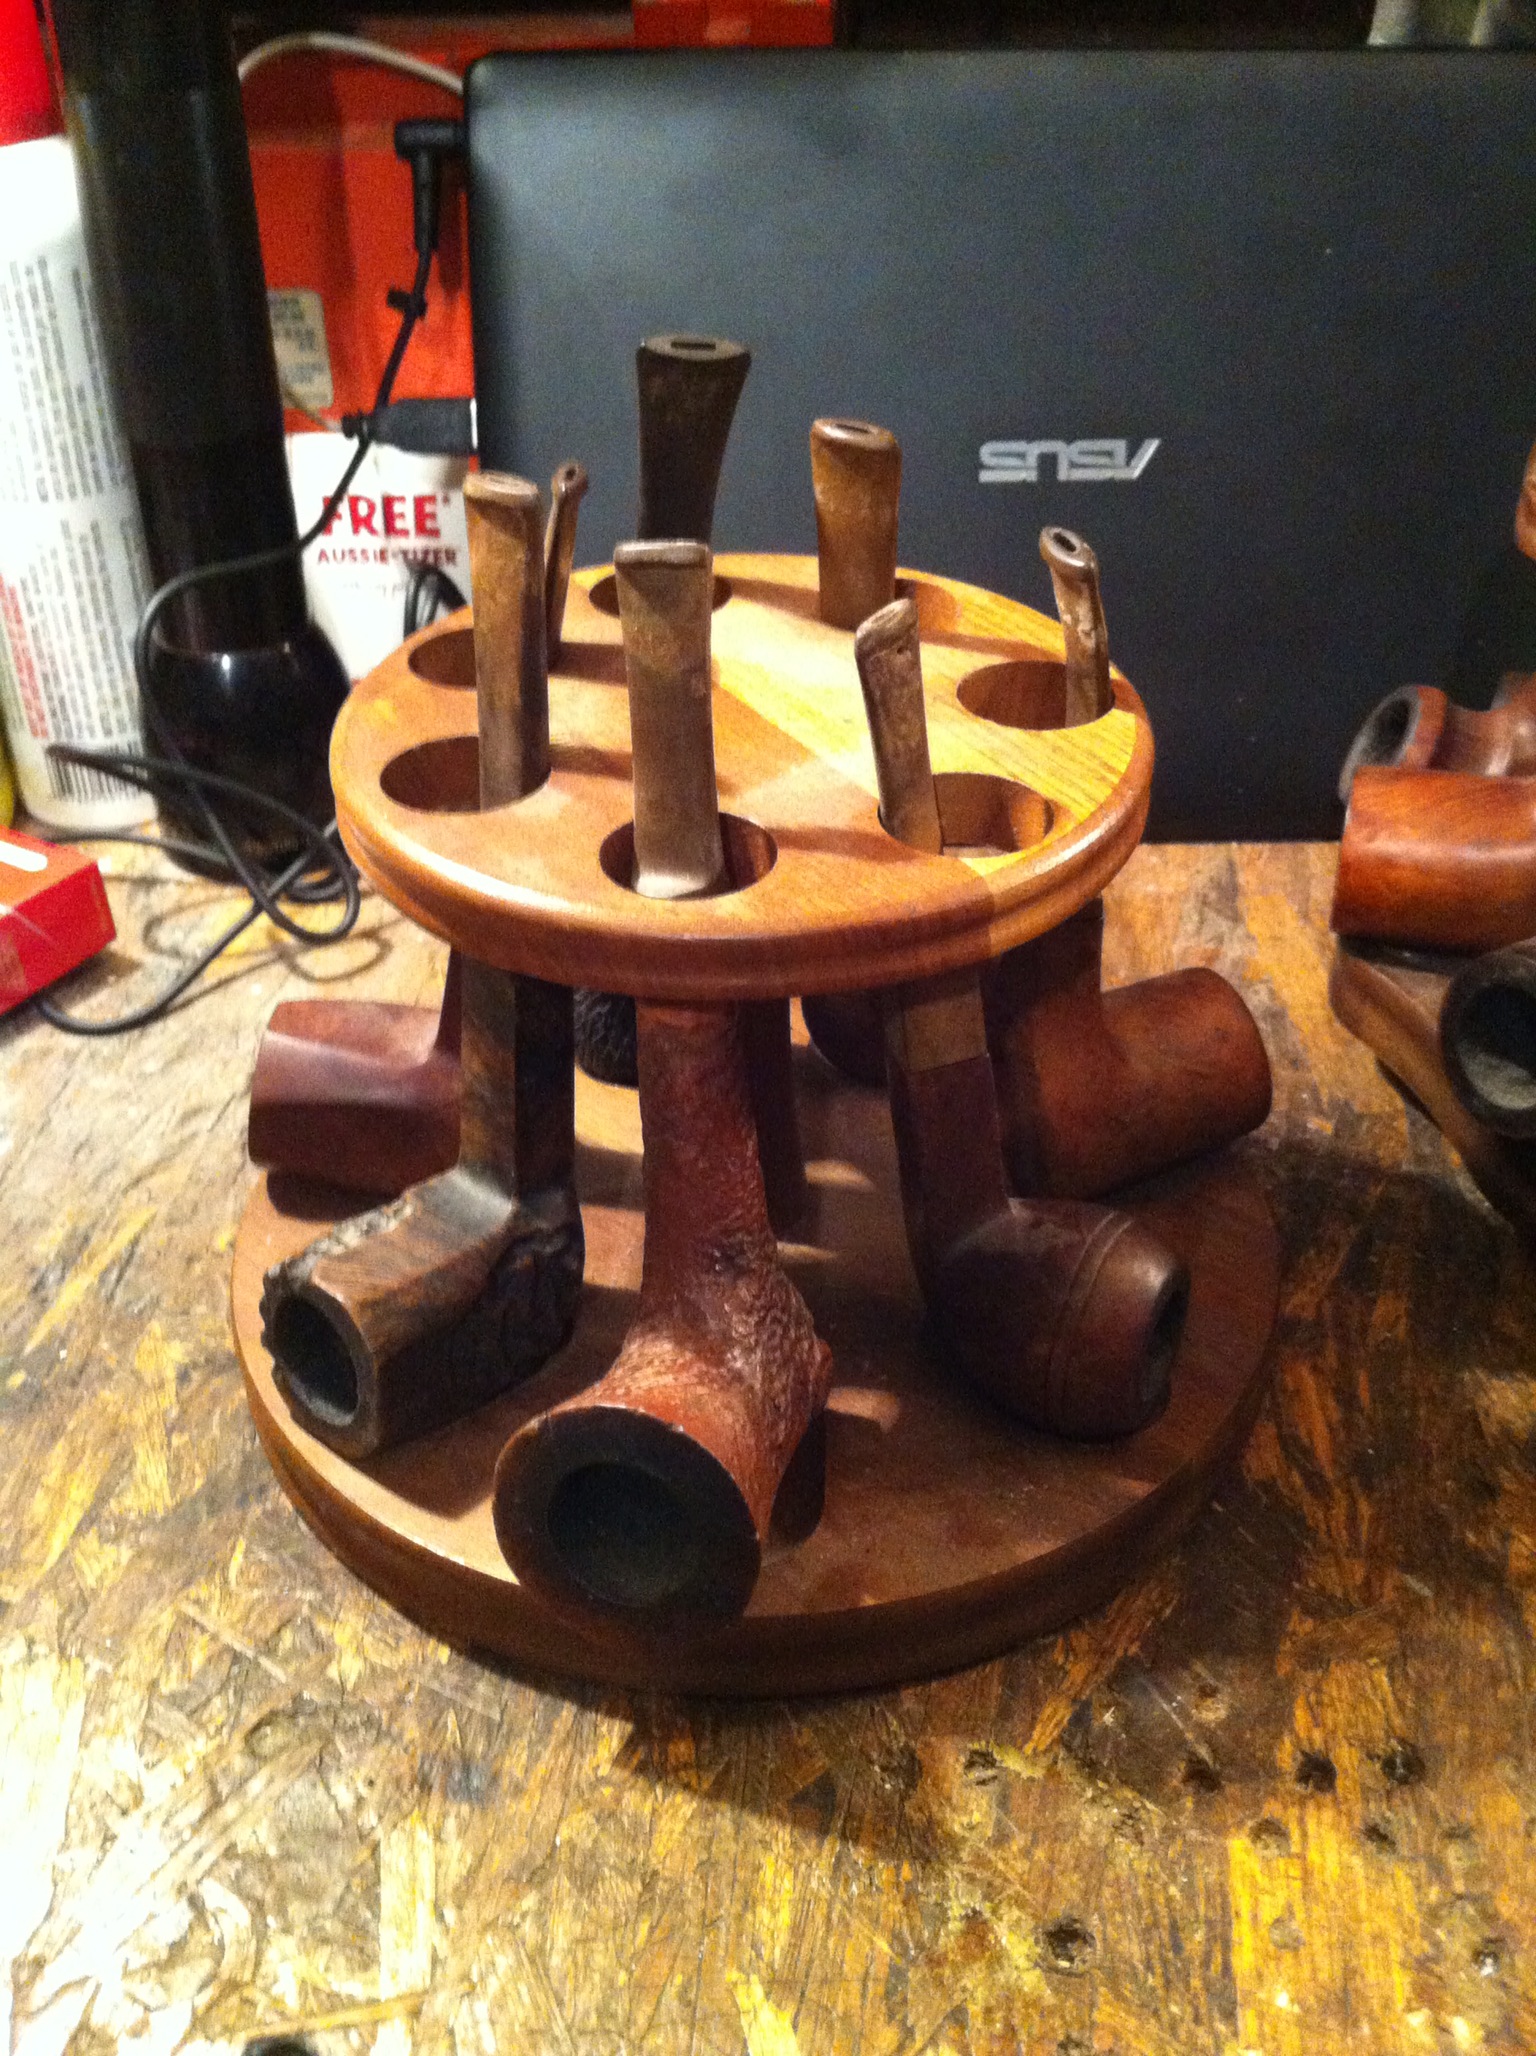
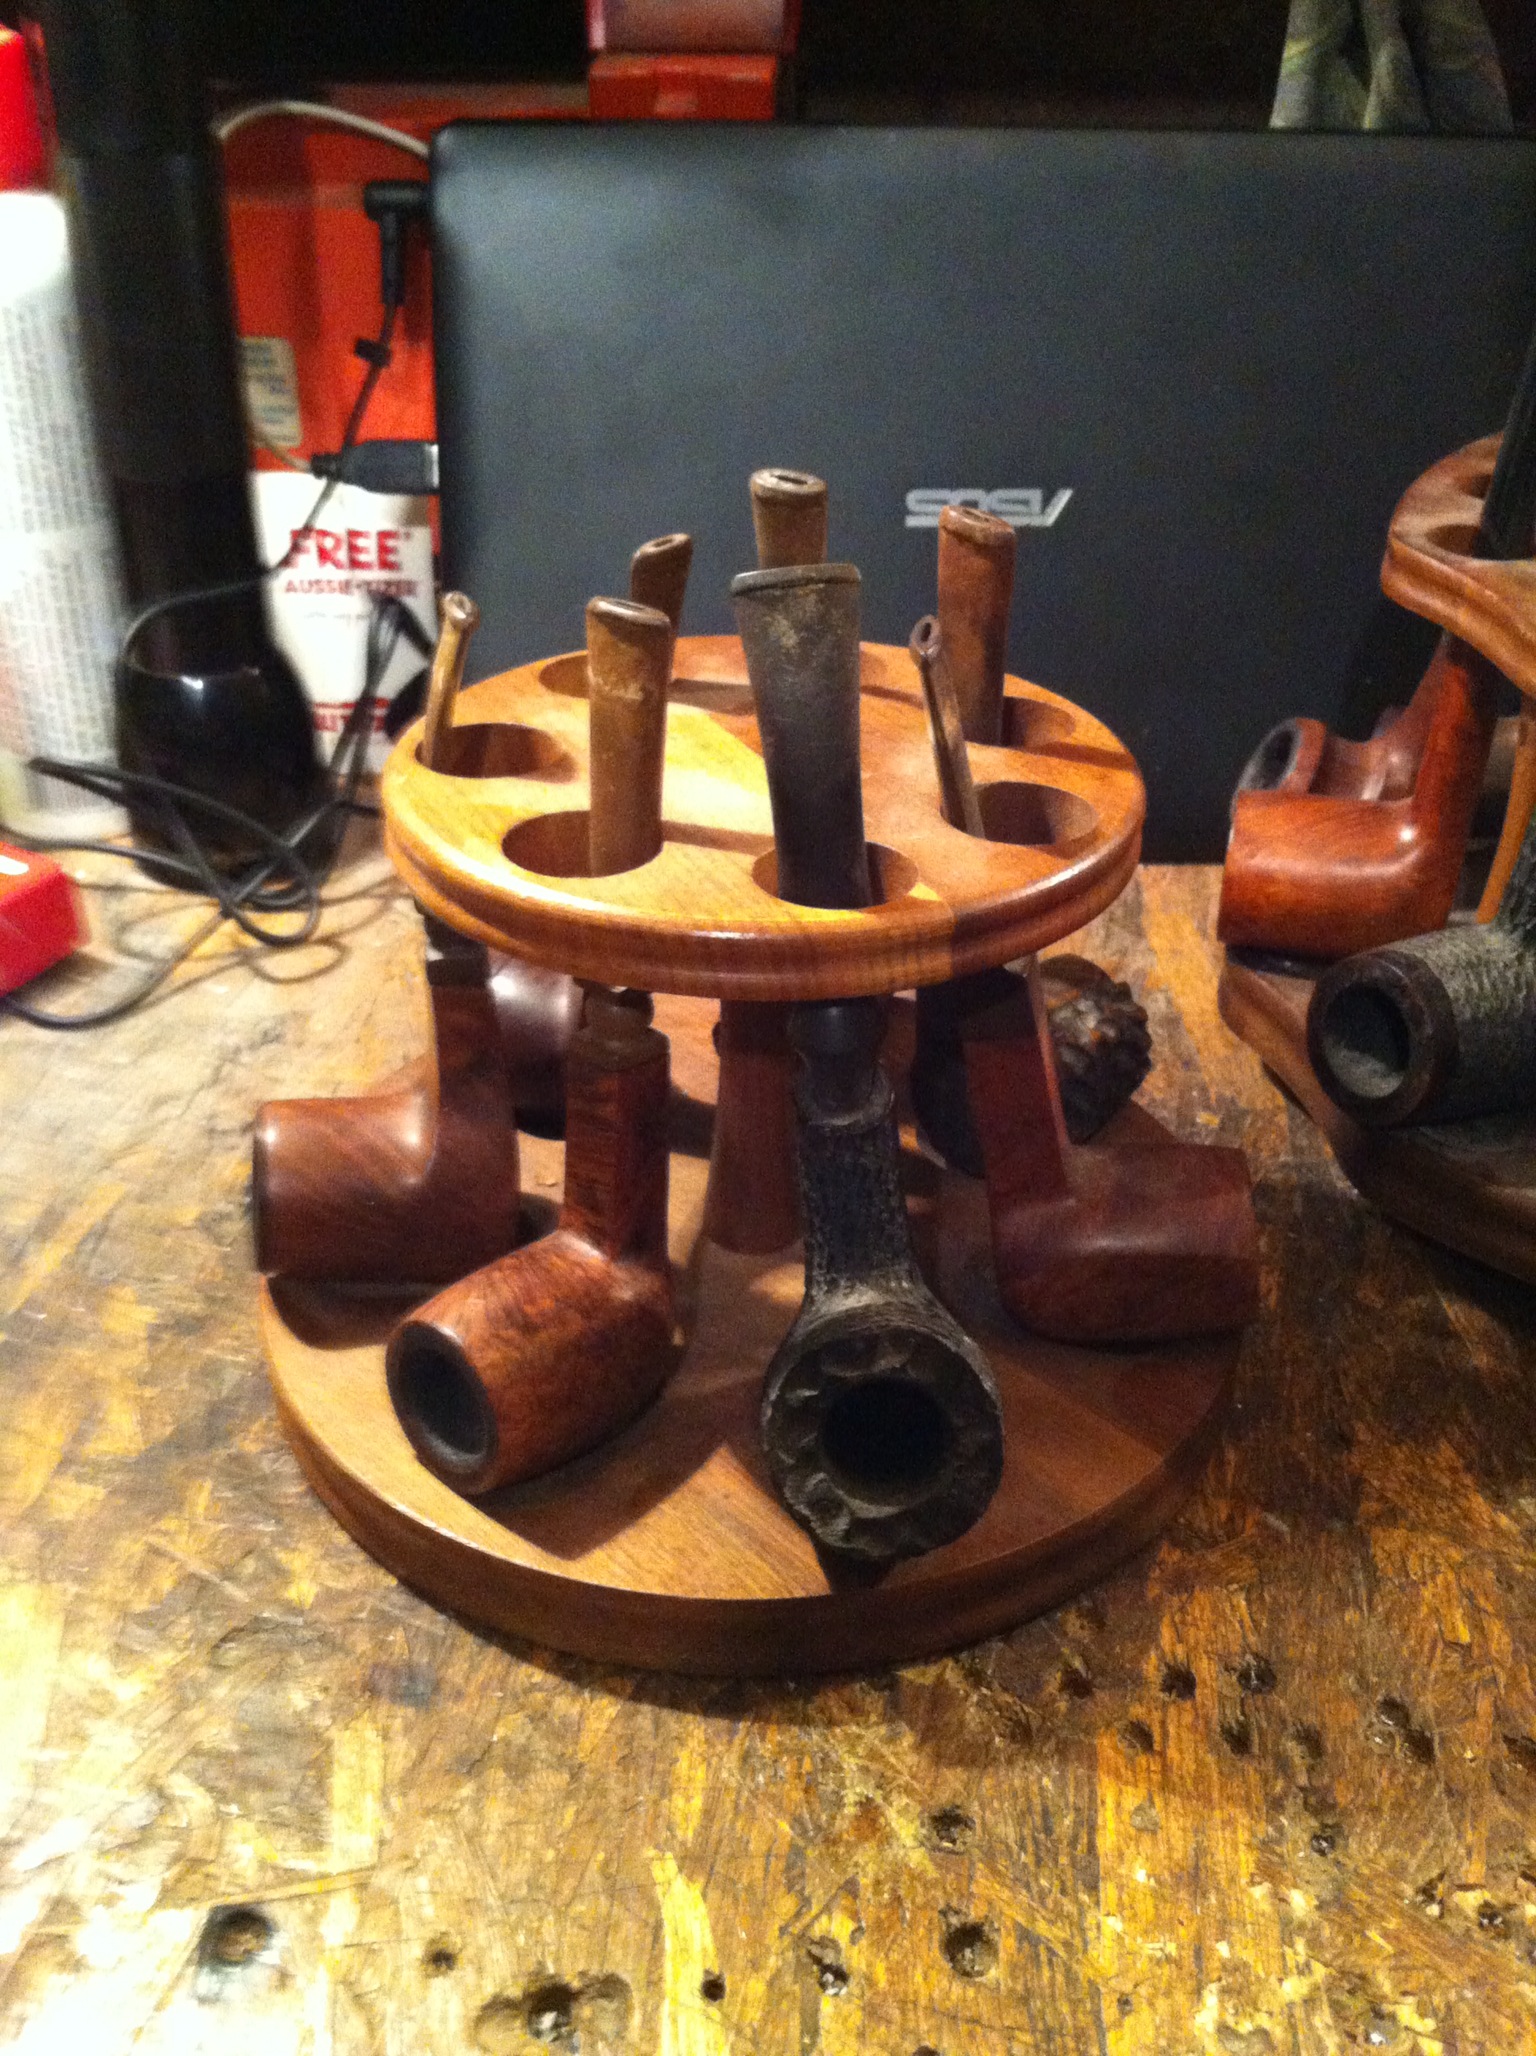
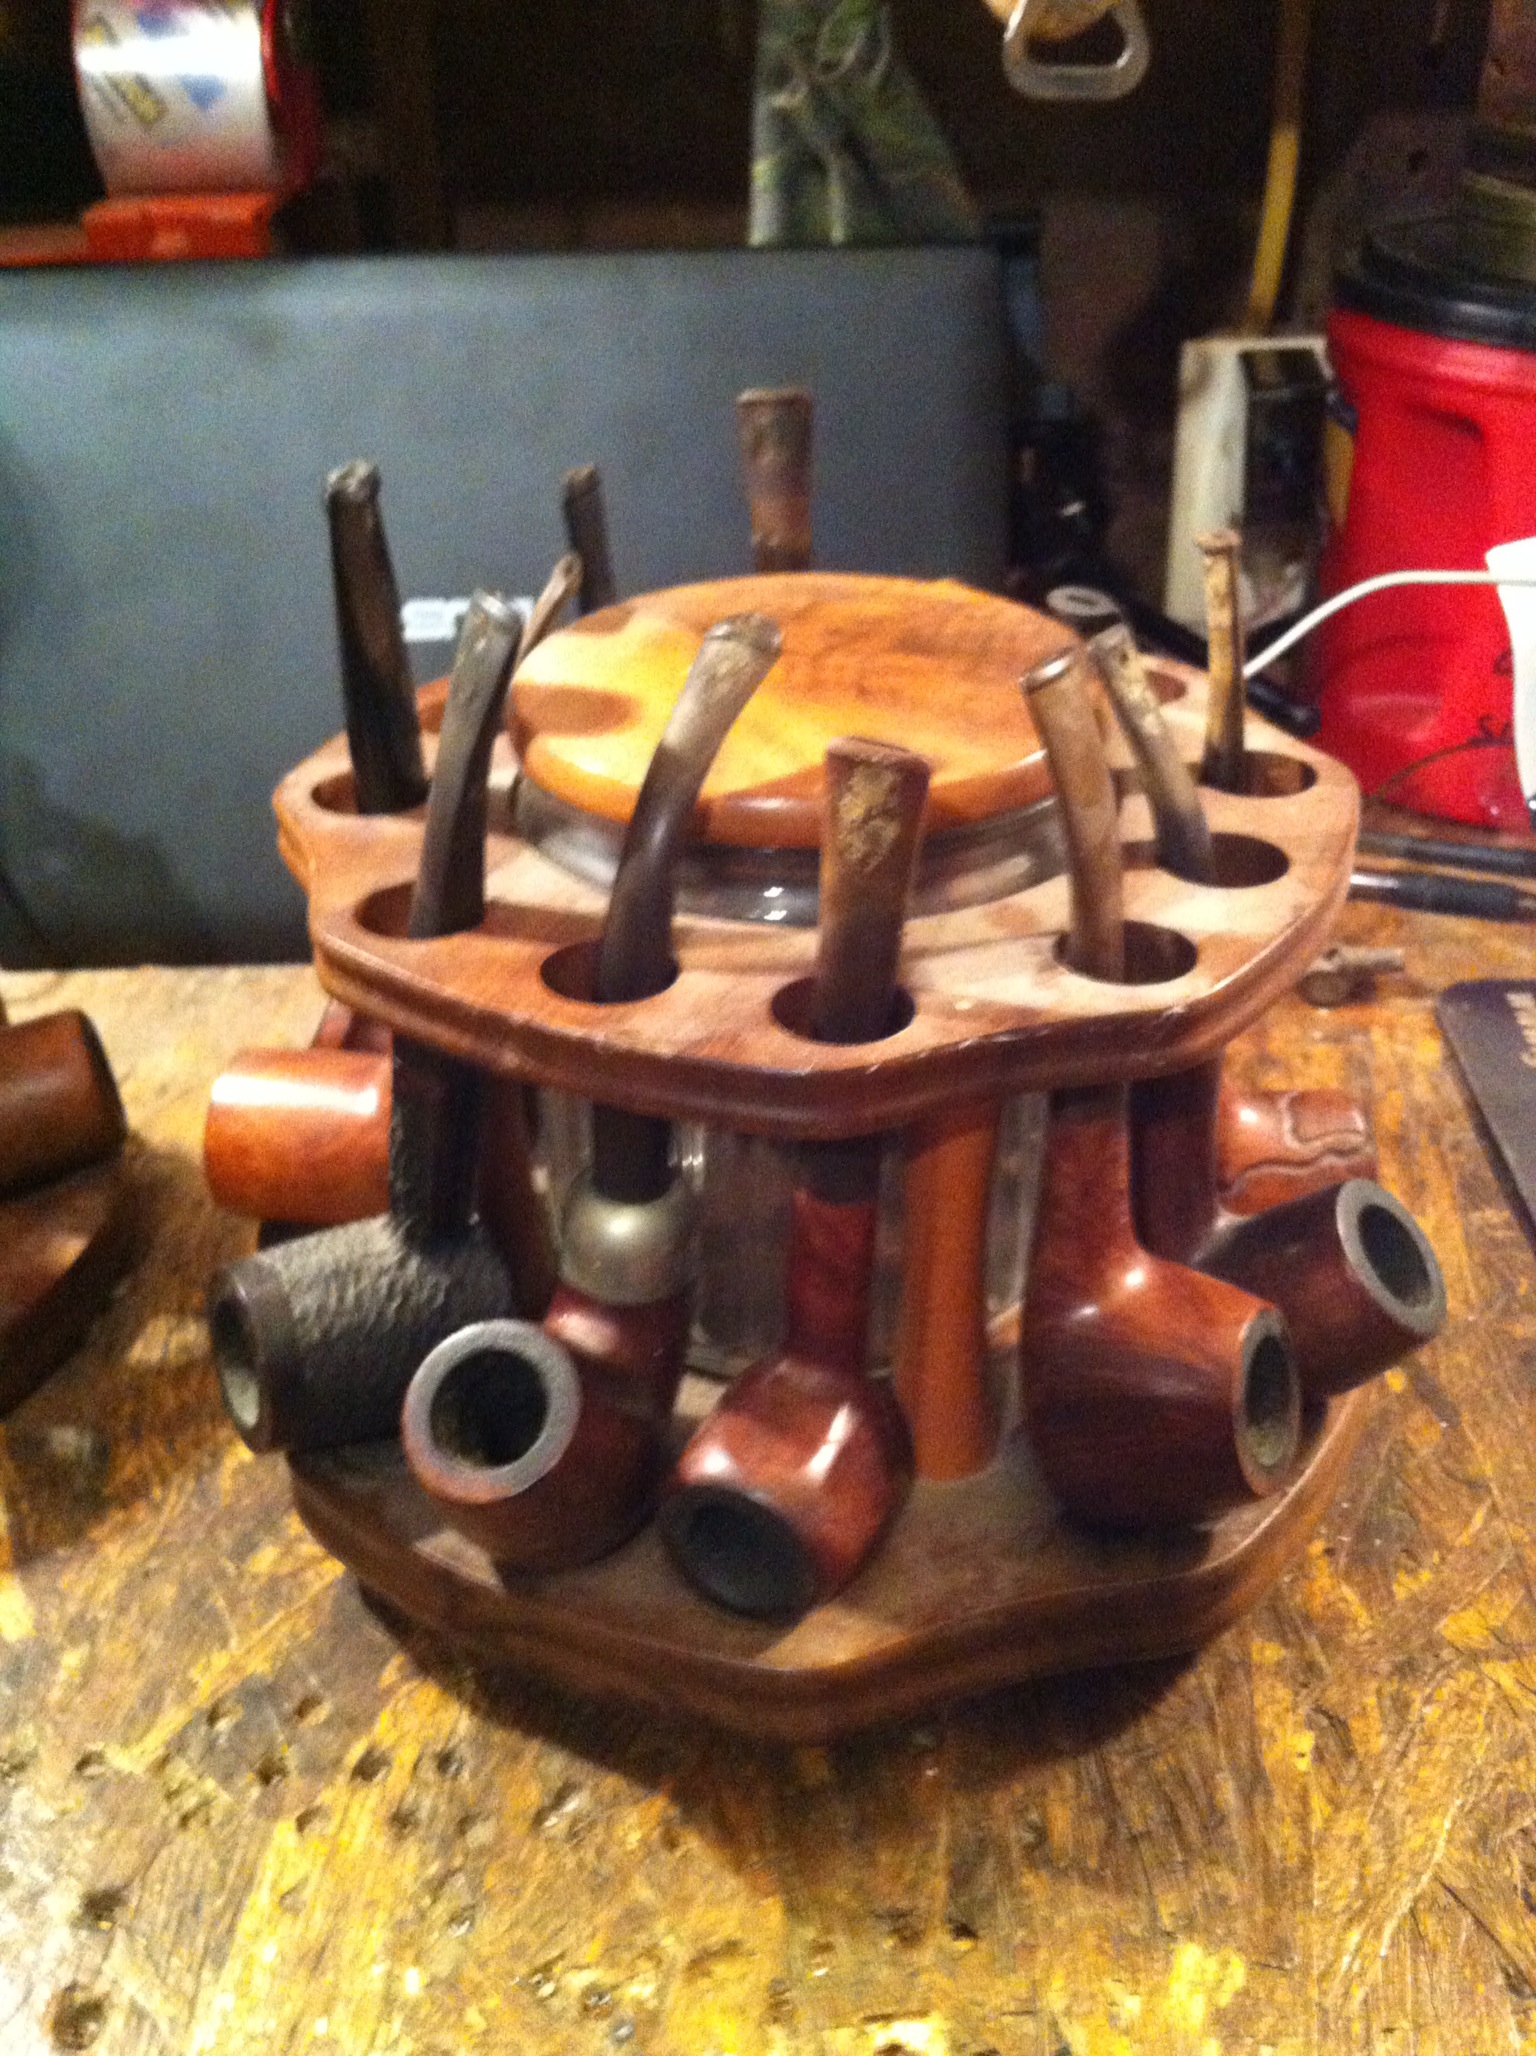
My wife and I were visiting her grandparents the other day. They are at the age where they are starting to hand down the precious items that they have collected over the years. As my wife and her mom were going through the rooms looking at figurines, paintings, and other things, I hear from the other room “Cody smokes a pipe”. My ears perked up then I was called to the front room. I heard, “Hey, take a look at these” as two full racks of old used pipes were sat down in front of me. I was told “take whatever you like, I won’t be smoking them anymore.” I was informed that all of these pipes are at least 50 years old and most of them were purchased at a smoke shop across from the University of Texas in Austin, TX. I asked if I could take all of them and was granted permission.
IMG_2468

IMG_2467

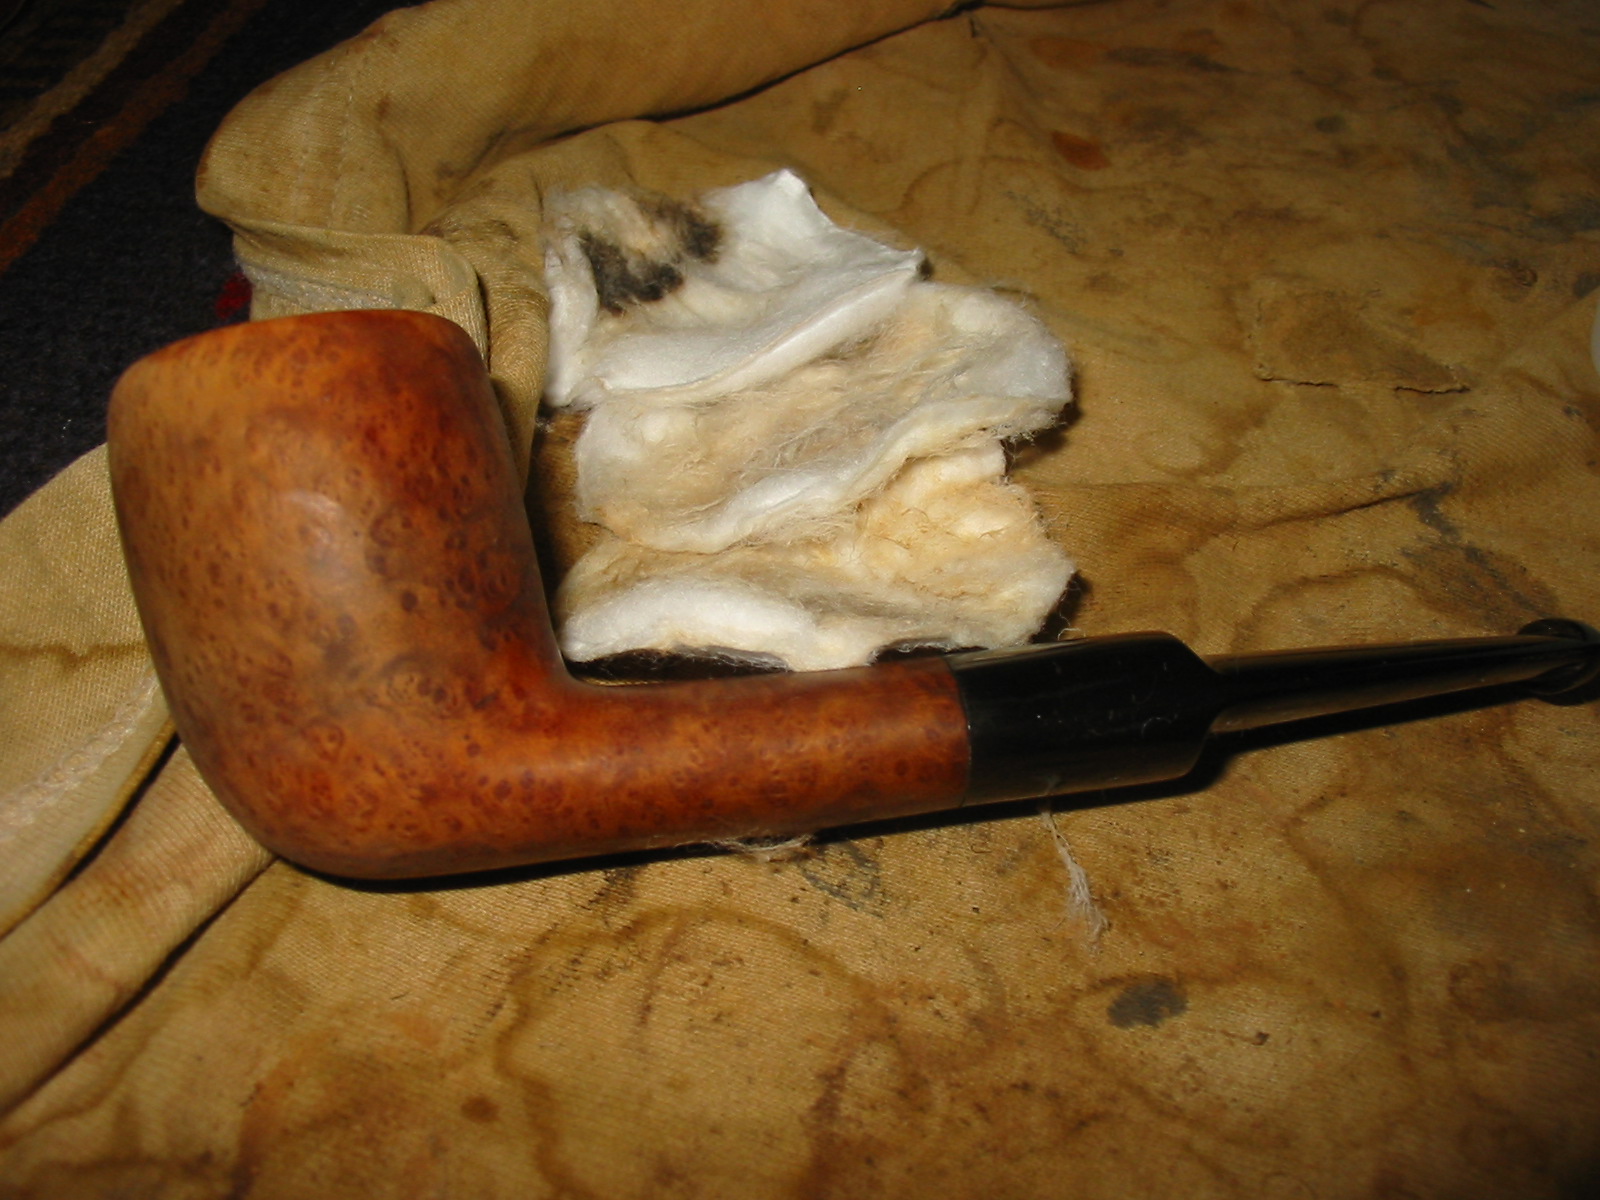
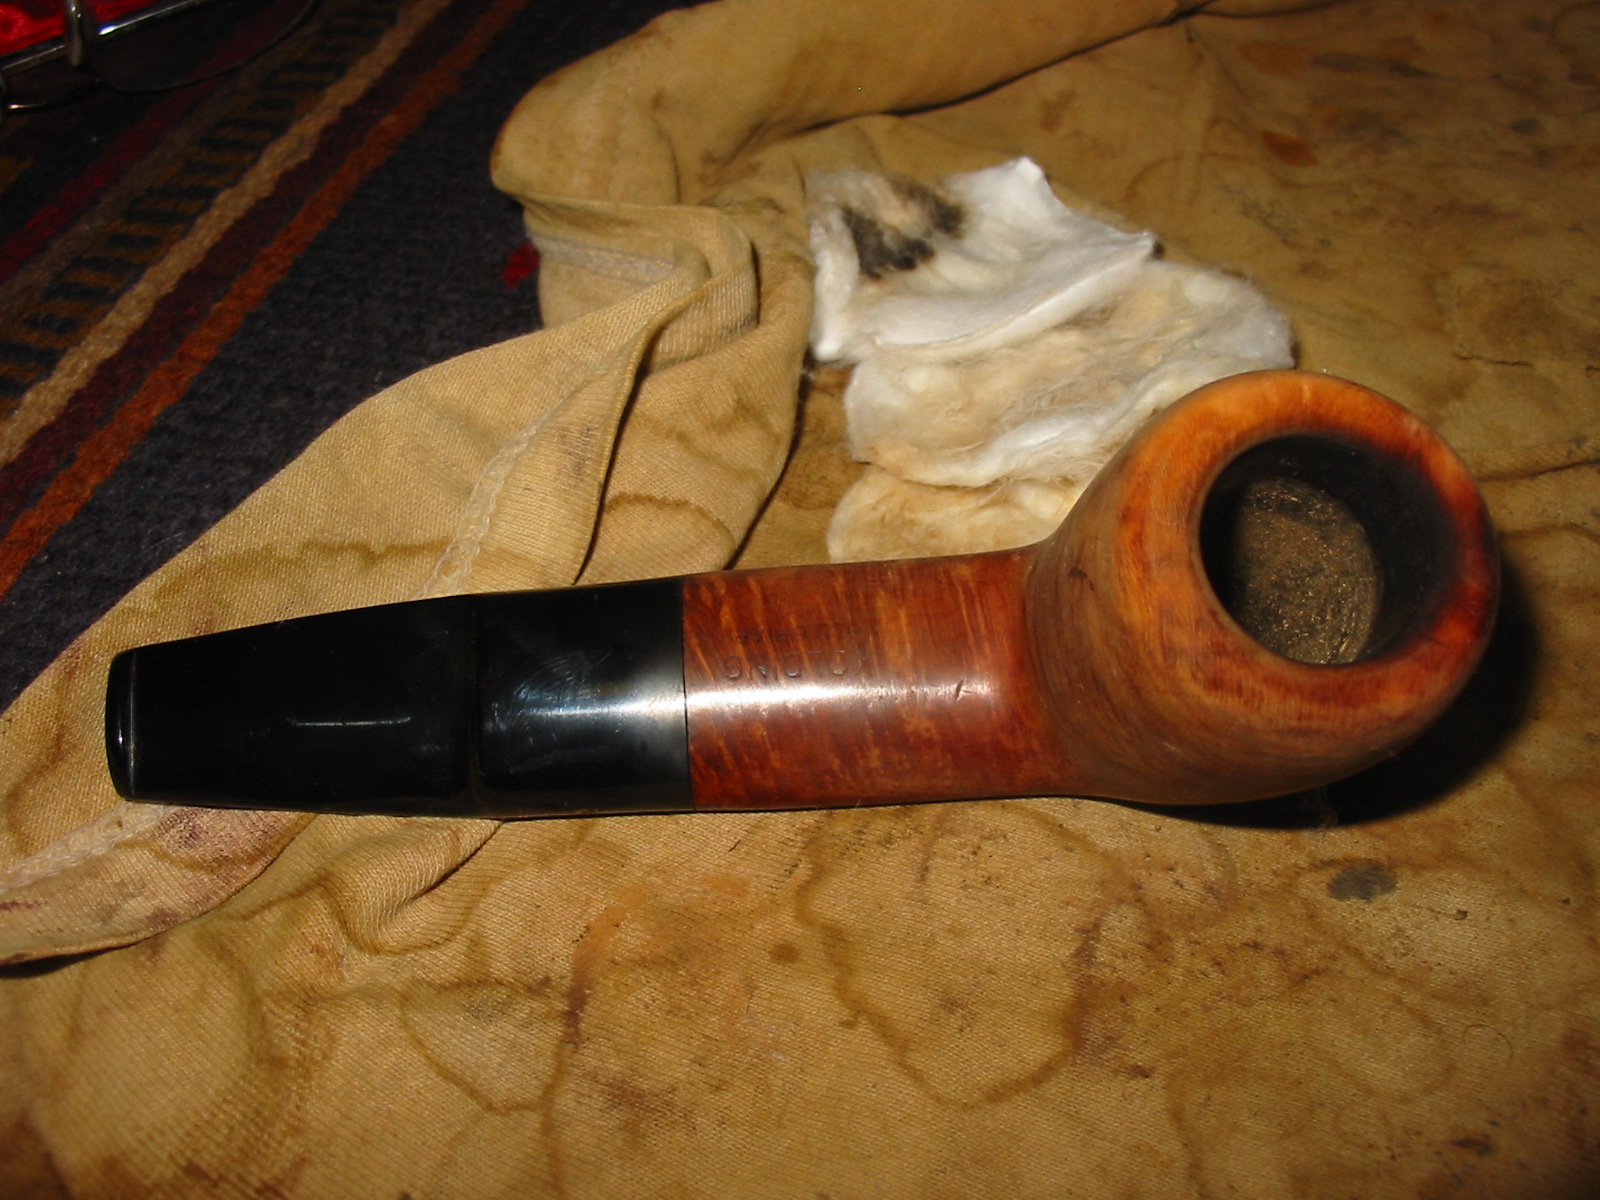
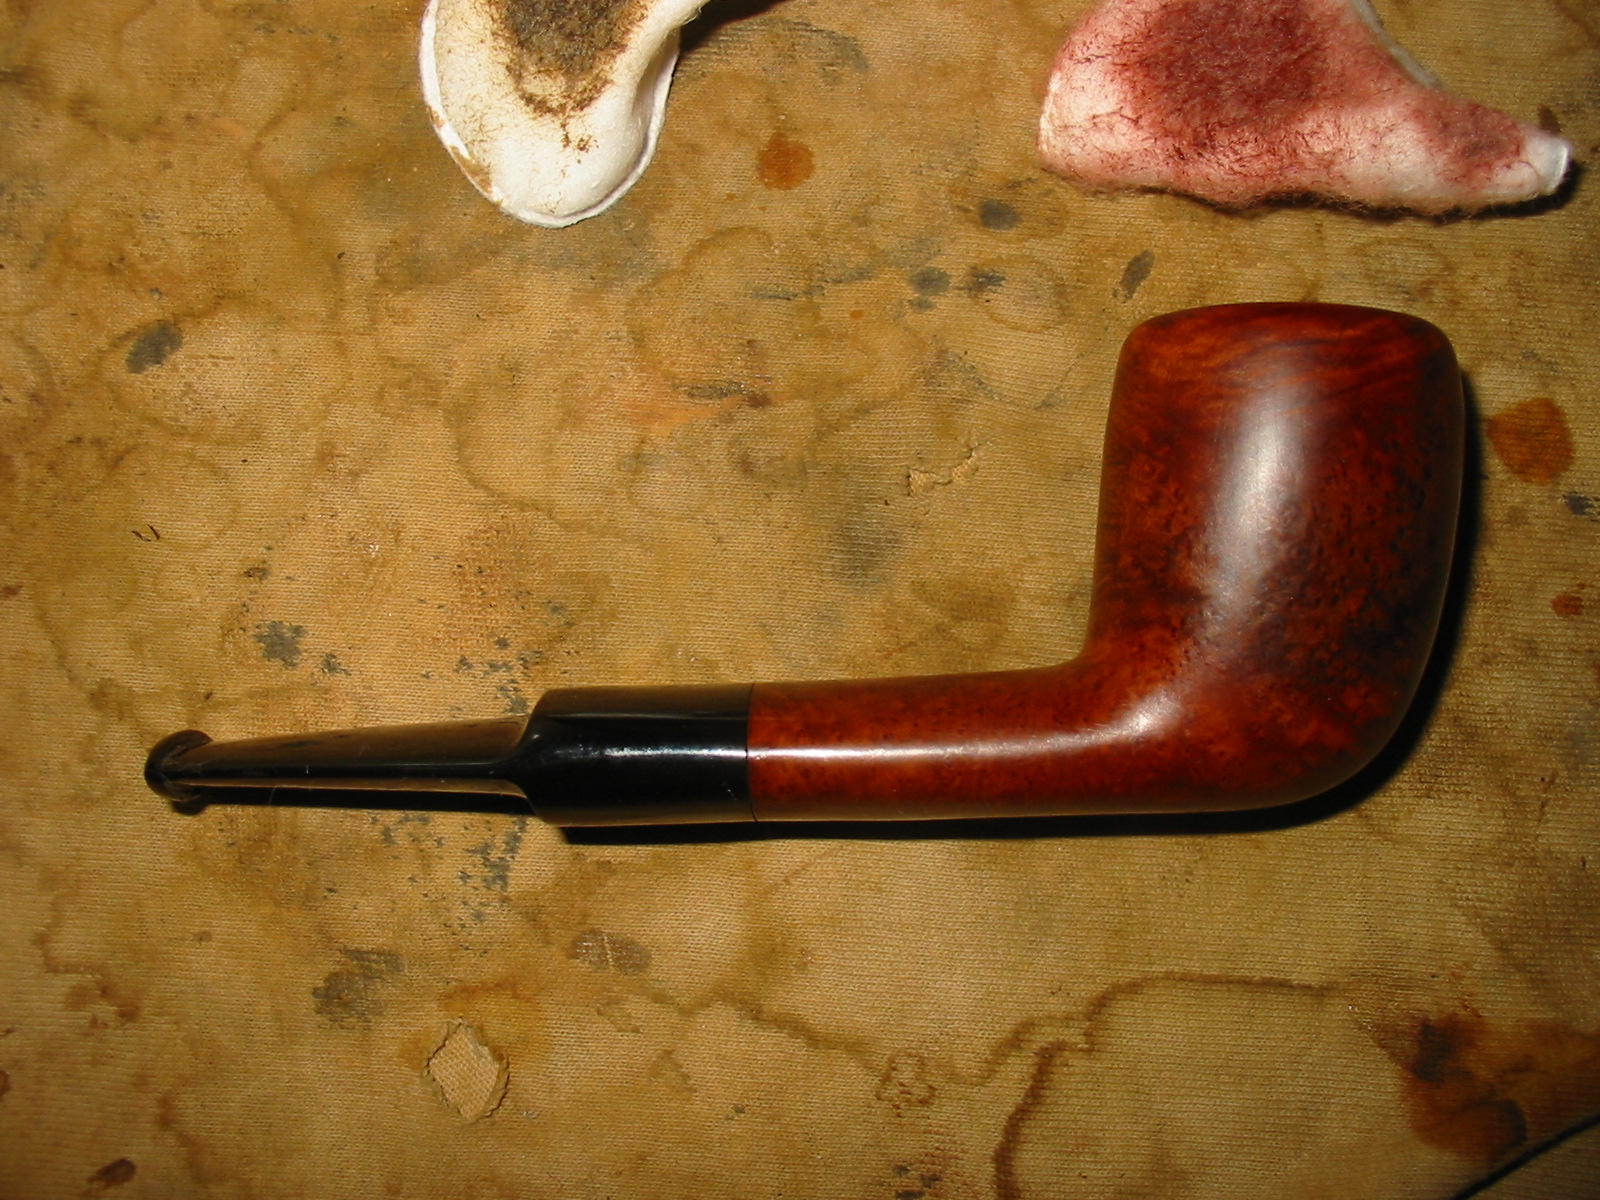
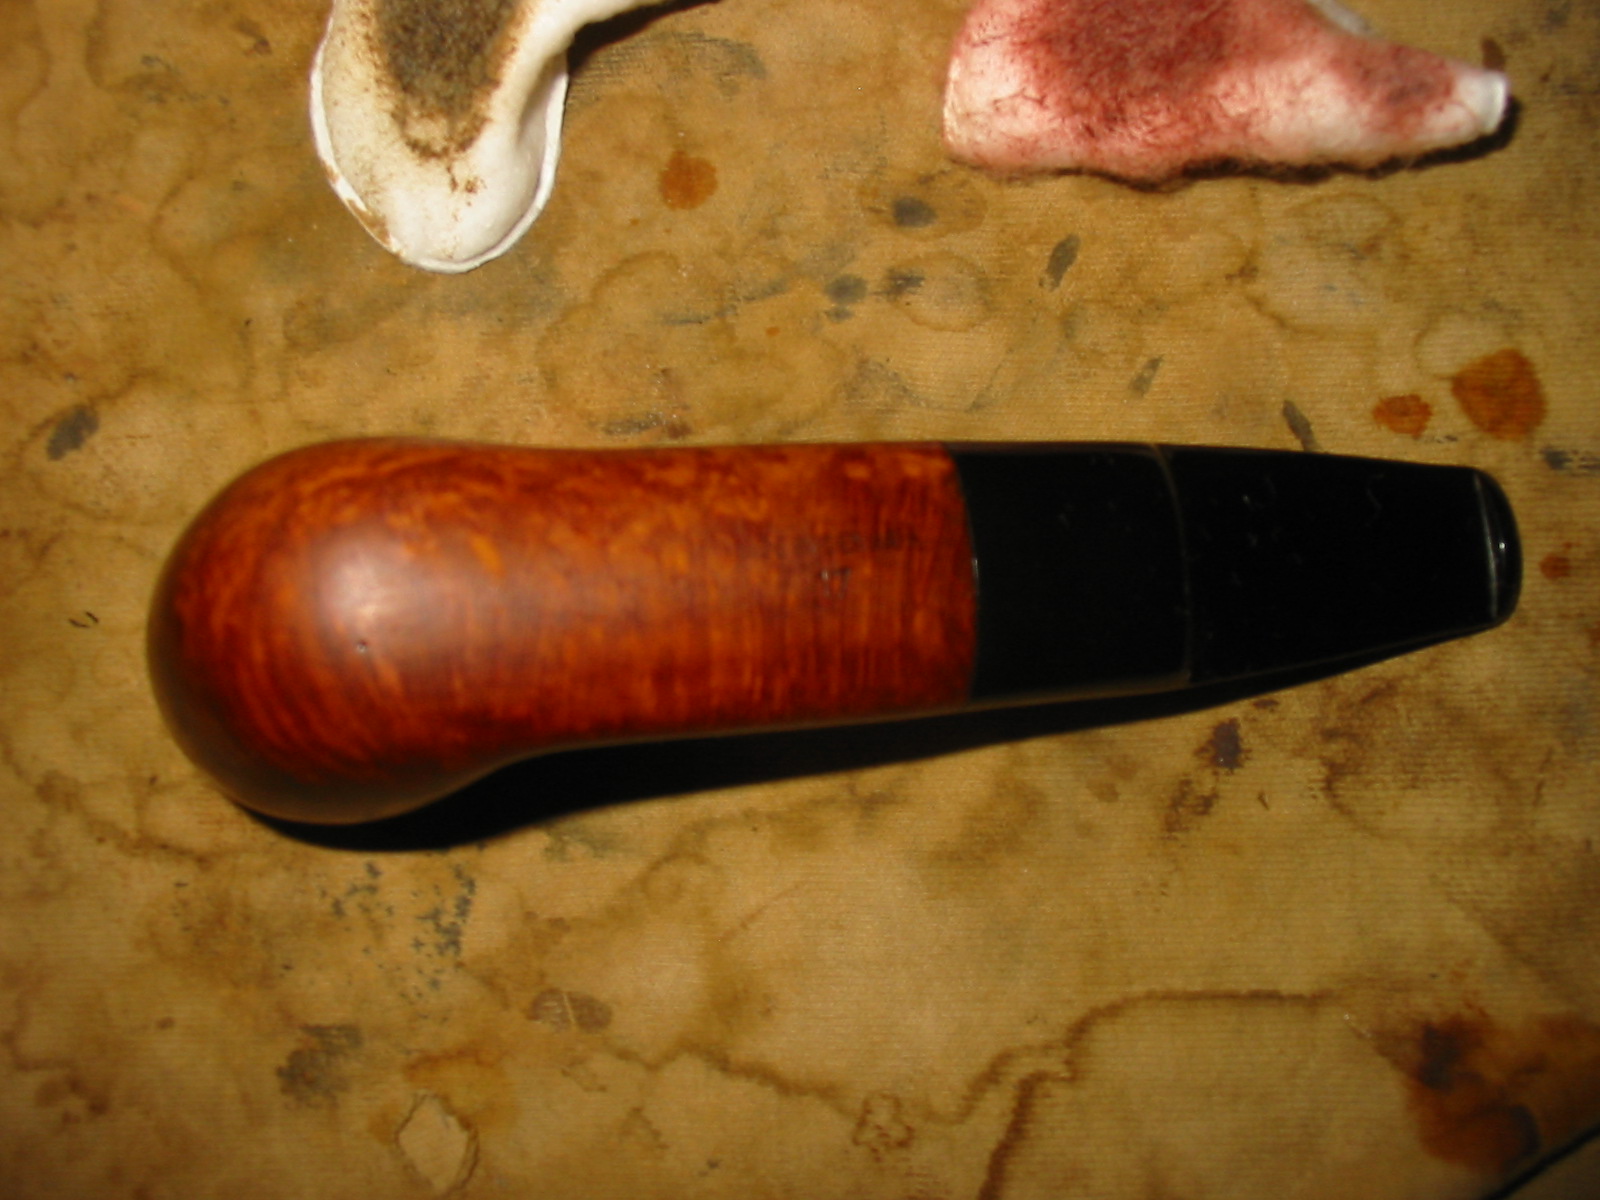
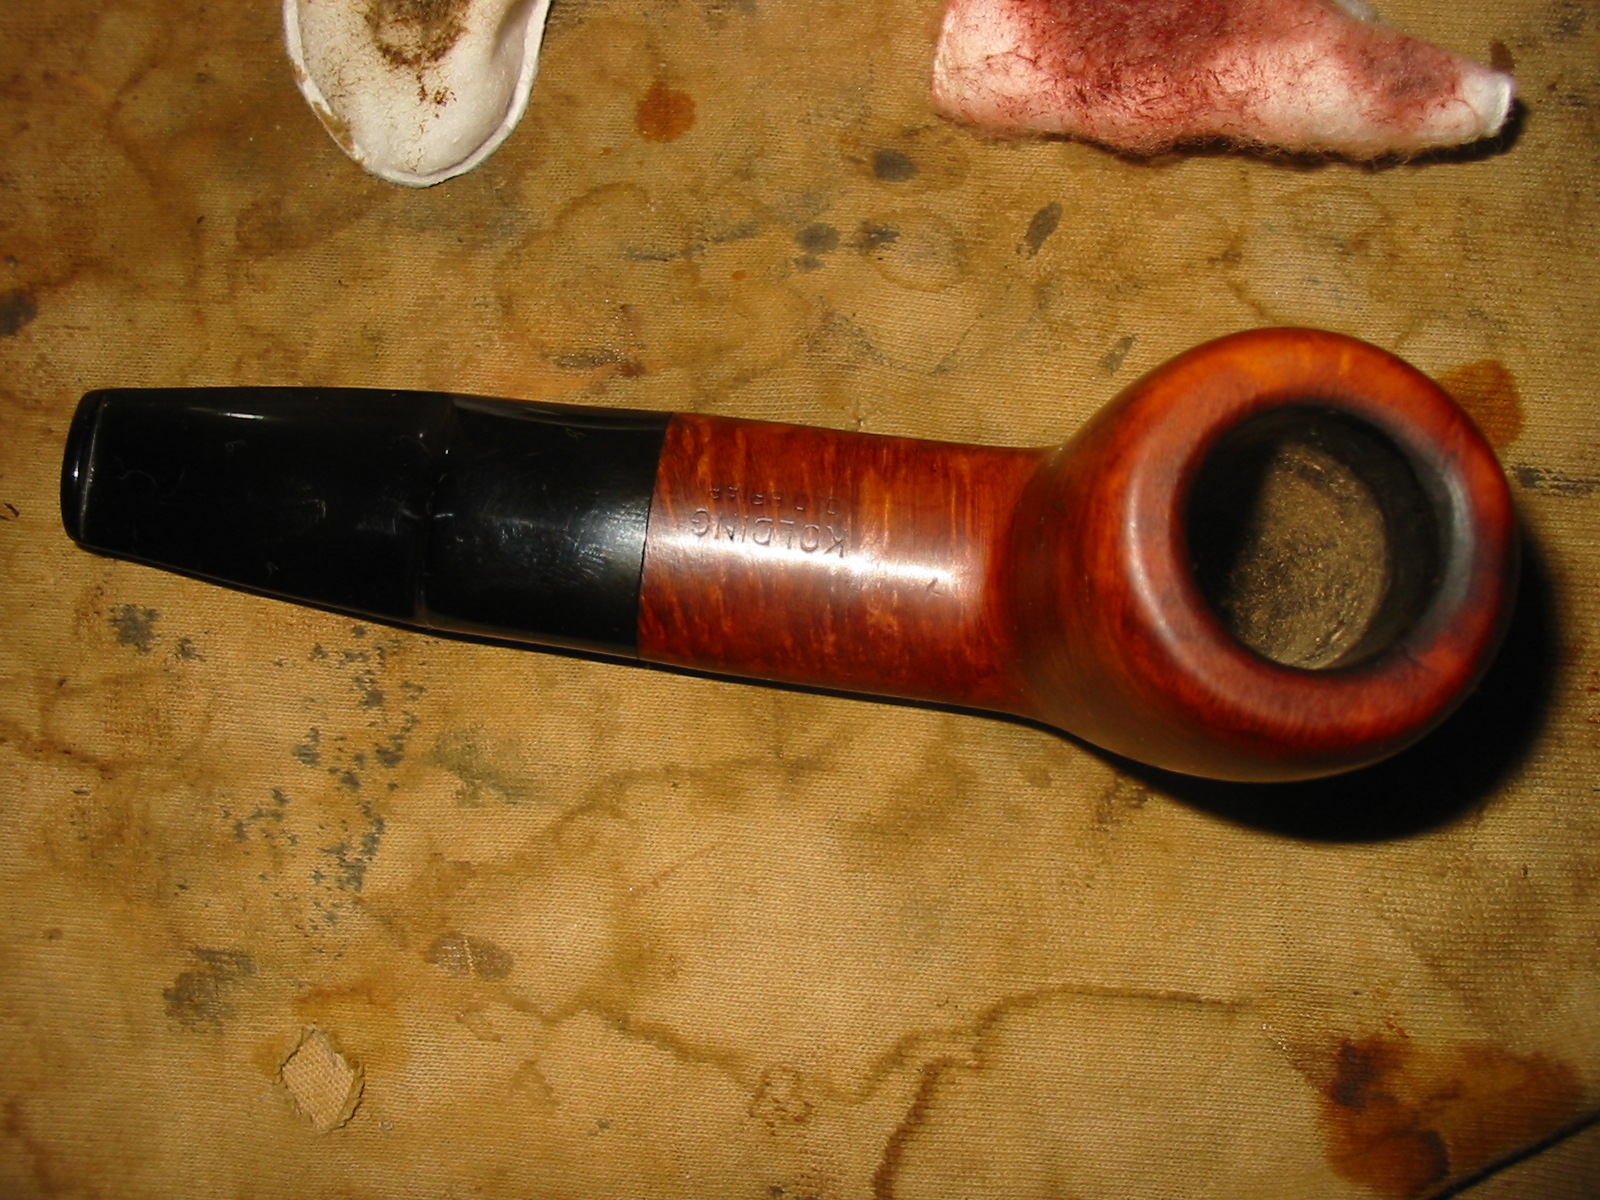
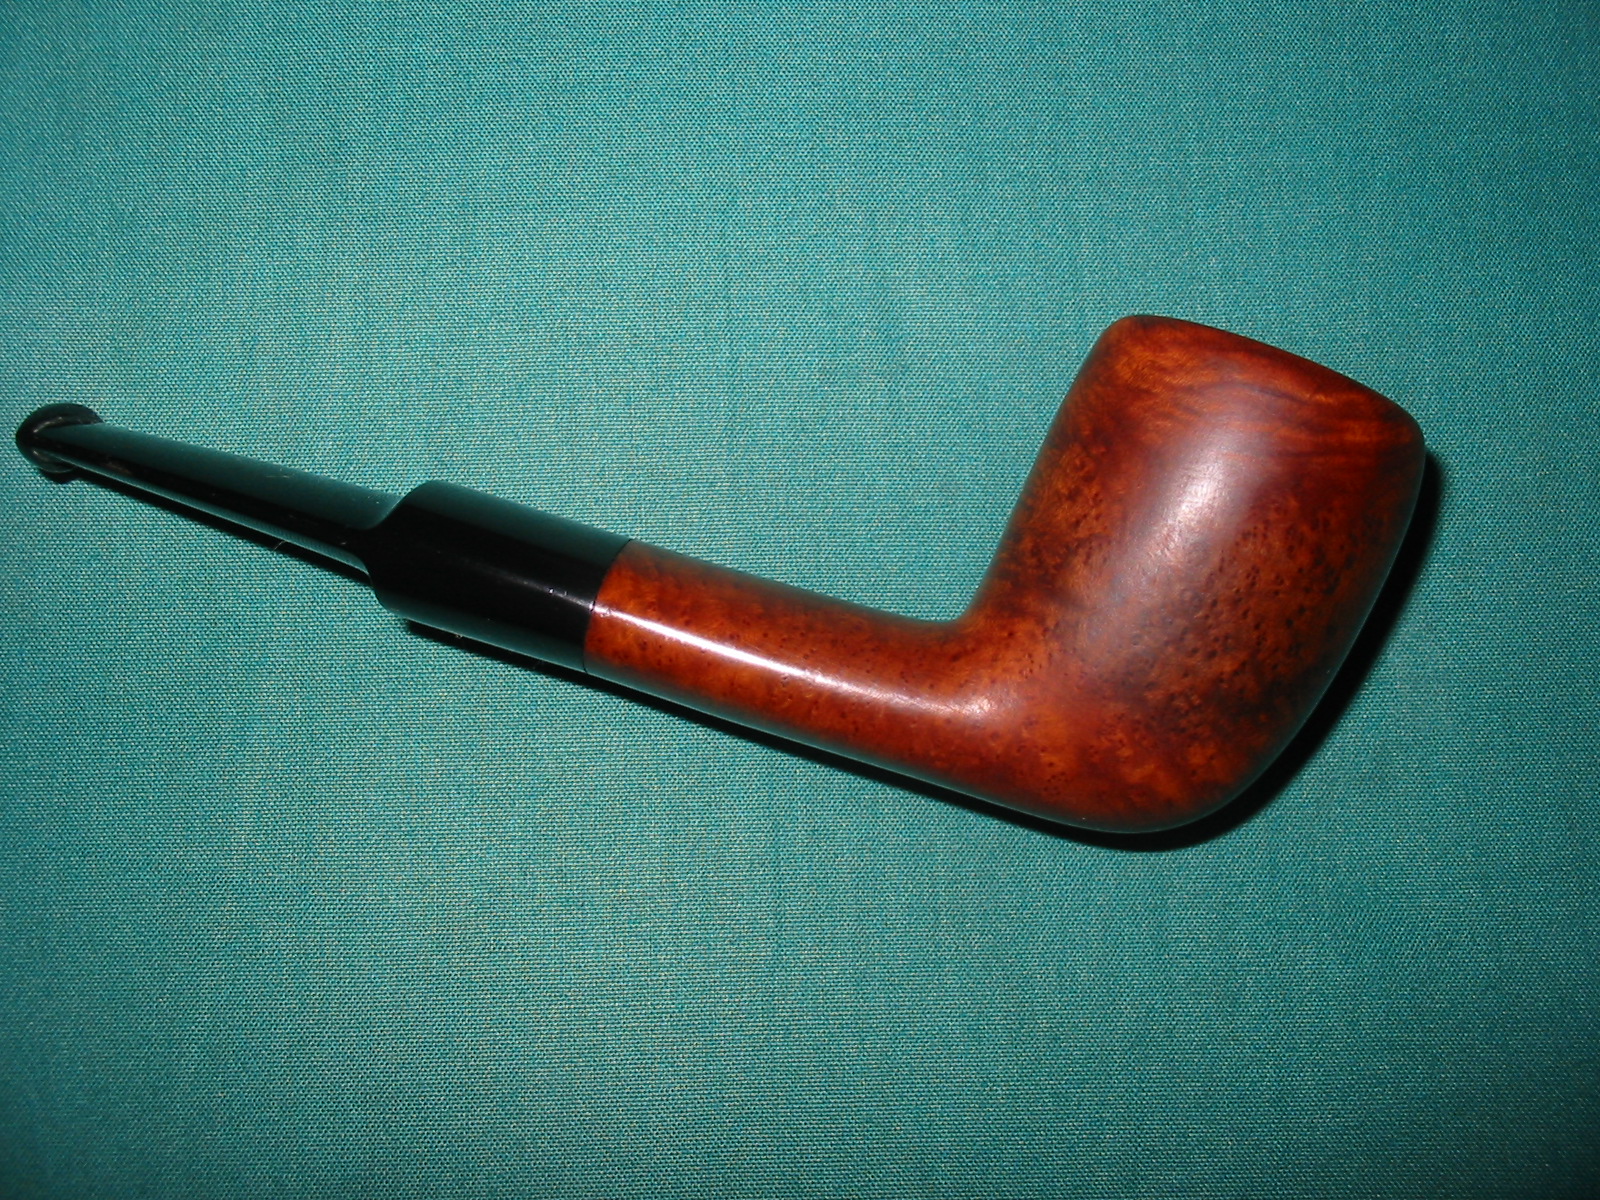
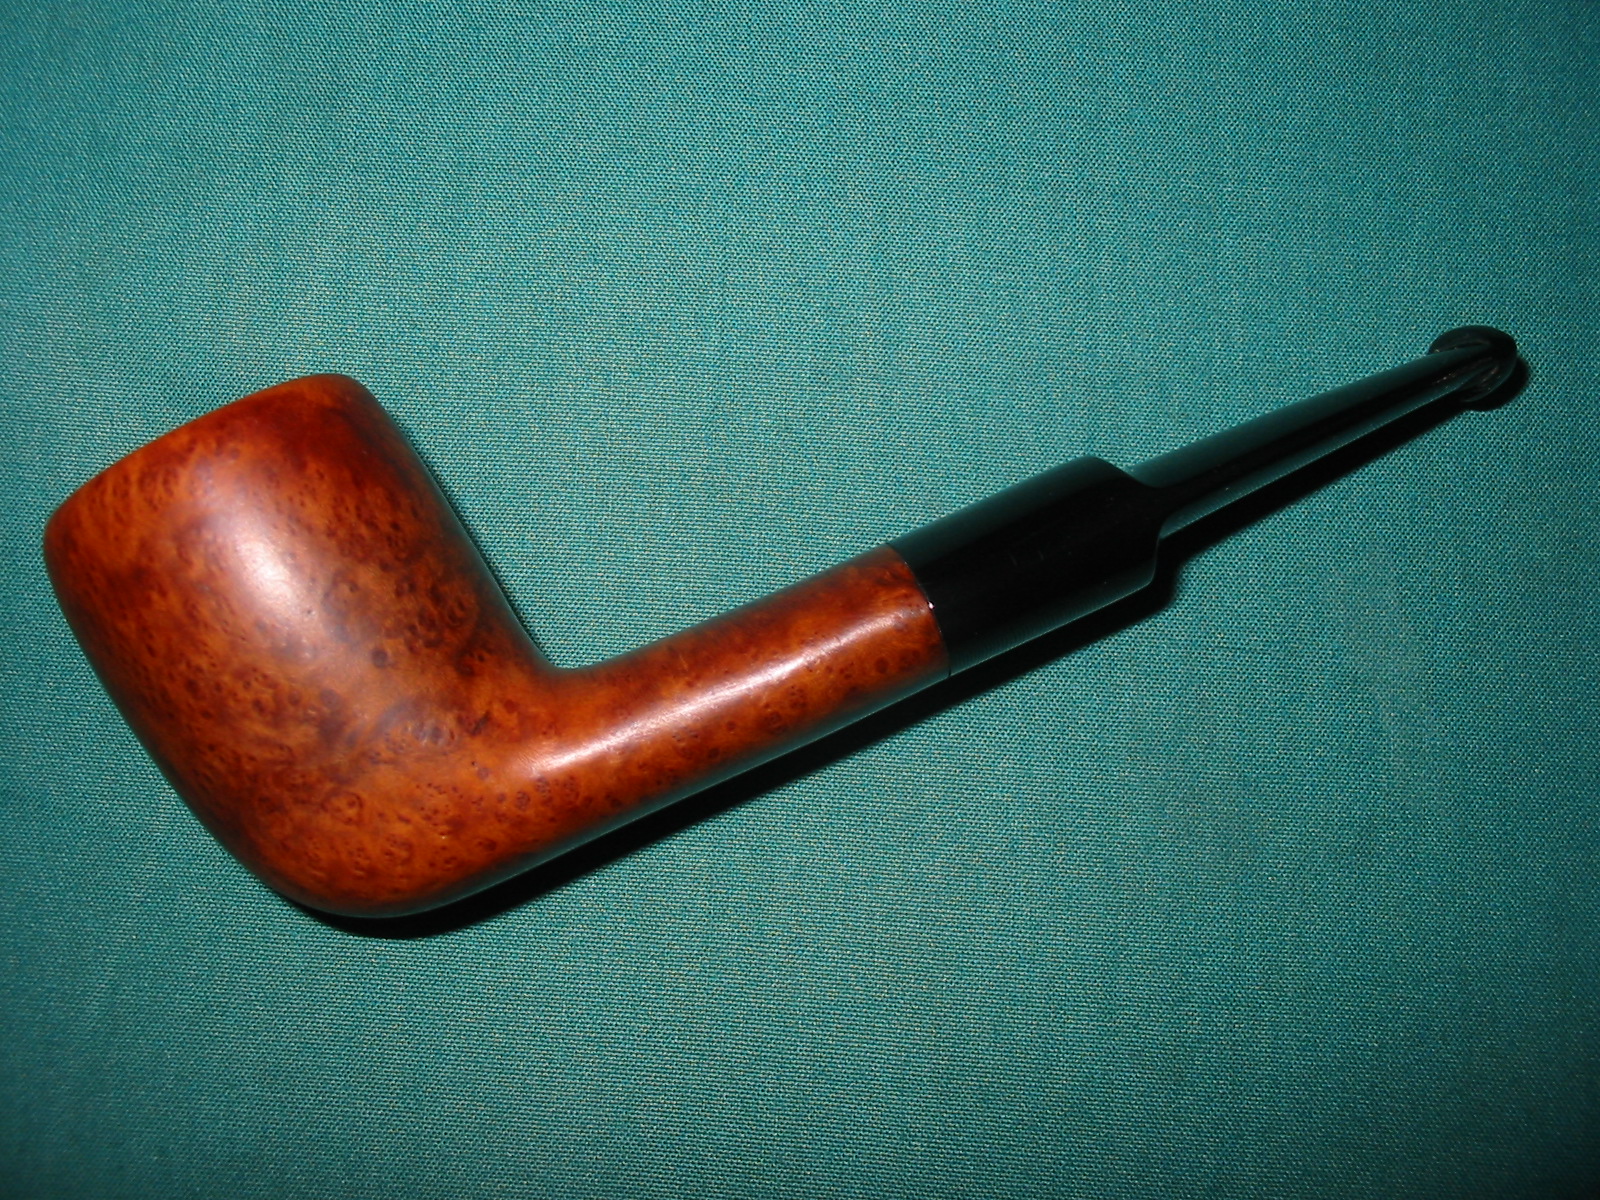
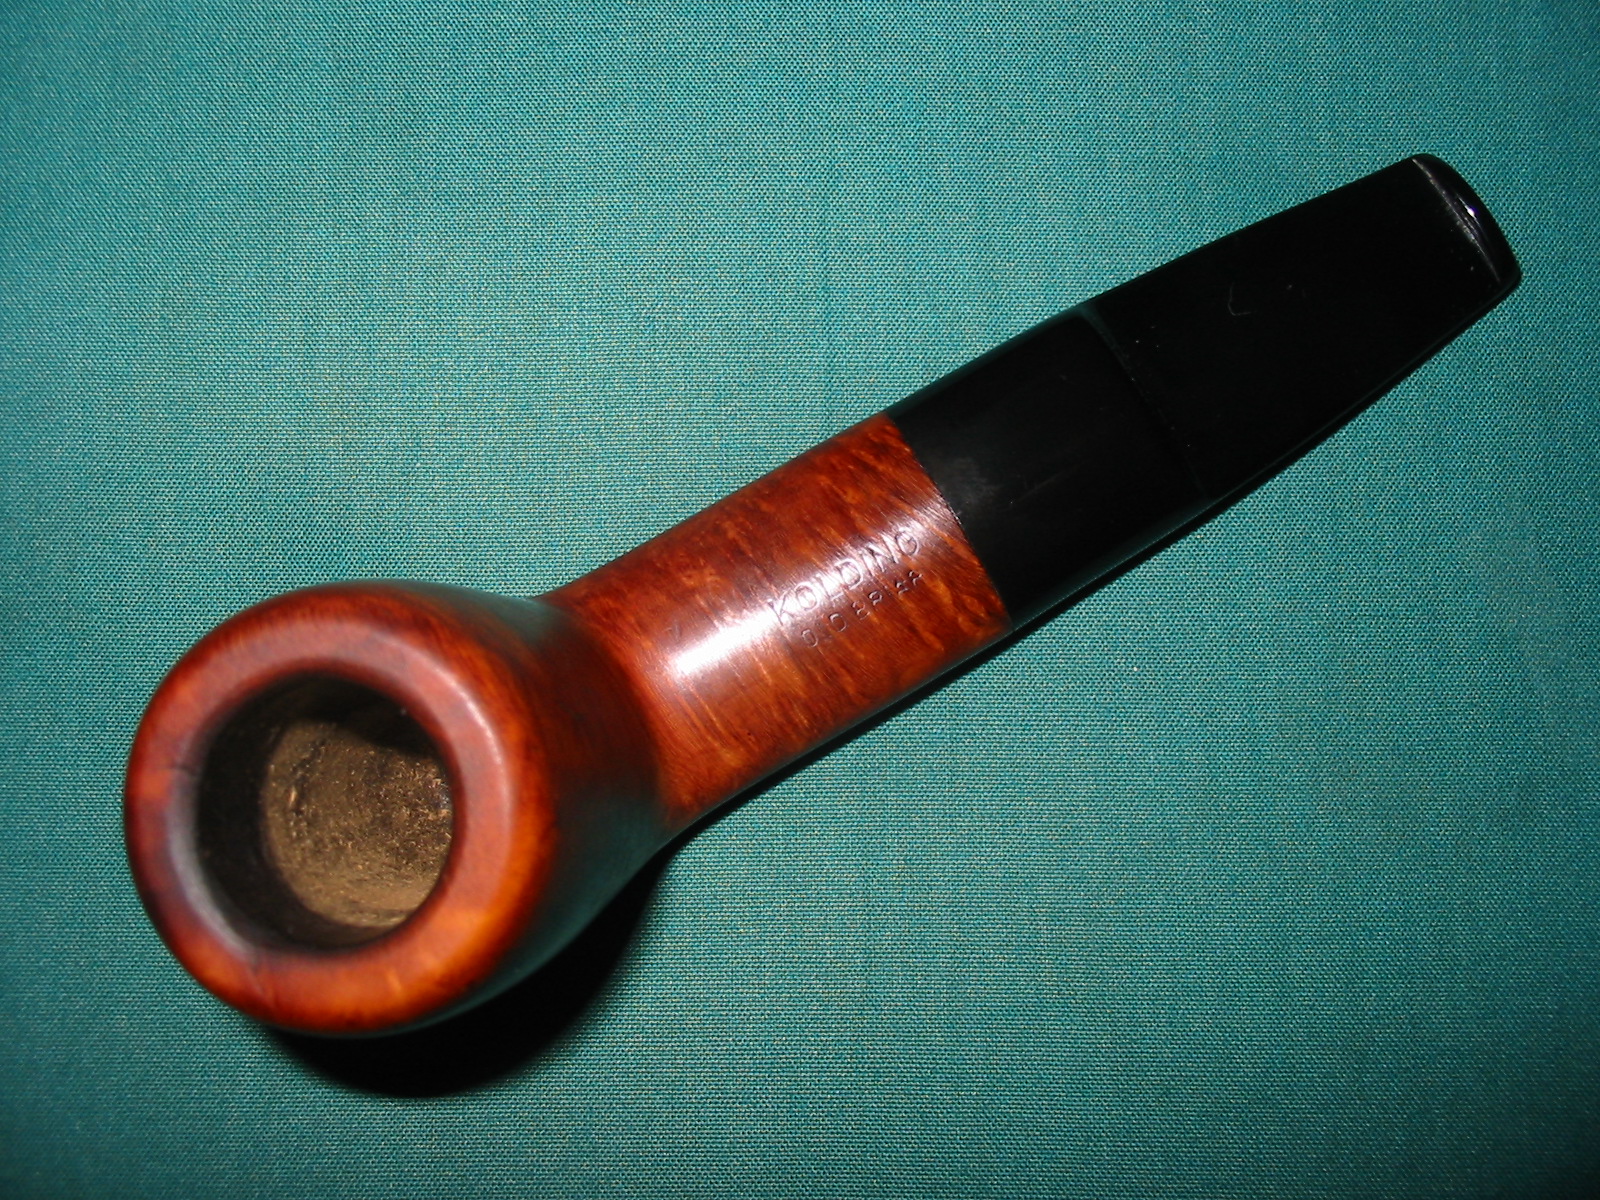
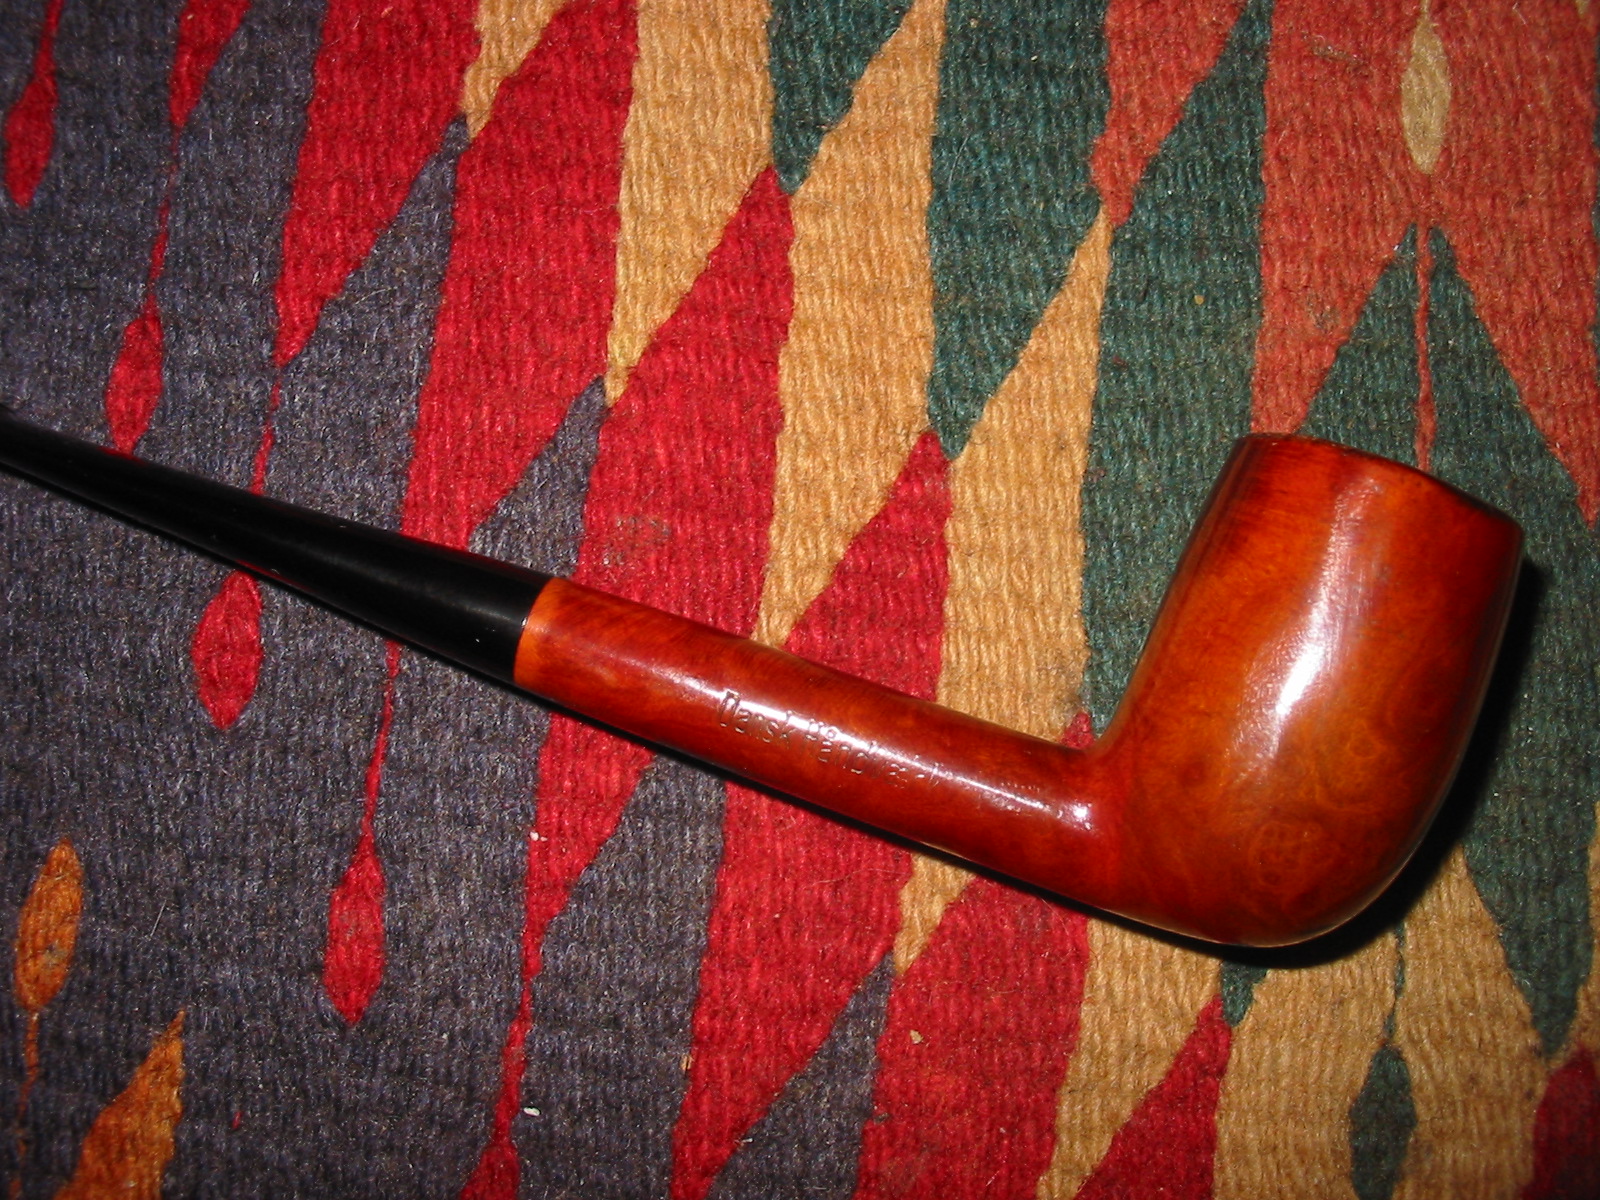
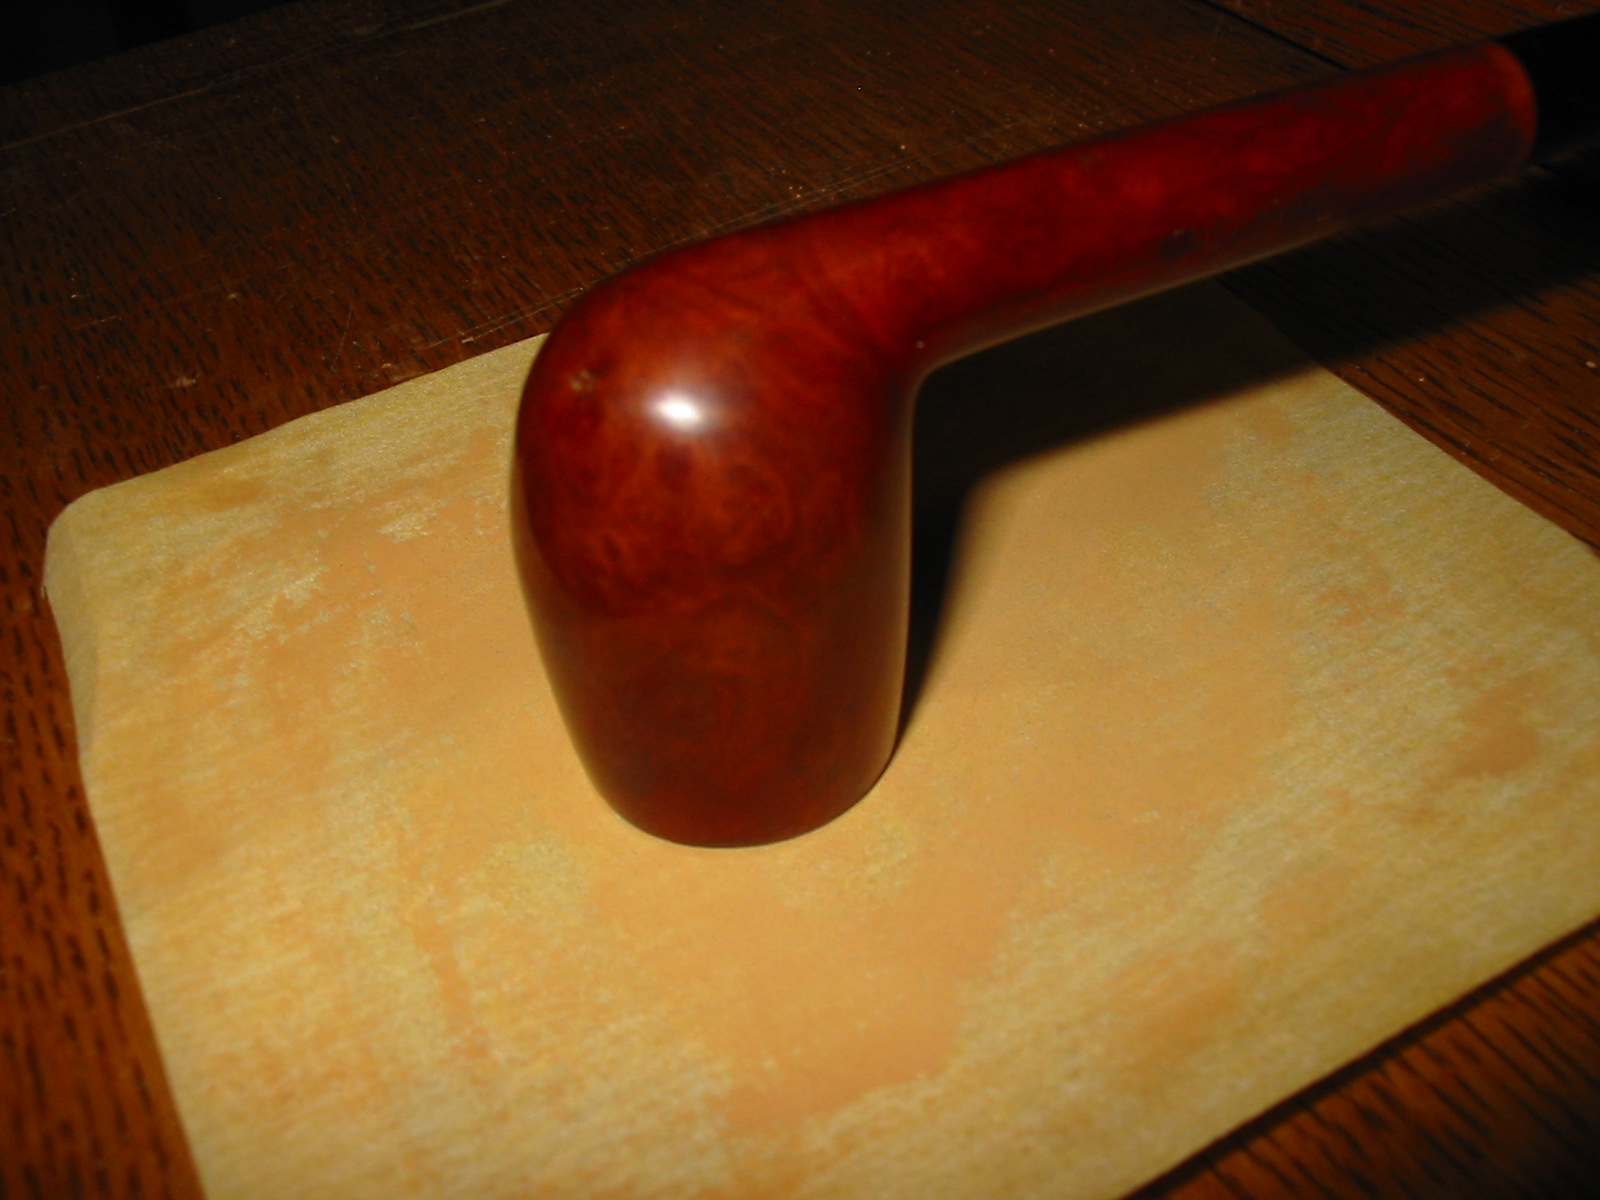
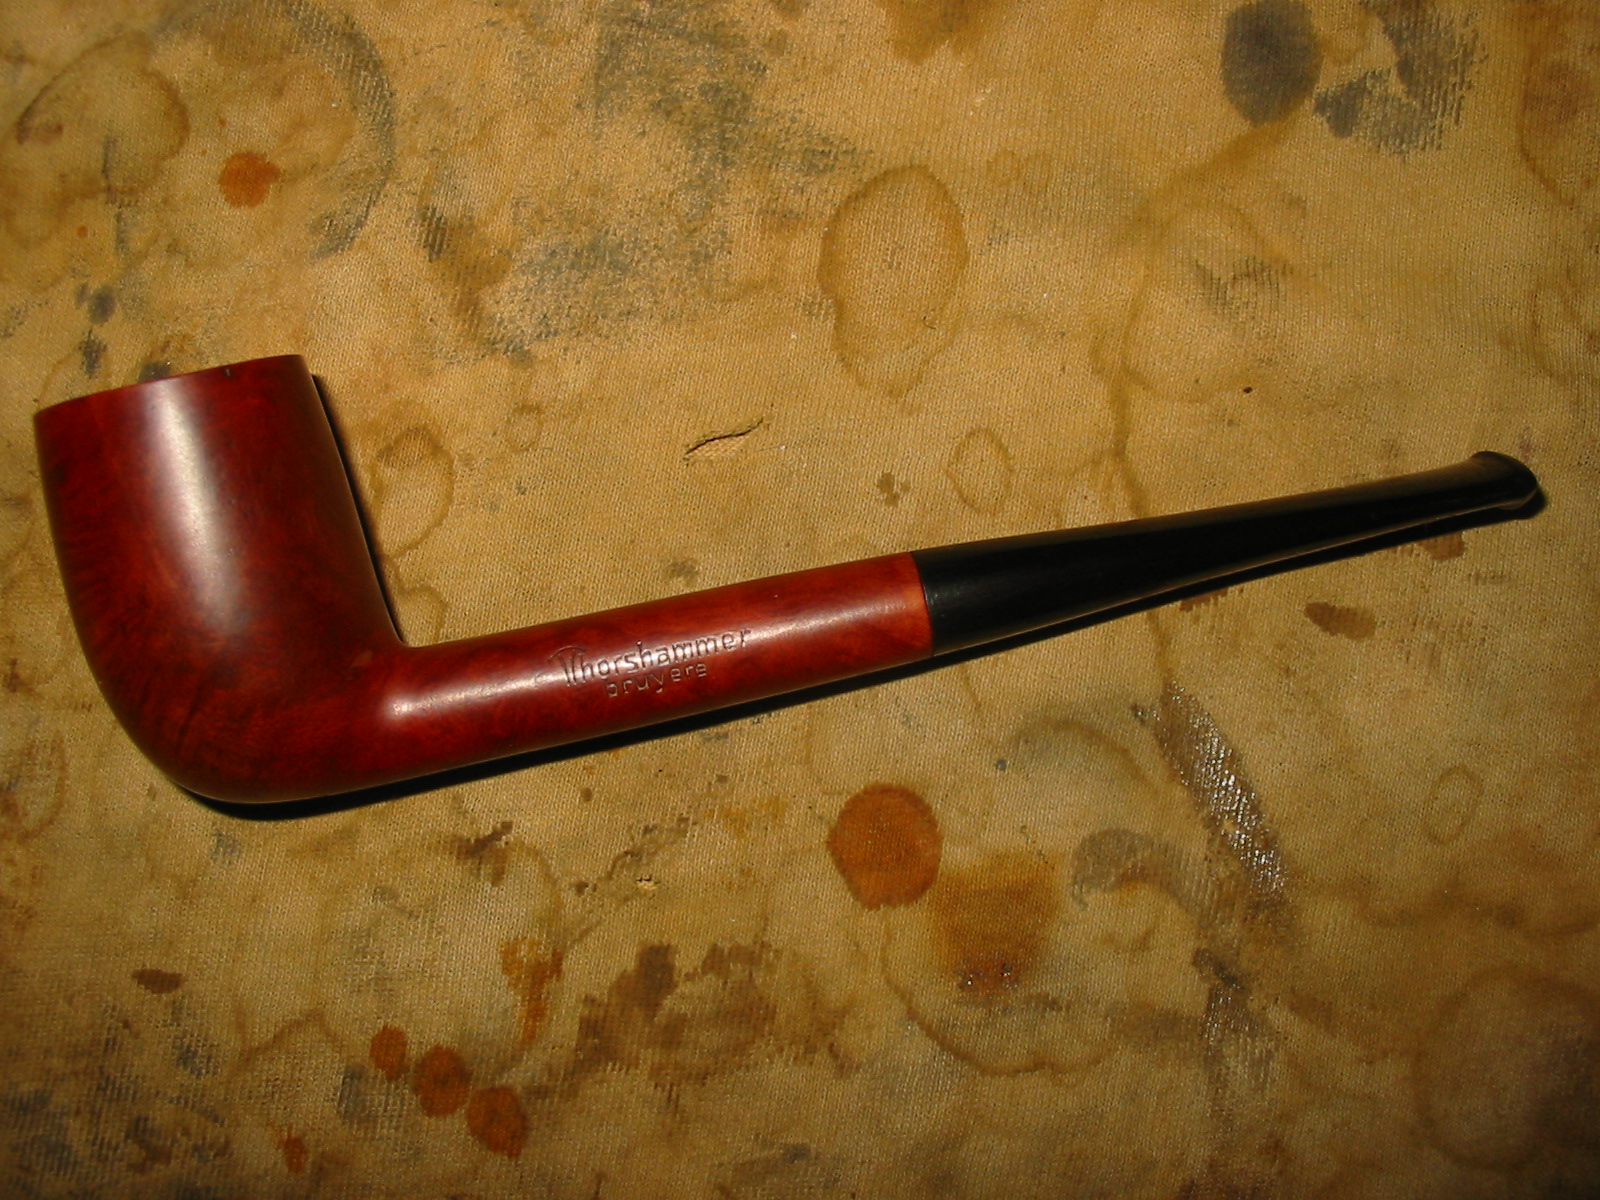
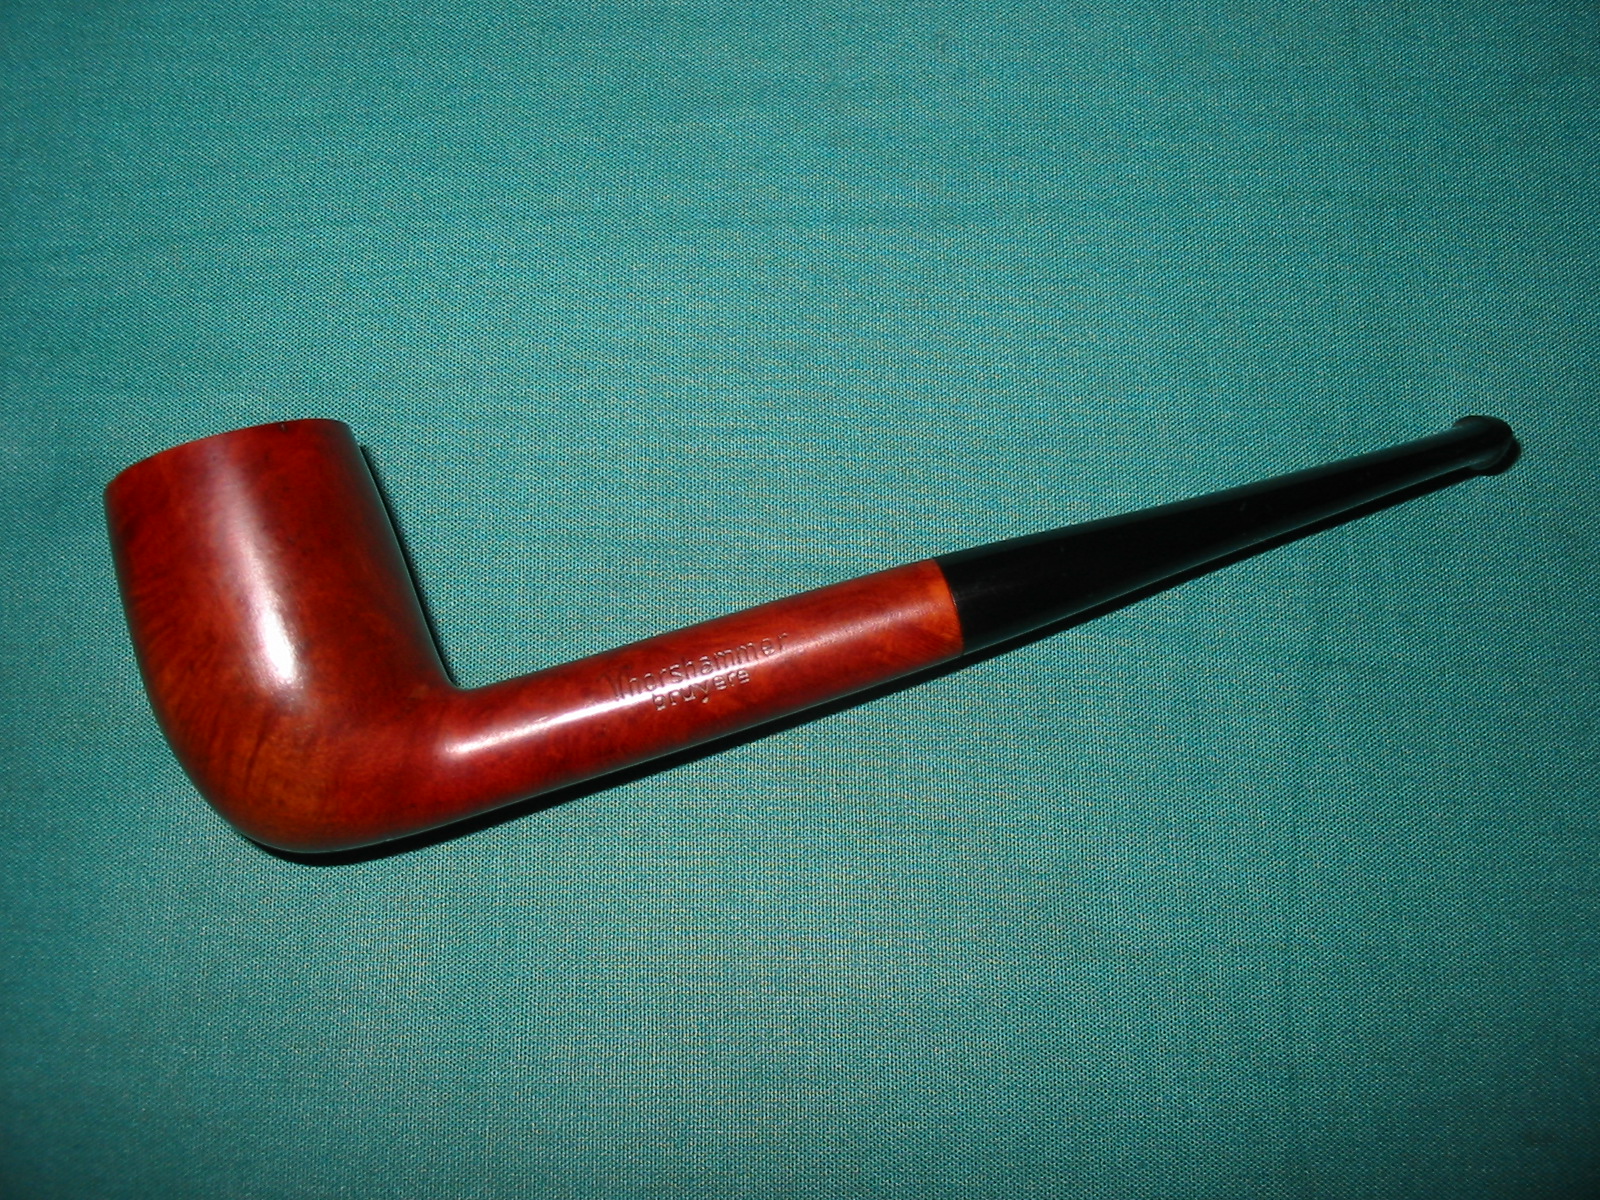
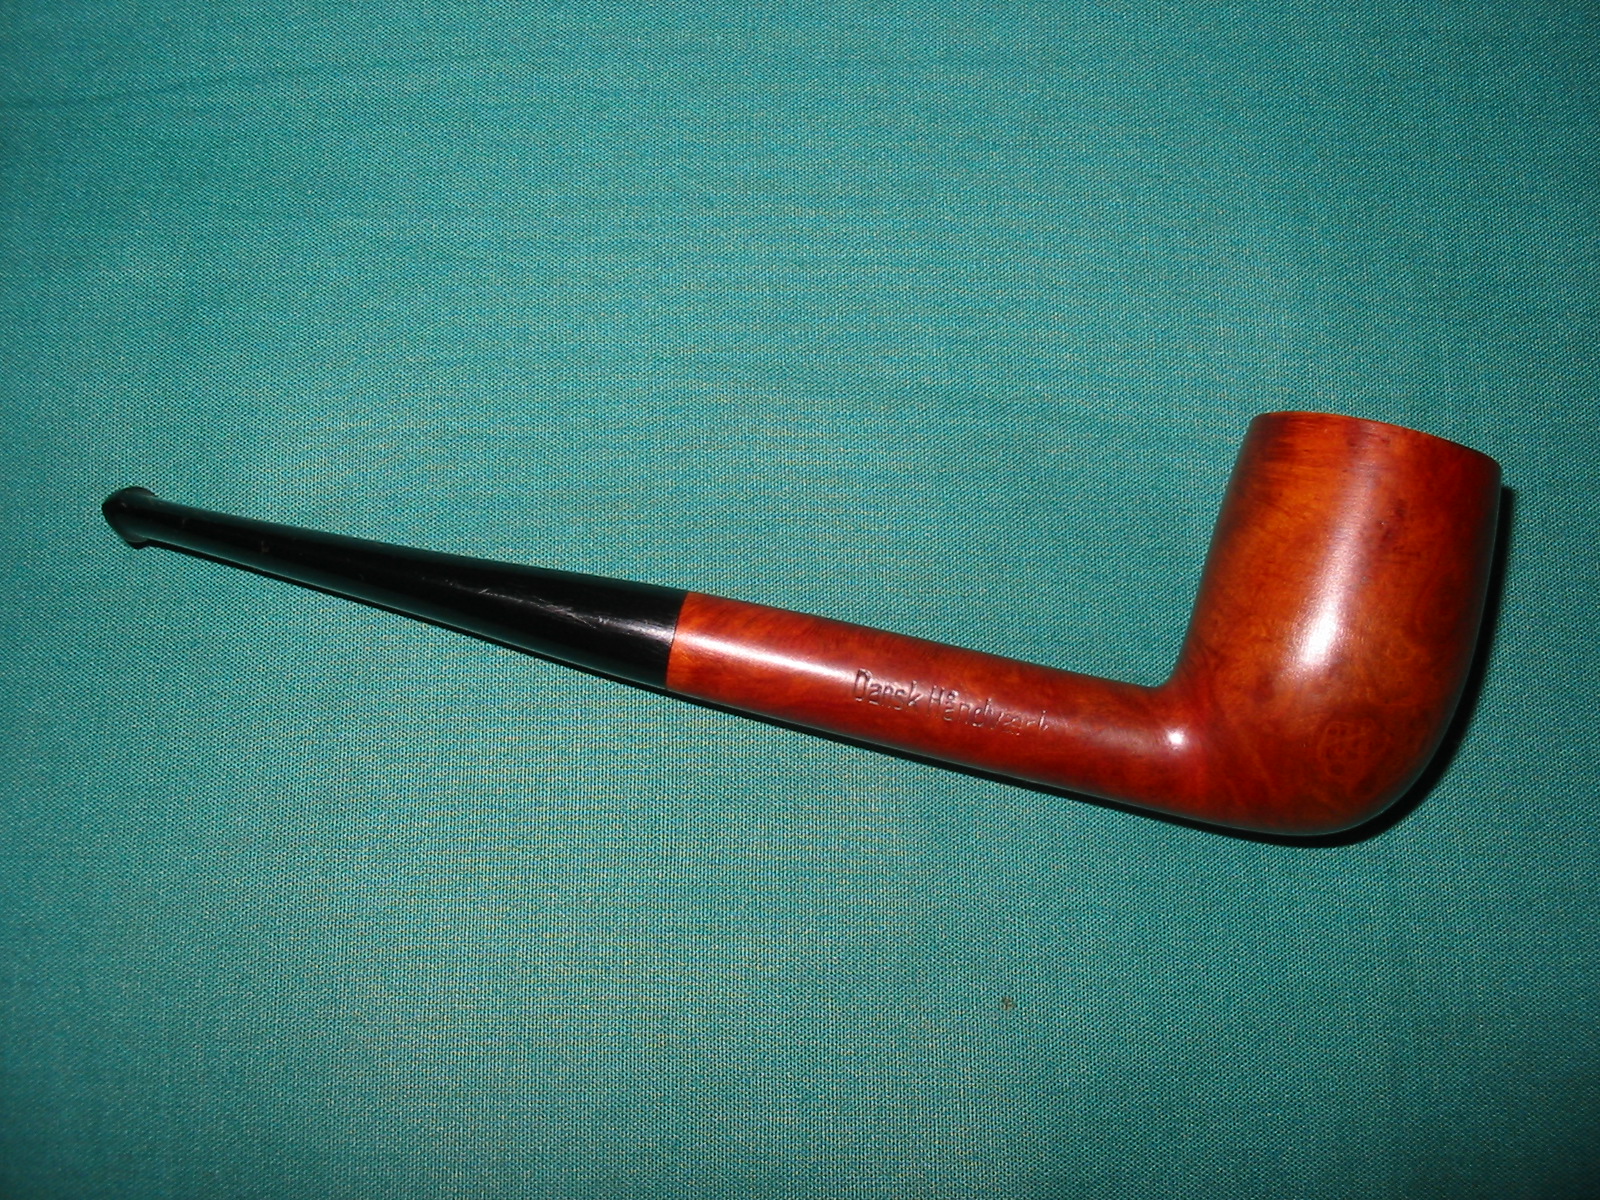
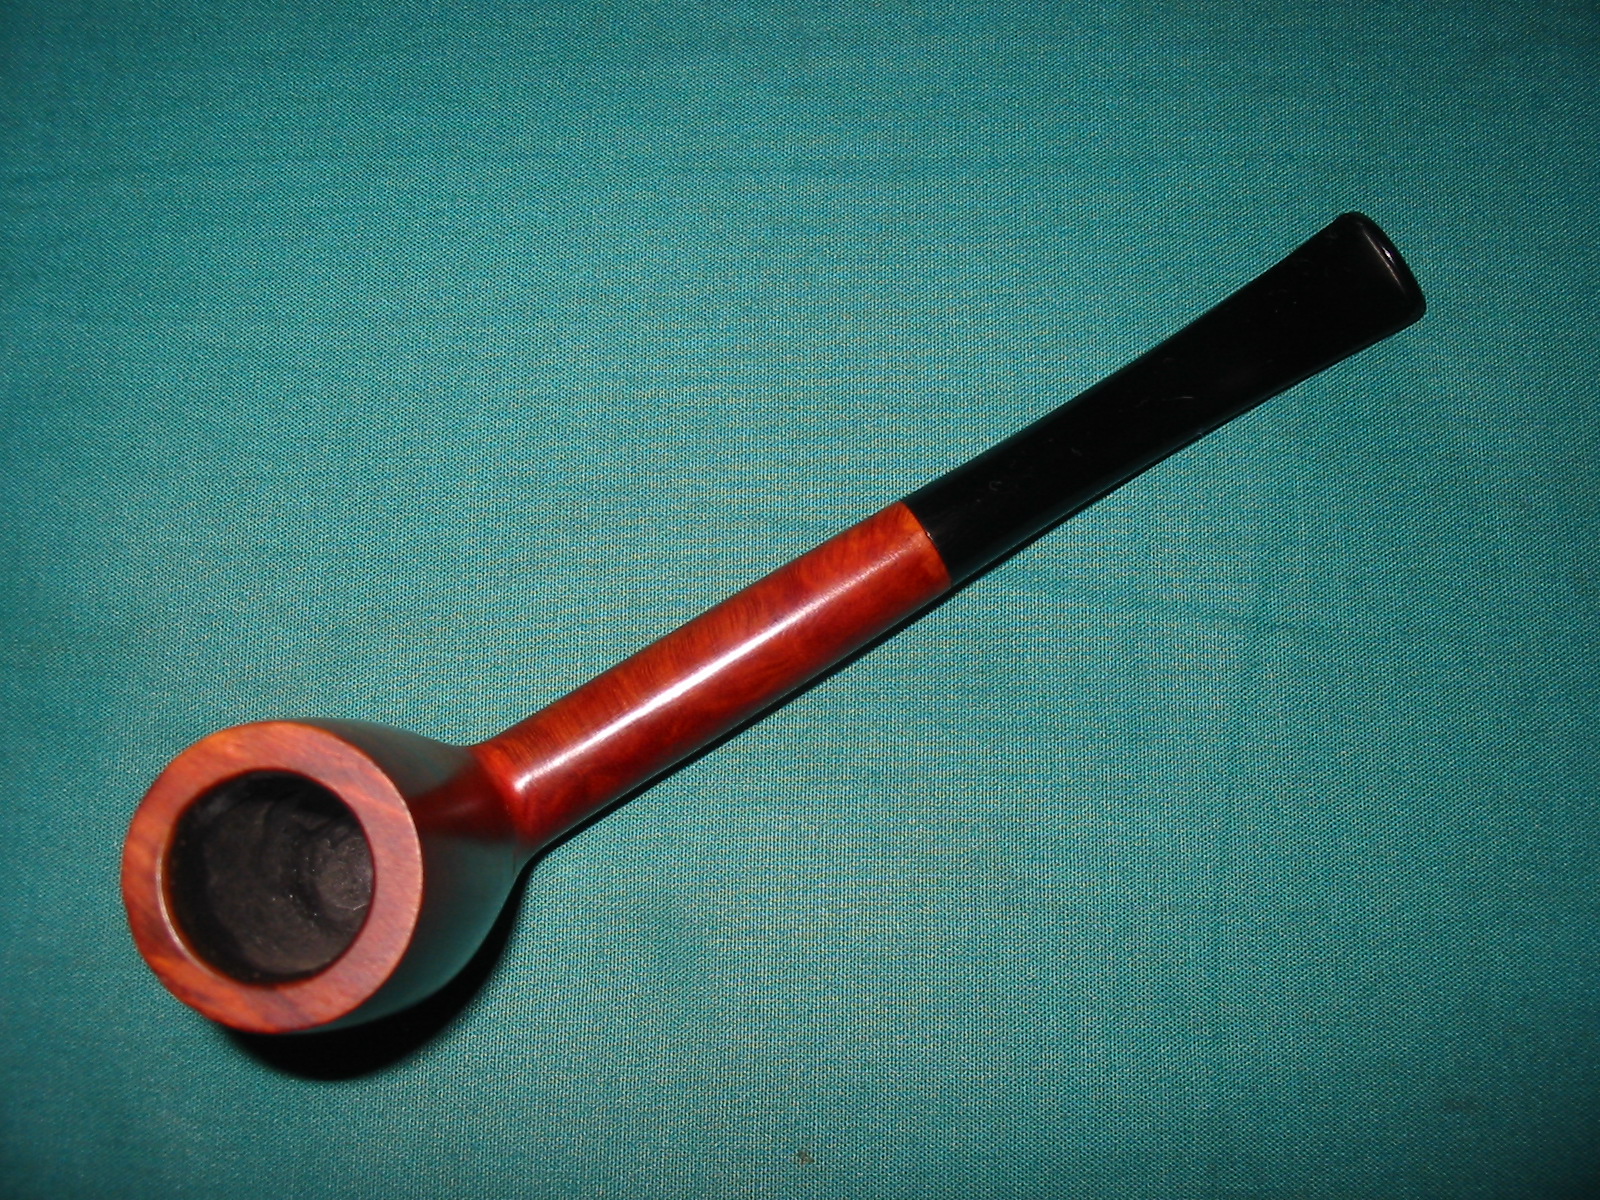
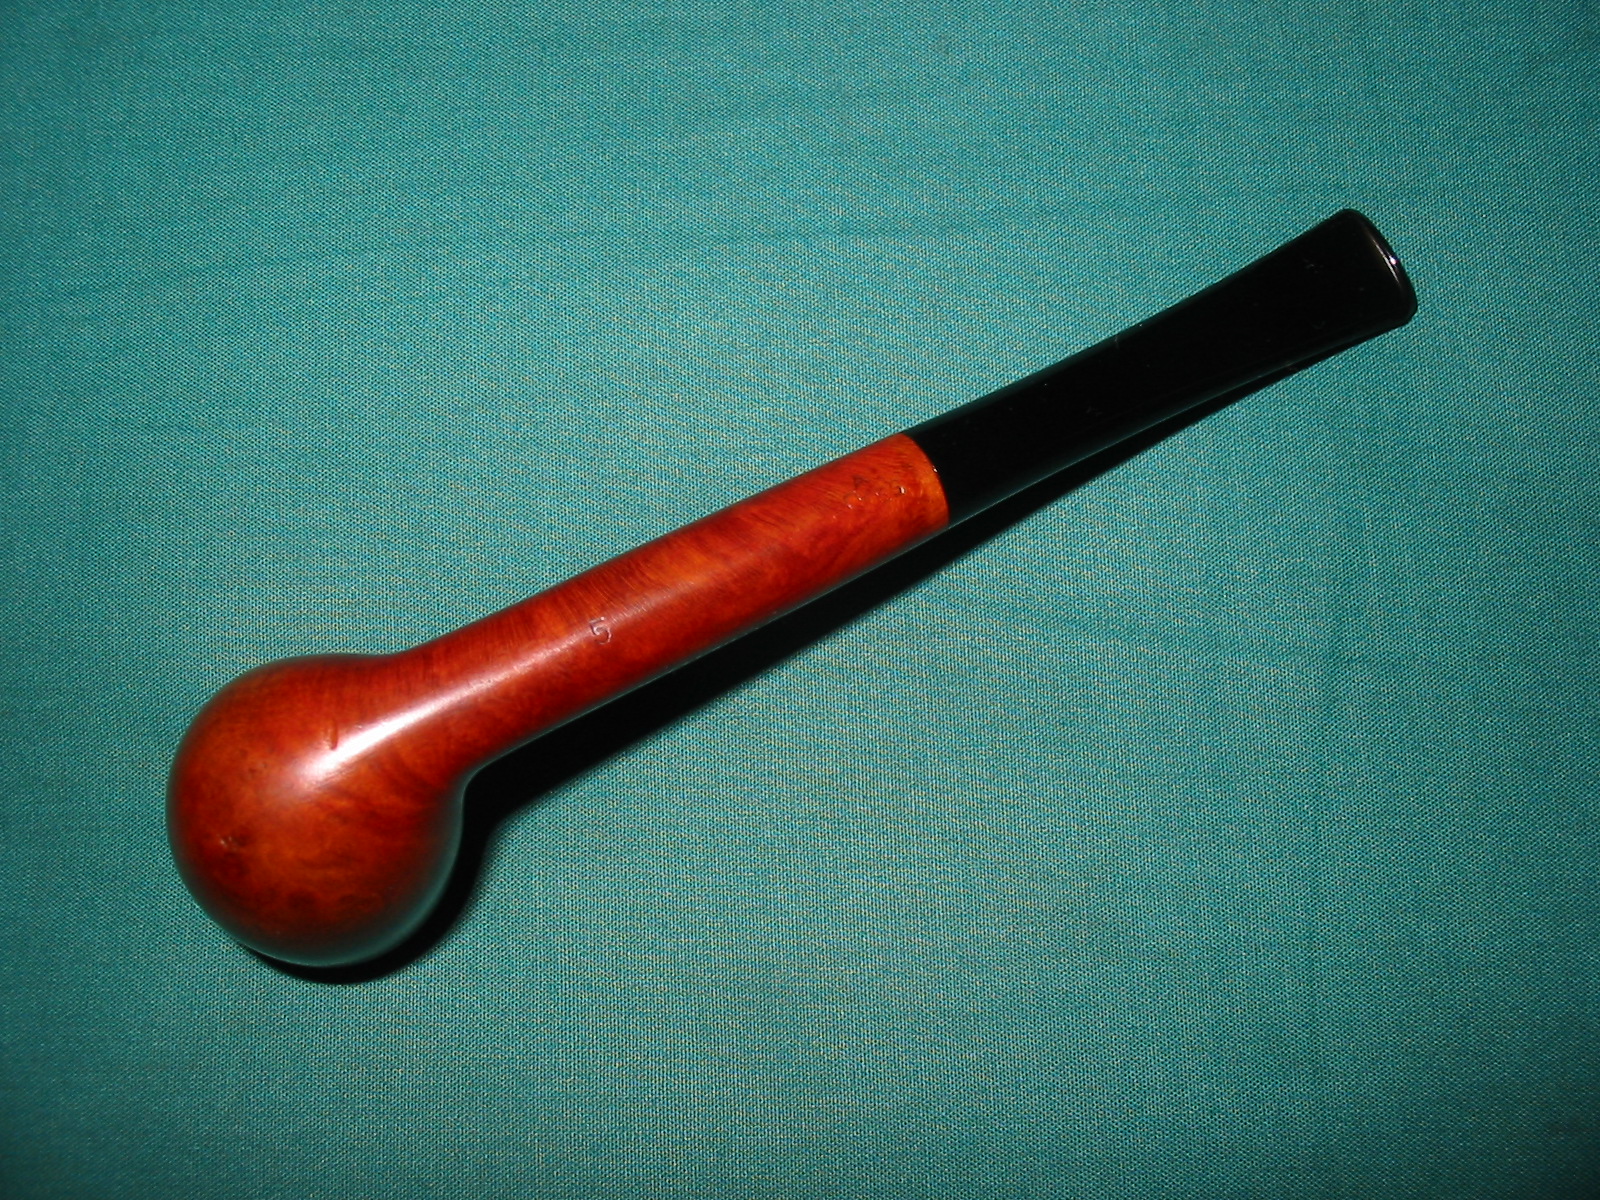
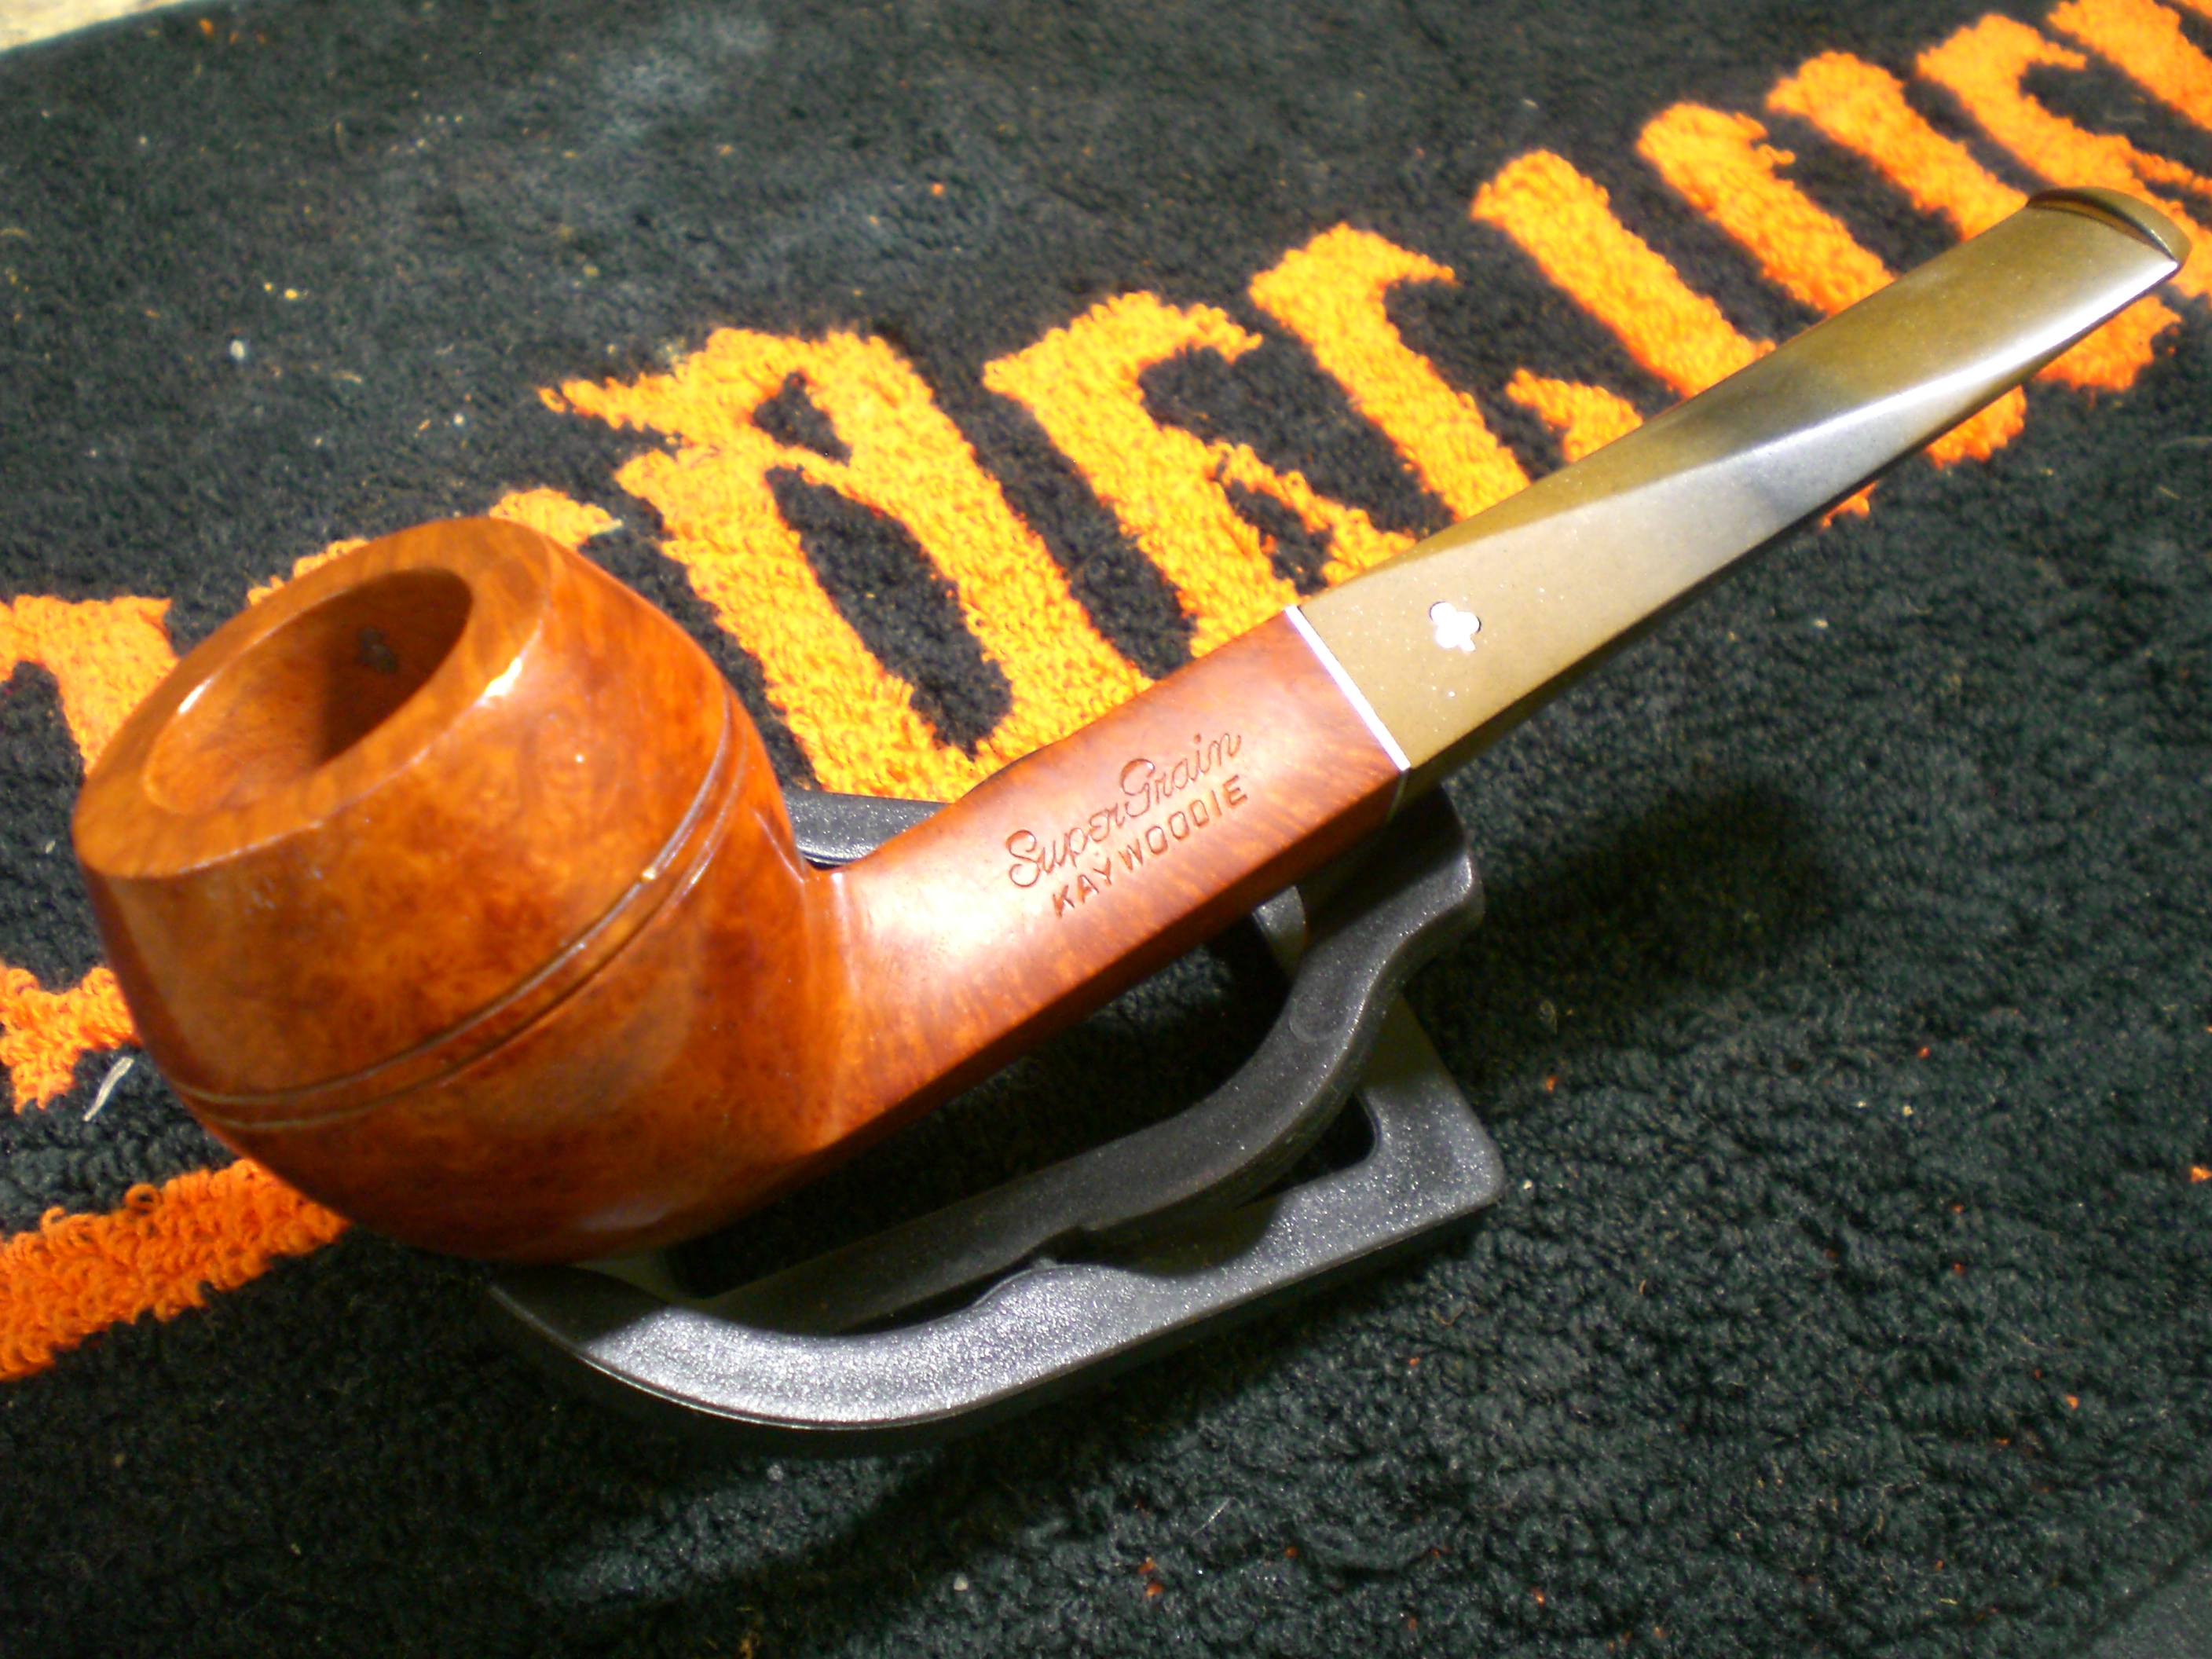
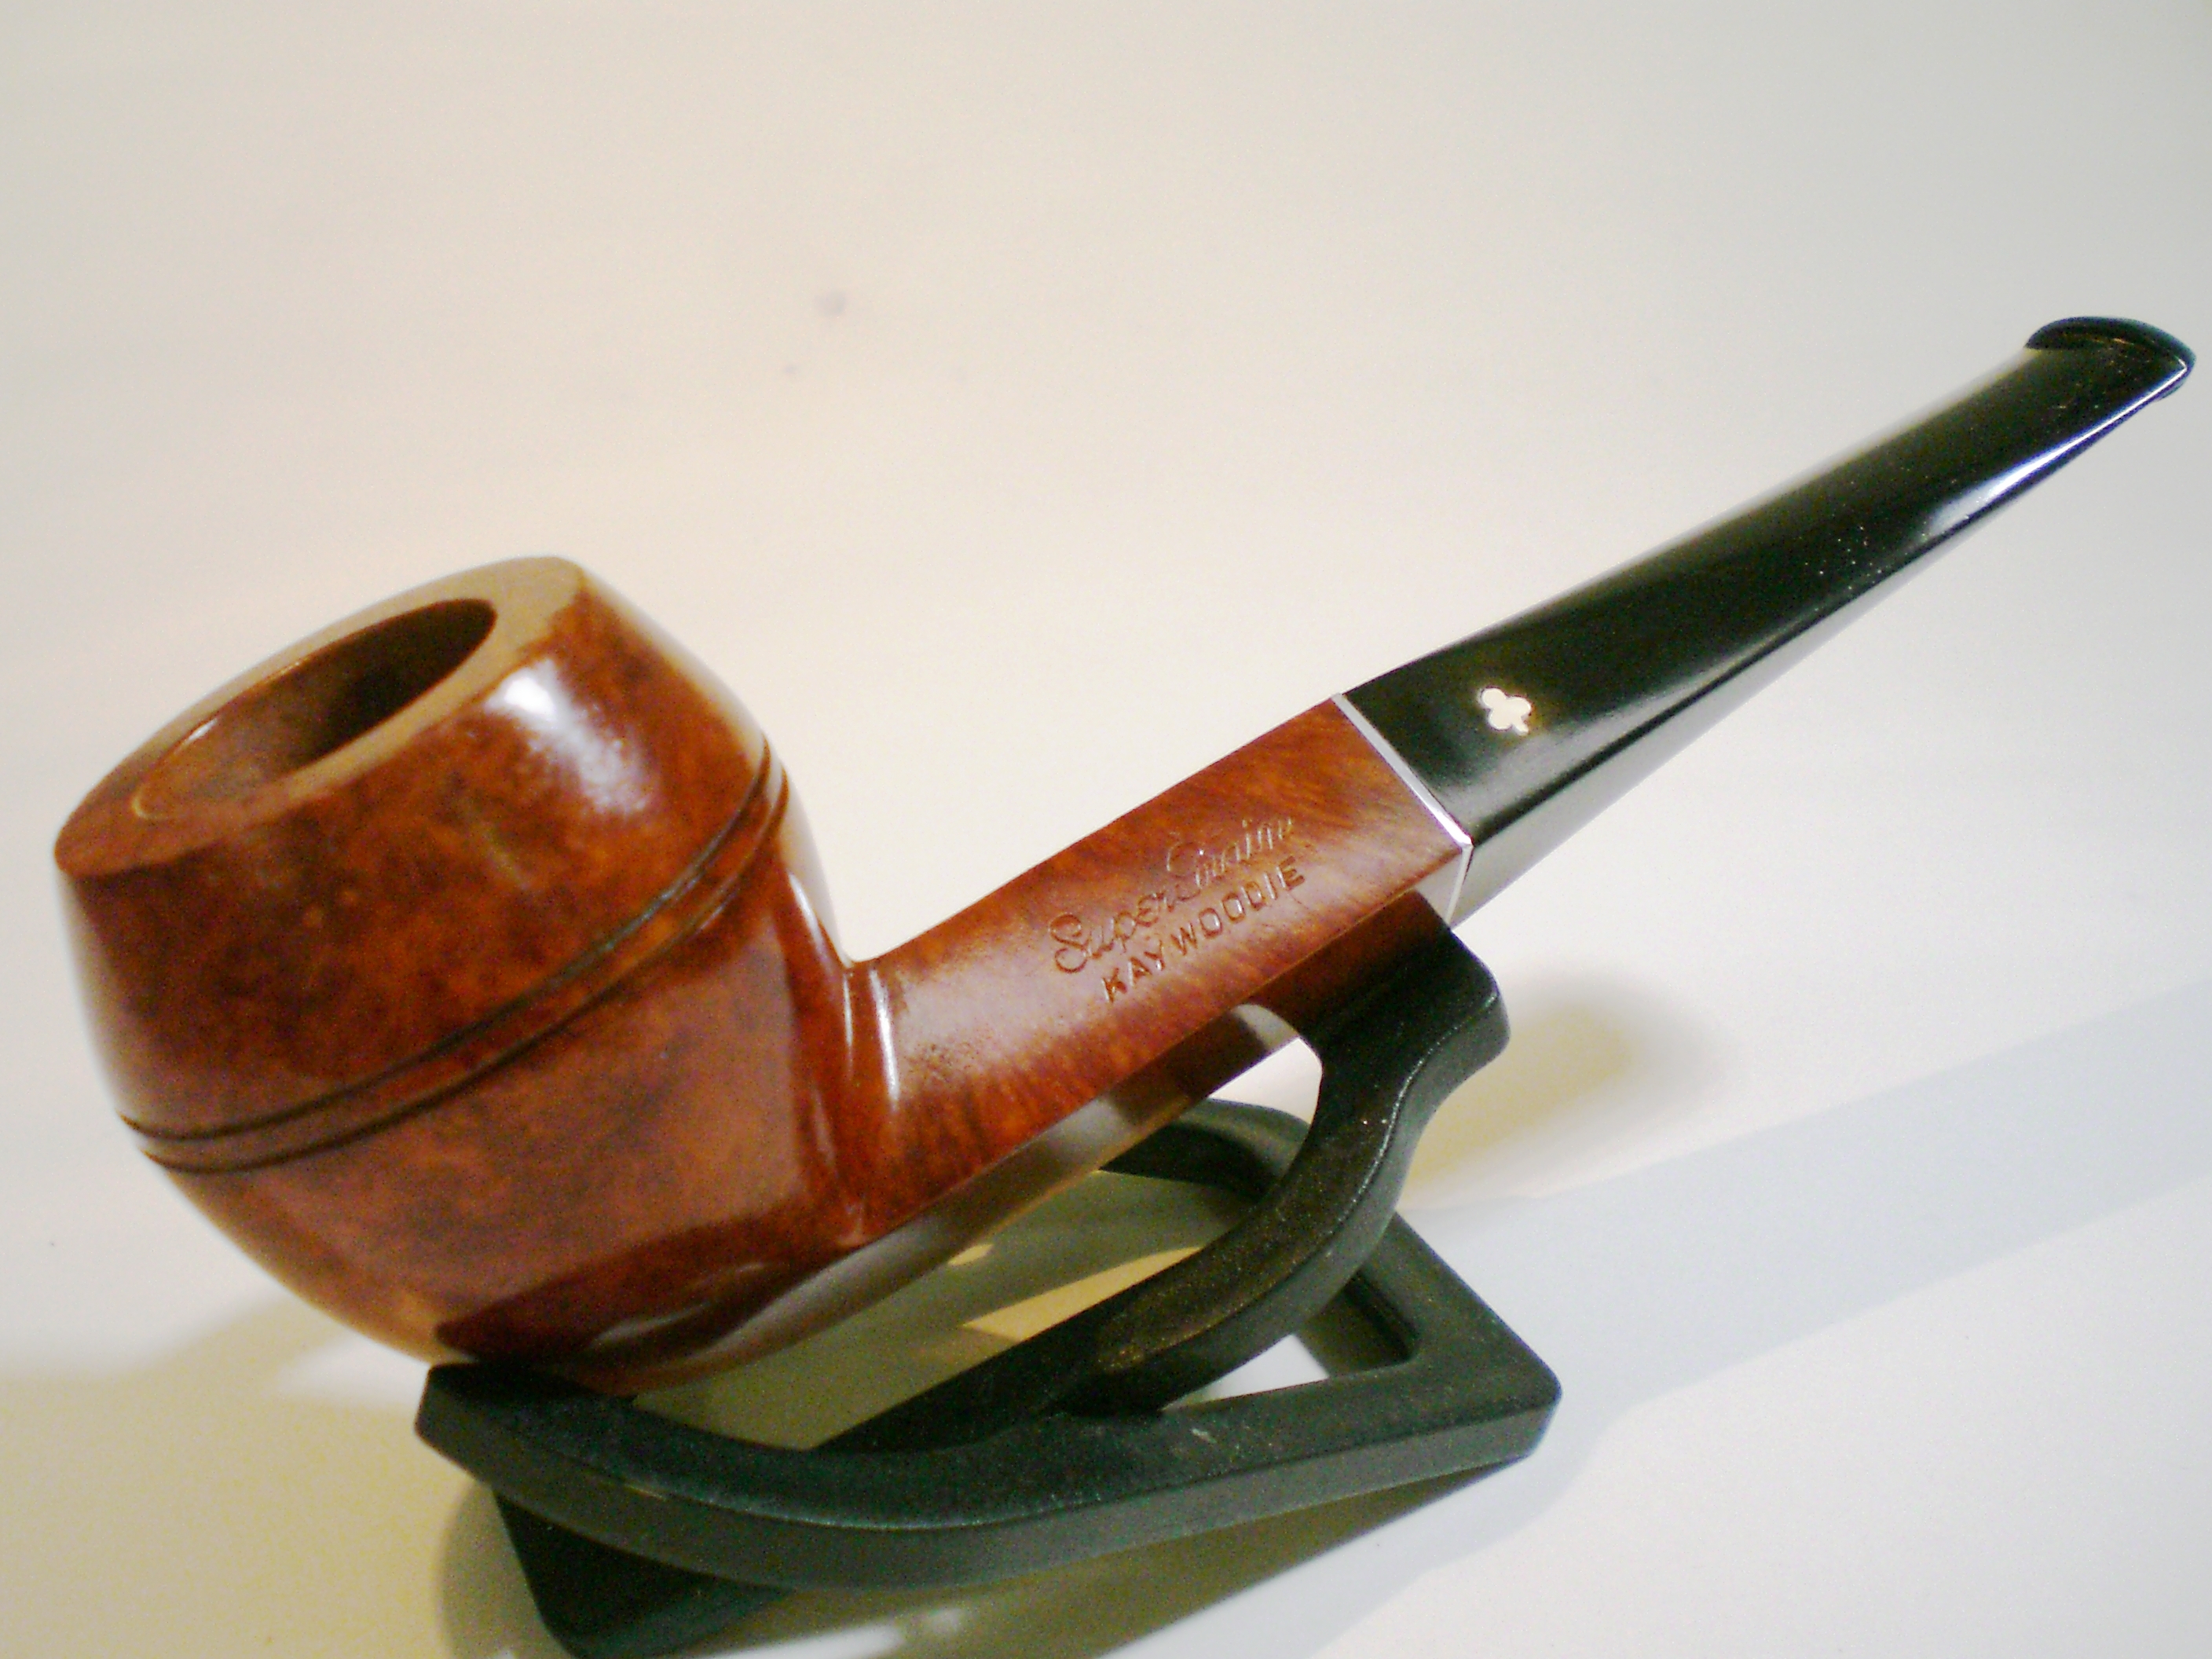
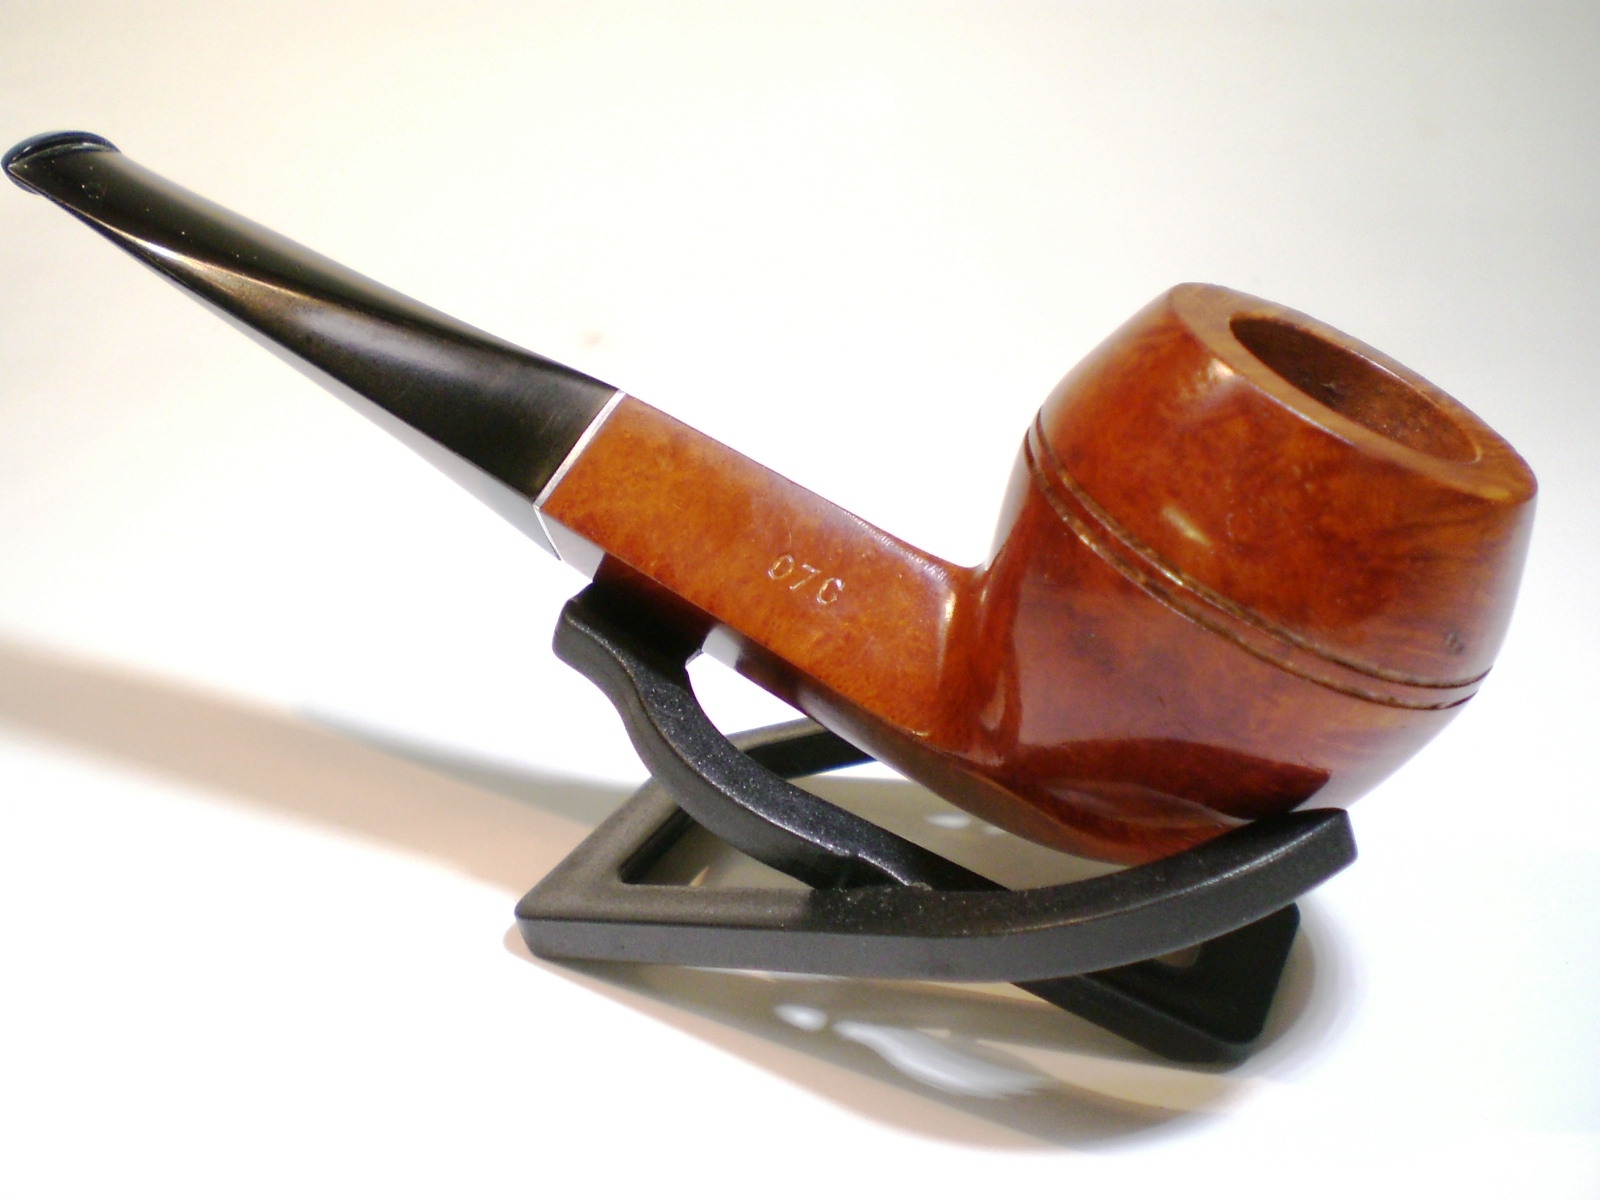
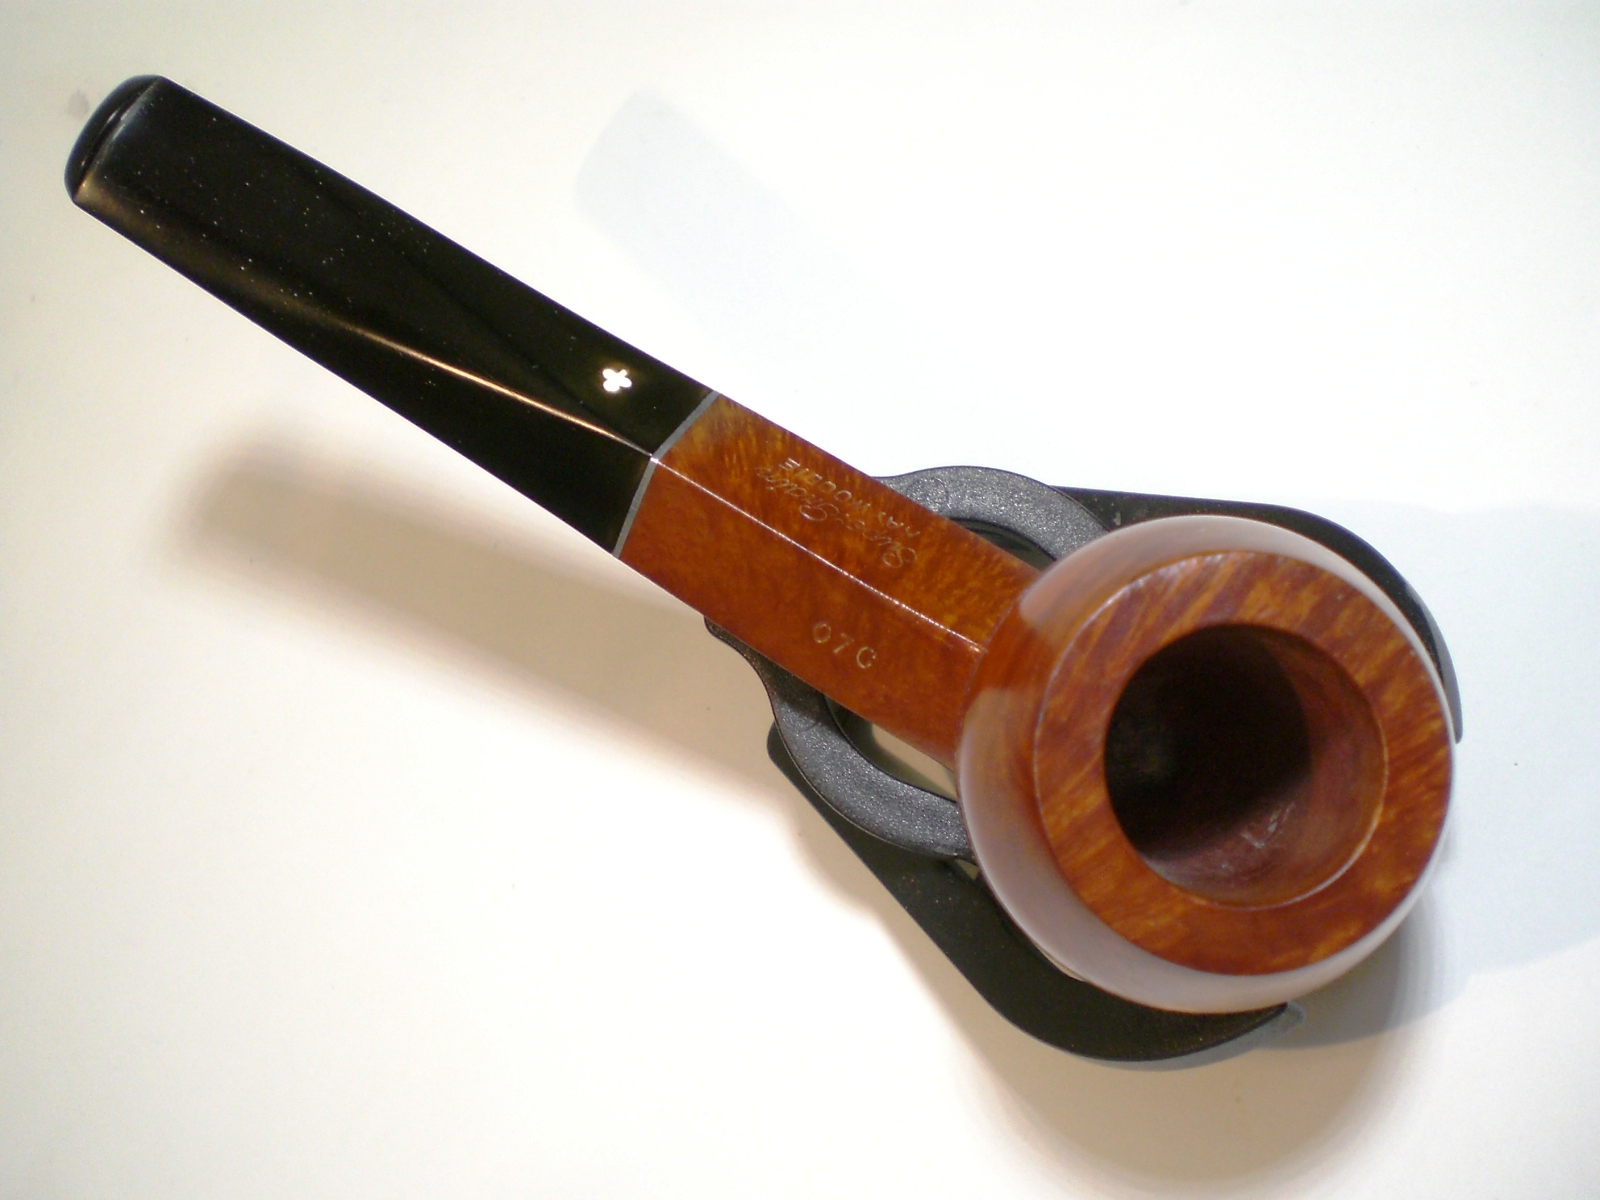
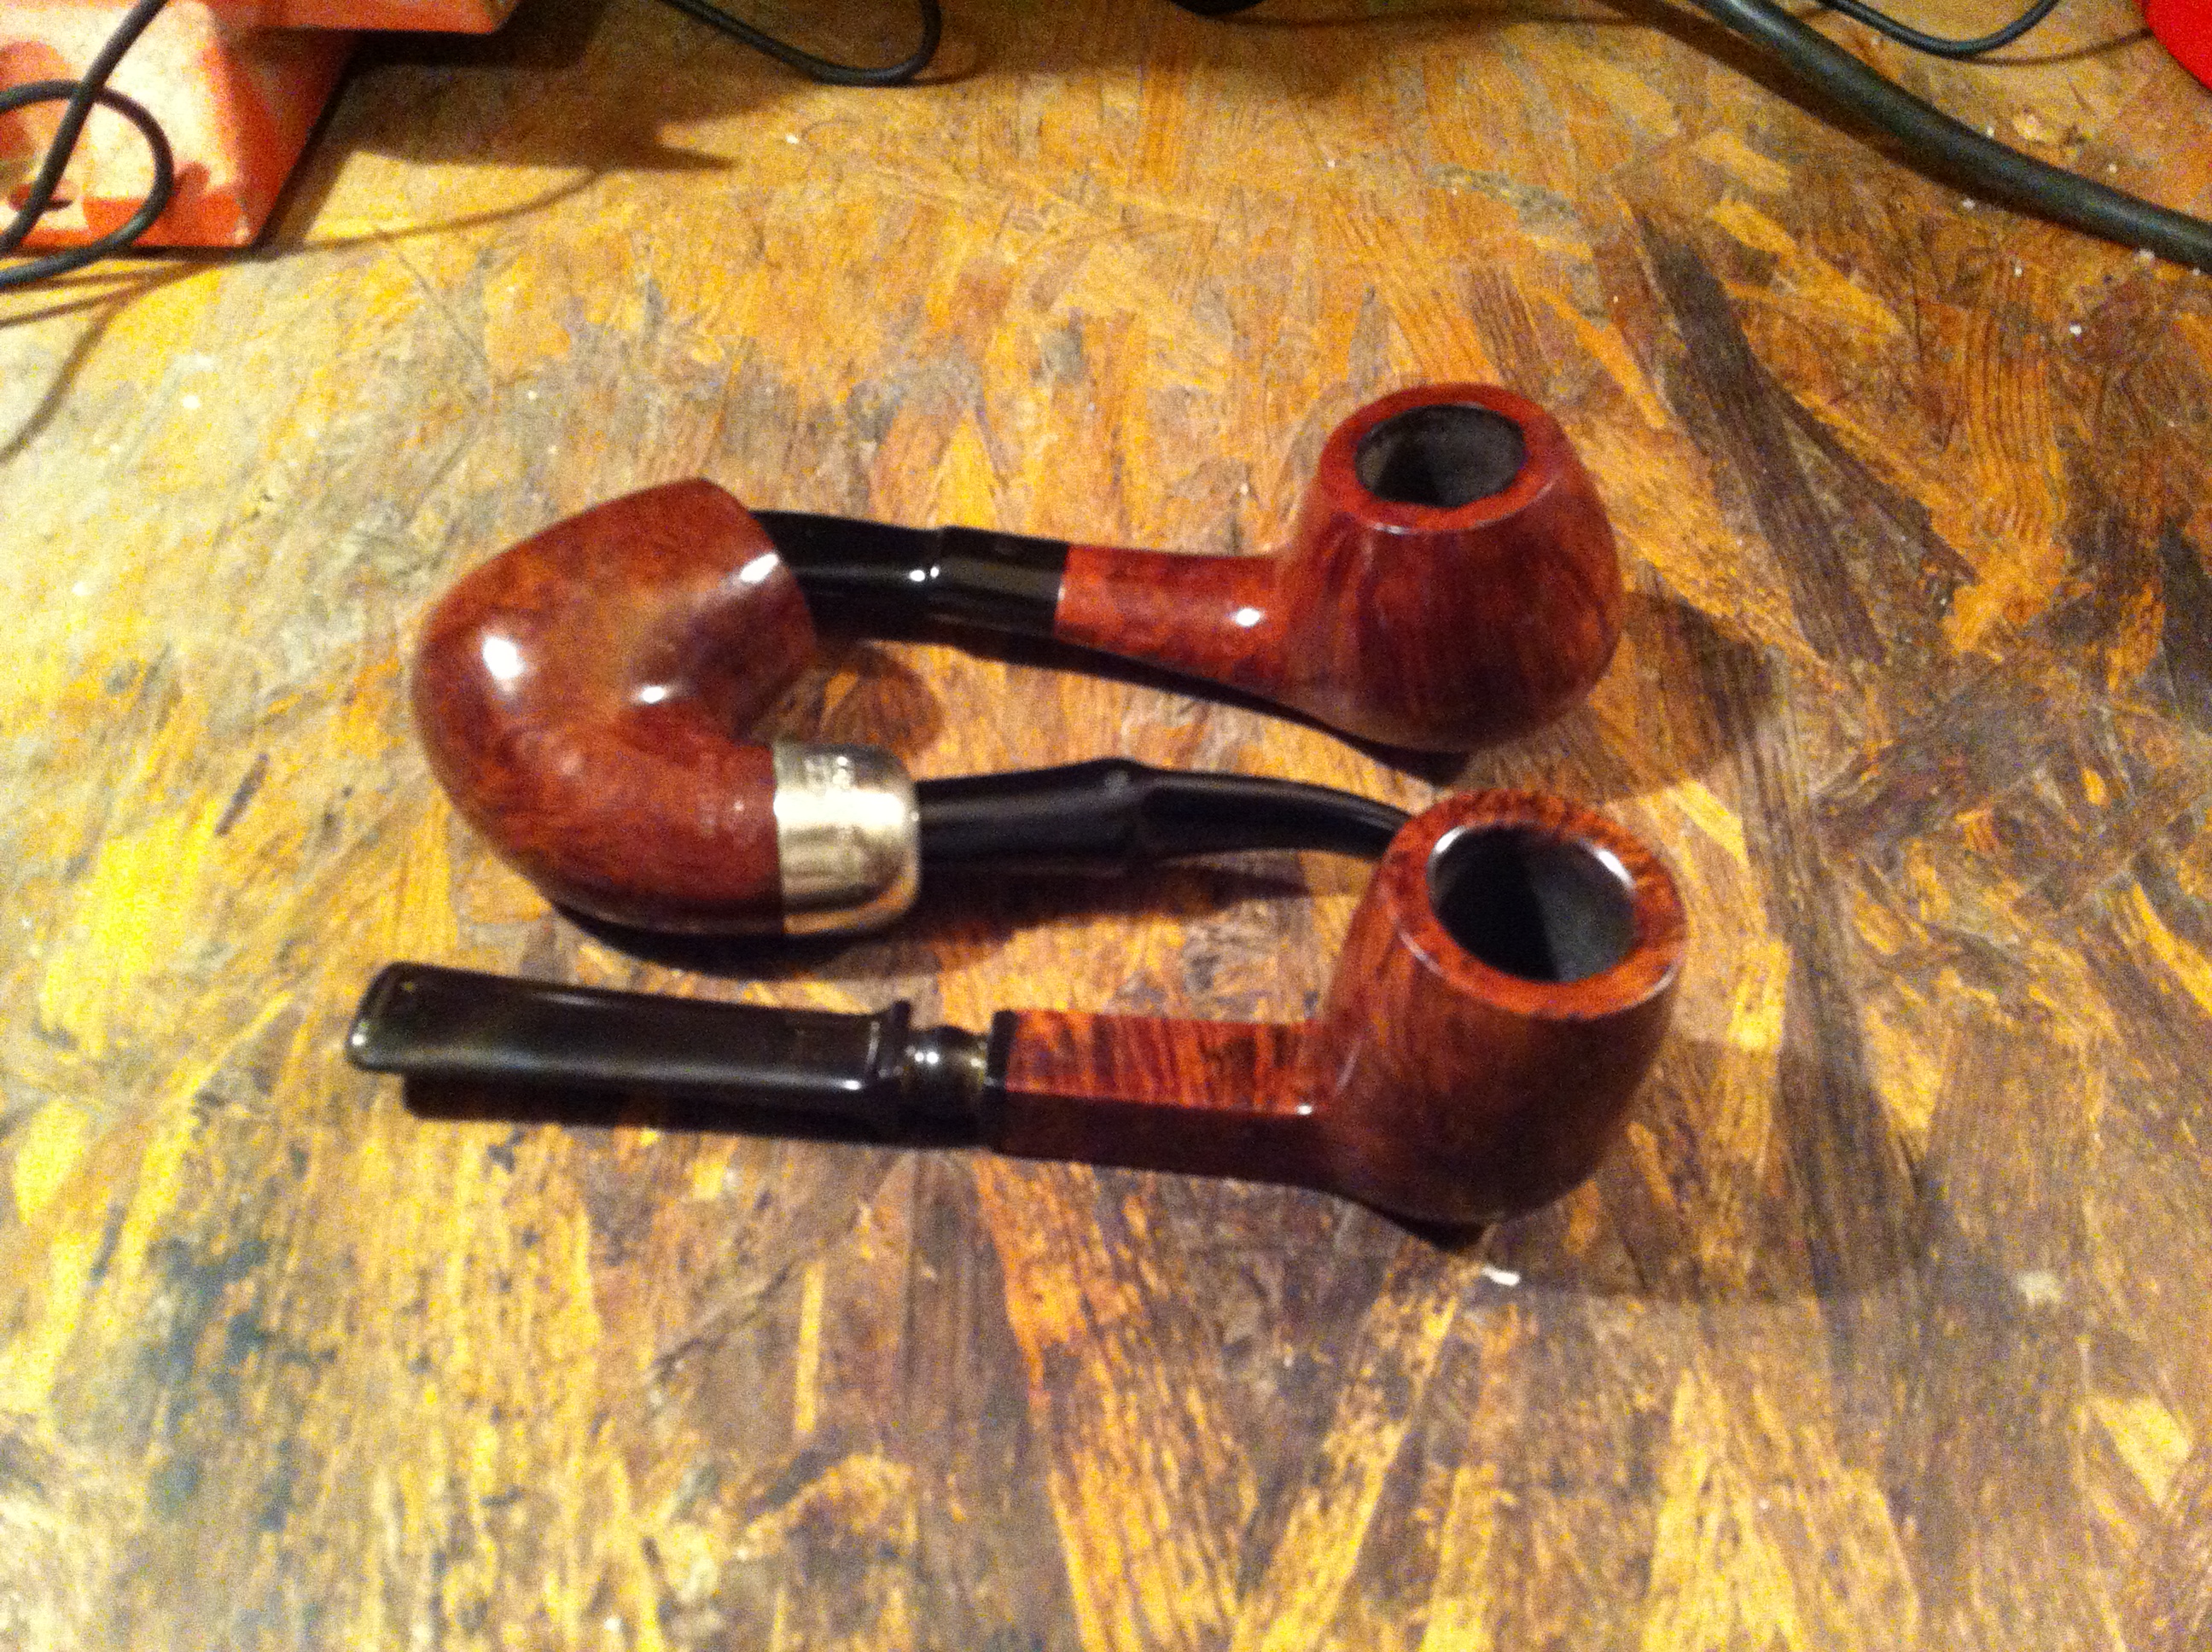
When I arrived home I started to go through all of them reading the names. GBD, Dr. Grabow, Rocky W. Germany, Aldo Velani, Penthouse (I thought that was a magazine huh who knew), Irwin’s, one meerschaum, and one Peterson. I started examining them closely to see how much work would be needed. I found that three had holes bitten through the stems but other than that some teeth marks, heavy amount of cake, and even heavier oxidation on the stems. My first thought was of all the people I have met that do restorations and how much it would cost to get these restored but, being the go getter that I am that thought quickly left my mind.
IMG_2470

IMG_2469

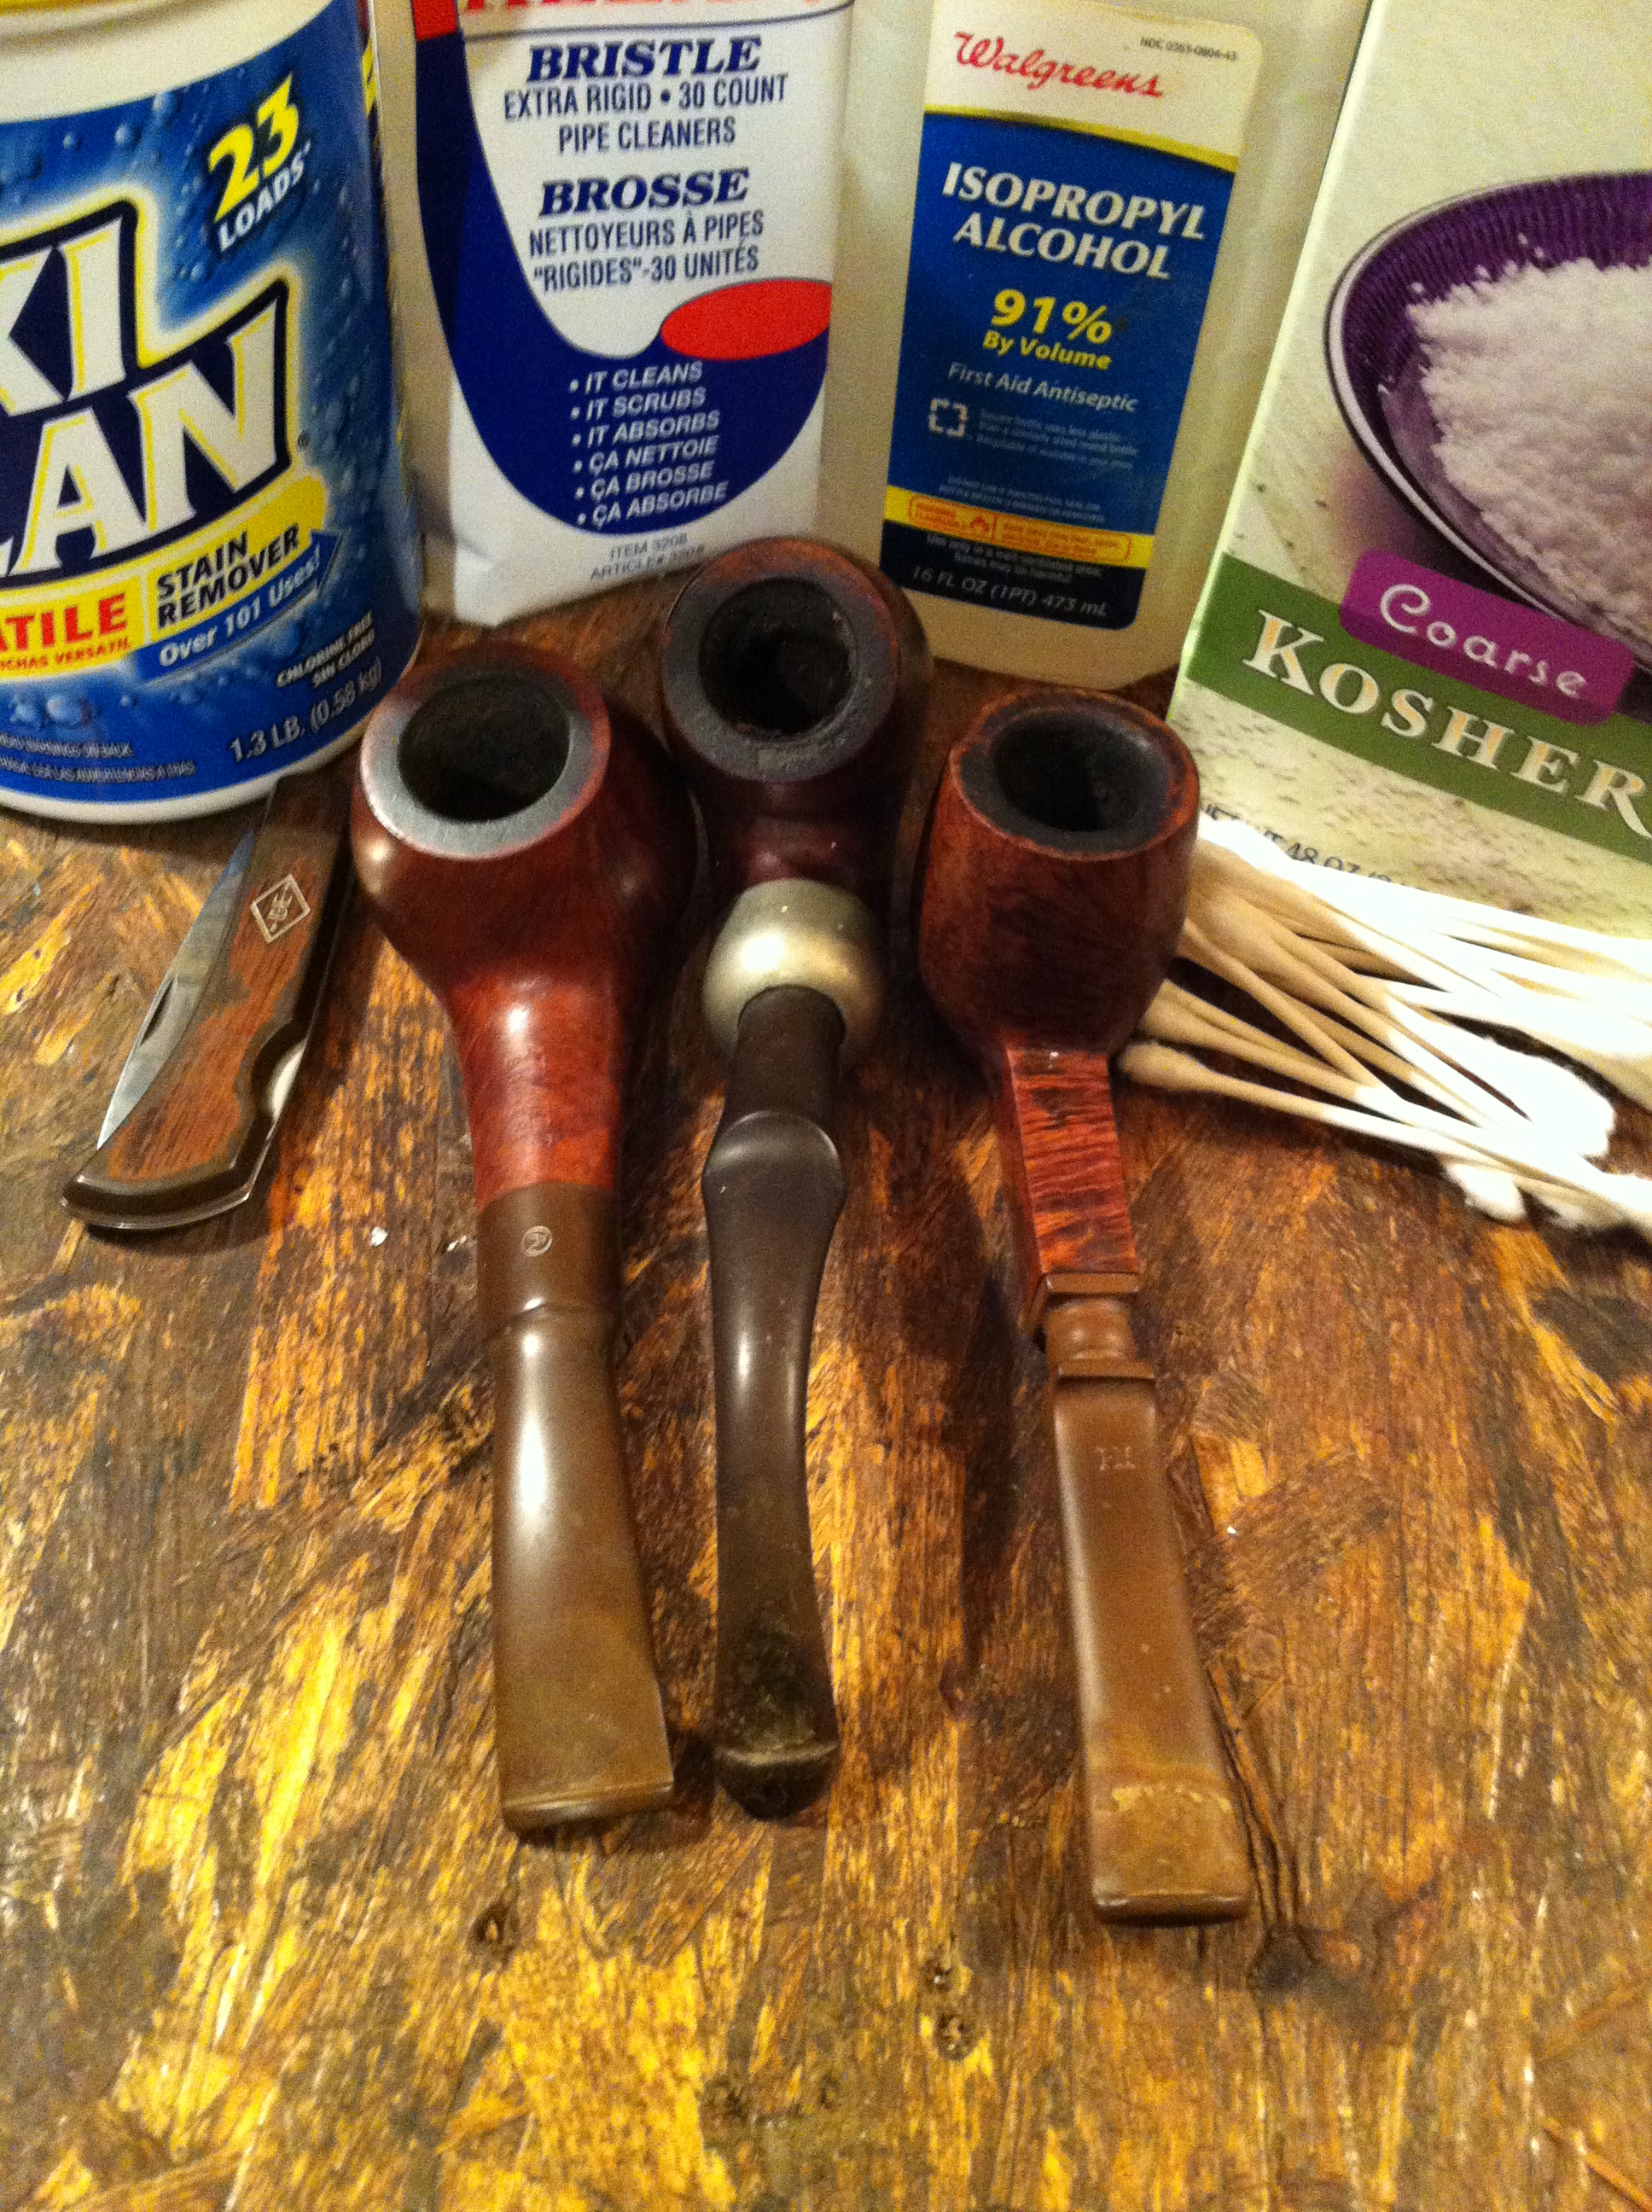
I then started to consume as much information as I could about restoring pipes. Reading tons of articles, many on this site, watching video after video, and digesting every piece of data I could get. After about 24 hours of nonstop information gathering I decided that I wanted to try to do this myself with very minimal materials. I would start with three pipes. The Materials used were as follows, a pocket knife, Oxy clean, bristled pipe cleaners, isopropyl alcohol, kosher salt, q-tips, my 6″ grinder converted into a buffer, Tripoli, carnauba wax, a polishing cloth, and some good ol’ elbow grease (which seems to be missing from a lot of people’s toolboxes these days but that’s a story for a different time).
IMG_2461

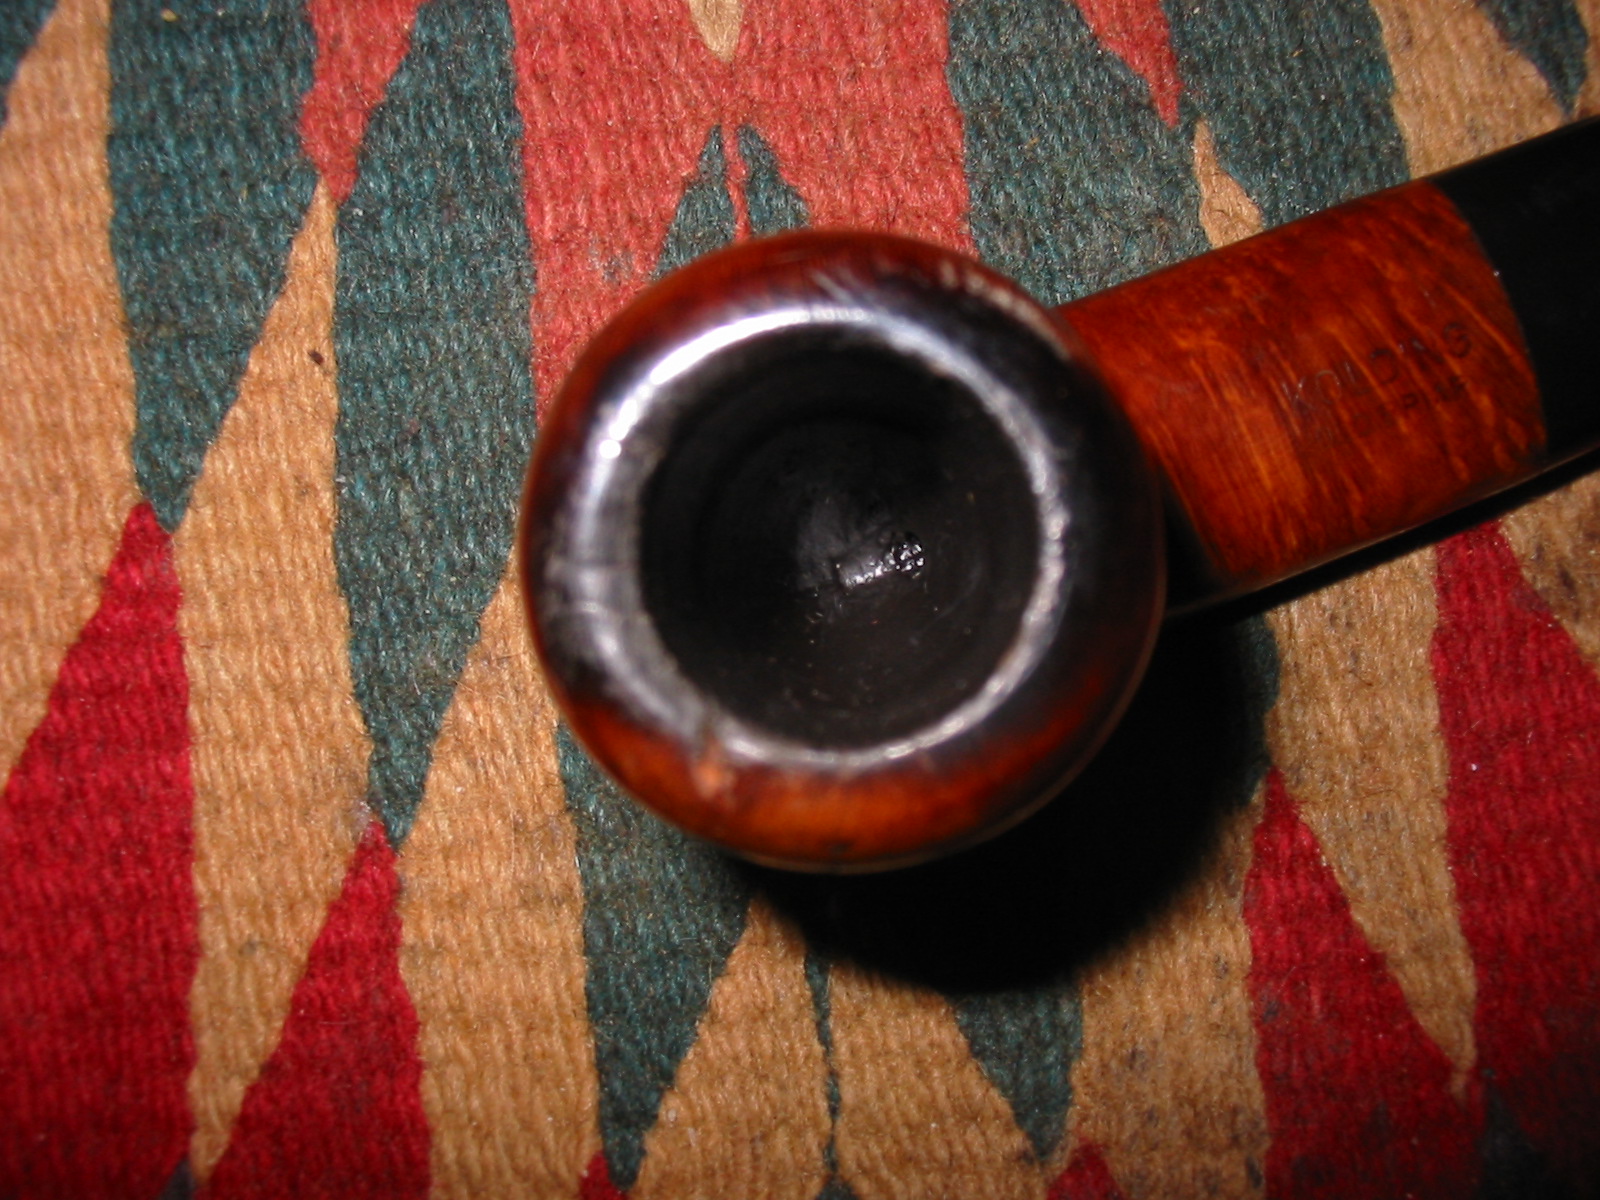
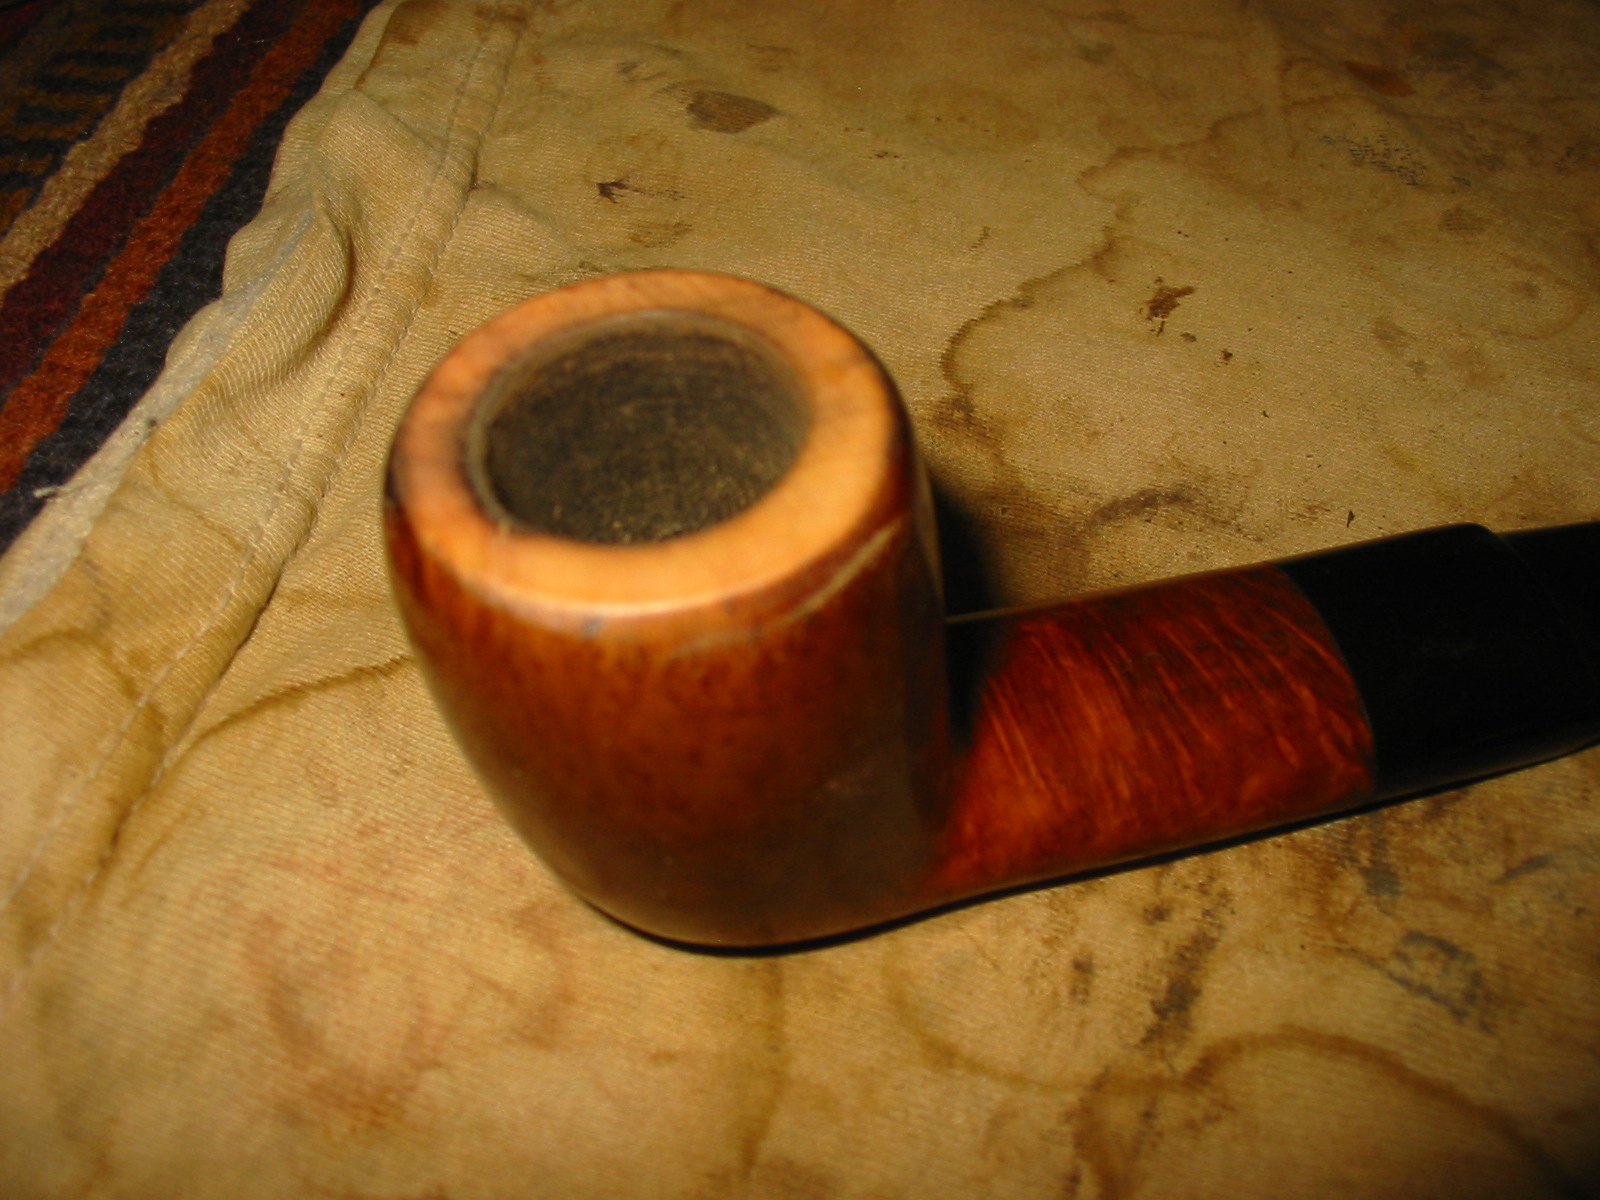
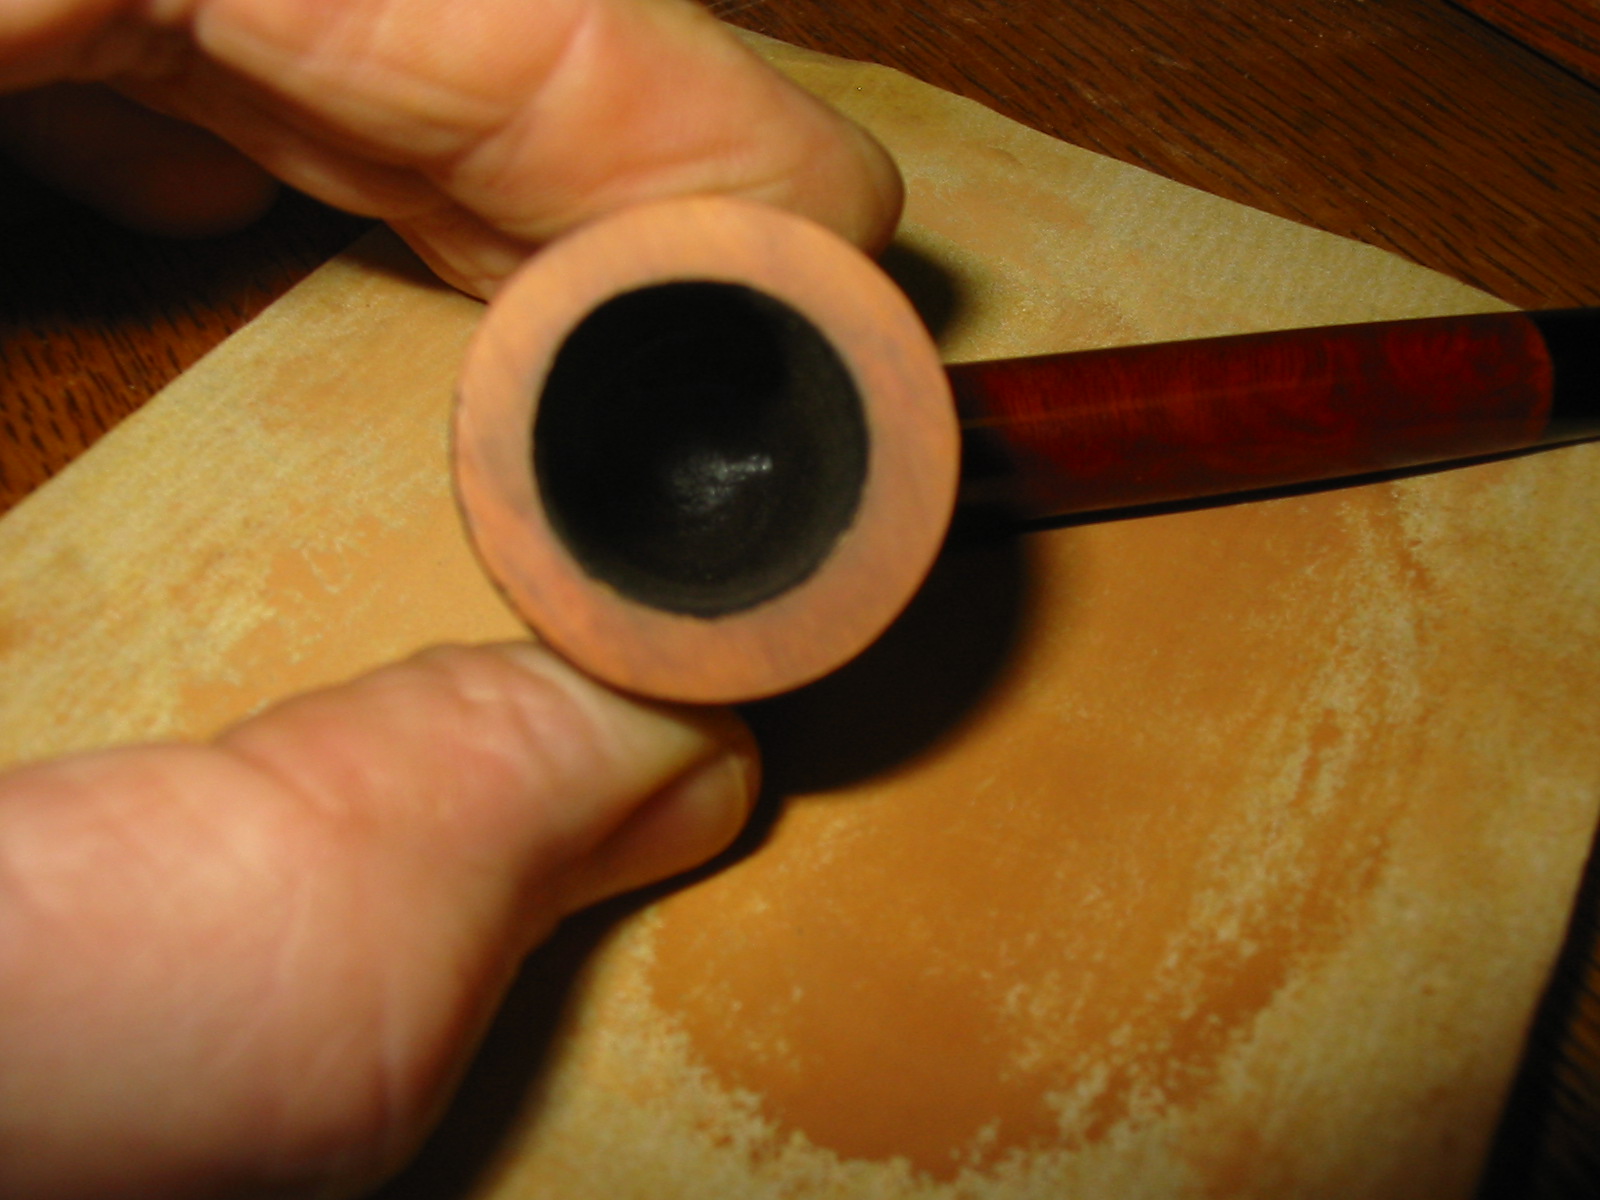
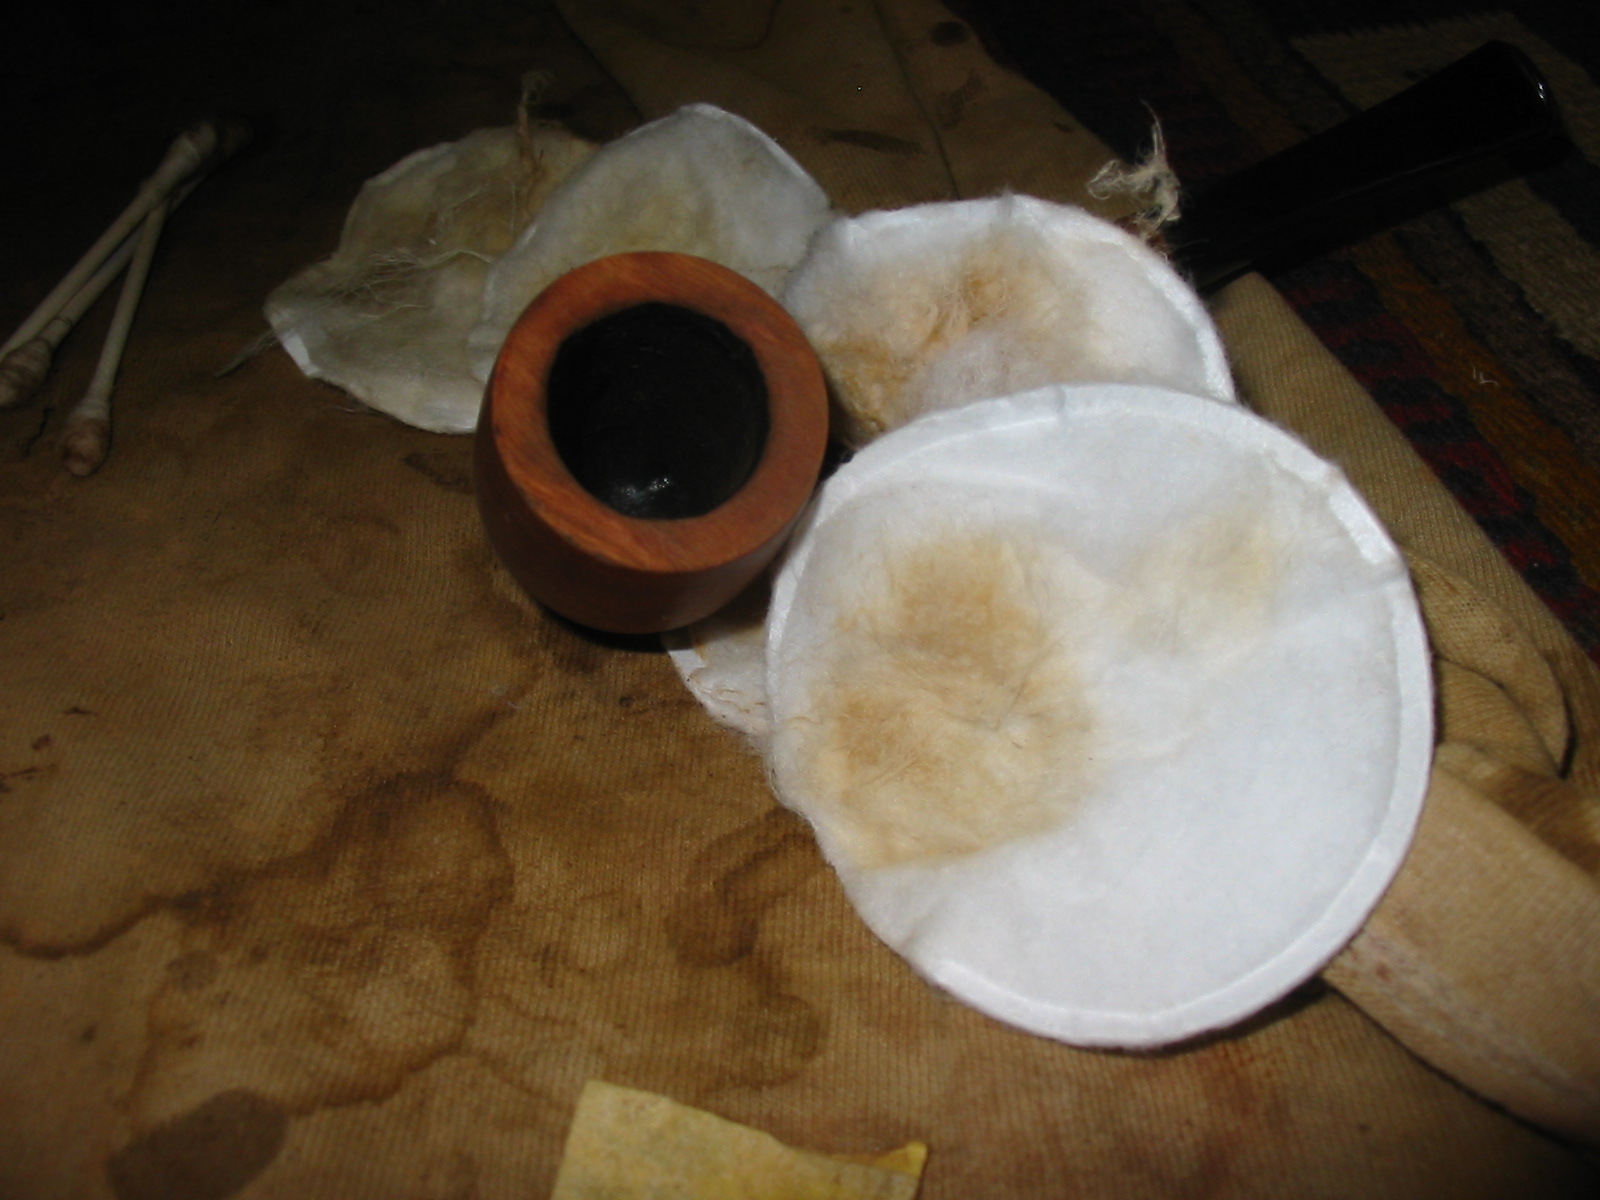
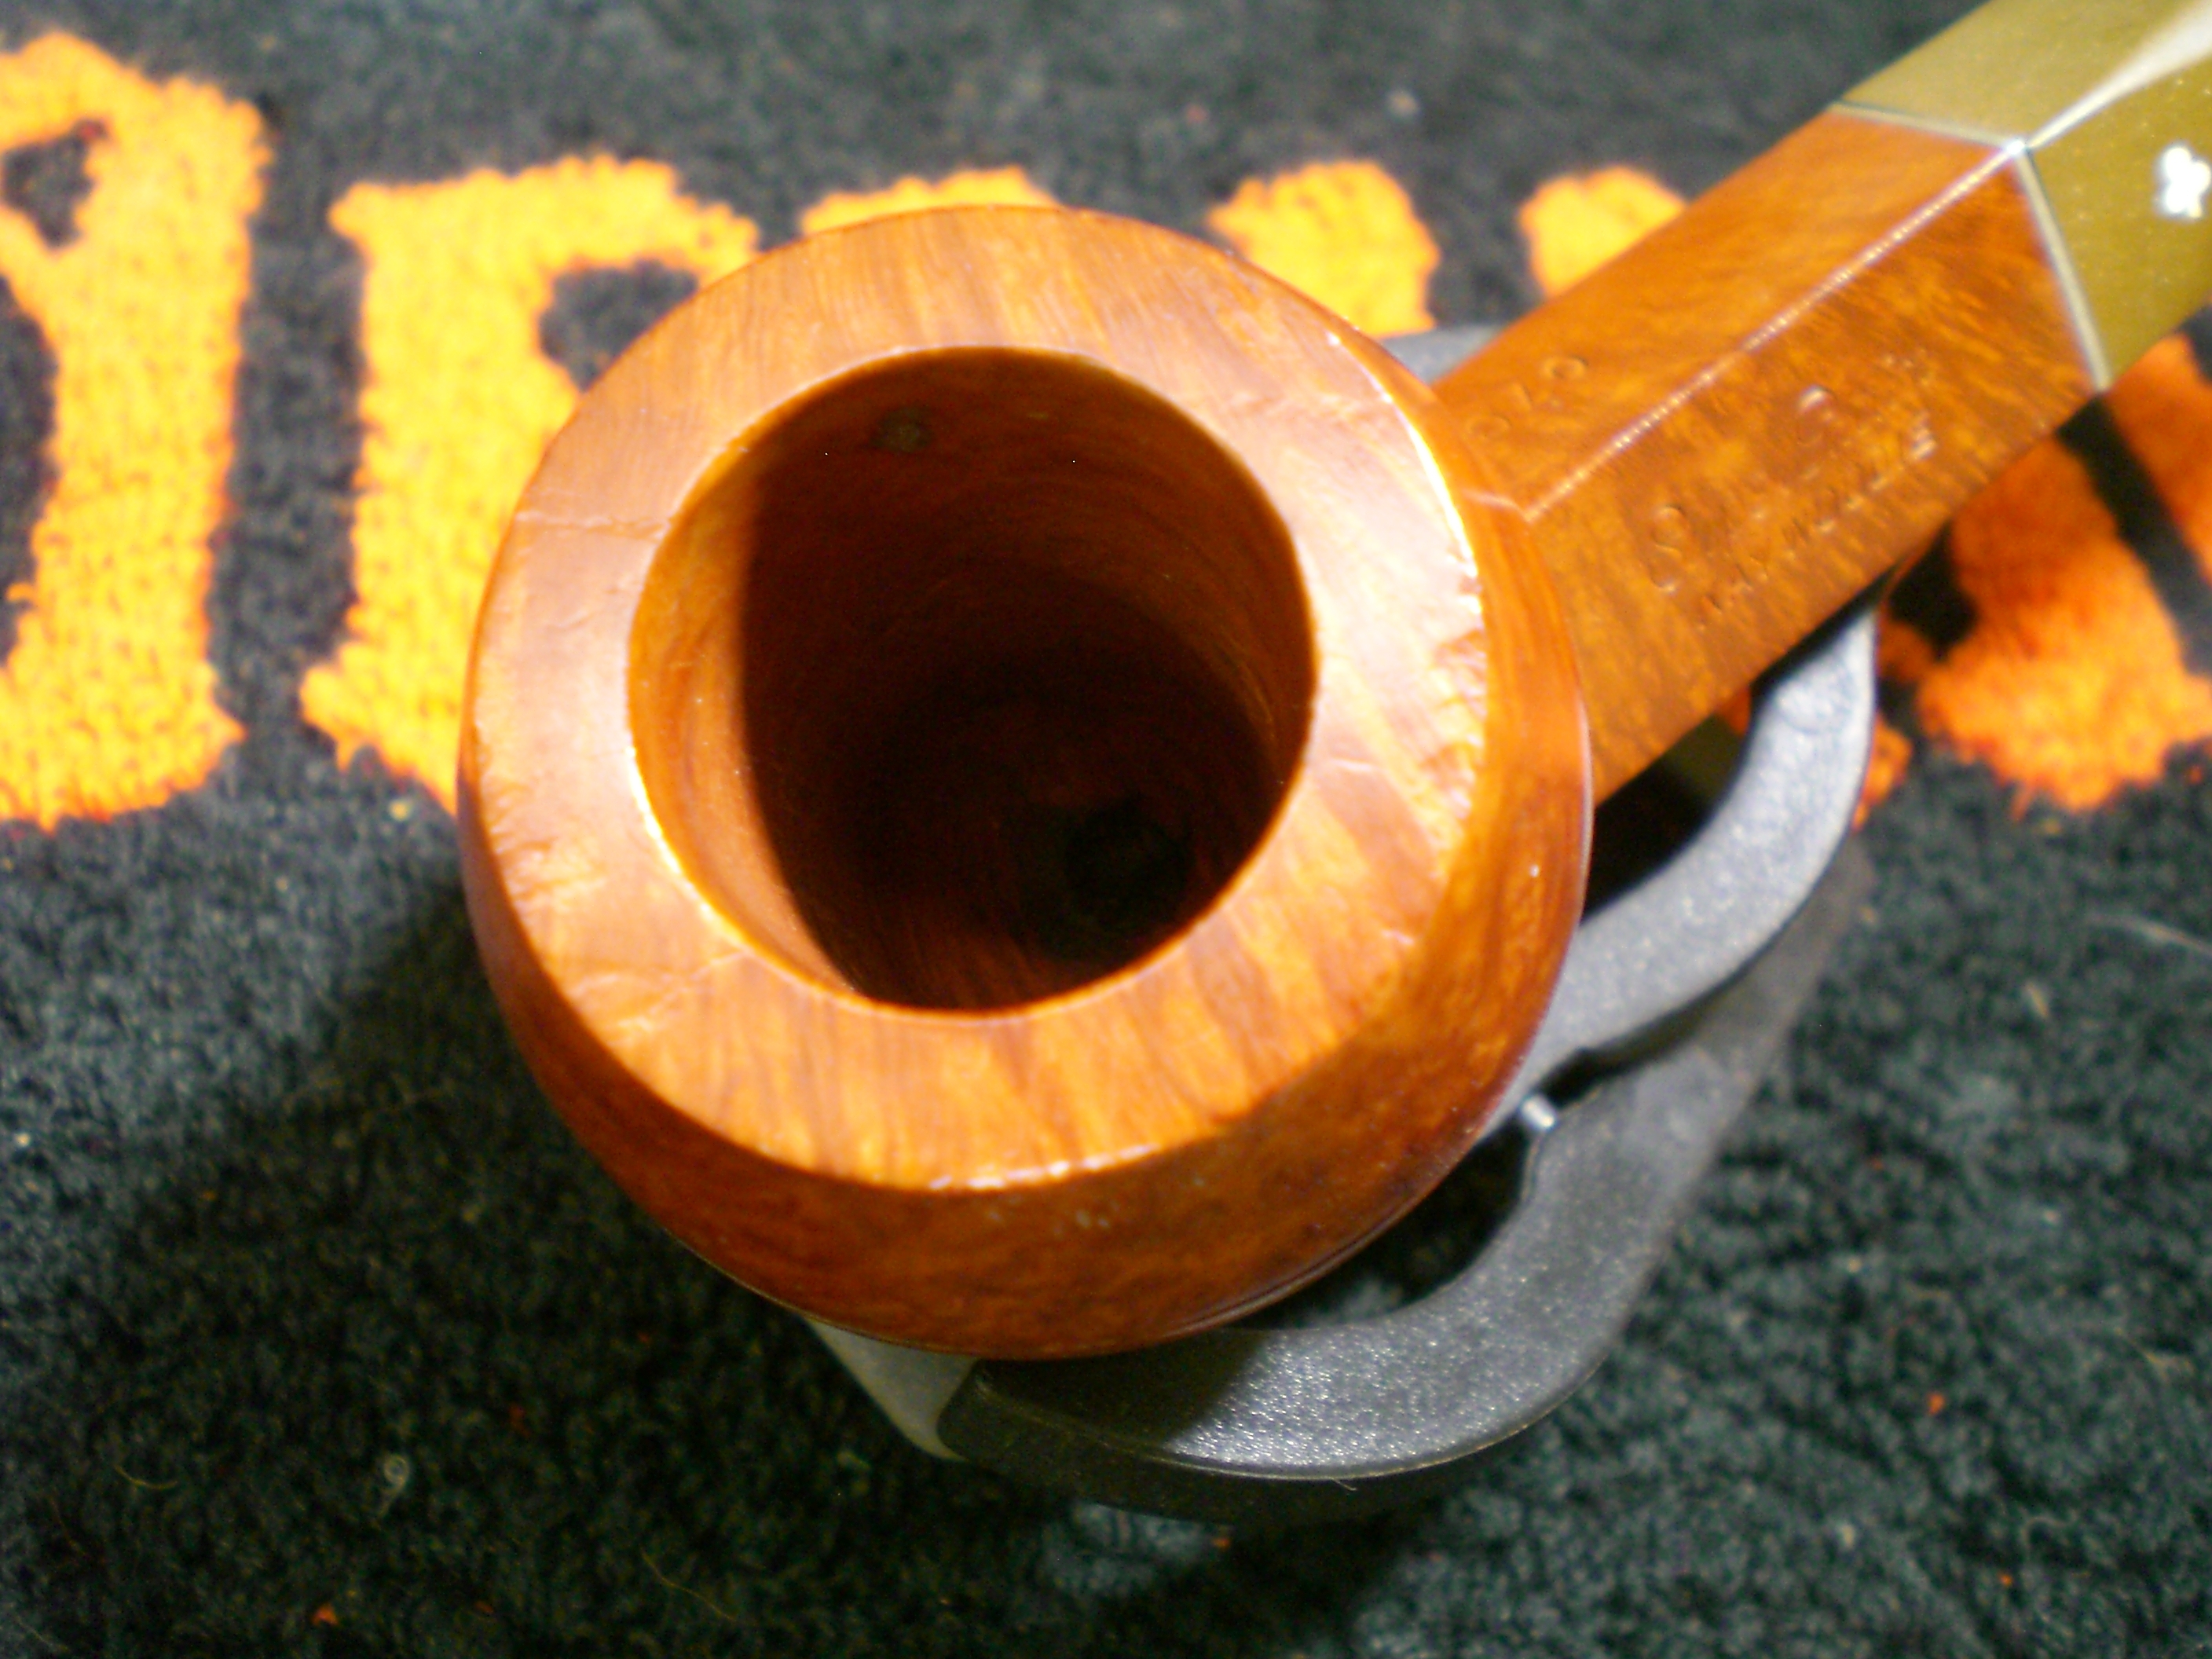
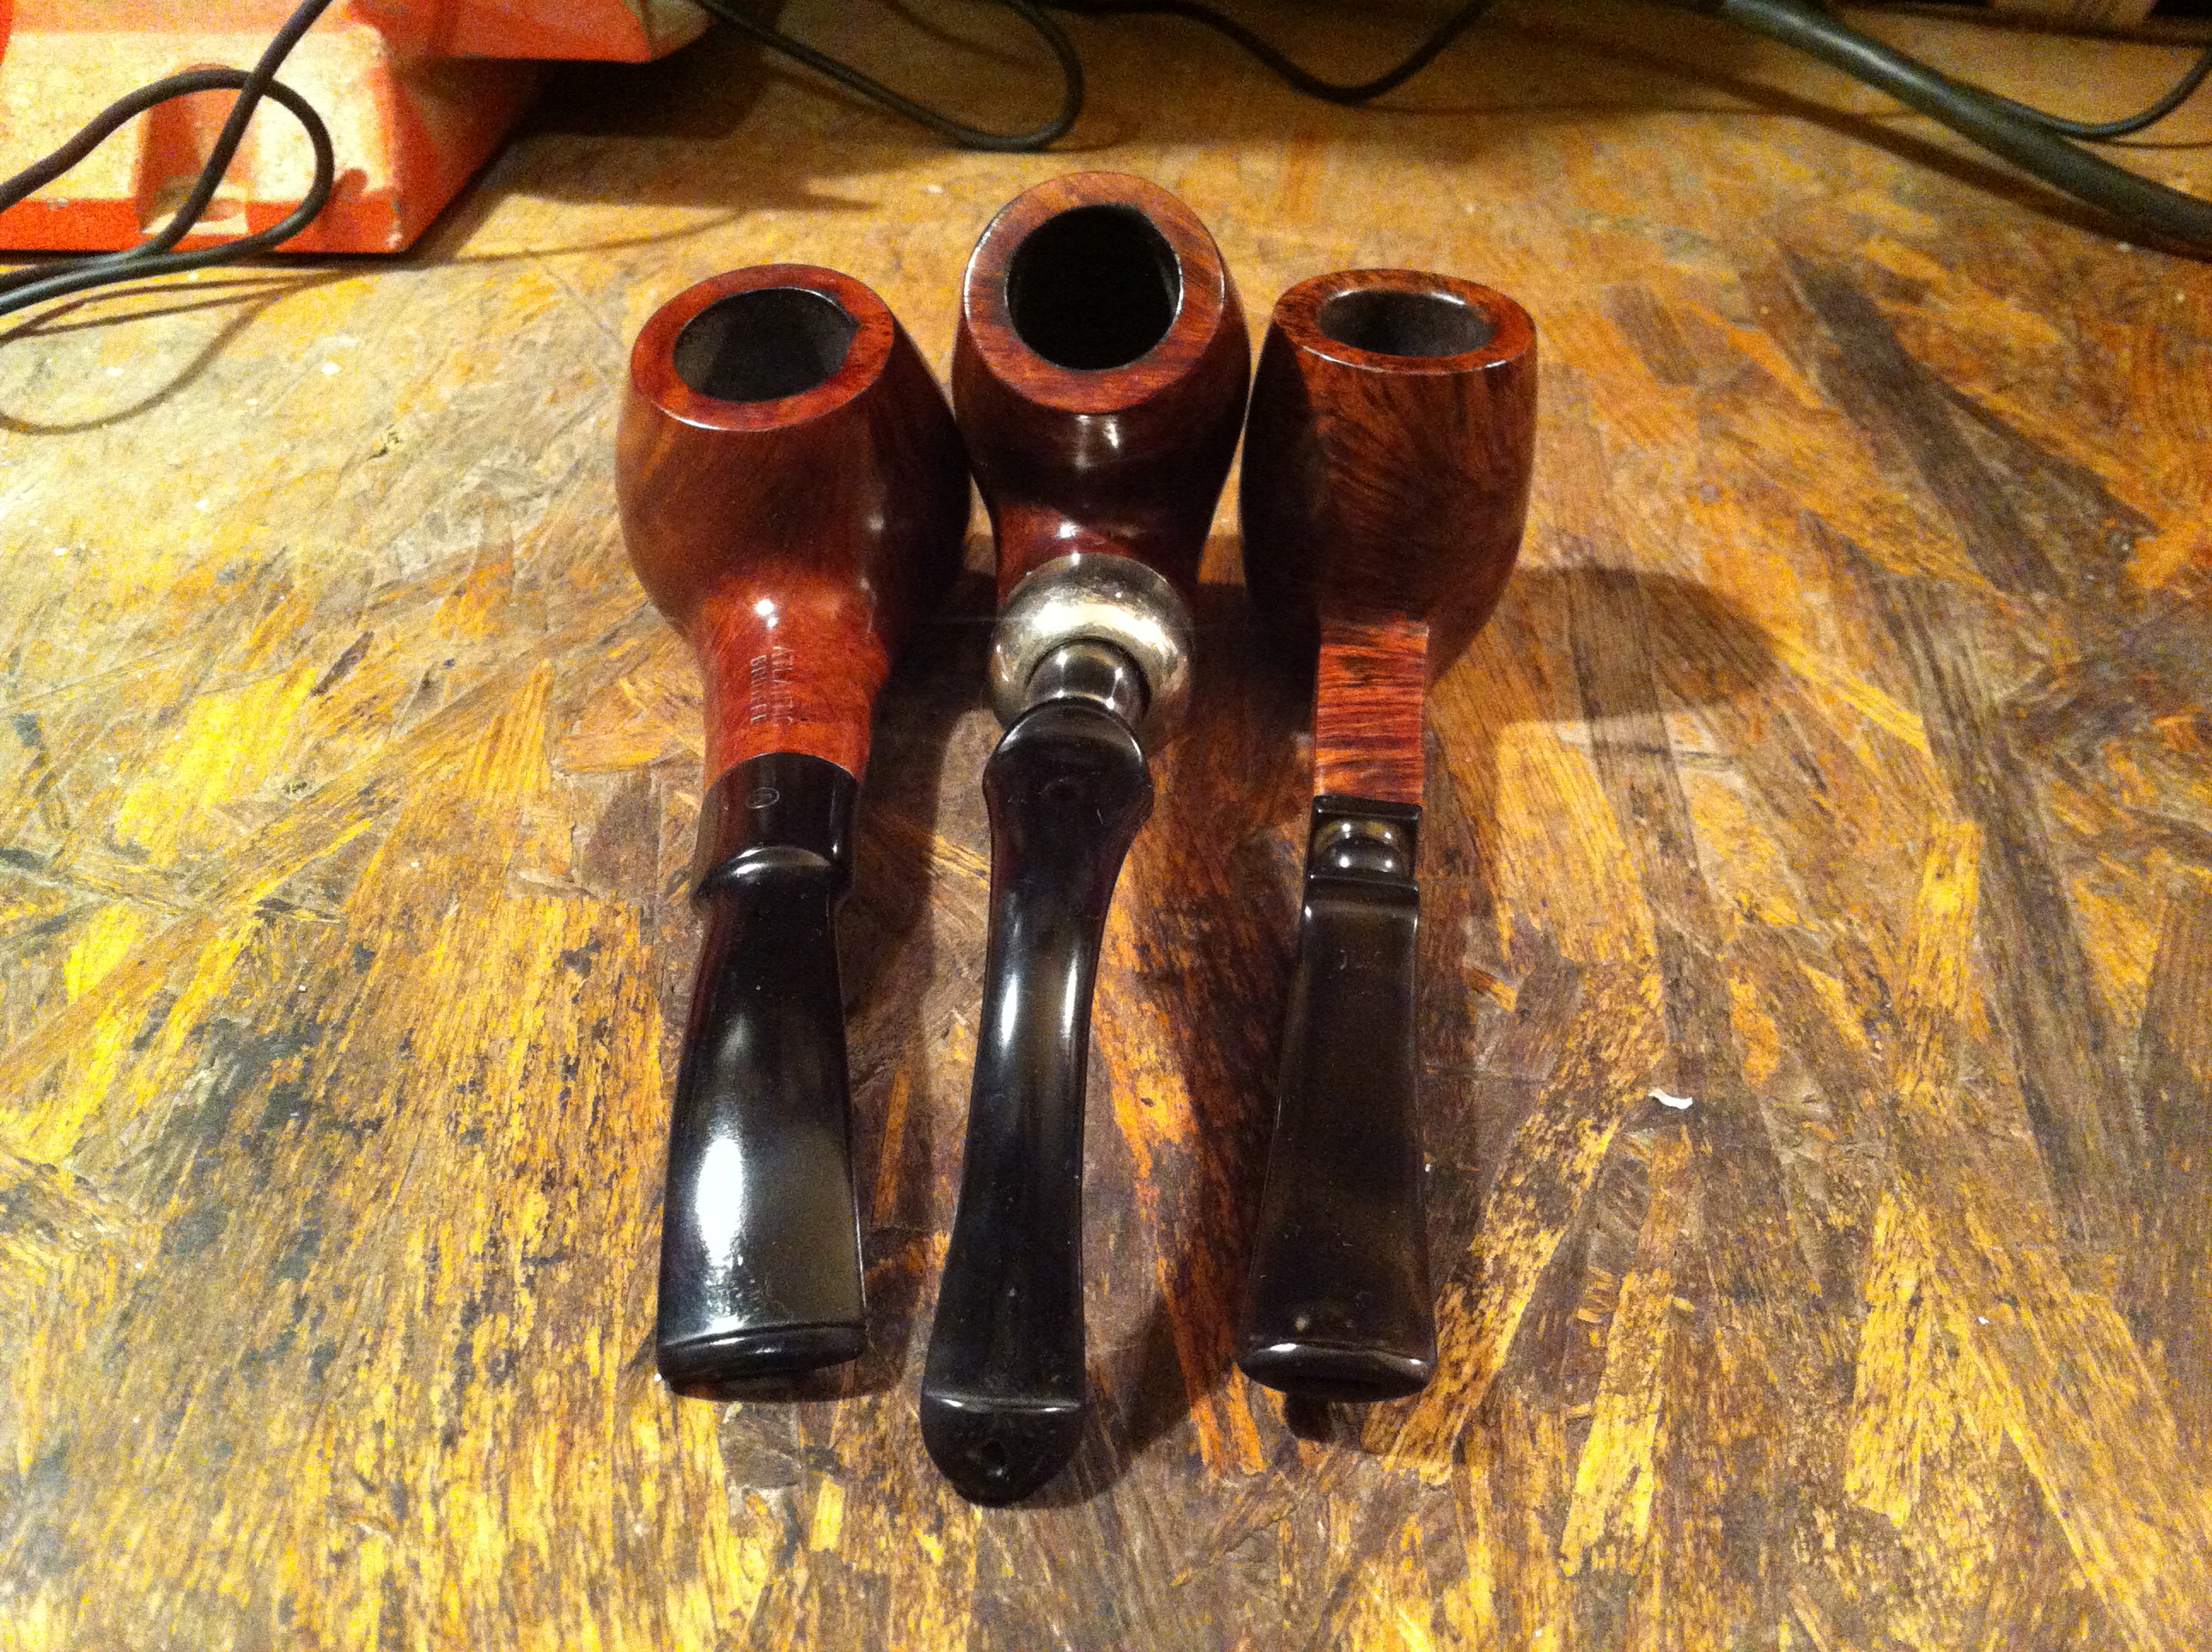
I started with the bowls and a pocket knife. I scraped all of the cake out being careful not to go all the way down to bare wood. I also used the knife to ever so lightly (and I mean ever so lightly) scrap the char from the rims of the bowls. I then used the pipe cleaners dipped in alcohol to clear out the draft holes. Next was the q-tips dipped in alcohol to clean out the tobacco chamber. This took quite some time but I was very persistent with it.

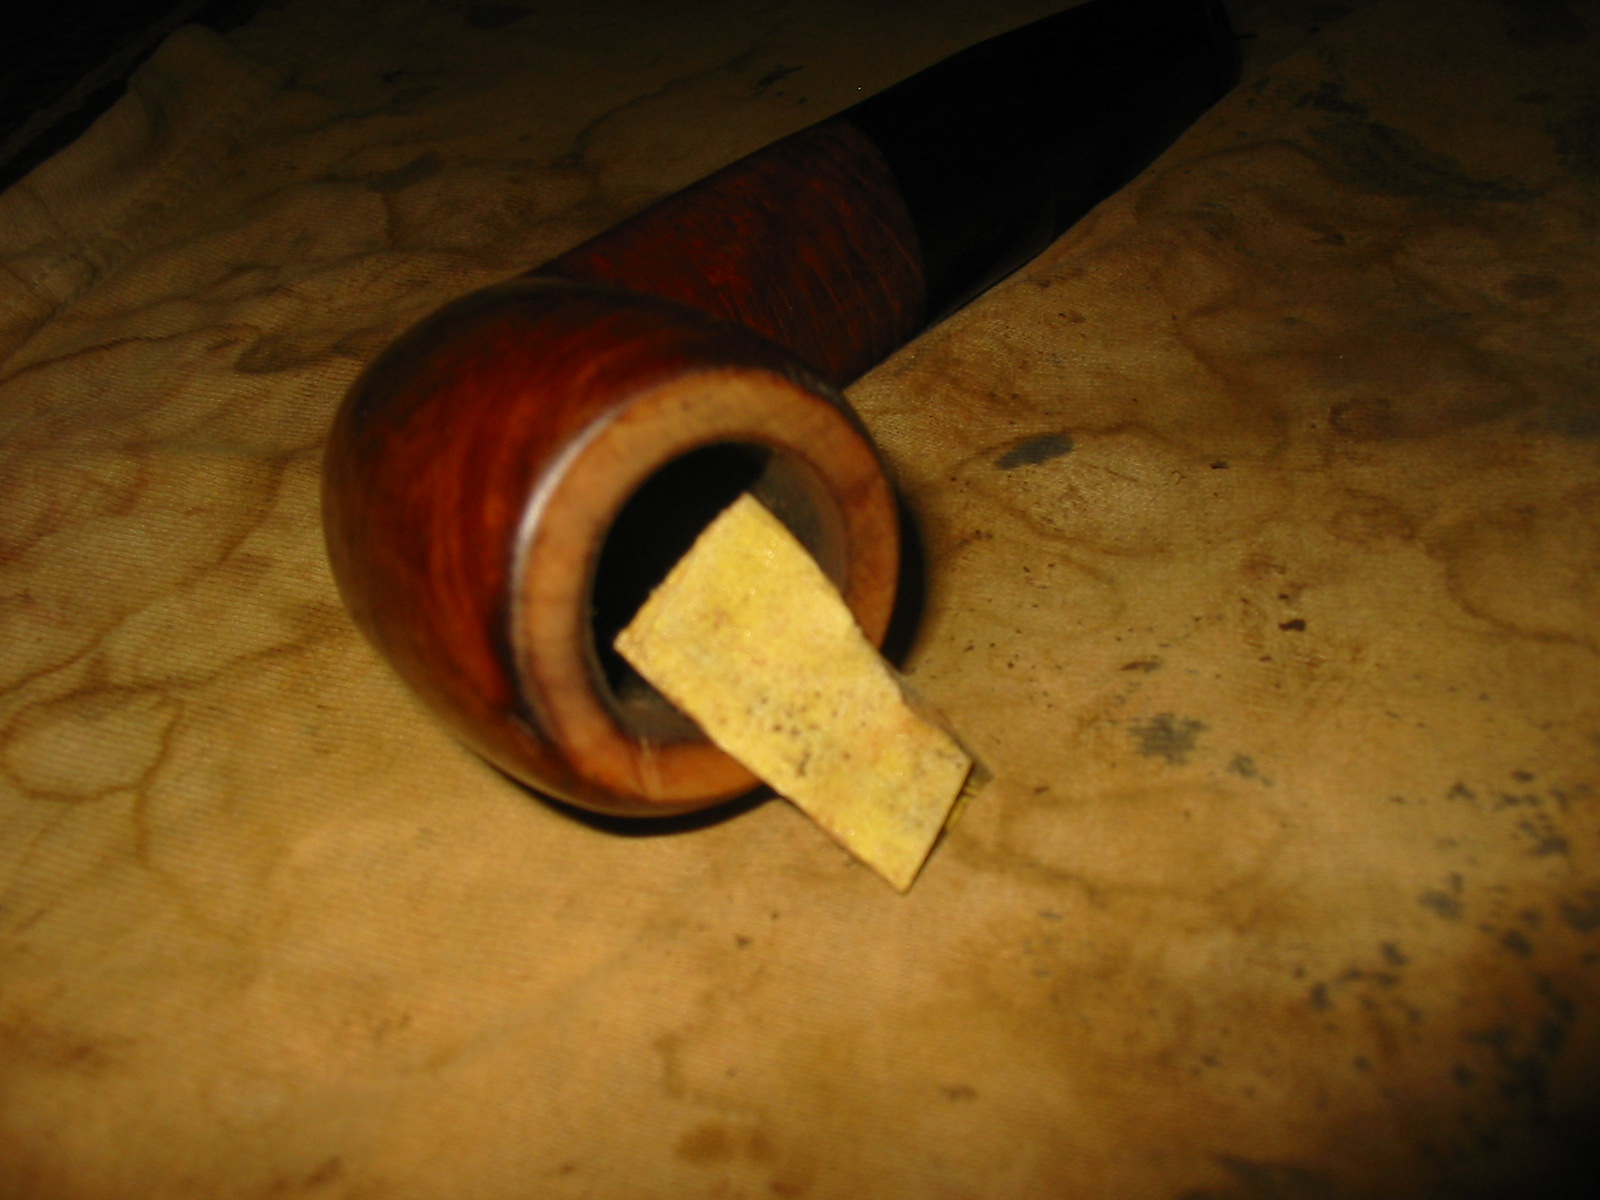
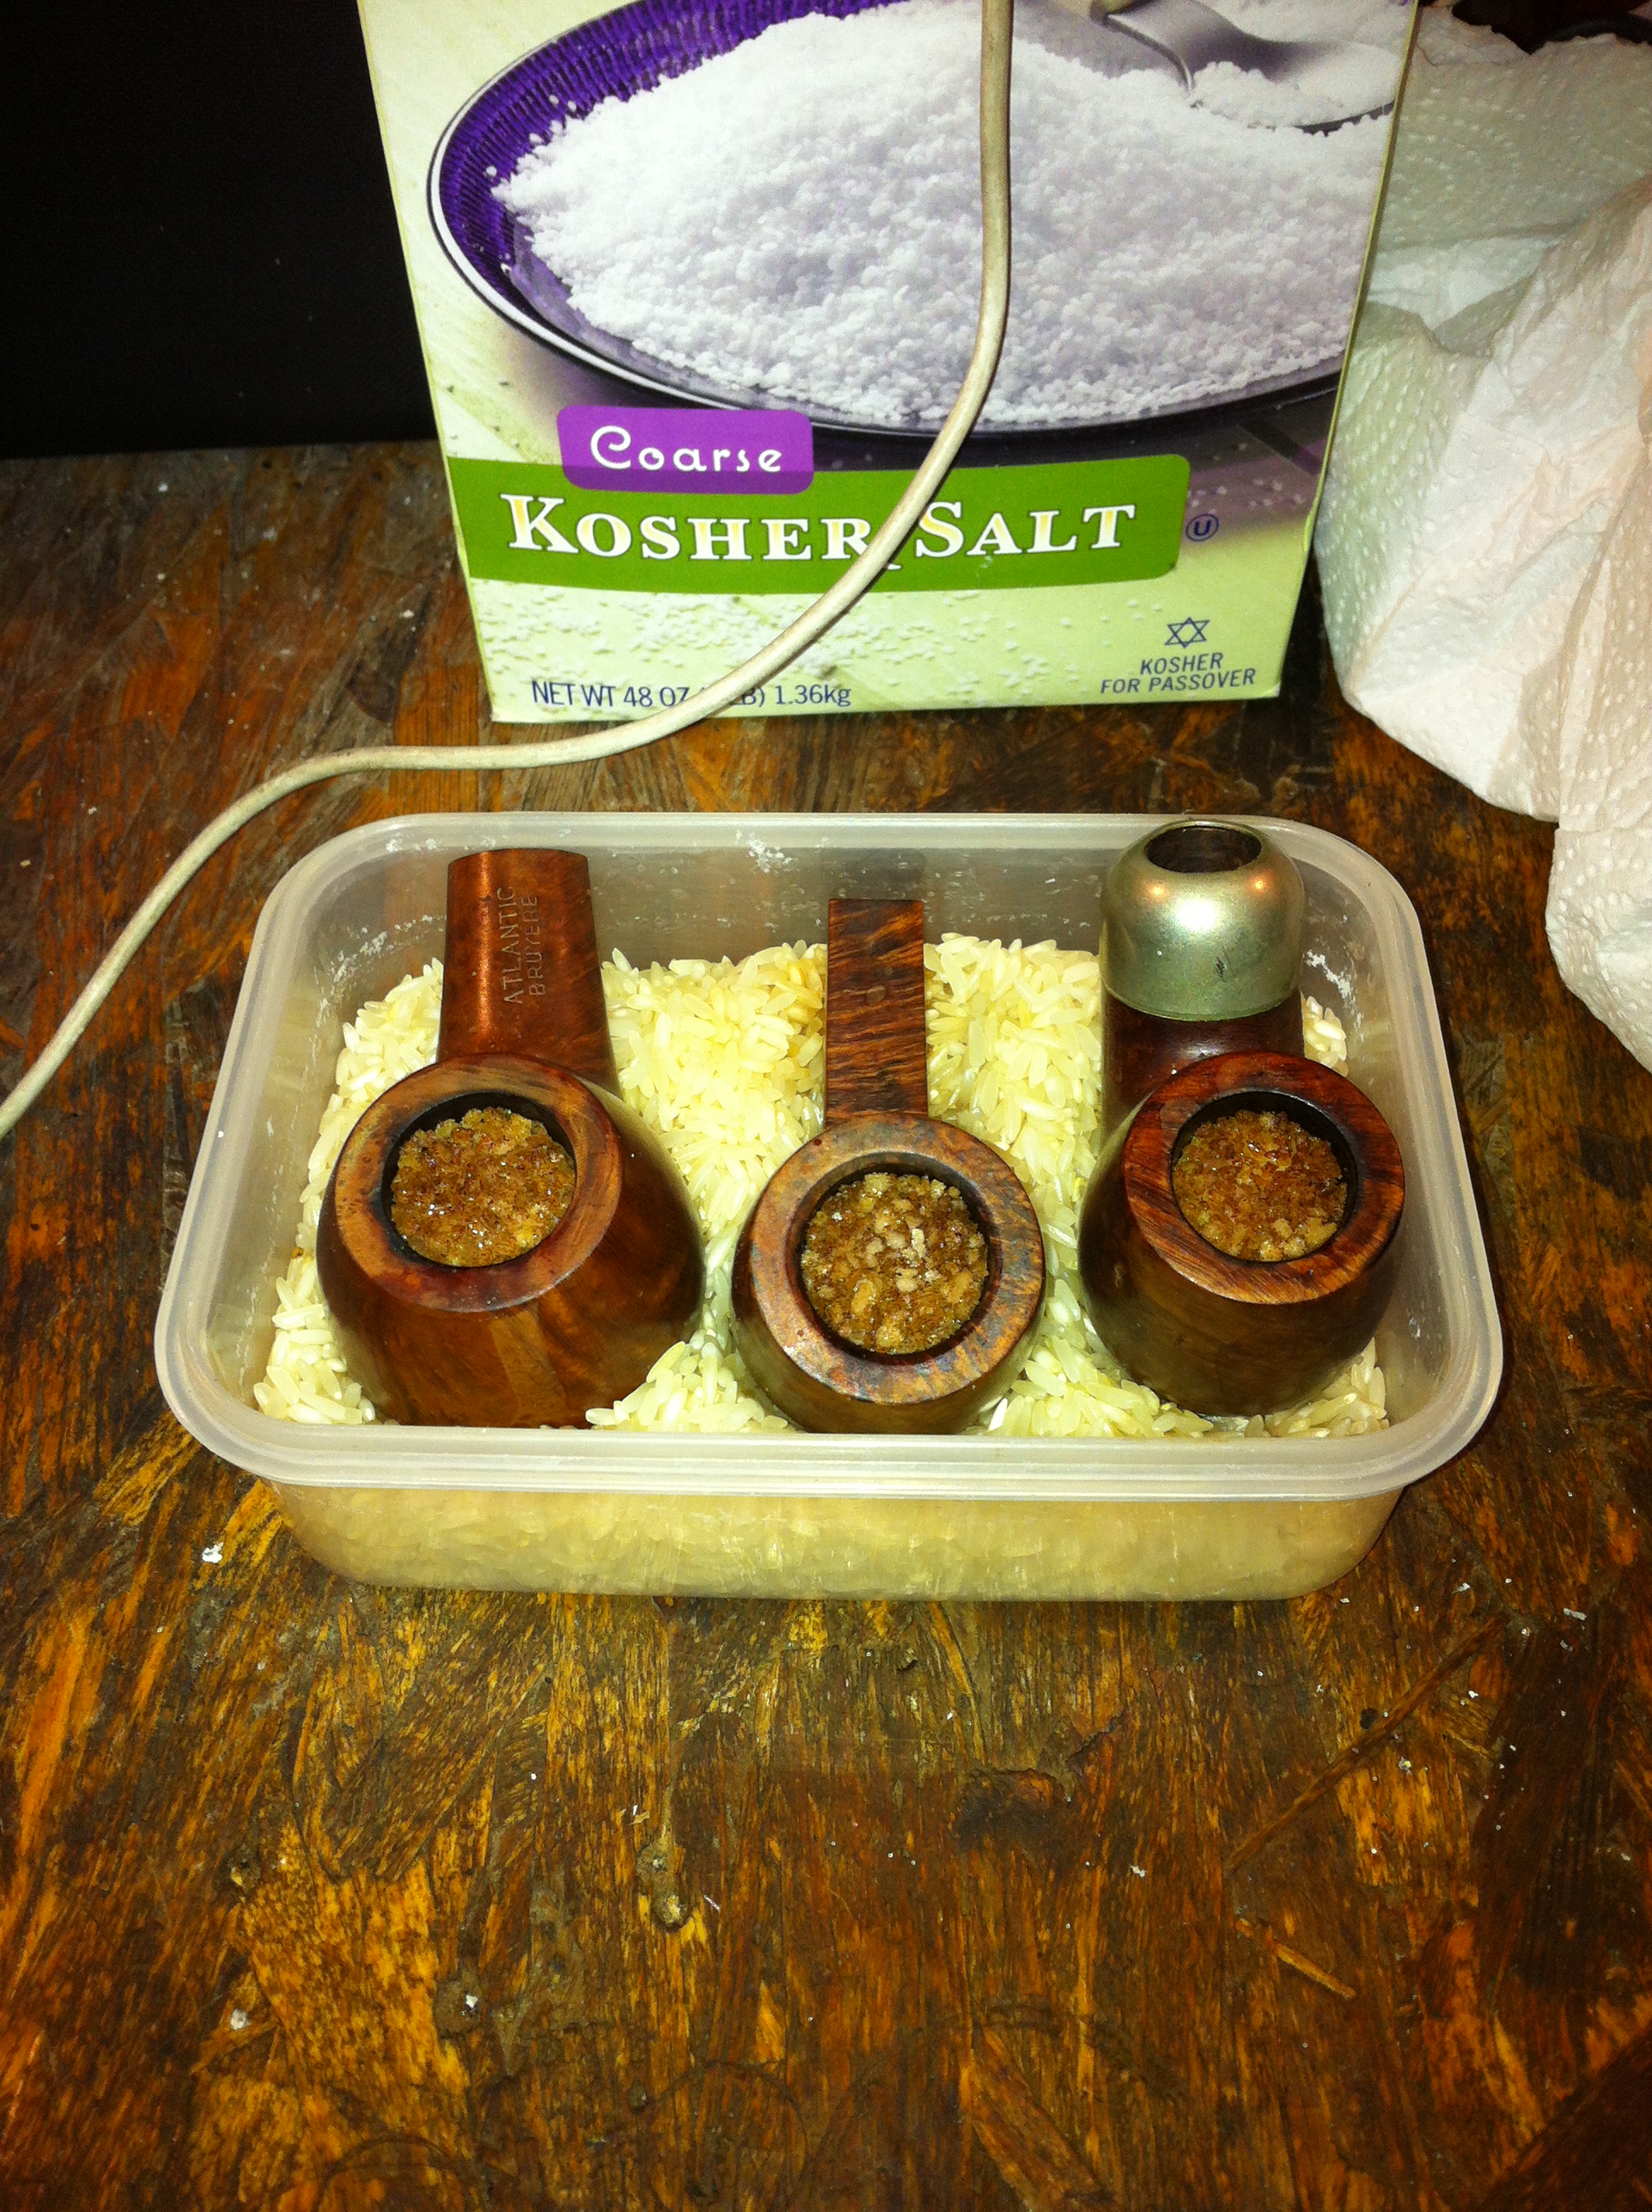
I then proceeded to the salt treatment. Typical treatment, fill the bowls with salt, not packing it but keeping it loose, then dropping the alcohol in. I sat the bowls in a dish with rice to keep them at the right angle and let them sit for 24 hours. I ended up doing 2 salt treatments when it was all said and done just to get more of the nastiness out of the chamber.
IMG_2464

IMG_2482

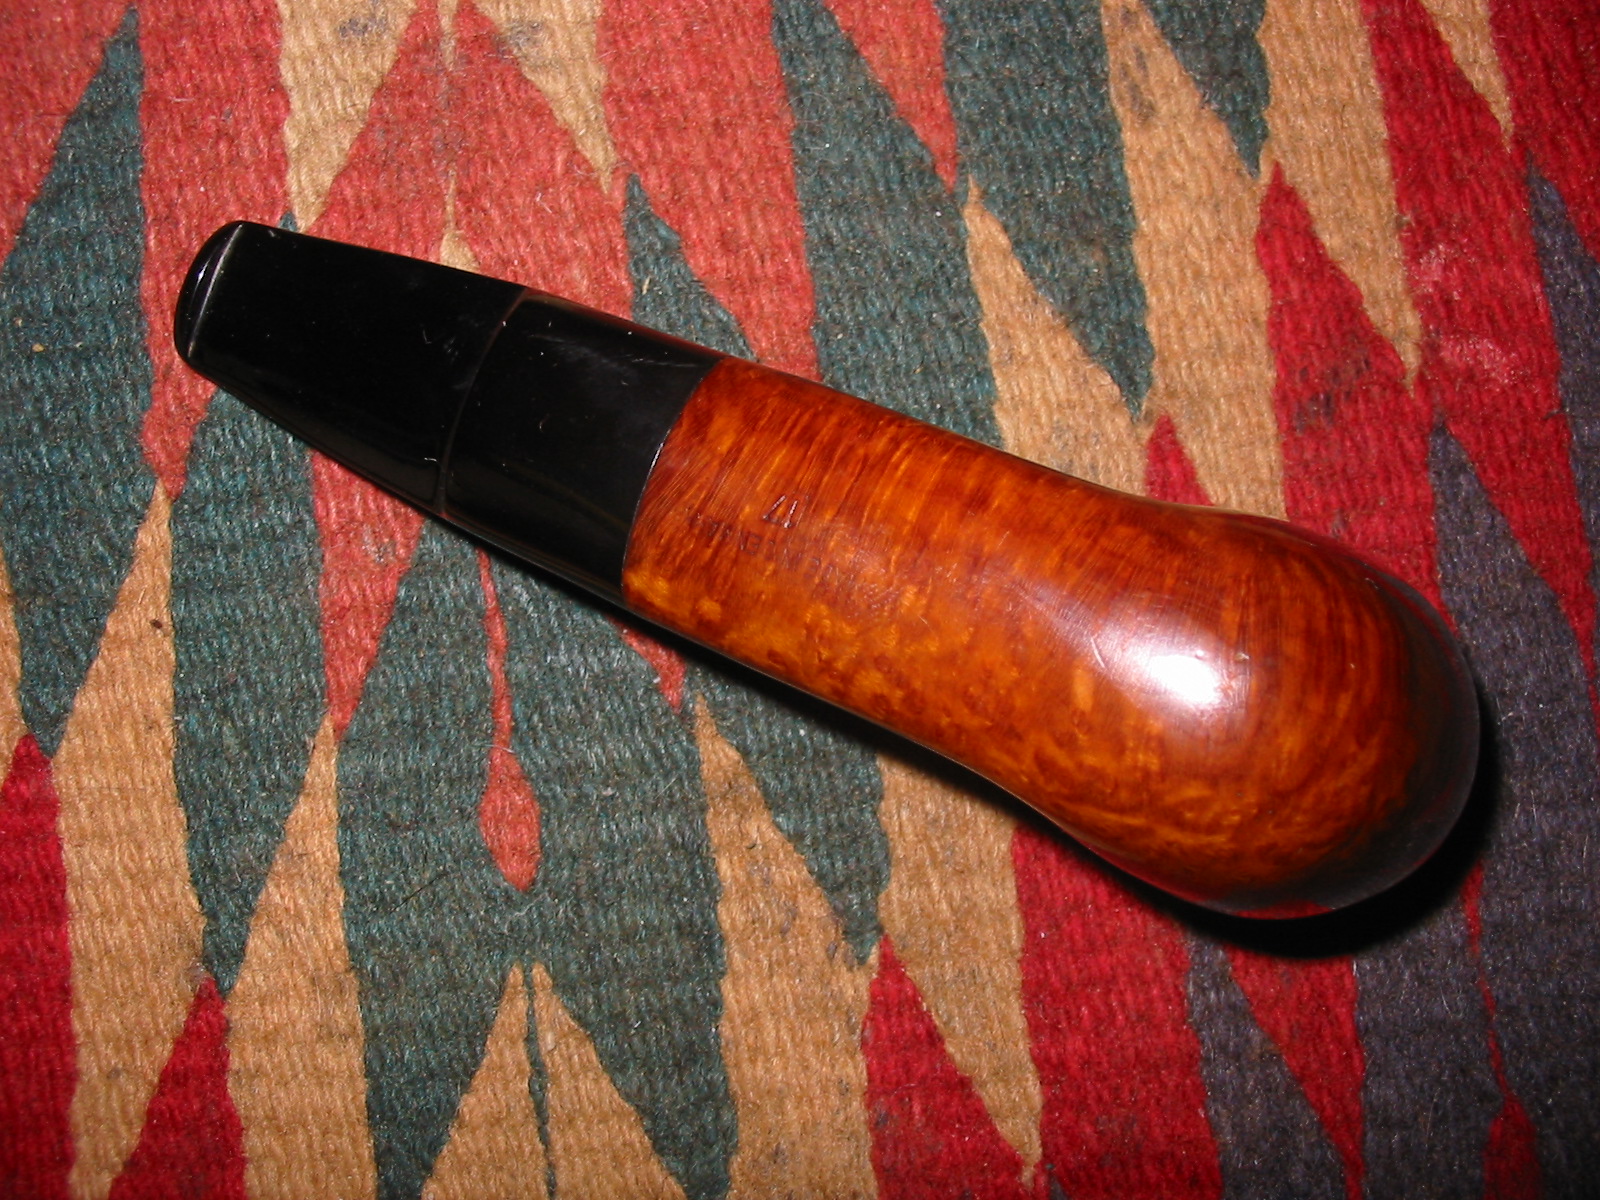
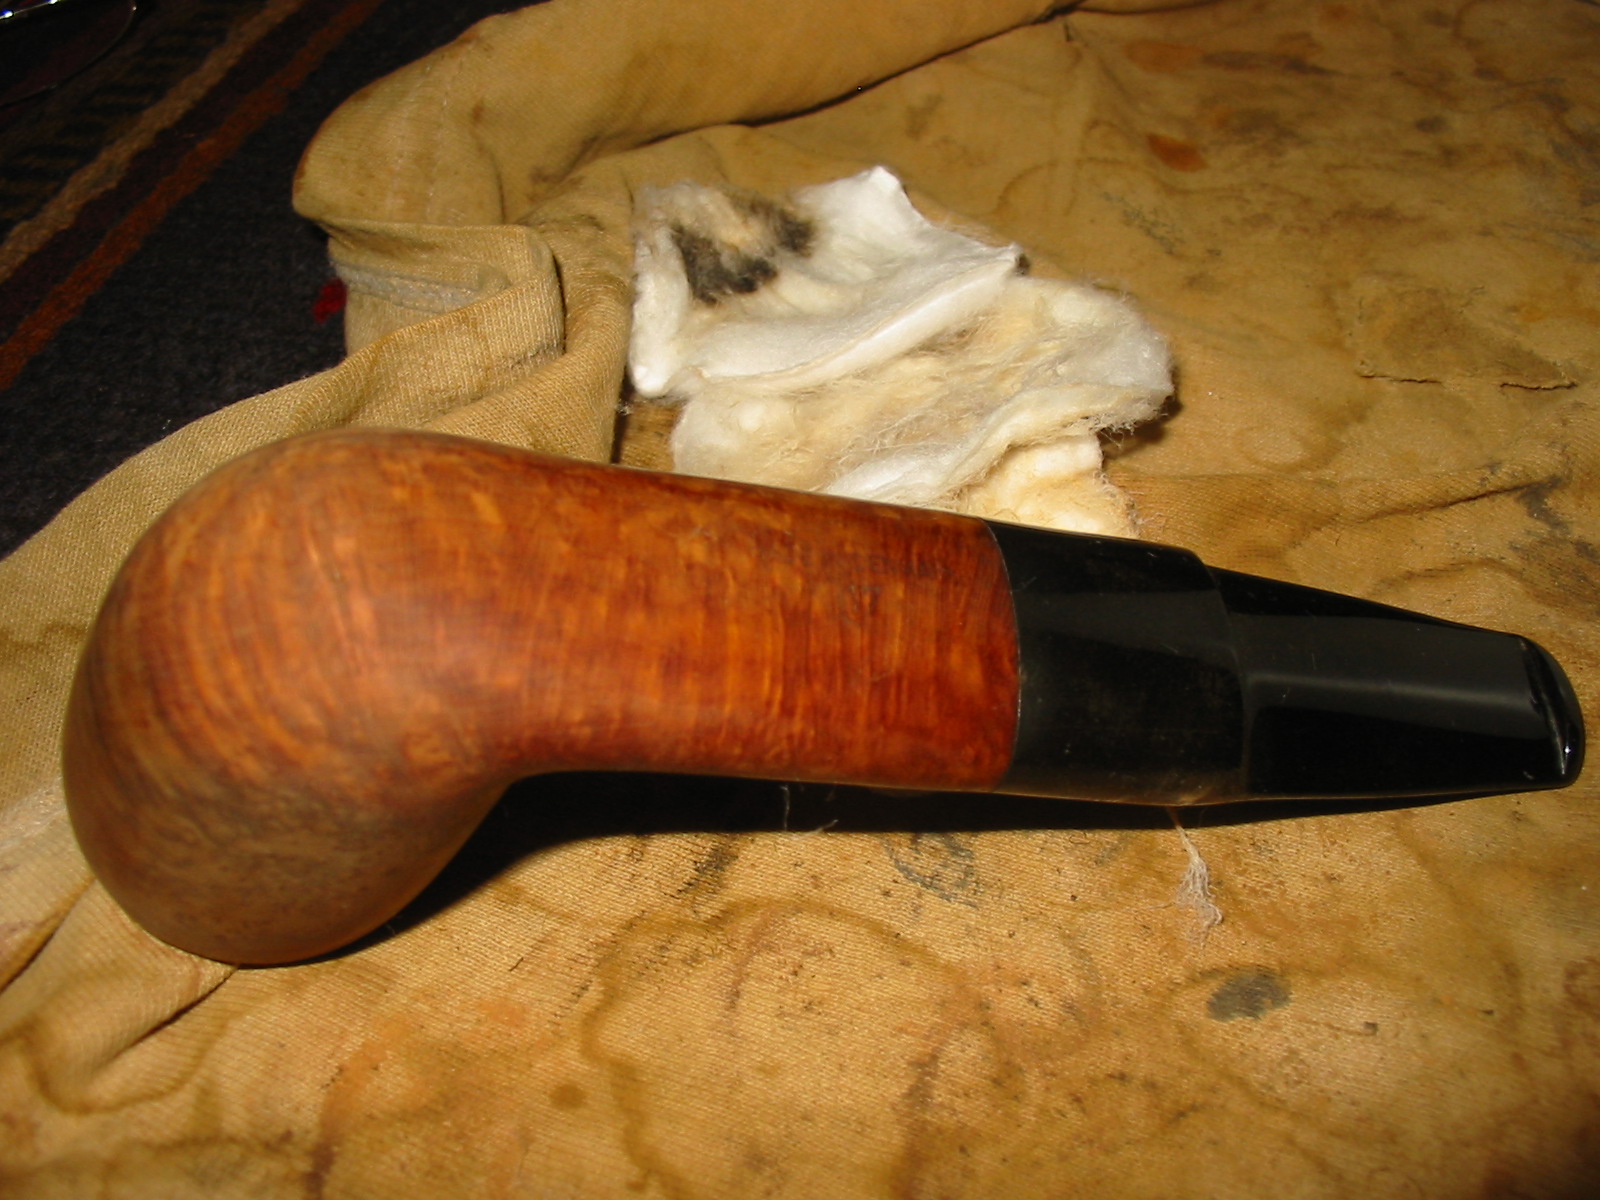
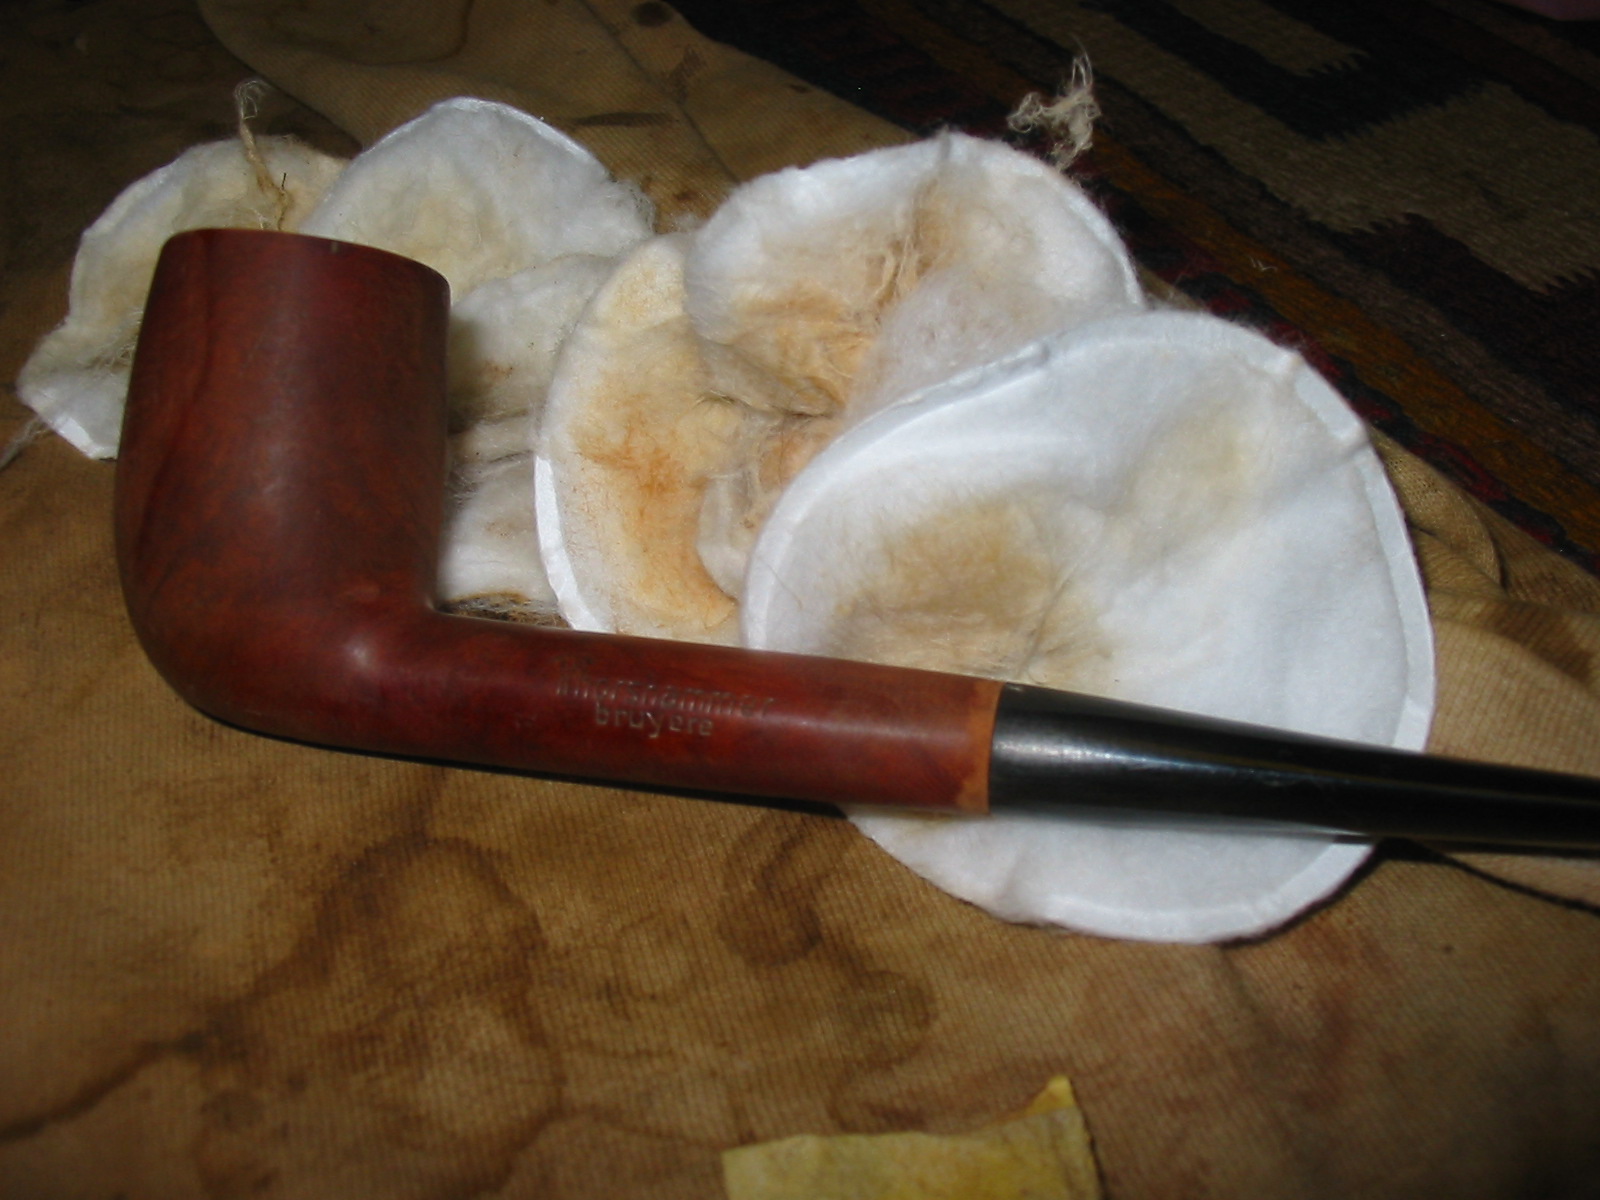
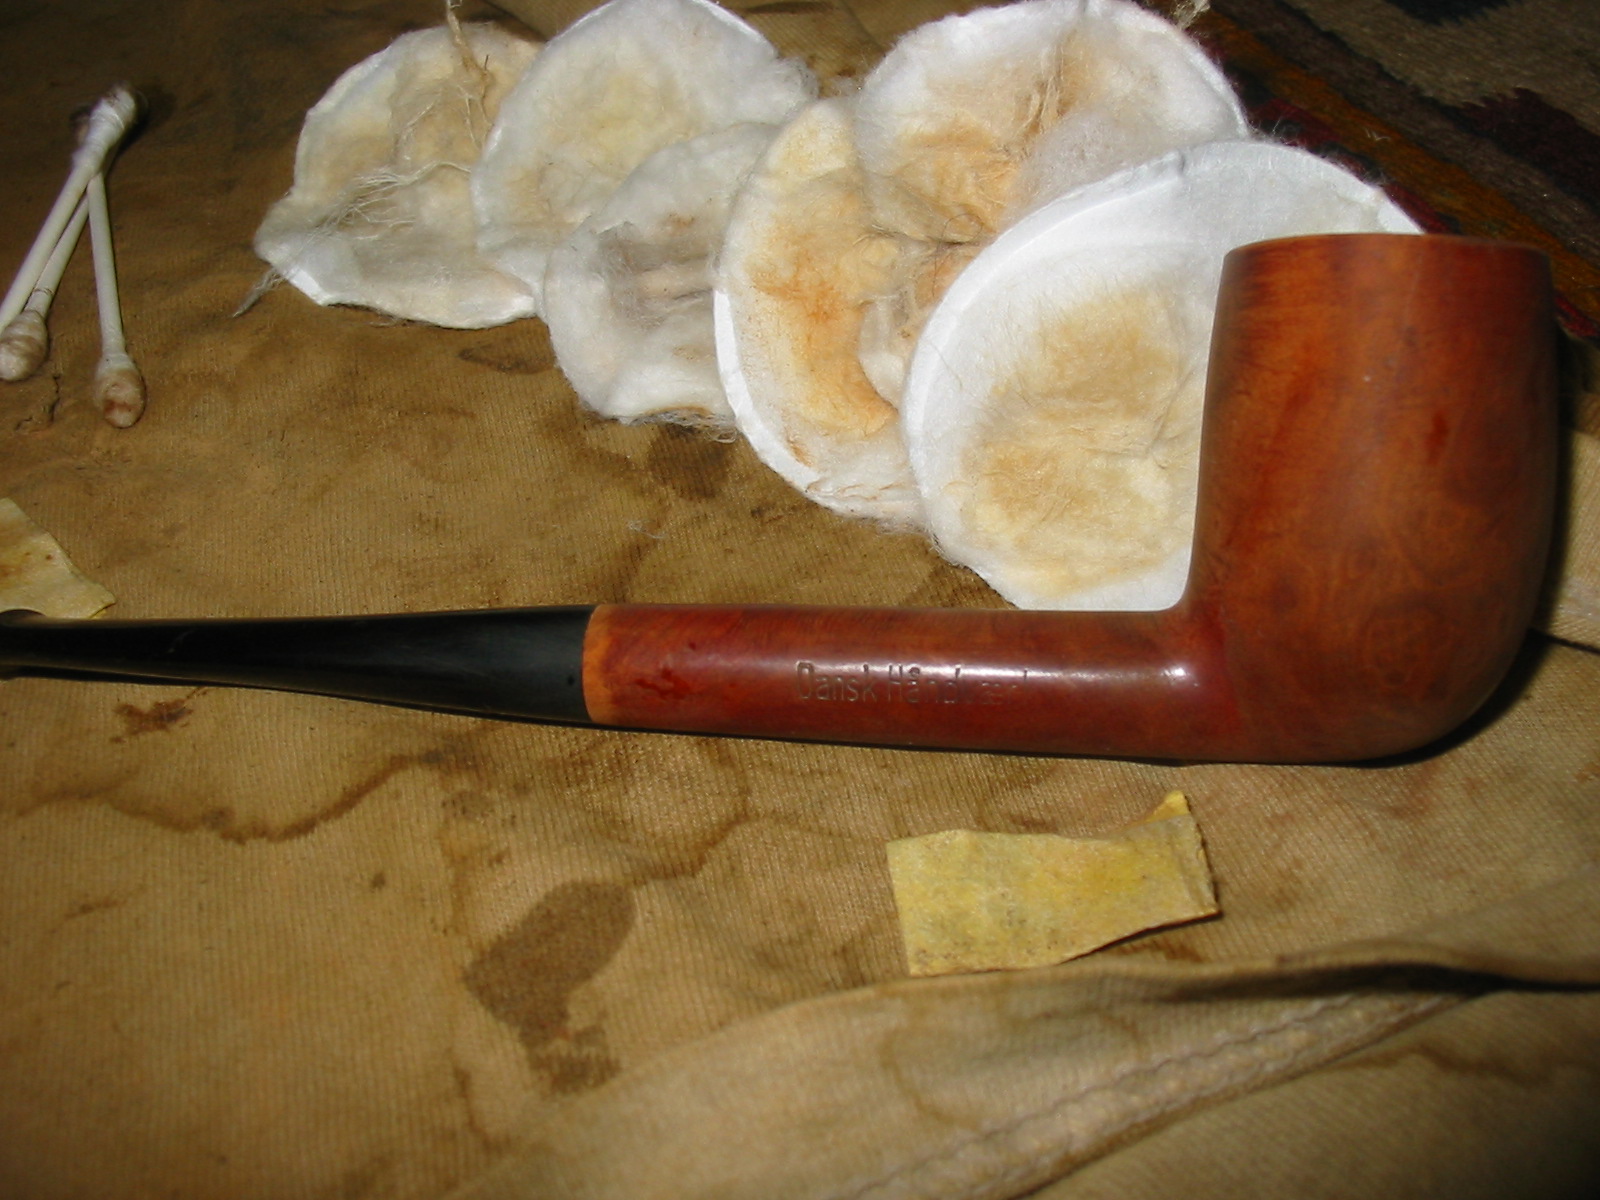
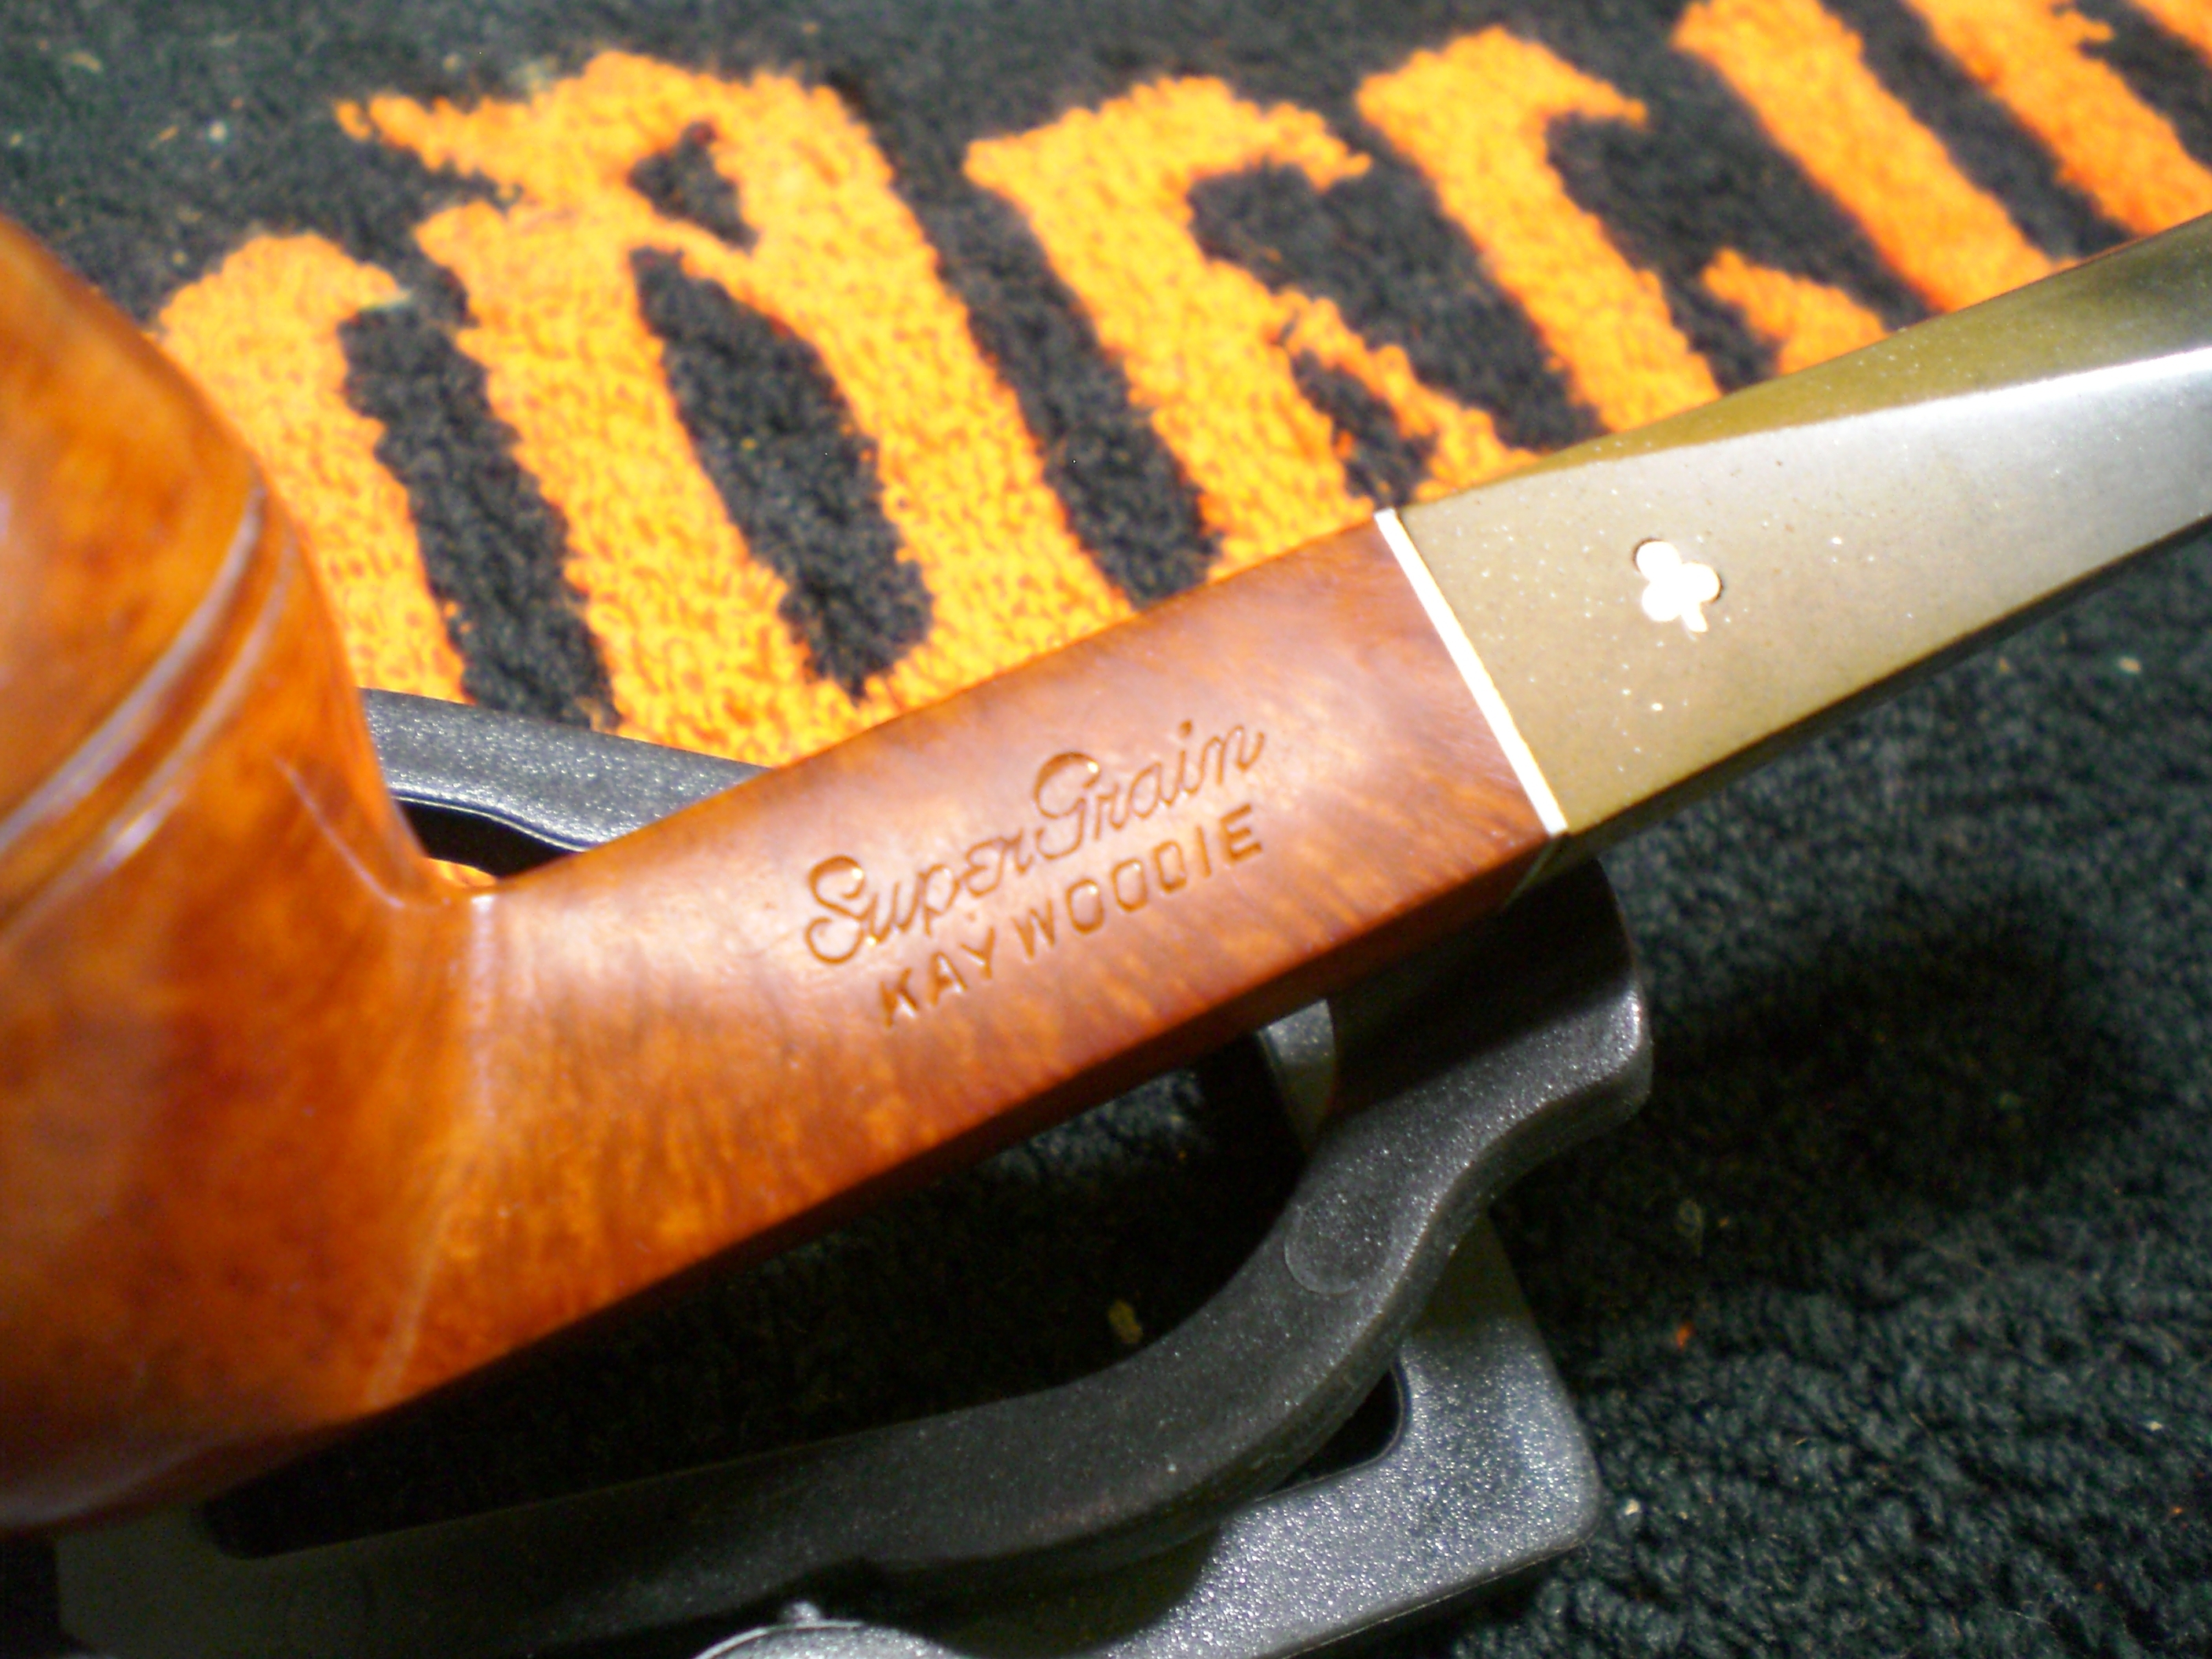
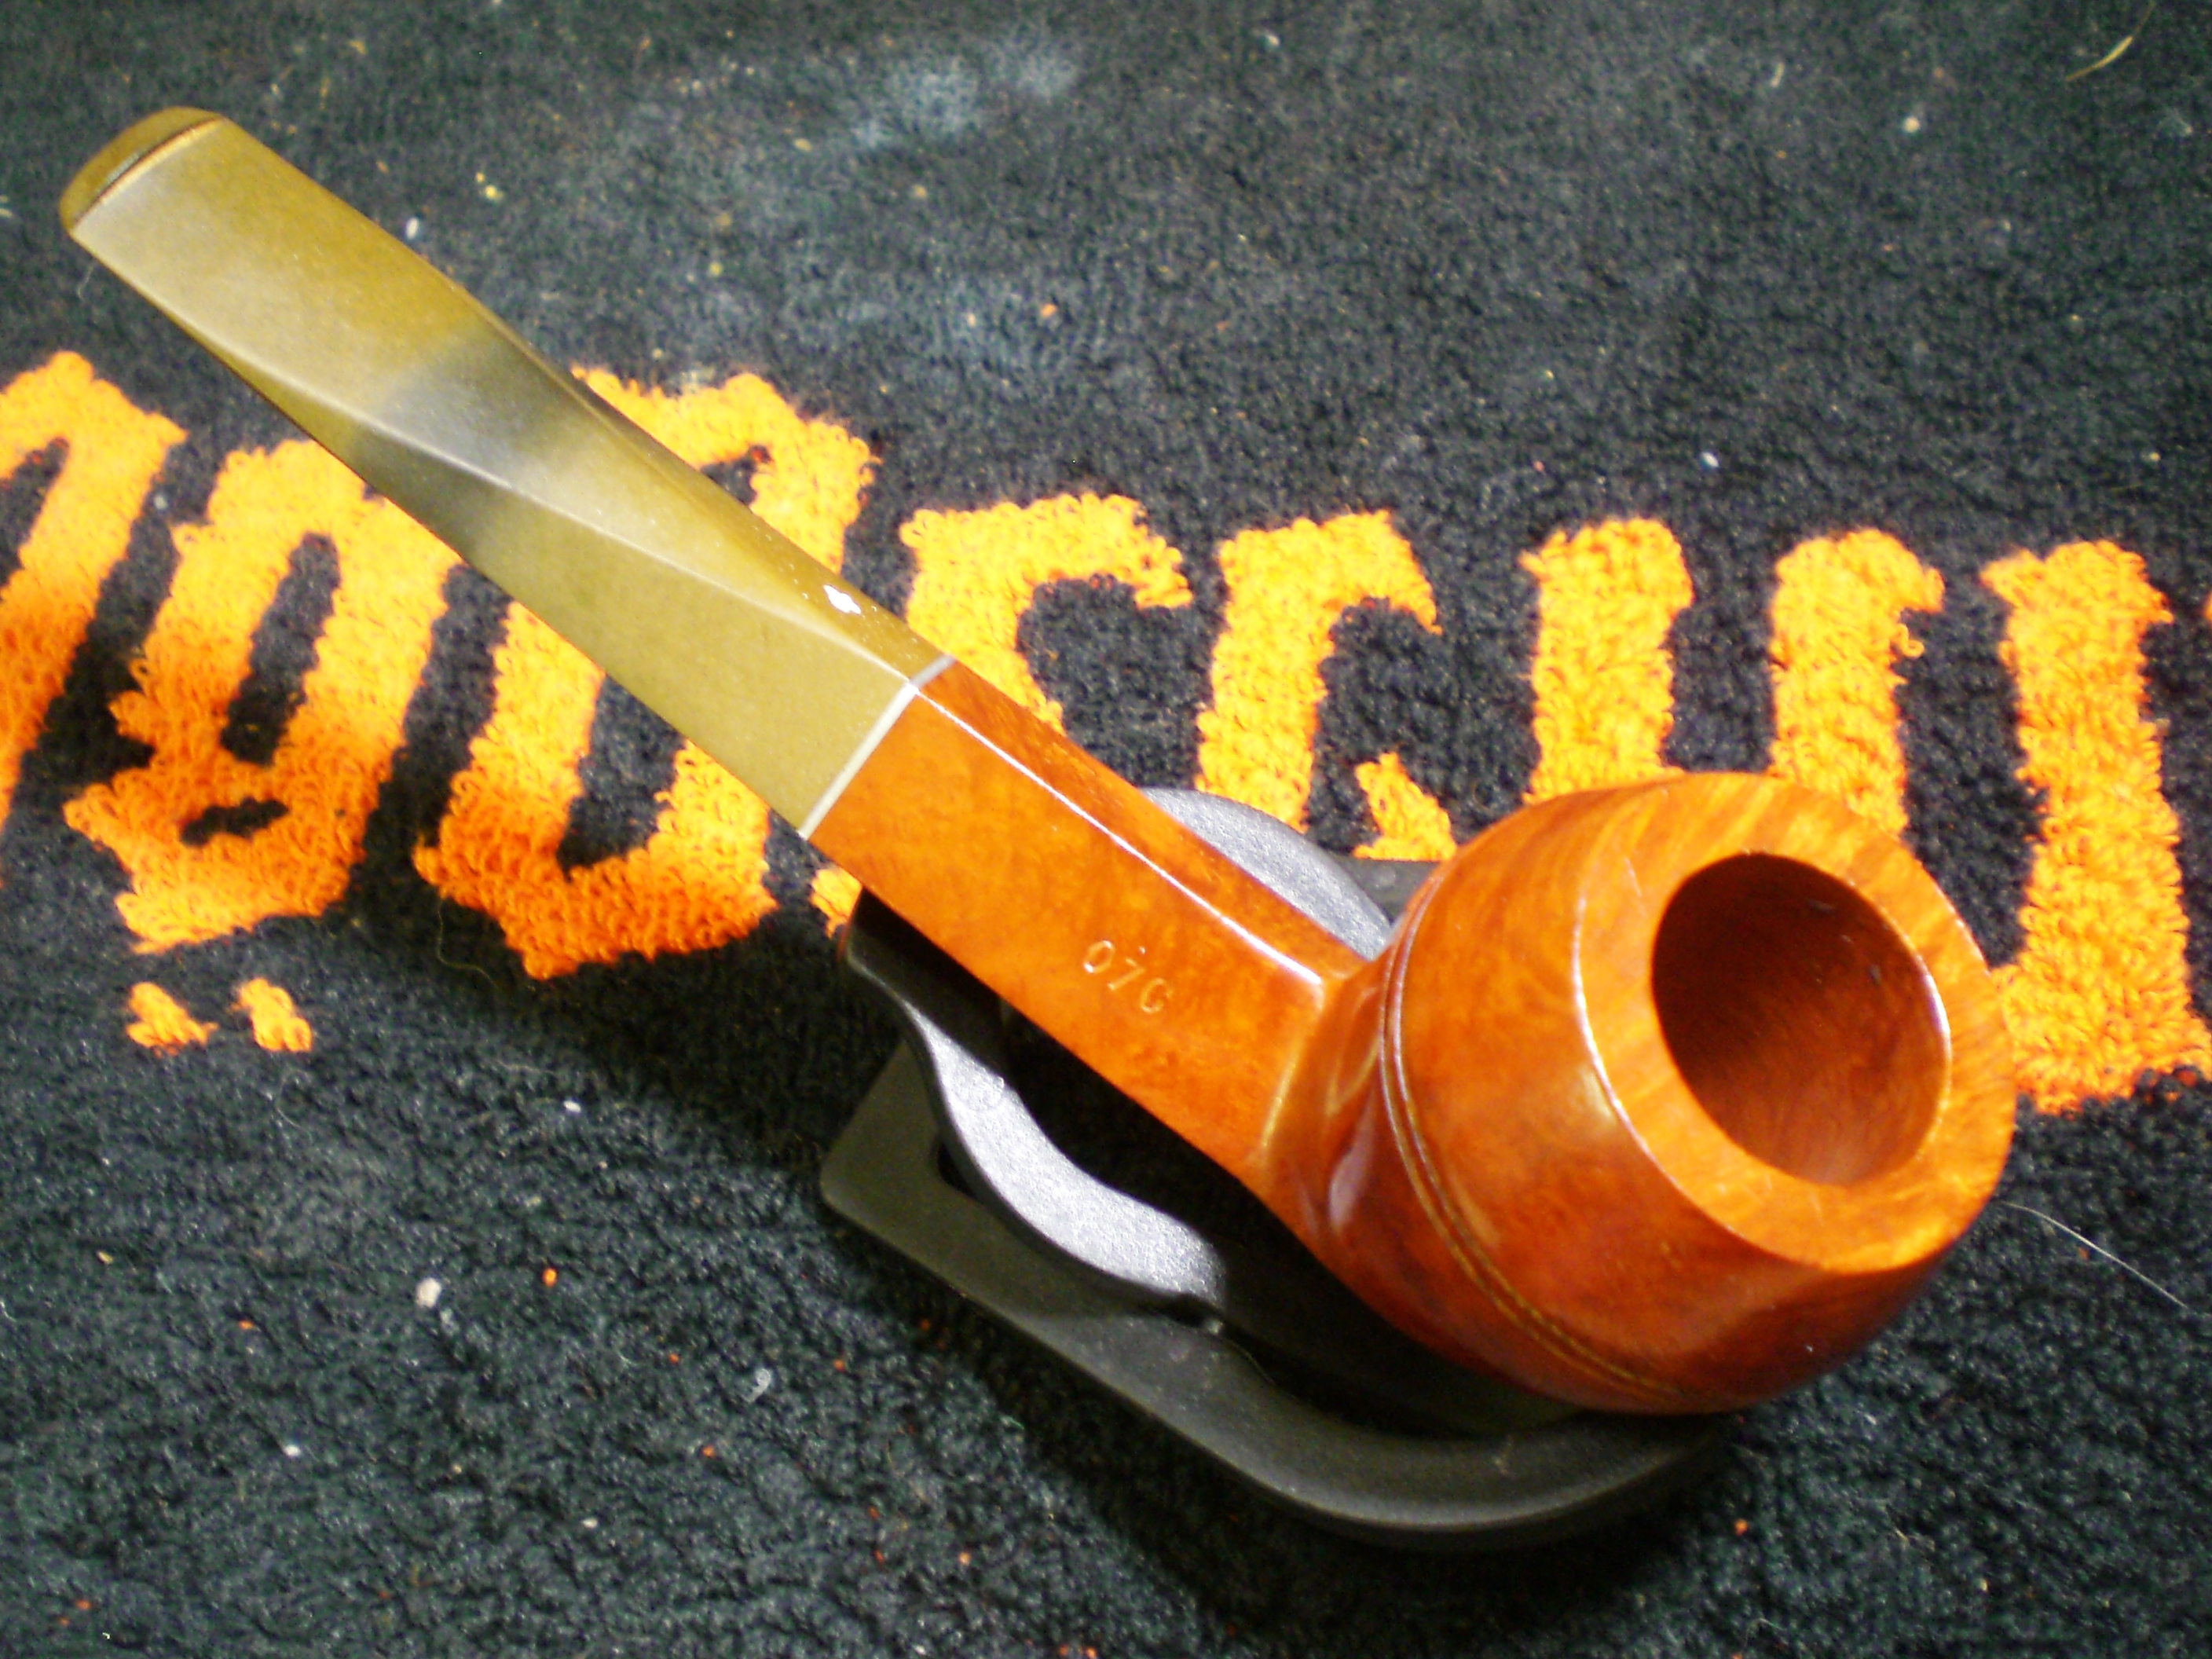
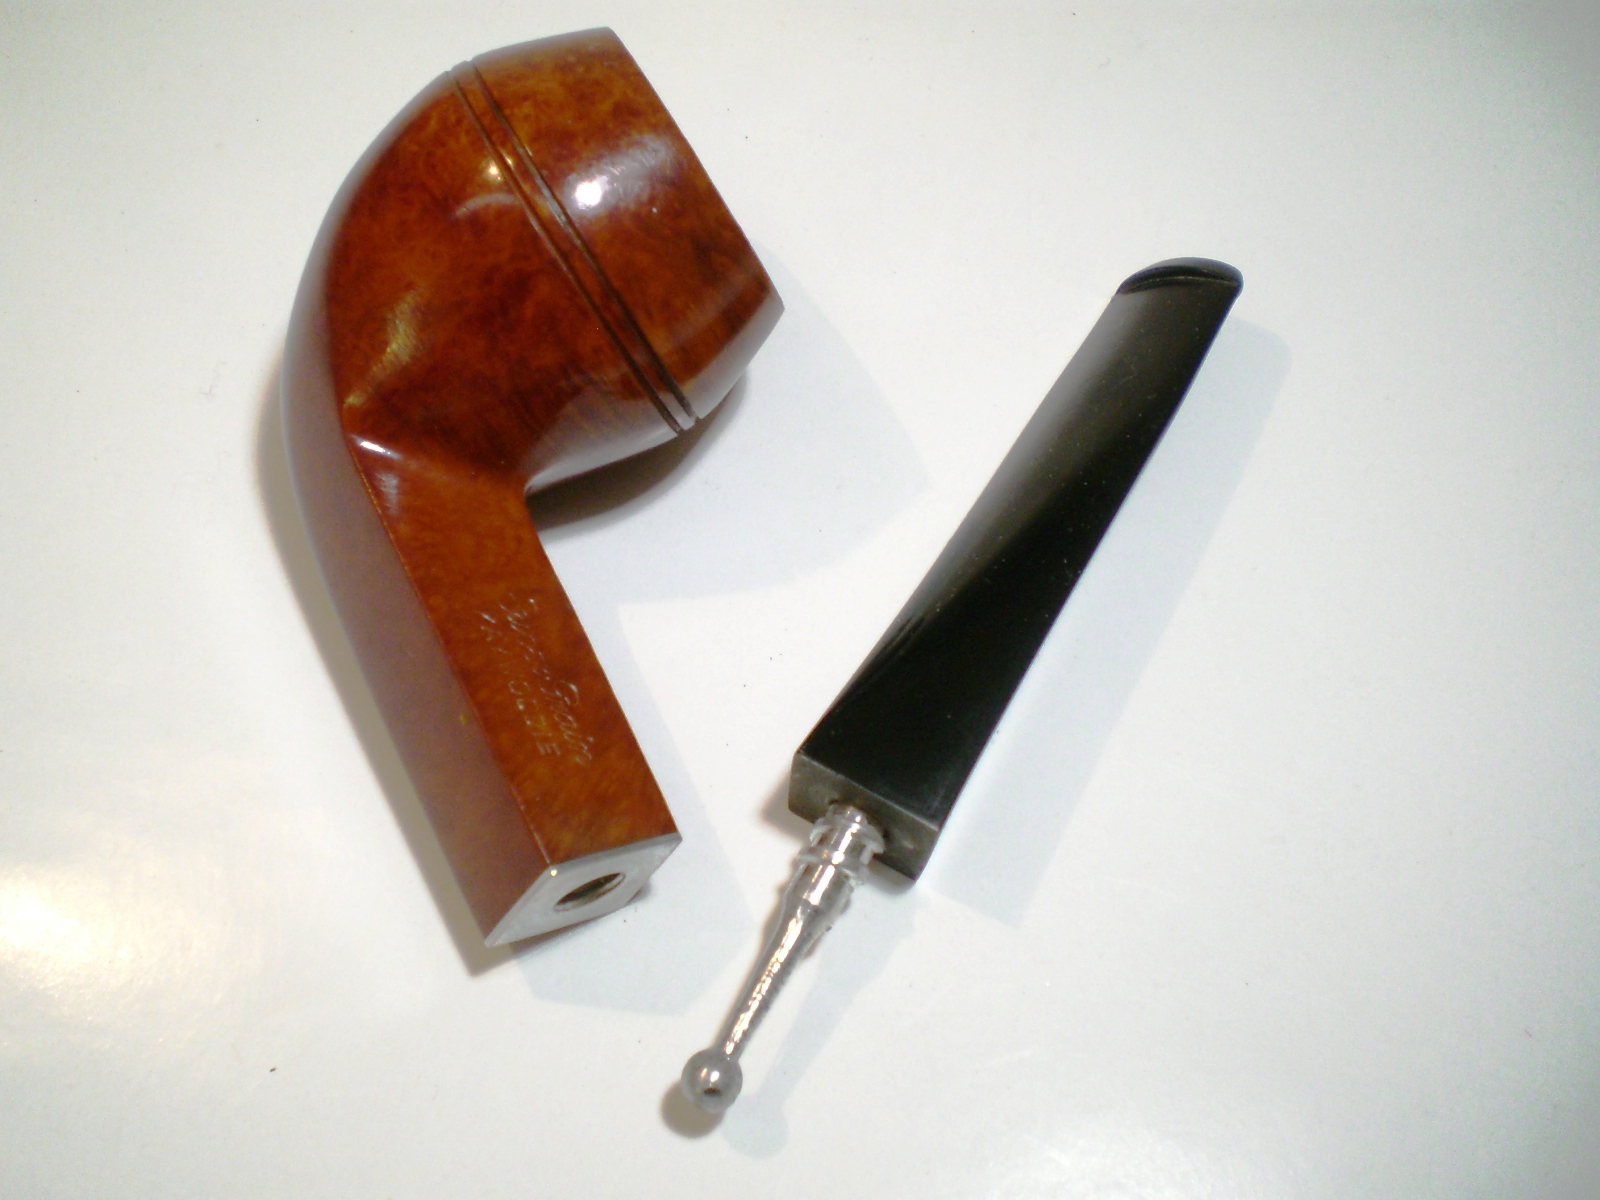
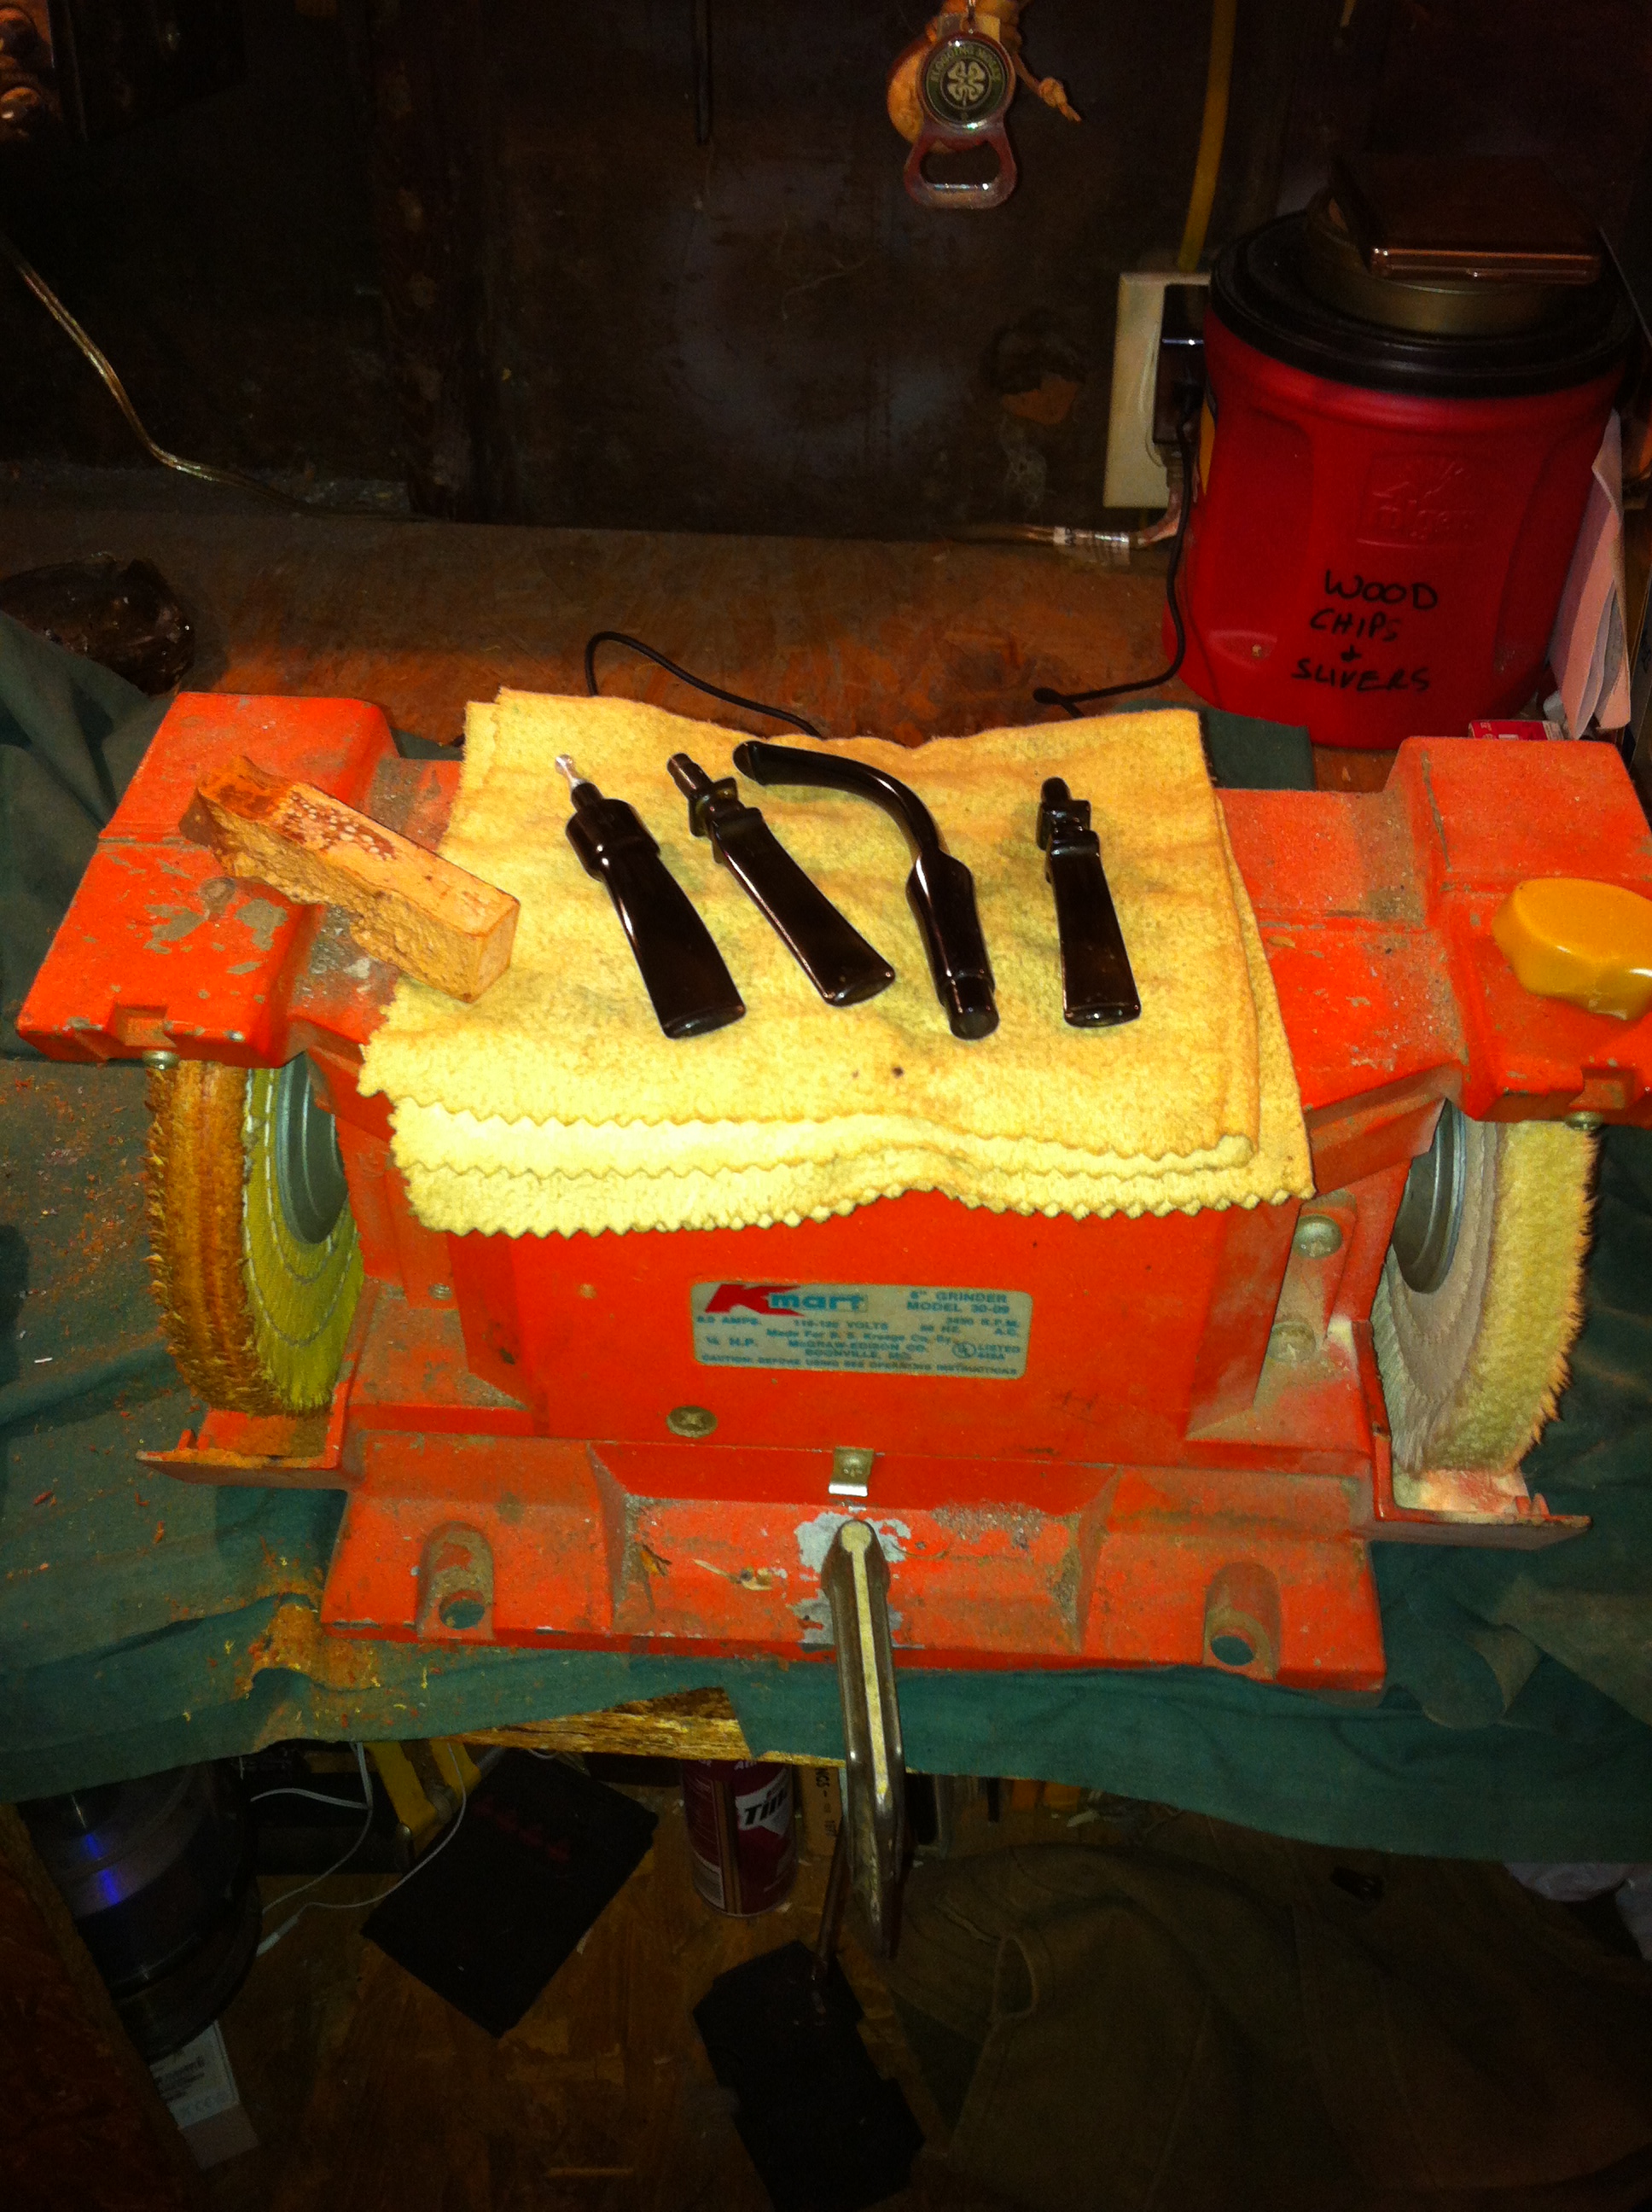
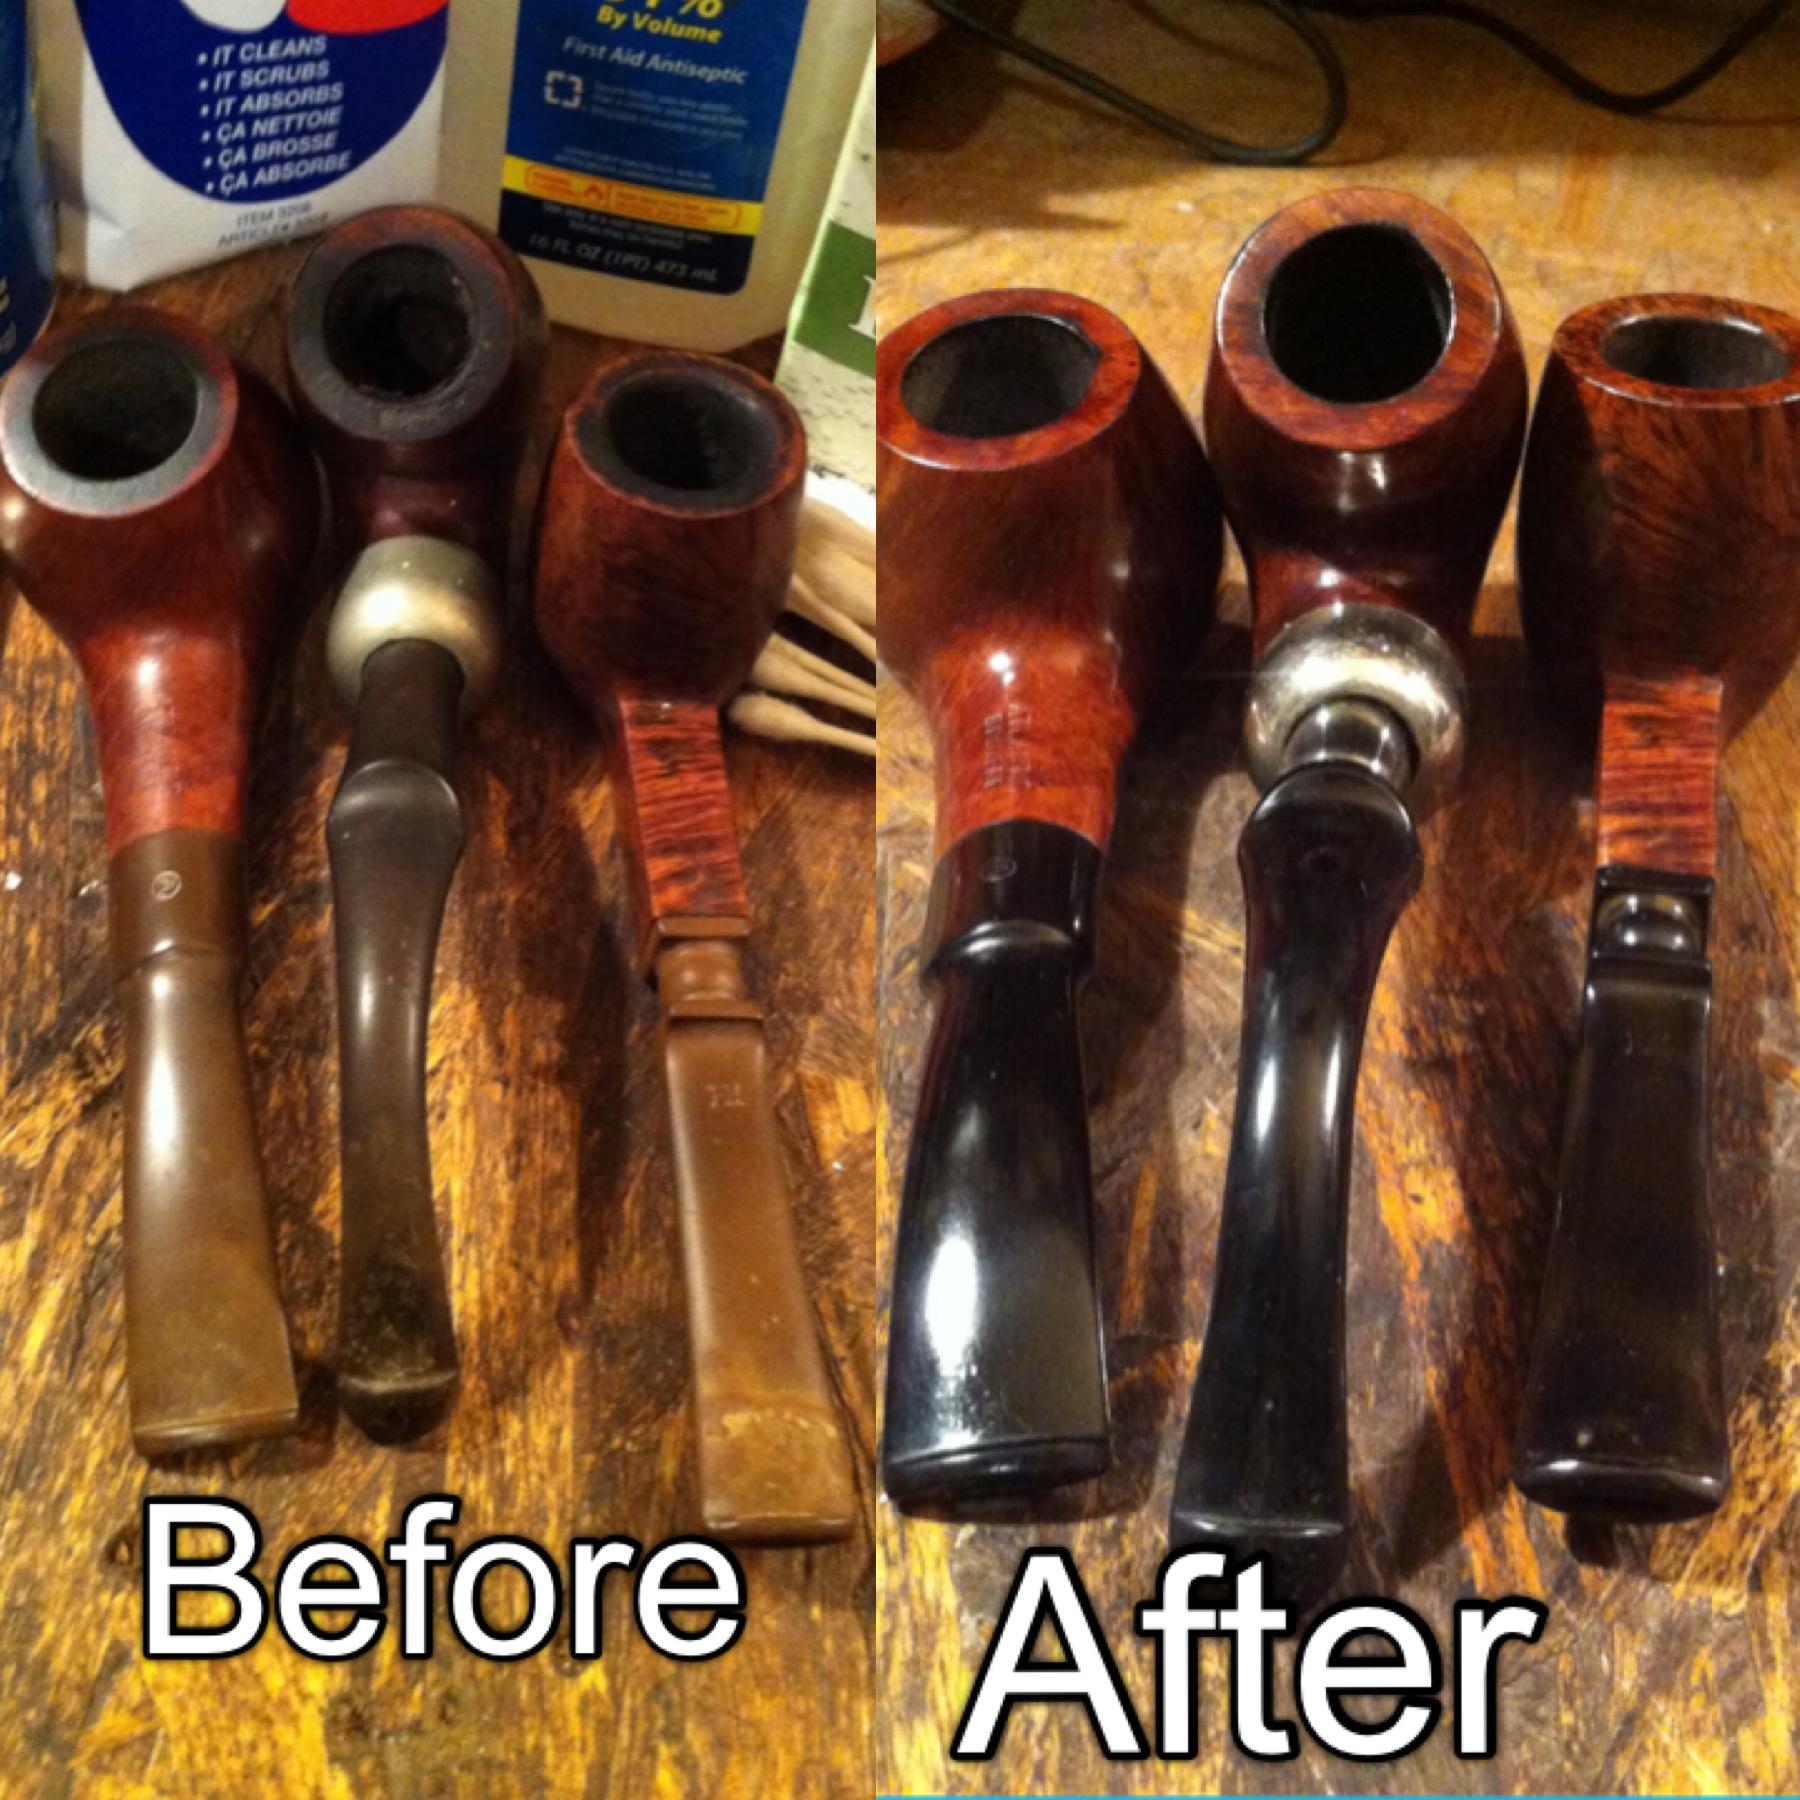
Next were the stems. Now when I say these stems had some oxidation I’m not kidding. These things were brown as a milk chocolate candy bar. I gathered a bowl, mixed in the oxy clean and proceeded to let the stems sit over night. The next morning I took them out of the dark beer colored water to discover that one stem was completely black now, one was a lighter shade of brown, and the last was half and half. I rinsed them off with water and rubbed them down with my handy cotton handkerchief (never leave home without it). I then started the second round of oxy clean concoction. I let these soak for about six hours and again the water changed colors but this time more of a light beer color. The black stem was still black, the dark brown was a lighter shade now, and the half and half was all black except for a small band of greenish brown at the base.

I took them out, repeated the steps as before and proceeded with the third round. I let them soak overnight this time and when I awoke, the water was almost as clear as when I began. The stems looked pretty much like they did after the second round of oxy so I proceeded to the next step, buffing. This is the part where I had to scratch my head a bit and figure out what exactly I was going to use to buff these stems with. I rummaged through my toolbox pulling out every kind of polishing compound and wax I could find.
IMG_2484

Most everything I read is that white diamond polishing compound is the best but I didn’t have any and I wasn’t willing to order some and wait. Maybe next time. So I laid out all that I had. Dremel tool red polishing compound, the little yellow bar that comes with my Flexcut carving knives, and Tripoli. Wait Tripoli where the heck did I get Tripoli….oh yea it came with my waxes from Pimo. As far as waxes I had bees-wax and carnauba wax. I decided on Tripoli and carnauba wax.

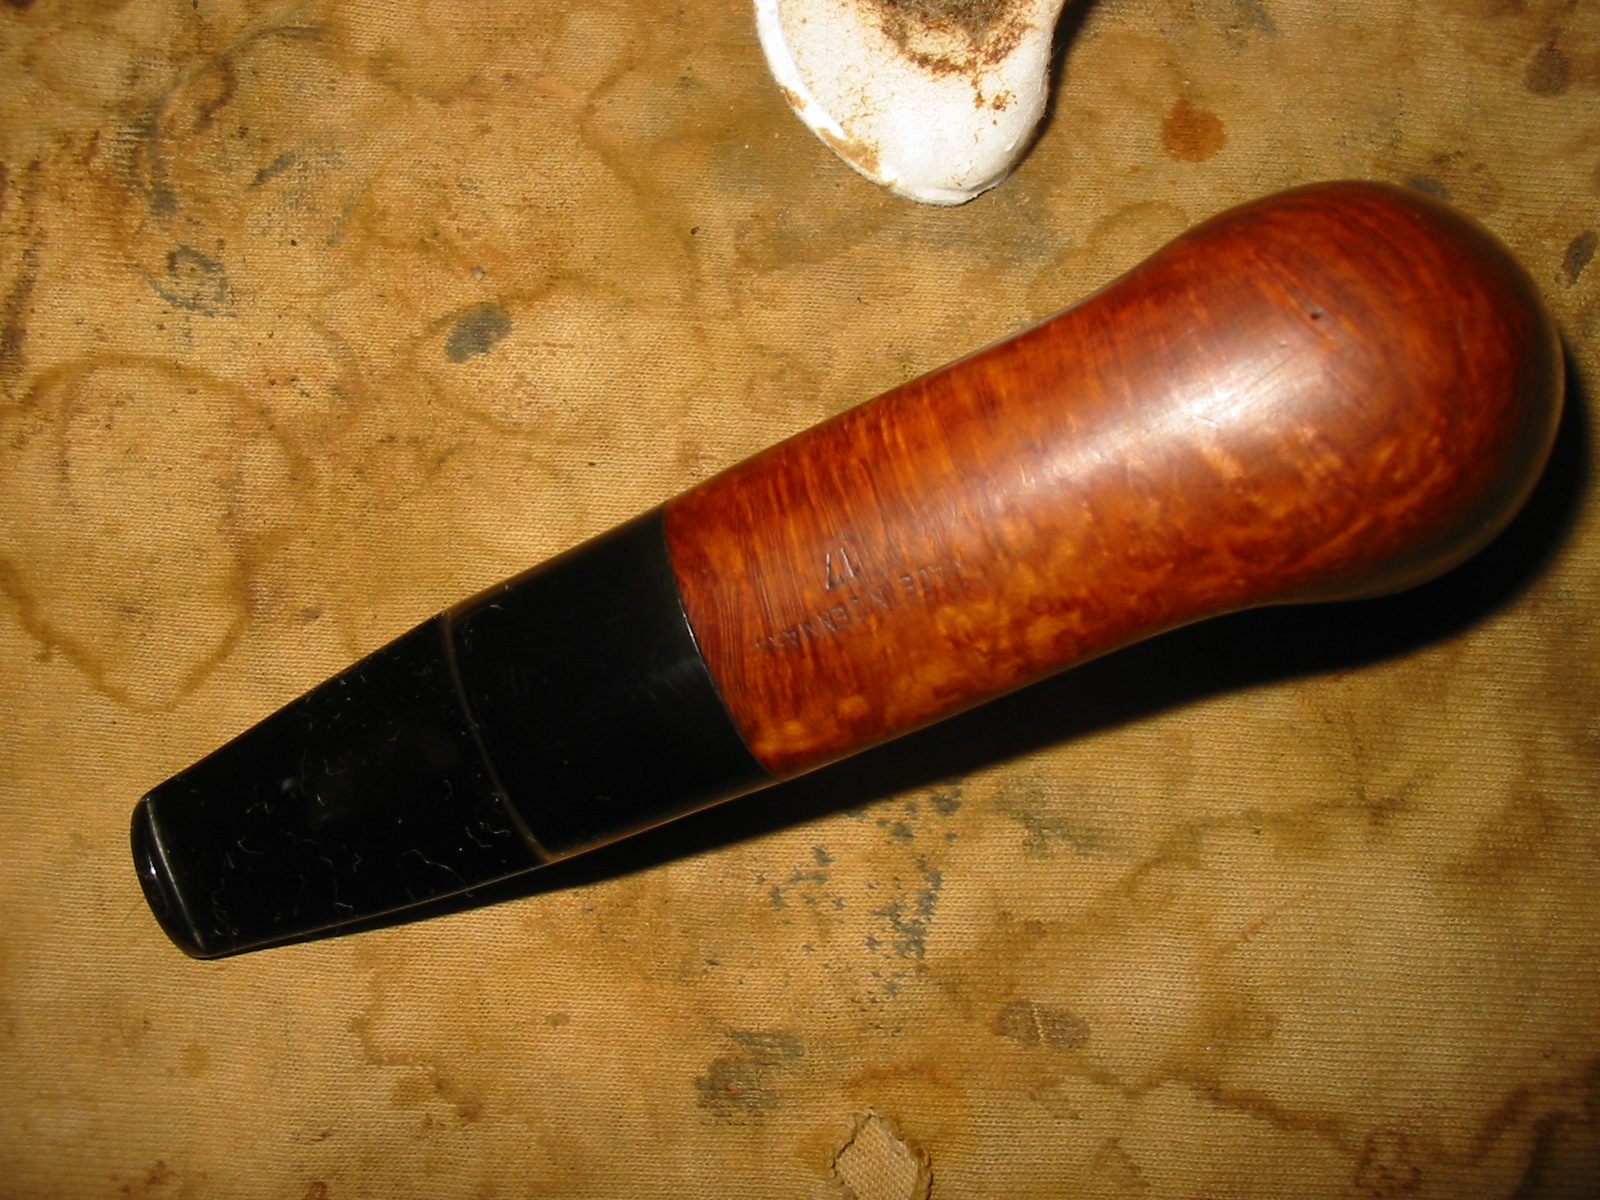
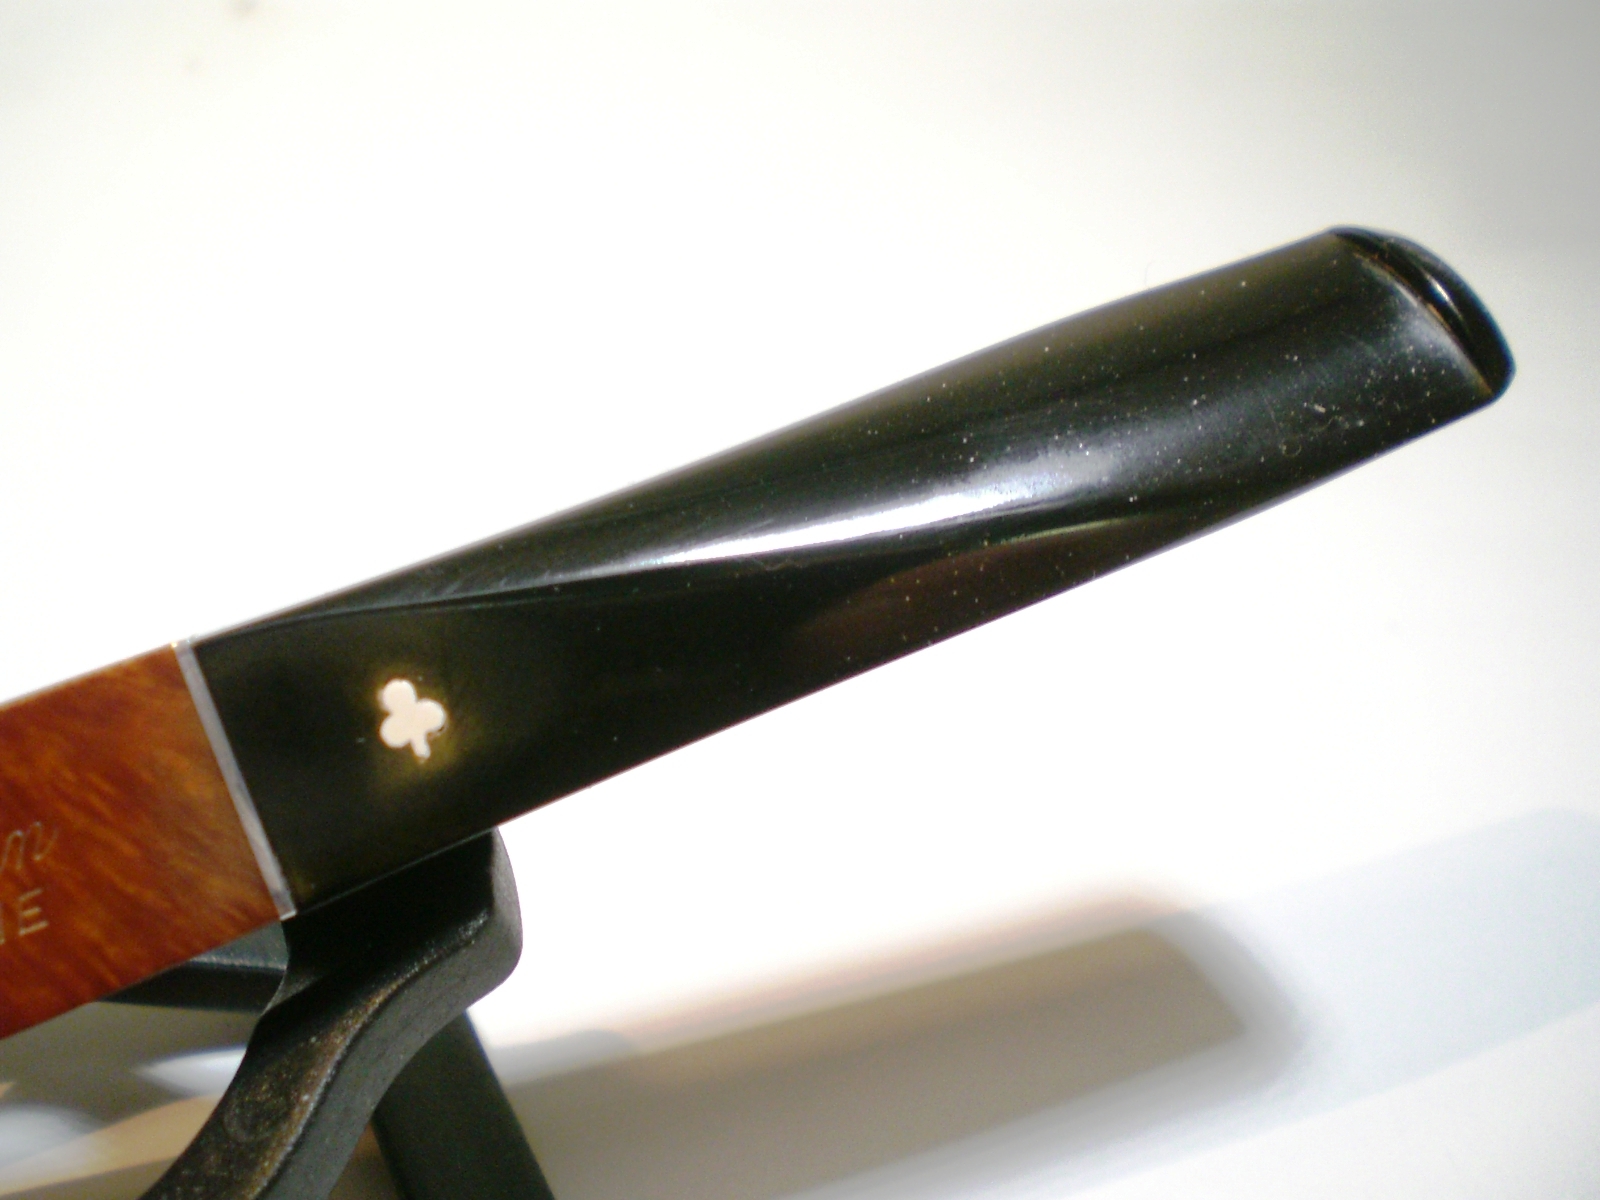
I first started with the Tripoli. This stuff took all the brown and green off and put quite the shine on them. It took some time, going very slowly, trying to get into all the nooks and crannies but worked very well. Then it was on to the carnauba wax. Now this is where the real shine came on. I started with just the stems then attached the pipes and buffed the pipe in its entirety. The last step was just to give them a wipe down with the polishing cloth (which came from my high school days as a trumpet player) and that was it.
IMG_2492

IMG_2491

I was absolutely blown away with the outcome. These pipes are once again beautiful. I will give them many years of care and I know they will return the favor. If I could leave you with one thing to remember from this it would be that just because something looks run down and used up it might not be. With a little love, some patience, and whole lot of elbow grease you can bring it back to life, have fun doing it, and learn a whole slew of lessons in the process. If you have any questions I would love to help in any way that I can and I know Steve feels the same way. Take care and have a great day.
IMG_2493

Cody Huey
http://www.codyhuey.com
codyjhuey@gmail.com