Blog by Steve Laug
My brother, Jeff has caught the pipe hunting bug and that is a great thing for me. It won’t kill him and he won’t suffer too much harm from it unless he gets carried away and gets in trouble with the wife. But it is good news for me. It means that with him we can cover twice the ground looking for old pipes than I used to do by myself. It also means that he comes on things that I have never seen. He is in the US and I am in Canada and we have different stomping grounds for our hunt other than the odd time we are in the same place. I don’t remember if we found this one while we were looking at eBay together using Facetime or if it was a find on a hunt. But it does not really matter as we got it. It is an old Kaywoodie the style of which I have never seen before. The base unit is the typical long metal shank but rather than a cup the bowl threads into this one has a ring on the end. It is split on the end of the bowl and goes around the base of the bowl. When I first looked at it I was hooked. I wanted to see it and work on it. The thing that caught my eye was the unusual look of the pipe. I wanted to see how the bowl was held in the ring.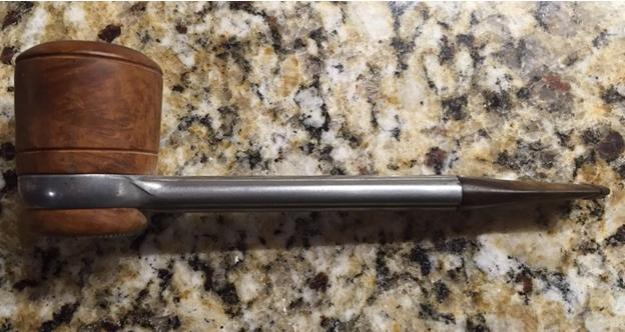


 The pipe was in pretty decent shape from the photos. The stem had the usual tooth chatter and oxidation around the button. The Kaywoodie club emblem on the stem looked rough. The embossed emblem in the aluminum shank was really clean. The entire base unit was oxidized but clean. The briar also was very clean. There was some darkening and lava on the back edge of hte rim and a thin cake in the bowl but no inner or outer edge rim damage.
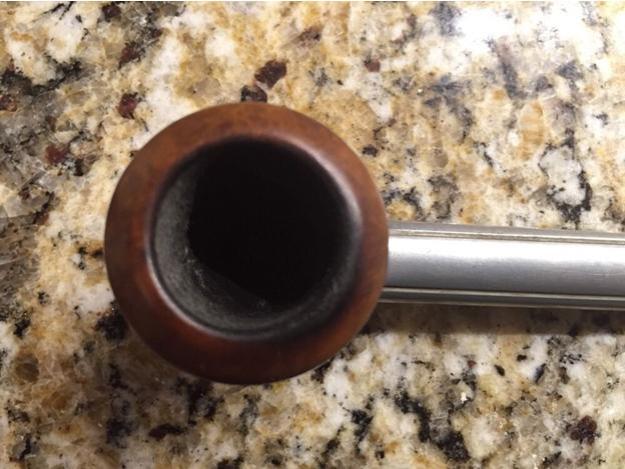 The base plate was stamped Kaywoodie Filter Pipe Pat. Pend and there was a slot in the bowl. It appeared that someone had tried to use a screwdriver to turn the base plate and damaged it. To me the slot looks like it was made for a coin to turn the base.
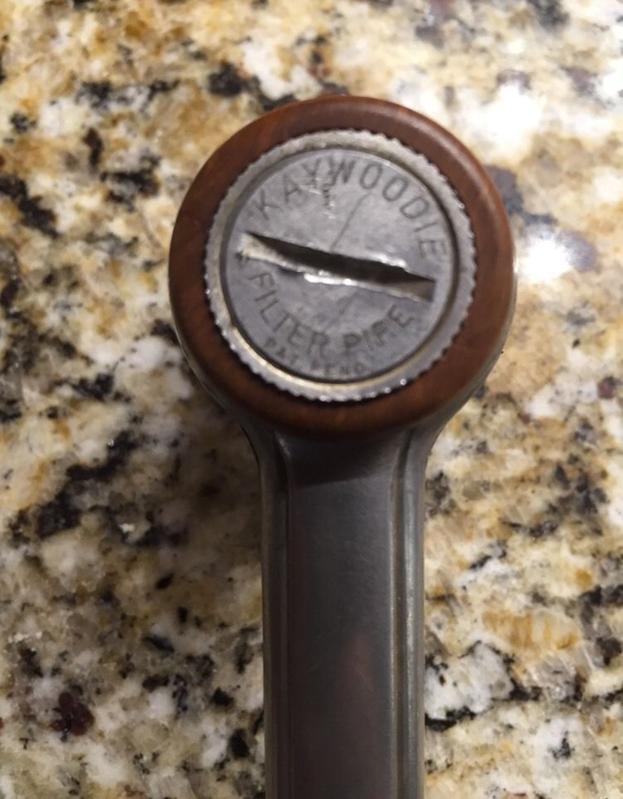 The next photo shows the pin on the front of the briar bowl and the split in the ring of the base unit. To me it is hard to figure out how the bowl is to be removed.
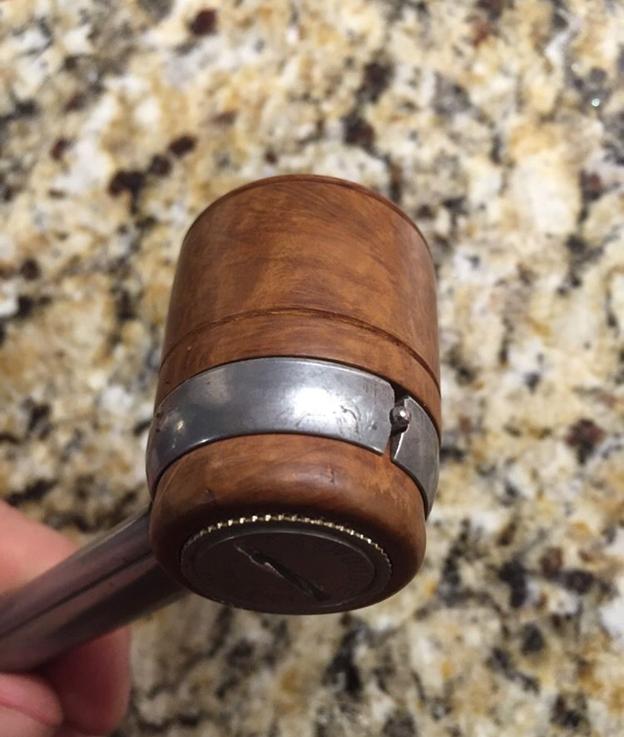 While my brother had it in hand in the states looking it over and trying to figure out how to remove the bowl I did a quick search and found the pipe on the Smoking Metal site (http://www.smokingmetal.co.uk/pipe.php?page=132). The site had the following information and pictures that I have copied to use here. The first paragraph gave me the information I was searching for on how to remove the bowl. I read it to my brother and he tried it and bowl came free. He showed me the pieces on Facetime. I was fascinated.
“Many of these wrecked by folk not realising how the bowl is released. Pulling the bit out of the stem and twisting half turn in either direction releases the retaining pin and allows the bowl to come free of the stem. The lower and right hand adverts are from October 1962 Flying Magazine
The pipes were $6.95, bowls @ $3.50 and 3 filters were 25 cents.”
“In the base of the bowl is a screw cap which when undone releases a ceramic filter. These filters came in plastic tubes containing three filters. As with all metal pipes, frequent cleaning is advisable to prevent any screws from becoming irretrievably sealed into pipe. The filters are at times available on eBay, but I have been told by Rob that soaking in alcohol (Everclear or IPA) can extend their life.”
The second photo below of the bowls and the third photo of the boxed set also come from the Smoking Metals website. In the photo of the bowls you can see the clay filter piece that sits in the bottom of the bowl. It is shaped like a flattened spool and there are holes in the top of the spool as well as a stamped Kaywoodie Club emblem. The bottom of the spool is indented and sits in the metal threaded base cap. In the third photo you can see how the filters were sold in plastic tubes that held three filters and sold for $.25.
Given all of information found in these photos I could not wait until the pipe arrived in Canada and I could take it apart and clean it up.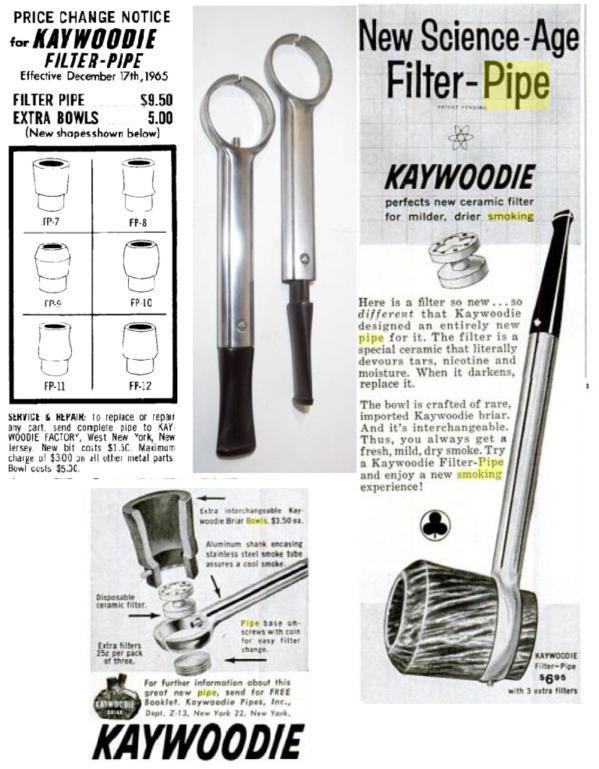

 When the pipe arrived I took the bowl off per the above instructions and it worked quite simply. I could easily see why the Smoking Metal website said that many of the pipes were damaged by improperly removing the bowl. Fortunately this one was not damaged by me. The metal base plate was solidly stuck in place and I read above that the clay filter was not damaged by alcohol so I dropped the bowl in an alcohol bath and let it sit all morning while I finished up some repairs I was doing. I took it out this afternoon and dried it off with a cotton cloth. The grime on the finish was gone and the bowl was clean. The lava on the rim was softened so I could work on it with more ease. It looked like I would not have to top the bowl to remove the lava. That is always a good thing. The rim edge was also not charred or burned which was a bonus as well.


 I decided to take the bowl apart before working on cleaning it up. I inserted a quarter in the slot in the bottom plate and twisted it both directions until it came loose. Then I unscrewed it and took out the clay filter. The inside of the base and cap were thick with tars. The clay filter was black and goopy.


 I cleaned out the bottom half of the bowl, the filter and the base cap with alcohol and cotton swabs. I picked the threads clean with a dental pick and then scrubbed them with the cotton swabs. I scrubbed the clay filter and used the pick to clean out the holes in the top of the spool and also the build up on the middle and bottom of the spool. I wiped it down with alcohol and cotton swabs.
 I wiped down the outside of the bowl with alcohol and cleaned out the air hole on the side of the bowl. I used 0000 steel wool to scrub the inside of the base cap.
 With the bottom half of the bowl cleaned I reamed the top half of the bowl with a PipNet reamer. I took the cake back to bare wood.
 I scrubbed the rim clean with cotton pads and saliva and was able to remove the lava build up. I sanded it lightly with a 3200 grit micromesh sanding pad and brought some shine to the rim.
 I set the bowl aside and went to work on the metal base and vulcanite stem. I cleaned out the interior of the shank and stem with pipe cleaners and alcohol. The stem is spring loaded and cannot be removed from the base without potential damage so I ran many pipe cleaners through to clean out the tars and oils.
 I sanded the stem to remove the oxidation and the tooth chatter. I used 220 grit sandpaper to break through the surface and then a medium grit sanding sponge.
 I rubbed down the stem with Obsidian Oil and then put the pipe back together. I dropped the filter into the bottom of the bowl with the holes upward, lubricated the threads on the bottom cap with Vaseline and screwed it in place. I pulled the stem back and turned it to retract the aluminum tube into the shank and dropped the bowl in place. I let the stem reseat and the tube entered the bowl. The bowl was anchored in place. Now I had a bit of a handle on the pipe while I worked over the stem with micromesh sanding pads.


 I started wet sanding with 1500-2400 grit micromesh pads and quickly found that the club logo was just pieces in the indent in the stem. It was broken and not complete. The ragged look that I had noted earlier was the grit and grim holding the broken logo in place.
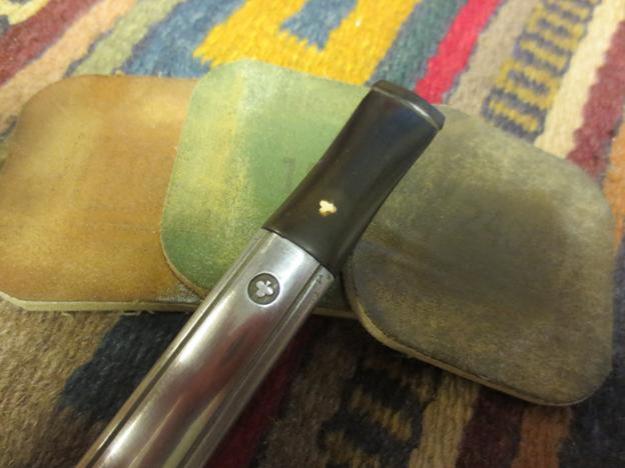 I cleaned out the old pieces of logo with a dental pick and blew out the dust. I had a broken Kaywoodie stem with a club logo the same size as this one so I carefully liberated it from the broken stem for use on this one (it visible at the bottom of the first photo) I cleaned out the indent on the stem with air and then put some all purpose glue in the hole with the end of the dental pick. I pressed the new logo into the hole with the rounded handle of a dental spatula. The new logo looked good and it was smooth when you ran a finger over that area of the stem.
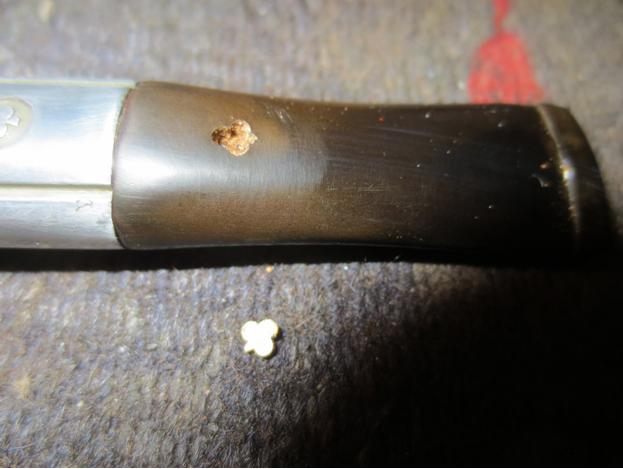
 I reworked the stem with the 1500-2400 grit micromesh, this time dry sanding it. There was no need to wet sand it again. I was careful while sanding around the newly set logo so as not to risk lifting it from the stem. I rubbed the stem down with Obsidian Oil and then dry sanded with 3200-4000 grit micromesh pads. The stem was beginning to take on a shine. I continued to polish it with 6000-12000 grit pads and gave it a final wipe down with Obsidian Oil. I let it dry.
 I gave the stem several coats of Conservator’s Wax and hand buffed the stem by hand so as not to damage to the logo. I also hand buffed the bowl and metal base by hand with the wax and then rubbed it down with a microfiber cloth to finish the shine. The finished pipe is shown in the photos below. I really like the looks and mechanics of this old Kaywoodie. It is a pleasure to add it to my collection of metal pipes.
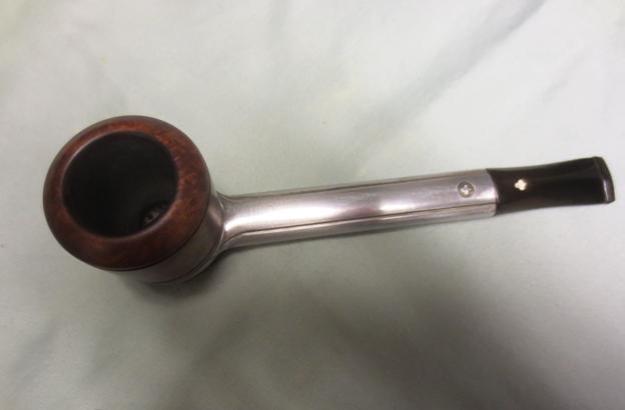


Pingback: Another Unusual Estate Find – A Kaywoodie Metal Filter Pipe with Case | rebornpipes
Does anyone know where I could find a filter and athe metal bowl screw/plug?
Excellent Article!
LikeLike
Bill, thanks for the message. I don’t have any extra. Perhaps one of the readers may have one.
LikeLike
Plus I still have one new and unused bowl, complete with a new filter
LikeLike
I had a fad with these pipes around 13 years ago and supplied the metalpipes site with some pics. I used to soak the ceramic filters in alcohoi for a while which cleans them, but alas eventually also shrinks them. I do not not smoke these pipes anymore, most have the screw disc stuck now. I still have some of the original, unused ceramic filters.
LikeLike
Very helpful post. Recently picked one of these up and couldn’t for the life of me figure out how to get the bowl off. Now I can properly restore it.
LikeLike
If I’m not mistaken, Steve, isn’t that the pipe I emailed you the link to and mentioned I’d buy it in a heartbeat if I could have afforded it at the time?
LikeLike
Robert you are right that is the one! I had forgotten. My brother in the states picked it up on eBay as the shipping to Canada was unbelievably high
LikeLike
Good move having your brother make the actual buy! There have been times when I wished I had friends in the UK or Ukraine to do that for me due to the seller’s use of the most expensive foreign delivery option possible. I knew you had forgotten as soon as I saw the photos. For once, however, I’m glad I didn’t buy it. You were clearly the right man for that job!
LikeLike
Those Kaywoodie metal pipes are very interesting. They seem overall to be better constructed than Falcons of the same era, with better quality briar as well. Excellent job on the stem logo. JB Hayes has a number of these in their estate drawers. They don’t seem to have the resale value/fan-base as the Falcons, so I’ve never bothered with them. I wonder what they smoke like without the ceramic filter?
LikeLike
I agree, Al. The 1955 Kaywoodie Filter Plus I restored recently, with the 5,000-bristle Filter Brush, was almost spotless inside after I removed the well-used and stained brush. I’m sure even the pipes in that line (1955-1959) during all but the first year, when the Filter Brush came with it, were easier to clean than other, more elegant looking brands — such as the beautiful Duncan Delta I restored at the same time. Isn’t it odd how some of the best pipe lines ever made get tossed out of the sales line-up just because they look plain?
And Steve: I’m sorry I forgot to mention earlier how good this blog is. I rated it a 5.
LikeLike
Forgot to say you did a nice job, Steve and that is a nice addition to your collection
LikeLike
Very cool pipe. Ingenious filtering system. I wonder if you could bake the ceramic filter in a self cleaning oven to turn the gunk to ash and then blow it off with compressed air. Just a thought.
LikeLike