Blog by Steve Laug
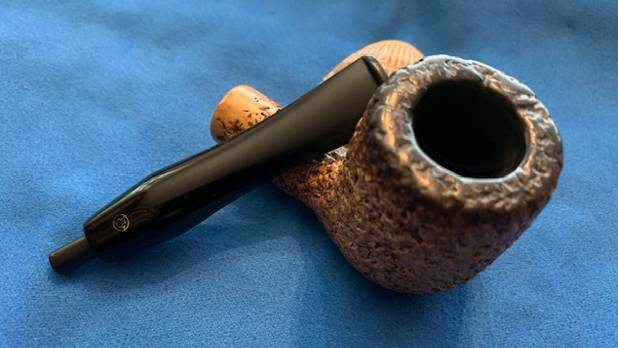
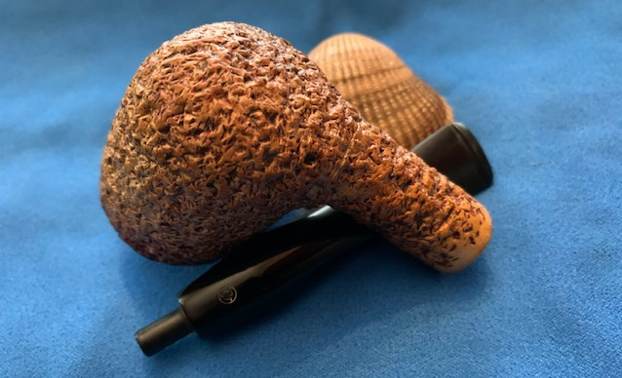
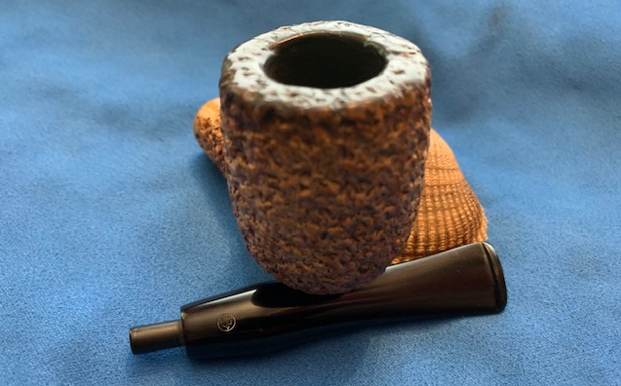
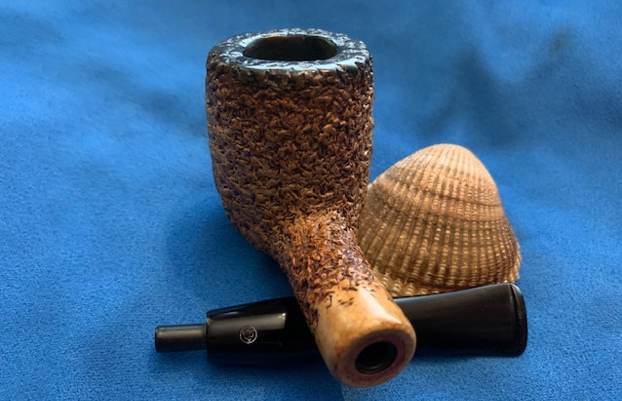
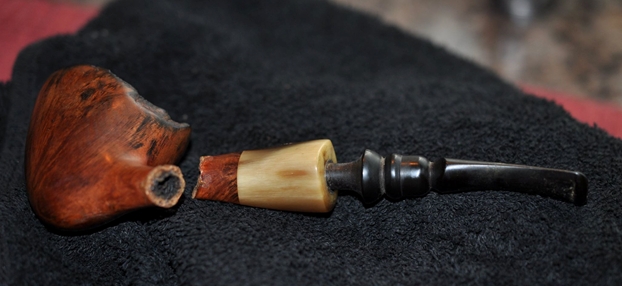
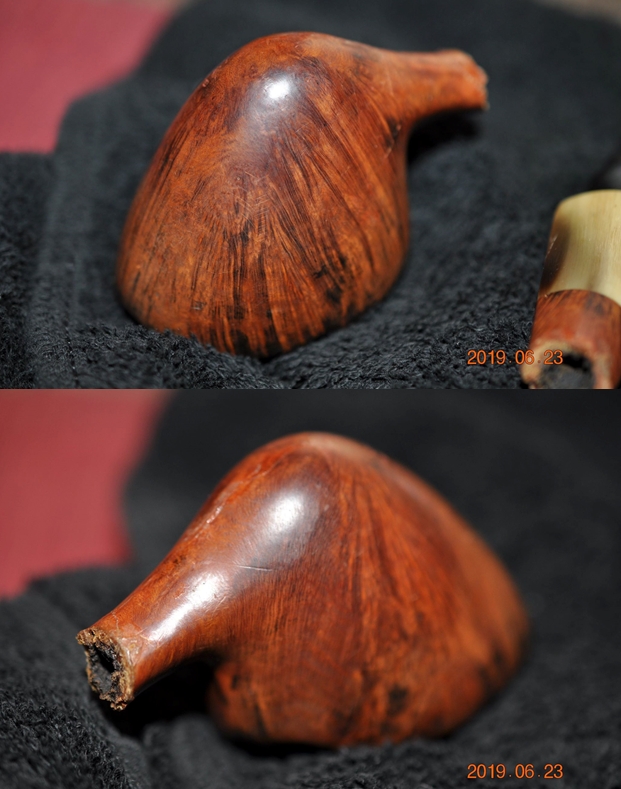
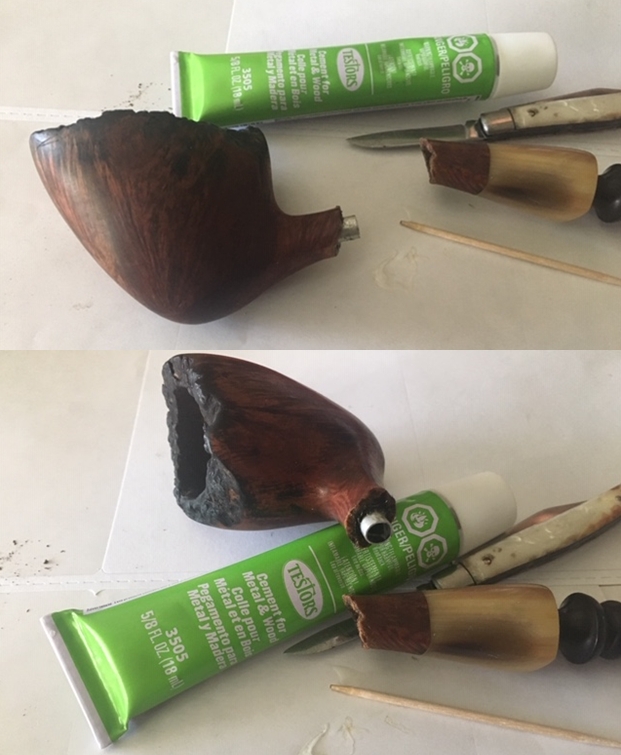
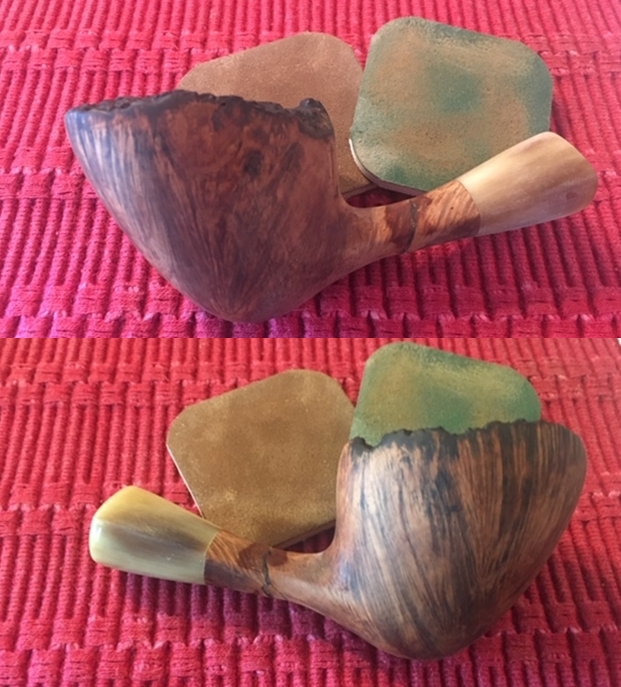
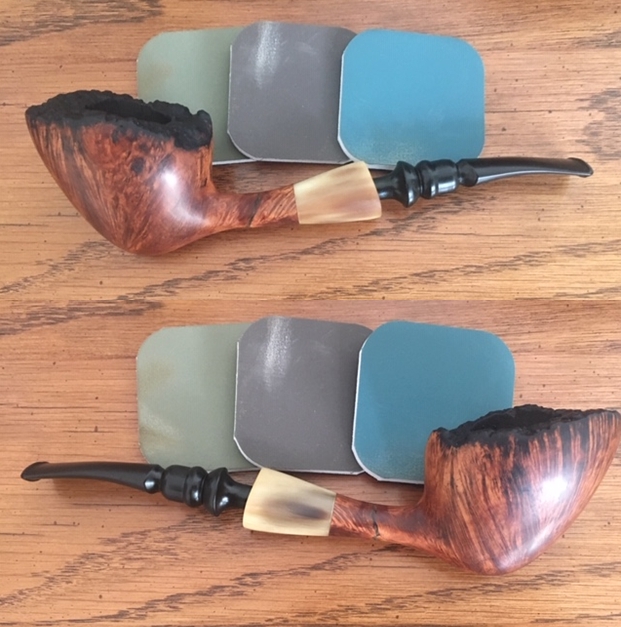
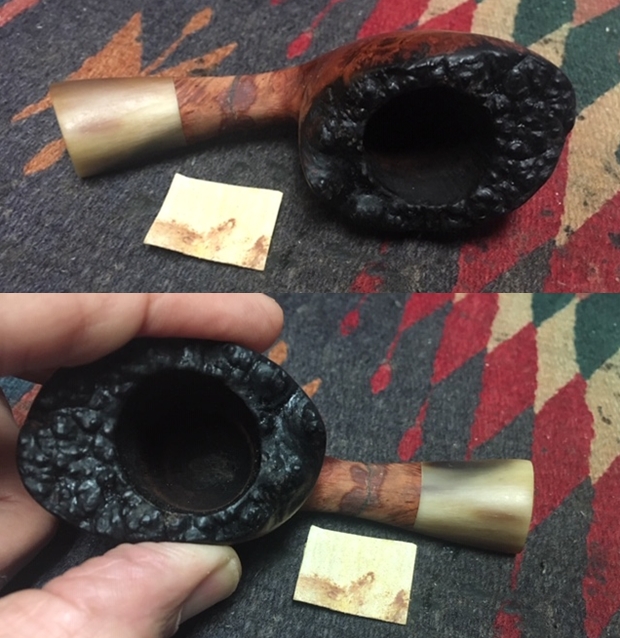
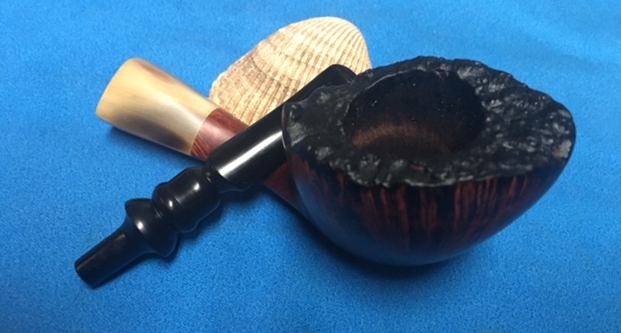
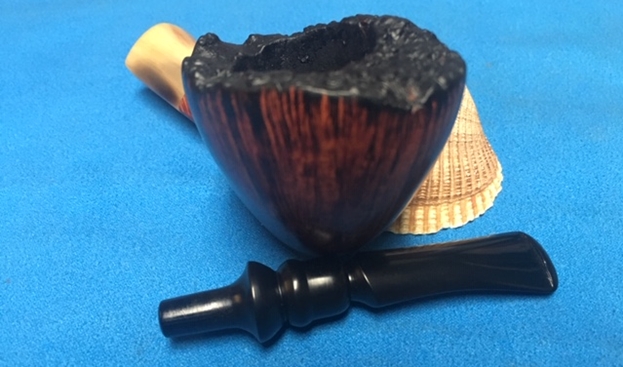
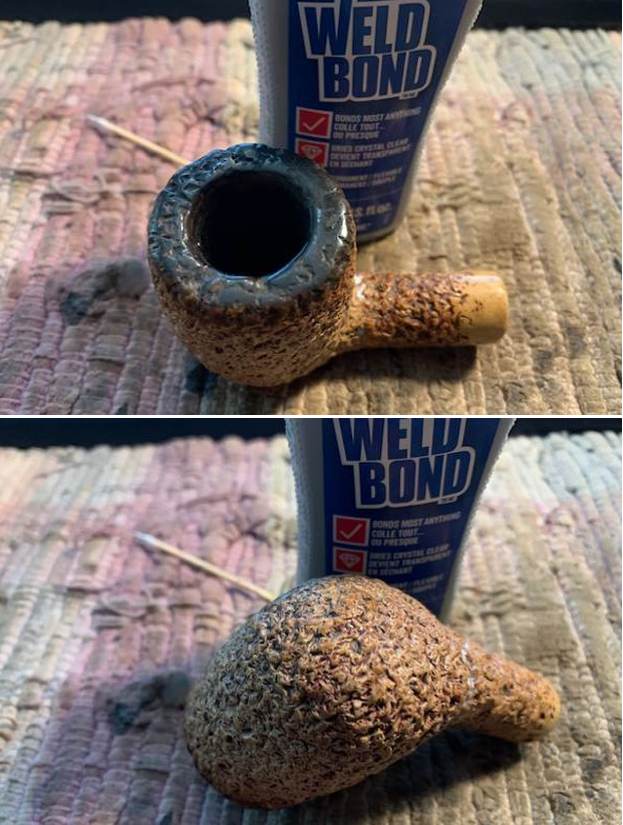
Yesterday afternoon a fellow stopped by for a visit and to show me his collection of Manx Meerschaum pipes from the Isle of Man. It turned out that his great uncle had worked at the Laxey Pipe Factory which closed in 2002 so he had some of his pipes and some others that he had collected over time. He also wanted to show me sad victim or circumstance – a Manx Billiard that a friend had knocked out of his hand/mouth the night before. The shank had snapped off at the bowl. The break was very clean and there were no extraneous pieces to deal with. It was complete in the two parts. The stem and tenon were undamaged. Fortunately as he transported it to my porch wrapped in a scarf it did not chip or incur further damage. I took photos of it this morning when I brought it to my work table.
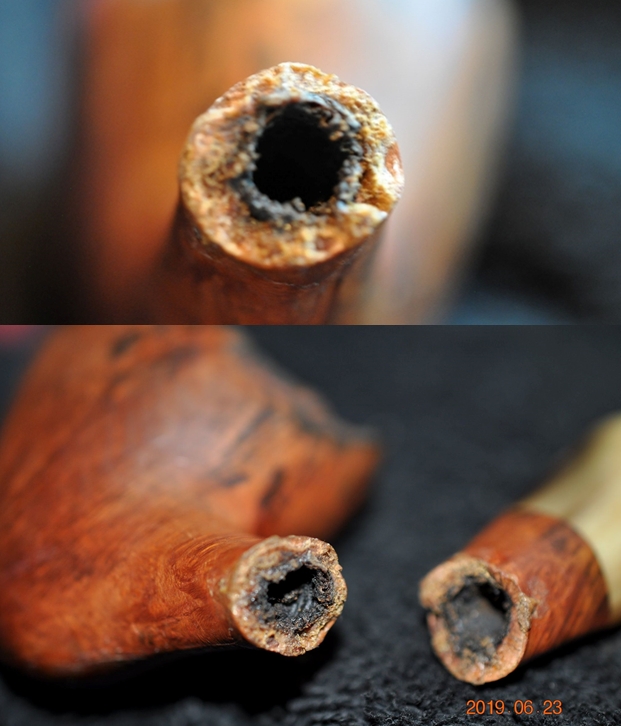
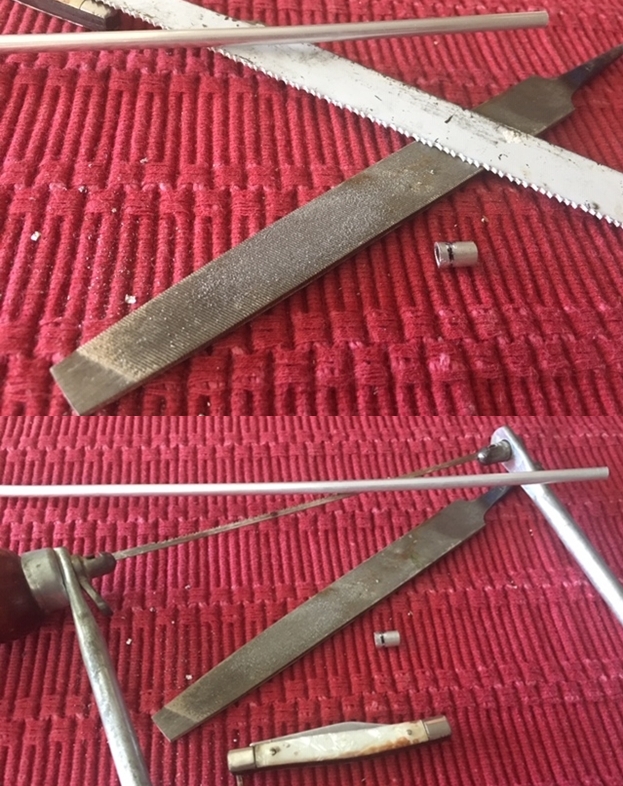
 I had a short piece of metal tubing. It is harder than the average aluminum inner tube and also a bit larger in diameter. It fit well in both sides of the broken airway. I was going to use super glue to anchor it in the bowl half first and let it harden very well. I did not want any slippage back and forth in the airway. I set the bowl aside to let the glue cure on the tube.
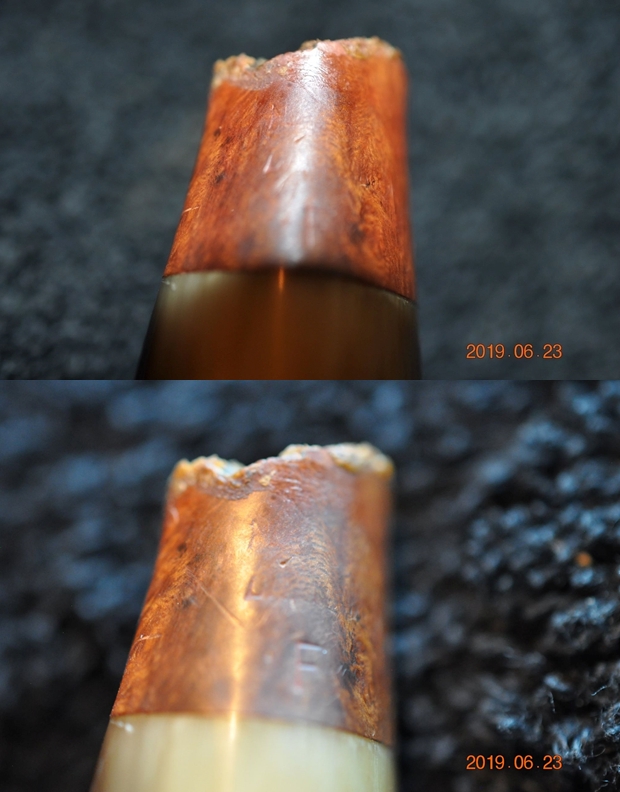
 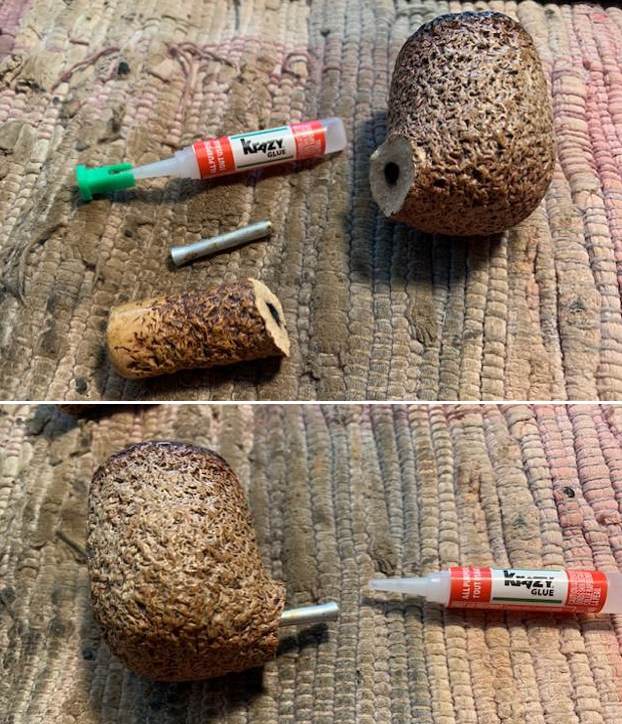 I filed the tube to roughen it up and to make the fit in the shank part of the break work well. I slide it in place and took a photo of the fit of the shank to the bowl. It looks quite good. I will need to glue it to get a solid repair but it looks like it will work well with no gaps once it is glued.
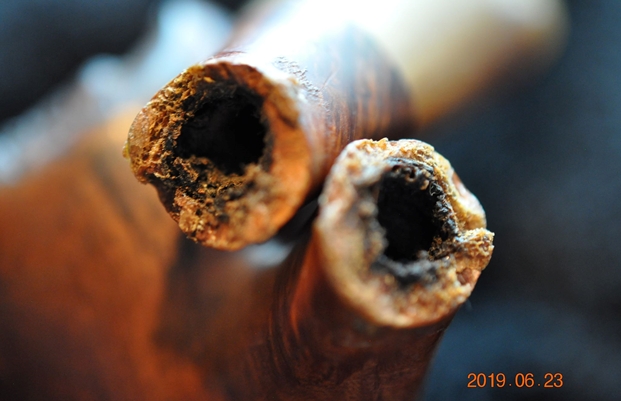
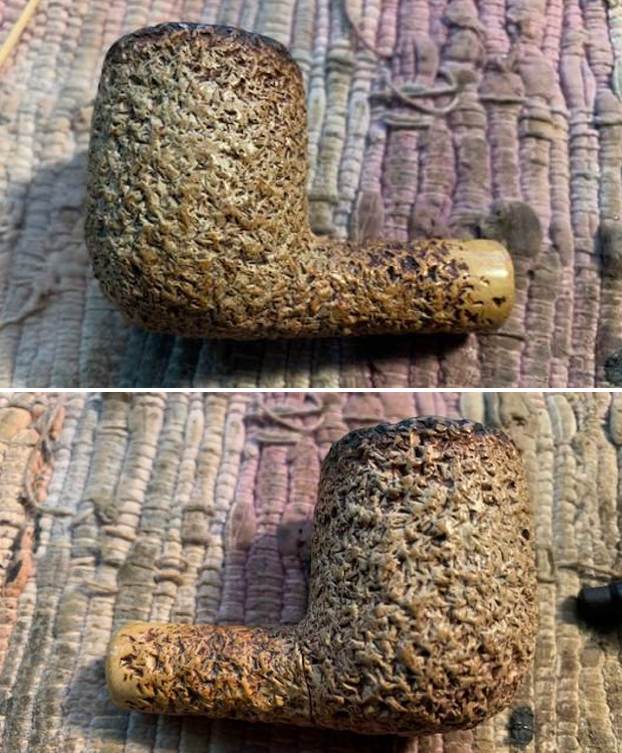 With the restoration going on in my basement shop area I could not put my hands on my epoxy so I went to the local tool shop near my house and chatted with one of the gents there about what I was working on. They had some JB Weld but he recommended a product called Weld Bond. It is good for repairing cracked pottery, stone and even wood. It dries rock hard in 24 hours and is clear once it dries (a bonus on this pipe). I spread the glue on both halves of the broken pipe and painted it on the surface of the tube as well with a tooth pick and worked it into the grooves of the break. I slid the shank piece on to the tube and lined the break up. I pressed the parts together and wiped off the excess glue with a cloth. I held it in place until it bonded the parts together.
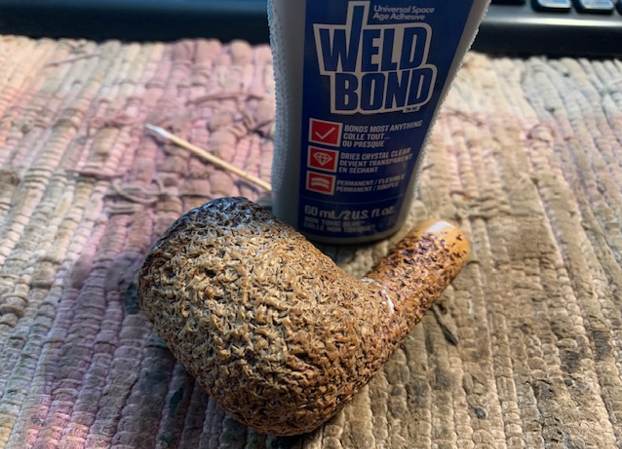
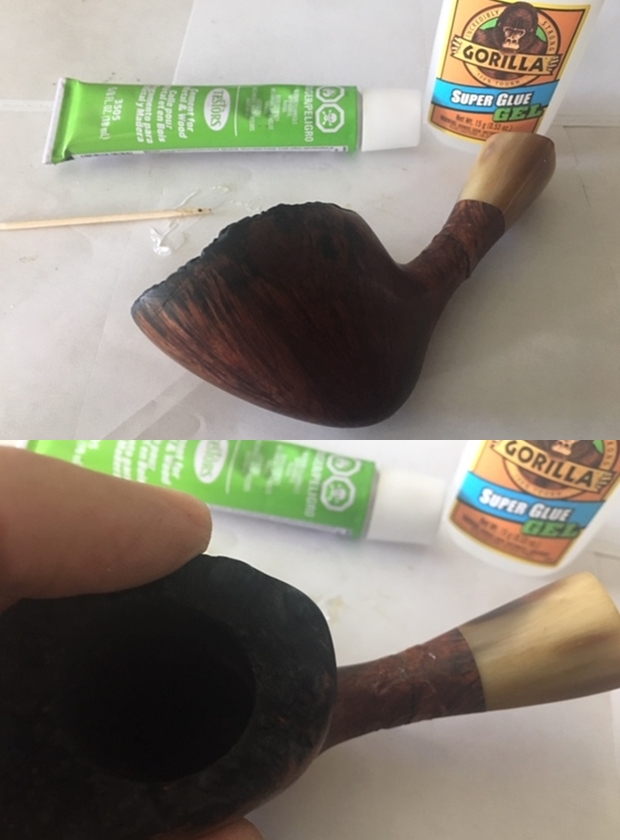
 I pressed the parts together and bound it together with green tape. I wrapped the tape around the entire bowl and shank to hold it tightly in place while the glue cured. I set the bowl aside for 24 hours to let that happen. That is always the hardest part for me as I am impatient and want to move onto the next part. But the wait is on and I am gritting my teeth while I wait.
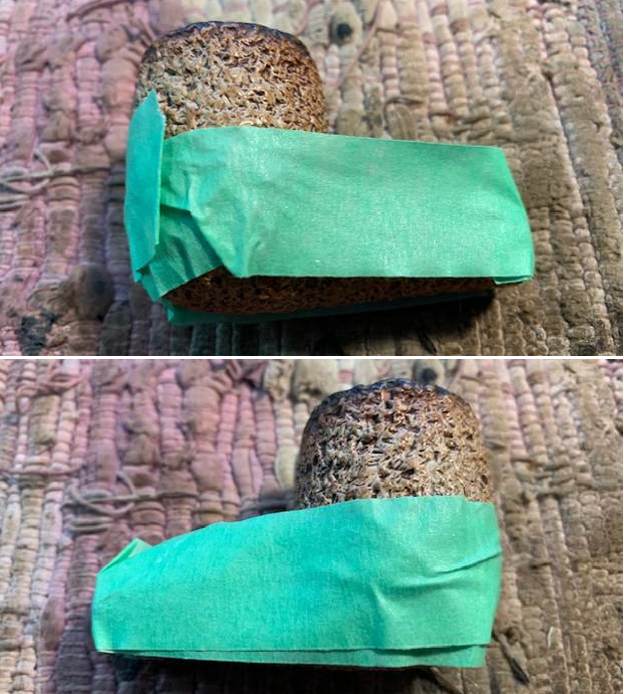
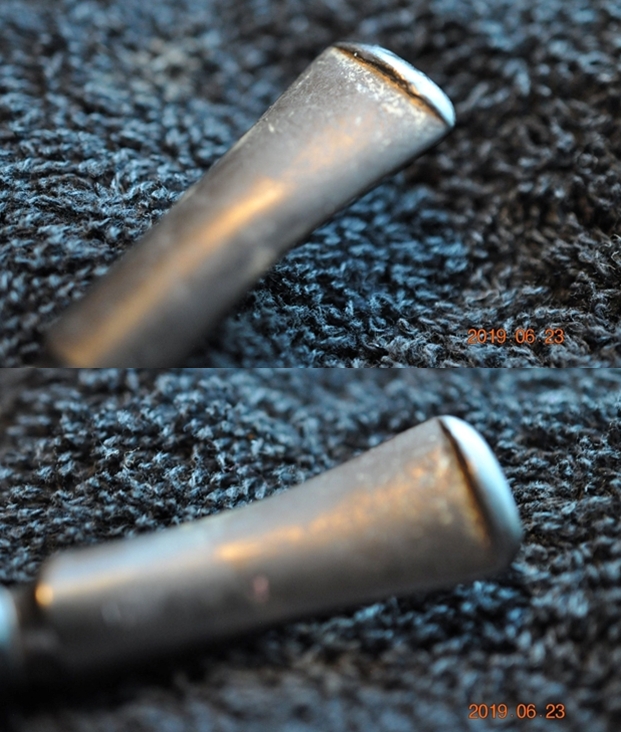
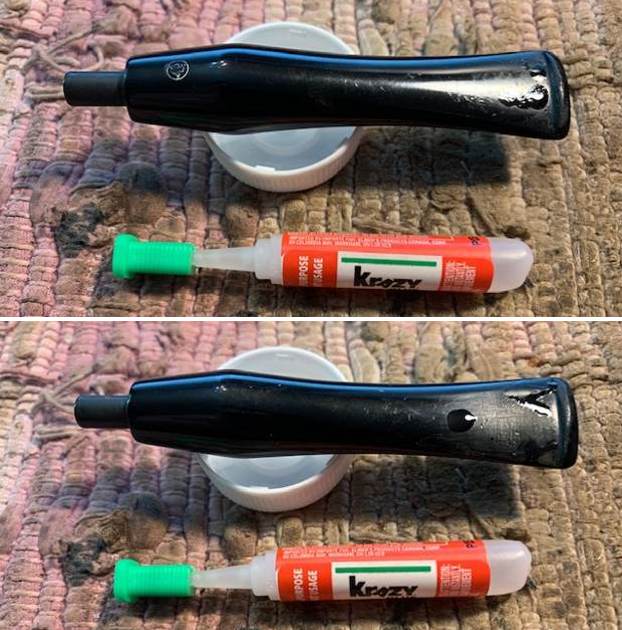
 I set the bowl aside and turned my attention to work on the stem. It had a lot of tooth chatter and light marks on the surface on both sides. I had originally thought the stem was acrylic but it was a nice vulcanite. I “painted’ the surface of the stem with the flame of a Bic lighter to lift them as much as possible. The marks on the underside lifted well. The majority of the top side also lifted. I had a few deeper ones that need a spot of super glue to smooth them out.
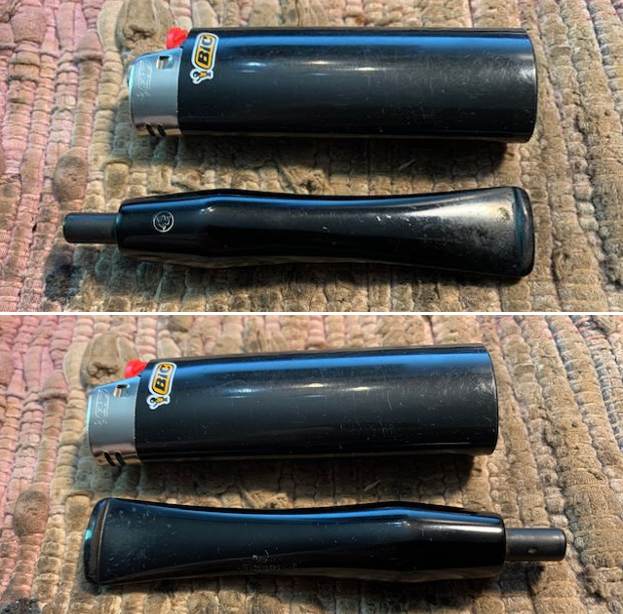
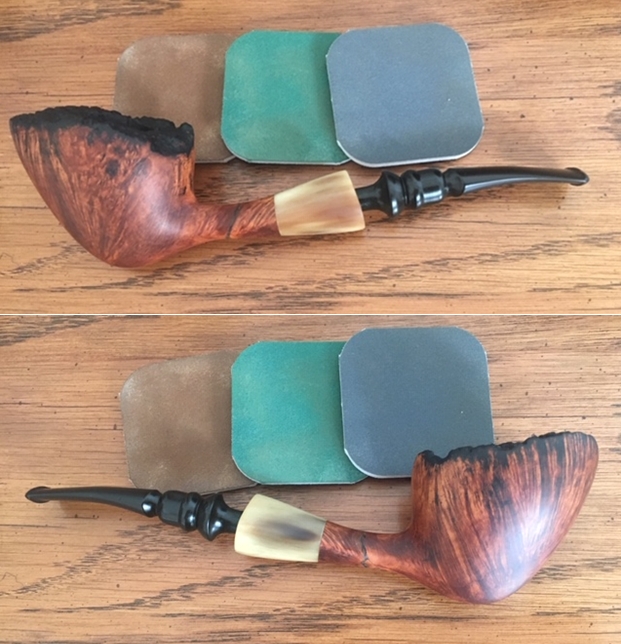
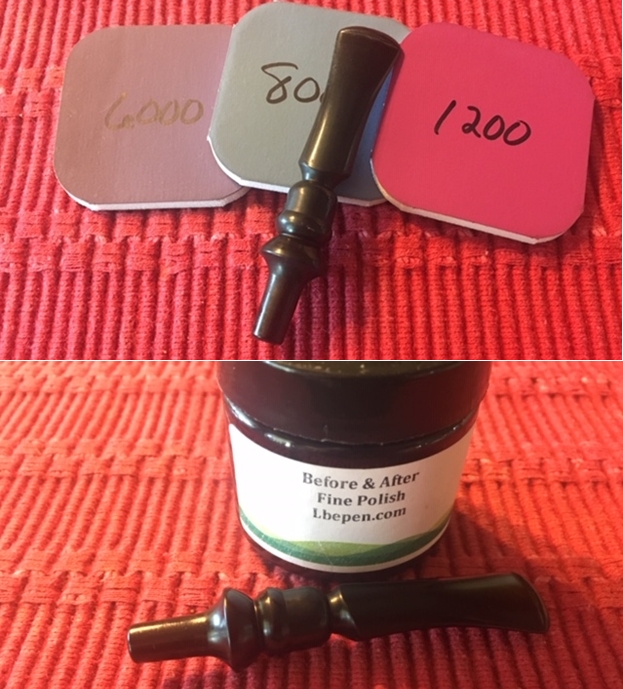
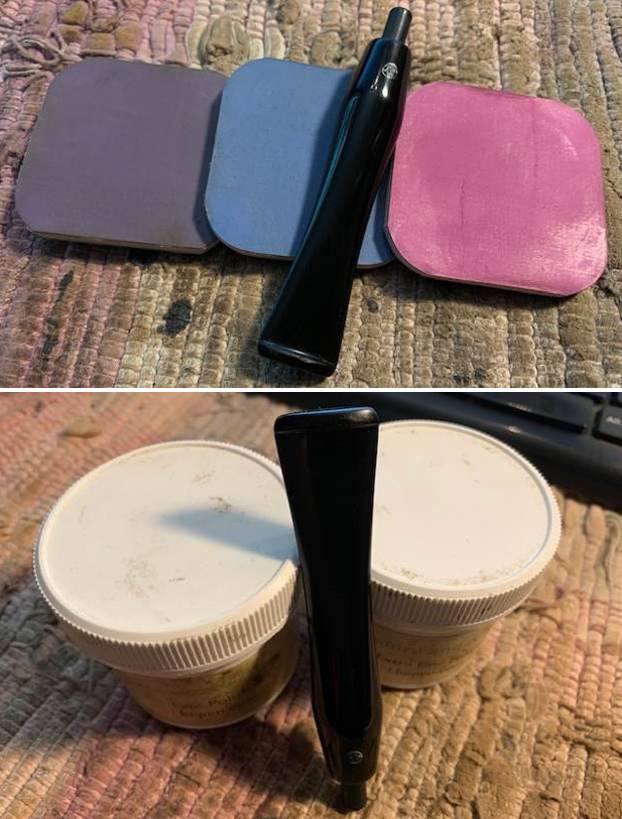
 Once the repair cured I sanded the repairs on the stem with 220 grit sandpaper to blend them into the surface of the vulcanite. I started polishing it with 400 grit wet dry sandpaper.
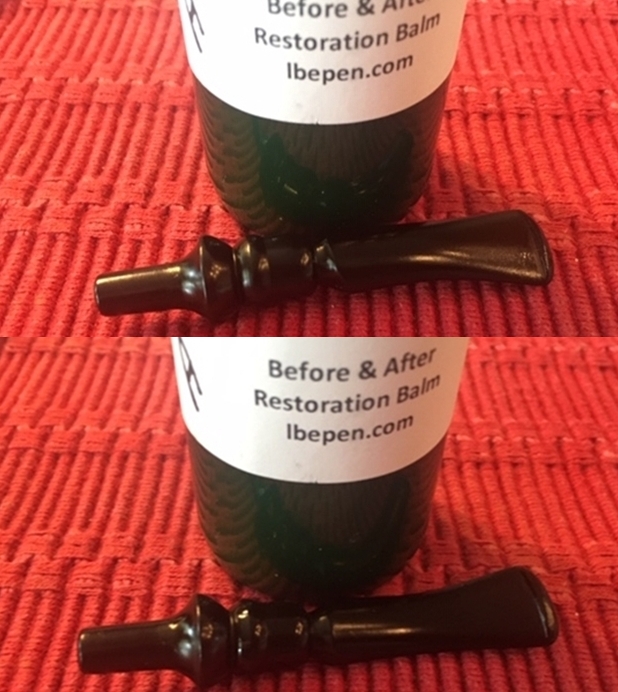
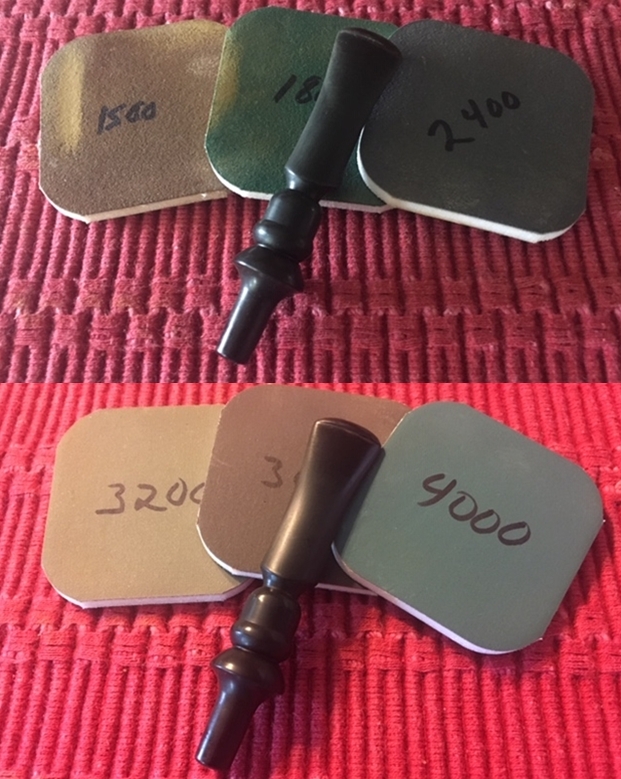
 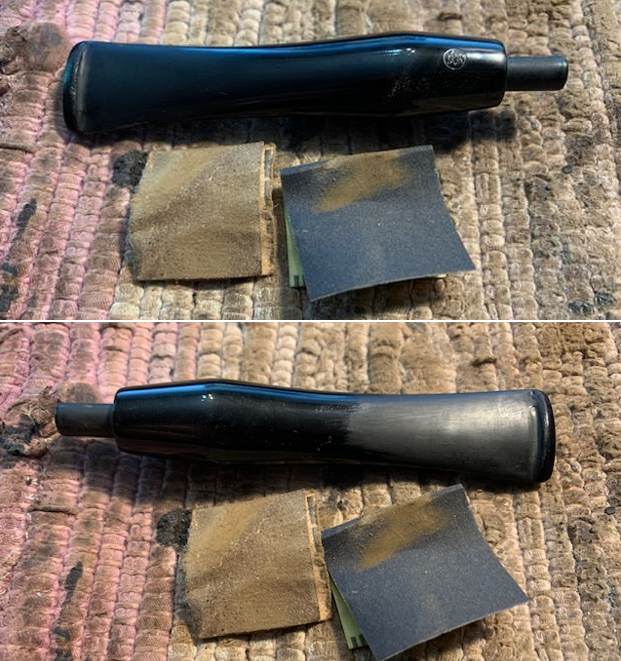 I polished the vulcanite stem with micromesh sanding pads – 1500-12000 grit pads. I wiped it down with Obsidian Oil after each sanding pad. I used Before & After Pipe Polish – both Fine and Extra Fine to further polish the stem.
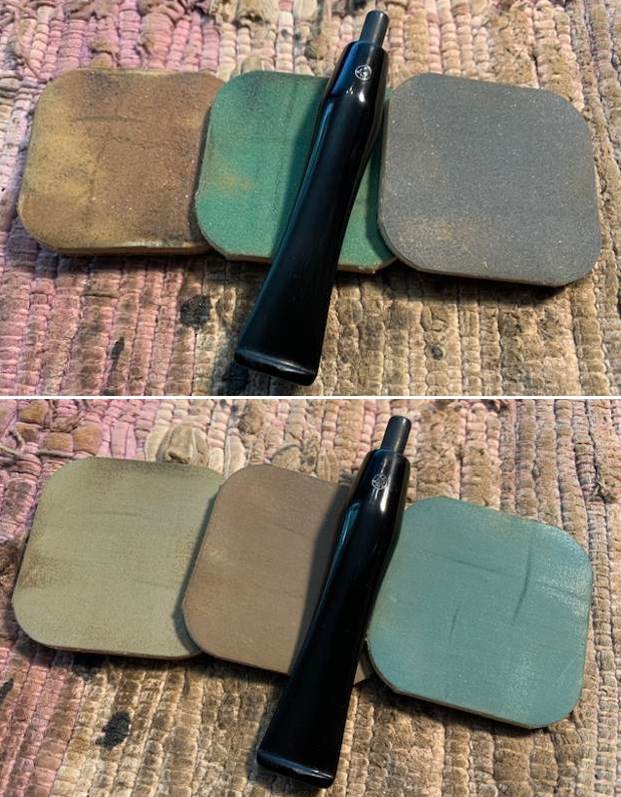
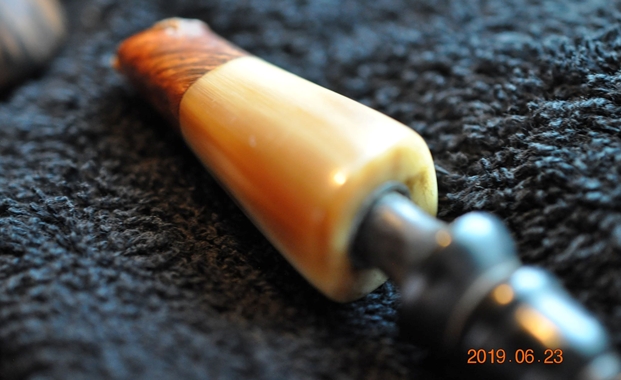
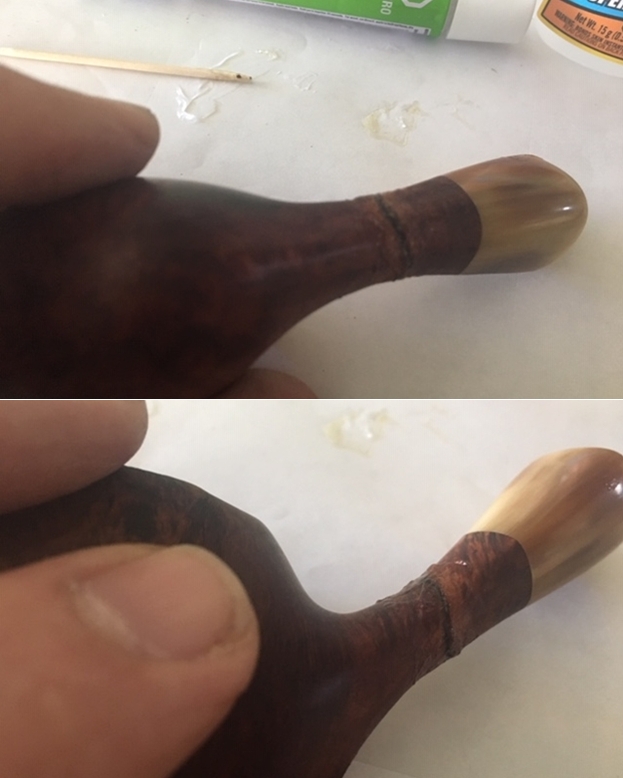
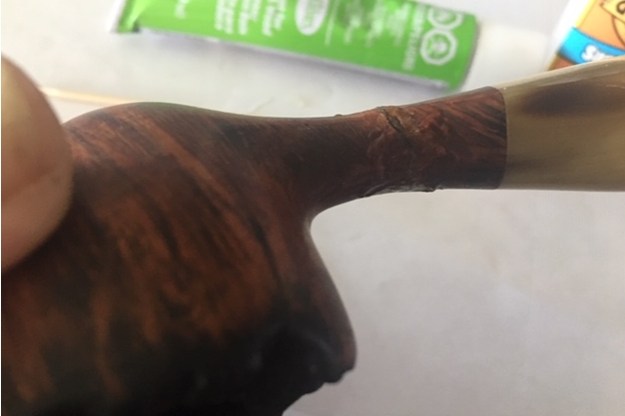
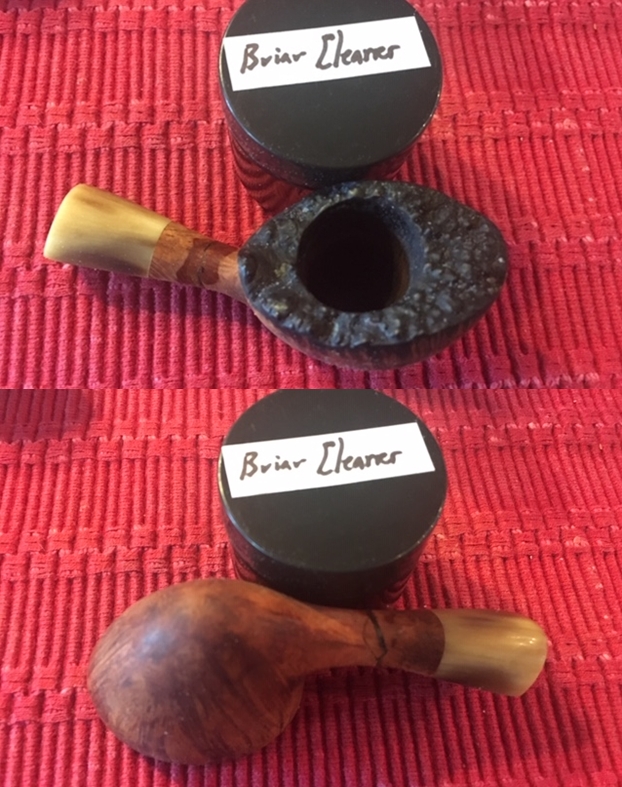
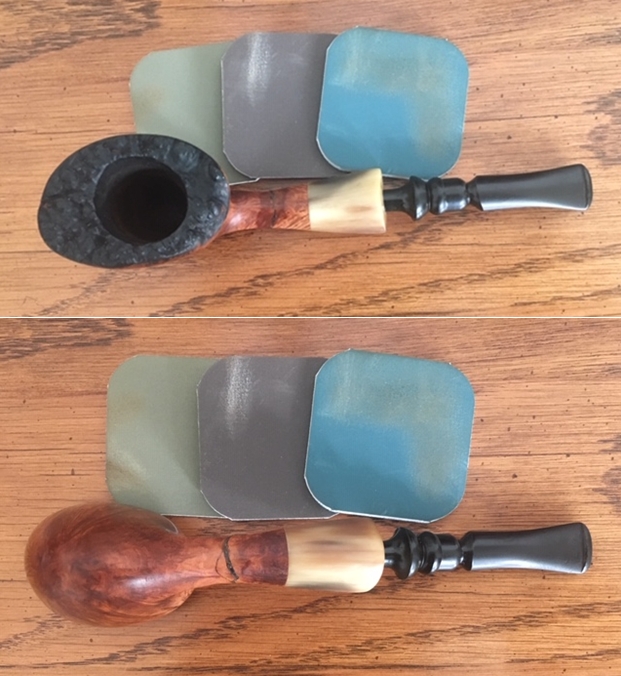
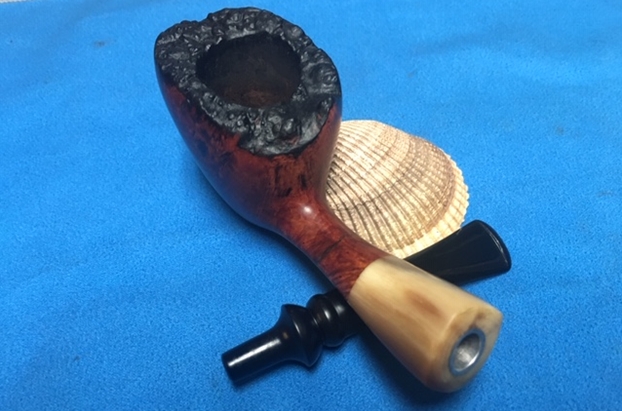
 I removed the tape holding the repaired shank/stem repair together. It was solid. The crack was only visible on the lower right side and part of the underside. It is filled in but can be seen if you look for it.
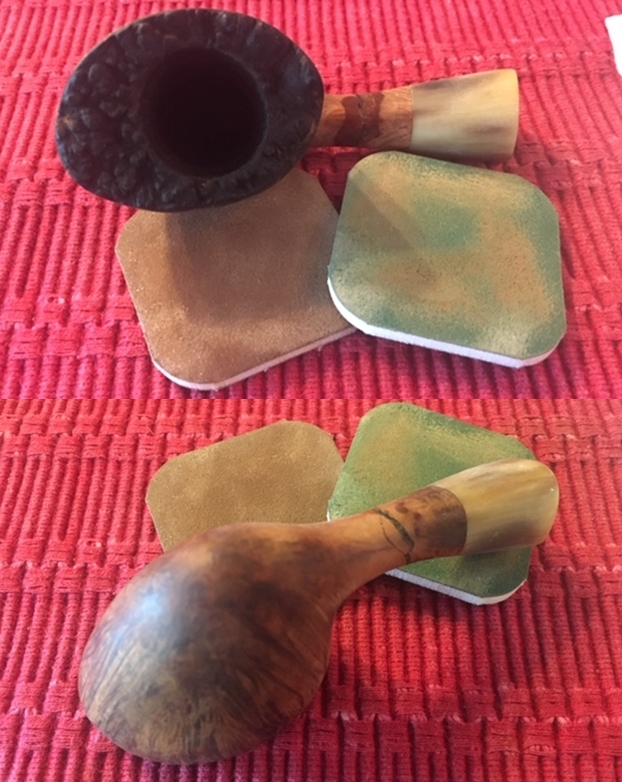
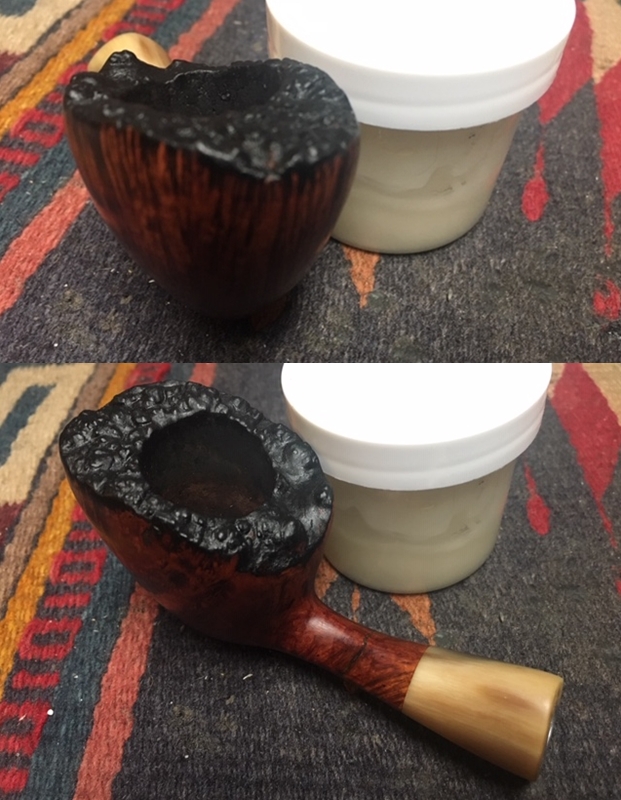
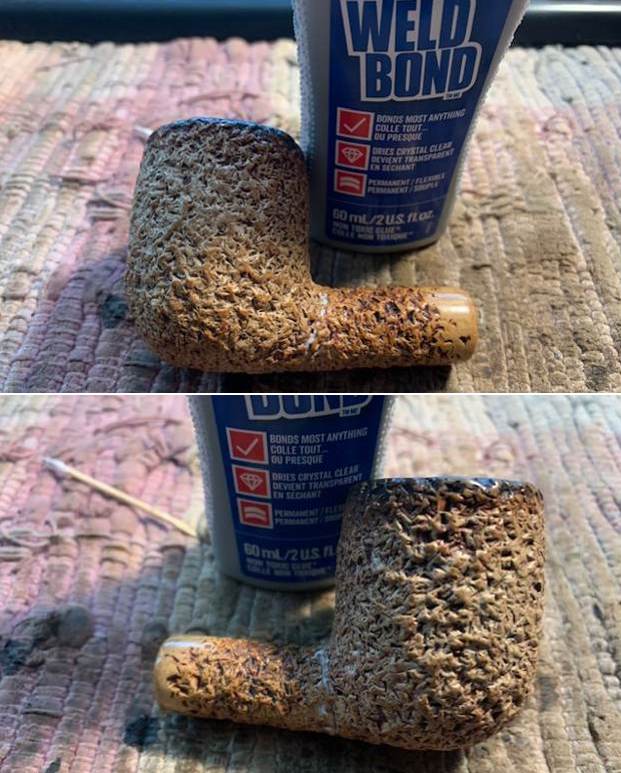
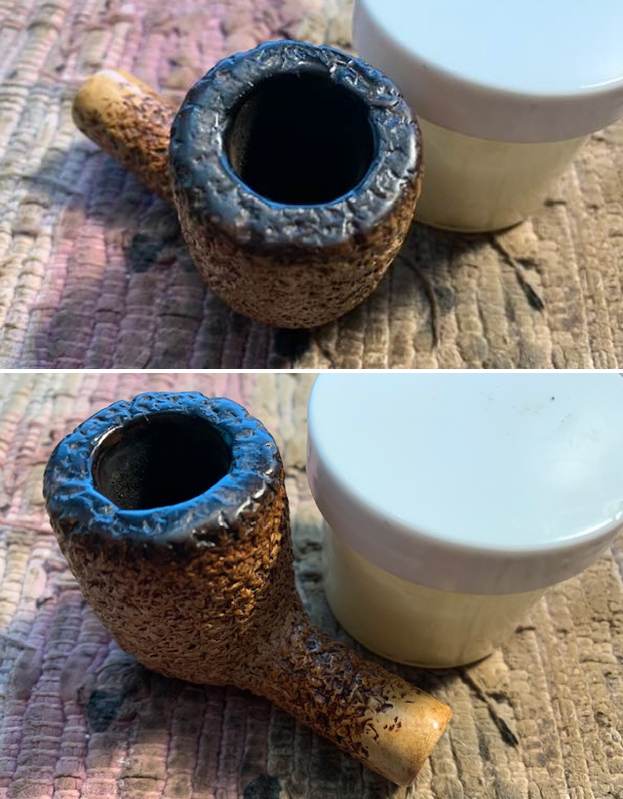
 I filled in the remaining crack in the surface of the meer on the right lower/underside with the Weld Bond glue I used to bind it together. It dries clear so I am looking forward to seeing how it looks afterward.
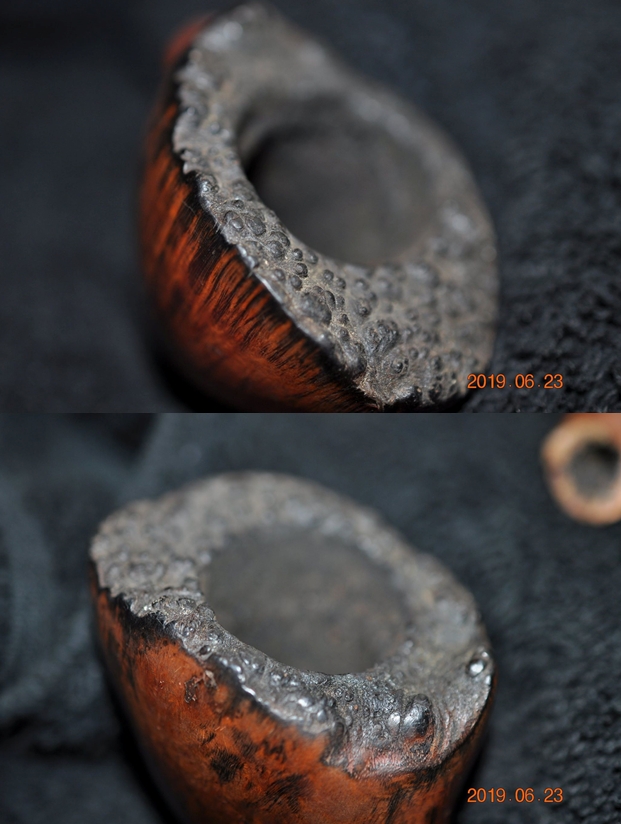
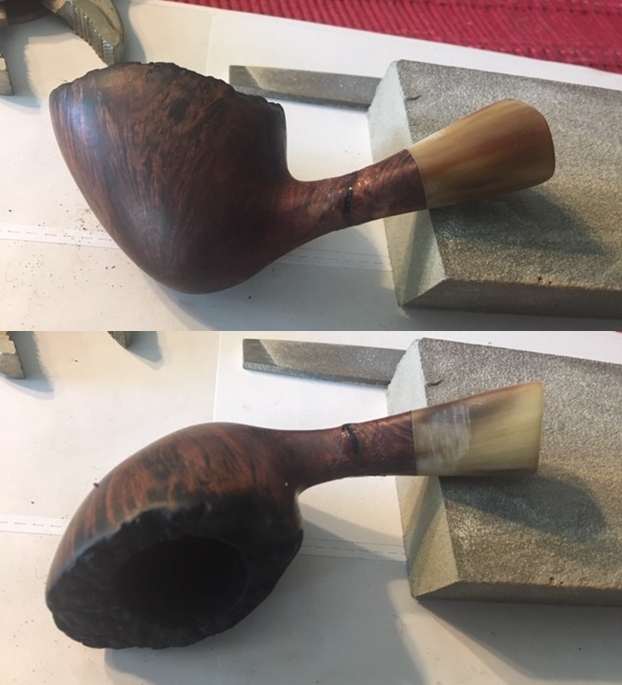
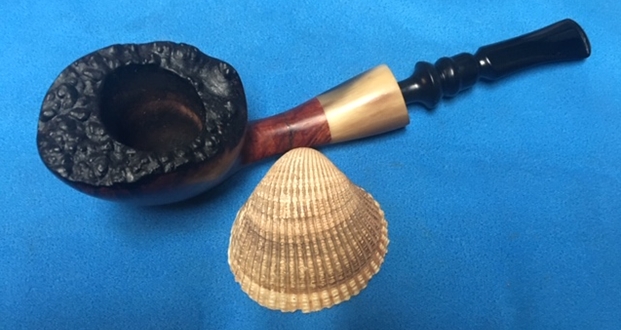
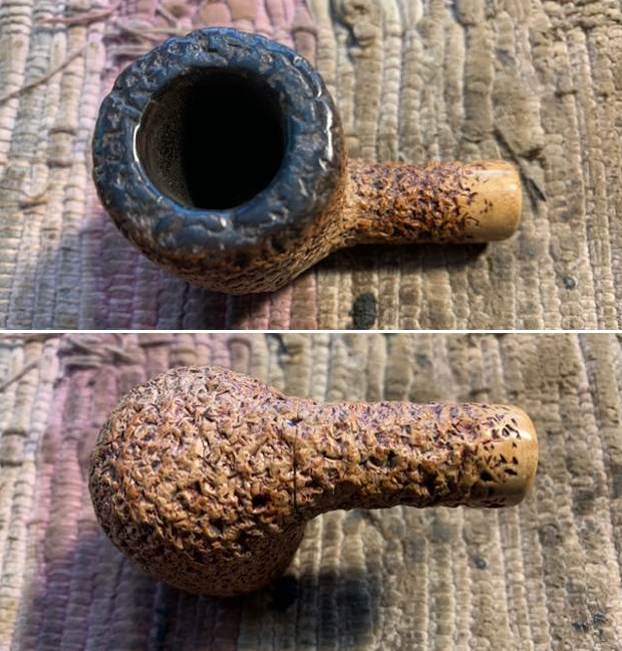
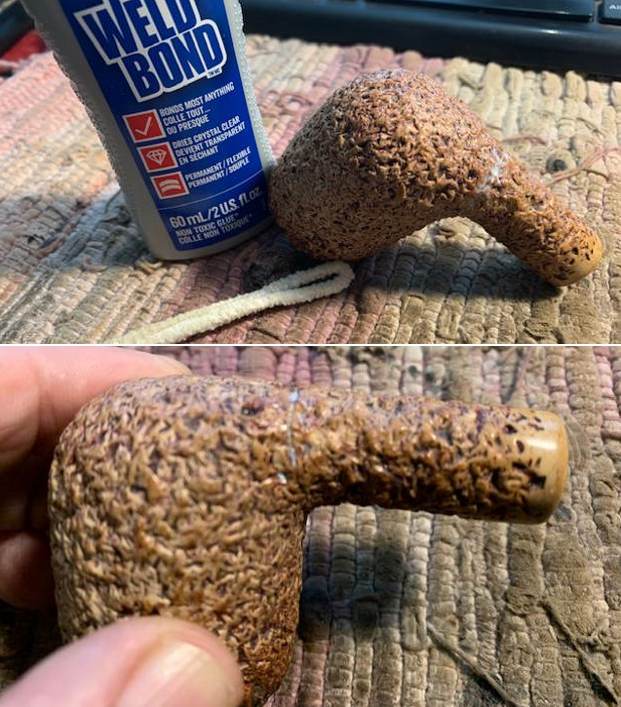 I reamed the pipe with a Savinelli Fitsall Pipe Knife. I cleaned the rim top with the tip of a knife and a brass bristle wire brush. I was able to get back some of the rustication on the top.
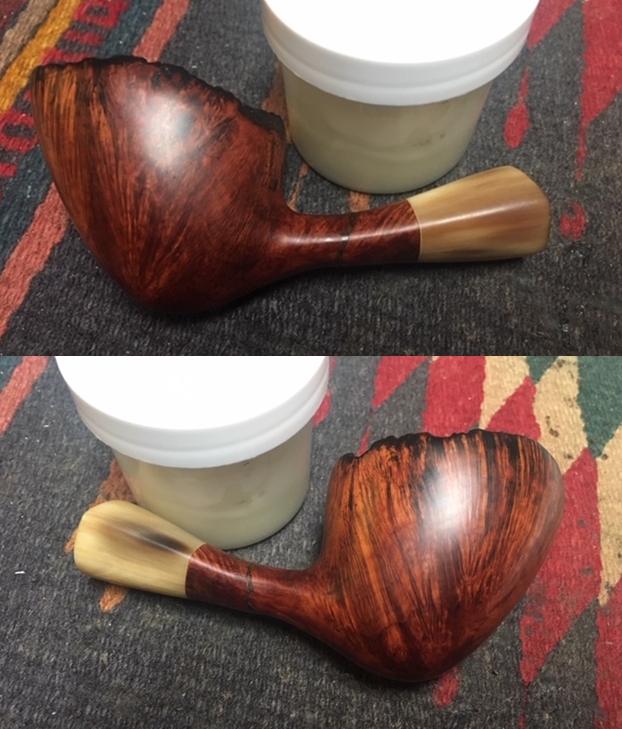
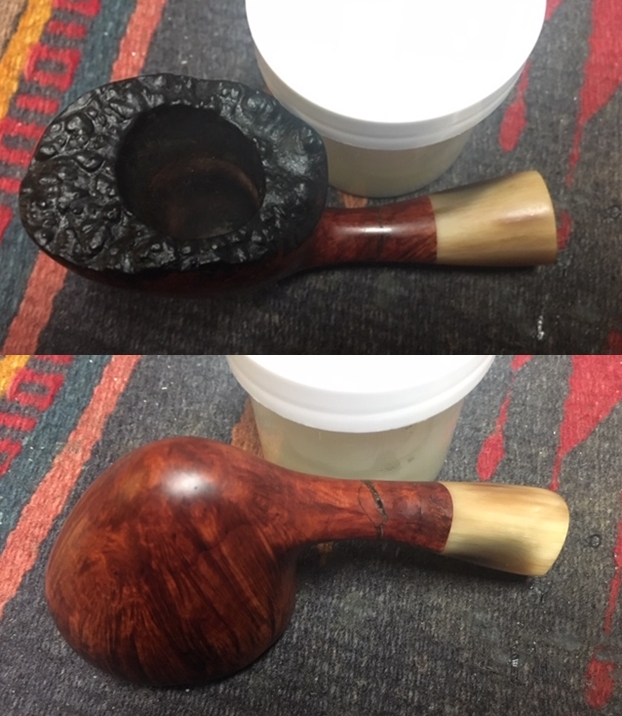
 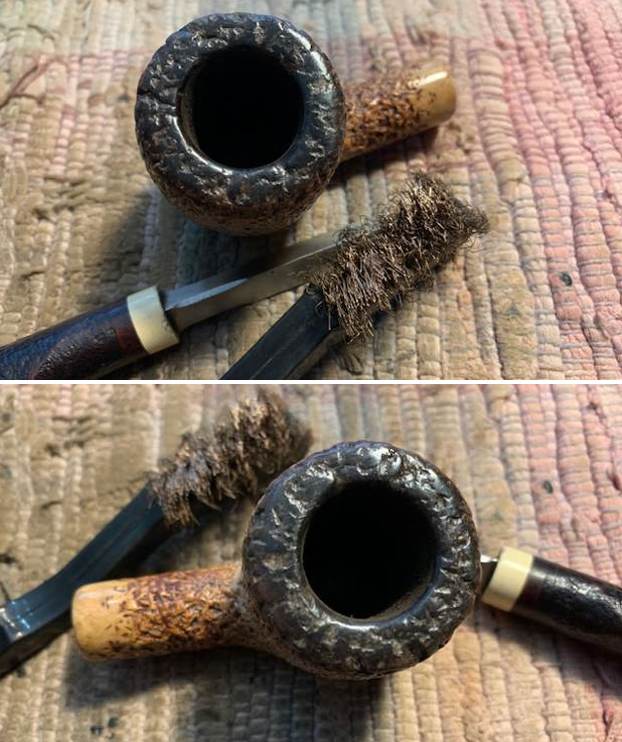 I have had good success with Before & After Restoration Balm on Meerschaum so I worked it into the surface of the bowl and shank with my finger tips and a shoe brush to clean, enliven and protect the rusticated surface of the meerschaum. I let it sit for 15 minutes and then buffed it off with a soft cloth. It looked very good.
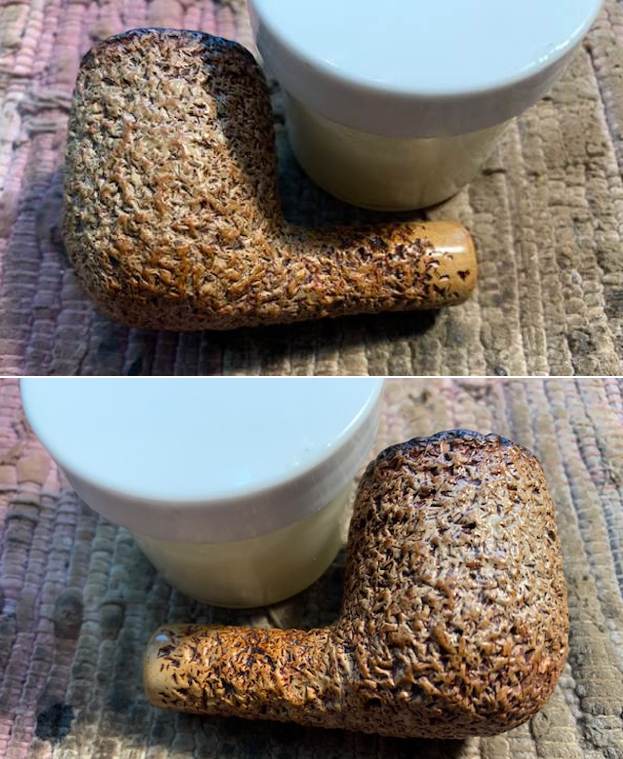

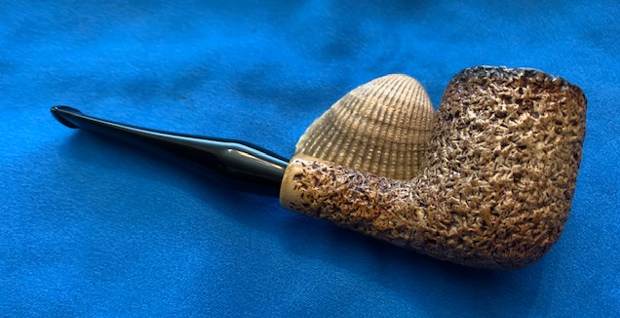
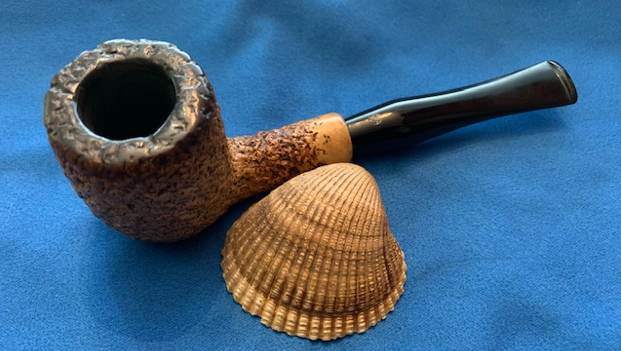
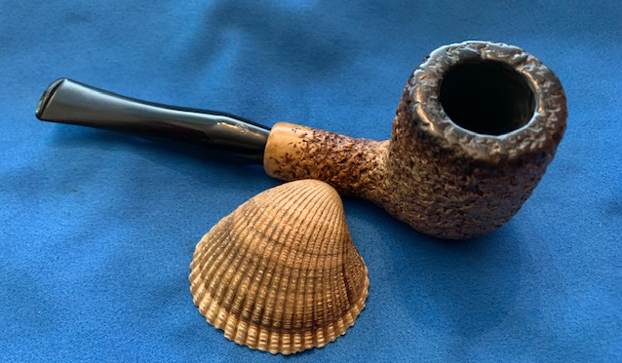
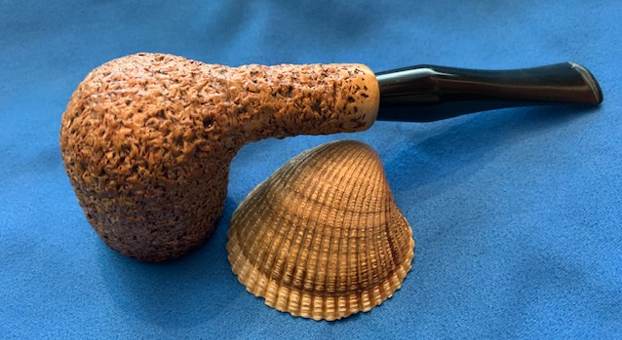
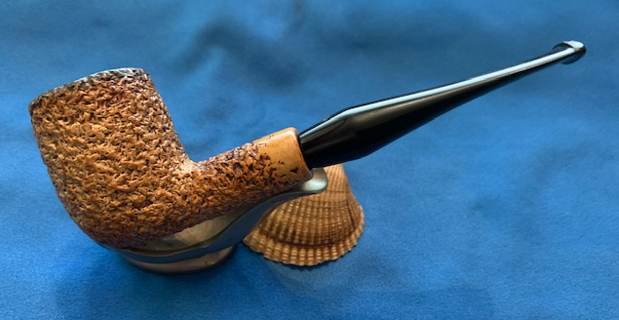
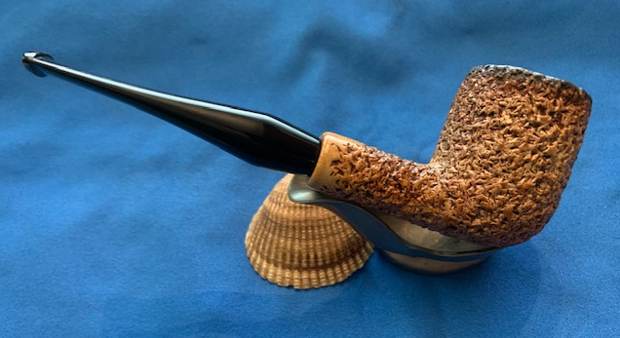
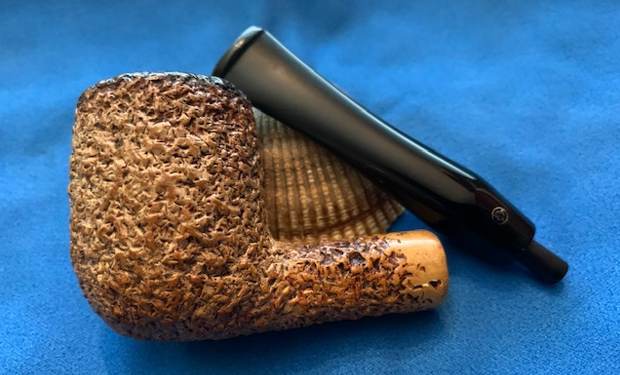
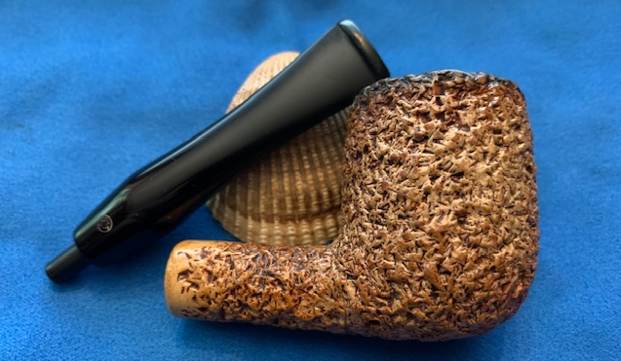
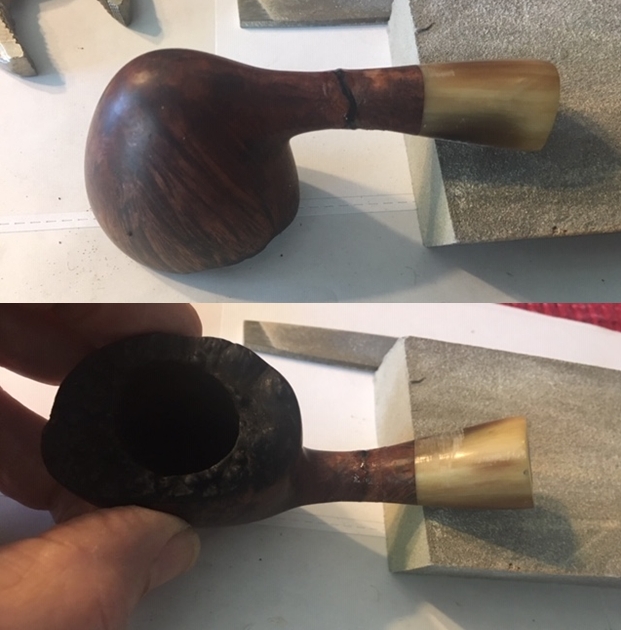
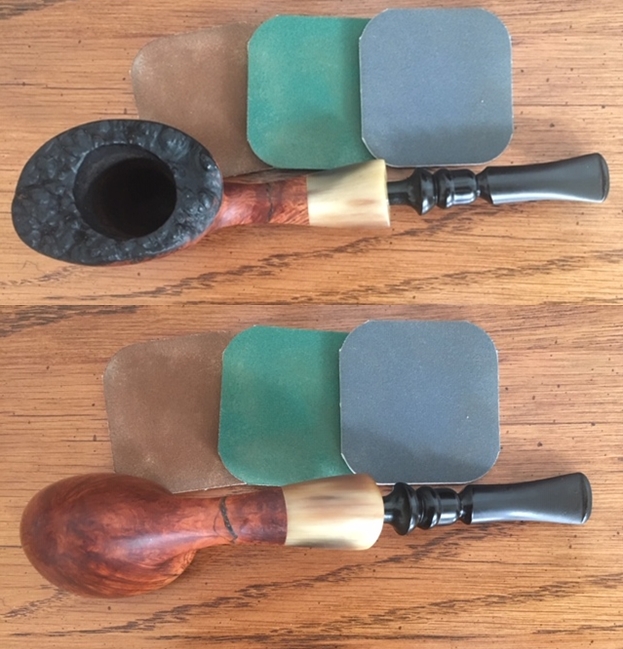
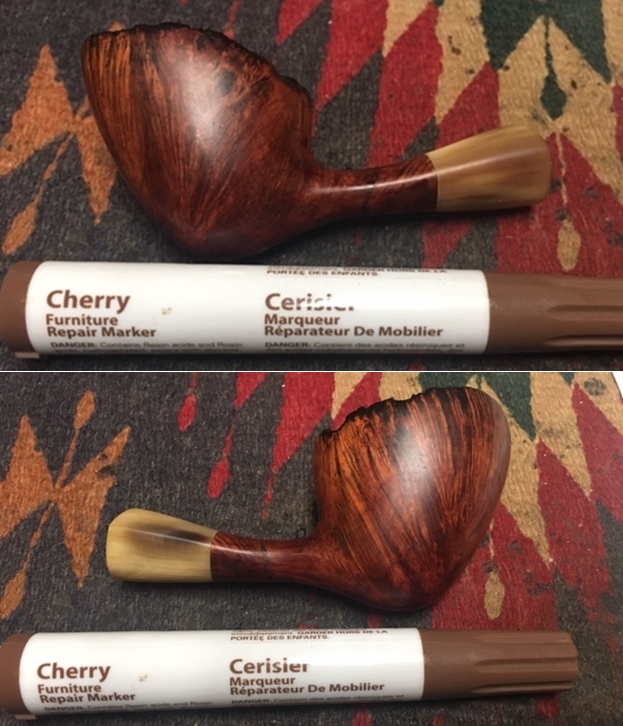
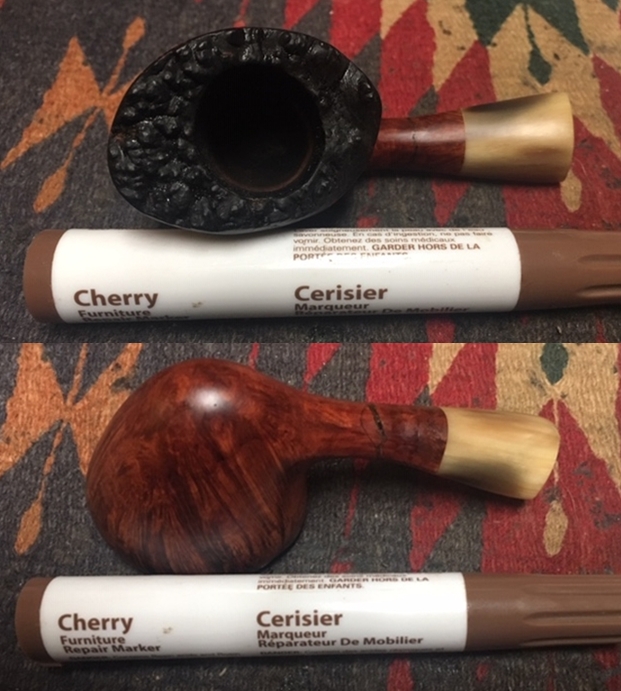
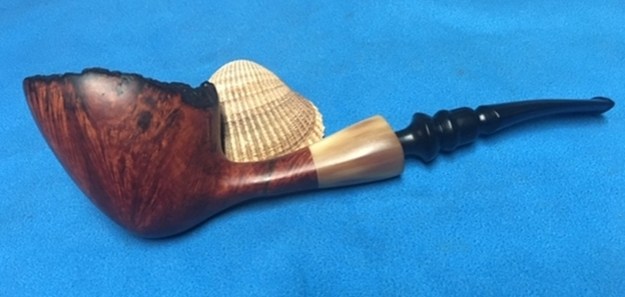
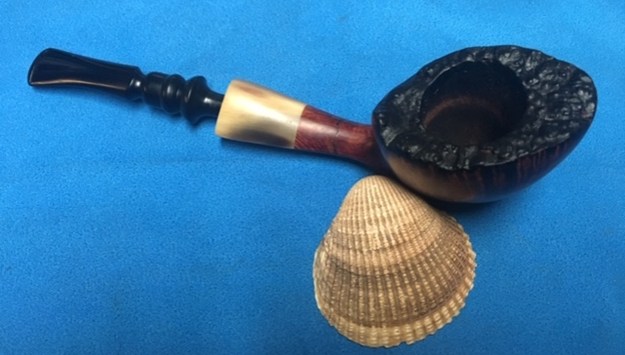
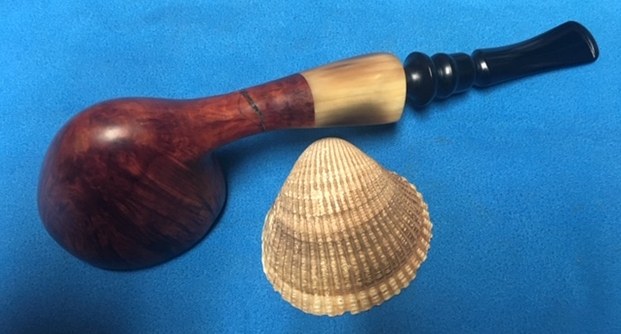
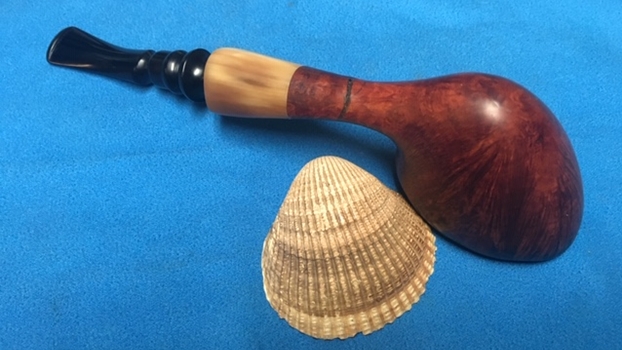
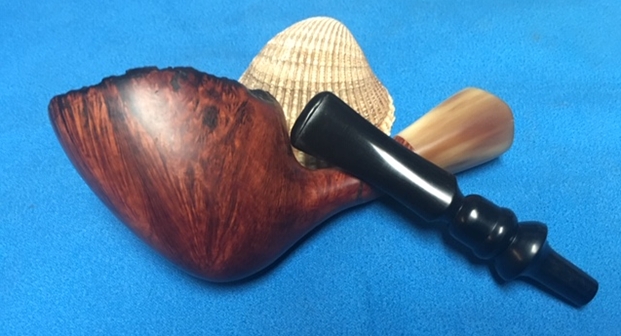
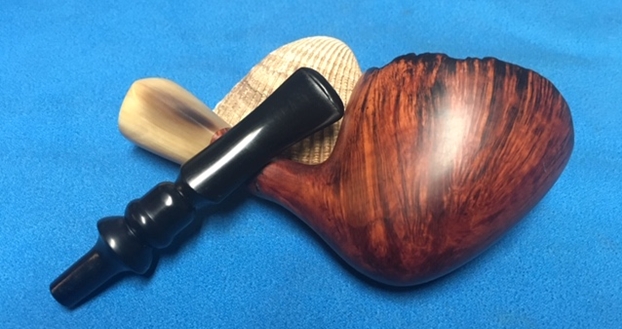
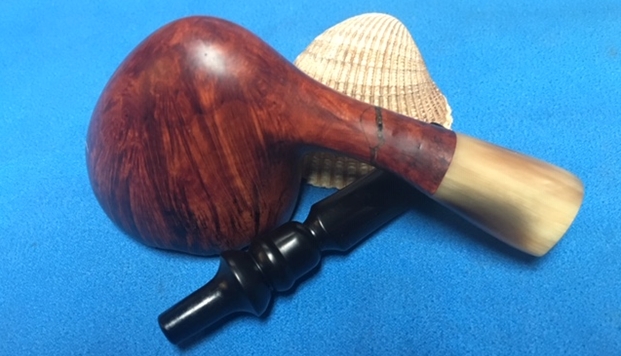
 This Manx Made Meerschaum Rusticated Billiard is a great looking pipe now that it has been restored. The style of rustication that is used around the bowl is classic Isle of Man rustication from the Laxley Pipe Company. It works well with both the shape and the polished vulcanite stem. I put the stem back on the bowl and carefully hand buffed the pipe with a microfiber cloth to deepen the shine. The finished Manx Made Meerschaum Billiard is another pipe that fits nicely in the hand and feels great. Give the finished pipe a look in the photos below. The dimensions of the pipe are Length: 6 inches, Height: 2 inches, Outside diameter of the bowl: 1 ¼ inches, Chamber diameter: ¾ of an inch. The weight of the pipe is 61 grams/2.15 ounces. I will be giving the fellow a call who dropped it off. I think he will enjoy the repair of one of his favourite pipes. Thanks for reading this blog and my reflections on the pipe while I worked on it. There are many more to come!