Tag Archives: topping a bowl

Kaywoodie White Briar Bulldog 12B


Guest Blog by Robert M. Boughton
Member, International Society of Codgers
Member, North American Society of Pipe Collectors
http://www.naspc.org
http://www.roadrunnerpipesnm.biz
http://about.me/boughtonrobert
Photos © the Author

INTRODUCTION
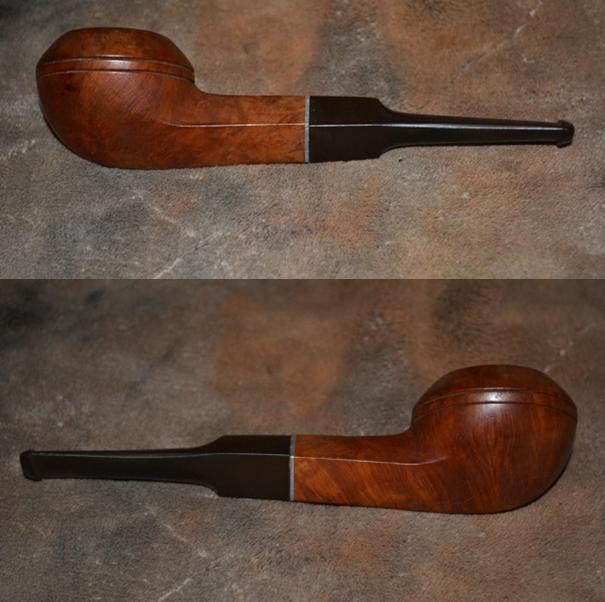
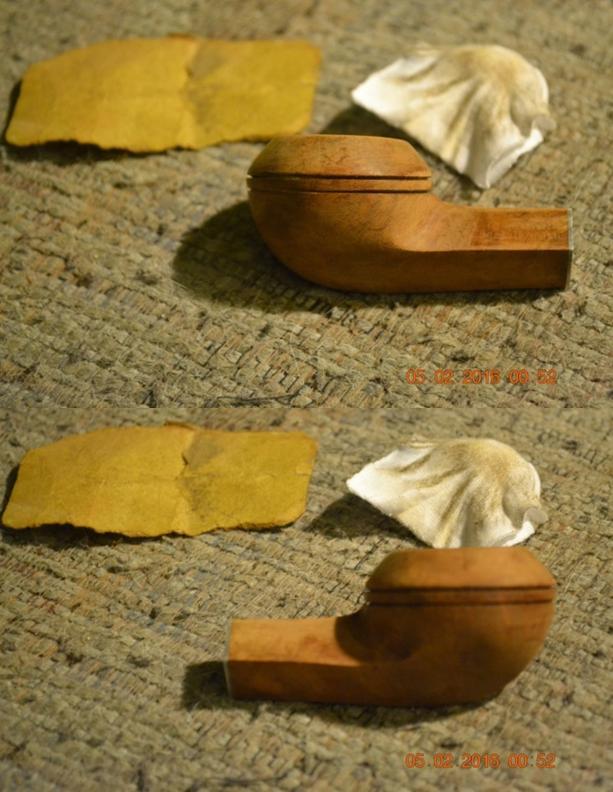
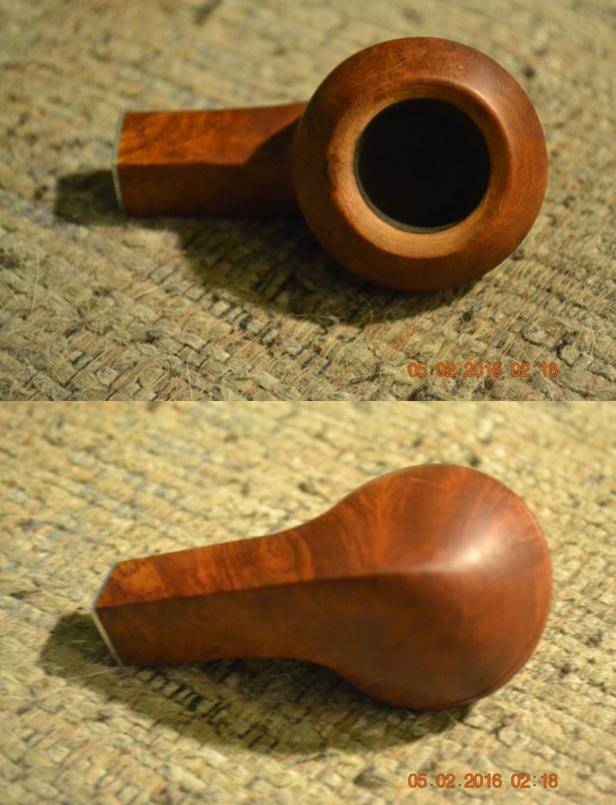
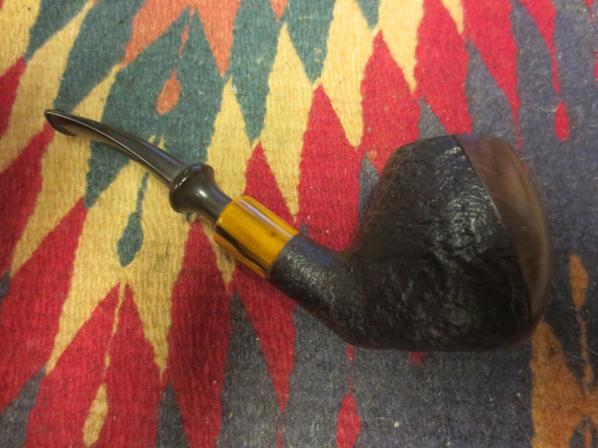
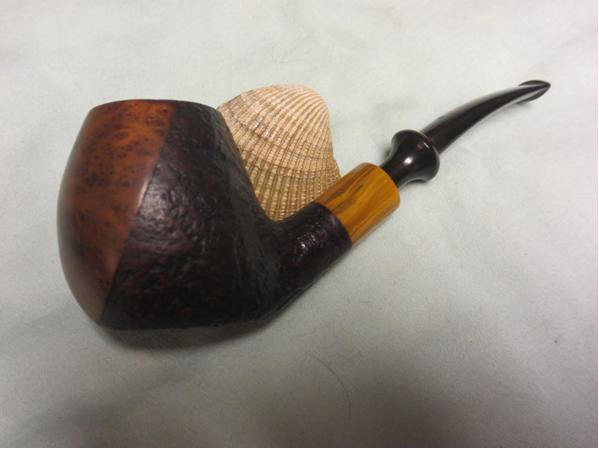
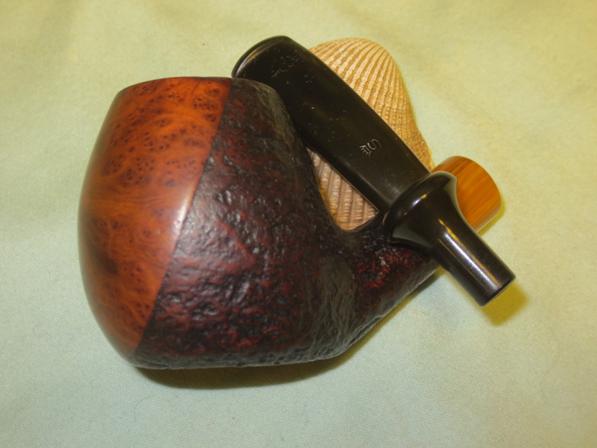
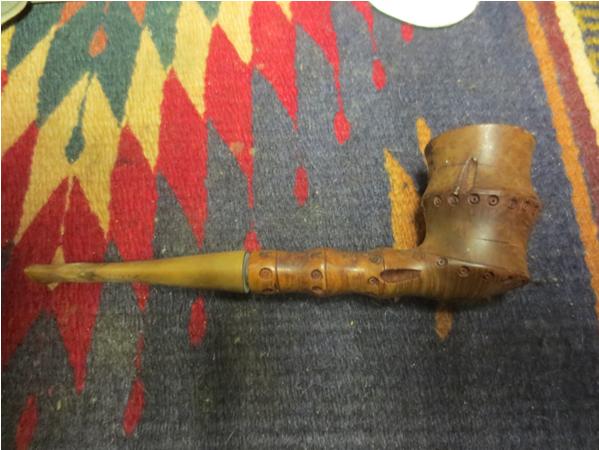
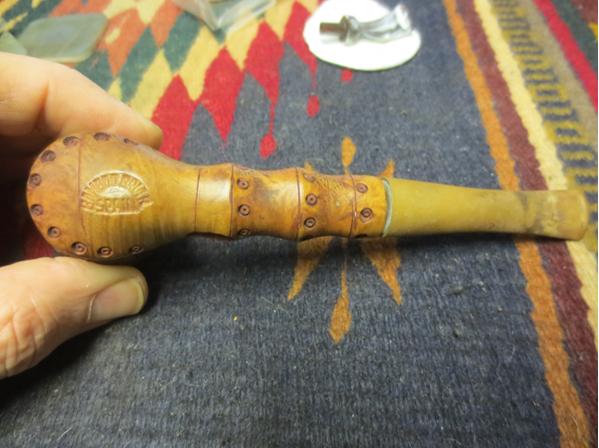
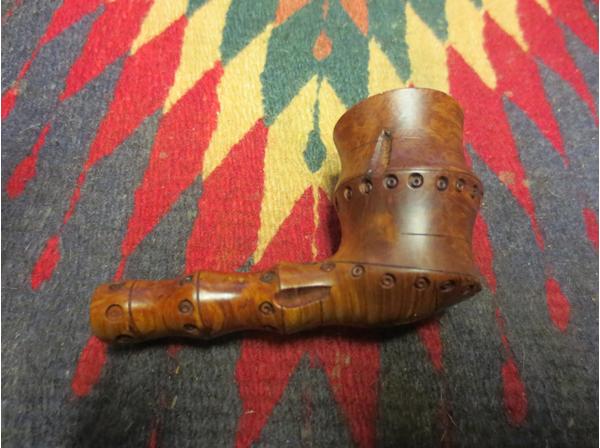
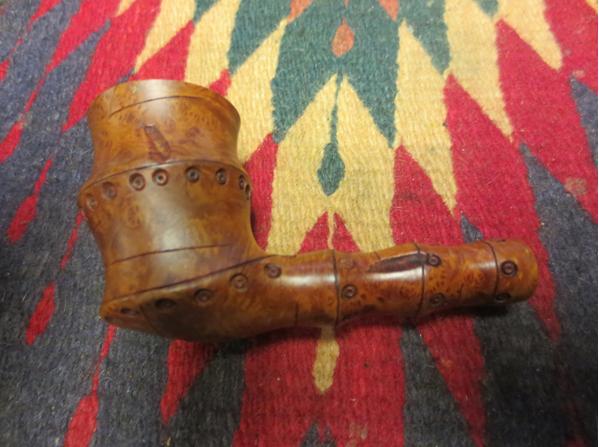
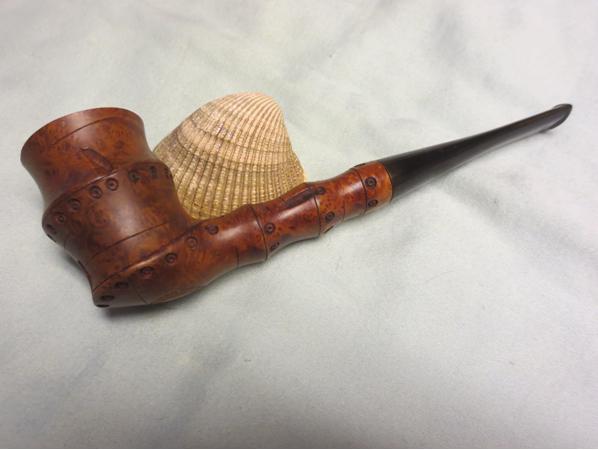
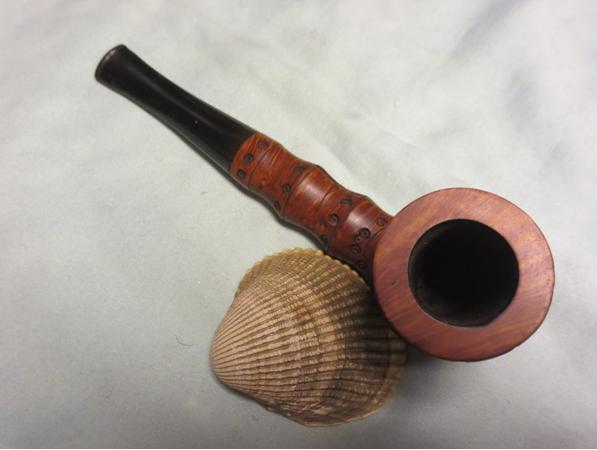
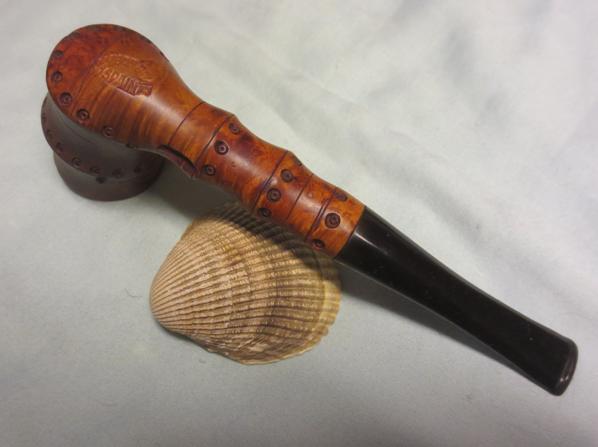
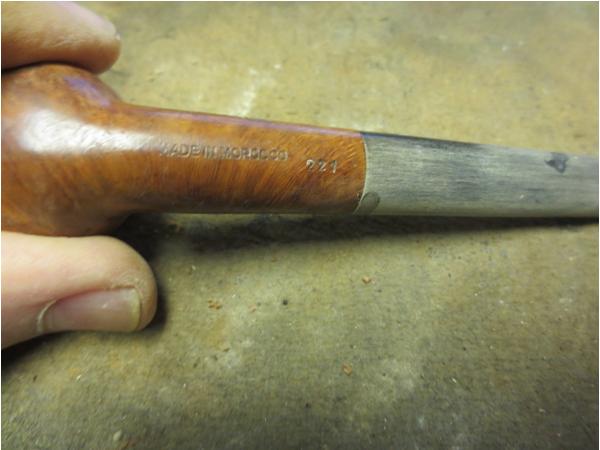
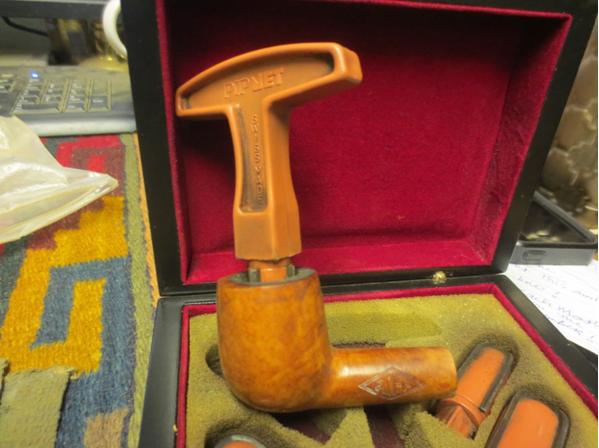
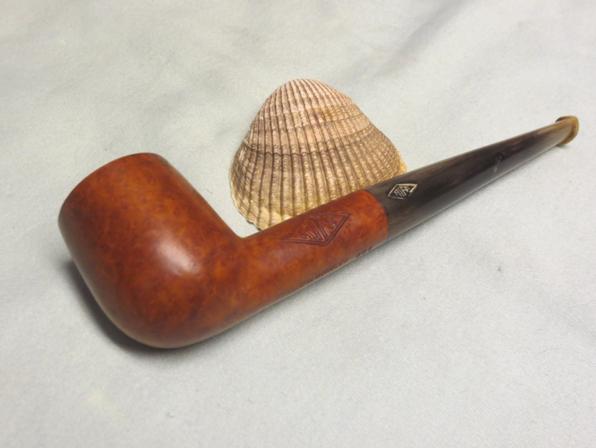
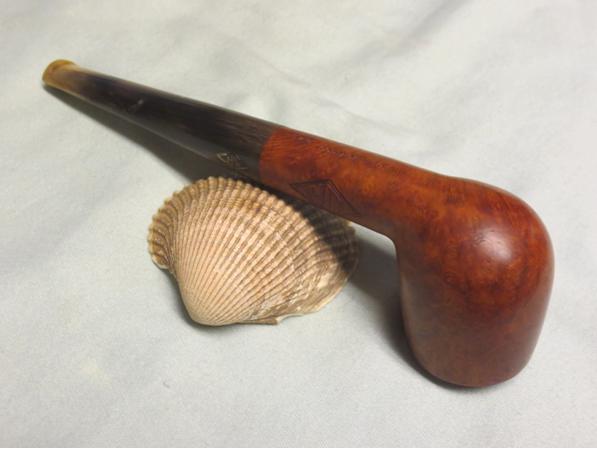
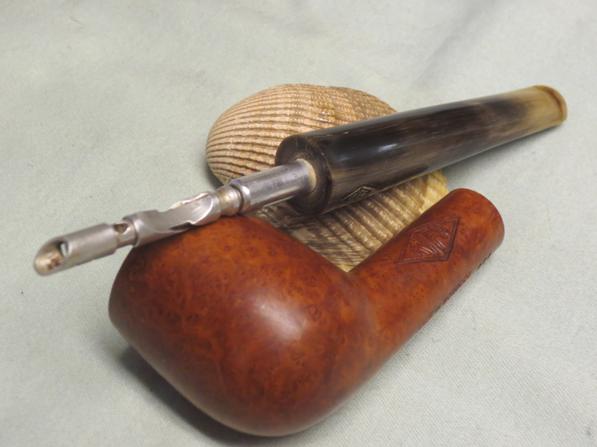
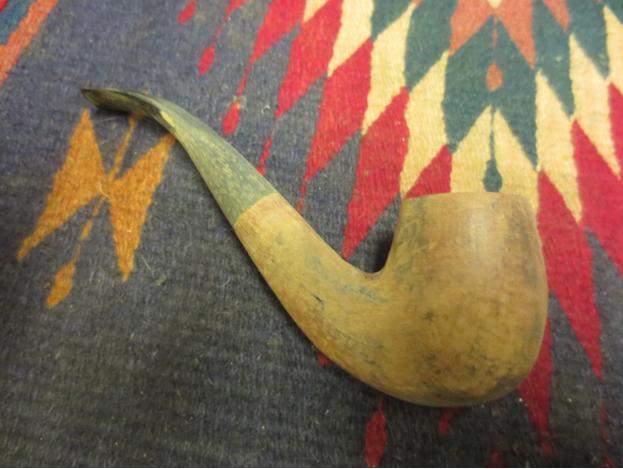
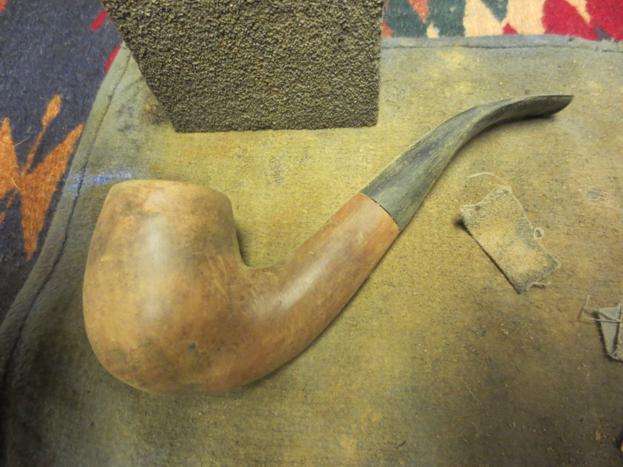
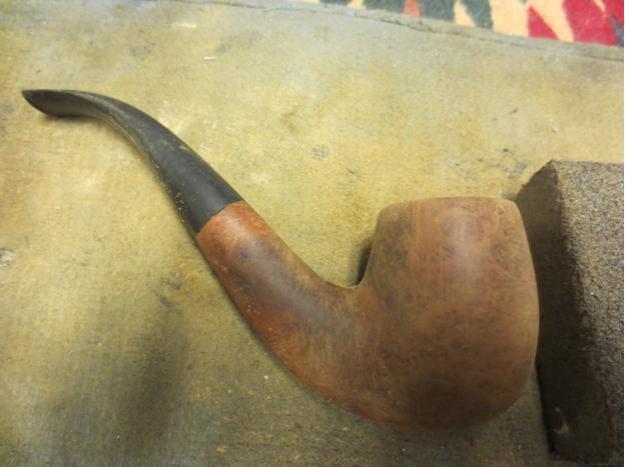
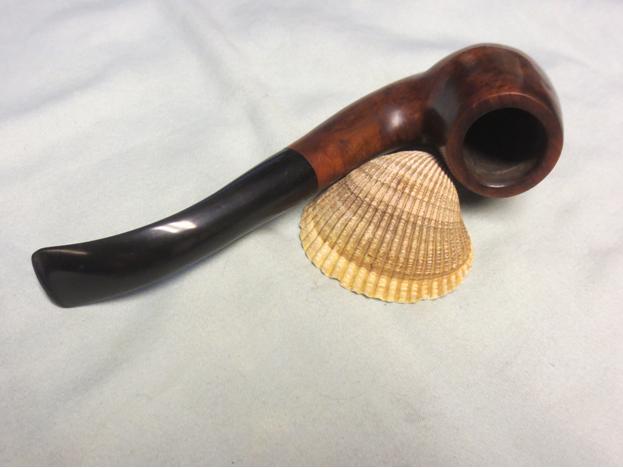
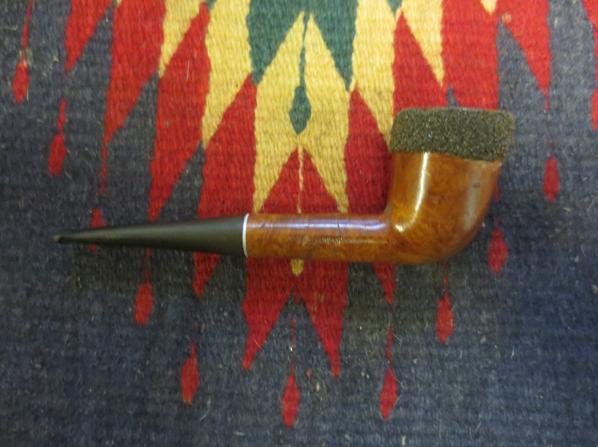
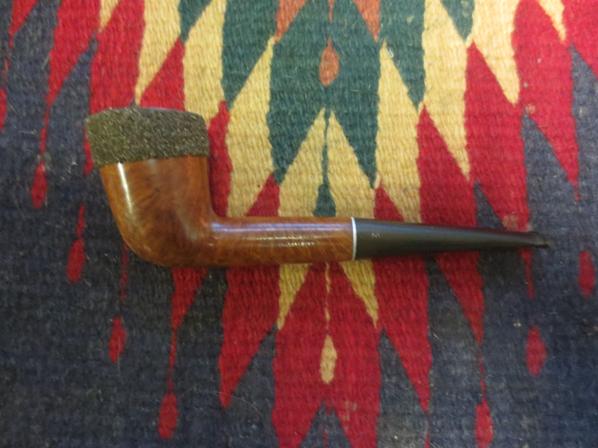
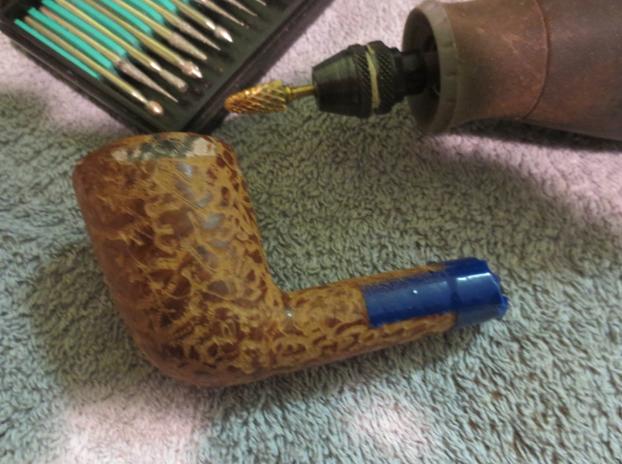
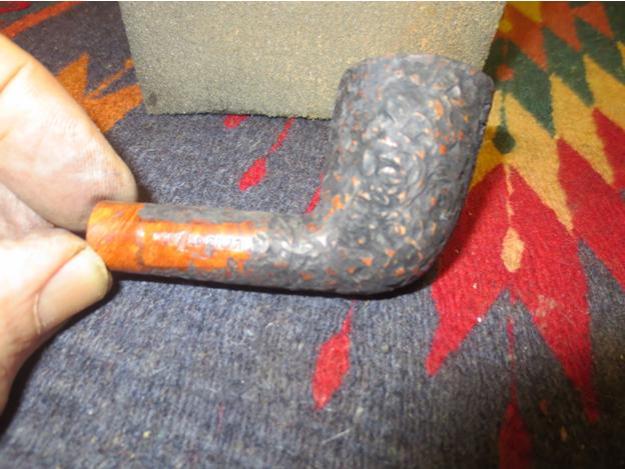
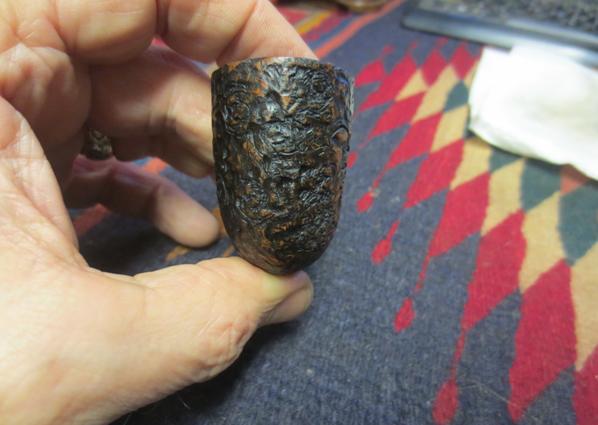
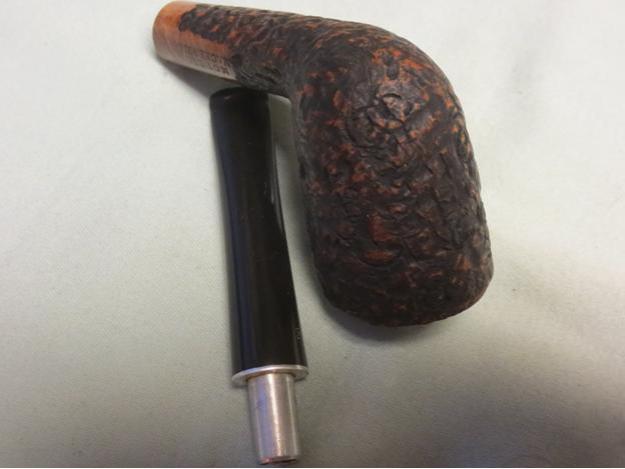
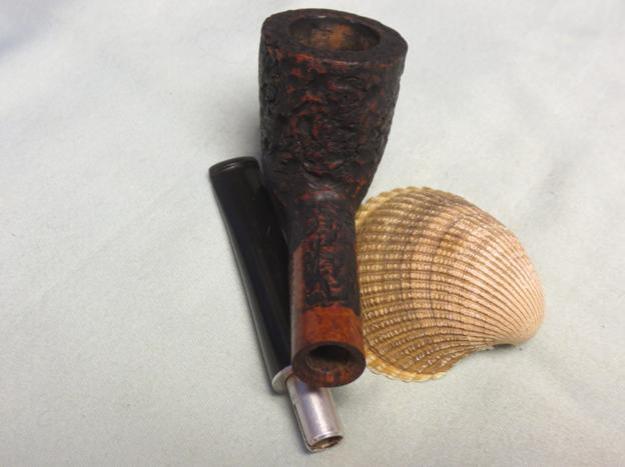
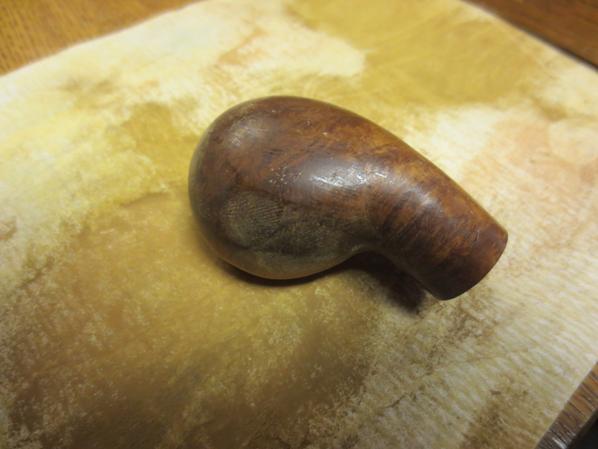
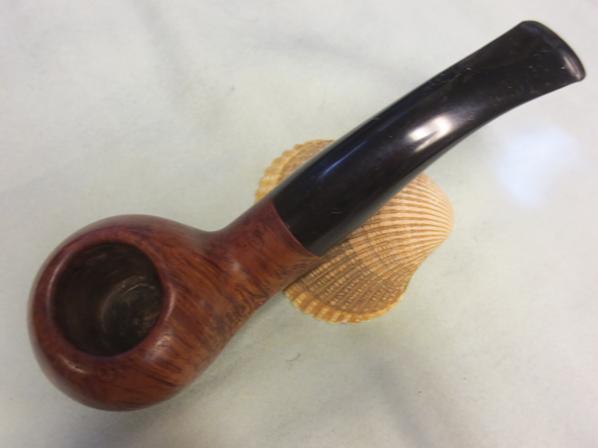
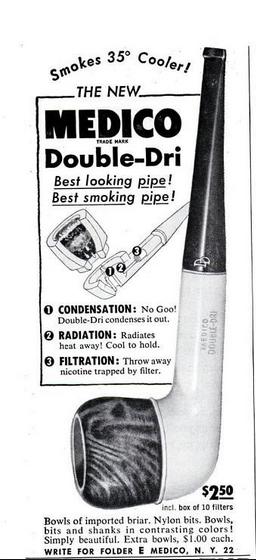
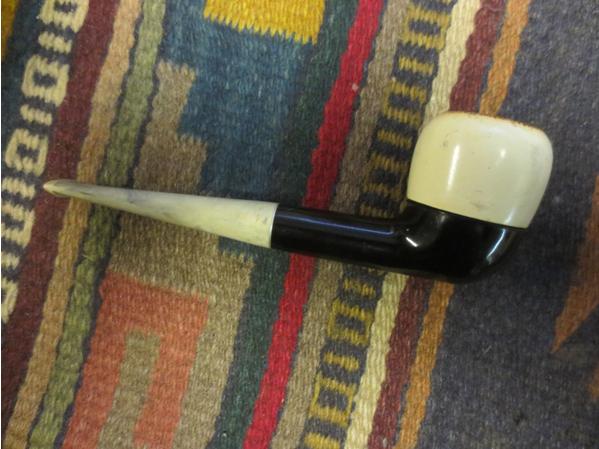
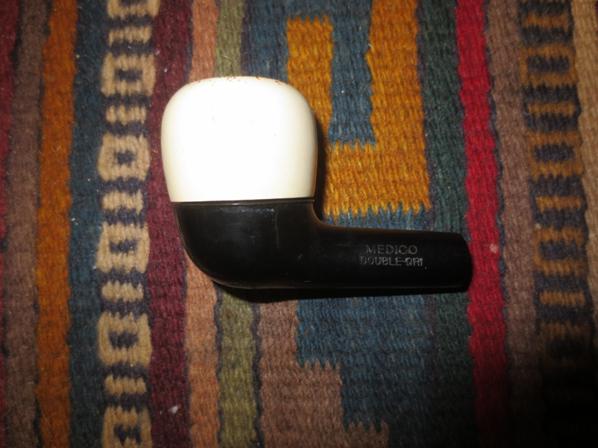
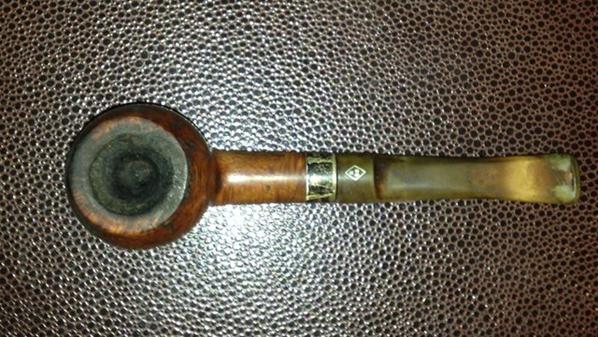
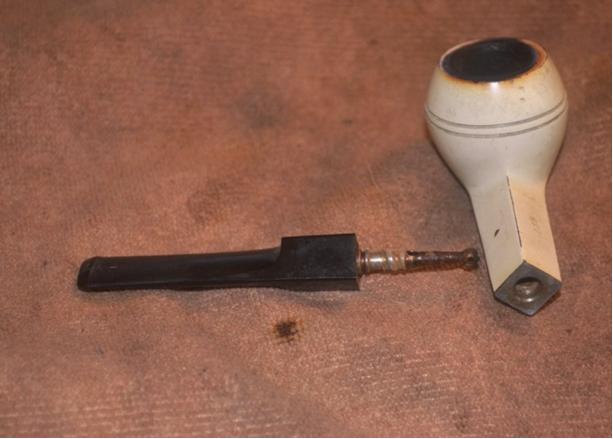
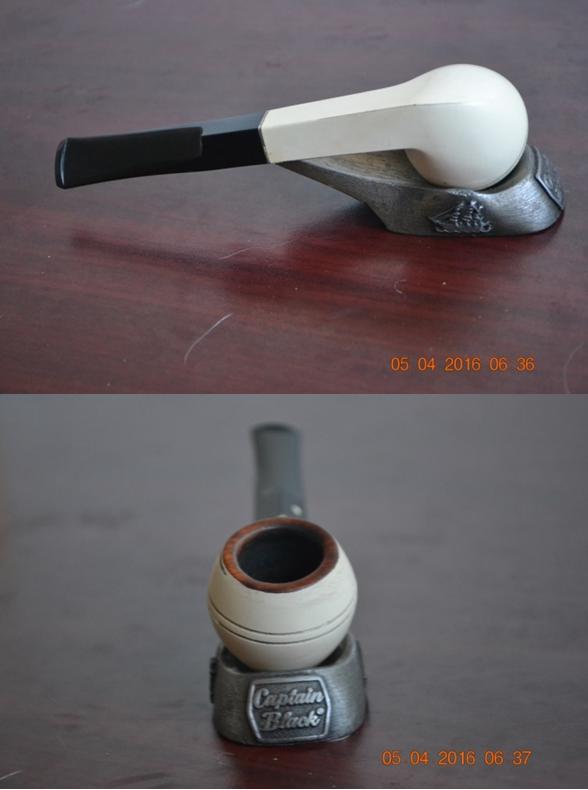
The Kaywoodie White Briar line lasted from 1951-1989. Some elusive quality, including perhaps its rough condition and the fact that I can’t find the same shape shown anywhere online, makes me suspect my bulldog is c. 1960-1970. It’s alright, I’m aware of the virtual non sequitur I just committed, and stand by it as a sort of literary tool if nothing else. Call it a hunch. Maybe I’m just a romantic. No doubt about the last part, at least.
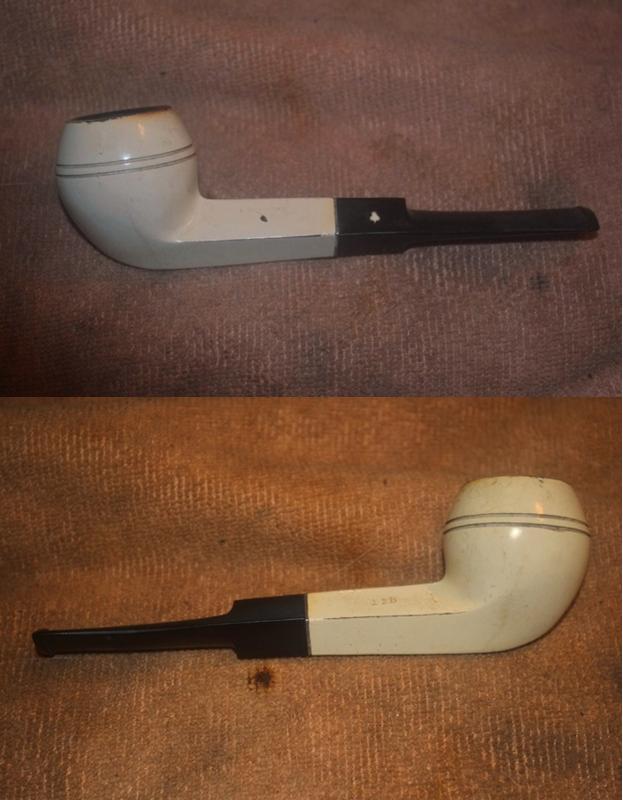
KW1 KW2 KW3 KW4RESTORATION
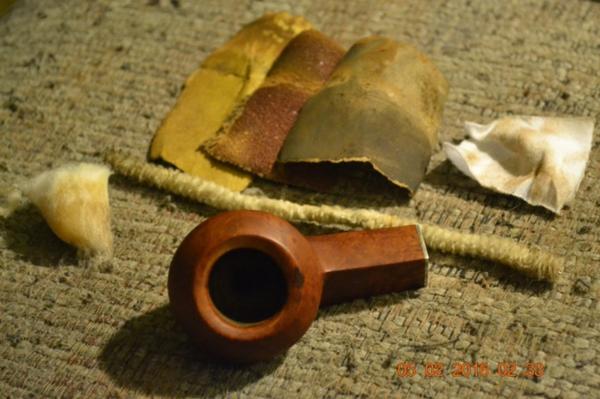
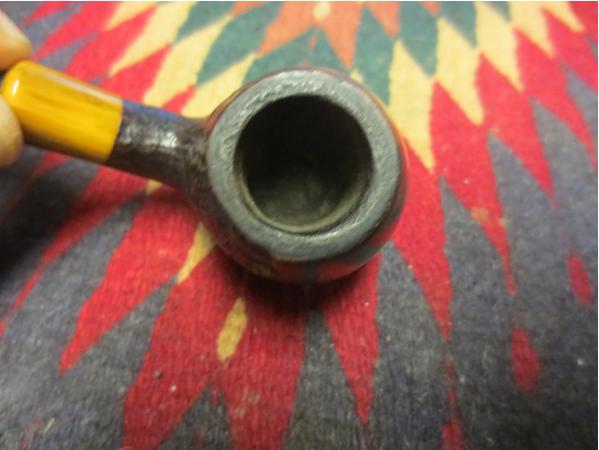
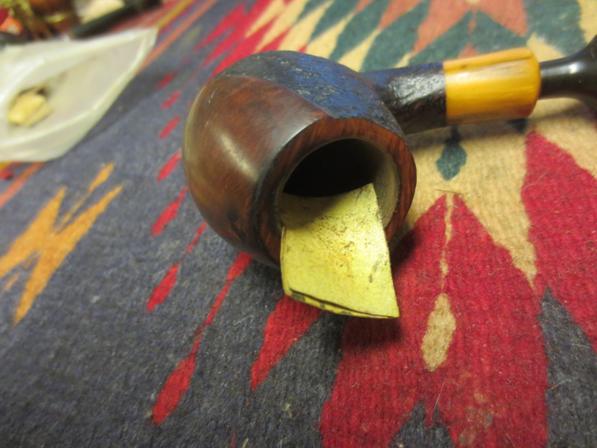
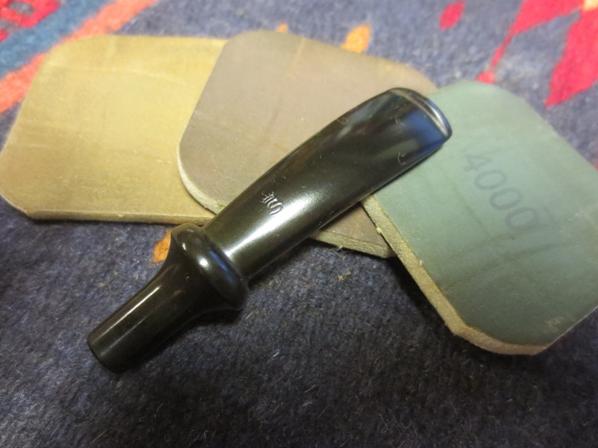
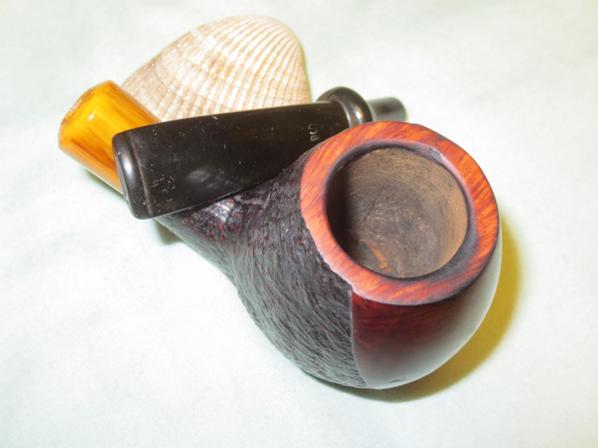
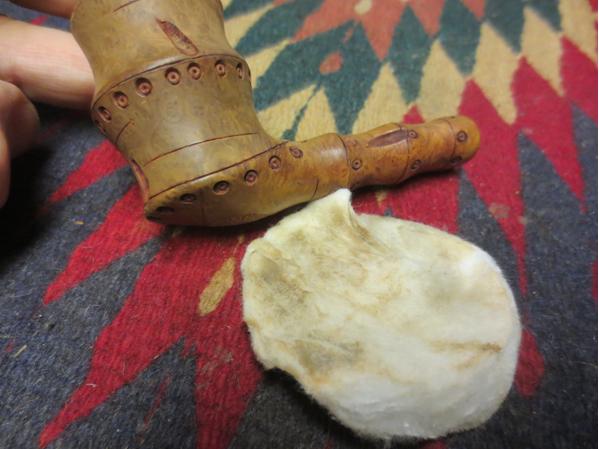
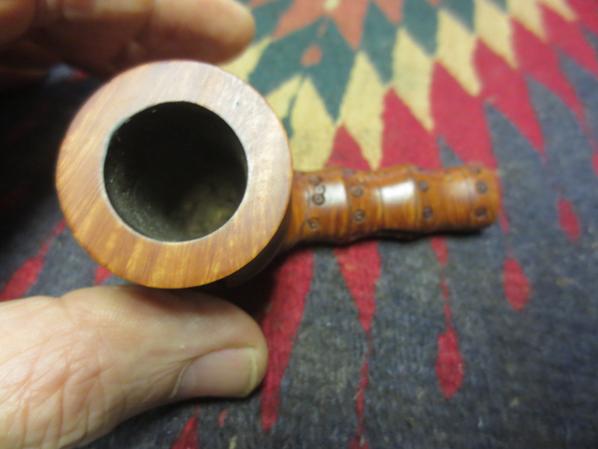
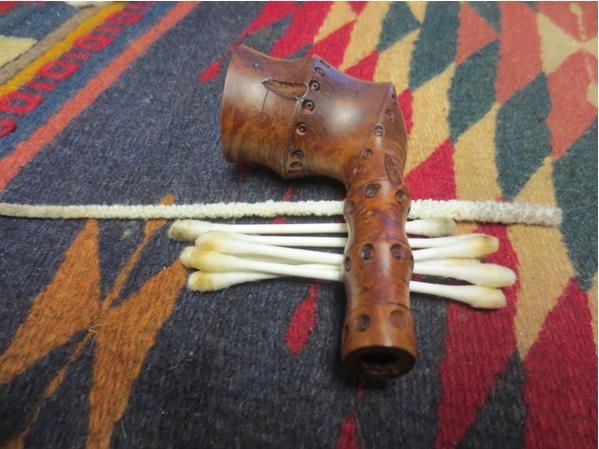
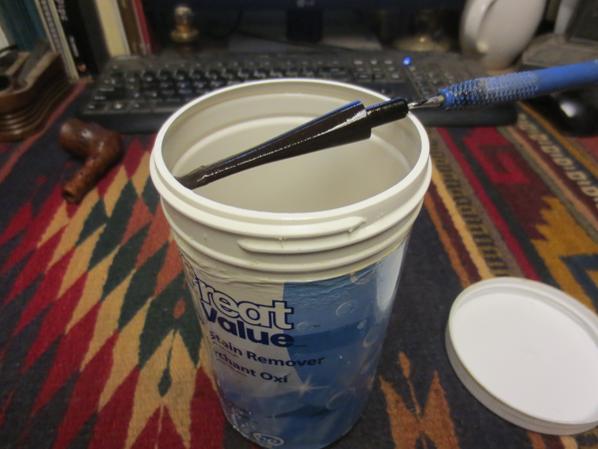
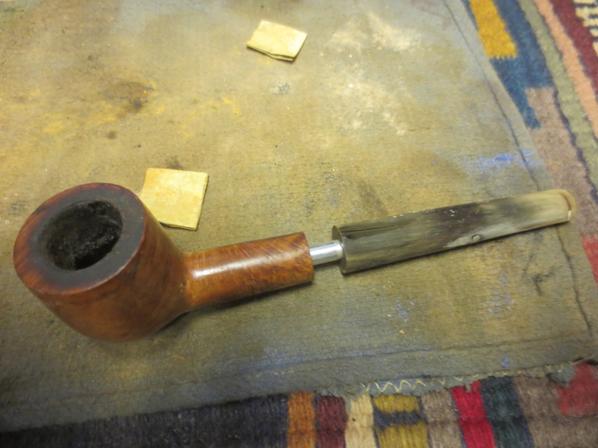
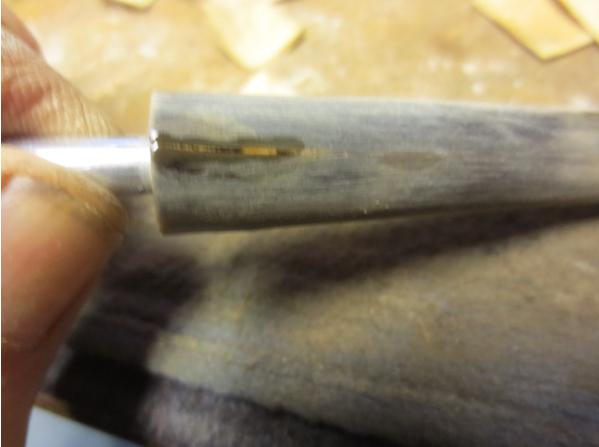
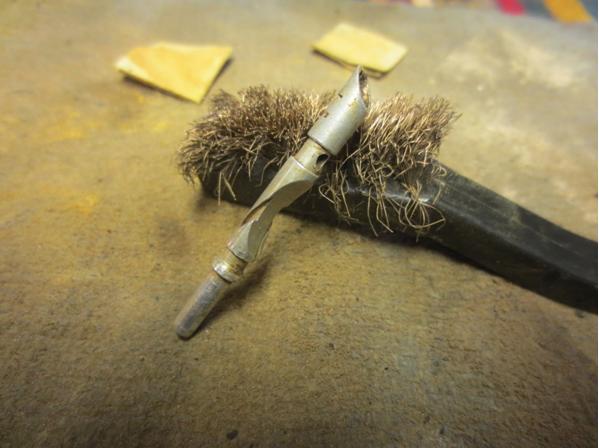
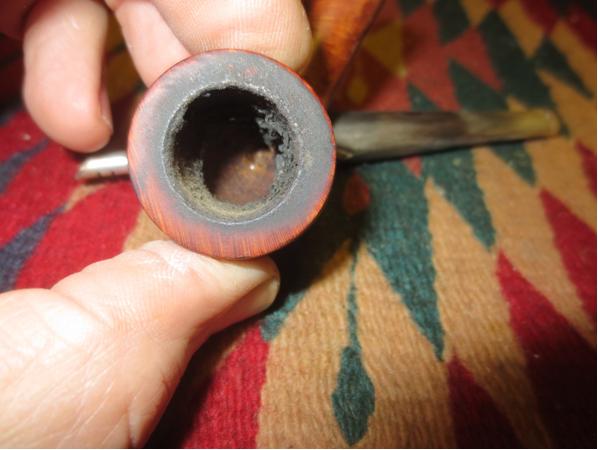
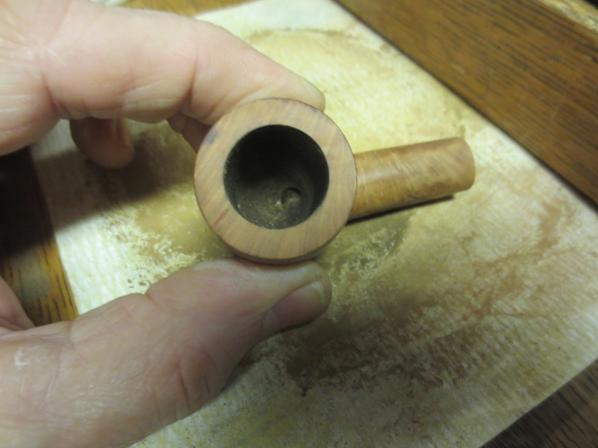
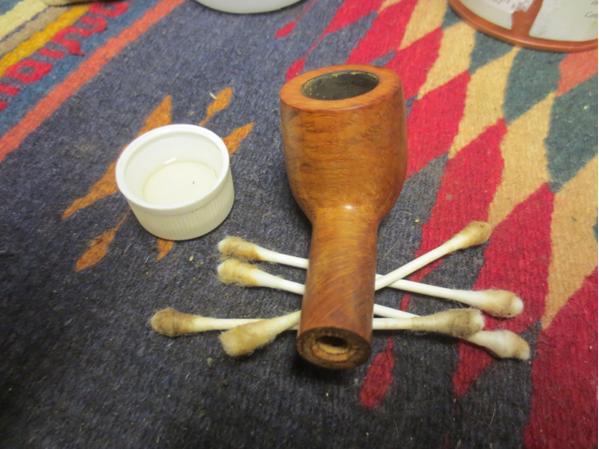
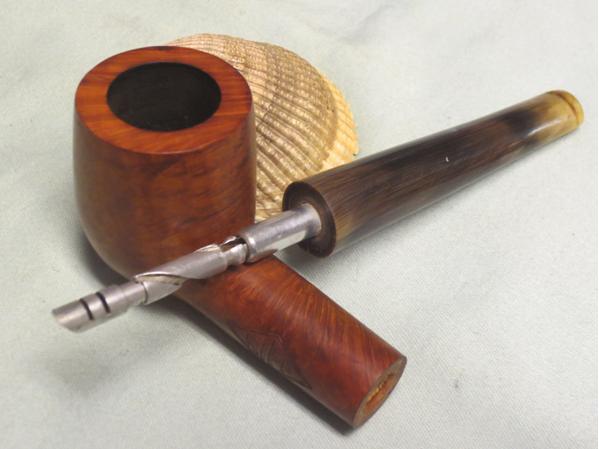
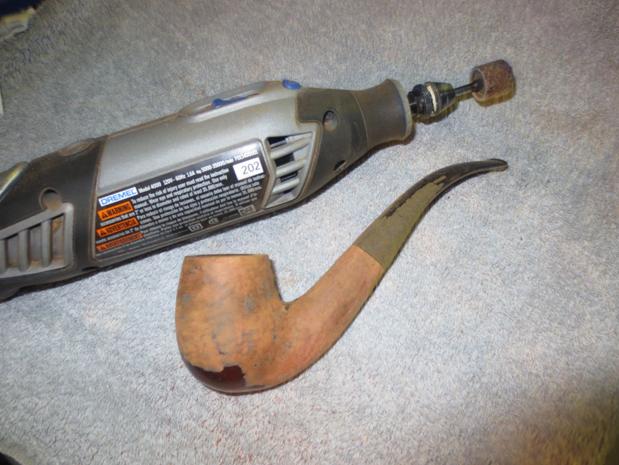
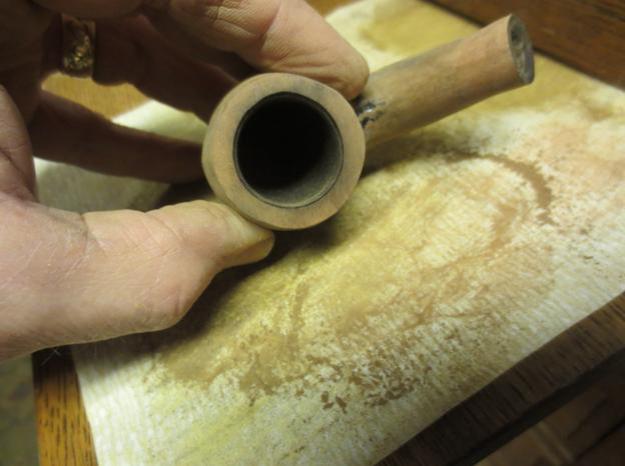
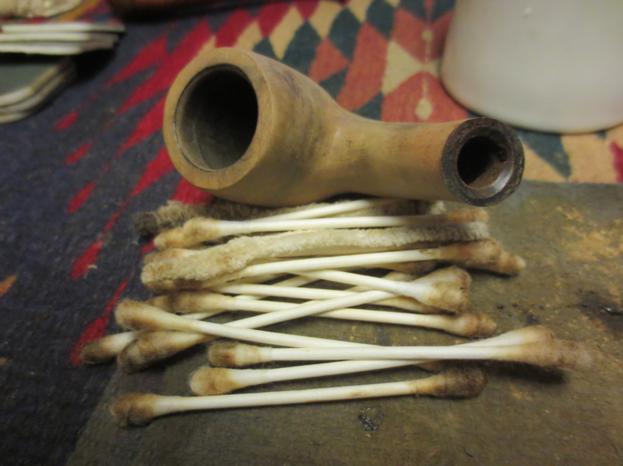
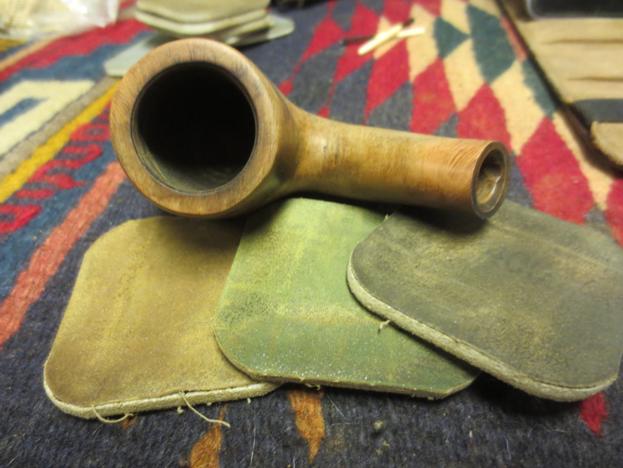
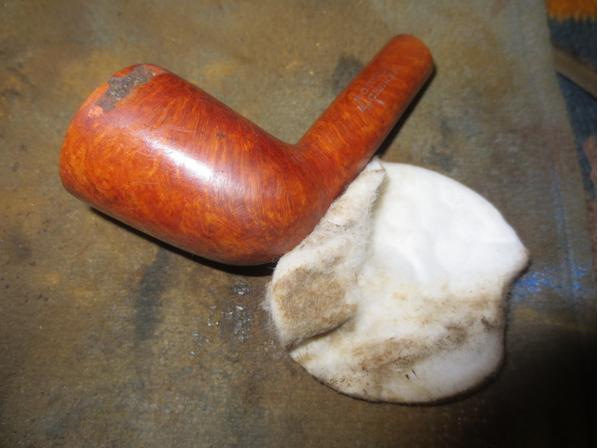
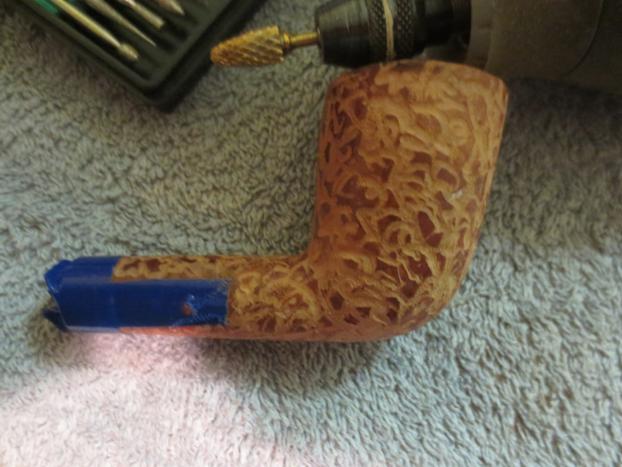
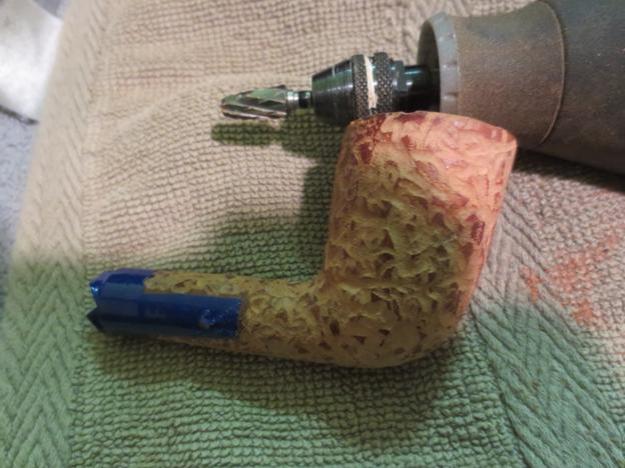
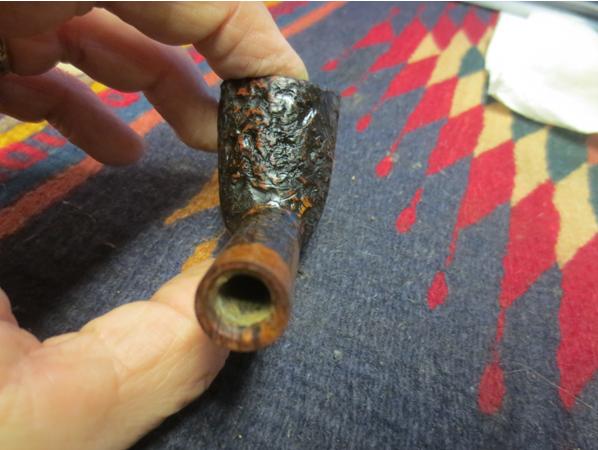
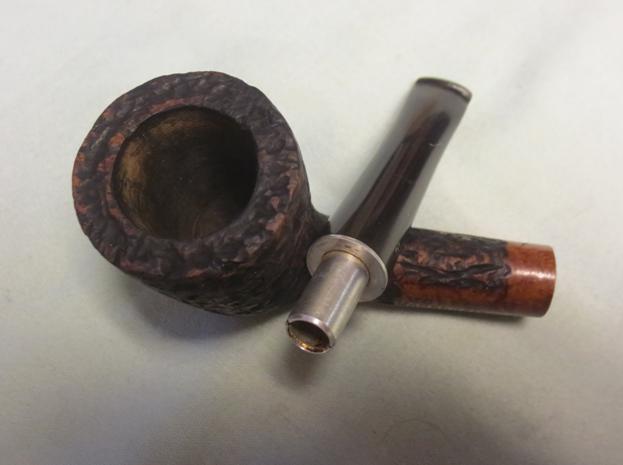
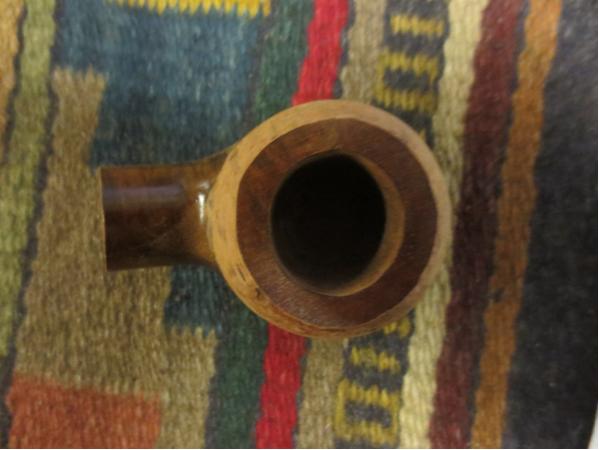
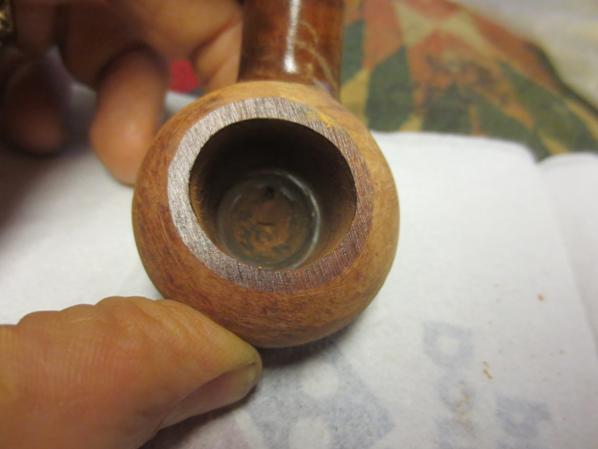
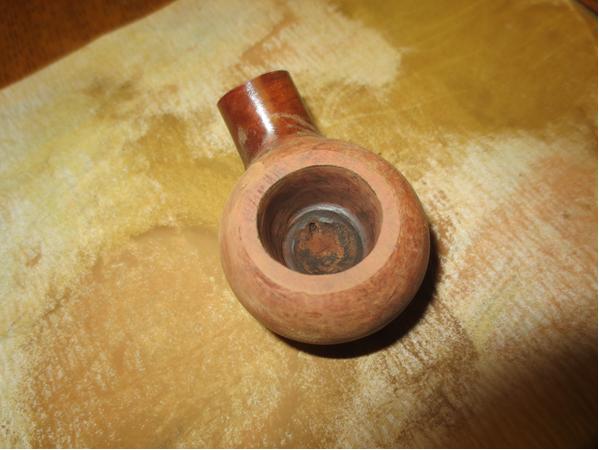
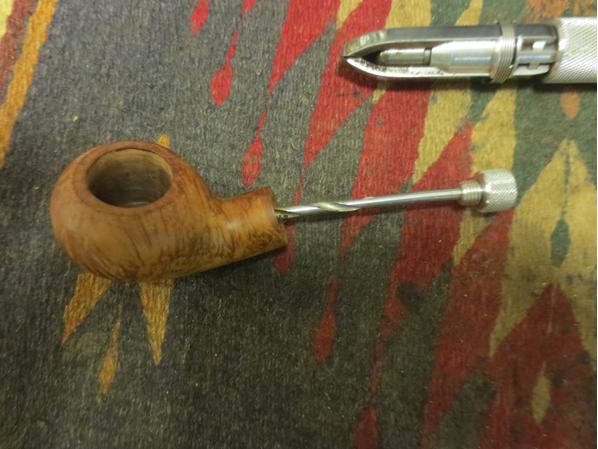
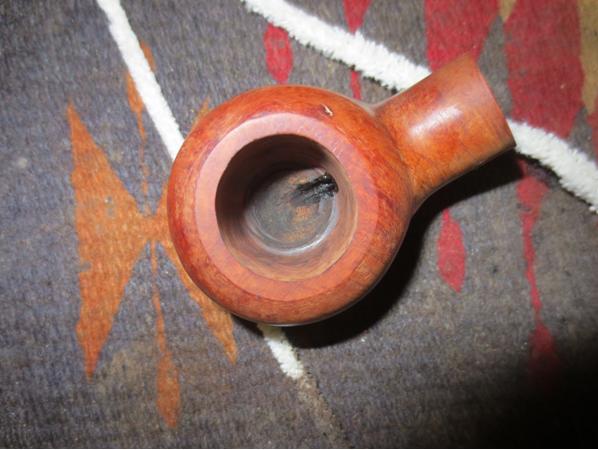
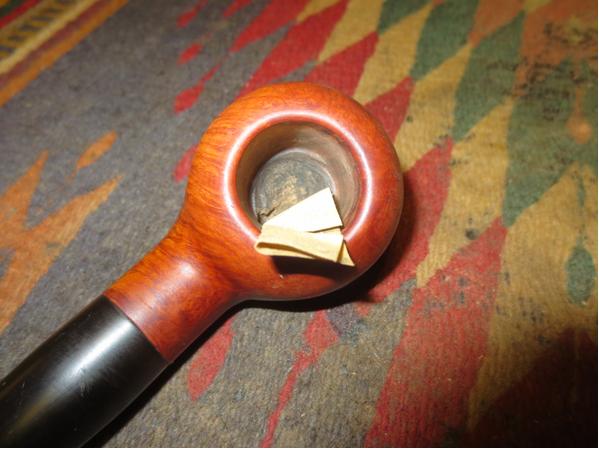
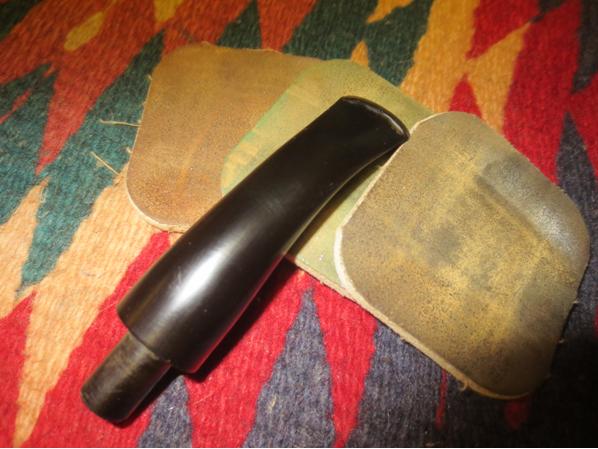
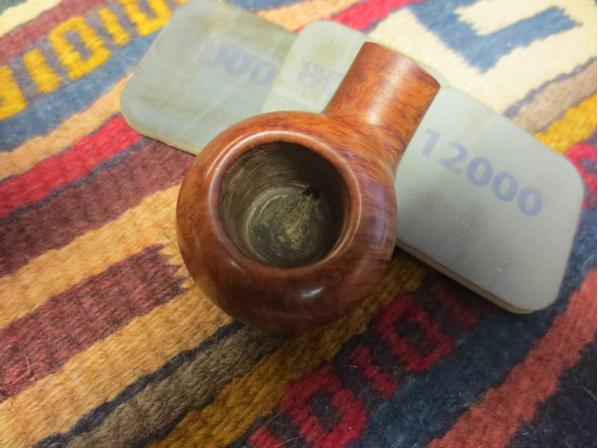
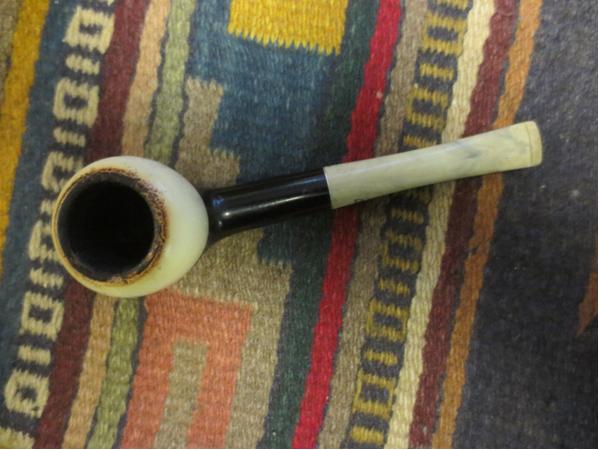
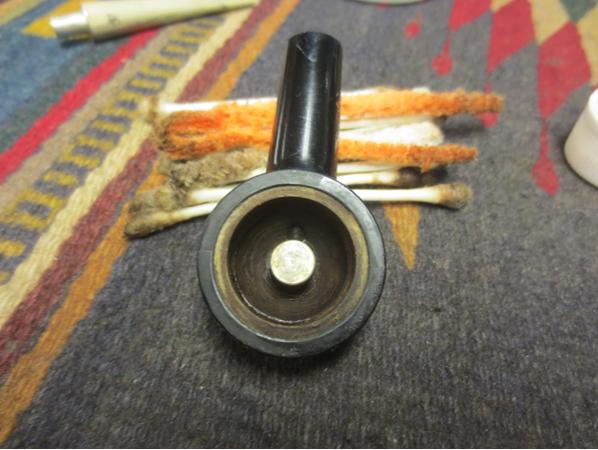
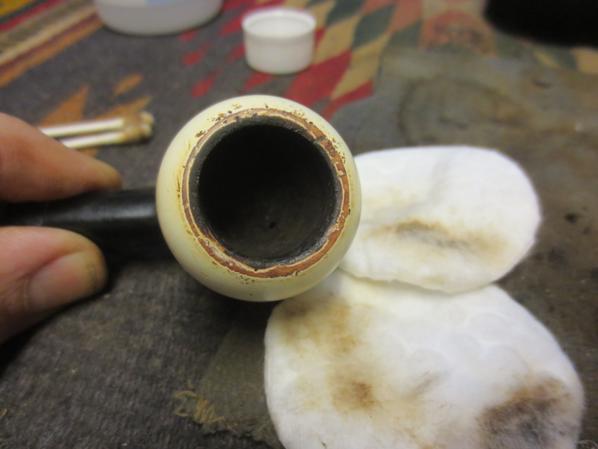
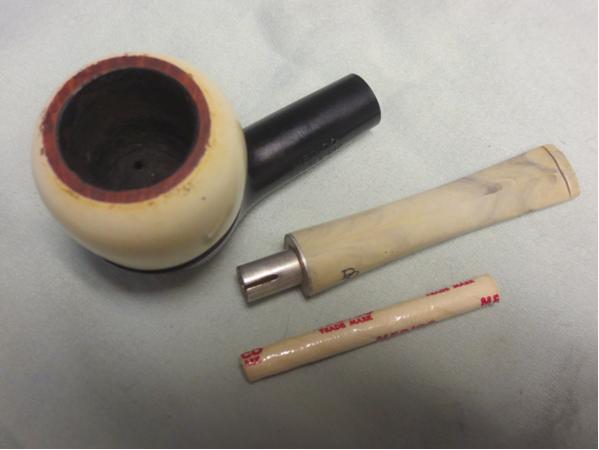
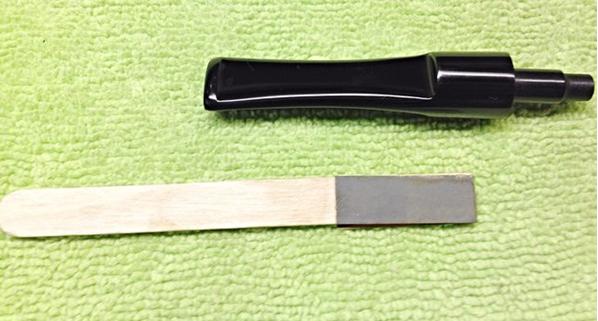
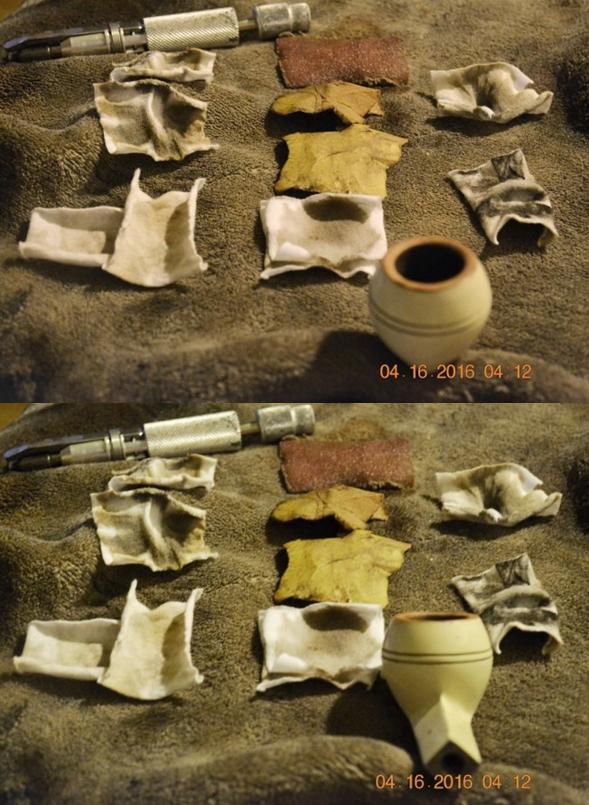
The bit was mostly just dirty.KW5
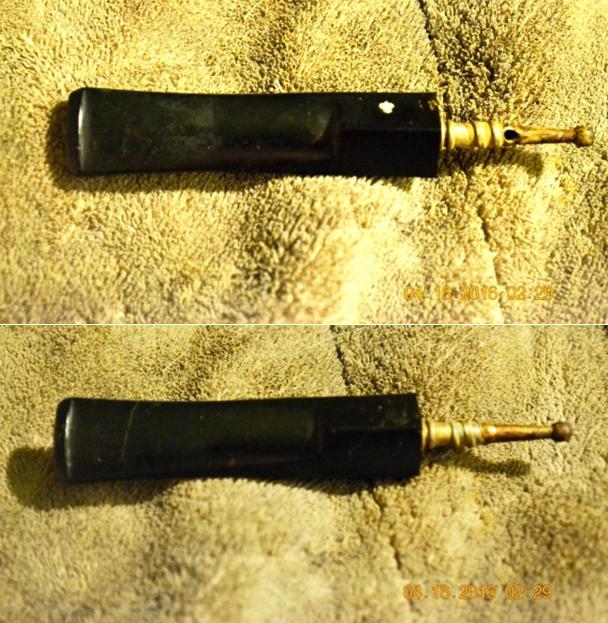
I put it in an OxiClean bath and began the process of cleaning the rest of the pipe by using my Senior Reamer to remove the fair amount of char from the chamber. I followed the reamer with 150-, 200- and 320-grit papers, and removed the excess soot with soft cotton cloth squares soaked in purified water. Then I applied a little purified water to the outside of the stummel with more soft cotton cloth squares, getting rid of considerable grime.

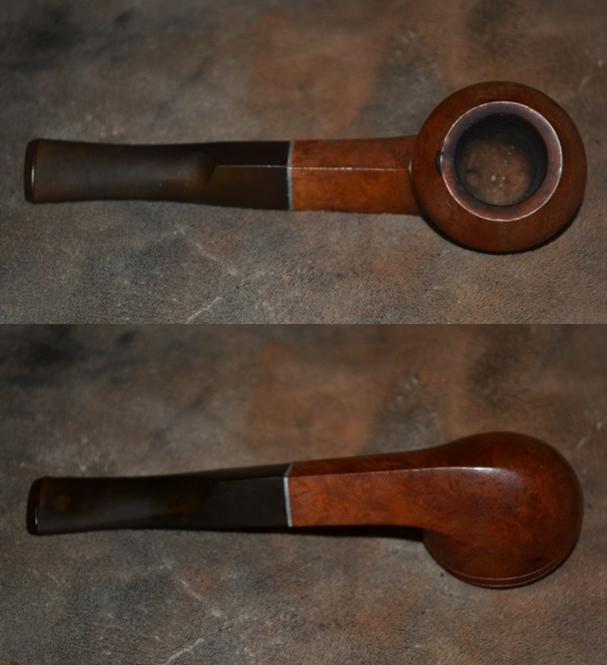
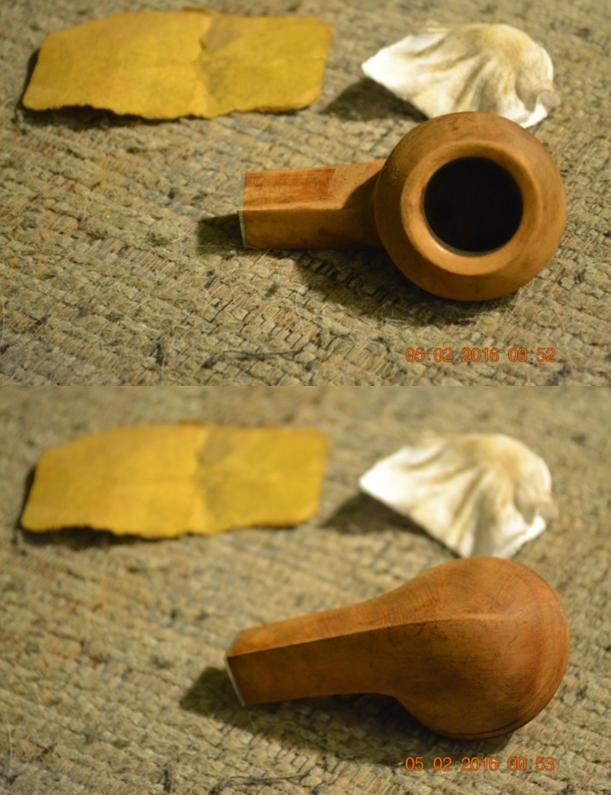
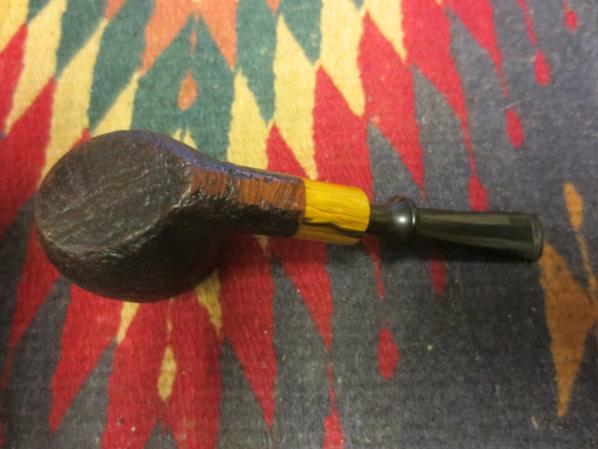
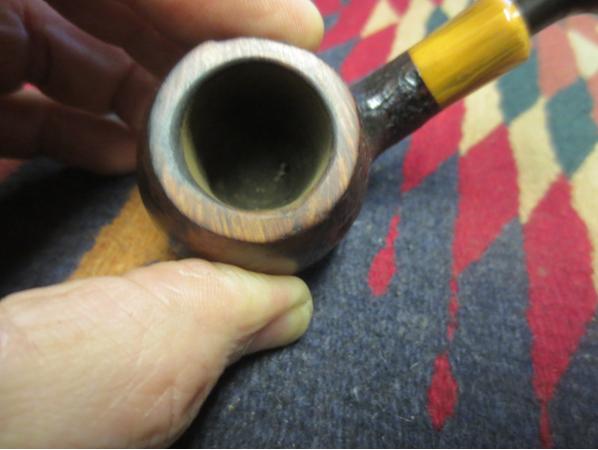
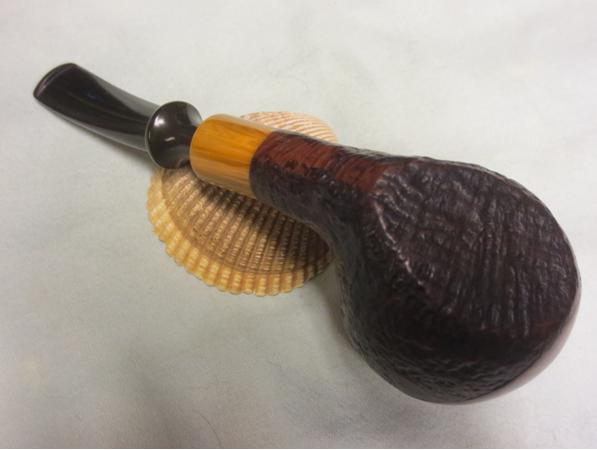
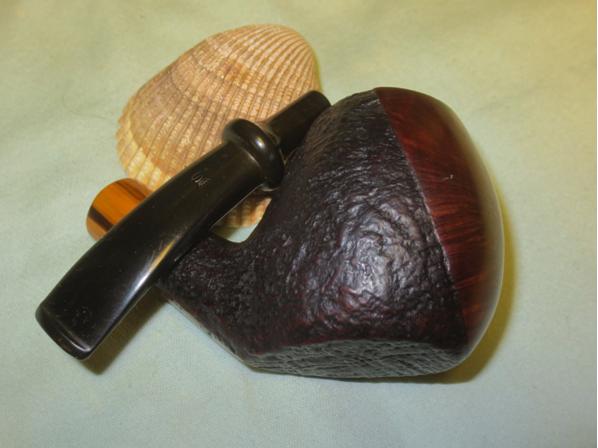
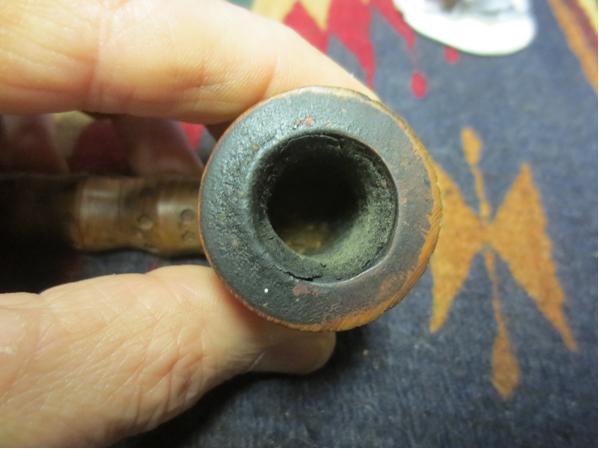
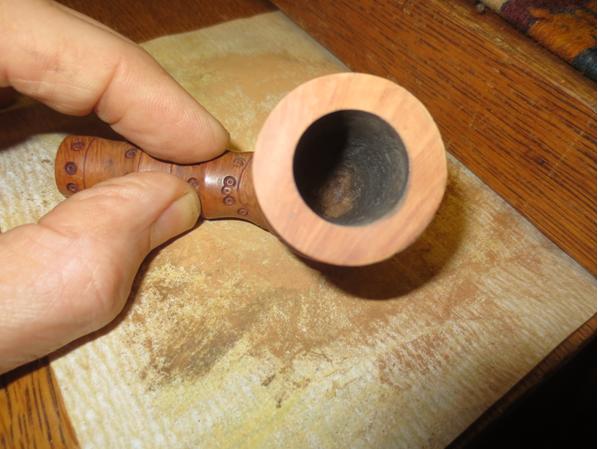
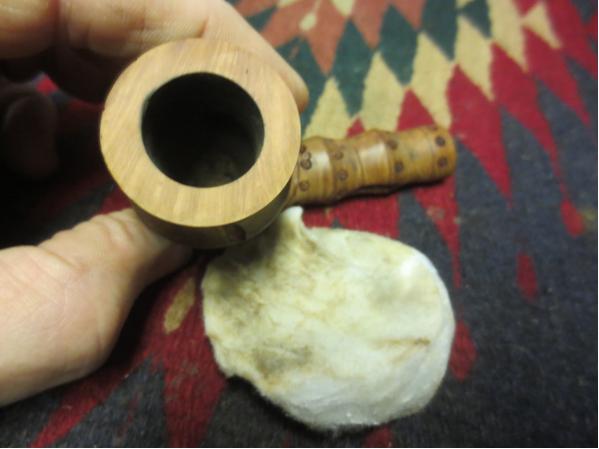
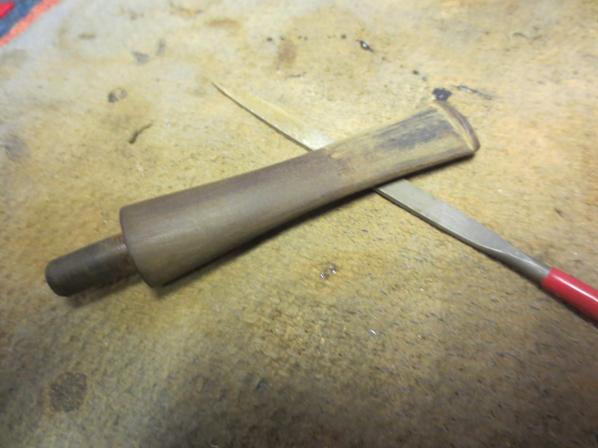
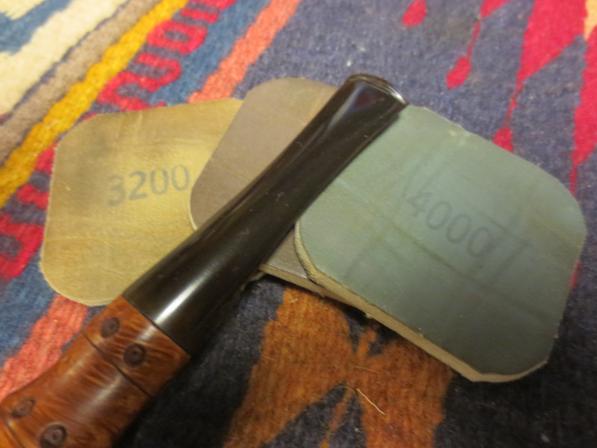
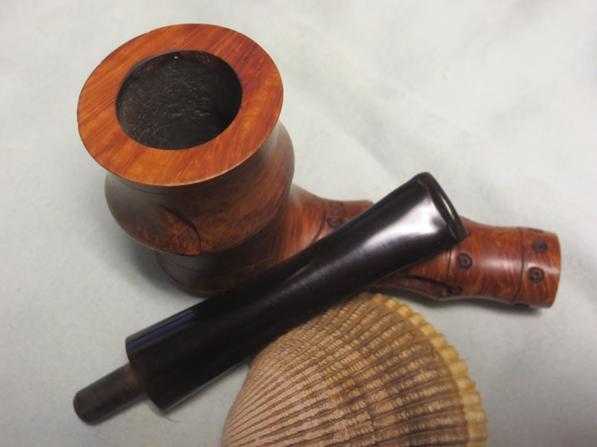
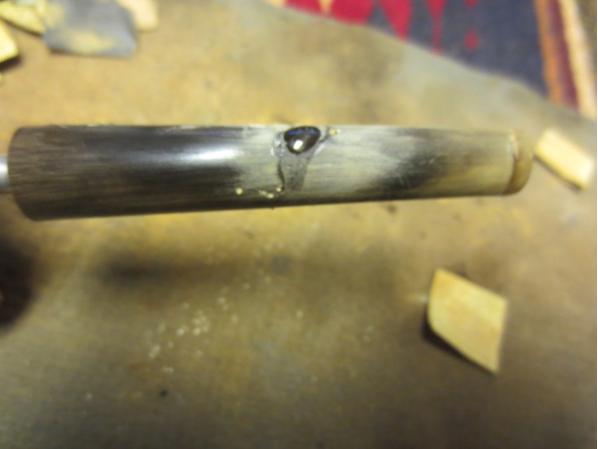
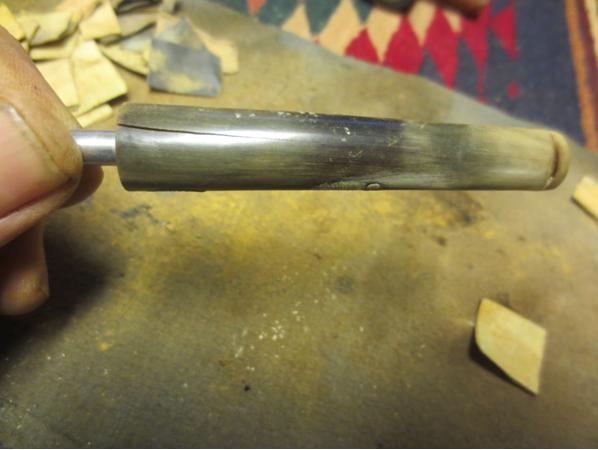
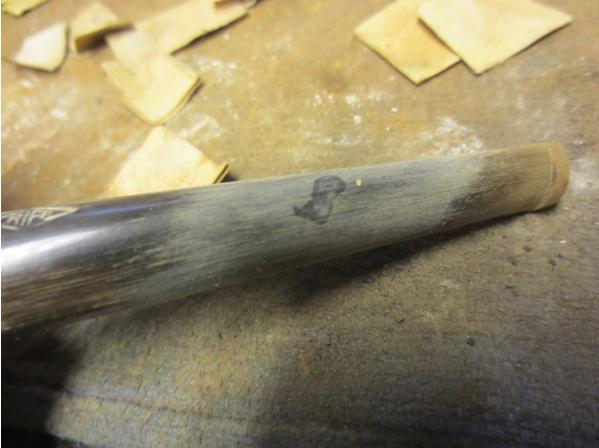
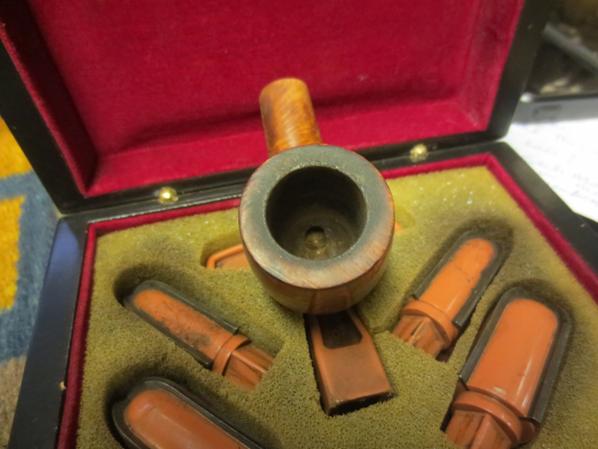
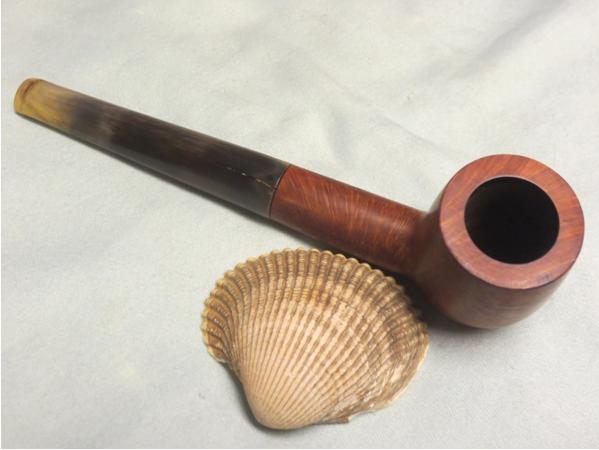
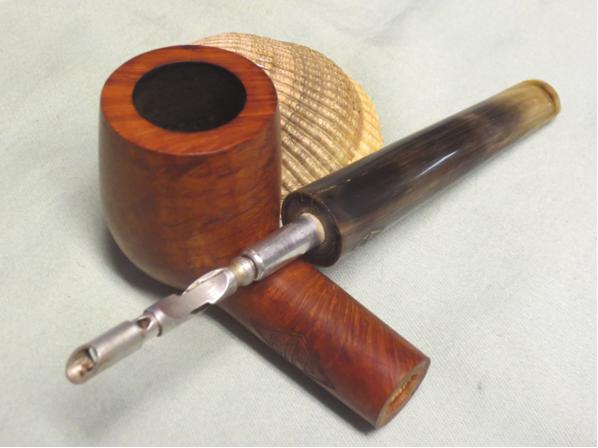
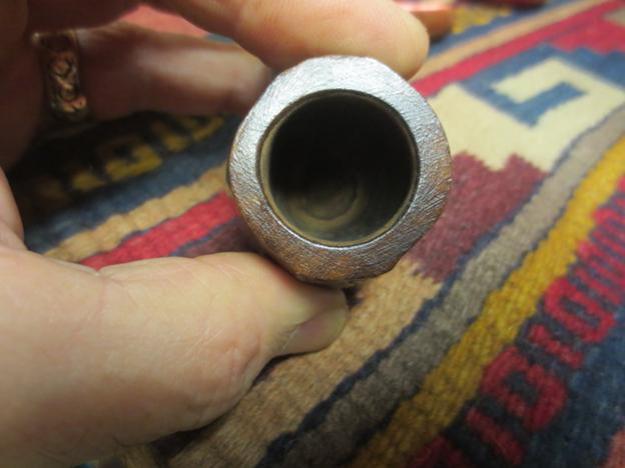
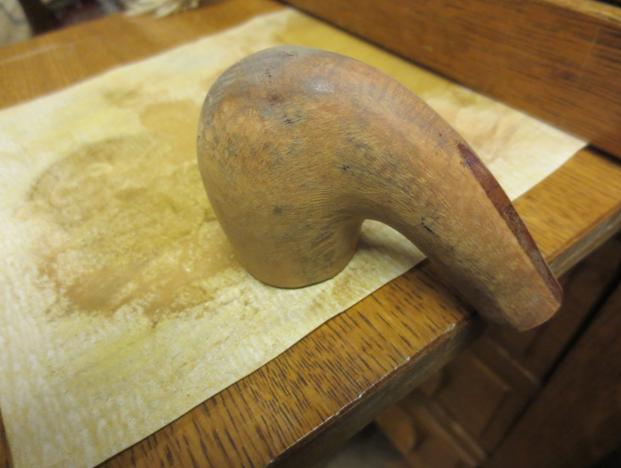
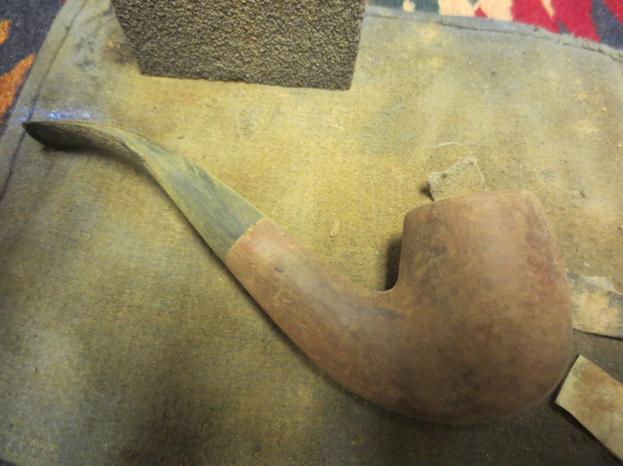
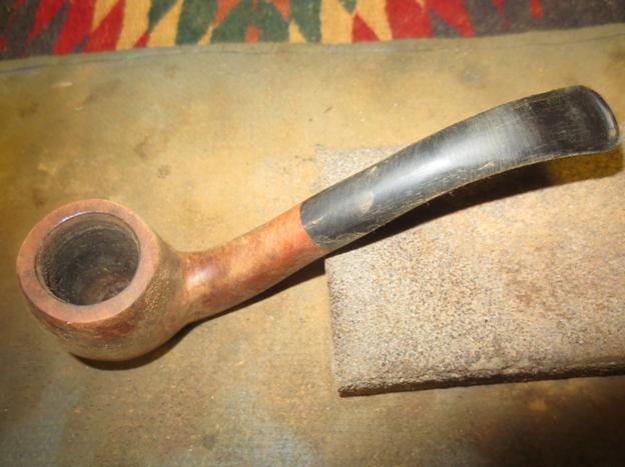
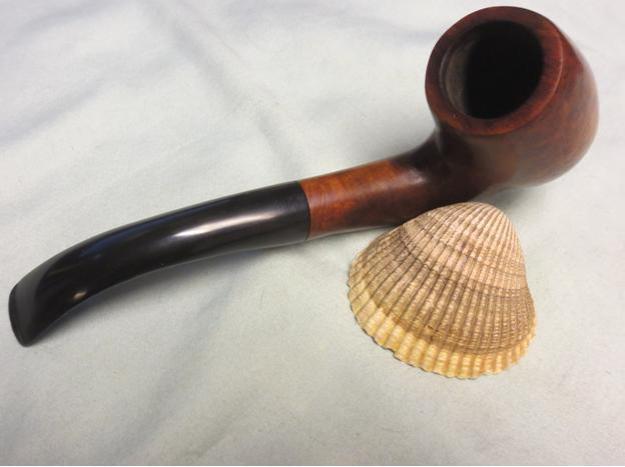
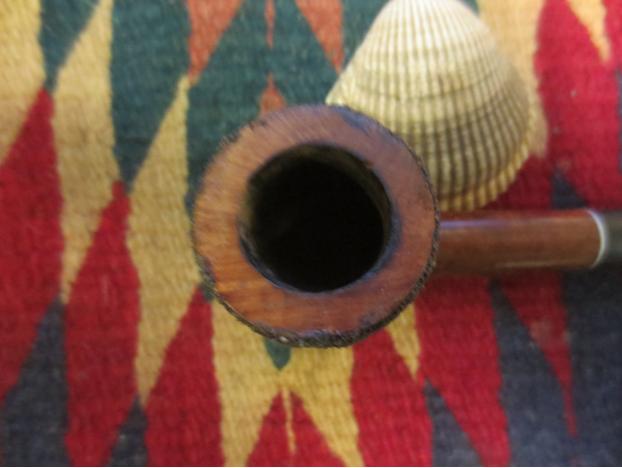
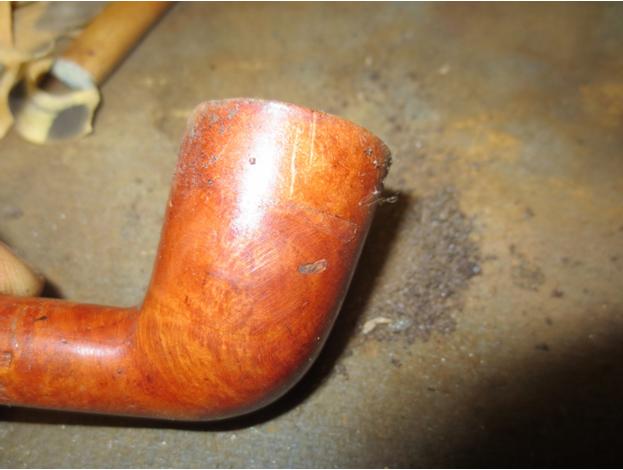
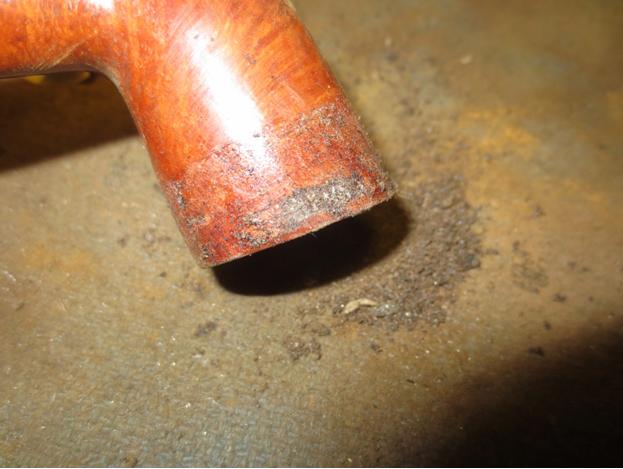
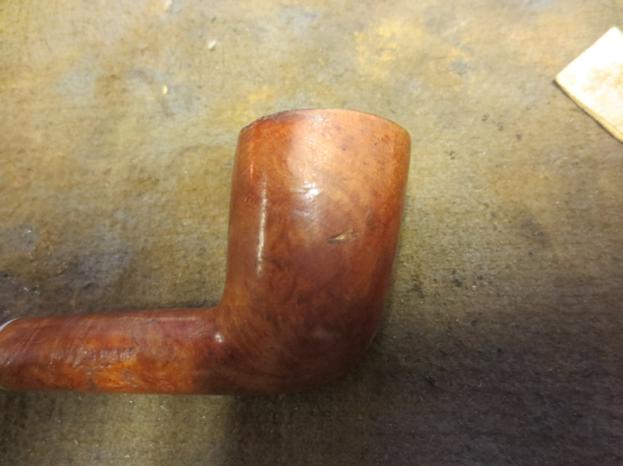
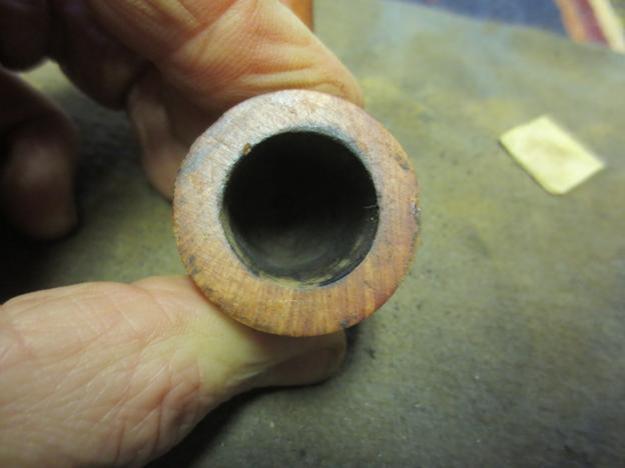
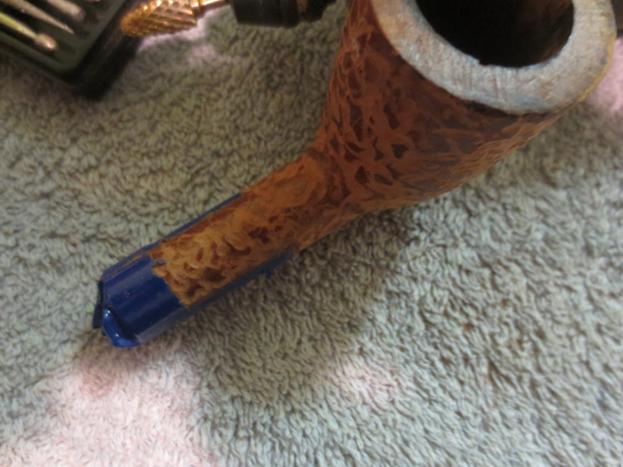
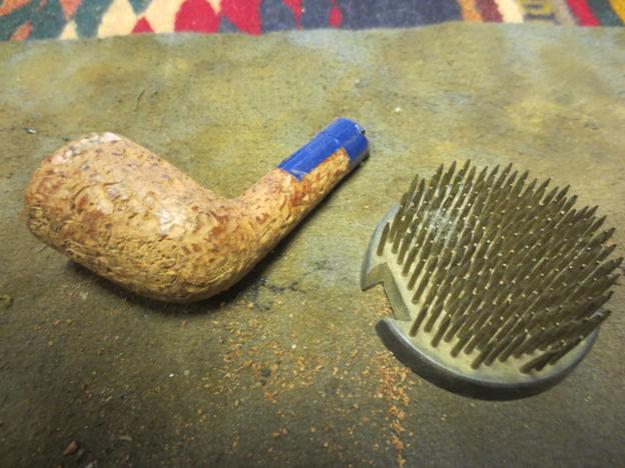
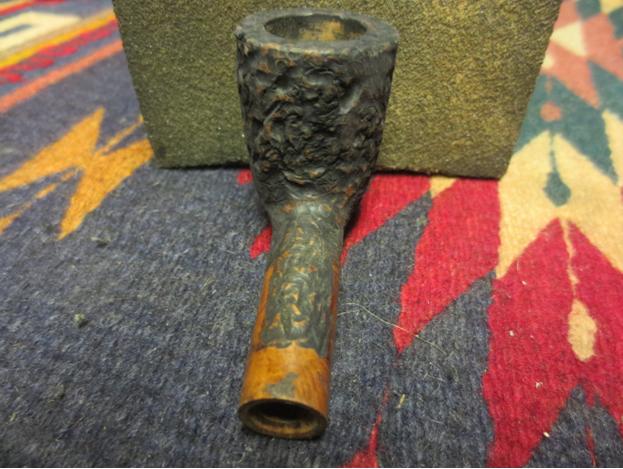
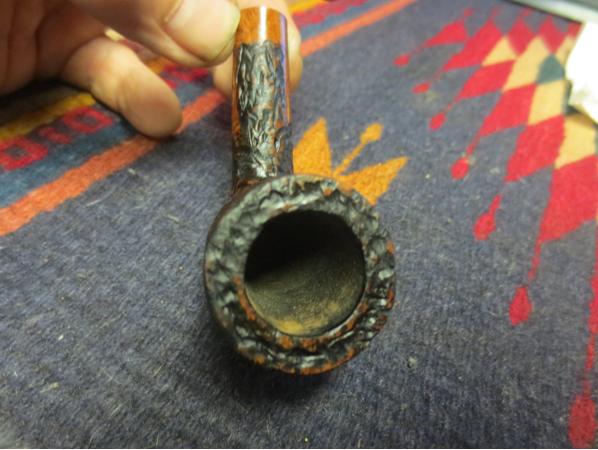
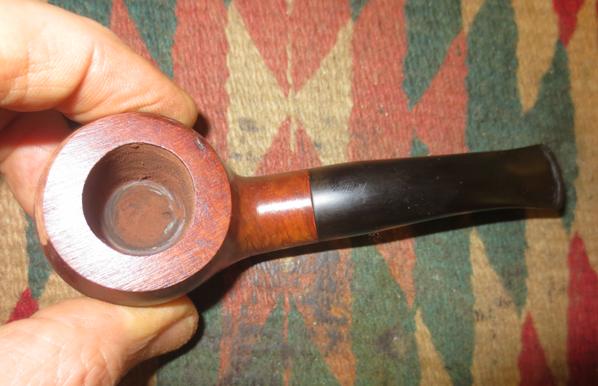
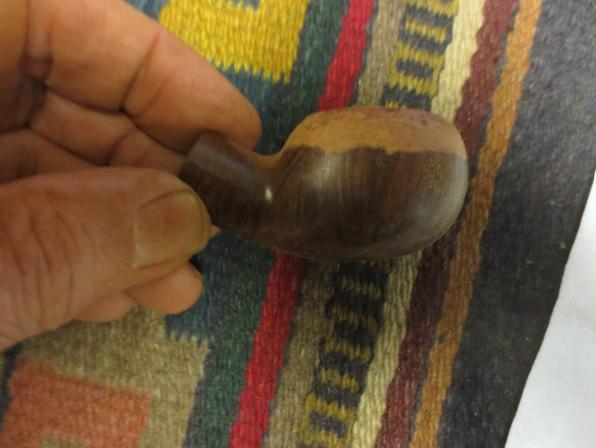
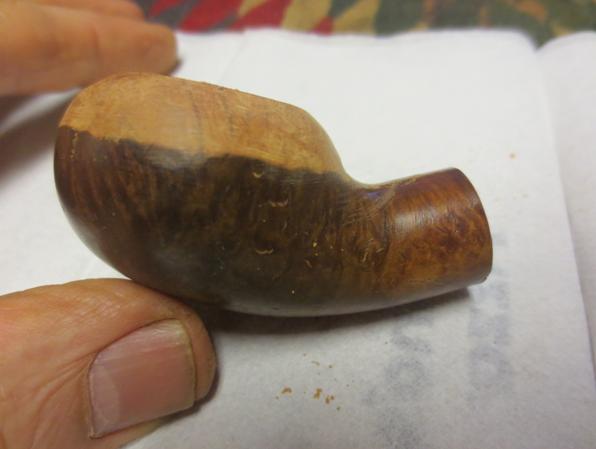
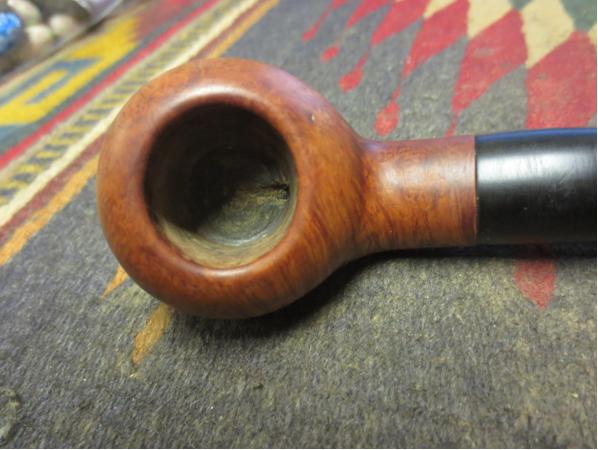
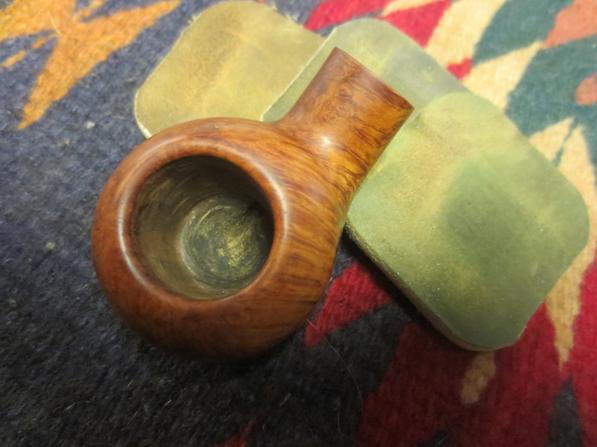
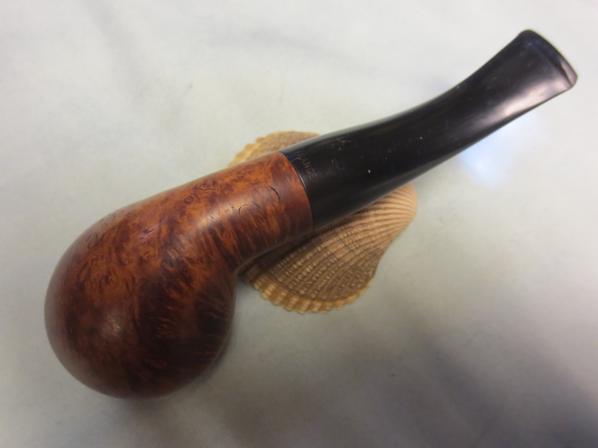
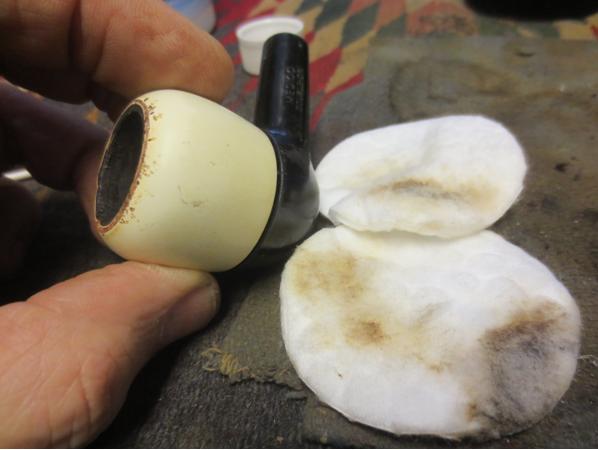
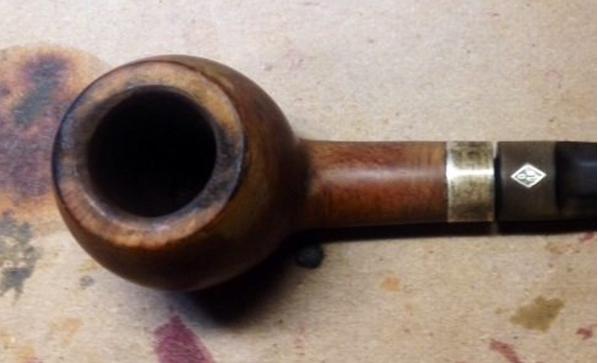
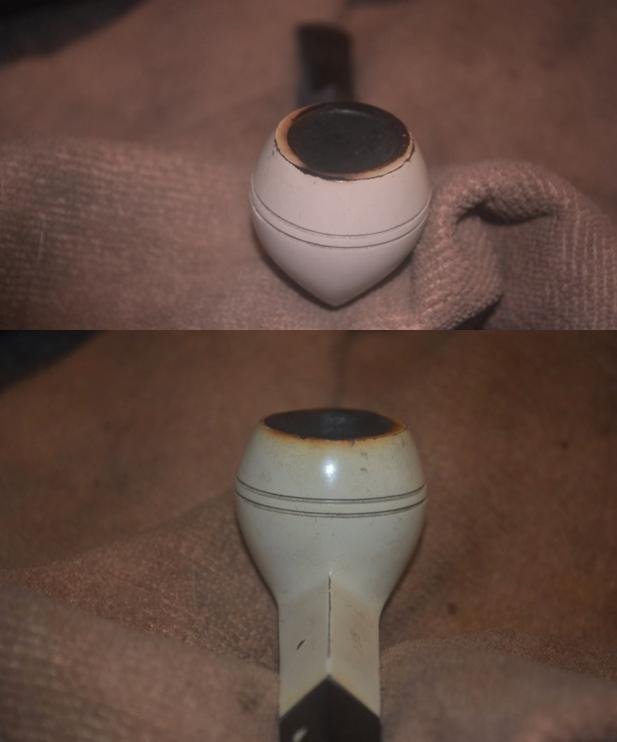
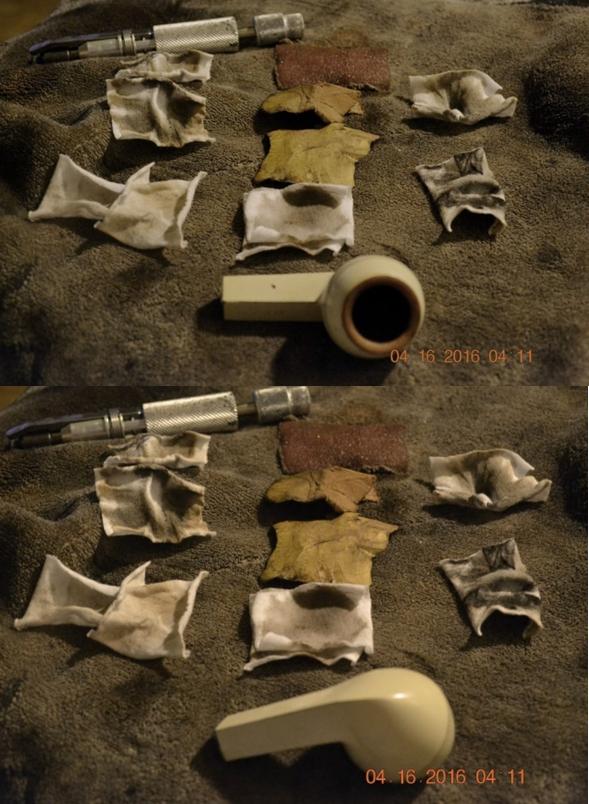
My main concern was the rim, which appeared to be scorched to the point of no return. I used still more soft cotton cloth squares with purified water to work away at the char before switching to 1800, 2400 and 3200 micro-mesh – and just as I thought it was coming clean realized to my horror that the blackened parts of the rim, which had turned a creamy brown color, were down to the briar! In hindsight, I don’t know if I should have left the tiny amount of the original finish that was left on the rim as it was, but I saw no reason. With sadness and reluctance, I removed it for uniformity.KW6 KW7 KW8
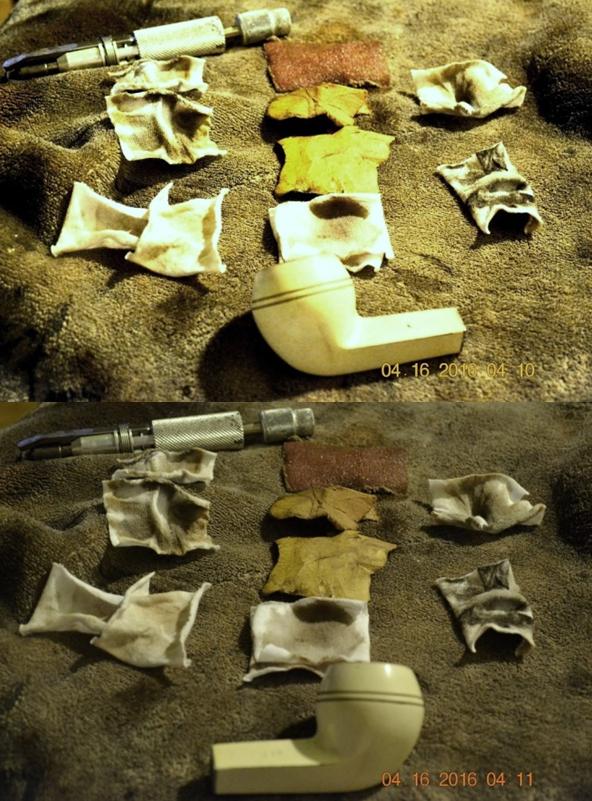
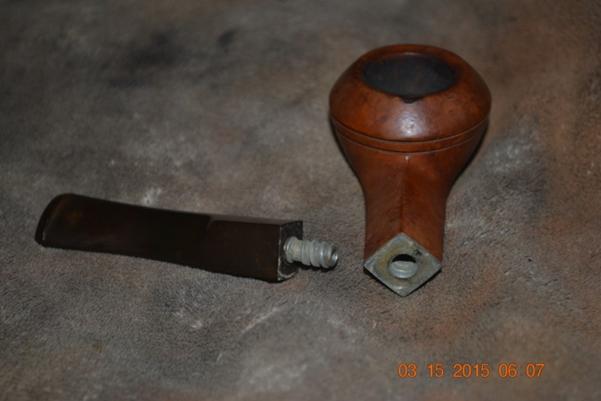
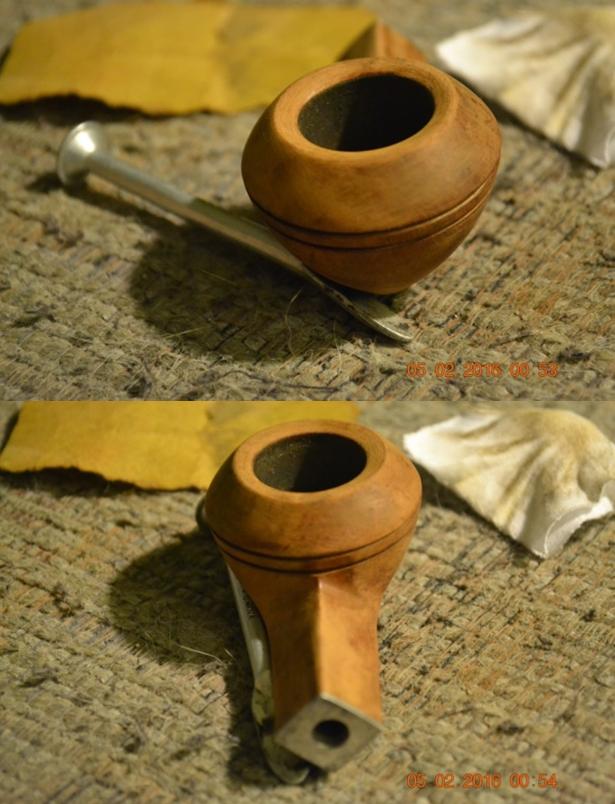
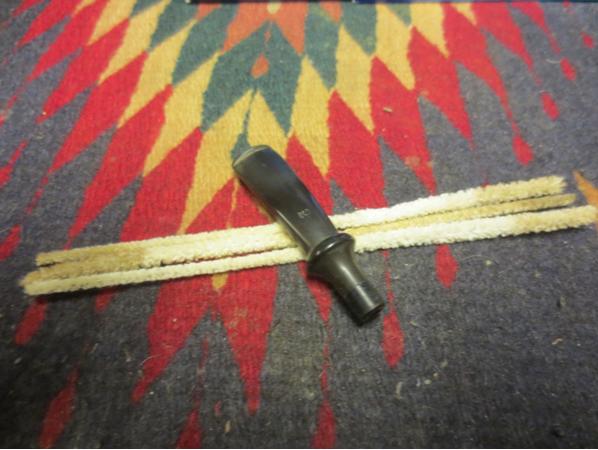
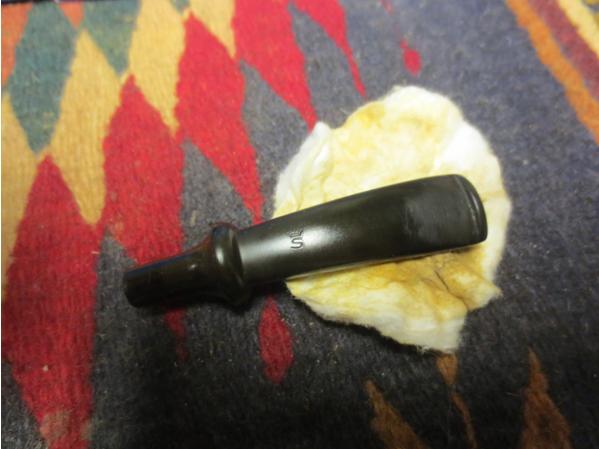
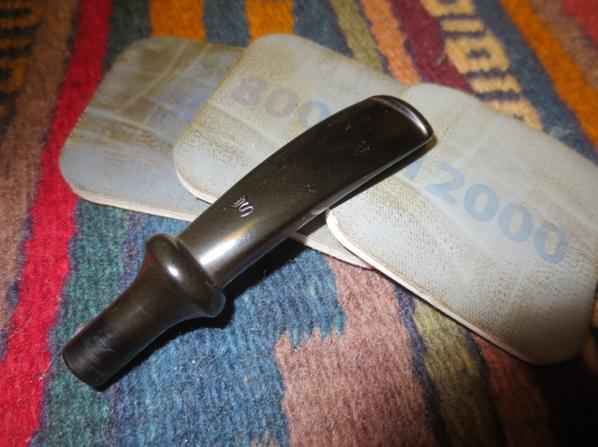
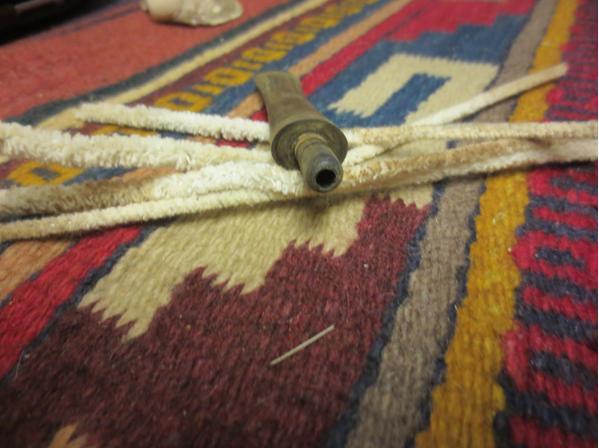
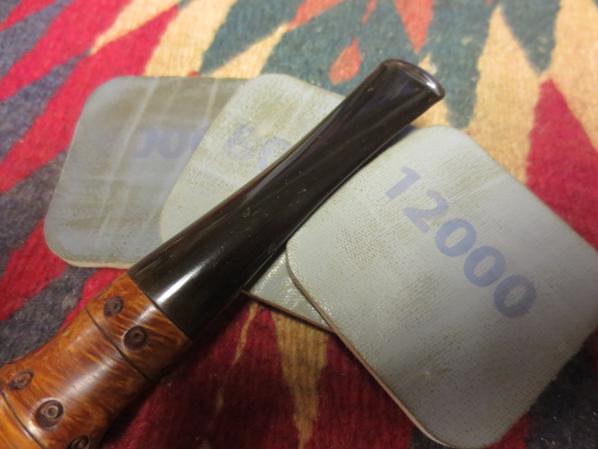
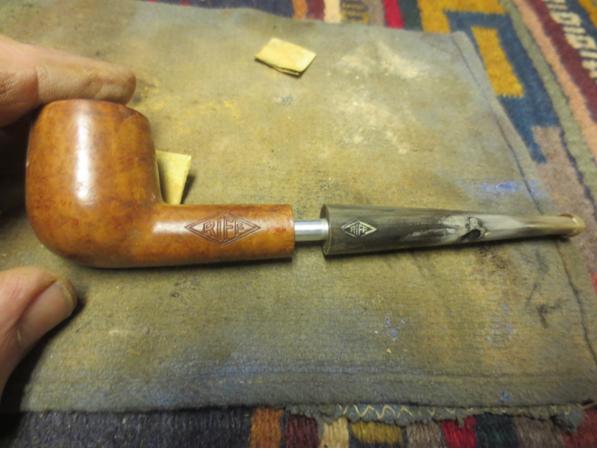
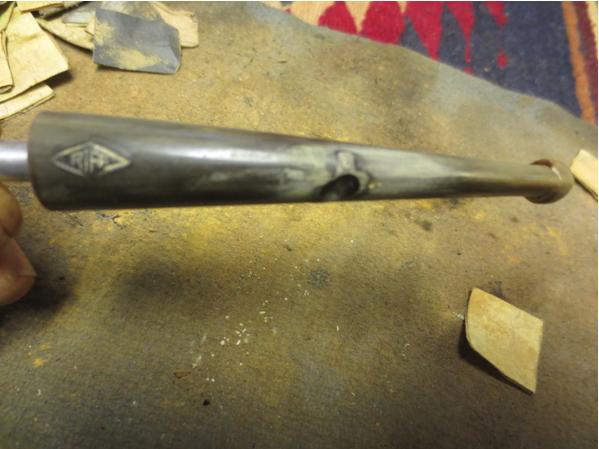
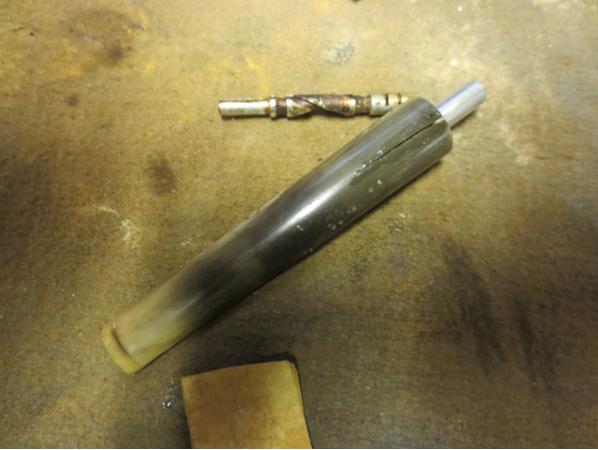
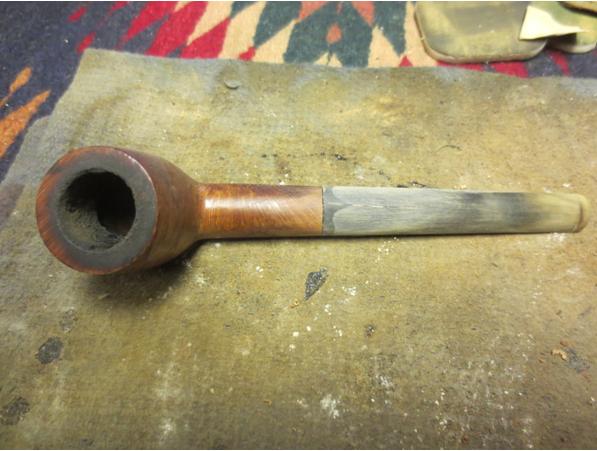
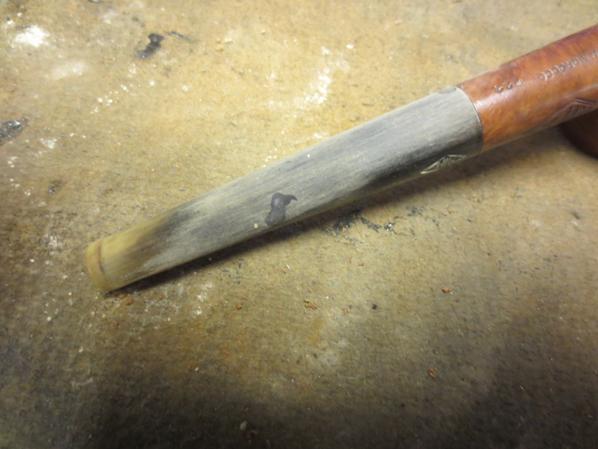
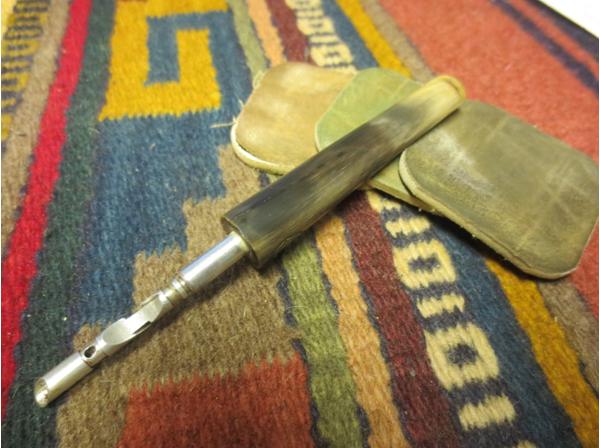
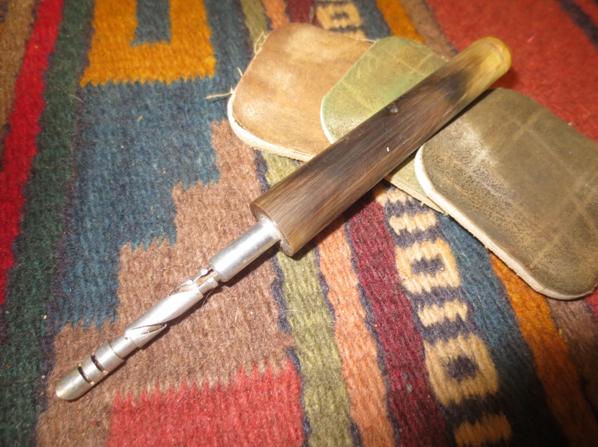
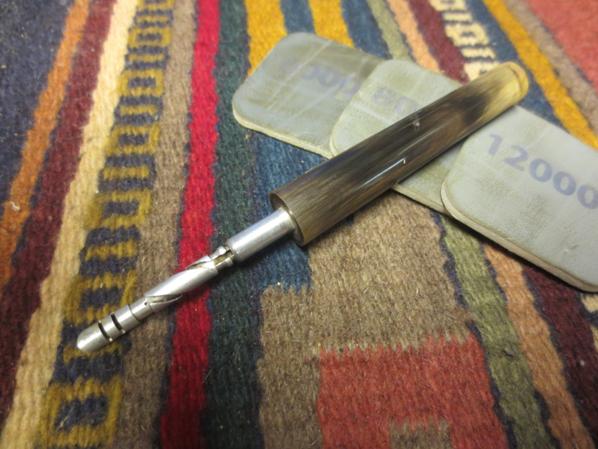
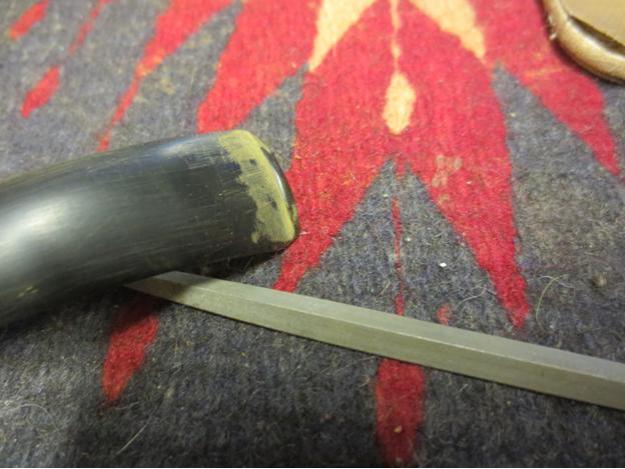
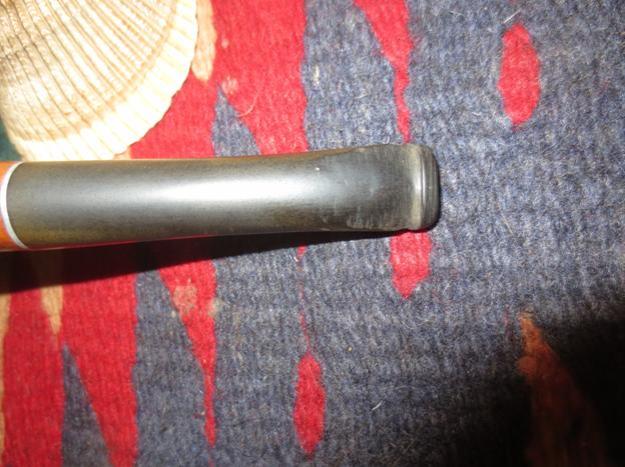
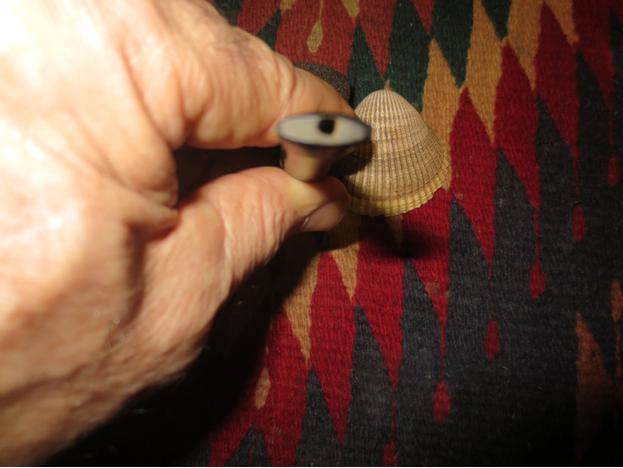
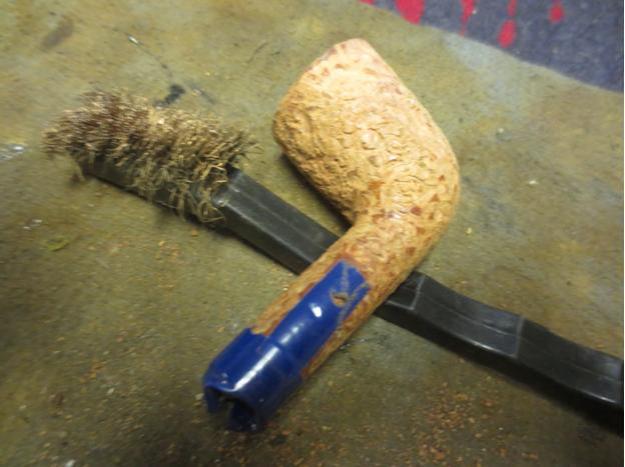
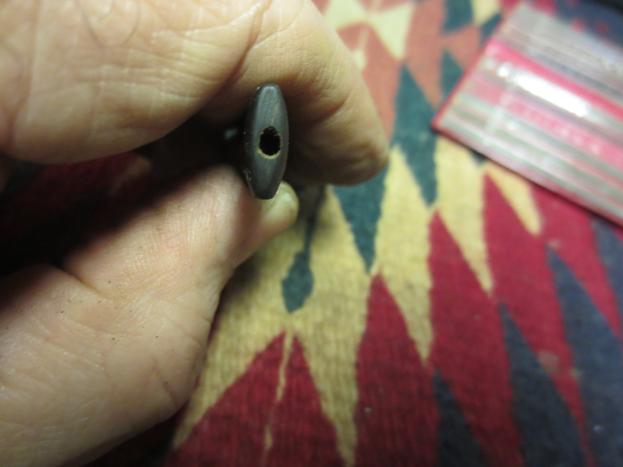
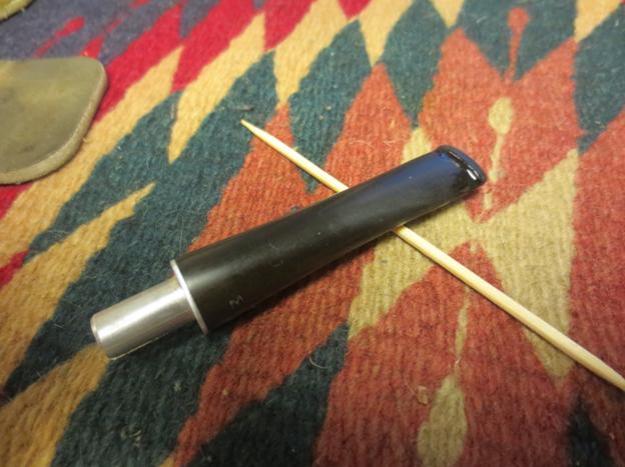
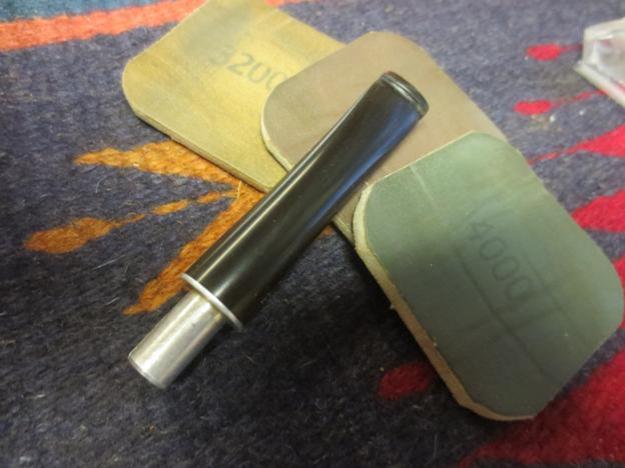
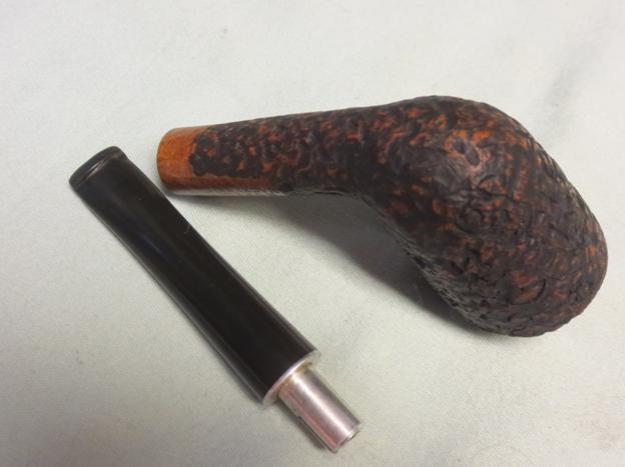
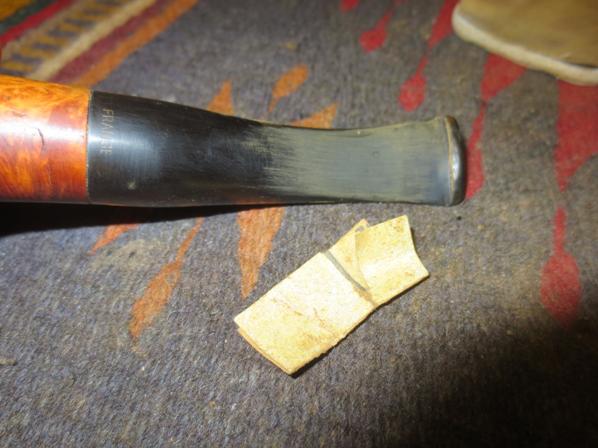
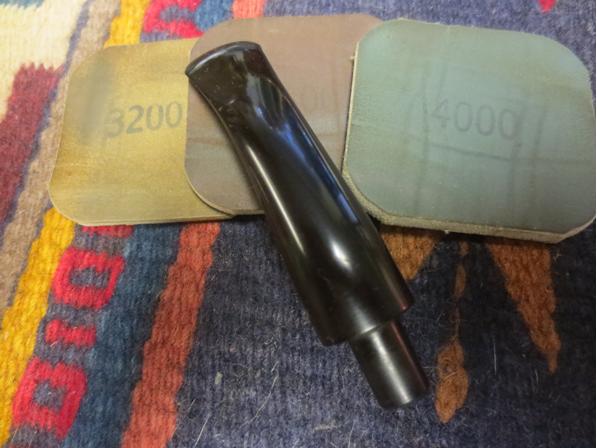
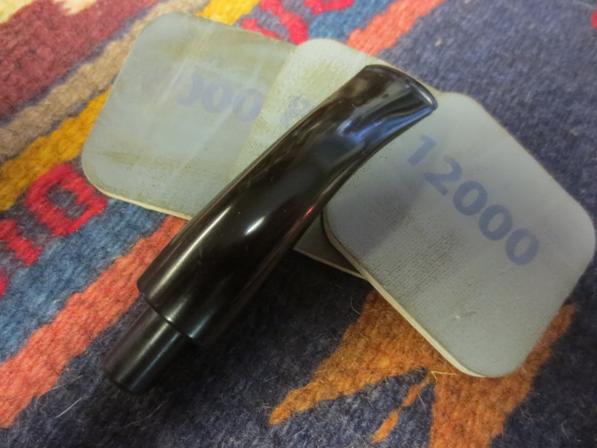
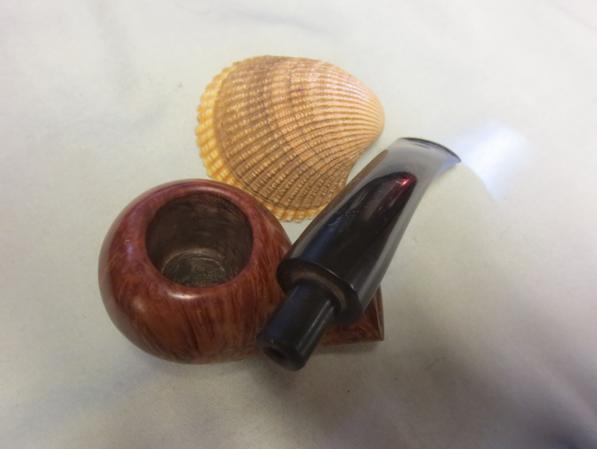
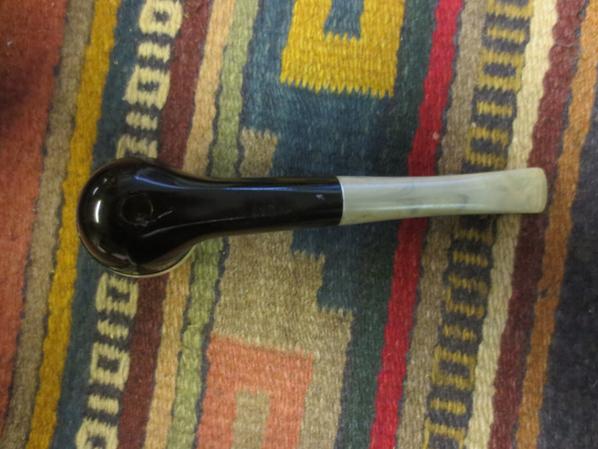
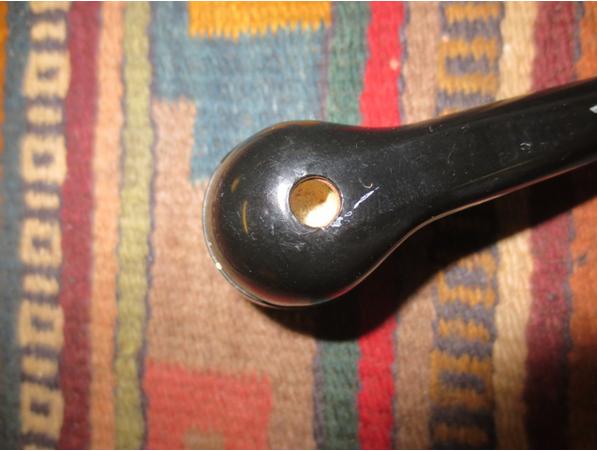
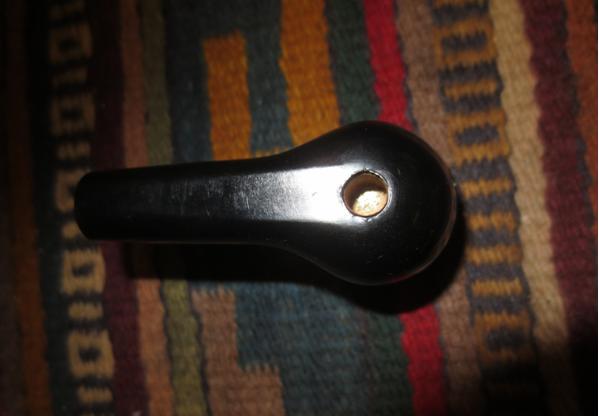
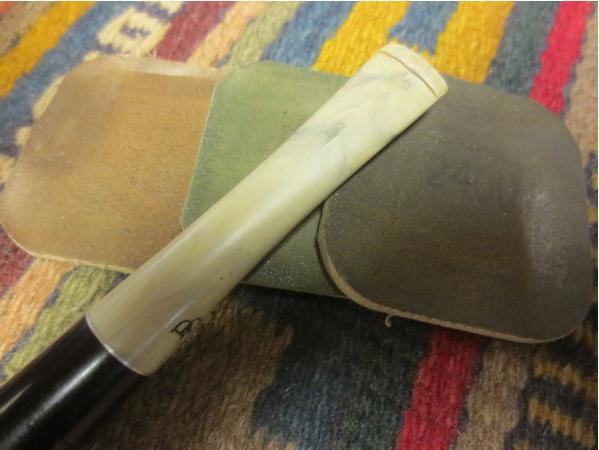
I replaced the bit, which I had removed from the OxiClean bath and used wet micro-mesh from 1500-12000 to return to a nice black smoothness, and retorted the pipe.KW9 KW10
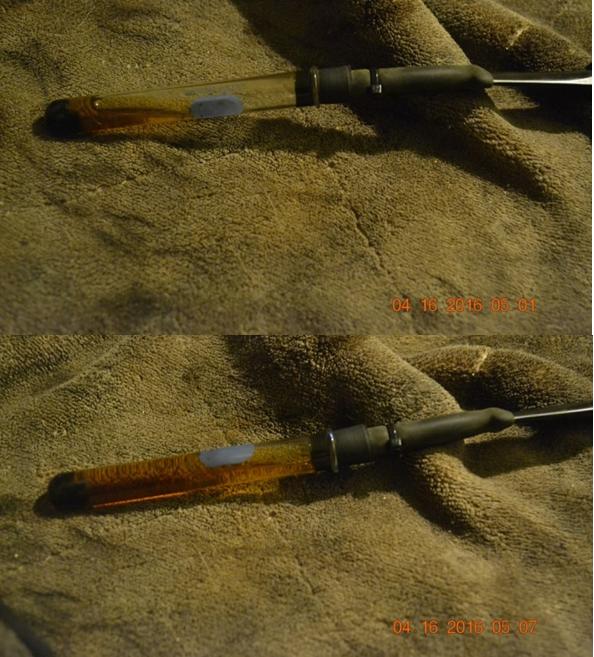
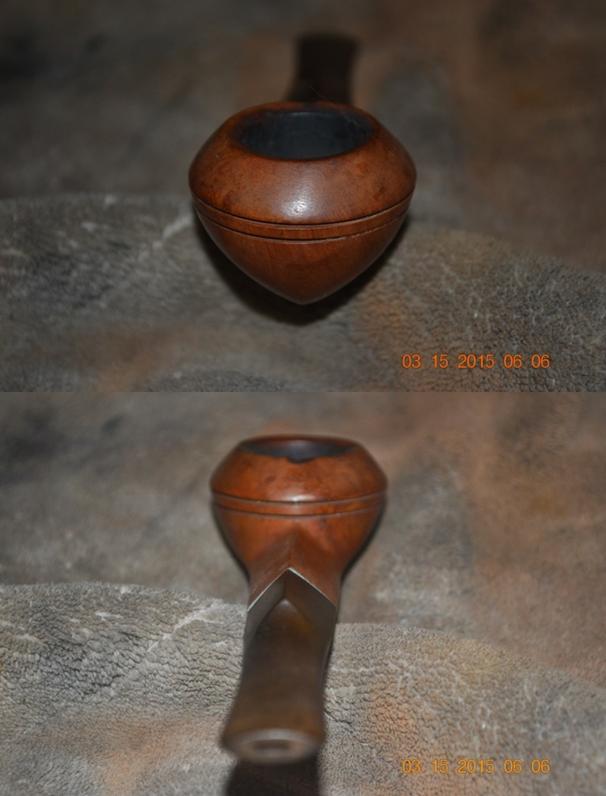
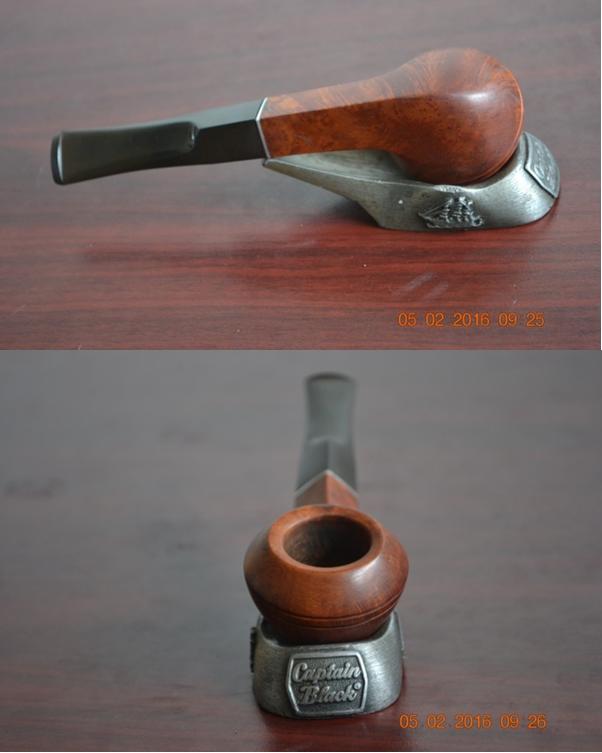
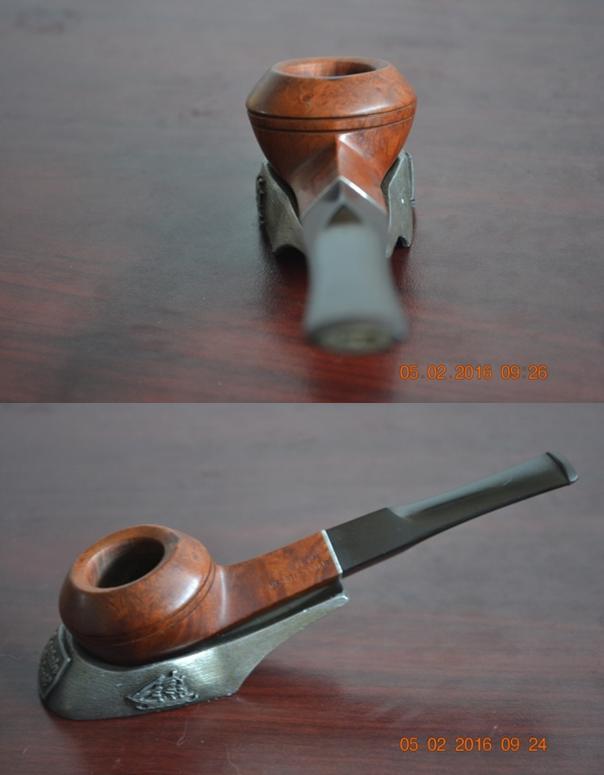
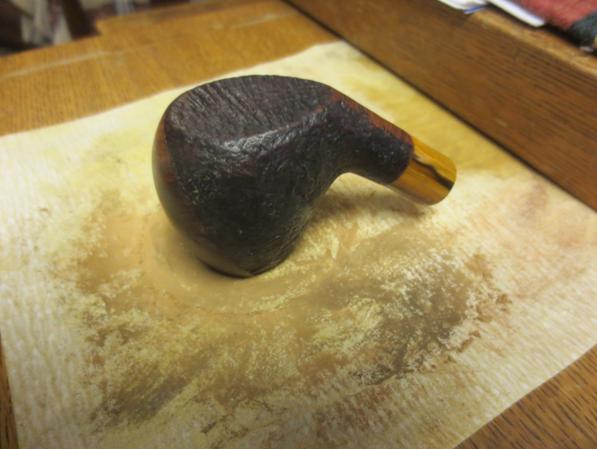
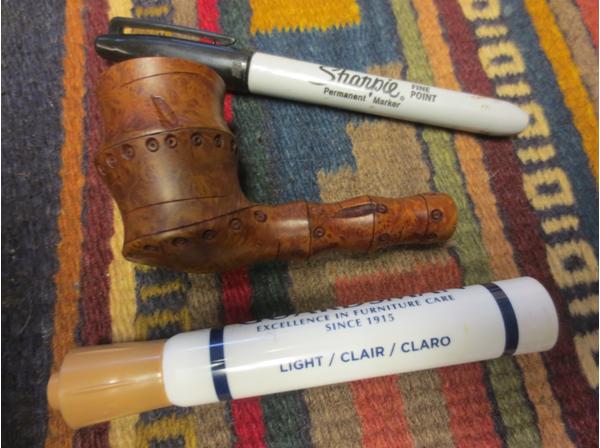
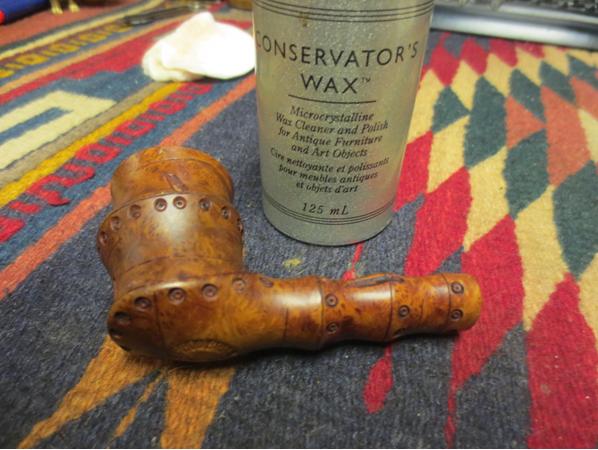
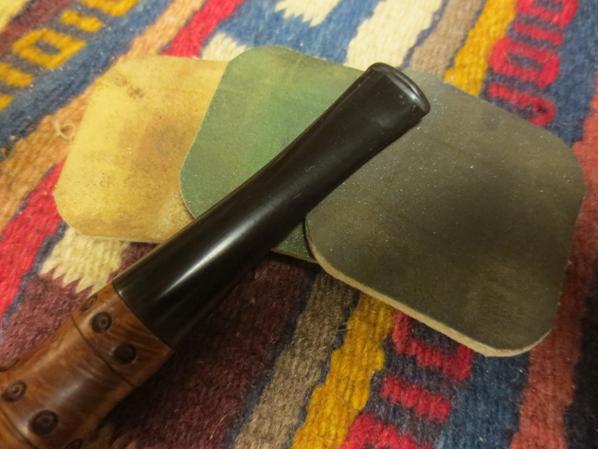
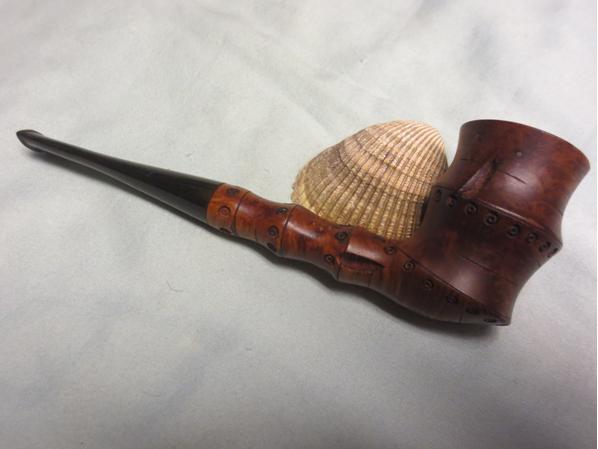
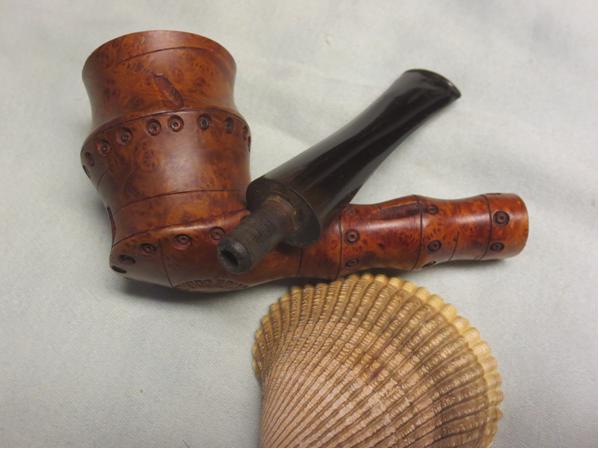
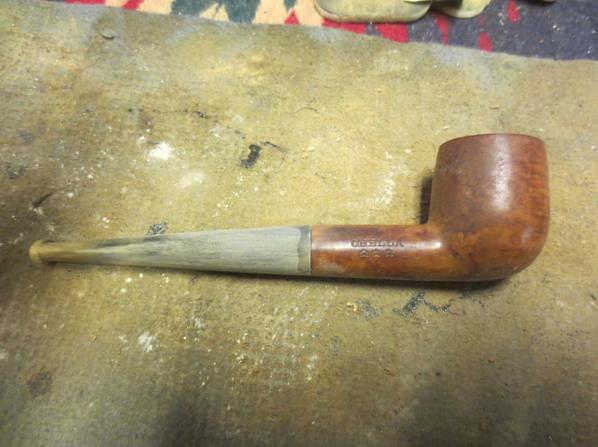
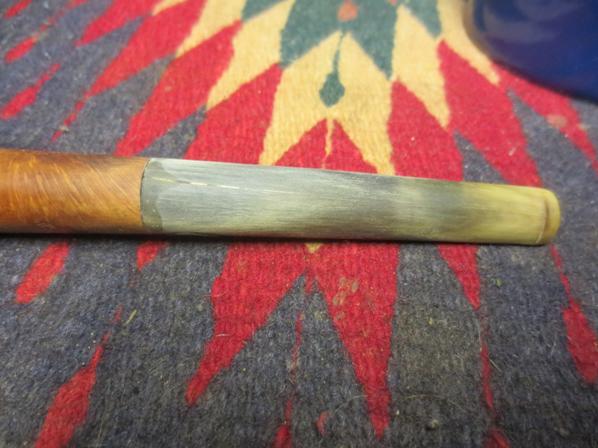
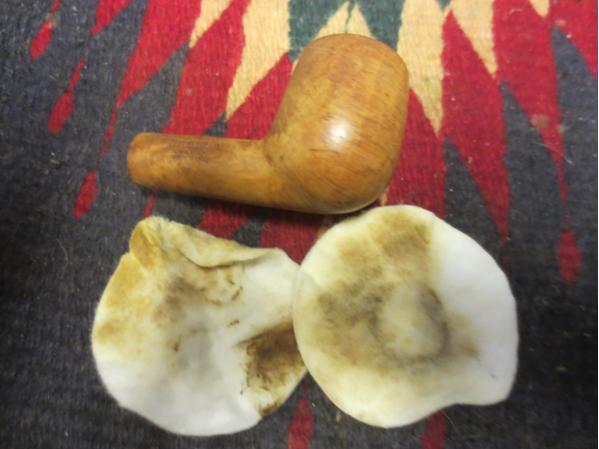
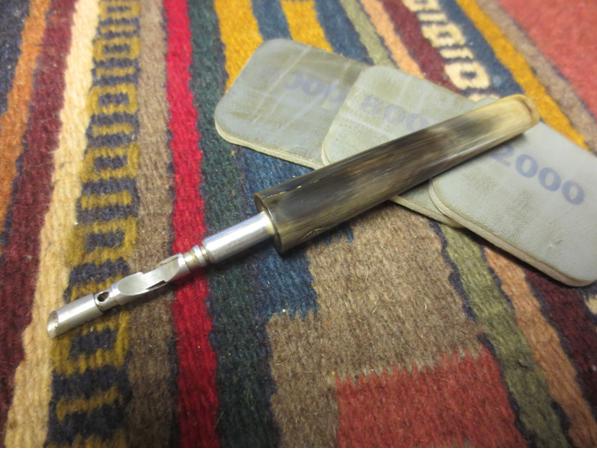
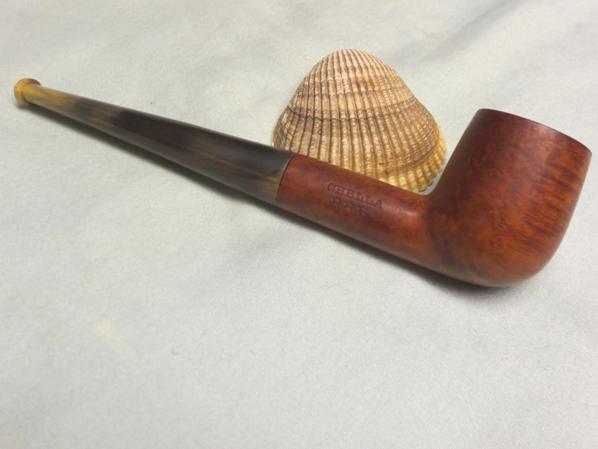
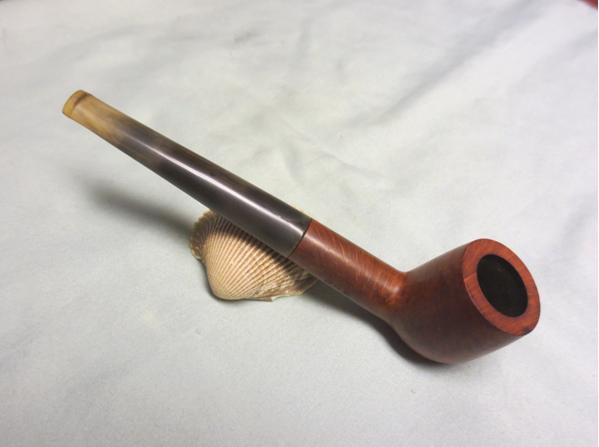
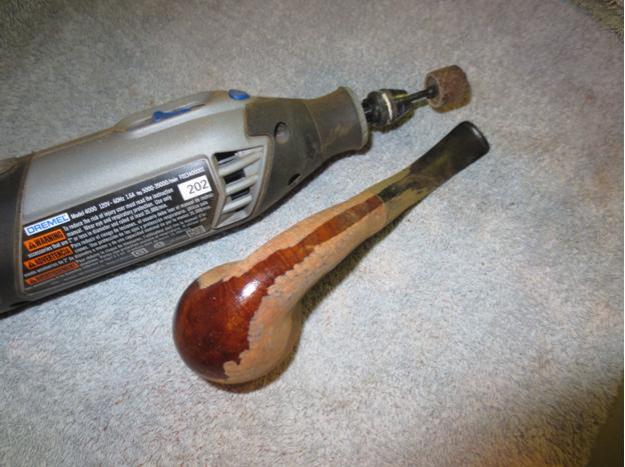
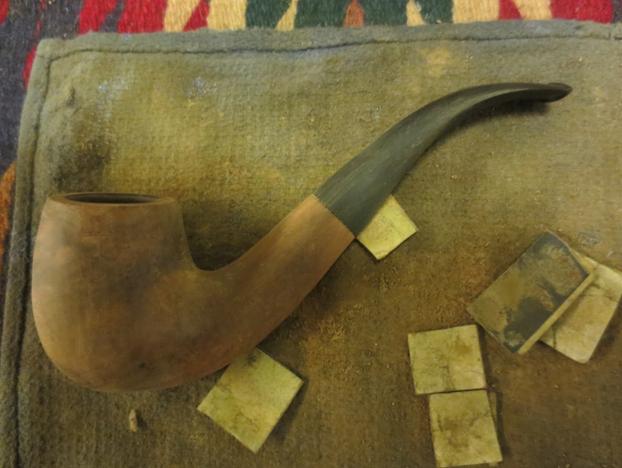
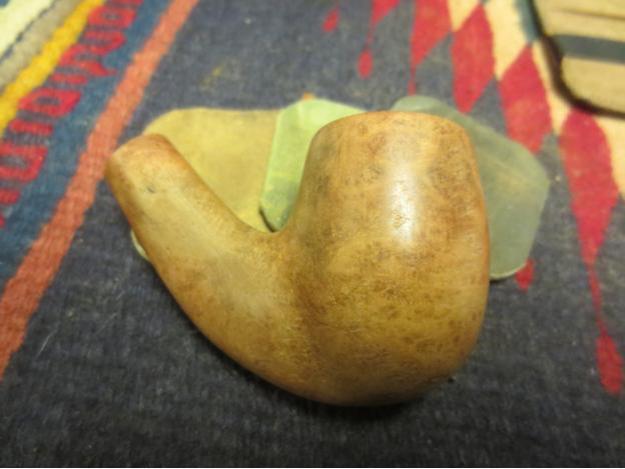
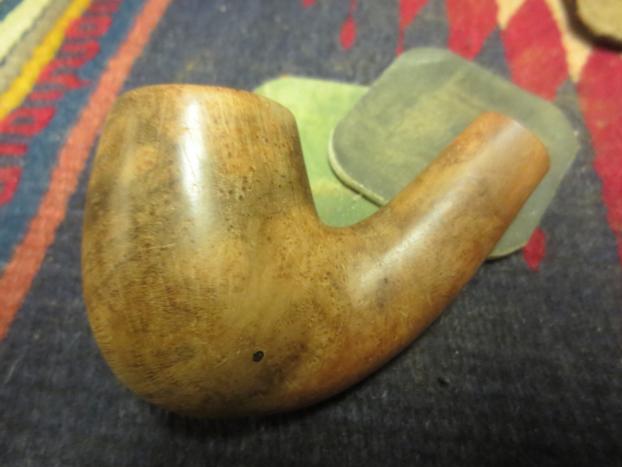
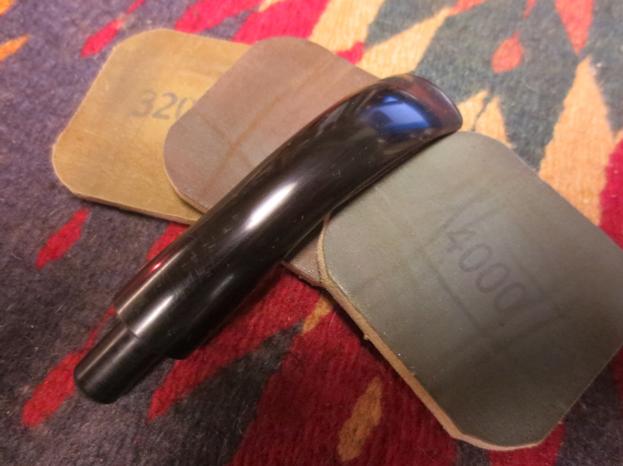
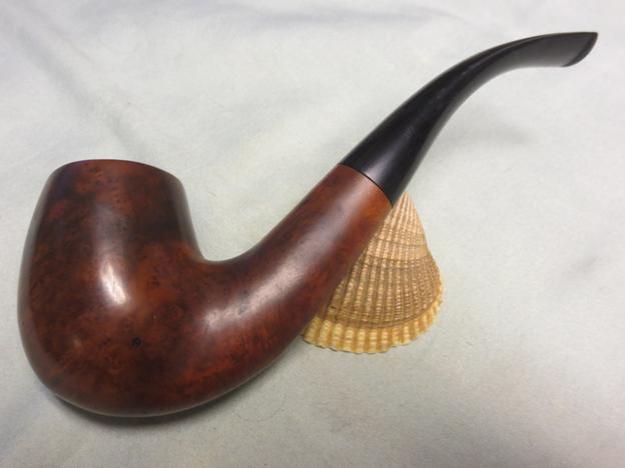
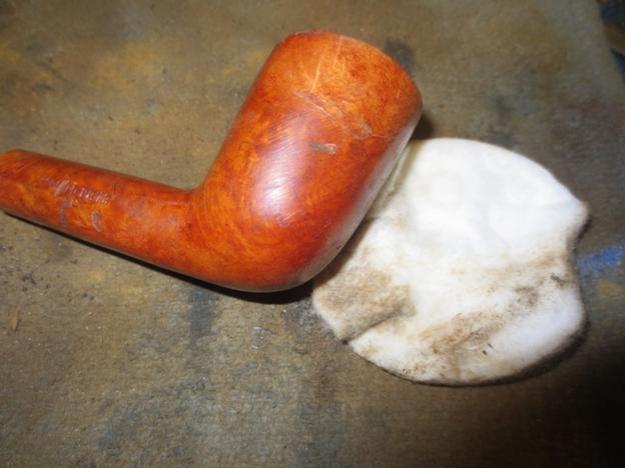
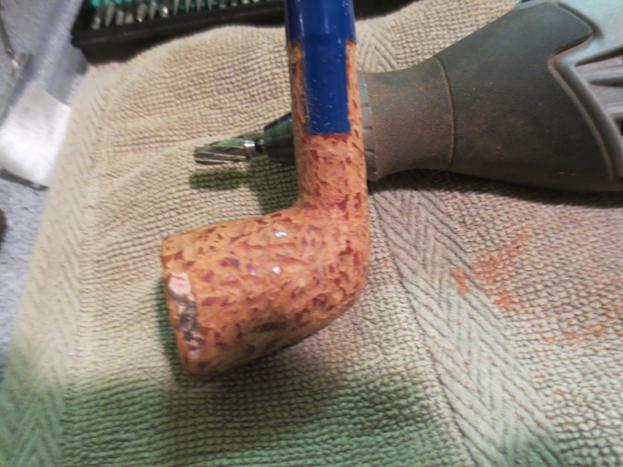
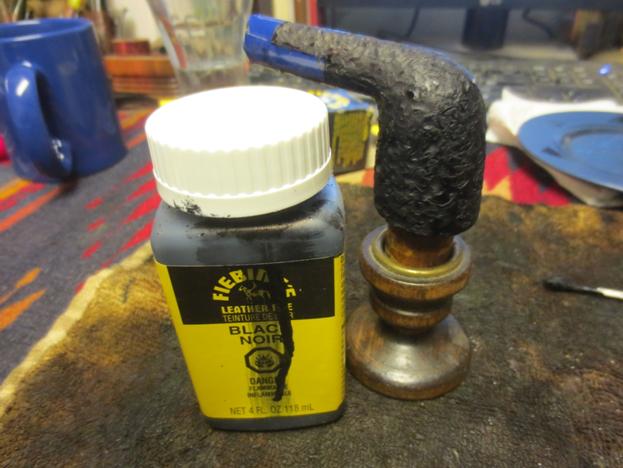
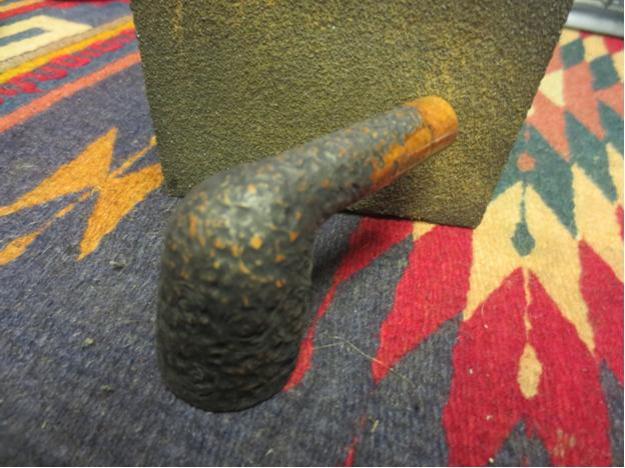
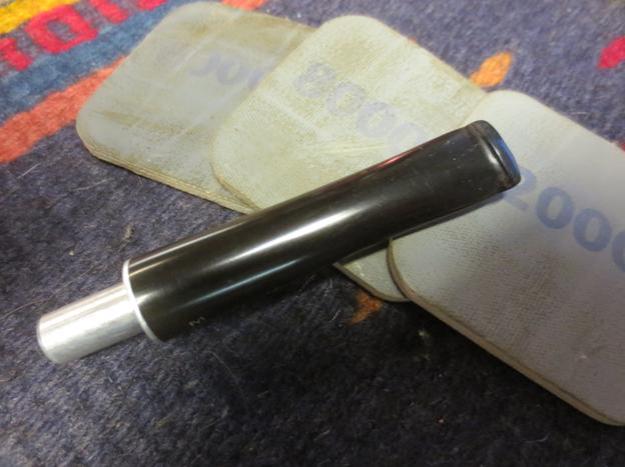
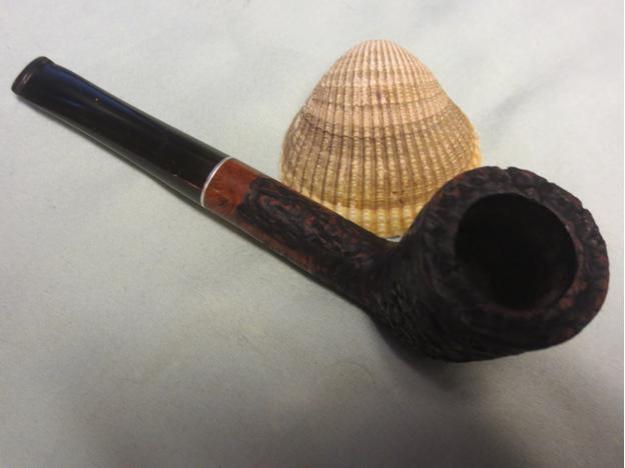
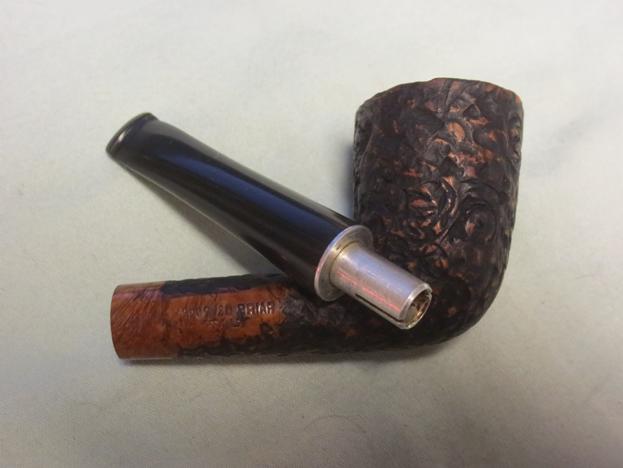
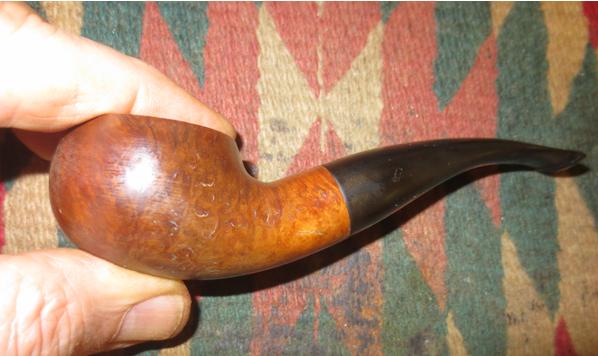
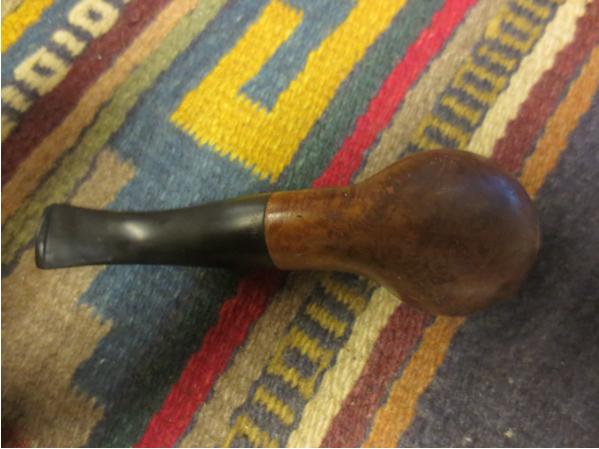
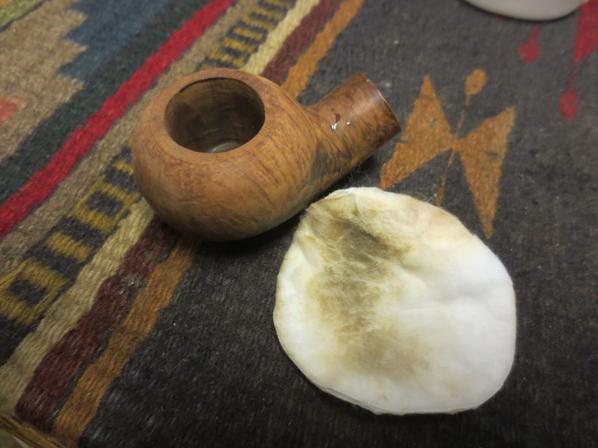
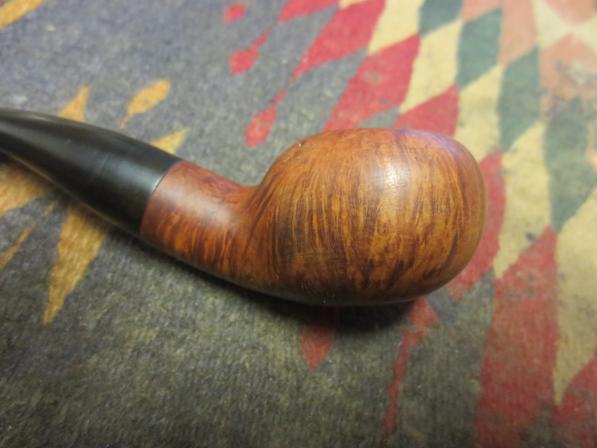
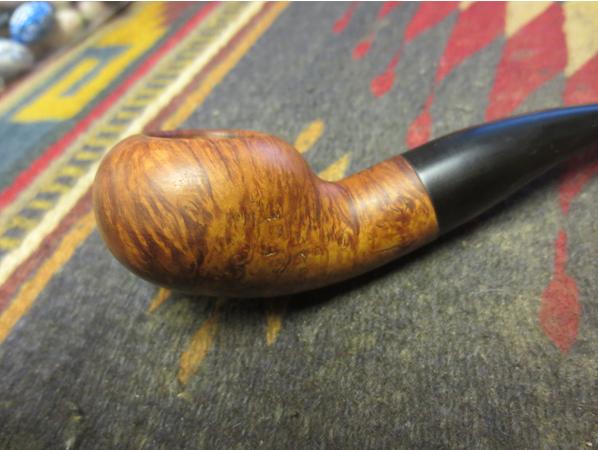
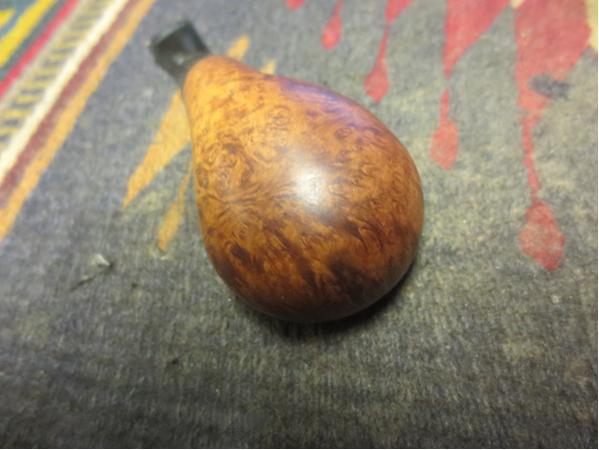
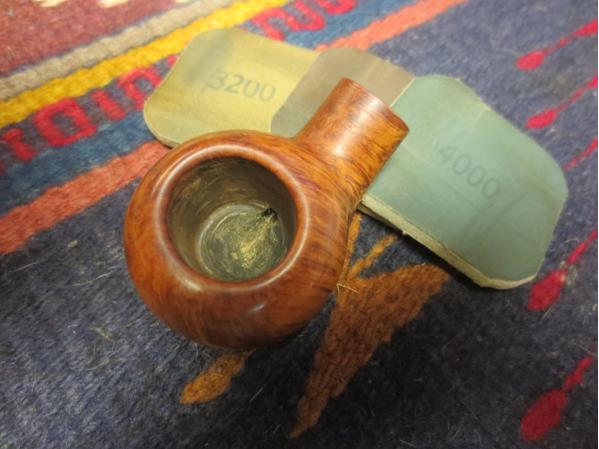
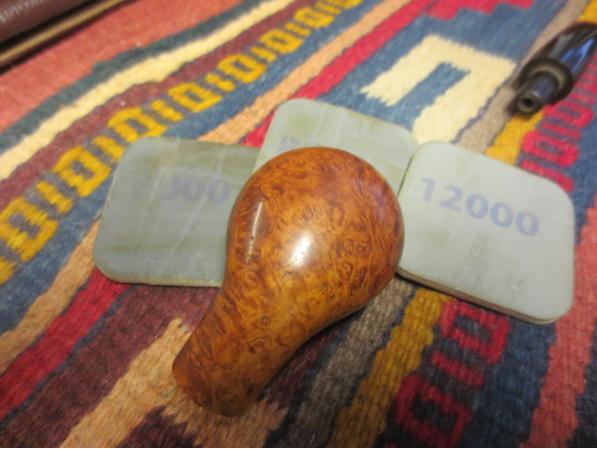
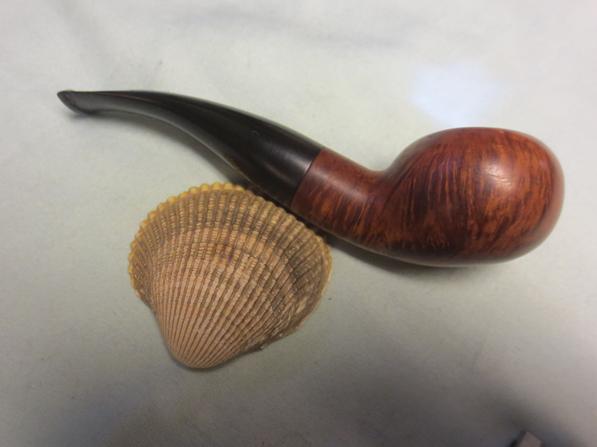
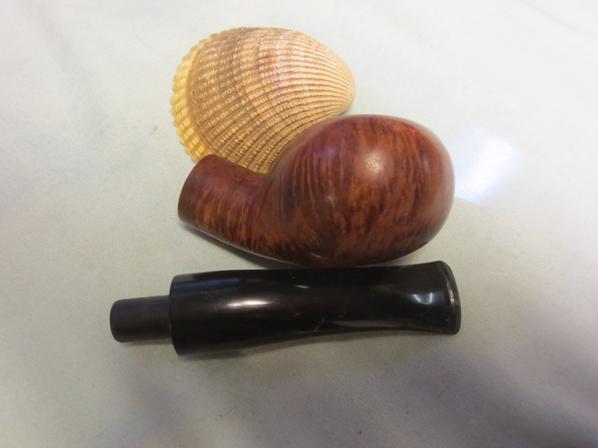
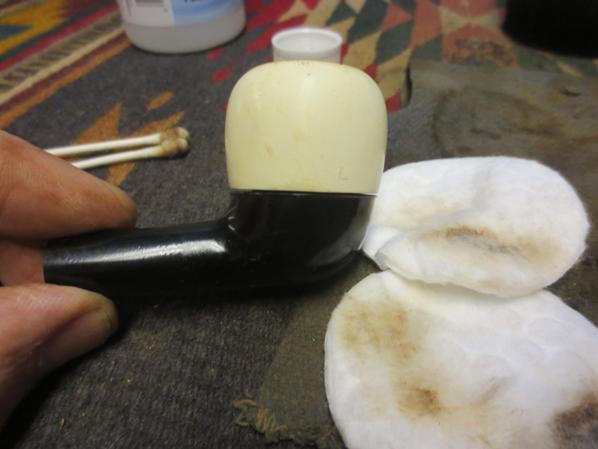
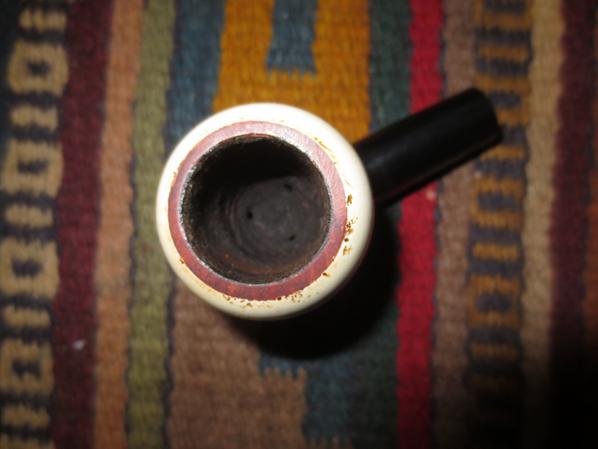
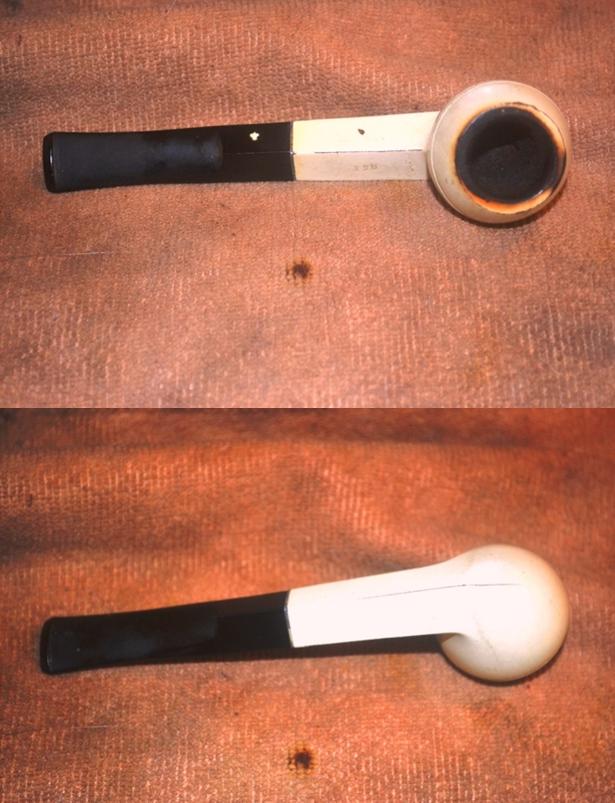
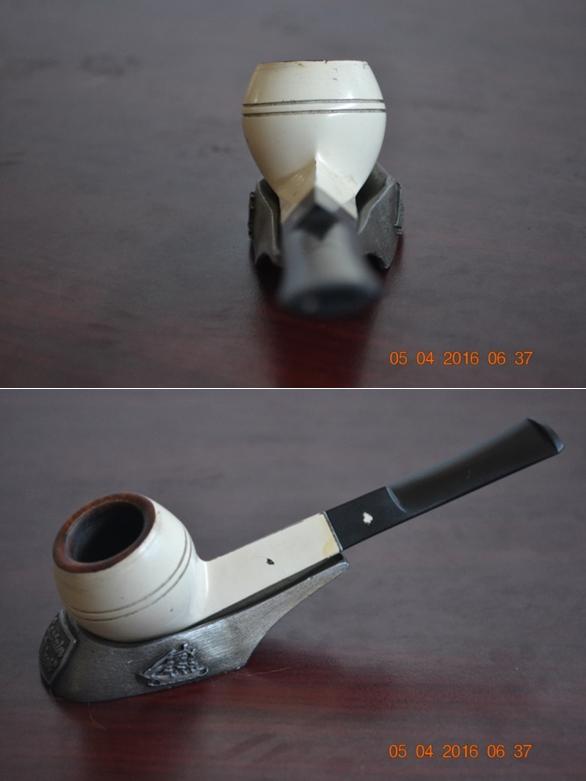
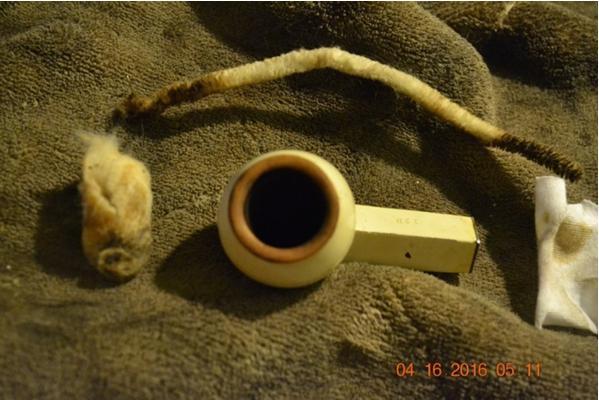
All that was left to do was an unexpected stain of the rim using Feibing’s Brown and flaming it, then buffing with white Tripoli, White Diamond and Carnauba. I buffed the bit as usual, with red and white Tripoli, White Diamond and Carnauba.
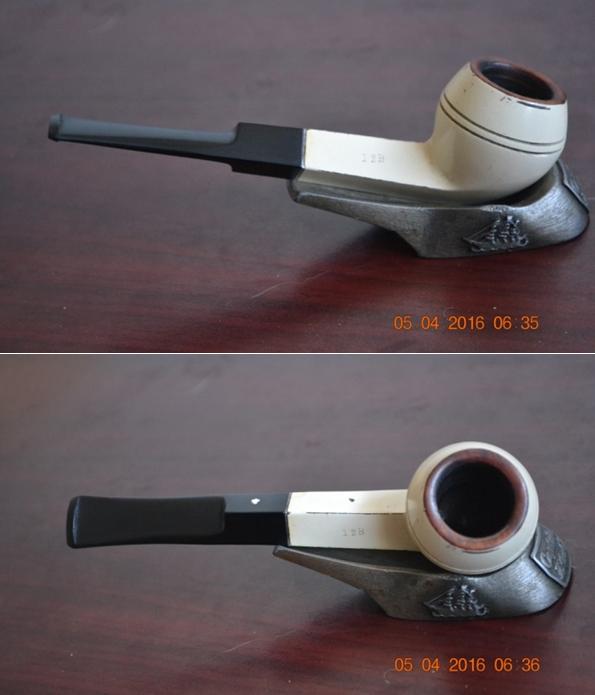
KW11 KW12 KW13CONCLUSION
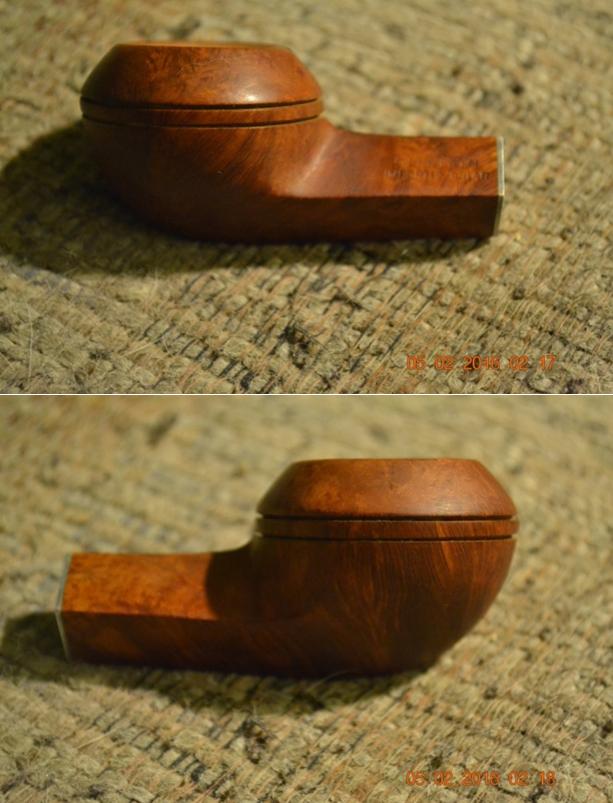
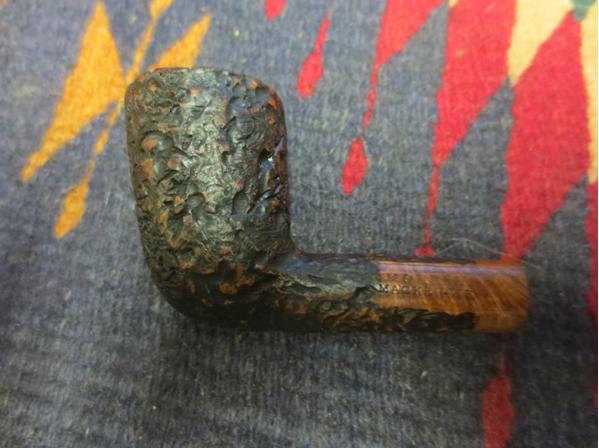
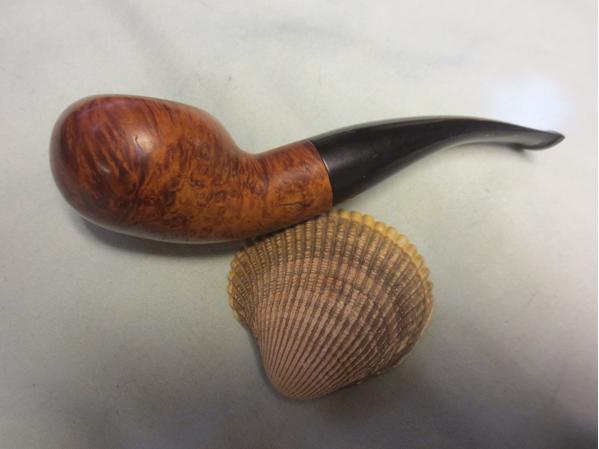
I’m always willing to face the music as far as responsibility for mistakes goes, but I honestly don’t know if the “mishap” I had with the rim is common with white briar restores. I didn’t use sandpaper – not until after it was already too late. But it was my restore, and so I will own it. As well as the pipe, most likely, unless anyone out there wants a good deal on a unique Kaywoodie White Briar Bulldog 12B with a brown briar rim!

Fixing a Citation Squat Bulldog


Guest Blog by Robert M. Boughton
Member, International Society of Codgers
Member, North American Society of Pipe Collectors
http://www.naspc.org
http://www.roadrunnerpipesnm.biz
http://about.me/boughtonrobert
Photos © the Author

INTRODUCTION
I thought I found the maker of this Citation on Pipephil, but should have taken a closer look at the nomenclature. As it turns out, the cursive style used by the U.S. manufacturer was a clear mismatch for the block letters on my squat bulldog. For now, I’m stumped. Here is the pipe as I received it.Citation1 Citation2 Citation3 Citation4The unusual cleanliness of the pipe tends to hide the need for serious work on the entire surface of the stummel, in particular a bad ding in the rim.Citation5RESTORATION
First, I tossed the bit in an OxiClean bath.Citation6While it started soaking, I used 150-grit paper evenly around the curved rim until the ding was gone and it was even all around. I also smoothed a rough spot on the right side of the top curve of the shank.Citation7Continuing just below the rim with 320-grit paper, I almost immediately realized the scratches were so pervasive and the grain so clear and fill-free that an Everclear strip was warranted. After the bit had soaked about 30 minutes, I dumped the OxiClean, rinsed the bit and ran a cleaner through it. Then I poured a jar of used Everclear in the Tupperware tub and dunked the stummel in.Citation8 Citation9

The bit was in good shape, and wet micro-mesh from 1500-12000 made it black and smooth again.Citation10I removed the stummel from the Everclear when it had soaked for an hour and wiped the chamber with a cotton cloth square before sanding the dried alcohol from the wood with 200-grit paper.Citation11 Citation12 Citation13Although I can’t explain how it works, my experiences stripping pipes with Everclear and then sanding and micro-meshing them had prepared me for the radical change in color I would notice after the full scale of micro-mesh.Citation14 Citation15 Citation16

Still, this is the first time I can remember where the grain was good enough that I didn’t need to use any stain. All I needed to do was sand the chamber and retort the pipe, the latter of which proved almost unnecessary.Citation17This is the finished pipe, after buffing with white Tripoli, White Diamond and Carnauba. I used red and white Tripoli, White Diamond and Carnauba on the bit.Citation18 Citation19 Citation20

CONCLUSION
Bulldogs always sell fast, even no-names or relatively unknown brands. But I still don’t know why I put off restoring this pipe for so long. Working on it was a real pleasure, and I did it overnight.

An Interesting Multi-Finish Stanwell Buffalo Sitter 606


Blog by Steve Laug

This pipe came to me in the last box of pipes that my brother sent me. It is a Stanwell as can be seen from the shape and finish. From my research I came to understand that it came from the Stanwell Buffalo line. It is stamped on the smooth underside of the shank with the words Stanwell Made in Denmark and the shape number 606. The shape number is very visible and I was unable to locate that number on the internet shape charts.The front of the bowl was smooth and there was an acrylic horn-like material as a shank extension. The bowl had a light cake and looked as if it had been reamed recently. The rim of the pipe was really dirty with lava overflow from the bowl but underneath I could see that it was originally smooth like the front of the bowl and the portion where the stamping was on the underside of the shank. There was some burn damage on the outer and the inner edges of the rim that would need to be addressed. The pipe was a mix of medium and dark brown stains and the finish had a light sand blast on the surface of the sides, back and bottom of the bowl and the top and sides of the shank. The finish was dirty with lots of grime in the grain of the blast. The stem is a military style stick bit. The stem was in good shape with only one tooth mark on the underside toward the right side of the pipe. The fit in the shank was snug. The stamping on the stem showed the Stanwell Crown and S and it was faint but visible.Buff1 Buff2 Buff3 Buff4I took a close up photo of the rim to show the state of things when I started. You can see the buildup on the surface and the burn damage on the front inner edge of the rim.Buff5I cleaned up the reaming with the Savinelli Pipe Knife and then cleaned out the internals of the bowl, shank, mortise and airway in the stem. I used pipe cleaners, cotton swabs and alcohol to remove all of the oils.Buff6 Buff7I scrubbed the stem with Meguiar’s Scratch X2.0 plastic polish to remove the oxidation. I sanded the tooth marks on the underside of the stem with 220 grit sandpaper until the stem was smooth.Buff8 Buff9I lightly topped the bowl on the topping board. I wanted to remove the damaged surface and clean up rim edges. I also wanted to expose the burn marks so that I could address them.Buff10I sanded the rim top with 1500-2400 grit micromesh sanding pads to smooth out the scratching. I then stained it with a medium brown stain pen to match the smooth portions of the pipe. You can see the burn damage on the inside edge of the front of the bowl.Buff11I folded a piece of sandpaper and worked on beveling the inside edge all the way around the bowl to minimize the damaged area on the right front edge. While the damage is still visible it is much more subtle than it was before the beveling.Buff12 Buff13I set the bowl aside and worked on the stem. I sanded it with 220 grit sandpaper to clean up some of the oxidation and then worked on it with micromesh sanding pads. I wet sanded the stem with 1500-2400 grit sanding pads and then rubbed the stem down with Obsidian Oil. I dry sanded with 3200-4000 grit pads and gave it another coat of oil. I finished sanding with 6000-12000 grit pads and gave it a final coat of oil. I set it aside to dry.Buff14 Buff15 Buff16I buffed the pipe with Blue Diamond (lightly on the bowl except for the smooth areas and the rim top and more concentrated on the stem). I gave the stem several coats of carnauba wax and buffed with a clean buffing pad. I hand waxed the bowl with Conservator’s Wax. I hand buffed the bowl with a shoe brush. I finished buffing the pipe with a microfiber cloth. The finished pipe is shown in the photos below. I am still debating rusticating the rim to match the bowl and stain it darker to blend with the sandblast but not sure… time will tell. Thanks for looking.Buff17 Buff18 Buff19 Buff20 Buff21 Buff22 Buff23

Introduced to a Bamboo Briar of Spain Oval Shank Billiard


Blog by Steve Laug

I don’t know why but I keep taking out some unique pipes from the box my brother Jeff sent me. He has an uncanny ability to find the unusual and interesting pipes for me to restore. This one is one I had never heard of before. I have seen other bamboo rusticated pipes but not one that had the stamping that this one does. It is stamped on the underside of the bowl with the words BAMBOO BRIAR in an arch over the word Spain. The carver did a marvelous job of replicating the look of bamboo in the briar. The nodules, lines and grooves that he/she put in the briar really look like bamboo. To give it even more of an interesting look they left the briar natural to highlight the subdued grain of the briar coming through the smooth areas of the bamboo and the carved nicks in the surface. It is really beautiful.

When I took it out of the box the bowl had a thick cake of carbon built up in the bowl. The rim was thickly caked as well with lava. The outer edges of the bowl had some nicks in it and there was a small burn mark on the front right inner edge of the bowl. The stem did not fully seat in the mortise because of the tars and oils there. The exposed portion of the tenon and the stem were badly oxidized. There was some light tooth chatter on the stem but overall it was in decent shape underneath the oxidation.Bamboo2 Bamboo3 Bamboo4 Bamboo5I took some close up photos of the rim and the bottom of the bowl. The picture of the rim shows the thickness of the cake and the state of the top of the rim. This old pipe was pretty clogged up with cake and tars. The picture of the bottom of the bowl shows the stamping. It reads Bamboo Briar over Spain.Bamboo6 Bamboo7Bamboo1I removed the stem and dropped in a jar of Oxyclean to soak the heavy oxidation for several hours. Before working on the bowl I did a little research on the brand and found that on my go to site, Logos and Stampings, or pipephil there was a notation. Here is the link: http://www.pipephil.eu/logos/en/logo-b1.html#bamboobriar.

On that site the pipe is described as follows: The bamboo like decorative carving was typical of Valencia’s manufacturers since the early 20th century. However it’s difficult to say who exactly the maker was.

With that information in hand I went to work on the bowl. I reamed it with a PipNet pipe reamer beginning with the smallest cutting head and working up to one that was the same diameter as the bowl. I removed the cake and took it back to bare wood. I finished the reaming and cleaned up the bowl walls with the Savinelli Pipe Knife.Bamboo8 Bamboo9 Bamboo10The outer edge of the rim was rough and the top had some nicks in the briar that made topping the bowl necessary. I topped it to remove the damaged areas of the rim using a topping board and 220 grit sandpaper.Bamboo11 Bamboo12I scrubbed the exterior of the bowl with acetone (fingernail polish remover) on cotton pads to clean up the dirt and oils from the natural finish of the briar.Bamboo13 Bamboo14 Bamboo15 Bamboo16I sanded the topped rim with 1500-2400 grit micromesh sanding pads and then used a light brown stain pen to stain it to match the patina on the bowl. I used a black Sharpie pen to touch the “root nodules” of the simulated bamboo. Bamboo17I hand applied some Conservators Wax to the bowl and once it dried hand buffed it with a shoe brush.Bamboo18I took photos of the pipe after buffing it. The colour of the rim and the patina that came out on the bowl with the wax gives it an aged bamboo look that I really like.Bamboo19 Bamboo20 Bamboo21 Bamboo22I cleaned out the shank with alcohol, cotton swabs and pipe cleaners to remove the tars and oils. I was quite surprised by how little came out of the shank with the cleaning. I expected it to be far worse.Bamboo23The stem had been soaking in Oxyclean for about four hours so it was time to work on that. I set the bowl aside and removed the stem from the Oxy soak. The soak had softened and removed much of the oxidation from the surface. It had also brought the deeper oxidation to the surface.Bamboo24I rubbed the stem down to remove the softened oxidation and then used needle files to clean up and define the edges of the button.Bamboo25I used pipe cleaners and alcohol to clean out the inside of the stem and again was surprised by the lack of real oils and tars.Bamboo26I sanded the stem with 220 grit sandpaper to smooth out the file marks and to remove the oxidation on the surface. I wet sanded the stem with 1500-2400 grit micromesh sanding pads and gave it a coat of Obsidian Oil. I dry sanded with 3200-4000 grit pads and gave it another coat of oil. I finished sanding it with 6000-12000 grit pads. I gave it a final coat of Obsidian Oil and let it dry.Bamboo27 Bamboo28 Bamboo29I buffed the stem on the buffer with Blue Diamond and then gave the pipe multiple coats of carnauba wax. I used a light touch on the bowl and shank so as not to clog up the nodules or grooves in the bamboo carving with too much wax. I raised the shine with a clean flannel buff on the buffer and then gave it a hand buff with a microfibre cloth. The finished pipe is shown in the photos below. I really like the way the patina of the briar and the carvings on the bowl and shank give the pipe a look of aged bamboo. The unknown Spanish carver did a great job on this one in my opinion. Now I have to decide whether to keep this one or not. It is so unique that I think it deserves a place in my collection. Thanks for looking.Bamboo30 Bamboo31 Bamboo32 Bamboo33 Bamboo34 Bamboo35 Bamboo36 Bamboo37

A New Brand for me – A Riff 221 Horn Stem Billiard


Blog by Steve Laug

This was a new pipe brand for me. It is stamped RIFF in a double lined diamond on both the left side of the shank and on the horn stem. On the right side it is stamped CHELLA over *** (3 stars). On the underside of the shank it is stamped Made in Morocco and the shape number 221. This has to be the first Morocco made pipe that I have worked on. It was in pretty decent shape in terms of the bowl. There was a shiny shellac coat over a natural finish. The rim had some tars and oils built up on the back top side but inner and outer edge was in perfect shape. There was a slight burn mark on the front right top of the rim. The bowl had a slight cake that was uneven around the inside. The problem lay in the stem. There was a large crack in horn on the top that traveled half way down the stem. There was also a large chunk of horn missing on the underside of the stem. It was a very smooth scooped shape chunk that made me wonder how it had happened. When I pulled the stem out of the shank there was a large stinger apparatus that extended the length of the shank and ended in the bottom of the bowl. The tenon was metal. The internals of the shank and stem were quite clean.Chell3 Chello1 Chello2I was jazzed to work on this stem as it provided several challenges to me. I forgot to take pictures before I started but caught myself just after I started to work on the underside of the stem. I wiped the stem down with a cotton pad and alcohol to clean off the surface. I began to fill in the edges of the missing chunk with clear super glue. I layered the glue in place on the area until it was filled. Once it had cured overnight I would sand it down smooth with the surface of the stem.Chello4 Chello5I cleaned out the crack with a dental pick. I drilled a tiny hole with a micro-drill bit at the end of the crack – toward the button. I filled in the crack and the drill hole with clear super glue and squeezed the crack together. I repeated the fill process until it formed a ridge along the crack. Once it cured I would sanded it smooth as well.Chello6 Chello7 Chello8 Chello9While the repairs on the stem dried I worked on the stinger. I used the brass bristle brush and alcohol to scrub off the oils and tars.Chello10In the morning I sanded the stem with 220 grit sandpaper. I had built up the edge that faced on the shank to fill in the gap caused by the crack. In the photo of the top view of the stem it is the darkened band around the edge of the stem next to the shank. I sanded the stem smooth and blended the repairs into the surface of stem.Chello11 Chello12 Chello13 Chello14I took some close-up photos of the stamping to show it to you. It was unique to me. The first photo shows that the underside of the shank reads Made in Morocco 221. The second photo shows the stamping on the left side and the horn stem – RIFF in a double diamond. The third photo shows the stamping on the right side of the shank – CHELLA ***. At this point you can see the repairs have blended into the surface quite well. They are darker than the stem material but most of that will disappear as the stem is polished. The stem is smooth on the top and the bottom and the crack and the missing chunk are no long detectable to touch.Chello15 Chello16 Chello17I continued to sand the stem until the repairs were very smooth.Chello18 Chello19 Chello20 Chello21With the initial work done on the stem I worked on the bowl. I reamed it with a PipNet reamer and took the cake down to bare wood.Chello22 Chello23 Chello24The rim top was damaged with heavy tarring and a small burn mark on the front right side. I topped it lightly with a topping board to remove the damage and the build up.Chello25 Chello26I scrubbed the shellac off the bowl with acetone on cotton pads to get down to the natural briar.Chello27 Chello28 Chello29I cleaned the stem with pipe cleaners and alcohol and the shank with the same using cotton swabs along with the pipe cleaners. It did not take much to remove the grime on the inside.Chello30 Chello31I wet sanded the stem with 1500-2400 grit micromesh sanding pads to begin to polish it. The first photo below shows the top of the stem and the second shows the underside.Chello32 Chello33I rubbed it down with Obsidian Oil and then dry sanded with 3200-4000 grit pads. The cracked area on the top of the stem is visible when you look for it but it is smooth to touch. It is interesting to see the striations begin to show in the polished horn.Chello34I gave it another coat of oil and then finished sanding it with 6000-12000 grit micromesh pads. The crack is definitely less visible on the top side of the stem (first photo below) and the filled in area on the underside is almost invisible (second photo).Chello35 Chello36I rubbed the briar down with a light coat of olive oil and then buffed the stem and bowl with Blue Diamond on the wheel. I gave the pipe multiple coats of carnauba wax and buffed it with a clean buffing pad. I had buffed it with a microfibre cloth. The finish pipe is shown in the photos below. I tried to give a variety of photos and angles so that you can see the repaired areas. Chello37 Chello38 Chello39 Chello40 Chello41The photo below shows the underside of the stem and the repaired area mid stem near the spot in the photo.Chello42The next two photos below show the repaired crack in the top side of the stem from various angles. While it is visible to the eye it is smooth to the touch. The crack has been stabilized and the drilled spot at the far end has stopped it from spreading further. I am happy with the finished pipe. Thanks for looking.Chello43 Chello45

A Ruined Stanwell Handmade 80R Bent Billiard – another ugly duckling


Blog by Steve Laug

Out of the three pipes from the “hackster” – the cut off Rhodesian, the coffee grounds Dublin and this Stanwell 80R Bent Billiard I have to say that the work he did on this one was by far the worst abomination. This pipe is stamped Stanwell Hand Made 80R Made in Denmark on the underside of the shank. It was a sandblast brown contrast bent billiard that would have been beautiful when it was made. The “hackster” decided to improve upon the finish and believe it or not he desecrated the pipe. He used a Dremel or sander to remove the majority of the sandblast finish leaving a dab of it on the back of the bowl at the joint of the shank and the bowl and a dab on the front side about 1 inch long from the rim. In removing the blast he completely ruined the shank leaving a thick band near the stem and the two thick sandblasted dabs. He sanded off the blast on the shank leaving it looking anemic and awful. He ruined the shape of the bowl and left it totally out of round on the outside. He also over reamed the bowl with what looked like a Dremel and sanding drum and took the bottom of the bowl almost ¼ inch below the entrance of the airway.

He did not leave the stem safe either he reshaped the button by removing the majority of the sharp edge. Then to add insult to injury he left the stamping intact on the bottom of the shank giving credit to Stanwell for the ruination of this fine briar pipe. It went from handmade to hand ruined. Over the entire bowl and slopping onto the stem was a thick coat of shellac. Runs and drips had hardened. The file and Dremel marks were held in perpetuity under a thick coat of shellac. That is where I started with this abomination. The question was could I do anything to redeem this mess.blast1 Blast2 blast3 blast4I took some photos of the stem and the left over sandblast sections. There is also a photo of the rim shows the out of round condition of the outer edge of the rim.blast5 blast6 blast7 blast8 blast9I sanded off the remaining sandblast sections on the bowl and shank and rounded the bowl with a Dremel and sanding drum. I used the Dremel to reshape the shank and the bowl and shank. The damage done to the shank made it necessary to shape the stem into an oval instead of a round.blast10 blast11 blast12 blast13With the rough shaping work done there was a lot of fine tuning to be done to the shape of the bowl. I topped the bowl with a topping board and 220 grit sandpaper to remove the deep saw and file marks and to flatten the surface. I sanded the areas on the bowl where I left the shellac and existing finish until they were smooth as well. I left the band on the bottom of the shank where the faint stampings that the “hackster” had left behind remained. I had still not decided whether to remove them as the pipe was certainly not a Stanwell any longer and when I was finished reclaiming it the pipe would be two times removed from the pipe that came out of the Stanwell factory.blast14 blast15I hand sanded the bowl and shank with 220 grit sandpaper to further shape it. I sanded the stem as well to remove the damage that had been done to it and also to reshape it to the oval shank.blast16 blast17 blast18 blast19I worked on the outer edge of the rim and shaped the bowl with 220 grit sandpaper. Fortunately, the inner beveled rim was undamaged. The bottom of the bowl was a mess that I would need to fill with pipe mud to restore the depth of the bowl to the bottom of entry of the airway into the bowl.blast20I sanded the bowl and shank with a coarse grit sanding block to smooth out more of the curves. The larger surface of the block ensures and evenness to the contours of the bowl and shank.blast21 blast22 blast23 blast24I used the heat gun to bend the end of the stem to the angle that would have originally been present when the pipe left Denmark. I sanded the stem and bowl further with sandpaper and gradually the pipe was taking shape. The swan was beginning to appear. During the sanding process I found that there were several flaws in the briar and at least one fill. During the course of the sanding these may well disappear. Overall this is a nice piece of briar with enough meat on it that I can still end up with a nice pipe.blast25I cleaned out the shank and the airway to the bowl and in the stem with alcohol, pipe cleaners and cotton swabs. It was amazingly dirty for a pipe that had been “refurbished”. The “hackster” had left the inside absolutely filthy while destroying the outside of the bowl and stem.blast26 blast27I continued to sand the bowl and stem with a coarse grit sanding block to remove the remaining scratches left behind by the Dremel and sanding drum. Gradually the swan was beginning to emerge. I was getting excited about what this one was going to look like when it was finished. There was some nice grain emerging as I sanded.blast28 blast29 blast30 blast31I sanded the bowl with micromesh sanding pads to further remove the scratches. I wet sanded the bowl with 1500-2400 grit pads and sanded until the grain began to shine.blast32 blast33 blast34I dry sanded with 3200-12000 grit pads and then rubbed on a coat of Danish Oil Cherry stain. I gave the bowl several coats of the finish and then set it on a cork stand to dry over night.blast35 blast36I cleaned up the sharp edge of the button with needle files to redefine it as the shape was blurred into the body of the stem. I shaped the button with 220 grit sandpaper at the same time to give it definition.blast37 blast38I sanded the file marks out with 220 grit sandpaper to blend the edge of the cut into the surface of the stem. I wet sanded the stem with 1500-2400 grit micromesh sanding pads and then gave the stem a coat of Obsidian Oil. I dry sanded with 3200-4000 grit pads and gave it another coat of oil. I finished by sanding with 6000-12000 grit pads and giving it a final coat of oil. I set the stem and pipe aside for the night.blast39 blast40 blast41In the morning I buffed the bowl and stem with Blue Diamond on the wheel to bring out the shine and then gave the pipe several coats of carnauba wax. I buffed it with a clean buffing pad and then by hand with a microfibre cloth. The finished pipe is shown in the photos below. To me it looks far better than the mess I started with but what is your verdict? Did a swan emerge? The pipe certainly has some nice grain and the flaws are small in comparison to the overall look of the pipe. Thanks for looking.blast42 blast43 blast44 blast45 blast46 blast47 blast48 blast49

The Transformation of a Second Ugly Duckling – Can it be done a second time?


Blog by Steve Laug

This afternoon I took on the second ugly duckling from the eBay “hackster” who had ruined the pipe that I transformed into a swan earlier. This one is stamped Morell over Mackenzie on the left side of the shank and Imported Briar over Italy on the right side. The Morell was a filter pipe so it was made to accommodate a Medico style paper filter. The pipe was a mess. Picture with me what it looked like. It had been painted with a band of coffee grounds (?) around the rim going down the sides of the bowl about a ¼ inch. The rim had been roughly sawn off and the tooth marks of either the file or saw were still present. The shank had damage that was ignored. The entire pipe had then been coated with a thick, runny coat of shellac that had rippled over the surface and given the pipe an obscene shininess that highlighted the atrocities that had been done to it. The stem was original but the “hackster’s” hand had not missed it either. It was cut off and a poorly cut button was carved into the stem. No care of thought was taken to account for the angles of the stem to the button and nothing had been done to open a slot in the end of the button. If you cannot picture it in your mind’s eye here are some photos.Dublin1 Dublin2 Dublin3 Dublin4I took some close up photos of the rim and stem. The rim photo is a little out of focus but you can see what I was talking about above. It was a mess. The issues with the stem are pretty self evident.Dublin5 Dublin6 Dublin7 Dublin8I scraped the coffee grounds off of the bowl edge with a sharp pen knife. In doing so I found a large pink/white fill on the left side of the bowl across the top just below the rim edge. In the next two photos you can see the coffee grounds on the cloth I put on the work table to collect them when I scraped them off. The bowl was pretty full of fills all the way around.Dublin9 Dublin10I scrubbed off the shellac with acetone on cotton pads until I had removed all the thick, runny coat that covered the bowl.Dublin11 Dublin12I took a close up photo of the fill area on the left side to give you an idea of the size of it. It was large and ugly. The other side of the bowl also had several and one larger one mid bowl.Dublin13 Dublin14I took a photo of the rim to show the detail of the file or saw marks.Dublin15With fills this large and a pipe this ugly something had to be done with it or it would end up looking worse than it did when I started. The ugly duckling would just be a duck of another colour. There would not be any swan emerging unless I took some drastic measures. I taped off the stamping on the bowl and a band around the shank stem union with some electrical tape to protect it during the rustication and the staining. I used a series of burrs on the Dremel to cut a random rustication pattern on the sides of the bowl. Different burrs gave a different effect so follow the photos until the end of the rustication to get a full idea of how each burr worked.Dublin16 Dublin17 Dublin18 Dublin19 Dublin20 Dublin21 Dublin22 Dublin23When I finished with a series of five different burrs I then used the rustication tool that was gifted to me and tore up the finish even more. I wanted to cut some deep gouges in the briar to give it heavy rustication.Dublin24I followed that up with a flower frog (see picture below) to further rusticated the finish.Dublin25Once finished with the serious weapons I used a brass bristle brush to knock of the loose particles of briar and smooth things out a bit.Dublin26My next step in the transformation process was to stain the bowl. I chose an aniline black stain to go into the grooves of the rustication because of the large fills. The black stain would penetrate even the white stain in the grooves I cut into it. I applied the stain and flamed it to set it in the briar.Dublin27 Dublin28When the stain dried I removed the tape from the smooth areas. I sanded the high points on the rustication with a sanding block to remove the black from those areas. I wanted to have a contrast that blended well with the smooth areas. I chose on this bowl to also rusticate the rim because of the amount of damage that the “hackster” had done to that area of the pipe. With the sanding done you can see the contrast beginning to show.Dublin29 Dublin30 Dublin31 Dublin32After I sanded the bowl and rim I rubbed it down with a light coat of olive oil to enliven the briar. I let is absorb into the wood before I hand buffed the pipe with a shoe brush.Dublin33 Dublin34 Dublin35 Dublin36 Dublin37With the bowl finished it was time to tackle the damage done to the stem. It had been clipped off and then sloppily tapered to the hand cut new button. I worked on the taper with a flat file and a sandpaper until the transition on both sides of the stem matched. I also cleaned up the button as it was wider on the top than the bottom. I also shaped the button so that it was uniform. The button was pinched and there was an indentation on both sides of the stem in front of the button. I sanded the sides of the stem to remove that indentation.Dublin38The end of the stem was left with a raw air hole. I used needle files to clean up the shape of the button from the end and also to cut and shape a slot.Dublin39 Dublin40The photo above shows the general shape of the slot. I still needed to flatten the face of the button and to clean up the slot but you get the idea. I also used some tiny spots of superglue to fill in the areas on the left side of the stem near the button where the “hackster” had cut back too much material. Once it dried I sanded it with 220 grit sandpaper to smooth it out and blend it into the surface of the stem.Dublin41With the reshaping and tapering done to the stem I went on to use my usual array of micromesh sanding pads. I wet sanded with 1500-2400 grit pads and gave it a coat of Obsidian Oil. I dry sanded with 3200-4000 grit pads, another coat of oil and then finished with 6000-12000grit pads. I gave it a final coat of oil and let it dry.Dublin42 Dublin43 Dublin44I buffed the bowl and stem with Blue Diamond – making sure to use a light hand on the bowl. Then I gave the stem several coats of carnauba wax. I gave the bowl a coat of Halcyon II wax and hand buffed the bowl with the shoe brush. I gave the entire pipe a final buff with a microfibre cloth. I think the ugly duckling once again became a swan. What do you think? I may well have to make a new stem for it one day. Dublin45 Dublin46 Dublin47 Dublin48 Dublin49 Dublin50 Dublin51 Dublin52 Dublin53

There has got to be a Swan in there somewhere – doesn’t there?


Blog by Steve Laug

Sometimes you are handed an ugly pipe. This one came to me from my brother and was part of a lot from an eBay seller who claims to be restoring estate pipes. Let me tell you, this guy should be shot for what he does to old pipes. My brother picked up four of his pipes. From his photos they appeared to be okay. But when they arrived they were absolutely awful. He had a lovely Stanwell sandblast billiard that he hacked the blast off of. He had a nice looking Dublin shape that he glued what appears to be coffee grounds around the rim from the top down about ¼ inch of the side. The third was butchered as well. Then there was this one – it must have been a nice Rhodesian but he had sawed it off below the rings and then left a very rough rim. He had drilled out the bowl and left it rough and out of round. To my thinking this one had been a GBD Rhodesian. The stem was stamped with the characteristic FRANCE across the joint of the shank and stem. There were remnants of a shape number on the right side that was illegible. There was also a very faint part of the oval on the left side of the shank. He had ruined a very sought after pipe. Added to that he had not even bothered to open the airway as it was plugged with thick black tars and I could not blow any air through it.

To top it all off he even pictures the final insult – in his sales he shows a can of shellac and proudly says he coats all of his work with shellac. Well the amount of dried, runny shellac on these bowls was astonishing. Under the shellac there were even hairs and dust permanently encased in a coat of the thick shiny mess. They all looked awful. The dried runs, the scratches and grooves left much to be desired. Even the stem had not escaped his savage attempts at restoration. There were sanding marks and large dings along the surface of the top and the bottom. The tooth marks that had been there were still evident. A large part of me wanted to throw them all away. But there is always that part of me that wants to see if I can reclaim these hack jobs and make something useful and beautiful out of the guy’s mess. I decided to tackle the cut off Rhodesian first. Time would tell if I could redeem the pipe and make it usable and beautiful once more.

Here is what it looked like when it arrived. Understand that the photos do not begin to give an idea of what the pipe looked and felt like I person… the best that they can do is give you a sense of what was there.Author1 Author2 Author3The first thing I decided to do after looking at it was to reshape the bowl. I used a Dremel and sanding drum to round the edges of the top to make it look more like a prince. It was a lot of sanding with the Dremel to reshape the bowl. The photos below show the process of shaping from the beginning. The first two photos show the first steps in the removal of briar to give the pipe some shape. Was the swan starting to appear? Not sure at this point.Author4 Author5I gave the sides of the bowl more of a curve toward the rim and reduced the size of the rim with the Dremel and sanding drum as shown in the next photos.Author6 Author7 Author8At this point I decided to top the bowl and get rid of the deep scratches on the rim top. The bowl after topping was beginning to take some stately shape. Maybe the swan was beginning to appear.Author9 Author10There was still too much width on the rim and not enough curves to the sides of the bowl for my liking. I sanded the bowl with 220 grit sandpaper to further shape it. I used acetone to remove the shellac and the messy finish on the remaining part of the bowl and shank. The pipe was quickly becoming mine rather than the work of the “hackster”.Author11I tried in vain to blow through the shank. The airway was blocked. I used an unfolded paperclip to break through the thick blockage. I poked and probed until I was able to blow through the airway. Once it was opened I used the drill bit on a KleenReem pipe reamer to unblock the airway. It took a bit of pushing and twisting to get it through the hard tars that lined the airway. Finally I was able to break through. I cleaned the shank and airway with pipe cleaners, cotton swabs and alcohol.Author12 Author13 Author14I put the pipe away for the night. In the morning I was still not pleased with the curvature of the bowl top so I used the Dremel and sanding drum on it once again and gave the bowl more of an upward slant toward the rim. I reduced the width of the rim top to almost nothing. Once I had the bowl shape better defined I sanded the bowl with 220 grit sandpaper to shape it further. I then went to work on the rim. I decided to bevel the rim inward to try to clean up the shape of the bowl. I folded a piece of 220 grit sandpaper and worked on the rim until I had a nice rounded top and beveled inner edge.Author15I sanded the bowl with a medium and a fine grit sanding block to remove the scratches. To me the swan is finally emerging. This piece of briar has some beautiful grain that was hidden beneath the dirty finish and the overcoat of shellac. I am liking the look of the pipe more and more.Author16 Author17 Author18 Author19The stem was actually more of a mess than I had initially thought. In sanding out the bite marks as much as the hack had done he has changed the slope of the stem. Now the angles of each side were different and the marks he had left behind were quite deep. I sanded the stem with 220 grit sandpaper to remove the marks and to try and reclaim the shape of the stem. Author20 Author21Once I had the shape of the stem repaired I sanded it with micromesh sanding pads – wetsanding with 1500-2400 grit pads and then rubbing it down with Obsidian Oil. I dry sanded with 3200-4000 grit pads and gave it another coat of oil. I finished with 6000-12000 grit pads and gave it a final coat of oil.Author22 Author23 Author24I sanded the bowl with micromesh sanding pads at the same time. Each successive grit pad from 1500-12000 gave the bowl a deeper shine.Author25 Author26 Author27 Author28I finished by buffing the pipe on the wheel with Blue Diamond polish and giving it multiple coats of carnauba wax. I buffed it with a clean buffing pad and then gave it a final hand buff with a microfibre cloth. The finished pipe is shown below. The grain on this old timer that has been given a new life is amazing. What do you think did the swan emerge from this ugly duckling? I think so but I am curious as to what you think. Thanks for looking.Author29 Author30 Author31 AUTHOR32 Author33 Author34 Author35

Restoring A Medico Double-Dri Bakelite Pipe


Blog by Steve Laug

In the ongoing adventure of discovery of the quest for the drier smoking pipe I keep finding new ones that intrigue me. This latest addition that my brother Jeff picked up is unique even if it was not part of that adventure of discovery. It is stamped Medico over Double-Dri and it is unusual to say the least. The base of the pipe I believe is made of Bakelite. The bowl is painted briar or at least looks to be. The bowl is friction fit into the base and is held in place by a cork or composition ring around the edges of the base. The bottom of the bowl is a hard clay or ceramic material. The bowl is U shaped and has three holes in the bottom of the bowl that angle outward toward the edge of the external bottom of the bowl that fits in the base. The bottom of the base has a raise metal pillar that sits in an indentation on the bottom of the bowl once it is in place. Double-dri3

This directs the airflow into the rounded bottom of the base and the airway on the back of the pipe. There is a Medico paper filter that sits in the shank of the pipe and the tenon of the stem to further dry out the smoke. Thus there are two traps for moisture so that the smoke that is drawn into the mouth of the smoker is Double Dry. The stem on the one I have is made of a multi-coloured white/grey and has a raised interlocking DD logo. The white/grey nylon looks quite nice with the dark of the base and the white of the bowl.

The pipes seemed to come in a variety of colours and bowl configurations and materials from meerschaum to briar and painted briar. The bases also came in a variety of colours as did the stems. I found the next photo on the web that gives some idea of the wide variety of choices in this 50’s era pipe. Double-Dri1Charles Lemon at Dadspipes wrote about one he did a refurb on and it got my attention so I have had an eye out for one. Here is his write up http://dadspipes.com/2015/10/30/1041/ He wrote that the “Double-Dri was Medico’s foray into the field of removable and interchangeable bowls, though where the Falcon pipe used aluminum for its shank, the Double-Dri used another 1950’s Space Age material, Nylon, for both shank and stem. Press-fit bowls were available in briar or the more expensive meerschaum.”Double-dri2

There was not much information on the brand. The PipePhil site just had the brand and a few photos of two different pipe configurations. The Smoking Metal site gave the name and a picture of the pipe put together and taken apart. There was nothing that I could find that spelled out what Charles spoke of in terms of the base and stem being nylon. It appeared to me that he was right about the stem on the one I had. It was nylon. The base however was exactly like earlier Bakelite pipes that I have in my collection. I know there is a way to check that but the look and feel certainly makes me think I am right in that assessment.

Like Charles I also found a few advertisements in 1950s era magazines that sold the pipe. I could not resist using the one to the left.It is a Medico advertisement in the March 1955 edition of Popular Mechanics magazine. The language of the advert makes for great reading. It says that it is the Best Looking Pipe and the Best Smoking Pipe. It smokes 35 degrees cooler. The Double-Dry system is shown in the line drawing as made up of three parts – Condensation, Radiation and Filtration. If you buy the press on this pipe you will wonder why it is not still being sold 60+ years later. (I would love to get a hold of a copy of the folder that is mentioned at the bottom of the advertisement if any of you have one around.)

When the pipe arrived I brought it to the worktable I took a few photos to show what the condition was when I started the clean up. It was in decent shape. The bowl was caked and the holes in the bottom of the bowl were clogged. I could not see how the airflow worked with the bowl and base from looking inside the bowl. The bowl had some nicks and damage on the top edge and had a thick coating of tars. The bowl exterior was also dirty and there were some black marks on the sides of the bowl. The base was dirty and caked with hardened tars and oils. The inside of the shank and airway were black and the airway into the base was reduced in size. The stem had a lot of tooth chatter on the top and the bottom sides near the button and the contrasting grey and white of the stem material were dull. The double DD on the stem looked to be in excellent shape.Double-dri4 Double-dri5 Double-dri6 Double-dri7I took a close up photo of the rim to show the damage that would need to be dealt with. I also did a close up photo of the bottom of the base to show the inset up into the bowl base.Double-dri8 Double-dri9

I took two photos of the base and the bowl – one looking at it from the top down and the other with the bottom side of the bowl showing.Double-dri10 Double-dri11

I removed the stem from the pipe and the old paper Medico Filter was present.Double-dri12

I cleaned out the inside of the base with cotton swabs and alcohol and cleaned out the airways in the shank and stem with pipe cleaners, cotton swabs and alcohol.Double-dri13 Double-dri14

The bowl had a rounded bottom so I used a PipNet reamer and reamed the bowl to remove the cake and enable me to see the airways in the bottom of the bowl.Double-dri15 Double-dri16

I used a paper clip to break through the airways from the underside of the bowl.Double-dri17I scrubbed the bowl exterior and rim with cotton pads and alcohol. I was able to remove most of the grime from the bowl and a fair bit of the lava from the rim. I could see that the rim was actually unpainted briar.Double-dri18 Double-dri19 Double-dri20 Double-dri21I sanded the bowl with 1500-2400 grit micromesh pads to remove some of the pieces of tar and oil that were stuck to the surface of the bowl. I also sanded the base with the micromesh to give it a shine.Double-dri22 Double-dri23I lightly topped the bowl to clean up the outer edge of and the top of the rim. I sanded the inner edge of the rim to smooth that out as well. I followed up on it by sanding it with 1500-2400 grit micromesh pads.Double-dri24I sanded the tooth chatter and marks out of the stem with 220 grit sandpaper and then wet sanded it with 1500-2400 grit micromesh sanding pads. I dry sanded it with 3200-12000 grit pads and the shine came back to the stem. The contrast of grey and white really began to stand out.Double-dri25 Double-dri26 Double-dri27I gave the nylon stem several coats of Conservator’s Wax and hand buffed the stem with a microfibre cloth. I put the pipe back together piece by piece including a new Medico paper filter in the stem.Double-dri28 Double-dri29 Double-dri30I gave the entire pipe another coat of Conservator’s Wax and hand buffed the pipe to a shine. The finished pipe is shown in the photos below. Other than the damage on the curve of the bowl the pipe looks very good. Thanks for looking.Double-dri31 Double-dri32 Double-dri33 Double-dri34 Double-dri35

BBB Own Make #166 Reconditioning


Blog by Dave Gossett

I’ve owned a few BBB’s for years but lately I’ve taken a real liking to the Own Make. I picked this up from eBay on the cheap. Even with the blurry pictures it looked rough, but it was even worse upon arrival.

The one time this pipe was actually reamed, I think it was with a knife. The inner rim was hacked up and the top was charred. Dave1 Dave2 Dave3 Dave4 Dave5I like a challenge so I got to work. I used a Dremel drill with a barrel sander to make way for a reamer.

Here is it after the initial cleaning. Lots of rim char and missing briar. Dave6I started with a slight topping to give it a crisp symmetrical outer rim ring and then beveled the inner rim to smooth out the damage. Next I sanded the outside of the bowl to remove the scratches. Once the rim and stummel repairs were finished, I sanded the bowl chamber smooth and added a fresh carbon coating.

Next up: the stem. Once the stem was cleaned and sanitized I removed the tooth chatter with needle files and began wet sanding. I use craft sticks and glue various grits of sand paper to them for wet sanding the sharp edges and angles. Wet sanding the entire stem by hand can soften the crisp edges of the original design. Using these small sticks, can remove all the oxidation without compromising the original shape.

Here is an example from another project pipe. The stem in this picture also has a button patch repair. Dave7To finish up, I gave it few coats of carnauba wax and polished the silver band. Dave8 Dave9 Dave10 Dave11