Blog by Steve Laug
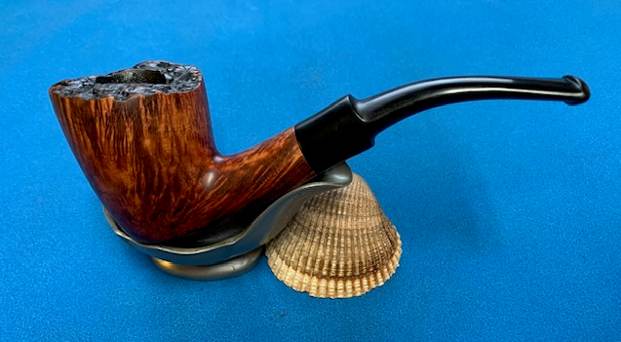
The next pipe on the table is the last of the five pipes that the Vancouver pipe man dropped off for me to work on for him. It was stamped Stanwell Danish Star and had a great flame and straight grain around the bowl and shank with plateau finish on the rim top. It is a Bent Dublin that was finished in a brown stain. It needed restoration on the bowl which was moderately caked and the shank was dirty. It also needed new stem as the current push stem was chewed and broken at the button. It was another pipe that I had restored back in 2016 and he had purchased at that time. I had done a complete restoration and removed the thick cake at that point. The stem had a small hole in the top that was about half the size it is now. The repair worked for at least 6-7 years so I am pleased with that. It is obviously another of his favourites as it is well used. The stem on it was original so I kept it and repaired it the first time. Here is the link to restoration (https://rebornpipes.com/2016/11/30/a-stanwell-danish-star-64/). Here are some photos of the pipe when he picked it up in 2016 to give a bit for context for my latest work. 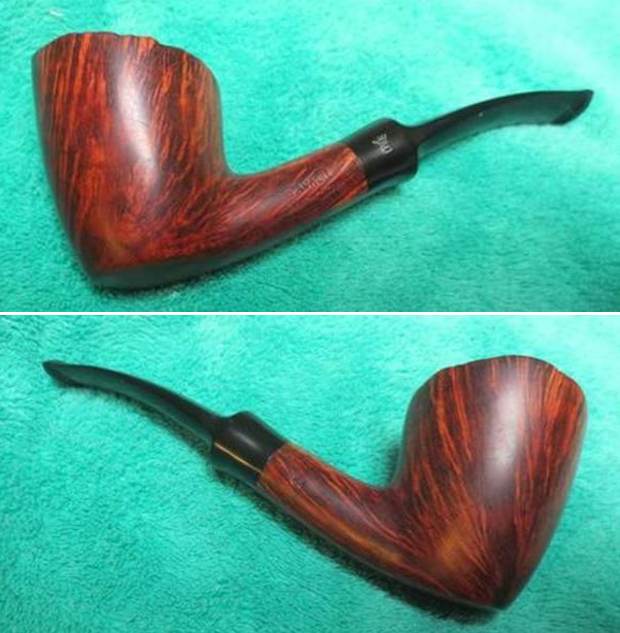
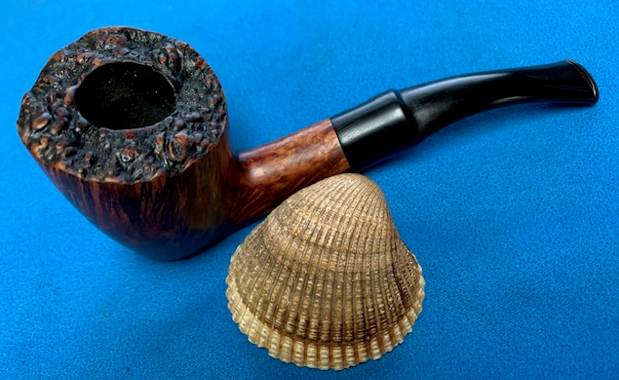
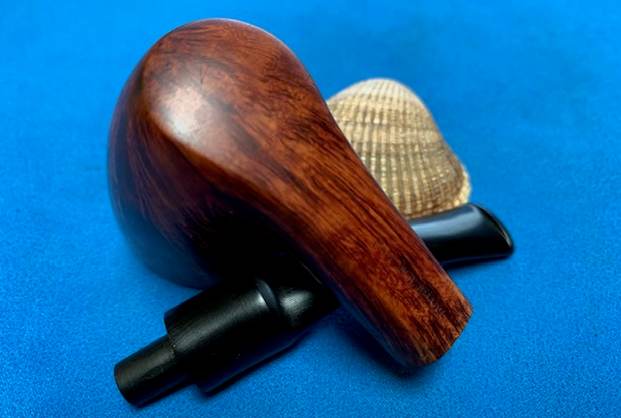
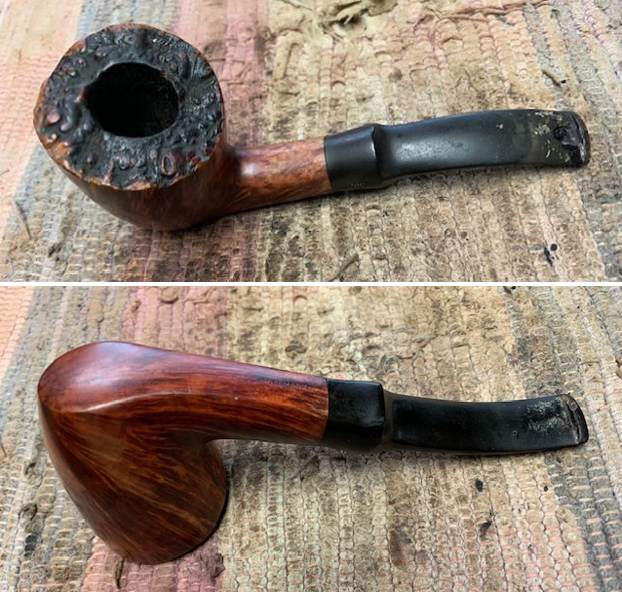
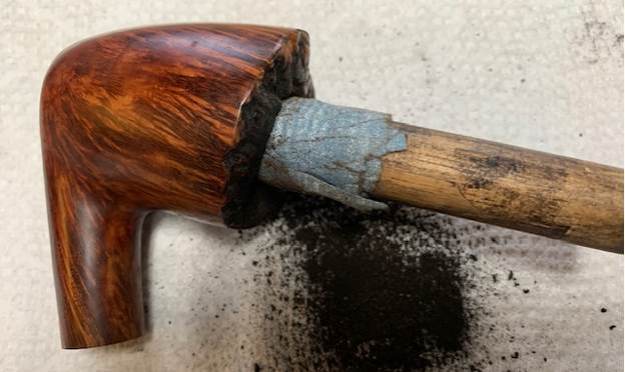
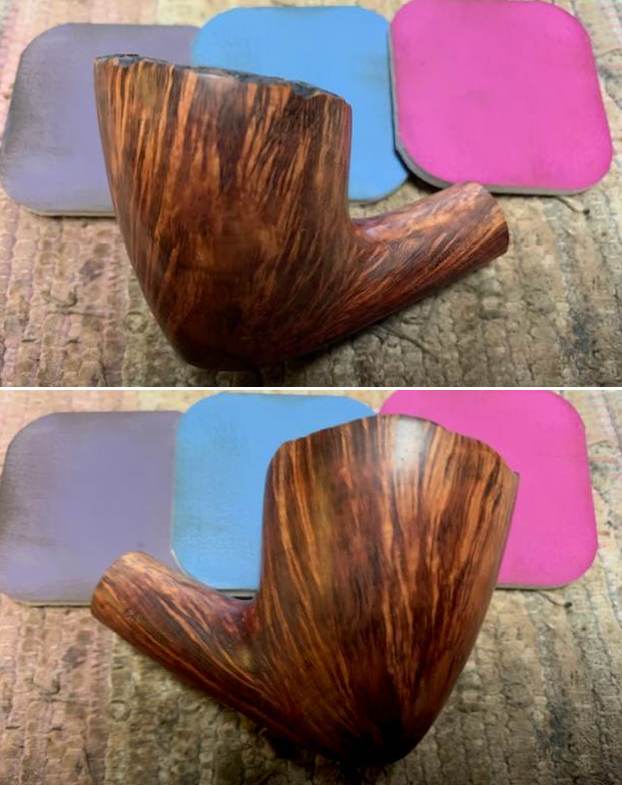
 When I took the pipe out of the bag of pipes to work on this afternoon, this is what I saw. The finish on the briar looked very good. It was dirty but the colour had stayed true. It had a bit of patina on the bowl but it was beautiful. The bowl had a moderate cake and the airway in the shank was dirty. The stem was oxidized, calcified and had a large chunk of vulcanite missing on the topside.
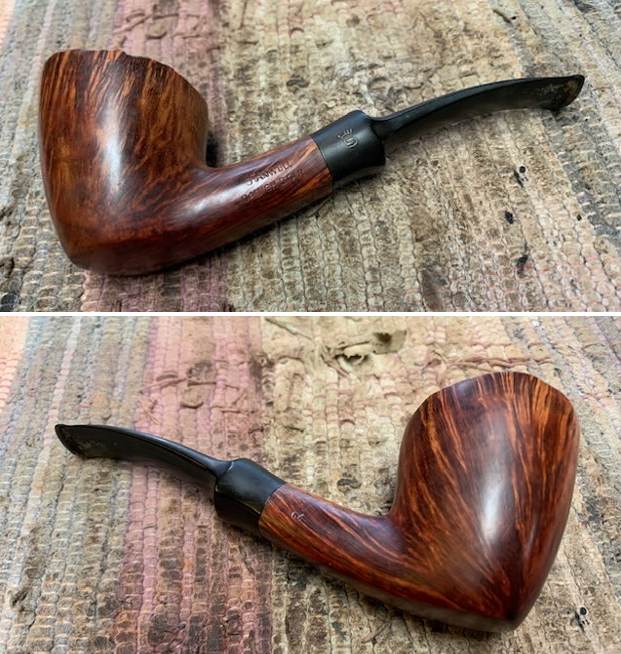
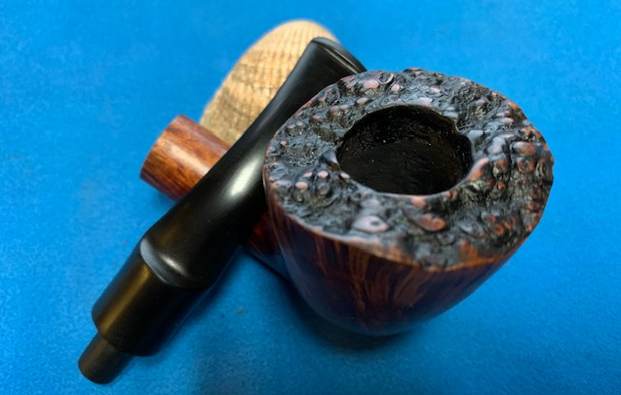
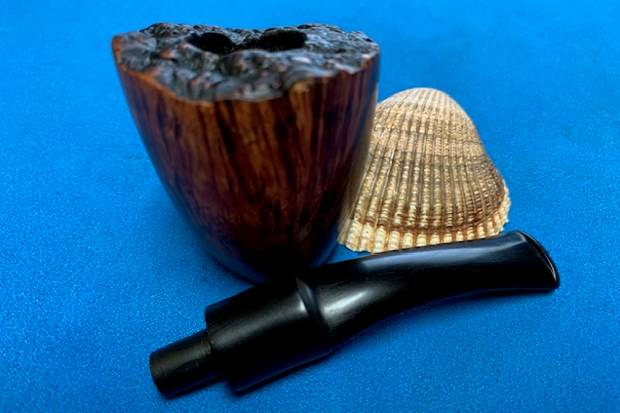
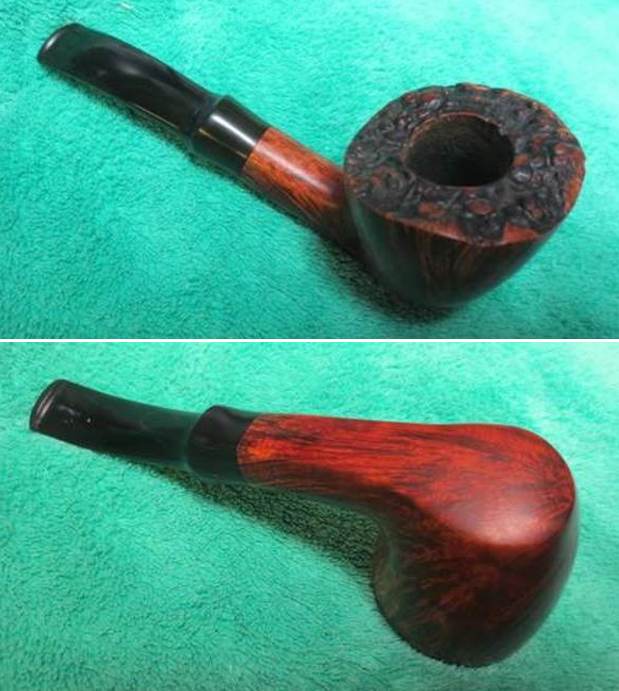
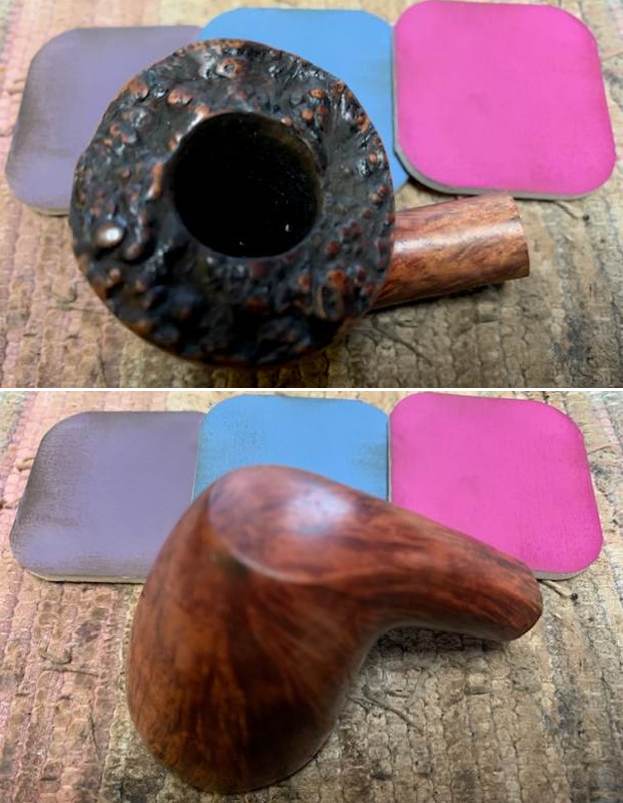
 I took photos of the rim top and stem to show their condition. You can see the moderate cake in the bowl how it looked. The plateau rim top had some lava in the grooves of the finish and some build up around the inside edge of the rim. It will clean up pretty well. The photos of the stem show the condition of the stem. You can see the tooth marks and the large hole on the top of the stem surface.
 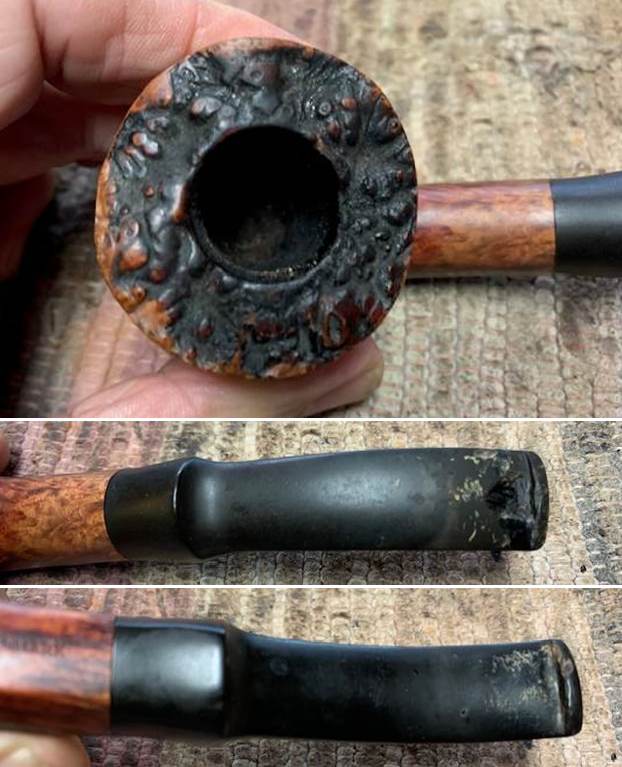 I took photos of the stamping on the sides of the shank. The stamping on the left side of the shank reads Stanwell [over] Danish Star. On the right side it is stamped with the shape number 64. On the underside of the shank it is stamped Made in Denmark. There was a Crown S stamp on the left side of the saddle I removed the stem from the shank to give a sense of the flow of the pipe.
 Now it was time to work on the pipe itself. I started my work on the pipe by cleaning and reaming the bowl The cake was quite thick but it can hold residual oils from previous tobaccos and I wanted to check the bowl walls for burn damage or checking. I reamed it with a PipNet pipe reamer to cut cake back to bare briar. I cleaned up the remnants of the cake with a Savinelli Fitsall Pipe knife. I sanded the walls with 220 grit sandpaper wrapped around a piece of dowel. I worked on them until they were smooth. There was no checking or burn damage to the bowl walls. It was quite clean.
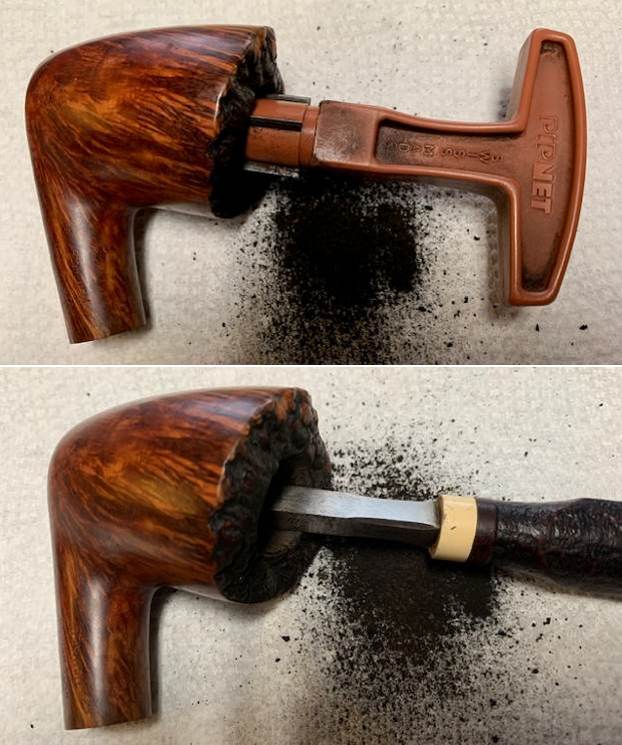
 I cleaned out the internals with 99% isopropyl alcohol, pipe cleaners and cotton swabs. I worked over the shank and the airway in the new stem. It took some work but once finished it was clean and smelled fresh.
 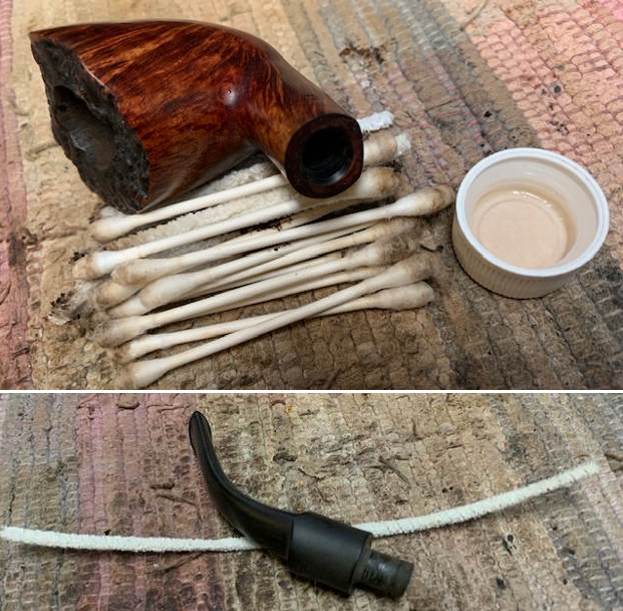 I used a brass bristle wire brush to clean up the plateau and knock off the lava and debris from the grooves and high spots on the rim top. It looked much better.
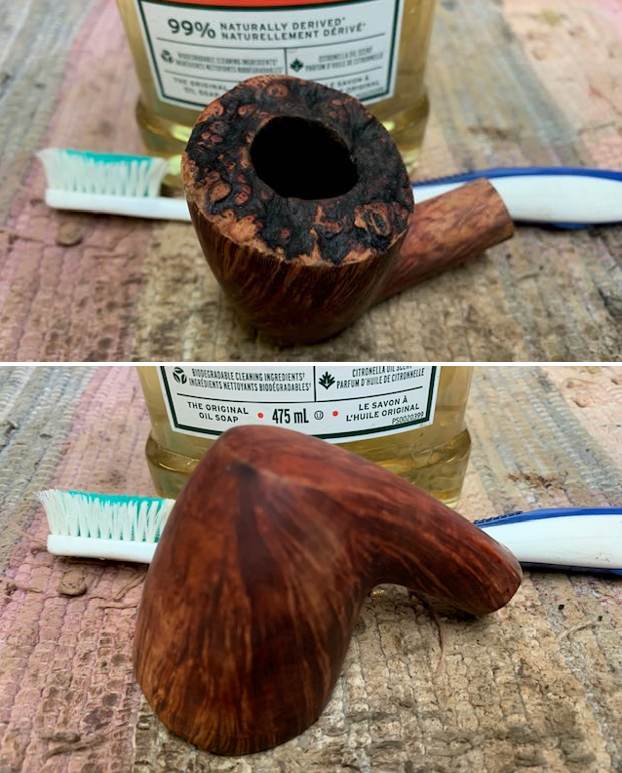
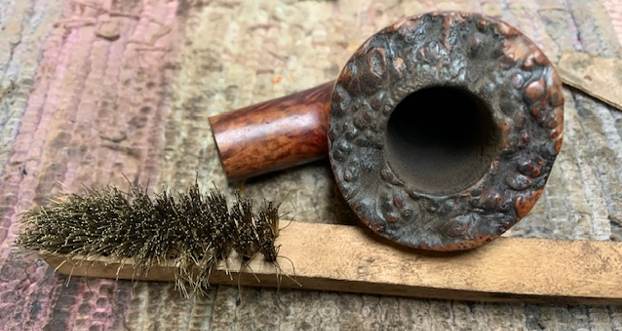 I scrubbed the bowl with undiluted Murphy’s Oil Soap with a tooth brush to remove the oils and grime from the finish. I rinsed the bowl with warm water to rinse off the soap and grime. I dried it off with a soft cloth.
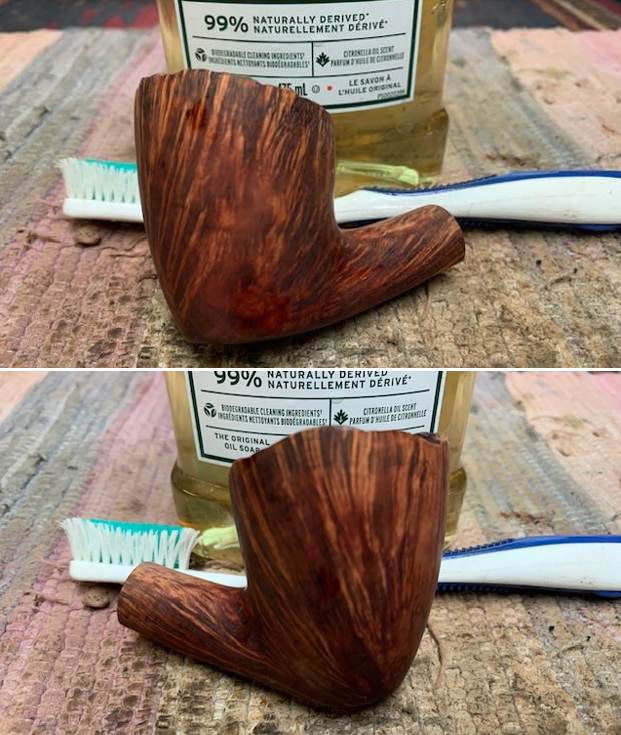
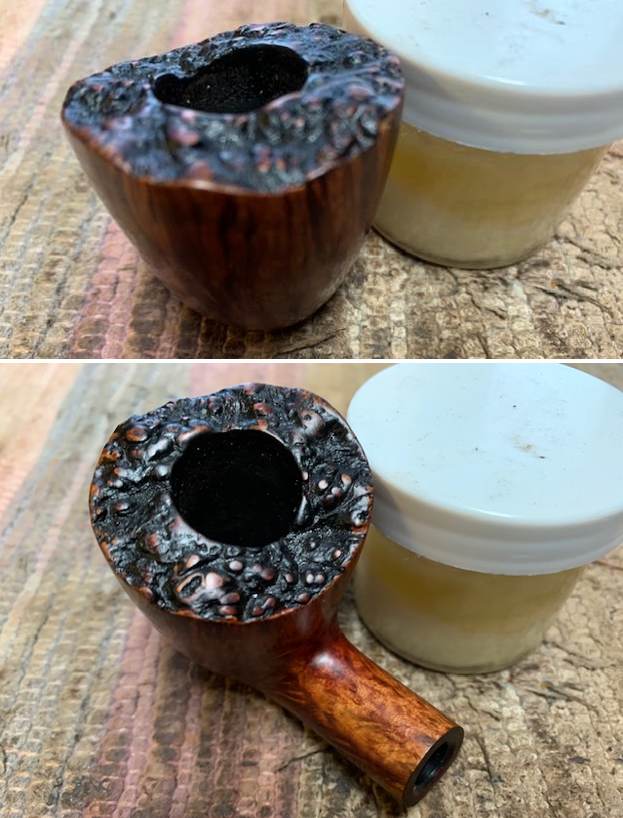
 I stained the plateau rim top with a Black stain pen. I stained the entire rim top in the valleys and in the plateau. I knock of the stain on the high spots sanding and polishing process I sand off the high spots.
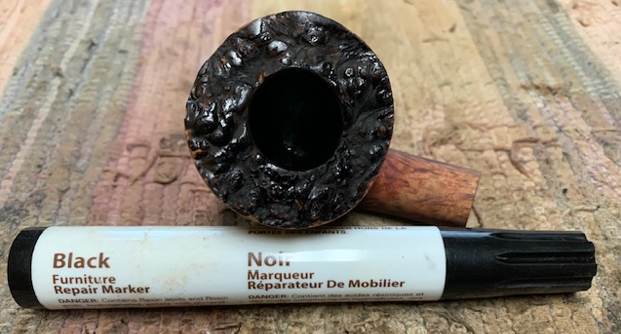 I polished the rim top with micromesh sanding pads – dry sanding with 1500-12000 grit pads. I sanded the stain off the high spots on the plateau rim top. I wiped the briar down with a damp cloth after each sanding pad. It took on a real shine by the time I finished with the last sanding pad.
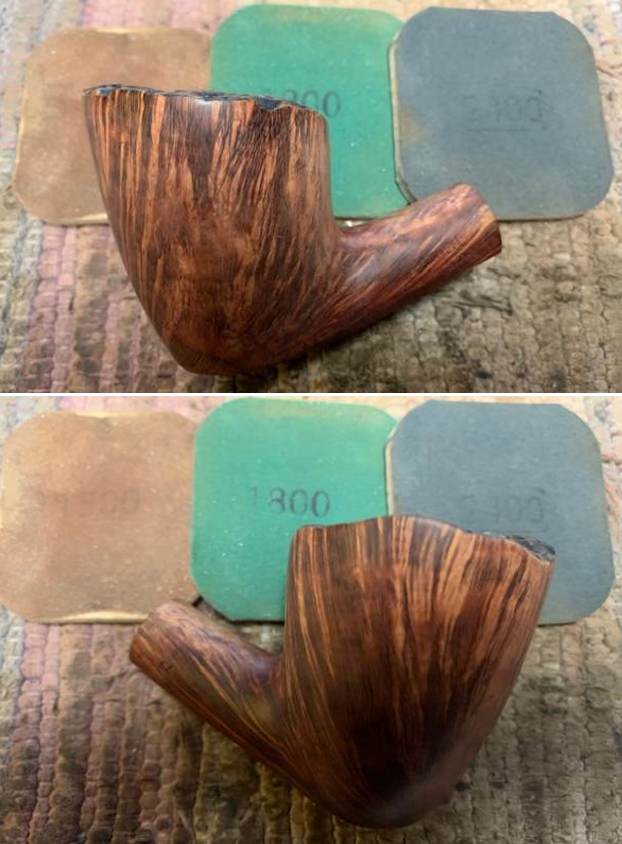


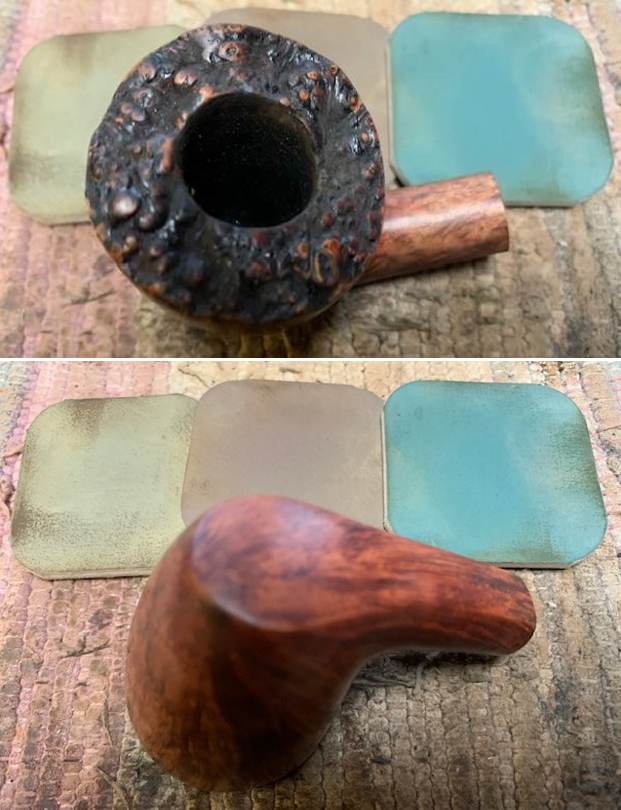
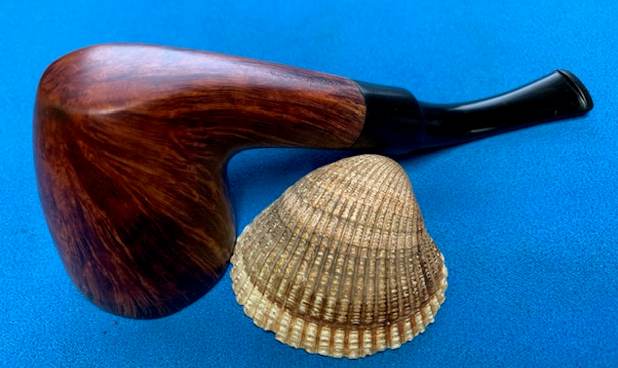
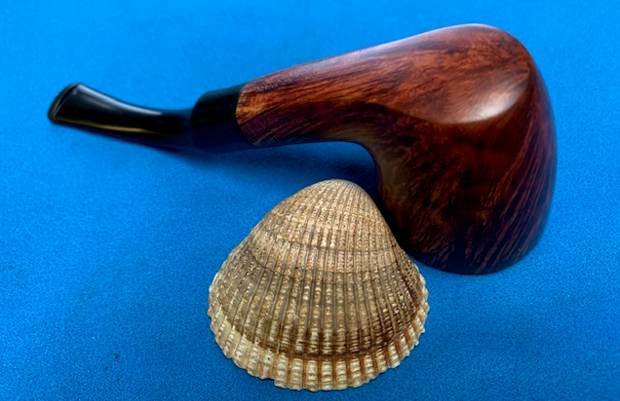
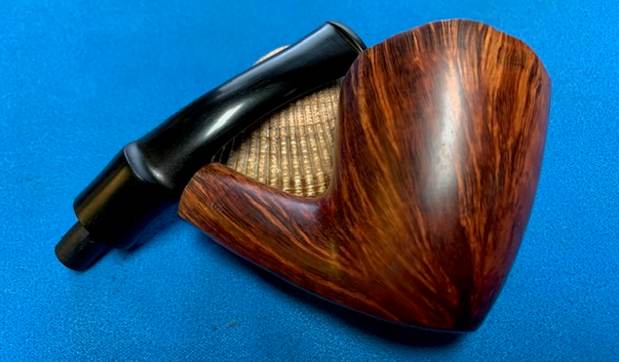
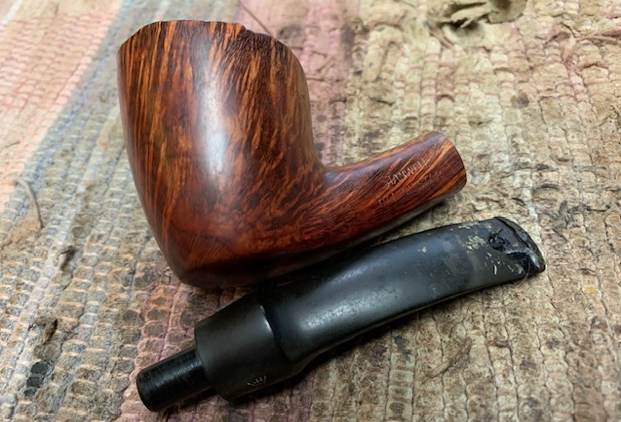
 I worked some Before & After Restoration Balm into the smooth bowl and the plateau rim top. I worked it into the surface of the briar with my fingertips to clean, enliven and protect the wood. I used a horse hair shoe brush to work it into the crevices and the valleys of the plateau. Once the bowl was covered with the balm I let it sit for about 15 minutes and buffed it off with a soft cotton cloth and the shoe brush. I polished it with a microfiber cloth. I took photos of the pipe at this point in the process to show what the bowl looked like at this point.
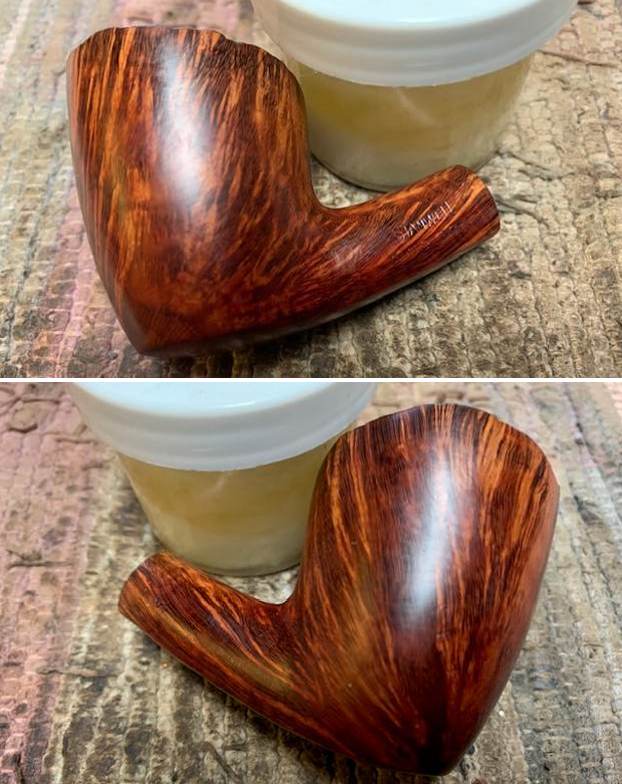

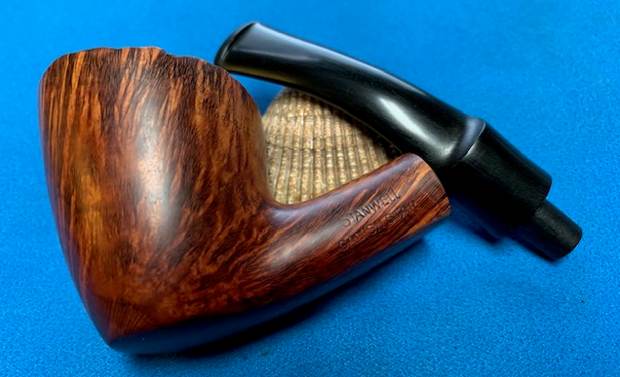
 Now it was time to deal with the replacement stem. I went through my can of stems and found a bent saddle vulcanite stem that was a close fit. It was more bent than the original but with a little straightening it would be perfect. I would also need to remove a little of the diameter of the tenon to get a snug fit in the shank.
 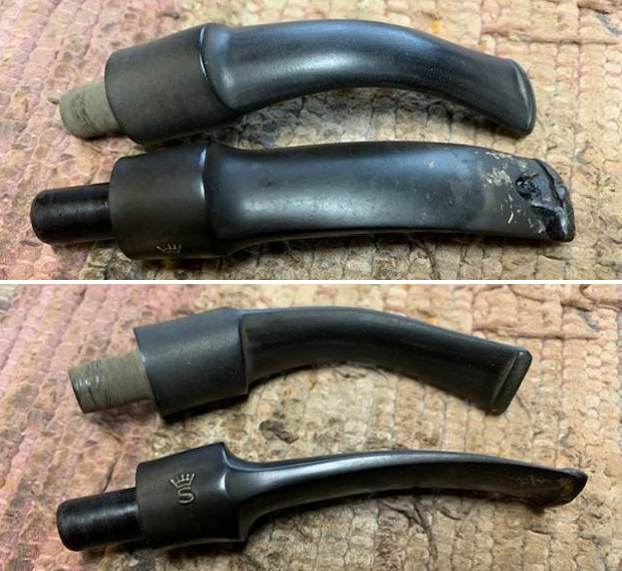 I put it in the shank as far as it would go before I fitted it correctly but you can see what the pipe will look like with the new stem. It is going to work very well.
 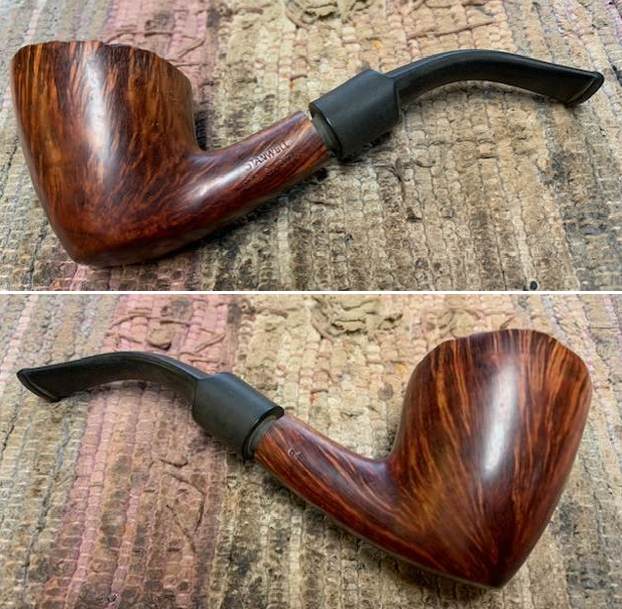 To correct the bend in the stem to match the rim top I “painted” it with the flame of a Bic lighter until the vulcanite was flexible. I bent it to the angle of the shank and rim top until I had the right look I was waiting for. It looked good.
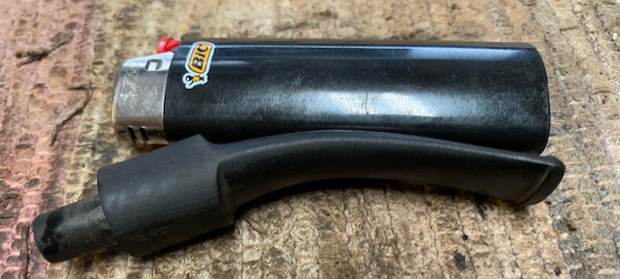 I used a piece of 220 grit sandpaper to reduce the diameter of the stem and flatten the bottom of the saddle portion to match the shank. I also sanded out the casting marks on the new stem and also the scratches in the vulcanite at the same time. I started polishing the stem with 600 grit wet dry sand paper.
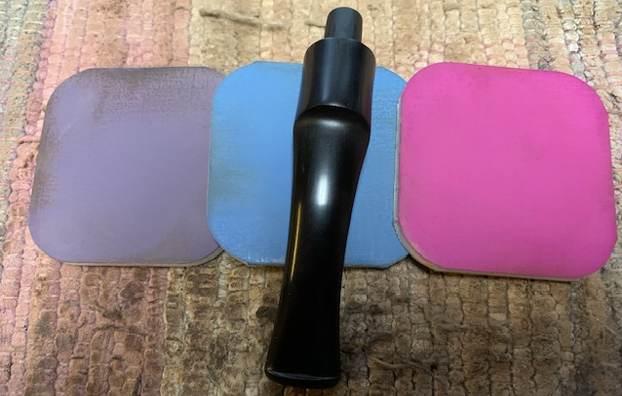
 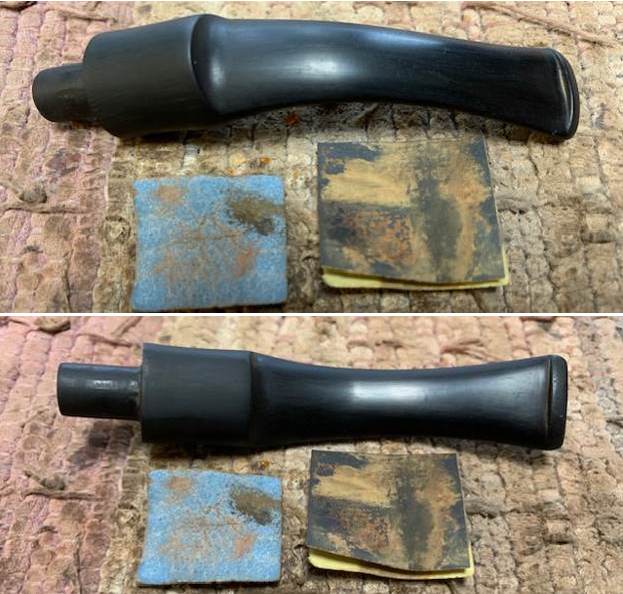 I used micromesh sanding pads and water to wet sand the stem with 1500-12000 grit sanding pads. I wiped it down after each sanding pad with Obsidian Oil on a cotton rag after each sanding pad as I find it does two things – first it protects the vulcanite and second it give the sanding pads bite in the polishing process.
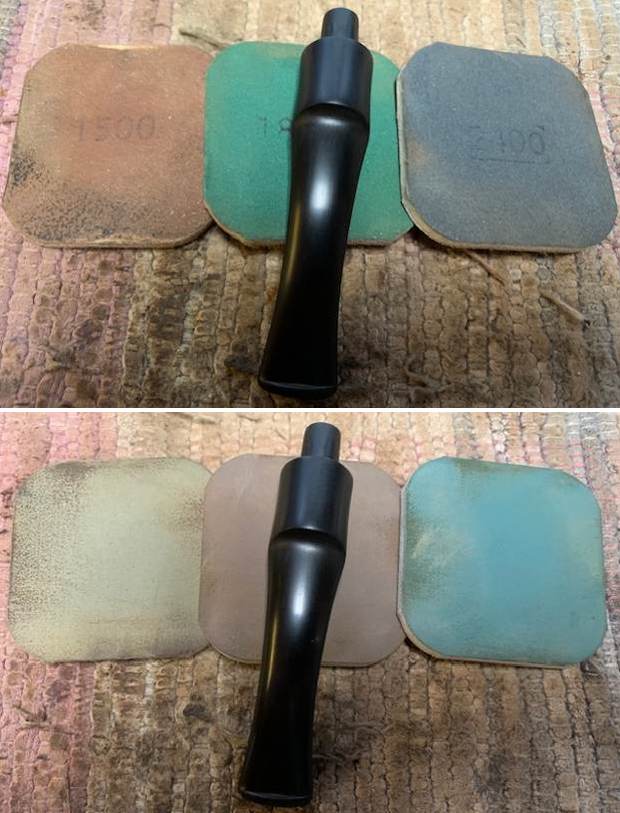
 After finishing with the micromesh pads I rub the stem down with Before & After Fine and Extra Fine stem polish as it seems to really remove the fine scratches in the vulcanite. I rub the Fine Polish on the stem and wipe it off with a paper towel and then repeat the process with the Extra Fine Polish. I finished the polishing of the stem down with a final coat of Obsidian Oil and set the stem aside to let the oil absorb. This process gives the stem a shine and also a bit of protection from oxidizing quickly.
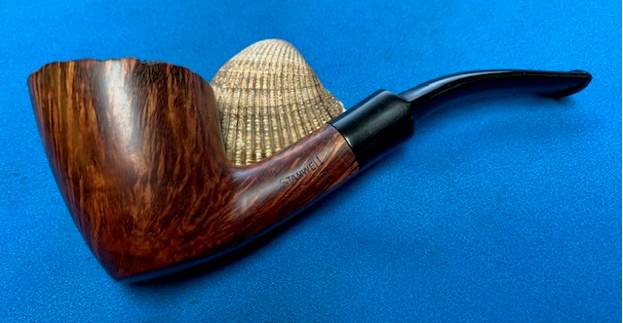
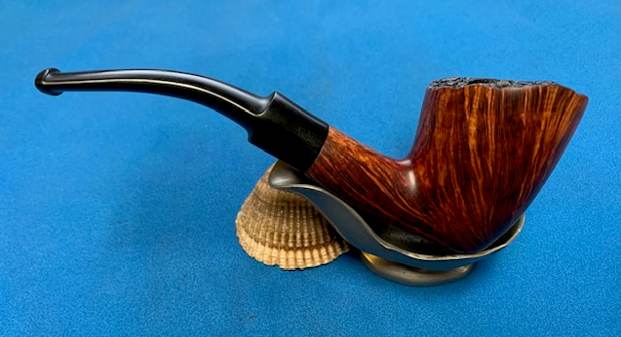
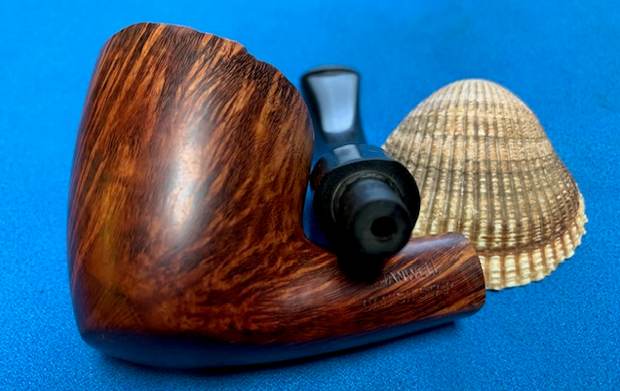
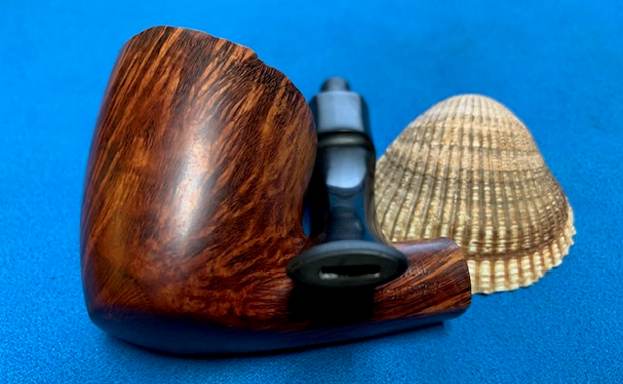
  I took the finished Stanwell Danish Star 64 Freehand Dublin bowl to wax and polish. I don’t buff the plateau rim top on the wheel as it leaves a lot of grit in the deep grooves of the finish. I polished the bowl and the stem with Blue Diamond on the buffing wheel to polish out the scratches in the briar and vulcanite. I buffed it and gave it multiple coats of carnauba wax to protect and give it a shine. I buffed the pipe with a clean buffing pad to raise the shine. I hand buffed it with a microfiber cloth to deepen the shine. The pipe polished up pretty nicely. The contrast of the dark stain on the briar revealing the grain with the shine of the polished vulcanite saddle stem is quite stunning. The rich finish around the bowl and shank is quite remarkable and the plateau rim top gives the pipe an incredible tactile presence. The Stanwell Danish Star 64 is a nice looking pipe and one that will be a great smoking pipe. The finished pipe is shown in the photos below with each of the stems. The dimensions of the pipe are Length: 6 inches, Height: 2 inches, Outside diameter of the bowl: 1 ¾ inches, Chamber diameter: ¾ of an inch. The weight of the large pipe is a light and comfortable 56 grams/1.98 ounces. It is a beautiful pipe and the last of the five pipes left with me for work. They are finished and ready for him to pick them up and enjoy once more. As always I encourage your questions and comments as you read the blog. Thanks to each of you who are reading this blog. Remember we are not pipe owners; we are pipe men and women who hold our pipes in trust until they pass on into the trust of those who follow us.