by Steve Laug
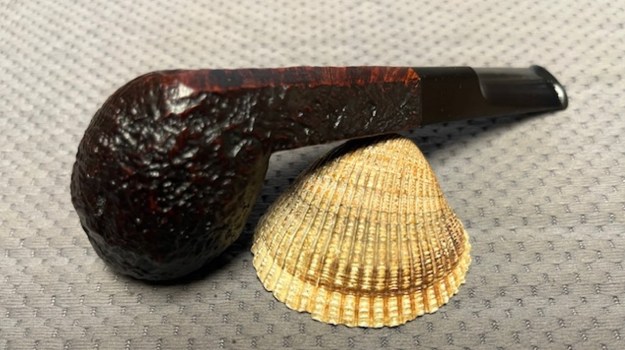
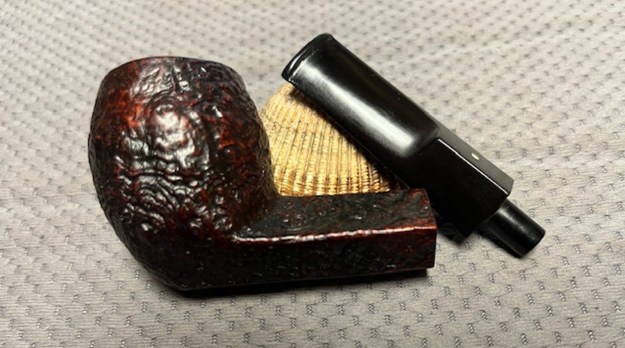
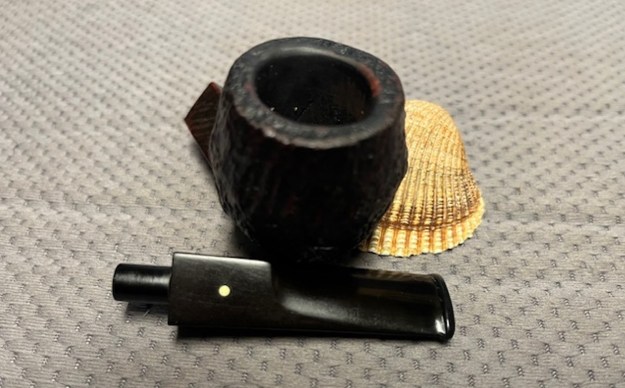
The next pipe on the table came to us from a seller in Cleveland, Ohio, USA on 04/26/2022. It is a Dunhill Shell Briar Bulldog with a saddle stem that has been “ridden hard”. It is in rough shape as can be seen in the photos below. It is stamped on a smooth panel on the underside of the shank. On the heel of the bowl it is stamped with the shape number OX followed by Dunhill [over] Shell Briar [followed by] Made in [over] England6 [followed by] Circle 4T. The stamping is faint in spots but still readable. The pipe has a mix of black, cordovan and brown stains on a Shell sandblast finish and some amazing grain that the shape follows well. The finish was dusty and dirty with grime ground into the nooks and crannies of the rugged sandblast. The bowl had a thick cake and there was heavy lava in the sandblasted rim top and edges. The original stem is on the pipe and it is a mess. The button has a crack on the top side and the underside is missing a huge chunk from the button forward about ¾ of an inch or more. Jeff took photos of the pipe to show what it looked like before he started working on it.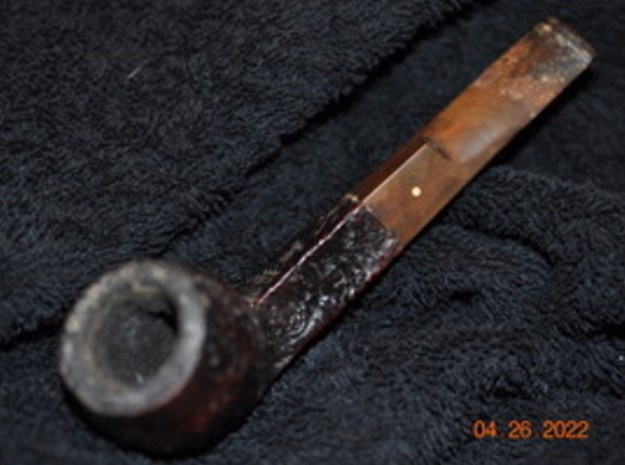 Jeff took photos of the bowl and rim top to show the thickness of the cake and the lava coat on the rim top. There was some tobacco debris in the bottom of the bowl. The stem photos show the condition of the short taper stem ahead of the button.
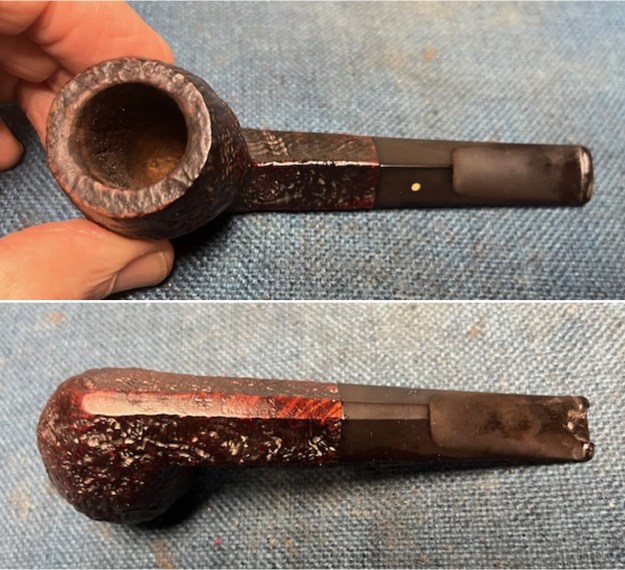
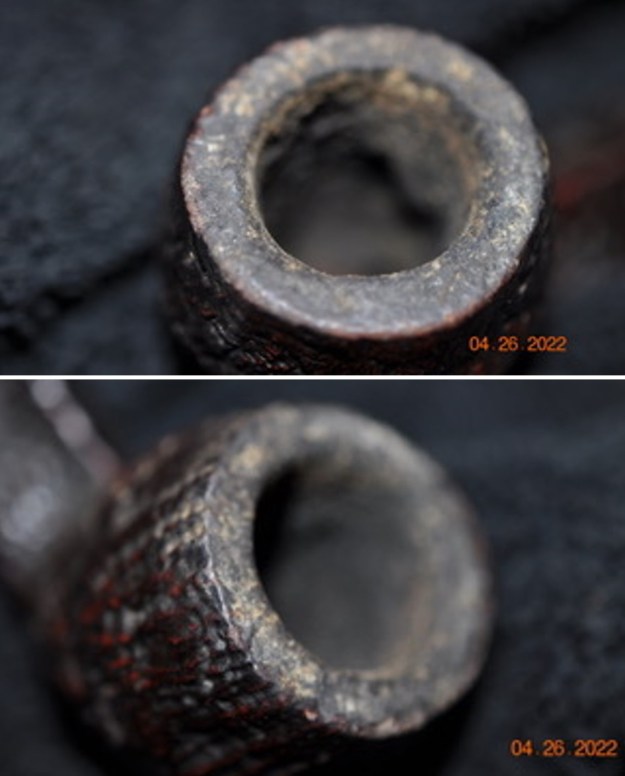
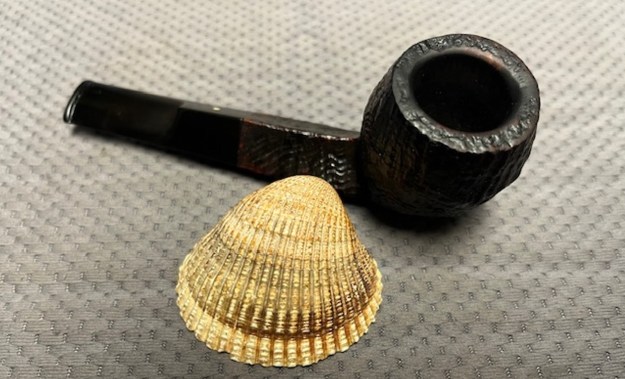
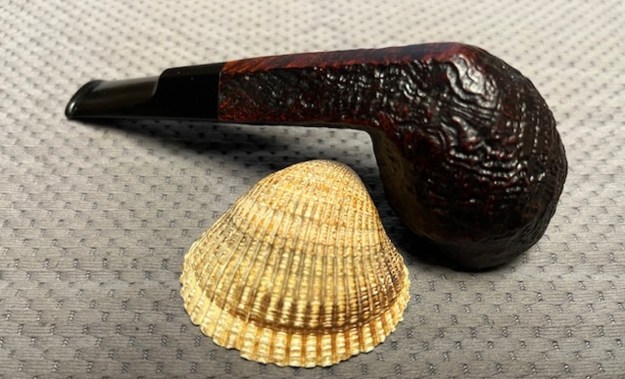
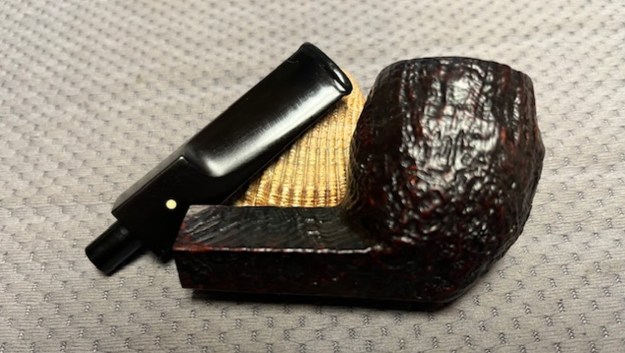
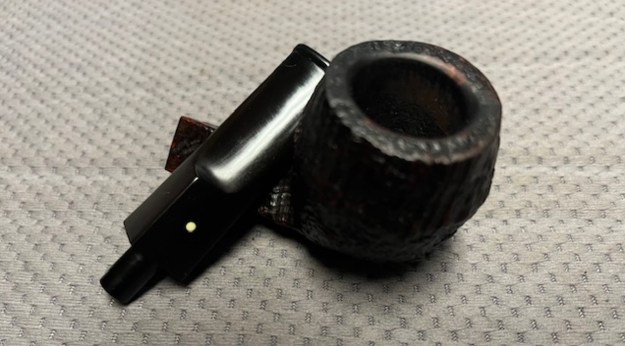
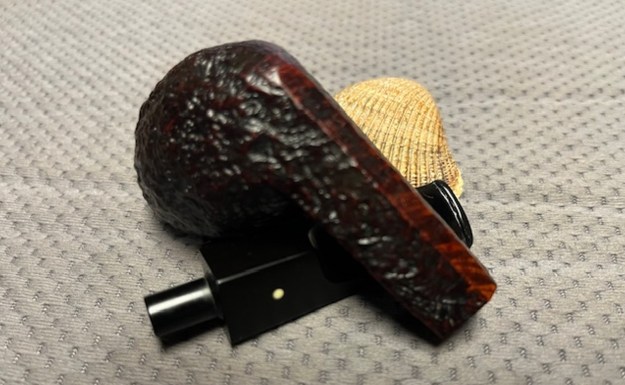
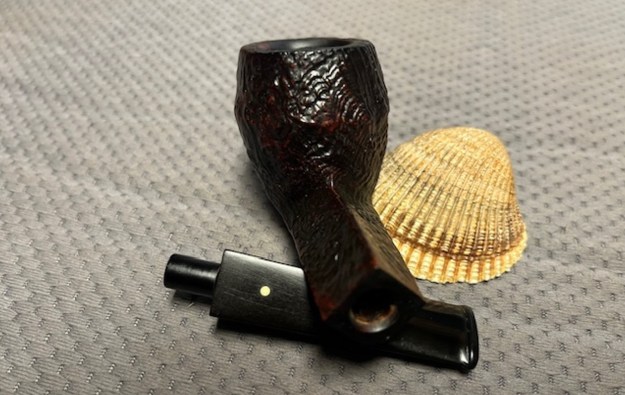
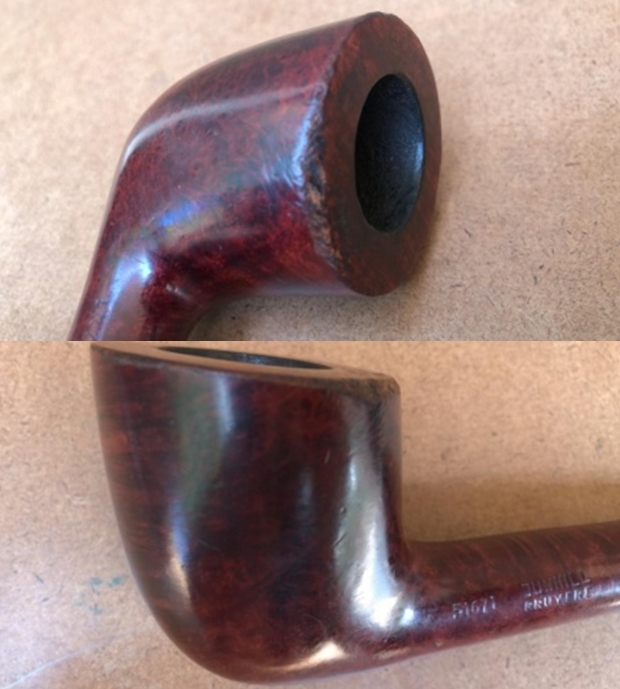
 Jeff took photos of the bowl sides and heel of the bowl to show the deep and rugged sandblast. It is a beautiful looking piece of briar.
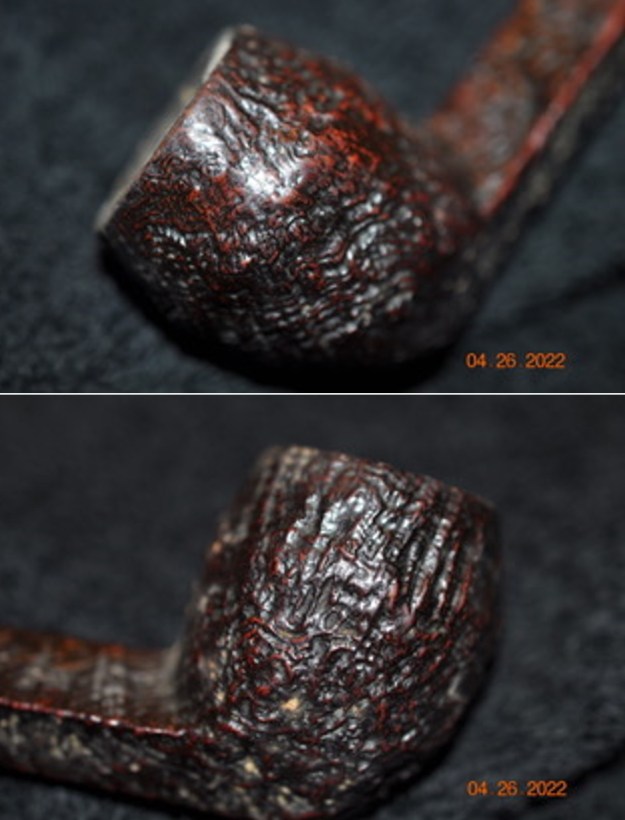
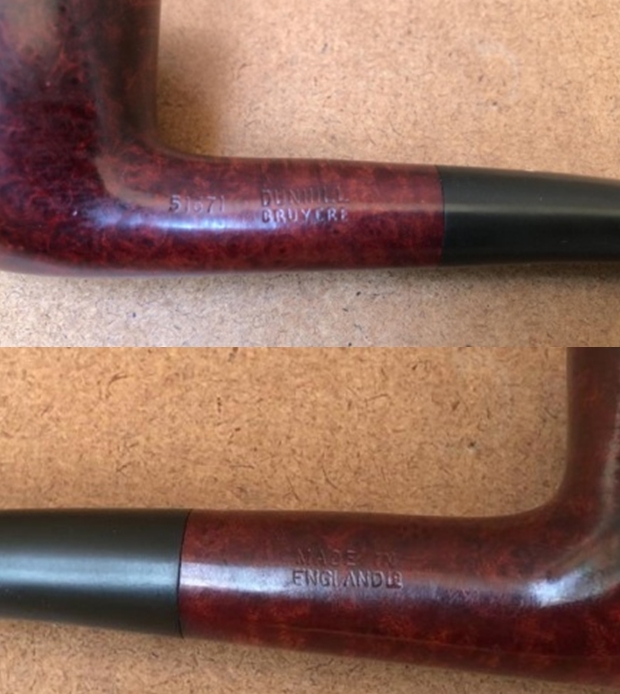
 Jeff a photo of the stamping on part of the shank. He did not capture the shape number or the Dunhill over Shell Briar. It is clear and readable as noted above.
  One of the first things I like to do is to unpack the stamping and understand each element in it. I turned to Pipephil’s helpful site (http://pipephil.eu/logos/en/dunhill/shell-briar1.html). The stamping is interpreted as follows: The OX is the shape of the pipe which I assume is a Bulldog. The Dunhill Shell Briar is the finish. Following the Made In England6 gives the year that the pipe was made. The circle 4 S is the stamp for a Group 4 in a Shell Briar finish.
I turned to Pipedia’s shape charts on Dunhills (https://pipedia.org/wiki/Dunhill_Shape_Chart). I have included the shape charts from the site. The first is the chart as a whole and the second is a larger version of the right column.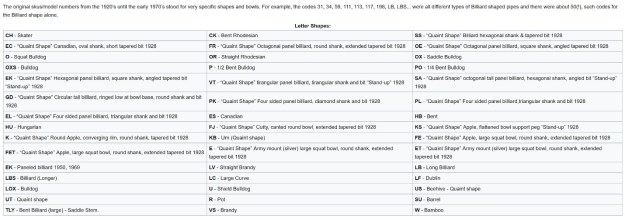
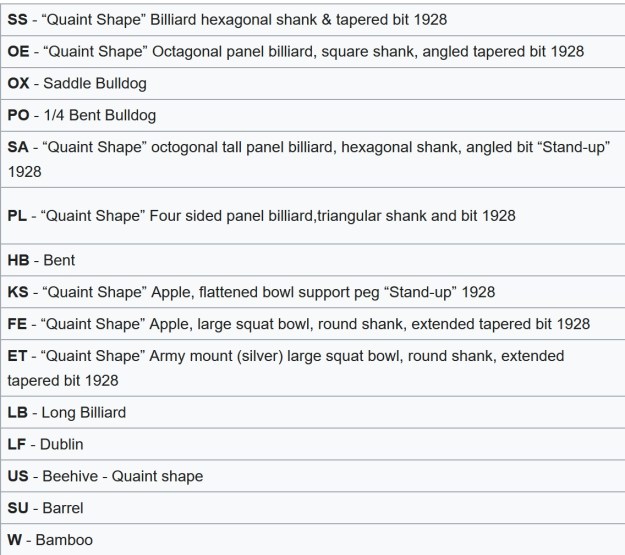 From the above information I could see that I was working on a Saddle Bulldog shaped pipe. The chart shows that the OX is the stamping for Saddle Bulldog.
From there I wanted to pin down the date stamp 6. The pipe has a patent number on it so that will also help with the date of this pipe. I have included the Dunhill Dating Key Part 2 chart below for you to follow (http://www.pipephil.eu/logos/en/dunhill/cledat-en1a.html). The third column shows the date of the pipe. Since it bears the smaller raised suffix 6 it took me to the 1950 box. From there the key tells me to add 1950 + 6 dates the pipe to 1956.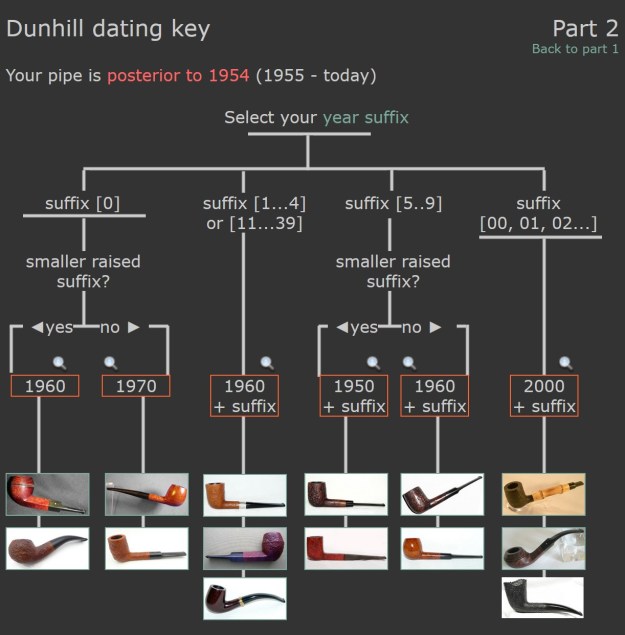 I wanted to know more about the Shell Briar/Shell finish and when it was introduced by Dunhill and how that fit the Patent stamp on the bowl. I turned to a listing on Pipedia that gave me the information I was looking for (https://pipedia.org/wiki/Dunhill).
Shell
The Shell is a deep, craggy sandblast finish with a black stain, traditionally applied to soft, beautifully grained Algerian briar. While perhaps not the first-ever use of sandblasting on pipes, the technique perfected by Dunhill is considered one of the brand’s most significant contributions to the art of pipe making. The development is documented in English patent No. 119708/17; preliminary work began on October 13, 1917, and the patent was granted a year later, just weeks before the end of the First World War.
The origin of the finish is famously recounted as an “Accidental Discovery” in early Dunhill catalogues. The story tells of Algerian briar blocks being inadvertently left near a furnace, causing the softer wood to shrink and the harder grain to stand out in a textured relief. The reality, as detailed in the patent application, was a deliberate process of steeping the briar in oil for weeks, followed by a heat treatment. Only then was the sandblast applied to cut away the softer wood, resulting in a durable, lightweight, and cool-smoking pipe.
In 1986, Dunhill introduced a premium version of the Shell finish called the ‘Ring Grain’. These pipes feature a particularly deep blast reminiscent of the classic style of the 1930s to mid-1960s, applied to briar with a superior grain pattern. The ‘Ring Grain’ name was later changed to ‘Shilling’ in 1995. Regarded by many enthusiasts as among the finest modern Dunhills, these pipes are produced in limited quantities and are exceptionally rare.[122][123]
Now I knew that I was working on a Dunhill Tanshell OX Bulldog with a Saddle stem that was made in 1956.
I turned to work on the pipe itself. Jeff had carried out his usual thorough cleanup of the pipe. He reamed the bowl with a PipNet reamer and cleaned up the reaming with a Savinelli Fitsall Pipe Knife. He scrubbed the internals of the bowl, shank and stem with alcohol, cotton swabs, shank brushes and pipe cleaners. He scrubbed the externals with undiluted Murphy’s Oil Soap and a tooth brush. He rinsed the bowl off with running water and dried it off with a soft cloth. He soaked the stem in Briarville’s Pipe Stem Deoxidizer and once it had soaked rinsed it off with warm water to remove the residual solution. He dried it off and rubbed it down to remove any oxidation that was still on the stem. The pipe looked very good when I received it. The bowl and rim top were in good condition but needed work on the blast in the top and damage on the inner edge. The saddle stem had a large piece of vulcanite missing on the underside from the button forward.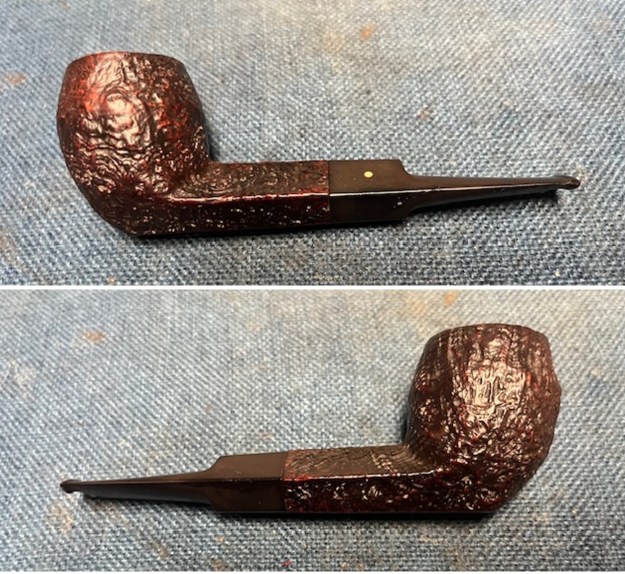
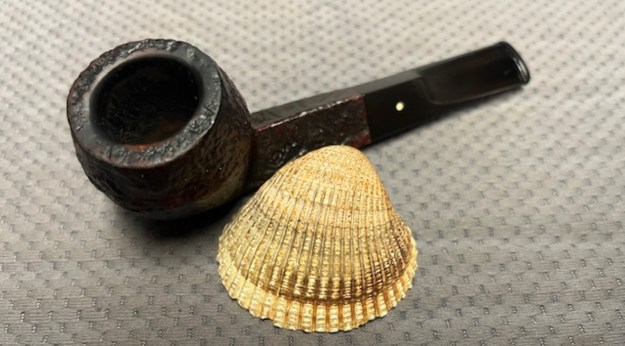
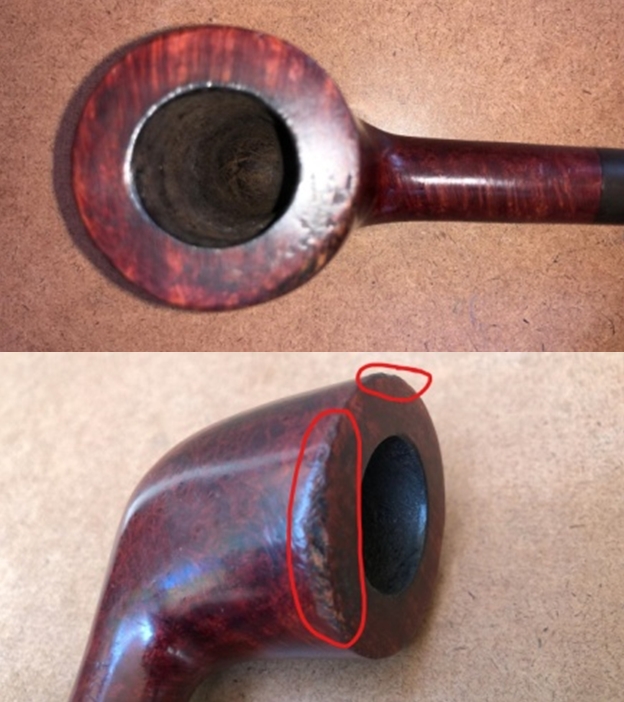
 I took a photo of the rim top to show the condition. You can see the clean bowl and damage to the inner edge of the bowl on the front and back side of the bowl. The stem came out looking clean. The issues noted above are visible in the photos below.
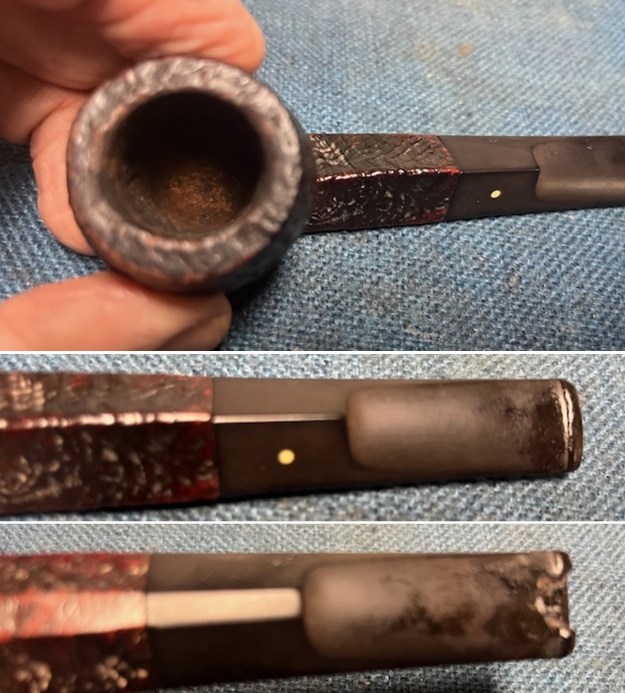 I took a photo of the underside of the shank to show the stamping. It is clear, though faint toward the stem and readable as noted above. I removed the stem from the shank and took a photo of the pipe parts to show what I was working with. It is a nice looking pipe.
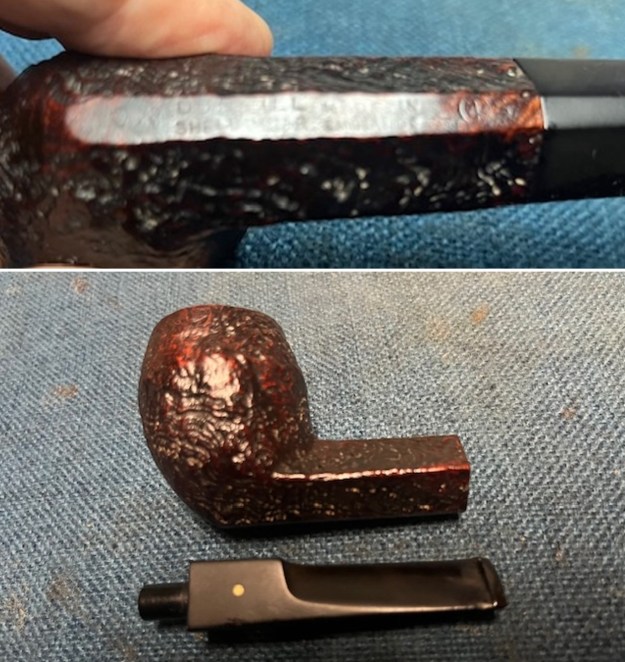 I started by working over the damage on inner edge of the rim. I started with a folded piece of 220 grit sandpaper to smooth out the inner edge and give it a slight bevel. It looked significantly better.
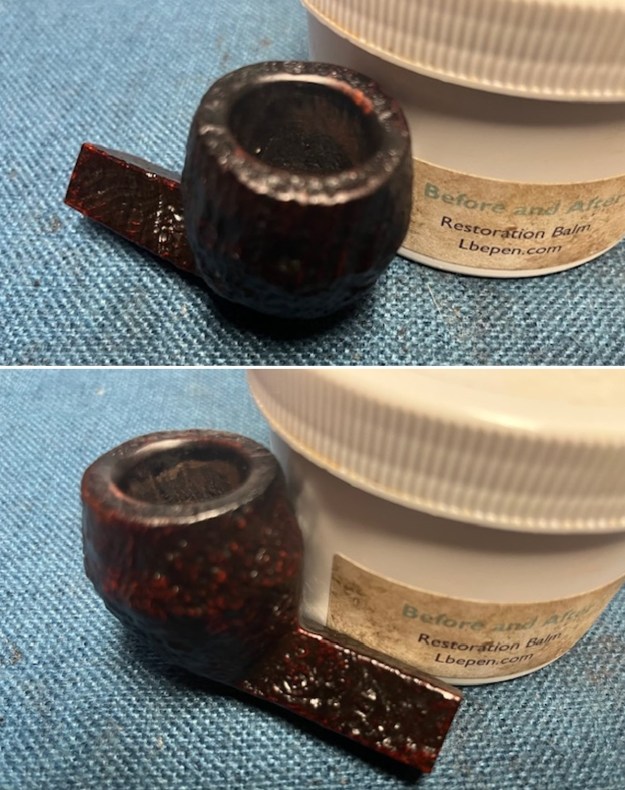
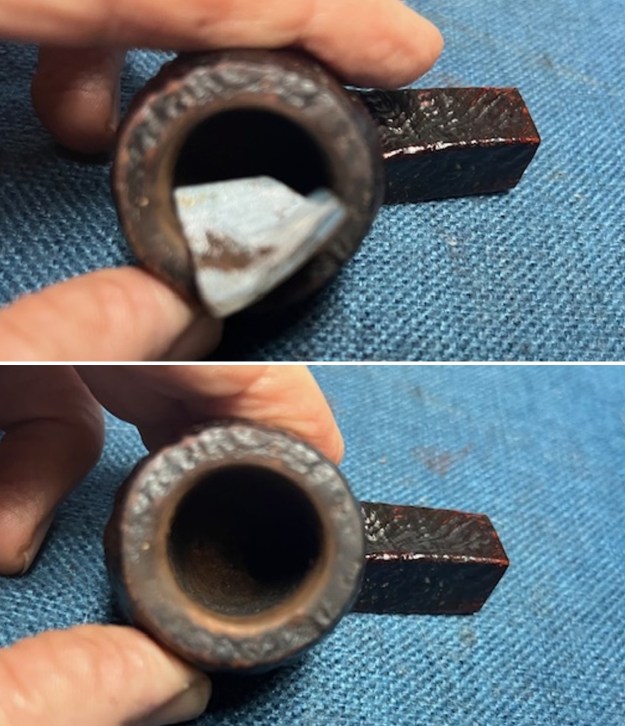 I rubbed the briar down with Before & After Restoration Balm. I worked it into the briar with my fingertips and a horsehair shoe brush to work it into the nooks and crannies of the sandblast finish. The product works to clean, enliven and preserve the briar. I let it sit for 10 minutes then I buffed it with a cotton cloth to deepen the shine. The briar really comes alive with the balm.
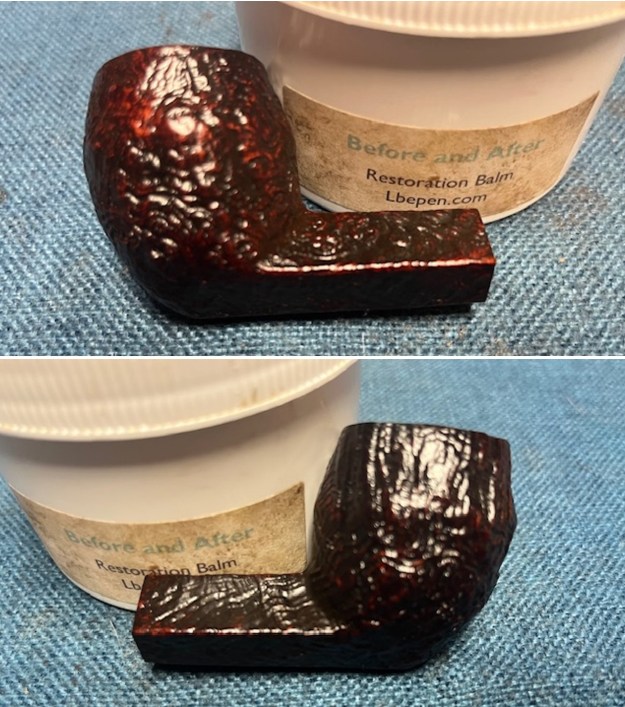
 I tried filling in the chipped area on the stem surface with Black CA Glue, carefully layering it on the surface. When it dried, it also cracked fell out. I tried another repair with a piece of mesh like Kenneth described in his blog on the stem repair. Once it cured it too cracked along the remaining edges of the stem and fell out. There was nothing I could add to strengthen the repair. With the various avenues of repair unsuccessful I decided to cut off the damaged stem end. I did it with a Dremel and sanding drum and removed all of the damaged area on the stem.
I rebuilt the new button on both sides with the Extra Strength Rubberized/Carbon Black CA glue. I layered it on the stem surface and repeated the process until the stem was workable. I let the repair cure overnight. Once it cured I shaped and flattened it with a small file.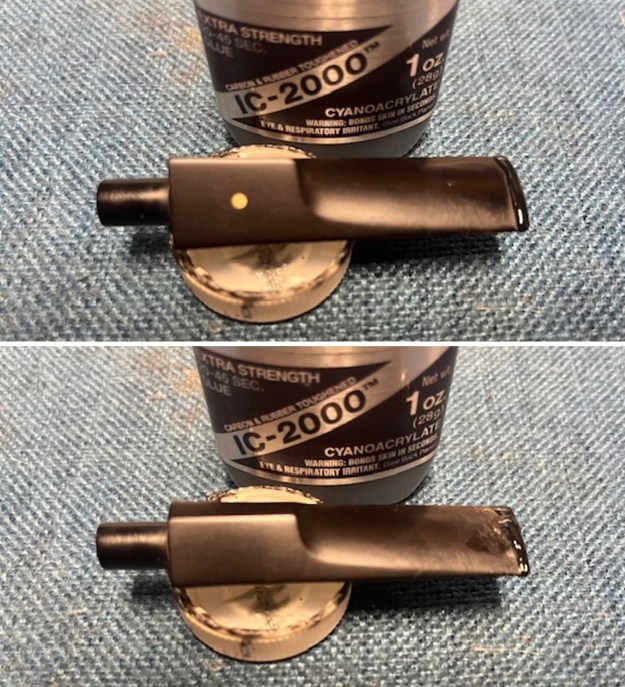
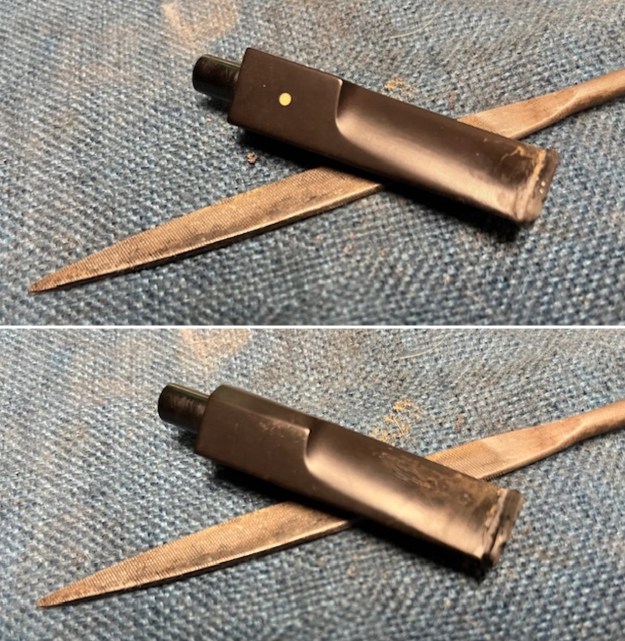 I shaped the slot with small files and a small pottery saw. I smoothed out the shape of the newly formed button and slot with 220 grit sandpaper. It looked very good at this point.
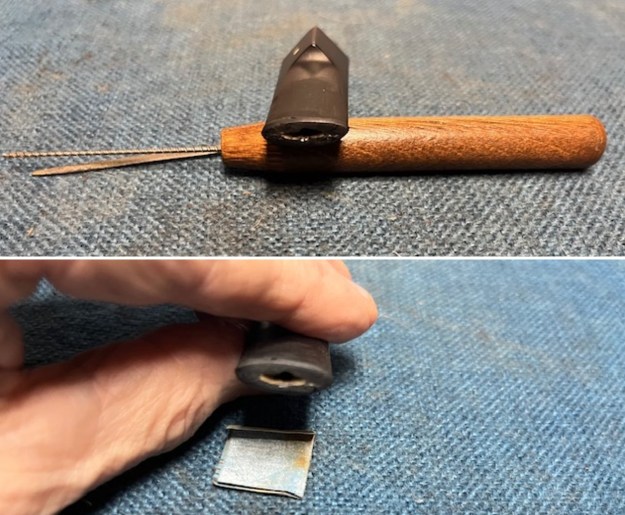
 I sanded the stem and tenon surface with 320-3500 grit 2×2 inch pads. I wiped the stem down with an Obsidian Oil cloth after each sanding pad.
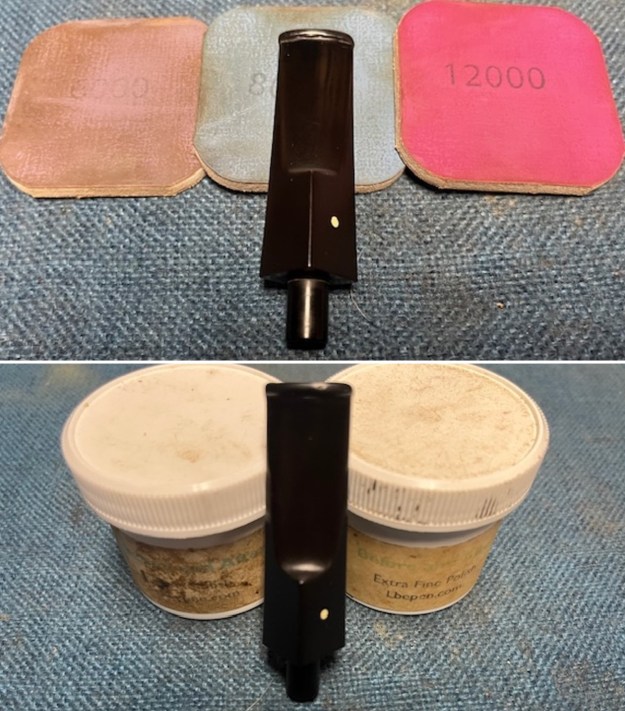
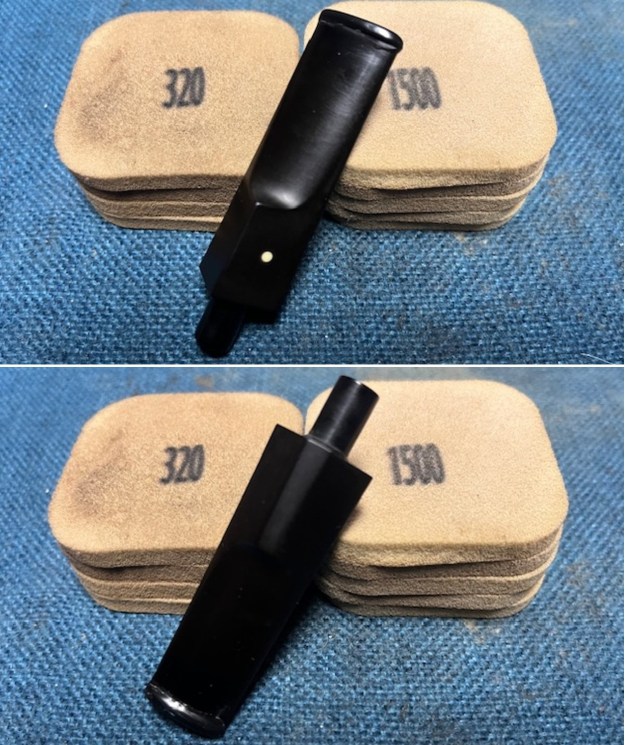 I polished the vulcanite with micromesh sanding pads – 1500-12000 grit pads. I wiped it down with Obsidian Oil after each sanding pad. I used Before & After Pipe Polish – both Fine and Extra Fine to further polish the stem.
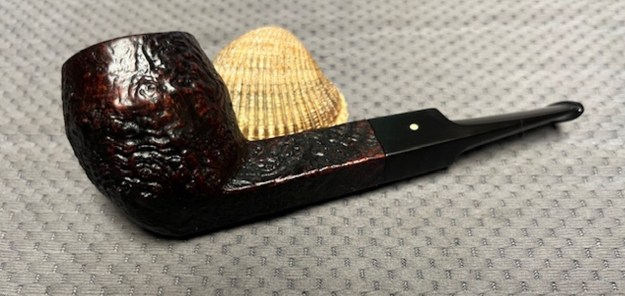
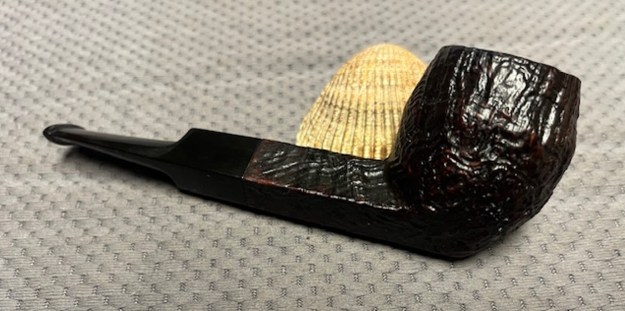
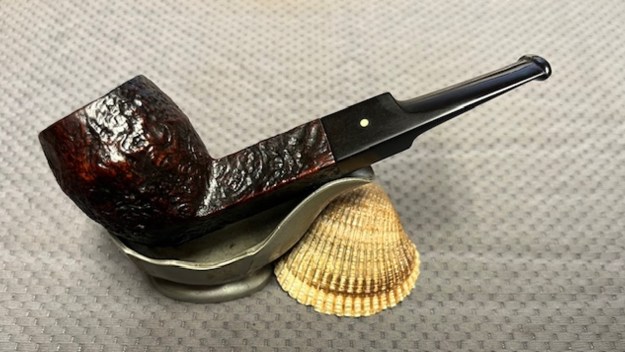
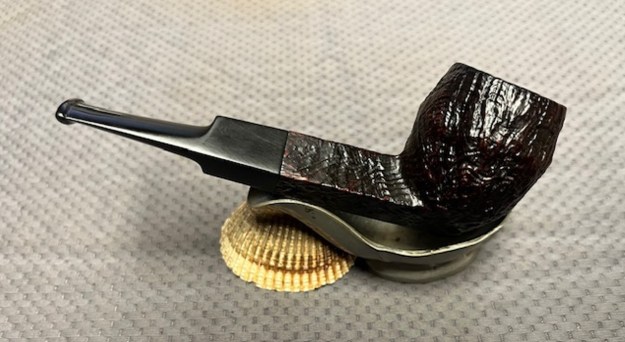
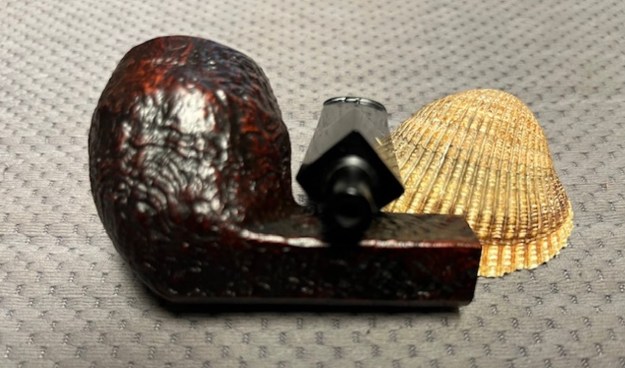
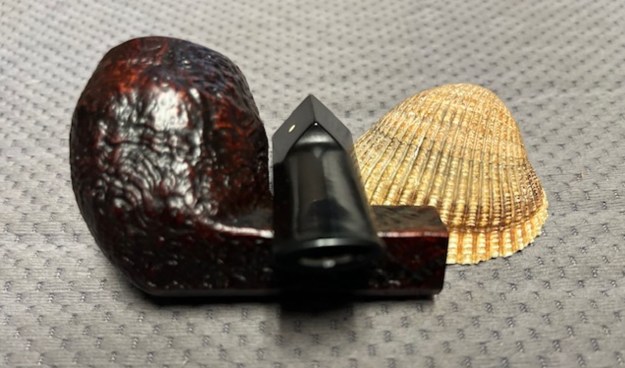
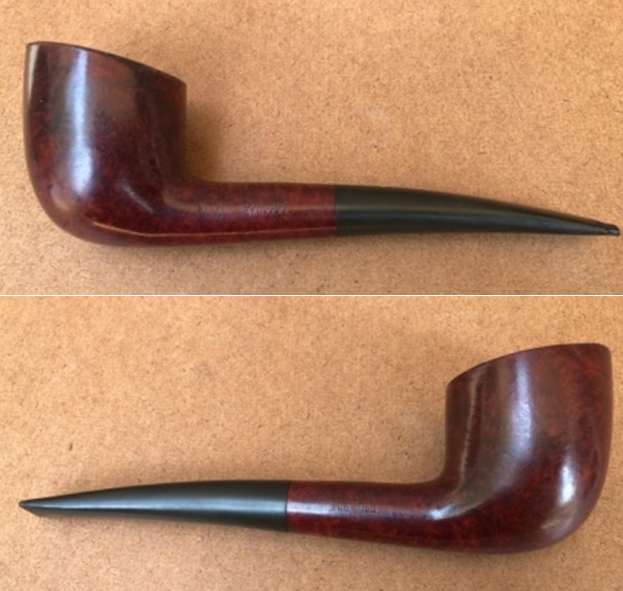
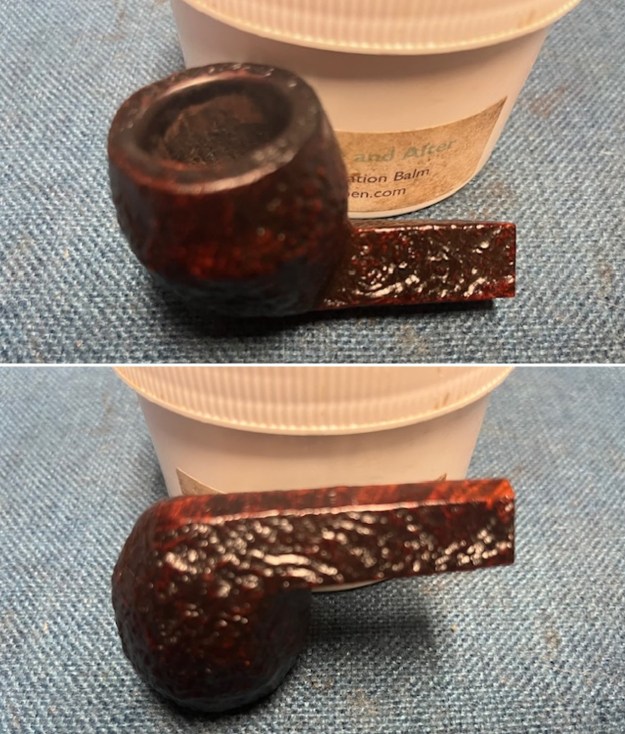
 This 1956 Dunhill Shell Briar OX Saddle Stem Bulldog has a beautiful, unique Dunhill Sandblast finish made in 1985. The rich Shell Briar finish that is identified with some great grain around the bowl and shank. It has some great rugged sandblast that Dunhill specialized in making. The polished black vulcanite saddle stem adds to the mix. I put the stem back on the bowl and buffed the pipe with Blue Diamond on the buffing wheel being careful to not buff the stamping. I gave the bowl and the stem multiple coats of carnauba wax on the buffing wheel and followed that by buffing it with a clean buffing pad. I hand buffed the pipe with a microfiber cloth to deepen the shine. The finished Dunhill Shell Briar OX Straight Bulldog is quite nice and feels great in the hand. Give the finished pipe a look in the photos below. The dimensions of the pipe are Length: 5 inches, Height: 1 ¾ inches, Outside diameter of the bowl: 1 ¼ inches, Chamber diameter: ¾ of an inch. The weight of the pipe is 40 grams/1.41 ounces. This one will be staying here as I do some testing on the durability of the repair under normal conditions. Thanks for walking through the restoration with me as I worked over another beautiful pipe Thanks for your time.