Blog by Steve Laug
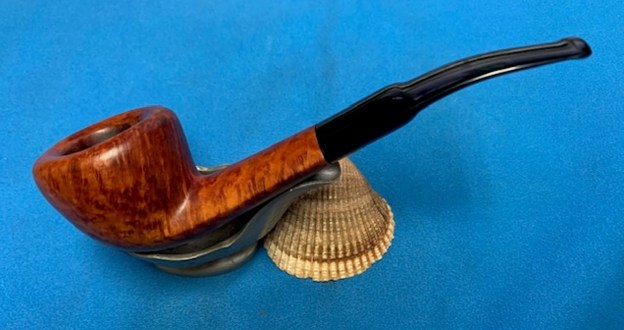
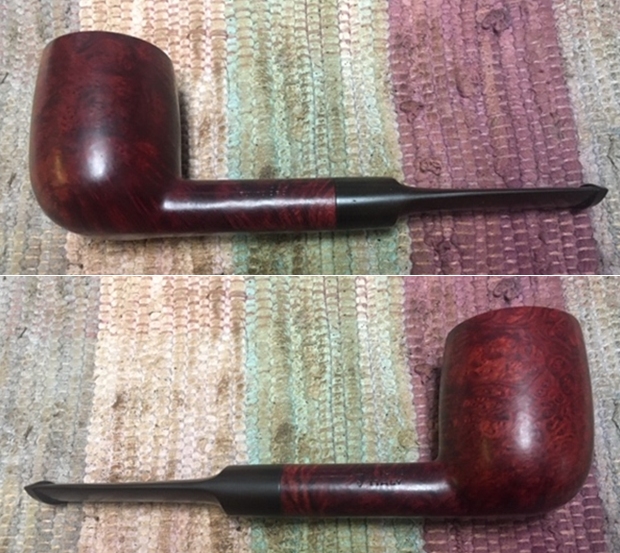
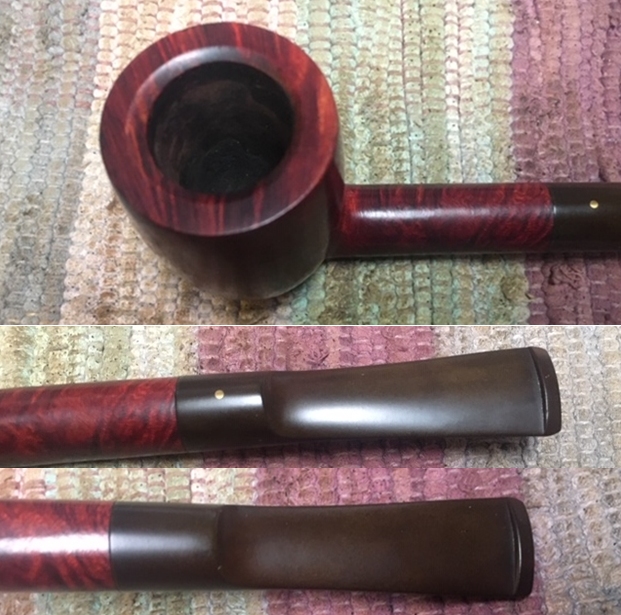
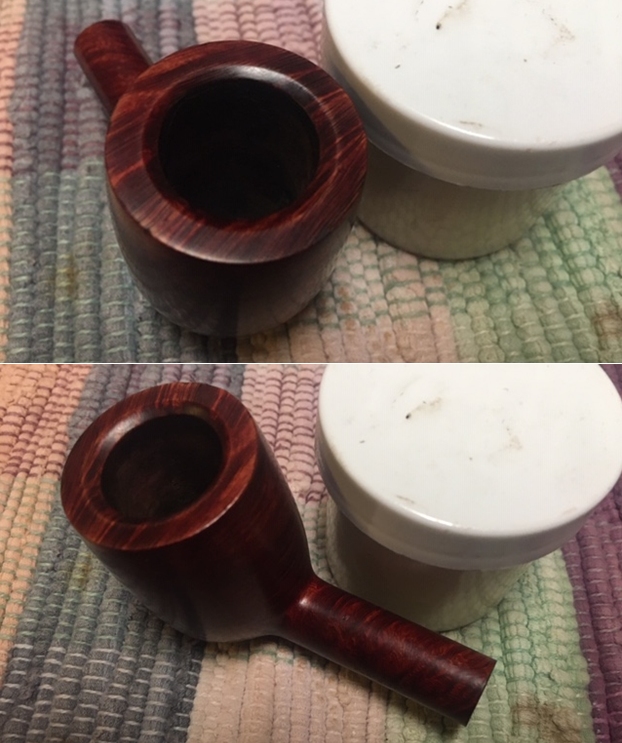
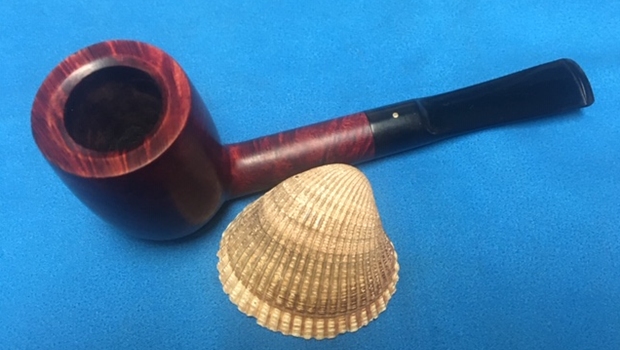
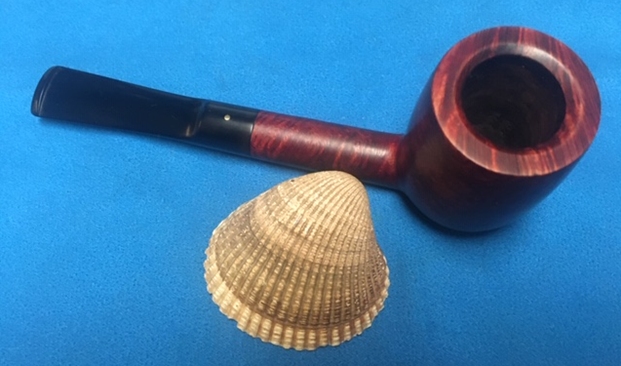
The next pipe on the work table is an interesting Diplomat shaped pipe that we obtained in a trade from a fellow in Japan 01/12/2023. It was stamped on the top side of the shank and read Savinelli [over] Punto Oro. On the underside of the shank it was stamped with a Savinelli S shield followed by the shape number 316KS [over] Italy. It has a smooth finish with beautiful grain patterns around the bowl and shank that is covered with a lot of oils, debris and grime. The bowl was quite clean and appeared to have been recently reamed and cleaned. The top and edges of the rim looked very good with some light darkening on the back inner edge of the crowned rim top. There was a very beautiful pipe underneath all of the buildup of years of use. The stem was an acrylic replacement that was not a perfect fit to the shank with a slightly smaller diameter crosswise to the shank so it would not be changed in the restoration. As it was acrylic there was no issue with oxidization or calcification on the stem. There were light tooth marks and chatter on both sides near the button. Jeff took photos of the pipe before he started his cleanup work on it.  Jeff took photos of the bowl and rim top to show the condition of the bowl and the rim top. It looked very good and there was some darkening on the back inner edge of the crowned rim top. Jeff took photos of the top and underside of the stem showing the light tooth marks and chatter on both sides.

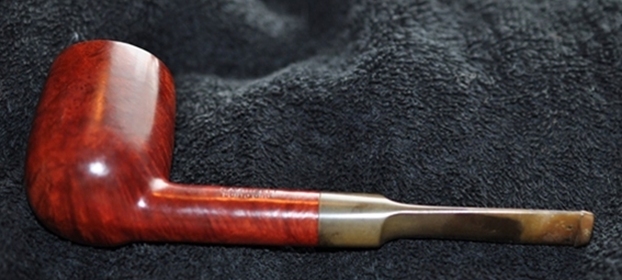
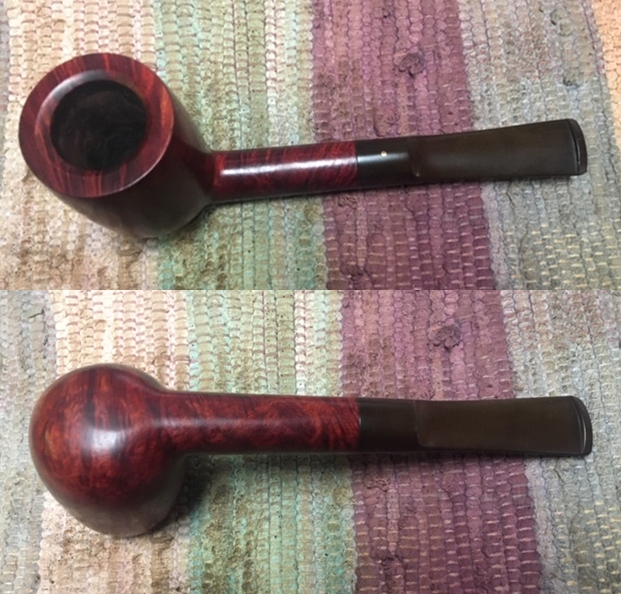
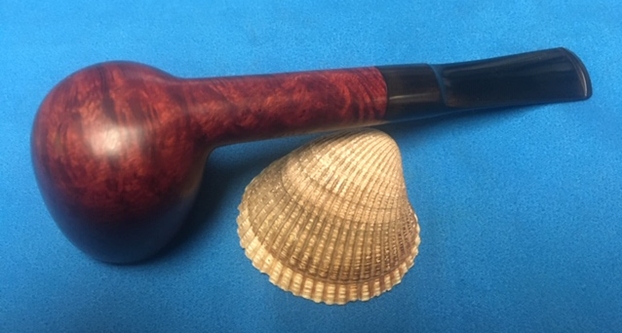
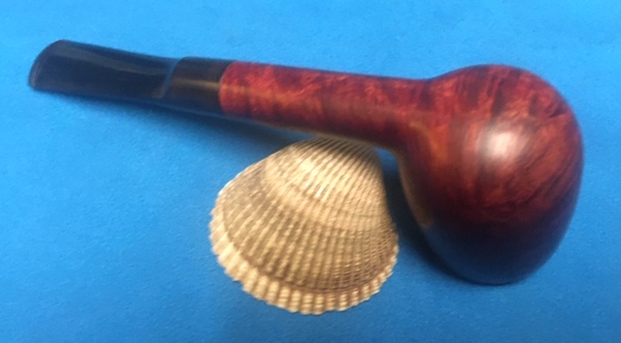
 Jeff took photos of the sides and heel of the bowl to show the condition of the finish. You can see the grime around the sides of the bowl and shank. Even under the dirt and debris of the years it looked very good.
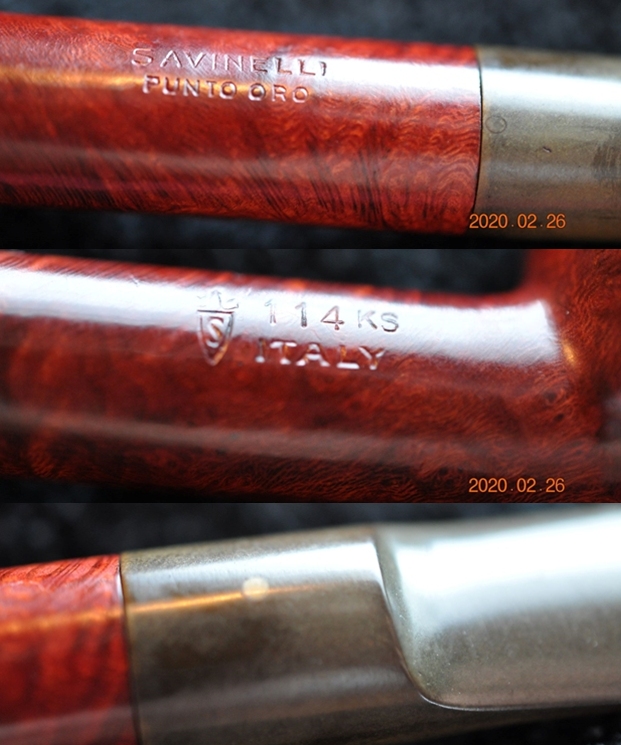
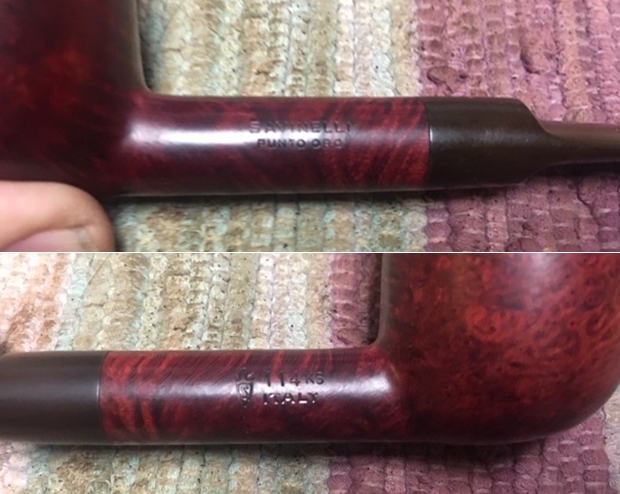
 Jeff took photos of the stamping on the top and underside of the shank. The stamping was faint but readable as you can see from the photos. It read as noted above.
  I turned to Pipephil’s site to get a feel for the Punto Oro line. All of the previous Punto Oro pipes that I have worked on were smooth finish with great grain. This was a sandblast one and I do not recall working on one before. Here is the link (http://www.pipephil.eu/logos/en/logo-savinelli3.html). I have included a screen capture of the pertinent information on the line below. It appears the line came out in both smooth and sandblast finishes.
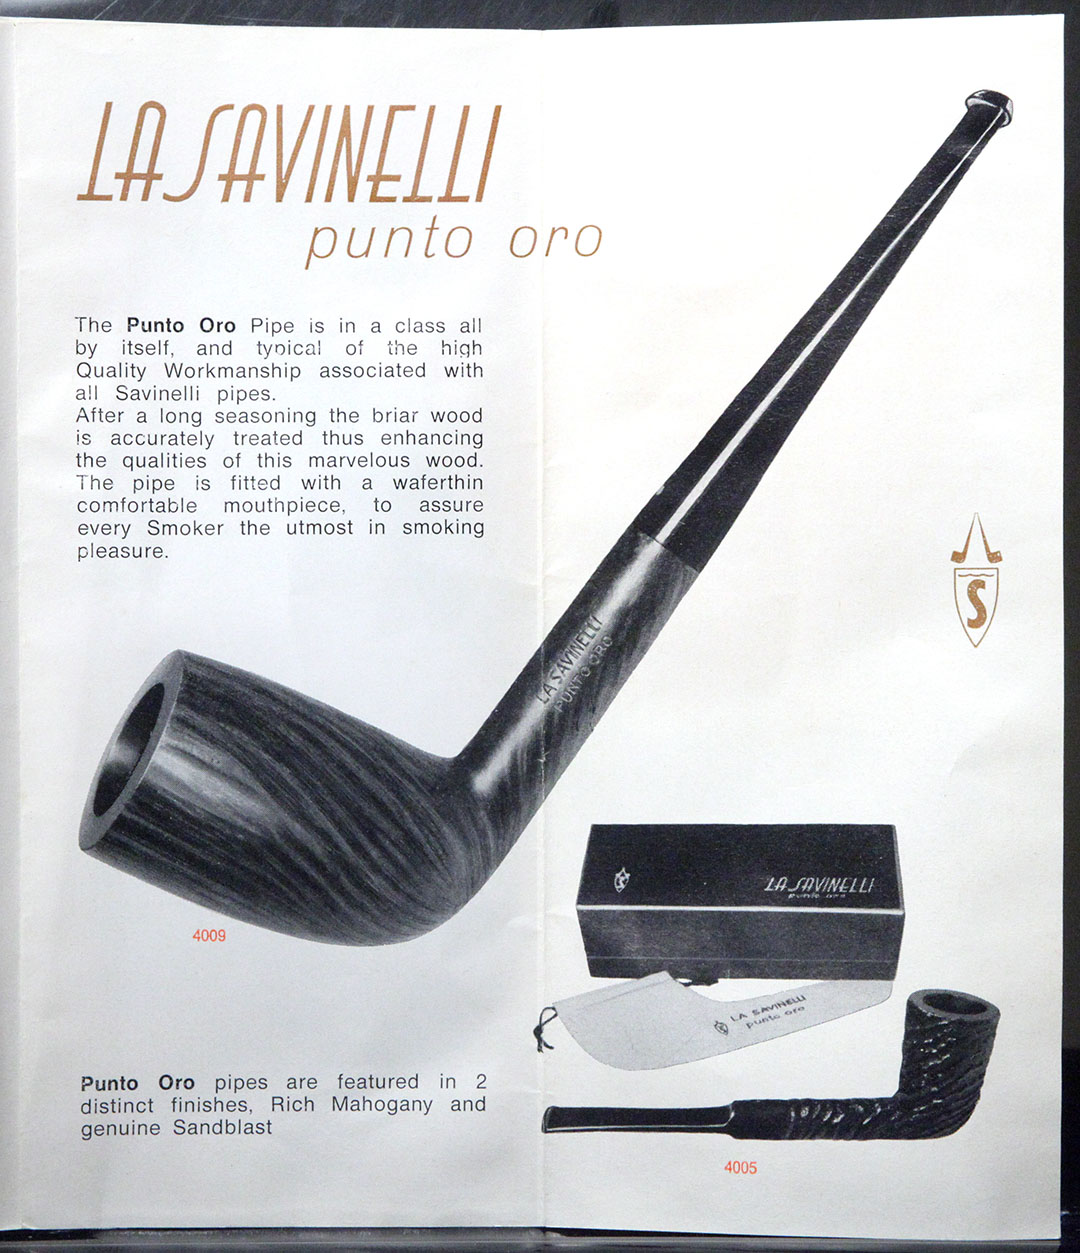
 I turned to Pipedia to look at what information they had on the brand. I found a catalogue page on the Punto Oro which confirmed what I had surmised about the line having both smooth and sandblast finished pipe (https://pipedia.org/images/d/db/Sav_Punto_Oro.jpg). I have included a screen capture of the page below. It says that the line was available in 2 distinct finishes – a rich Mahogany smooth finish and a genuine sandblast.
 The Savinelli shape number was 310KS so I turned to the Savinelli Shape Chart on Pipedia and included a screen capture (https://pipedia.org/images/4/41/Sav_Shape_Chart_2017.jpg). I have drawn a red box around the 316KS shape in the photo below.
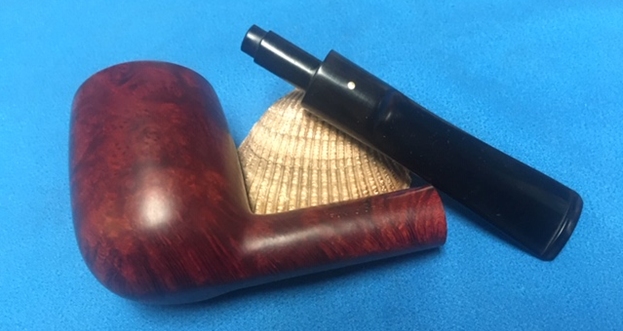
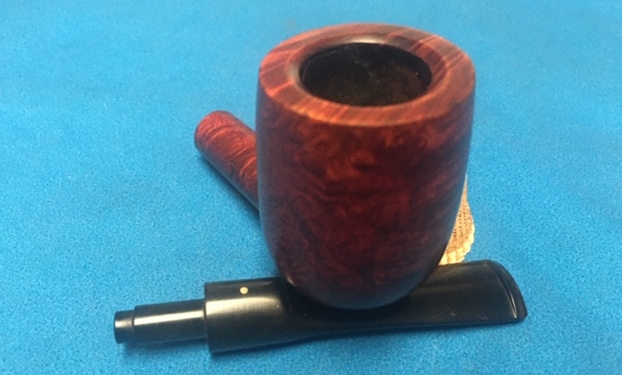
  Armed with that information I turned to work on the pipe itself. Jeff had done a great job cleaning up the pipe as usual. He cleaned up the inside of the bowl with a PipNet reamer and a Savinelli Fitsall Pipe Knife. The bowl walls looked very good. He scrubbed the interior of the bowl and shank with pipe cleaners, cotton swabs and alcohol to remove the tars and oils. He scrubbed the exterior of the pipe with Murphy’s Oil Soap and a tooth brush to remove the grime from the finish. He worked on the rim top lava and darkening with the soap and tooth brush. He scrubbed the inside of the stem with alcohol and pipe cleaners. He scrubbed the exterior with Soft Scrub and then soaked it in Briarville’s Pipe Stem Deoxidizer. He washed it off with warm water to remove the deoxidizer. The pipe looked far better. I took photos of the pipe when I received it before I started working on it.
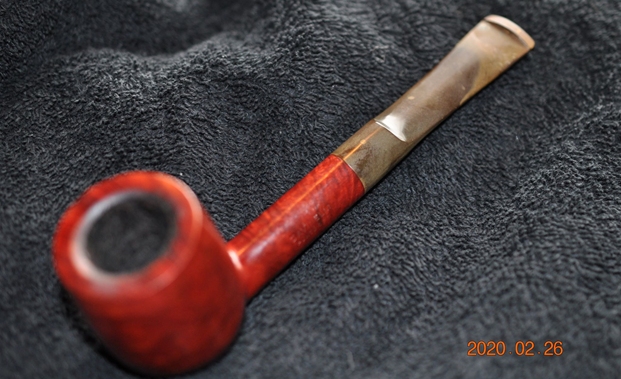
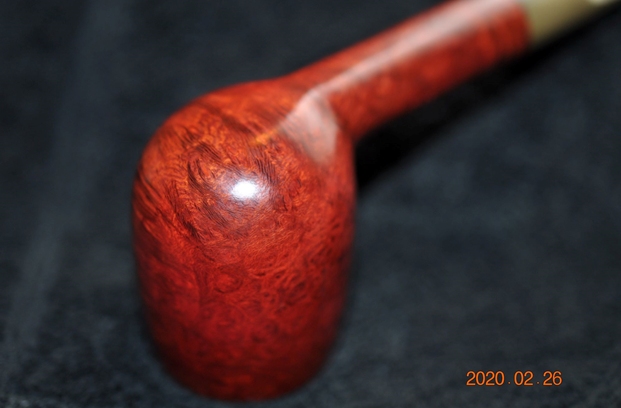
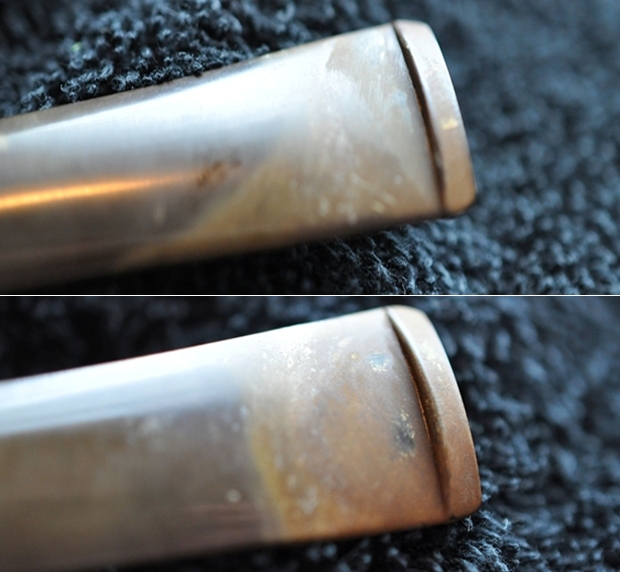
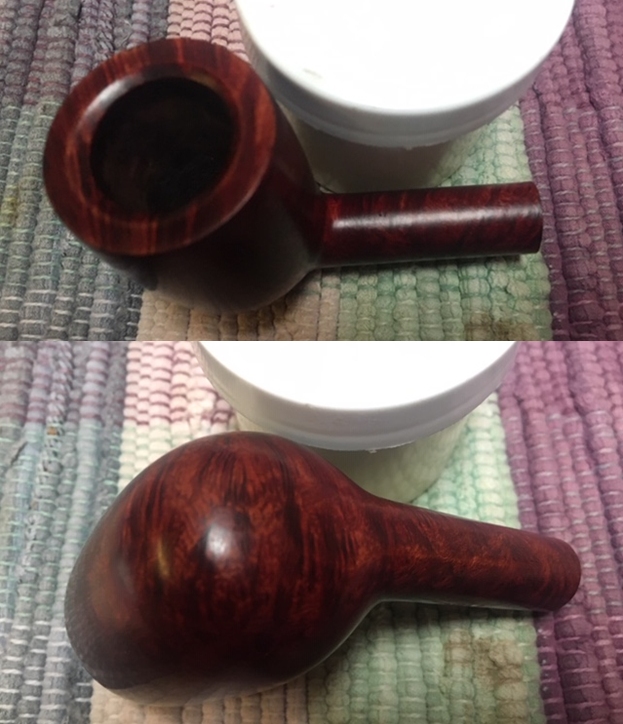
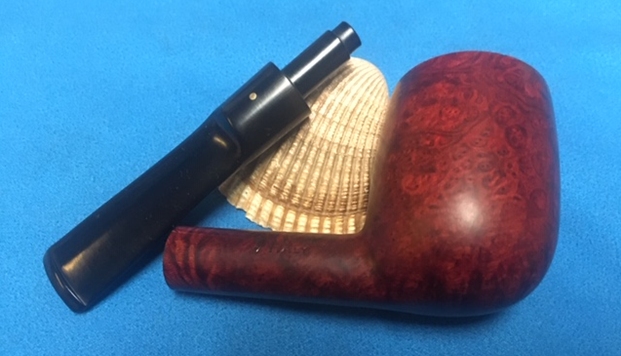
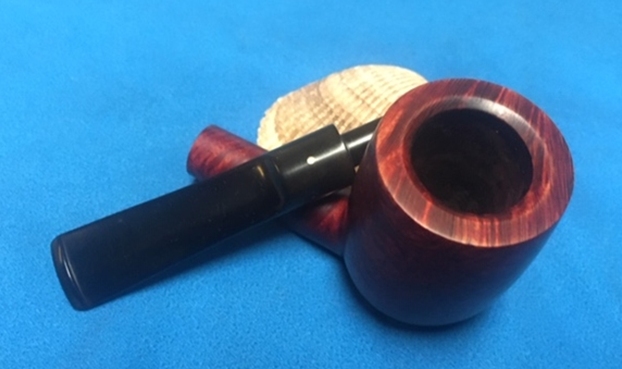
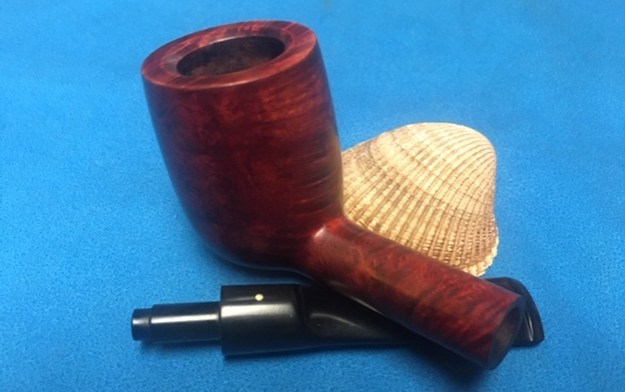
 I took photos of the bowl and rim top to show how clean it was. You can see the darkening on the inner edge of the rim and the top. The stem looks clean of oxidation and the tooth marks and chatter are very clear in the photos.
 I took photos of the stamping on the top and the underside of the shank. The stamping is faint in spots but it is still readable. I took a photo of the pipe with the stem removed to show the overall look of stem, tenon and profile of the pipe.
 I decided to start my work on the pipe by cleaning up the rim top and inner edge of the bowl with a folded piece of 220 grit sandpaper. I removed the darkening and nicks on the inner edge. It looked significantly better.
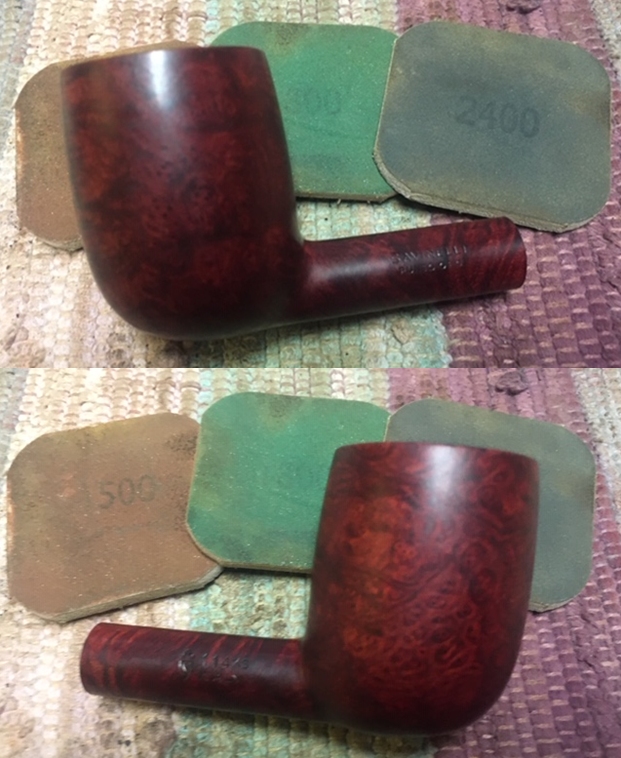
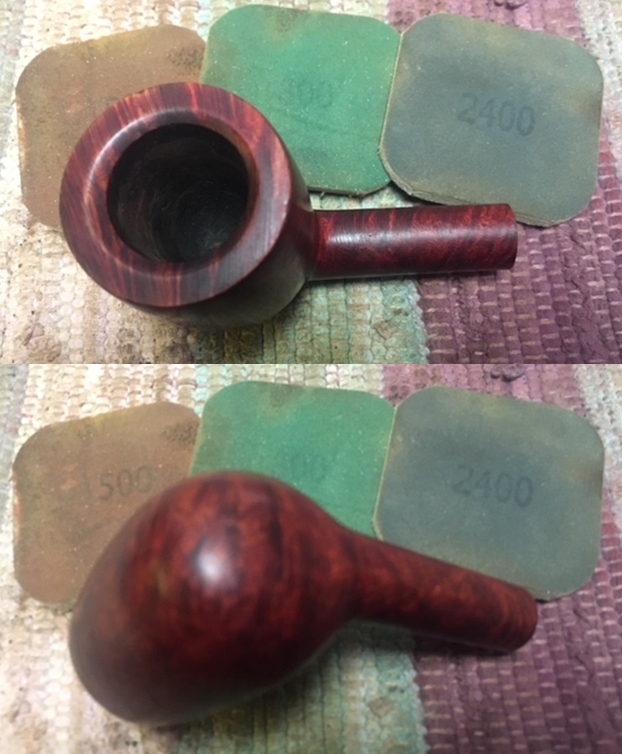
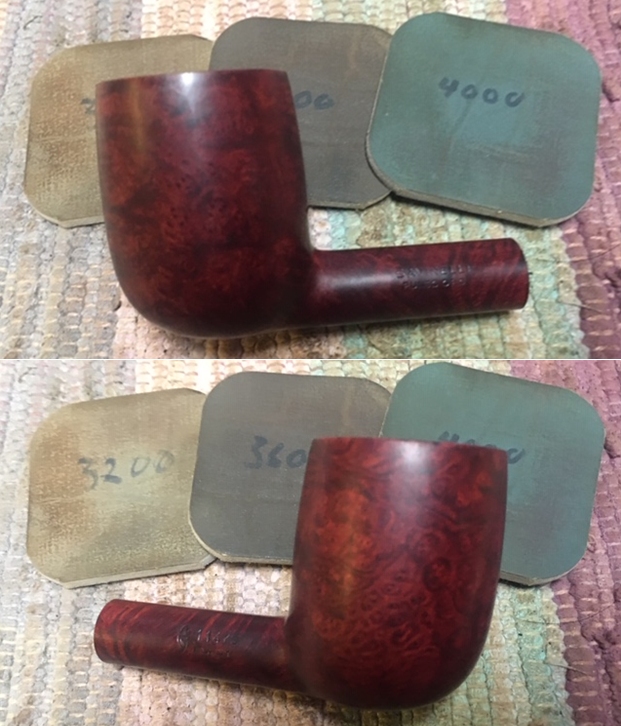
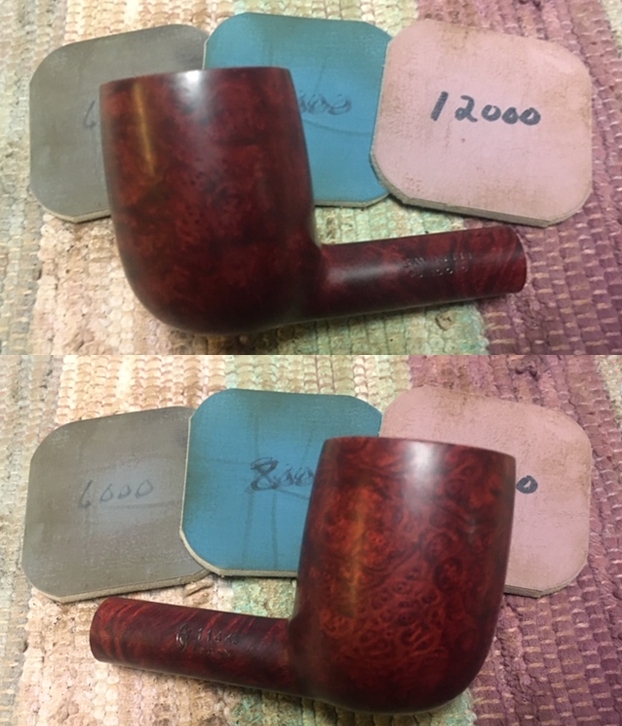
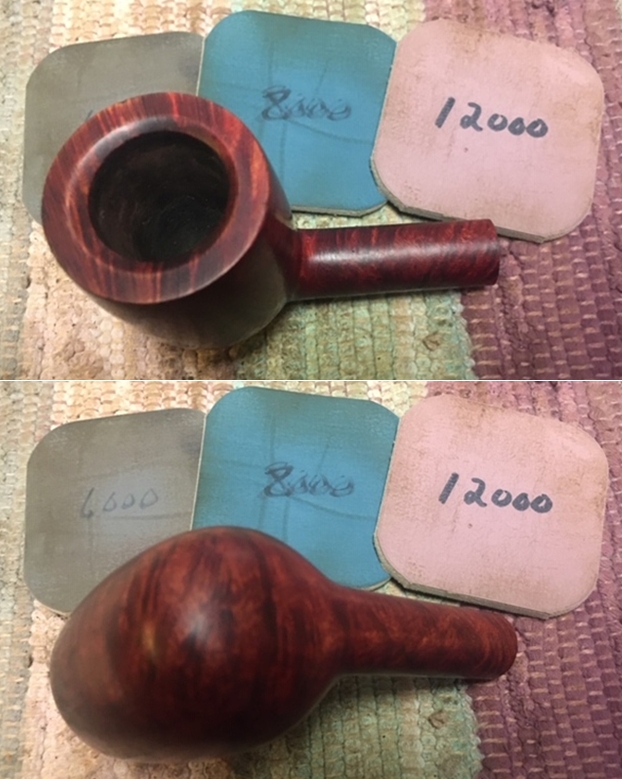
  I polished the briar with micromesh sanding pads – dry sanding it with 1500-12000 grit sanding pads. I wiped it down with a damp cloth after each sanding pad to remove the dust. The briar was really shining by the final pad.


 I rubbed the bowl and rim down with Before & After Restoration Balm. I worked it into the surface of the briar with my fingertips to clean, enliven and protect it. I let the balm sit for 10 minutes and then buffed with a cotton cloth to raise the shine. I really like watching the Balm do its magic and bring the briar alive. There are still small nicks in the briar but I have decided to leave them as part the pipe’s story.

 I built up the rounded edge of the button on the top side with black, rubberized CA glue. I filled in the deep marks on the stem with clear CA glue and set it aside to cure. Once it cured I used a file to flattened the repairs and redefine the button edge. I sanded the stem with 220 grit sandpaper to further blend in the repairs. I started polishing it with 600 grit wet dry sandpaper.

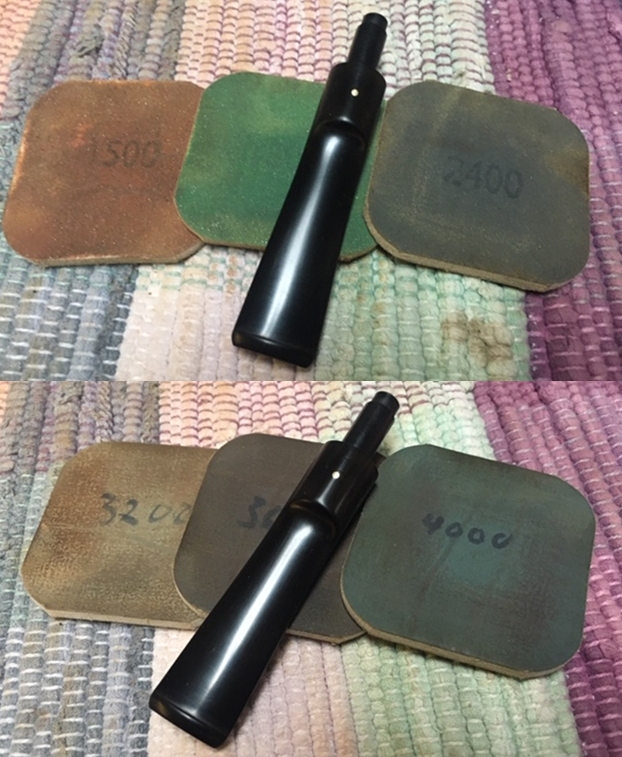
 I polished the stem with micromesh sanding pads – wet sanding with 1500-12000 grit pads. I wiped the stem down after each sanding pad with Obsidian Oil.
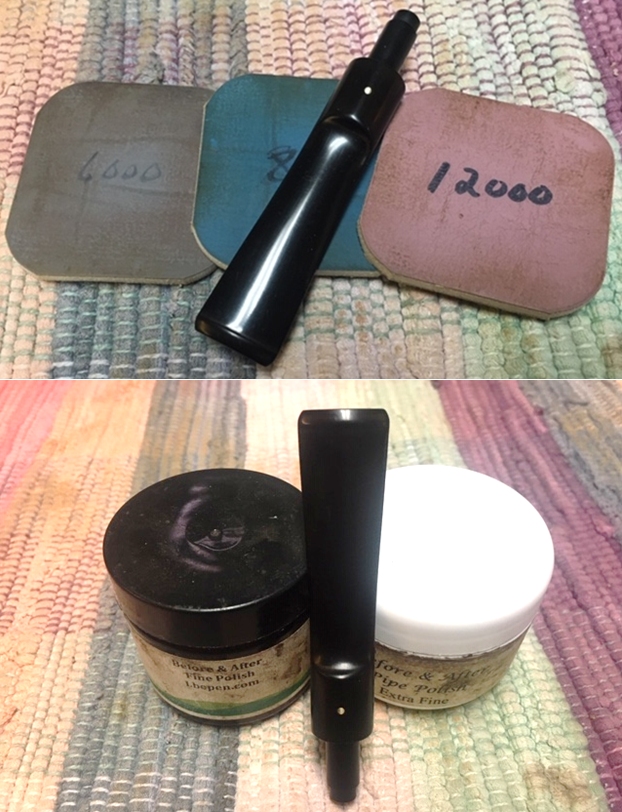
 I polished it with Before & After Pipe Stem Polish – both Fine and Extra Fine. I gave it a coat of Obsidian Pipe Stem Oil. It works to protect the stem from oxidizing. I set it aside to dry.
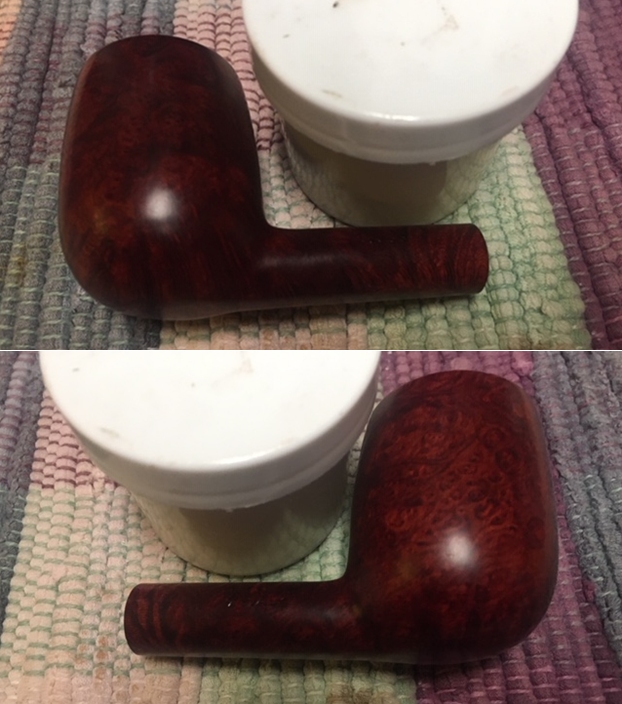
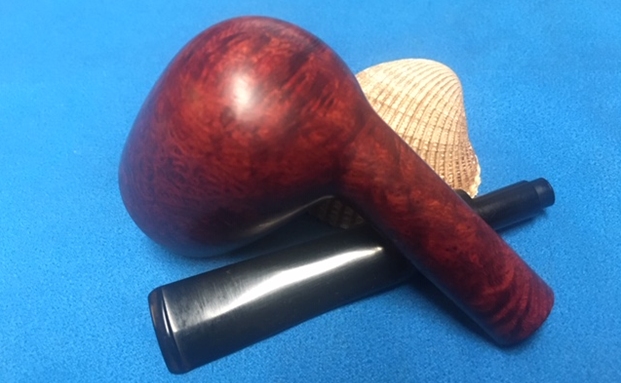
  I put the stem back on the Savinelli Punto Oro 316KS Oval Shank Dublin and buffed the pipe with Blue Diamond on the buffing wheel. I polished the briar and the vulcanite of the stem until there was a rich shine. This classic Savinelli shape and finish really highlights a proportionally well carved pipe. Once I buffed the pipe the briar came alive as the grain just popped with polishing. The black acrylic saddle stem has a rich glow. This Punto Oro 316KS fits well in the hand and sits right in the mouth. Have a look at it with the photos below. The dimensions are Length: 6 inches, Height: 1 ½ inches, Outside diameter of the bowl: 1 ¾ inches, Chamber diameter: 7/8 of and inch. The weight of the pipe is 1.66 ounces/47 grams. This beauty will be going on the rebornpipes online store in the Italian Pipemakers Section. If you are interested let me know. Thanks for walking through the restoration with me as it was a pleasure to work on.
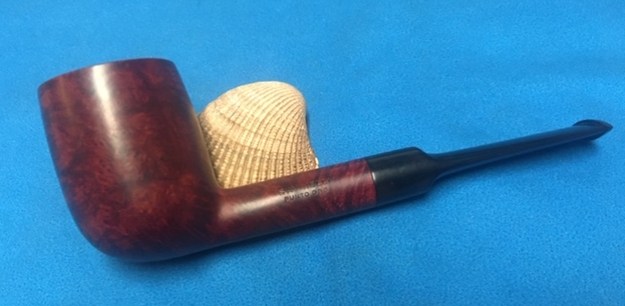
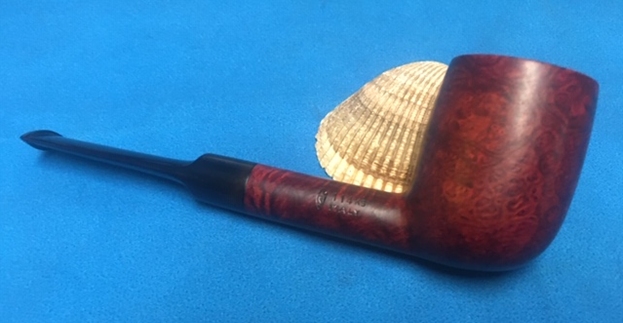
As always, I encourage your questions and comments as you read the blog. Thanks to each of you who are reading this blog. Remember we are not pipe owners; we are pipe men and women who hold our pipes in trust until they pass on into the trust of those who follow us.


