Tag Archives: restemming a pipe

Some Refurbs South African Style – Piet Binsbergen


One of my ideas when starting rebornpipes was to have a place where folks who did refurbishing could post and interact. Today another piece of that idea is coming to fruition. I am posting a series of refurbs from a friend in South Africa – Piet Binsbergen. Last evening (my time) we connected on Skype after a long interaction via email over the past year. Here are a few of his pipes that have been restored. Following is Piet’s post and the pictures.

Hey Steve,
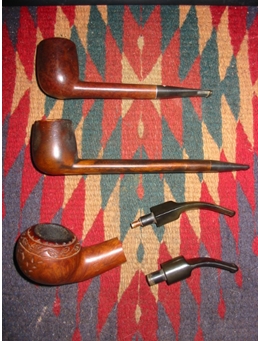
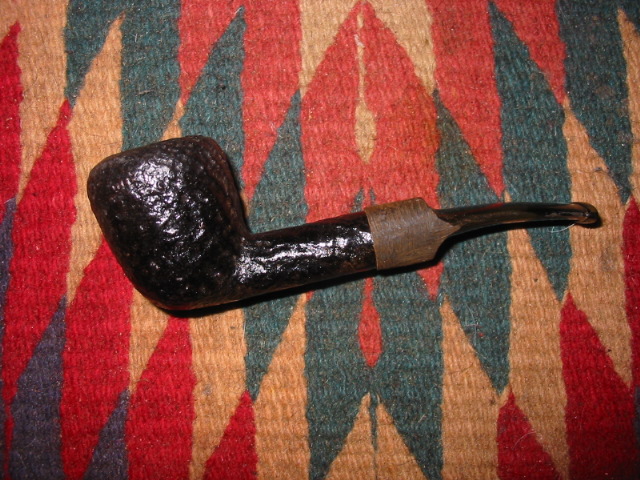
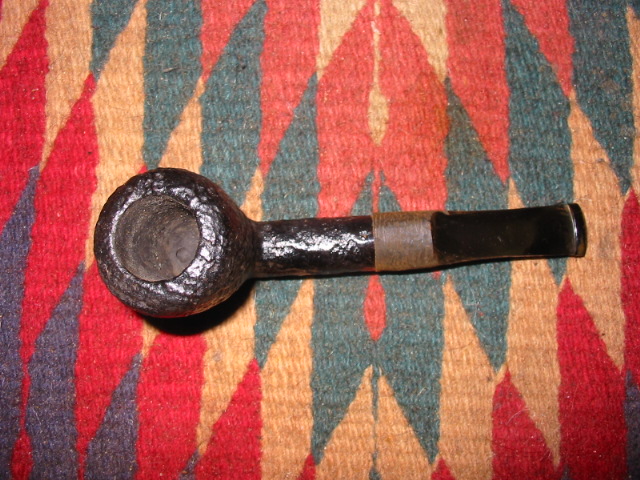
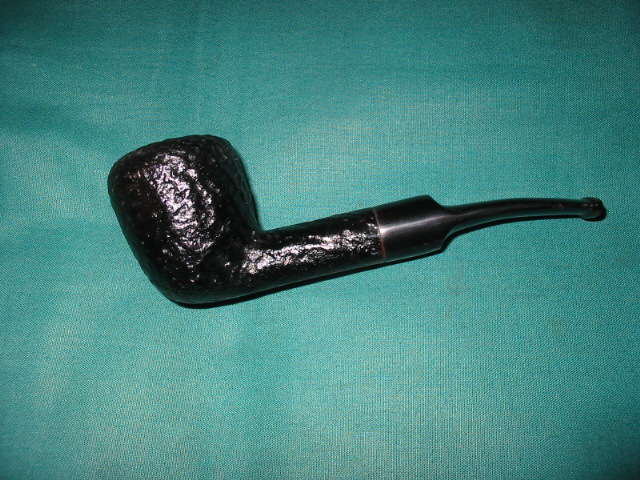
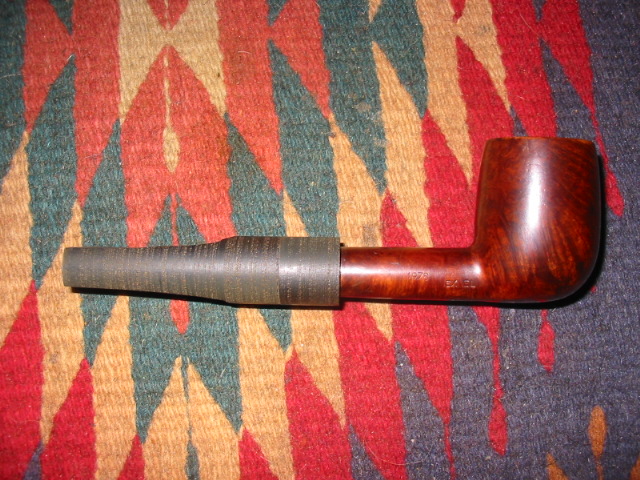
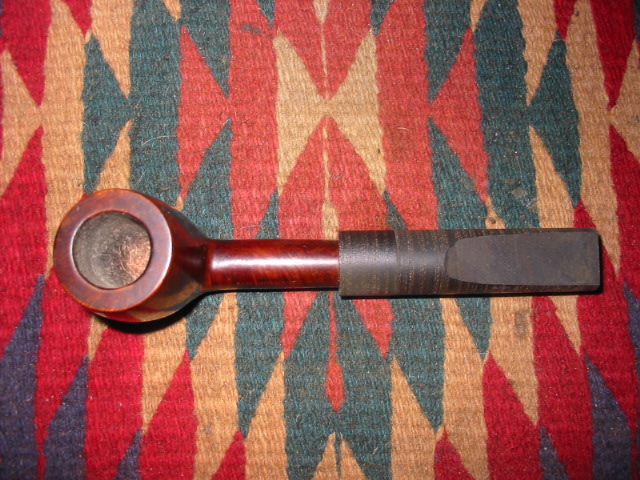
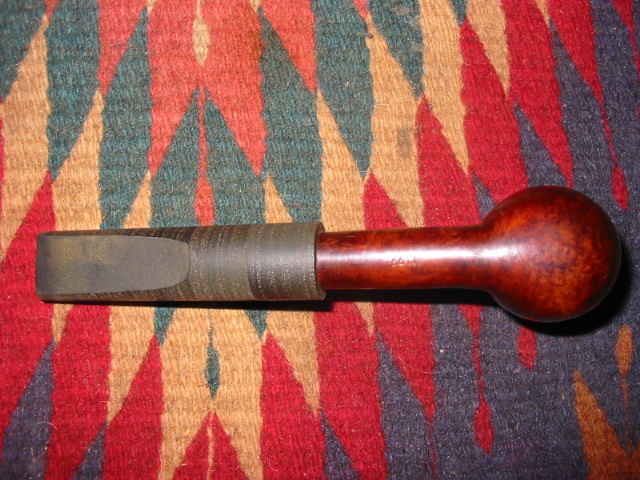
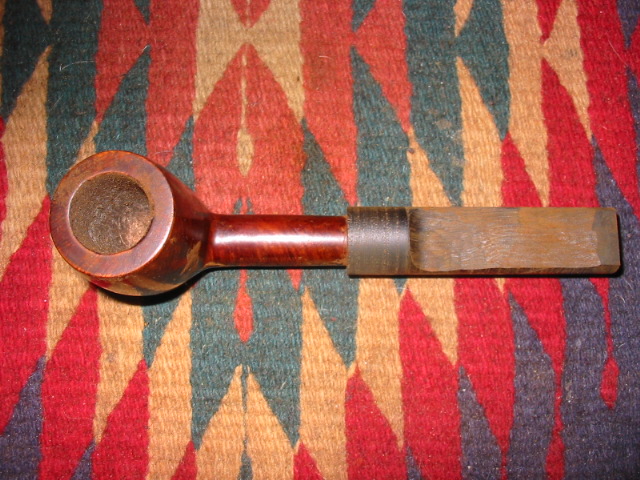
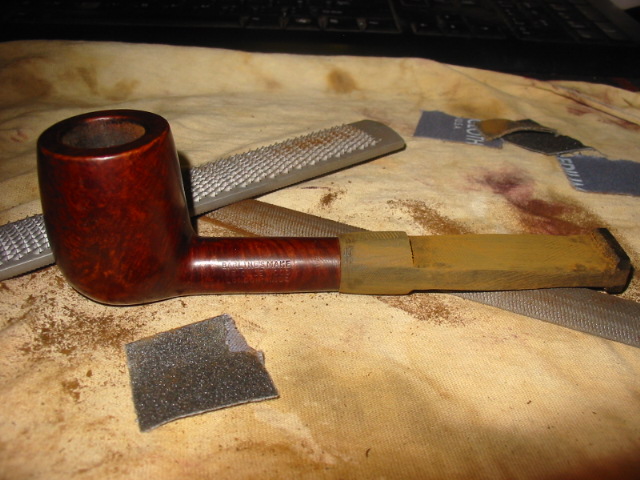
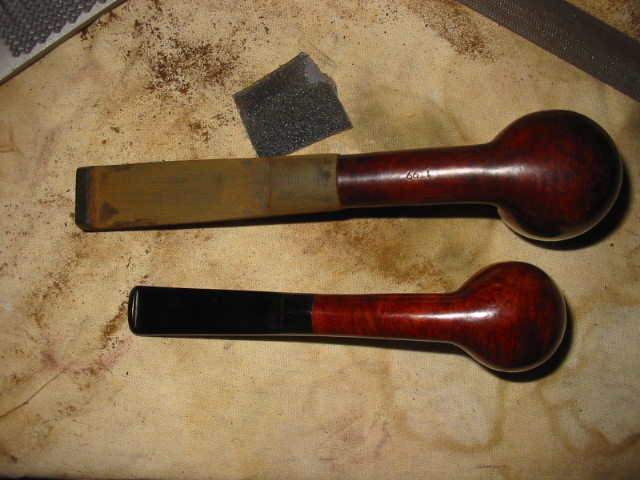
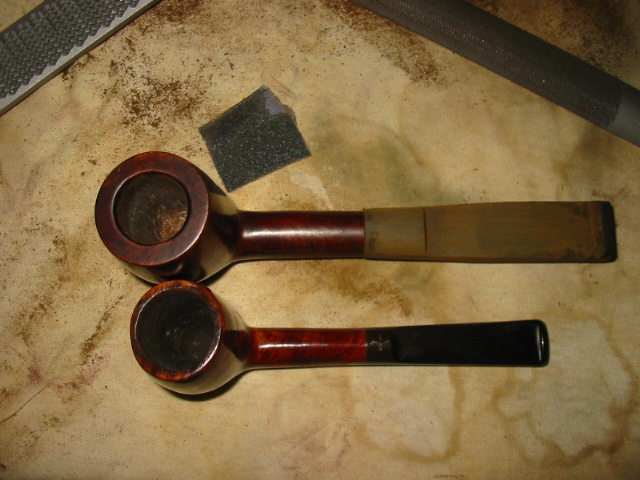
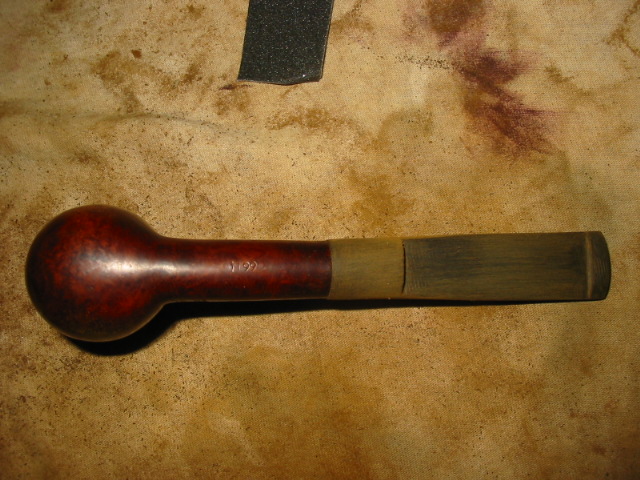
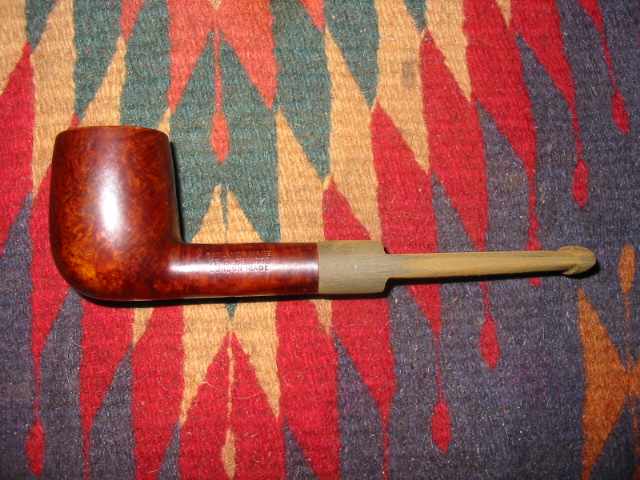
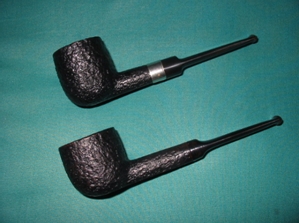
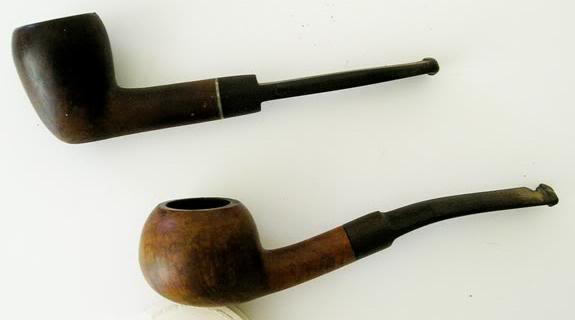
Good to chat with you friend. Here are some of my latest clean ups. Here is a GBD Prehistoric Prince, 1960’s, I am not a cool as you so the stem needed replacing. I am working on the Steve Laug filling trick, I may just graduate soon. I opened the air way to 4mm right through.

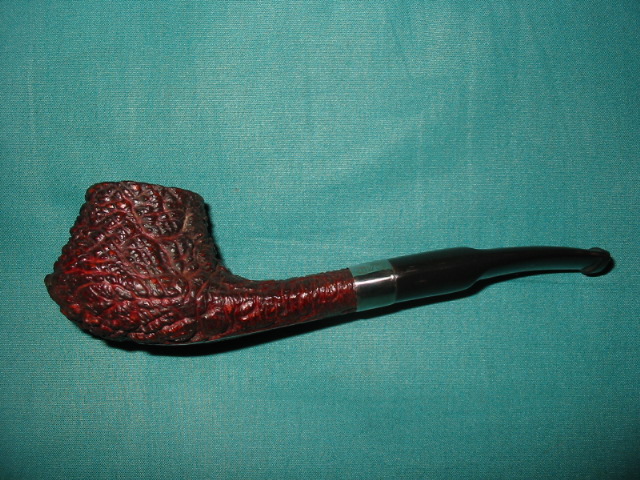
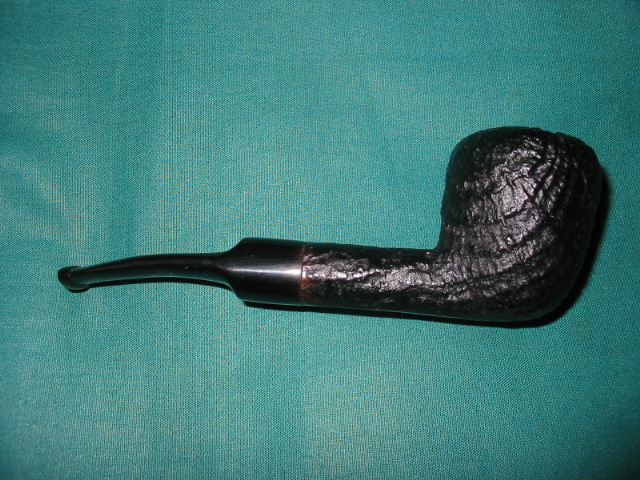
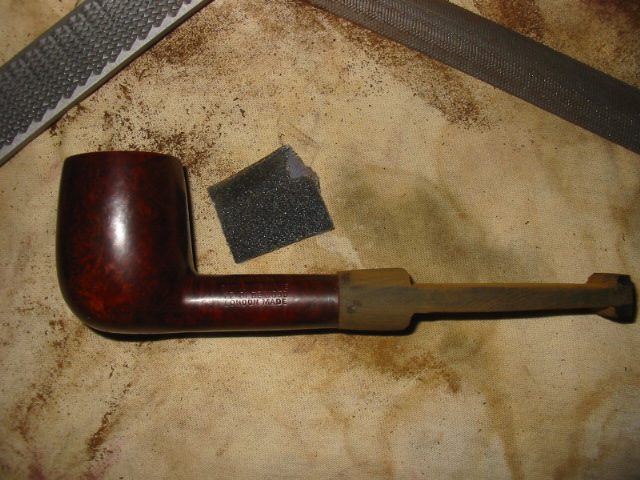
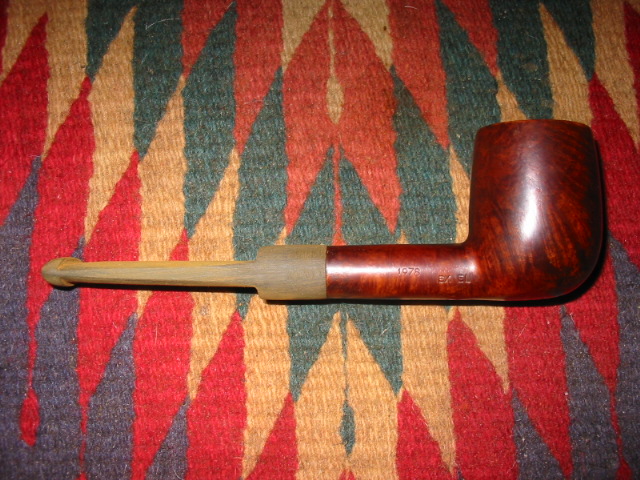
Here is a Peterson that I needed to sand the bowl and restain. Round 1 black to penetrate the soft wood, sand and then round two I used brown stain. I have also been pre-carbonising the bowls of late.

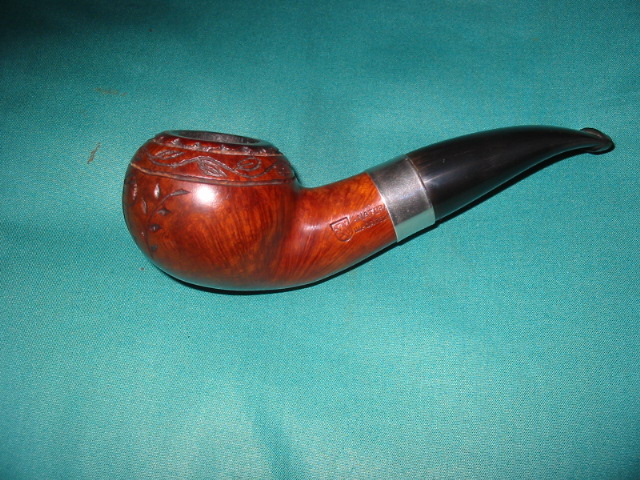
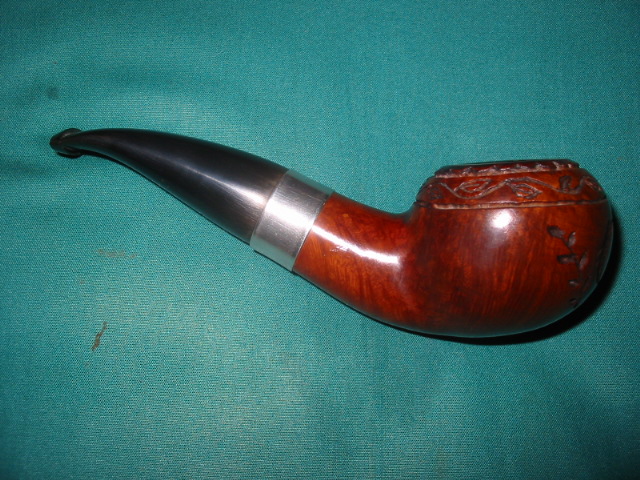
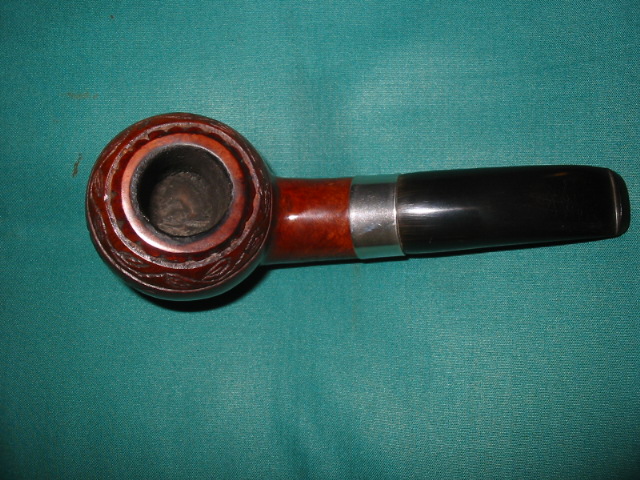
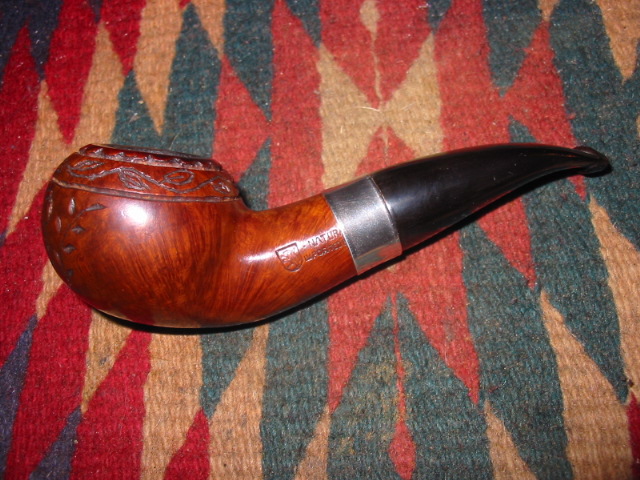
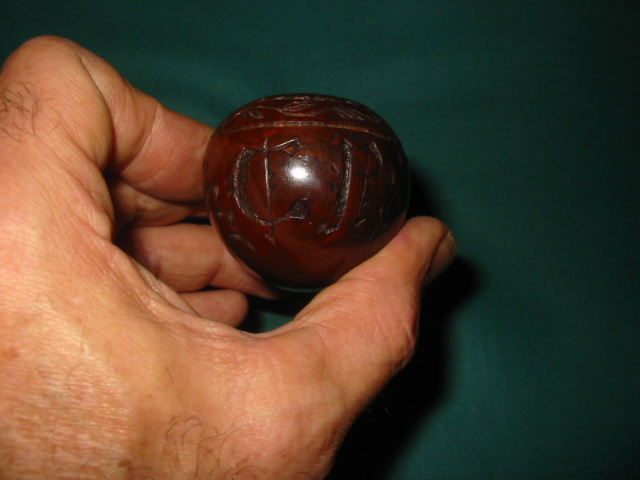
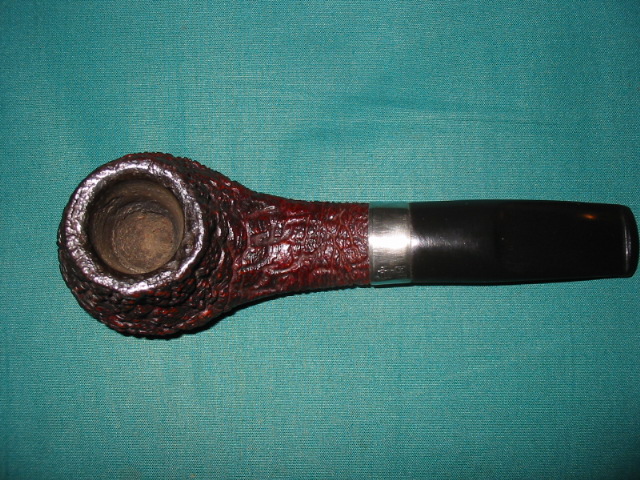
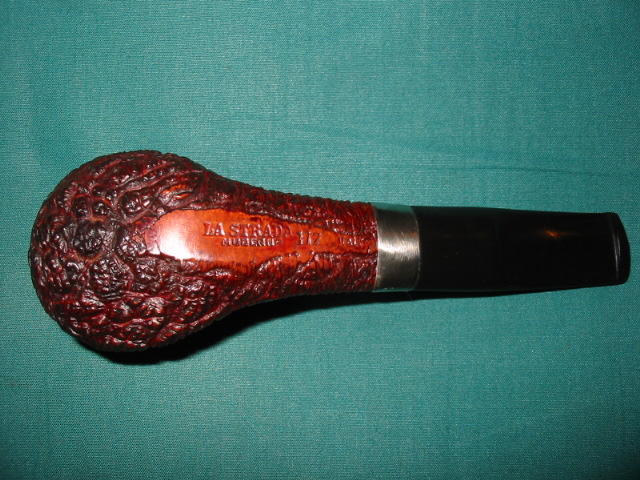
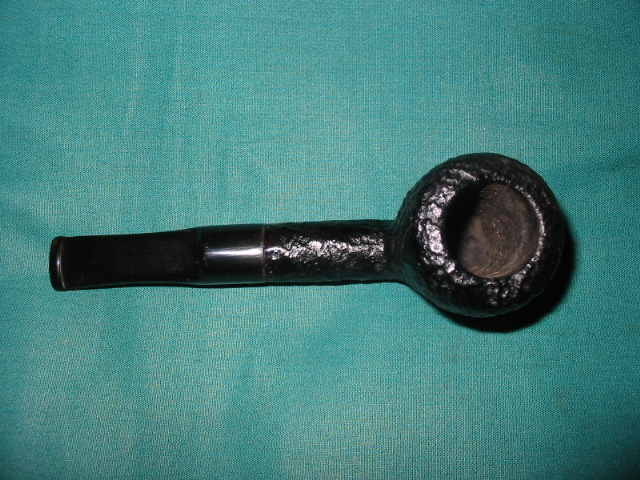
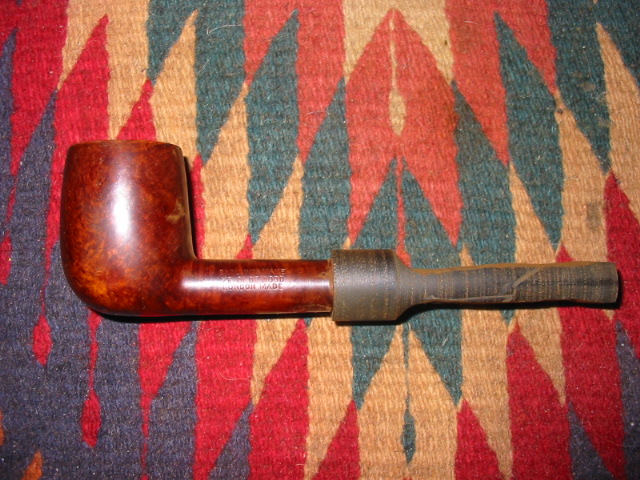
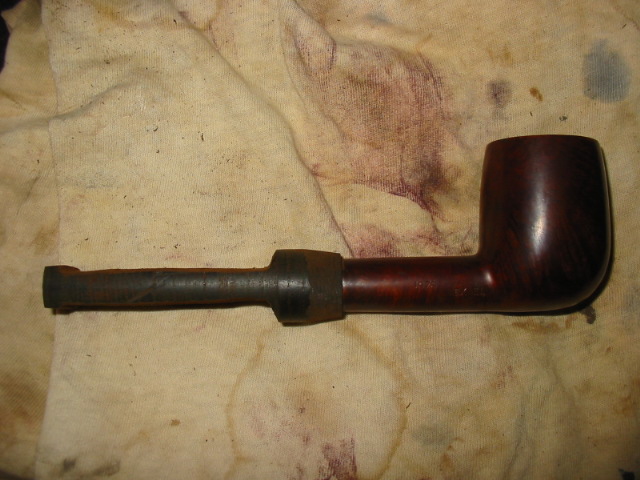
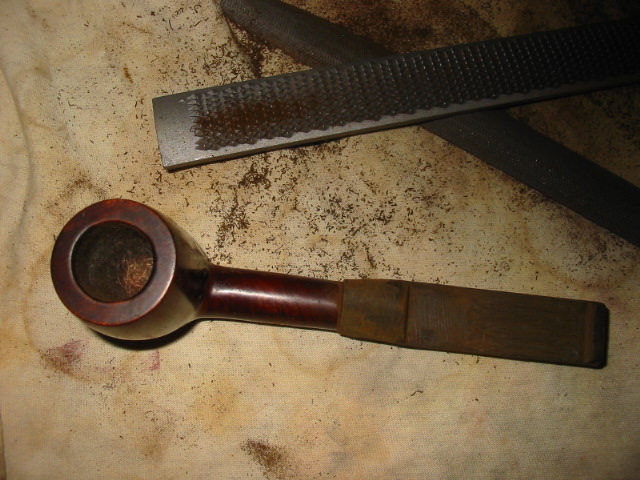
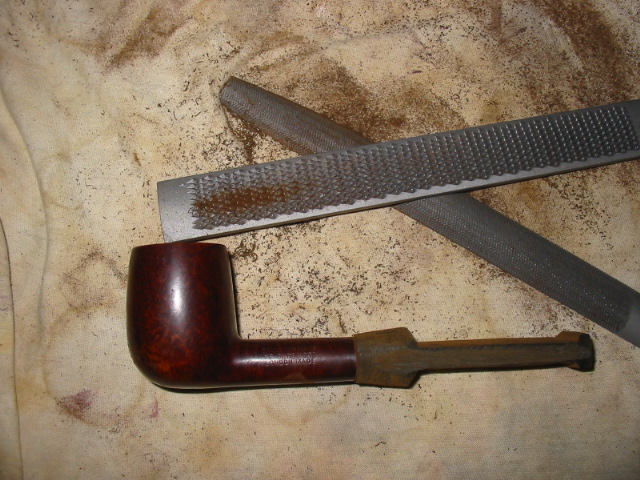
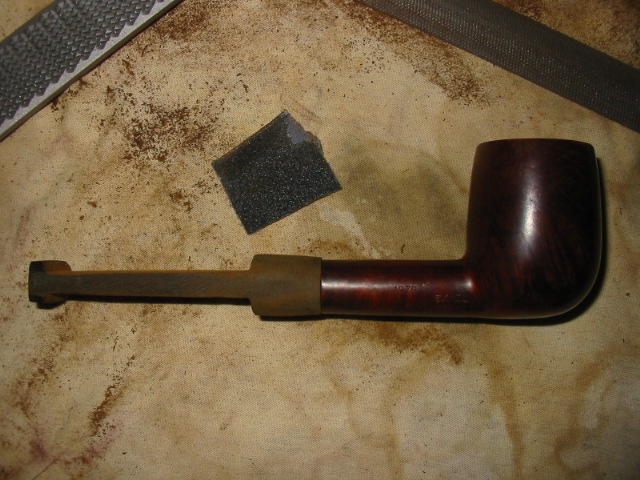
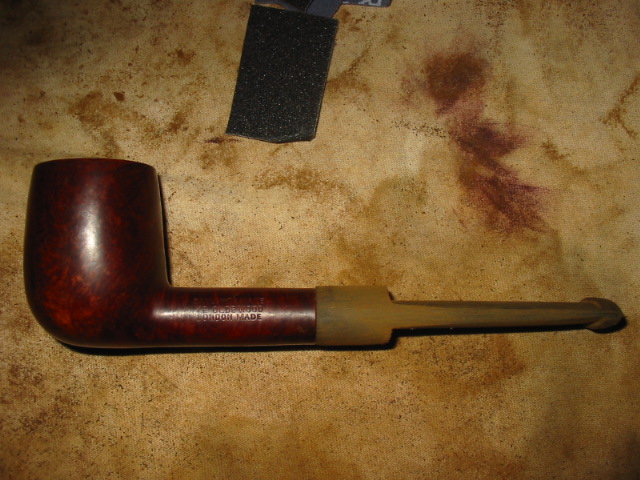
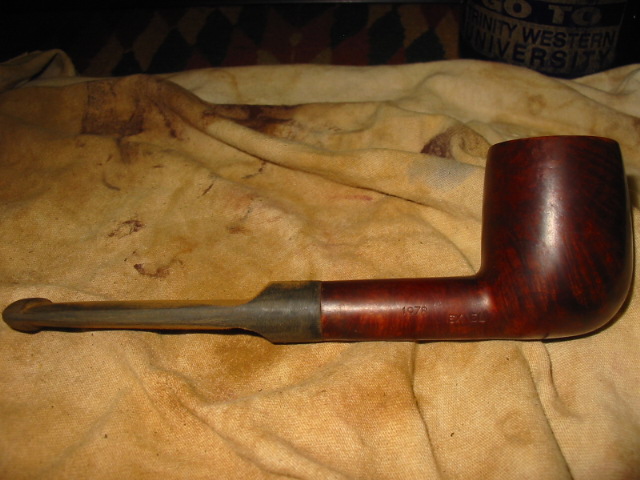
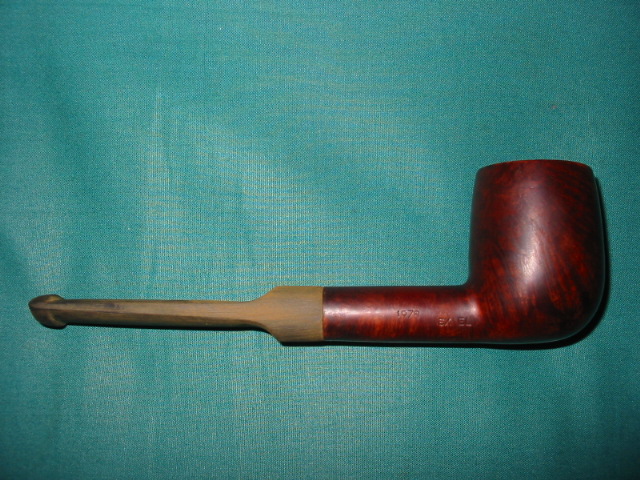
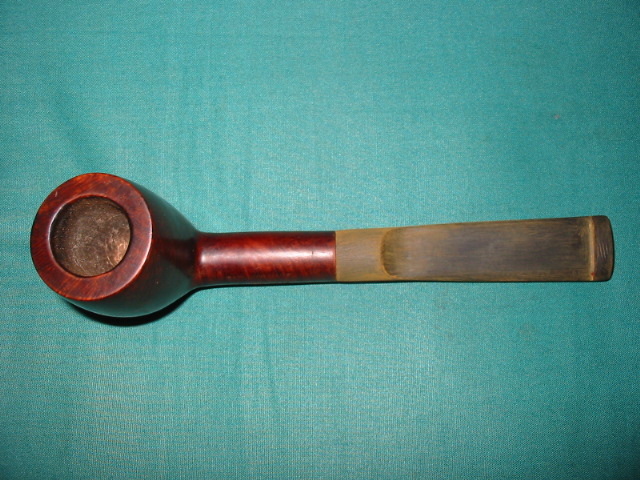
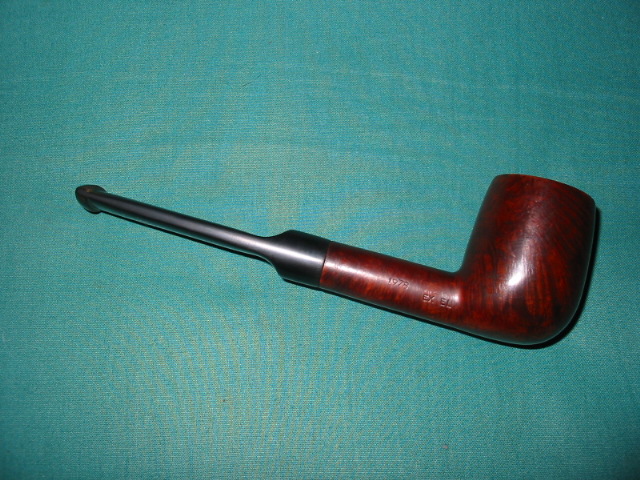
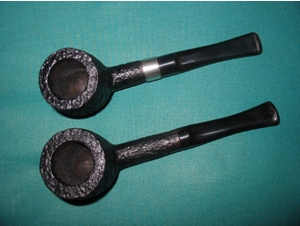
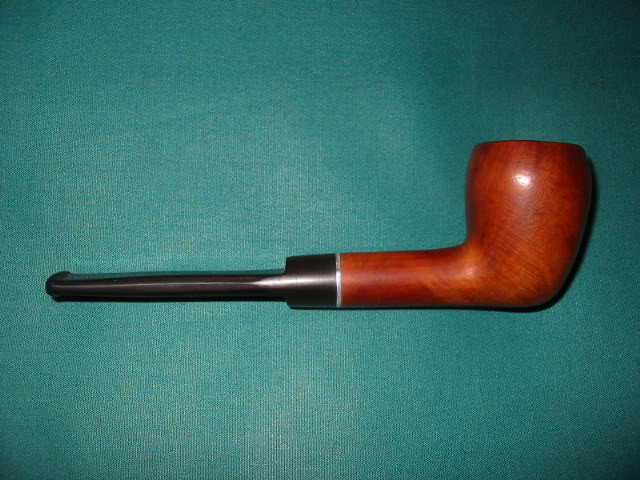
Next is a pipe belonging to Mark Vosseler in NY. It was his dad’s. Wanted a new stem as this one draws bad! Fitted a pre-moulded sem and added elephant ivory ring, opened airway 4mm. Sanded and re stained bowl to get rid of fills.

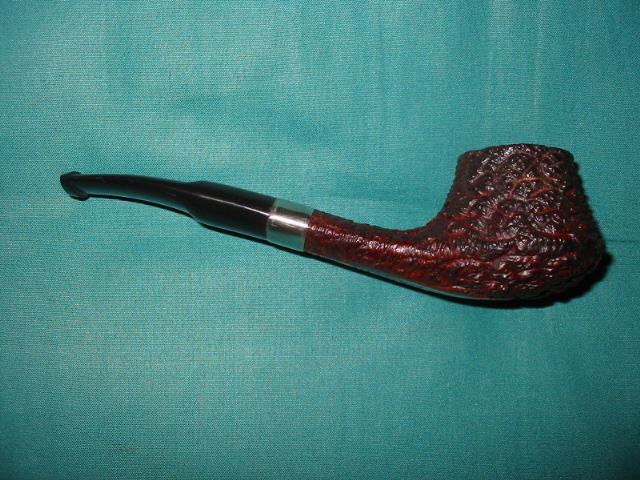
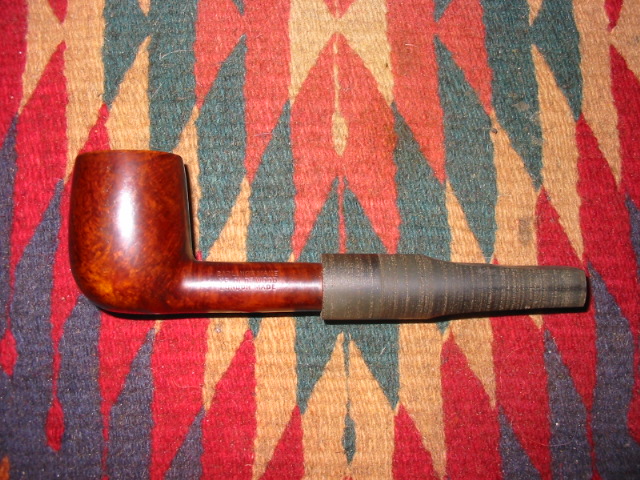
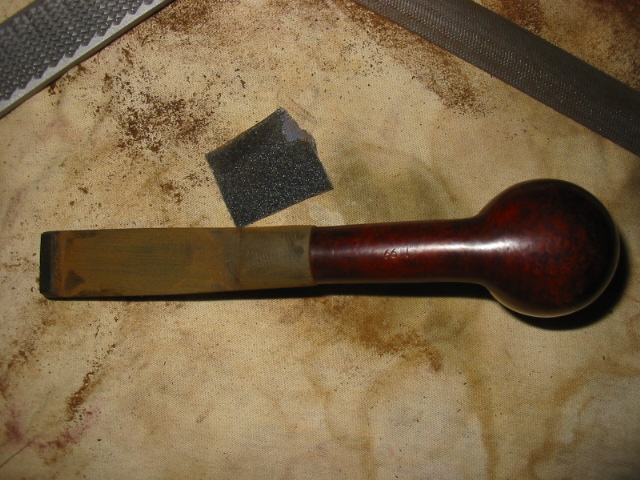
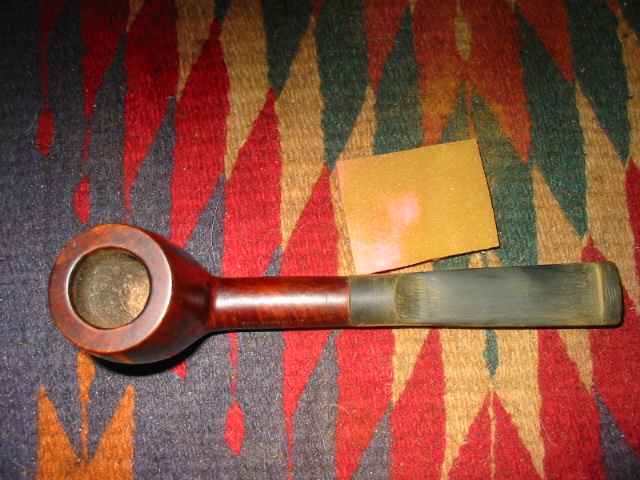
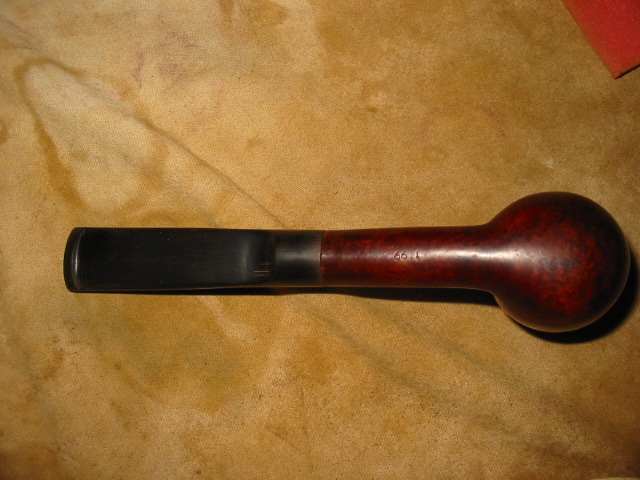
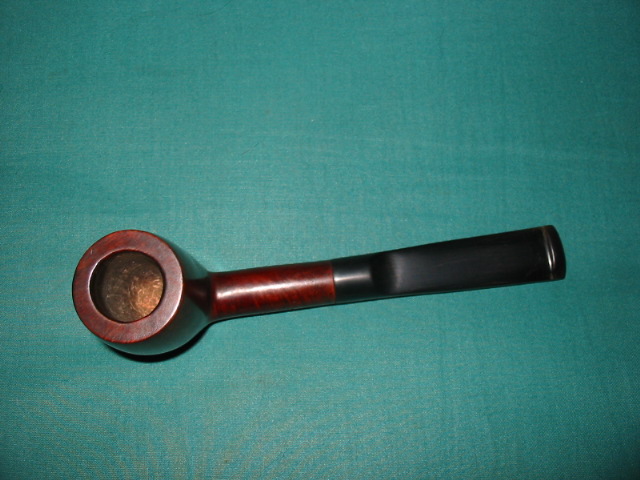
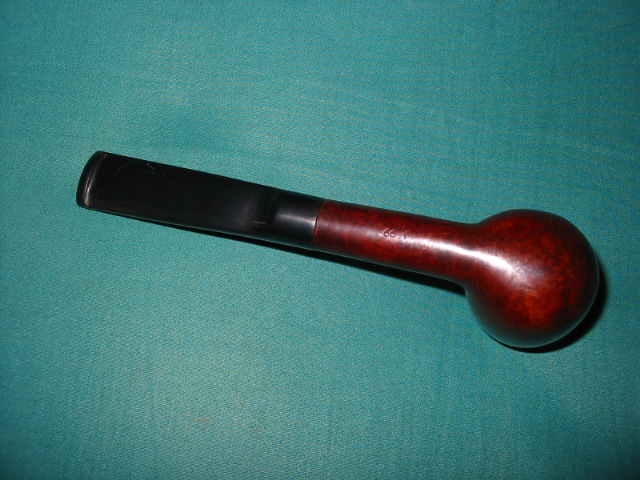
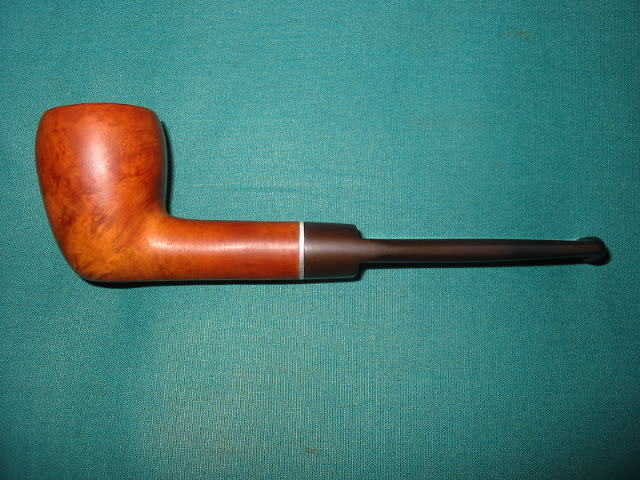
The last one in this lot is this GBD Concord. It was cleaned and refurbished. Restained the bowl and worked on the oxidized stem.

Restemmed Savinelli Hand Carved Folk Art Bowl


I picked up the three pipes below at an antique mall in Washington. The third one is the one about which I am writing this article. It came with the two stems pictured with it below. Neither of them fit the pipe. I decided to work on a tapered stem for this one. The bowl as badly faded in terms of colouration. One side was darker than the other. The rim was darkened and tarred. What attracted me to this pipe was the interesting folk art carving on the bowl. There was a hand carved vine that was carved around the bowl top with and interesting line on the top and bottom of the design. There was also a sheaf of leaves on the front of the bowl. There were also the initials C. J. I believe carved in the front of the bowl. They were done in an old Germanic style script. The carving was nicely done and very folksy. I decided to pick it up rework it.

Image

The first thing I did to it was to clean and ream the bowl. I wanted to have it clean to work on. I do what I call a field dress when I pick them up in the shops. I generally have a bottle of Isopropyl alcohol and a small reamer and pipe cleaners to get the major grime off. I have added some cotton pads to that kit. I cleaned enough to bring home with less work to do at home. I finished cleaning and reaming it. I scrubbed the top of the bowl with Murphy’s Oil Soap and a tooth brush until the tars and grime were gone. I scrubbed the carvings as well and wiped off the soap. Once it was clean I found a nice taper stem in my can of stems and fit the tenon to the mortise. I then used my Dremel to get the stem diameter to match the shank. When it was as close as I could get it with the Dremel I dropped the bowl in the 99% alcohol bath to soak while I worked on the stem with sandpaper – 240 grit, 400 and 600 grit wet dry and water – to remove the scratches and smooth out the surface and flow of the stem.

When I took the pipe out of the bath I dried it and looked at the shank. I kind of like the look of a nickel band on these chubby pipes so I pressure fit a band on the shank. I then restained the pipe with some medium brown Feibings Shoe Dye (an aniline stain). I flamed it to set the stain and then took it to the buffer to polish the new stain. The carving held a bit of the stain so they are just a shade darker than the rest of the bowl.

I sanded the stem with my micromesh list – 1500 – 6000 grit pads. Once done I buffed the stem (on the pipe) with White Diamond. I gave the whole pipe several coats of  carnauba wax to build a shine and make the grain shine. ImageImageImageImageImage

A New Stem for a La Strada Moderna Volcano


Blog by Steve Laug

I restemmed a couple of pipes for a fellow Canadian who needed one done for himself and one for his father in law. In thanks he gave me a couple of pipes. This La Strada Moderna Volcano was one of them. It was in need of a stem as well and also needed a good cleaning and restaining. The mortise in the tenon was actually very thin at the top of the shank and had some very small cracks that seemed to have come from just removing and reinserting the stem. I repaired the cracks by opening them a bit with pressure on a dental pick and dripped some superglue into the cracks and held them closed until the glue set. I then banded the shank with an oval nickel band that I pressure fit.

I had an oval stem blank in my can of stems that would fit with a bit of work. I fit the tenon with my tenon cutter and sandpaper. Then I used the Dremel to shape the stem to a fit. Using the larger sanding drum on the Dremel I can get very close to a good fit and with a light touch can leave the surface with minimum scratching. I then finish the fit with sandpaper. In this case I used some medium grit emery cloth to bring it very close and then 240 grit sandpaper to finish the fit. Once that was done I used 400 and 600 wet dry sand paper to finish removing the scratches and then took it to the buffer and buffed it with Tripoli so that I could see the scratches I needed to work on some more with sandpaper before turning to the micromesh sanding pads. I used 1500-6000 grit pads to finish sanding the stem. I then finished with White Diamond on the buffer and gave the stem several coats of carnauba wax. I restained the bowl with oxblood aniline stain and then buffed the bowl lightly with White Diamond and coated it with Halcyon II wax to give it a sheen.

ImageImageImageImage

Restemming a little nosewarmer


Last evening I finished restemming this little nosewarmer. It is stamped Bounty over Real Briar on the bottom of the shank. It has a nice sand blast finish and is stained black over a red undercoat. It length is 4 ½ inches, height is 1 ½ inches, outer diameter of the bowl is 1 ¼ inches and the chamber diameter is 5/8 inches.

The bowl was in great shape when I got it in a box of stummels needing restemming. When I restemmed the one that I carved I set aside the old stem and yesterday was looking at it and thought it would fit this bowl. I took the bowl out and the stem fit. The tenon was perfect but the diameter of the stem was too big. I used my Dremel and sanding drum to take it down close. The series of four photos below show it when I had finished the first work with the Dremel.ImageImageImageImage

The next series of four photos show the stem fit after sanding with 240 grit sandpaper to remove the remaining vulcanite and bring the stem to a proper fit. This took several trips back to the Dremel for more sanding with the drum and then back to the sandpaper to smooth out the scratches. The photos were taken just at the point I had moved on to sand with the micromesh pads. I started with 1500 and 1800 grits to really work on the scratches and shaping. I use these wet as I find that they work better wet. From there I moved through the micromesh pads from 2400 to 6000 grit with each one polishing the stem more deeply.ImageImageImageImage

The last series of photos show the finished pipe. The stem has a deep shine. I used some 8000 and 12000 grit micromesh for the first time on this one and I have to tell you the difference between the 6000 and the 8000 grit was noticeable in the finish. This morning I buffed the pipe with carnauba wax and it is ready for a smoke!

ImageImageImageresImage

Cutting a new stem from rod stock – a photo essay


Blog by Steve Laug

This one has been sitting on my desk for a long time in need of a stem. I have restemmed it with at least two different moulded stems that I have fit the tenon on and carved the surface down to make a slab like stem but none of them worked for a variety of reasons. One of them I sanded right through the top of the stem as I flattened it. The second just was not wide enough in the flare that makes a Barling stem what it is. I scrounged on EBay for old stems or ruined Barlings so that I could scavenge a stem. I found several but when they arrived they were oval stems or stems with a smaller diameter at the shank. So I was stuck and the pipe sat for probably four more months.

One evening I was chatting on Skype with Dan Chlebove from Gabrieli Pipes about it and asked him if he would be willing to cut a piece of vulcanite rod stock for me to work on. He agreed and quickly did that for me and sent it up to the Great White North! It arrived and I fit the tenon to the mortise with very little effort. After that I again set the pipe aside while I worked on the fortitude to go to work on the stem. The piece of rod stock looked daunting to me and I had never hand cut a stem before. This was going to be my first hand cut a stem and a Barling slab stem to boot. I was not sure whether I would be able to pull it off. So it sat! Probably another month went by with it sitting on my desk next to the computer just quietly, silently taunting me to take the plunge.

ImageImageImageImage

The long and short of it is that five months to the day from when I received the pipe stummel in the mail, I finally went to work on the stem. I set up my Dremel with the large sanding drum and got out my wood rasps and files and went to work on the stem. I did the initial shaping and cutting away of material with the Dremel and the sanding drum. I decided to start by cutting back volume on what would be the slab part of the bit. Notice in the pictures below I left a bar at the tip for where the button would be when I finished the stem. I did not work on the diameter of the saddle or the curves of the Barlings saddle at this point. I was only interested in removing material to begin to get the rod shaped into the stem and remove as much material as possible with the Dremel. The three photos below show the first steps in the process and the result of sanding with the Dremel. I have shown the stem on the pipe from the top and bottom view to give an idea of what I was aiming for and in profile in the third photo to show how much material had been removed at this point in the process.

ImageImageImage

There was still a long way to go to get the stem to even close to the final shape. I used the Dremel and sanding drum to remove more material and begin to take the saddle down to size to fit the diameter of the shank. At this point the saddle is slightly conical as I was working particularly on the junction of the stem and shank. I also sanded away more of the slab material and used the drum to shape in the portion of the rod that would end up being the button on the finished pipe. The next three photos show the results of the next process of sanding with the Dremel. The shape is beginning to emerge from the rod stock.ImageImageImage

The next two photos show the file and rasp that I used in the next part of the work of shaping. I would come back to the Dremel to remove more material but I wanted to flatten the slab and not have any waves in it that the round sanding drum left behind (visible in the photos above, I was careful so they were not too bad, but they were there). I sent up the pipe on the work bench and use the rasp to cut away material. I held it horizontal to the slab and worked the length back and forth until it was straight and smooth. I used a file to take out many of the deep cuts of the rasp and to work on the edge of the button on the end of the rod stock. The first photo shows where the stem is beginning to more clearly emerge. There is still a lot of work to do at this point but it is beginning to tentatively take shape. All through the process from this point on I kept a picture of a Barling’s Make Billiard close at hand to compare as I removed more and more material. It has been wisely said that you should progress slowly because you can always remove more material but you cannot put it back. The saddle of the stem is still conical because I still needed to work the taper and slight flare of the slab bit. The flat slab is very proportional in the second profile picture. It is flat at this point but still far too thick for the finished stem. The button is better defined and the stem is very clearly outlined in both pictures.

ImageImage

At this point I took the pipe back to the Dremel to remove some the saddle and some of the thickness of the slab. The picture below shows what the pipe looked like when I brought it back to the work bench to use the files again. You will note that I worked with the stem on the pipe. I do this because I want to keep things in proportion and find that when I work with it off of the stem it is easy to lose the roundness of the saddle portion and a feel for the look of the pipe in profile. I use the pipe bowl as a guide to keep me focused in what I remove of the vulcanite. Each step the stem is emerging more and more from the rod stock.

Image

In the next three photos I used some 80 grit sand paper to remove more material from the saddle. At this point I still left a bit of the conical shape. I was working on the profile to bring the saddle into line with the horizontal lines of the shank. You can see that there is still a lot of material to remove before it is in line. I also began to work on the taper back to the button. I would have to remove some more of the thickness of the slab but I wanted to narrow the flow back to the button.ImageImageImage

The next two photos show the pipe from the top and the bottom next to a smaller Barling’s Make billiard that I was using as an example along with the photos I had collected. I was ready to start working on the taper of the slab on each side. Note the way the little billiard stems line go from the shank to the button in the photos. I wanted to make the lines on the slab I was working on to go the same angles. You can see what I am speaking of most clearly in the second photo of the top of both stems. I was aiming for the shape and angle of the sides of the original to match the stem I was shaping. At this point the stem is really taking shape and I can see it more clearly as I work on it. There is still much material to remove from the thickness of the slab but care must be exercised as I needed to open up the airway with a larger drill bit before going much further. I did not want the stem to be so thin that I would drill right through the top or bottom.

ImageImage

The next four photos show the pipe stem after I have drilled the airway and opened it up. I then removed more of the material from the slab and the saddle with the sanding drum and then sandpaper. The stem was getting closer to the shape I was aiming for. I also sanded the taper from the saddle back to the button with the files and the sandpaper. I wanted a gradual move and flow back while keeping the profile flat. The upper portion of the stem next to the saddle was close to flatness I wanted but the nearer the button the stem was crowned and needed to be sanded flat once again. I shaped the button and removed material from the thickness of it to approximate the finished profile. I also slanted the lip of the button away from the stem. In the last two photos of the foursome I show the top and bottom views of the stem at this point. I had the angles from the saddle to the button along the sides with the right flare. The overall look of the stem was very close to the original, just a bit thick and crowned rather than flat at the button end. More sanding needed to be done!

ImageImageImageImage

In the next four photos the crown on the stem has been removed, the diameter of the saddle and the shank are very close and the fit is excellent. The button has been shaped a bit more but there it still a lot of material on it. The slab of the stem is still thicker than I would like but it is getting closer to the finished stem. The shape is very clear now and the round piece of rod stock has all but disappeared. You will notice at this point that the saddle and slab are at right angles and there is not the curve of the original Barling’s Make stem where the saddle merges with the slab. That remains to be done. The angles of the slab from shank to button are finally getting there. Lots of sanding has been done and more to come to get this just so.

ImageImageImageImage

I used the Dremel sanding drum to carve the angles of the saddle to slab transition. I needed to go from the ninety degree angle in the above photos to more of a curved flowing transition. I drew the curve I was aiming at with a carpenters pencil on the saddle portion of the stem so that I could see how much material to cut away with the sanding drum. The next three photos show the stem after the sanding drum had done its work. It is hard to see in the profile shots but I pushed the drum a little too deeply into the slab portion and caused the flatness to have a slight dip on the top and the bottom of the slab. It would take much sanding to bring that back to level with both files and sandpaper. I used a file to work on the surface first to smooth out the surface and level it and then 80 grit sand paper to begin to smooth out the slab and bring it back to level.

ImageImageImage

The next two photos show the progress of removing the dips. The first shows the profile and if you look closely you can see the dip in the top and bottom is lessening though it is still present. The sanding disk in the picture is a soft sponge with 100 grit sandpaper attached and it is perfect for working the curve of the angles on the saddle. I also worked on the angles from shank to button some more with the sandpaper and also the button to give it more definition.

ImageImage

The next series of photos show the work that was done to remove more of the material in the saddle and smooth out the shank/stem junction. There was still material that need to be removed from the underside of the saddle at this point as can be seen in the two profile pictures. The top is pretty close but both need more sanding to make the surface horizontal from the bowl to the saddle transition to the slab. I also worked on the width of the slab horizontally. I would also need to flatten the sides of the slab rather than curve them as they are in these photos. The curve of the saddle to the slab it looking very good at this point and is a match to the original stem in terms of angle and position. I sanded the button some more as well to thin it down and to taper it backward toward the slot.

ImageImageImageImage

The next series of photos show the stem after I have removed much of the thickness around the shank junction. The top is just about perfect in terms of it horizontal look. The bottom needs to have a bit removed near the slope to the slab. The side profile shots show that the taper in terms of width is getting very close. I also flattened the edges of the stem profile from shank to button to give it a more Barling’s shape. The button is getting a cleaner look as I shape it with the sandpaper and the slab is just about the correct thinness and flatness. The last two photos of the top and bottom of the stem show that the angles of the stem flow nicely from the bowl to the buttonImageImageImageImage

The last four photos show the pipe with the shaping finished. The stem fits the shank well and the diameter of the shank and saddle match. The curved edge of the saddle is matching and when overlaid on a picture of the original stem it also matches. The taper of the bit from saddle to button is smooth and flowing. The width of the bit tapering from the bowl back to the button is equal and smooth. The button has been shaped and the width and angles on it are matching the original stem. I have opened the slot on the end of the stem but still need to shape the slot to be more like the Barling slot. There are also scratches that need to be removed from the surface of the stem to get the rich polish on the vulcanite. Those are minor things that need to be completed before the stem is completely finished but it has gone from a vulcanite rod to a Barling’s stem shape.

ImageImageImageImage

I enjoyed the process of stem shaping from start to finish. Though this took probably about 5 hours or more, and I am sure there are faster ways to do the work, I learned far more than the time spent can spell out. I would not change anything about the learning as I do my best in hands on experiences. The process of shaping a piece of rod stock into a stem has been demystified for me and I have gained a new appreciation for the work of pipe makers and repairmen who hand cut stems. There is no way a craftsman can be compensated adequately for the painstaking detail that goes into shaping and crafting a hand cut stem. My hat is off to those who take the time to do that on the pipes they make. Thank you.

UPDATE: I just finished shaping the button and the slot on the new stem. I used needle files and folded sandpaper to smooth out the slot. I funneled it back quite a ways. The pictures below show the shape of the button and the slot as it stands now.

Here are a couple of photos of the shape of the button in profile and from above.

Refurb – A pair of Astleys 68s


Just finished the final buff on these two and thought I would post them. In researching the net for information on these pipes I found a 1968 catalogue that showed that they originally had saddle stems. I sorted through my stem box and found two saddle stems for these Astleys bowls. I fit these stems to the bowls. They are stamped Astleys 68 which is a pot shape. They also have the address on Jermyn Street London stamped on them. The bowls were reamed and cleaned. I then restained them with black stain, fired the stain to set it and then buffed with white diamond lightly before waxing with Halcyon wax.

The pipe with the band had a crack in the shank that I repaired and pressure fit with the nickel band. The blast on this pair is nicely done. Astleys called this their Crusty Briar line. Here are the pics. Thanks for looking.

ImageImageImage

Refurbed Breezewood Acorn


I picked this old timer up in the ebay purchase that included the Bertrams author. It was almost black it was so dirty. It is incredibly light weight. Once I got the grime off I could see a wee bit of the stamping left and it read Breezewood. I reamed and cleaned the inside. The stem is a screw mount like the old Kaywoodies. It has been clipped of stinger contraption but it is a good open draw. I cleaned the stem and used the micromesh sanding disks on it. The bowl was soaked in an alcohol bath to remove the finish and grime and then sanded with 220, 400, 600 sand paper and then micromesh 1800, 2400, and 4000 grit pads. Here are the before and after shots. Below the pictures I have posted a write up of the history of Breezewood pipes by the late Mike Leverette (a friend and historian of things pipe).

The pipe is pictured in the top photo below of the two pipes.

Image

Here is a series of photos of the refurbished pipe.

Image

ImageImageImage

Here are some informational ads on Breezewood pipes

ImageImage

I wanted to include this brief article by Mike Leverette as it gives background history that is not commonly known or available regarding these early alternatives to briar that came out during the war years.

“There were at least three pipe brands made from the Mountain Laurel; Trapwell, Breezewood and Custombilt. Trapwell pipes were made by D & P Pipe Works beginning on or before 1943. D & P Pipe Works, owned by D. P. Levitas (Ross 2005), began making pipes in 1938 (Wilczak and Colwell 1997) probably in New York City but relocated to Sparta, Alleghany County, North Carolina in 1943 (Sparta/Alleghany CoC 2006), in order to be closer to the huge population of Mountain Laurel in the area. Later, this company changed their name to Sparta Pipe Works and still later to Sparta Industries. I have one Trapwell World’s Best Briar pipe in my collection, a small billiard, and here again; it is a great little smoker. World’s Best Briar was their marketing ploy for Mountain Laurel. Trapwell’s ‘trap’ is a highly complicated condensing system when compared to most regular metal condensers. After the war, Trapwell pipes were made from regular briar wood, or “imported briar” until their demise.

According to a 1942 Life magazine advertisement, Breezewood pipes were made by The Breezewood Pipe Company, located at 630 Fifth Avenue, New York City, though Wilczak and Colwell state the Breezewood pipes were made by Kaufmann Brothers & Bondy (KB&B) beginning in 1941 (Wilczak and Colwell 1997). The Breezewood Pipe Company may have been a subsidiary of KB&B. To quote the 1942 Life magazine advertisement; “There, deep in the Great Smoky Mountains, they found it – found an uncharted virgin forest of burls, great old burls that had been growing there uncounted years. And from these old burls, pipes of astonishing lightness of weight are made – their name: Breezewood.”

At the present time, this is all I have been able to find on the history of Breezewood pipes. Here again, the one Breezewood pipe, a small billiard, I have in my collection is a great little smoker. I am not overly fond of metal condensers and this Breezewood pipe has a simple tube condenser similar to Dunhill’s “inner tube”.