Tag Archives: restaining a bowl and rim

Renewing a 30’s Era KBB Yello-Bole Honey Cured Briar


Blog by Steve Laug

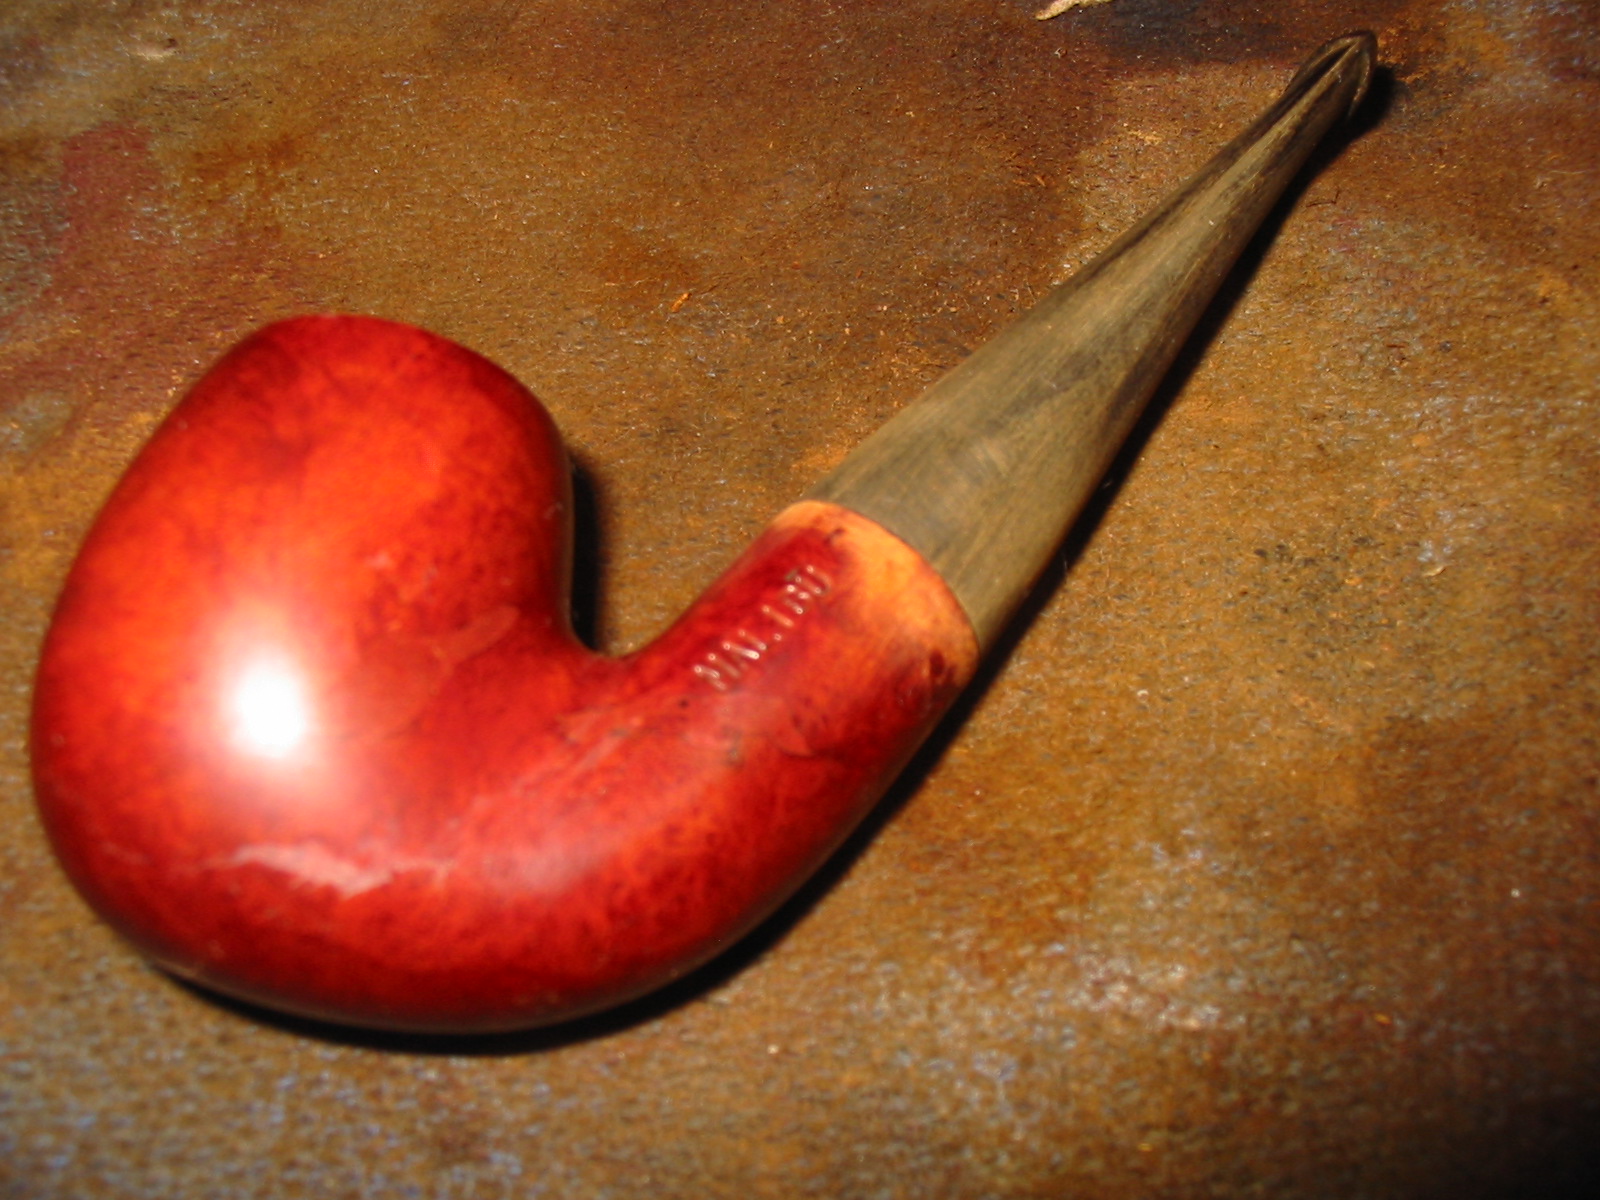
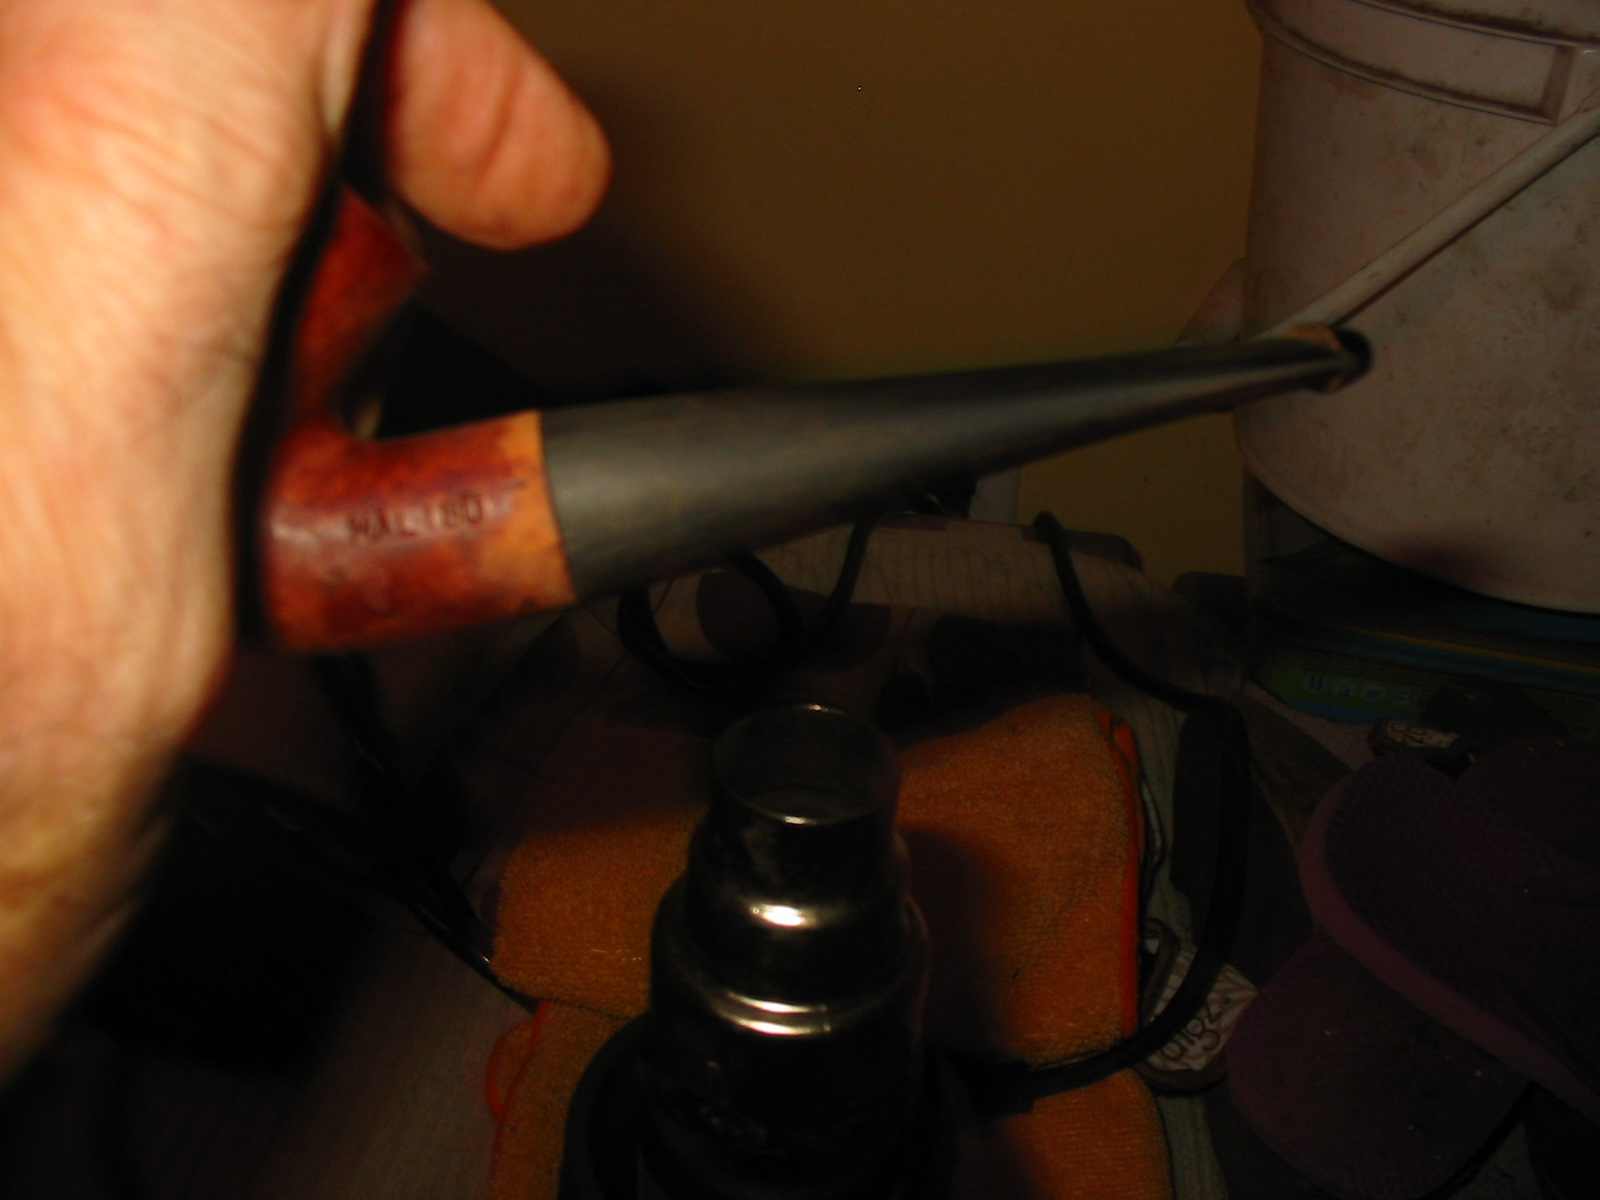
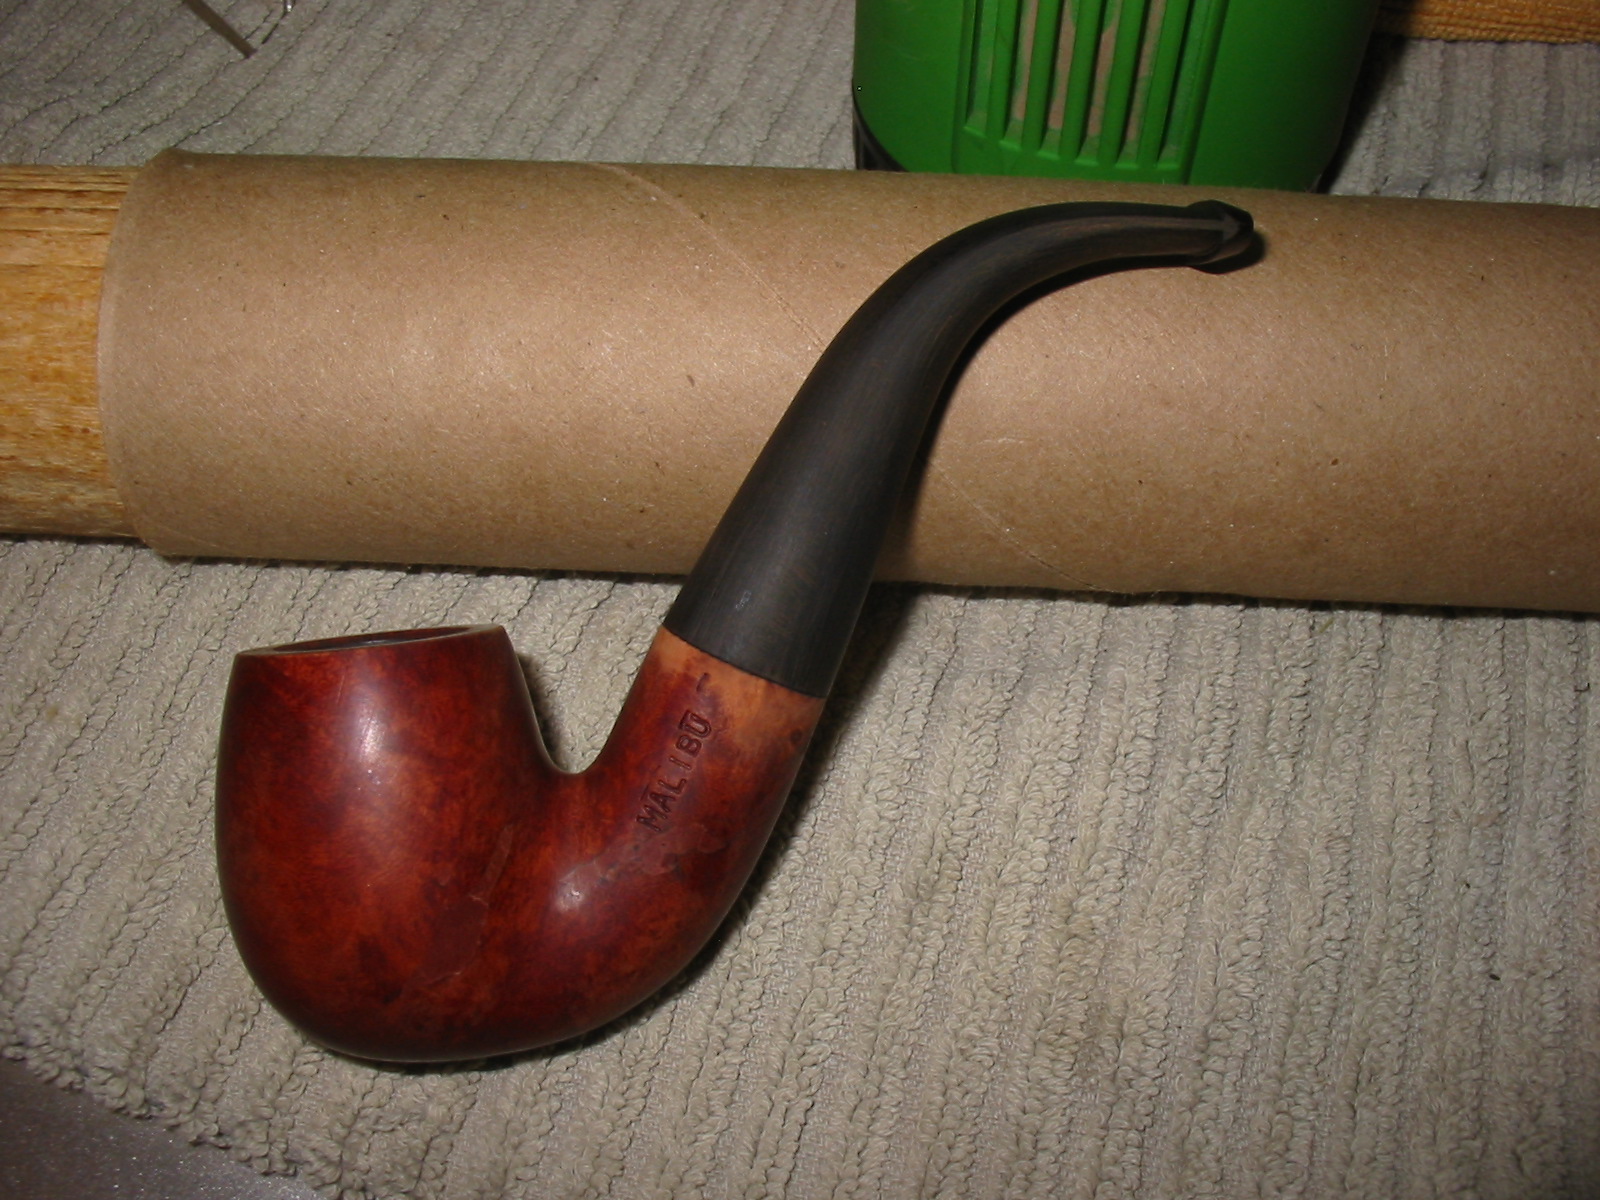
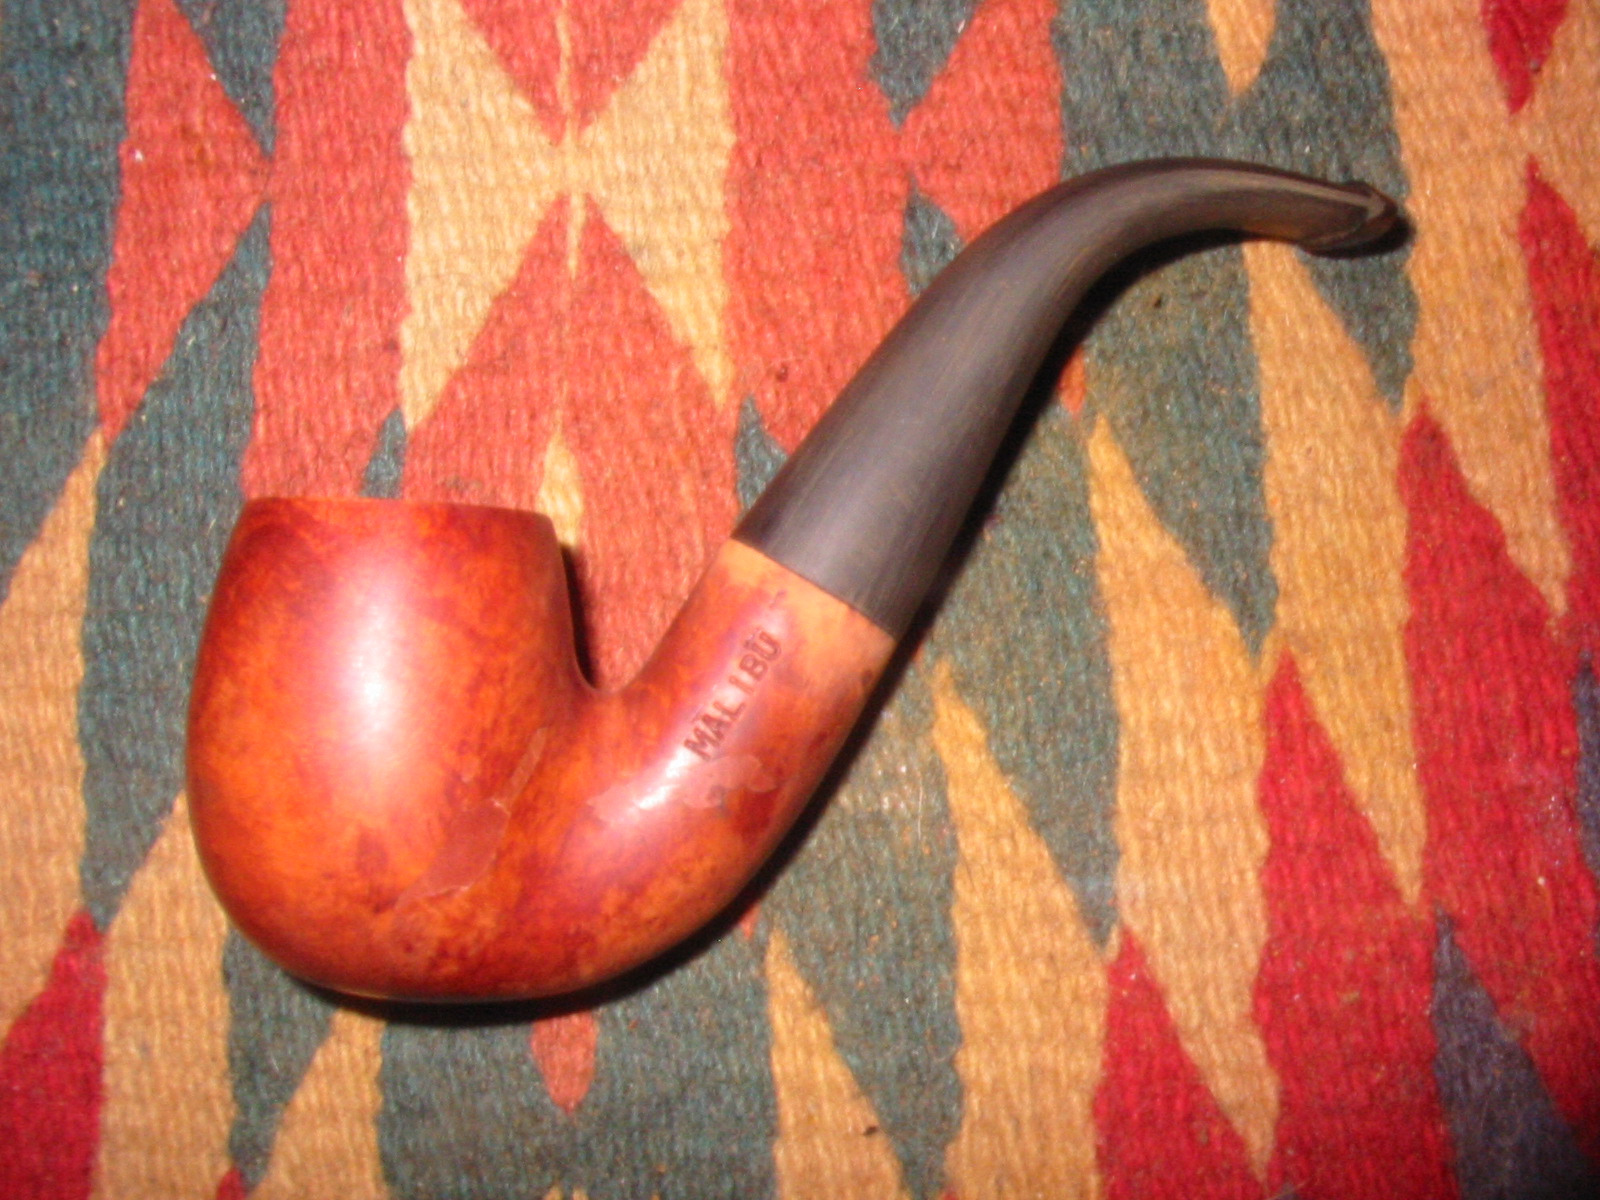
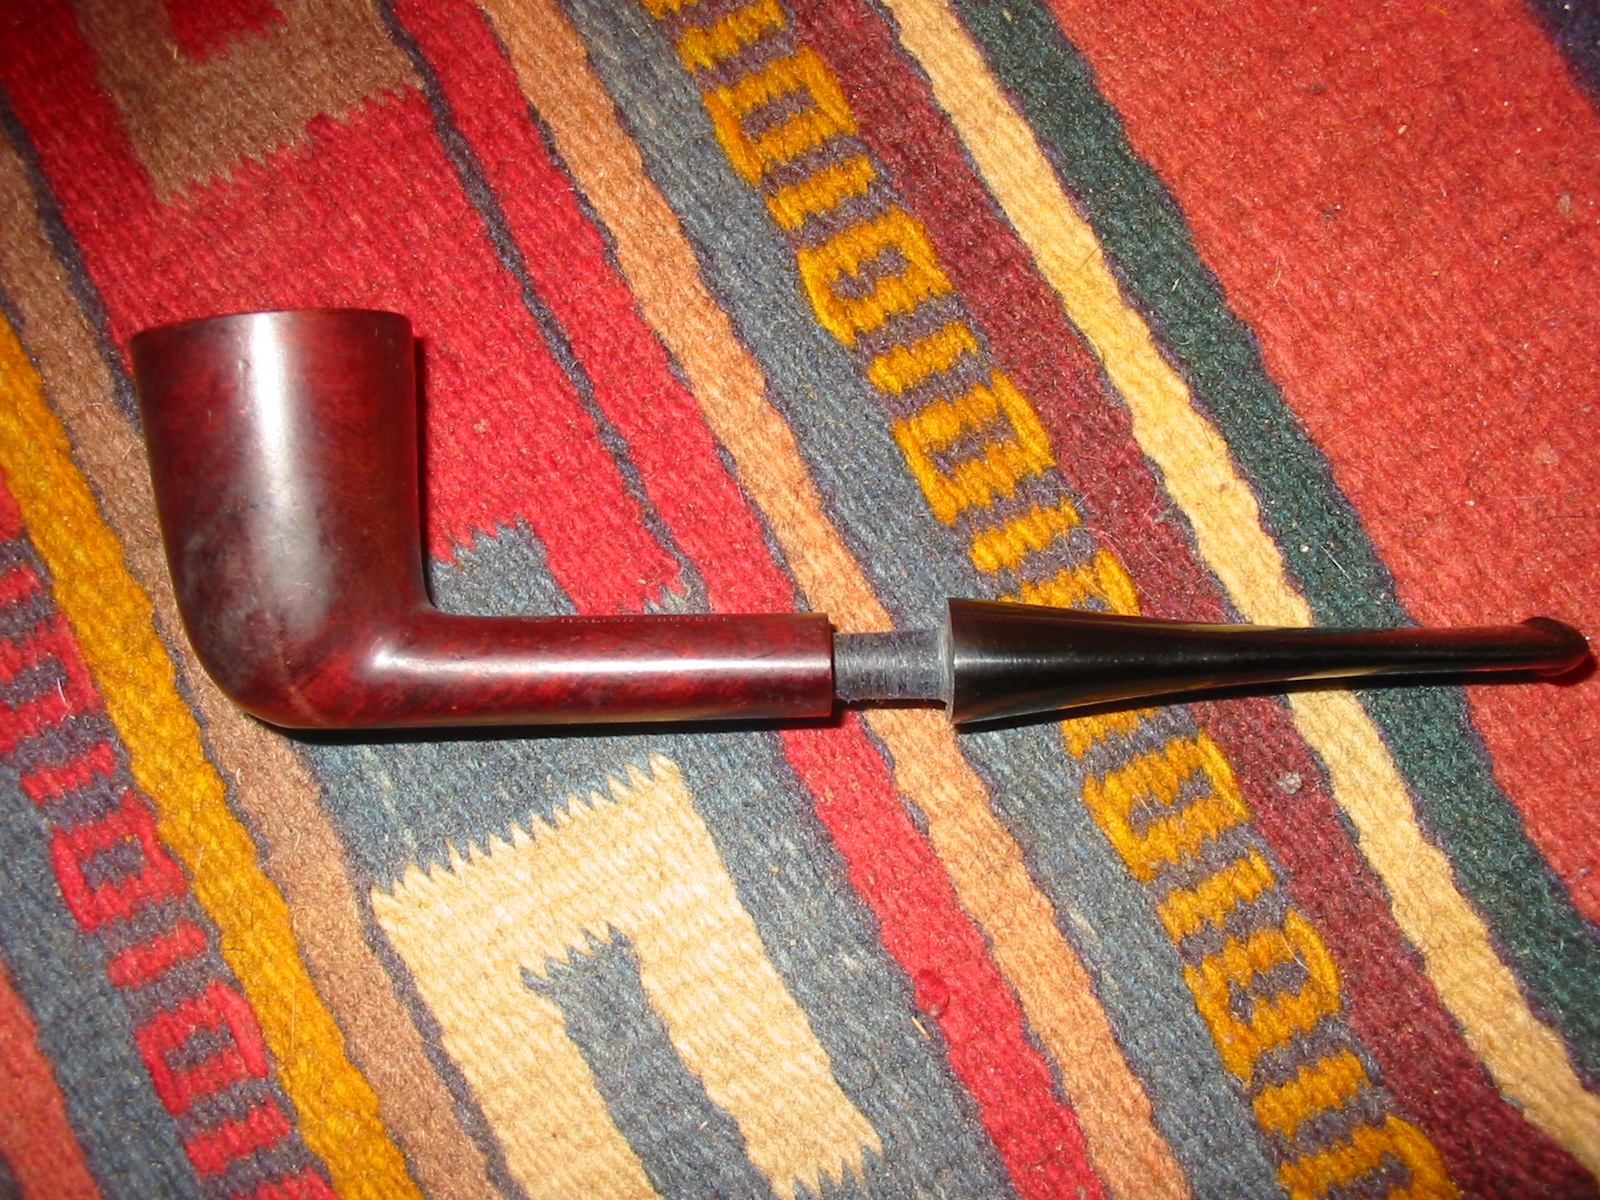
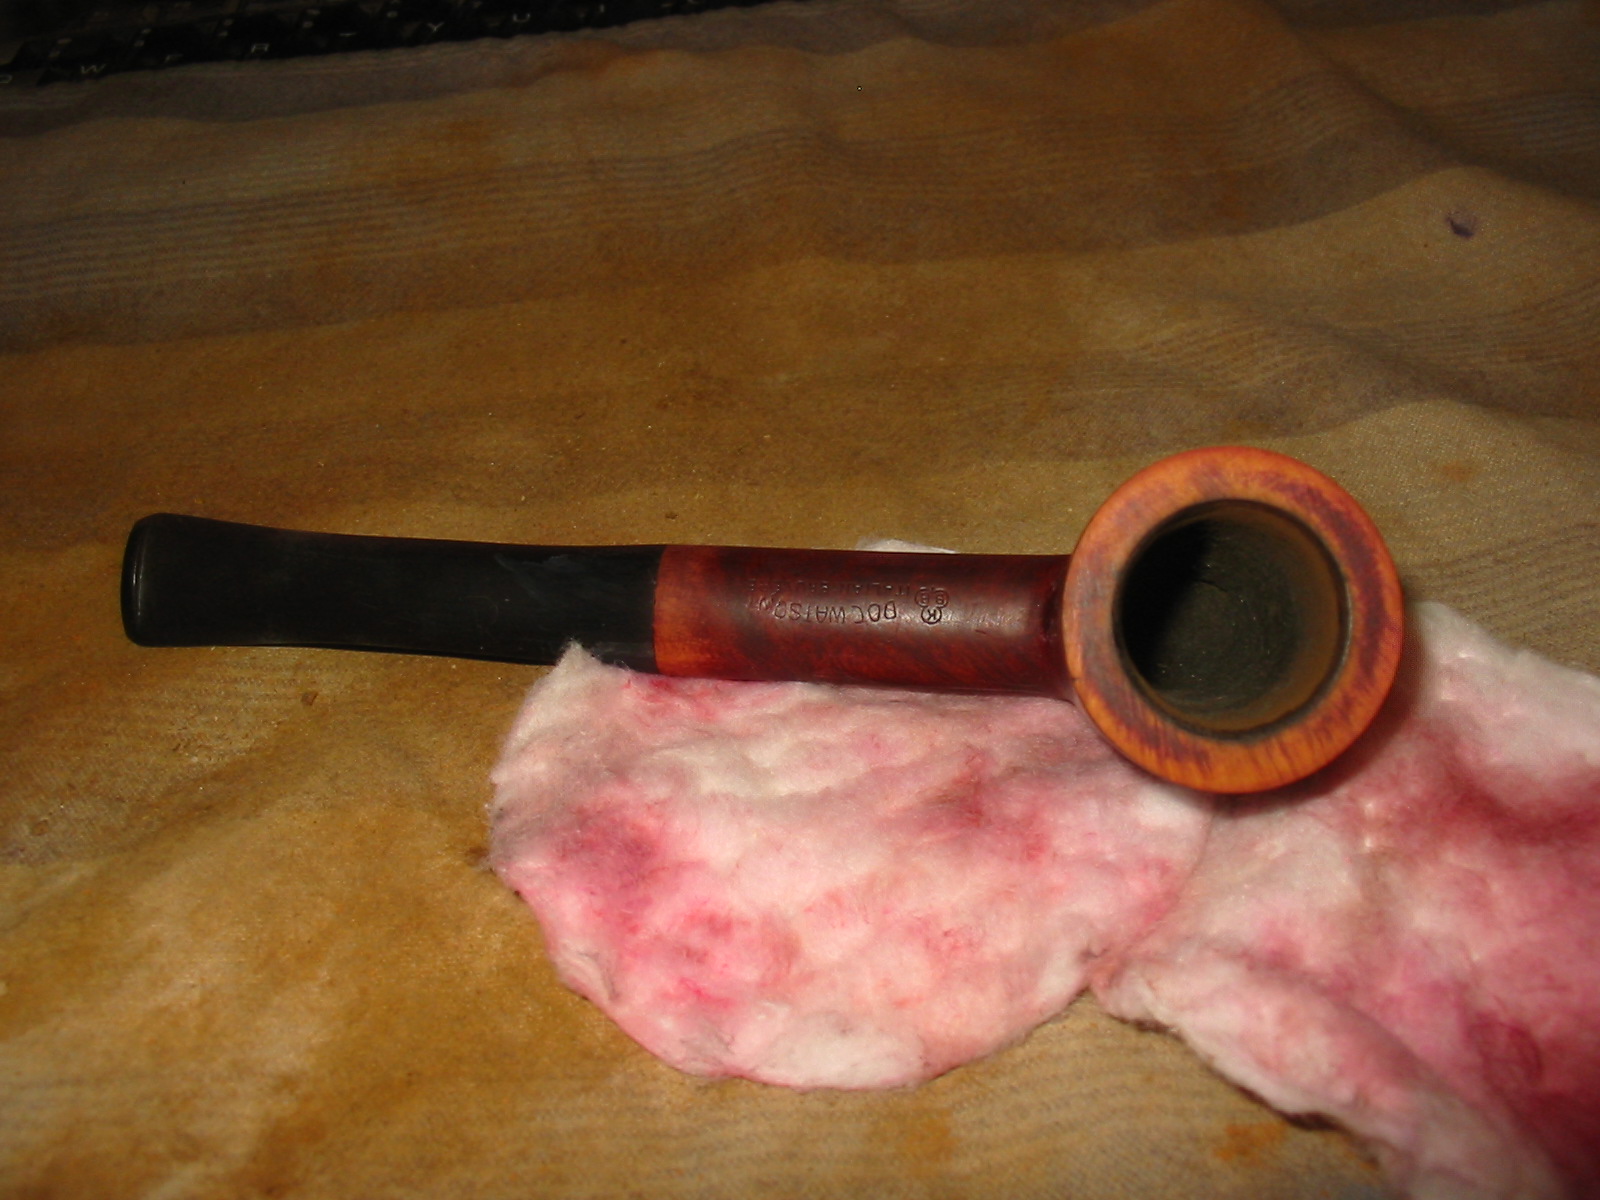
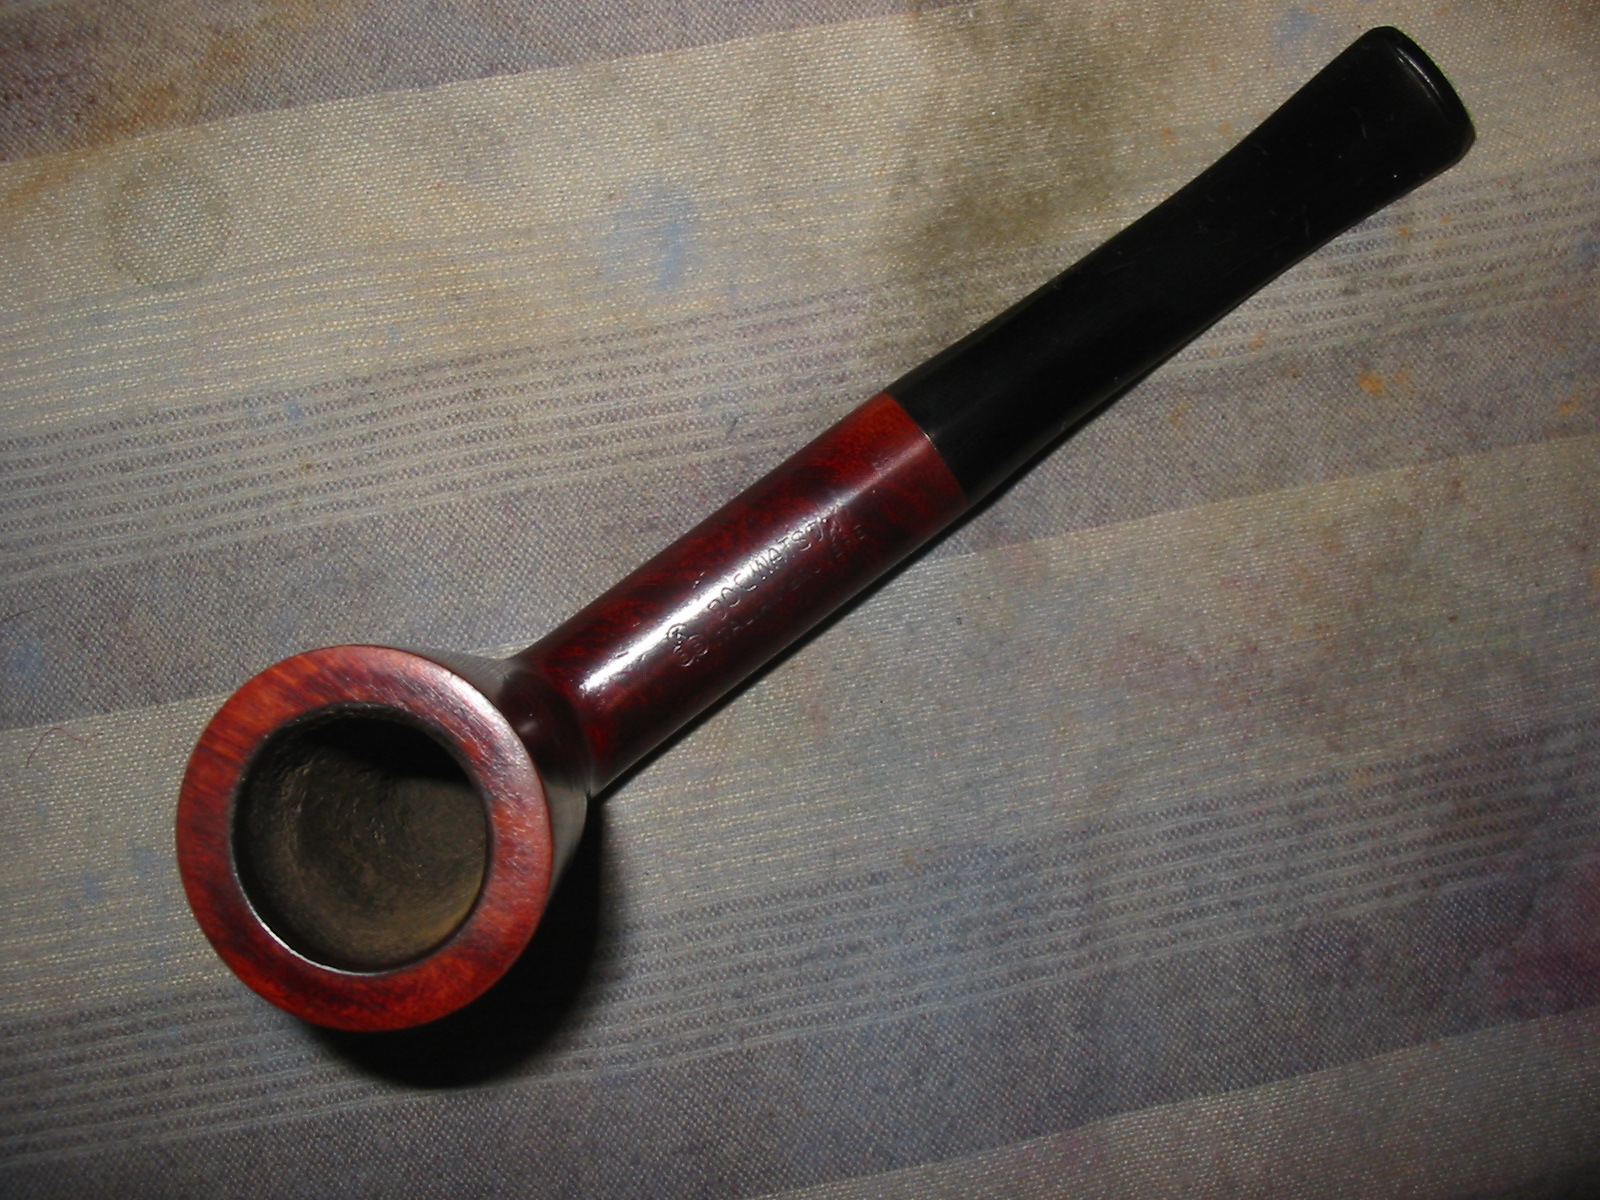
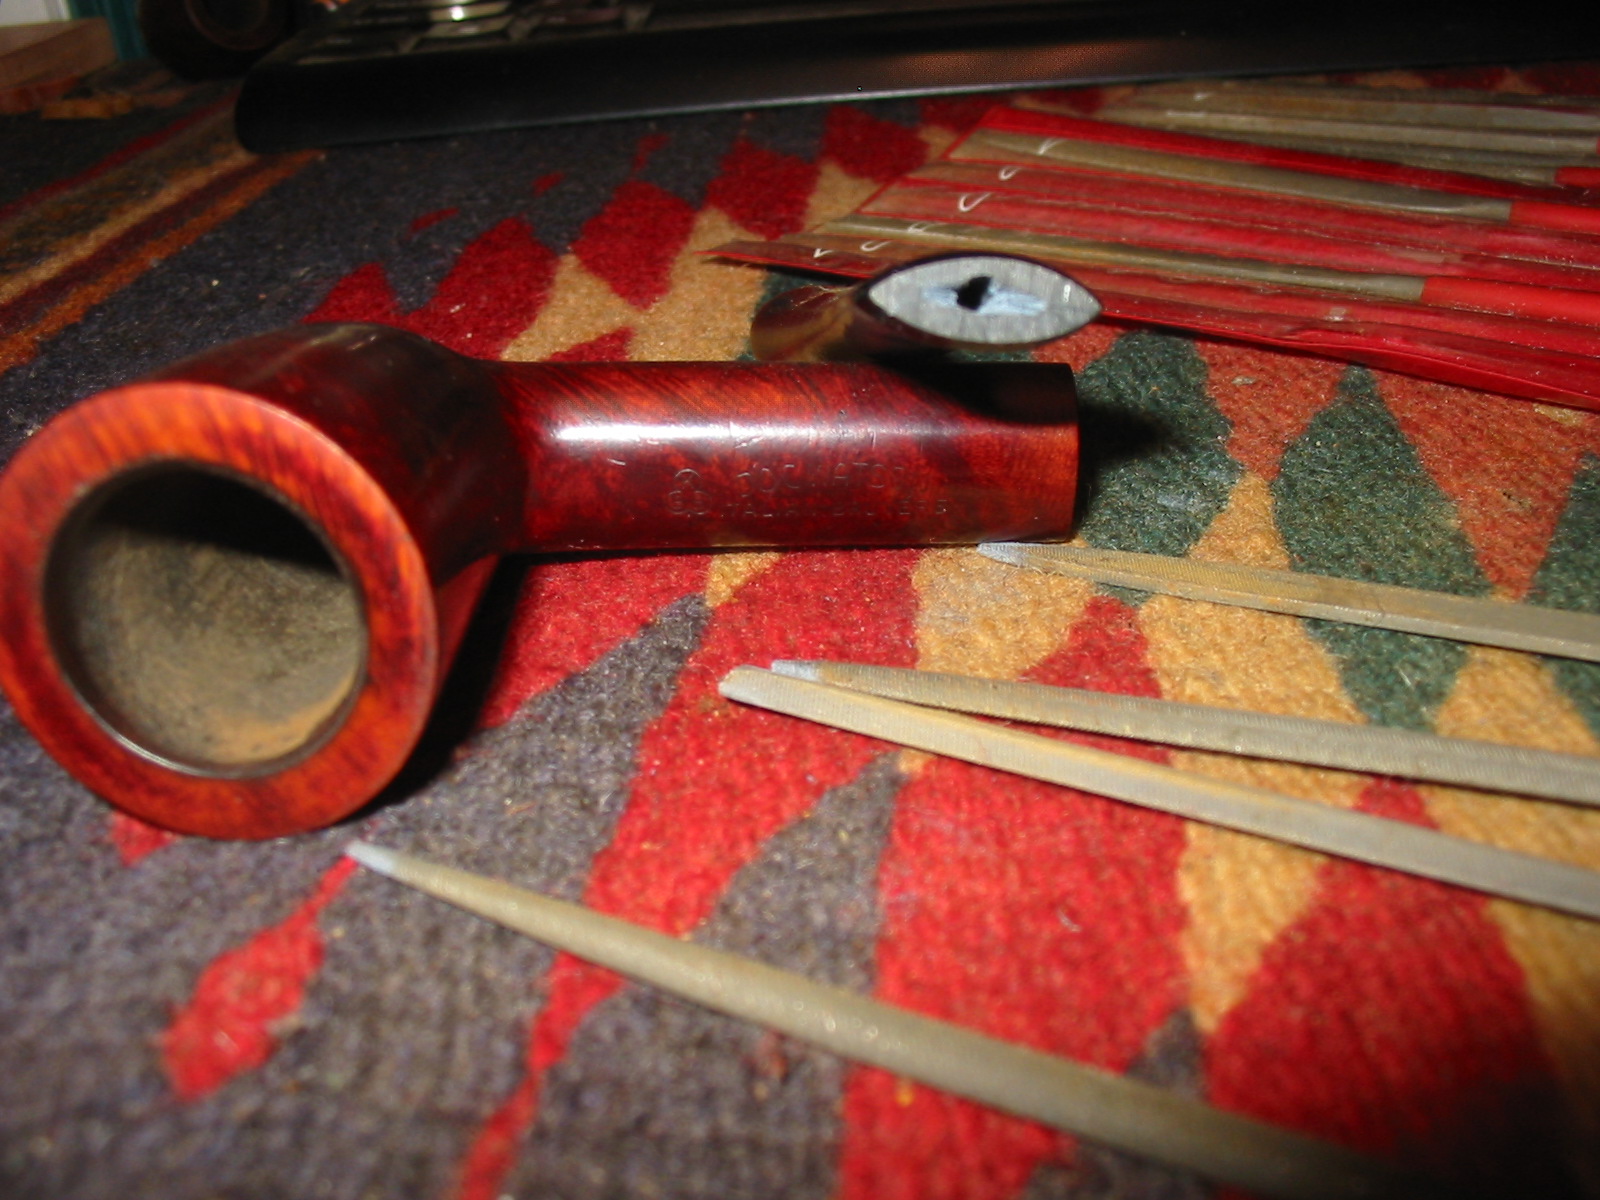
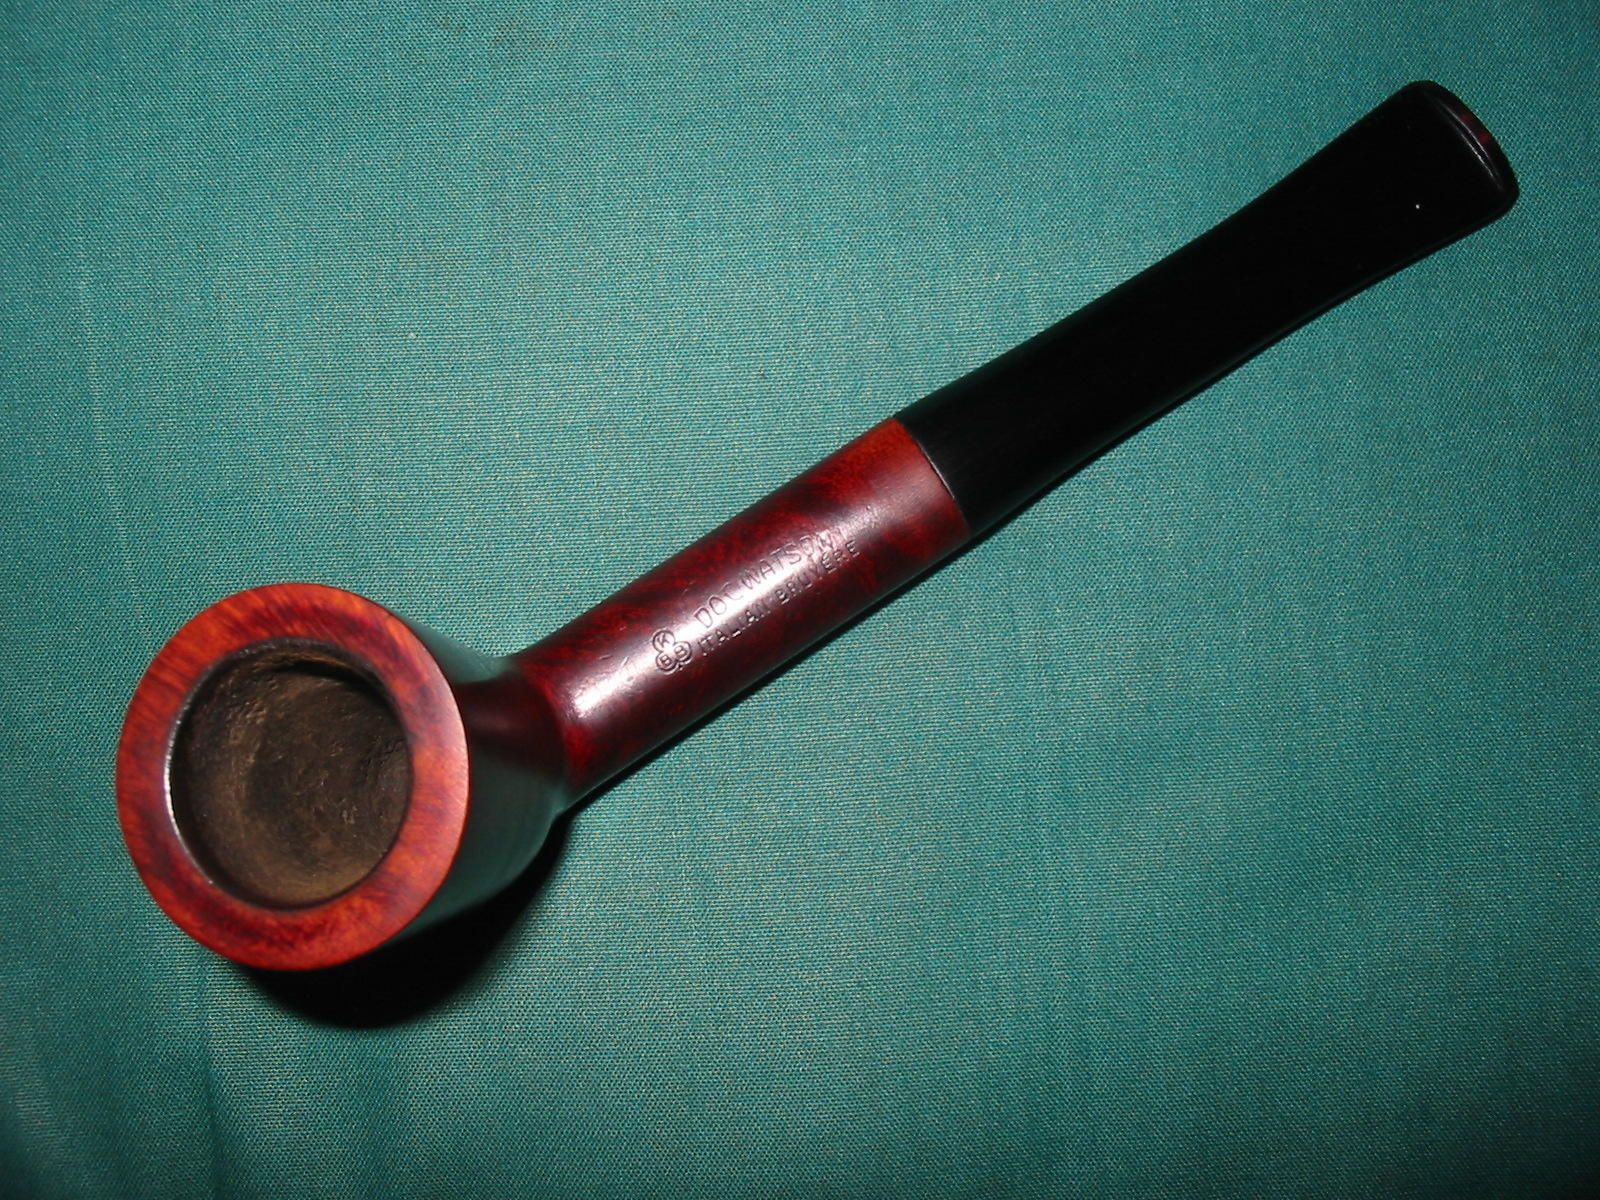
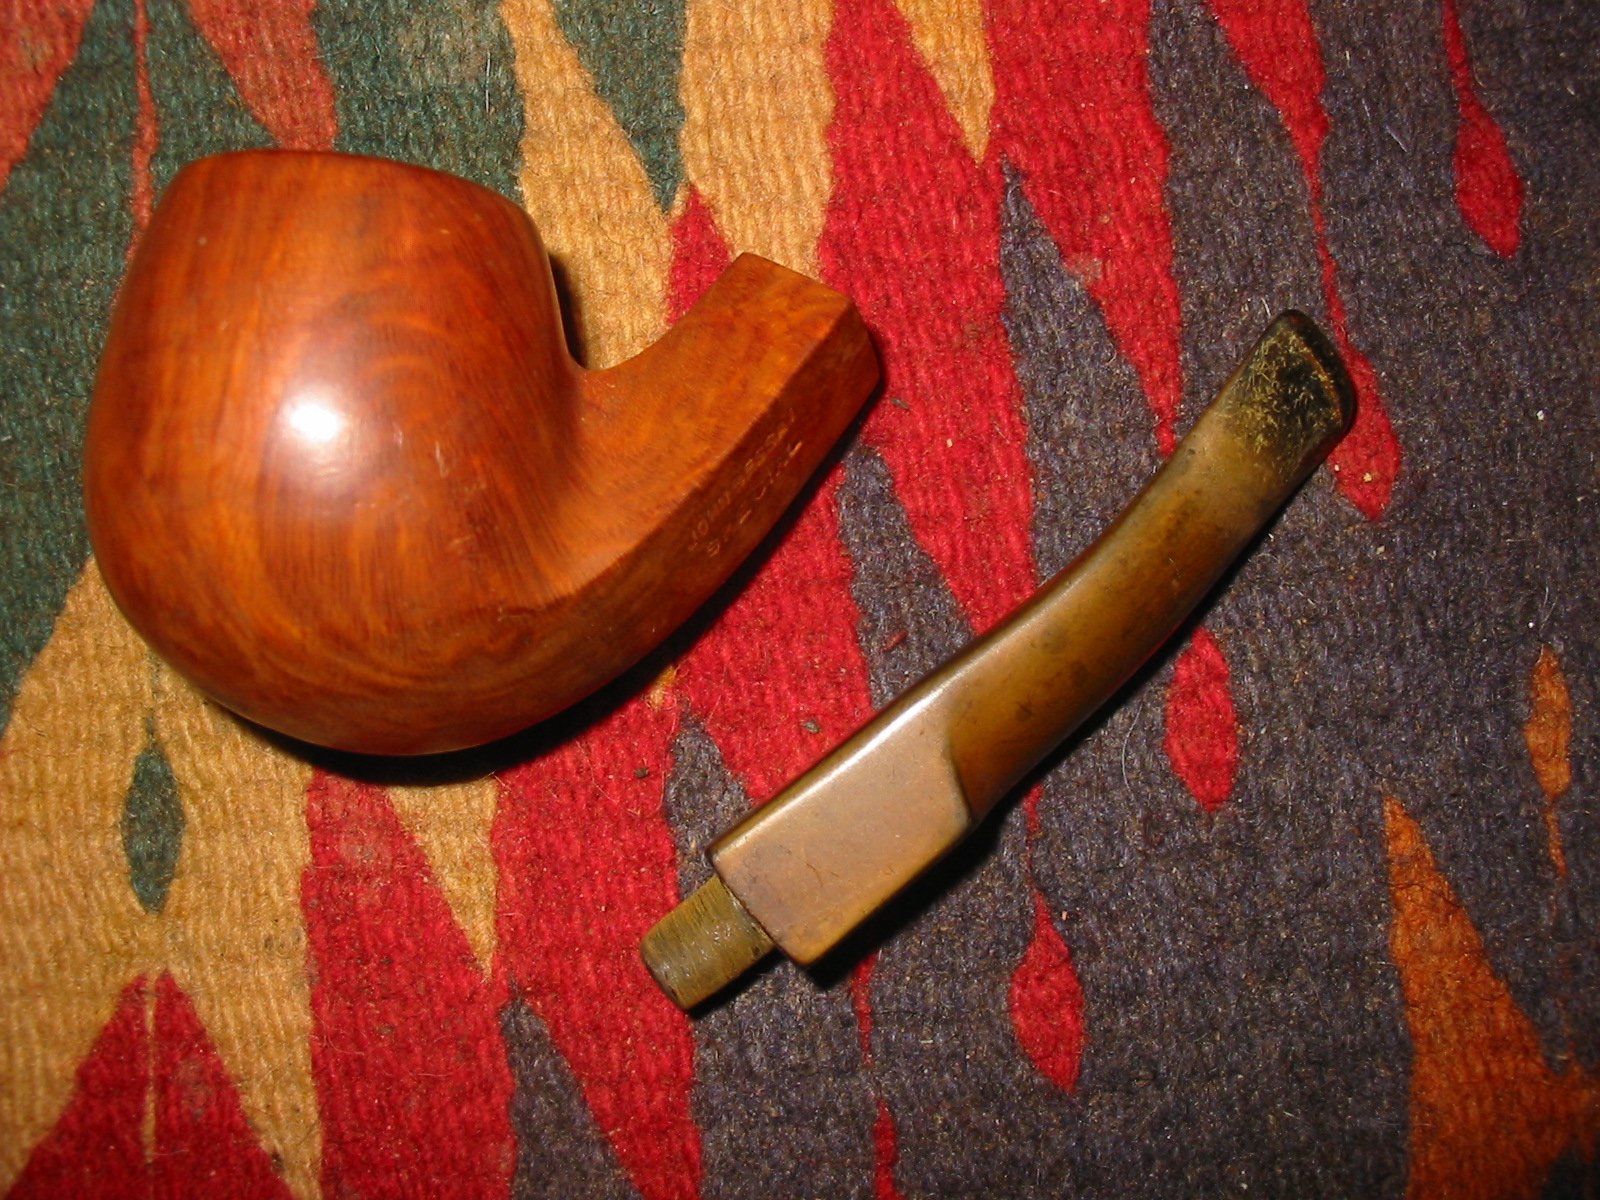
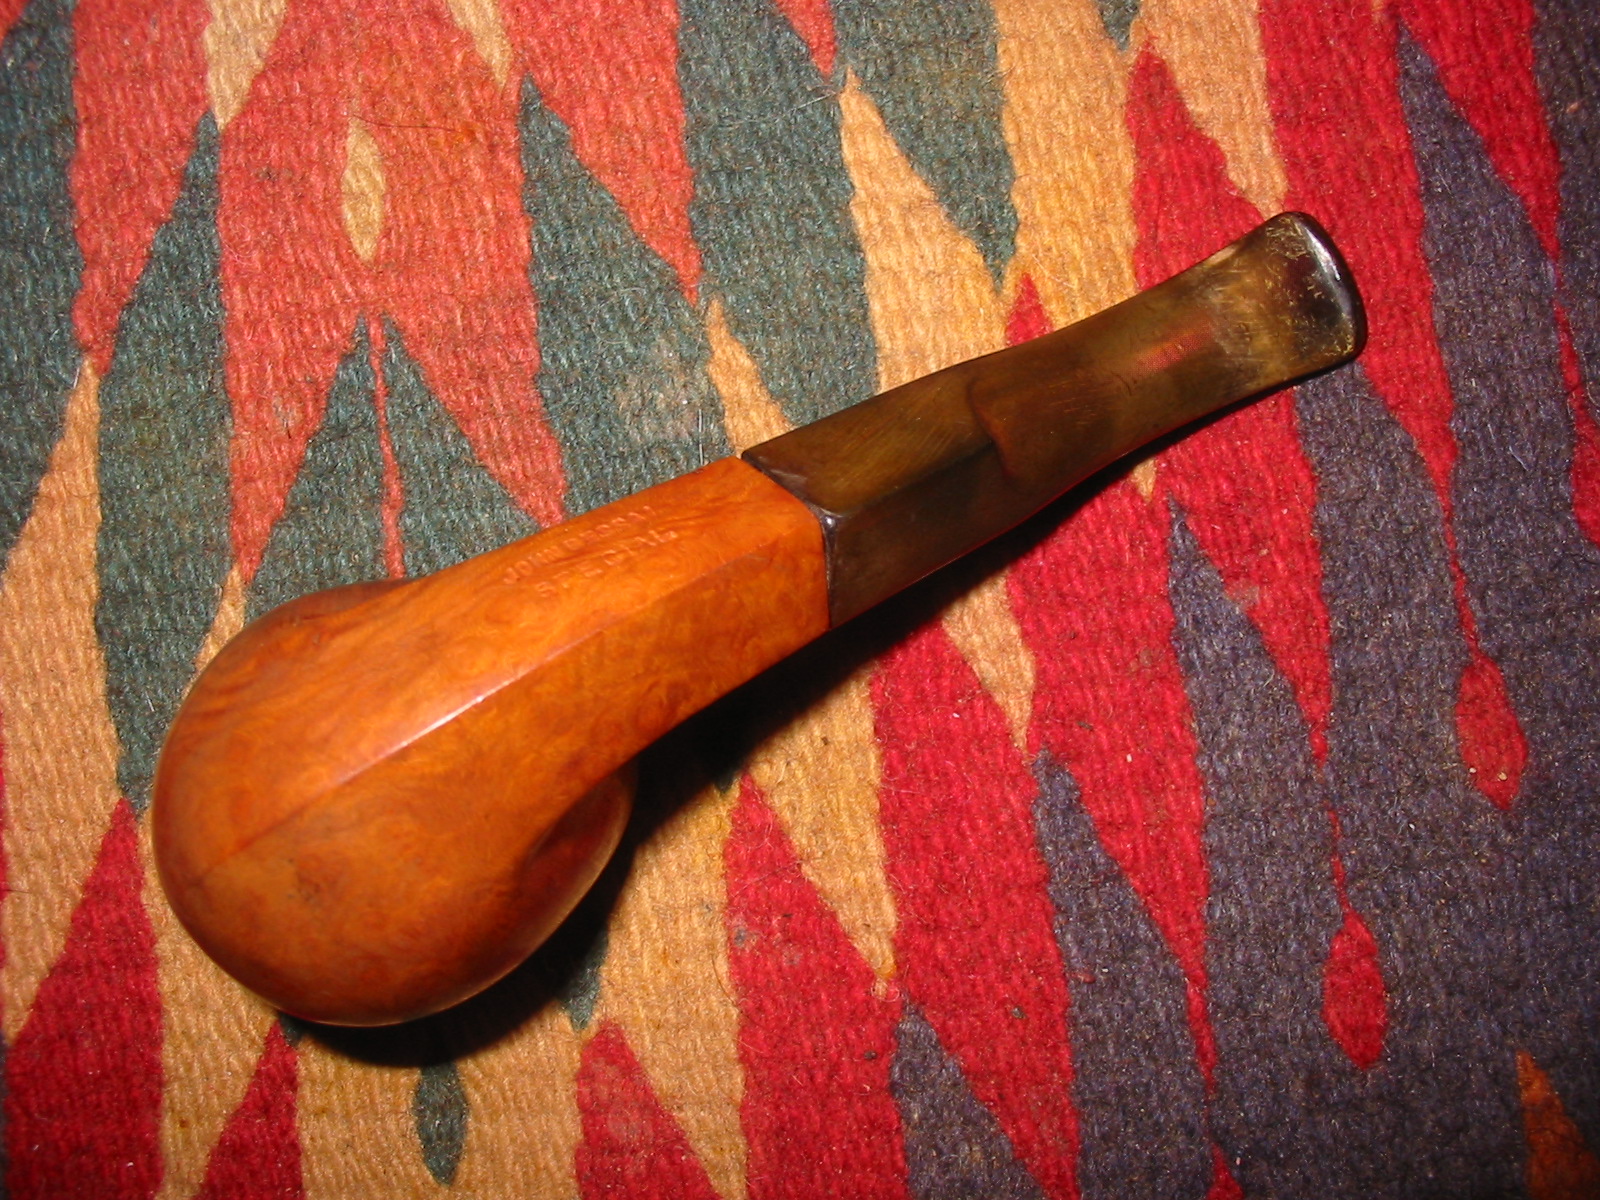
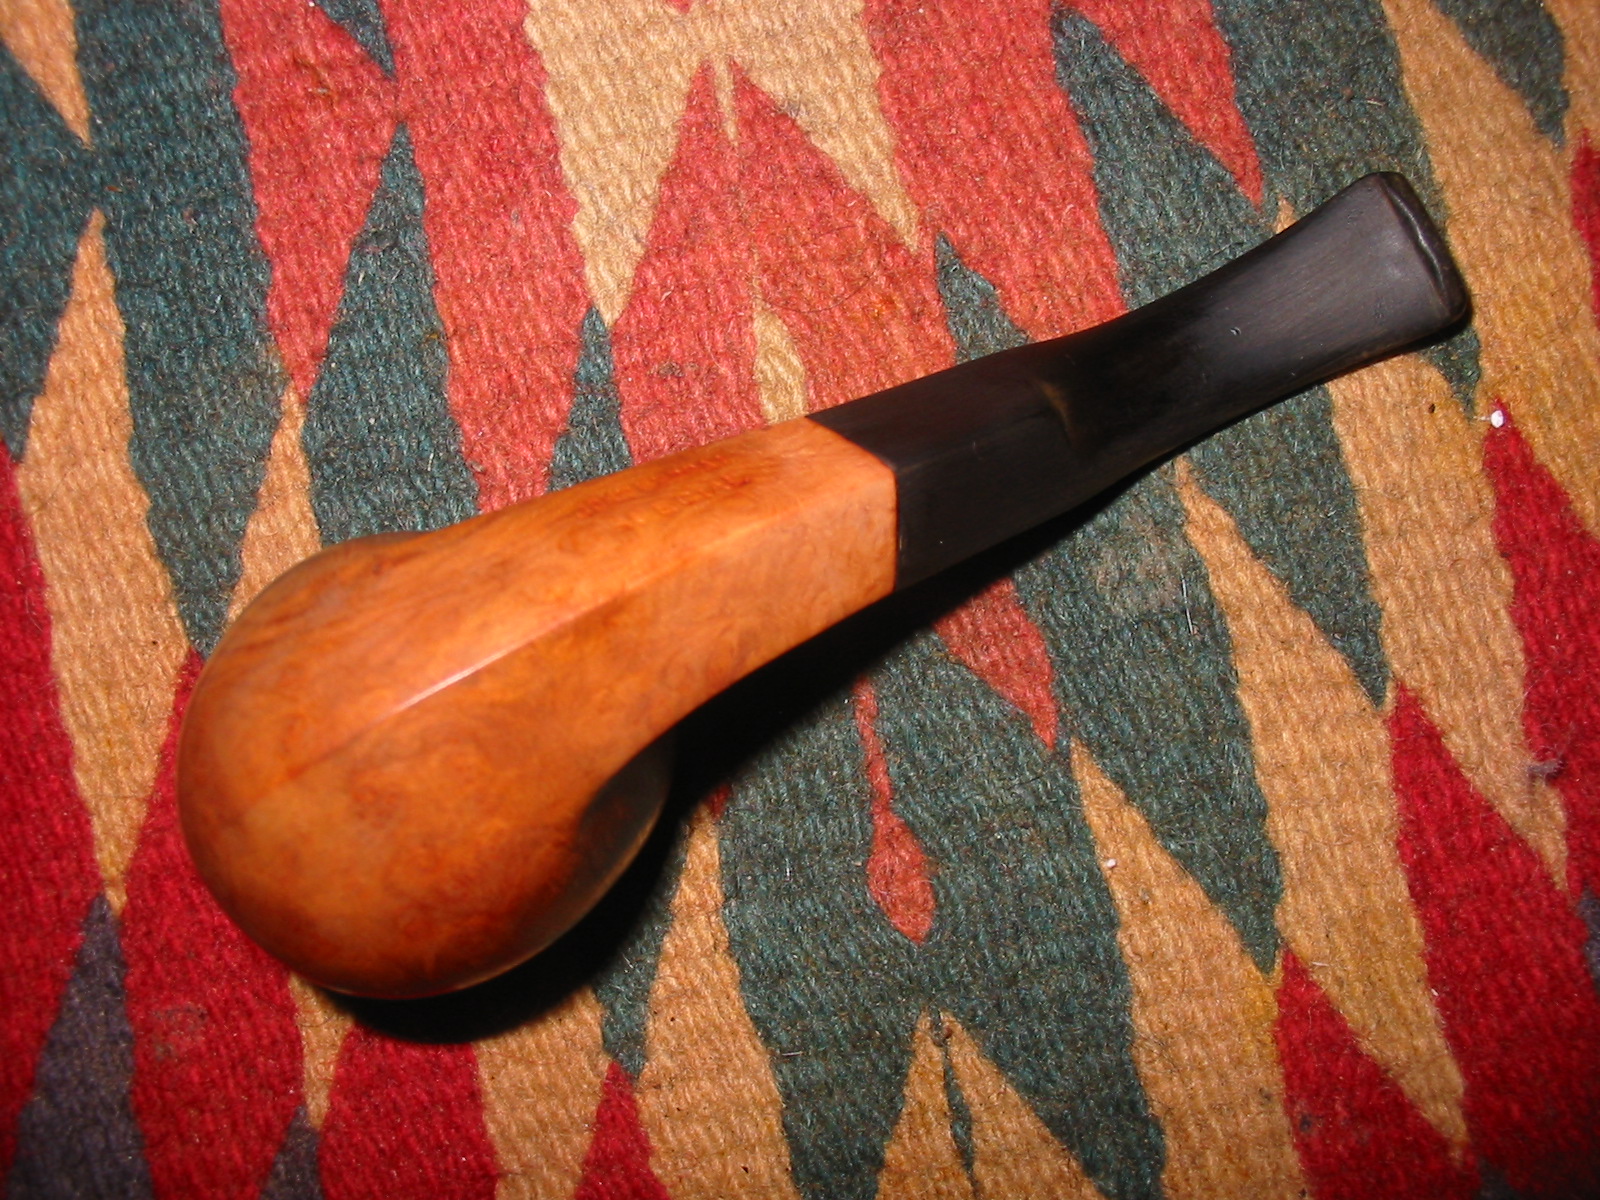
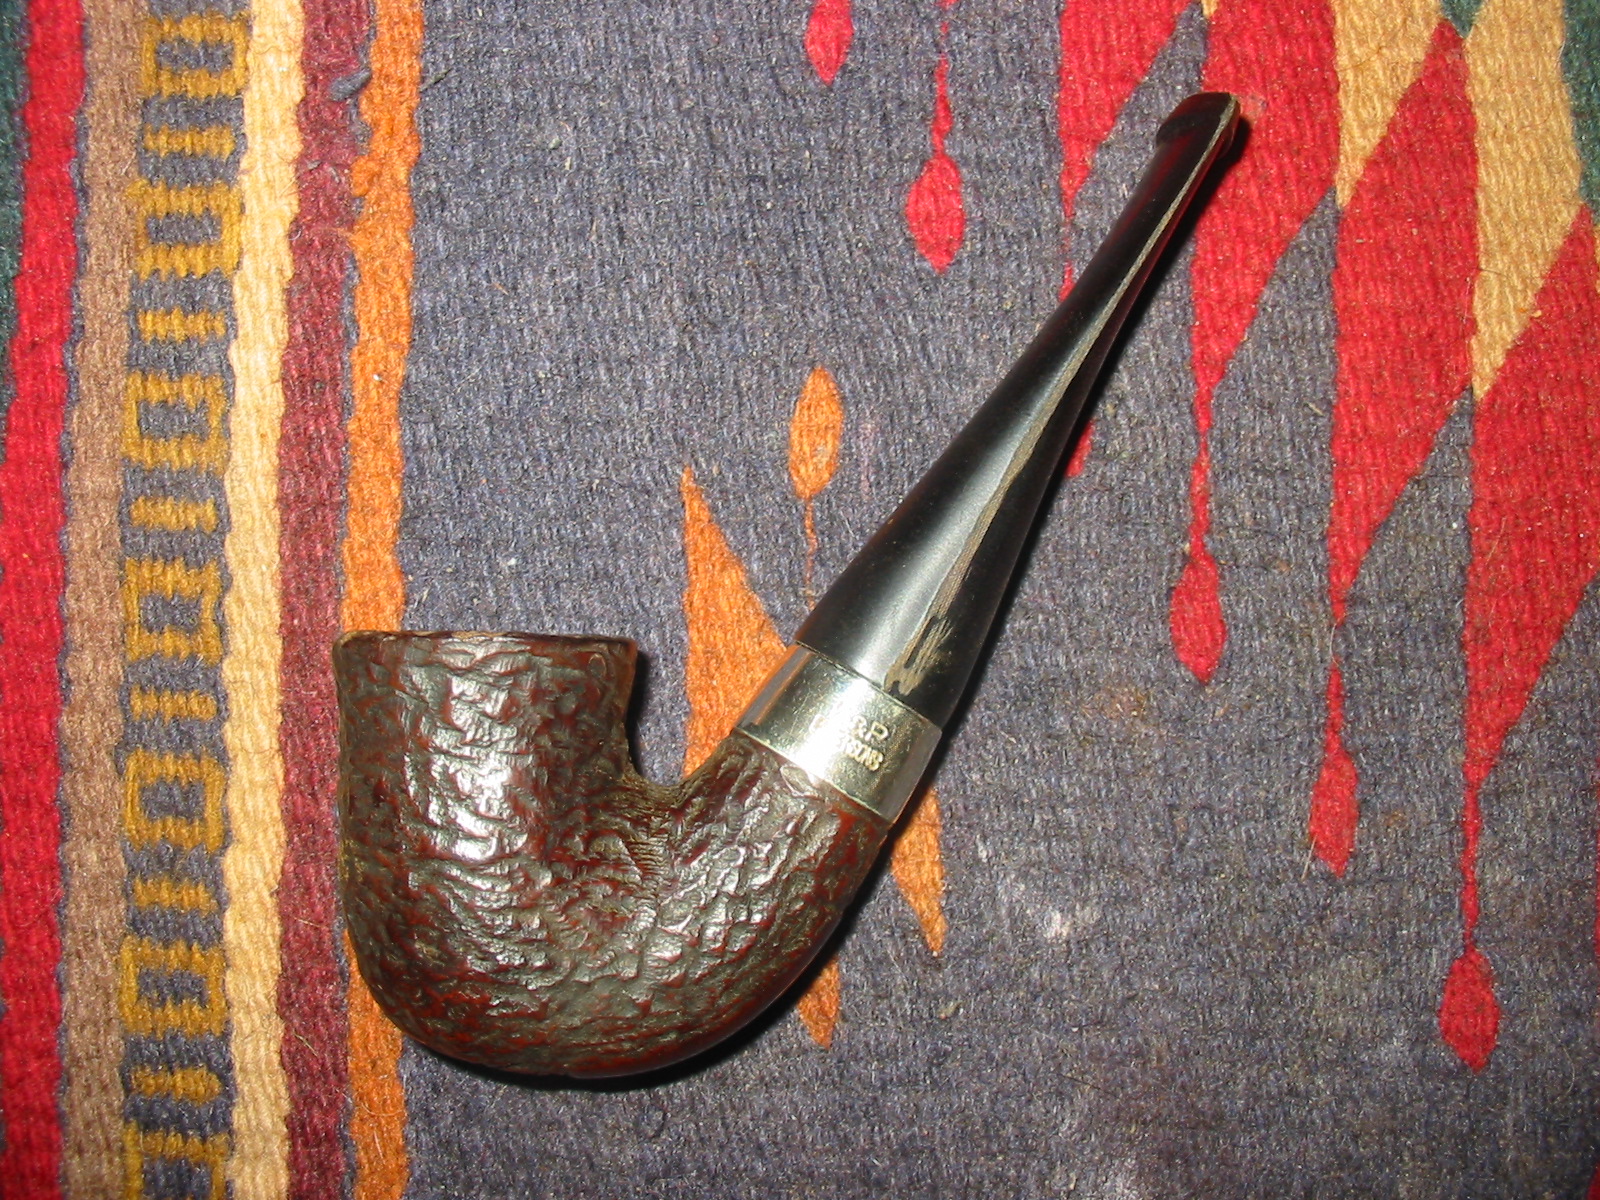
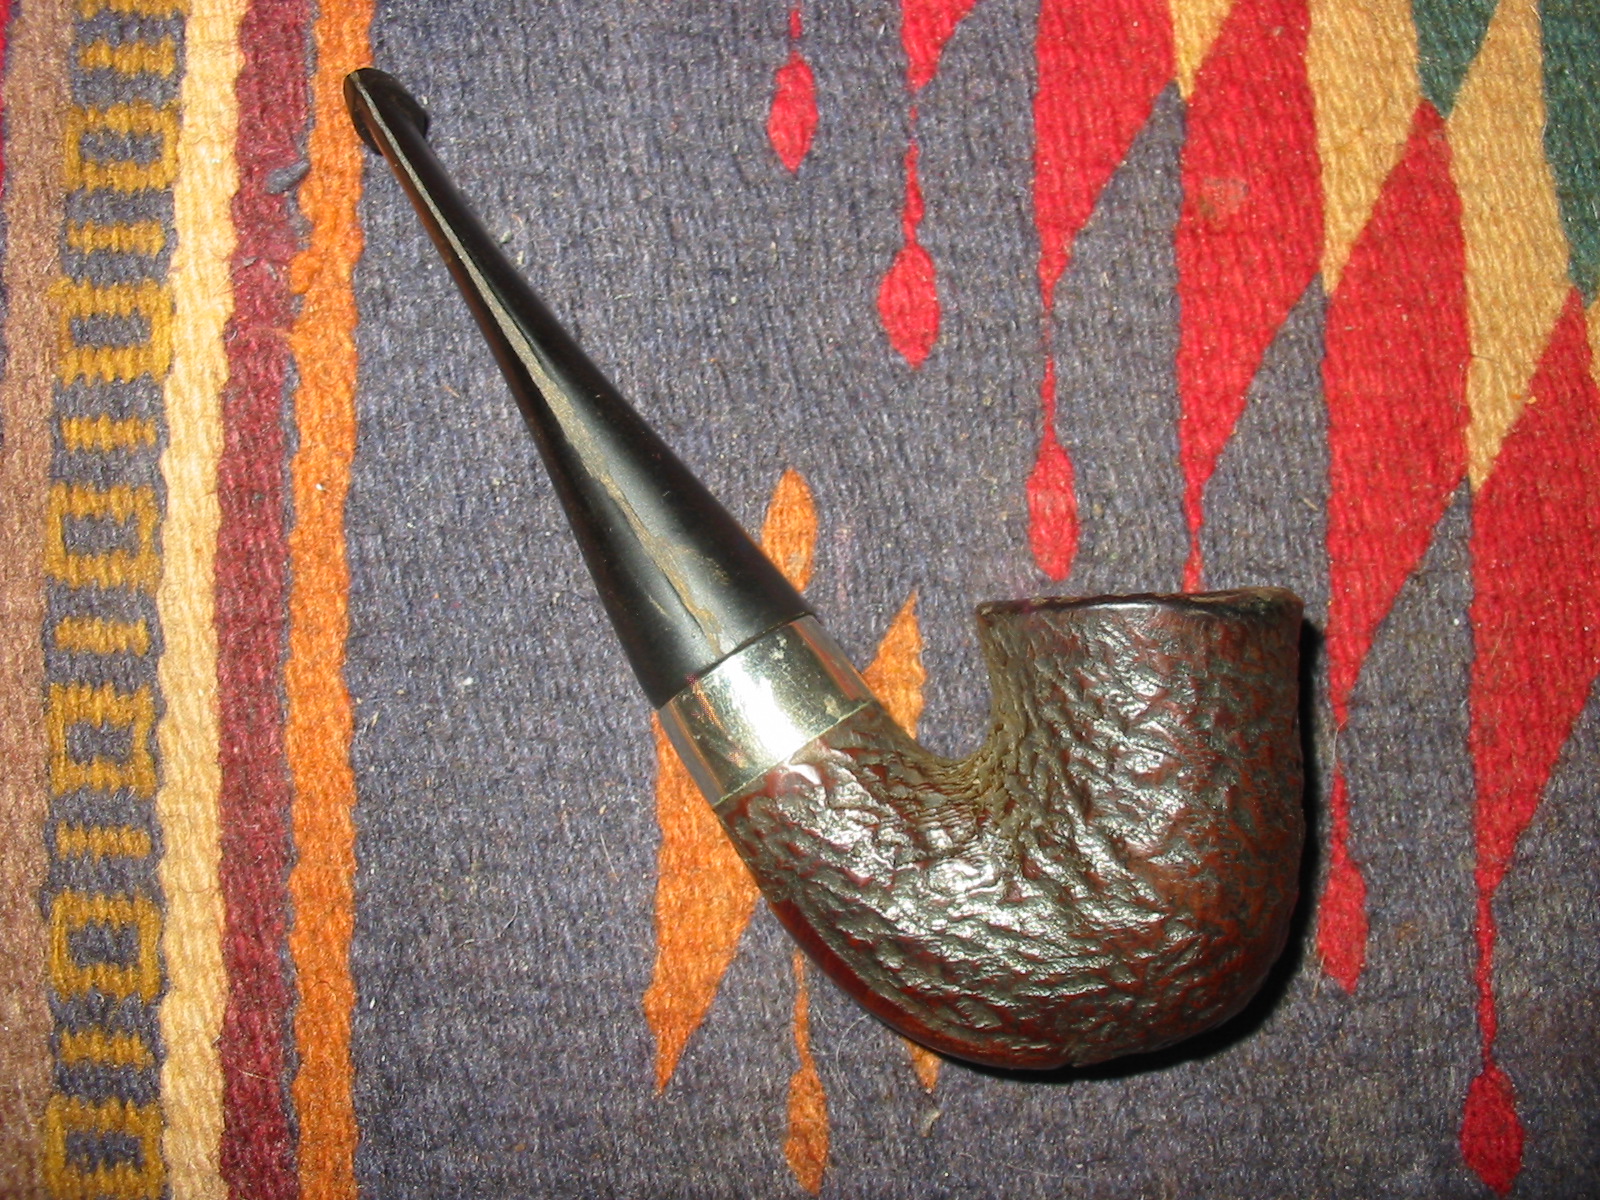
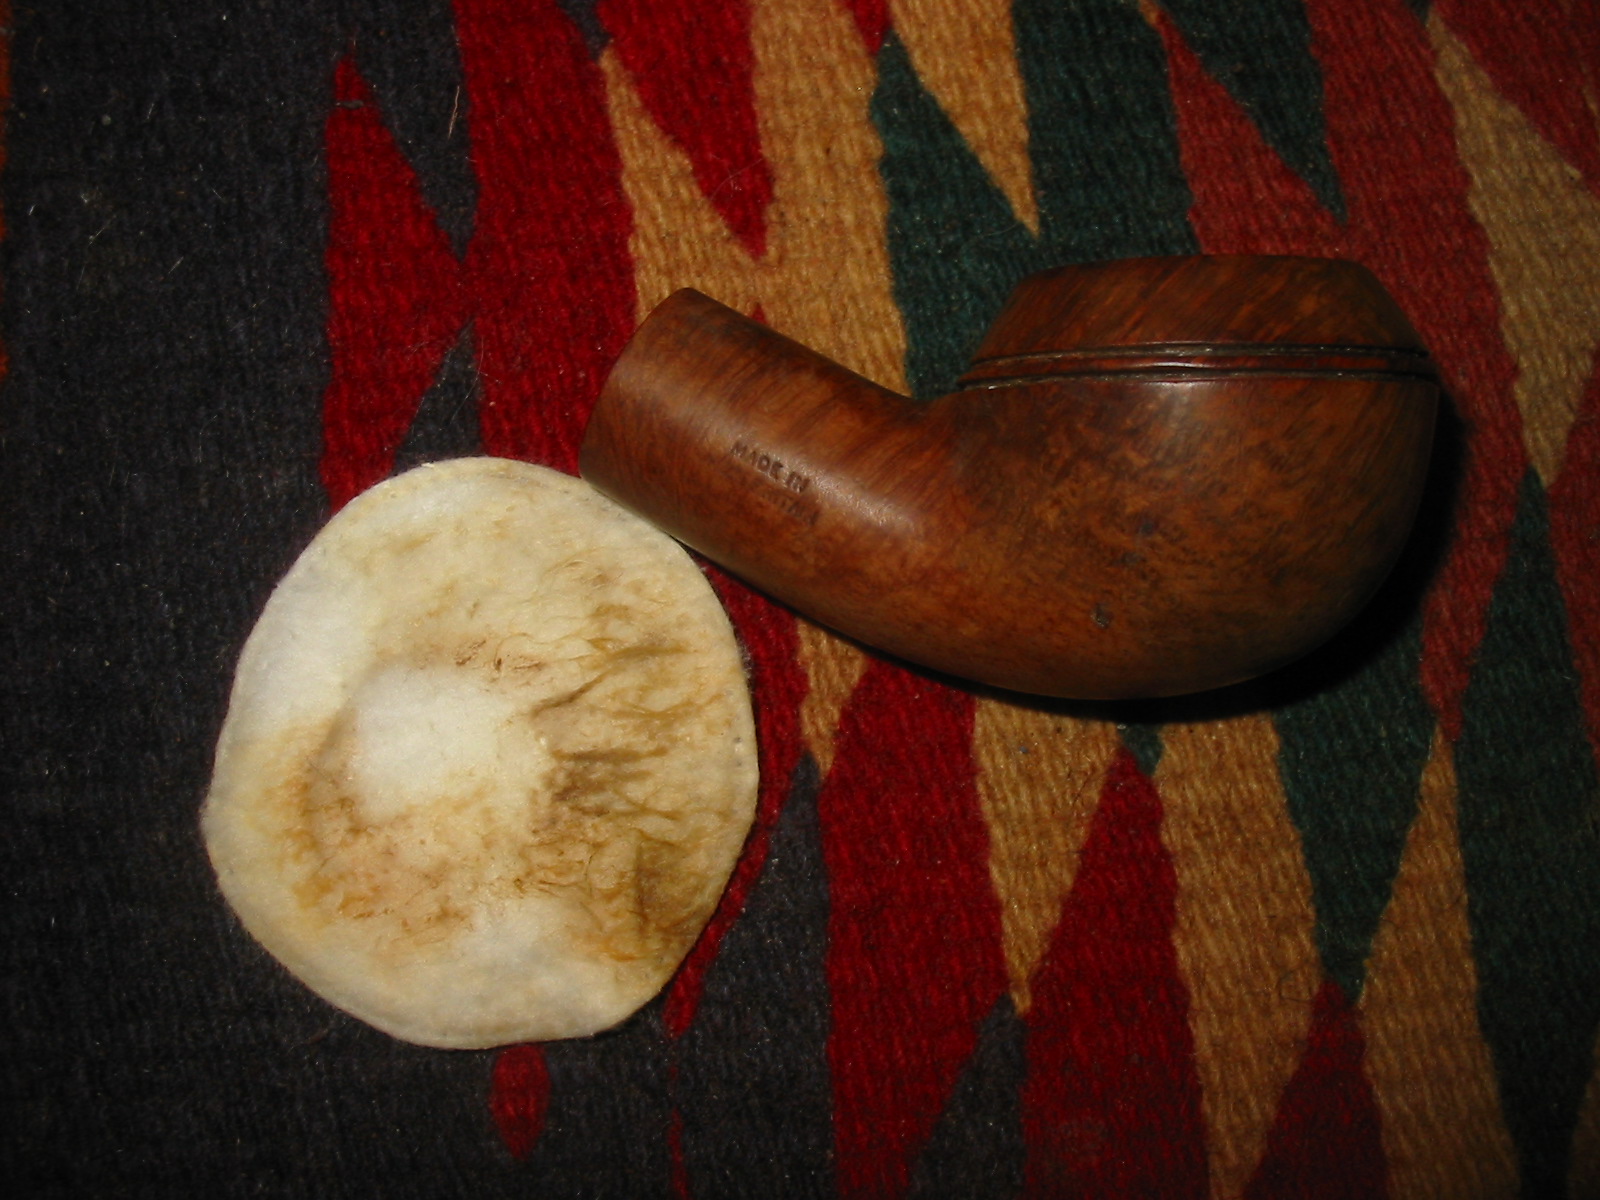
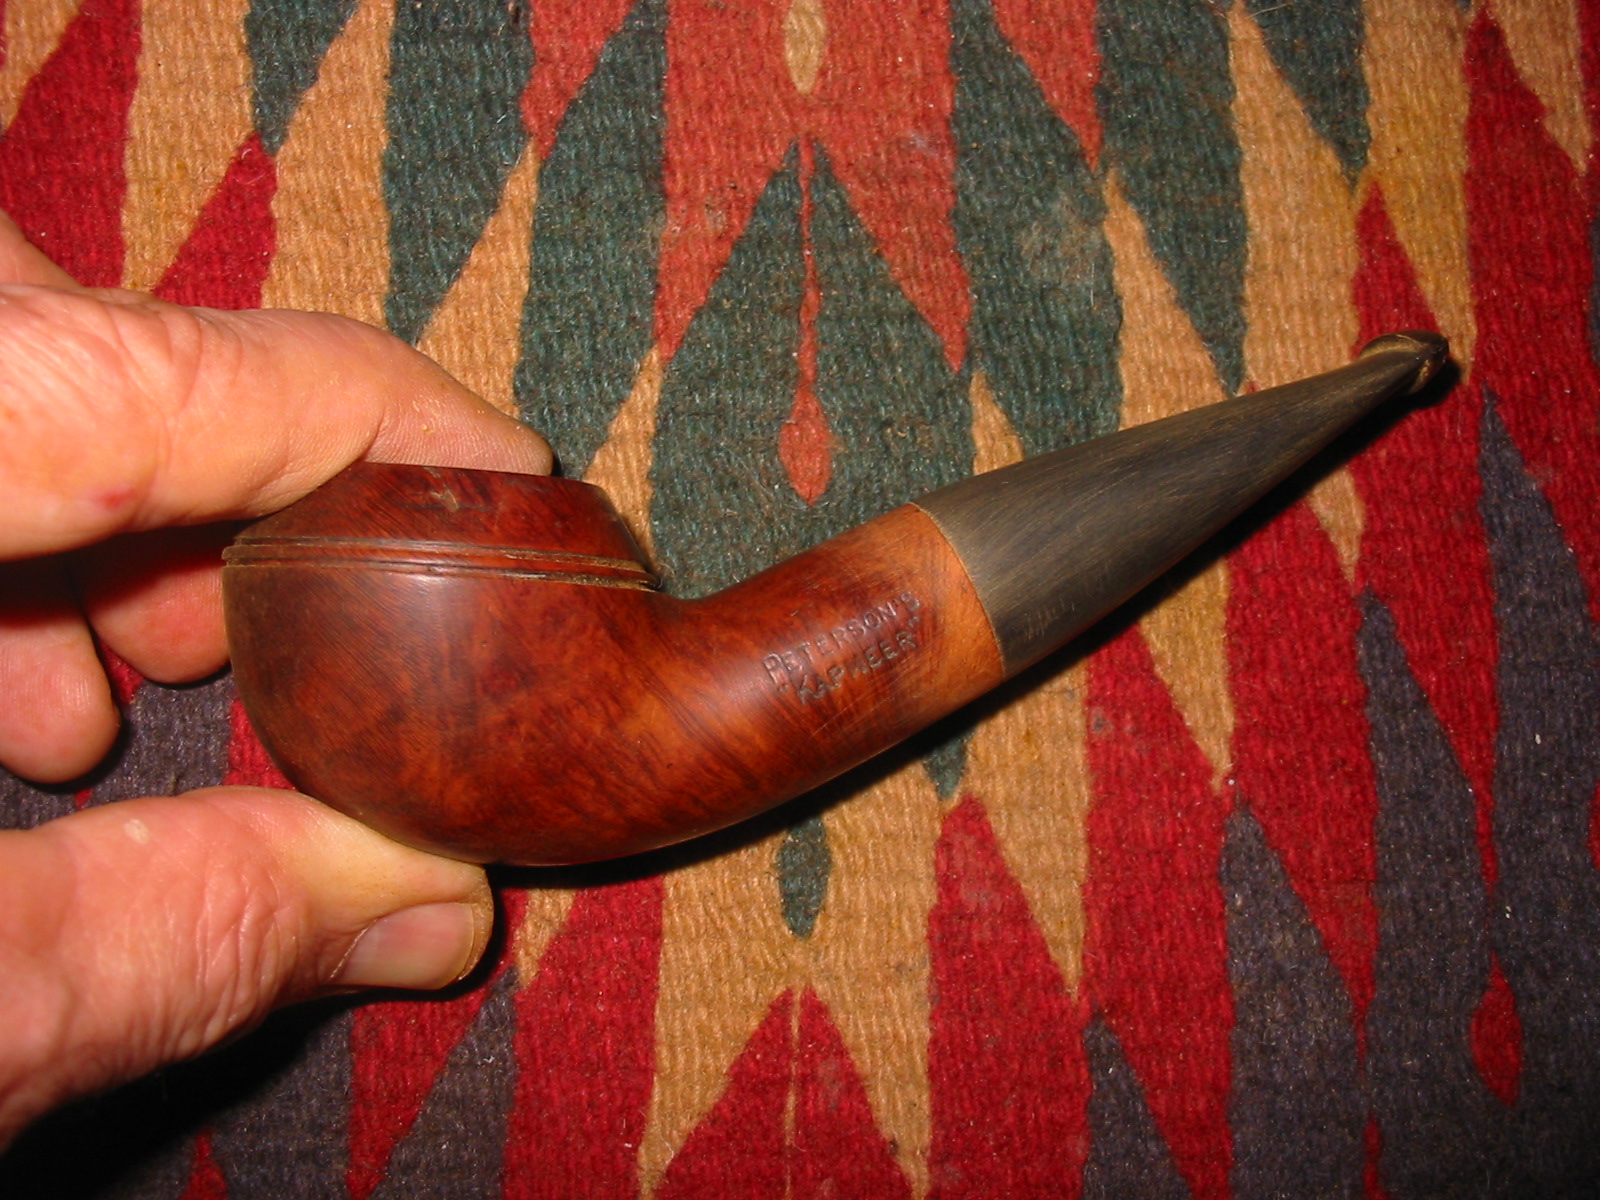
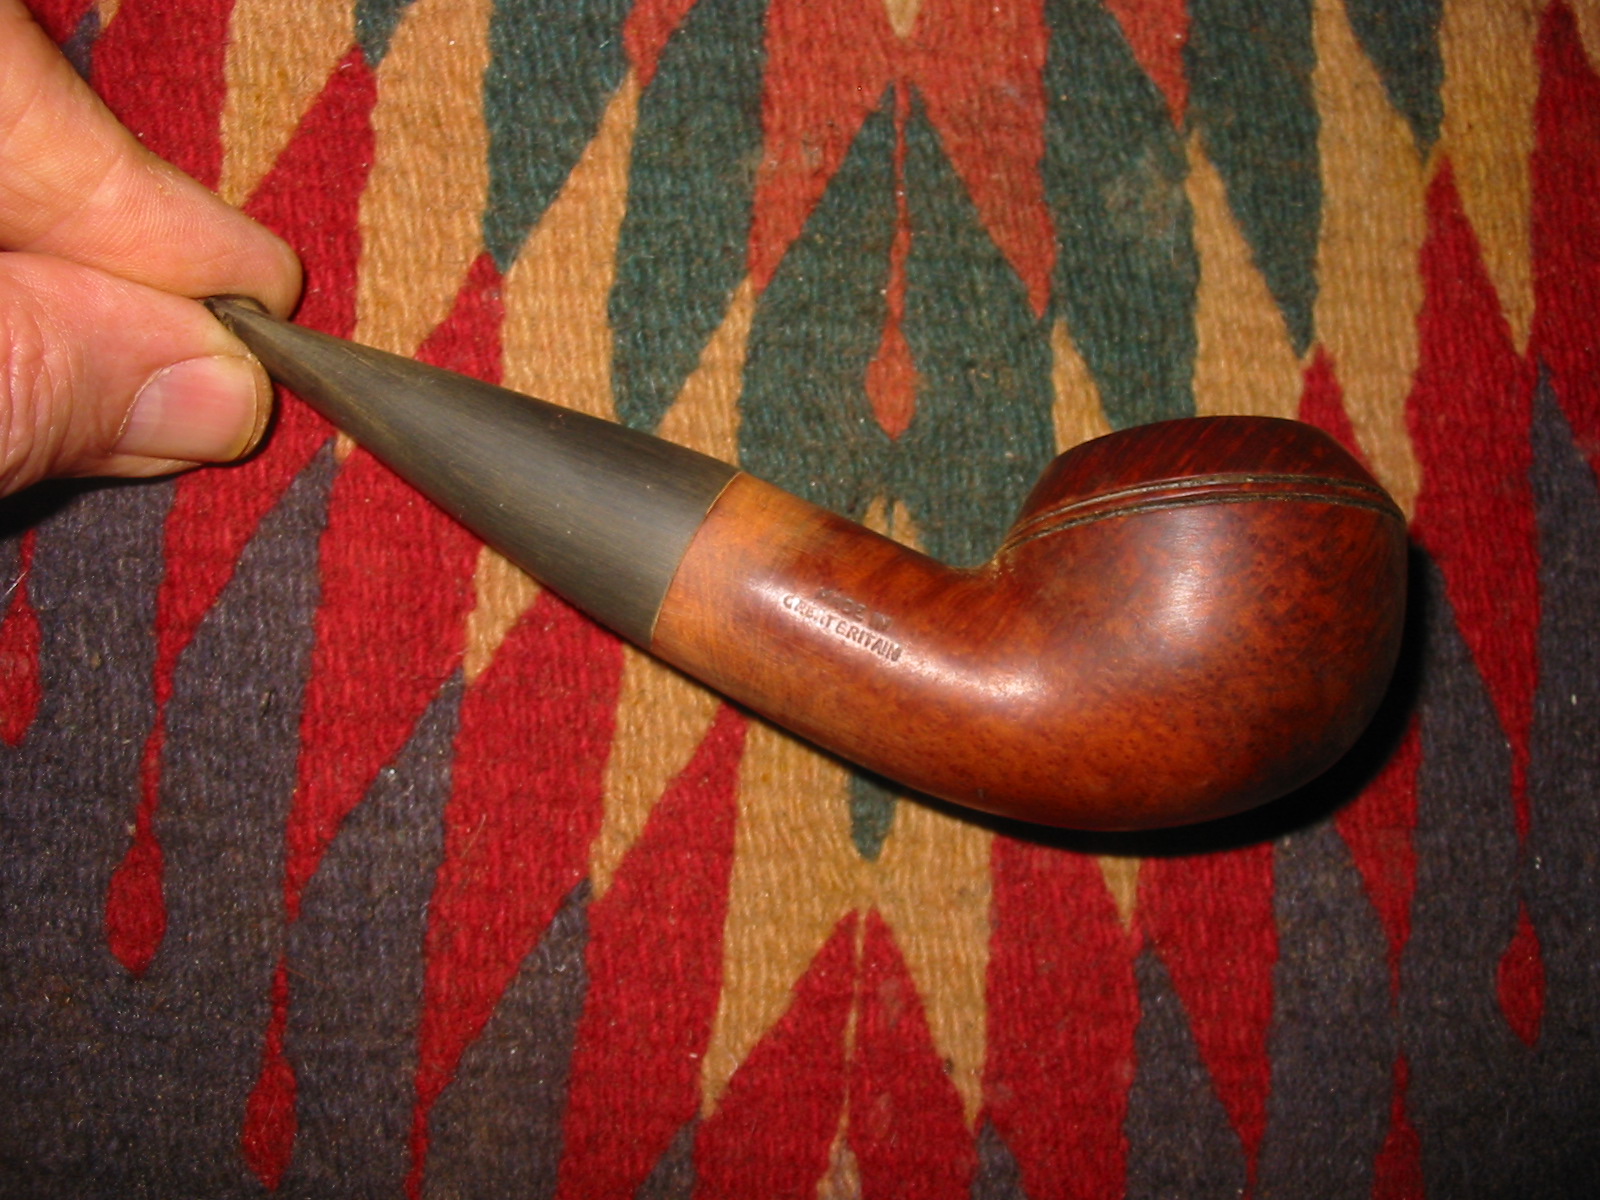
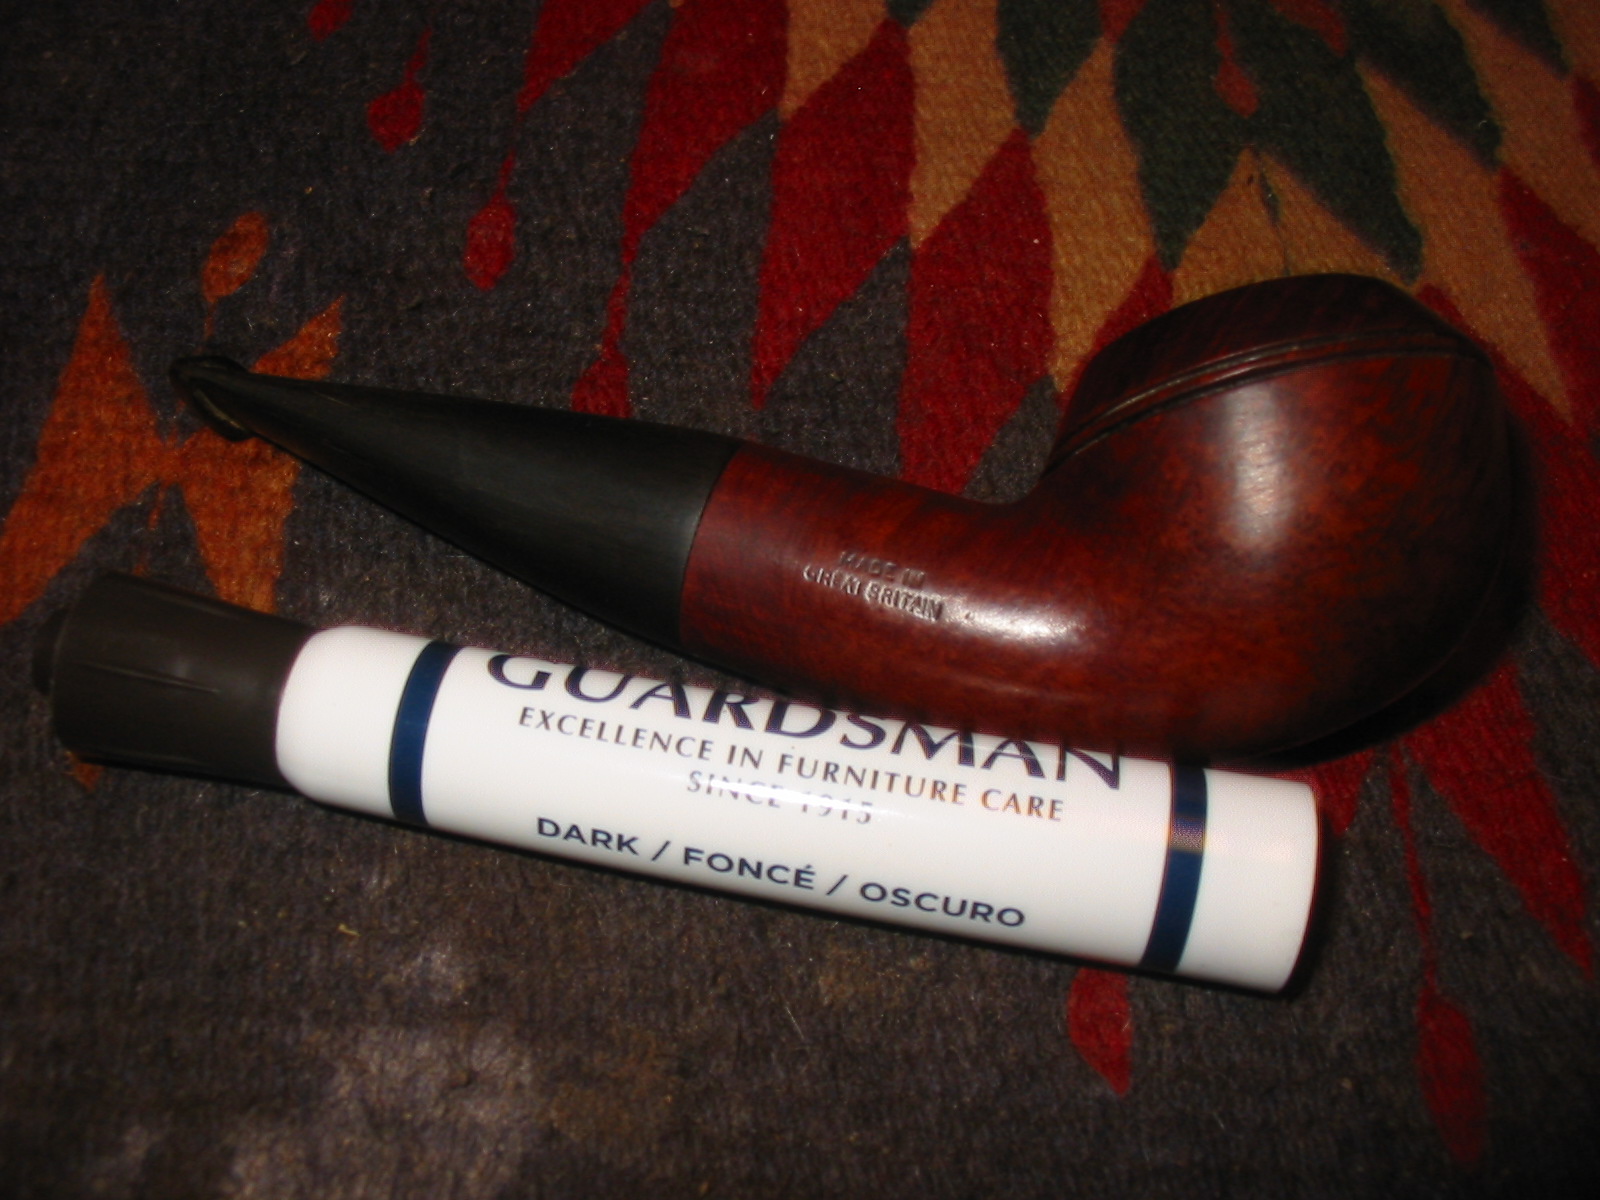
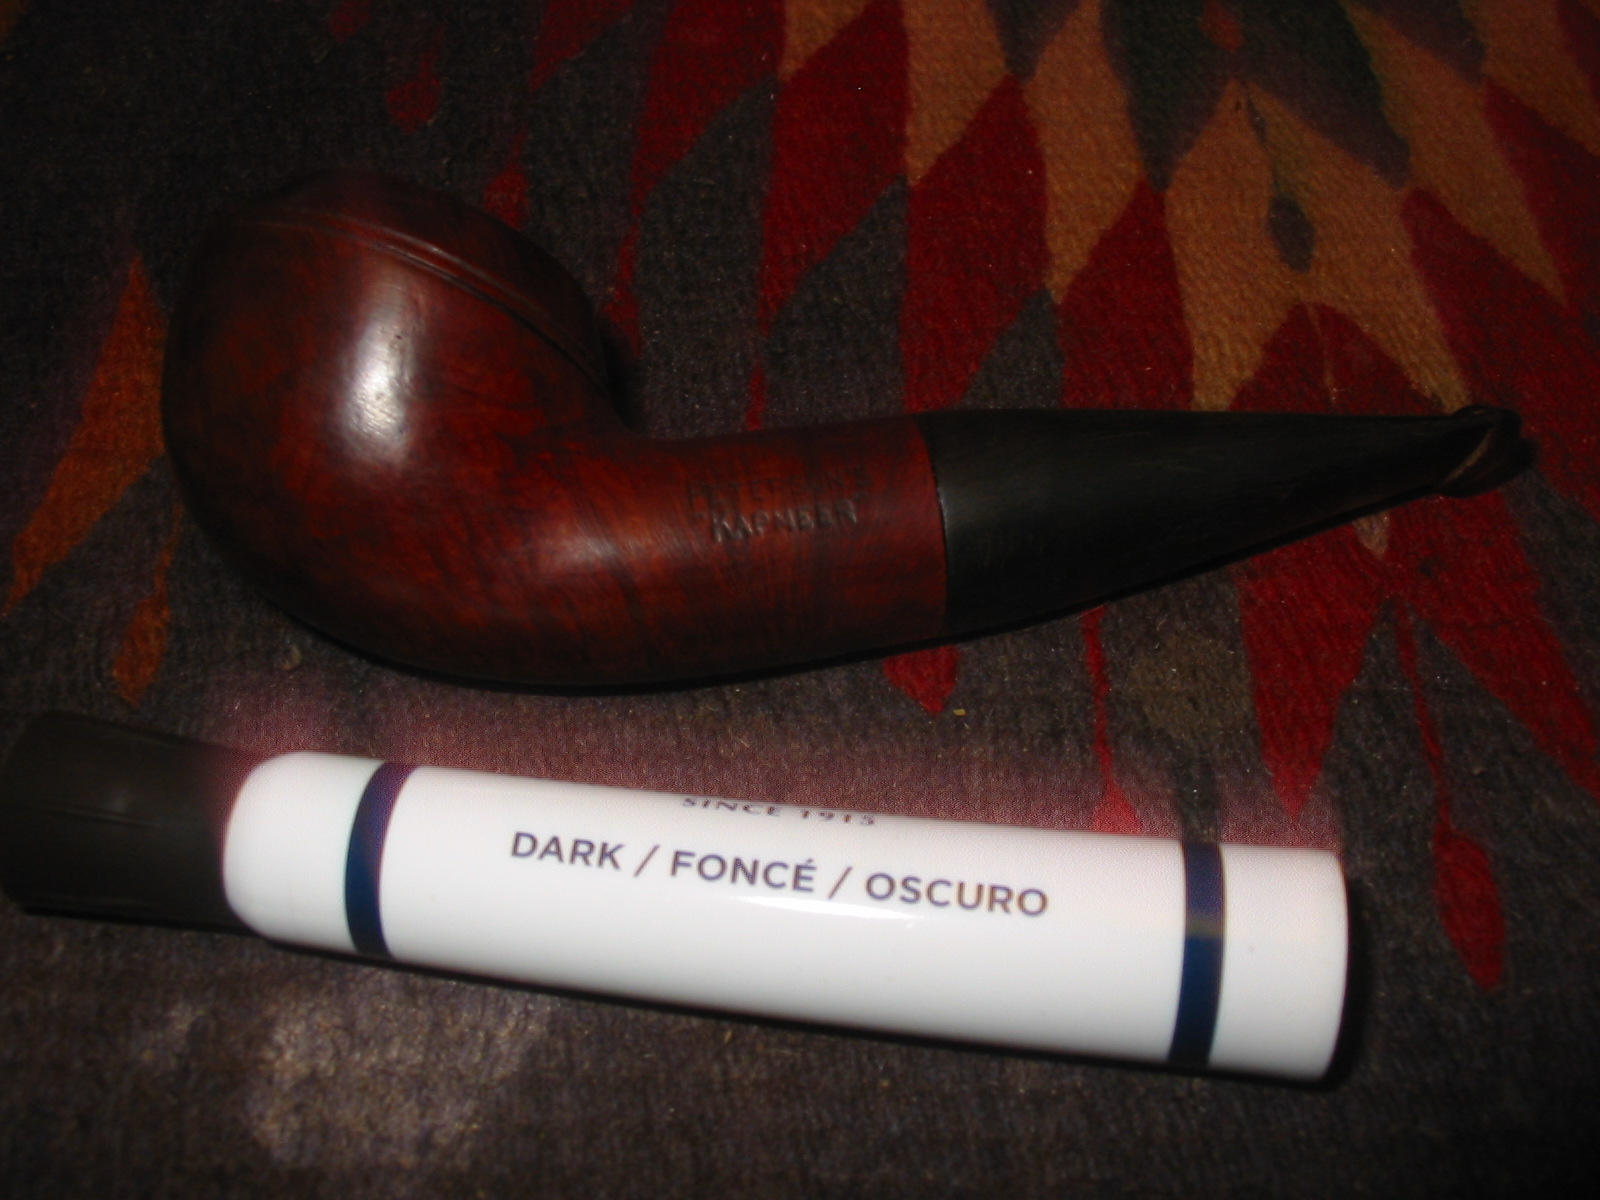
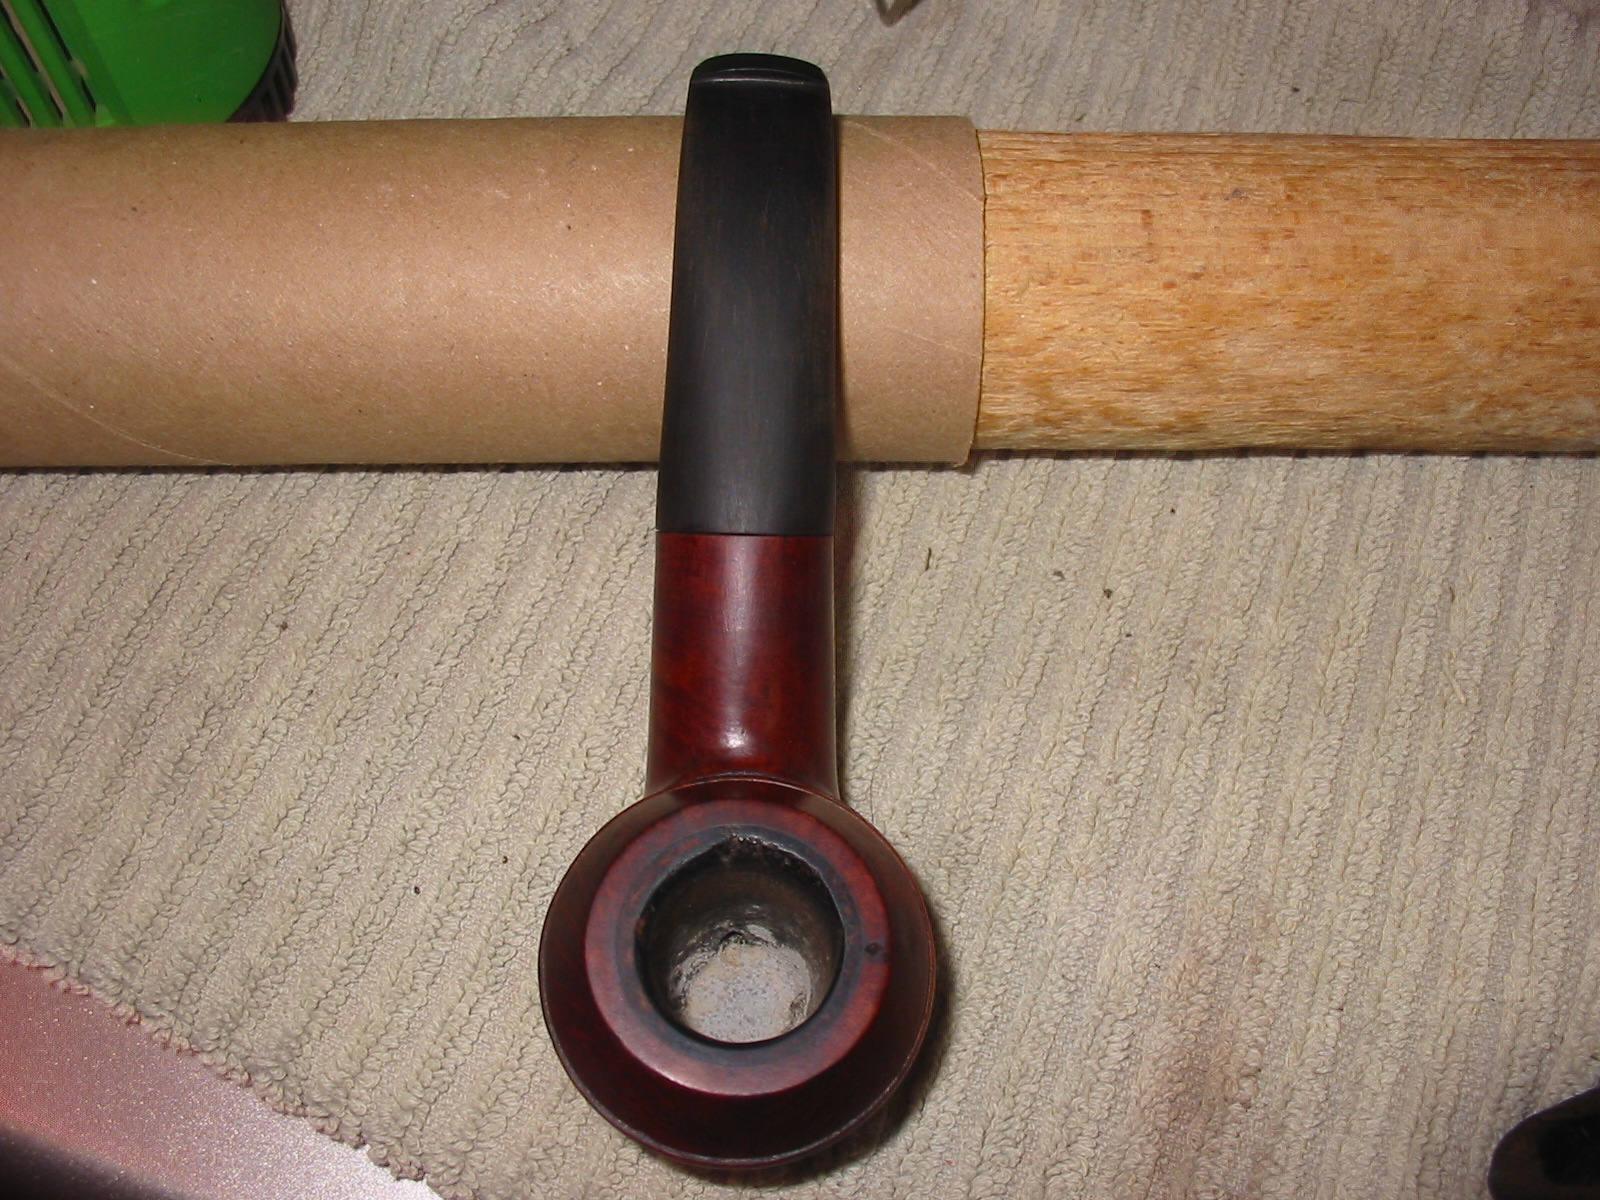
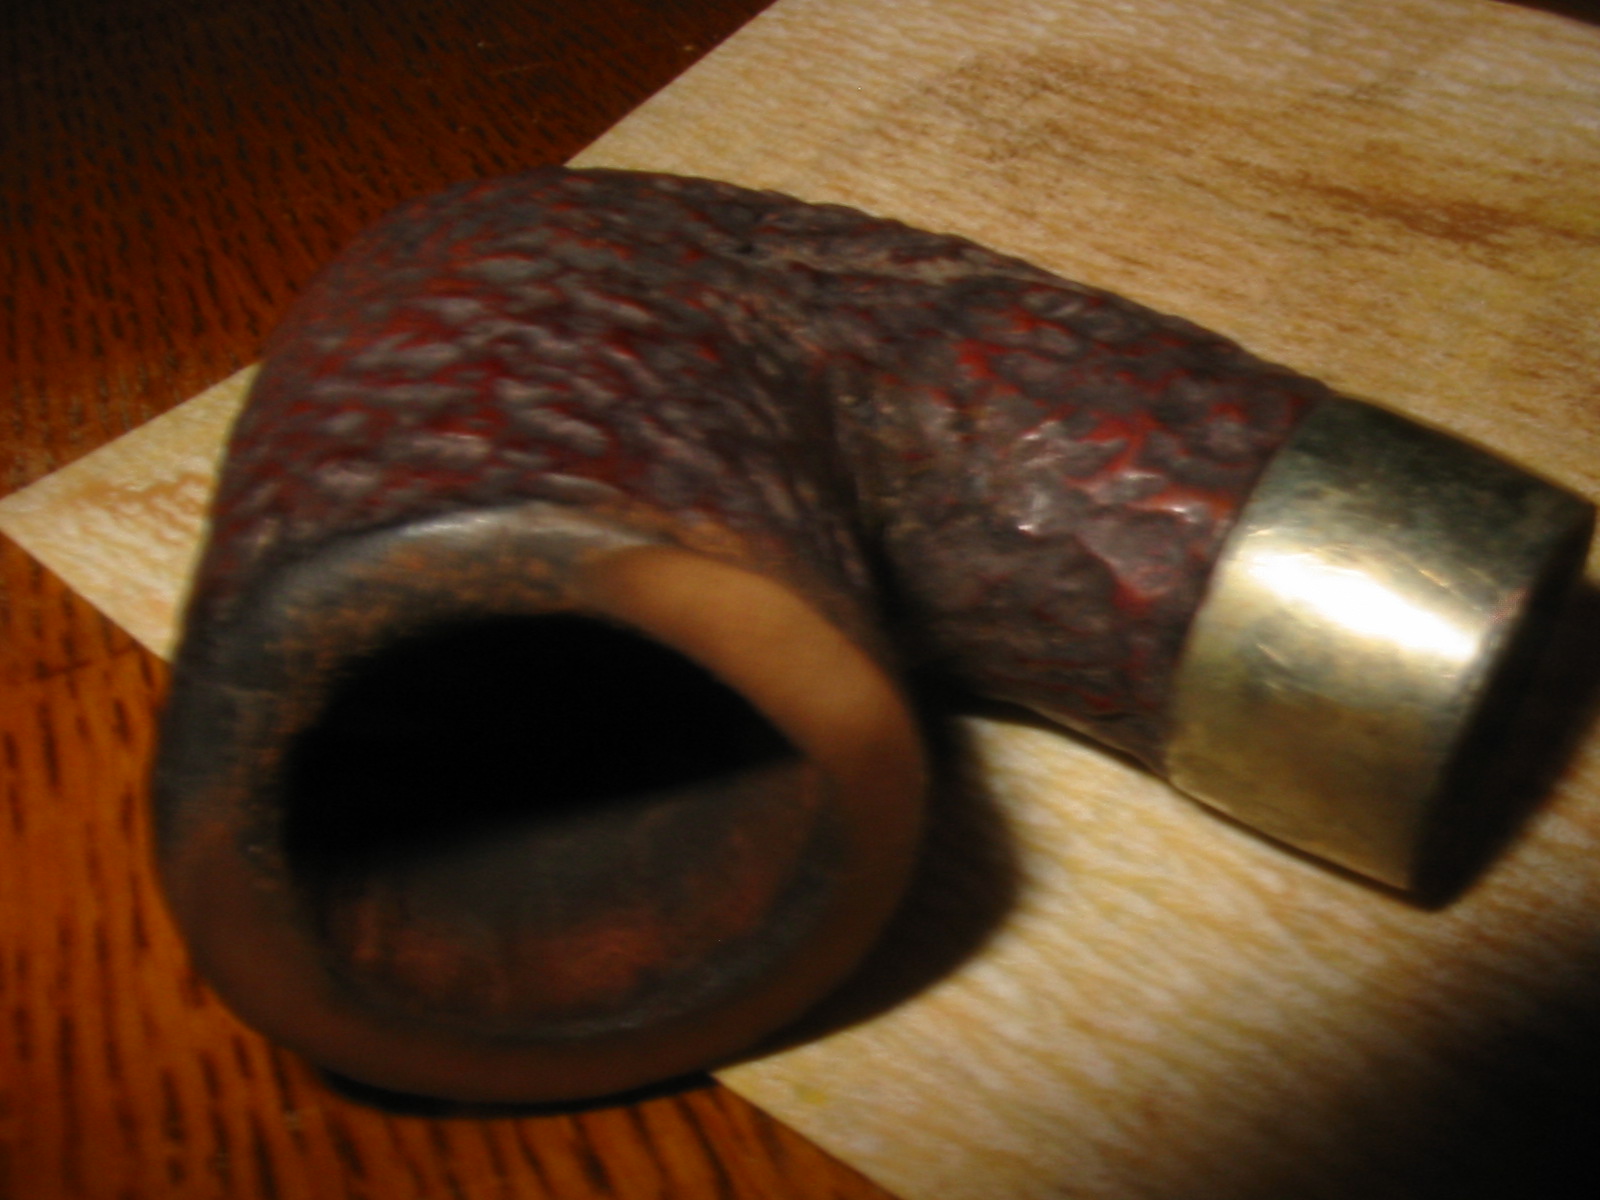
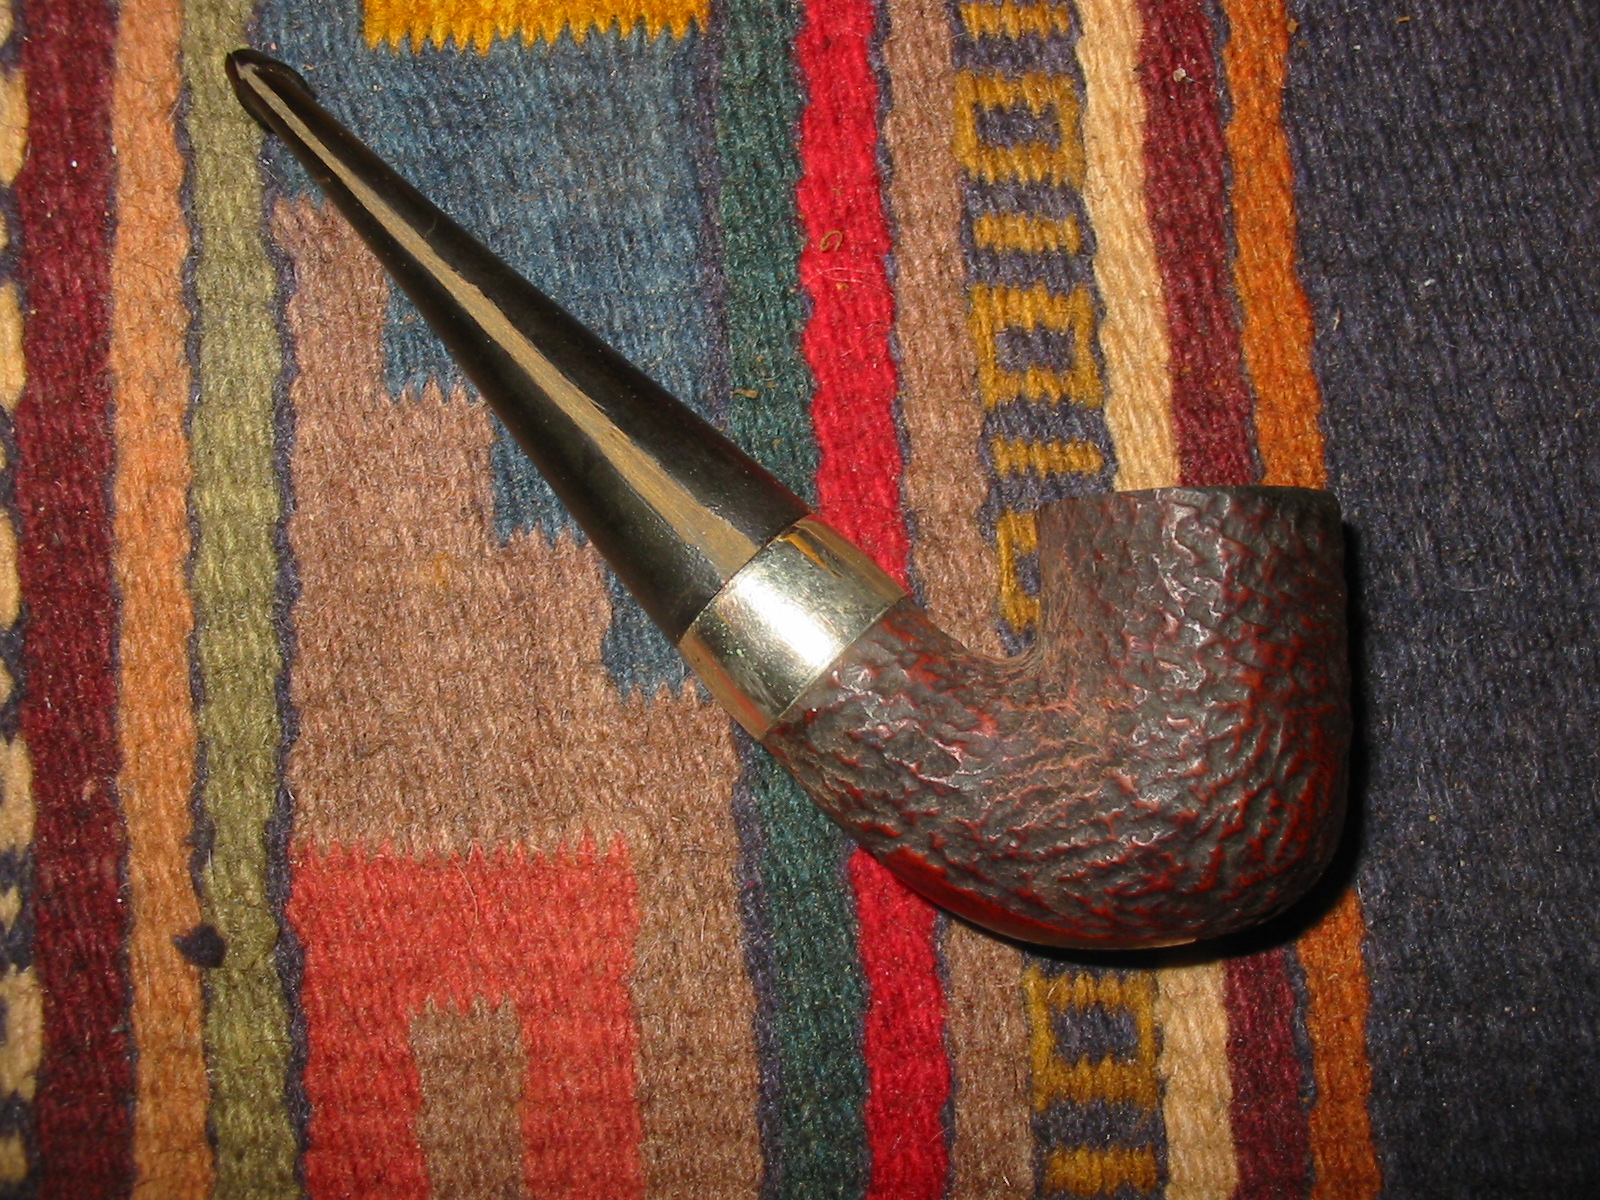
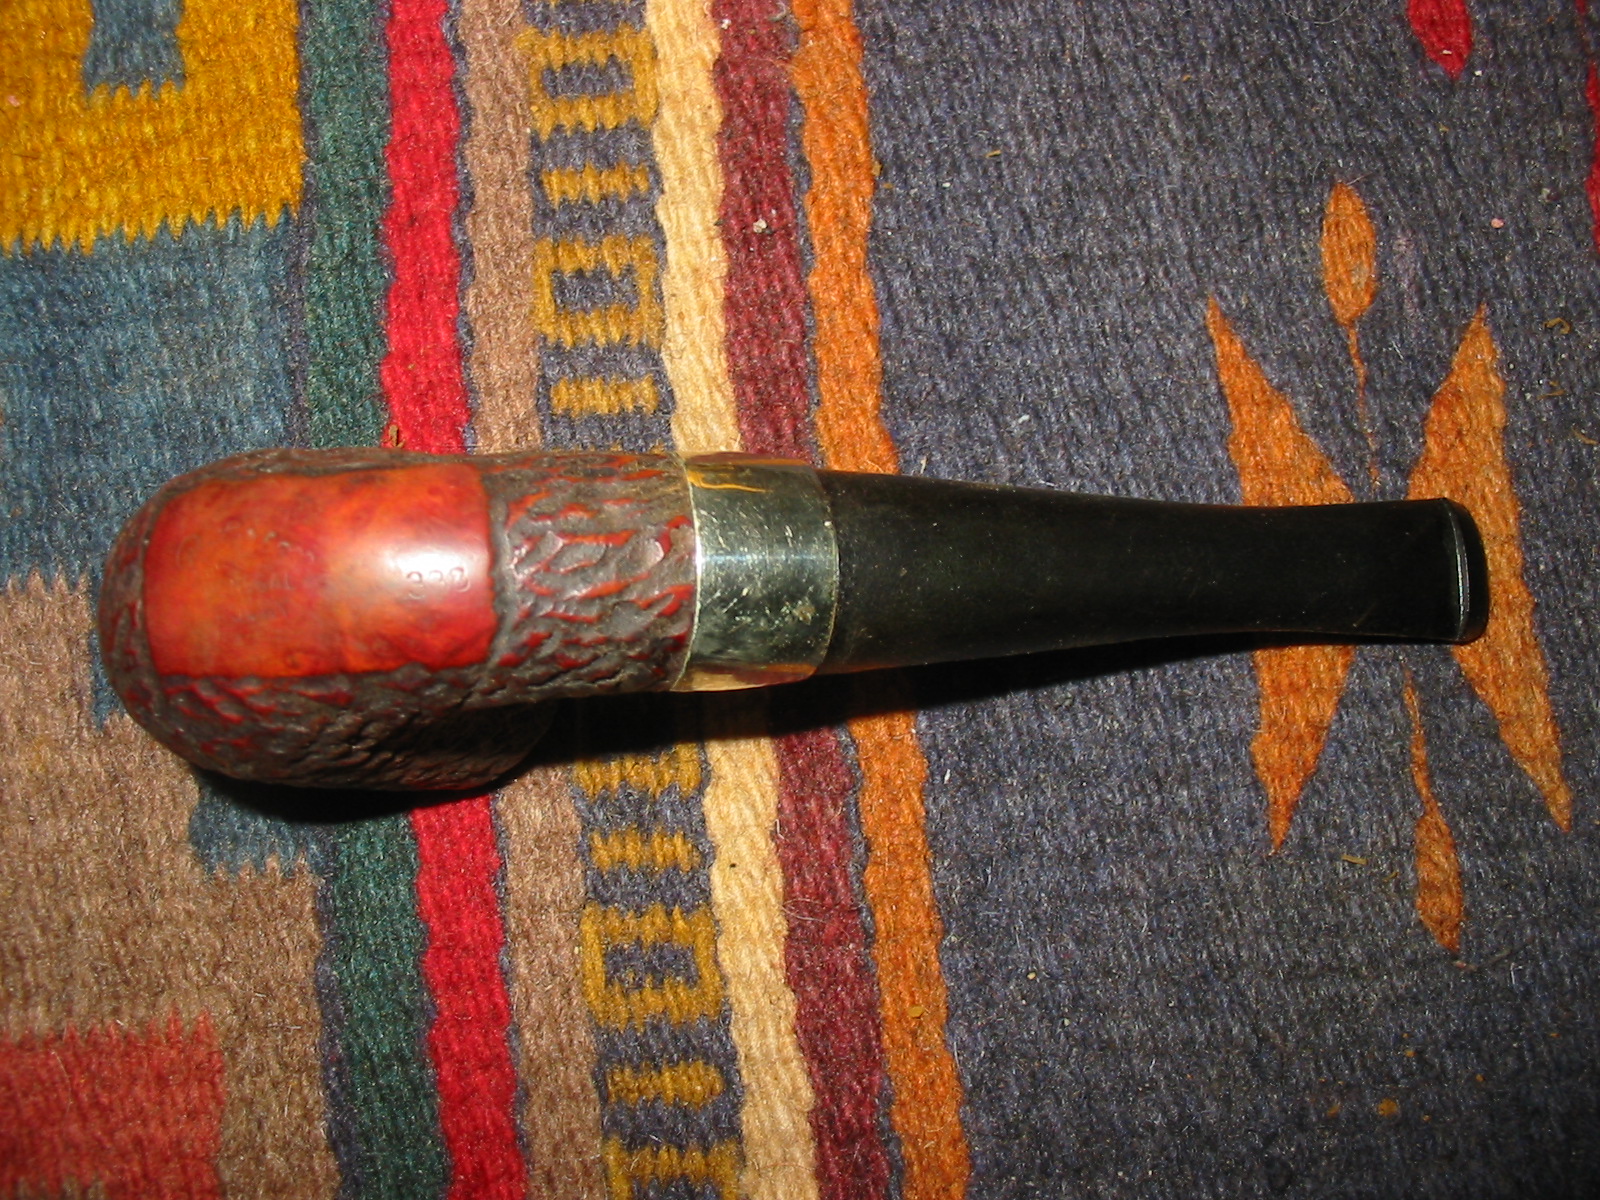
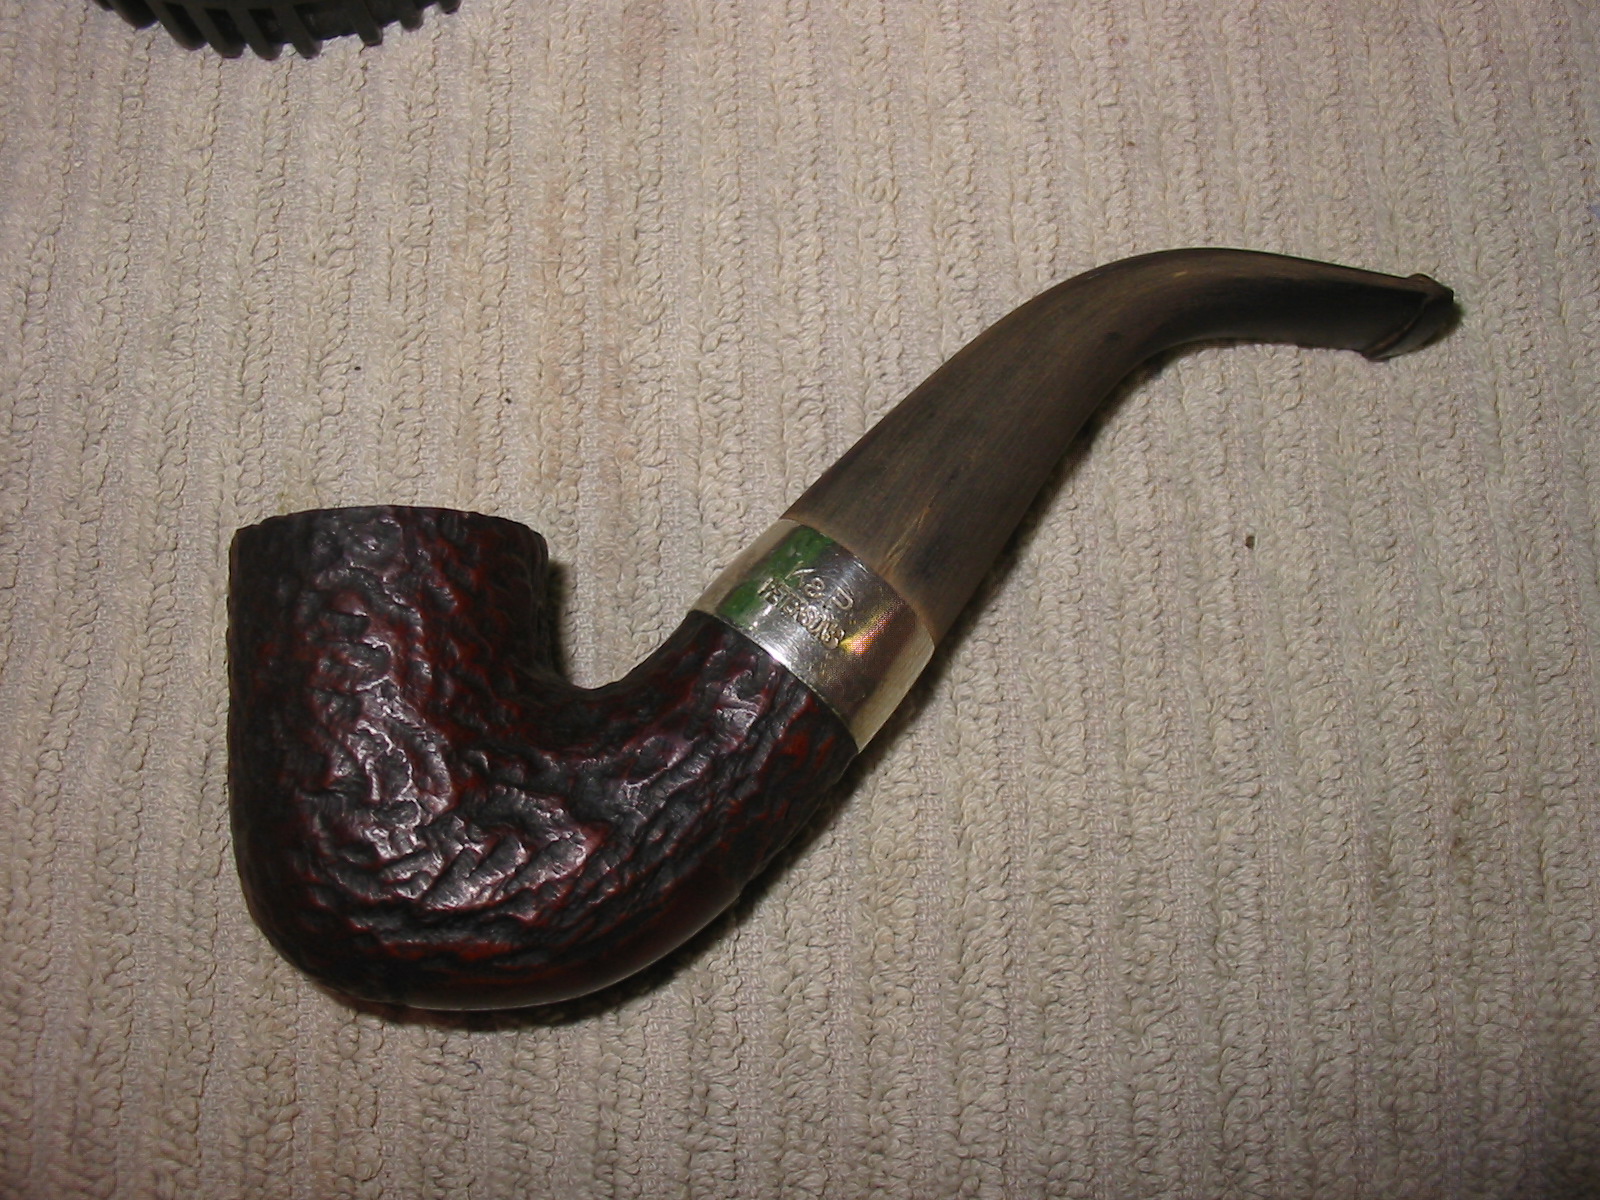
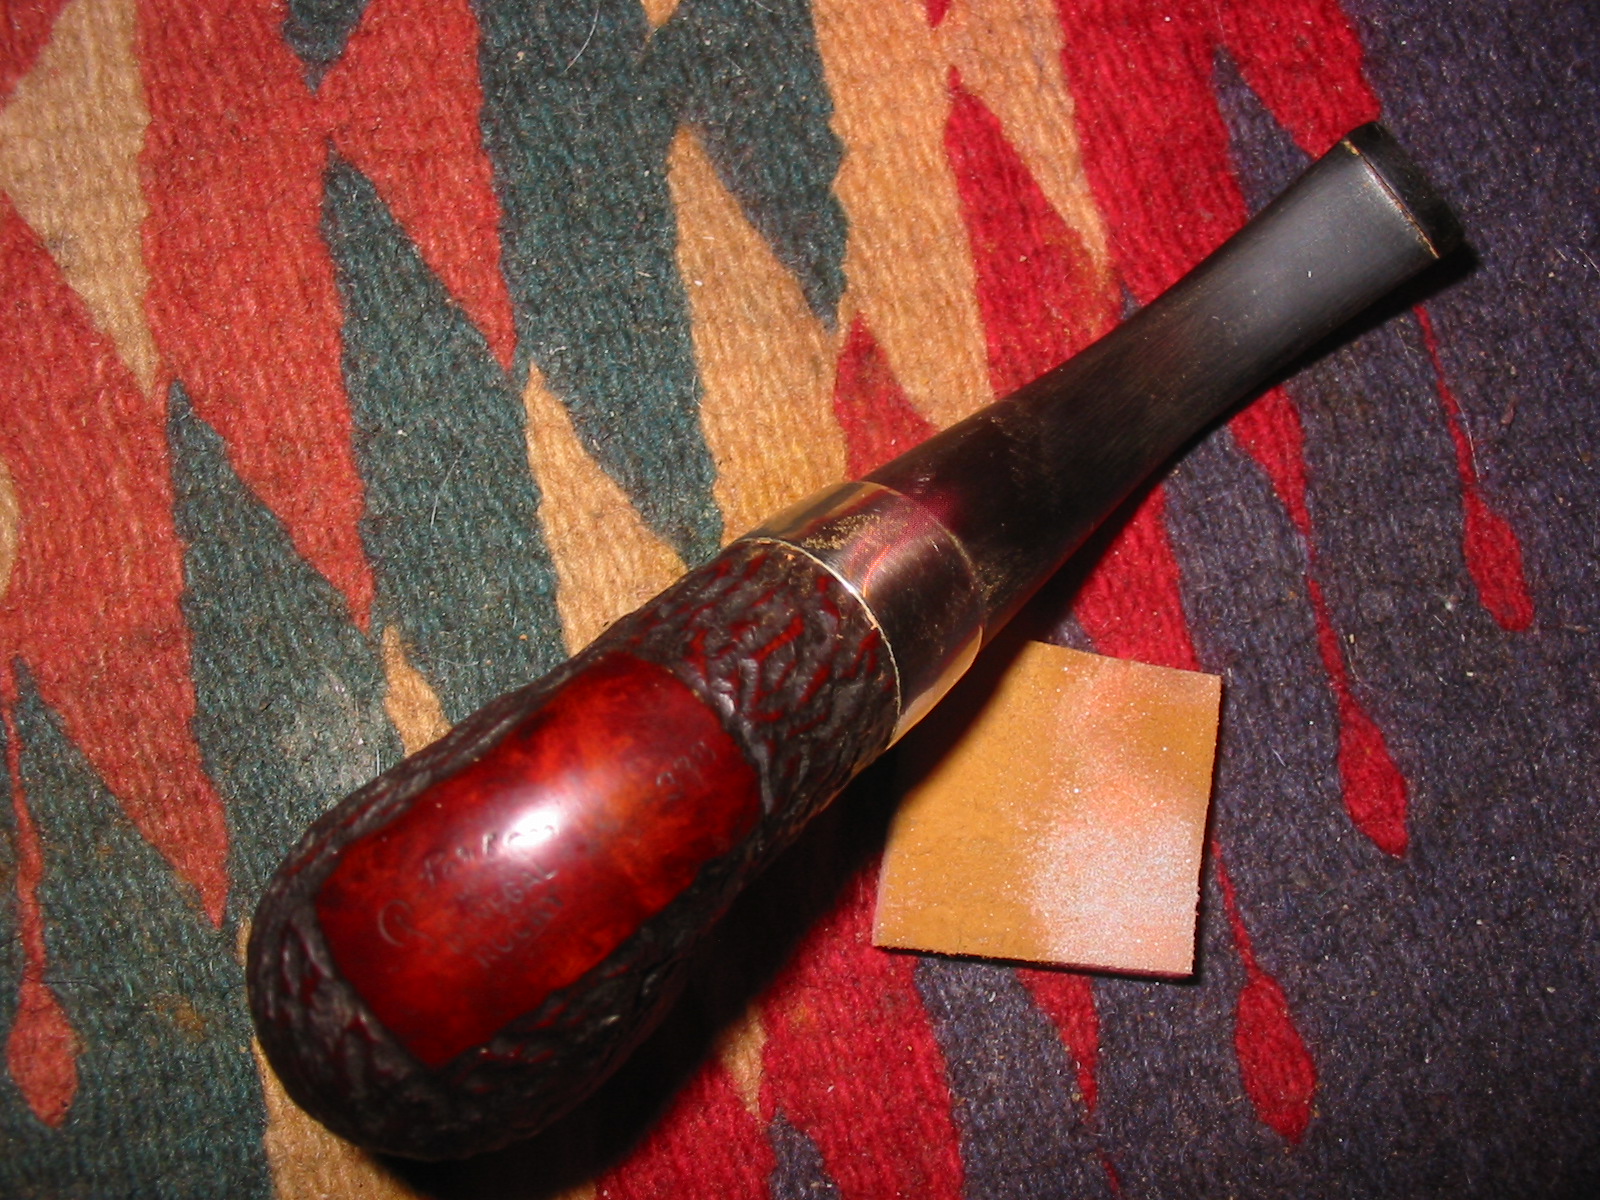
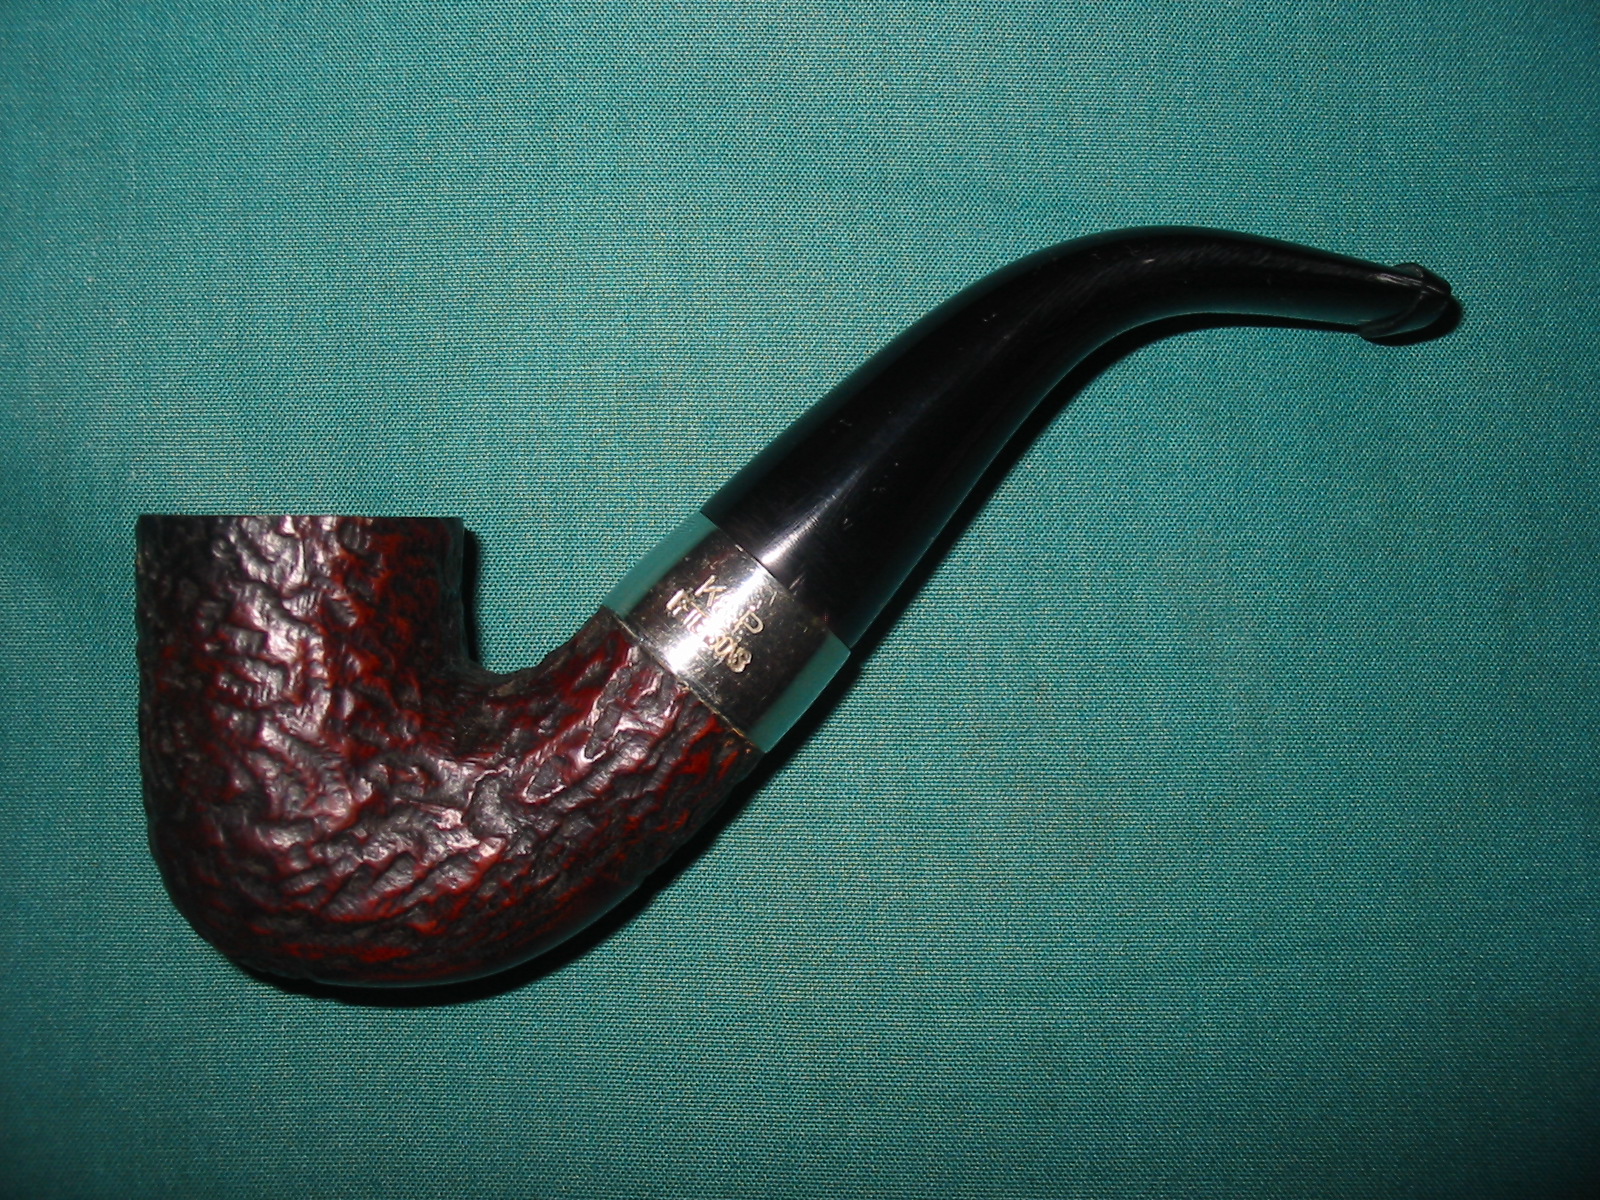
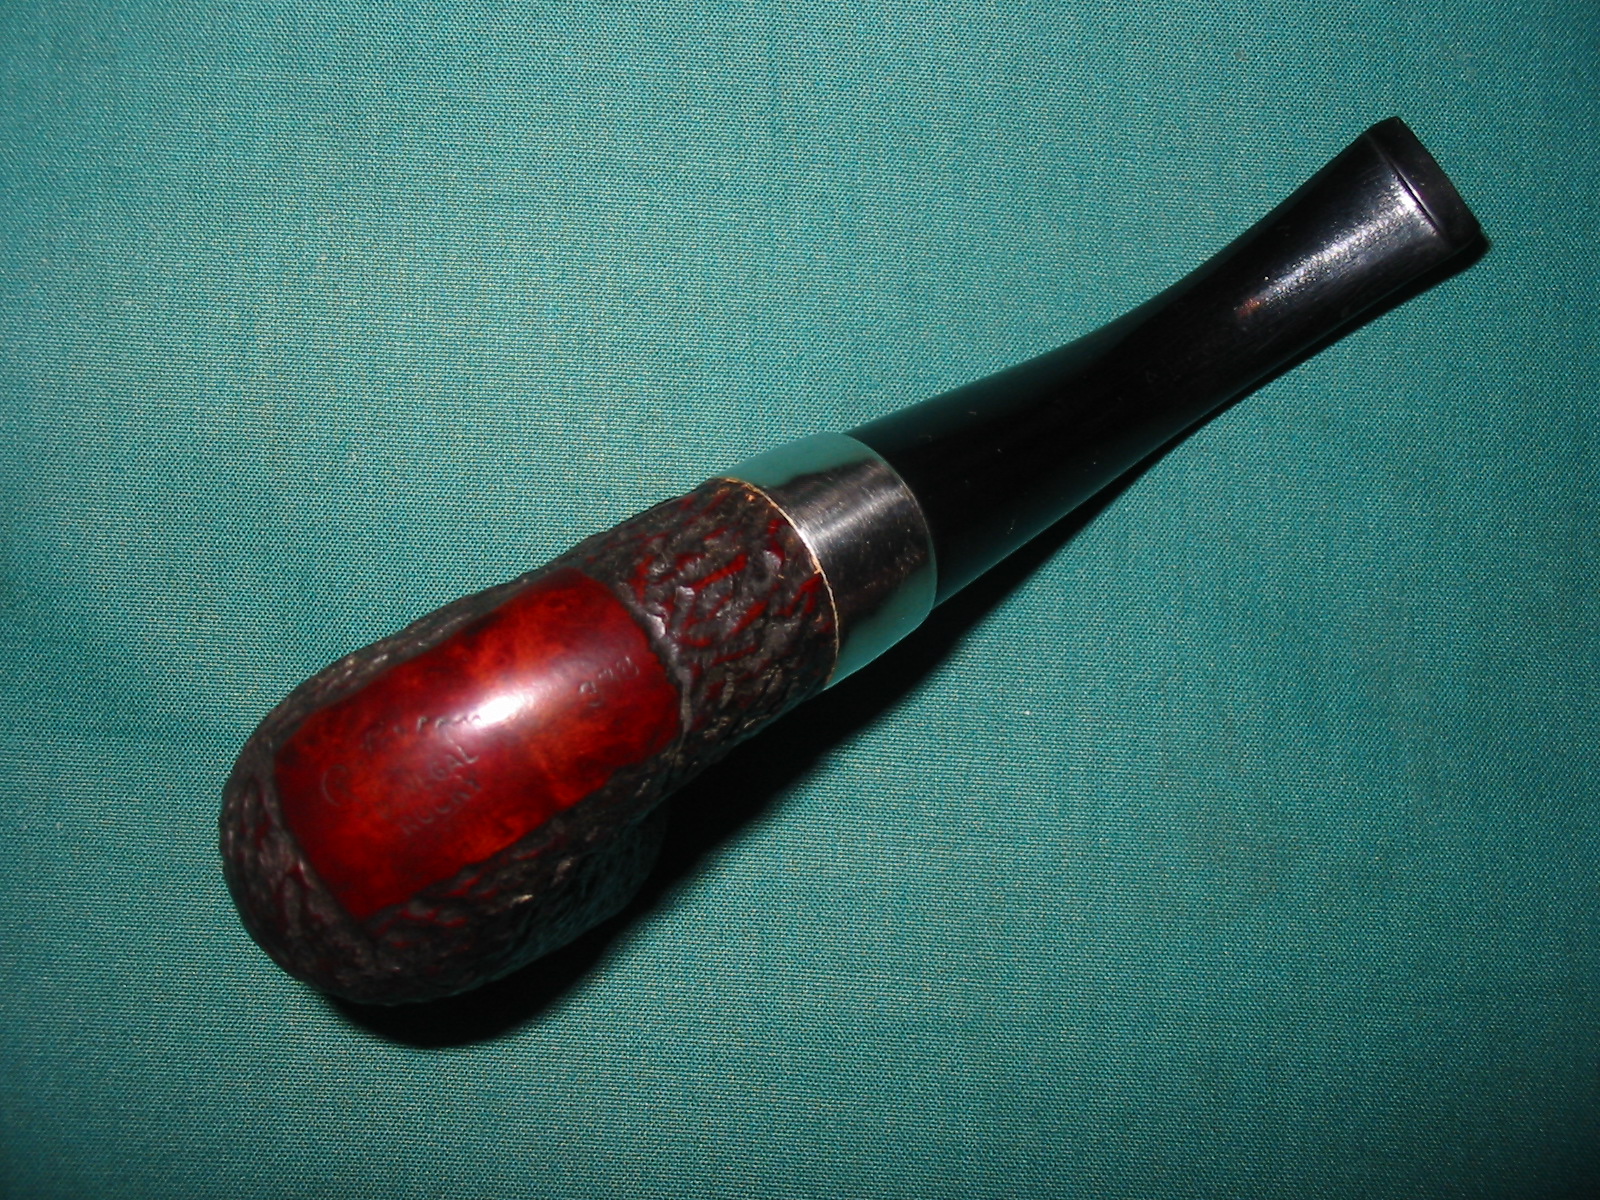
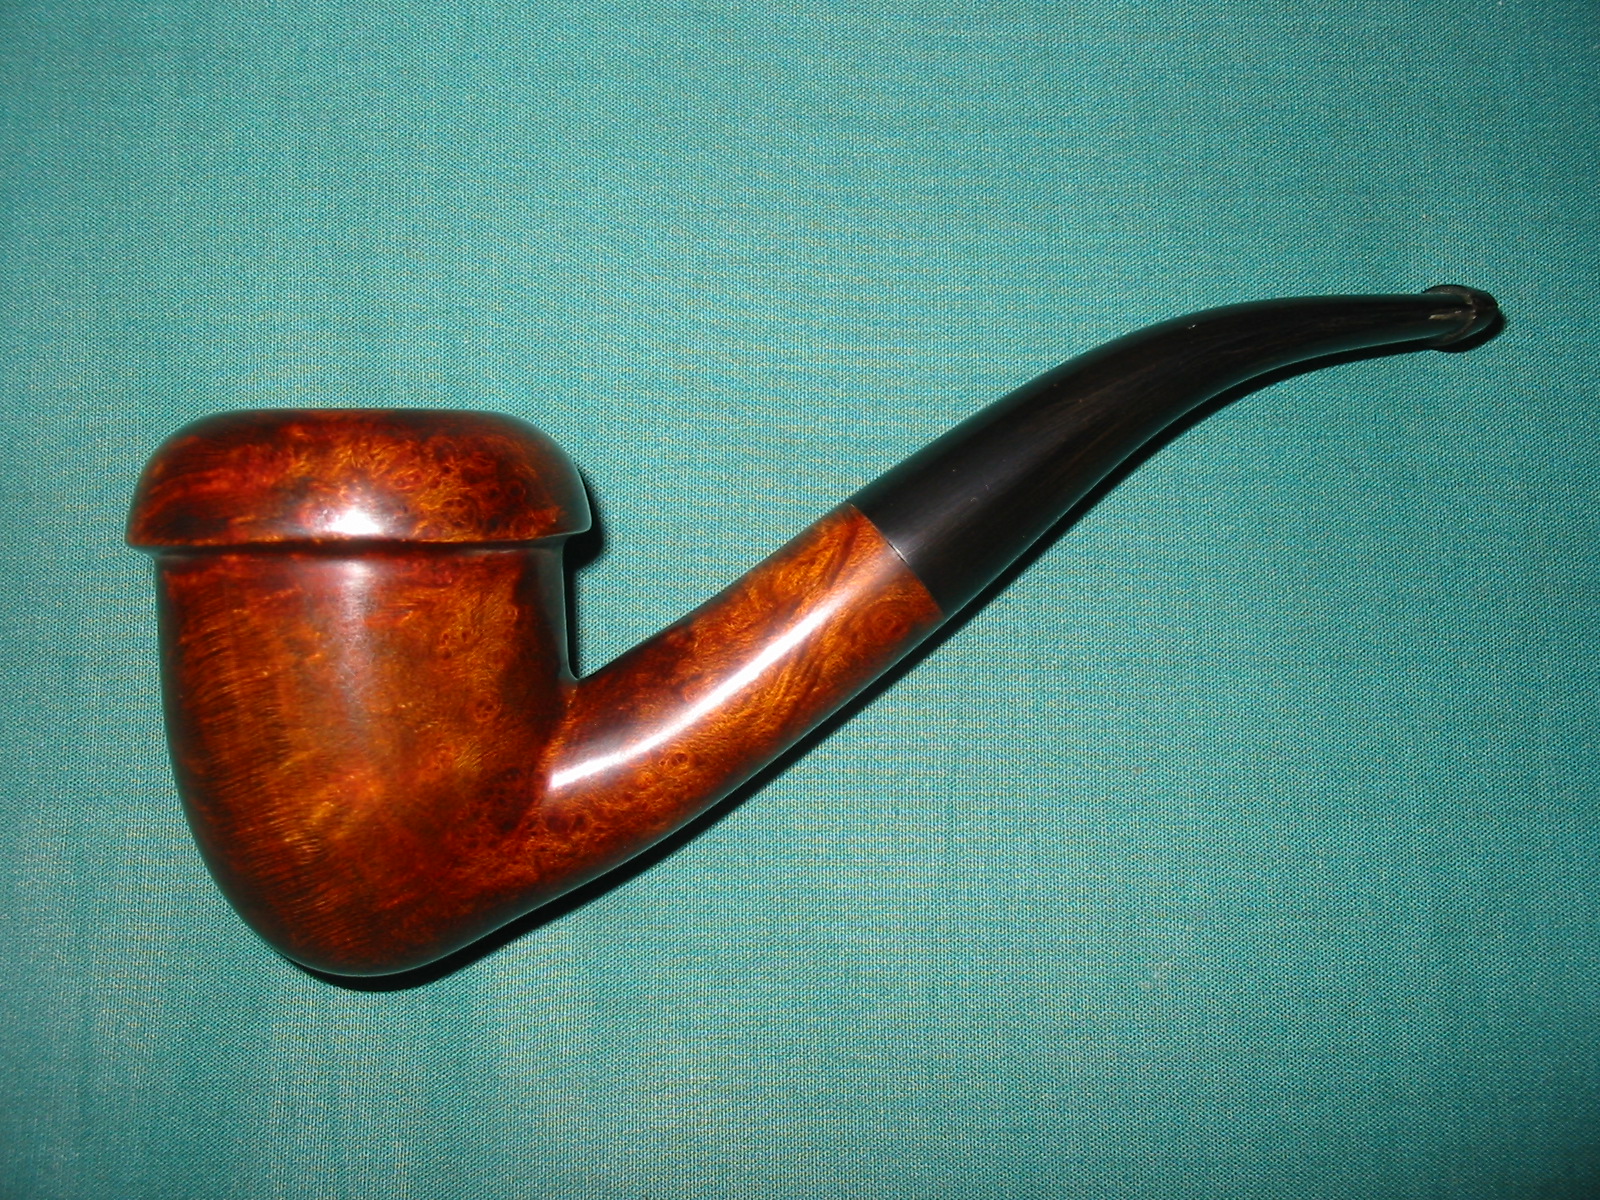
I just finished restoring and restemming an older Yello-Bole billiard. The bowl was stamped with the KBB (no ampersand) on the left side of the shank and next to it is stamped Yello-Bole in capital letters. Underneath is stamped Honey Cured Briar. On the right side of the shank it is stamped 2068B.
IMG_7566 
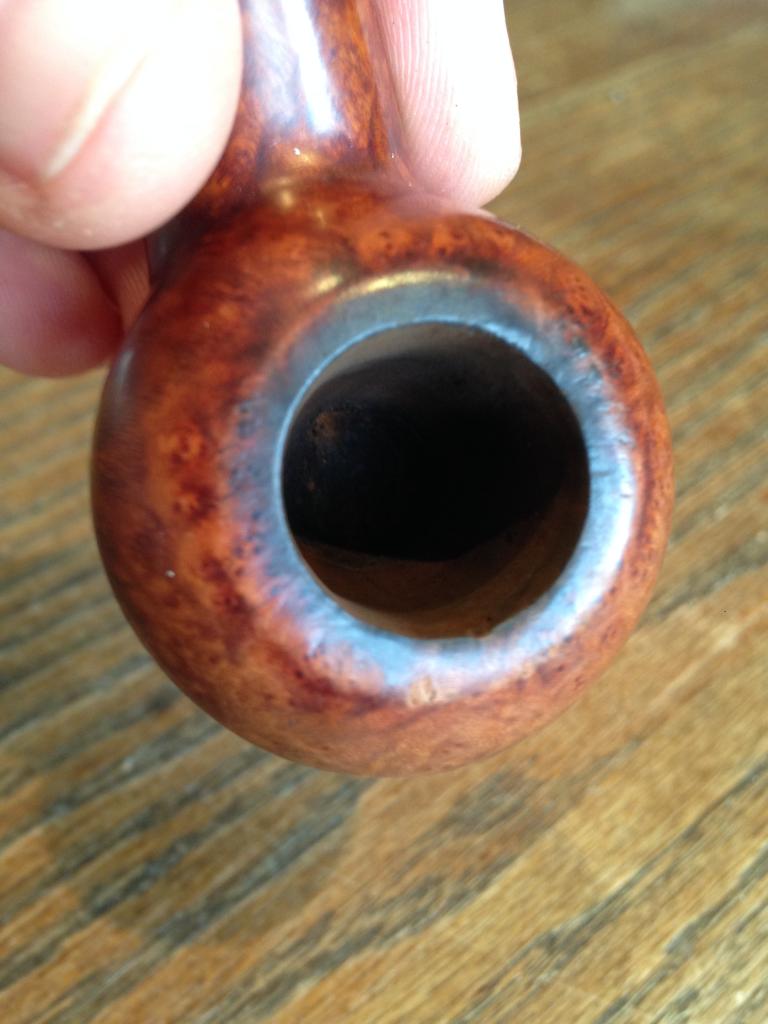
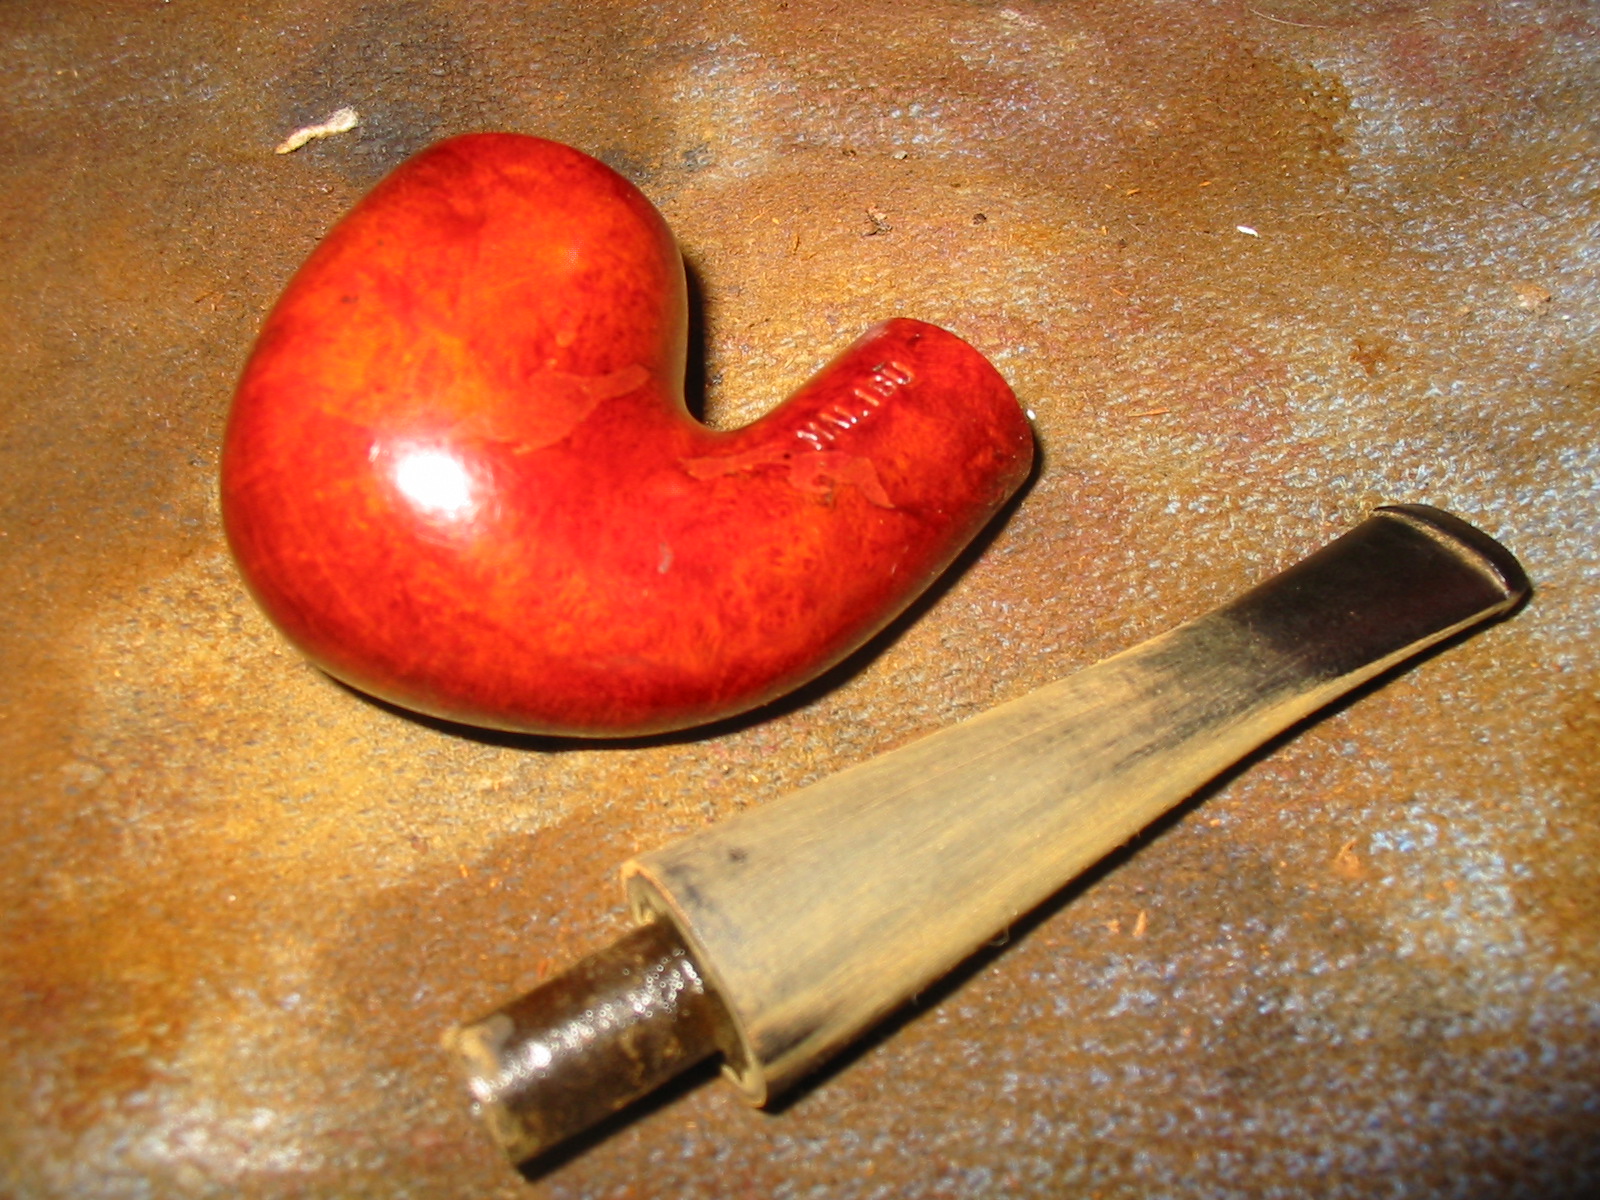
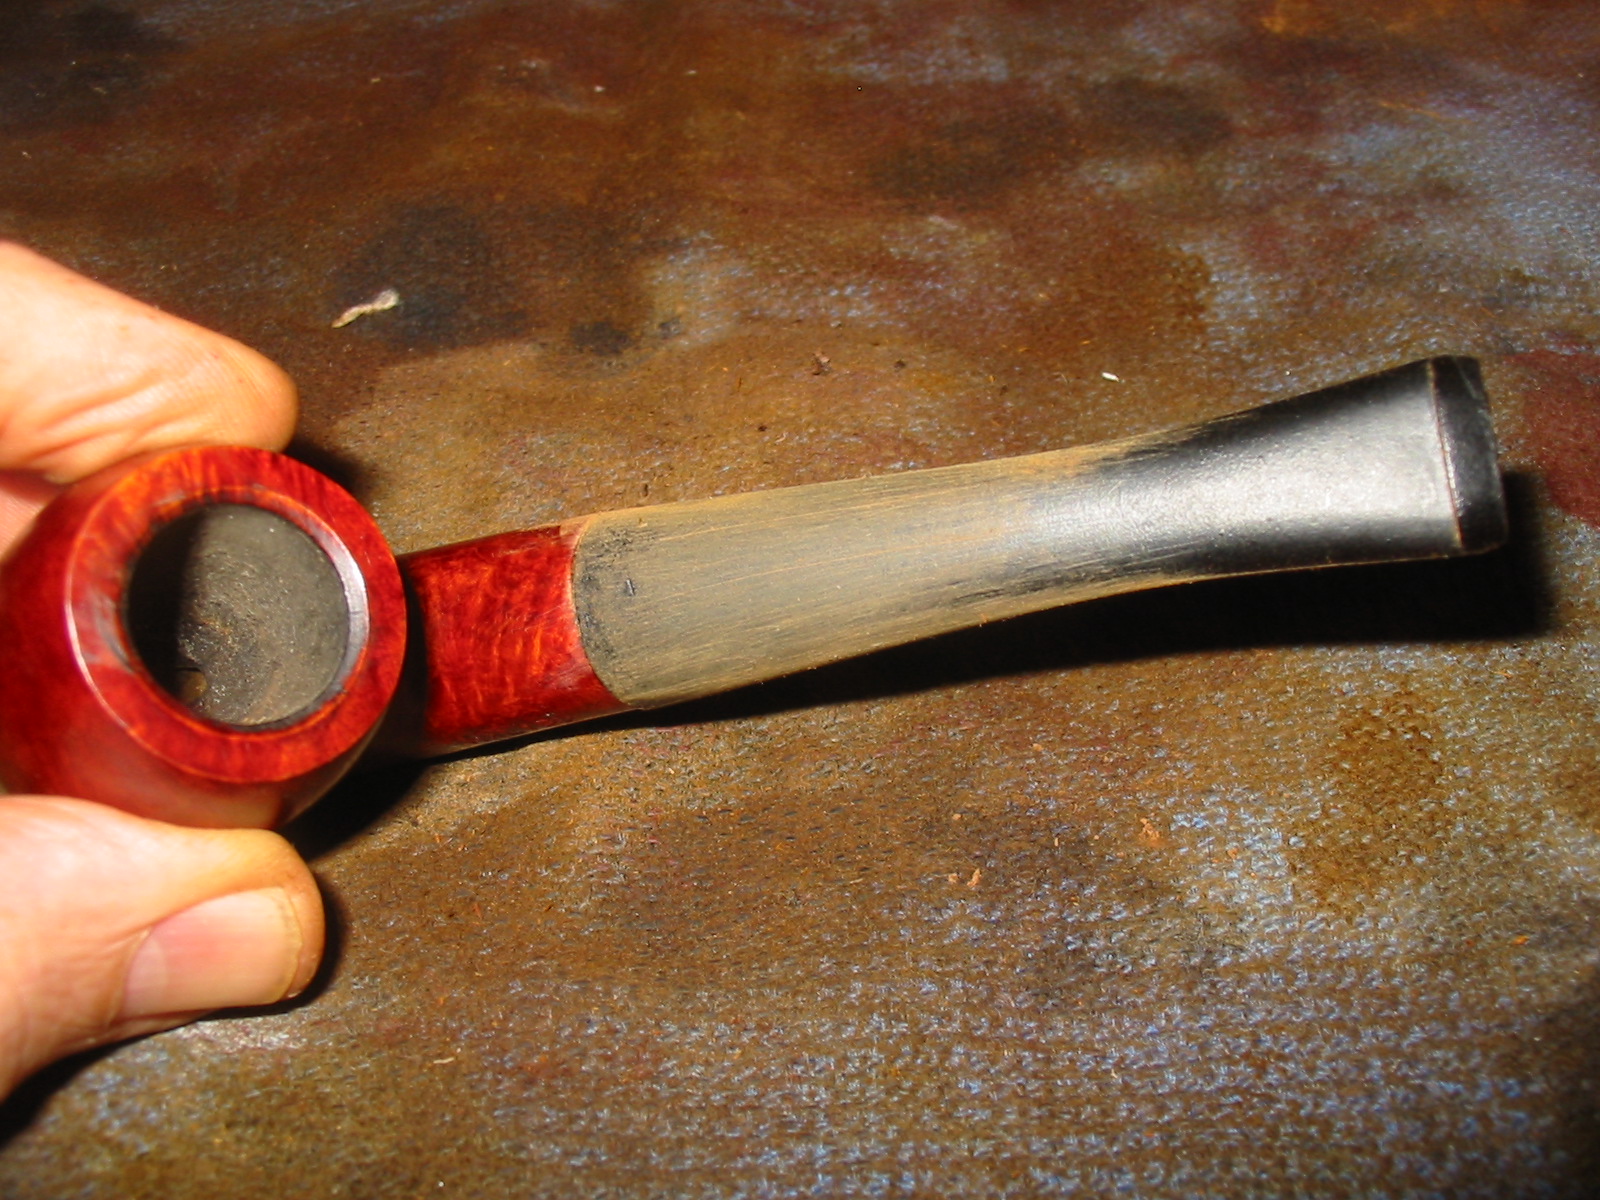
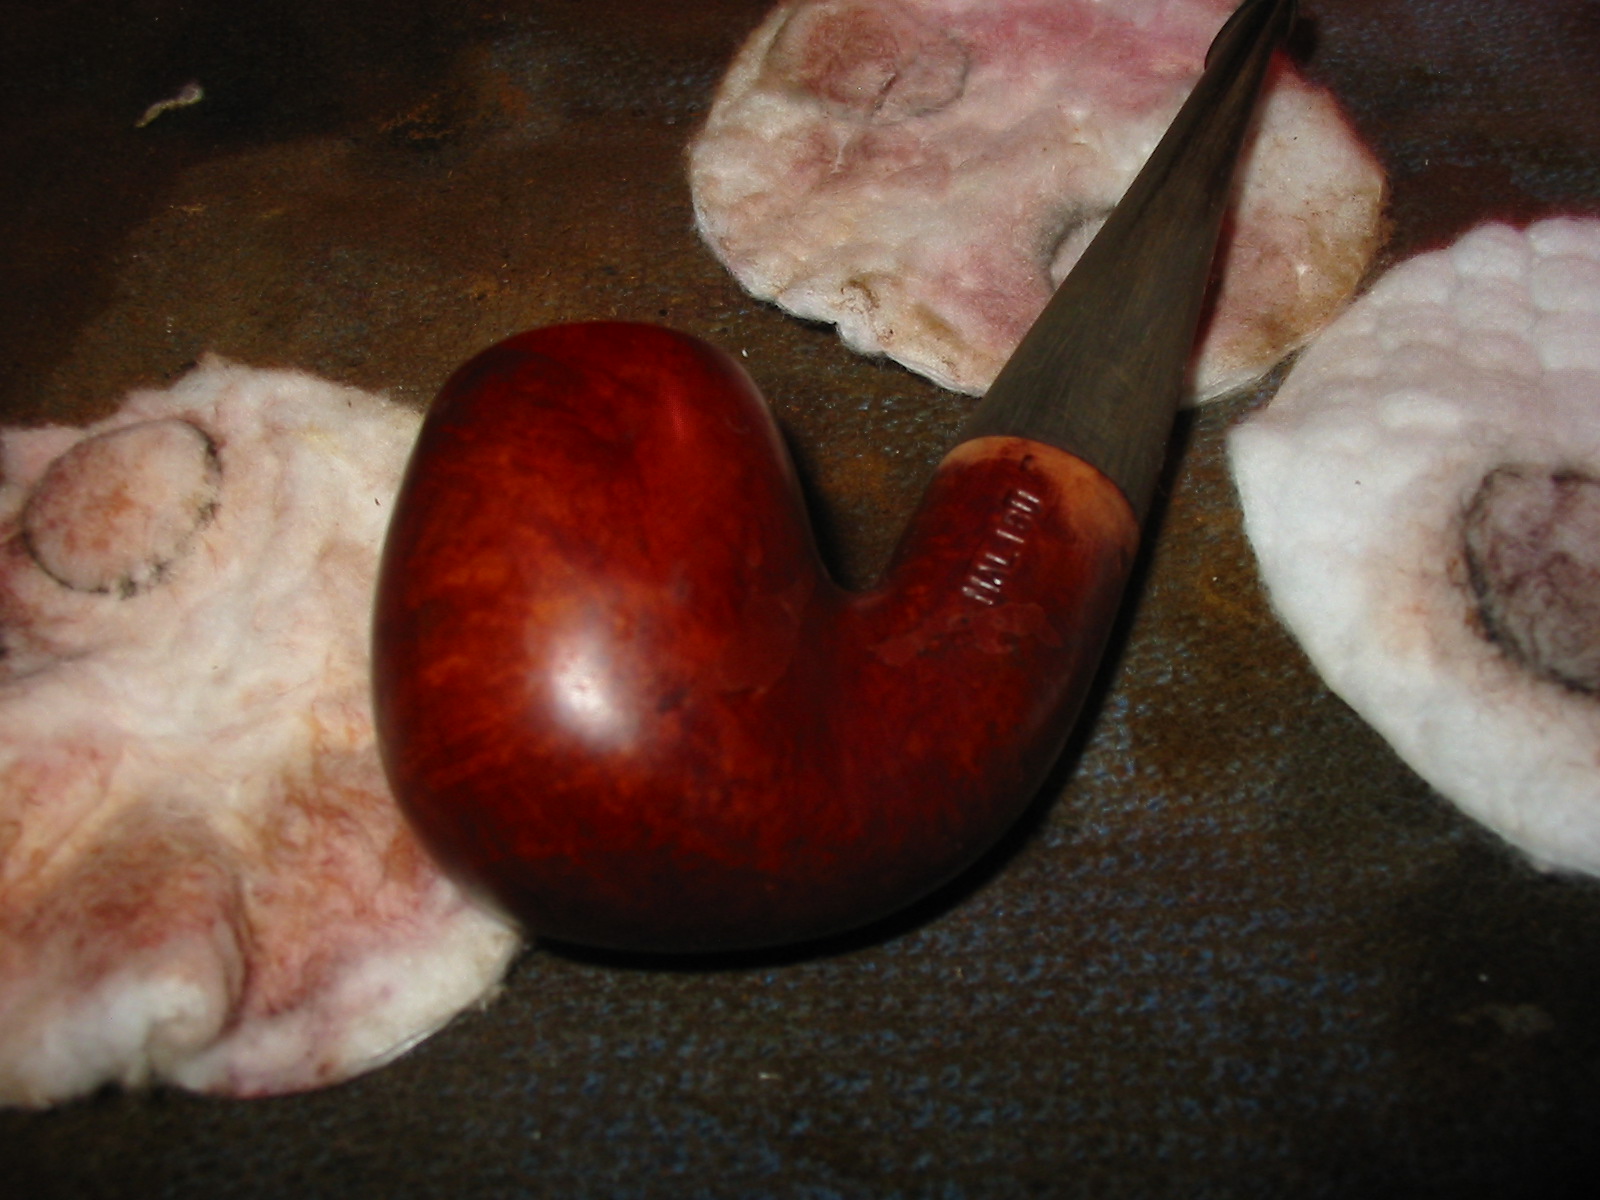
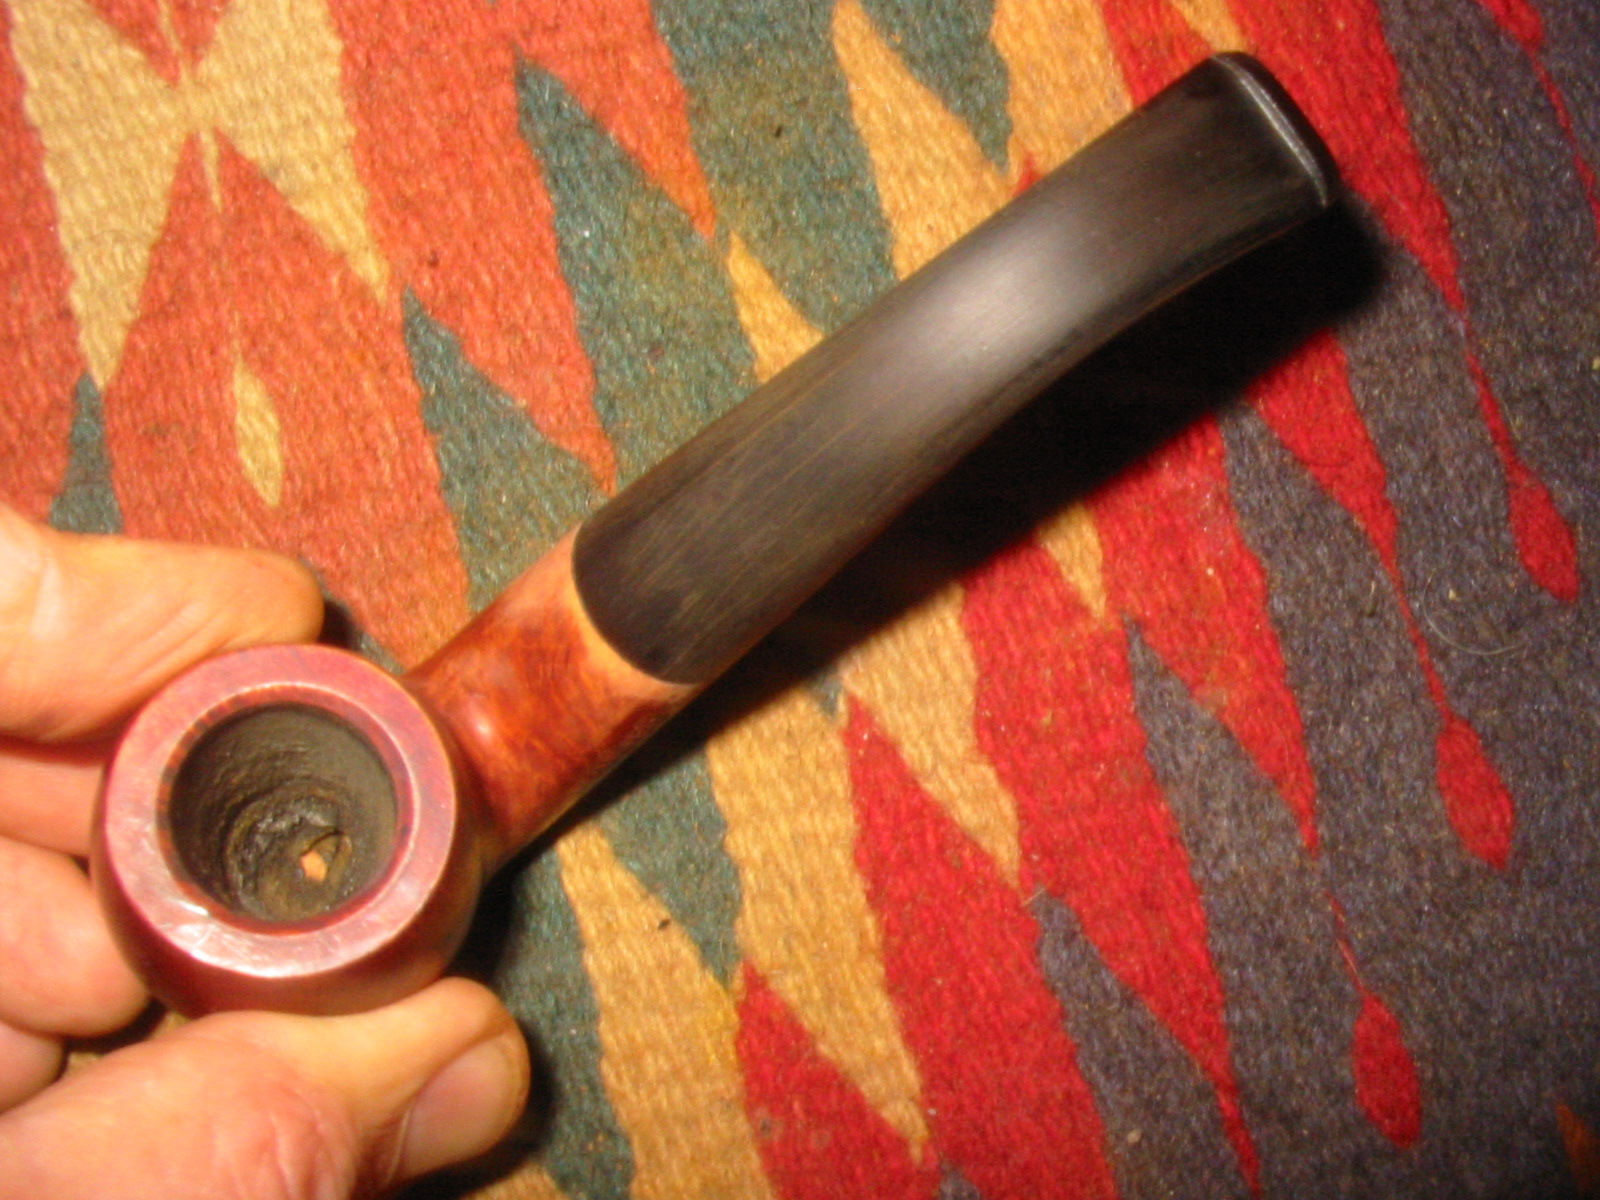
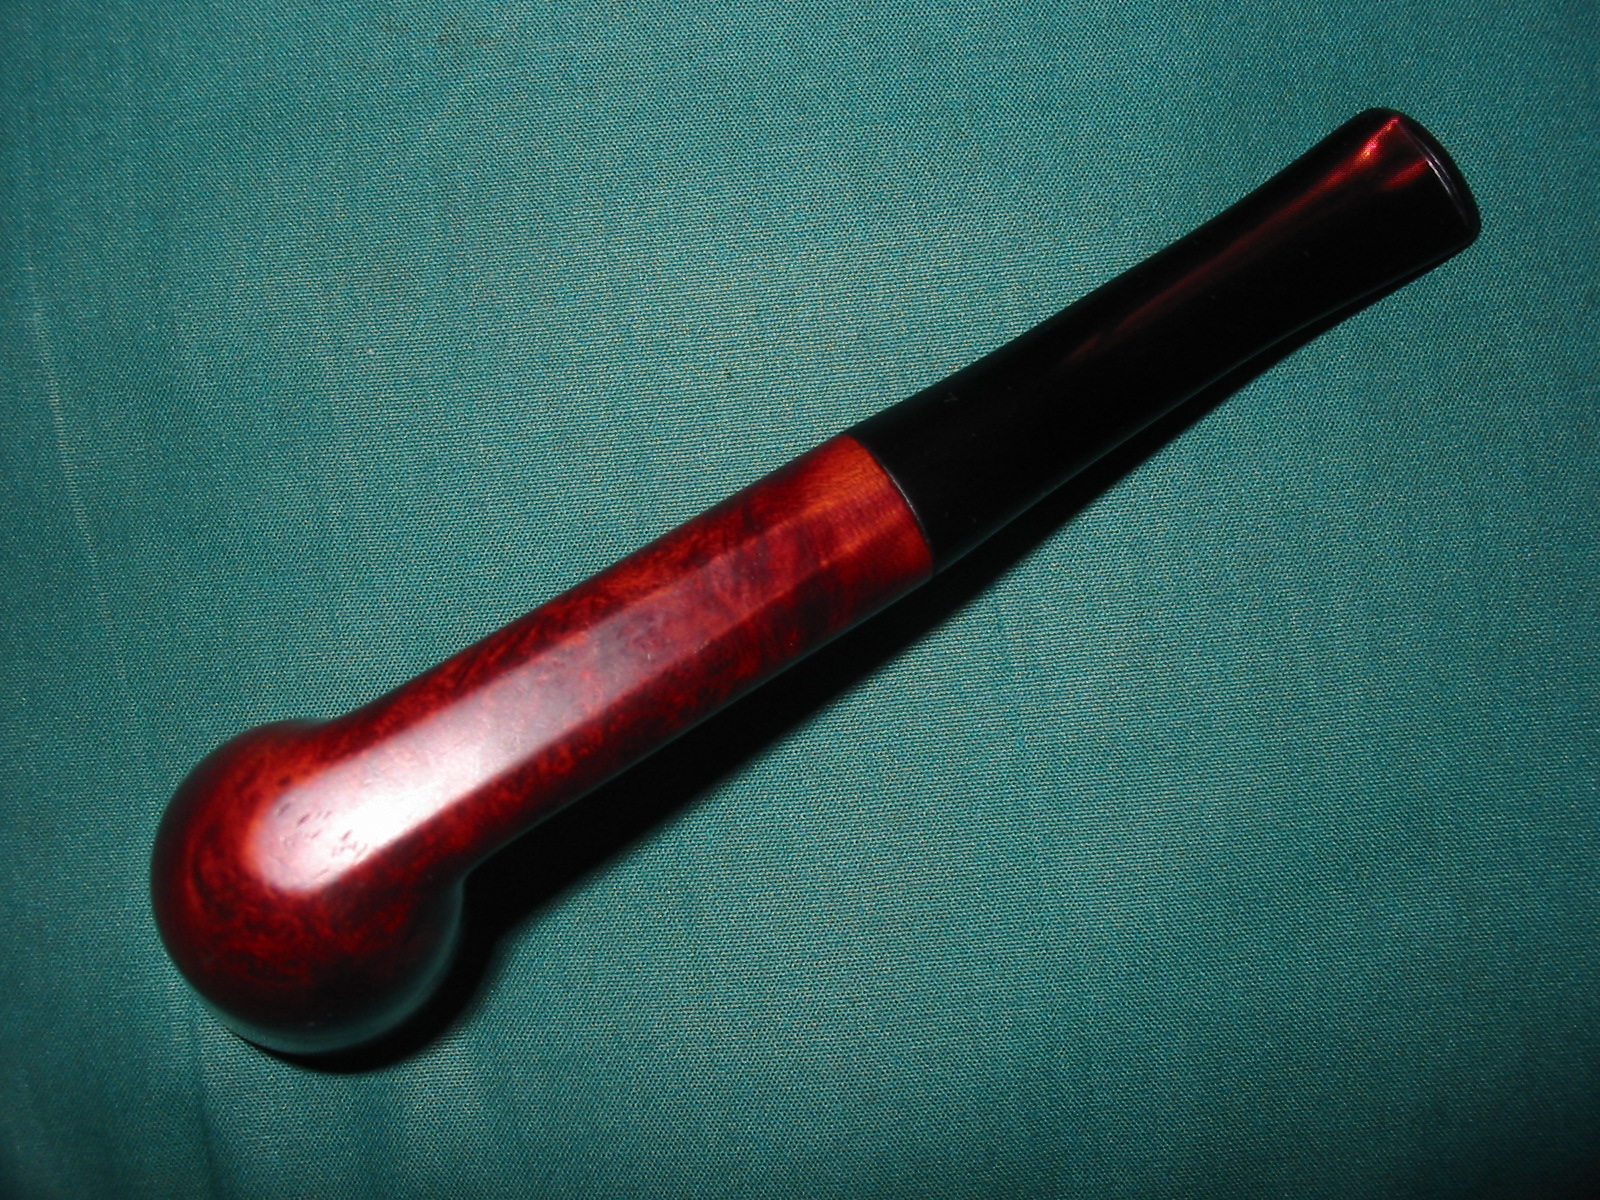
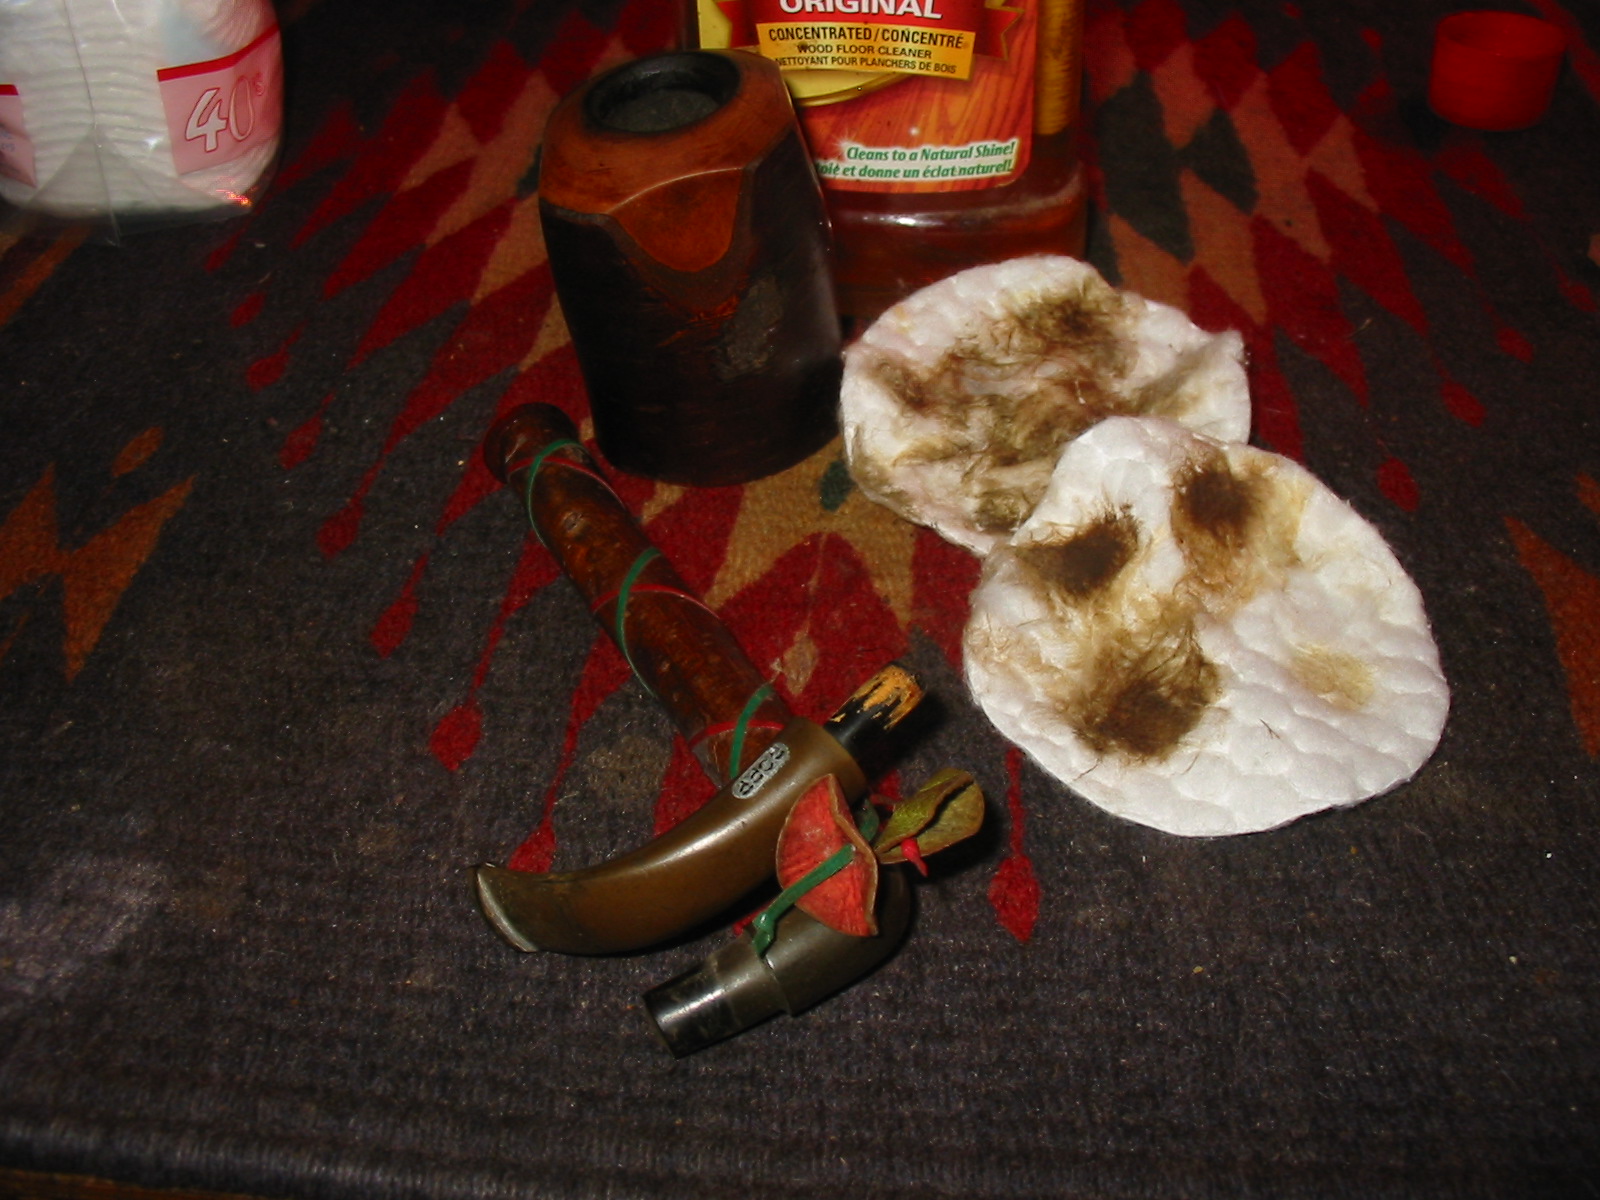
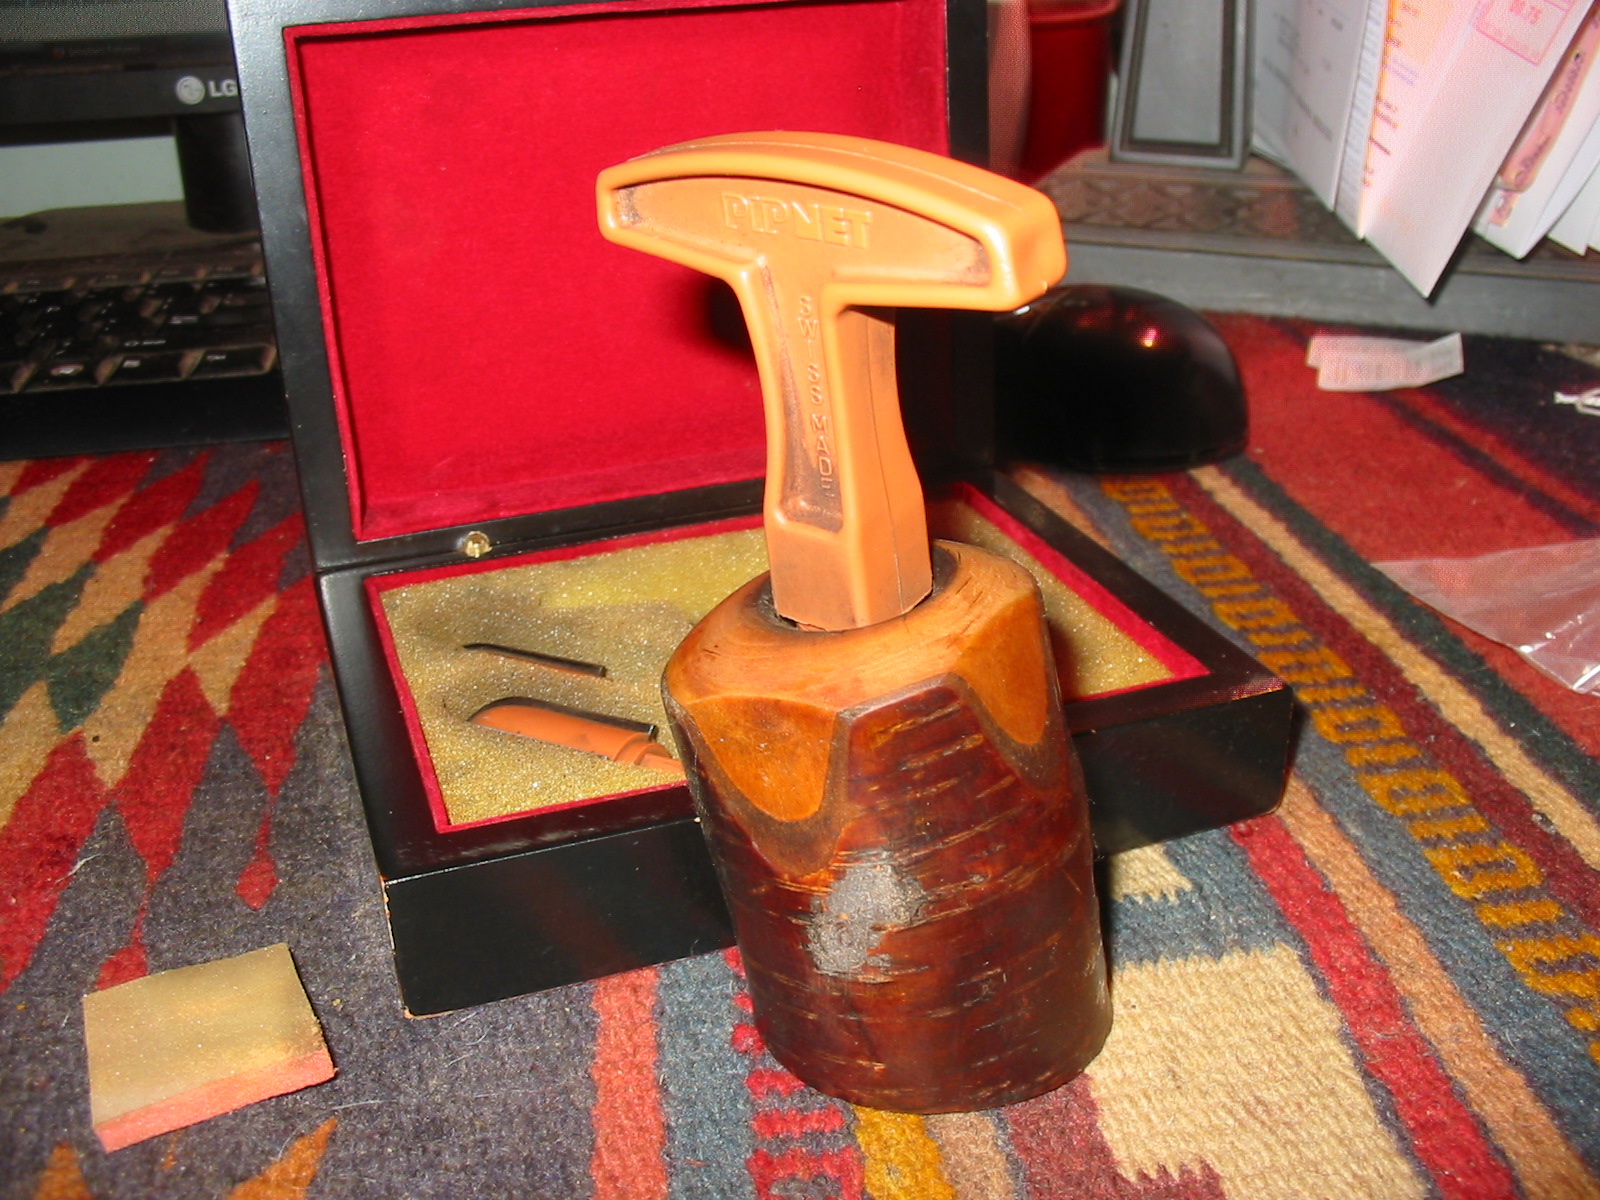
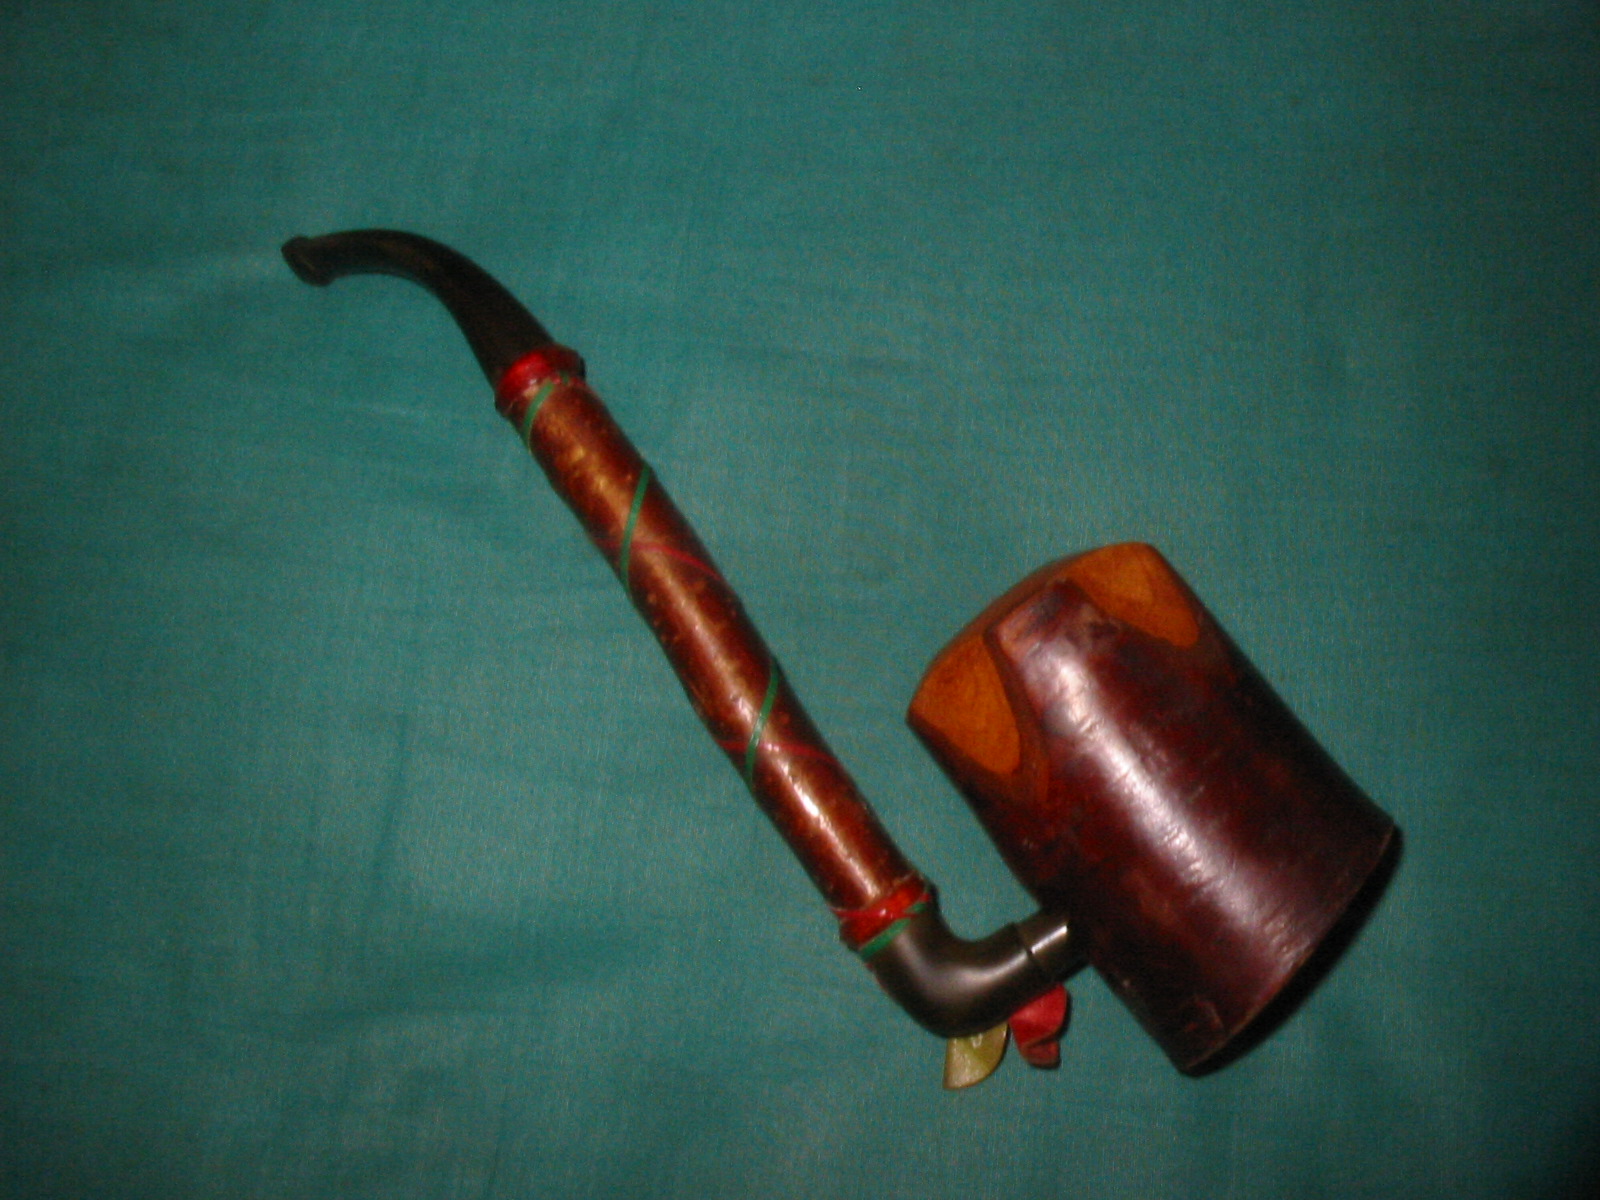
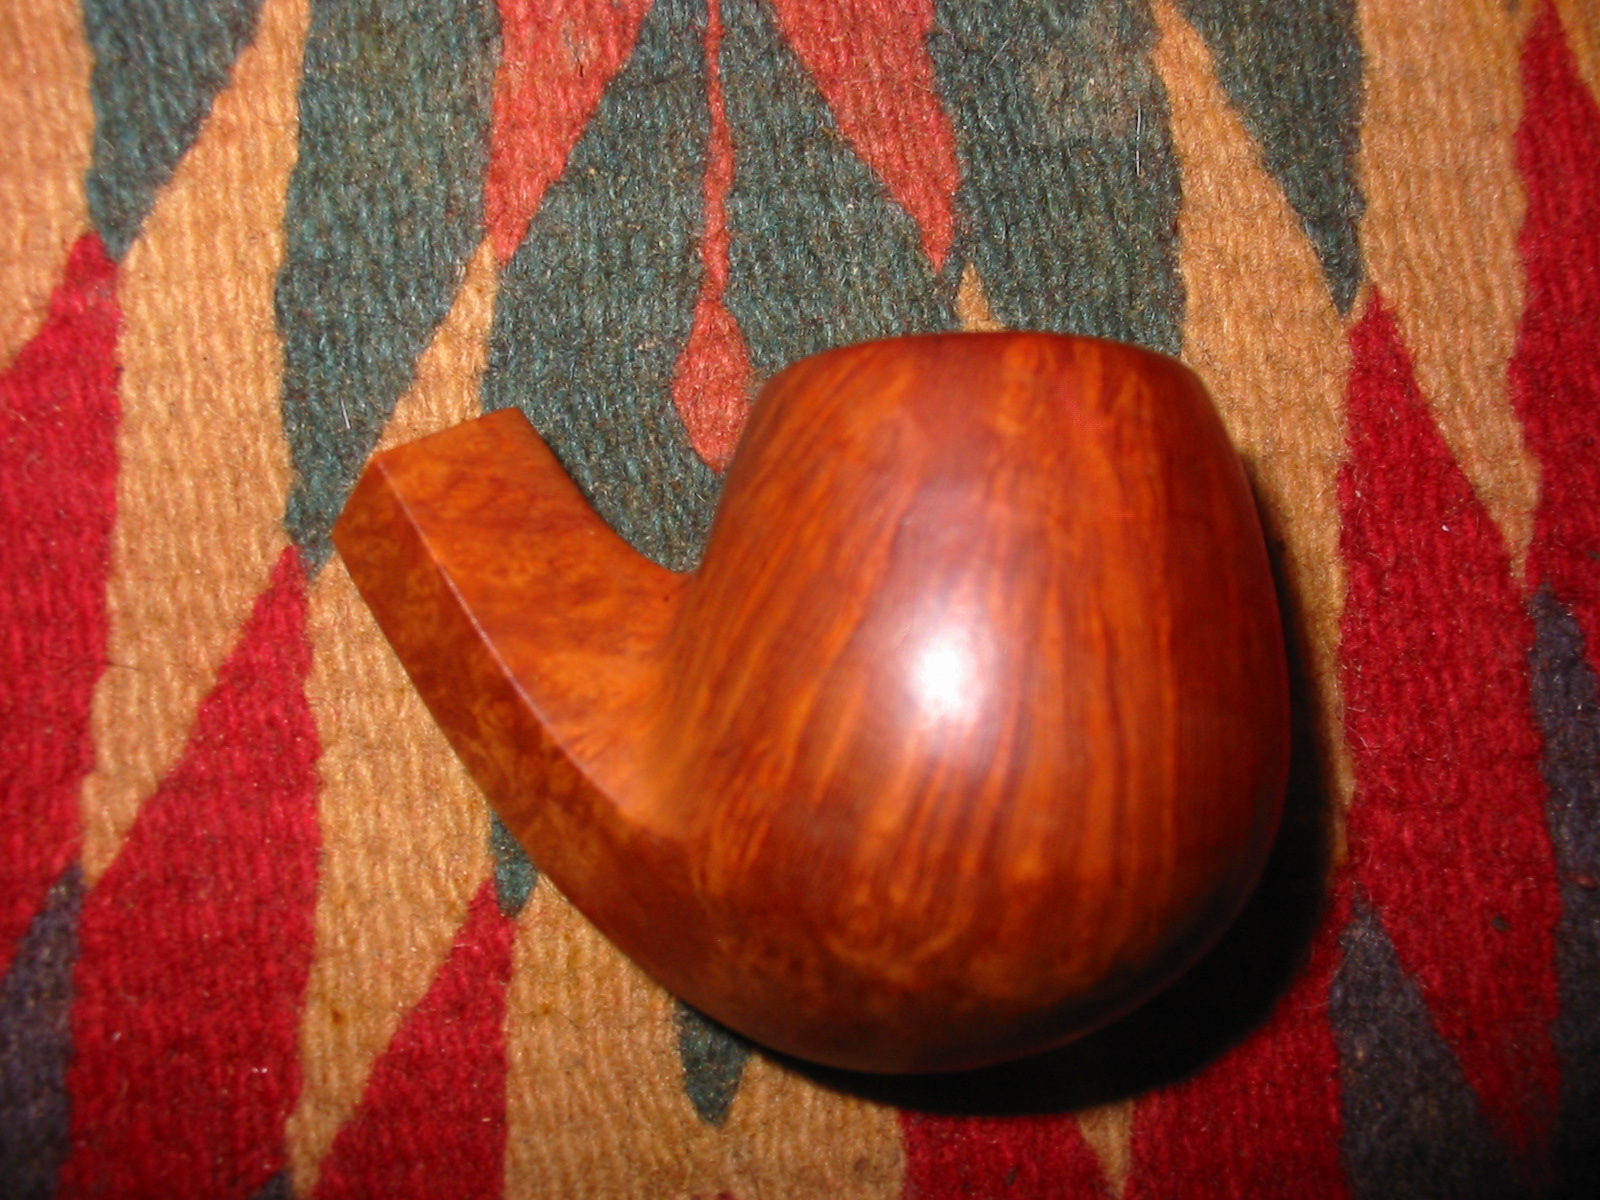
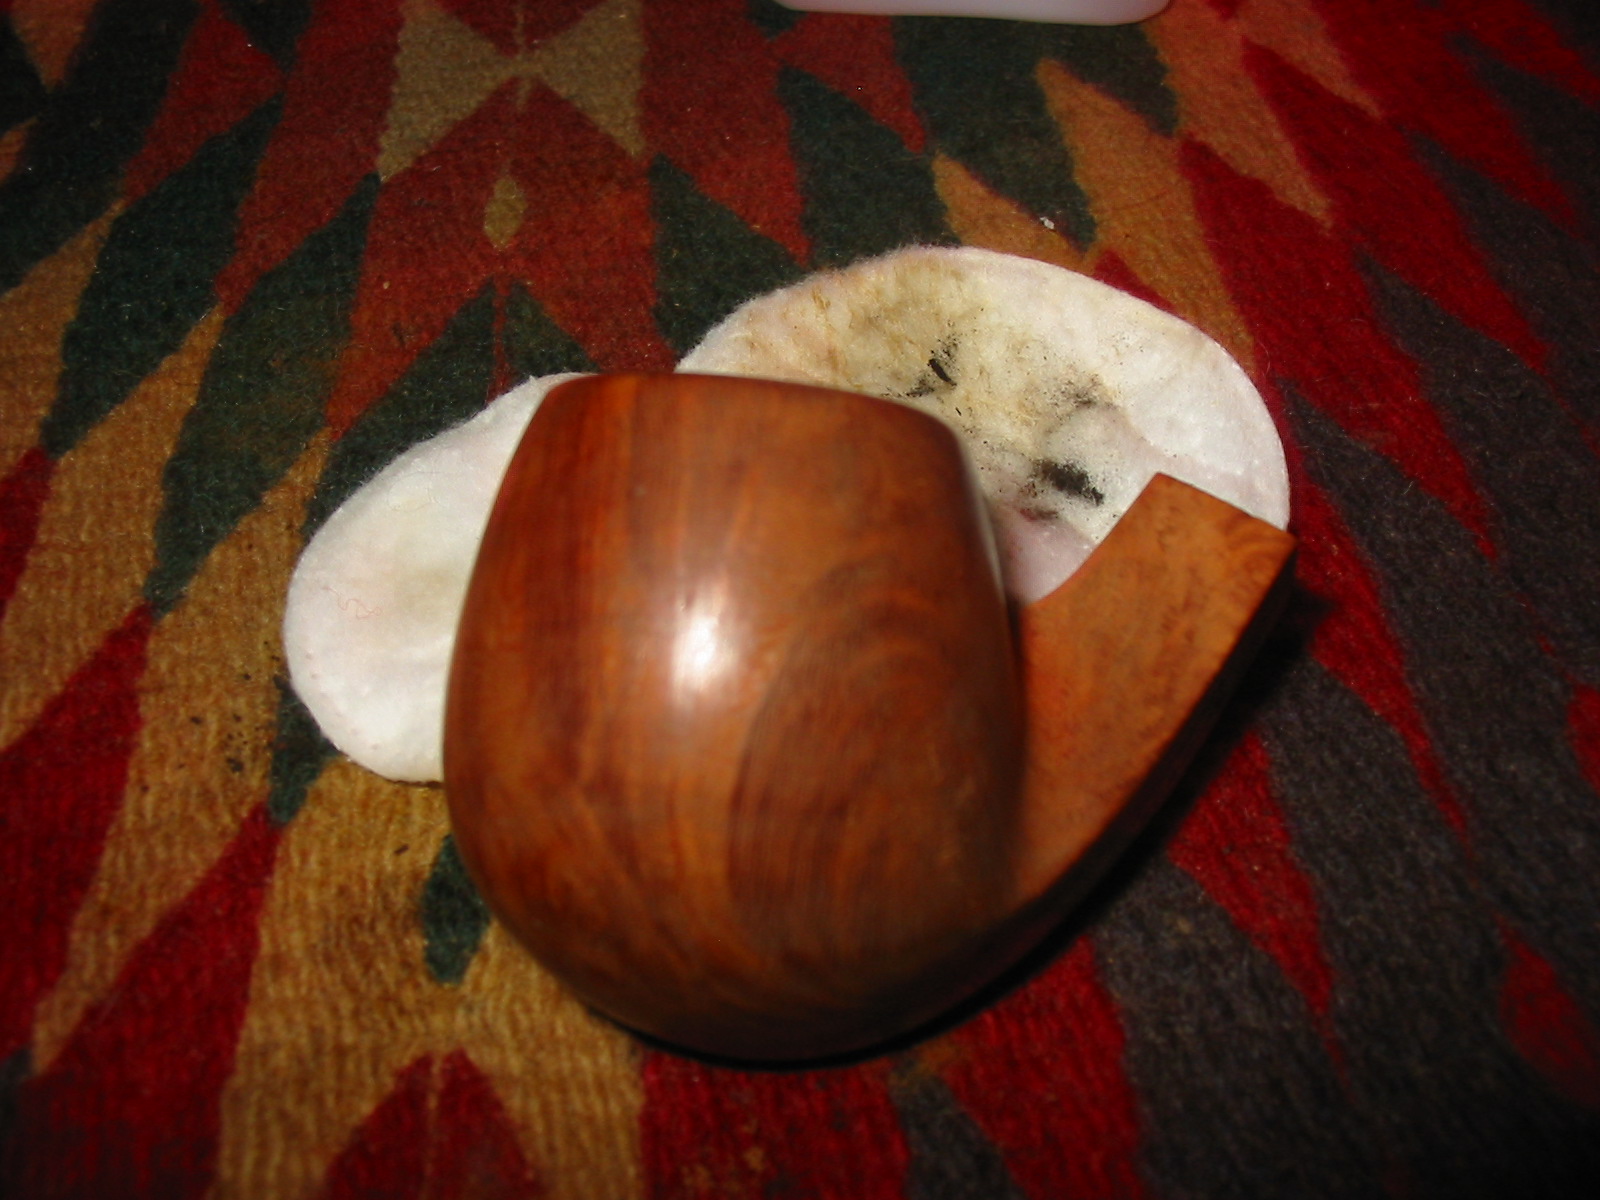
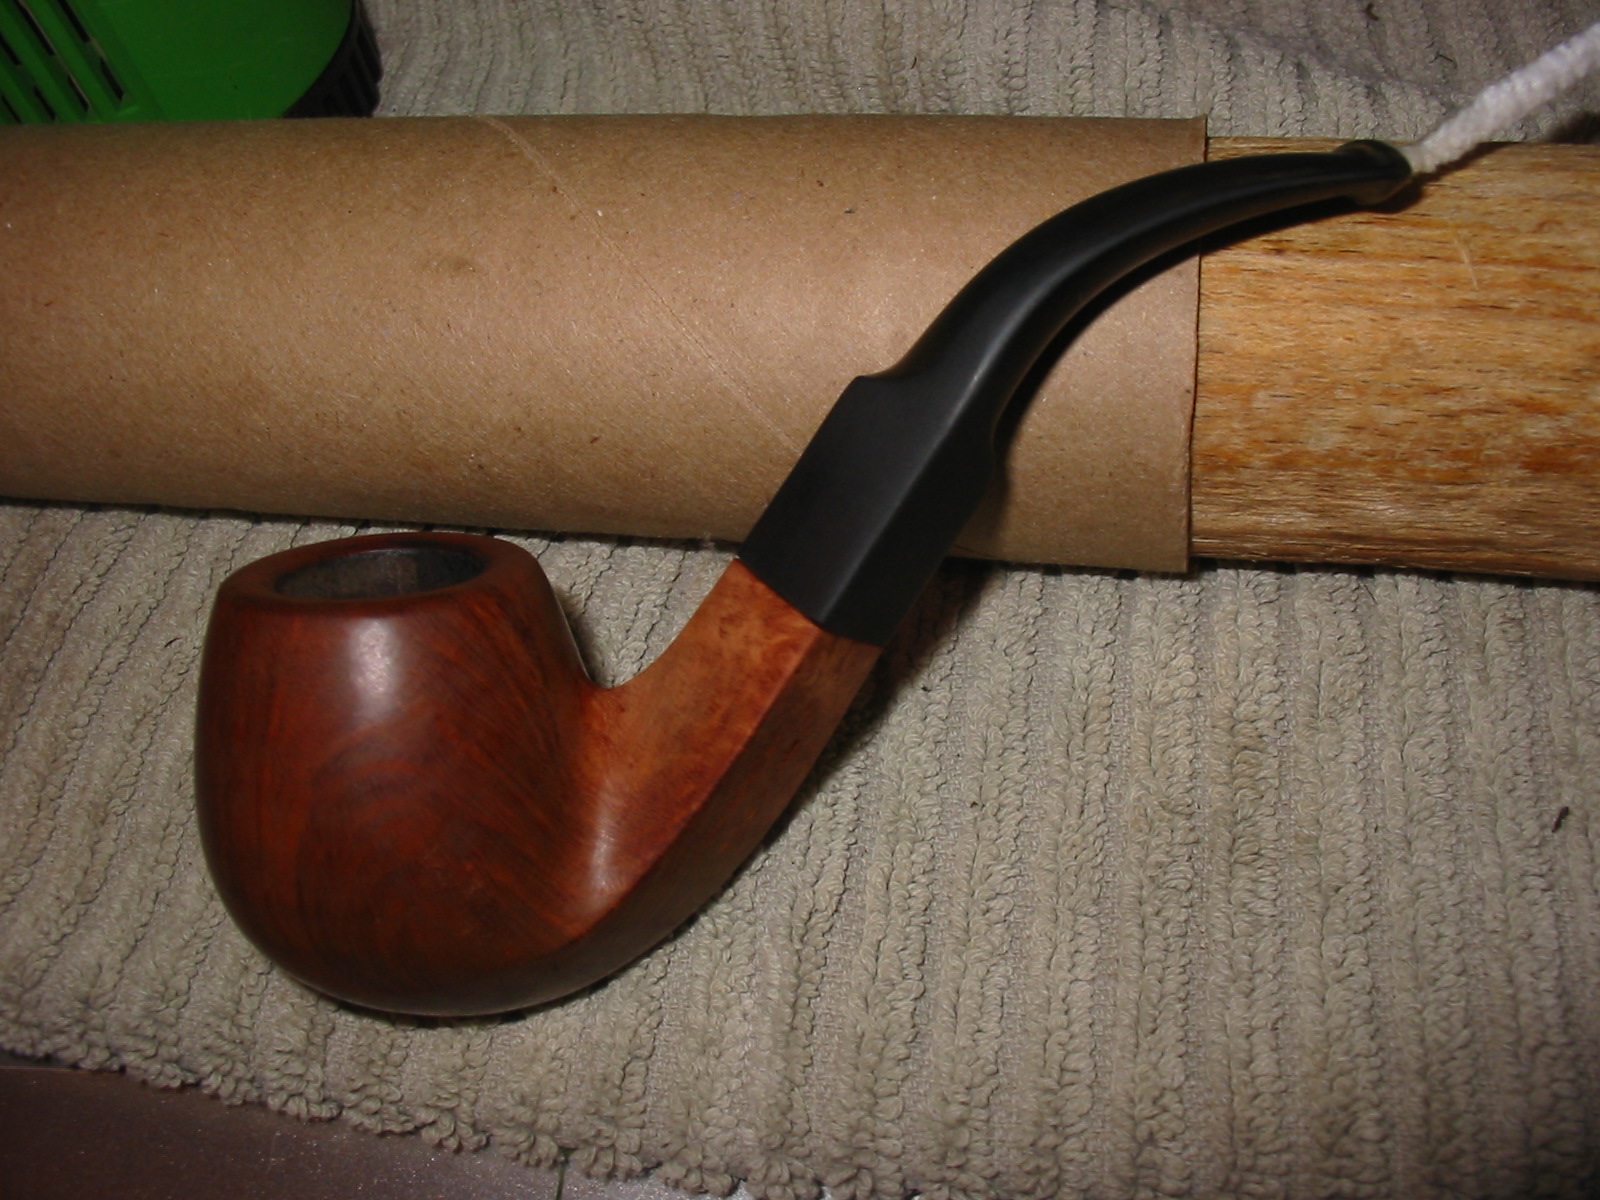
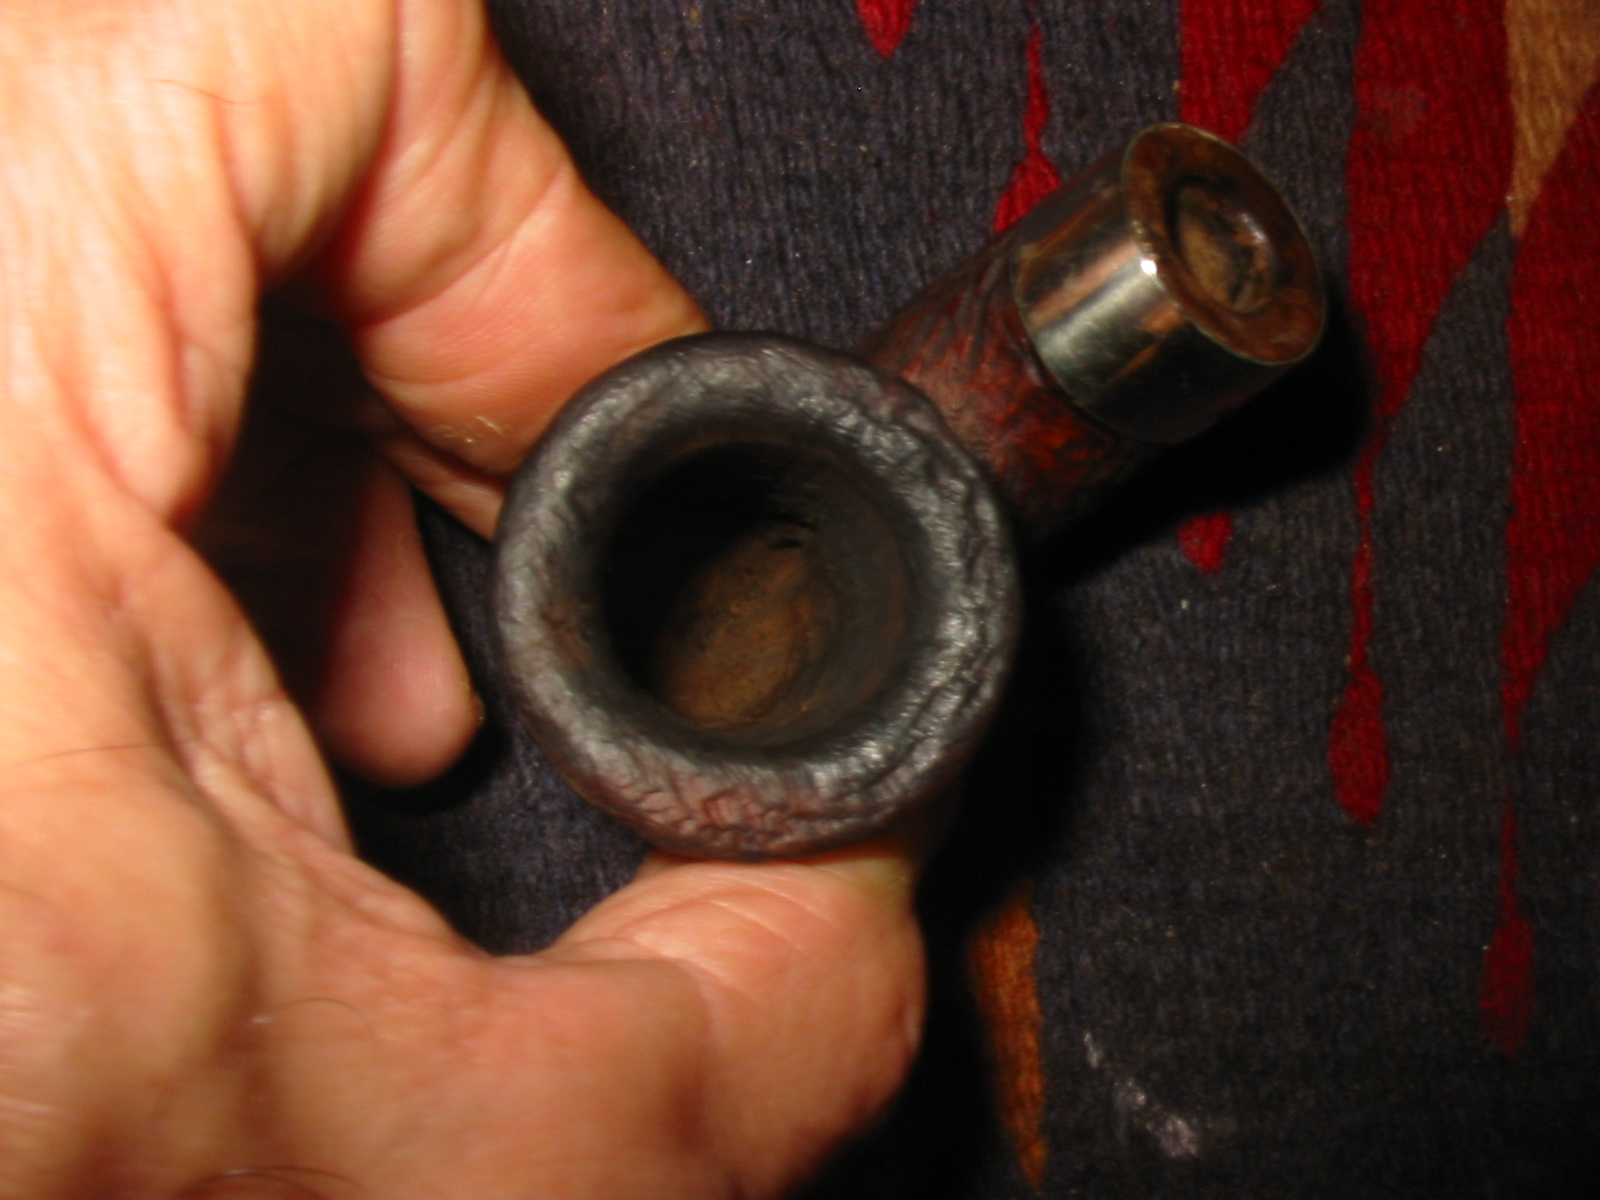
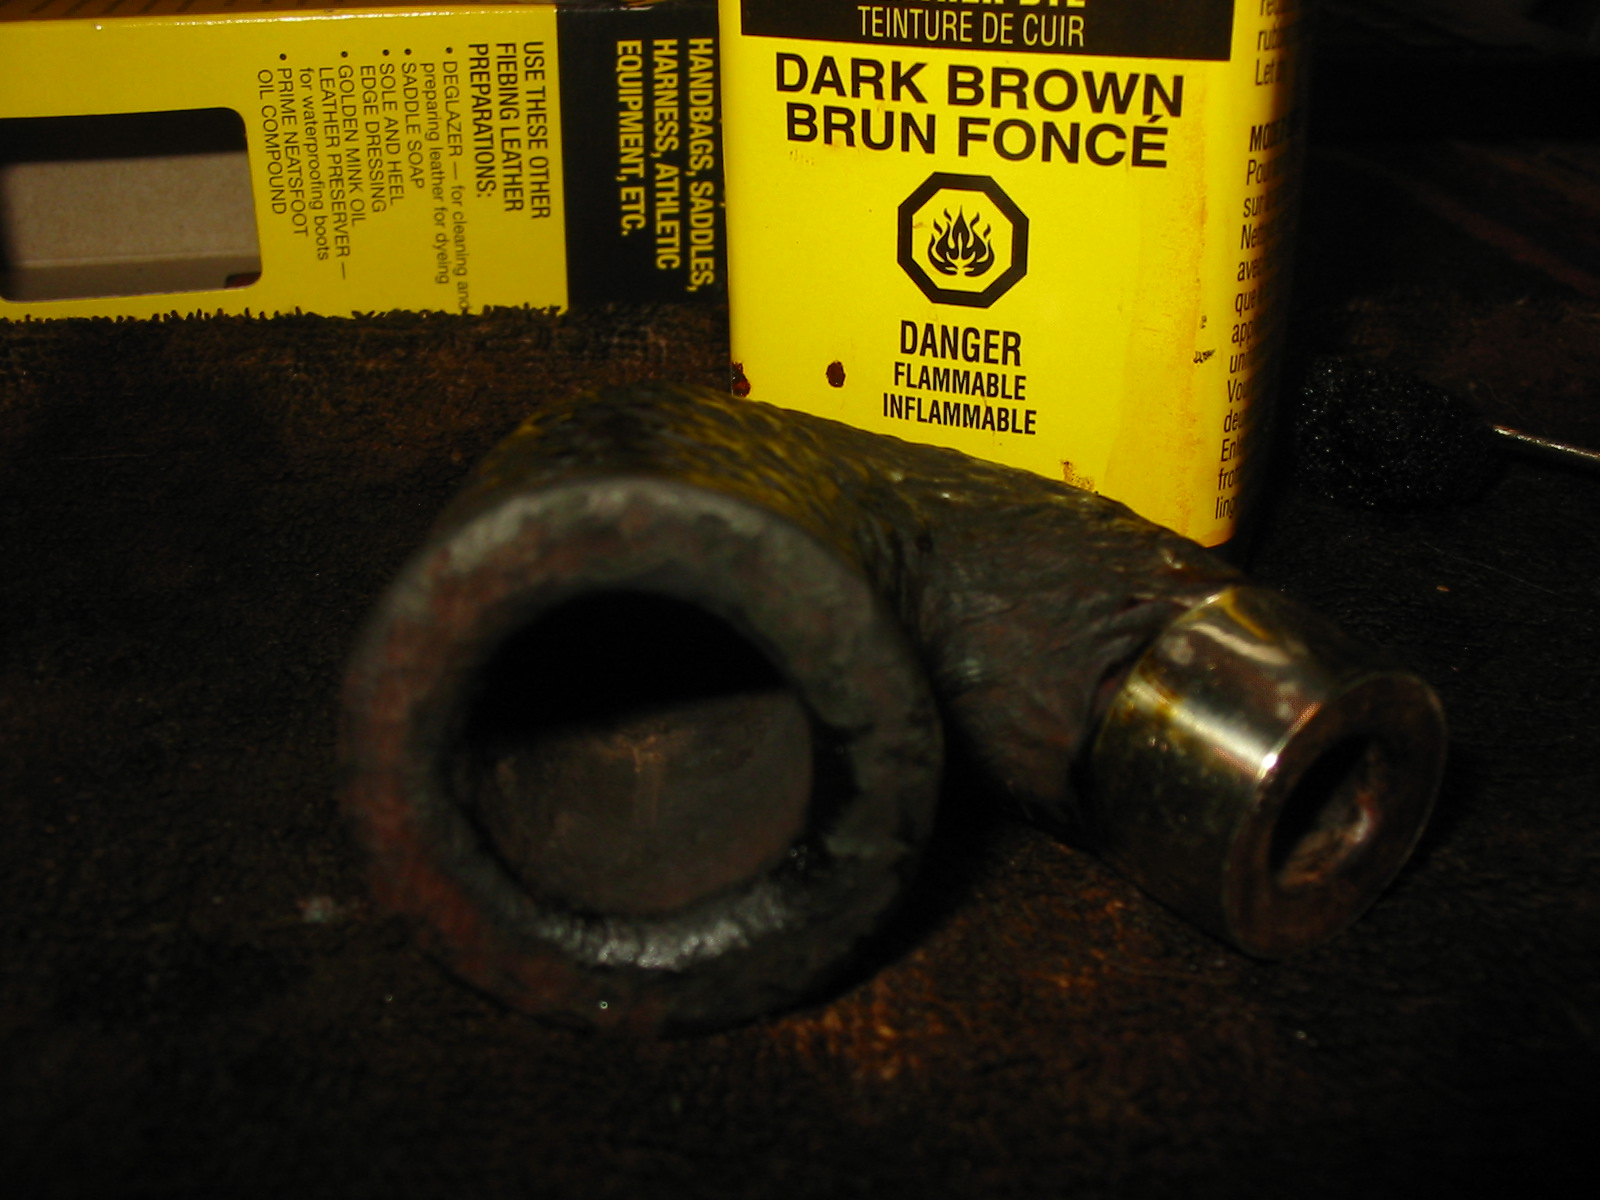
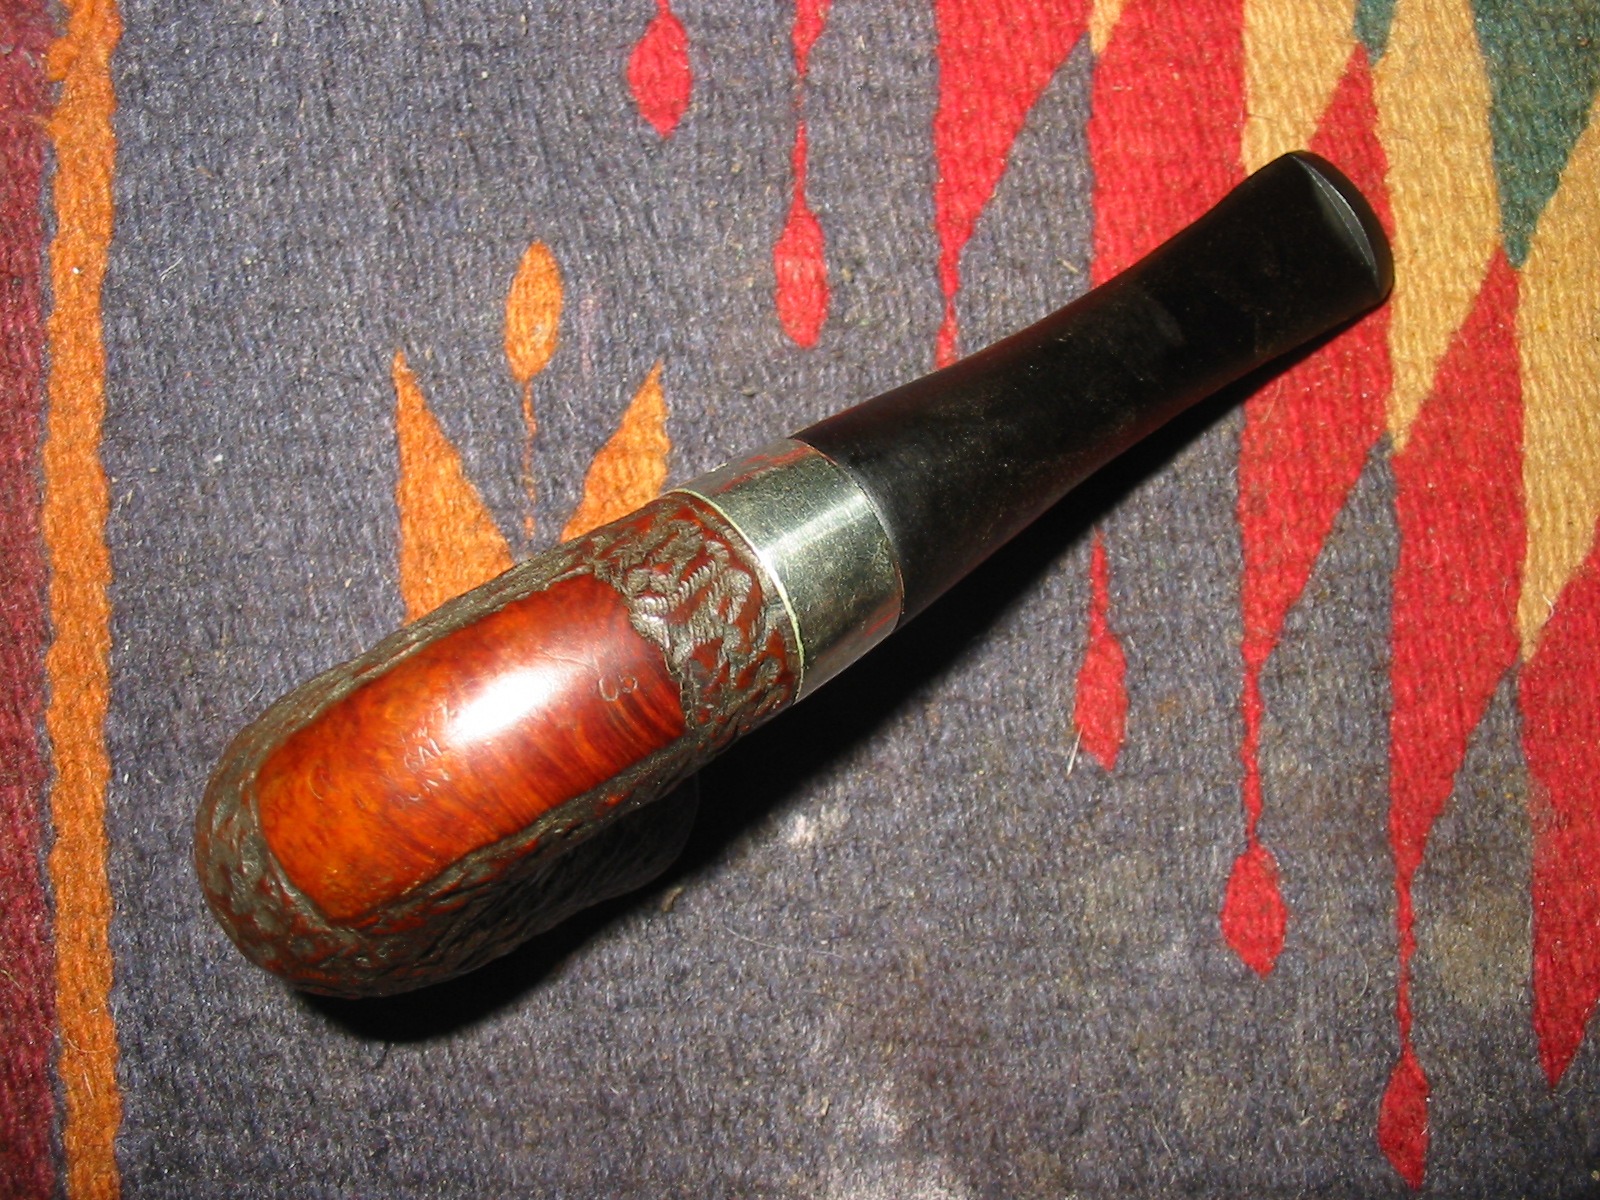
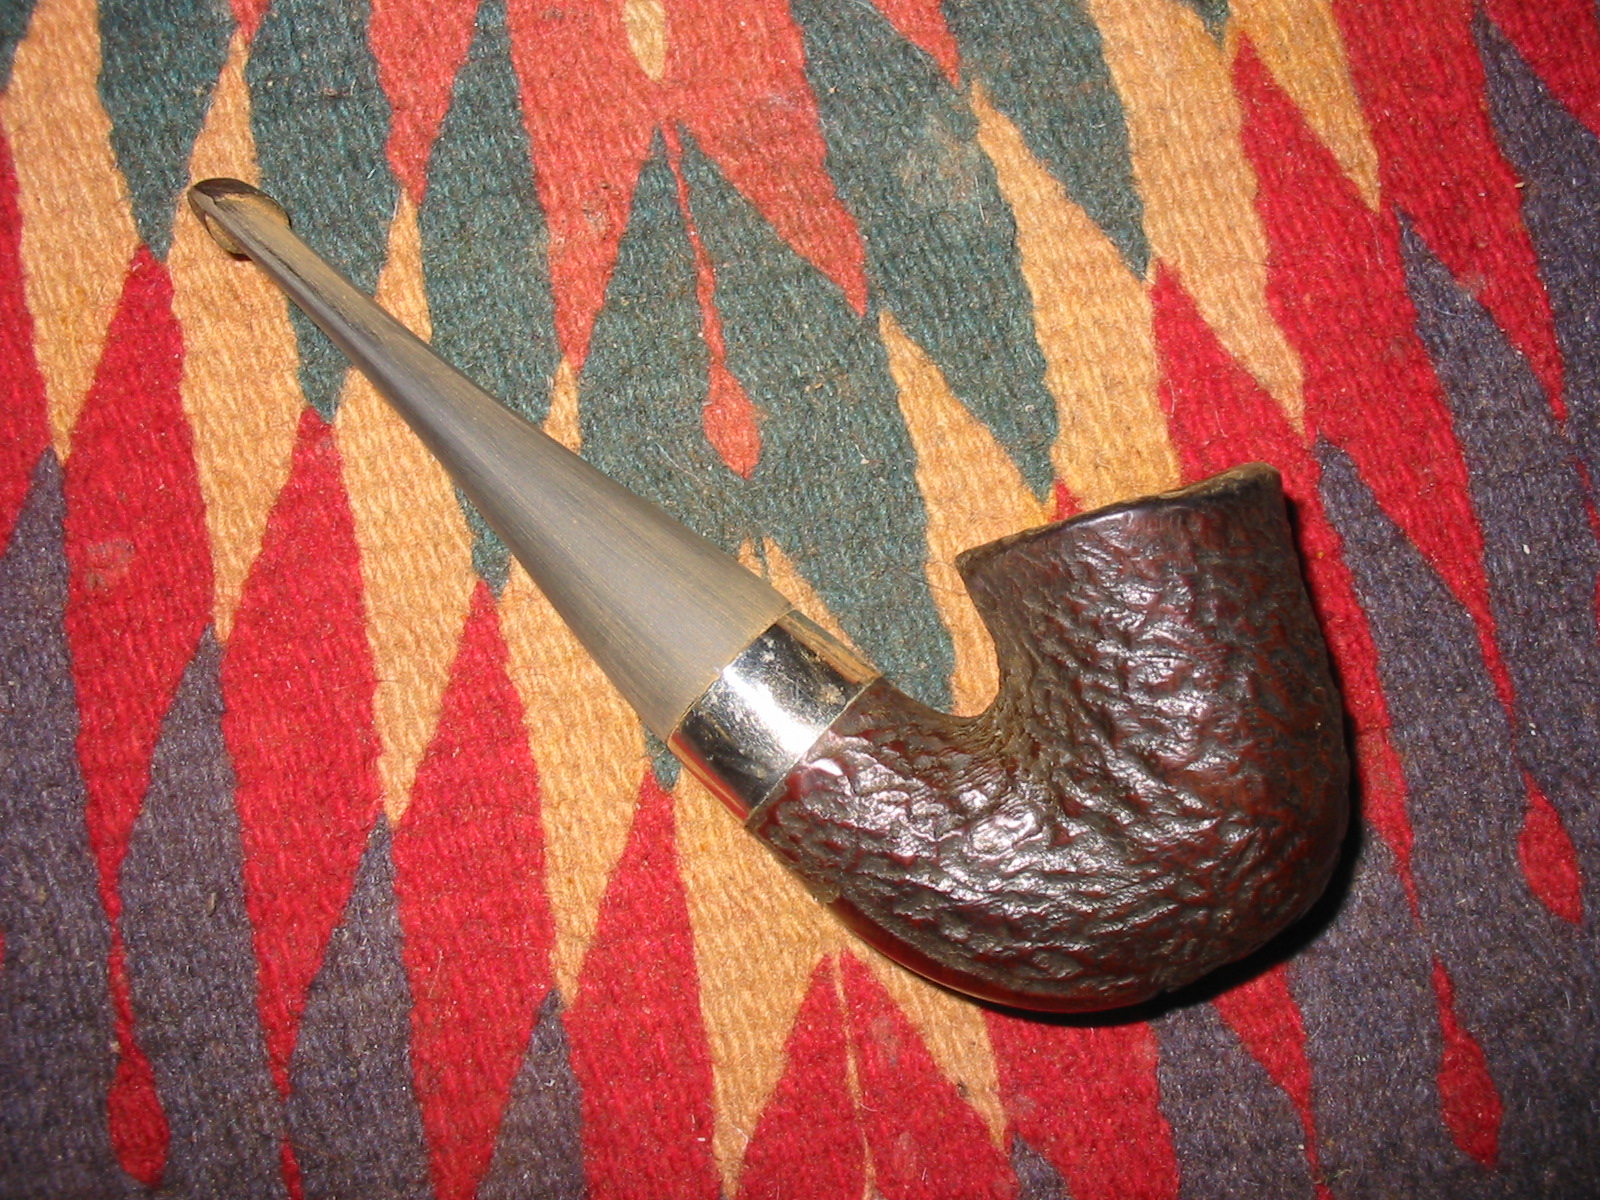
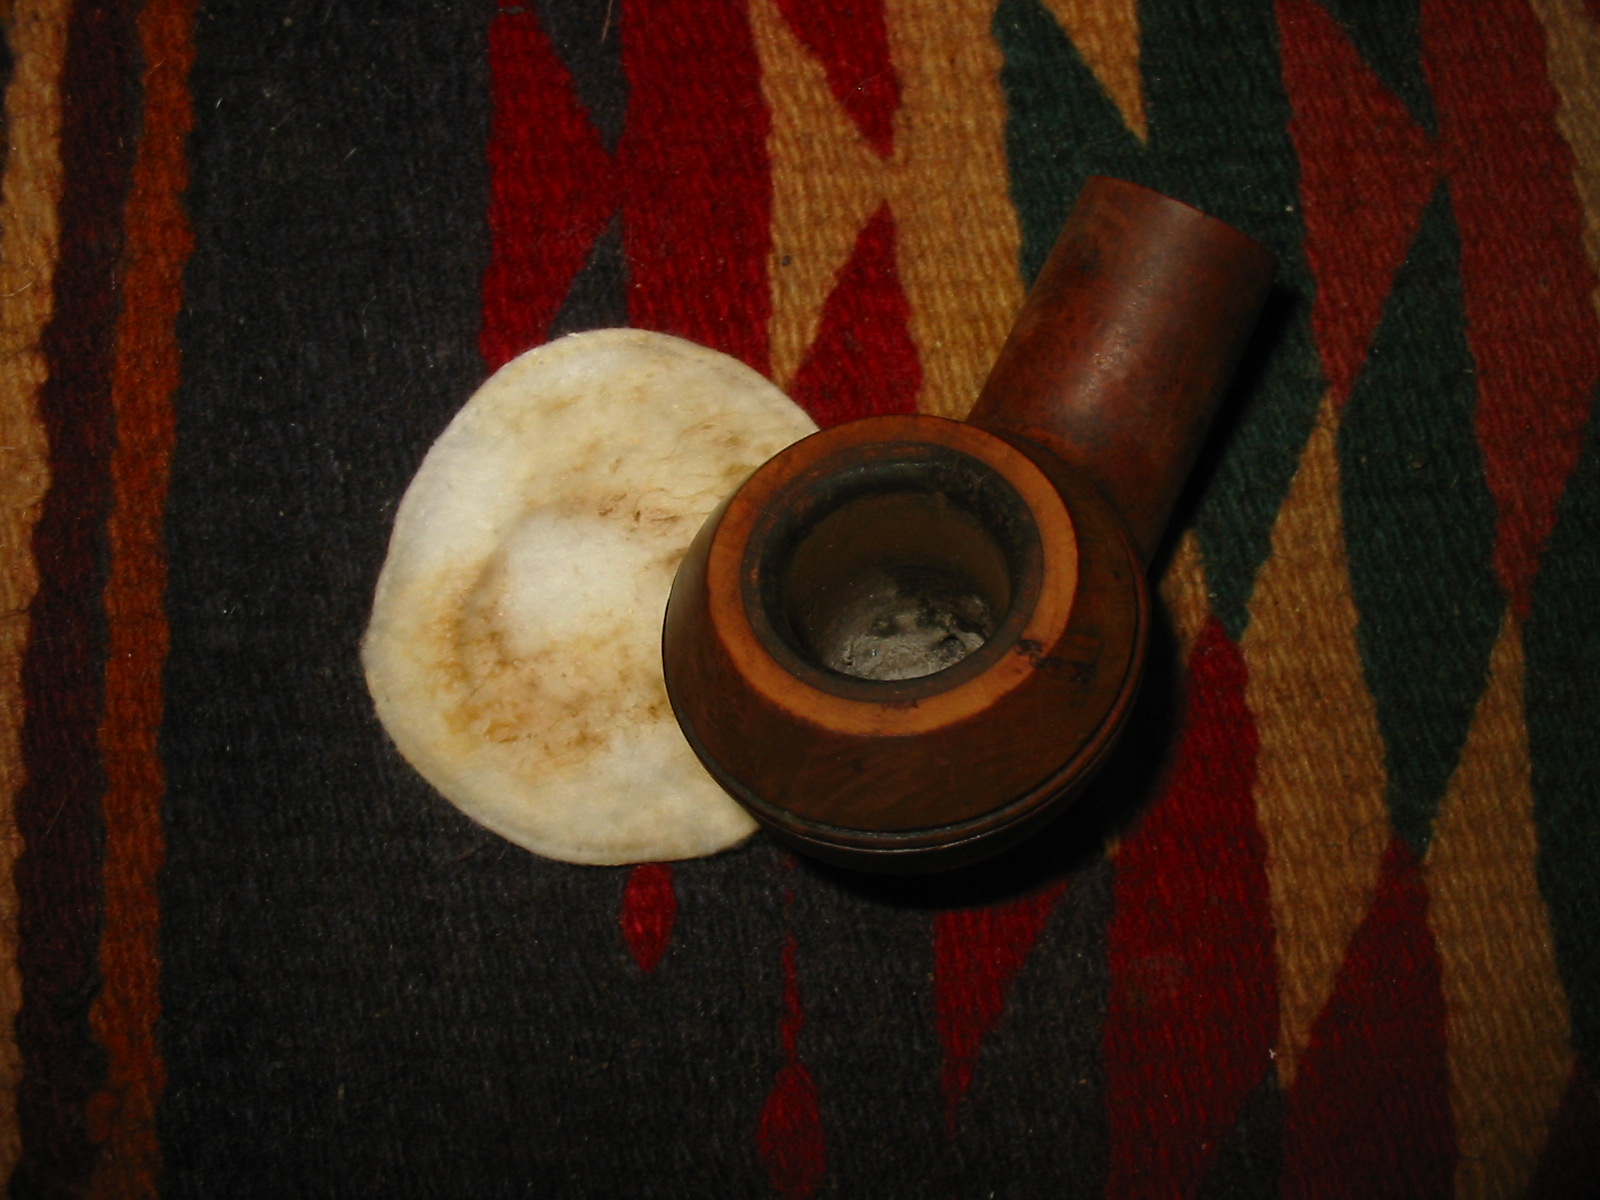
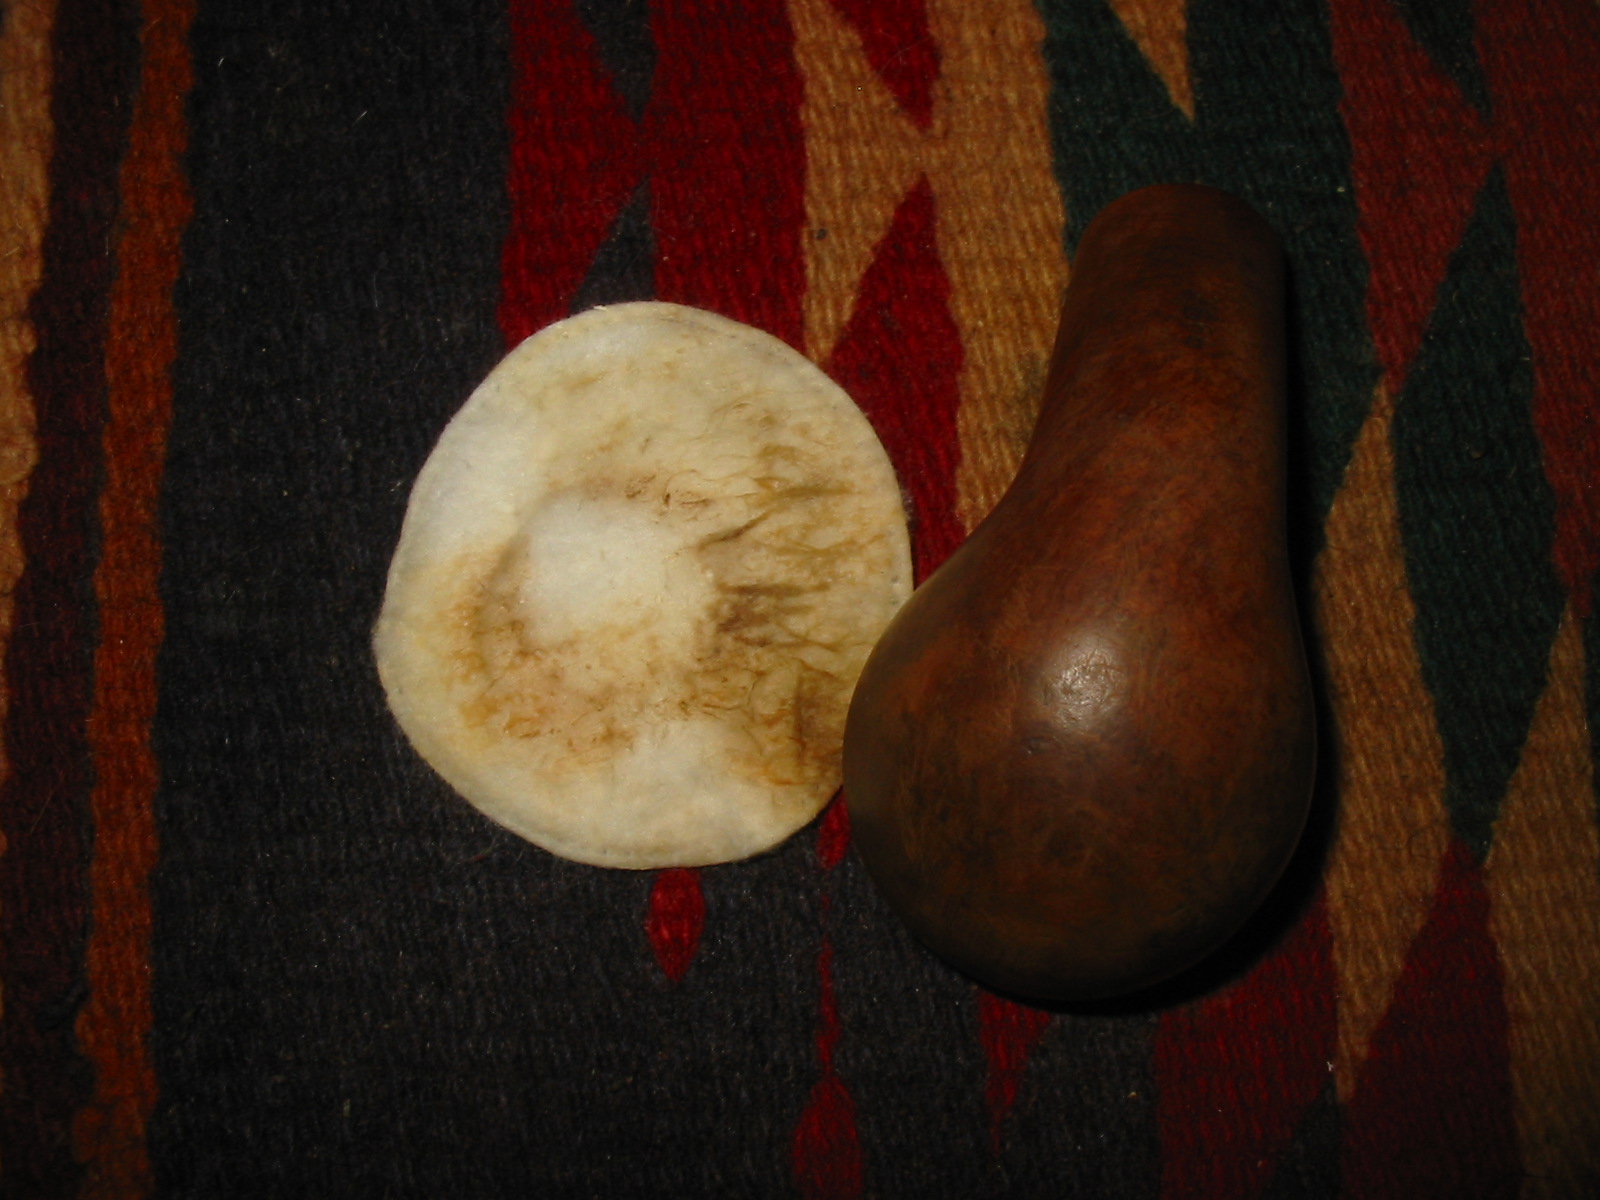
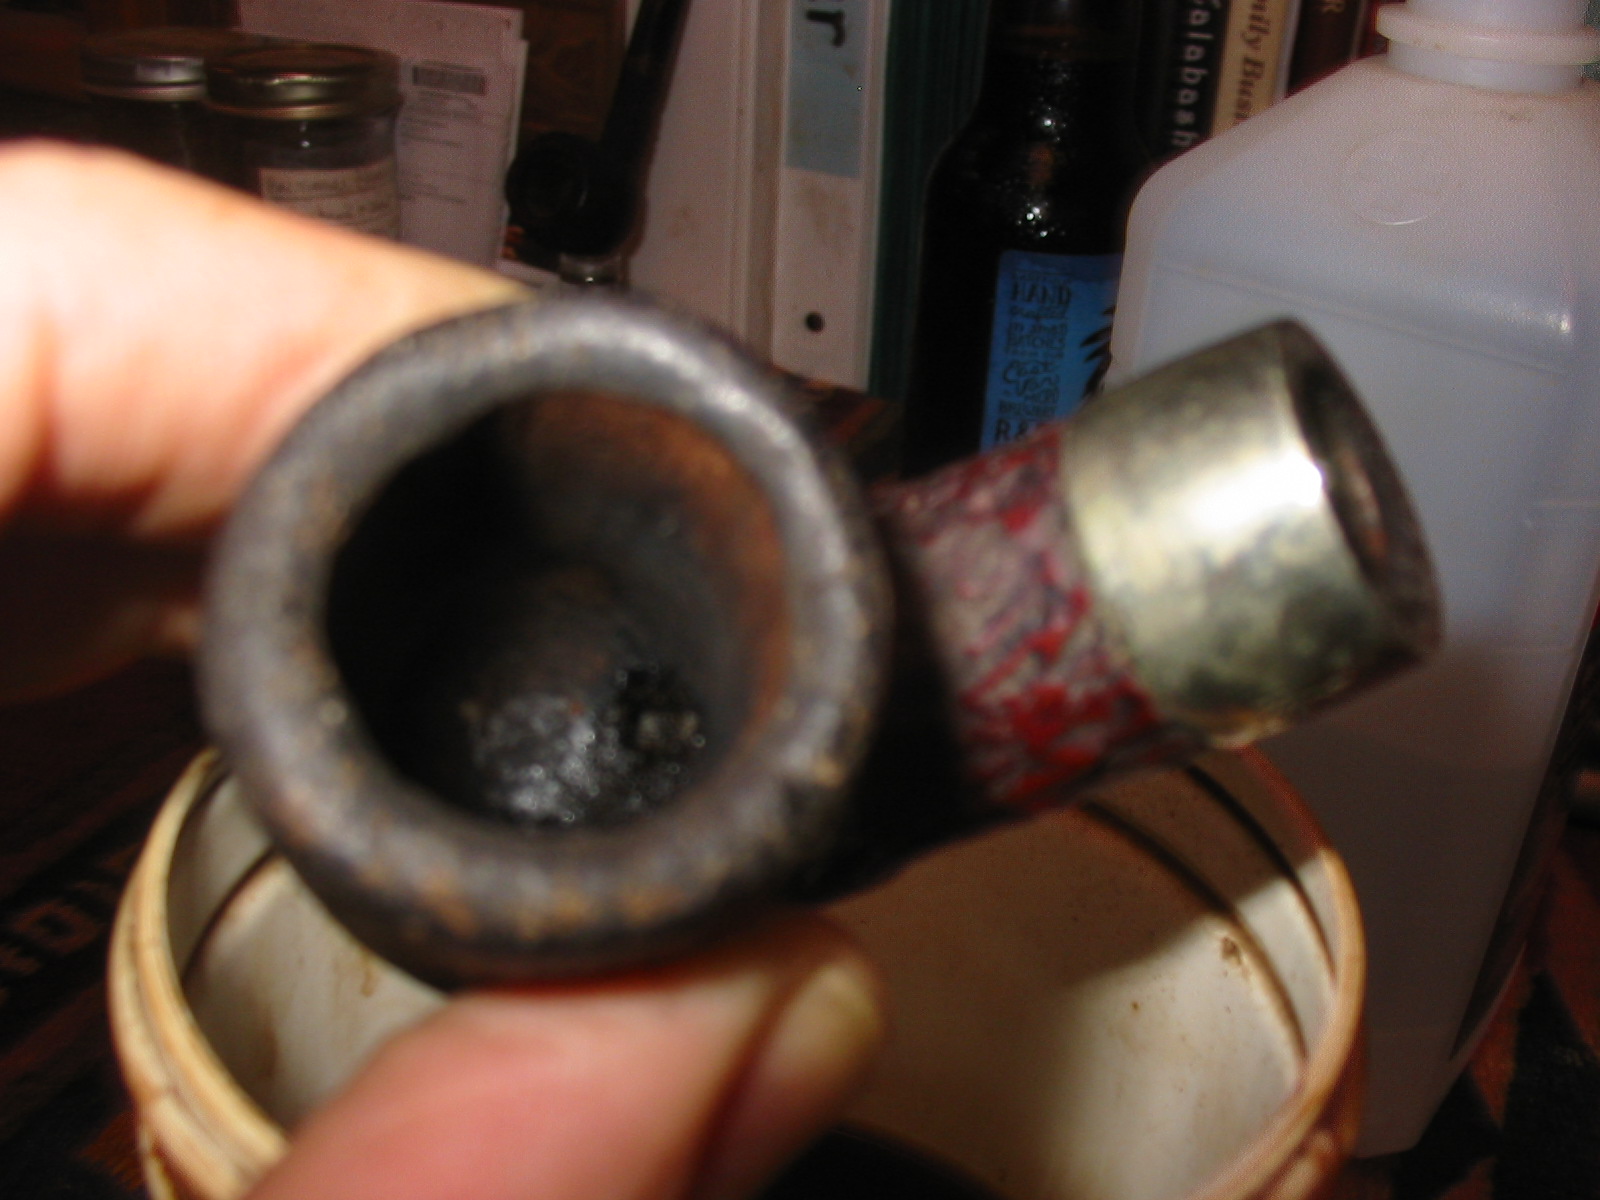
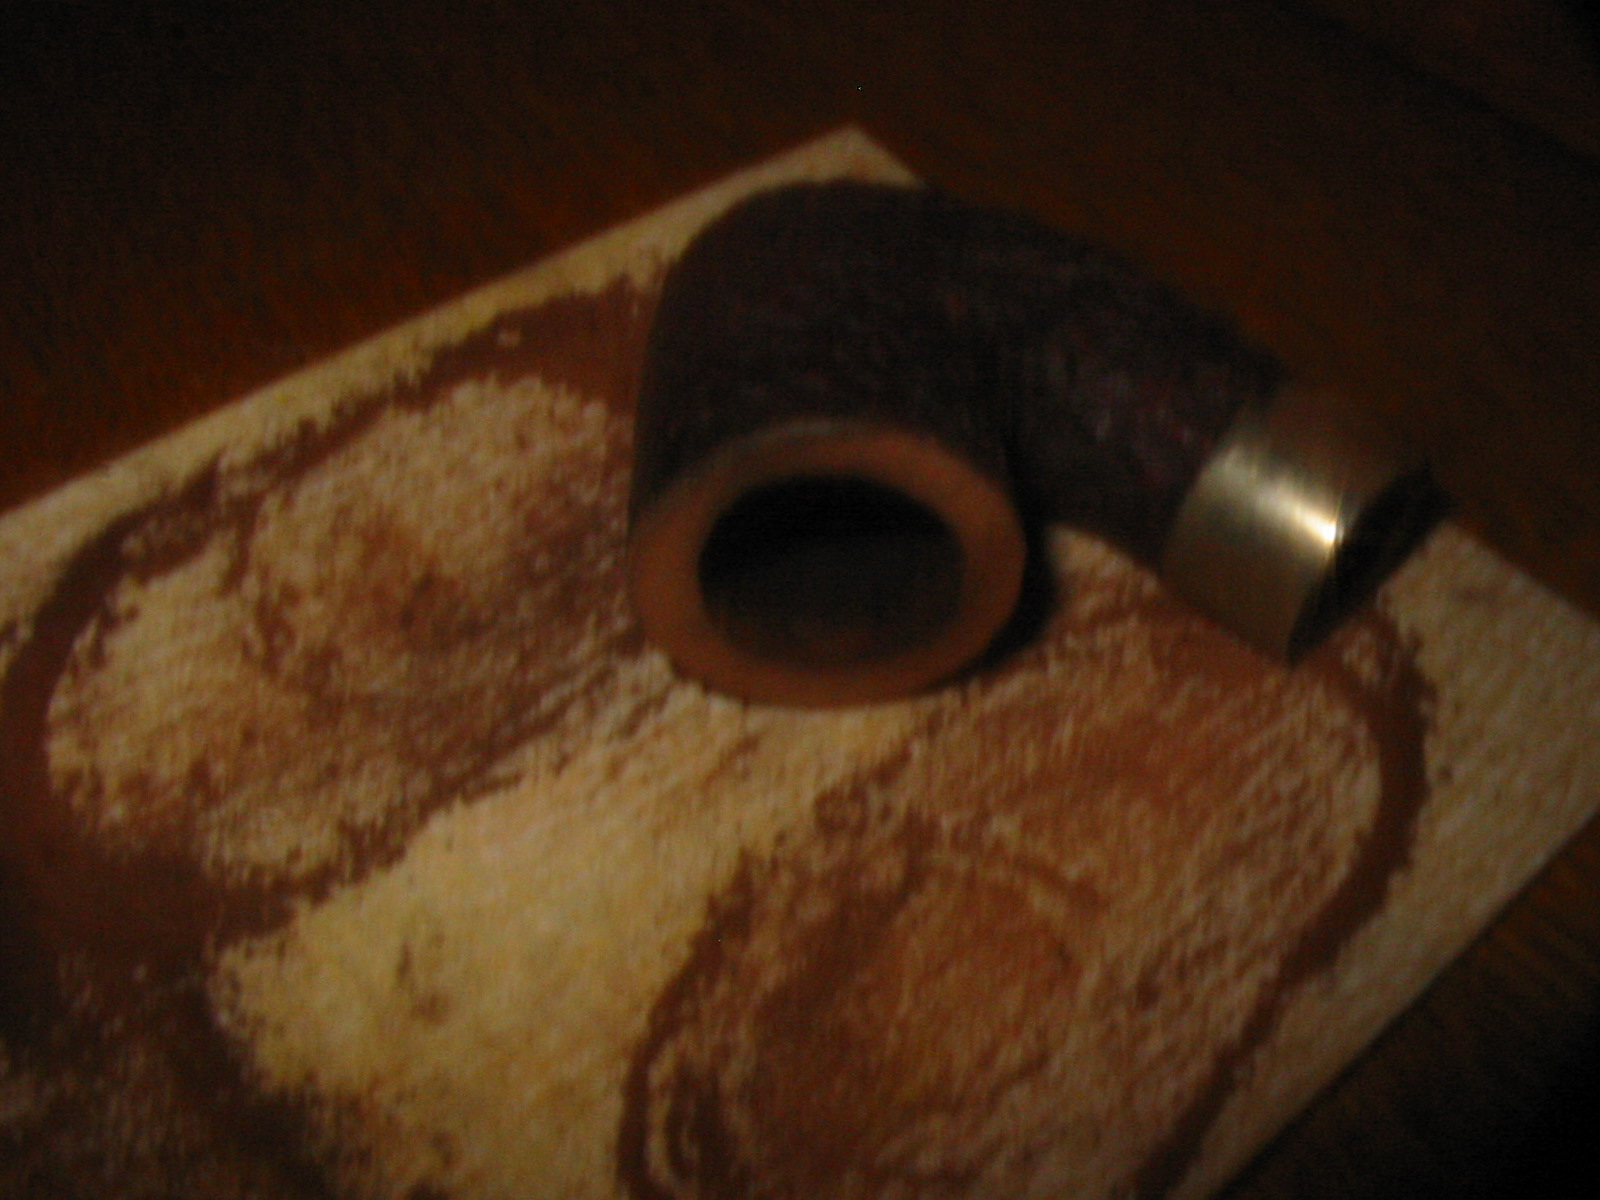
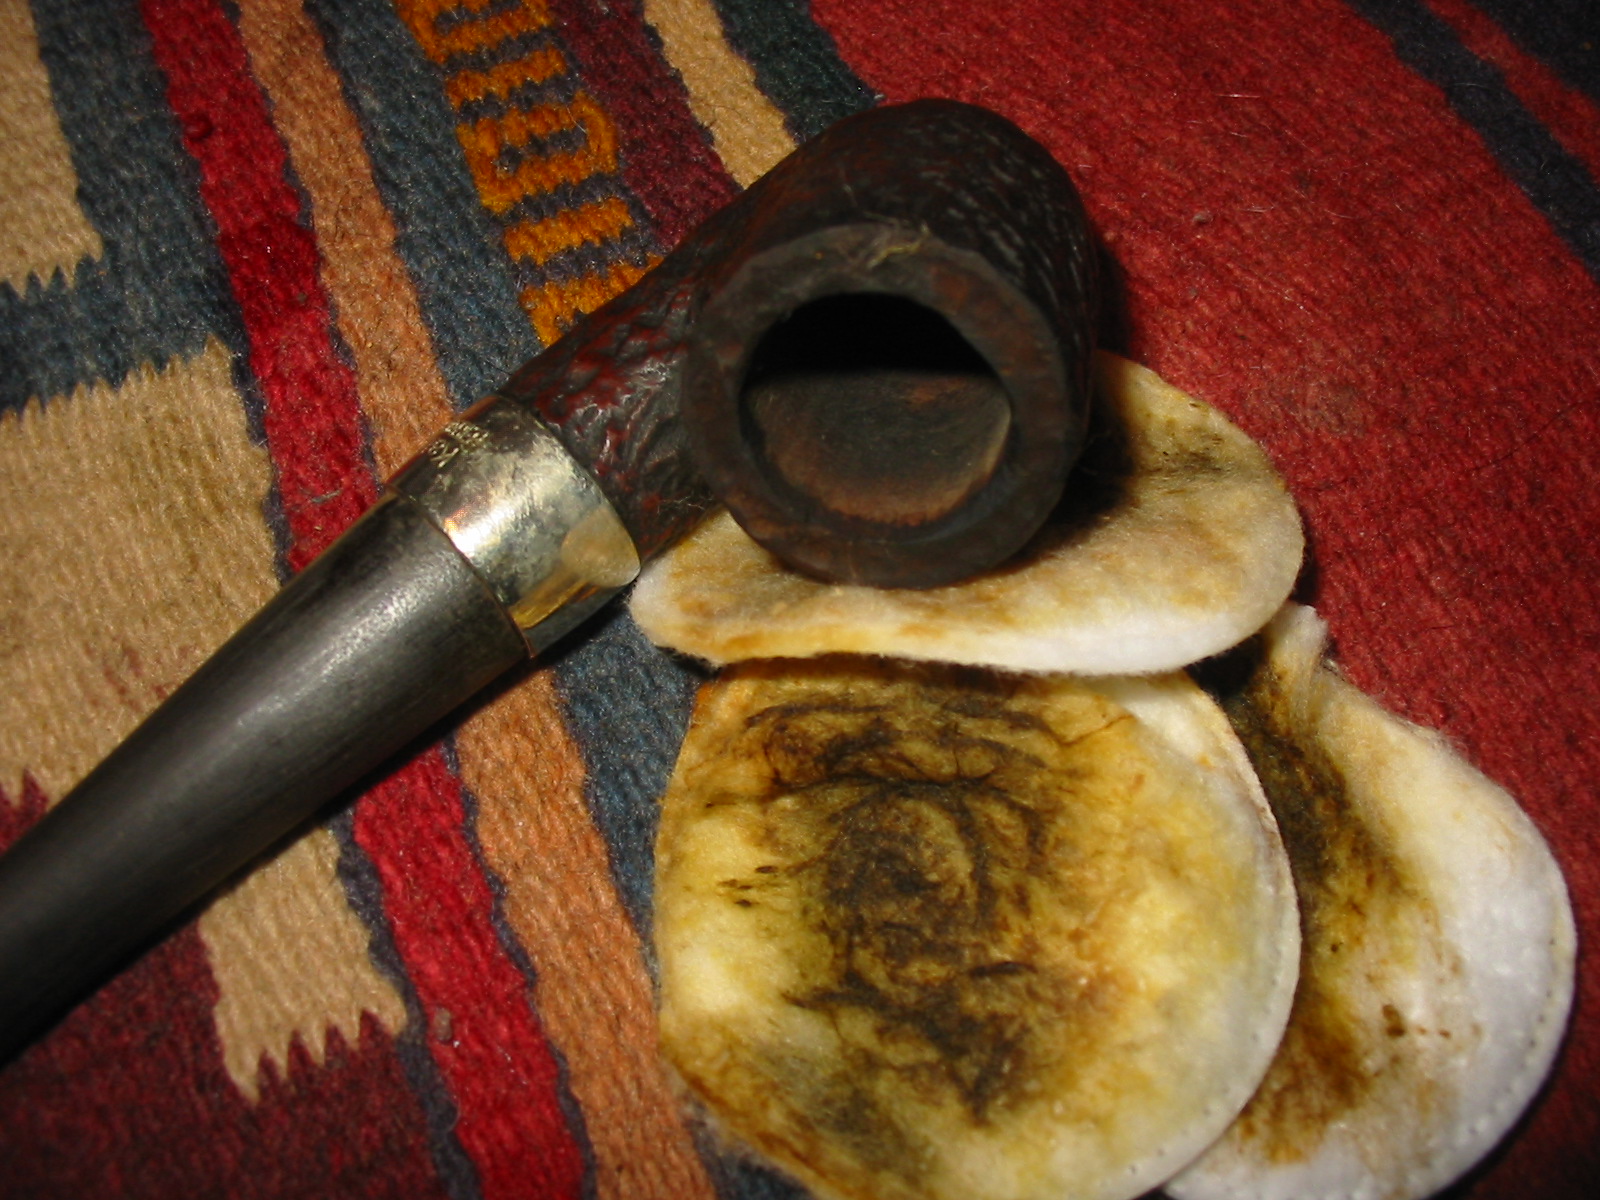
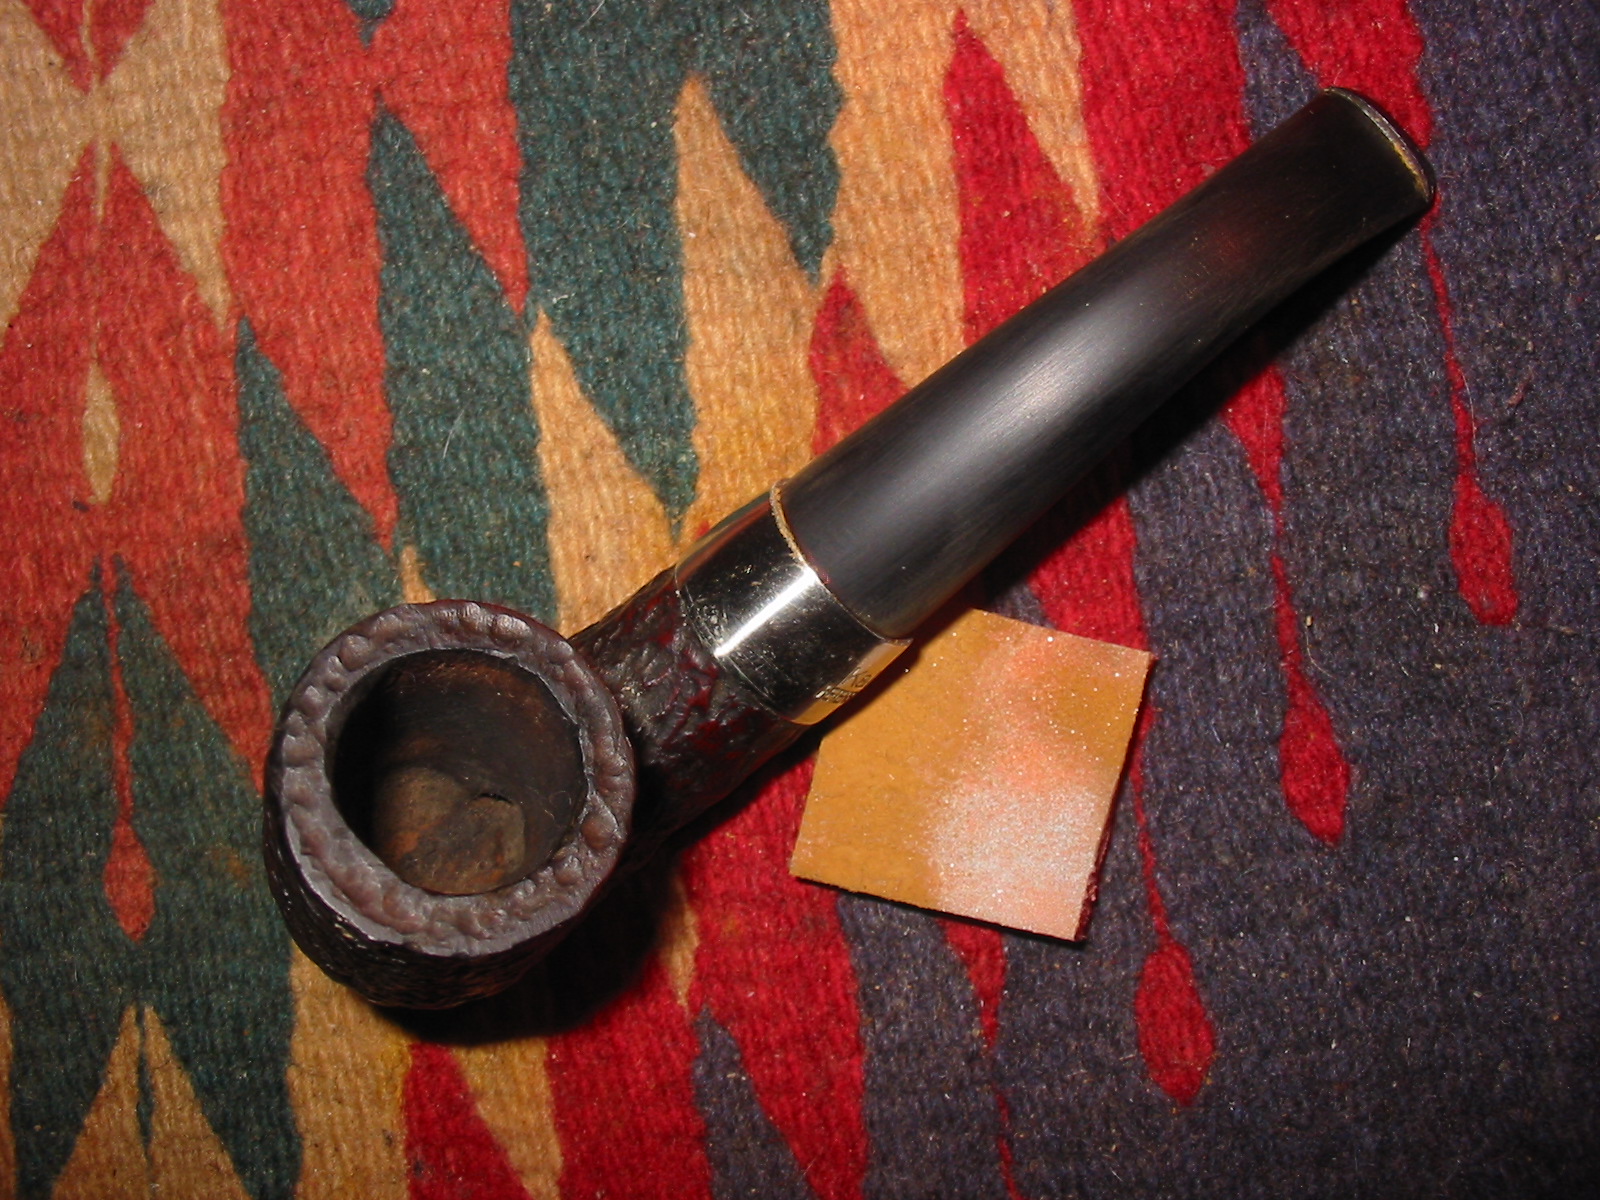
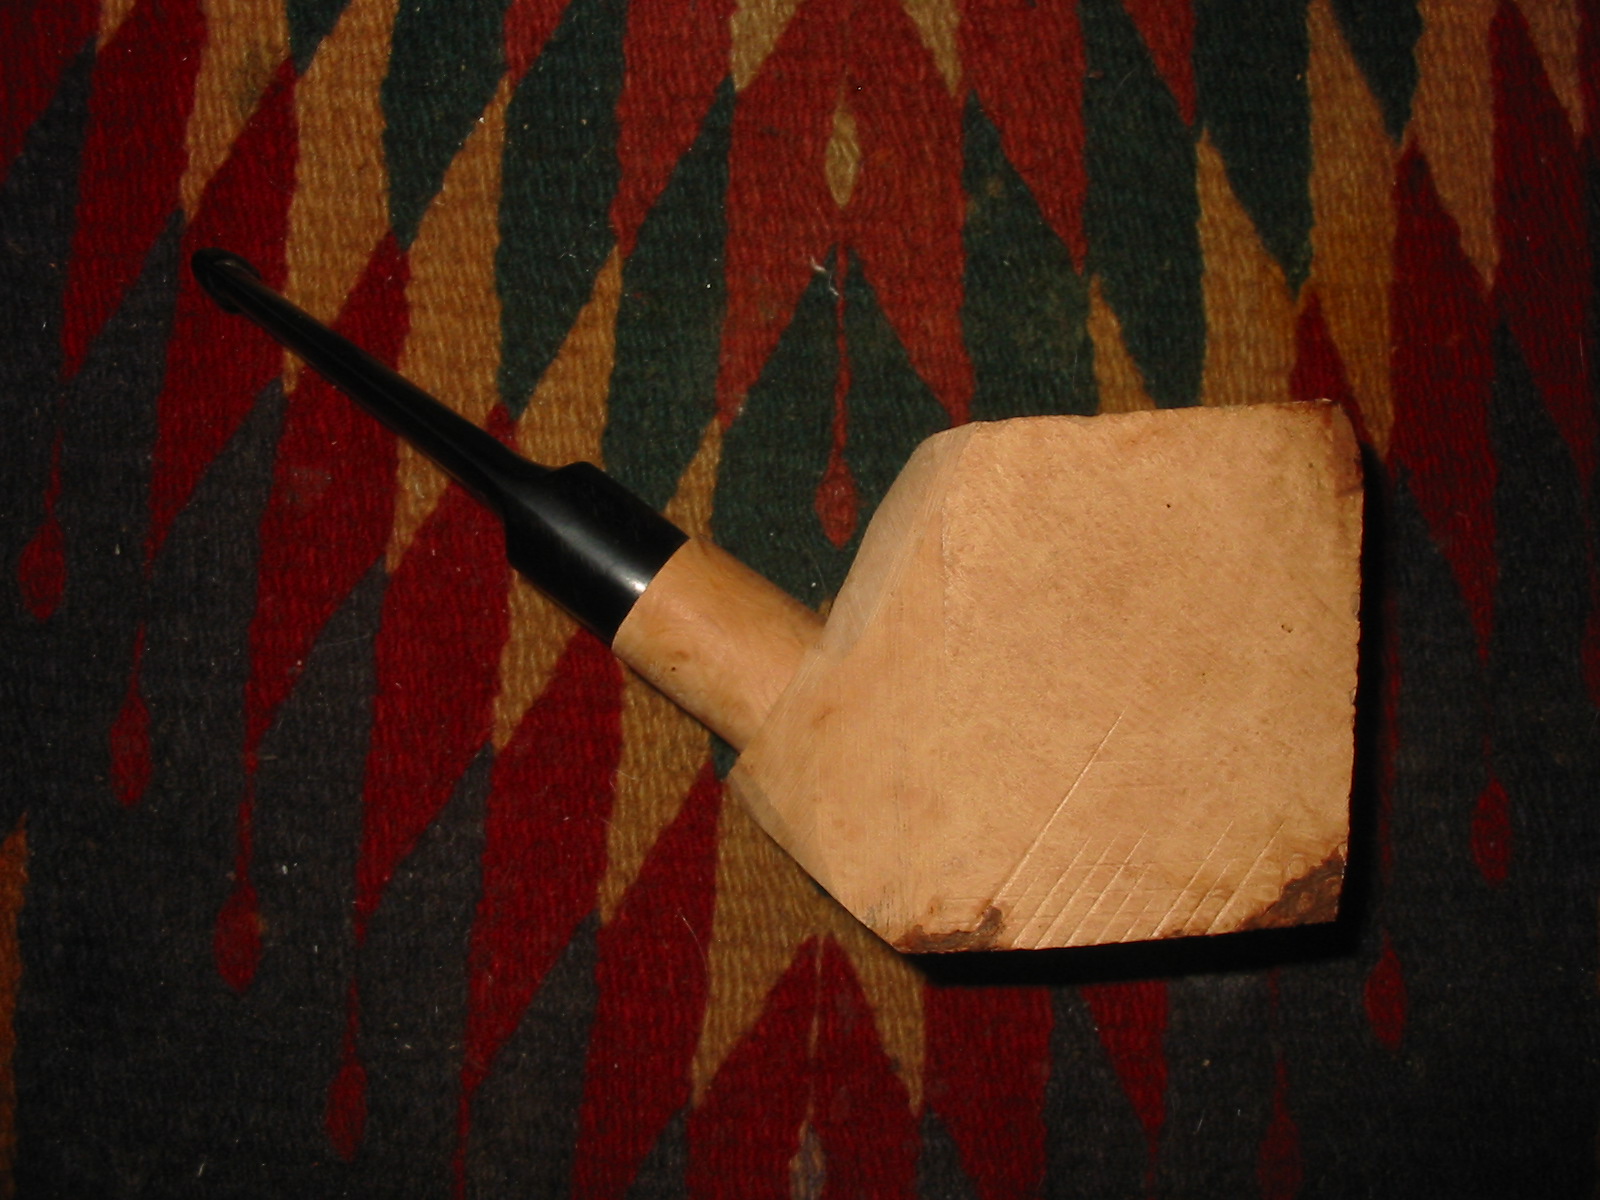
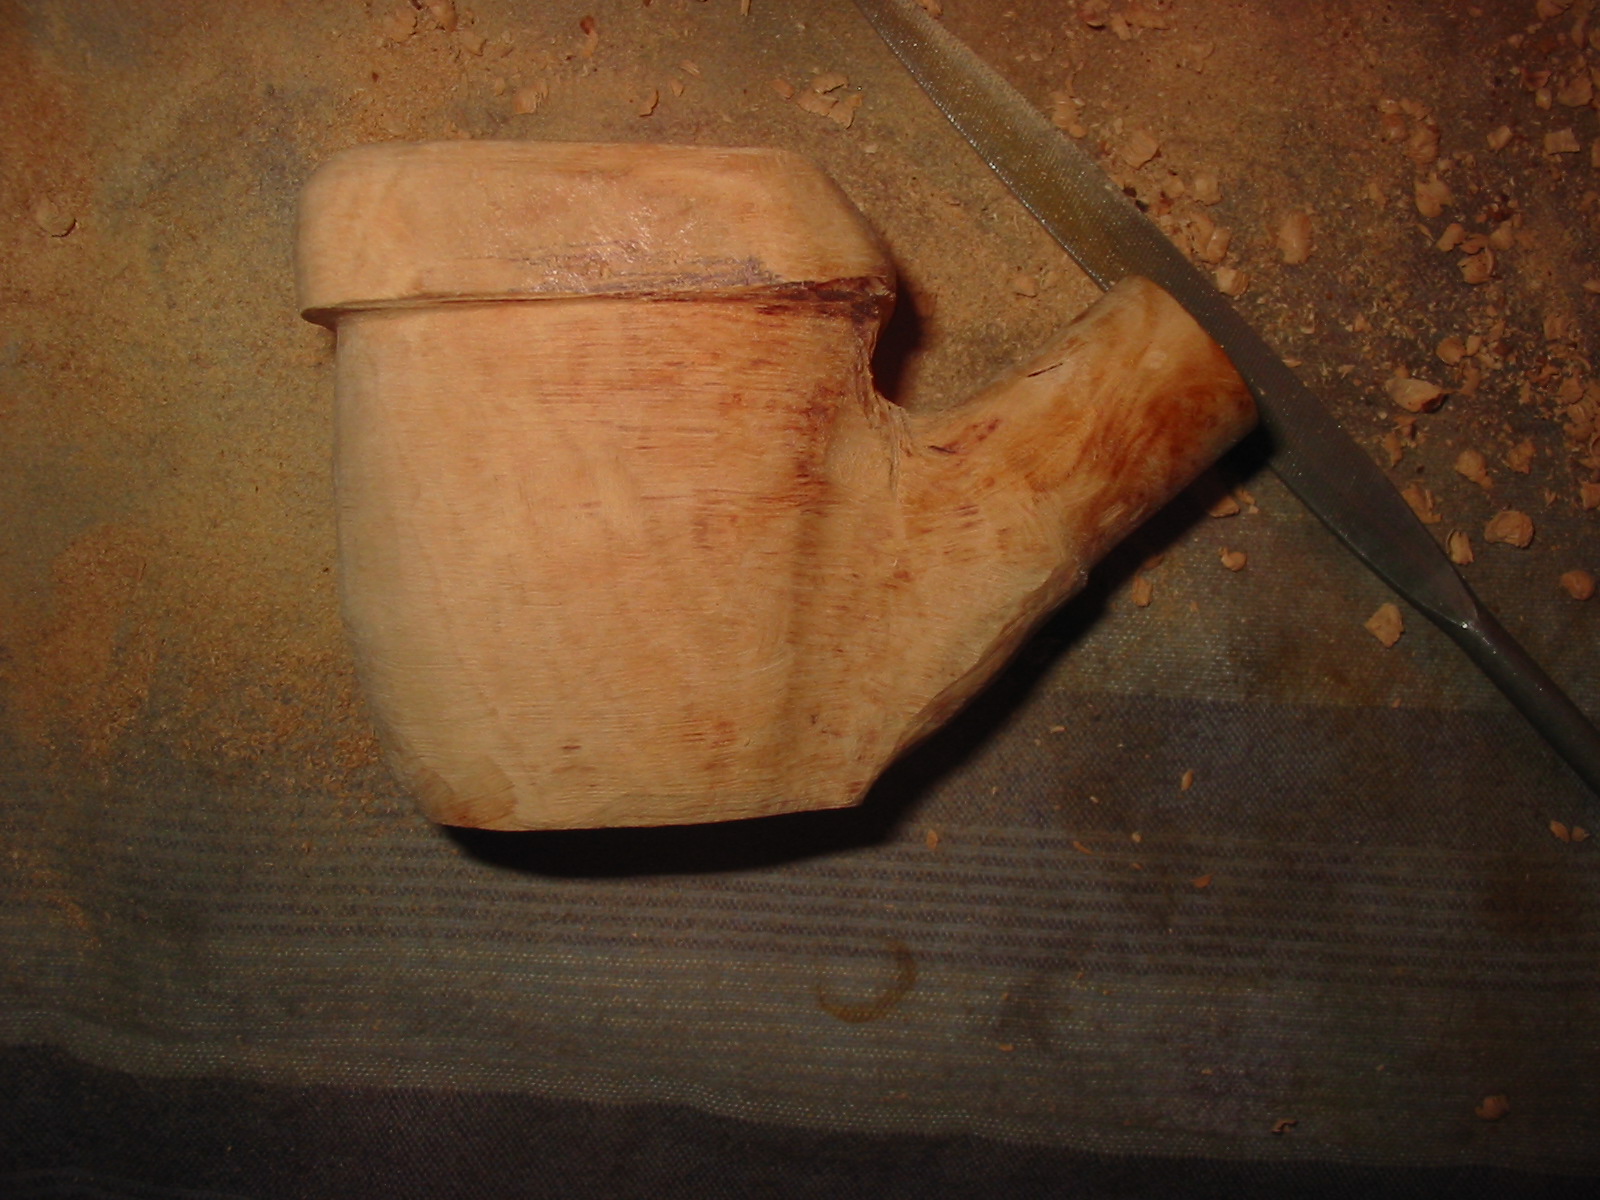
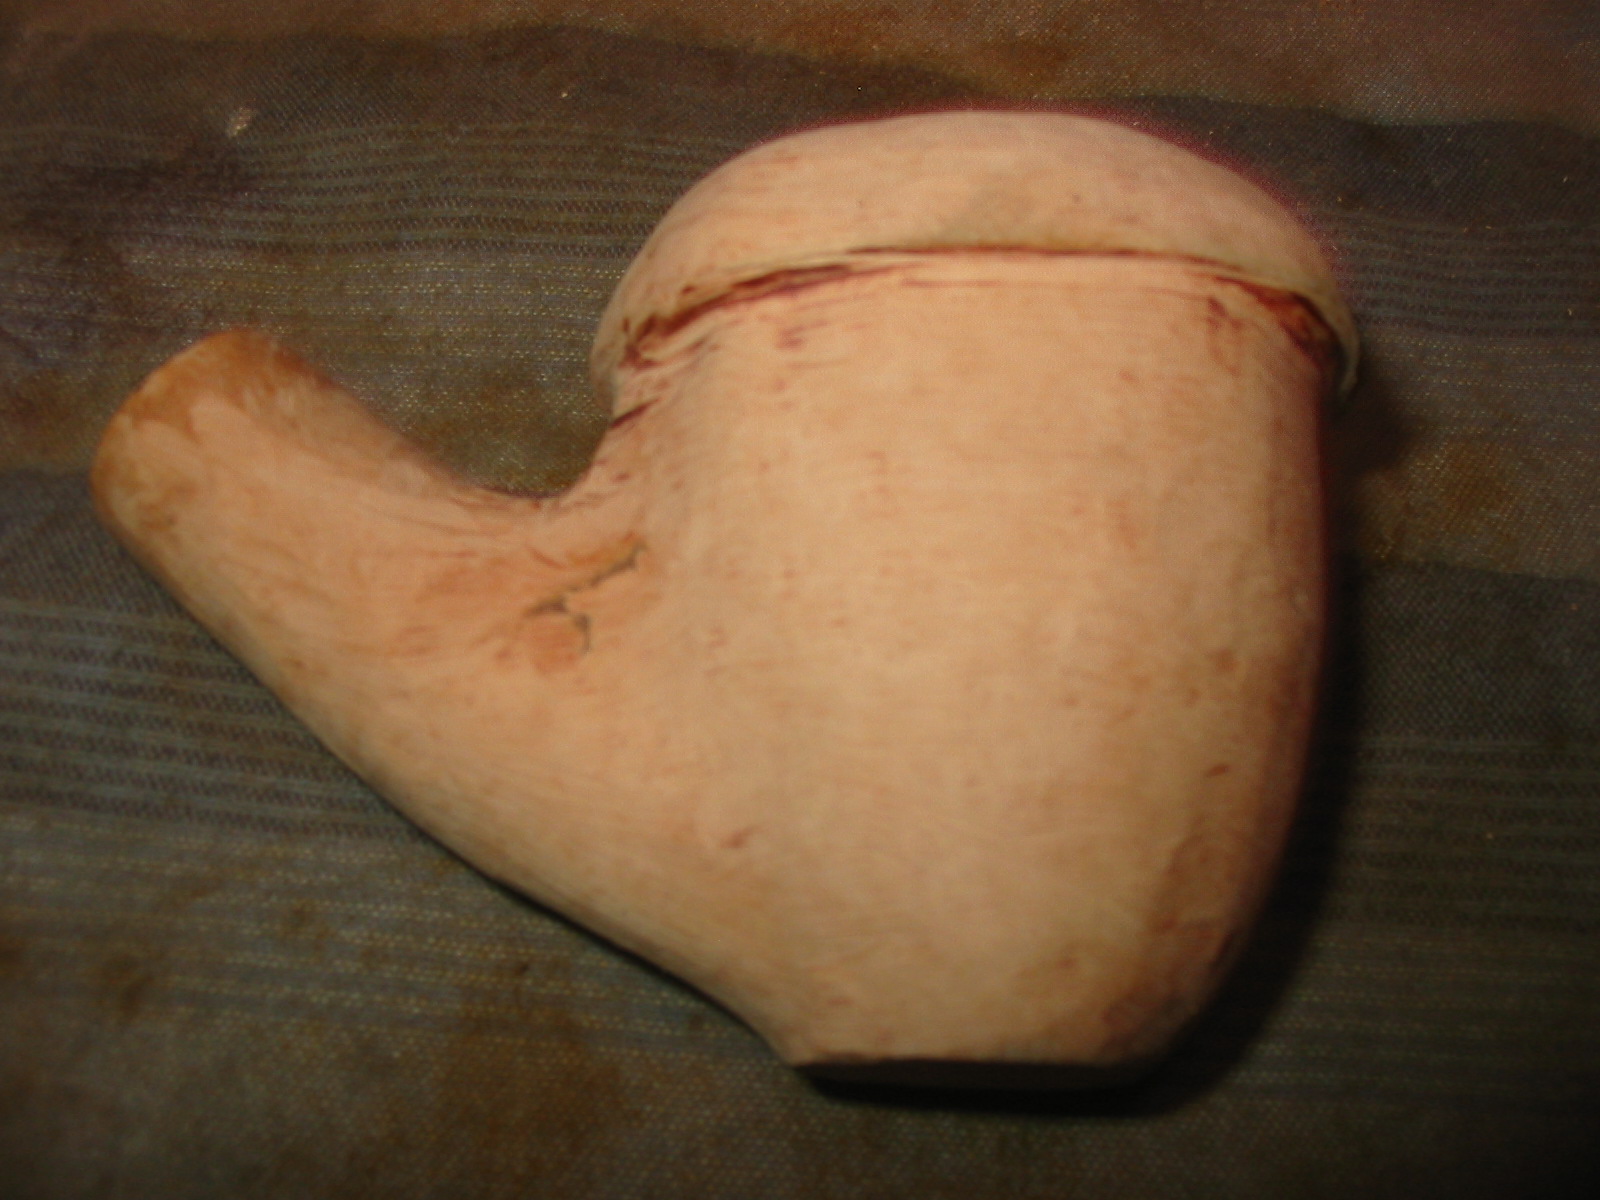
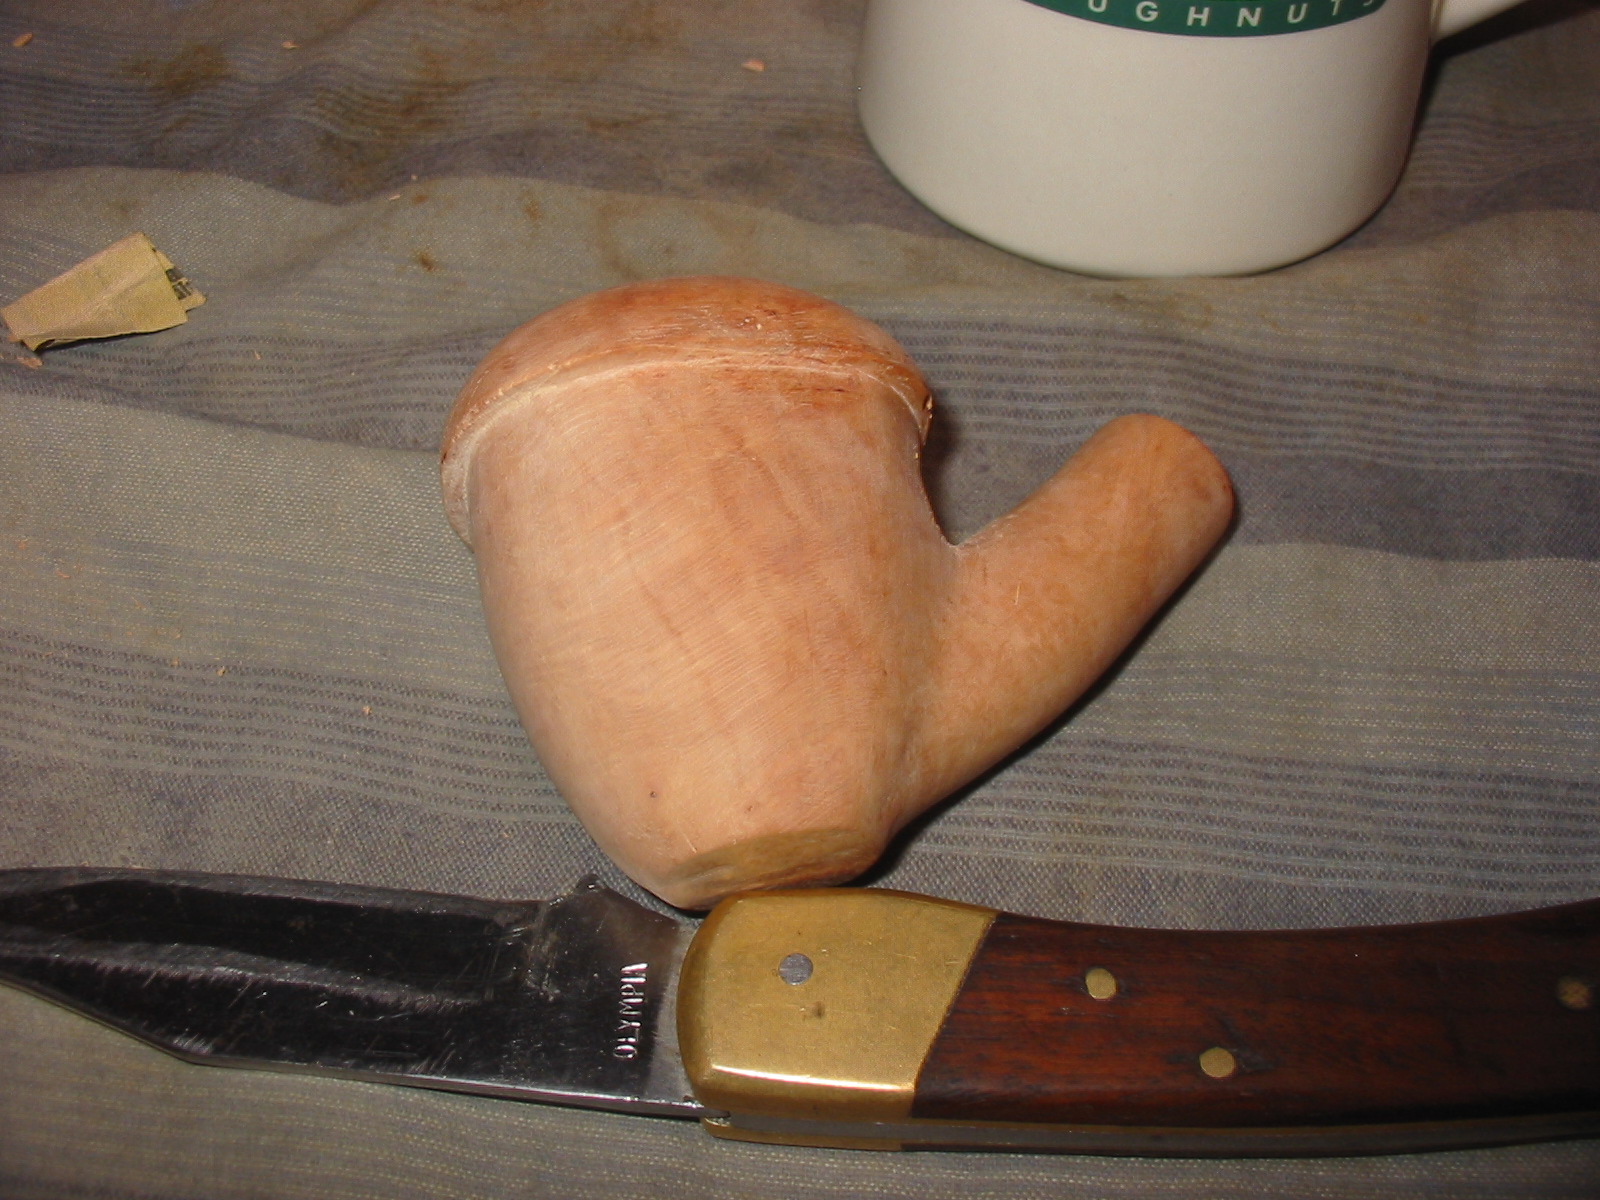
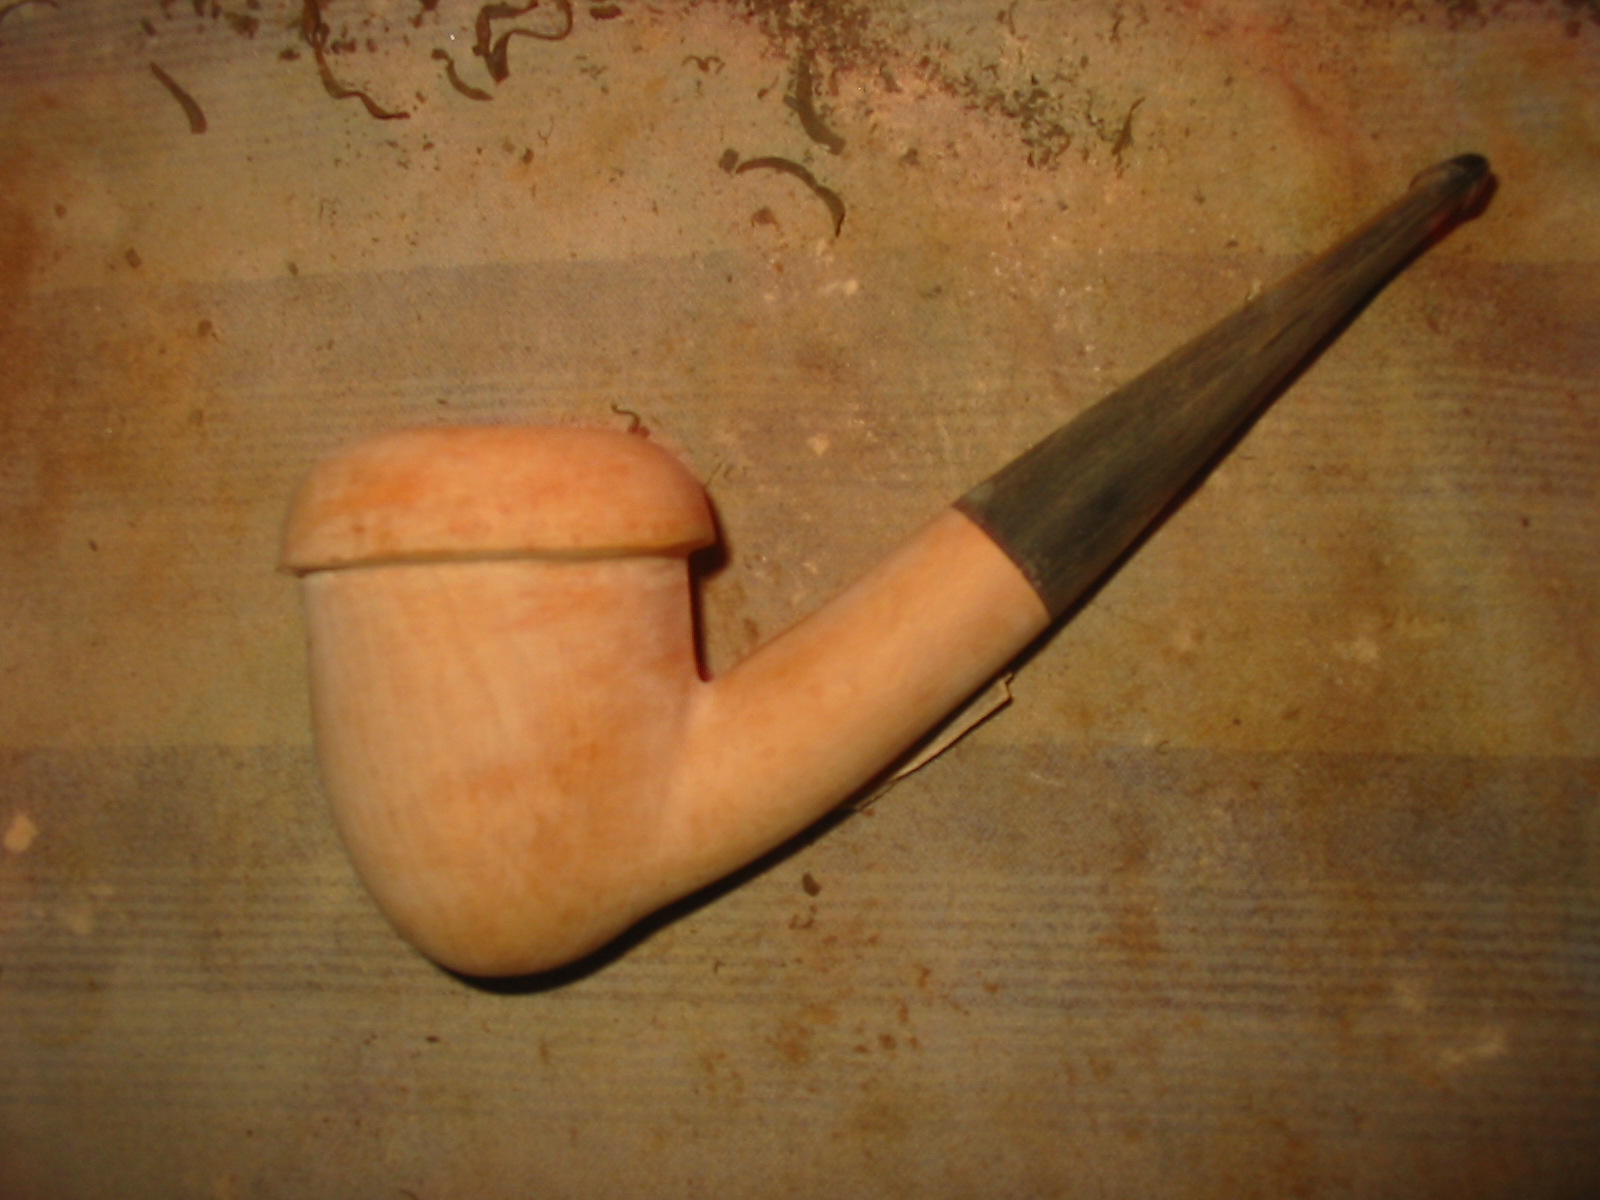
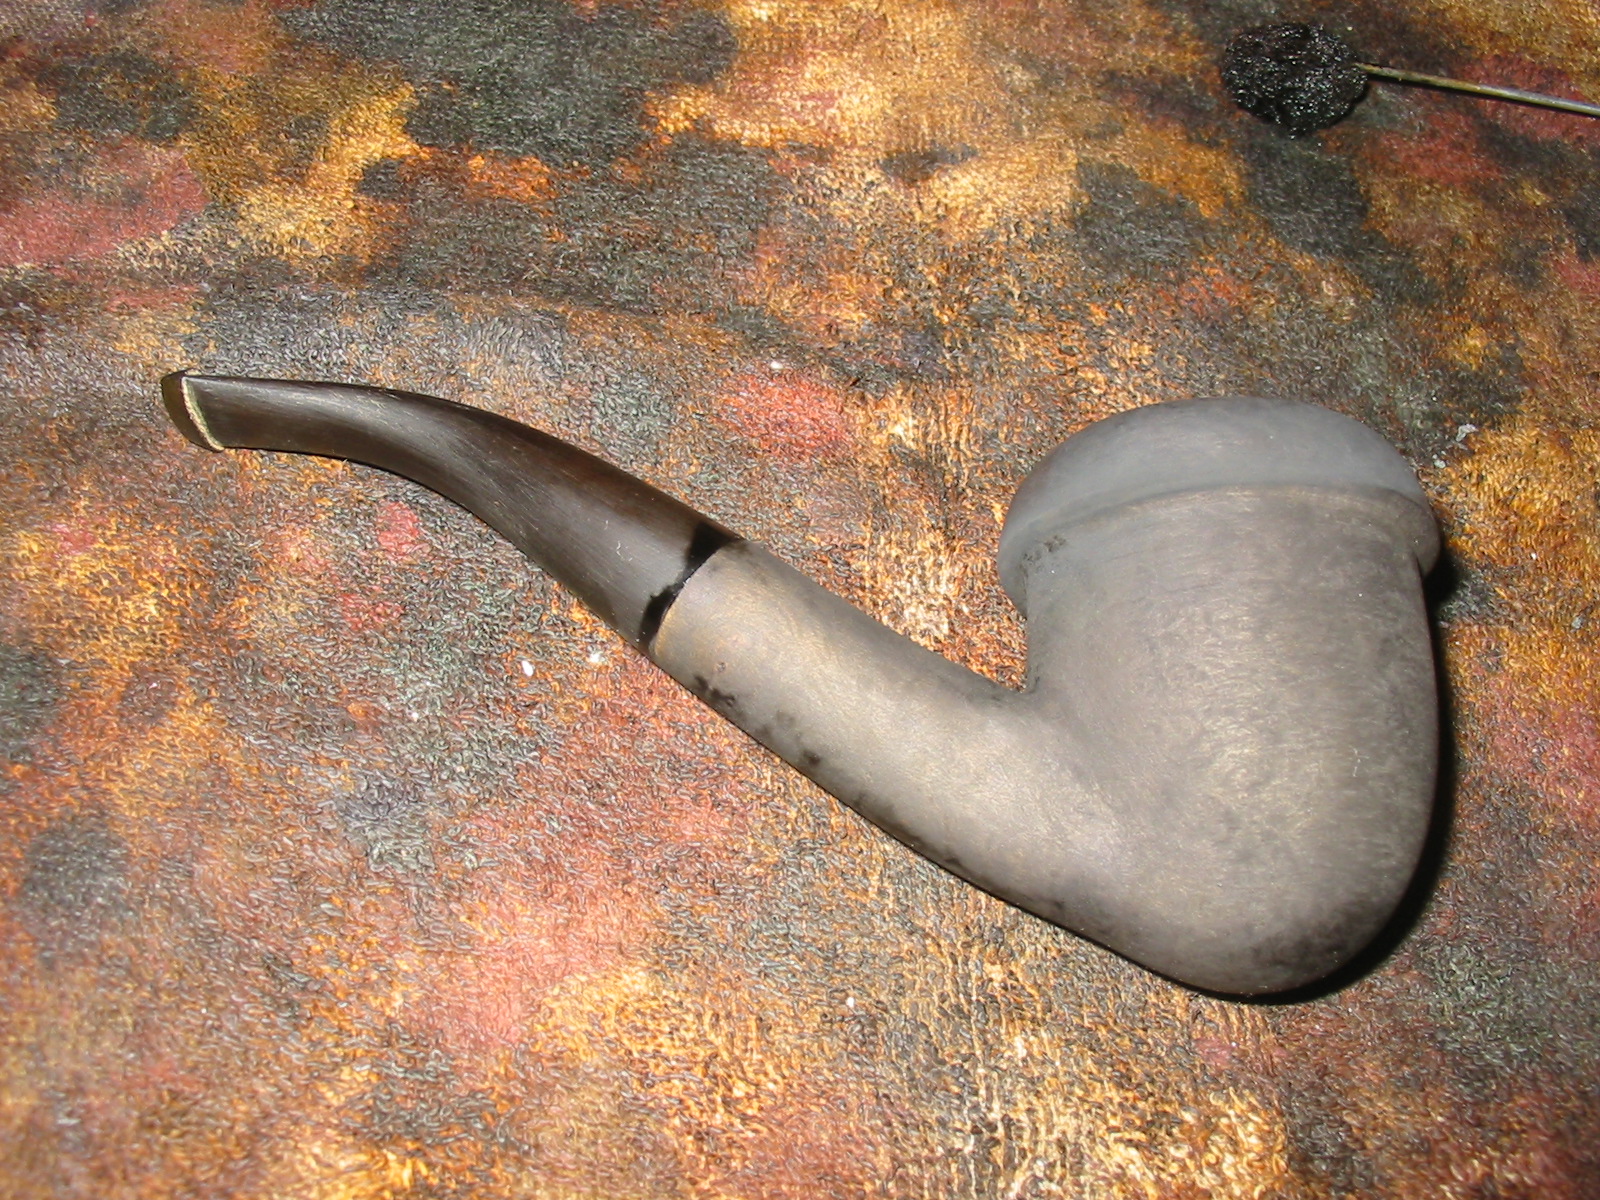
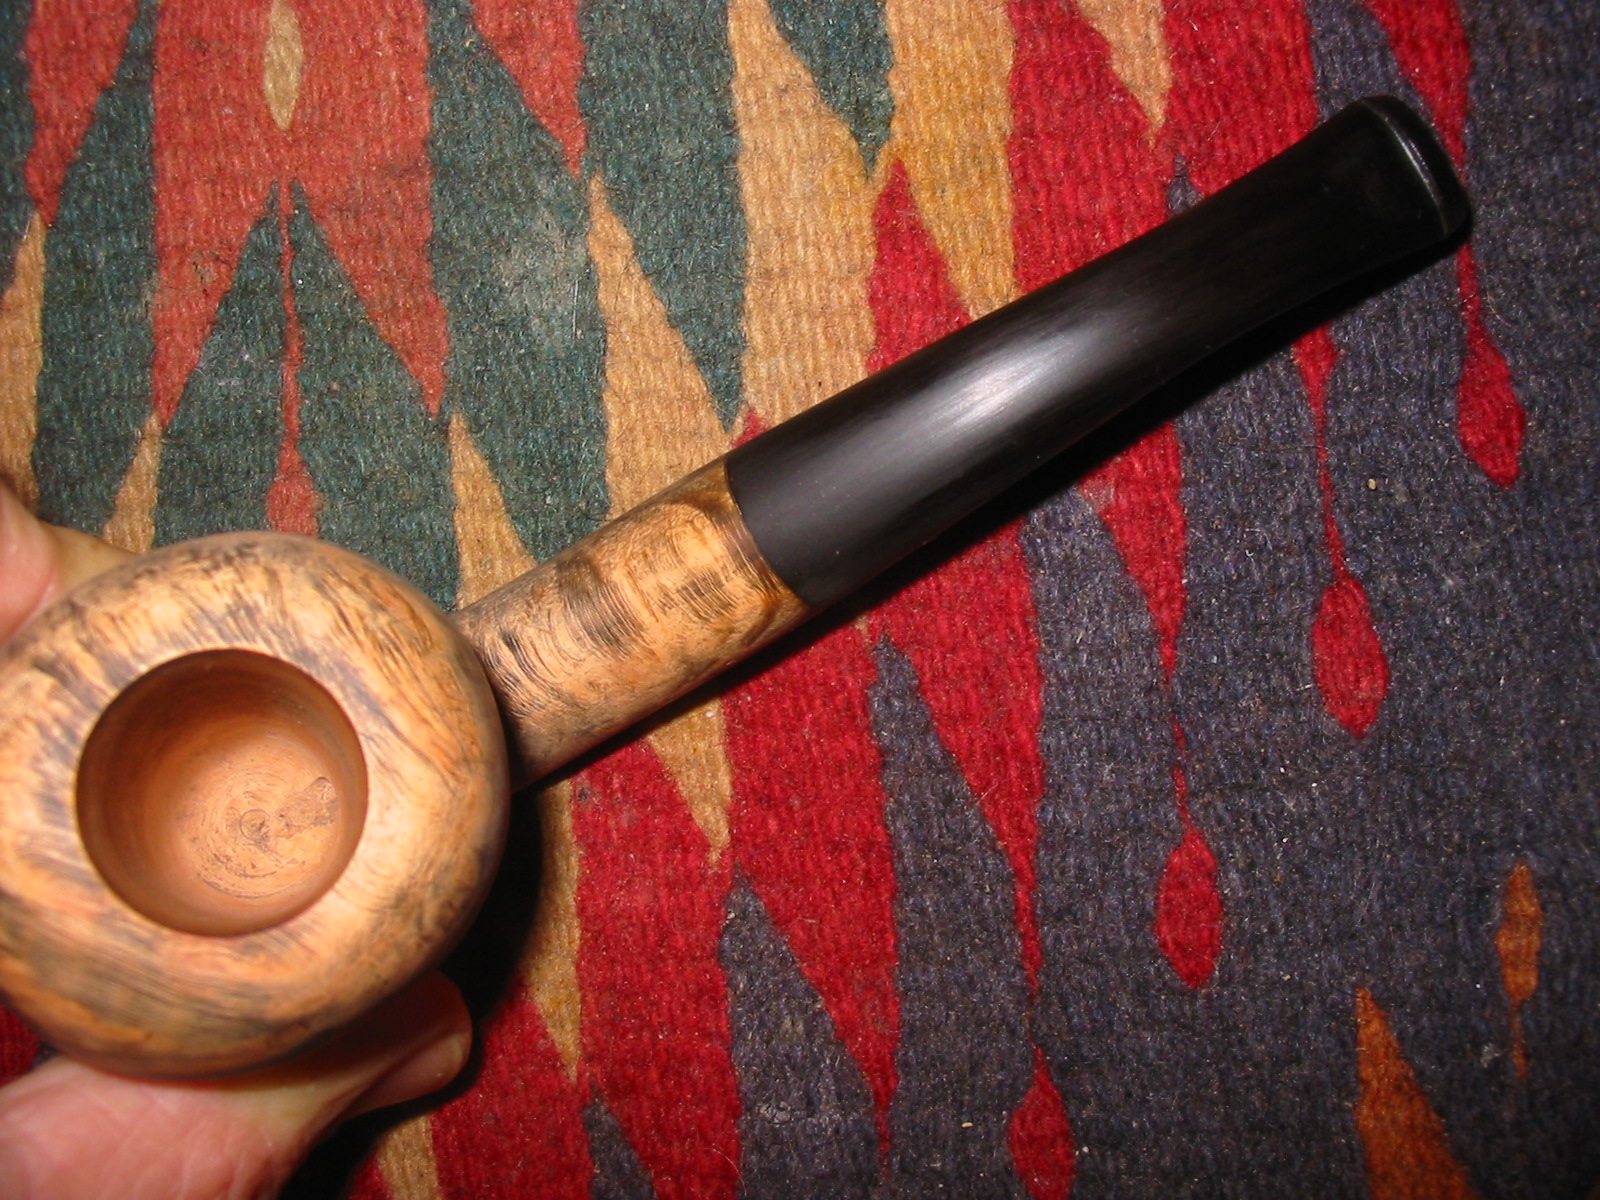
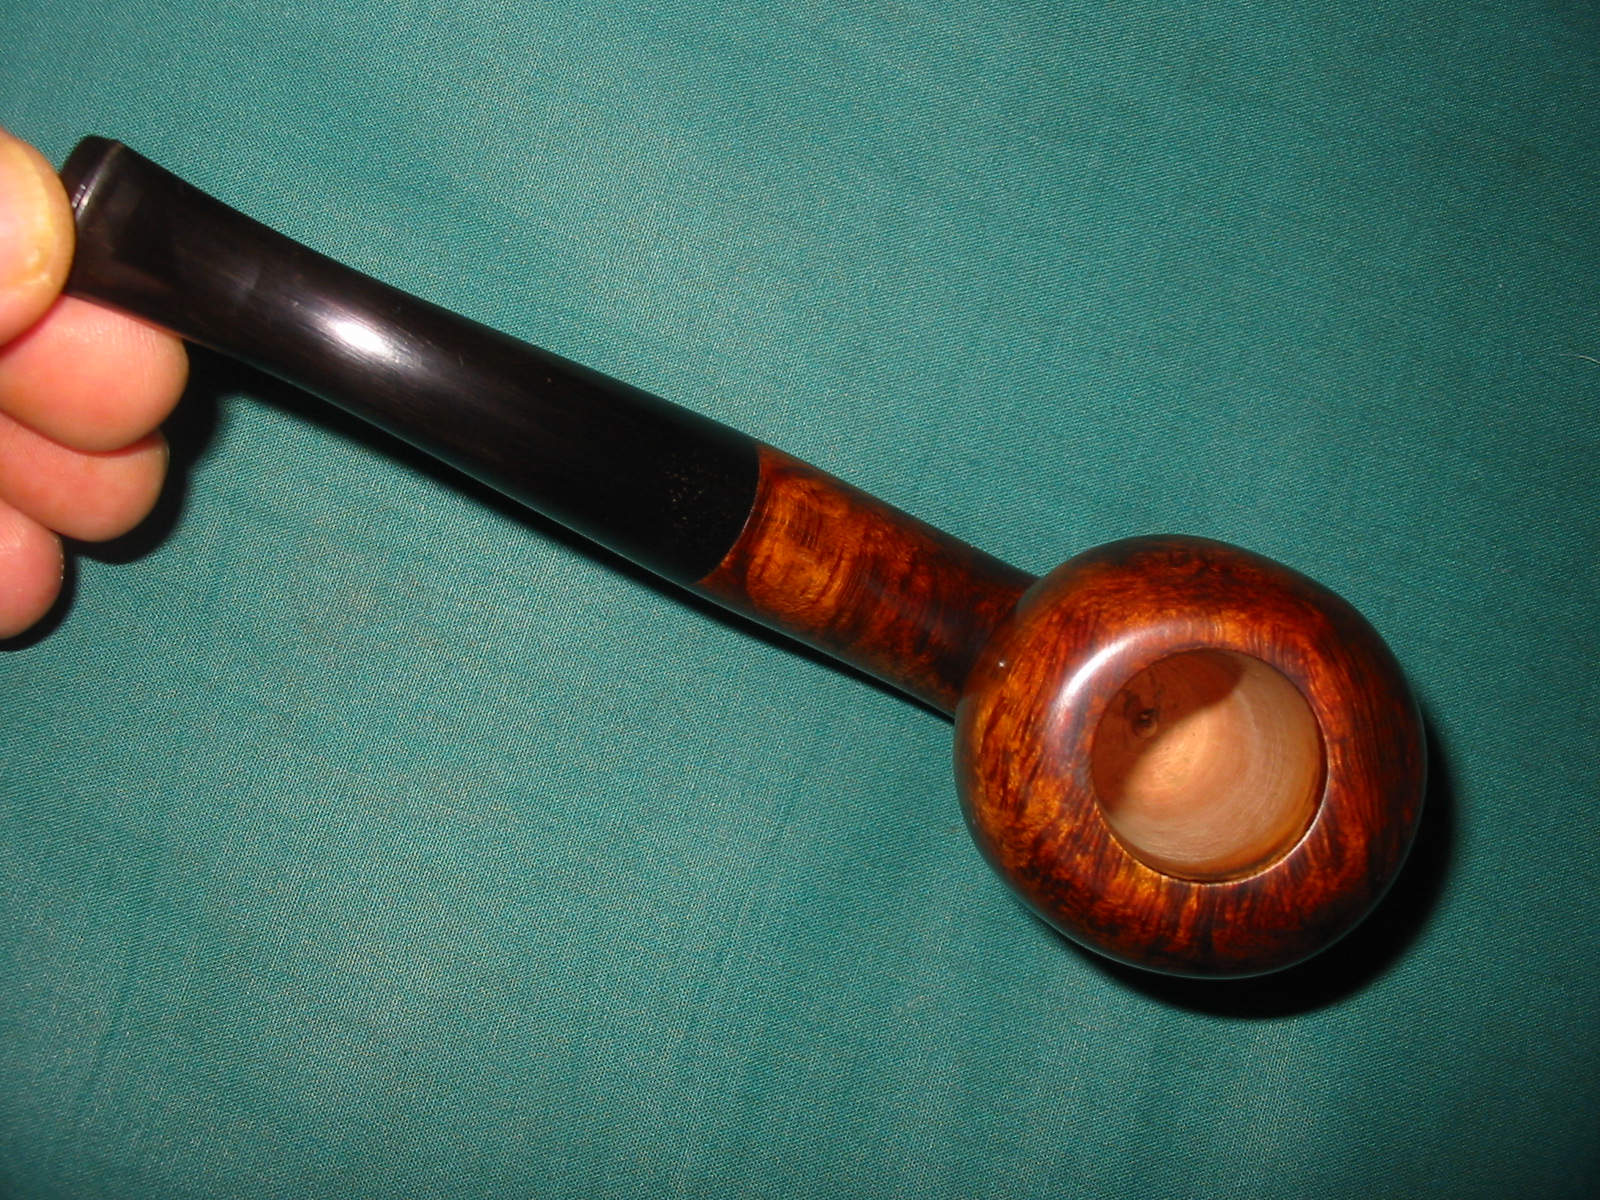
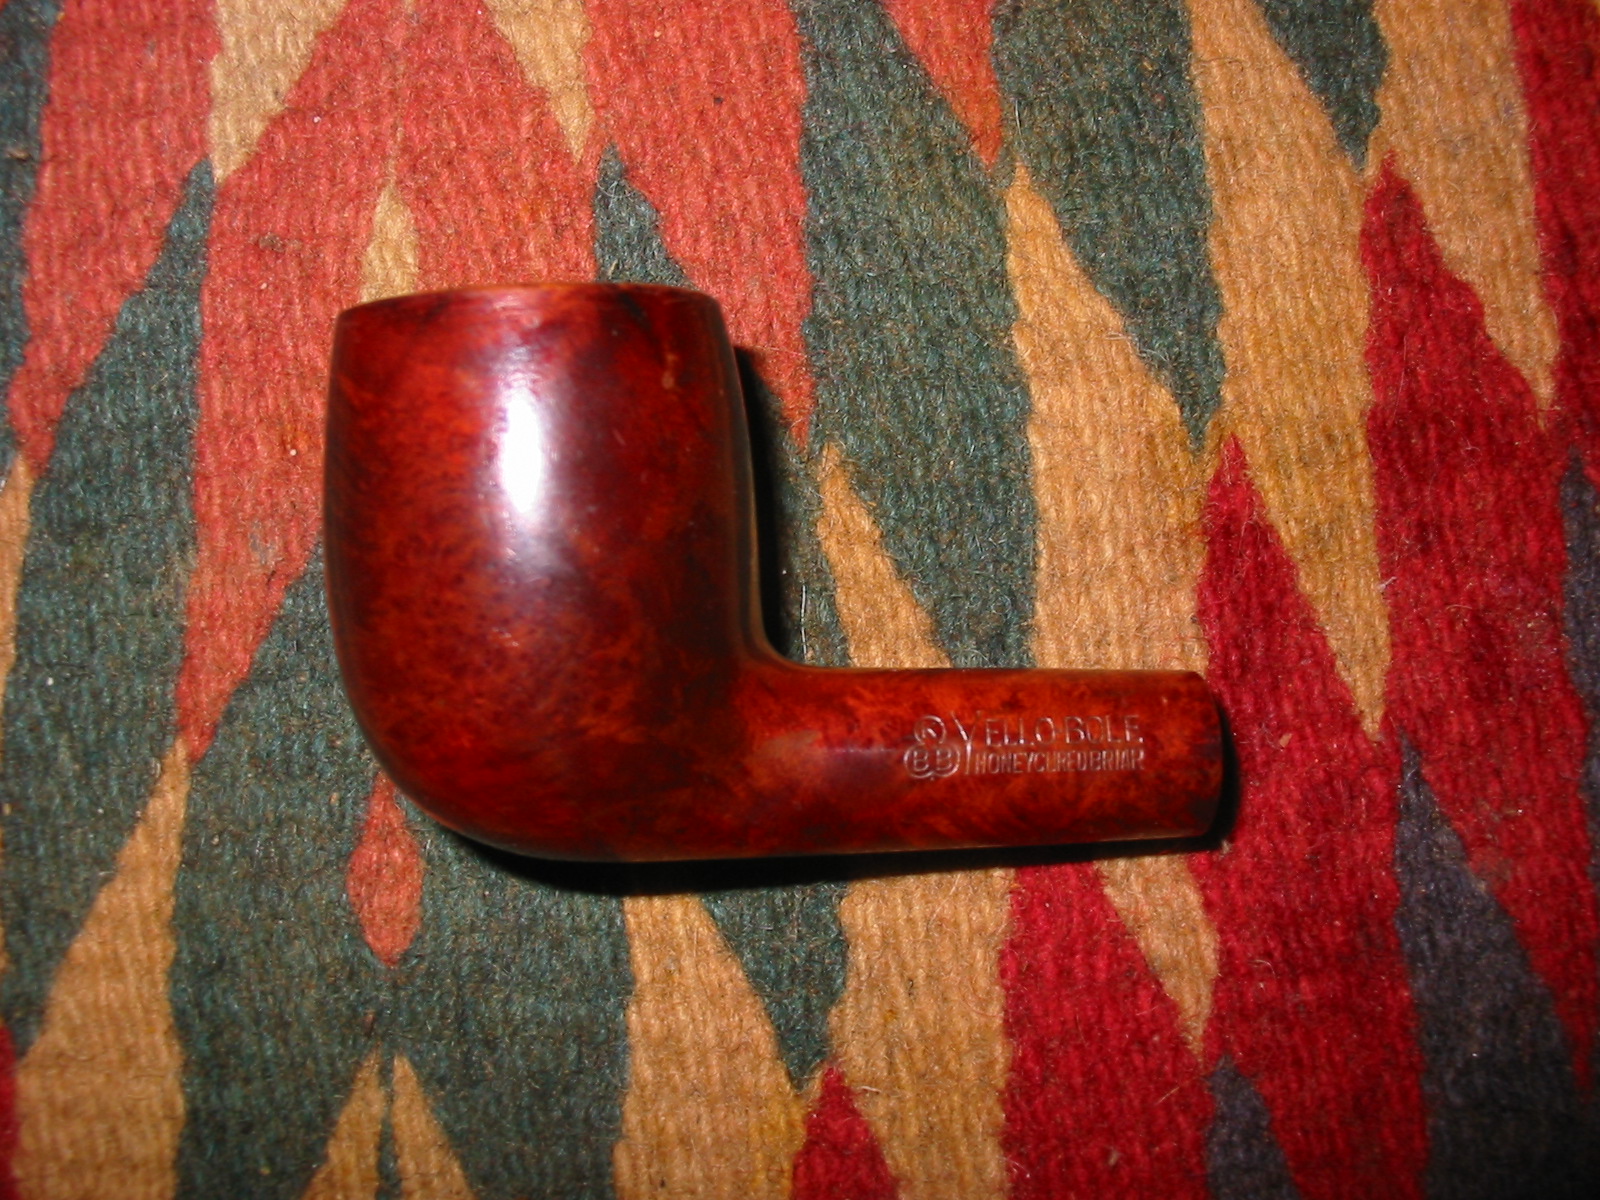
The bowl was in decent shape. The finish had a heavy coat of varnish over the stain but the briar appeared to be quite nice. I could not find any visible fills in the bowl. There was some good grain under the varnish. The rim had been topped and was rounded and crowned. It still had some scratch marks in the wood and also it was stained in a much lighter colour than the rest of the bowl. The stem was missing. It originally had a push tenon stem as the mortise was not threaded. Fitting a new stem would not be difficult but getting proper look to the stem required that I had some idea of the era of the pipe. That pushed me to do a bit of research. IMG_7567IMG_7570 Since Yello-Bole pipes are one of my favorite older US brands doing the research would be enjoyable. As with other early brands made in the states I have found that older is better. A KBB in a cloverleaf stamp will date them back to the ’30’s. I have found through my reading that the 4 digit shape numbers are older than 2 digit ones. The pipes with the logo on top of the stem are older than ones that have them on the side. That is just some of the information that I found with a cursory read through the forums and a variety of websites.

I found that Kaywoodie would sort shipments of briar and send the culls to be used for Yello-Boles, meaning they got some quality briar. One fellow on the web believes that is why Yello-Bole pipes tend to be smaller over all, working around flaws. He also said that he thinks calling them Kaywoodie seconds is a bit of a misnomer, being that Kaywoodie was one of the largest briar purchasers in the world at the time (’20’s-50’s) and got some fantastic wood.

I came across the SM Frank website http://www.smfrankcoinc.com/home/?page_id=2 and found a wealth of historical information on Kaywoodies, Yello-Boles and the merger between KBB and SM Frank and later Demuth. It was a great read and I would encourage others to give the website a read. The information in the next paragraph was condensed from that site. I found confirmation for the statement above that the Yello-Bole line was an outlet for lower grade briar not used in Kaywoodie production. Yello-Bole’s were introduced in 1932 and manufactured by Penacook, New Hampshire subsidiary, The New England Briar Pipe Company. Advertising from the 1940′s, pictures the Yello-Bole “Honey Girl” and urges the pipe smoker to smoke the pipe with “a little honey in every bowl.” Honey was an ingredient of the material used to line the inside of the bowl. It was said to provide a faster, sweeter break-in of the pipe.

I went hunting further to see if I could find information on establishing dates for Yello-Bole pipes and found that there was not a lot of information other than what I had found above. Then I came across this link to the Kaywoodie Forum: http://kaywoodie.myfreeforum.org/archive/dating-yello-bole-pipes__o_t__t_86.html I quote the information I found there as it gives the only information that I found in my hunt to this point.

“OK so there isn’t a lot of dating information for Yello-Bole pipes but here is what I have learned so far.
– If it has the KBB stamped in the clover leaf it was made 1955 or earlier as they stopped the stamping after being acquired by S.M. Frank.
– From 1933-1936 they were stamped Honey Cured Briar.
– Pipes stems stamped with the propeller logo they were made in the 30s or 40s no propellers were used after the 40s.
– Yello-Bole also used a 4 digit code stamped on the pipe in the 30s.
– If the pipe had the Yello-Bole circle stamped on the shank it was made in the 30s this stopped after 1939.
– If the pipe was stamped BRUYERE rather than briar it was made in the 30s.

That is all I have in my notes right now I don’t have anything on the multitude of stem stampings or any other age indicators. If anyone has more definitive information or other methods of determining date please feel free to post it and I will edit this as I go. I currently have 2 from the 30s and 6 from pre 55 and 2 fairly modern ones.”

One further item was also found on that site. It was just a passing comment in the midst of some information on Kaywoodie pipes. I quote: “The pre-Kaywoodie KB&B pipes were marked on the shank with a cloverleaf around KB&B. Some early Kaywoodies had this same marking on the shank, but the practice was dropped sometime prior to 1936. Yello-Boles also had KBB in the leaf on the shanks, but did not have the ampersand found on Kaywoodies.” (Highlighting is mine)

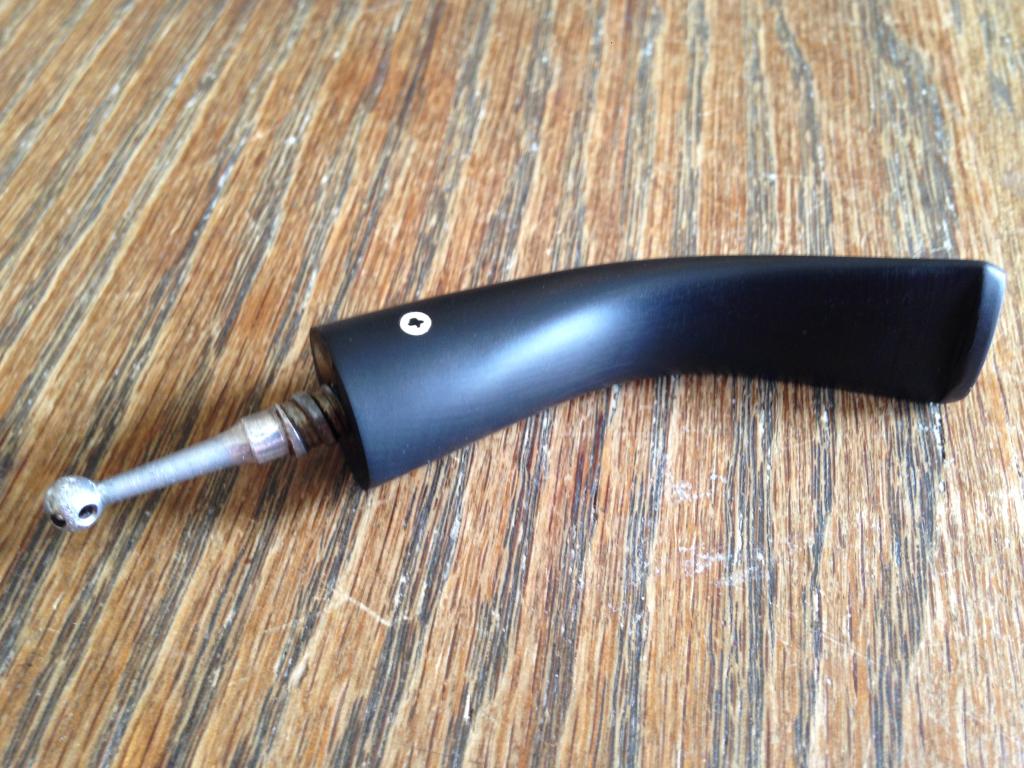
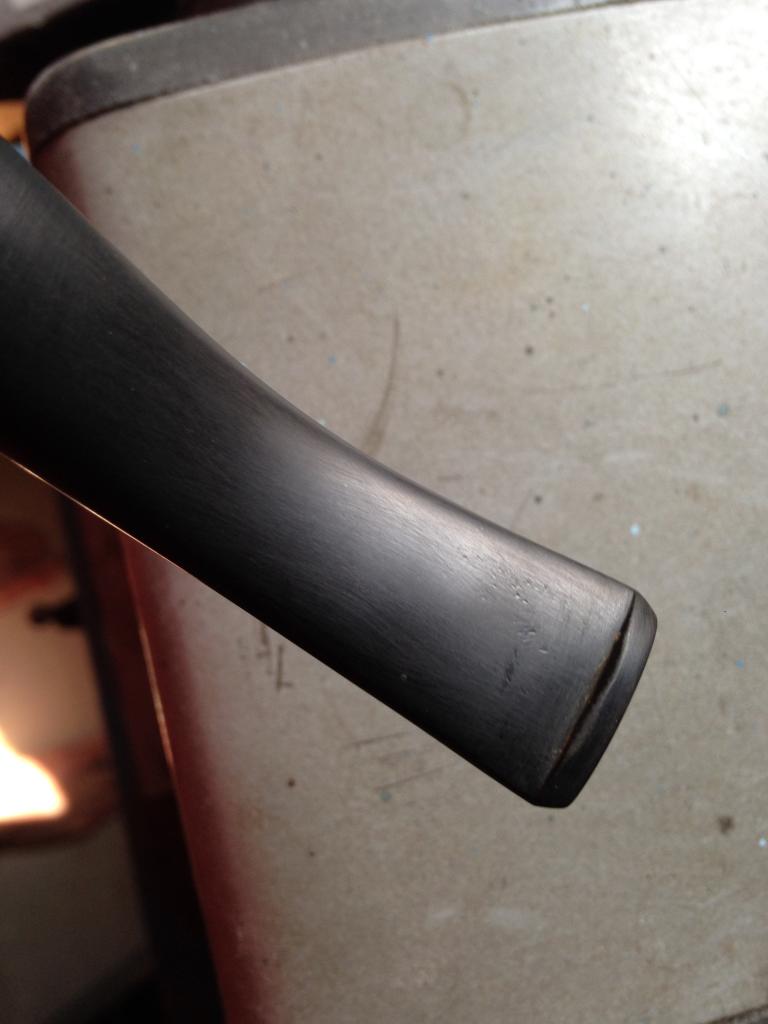
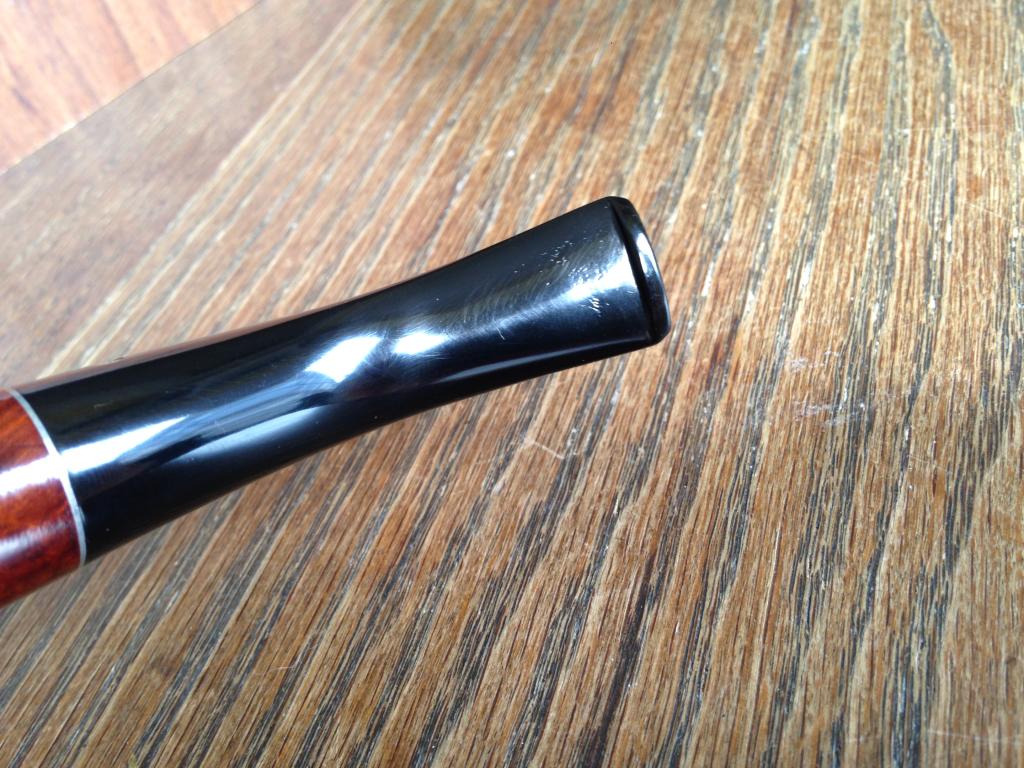
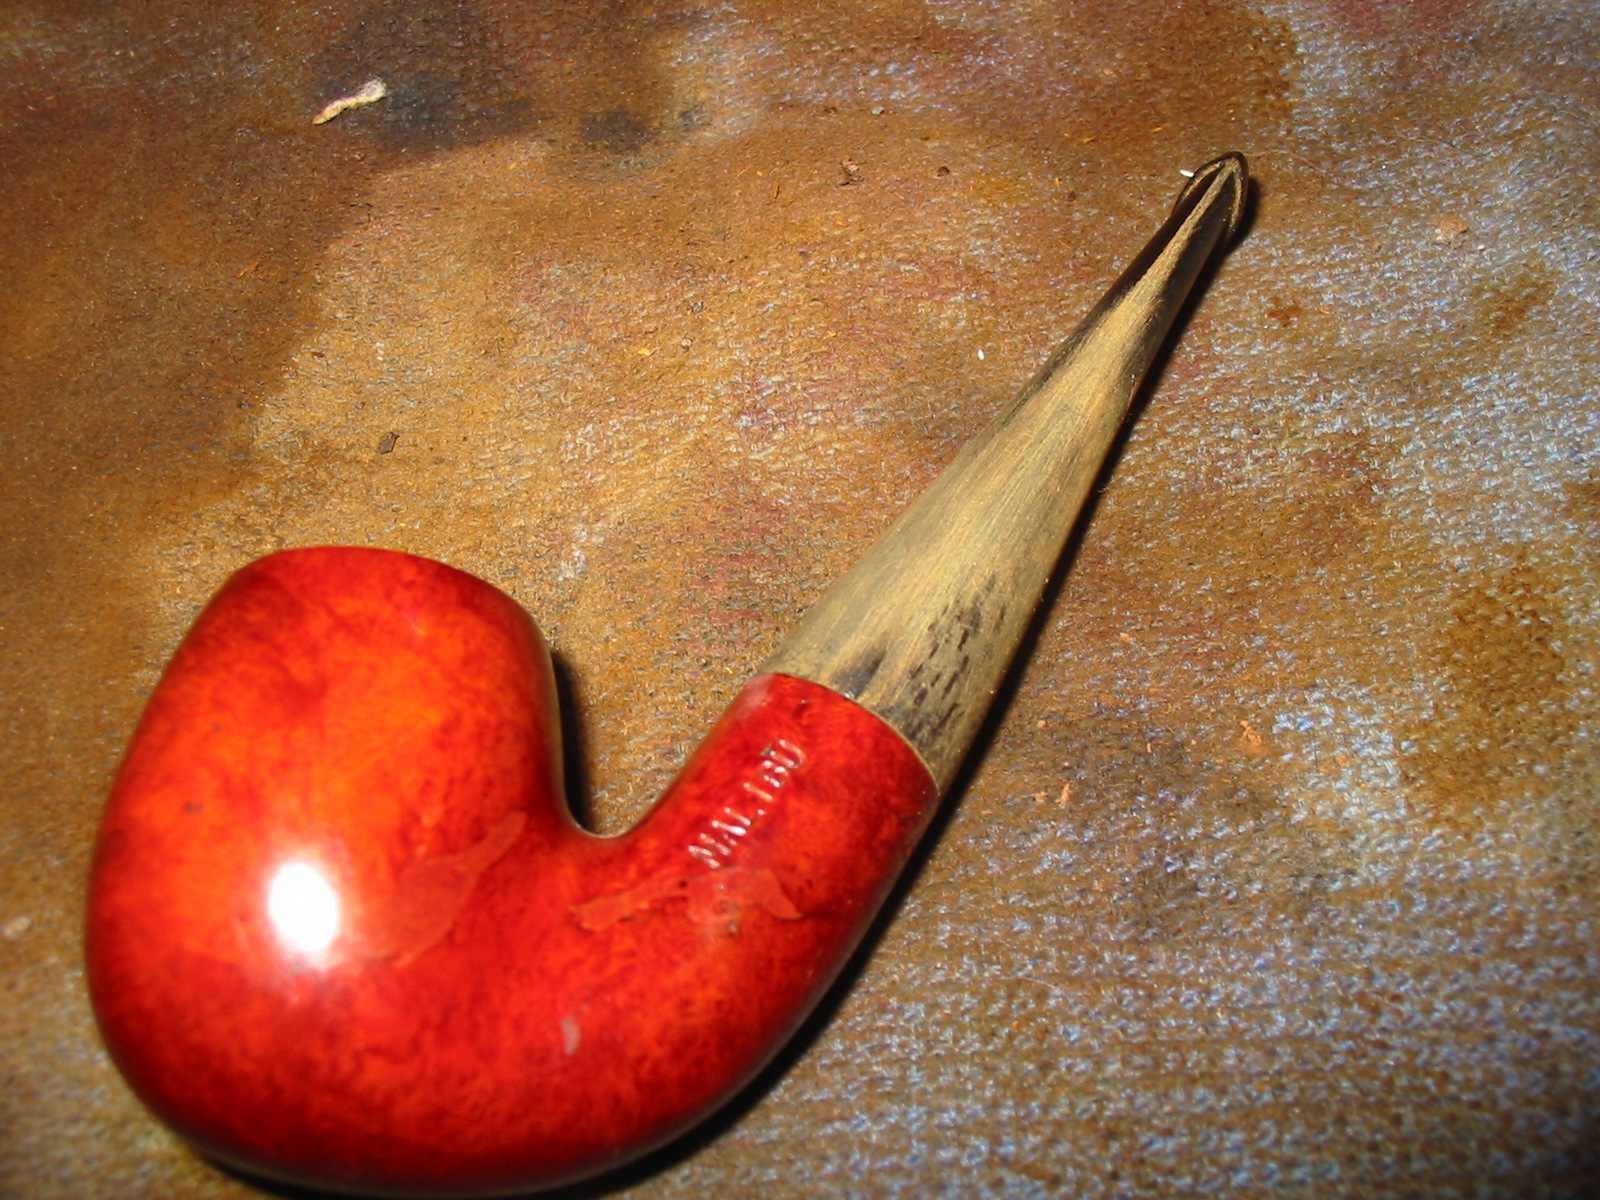
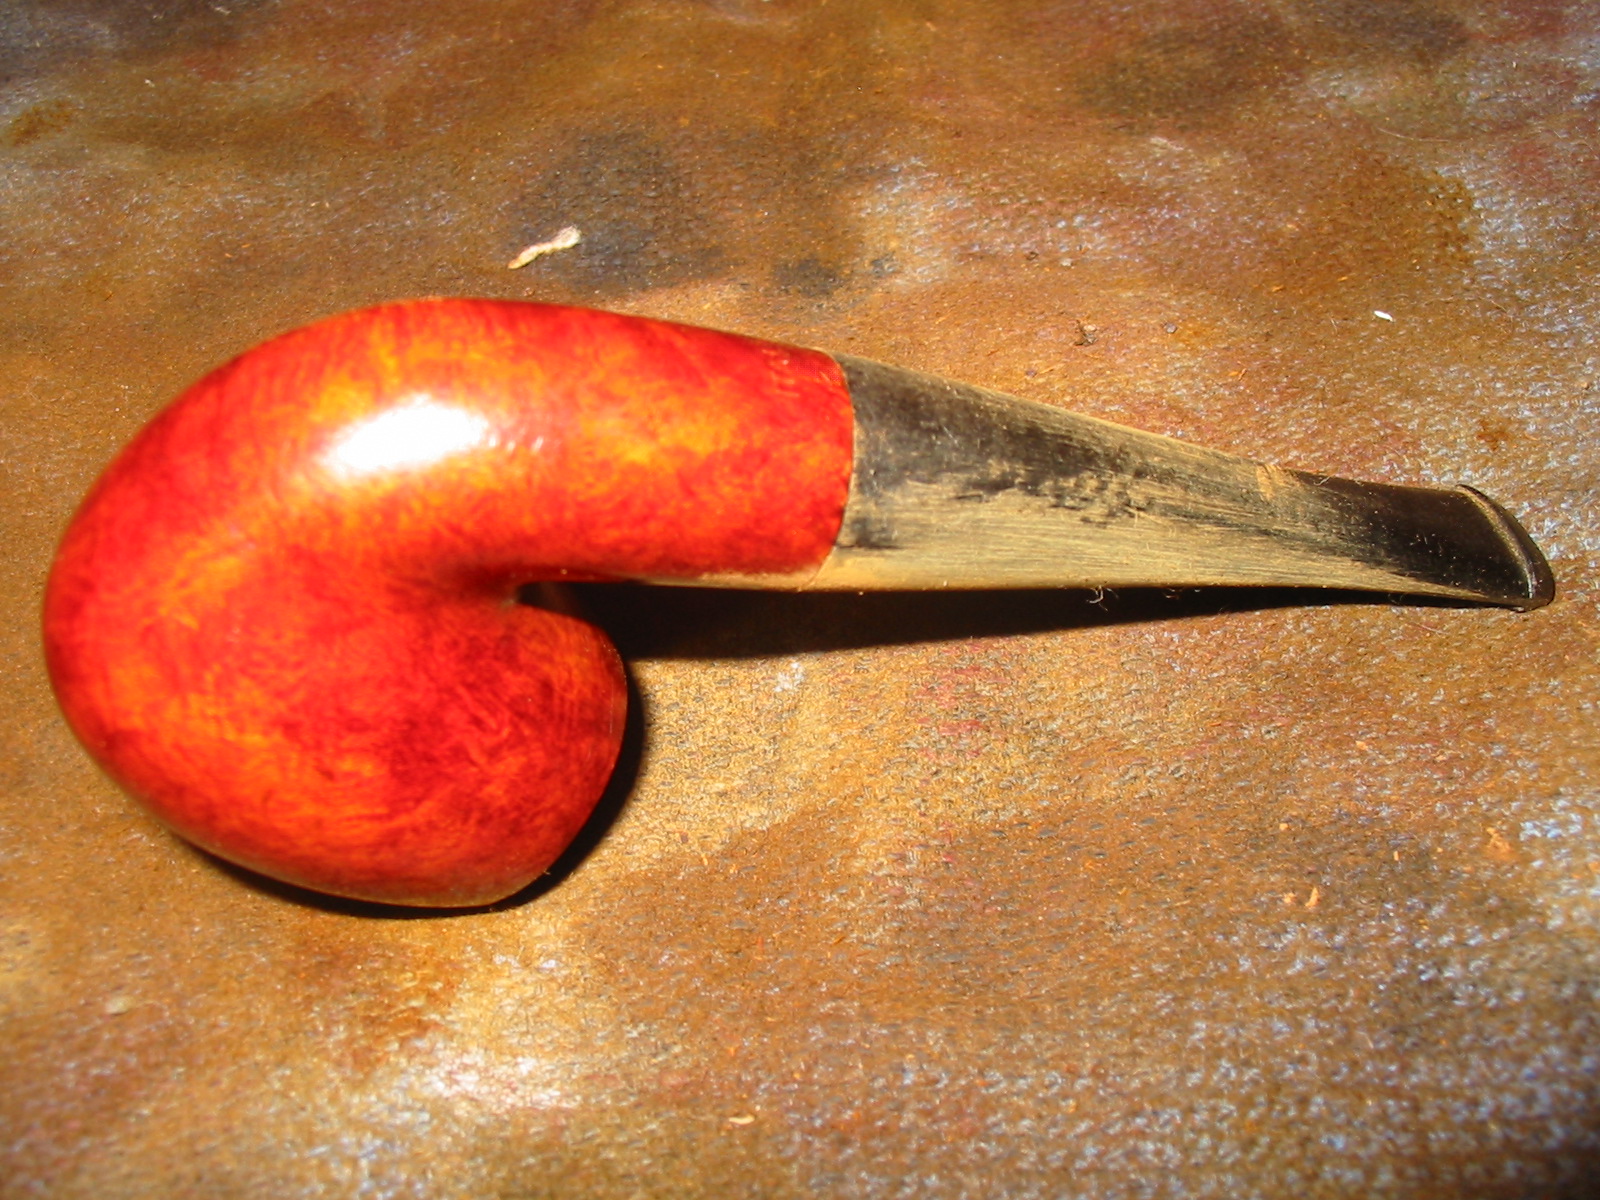
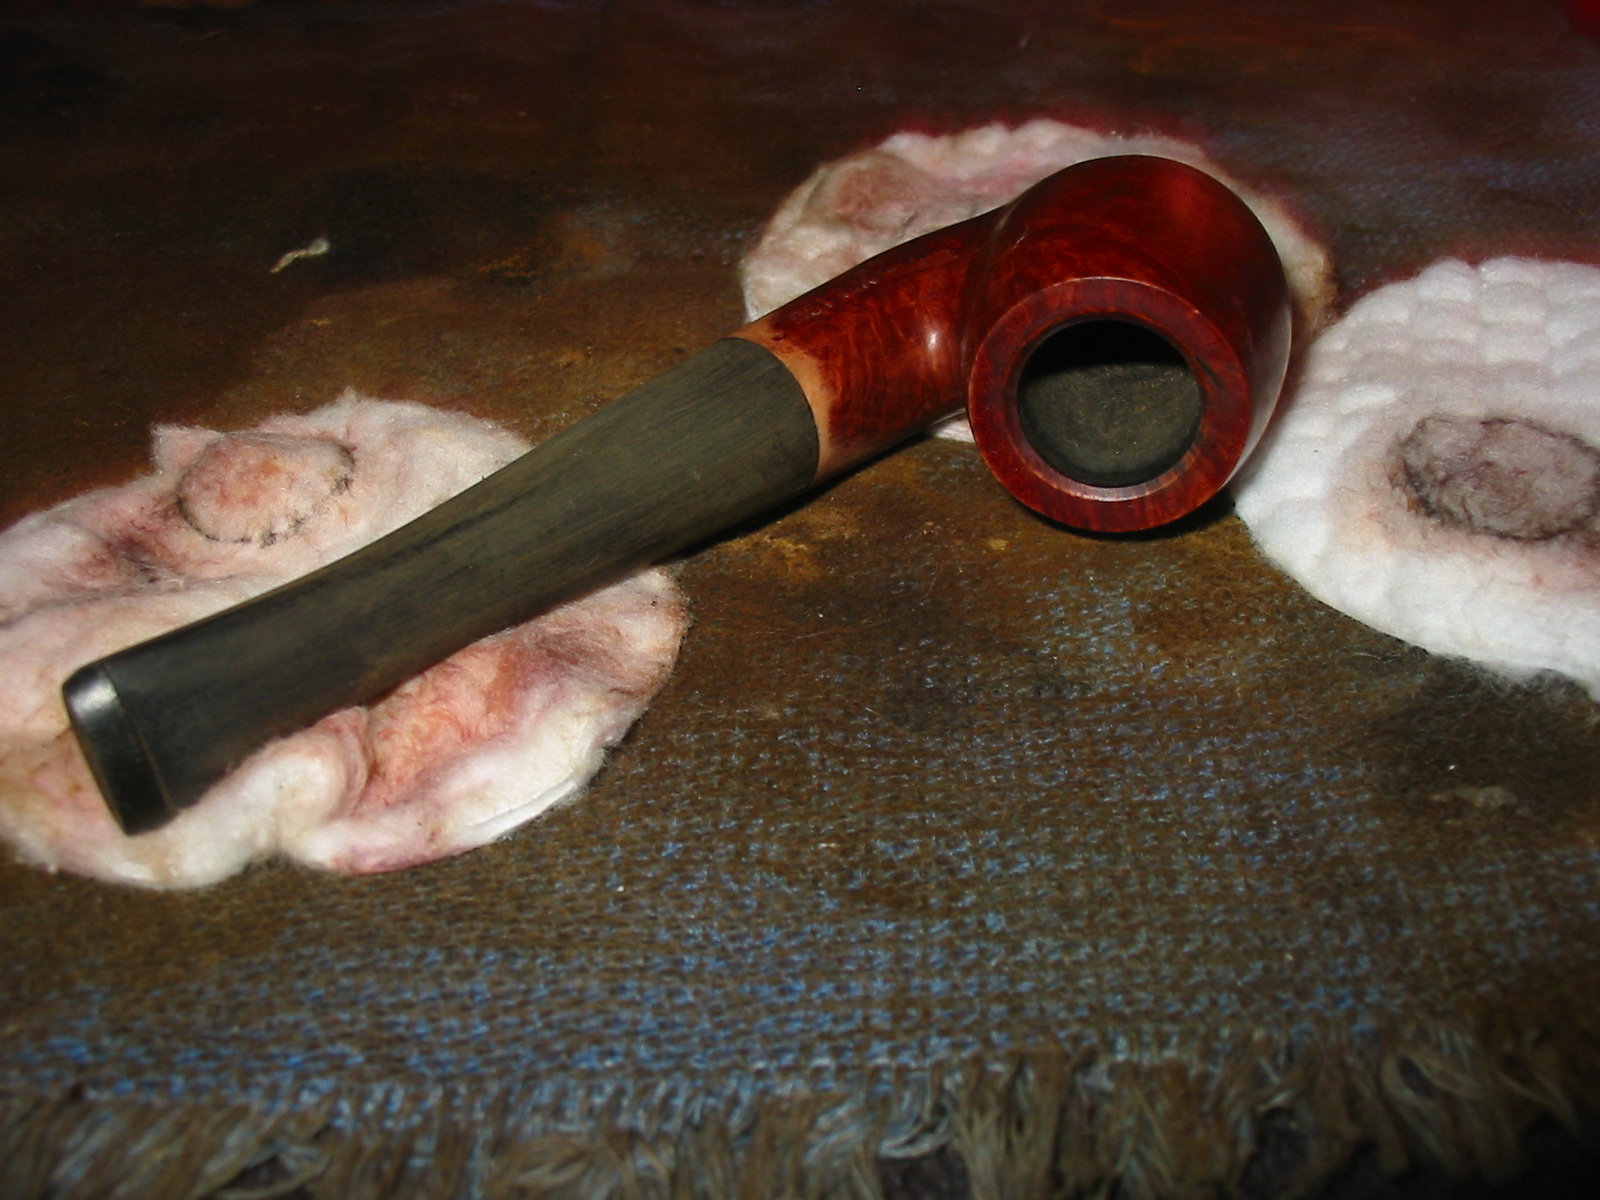
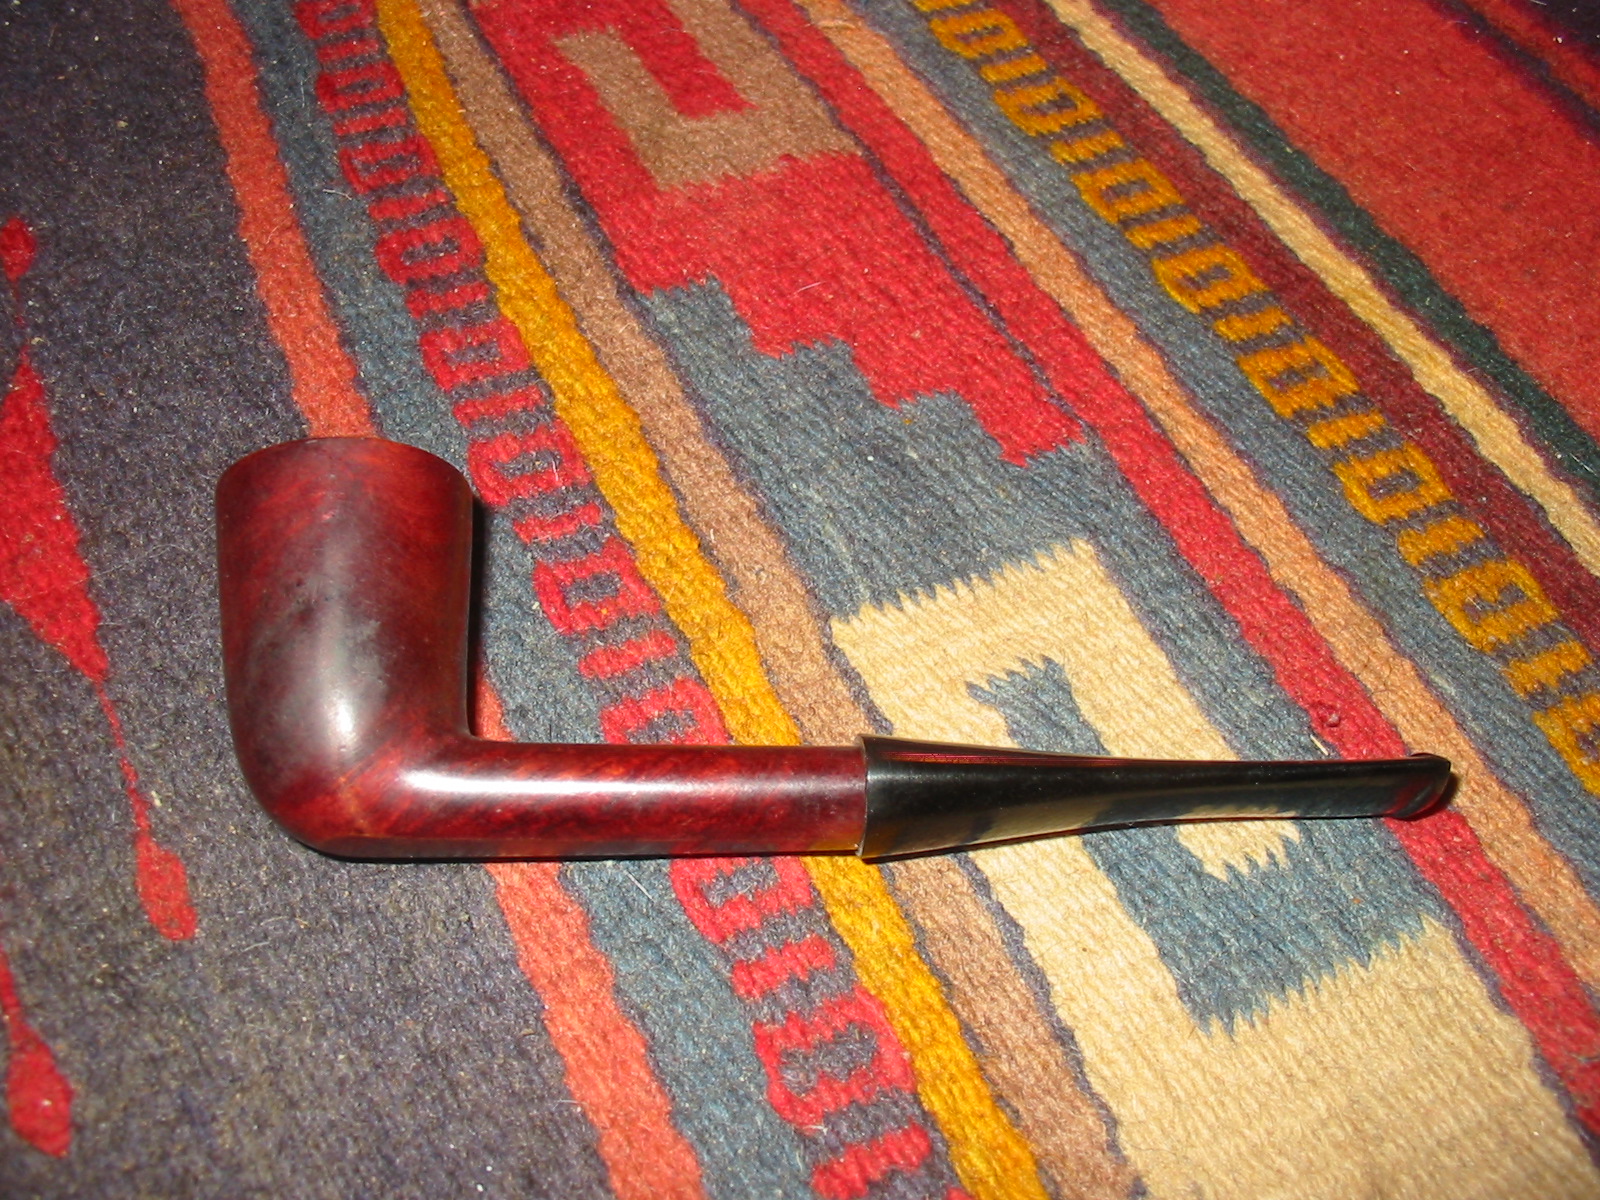
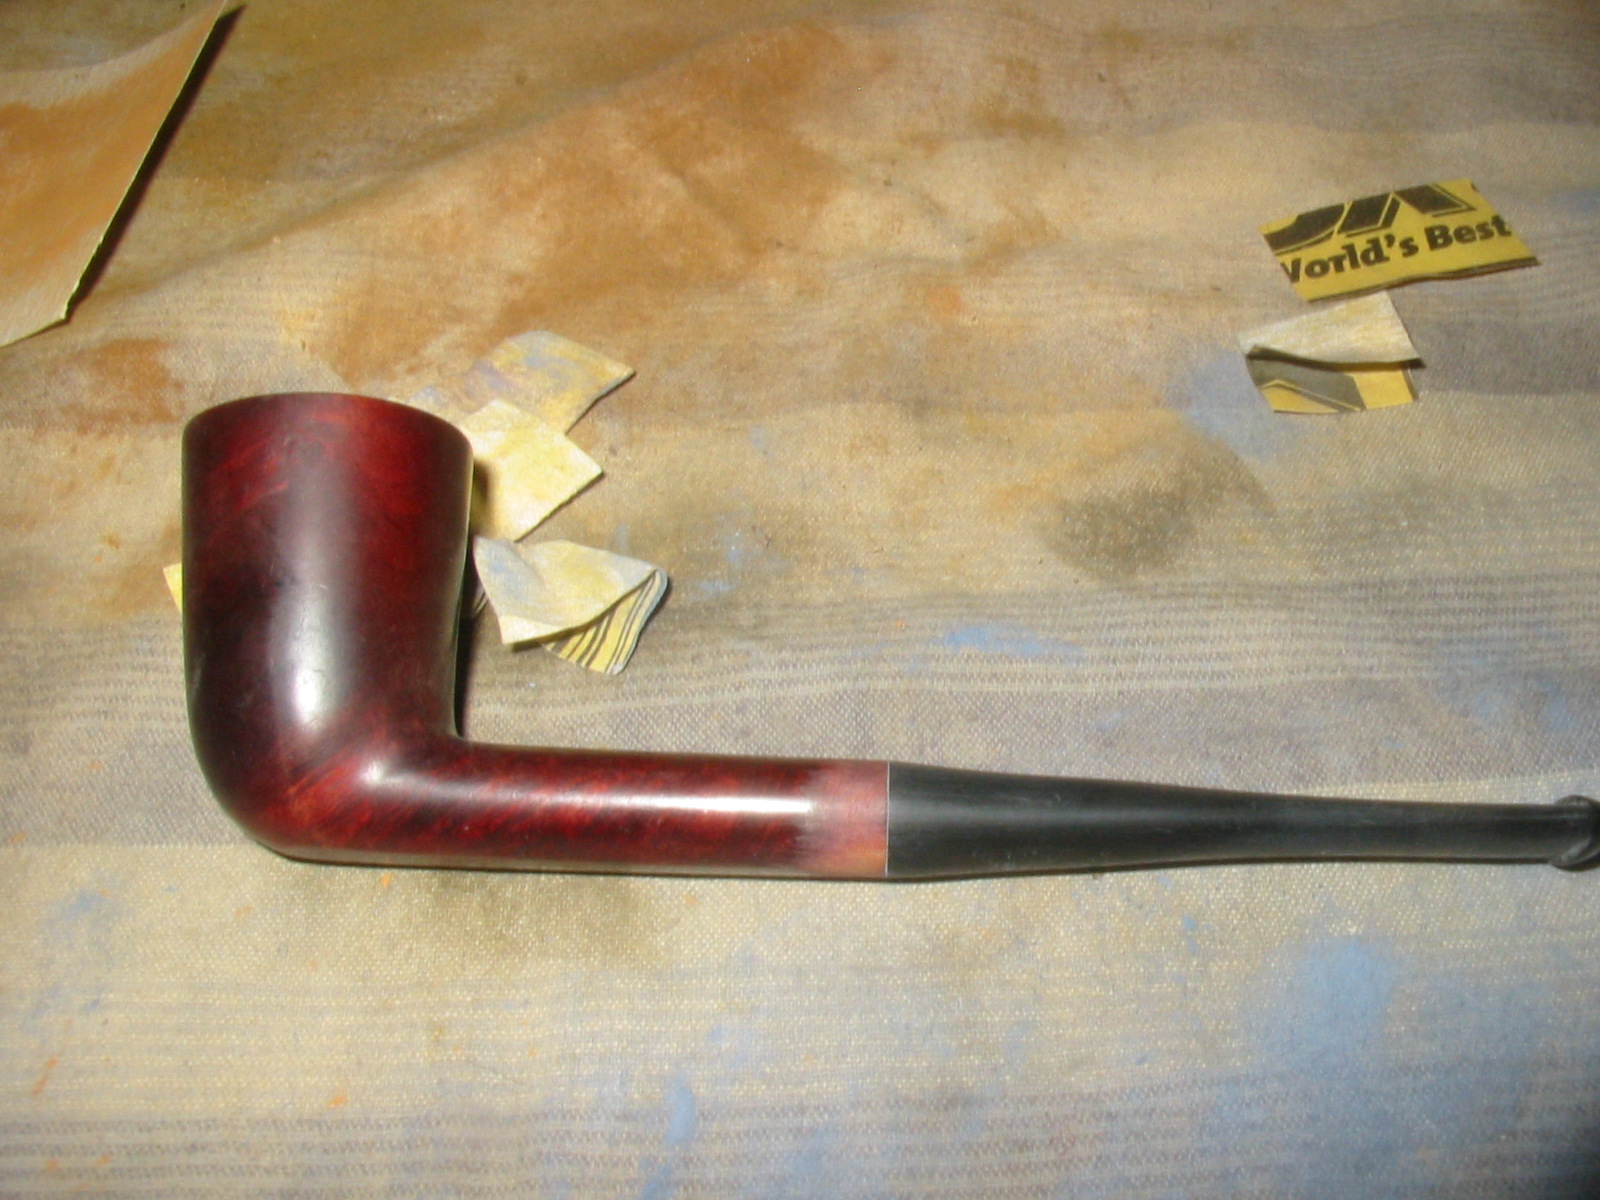
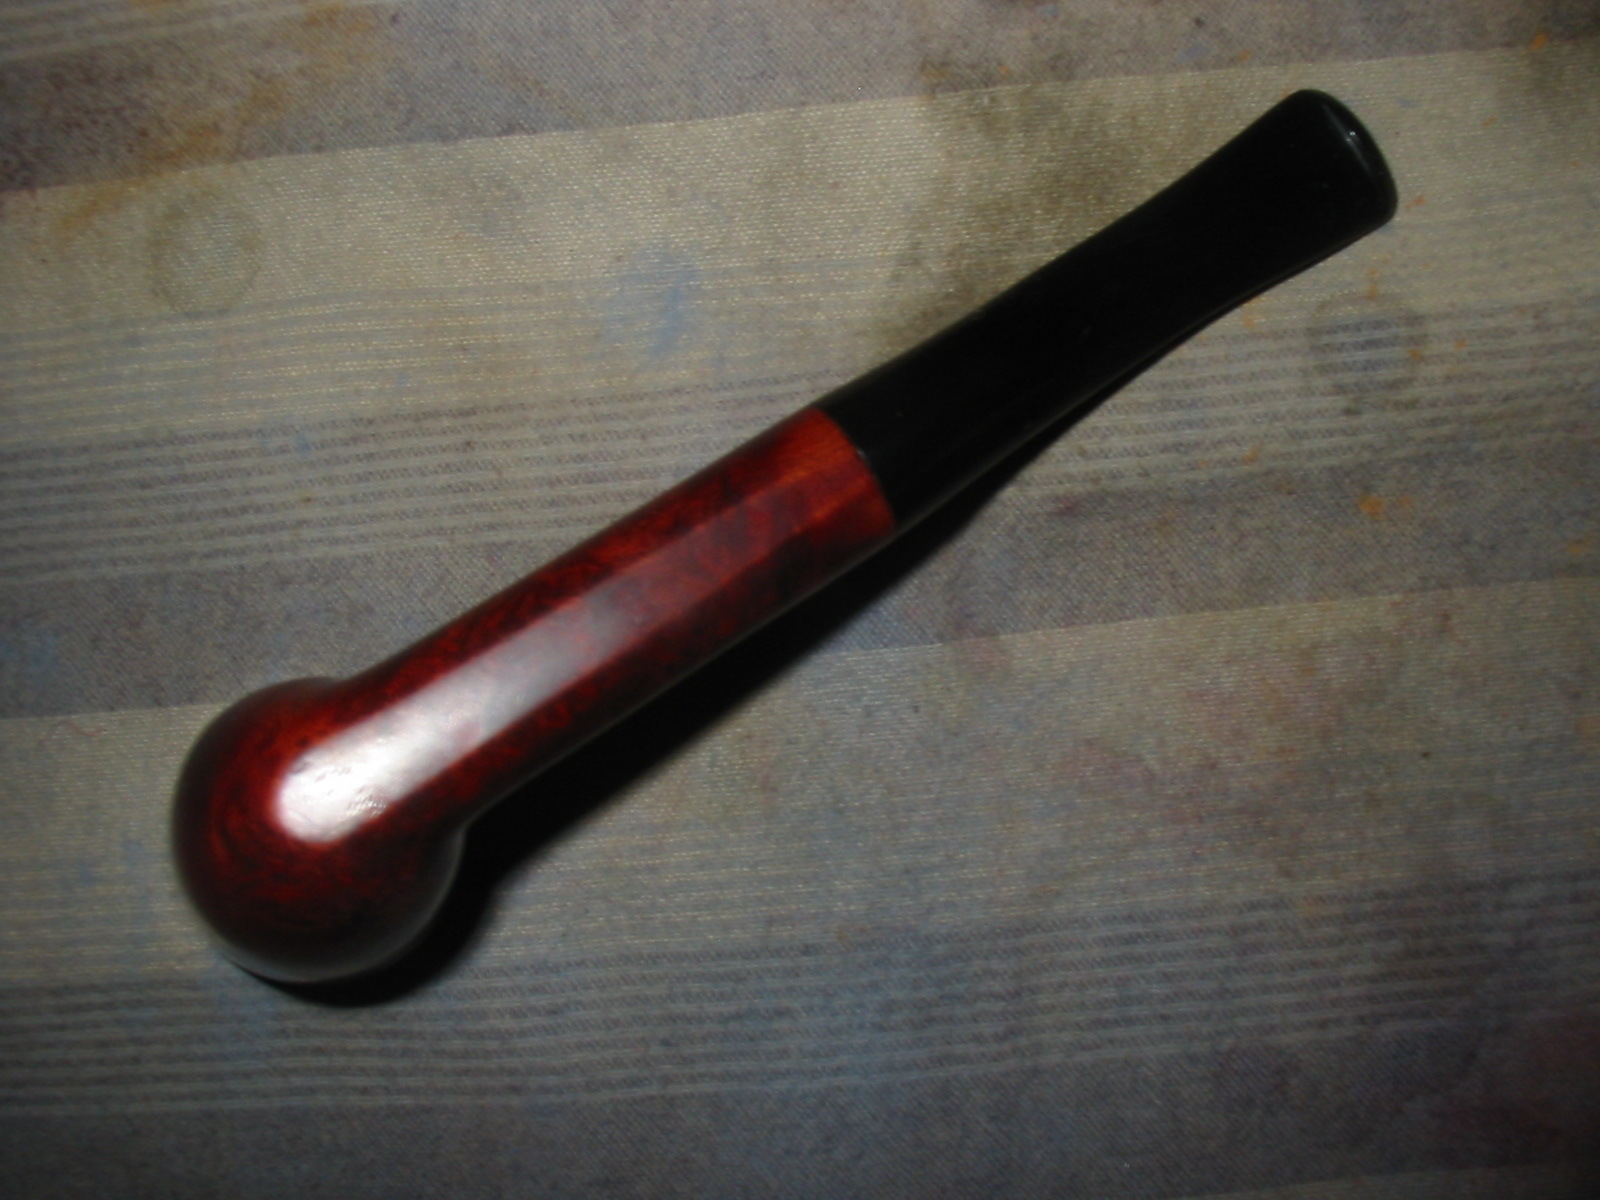
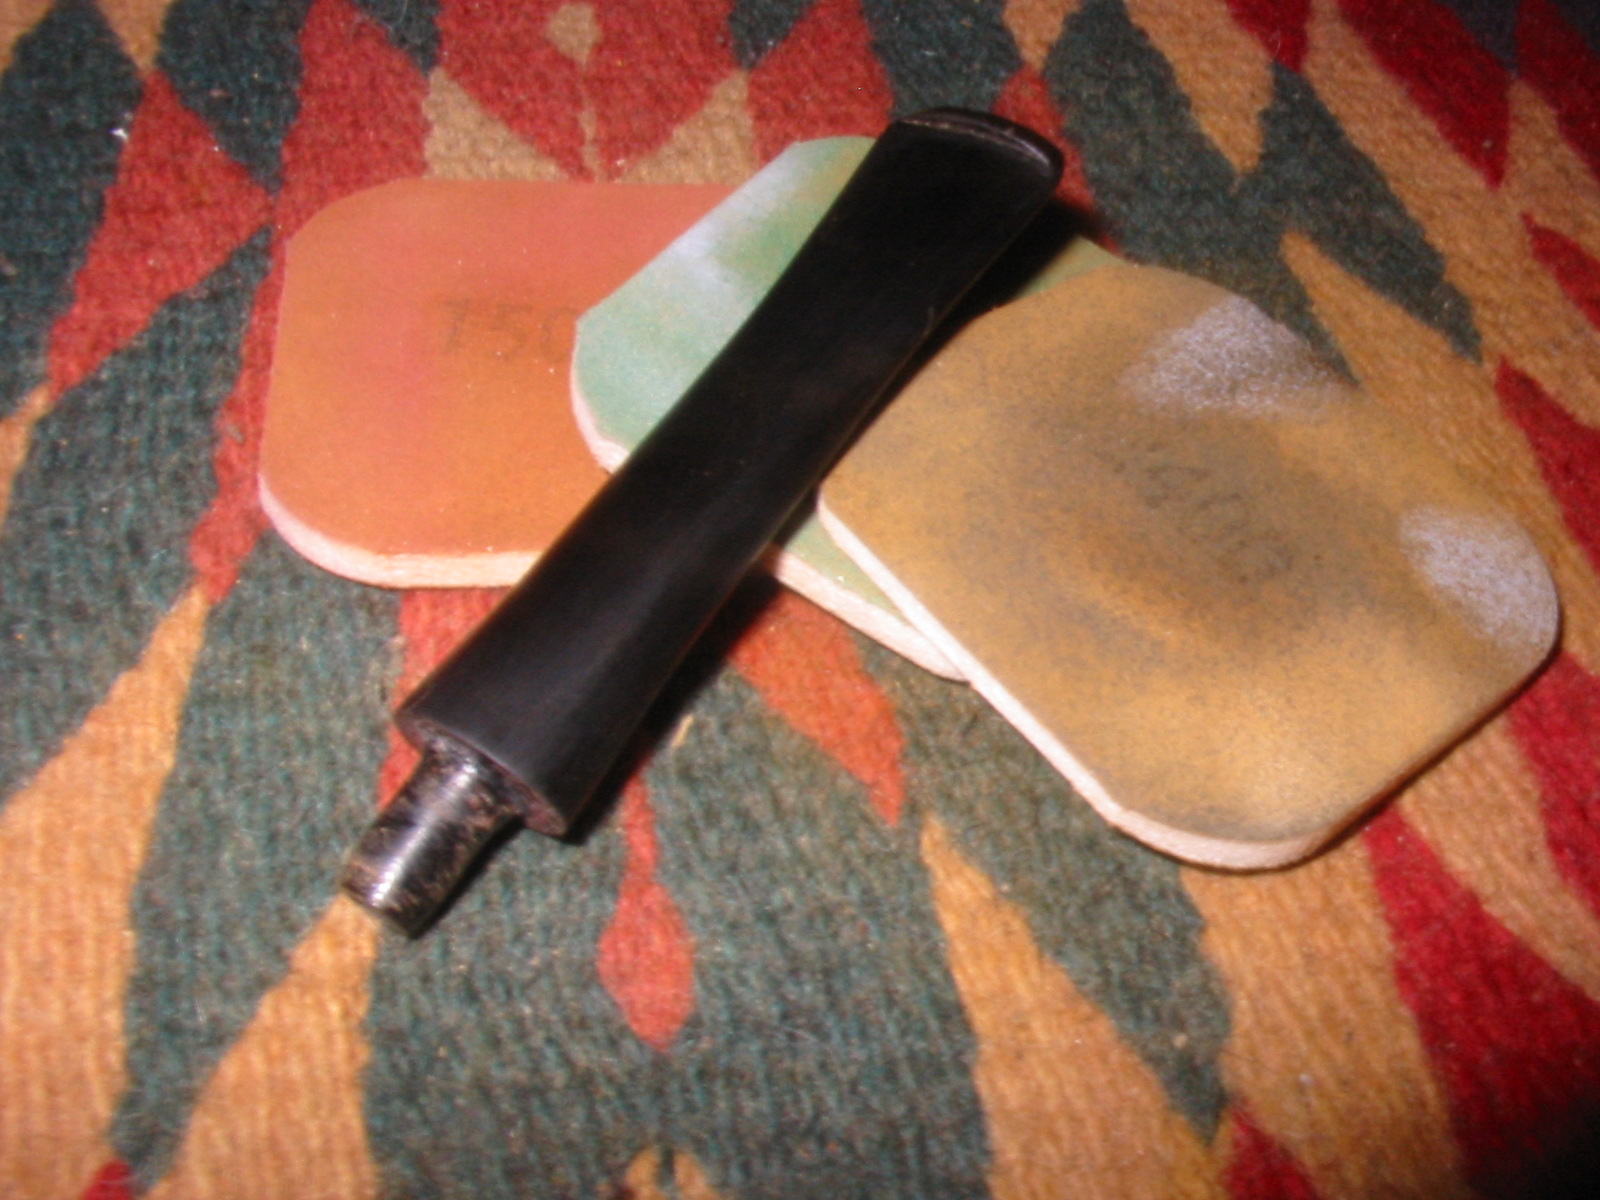
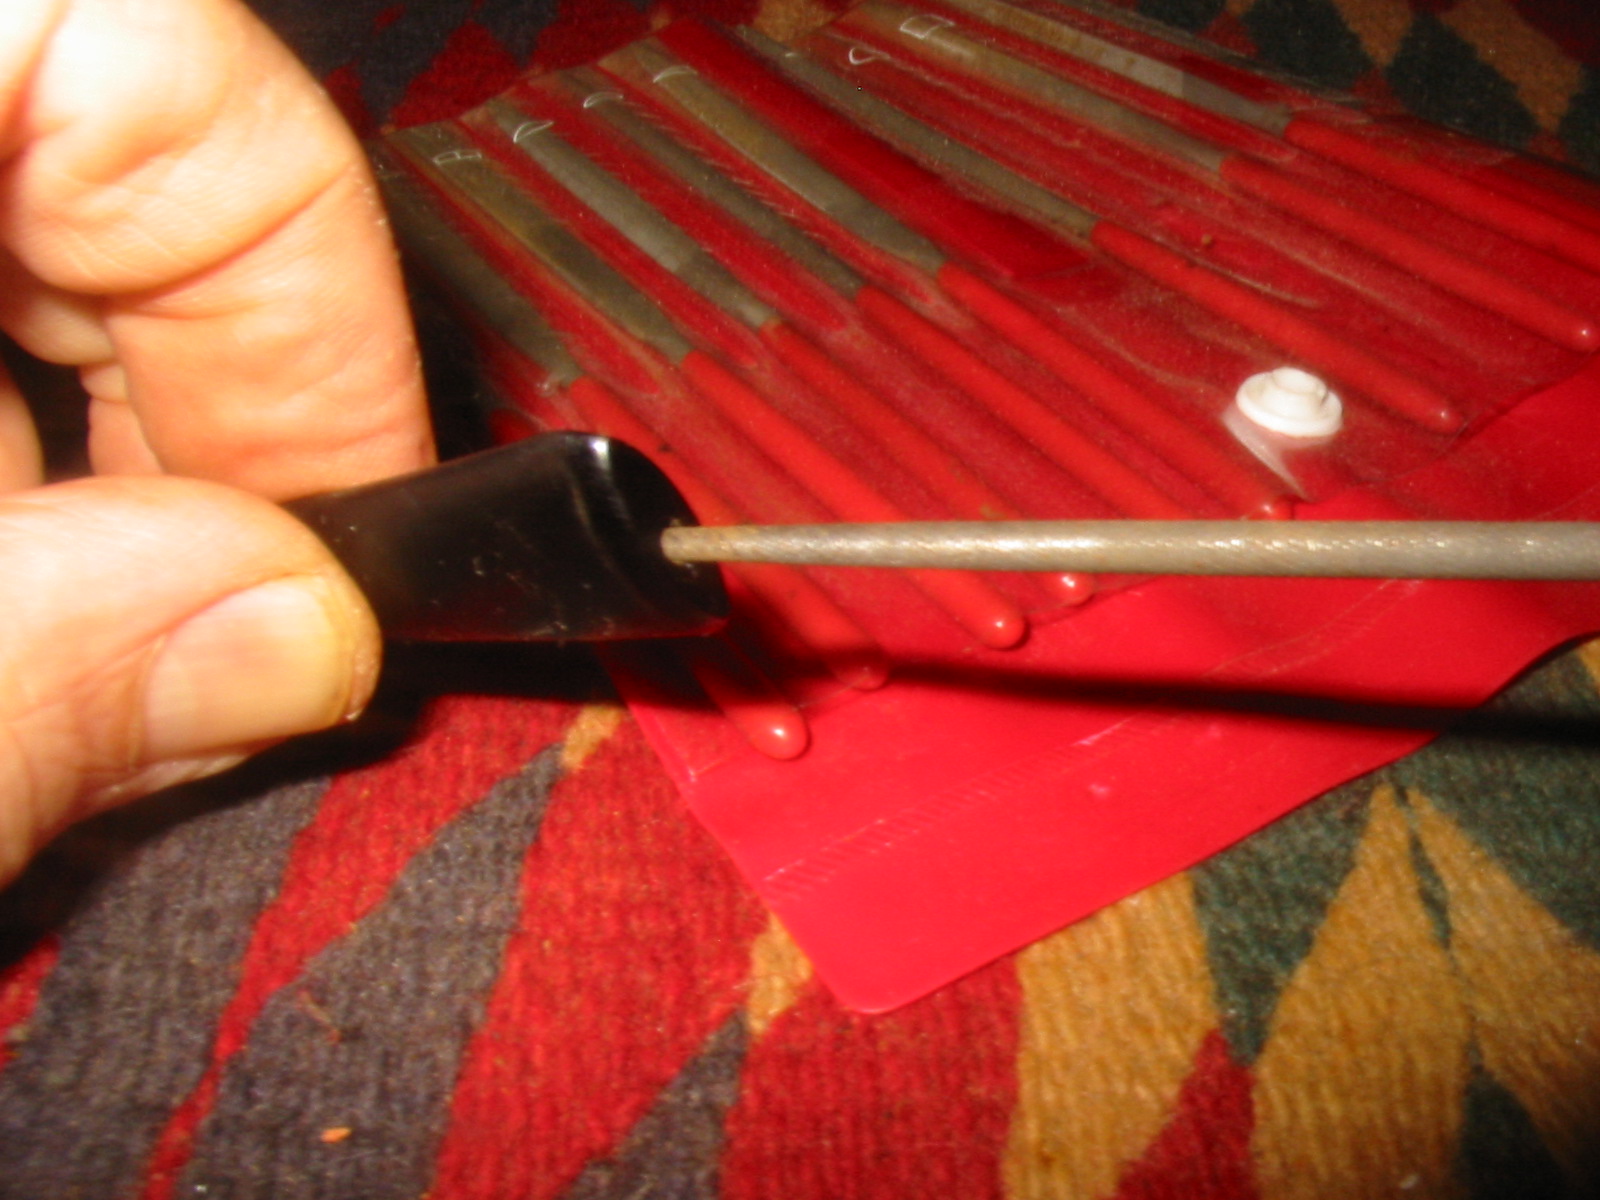
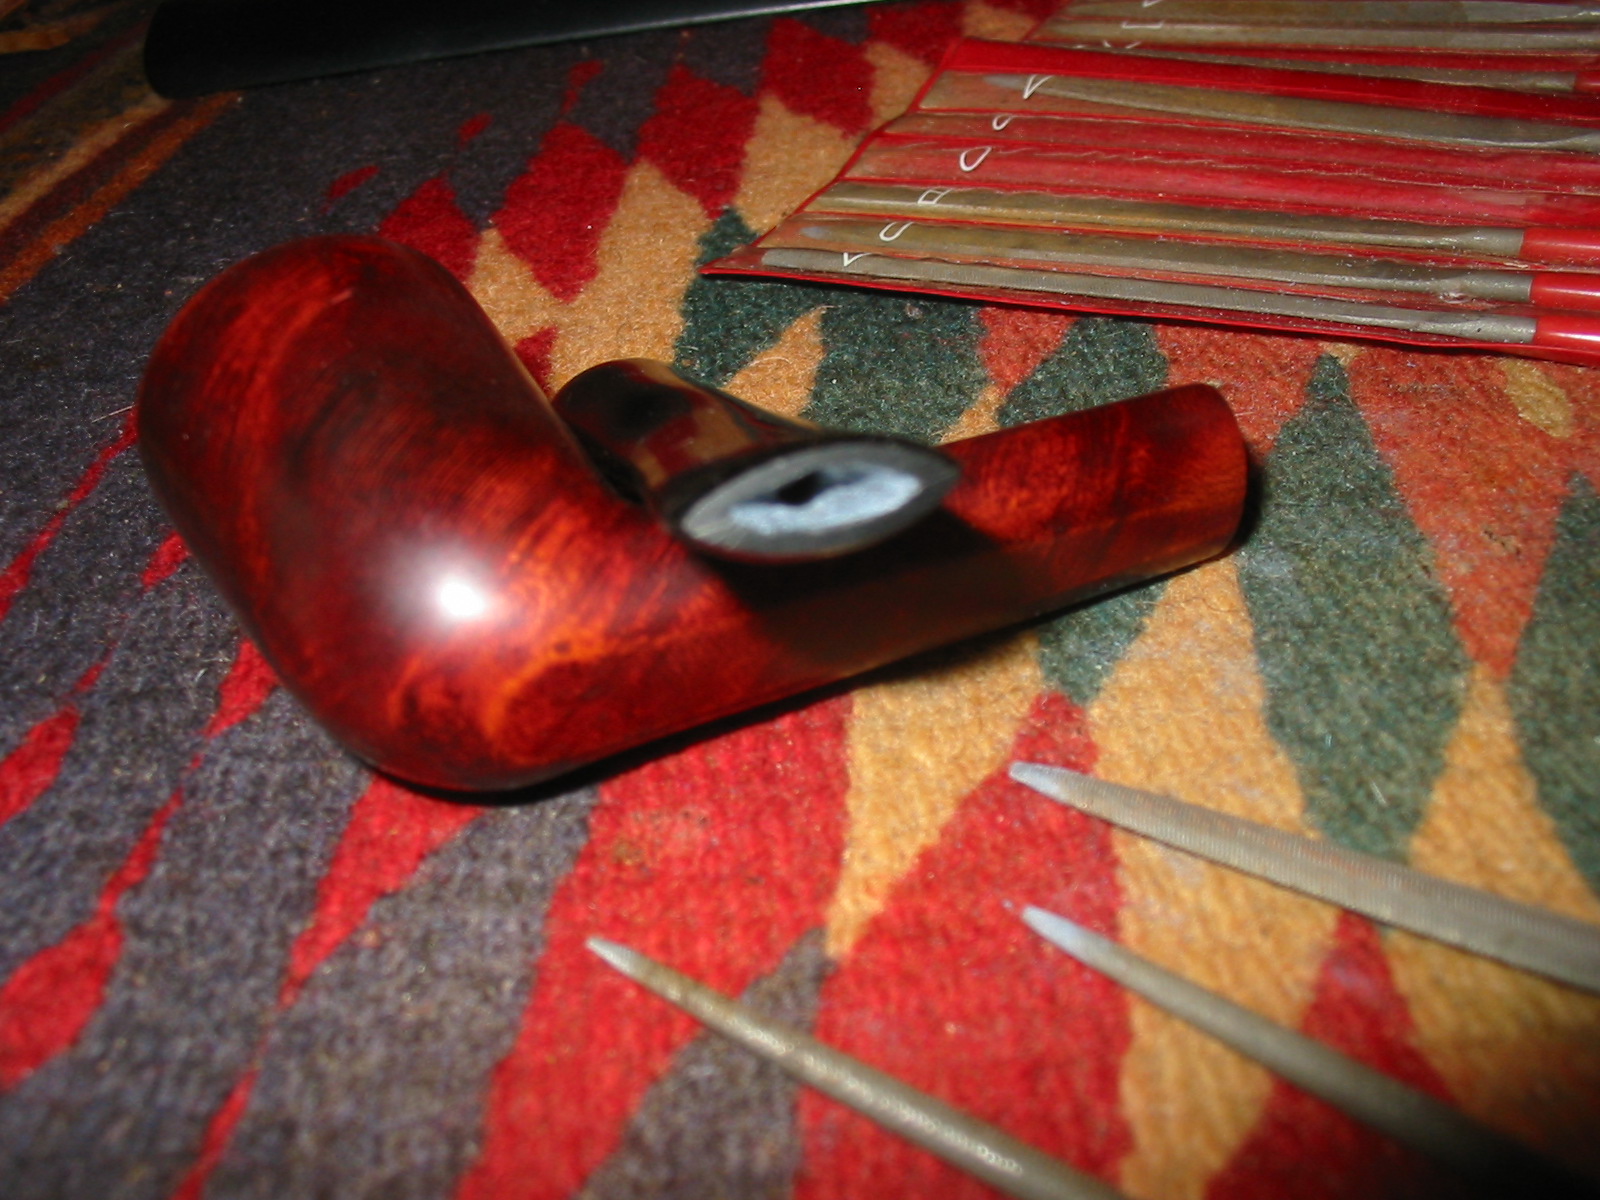
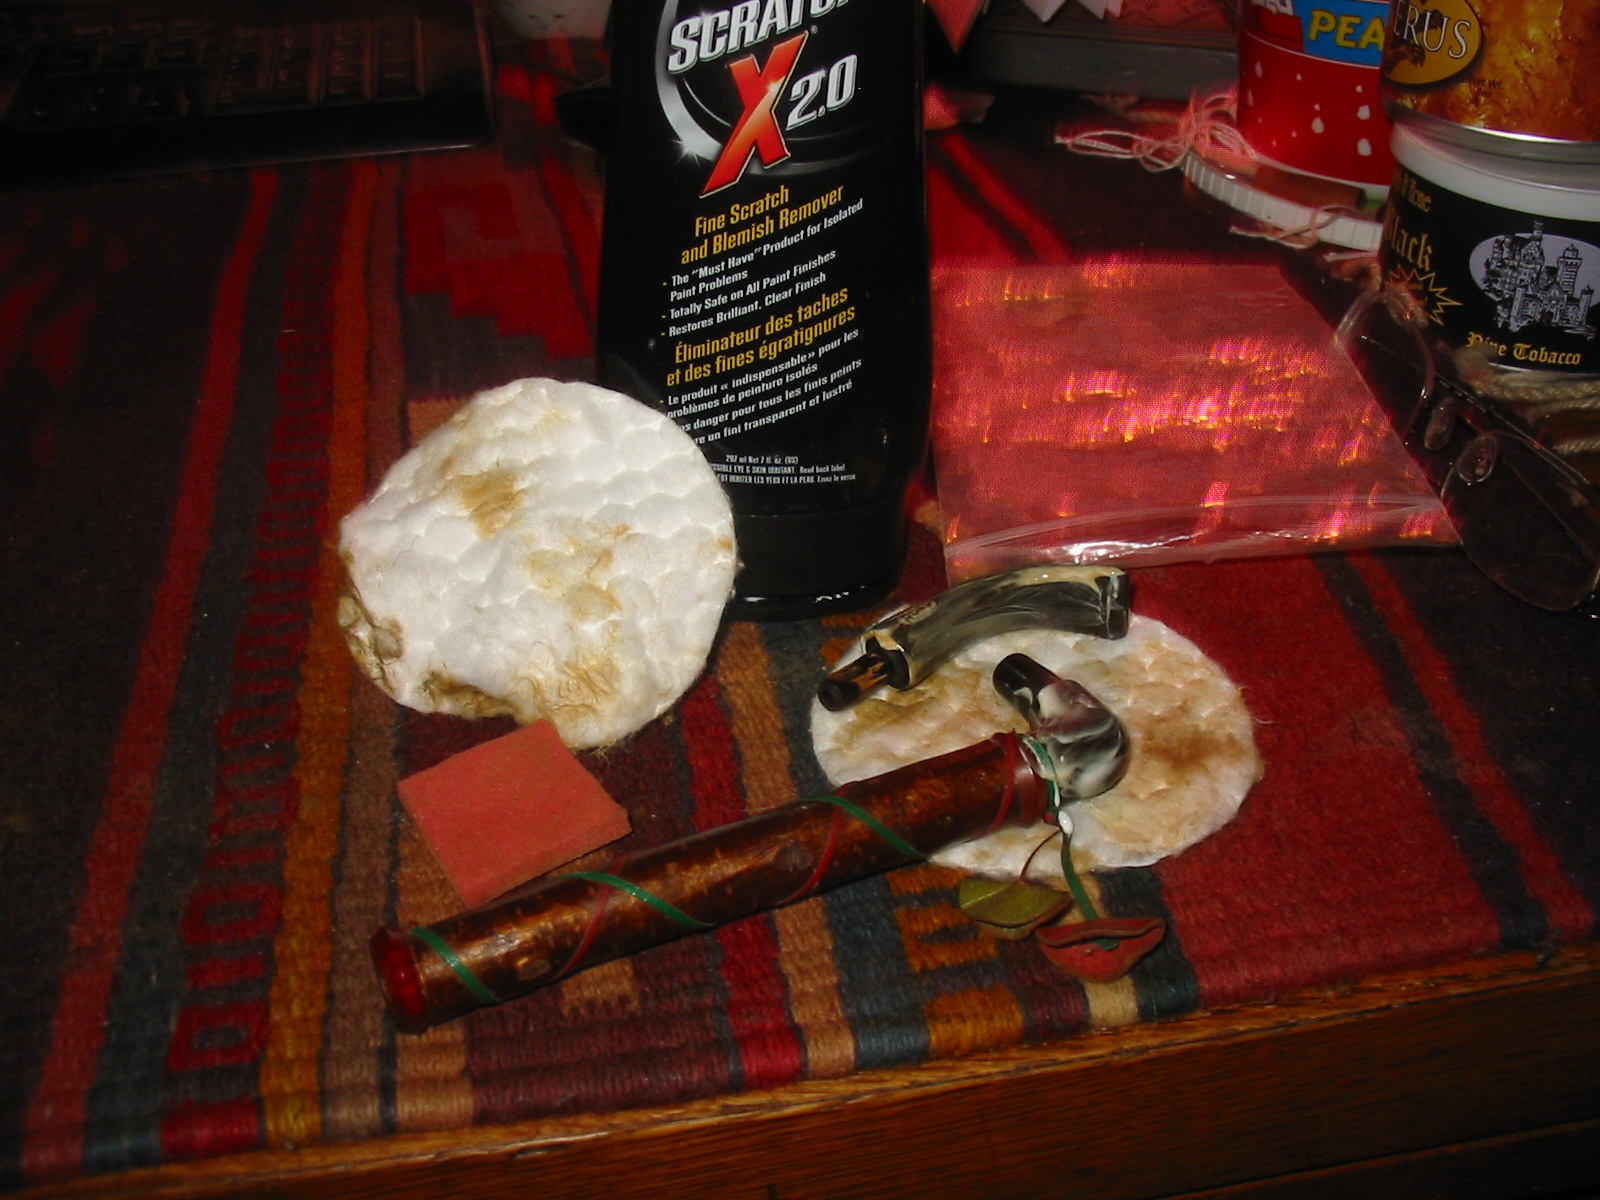
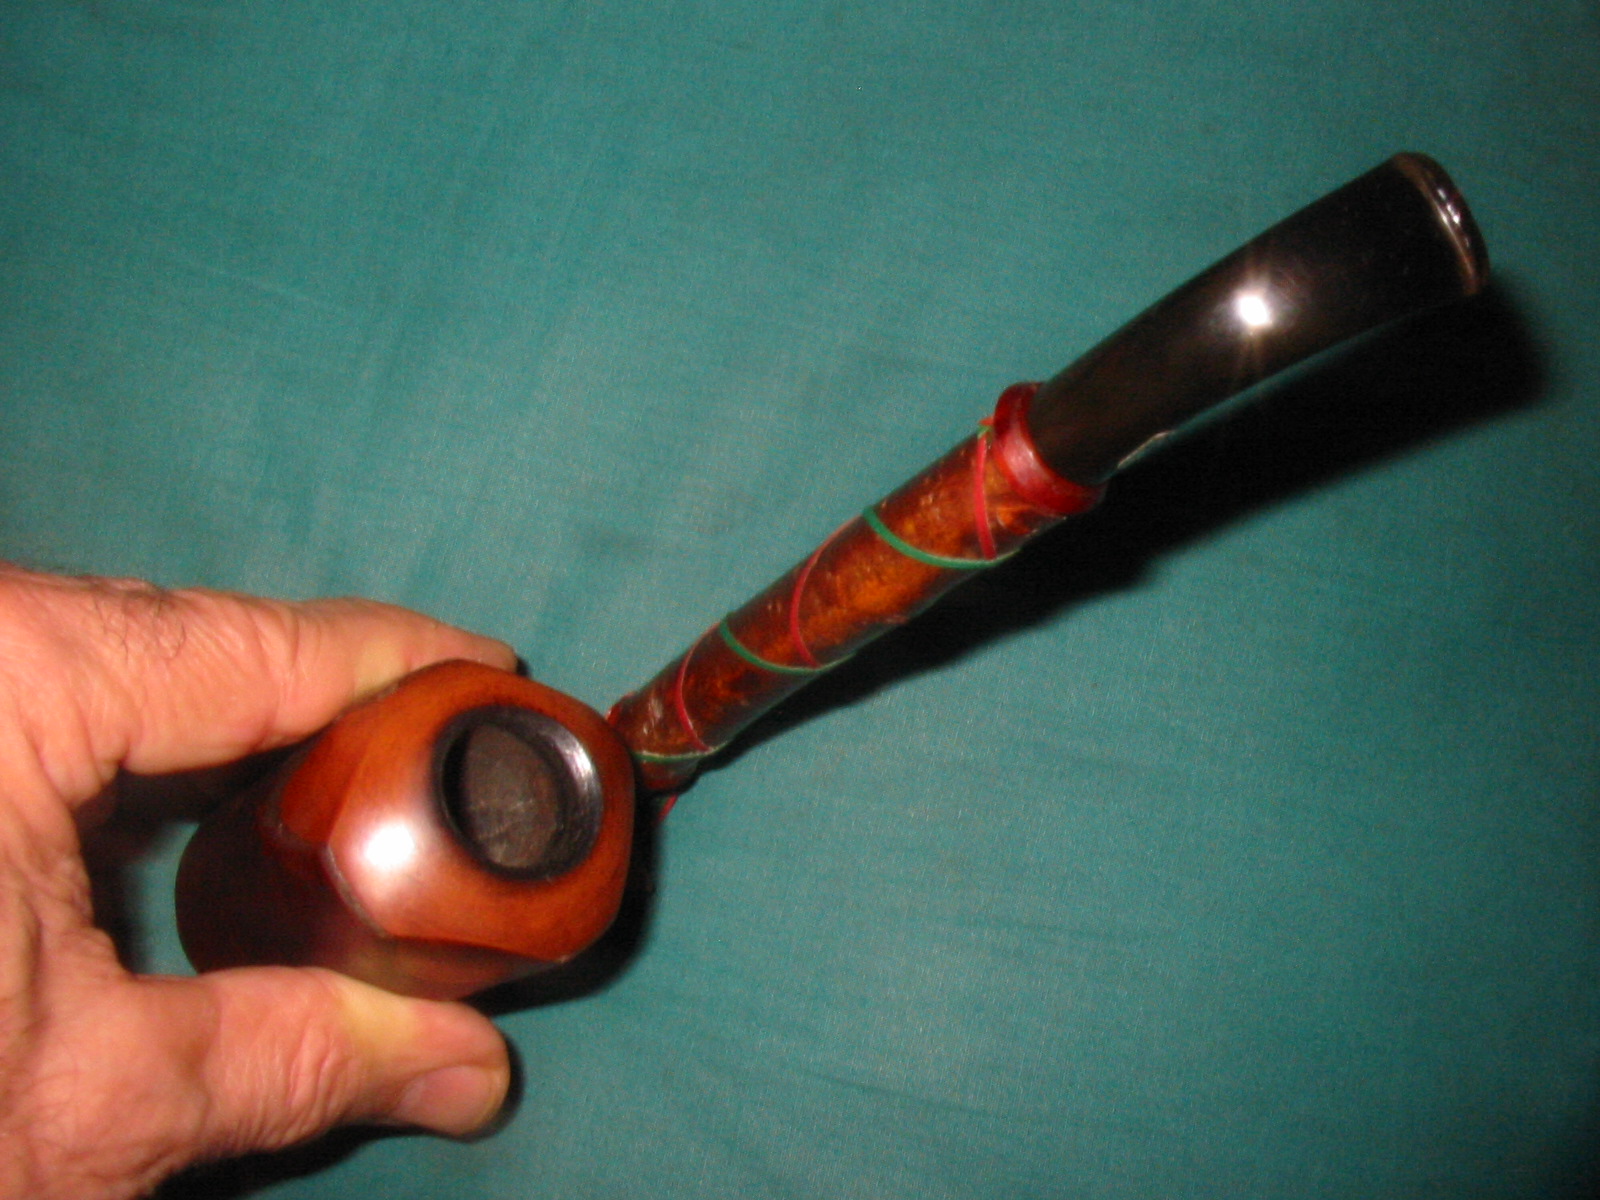
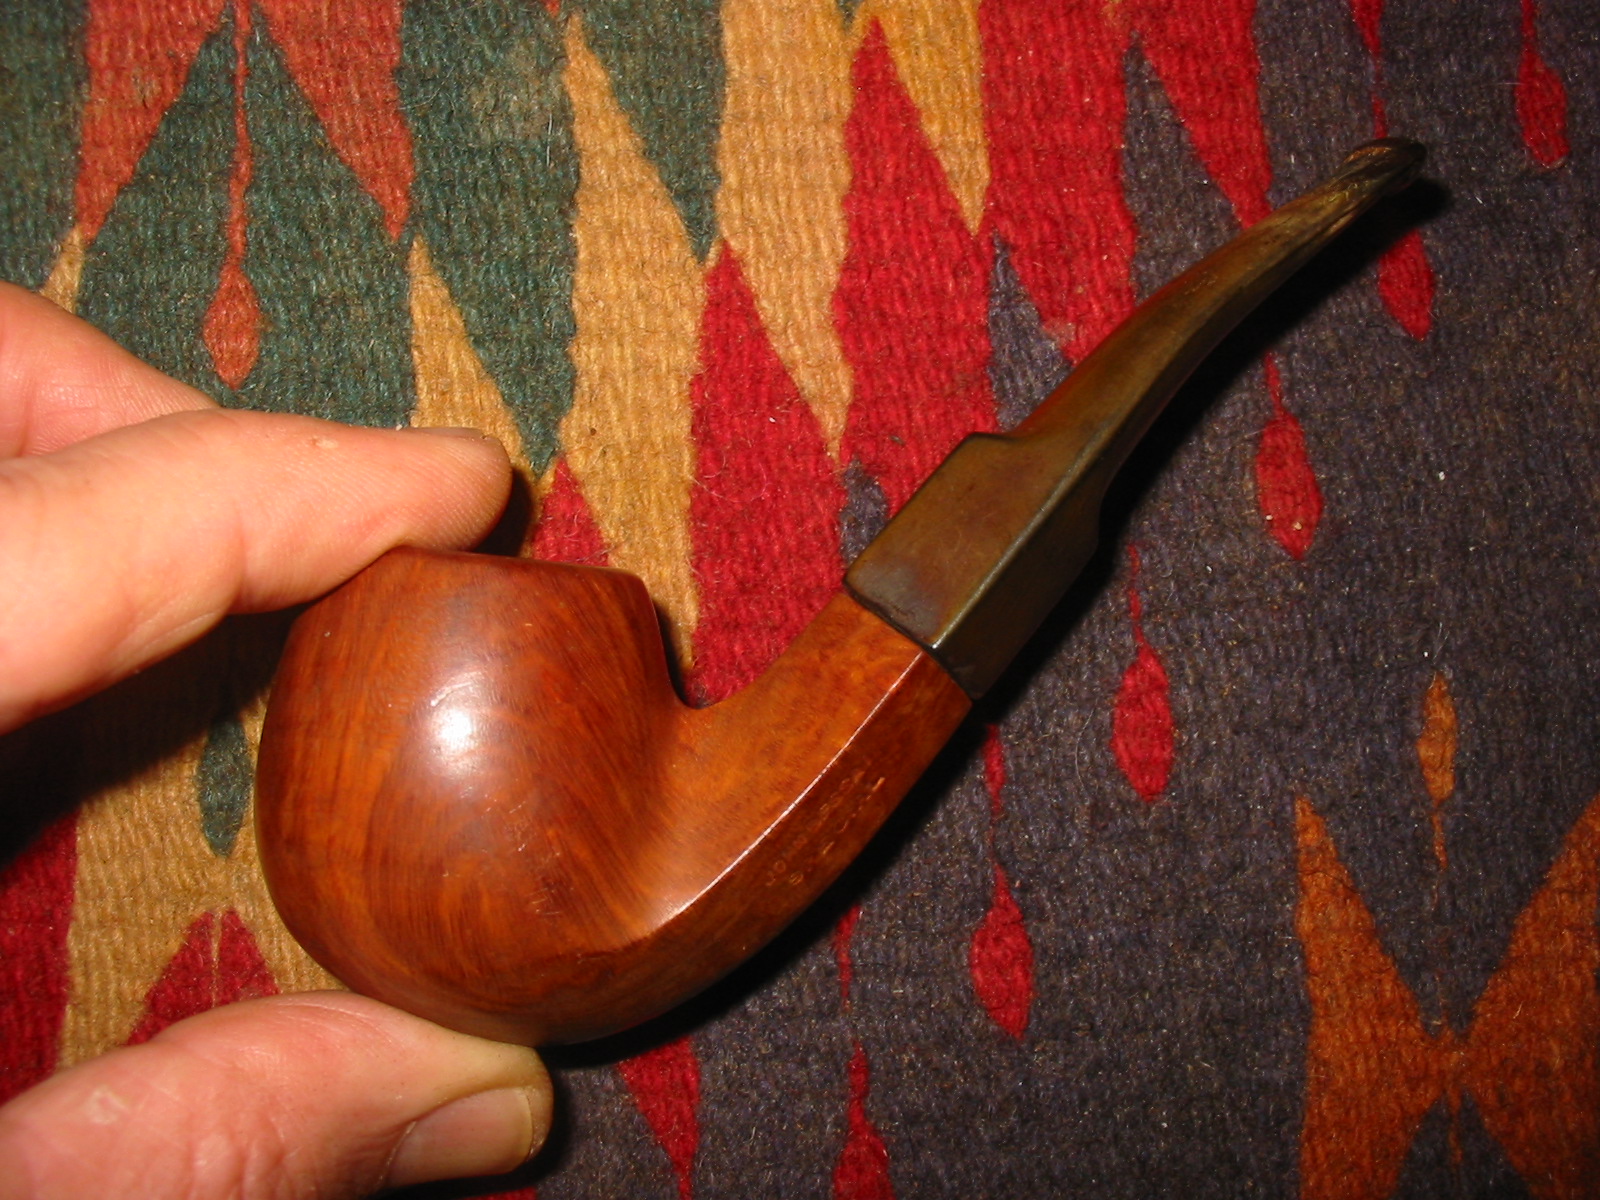
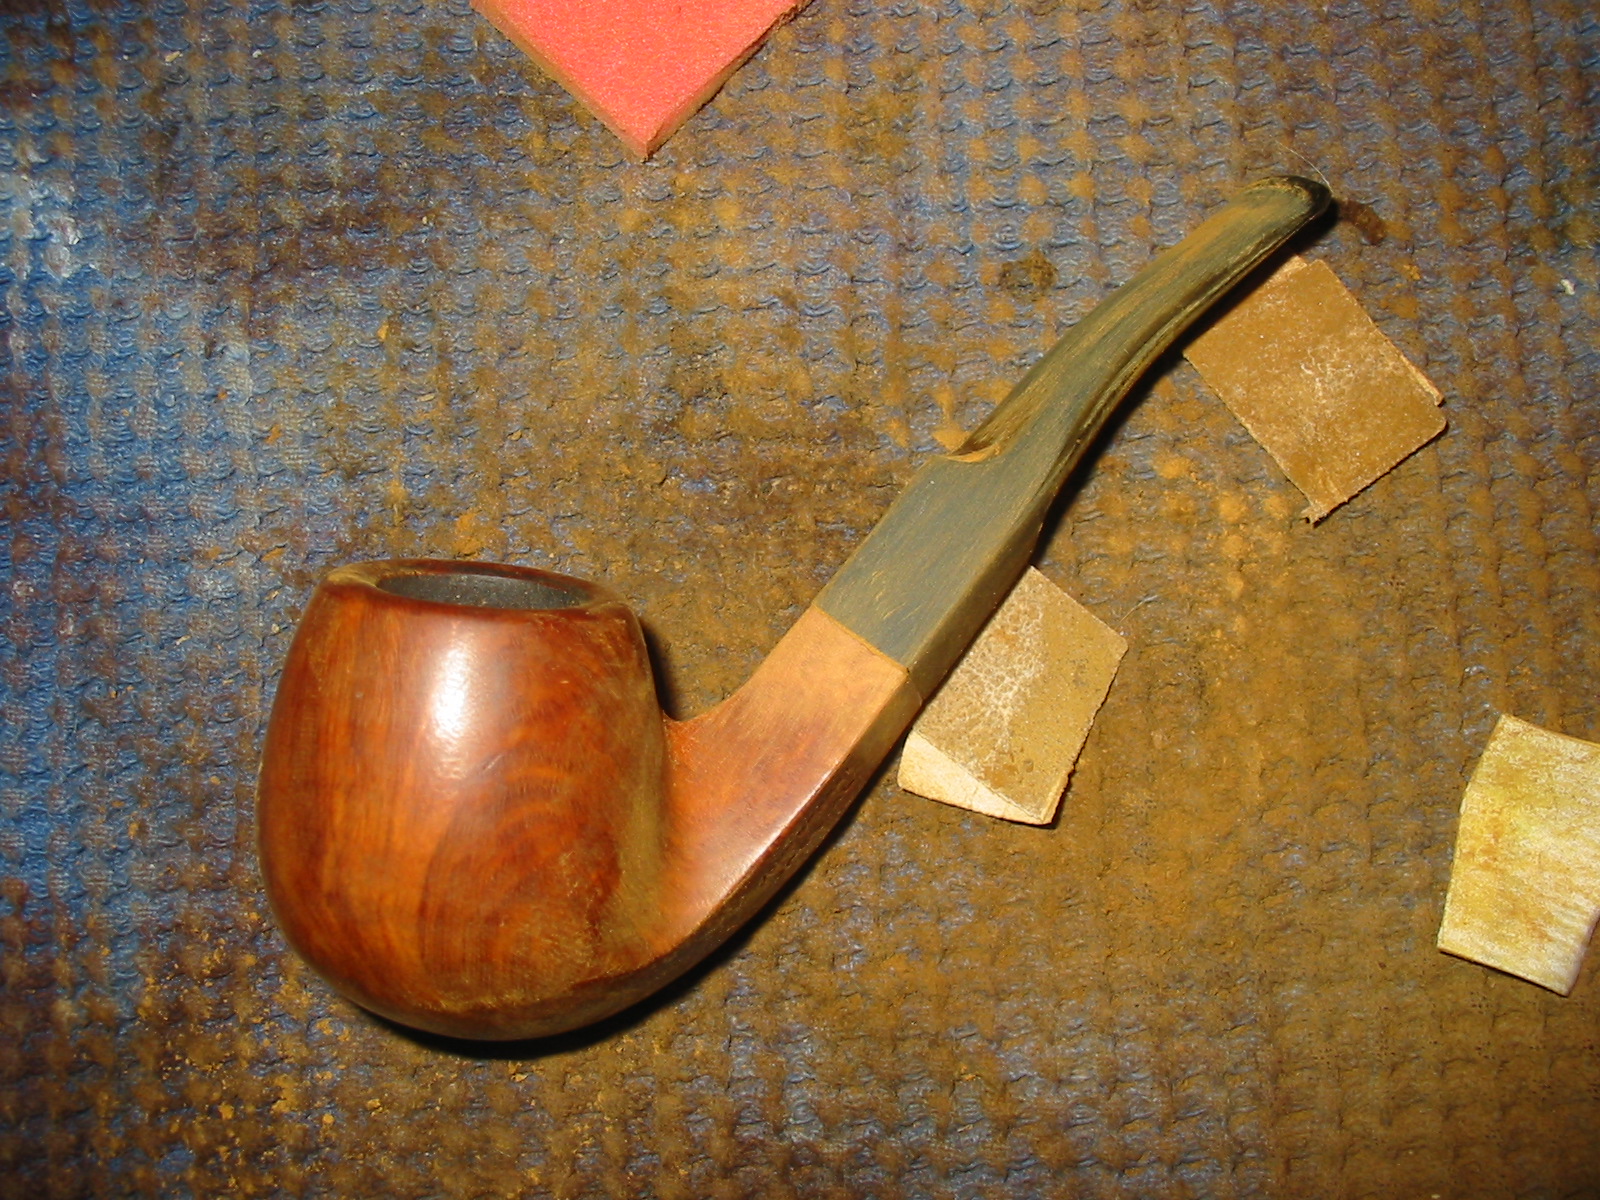
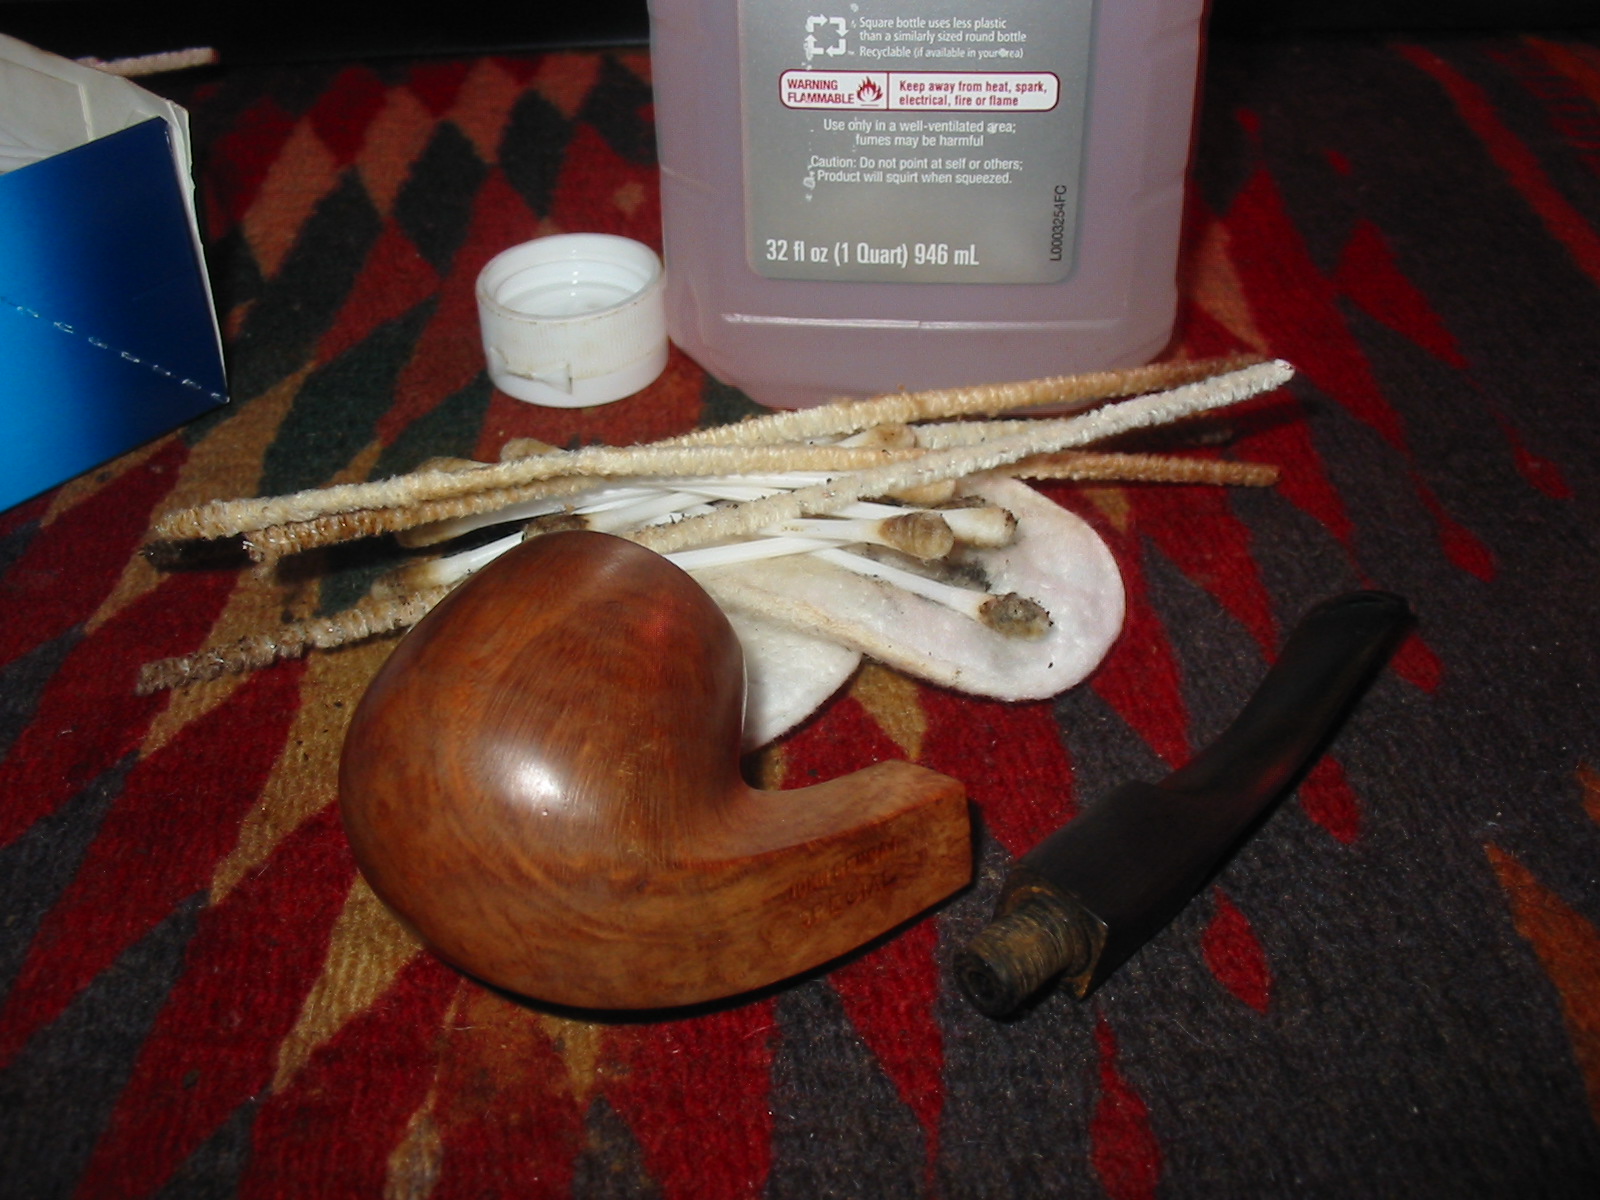
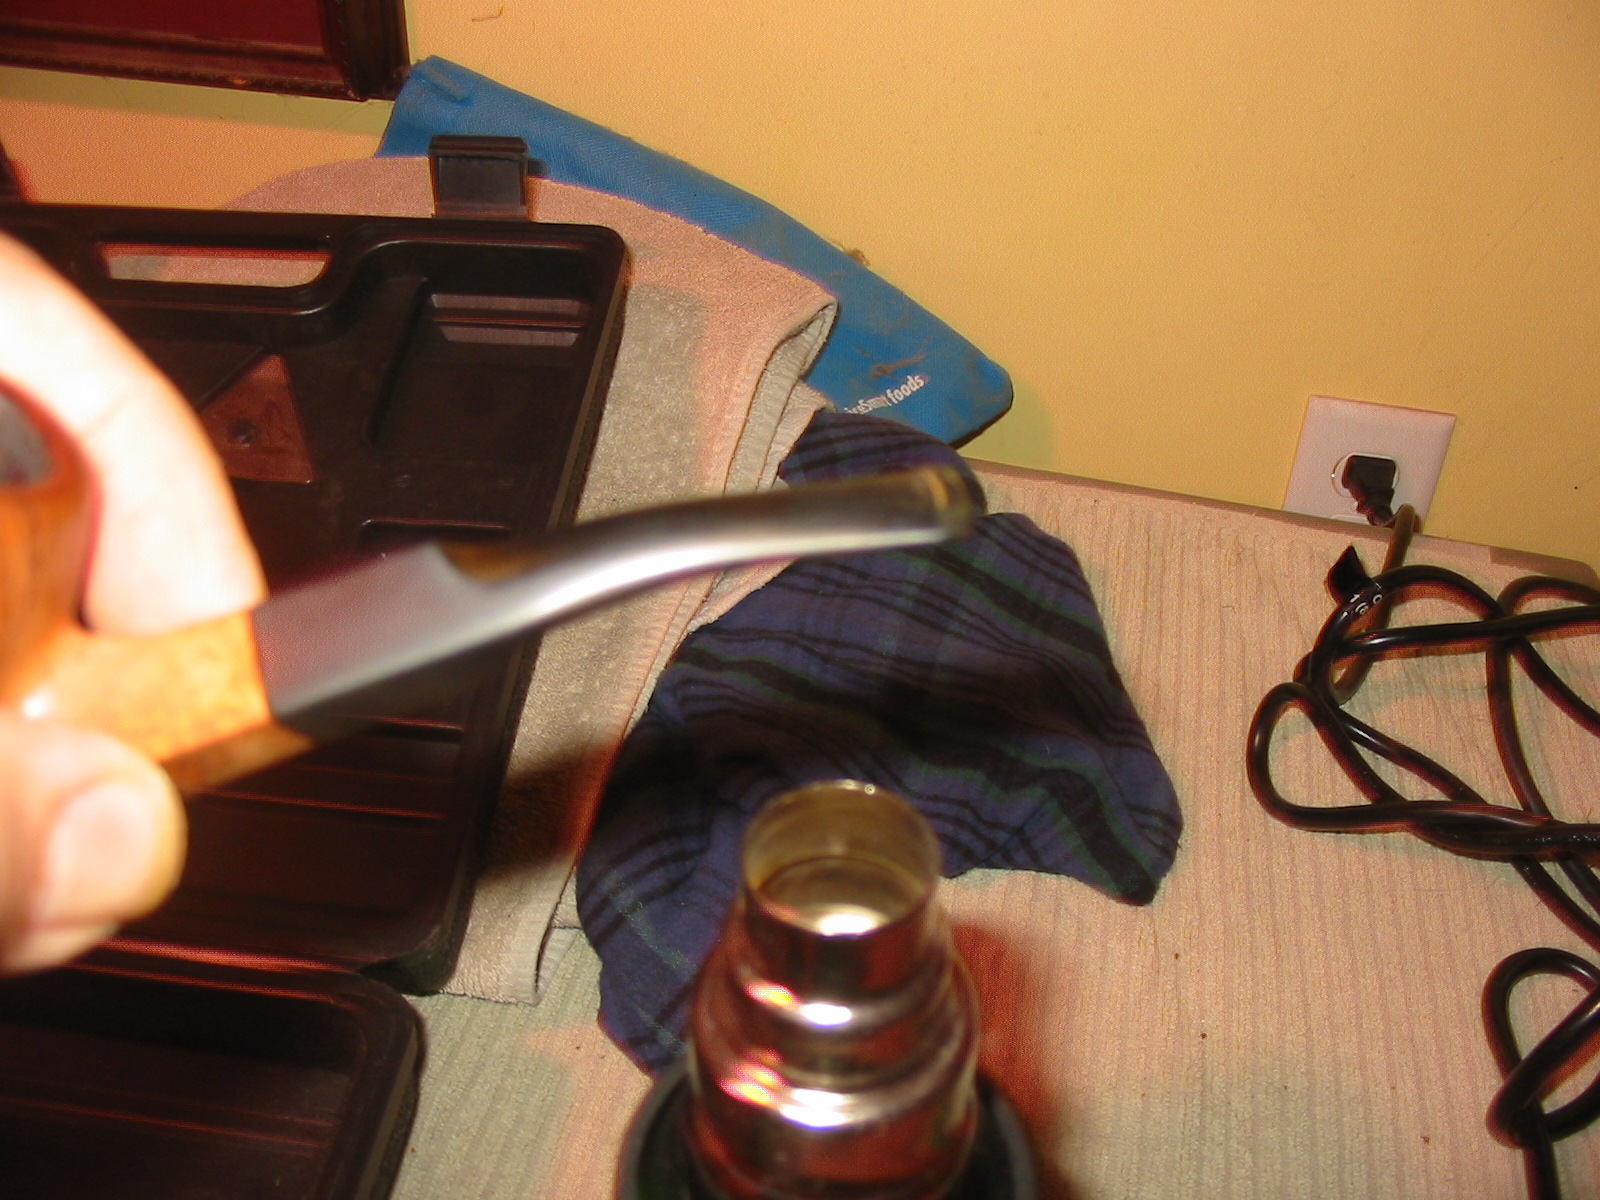
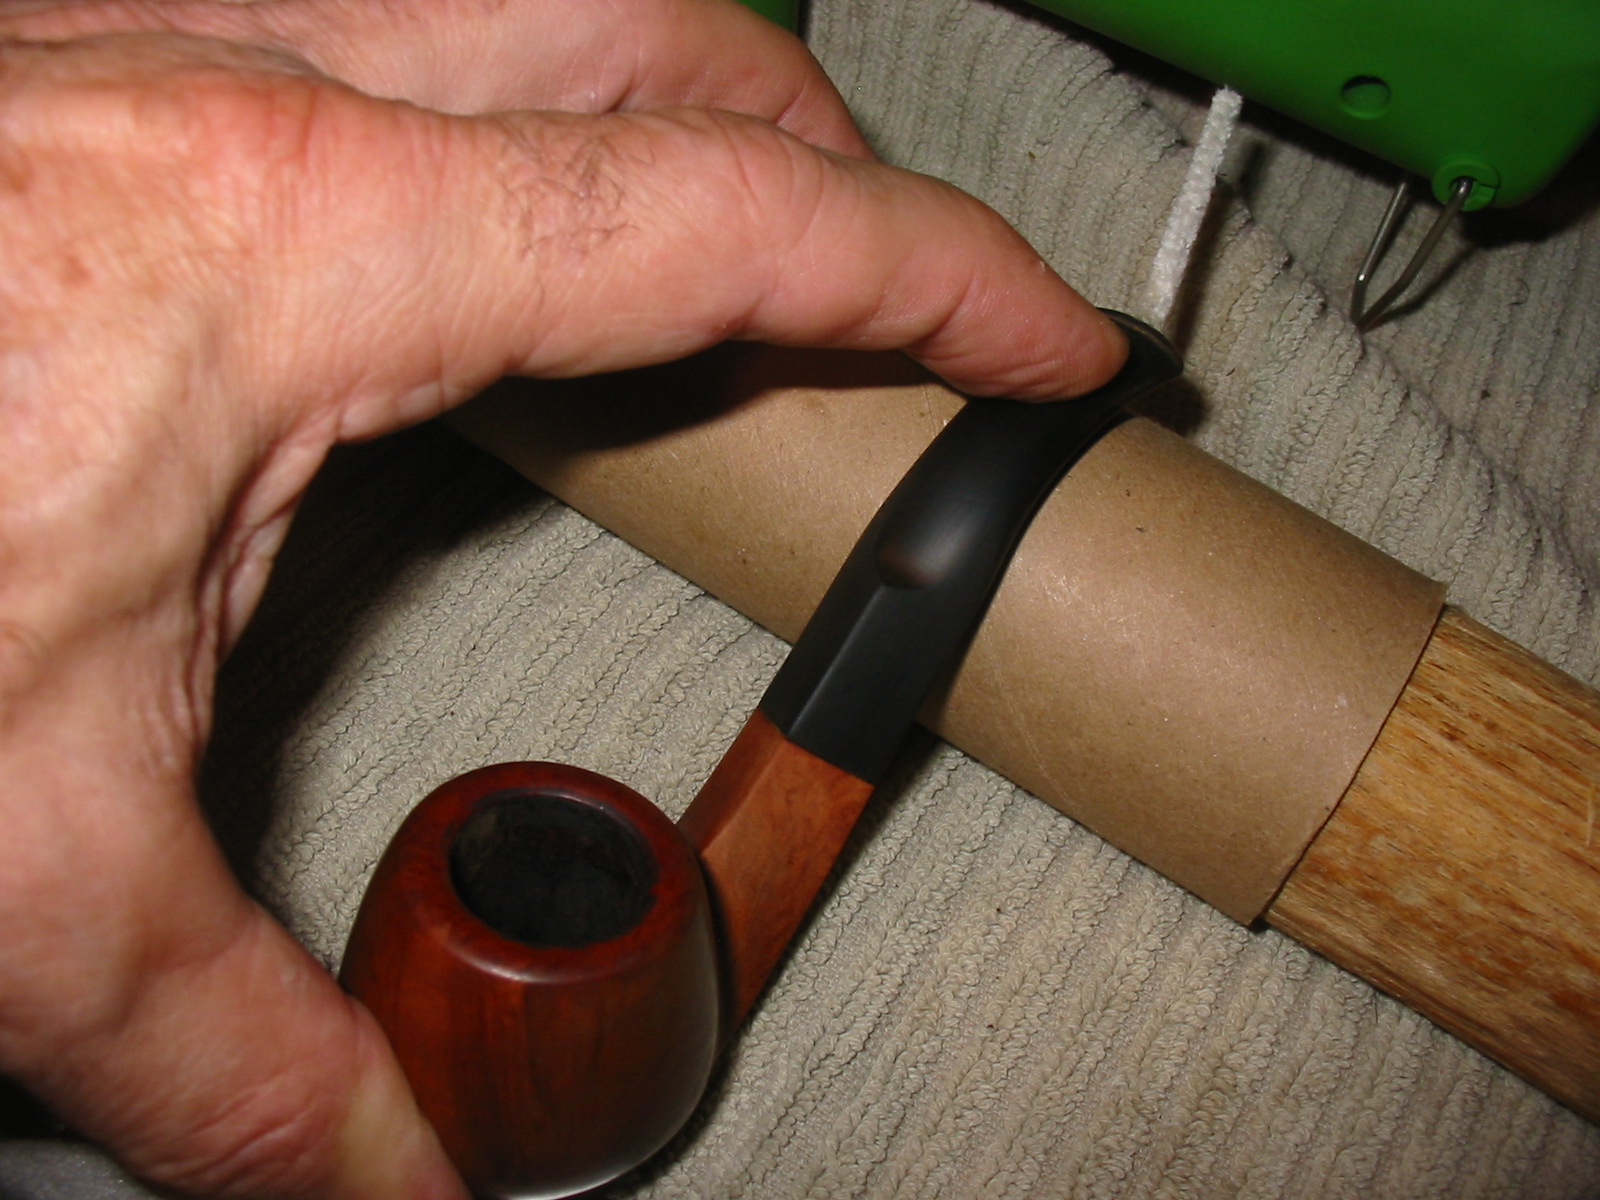
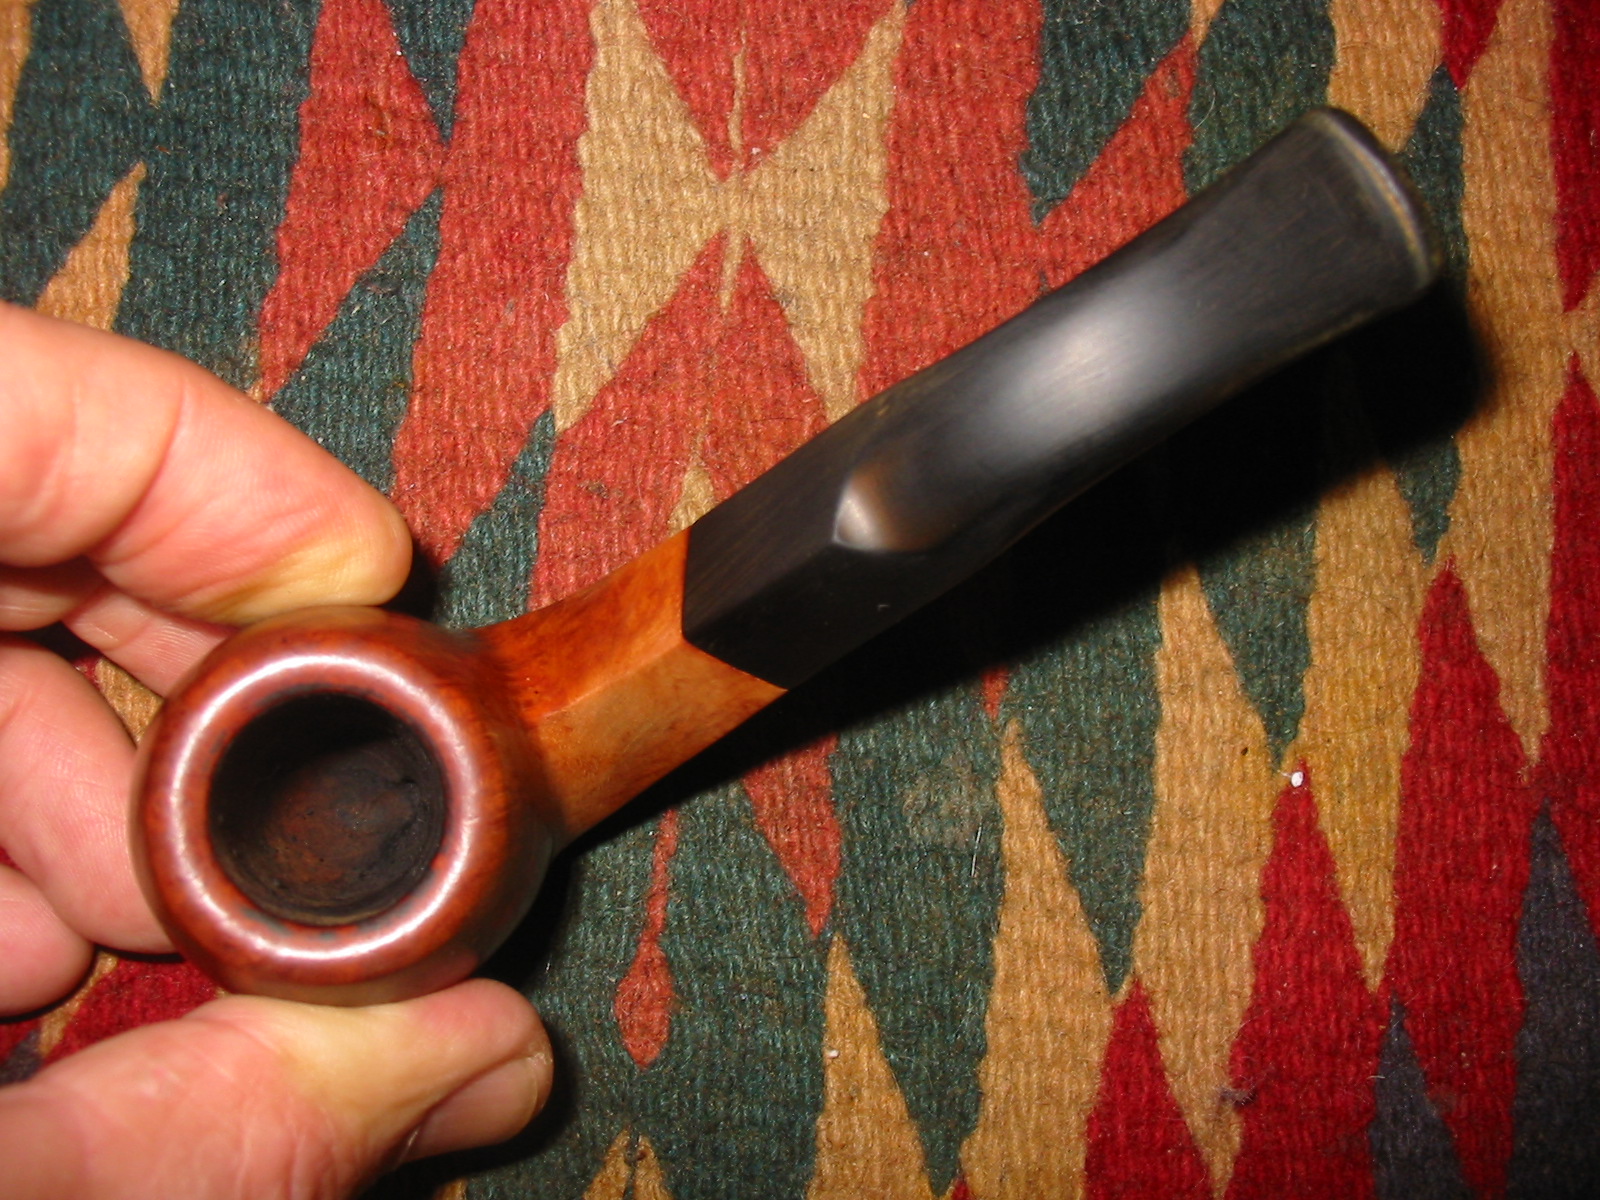
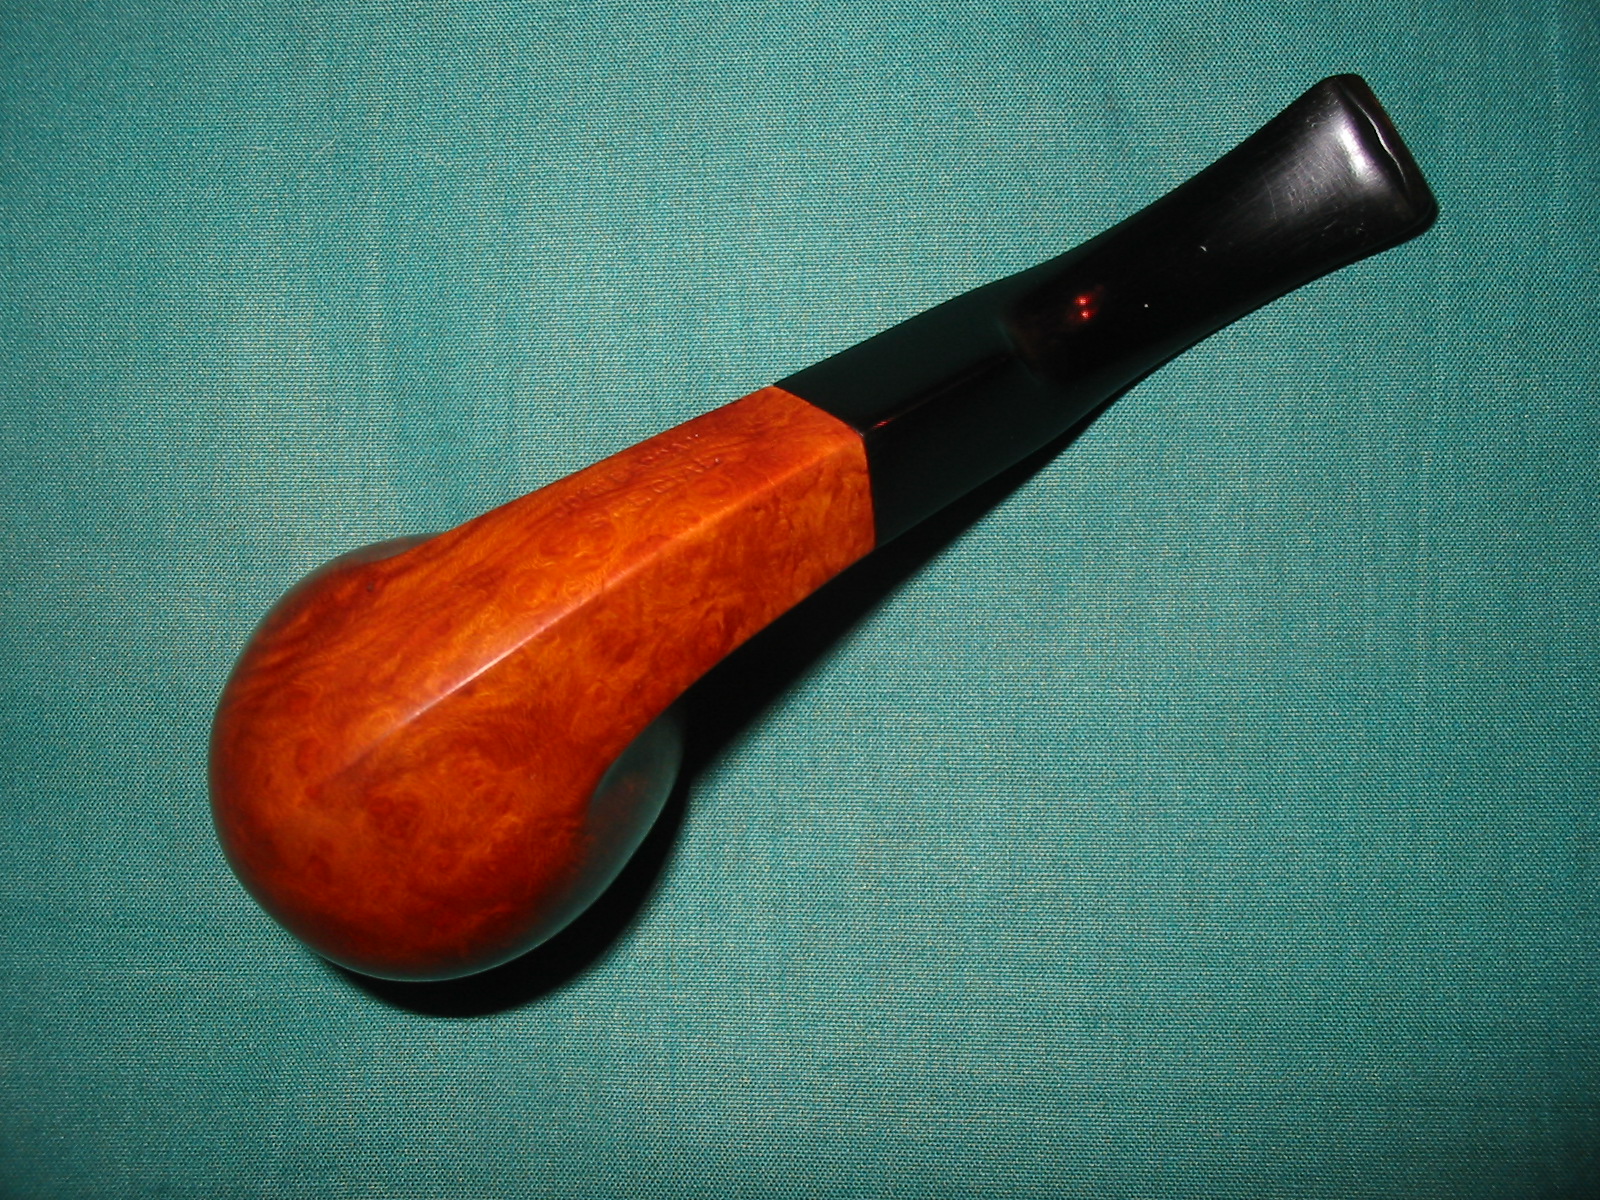
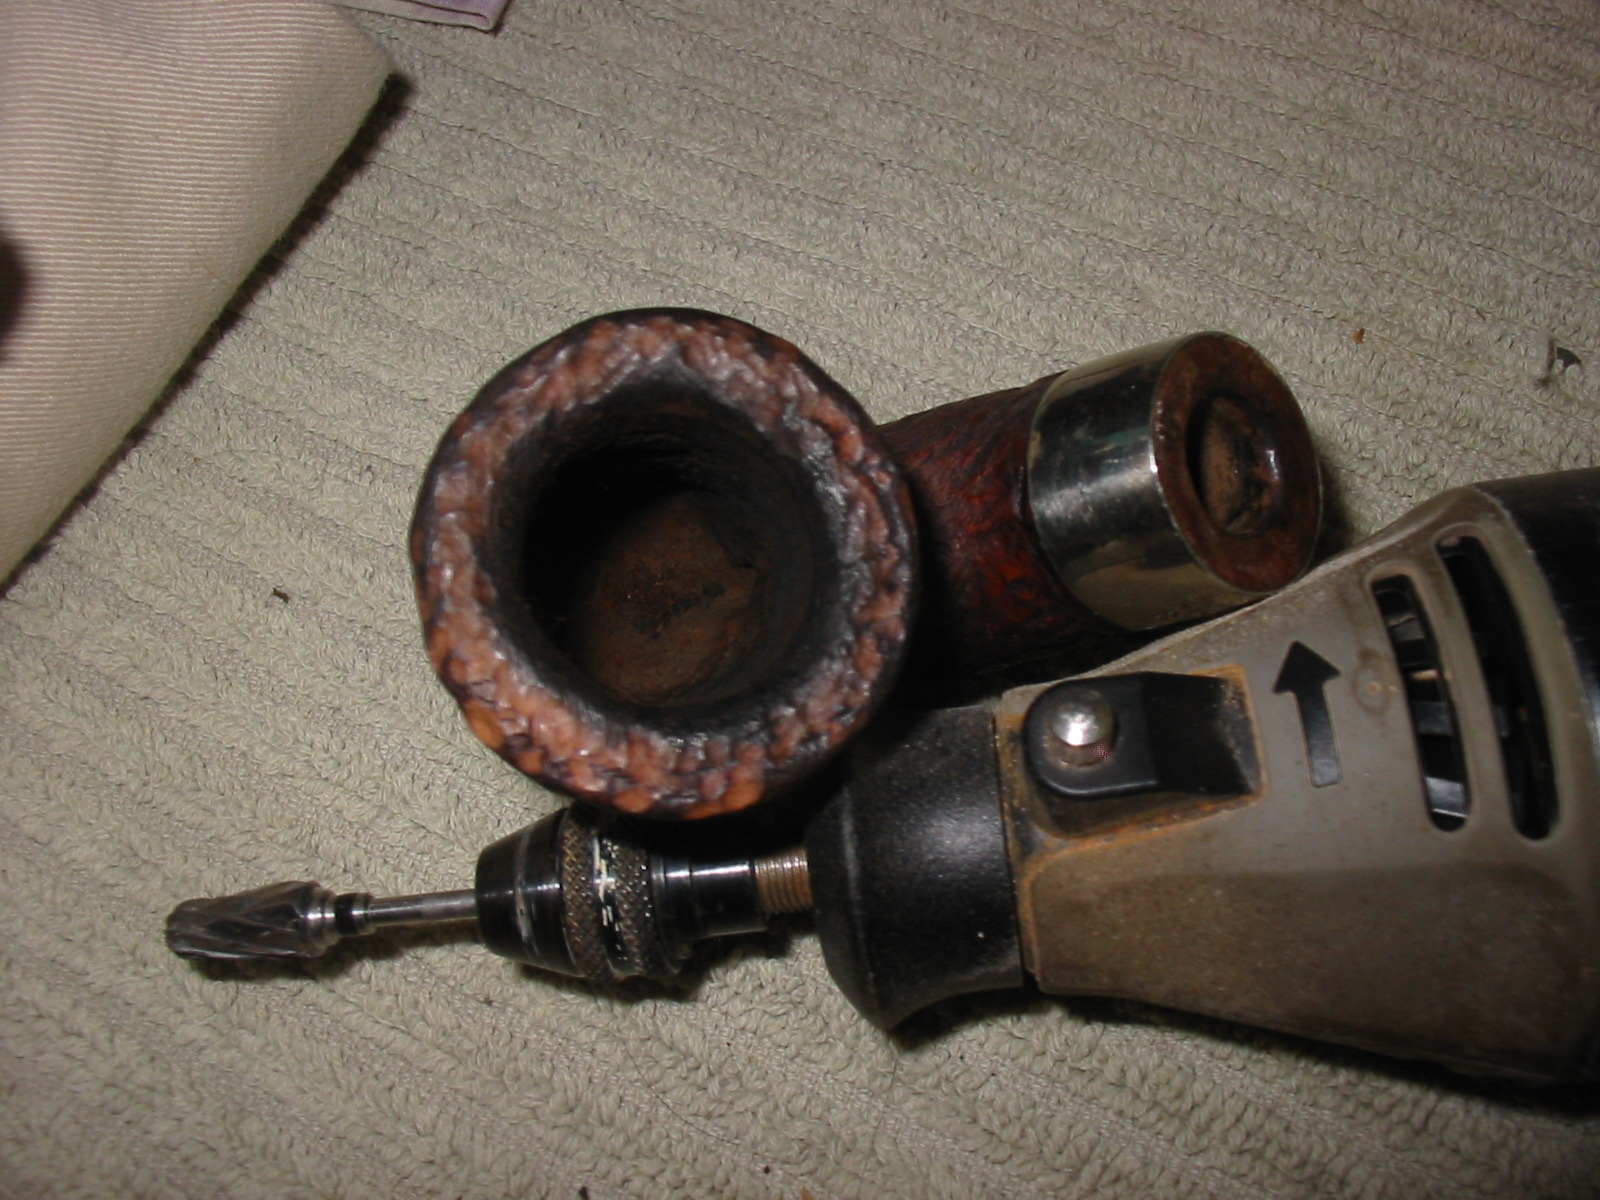
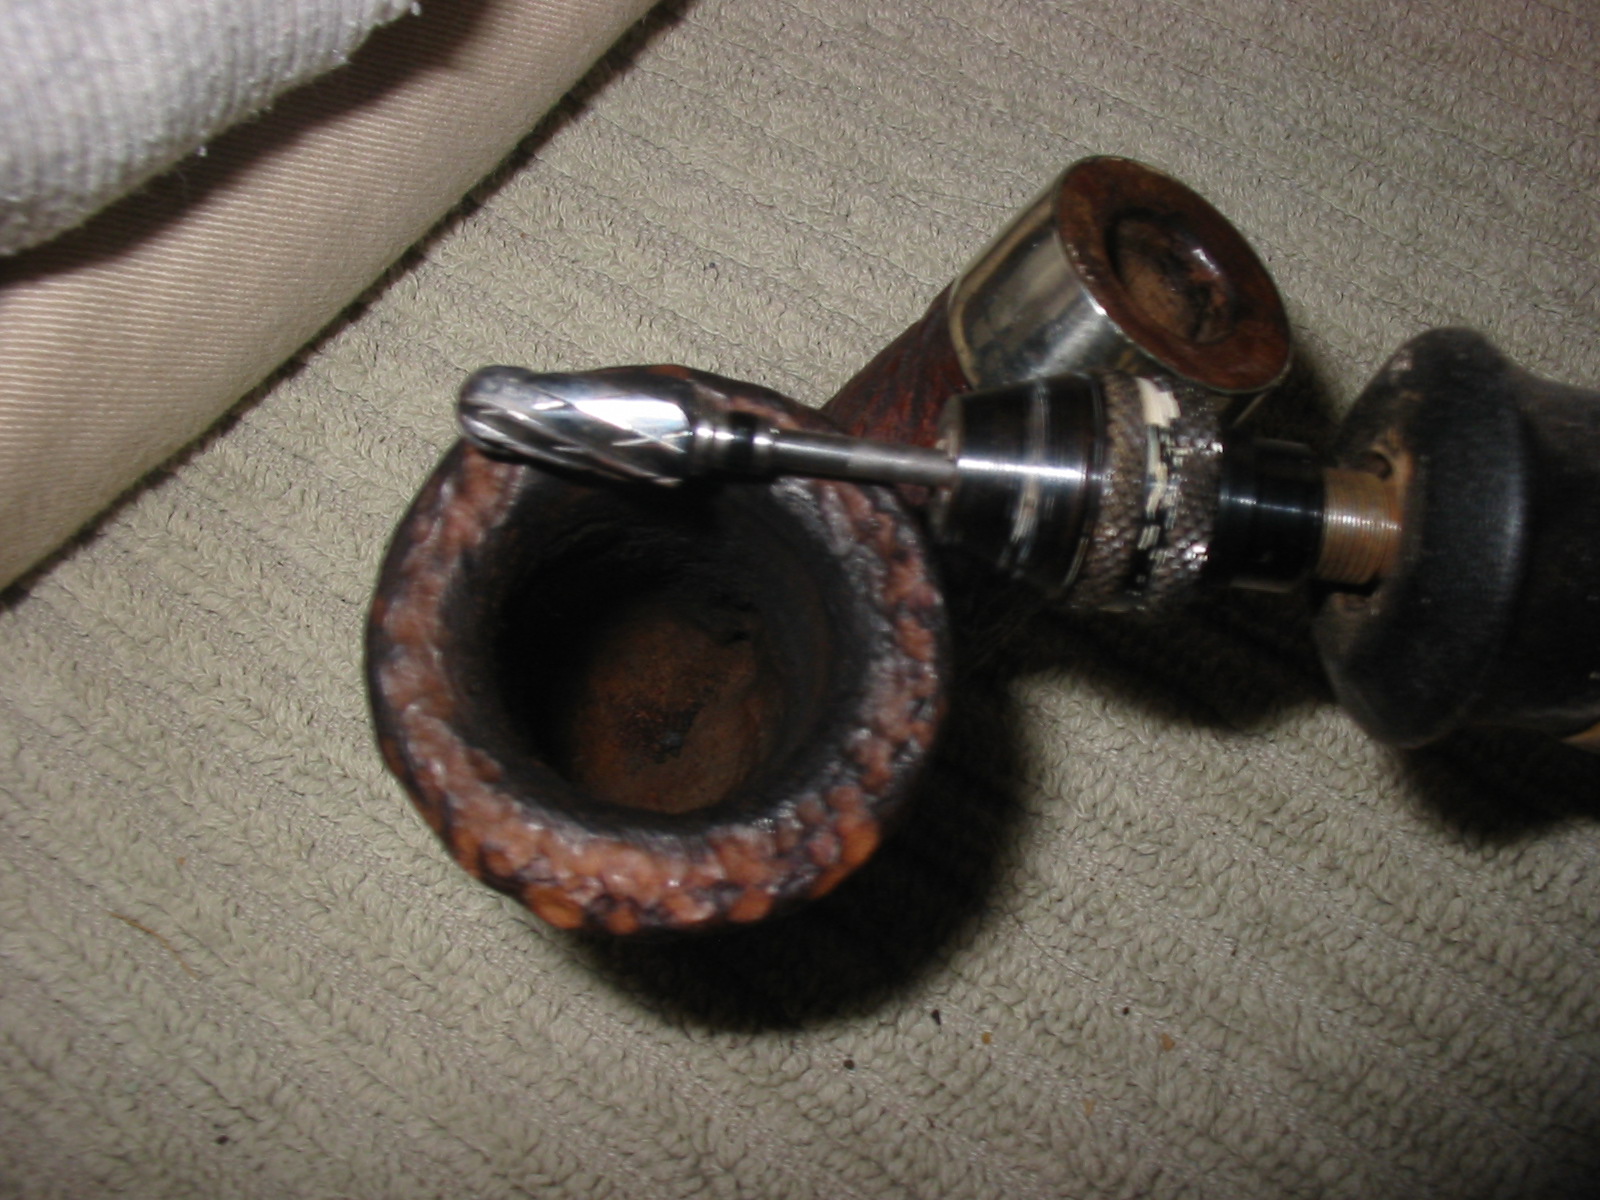
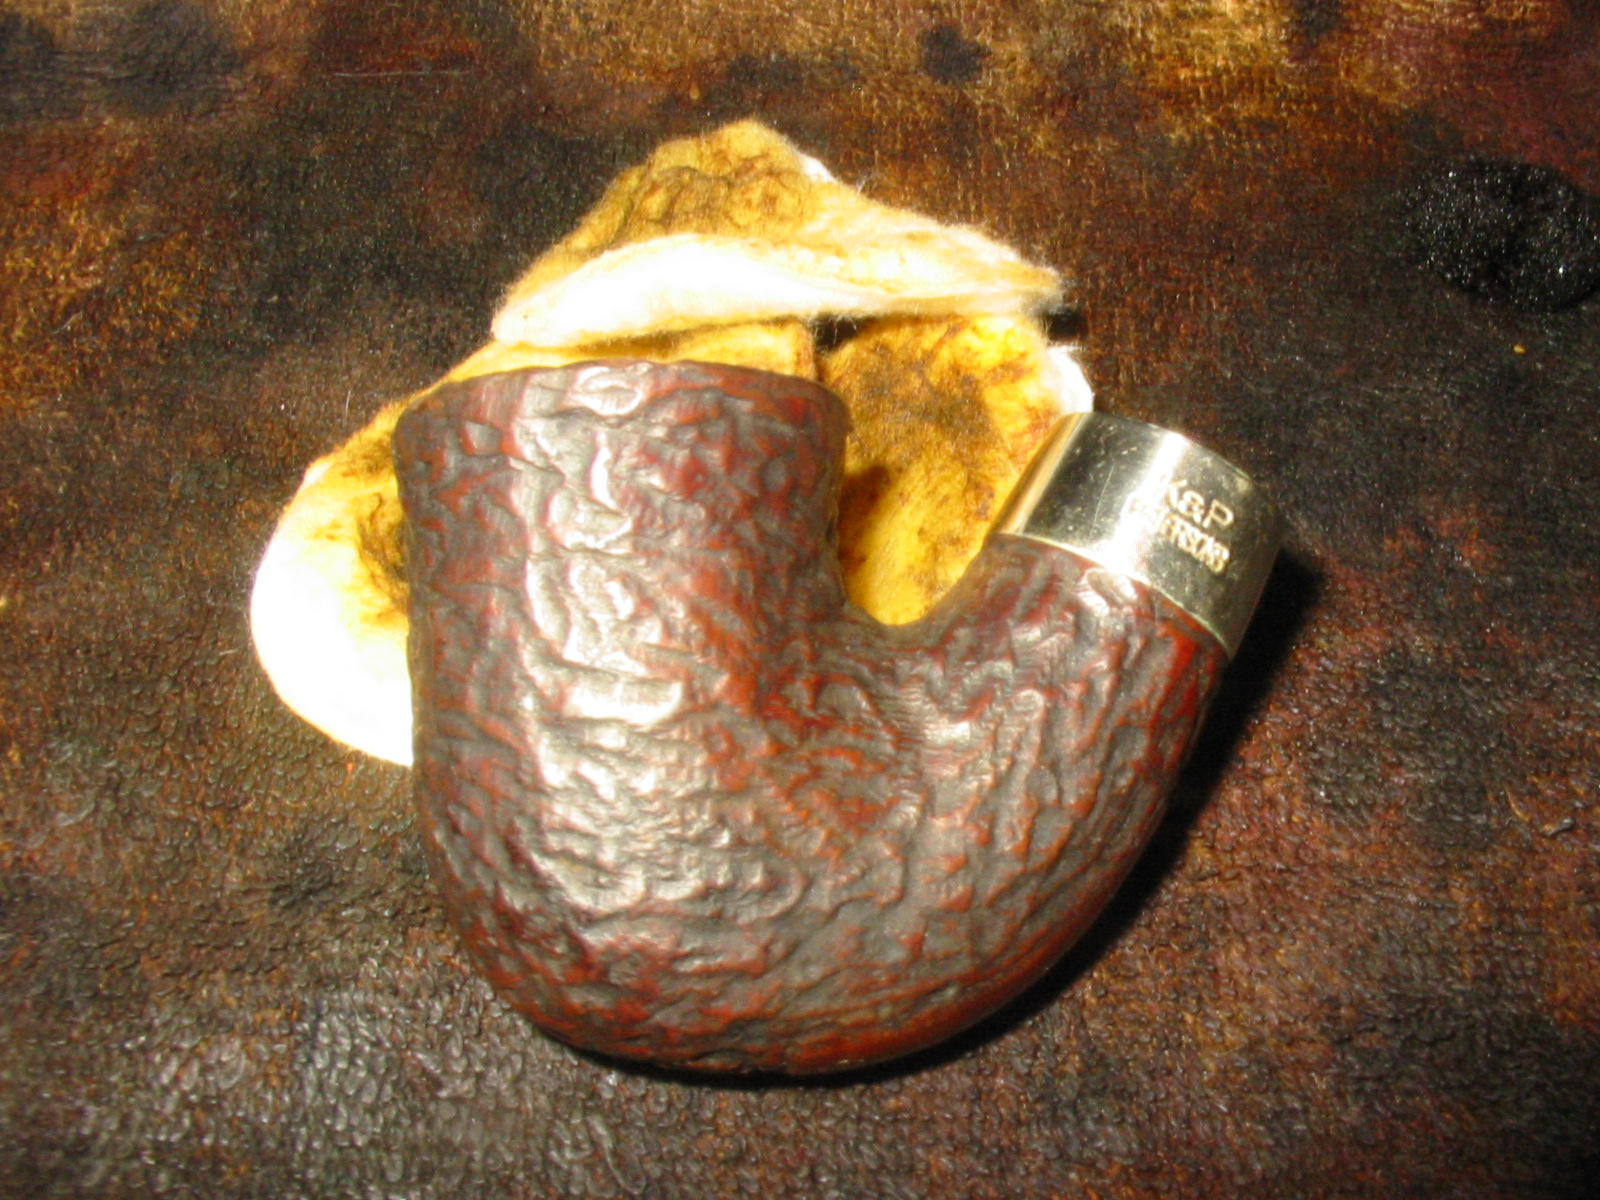
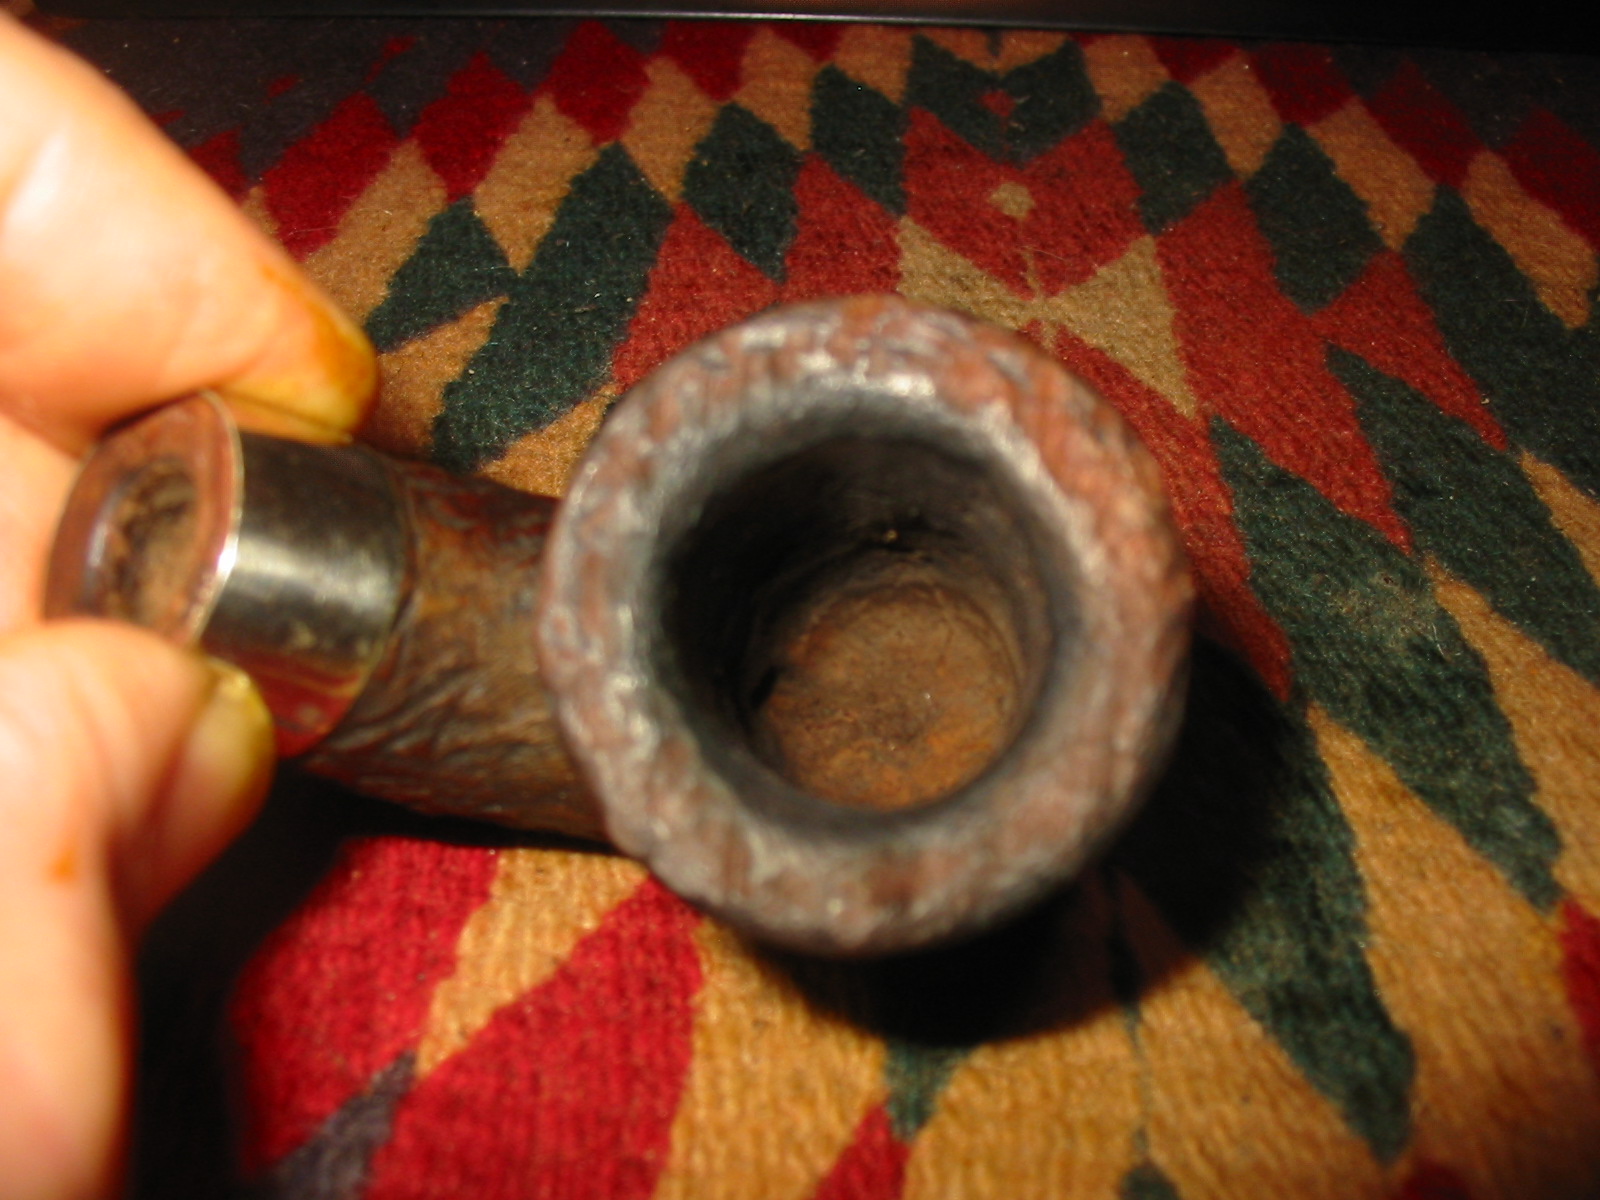
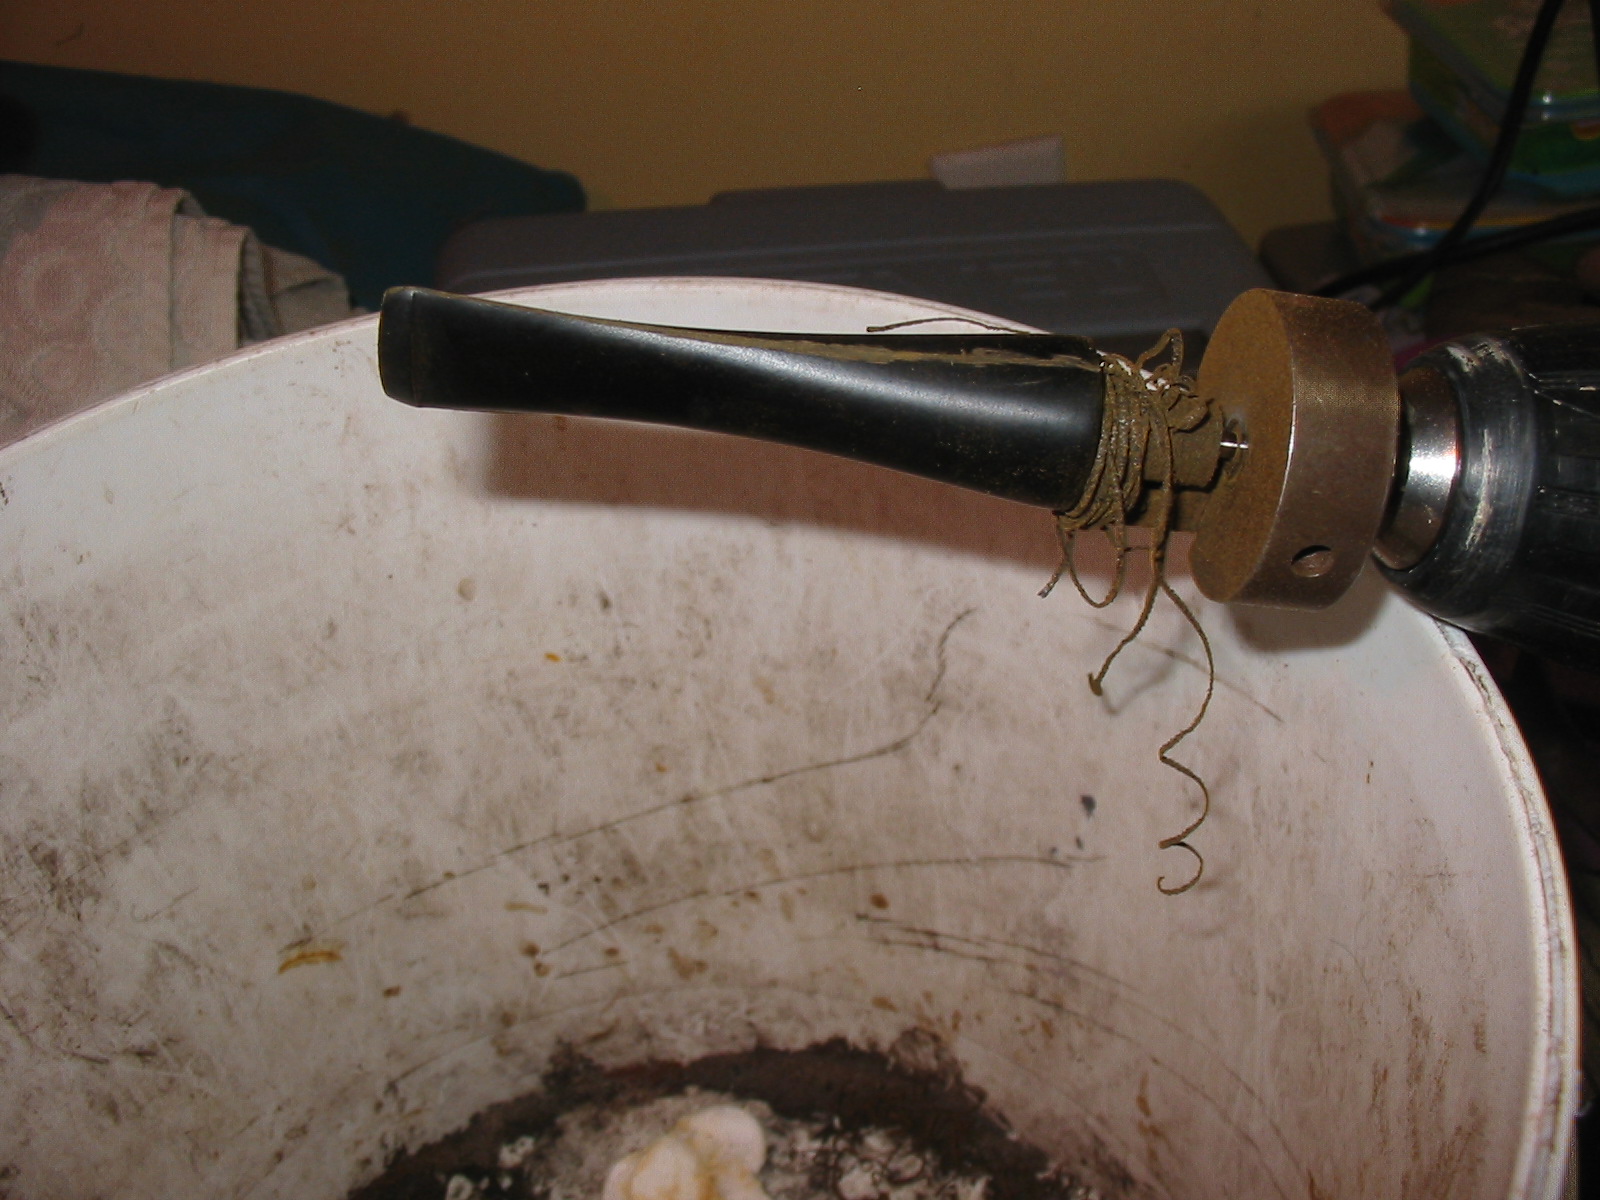
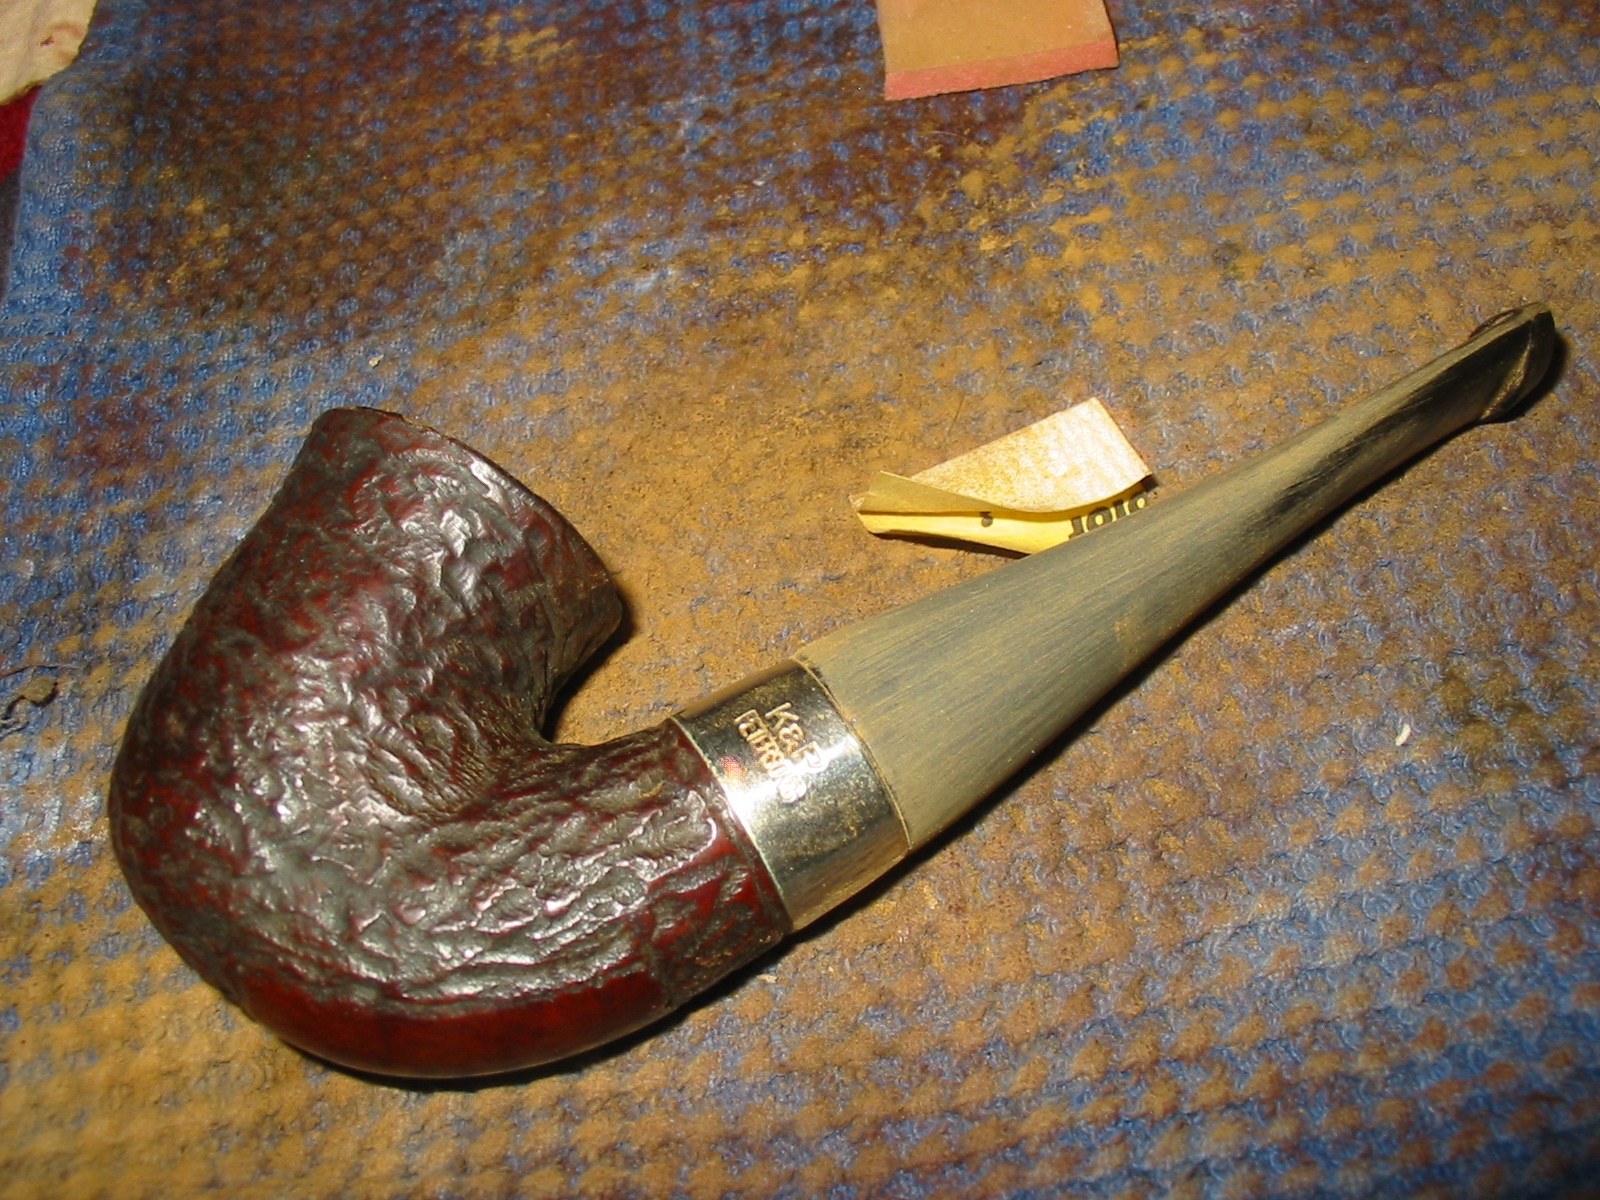
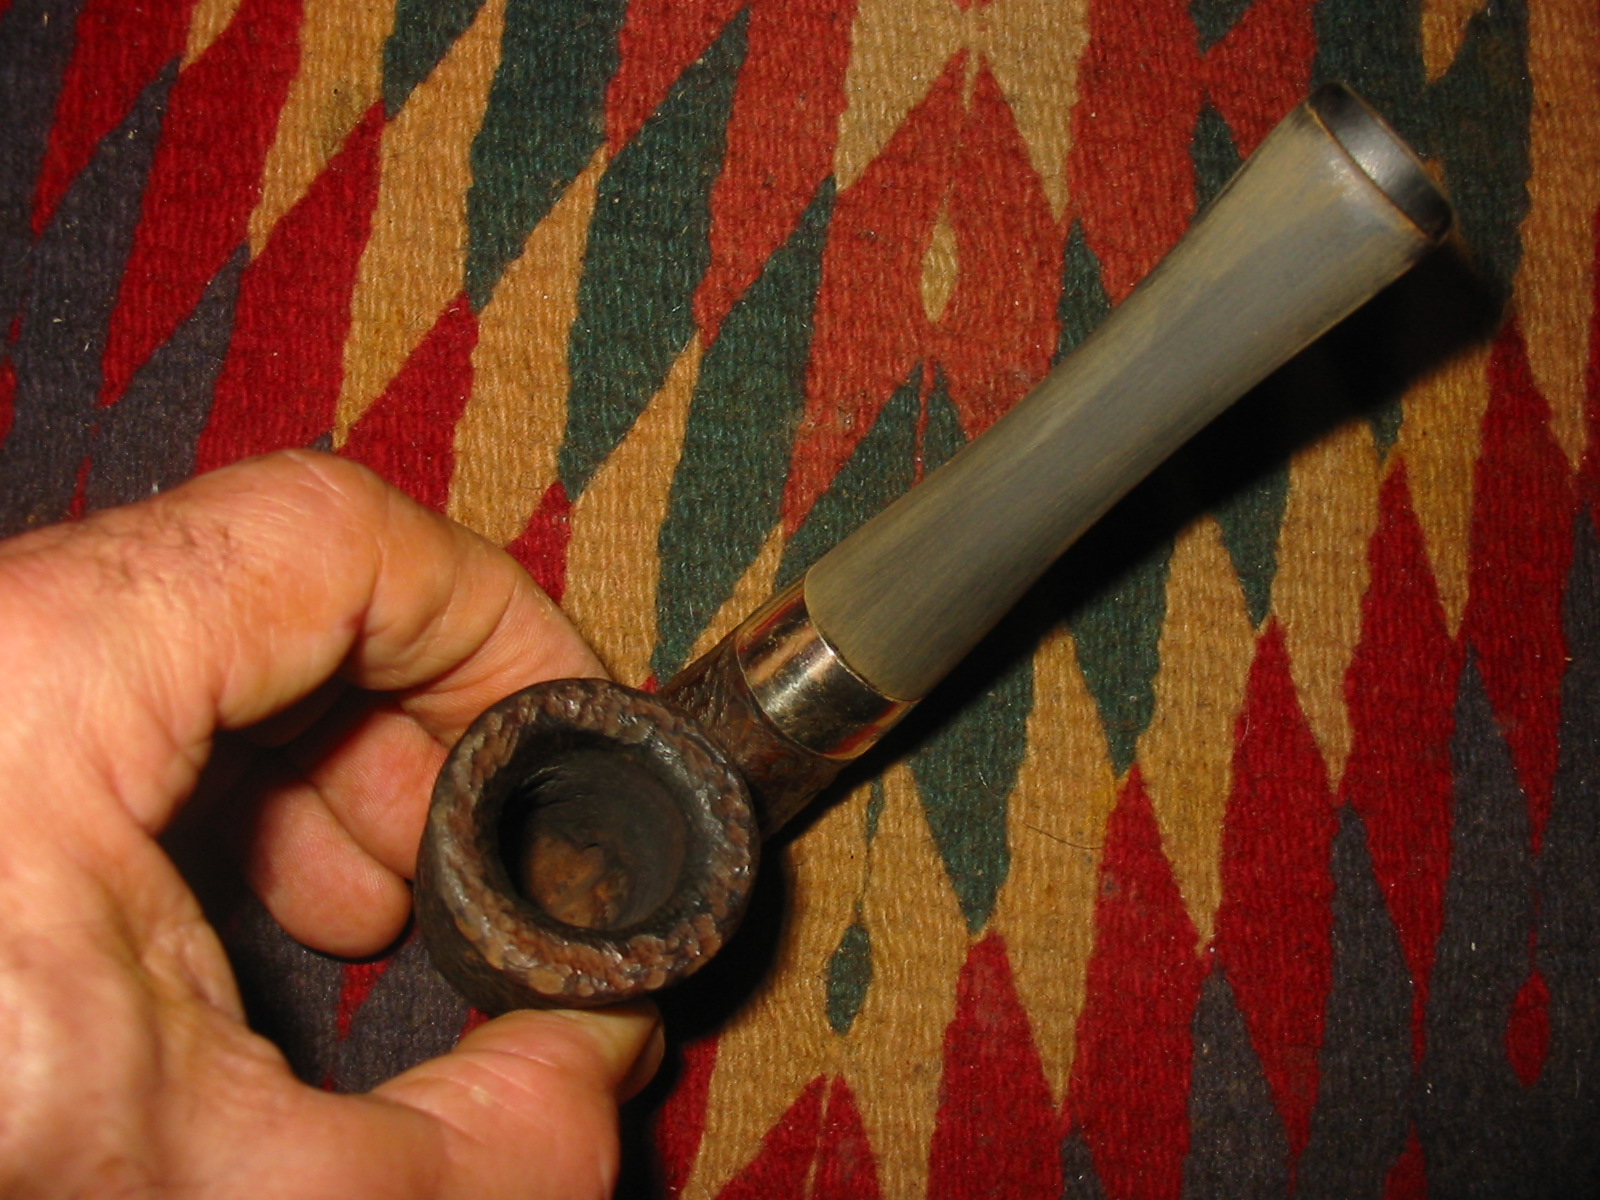
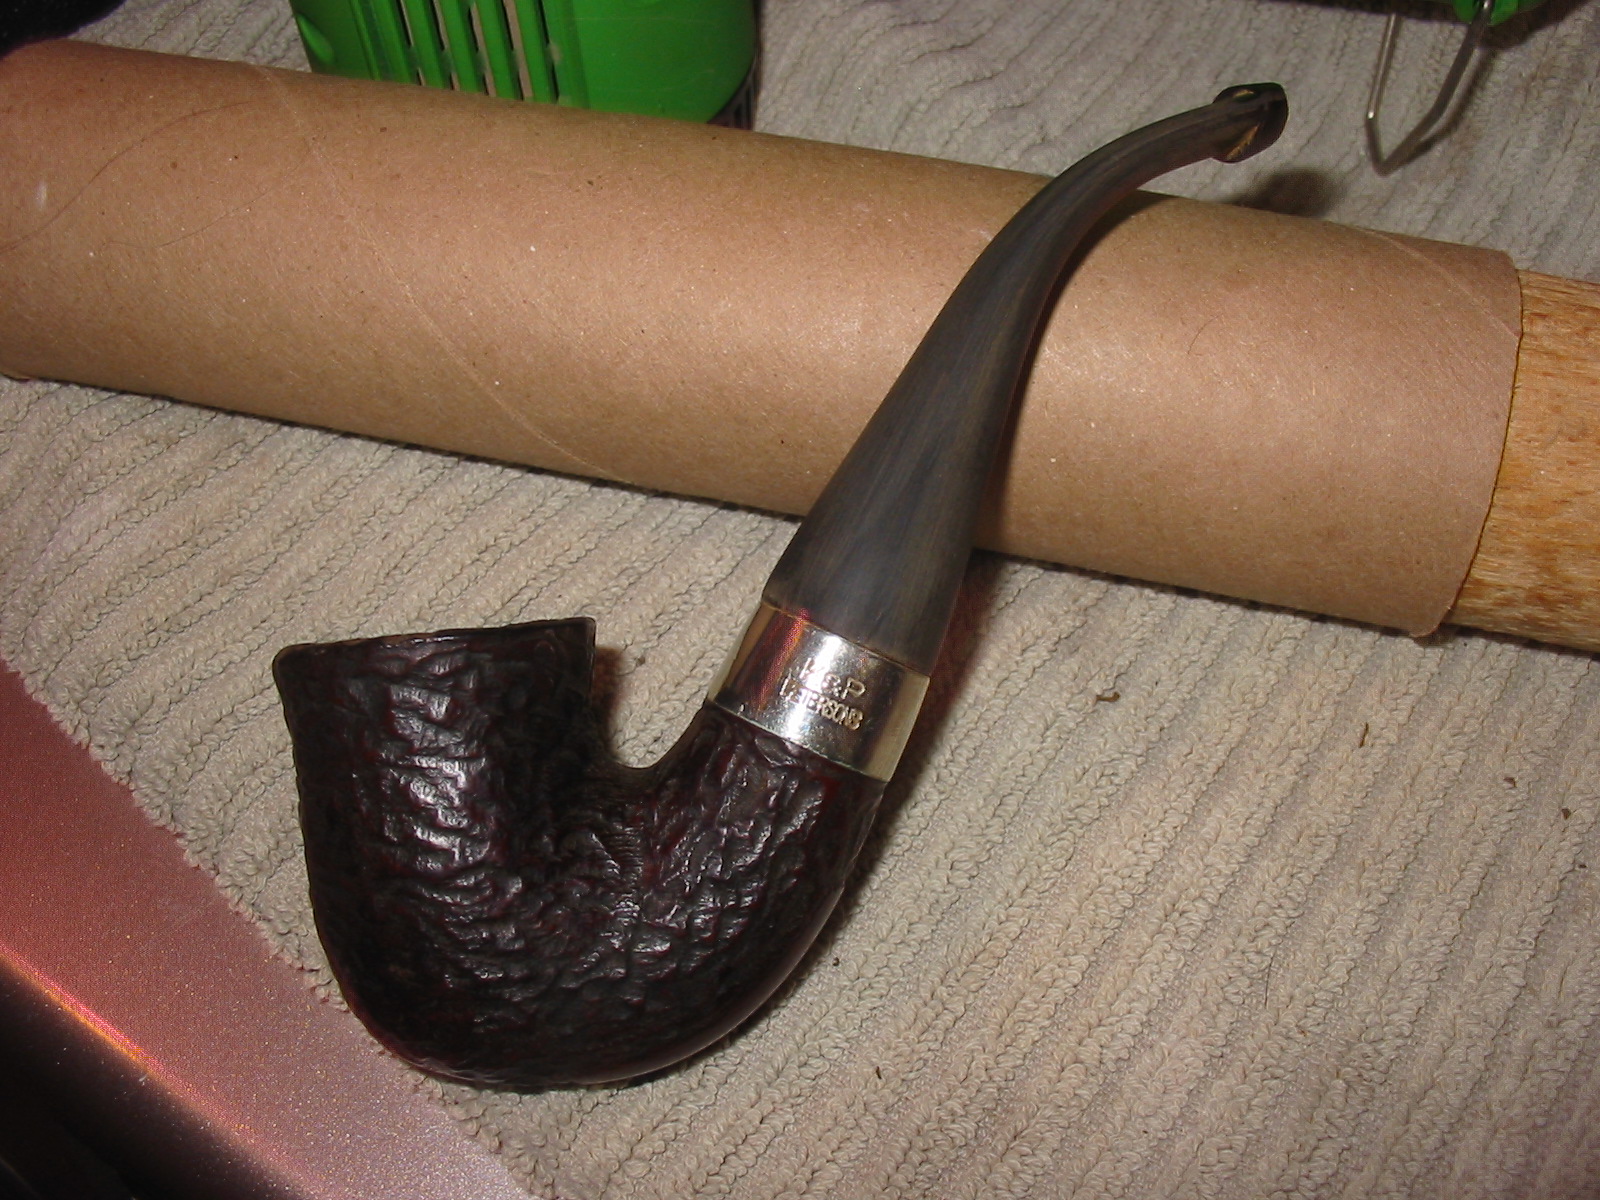
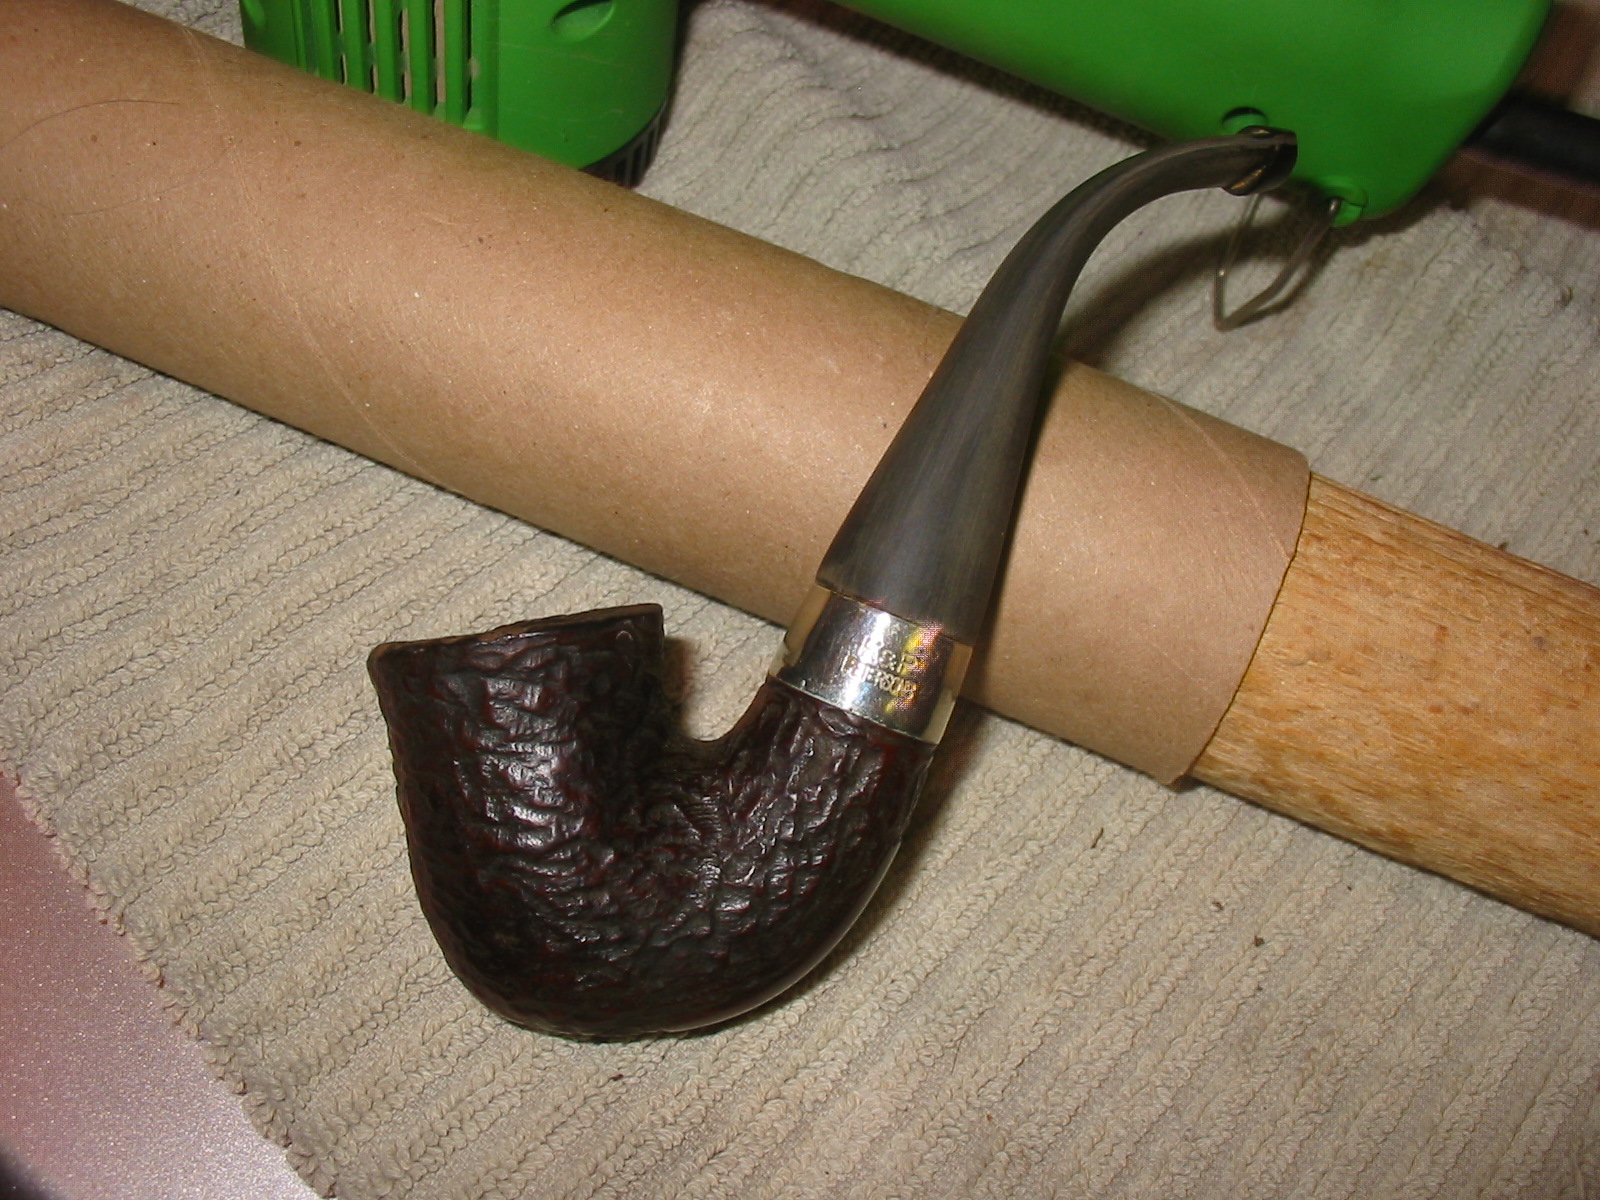
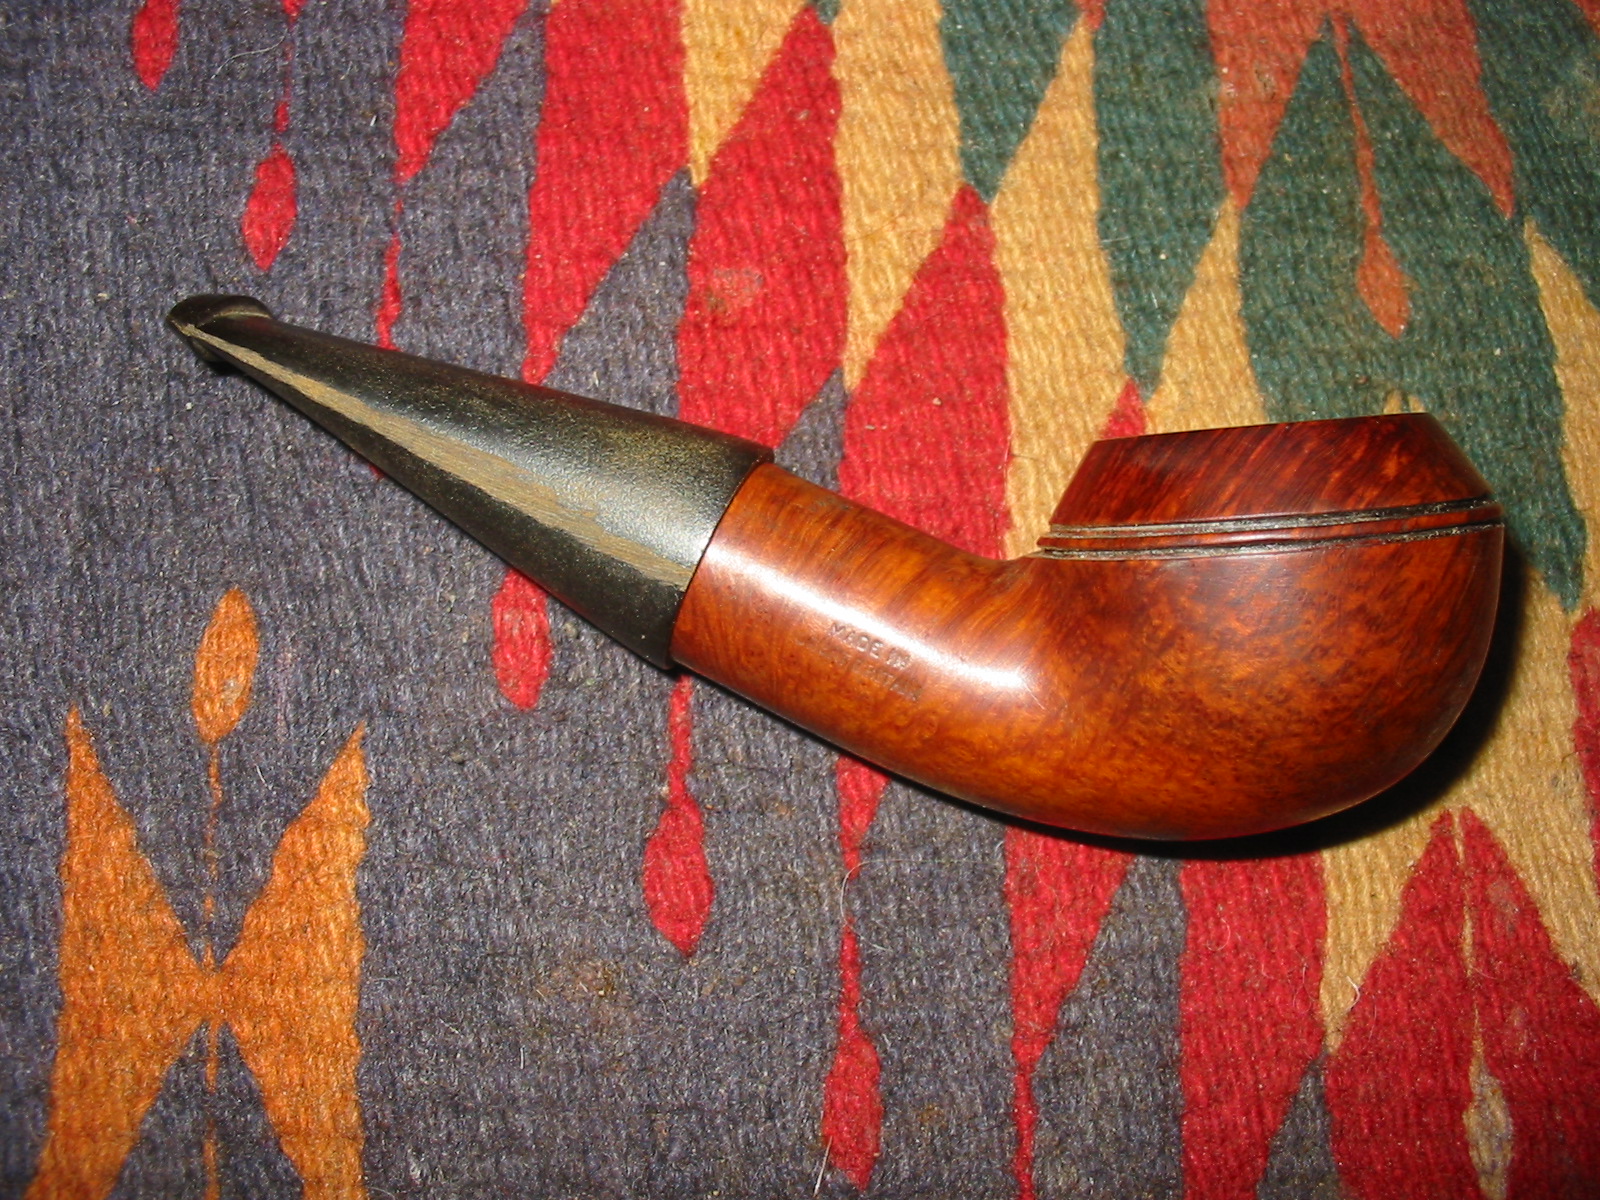
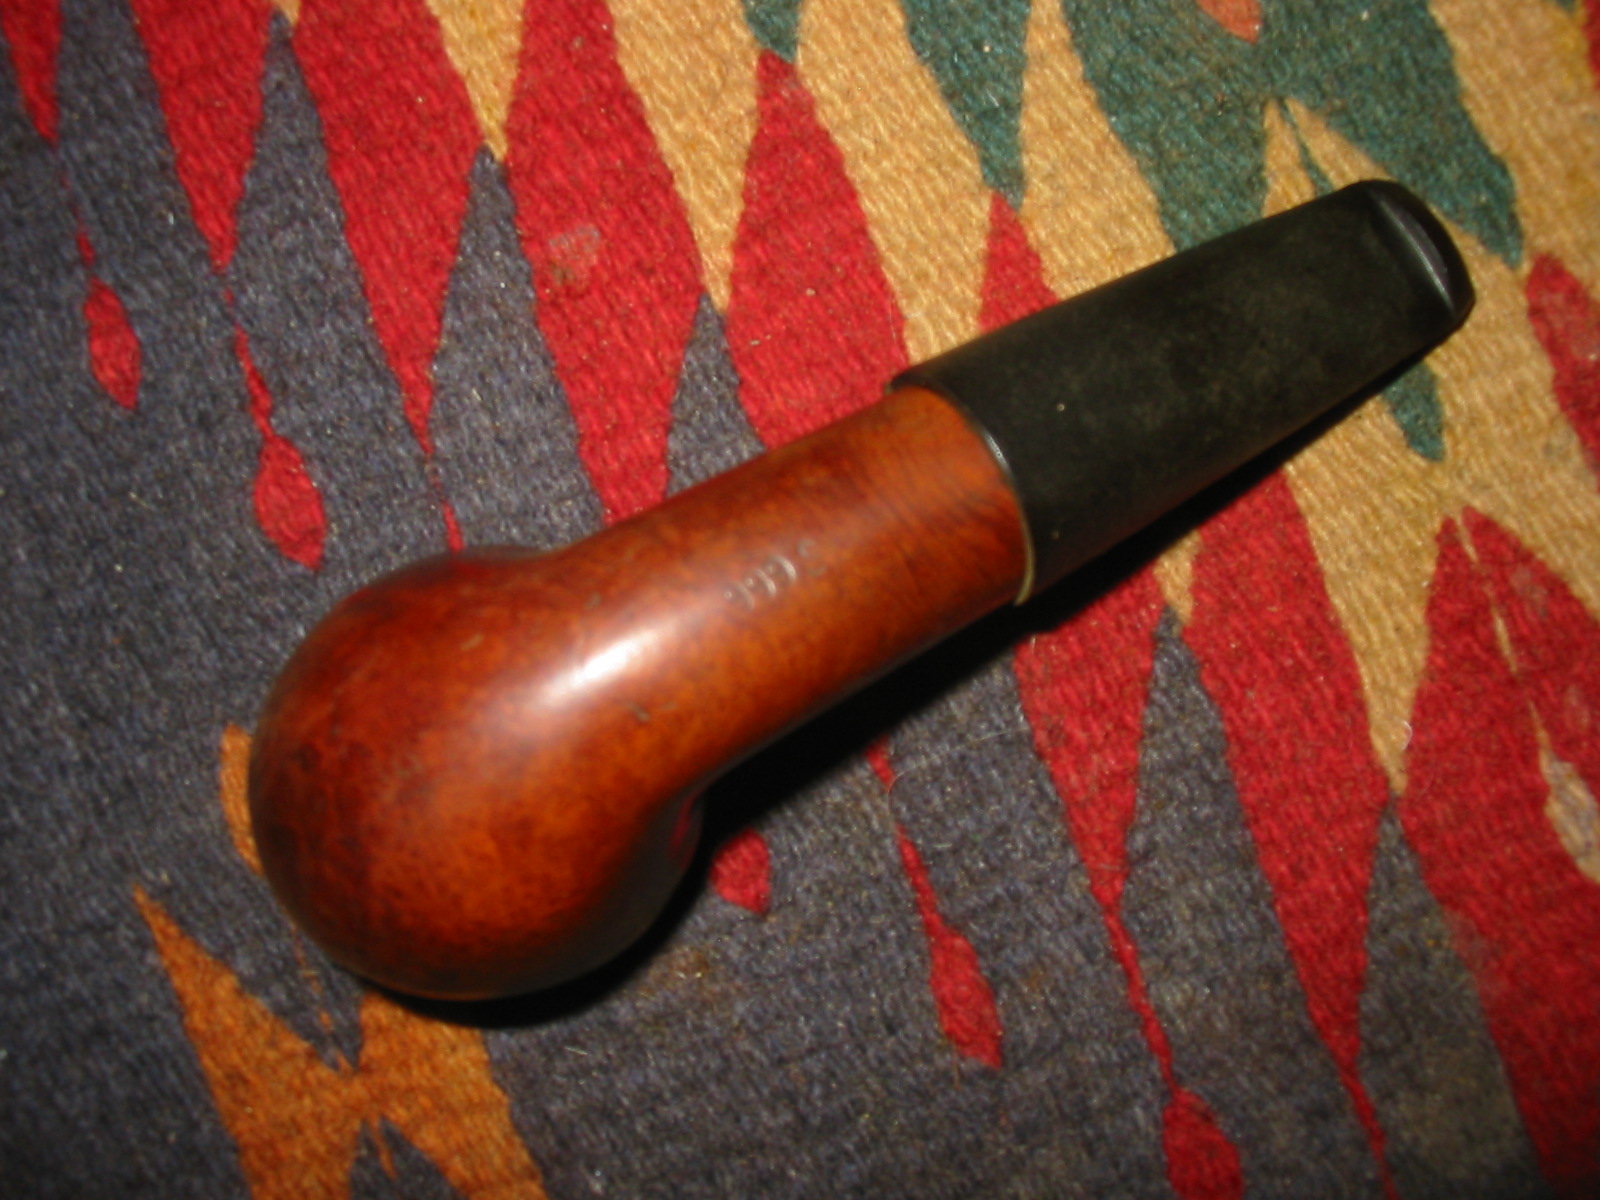
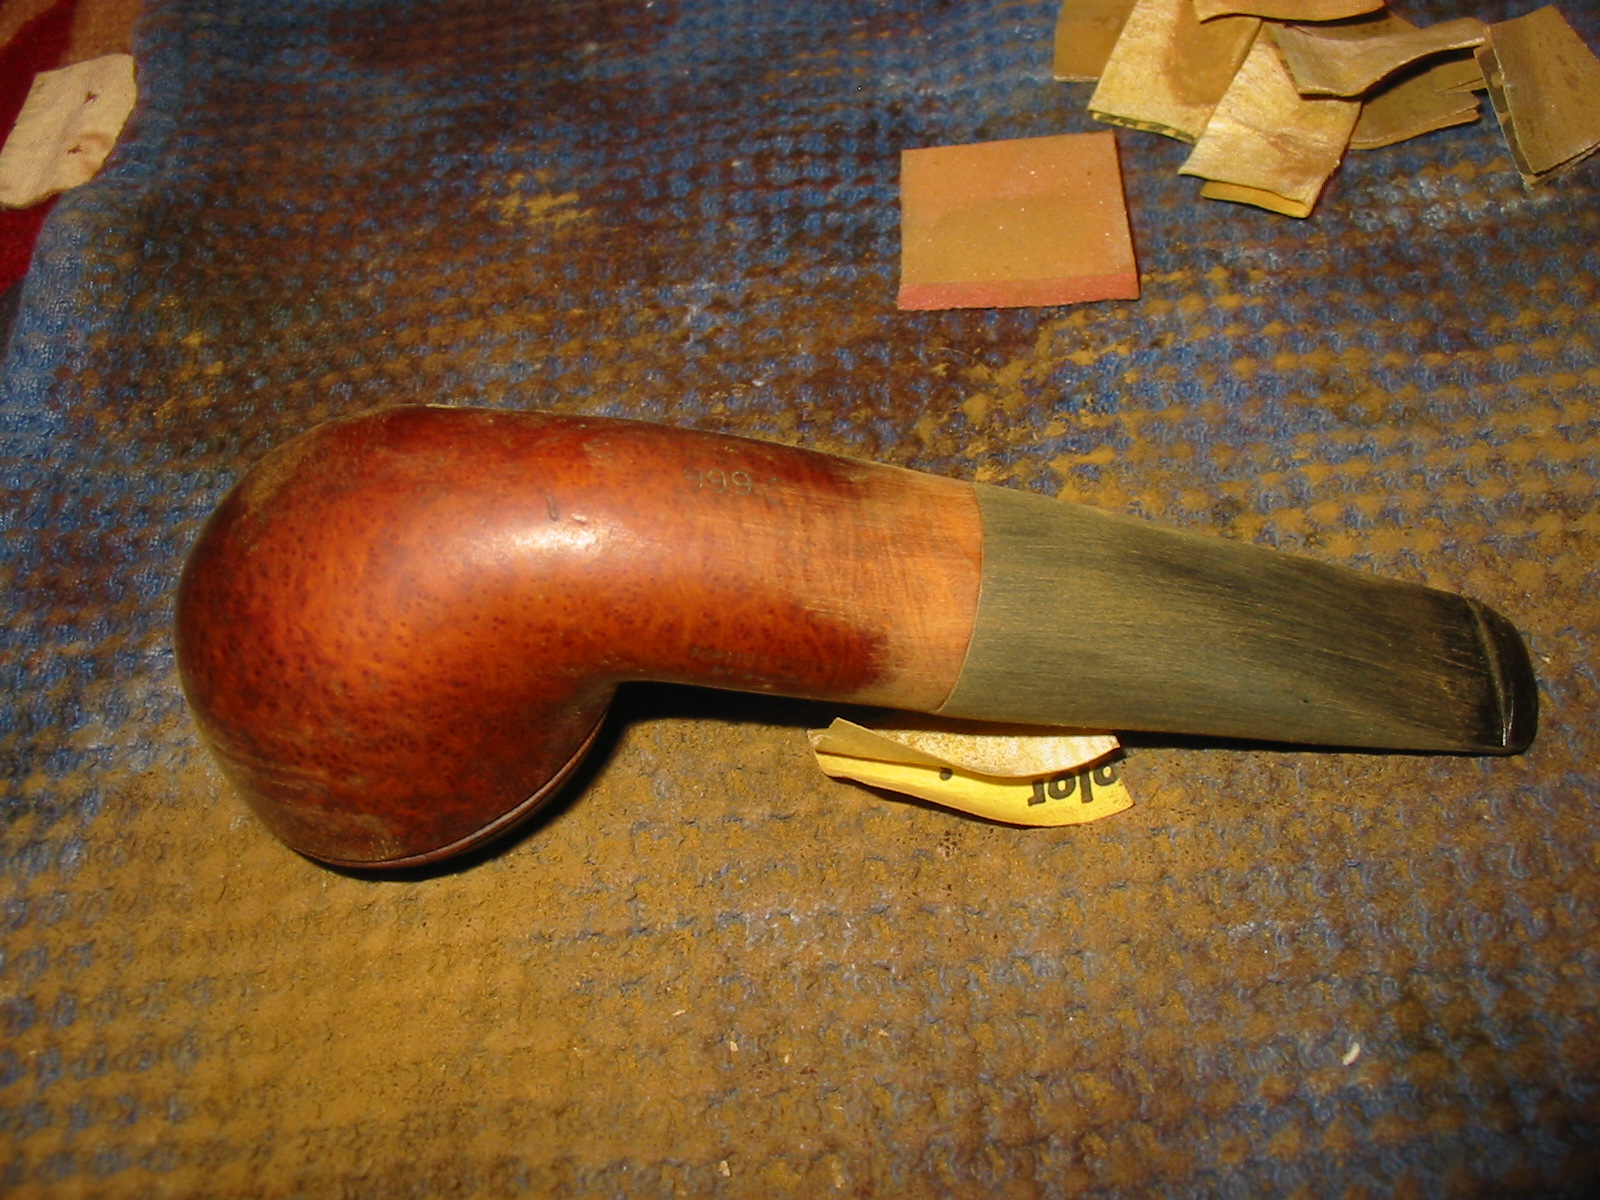
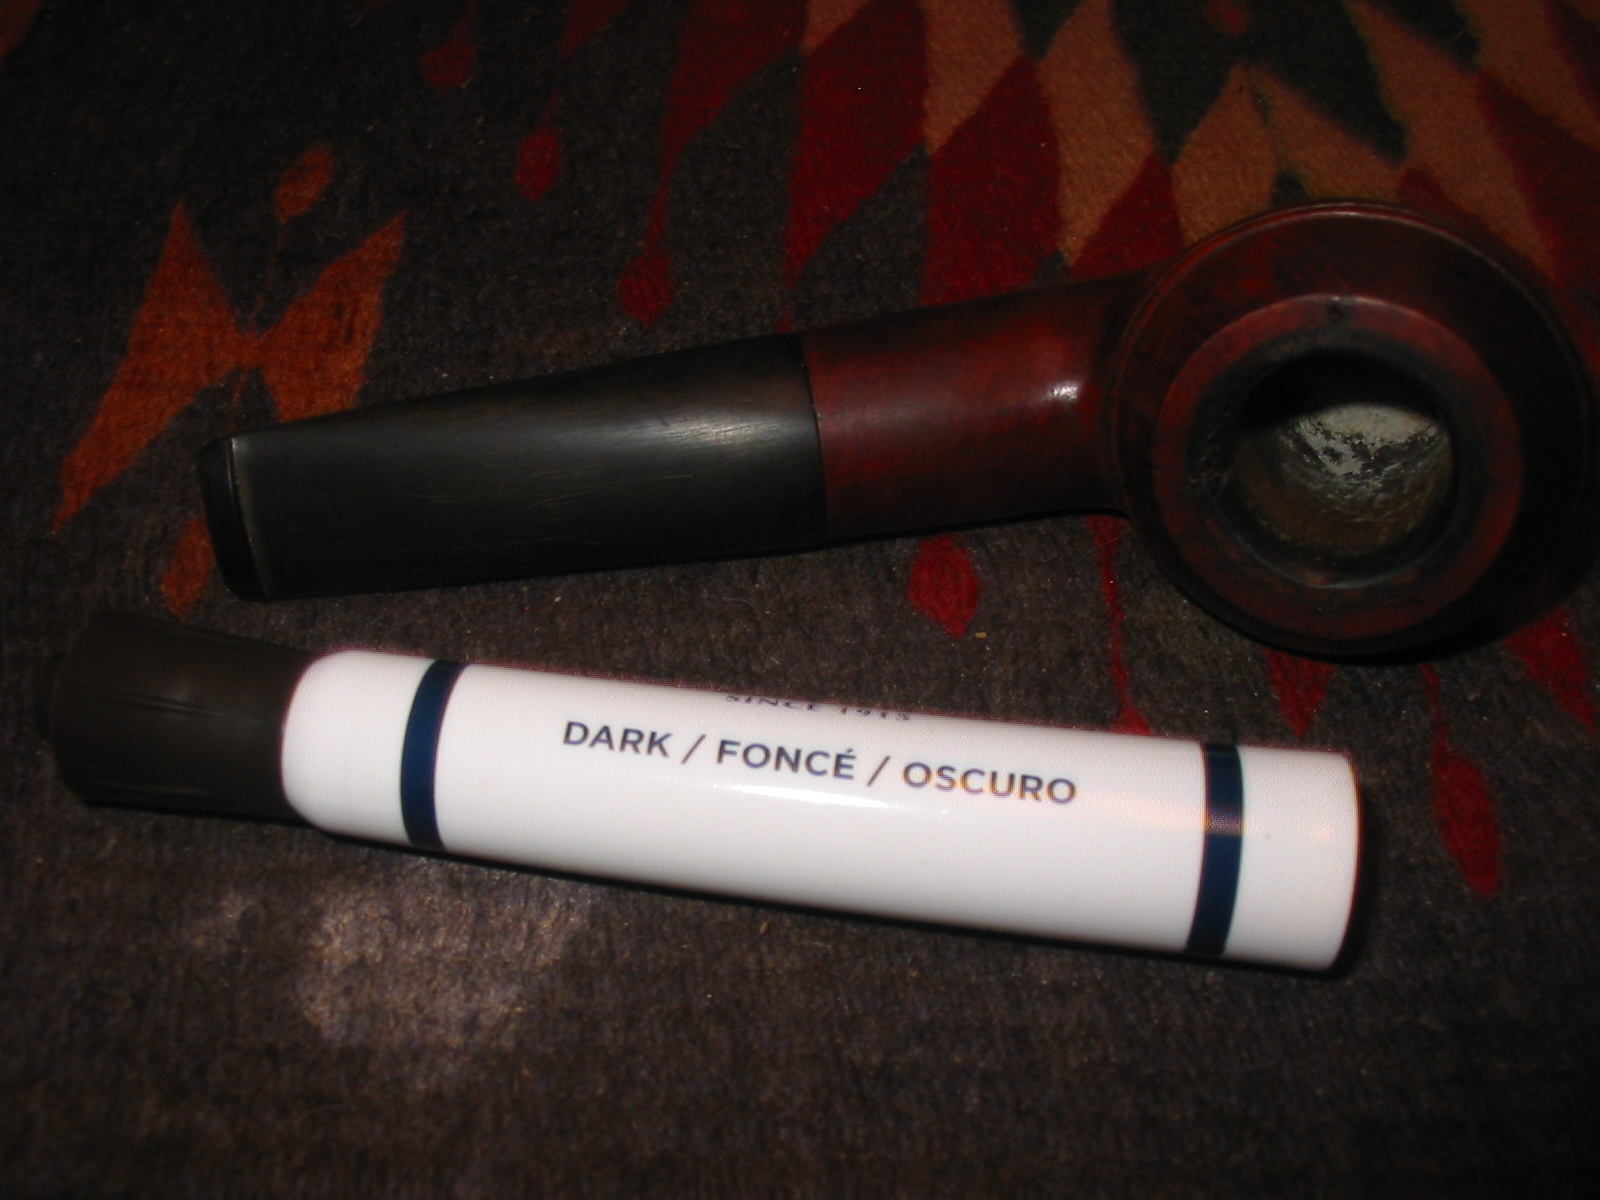
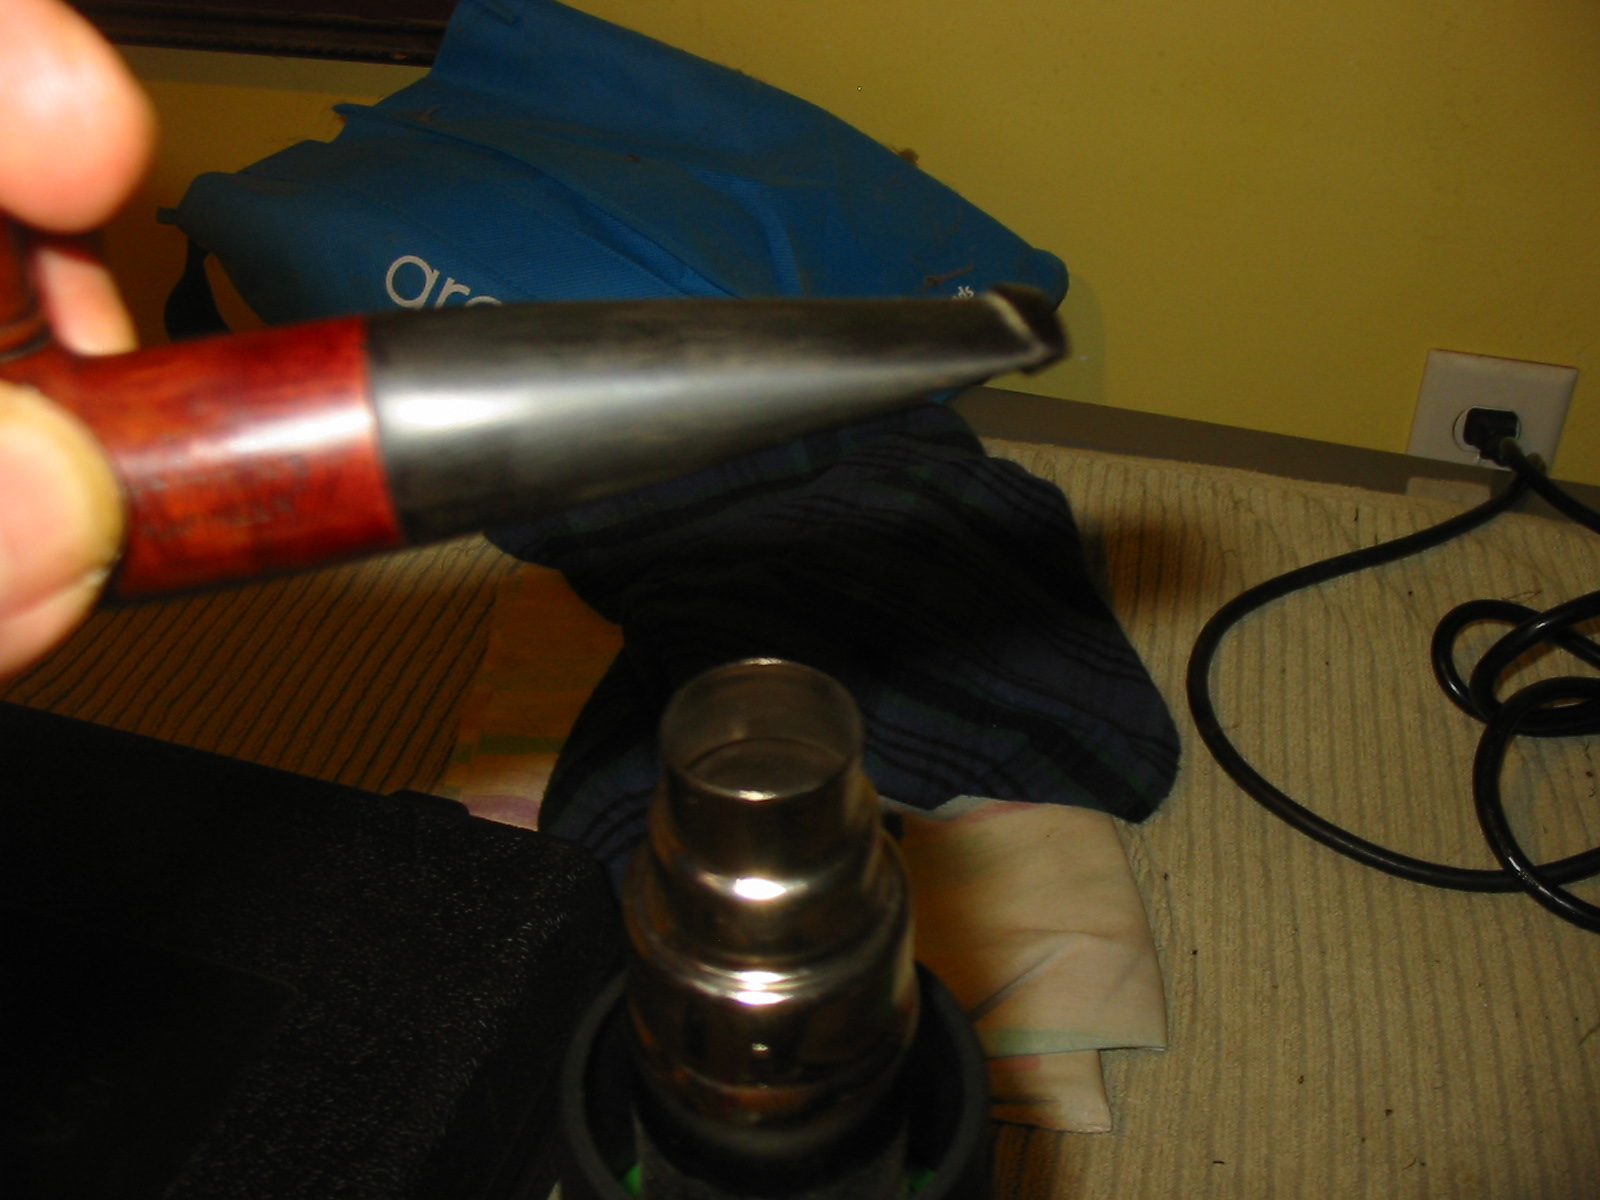
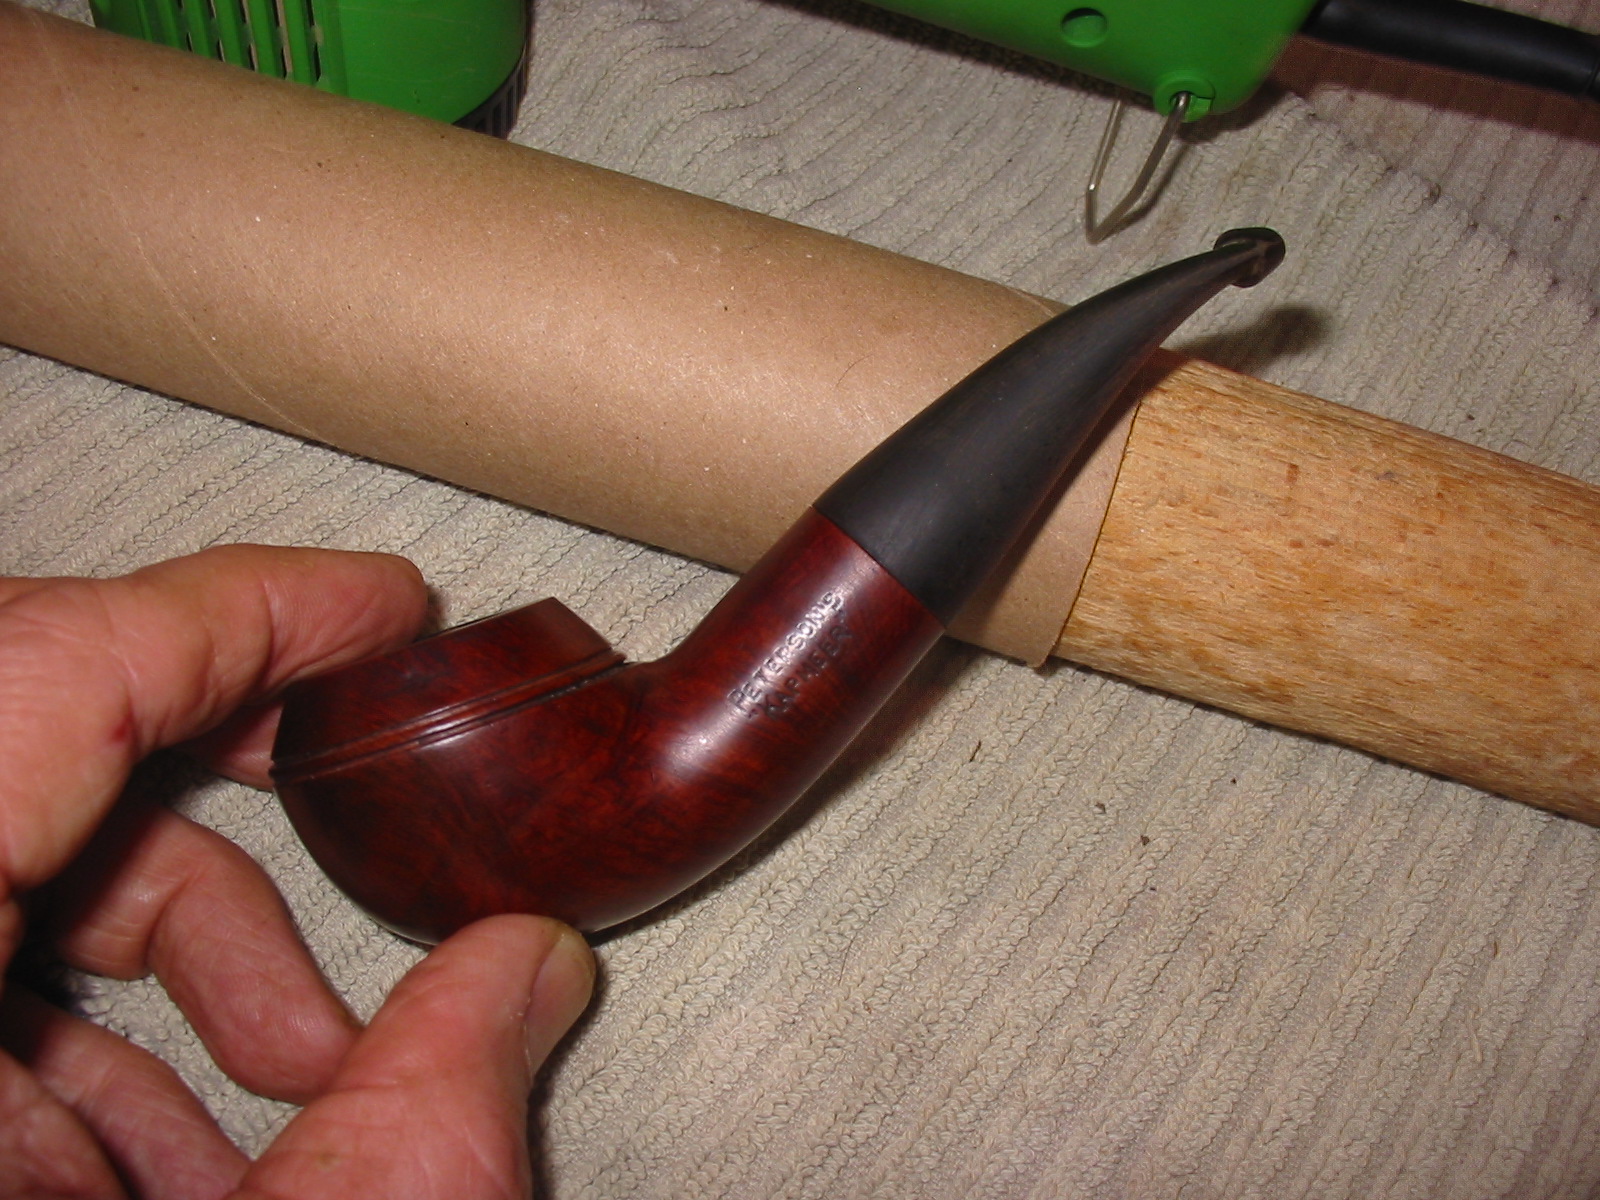
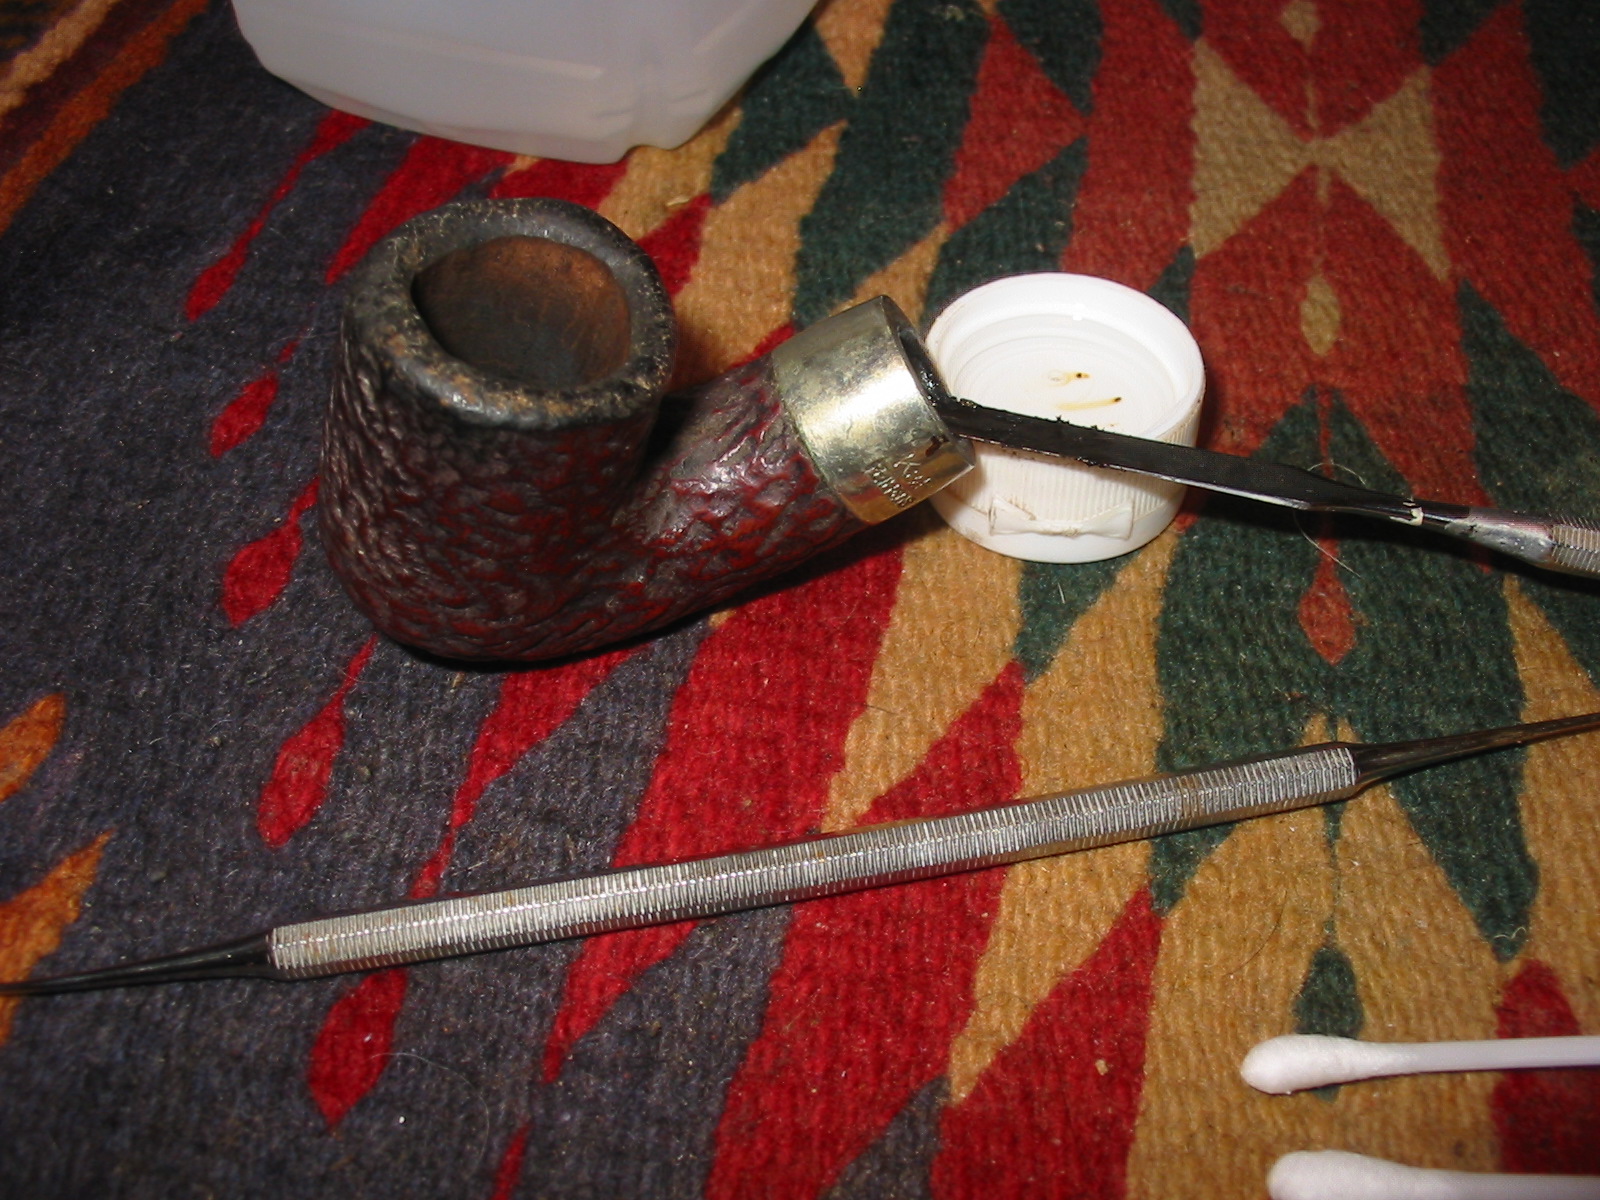
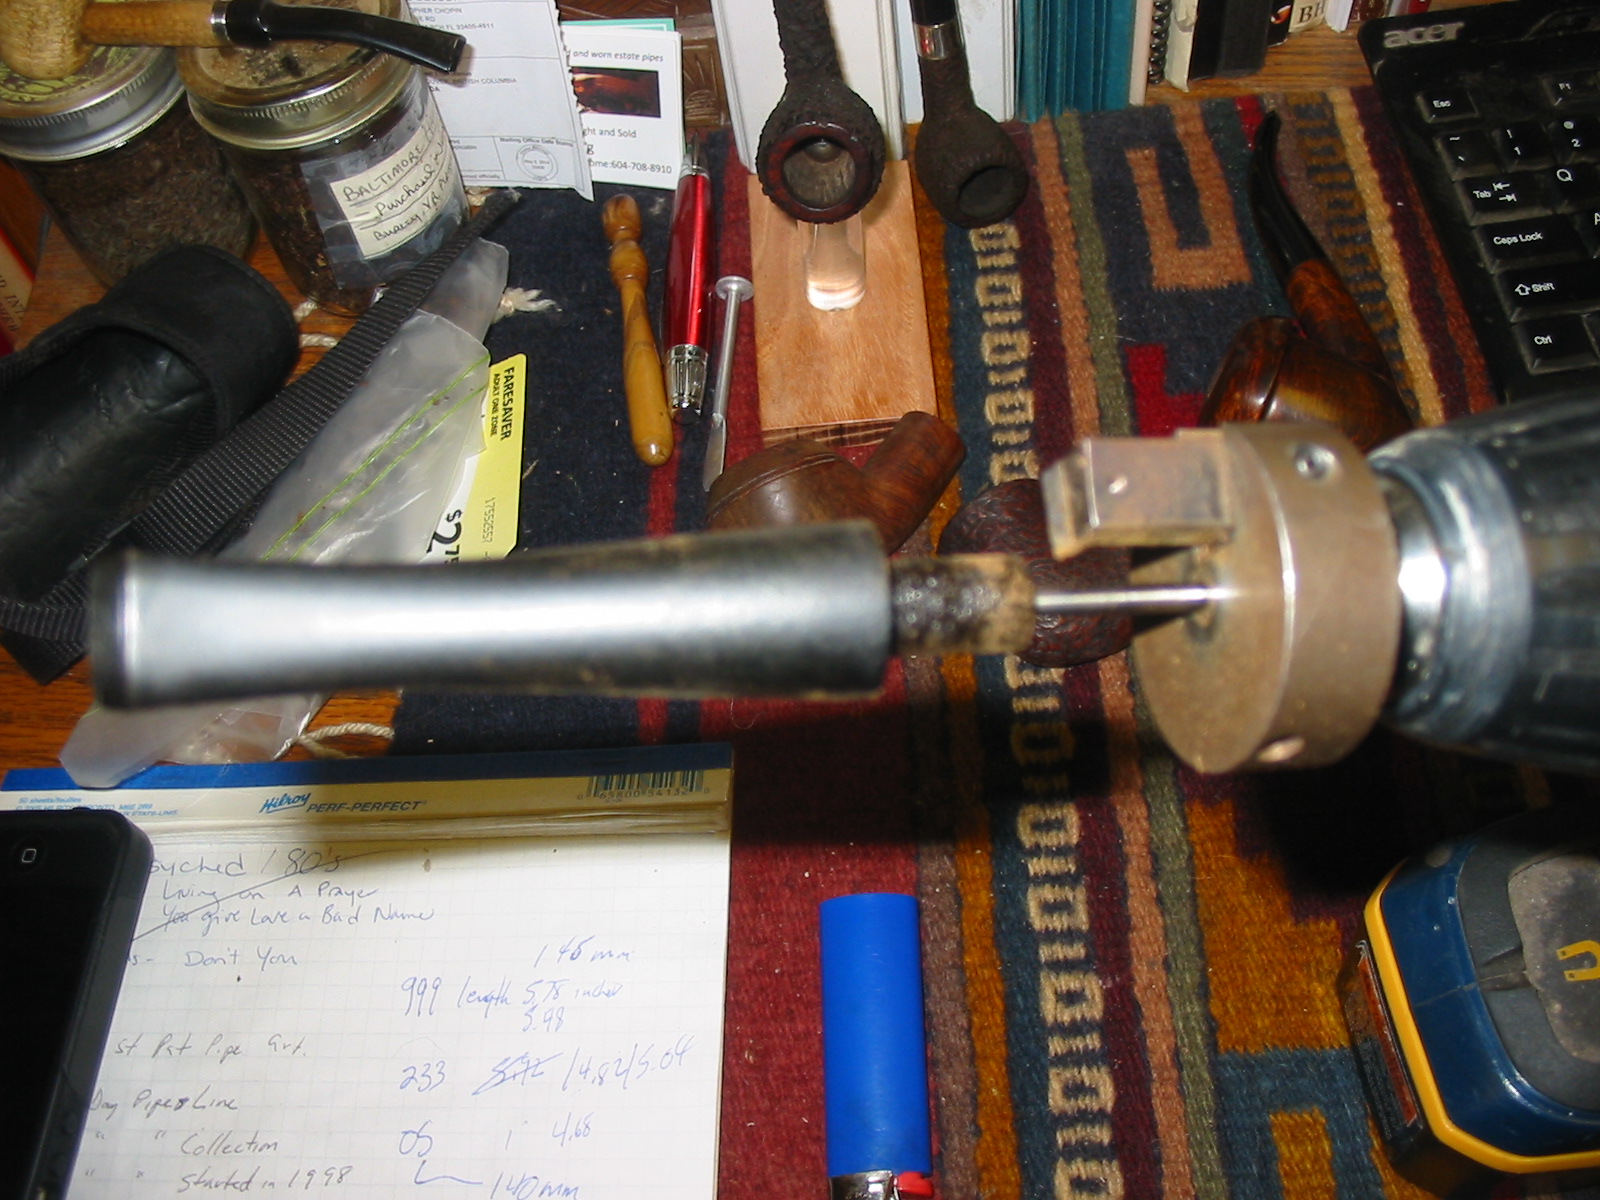
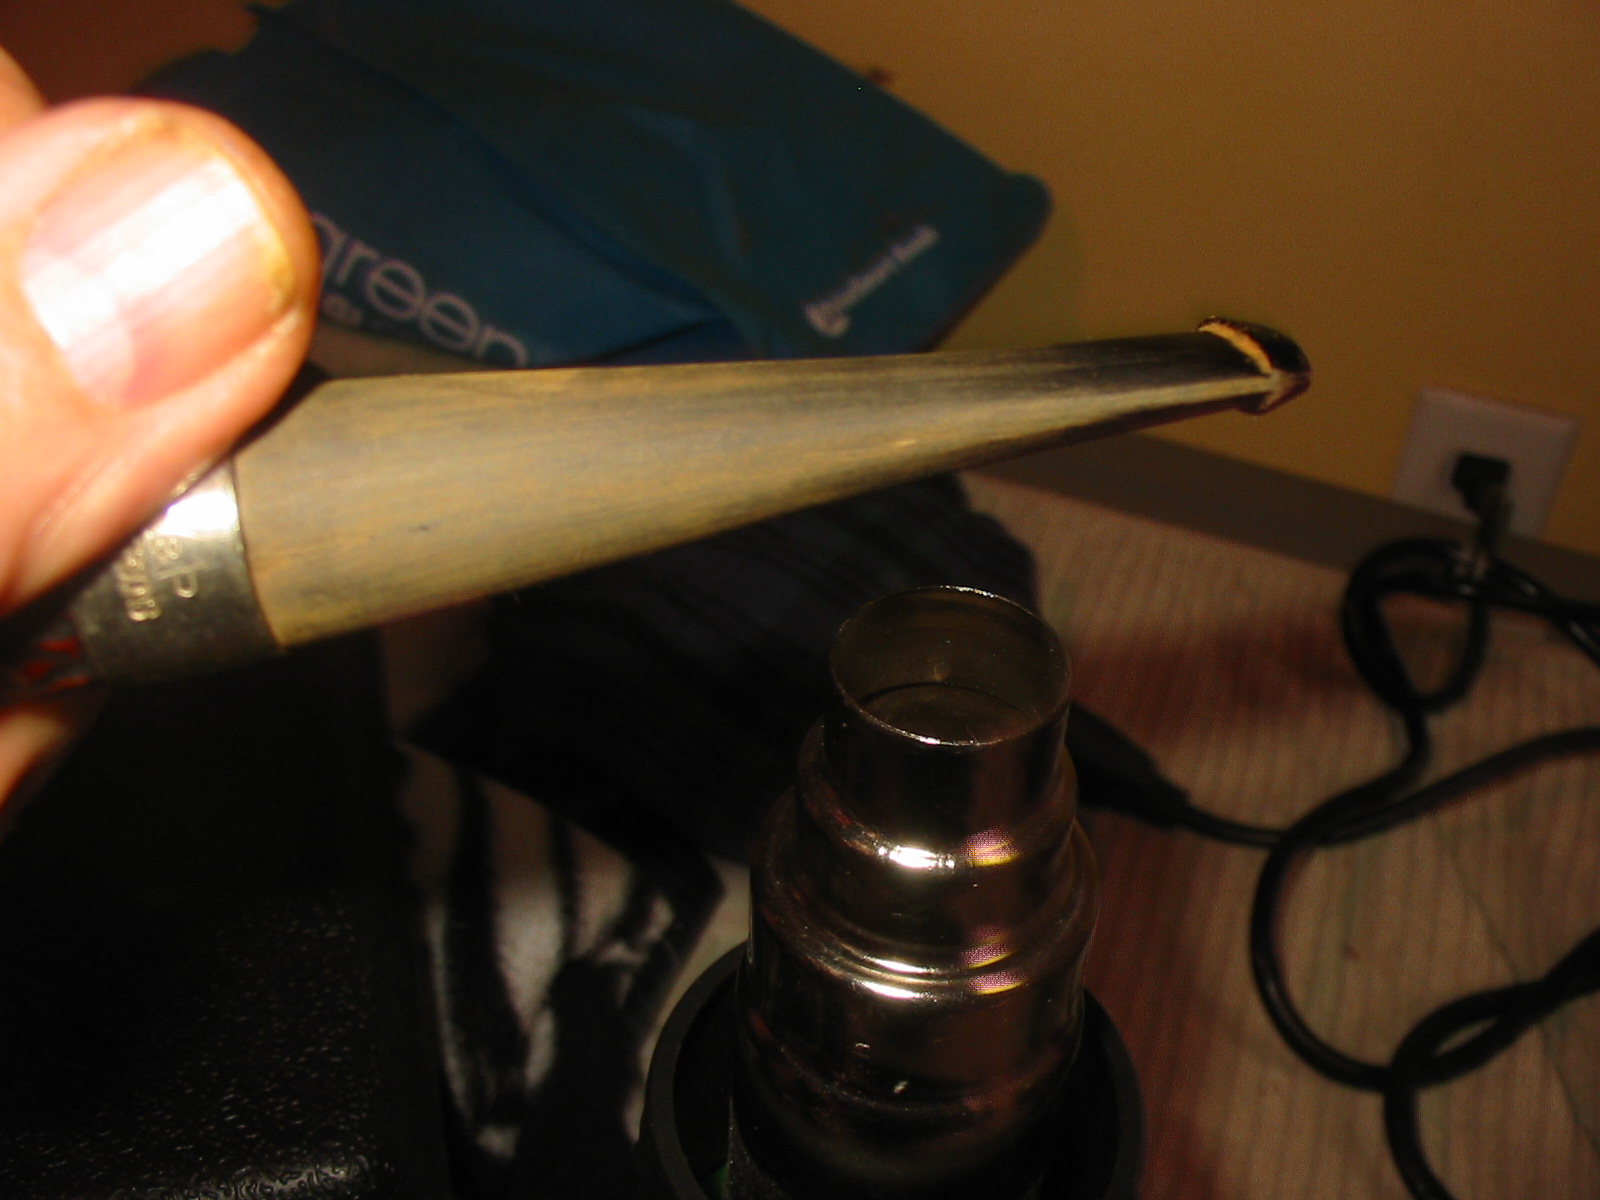
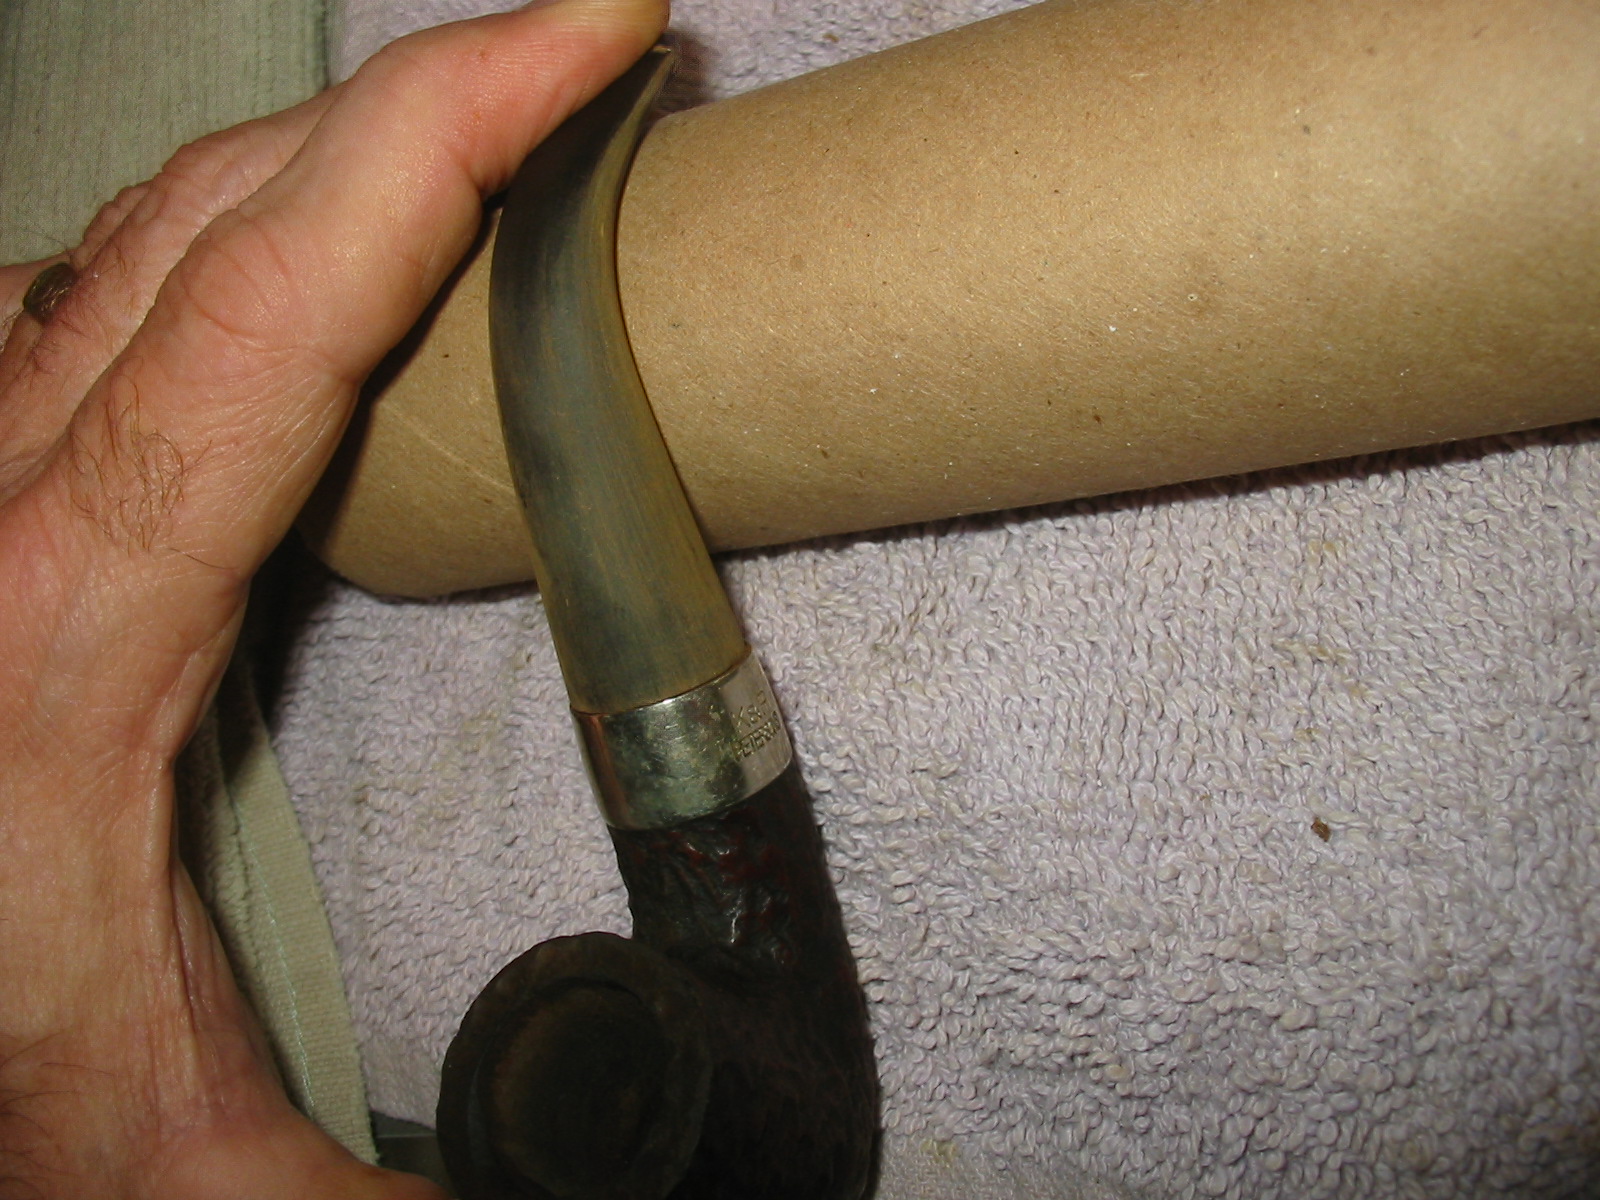
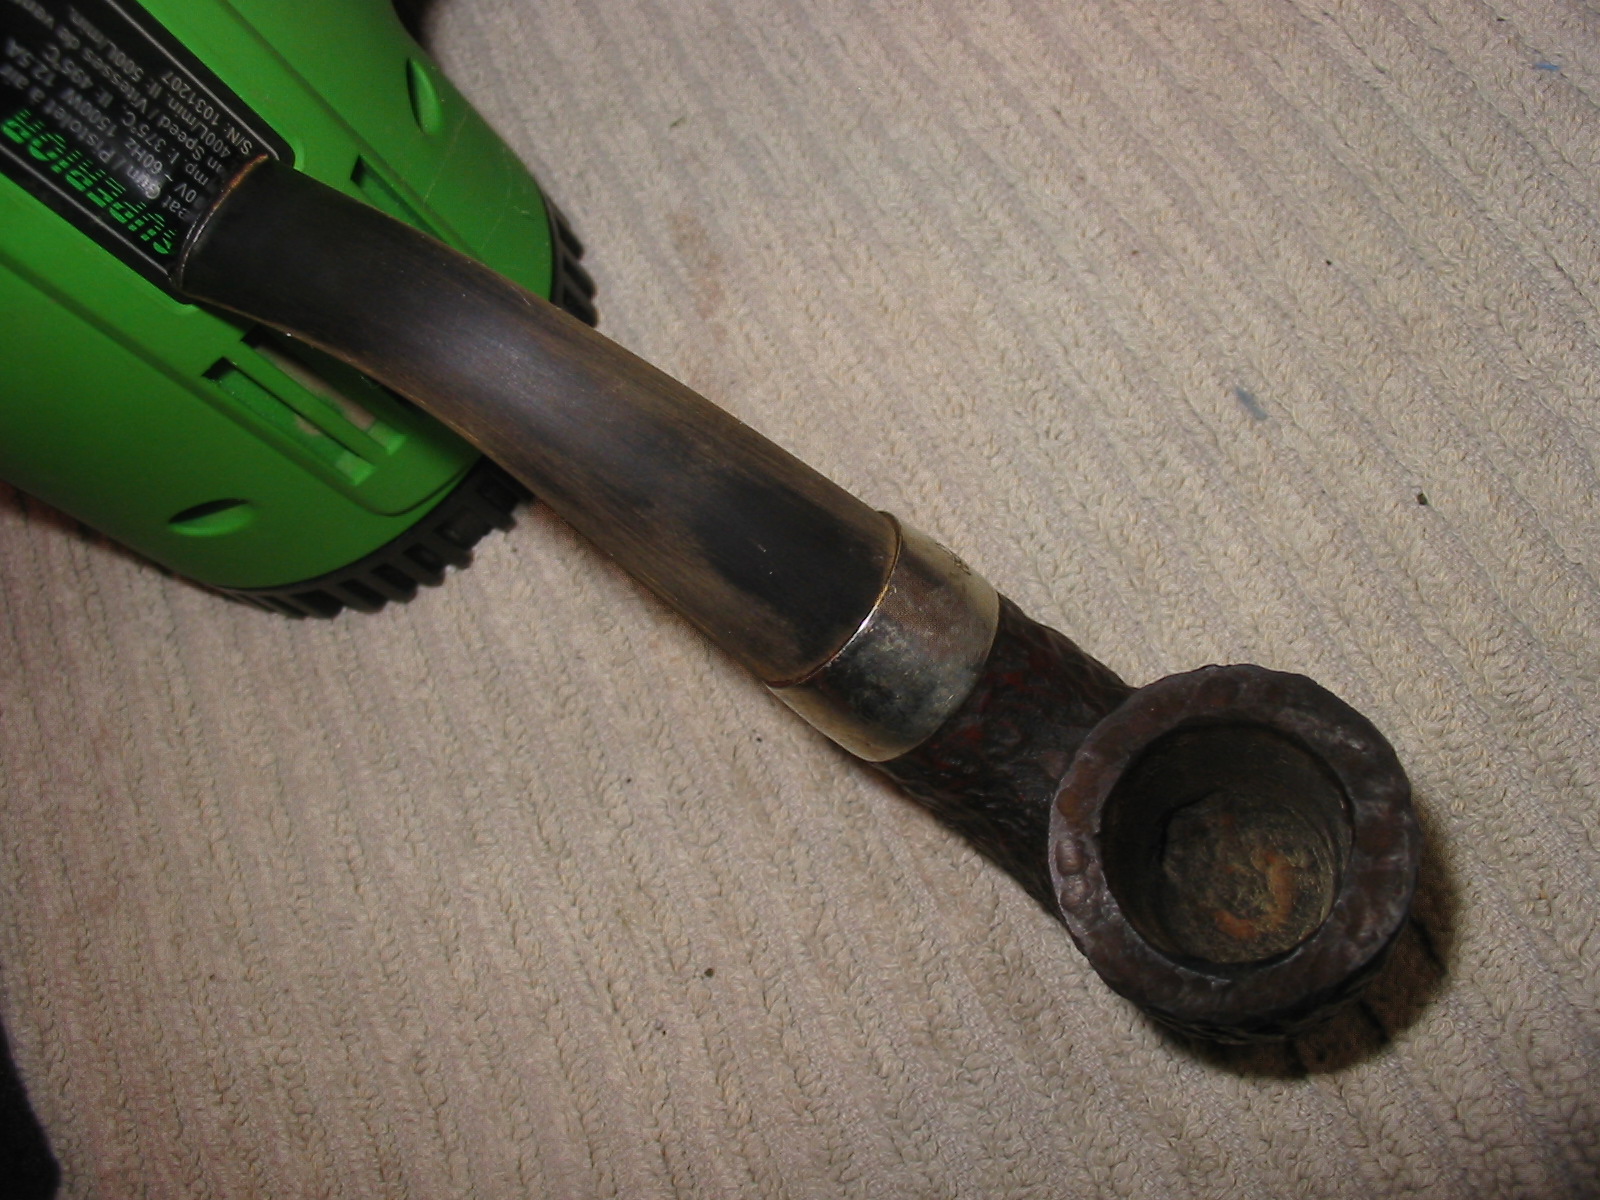
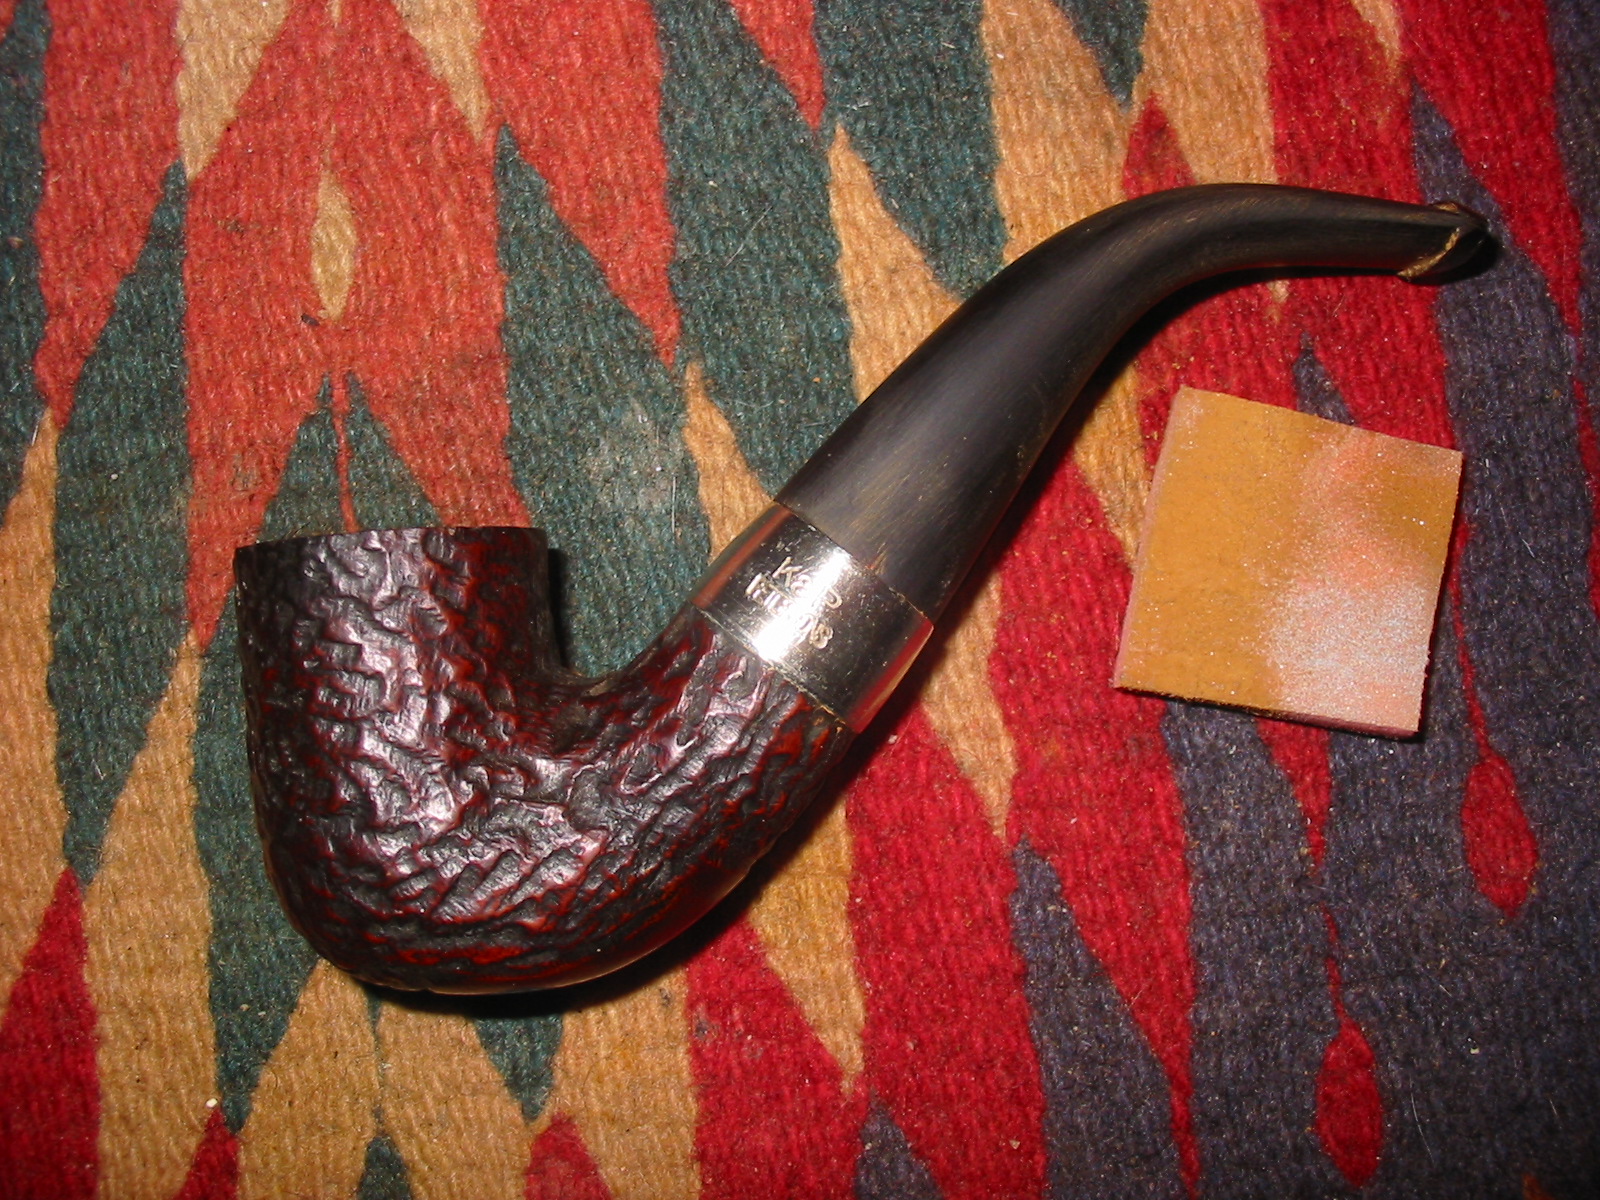
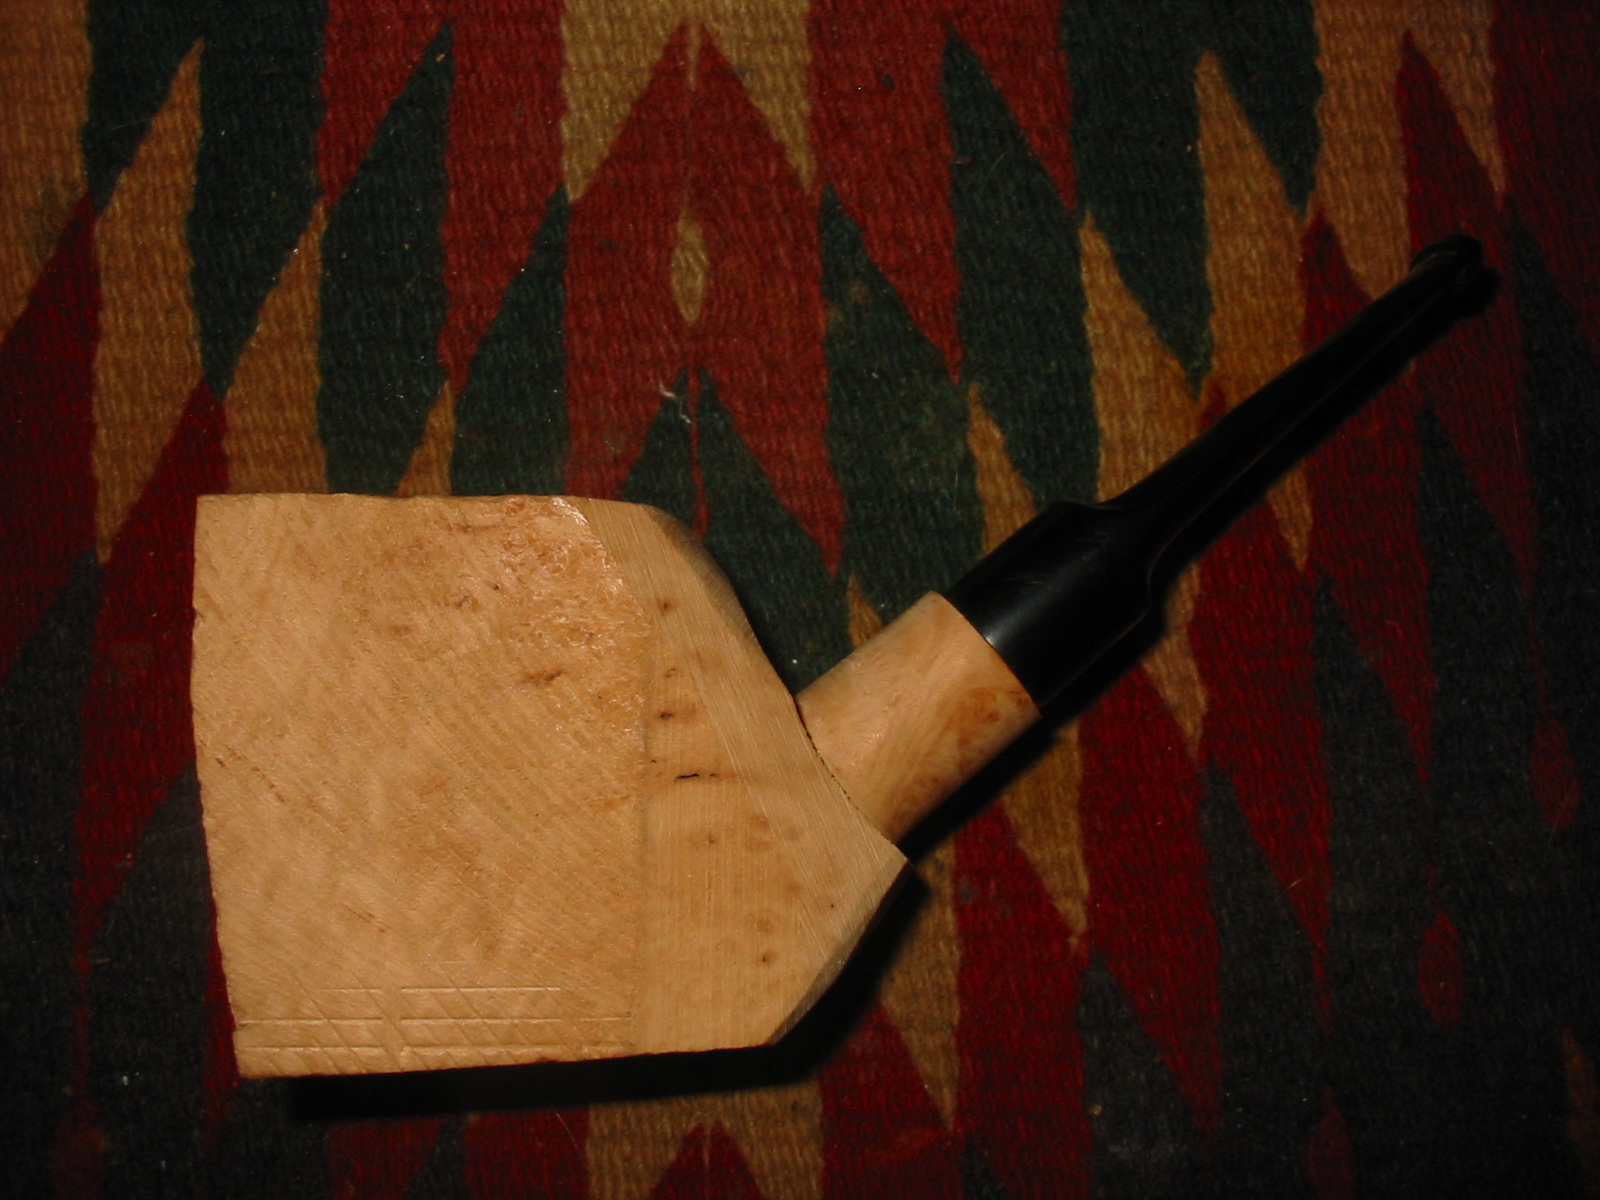
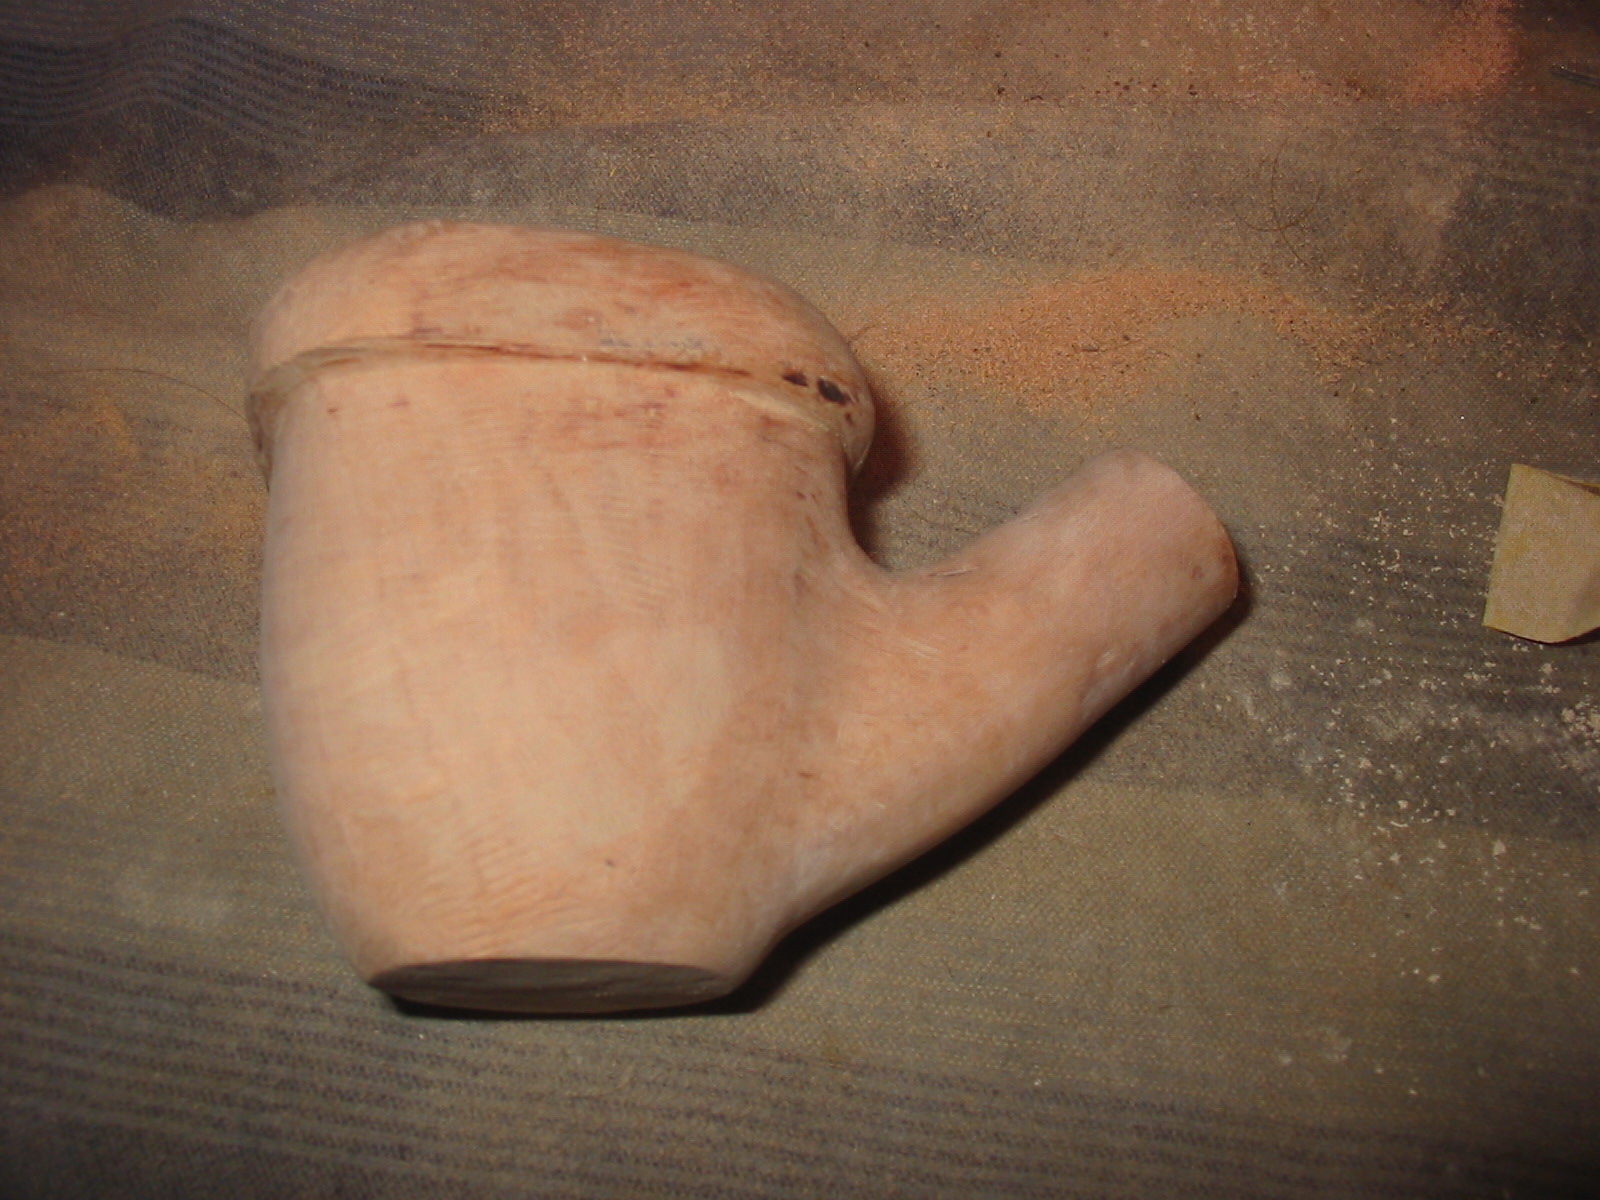
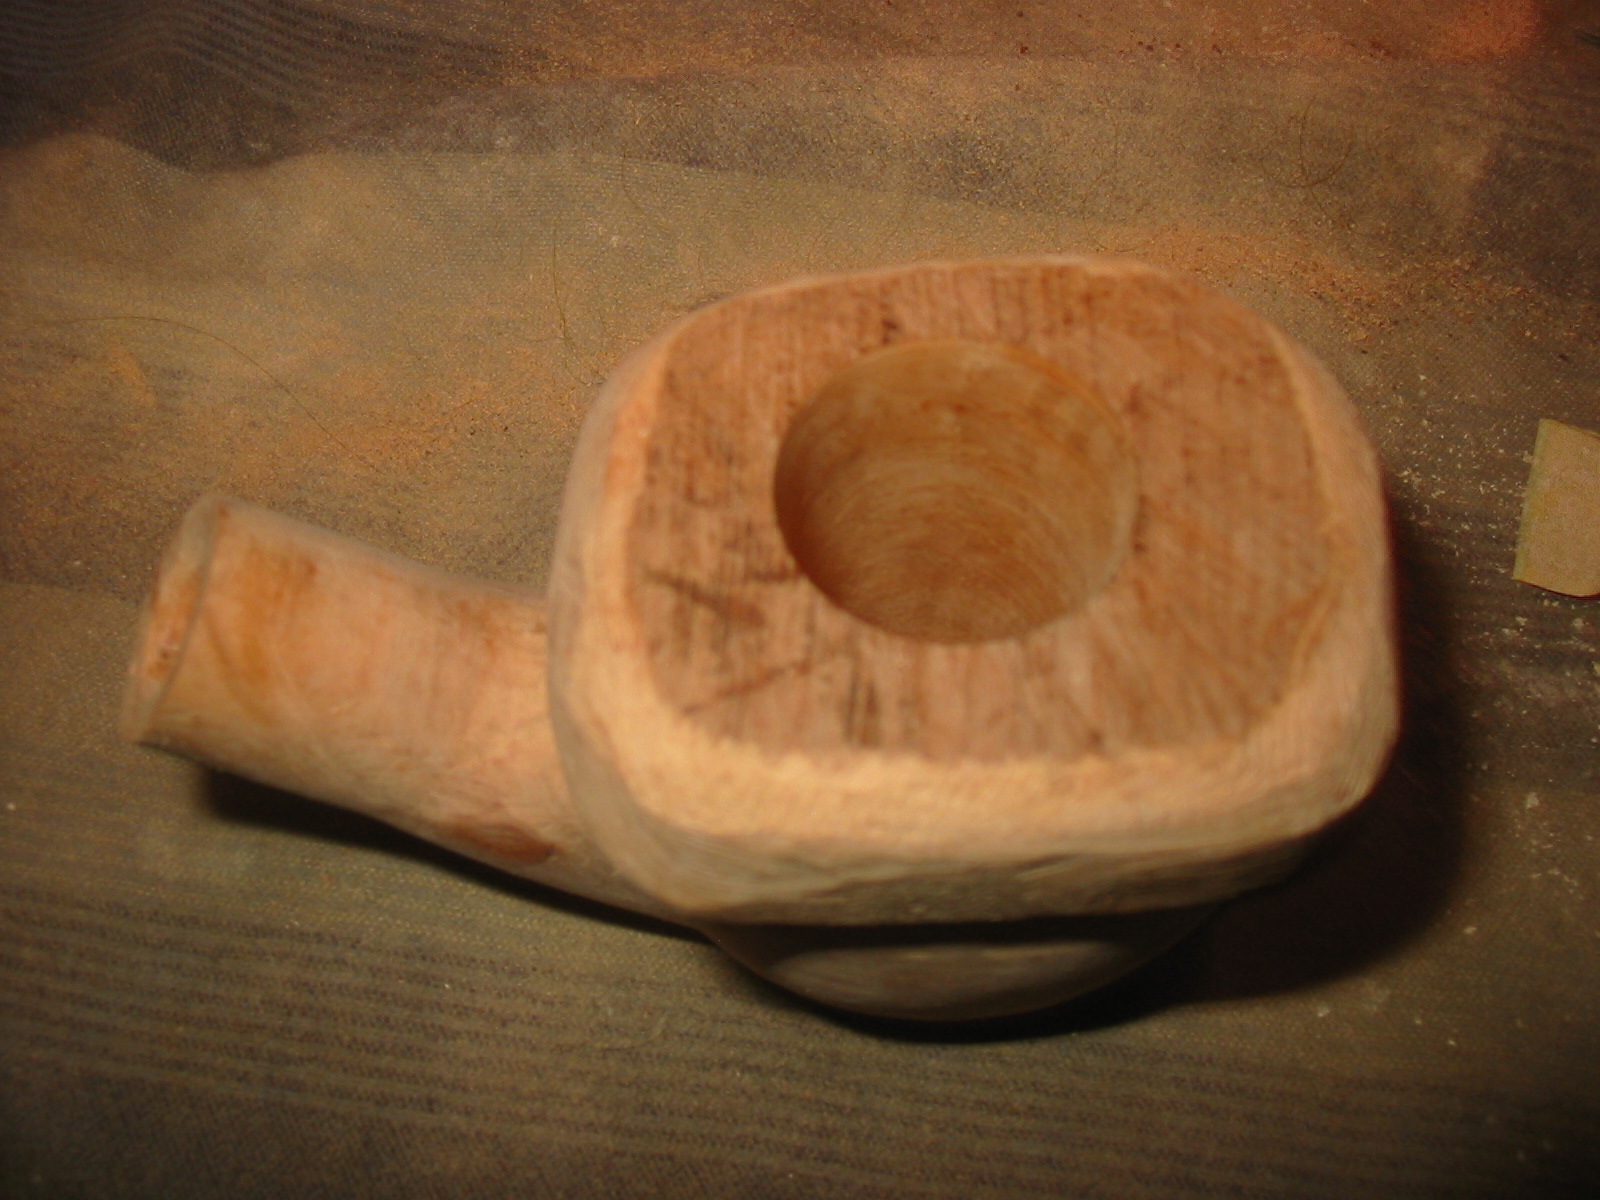
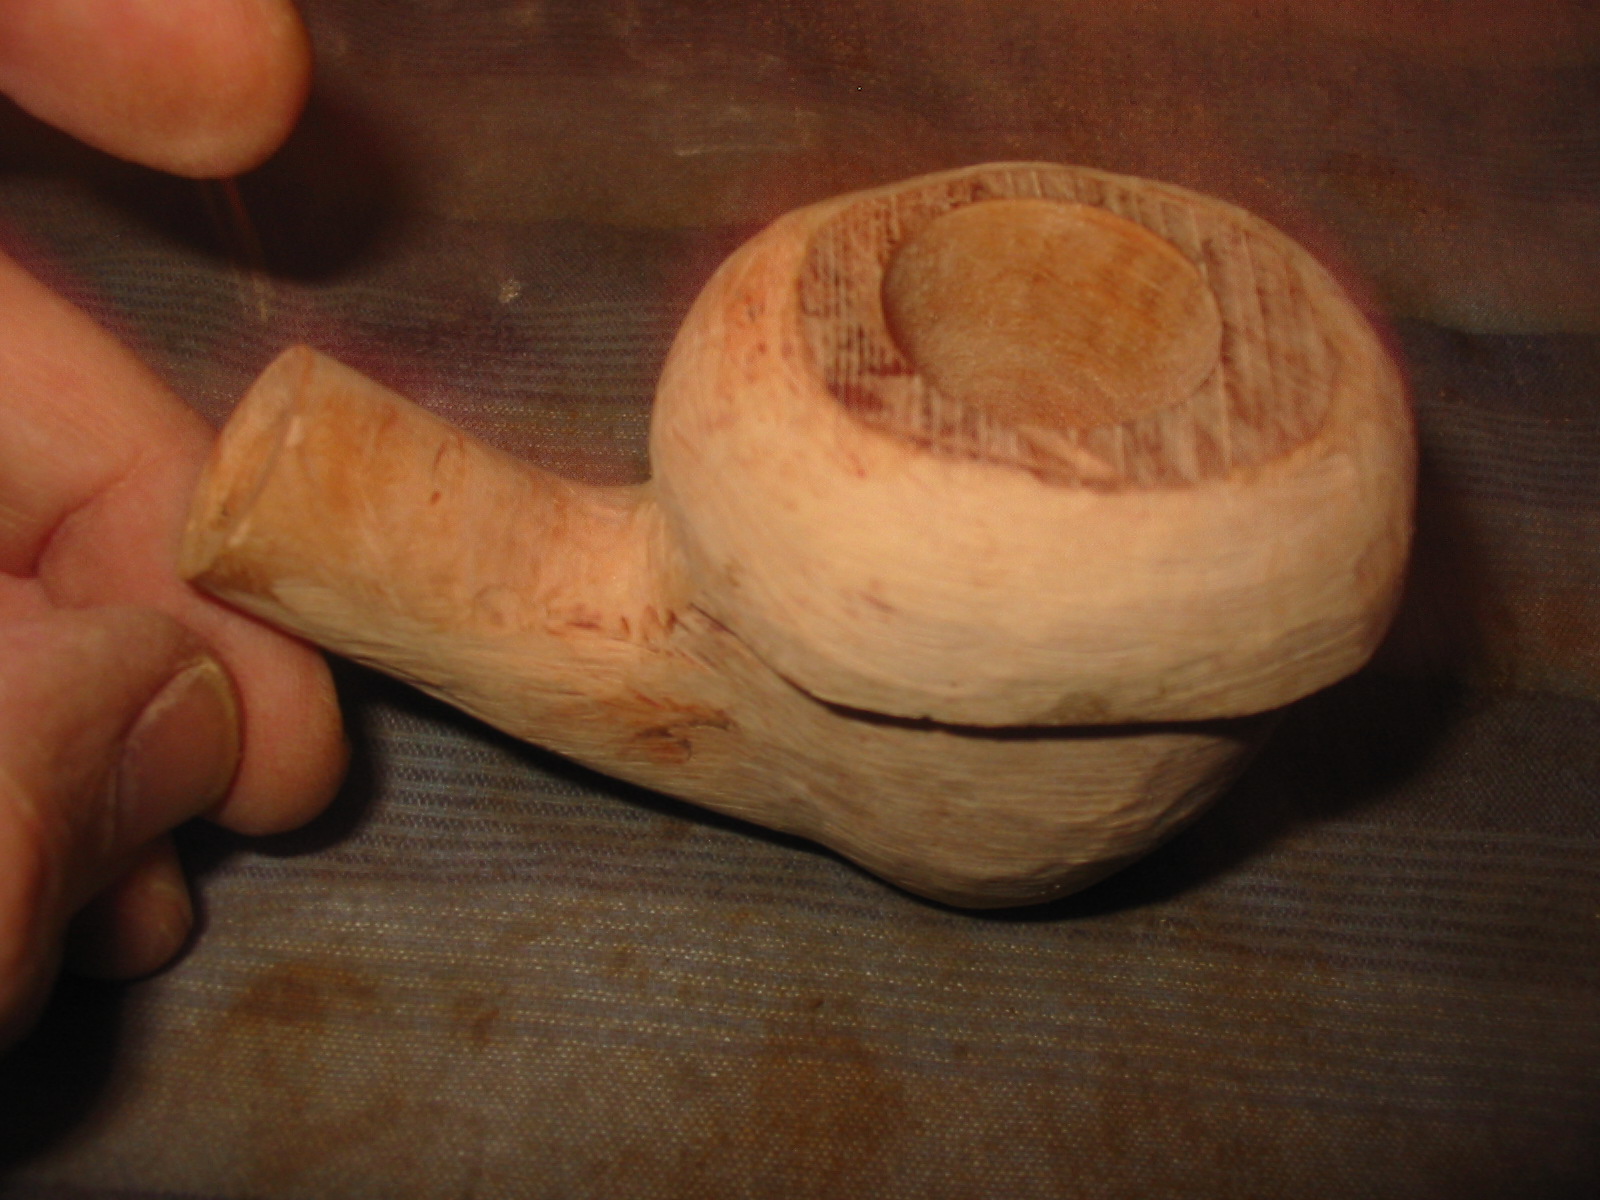
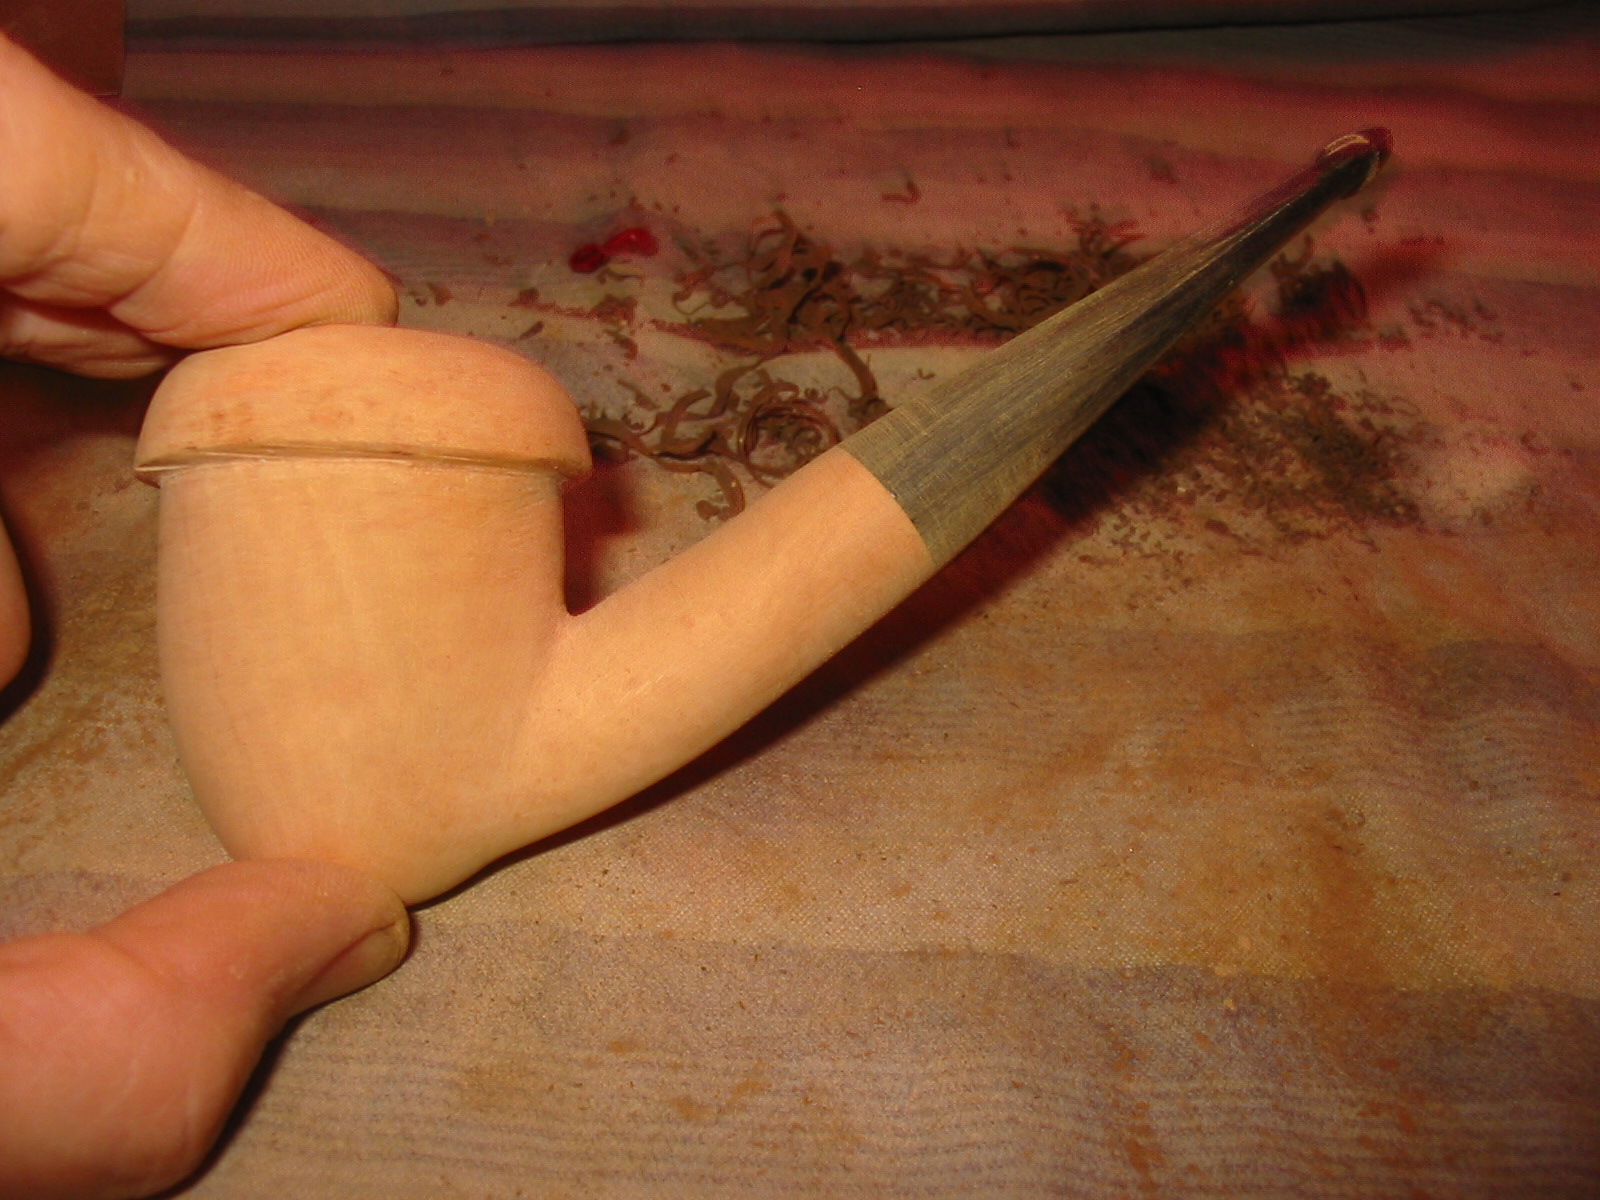
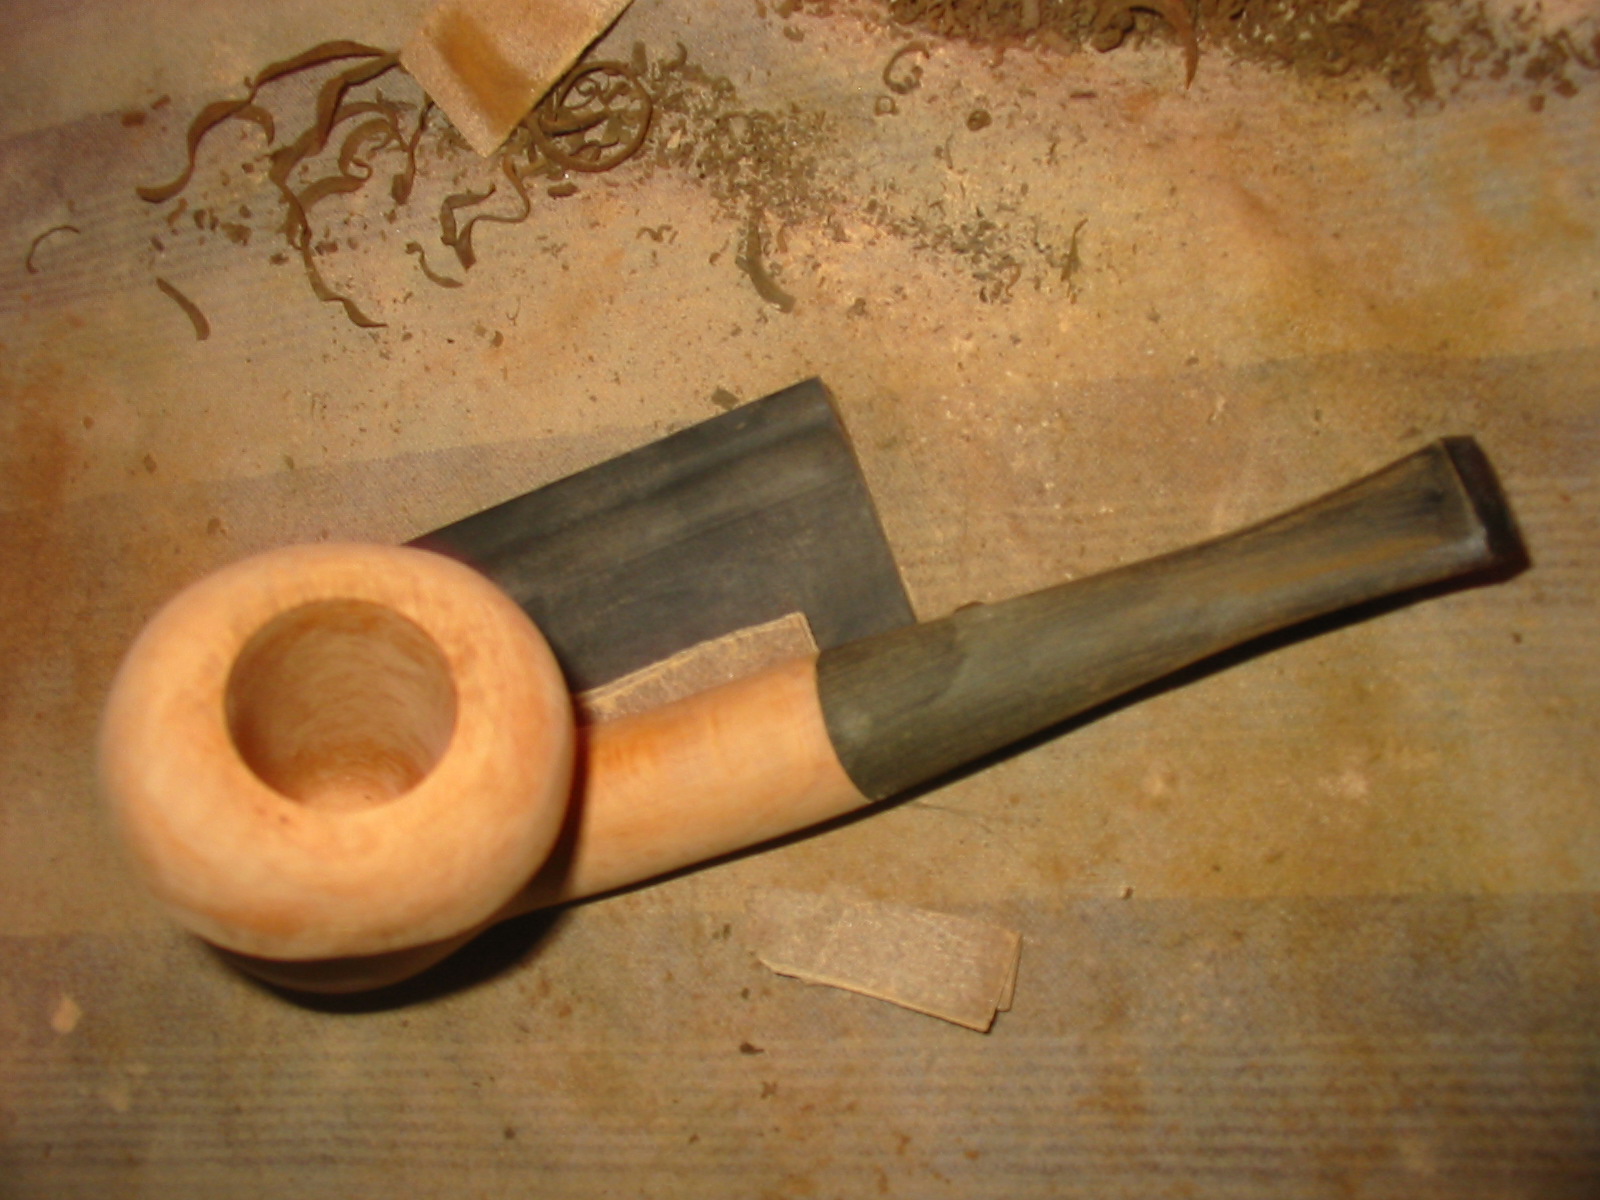
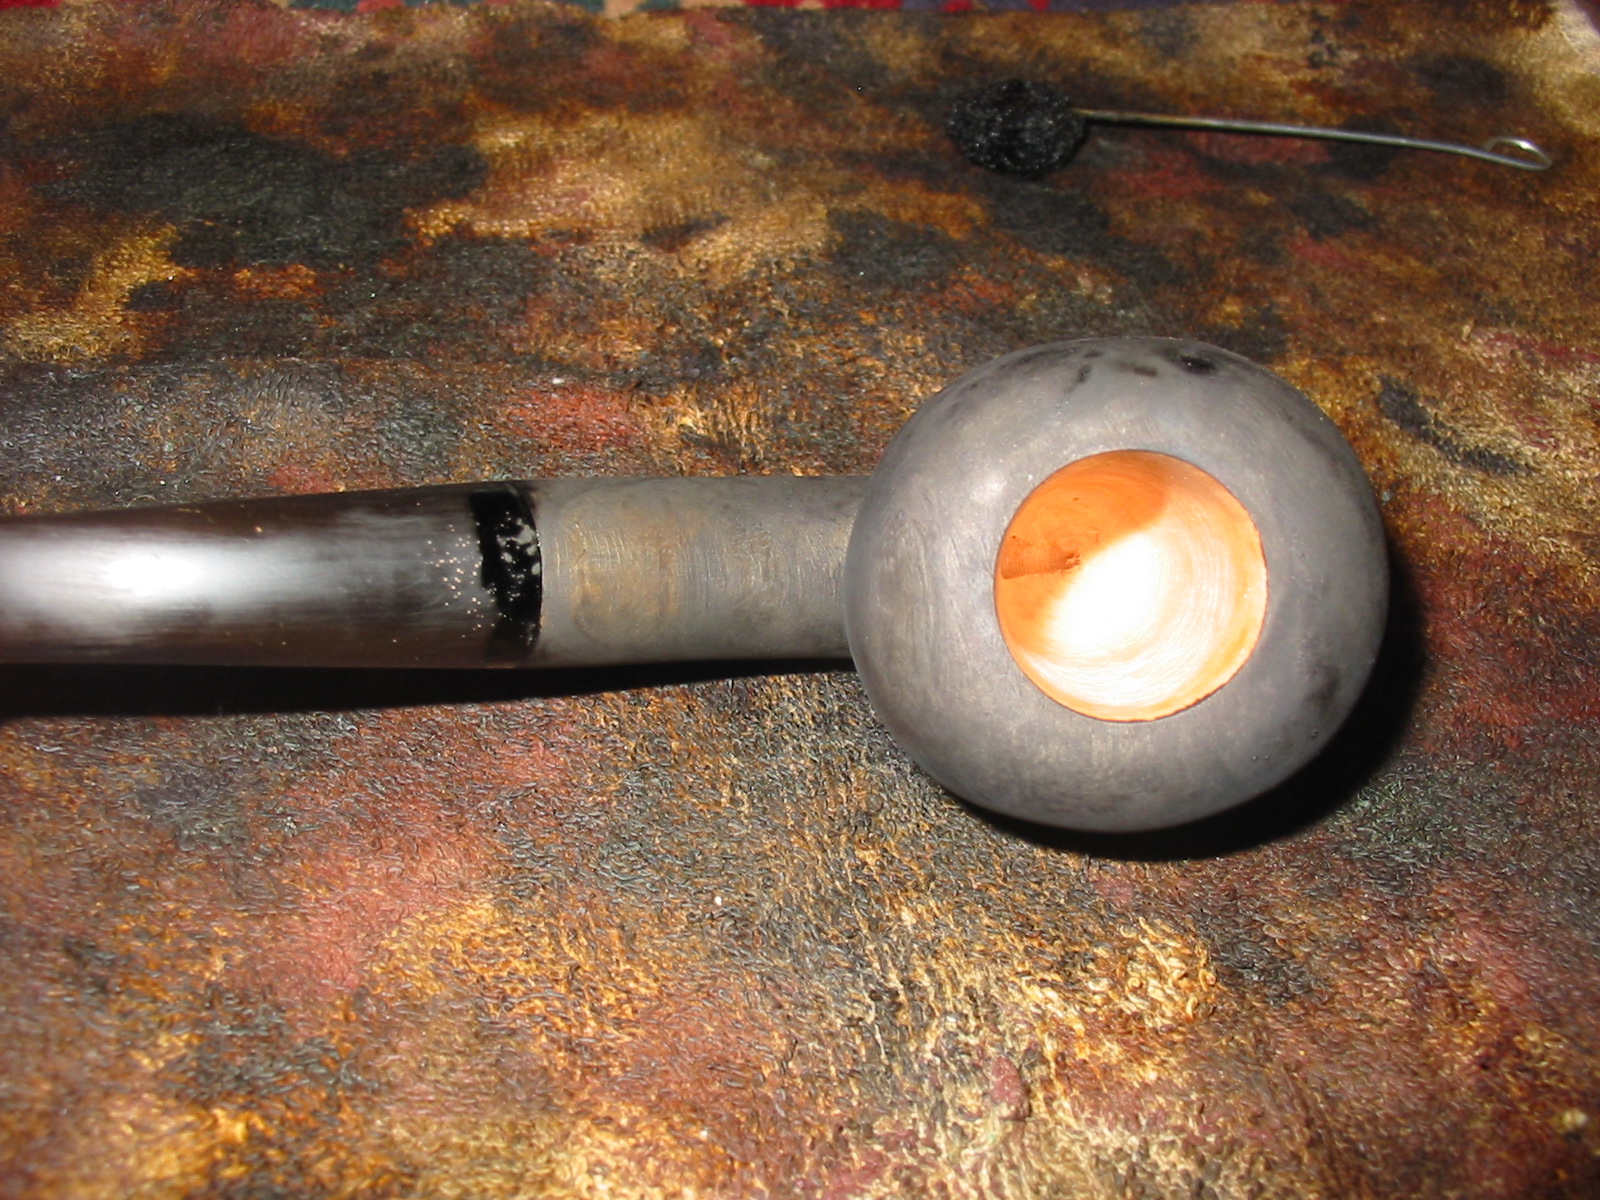
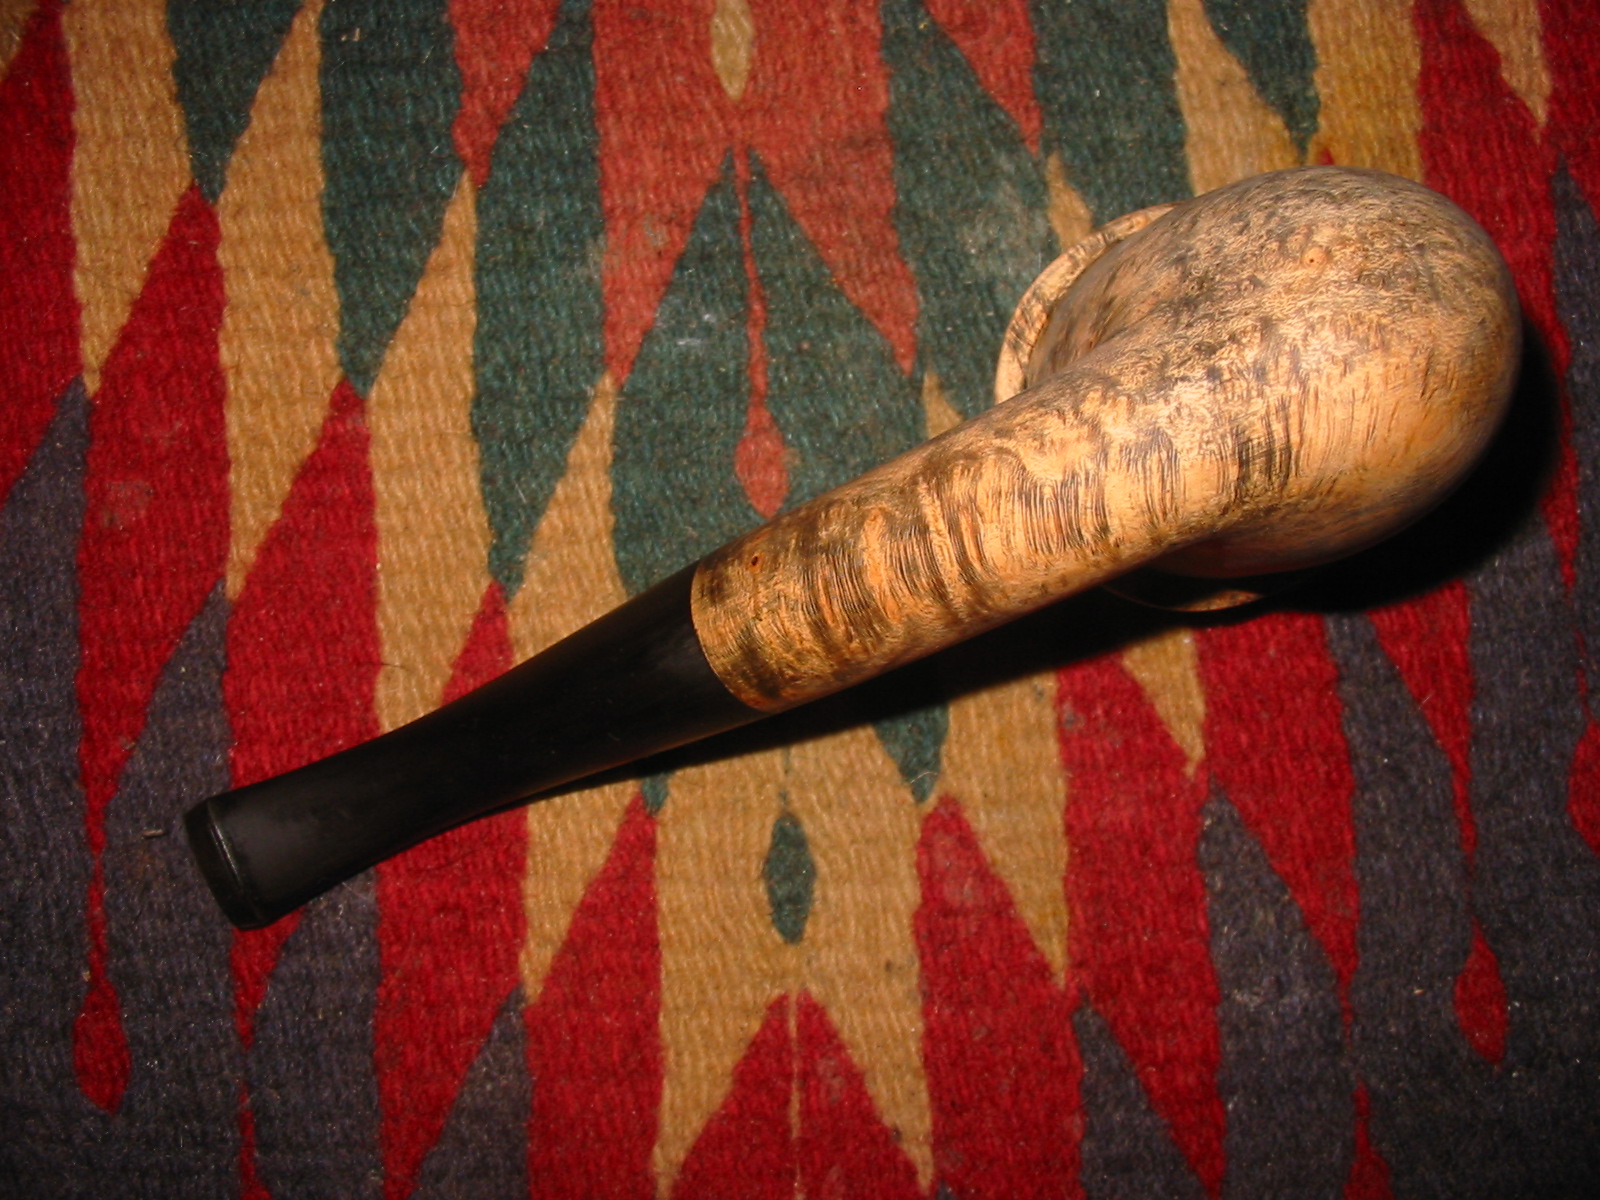
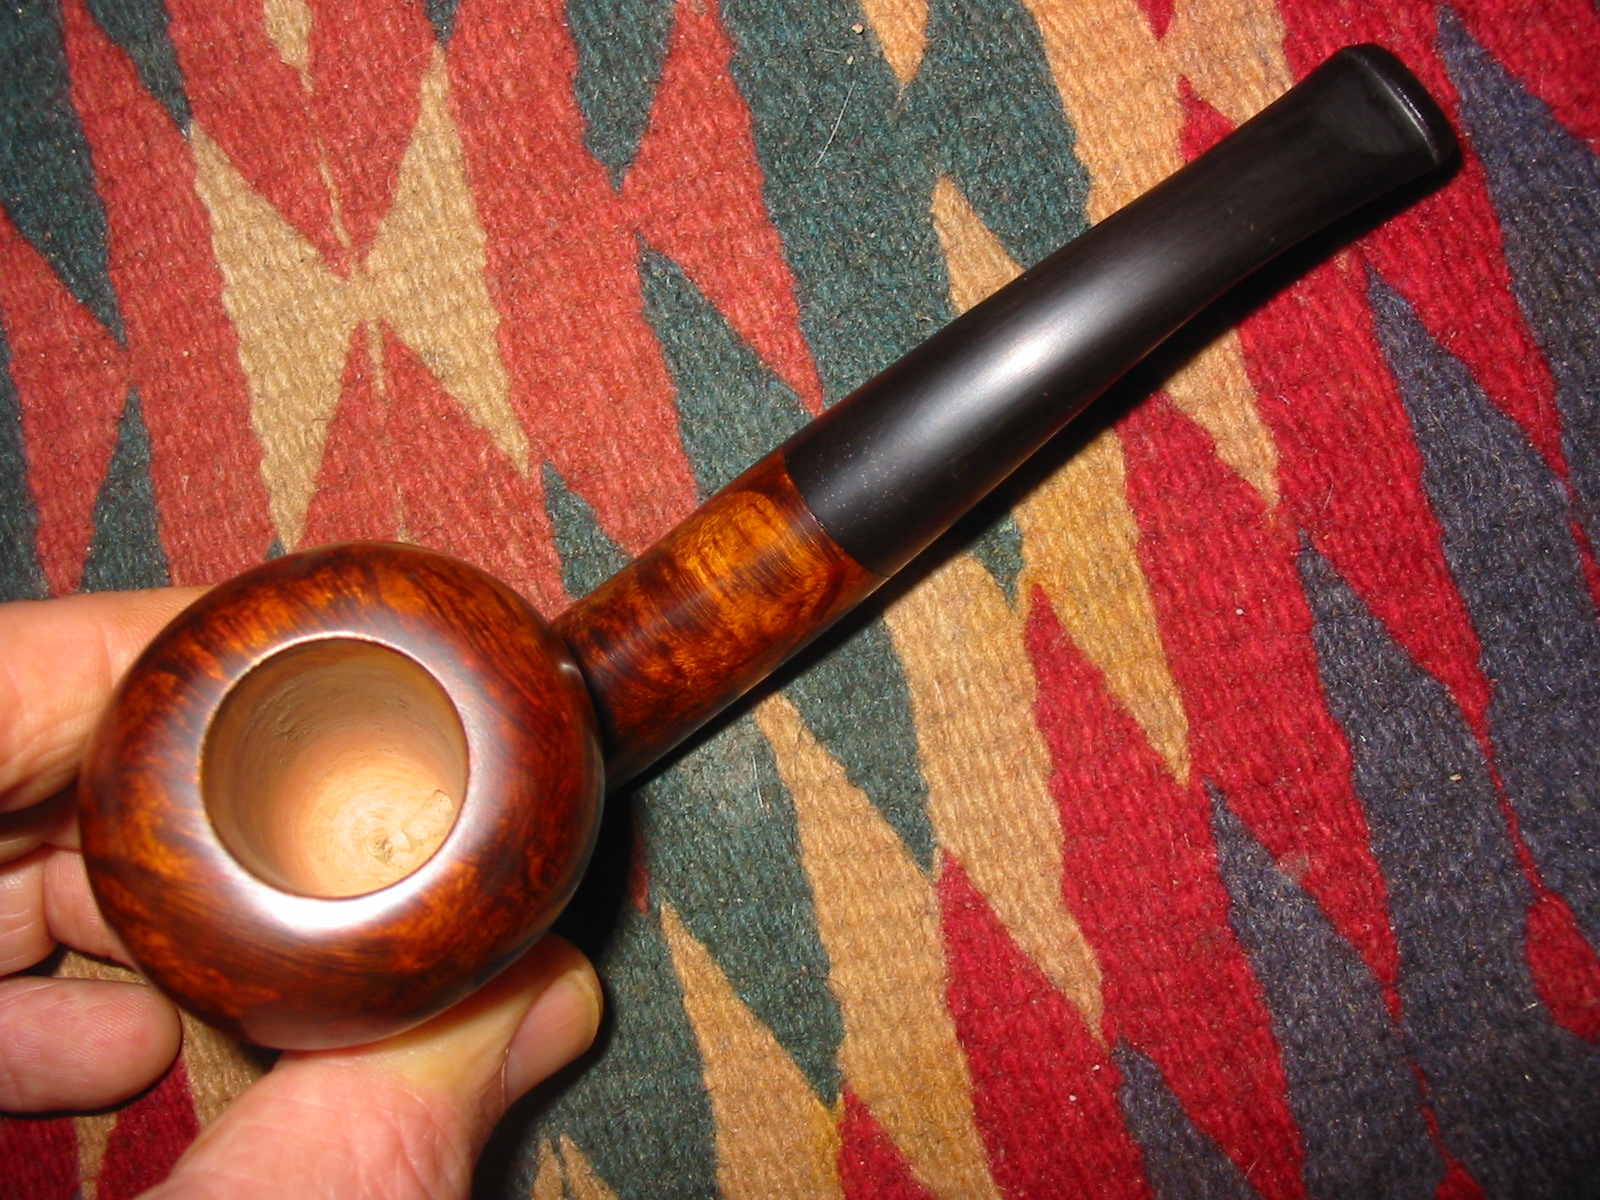
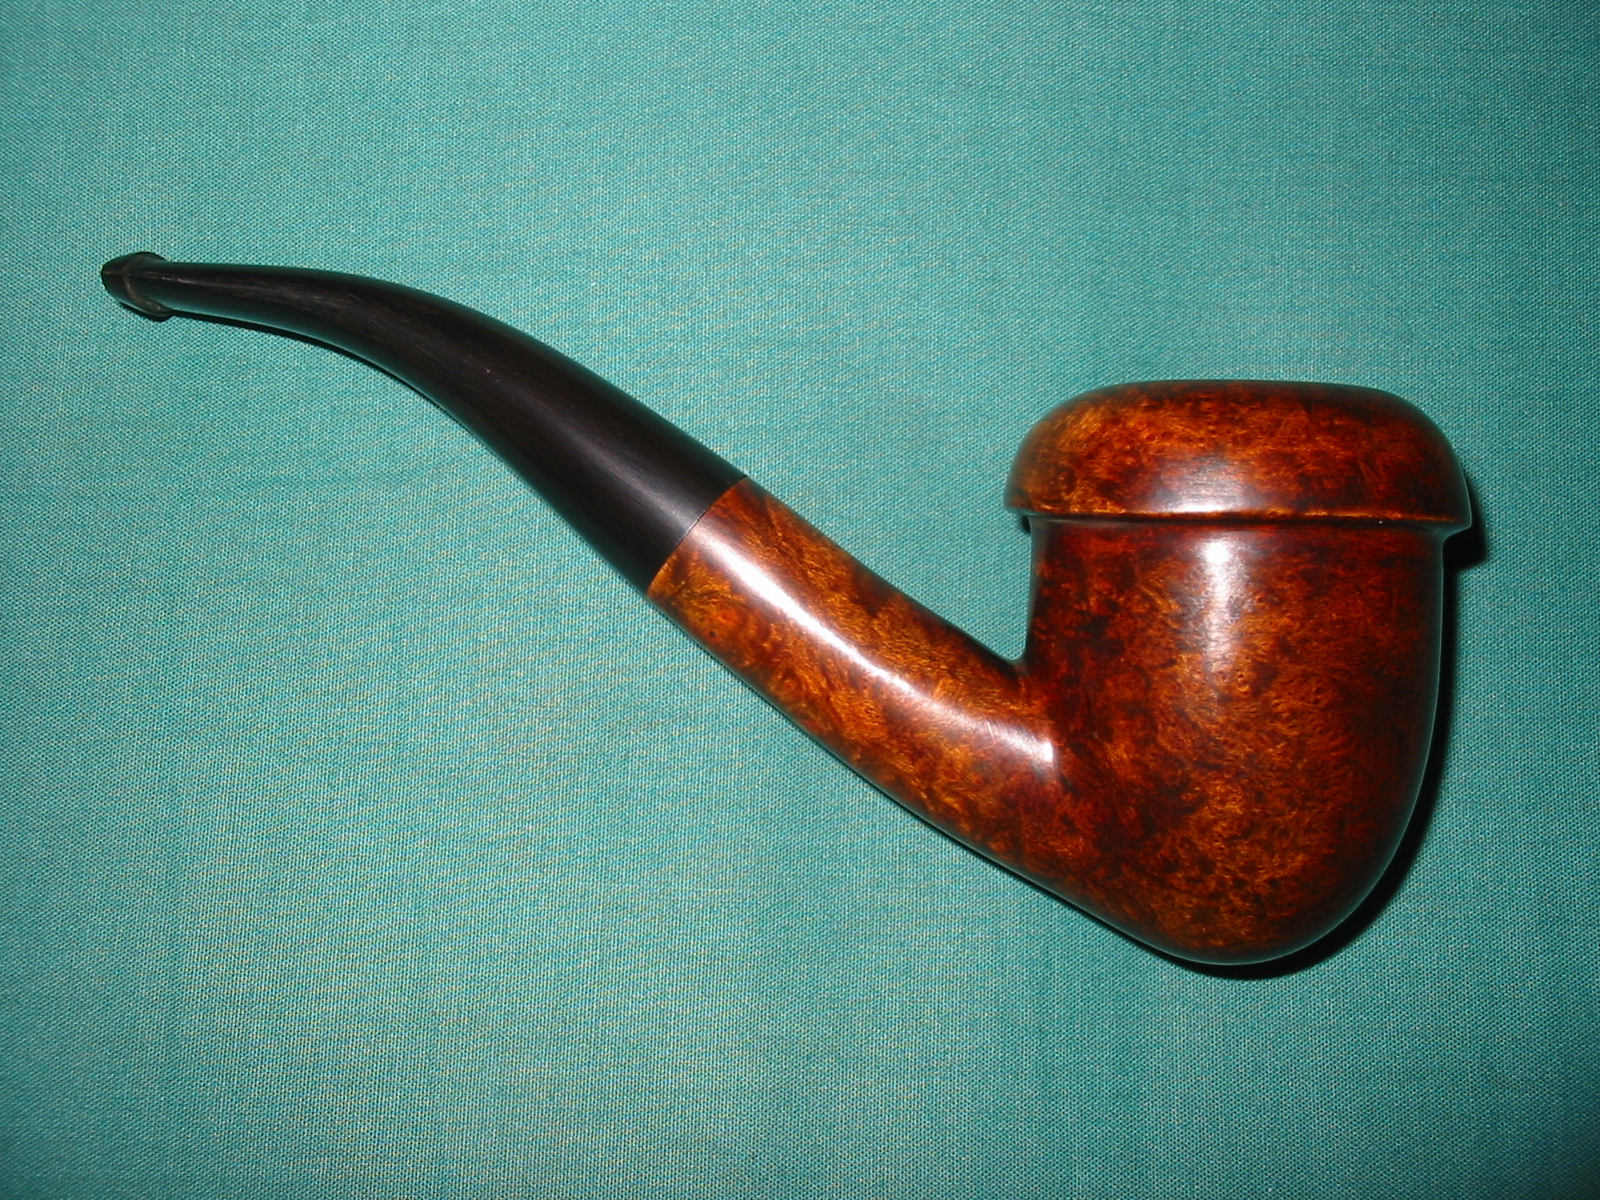
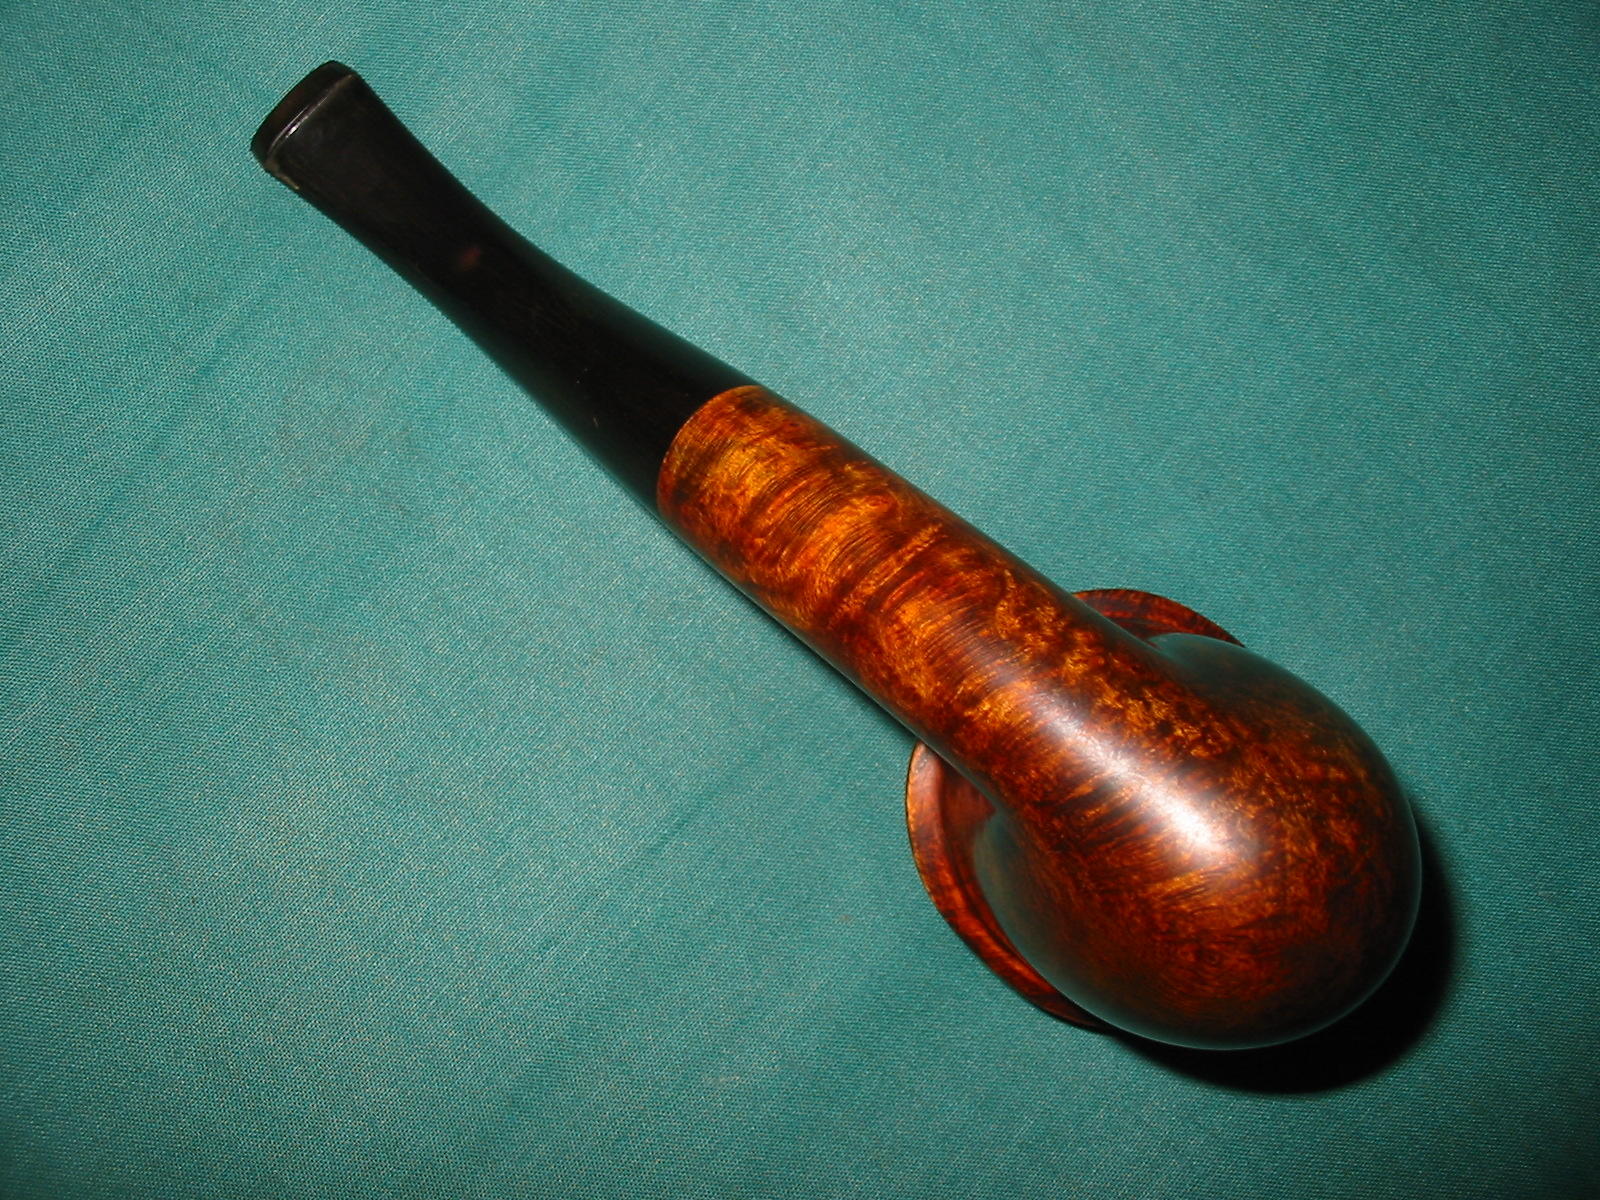
Given the above information I discovered that the pipe I was working on was made sometime between 1933-1936. It was stamped with the Honey Cured Briar stamping on the shank and had a four digit code. Thus it was an early Yello-Bole from the 1930s. With that information I had a fairly clear idea of what kind of stem I needed to fit to the shank. I looked for photos of the pipe online and found none from that era. So I looked at KW stems to get some sense of what the shape of the stem and the slope of the taper would have been like. I found one the shape I was looking for in my can of stems. It had the right taper and look and after turning the tenon I was able to fit it to the shank. The diameter of the stem was slightly larger than the shank on the top and would need to be sanded until the transition was smooth between the shank and stem. IMG_7577IMG_7578IMG_7579 
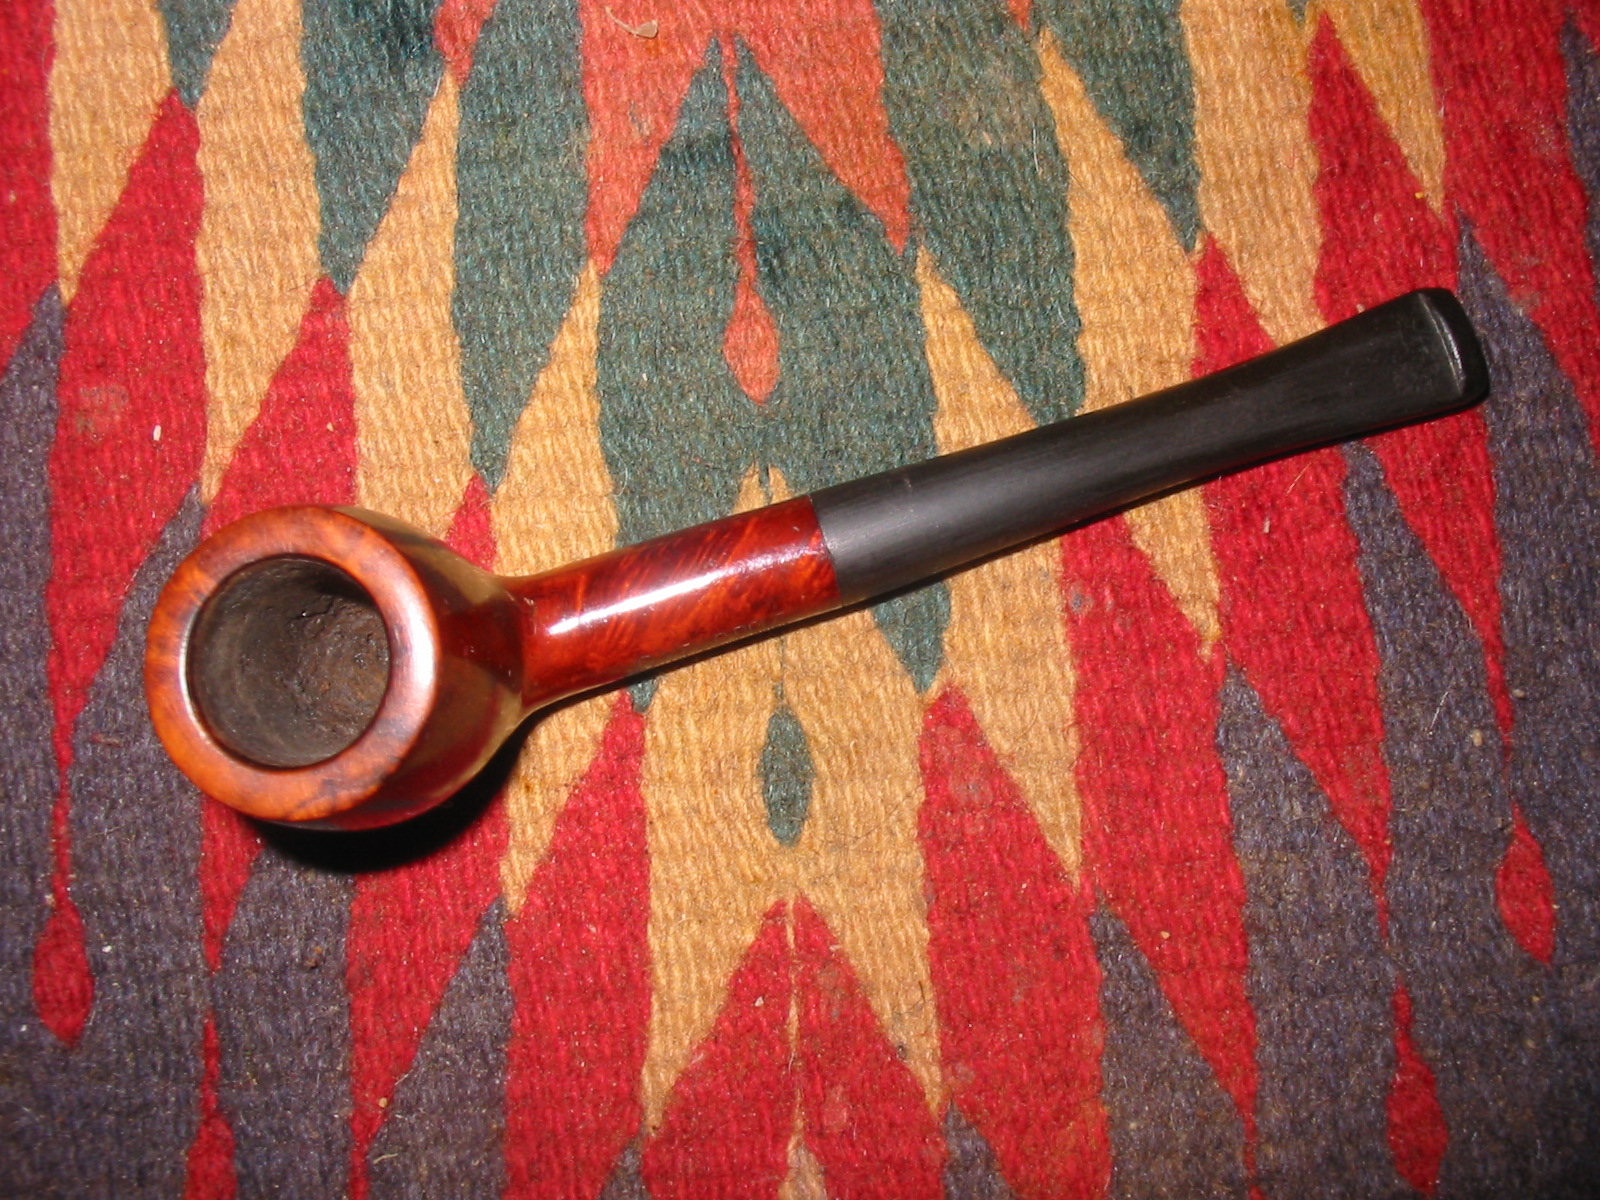
I sanded the stem with 220 grit sandpaper to remove the excess material on the top side. I sanded the shank to make the transition smooth. I planned on removing the varnish and touching up the stain on the rim anyway so to touch up the shank would not be a problem. I sanded carefully so as not to damage the stamping. IMG_7592IMG_7593IMG_7594IMG_7595 
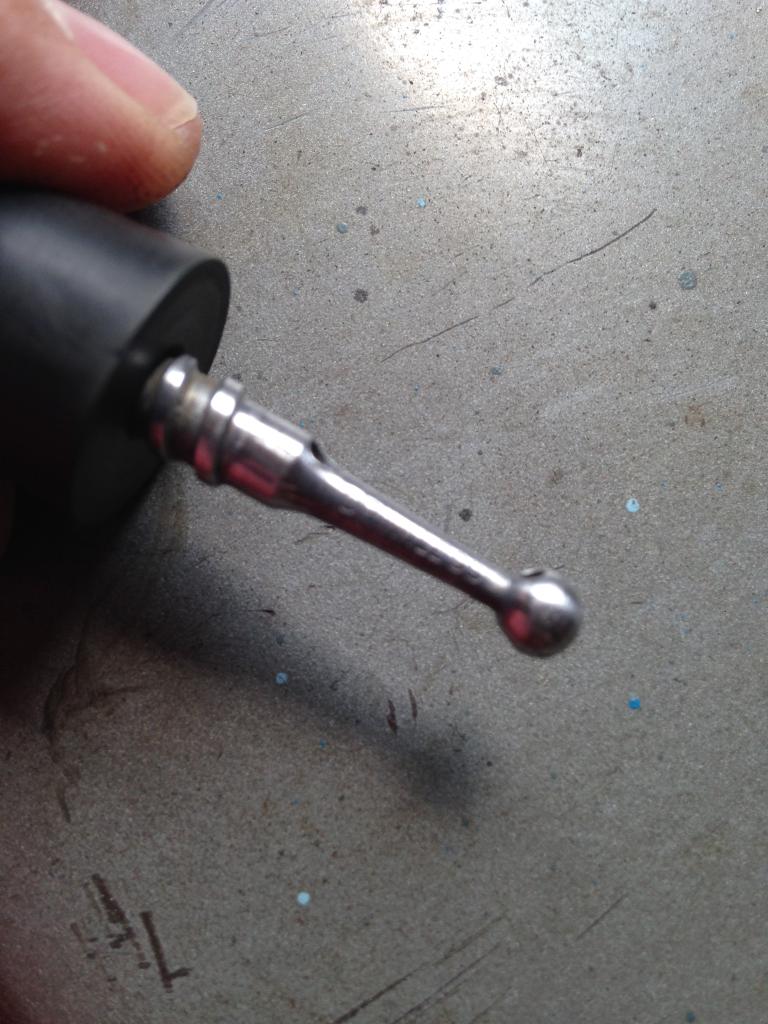
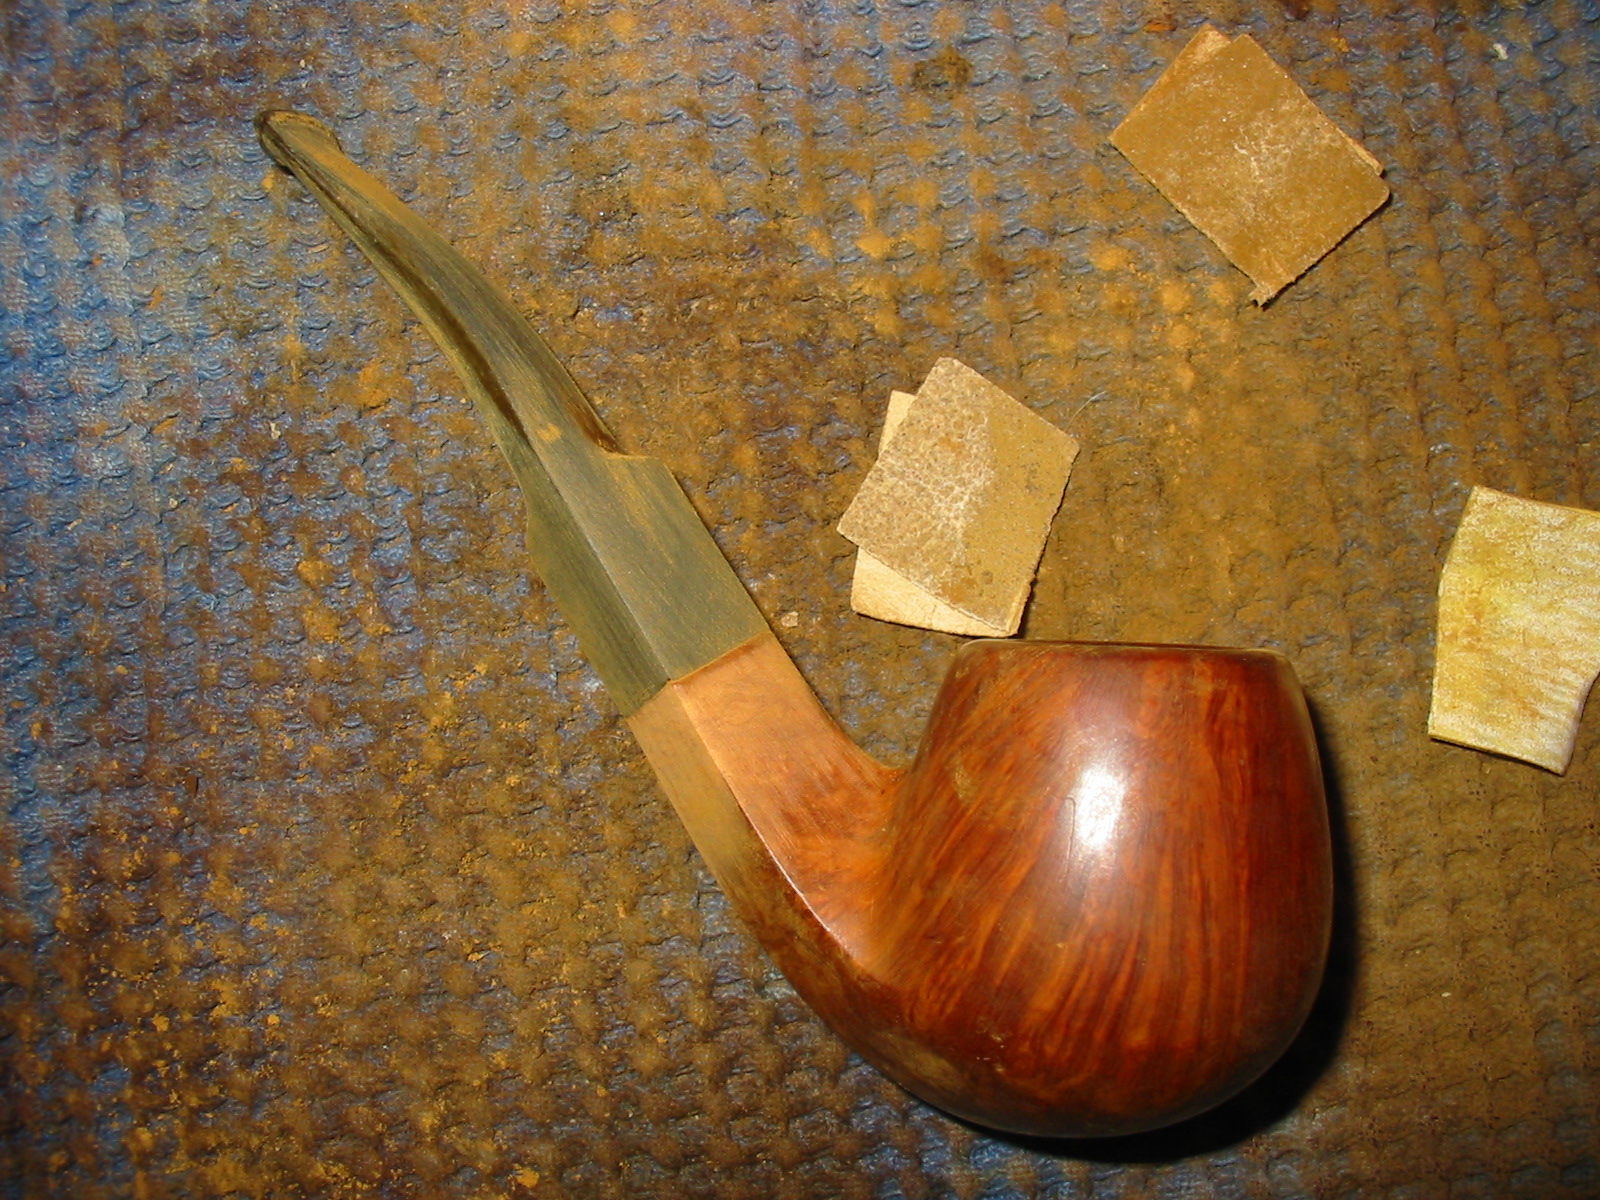
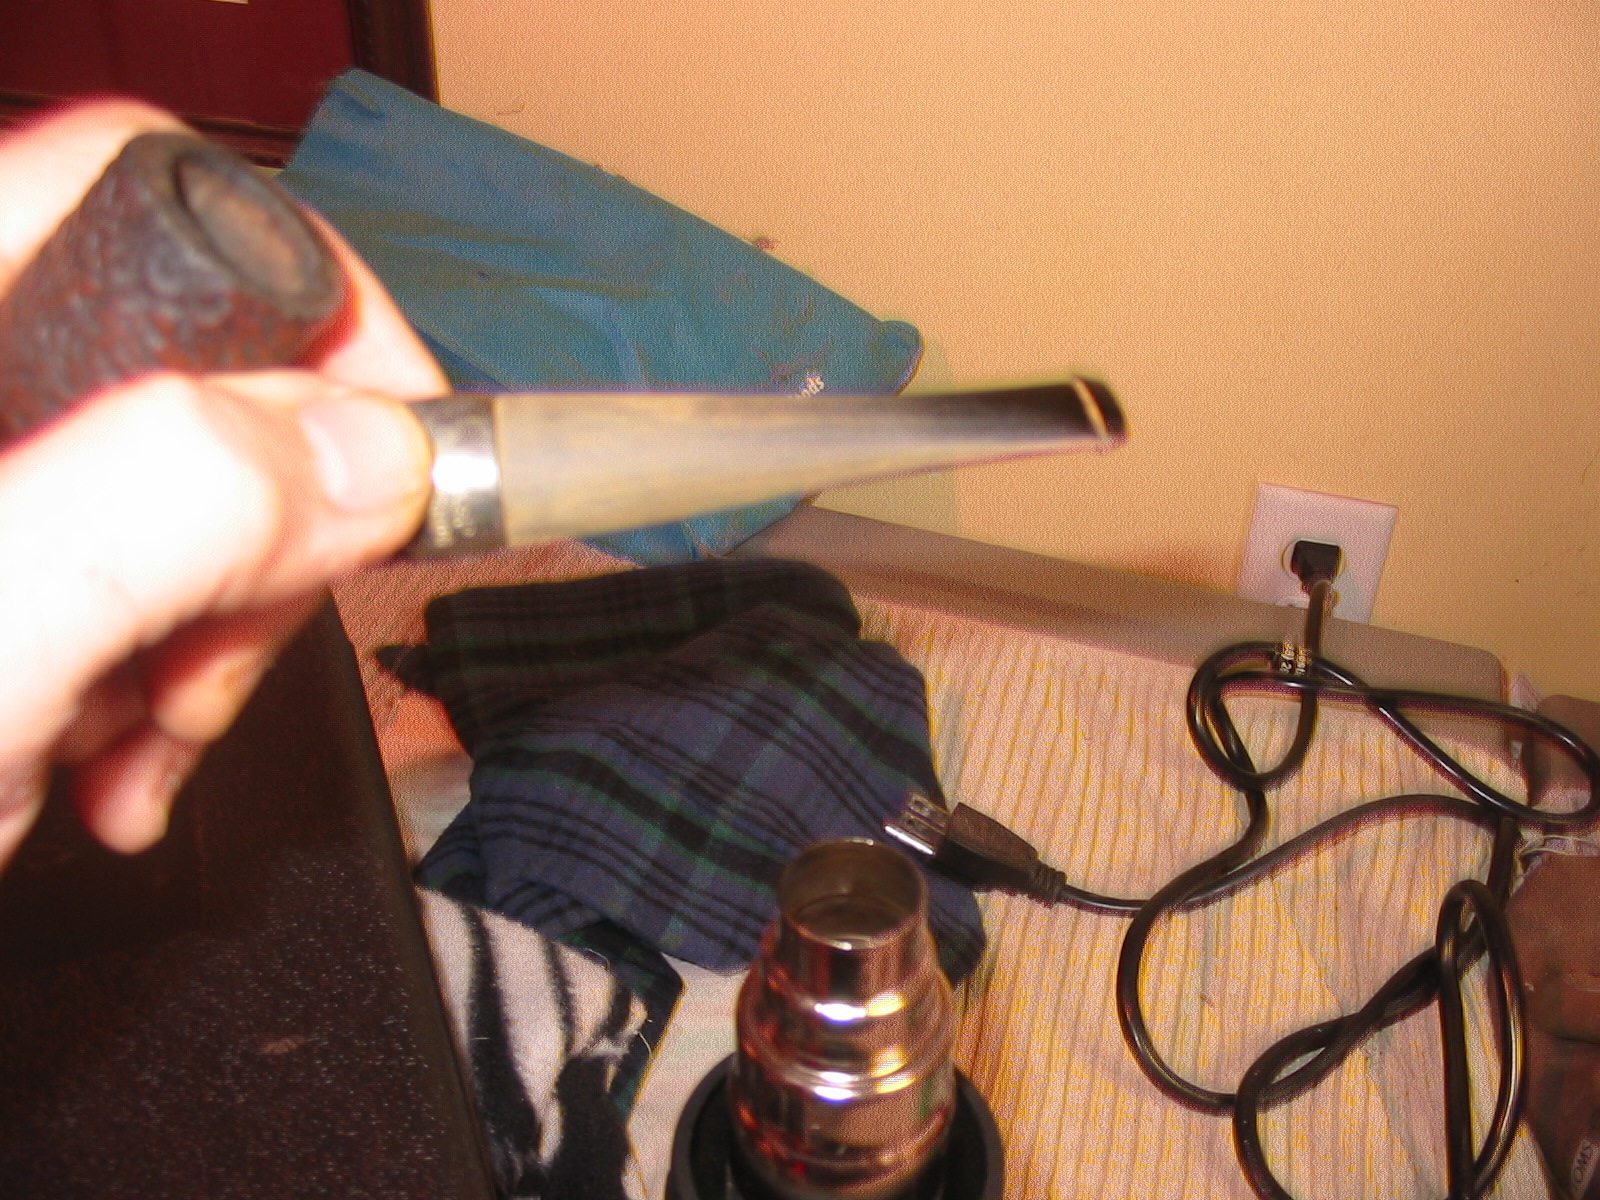
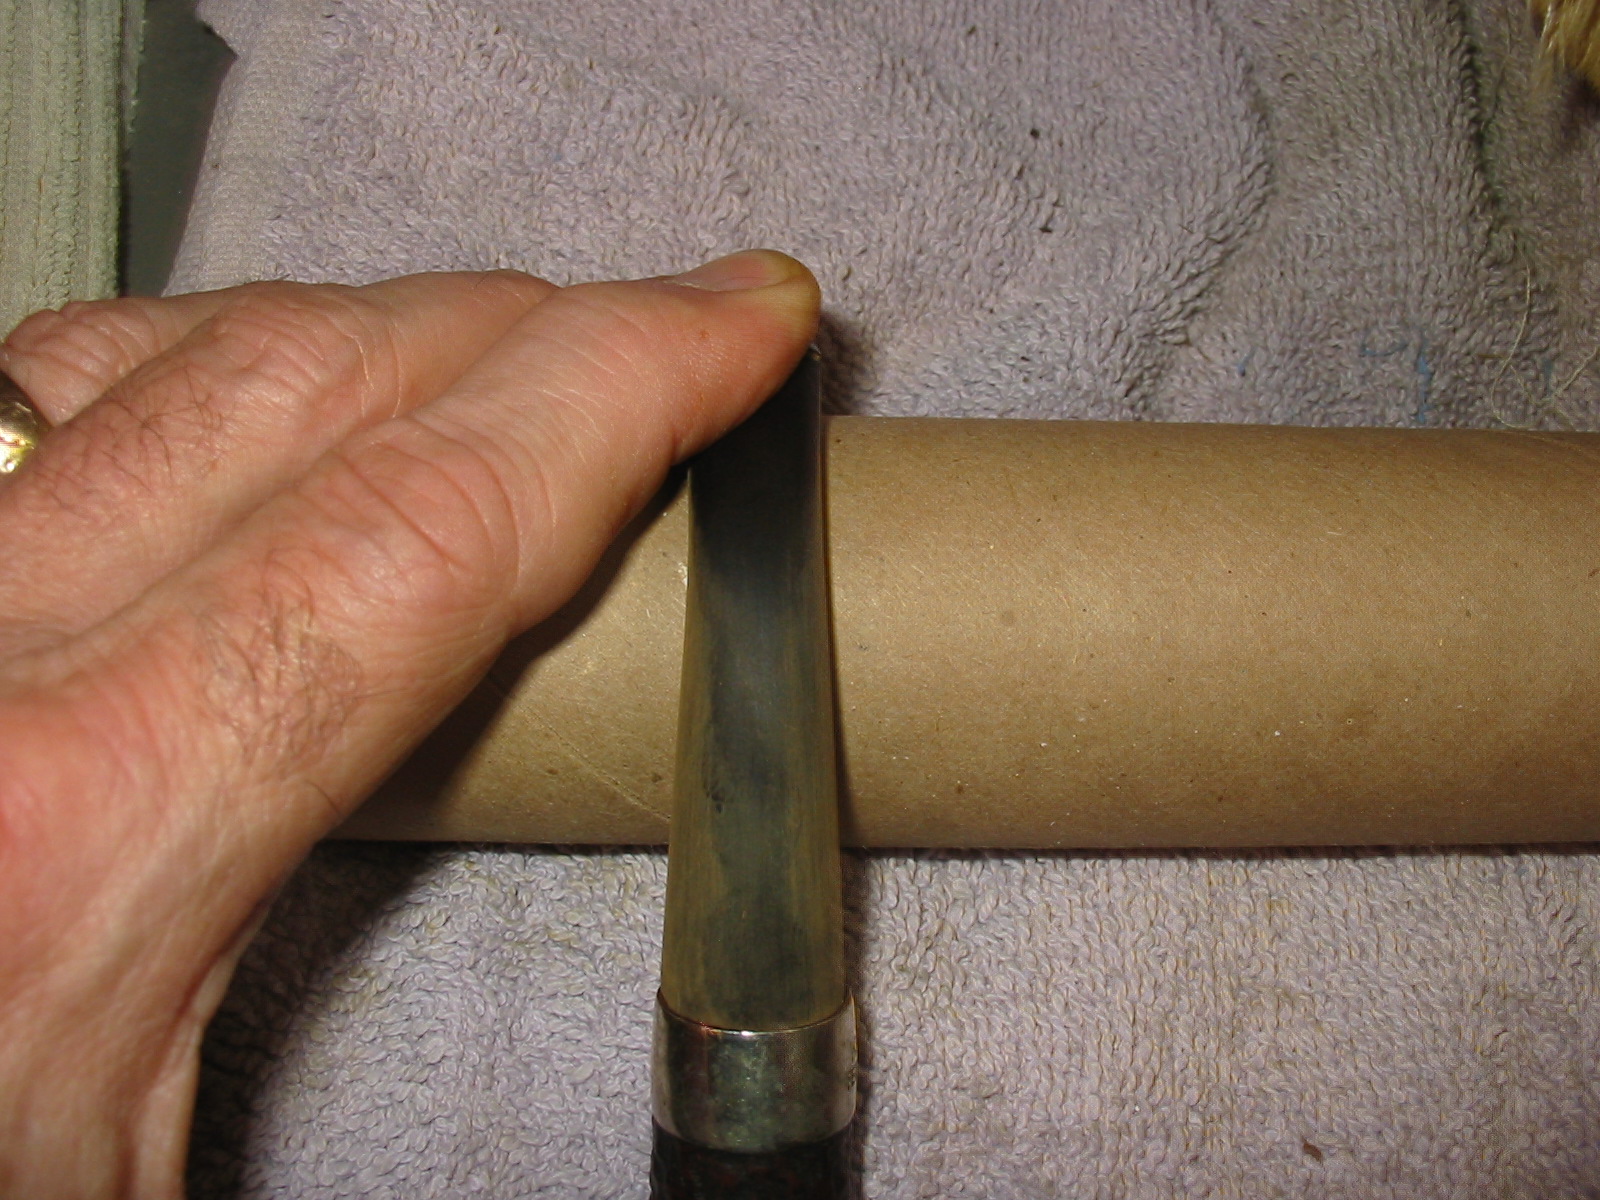
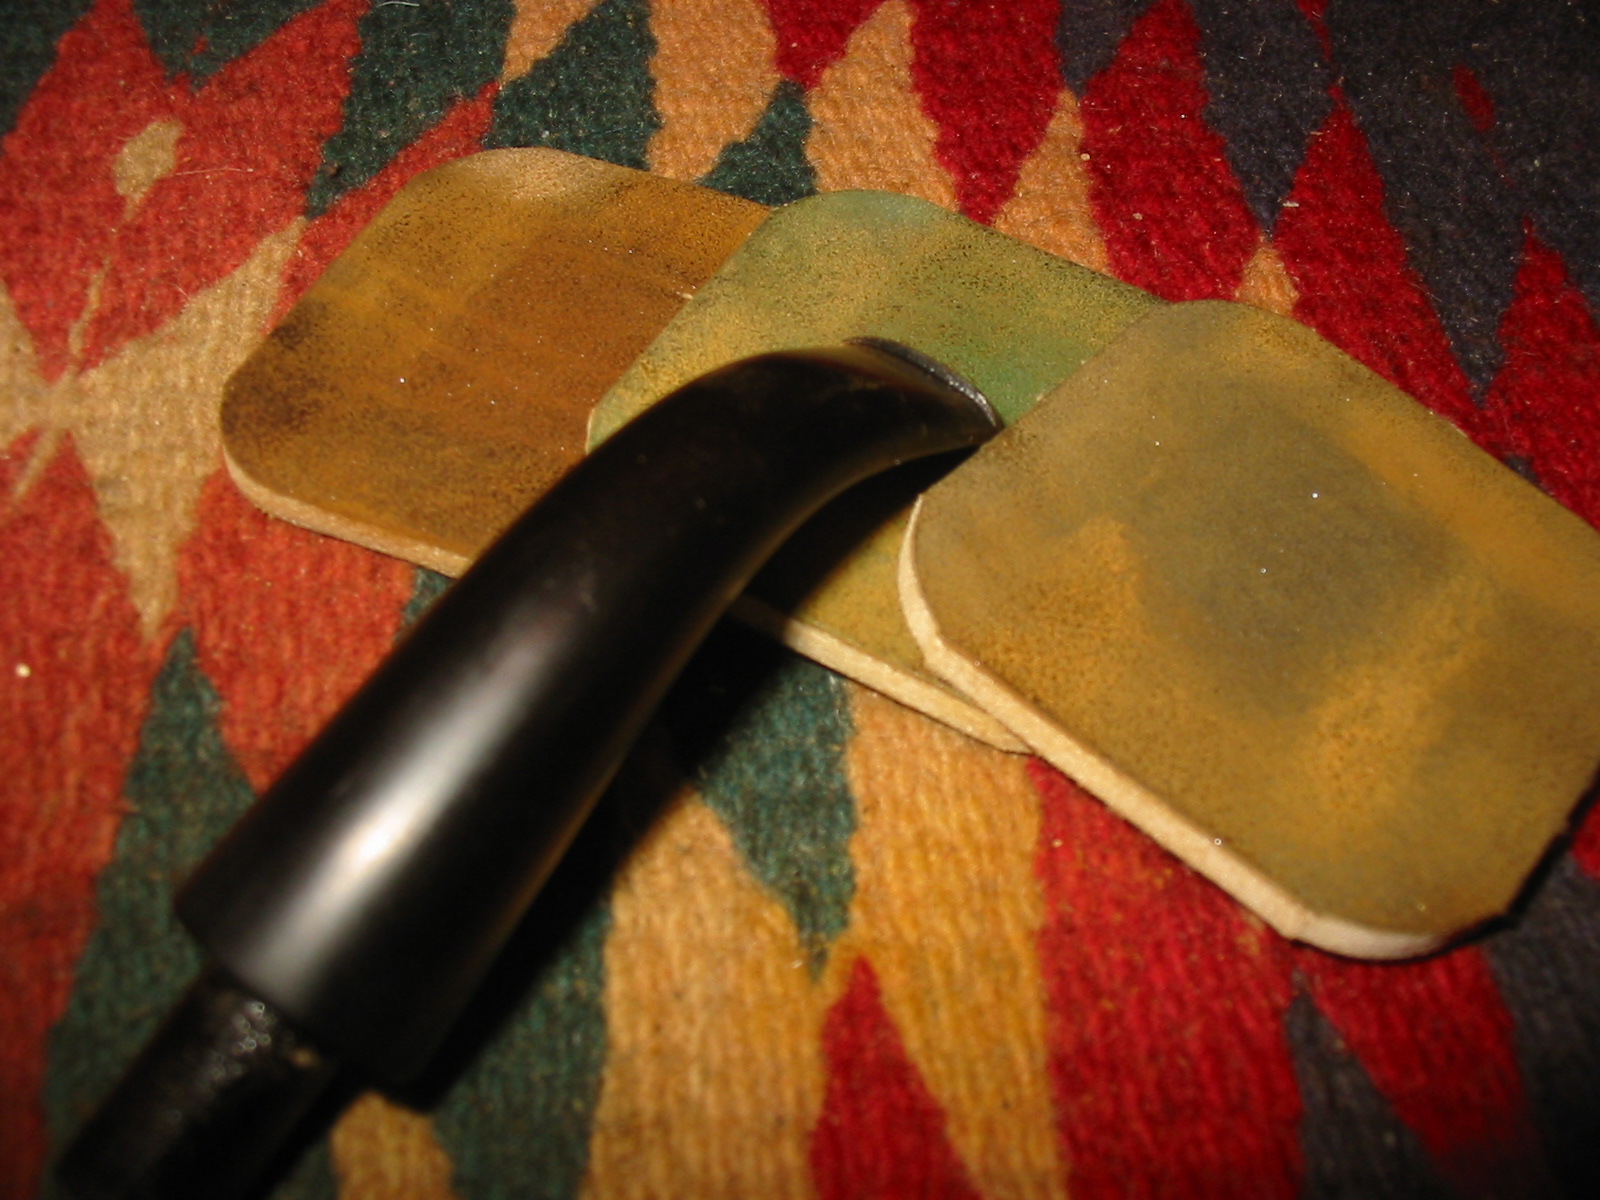
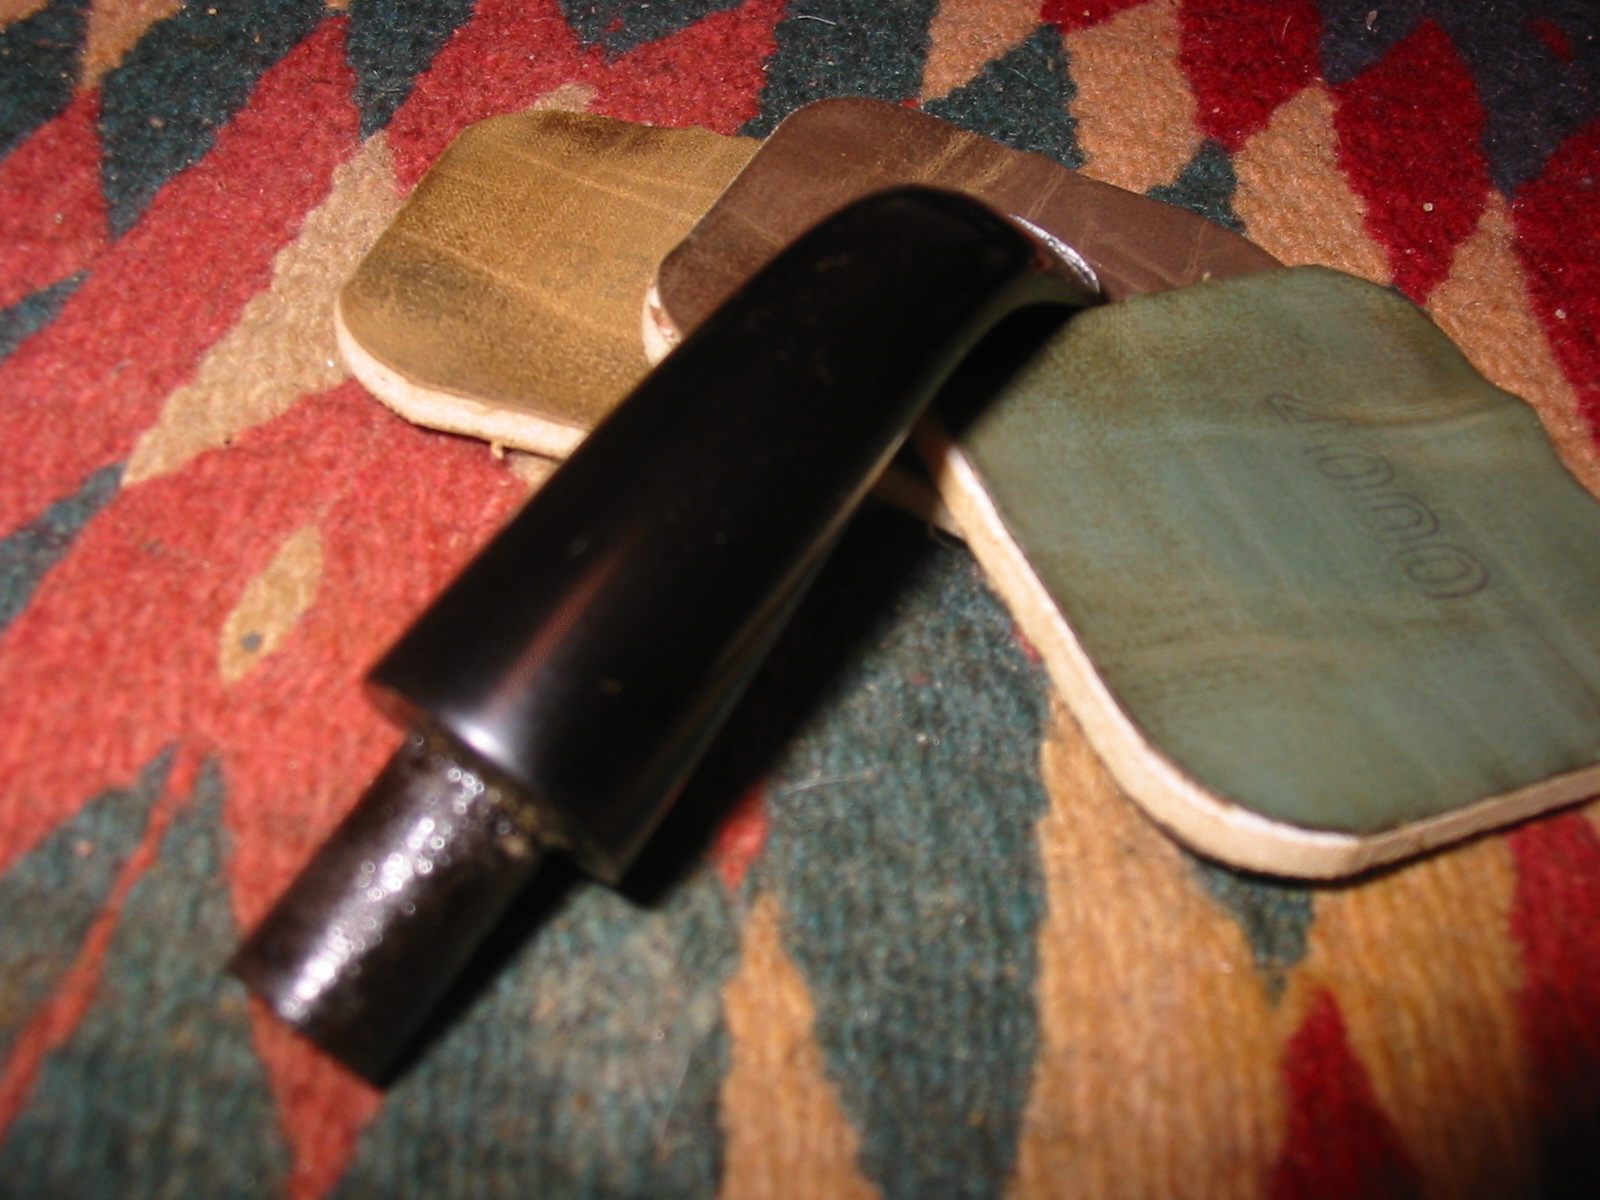
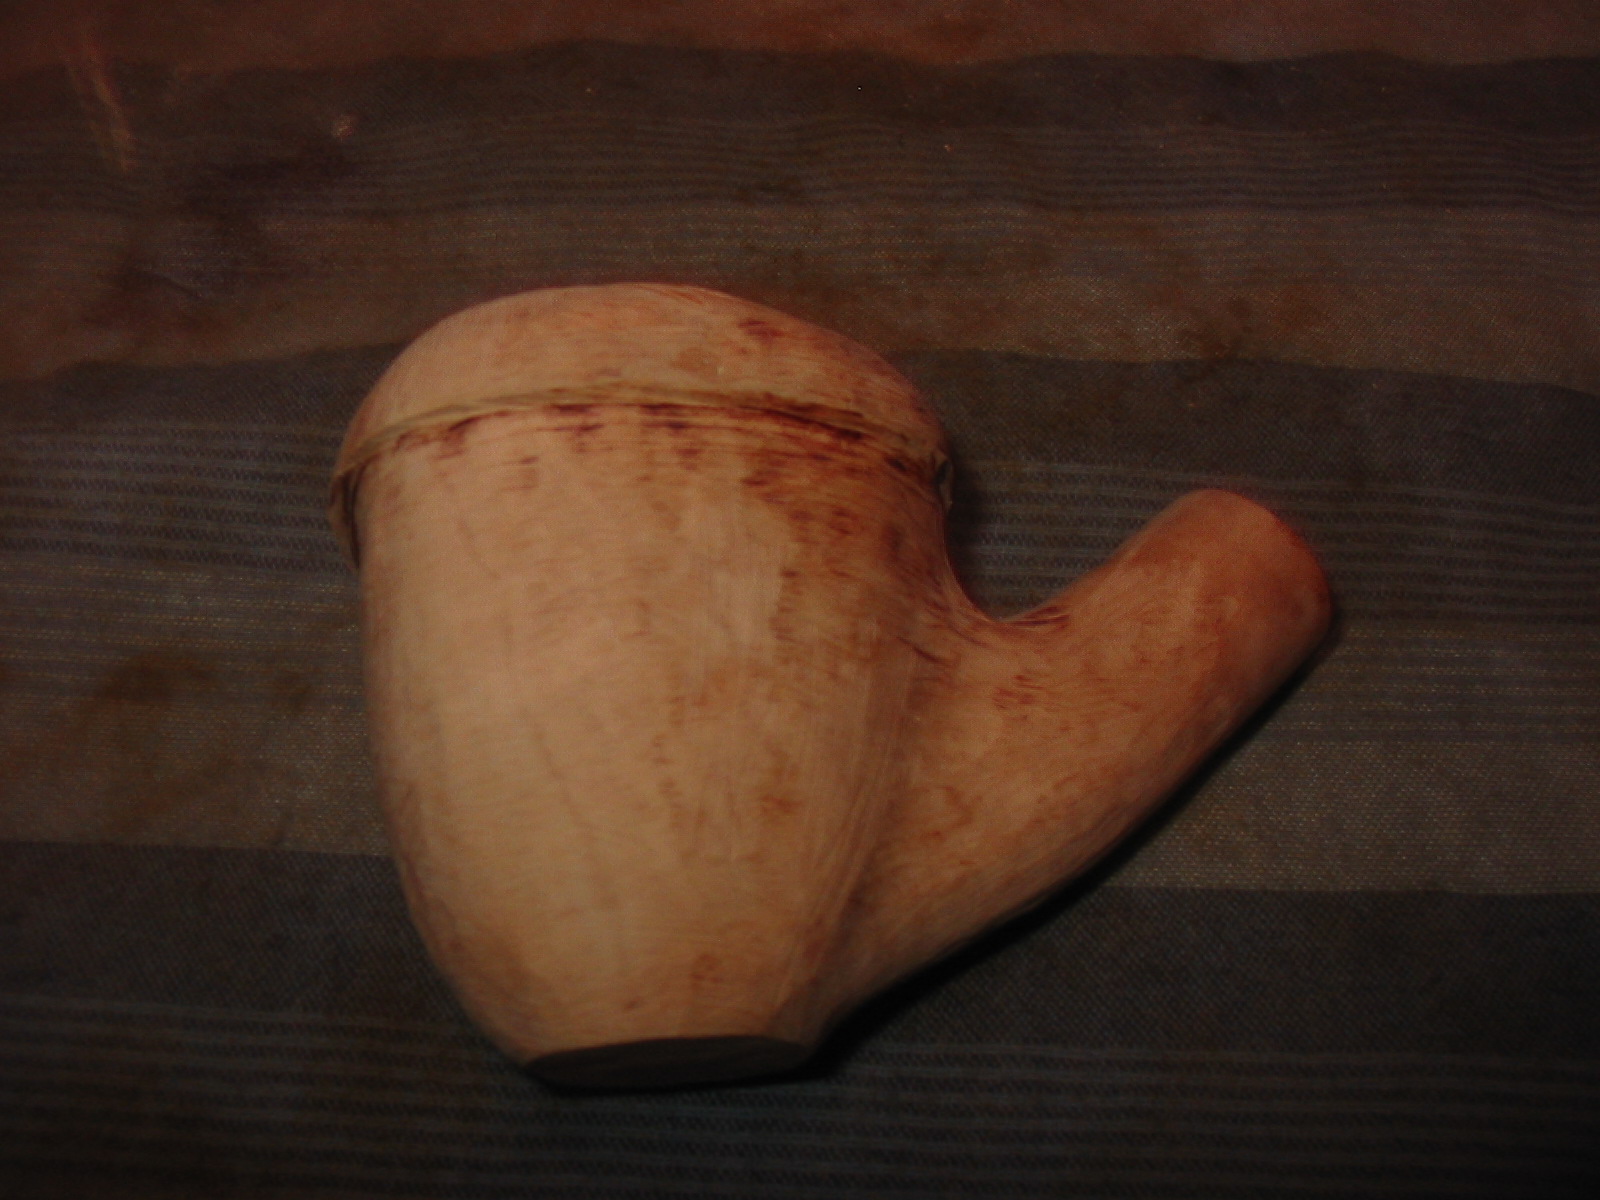
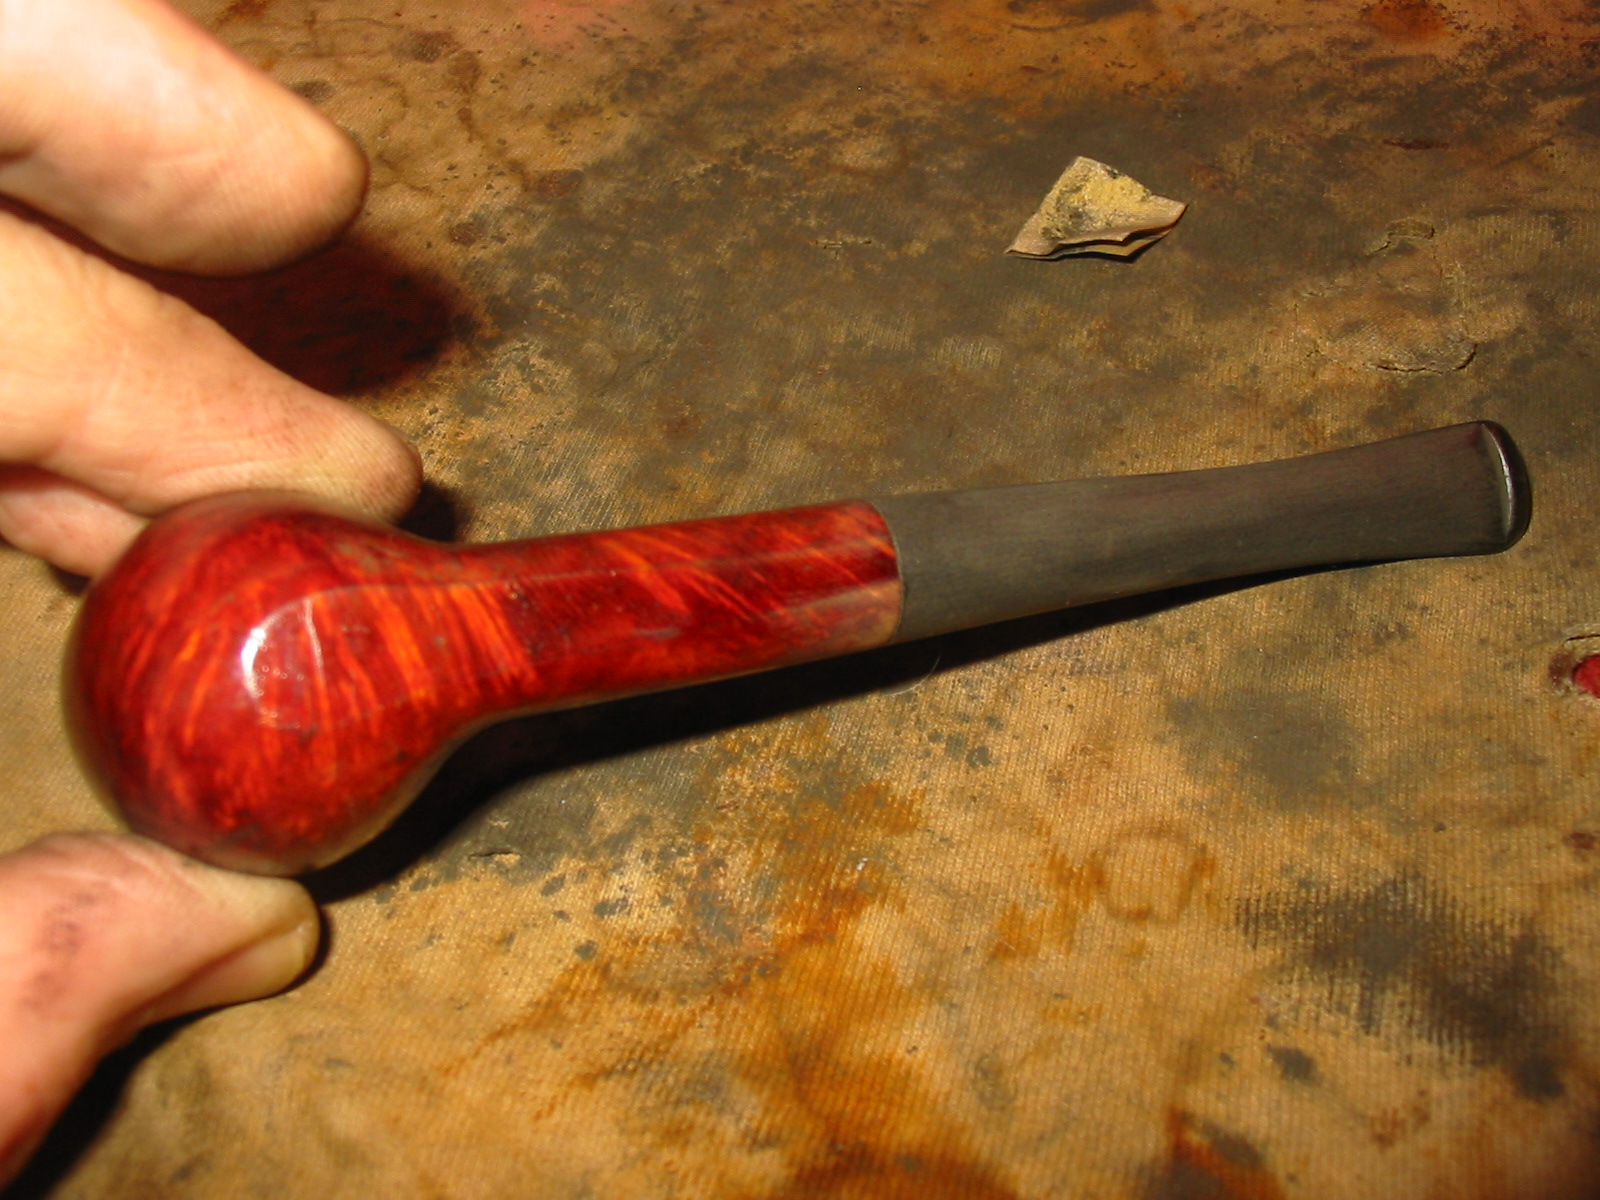
There were some slight ripples in the taper of the stem so I sanded it with a sanding block to smooth out the high points on the taper and even out the line. IMG_7596IMG_7597IMG_7598 
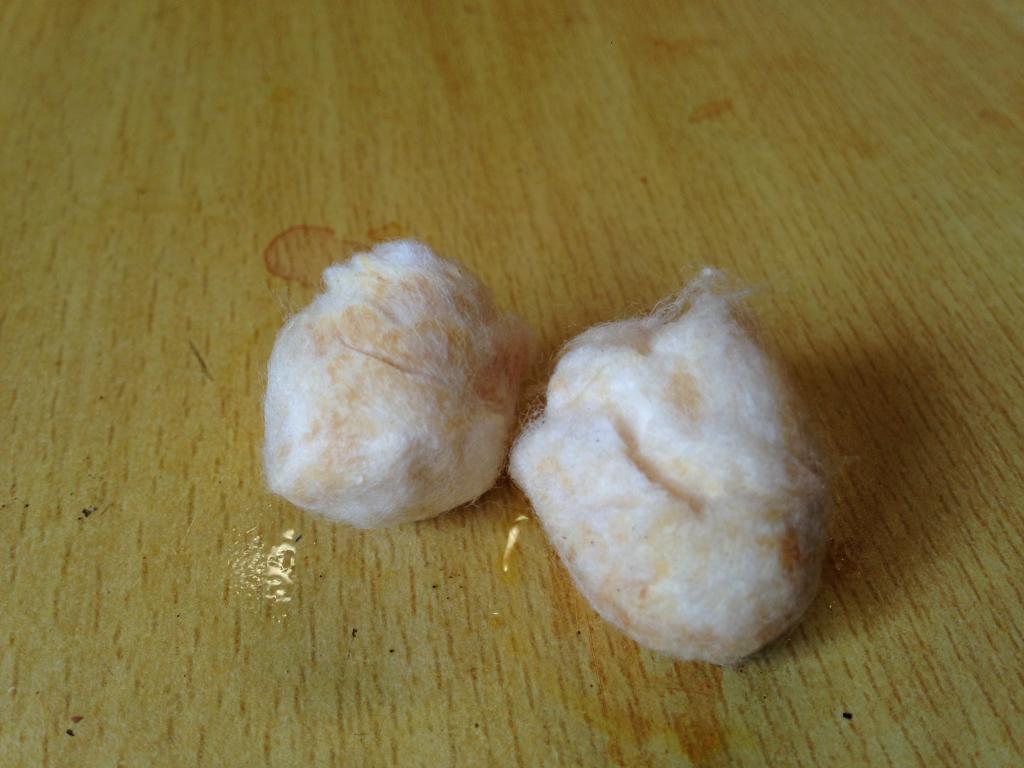
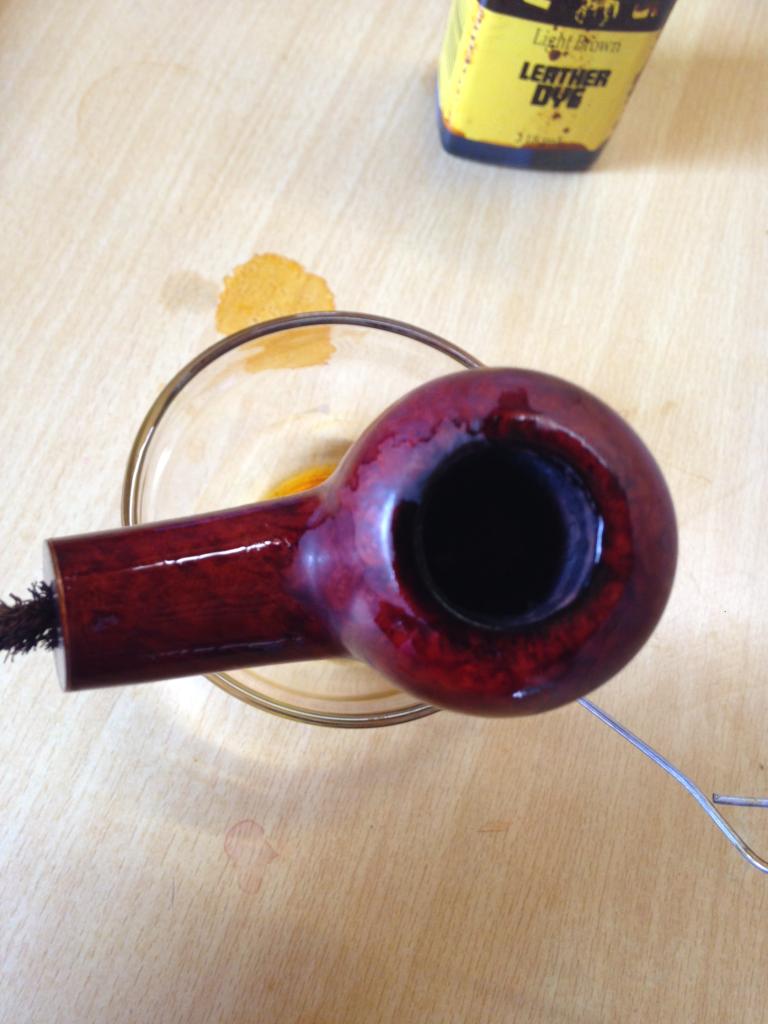
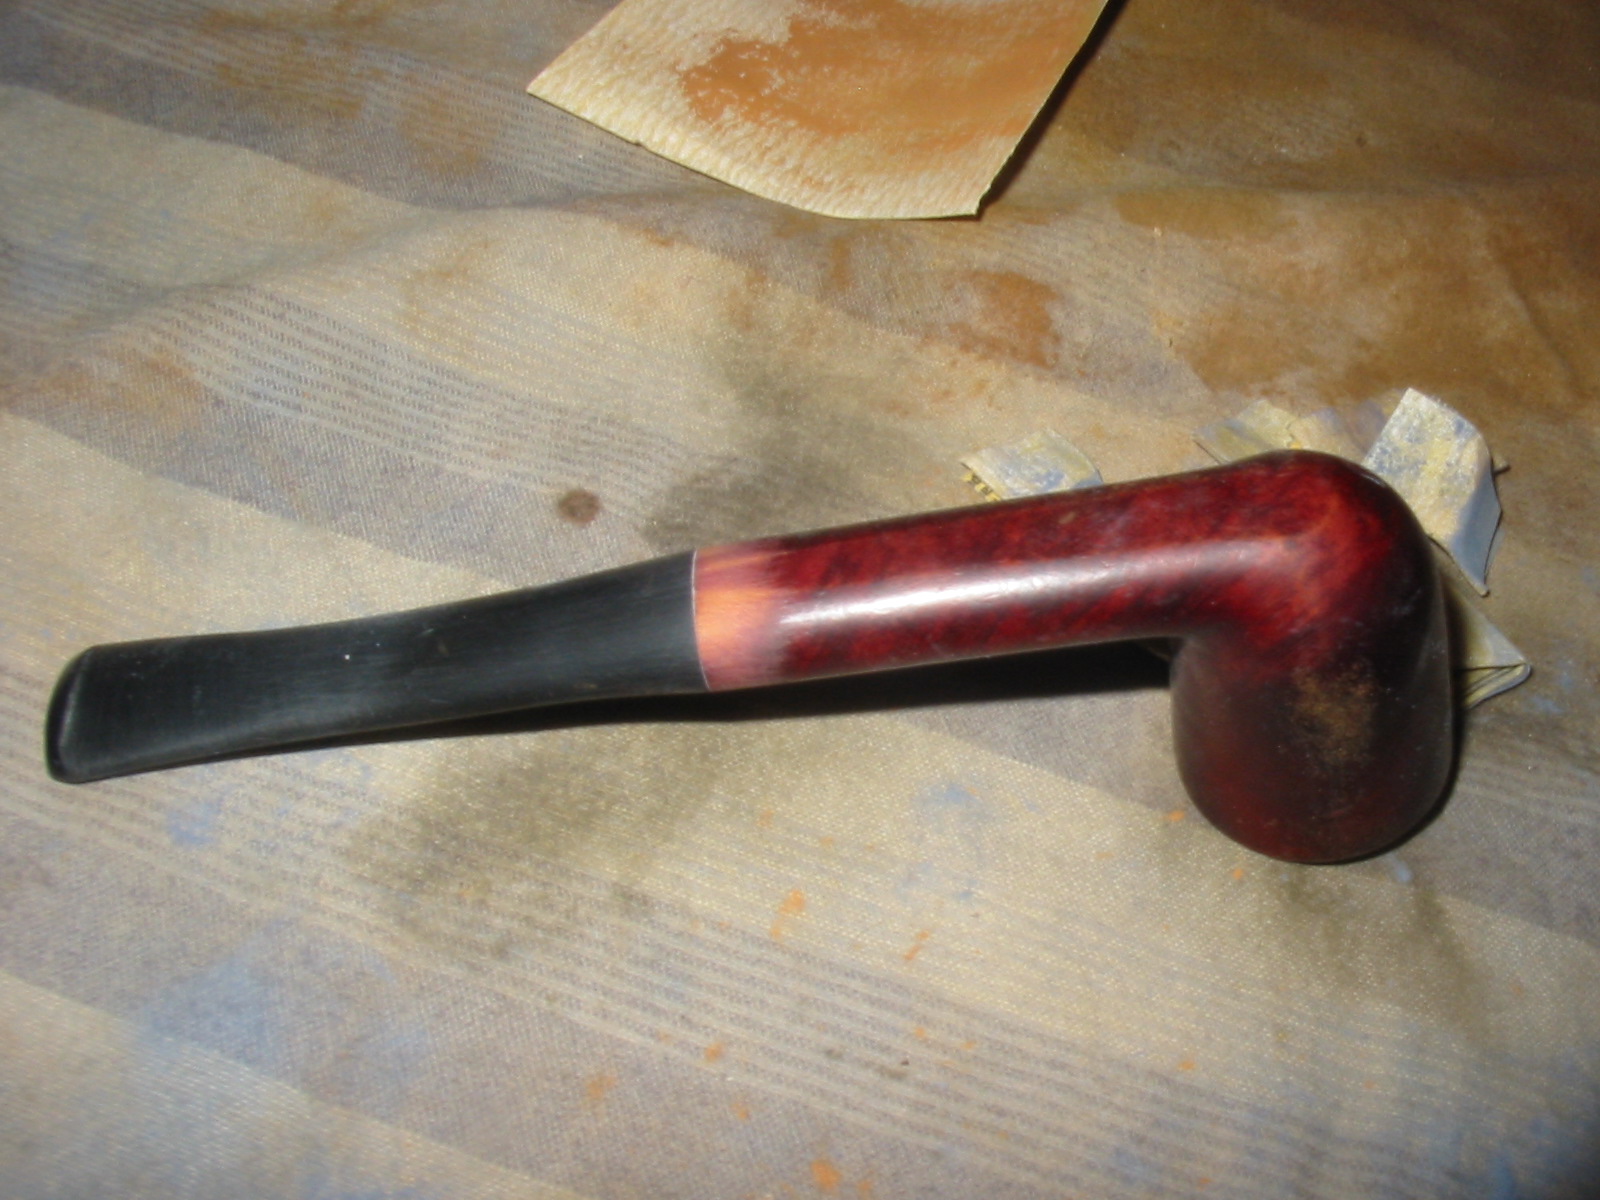
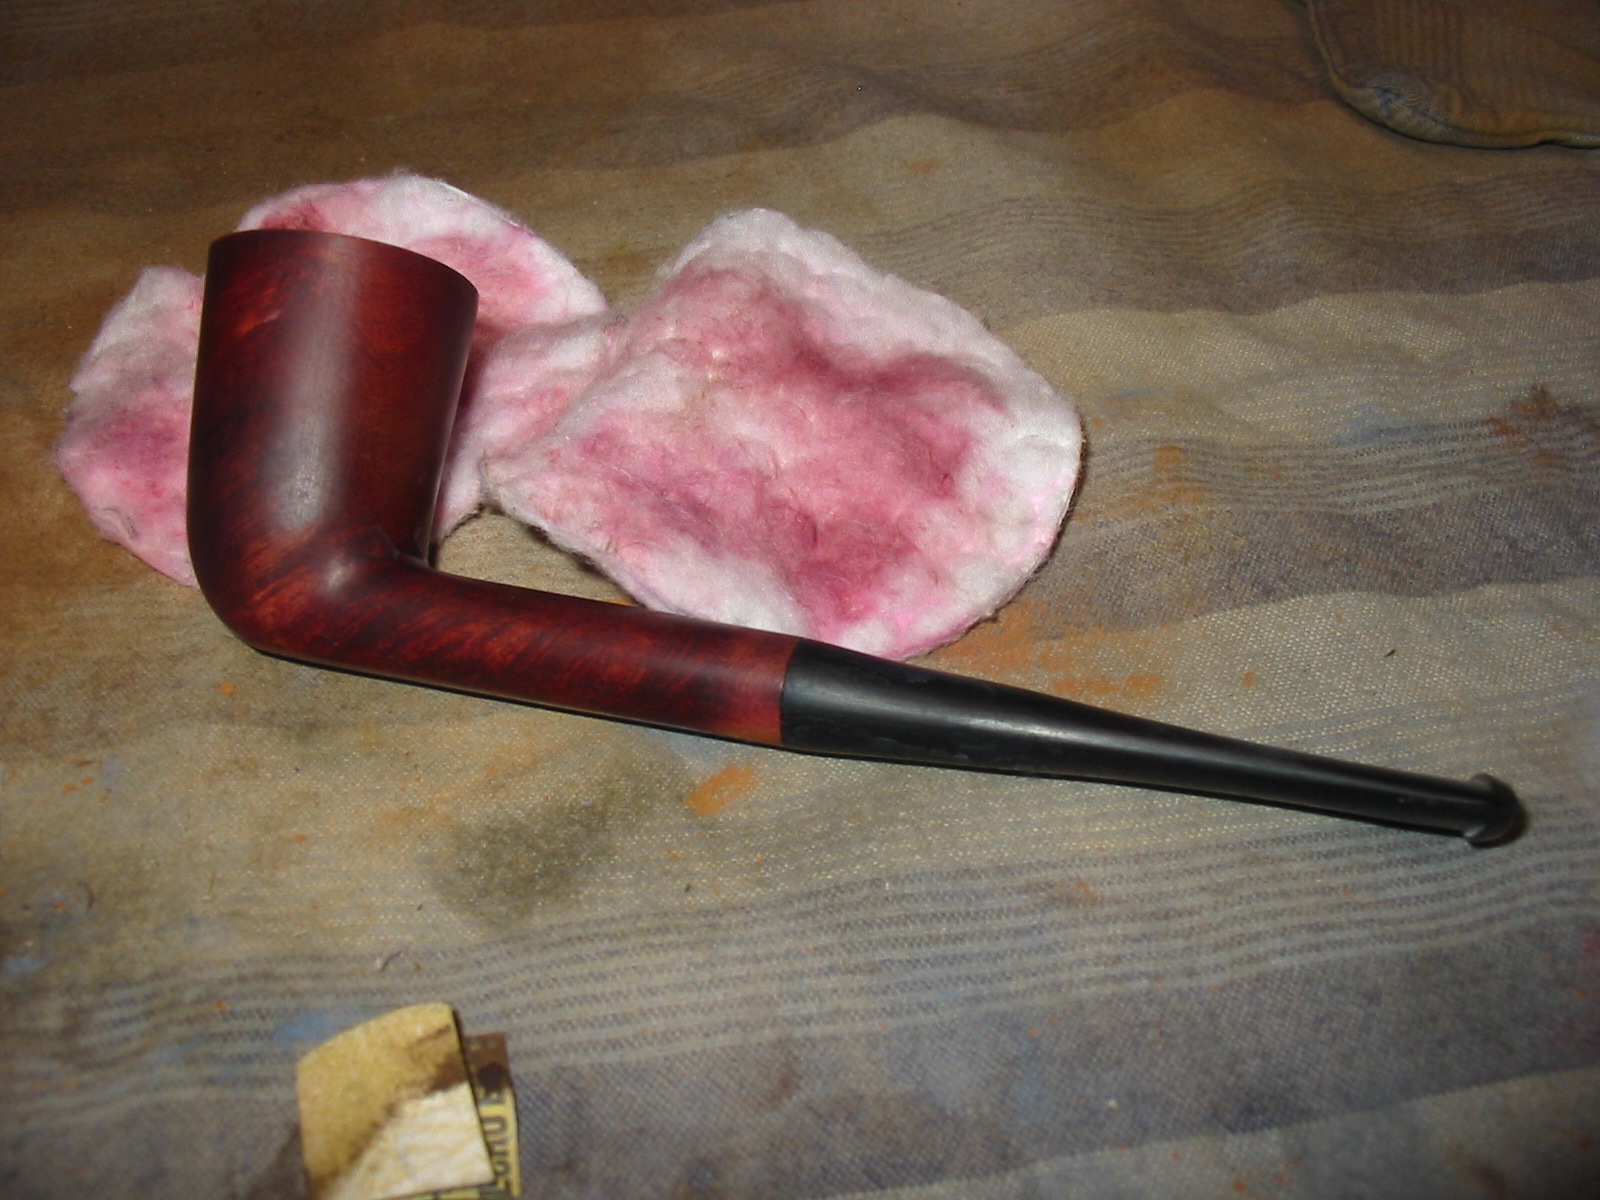
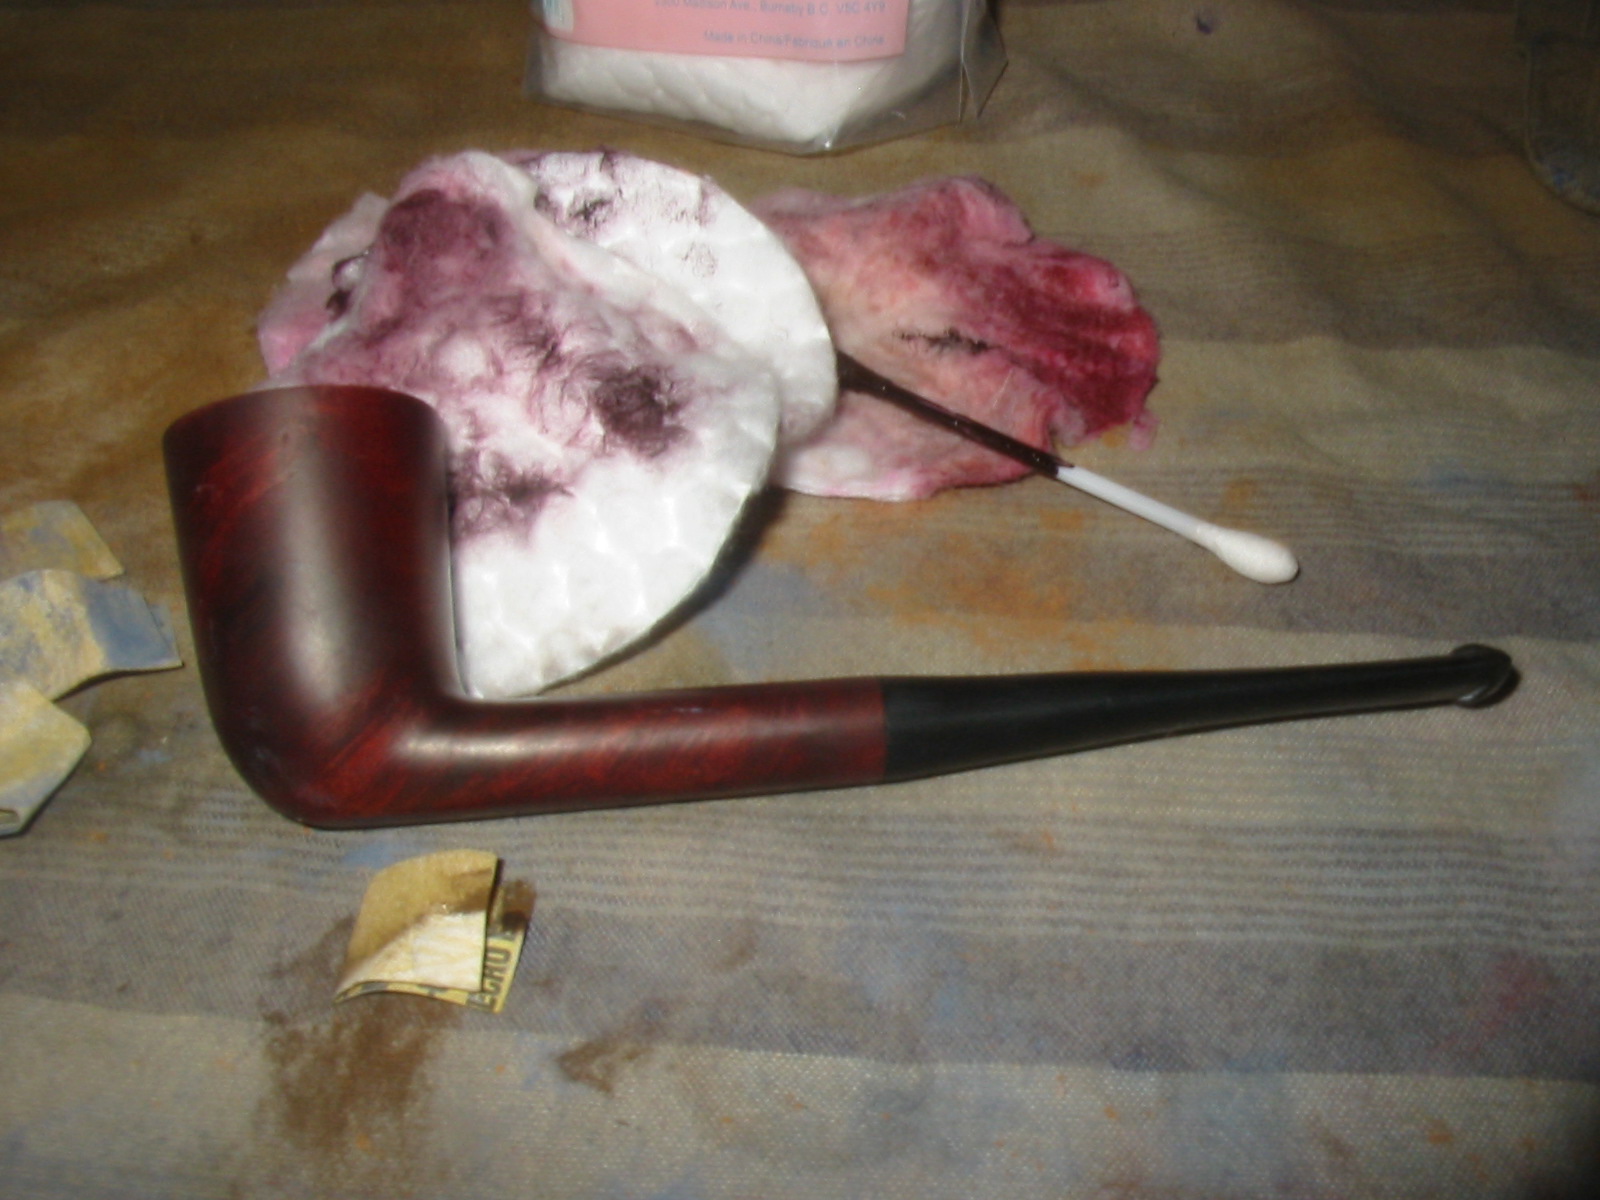
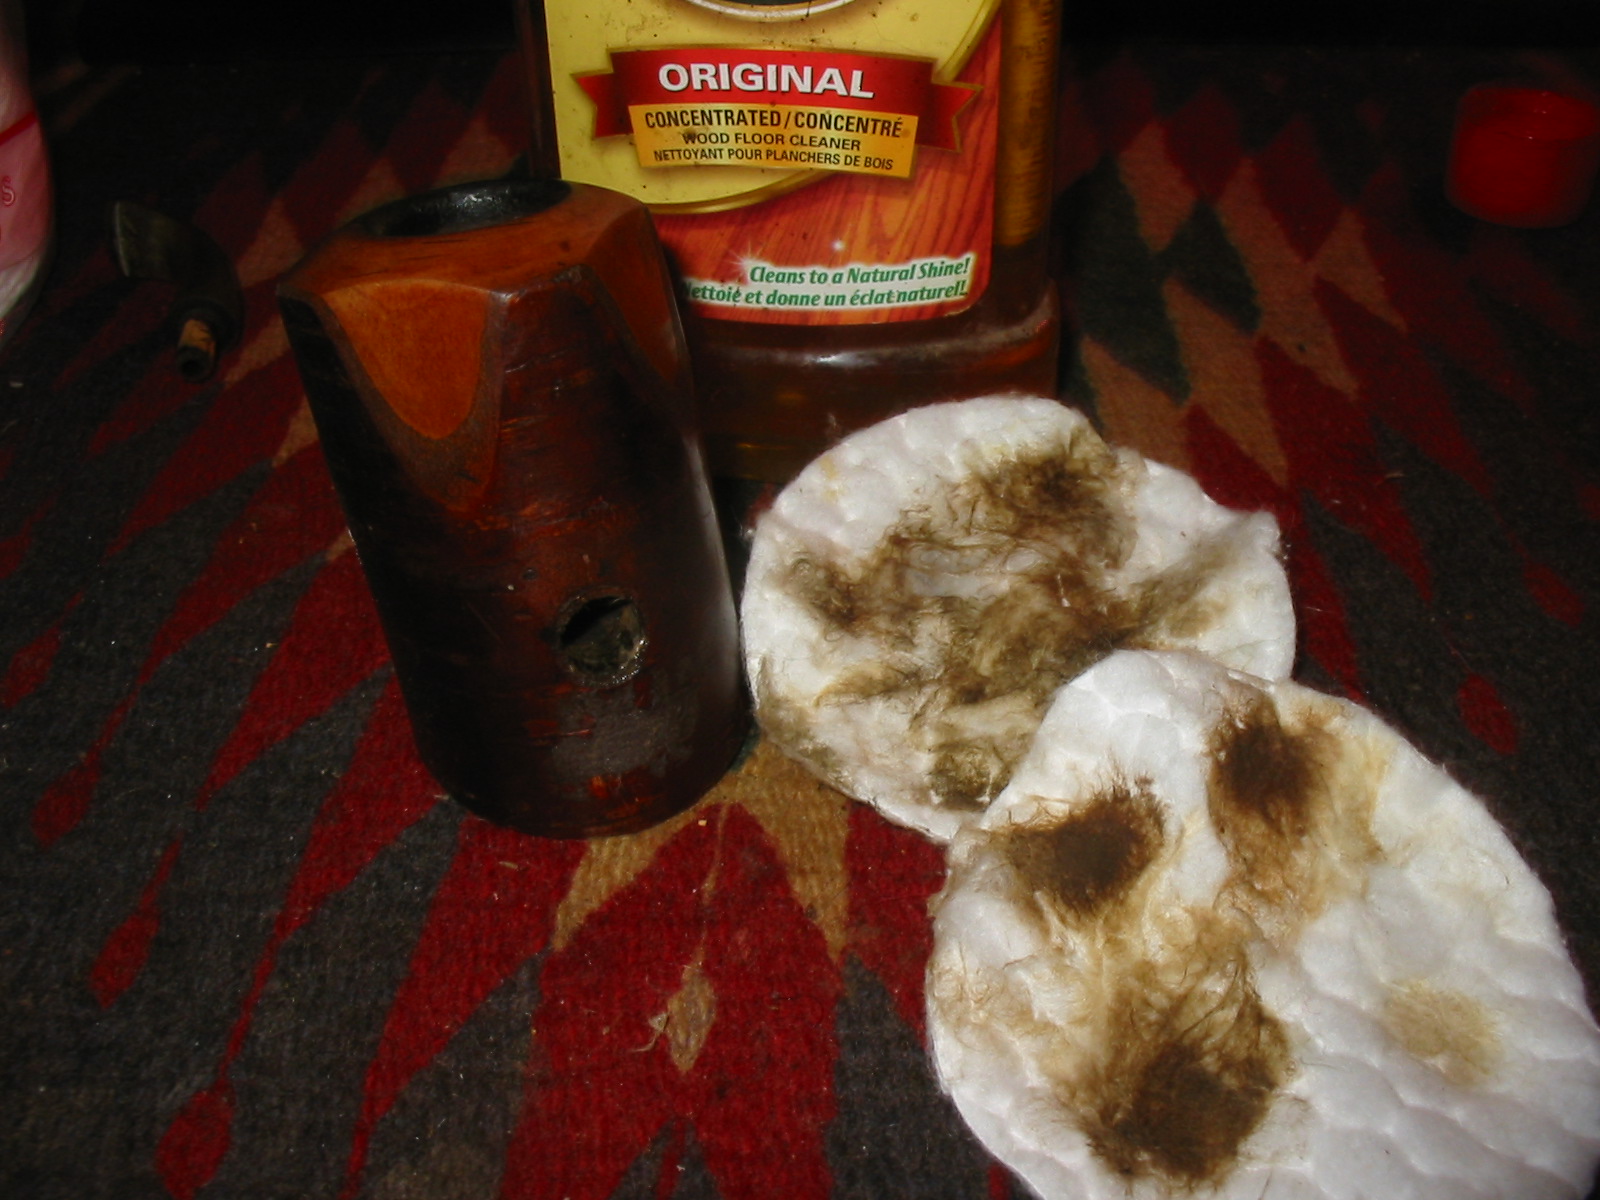
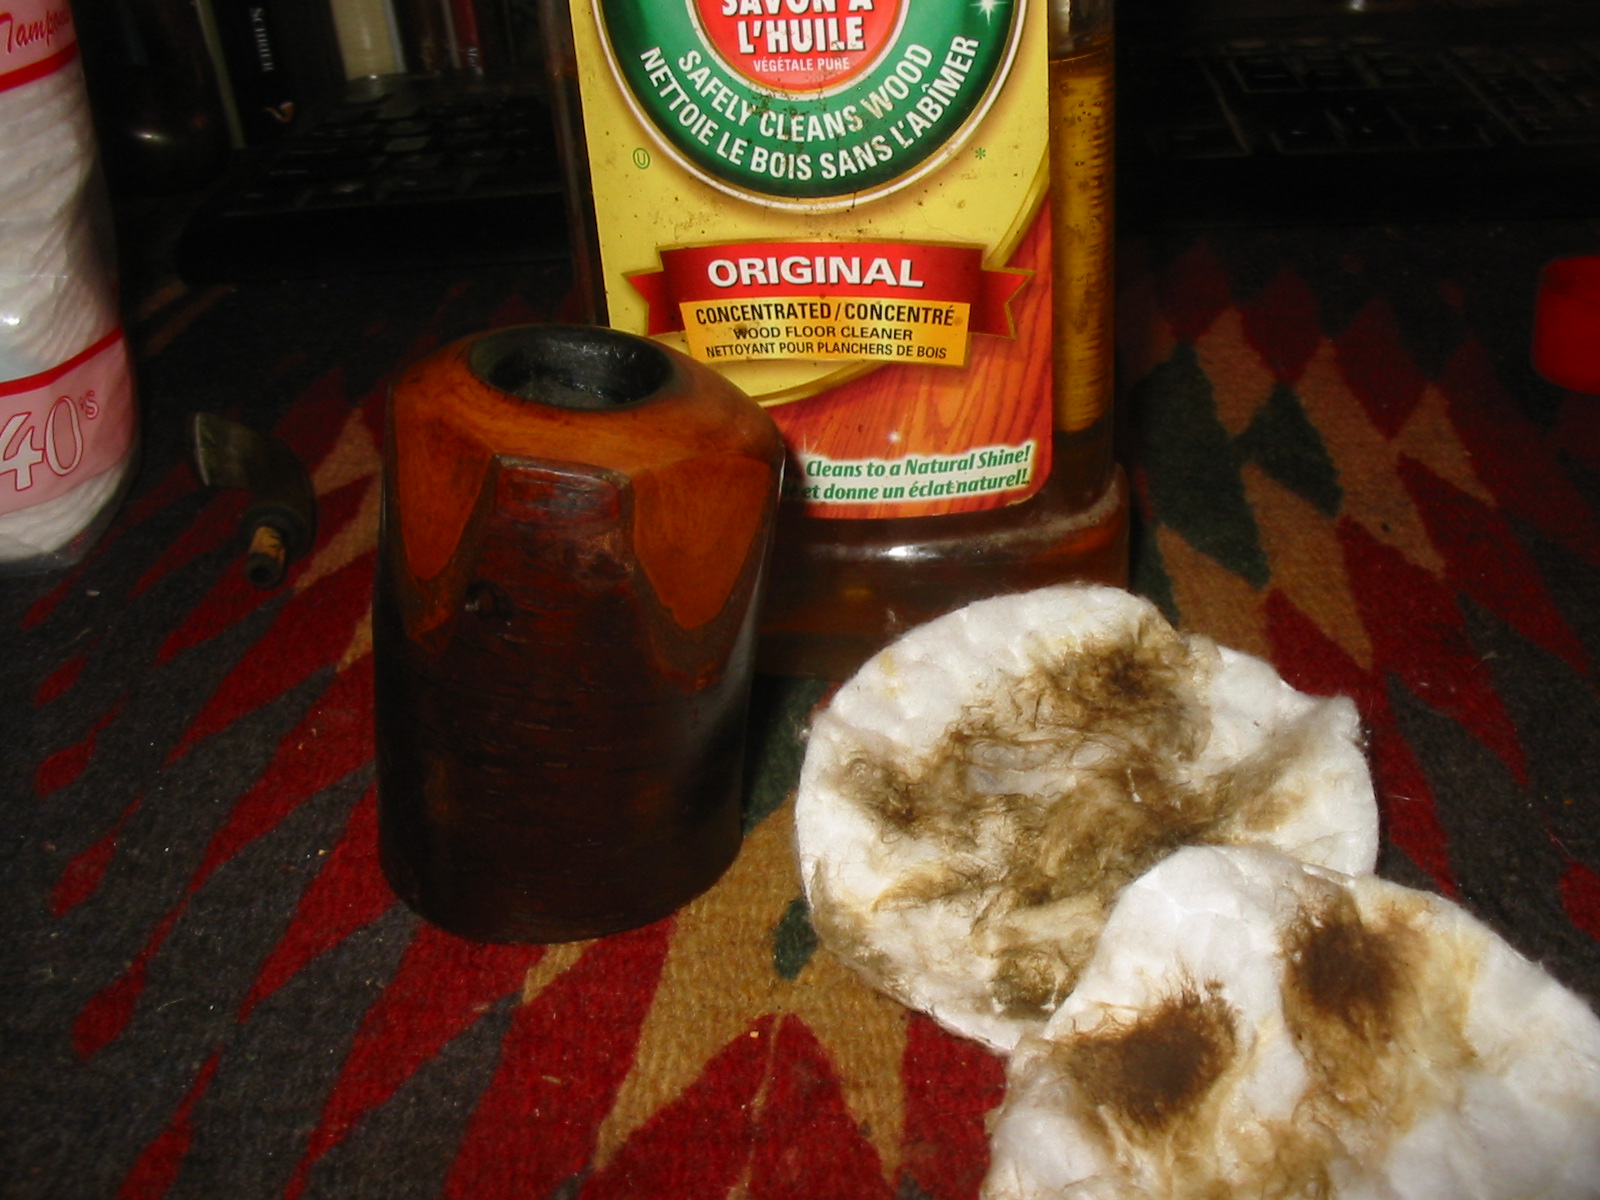
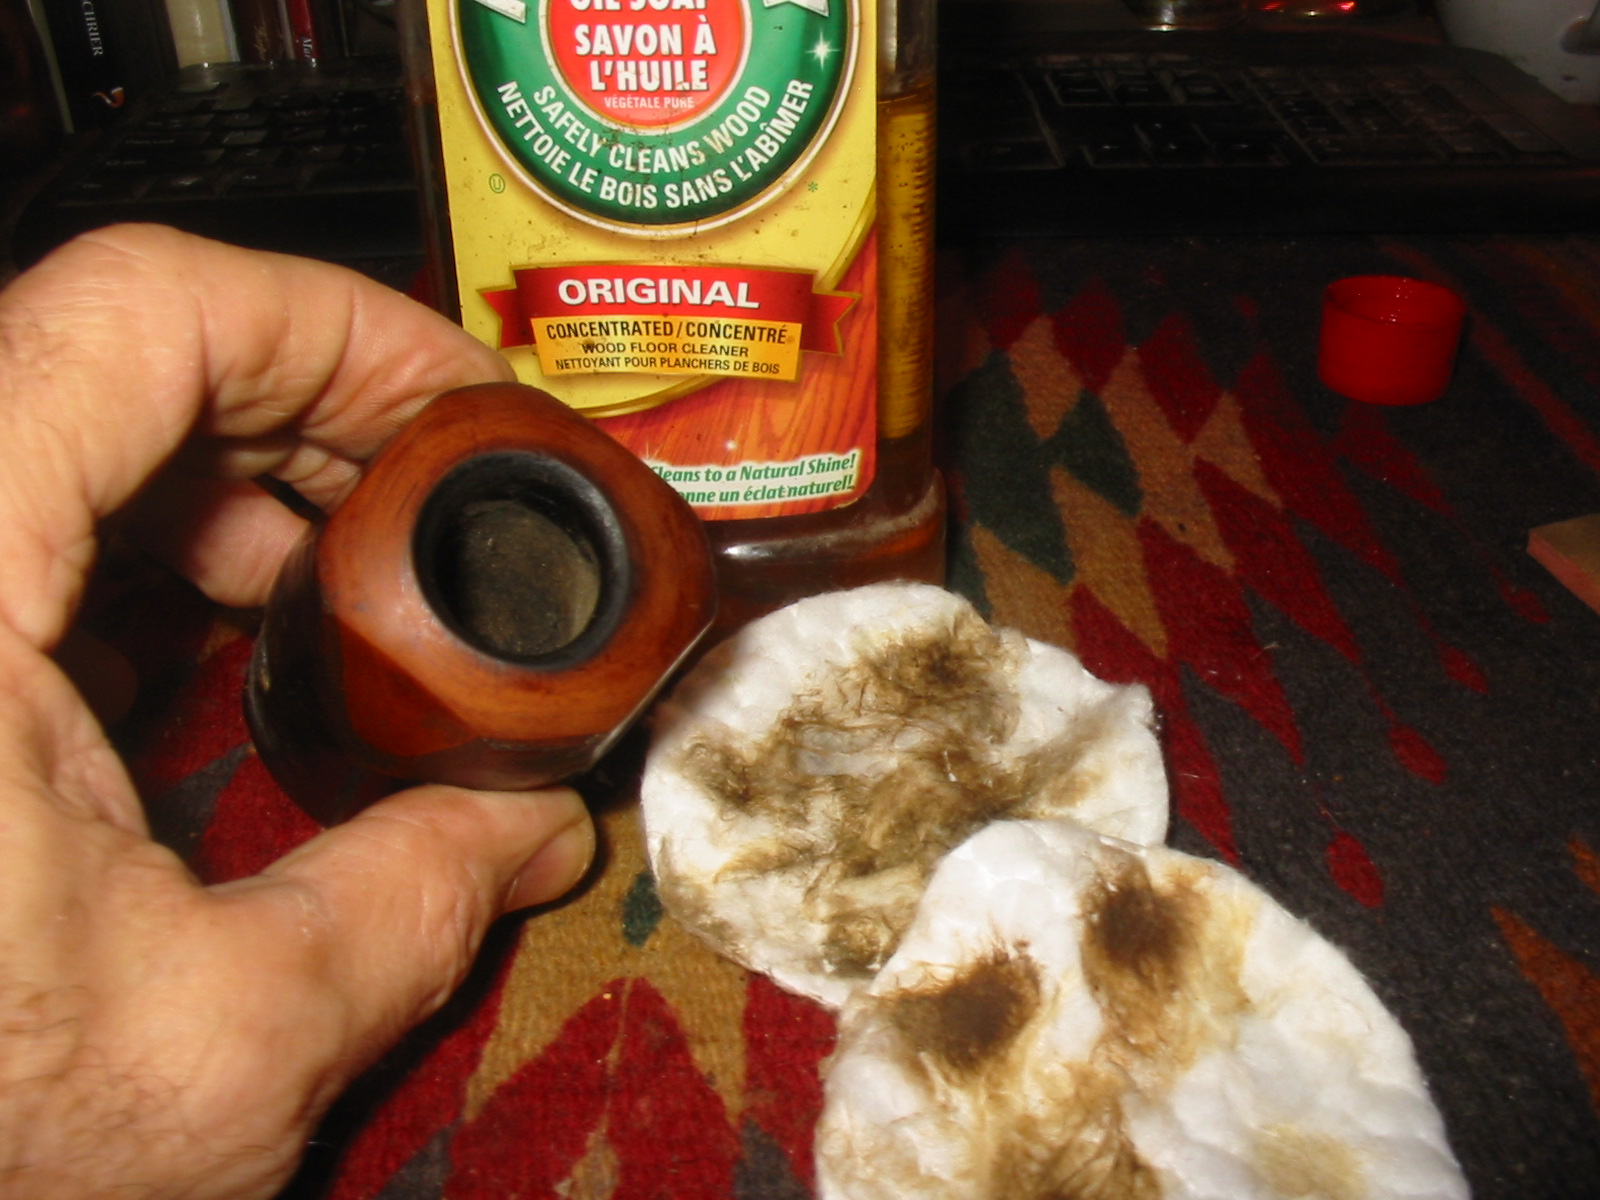
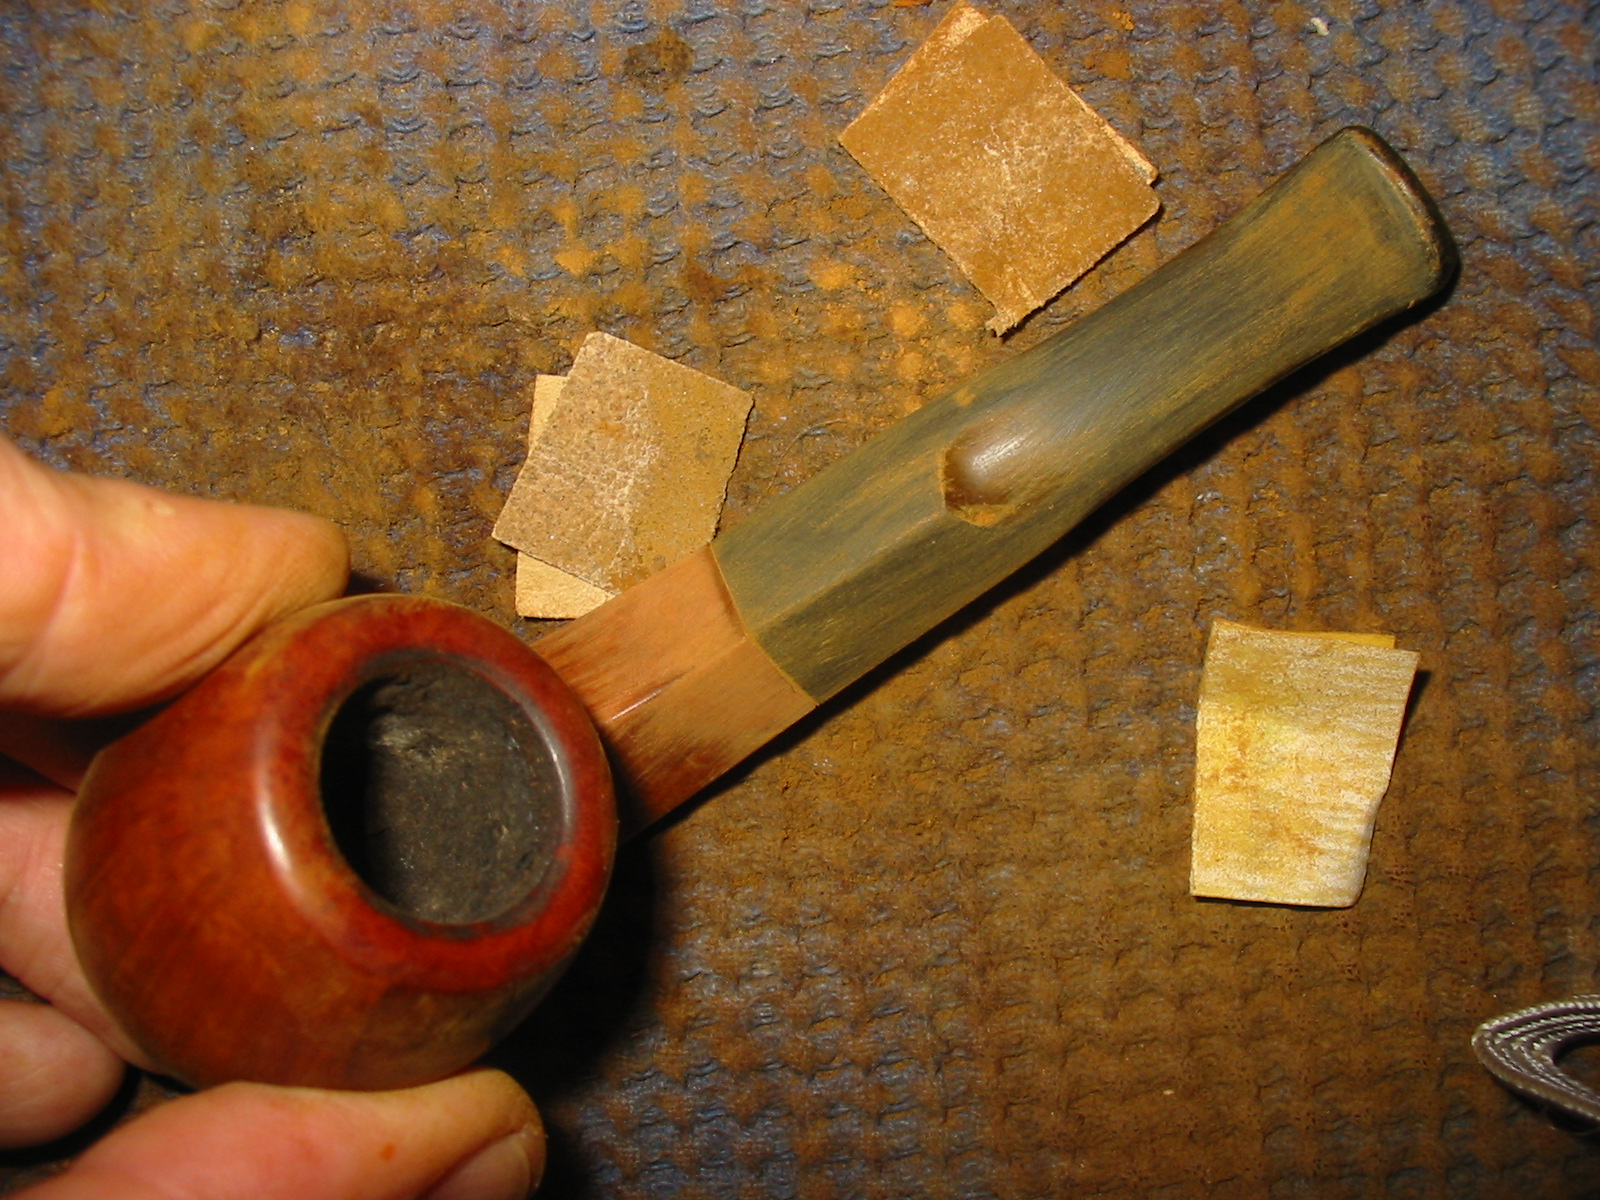
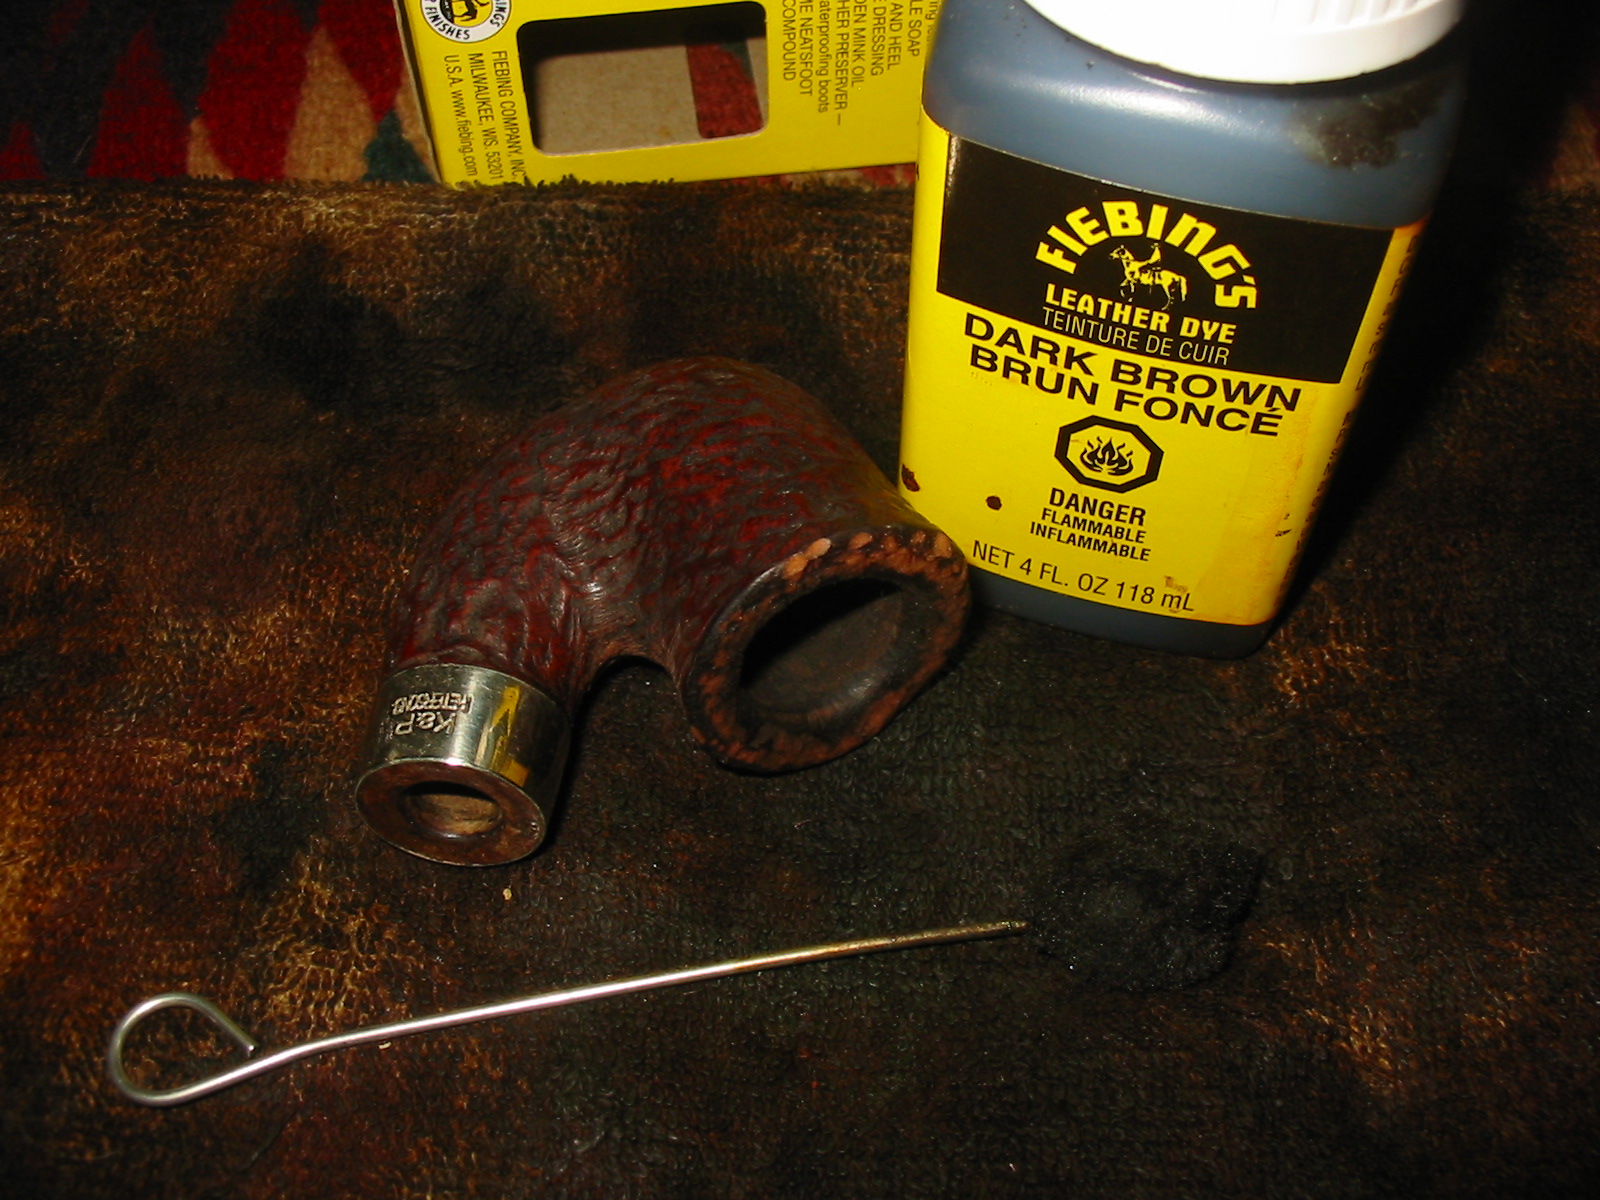
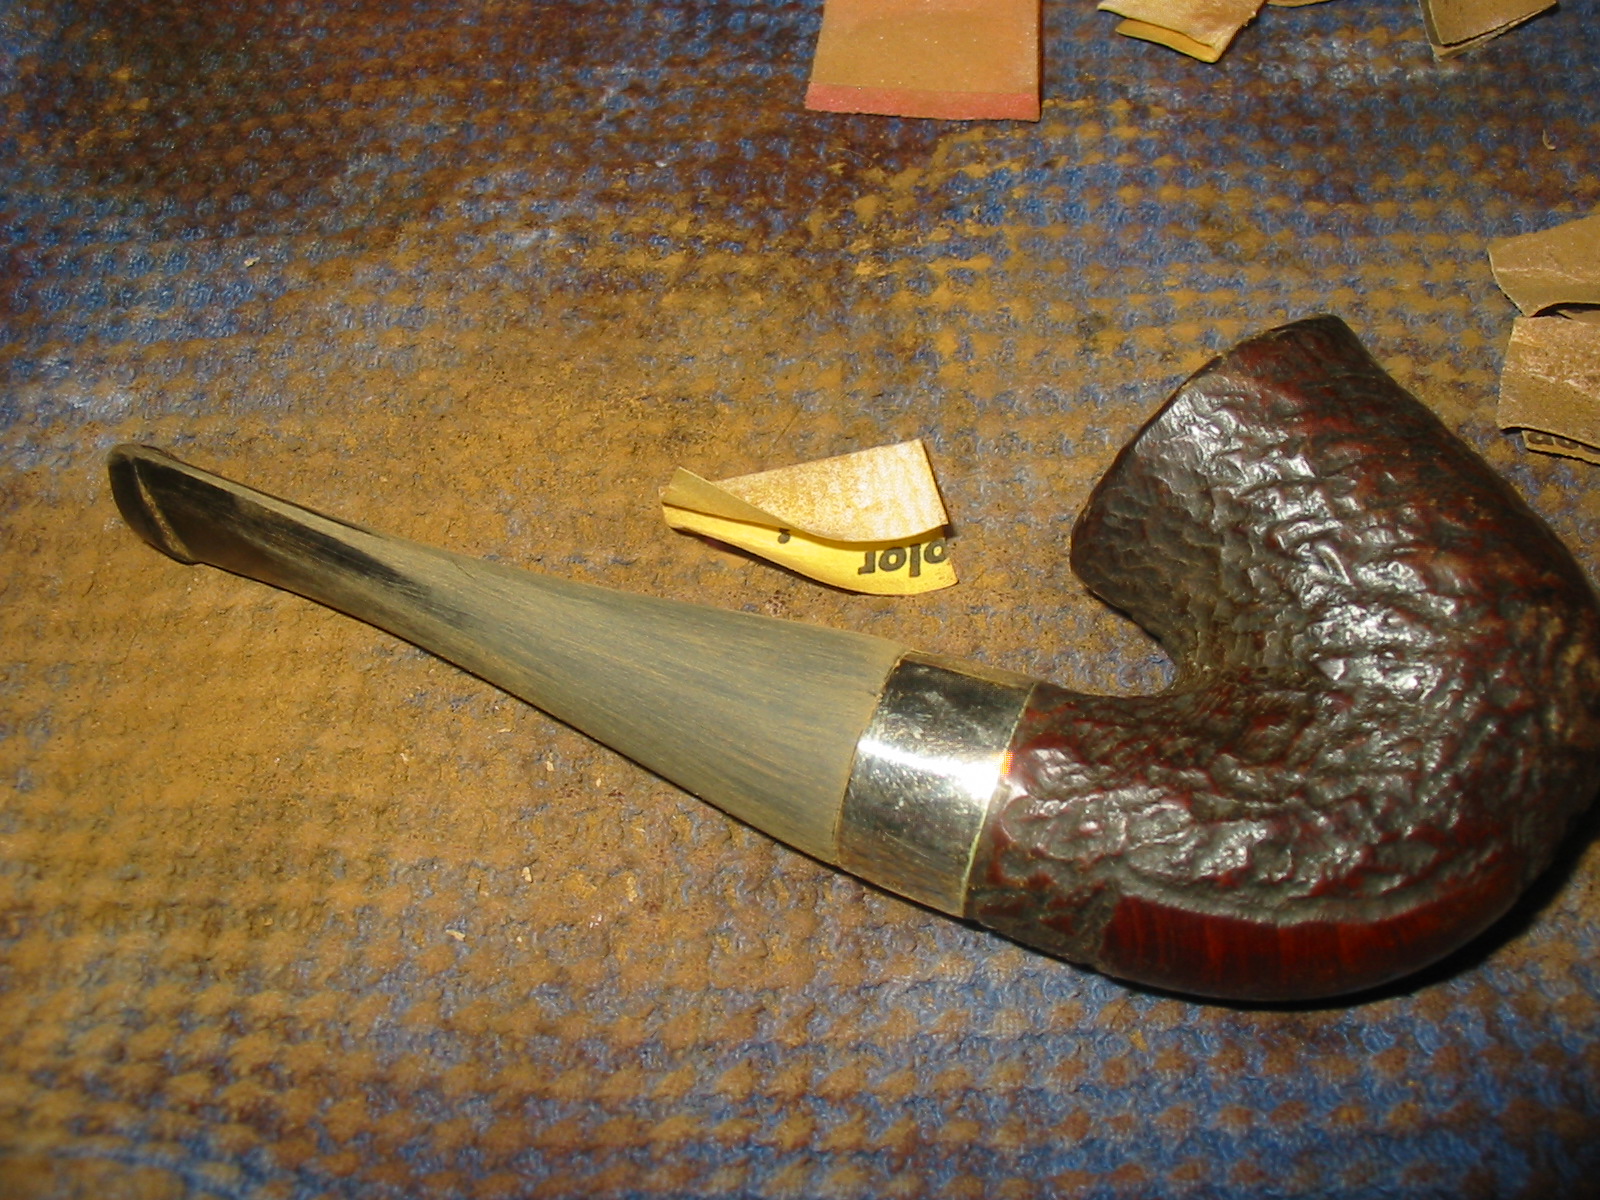
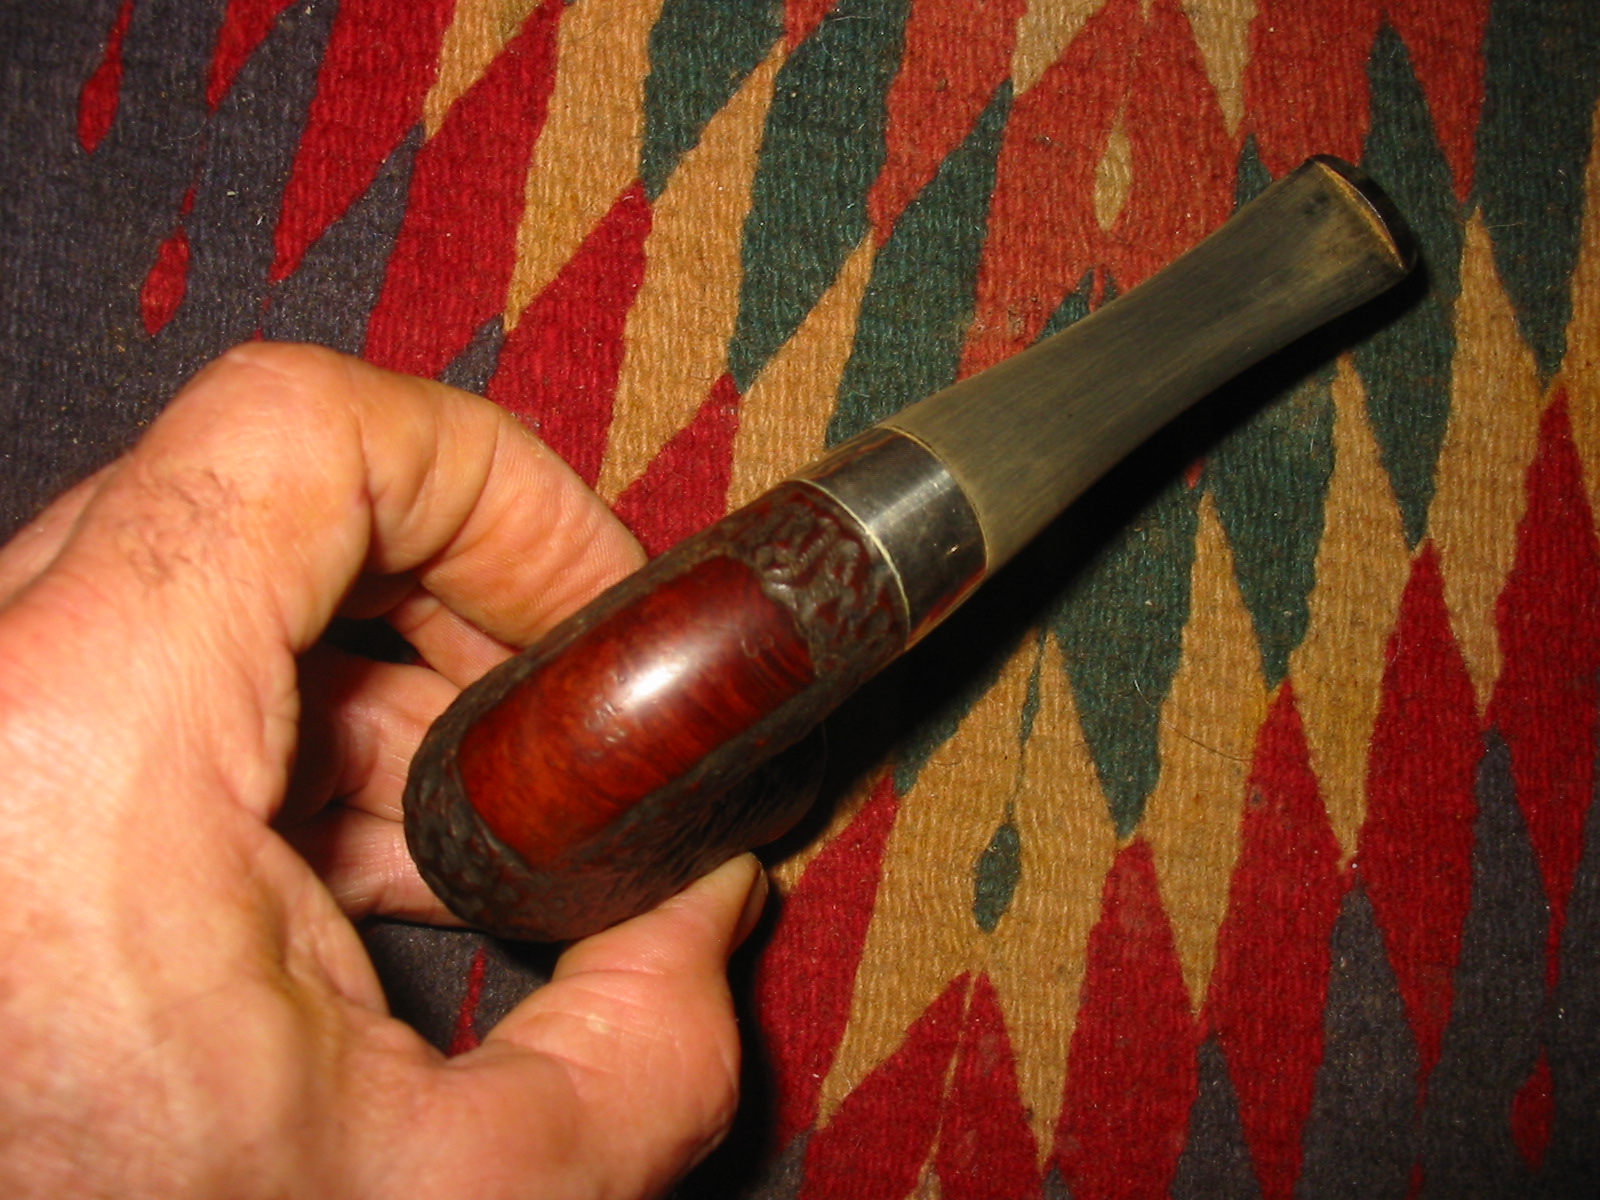
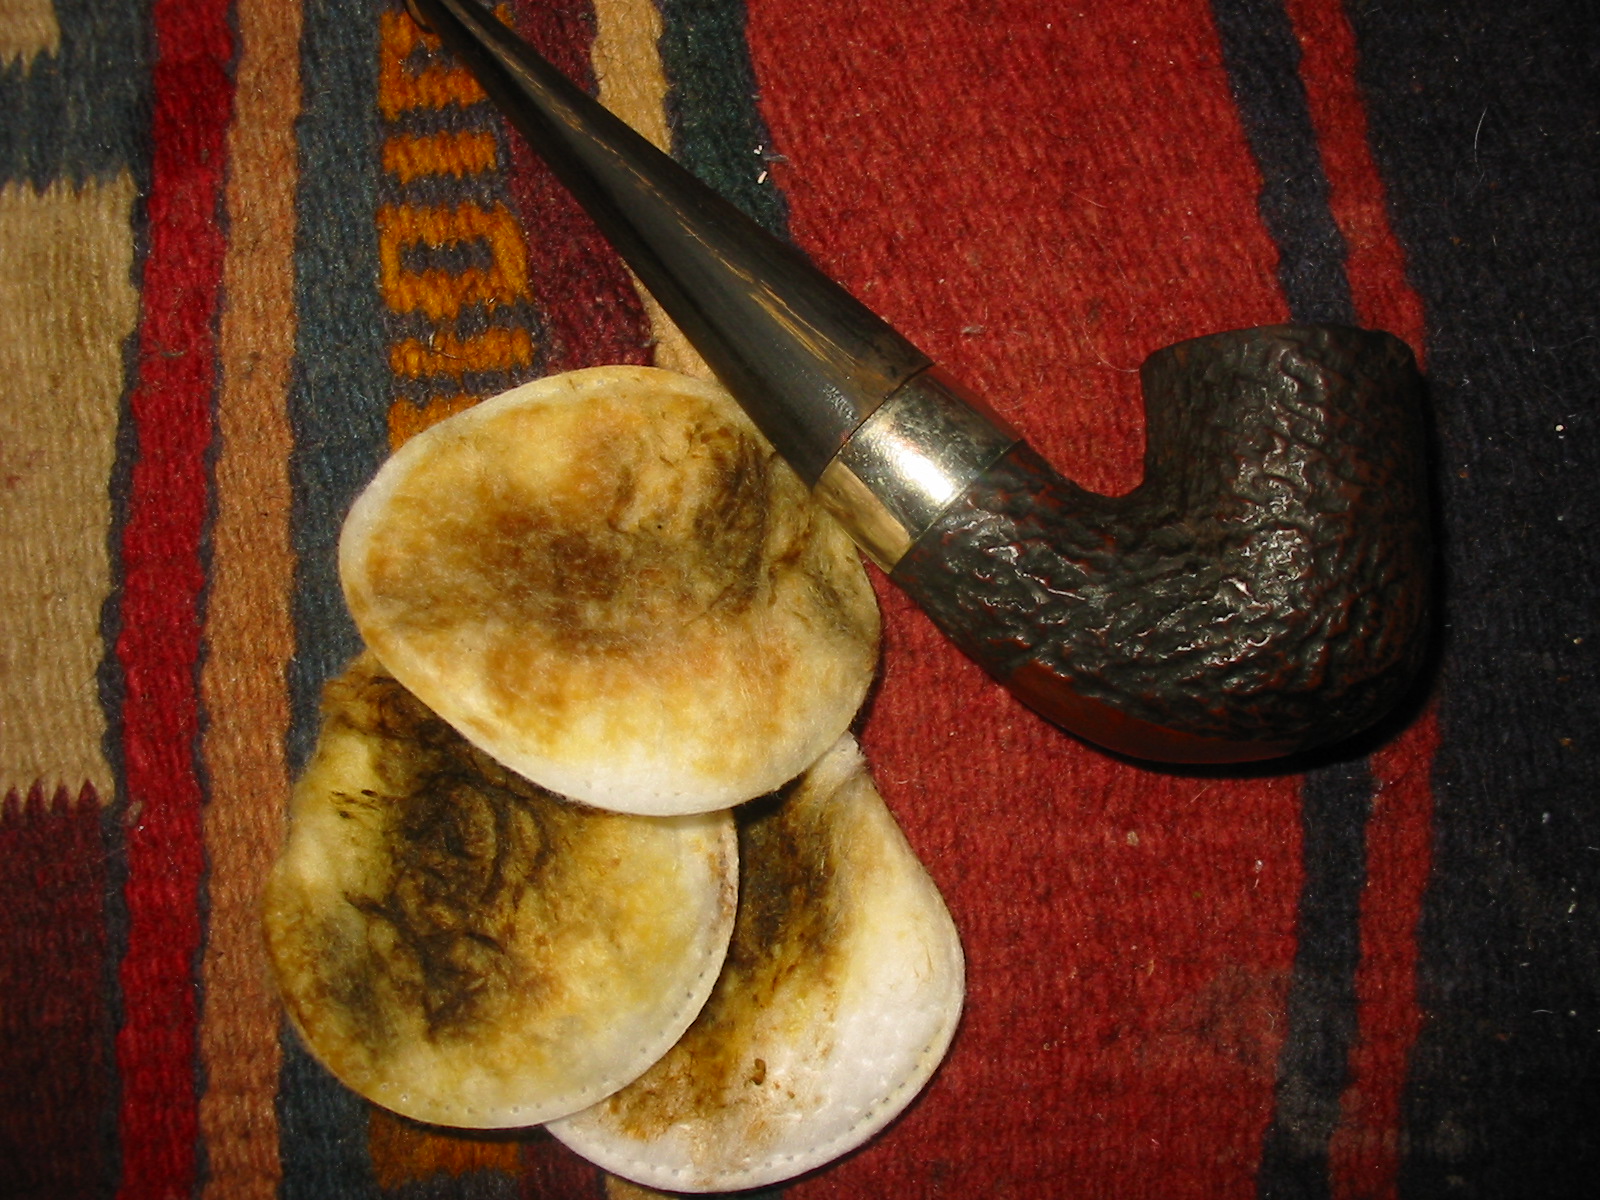
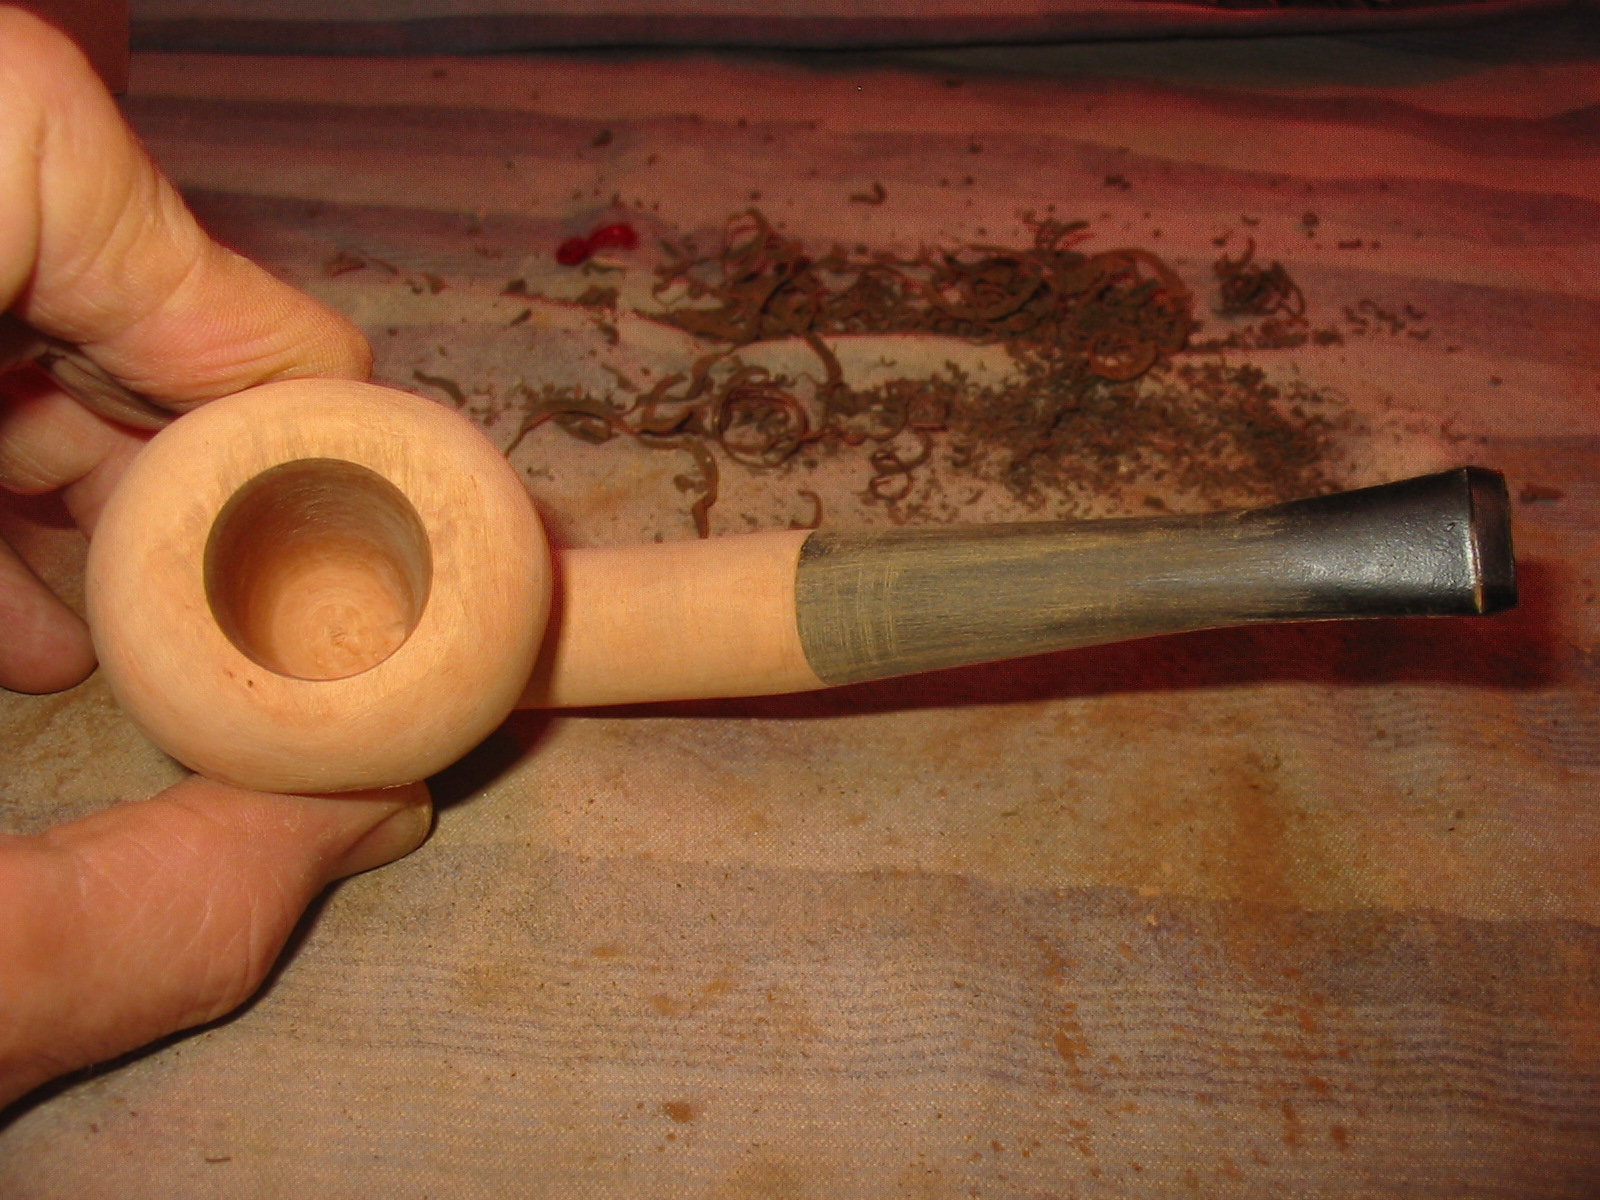
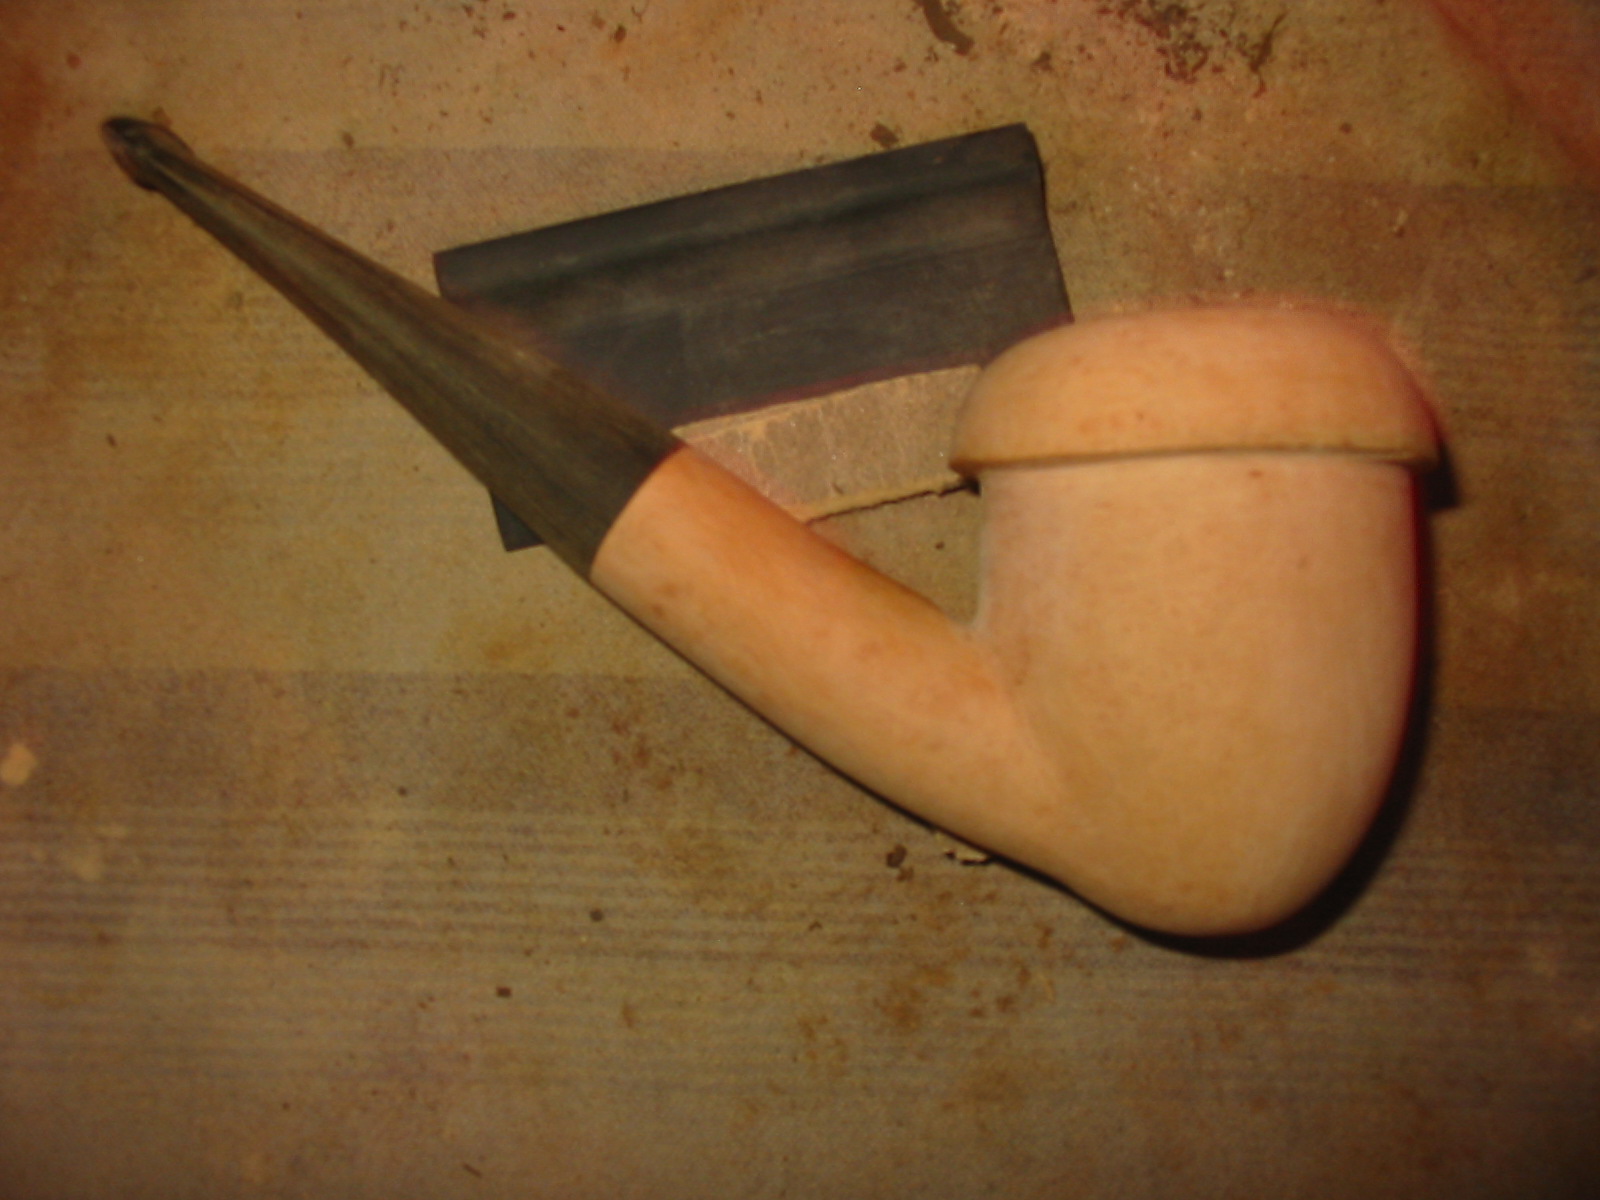
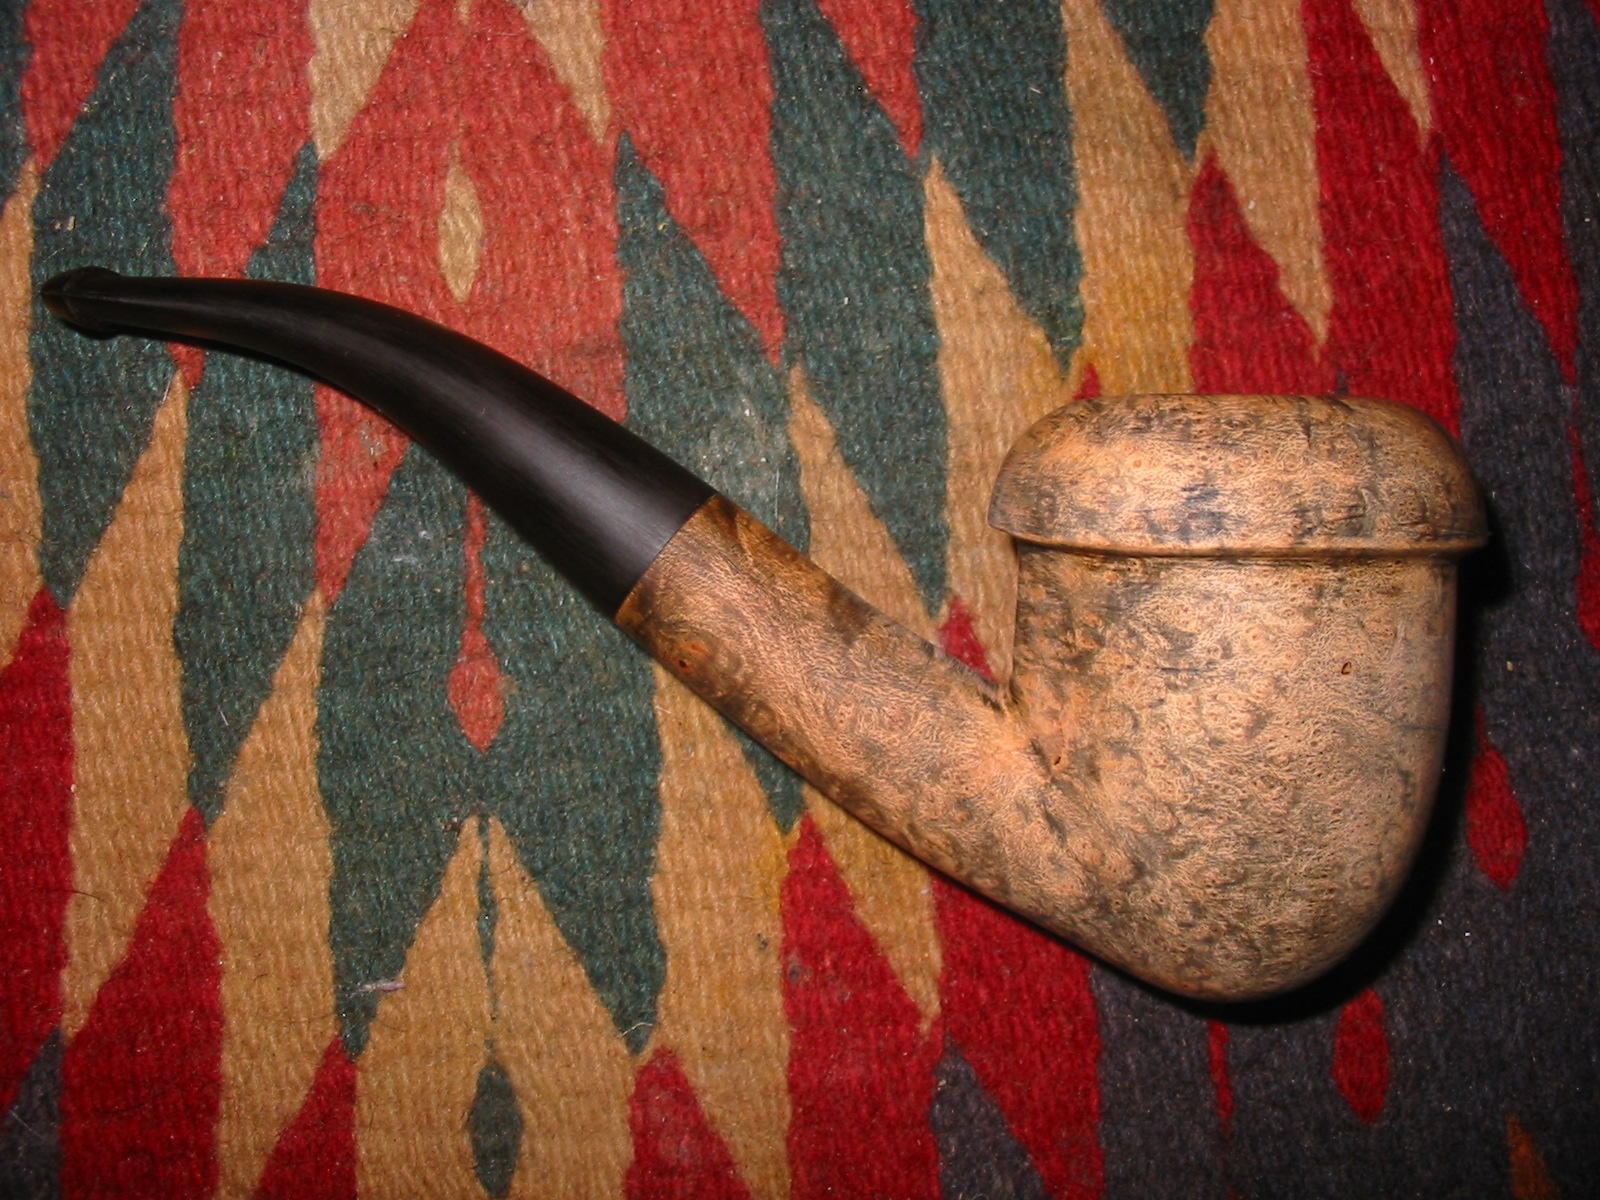
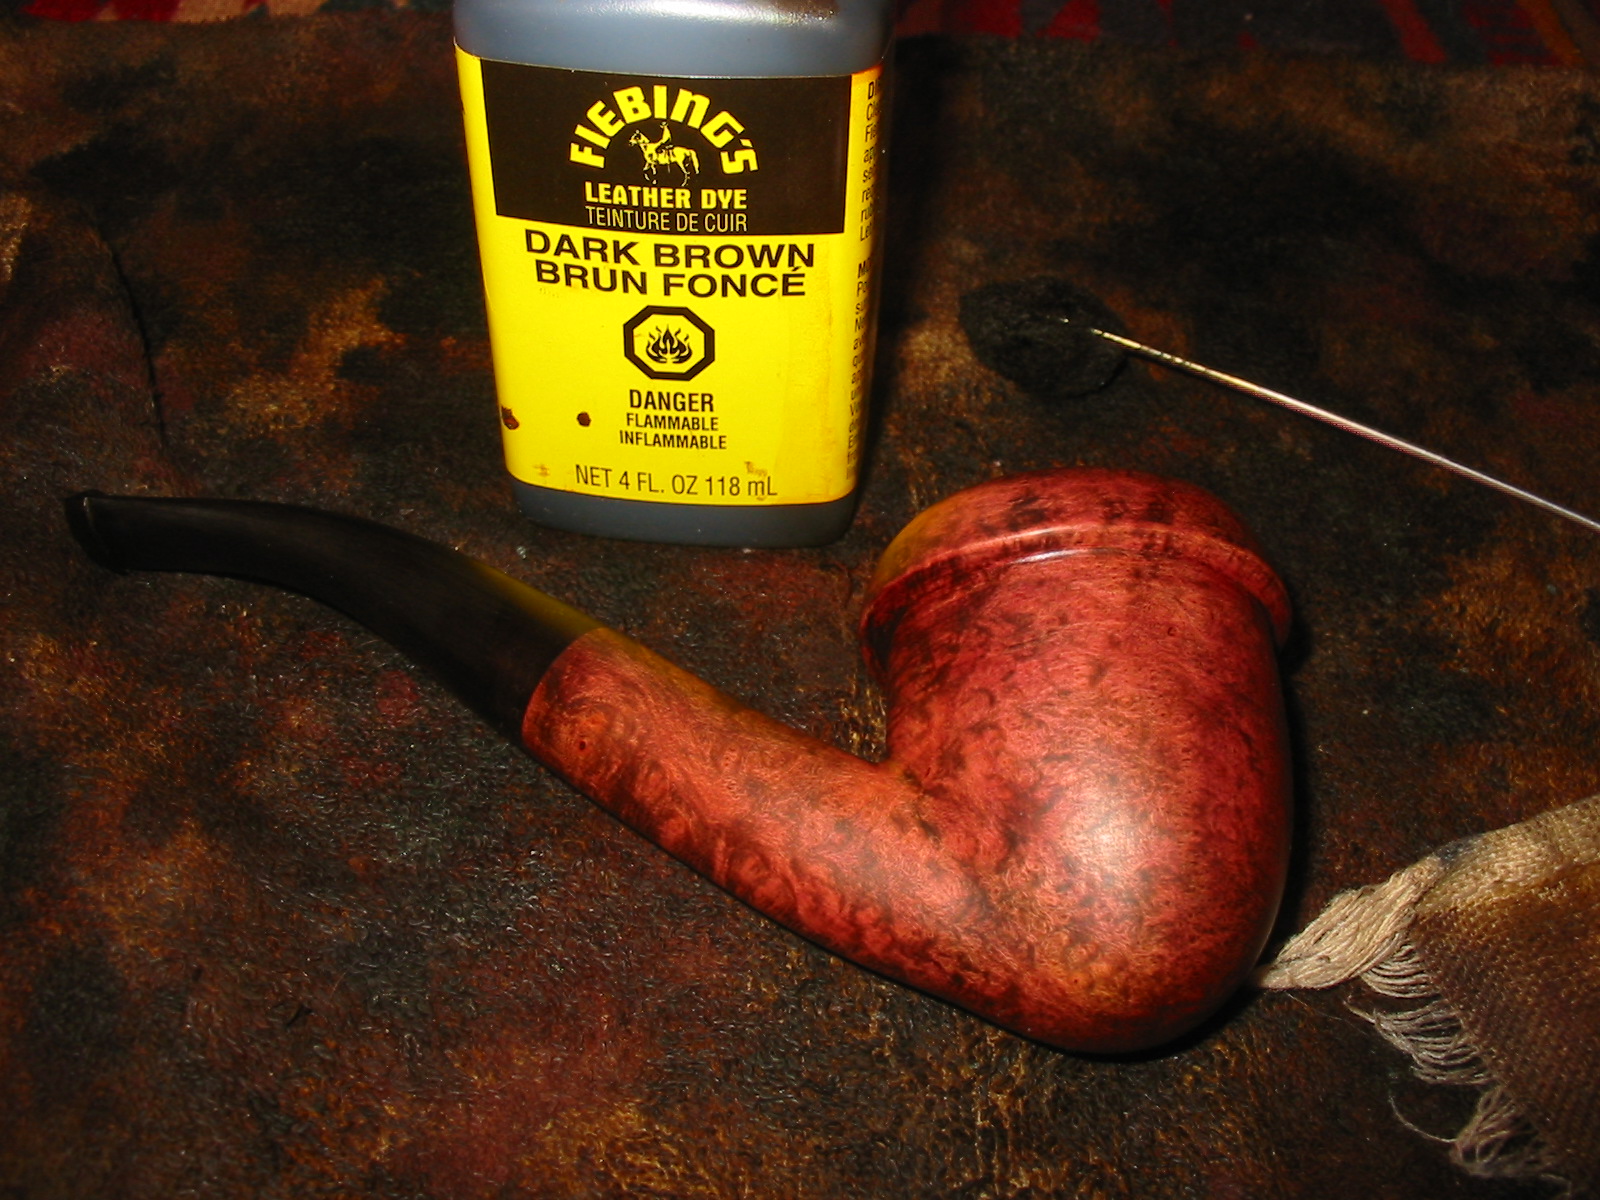
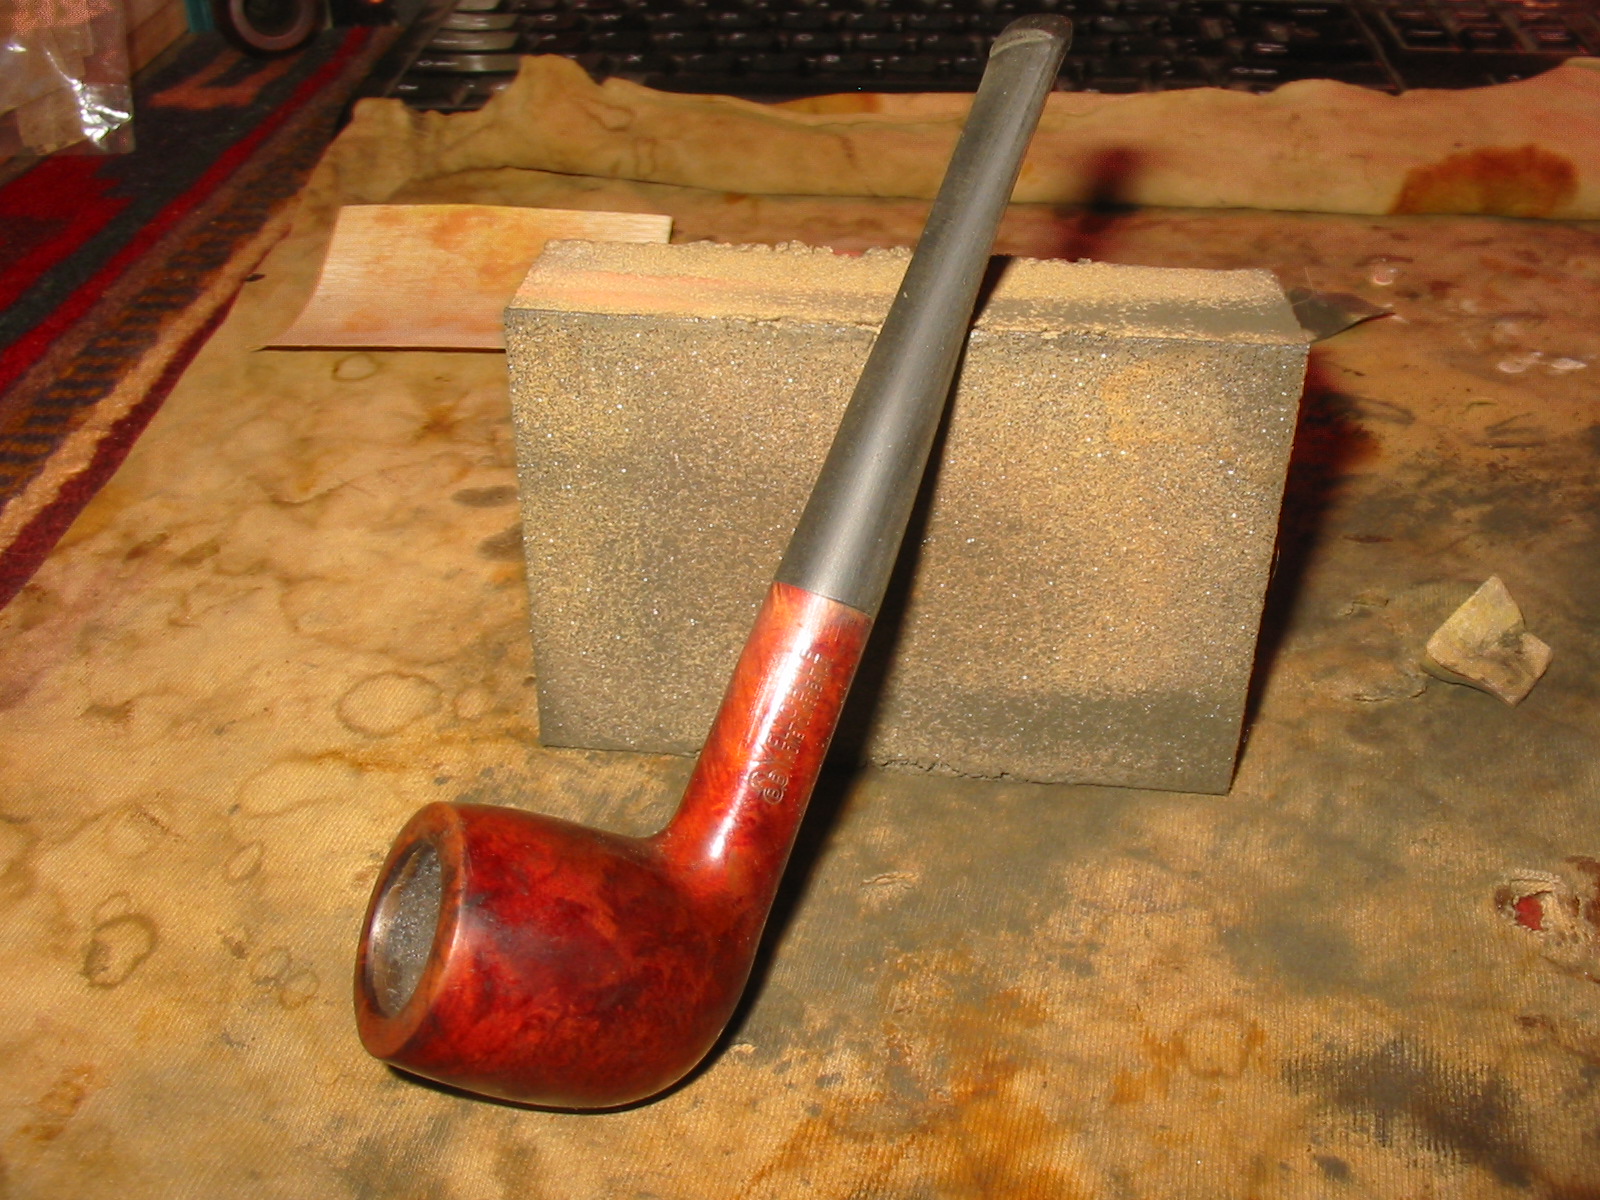
I wiped down the bowl with acetone and cotton pads to remove the varnish and some of the stain coat. I always do that when I am going to do a restain on the rim and shank as I find that it makes the new coat of stain much simpler. IMG_7599IMG_7600 
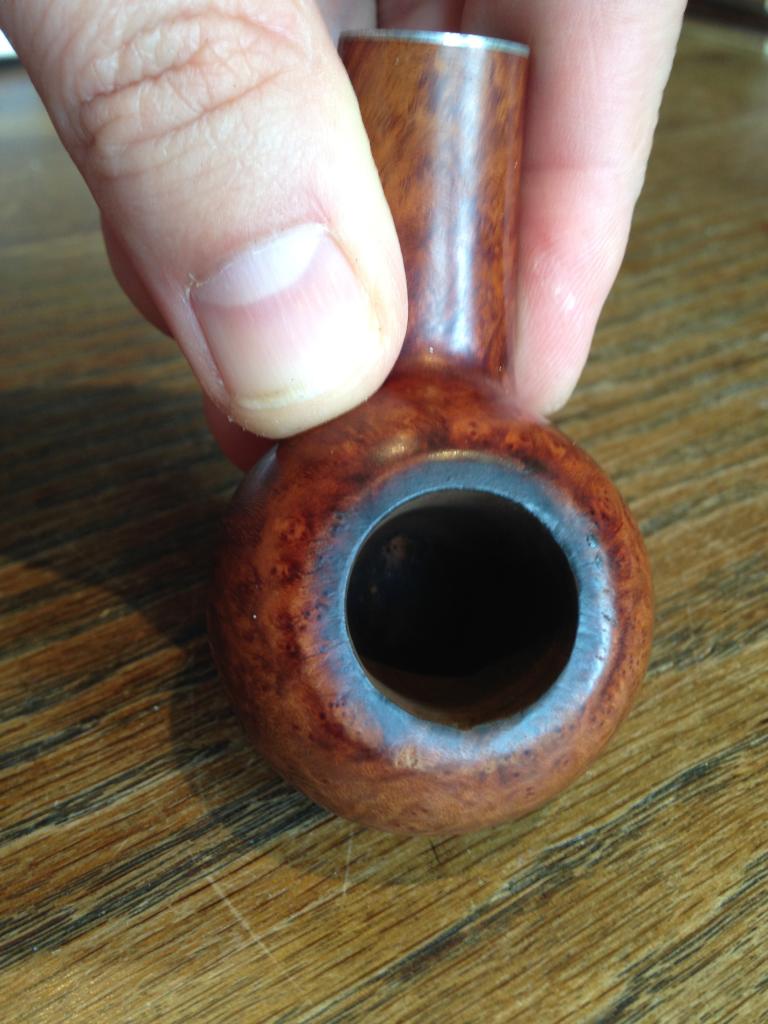
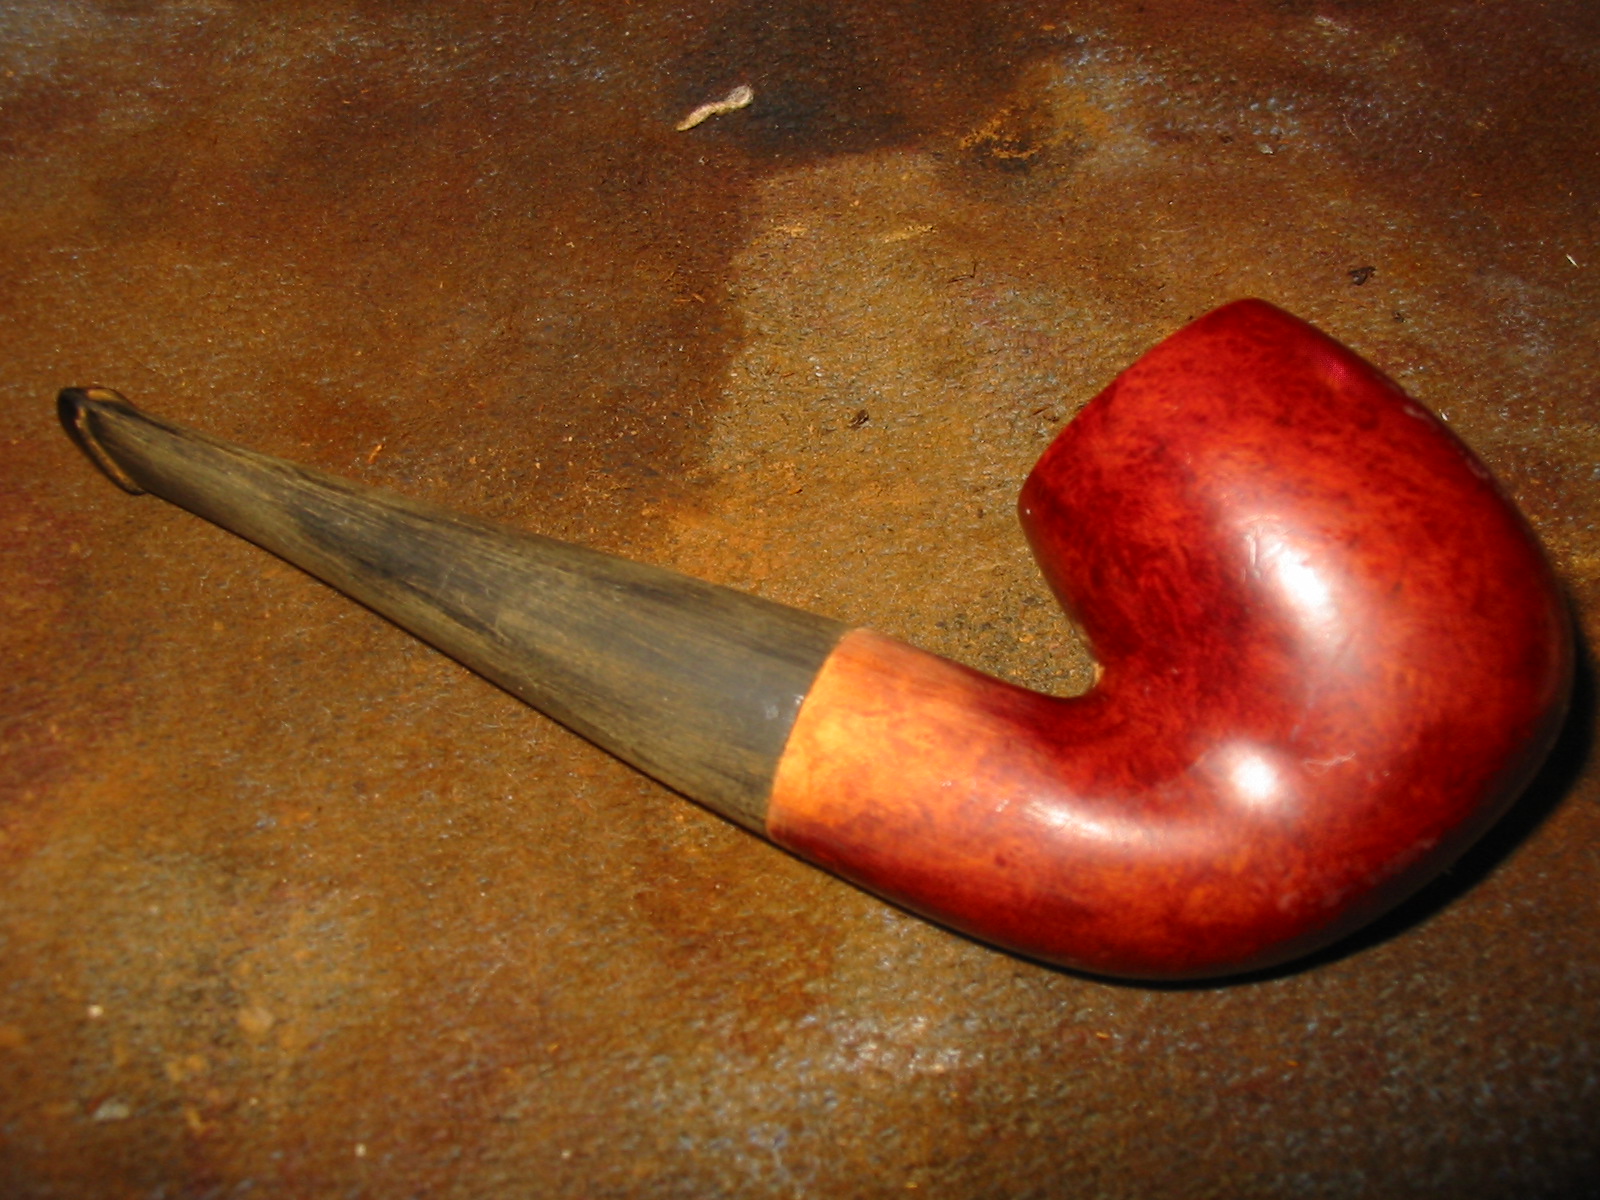
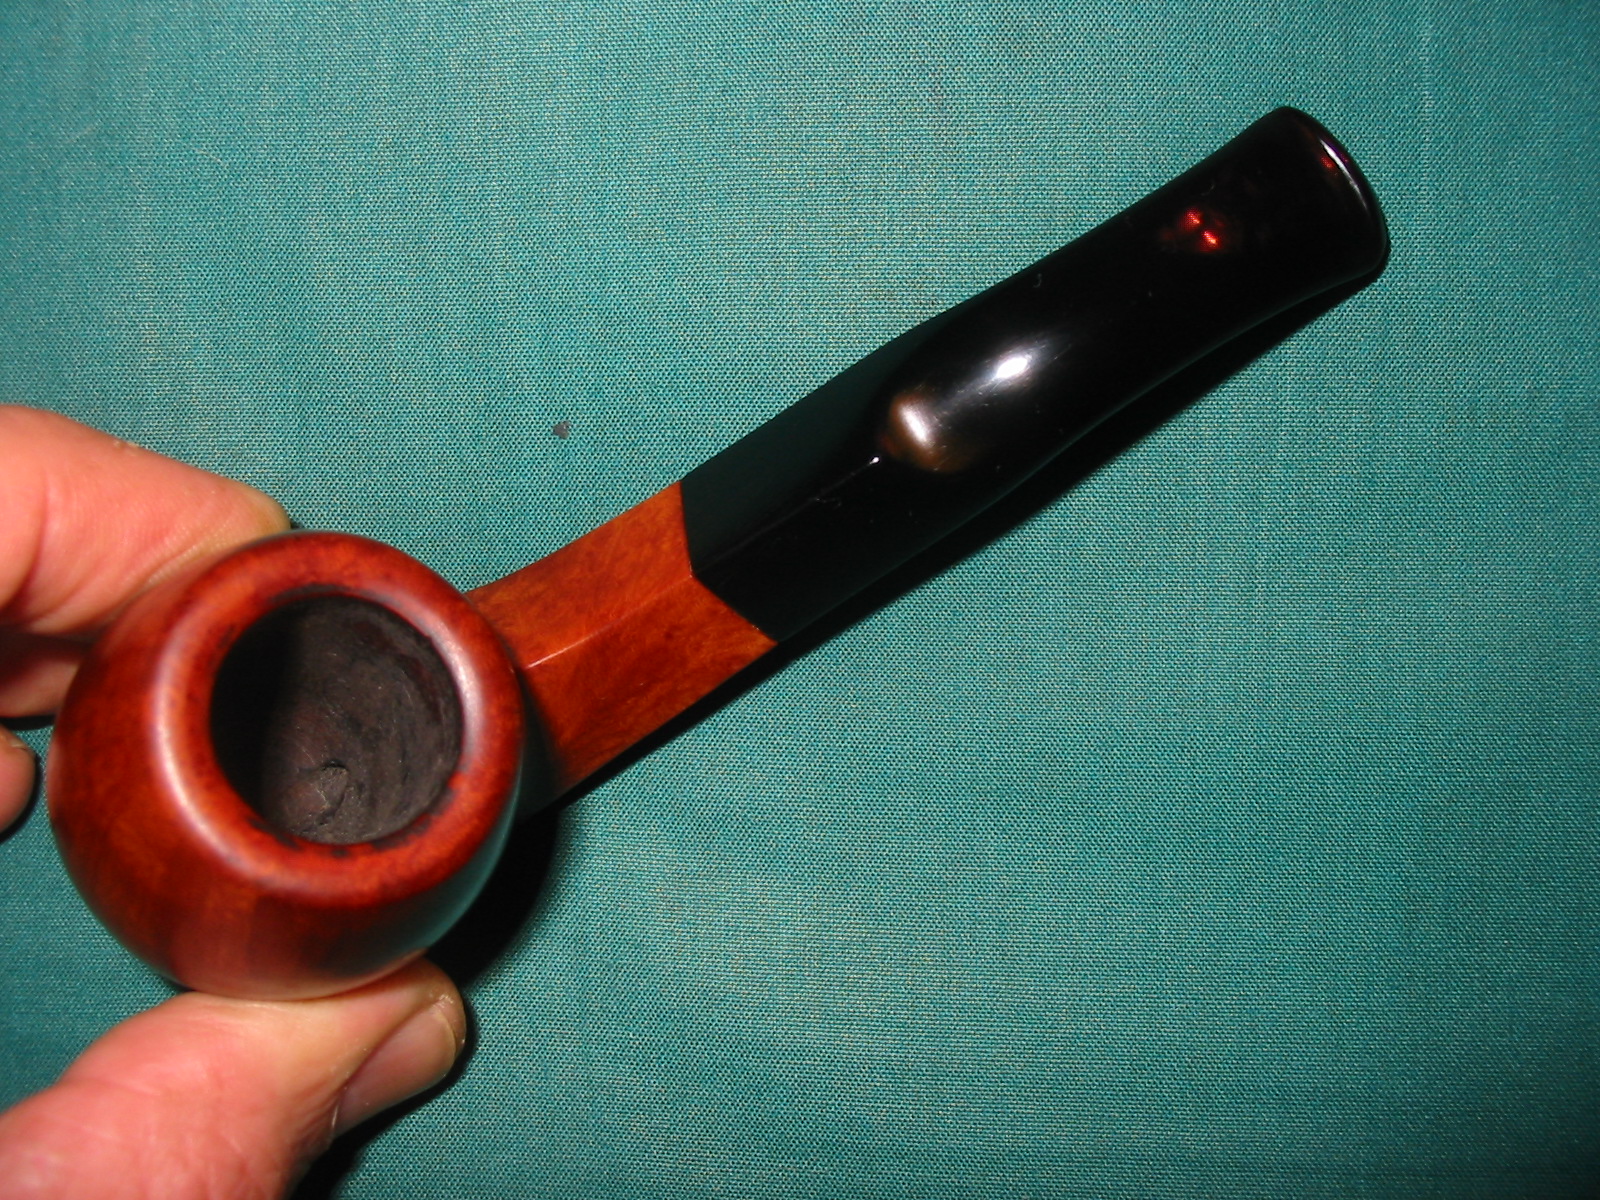
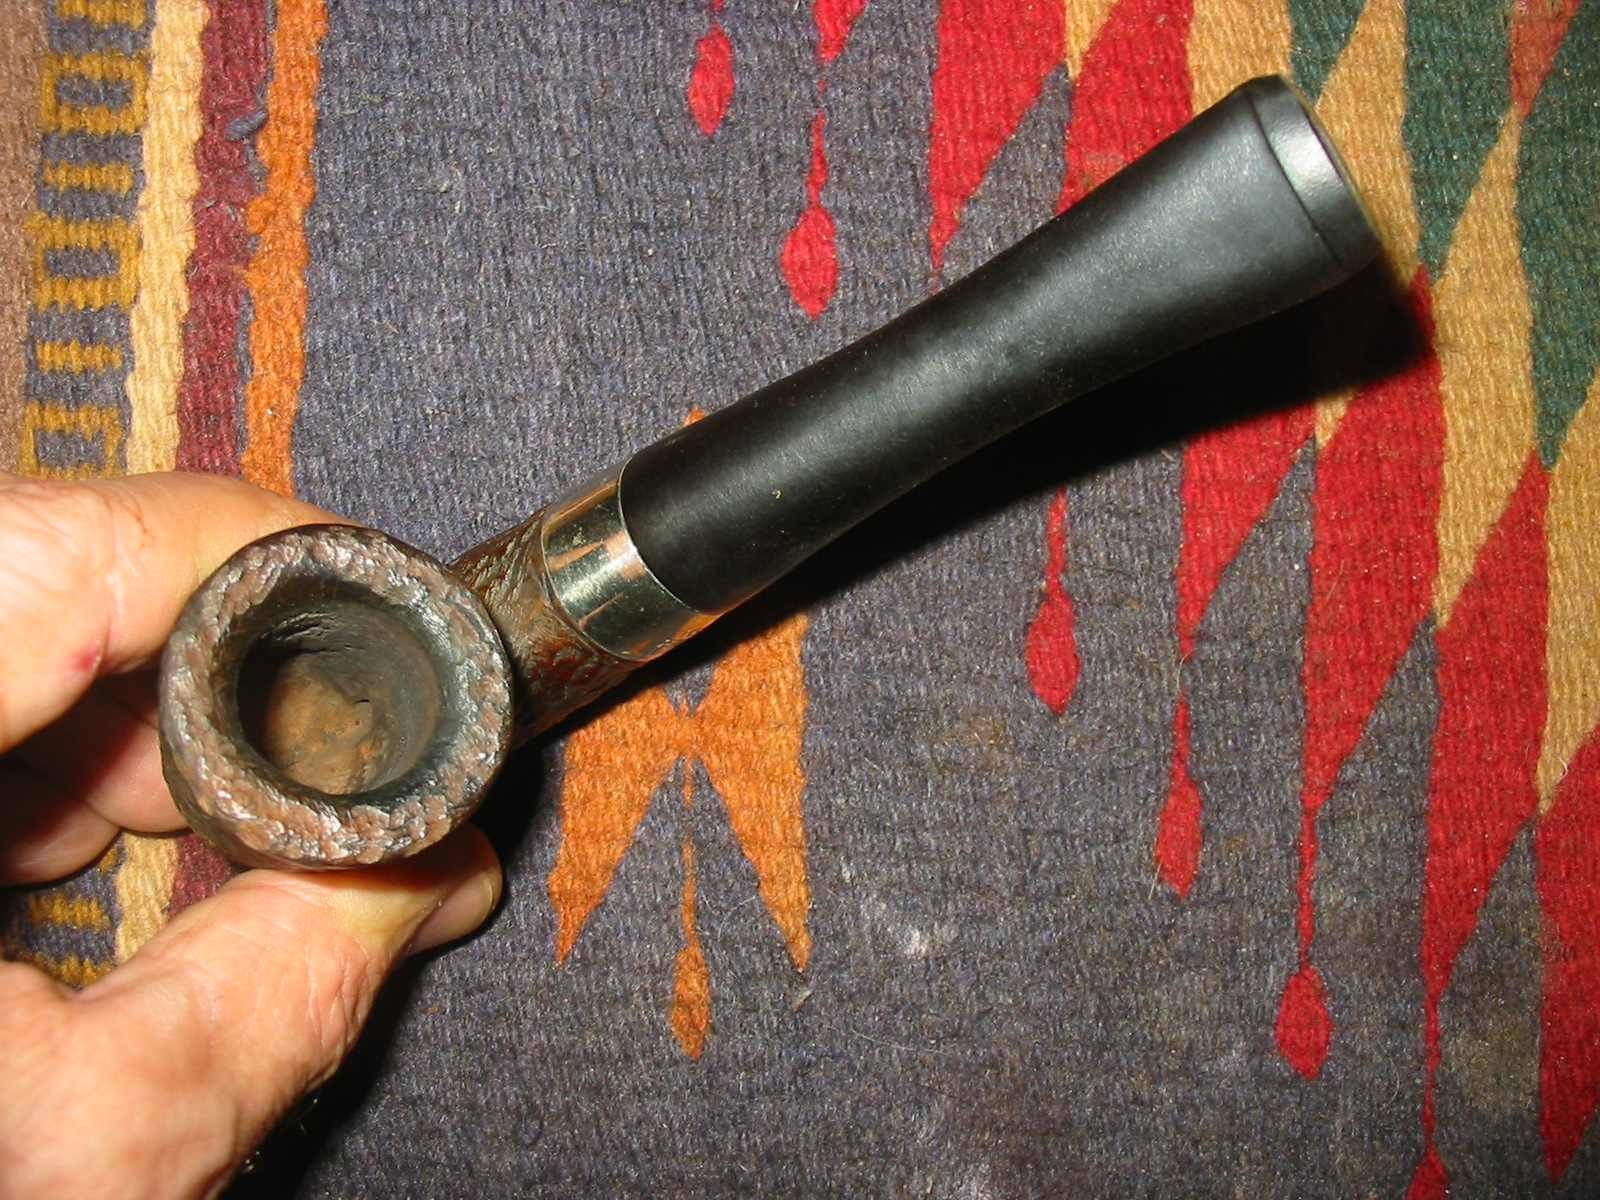
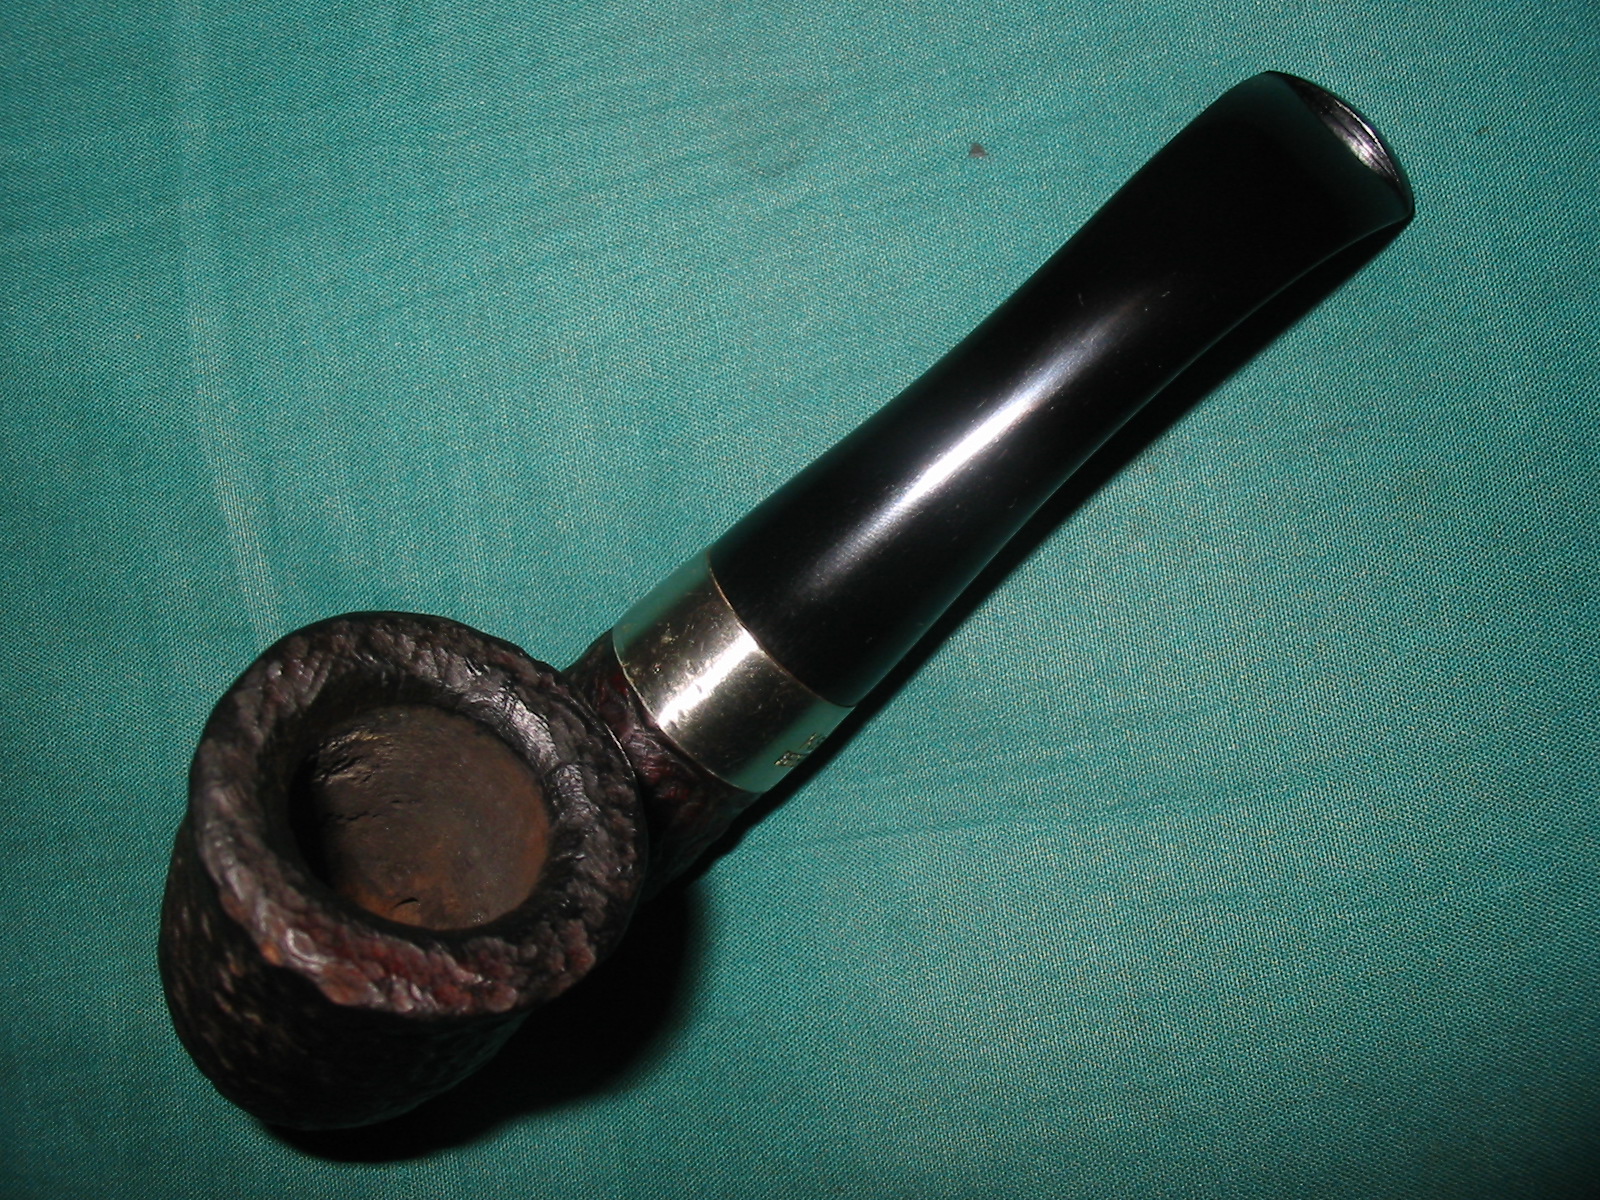
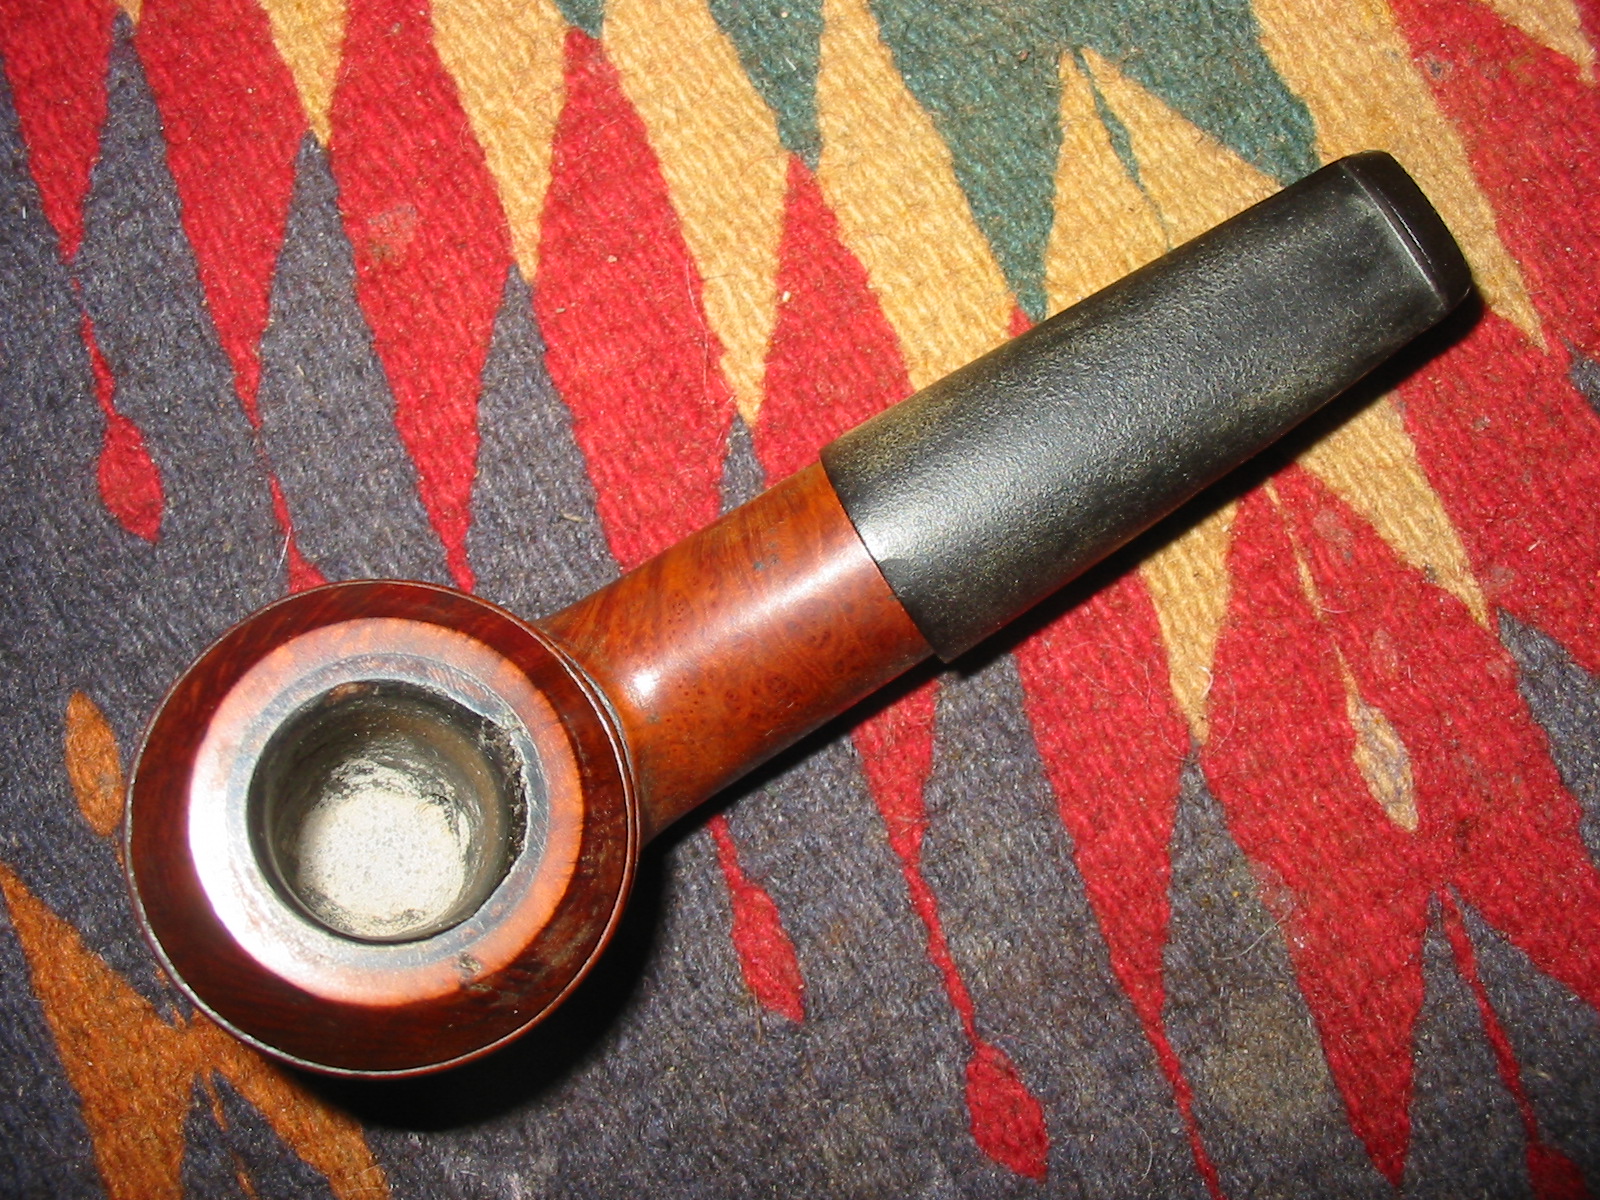
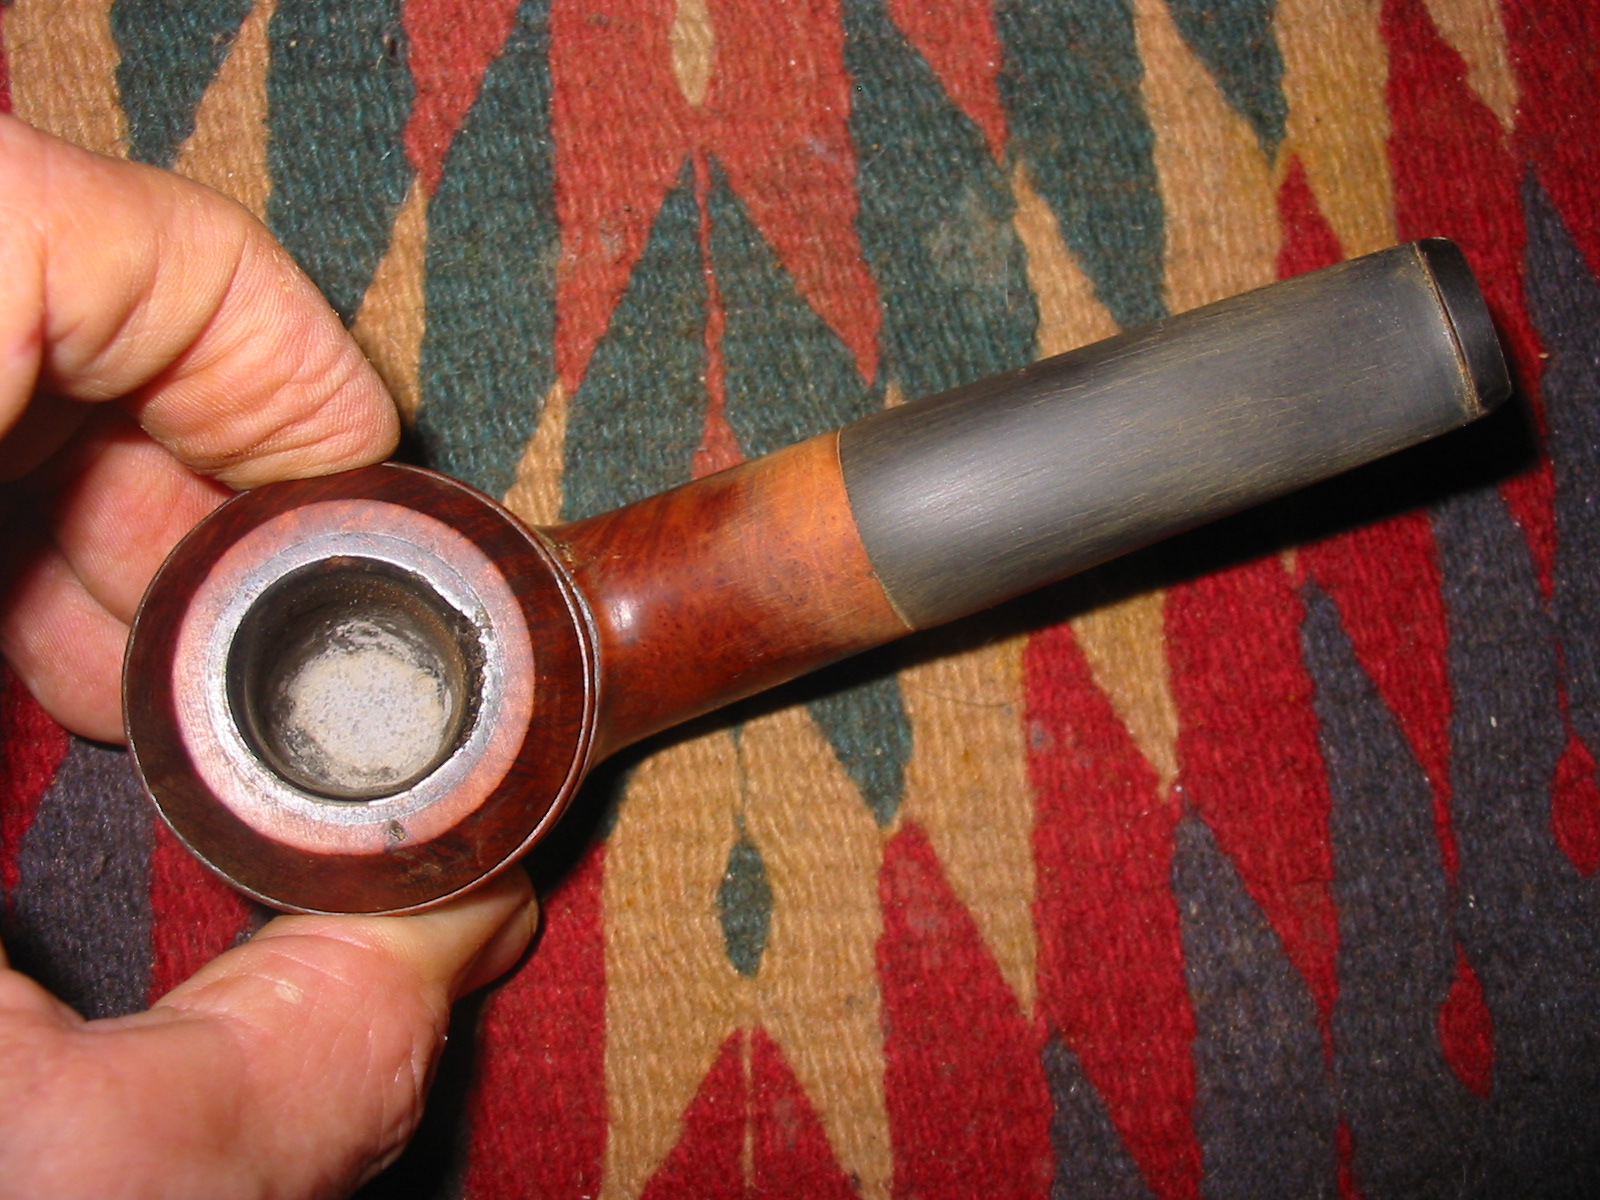
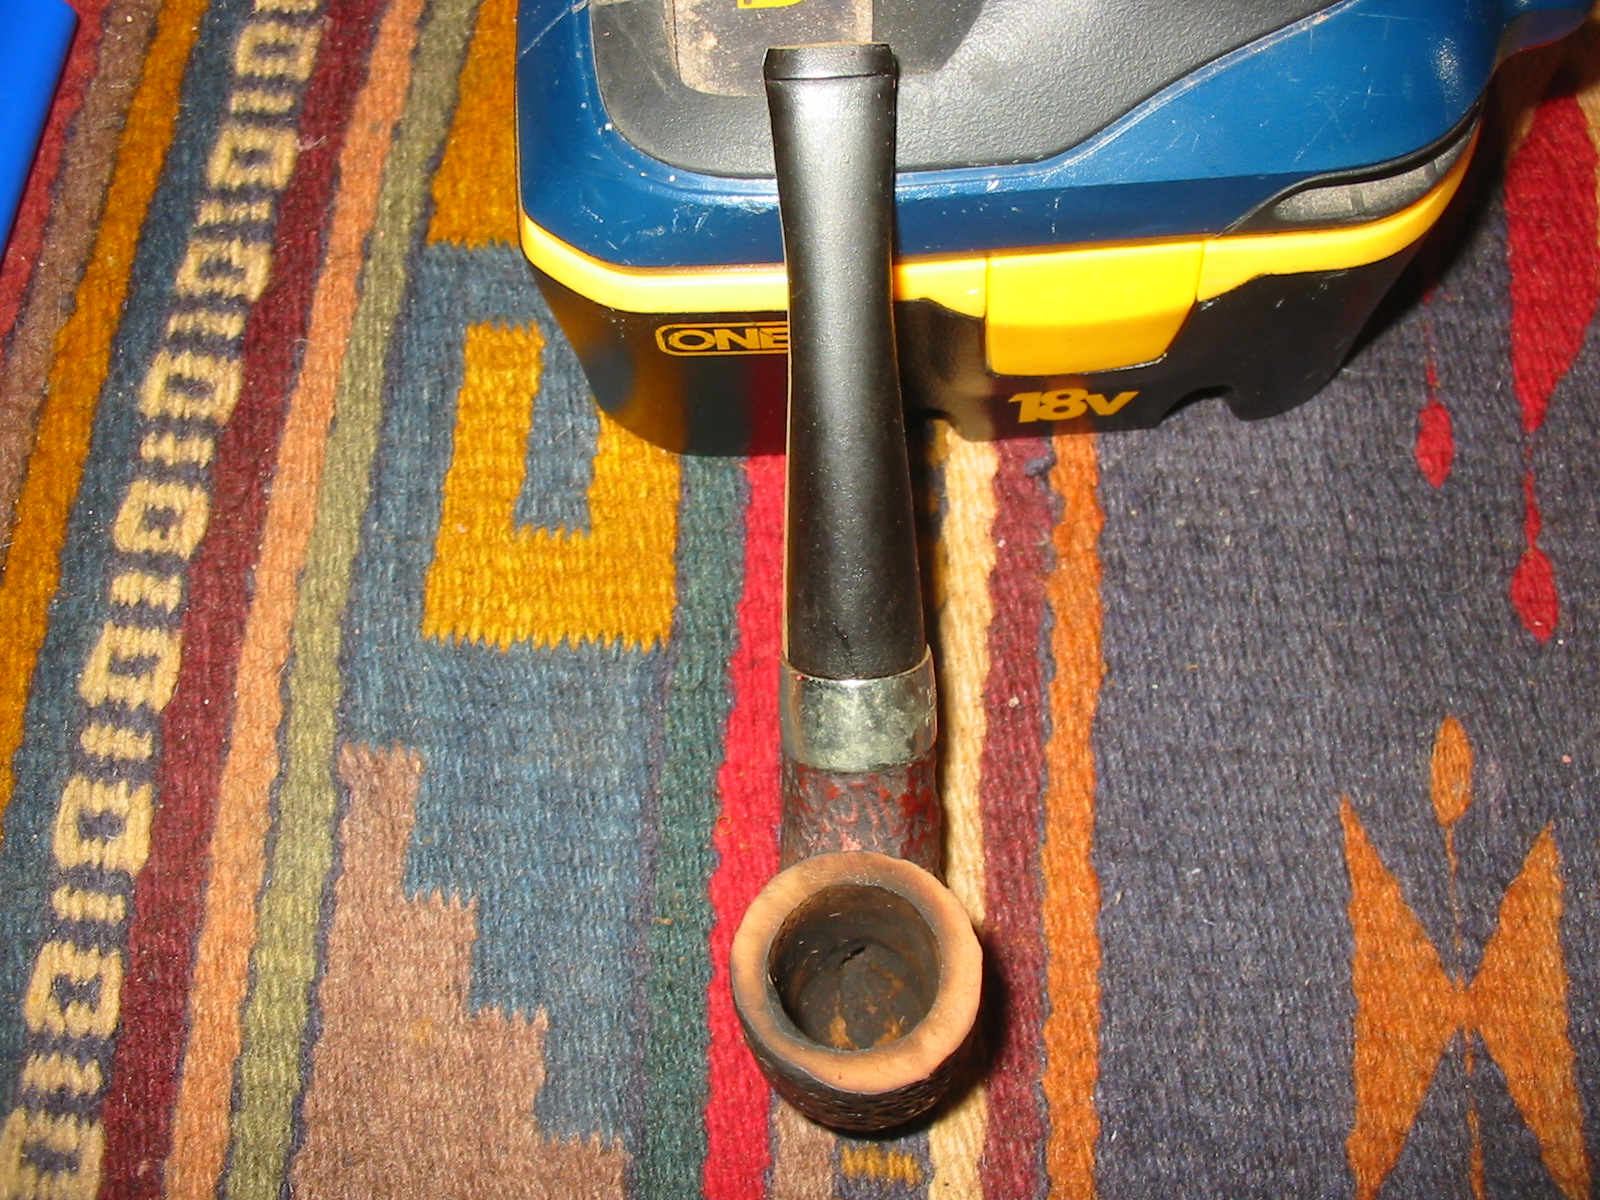
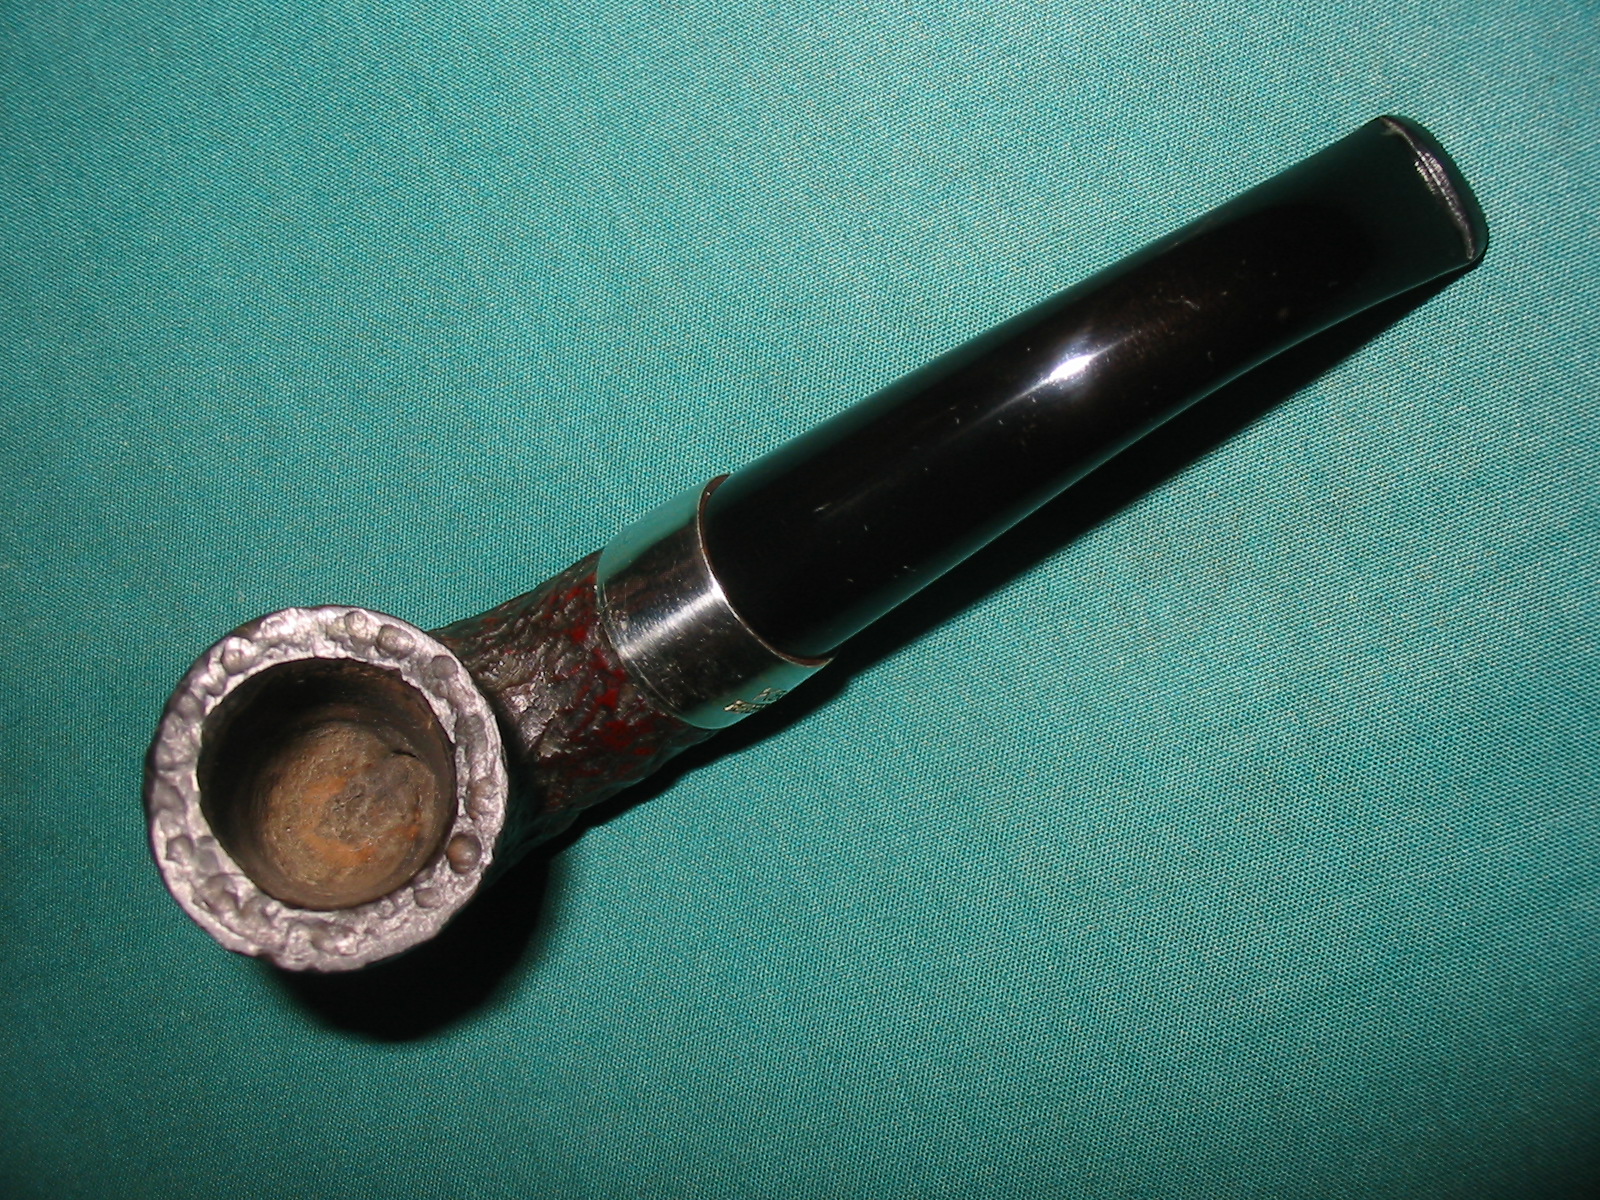
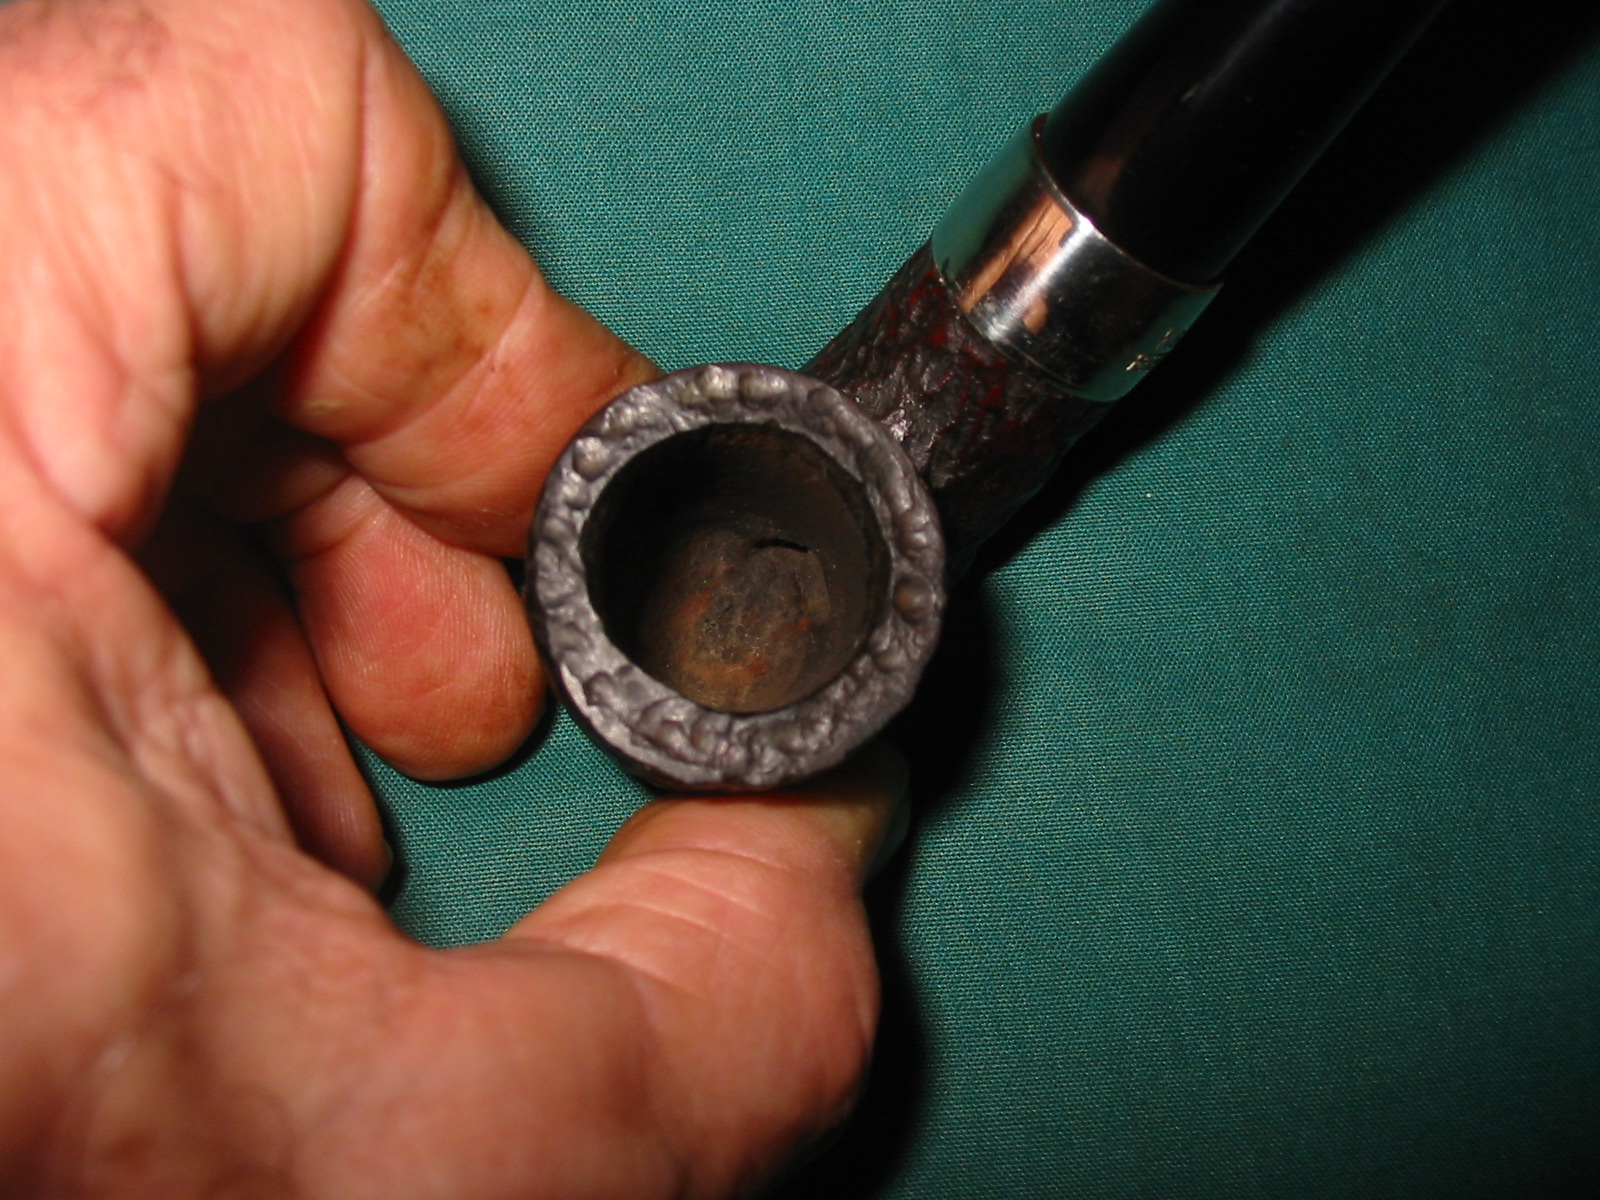
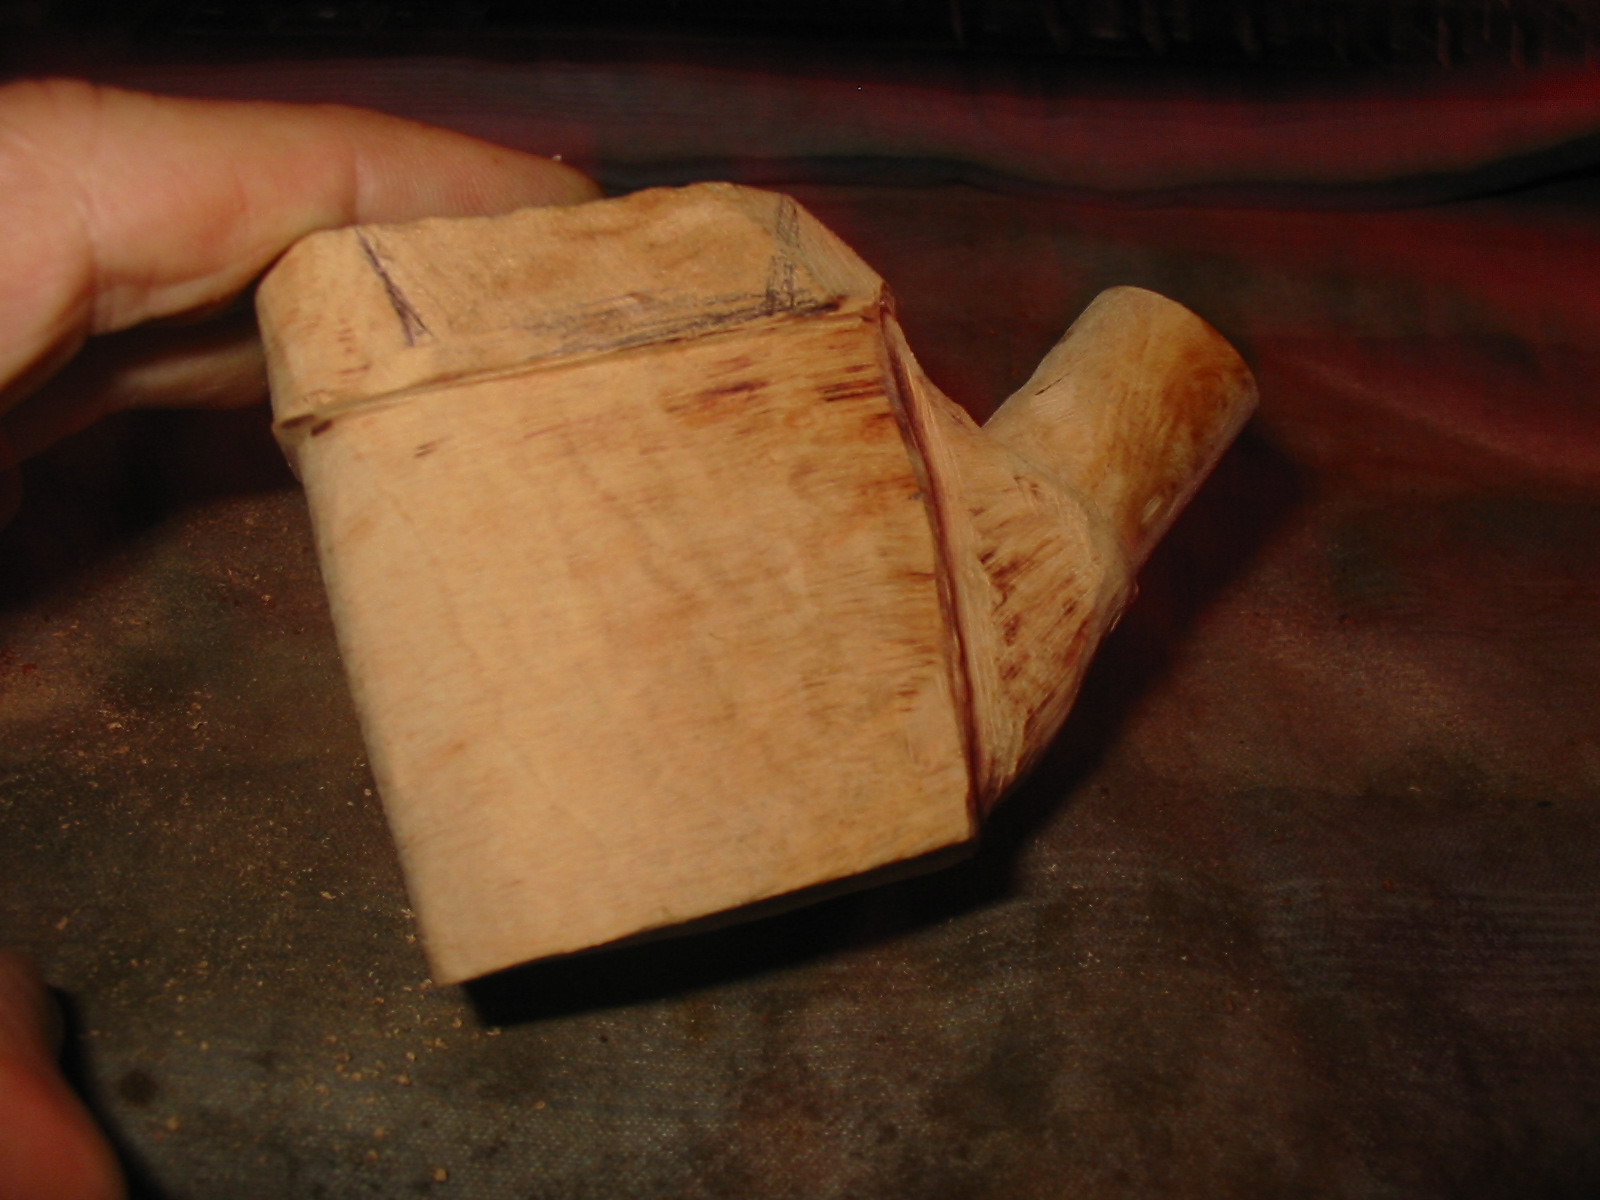
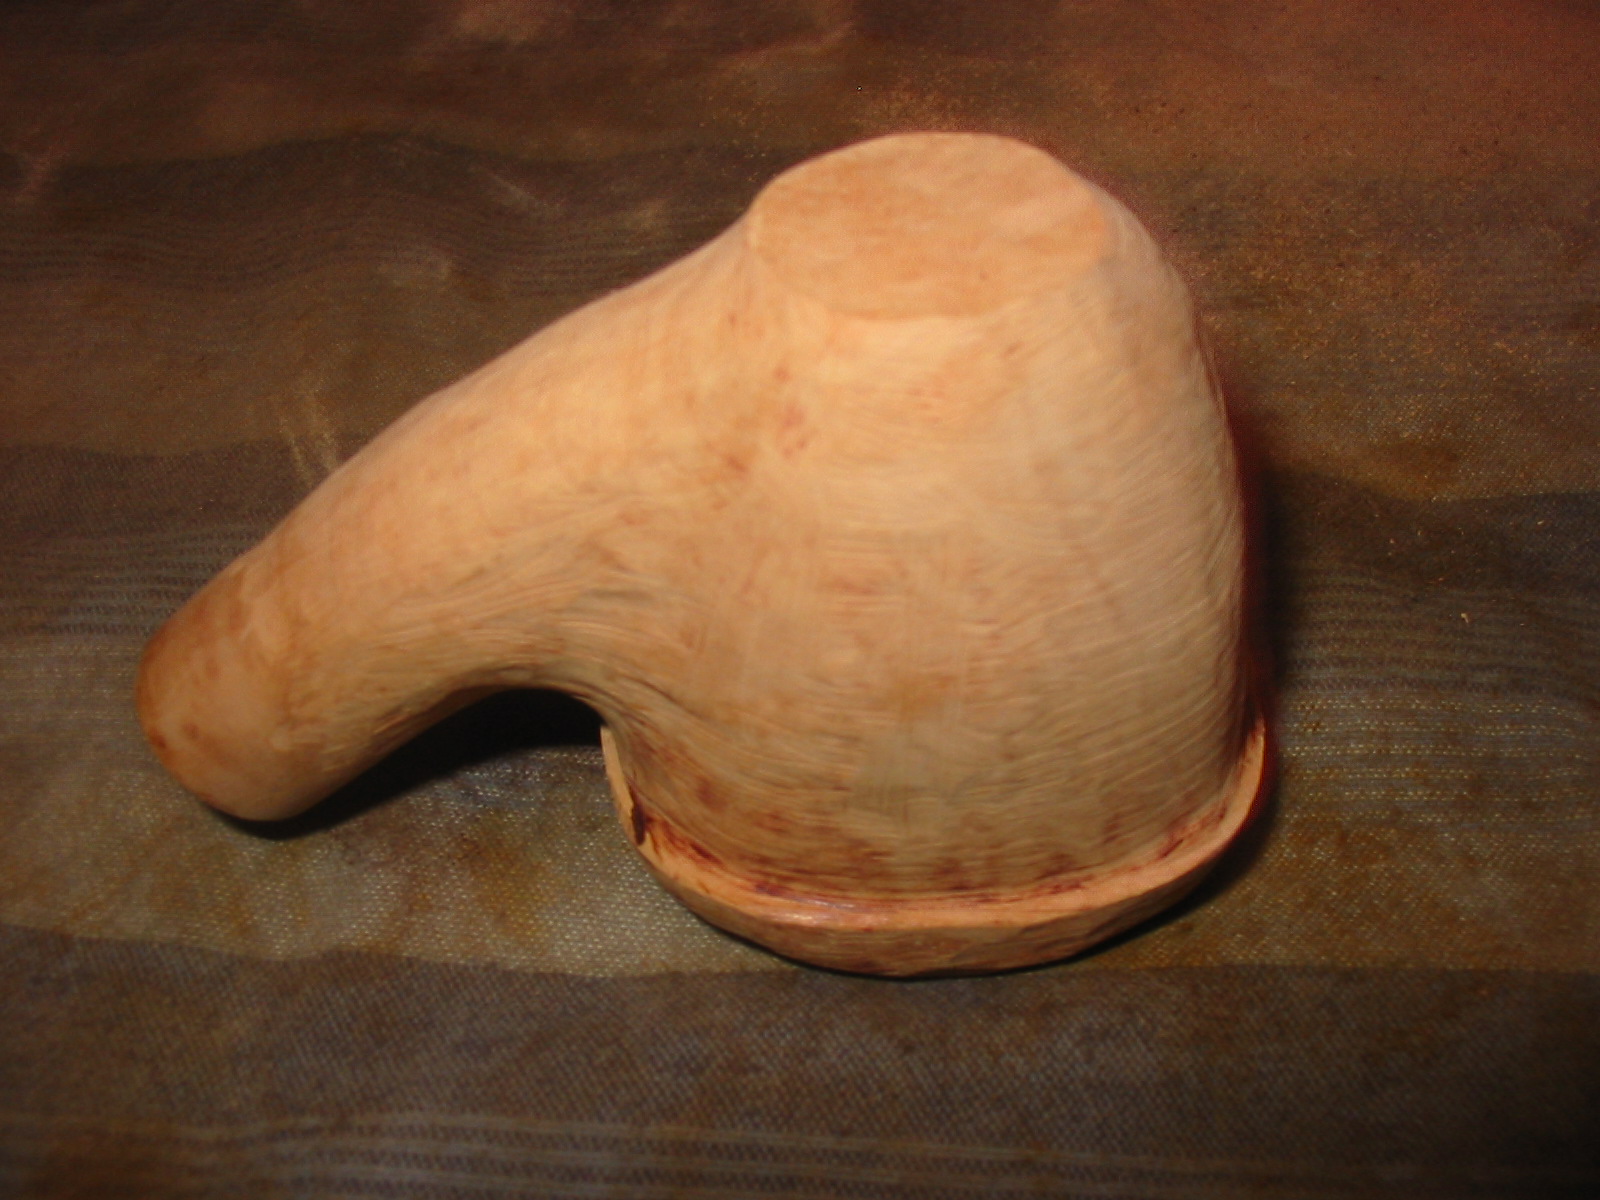
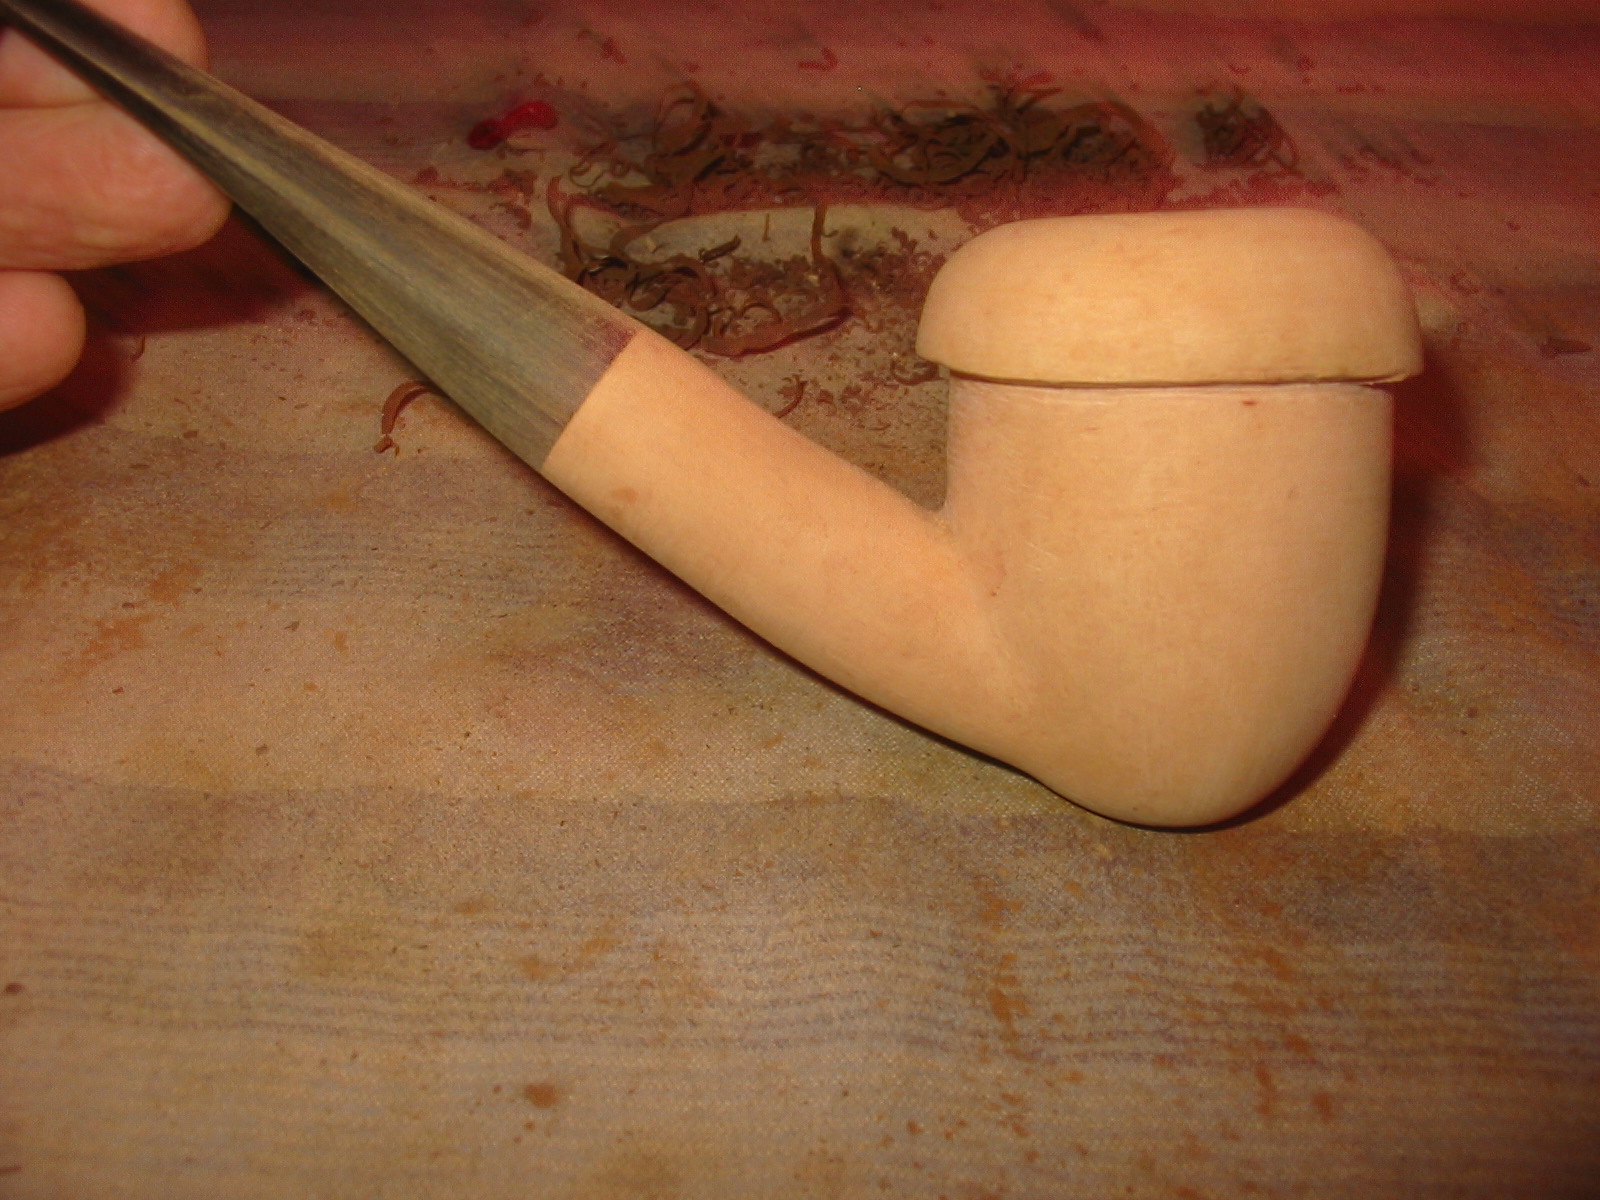
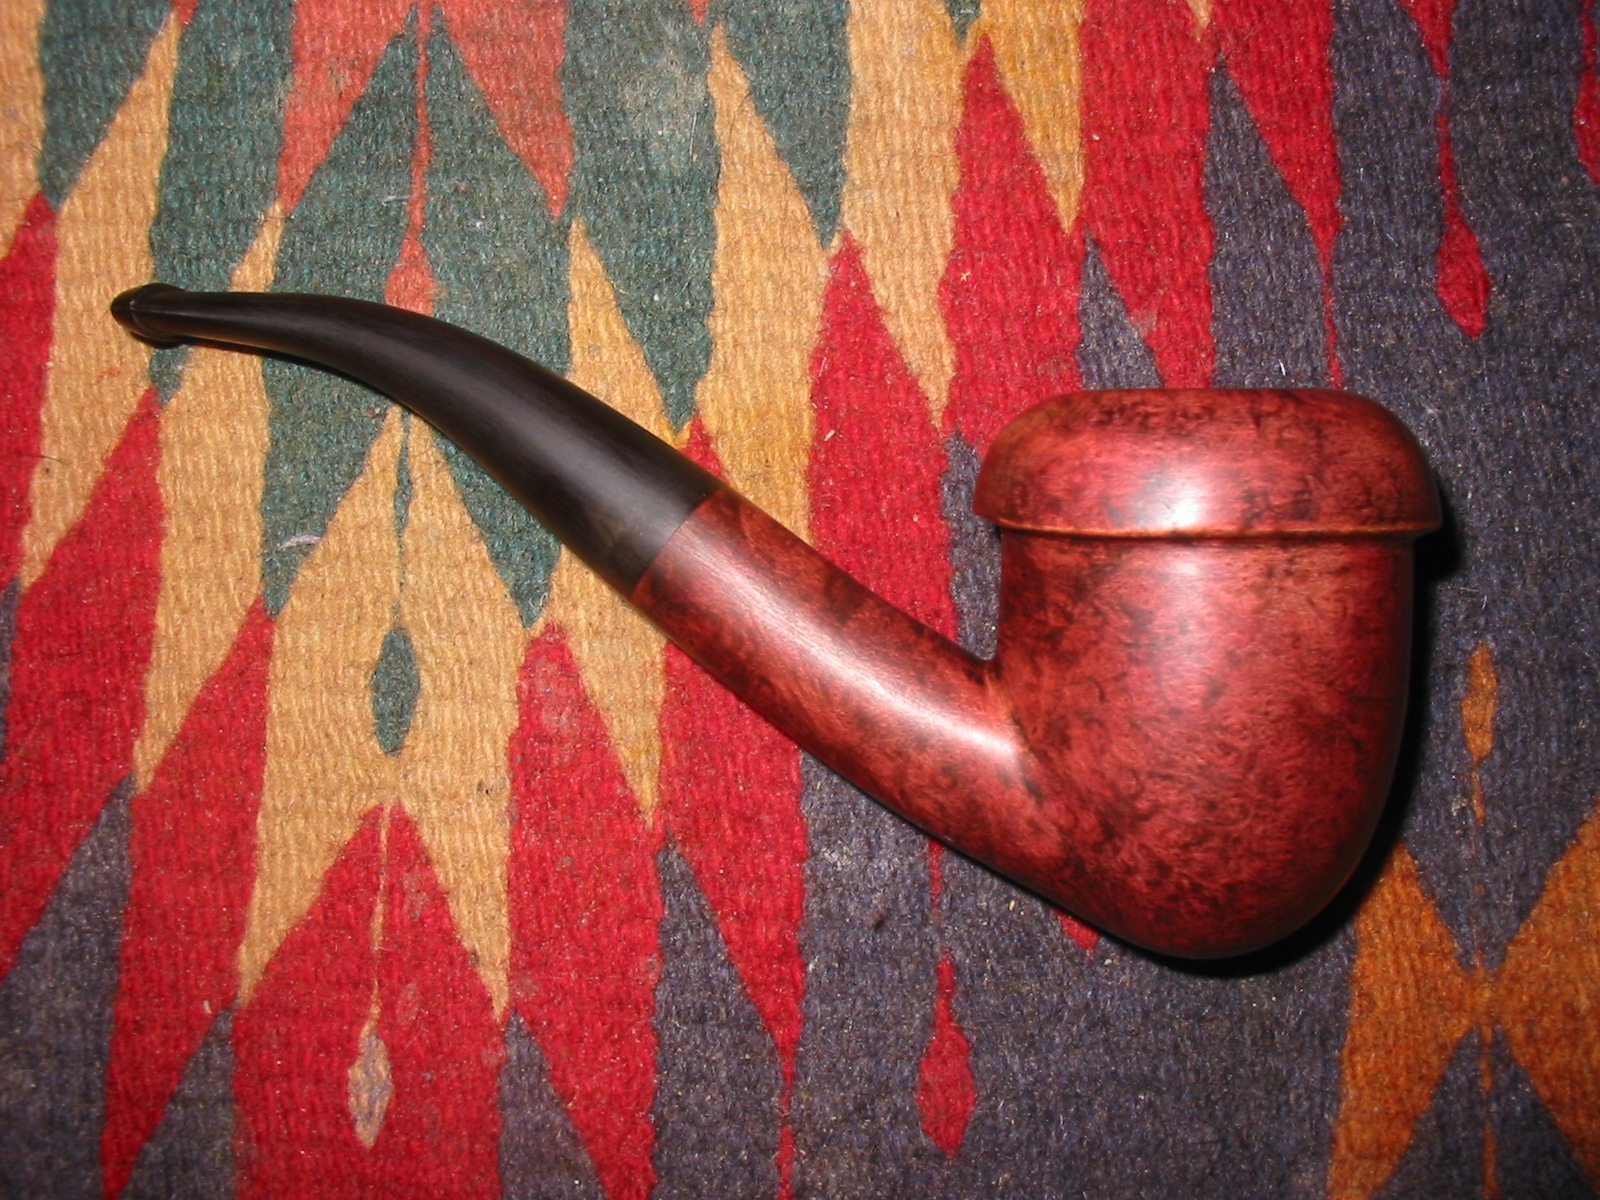
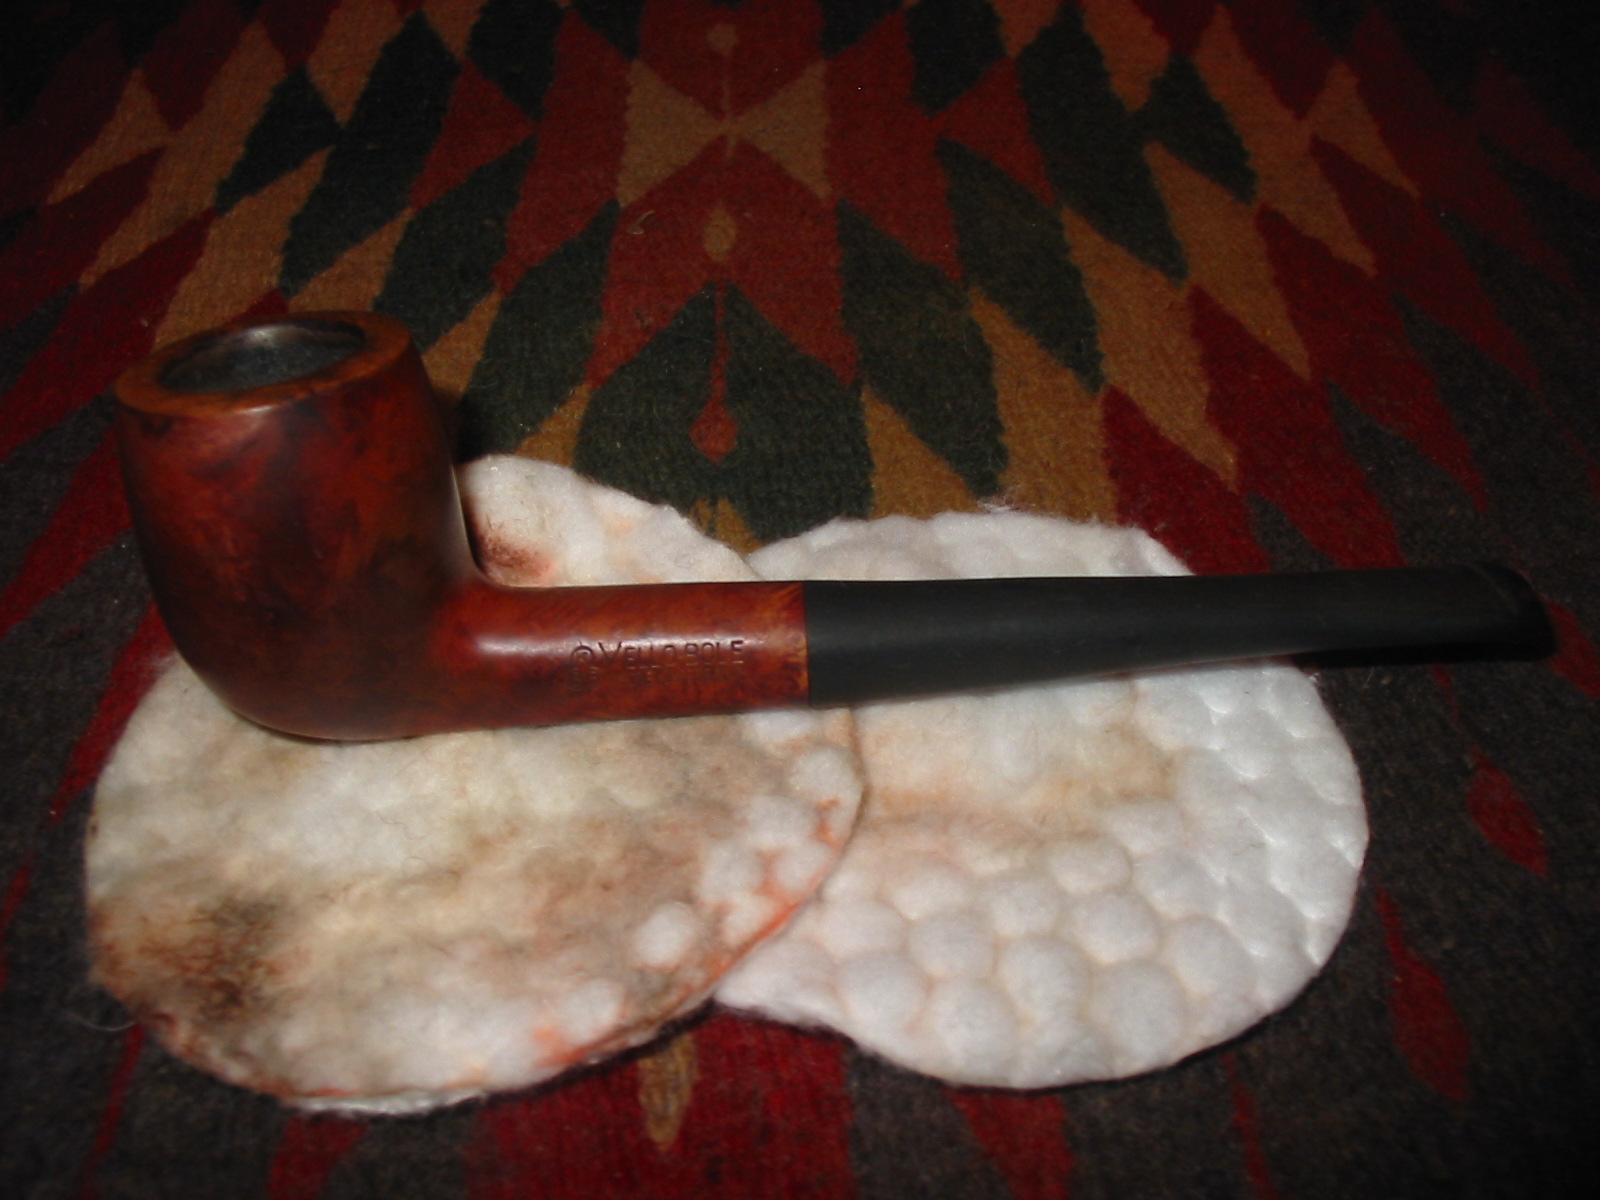
I wanted to remove the crown and rounding of the rim and flatten it out. The original bowls did not have a crowned rim but a flat one so I wanted to repair that and bring it back to its original look. I set up a topping board and 220 grit sandpaper and pressed the rim into the sandpaper and sanded the top flat. IMG_7601IMG_7602 
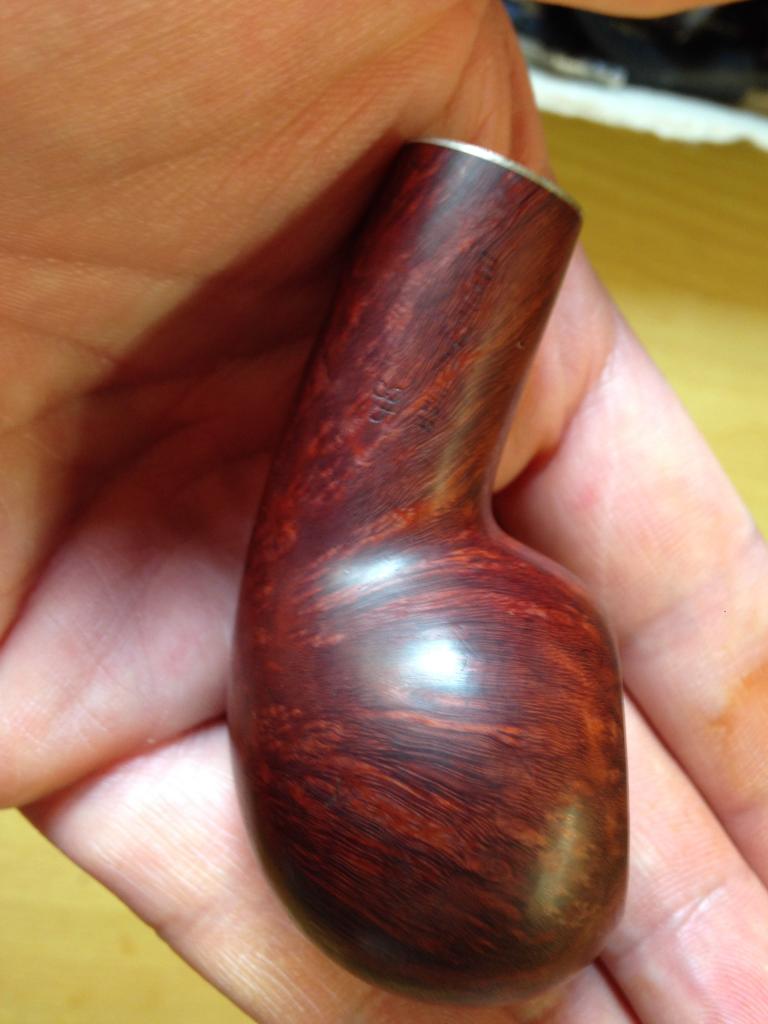
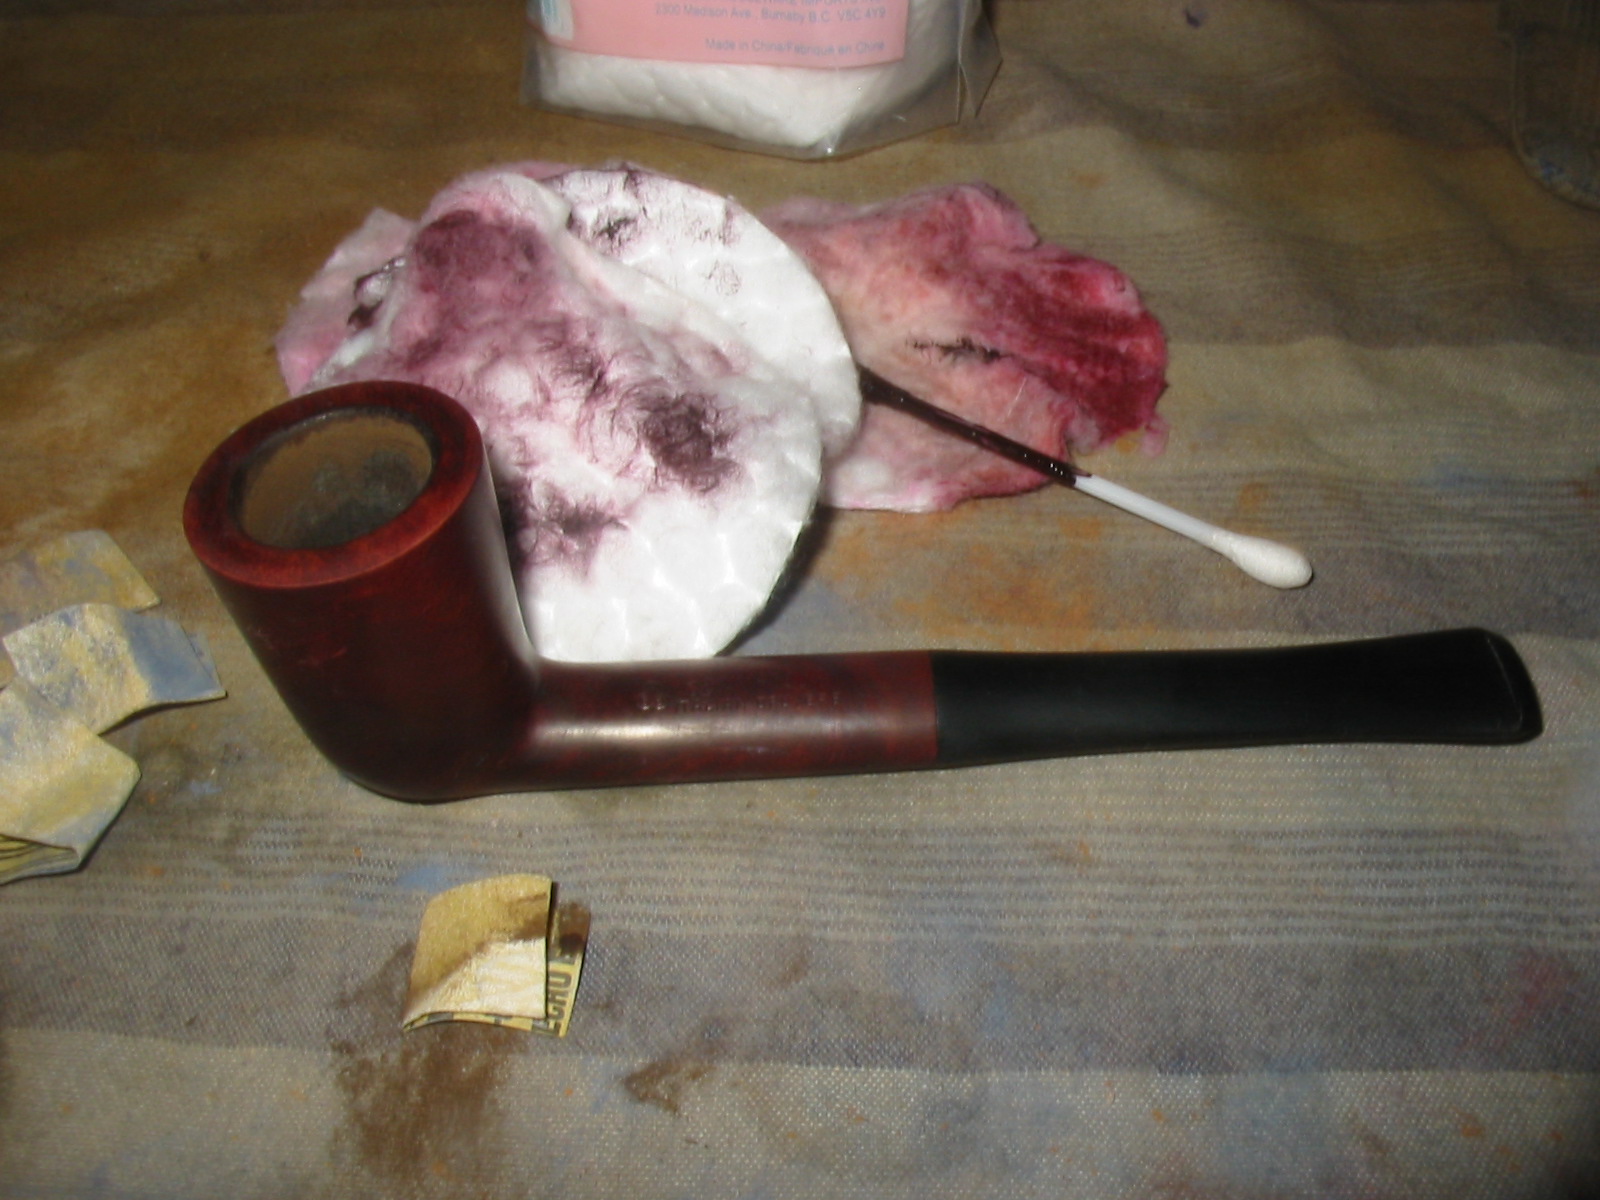
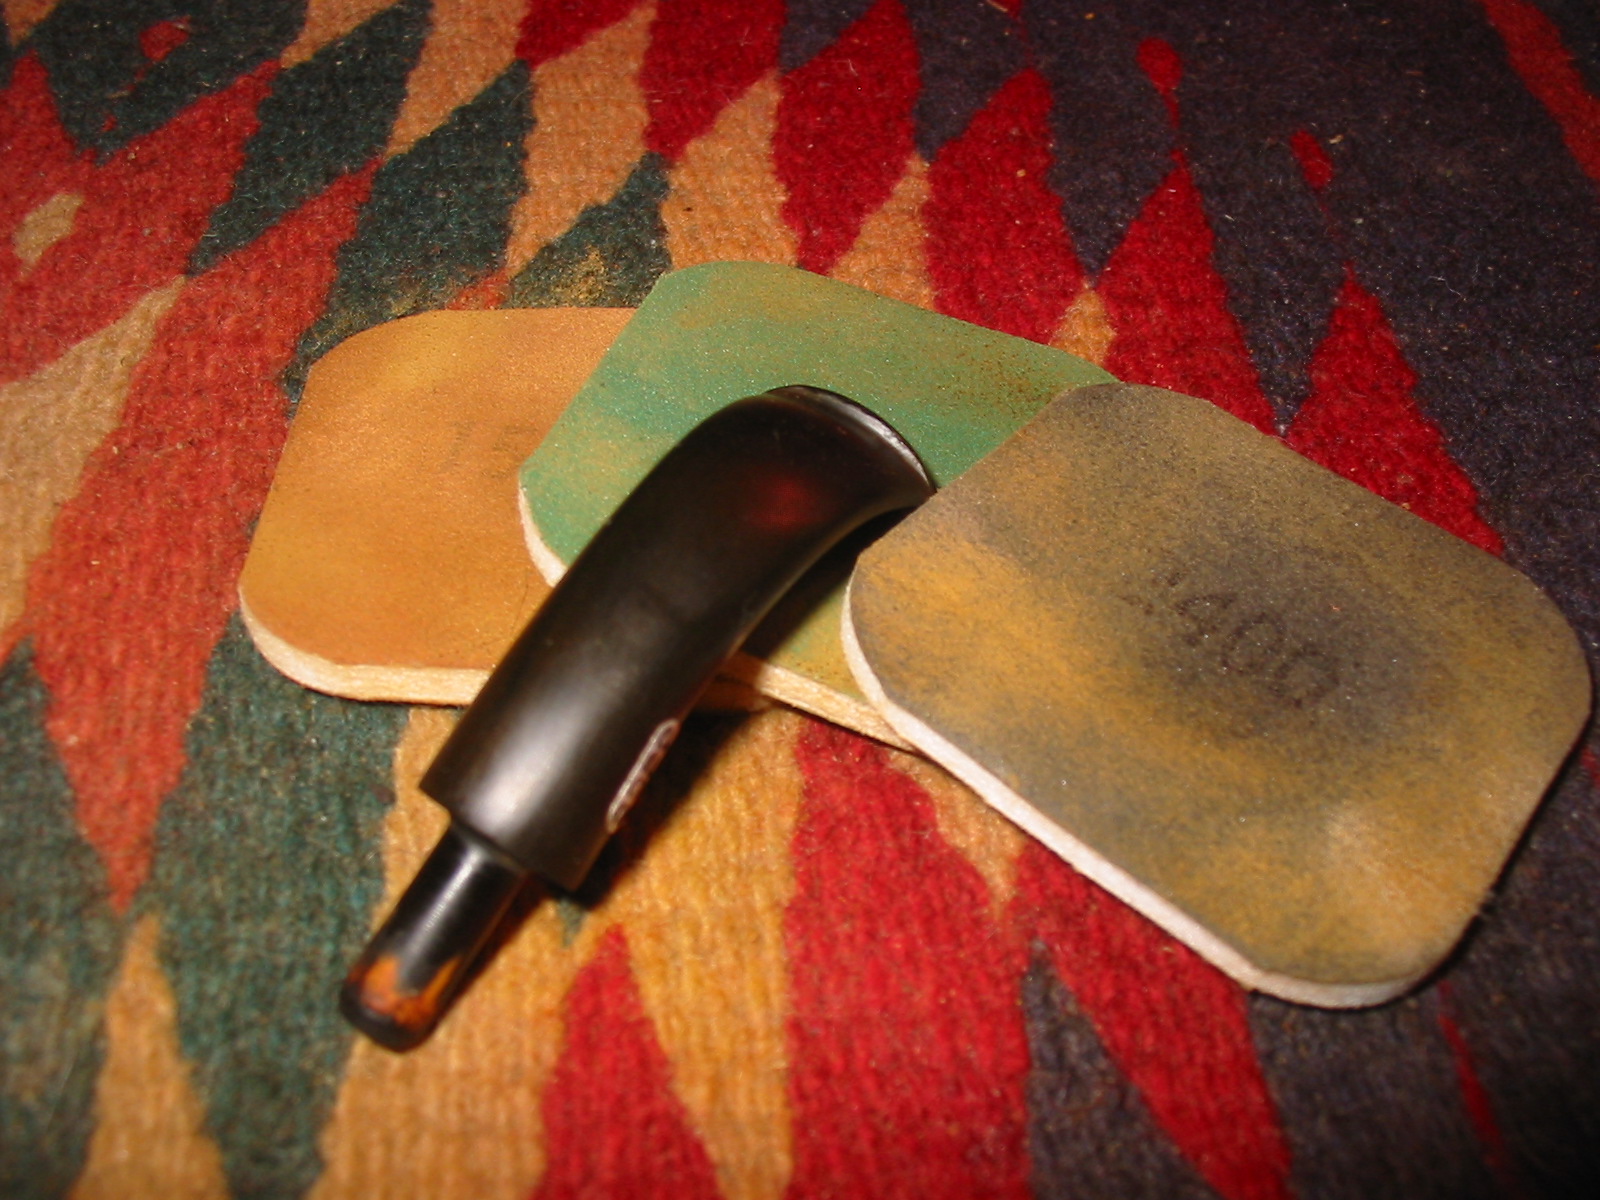
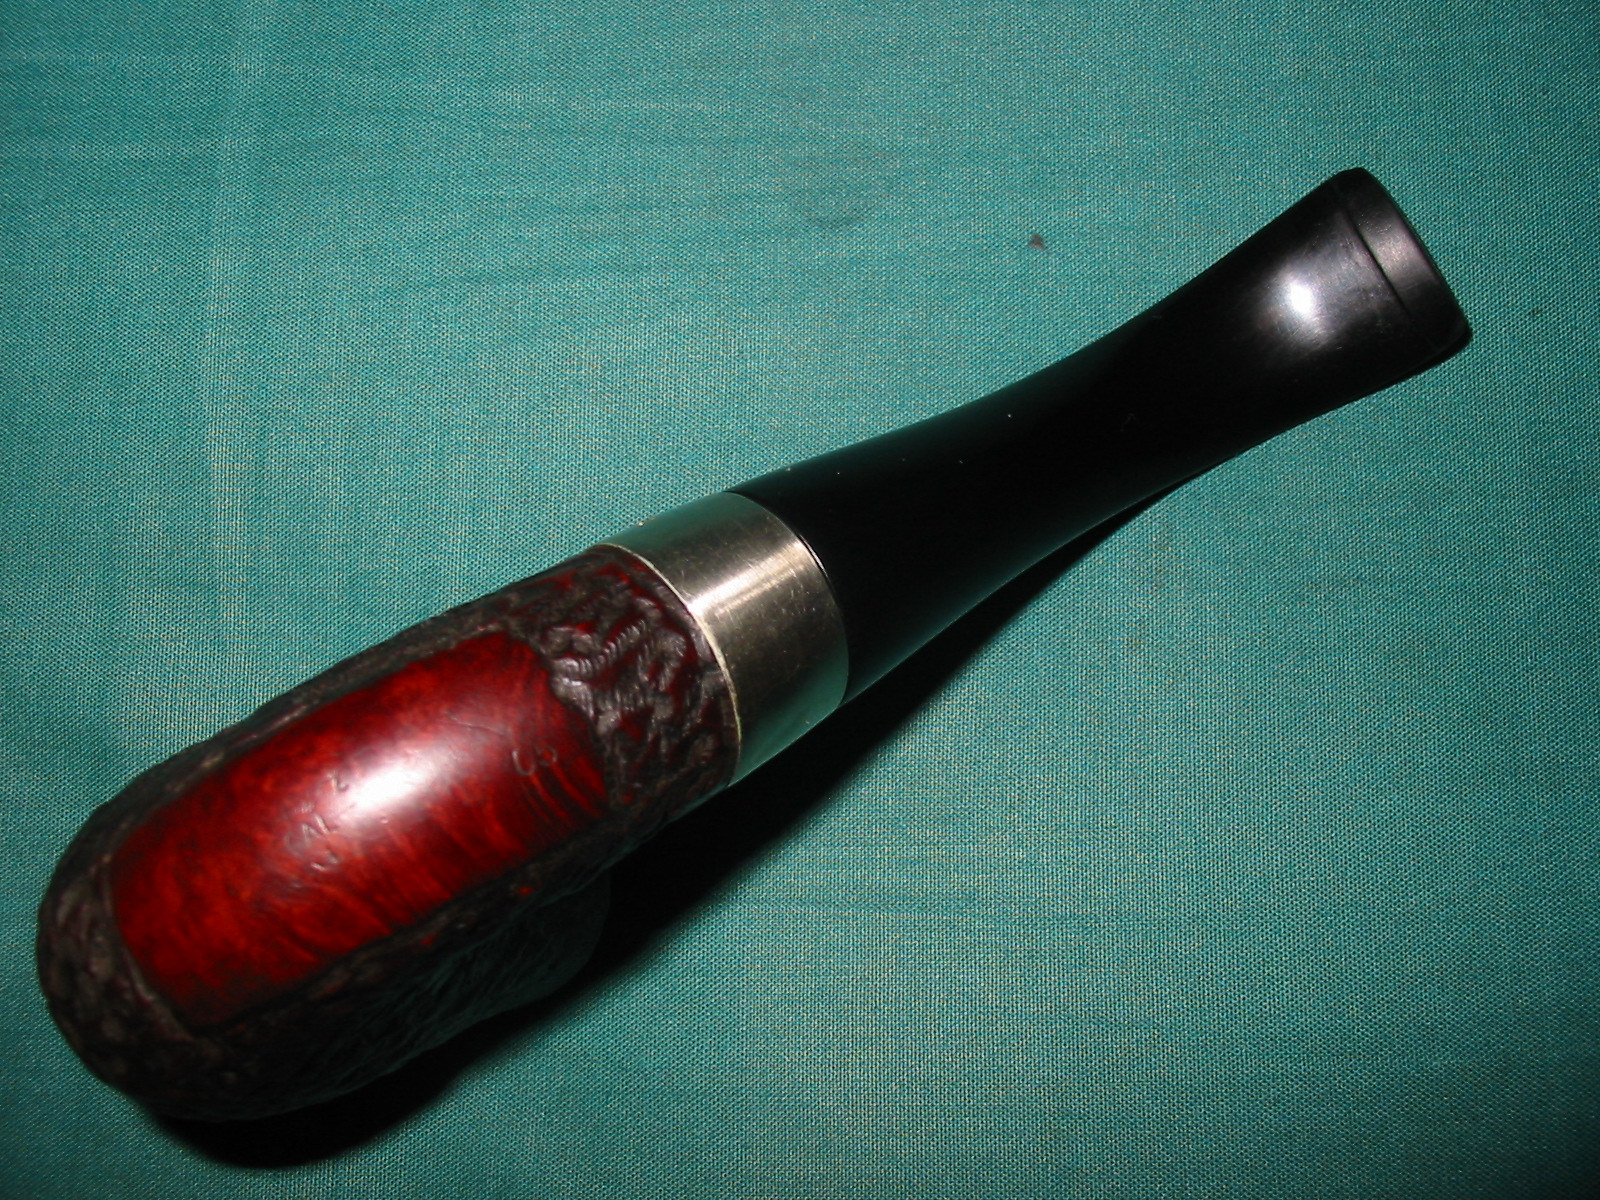
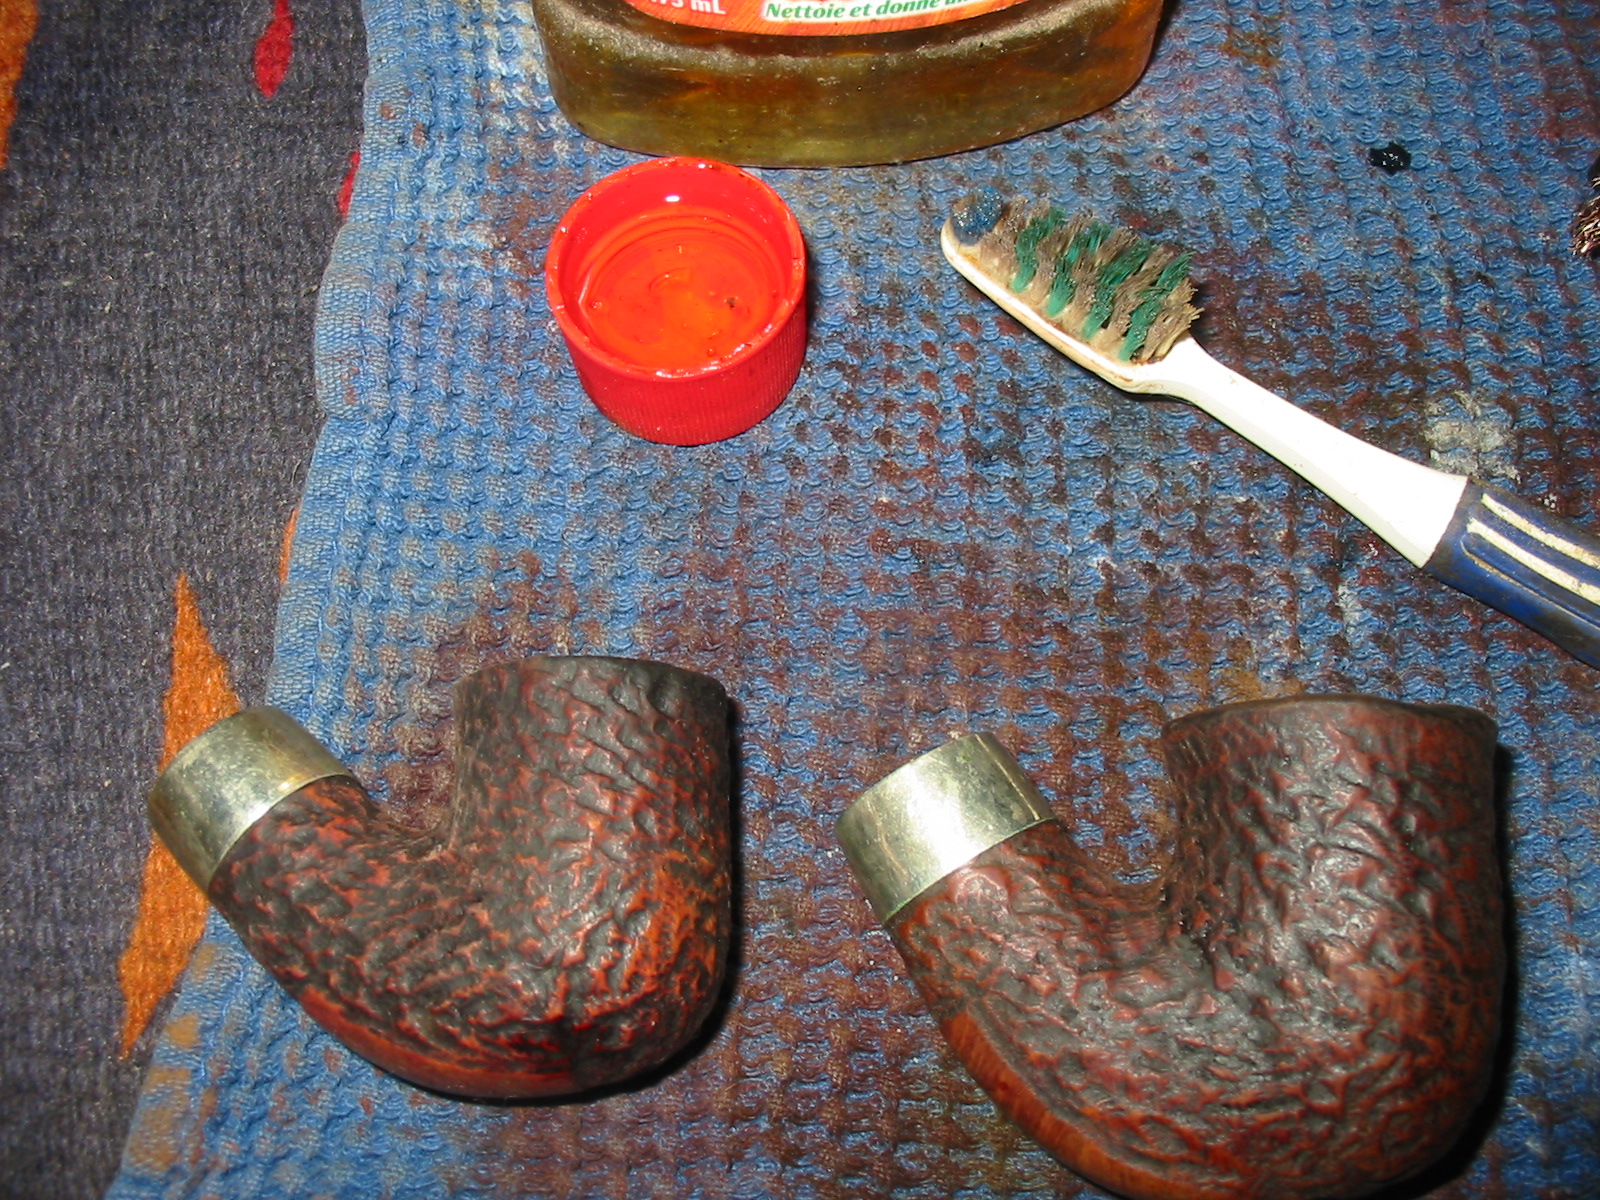
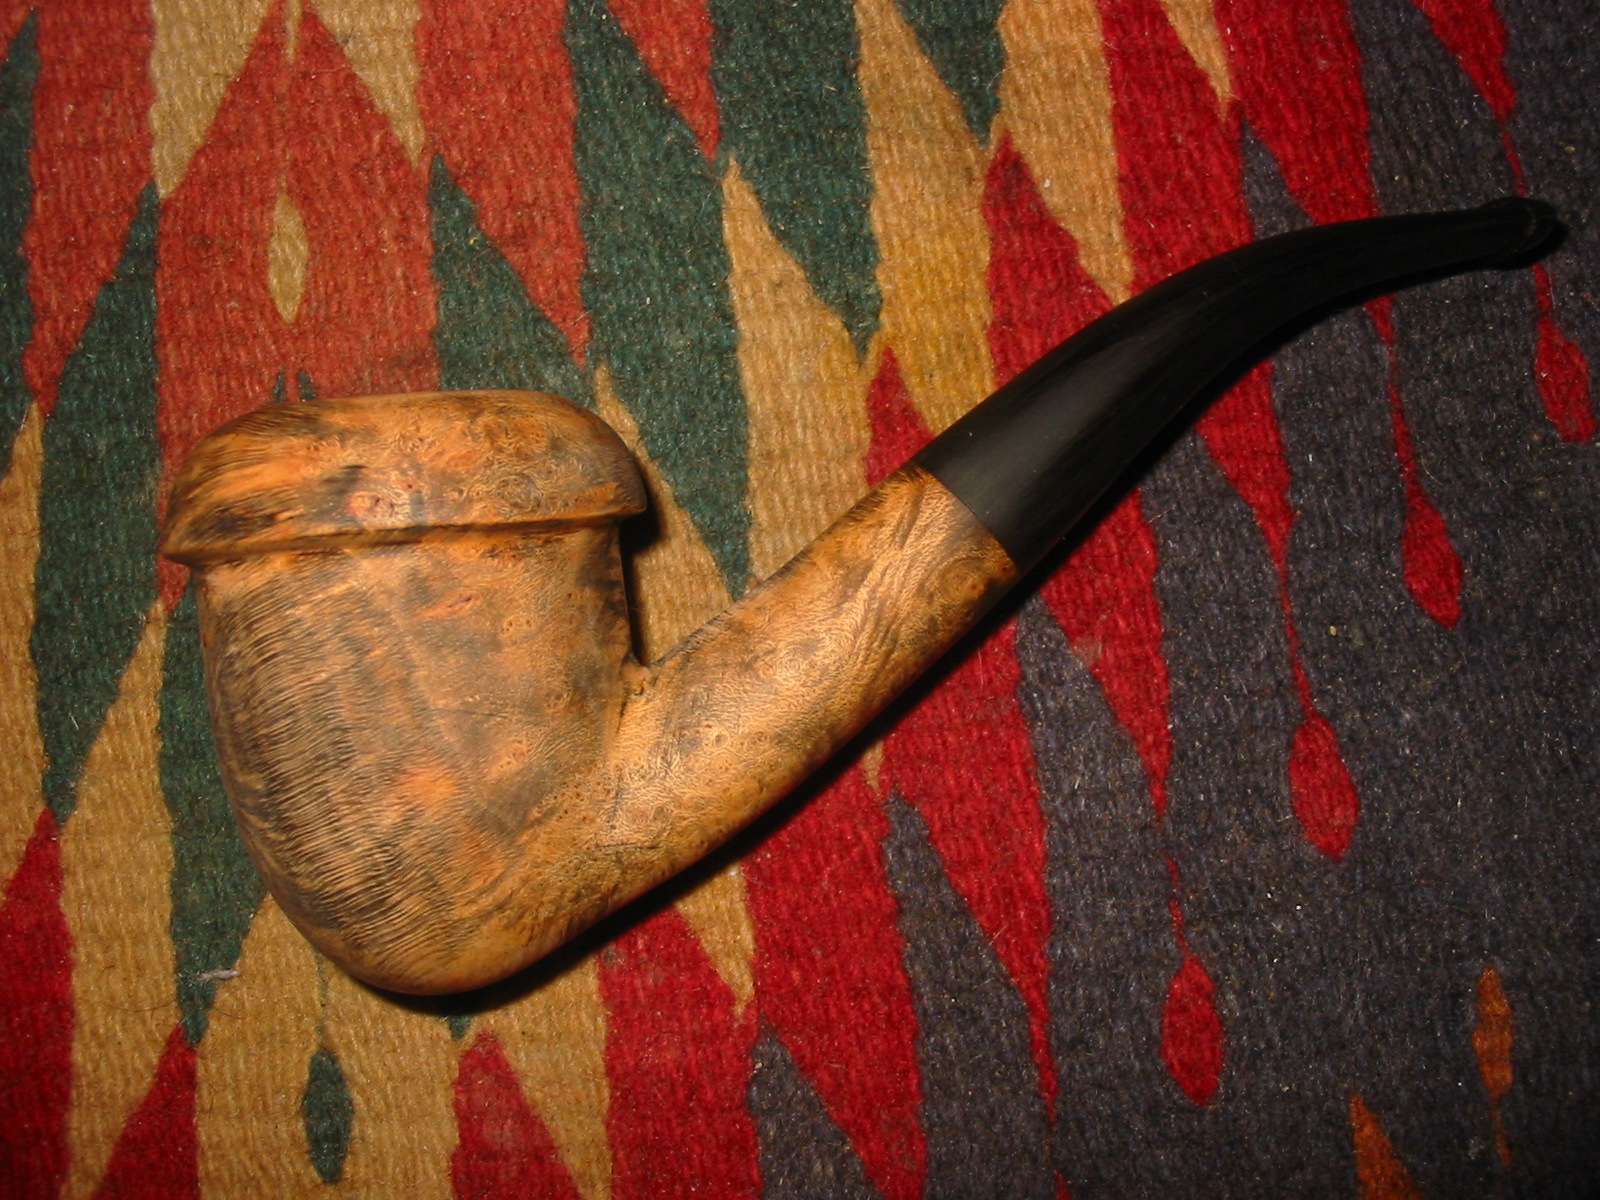
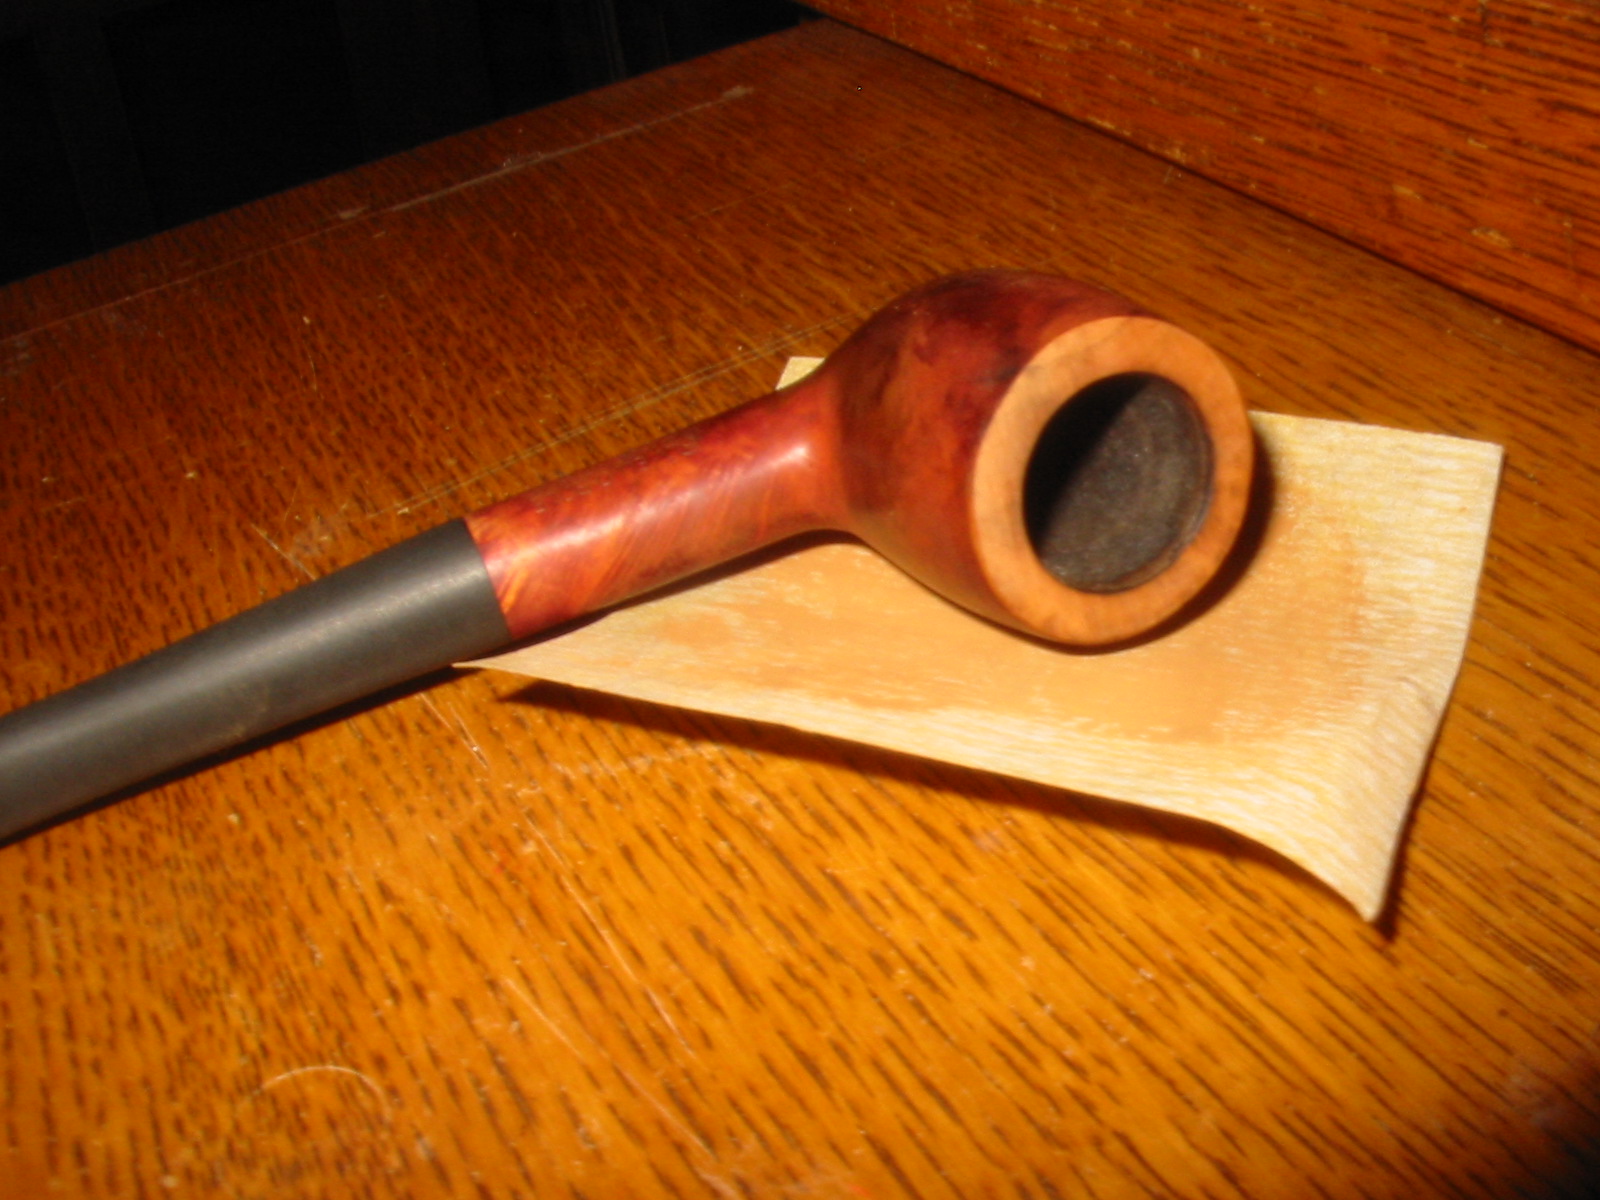
I sanded the rim with a medium and a fine grit sanding sponge and also with 1500-2400 grit micromesh sanding pads to prepare it for staining. I stained the bowl, rim and shank with oxblood aniline based stain, flamed and repeated until the coverage was even. I then buffed the pipe with White Diamond. IMG_7604IMG_7605IMG_7606IMG_7608 
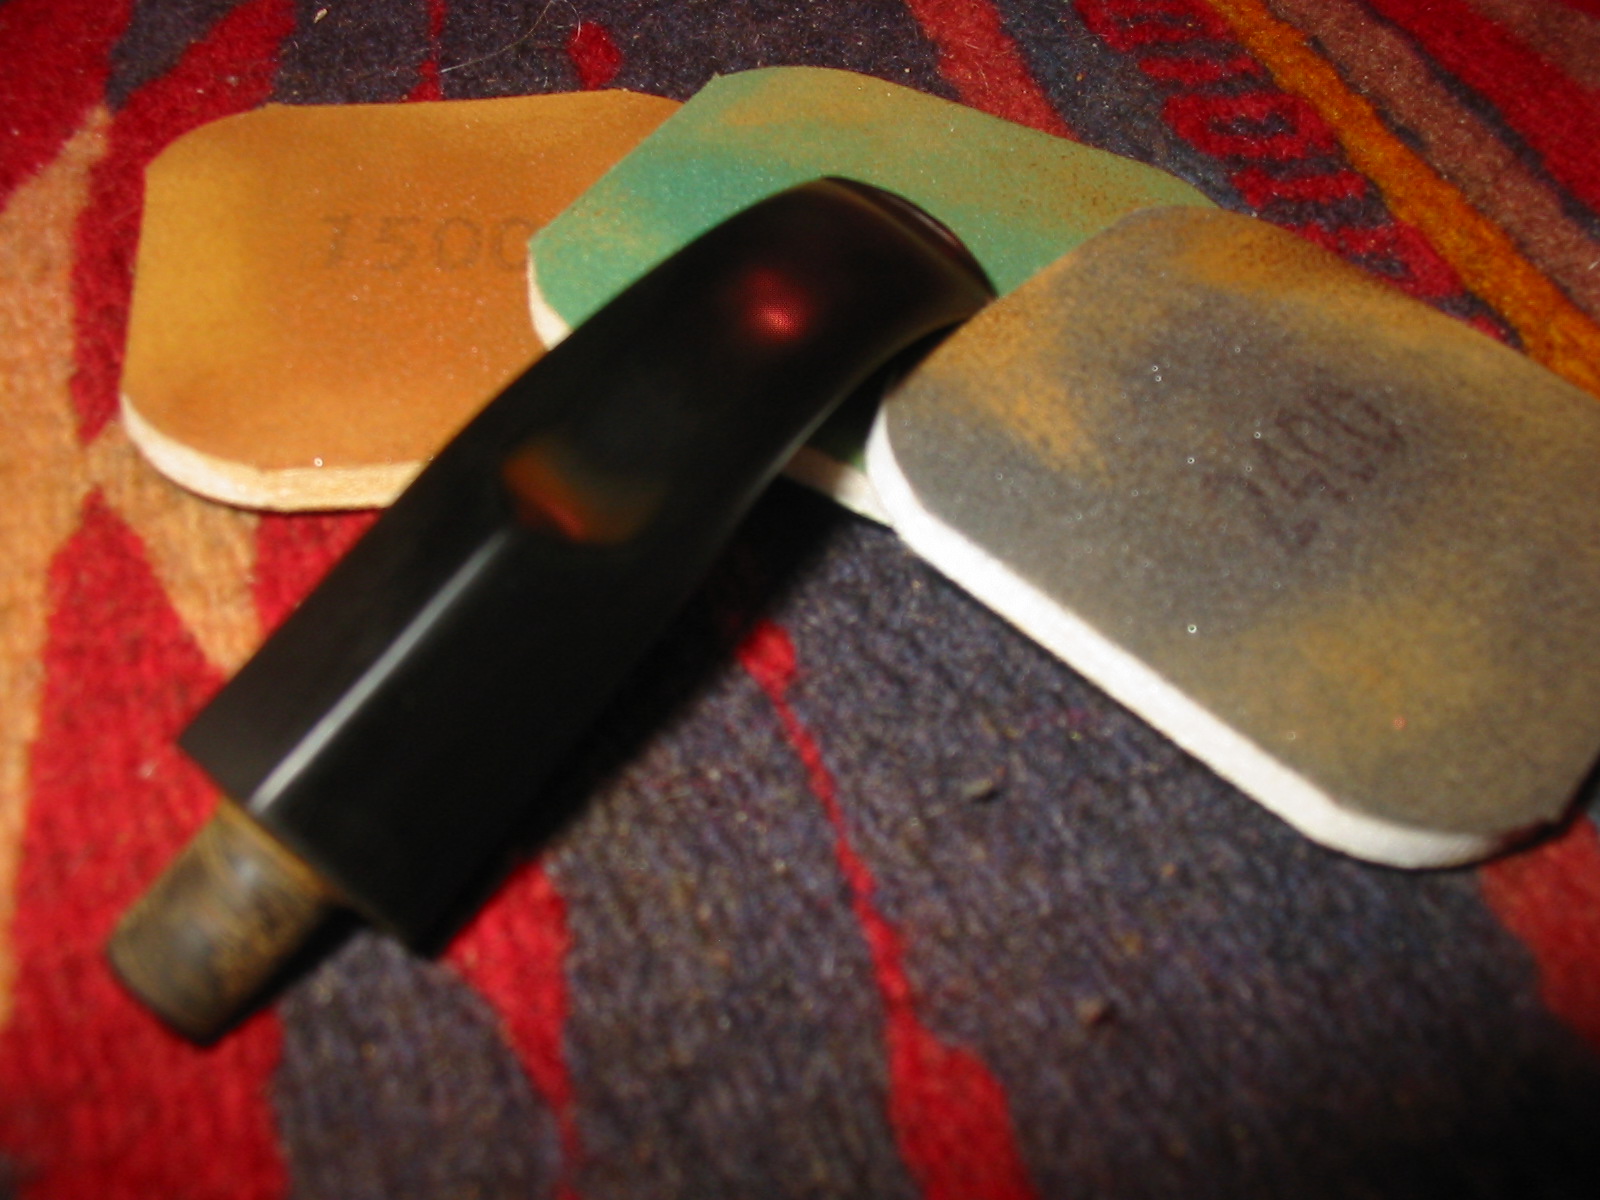
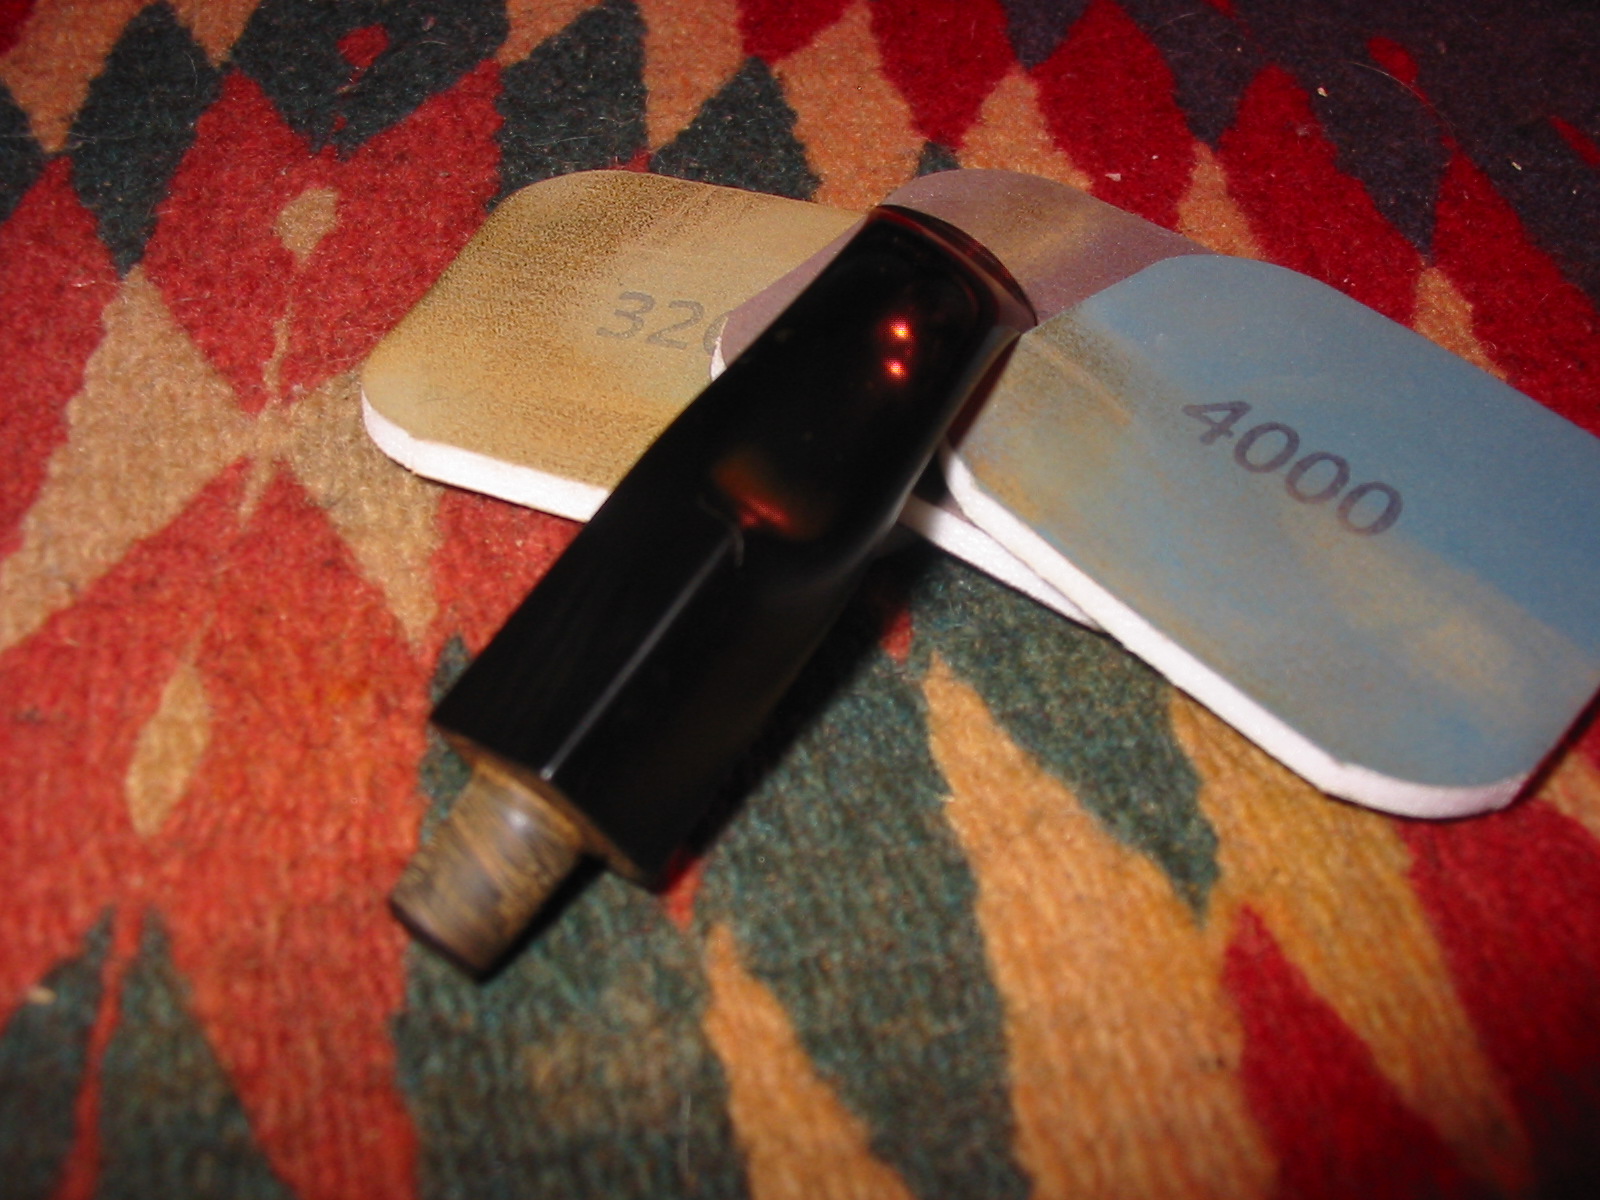
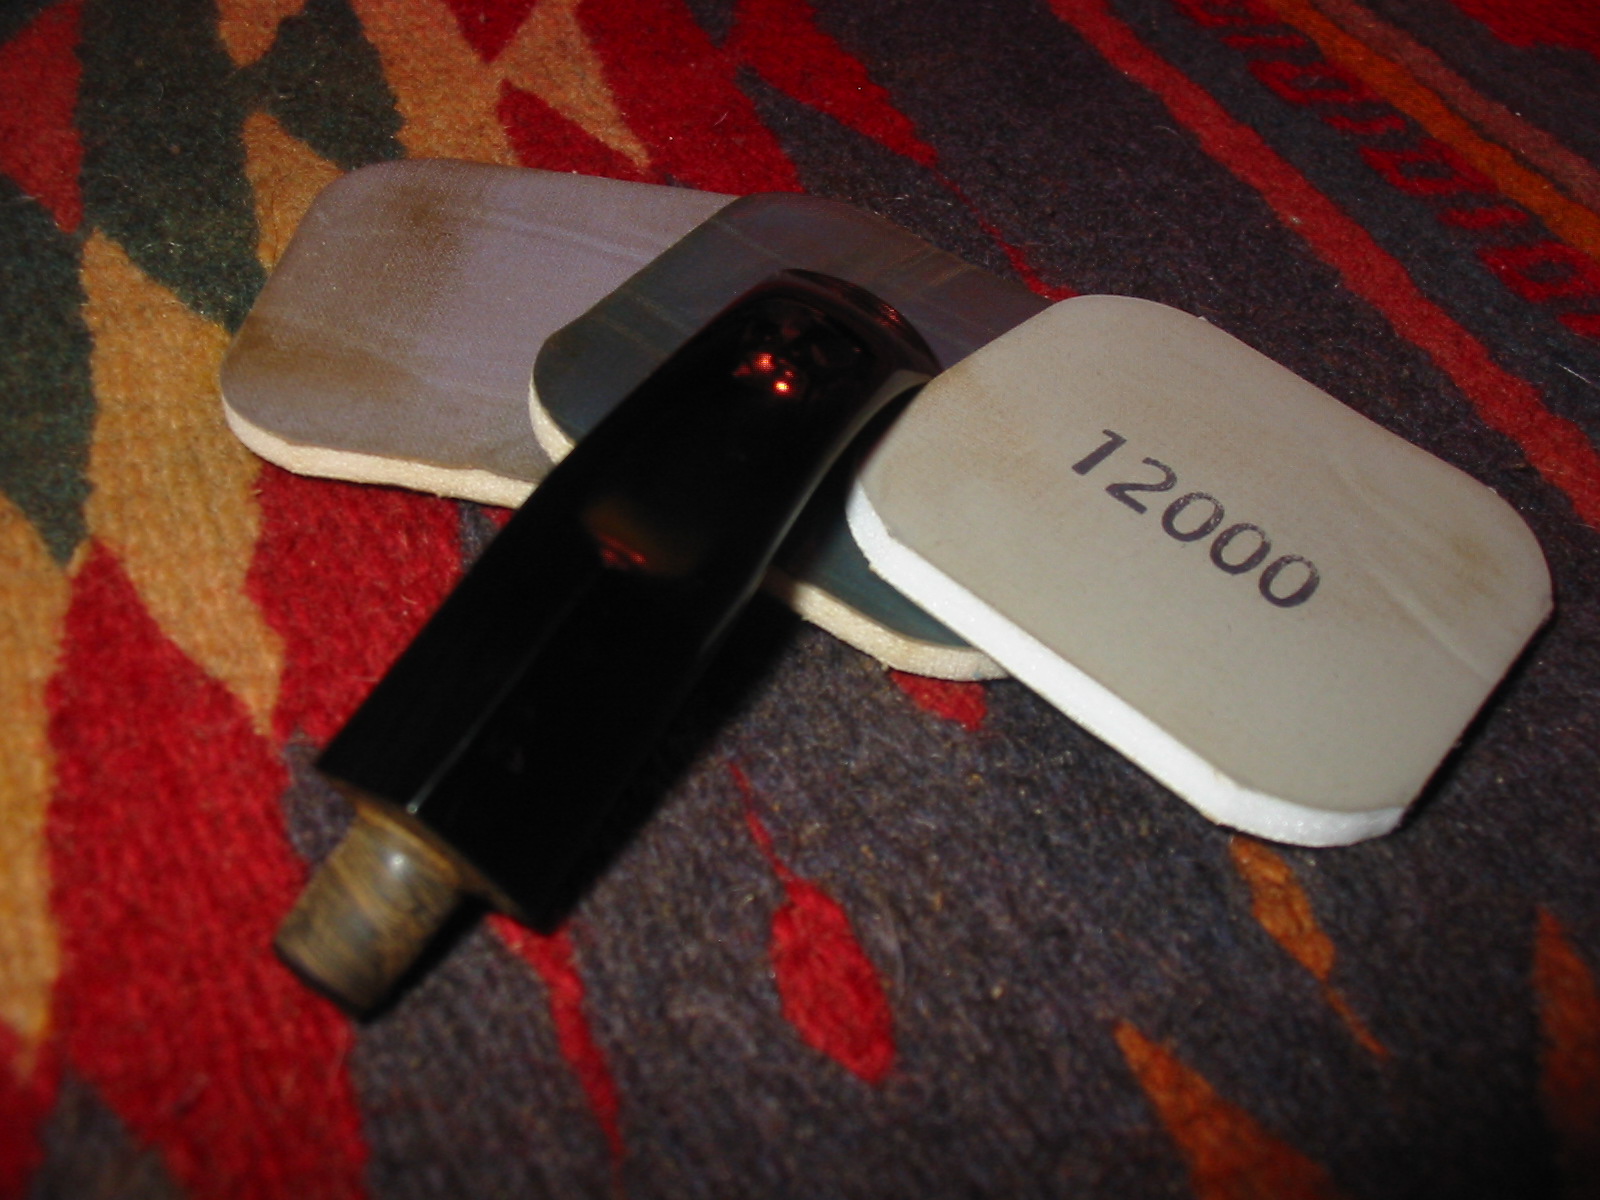
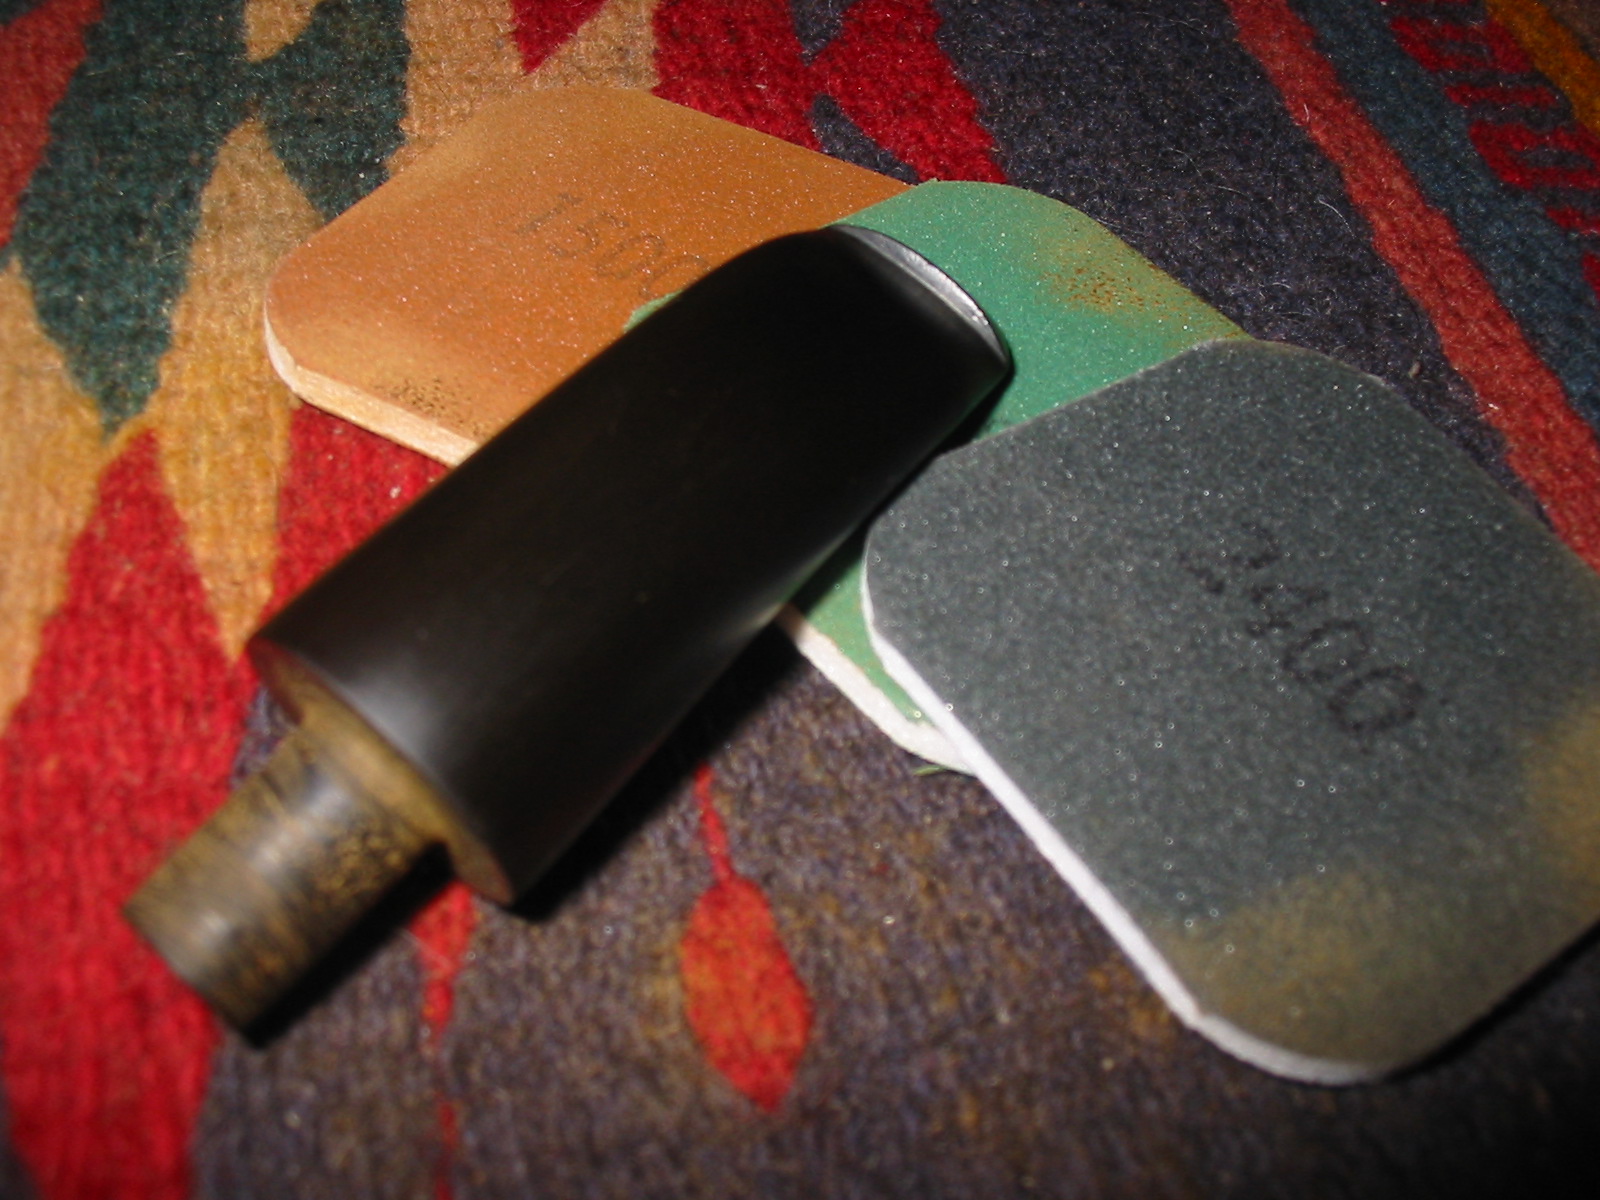
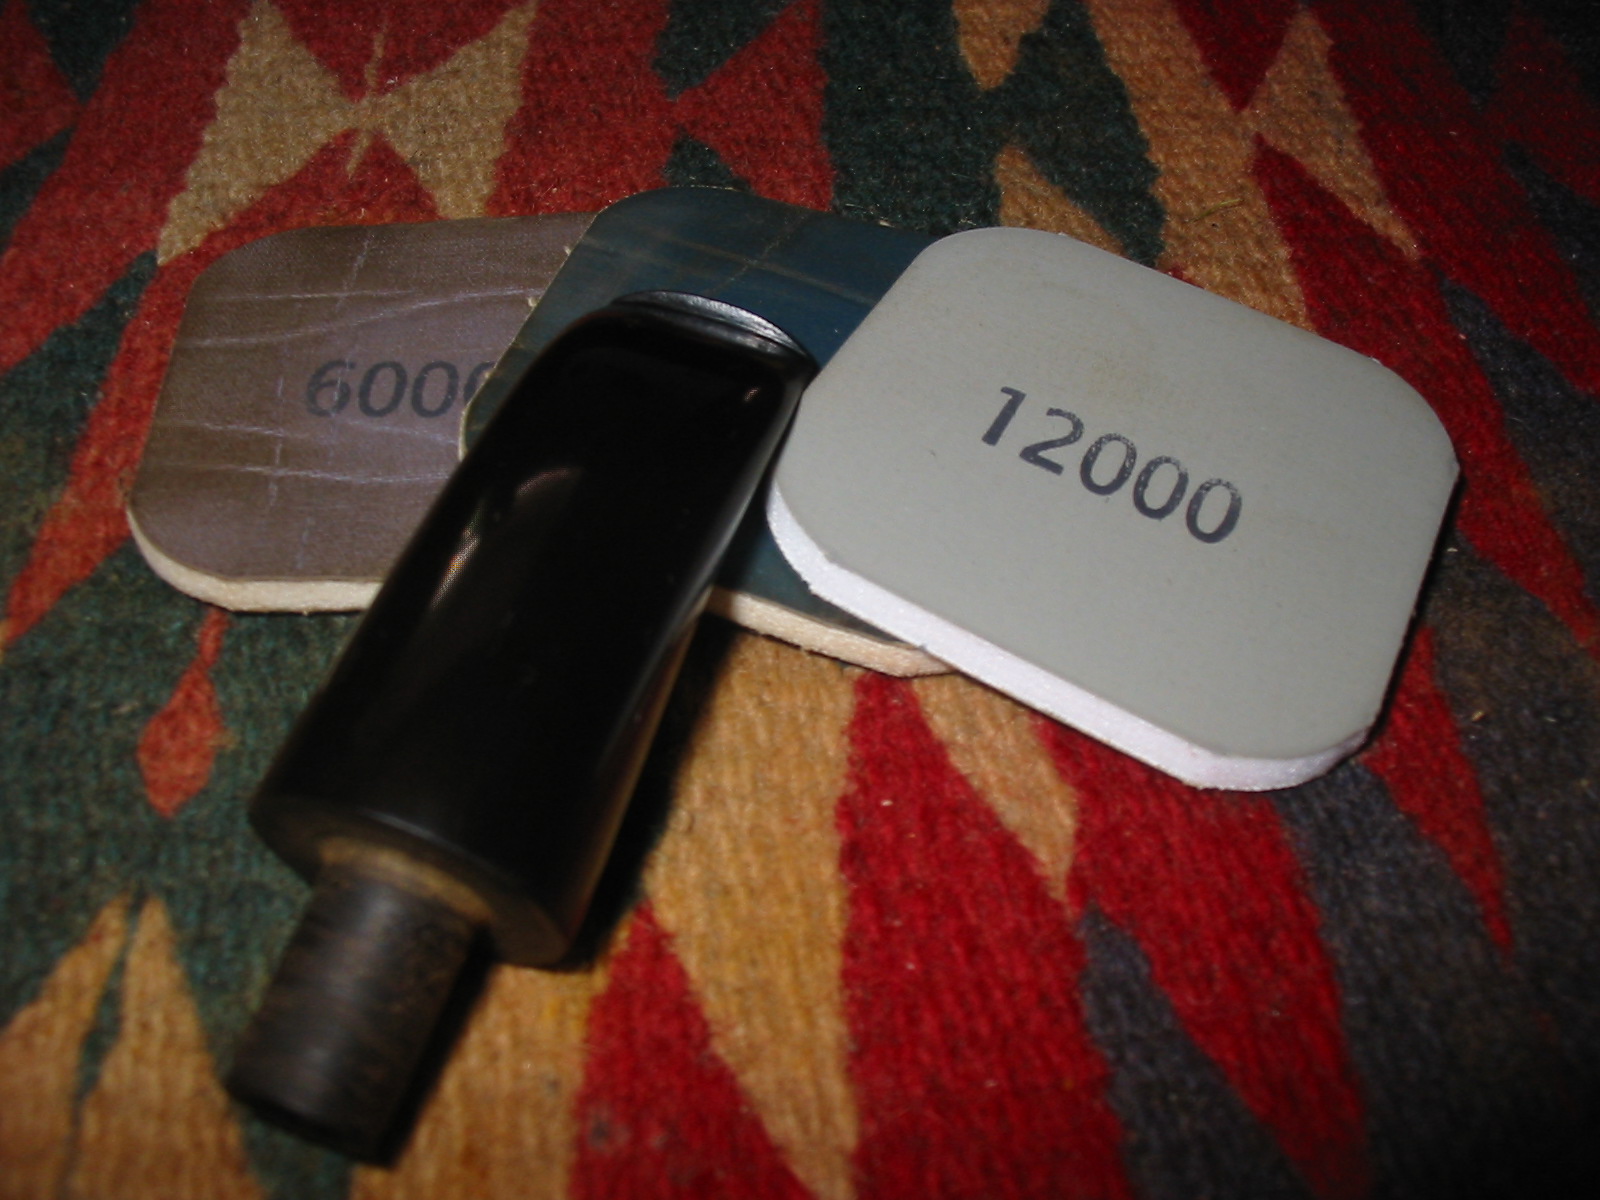
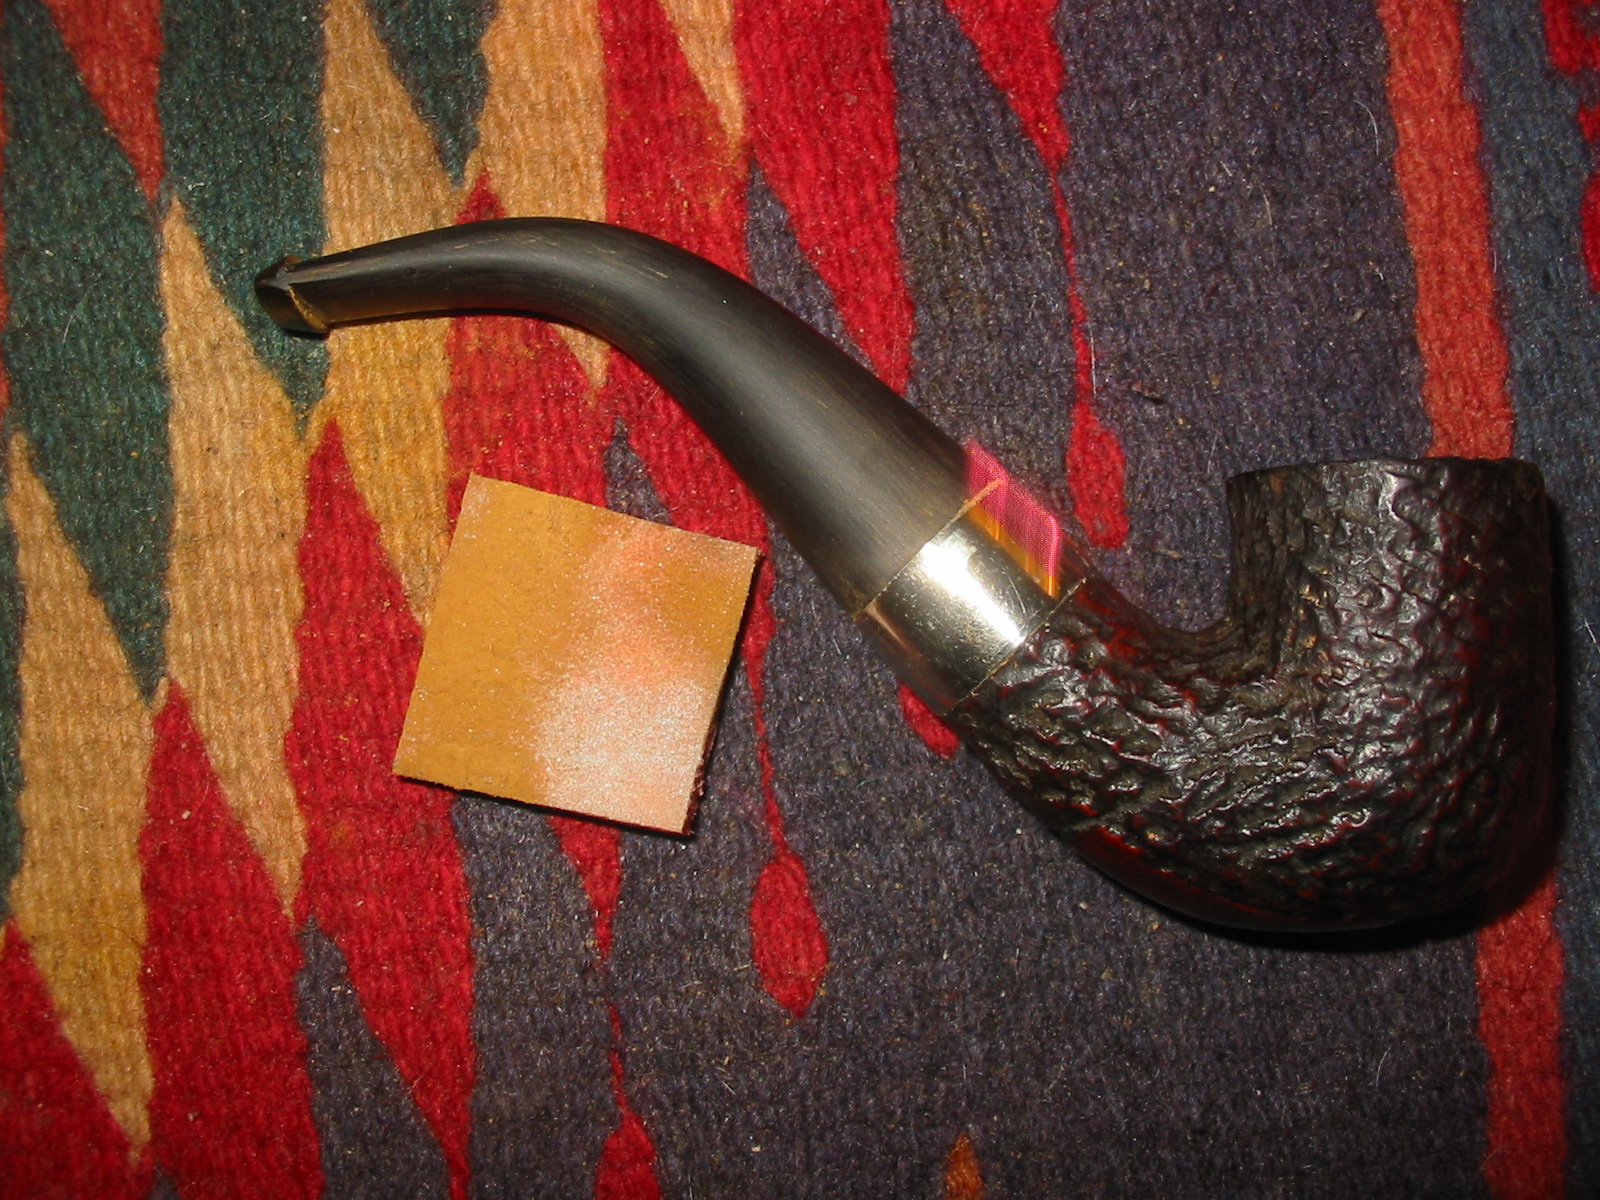
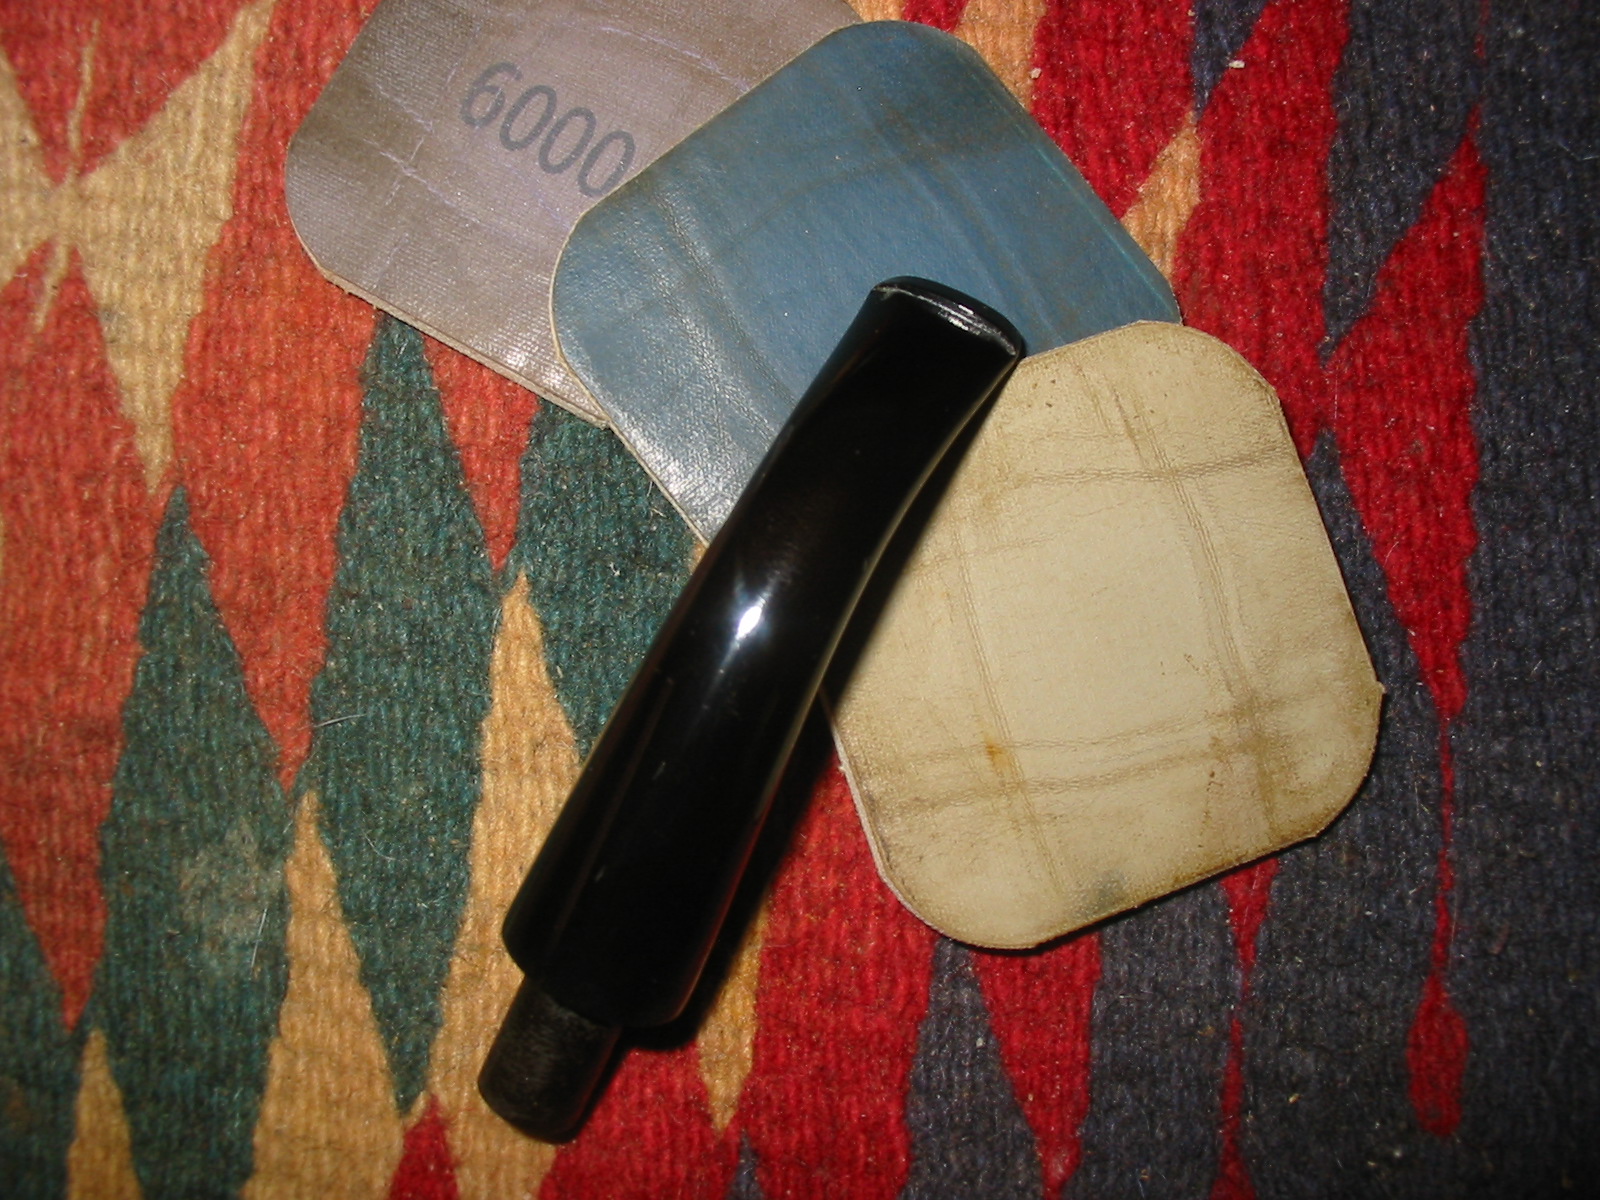
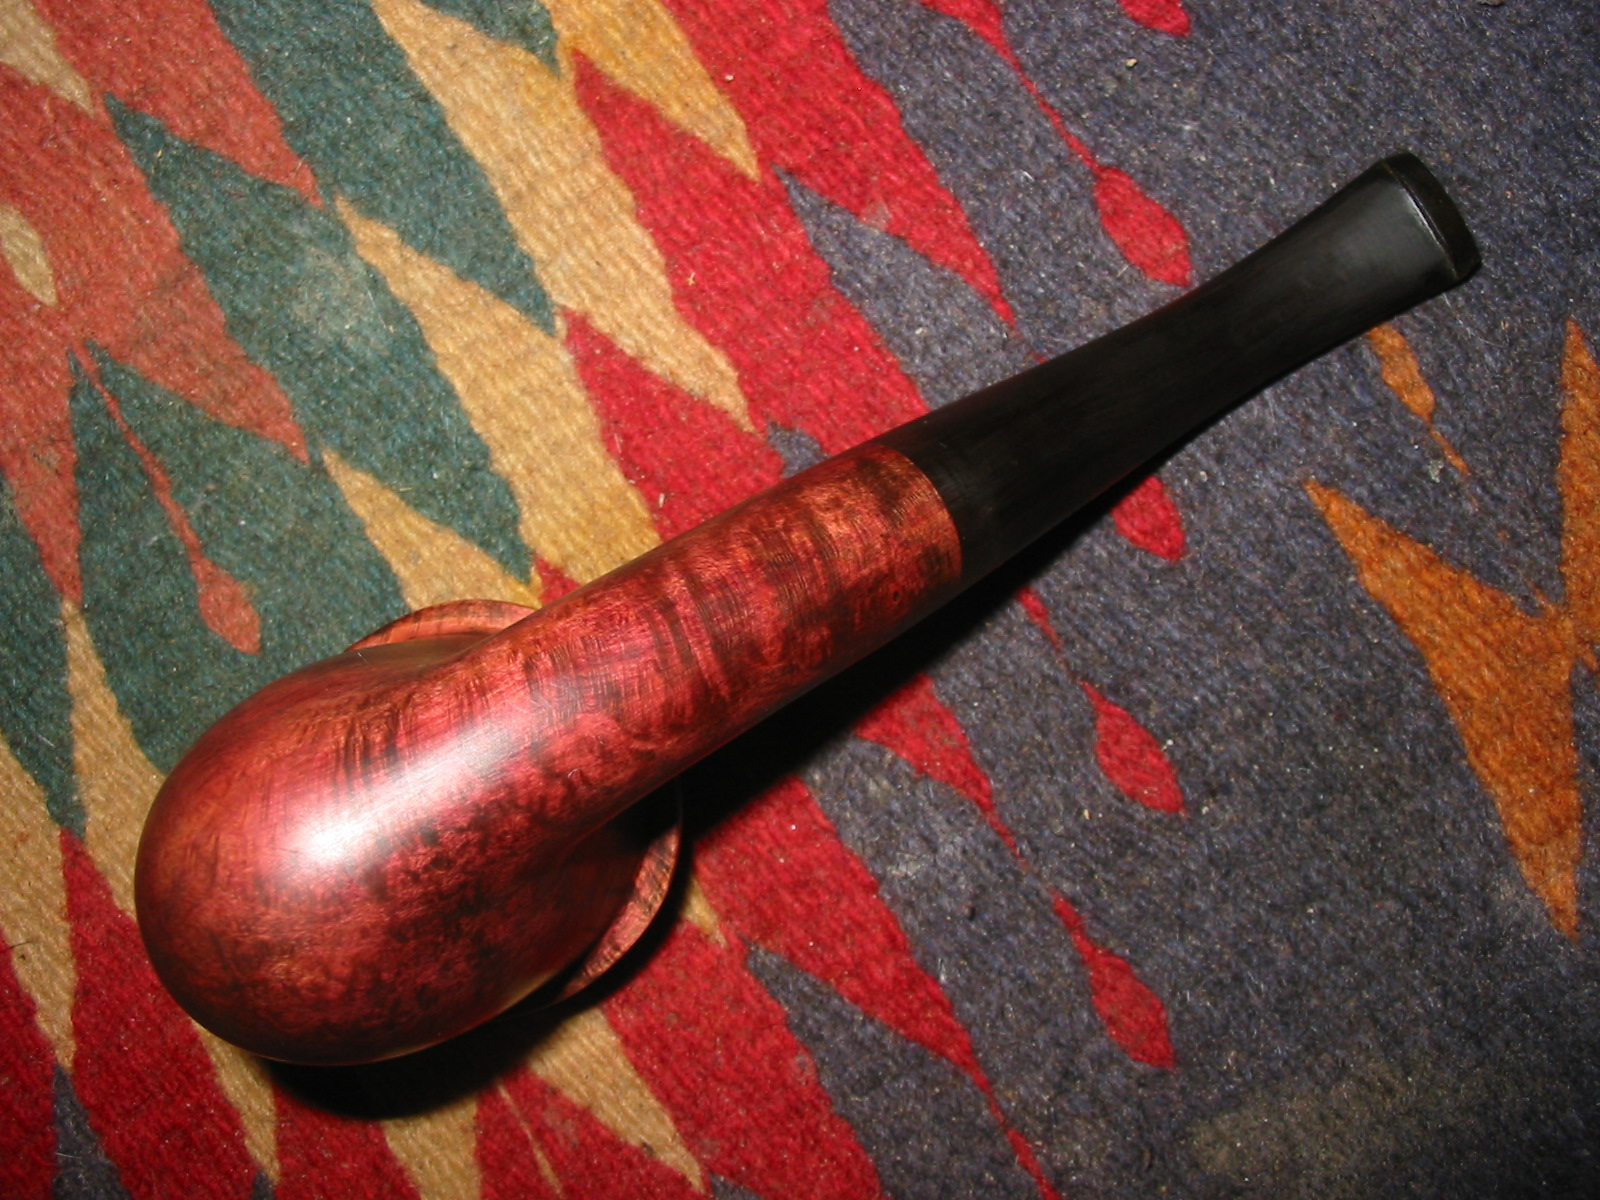
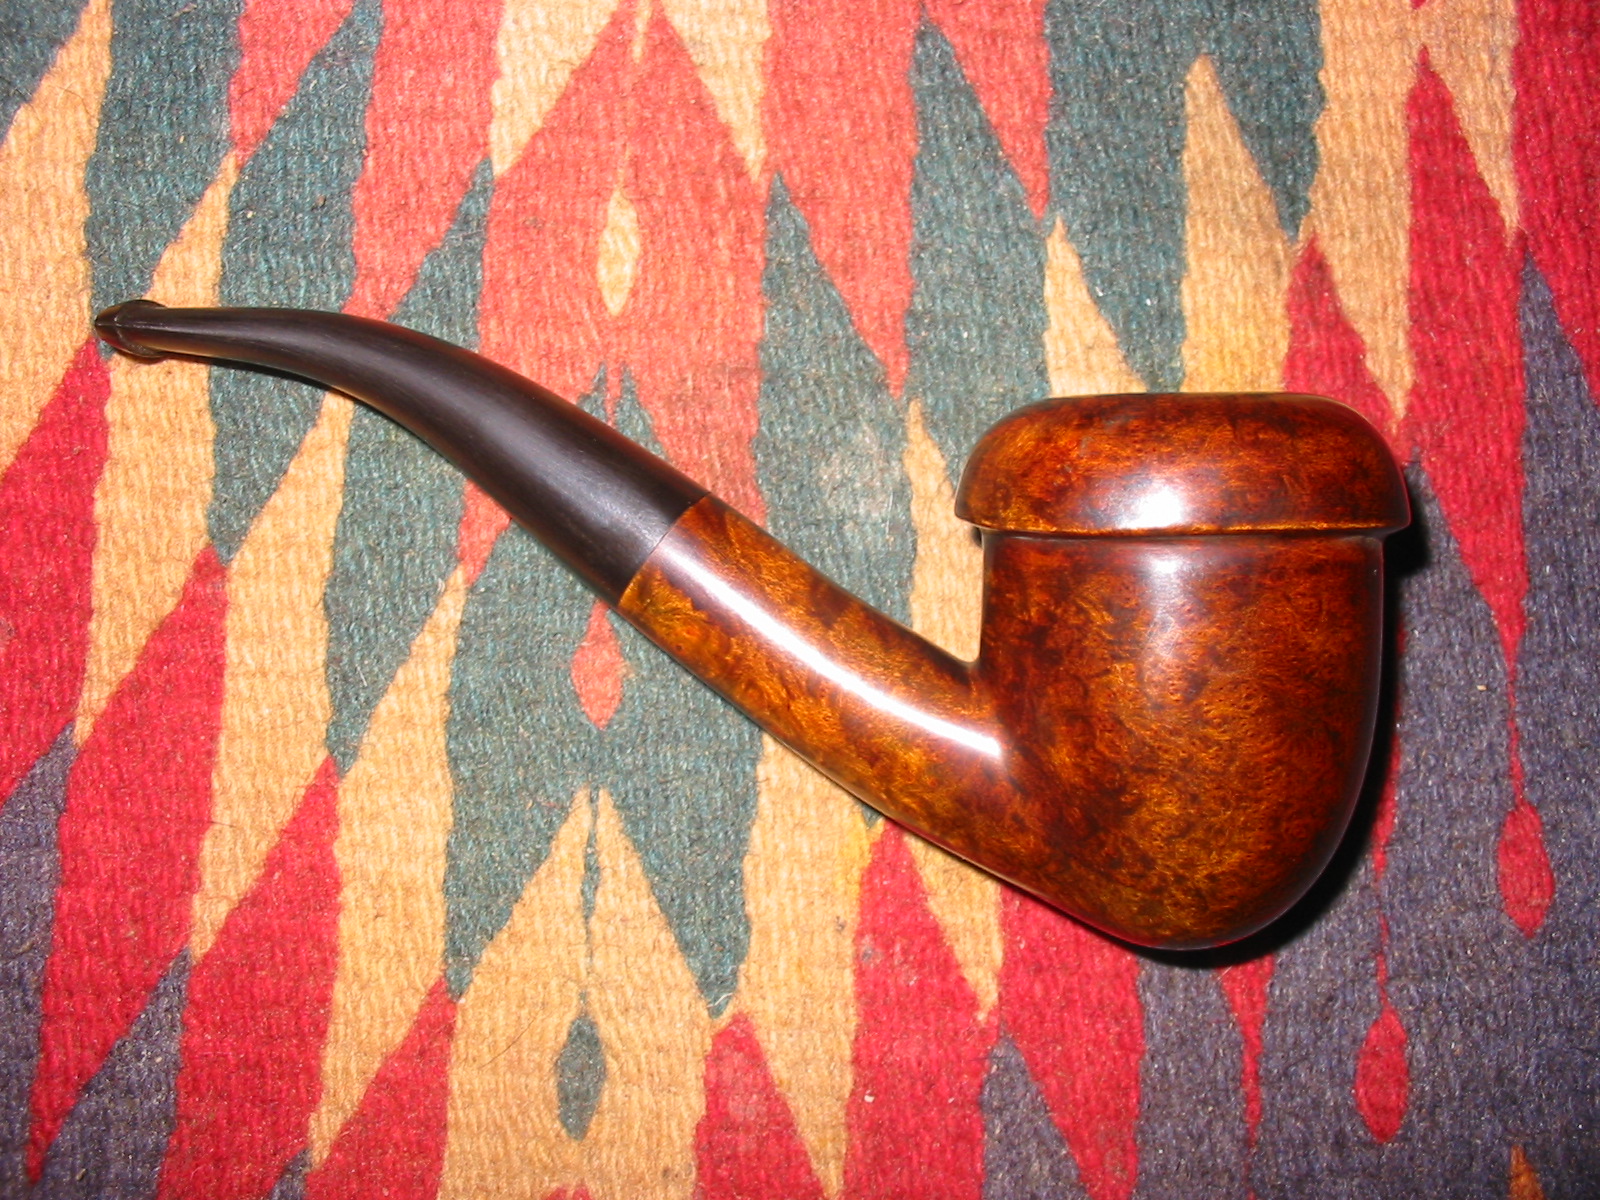
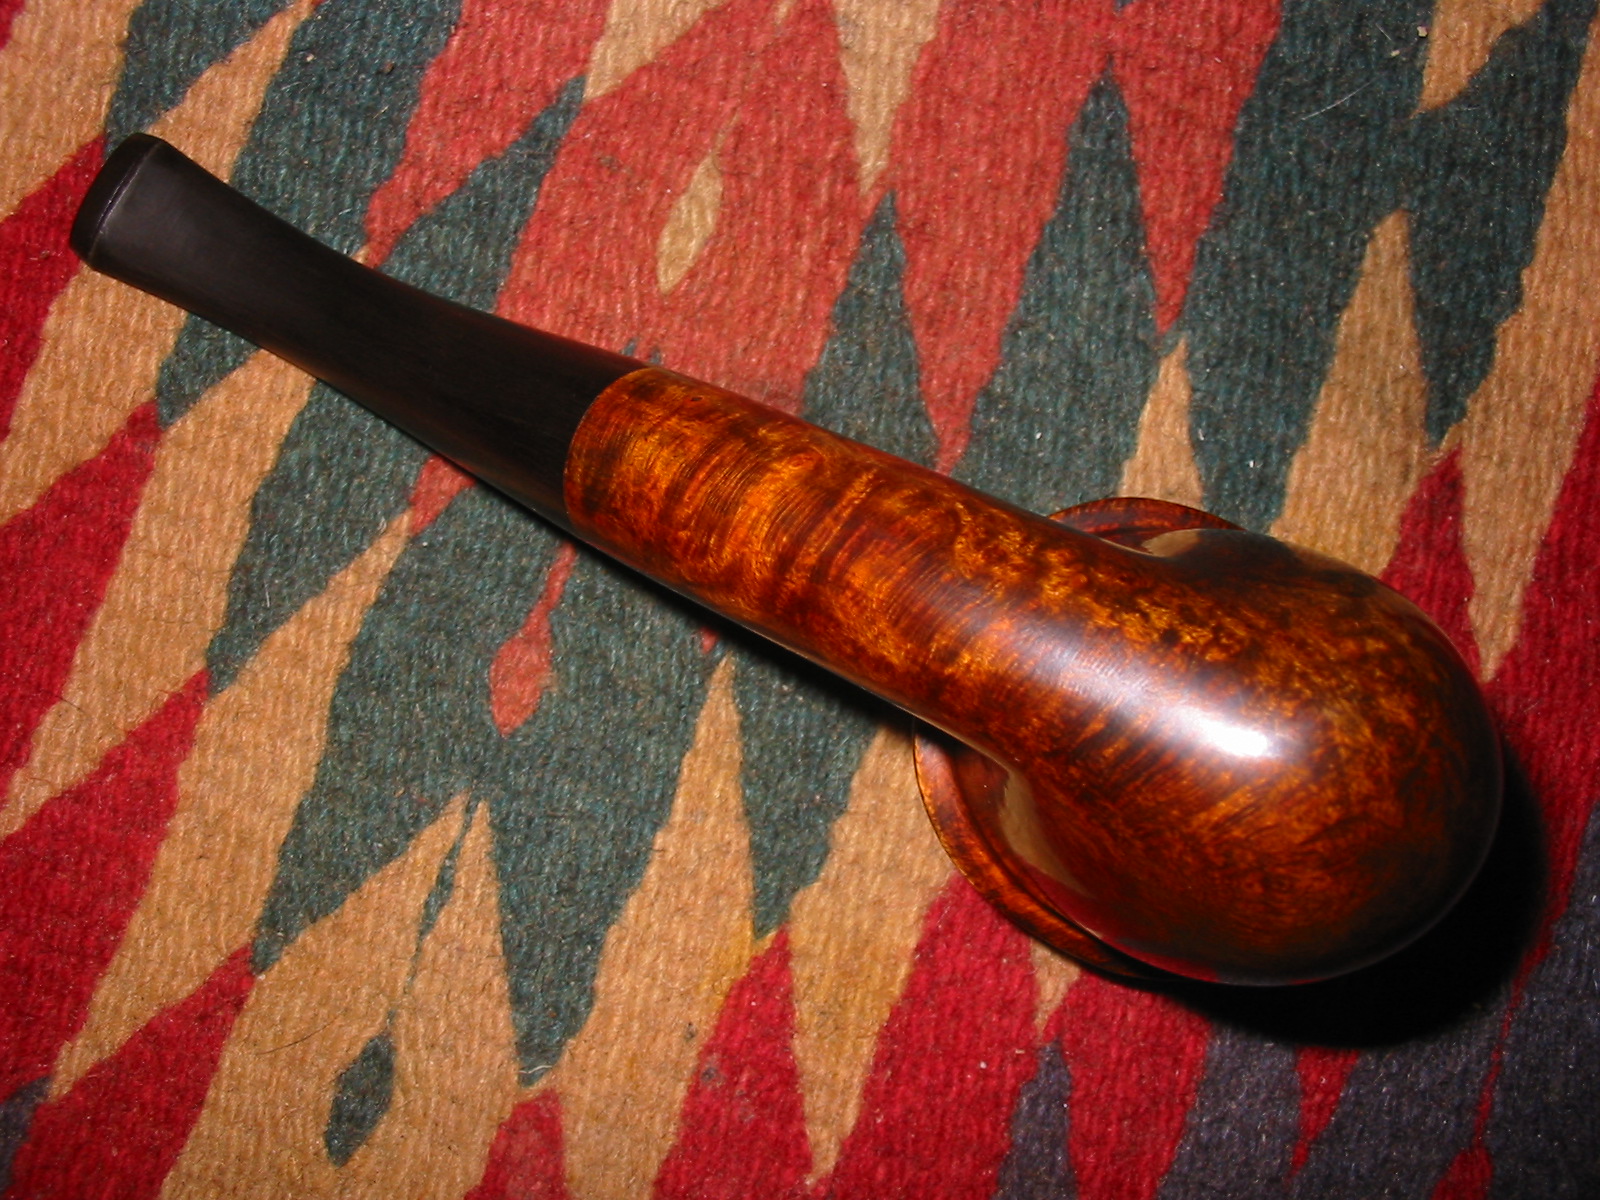
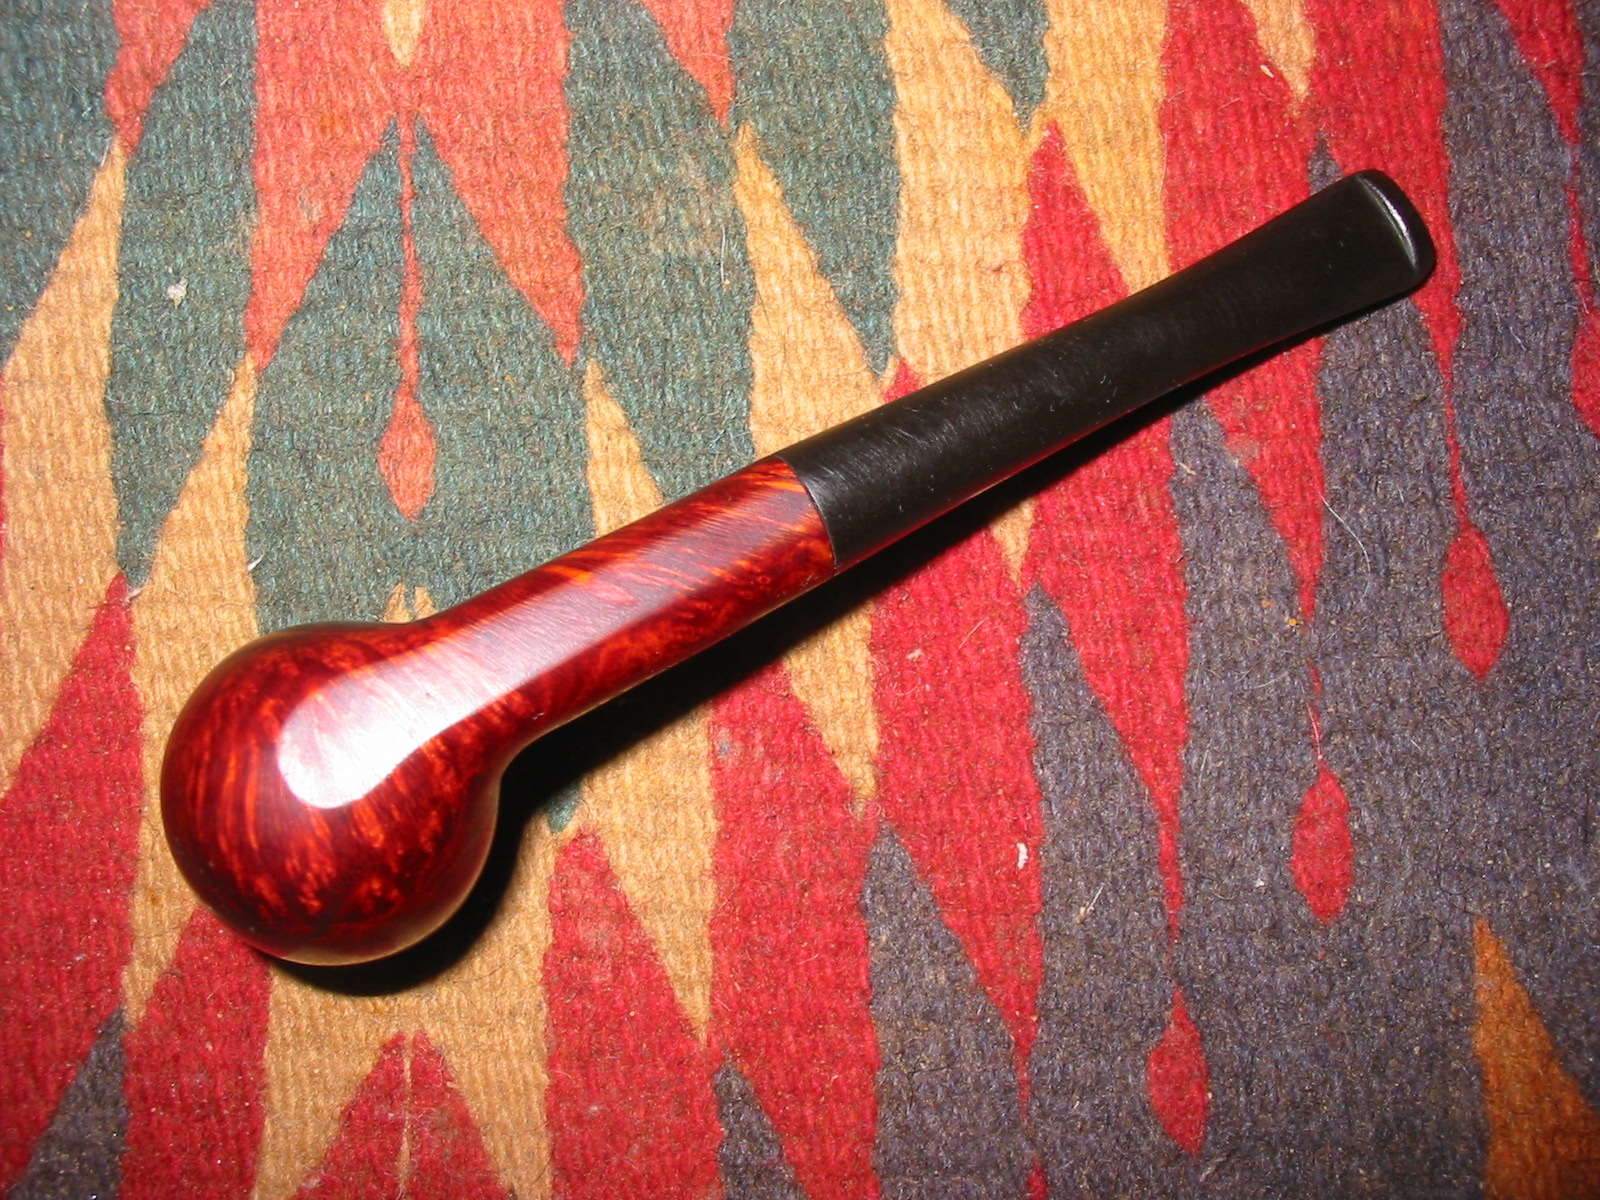
I sanded the stem with medium and fine grit sanding pads once again and then sanded it with the micromesh sanding pads. I wet sanded with 1500-2400 grit pads and 3200-12,000 grit pads. I rubbed the stem down with Obsidian Oil and when it had dried took the pipe to the buffer. IMG_7609IMG_7610IMG_7611 
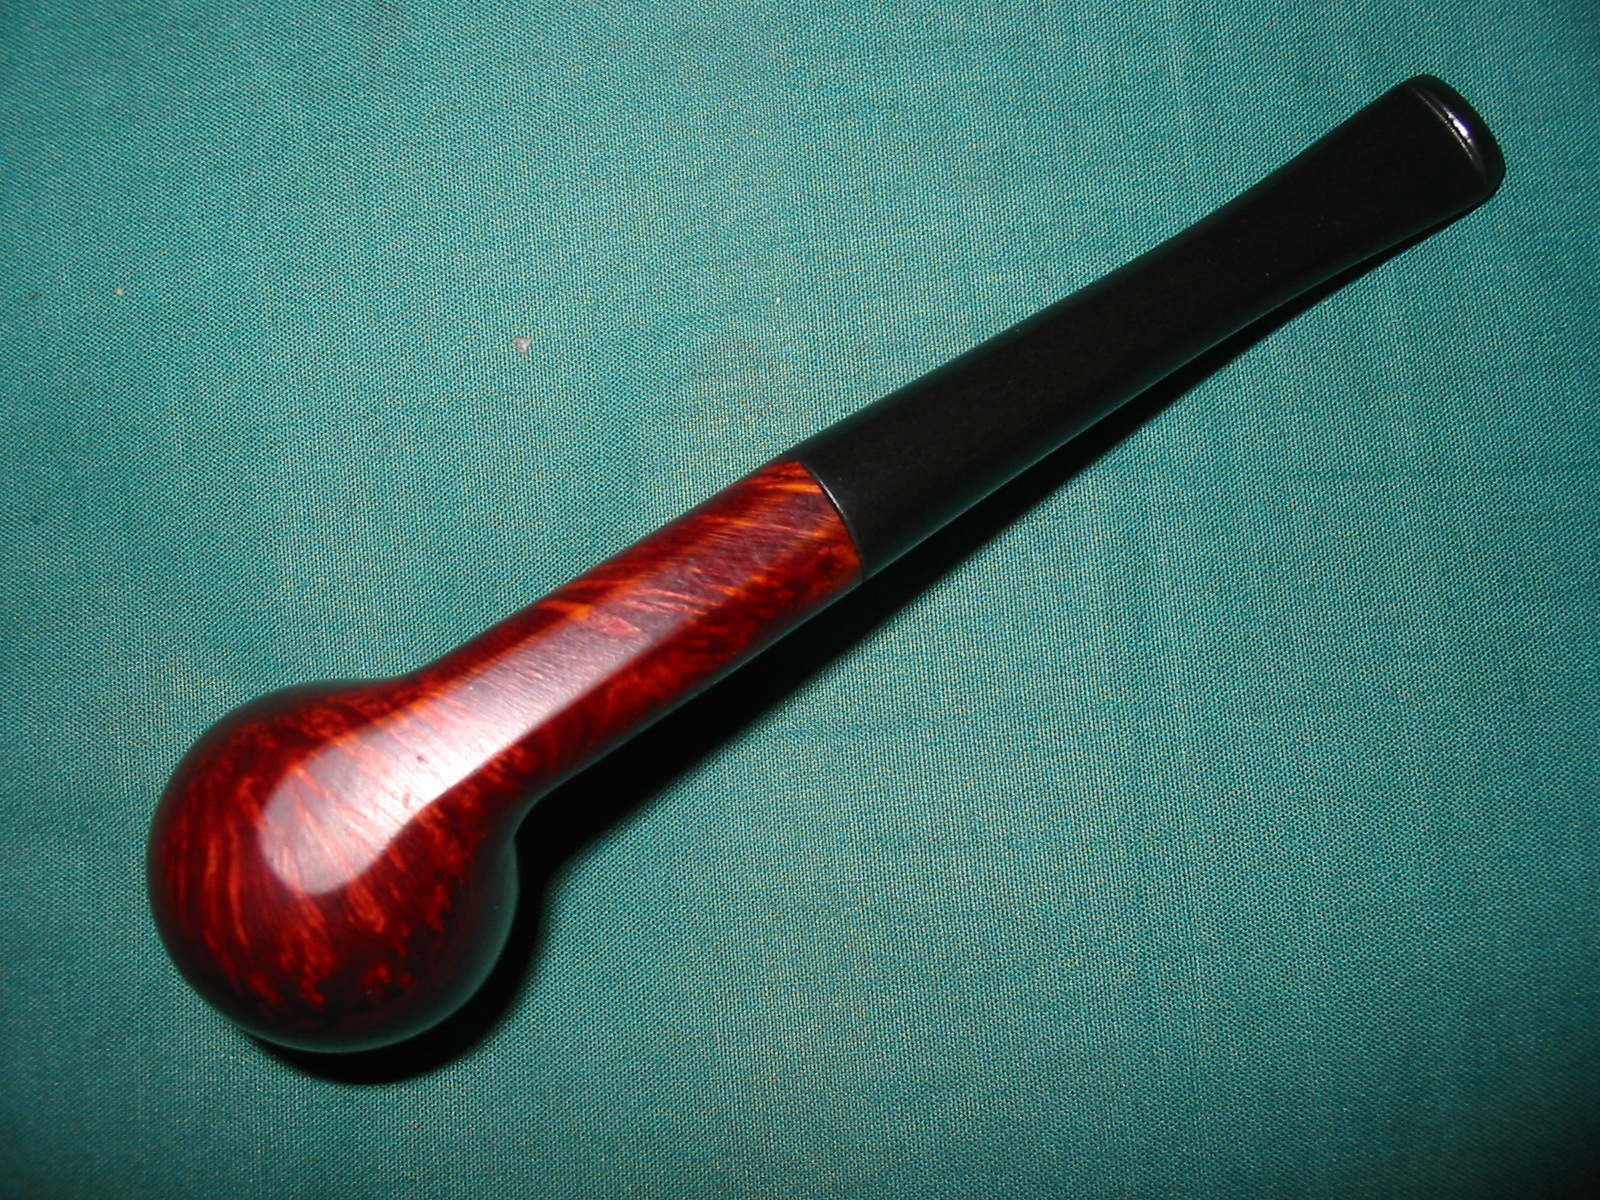
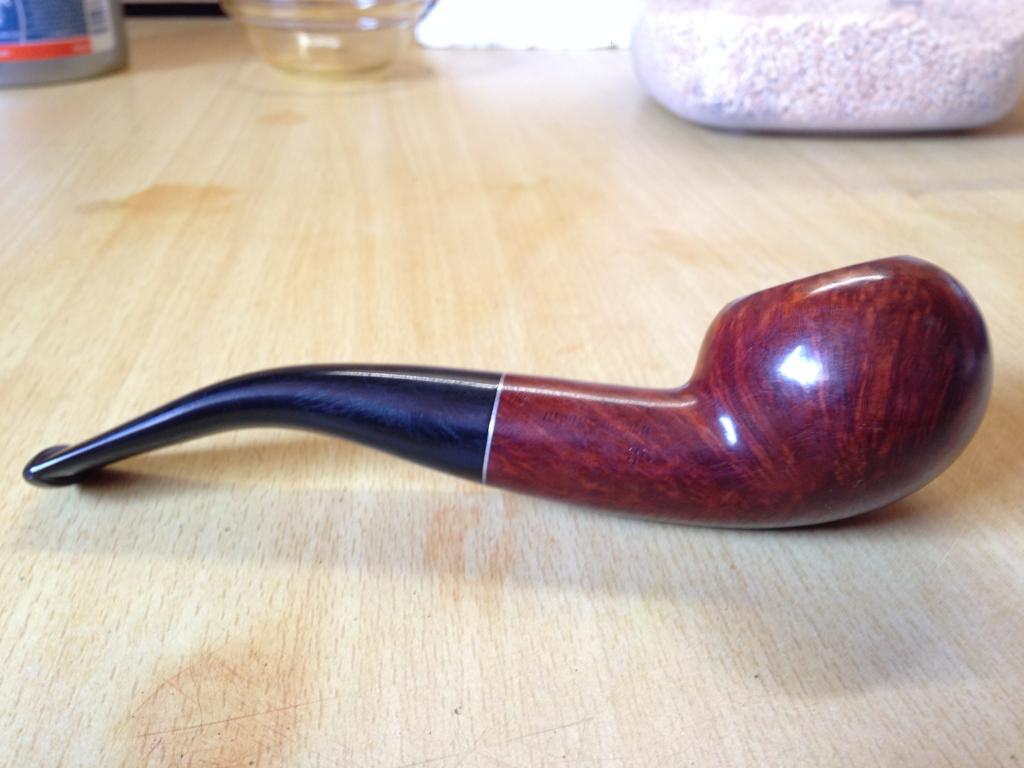
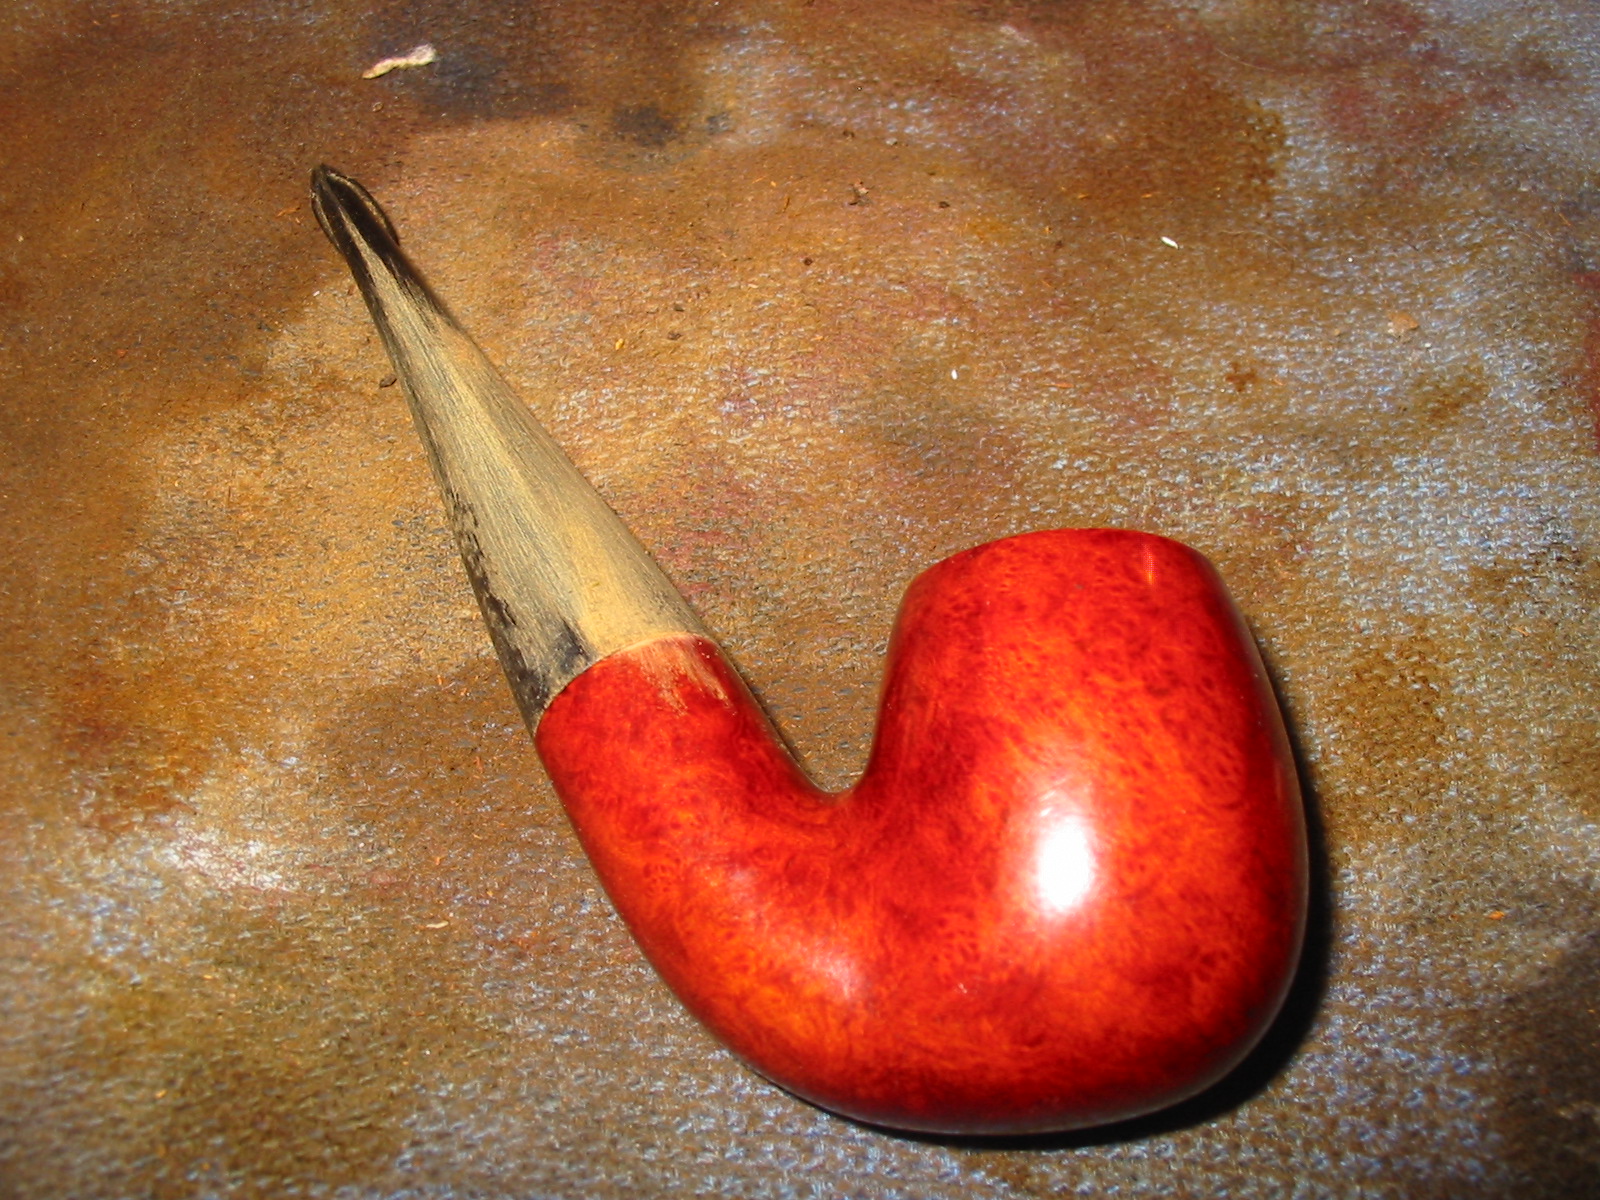
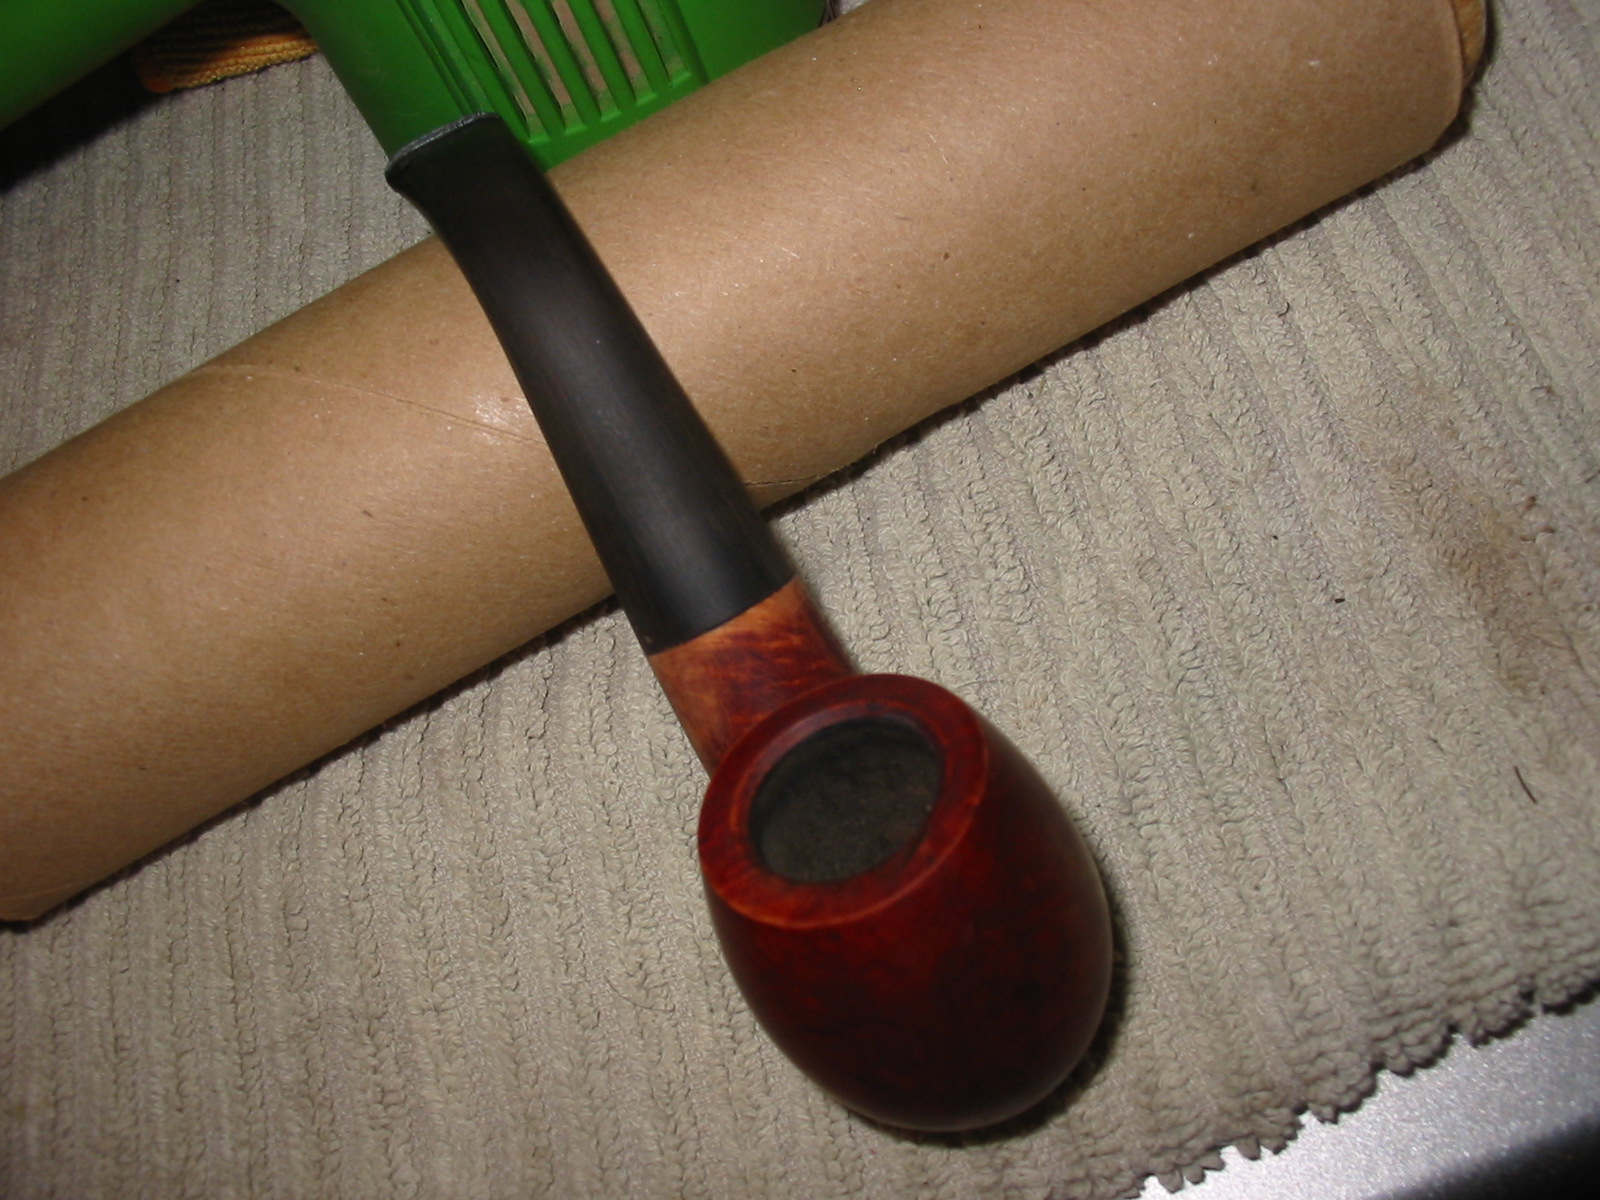
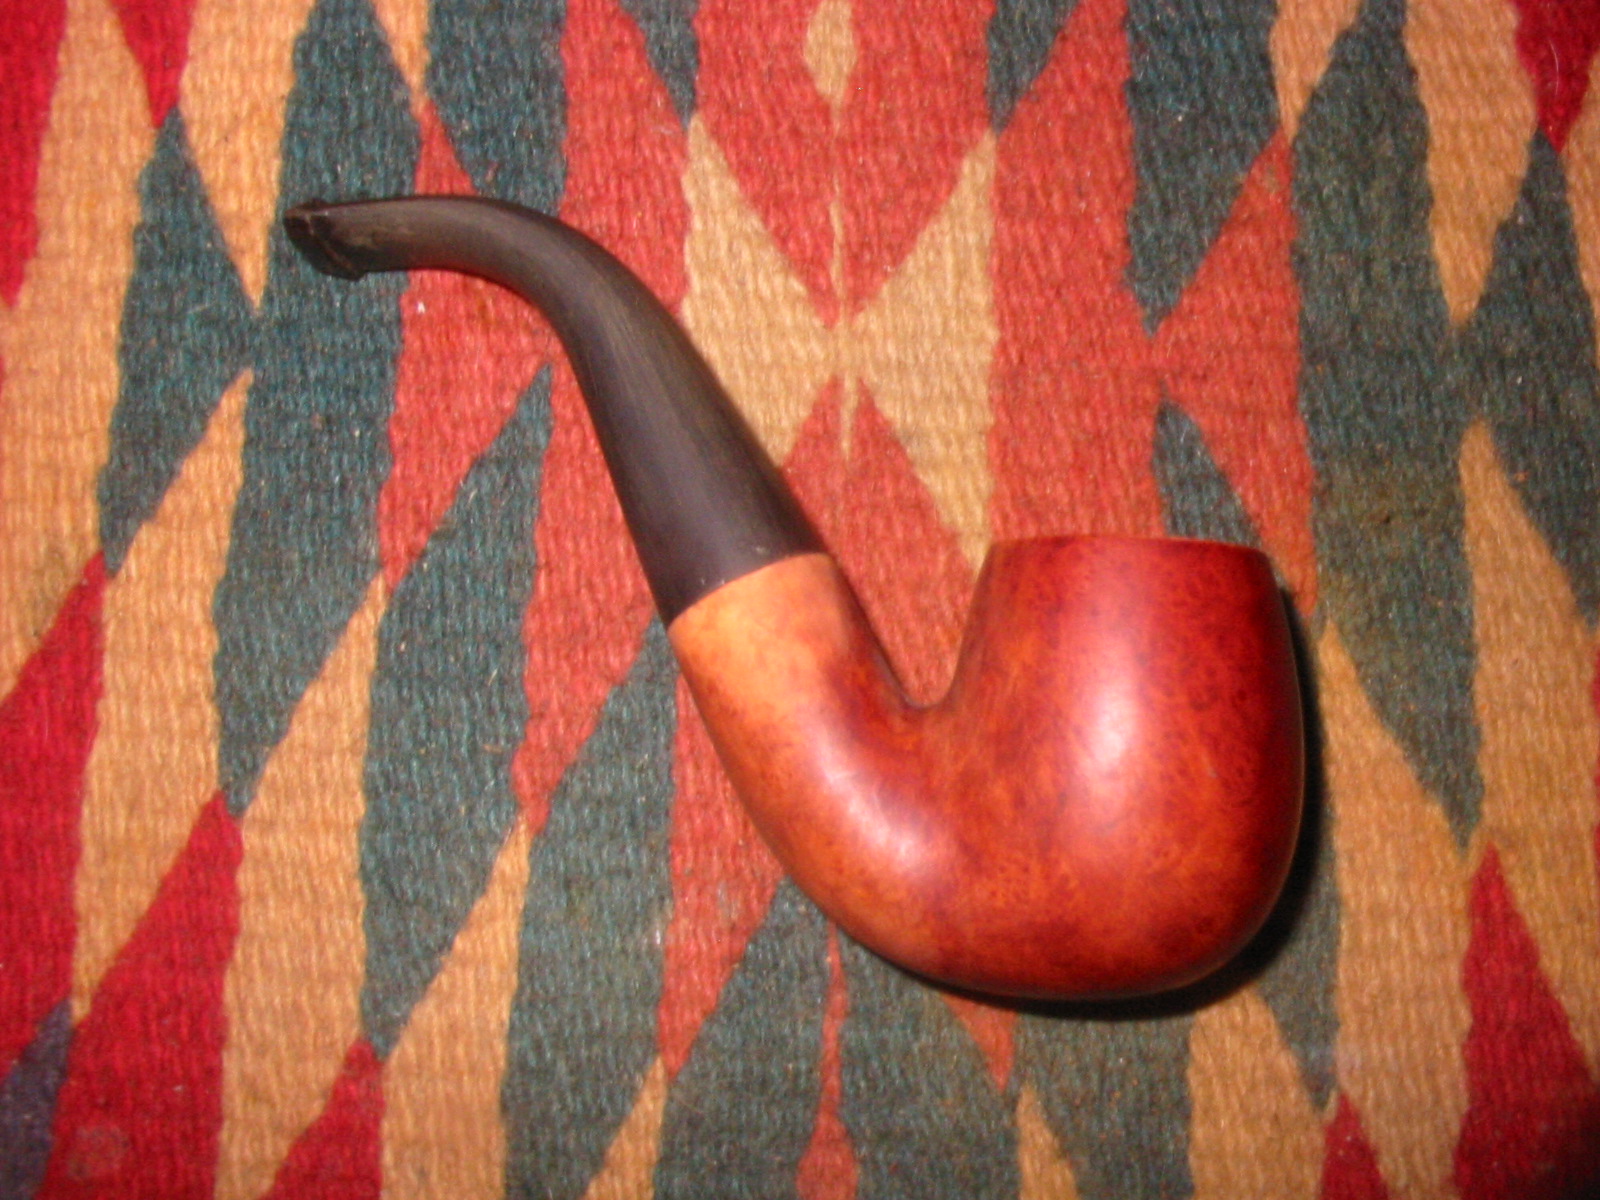
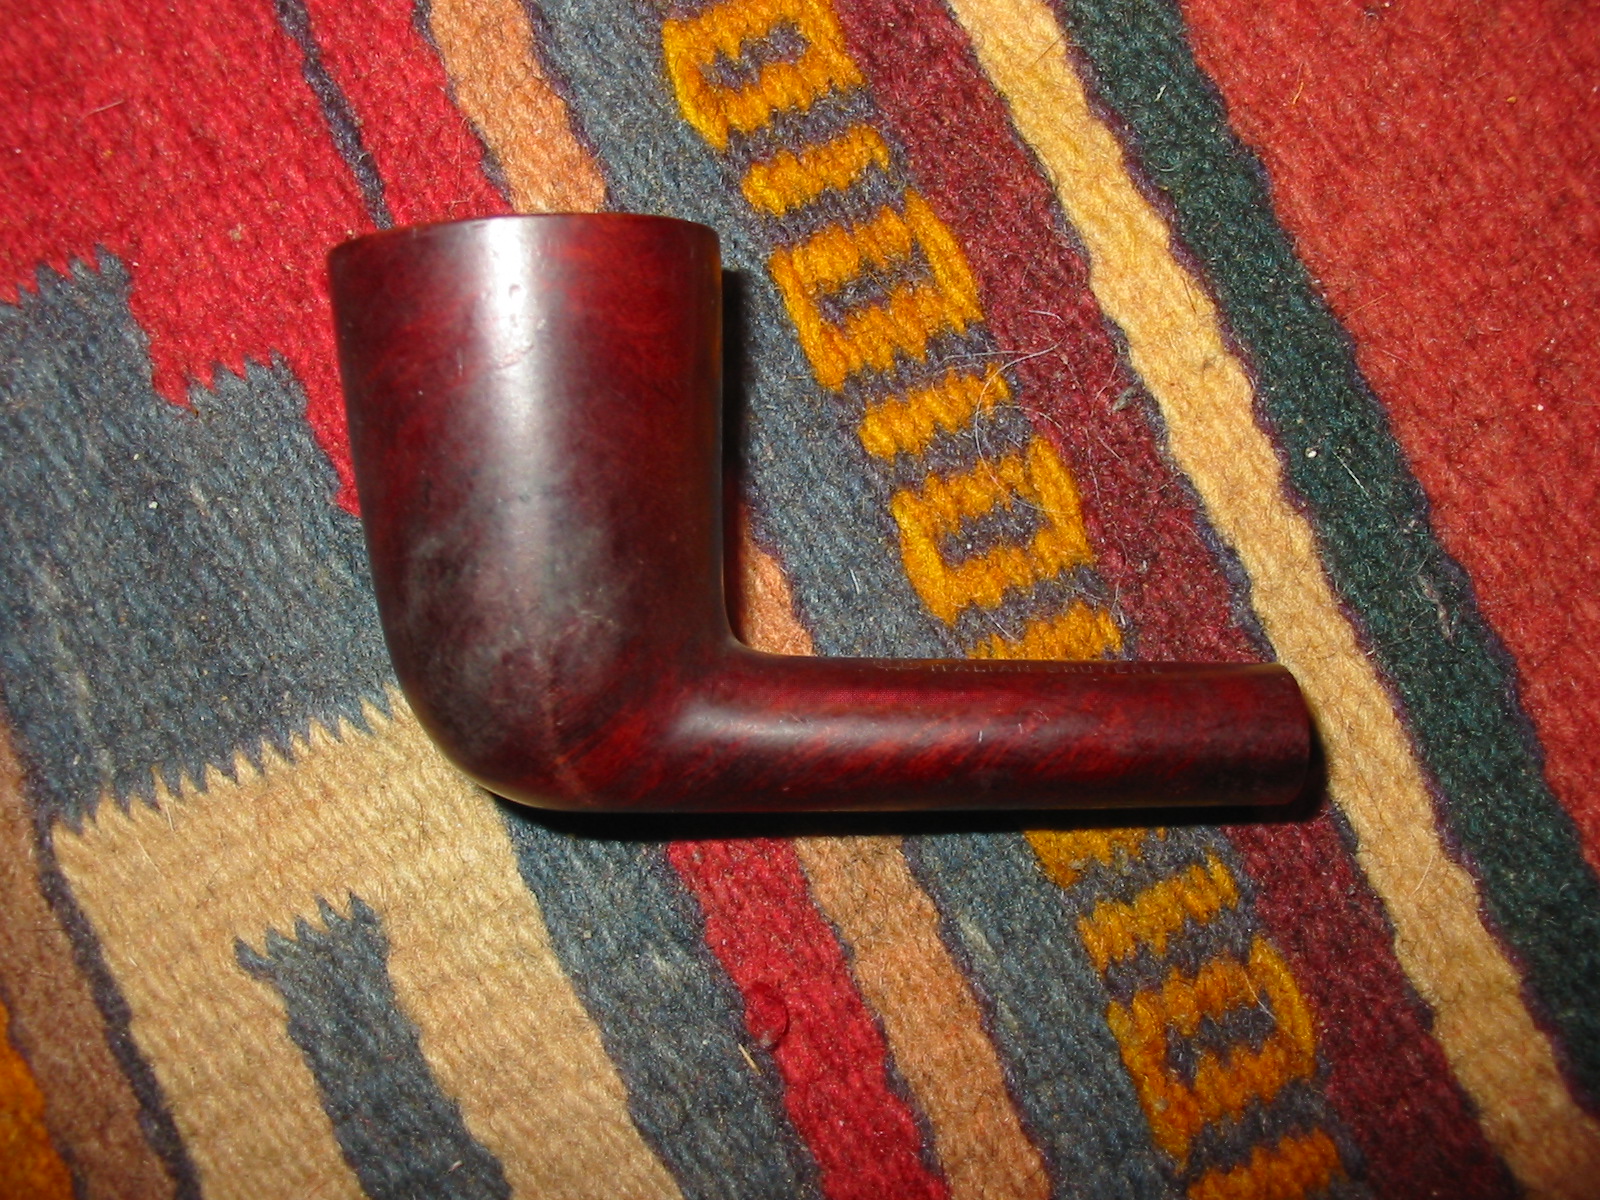
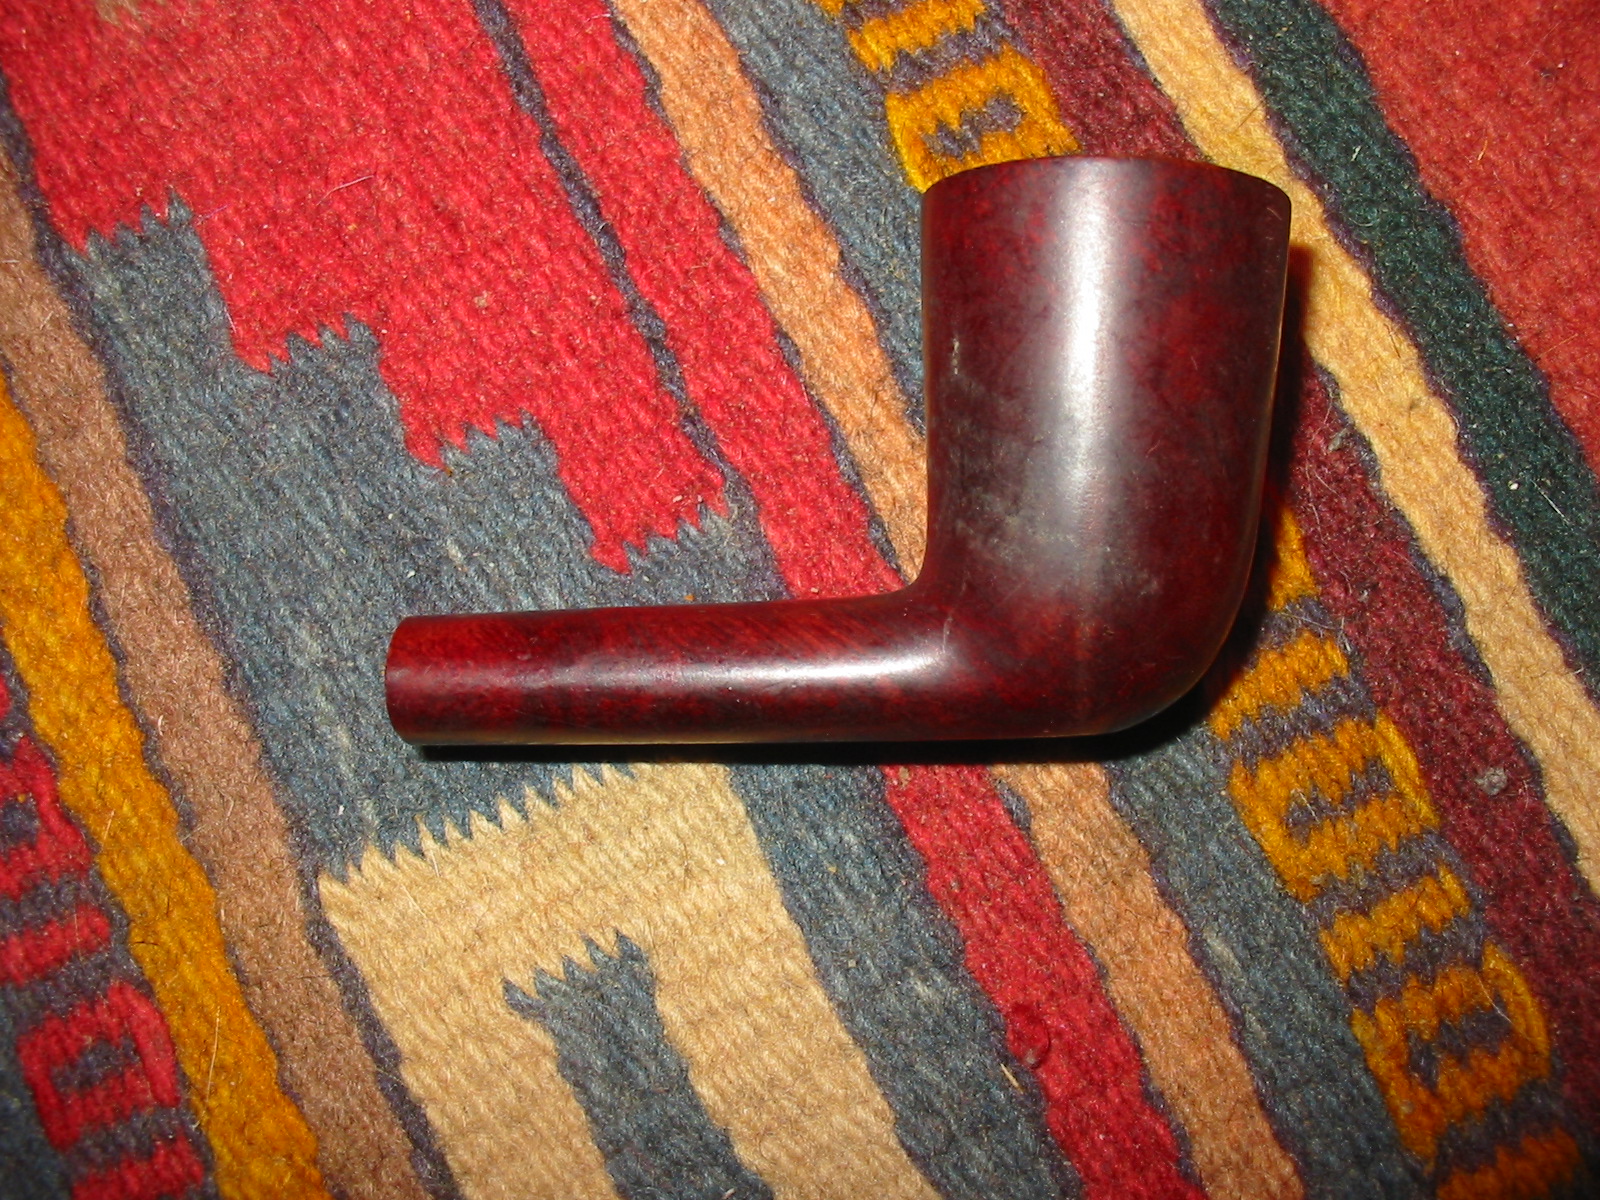
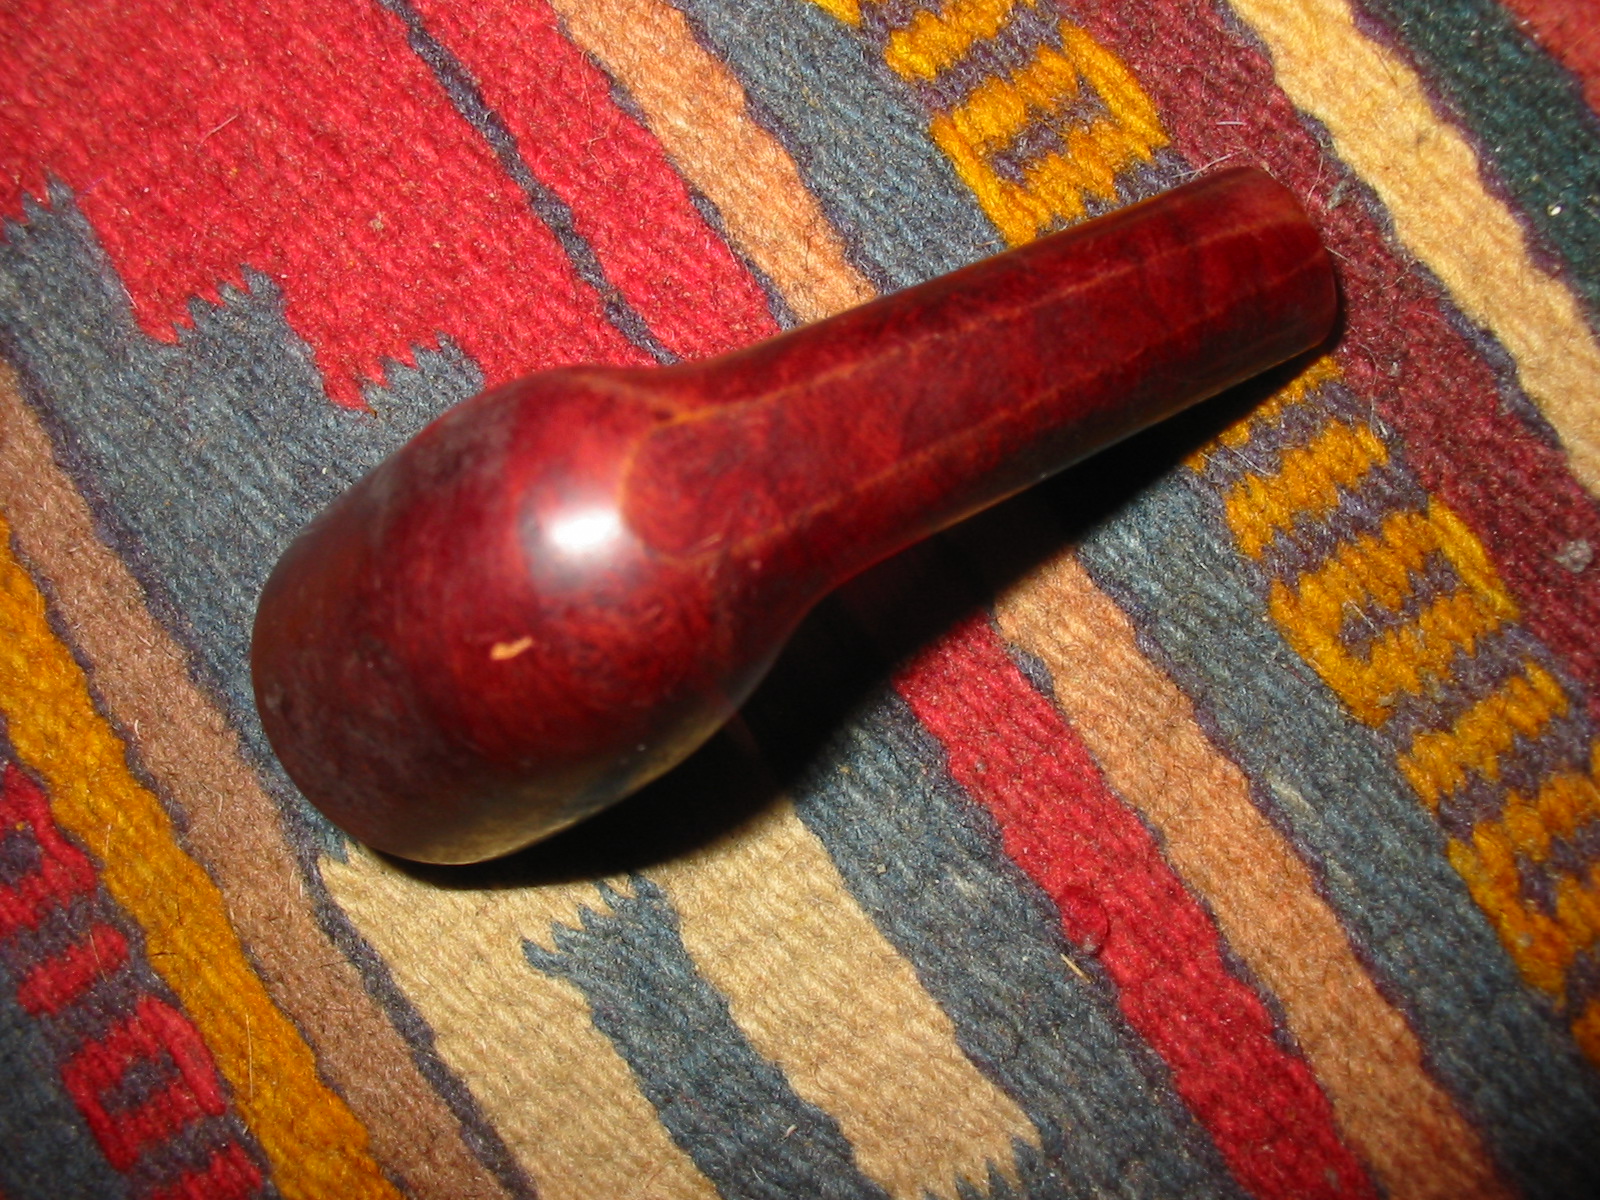
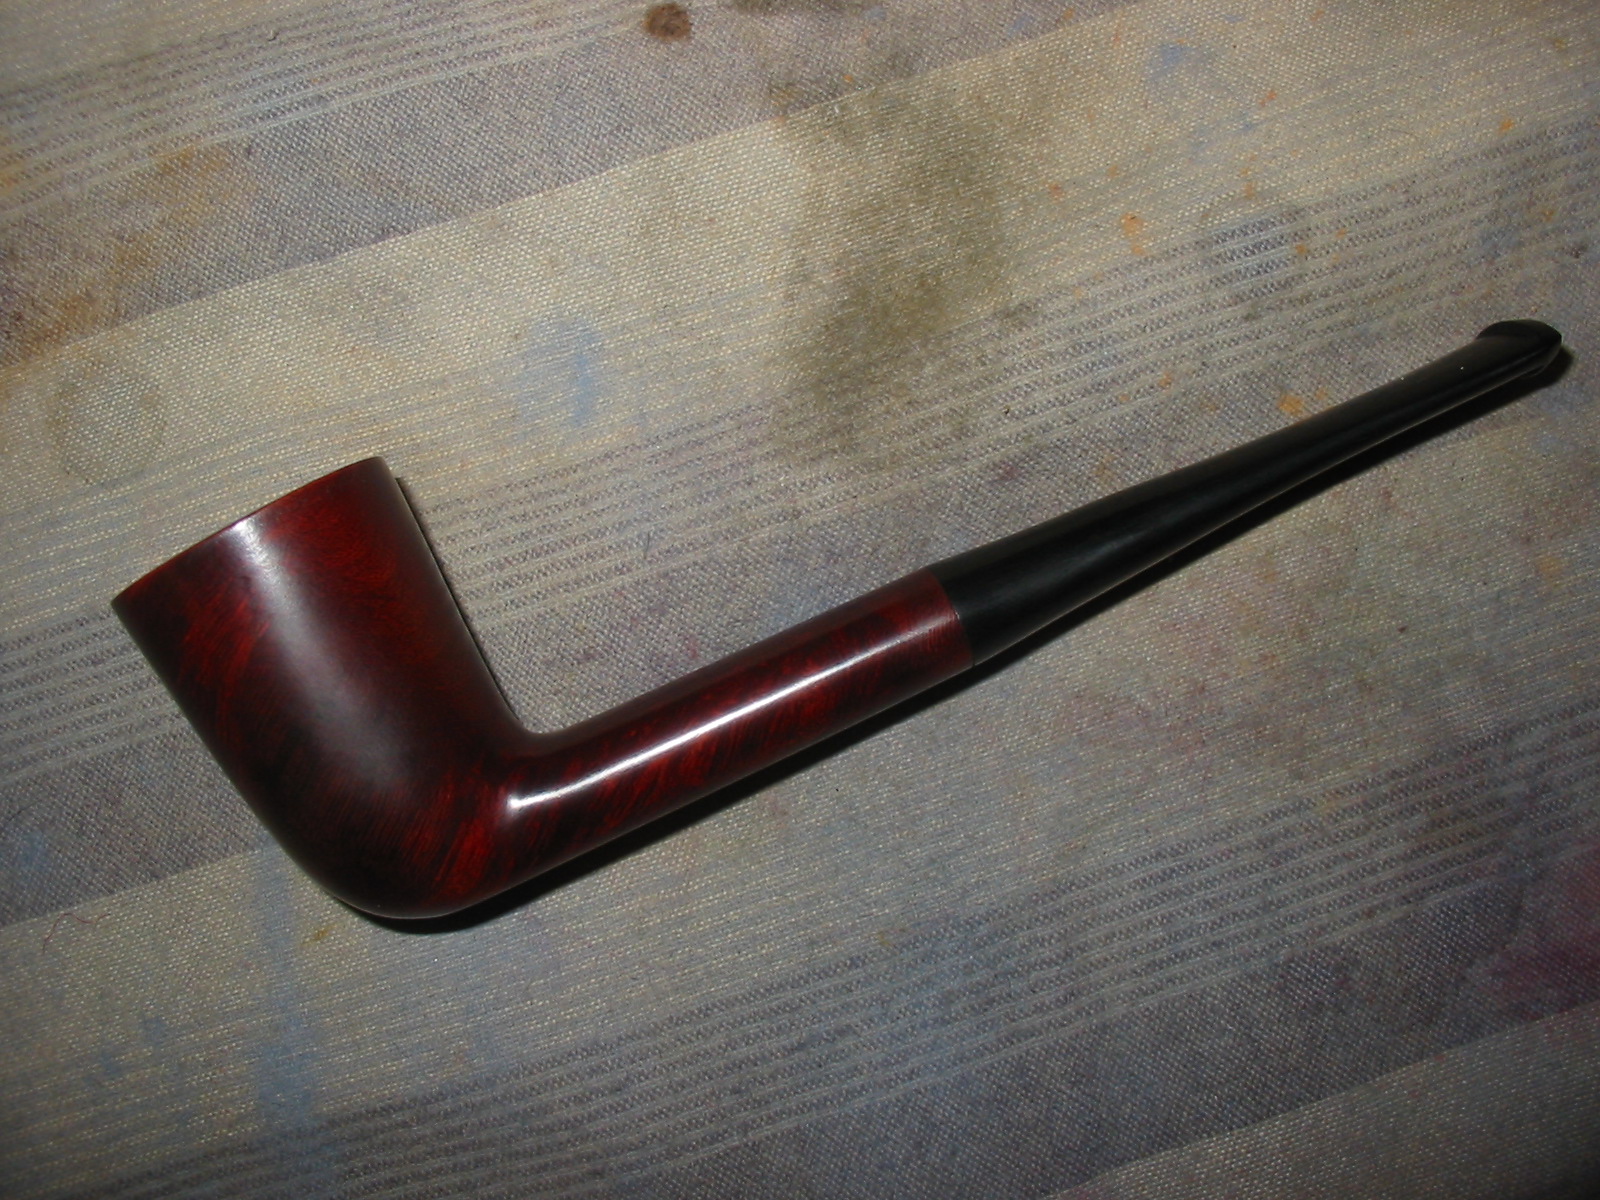
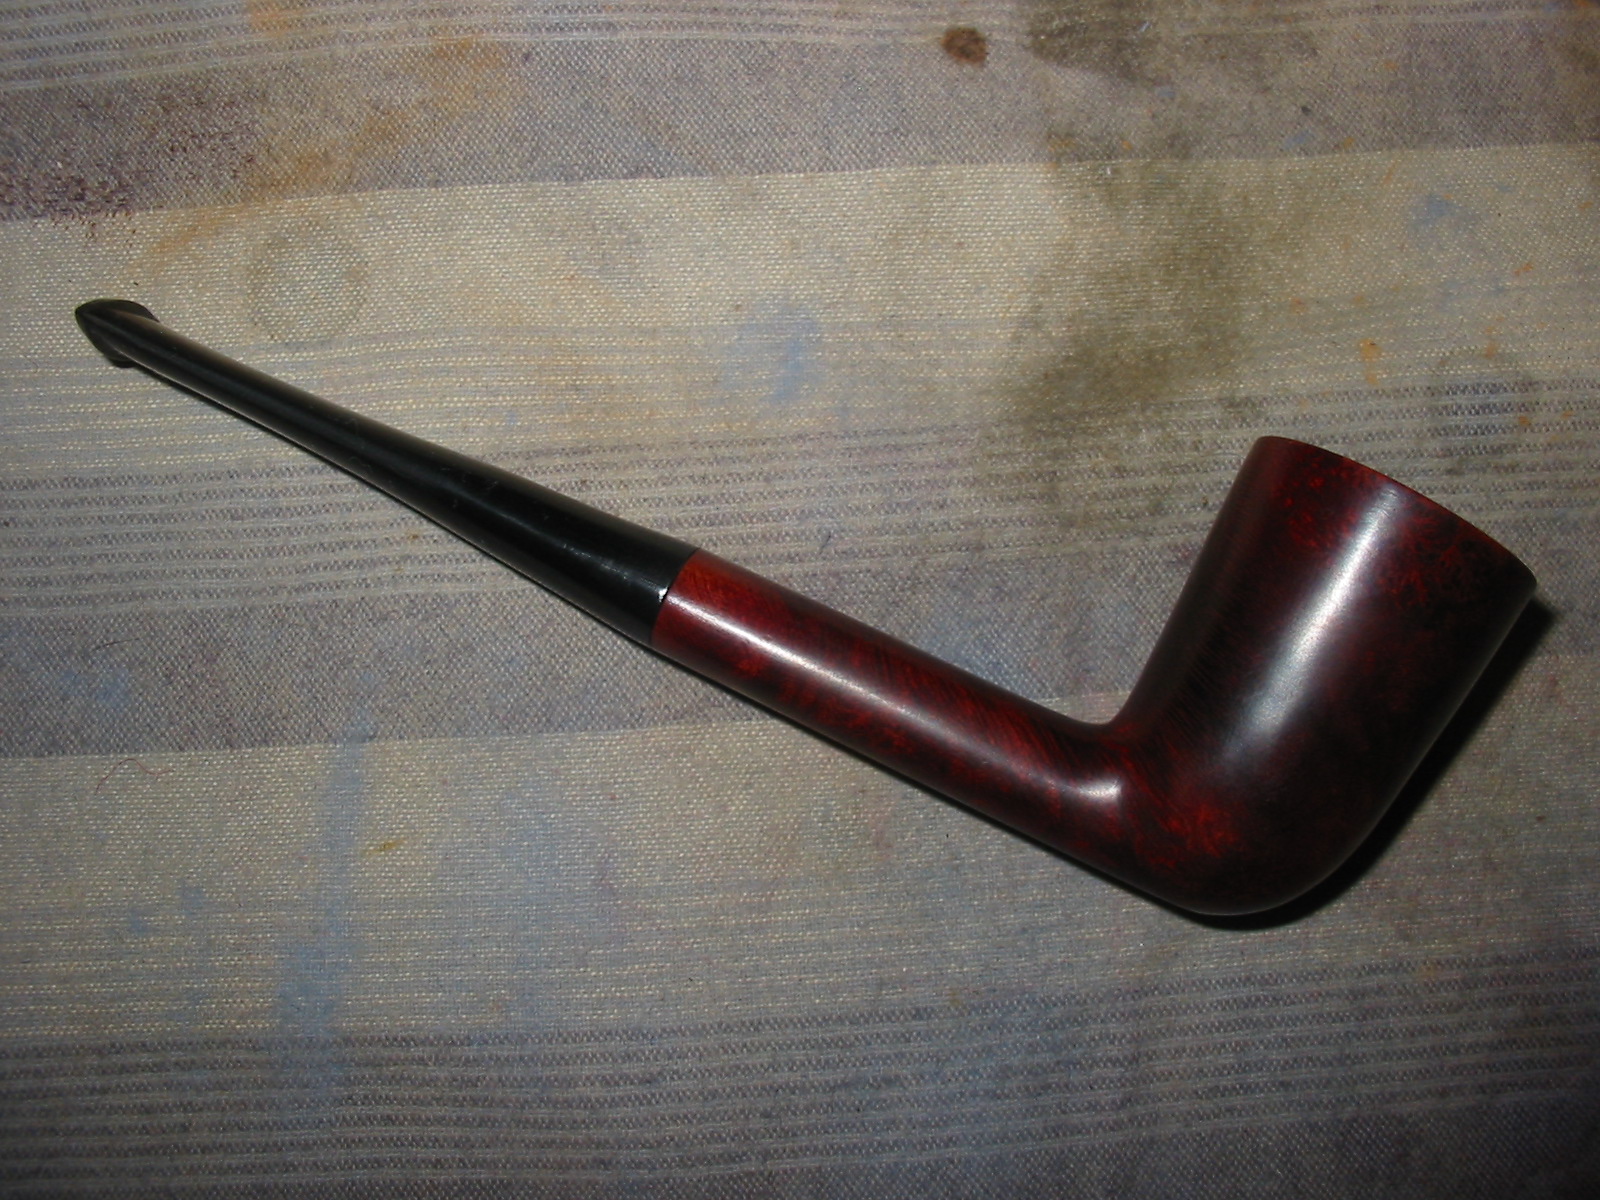
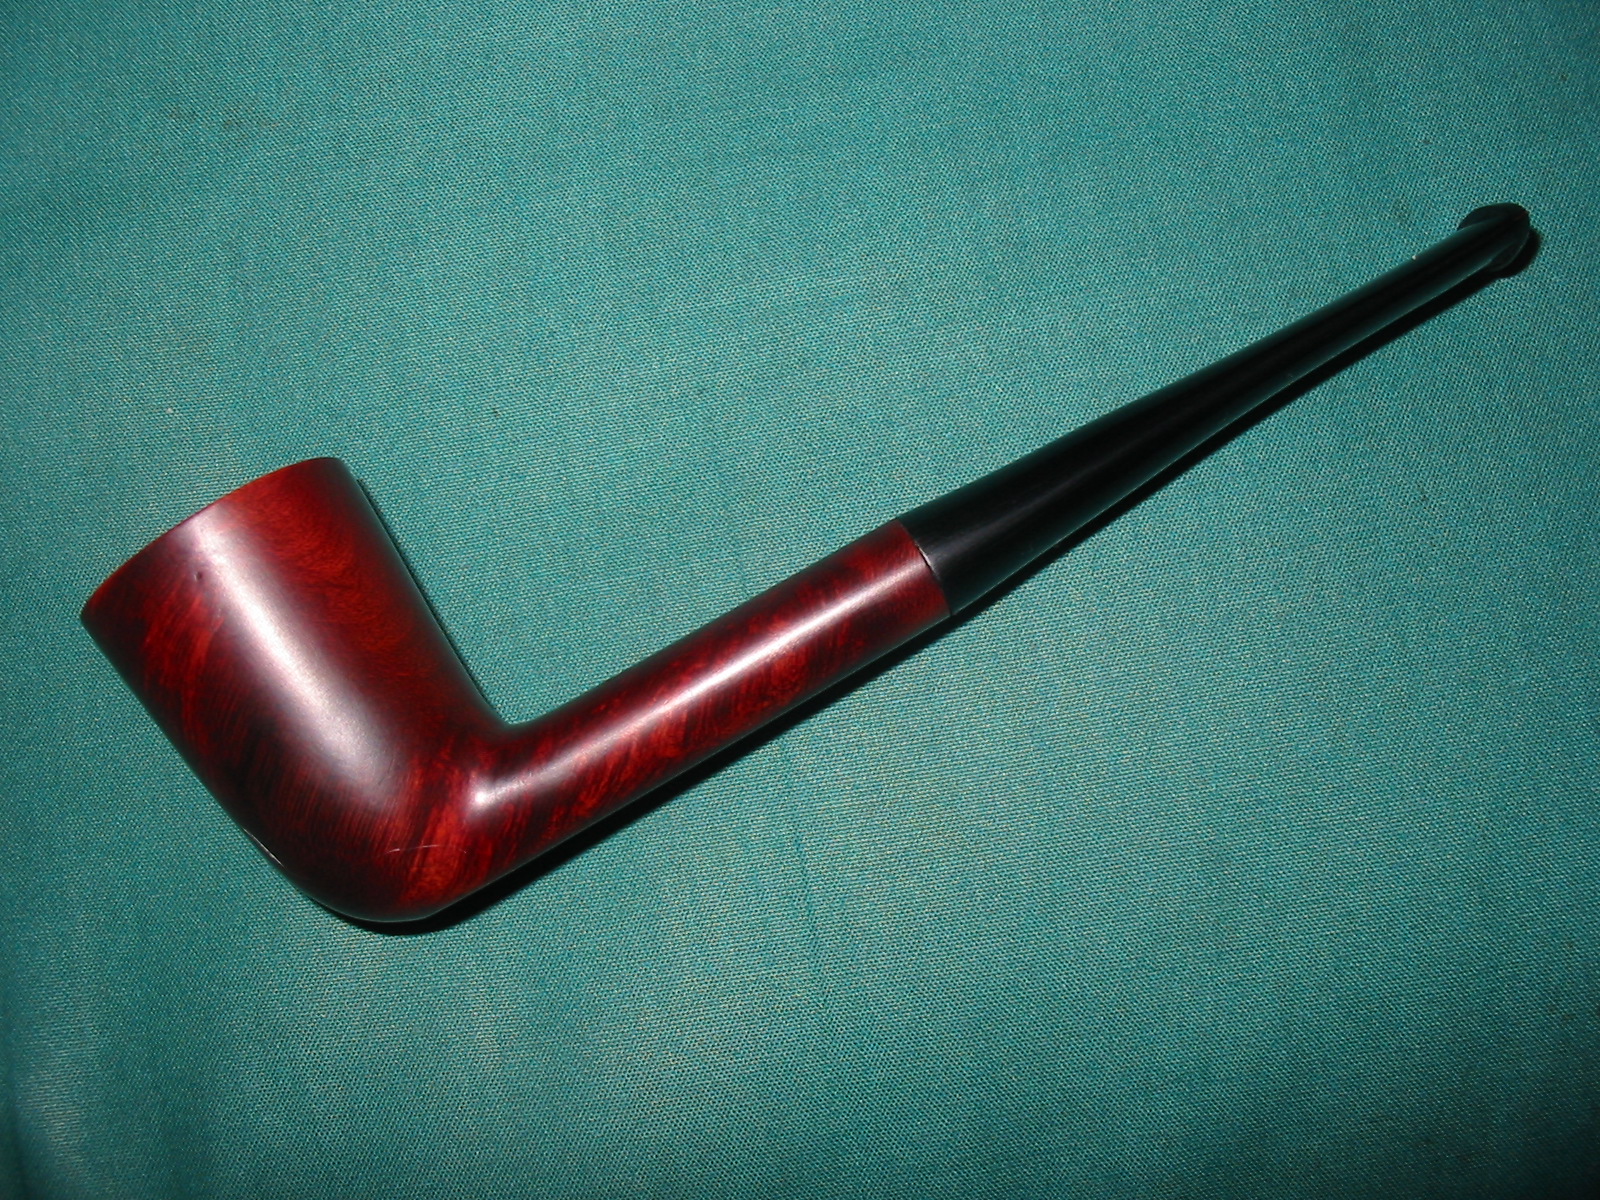
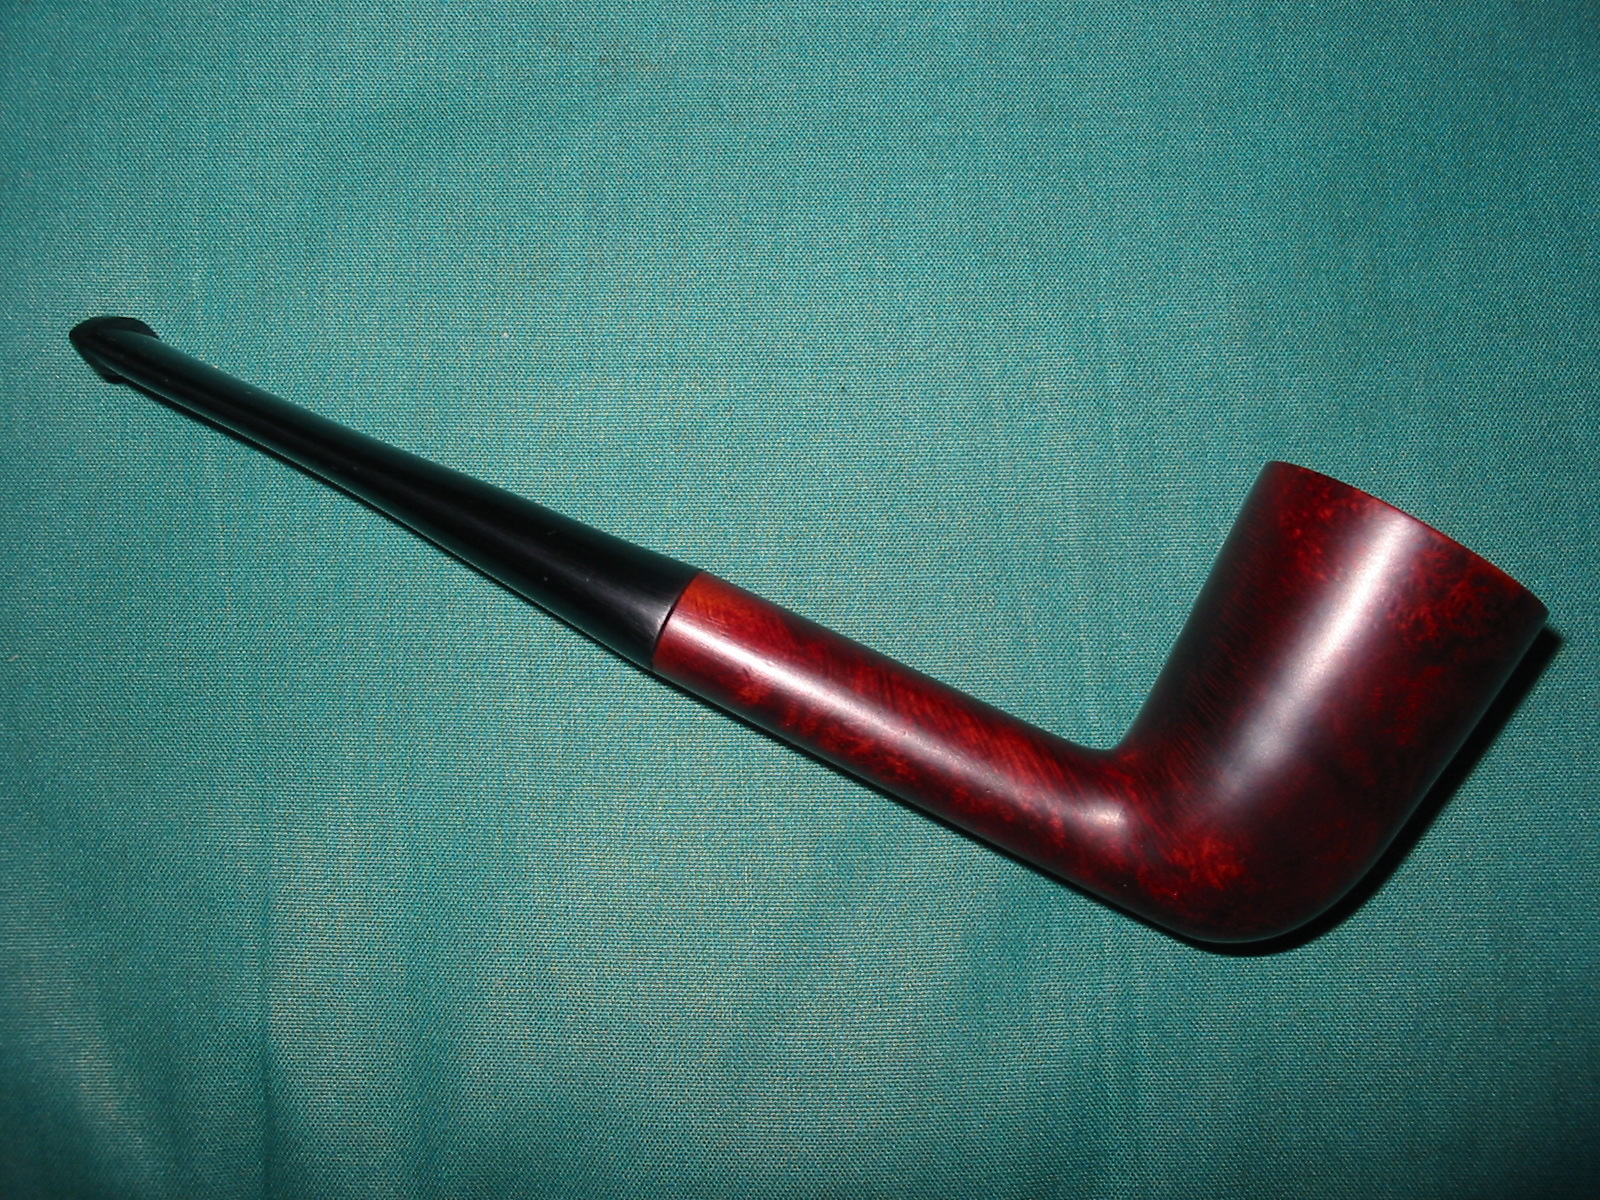
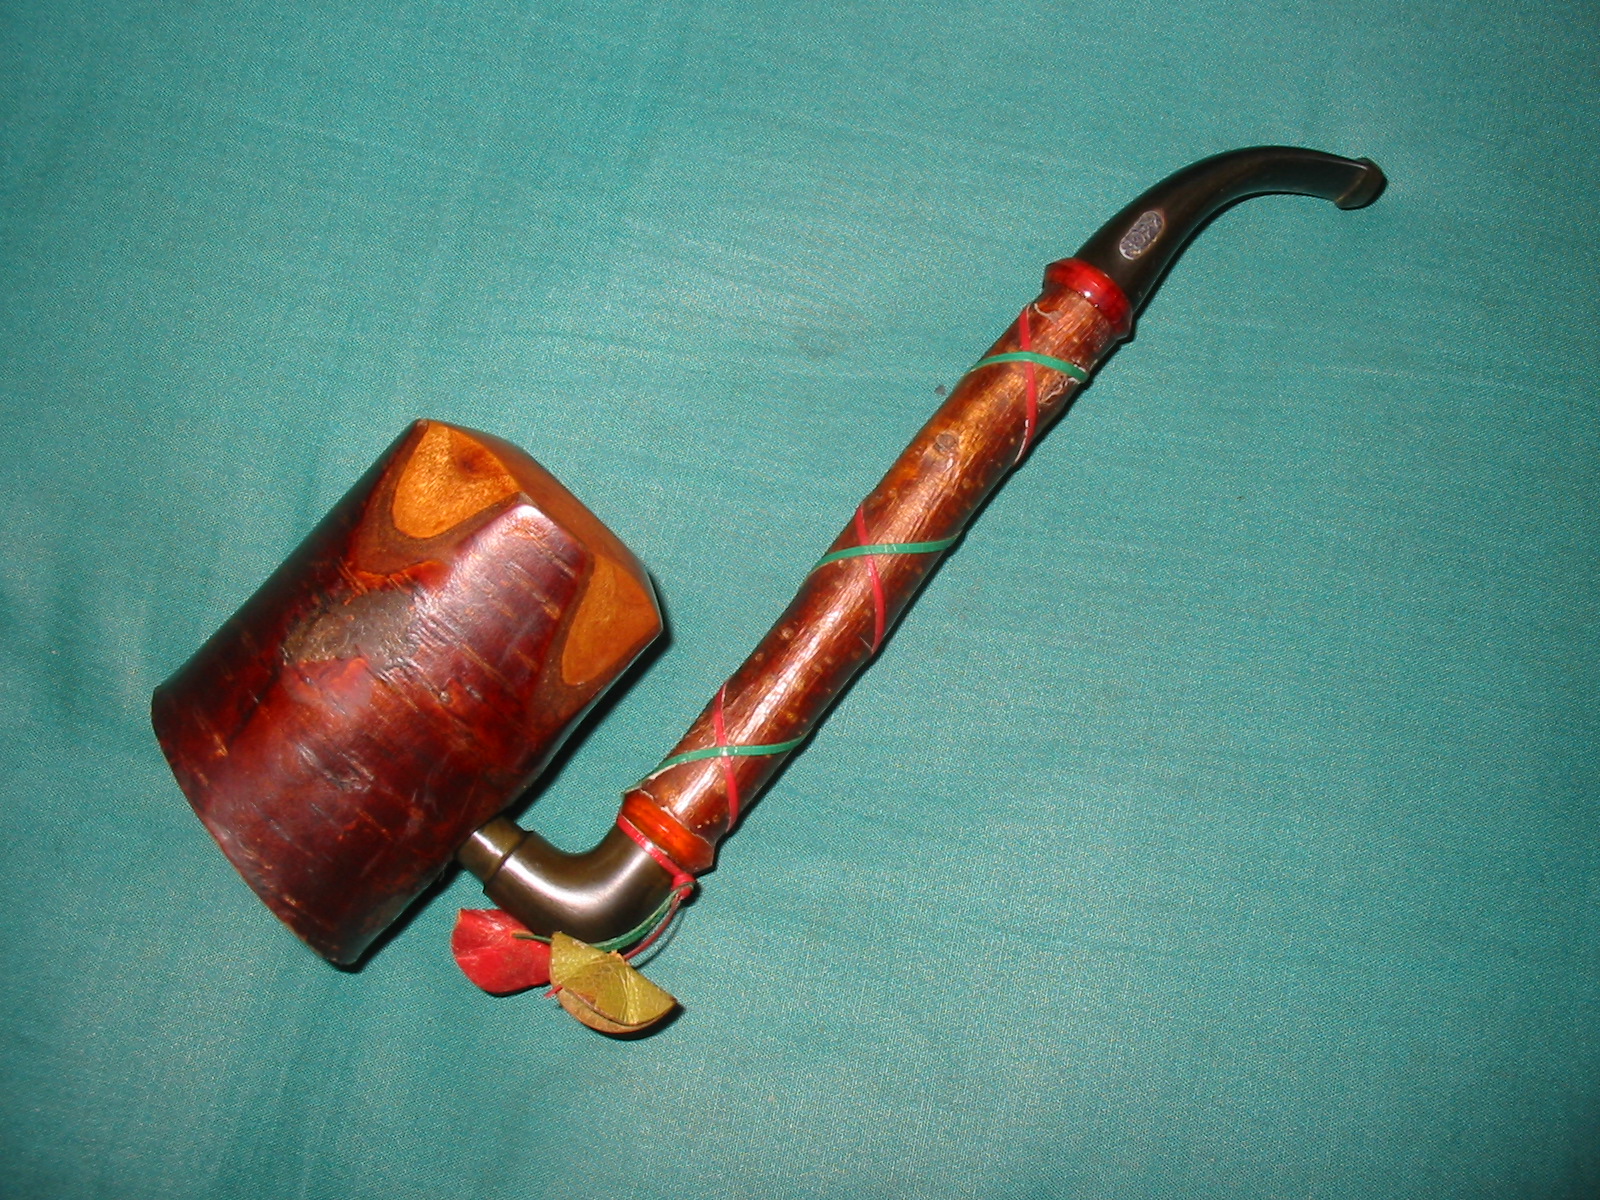
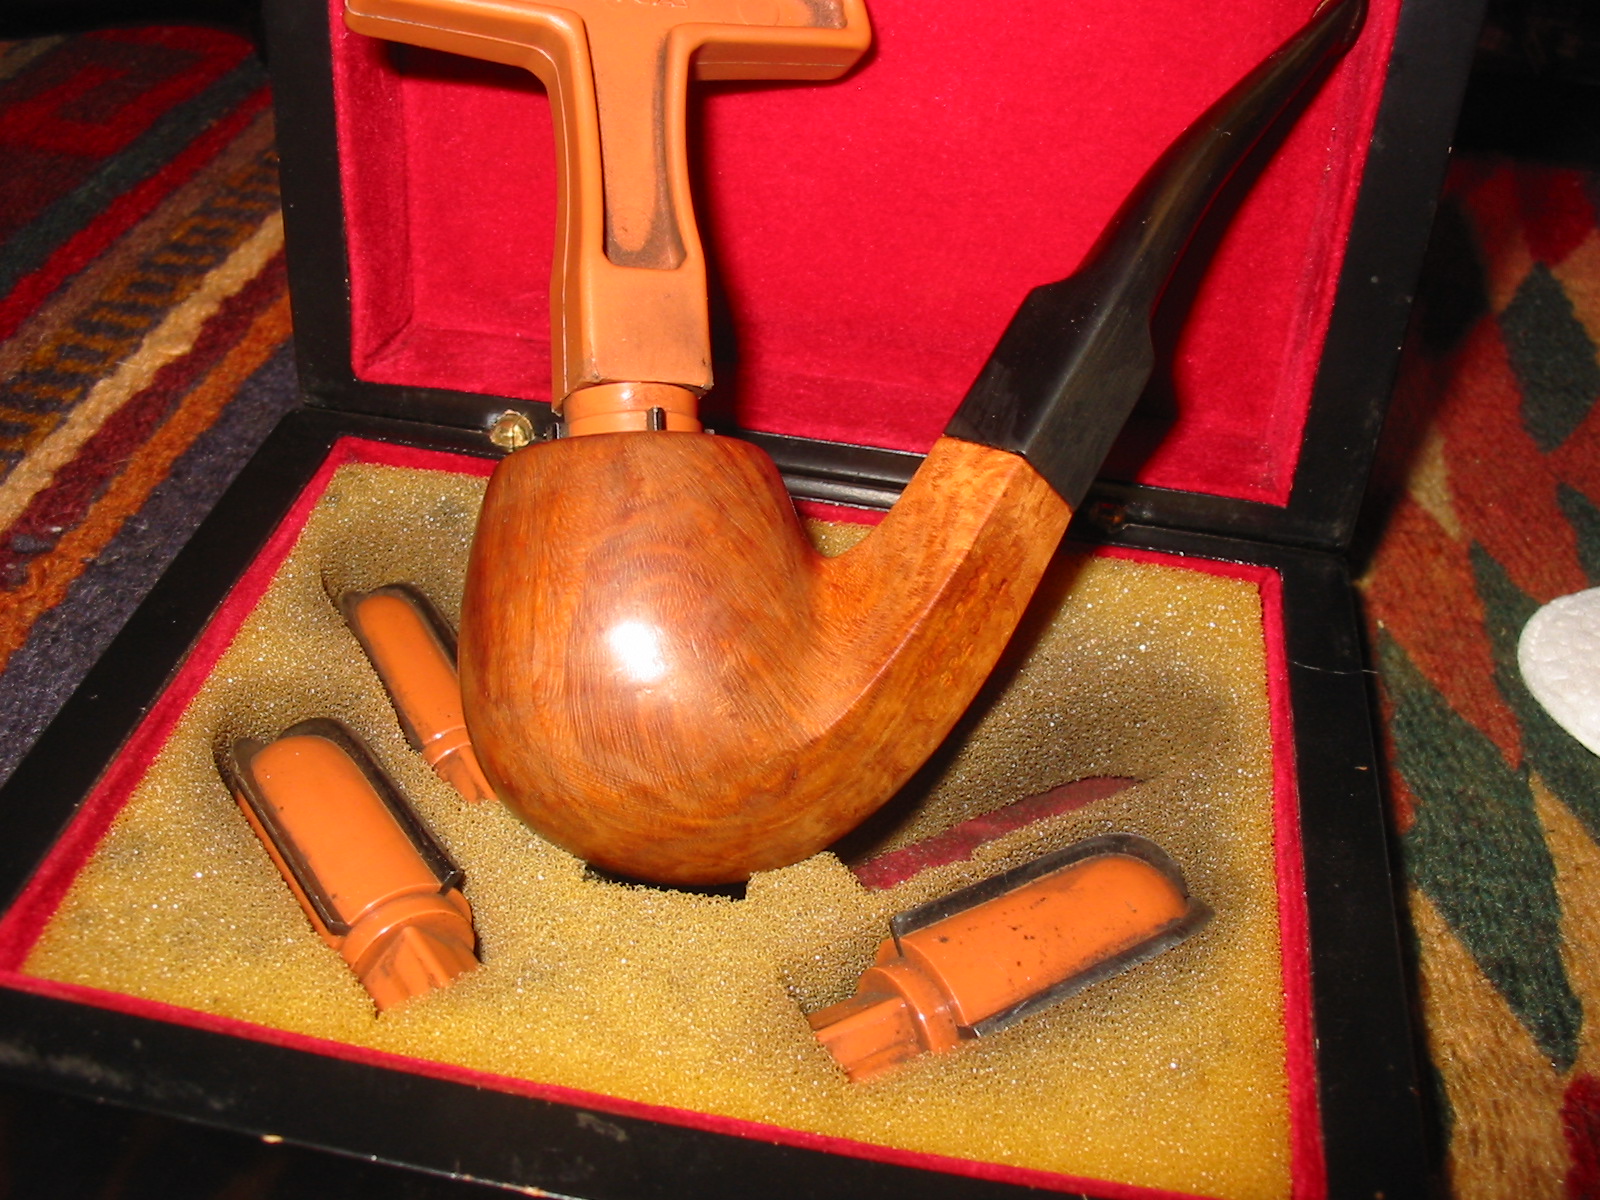
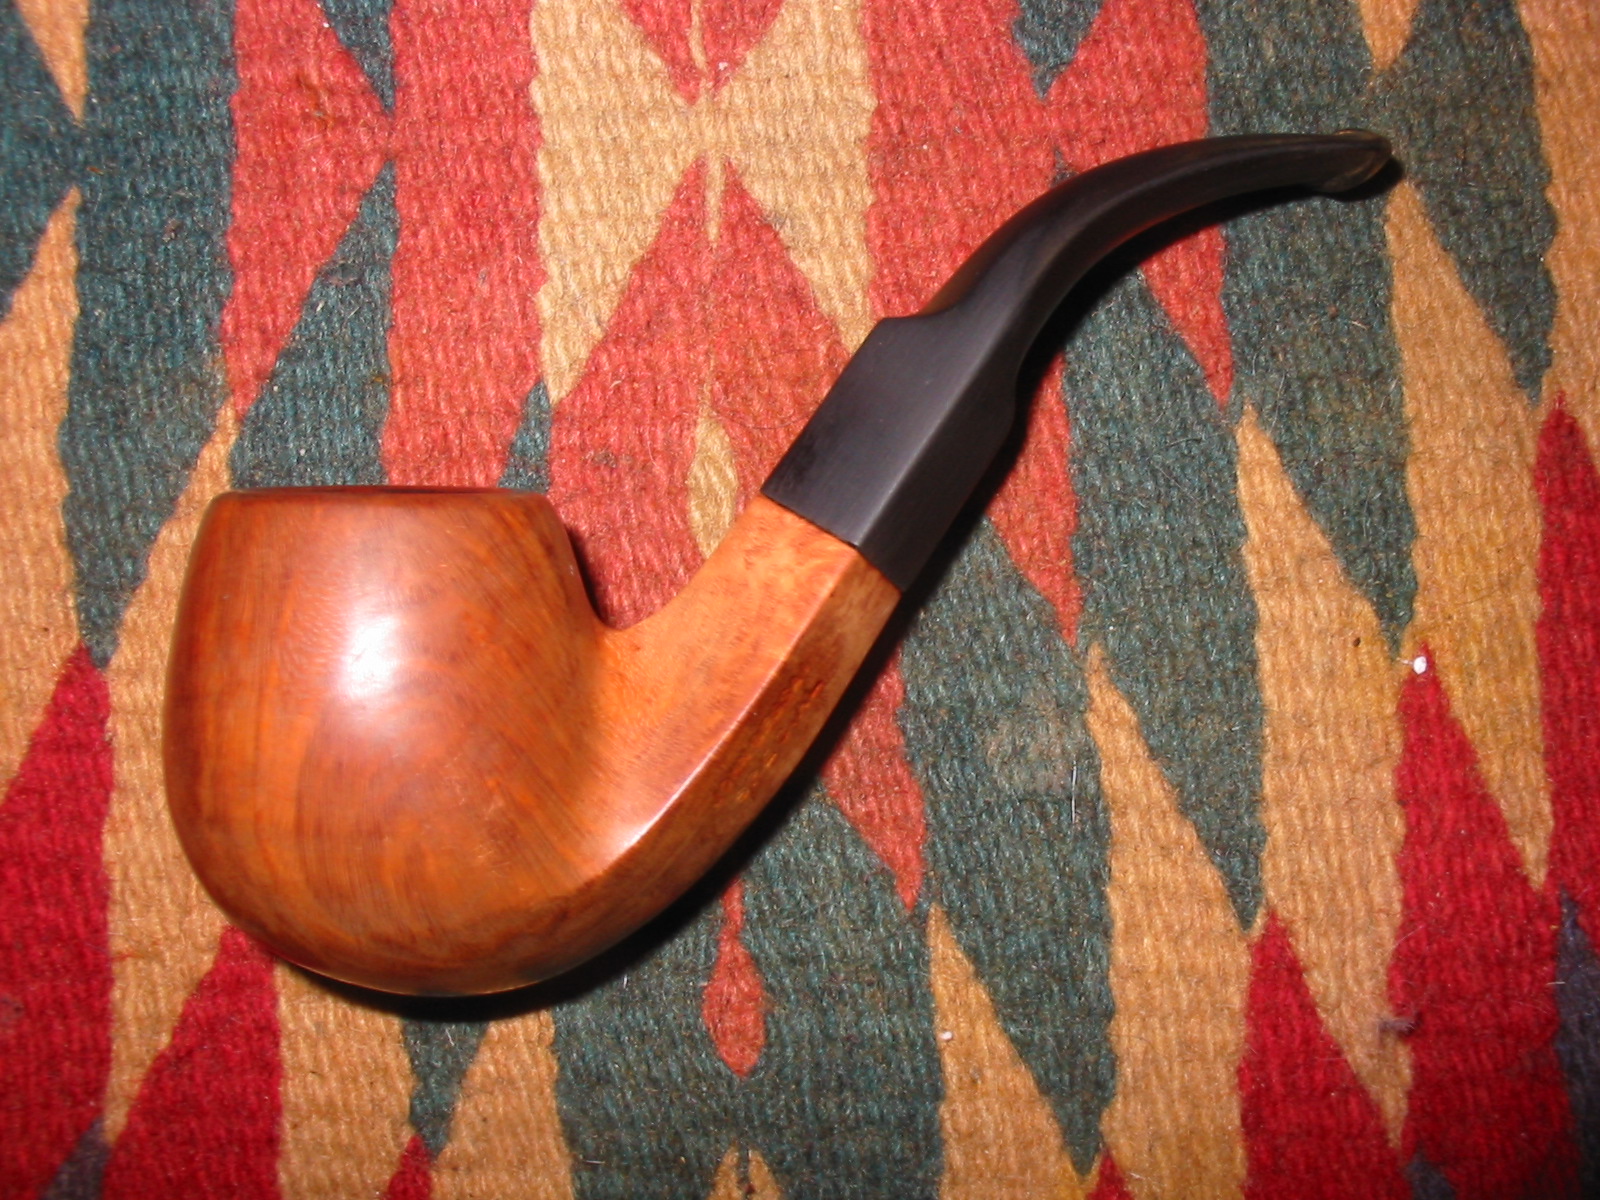
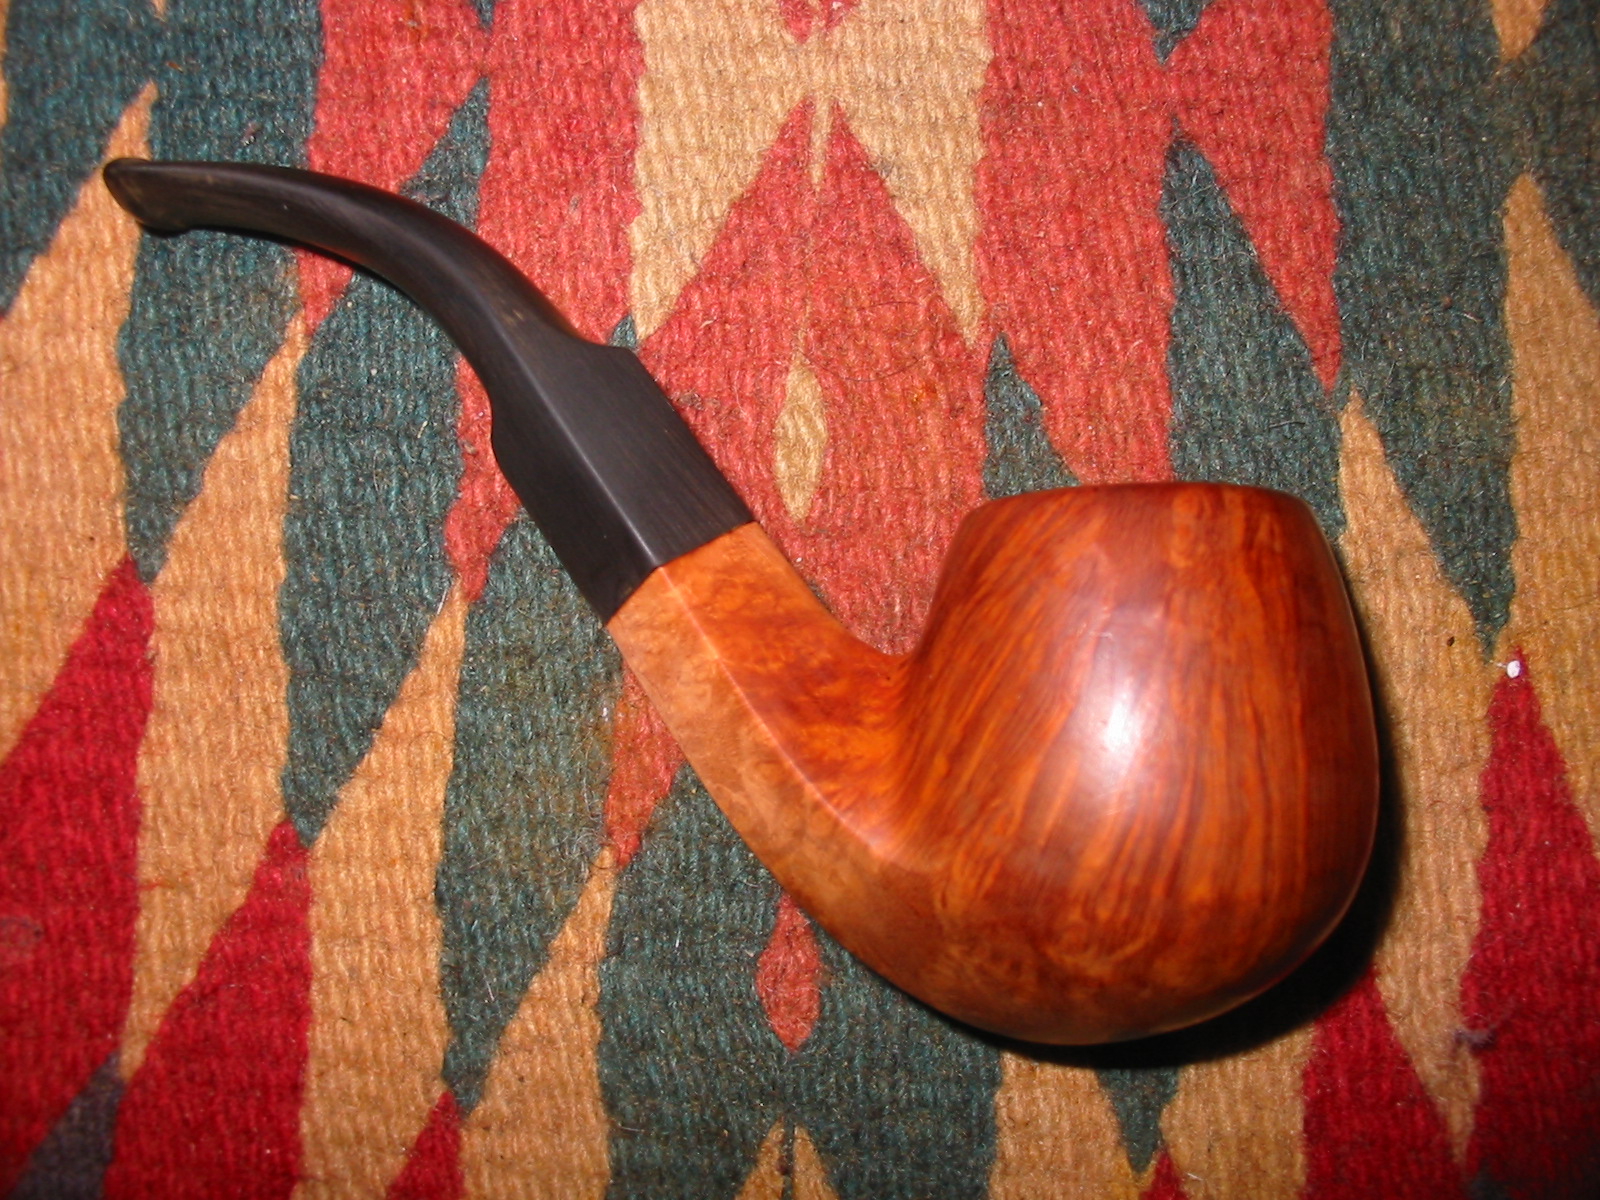
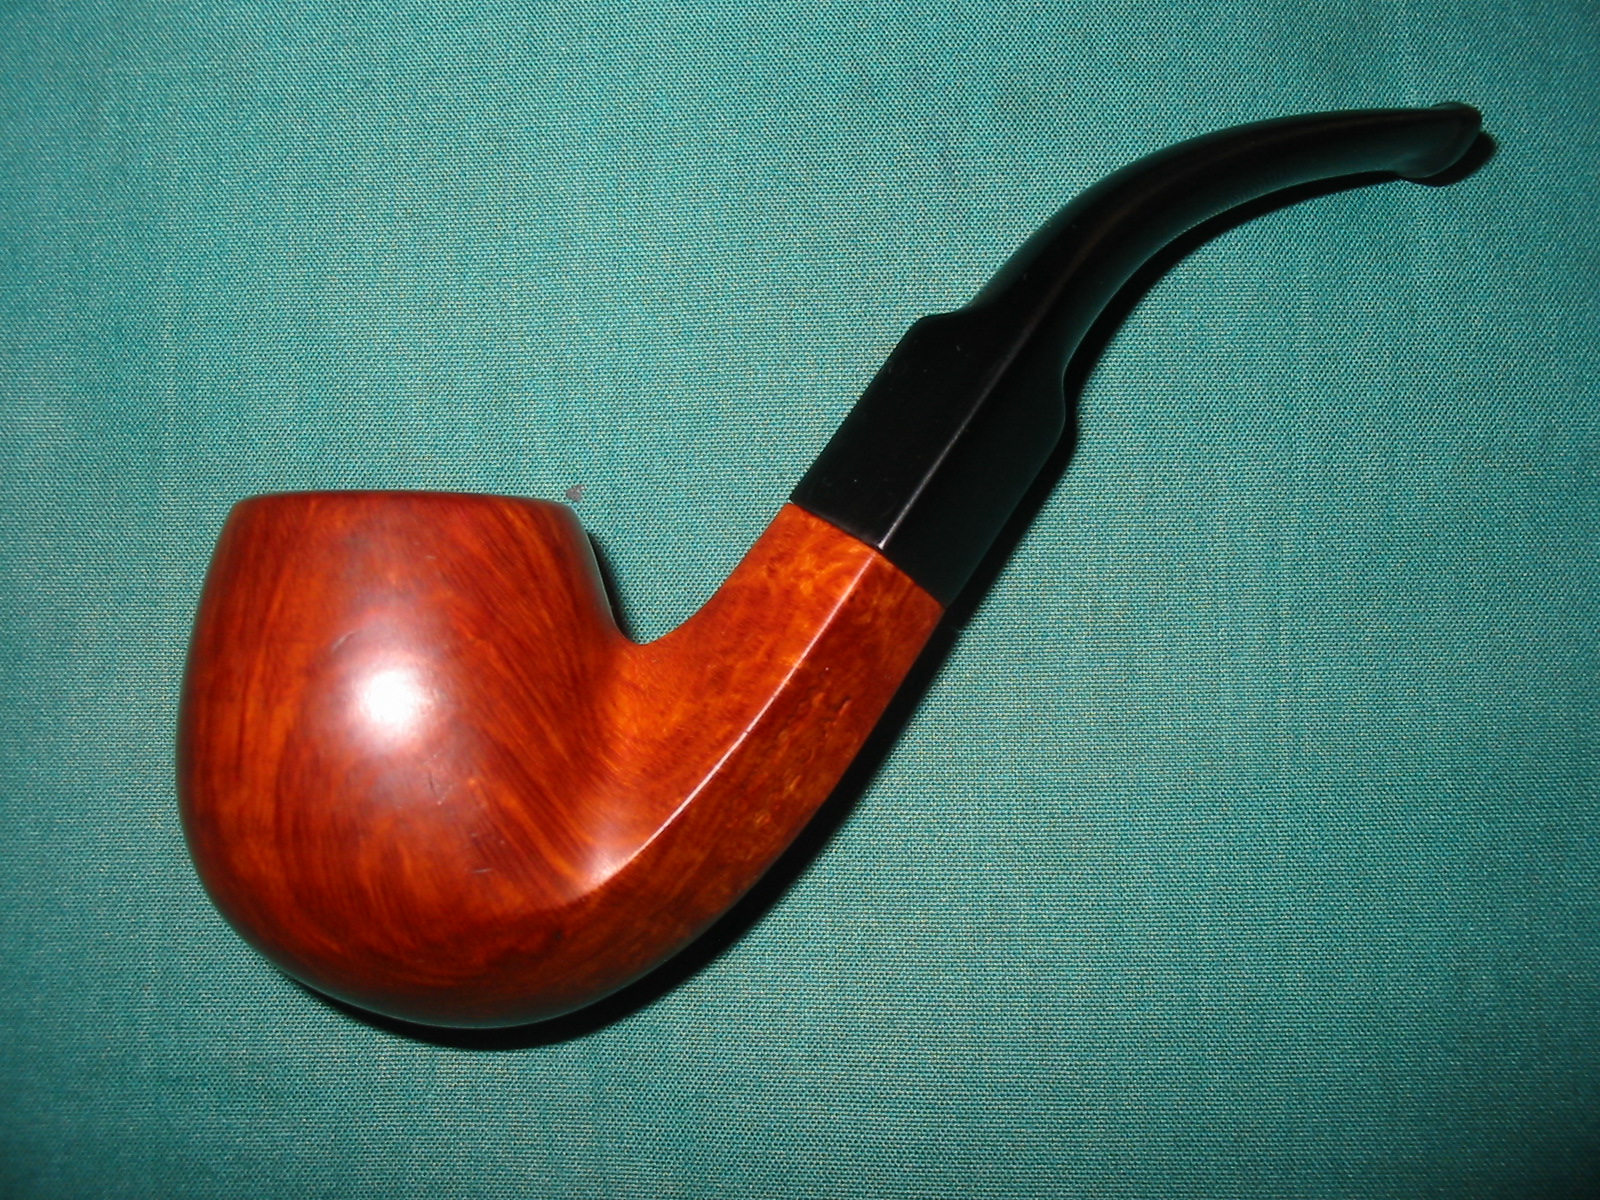
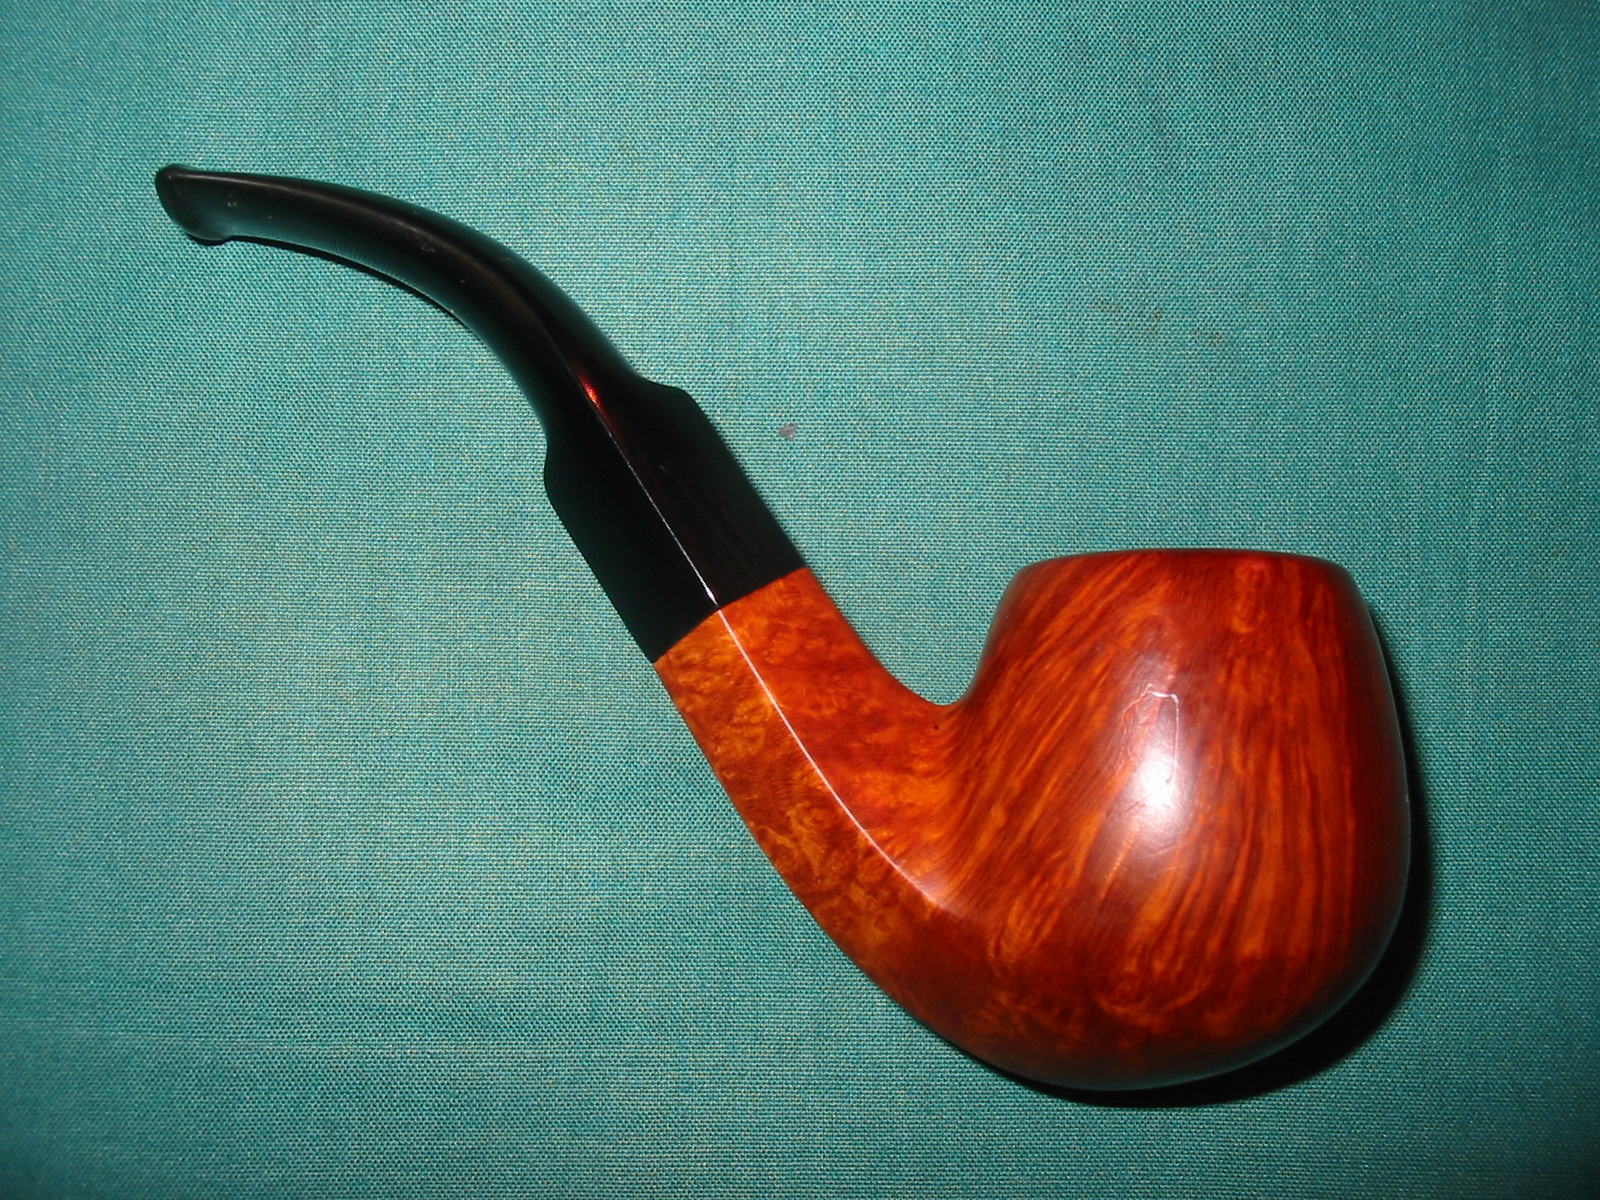
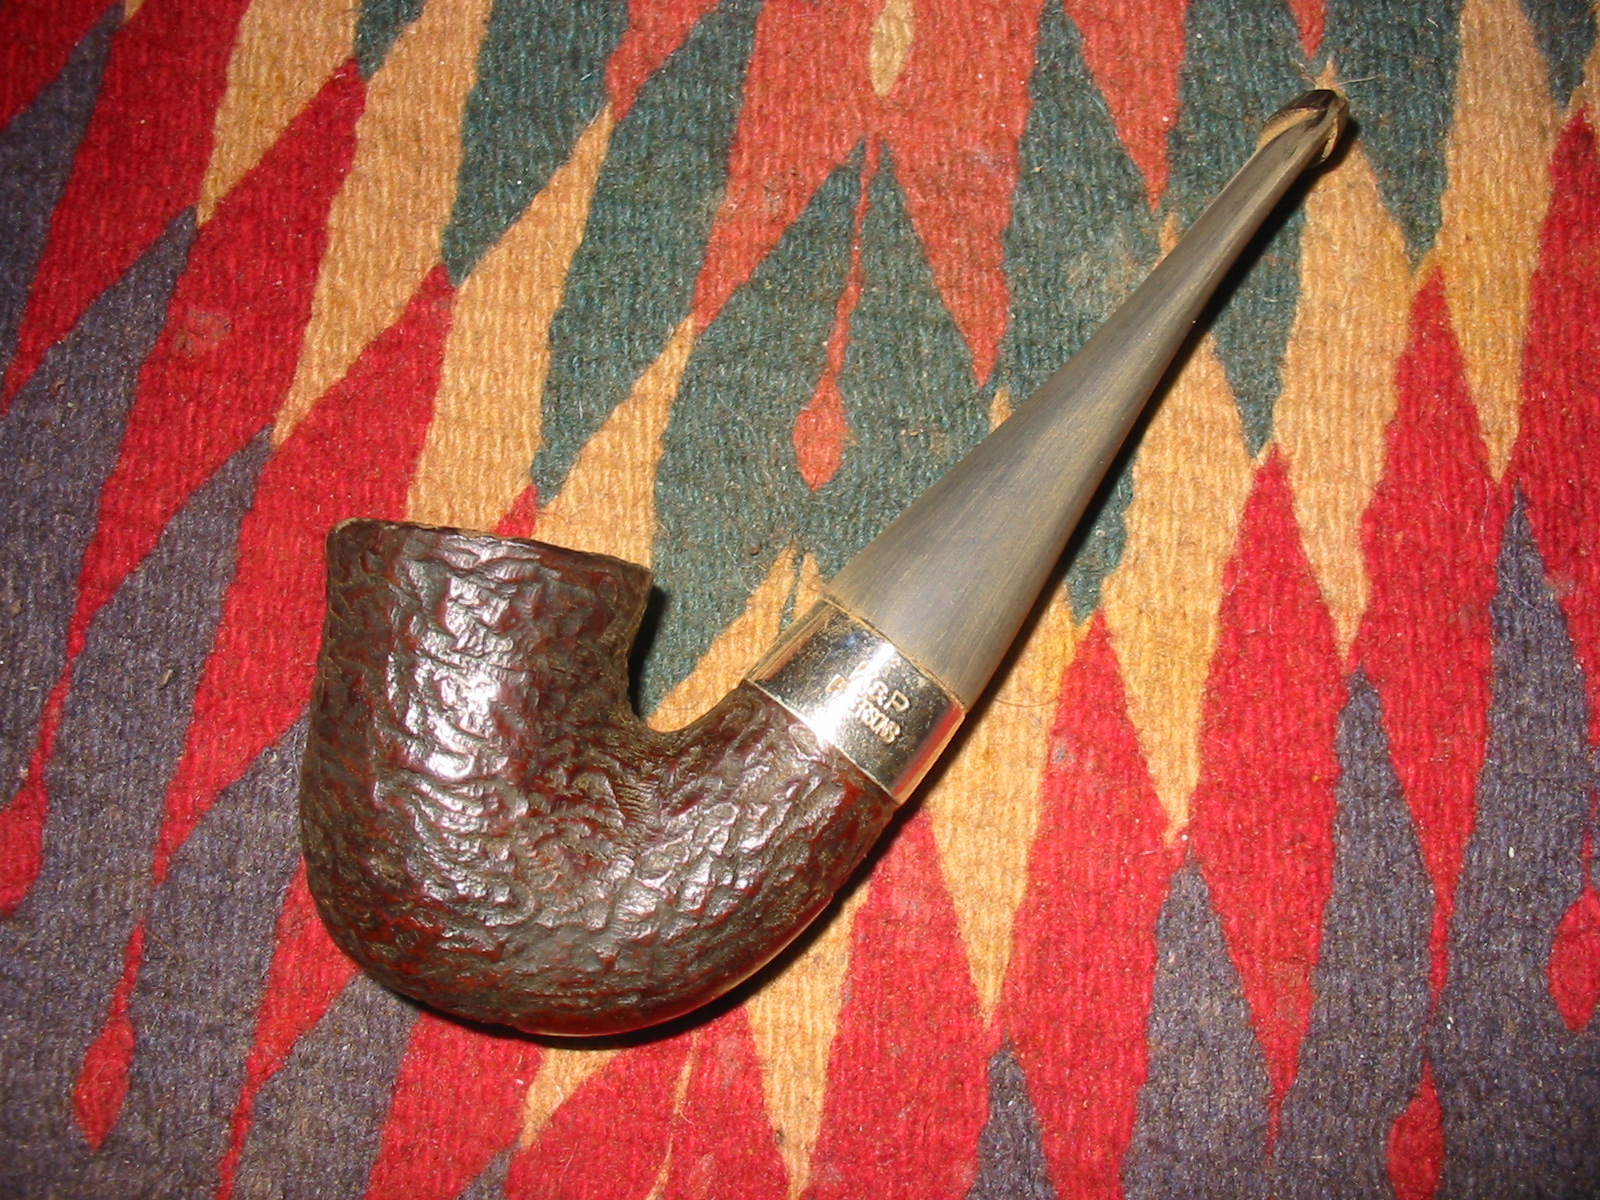
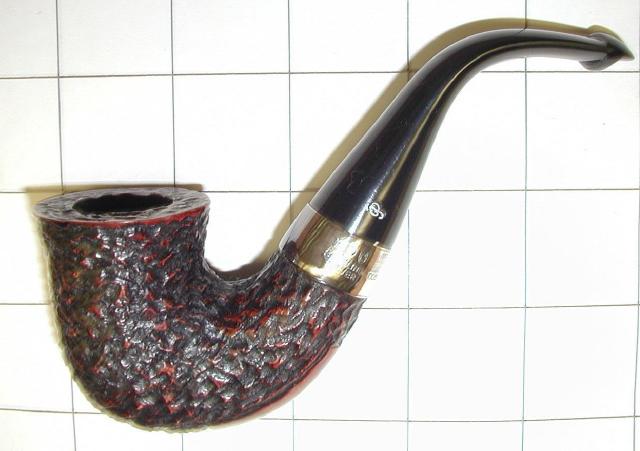
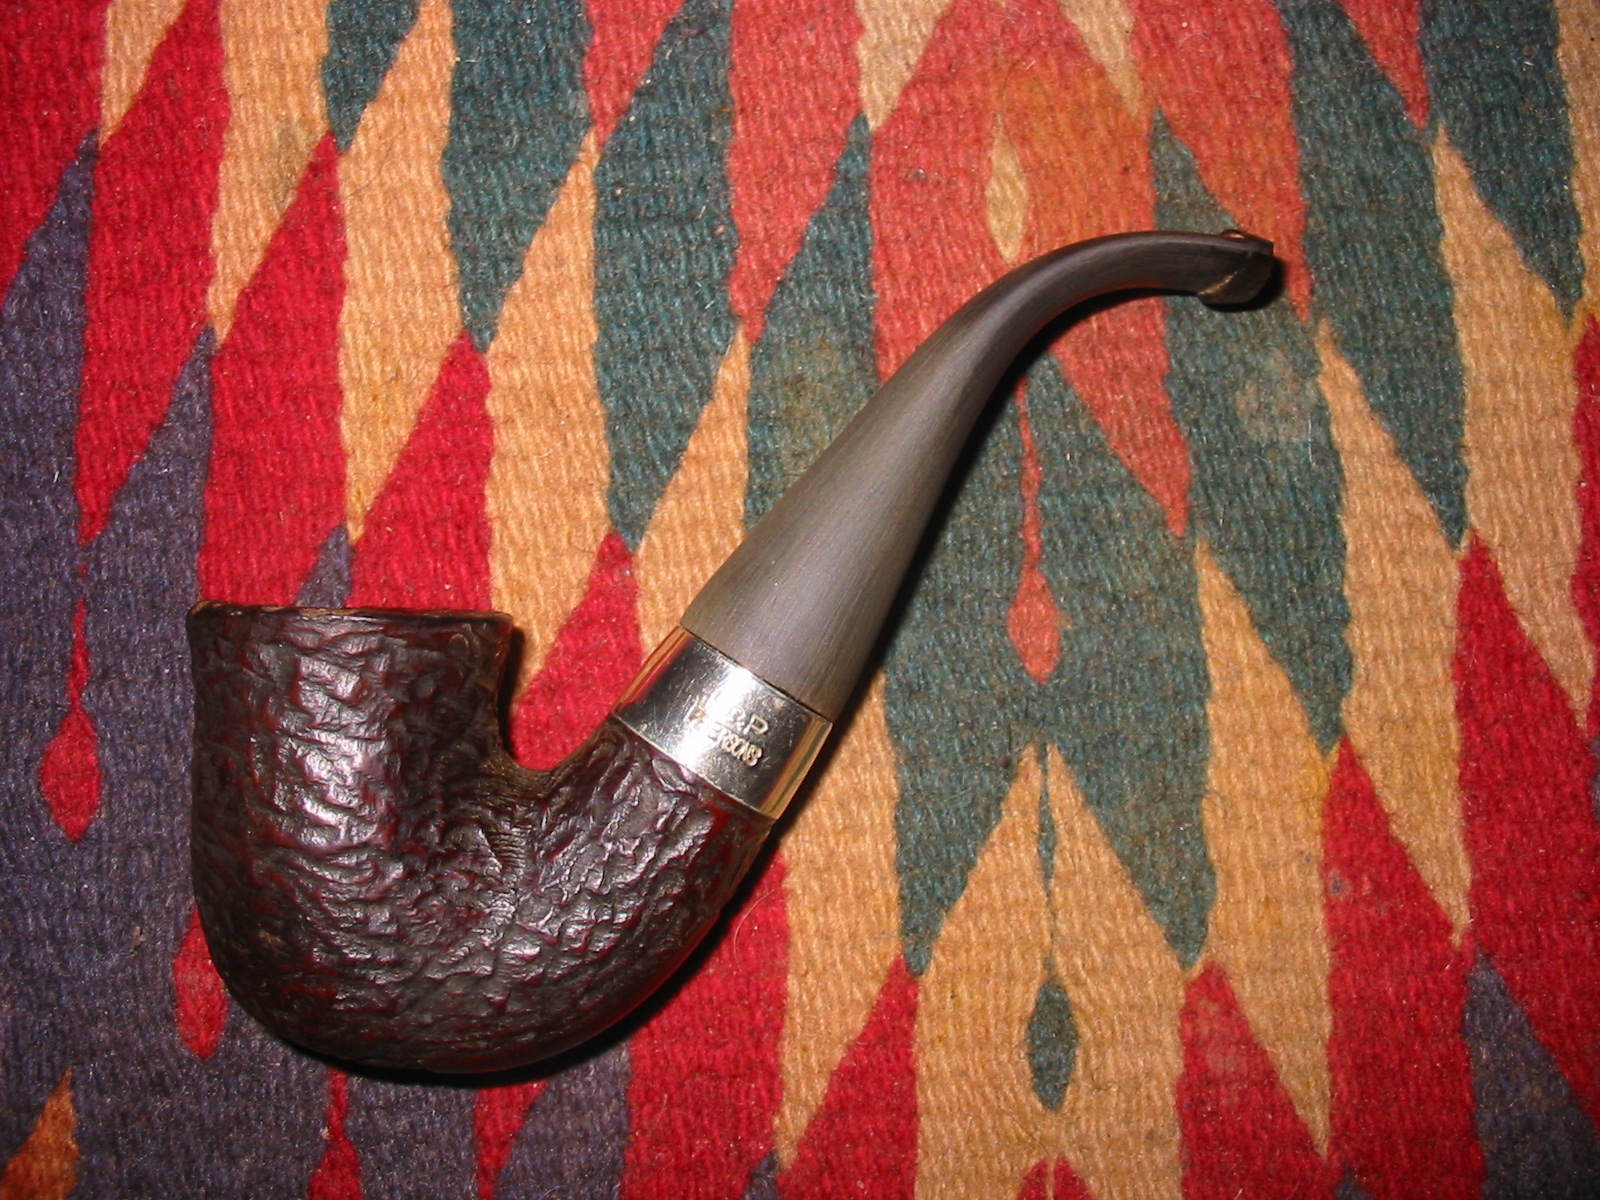
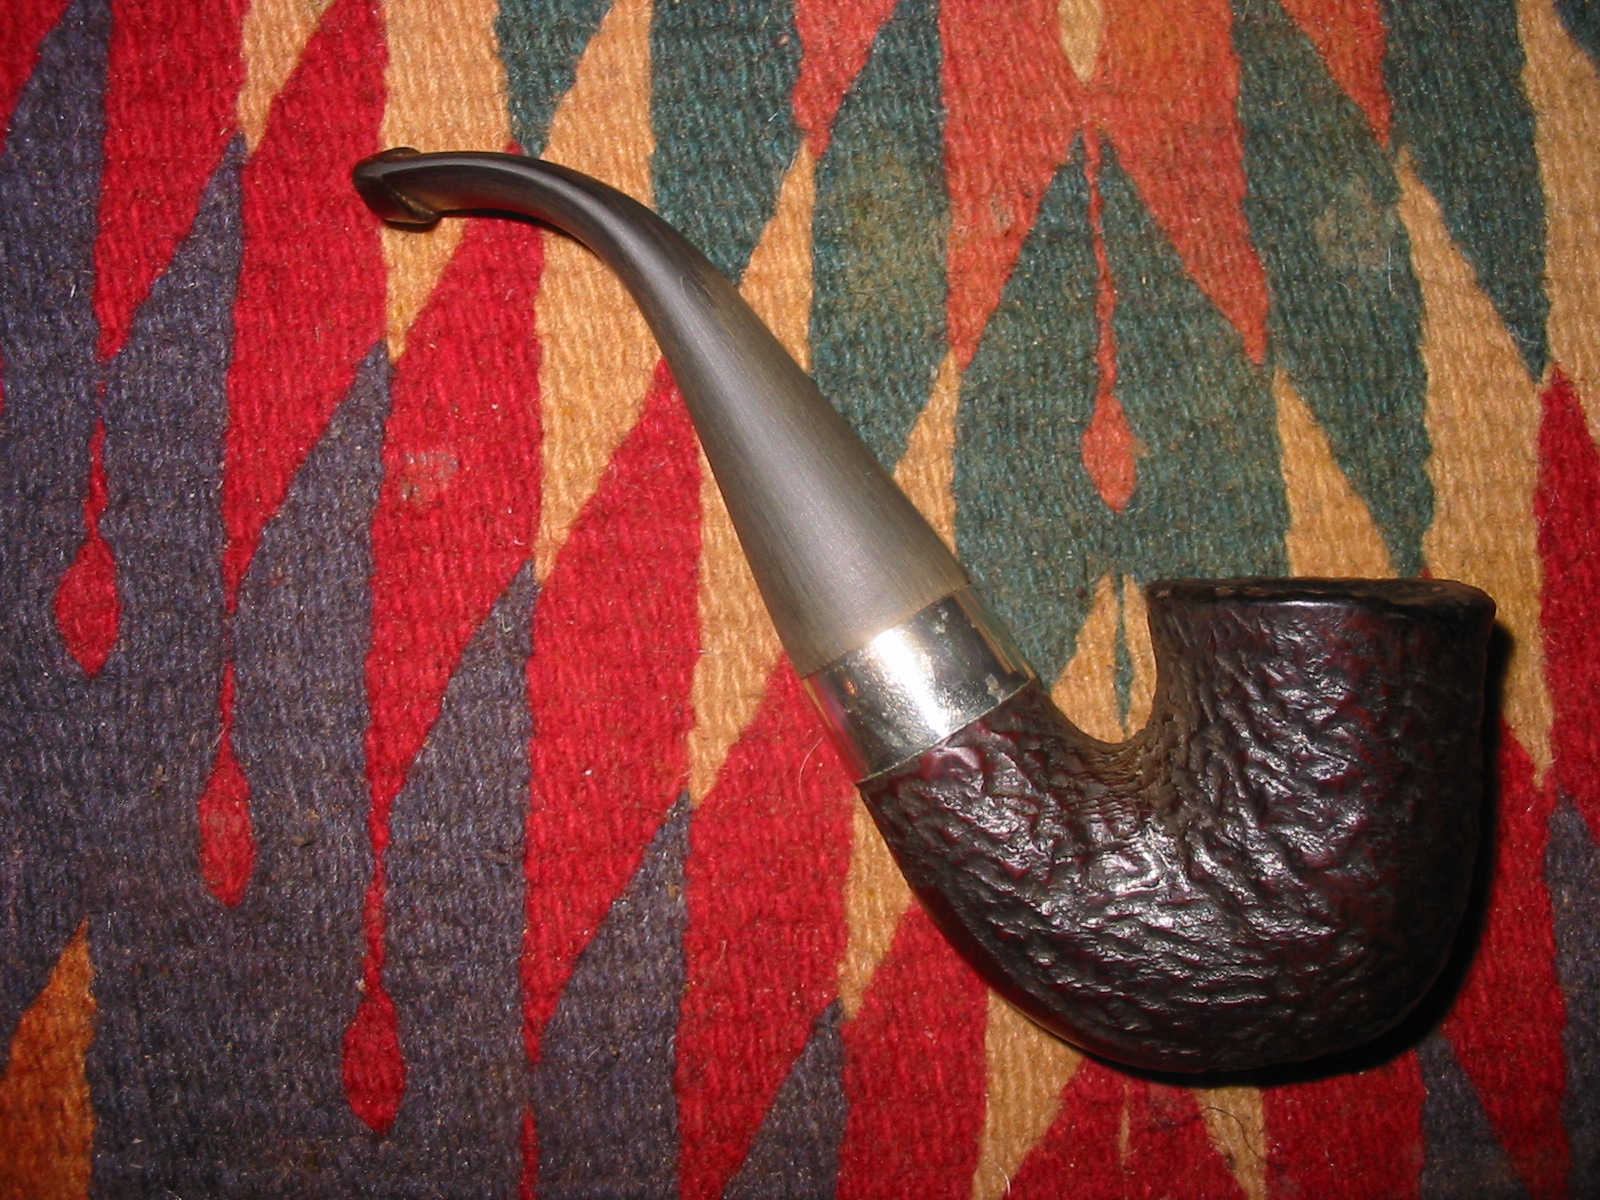
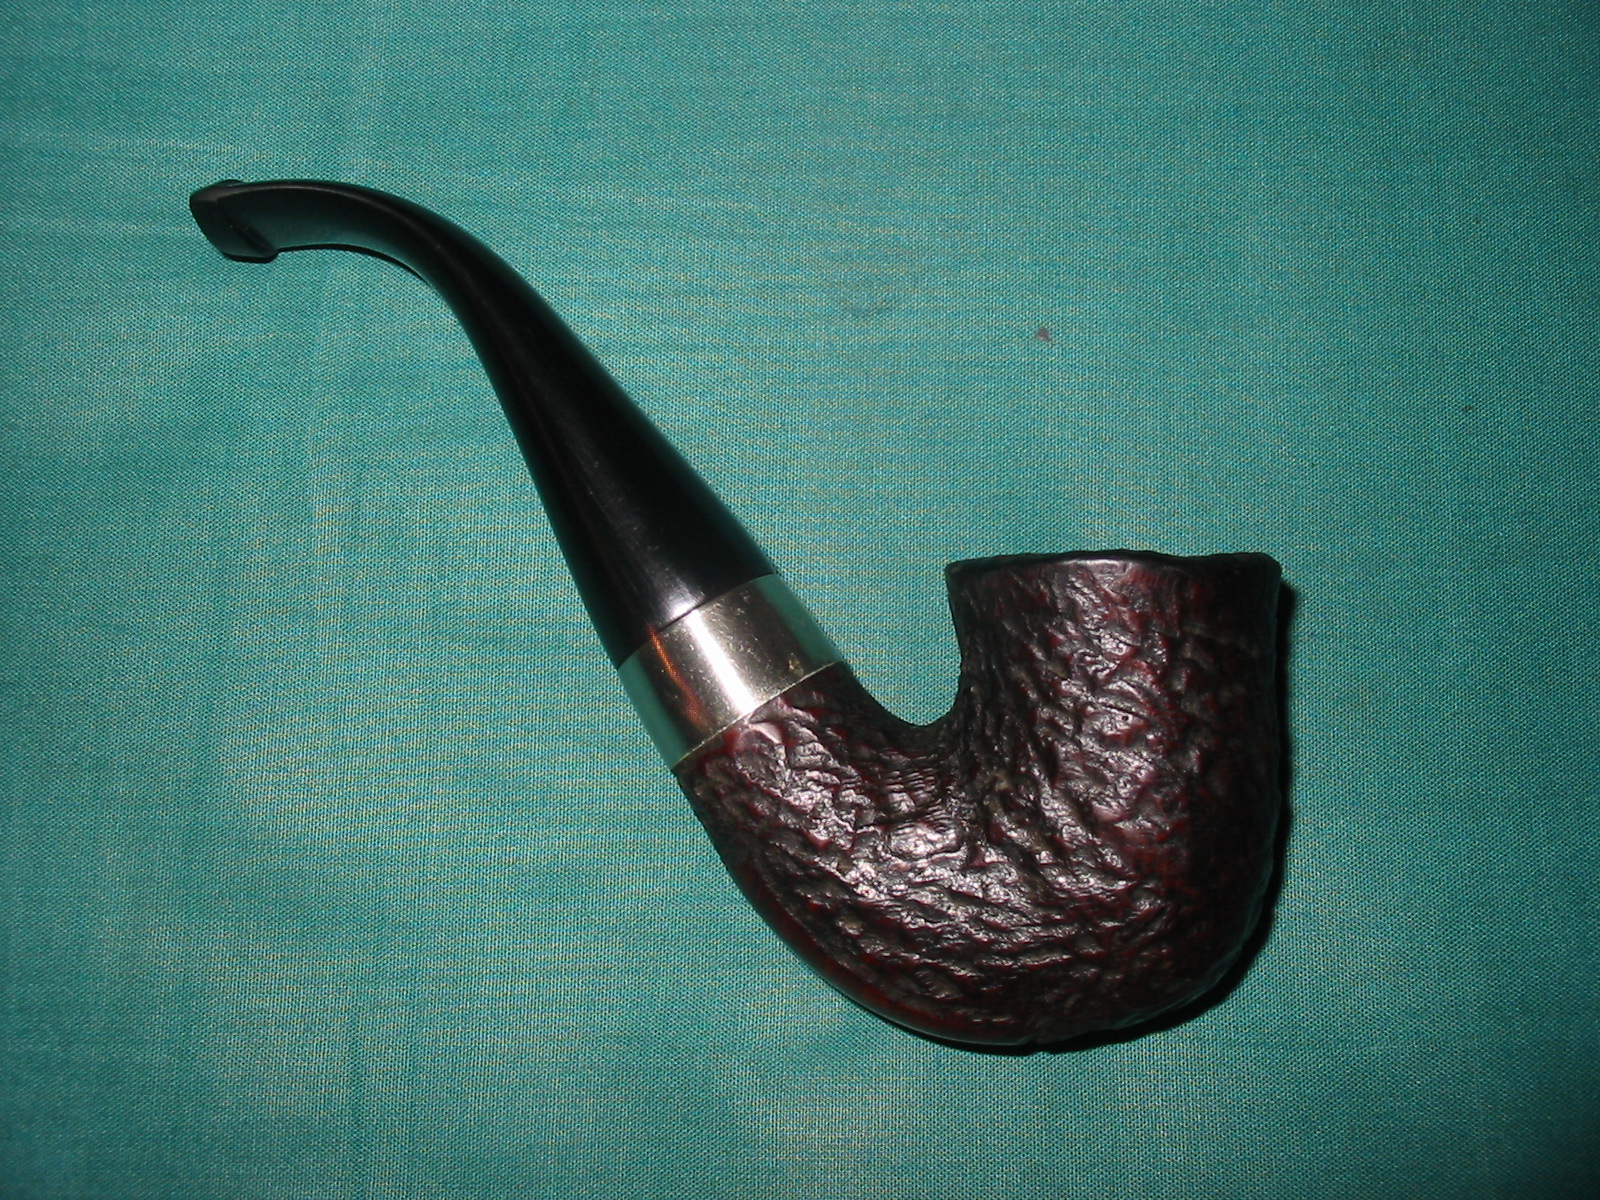
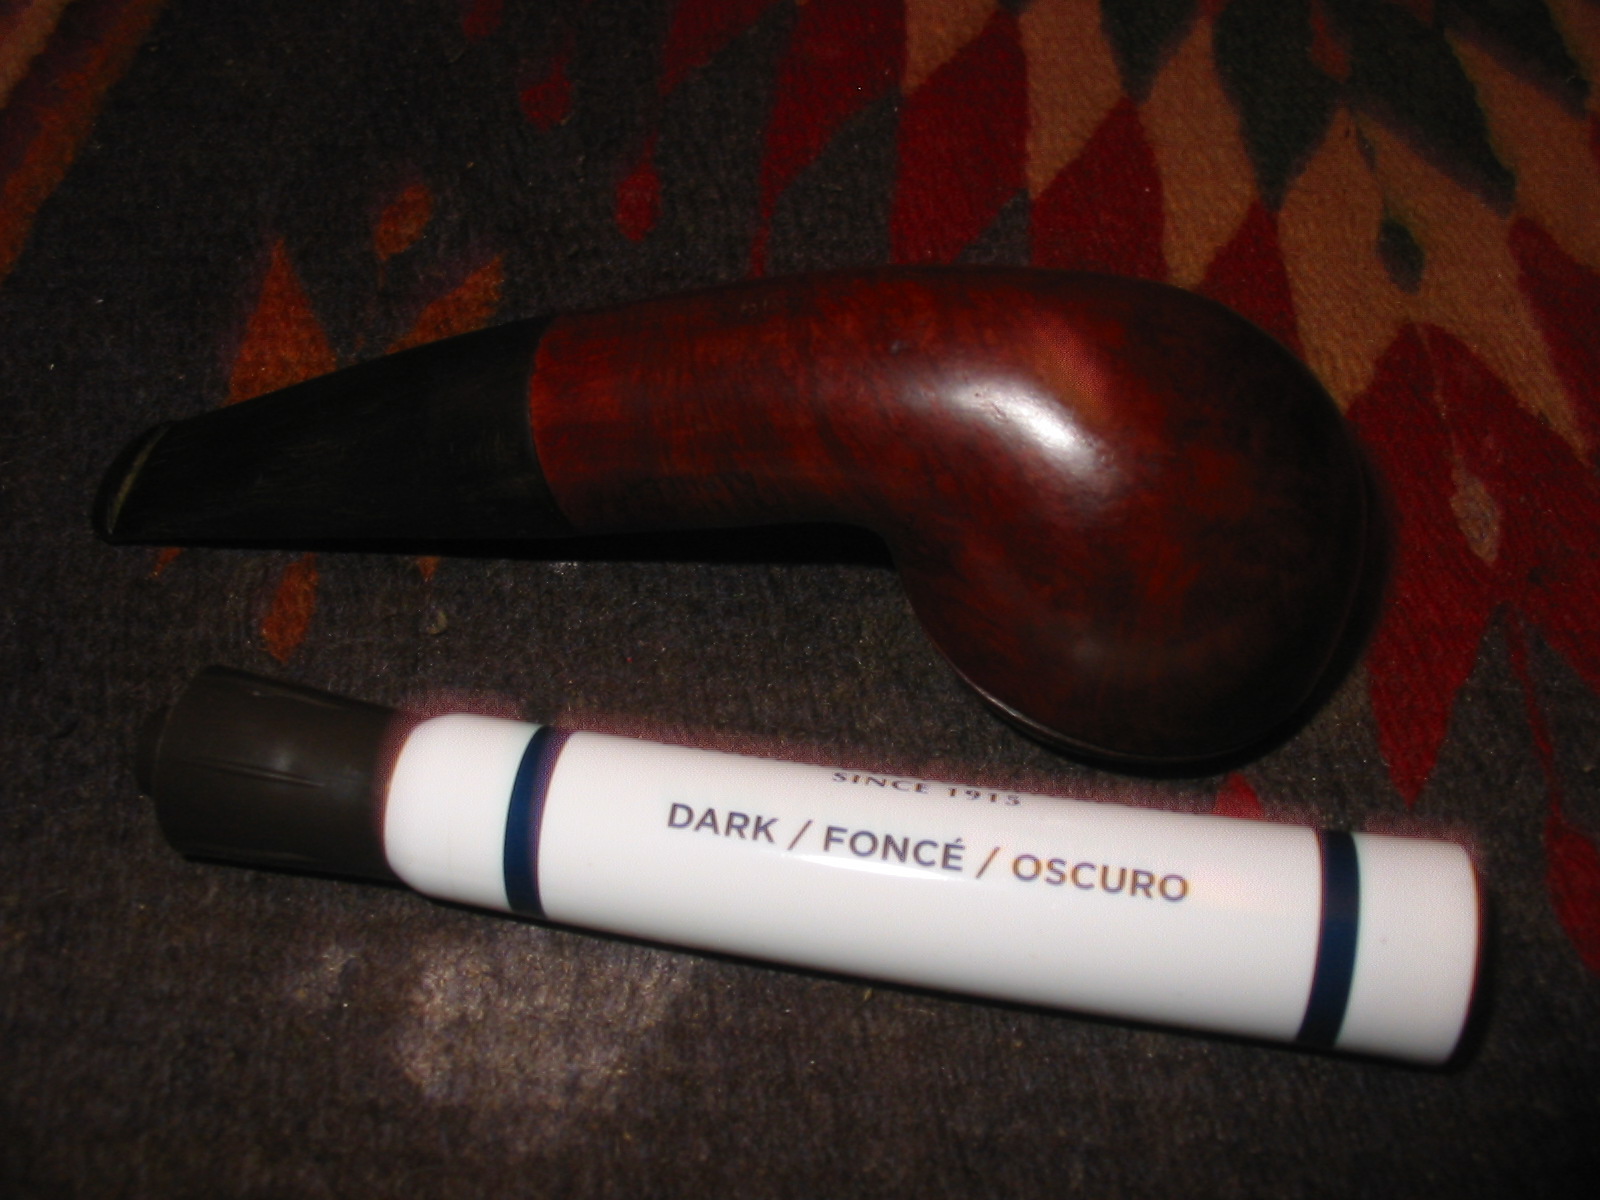
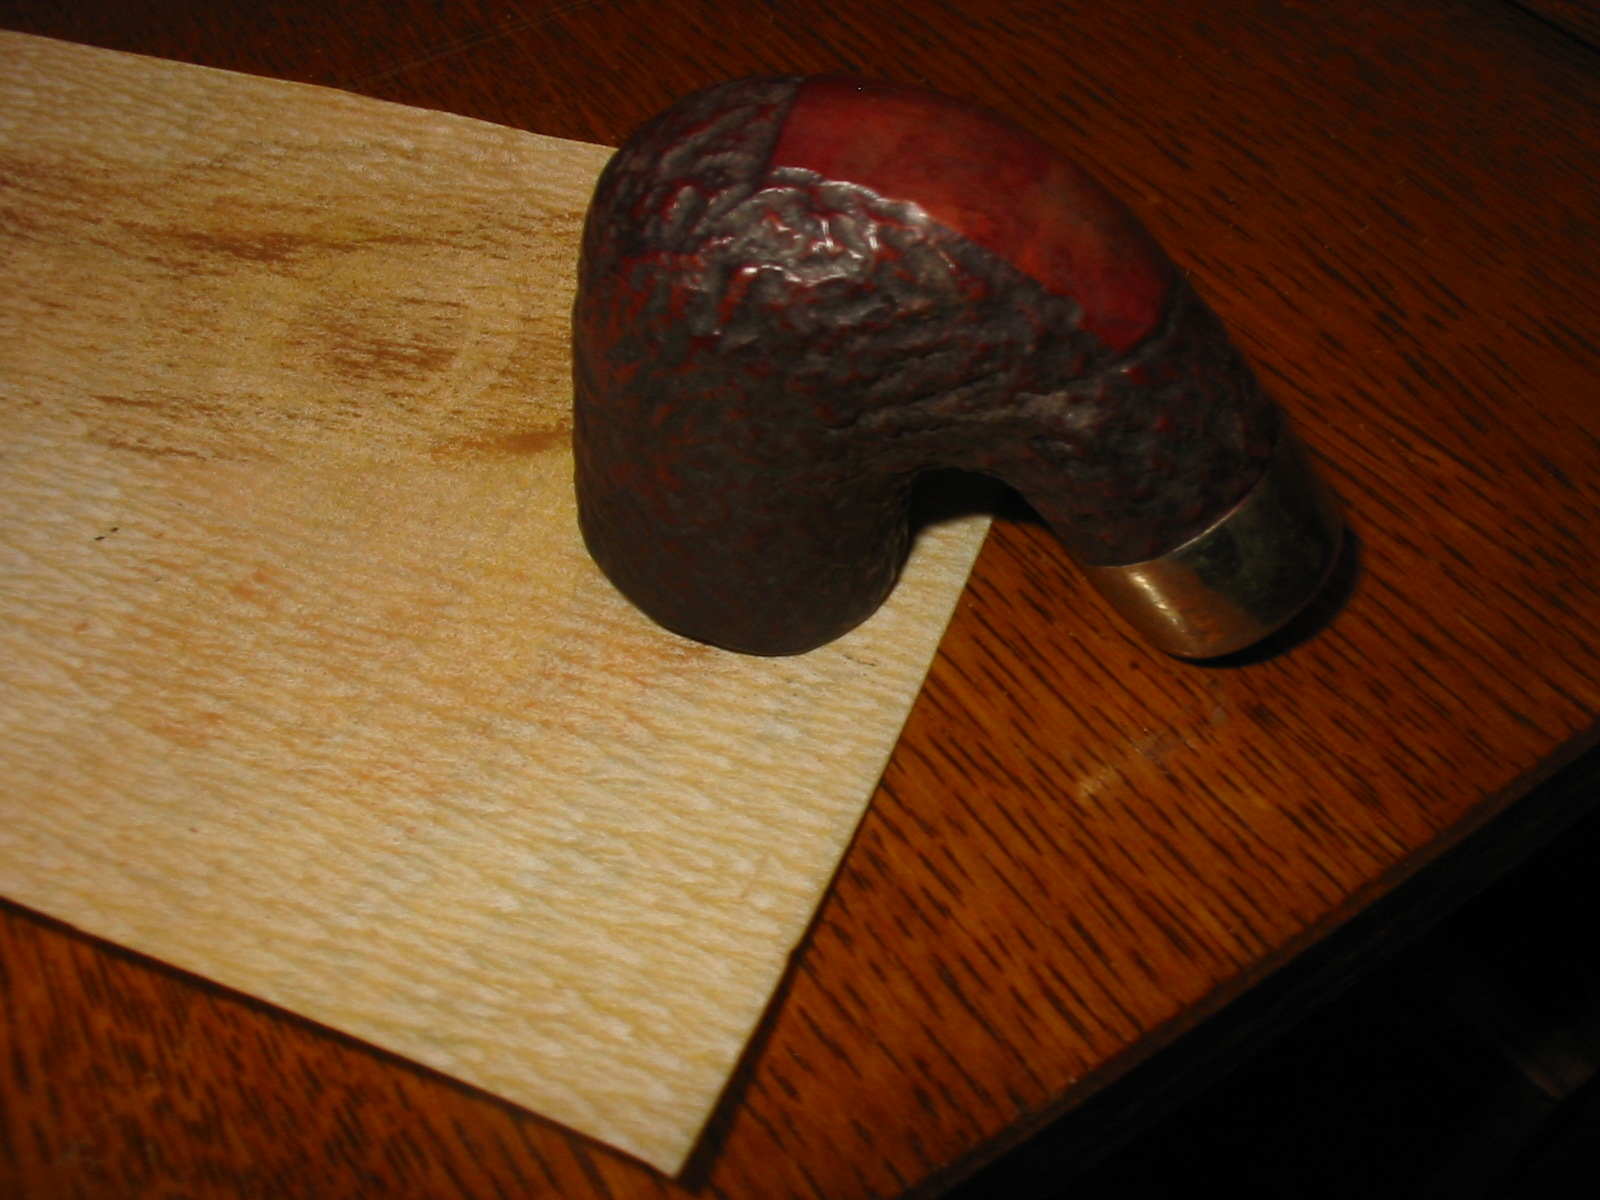
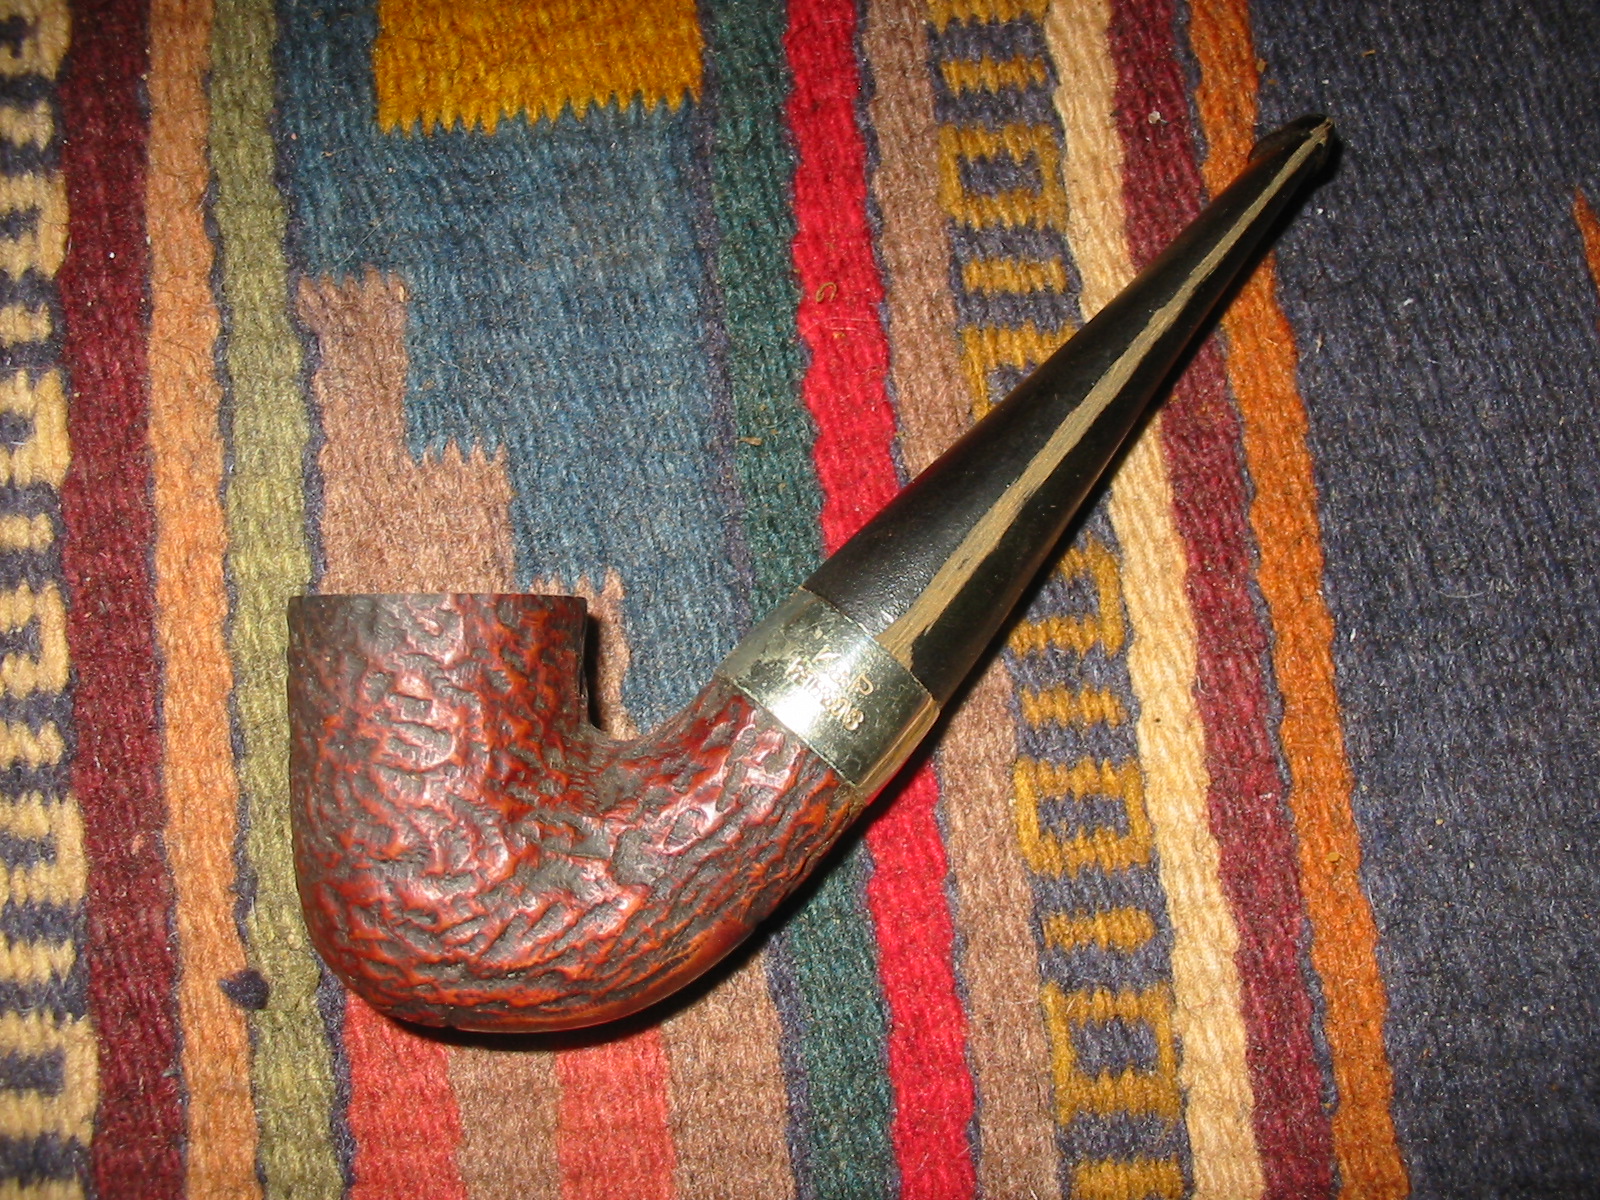
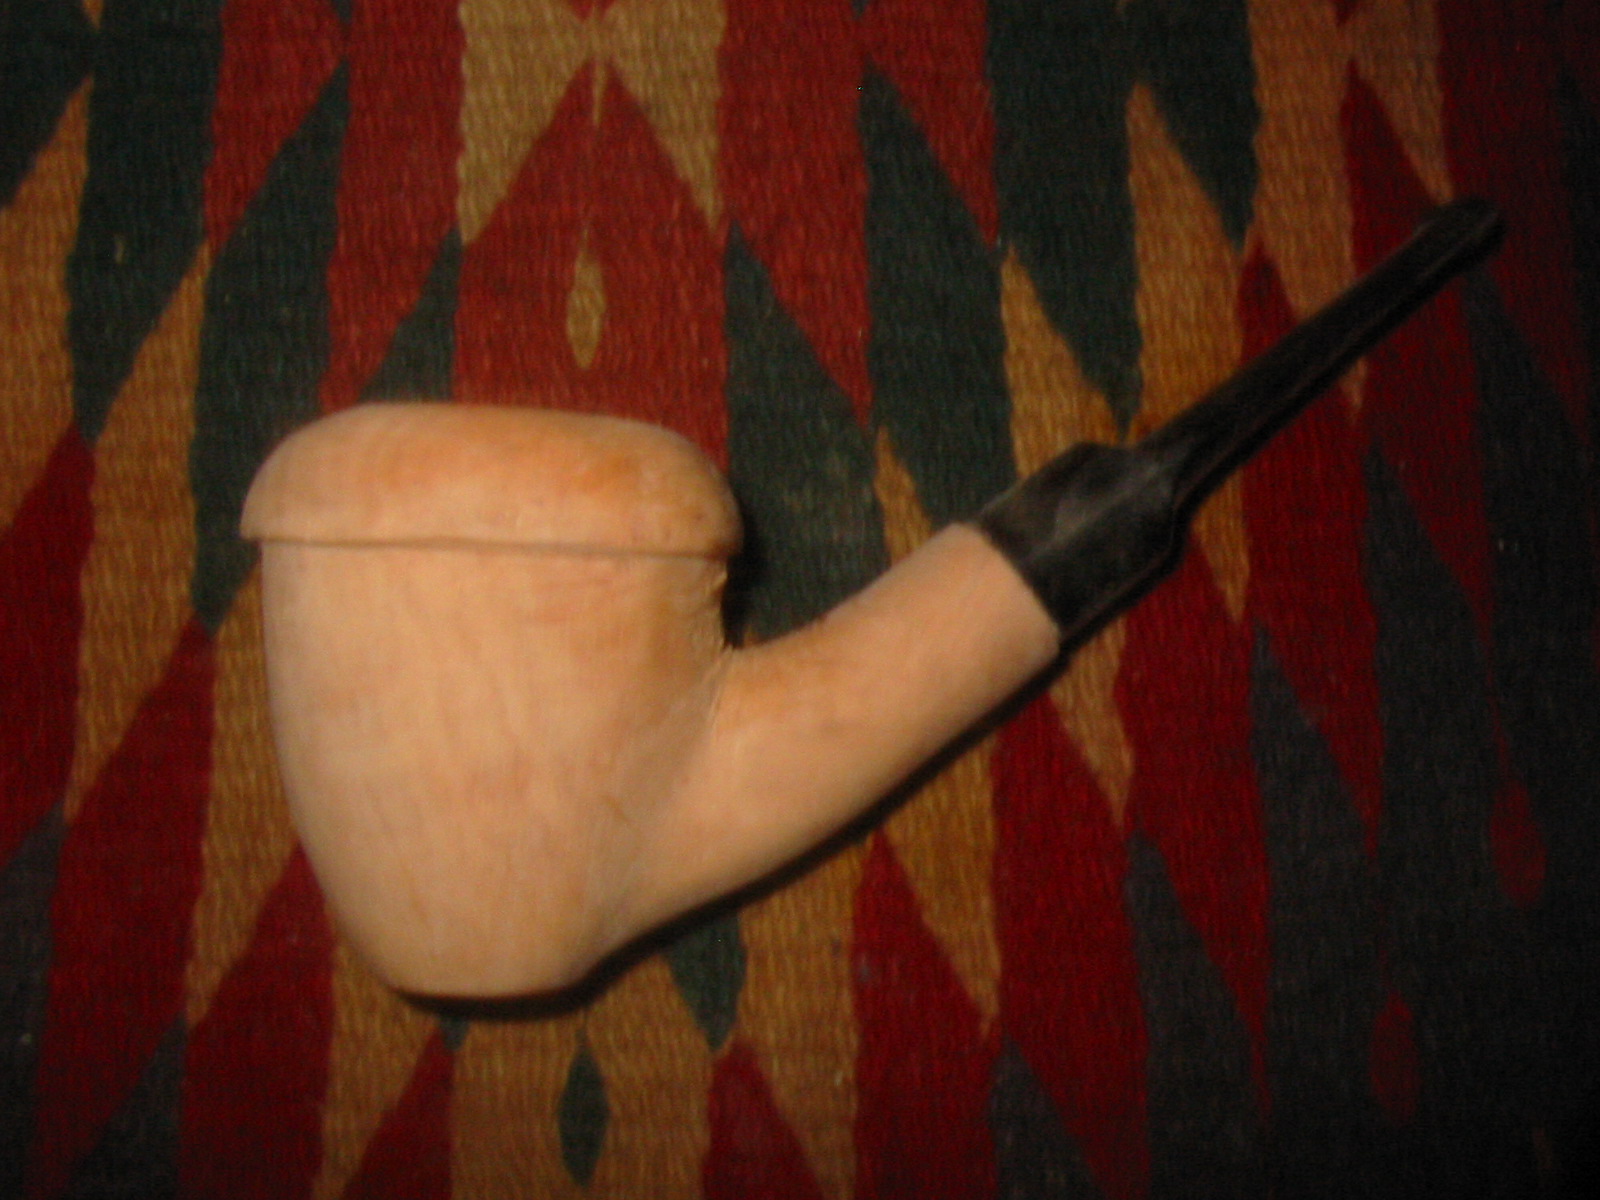
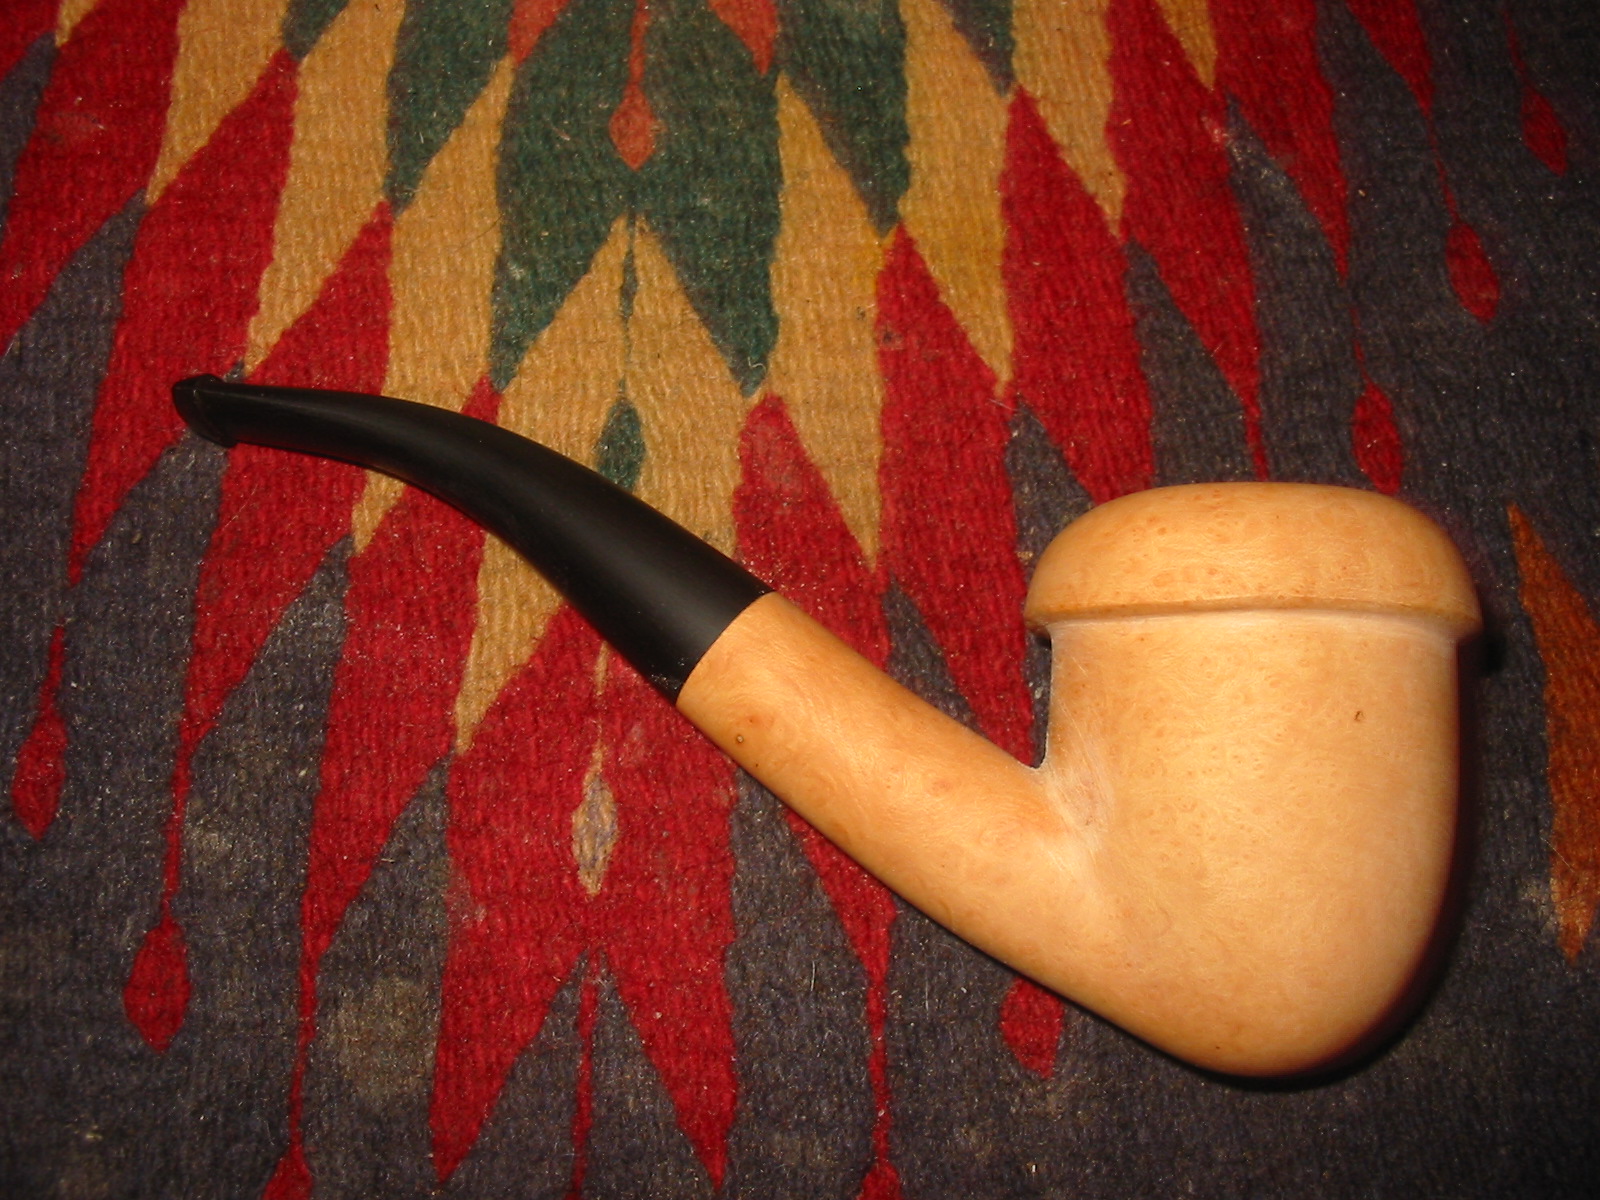
I buffed the pipe with White Diamond and then gave it multiple coats of carnauba wax, buffing with a flannel buff between the coats. The finished 1930’s era pipe is shown below ready to be loaded and enjoyed for another 80 years. The stain does a great job highlighting the grain on this little pipe. It came out looking like new. The stamping stands out and is still sharp. The stem tapers just right to my liking. It is finished and waiting. Now the only decision left is what tobacco to use to break it in once again. IMG_7613IMG_7617IMG_7615IMG_7616

Restored – Kaywoodie Flame Grain 13B (Author) Drinkless – Pat Russell


It is a pleasure to present Pat’s second contribution to the blog. In it he describes his work on an old Kaywoodie in one of my favourite shapes – the 13B. Thanks for the contribution Pat. Keep ’em coming. You are doing some great work.

Greetings friends.

It’s been one heckuva week, one of those weeks where life just seems to take over. As a reward for making it through, I’ve taken a holiday today to restore a beautiful old pipe that has been sitting on my bench for a month or so. This was another $14.00 eBay win, and one I was thrilled about. I started looking for early Kaywoodies about a year ago when I fell in love with the quality of the briar. This lovely little author was in pretty good shape. The drinkless stinger, with 4 holes, and a two digit shape code with one letter dates it to between 1940 and the early 1950s. There was a sizable tooth mark in the top of the stem, a couple smaller bites out of the bottom of the bit, and a few small dings and dents in the bowl. Other than that, the pipe was in pretty good shape.
KW1KW2KW3KW4KW5 So I threw the stem in a OxyClean bath, and then took the new PipNet reamer to the cake.
KW6KW7KW8 I then wet a tea towel and set the bowl rim down on the towel for two minutes or so, before using the damp towel to wipe off the rim char and tars.
KW9 Once that was done, I wet sanded the stem with 600 and 800 grit sandpaper.
KW10 Then took the heat gun to the stem to work on those dents.
KW11KW12 It took a couple attempts, but they both lifted somewhat.
KW13KW14 Then I took 0000 steel wool to the stinger to clean it up.
KW15 Following the stinger, I elected to do a surface clean of the stummel with acetone and a cotton pad.
KW17KW18KW19KW20 At this point, it was time to make some judgement calls. There was still some rim darkening, there were a couple very minor dents in the bowl, and that tooth mark was still there even after the heat treatment and there was a little bleaching around the top of the bowl. This pipe is for me. I’m a clencher. I elected to leave the tooth mark. I also elected to leave the dents, and do a light tint of the bowl to bring back the colour.

The next step was a date with about fifty pipe cleaners and the same number of bristle cleaners liberally dosed with isopropyl alcohol. After a thorough scrub out, I elected to finish the stem, shank and stummel clean with a retort.
KW21KW22KW23 Testament to the fact that isopropyl alcohol and pipe cleaners don’t clean out everything, here are the cotton balls from the bowl post retort.
KW24 Post retort, I added two drops of Fiebing’s Light Brown to about half an eye dropper of 99% isopropyl alcohol. I do this to create tints. I don’t always want to restain a pipe, the tint allows me to blend the stain and bring colour back to the bleached areas of the stummel.
KW25KW26KW27KW28KW29 After adding the tint, I used a cotton ball with isopropyl alcohol to wipe down the stummel and even out the tint.
KW30KW31 Then the pipe went to the buffer. First with white diamond…
KW32KW33 Then with Carnauba…
KW34KW35KW36KW37 Then after a wipe down with a Dunhill Pipe Wipe…
KW38KW39KW40KW41KW42KW43 I love this pipe. I’m thrilled to have it, and can’t wait to smoke it.

Right now I’m having one of these to celebrate.
KW44 As always, thanks for looking, and feel free to toss any tips my way.

A Malibu Bent Billiard by Savinelli Restemmed and Restored.


The next pipe from the gift box of bowls was a bent billiard stamped MALIBU on the left side of the shank and Italy on the underside. There is no other stamping on the pipe. I searched the internet for information on the brand and also looked in the book Who Made That Pipe and there found that the pipe was made by Savinelli. I emailed Savinelli but have not yet received a confirmation of that information. I will update this post as soon as I hear from them. In the meantime I worked on the bowl. It was in decent shape though covered by a thick varnish coat that gave it a perma-shine. The bowl and shank were dirty but had not been smoked enough to build up a cake or tars. The rim was in excellent shape and the finish other than being very plastic looking was clean. In the first photo below you can see the two large fills that were on the bowl and shank on the left side. The first is on the side of the bowl, just ahead and below the bend. The second is on the shank next to and below the stamping. They seemed to have taken the stain and though they are visible are not a bright pink. There was no stem with the pipe so I found the one in the photo below that would fit the shank with a little work.
IMG_7519
I turned the tenon down with a PIMO Tenon Turning Tool and then sanded some of the seams that still showed on the side of the bowl. The diameter was very close to being the same – I had to make a few adjustments on the top and the right side to get a seamless fit.
IMG_7520

IMG_7521

IMG_7522

IMG_7523
I sanded the stem in place and sanded the shank at the same time. I needed to remove the varnish coat anyway so I figured it would be okay to sand the shank at the same time. I did not want to reduce the size of the shank – merely that of the stem and then match them. I find that if I do that with the stem off the shank it is easy to round the edges of the stem. With it in place and using a sanding block I can get a smooth transition. I also work to restain the sanded area of the shank to match the bowl.
IMG_7524

IMG_7525

IMG_7526

IMG_7527
Once the transition was smooth I wiped down the bowl with acetone to remove the varnish coat. It took some scrubbing with acetone wet cotton pads. I was finally able to break through the finish with the acetone.
IMG_7528

IMG_7529

IMG_7530
I sanded the bowl and shank, carefully avoiding the stamping, with a medium and a fine grit sanding sponge. I sanded the entire bowl and shank and then wiped the bowl down with isopropyl alcohol to remove the sanding dust.
IMG_7531

IMG_7532
I sanded the stem with the same sanding sponges and removed the majority of the scratches left behind by the sandpaper. I set up a heat gun and heated the stem to soften it so I could bend it. When it was pliable I bent it over a rolling pin with a hard cardboard tube over it to smooth out the wood. I bend it until the stem looks right with the bend in the shank and then use cool water to set the bend.
IMG_7533

IMG_7538

IMG_7539
With the bend set I took it back to the worktable to sand the bowl to even out the existing finish and the stem.
IMG_7541

IMG_7542

IMG_7543

IMG_7544
I stained the bowl with a medium brown aniline stain, flamed it and repeated the process. I sanded the stem with the usual battery of micromesh sanding pads – wet sanding with 1500-2400 grit pads and dry sanding with 3200-12,000 grit pads. I rubbed the stem down with Obsidian Oil between each set of three pads and then as a final rub down once I had buffed the stem with White Diamond. I buffed the entire pipe with White Diamond and then gave the bowl and stem multiple coats of carnauba wax – buffing with a soft flannel buff between coats of wax. The finished pipe is shown below. The fills on the left side are still visible but the blend into the bowl is quite good. It is tolerable. The pipe is cleaned, refinished and ready for the rack of the next pipe man who will smoke it.
IMG_7551

IMG_7565

IMG_7552

IMG_7553

New Life for an old KBB Doc Watson Dublin


Yet another of the gift bowls was on the work table today. It a delicate Dublin shaped bowl that is stamped on the top of the oval shank with KBB in the cloverleaf and next that Doc Watson in an arc over Italian Bruyere. There are no other stampings on the bowl or shank. I was intrigue to work on this old pipe as Doc Watson was one of my favourite musician/singers. I enjoy his guitar playing and singing. I have no idea if this pipe is connected to him in any way but the name brought back memories of small concerts when I lived in Southern California. The finish was dirty and the briar darkened on the left and right side of the bowl where it was held in the hands. Oils and soil from the hands of the previous smoker had darkened the bowl. It had a dark oxblood stain that hid the grain of the briar. There was a small nick on the bottom front of the bowl that did not go too deep into the briar. The rim was darkened and had a buildup carbon and oils that would need to be cleaned. The bowl had a light uneven cake and the shank was dirty.
IMG_7445

IMG_7446

IMG_7447

IMG_7448
I had a new oval Lucite stem in my stem can that would work well for this bowl. The slot in the button had not been cut or shaped. The diameter of the stem was slightly larger than the shank so it would need to be shaped. The tenon was too longer so it would need to be shortened to fit in the shank.
IMG_7449

IMG_7450
I used a Dremel to sand the diameter of the tenon and shorten it. When I had the fit close I sanded it by hand to assure a snug fit in the shank.
IMG_7451

IMG_7453
I initially sanded the excess diameter on the stem with the Dremel and a sanding drum. I followed that by sanding with 150 grit sandpaper to smooth it out and bring it closer to matching the stem. I When I had the fit close I sanded the shank and stem together with 220 grit sandpaper to make the transition absolutely smooth.
IMG_7454

IMG_7486

IMG_7487

IMG_7488

IMG_7489
I wiped down the bowl with acetone on cotton pads to remove the finish. I find that when I break down the stain I can actually bleed it into the sanded portion of the shank. This colours the shank and makes it easier to apply the next coat to the whole bowl.
IMG_7490

IMG_7491

IMG_7492

IMG_7493
I sanded the bowl and shank with 1500-2400 grit micromesh sanding pads. Then wiped it down a final time with isopropyl alcohol.
IMG_7494
I stained the bowl with a oxblood aniline stain, flamed it and repeated the process. It covered the pipe very well.
IMG_7495

IMG_7496
When it had dried I buffed the pipe with White Diamond to polish it. The bowl was ready to be buffed with carnauba but I waited until I had worked on the stem then I would buff them together.
IMG_7499

IMG_7500

IMG_7501

IMG_7502
I sanded the stem with my usual array of micromesh sanding pads. I wet sanded it with 1500-2400 grit pads. I then worked on the slot. I wanted to have a wide open oval slot in the button so I used needle files to open the airway in the end of the stem. I used flat, round and oval files to open it and then a folded piece of sandpaper to polish after filing.
IMG_7503

IMG_7504

IMG_7507

IMG_7509

IMG_7512
I dry sanded the stem and the end of the button with 3200-12,000 grit pads. To remove some of the scratches left on the button I also started again and wet sanded with the 1500-2400 grit pads. When I had finished sanding I polished it with Obsidian Oil and let it dry. The Oil does not soak in like it does on vulcanite but provides a lubricant that works well when I buff the Lucite stem with White Diamond.
IMG_7513

IMG_7514
I buffed the bowl and stem with White Diamond and then gave it multiple coats of carnauba wax, polishing it with a clean flannel buff between coats. When finished the pipe looks like it must have the day it left the KBB factory. It is cleaned, restored and ready to smoke. The finished pipe is shown below.
IMG_7515

IMG_7516

IMG_7517

IMG_7518

Ropp Cherrywood Everest Oom Paul Restored


Yet another one of the pipe bowls that came to me in the gift box was a Ropp Cherrywood. It is stamped on the bottom of the bowl on a polished smooth portion, Ropp over Everest over Made in France. The wood was dirty and tired looking but still solid. The bowl was caked but not burned. The rim had a carbon buildup on it but was not burned or scorched. The drilling on the pipe was perfect. At first I thought that only the bowl had been included and I was scheming about the kind of stem to put on this one. But in the bottom of the box I found the original stem. It had a vulcanite 90 degree angle portion attached to the end of a cherrywood branch that fit snug in the hole in the bowl. At the other end of the cherrywood branch/shank was the stem. It bore the Ropp emblem and was badly oxidized. There was some tooth chatter on the stem near the button on the top and the bottom. The tenon on the stem had been coated with a brown wax to ensure a snug fit in the shank.
IMG_7443
I scrubbed the exterior of the bowl and rim with Murphy’s Oil Soap and cotton pads to remove the dirt and grime that had built up on the bark and wood. There were several places where the bark had a pitch build up on the outside that had hardened and was black. I was able to scrub away all of the carbon buildup on the rim and bring it back to the natural colour.
IMG_7419

IMG_7420

IMG_7421
I scrubbed the shank carefully with oil soap on cotton pads so as not to damage the leather wrapping that was on it. There were two cords – one red and one green that were interlaced around the length of the shank. A plastic ring was glued on the shank on both ends to anchor the leather cords. On the bowl end of the shank there were two roundels of leather that acted as tassels.
IMG_7425
I reamed the bowl with a PipNet reamer. I find that the heads of this reamer fit most of the bowls that I work on. I cleaned out the ash from the bowl and then swabbed the bowl out with cotton swabs and alcohol. I also cleaned the airway on the bowl with cotton swabs.
IMG_7426
The 90 degree angle vulcanite connector between the bowl and shank was oxidized. It was hard to sand with micromesh pads or sanding sticks so I used a fine grit sanding sponge to break up the oxidation and then scrubbed it with Meguiar’s Scratch X2.0 – a plastic polish to remove the oxidation. It took a lot of scrubbing to get through the oxidation. I applied the polish with my finger and when it had dried scrubbed it off with cotton pads. While I worked on the connector I also applied the Scratch X2.0 to the stem and let it sit.
IMG_7427
I sanded the stem with 220 grit sandpaper, medium and fine grit sanding sponges and then with the usual array of micromesh sanding pads. I wet sanded with 1500-2400 grit pads and dry sanded with 3200-12000 grit pads. I buffed the stem with White Diamond. I left some of the wax buildup on the stem once I found that to remove it made the stem very loose.
IMG_7428

IMG_7431

IMG_7432
I buffed the bowl and stem with White Diamond and then gave it several coats of carnauba wax and buffed it with a soft flannel buff. I hand waxed the shank with Halcyon II and then a shoe brush. The finished pipe is shown below. I am looking forward to experiencing a smoke in a Ropp Cherrywood Oom Paul.
IMG_7439

IMG_7440

IMG_7441

IMG_7442
The final two photos were taken with my cell phone to show my Ropp Threesome – a Volcano, the Oom Paul and the newest Frankenpipe that I wrote about earlier. They make an interesting subset of my pipe collection and now they occupy shelves in my study. I think in the long run at least the two larger pipes will be primarily display items (though I plan to try them all out at least once).
photo 2

photo 4

Restemming and Restoring a John Bessai Special Diamond Shank Bent Brandy


Blog by Steve Laug

I was gifted a box of pipe bowls that needed varying degrees of work and a few odds and ends of pipe parts that now reside in my cans of parts. The bowls have refilled my refurbishing box. The first of these that I chose to work on is a beautifully grained, flawless piece of briar made into a diamond shank brandy. It is stamped on the left underside of the shank – John Bessai over Special. There is no other stamping on the pipe at all. The rim of the bowl is rounded. The pipe bowl is in excellent condition with no problems with the finish. The bowl needed reaming as it had an uneven cake on one side and on the upper portion. The shank is dirty with tars and oils but otherwise in good shape. The drilling and finish on this pipe is perfect. It is a beauty. From a previous Bessai pipe that I had found nearly three years ago I knew a little bit of history. I had hunted to gather information at that time.
IMG_7318

IMG_7319

IMG_7320

IMG_7321
HISTORY & BACKGROUND
I started out with what I had found previously and written about on the blog. I quote the following paragraph from Pipedia http://pipedia.org/index.php?title=Bessai

1. “John Bessai was a long time pipemaker, repairman and tobacco shop owner who operated his pipe shop at the “Old Arcade” in Cleveland, Ohio. The shop was opened in approximately 1898. It was a small 2-room shop where he hand-crafted his own pipes in the back room and could work when customers were not there. Like so many other shop made brand, John Bessai’s limited production was quickly acquired by regular customers and thus his craftsmanship remained little known outside of Ohio and the Midwest. While his name is known by pipe collectors in the Midwest, his work is seldom seen elsewhere! He died before 1969. Nevertheless, John Bessai left behind a small number of classic shaped pipes; all were made on-site. They are praised worthy of collecting and reflecting skills well beyond most American pipe makers. John Bessai’s logo “JB” appeared as one letter as the “back” of the “J” and the “back” of the “B” share a single line. The logo was stamped on the stem and on the left side of the shank. His son Herb Bessai took over the business and also continued making pipes. He closed the shop in about 1978.”

I suspected that there would be more information three years later. I did some further research and came across the information found in the paragraph below on one of the pipe forums.

2. “John Bessai was located in the Colonial Arcade at least into the late 1980s. After his death, his son Herb ran the shop. It was taken over after Herb’s retirement by a male and then name was changed to “Old Erie Pipes”. This was then located in the Erieview Plaza and when that mall closed, taken over by Cousin’s Cigars which has a store on Euclid Avenue near CSU, and a store on Chagrin Boulevard in Woodmere Village.”

That small quotation gave me a bit more information of the state of the store after John’s death and Herb’s retirement. But I still wanted more information. I wanted to know about the history of the brand and if there was any information on the various grades in the brand and the stamping on the pipes. I wanted to know a bit of a timeline for the brands. Finally my digging paid off. ON one of the pipe forums I came across a link that led me to a gold mine of information gathered by a man after my own heart, Andrew Hross. He has a blog call Classic Pipe Shop on Blogspot. I have included the link below for those who want more information. Andrew has done an amazing job of gathering information on the Bessai Brand so rather than rewrite the history I am quoting portions of Andrew’s work on The John Bessai Pipe Clinic.

http://classicpipeshop.blogspot.ca/2014/04/the-john-bessai-pipe-clinic-information.html

3. The John Bessai Pipe Clinic, 35 Colonial Arcade, Cleveland, OH 44115 – by Andrew Hross
a. Owner(s):
**John Bessai 1920s until his passing in 1969
**Herb Bessai ~1962-1983
**Daniel Gottschall 1984-~1993
**Purchased by Dad’s Smoke Shop / Cousin’s Smoke Shop and rolled into the Old Erie Smoke Shop about 1993.

Cousin’s Cigars purchased the remaining stock of Bessai pipes near after Herb Bessai passed away in 2002.

b. Years of Operation:

1920s (unkown specific date at this time) – 1983. After 1983 the business was sold to Daniel Gottschall who later sold it to Cousin’s Cigar (Euclid Ave) around 1993. The name was changed to “Old Erie Tobacco Company”. They were forced to move to the Galleria when all the tenants of the Old Arcade were cleared out to make room for renovations. Their new address was The Galleria at Erieview, 1301 East 9th Street in Cleveland.

After this move the location wasn’t as busy as they had hoped and Cousin’s moved all the Old Erie Tobacco assets to their Euclid Avenue Store. The store has since moved to a St. Clair location after Cleveland State forced them out due to anti-smoking regulations on campus. Their St. Clair location offers many of John Bessai Pipe Clinic’s old tobacco blends.

Their new store opened in the Merriman Valley area in Akron, Ohio where the store manager John Coleman oversees the day to day operations. John was instrumental in helping me piece together a lot of loose ends during Bessai Pipe Clinic’s transition years.

My father visited their shop several times in the early 60s as he attended Fenn College (now Cleveland State University) as an undergrad before moving on to Ohio State University for his Masters. He’s way smarter than I am so I just go with the flow…

He mentioned meeting John at that time who quickly gave my father some pointers on smoking a pipe and how to take samples from the shop’s expansive sample jar collection. His pipes were on display in the shop although I don’t believe he had a lot of pipes on display at any given time due to production in-shop.

John’s son Herb took over the shop in the early 60s after he graduated from Cleveland State University / Fenn College (unclear) as he is listed as having played Basketball for CSU. Herb was also a helpful, informative and friendly individual. Articles exist from the Herald in 1962 where they interviewed Herb (with photograph) about the state of smoking in the new age of the early 60s. I visited the shop in the late 70s / early 80s with my father during a trip to Cleveland and couldn’t tell you much about the shop other than the guy working was very friendly. Back then it wasn’t unusual to be a kid and walk into a smoke shop with your father. Clearly I didn’t purchase anything but my father probably picked up some tobacco but I remember him looking at pipes displayed on a back wall. The shop was small but impressive.

If anyone has any pictures of the shop or old catalogs, I would love any additional information as it’s tough to come by 30+ years later!

c. Pipes offered by John Bessai Pipe Clinic:
Most of the pipes that were offered by the John Bessai Pipe Clinic were fairly standard in shape… I would say most of the pipes Bessai offered were smooth pipes. My assessment would be 90% smooth and 10% rusticated / sandblasted…

…The story is that John crafted pipes in the back room or off site and finished them in house while the store wasn’t busy. Very little information is available on the accuracy of this statement. Some of his pipes from the late 1960s through the 1970s (John passed away in 1969) I feel were left over stock from previous turnings and sometimes showed fills or sand pits. Some of these pipes even carry Herb’s markings (see below). These pipes still smoke very well but are not as eye-appealing as other earlier pipes from the store’s career.

d. Stampings and rough dating of John Bessai Pipe Clinic Pipes:
Which pipes did John make and which ones did Herb make/finish? All Bessai pipes carry his standard large JB stamp either on the stem or shank or both. Typically the JB on the stem is within a circle.

All pipes created by John Bessai’s hands reportedly contain the miniscule ‘jb’ stamp on the shank or body of the pipe. I have older pipes in my possession that do not contain this stamp (condenser, old stamps, etc) that were clearly shop made pipes. I feel he started using the tiny ‘jb’ stamp in the 50s to early 60s.

An interesting note about John Bessai’s stems – they always clean very nicely and aren’t prone to as much oxidation (that brownish / green color) as most dunhill and Charatan pipes tend to oxidize. His cuts to his stems were very impressive and often transitioned from diamond-shaped shanks almost architecturally. Very comfortable to smoke.

John Bessai Special Pipes:
… I have a couple Bessai Special pipes. These stand out either by large size, graining or possibly shape. Most Specials are unique pipes and are rare to find in comparison to his regular issue pipes.

John Bessai Special X pipes:

I only have one of these and it’s a beauty. This one is a larger bowl (around a group 4 dunhill) with deep colored grain and a hefty substantial shank. Special X pipes are probably the rarest of John Bessai pipes and should be sought out if possible. I’ve smoke mine roughly 4 or 5 times and it performs with the best of my pipes…

Herb Bessai Pipes:
Unfortunately none of these pipes that I’ve seen have astounded me with grain or general appearance. Having said this, these pipes smoke nicely and are a great value if you can find them. I have one that my father found at an Antique Show in the South. There’s another author shape on reborn pipe’s blog that someone refinished because of the amount of fills in the pipe. He also states it’s a wonderful smoker (Editor’s note: This is my pipe and the write up I did on the blog). These pipes are likely from the late 60s through the early 70s. I believe many pipes after this period were created en masse at a factory in the US. It is unclear what stamp was used on these later pipes…

e. Dating / Circa era Bessai Pipes:
If the pipe carries a stamp stating Cleveland, O U.S.A. it’s considered an older production pipe (pre1960s). I’ve not seen any newer pipes with that stamp.

Bullseye stamping usually indicates an earlier pipe as that stamp seems to have been abandoned pre1960 as well.

Most of the earlier Bessai pipes have an unusual ‘stinger’ or condenser at the end of the tenon which is unique to Bessai pipes. They are either a hard plastic or created out of wood. They are typically easy to remove and could have been easily lost if misplaced. These pipes I would consider pre-1960 and possibly 1940s-early 1950s production based on their stamps and patina of the pipes.

1970s 1980s and beyond: My feeling on these pipes after John’s passing is that they purchased finished pipes from a large manufacturer and stamped them with the John Bessai or Bessai stamp (on shank and/or stem). Most of these shapes are standard among many stores from that period and offer less than spectacular grain (and sometimes fills). Stamps on these pipes are probably fairly plain and don’t have the tiny ‘jb’ stamp on the shank indicating it was produced by John Bessai.

RESTORATION
I went through my can of stems and found an older diamond-shaped saddle stem that fit quite well in the shank of the Bessai. The tenon was a little big so I sanded it with the Dremel and sanding drum until it fit snugly in the shank. The stem was an estate stem so it was dirty and had tooth chatter and some small indentations from teeth on the top and bottom of the stem near the button. It was slightly larger than the shank so that it would need to be sanded until it fit the line and shape of the shank.
IMG_7306

IMG_7307

IMG_7317
I sanded the stem and shank with 150 and 220 grit sandpaper to bring all sides and angles to match the shank angles and sides. I sanded the stem to remove the tooth marks and the tooth chatter in the process.
IMG_7322

IMG_7323

IMG_7324

IMG_7325
I sanded the stem and shank with a medium and fine grit sanding sponge to remove the scratch marks left behind by the sandpapers.
IMG_7326

IMG_7327
I reamed the bowl with a PipNet reamer to remove the uneven build up of cake in the bowl.
IMG_7328
I wiped down the surface of the briar with acetone on cotton pads to remove the finish on the bowl and make restaining it simpler.
IMG_7329
I cleaned out the bowl and the shank with isopropyl alcohol (99%) on cotton swabs and pipe cleaners until the bowl and shank were clean. I cleaned out the stem with pipe cleaners and alcohol as well. I also beveled the airway on the end of the tenon to make the flow more open.
IMG_7330
I set up a heat gun and heated the stem to bend it to fit the shape of the pipe. I inserted a pipe cleaner in the stem and then bent it over a rolling pin and set the bend with cool tap water.
IMG_7331

IMG_7332

IMG_7333
I wiped down the bowl and stem with isopropyl alcohol. The grain on this pipe is quite stunning so once it is restained and the stem finished it will be a beautiful pipe.
IMG_7335

IMG_7339

IMG_7342

IMG_7343
I stained the bowl with a medium brown aniline stain and flamed it, I gave it more stain and flamed it again. I then sanded the stem with medium and fine grit sanding sponges and then with my usual array of micromesh sanding pads. I wet sanded the stem with 1500-2400 grit pads and dry sanded with 3200-12,000 grit pads. Between each set of three pads I rubbed the stem down with Obsidian Oil.
IMG_7344

IMG_7345

IMG_7346
When I finished sanding with the final grits of micromesh I gave it another coat of Obsidian Oil and then buffed the stem and bowl with White Diamond. I gave the bowl and the stem multiple coats of carnauba wax and used a soft flannel buffing pad between coats to polish it. The finished pipe is shown below. The new coat of stain and the shine on the stem give the pipe a new and clean look. It is ready for its inaugural smoke. The background history sets the stage for a deeper appreciation of the pipe once I fire it up. It should smoke very well.
IMG_7347

IMG_7348

IMG_7349

IMG_7350

A Peterson’s Donegal Rocky 05 Reborn


The third pipe in the Peterson trio of pipes shown in the photo below came to the worktable today. It is a Peterson’s Donegal Rocky 05 bent Dublin. It is the second pipe in the photo below. The bowl was badly caked – uneven and broken. The rim had a thick coat of tar and carbon buildup and was damaged on the right front side of the rim. The stem was missing and the nickel band was tarnished but undented. The finish was worn and the grooves of the rustication were filled with grit and grime from years of smoking. Like the other two pipes in this lot it must have been a favourite of the previous owner to be smoked to this degree. The inside of the shank was clogged with thick tars and oils and I was unable to blow air through it.
$_57
I reamed the bowl with a PipNet reamer until the cake was gone and the bowl was bare wood. My goal was to take back all the cake and rebuild a new smooth one. I pushed a paper clip through the airway to open the clog. I used cotton swabs, shank brushes and a drill bit to remove all of the grime and buildup in the airway and the shank. I scrubbed the exterior of the bowl with a soft bristle tooth brush and Murphy’s Oil Soap. I rinsed it under warm water to remove the soap and patted it dry. Once it was clean I filled the bowl with cotton balls and used an ear syringe to fill the bowl with isopropyl alcohol. I let the bowl sit over night in an ice cube tray to keep it upright. The first photo shows the set up when I first filled it. The second photo below shows the bowl after it had soaked over twelve hours.
IMG_7127

IMG_7152

IMG_7153
I took the dirty cotton balls out and washed out the bowl and shank with clean isopropyl alcohol and cotton swabs. While it was drying I scrubbed the rim with a brass tire brush to clean off the build up on the rustication. In the photo below the damage to the rustication is very evident. It is burned and worn smooth on the right front and side.
IMG_7173
I used the Dremel with one of the burs that Joyal gave me to re-rusticate the rim. I followed the patter on the portions of the rim that were still visible and tried to duplicate them on the rest of the rim.
IMG_7174

IMG_7175
After rusticating the rim I restained it with a dark brown aniline stain. I applied the stain, flamed it and repeated the process until the coverage was even across the rim. I stained the bowl with the dark brown stain as well and flamed it.
IMG_7177

IMG_7178
The brown stain was too opaque and the contrast between the dark in the crevices and grooves of the briar and the lighter brown on the high spots was gone. I wiped the bowl down with acetone on a cotton pad until I had the contrast that I was aiming for.
IMG_7179

IMG_7180

IMG_7183
I ordered some stems that were the correct diameter and length for the 05 from Tim West at J.H. Lowe and Company. They arrived on Friday so I was able to fit one to the shank. I turned the tenon with a PIMO Tenon Turning Tool. The fitting of a tenon to the tapered shank of Peterson pipes takes a little getting used to. I worked to match the taper of the tenon to the taper of the mortise and was able to get a good fit on against the band.
IMG_7236

IMG_7238
I used the sanding drum on the Dremel to remove the casting seams on the sides and the button of the stem.
IMG_7239

IMG_7240

IMG_7241

IMG_7242
I sanded the stem with 150 and 220 grit sandpaper to match the diameter of the shank to the diameter of the band.
IMG_7251

IMG_7252
I sanded the stem with medium and fine grit sanding sponges to remove the scratching left behind by the sandpapers.
IMG_7257

IMG_7258

IMG_7259

IMG_7260
I wanted to bend the stem to match the original stem that would have been on the pipe. I looked up photos on the web of the 05 and copied one of them. I decided to use a fishtail stem instead of the p-lip stem but I was able to use the photo as a template of the bend.
don05
I heated the stem with a heat gun until it was flexible and then bent it over a rolling pin with a cardboard sleeve over it. I have found that the cardboard prevents the hot vulcanite from marring when I bend it. The second photo below shows the first attempt at the bend and the third photo shows it after I reheated it and rebent it to match the template.
IMG_7271

IMG_7275

IMG_7277
I sanded the stem with the medium and fine grit sanding sponges again. At this point in the process the stem was ready for the fine sanding work with the micromesh sanding pads.
IMG_7294

IMG_7295
I sanded the stem with the usual array of micromesh sanding pads – wet sanding with 1500-2400 grit pads and dry sanding with 3200-12000 grit pads. In between each set of three pads (1500-2400, 3200-4000 and 6000-12000) I rubbed the stem down with Obsidian Oil. I let it dry before moving on to the next grit of pads. Once it was finished I rubbed it down with a final coat of Obsidian Oil and when it had dried I buffed the stem with White Diamond. I gave the bowl a coating of Halcyon II wax and hand buffed it with a shoe brush and gave the stem multiple coats of carnauba wax, buffing with a clean flannel buffing pad between applications. The finished pipe is shown below. It too is ready for its inaugural smoke – maybe a bowl of Louisiana Red will start this one off also… anyway, it is ready for the a long life ahead.
IMG_7301

IMG_7302

IMG_7303

IMG_7304

Restoring and Restemming a Peterson’s Kapmeer 999S


Blog by Steve Laug

I just finished working on the second of the three pipes that I picked up on Ebay in the lot of three Petersons. It is the third bowl in the photos below. It is stamped Peterson’s over KAPMEER on the left side of the shank, 999S on the underside of the shank and Made in Great Britain on the right side of the shank. It is actually the reason I bid on this lot of pipe bowls. I love the older 999 shape with the thick shank. I like the way it feels in hand and the look of it. As you can see it was in rough shape. There was no stem for it. The finish was rough and worn, the bowl had a thick uneven cake in it and the top of the rim was thick with a cake build up. From what little I knew the KAPMEER was a meerlined pipe. There was something unique about its design but that escaped me at the moment.

While I waited for it to arrive I did a bit of digging into the KAPMEER line. The first thing I found was a quote that said, “The line was introduced for those who preferred to smoke their tobacco in a meerschaum bowl, but still have the looks and advantages of a briar pipe”. That was not altogether helpful to me. It is much the same advertizing info that is included in most of the sales material for meerlined pipes. What was the difference between those pipes and the KAPMEER? The meerschaum lining ended just before the draw hole, so you do not have the problem of deterioration in the bottom of the meerschaum insert in the tobacco chamber. It was believed that this would reduce the possibility of a burn out on the sides of the bowl. I found the two photos below online that clearly show the design of the KAPMEER bowl. The first photo shows the bottom edge of the insert just above the draught hole. The bowl bottom is briar. The second photo shows the contrast between the meerschaum lining and the briar on the bottom of the bowl. In looking at these photos I think I understand the idea of combining the best of meerschaum and briar pipes. The theory would be that the meerschaum lining would deliver a meerschaum style cool smoke and the briar bottom would give the durability and strength of briar.
Kapmeer bowl top view

tumblr_mw3ugfrLNV1t13exzo2_1280
or early 1970s. The pipe in the second photo is a later design. The early pipes had a regular stem/shank junction rather than the faux military stem. The one that I had came from a period in time where the stem was most likely a tapered stem with an aligned fit. The pipes were made in Great Britain on the Isle of Man. I found out that though Peterson had maintained a factory in London since 1899, the ‘Made in England’ stamp was discontinued with the closing down of the London-based factory (1969/70). That puts my bowl pre-1970 in terms of date. The thick shank on the 999 bowl dates it earlier than that period.

I gently reamed the bowl, being careful to not damage the meer lining. I wanted to take the cake back as far as possible with the reamer and would do the rest with sandpaper. I sanded the meer lining with 220 grit sandpaper until the entire cake was gone and the meer was once again smooth. It was darkened and would not be white again do to use. I gently topped the bowl with a topping board to remove the cake and smooth out the rim damage before working on the rest of the bowl. I wiped the bowl down with acetone on cotton pads, carefully avoiding the meerschaum lining on the top of the rim. The acetone removed the grime and the spotty stain on the bowl and would form the base for restaining the bowl later.

The bottom of the bowl had been over reamed and the briar damaged with deep gouges on the bottom. The bottom was still thick so there were no worries about burn out. I mixed a batch of pipe mud from cigar ash and water and applied it to the bottom of the bowl to bring the bottom up to the airway entrance. I tamped it in place with a pipe nail. I put some mud on the side walls below the end of the meerschaum lining. I set it aside to cure.
IMG_7169

IMG_7170

IMG_7171

IMG_7172
Once the mud had cured I wiped out the inside of the bowl with a damp cotton pad to clean any of the mud that had gotten on the meer lining. I wiped down the outside of the bowl with acetone and cotton pads a final time. I had a stem set aside from my can of stems that would fit the shank once the tenon was turned and the diameter of the stem reduced. I turned the tenon with a PIMO Tenon Turning Tool slowly until it fit the shank. I sanded the tenon with a sanding drum on a Dremel to finish the fit. I sanded the casting marks on both sides of the stem and on the end of the button with the Dremel as well. When all was finished the fit against the shank was snug and clean.

IMG_7243 IMG_7244 IMG_7245 IMG_7246As can be seen from the photos above the diameter of the stem was bigger than that of the shank. I used the sanding drum on the Dremel to take it down as close as possible to the shank diameter without damaging the shank. Once I had it close I did the rest of the work with 150 grit sandpaper and followed that with 220 grit sandpaper. When the transition between the two was smooth to touch I used a medium and a fine grit sanding sponge to remove the scratch marks from the stem. Since I was planning on restaining the pipe I sanded the shank gently to make sure that the transition would be smooth and the flow correct. I have found that this is the only way to keep the stem and shank matching without and shift in height on either material.
IMG_7247IMG_7248IMG_7249IMG_7250I wiped off the sanding dust with a damp cloth and gave the stem a wipe down as well. The photos below show the look of the stem and shank union at this point in the process. I also gave the rim a light sanding with the sanding sponges as well. There is one small sandpit in the top left side of the rim. I decided to leave it rather than fill it.

IMG_7253 IMG_7256IMG_7254IMG_7255I sanded the shank with 1500-2400 grit micromesh sanding pads to remove scratches in the finish and wiped the bowl down with alcohol on a cotton pad. Greg sent me a set of staining pens to work with so I decided to try them out on this pipe. I tried the light and medium pens and found that they did not match the stain on the pipe so I settled for the dark pen. I drew on the unstained surface of the shank and then blended it into the rest of the bowl. I also did the same on the rim, blending it downward into the sides of the bowl. The pen was very easy to control and keep off the meer lining on the inner edge of the rim.

IMG_7262 IMG_7263 IMG_7264 IMG_7265When the stain had dried I buffed the bowl with White Diamond and then gave it a coating of carnauba wax to seal it and give it a shine. I had done enough of the early sanding on the stem by that point to set up a heat gun to heat and bend the stem. I held it over the heat until the stem was soft and then bent it over a rolling pin that I use for bending stems. I have a thick cardboard tube that I slide on the rolling pin to provide a softer surface than the old rolling pin when I am bending the heated vulcanite.

IMG_7268 IMG_7272 IMG_7273The photo above shows the first attempt at the bend in the stem. It was not bent enough to my liking so I reheated it and bent it again. Once the bend was correct I set it in cool water.

IMG_7276I took the pipe back to the worktable to sand the stem. I wet sanded with 1500-2400 grit micromesh sanding pads and dry sanded with 3200-12,000 grit pads. I rubbed the stem down between each of the three grits with Obsidian Oil and let it soak in before moving on to the next series of three grits.

IMG_7278 IMG_7279 IMG_7280I rubbed it down a final time with the Obsidian Oil and then buffed the pipe and stem with White Diamond on the wheel. I gave the pipe multiple coats of carnauba wax and between each coat buffed it with a soft flannel buff. The finished pipe is shown in the photos below. All that is left is to load a bowl of some aged Louisiana Red and enjoy a bowl.

IMG_7281 IMG_7284 IMG_7285 IMG_7289For comparison sake, I have included a photo of the newly reworked KAPMEER with the earlier KILDARE that I restemmed from a piece of Cumberland rodstock that I purchased from Todd Bannard of Briar, Sweat and Tears Pipes http://www.briarsweatandtears.com/ . Todd cut the length and did the drilling and shaping on that piece before sending it to me to finish. As you can see both have the thicker old style shanks that are no longer used on Peterson 999 pipes. This pipe is the third one that I have from that earlier time period. It is the shape of the 999s that I favour.

IMG_7291

Resuscitating a Peterson Donegal Rocky 338 Bent Billiard


A few weeks ago one of the EBay sellers that I have bought several pipes from over the years had three Peterson bowls, sans stems listed for sale. They were in rough shape but I decided I wanted to give refurbishing them all a try. Besides one of them was a 999S and I love the 999 shape. That alone would have pushed me to make a bid on this lot. I ended up buying the threesome for more than I usually pay for pipe bowls but I figured it was worth the effort. This is the photo of the threesome from the sale listing.

The first of the three Peterson bowls is on the worktable at the moment. The finish was very rough on the pipe. It had built up grime in all of the grooves of the rustication. The inside of the bowl was caked almost to the top of the rim. The shank was one of the foulest things I think I have seen before. It was caked with oily tars from just inside the edge of the mortise to the bottom of the mortise. The rim was badly damaged with the front edge burned down lower than the rest. The rim was ragged looking and uneven all the way around. It looked to be solid though underneath the damage. The stamping on the underside of the shank said Petersons Donegal Rocky with the shape number 338. All the stamping is quite faint but still readable with a lens.
IMG_7098

IMG_7099
I cleaned and reamed the bowl. It is funny how short and easy that sounds but in this case that was not true. The cake in the bowl was like concrete and had totally closed off the bottom half of the bowl. The remaining top half had a slight slice to the airway but that effort was useless as the shank was completely clogged and no air could go through. I reamed as much of the bowl as I could with a PipNet reamer, not even getting as low as the airway. This stuff was very hard. I cleaned the shank with alcohol and cotton swabs. I tried to push a pipe cleaner through the clogged airway in the shank and was unable to get it to through. I decided to throw the bowl in an alcohol bath to soak for several hours to loosen things up.
IMG_7100

IMG_7111
When I took it out of the bath the alcohol soak had done its work. I was able to ream the rest of the way to the bottom of the bowl and completely remove the cake. I was able to push a wire through the airway and then cleaned out the airway and shank with cotton swabs and some assorted dental tools (thanks Joyal).
IMG_7112

IMG_7108
I scrubbed the rusticated finish of the bowl with Murphy’s Oil Soap and a tooth brush. I used a soft brass bristle brush to work on the rim and clean up the loose build up. Once I had scrubbed it I rinsed it with warm water. I dried it off and still had to do some more scrubbing. I cleaned the inside of the bowl and shank with the dental tools and cotton swabs and alcohol.
IMG_7125

IMG_7127
The rim was so badly damaged and uneven with the burned area that I topped it using the topping board and 220 grit sandpaper until it was flat.
IMG_7121

IMG_7123

IMG_7124
I went through my stem can and found a three inch long stem that was approximately the same shape and length as the original stem. I turned the tenon with the PIMO Tenon Turning tool and removed the castings on the sides and the end of the stem. I further shaped it with the Dremel and sanding drum.
IMG_7128

IMG_7129

IMG_7131

IMG_7132

IMG_7133
I wanted the top of the bowl to have the same rustication that it originally had before all the rim damage. It had a pattern that was similar to the rustication on the bowl itself. I looked on line to find photos of the rim of a Donegal Rocky that would be a pattern for me to copy. I put a dental bur that Joyal has given me on a Dremel tool and set the speed to a slow speed and used it to rusticate the rim to match the pattern in the photo of the bowl.
IMG_7134
I wiped the bowl down with a cotton pad and alcohol to clean off the dust from the rustication and then stained the whole bowl with a dark brown aniline stain. In the photos below the rim is obviously much lighter in colour than the rest of the bowl so it took five coats of stain before it matched the bowl. I applied the stain and flamed it with a lighter to set the stain repeatedly until the coverage was correct.
IMG_7135

IMG_7136
The brown was very dark and the original contrast look on the Donegal Rocky was not evident. I wiped the bowl down with acetone on cotton pads to lighten it and bring back some contrast to the rusticated finish. In the photos below the properly darkened rim is visible.
IMG_7137

IMG_7138

IMG_7139
I lightly buffed the bowl and rim with White Diamond and then applied some Halcyon II wax on both and then buffed with a soft flannel buff. I knew that I would have to wax it again once I had finished but I always put a coat of wax on the bowl to protect the finish when I give it a more thorough clean. I sanded the stem with 220 grit sandpaper to smooth out the casting marks and the Dremel marks. Once I had the initial sanding finished I decided to bend the stem. I heated it over a heat gun until it was pliable and bent it over and old rolling pin. I used a photo of 338 I found on the net as a template for the bend in the stem. I made the photo life sized and laid the pipe against the computer screen to match the bend. Once I had the bend correct the rest of the stem work could begin.
IMG_7140

IMG_7141

IMG_7142

IMG_7143

0003284_sterling-silver-338_430

IMG_7144

IMG_7145

IMG_7146

IMG_7147
I removed the stem from the bowl, stuffed cotton bolls in the bowl of the pipe and used an ear syringe to fill the bowl with isopropyl alcohol. I set the bowl in an old ice cube tray that keeps the bowl upright. I set the tray aside to let the alcohol sweeten the pipe and draw out the oils in the bowl and shank.
IMG_7149
Four hours later the alcohol had begun to pull out the tars and oils into the cotton.
IMG_7152
Twelve hours from the starting time, the cotton was a dark brown and most of the alcohol had evaporated. I pulled the cotton out of the bowls and wiped them dry with a cotton swab soaked in clean alcohol and they came out clean other than a little bit of the detritus that had collected in the bottom of the bowl. I swabbed out the shank and airway as well with pipe cleaners and cotton swabs dipped in alcohol and the shank was clean. The pipe smelled sweet and ready to smoke.
IMG_7153
I turned my attention to the stem and sanded it with a medium and a fine grit sanding sponge. It removed the majority of scratches from the surface of the stem left behind by the 220 grit sandpaper (I believe these sponges are equivalent to 400 and 600 grit wet dry sandpaper).
IMG_7154

IMG_7155
The rustication that I did on the top of the bowl rim is very clear in the next photo.
IMG_7156

IMG_7157
I sanded the stem with micromesh sanding pads – wet sanding with 1500-2400 grit pads and dry sanding with 3200-12,000 grit pads. Between each set of three grits I wiped the stem down with Obsidian Oil and let it soak into the vulcanite.
IMG_7160

IMG_7161

IMG_7162
When I had finished sanding with the 12,000 grit pad I rubbed it down with a final coat of Obsidian Oil and when it had dried buffed the stem with White Diamond and a Blue Plastic buffing compound. I then gave the stem multiple coats of carnauba wax, buffing with a soft flannel buff between coats. I waxed the bowl with Halcyon II wax and hand buffed it with a soft bristle shoe brush and a cotton buffing cloth. I used the 6000, 8000 and 12,000 grit micromesh pads to polish the nickel band and then gave it a buff with a silver polishing cloth. This old Peterson 338, that must have been an incredible smoke to have been smoked as hard as it was, is now ready to enter the next era of its life and provide the same kind of service to me. I look forward to smoking it later in the week once I am sure the alcohol in the bowl and shank has all evaporated. I have to tell you, I am looking forward to having a bowl in this old timer.
IMG_7163

IMG_7164

IMG_7165

IMG_7167

IMG_7166

Carving Another One from a Pre-Drilled Kit


When I was traveling in the early spring I stopped by Burlington on Whyte Tobacconist in Edmonton, Alberta, Canada to pick up some tobacco and have a look at their stock. In the past I had purchased a pipe kit from them and found it to be a pretty decent piece of briar. It was the last pipe I had carved for myself. I looked through the lot and found one I like this time as well. I purchased it and carried it home. It sat on my desk for the past several months while I tried to figure out what I wanted to do with it. It was drilled to be a three-quarter bent pipe and had a vulcanite stem this time. The last one I has purchase had a Lucite stem. I thought it had potential and I just needed time to let it marinate in my brain until I decided what to carve.
IMG_6970

IMG_6971

IMG_6972

IMG_6973
I had a long weekend with rainy days forecasted for the entire time so it was a perfect opportunity to work on the block and see what I could carve. I don’t have many power tools in terms of facilitating carving but I do have files, knives and a Dremel with many sanding drums. I sketched out an idea on the block and began to sand away the excess briar with the Dremel. I had drawn a calabash/acorn shaped pipe. I have an old 100+ year old oak tree in my front yard and every fall I fight the squirrels in picking up the acorns. I was cleaning up around the tree recently and came across one they had dropped. I had the thought that an acorn shape including the cap would make an interesting looking pipe. With that in mind I attacked the work of shaping the briar. I find that I always am reticent to remove briar because I know I cannot put it back once it is gone so it takes me awhile to get the pipe walls and shank the proper shape and thinness. This one was going to be a bit thicker that I wanted when I realized that the shank was drilled for a 9mm filter. That would mean that the diameter of the shank would be larger than I had hoped.

In the photos and words below I plan on taking you with me on the journey from block to pipe. You might well have made different decisions than I did in the shaping of the block. And you probably would use better/different tools to work the shape. However, I worked with the tools I had and really wanted to show that the shaping can be done with a few tools, persistence and lots of hard hand work. Thanks for coming along with me on this journey. If you want to skip the words, feel free to do so and enjoy the process shown in the photos.
IMG_7030
I used a Dremel tool with a sanding drum, several different wood rasps and files to cut away the excess material. I find that the Dremel works fairly quickly in removing the briar and the files and rasps work well in the area where the shank joins the bowl. In the past I have tried to do that work with sandpaper and sanding sponges and was not happy with the overall results. The files and rasps facilitate a more defined junction. I also used several carving knives that I have to further define the angles of the junction.
IMG_7031

IMG_7033

IMG_7035

IMG_7037

IMG_7032

IMG_7034

IMG_7036
It took a lot of sanding with the Dremel and sanding drum to round out the corners on the block and remove the excess material around the shank. I worked to taper the bowl into the point at the bottom of the acorn and files and the Dremel to cut in the edge of the cap on the top of the bowl. I had spent approximately two hours to get the bowl to this point in the process. The photos below show that the shape is beginning to emerge from the block.
IMG_7039

IMG_7041

IMG_7038

IMG_7040
I worked on defining the shape of the bowl and differentiating the shank from the bowl. I continued to use the Dremel and sanding drum to taper the bowl and further define the shank/bowl junction. I also used it to increase the depth of the line between the cap and the body of the acorn as well as the curves of the cap. I was trying to shape the curves to resemble a meerschaum cup in a calabash.
IMG_7042

IMG_7043

IMG_7044

IMG_7045
I worked on the block with 100 grit sandpaper to further refine the angles and shape. I used a sharp knife to clean up the shank and bowl junction and give it even a clearer definition.
IMG_7046

IMG_7049
Before I took down more of the thickness of the shank I decided to make a new stem for the pipe. I wanted to get rid of the 9mm stem and put a tapered stem on the shank instead of the saddle stem. I turned the tenon with a PIMO tenon turning tool on a cordless drill and then hand fit it to the mortise. Once I had a good fit I sanded the shank and stem to get a smooth transition between the two materials. I used 100 grit sandpaper and then 220 grit to smooth it out. I continued to take down the taper on the bowl and round out the bottom of the bowl and the edges around the cap with the 100 grit and 220 grit sandpaper. The bowl was starting to take shape at this point in the process. It was still too thick to my liking and the cap was too blocky. A lot more sanding waits for me.
IMG_7050

IMG_7051

IMG_7052
I used the Dremel and sanding drum to remove more of the briar and then hand sanded with the 100 grit sandpaper to further refine the shape. I used a sanding wedge to work on the angle at the junction of the shank and bowl and clean up the carving marks. I also want to flatten the bottom of the bowl slightly and minimize the dip at the shank and bowl on the bottom.
IMG_7053

IMG_7054

IMG_7056
I continued to remove diameter from the shank and also work on the bottom of the bowl to give it a more rounded look and feel. I used 100 grit sandpaper to work on these areas. I sanded the stem as well to keep the taper and flow even between the two materials. I also sanded the curve on the cap to makes the angles less sharp.
IMG_7057
I used a heat gun to heat the stem and bent it over an old rolling pin I use for bending stems. I wanted the angle of the stem to approximate the angle of the curve on the bottom of the bowl so I needed to do a bit more sanding on the bowl. The next three photos show the progress on reducing the point on the bottom of the bowl.
IMG_7058

IMG_7061

IMG_7062
I decided to give the bowl a black under stain to highlight the grain. The right side of the bowl and shank had some great birdseye grain and the top and bottom of the shank had cross grain. The left side of the bowl had a mixed grain pattern but it was still quite nice. The black stain would permeate the grain and make it stand out. I heated the briar with the heat gun and applied a coat of black stain, flamed it and reapplied it repeating the pattern until the coverage was even. Once it had dried I wiped it down with acetone on cotton pads to remove the stain from the harder briar where it had not gone into the grain.
IMG_7065

IMG_7066

IMG_7067
I sanded the bowl with a medium grit sanding pad to remove more of the stain and to help highlight the contrast between the grain and the lighter portions of the briar. I buffed it with red Tripoli. The photos below show the bowl as it stood after the buffing. There was still sanding to do to remove the dark scratch marks in the finish and further remove the black stain.
IMG_7074

IMG_7075

IMG_7076

IMG_7077
I wanted to add to the contrast of the grain so I stained the pipe with oxblood aniline stain and then buffed it with White Diamond. The contrast was evident and the grain stood out nicely against the second coat of stain but it was just too red for my liking. I wanted more of a reddish brown colour than the red it was after the stain.
IMG_7079

IMG_7080

IMG_7081

IMG_7082
I rubbed bowl down with a cherry stain to lighten the red. It was still too red for me. The pipe in the photo below shows the cherry stain over coat on the oxblood.
IMG_7083
I decided to add a coat of dark brown stain to the bowl and give it a deeper, richer colour. I applied the dark brown stain and flamed it, reapplied, flamed it again and then buffed the bowl with White Diamond to polish it and make it more transparent. I wanted the grain to pop through the finish but I wanted it to be less obtrusive than the above photos.
IMG_7090

IMG_7091

IMG_7092

IMG_7093
I sanded the bowl with micromesh sanding pads using 3200-6000 grit pads to even out the dark and light portions. I also wanted to polish the finish more before calling it finished. I buffed the bowl with White Diamond and gave it several coats of carnauba wax to give a shine. I polished the stem with the micromesh pads – wet sanding with 1500-2400 grit pads and dry sanding with 3200-12,000 grit pads. I rubbed the stem down with Obsidian Oil and when dry I buffed the pipe with White Diamond. I gave the bowl and stem multiple coats of carnauba wax, buffing with a soft flannel buff between applications of wax. The finished pipe is shown below. (However, there is one disclaimer – with any pipe I have made in the past I have always gone back after a time and changed the look. The odds are thus quite high that I will modify this one as well somewhere down the road.)
IMG_7094

IMG_7095

IMG_7096

IMG_7097
I took the new pipe with me to work yesterday and planned to take a walk and fire it up at my lunch hour. It actually worked out that I did just that! I packed a bowl of Hearth and Home Louisiana Red and enjoyed a good walk and contemplative time. The bowl got warm but not hot, the draw was very good and the feel in the hand and mouth was comfortable. It is bigger than the pipes I usually smoked but surprisingly it is not very heavy.

Thanks for taking the journey with me from block of briar to pipe.