Tag Archives: repairing tooth marks

Cleaning up an Edwards Unique – Hexagonal Straight Dublin


Blog by Steve Laug

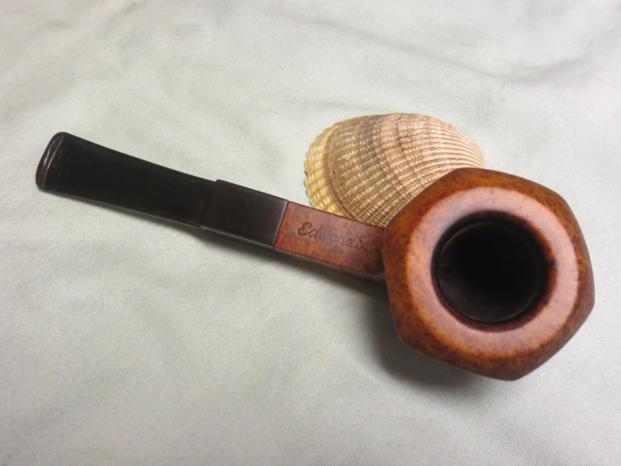
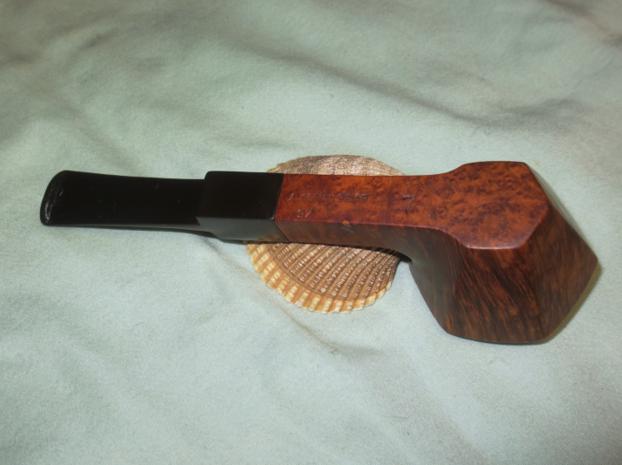
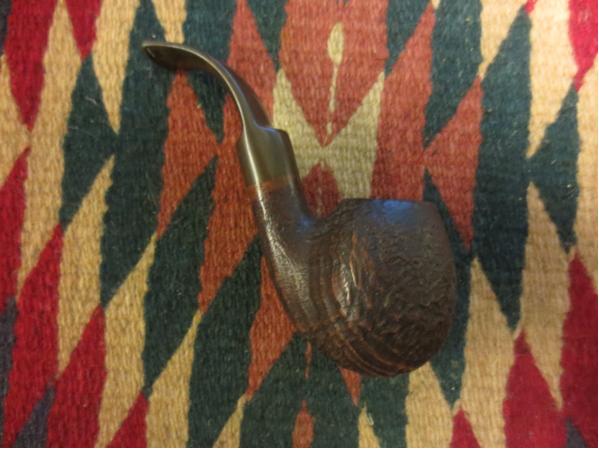
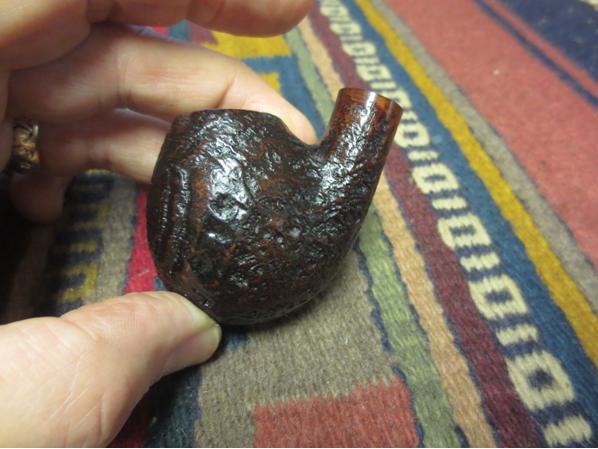
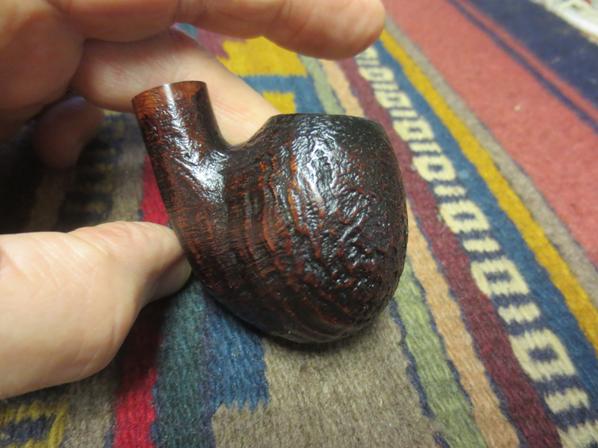
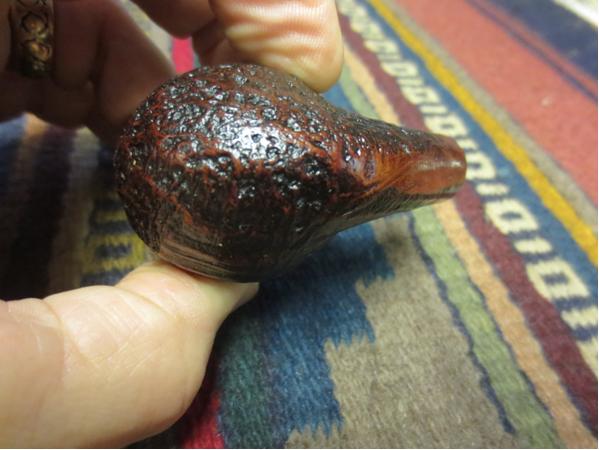
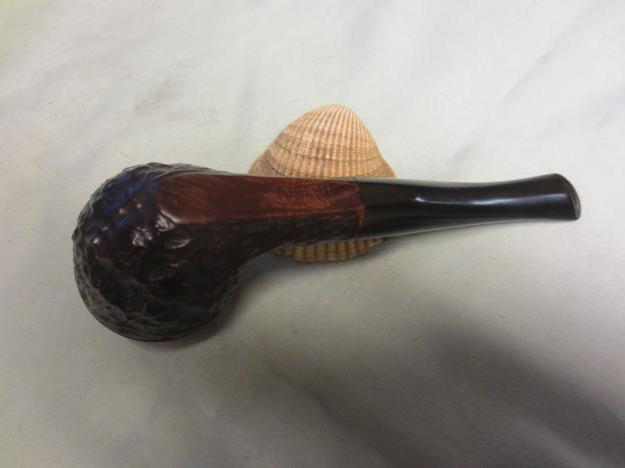
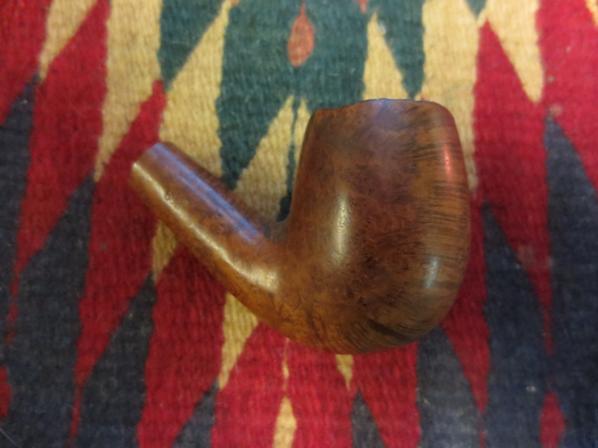
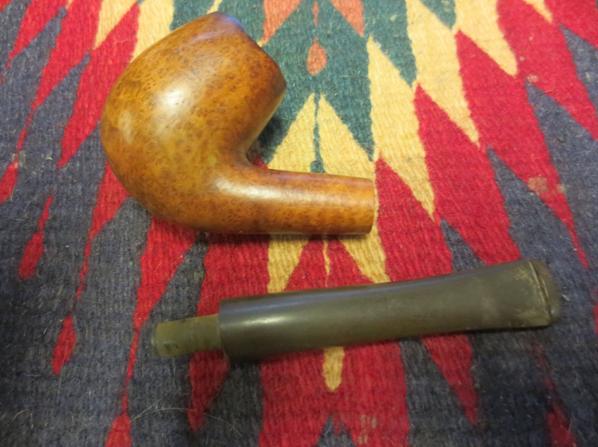
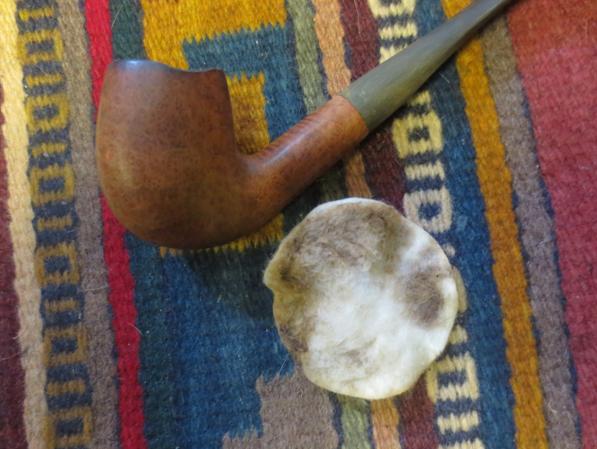
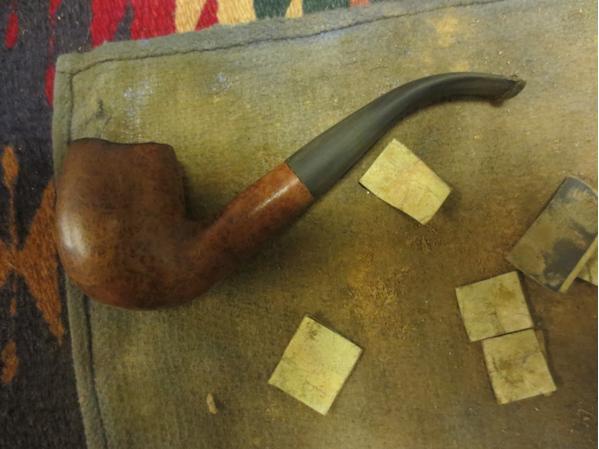
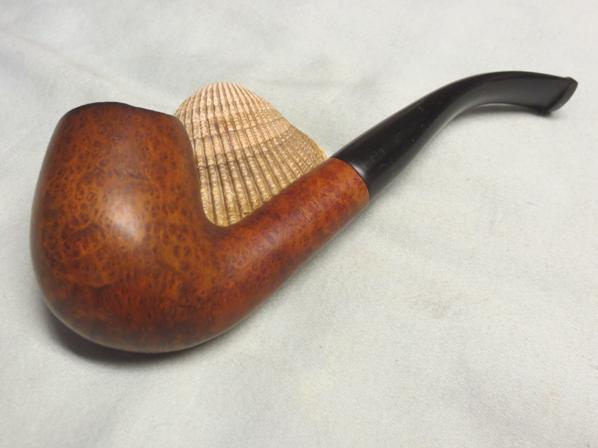
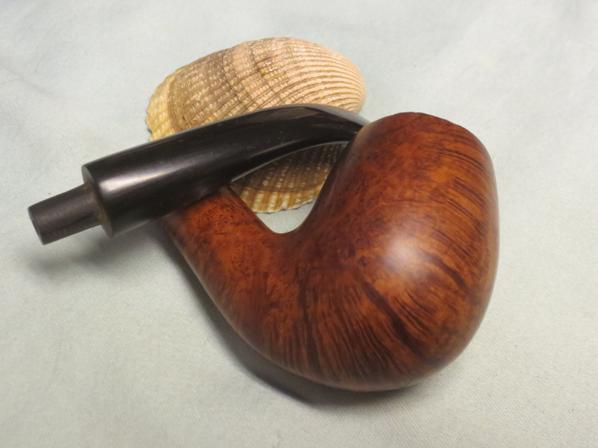
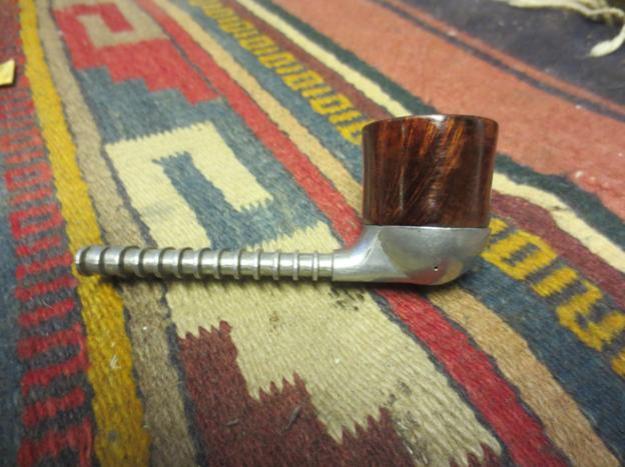
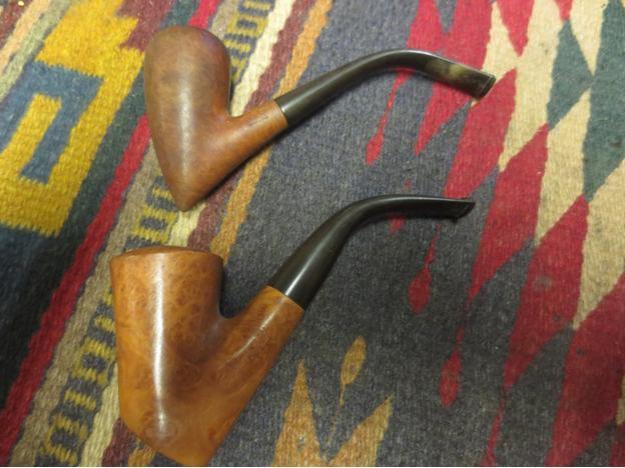
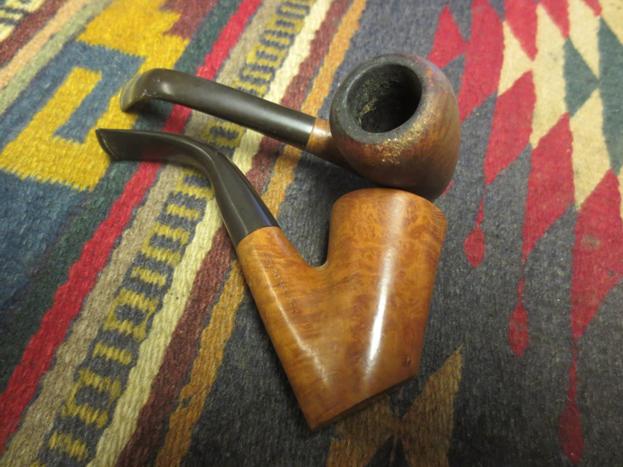
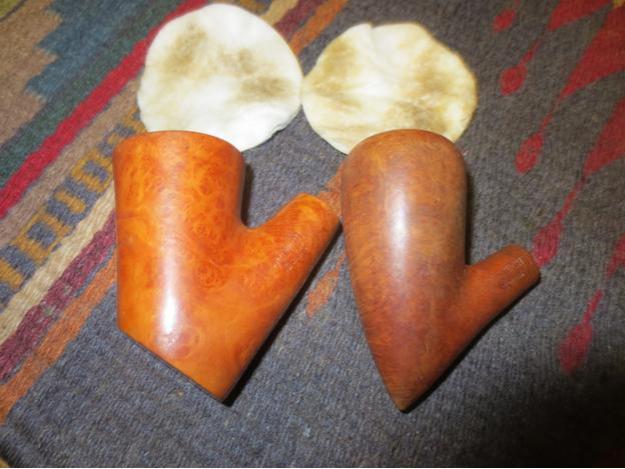
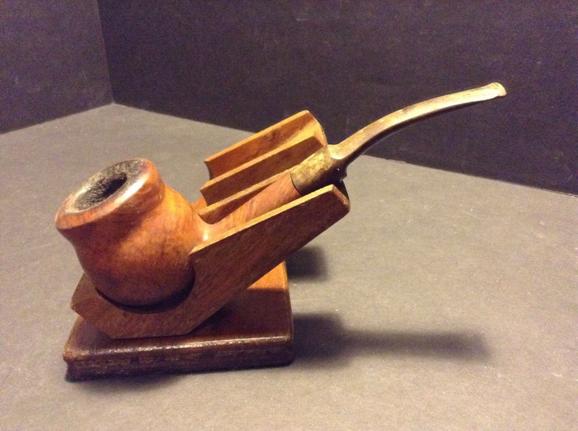
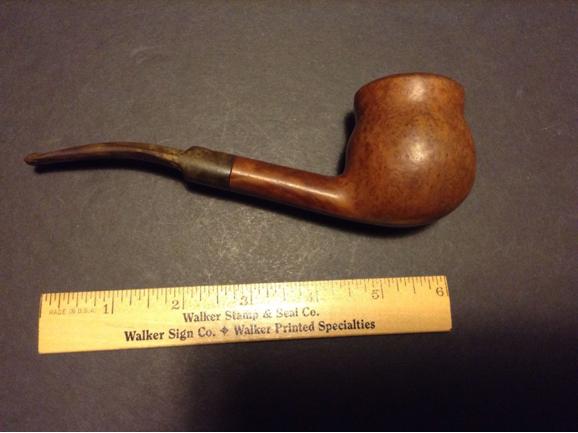
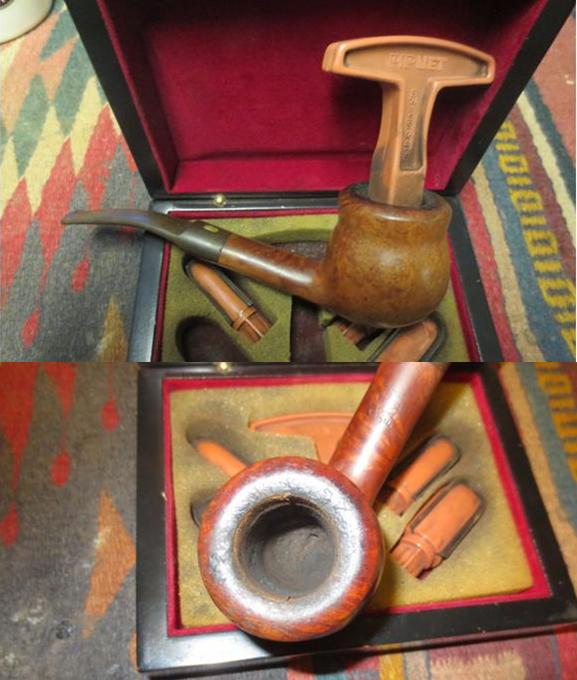
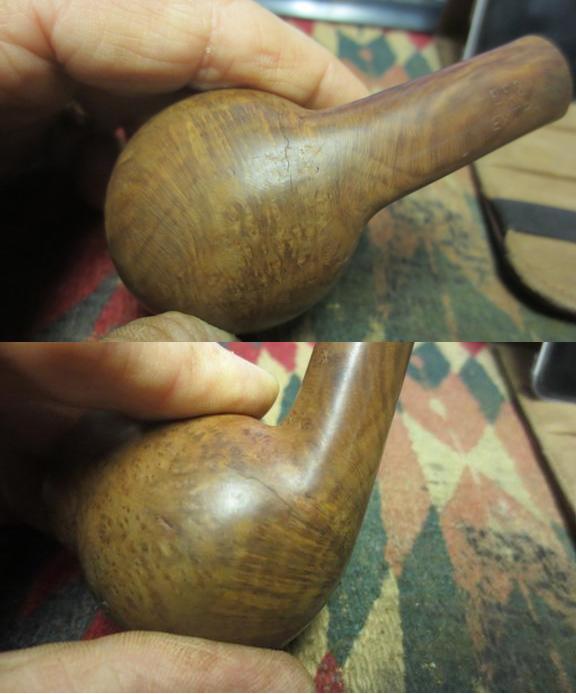
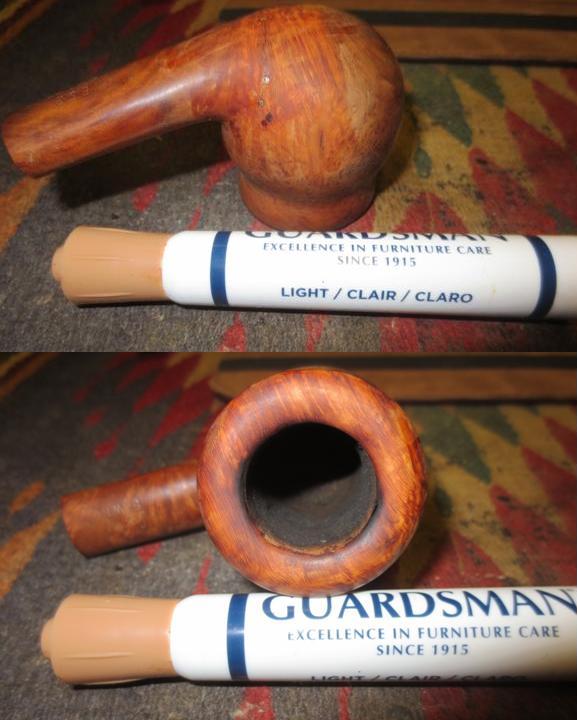
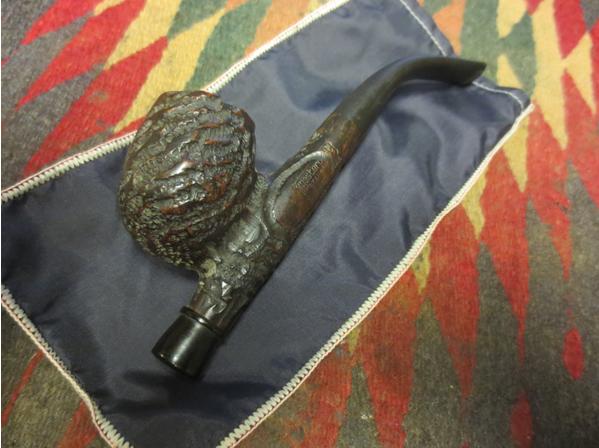
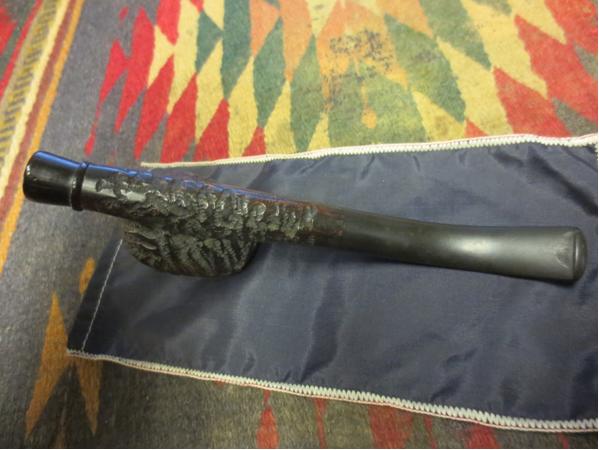
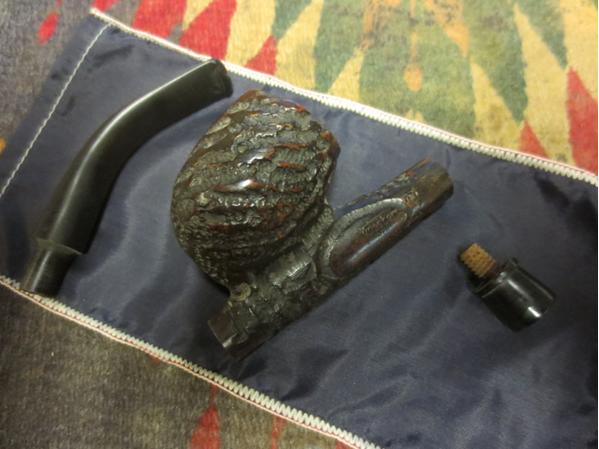
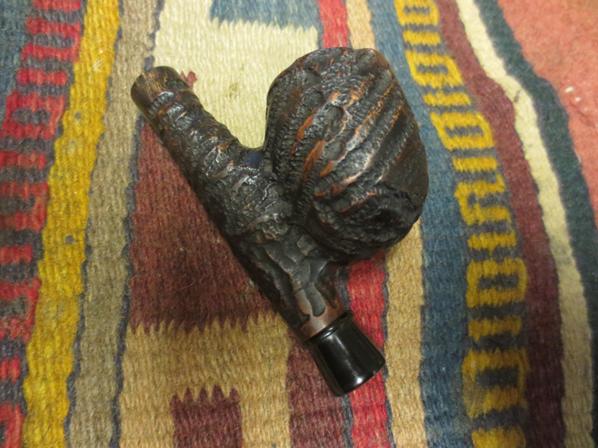
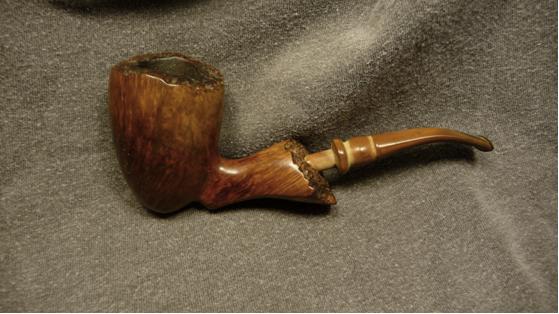
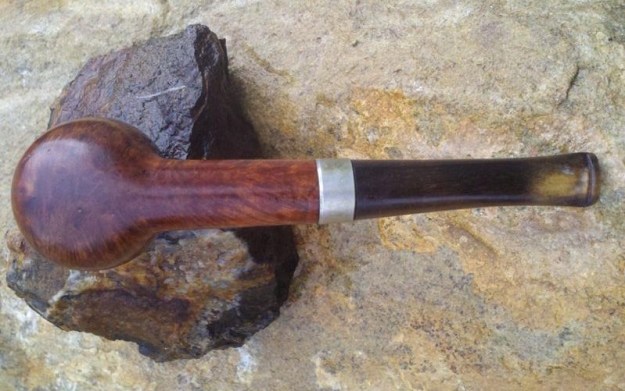
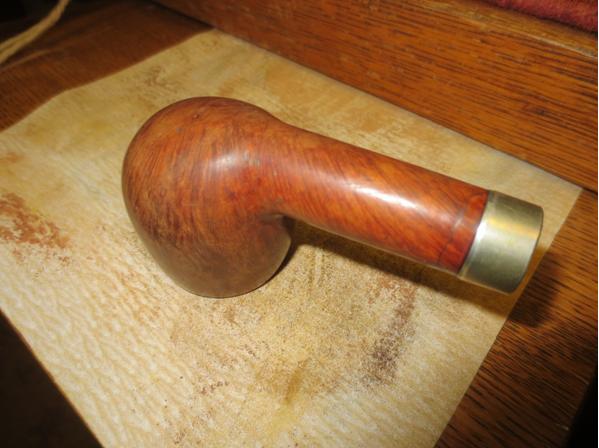
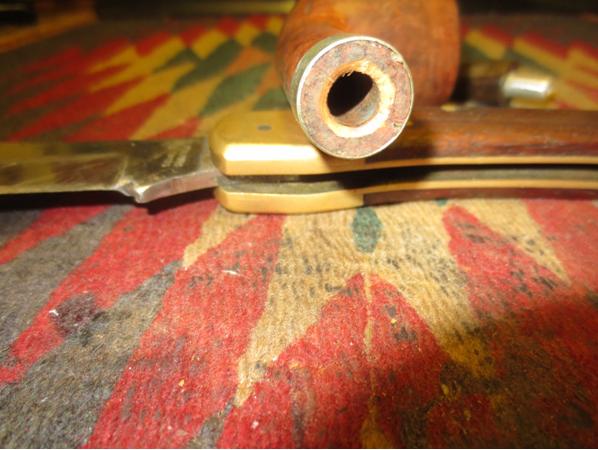
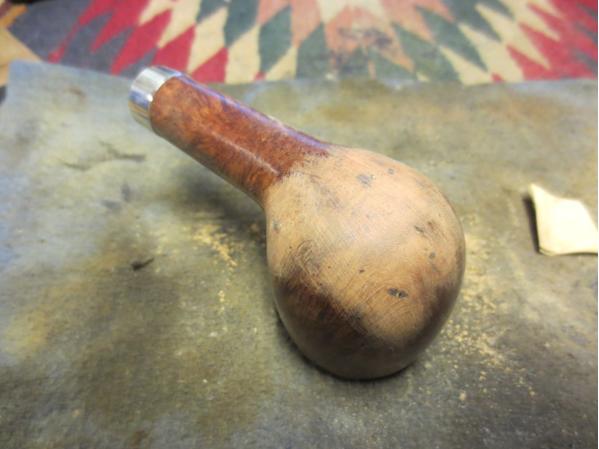
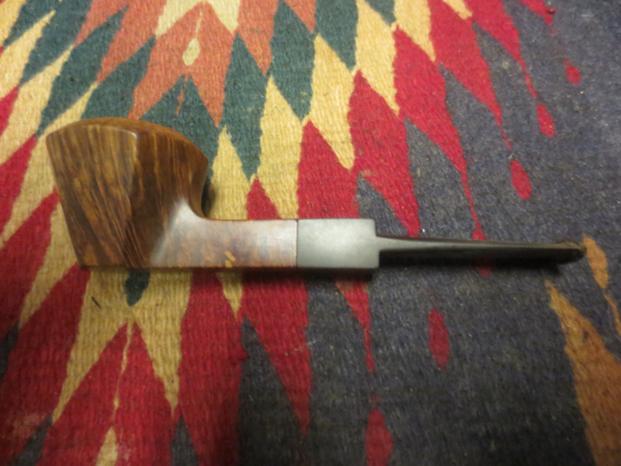
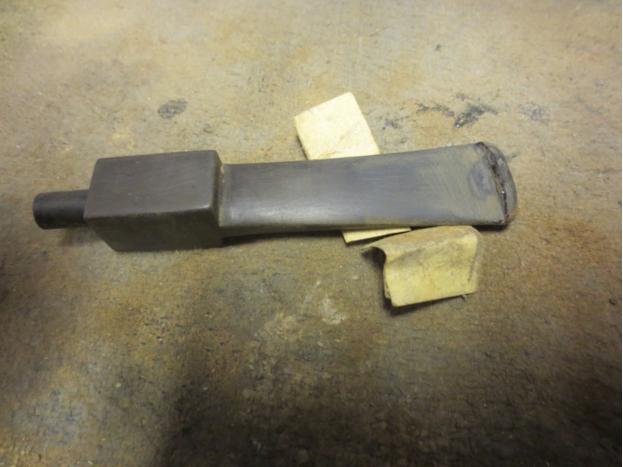
Over the years I have cleaned up, traded or kept many Edwards smoking pipes. The natural finish briar has always made these pipes attractive to me. The briar is always light weight and beautiful. Many have had a few fills in them but that in no way detracted from the beauty of the pipe. This one from my brother Jeff is different than any of the others that I have had pass through my hands. It is a square shank hexagonal Straight Dublin that has a shape that I have never seen before. The grain on it is quite stunning even though there are some small fills on the shank and on the right side of the bowl. The finish was in decent shape under the light grime on the surface. The beveled inner edge of the rim had some lava build-up and it spilled over to the flat portion of the rim toward the back side. I had field reamed the cake while I was staying with my brother in Idaho. The bowl was pretty clean and the inner edge of the rim was round. There were no dings or dents in the rim or the curved cap on the bowl. The stem was oxidized and had some fairly deep tooth marks at the button.Ed1Ed2Ed3

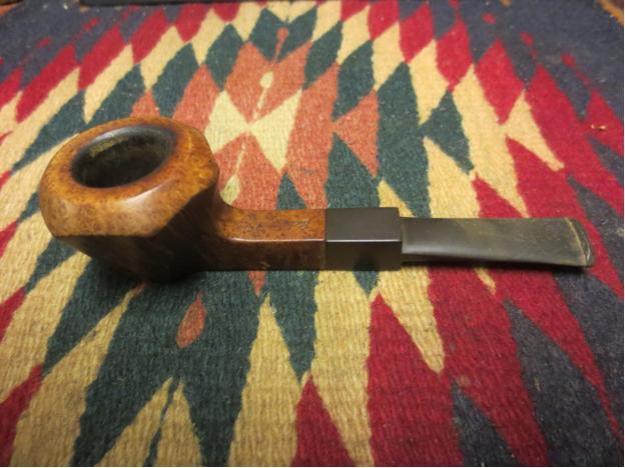
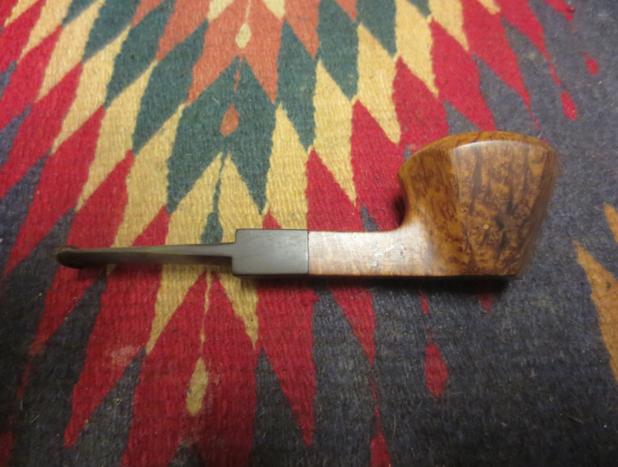
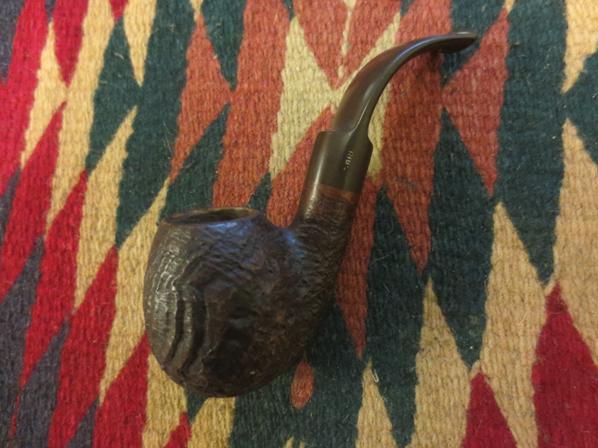
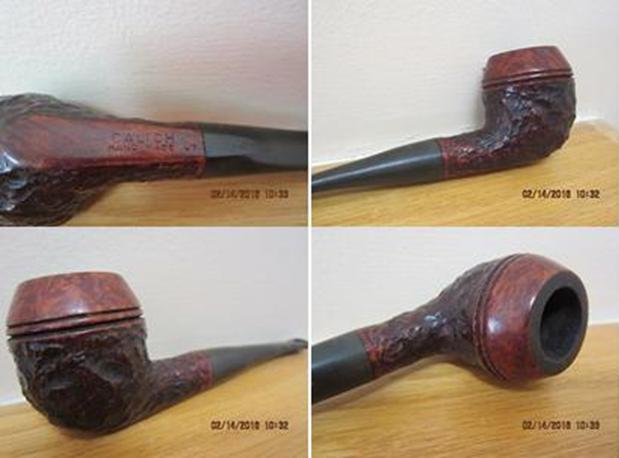
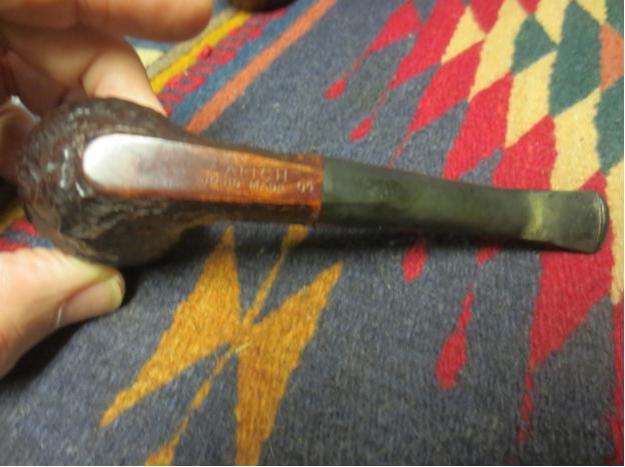
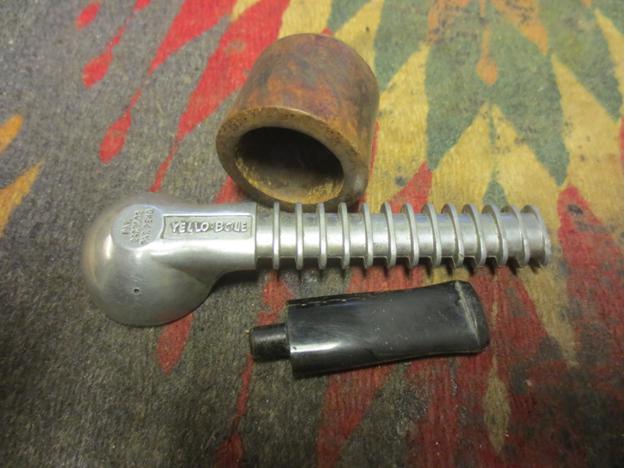
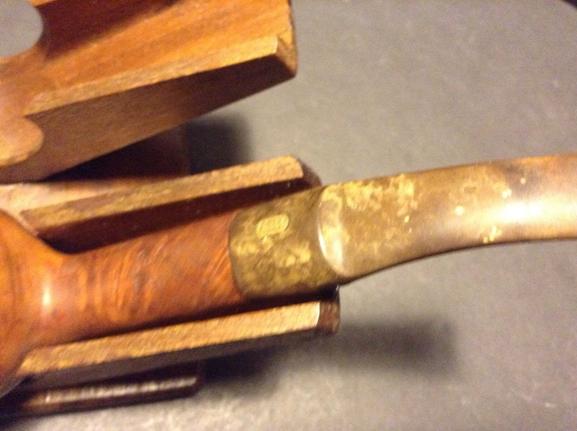
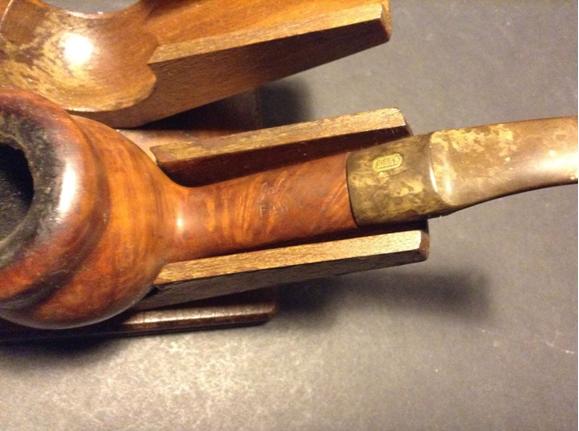
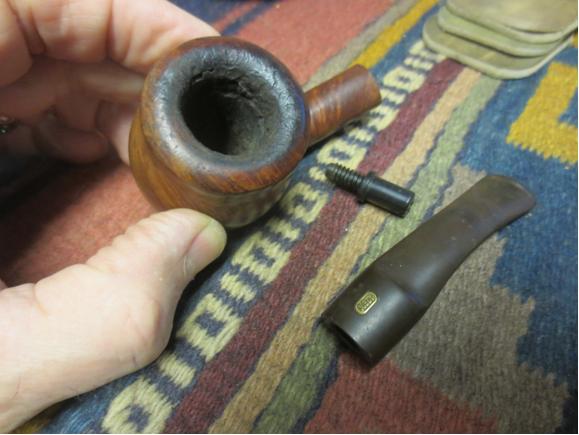
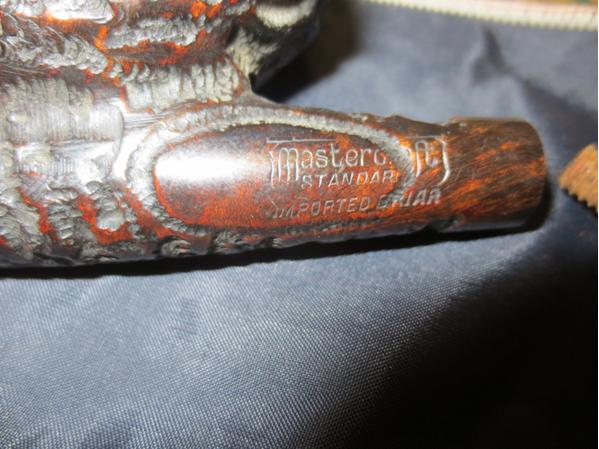
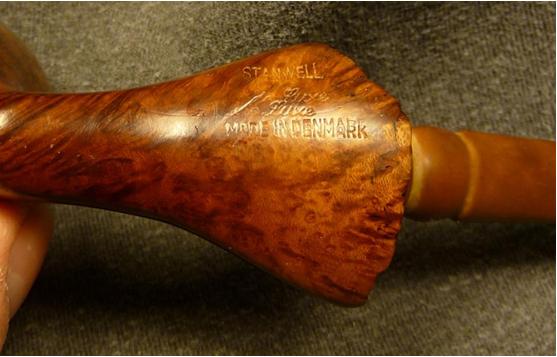
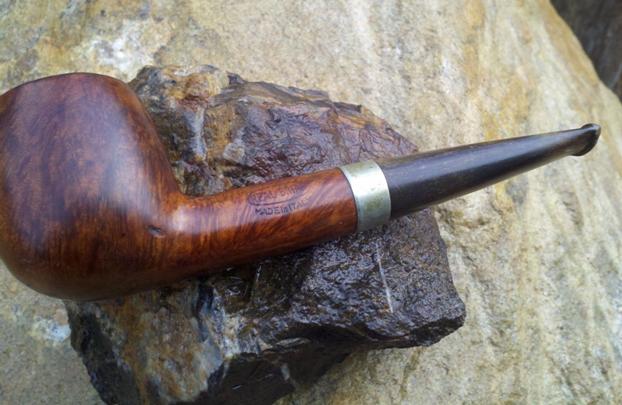
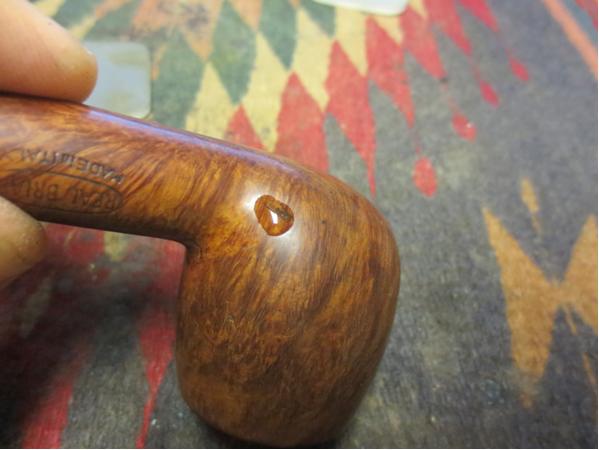
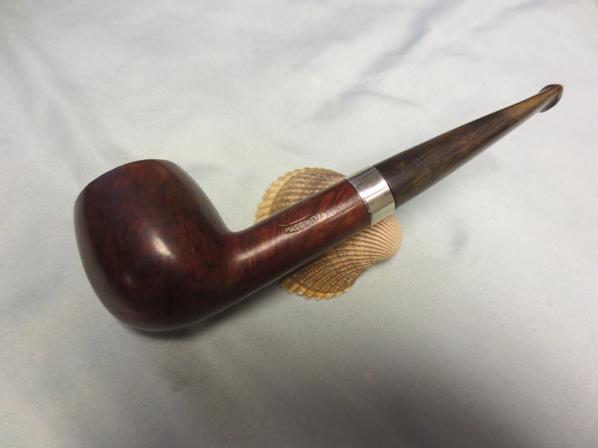
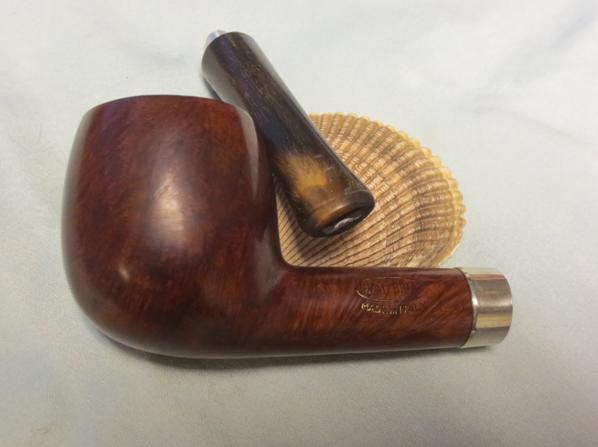
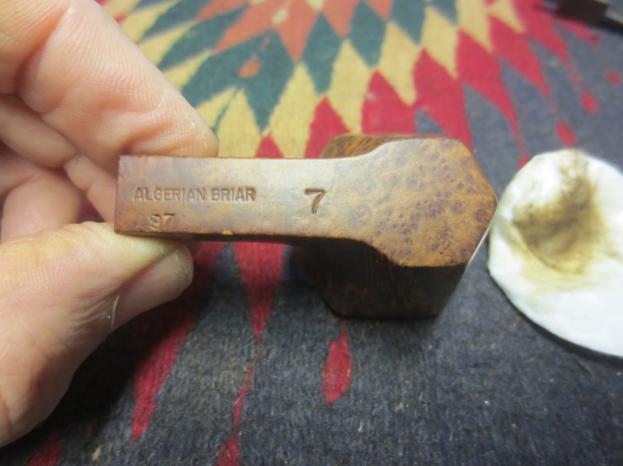
The shank was stamped on top with the word Edward’s and on the underside Algerian Briar with the shape number 87 underneath. There was a large #7 near the flat bowl bottom.Ed4Ed5

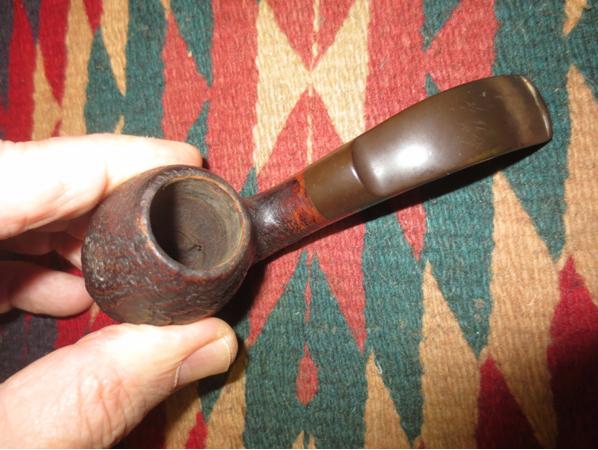
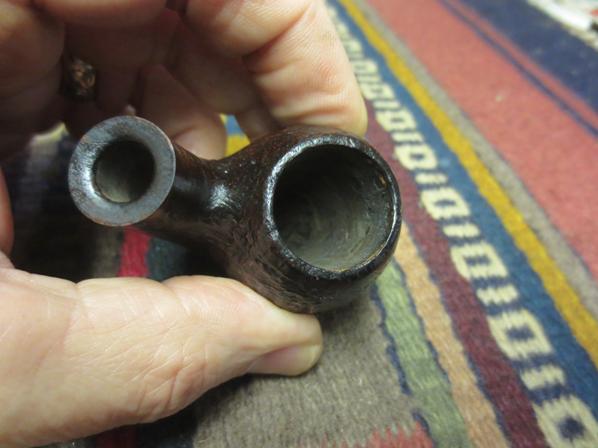
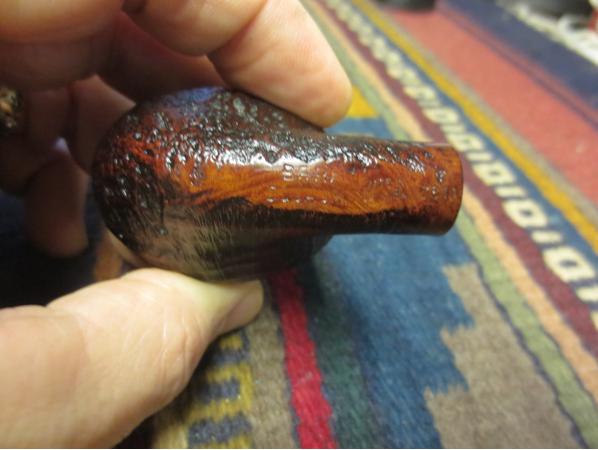
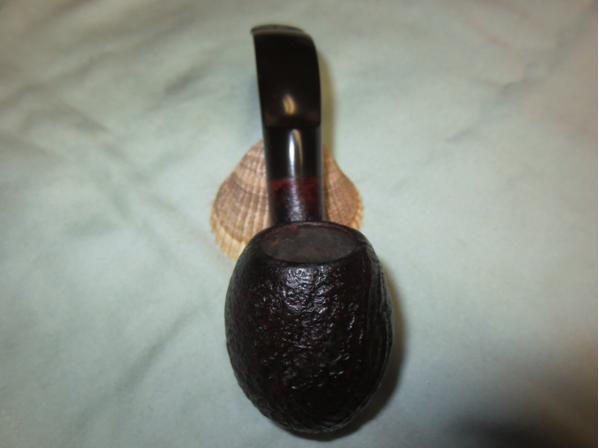
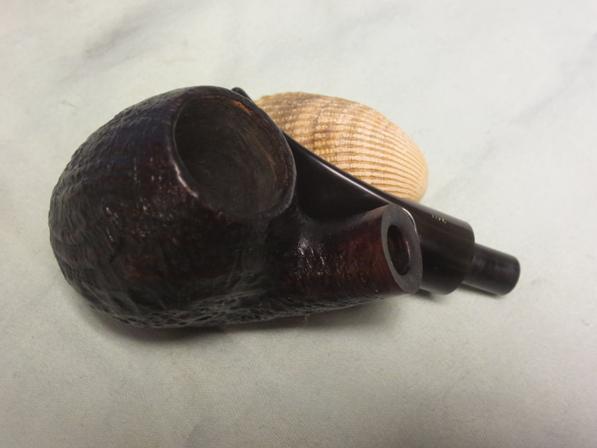
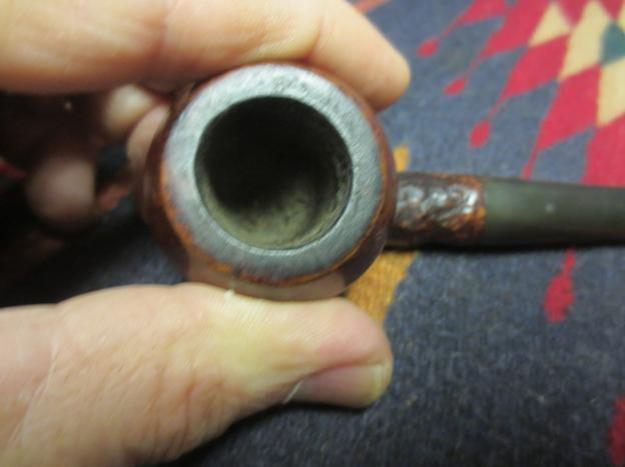
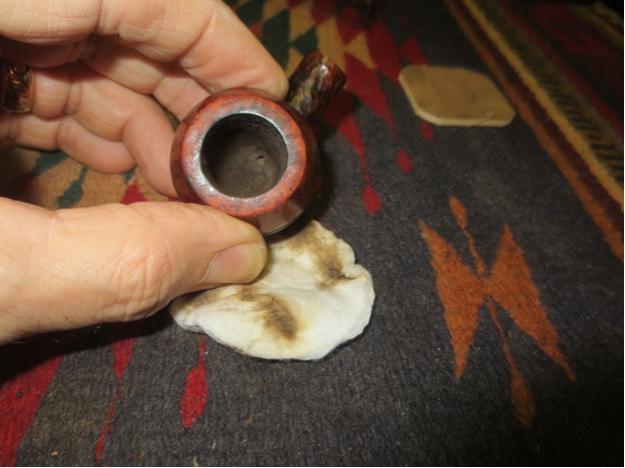
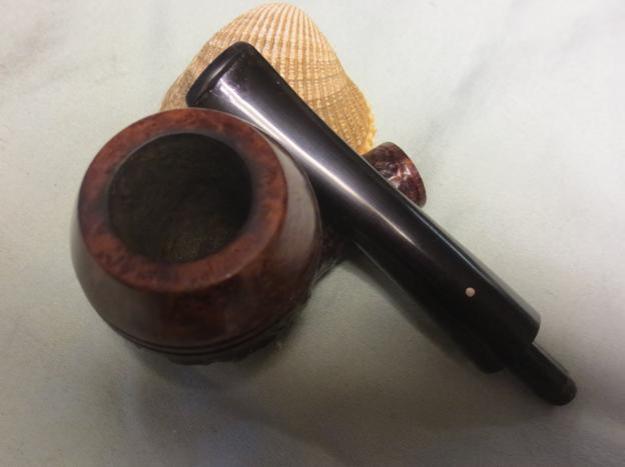
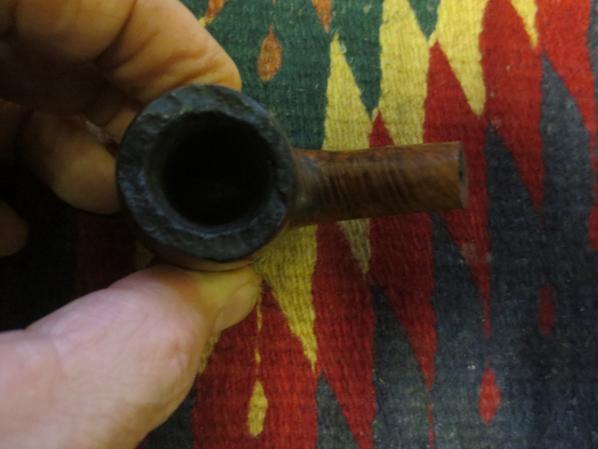
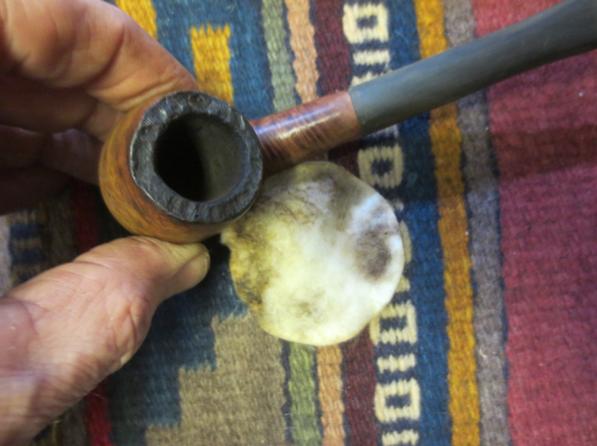
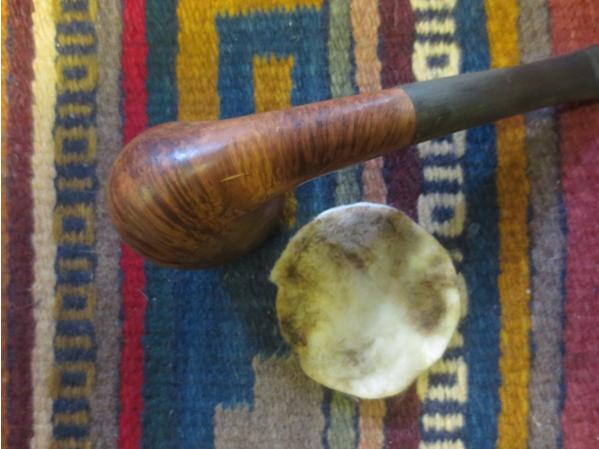
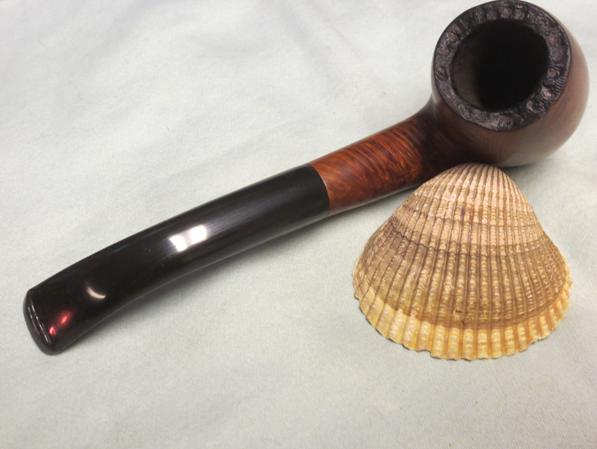
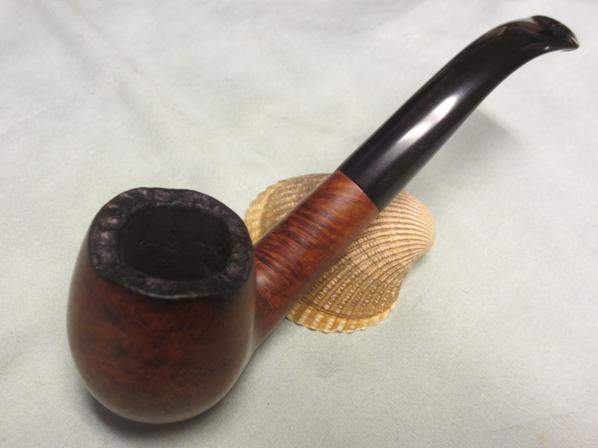
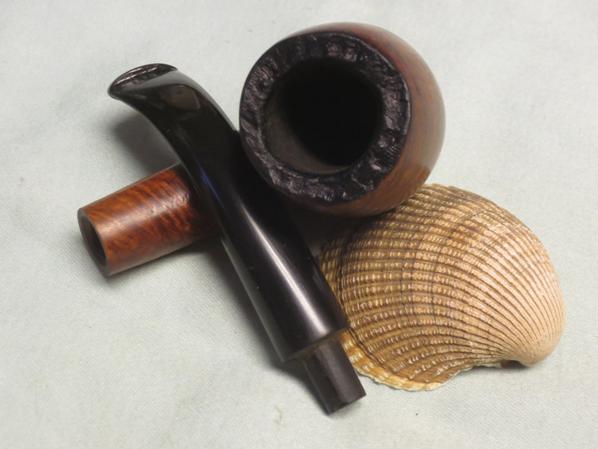
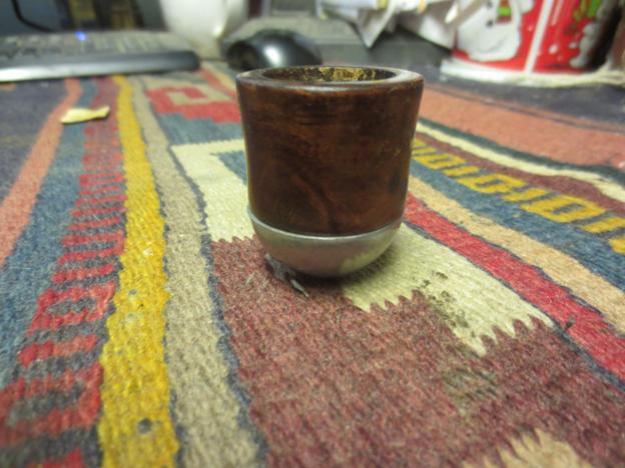
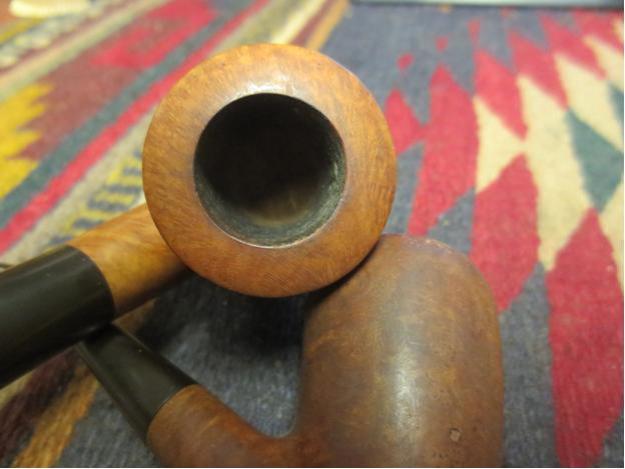
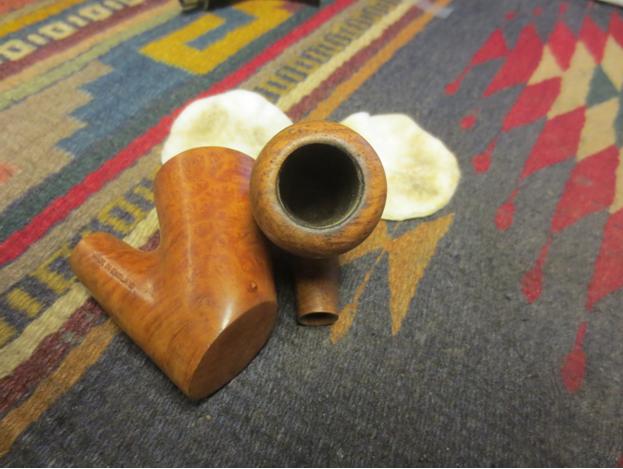
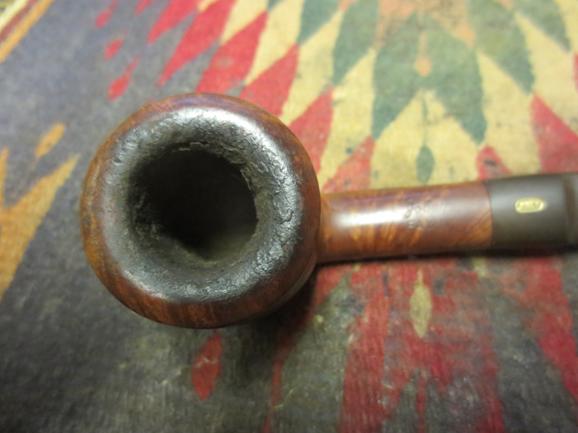
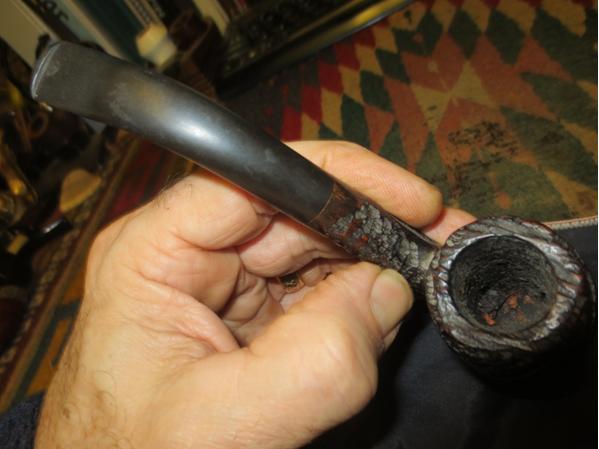
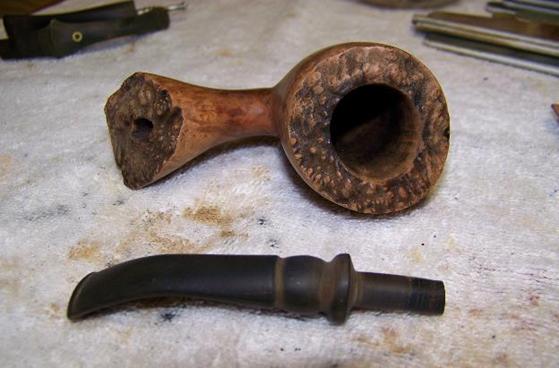
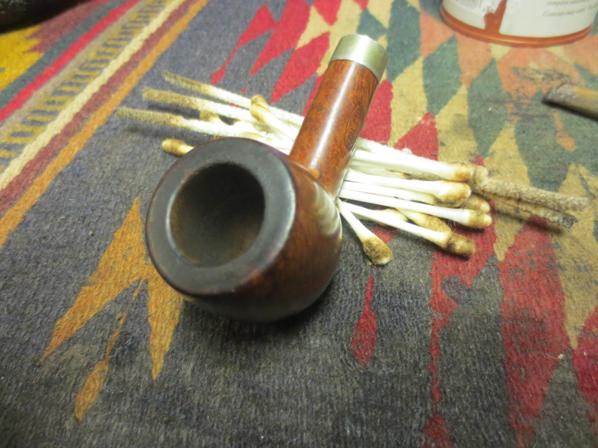
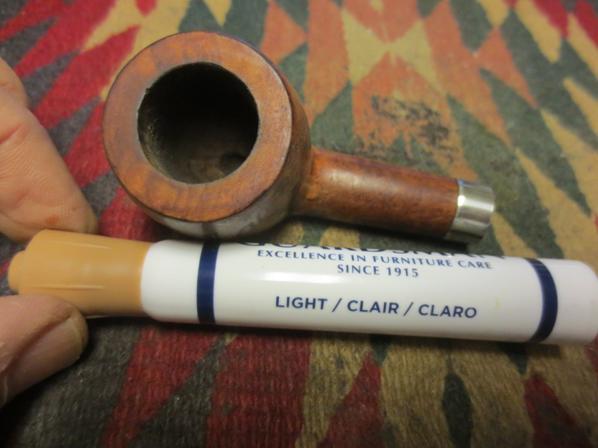
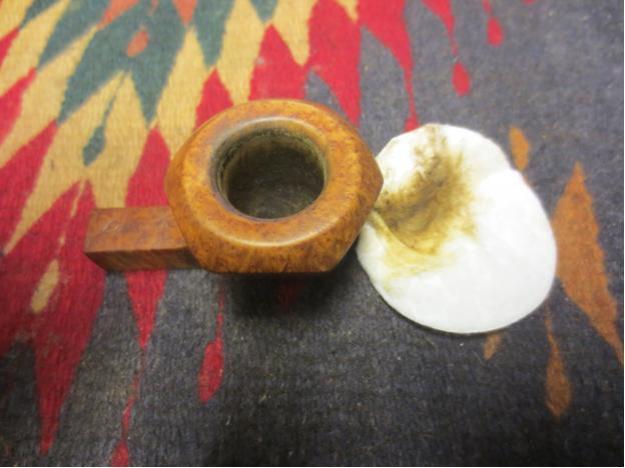
I took a close-up photo of the bowl and the rim to highlight the cleanness of the bowl and the lava on the bevel.Ed6

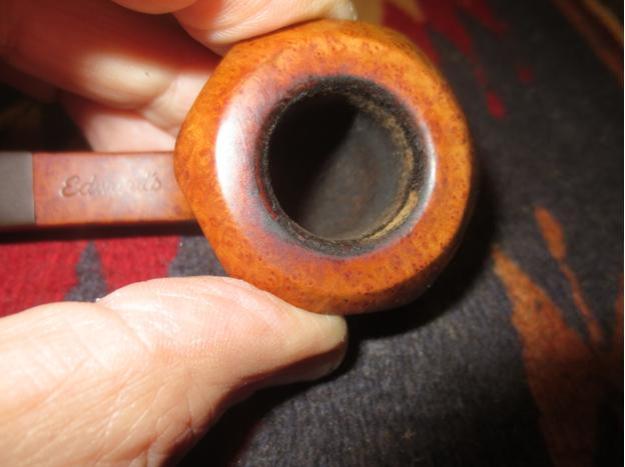
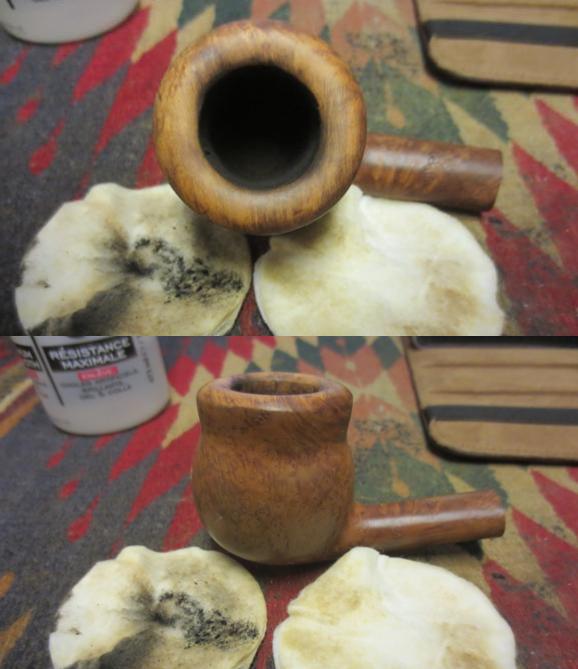
I sanded the rim with a worn piece of 220 grit sandpaper to remove the lava on the rim surface and also to rework the inner bevel.Ed7

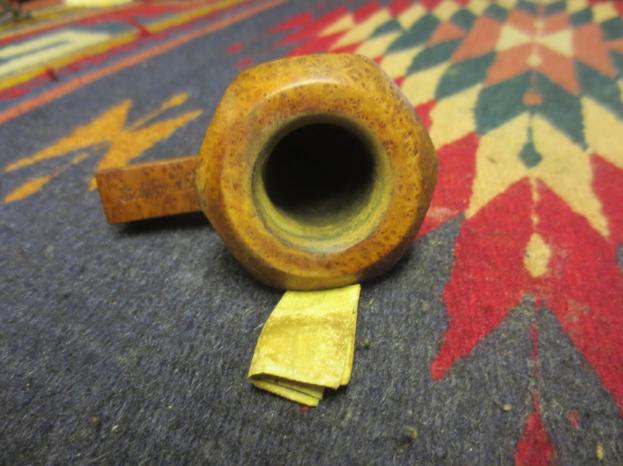
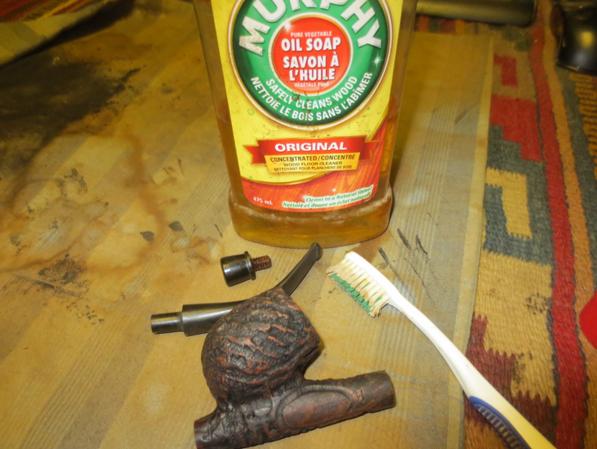
I scrubbed the bowl with Murphy’s Oil Soap and cotton pads to remove the grime. I scrubbed around the rim surface as well. I sanded the rim with 1500-2400 grit micromesh sanding pads and then scrubbed it again. I was amazed at how well the rim came out.Ed10Ed9Ed10Ed11

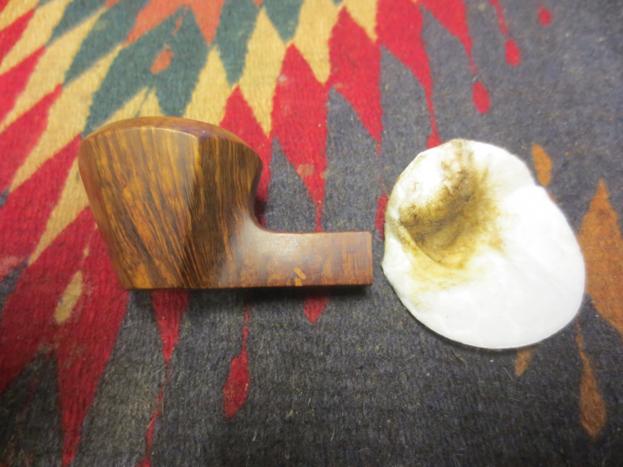
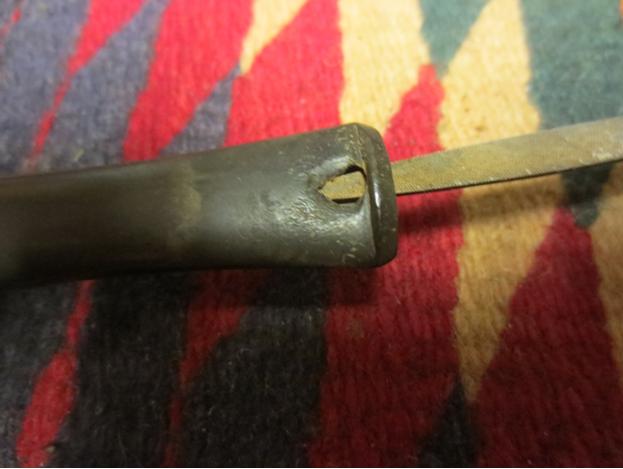
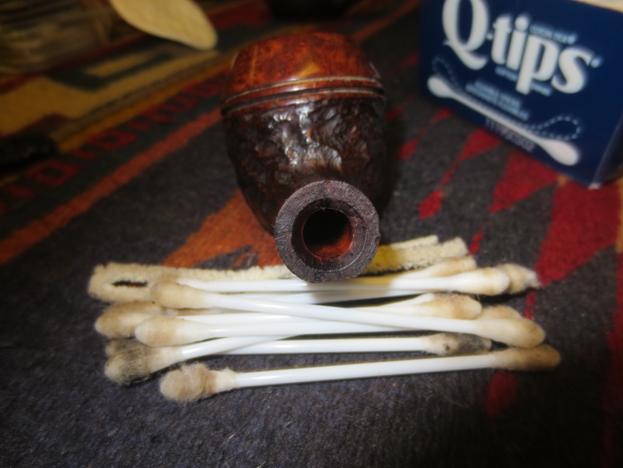
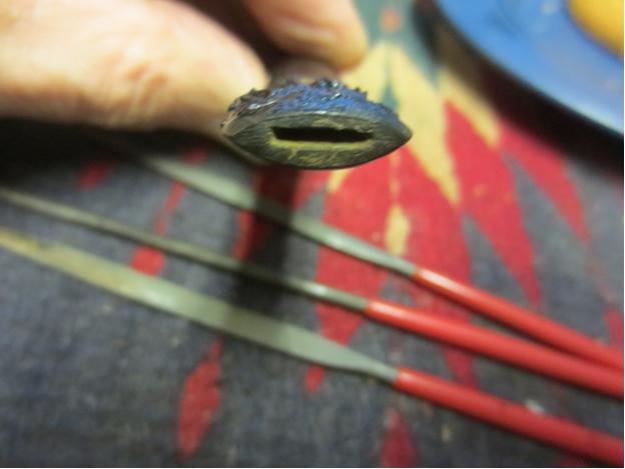
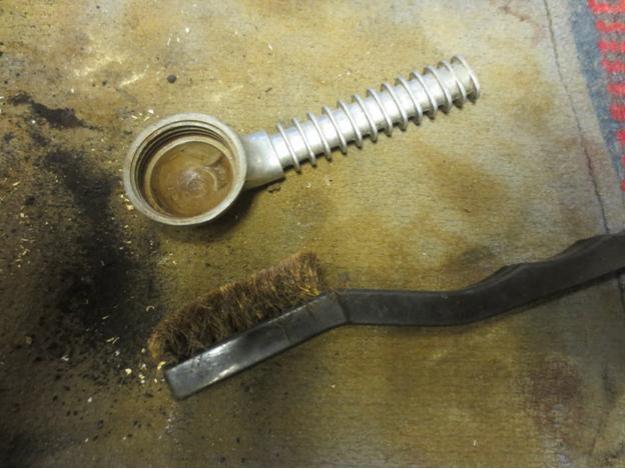
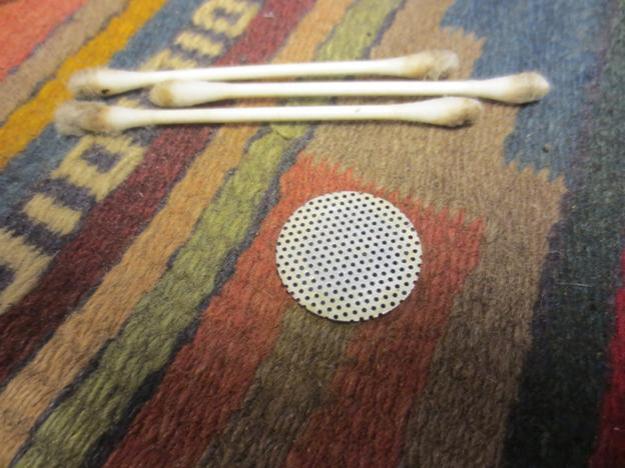
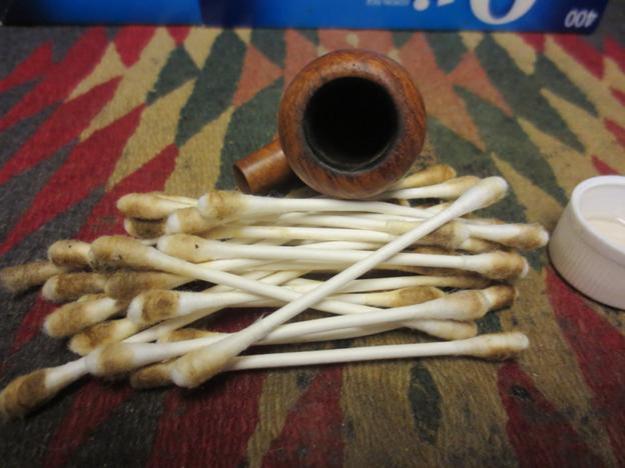
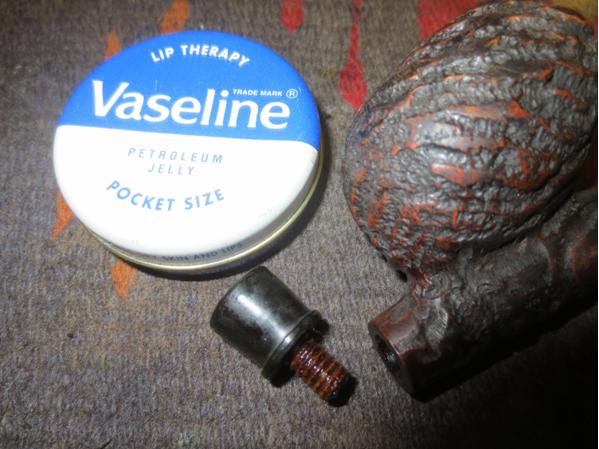
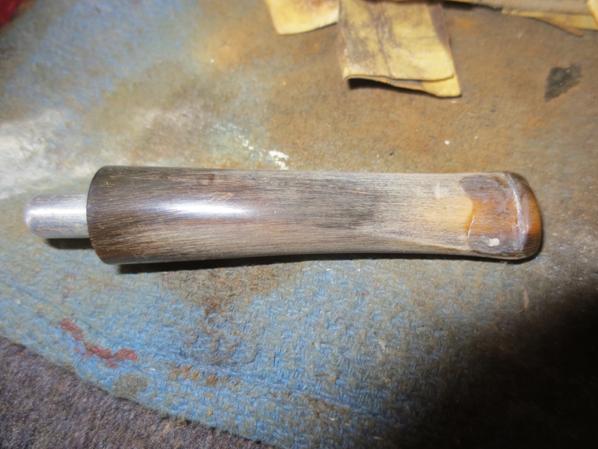
With the externals clean I scrubbed the airway and the mortise and the stem with cotton swabs, pipe cleaners and alcohol. I used a dental pick to clear out the slot in the button.Ed12Ed13

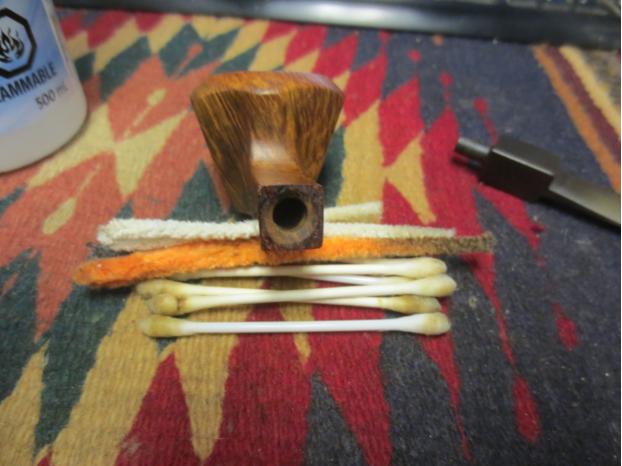
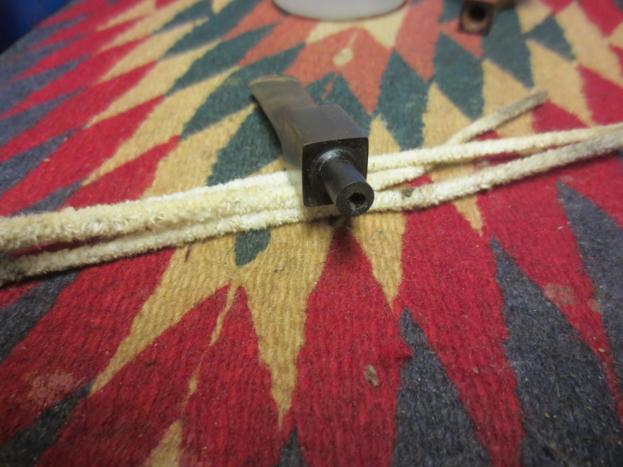
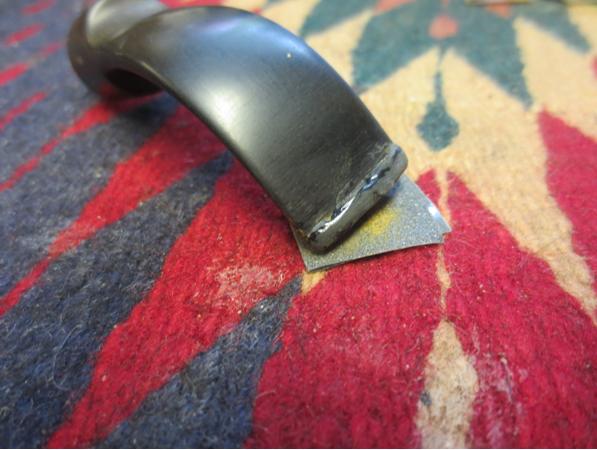
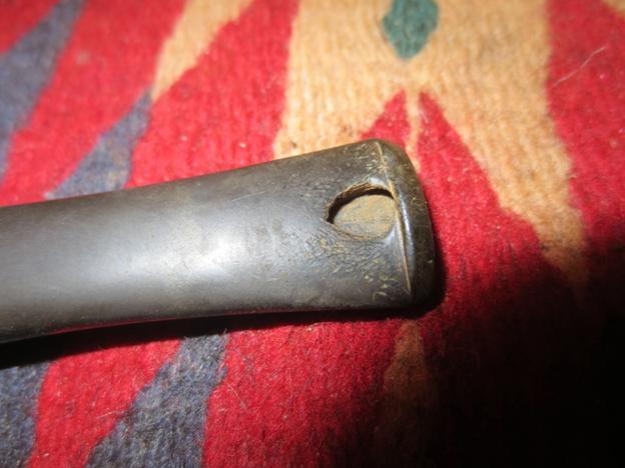
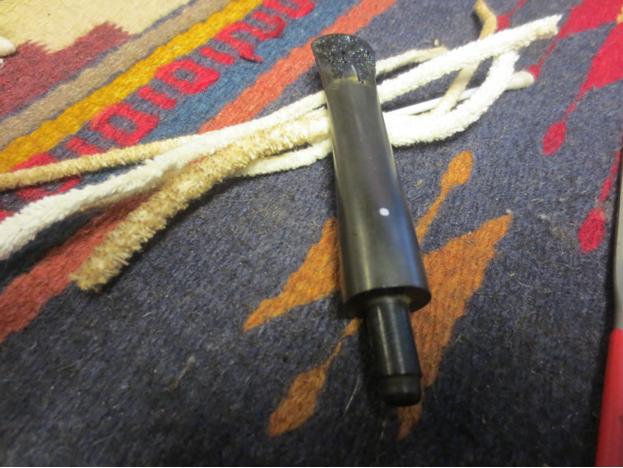
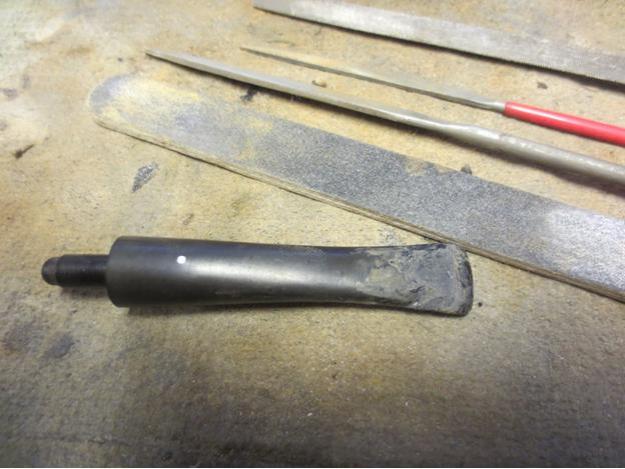
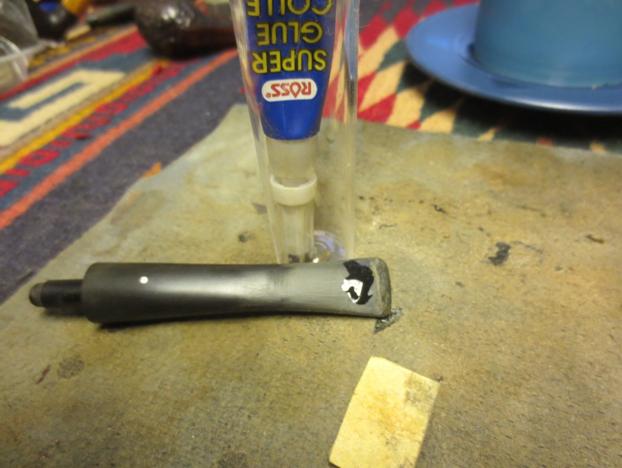
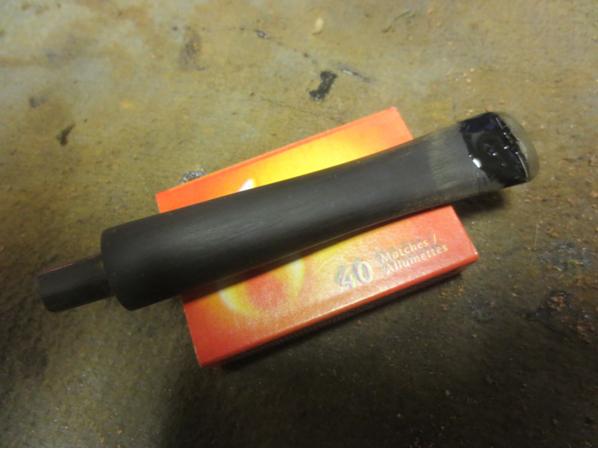
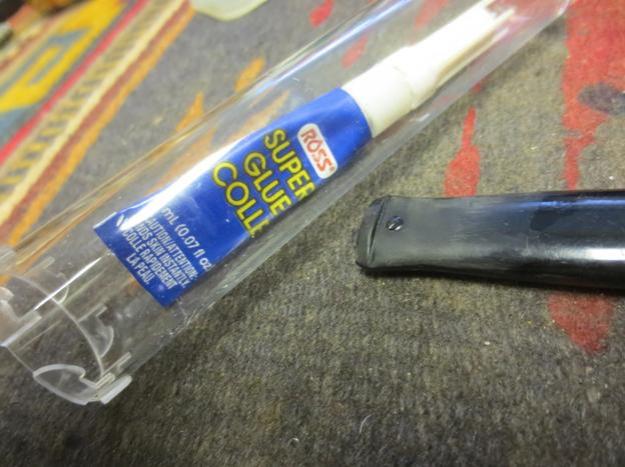
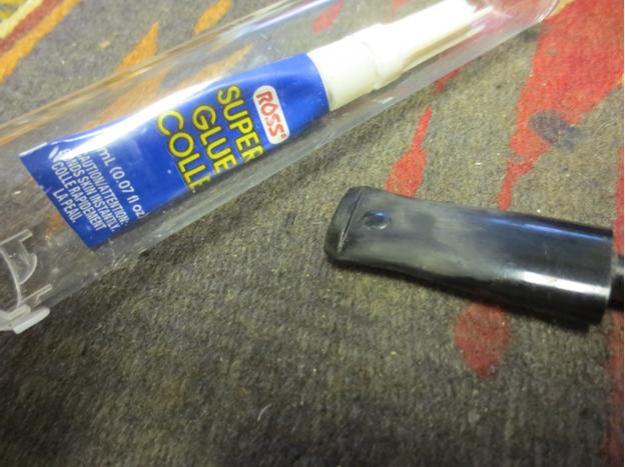
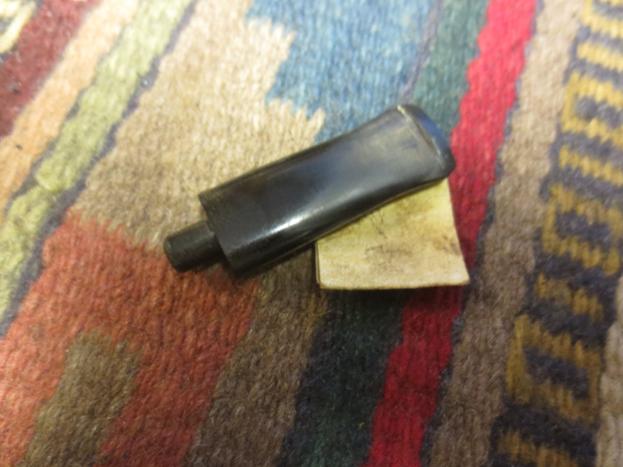
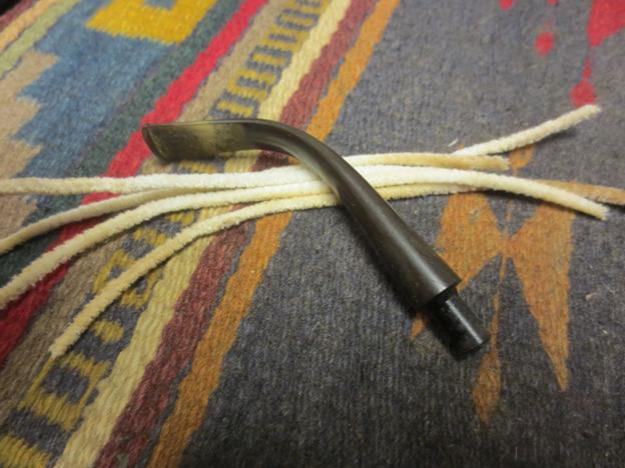
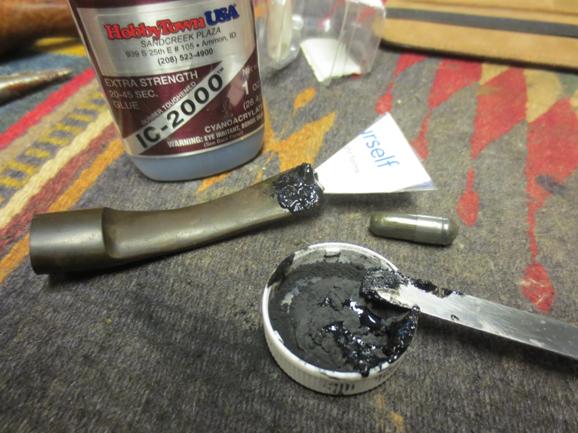
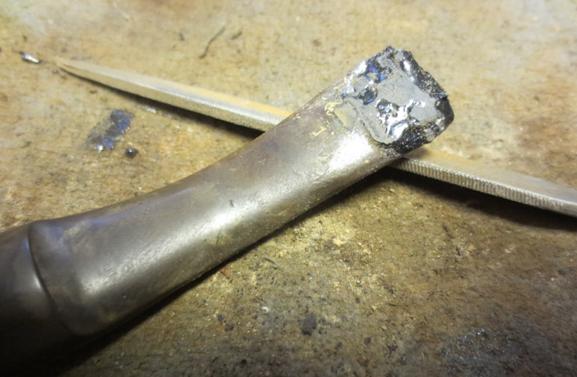
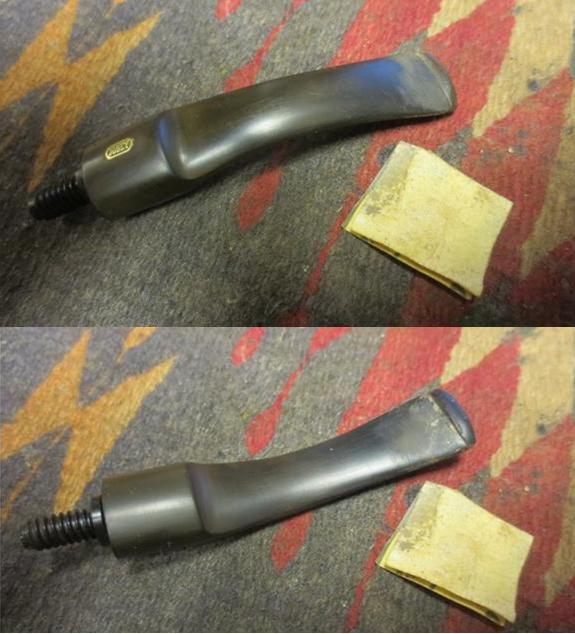
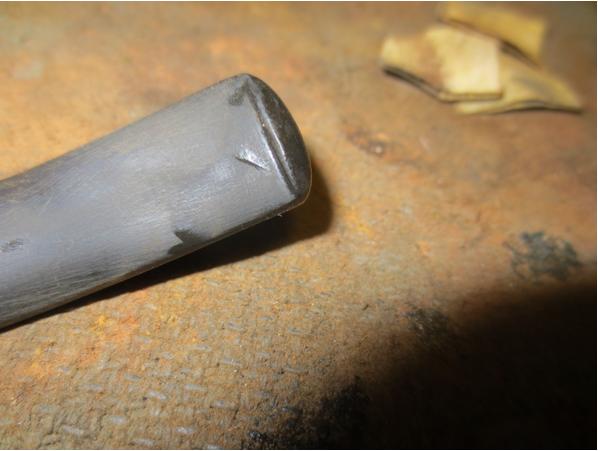
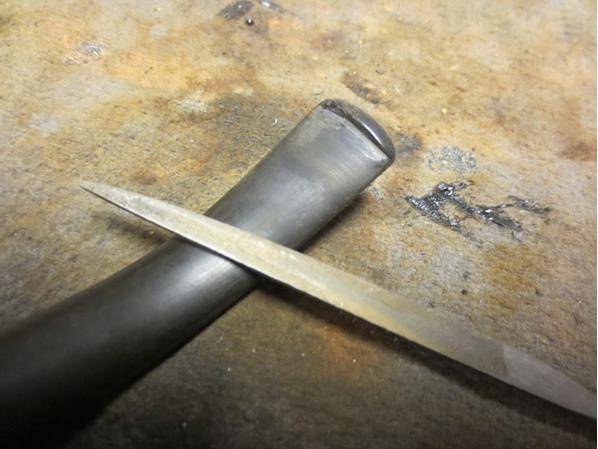
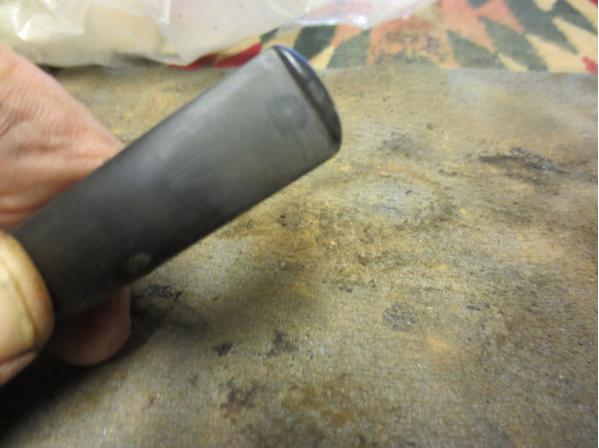
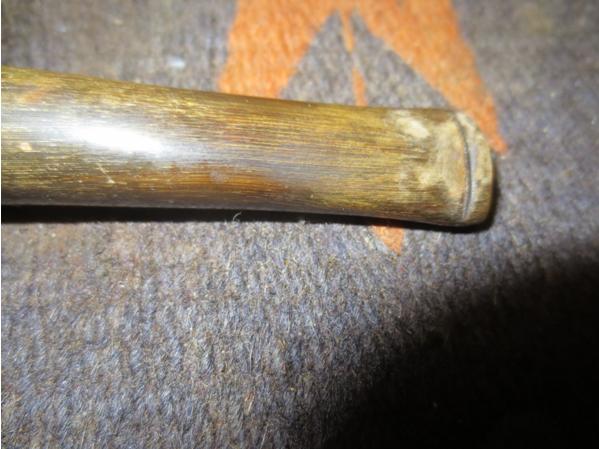
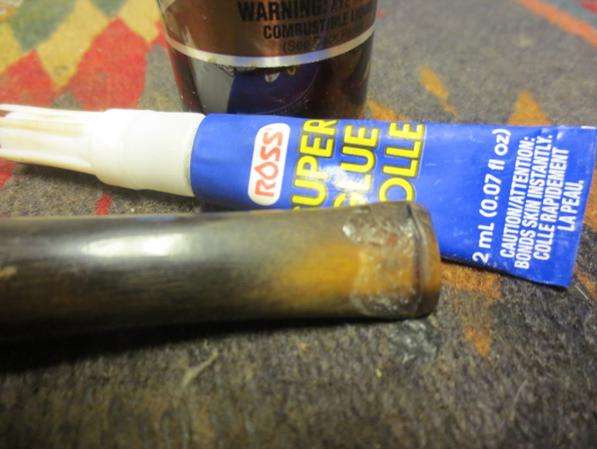
I sanded the stem with 220 grit sandpaper to remove the oxidation. I worked on the area around the tooth marks next to the button on both sides. I scrubbed out the tooth marks with alcohol and once they were clean prepared them for the patch. I patched the tooth marks with black super glue and set the stem aside so the glue would cure.Ed14Ed15

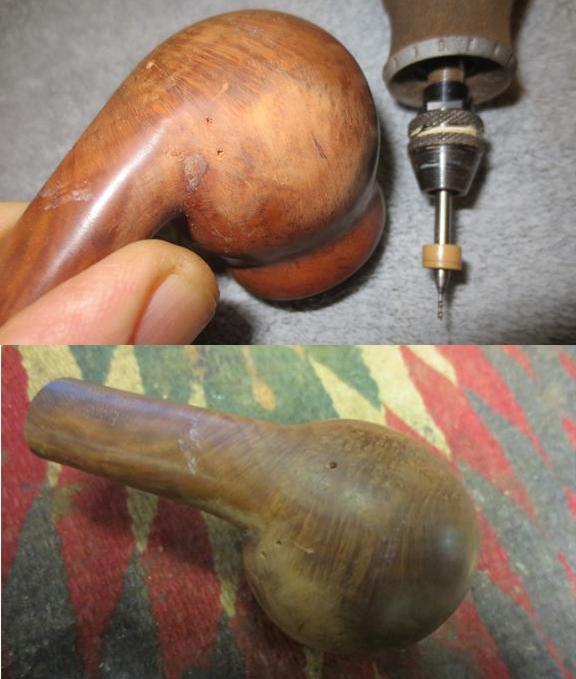
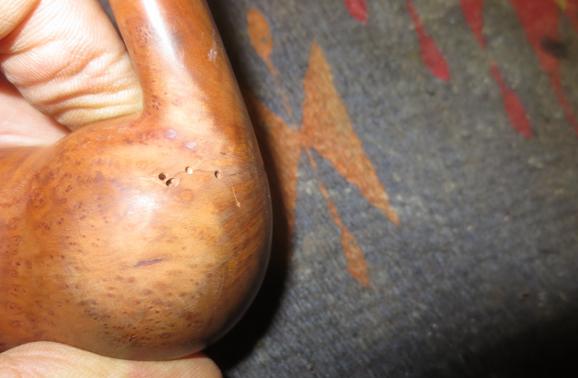
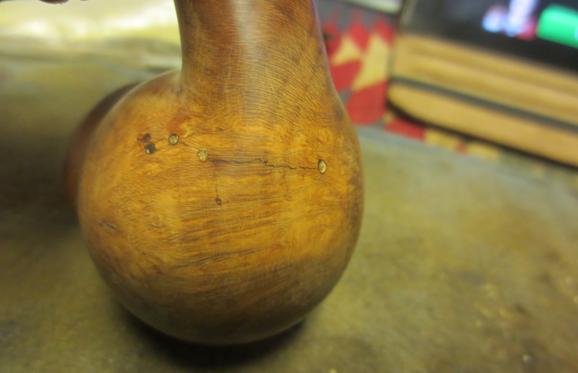
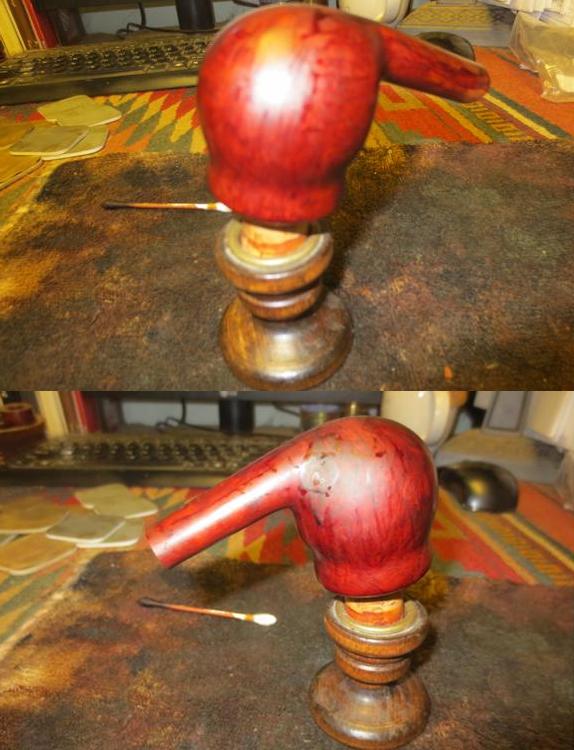
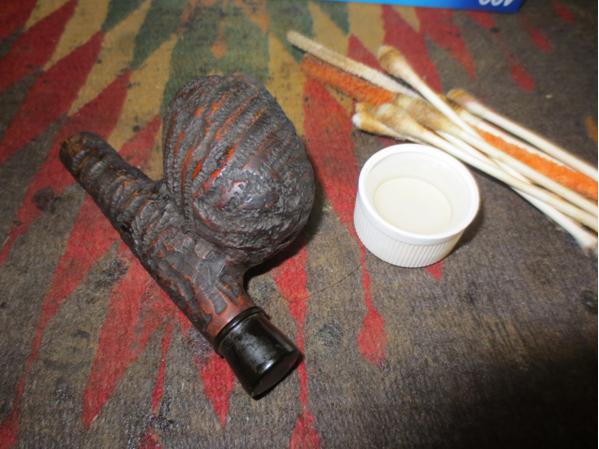
While the glue dried I decided to work on masking the fills on the shank and the bowl of the pipe. I used a Black Sharpie and lightly drew lines across the fills on the right side of the bowl and the middle of the left side of the shank, working to blend them into the surrounding grain.Ed16Ed17

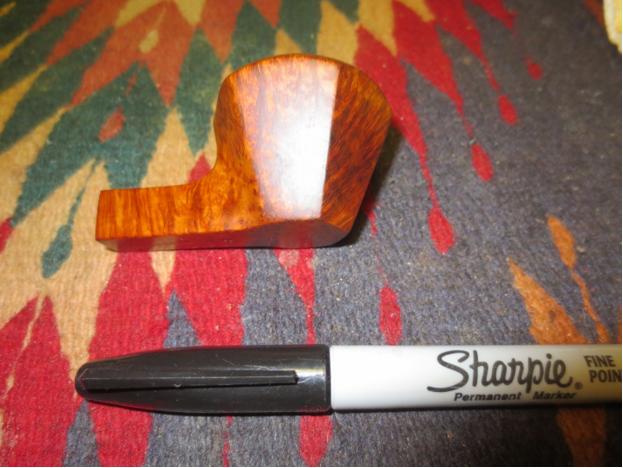
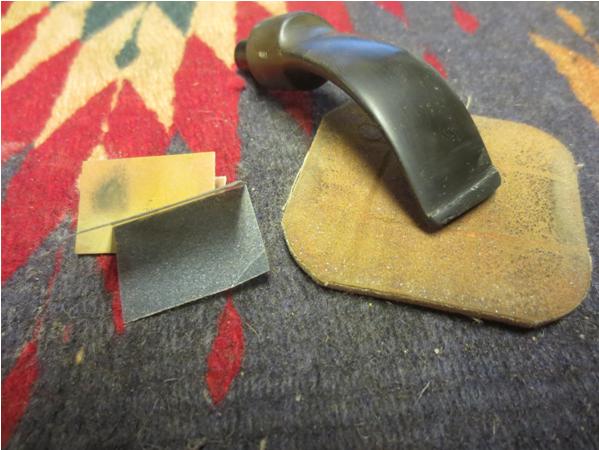
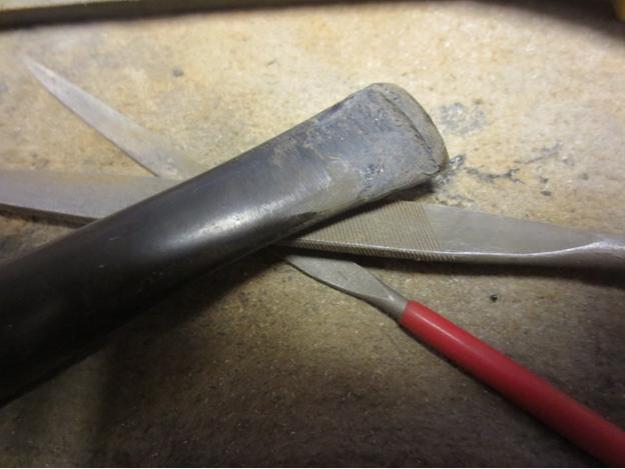
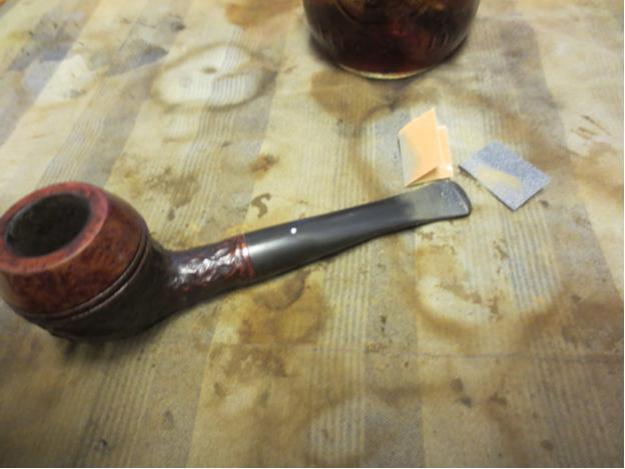
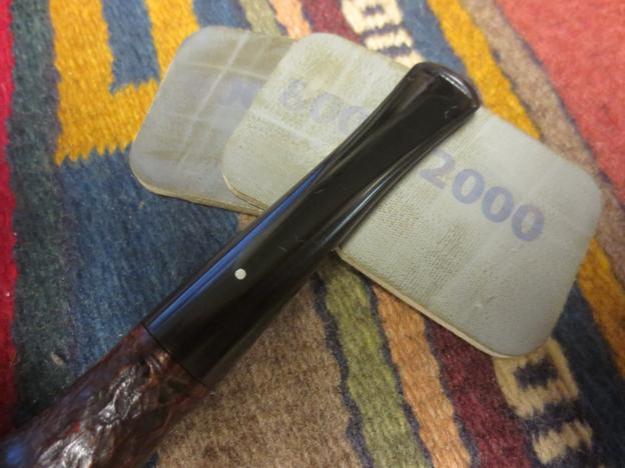
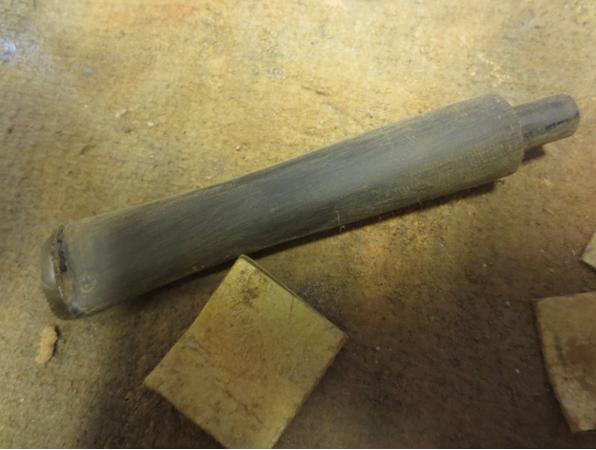
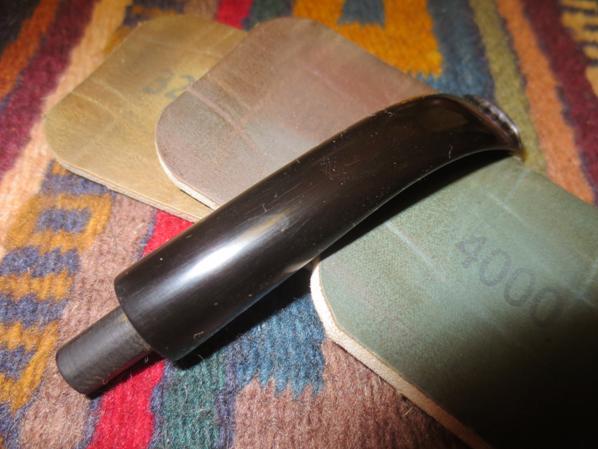
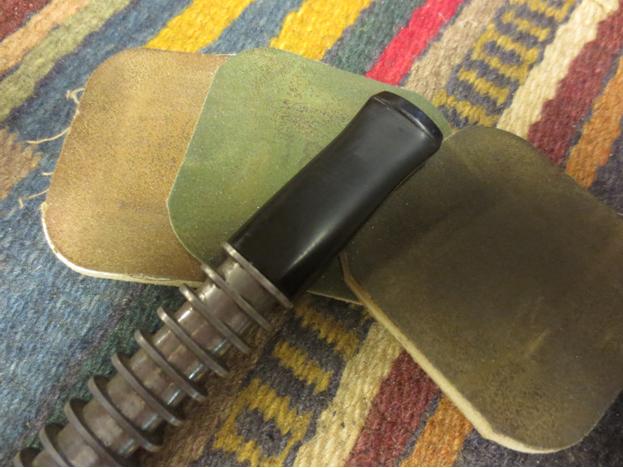
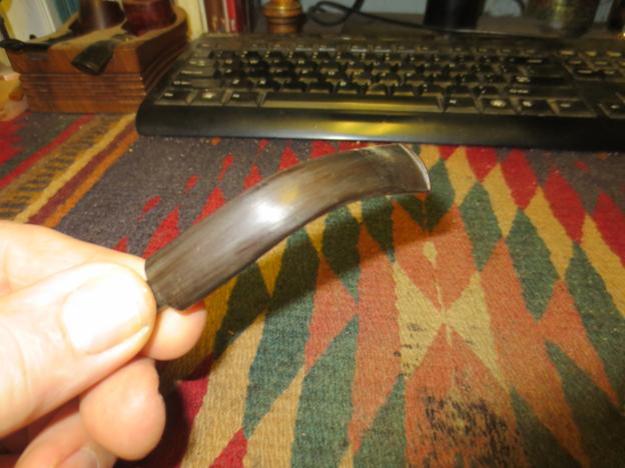
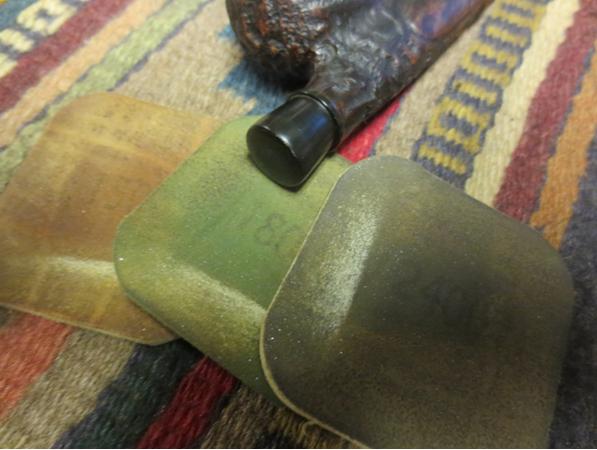
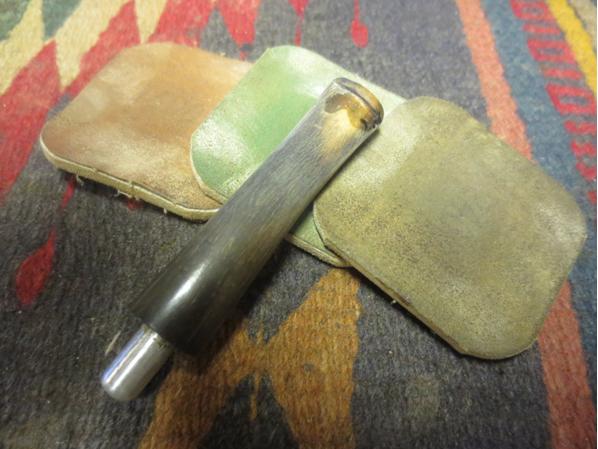
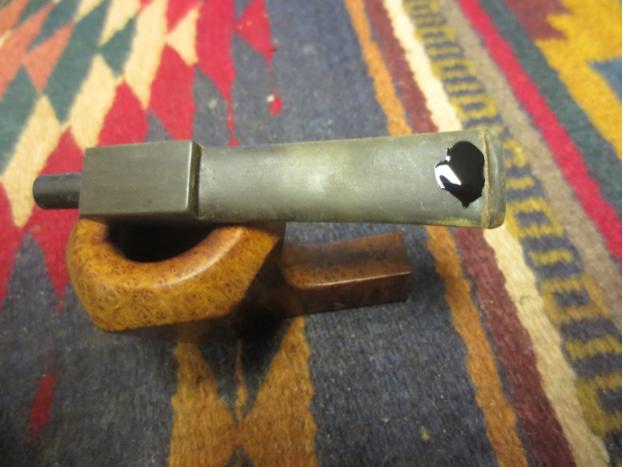
Once the patches on the stem had cured I sanded the stem with 220 grit sandpaper to blend the patch into the stem material. I sanded it with 280-600 grit sandpaper to smooth out the scratches and used a medium grit sanding stick to sand in the angles of the saddle. The oxidation on this stem was stubborn. I scrubbed it with Meguiar’s Scratch X2.0 and then spent a significant amount of time wet sanding it with 1500-1800 micromesh pads. Finally I got through the oxidation. It was not deep in the stem it was just stubbornly hard so breaking the surface took a lot of sanding. Ed18Ed19Ed20Ed21Ed22

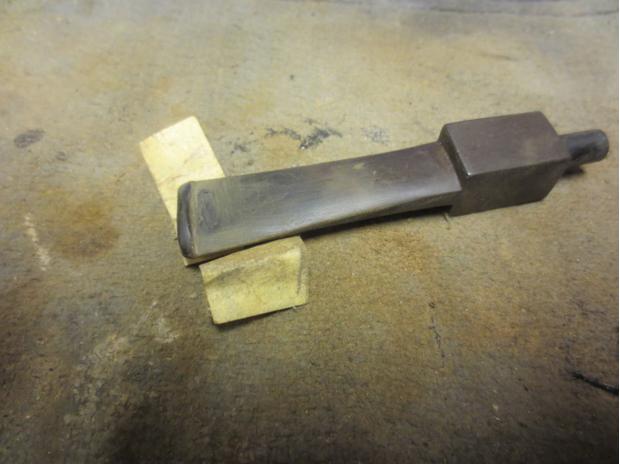
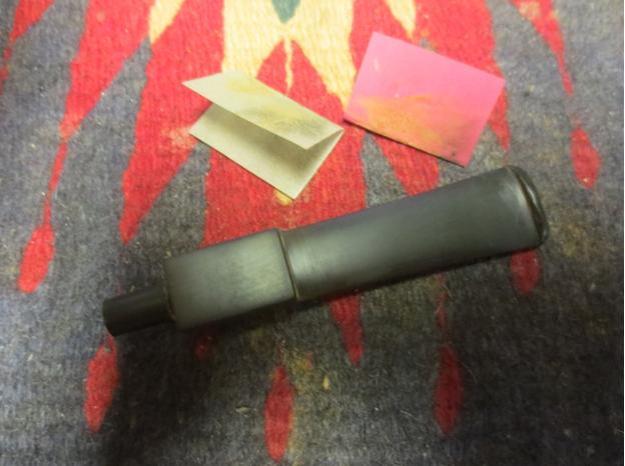
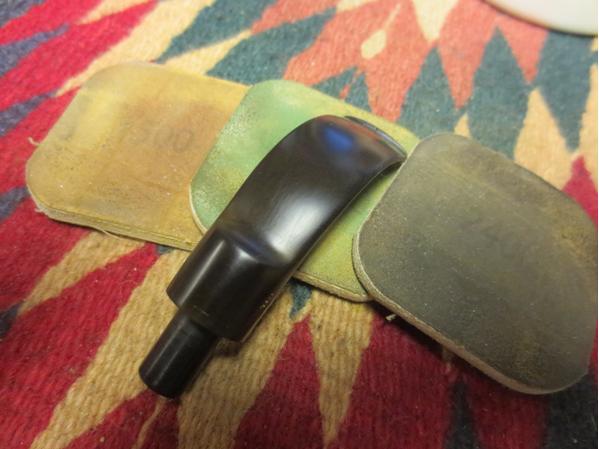
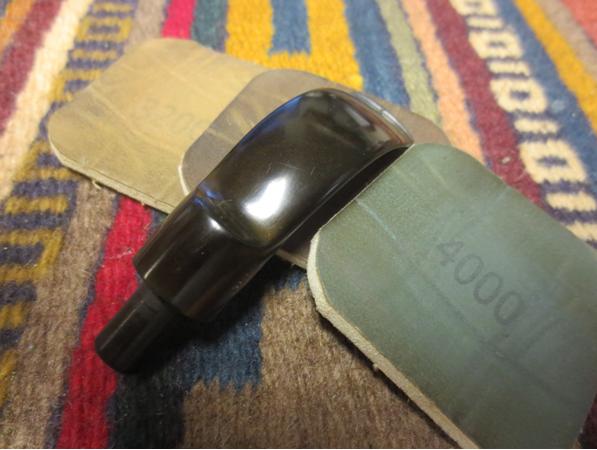
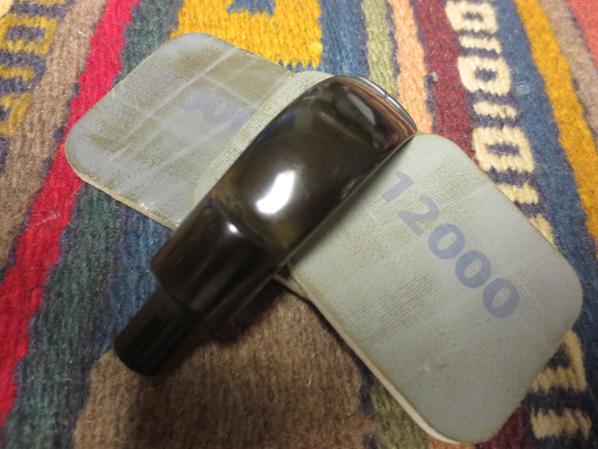
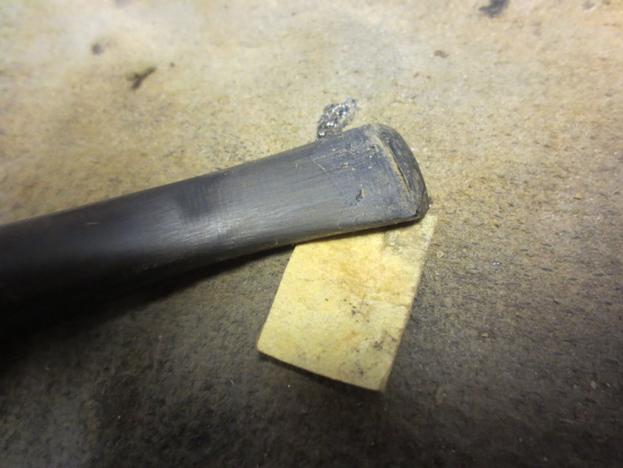
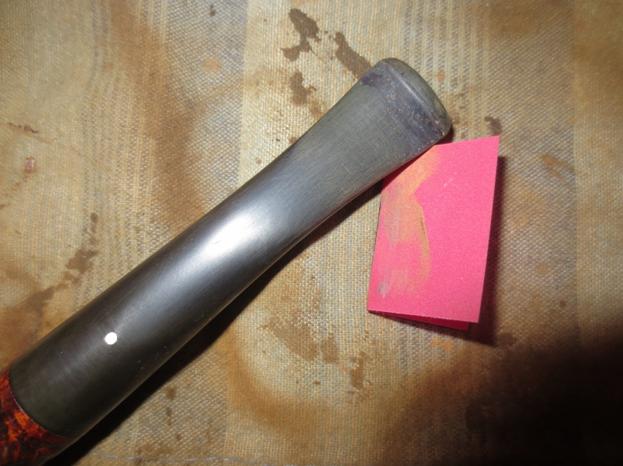
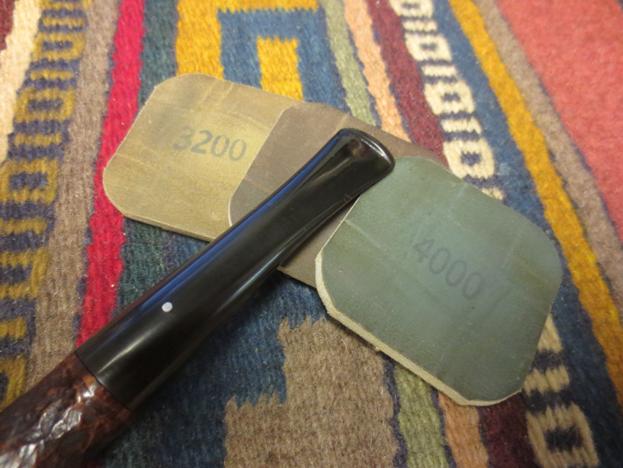
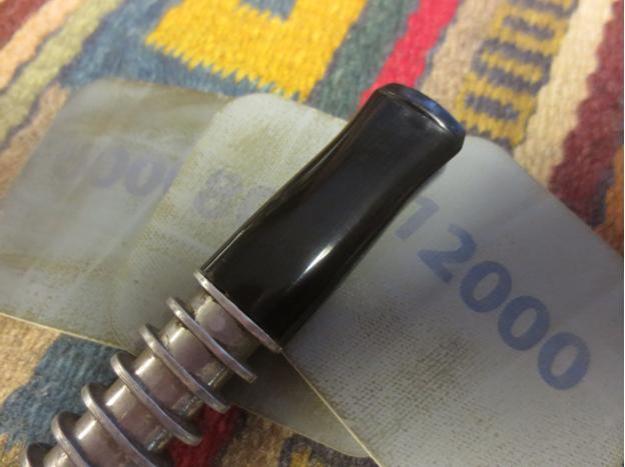
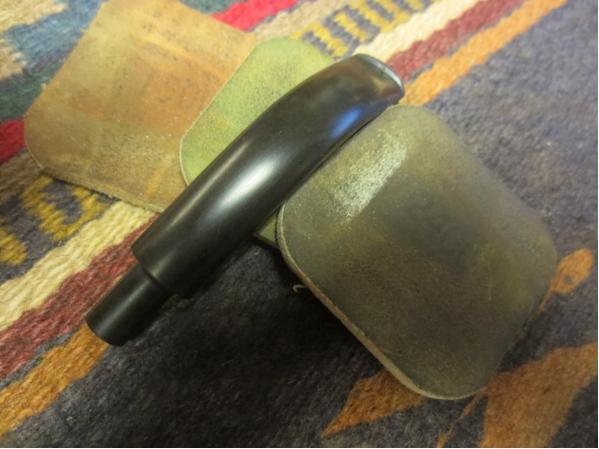
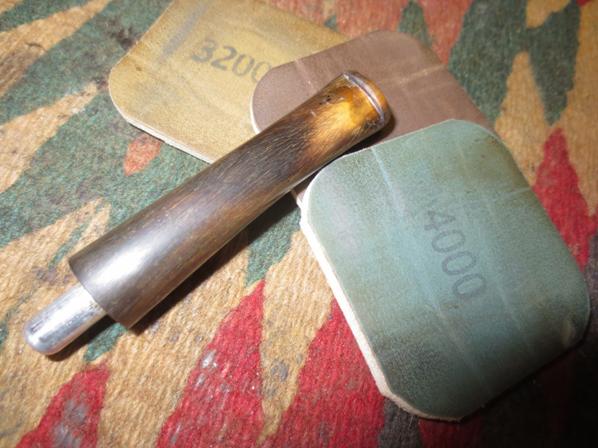
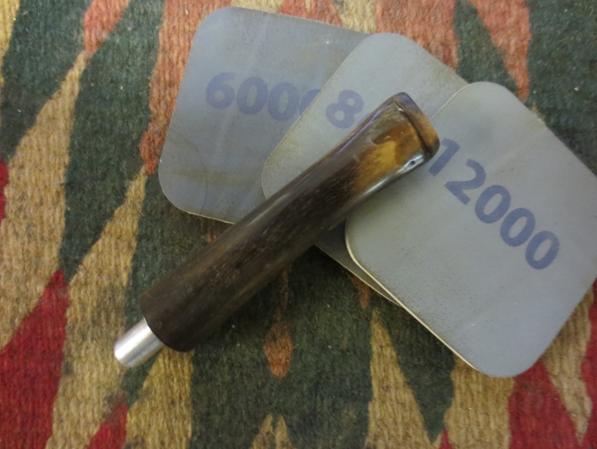
With the oxidation finally conquered and the patches blended in I sanded the stem with 1500-2400 grit micromesh some more – this time working to polish the stem. I gave the stem a coat of Obsidian Oil and sanded it with 3200-4000 grit pads. I gave it another coat of oil and sanded it with 6000-12000 grit pads. I gave it a final coat of oil and let it dry.Ed23Ed24Ed25

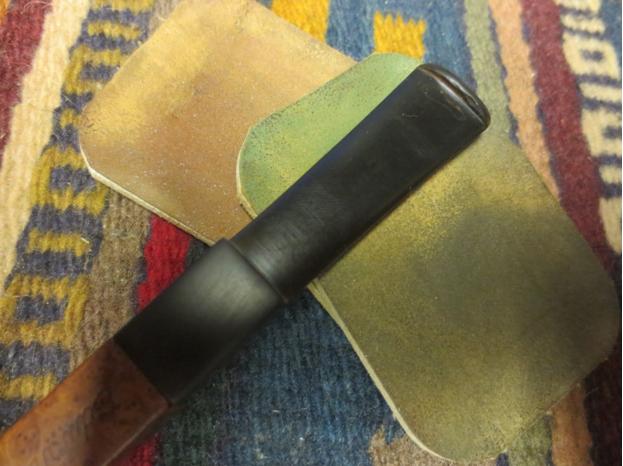
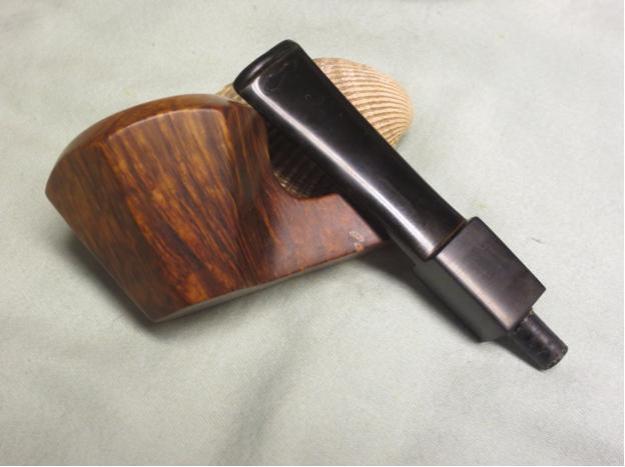
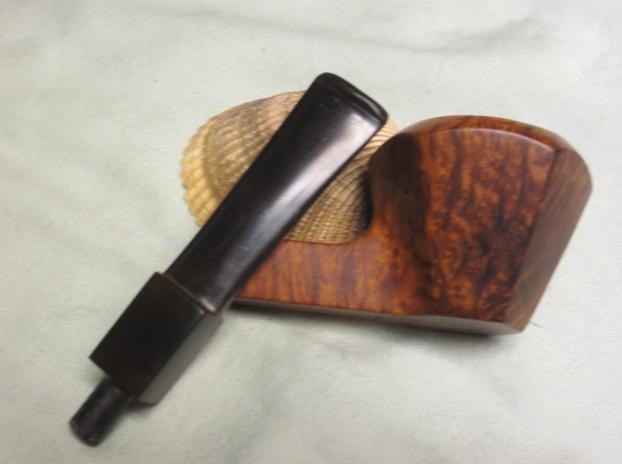
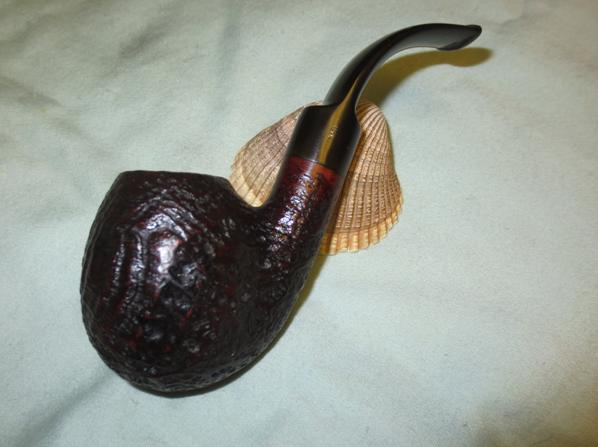
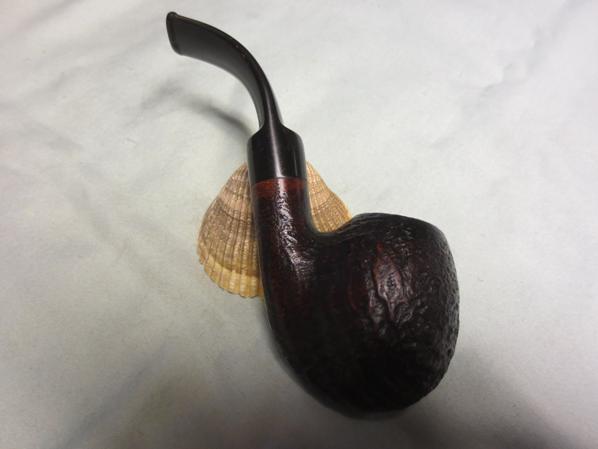
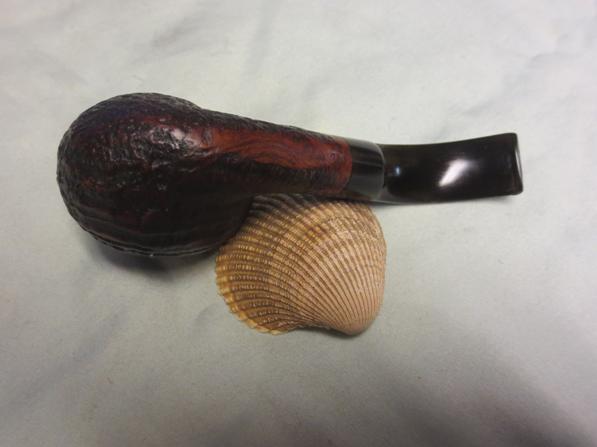
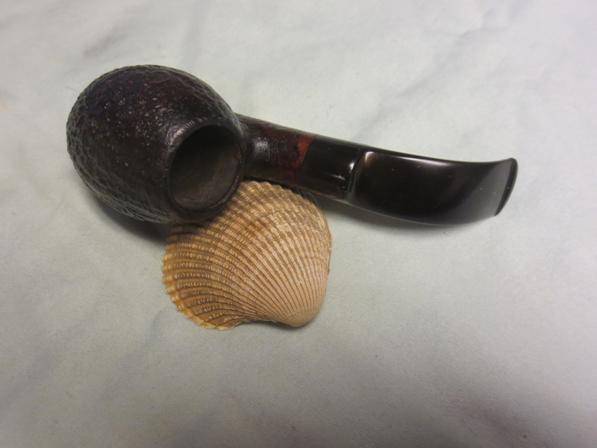
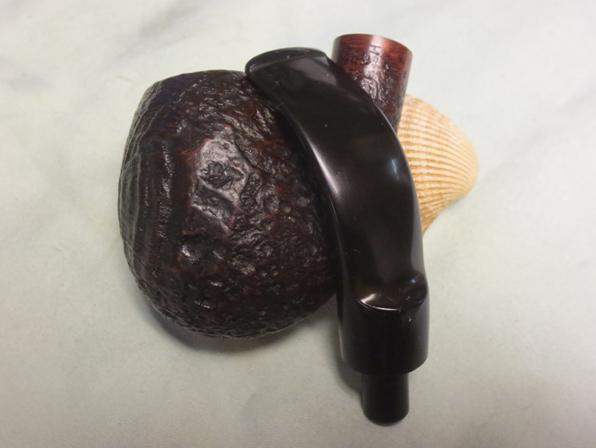
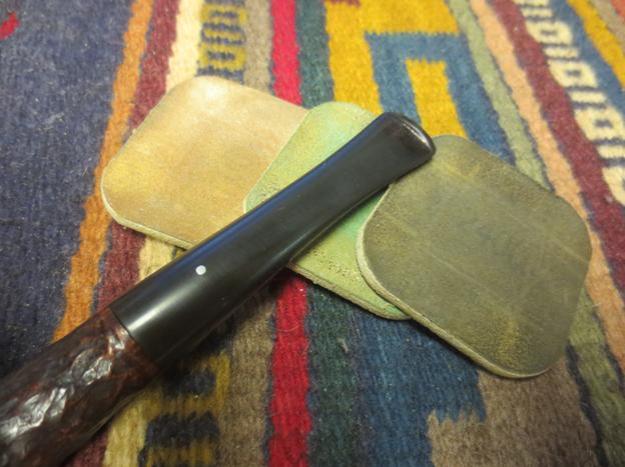
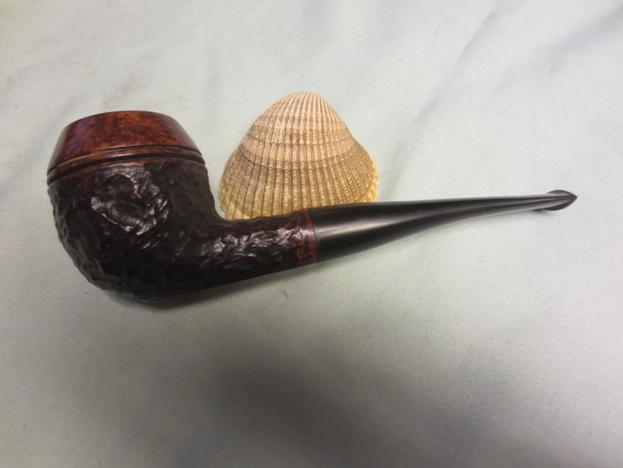
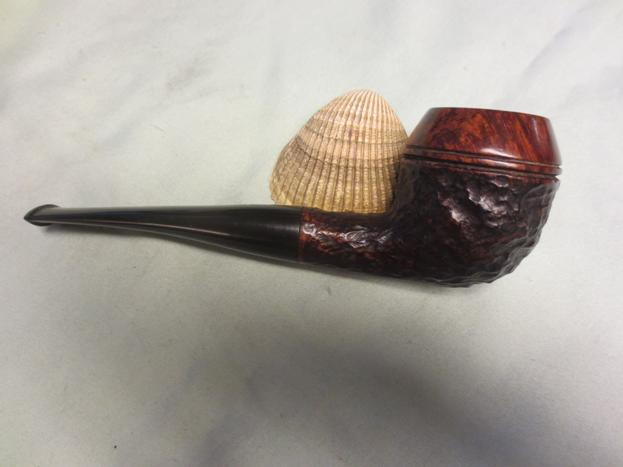
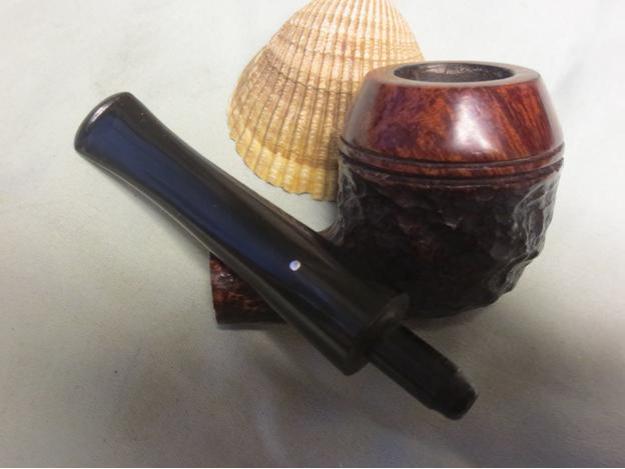
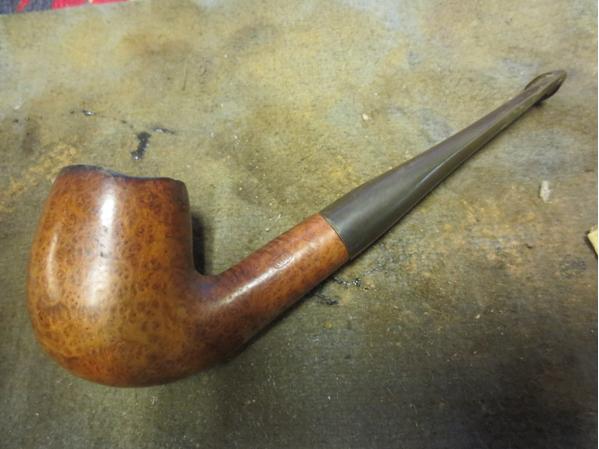
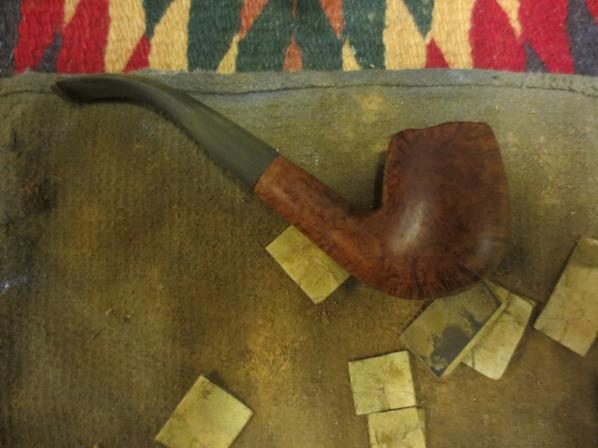
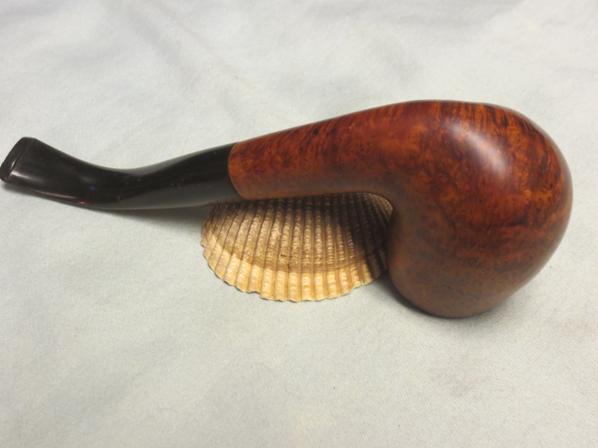
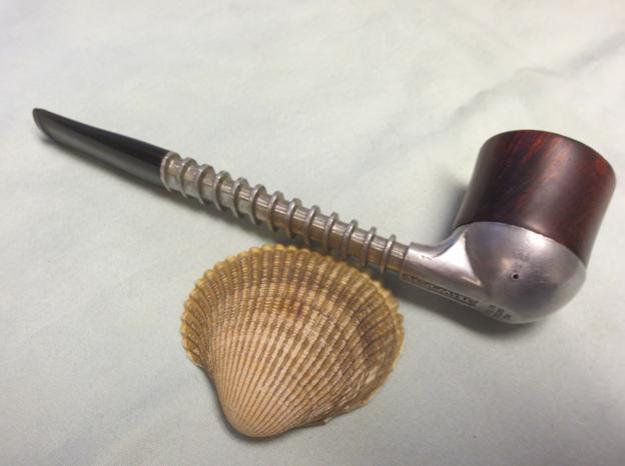
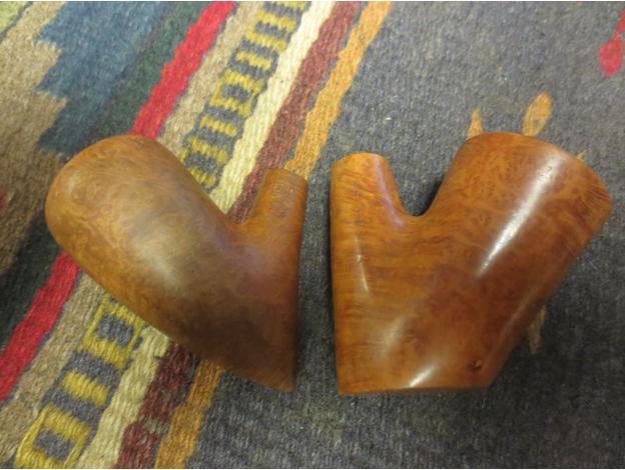
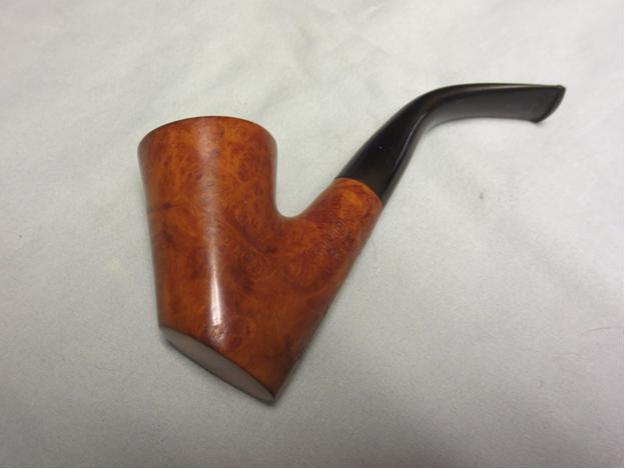
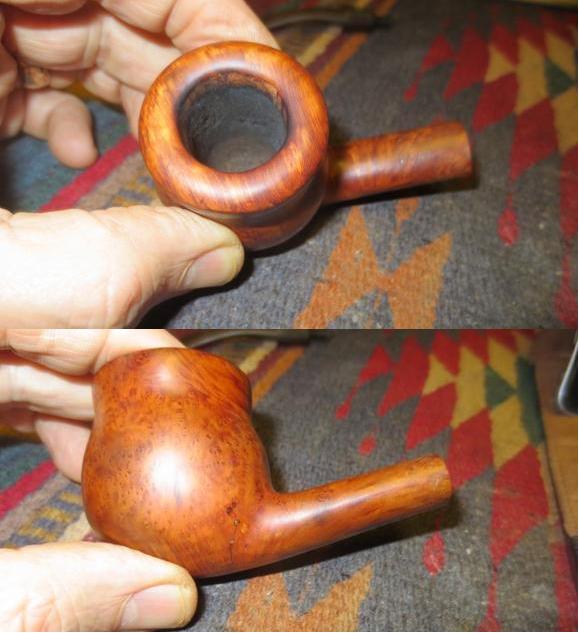
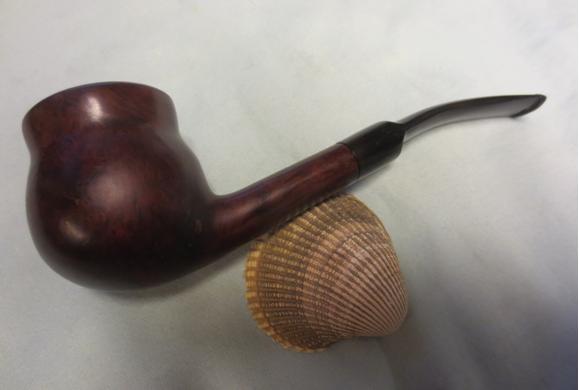
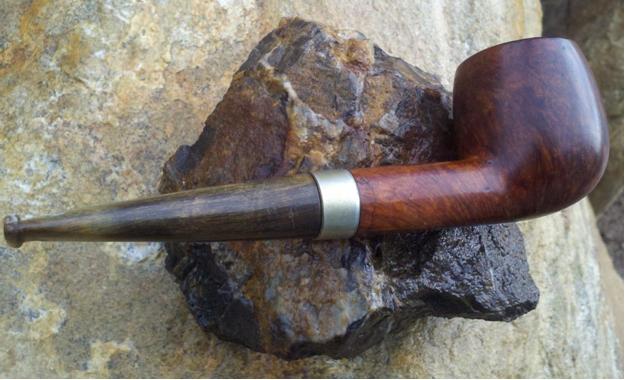
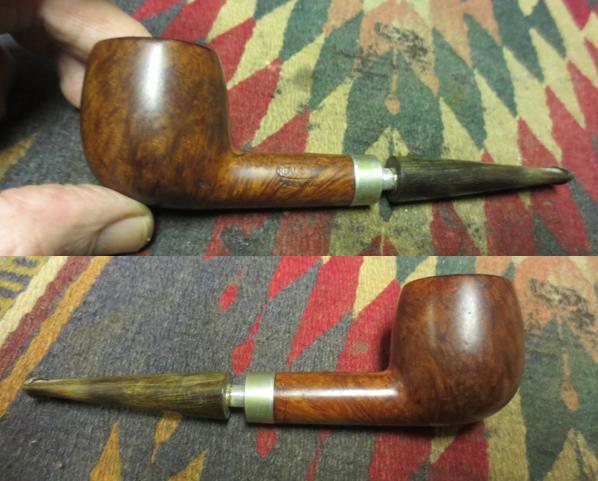
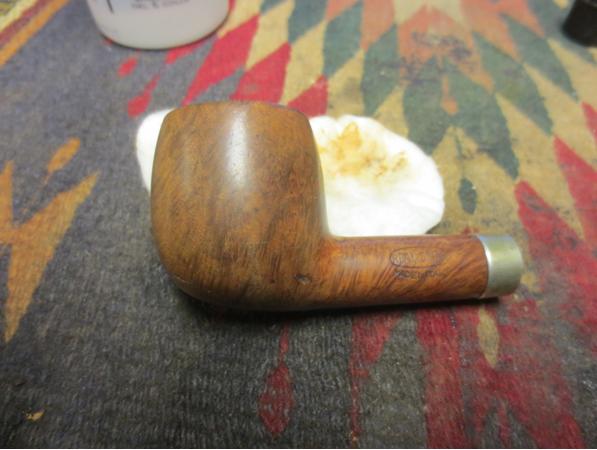
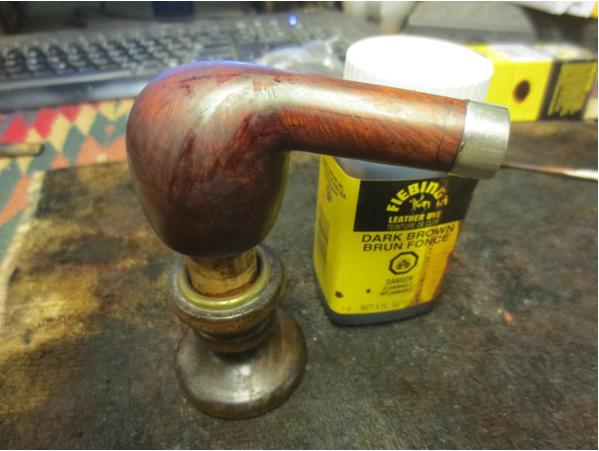
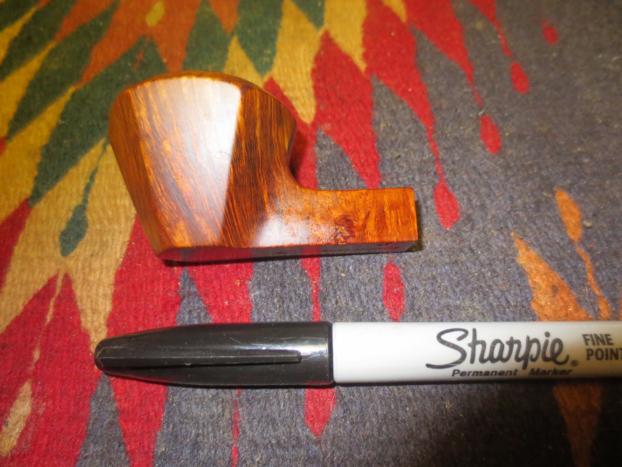
I buffed the pipe with Blue Diamond on the wheel and gave the bowl and stem multiple coats of carnauba wax. I buffed it with a clean buffing pad and hand buffed it with a microfibre cloth. The finished pipe is shown in the photos below. I was able to clean up the rim so it looks almost new – little darkening on the inside bevel toward the back. The fill on the side of the bowl disappeared and the one on the shank is less glaring. The stem repairs look good and I was finally able to remove the oxidation. All in all it is a beautiful pipe with lovely grain and it should provide many more years of service. Ed26Ed27Ed28Ed29Ed30Ed31Ed32

Breathing Some Life into a Bari Squash Full Bent 7811


Blog by Steve Laug

Bari1When my brother sent me a picture of this Bari Squash there was something about it that reminded me of the teardrop shape that Julius Vesz, a Canadian pipemaker, carved. It was more egg-shaped however but the similarity caught my attention. He was able to pick it up on Ebay for a decent price and it only remained for me to get it in hand and work on it. Once I got the pipe to the work table I could see that it really was in decent shape. The pipe fit nicely in the hand and is 4 3/4 inches long, the bowl is 1.875 inches tall, inside diameter of bowl is 3/4 inches. The stamping on the smooth portion on the bottom is unevenly stamped and reads: Bari over Squash. Next to that is reads Made in Denmark with the shape number 7811 at the end. Bari2 Bari3I know next to nothing about the Bari brand so I looked it up on Pipedia. Here is the link: https://pipedia.org/wiki/Bari. I summarized the material that I found there as it gives a clear picture of the brand. I found several pipes in my latest hunt by Viggo Nielsen so this was very interesting information.

Pipedia states that Bari Piber was founded by Viggo Nielsen in Kolding, Denmark around the turn of 1950/51. His sons Kai and Jørgen both grew into their father’s business from a very young age and worked there till 1975. Both have become successful pipe makers. Bari successfully adapted the new Danish design that had been started mainly by Stanwell for its own models. Bari was sold in 1978 to Van Eicken Tobaccos in Hamburg, Germany though the pipes were still made in Denmark. From 1978 to 1993 Åge Bogelund and Helmer Thomsen headed Bari’s pipe production. Helmer Thomson bought the company in 1993 re-naming it to “Bari Piber Helmer Thomsen”. The workshop moved to more convenient buildings in Vejen. Bogelund, who created very respectable freehands of his own during the time at Bari got lost somehow after 1993. Bari’s basic conception fundamentally stayed the same for decades: series pipes pre-worked by machines and carefully finished by hand – thus no spectacular highgrades but solid, reliable every day’s companions were what they turned out. The most famous series are the smooth “Classic Diamond” and the blasted “Wiking”.

The finish on the Bari Squash that I was working on was dirty and tired looking but the blast was really nice. The rim was clean and both the inner and outer edges were in great shape. I had reamed the pipe back to bare briar while I was traveling. It looked to be in excellent shape. There was some wear on the front outer edge of the rim that would need a touch up of stain. The stem was oxidized and scratched. The top of the button had a tooth mark that indented it mid button along the sharp edge but not on the outer curve. The stamping on the left side of the stem read BARI and was light and uneven. After reading about the factory I wonder what era of the Bari life span this pipe came from. Bari4 Bari5Once I got home to the workshop I cleaned up the “field” reaming with a Savinelli Pipe Knife to smooth out the walls of the bowl.Bari6I cleaned out the shank and airway in the bowl and the stem with alcohol, pipe cleaners and cotton swabs. The darkening on the cotton was a combination of tobacco juices and brown stain. It looked as if the inside of the shank had some stain.Bari7 Bari8I scrubbed the exterior of the bowl with Murphy’s Oil Soap and then rinsed it off and dried it. I gave it several coats of Conservator’s Wax and hand buffed it with a shoe brush.Bari9I gave the bowl a light buff on the wheel with a clean buffing pad to raise the shine.Bari10 Bari11 Bari12 Bari13 Bari14With the bowl finished it was time to work on the stem. There was a bite mark on the top of the button that needed to be addressed. I used some black super glue to fill in the divot on the top and smooth out the damage.Bari15Once the glue dried I sanded and shaped the button with needle files and sandpaper. The photos below show the shape developing from the repair to the finished look. Much polishing still needed to happen but it was shaped and ready.Bari16 Bari17 Bari18I wet sanded the stem with 1500-2400 grit micromesh sanding pads. I gave it coat of Obsidian Oil and then dry sanded the stem with 3200-4000 grit pads. I gave it another coat of oil and then buffed it with Blue Diamond on the wheel. I took it back to the table and sanded it with 6000-12000 grit pads and gave it a final coat of Obsidian Oil. I set it aside to dry.Bari19 Bari20 Bari21I buffed the pipe stem with Blue Diamond and then with multiple coats of carnauba wax. I buffed the pipe with a clean buffing pad to raise the shine. I hand buffed it with a microfibre cloth and took the final photos below. I love the shape of this little pipe and the feel of it in hand. It came out beautifully in my opinion. Thanks for looking.Bari22 Bari23 Bari24 Bari25 Bari26 Bari27 Bari28 Bari29 Bari30

Restoring a Lovely Rhodesian by John Calich


Blog by Steve Laug

I have had a thing for Calich pipes since John made a new stem for a bowl I bought on Ebay for one of his pipes. It was a labour of love and one which led to several phone conversations and correspondence with John. He was a great guy and a definite loss to the Canadian pipe smoking community. Whenever I come across one of his pipes in need of work I try to purchase it and restore it. The pipe I am writing about at this time is a Calich Hand Made Rhodesian that is stamped that way on the underside of the shank. It also has a 04 stamping. The photos below were shown by the eBay seller. The bowl appears to be in great shape. The stem is slightly oxidized and the seller noted that there was a hole in the top side of the stem at the button. I knew what I was getting into when I purchased this pipe – or so I thought.Calich1I have written several blogs about Calich pipes that help give an idea of the age of the pipe. While I waited for the pipe to arrive I reread those pieces to refresh my memory on the stamping. I have included the links to the blogs below.

https://rebornpipes.com/2015/03/03/one-of-my-john-calich-pipes-a-calich-ee-billiard/

I summarize the dating information from those blogs now: From my research and conversations I learned that John’s pipes were graded 3E – 8E. The retail prices for them ranged from $145.00 to $500.00. Each pipe was stamped “CALICH” and given an E grade. His earlier pipes were graded from 3-14 and had a single, tiny silver dot applied to the top of the stem. More information can be found at the Pipedia website by clicking on this link. http://pipedia.org/wiki/Calich This information told me as expected that the pipe I had was an earlier one.

I vaguely remembered that I had found further information but could not remember it so I read the next blog I wrote. https://rebornpipes.com/2014/03/21/reflecting-on-my-collection-of-john-calich-pipes/ There the information honed in on the date more closely. I quote from that blog now: I did find out some further information on the dating of Calich pipes as the information on Pipedia was not complete. What I found was very helpful. His early pipes were graded with numbers from 3 – 14. By the late 1980’s Calich introduced 15, 16, and even one 17. In the mid-90’s the grade system changed employing a number of E’s. The more EE’s the higher the grade. From that information I knew that the pipe I had was not only an earlier one but came from early in the 1980s.

When the pipe arrived I took some photos of it to give a clear picture of what I was going to have to deal with in the restoration of this pipe. The stem was more oxidized than the seller’s photos showed and the finish also showed more debris in the rustication and the double rings around the bowl cap than had appeared in the photos. The rim top looked about the same – there was a thin build up of lava on the flat surface but the inner and outer edges were undamaged.Calich2 Calich3The bowl had a light cake in it and would be easy to deal with. There was no damage to the inner bowl. As I looked over the surface of the bowl it was clear that under the grime the pipe was in pretty decent shape. The big issue was the hole in the top side of the stem at the button.Calich4 Calich5 Calich6I took a photo of the bite through to show the extent of the damage. The edges of the bite through were also pushed down into the airway on the stem constricting the airway so that a pipe cleaner would not pass through. The topside of the button was also thinned down considerably and would need to be built up. Calich7 Calich8I used needle files and a dental pick to open up the airway and clean up the crushed edges of the bite through. It enlarged the hole but the airway was wide open when I finished. I also roughed up the edges of the cleaned up hole with the needle files to give a rough surface for the repair to bond to.Calich9 Calich10 Calich11With the stem hole cleaned up I was ready to begin the repair. I cut a wedge of cardboard and covered it with clear tape to make a surface that the glue would not stick to. I inserted it into the airway under the hole and wedged it in place. I mixed a batch of activated charcoal powder and black super glue to make a patching mortar and using a dental spatula applied the material to the hole and the top of the button to build it up. I sprayed it with some accelerator to harden the surface so I could continue to work on the pipe and removed the cardboard wedge.Calich12 Calich13I reamed the bowl with the Savinelli Pipe Knife to clean out the thin cake. You can see from the photo that there was not much of a build up so it was quick job.Calich14I set the stem aside and used a dental pick to clean out the rings around the bowl cap. I scrubbed the rustication with some Murphy’s Oil Soap to clean up the dust in the grooves and crevices of the finish.Calich15I scrubbed the top of the rim with saliva and cotton pads and was able to remove the lava on the surface without harming the finish on the bowl top.Calich16 Calich17I cleaned out the inside of the mortise and shank with cotton swabs, pipe cleaners and alcohol.Calich18By that time I was also able to clean out the inside of the stem with pipe cleaners and alcohol. The pipe cleaners went through with little issue and the stem was clean.Calich19The next morning after the glue had cured overnight I worked on the stem. I needed to reshape the slot to facilitate easy cleaning so I used needle files to clean up the entrance of the airway.Calich20I sanded the stem repair and the surface of the button top with a sanding board to begin the process of reshaping the surfaces of both.Calich21I cleaned up the edge of the button and shaped the surface of the button with needle files until the edge was sharp the surface matched that of the underside of the button.Calich22With all of the hard shaping done it was time to begin the tedious process of sanding the repairs. I started with 220 grit sandpaper to smooth out the surface and the transition to the rest of the stem.Calich23There were still some small holes around some spots on the fill. I used a clear super glue to fill these in and smoothed out the patch with a spatula.Calich24 Calich25When the repair had dried I sanded it with some finer grit sand papers until the surface was smooth.Calich26 Calich27 Calich28I moved on to sand the stem with micromesh sanding pads – wet sanding it with 1500-2400 grit pads and then giving it a coat of Obsidian Oil. I dry sanded with 3200-4000 grit pads and gave it another coat of oil. I finished by sanding it with 6000-12000 grit pads and giving it a final coat of oil. I let the oil dry before buffing the pipe.Calich29 Calich30 Calich31I buffed the pipe and stem with Blue Diamond on the wheel and then gave the stem several coats of Carnauba wax. I buffed the stem with a clean buffing pad. I gave the bowl several coats of Conservator’s Wax and hand buffed it with a shoe brush. The finished pipe is shown in the photos below. The stem repair is solid and though visible to me as I have looked at it so long, it is not obvious. The pipe is useable and looks as close to what it must have looked like when John shipped it out from his shop in the 80s. Thanks for looking.Calich32 Calich33 Calich34 Calich35 Calich36 Calich37 Calilch36

Restemming a GBD International London Made – 508 Bent Billiard


Blog by Steve Laug

Quite a while ago now my brother Jeff picked up a handful of pipes from an antique shop in Montana. There were quite a few GBD pipes in the lot. One of them was this GBD International bent billiard. It came with a gnawed off stem that was irreparable. The bowl was caked and dirty and the rusticated/plateau top was filled with grime to the point that it was almost smooth. The bowl looked good under the grime and the finish looked salvageable. The pipe was stamped GBD in an oval over International over London Made on the left side of the shank. On the right side it was stamped with London England over the shape number 508. I failed to take photos of the bowl before I cleaned it up as I was on a roll with about four bowls going at the same time. Here is what it looked like after I had wiped it down with alcohol. I scrubbed the plateau top with a brass bristle brush and some Murphy’s Oil Soap. I rinsed it down with cool water and dried it off. It is in very good shape. I had reamed the bowl with a PipNet reamer and cleaned out the shank and the bowl. GBD1 GBD2 GBD3 GBD4I went through my stem can and had several potential stems there. I chose one that was slightly larger in diameter than the shank. I had to shorten the tenon as it was too long to sit correctly in the shank.GBD5 GBD6With the tenon shortened the stem fit nicely in the mortise. The diameter was close and I would adjust it to fit.GBD7The stem was a used one that I recycled and it had one deep bit mark on the top side near the button. I sanded it smooth and cleaned it before I filled it in with black super glue. Once the glue cured I sanded the repair with 220 grit sandpaper to smooth it out.GBD8 GBD9I used the Dremel and sanding drum to reduce the diameter of the stem. I sanded it with 220 grit sandpaper until the transition was smooth. I wiped down the bowl with acetone on cotton pads to clean off the remaining grime before restaining the rim with a Black Sharpie.GBD10 GBD11 GBD12 GBD13I heated the stem over a heat gun until it was pliable and bent it to the proper angle. I set the bend with cold water. I sanded the stem with 220 grit sandpaper to remove the scratches left behind by the Dremel and smooth out the flow of the stem.GBD14 GBD15I sanded the stem with micromesh sanding pads – wet sanding with 1500-2400 grit pads. I rubbed the stem down with Obsidian Oil and then dry sanded it with 3200-4000 grit pads. I gave it another coat of oil and then finished sanding it with 6000-12000 grit pads. I gave it a final coat of oil and let it dry.GBD16 GBD17 GBD18I buffed the bowl and stem with Blue Diamond on the buffing wheel and then gave the pipe multiple coats of carnauba wax. I buffed it with a clean buffing pad and then hand buffed it with a microfibre cloth. The finished pipe is shown in the photos below. The grain on this pipe is spectacular – great birdseye on the sides and cross grain on the front, back and bottom. The plateau or rustication on the rim that I stained black gives it a unique look. I think it is a beauty! Thanks for looking.GBD19 GBD20 GBD21 GBD22 GBD23 GBD24 GBD25 GBD26 GBD27

Bringing New Life to a Yello-Bole Metal


Blog by Steve Laug

My brother found this older Yello-Bole metal pipe. It is a lot like the older Grabow Vikings but the bottom of the bowl is different from the Grabow. Between the bowl and the metal base there is a flat perforated screen or disk that the tobacco sits on. It acts as the bottom of the bowl. The wooden bowl itself is a threaded tube that screws into the base. There are two pin holes on the sides of the base (one on each side about mid base below the bowl). These serve as openings to draw air into the bowl. This one was in decent shape and would take a little work to clean up. The photos below were provided by the eBay seller and show the state of the pipe. From the first two photos below you can see the wear on the stem and the white calcification that generally builds up under a rubber softee bit. The finish on the bowl is shot. There is nothing but bare briar showing. The outer edge of the rim looks good. YB1 YB2The next two photos give a top and underside view of the pipe. You can see the ring of cake in the bowl around the middle and lighter on the top and bottom edges. You can see the metal disk in the bottom of the bowl. I have purchased a few of these over the years and almost all of them were missing the metal disk that sat in the base between the bowl and base. The stem shows some tooth marks on the top and underside.YB3 YB4The final photo included by the seller showed the stamping on the underside of the base. It read Yello-Bole horizontally along the bottom of the shank. It also gave the patent number on the bottom of the base. It read PAT. over 2467002 over PAT. PEND. That was enough data to do a patent search on the US Patent Information site. http://www.uspto.gov/patents-application-process/search-patents. From there I copied the patent drawing and included it below.YB5The diagram and the accompanying documents show the conceptual and descriptive narrative of what the pipe was about and what its maker hoped to achieve with his design. The inventor was a Samuel Laurence Atkins of New York. He filed his patent application on July 14, 1945. The patent was granted April 12, 1949. The pipe that I have is stamped Patent Pending thus it is easy to extrapolate that it was made between the dates July 14, 1945 and April 11, 1949 which are the dates before the patent was granted. That makes this pipe between 67-71 years old. It is in pretty decent shape for a pipe of that age.YB6 YB7I took the following photos when the pipe arrived. The seller’s photos were pretty good at showing the issues with the pipe. All the things noted above were correct.YB8 YB9 YB10 YB11The pipe was quite easy to take apart. I unscrewed the bowl and tapped out the disk in the base. The stem came out of the shank with little effort. I took the photo below to show the parts. The second photo shows the cake in the bowl.YB12 YB13I started the clean up with reaming the bowl. I used the PipNet reamer and the largest cutting head to ream from the top of the bowl. I used the second head to ream the bowl from the bottom. I reamed it back to bare briar. There was still some of the signature Yello-Bole bowl coating showing near the top just below the rim.YB14 YB15I scrubbed the bowl base with a brass bristle brush to loosen up the dried tars and oils in the base. I used a dental pick to clean out the threads. I also scrubbed the disk with the brush. YB16 YB17I used pipe cleaners, cotton swabs and alcohol to clean the surface of the disk and the inside of the base and airway.YB18 YB19

I scrubbed the interior and exterior of the stem with alcohol and pipe cleaners to remove the build up on the outside and the oils on the inside.YB20With the cleanup finished I set the parts on the table and took a few photos of the cleaned up pipe. Now it was time to restore it.YB21 YB22I wiped down the bowl with cotton pads and acetone to remove the grime and the remaining finish on the bowl.YB23

I stained the bowl with a dark brown stain pen.YB24 YB25I buffed the bowl with red Tripoli to spread and polish the stain. I buffed it with Blue Diamond and rubbed the bowl down with a light coat of olive oil. At this point in the process the bowl and the metal base was complete. I took the following photos to show the state of the progress thus far.YB26 YB27 YB28 YB29 YB30I cleaned the stem and used a clear super glue to repair the deep tooth marks in the top and underside of the stem near the button.YB31 YB32I sanded the repairs with 220 grit sandpaper to blend it into the surface of the stem. YB33 YB34I worked on the stem with micromesh sanding pads. I wet sanded with 1500-2400 grit sanding pads and then rubbed the stem down with Obsidian Oil. I wet sanded with 3200-4000 grit pads and gave it another coat of oil. I finished by dry sanding with 6000-12000 grit pads. I gave it a final coat of oil and let it dry.YB35 YB36 YB37I buffed the bowl and stem with Blue Diamond on the wheel and then gave both multiple coats of carnauba wax. I buffed it with a clean buffing pad and then by hand with a microfiber cloth. The finished pipe is shown in the photos below. Thanks for looking.YB38 YB39 YB40 YB41 YB42 YB43

A Rare Find – A Pair of Fieldcraft Dulwich Quaints


Blog by Steve Laug

My brother found this pair of Dulwich Quaints – one a sitter, kind of bent poker and the other a kind of pickaxe shape. The shape and the look of them were unique and there was something about them that immediately drew me to them. They are not big pipes but they have full sized bowls. The stems were made out of very good vulcanite. The briar was quite nice even though both pipe sported a few fills. The bent poker is stamped DULWICH over Quaint on the left side of the shank and Made in England on the right side. On the underside of the shank it is stamped Fieldcraft and the shape number 102. The pickaxe is stamp DULWICH over Quaint on the left side and Made in England on the right and on the underside it has the shape number 126. I have hunted high and low for information on the brand using the Dulwich moniker as well as the Fieldcraft one. Both take me nowhere. One of the earlier pipes I repaired was stamped with the Fieldcraft name and the shape number was clearly a Orlik Pipe Shape. In this case I have no idea who the maker was. Both are interesting old pipes.Dulwich1 Dulwich2The poker shaped sitter had hardly been smoked with over half of the bowl undarkened briar. The stem had some tooth chatter on the underside near the button but other than being oxidized it was a clean pipe. The finish on it was also pretty decent with a few small fills toward the bottom of the bowl on the left side and the front. There was some scratching in the briar as well particularly on the bottom of the bowl. The pickaxe was in rougher shape all the way around. It had a thick cake in the bowl with lava on the rim. The front right rim edge and top had been badly beaten against something that left the briar very rough. The stem was oxidized and had a line of calcification. There was tooth chatter on both the top and bottom sides near the button.Dulwich3 Dulwich4 Dulwich5I took a close up picture of both rims to show what they looked like when I started the refurb. The poker had a slightly crowned rim that is undamaged and has no lava or tars. The pickaxe is another story.Dulwich6 Dulwich7I reamed the bowl of the pickaxe with a PipNet reamer using the smallest cutting head. I took the cake back to bare briar so that I could repair the rim damage.Dulwich8 Dulwich8aI wiped both bowls down with acetone on cotton pads to remove the finish and the grime that was particularly prevalent on the pickaxe.Dulwich9 Dulwich10I sanded the rim of the pickaxe with 220 grit sandpaper to remove the damage to the surface of the front edge and top. I sanded it with a medium and a fine grit sanding sponge and then with micromesh sanding pads – 1500-24000 grit. I wiped the rim down with acetone.Dulwich11 Dulwich12I buffed both bowls with White Diamond on the wheel to get a natural shine.Dulwich13 Dulwich14 Dulwich15 Dulwich16I cleaned out the mortise and the airway on both pipes with cotton swabs, pipe cleaners and alcohol.Dulwich17 Dulwich18I cleaned out the airways on both stems with alcohol and pipe cleaners.Dulwich19 Dulwich20I sanded the stems with 220 grit sandpaper to clear the surface of the oxidation and the calcification on the pickaxe stem. I scrubbed the bite marks on the underside of the stem and used black super glue to repair them.Dulwich21 Dulwich22I sanded the poker stem with 220 grit sandpaper and removed the tooth marks on the underside of the stem near the button.Dulwich23 Dulwich24I rubbed the stems down with some Obsidian Oil and put them back on the bowls to get a quick look at how the work was coming along.Dulwich25I scrubbed the stems with Meguiar’s Scratch X2.0 Fine scratch and blemish remover. It worked really well on the pencil stem on the pickaxe and not as effectively on the thicker stem of poker.Dulwich26I wet sanded the stem of the pickaxe and the stem on the poker with 1500-2400 grit micromesh sanding pads and then rubbed the stem down again with the Obsidian Oil. I dry sanded the stems of both with 3200-4000 grit micromesh and then gave them another coat of the oil. I finished sanding them with the 6000-12000 grit micromesh pads and gave them a final coat of oil and set them aside to dry.Dulwich27 Dulwich28 Dulwich29 Dulwich30The briar was naturally finished so I did not stain either bowl. I gave them a light coat of olive oil and then buffed the stems and bowls of both pipe with Blue Diamond on the wheel. I gave them both several coats of carnauba wax. I buffed them with a clean flannel buffing pad and then by hand with a microfiber cloth. The finished pipes are shown in the photos below. Do any of you who are reading this have any information on either Fieldcraft or Dulwich pipes? I have seen and repaired several over the years and so far have been unable to identify them beyond the initial one that was an Orlik made pipe. Thanks ahead of time for any help that you may have.Dulwich31 Dulwich32 Dulwich33 Dulwich34 Dulwich35 Dulwich36 Dulwich37 Dulwich38 Dulwich39 Dulwich40 Dulwich41 Dulwich42 Dulwich43 Dulwich44

More than met the eye: Would I be able to bring this Jobey Fawn Cauldron back to life?


Blog by Steve Laug

My brother sent me the Ebay link to this Jobey Cauldron and I was hooked. It was in pretty worn shape in terms of the finish and the rim. There was a thick cake in the bowl and some serious lava had overflowed the rim. There were nicks around the outer edge of the rim and the bevel on the inner edge was pretty well covered with lava. There were scratches in the sides of the bowl and it was truly filthy. The stem was oxidized and spotty on the stop side and the saddle. Underneath it was missing a large triangular chunk from the button forward. It was a Jobey so it had the Jobey link tenon that screwed into the shank and the stem fit over the tenon. It was made for a quick and easy replacement. The photos below are from the Ebay seller and clearly show the state of the pipe he was selling. We bid on it and won. Little did I know that what I saw in terms of issues with this pipe were only part of the problems that I would need to deal with in restoring it. Cauldron1 Cauldron2 Cauldron3The seller included a few close up photos to show some of the damage to the pipe. The oxidized and spotty stem is shown in the first photo and the second shows the state of the rim and bowl.Cauldron4 Cauldron5The next two photos show the stamping on the pipe. The top of the shank is stamped Jobey in script over FAWN. The underside is stamped E52 over EXTRA.Cauldron6 Cauldron7The seller also included the following photos to give a clear picture of the profile of the pipe and the damage to the underside of the stem. He gets full props for full disclosure of the issues with this pipe (at least those that were visible through the grime and build up on the briar and stem).Cauldron8 Cauldron9 Cauldron10I went online and searched for a photo of what the pipe had originally looked like and found this one on Smokingpipes.com. Looking at it gave me hope for the repairs and restoration of the one we purchased.Cauldron11When the pipe arrived I put it in my box of pipes to be refurbed and it sat for several months. When I took it out and looked it over I found that the stem was not aligned. I tried to unscrew it from the shank and it would not turn. I tried to wiggle the stem free from the shank and in the process heard that awful cracking sound which refurbishers the world over have come to dread. The tenon snapped off. Great! Now I added one more issue to the refurbishing process on this old pipe. Fortunately, I was able to clear the broken end out of the stem with very little problem but the one in the shank took a bit more ingenuity. I finally was able to remove it by hand turning a drill bit into the broken end and then turning it free of the shank. I cleaned out the shank with pipe cleaners, cotton swabs and alcohol, and then put the parts aside. Since I had no Jobey Link tenons in my kit I would need to wait until I could get some. I called Tim West at JH Lowe and put in an order for tenons. Even that turned out to be far more of an issue than I expected – they came in five sizes and the one I had was so shattered that I was unable to get the measurements. I could estimate the measurements but not get an accurate diameter on either the threaded end or the insert. So I had to order one of each of the three sizes that Tim had in stock. I was hoping that when they arrived that one of them would fit the stem and the shank. Now I would have to wait for their arrival.

It did not take too long of the package to come from Tim. I took out the various Jobey Links that he included and breathed a sigh of relief when the middle sized link was a perfect fit in the shank. The end of the tenon is slotted so that it can be screwed into the shank and unscrewed with a slotted screw driver. In this case it turned into the shank with no issues. The stem did not fit over the end of the tenon but the measurements were correct so I cleaned out the end of the stem and was astonished at the amount of grit that came out of it. I used cotton swabs and alcohol to scrub it clean. Once it was clean the stem fit snuggly over the end of the tenon and all parts aligned perfectly.Cauldron12 Cauldron13 Cauldron14 Cauldron15With the stem fit completed and the new tenon in place it was time to clean up the pipe and see what I was dealing with underneath the grime and dirt. I took some close up photos of the bowl and the stem issues and a complete set of photos of the pipe from multiple angles to show what it looked like when I started.Cauldron16 Cauldron17 Cauldron18 Cauldron19The bowl on this pipe is quite large. I reamed it with the two largest cutting heads on the PipNet pipe reamer and took the cake back to bare briar. I cleaned up the ridges and edges of the broken cake shown in the second photo below with a pen knife and the bowl inside was smooth and clean.Cauldron20I lightly sanded the rim with 220 grit sandpaper to cut through the thick lava on the rim and the inner edge of the bowl. I was able to remove most of it with the sandpaper and finished by scrubbing the bowl down with acetone on cotton pads. The next photo shows the beauty of the rim that lay beneath the lava flow.Cauldron21Once I had removed the grime and the finish I examined the bowl to look for issues that I would need to deal with. Sadly I found that there was a hairline crack where the shank connected to the bowl. It was on the underside of that junction and went up the left side. It was about an inch long. This Jobey Cauldron was turning out to be far more work than I originally imagined when my brother and I had looked at the Ebay photos.Cauldron22This crack, though not deep and pretty cosmetic at this point, would need to be dealt with so that it would not become a bigger issue. I used a micro drill bit on the Dremel and drilled both ends of the crack. I examined it with a lens and saw that it went a little further than I had expected originally and redrilled the end of the crack on the side of the bowl.Cauldron23I decided to also drill some small holes along the crack to make sure that I could seal it further.Cauldron24I pressed some briar dust into the drill holes with a dental pick and then put drops of super glue into the filled holes. I pressed some more briar dust into the surface of the holes to deal with expected shrinkage as the patches dried. At this point the repair always looks ugly and over done but I have found if I skip the last step I have to repeat the process to ensure that the holes are filled.Cauldron25I sanded the repairs with 220 grit sandpaper and then with a medium and fine grit sanding sponge.Cauldron26I stained the repair area and the top of the rim with a light brown stain pen to blend it into the colour of the bowl and shank. This would not be the final colour of the bowl but I wanted to minimize the difference between the sanded areas and the rest of the bowl and shank when I gave it a final stain coat.Cauldron27

I buffed the bowl with Blue Diamond to even out the stain. While the repairs showed through the stain at this point I intended to darken the stain later and it would blend in the repairs a bit more.Cauldron28 Cauldron29With the bowl basically finished at this point I worked on the stem. The missing chunk in the stem end was the expected major repair that needed to be addressed. I mixed up a batch of black super glue and activated charcoal powder to make a paste. I put a wedge of cardboard wrapped in packing tape in what remained of the slot in the stem and applied the paste to the hole in the stem with a dental spatula. At this point I was more interested in getting a good thick coat of the paste in place than in making it look pretty. Shaping and smoothing would be done once it cured.Cauldron30 Cauldron31Once the patch had cured I used a file to define the edge of the button and to smooth out the surface of the stem. I used the topping board to smooth out the end of the stem.Cauldron32It took a lot of filing with needle files to clean up and define the button and then sanding with 220 grit sandpaper to blend the patch into the surface of the surround stem. I used a round, an oval and a flattened oval needle file to open up and shape the slot on the bottom side to match that of the top side.Cauldron33I continued to sand the stem surface with 220 grit sandpaper to shape the blade and the button. The stem was beginning to take shape. The new button and the repair to the bottom of the stem were complete.Cauldron34I wanted to make sure to stain the bowl before I called it a night so I set the stem aside for a bit and stained the bowl. I gave it several coats of dark brown aniline stain and flamed it between to set the colour in the briar. The darker colour would bring the pipe to a similar colour to the one that I found on Smoking pipes.com (shown above).Cauldron35In the morning I worked some more on the stem. I wet sanded it with 1500-2400 micromesh sanding pads. I gave it a coat of Obsidian Oil and then dry sanded it with 3200-4000 grit pads. I gave it another coat of oil and then finished sanding it with 6000-12000 grit pads. I gave it a final coat of Obsidian Oil and set it aside to dry. Cauldron36 Cauldron37 Cauldron38At this point in the process you can see the scratches on the underside of the stem. No matter how much I sanded them with the micromesh pads these still remained. I started over the process of sanding with the pads – beginning with 1500 grit I worked my way through them until I had finished with 12000 grit. Finally I was able to remove the scratches. I buffed the stem and bowl with Blue Diamond on the wheel and then gave both the bowl and stem several coats of carnauba wax. I buffed it with a clean flannel buff and then with a microfiber cloth before taking the photos below. The finished pipe is shown in the photos below. The repairs to the hairline crack and the stem repair though still visible under scrutiny blend in well with the rest of the bowl and stem. The darker stain covers the repairs on the bowl and look quite natural. The bowl has been brought back to life and I like the rich colour of the buffed and polished dark brown stain. Thanks for looking.Cauldron39 Cauldron40 Cauldron41 Cauldron42 Cauldron43 Cauldron44 Cauldron45 Cauldron46

Breathing New Life into an old Mastercraft Standard Cavalier


Blog by Steve Laug

I have always wondered what it would be like to work on a Cavalier shaped pipe. There was something intriguing about working on a long shank with an end cap and a bowl carved coming out of the side of the shank. The look of the pipe and the dapper appearance may well have contributed to the name of the shape. It is made to hang from the mouth of the pipe smoker and be clenched as he is doing other things. This one is another of the pipes that came to me from my brother Jeff.Cavalier1

Cavalier2 It is a great example of the shape. It is a rusticated Cavalier that has brown and dark contrasting colours over a worm trail like rustication. The end cap is a hard rubber and has a bone tenon connecting it to internal threads in the bottom of the shank. The stem is also a good quality rubber as it is not even oxidized. There are tooth marks on the bottom and the top of the stem near the button left behind by the clencher that smoked it. Cavalier3 The rim of this one is in great shape no damage. The amazing thing was that there was unsmoked tobacco in the bottom of the bowl. There was also a thick cake on the walls of the bowl. It did not extend to the bottom of the bowl but ended shortly above the entrance of the airway at the bottom of the bowl.Cavalier4

Cavalier5 The pipe came in its own satin bag which is why the pipe was in such good shape. The finish was dirty and dusty in the grooves but that was the extent of the issues with it. This would be an easy clean up. I took it apart and took the photo below of the parts of the pipe.Cavalier6 It is stamped on the left side of the shank with the words Mastercraft over Standard over Imported Briar. All words are in upper case on the shank. It appears that the stamping was to be done in a smooth oval on the shank but it missed the oval by about a ¼ inch and sits over the rustication on the shank.Cavalier7 I scrubbed the bowl and the threads on the end cap with Murphy’s Oil Soap and a tooth brush. I rinsed off the pipe with running water and dried it off. The cleaned finish looked very good. I would not need to do much with the finish on this pipe.Cavalier8 I removed the tobacco remnants from the bowl and then reamed the bowl with a PipNet reamer. I took the cake back to bare briar.Cavalier9

Cavalier10 I cleaned off the threads on the end cap – it was a bone tenon – with a brass bristle wire brush. One it was clean I put a coat of Vaseline on the tenons and screwed it back in place.Cavalier11 Before I put the end cap in place I cleaned out the inside of the shank from end to end with pipe cleaners, cotton swabs and alcohol. Once it was clean I put the end cap in place. I also cleaned out the airway in the stem at the same time.Cavalier12

Cavalier13 The deep gouges in the top and bottom sides of the stem needed to be cleaned up. There was a lot of tooth chatter around the deep gouges so I sanded out the tooth chatter with 220 grit sandpaper. The sanding work left two gouges on the underside and one on the top side of the stem that would need some work.Cavalier14

Cavalier15 I cleaned out the divots with alcohol and dried it off. I filled them in with black super glue until there was bubble over the surface. I let the glue cure.Cavalier16

Cavalier17 While the stem patch cured I worked on the end cap. I wet sanded it with 1500-2400 grit micromesh sanding pads and rubbed it down with Obsidian Oil. I dry sanded it with 3200-4000 grit pads and gave it another coat of oil. I finished sanding it with 6000-12000 grit pads and gave it a final rub down of the oil. I let it dry.Cavalier18

Cavalier19

Cavalier20 When the end cap was dry I rubbed down the bowl with a light coat of olive oil to bring some life back to the dry briar. At this point the pipe is beginning to look really good. The contrast stain of the black and the dark brown gives depth to the rusticated finish of the bowl.Cavalier21

Cavalier22

Cavalier23

Cavalier24 Once the glue dried on the stem I used a needle file to sharpen the edge of the button and clean it up. I flattened the repair on the blade of the stem as well.Cavalier25 I sanded the repaired areas on the stem and the newly made file marks with 220 grit sandpaper. I worked until the repair was blended into the surface of the blade. The repair on the top stood out more at this point in the process. That would change as I worked on it longer.Cavalier26

Cavalier27 I sanded the stem with micromesh sanding pads – wet sanding with 1500-2400 grit pads and rubbed the stem down with Obsidian Oil. I dry sanded it with 3200-4000 grit pads and gave it another coat of oil. I finished with 6000-12000 grit pads and gave it a final coat of oil. I let the oil dry before taking the pipe to the buffer.Cavalier28

Cavalier29

Cavalier30 I buffed the stem with Blue Diamond and lightly buffed the bowl. Care had to be exercised to not get build-up in the rustication. It takes a very light touch to keep that from happening. I gave the stem several coats of carnauba wax. I used Conservator’s Wax on the bowl and hand buffed the bowl with a shoe brush. I hand buffed the pipe with a microfibre cloth to add some depth to the shine. The finished pipe is shown in the photos below. It is a beautiful pipe and I love the feel of it in my hand. It was an enjoyable restoration. Thanks for looking.Cavalier31

Cavalier32

Cavalier33

Cavalier34

Cavalier35

Cavalier36

Cavalier37

Simple Restoration of a Stanwell Freehand


Blog by Aaron Henson – 2/20/16

I have had my eye on this pipe for several months. It has been languishing in a local antique shop since last summer and was priced as if it were fully restored. To my surprise it was still there at the end of January and the shop had lowered the price. I talked with the owner for a while and eventually got his rock bottom price (which was my top end price). After all, it is a beautiful piece of briar.Stan1

Stan2 This is big pipe: the chamber is 7/8” (22 mm) diameter and 1¾” (45 mm) deep and the walls are more than 3/8” (10mm) thick.Stan3 Inspecting the pipe I did not find much wrong. The stem was heavily oxidized and had very little tooth chatter. The briar was free from dent, gouges and the like. A few minor scratches and the worn stain was all that needed to be addressed. And there was only a light cake in the bowl. As for markings, there were none on the stem and some double markings on the bottom of the shank. It read STANWELL over de Luxe (double stamped) over MADE IN DENMARK (also double stamped). From what I could find, I estimate this pipe was made sometime in the 1970’s. If anyone can date it better please let me know.Stan4 I set the stem to soak in an Oxyclean solution and began working on the stummel. I cleaned the outside of the briar with a tooth brush and Murphy’s oil soap, rinsing with water then quickly drying with a paper towel. I repeated the process on the plateaux several times. Next I reamed the chamber back to bare wood and inspected the internals. Then the internals of the shank cleaned up easily with cotton swaps and bristled pipe cleaners.

All-in-all, other than a micro crack on the outer surface, the briar was in great shape. There was one long scratch near the stamping but I didn’t want to touch that and risk damaging the stamps. I wanted a very smooth finish so I sanded the outside of the pipe with 1500 – 3200 micromesh pads and set it aside.Stan5

Stan6 Returning to the stem, I scrubbed off the oxidation with a green pad and scrubbed the airway with a series of alcohol soaked pipe cleaners – bristled then soft. The tooth chatter was raised with heat from a lighter and the deepest tooth mark was filled with black superglue. When cured, the stem was sanded and polished with 1500 – 12000 micromesh pads. I wet sand with the first six pads and dry polish with the last three. A little mineral oil between sets of three pads seems to help too.Stan7

Stan8 Next the pipe was assembled and taken to the alcohol retort. Even thought I had scrubbed the internals thoroughly, it took 3 test tubes of Everclear until I no longer smell the ghosts of the previous owner’s tobacco.Stan9 In my research of the Stanwell pipes, I found that Stanwell used a walnut stain. This was consistent with the remnants of stain that I found on this pipe and I wanted to restore the original look. I began by applying and undiluted Feibing’s dark brown. After it set I realized that Feibing’s brown dye have too much of a red base and it was not direction I wanted to go.

I wiped as much off as I could with an alcohol soaked cotton pad and sanded the surface with the 2400 micromesh pad again to remove a bit more. Returning to my local Tandy Leather, I searched for a walnut stain. After looking at stain samples on leather (which responds much differently than briar) I placed my bets on Eco-Flo’s Bison Brown. This time the results were much more like what I had seen in pictures of similar Stanwell pipes. I applied the stain at full strength and flamed it. After the second coat dried I wiped the excess off with an alcohol soaked pad.

With the smooth surfaces done I stained the plateaux with Feibing’s black dye. Once it dried, I wiped the entire wipe down with mineral oil then set it aside to soak in. It was two days later that I found time to return and take the pipe to the buffing station. I buffed the entire pipe with red diamond then applied three coats of carnauba.

Thanks for reading and I would like to hear your comments.Stan10

Stan11

Stan12

Stan13

More Work than I thought – A Real Briar Billiard with a horn stem


Blog by Steve Laug

When I saw this pipe on eBay when my brother and I were searching for pipes in the estate pipe area I thought it would be a simple restoration. The briar appeared to be in decent shape and the finish looked very good. The rim was dirty but looked undamaged under the grime and tars. The horn stem did not look too damaged and should also be an easy repair. When the pipe arrived at my brother’s home he took the following photos and sent them to me to have a look at the pipe. It still looked pretty straight forward to me.RB1

RB2

RB3

RB4

RB5 When the pipe arrived here in Canada I was in for a surprise. It definitely looked good but the more I dug deeper the more issues that I found. The rim was tarred and covered with lava and underneath the outer edges were rounded over. The bowl had a light cake at the top and half way down and a deep groove had been cut in the bottom of the bowl by aggressive insertion of the pipe cleaner. The groove or pit was below the airhole entry to the bowl. The shank had been repaired and the crack that I noted in the pictures had been well repaired and the band put in place to strengthen the shank. It would not take much to clean it up. The finish which at first glance looked good had deep gouges in the bottom of the bowl and on the left side of the bowl near the shank union. These were sharp cuts and could not be steamed out. There was a large fill on top of the shank where it met the bowl. It appeared to be pink putty but it was solid and tight. The stem was also nicked quite a bit on the top mid stem and on the left side near the band. The top and bottom sides had some deep tooth marks on them that I could not see from the photos. The stem was very tight in the shank and took some persuasion to remove.RB6

RB7 The next two photos show the repair work on the underside of the shank. It was very well done and would not need to be further dealt with. The third photo shows the rim with the rounded outer edge.RB8

RB9

RB10 I removed the stem from the shank with a bit of pulling and found that the metal tenon was covered with tar and had been stuck in the shank by the tars.RB11 I reamed the bowl back to bare wood to bring the rest of the bowl in line with the bottom half. I used a PipNet reamer with the second cutting head. In the second photo you can see the deep pit in the bottom of the bowl.RB12

RB13 I cleaned out the stem and the tenon with alcohol, cotton swabs and pipe cleaners.RB14 The next two photos show the tooth marks on both sides of the stem. They are quite deep and they will need to be repaired.RB15

RB16 I wiped down the stem with a cotton pad and alcohol and then put drops of super glue in the tooth marks. I sprayed them with accelerator.RB17

RB18 I scrubbed out the mortise, shank and bowl with alcohol, pipe cleaners and cotton swabs. I scrubbed until the pipe cleaners and cotton swabs came out clean.RB19 I topped the bowl to remove the damage to the bowl top and to clean up the round outer edge of the rim. Once again, note the deep pit in the bottom of the bowl that is visible in the second photo.RB20

RB21 I scrubbed the exterior of the bowl with cotton pads and acetone to remove the finish and the grime that was ground into the briar. I was going to need to do some work on the gouges on the bowl sides and bottom so I wanted it clean.RB22

RB23 The stem never sat completely tight against the shank so I beveled the inner edge of the mortise to accommodate the tenon/stem junction.RB24 With the externals cleaned I decided to do the repairs on the gouges on the bowl side and bottom. I put a drop of clear super glue in the divot and then pressed briar dust into the hole with a dental spatula. I pressed the dust deep into the glue to get a good fill. The second photo below shows the bowl side and bottom with what looks like a pox. The briar dust and glue fills are dry at this point and ready to sand. I sanded them with 220 grit sandpaper and then with 1500-2400 grit micromesh sanding pads.RB25

RB26

RB27

RB28 I used a light brown stain pen to give the fresh sanded briar on the bowl bottom and the rim an initial coat. I then stained the entire bowl with a dark brown aniline stain, flamed it and repeated the process. I set it aside to dry for about 30 minutes before buffing with Blue Diamond on the wheel.RB29

RB30

RB31

RB32 I mixed a batch of pipe mud (cigar ash and water) to fill the pit in the bottom of the bowl. I put a pipe cleaner in the airway with just the tip extending into the bowl. I used the spatula to put the mud in the bottom of the bowl and pressed it into the pit with the hand of the spatula. I added the pipe mud until the bowl bottom was level.RB33 I set the bowl aside to so that the pipe mud would cure and worked on the stem. I sanded the stem with 220 grit sandpaper to smooth out all of the nicks and scratches as well as blend in the super glue fills. It took a lot of sanding to smooth out the stem surface and remove as many of the scratches and dents as I could and still keep the profile. The super glue dried hard and the clear glue looks shiny and raises colour in the horn so it is very visible at this point.RB34

RB35 When I had smoothed out the surface of as many flaws as possible I worked on it with micromesh sanding pads. I wet sanded it with 1500-2400 grit pads. The repairs are starting to blend in. They will never be invisible but they are smooth. I rubbed the stem down with Obsidian Oil before continuing.RB36

RB37 I wet sanded the stem with 3200-4000 grit micromesh and then dry sanded with the same grit pads. I gave it another coat of the oil.RB38

RB39 I finished by dry sanding the stem with 6000-12000 grit micromesh sanding pads and then buffing the stem with Blue Diamond on the wheel. I gave it a final coat of Obsidian Oil and set it aside to dry.RB40

RB41 I polished the silver band with silver polish and brought the parts together. I gave the pipe a final buff on the wheel and gave it multiple coats of carnauba wax. I buffed it with a clean buff and the with a microfibre cloth to raise the final shine. The finished pipe is shown in the photos below. While the patches in the stem still show they are shiny and smooth to the touch and will give protection to the stem. The repairs to the cuts and gouges in the bowl look really good and virtually disappear under the stain and the polish. The pipe should live through at least another life time before it needs this kind of attention again.RB42

RB43

RB44

RB45

RB46

RB47

RB48

RB49

RB50