Tag Archives: removing tooth chatter

Replacing a Tenon and Repairing a Crack in a Saddle Stem on a Velani Caprice Bent Billiard


by Steve Laug

I received an email from a fellow pipeman, Larry about a pipe he had that had been knocked off the stand and the tenon had snapped. I have included his email below.

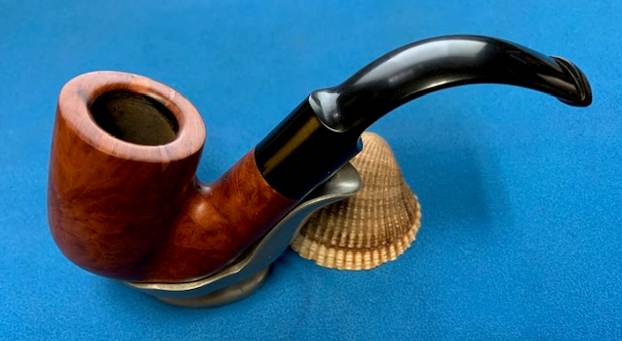
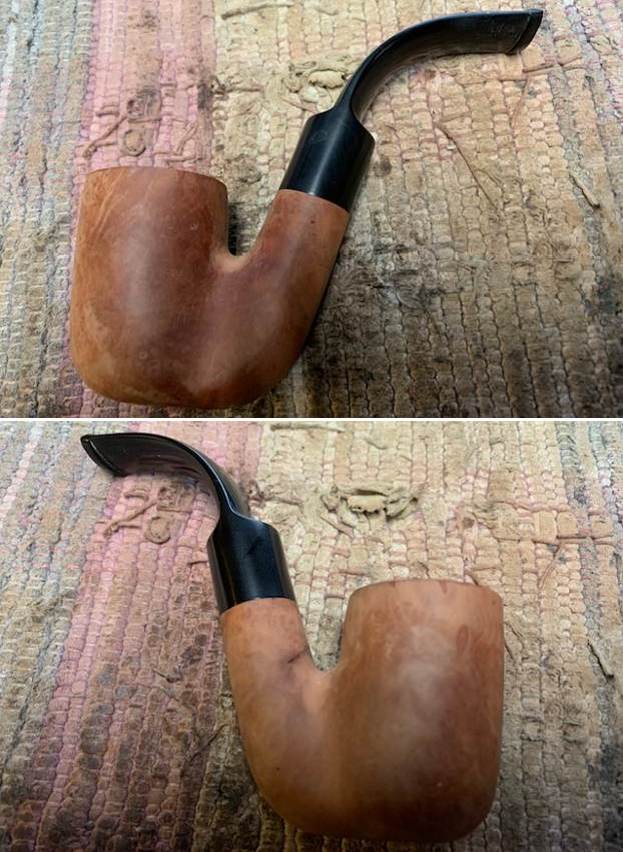
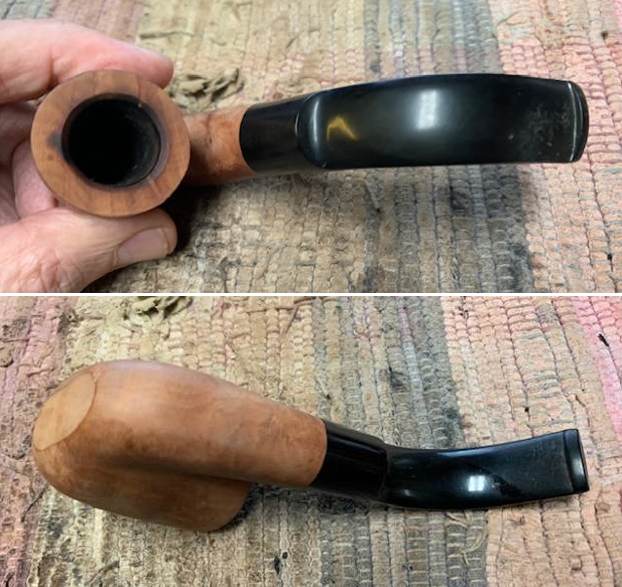
I have a Pipe stem that broke on a Velani Caprice, and I was wondering how much you would charge to replace the stem. The pipe was knocked off my stand and broke the stem from the pipe; I was able to get the part that broke out from the pipe. I would like your opinion and what you would charge. I could send you pictures as well. Thank you. – Larry

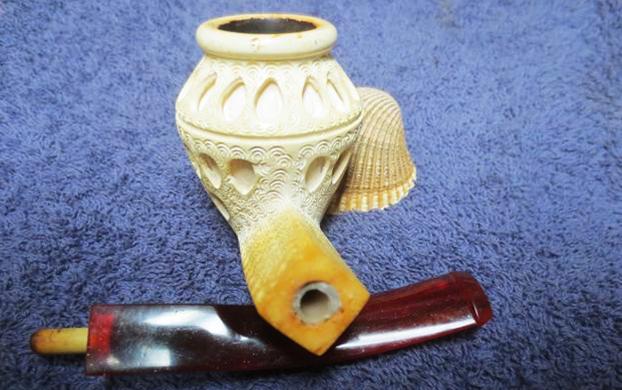
I wrote back with my normal questions about what had broken and if he was able to send me photos of the pipe so I could more thoroughly assess what had happened to the pipe. He sent me the following photos that clearly showed the damage. 
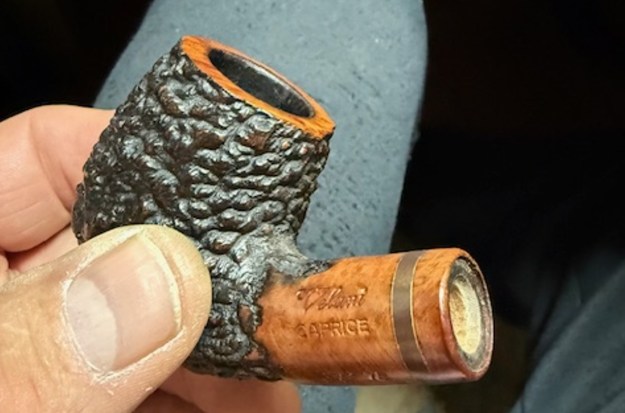
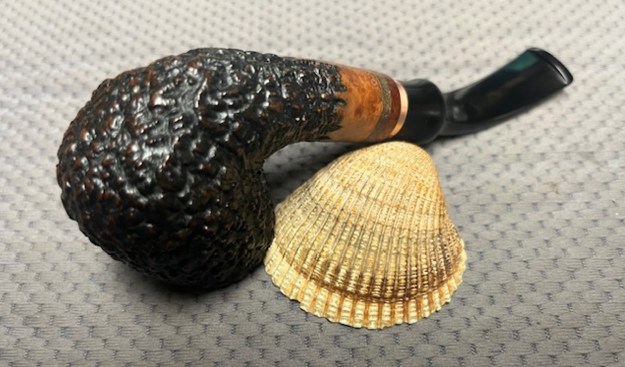
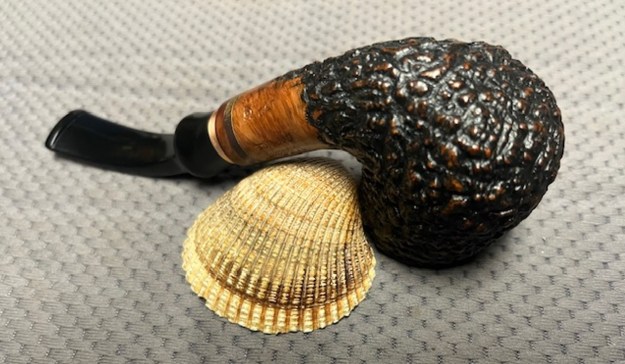
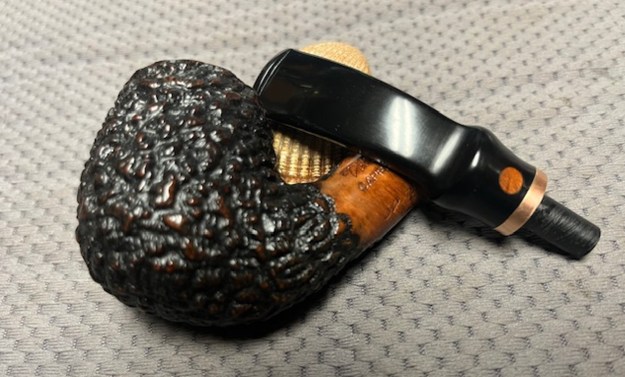
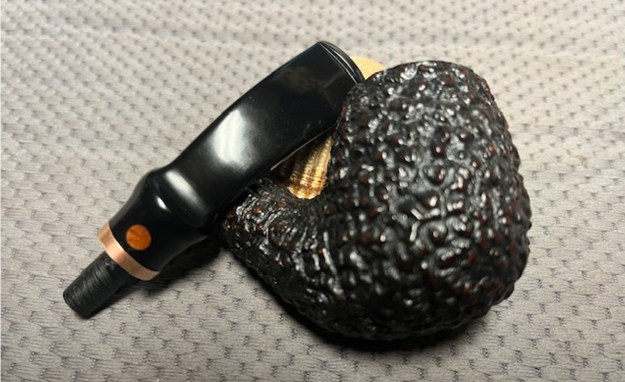
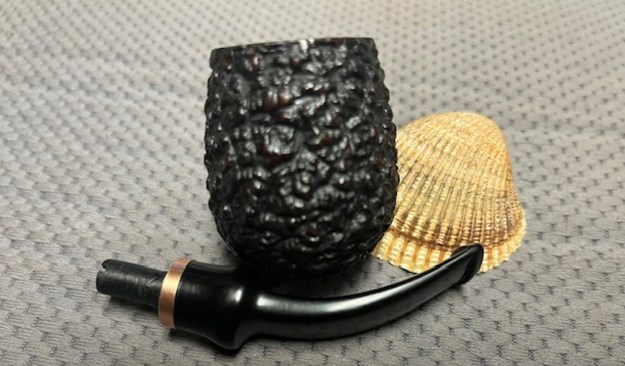
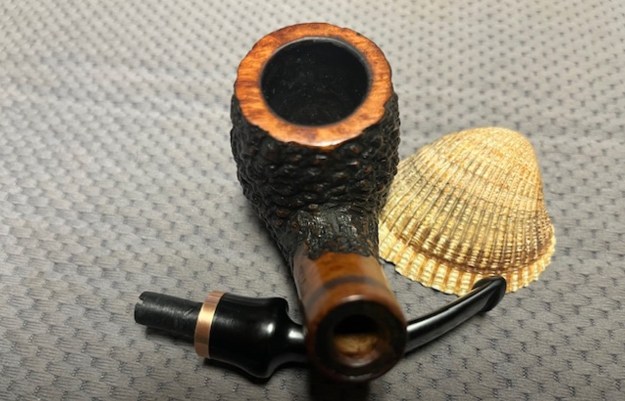
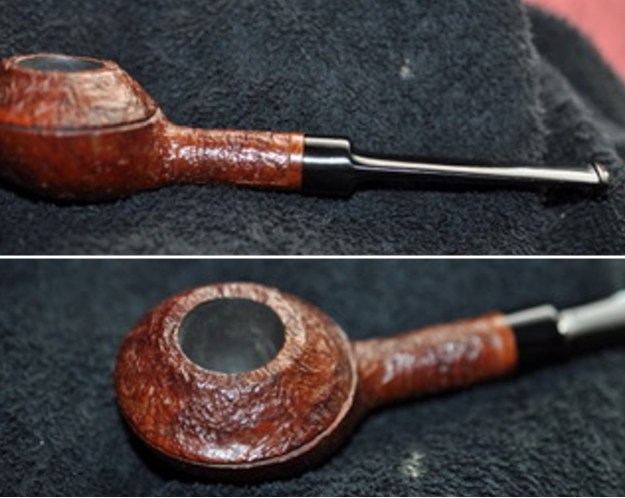
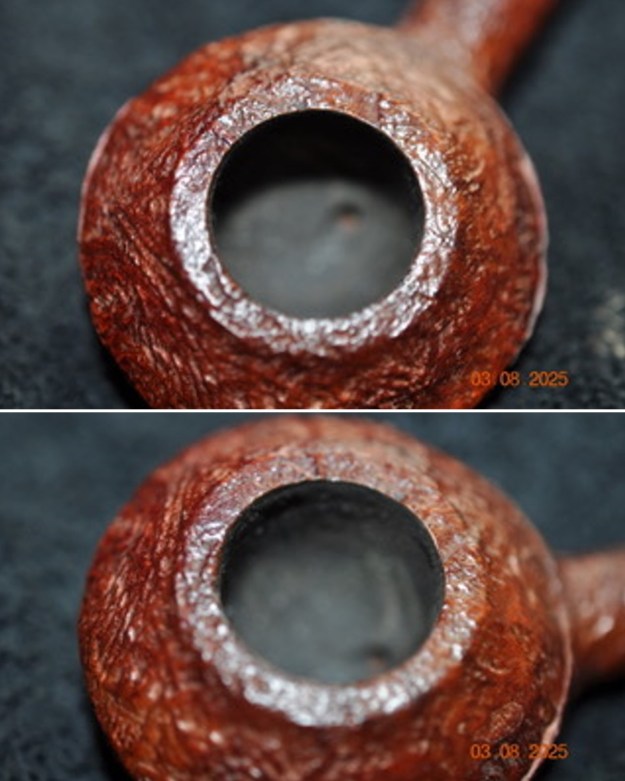
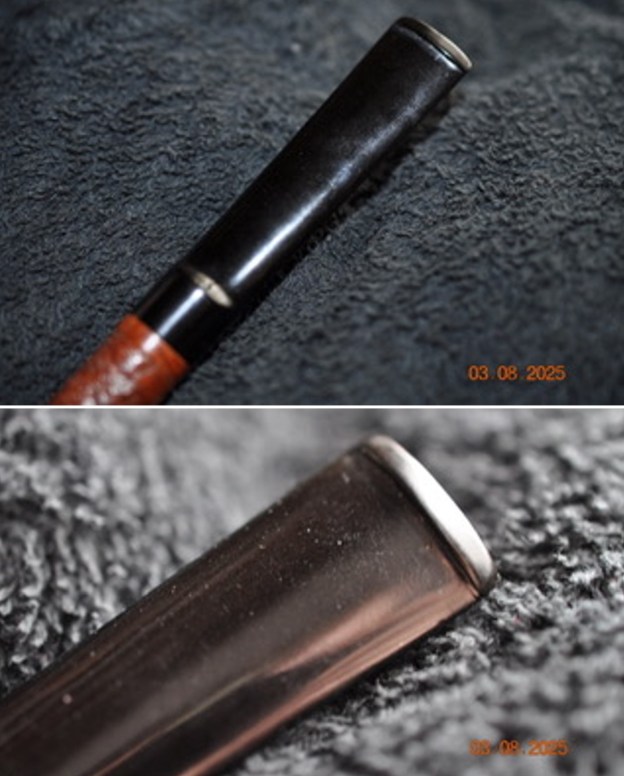
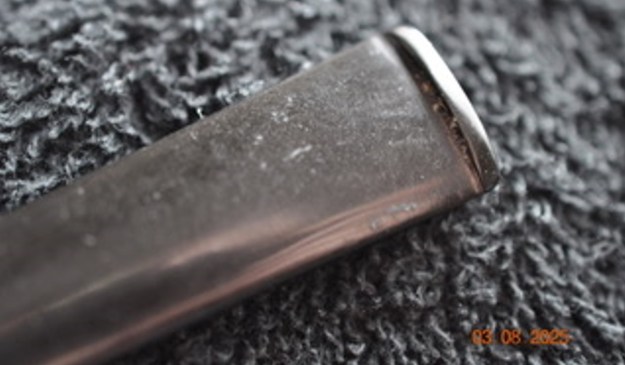
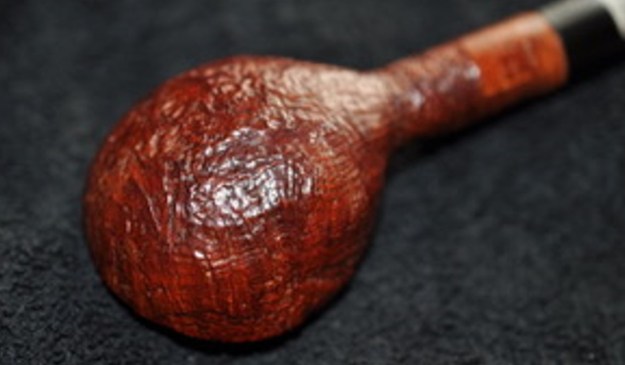
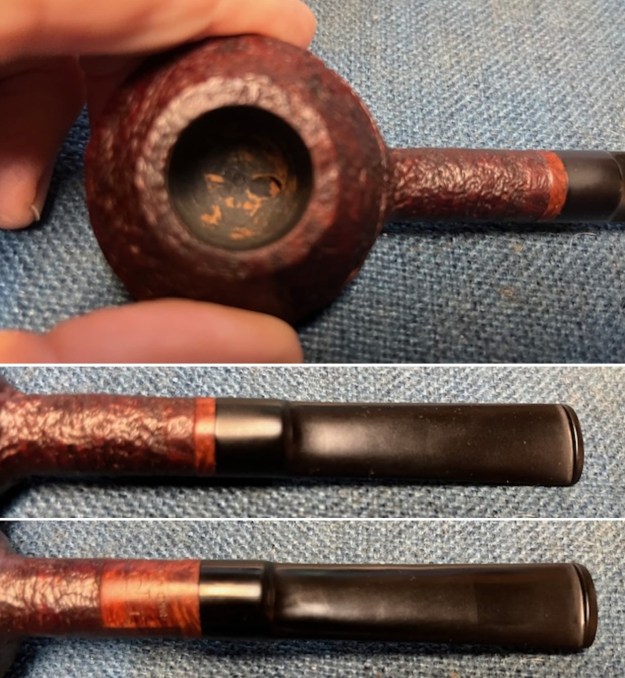
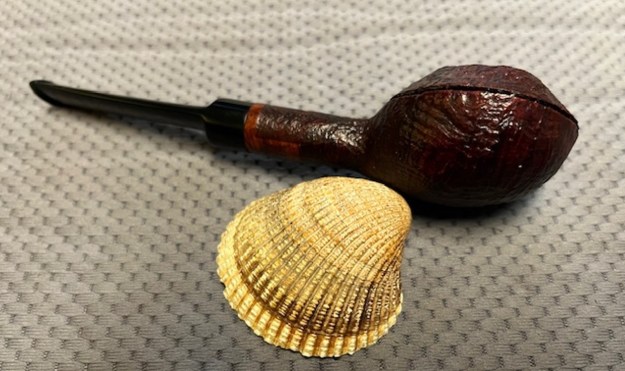
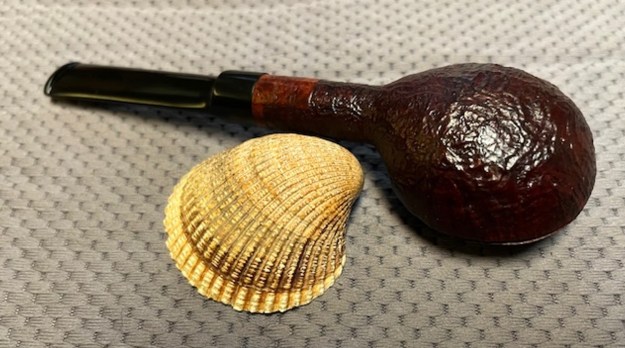
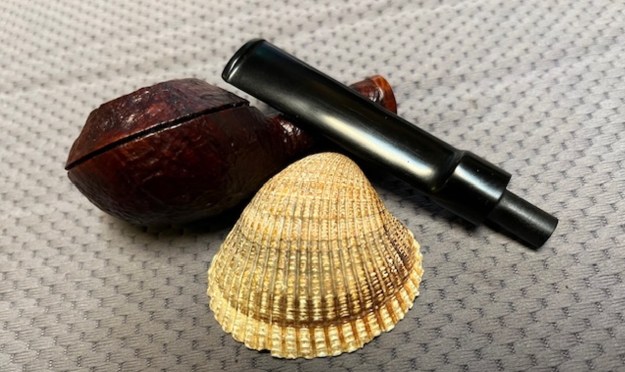
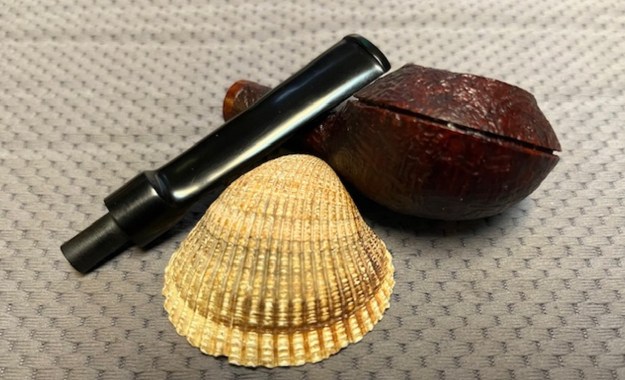
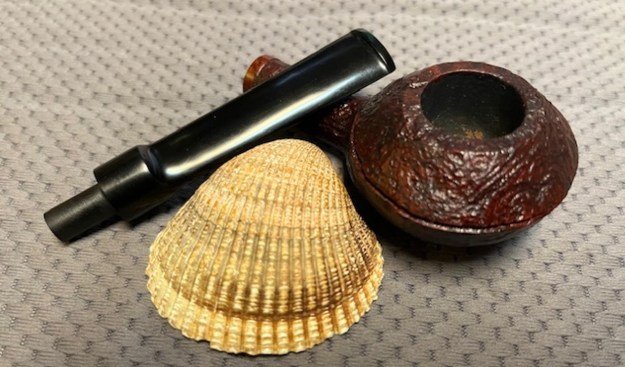
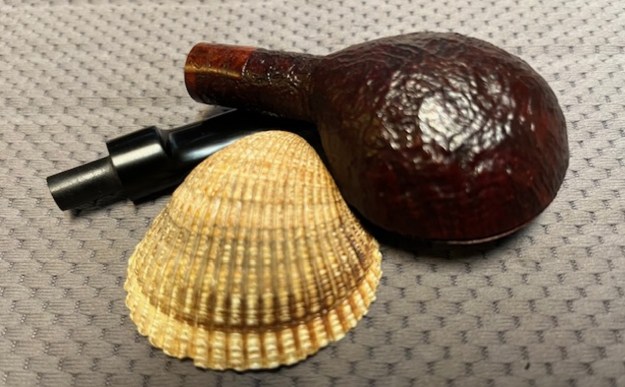
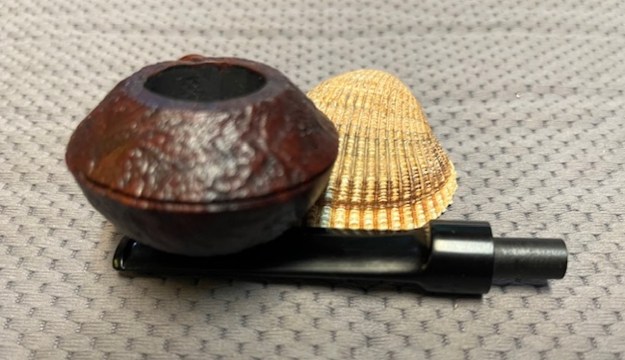
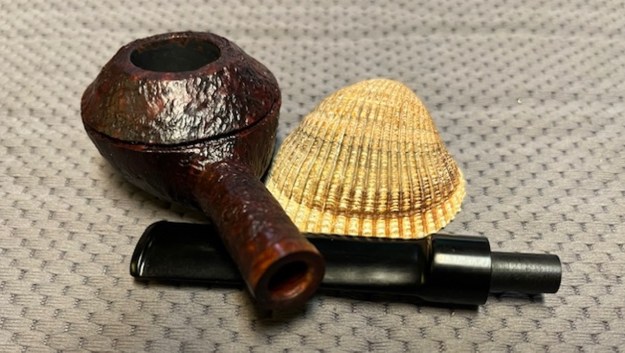
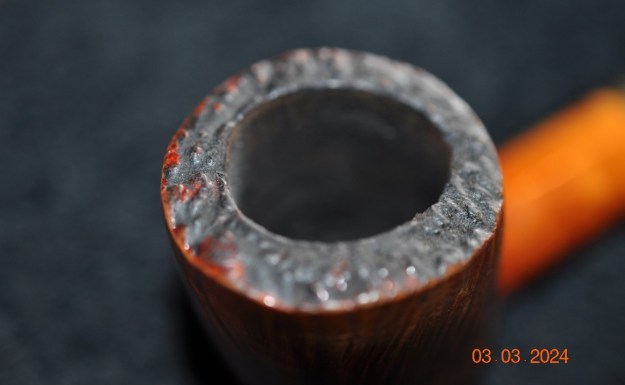
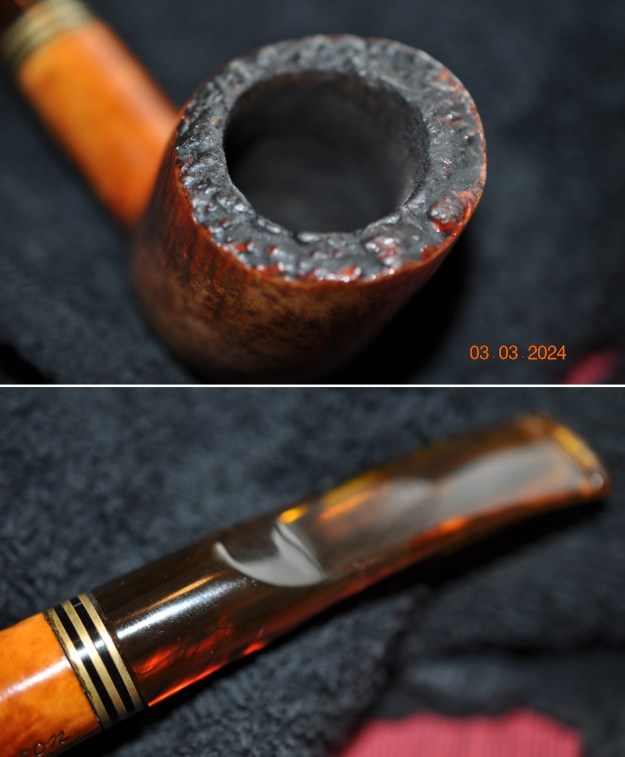
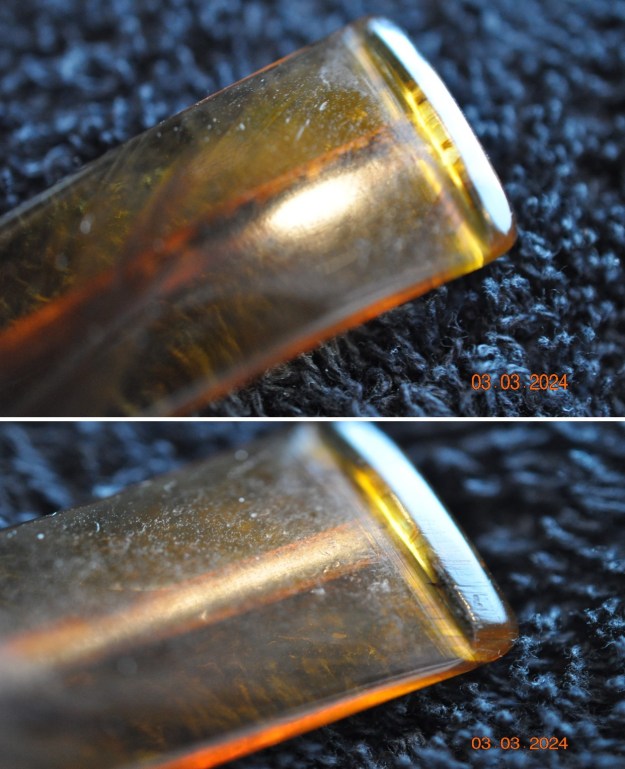
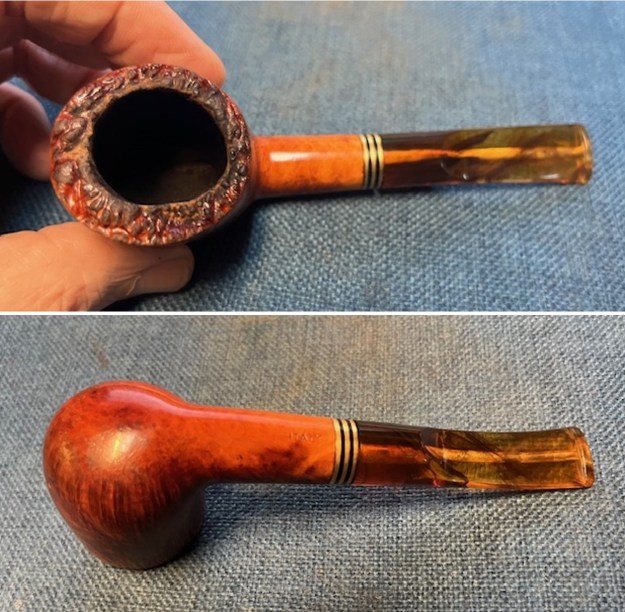
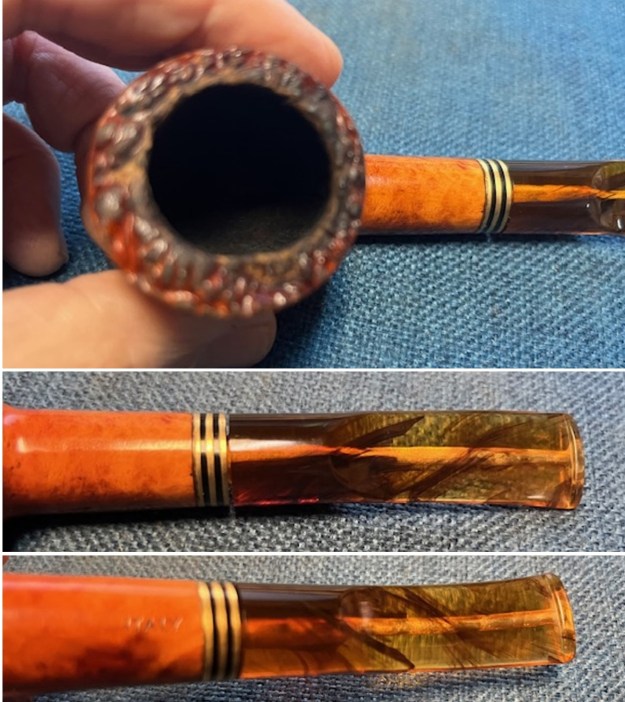
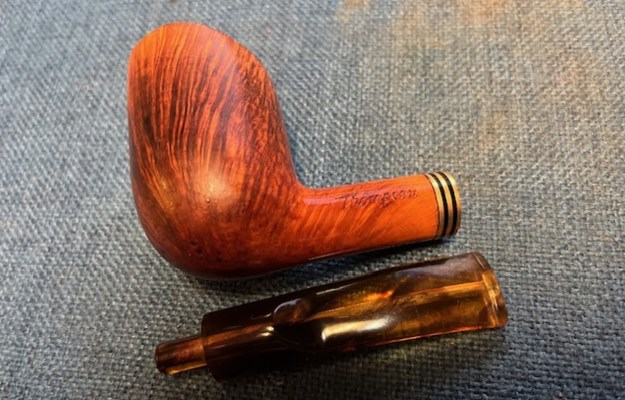
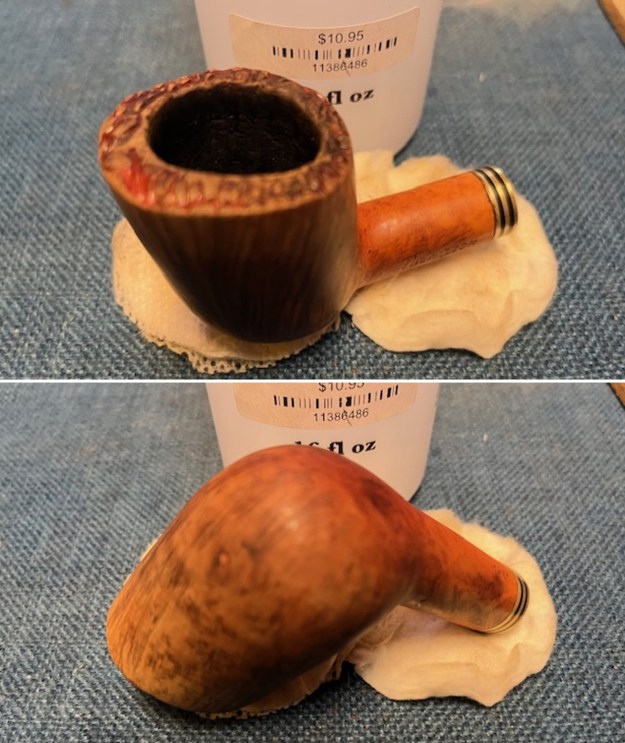
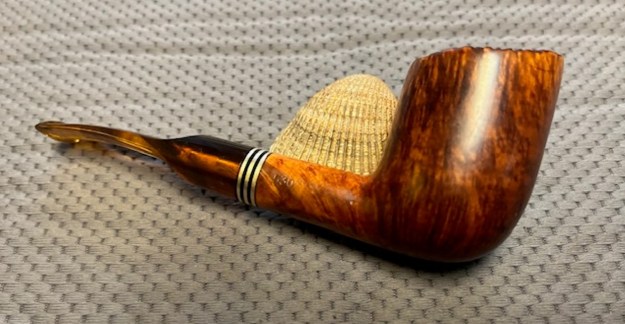
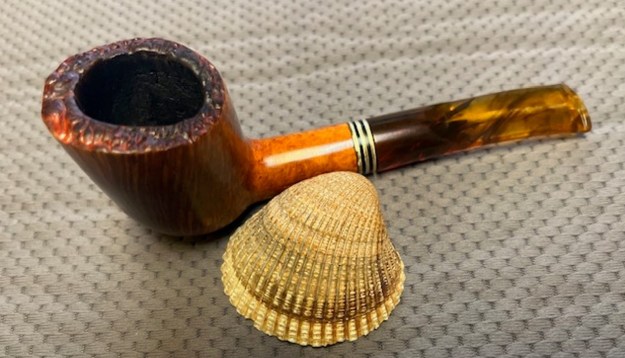
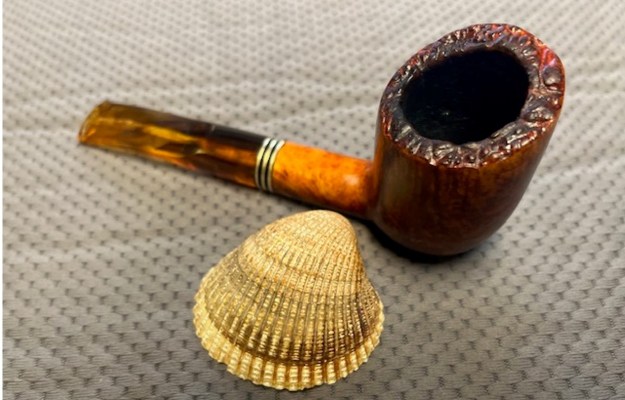
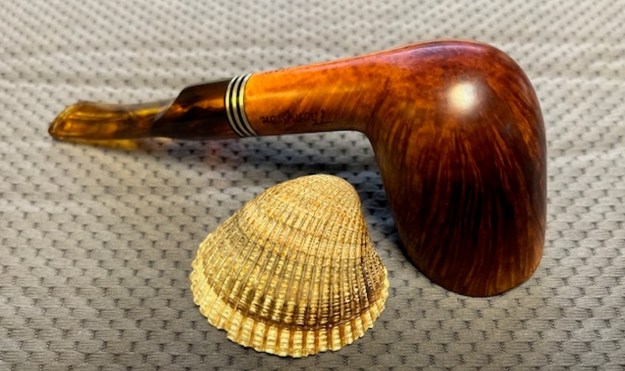
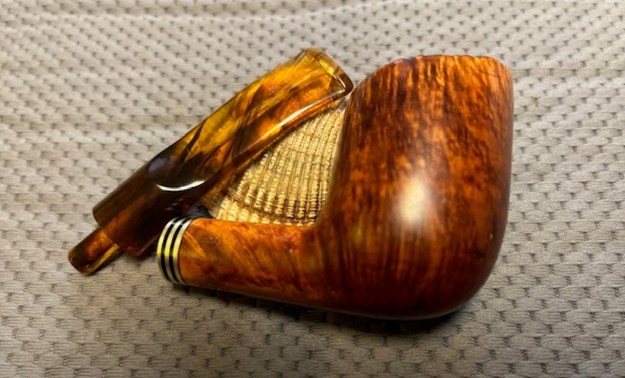
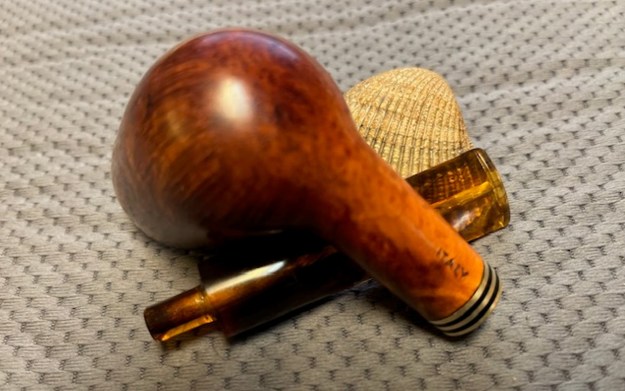
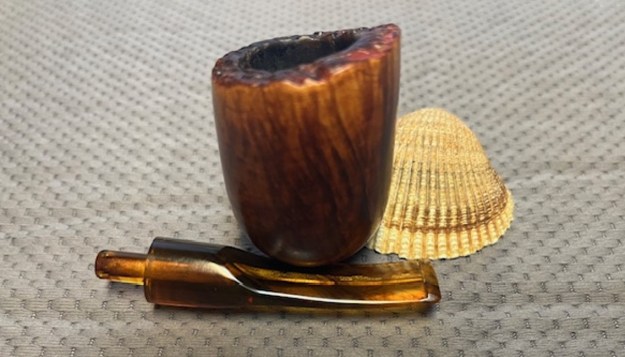
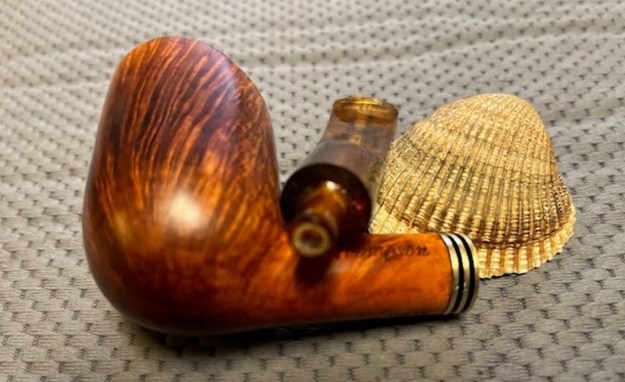
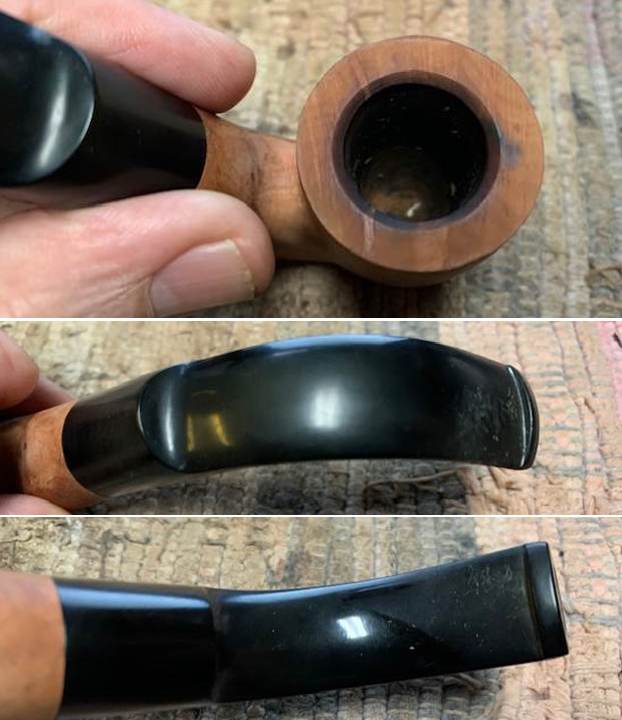
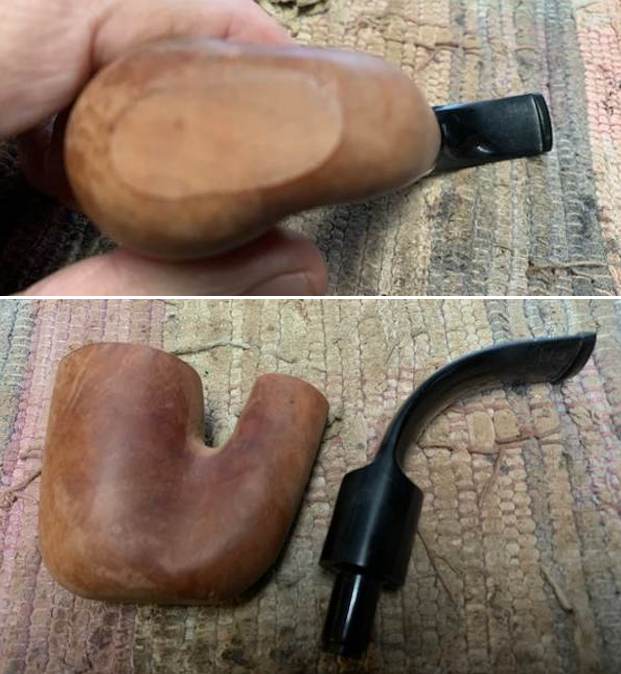
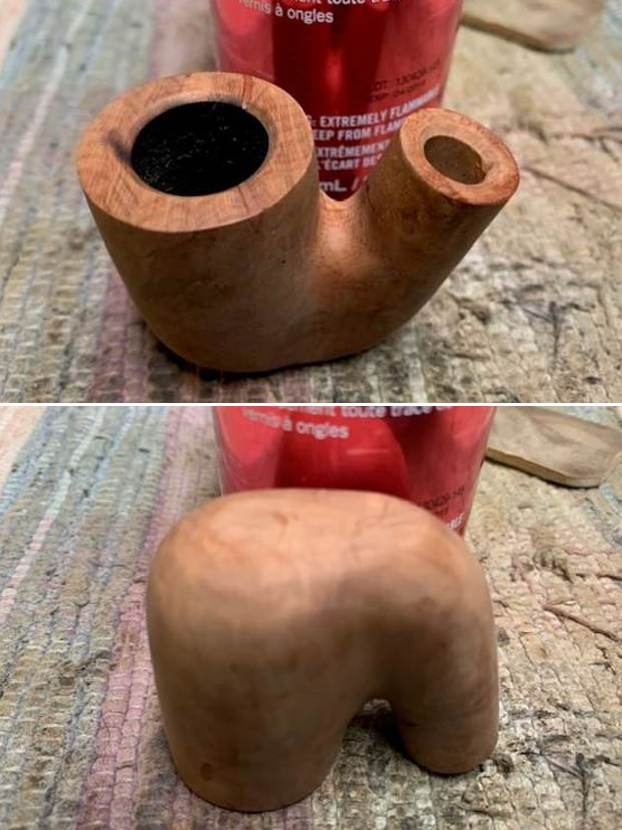
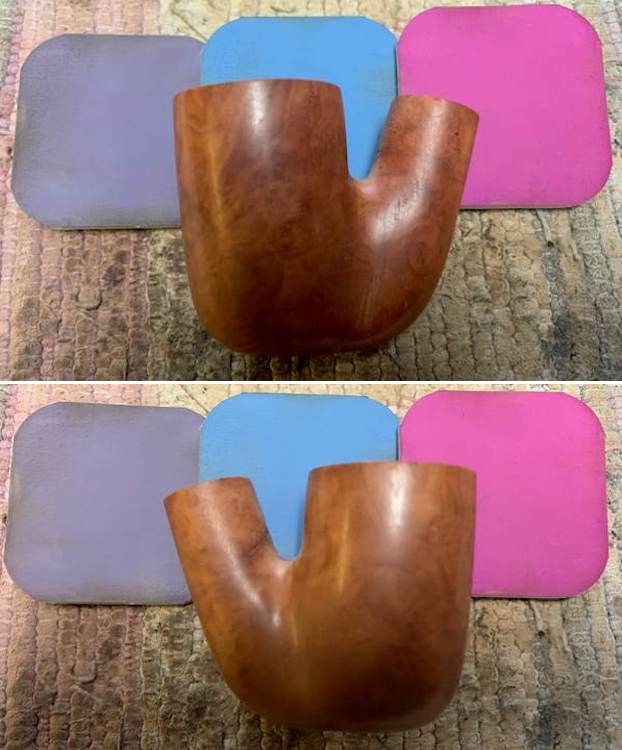
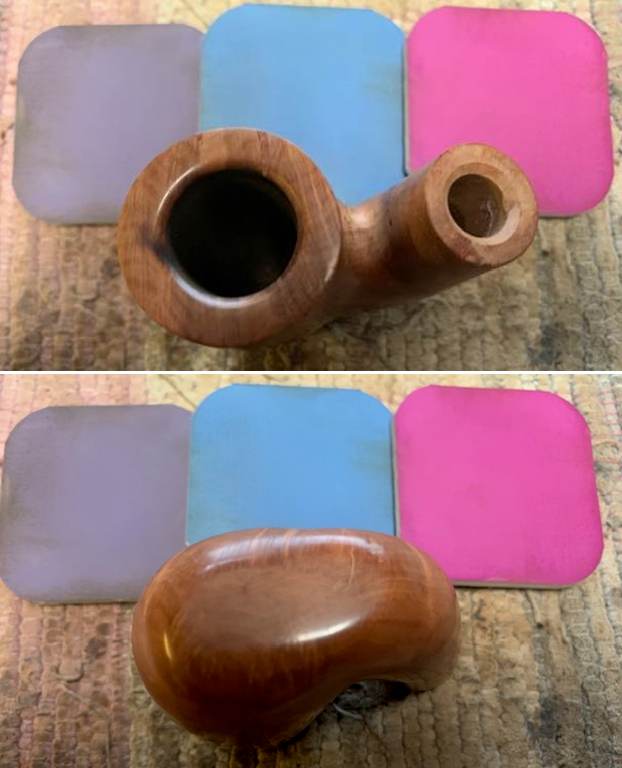
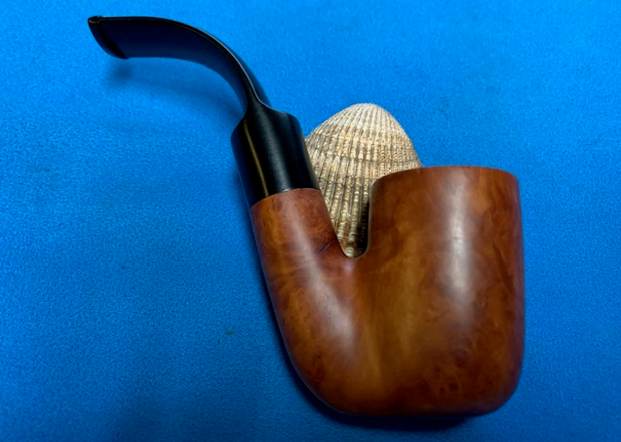
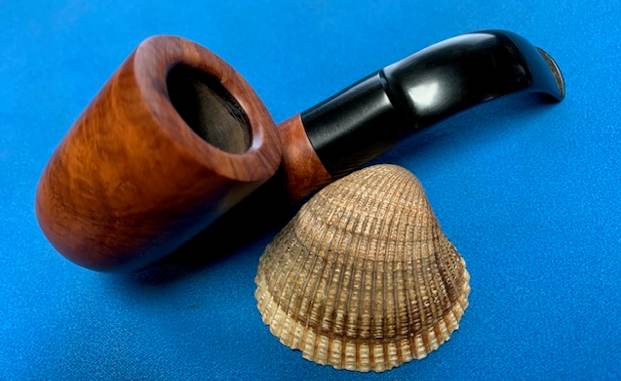
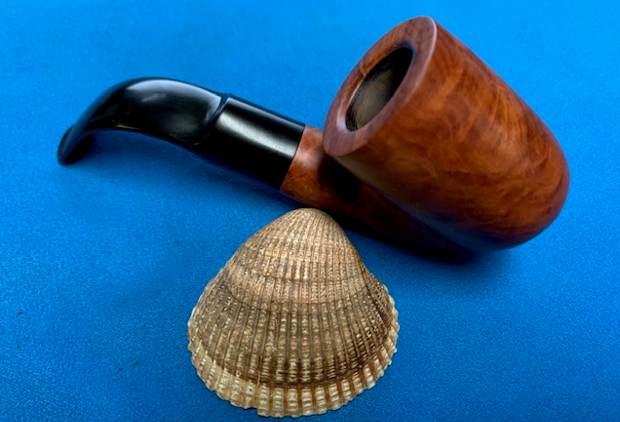
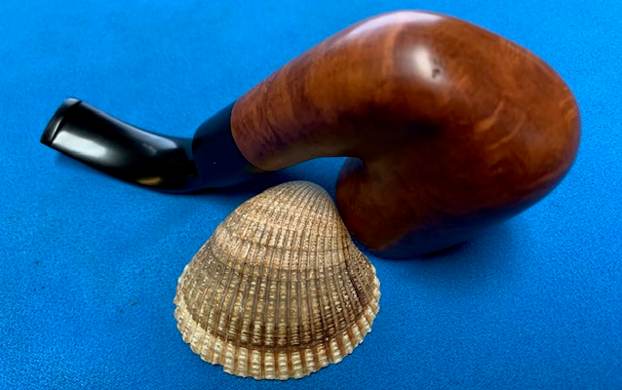
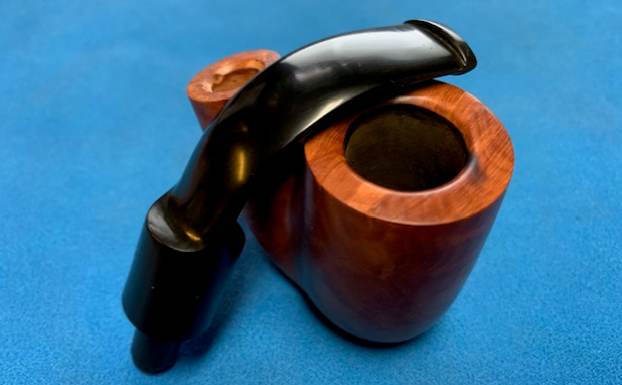
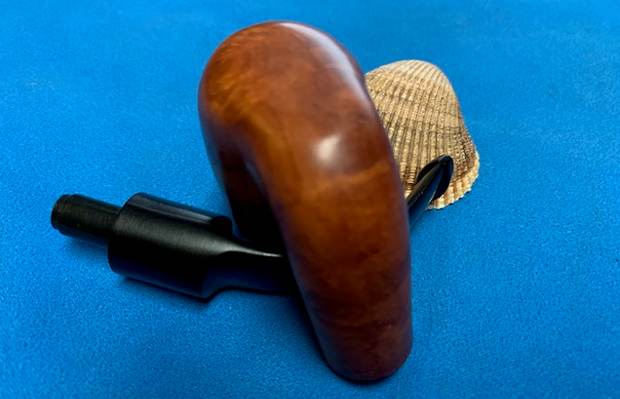
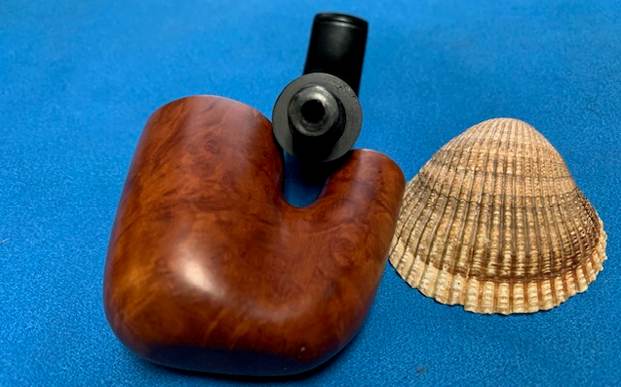
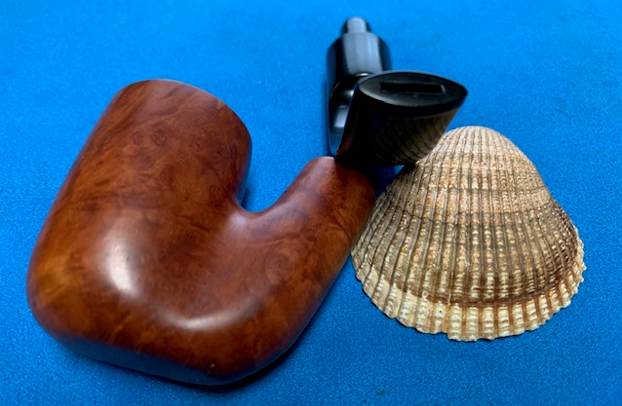
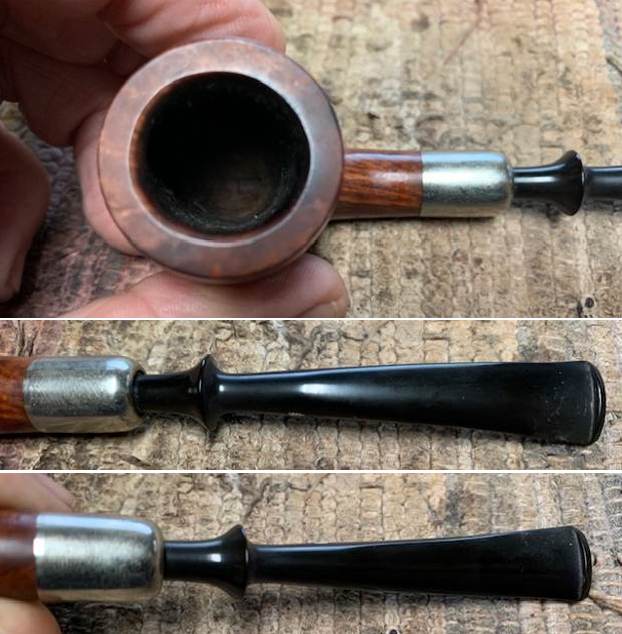
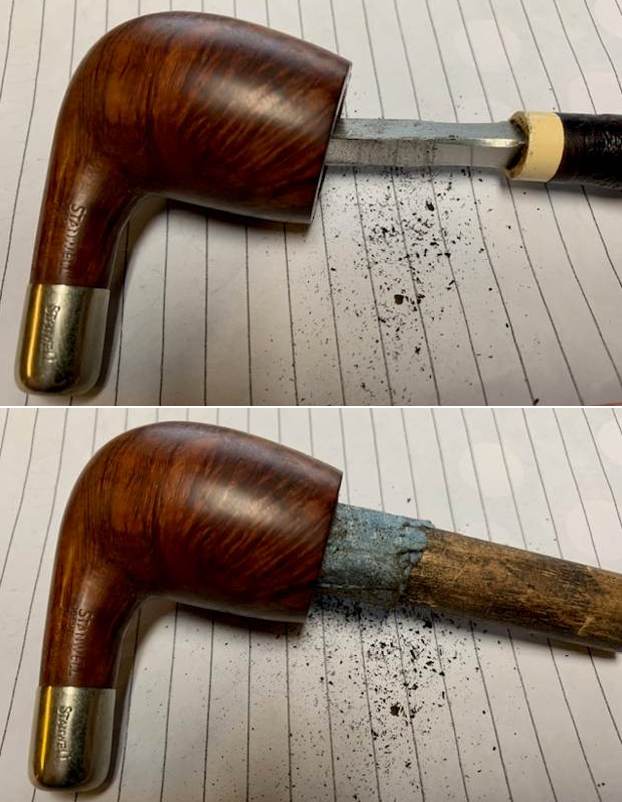
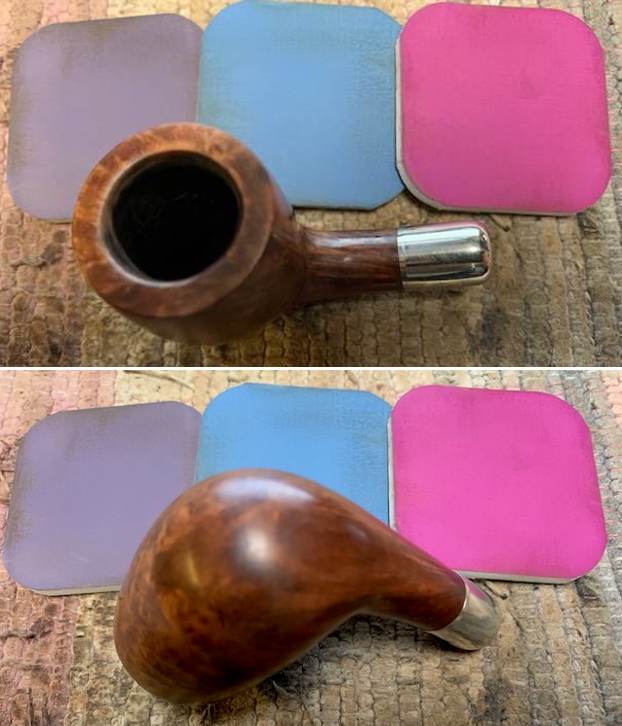
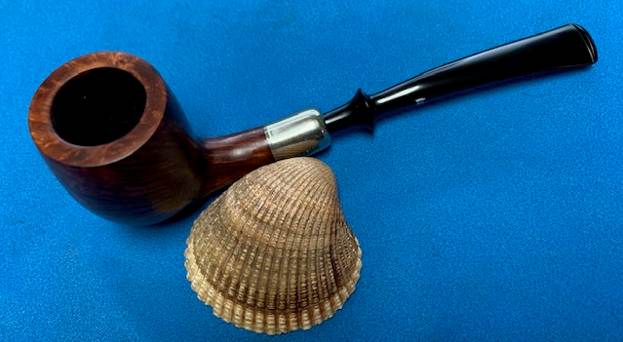
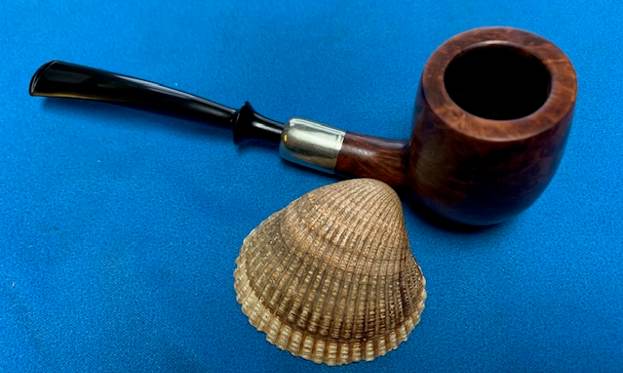
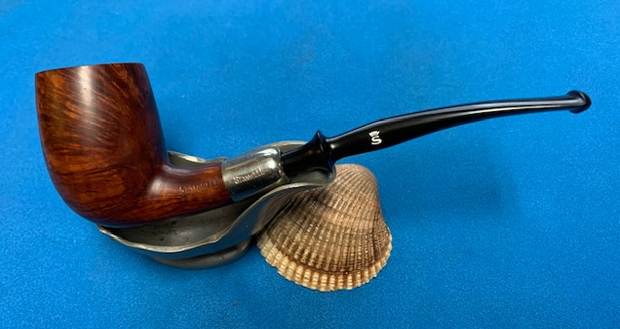
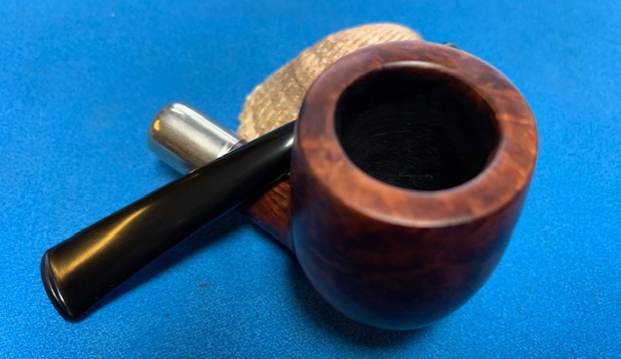
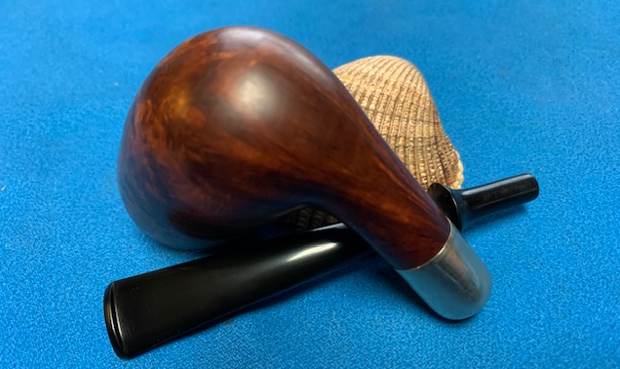
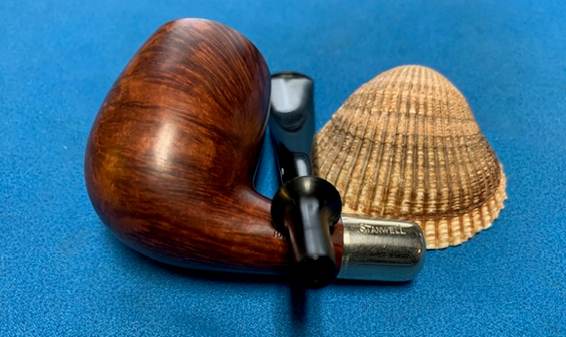
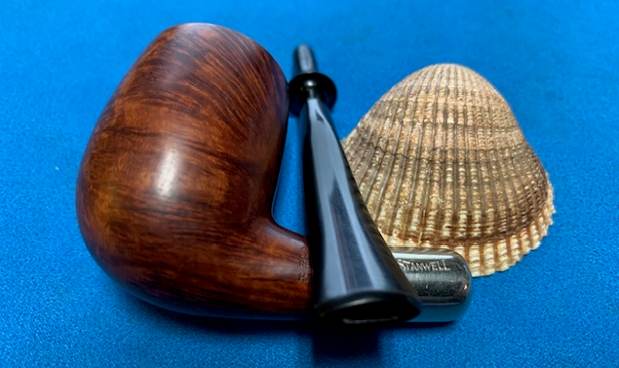
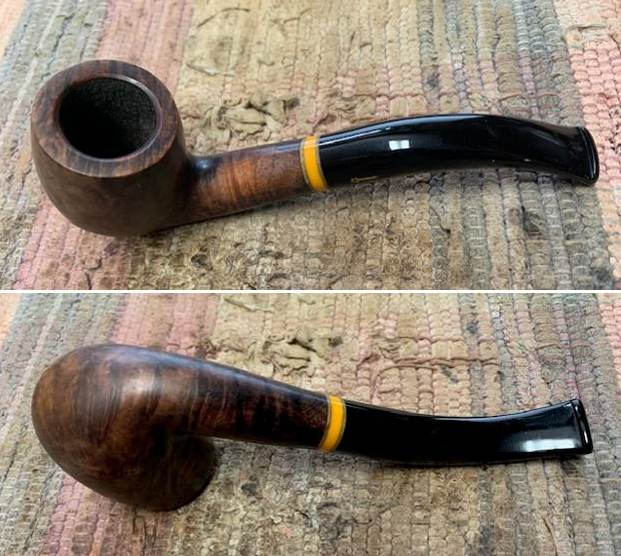
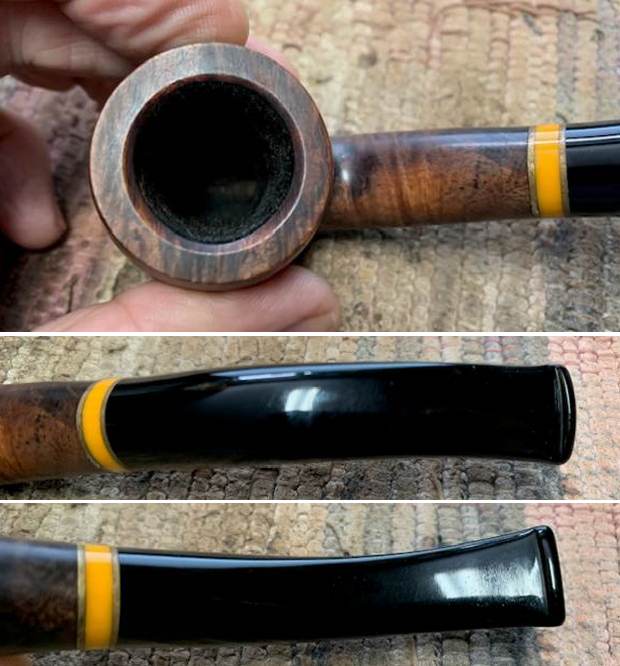
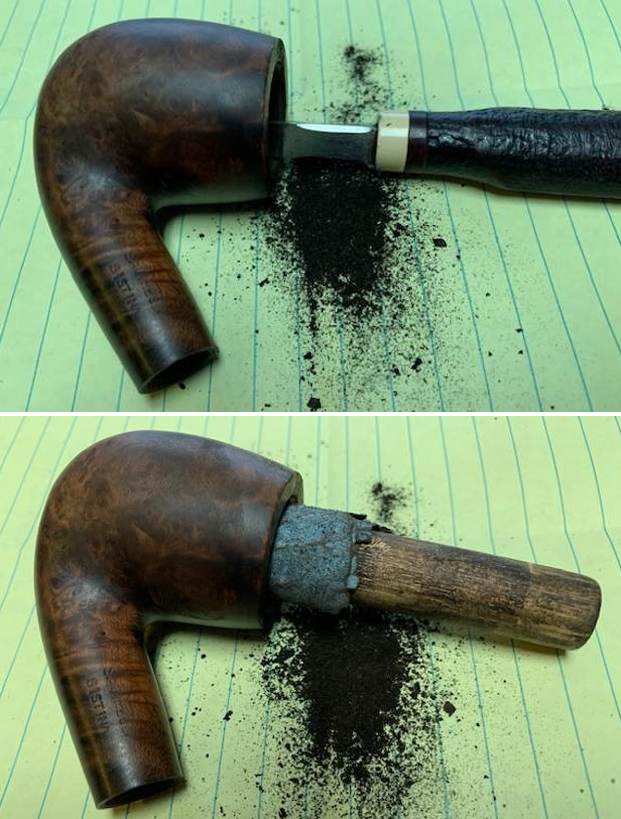
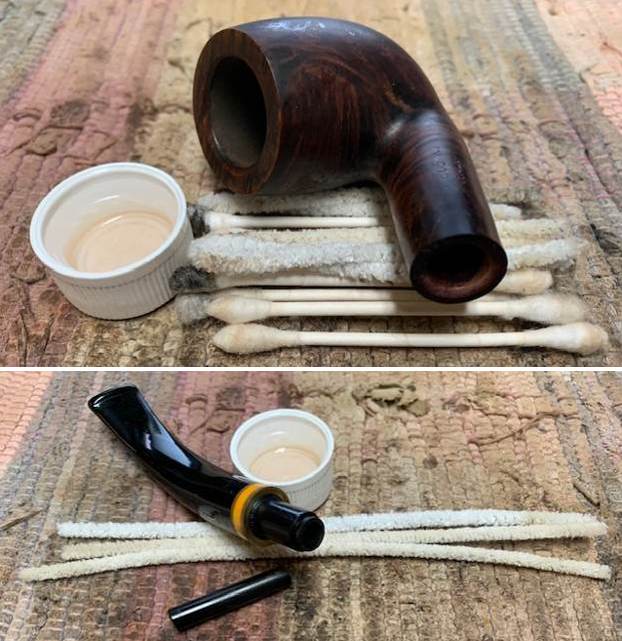
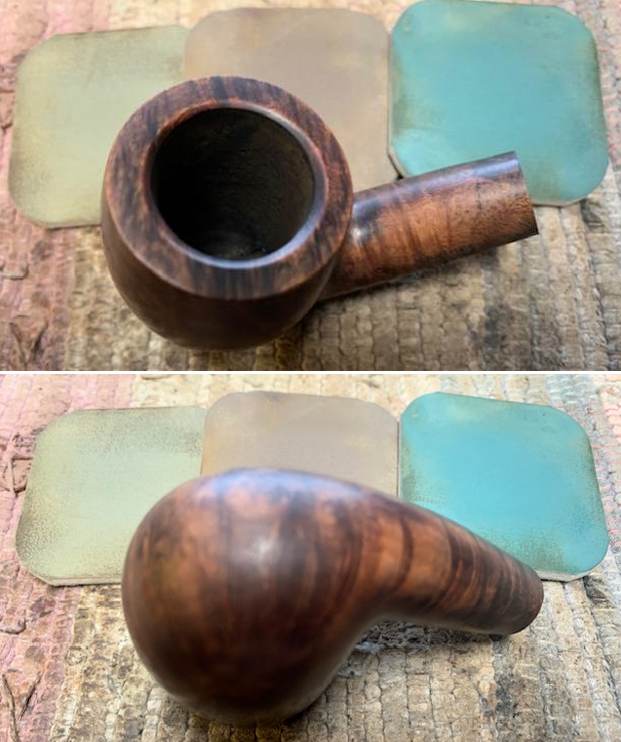
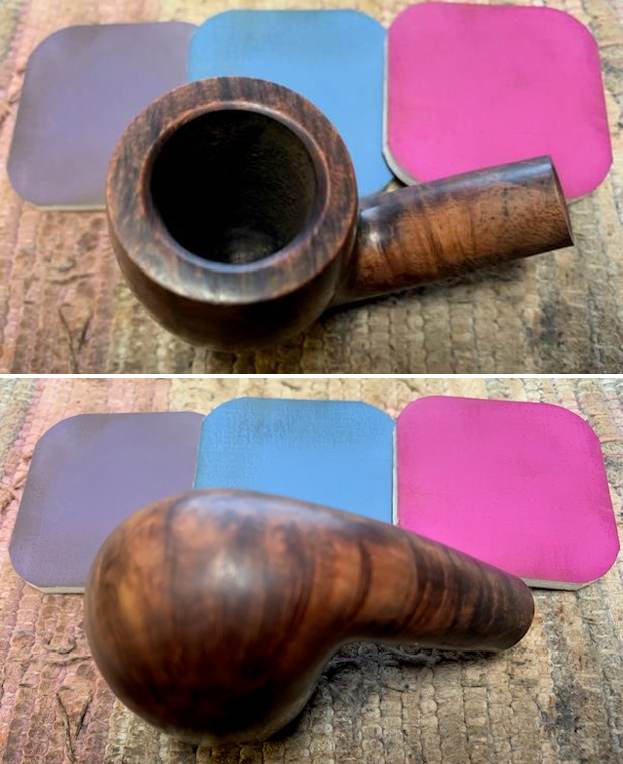
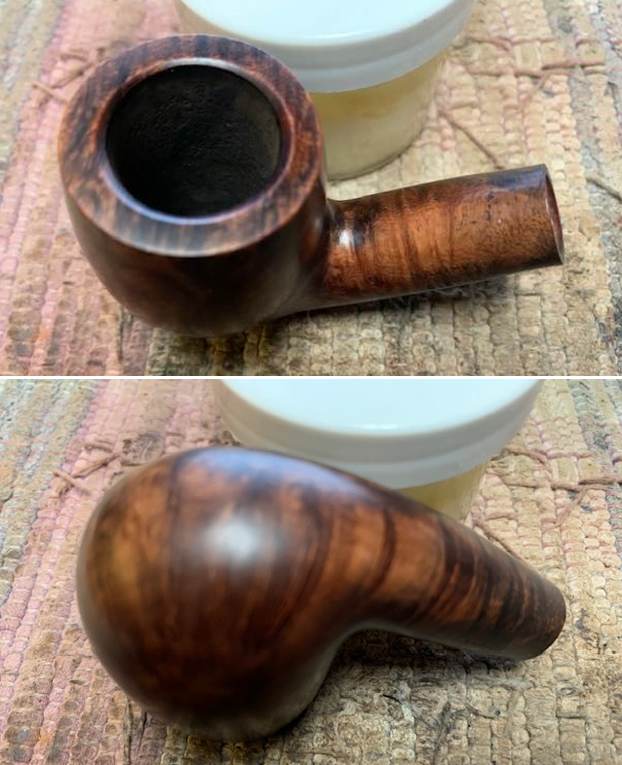
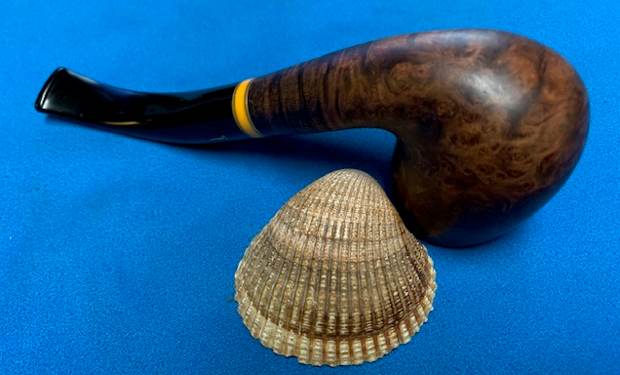
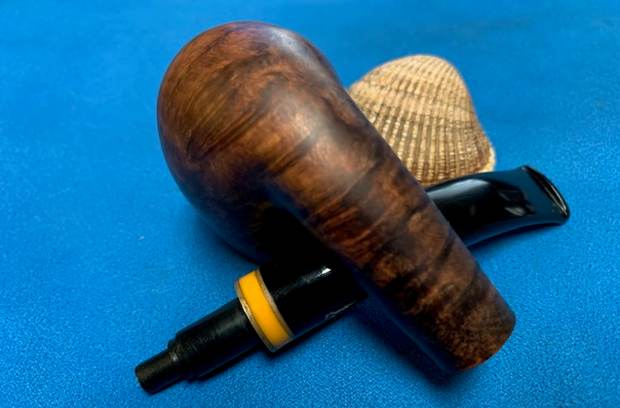
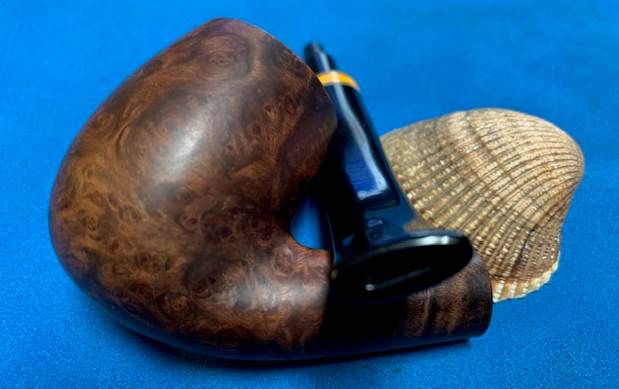
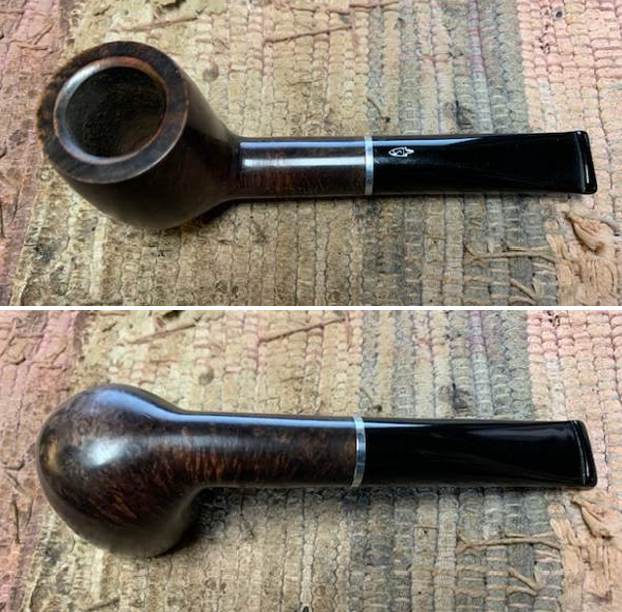
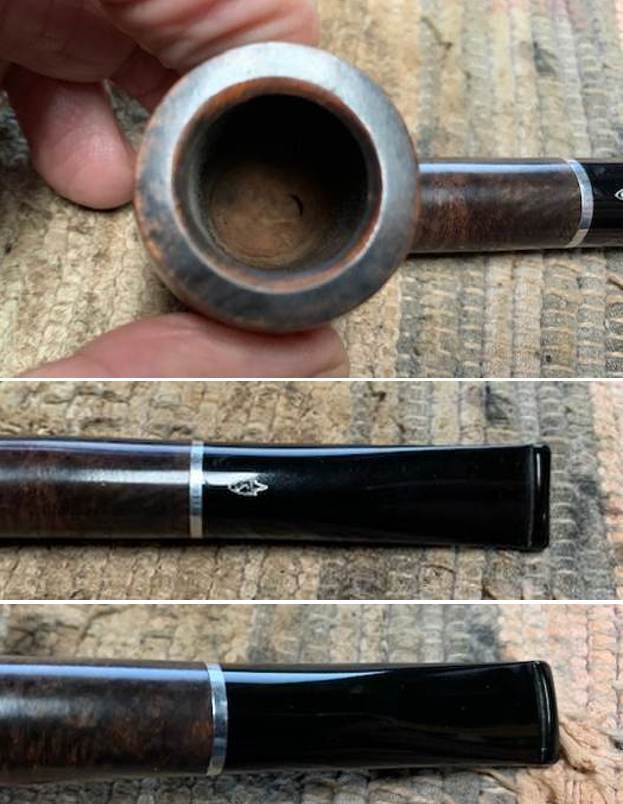
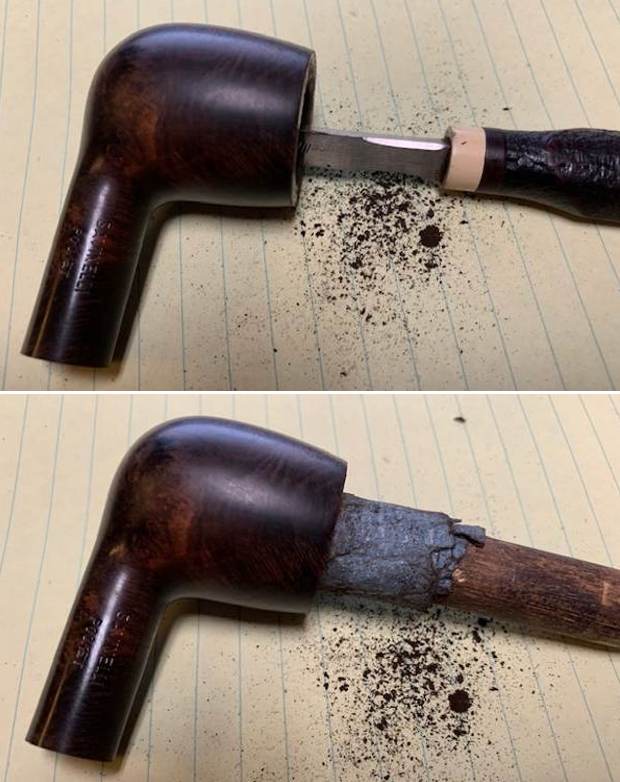
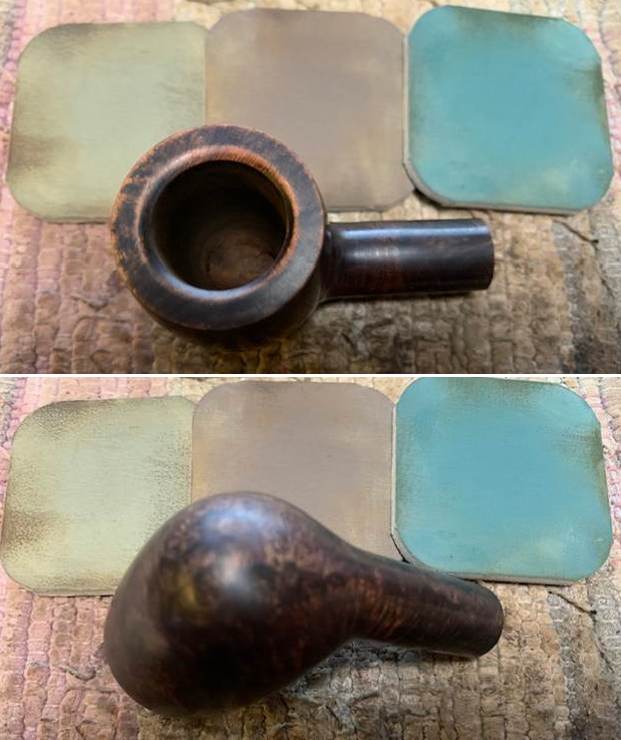
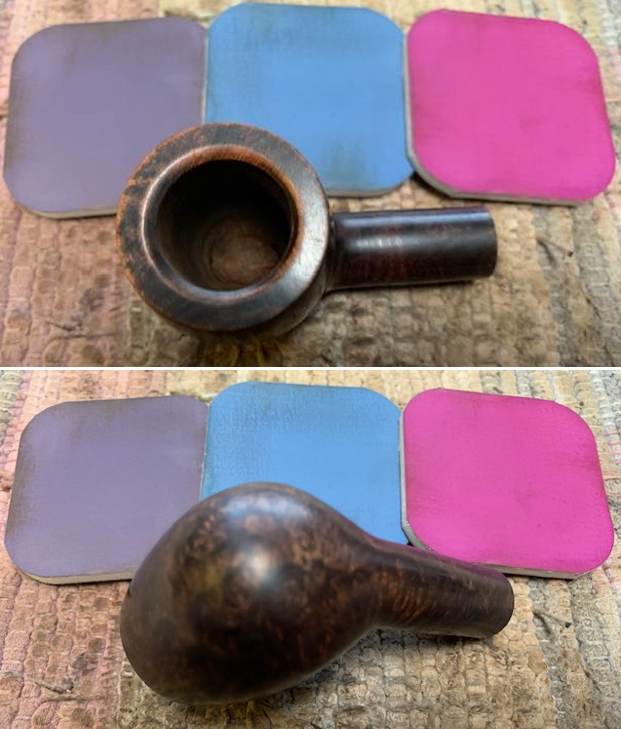
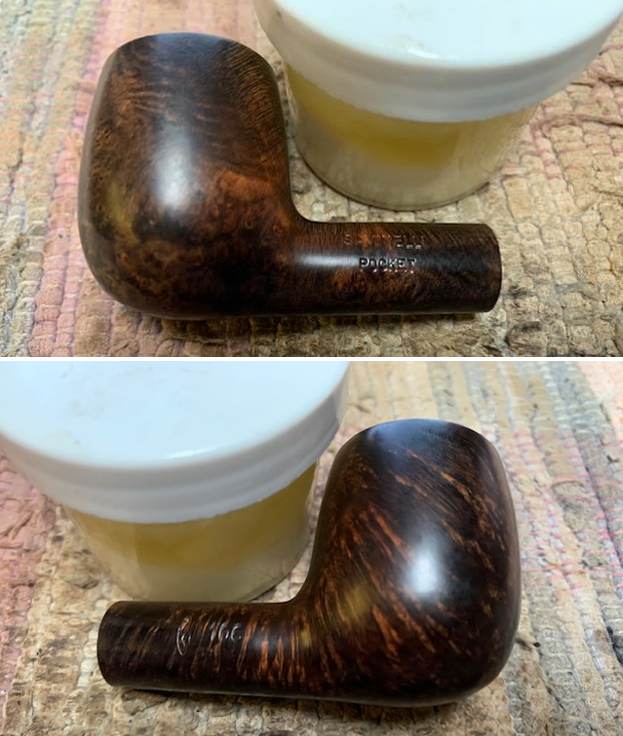
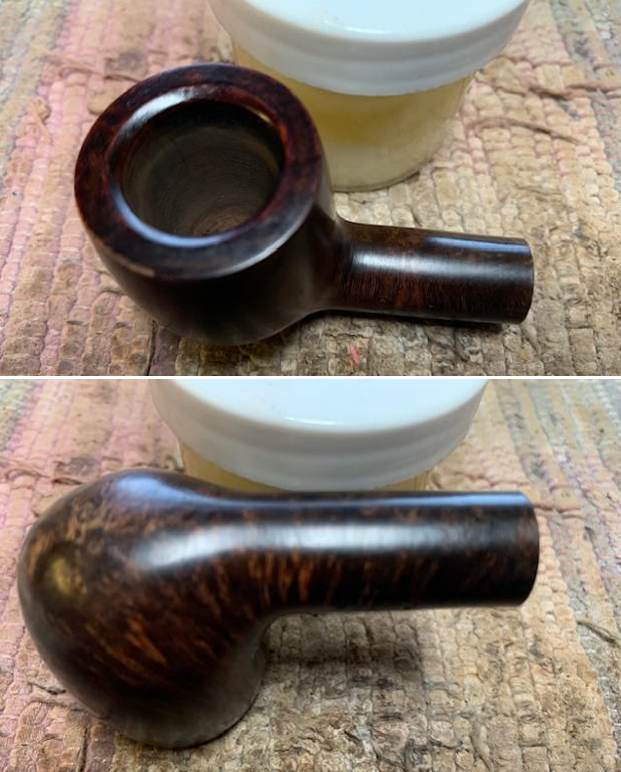
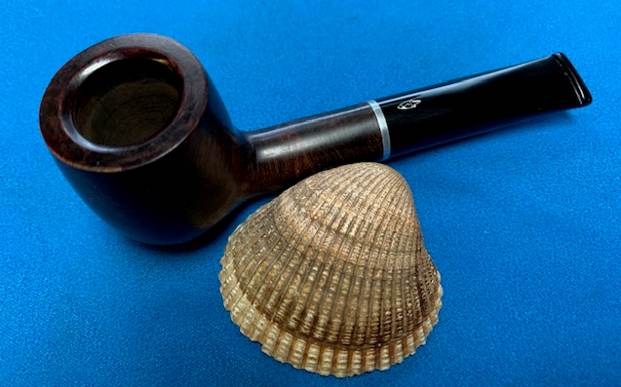
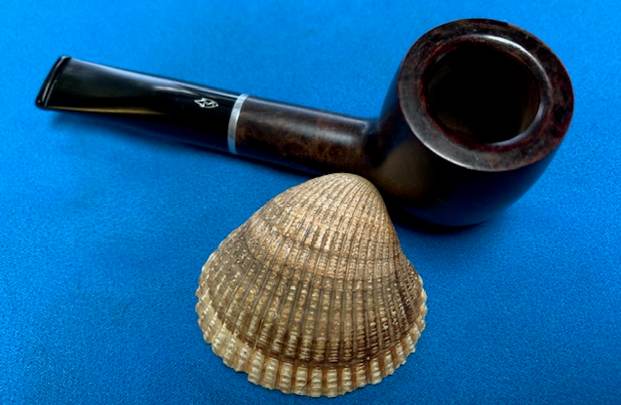
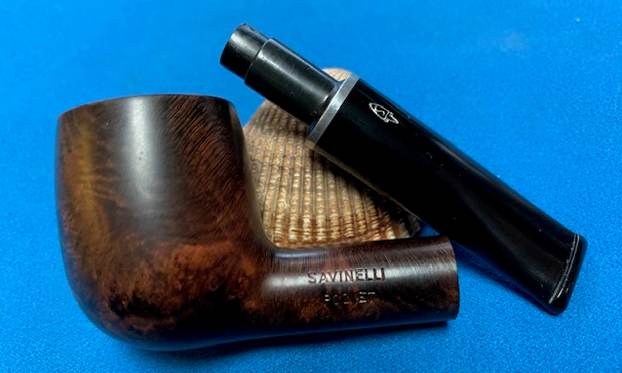
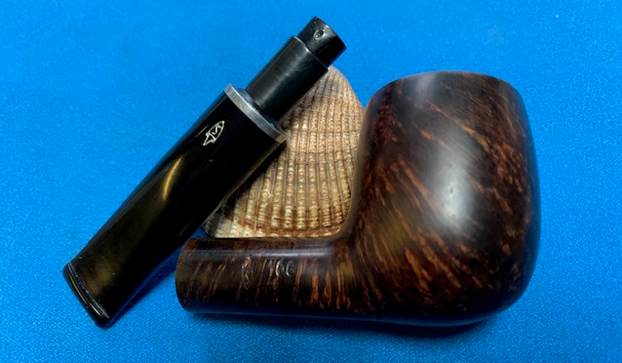
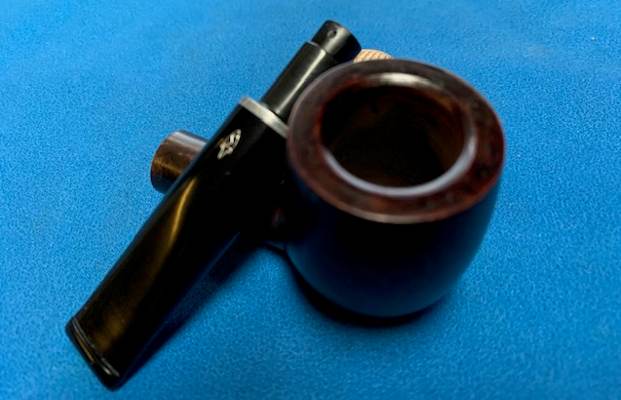
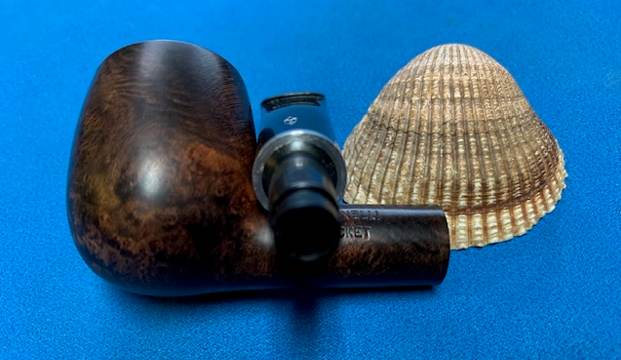
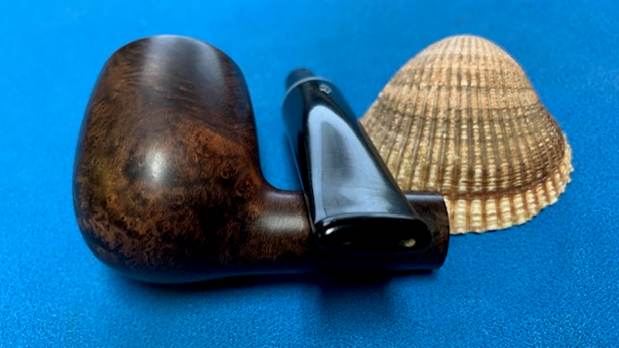
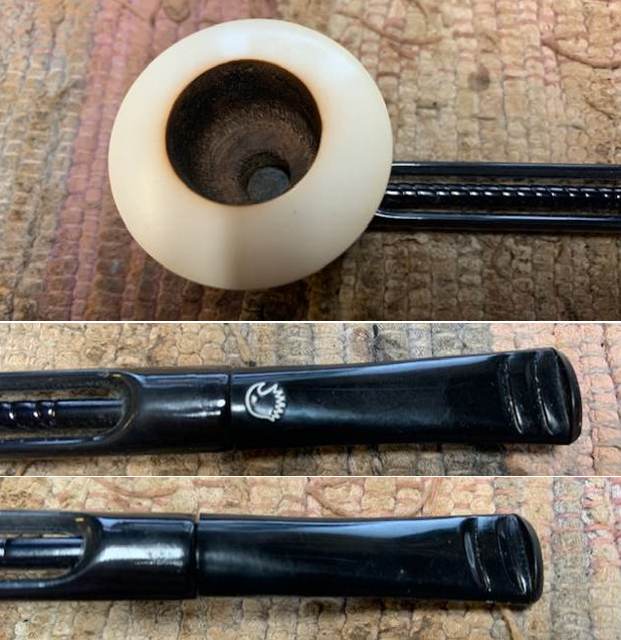
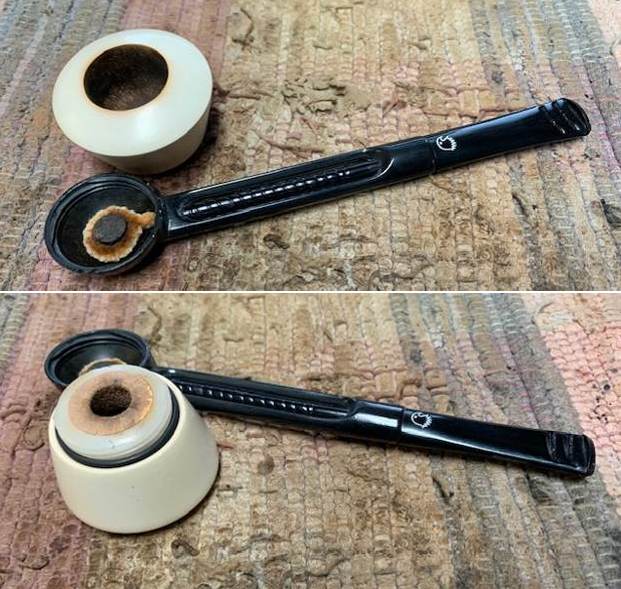
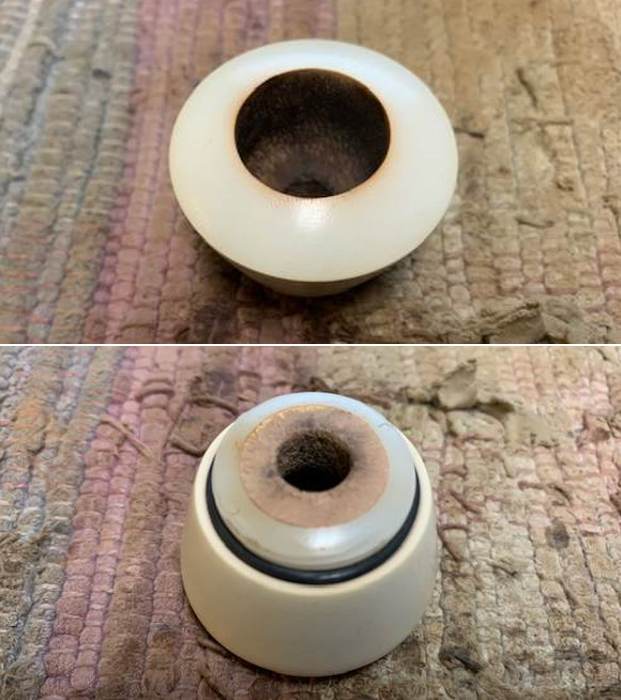
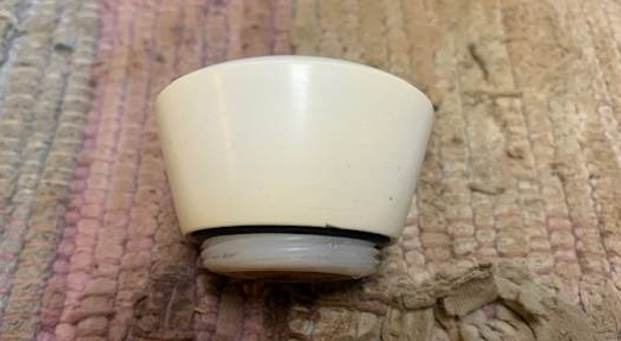
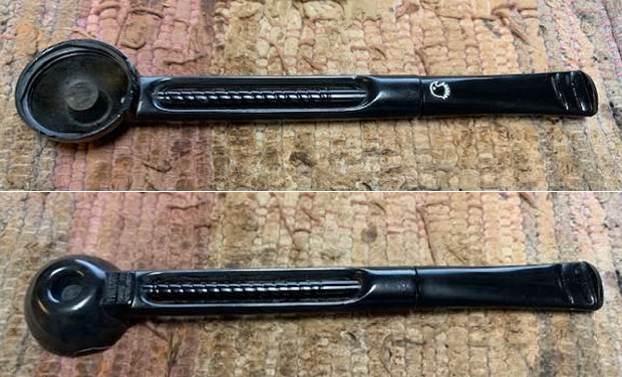
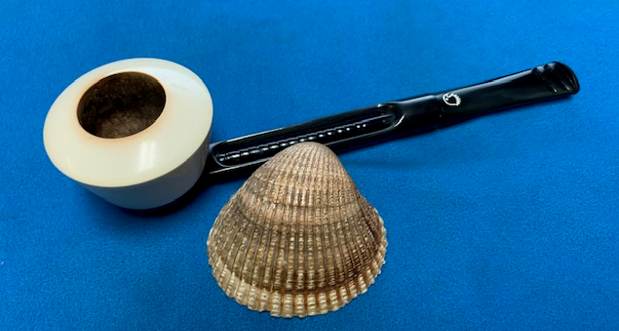
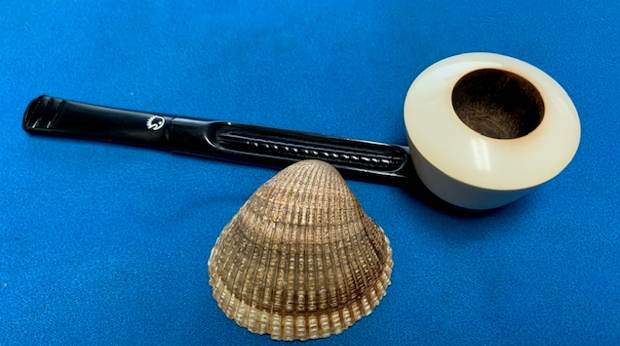
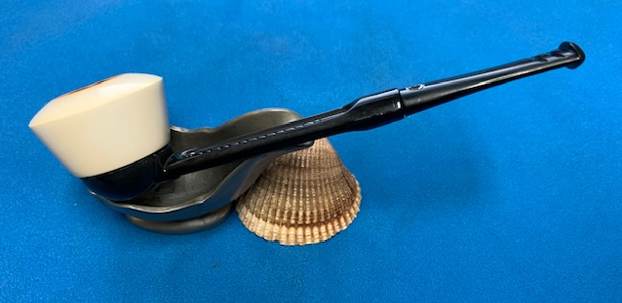
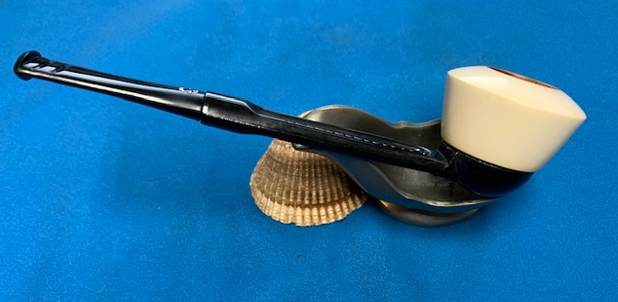
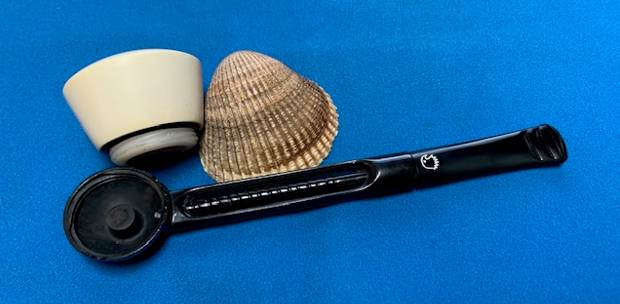
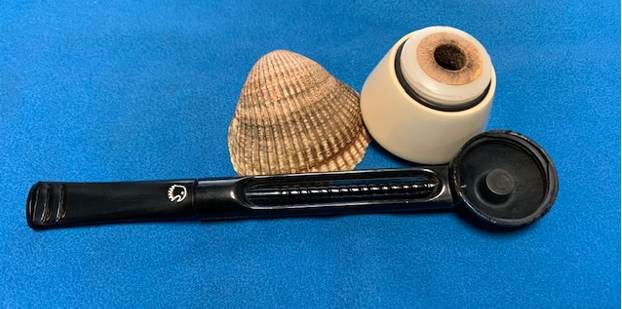
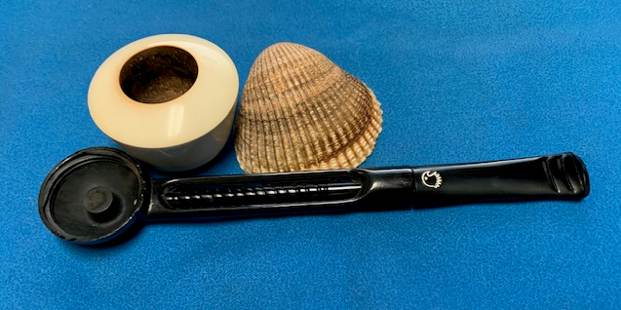
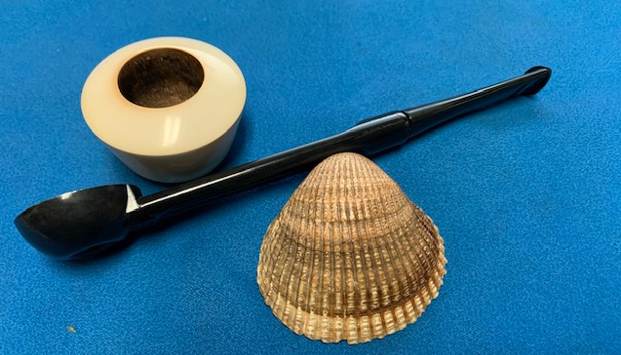
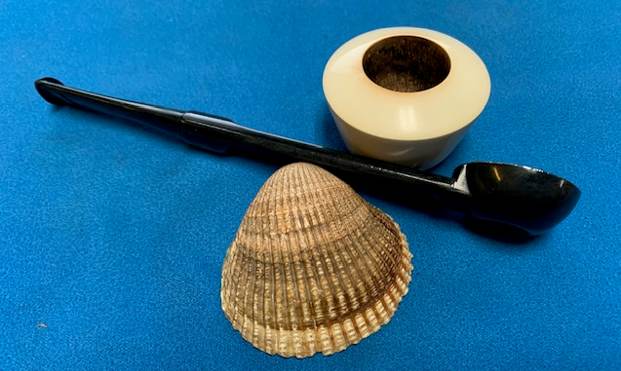
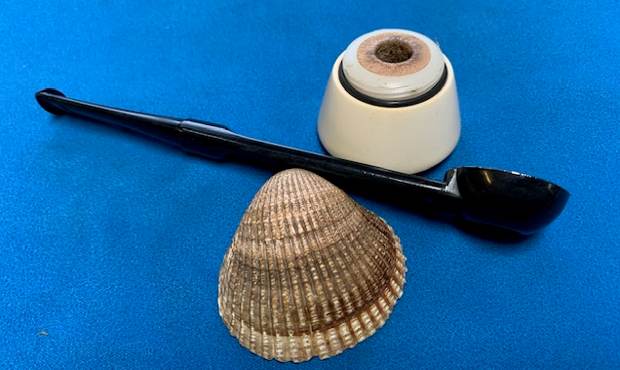
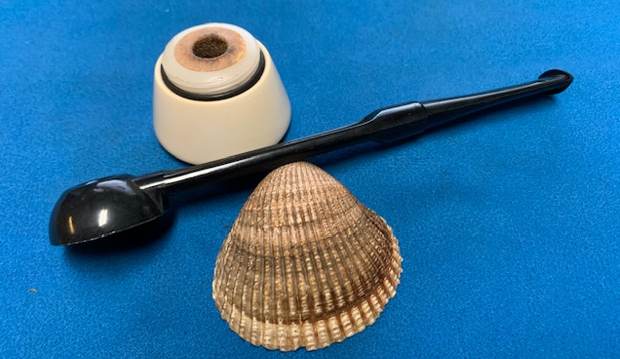
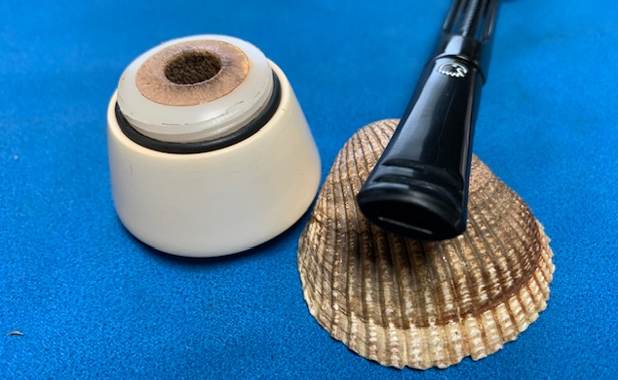
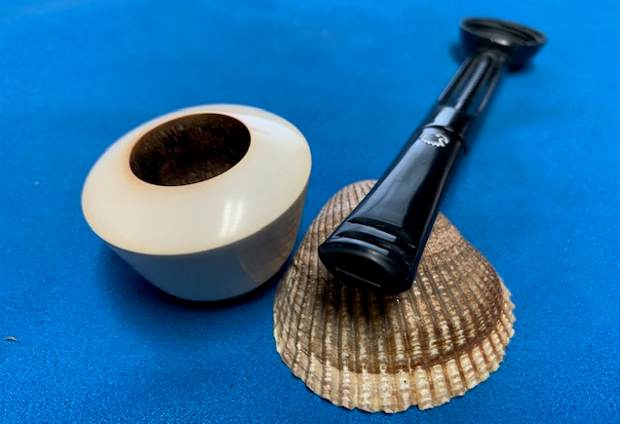
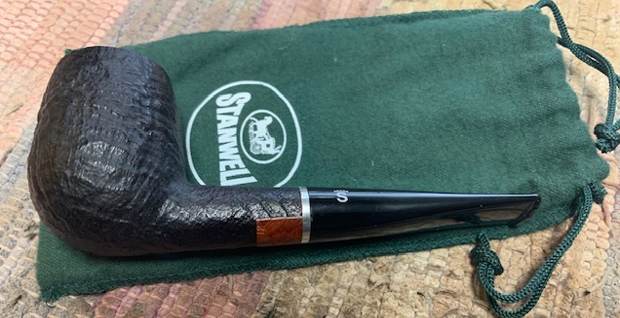
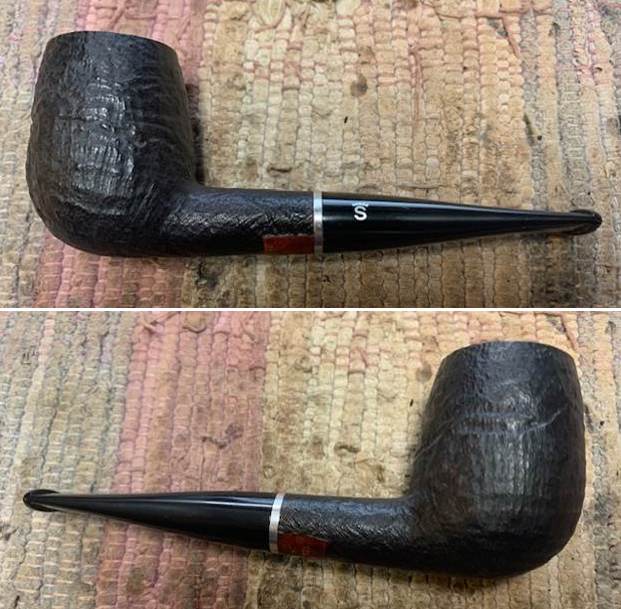
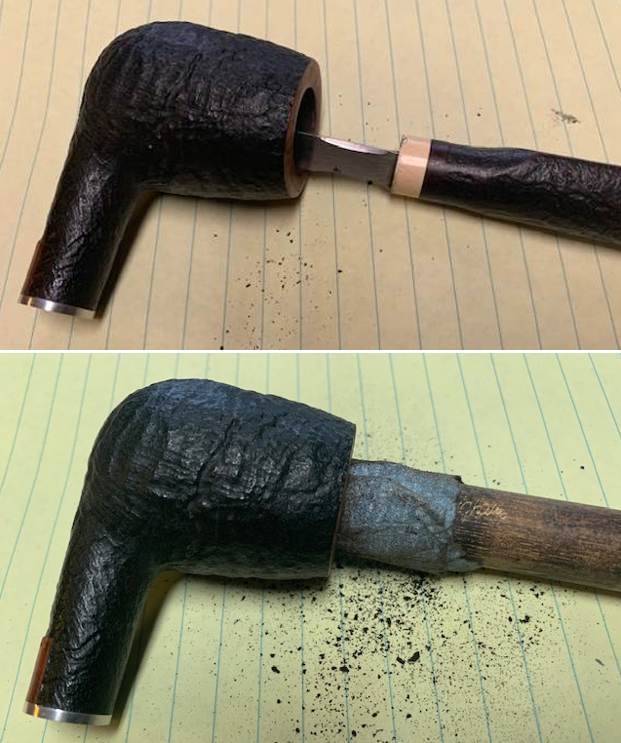
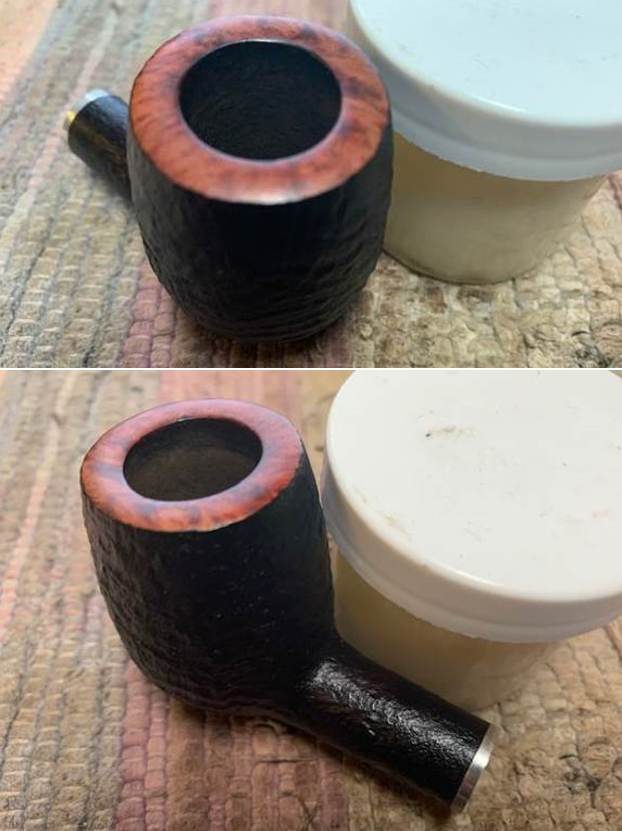
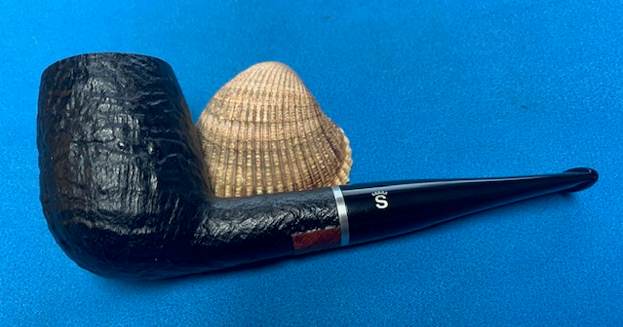
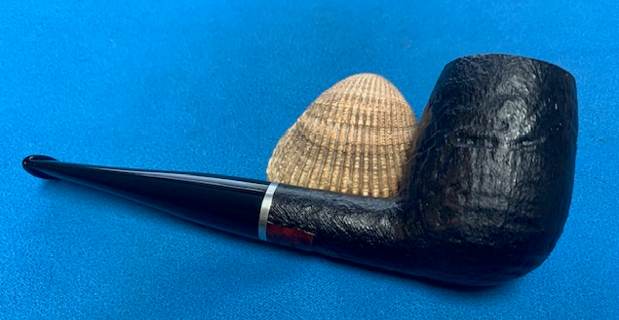
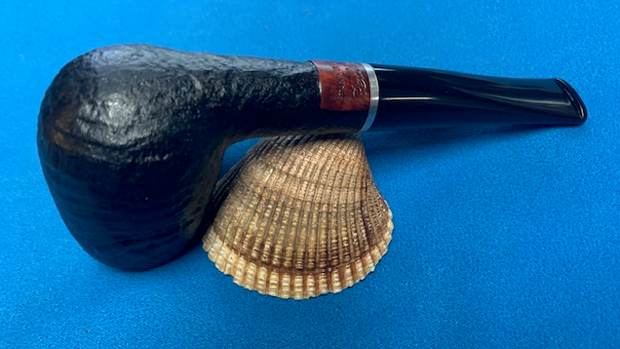
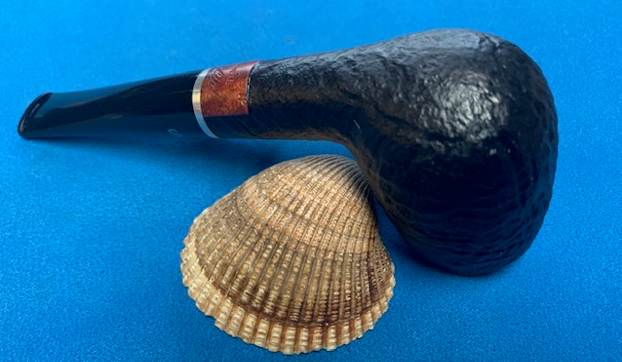
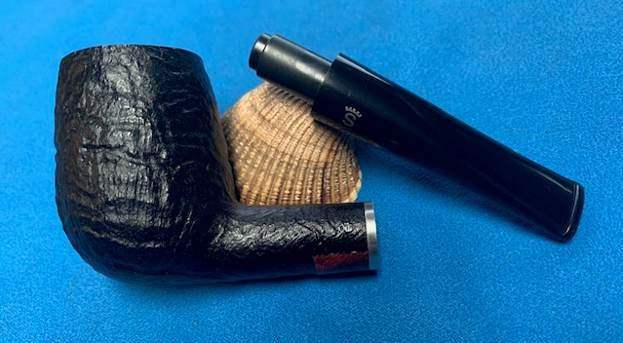
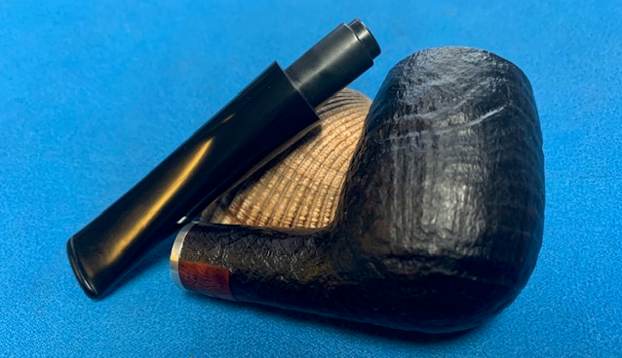
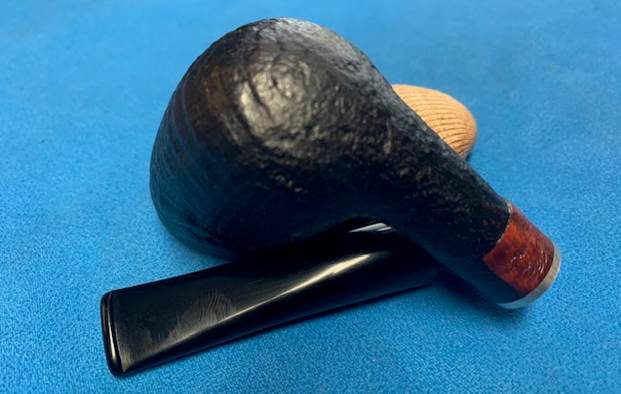
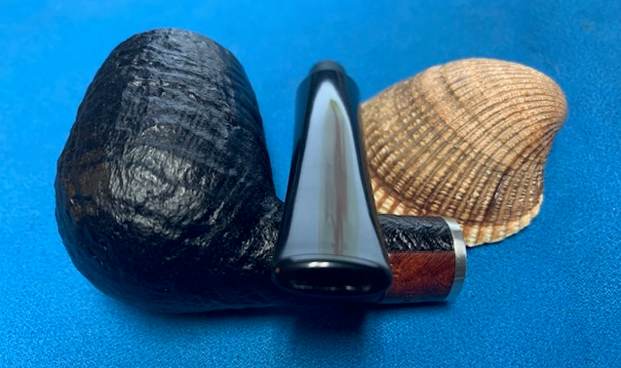
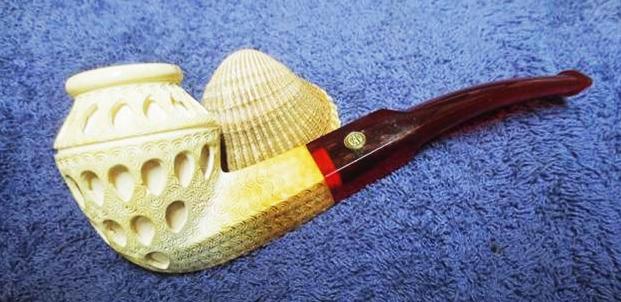
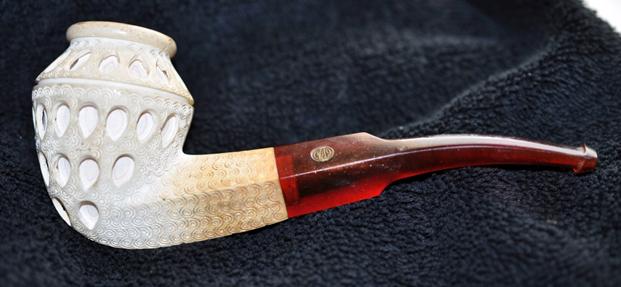
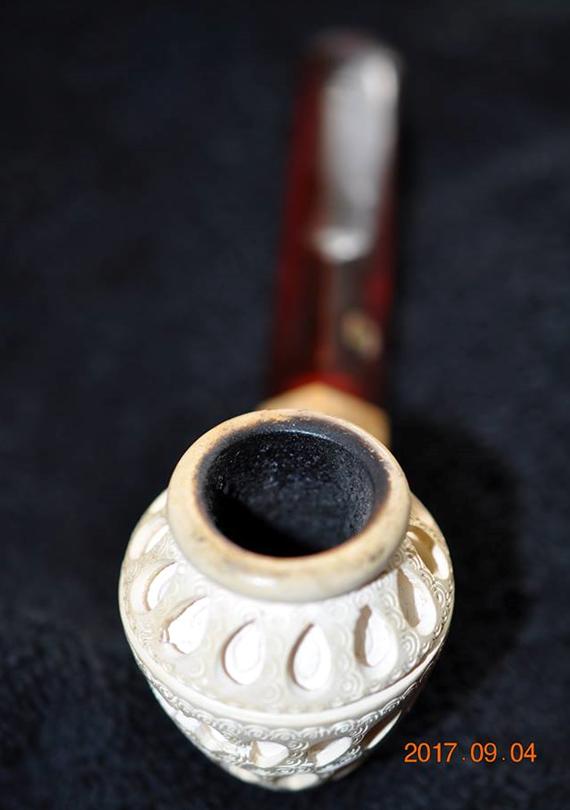
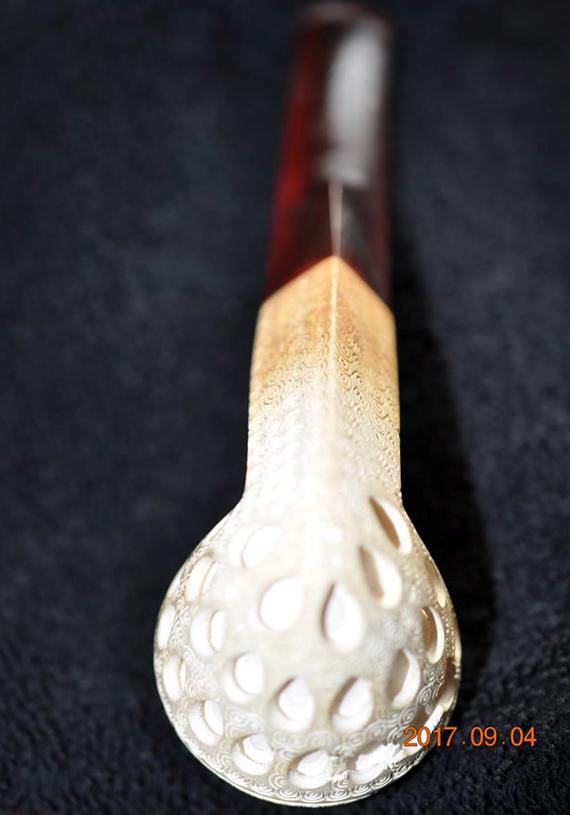
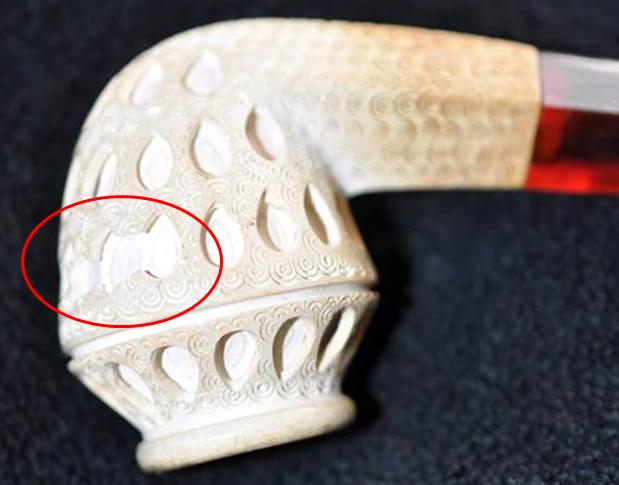
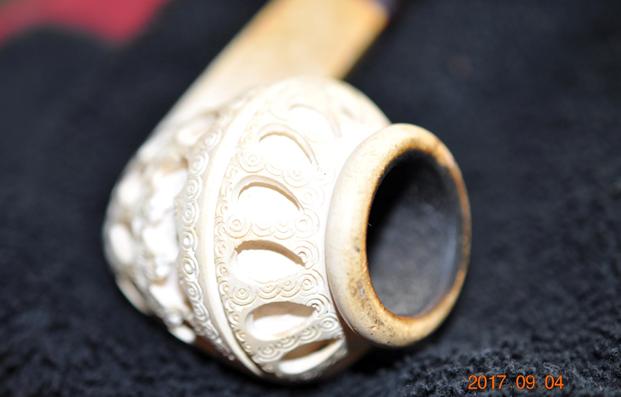
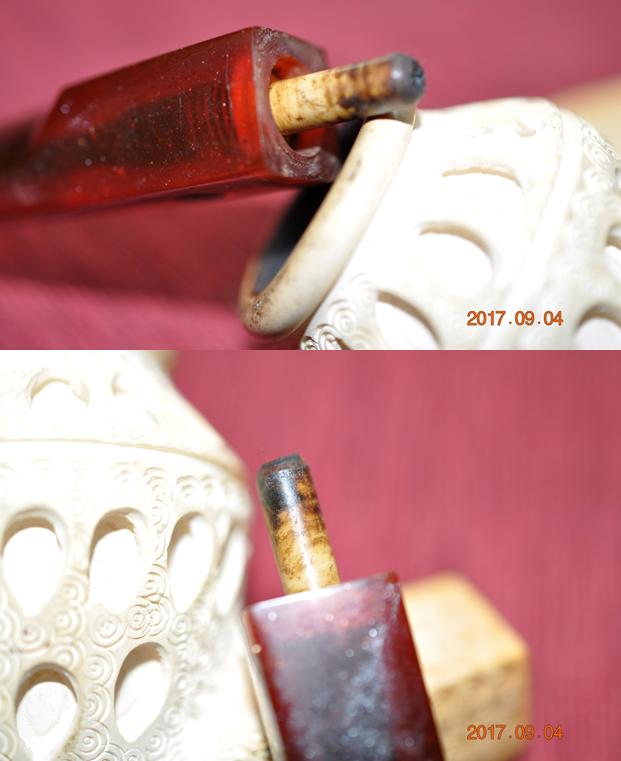
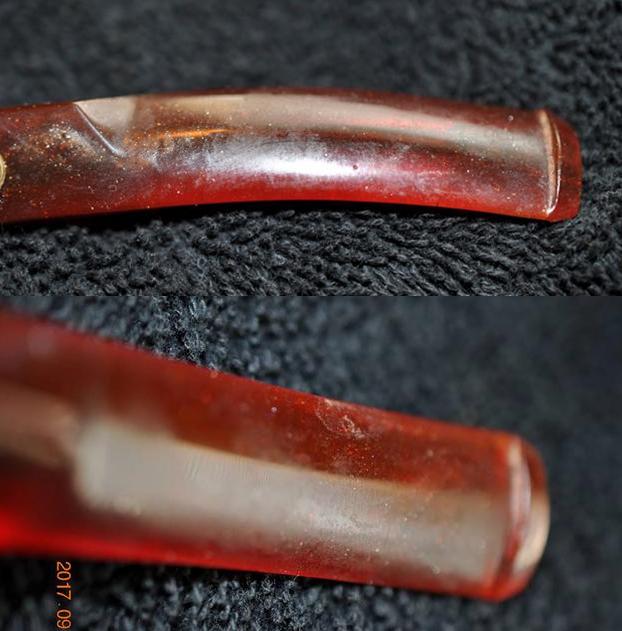
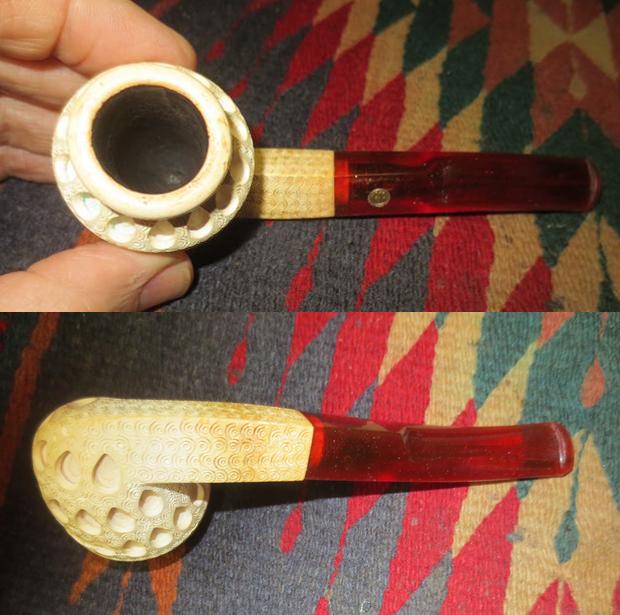
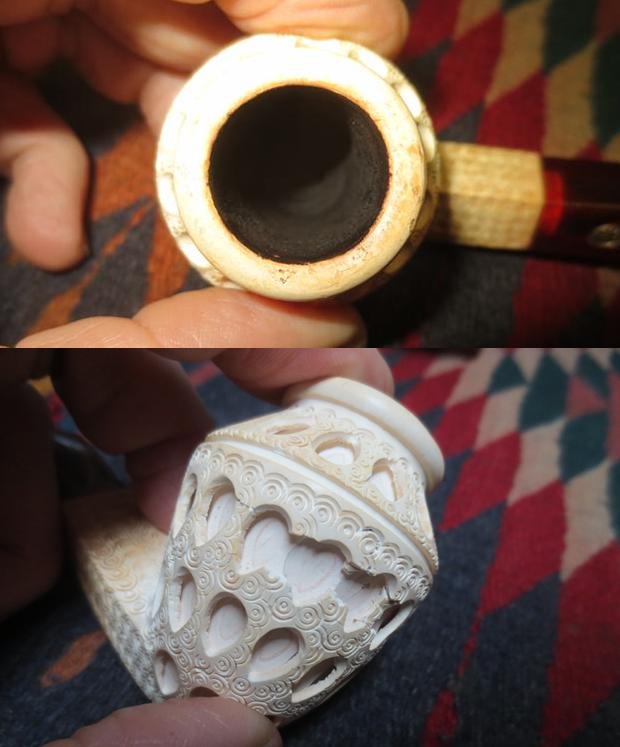
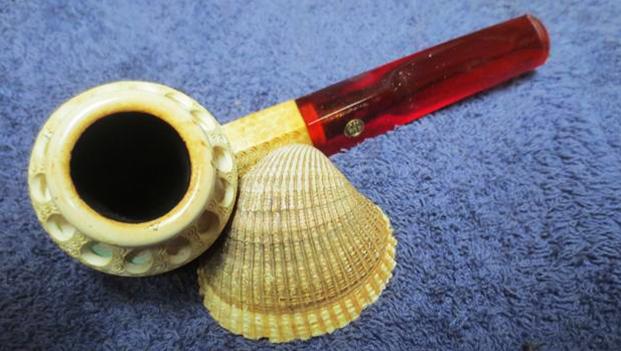
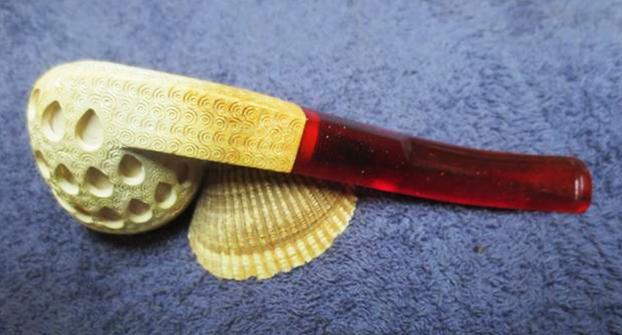
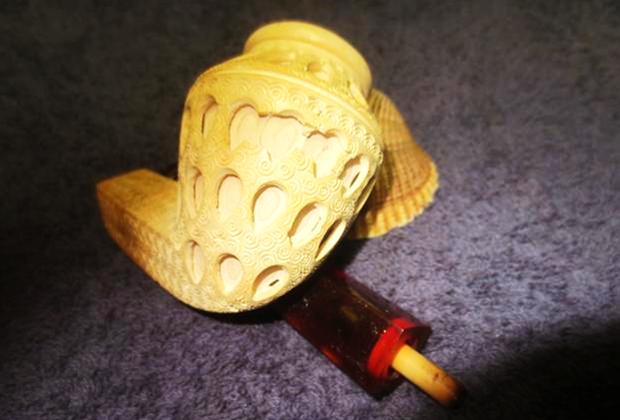
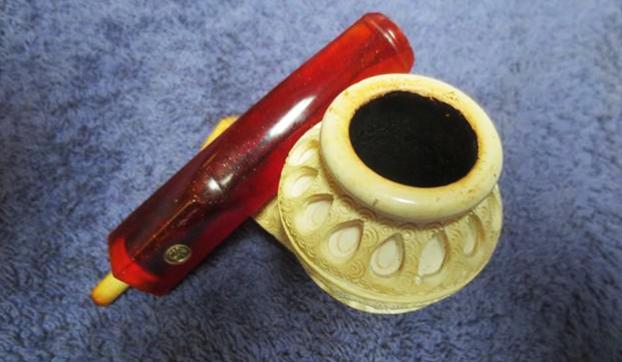
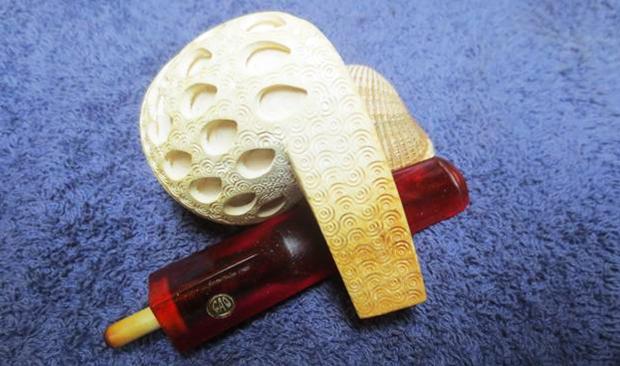
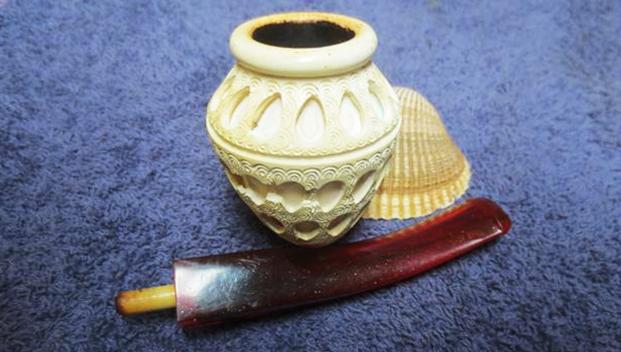
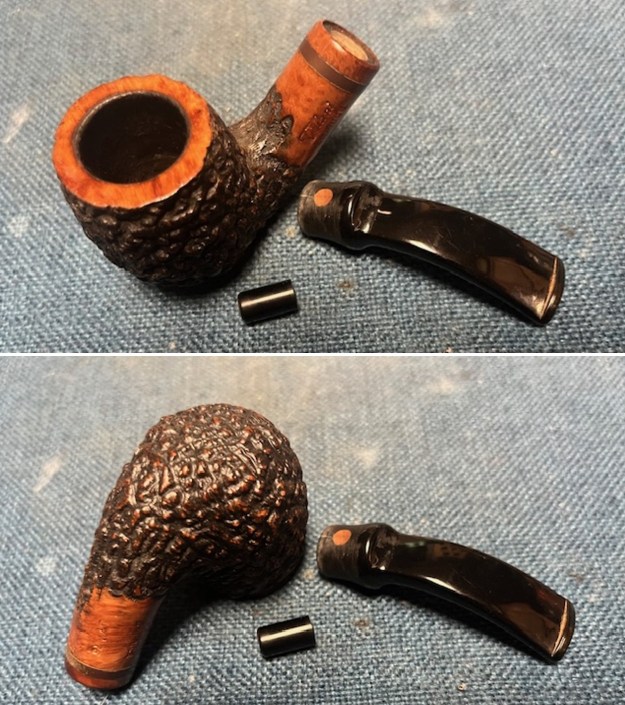
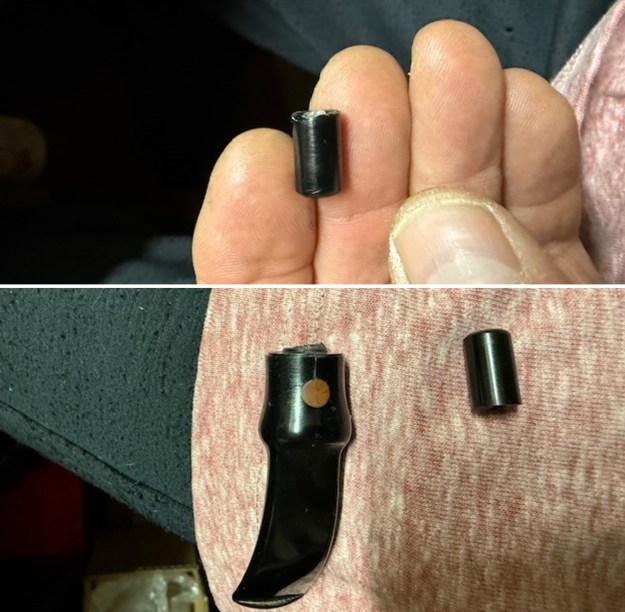
When the box arrived from Larry yesterday I opened it to see what I was dealing with. The pipe was stamped on the left side of the shank and read Velani [over] Caprice and AV 75 on the underside. It was also stamped Italy against the acrylic spacer in the shank end. The stamping was clear and readable. The heavily coral like rusticated finish was quite clean and the bowl inside was smooth and appeared to have been recently reamed. The rim top was smooth and it was quite clean. It was dusty but otherwise clean. The stem was wrapped along with the broken tenon in the box. The saddle portion of the stem had cracked off and Larry had glued it back together with epoxy. He had done a great job and the crack was solid. There were still some light crevices where the repair had been done that would need to be filled in. I set the pipe aside so that I could think about the repair. I took photos of the broken parts of the pipe and have included them below. 
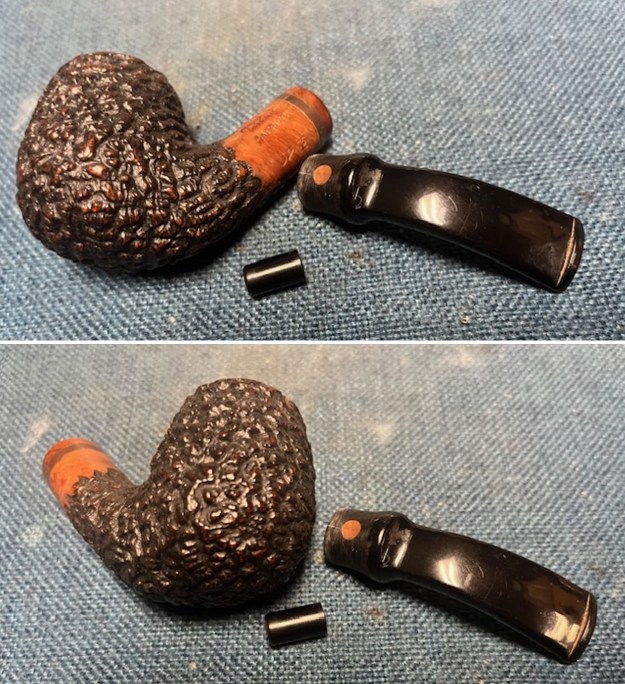
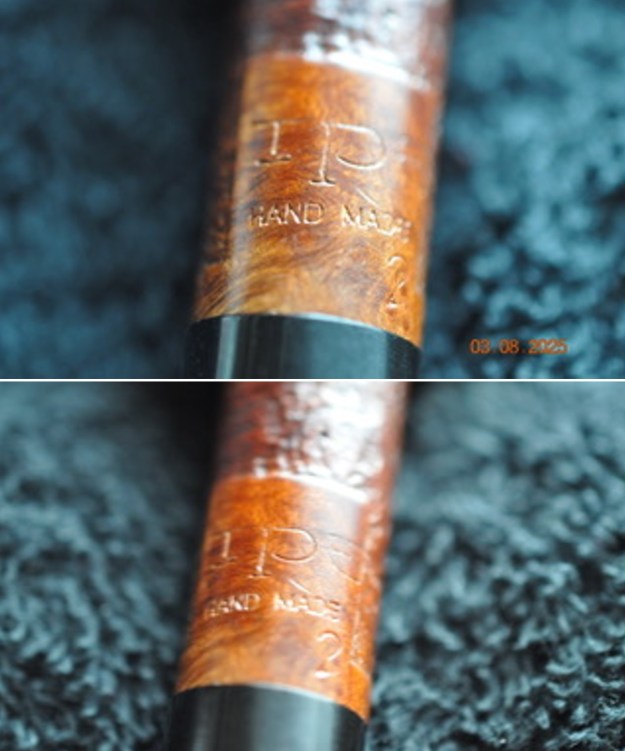
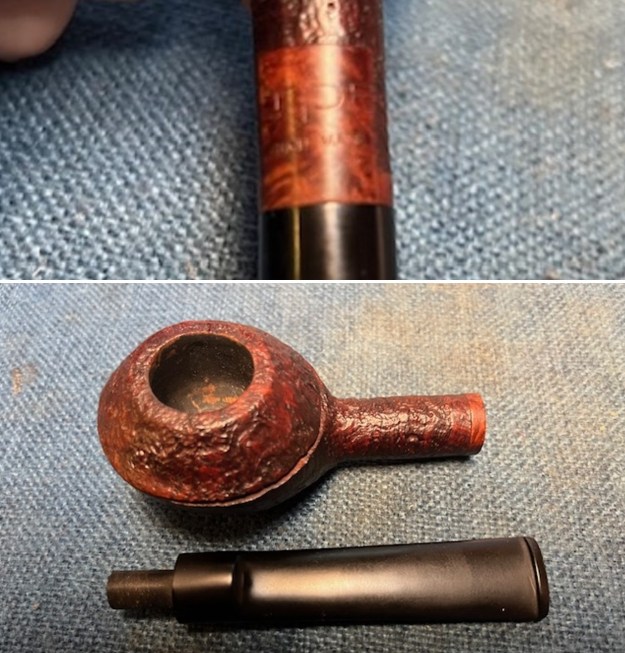
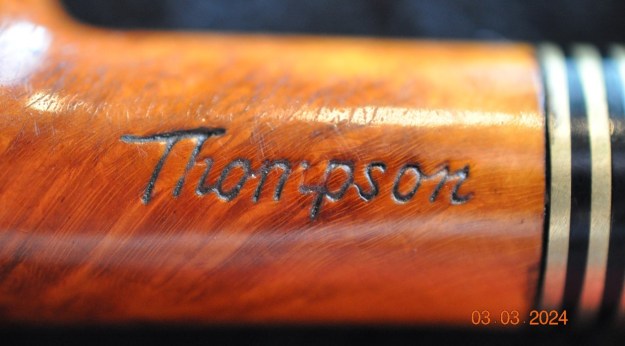
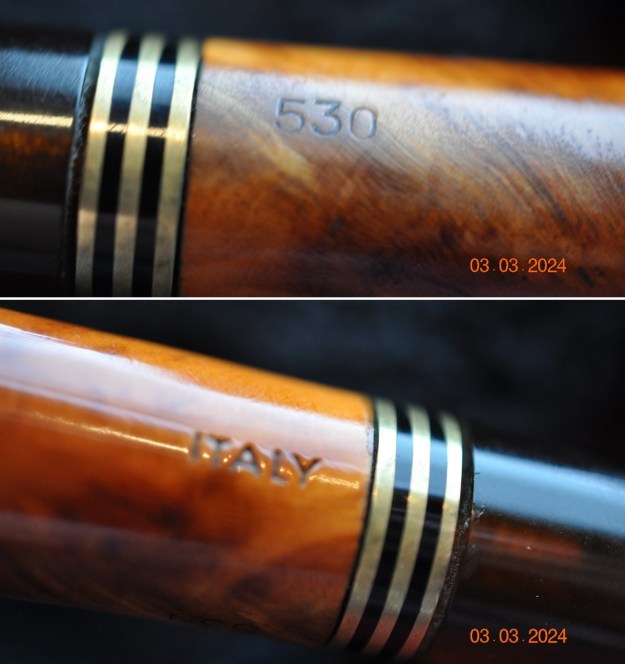
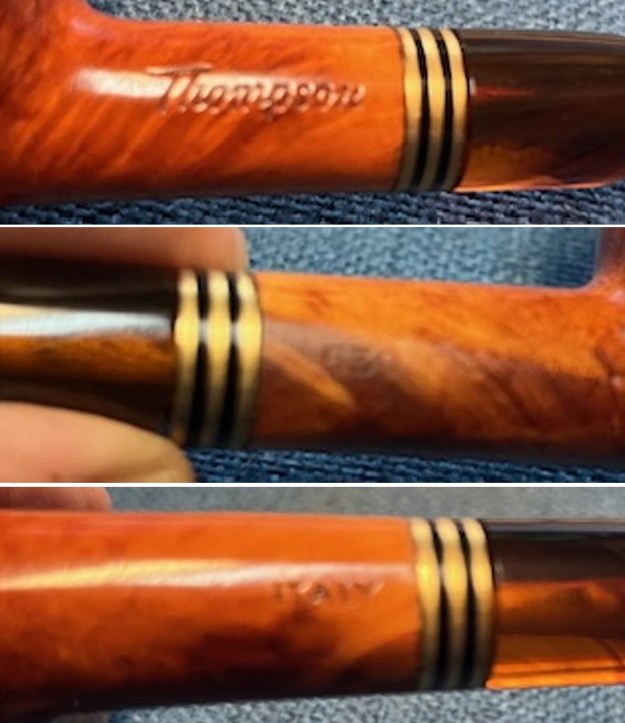
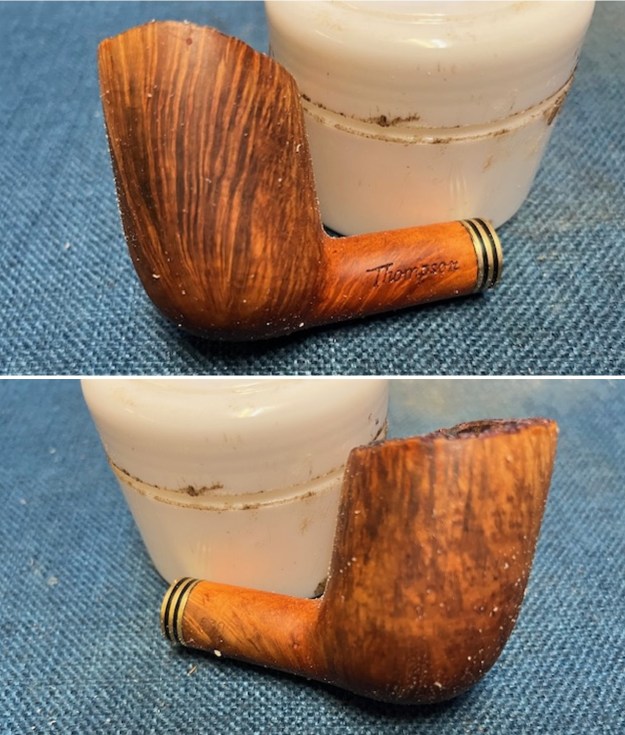
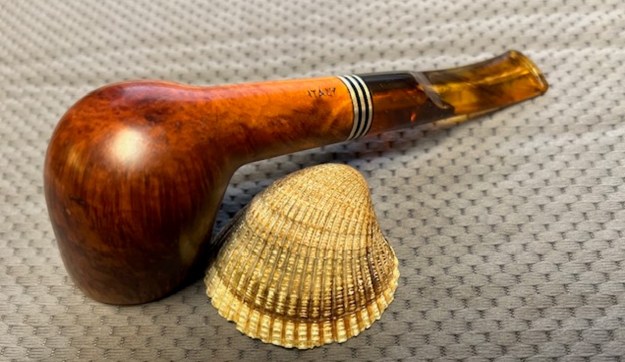
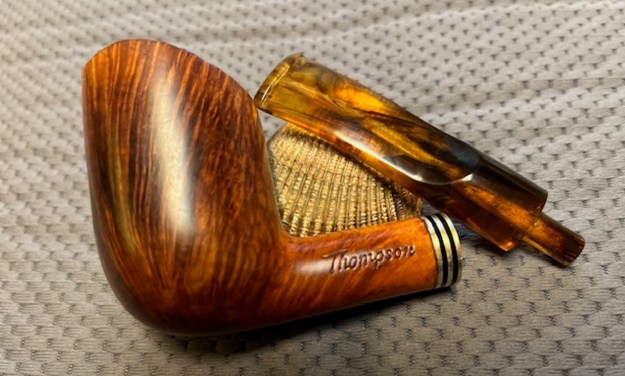
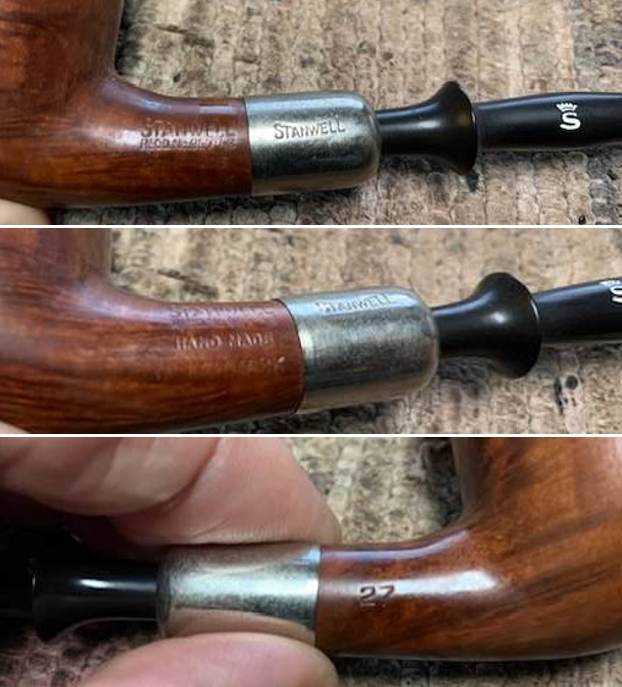
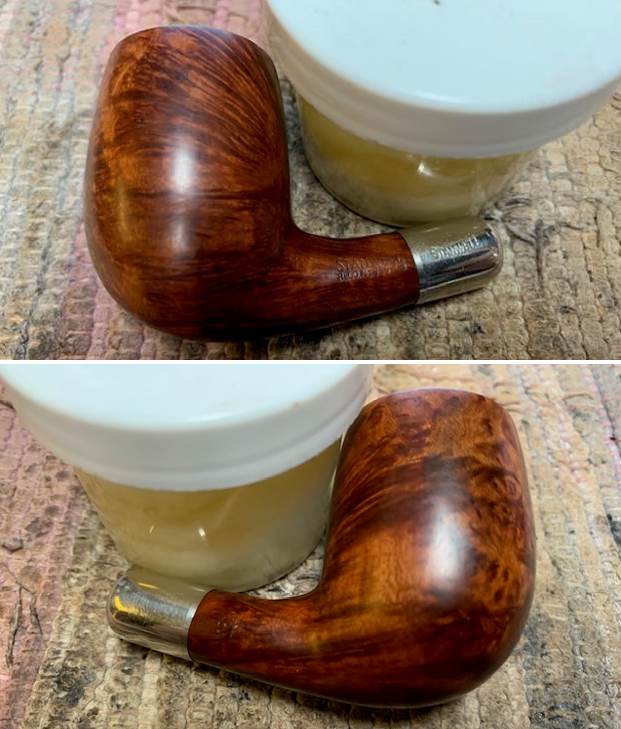
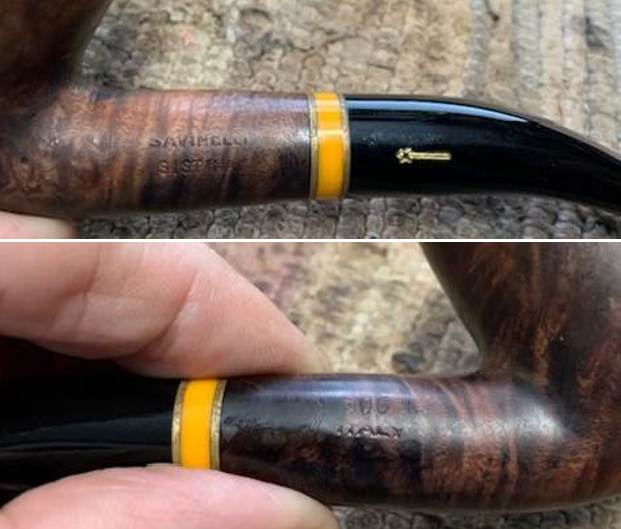
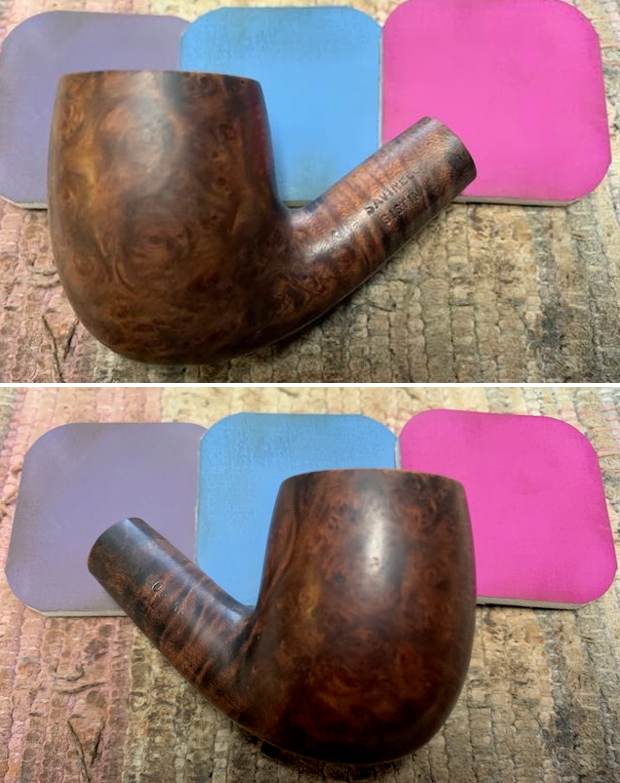
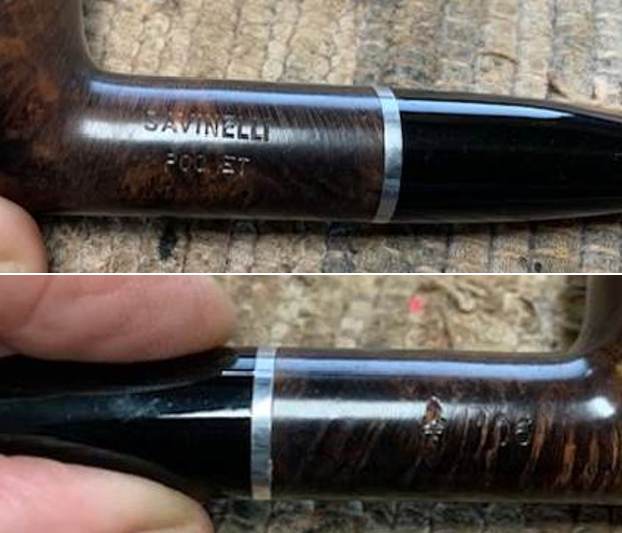
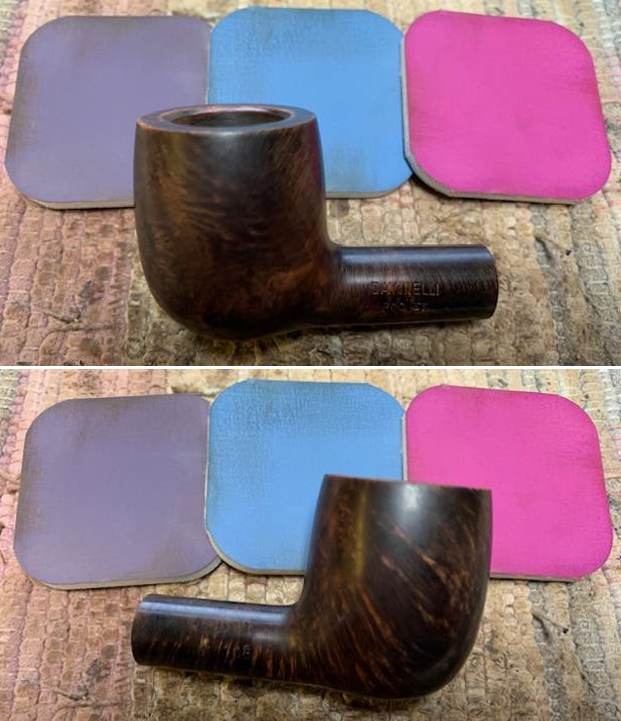
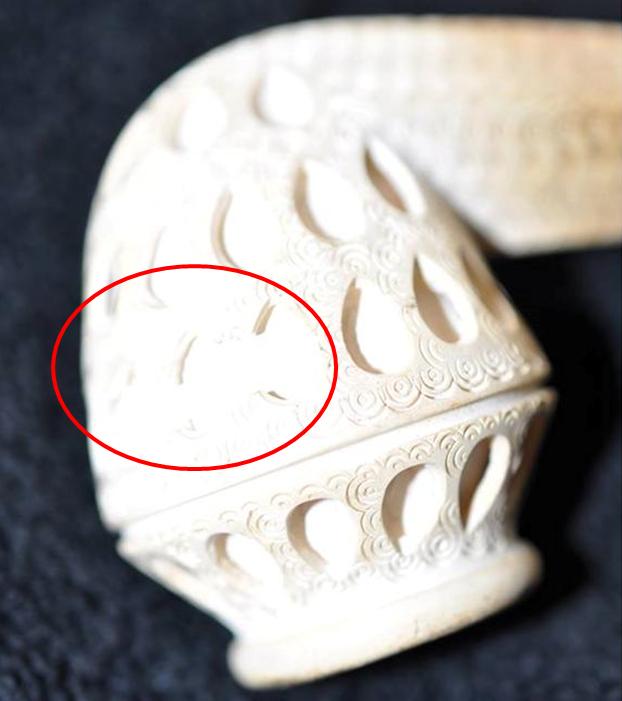
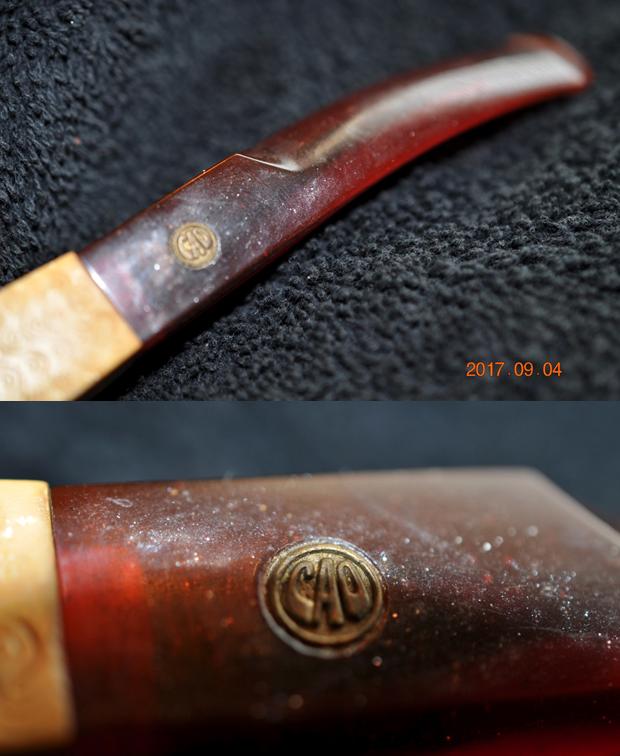
I took photos of the stamping on the shank. It was clear and readable as noted above. 
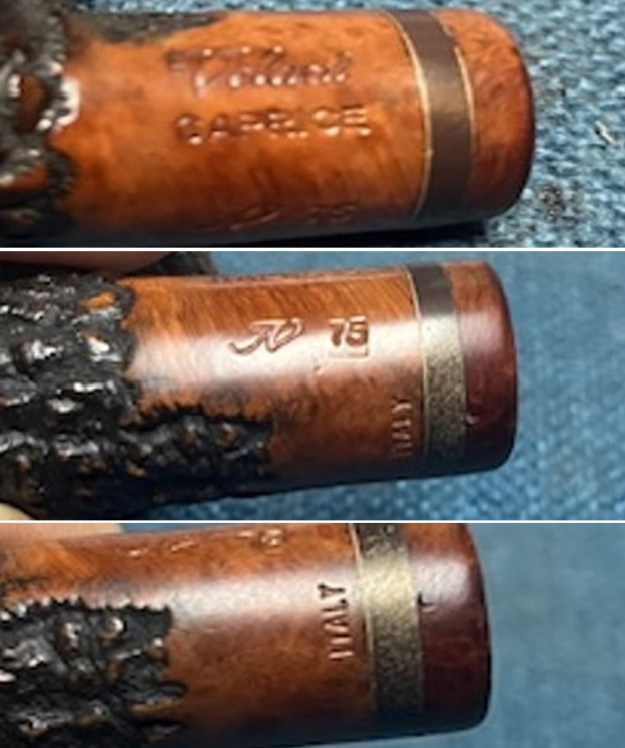
I turned to Pipephil to refresh my memory of the brand understand a bit more about it before I started working on the stem (http://www.pipephil.eu/logos/en/logo-a3.html#aldovelani). I am including a screen capture below. 
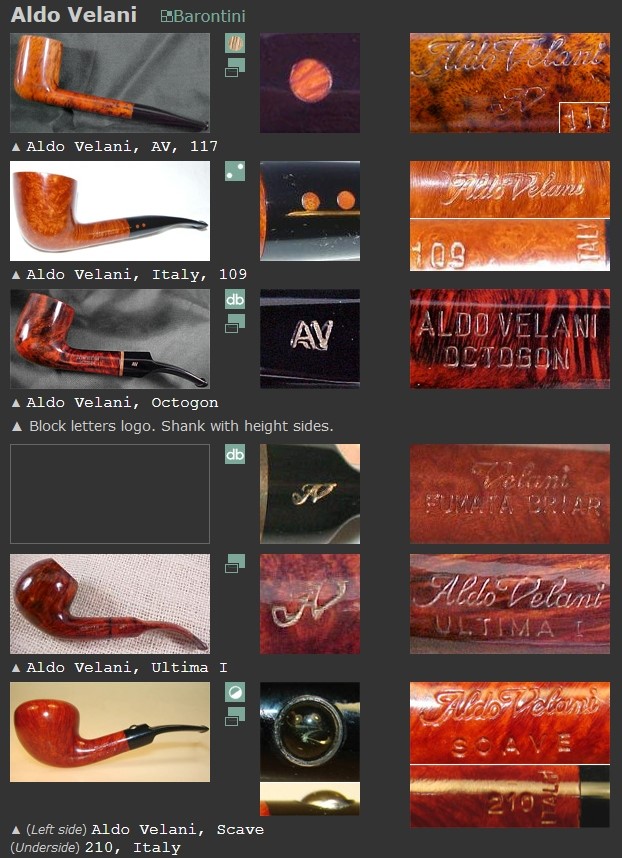
From the side bar on Pipephil I was reminded that Aldo Velani is the fictional name for a sub-brand of Barontini that was mainly intended for export.

I turned to Pipedia to see if I could learn a bit more about the brand and the link took me to Cesare Barontini’s page (https://pipedia.org/wiki/Aldo_Velani). It also confirmed the information from the side bar above. Now it was time to work on the pipe.

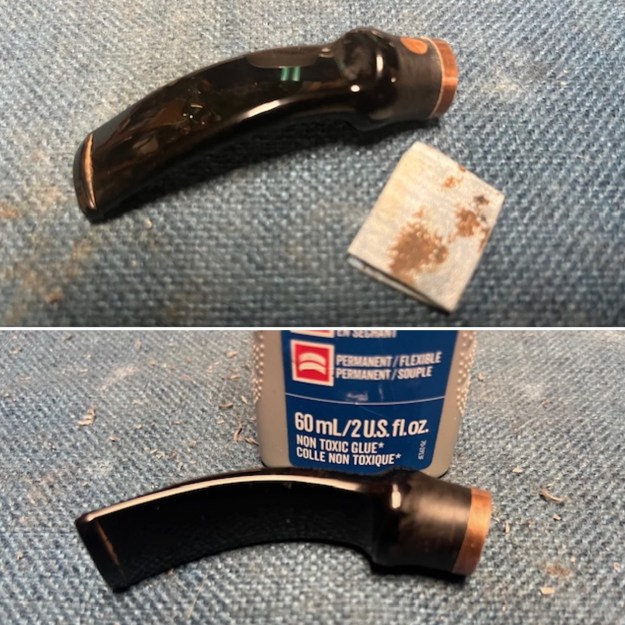
I began my work on the pipe by addressing the cracked portion of the saddle stem. I cleaned out the surface of the repairs that Larry had done and filled in the shallow grooves with black CA glue.  
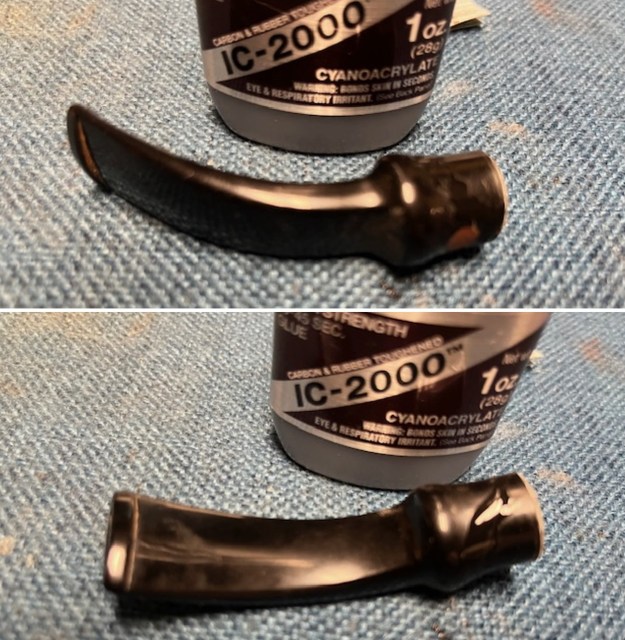
I sanded the repairs with 220 grit sandpaper to smooth them out. I sanded the end of the saddle and fitted it with a thin brass band. I thinned the depth of the band with a topping board to reduce the profile so that it would not cover the briar dot on the top of the saddle. It would function as an external band to hold the repairs tight while I drilled the airway for the new tenon. I coated the inside of the band with white glue and pressed it on the stem. 
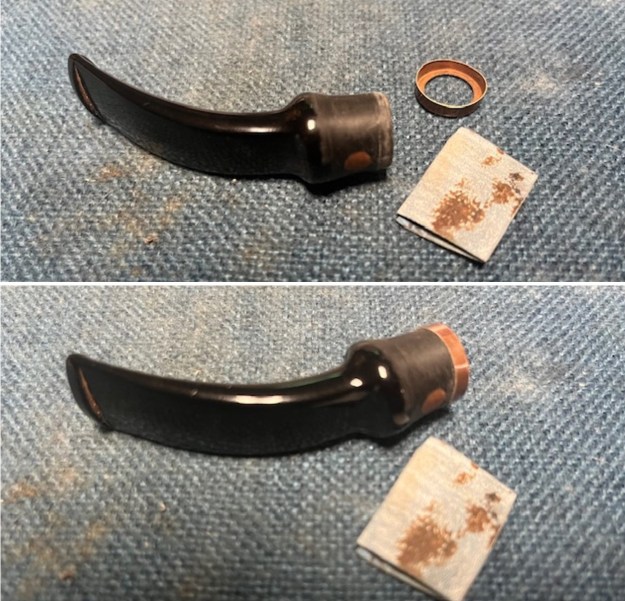
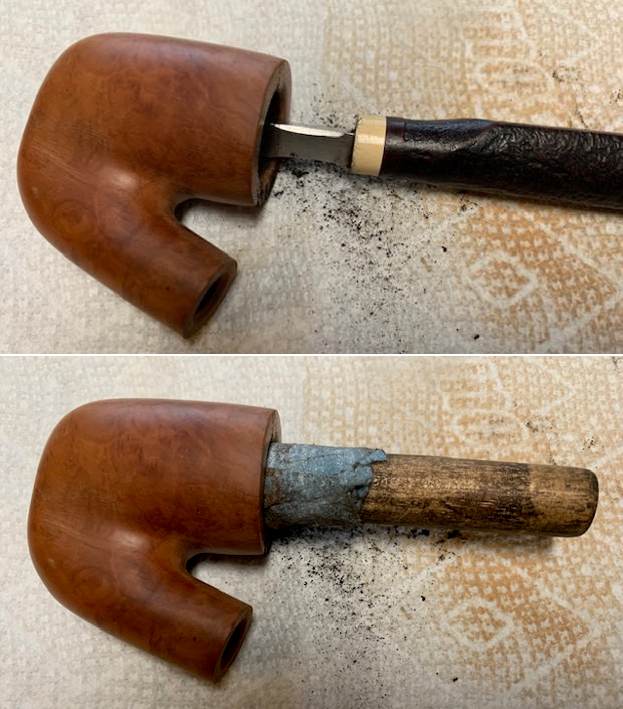
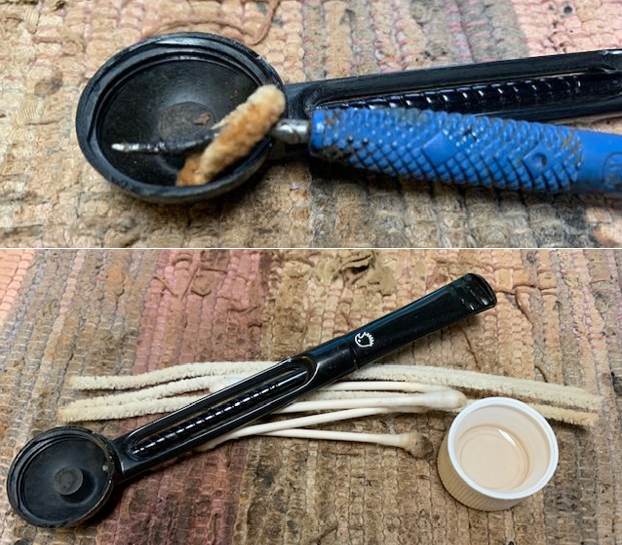
Once the band was solid on the stem I drilled the airway open with two progressively larger drill bits on the cordless drill. I needed it open enough to hold the new tenon in place. It would also provide an internal tube that the stem was bound to. The repair that Larry had done, the band on the outside and the new tenon would provide a solid repair for the crack in the saddle portion of the stem. 
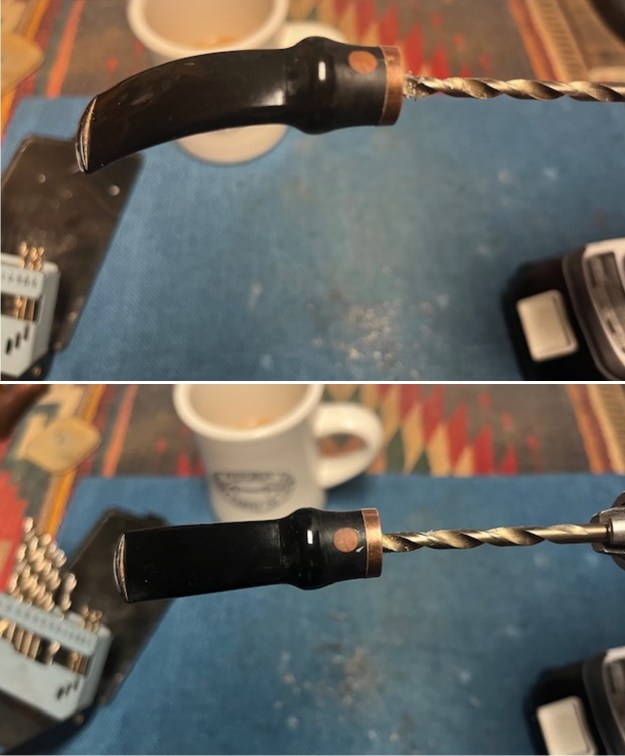
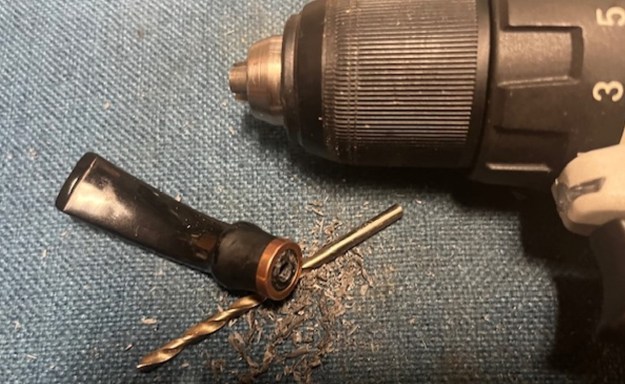
I went through my bag of tenons and found one that was the right fit for the shank. I used a tenon that was made for the Jobey link system. I removed the ridge around the tenon that was made for the Jobey stem and would inset. I used my Dremel to remove that ridge as it was not necessary for a regular tenon.I reworked a second tenon and once it was done I painted the threads on the tenon with black CA glue and inserted it in the opened airway on the stem. I set it aside to cure.
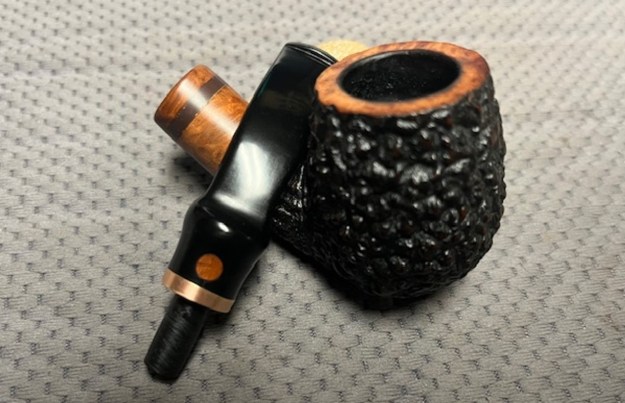
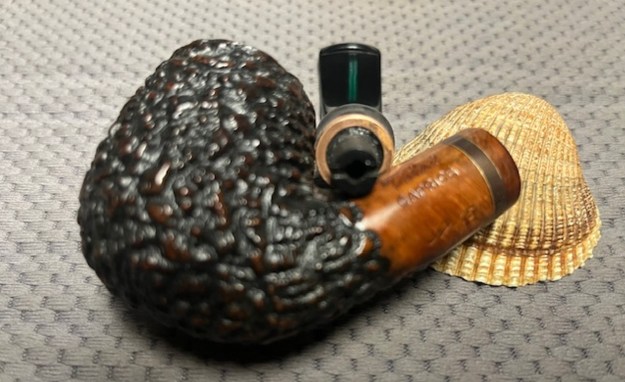
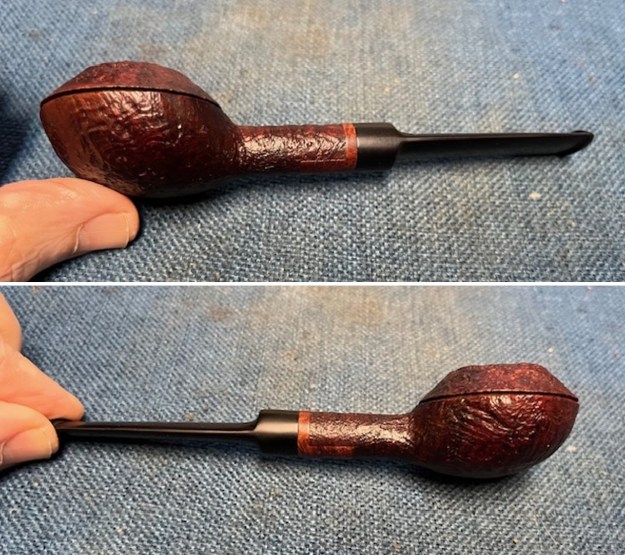
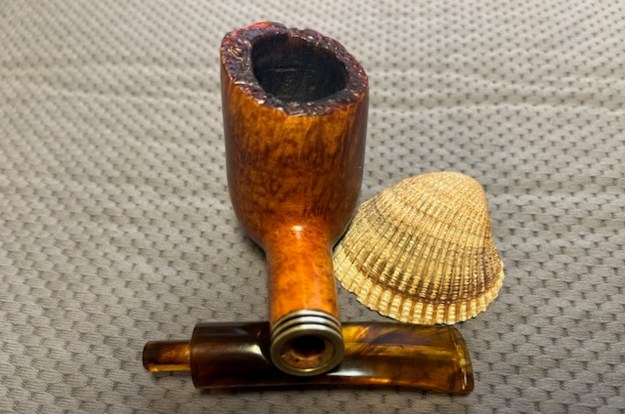
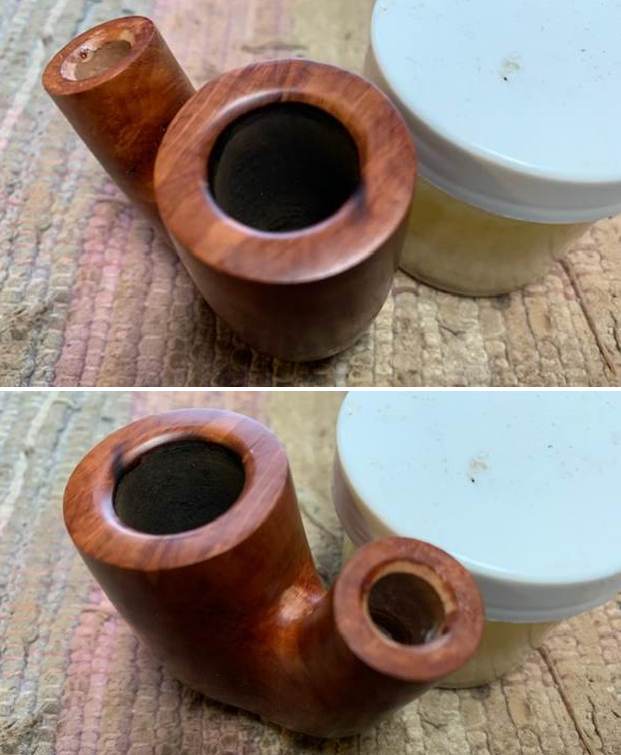
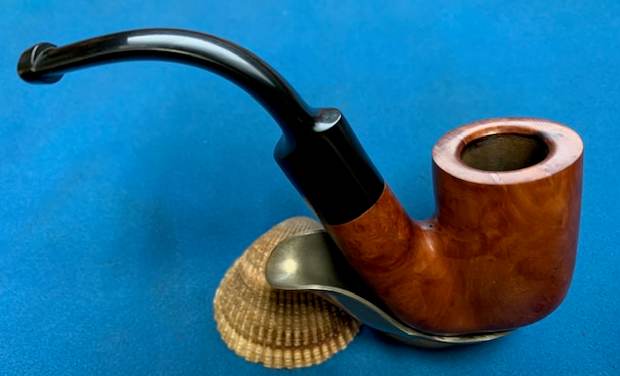
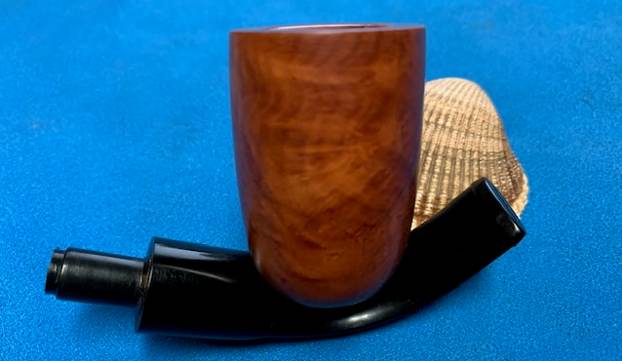
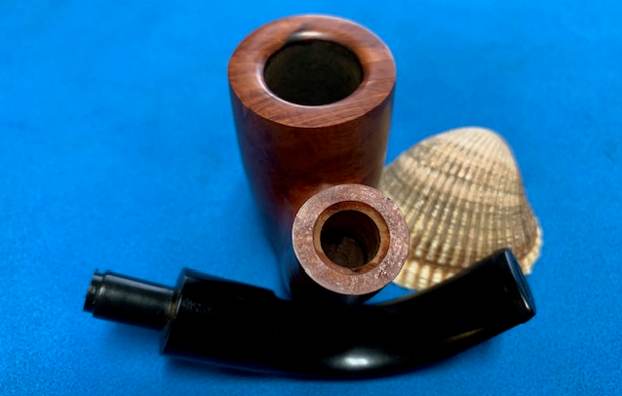
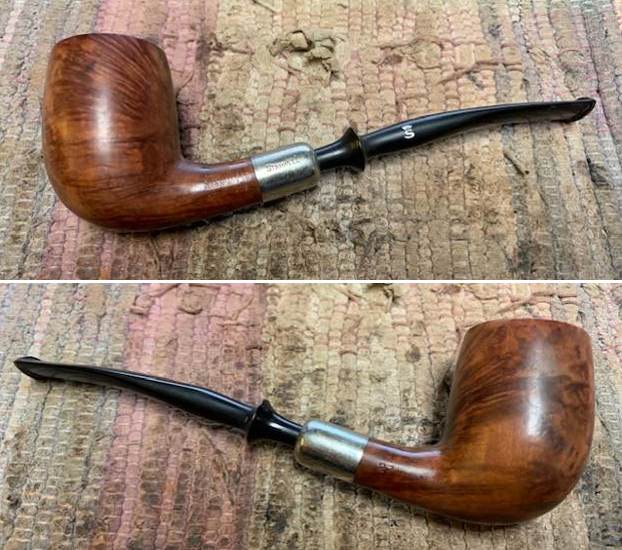
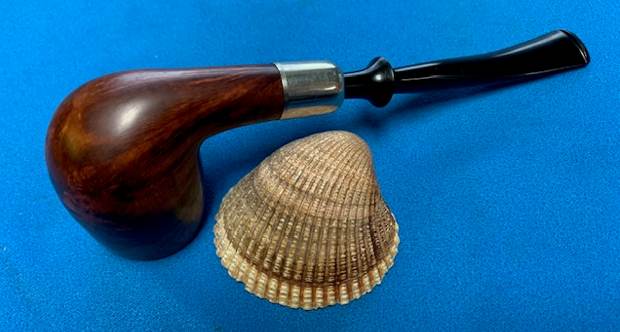
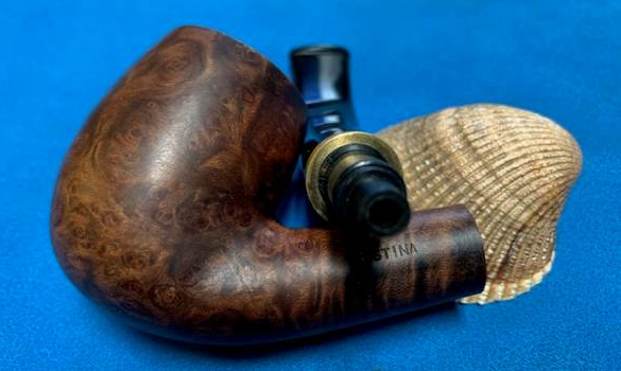
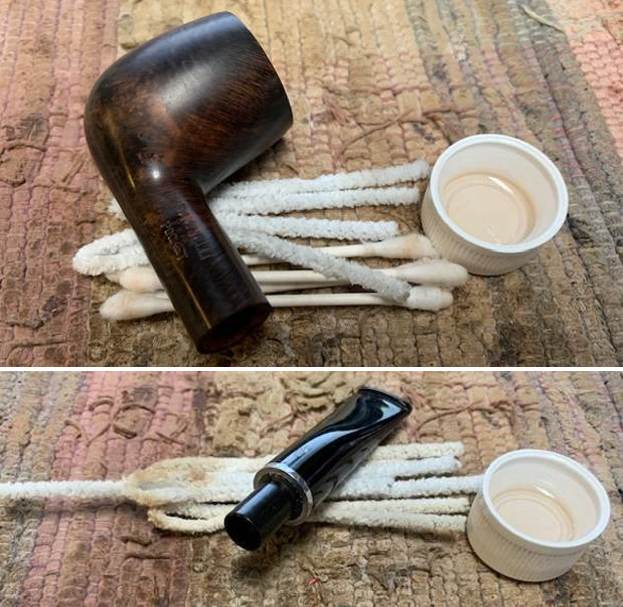
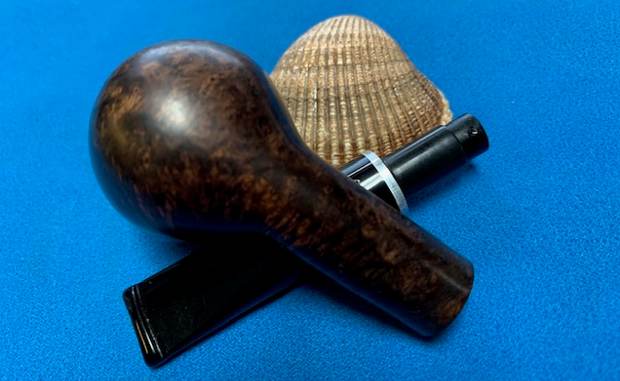
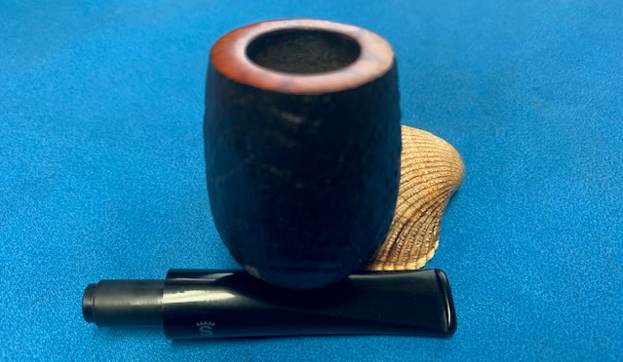
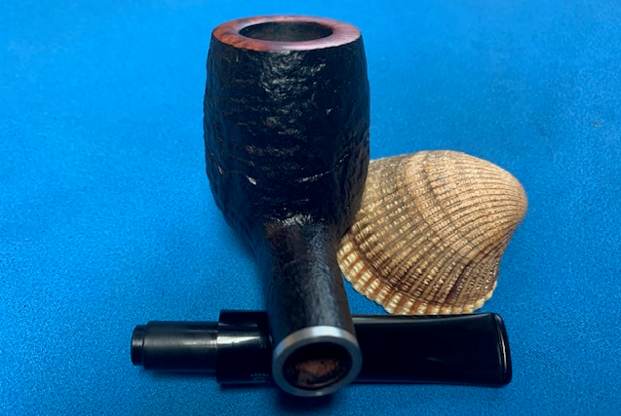
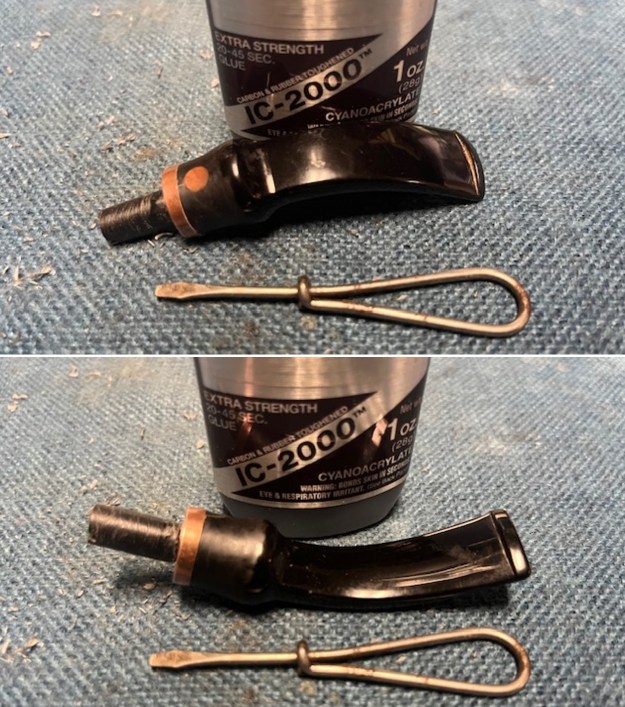
I took a photo of the finished tenon and then once cured I inserted it in the shank and took more photos of the finished repair. I still need to polish the pipe to be finished but the fit was correct. 
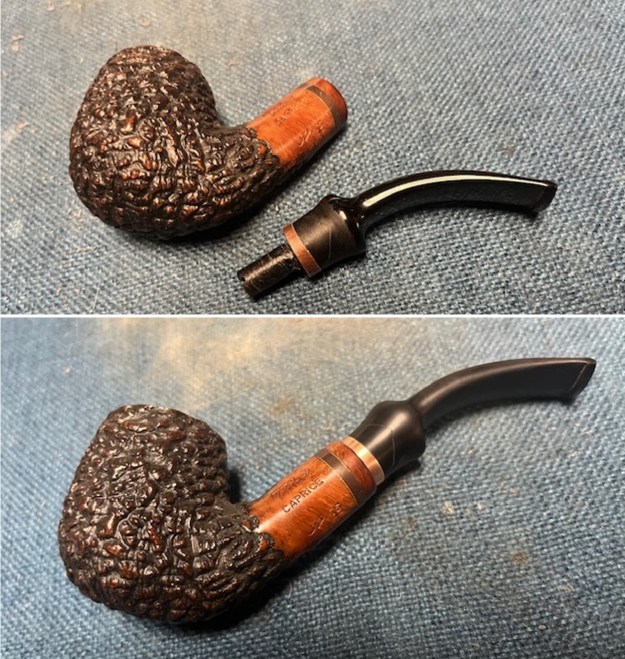
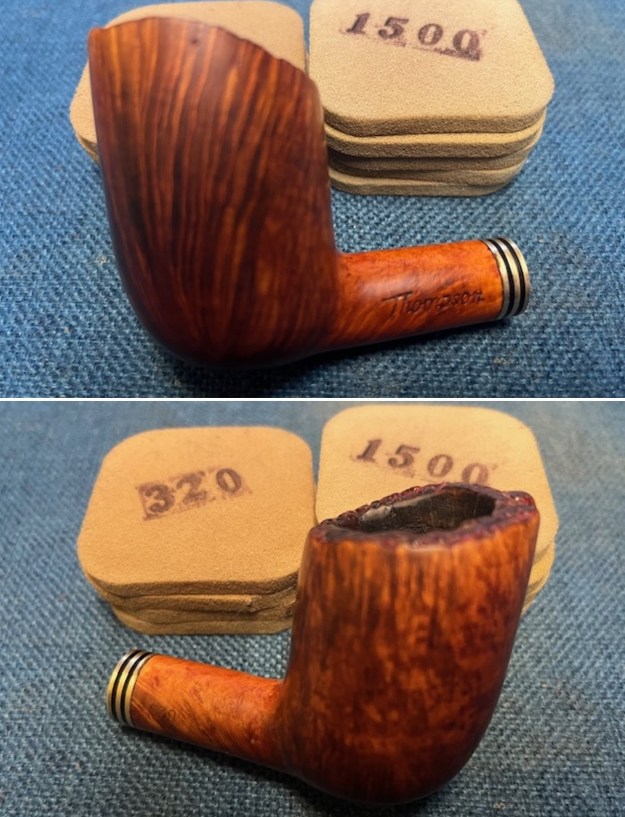
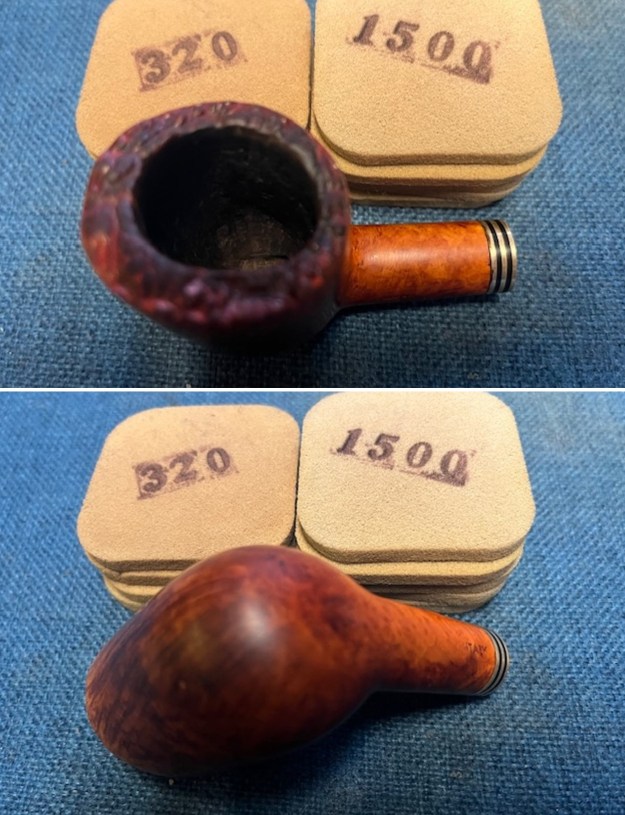
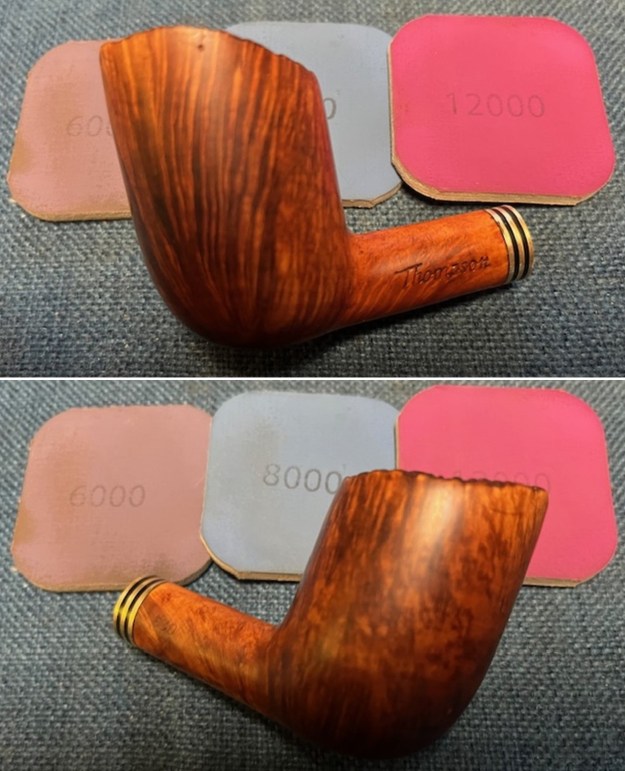
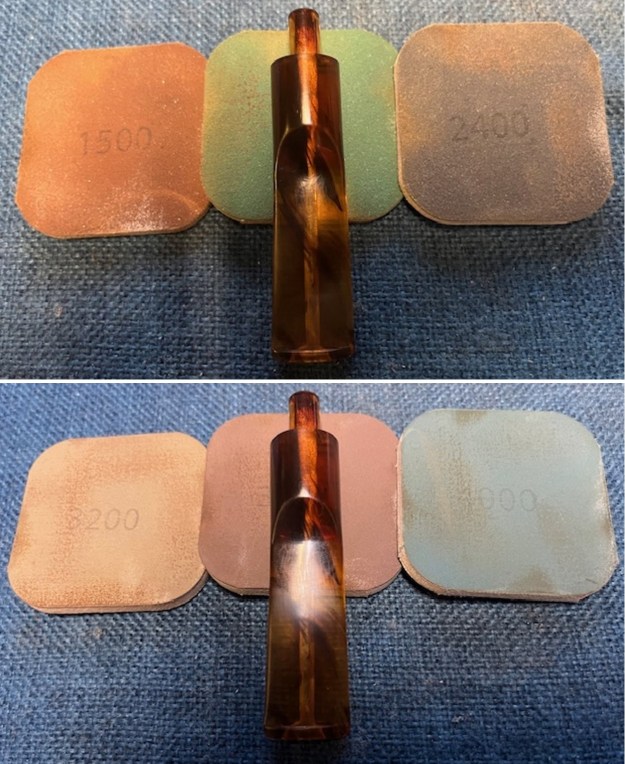
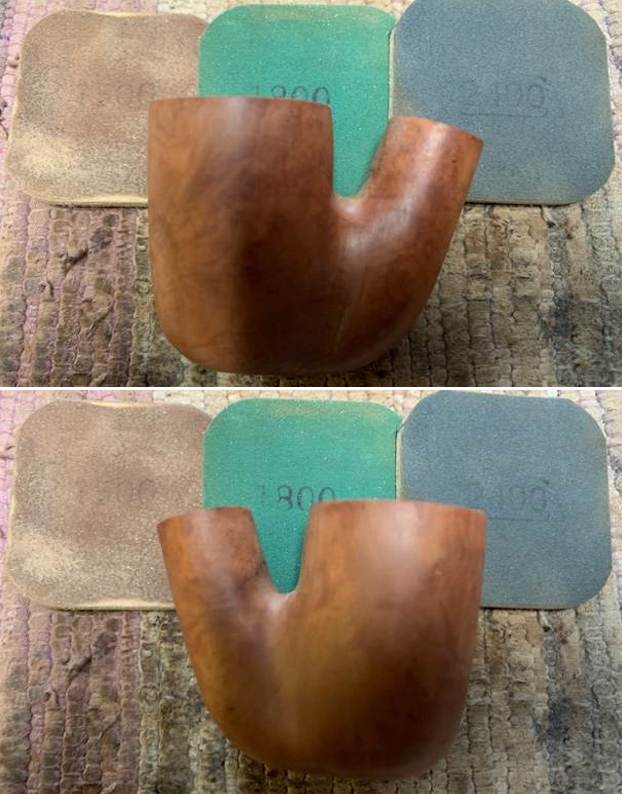
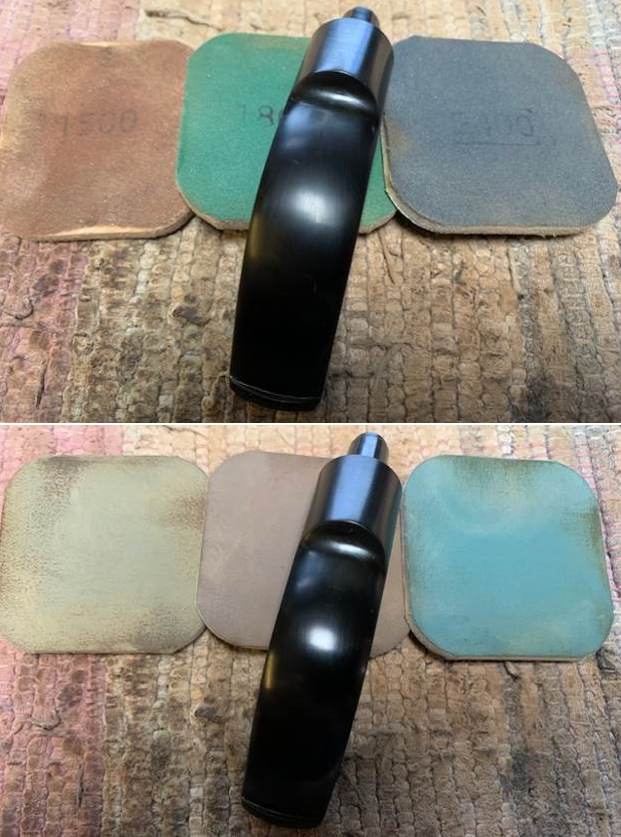
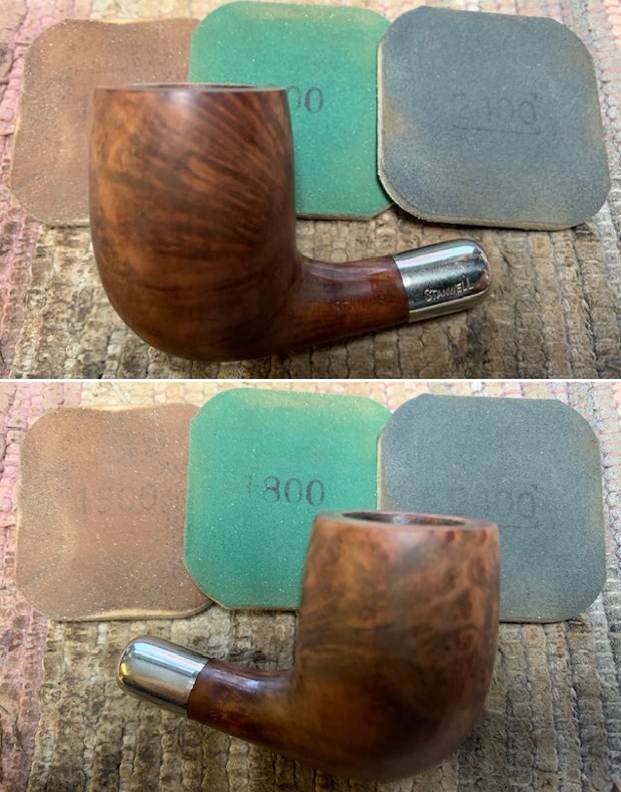
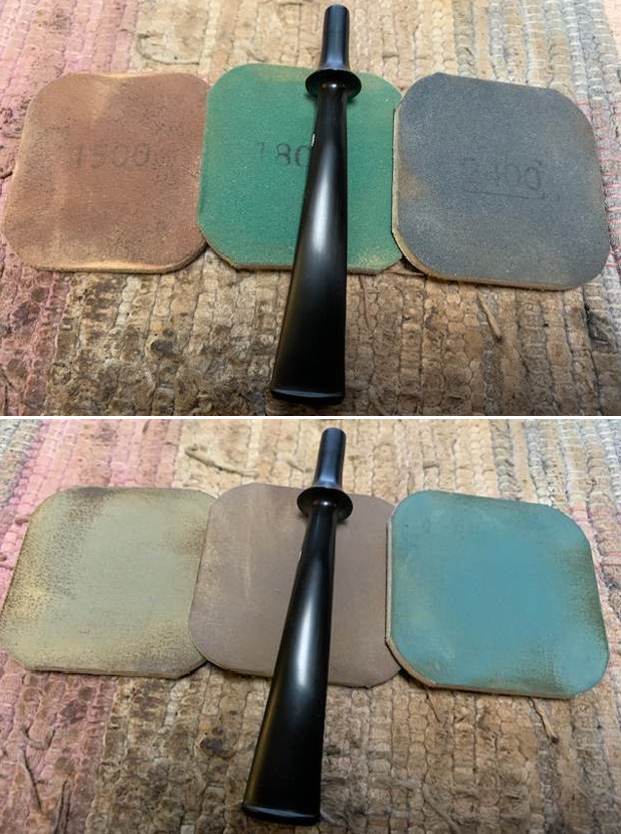
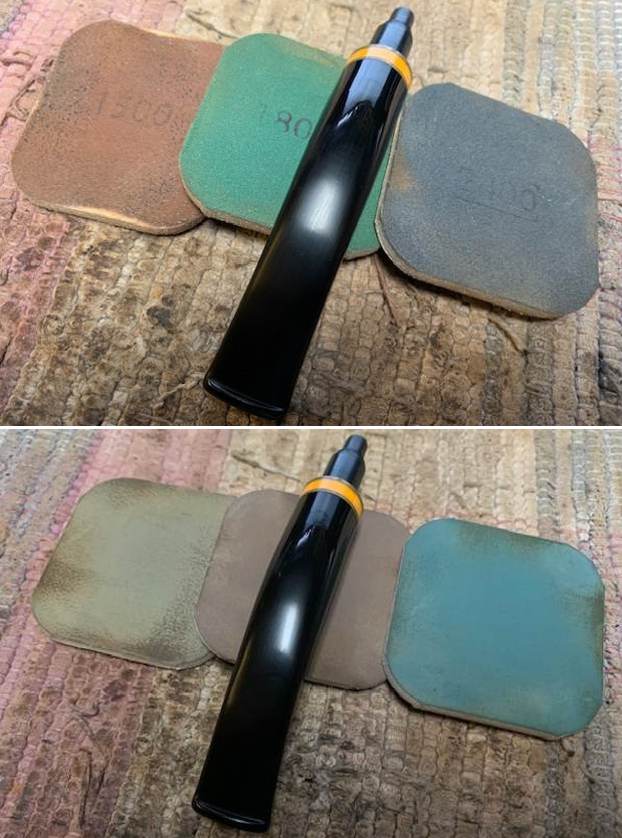
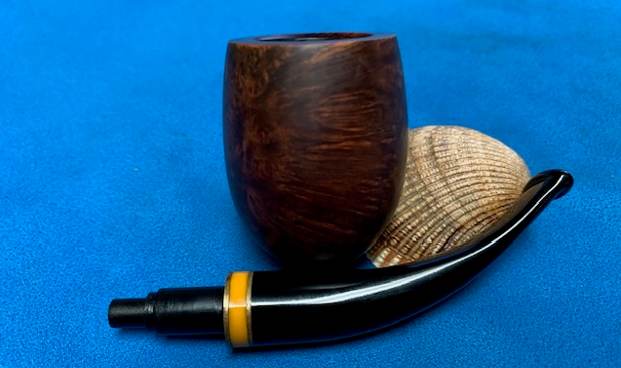
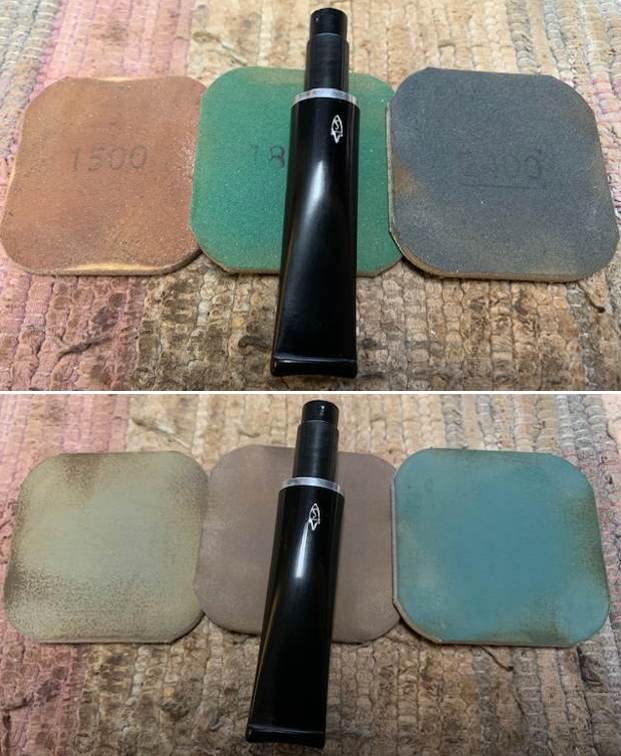
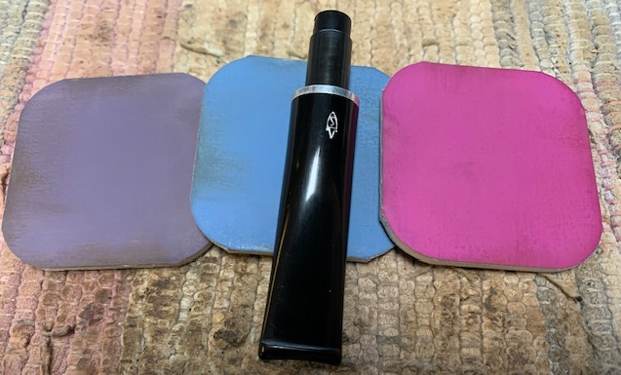
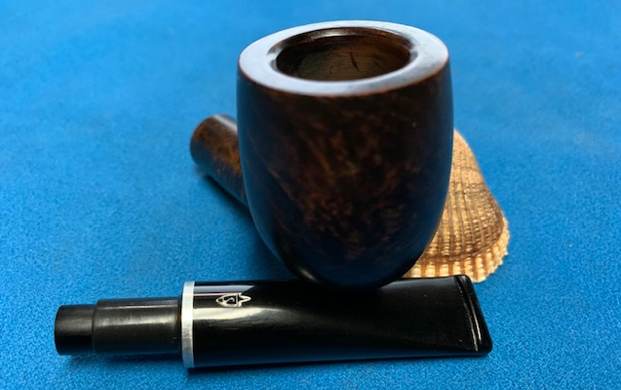
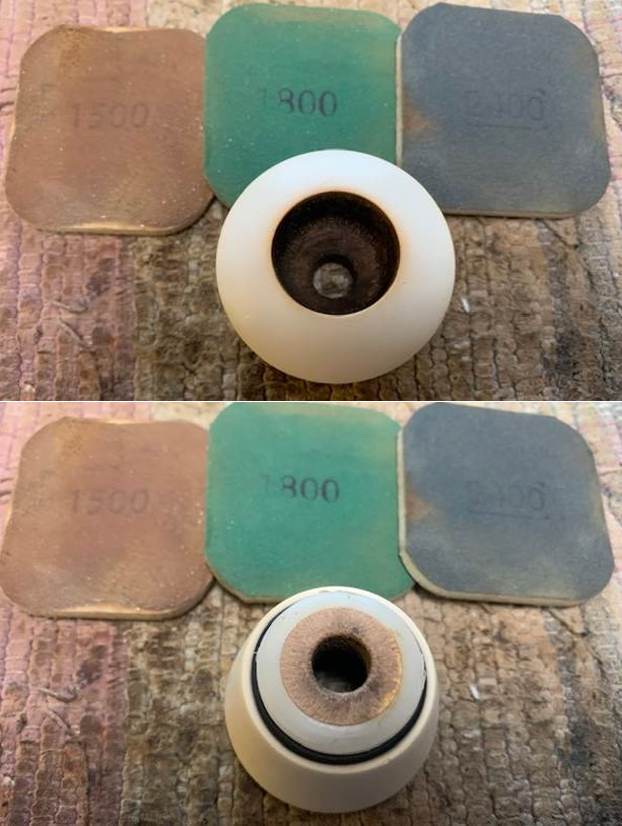
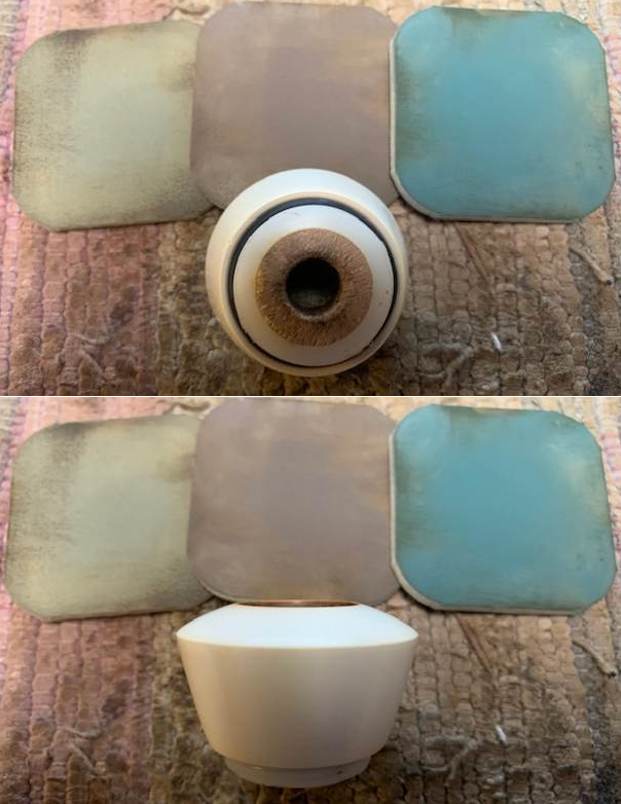
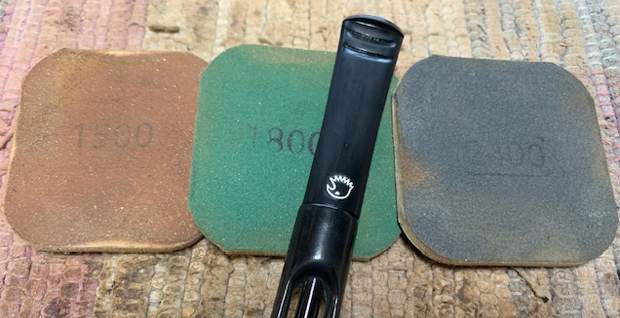
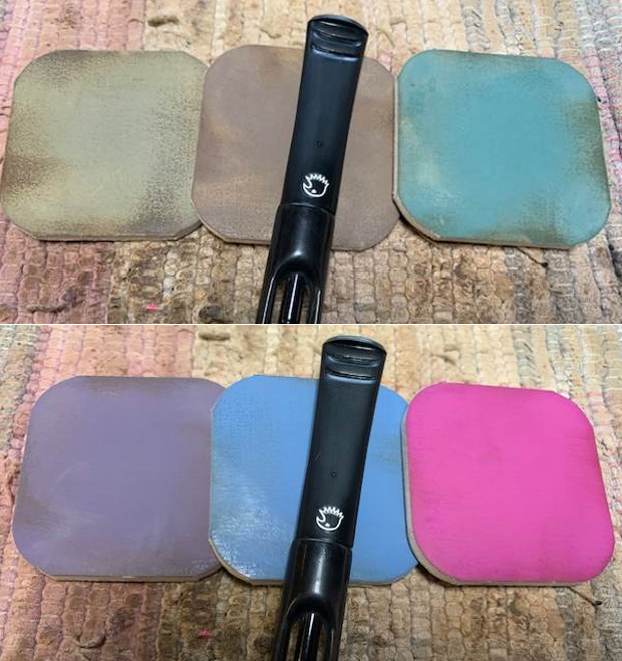
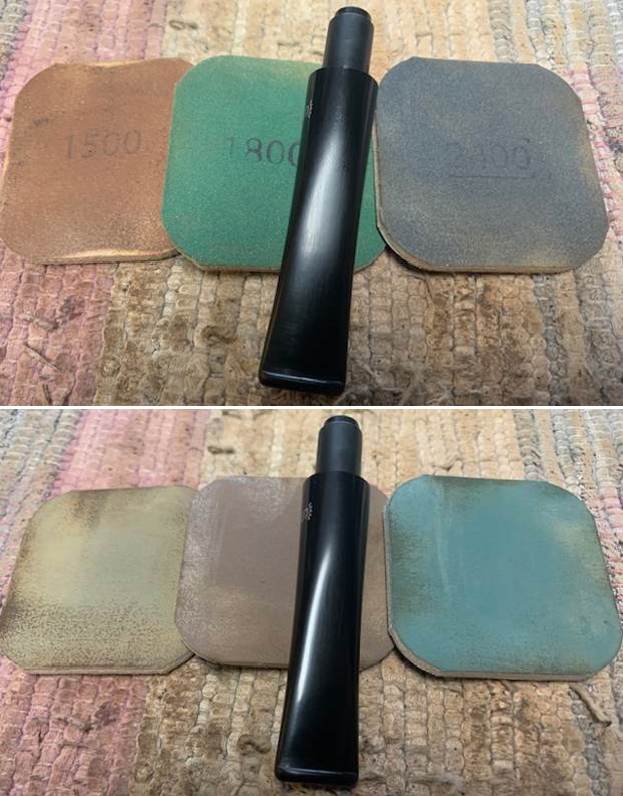
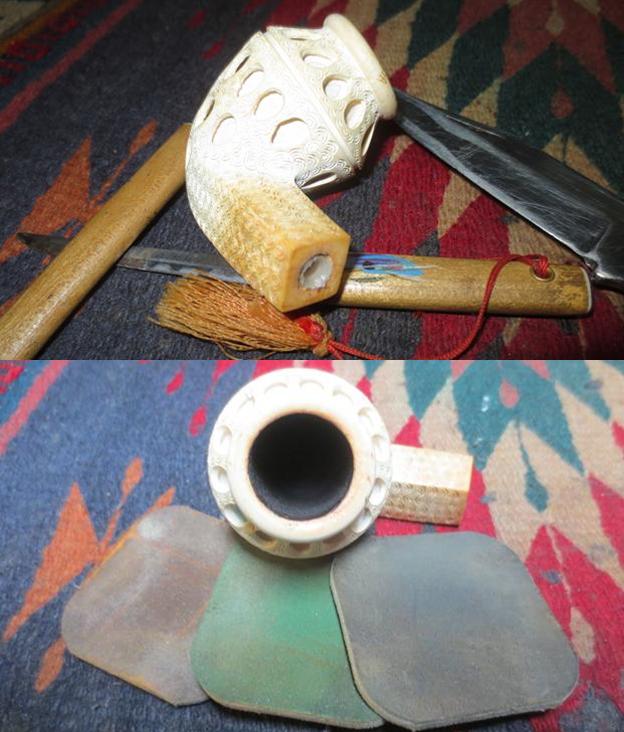
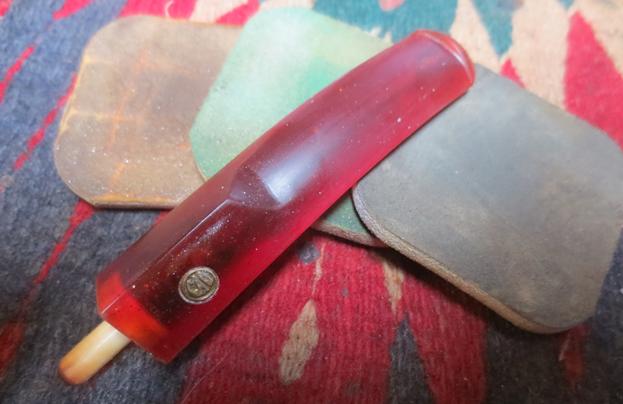
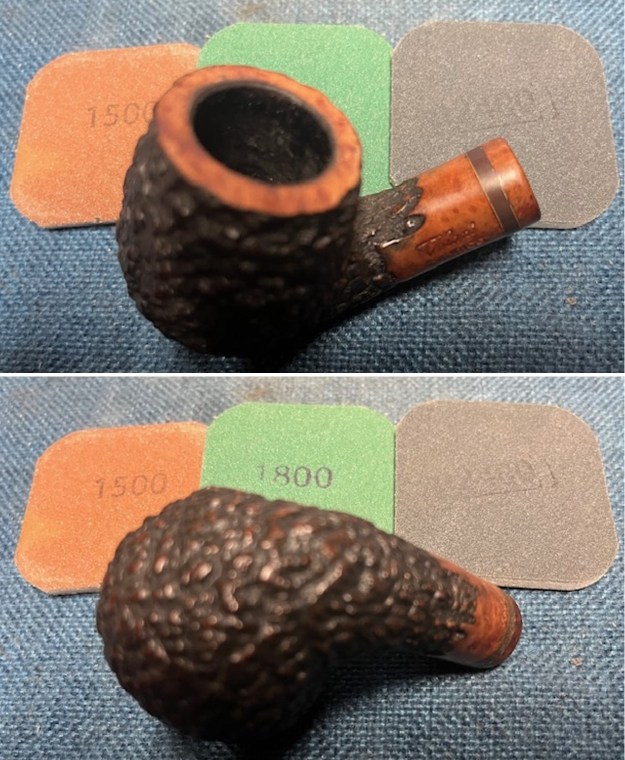
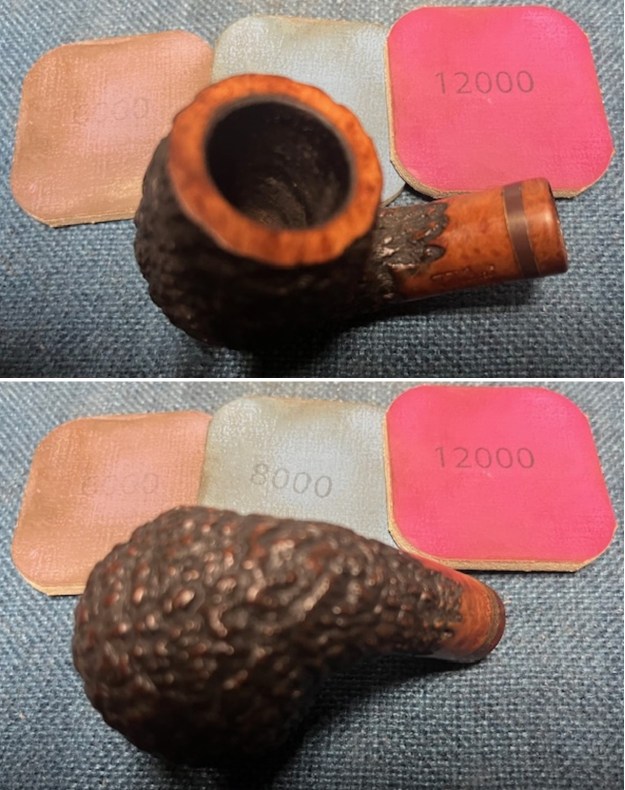
I finished working on the stem by sanding it with 32-3500 grit 2×2 inch sanding pads to smooth out the repair and to remove the tooth chatter. The pipe stem was looking very good. 
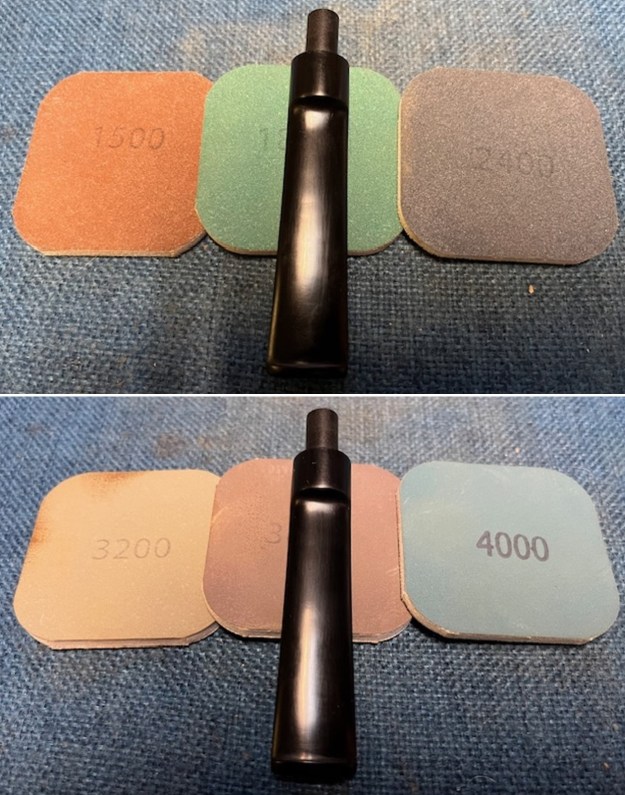
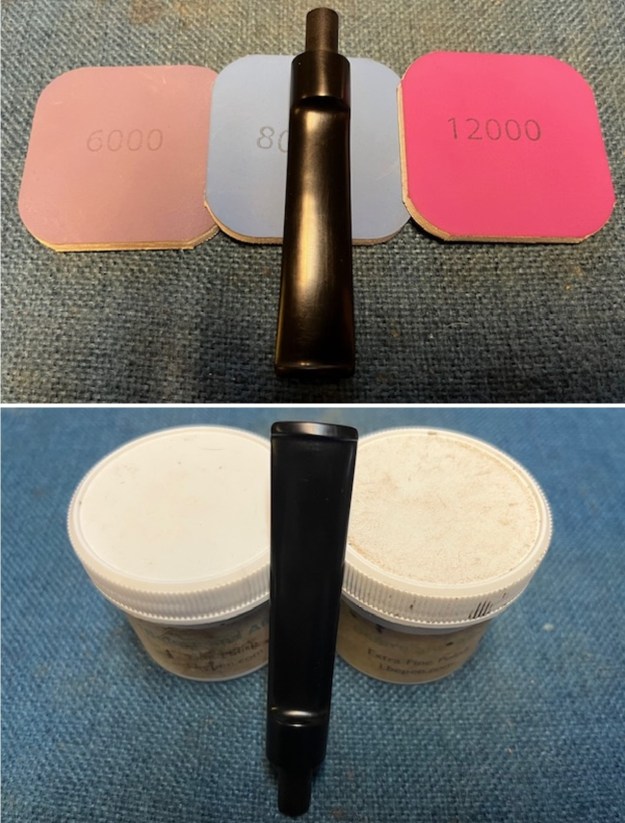
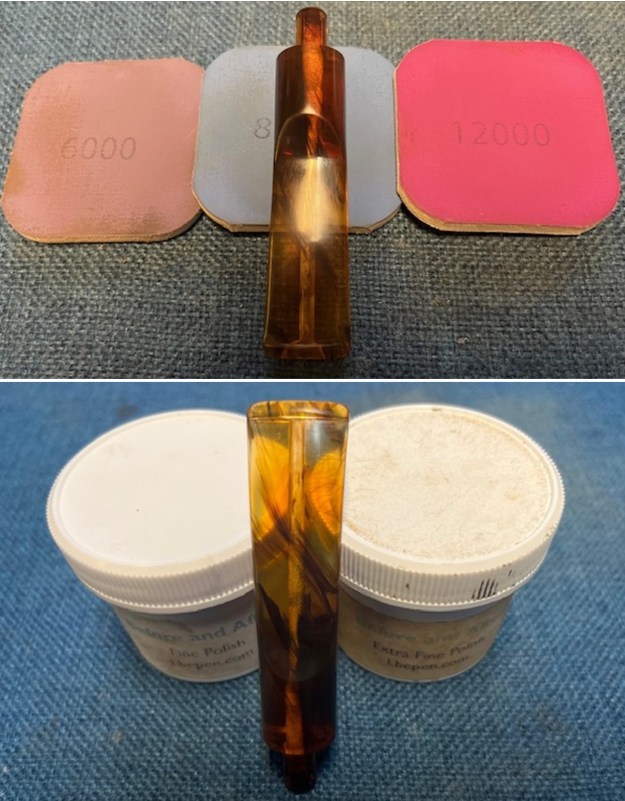
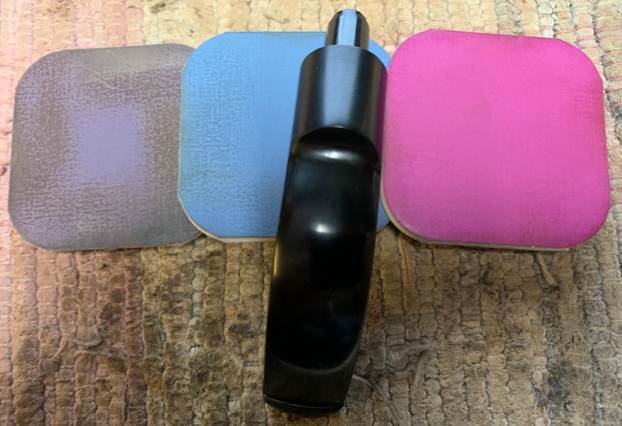
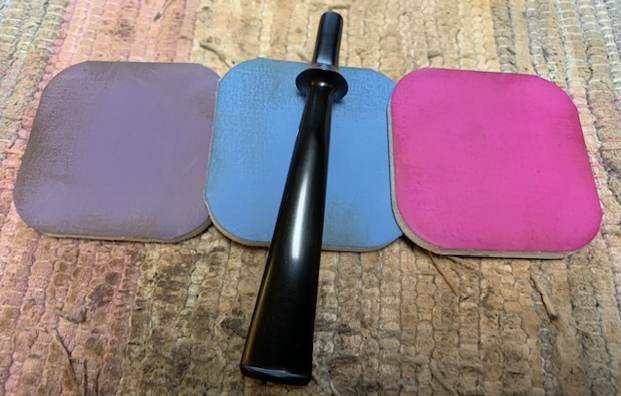
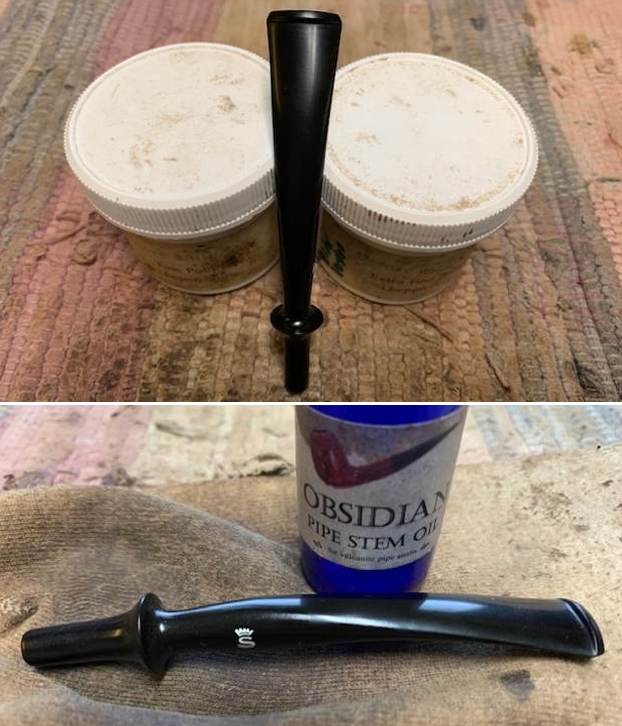
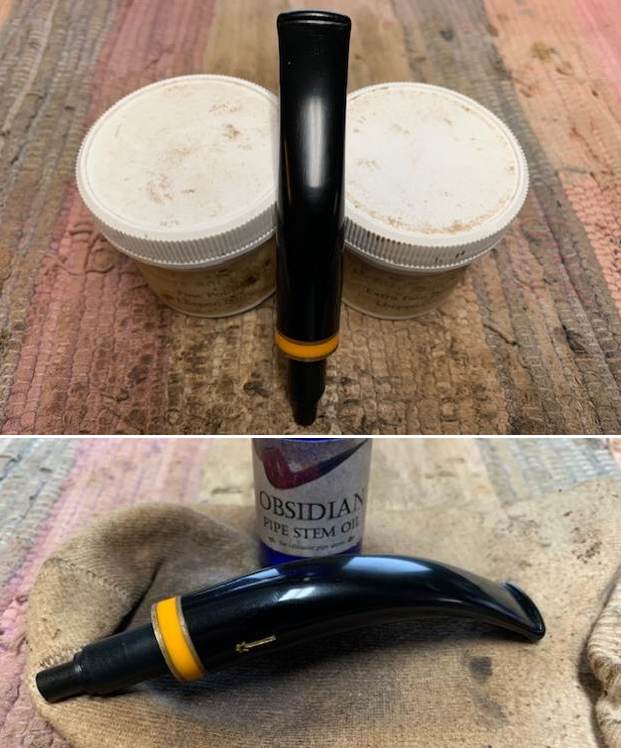
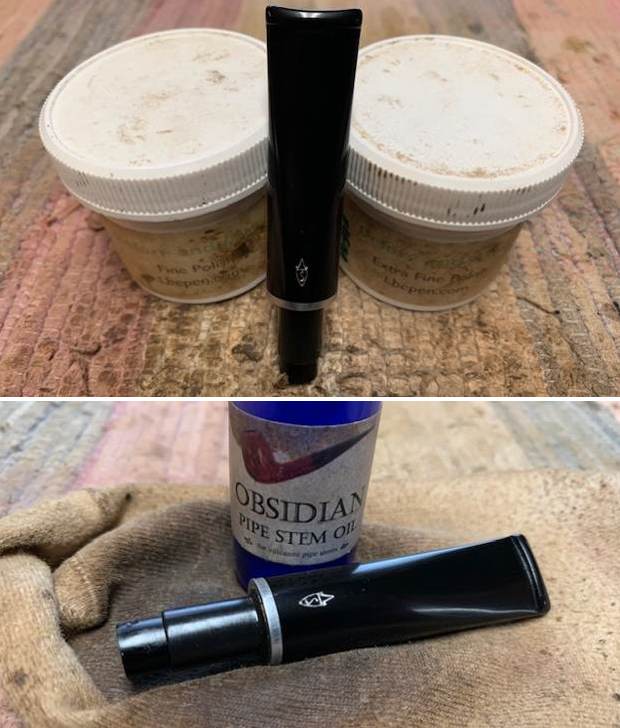
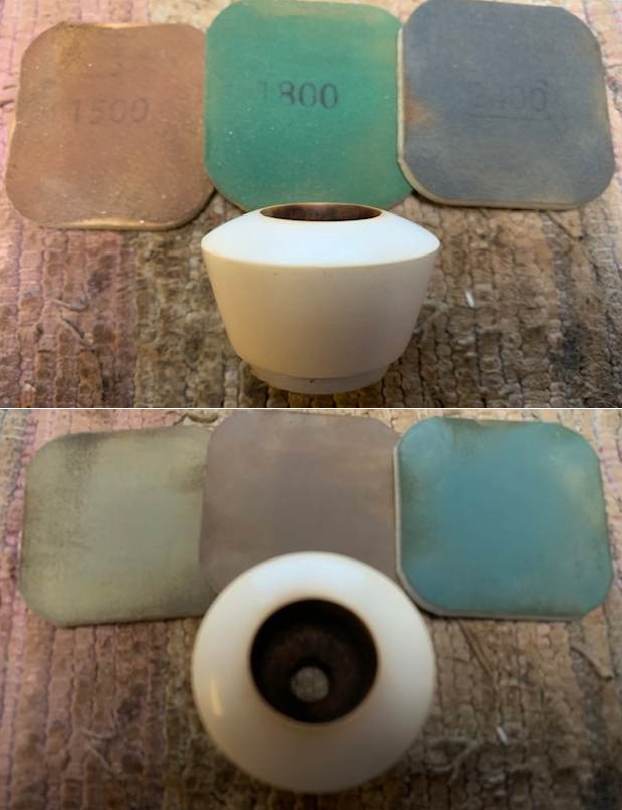
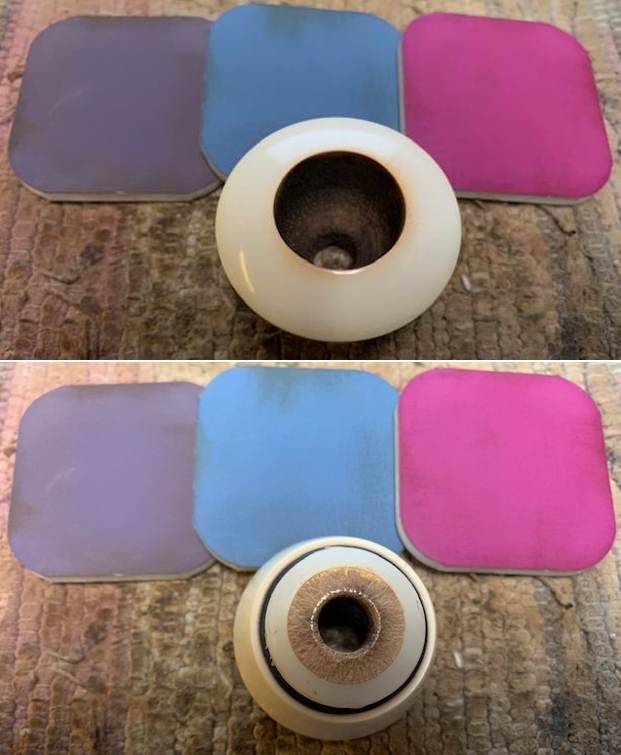
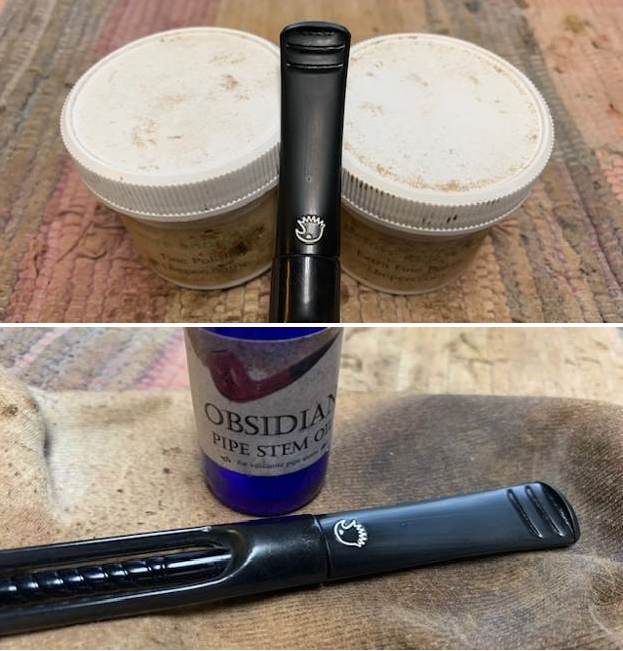
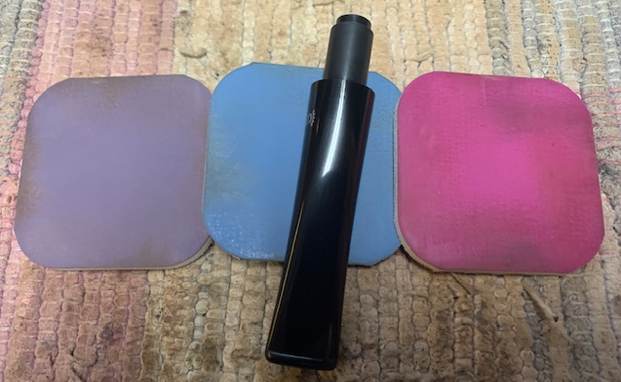
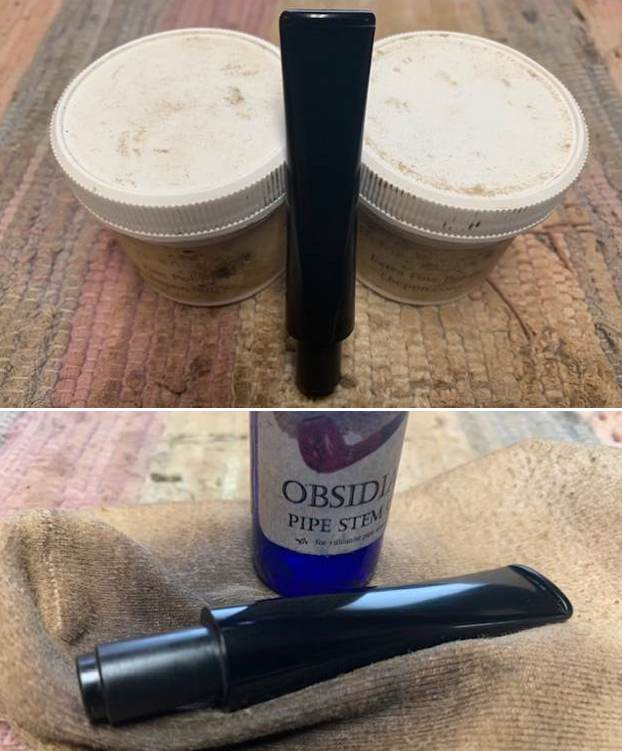
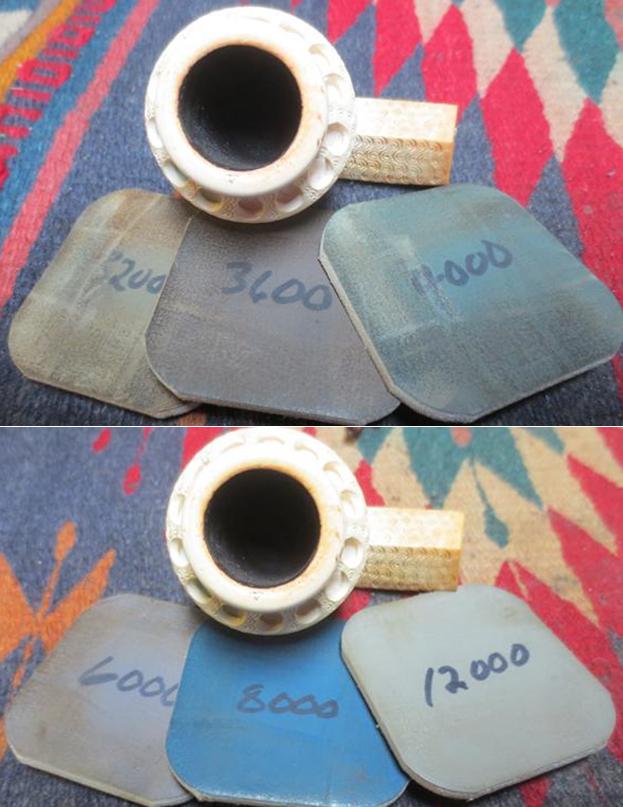
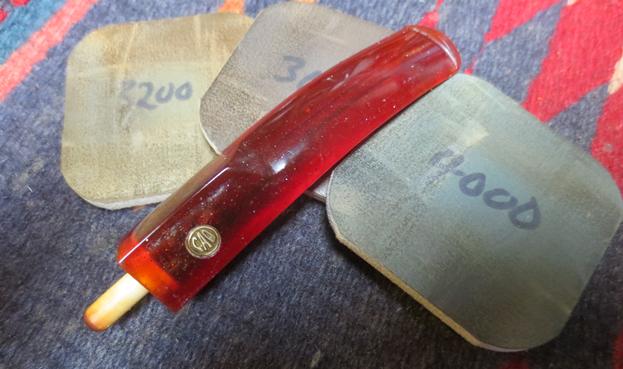
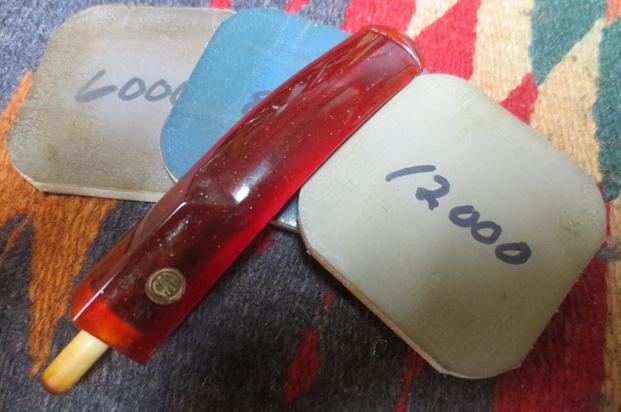
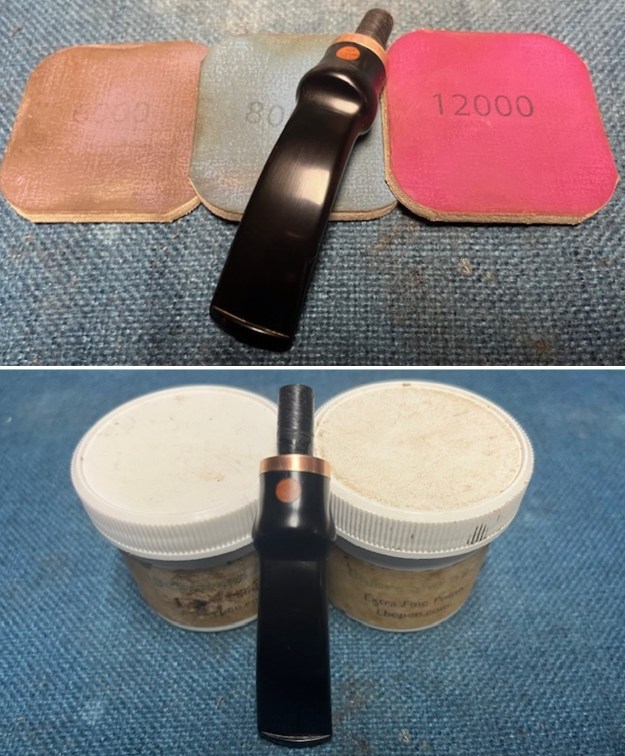
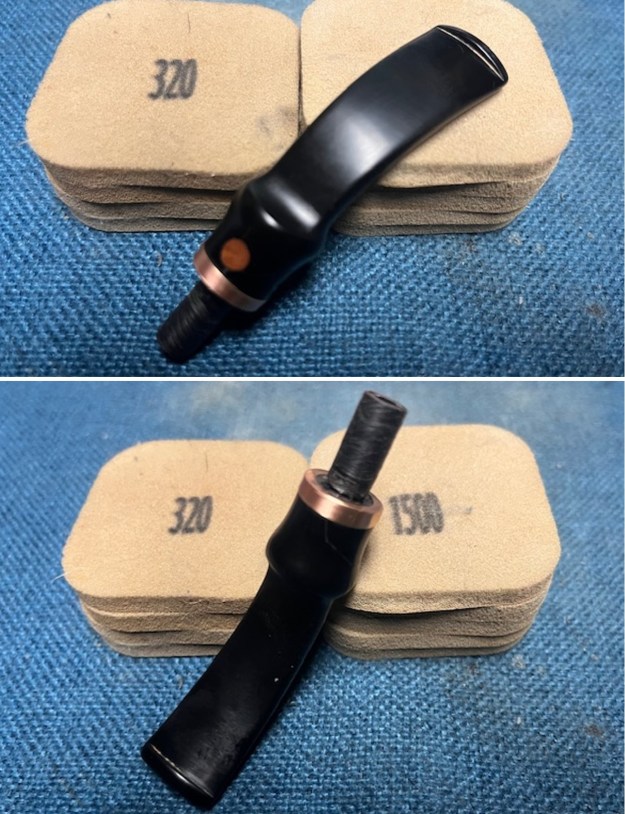
I polished the stem with micromesh sanding pads – wet sanding with 1500-12000 grit pads and wiped down the stem with some Obsidian Oil after each sanding pad. I finished the polishing with some Before & After Stem Polish – both fine and extra fine. I gave it a final coat of Obsidian Oil and set the stem aside. 
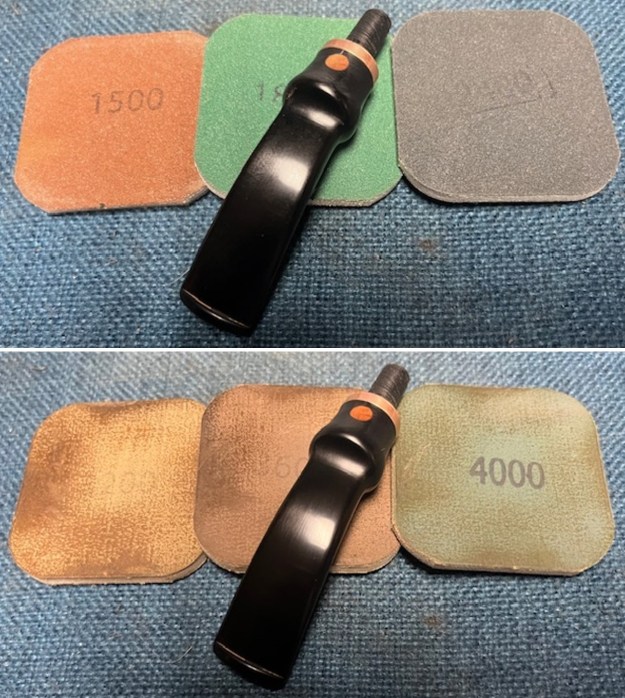
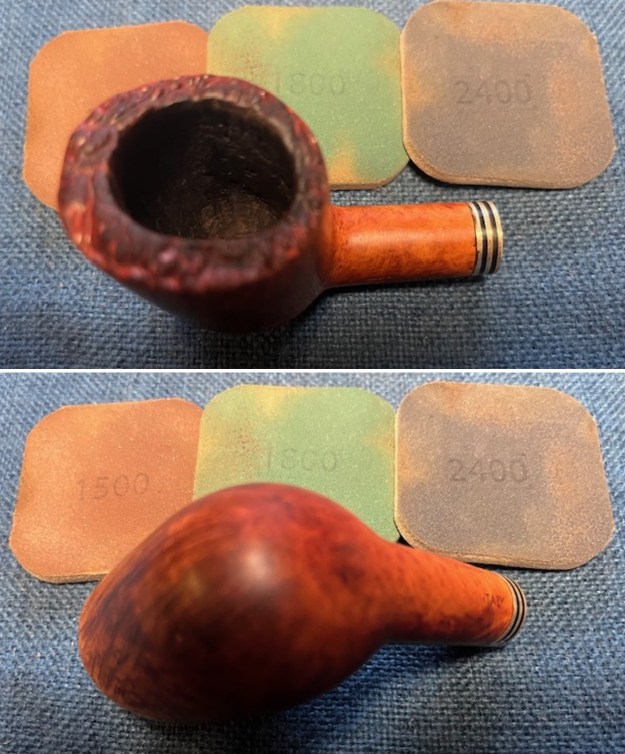
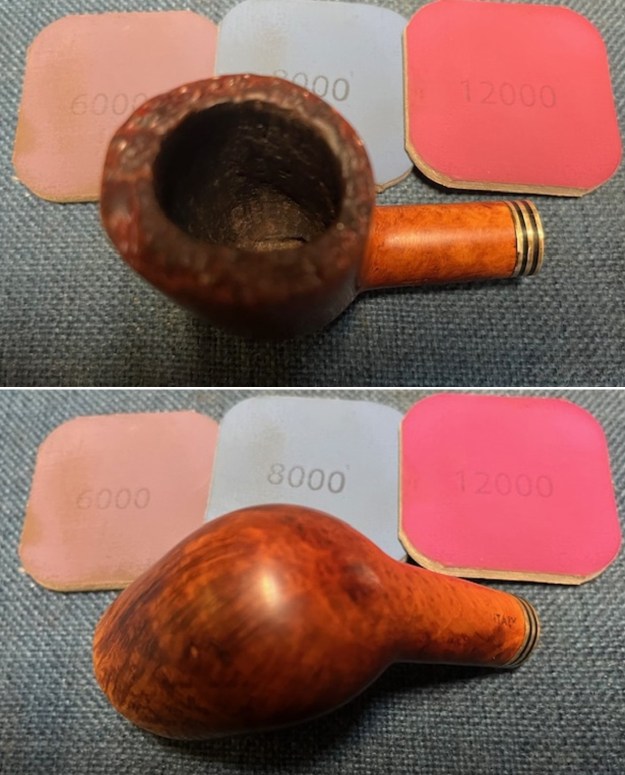
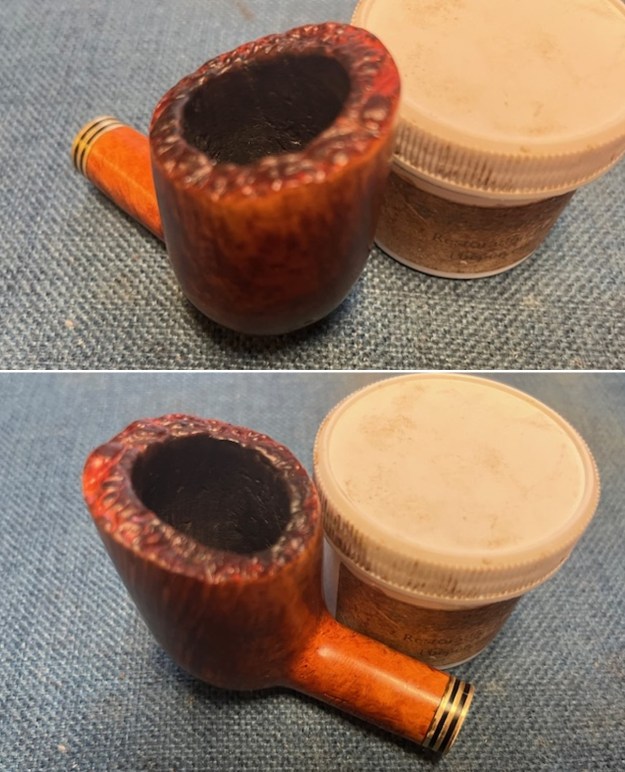
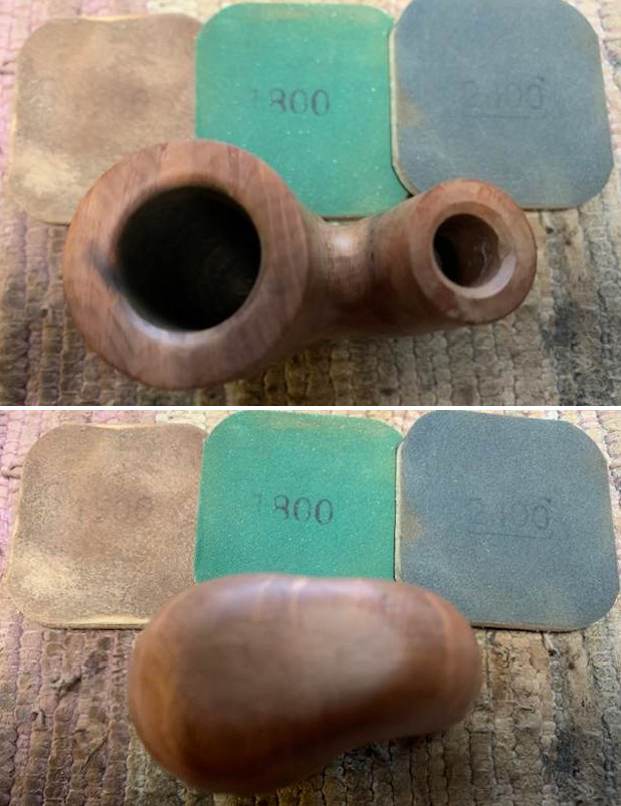
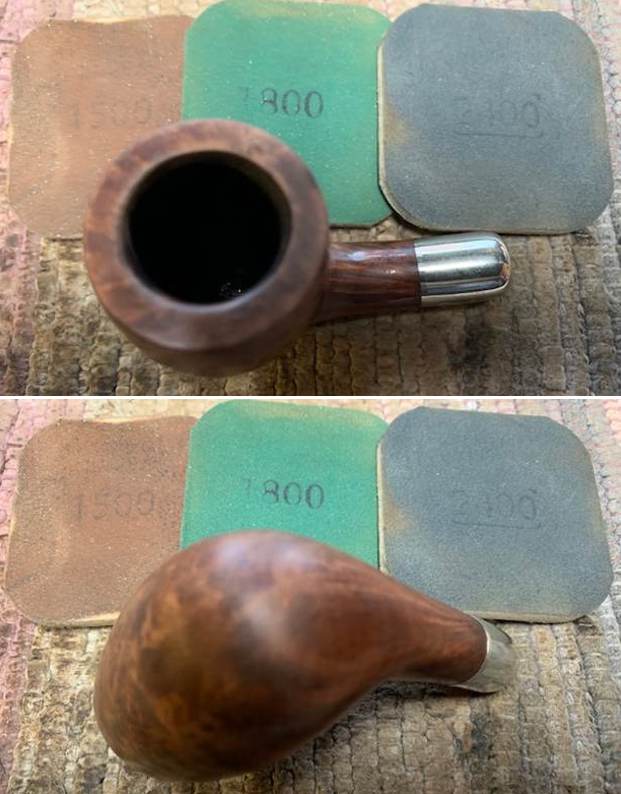
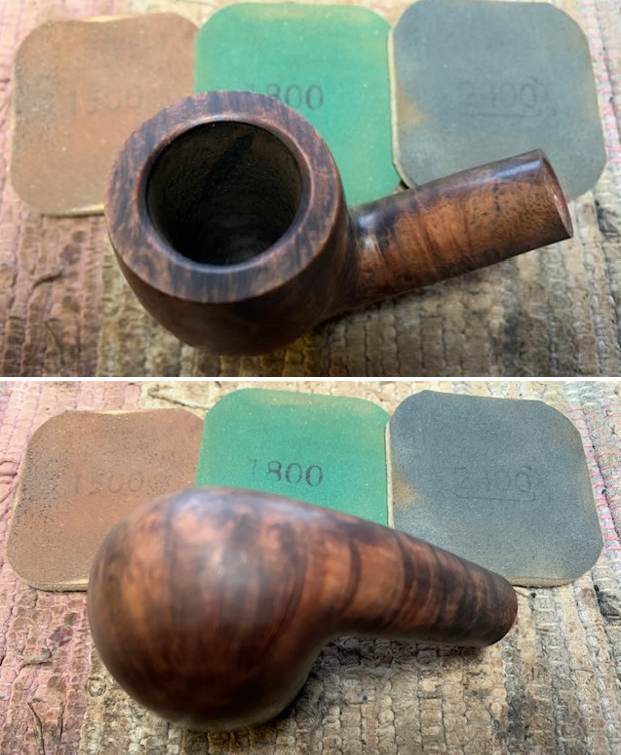
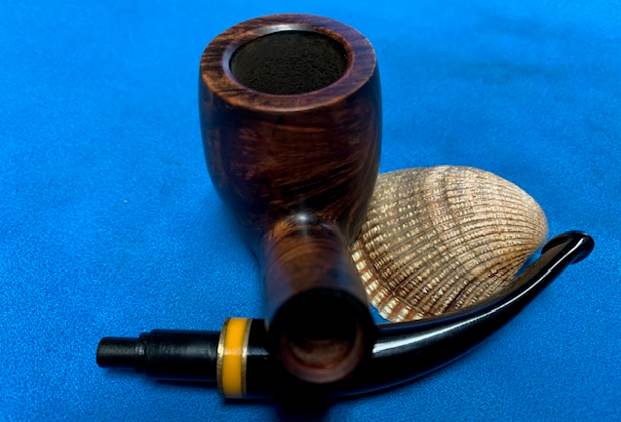
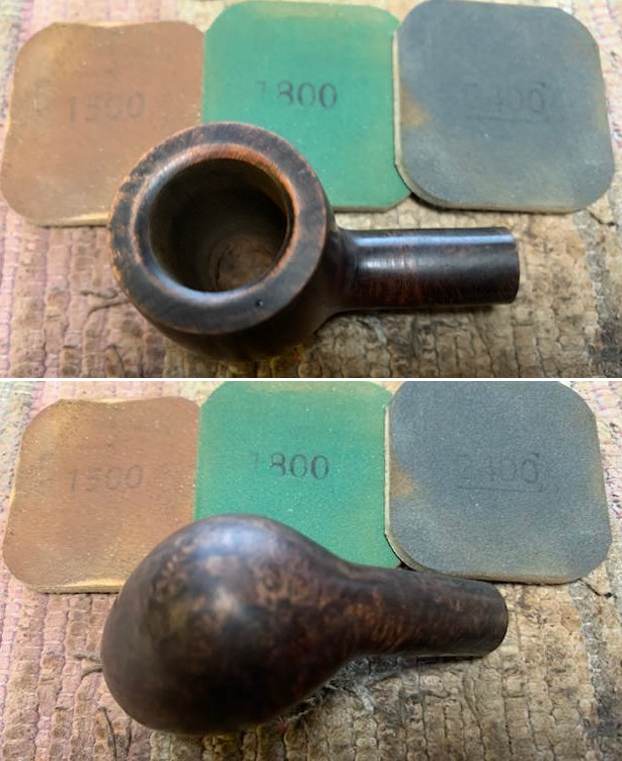
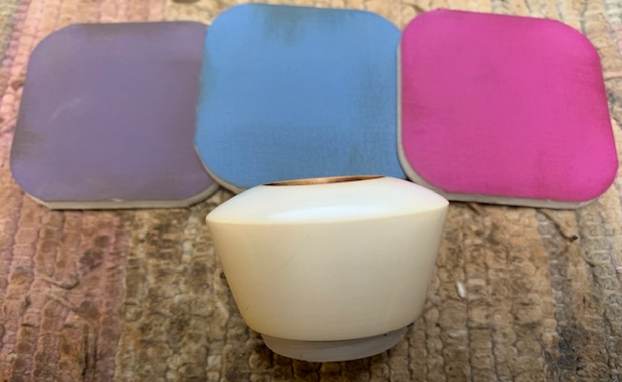
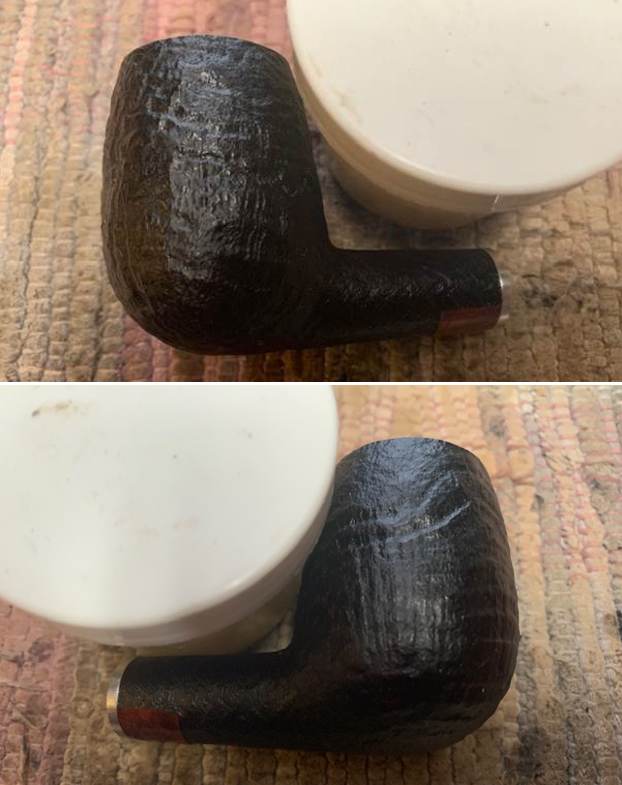
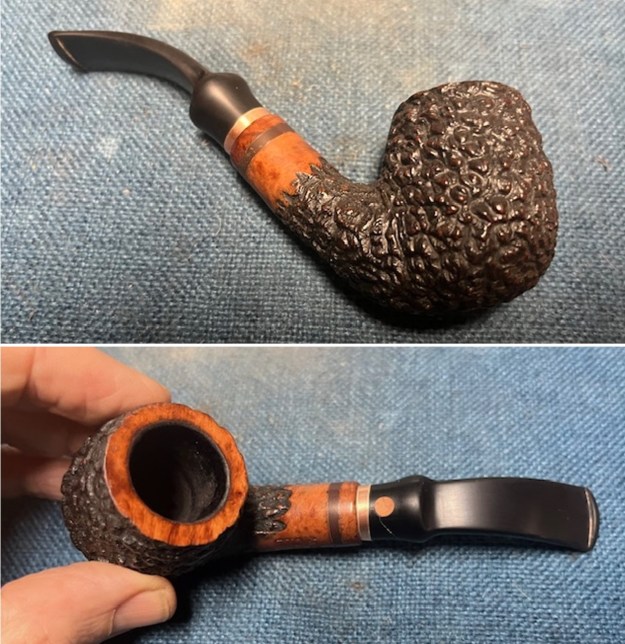
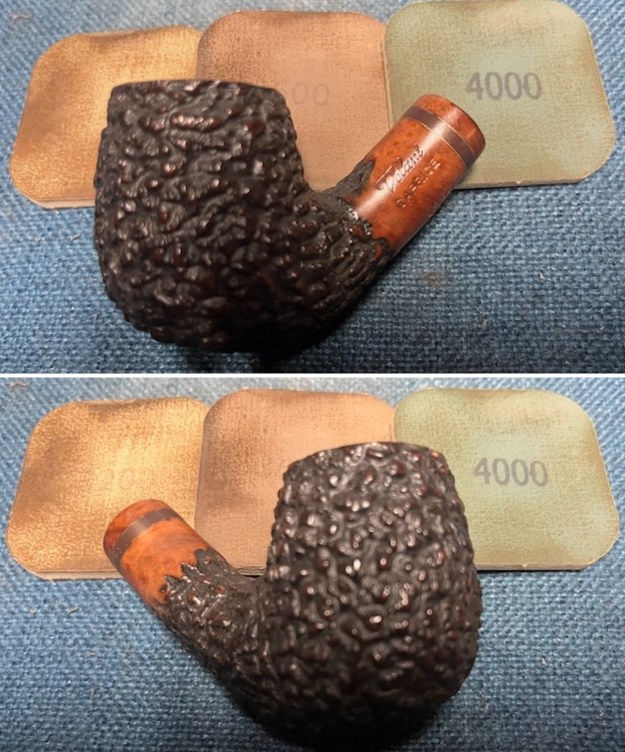
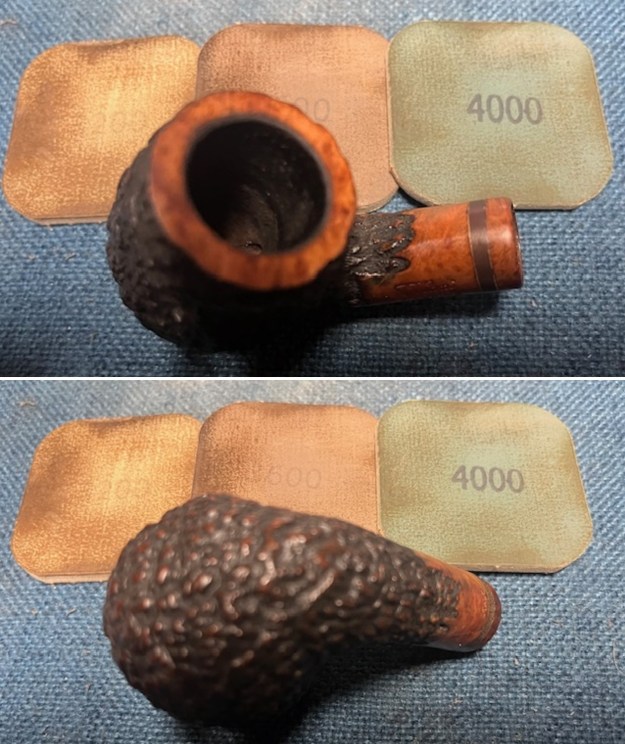
I polished the smooth rim top and portions of the shank with 1500-12000 grit micromesh sanding pads. I wiped it down with a damp cloth after each pad to remove the debris. I worked over the inner edge of the rim at the same time. The smooth portions began to look very good. 
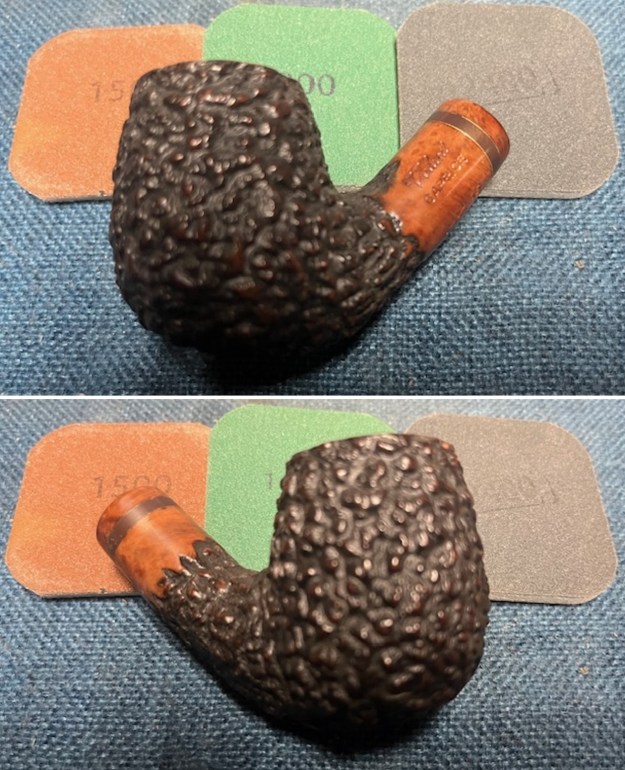
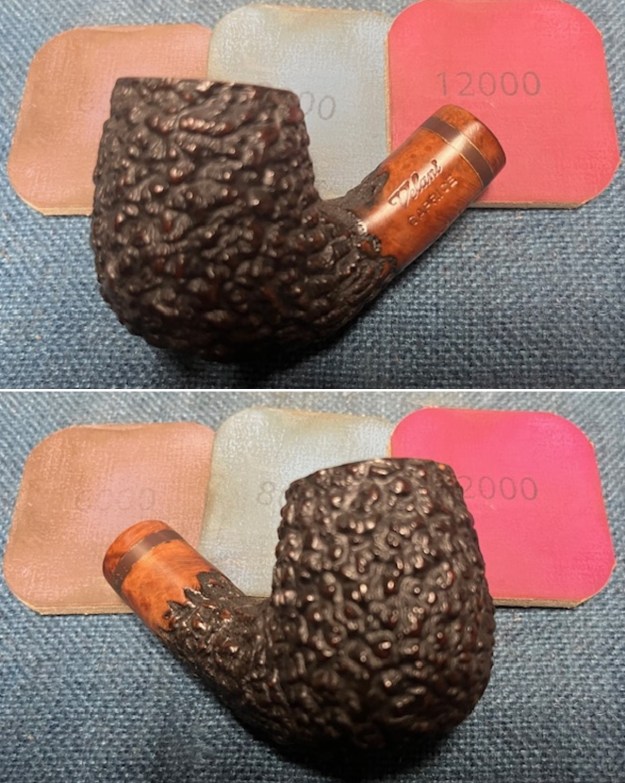
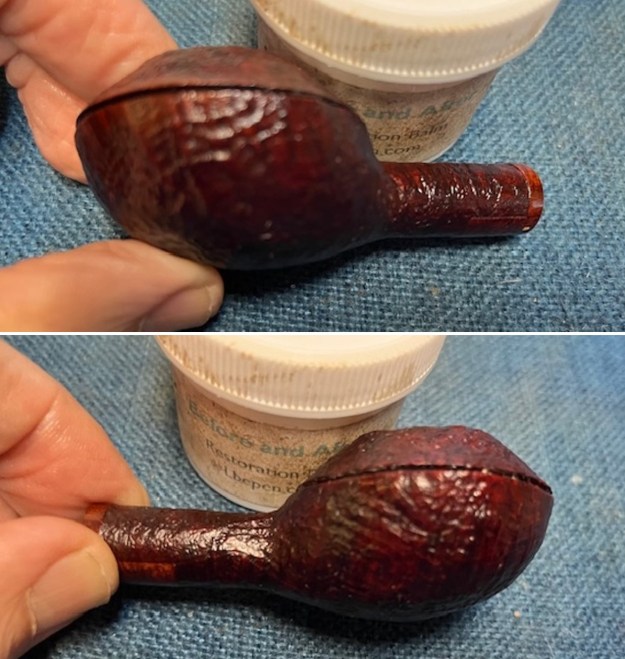
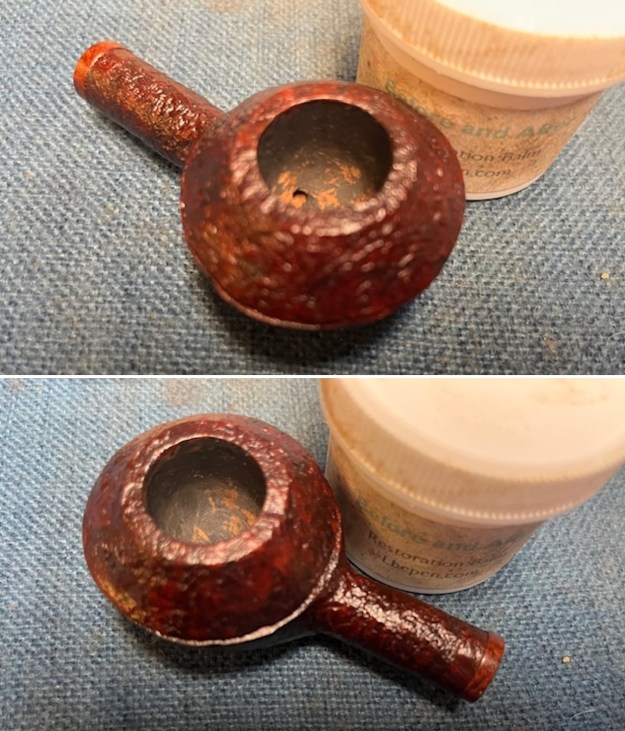
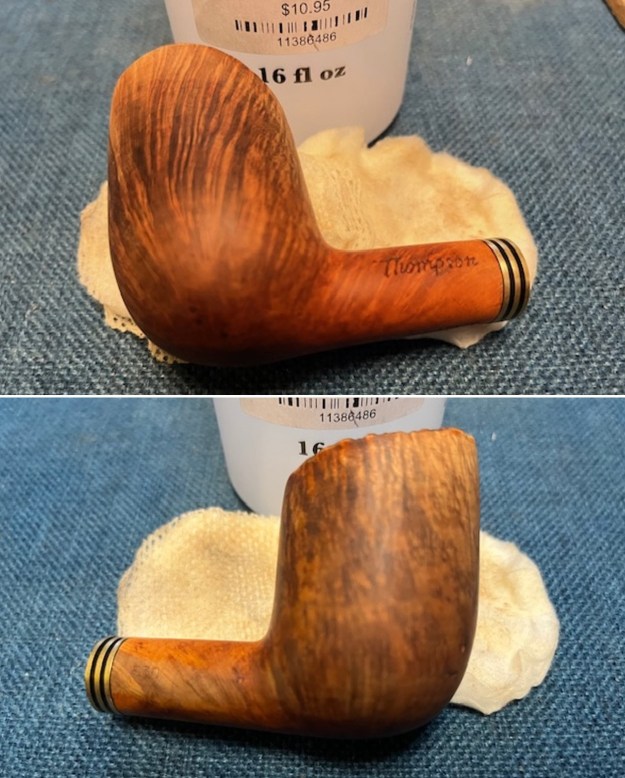
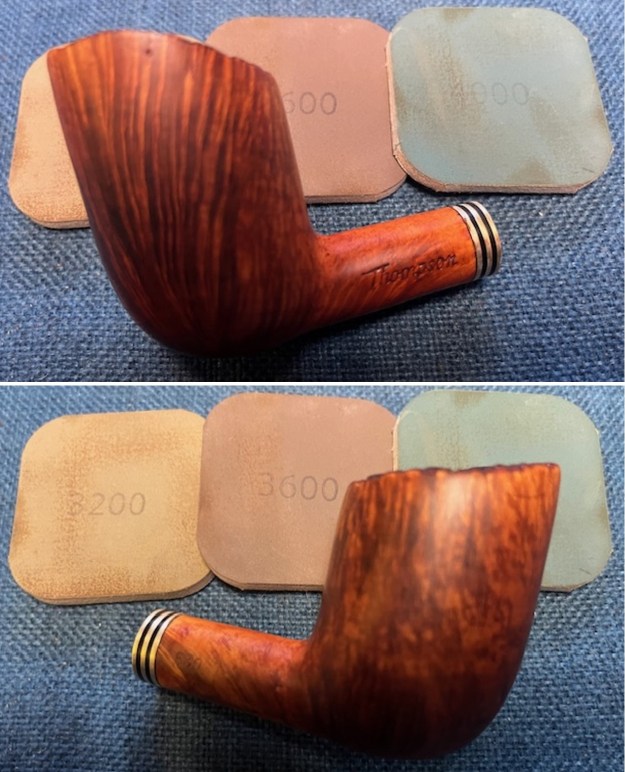
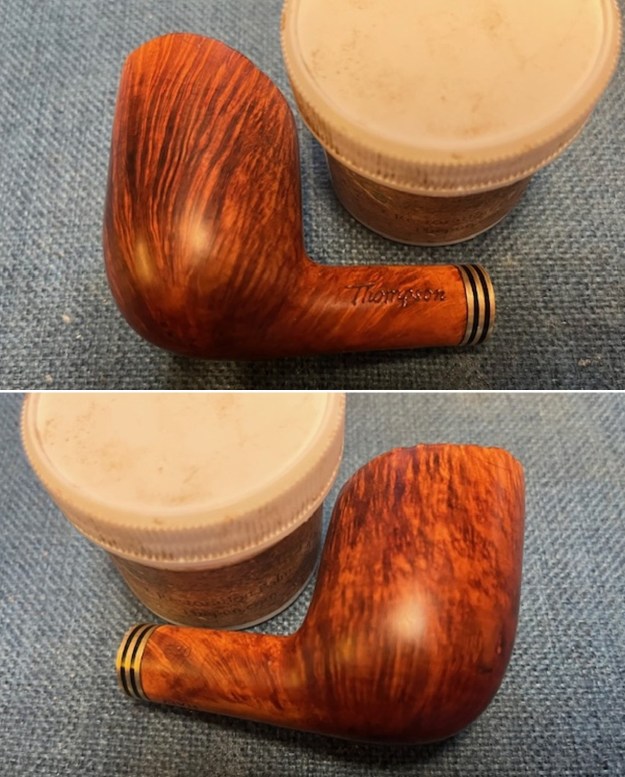
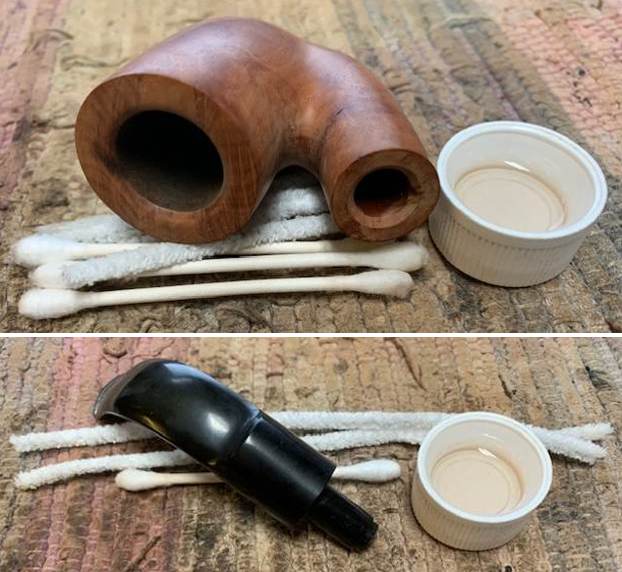
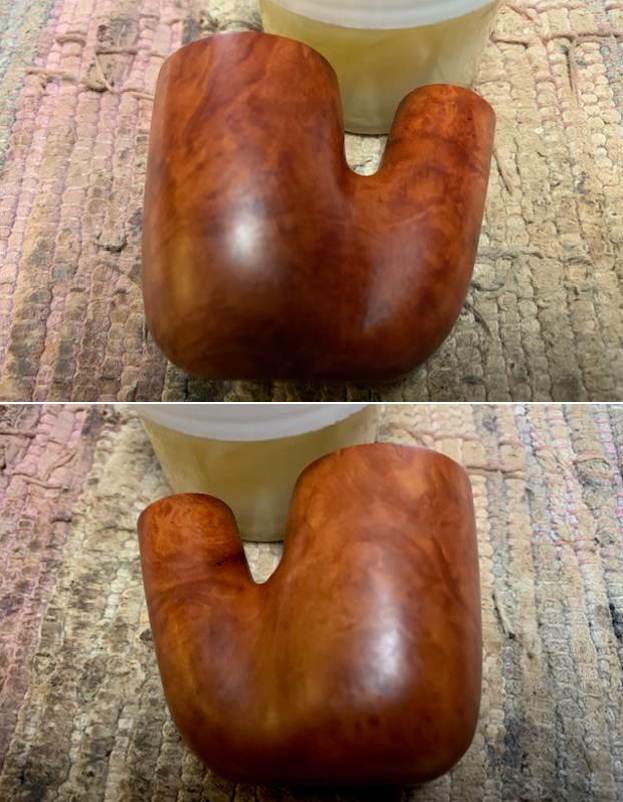
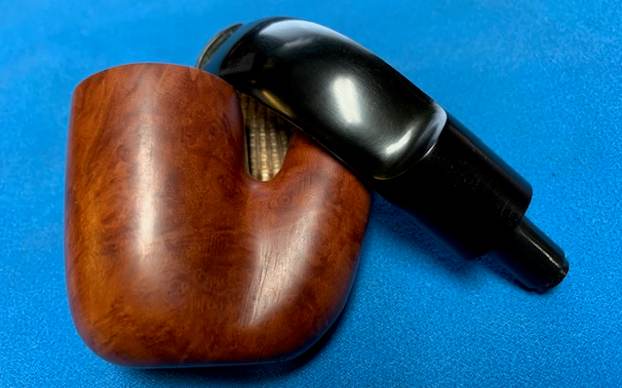
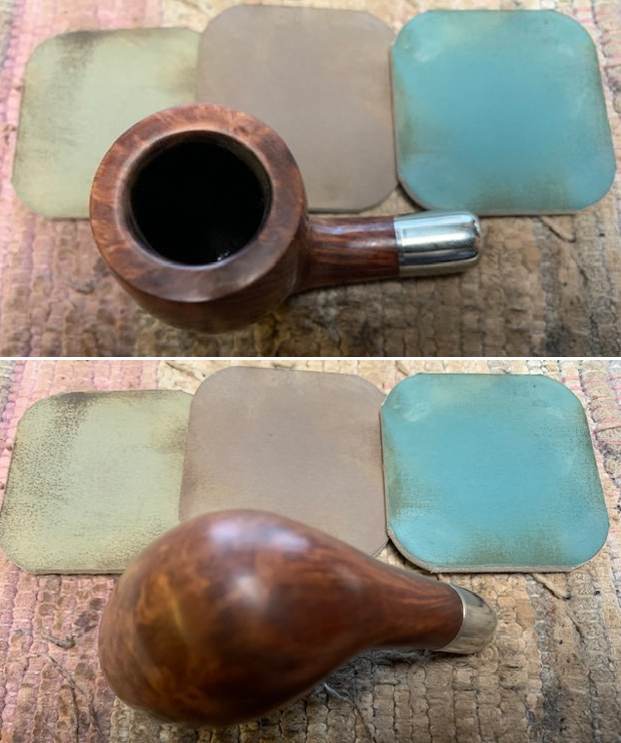
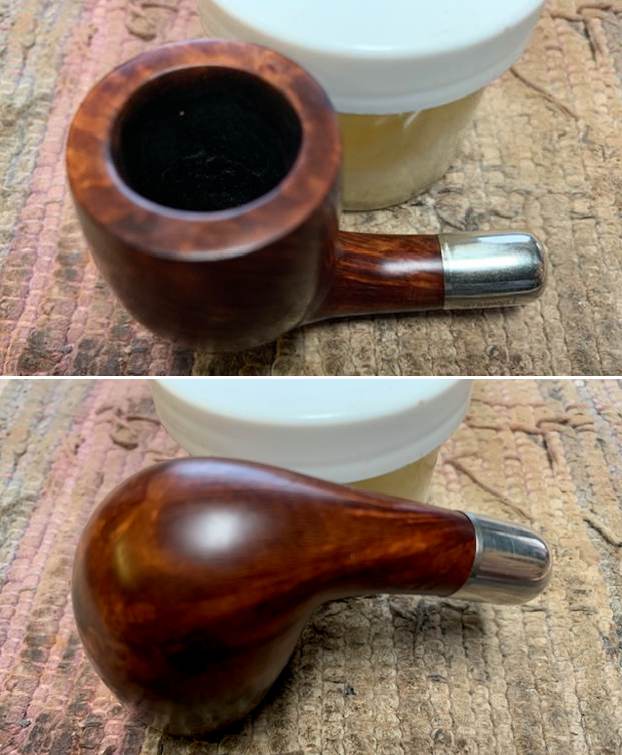
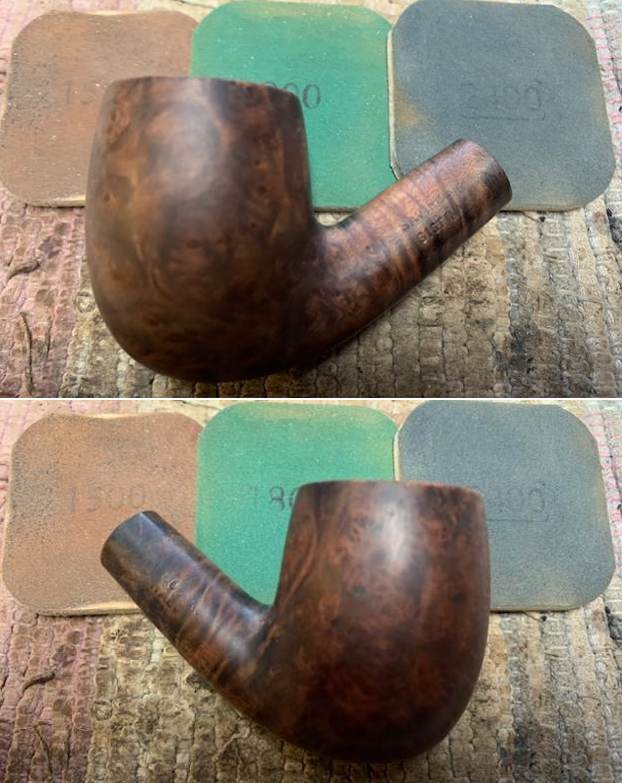
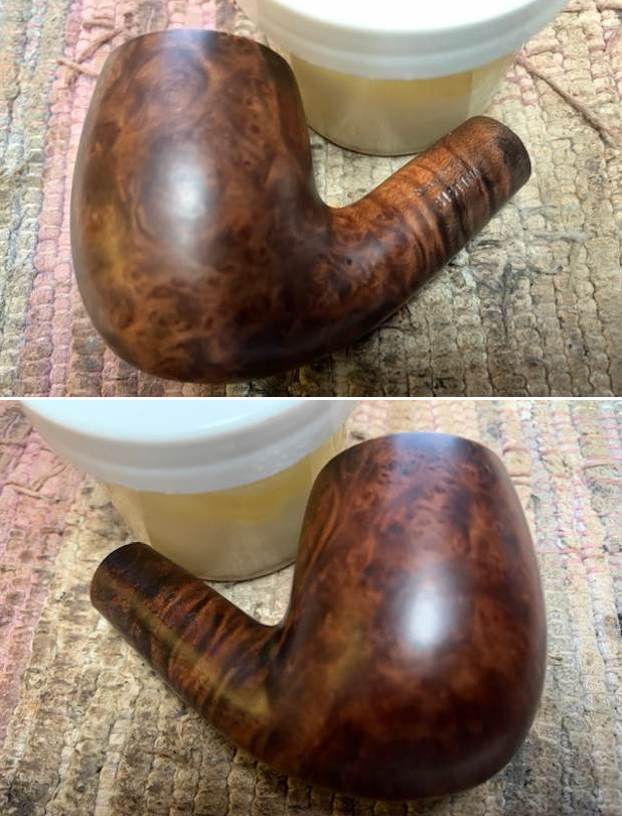
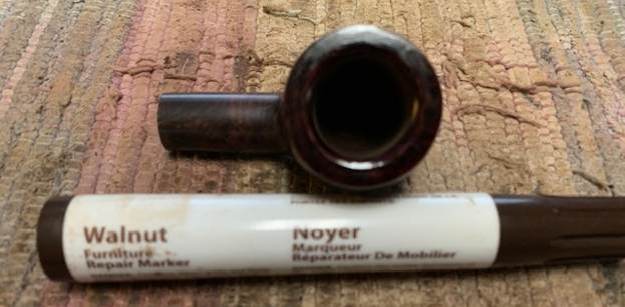
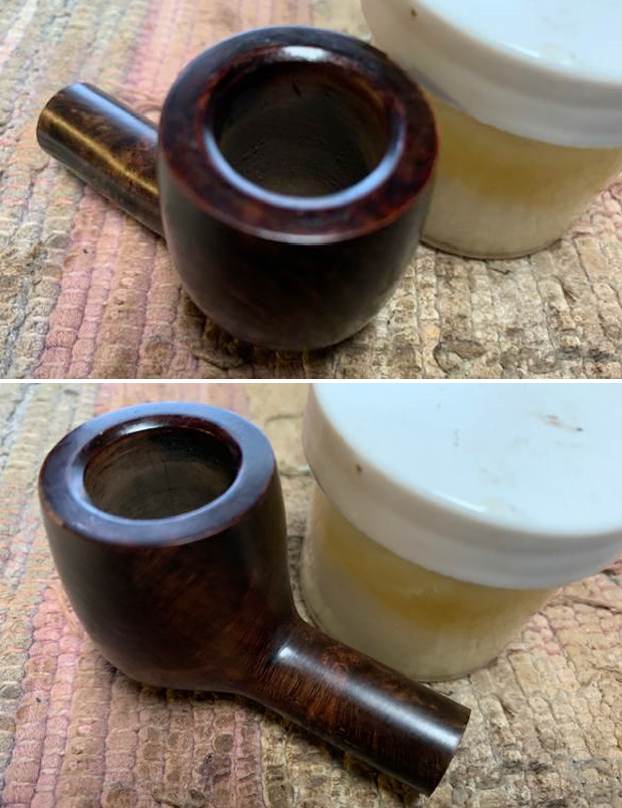
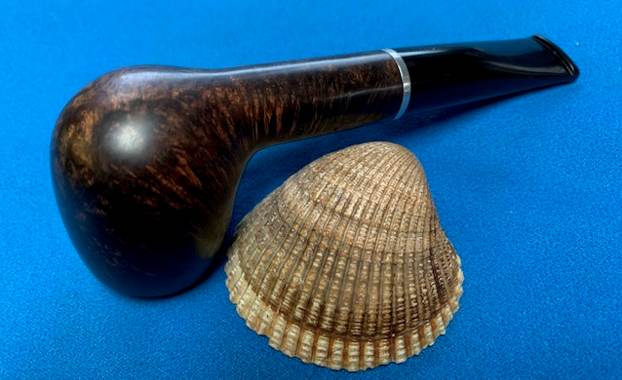
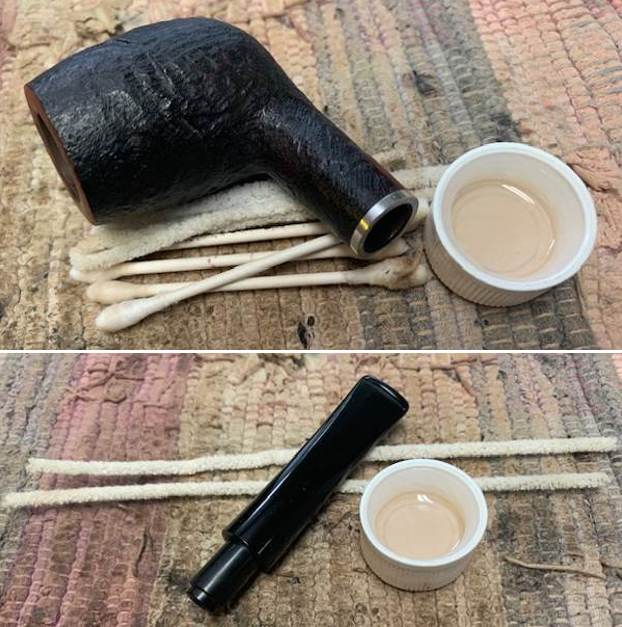
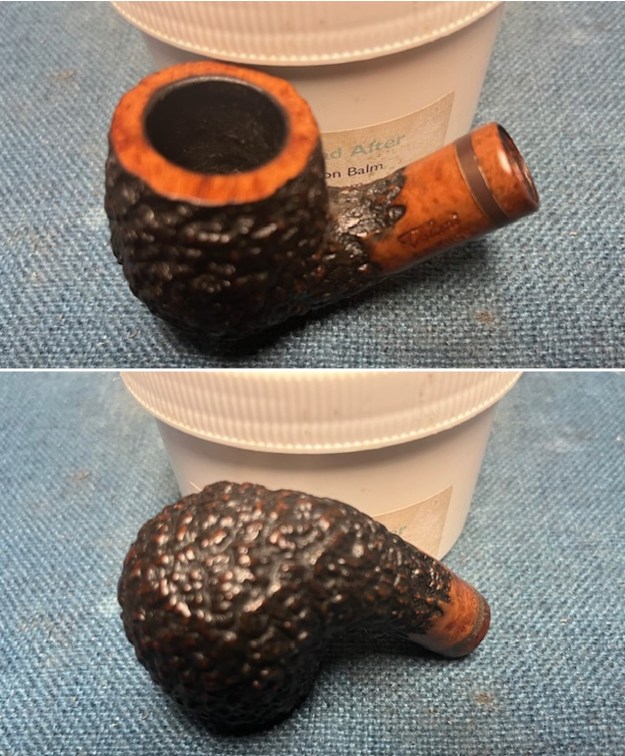
I rubbed the bowl and shank down with Before & After Restoration Balm. I worked it into the surface of the bowl sides and shank with my fingertips to clean, enliven and protect the briar. I let the balm sit for a little while and then buffed with a cotton cloth to raise the shine. The Balm did its magic and the grain stood out. 
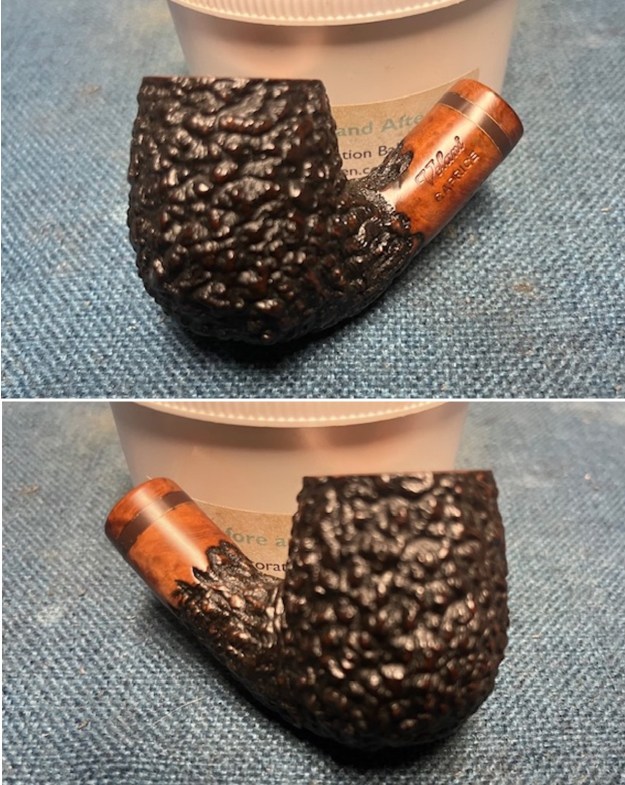
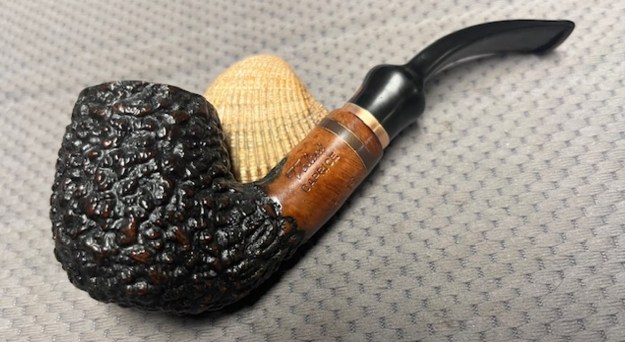
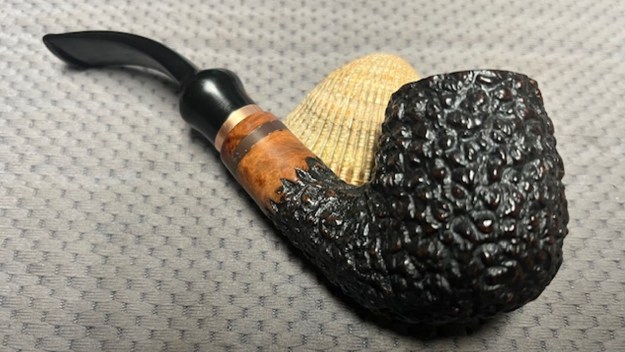
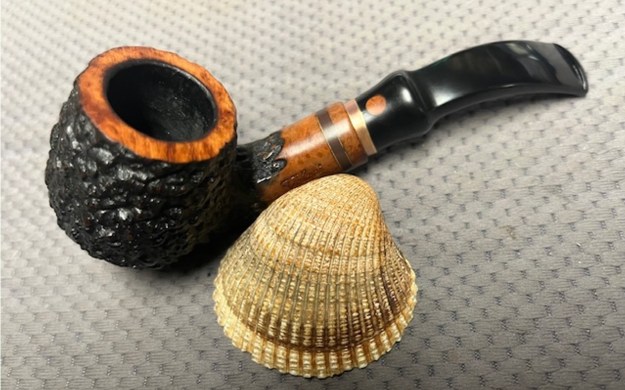
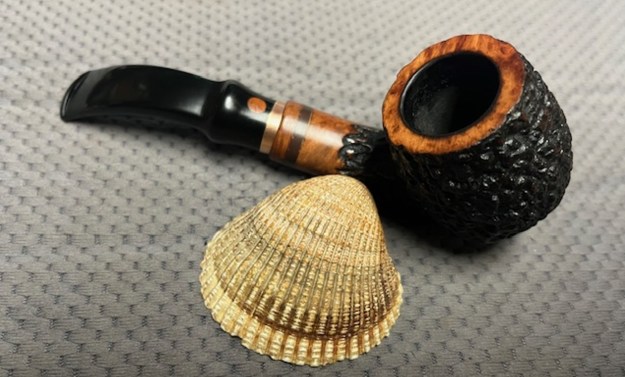
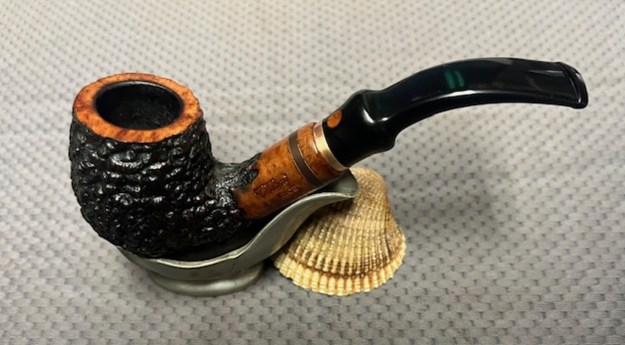
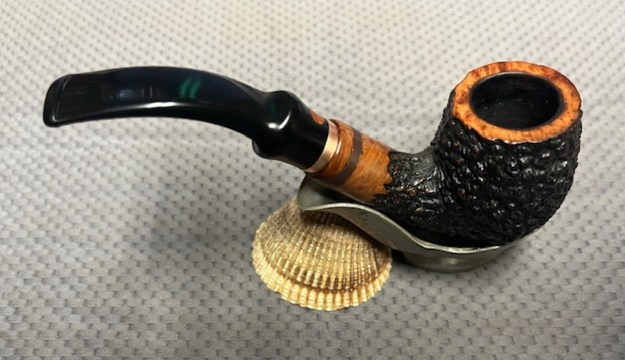
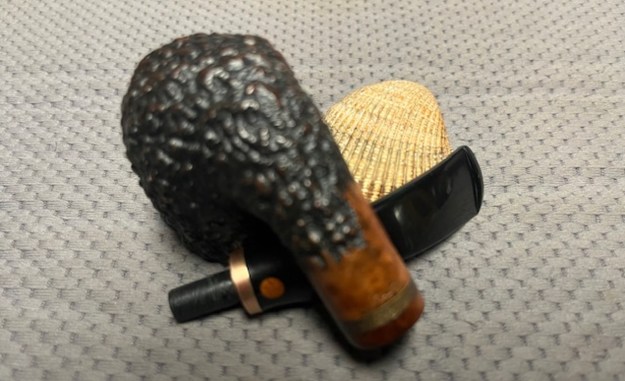
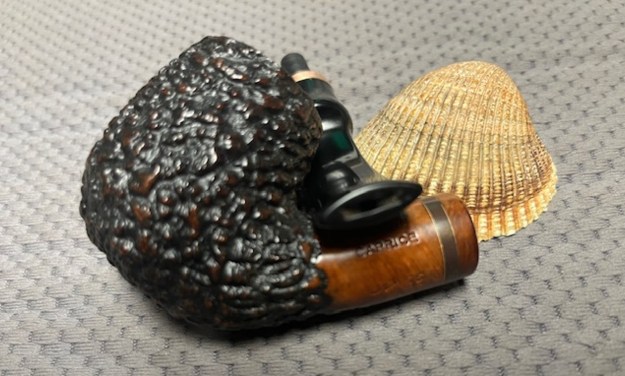
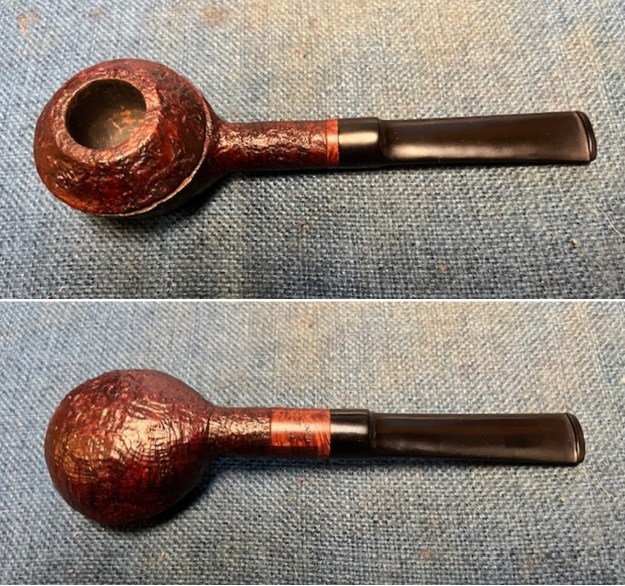
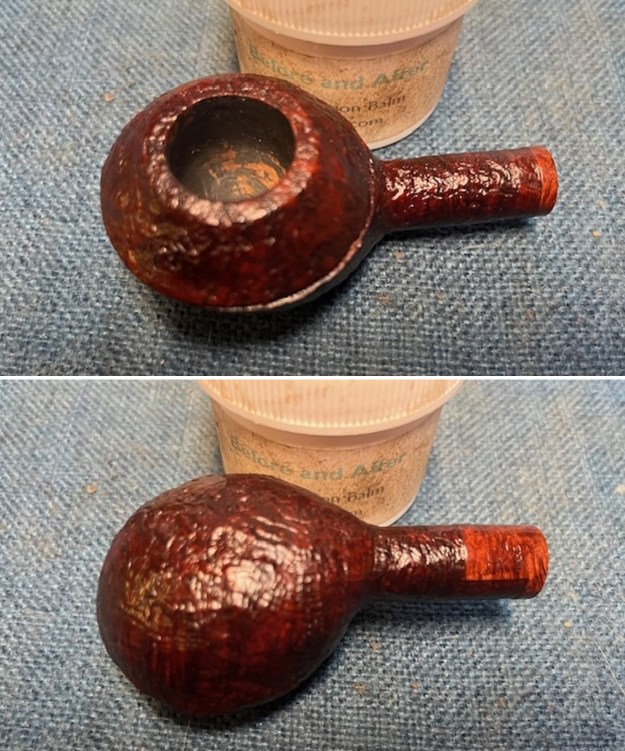
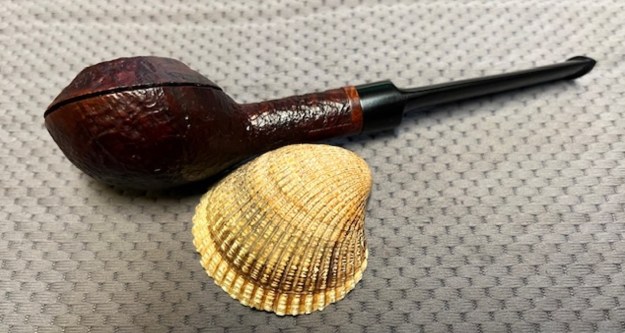
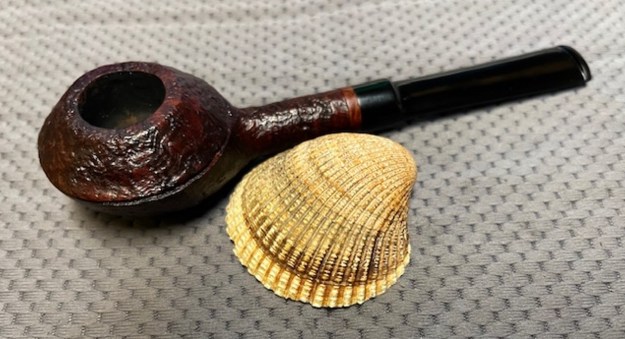
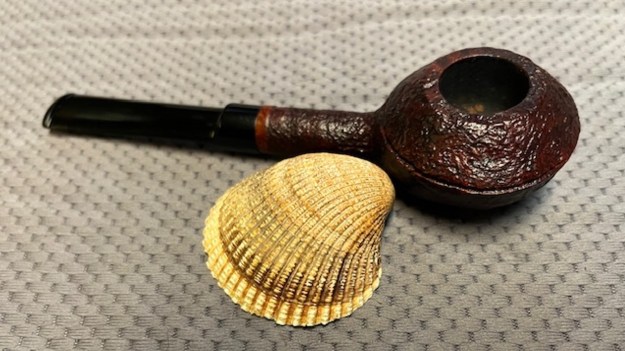
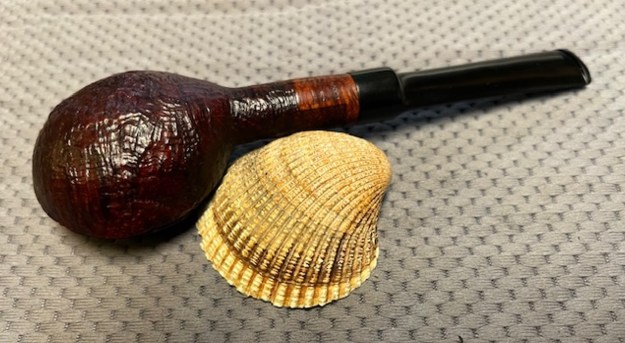
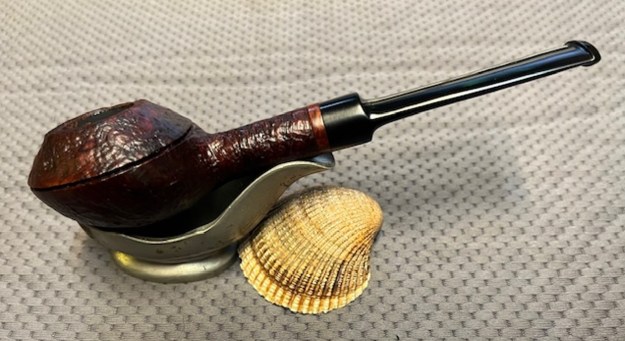
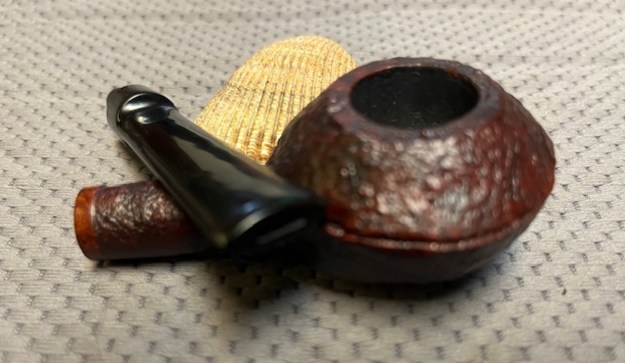
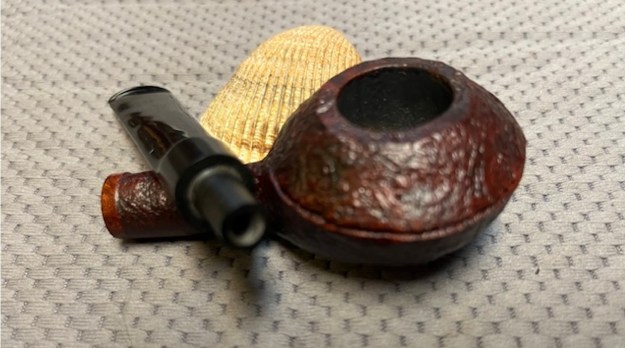
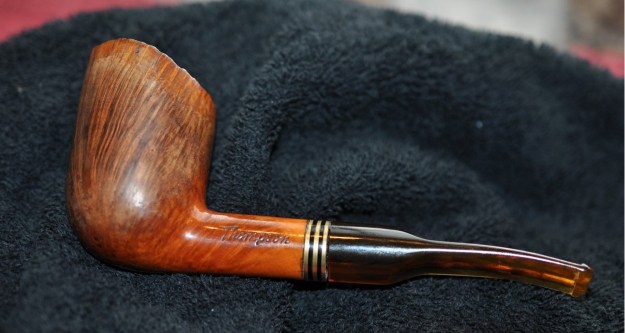
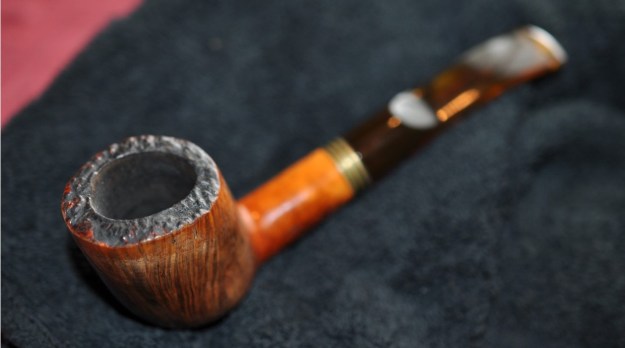
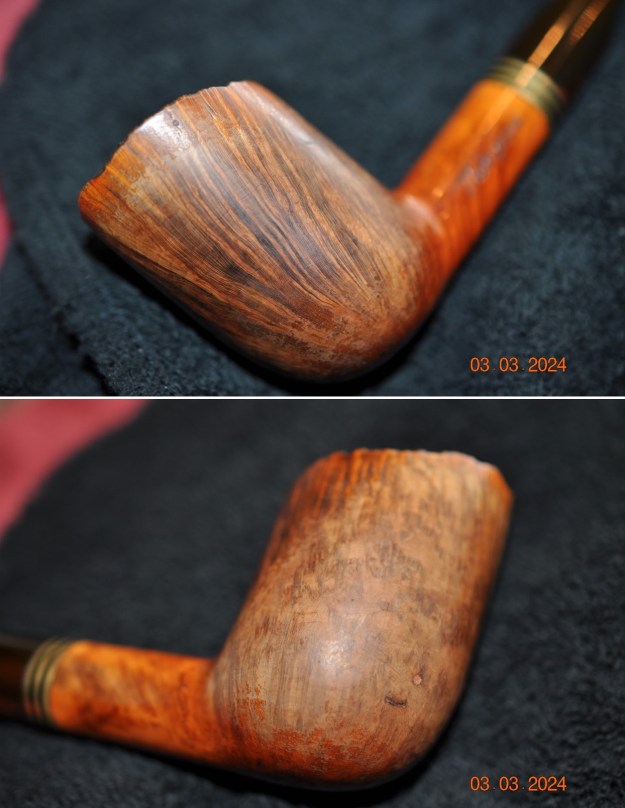
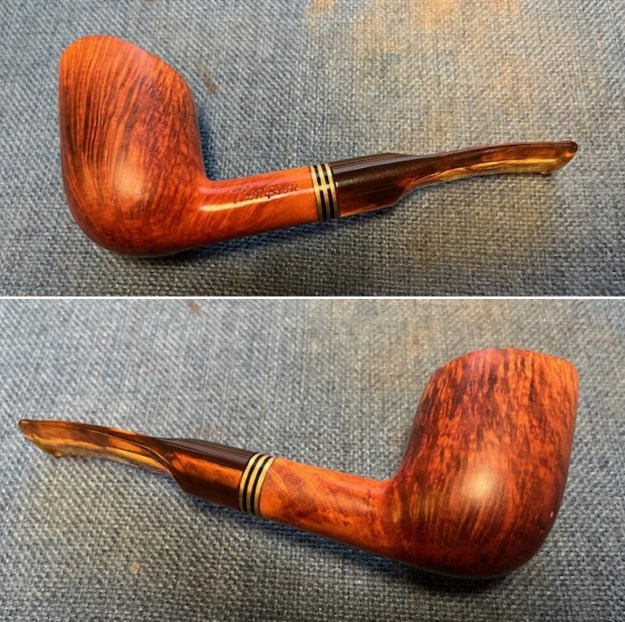
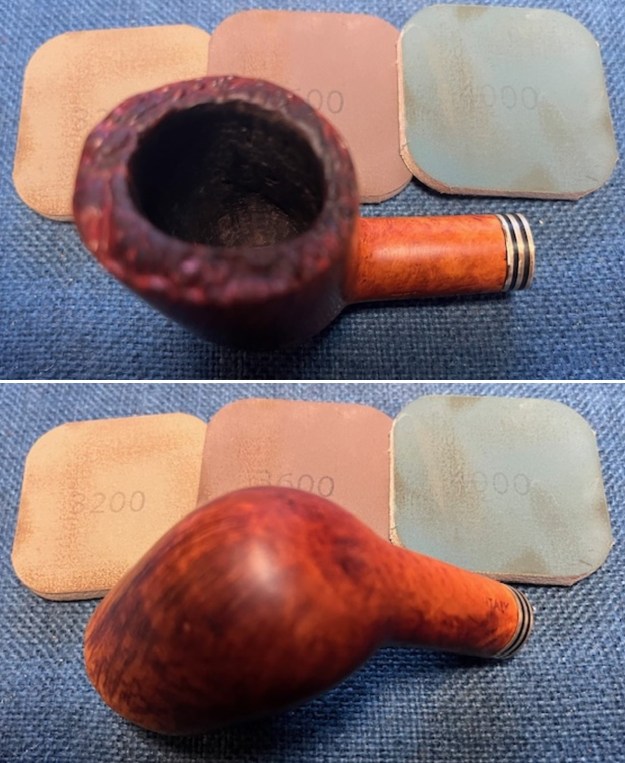
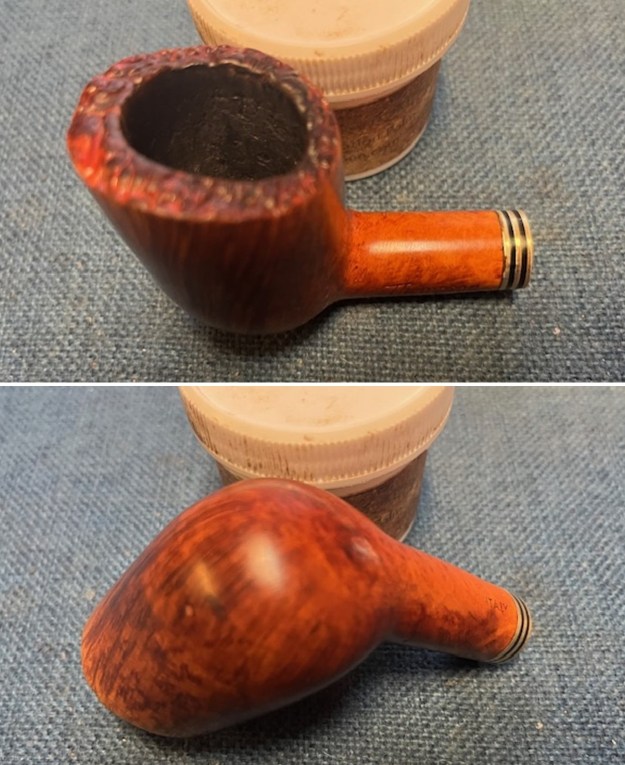
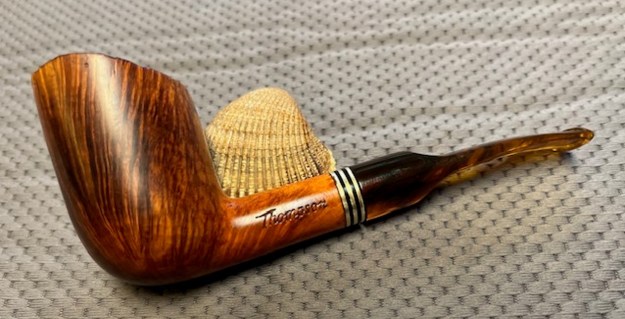
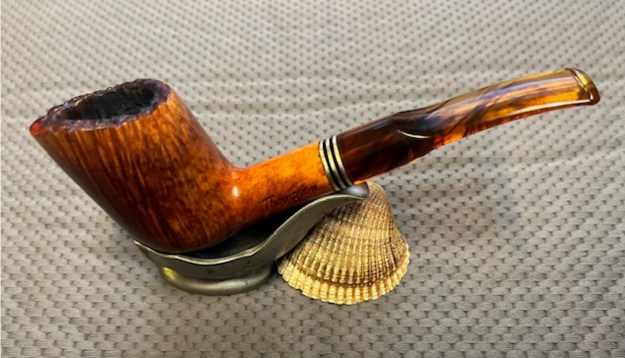
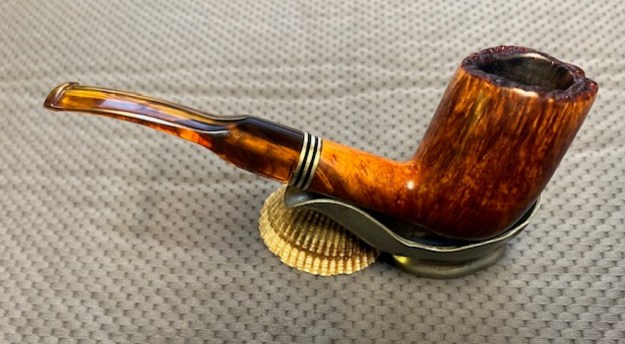
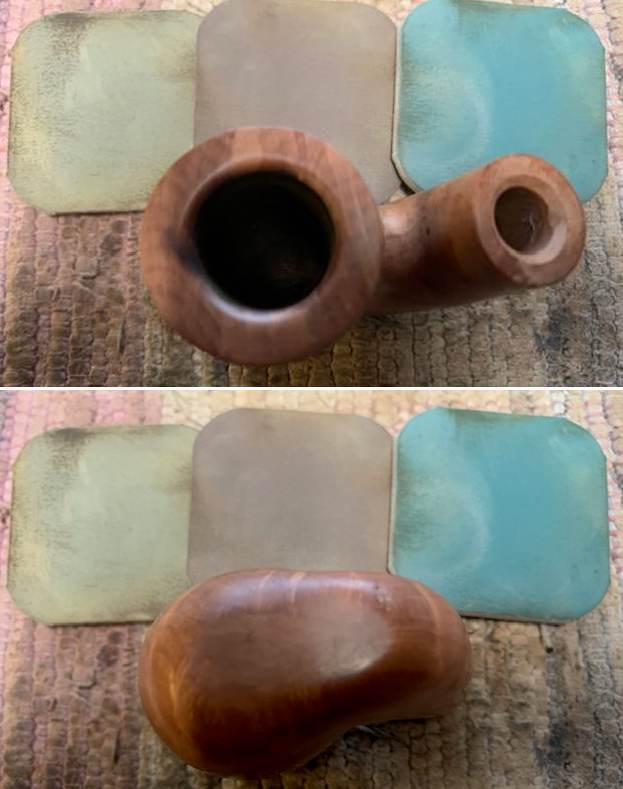
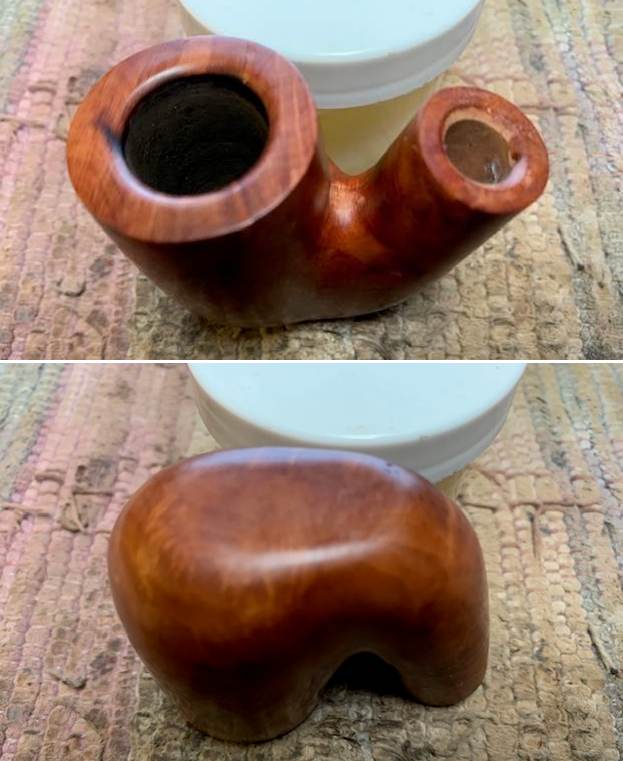
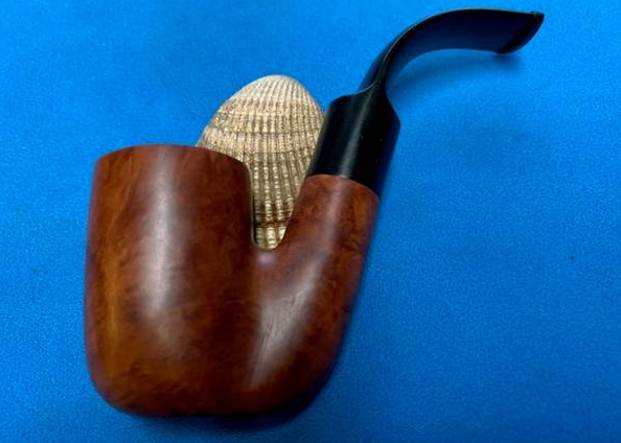
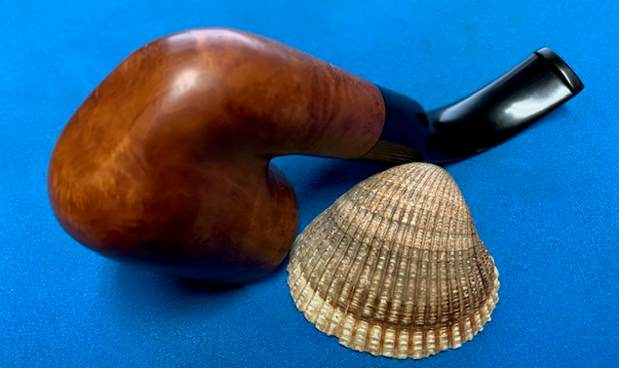
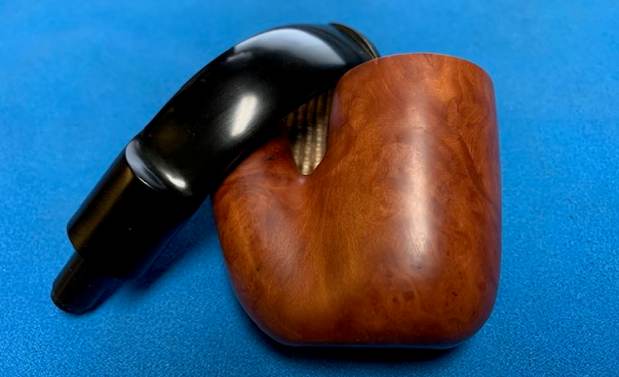
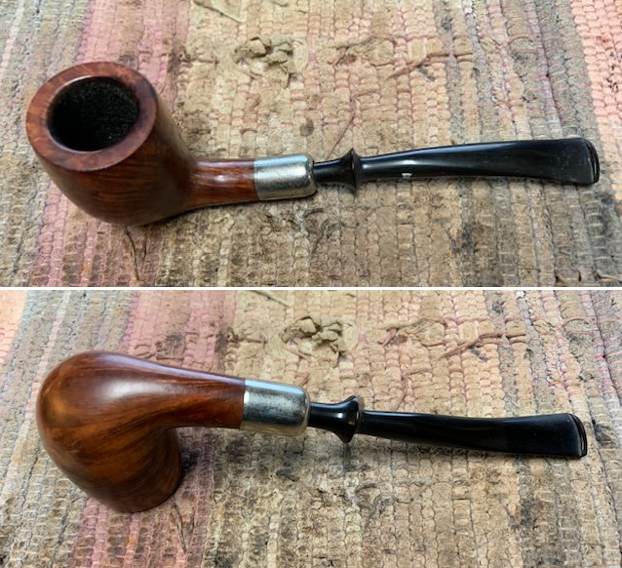
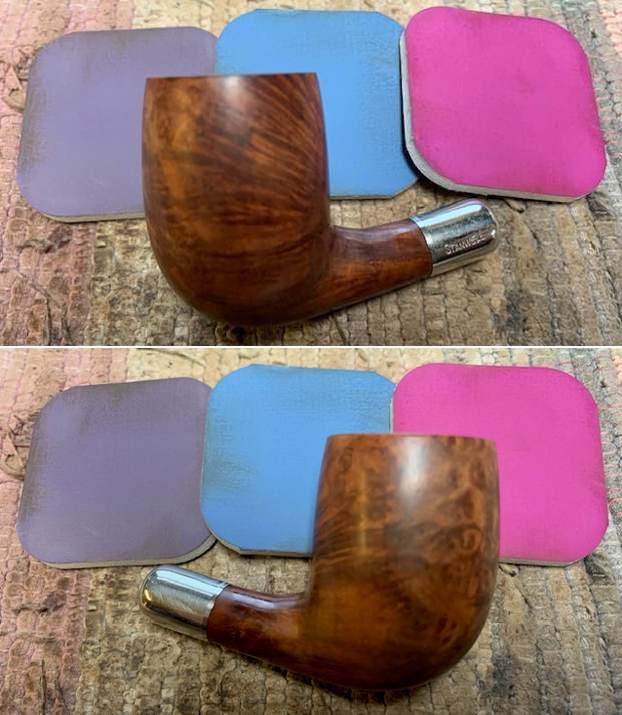
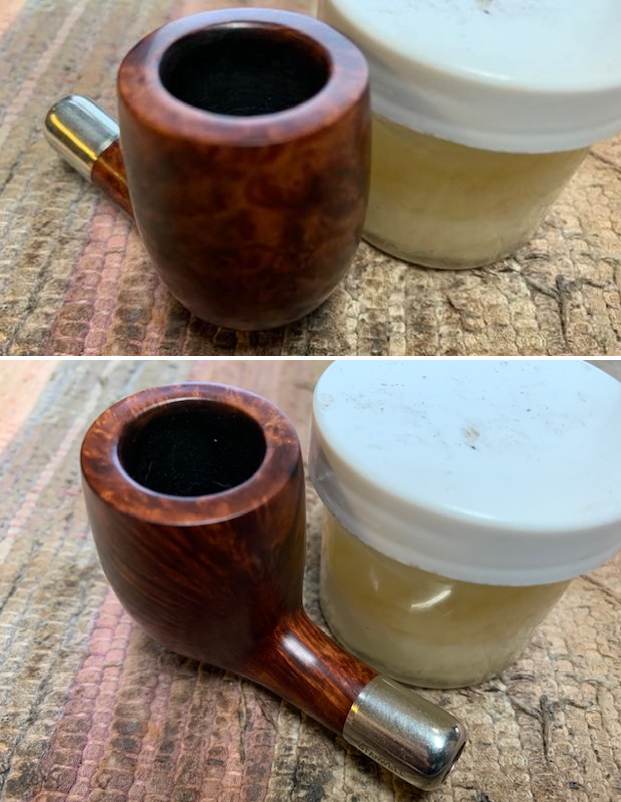
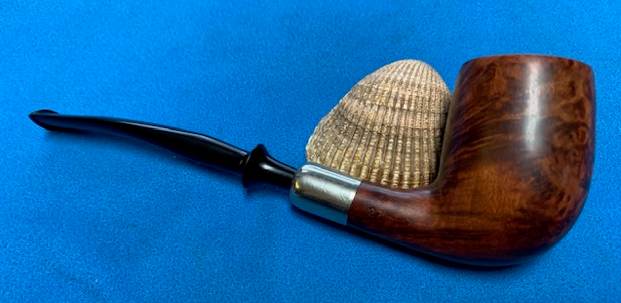
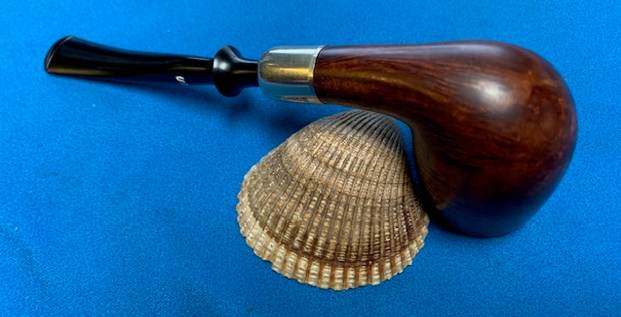
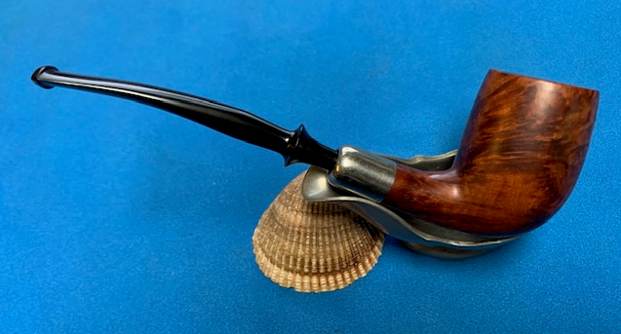
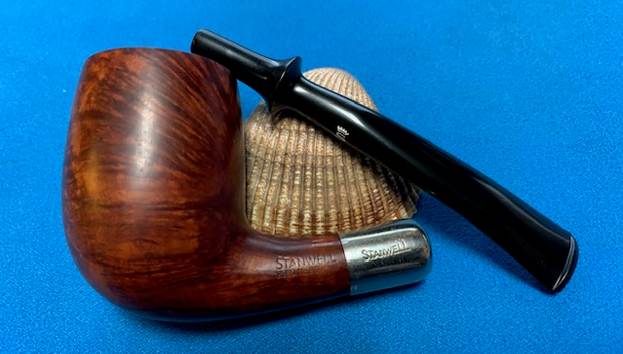
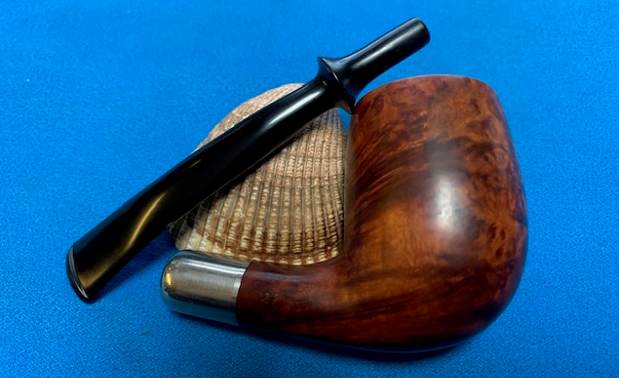
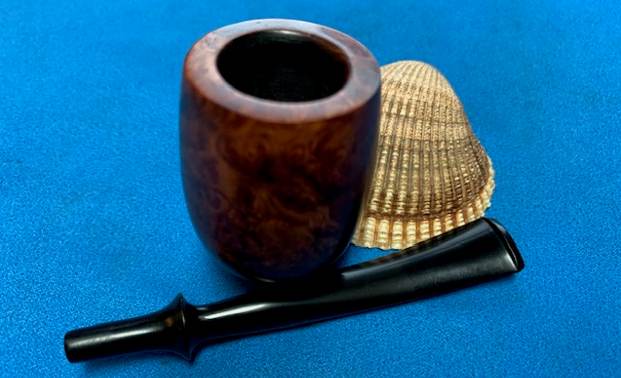
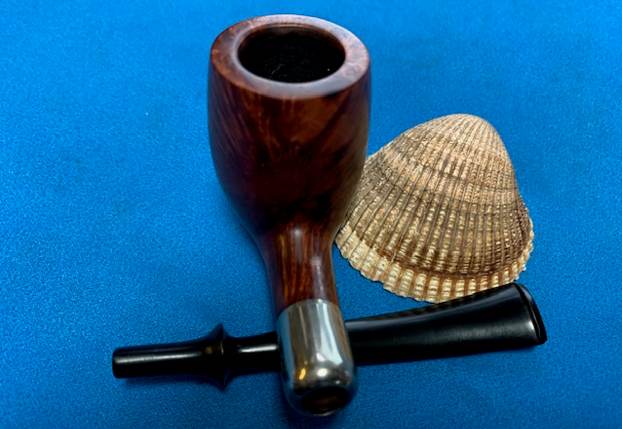
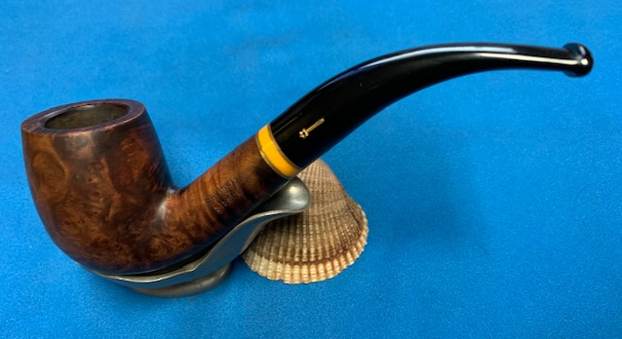
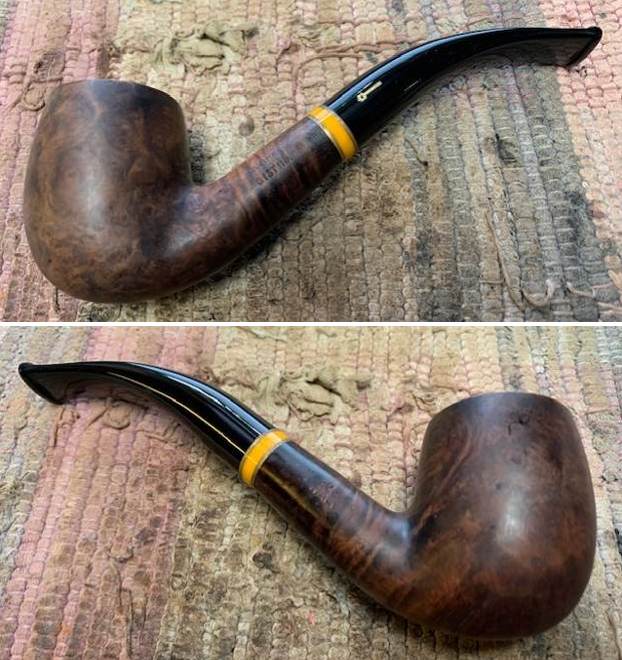
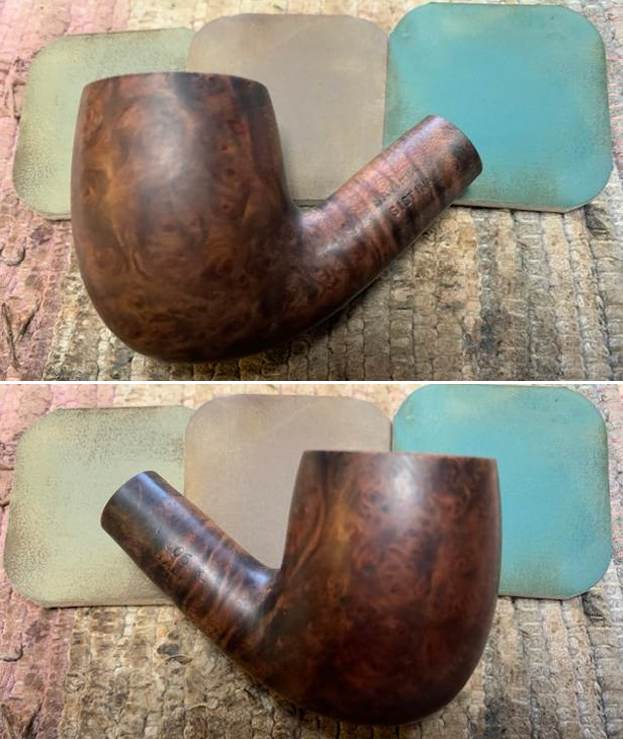
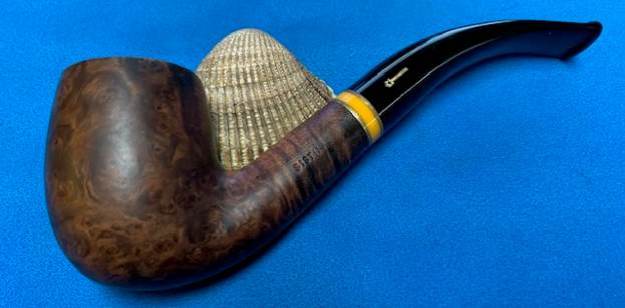
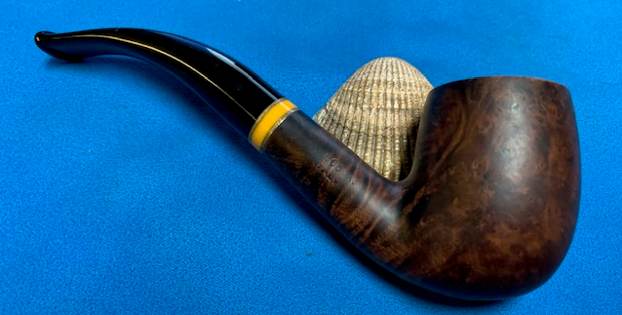
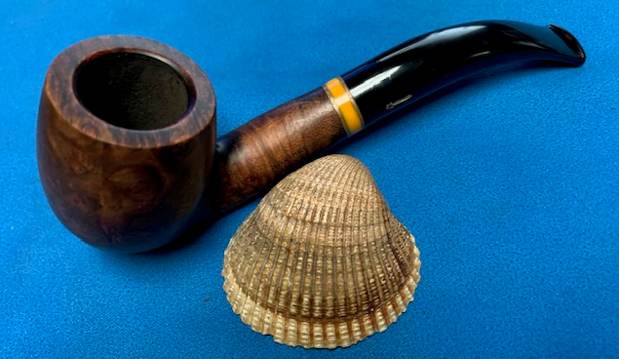
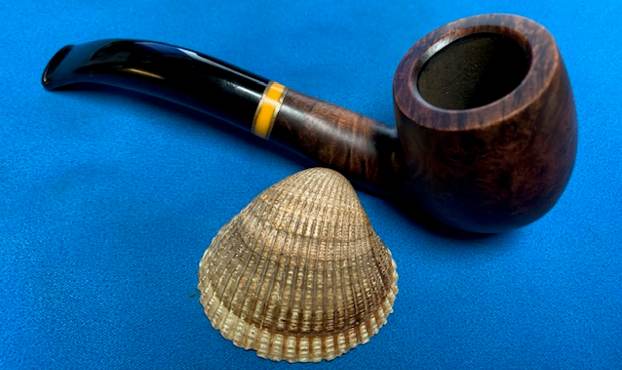
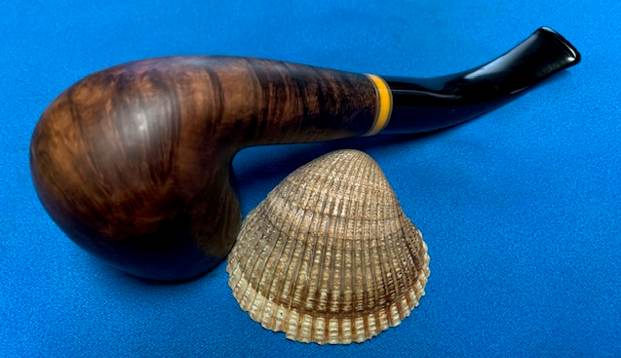
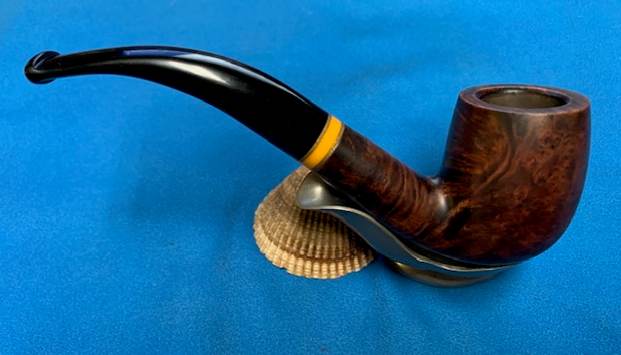
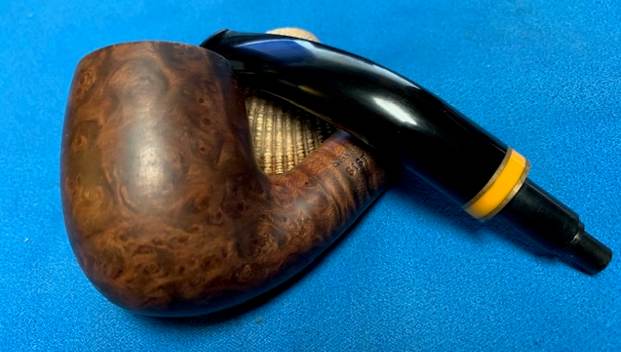
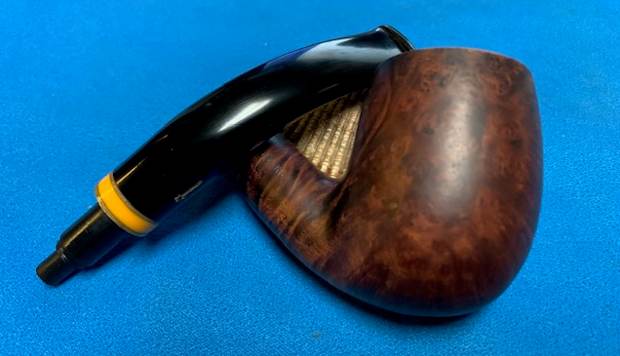
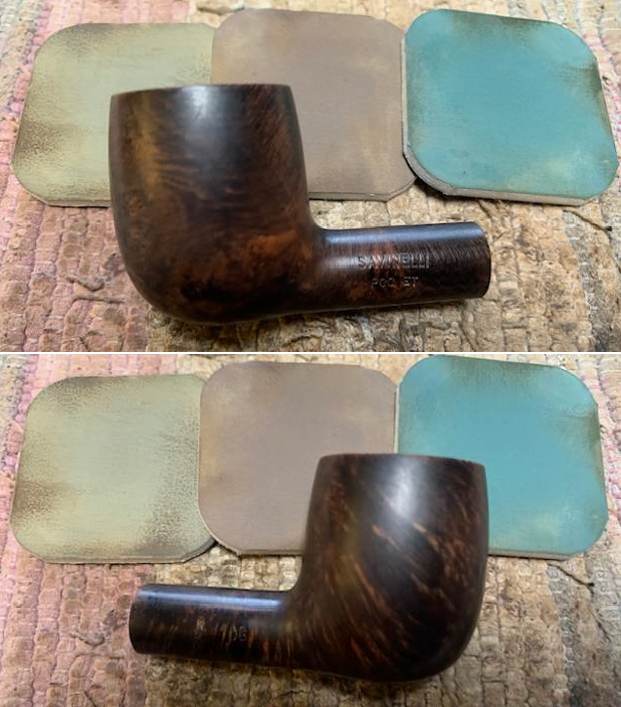
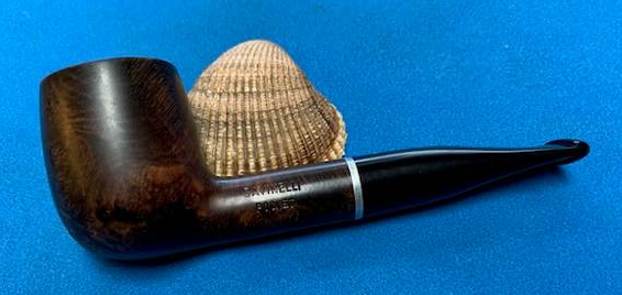
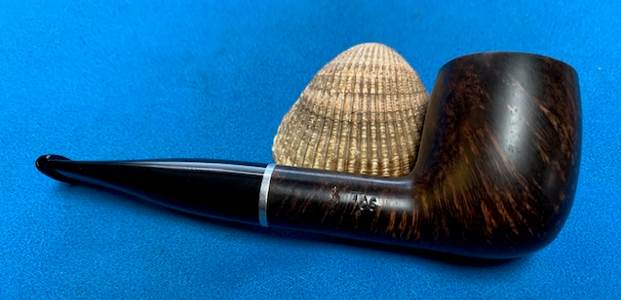
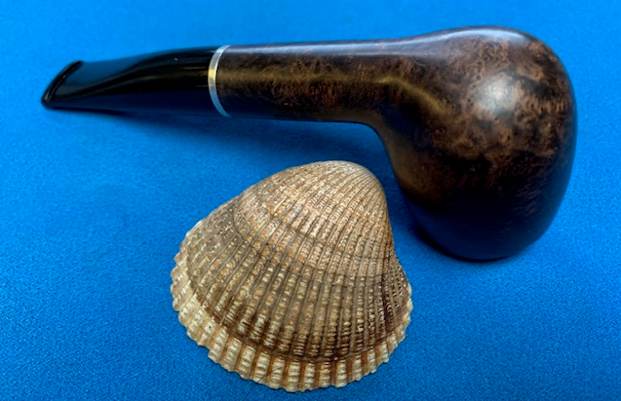
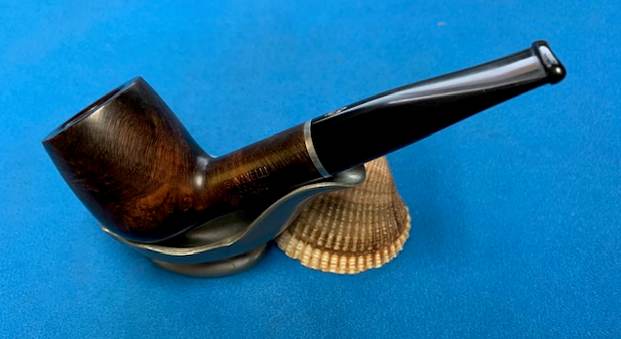
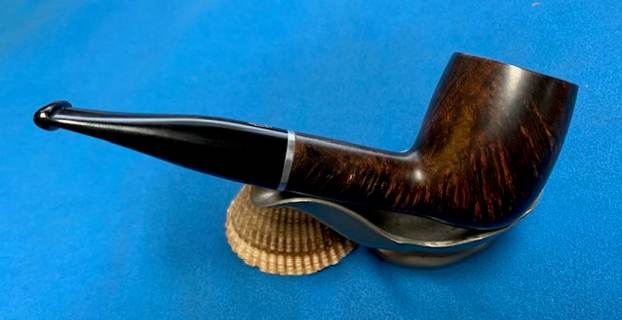
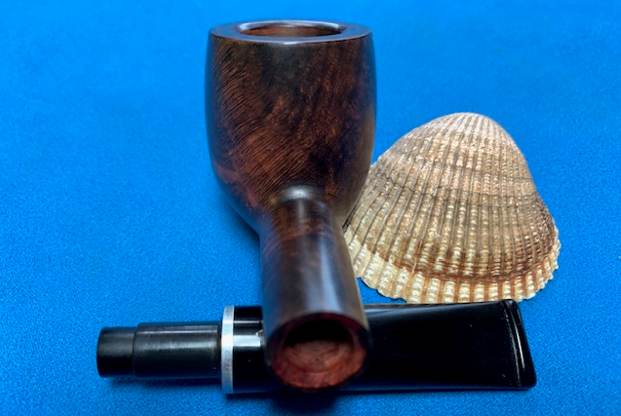
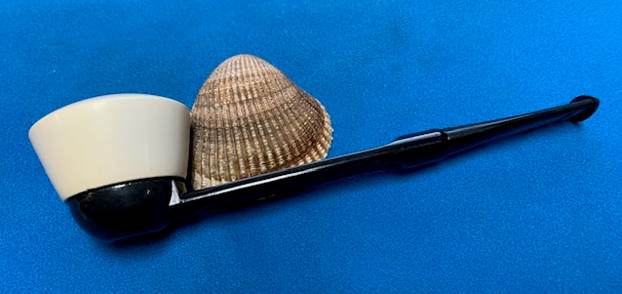
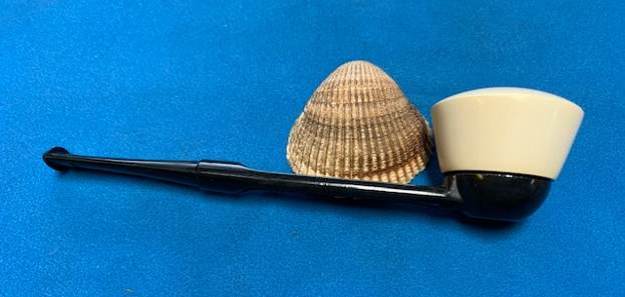
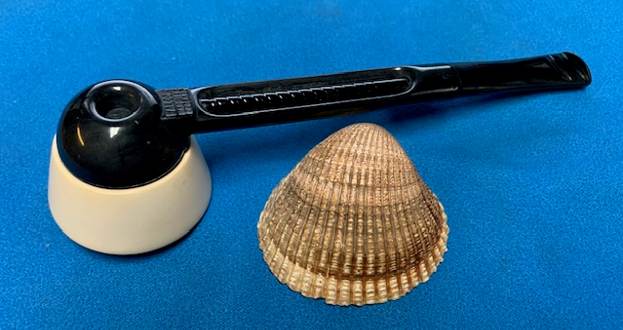
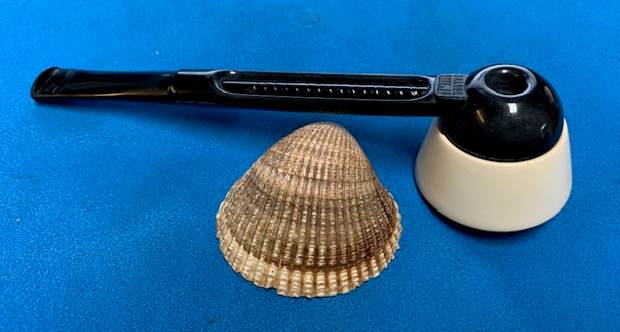
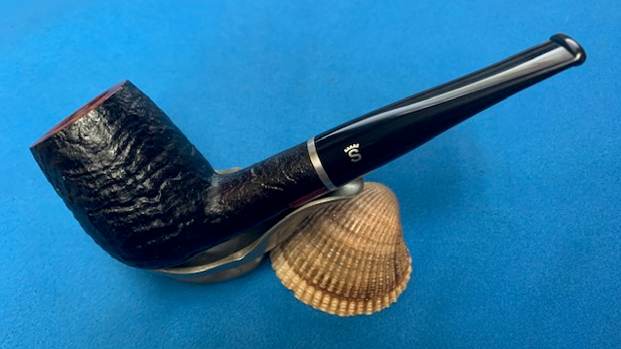
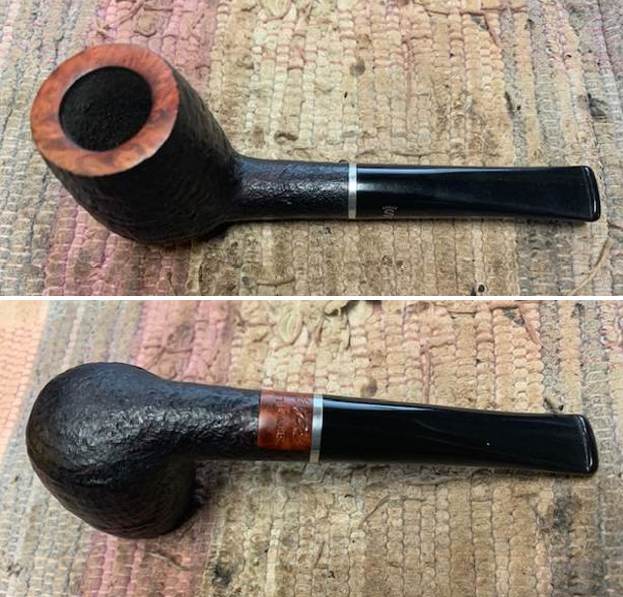
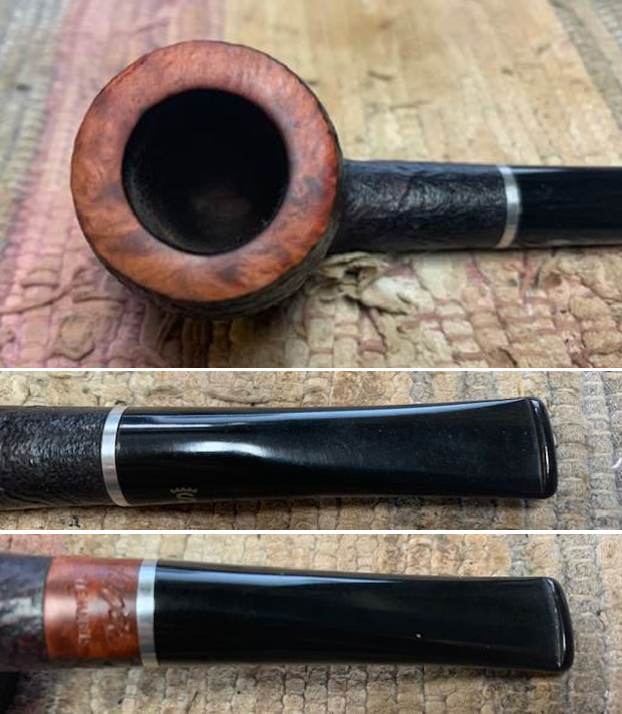
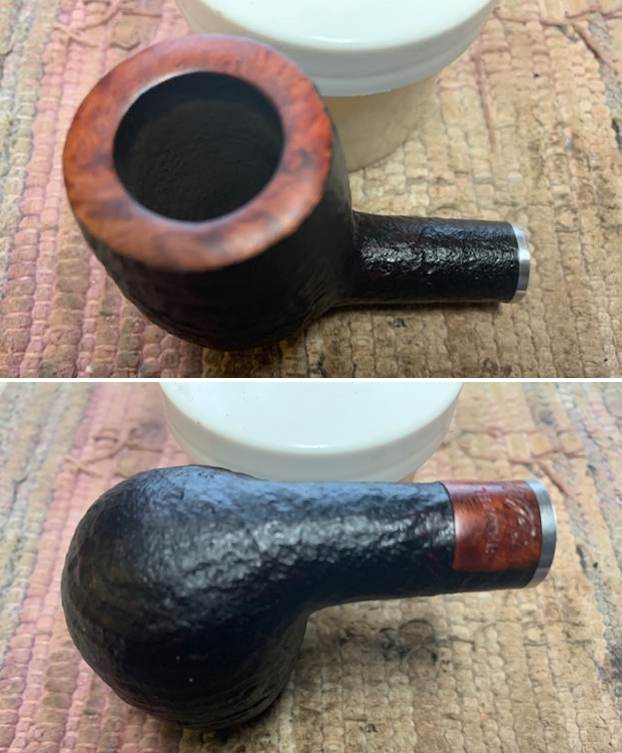
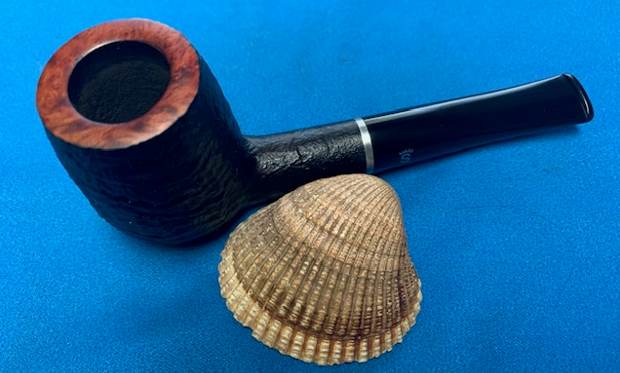
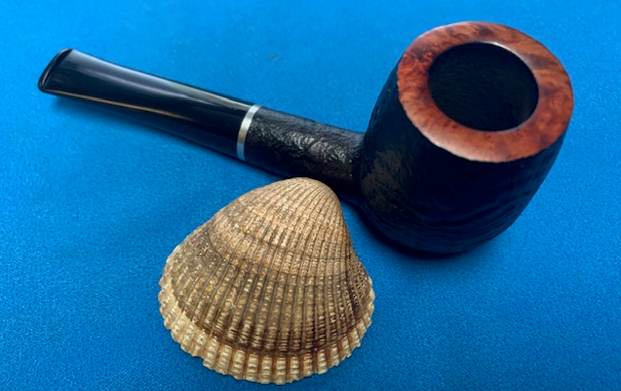
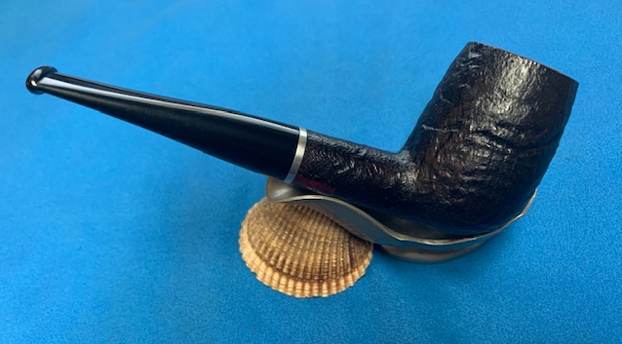
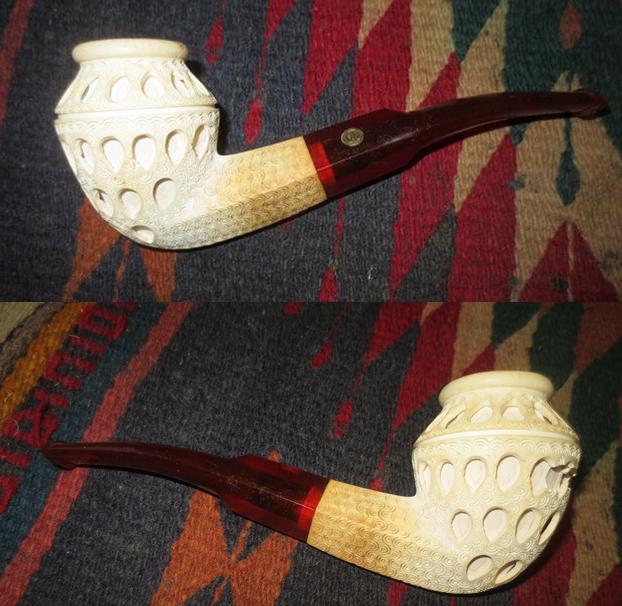
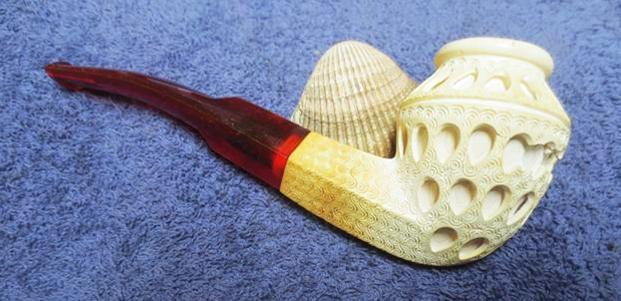
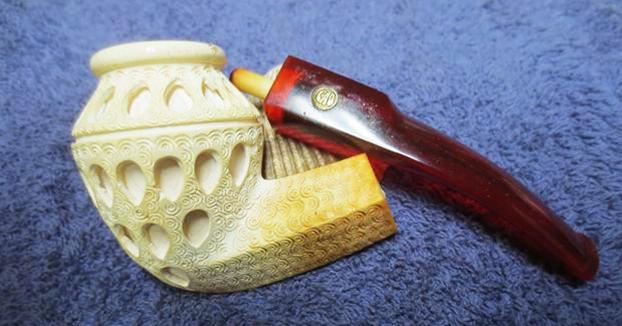
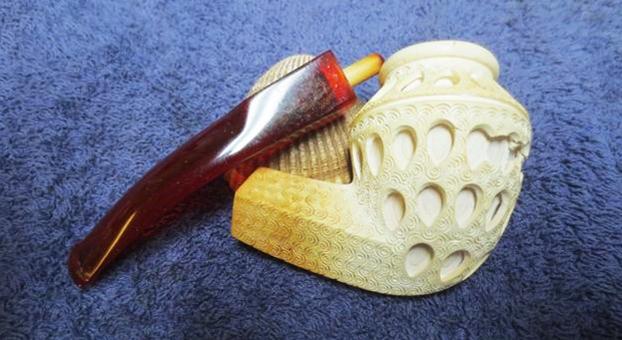
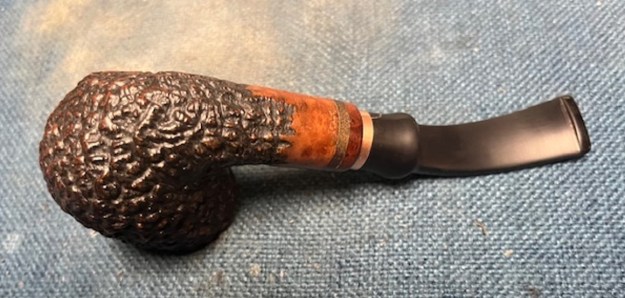
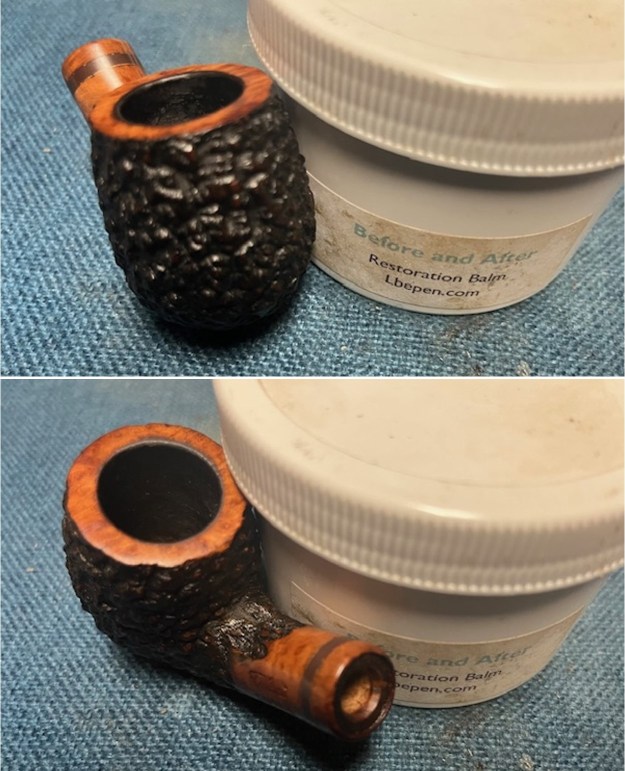
This rusticated Velani Caprice 75 Bent Billiard with a fancy saddle stem is a great looking pipe now that it has been restored and the tenon and stem repaired. The briar around the bowl is clean and the rustication really came alive. The rich brown stains of the rustication took on a sense of depth with the polishing and waxing. The grain really popped. I put the acrylic stem back on the bowl and carefully buffed the pipe with Blue Diamond on the buffing wheel using a light touch on the briar. I gave the bowl and the stem multiple coats of carnauba wax on the buffing wheel. I buffed the pipe with a clean buffing pad to raise the shine. I hand buffed the pipe with a microfiber cloth to deepen the shine. The finished Velani Caprice Rusticated Bent Billiard is a beauty and feels in the hand and looks very good. Give the finished pipe a look in the photos below. The dimensions of the pipe are Length: 5 ½ inches, Height: 2 inches, Outside diameter of the bowl: 1 ¼ inches, Chamber diameter: ¾ of an inch. The weight of the pipe is 1.76 ounces/49 grams. Thanks for reading this blog and my reflections on the pipe while I worked on it. There are many more to come!

New Life for a Mysterious TPE Hand Made 2 Squat Rhodesian/Saucer


by Steve Laug

The next pipe on the table is a squat Rhodesian or saucer shaped pipe. We purchased it from an antique shop in Ogden, Utah, USA on 10/10/2024. It is a nicely sandblasted Rhodesian that has a great finish. The rim top is in great condition and is sandblasted along with the bowl. It is stamped on the underside of the shank and reads T.P.E. [over] Hand Made [over] 2. There was a moderate cake in the bowl and some light lava spots on the rim top. The stem was lightly oxidized and there were some light tooth marks and chatter on the top and underside ahead of the button. Jeff took photos of the pipe before he started his cleanup work. They tell the story and give a glimpse of the promise that we see in this pipe. He took a photo of the rim top and bowl to show the current condition. The inner edge and the rim top looked good and had some spots of lava as mentioned above. The photos of the bowl walls show the moderate cake on the walls. The stem photos show the oxidation and light marks on both sides ahead of the button. Jeff took a photo of the heel of the bowl to give a sense of the condition of the bowl and the look of the sandblast around the bowl. It is a beauty.He took photos of the underside of the shank to capture the stamping. It was clear and readable as noted above.The TPE stamping was unknown to me so I did a quick check on Pipephil’s site and Pipedia and there was nothing listed with those initials of what I came understand was the abbreviation for Tobacco Pipe Exporters. I did a Google search and found a conversation on Pipesmagazine forum and found Jonas Clark’s comments very helpful. I have included both the link to the conversation below as well as Clark’s comments. https://pipesmagazine.com/forums/threads/bamboo-shank-briar-stamped-t-p-e-maker.66712/

jonasclark —

I’m in Seattle, as is Tobacco Pipe Exporters, and I know the shop (F. K. Kirsten) has other pipes I see on the TPE website, so this must be theirs. I don’t see any bamboo on their website, though. Most of what they show is very basic, but this is a fancy pipe. As are another I’ve had no luck IDing (but which isn’t marked TPE), the ‘hole pipes’ shown a ways down their page, which have plateau tops – they’re stamped La Scala.

I see that TPE claims to be importers for Amadeus Pipe Co. out of Greece, on whom I can find little except an expired domain name.

Update: I spoke to Kevin Brackett at Tobacco Pipe Exporters. He told me he has an arrangement with a carver, who would like to sell high-grade pipes someday but feels he’s not ready yet. Kevin buys his pipes inexpensively, stamps them TPE, and sells them inexpensively (about $150 for these bamboo shank models). He gives this carver free reign to make whatever he likes. For this reason, he won’t say who carved this pipe, or even where he’s from! However, he has a few more such pipes, and I’ll be looking at them in a week or so. If anyone here might be interested, I’ll get photos and prices, and would offer them here for exactly what he charges me.
The “La Scala” hole or bridge pipes with plateau are an Italian import TPE sells, and they have some of those, too. The F.K. Kirsten shop is their only Washington retailer.

Now it was time to work on the pipe. Since Jeff always follows the same pattern of work in his cleanup we do not include photos but rather just a simple summary. Jeff reamed the bowl with a PipNet pipe reamer and followed up with a Savinelli Fitsall pipe knife to remove the cake. He scrubbed out the mortise and the airway in the shank and the stem with alcohol, cotton swabs and pipe cleaners. He scrubbed the exterior of the bowl, rim, shank and stem with a tooth brush and undiluted Murphy’s Oil Soap to remove the oils and tars on the rim and the grime on the finish of the bowl. He rinsed it under running water. He dried it off with a soft cloth. He was able to remove the spotty lava build up on the rim top and edges of the rim. He soaked the stem in some of Briarville’s Pipe Stem Deoxidizer and rinsed it with warm water. He dried if off with a soft cloth. The stem was clean and the remnants of oxidation were gone. I took photos of what the pipe looked like when I brought to my worktable. I took close up photos of the bowl, rim top and stem to show how clean the pipe was. The bowl was clean and the rim top and the inner edge looked good. The stem was clean and there were light tooth marks on the top and underside of the stem.I took a photo of the stamping on the underside of the shank. It is clear and readable and read as noted above. I also removed the stem from the shank and took photos of the pipe to show the look of the parts.The bowl is in excellent condition. I started by working some Before & After Restoration Balm into the surface of the briar with my fingertips to clean, enliven and protect the briar. I let the balm sit for 15 minutes and then buffed with a cotton cloth to raise the shine. The photos show the bowl at this point in the restoration process. I set the bowl aside and turned to the stem. I polished the stem with micromesh sanding pads – dry sanding with 1500-12000 grit pads. I wiped the stem down after each sanding pad with Obsidian Oil. I polished it with Before & After Pipe Stem Polish – both Fine and Extra Fine. Once I had finished the polishing I gave it final coat of oil and set it aside to dry. I am excited to finish this TPE Hand Made 2 Squat Rhodesian with a vulcanite saddle stem. I put the pipe back together and buffed it with Blue Diamond on the buffing wheel. I gave the bowl and the stem multiple coats of carnauba wax. I hand buffed the pipe with a clean buffing pad to raise the shine. It is fun to see what the polished bowl looks like with the mix of grain on the sides of the bowl. Added to that the black vulcanite saddle stem was beautiful. This smooth TPE Hand Made 2 Squat Rhodesian is great looking and the pipe feels great in my hand. It is light and well balanced. Have a look at it with the photos below. The dimensions are Length: 6 inches, Height: 1 ¼ inches, Outside diameter of the bowl: 2 inches, Chamber diameter: ¾ of an inch. The weight of the pipe is 38 grams /1.34 ounces. It turned out to be a beautiful pipe. I will be putting it on the rebornpipes store in the American Pipe Makers section. If you are interested in adding it to your rack let me know by message or by email to slaug@uniserve.com. Thanks for your time reading the blog. I appreciate it.

Restoring a Thompson 530 Italy Freehand


by Steve Laug

This pipe has been in my to-do box for almost a year now and some how I continue to pass over it and go on to something else. It came to us from an eBay seller in Jordan, Minnesota, USA on 01/22/2024. This afternoon I picked it up to fit in between my restoration of Peterson’s Pipes that I am working. This one is stamped Thompson in script on the left side of the shank. On the right side of the shank it reads 530 the shape number. On the underside of the shank it is stamped ITALY. It is well grained freehand shape with a faux plateau rim top that has been stained with a mix of black and brown stains. The shank is banded with three brass bands. The stem is amber acrylic and looks quite nice. The pipe is dirty and the stain and finish has come off the sides of the bowl and there is a lot of oils and hand grime ground into the finish on both sides.  The shank still has some heavy varnish on it that leaves it shiny. The bowl has a thick cake and there is a lave overflow into the rusticated/faux rim top. The stem is also dirty and has some tooth chatter on both sides ahead of the button. Otherwise the stem is in better condition than the bowl. Jeff took photos of the pipe before he started his clean up work. He took photos of the rim top and stem to show the general condition of the pipe. The bowl is heavily caked and the rim top and edges have a significant lava overflow. The stem looks good but it has light tooth marks on the top and underside near the button. He took photos of the sides and heel of the bowl to show the grain and the damaged finish that was very visible around the bowl and shank. He took photos of the stamping on the shank sides and read as noted above and was clear and readable. Before I started working on the pipe itself, I turned to Pipedia and looked up Thompson and in this case Norm Thompson. I found a bit of information that gave me the background I was interested in finding. Here is the link (https://pipedia.org/wiki/Thompson,_Norm).

Norman Anchor Thompson, Sr. (known as “Norm Thompson”) was an immigrant from Britain. He had settled in Salt Lake City before fighting for Canada in World War I. After the war he lived briefly in Los Angeles before settling in Portland, Oregon. Norm Thompson started a mail order only business in 1949 as a way to sell his homemade flies for fly-fishing by placing an advertisement in Field & Stream. I understand tobacco products were sold via the mail order business, as well, to a limited degree. Around 1951 he handed over the mail order business to Peter Alport, his son-in-law. Alport worked to expand the company’s product offerings beyond fly-fishing items and into clothing and other outdoor merchandise, plus he developed the company’s slogan of “Escape from the ordinary”.

Norm Thompson would go on to own seven pipe shops, the first one in 1959, and later two nightclubs, all in the Portland area. Norm Thompson Pipe Shops sold higher end pipes, from the likes of Dunhill, Charatan, and Savinelli. Norm Thompson died in 1968 from complications related to his exposure to mustard gas during his World War I military service in Europe.

The First Edition Norm Thompson Pipe Catalogue (right column of this article) was likely a publication that was a product of Peter Alport, as the slogan “Escape from the ordinary” (a slogan credited to Alport) is clearly seen in the publication. No date can be seen on the publication, but we conclude it is late 1960s to early 1970s. Of interest, is the evidence of collaboration between Norm Thompson and Charatan, with Charatan credited with making the Norm Thompson “Regent”. This would have been during the Lane Era. It is also likely that Norm Thompson pipes stamped “Made in Italy” were a Norm Thompson – Savinelli collaboration.

I did some more searching and found an interesting thread on the brand on Pipesmagazine.com (https://pipesmagazine.com/forums/threads/thompson-pipes.72989/). There was a comparison between pipes made for the Thompson Cigar Company and those made for Norm Thompson.

I stumbled on to a pipe that has impressed me. Thompson. Initially, I found a Thompson pipe commissioned by an American company known as, Thompson Cigar Company. They have a following and a fine reputation. I assumed the Thompson pipe I had acquired was a Thompson Cigar Company pipe. I was wrong. In fact, I had purchased a “Norm Thompson” (only designated as “Thompson”) : out of England. Norm Thompson (a B&M tobacco shop in England) had pipes commissioned as well. Both Thompsons were old school B&Ms that had pipes manufactured by reputable pipe makers. From what I have ascertained, Thompson Cigar Company had a lot of free-hands made. Norm Thompson (England) had more traditional English pipe-shapes made (makes sense). Thompson-USA display the name “Thompson” in cursive. Thompson-England display Thompson in block letters. Both Thompsons get rave views from those who own them. You can still find them for reasonable prices on EBeast.

The thread went on with more information as well as folks expounding on the qualities of the pipes. They also confirmed that the Thompson Italy pipes were more than likely collaborations with Savinelli. Now it was time to work on the pipe.

Jeff had cleaned up the pipe with his usual thoroughness. He reamed the pipe with a PipNet Pipe Reamer and cleaned up the remnants with a Savinelli Fitsall Pipe Knife.  He scrubbed the bowl with undiluted Murphy’s Oil Soap with a tooth brush. He rinsed it under running warm water to remove the soap and grime. He cleaned out the inside of the shank and the airway in the stem with alcohol, cotton swabs and pipe cleaners. He soaked the stem in Before & After Deoxidizer and rinsed it off with warm water. Somewhere along the way as it sat here it picked up some stickiness on the top of the stem that looks a lot like what is left behind by a gummed label. I took photos of the pipe 3 years later when I finally got around to working on it. As you can see it is another beautiful looking pipe. I took photos of the rim top and bowl as well as the stem to give a sense of the condition of both. The faux plateau rim top and the inner edge had some darkening and burn damage on the inner edge on the back of the bowl. The bowl is slightly oval and out of round. The stem was clean but had light tooth marks and chatter on the top and underside ahead of the button.I took photos of the stamping on the sides of the shank. They are clear and readable as noted above. I took the stem out of the shank and took a photo of the overall look of the pipe. It is another beauty. There are a few small dings from the journey of the pipe that will remain as a part of its story. The sides of the bowl had some darkening on the sides of the bowl caused by the oils from the hands. I scrubbed the walls down with acetone on cotton pads to remove the oils. It looked better but still showed some darkening. I was still not happy with the situation on the sides and rim top of the bowl. I scrubbed the briar with a tooth brush and some Before & After Briar Cleaner to remove more of the oils. I wiped off the cleaner with a paper towel and took some photos of the pipe at this point. I sanded the bowl with 320-3500 grit sanding pads to smooth out the finish and remove the scratches and small nicks in the finish. It looked much better once I had finished. I polished the briar with micromesh sanding pads – wet sanding with 1500-12000 grit pads. I wiped the bowl down after each pad with a damp cloth. I rubbed the bowl down with Before & After Restoration Balm. I worked it into the surface of the bowl sides and shank with my fingertips. The product works to clean, enliven and protect the briar. I let the balm sit for a little while and then buffed with a cotton cloth to raise the shine. I set the bowl aside and turned to work on the stem. I polished the stem with micromesh sanding pads – 1500-12000 grit pads. I wiped it down with Obsidian Oil after each sanding pad. I used Before & After Pipe Polish – both Fine and Extra Fine to further polish the stem. I gave it a final coat of Obsidian Oil and set it aside to dry. This Thompson 530 Italian Made Freehand is a nice looking pipe. The Medium Brown stain highlights some excellent grain around the bowl sides and the heel. The faux plateau on the rim top looked very good. The finish on the pipe is in excellent condition and the contrasting stains work well to highlight the grain on the pipe. The polished amber acrylic saddle stem adds to the mix. With the grime and debris gone from the finish and the bowl it is eye-catching. I put the stem back on the bowl and buffed the pipe with Blue Diamond on the buffing wheel. I gave the bowl and the stem multiple coats of carnauba wax on the buffing wheel and followed that by buffing it with a clean buffing pad. I hand buffed the pipe with a microfiber cloth to deepen the shine. The finished Thompson 530 Freehand is quite nice and feels great in the hand. Give the finished pipe a look in the photos below. The dimensions of the pipe are Length: 5 ¾ inches, Height: 2 inches, Outside diameter of the bowl: 1 ½ inches, Chamber diameter: 7/8 of an inch. The weight of the pipe is 1.76 ounces/50 grams. Thanks for walking through the restoration with me as I worked over another beautiful pipe. This pipe will be added to the Italian Pipe Makers Section of the rebornpipes store soon. If you want to add it to your collection send me an email or a message! Thanks for your time.

Restoring a No Name Natural Finished Oom Paul


Blog by Steve Laug

The next pipe I have chosen to work on is a Natural Finish smooth Oom Paul with a bent saddle stem that I picked up in a lot of 10 pipes from a fellow on Vancouver Island who was selling his collection. This is the final pipe of the 10 so it has been a fun journey to clean them up. There is no stamping on the shank on either side. It is unmarked and a no name. The saddle stem has a no stamping either. The pipe is a nice looking pipe with some mixed grain around the bowl and shank. There are some small fills in the briar but not to ugly. It has a natural finish. It is light weight and comfortable pipe to hold. I brought it to the work table and turned it over in my hands. This is what I saw when I over the pipe.

  1. The natural finish was okay with some hand oils on the sides of the bowl and grime ground into the finish around the bowl sides. The finish is rough and unfinished. It looks dull but the it really highlights the grain around the bowl sides and shank. There are some fills on the bowl – right side toward the top front, back of the rim top and one on the top of the full bent shank.
  2. The smooth rim top was okay and the inner and outer edges looked good. There was no lava build on the top and the beveled inner edge. There was some grime on the rim top and a burn mark on the top front of the rim and the bevel.
  3. There was a light cake in the bowl. It held the aroma of the tobaccos smoked in it – fortunately not aromatic. The walls looked to be undamaged but once I removed the light cake I could confirm that.
  4. The vulcanite saddle stem is in good condition with just some oxidation and light tooth marks and chatter on the top and underside ahead of the button.
  5. The heel of the bowl has a sanded spot that is flat and has not been sanded or smoothed out. It was made to be a sitter but it had not been finished out.

To summarize what I saw – this no name Oom Paul is a well made pipe. It is a dirty but otherwise in good condition. The stem is lightly tooth marked but otherwise undamaged. There does not appear to be any calcification, only some light oxidation on the stem surface. The look and feel of the pipe in the hand is great. It is going to clean up very well. Here are photos of the pipe before I started my clean up.   The bowl of the pipe looked good. The rim top is clean but there is some darkening on the beveled inner edge of the bowl on the back right side. There was a burn mark on the rim top at the front of the bowl. There does not seem to be any damage to the smooth finish. I see no warning signs in the rim top or the edges of the bowl. I took photos of the stem to show the condition of it. Though hard to see there are light tooth chatter on the surface of both sides ahead of the button but it should clean up easily with polishing. The next photo captures the flattened heel of the bowl. It is still roughly finished and will need some sanding. I removed the stem from the shank and took a photo of it to give a sense of proportion. Now it was time to work on the pipe itself. I started my work on the pipe by cleaning the internals. The cake was quite thin but it can hold residual oils from previous tobaccos and I wanted to check the bowl walls for burn damage or checking. I reamed it with a Savinelli Fitsall Pipe knife and took the cake back to bare briar. I sanded the walls with 220 grit sandpaper wrapped around a piece of dowel. I worked on them until they were smooth. There was no checking or burn damage to the bowl walls. It was quite clean. I cleaned out the internals of the shank and the airway in the stem with 99% isopropyl alcohol, cotton swabs and pipe cleaners. I worked them over until they were clean.  I scrubbed the bowl with acetone and a cotton pad to remove the oils on the sides of the bowl and spottiness from the bowl and shank. It looked much better once it dried off.  I polished the briar with micromesh sanding pads. I choose to dry sand the briar rather than wet sand it. Again it is a matter of personal preference. I prefer to use the pads dry and find they work very well on the briar. I sand with each pad (9 in total) and group them by threes for ease of reference. I wipe the bowl down after each pad with a damp cloth to remove the sanding debris and check the briar. I love seeing the developing shine on the briar as I move through the pads which is why I include so many photos of this step. I worked some Before & After Restoration Balm into the finish on the bowl and shank. I worked it into the surface of the briar with my fingertips to clean, enliven and protect the wood. Once the bowl was covered with the balm I let it sit for about 15 minutes and buffed it off with a soft cotton cloth and the shoe brush. I polished it with a microfiber cloth. I took photos of the pipe at this point in the process to show what the bowl looked like at this point. It is really a beauty. I set the bowl aside and worked on the stem. I dry sanded both sides of the stem with 1500-12000 grit pads to polish it further. I wiped it down with a cloth impregnated with Obsidian Oil after each sanding pad. Though I know that it does not do much with the acrylic I find that it still adds depth to the final shine on the stem which grew deeper with each sanding pad.  I finished polishing the stem with Before & After Pipe Polish – both Fine and Extra Fine polishes. I wiped the stem down with some Obsidian Oil afterwards and buffed it with a soft microfiber cloth. I took the No Name Oom Paul to the buffer to wax and polish. I buffed the bowl and stem with Blue Diamond polish on the wheel to polish out the scratches in the vulcanite. I gave the pipe multiple coats of carnauba wax on the wheel and then buffed the pipe with a clean buffing pad to raise the shine. I hand buffed it with a microfiber cloth to deepen the shine. The pipe polished up pretty nicely. The Natural finish used on the briar brings out the grain and the bowl looks excellent with the shine and the bent saddle stem. The rich finish around the bowl and shank is quite remarkable and gives the pipe a great look. The No Name Oom Paul is a beautiful pipe and one that will be a great smoking pipe. The finished pipe is shown in the photos below with each of the stems. The dimensions of the pipe are Length: 5 inches, Height: 2 inches, Outside diameter of the bowl: 1 ¼ inches, Chamber diameter: ¾ of an inch. The weight of the large pipe is a light and comfortable 55 grams/1.94 ounces. This is a great looking Natural Finish Oom Paul. I will be adding it to the rebornpipes store in the American Pipe Makers Section. If you want to add it to your rack let me know. Thanks for walking through the restoration with me. Cheers.

Restoring a Stanwell Regd. No. 969-48 Hand Made Military Mount Billiard


Blog by Steve Laug

The next pipe I have chosen to work on is a nice looking smooth brown bent Billiard with a silver ferrule and a vulcanite military mount stem that I picked up in a lot of 10 pipes from a fellow on Vancouver Island who was selling his collection. The stamping on the left side of the shank reads Stanwell [over] Regd. No. 969-48 [over] Hand Made [over] In Denmark. On the right side it was stamped with the shape number 27. The silver ferrule is stamped Stanwell on the left side. The saddle military saddle stem has a stamped with a white Crown S Stanwell logo on the left side. The pipe is a nice looking pipe with some nice cross grain on the sides of the bowl and shank. It has a medium brown finish. It is light weight and comfortable pipe to hold. I removed the pipe from the Stanwell pipe sock and turned it over in my hands. It was in good condition.This is what I saw when I over the pipe.

  1. The finish was very good with only some hand oils on the sides of the bowl and light dust and grime ground into the finish around the bowl sides. The brown stain is dull but the it really highlights the grain around the bowl sides and shank
  2. The smooth rim top looked very good and the inner and outer edges look very good. There was no lava build on the top and the edges. There was some grime on the rim top but the rest looked clean and undamaged.
  3. There was a light cake in the bowl. It held the aroma of the tobaccos smoked in it – fortunately not aromatic. The walls looked to be undamaged but once I removed the light cake I could confirm that.
  4. The silver Stanwell ferrule on the shank end is undamaged and clean. There is some tarnish on the silver and it is dull but still looks good overall.
  5. The thin, fancy saddle stem has a white Crown S logo stamped on the left side that identifies it as a Stanwell pipe. It is in excellent condition with just some light tooth marks and chatter on the top and underside ahead of the button.

To summarize what I saw – this Stanwell Hand Made Regd. No. military mount Billiard is a well made pipe. It is a dirty but otherwise in good condition. The stem is lightly tooth marked but otherwise undamaged. There does not appear to be any calcification or oxidation on the stem surface. The look and feel of the pipe in the hand is great. It is going to clean up very well. Here are photos of the pipe before I started my clean up.   The bowl of the pipe looked very good. The rim top is clean but there is some darkening on the top back of the rim. There does not seem to be any damage to the smooth finish. The edges of the bowl were undamaged and looked very good. I see no warning signs in the rim top or the edges of the bowl. I took photos of the stem to show the condition. Though hard to see there is light tooth chatter on the surface of both sides ahead of the button but it should clean up easily with polishing. The next photos capture the stamping on the shank and the saddle stem. It read as I have noted above. I removed the stem from the shank and took a photo of it to give a sense of proportion. As is my practice when working on pipes I researched the provenance of the pipe. I turned first to Pipephil (http://pipephil.eu/logos/en/logo-stanwell.html) to see what I could find. I found a side bar note on the stamping on the pipe. I found there that the company had begun in 1942 and that the “Regd. No.” stamping was discontinued in late 1960s to very early 1970s. So now I knew that the pipe was made after 1942 and before the late 1960s or early 1970s. I wanted to see if I could pin down the date a bit more.

I then turned to Pipedia to learn more about the pipe (https://pipedia.org/wiki/Stanwell). I read through the article by Smoking Pipes.com there and would recommend it as being a good read. In the material there I found no additional information. I scrolled through the photos and the included catalogue pages and there I found something helpful. There was a late 1950s catalogue shown there that had the description of the pipe I have and also the shape 27 shown in the pages. I have included a screen capture of the page below. I have circled the shape in the photo below. With that information I had learned that this pipe was available in the late 1950s in the shape that I had in hand. The Regd. No. stamping on Stanwell pipes ended in the late 1960s or early 1970s. My guess would place this pipe in the period between 1958-1965. It is a real beauty.

Now it was time to work on the pipe itself. I started my work on the pipe by cleaning the internals. The cake was quite thin but it can hold residual oils from previous tobaccos and I wanted to check the bowl walls for burn damage or checking. I reamed it with a Savinelli Fitsall Pipe knife and took the cake back to bare briar. I sanded the walls with 220 grit sandpaper wrapped around a piece of dowel. I worked on them until they were smooth. There was no checking or burn damage to the bowl walls. It was quite clean. I cleaned out the internals of the shank and the airway in the stem with 99% isopropyl alcohol, cotton swabs and pipe cleaners. I also cleaned the adapter that had come with the pipe. I worked them over until they were clean. I scrubbed the bowl with undiluted Murphy’s Oil Soap to remove the oils in the sides of the bowl. I used a tooth brush to work it into the briar. I rinsed it off with warm running water to remove the soap and the grime. It looked much better once I dried it off.  I polished the briar with micromesh sanding pads. I choose to dry sand the briar rather than wet sand it. Again it is a matter of personal preference. I prefer to use the pads dry and find they work very well on the briar. I sand with each pad (9 in total) and group them by threes for ease of reference. I wipe the bowl down after each pad with a damp cloth to remove the sanding debris and check the briar. I love seeing the developing shine on the briar as I move through the pads which is why I include so many photos of this step.     I worked some Before & After Restoration Balm into the finish on the bowl and shank. I worked it into the surface of the briar with my fingertips to clean, enliven and protect the wood. Once the bowl was covered with the balm I let it sit for about 15 minutes and buffed it off with a soft cotton cloth and the shoe brush. I polished it with a microfiber cloth. I took photos of the pipe at this point in the process to show what the bowl looked like at this point. The light sandblast finish looks very good and has a real touch of beauty.    I set the bowl aside and worked on the stem. I dry sanded both sides of the stem with 1500-12000 grit pads to polish it further. I wiped it down with a cloth impregnated with Obsidian Oil after each sanding pad. I find that it still adds depth to the final shine on the stem which grew deeper with each sanding pad.  I finished polishing the stem with Before & After Pipe Polish – both Fine and Extra Fine polishes. I wiped the stem down with some Obsidian Oil afterwards and buffed it with a soft microfiber cloth.    I took the Stanwell Hand Made Military Mount 27 Billiard to wax and polish. I buffed the bowl and stem with Blue Diamond polish on the wheel to polish out the scratches in the vulcanite. I gave the pipe multiple coats of carnauba wax on the wheel and then buffed the pipe with a clean buffing pad to raise the shine. I hand buffed it with a microfiber cloth to deepen the shine. The pipe polished up pretty nicely. The stains used on the briar bring out the grain and the bowl looks excellent with the shine of the polished silver ferrule and the vulcanite Military mount saddle stem. The rich finish around the bowl and shank is quite remarkable and gives the pipe an incredible look. The Stanwell Hand Made 27 Billiard is a beautiful pipe and one that will be a great smoking pipe. The finished pipe is shown in the photos below with each of the stems. The dimensions of the pipe are Length: 6 inches, Height: 2 inches, Outside diameter of the bowl: 1 ¼ inches, Chamber diameter: ¾ of an inch. The weight of the large pipe is a light and comfortable 34 grams/1.20 ounces. This is a great looking Hand Made Billiard. I will be adding it to the rebornpipes store in the Danish Pipe Makers Section. If you want to add it to your rack let me know. Thanks for walking through the restoration with me. Cheers.

Restoring a Italian Made Savinelli Sistina 606 Bent Billiard with a Filter Stem


Blog by Steve Laug

The next pipe I have chosen to work on is a nice looking smooth brown bent Billiard with a brass and orange acrylic band/adornment on the acrylic stem that I picked up in a lot of 10 pipes from a fellow on Vancouver Island who was selling his collection. The stamping on the left side of the shank reads Savinelli [over] Sistina. On the right side it was stamped with a Savinelli Shield followed by the shape number 606 [over] Italy. The twin brass bands sandwiching a piece of golden acrylic on the stem has no stamping. The acrylic taper stem has a stamped gold shooting star on the left side. The pipe is a nice looking pipe with a black understain on the grain and a medium brown finish. It is light weight and comfortable pipe to hold. I picked up the pipe and turned it over in my hands. It was in good condition.

This is what I saw when I over the pipe.

  1. The finish was very good with only some light dust and grime ground into the finish around the bowl sides. The matte brown/black stain is dull but the it really highlights the grain around the bowl sides and shank
  2. The smooth rim top looked very good and the beveled inner edge and outer edges look very good. There was no lava build on the top and the edges were clean and undamaged.
  3. There was a light cake in the bowl. It held the aroma of the tobaccos smoked in it – fortunately not aromatic. The walls looked to be undamaged but once I removed the light cake I could confirm that.
  4. The band on the stem is twin brass bands sandwiching an amber/orange yellow piece of acrylic and looks to be good condition. It is undamaged and clean. The band looks really good with the finish on the bowl and the black acrylic taper stem.
  5. The acrylic taper stem has a gold shooting logo stamped on the left side that identifies it as a Savinelli pipe. It is in excellent condition with just some light tooth marks and chatter on the top and underside ahead of the button.

To summarize what I saw – this Savinelli Sistina 606 Bent Billiard is a well made pipe. It is a little dusty but otherwise in good condition. The acrylic stem is lightly tooth marked but otherwise undamaged. The tenon has a converter taking it from a 9mm to a standard unfiltered stem. There does not appear to be any calcification on the stem surface. The look and feel of the pipe in the hand is great. It is going to clean up very well. Here are photos of the pipe before I started my clean up.   The bowl of the pipe looked very good. The rim top is clean does not seem to have any damage to the smooth finish. The edges of the bowl were undamaged and looked very good. I see no warning signs in the rim top or the edges of the bowl. I took photos of the stem to show the condition of each one. Though hard to see there are light tooth chatter on the surface of both sides ahead of the button but it should clean up easily with polishing. The next photos capture the stamping on the shank. It read as I have noted above. I removed the stem from the shank and took a photo of it to give a sense of proportion. Now it was time to work on the pipe itself. I started my work on the pipe by cleaning the internals. The cake was quite thin but it can hold residual oils from previous tobaccos and I wanted to check the bowl walls for burn damage or checking. I reamed it with a Savinelli Fitsall Pipe knife and took the cake back to bare briar. I sanded the walls with 220 grit sandpaper wrapped around a piece of dowel. I worked on them until they were smooth. There was no checking or burn damage to the bowl walls. It was quite clean.I cleaned out the internals of the shank and the airway in the stem with 99% isopropyl alcohol, cotton swabs and pipe cleaners. I also cleaned the adapter that had come with the pipe. I worked them over until they were clean. I polished the briar with micromesh sanding pads. I choose to dry sand the briar rather than wet sand it. Again it is a matter of personal preference. I prefer to use the pads dry and find they work very well on the briar. I sand with each pad (9 in total) and group them by threes for ease of reference. I wipe the bowl down after each pad with a damp cloth to remove the sanding debris and check the briar. I love seeing the developing shine on the briar as I move through the pads which is why I include so many photos of this step.   I worked some Before & After Restoration Balm into the finish on the bowl and shank. I worked it into the surface of the briar with my fingertips to clean, enliven and protect the wood. Once the bowl was covered with the balm I let it sit for about 15 minutes and buffed it off with a soft cotton cloth and the shoe brush. I polished it with a microfiber cloth. I took photos of the pipe at this point in the process to show what the bowl looked like at this point. The light sandblast finish looks very good and has a real touch of beauty. I set the bowl aside and worked on the stem. I dry sanded both sides of the stem with 1500-12000 grit pads to polish it further. I wiped it down with a cloth impregnated with Obsidian Oil after each sanding pad. Though I know that it does not do much with the acrylic I find that it still adds depth to the final shine on the stem which grew deeper with each sanding pad.   I finished polishing the stem with Before & After Pipe Polish – both Fine and Extra Fine polishes. I wiped the stem down with some Obsidian Oil afterwards and buffed it with a soft microfiber cloth.   I took the Savinelli Sistina 606 Bent Billiard to wax and polish. I buffed the bowl and stem with Blue Diamond polish on the wheel to polish out the scratches in the acrylic. I gave the pipe multiple coats of carnauba wax on the wheel and then buffed the pipe with a clean buffing pad to raise the shine. I hand buffed it with a microfiber cloth to deepen the shine. The pipe polished up pretty nicely. The contrast of the dark understain on the briar brings out the grain and the medium brown stain looks excellent with the shine of the polished acrylic stem is quite stunning. The rich finish around the bowl and shank is quite remarkable and gives the pipe an incredible presence. The Savinelli Sistina Bent Billiard is a beautiful pipe and one that will be a great smoking pipe. The finished pipe is shown in the photos below with each of the stems. The dimensions of the pipe are Length: 6 inches, Height: 2 inches, Outside diameter of the bowl: 1 ¼ inches, Chamber diameter: 7/8 of an inch. The weight of the large pipe is a light and comfortable 53 grams/1.87 ounces. This is a great looking Bent Billiard. I will be adding it to the rebornpipes store in the Italian Pipe Makers Section. If you want to add it to your rack let me know. Thanks for walking through the restoration with me. Cheers.

Restoring a Stubby Italian Made Savinelli Pocket 106 Billiard with a Filter Stem


Blog by Steve Laug

The next pipe I have chosen to work on is a nice looking smooth black and brown Billiard with a thin silver band/adornment on the acrylic stem that I picked up in a lot of 10 pipes from a fellow on Vancouver Island who was selling his collection. The stamping on the left side of the shank reads Savinelli [over] Pocket. On the right side it was stamped with the Savinelli Shield followed by the shape number 106 [over] Italy. The thin silver band on the stem has no stamping. The acrylic taper stem has a stamped silver Savinelli S shield. The pipe is a nice looking dark finish. It is short, light weight and comfortable to hold. I picked up the pipe and turned it over in my hands. It was in good condition.

This is what I saw when I over the pipe.

  1. The finish was very good with only some light dust and grime ground into the finish around the bowl sides. The dark brown/black stain is dull but the it really highlights the grain around the bowl sides and shank
  2. The smooth rim top looked very good with some spots on the inner bevel and the out edge where the finish had lightened. There was no lava build on the top and the edges were clean and undamaged.
  3. There was a light cake in the bowl. It held the aroma of the tobaccos smoked in it – fortunately not aromatic. The walls looked to be undamaged but once I removed the light cake I could confirm that.
  4. The band on the stem is silver in colour and looks to be good condition. It is undamaged and clean. The thin band looks really good with the finish on the bowl and the acrylic taper stem.
  5. The acrylic taper stem has a silver Savinelli Shield logo stamped on the topside that identifies it as a Savinelli pipe. It is in excellent condition with just some light tooth chatter on the top and underside ahead of the button.

To summarize what I saw – this Savinelli Pocket 106 Billiard is a well made pipe. It is a little dusty but otherwise in good condition. The acrylic stem is lightly marked but otherwise undamaged. The tenon has a converter taking it from a 9mm to a 6mm stem. There does not appear to be any calcification on the stem surface. The look and feel of the pipe in the hand is great. It is going to clean up very well. Here are photos of the pipe before I started my clean up. The bowl of the pipe looked very good. The rim top is clean does not seem to have any damage to the smooth finish. The edges of the bowl were undamaged and looked very good. I see no warning signs in the rim top or the edges of the bowl. I took photos of the stem to show the condition of each one. Though hard to see there are light tooth chatter on the surface of both sides ahead of the button but it should clean up easily with sandpaper.The next photo captures the stamping on the shank. It read as I have noted above. I removed the stem from the shank and took a photo of it to give a sense of proportion.Now it was time to work on the pipe itself. I started my work on the pipe by cleaning the internals. The cake was quite thin but it can hold residual oils from previous tobaccos and I wanted to check the bowl walls for burn damage or checking. I reamed it with a Savinelli Fitsall Pipe knife and took the cake back to bare briar. I sanded the walls with 220 grit sandpaper wrapped around a piece of dowel. I worked on them until they were smooth. There was no checking or burn damage to the bowl walls. It was quite clean. I cleaned out the internals of the shank and the airway in the stem with 99% isopropyl alcohol, cotton swabs and pipe cleaners. I worked them over until they were clean.     I polished the briar with micromesh sanding pads. I choose to dry sand the briar rather than wet sand it. Again it is a matter of personal preference. I prefer to use the pads dry and find they work very well on the briar. I sand with each pad (9 in total) and group them by threes for ease of reference. I wipe the bowl down after each pad with a damp cloth to remove the sanding debris and check the briar. I love seeing the developing shine on the briar as I move through the pads which is why I include so many photos of this step. I used a Walnut stain pen to touch up the faded spots on the rim top and edges. I set it aside to let the stain cure. It matched the rest of the stain on the bowl top and sides. I worked some Before & After Restoration Balm into the finish on the bowl and shank. I worked it into the surface of the briar with my fingertips to clean, enliven and protect the wood. Once the bowl was covered with the balm I let it sit for about 15 minutes and buffed it off with a soft cotton cloth and the shoe brush. I polished it with a microfiber cloth. I took photos of the pipe at this point in the process to show what the bowl looked like at this point. The light sandblast finish looks very good and has a real touch of beauty. I set the bowl aside and worked on the stem. I dry sanded both sides of the stem with 1500-12000 grit pads to polish it further. I wiped it down with a cloth impregnated with Obsidian Oil after each sanding pad. Though I know that it does not do much with the acrylic I find that it still adds depth to the final shine on the stem which grew deeper with each sanding pad. I finished polishing the stem with Before & After Pipe Polish – both Fine and Extra Fine polishes. I wiped the stem down with some Obsidian Oil afterwards and buffed it with a soft microfiber cloth. I took the Savinelli Pocket 106 Billiard to wax and polish. I buffed the bowl and stem with Blue Diamond polish on the wheel to polish out the scratches in the acrylic. I gave the pipe multiple coats of carnauba wax on the wheel and then buffed the pipe with a clean buffing pad to raise the shine. I hand buffed it with a microfiber cloth to deepen the shine. The pipe polished up pretty nicely. The contrast of the dark stain on the briar with the shine of the polished acrylic stem is quite stunning. The rich finish around the bowl and shank is quite remarkable. The Savinelli Pocket 106 Billiard is a beautiful pipe and one that will be a great smoking pipe. The finished pipe is shown in the photos below with each of the stems. The dimensions of the pipe are Length: 5 inches, Height: 1 ½ inches, Outside diameter of the bowl: 1 ¼ inches, Chamber diameter: ¾ of an inch. The weight of the small pipe is a light and comfortable 35 grams/1.23 ounces. This is a great looking Savinelli Pocket Billiard. I will be adding it to the rebornpipes store in the Italian Pipe Makers Section. If you want to add it to your rack let me know. Thanks for walking through the restoration with me. Cheers.

Restoring a Black Falcon Base with a Meerschaum Bowl and a Dental Bit


Blog by Steve Laug

The next pipe I have chosen to work on is a nice looking Meerschaum Bowl Black Falcon with a a vulcanite dental bit stem that I picked up in a lot of 10 pipes from a fellow on Vancouver Island who was selling his collection. The stamping on a heel of the bowl reads Falcon [over] Made in [over] England. The vulcanite dental taper stem has a stamped Falcon logo on the topside. The pipe is a nice looking Meerschaum. It is light weight and comfortable to hold. I brought pipe to the work desk and turned it over in my hands. It was in good condition.

This is what I saw when I examined it.

  1. The finish on the smooth meerschaum was very good with a light patina developing around the rim top of the bowl. The fit and finish on the bowl and stem is very good.
  2. The smooth rim top looked very good with some light patina developing. There was no lava build on the top and the edges were clean and undamaged.
  3. There was no cake in the bowl. It held the aroma of the tobaccos smoked in it – fortunately not aromatic. My guess is that when I remove the bowl from the base that will be solved. The walls looked to be undamaged but once I removed the light cake I could confirm that.
  4. The bowl sits snug in the base with no gaps or signs of leakage around the joint.
  5. The vulcanite dental bit has a Falcon stamped on top that identifies it as a Falcon pipe. It is in excellent condition with no tooth chatter and marks on the top and underside ahead of the button.

To summarize what I saw – the Black Falcon Meerschaum Bowled pipe is in excellent condition. It is a little dusty but otherwise looks good. The vulcanite dental bit is clean and no marks are on the ridges of the bit. The look and feel of the pipe in the hand is great. It is going to clean up very well. Here are photos of the pipe before I started my clean up. The bowl of the pipe looked very good. The rim top is clean does not seem to have any damage to the smooth finish. The edges of the bowl were undamaged and looked very good. I took photos of the stem to show the condition of each one. Though hard to see there was light tooth chatter on the surface of both sides ahead of the button but it should clean up easily with micromesh pads.The next photo captures the stamping a smooth patch on the underside of the base. It read as I have noted above. I took a photo of the logo on the topside of the stem as well.I removed the bowl from the base and took some photos. There was a pipe cleaner ring in the bottom of the base that was used as a Falcon filter ring. It absorbed the tars and oils from the smoke. It was stiff and dirty. The base underneath is also dirty.I took photos of the bowl to show the condition. The top looked very good in the photos and it has some developing patina. There were no nicks or scratches in the meerschaum bowl – top, sides or base. The base is quite unique and not one I had seen before. There was a nylon threaded ring around the meerschaum end. Around the top of the nylon base there was a rubber “O-ring”. I took photos of the base. The painted black base and shank is clean and undamaged. Like other Falcons I have worked on the stem is pressed into place and is not easily removable. It looks to be in good condition.I used a dental pick to remove the pipe cleaner ring from the bottom of the base. Once it was out of the bowl you can see the oils and debris in the base. I cleaned it out with alcohol, cotton swabs and pipe cleaners. I used pipe cleaners to clean out the shank and the stem. I polished the meerschaum rim top and bowl sides with micromesh sanding pads – dry sanding with 1500-12000 grit pads. I wiped the meer down after each sanding pad using a damp cloth to remove the sanding debris. It took on a rich shine. I set the bowl aside and turned my attention to the stem. It was new so it only needed to be polished. I use micromesh sanding pads and water to wet sand the stem with 1500-12000 grit sanding pads. I wiped it down after each sanding pad with Obsidian Oil on a cotton rag after each sanding pad as I find it does two things – first it protects the vulcanite and second it give the sanding pads bite in the polishing process. After finishing with the micromesh pads I rub the stem down with Before & After Fine and Extra Fine stem polish as it seems to really remove the fine scratches in the vulcanite. I rub the Fine Polish on the stem and wipe it off with a paper towel and then repeat the process with the Extra Fine Polish. I finished the polishing of the stem down with a final coat of Obsidian Oil and set the stem aside to let the oil absorb. This process gives the stem a shine and also a bit of protection from oxidizing quickly.   I took the Black Falcon with a Meerschaum bowl to wax and polish. I buffed the bowl and stem with Blue Diamond on the buffing wheel to polish out the scratches in the acrylic. I gave the bowl and stem several coats of carnauba wax on the wheel. I buffed the pipe with a clean buffing pad to raise the shine. I hand buffed it with a microfiber cloth to deepen the shine. The pipe polished up pretty nicely. The contrast of the natural colour of the meerschaum bowl with the shine of the polished black base and stem is stunning. The smooth finish around the bowl and shank is quite remarkable and gives the pipe a beautiful look. The Falcon Meerschaum is a nice looking pipe and one that will be a great smoking pipe. The finished pipe is shown in the photos below with each of the stems. The dimensions of the pipe are Length: 6 inches, Height: 1 ½ inches, Outside diameter of the bowl: 1 ¾ inches, Chamber diameter: ¾ of an inch. The weight of the large pipe is a light and comfortable 35 grams/1.23 ounces. It is an interesting Freehand that I wish I could learn more about but as it is it should be a fun smoke. I will be putting it on the rebornpipes store in the British Pipe Makers Section. As always I encourage your questions and comments as you read the blog. Thanks to each of you who are reading this blog. Remember we are not pipe owners; we are pipemen and women who hold our pipes in trust until they pass on into the trust of those who follow us.

Restoring a Beautiful Stanwell Relief 12 Sandblast Billiard


Blog by Steve Laug

The next pipe I have chosen to work on is a nice looking sandblast black and brown Billiard with a thin silver band/adornment and an acrylic stem that I picked up in a lot of 10 pipes from a fellow on Vancouver Island who was selling his collection. The stamping on a smooth patch on the underside of the shank reads Stanwell [over] Relief in script. The shape number 12 is on the right side of the stamp toward the top of the smooth panel. The thin silver band on the shank has stamping. The acrylic taper stem has a silver Stanwell Crown S inlaid. The pipe is a nice looking sandblast. It is light weight and comfortable to hold. The pipe came in a pipe sock stamped with a horse and carriage in an oval [over] Stanwell. I took the pipe out of the sock and turned it over in my hands. It was in good condition.This is what I saw when I took it out of the pipe sock.

  1. The finish was very good with only some light dust in the grain around the bowl side. The dark brown/black stain is dull but the it really highlights the grain around the bowl sides and shank
  2. The smooth rim top looked very good with some light darkening but not much. There was no lava build on the top and the edges were clean and undamaged.
  3. There was a light cake in the bowl. It held the aroma of the tobaccos smoked in it – fortunately not aromatic. The walls looked to be undamaged but once I removed the light cake I could confirm that.
  4. The band is silver and looks to be good condition. It is undamaged and clean. The thin band looks really good with the “Relief” finish and the smooth rim top.
  5. The acrylic taper stem has a silver Crown S logo that identifies it as a Stanwell pipe. It is in excellent condition with just some light tooth chatter and marks on the top and underside ahead of the button.

To summarize what I saw – this Stanwell Relief Sandblast 12 Billiard is a well made pipe. It is a little dusty but otherwise in good condition. The acrylic stem is lightly marked but otherwise undamaged. There does not appear to be any calcification on the stem surface. The look and feel of the pipe in the hand is great. It is going to clean up very well. Here are photos of the pipe before I started my clean up. The bowl of the pipe looked very good. The rim top is clean does not seem to have any damage to the smooth finish. The edges of the bowl were undamaged and looked very good. I see no warning signs in the rim top or the edges of the bowl. I took photos of the stem to show the condition of each one. Though hard to see there are light tooth marks and chatter on the surface of both sides ahead of the button but it should clean up easily with sandpaper.The next photo captures the stamping a smooth patch on the underside of the shank. It read as I have noted above. I took a photo of the logo on the left side of the stem as well. I removed the stem from the shank and took a photo of it to give a sense of proportion.Now it was time to work on the pipe itself. I started my work on the pipe by cleaning the internals. The cake was quite thin but it can hold residual oils from previous tobaccos and I wanted to check the bowl walls for burn damage or checking. I reamed it with a Savinelli Fitsall Pipe knife and took the cake back to bare briar. I sanded the walls with 220 grit sandpaper wrapped around a piece of dowel. I worked on them until they were smooth. There was no checking or burn damage to the bowl walls. It was quite clean. I cleaned out the internals of the shank and the airway in the stem with 99% isopropyl alcohol, cotton swabs and pipe cleaners. I worked them over until they were clean. I worked some Before & After Restoration Balm into the rusticated finish on the bowl and shank and the rim top. I worked it into the surface of the briar with my fingertips to clean, enliven and protect the wood. I used a horse hair shoe brush to work it into the crevices and rings around bowl cap. Once the bowl was covered with the balm I let it sit for about 15 minutes and buffed it off with a soft cotton cloth and the shoe brush. I polished it with a microfiber cloth. I took photos of the pipe at this point in the process to show what the bowl looked like at this point. The light sandblast finish looks very good and has a real touch of beauty.   I set the bowl aside and worked on the stem. I dry sanded both sides of the stem with 1500-12000 grit pads to polish it further. I wiped it down with a cloth impregnated with Obsidian Oil after each sanding pad. Though I know that it does not do much with the acrylic I find that it still adds depth to the final shine on the stem which grew deeper with each sanding pad. I finished polishing the stem with Before & After Pipe Polish – both Fine and Extra Fine polishes. I wiped the stem down with some Obsidian Oil afterwards and buffed it with a soft microfiber cloth. I took the Stanwell Relief 12 Sandblast Billiard bowl to wax and polish. I don’t buff the sandblast bowl on the wheel as it leaves a lot of grit in the deep grooves of the finis. I gave the bowl and shank multiple coats of Conservator’s Wax and buffed it with a shoe brush to raise the shine. The wax is great protection and I love using it on sandblast finishes because it does not build up in the grooves and valleys like carnauba wax does. I buffed it by hand with a microfiber cloth to finish the shine. I polished the stem with Blue Diamond on the buffing wheel to polish out the scratches in the acrylic. I buffed the pipe with a clean buffing pad to raise the shine. I hand buffed it with a microfiber cloth to deepen the shine. The pipe polished up pretty nicely. The contrast of the dark stain on the briar with the shine of the polished acrylic stem is quite stunning. The rich sandblast finish around the bowl and shank is quite remarkable and gives the pipe an incredible tactile presence. The Stanwell Relief 12 Sandblast Billiard is a beautiful pipe and one that will be a great smoking pipe. The finished pipe is shown in the photos below with each of the stems. The dimensions of the pipe are Length: 5 inches, Height: 2 inches, Outside diameter of the bowl: 1 ¼ inches, Chamber diameter: ¾ of an inch. The weight of the large pipe is a light and comfortable 46 grams/1.62 ounces. This is a great looking Stanwell Relief 12 Billiard. I will be adding it to the rebornpipes store in the Danish Pipe Makers Section. If you want to add it to your rack let me know. Thanks for walking through the restoration with me. Cheers.

Refreshing a Damaged CAO Lattice Meerschaum Pipe


Blog by Steve Laug

We probably paid too much for this beautiful meerschaum pipe but the shape and the carving are so unique that we had to buy it. It is made by CAO and is a shape I would call a Grecian urn. It has lattice carving around the bowl side and the rim is smooth. The shank has a pattern that looks a lot like scales and swirls. There was some very nice colouring happening on the shank and lightly on the bowl sides and rim. There was a cake in the bowl and some lava overflow on the rim top. There were some missing separators between two of the lattice windows but otherwise the bowl was undamaged. The stem was Lucite and had a round brass CAO logo on the top left side of the saddle. The stem had metallic gold flecks mixed in with the Lucite so that it had a natural sparkle to the reddish amberlike stem. There were not any tooth marks or dents on the stem surface but there were small scratches in the Lucite. There was also some wear and tear to the sharp edge of the button that would need to be cleaned up. Jeff took some photos of the pipe before he started the cleanup. The next series of close up photos show the condition of the bowl and rim and the overall condition of the bowl sides. You can see the bowl and cake with the overflow of lava on the rim top. There is also some fuzz that has attached to the cake. It was a dirty bowl. The sides of the bowl look very good other than the damage to the separators between three of the tear drops in the lattice work on the front of the bowl. The second, third and fourth photos below show the damaged portion circled in red. Other than that damage to the front of the bowl the rest of the carving is in excellent condition. The pipe, though imperfect will nonetheless be a beautiful addition to someone’s collection. They will just have to overlook the damaged area and enjoy the pipe.The connector between the shank and stem is a push tenon. There is a Delrin insert in the shank of the pipe and a Delrin tenon threaded into the end of the stem. It is dirty and stained but is undamaged.The round brass logo is dirty but it is undamaged. It is inset into the left topside of the saddle stem. The surrounding stem is quite dirty but there is no damage.The next two photos show the condition of the top and underside of the stem. You can see the metallic sparkles in the saddle portion and the scratches in the Lucite.Jeff carefully reamed out the bowl with a Savinelli Fitsall Pipe Knife and took it back to the bare meerschaum walls. He scrubbed the rim top and scraped off the lava on the surface with a knife. He carefully cleaned the exterior of the bowl with a damp cloth to avoid further damage to the front of the bowl. He cleaned out the shank and airway in the bowl and stem with alcohol and pipe cleaners. He cleaned out the recessed area around the inset tenon in the stem with alcohol and cotton swabs. He washed the exterior of the stem with clean water. I took photos of the pipe when I brought it to my work table to show the condition of the pipe after Jeff’s work and before I polished it. I took a photo of the rim top to show how well it cleaned up. Jeff did a great job getting rid of the lava overflow. I also took a photo of the cleaned up damaged area of the bowl.The stem cleaned up really nicely. The gold flecks in the Lucite really stand out now and the gold/brass logo inset looks really good now. The stem should polish up nicely.The mortise insert in the shank had a ragged edge to it. I used a sharp knife and a pen knife to clean up the ragged end. I wanted a smooth fit in the shank. Once I had finished that part of the shank and sanded it down I worked on polishing the rim and ring on the top of the bowl. I polished it with micromesh sanding pads – wet sanding with 1500-2400 grit pads and dry sanding with 3200-12000 grit pads. I wiped the rim down after each pad with a damp cotton pad. I polished out the scratches and marks in the metallic Lucite stem with micromesh sanding pads – wet sanding it with 1500-2400 grit pads and dry sanding it with 3200-12000 grit pads. I wiped the stem down with a damp cotton pad after each sanding pad. I lightly buffed the stem with Blue Diamond on the buffing wheel. After the final pad I wiped it down with a damp pad and rubbed it down with a final coat of oil and set it aside to dry. I put the stem back on the bowl and carefully worked the pipe on the buffing wheel with a clean pad. I used a gentle touch on both the meerschaum and the Lucite stem so as not to damage either of them. I gave the meerschaum bowl multiple coats of Conservator’s Wax and hand buffed it with a shoe brush and a microfiber cloth to deepen the shine. The finished pipe is shown in the photos below. Even with the damaged area on the front of the bowl it still looks better than it did in the beginning. The unique shape and lattice work carving work together to make this a beautiful pipe. The dimensions of the pipe are: Length: 6 inches, Height: 2 ½ inches, Diameter of the bowl: 1 1/8 inch, Diameter of the chamber: 3/4 inches. I will be adding this one to the rebornpipes store shortly if you are interested in adding it to your collection. It will make a fine addition to the rack. If you are interested email me at slaug@uniserve.com or send me a message on Facebook. Thanks for looking.