Tag Archives: removing tarnish on a silver band

Restoring a Peterson’s K&P Dublin Made in Ireland Canadian


by Steve Laug

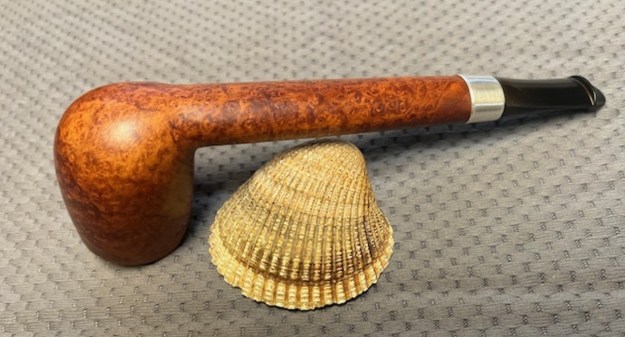
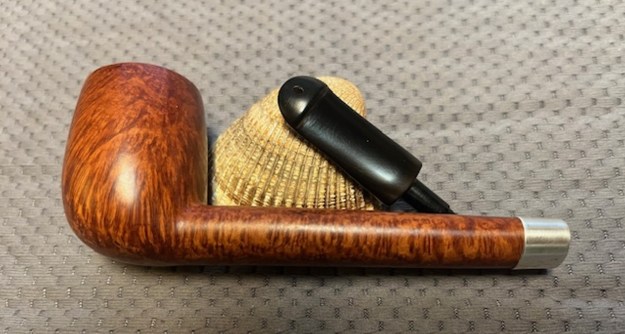
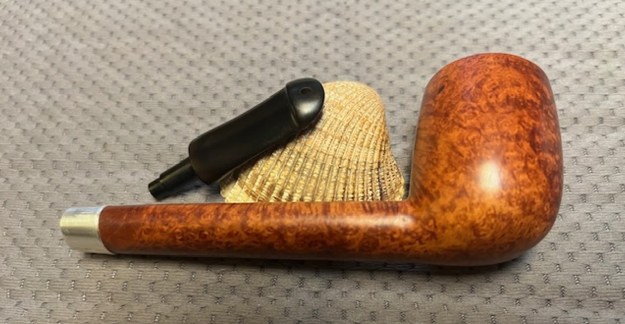
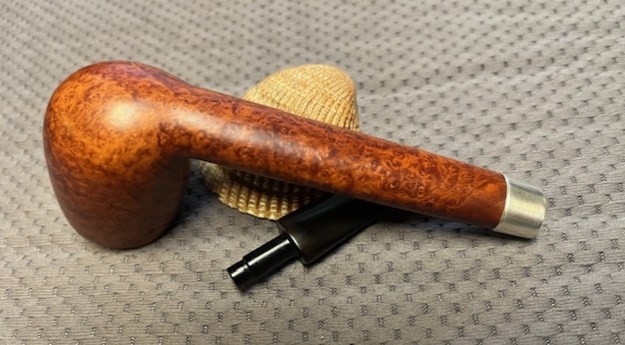
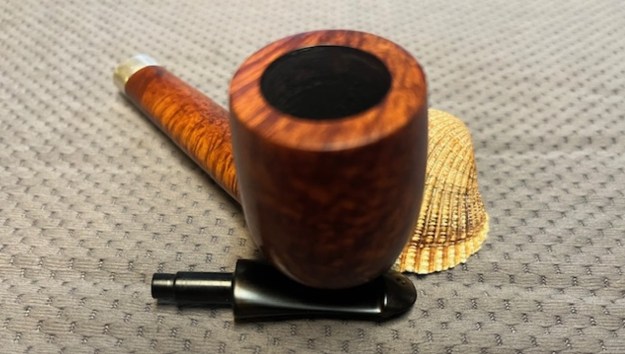
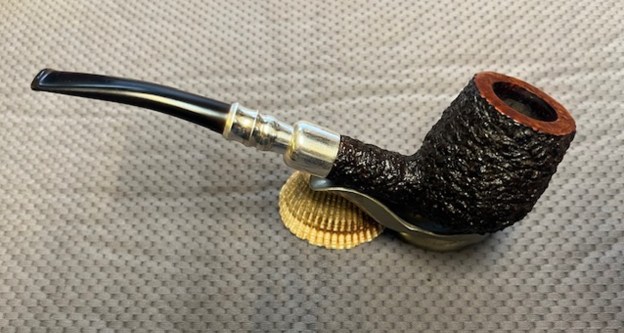
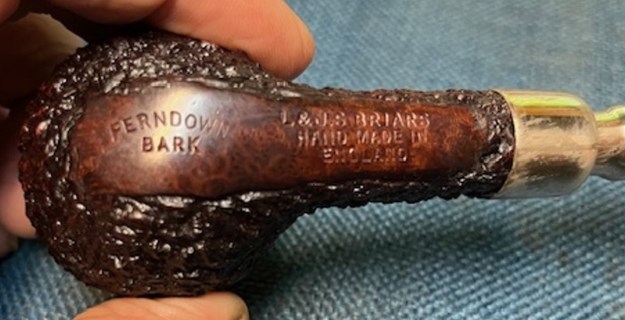
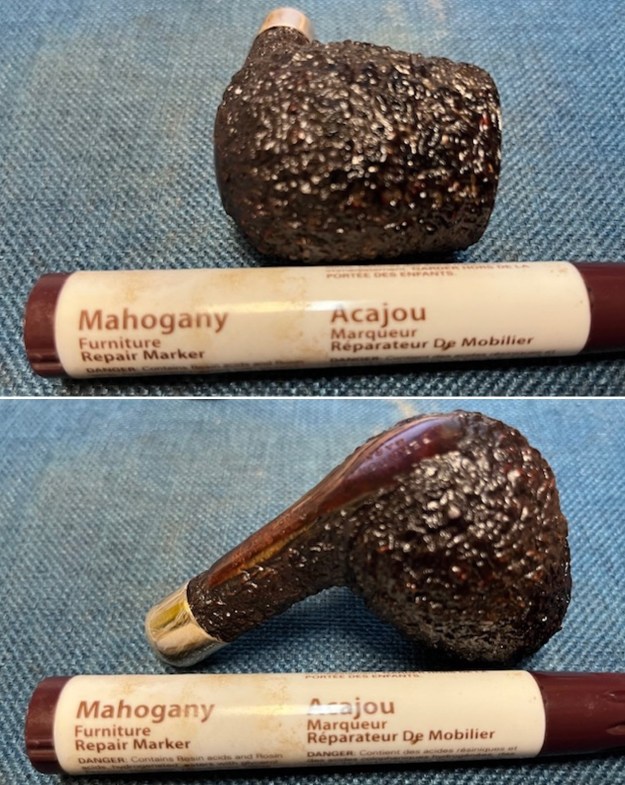
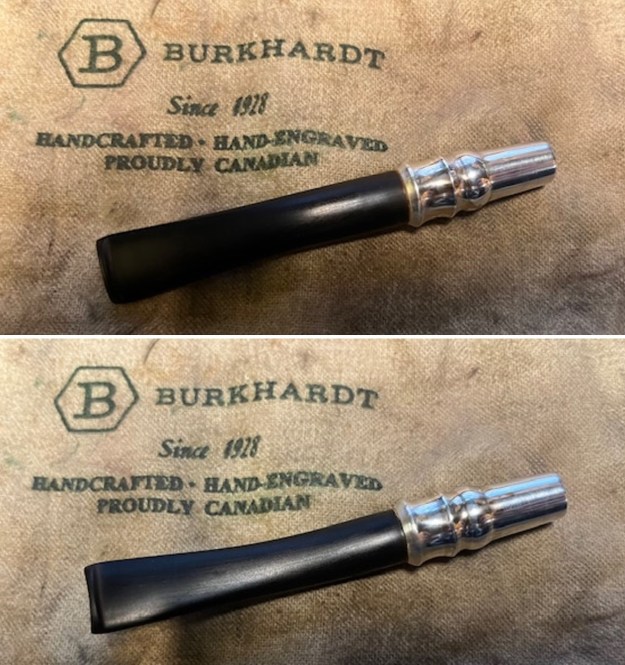
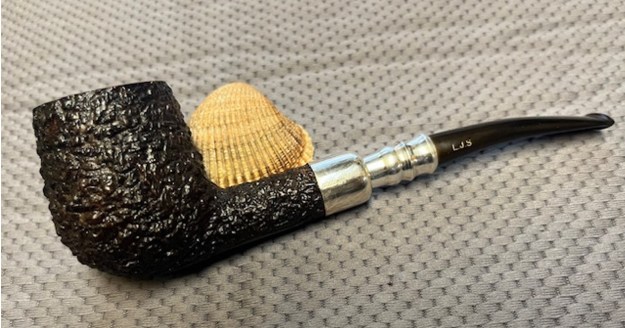
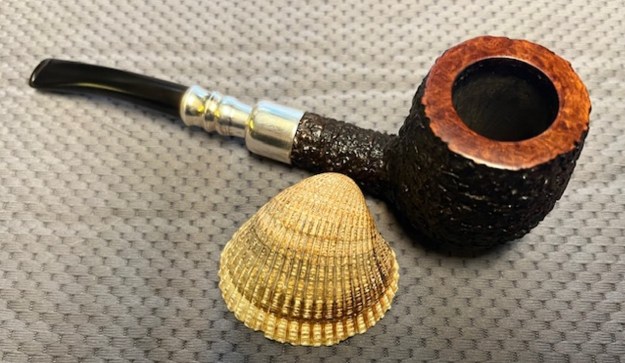
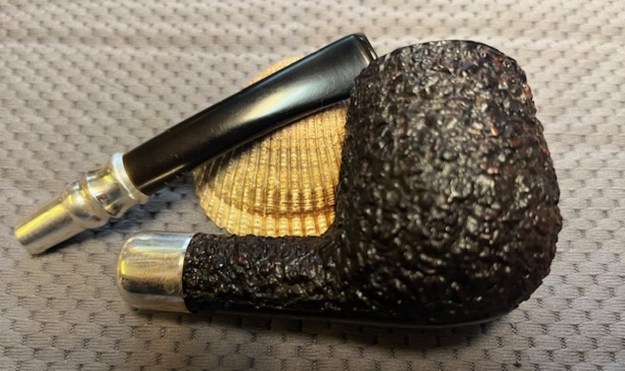
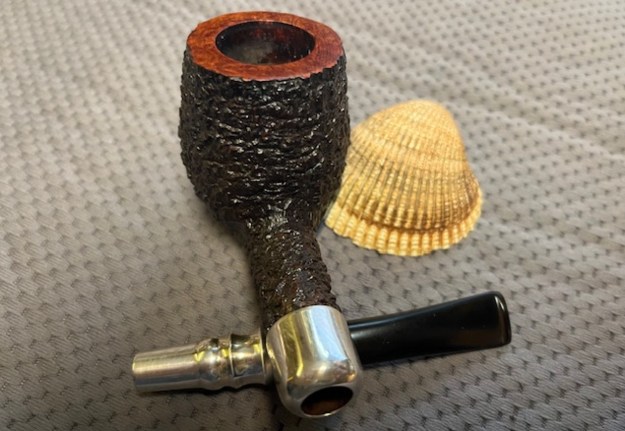
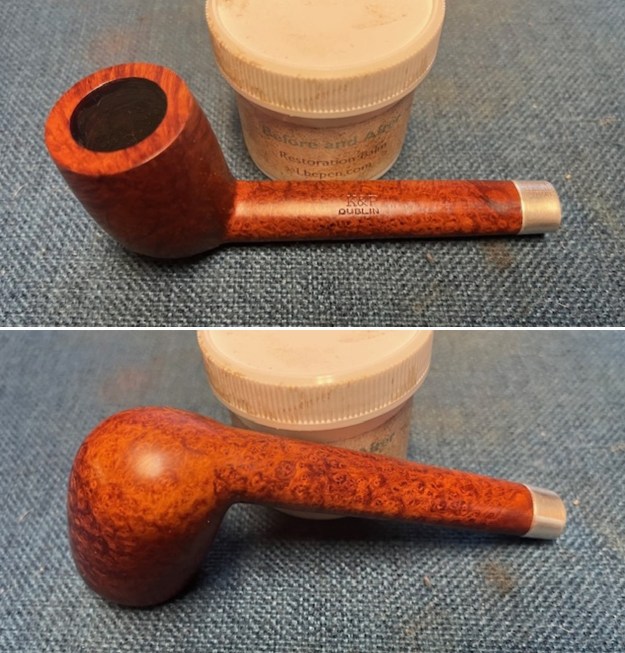
Last weekend Kenneth and I went to an antique show in New Westminster, BC. It is our third year going but still we have no idea what we are going to fine each time we go. It is always a part of the fun to wander through the various stalls and see what the vendors are offering on their tables. There are always surprising things – items that I grew up with that are now called antiques or at least collectibles. If only my foresight had been as good as my memory is now I could have sold many of the things I played with and ate from! But I digress. Back to the pipe hunting. We saw the usual offerings of things Grabow and Medico that were in very rough shape. I think we both have become much more selective over time and we passed on spending time with them. I did a few items that I picked up to restore. I took a picture of the group of fout pipes. In the left column from top to bottom there was a Peterson’s System Standard 1307 (Canadian number on a 307 shape), a Bulldog that was stamped Fraser Valley Made in Canada with a white dot stem and at the bottom was another Peterson – a K&P Dublin Made in Ireland Canadian with a Sterling Silver Band. The one on the right side is an older GBD Nosewarmer with an orific button on the short stem. Not a bad group of pipes to bring to the work table.
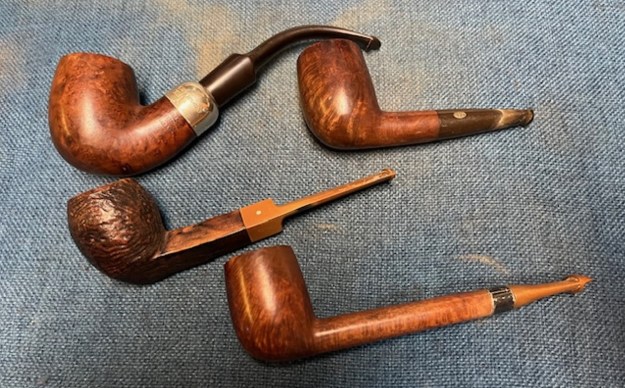
The first of them I chose to bring to the table was the K&P Canadian at the bottom of the above photo. It is a pretty pipe and bears the stamping on the top of the shank that reads K&P [over] Dublin. On the underside the COM stamp is Made in Ireland in a circle. That format for the stamp made the pipe one that was made between 1945-1972. On the worn and oxidized Silver band it is stamped K & P in three shields [over] Sterling [over] Silver. The bowl has a light cake but the rim top and edges are very clean. The shank looks to be clean also. The stem is heavily oxidized and will take some work to bring it back to black. There does not appear to be any stamping or logo on the stem. It is an original P-lip style stem and it is in surprisingly good condition under the oxidation. I took photos of the pipe before I started my clean up work on it. 
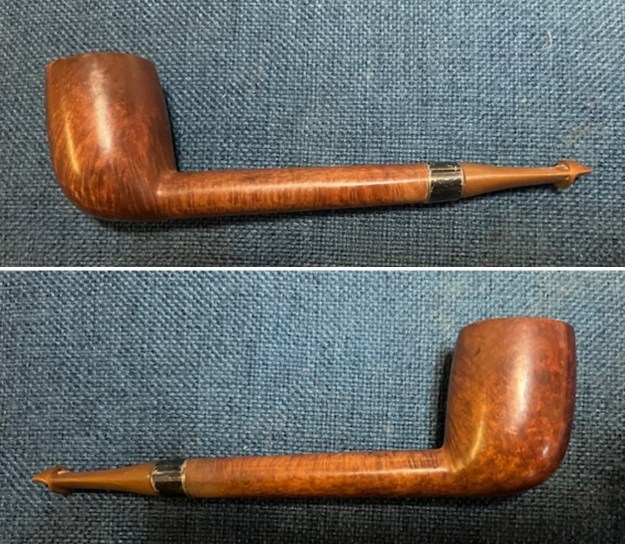
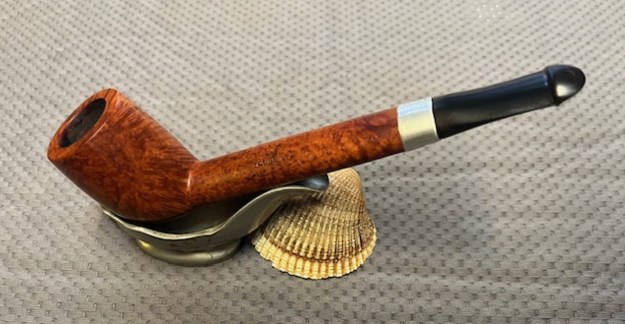
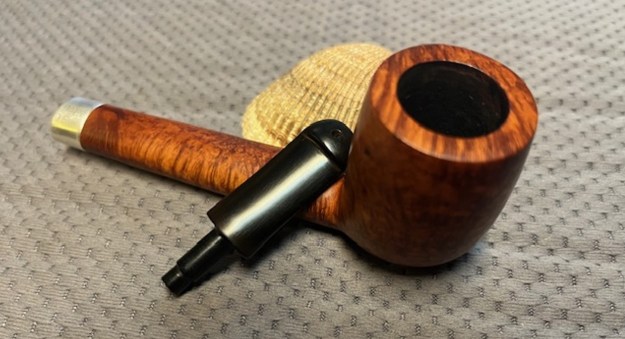
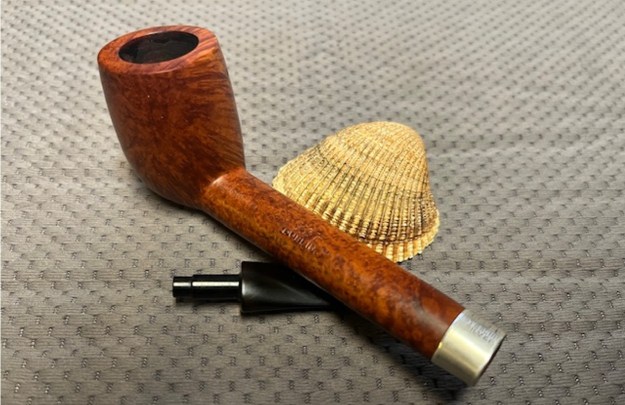
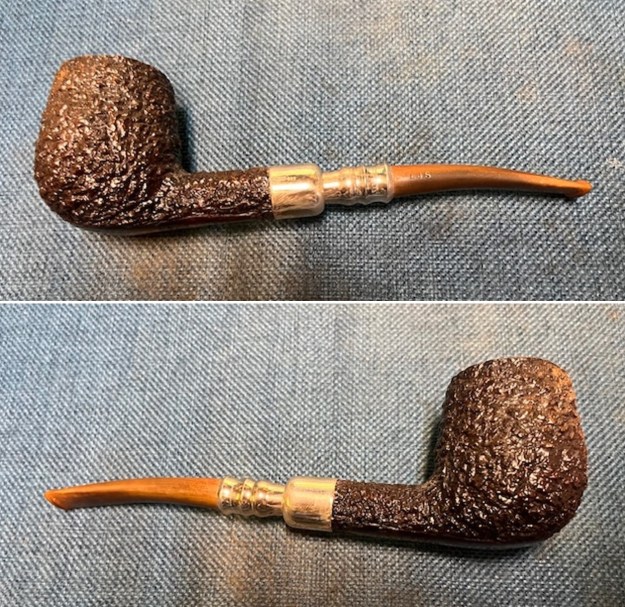
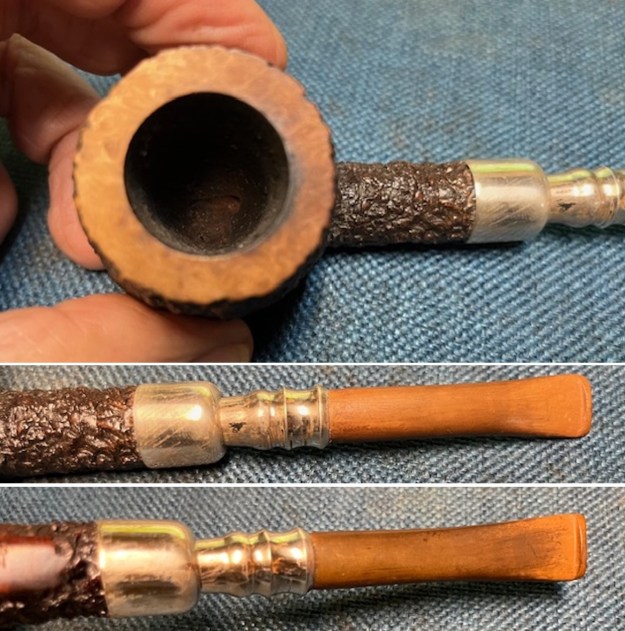
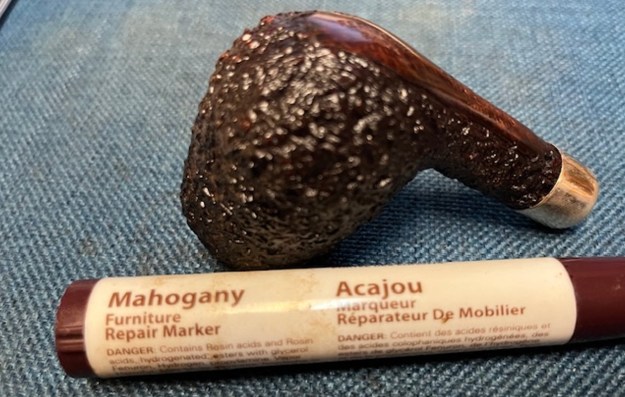
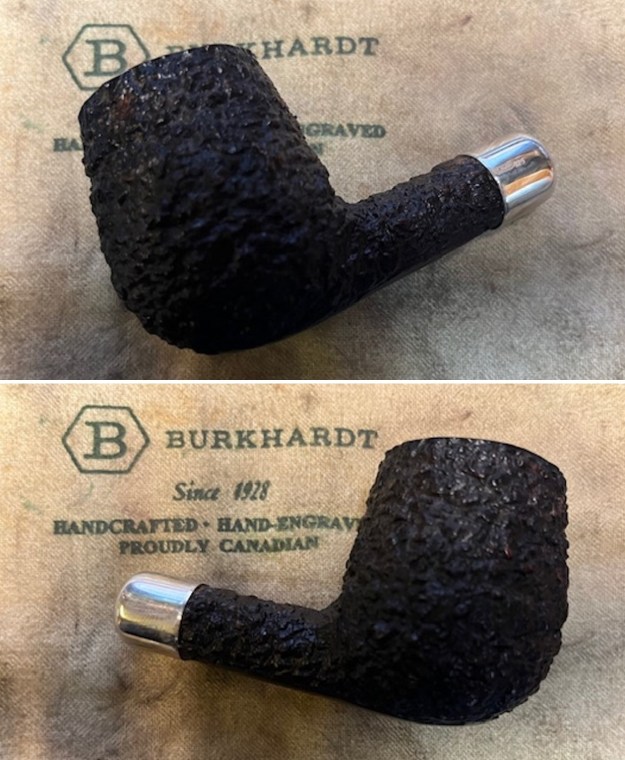
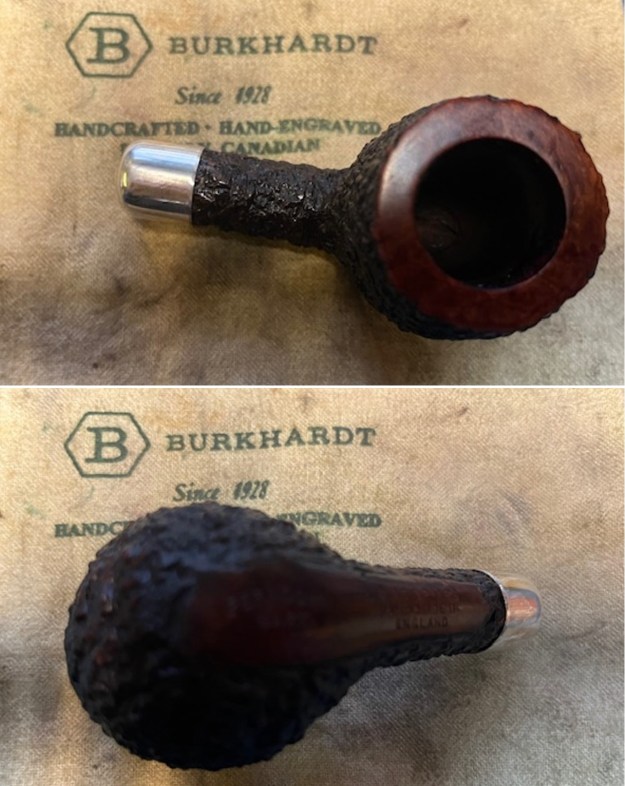
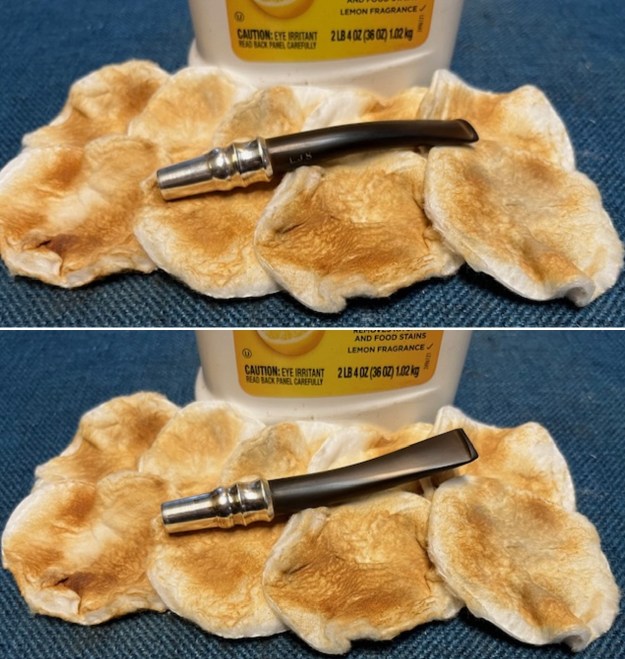
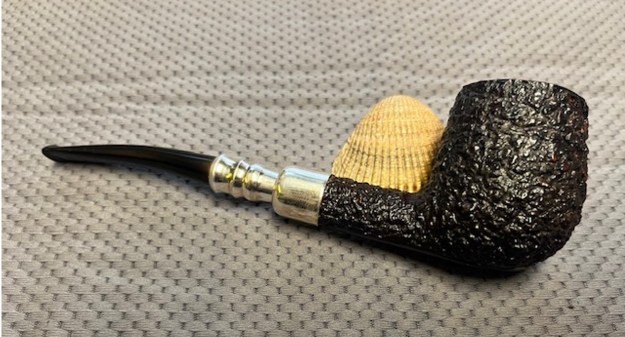
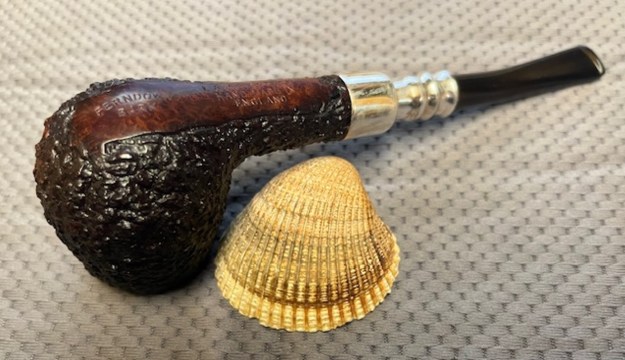
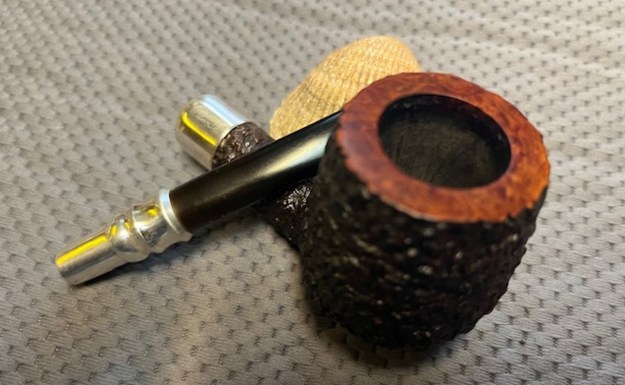
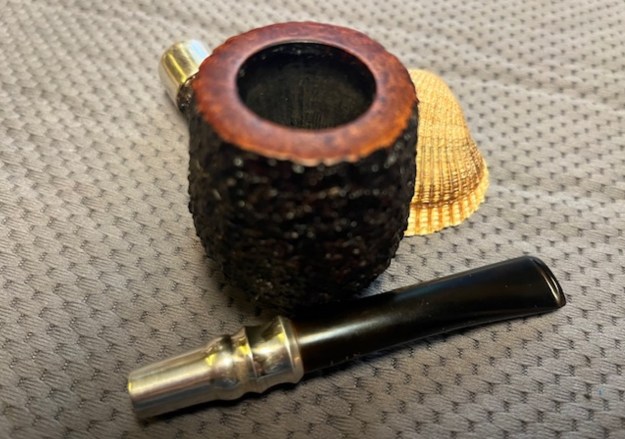
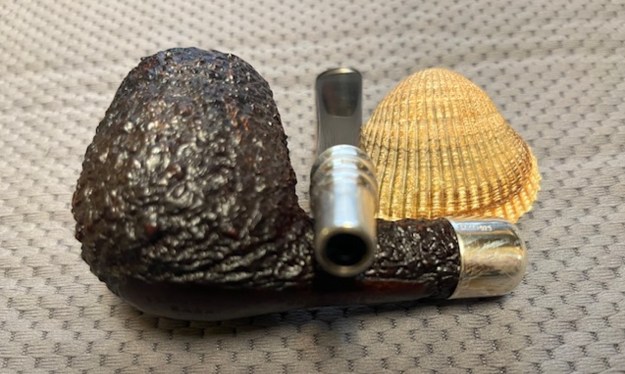
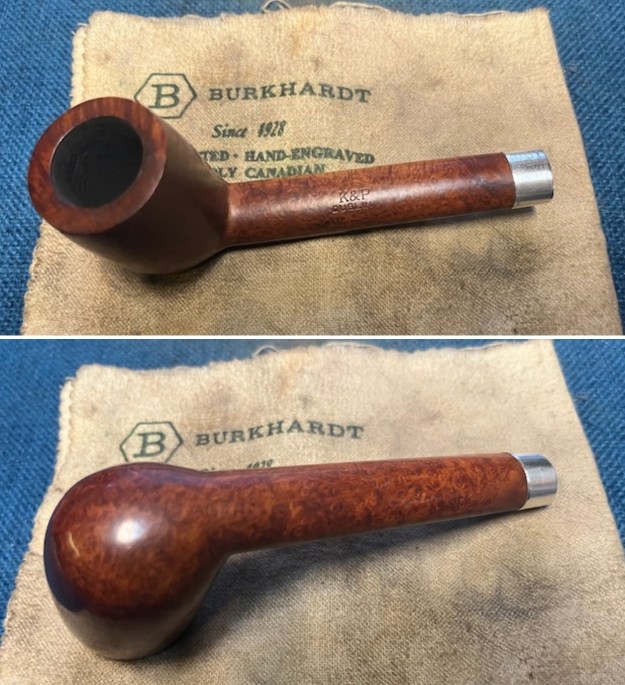
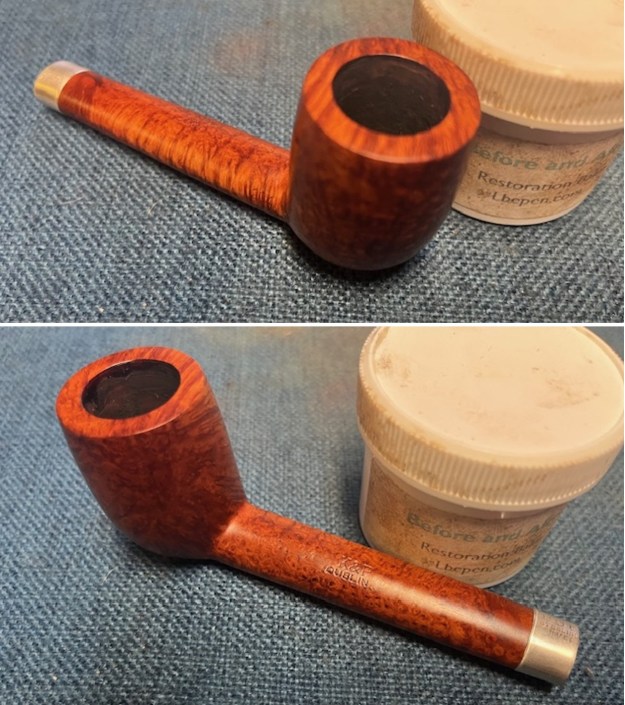
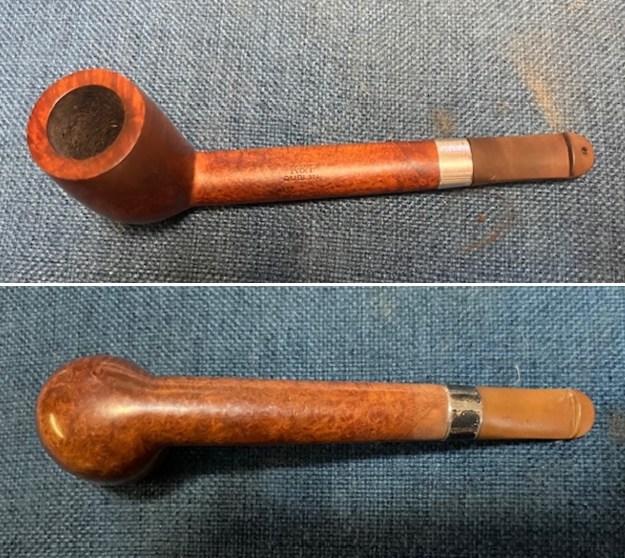
I took a close-up photo of the rim top to show the condition of the bowl and inner edge of the bowl and the stem. You can clearly see the cake in the bowl and the darkening and lava on the rim top. The stem photos show the deep oxidation on the stem and the silver band.
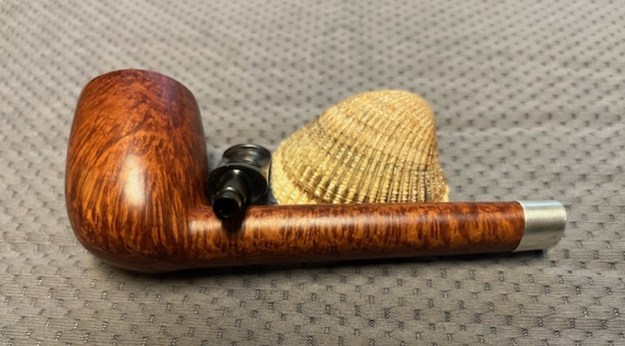
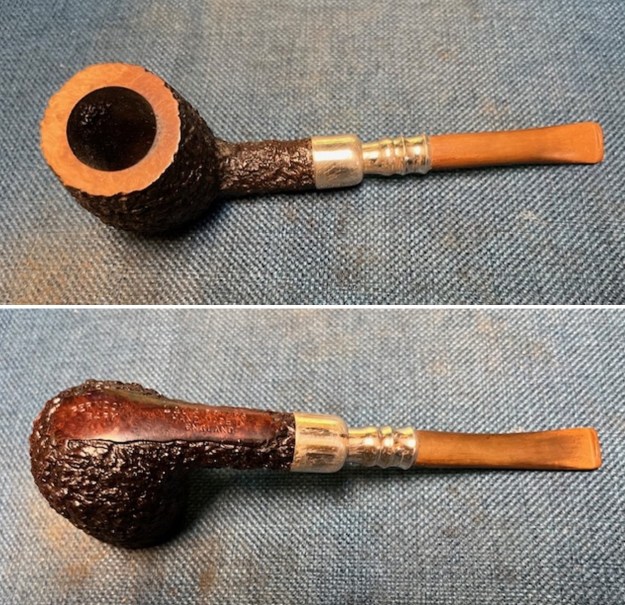
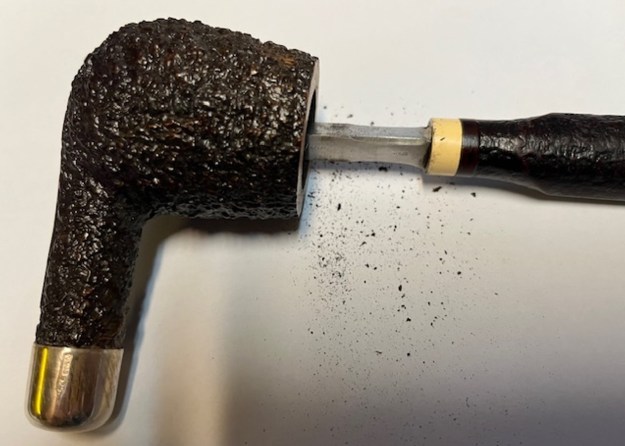
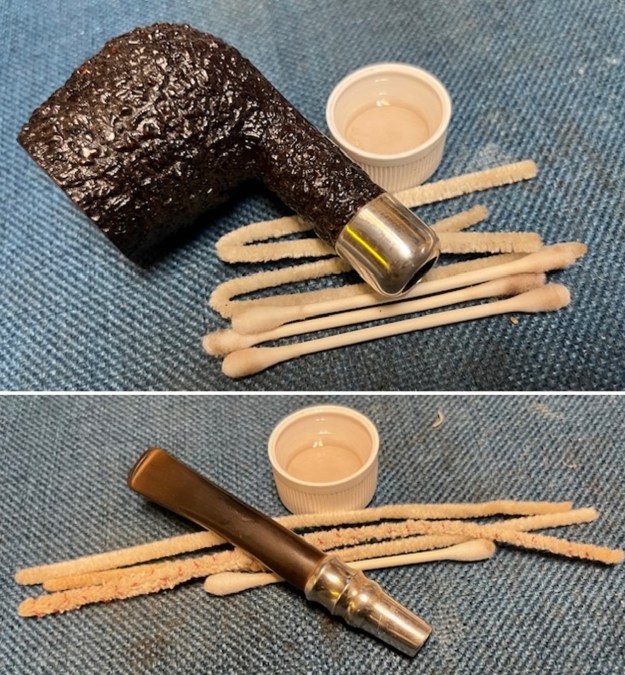
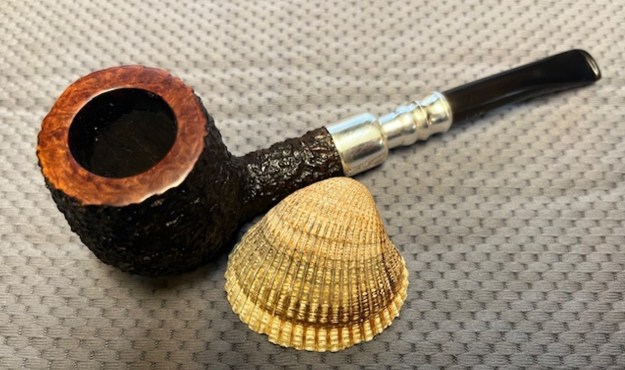
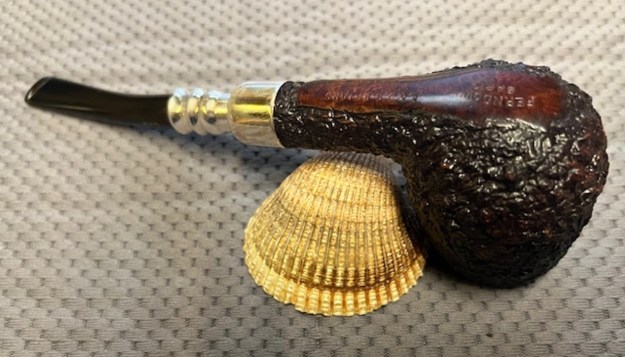
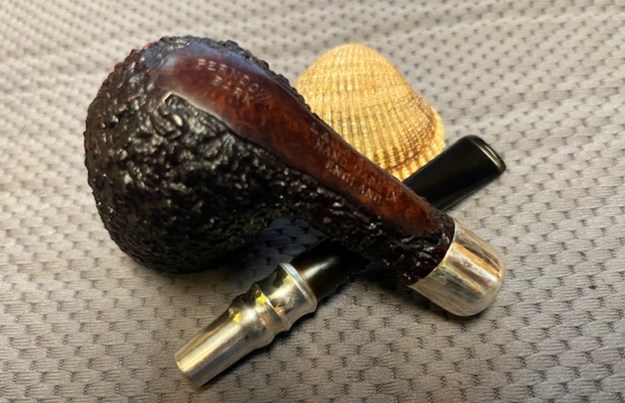
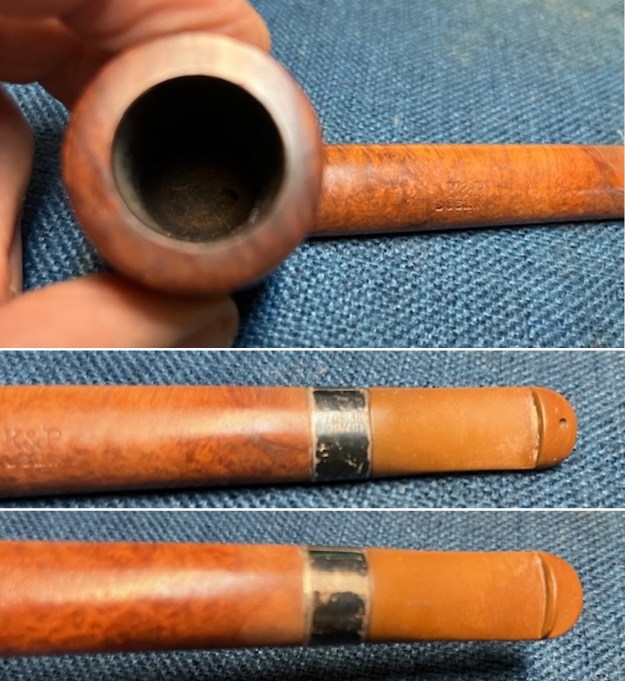
I took a photo of the stamping on the sides of the shank. It is clear and readable as noted above. I removed the stem and took a photo of the parts of the pipe. It is a pretty little pipe.
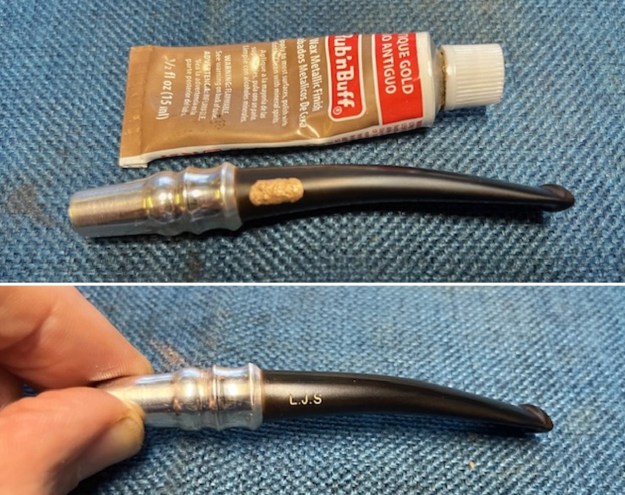
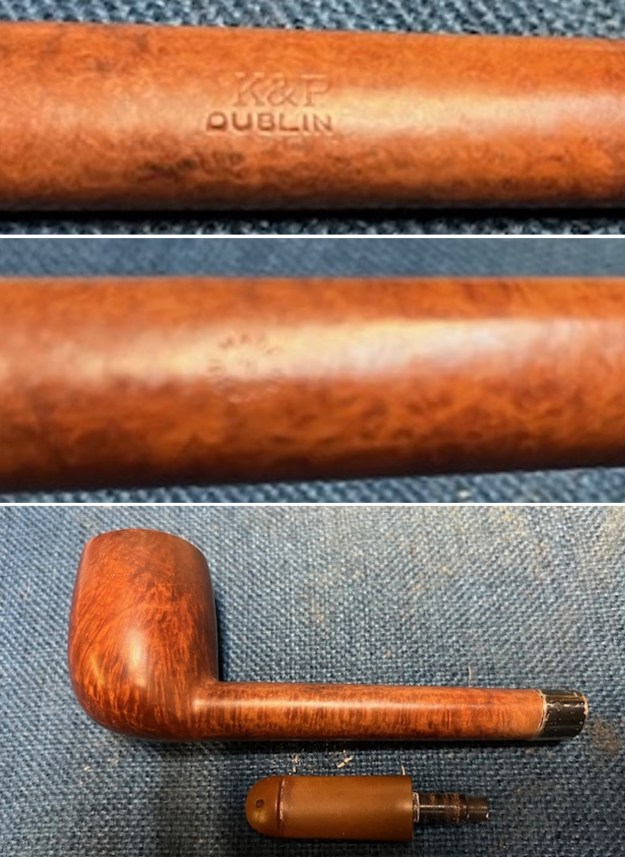
Now it was time to work on the pipe. I cleaned up the silver band with a jeweller’s cloth so that I could read the stamping clearly. It read as noted above and the characters were slightly worn under the oxidation. But it is a great addition to the pipe. 
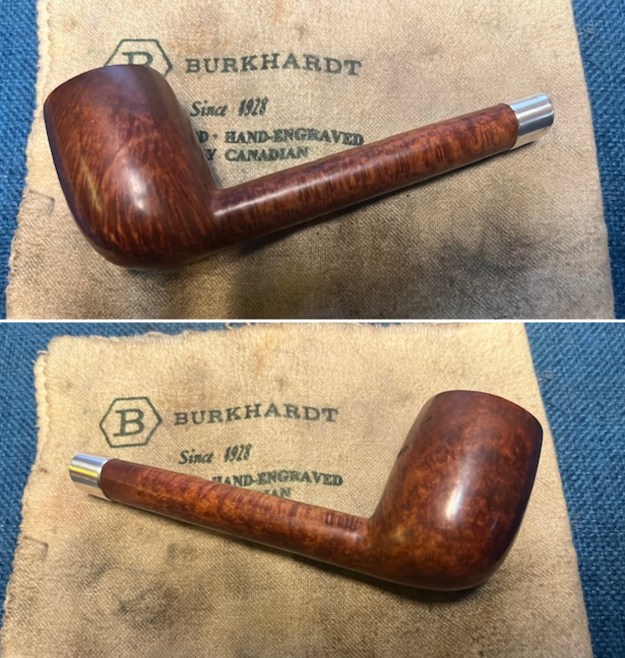
I reamed the pipe with a Savinelli Fitsall Pipe Knife to remove the thin cake in the bowl and check the bowl walls. I sanded the bowl with a piece of dowel wrapped with 220 grit sandpaper. It looked much better at this point.
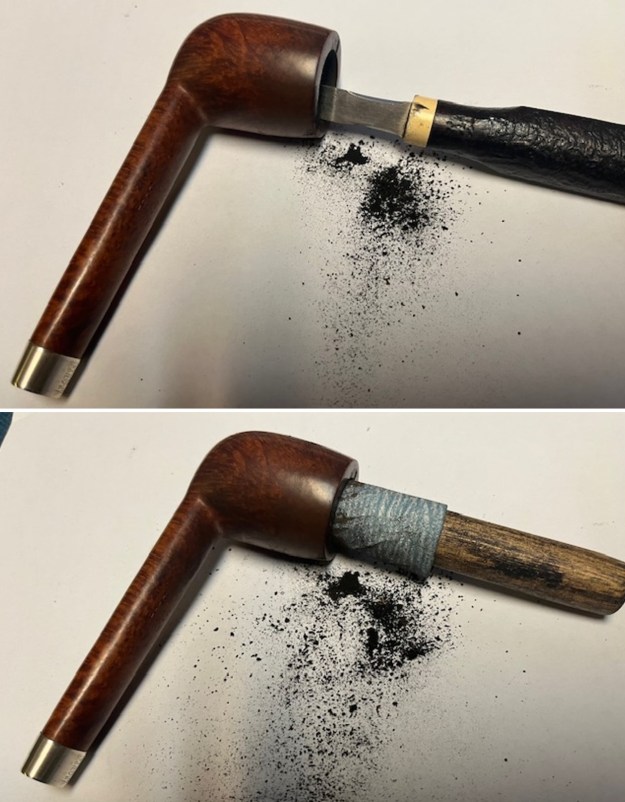
I moved on to clean up the internals. I cleaned out the airway and mortise with pipe cleaners, cotton swabs and alcohol. I cleaned out the airway in the stem at the same time. I was surprised at how clean the internals were. 
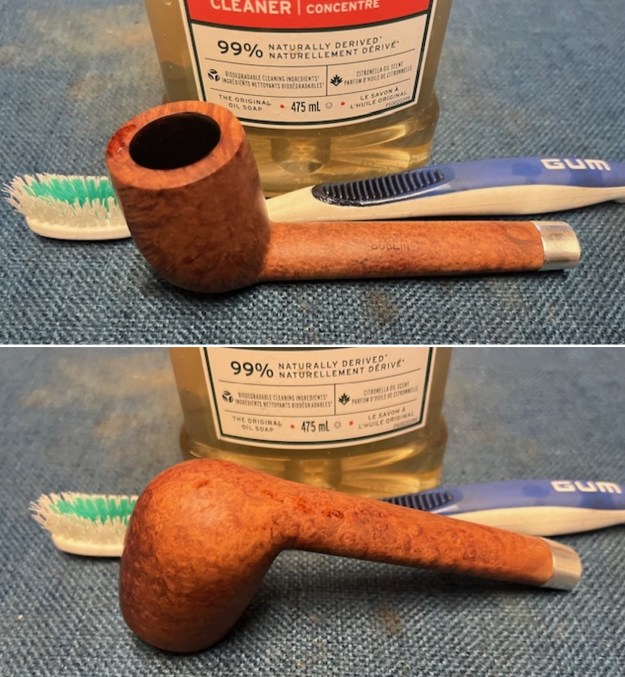
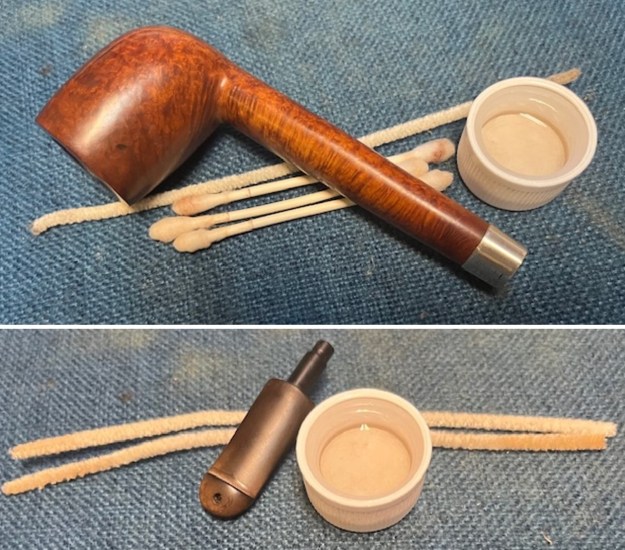
I scrubbed the externals of the pipe with undiluted Murphy’s Oil Soap and a tooth brush to remove the grime in the finish and on the rim top. I worked on it until it looked much better and then rinsed it off with warm water. I dried it off with a soft cloth. 
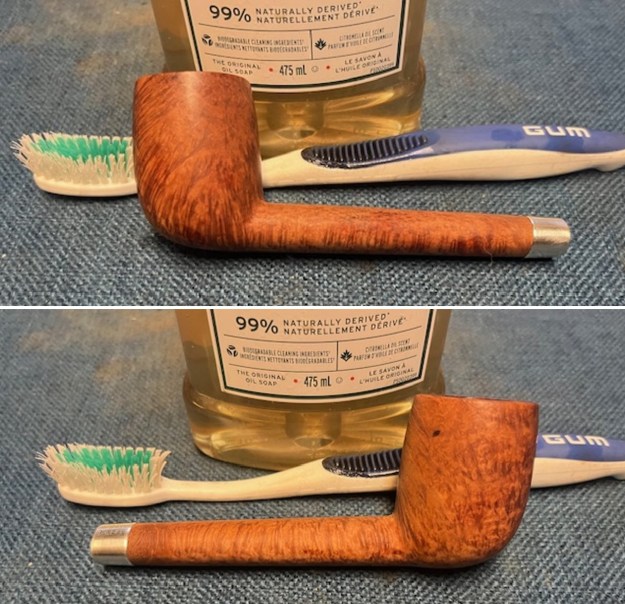
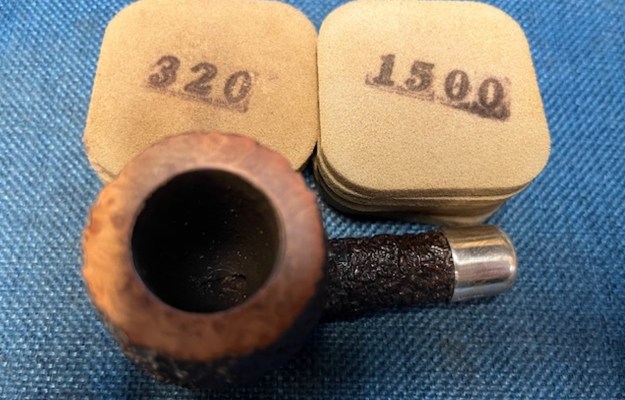
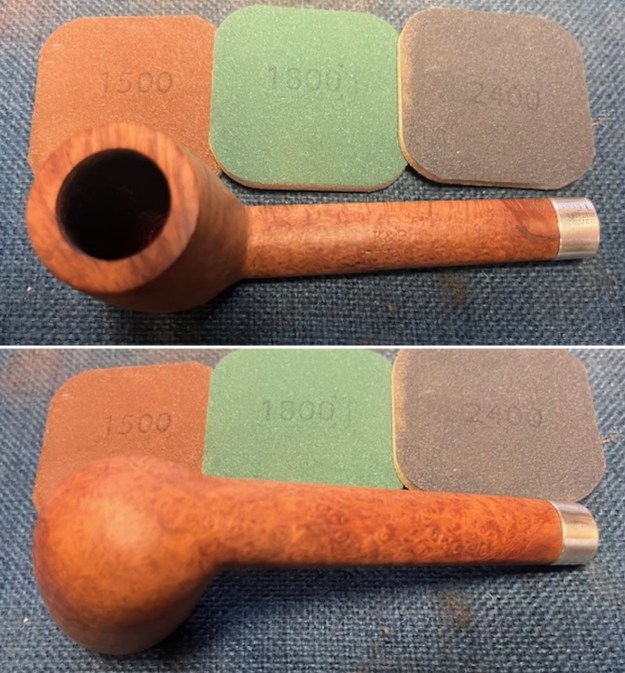
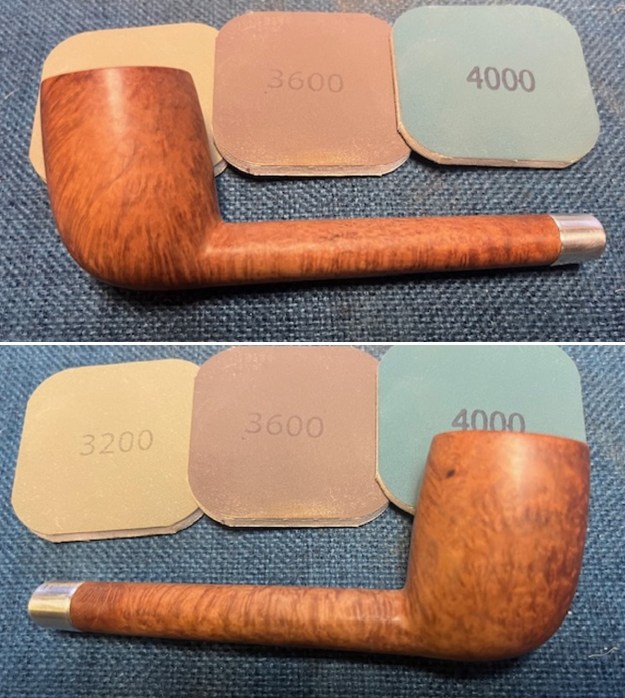
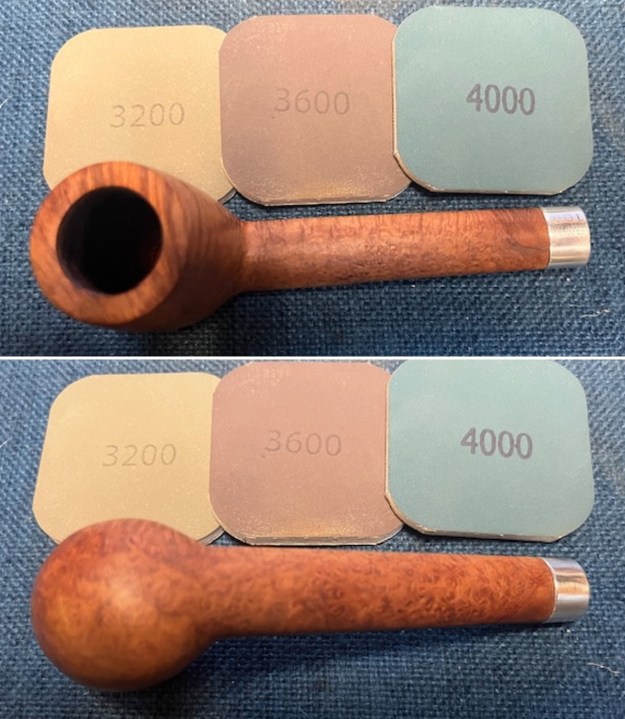
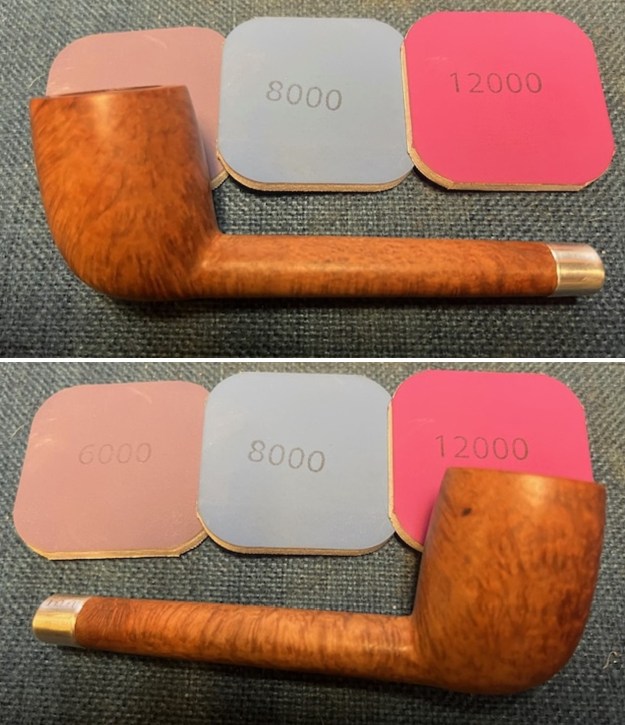
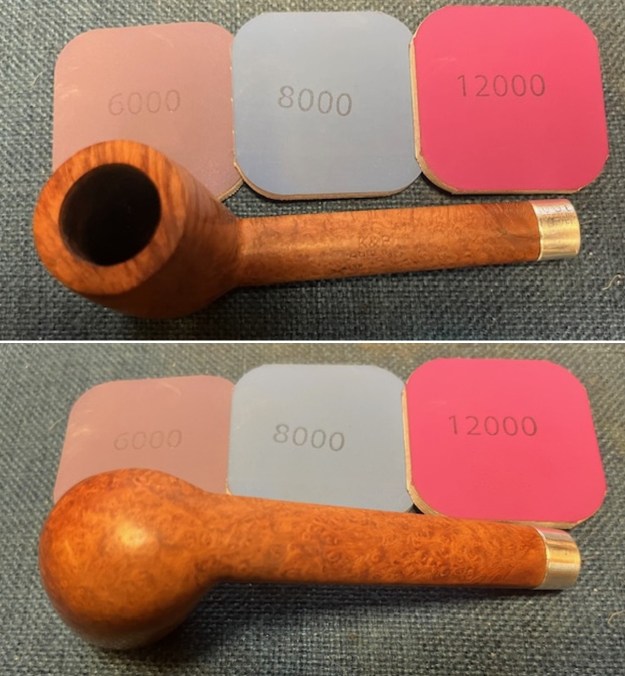
I polished the bowl with micromesh sanding pads – dry sanding with 1500-12000 grit sanding pads. I wiped it down between pads with a damp cloth. It really began to take on a deep shine. There is a dark spot on the right side of the bowl. It is solid so it is not a fill. My guess is that it is where a root or such came out of the briar. 
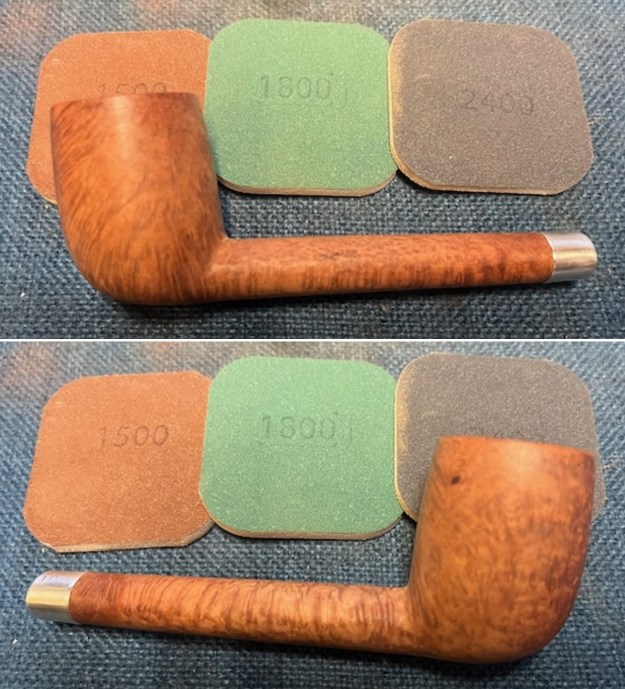
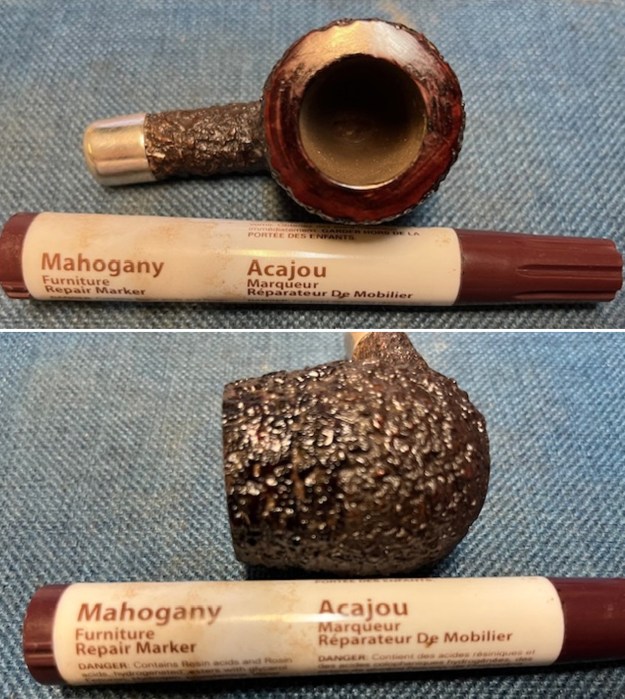
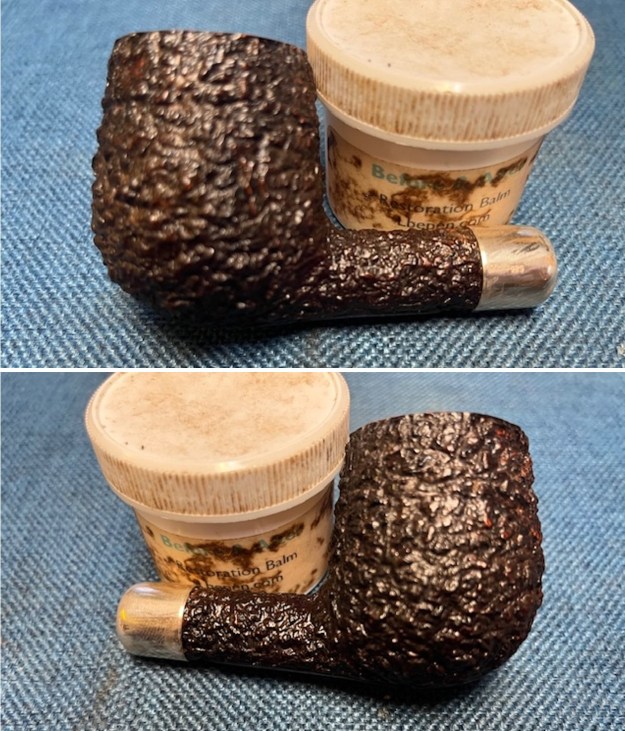
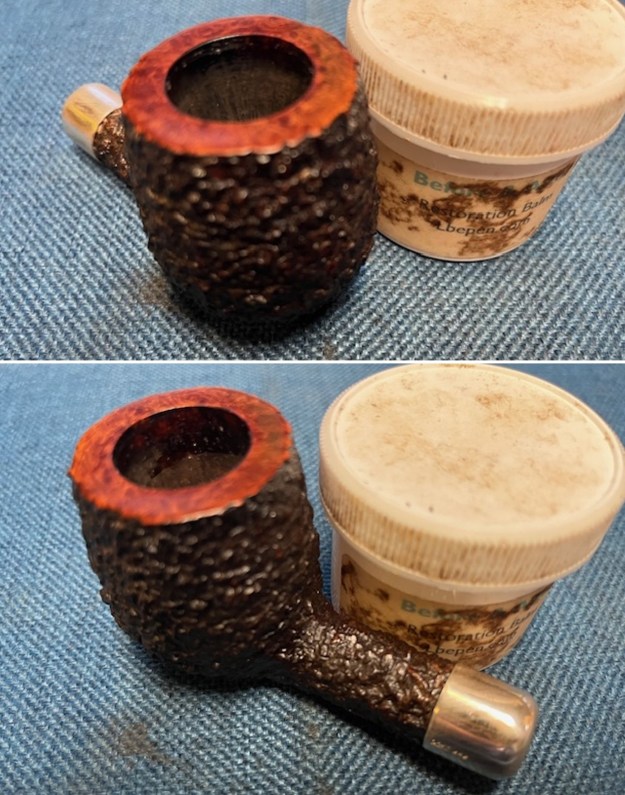
The exterior of the bowl looks better after sanding. I worked some Before & After Restoration Balm into the briar with my finger tips. I let it sit on the bowl for 10 minutes and then buffed it off with a paper towel and soft cloth. The product is a great addition to the restoration work. It enlivens, enriches and protects the briar while giving it a deep glow. It is a product I use on every pipe I restore. 
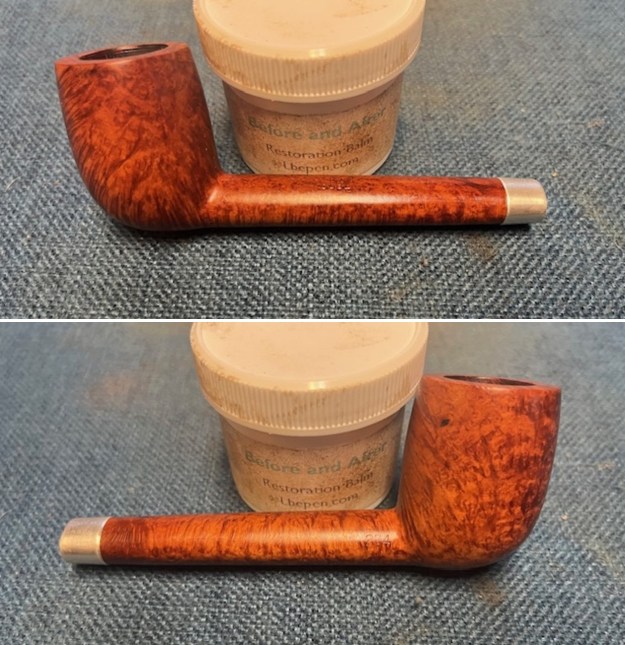
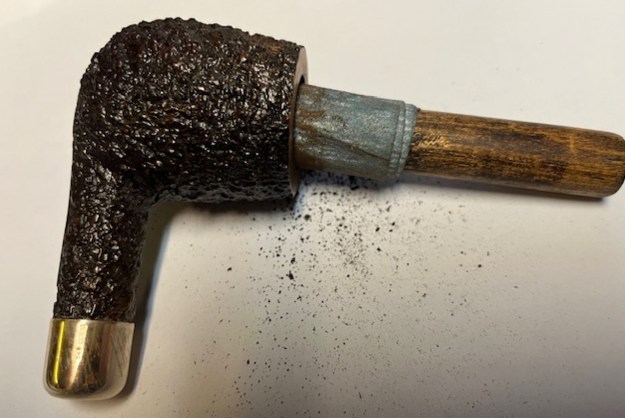
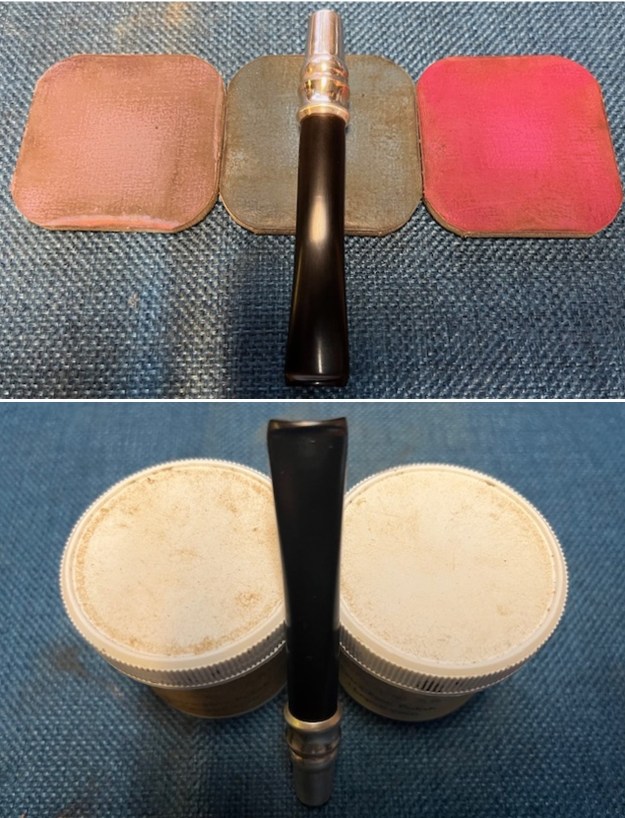
I set the bowl aside and turned my attention to the stem. I scrubbed the stem with Soft Scrub and cotton pads to remove the oxidation. I was able to rid the surface of the majority of the brown and what was left would be able to be sanded off.
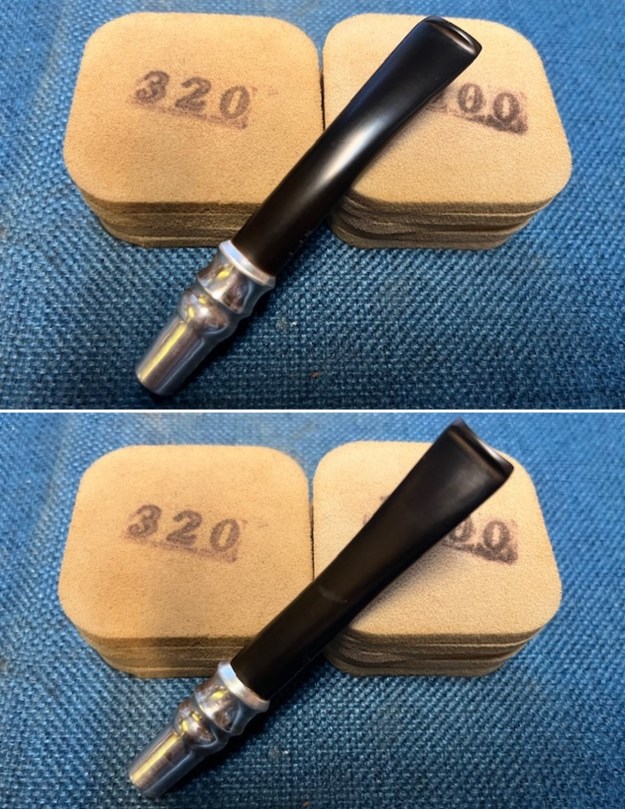
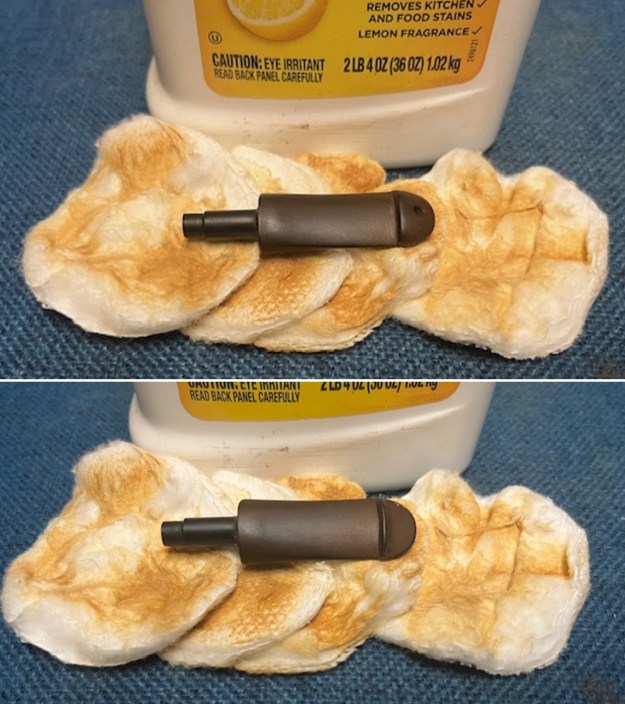
There were no deep marks or chatter so I sanded the stem with 320-3500 grit sanding pads and wiped it down with Obsidian Oil to remove the sanding dust.
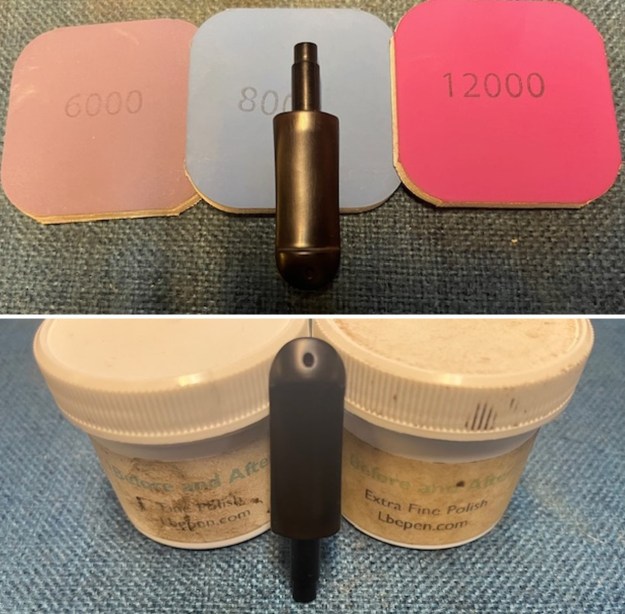
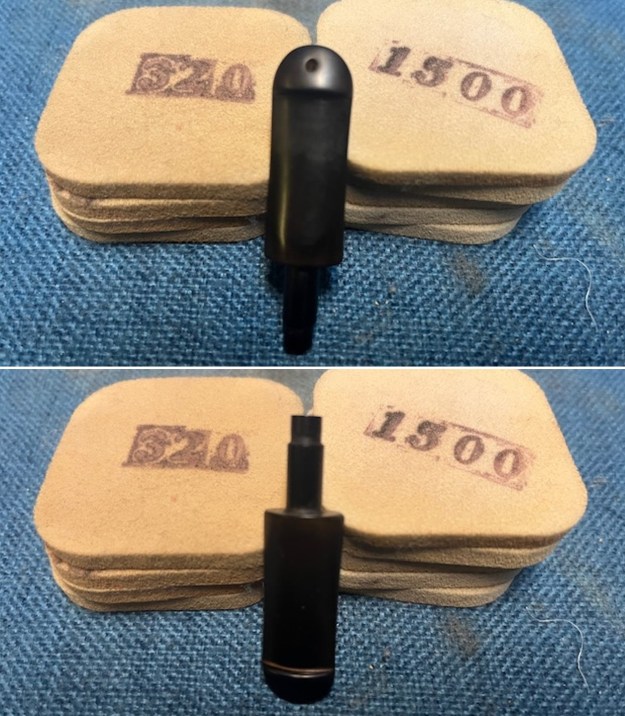
I polished the stem with micromesh sanding pads – dry sanding with 1500-12000 grit pads. I wiped the stem down after each sanding pad with Obsidian Oil to further protect the vulcanite surface. I finished the polishing with Before & After Pipe Stem Polish – Fine and Extra Fine. I wiped the stem down a final time with Obsidian Oil and a cloth. It really looks very good. 
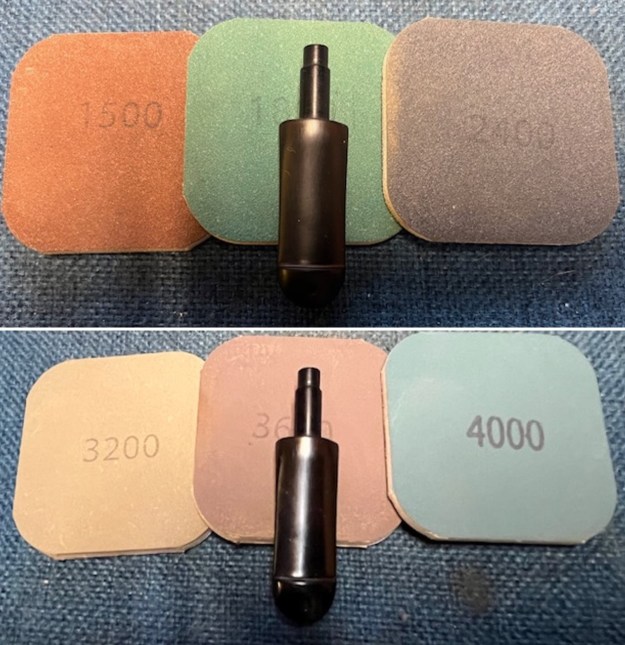
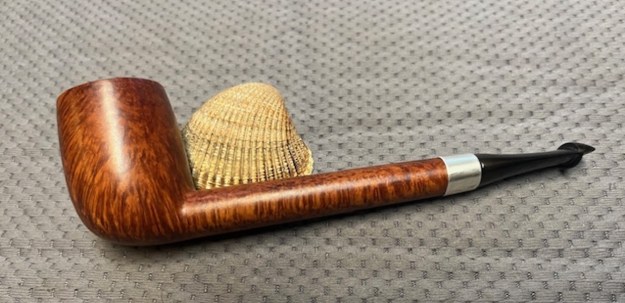
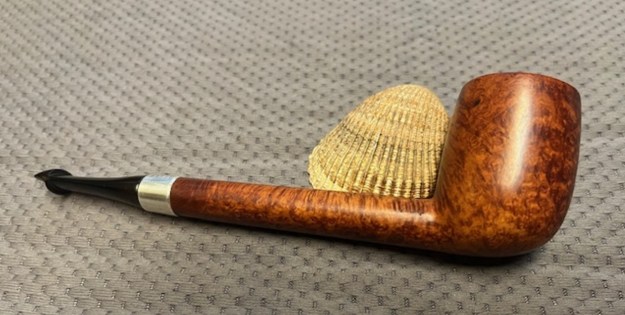
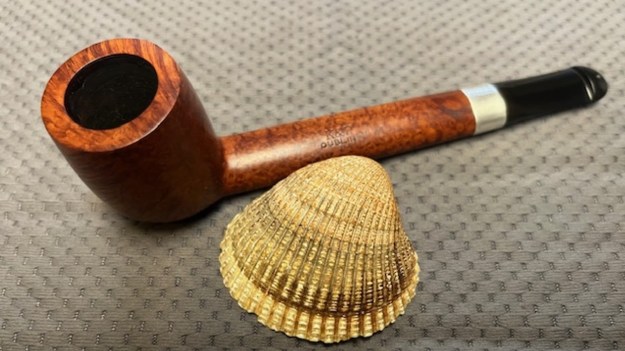
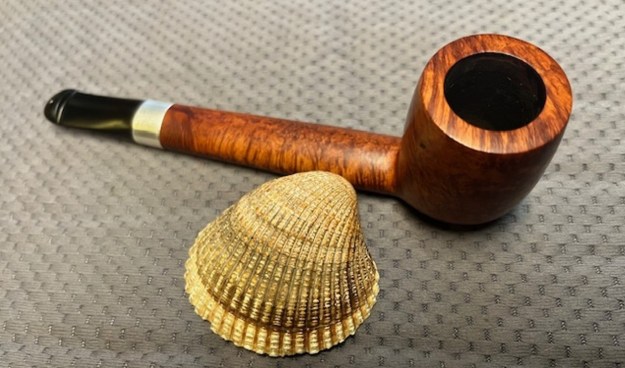
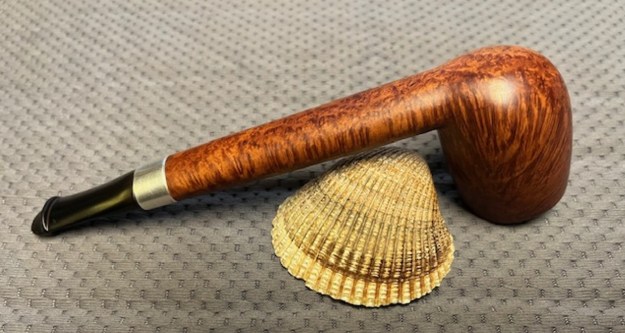
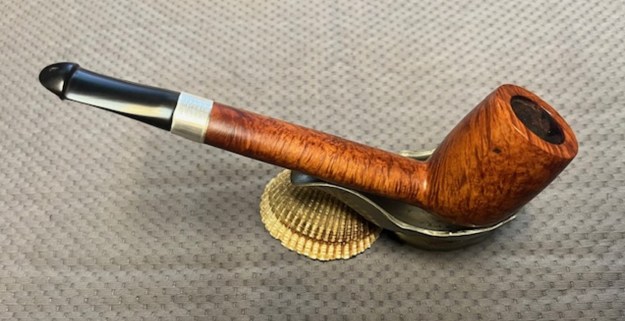
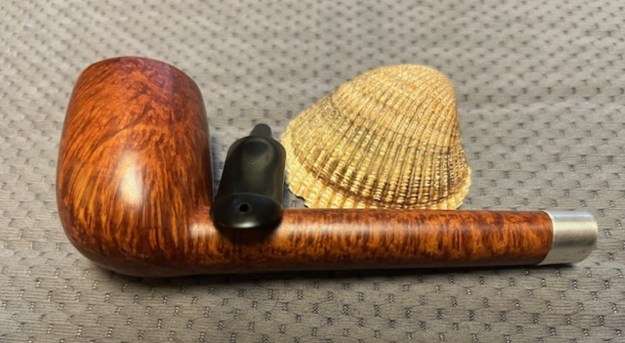
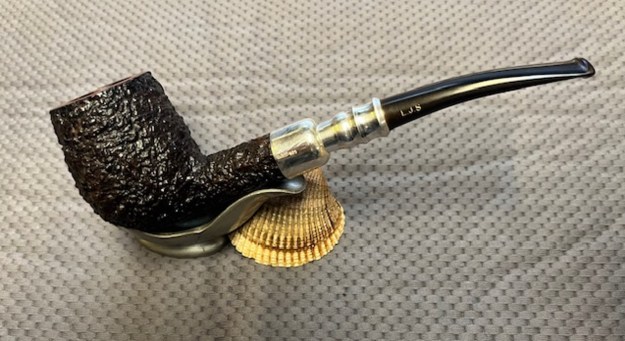
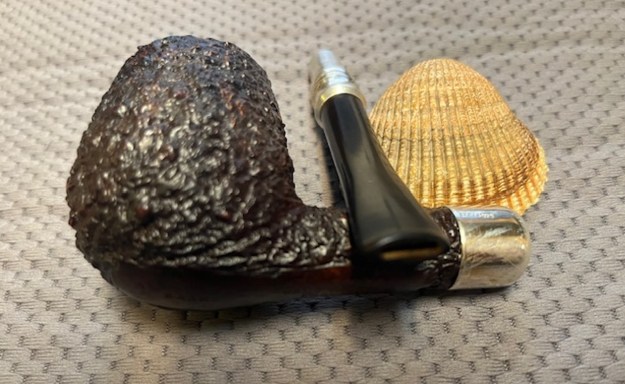
I am always excited to finish working on a pipe. This K&P Dublin Made in Ireland Canadian made between 1945-1972 is no exception. I put the pipe back together and buffed it with Blue Diamond on the buffing wheel. I gave the bowl and the stem multiple coats of carnauba wax. I buffed the pipe with a clean buffing pad to raise the shine and hand buffed it with a microfibre cloth to deepen the shine. It is fun to see what the polished bowl looks like with polished silver and the black vulcanite taper stem. This Classic looking Peterson’s K&P Dublin Canadian feels great in my hand. It is light and well balanced. Have a look at it with the photos below. The dimensions are Length: 6 inches, Height: 1 ¾ inches, Outside diameter of the bowl: 1 ¼ inches, Chamber diameter: ¾ of an inch. The weight of the pipe is 31 grams/1.09 ounces. I will be putting it on the rebornpipes store shortly in the Irish Pipe Makers Section if you are interested in it. Thanks for walking through the restoration with me as I worked over this pipe. Thanks to each of you who are reading this blog.

Restoring a Ferndown Bark L&JS Briars Silver Spigot Billiard


By Steve Laug

The next pipe on the table is a beautiful rusticated Billiard with a silver ferrule and silver spigot stem. We purchased it from an Antique Mall in Lincoln City, Oregon, USA on 08/24/2024. The pipe is stamped on a smooth panel on the underside of the shank and reads Ferndown [arched over] Bark followed by L&JS Briars [over] Hand Made In [over] England. There was a thin cake in the bowl and the rim top and inner edge had been scraped and was faded. There was grime ground into the rusticated finish around the bowl and shank. There was also some fading on the right side of the bowl toward the front running down from the rim edge to about midbowl. It was faded as if by sun or perhaps whatever had stripped the rim top. The pipe was someone’s obvious favourite and was well care. The inner edge looked to be in good condition. The oxidized ferrule and spigot end on the stem are both Sterling Silver. The ferrule bears the stamp L&JS followed by 925 on the left side. There is an LJS logo stamped in gold on the left side of the taper stem. The stem is heavily oxidized and calcified. There appears to be some light tooth chatter on the top and underside of the stem ahead of the button. I took photos of the pipe earlier this morning before I started my clean up work. I have included them below. I took a photo of the rim top, bowl and the surfaces of the stem to give a sense of the condition of the pipe. The walls of the bowl had a thin cake with no lava on the rim edges or top. The stem is heavily oxidized, calcified and dirty. There are light tooth marks on both sides ahead of the button.I took a photo of the stamping on the smooth panel on the underside the heel and the shank. It is clear and readable and read as noted above. The silver ferrule and the left side of the taper both have clear stamping under the oxidation that reads as noted above.I took some photos of the fading on the front and the right side of the bowl extending half way down the rusticated surface. It is wash out and matches the washed out rim top on the bowl. I took a photo of the pipe with the stem removed. It is definitely dirty and the silver and the stem both are oxidized. To gather backgound on the brand I turned to Pipephil’s site to see what was included in the listing there (http://www.pipephil.eu/logos/en/logo-f1.html). I have included both the screen capture and also the side bar below the photo I have included.Artisan: Leslie (Les) Wood. He was the master silver smith at Alfred Dunhill Ltd. before starting L. & J.S. Briars. Pipes for the European market are stamped “L. Wood” while those for US are stamped “Ferndown”. Production: ~ 2000 pipes/year (Ferndown + L.Wood) See also Elwood

The first pipe pictured in the screen capture above is stamped similarly to mine. The pipe I had in hand did not have the stars on the heel so there was no size designation on the pipe. This is a large pipe. The Bark finish is a designation used for both sandblasted and rusticated. The stem on the pipe I am working on is also not Cumberland but rather black vulcanite with a silver spigot ending.

I turned to Pipedia next (https://pipedia.org/wiki/Ferndown). There is a great article there on the carver, the pipes and the workshop. It is worth the time to give it a read. I am quoting the section on the pipes below for the information included.

Due to the vagaries of international trademark law, he sold his earlier pipes as ”L.&J.S Briars”, “Ellwood”, “Les Wood” or “L. Wood”. Until recently, an average of 1500 – 2000 pipes a year were sold as “Ferndown” — named for the mansion he lives in — in the UK and US, but as “L. Wood” pipes in Germany

…To many pipe smokers, Les Wood’s pipes embody the revival of great English pipe making initiated by Ashton in the early 1980s. The high-grade Italian and Spanish plateau he prefers is oil-cured in the tradition of both Dunhill and Ashton. The pipes are renowned for their pleasant, slightly nutty flavor and remarkable smoking characteristics. They feature impeccable craftsmanship extending to very good stem/bit work, though many pipes are often a bit heavier. The hallmark of his work, of course, is the excellent silver work. Almost all of his pipes feature rings or ferules for spigot stems. Grading is by finish: “Bark” (ca. 90%, rusticated, dark brown and black), “Antique Bark” (tan rusticated), “Reo” (brown and red, smooth), “Root” (orange, smooth), and “Tudor Root” (orange and brown smooth) and by size (one to four stars). He also designates straight grains with SG.

The pipe I am working on is as noted above a Ferndown which identifies it as a pipe named after his mansion and as a pipe made for the UK and the US. It is also as noted in red above stamped Bark which identifies it as a dark brown and black rusticated pipe.

Now it was time to work on the pipe. I started my work by reaming the pipe. I scraped out the light cake with a Savinelli Fitsall Pipe Knife. I took the cake back to bare briar. I sanded the walls smooth with 220 grit sandpaper wrapped around a piece of dowel. The bowl walls looked very good with no burn damage or checking on the walls. I worked on the fading and damage to the rim top with 320-3500 grit sanding pads. It looked much better when I had finished with the last of the pads.At this point I stained the rim top and the faded areas around the bowl with a Mahogany stain pen. It blended well with the surrounding briar on the bowl sides. The rim top looked better but I would need to polish it and clean up the finished look of the rim top. I cleaned out he internals of the shank, mortise and airway in the shank and the stem with alcohol, cotton swabs and pipe cleaners.I polished the smooth rim top with micromesh sanding pads. I dry sanded it with 1500-12000 grit sanding pads and wiped the bowl down after each pad with a damp cloth. By the final pads the briar really had a shine. I rubbed the briar down with Before & After Restoration Balm. I worked it into the smooth rim top surface with my fingertips and into the heavy rustication with a shoebrush. The product works to clean, enliven and preserve the briar. I let it sit for 10 minutes then I buffed it with a cotton cloth to deepen the shine. The briar really comes alive with the balm. I polished the silver ferrule and the spigot end on the stem with a jeweller’s cloth to clean up and prevent further oxidation in the future. The contrast between the silver and the heavy rustication is very nice. I set the bowl aside and turned my attention to the stem. I scrubbed the oxidation on the stem surface with Soft Scrub and cotton pads until it was much cleaner.I sanded the surface with 320-3500 grit sanding pads. I wiped the stem down after each pad with Obsidian Oil. I was able to remove the remnants of oxidation and the stem looked better.I touched up the LJS stamp on the left side of the taper stem with Rub’n Buff Antique Gold. I rubbed it on and worked it into the stamp with a tooth pick. I buffed it off with an Obsidian Oil cloth. It looks very good.I polished the vulcanite stem with micromesh sanding pads – 1500-12000 grit pads. I wiped it down with Obsidian Oil after each sanding pad. I used Before & After Pipe Stem Polish – both Fine and Extra Fine to further polish the stem. This beautiful Ferndown Bark Rusticated L&JS Briars Silver Spigot Billiard with a taper vulcanite stem looks amazing after the work on it. The briar is clean and the grain really came alive. The rich brown stains gave the finish a sense of depth with the polishing and waxing. The grain really popped. I put the stem back on the bowl and buffed the pipe with Blue Diamond on the buffing wheel using a light touch on the briar. I gave the bowl multiple coats of Conservator’s Wax and the stem multiple coats of carnauba wax on the buffing wheel. I buffed the pipe with a clean buffing pad to raise the shine. I hand buffed the pipe with a microfiber cloth to deepen the shine. The finished Ferndown Bark Silver Spigot Billiard really is a beauty and feels great in the hand and looks very good. Give the finished pipe a look in the photos below. The dimensions of the pipe are Length: 6 ¾ inches, Height: 2 inches, Outside diameter of the bowl: 1 ½ inches, Chamber diameter: 7/8 of an inch. The weight of the pipe is 66 grams/2.33 ounces. This beautiful rusticated pipe will soon be on the rebornpipes store in the British Pipemakers Secton. It should make a great smoker for the next trustee. Thanks for reading this blog and my reflections on the pipe while I worked on it. It was a fun one to work on.

Restoring a Ferndown Bark Antique *** Hand Made in England Les Wood Dublin


Blog by Steve Laug

The next pipe on the table is a beautiful rusticated Dublin with a silver band. We purchased it from an estate sale in Oregon City, Oregon, USA on 03/21/2024.The pipe is stamped on a smooth panel on the underside of the shank and reads *** followed by Ferndown [arched over] Bark [over] Antique followed by Hand Made In [over] England [over] Les Wood. There was a thick cake in the bowl with a lava coat around the inner edge and lightly on the top. There was grime ground into the rusticated finish around the bowl and shank. The pipe had been smoked heavily and was someone’s obvious favourite. It was hard to know the condition of the inner edge for certain because of the lava. The oxidized band on the shank is Sterling Silver and bears the stamp L&JS followed by 925 on the left side. There is an LJS logo stamped in gold on the left side of the taper stem. The stem is oxidized and calcified. With a mark left behind on the stem end from a Softee Bit. There appears to be some light tooth chatter on the top and underside of the stem ahead of the button. Jeff took photos of the pipe before he started his clean up work. I have included them below. Jeff took photos of the rim top, bowl and the surfaces of the stem to give a sense of the condition of the pipe. The walls of the bowl had a thick cake which overflowed over the rim edges and onto the rim top. The stem is oxidized, calcified and dirty. There are light tooth marks on both sides ahead of the button. He took photos of the sides and heel of the bowl to give a clear picture of the way the shape follows the grain. The rustication is really beautiful even showing through the grime filling in the valleys and low spots. The depth and randomness of the rustication is very well done. He took photos of the stamping on the smooth panel on the underside the heel and the shank. It is clear and readable and read as noted above. The silver band and the left side of the taper both have clear stamping under the oxidation that reads as noted above. To gather backgound on the brand I turned to Pipephil’s site to see what was included in the listing there (http://www.pipephil.eu/logos/en/logo-f1.html). I have included both the screen capture and also the side bar below the photo I have included.Artisan: Leslie (Les) Wood. He was the master silver smith at Alfred Dunhill Ltd. before starting L. & J.S. Briars. Pipes for the European market are stamped “L. Wood” while those for US are stamped “Ferndown”. Production: ~ 2000 pipes/year (Ferndown + L.Wood) See also Elwood

The first pipe pictured in the screen capture above is stamped similarly to mine. From that listing I learned that the 3 stars was the designation for the size of the pipe. This is largest pipe. The Bark finish is a designation used for both sandblasted and rusticated. I still need to unpack the Antique stamp but it is becoming very clear. The stem on this one is also not Cumberland but rather black vulcanite.

I turned to Pipedia next (https://pipedia.org/wiki/Ferndown). There is a great article there on the carver, the pipes and the workshop. It is worth the time to give it a read. I am quoting the section on the pipes below for the information included.

Due to the vagaries of international trademark law, he sold his earlier pipes as ” L.&J.S Briars”, “Ellwood”, “Les Wood” or “L. Wood”. Until recently, an average of 1500 – 2000 pipes a year were sold as “Ferndown” — named for the mansion he lives in — in the UK and US, but as “L. Wood” pipes in Germany

…To many pipe smokers, Les Wood’s pipes embody the revival of great English pipe making initiated by Ashton in the early 1980s. The high-grade Italian and Spanish plateau he prefers is oil-cured in the tradition of both Dunhill and Ashton. The pipes are renowned for their pleasant, slightly nutty flavor and remarkable smoking characteristics. They feature impeccable craftsmanship extending to very good stem/bit work, though many pipes are often a bit heavier. The hallmark of his work, of course, is the excellent silver work. Almost all of his pipes feature rings or ferules for spigot stems. Grading is by finish: “Bark” (ca. 90%, rusticated, dark brown and black), “Antique Bark” (tan rusticated), “Reo” (brown and red, smooth), “Root” (orange, smooth), and “Tudor Root” (orange and brown smooth) and by size (one to four stars). He also designates straight grains with SG.

The pipe I am working on is as noted above a Ferndown which identifies it as a pipe named after his mansion and as a pipe made for the UK and the US. It is also as noted in red above stamped Antique Bark which identifies it as a tan rusticated pipe.

Now it was my turn to work on the pipe. Jeff had done an amazing cleanup of the pipe. He reamed the light cake with a PipNet reamer and cleaned up that with a Savinelli Fitsall Pipe Knife. He scrubbed the internals of the bowl and stem with alcohol, cotton swabs and pipe cleaners. He scrubbed the externals with undiluted Murphy’s Oil Soap and rinsed the bowl off with running water. He soaked the stem in Briarville’s Pipe stem Deoxidizer and once it had soaked rinsed it off with warm water to remove the residual solution. He dried it off and rubbed it down to remove any oxidation that was still on the stem. The pipe looked very good when I received it. I took photos of the bowl and the rim top as well as both sides of the stem to show the condition of the pipe before I started my work. The rim top was very clean but there were scratches on the flat surface and the inner edge showed some nicks, roughness and darkening. The Sterling Silver band looked much better without the oxidation and darkening. The stem showed light tooth marks on the top and underside of the stem near the button. There was a light mark on the top right of the button edge.I took a photo of the stamping on the underside of the shank. The photo of the stamping is clear and readable. I took a photo of the logo on the silver band and on the left side of the taper stem. I removed the stem from the shank and took a photo of the pipe parts. I started my work on the pipe by addressing the darkening to the inner edge of the bowl. I used a folded piece of 220 sandpaper to smooth out the rim edge. Once I was finished it looked much better.I polished the smooth rim top with micromesh sanding pads. I dry sanded it with 1500-12000 grit sanding pads and wiped the bowl down after each pad with a damp cloth. By the final pads the briar really had a shine. I rubbed the briar down with Before & After Restoration Balm. I worked it into the smooth rim top surface with my fingertips and into the heavy rustication with a shoebrush. The product works to clean, enliven and preserve the briar. I let it sit for 10 minutes then I buffed it with a cotton cloth to deepen the shine. The briar really comes alive with the balm. I polished the silver band with a jeweller’s cloth to clean up and prevent further oxidation in the future. The contrast between the silver and the heavy rustication is very nice. I set the bowl aside and turned my attention to the stem. I sanded out the roughness and light tooth damage with 320-3500 grit sanding pads. I wiped the stem down after each pad with Obsidian Oil. I was able to remove the roughness and damage and the stem looked better.I touched up the LJS stamp on the left side of the taper stem with Rub’n Buff Antique Gold. I rubbed it on and worked it into the stamp with a tooth pick. I buffed it off with a Obsidian Oil cloth. It looks very good.I polished the vulcanite stem with micromesh sanding pads – 1500-12000 grit pads. I wiped it down with Obsidian Oil after each sanding pad. I used Before & After Pipe Polish – both Fine and Extra Fine to further polish the stem. This nice looking Les Wood Ferndown Bark Antique *** Rusticated Dublin with a taper vulcanite stem is a great looking pipe now that it has been restored. The briar is clean and the grain really came alive. The rich brown stains gave the finish a sense of depth with the polishing and waxing. The grain really popped. I put the stem back on the bowl and buffed the pipe with Blue Diamond on the buffing wheel using a light touch on the briar. I gave the bowl and the stem multiple coats of carnauba wax on the buffing wheel. I buffed the pipe with a clean buffing pad to raise the shine. I hand buffed the pipe with a microfiber cloth to deepen the shine. The finished Ferndown Bark Antique *** Dublin really is a beauty and feels great in the hand and looks very good. Give the finished pipe a look in the photos below. The dimensions of the pipe are Length: 6 inches, Height: 2 inches, Outside diameter of the bowl: 1 ¾ inches, Chamber diameter: 7/8 of an inch. The weight of the pipe is 66 grams/2.33 ounces. This beautiful rusticated pipe will soon be on the rebornpipes store in the British Pipemakers Secton. It should make a great smoker for the next trustee. Thanks for reading this blog and my reflections on the pipe while I worked on it. It was a fun one to work on.