Blog by Steve Laug
 As I continue to work through the pipes in Bob Kerr’s Estate I am enjoying choosing different brands that he had to focus on for a bit. I had eight more from his Dunhill collection that I decided to go back to and finish working my way through that sub collection of the estate. Out of the 8 pipes six were Bruyere finished pipes, one was a Made in London (turns out it is also a Bruyere finished pipe), and one was a Root Briar. What follows is a list of what I saw when I examined the 8 pipes. As I finish the pipes I will include the link to the blog on that particular pipe for easy reference. I have already restored 16 pipes from this subgroup so you can do a quick search to read about the work on the Shell Briars and Tanshell Briars that were in that part of the collection.
- Bruyere 656 F/T Made in England 2 Circle 4A – Group 4 size Bruyere made in 1962. Stem is oxidized, tooth marks and chatter near the button, some calcification with damage to the button. Finish is dirty, bowl caked and lava overflow on the rim top. Bowl is out of round, damaged edge.
- Bruyere 112 F/T Made in England 9/11 Circle 2A – Group 2 size Bruyere made in 1969 and sold in 1971. Stem is oxidized, tooth marks and chatter near the button, some calcification with damage to the button. Finish is dirty, bowl caked and lava overflow on the rim top. Bowl is out of round, damaged edge.
- Bruyere 0333 Made in England 16 made in 1976. Stem is oxidized, tooth marks and chatter near the button, some calcification with damage to the button. Finish is dirty, bowl caked and lava overflow on the rim top. Bowl is out of round, damaged edge.
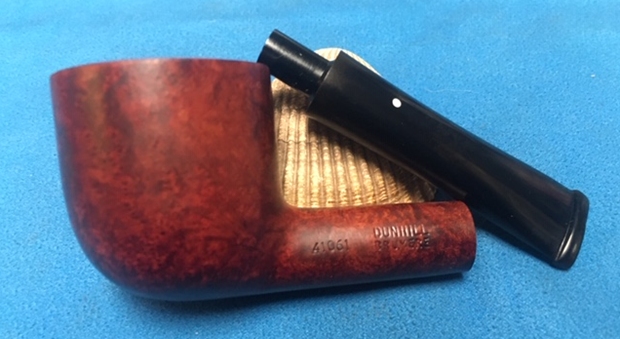
- Bruyere 41061 Made in England 18 made in 1978. Stem is oxidized, tooth marks and chatter near the button, some calcification with damage to the button. Finish is dirty, bowl caked and lava overflow on the rim top. Bowl is out of round, damaged edge. I finished the restoration on it. Here is the link to the blog – (https://rebornpipes.com/2019/12/24/restoring-a-1978-dunhill-bruyere-41061-from-bob-kerrs-estate/).
- Bruyere 142 F/T Made in England 7/9/11 Circle 4A – Group for size Bruyere made in 1967 and sent out in 1969 or 1971. Stem is oxidized, tooth marks and chatter near the button, some calcification with damage to the button. Finish is dirty, bowl caked and lava overflow on the rim top. Bowl is out of round, damaged edge. I finished the restoration on it. Here is the link to the blog – https://rebornpipes.com/2019/12/27/restoring-a-1967-dunhill-bruyere-142-f-t-billiard-from-bob-kerrs-estate/
- (A) Dunill London Inner Tube PAT N°5861/12 Shape 34. Stem is oxidized, tooth marks and chatter near the button, some calcification with damage to the button. Finish is dirty, bowl caked and lava overflow on the rim top. Bowl is out of round, damaged edge. I finished the restoration on it. Here is the link to the blog – (https://rebornpipes.com/2019/12/26/restoring-a-1913-a-dunhill-london-34-billiard-from-bob-kerrs-estate/).
- (Ao) Dunhill London 113 Made in England 5 PAT N°158709/14. Stem is oxidized, tooth marks and chatter near the button, some calcification with damage to the button. Finish is dirty, bowl caked and lava overflow on the rim top. Bowl is out of round, damaged rim edges. I finished the restoration on it. Here is the link to the blog – (https://rebornpipes.com/2019/12/25/restoring-a-1925-ao-dunhill-london-113-billiard-from-bob-kerrs-estate/).
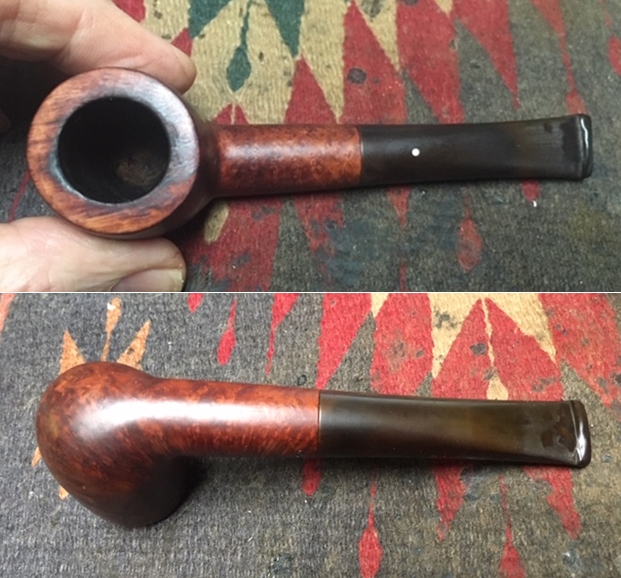
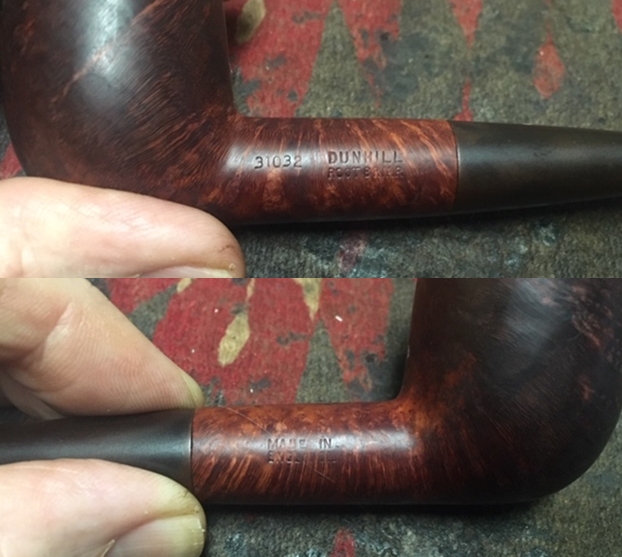
- Root Briar 31032 Made in England 18 – made in 1978. Stem is oxidized, tooth marks and chatter near the button, some calcification with damage to the button. Finish is dirty, bowl caked and lava overflow on the rim top. Bowl is out of round, damaged edge. I finished the restoration on it. Here is the link to the blog – (https://rebornpipes.com/2019/12/23/restoring-a-1978-dunhill-root-briar-31032-billiard-from-bob-kerrs-estate/).
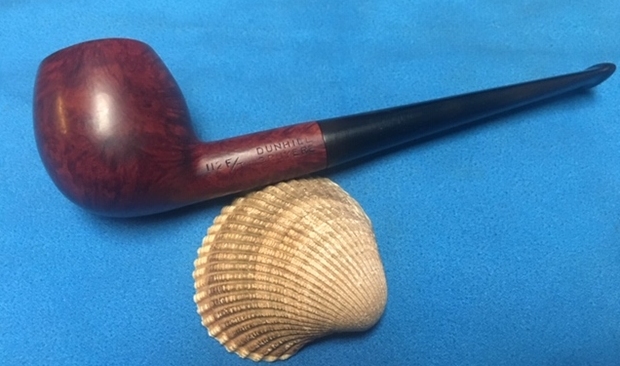
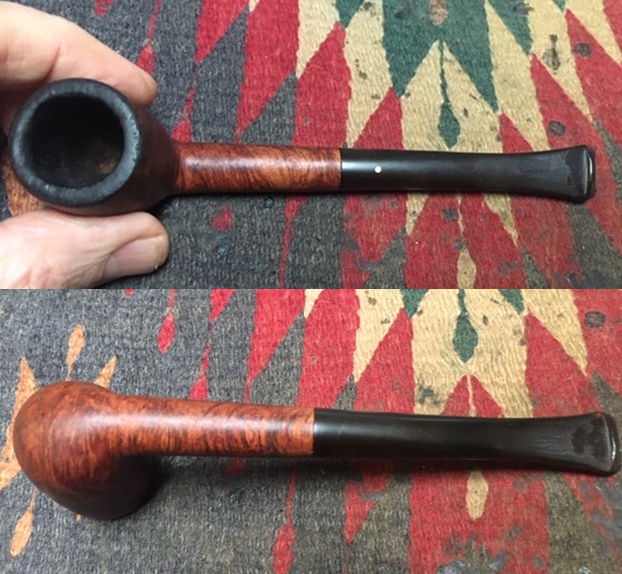
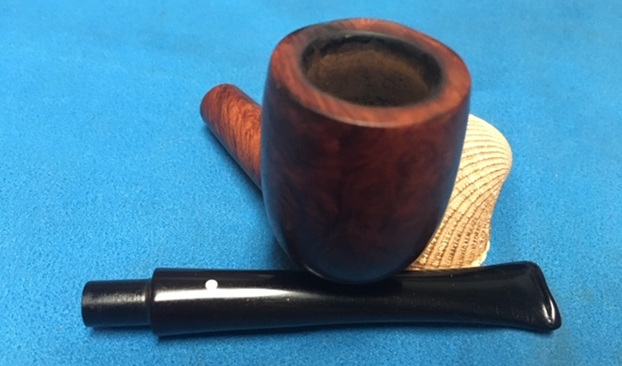
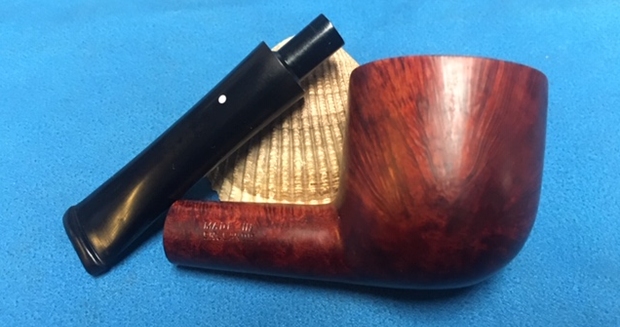
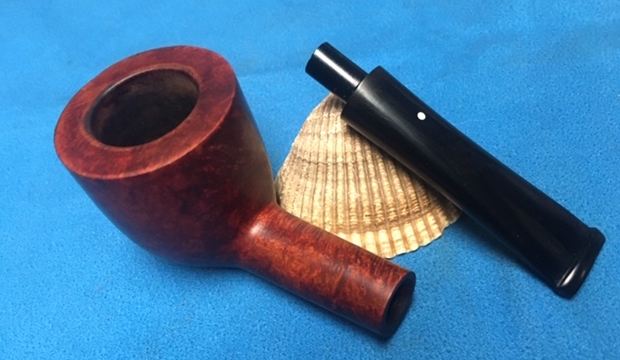
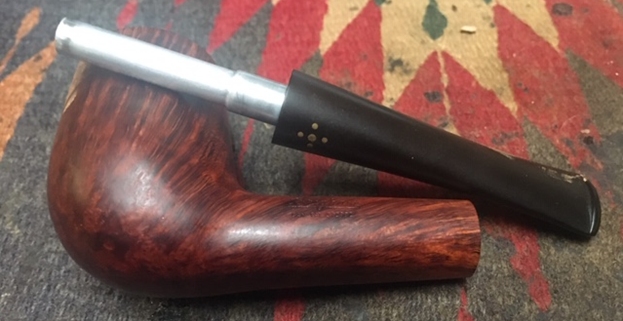
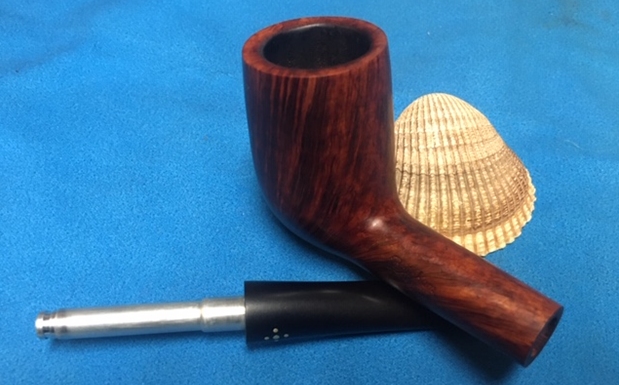
I finished work on #4, #5, #6, #7 & #8 and turned my attention to #2, another heavily used pipe but this time an Apple shaped pipe with a tapered stem. The pipe was stamped on the left side of the shank with the shape number 112 F/T next to the bowl/shank junction. That is followed by Dunhill over Bruyere. On the right side of the shank it is stamped Made in England 9 with a slightly superscript 11 with a Circle 2A. It appears that the pipe stamped as this one is was made in 1969 and shipped or sold in 1971. The 112 F/T is an Apple with a fish tail (F/T) tapered stem. The 2A stamp gives the Group or size number which in this case is a 2. The A stamp denotes a Bruyere pipe. Working on this is a change after the group of billiards I have worked on so far.
I am once again including Chuck Stanion’s eloquent description of the Bruyere on the smokingpipes.com site as follows (https://www.smokingpipes.com/pipes/new/dunhill/moreinfo.cfm?product_id=346421):
The Bruyere was Alfred Dunhill’s original finish upon launching his brand of premium pipes and smoking accessories and was the only Dunhill finish from 1910 until 1917. Even after the addition of other finishes, the Bruyere maintained a high level of popularity, becoming synonymous with what is thought of, even today, as the quintessential pipe. To achieve the iconic, ruby hue and saturation, a skilled craftsman painstakingly layers particular stains in a precise manner, then meticulously polishes the pipe to a high luster. The final result is, simply put, timeless.
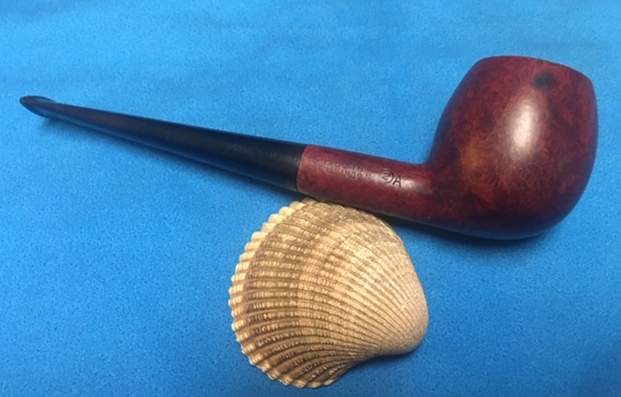
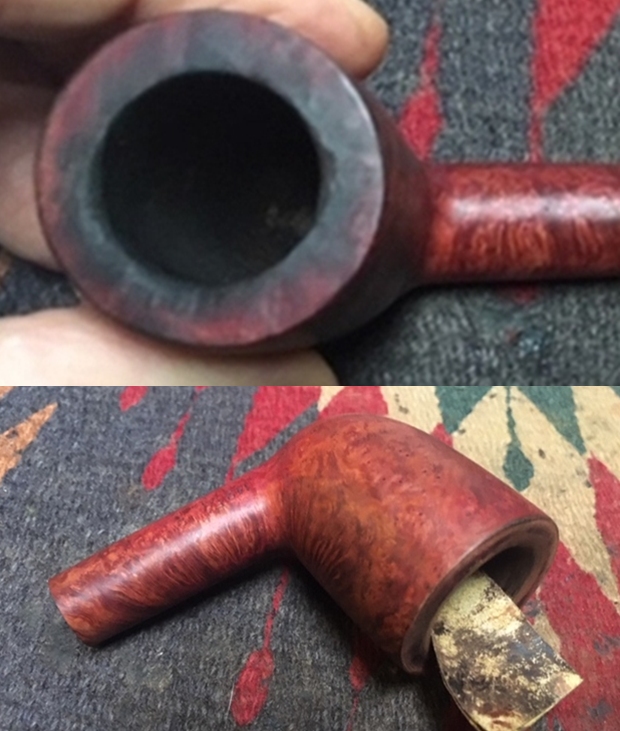
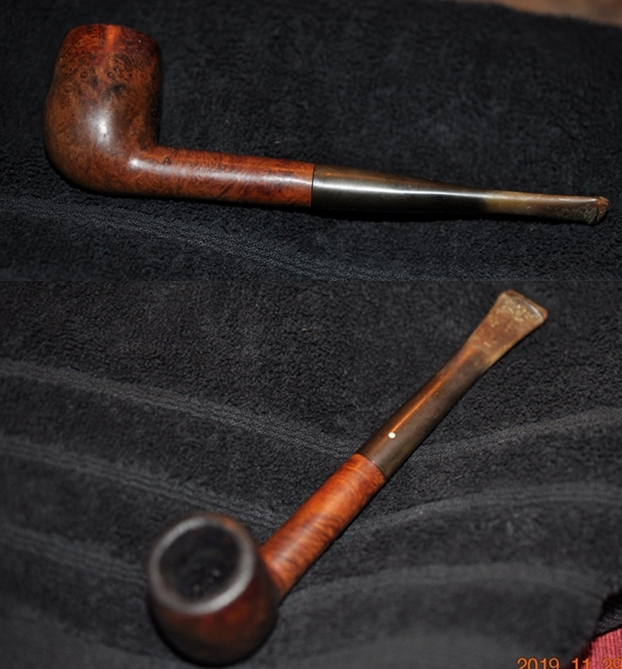
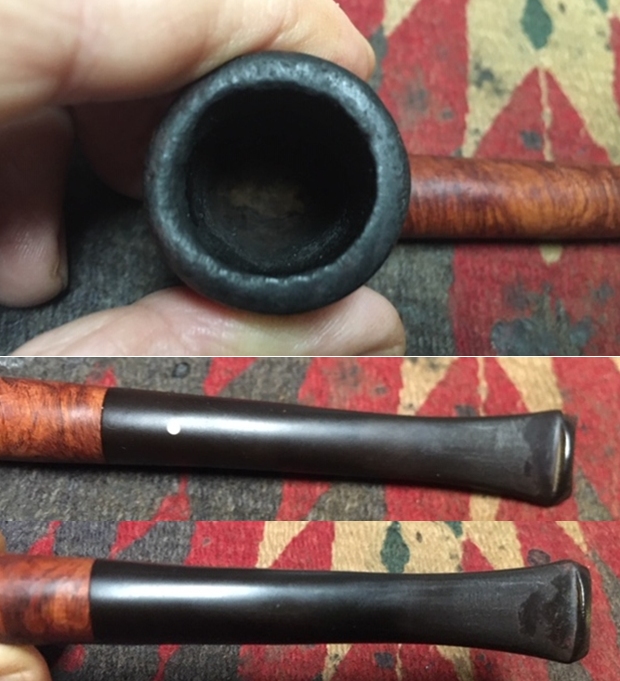
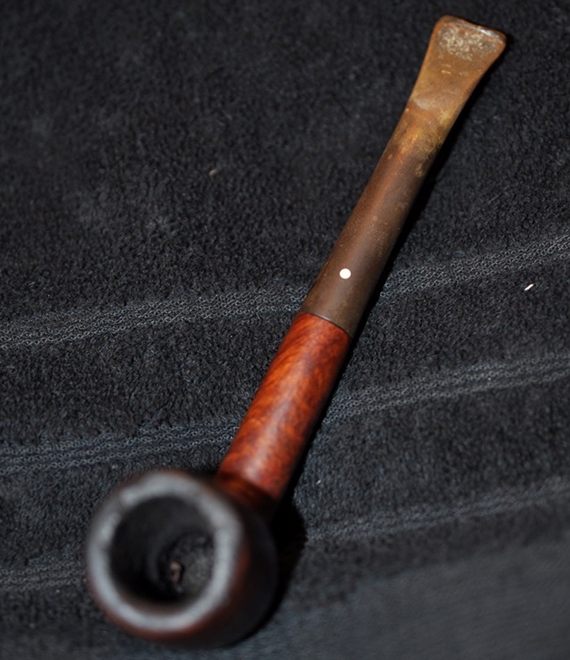
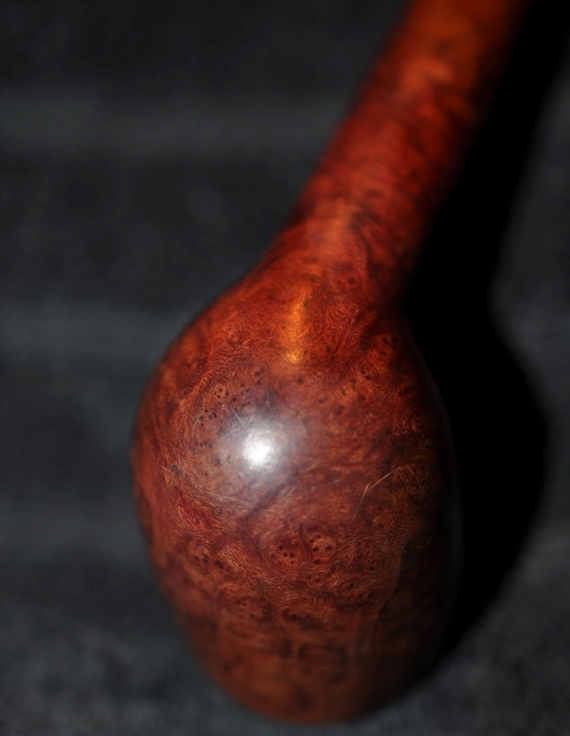
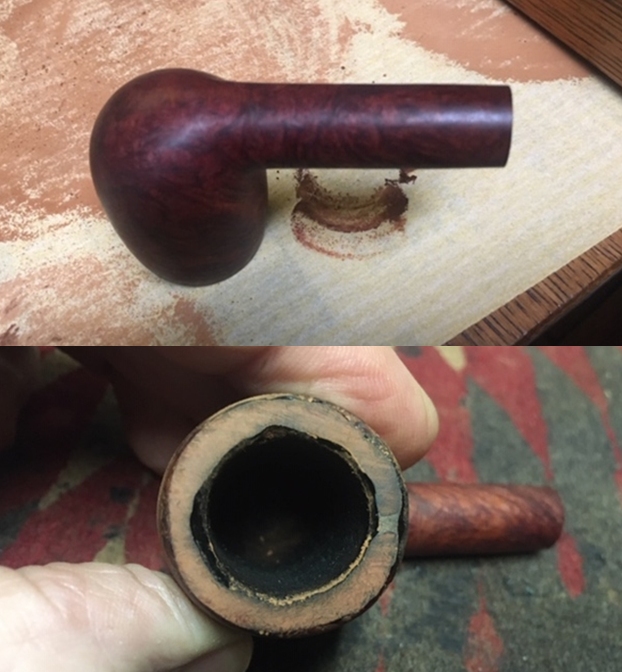
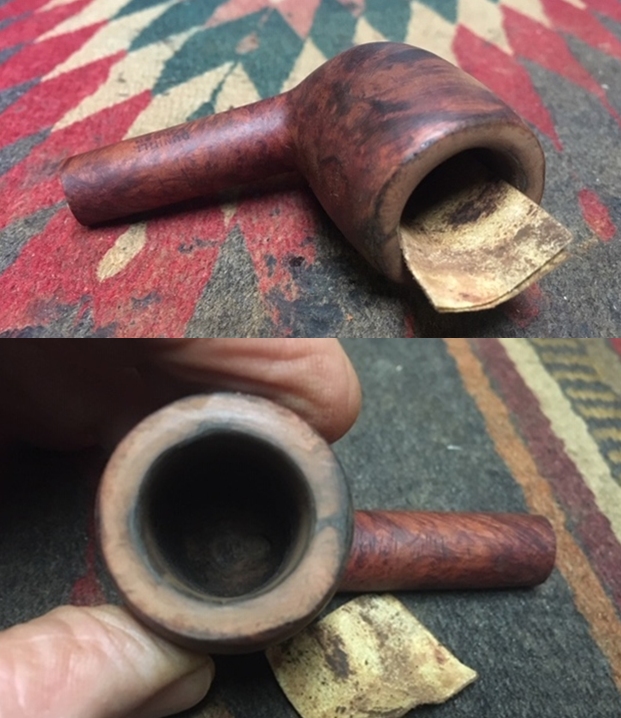
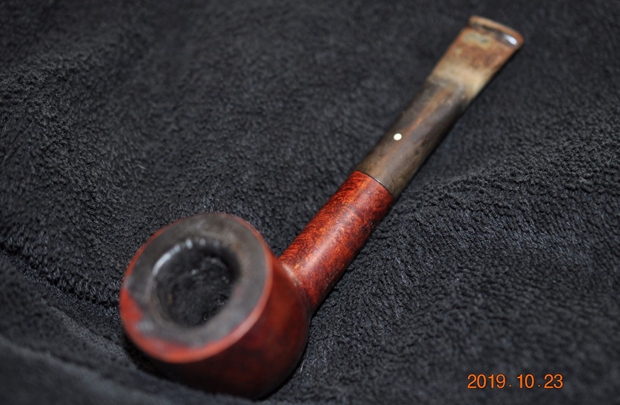
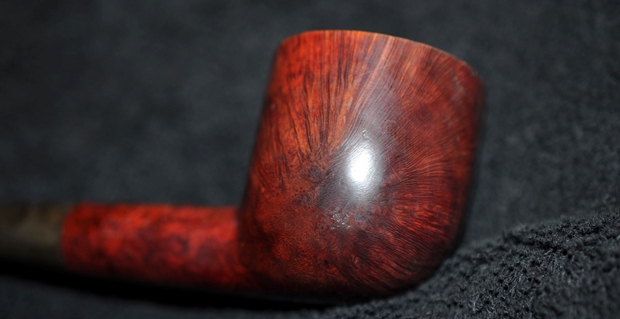
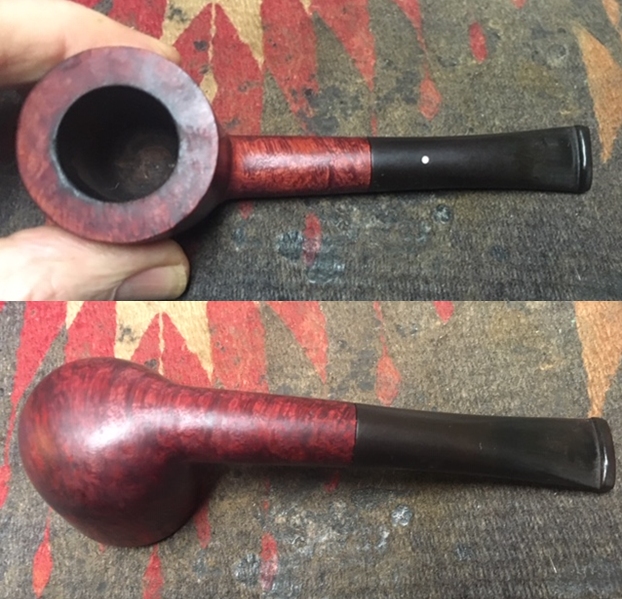
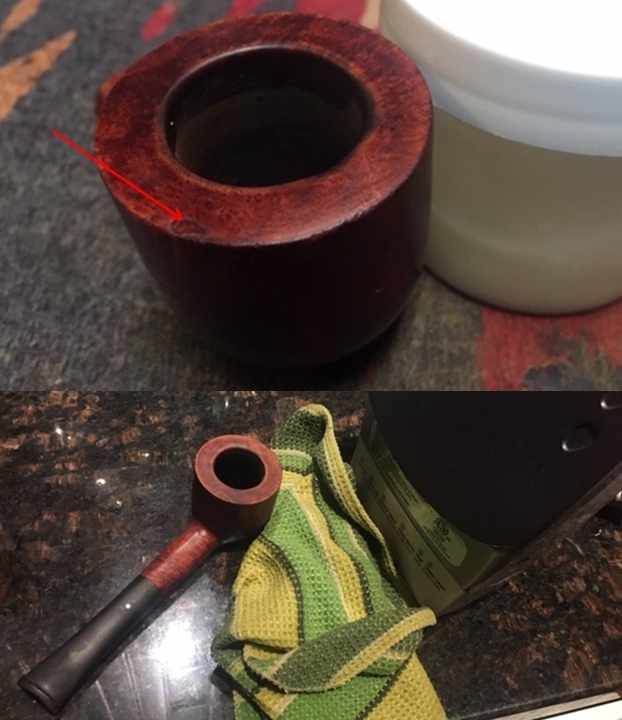
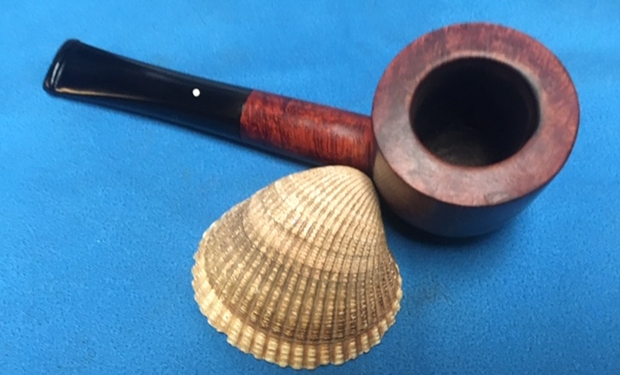
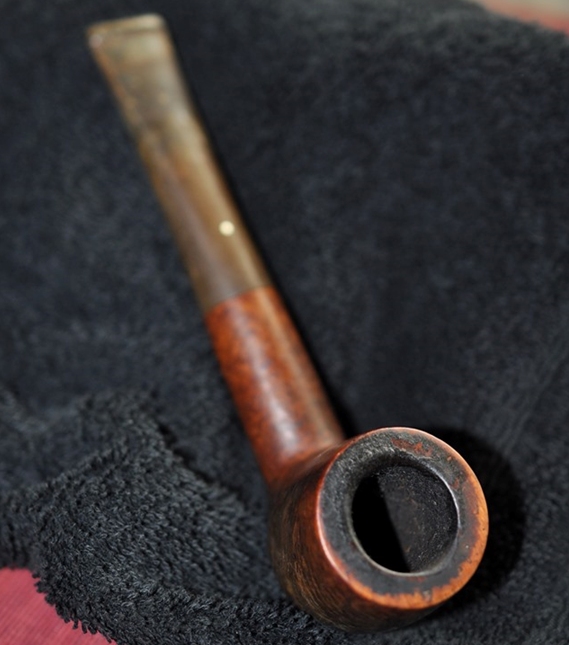
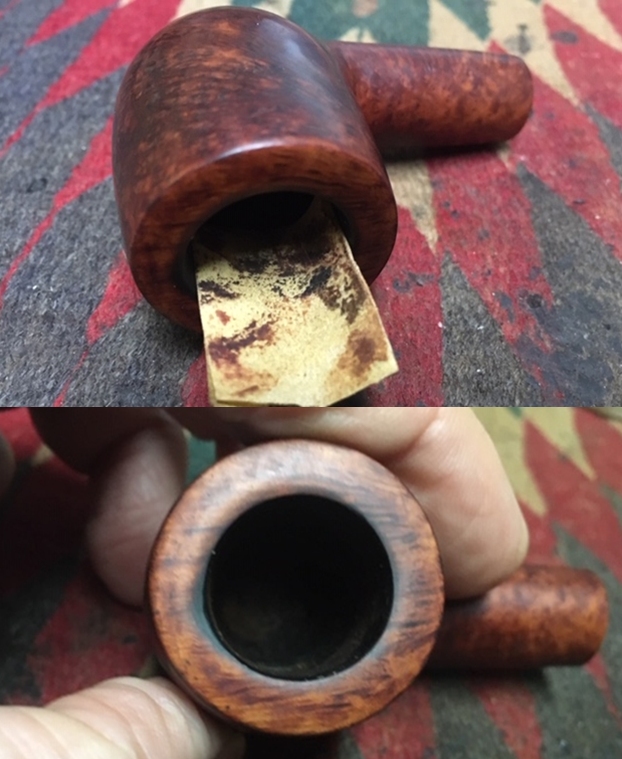
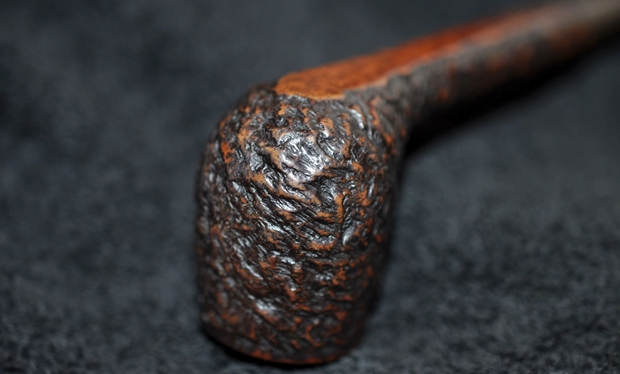
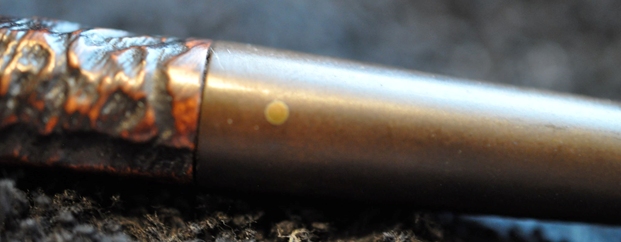
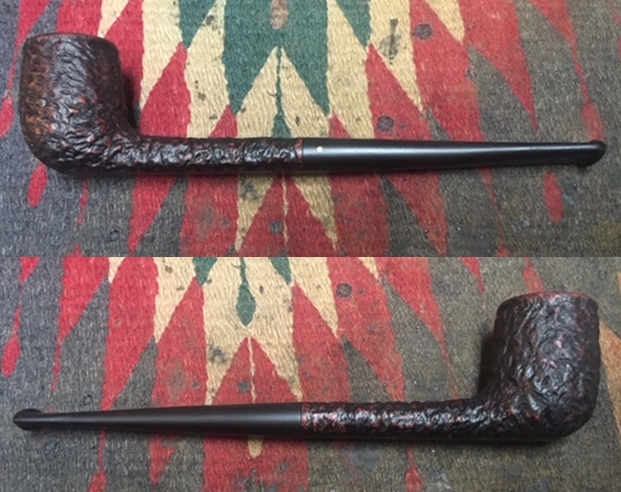
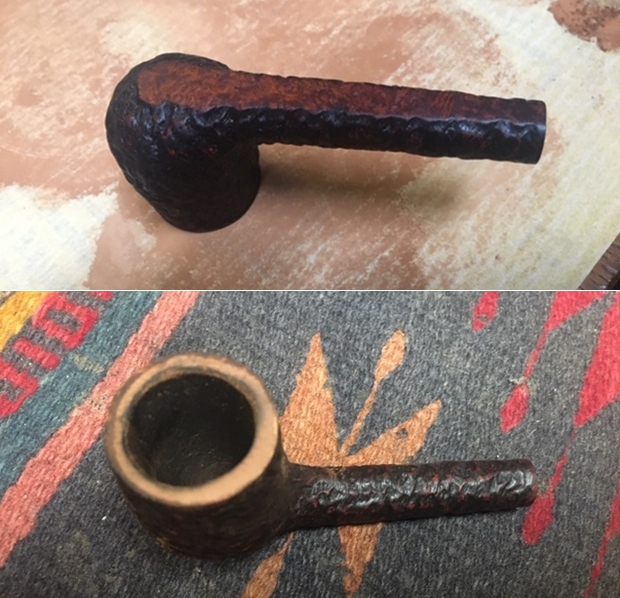
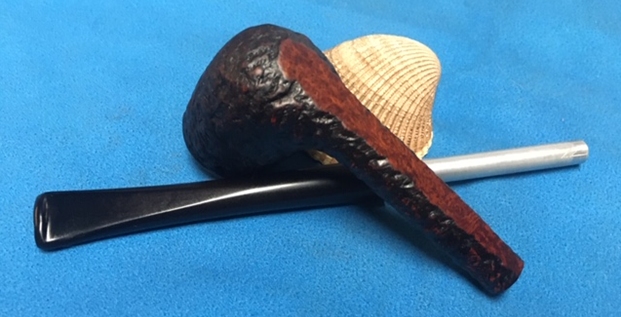
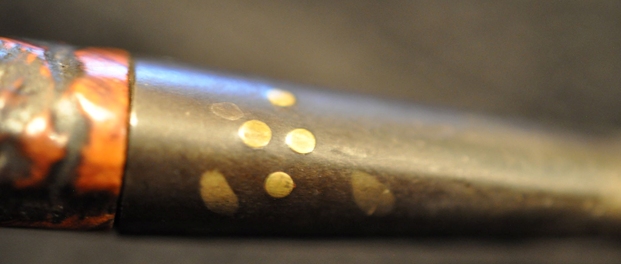
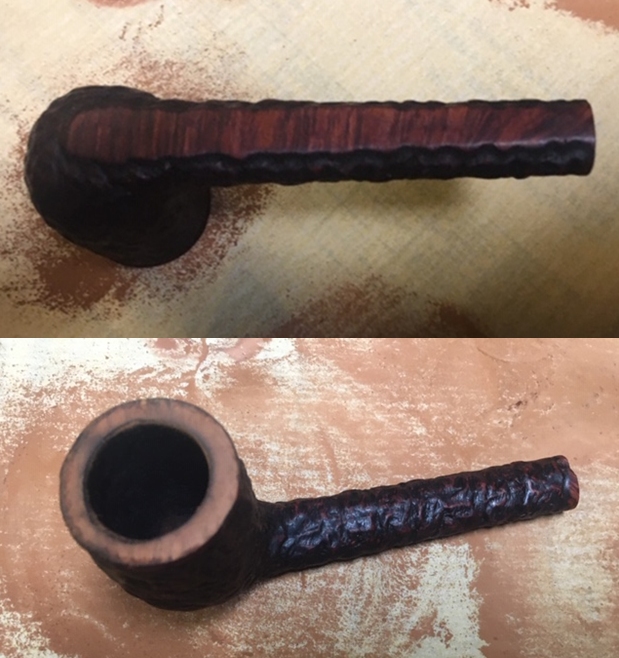
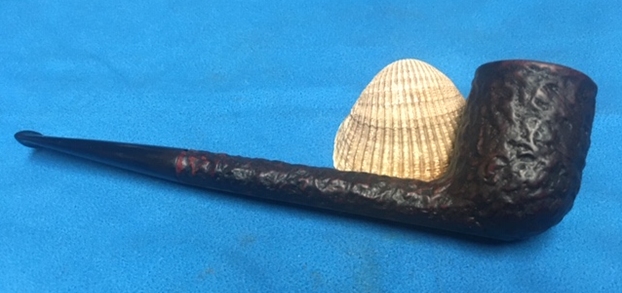
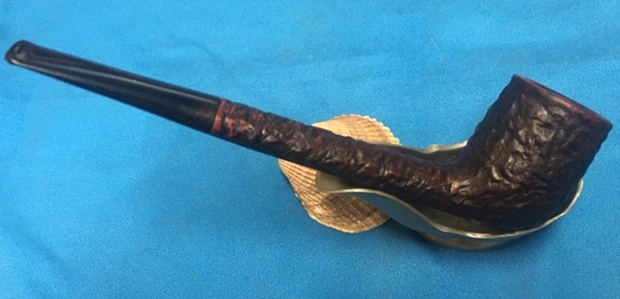
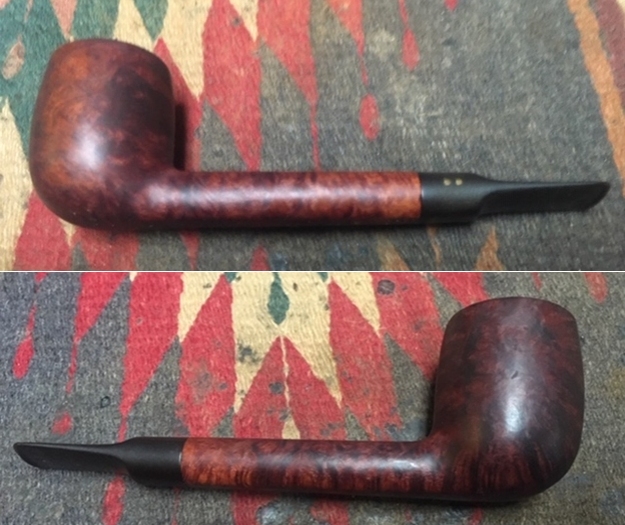
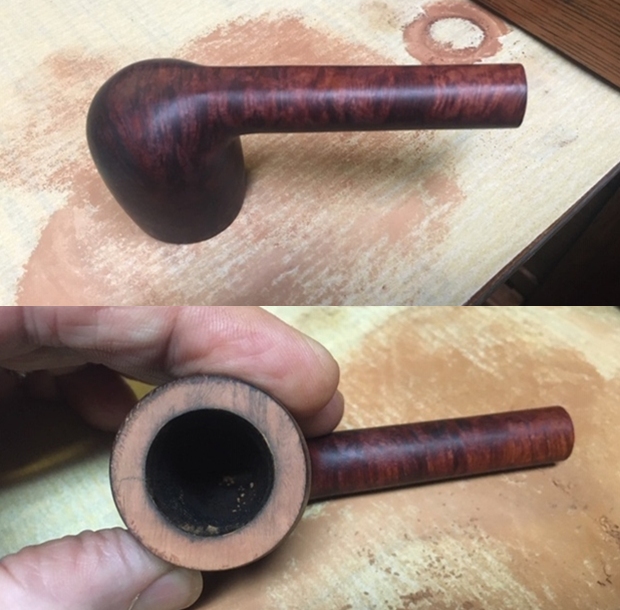
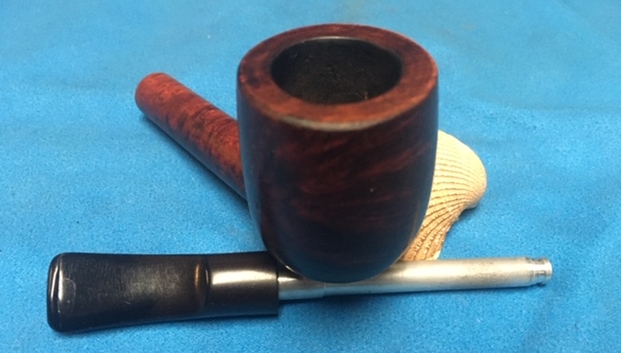
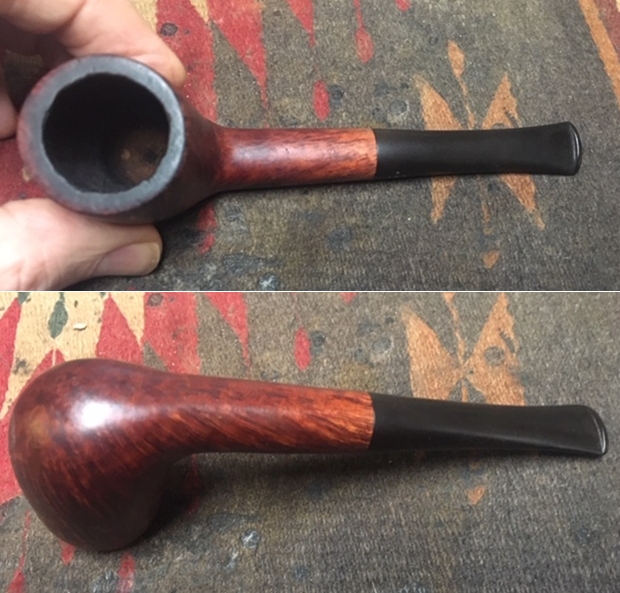
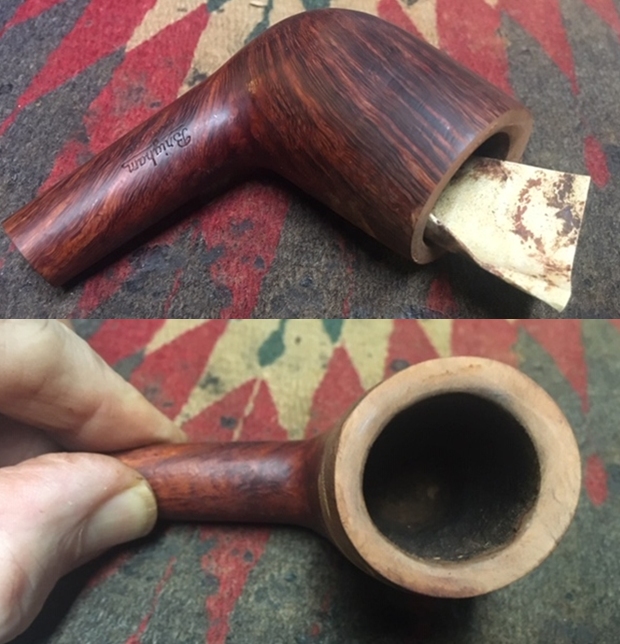
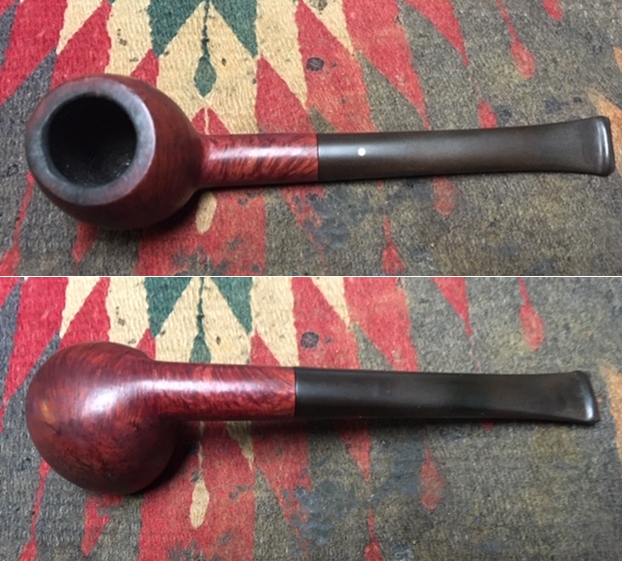
Like Bob’s other Dunhill pipe this one also had a thick cake in the bowl with remnants of tobacco stuck on the walls. There was a lava overflow on the rim so it was hard to know what kind of damage lay beneath the thick covering. Once it was cleaned I would have a better idea of the condition of the rim top. I could see however that there was definitely damage to the front inner edge of the bowl. The grain that is poking through the grime and oils appears to be quite beautiful – birdseye grain on the bowl sides and cross grain on the front and back as well as the heel of the bowl. The stem was oxidized and calcified toward the end with some tooth chatter. There were also some tooth marks on both sides of the stem ahead of the button and on the button itself. There was the classic White Spot on the top of the stem. Jeff took photos of the pipe before he started his cleanup work on it. 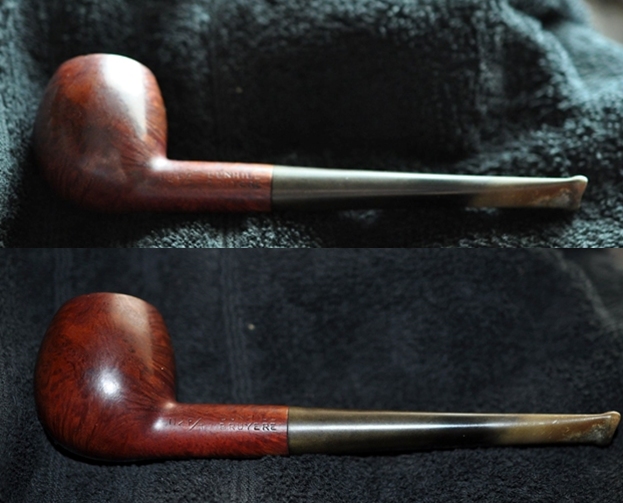
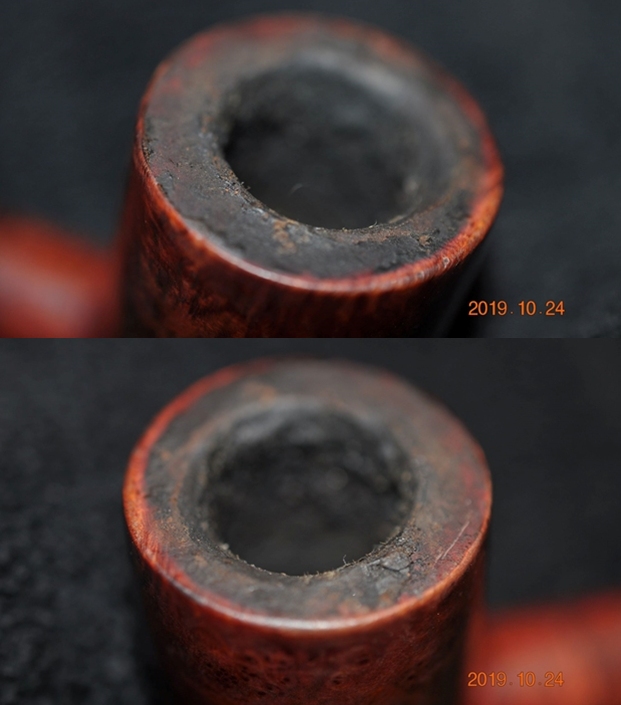
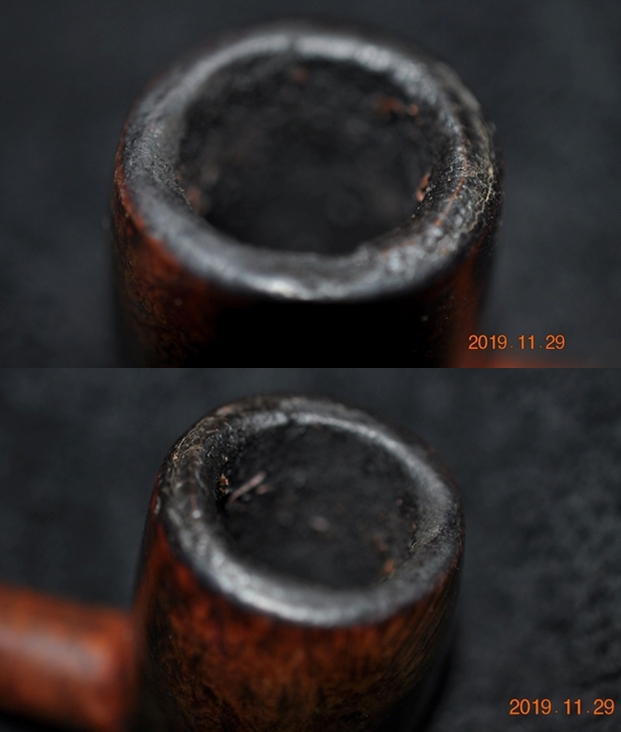
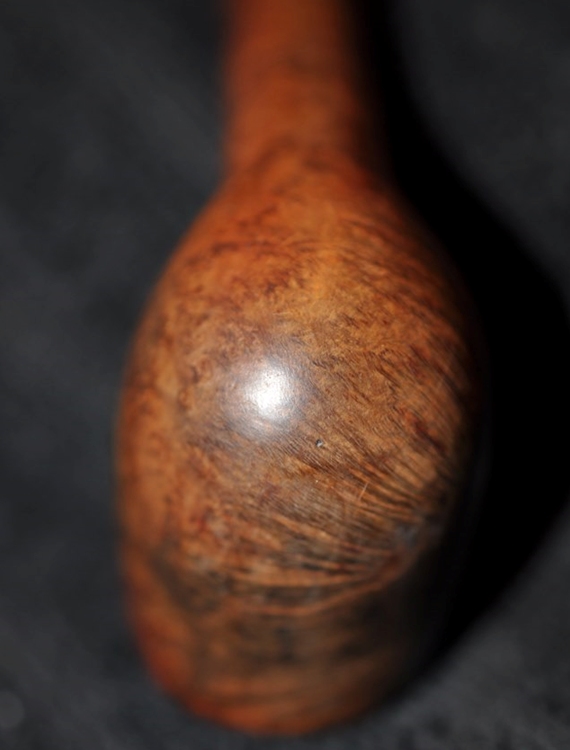
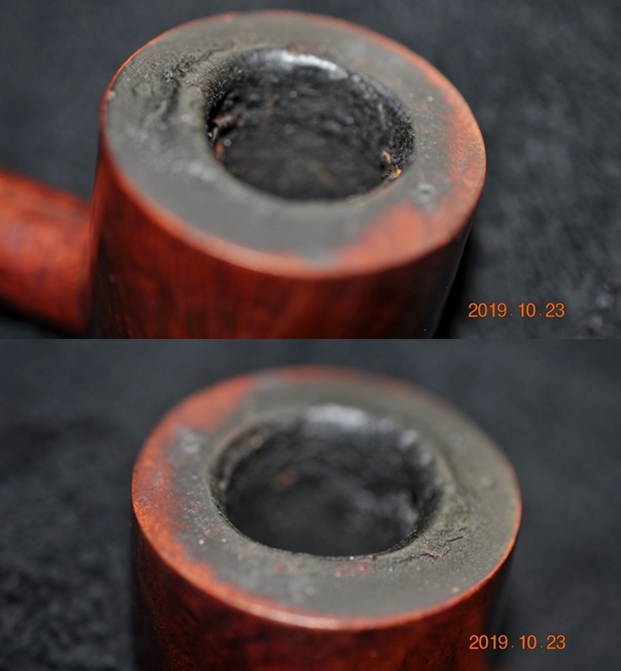
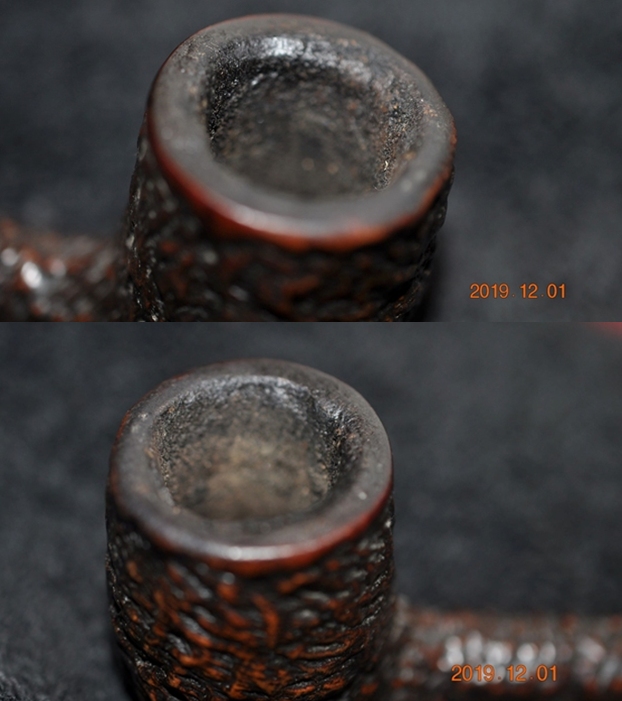
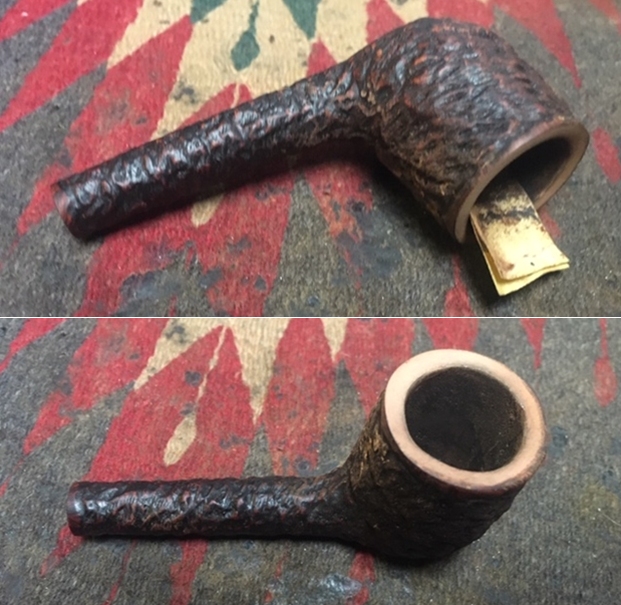
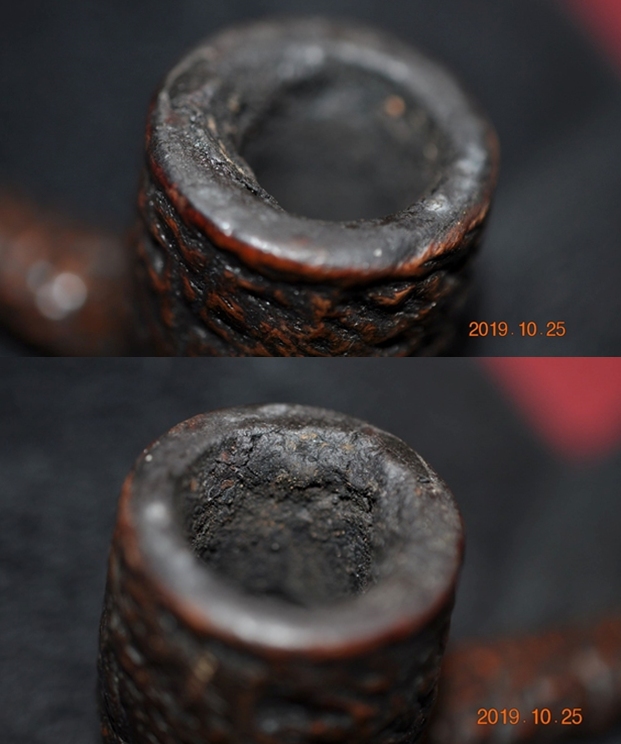
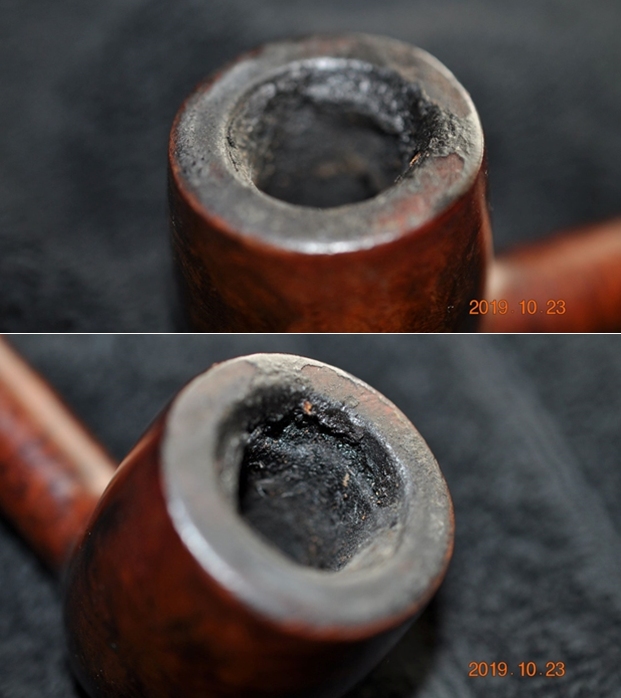
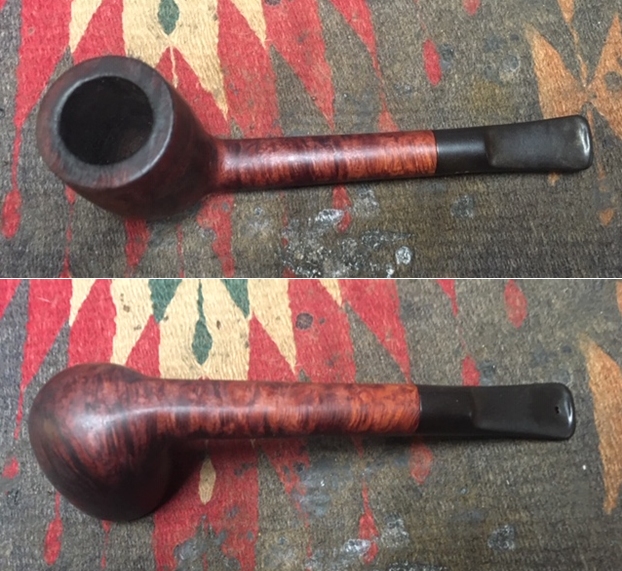
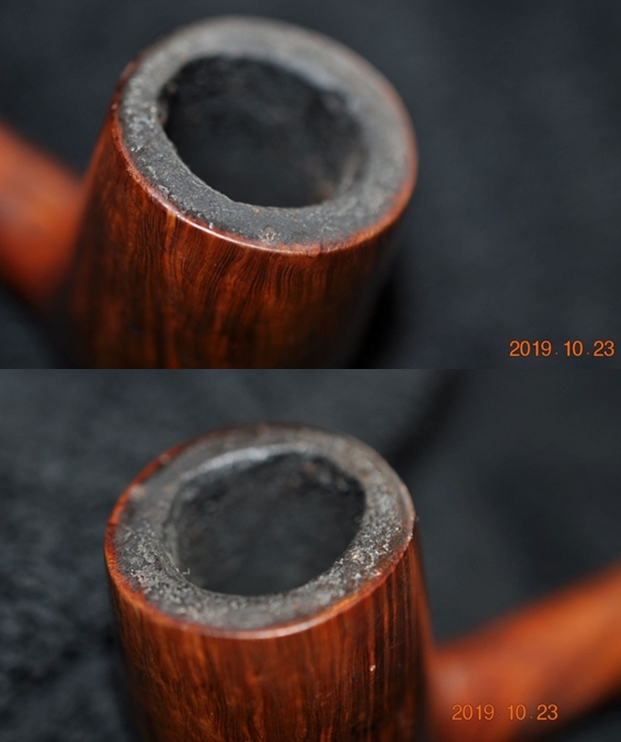
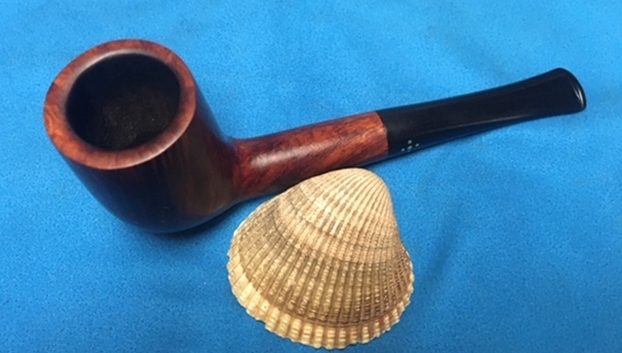
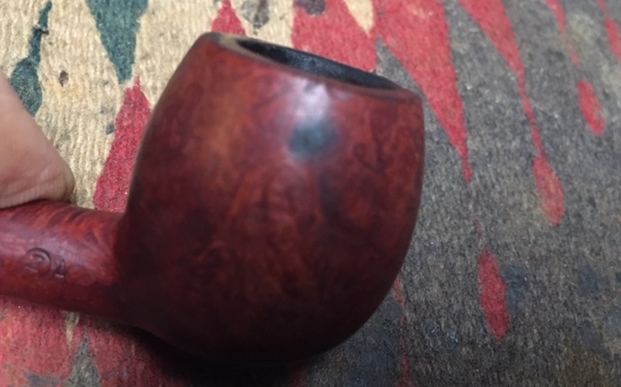
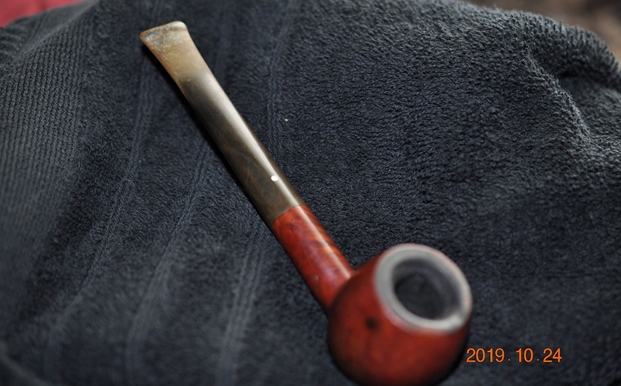 Jeff took photos of the bowl and rim top to show the thick, hard cake in the bowl with remnants of tobacco stuck on the walls of the bowl. There was a lava build up on the smooth rim top and the edges of the bowl. The rim top looked pretty good but it was hard to know for sure. It appeared that there was damage on the inner edge. The outer edges looked to be okay other than a few small nicks on the sides. There was a burn mark on the right side of the bowl from where the pipe had been laid down in an ashtray. It was not deep but it was permanent.
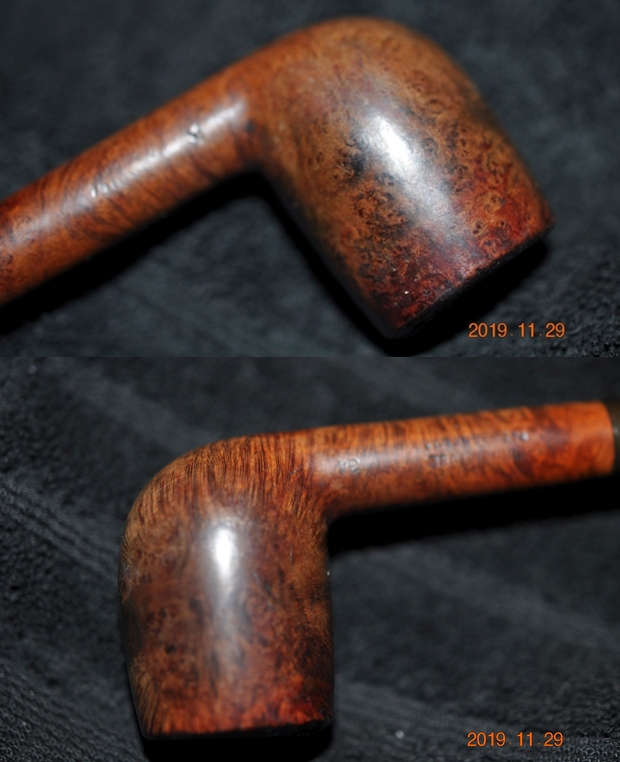
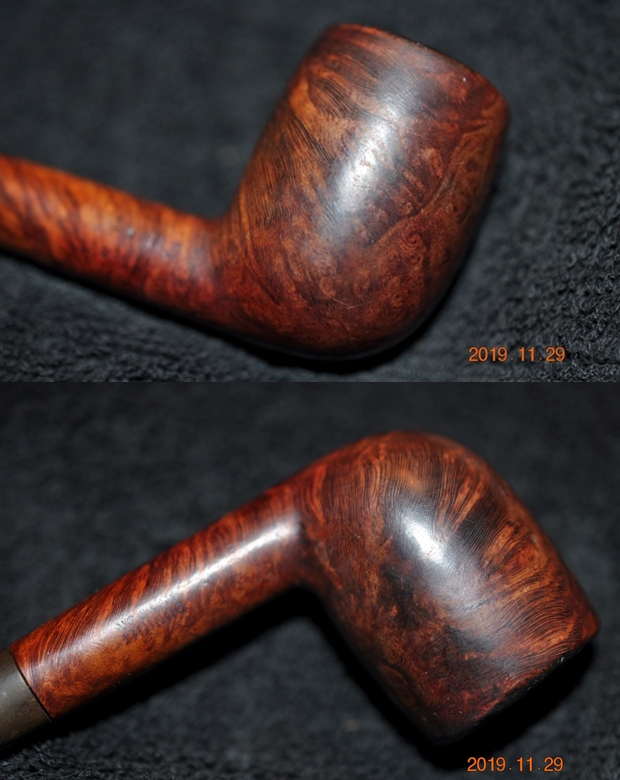
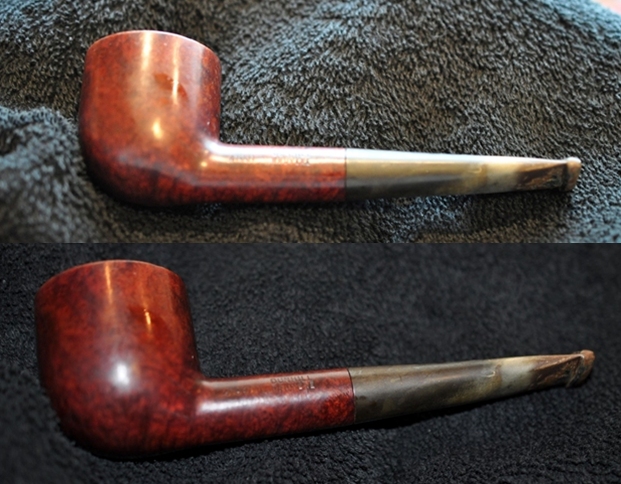
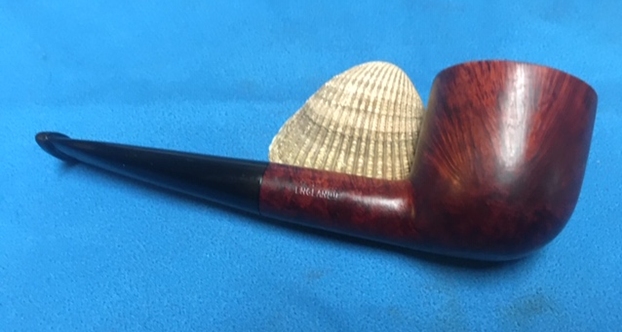
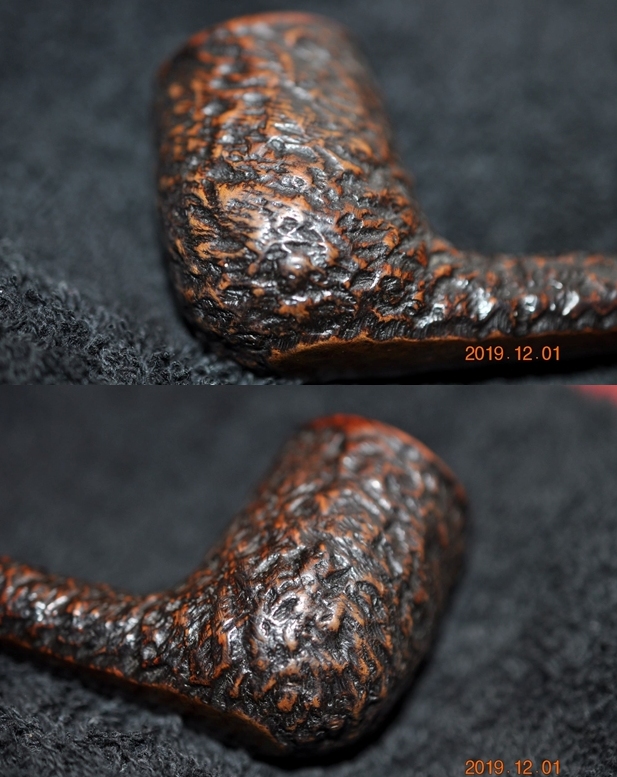
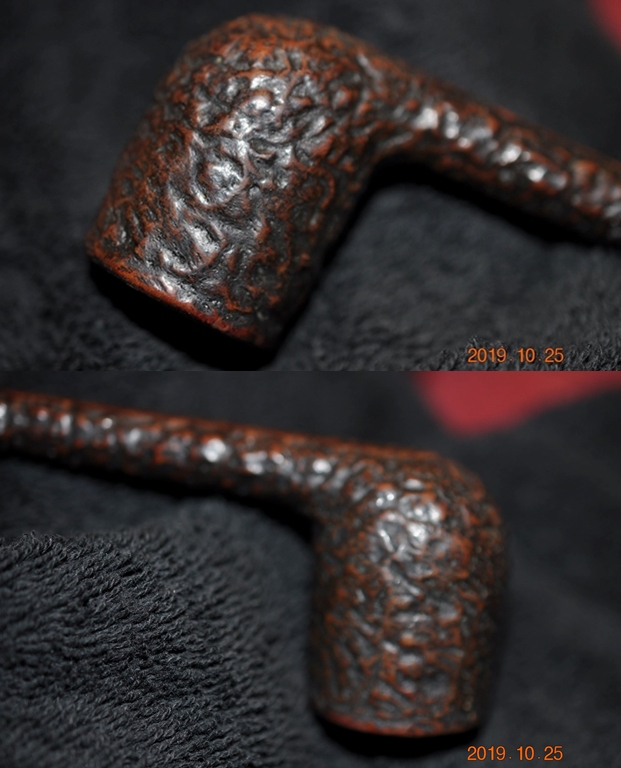
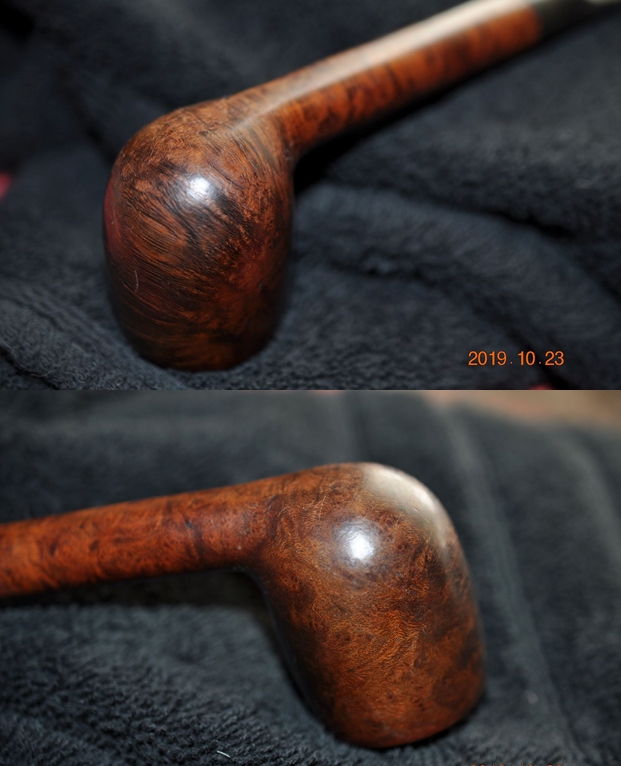
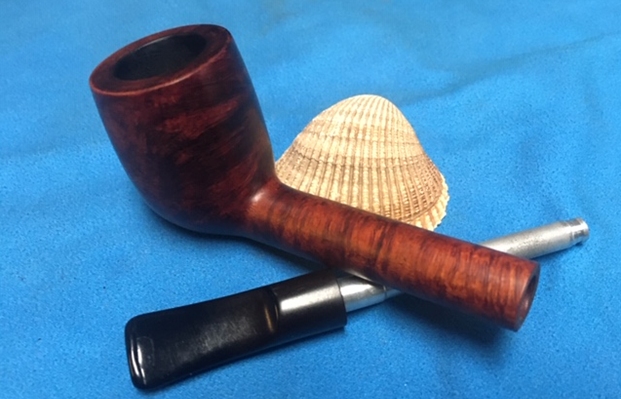
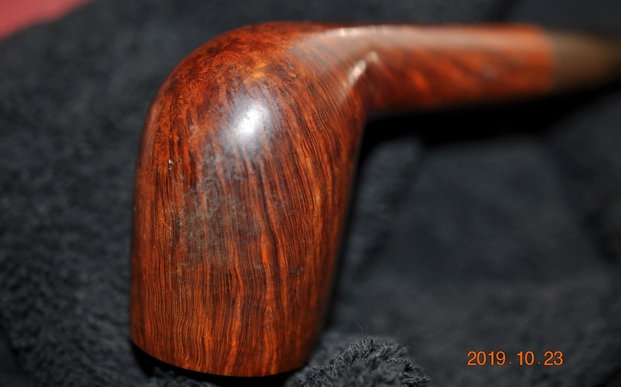
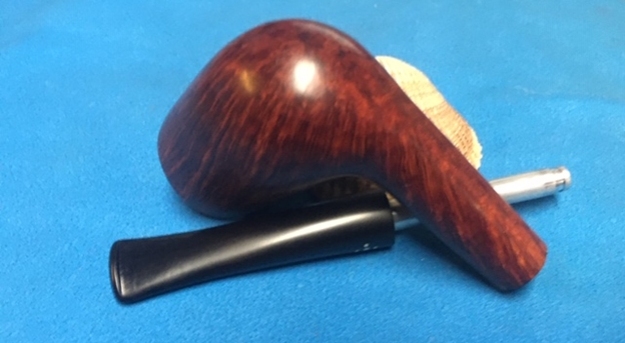
 Jeff took photos of the sides and heel of the bowl to show the condition of the finish. You can see the beautiful grain patterns around the sides of the bowl and shank. Even under the dirt and debris of the years it looked very good.
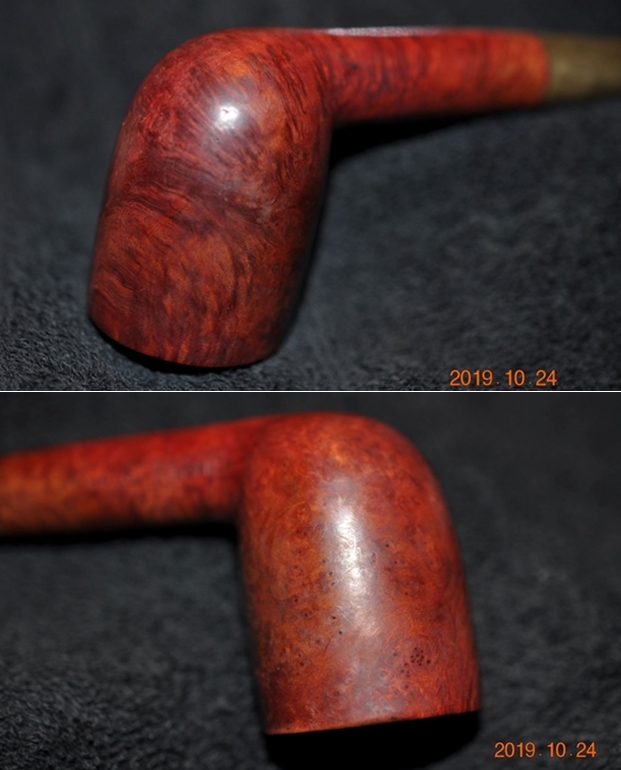
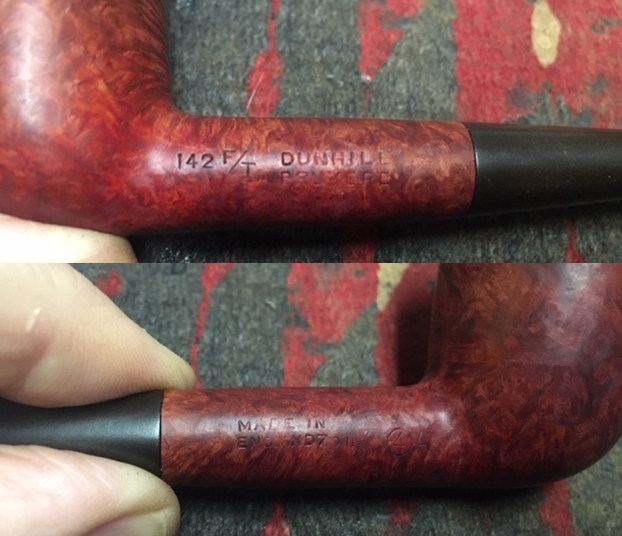
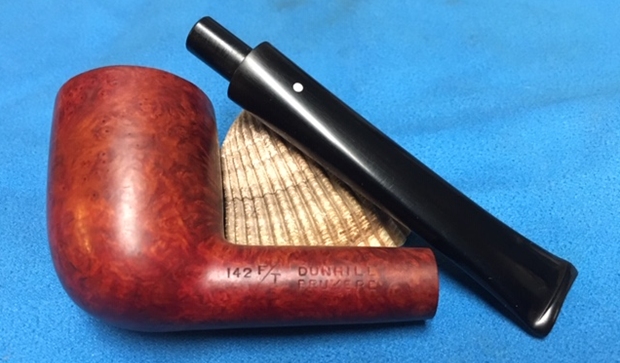
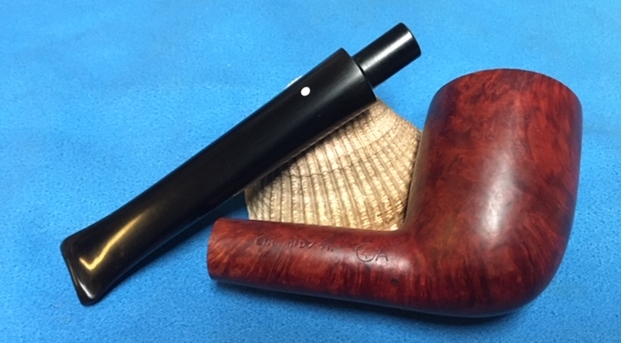
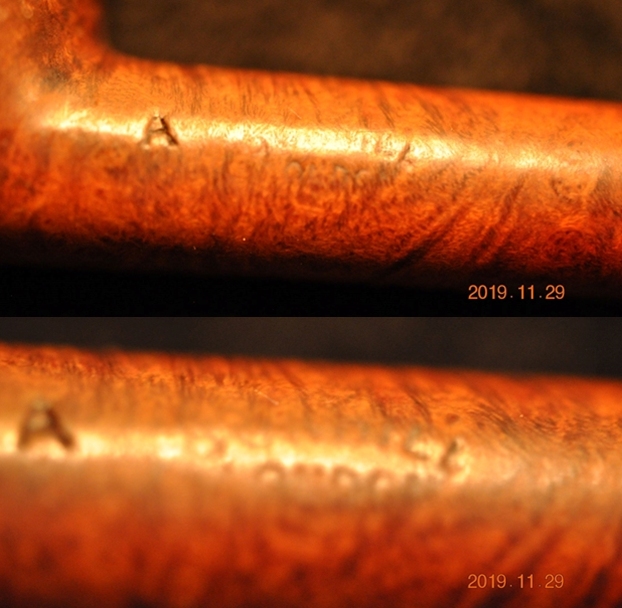
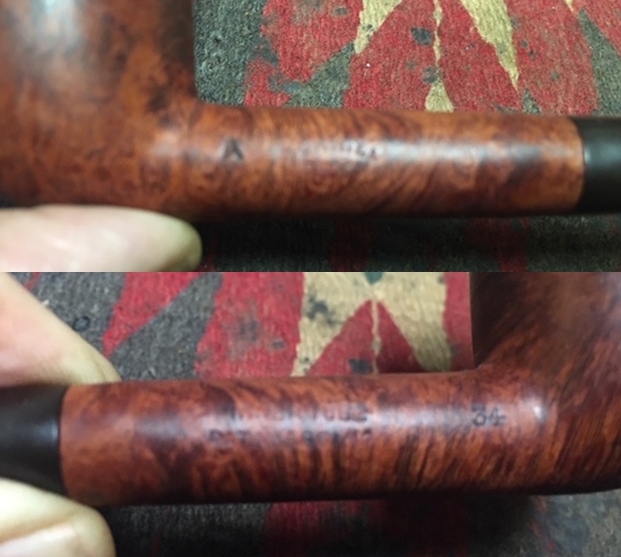
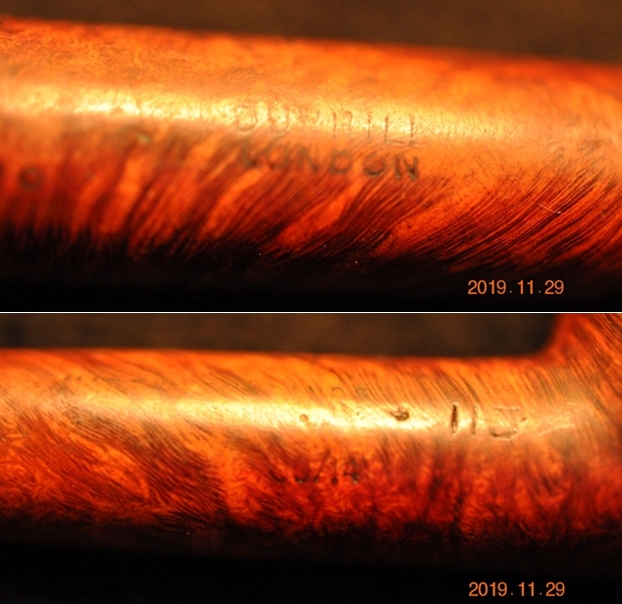
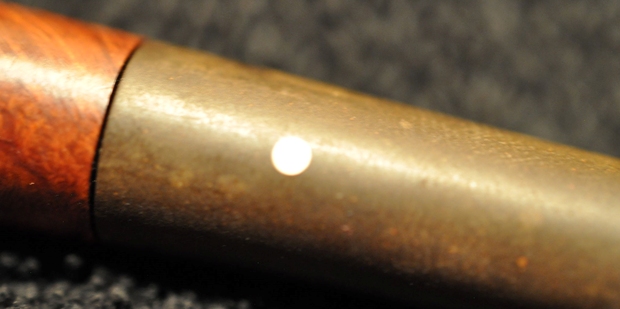
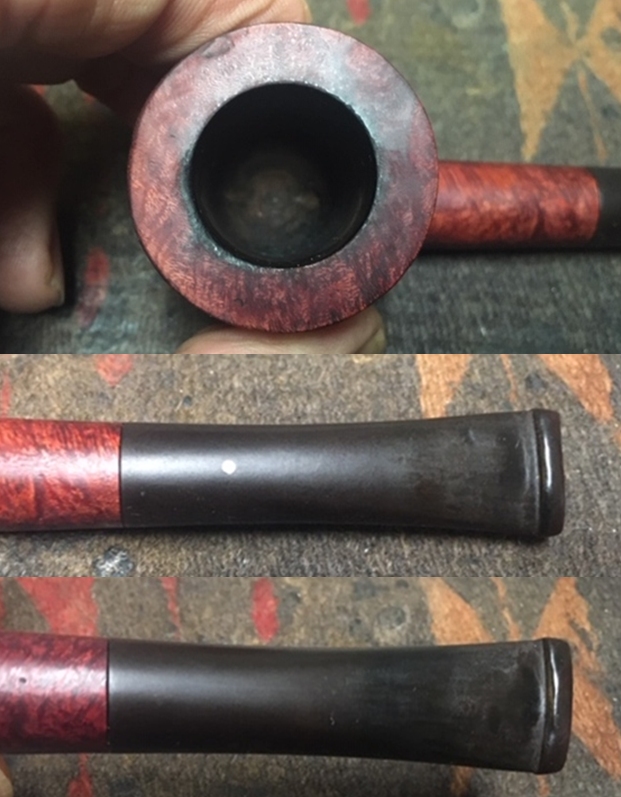
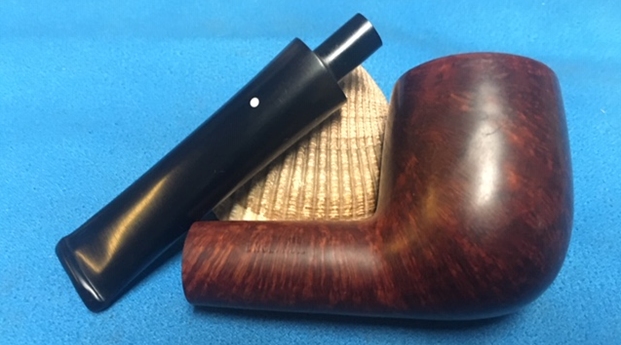
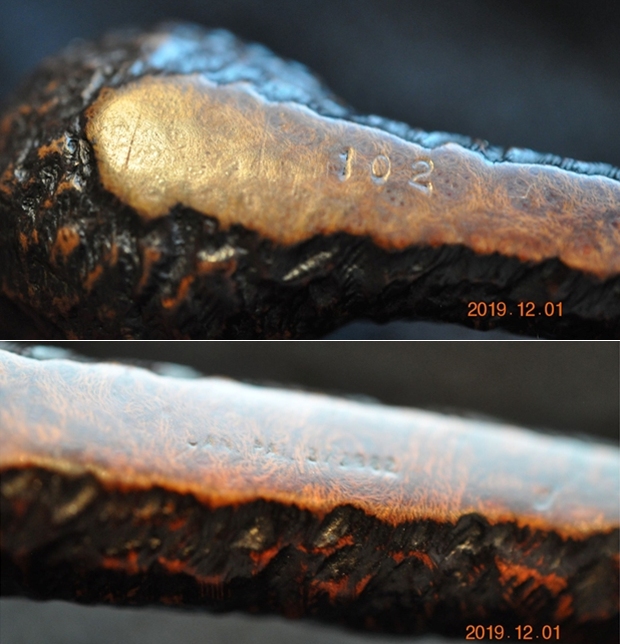
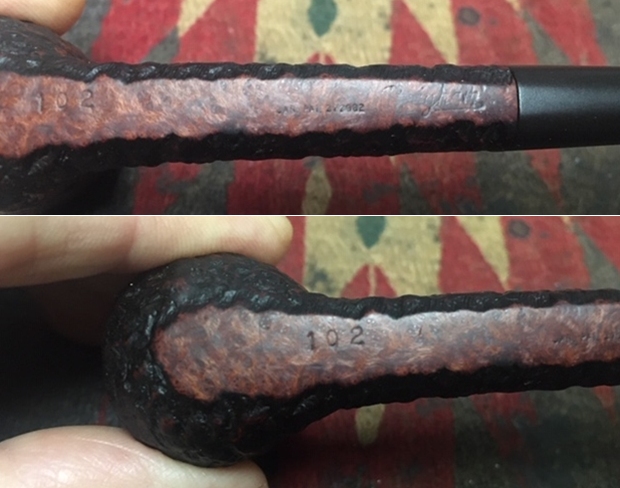
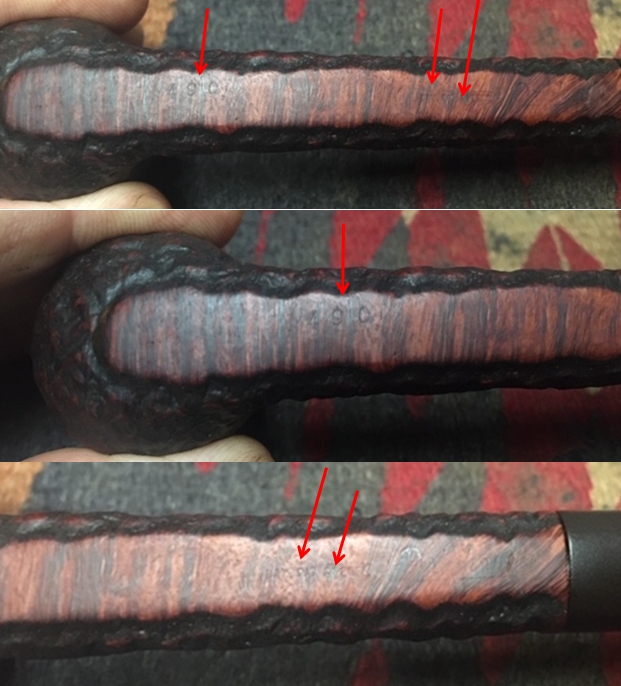
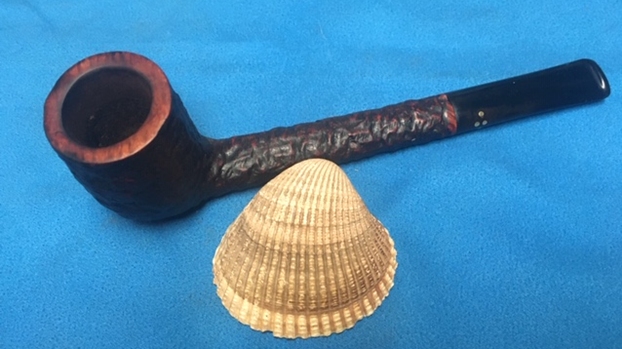
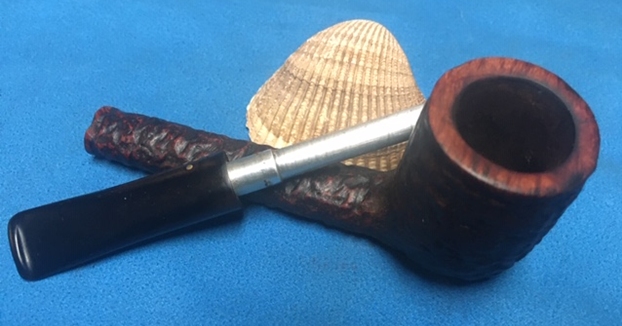
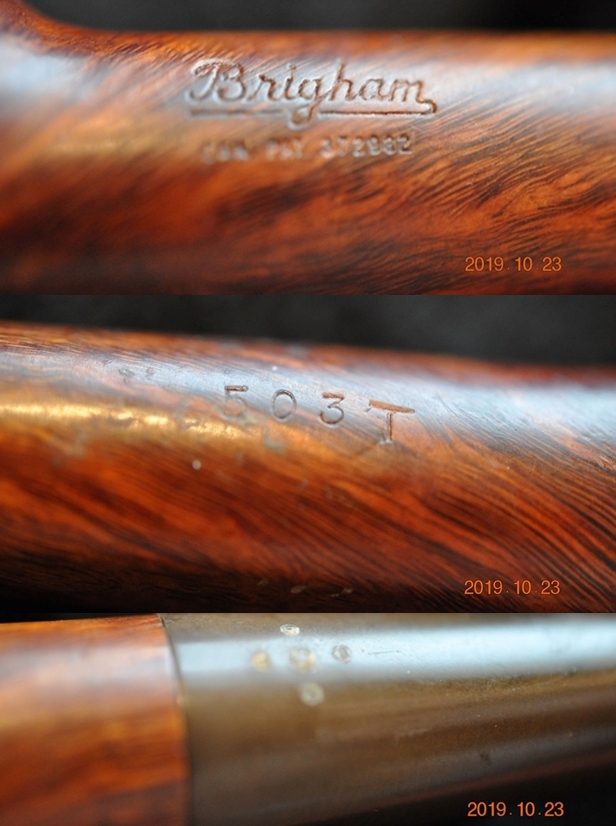
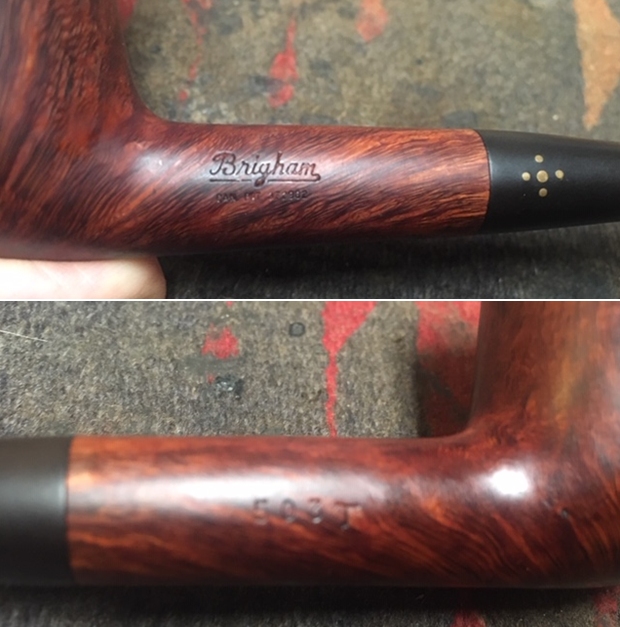
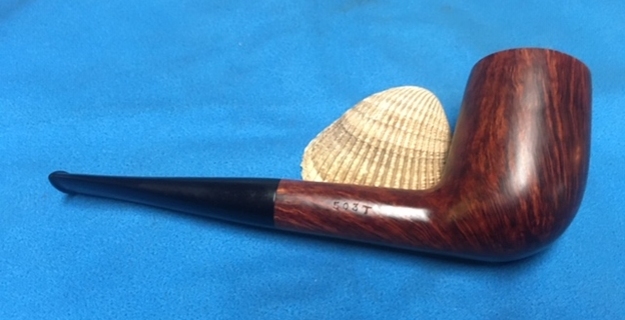
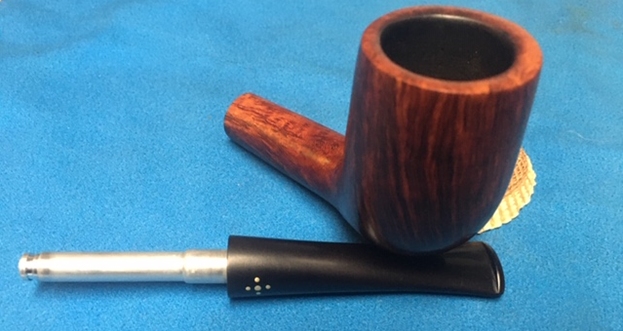
 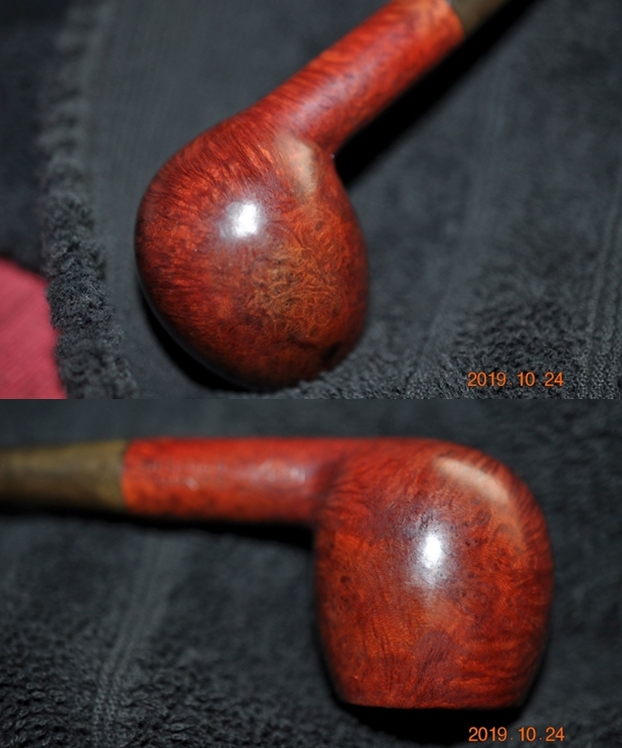 The stamping is very readable. On the left side of the shank you can see 112 F/T which is the shape number followed by the F/T for a Fish tail stem. Next to that it is stamped Dunhill over Bruyere. On the right side it reads Made in England 9/11 followed by Circle 2A. Jeff included a pic of the White Spot on the stem.
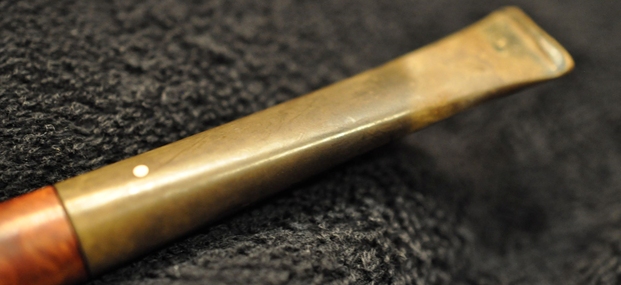
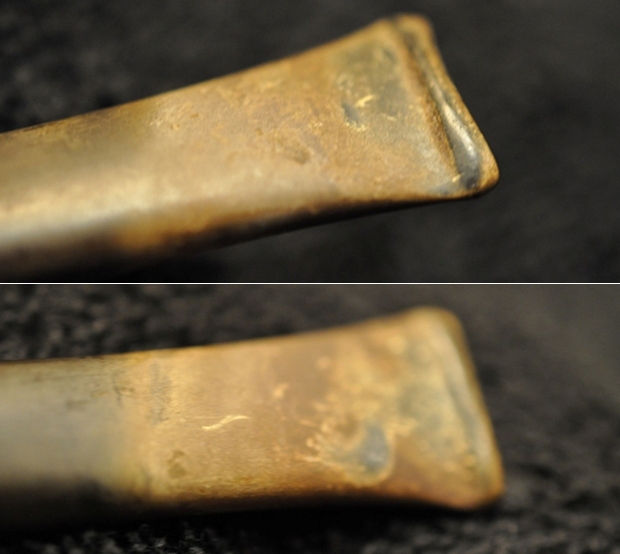
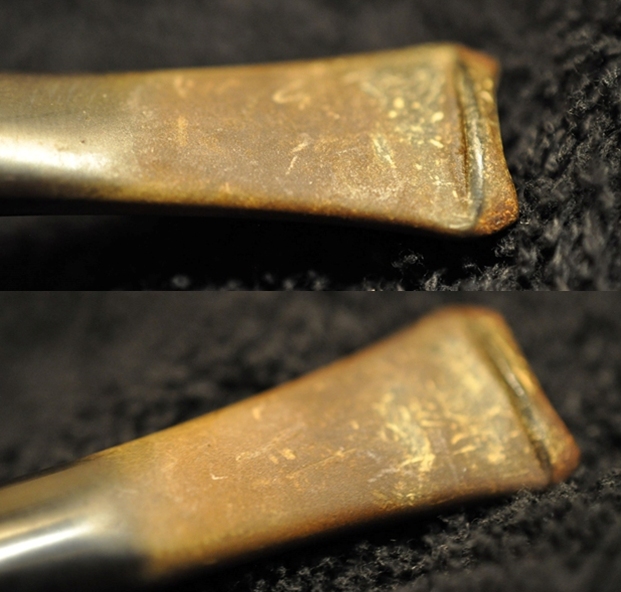
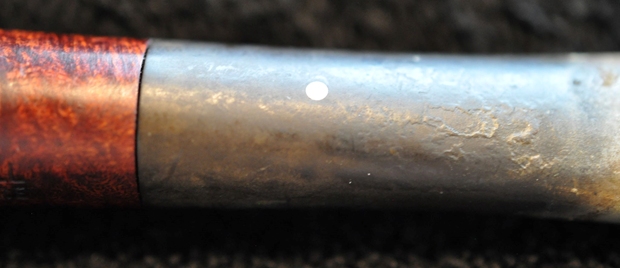
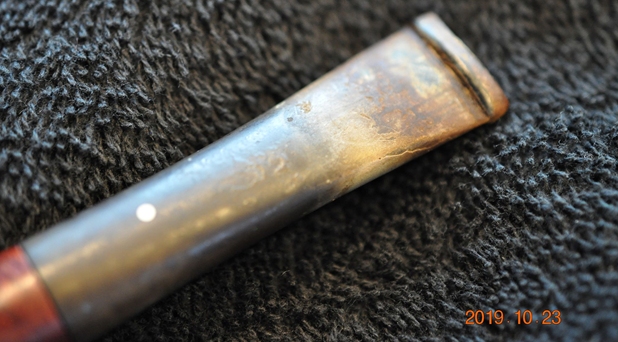
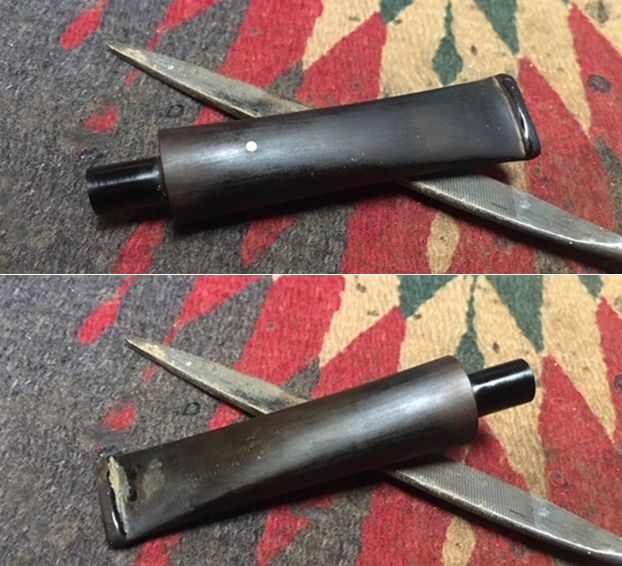
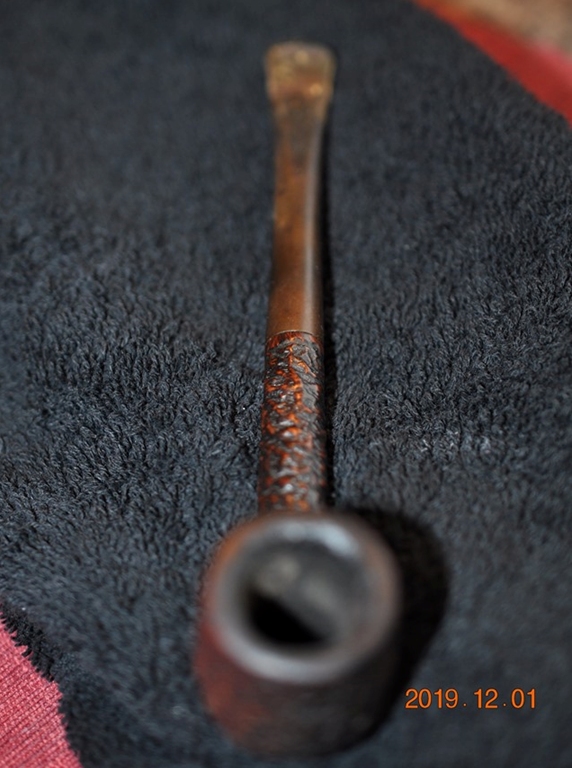
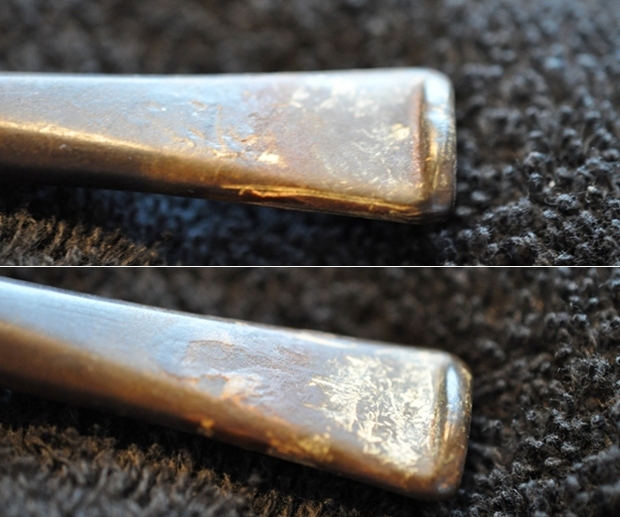
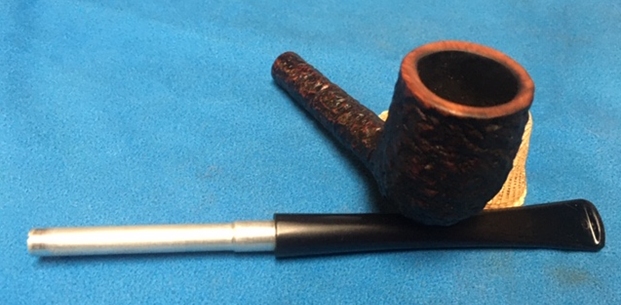
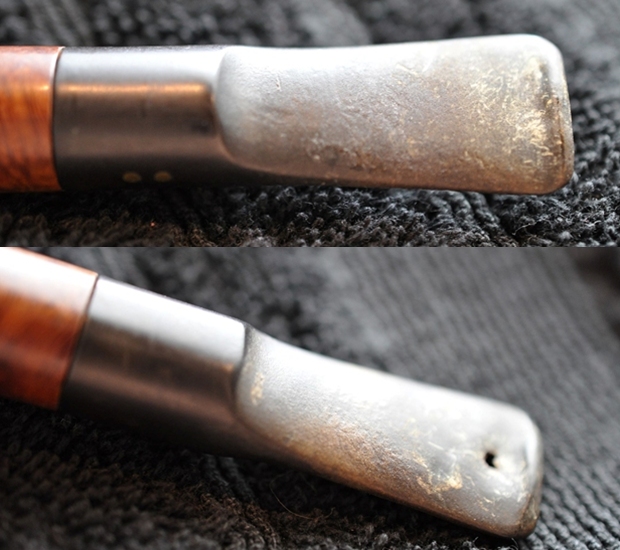
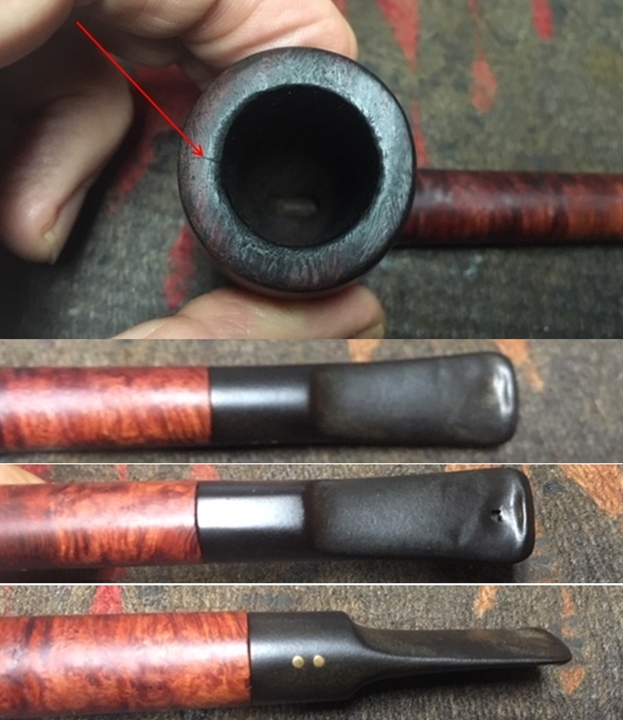
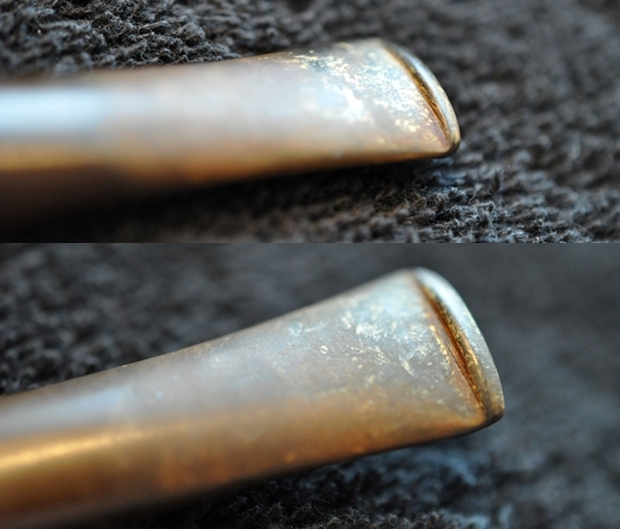
 Jeff took photos of the top and underside of the stem showing the tooth chatter, scratching, calcification and oxidation on the stem surface and wear on the edges of the button.
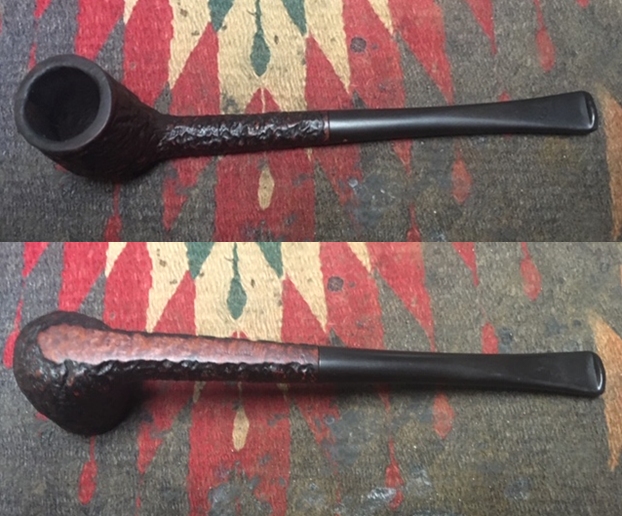
 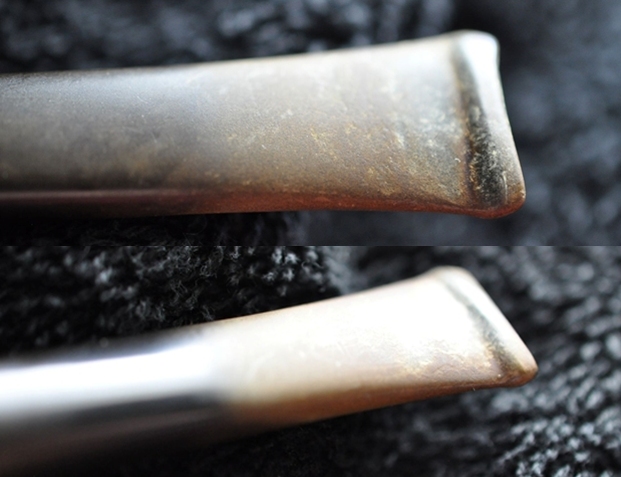 I can’t begin tell you how great it feels to have Jeff’s help on cleaning up the pipes from Bob’s estate as the 125+ pipes were taking me a long time to do alone. He cleaned this filthy pipe with his usual penchant for thoroughness that I really appreciate. This one was a real mess and I was looking forward to seeing what he had done with this one when I took it out of his box. It looked amazing and CLEAN. He reamed it with a PipNet pipe reamer and cleaned up the reaming with a Savinelli Fitsall Pipe Knife. He scrubbed out the internals with alcohol, pipe cleaners and cotton swabs until the pipe was clean. He scrubbed the exterior of the bowl with Murphy’s Oil Soap and a tooth brush to remove the grime and grit on the briar and the lava on the rim top. The finish looks good with great looking grain around the bowl and shank. The rim top looked better on this pipe. The condition of the inner and outer edges was not too bad. The stem looked a lot better. Jeff soaked the stem in Before & After Deoxidizer to remove the oxidation on the rubber. The pipe was ready for me to carry on the next part of the process.
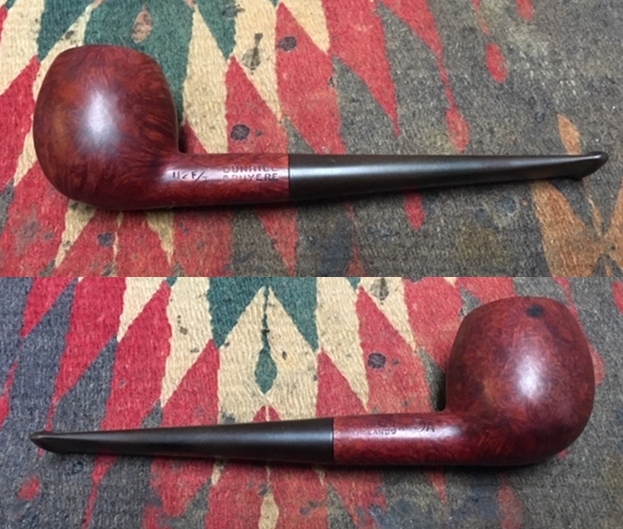
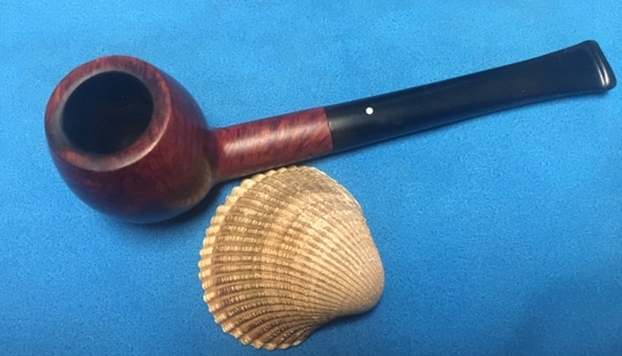
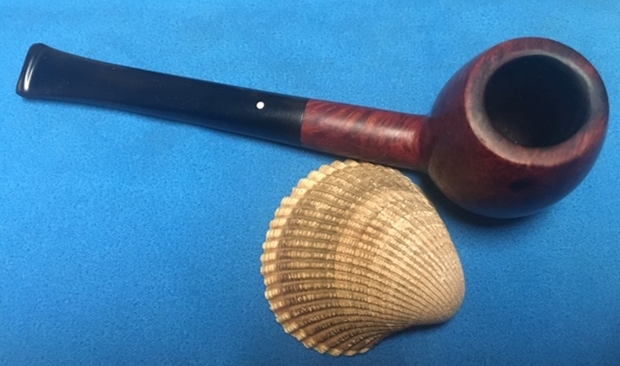
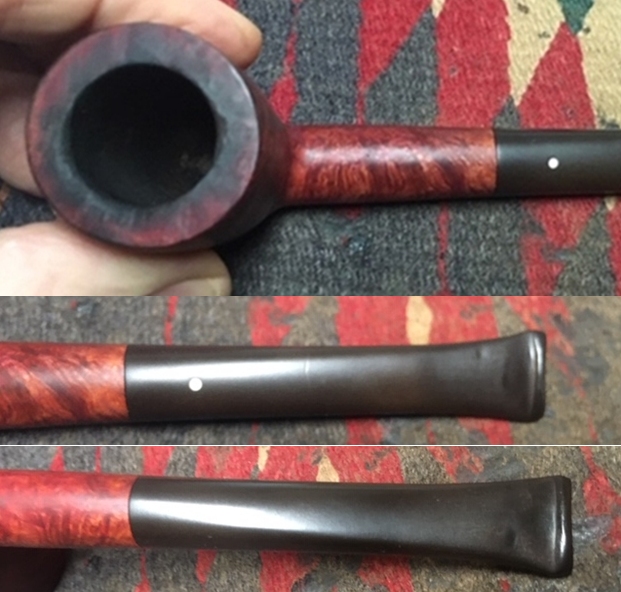
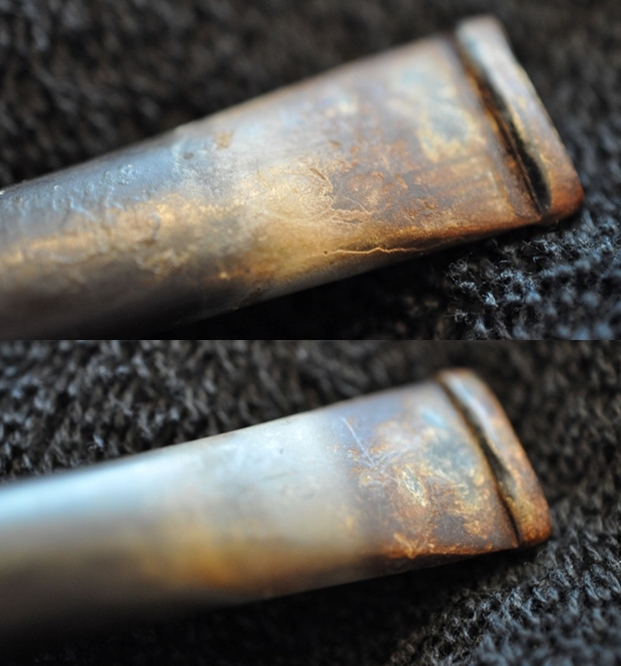
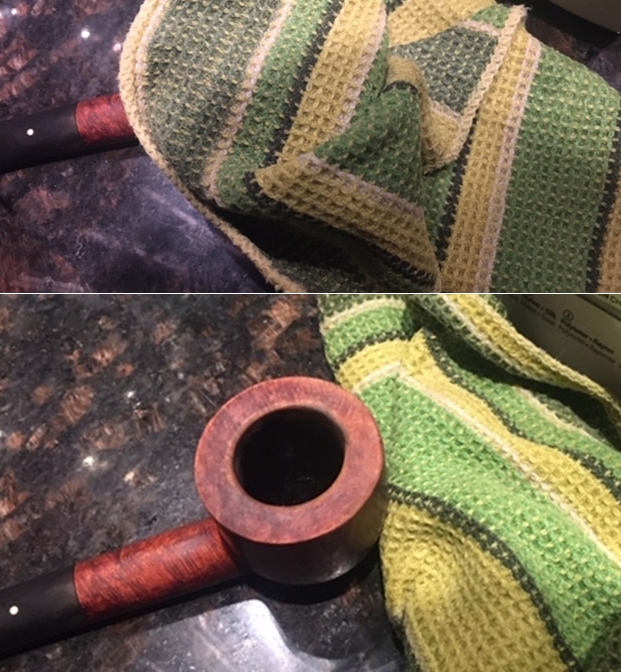
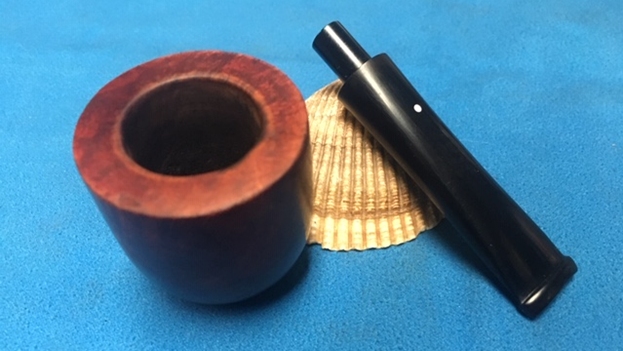
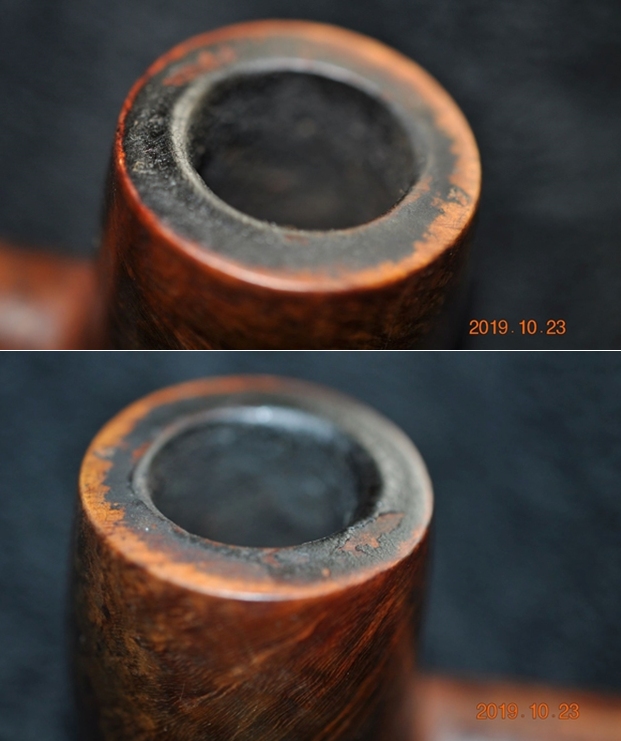
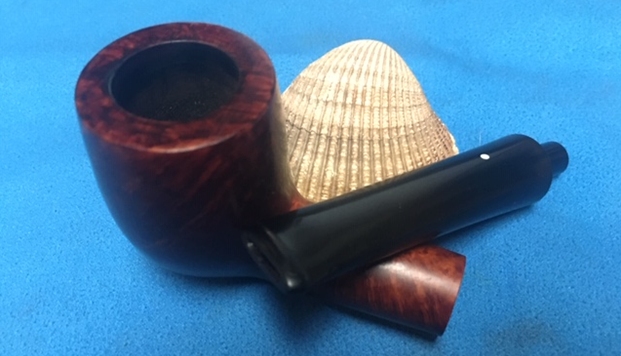
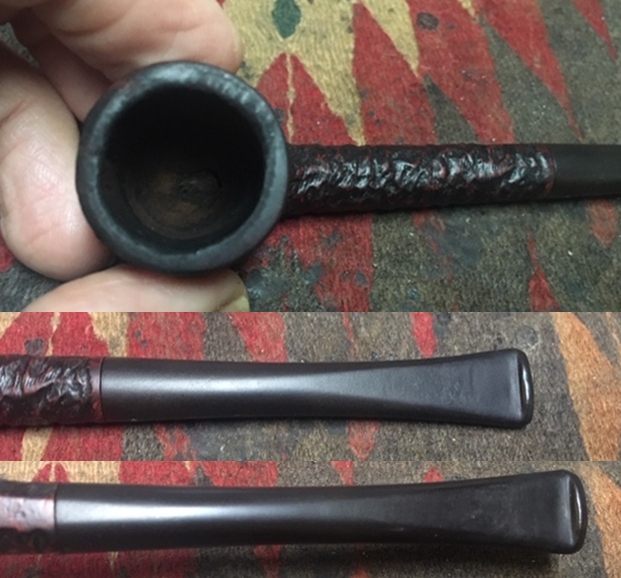
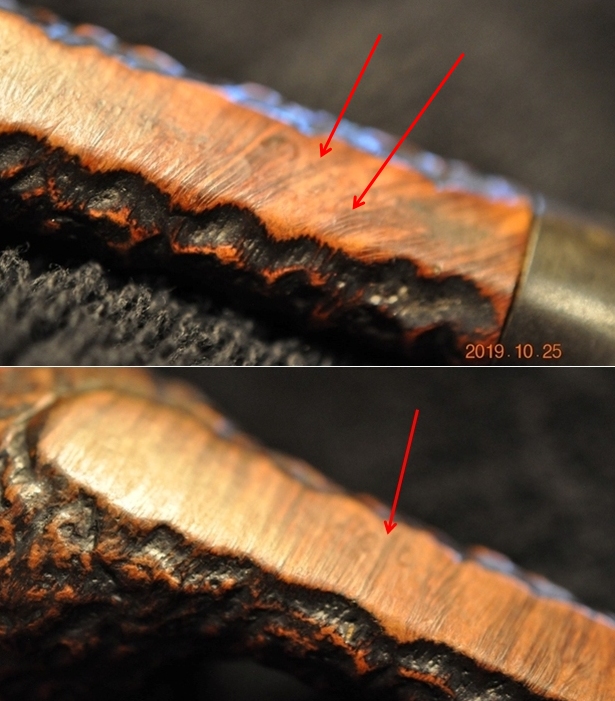
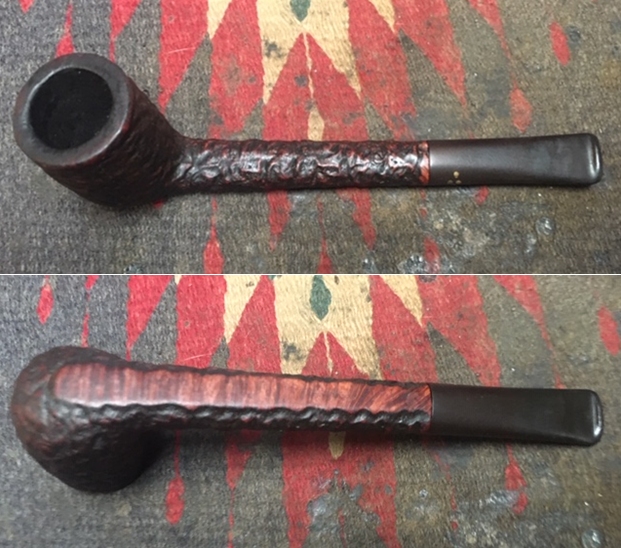
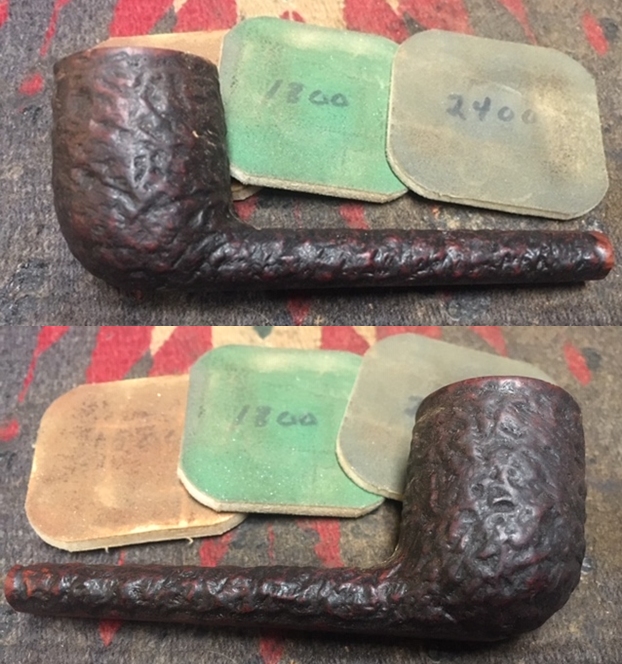
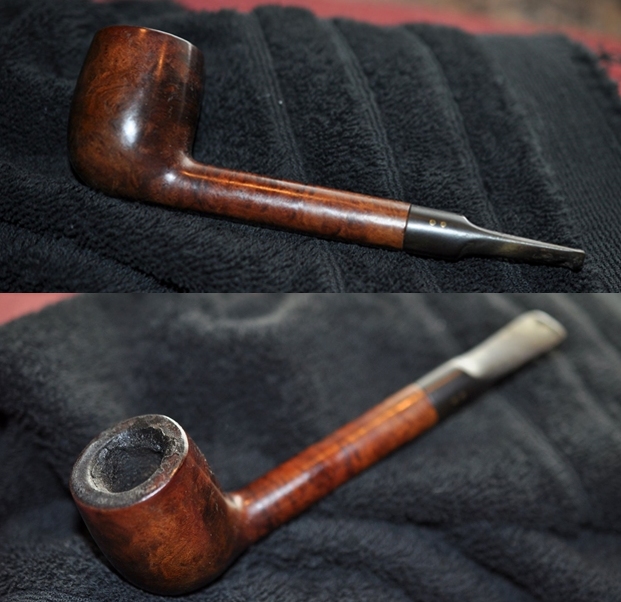
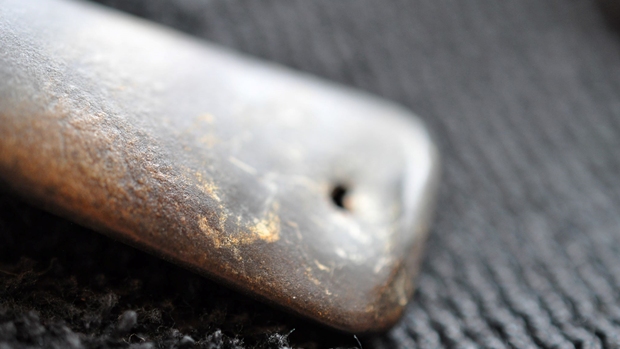
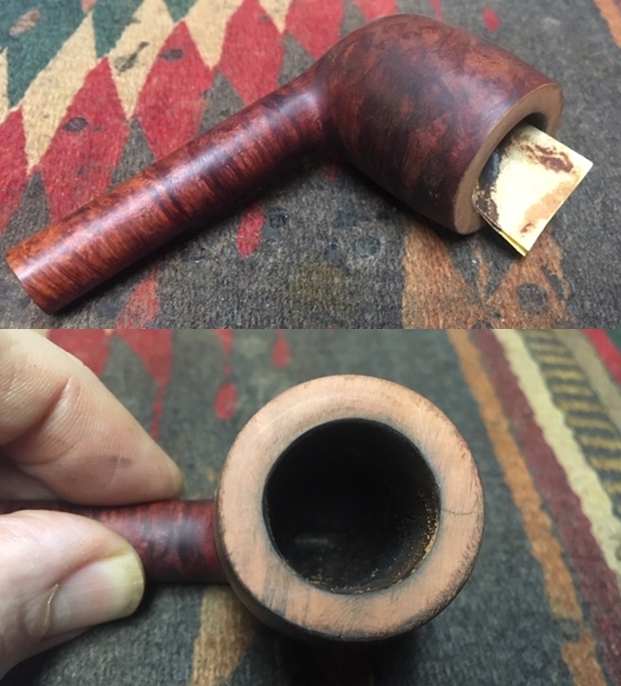
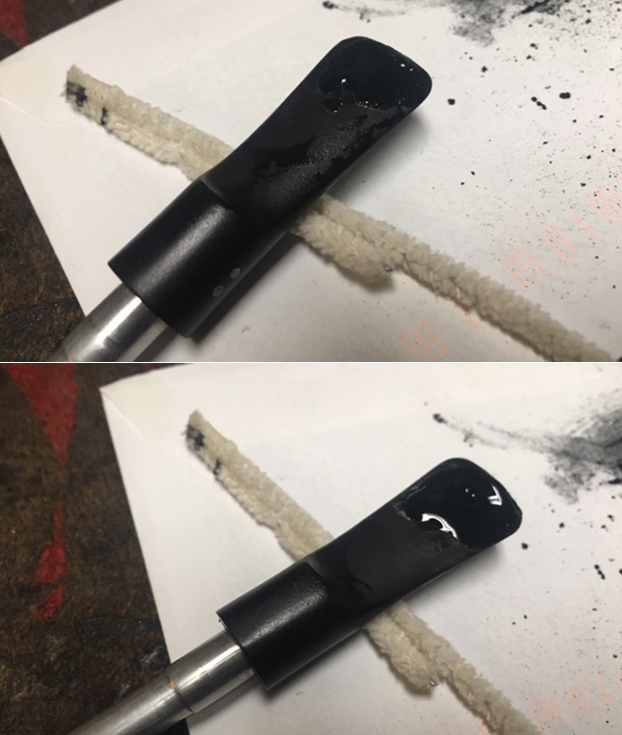
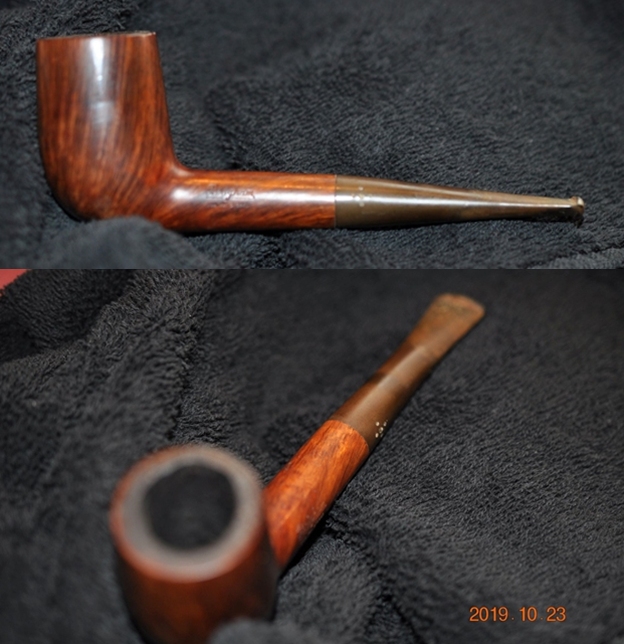
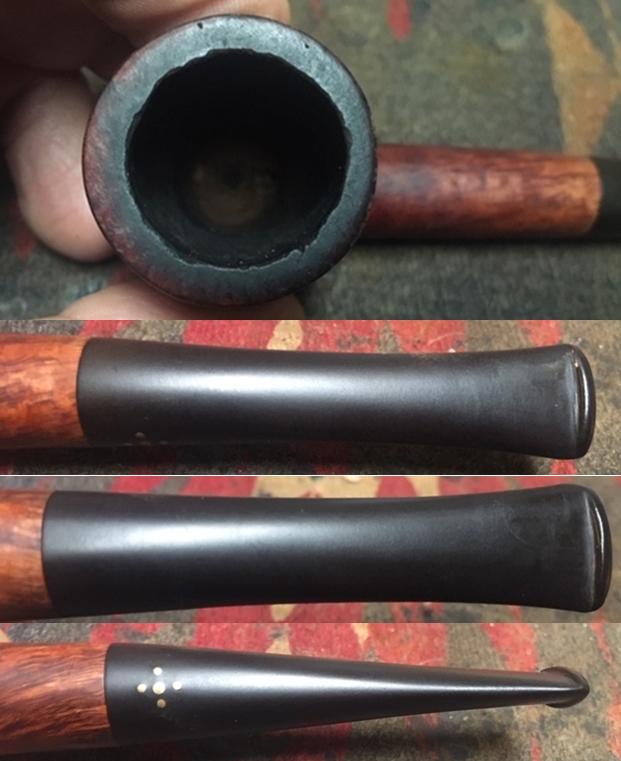
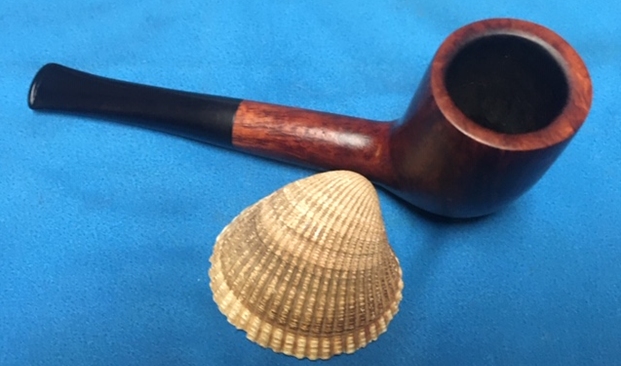
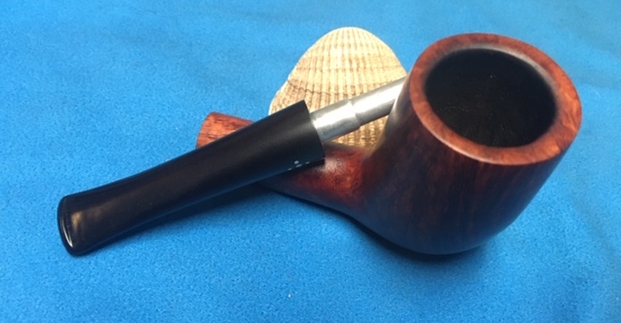
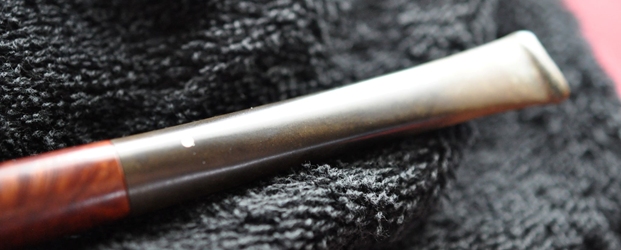
 I took some close up photos of the rim top and also of the stem surface. I wanted to show how well it had cleaned up and what needed to be done. The rim top had a worn and burned area on the left front of the inner edge. There was darkening and nicks all around the top of the bowl and on the inner edge. The outer edge looked good. I also took close up photos of the stem to show the tooth marks and chatter on the stem surface. I also took a close up photo of the burn mark on the right side of the bowl.
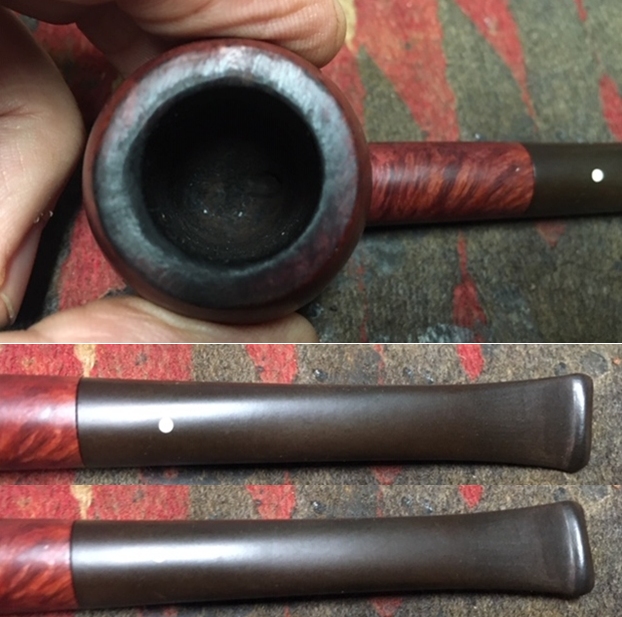
 The stamping appeared to be as clear as it was before the cleanup work. This is just one of the things I appreciate about Jeff’s cleanup is that he works to protect and preserve the nomenclature on the shank of the pipes that he works on. I took some photos to show the stamping.
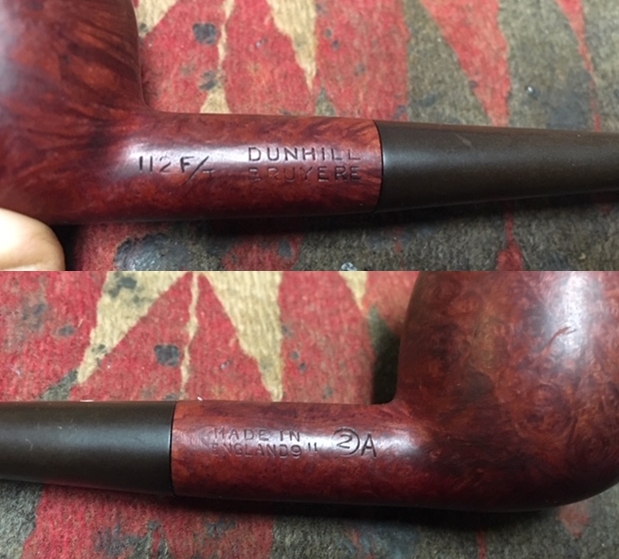
 Bob loved his Dunhill pipes and it was obvious that he enjoyed smoking them. Some appeared to be daily smokes while others he seemed to reserve for special occasions. Some seemed like they must have hung in his mouth while he did his carving while others were smoked in his chair. Having worked on over 60 of his pipes so far I am getting a feel for them. This one is in rough condition and I suppose it might well have been before Bob took up the trust. I suppose I won’t ever know for sure but it certainly has a long and interesting story if it could only tell it.
I am sure that many of you have read at least some of the other restoration work that I have done on previous pipes. You have also read what I have included about Bob Kerr, the pipeman who held these pipes in trust before I came to work on them (see photo to the left). Also, if you have followed the blog for long you will already know that I like to include background information on the pipeman whose pipes I am restoring. For me, when I am working on an estate I really like to have a sense of the person who held the pipes in trust before I worked on them. It gives me another dimension of the restoration work. Bob’s daughter wrote a short tribute to her father. I thank you Brian and tell your wife thank you as well.
I am delighted to pass on these beloved pipes of my father’s. I hope each user gets many hours of contemplative pleasure as he did. I remember the aroma of tobacco in the rec room, as he put up his feet on his lazy boy. He’d be first at the paper then, no one could touch it before him. Maybe there would be a movie on with an actor smoking a pipe. He would have very definite opinions on whether the performer was a ‘real’ smoker or not, a distinction which I could never see but it would be very clear to him. He worked by day as a sales manager of a paper products company, a job he hated. What he longed for was the life of an artist, so on the weekends and sometimes mid-week evenings he would journey to his workshop and come out with wood sculptures, all of which he declared as crap but every one of them treasured by my sister and myself. Enjoy the pipes, and maybe a little of his creative spirit will enter you!
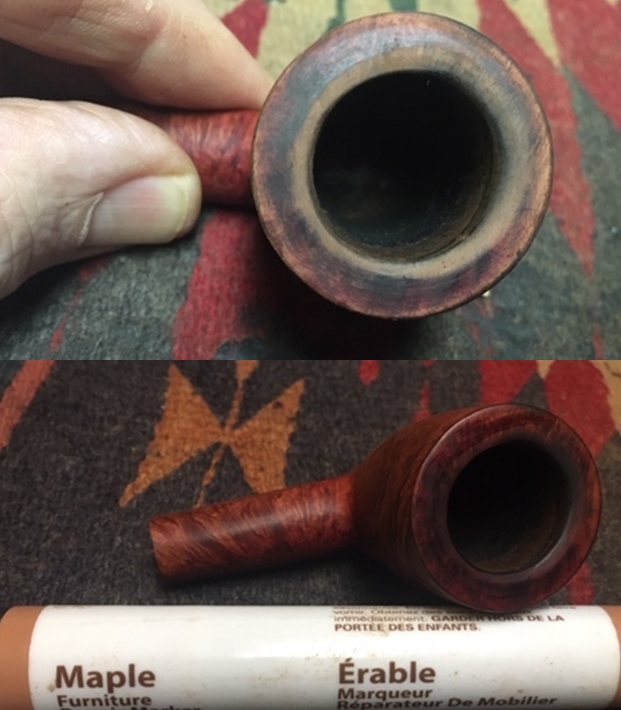
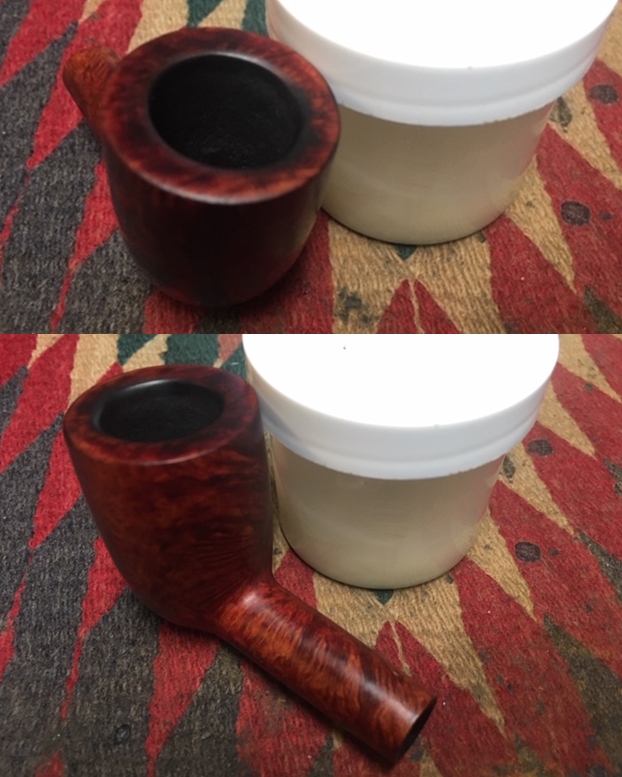
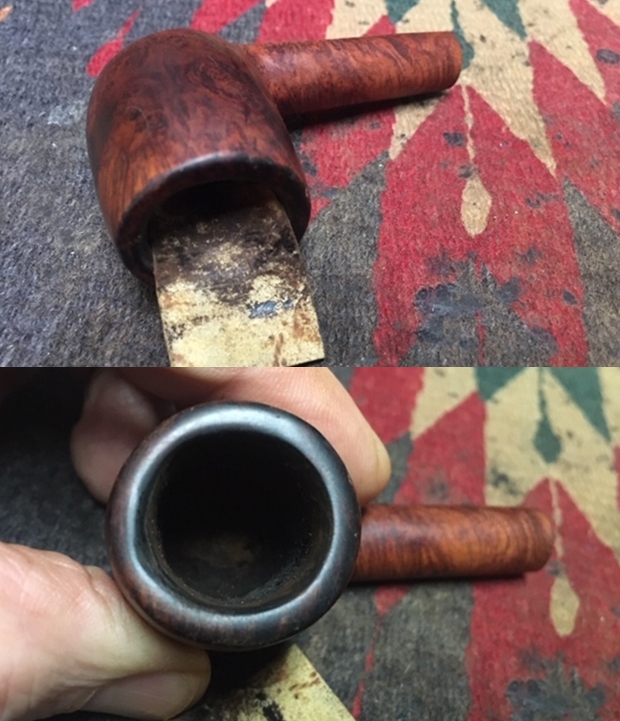
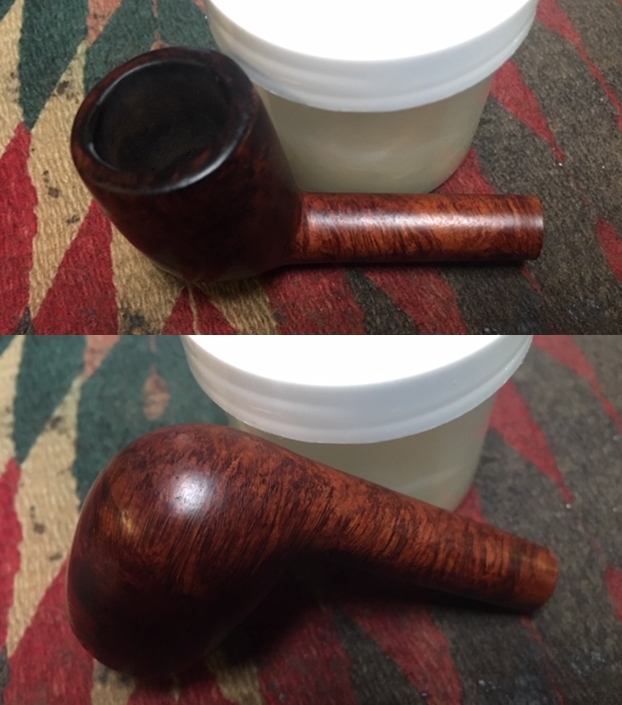
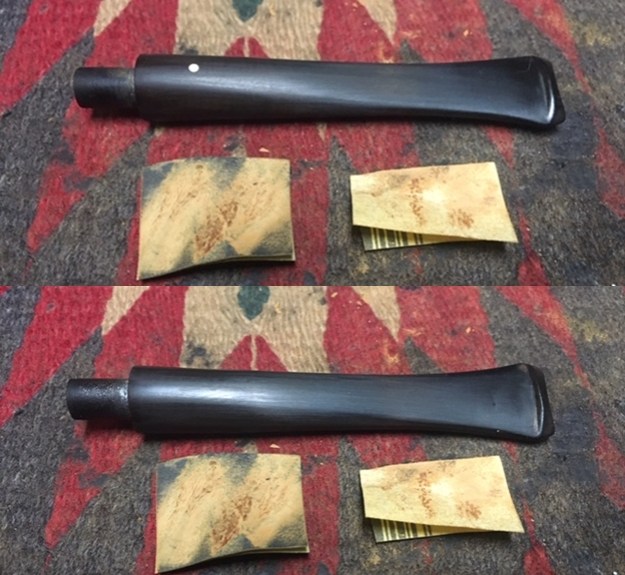
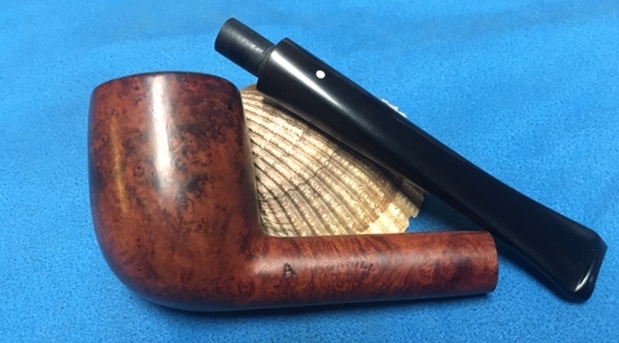
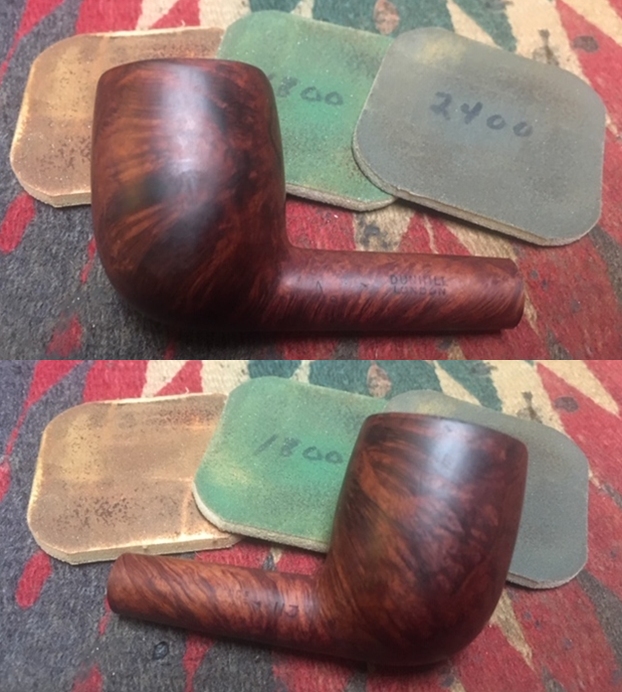
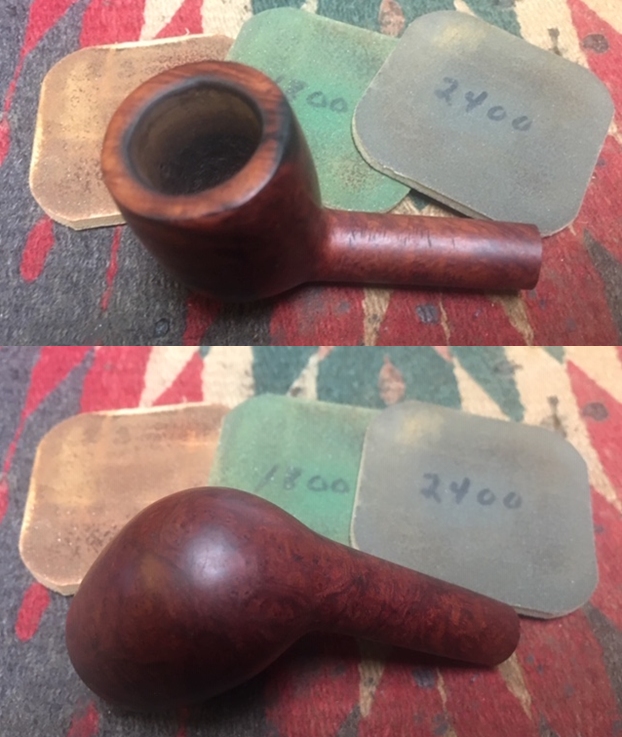
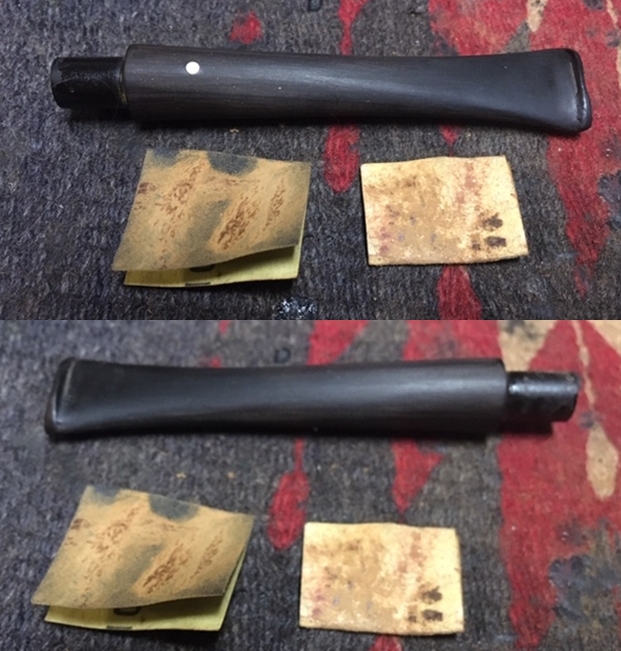
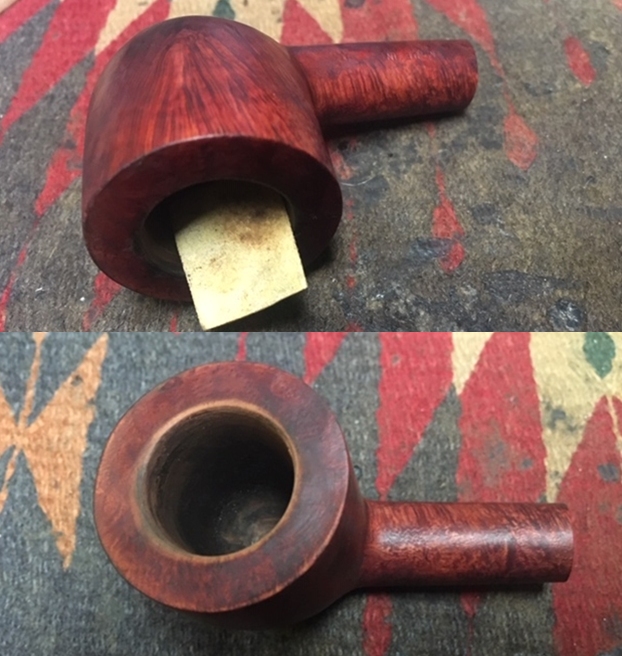
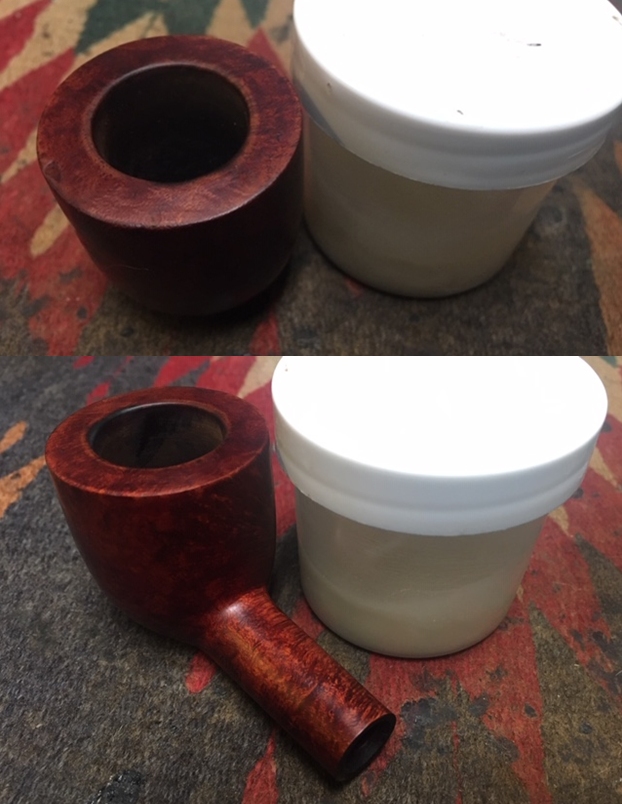
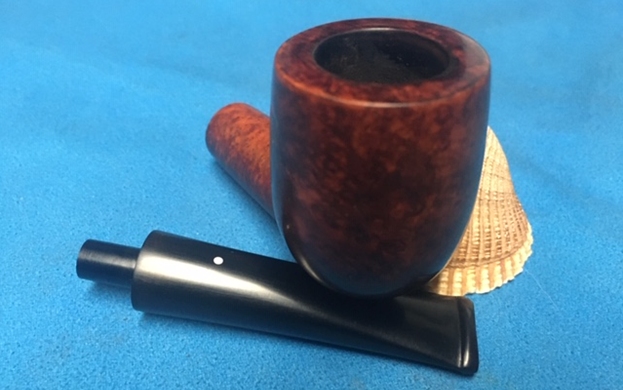
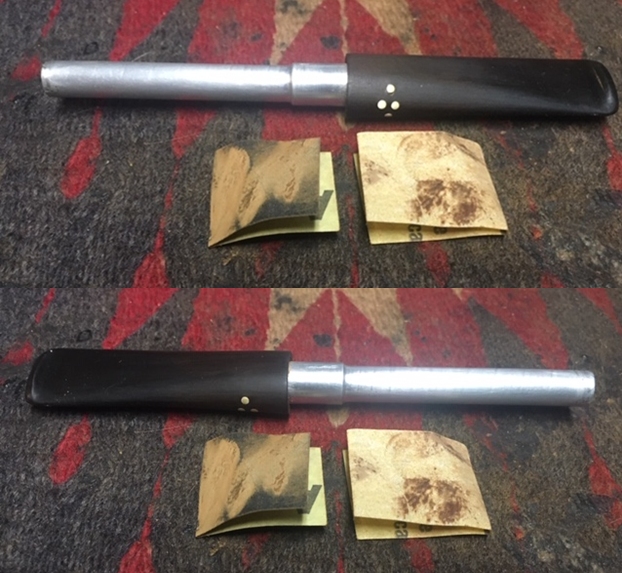
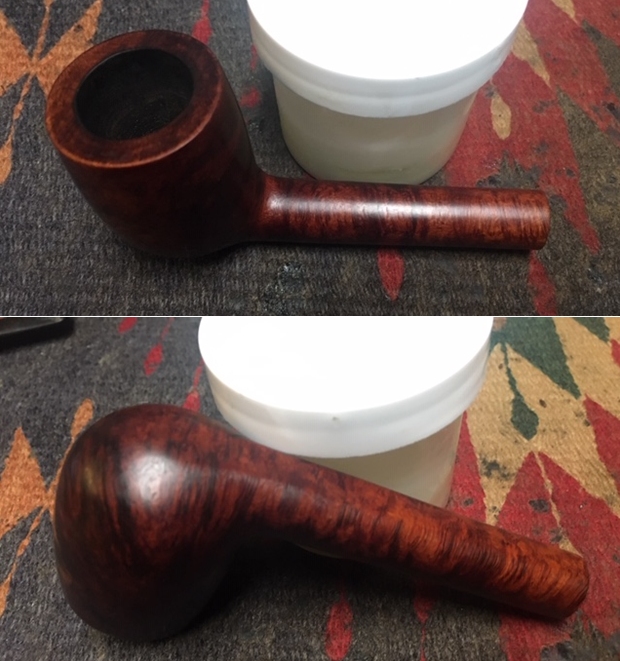
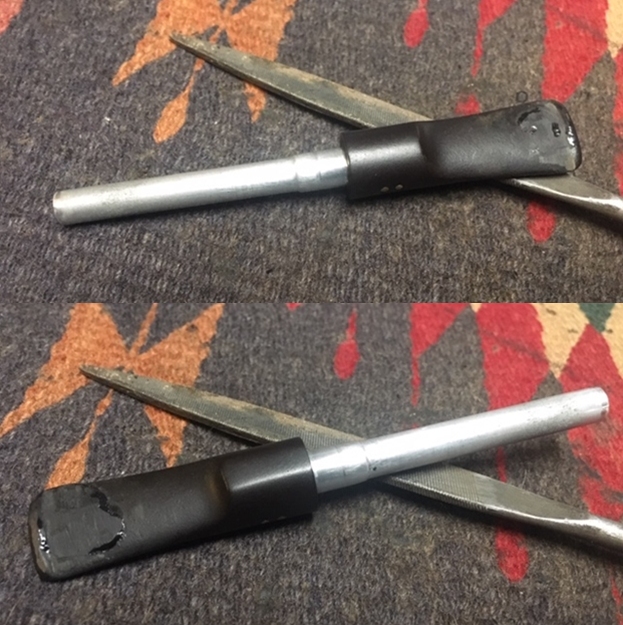
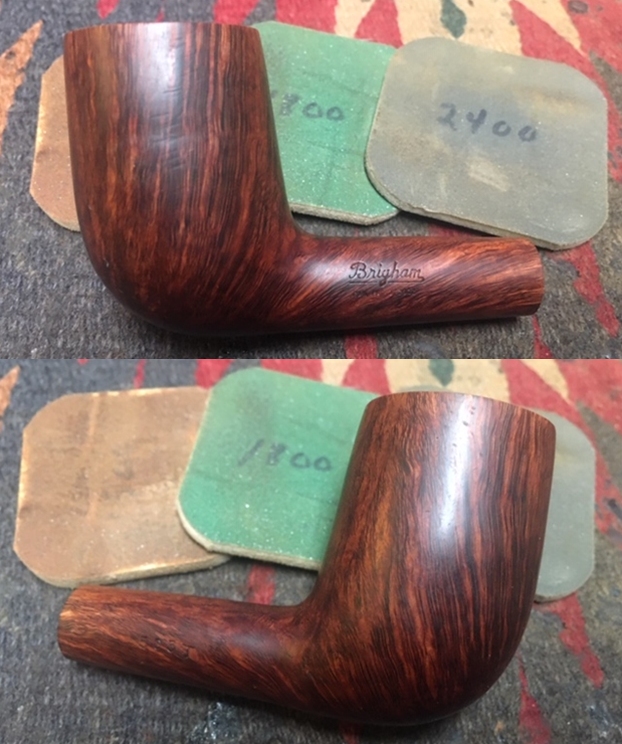
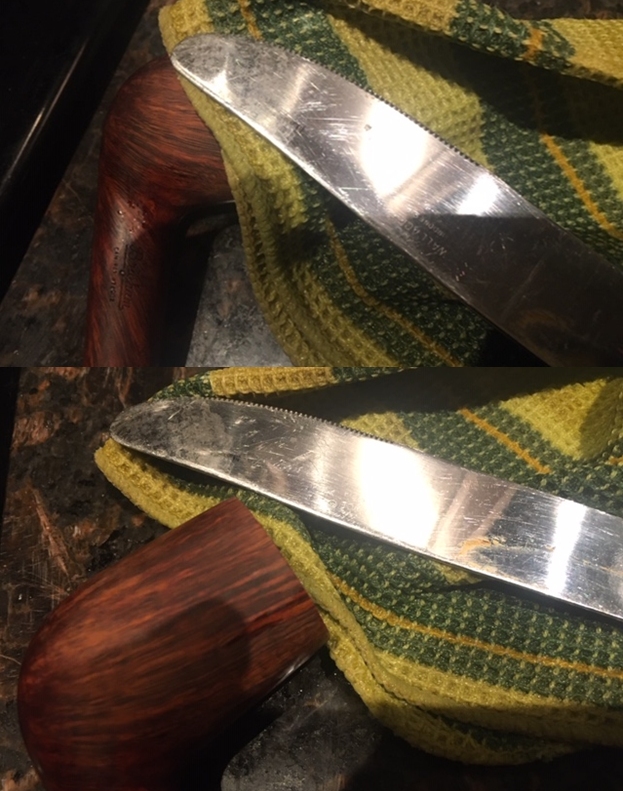
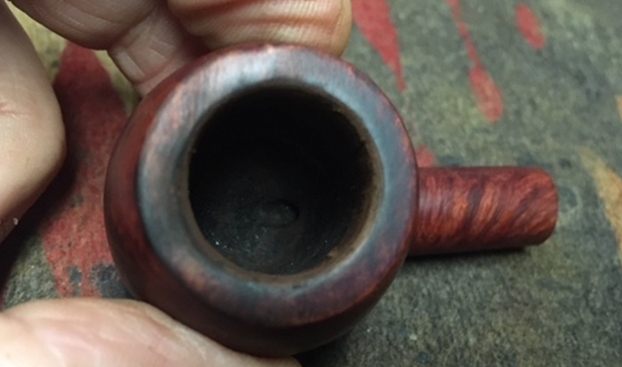
It was time to get on with the restoration of this Dunhill Bruyere 112F/T Apple. It was a bit of a change of pace from the last bunch of billiards that I had worked on. I really need to send a shout out to Jeff for the hard cleanup work that Jeff does on each of these pipes. They were a real mess when I sent them to Jeff and I have to tell you it was great that I can start my part of the process with a clean pipe. I decided to start the process by dealing with the the damage to the inner edge of the bowl. I wanted to minimize the intrusiveness of the work on the rim and focus just on the rim edge. I carefully worked on the inner edge with a folded piece of 220 grit sandpaper and gave it a very slight bevel. I was able to remove much of the darkening and damage. The first photo shows the damaged inner edges of the bowl and the darkening around the full bowl. The second photo below shows the process I used with the folded sandpaper. The third photo shows the rim top and edges after my work on them…though not perfect I think it is an improvement. 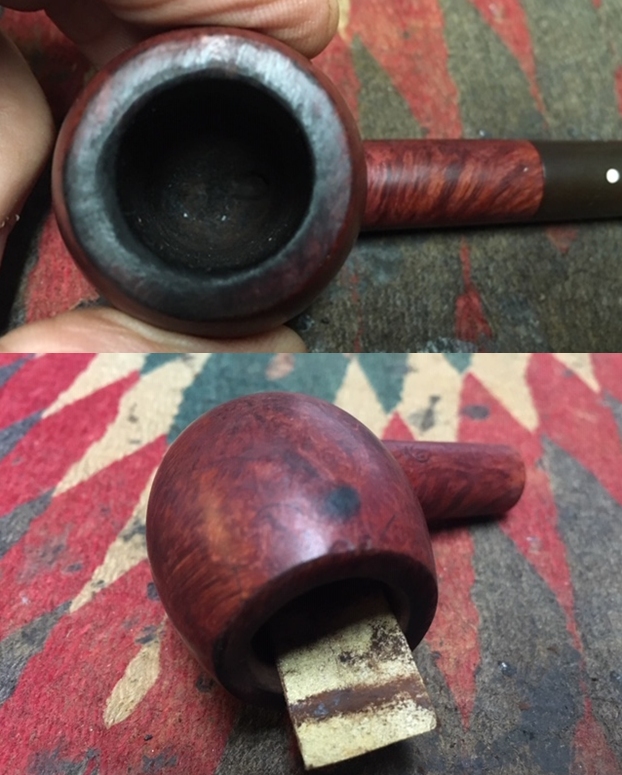
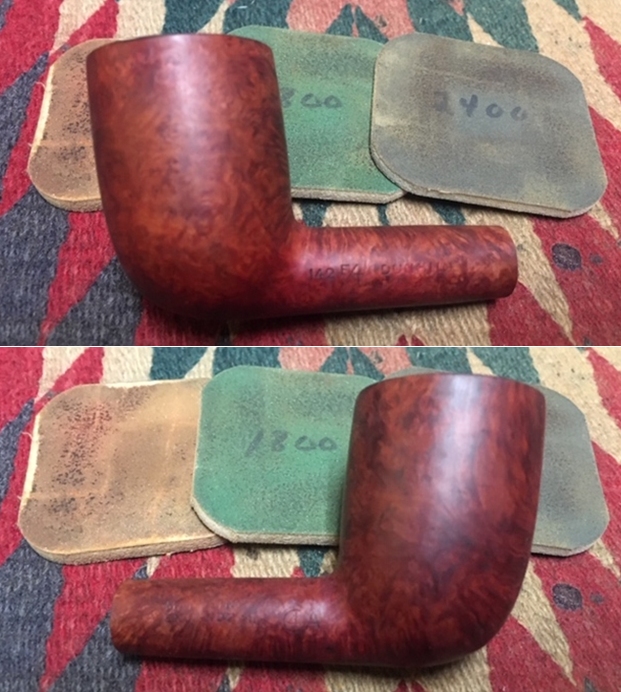
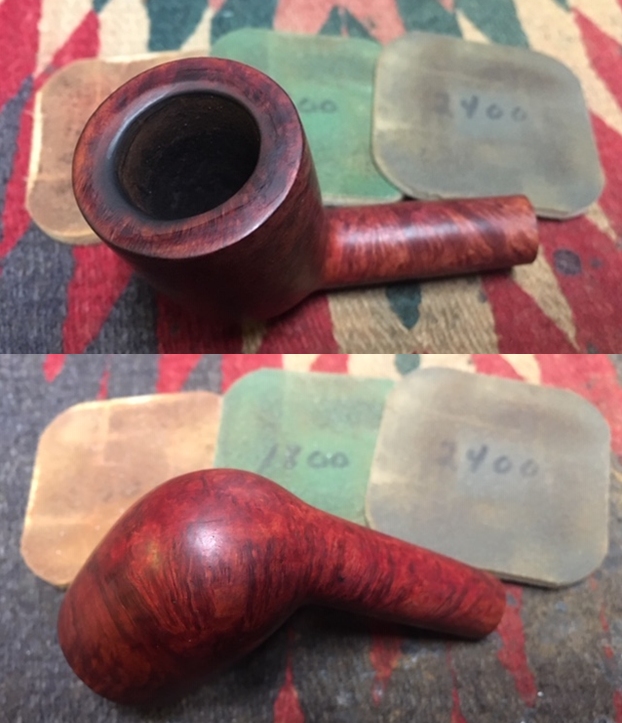
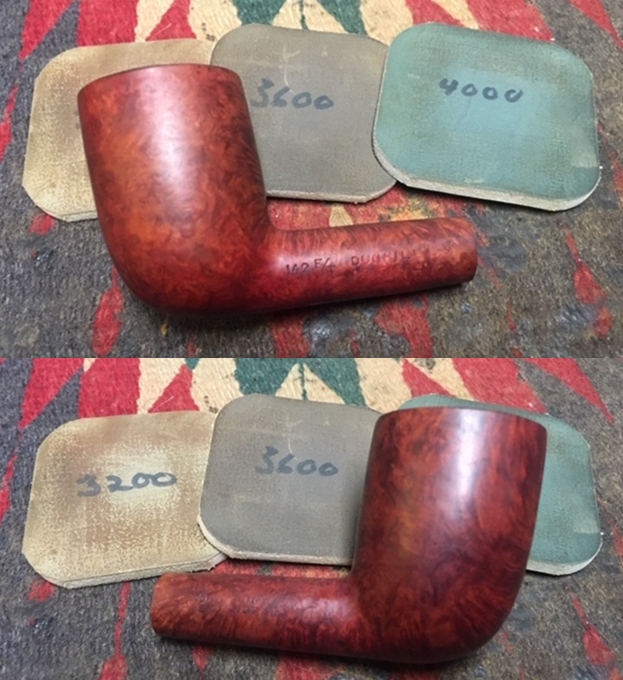
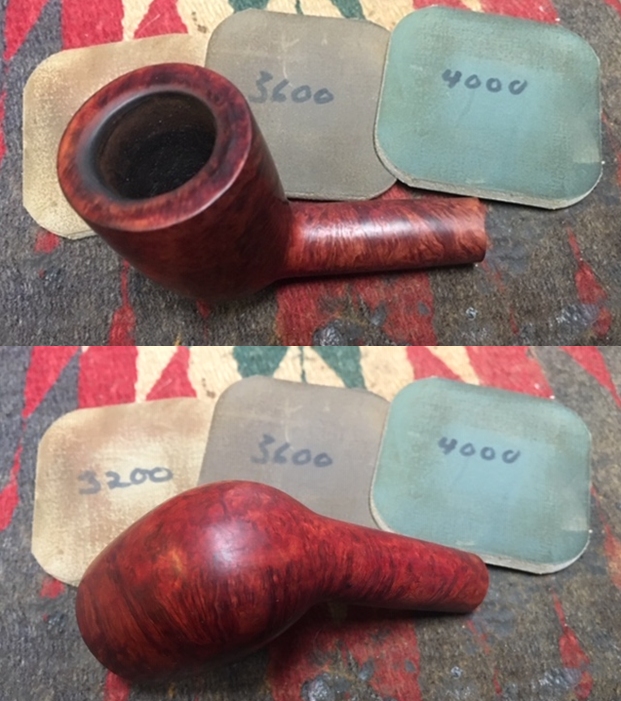
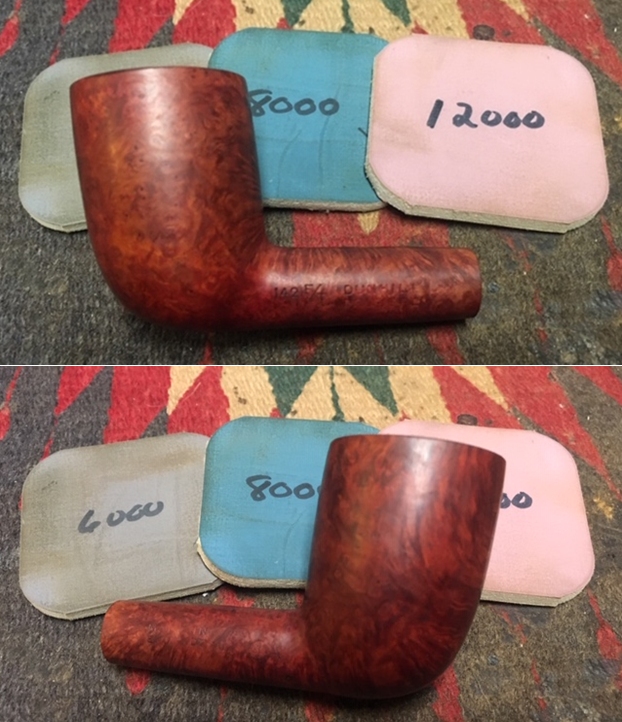
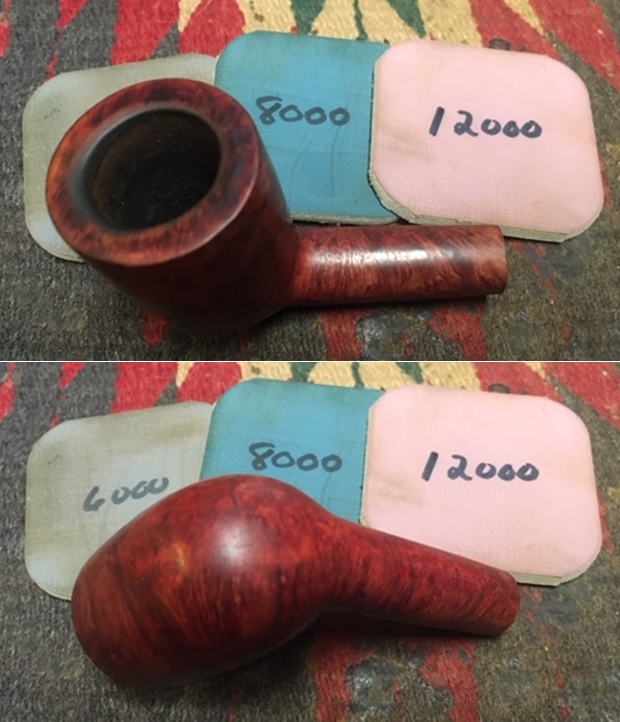
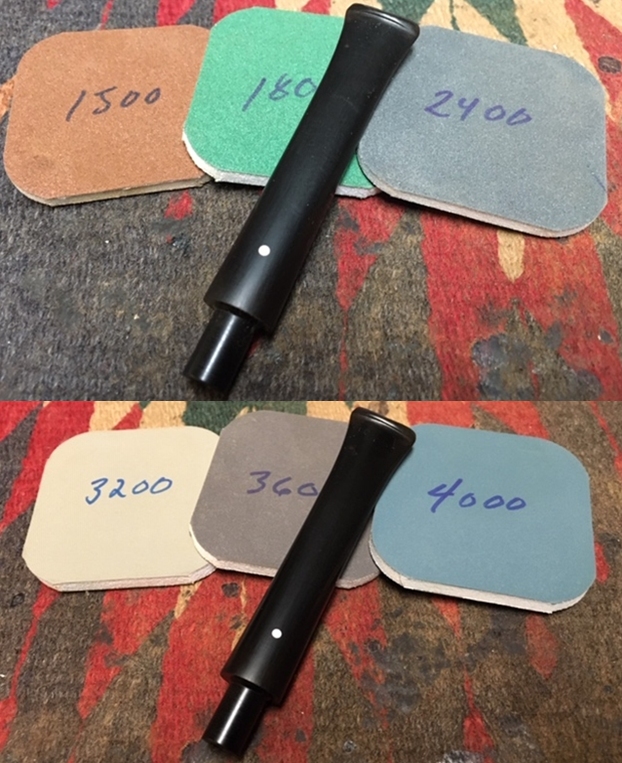
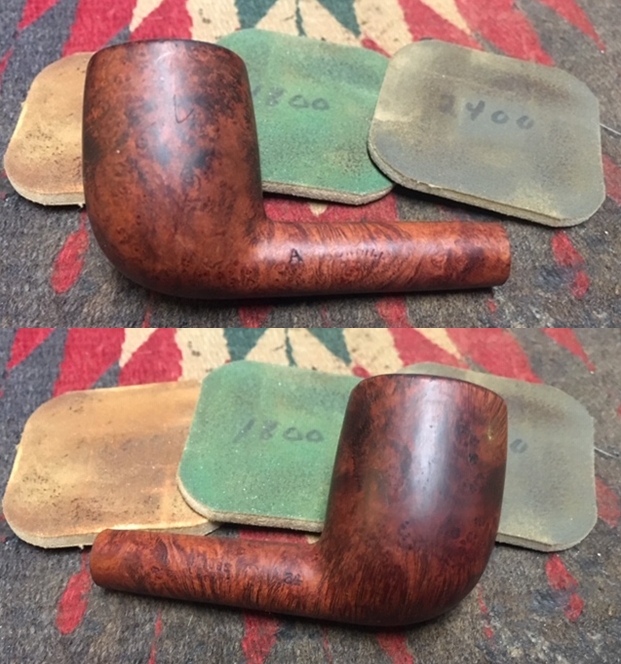
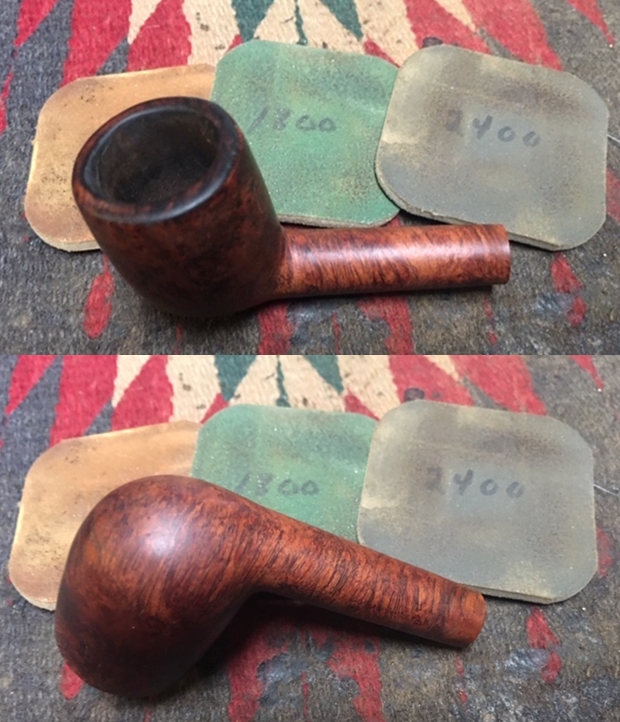
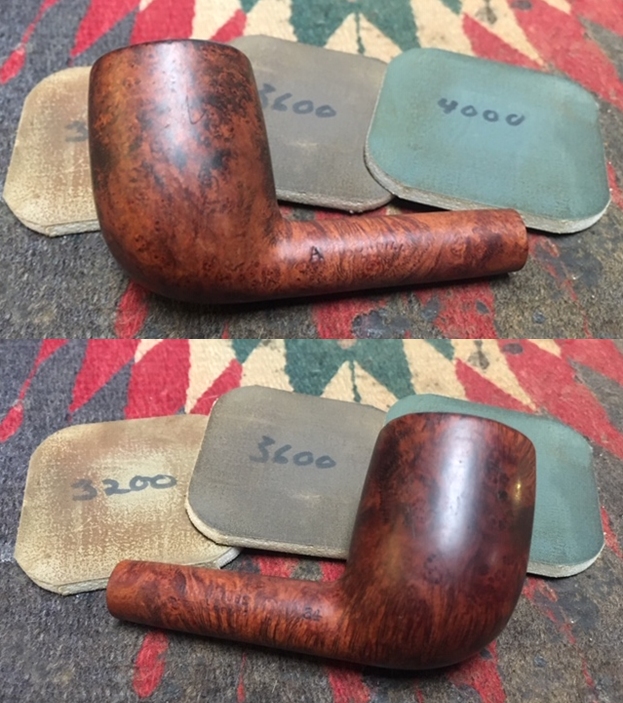
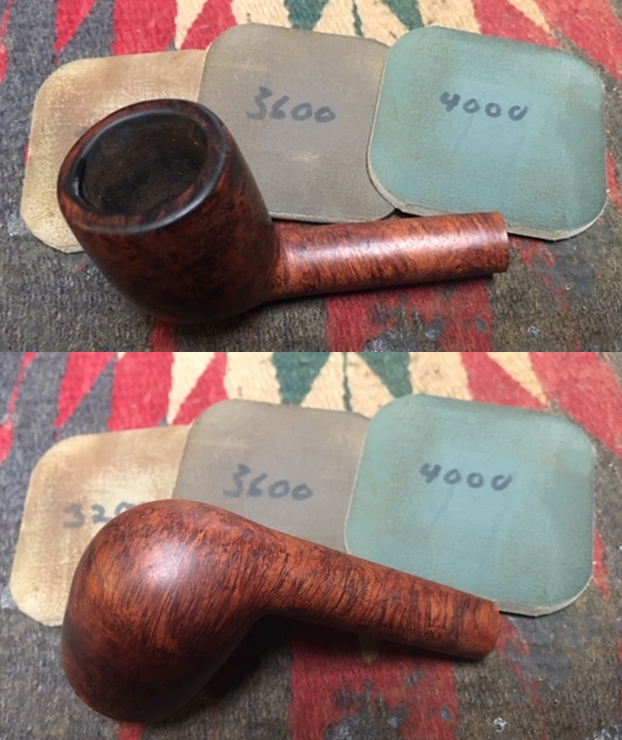
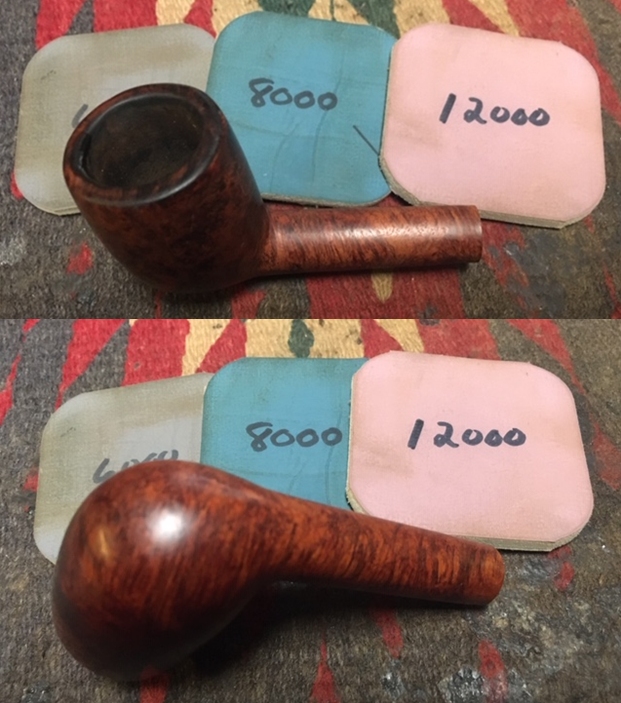
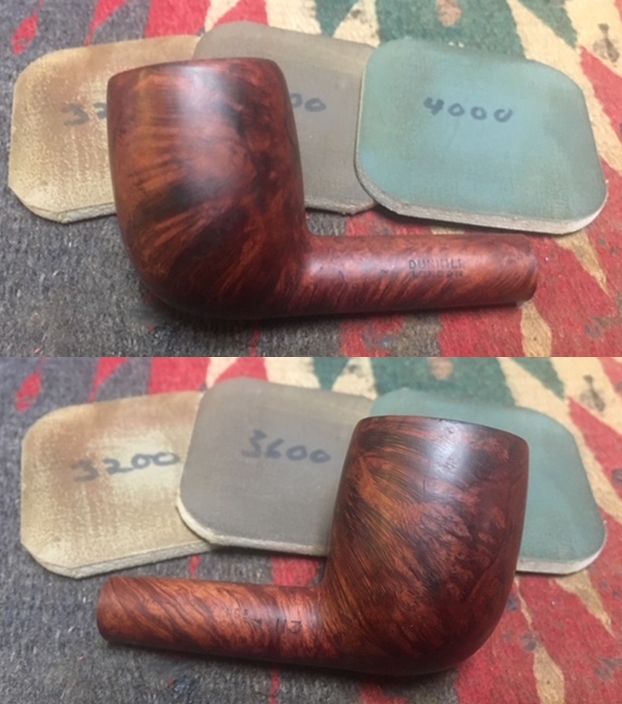
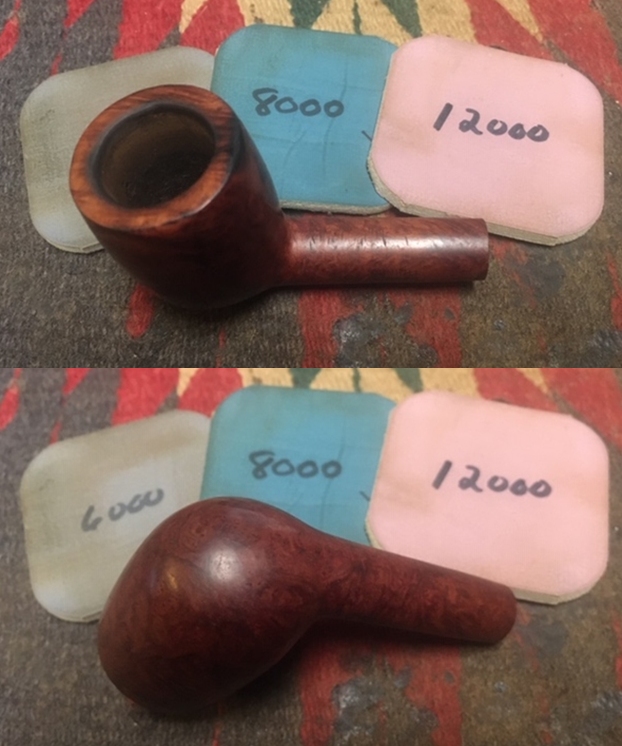
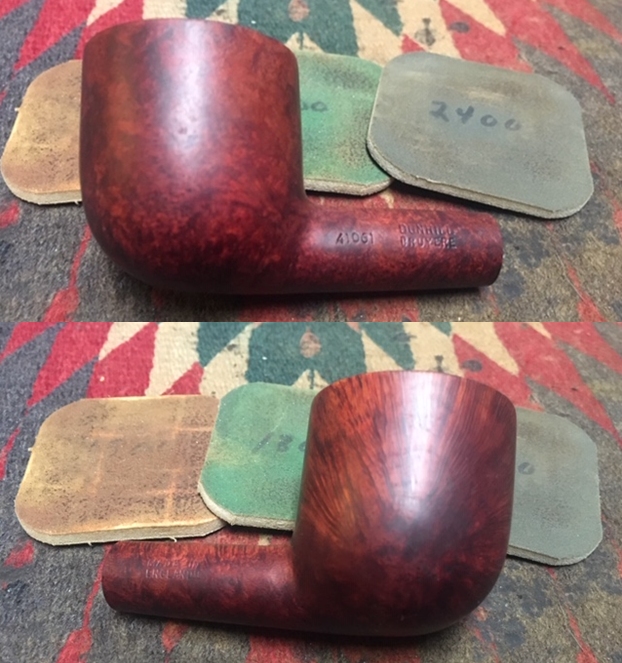
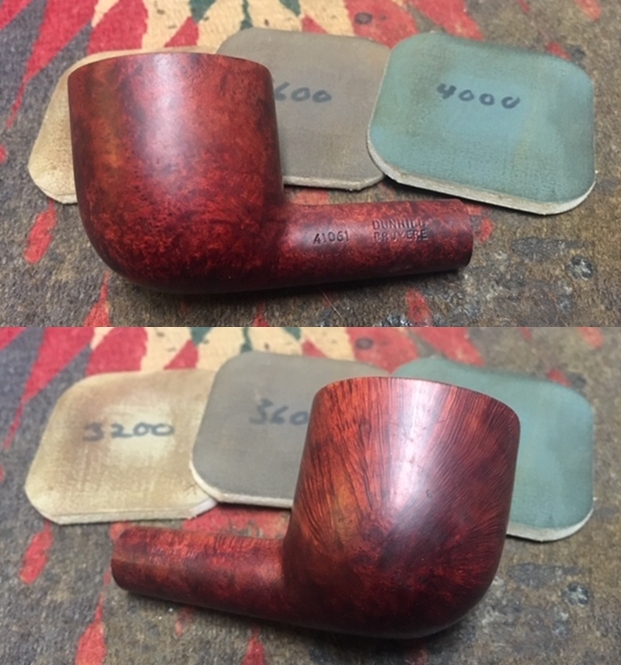
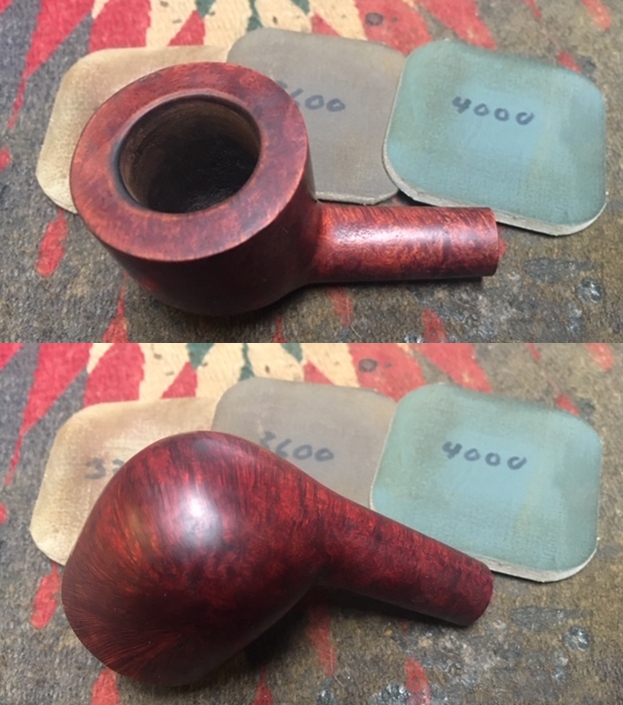
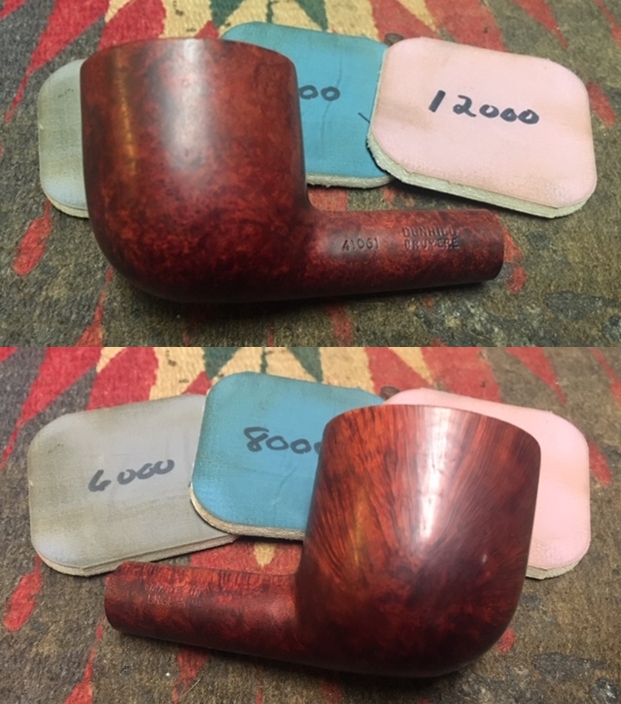
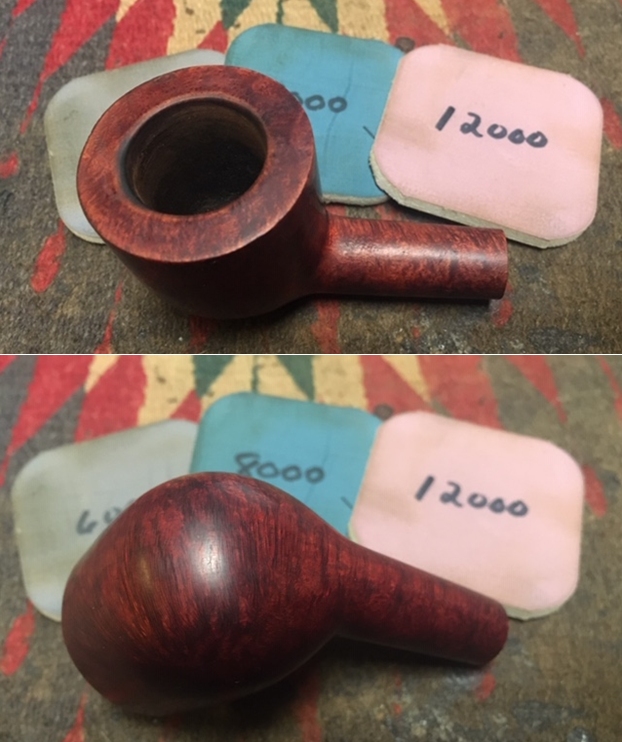
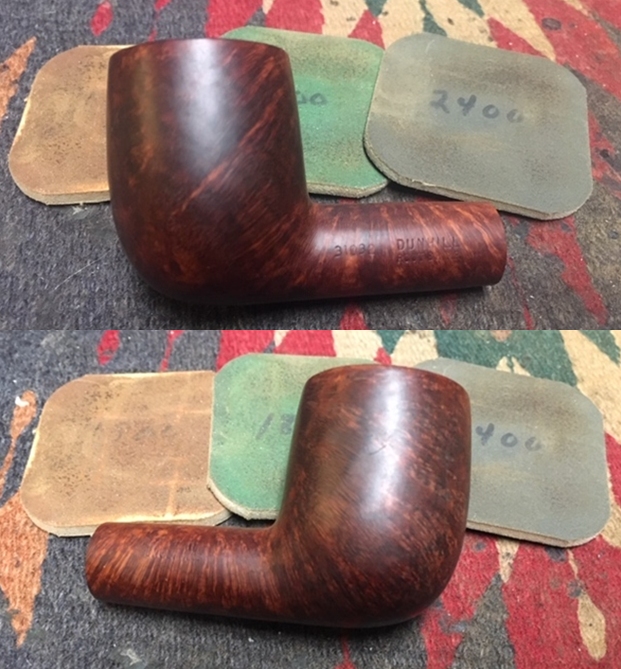
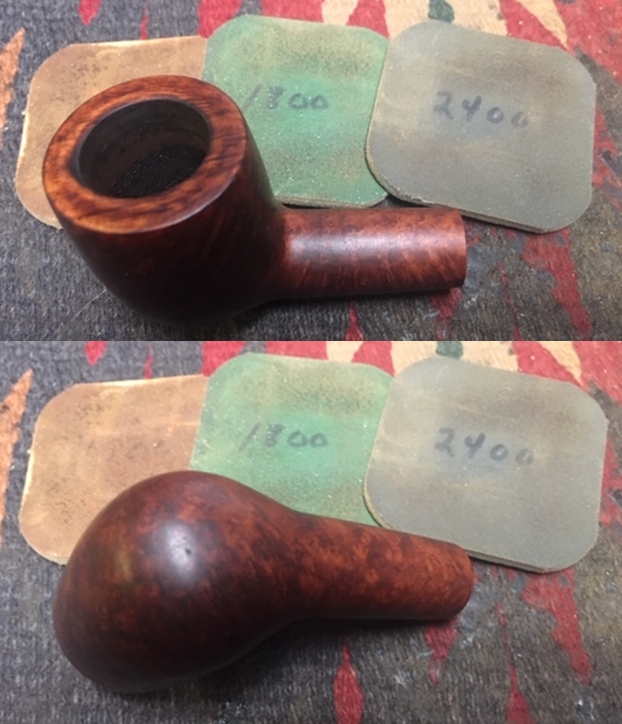
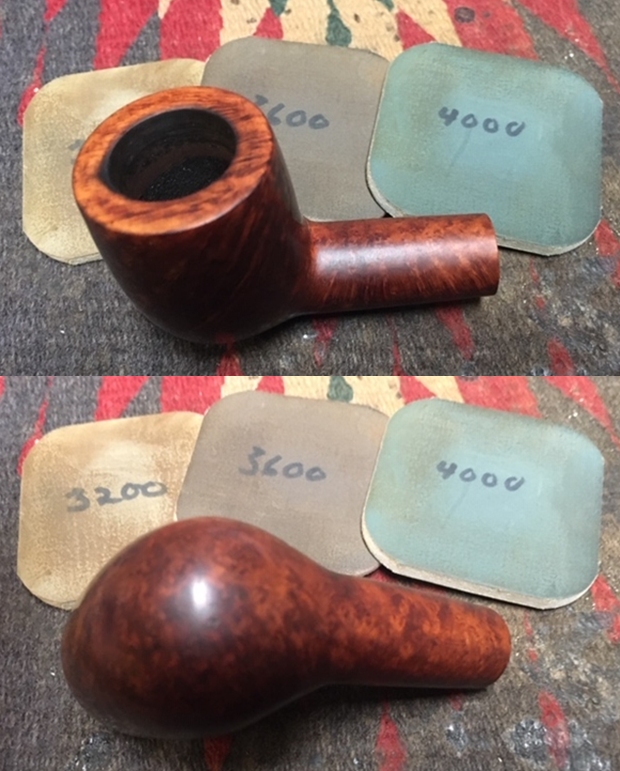
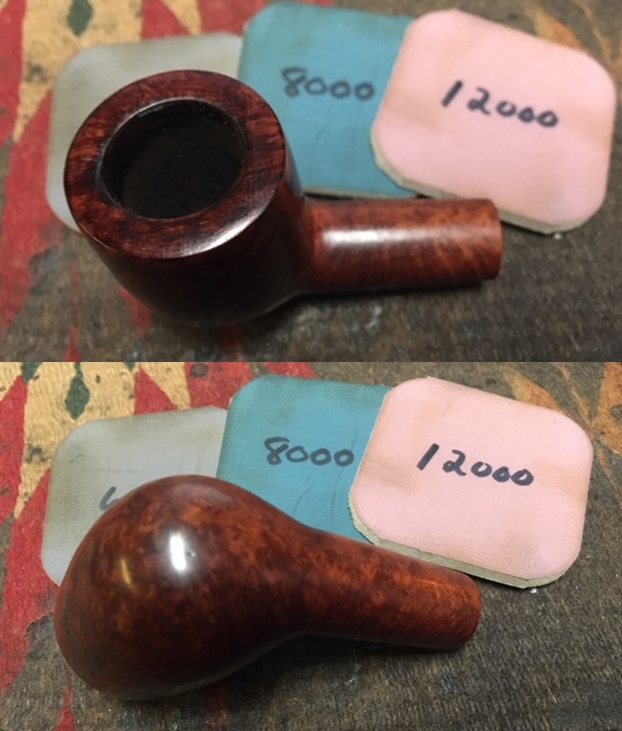
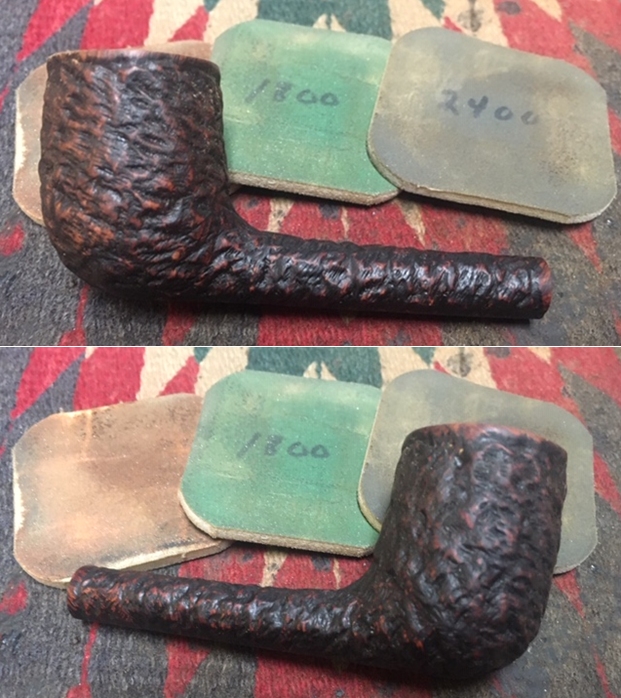
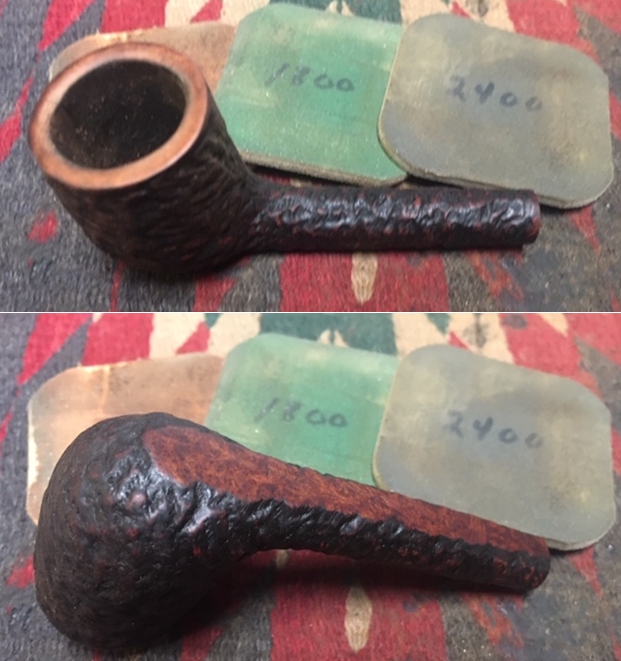
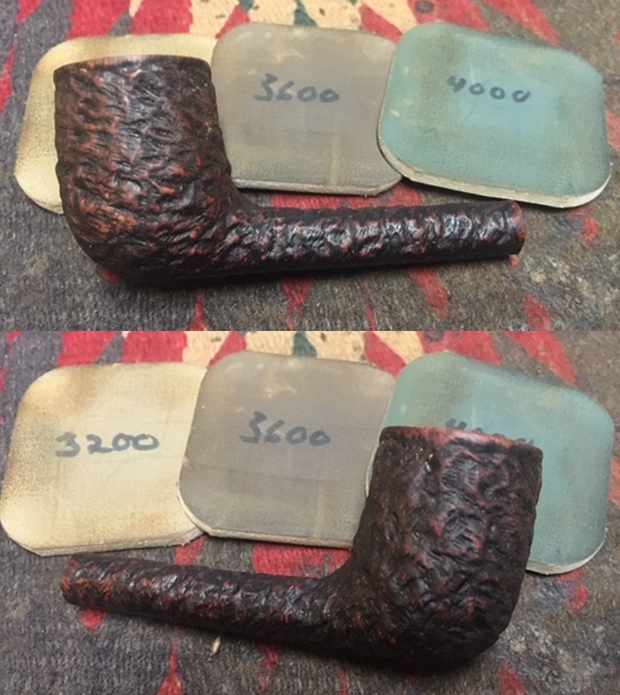
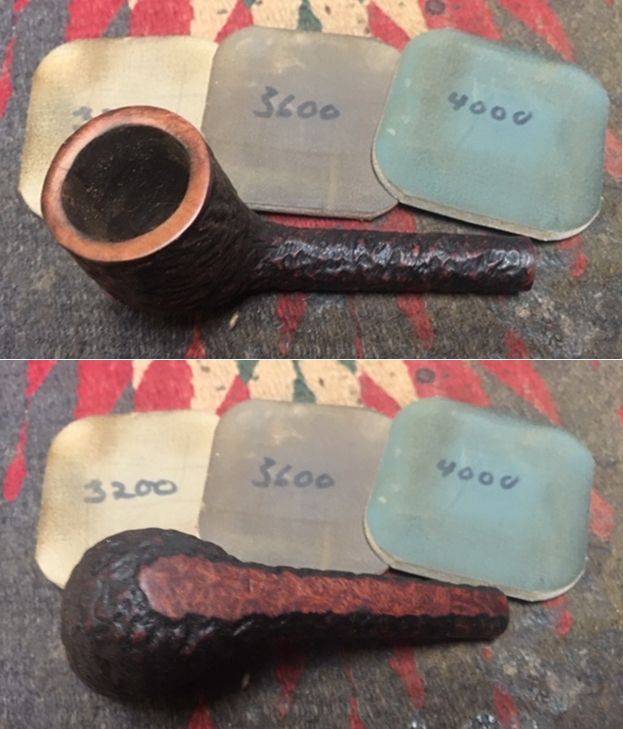
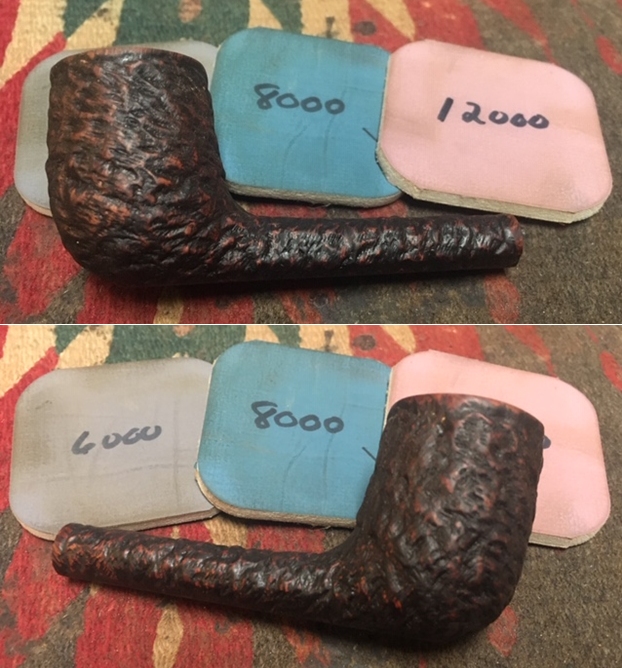
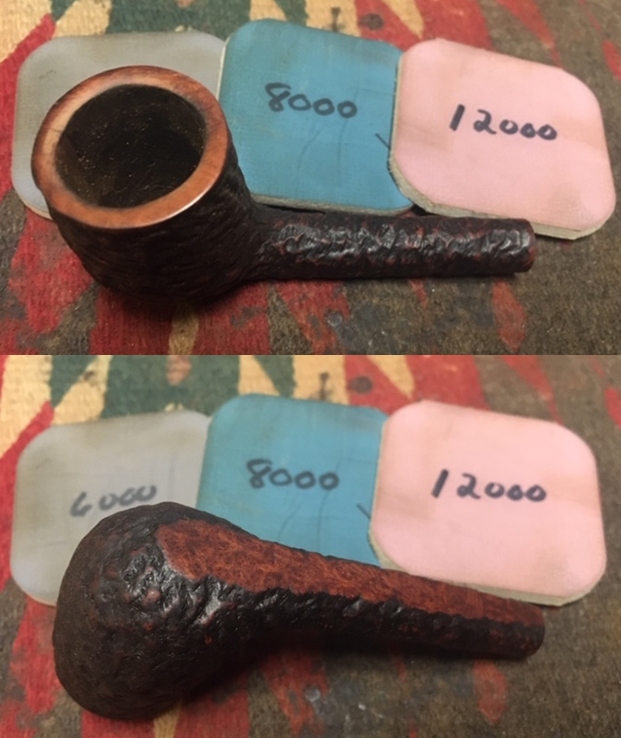
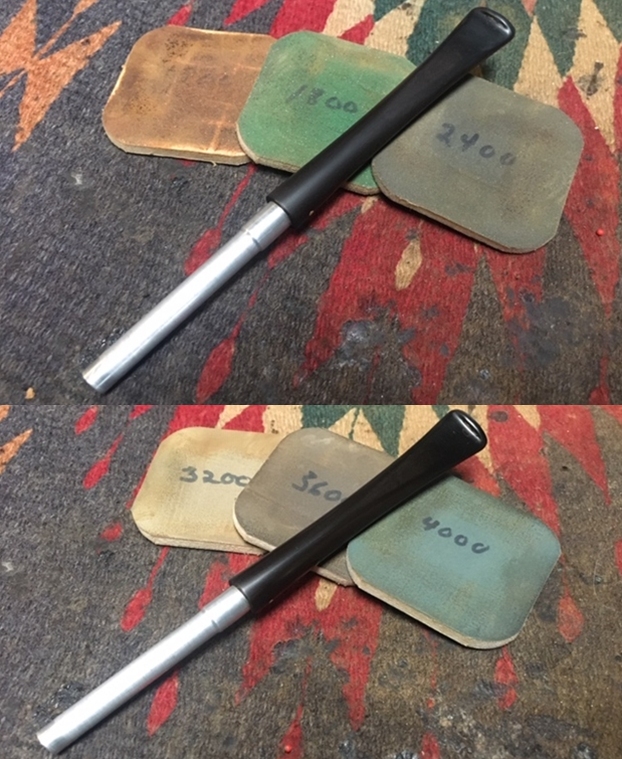
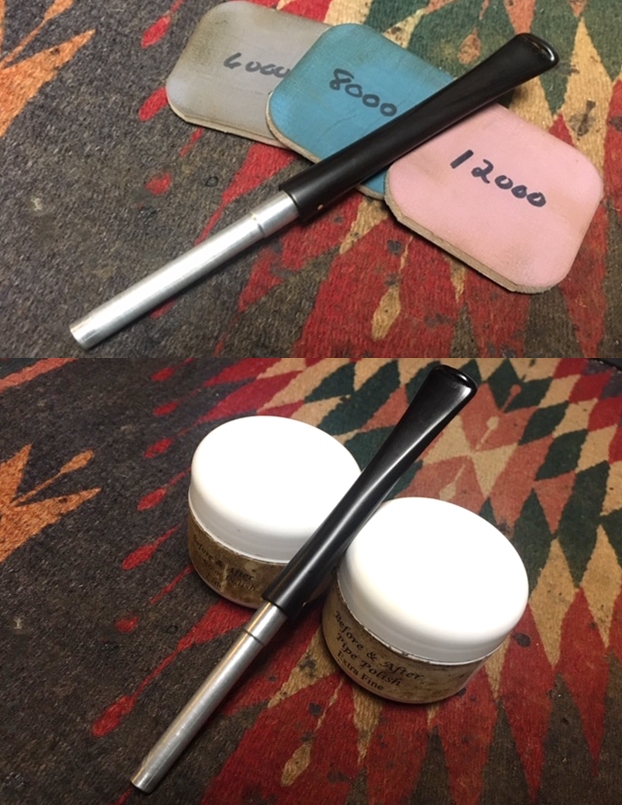
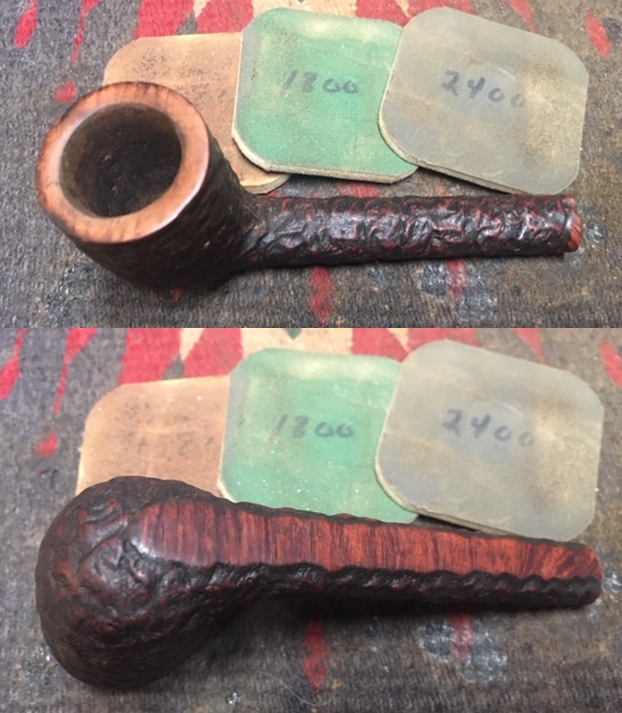
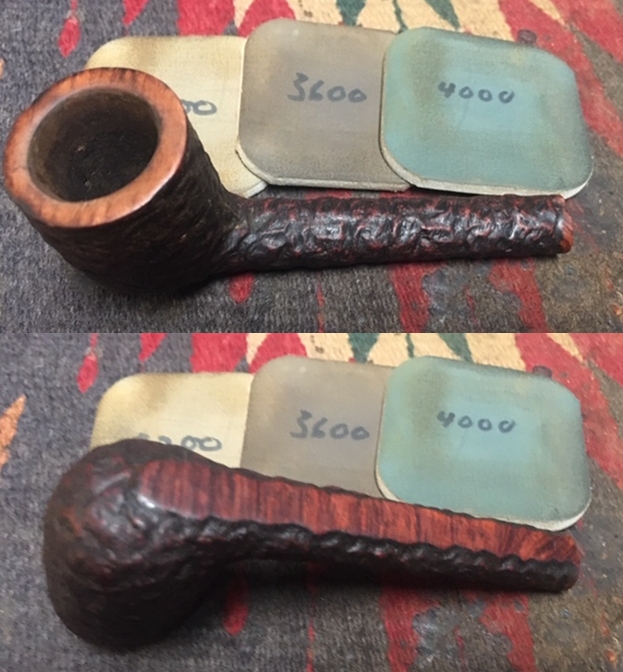
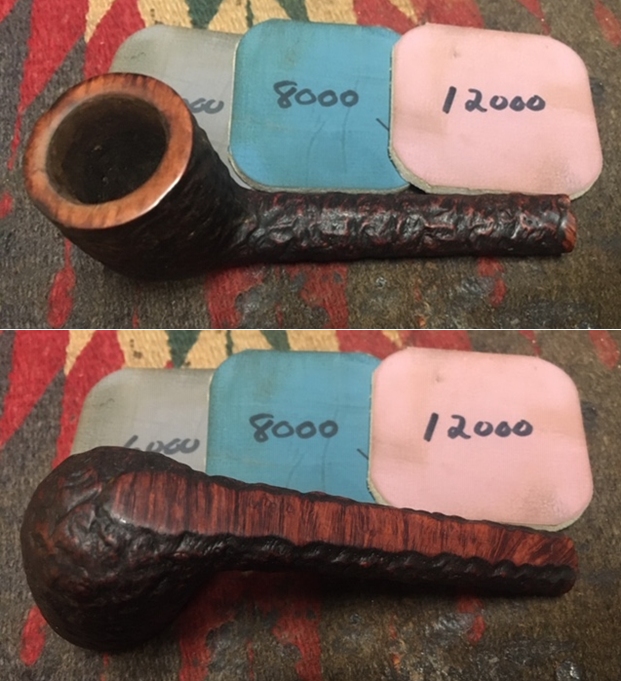
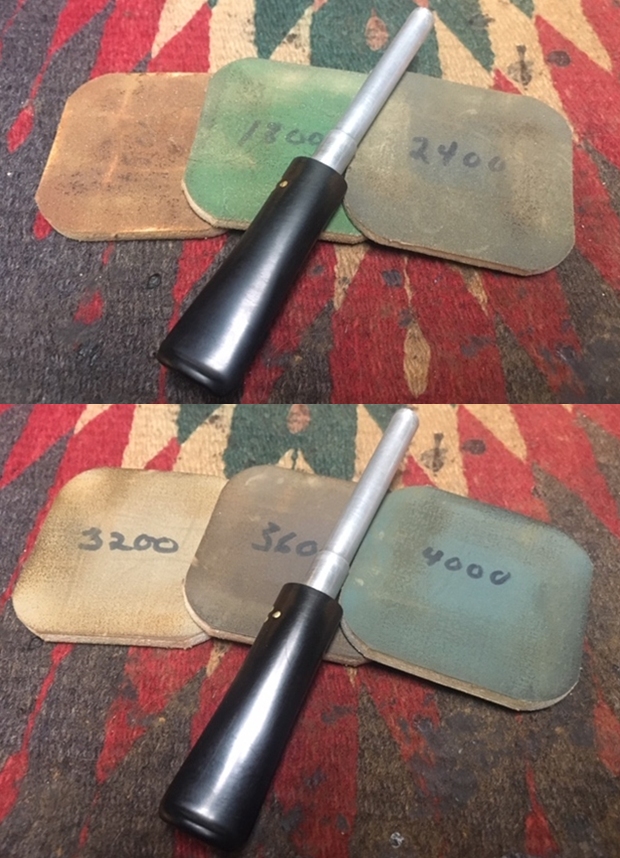
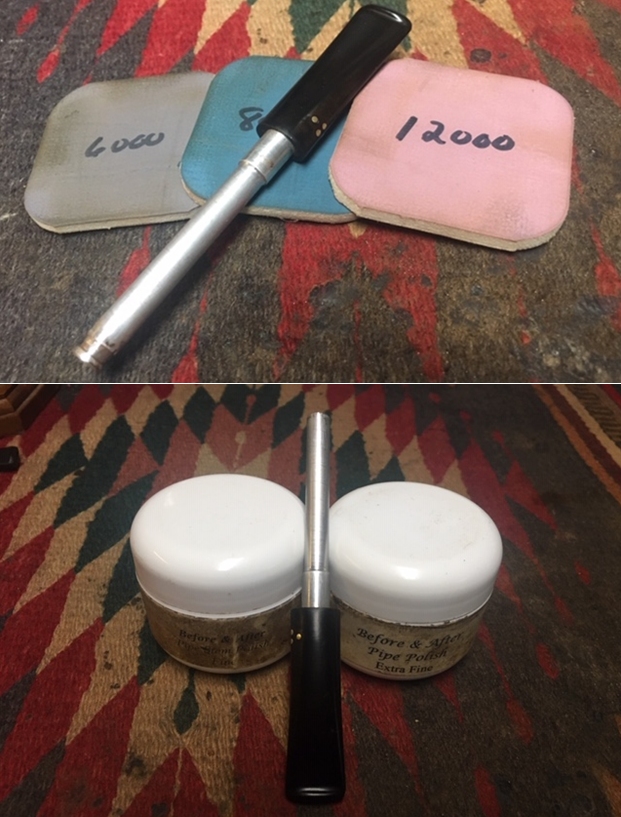
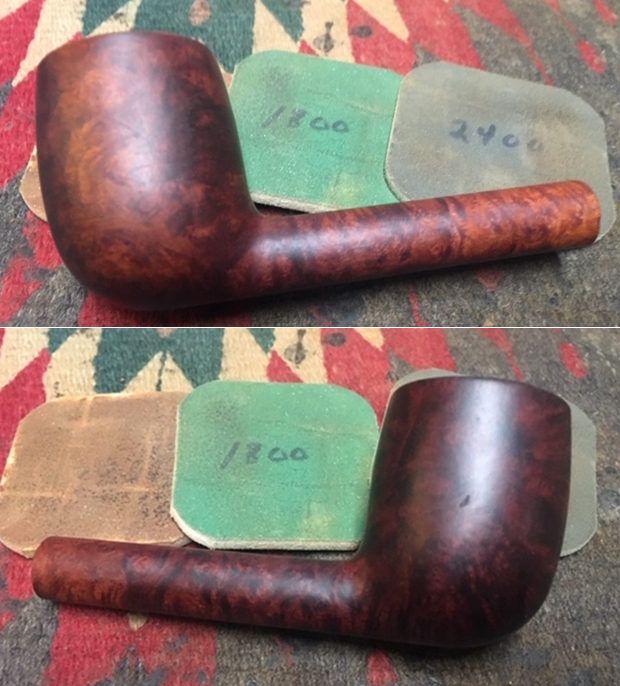
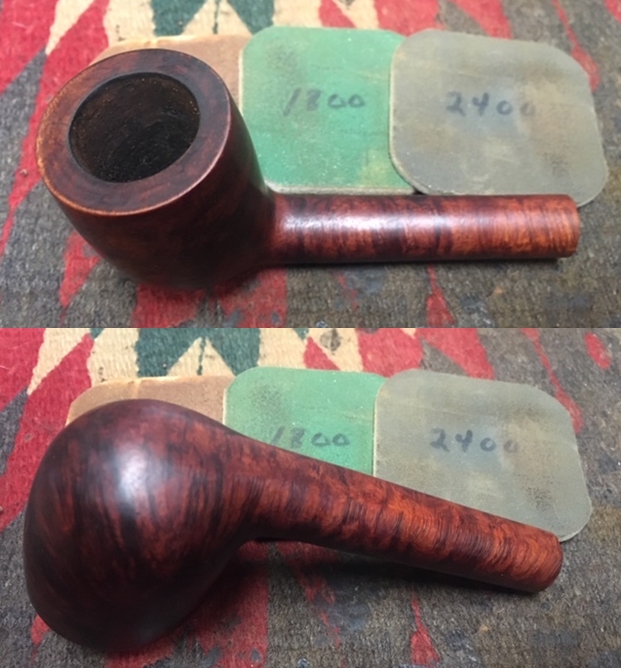
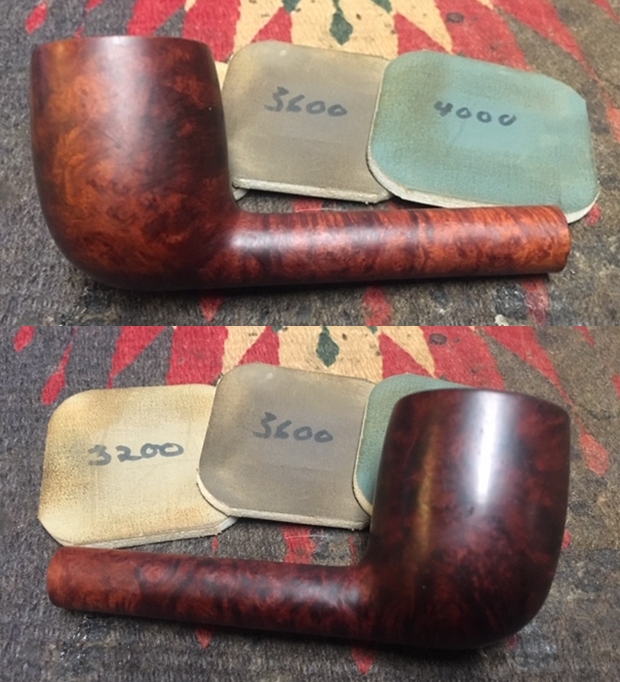
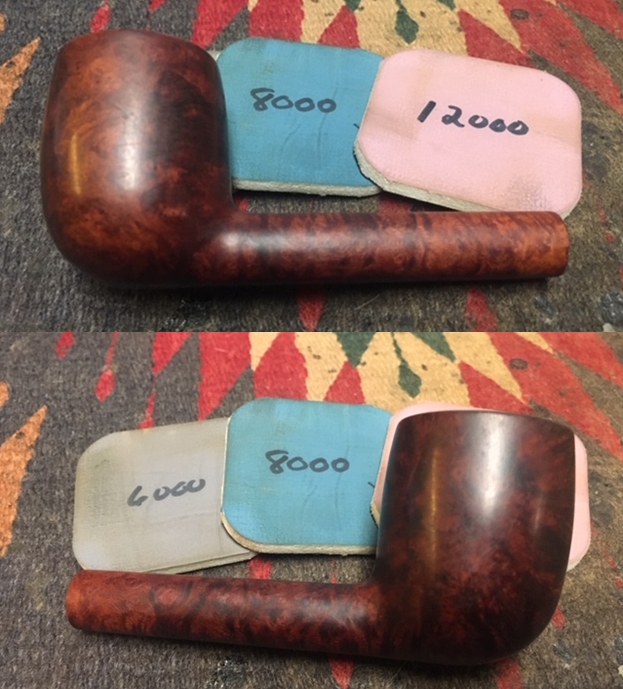
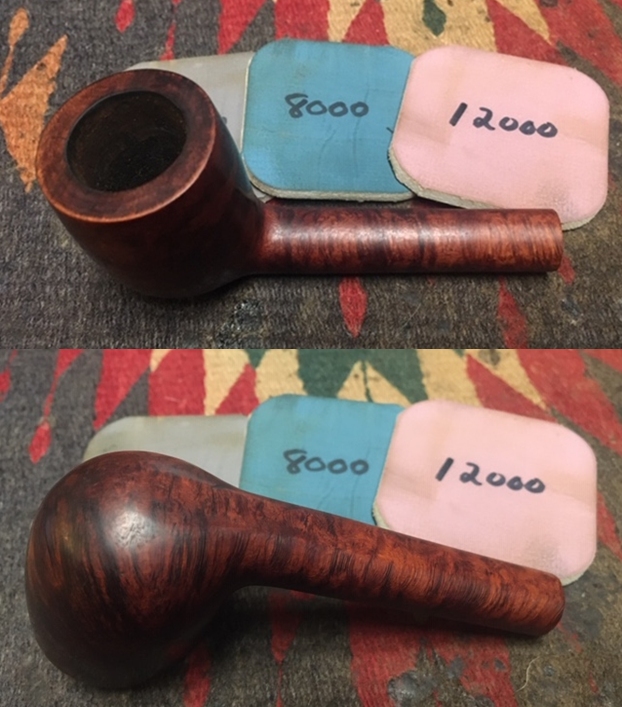
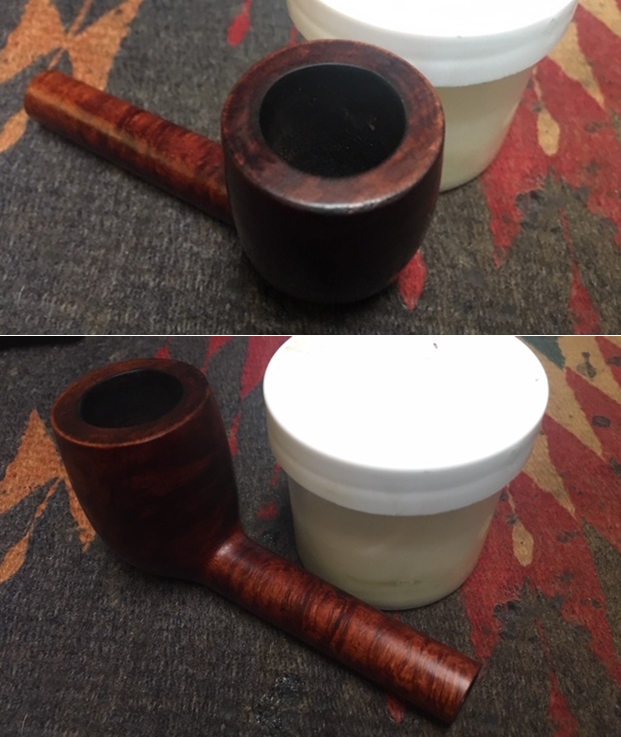
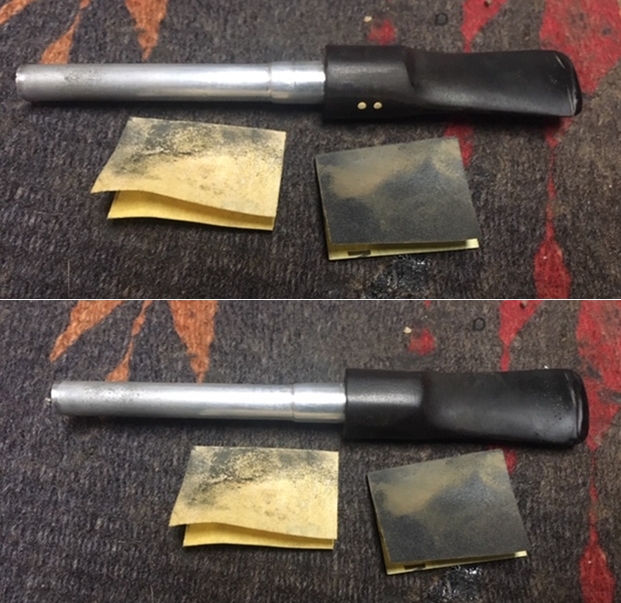
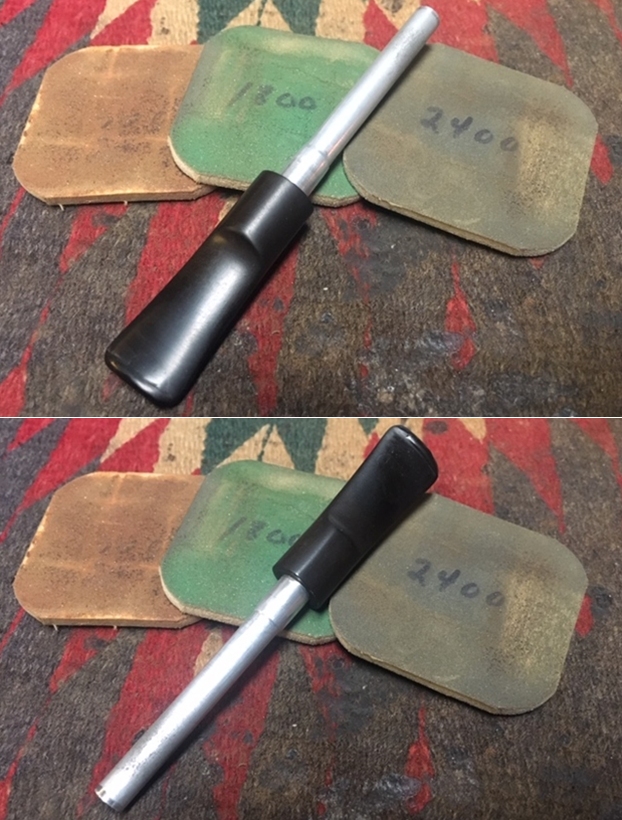
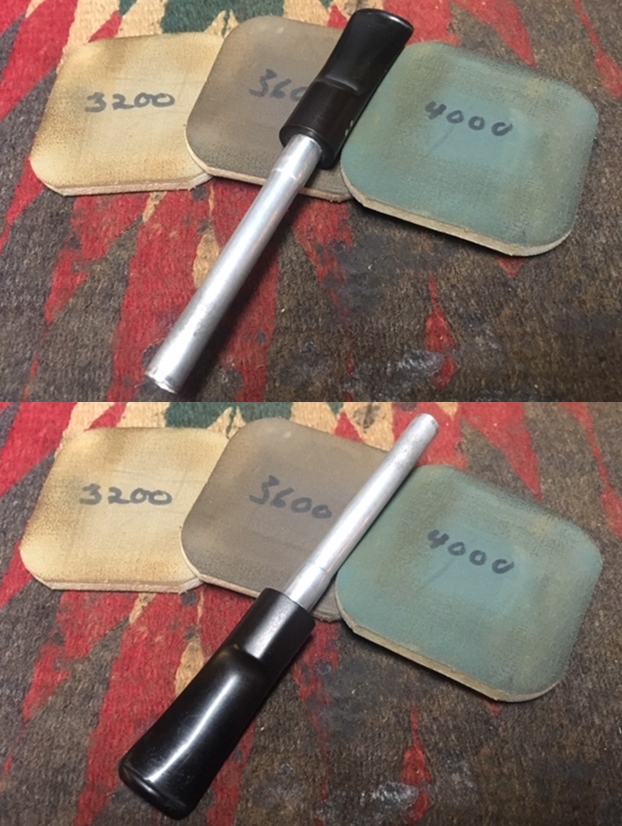
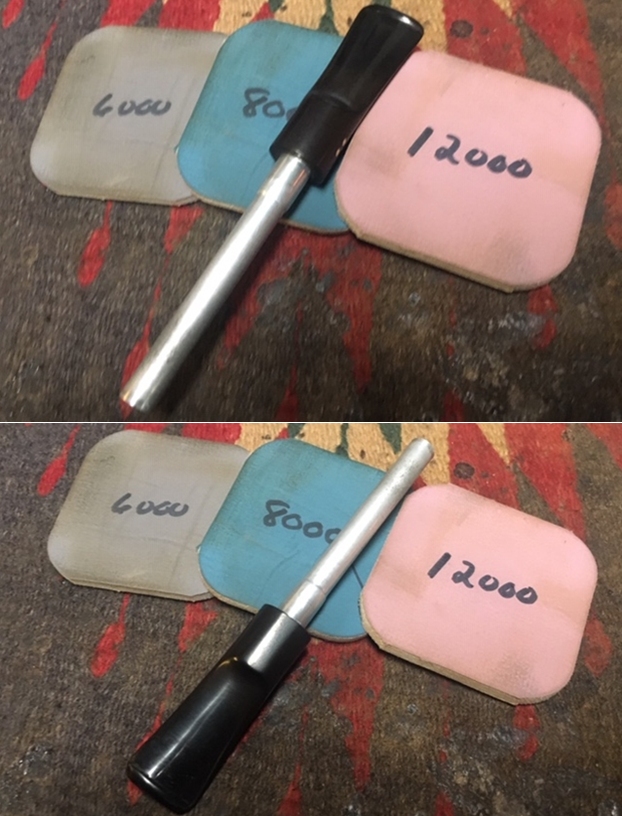
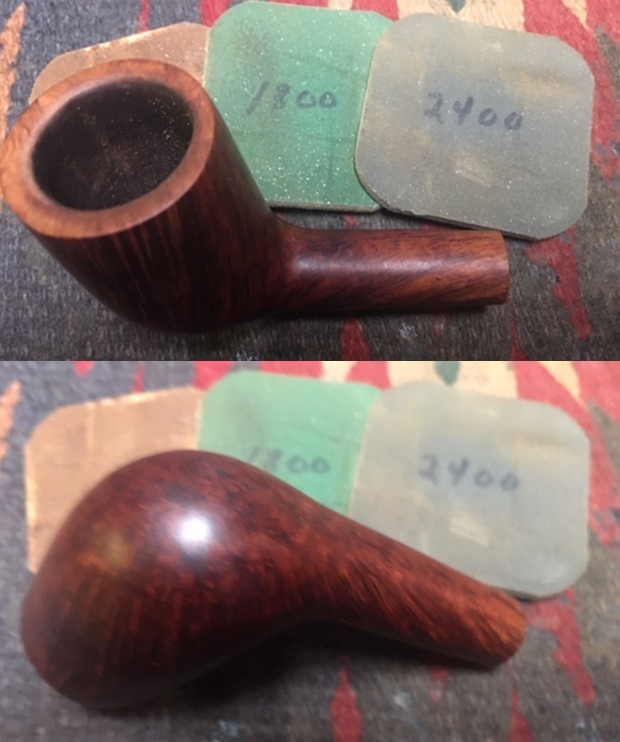
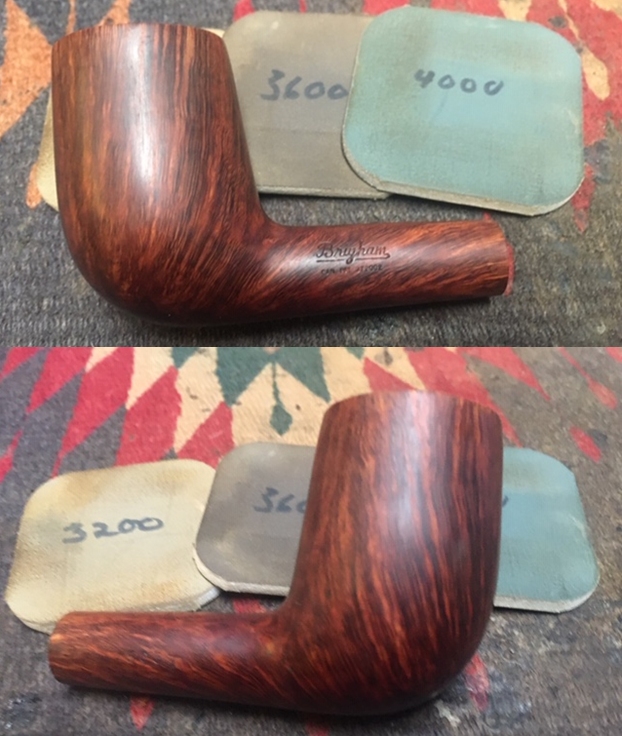
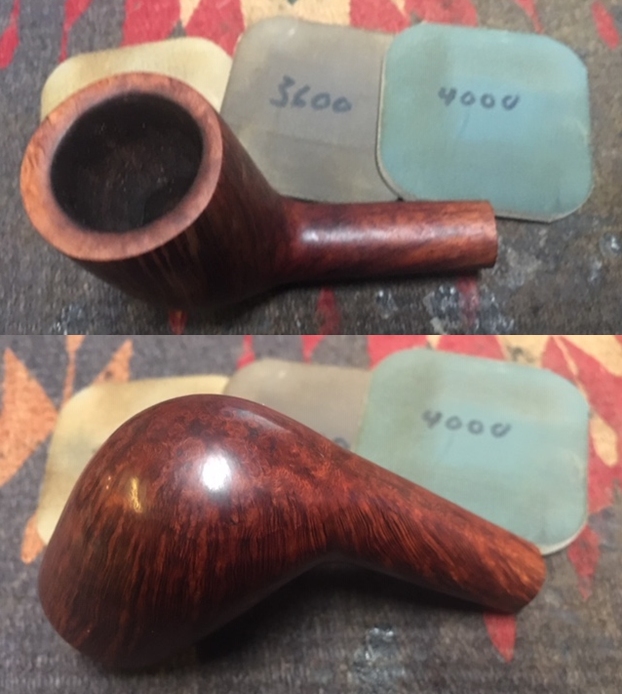
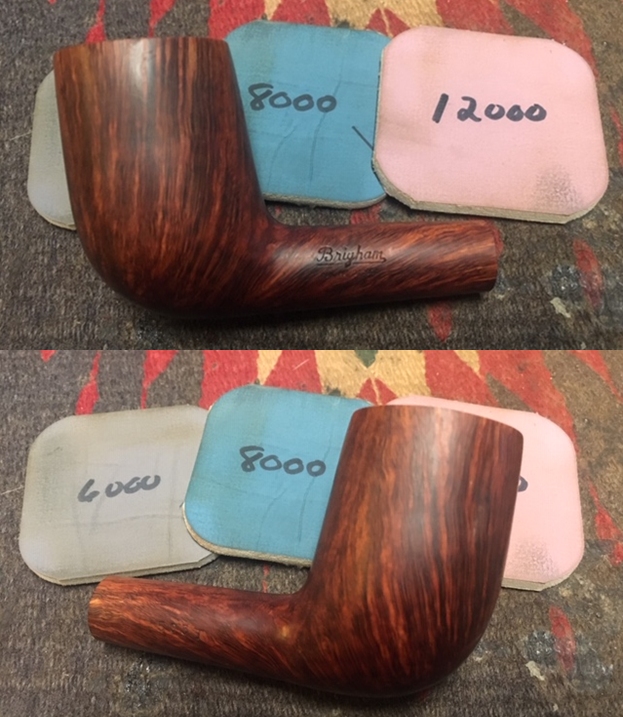
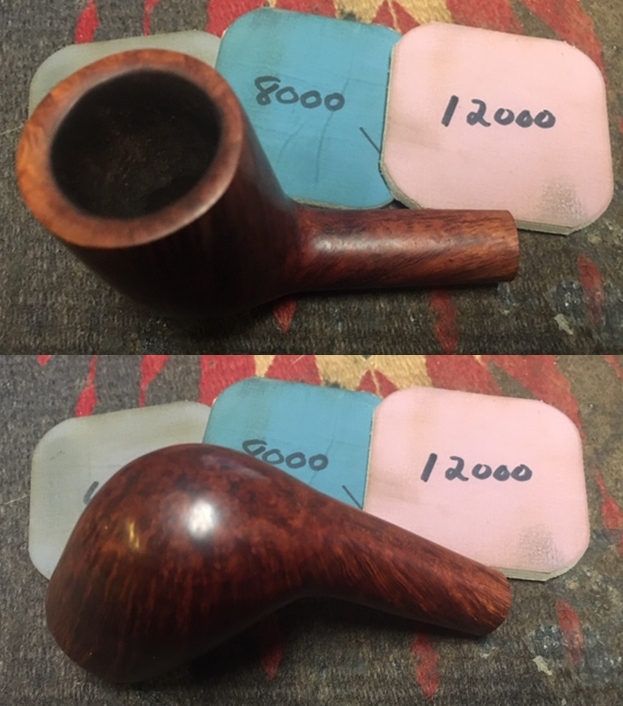
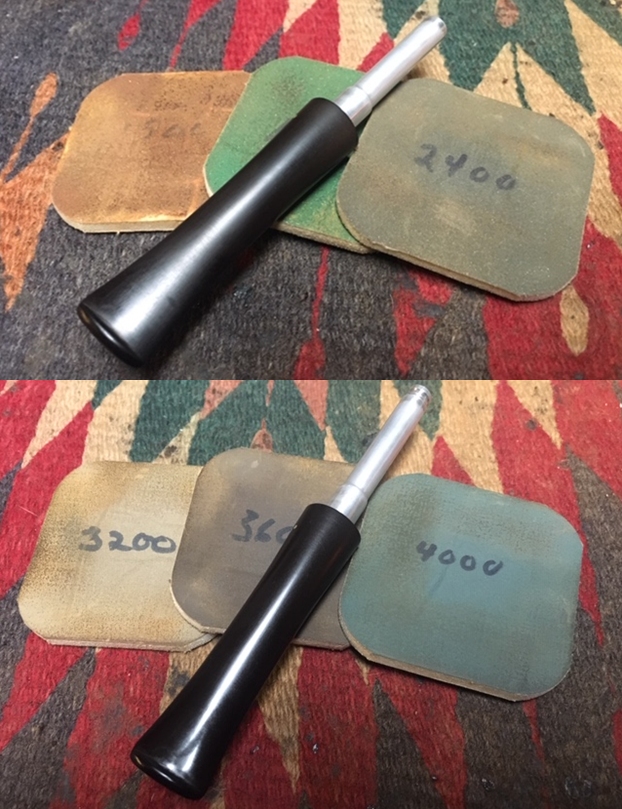
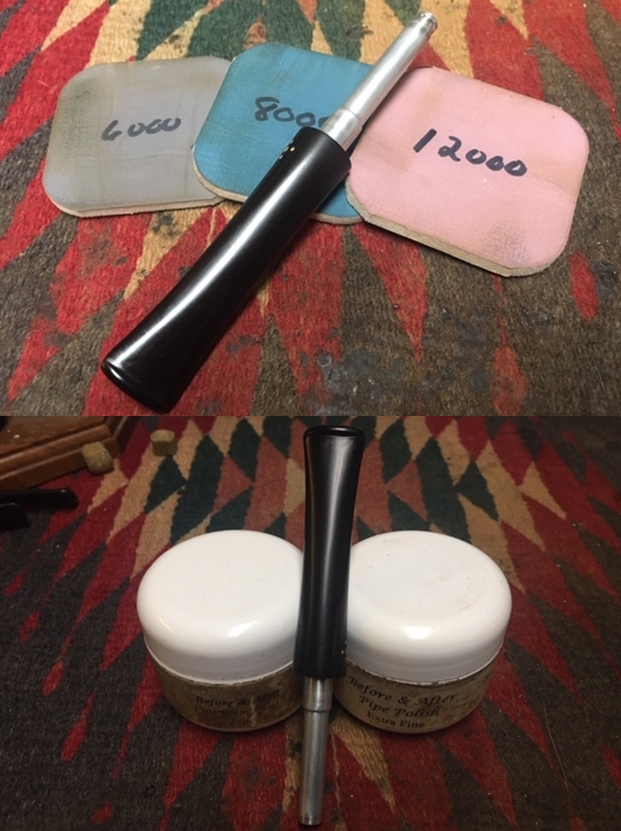
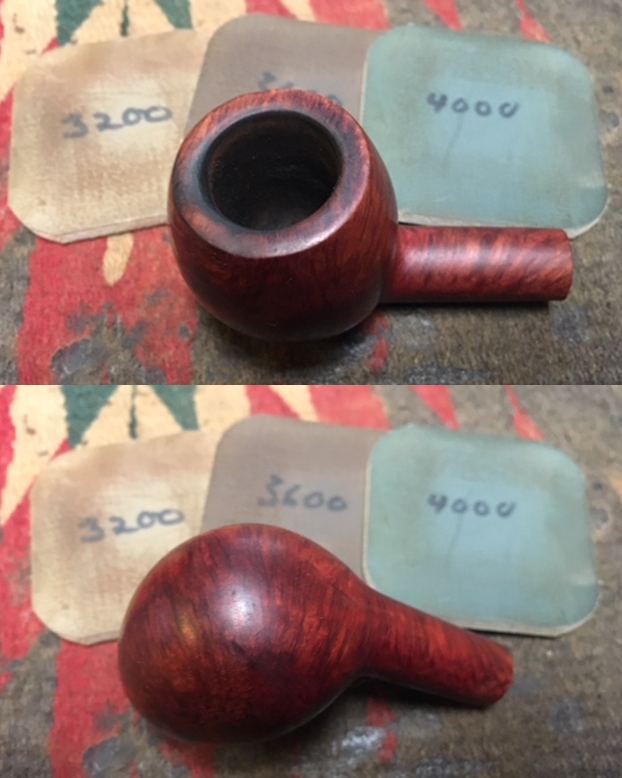
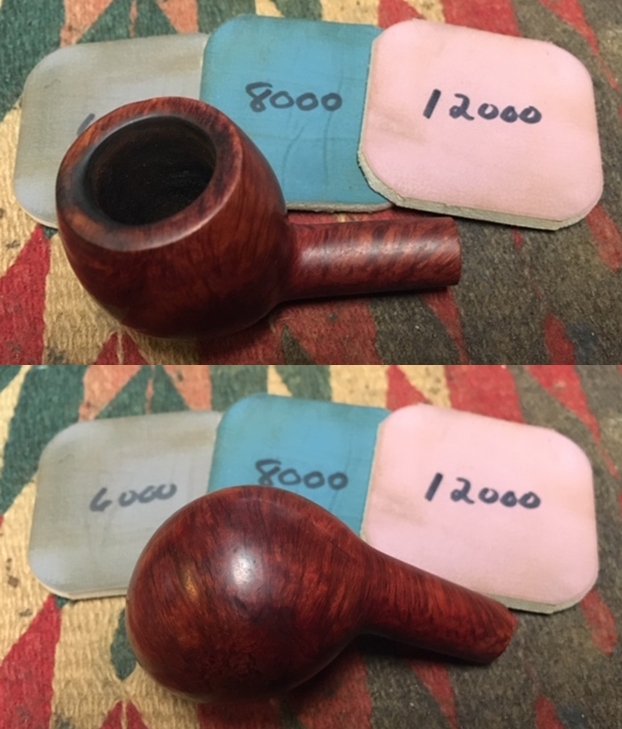
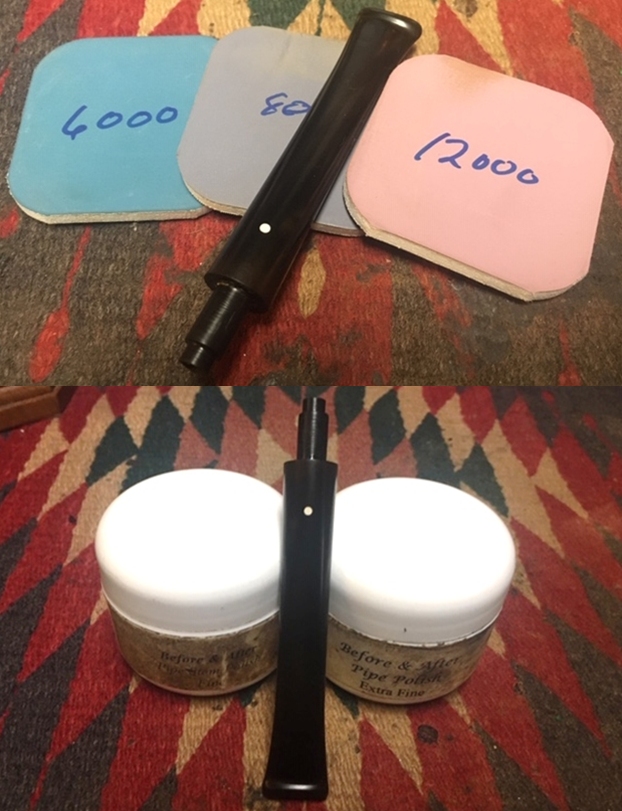
 I polished the briar on the rim top and bowl with worn micromesh sanding pads – wet sanding it with 1500-12000 grit micromesh sanding pads. I wiped it down after each pad with a damp cloth. I find that the worn pads do a great job polishing and still retain the original patina of the pipe.
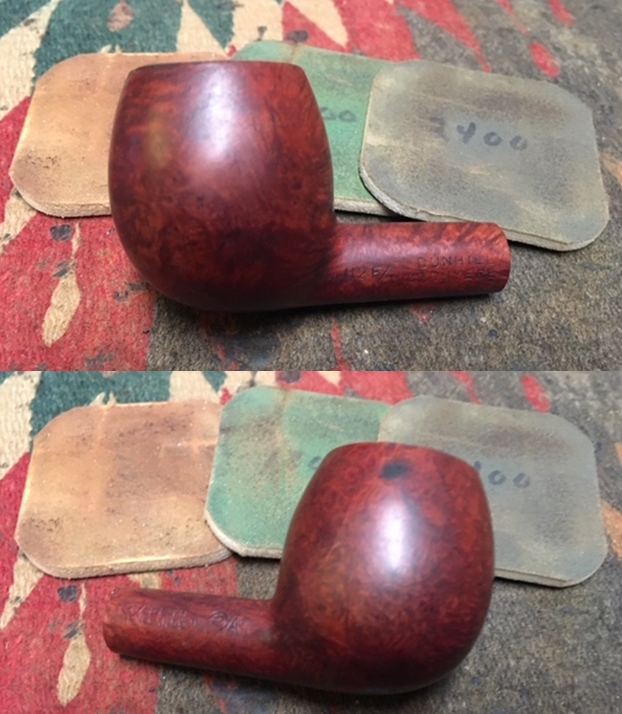
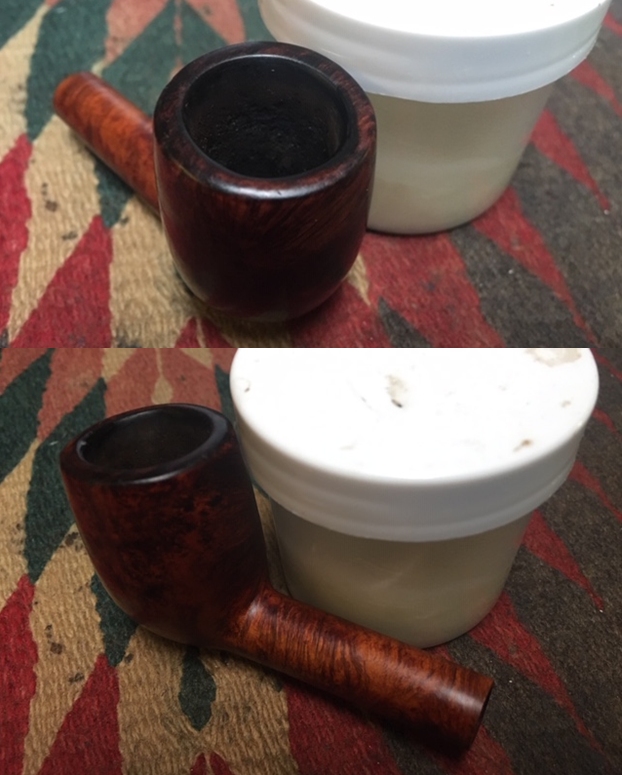
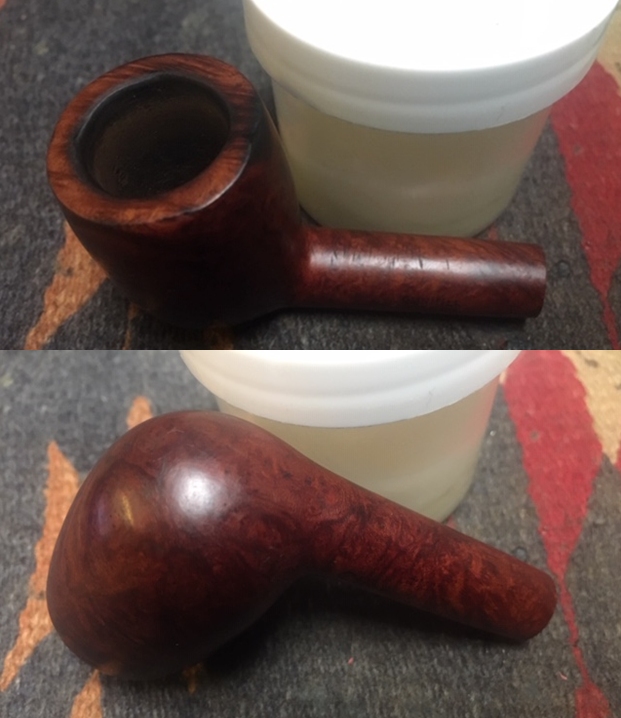
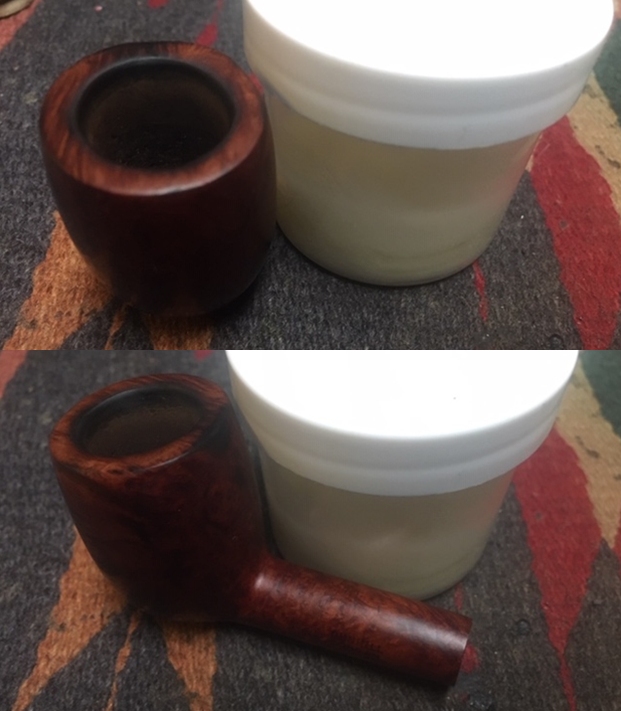
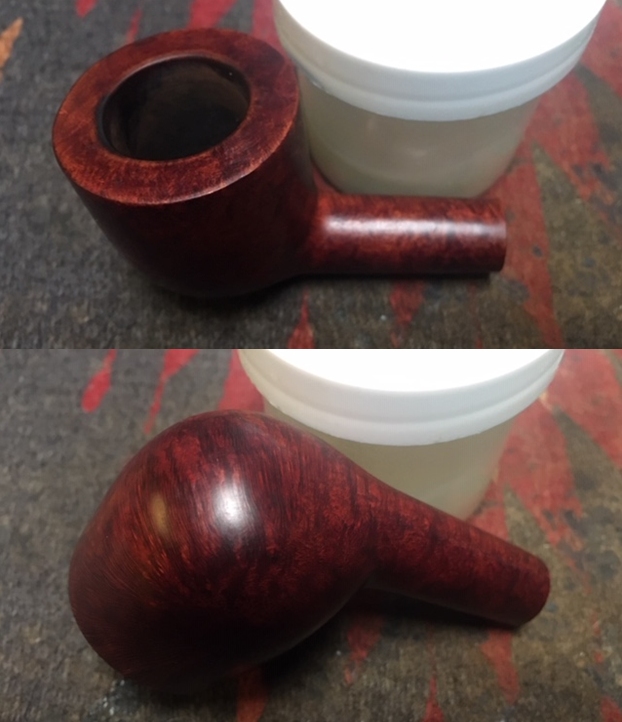
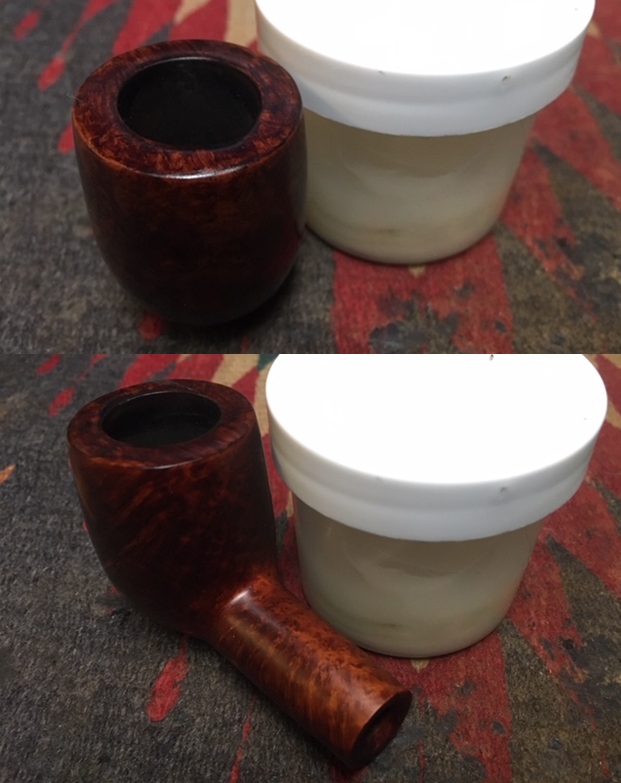
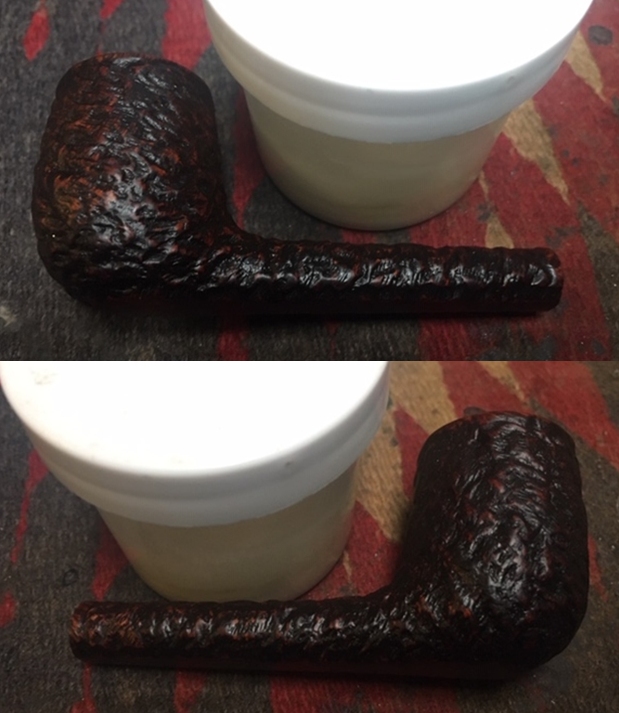
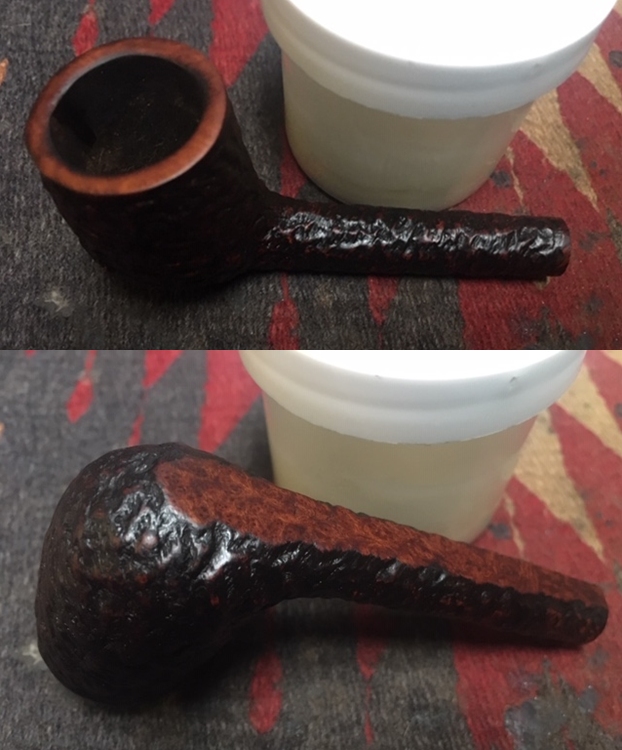
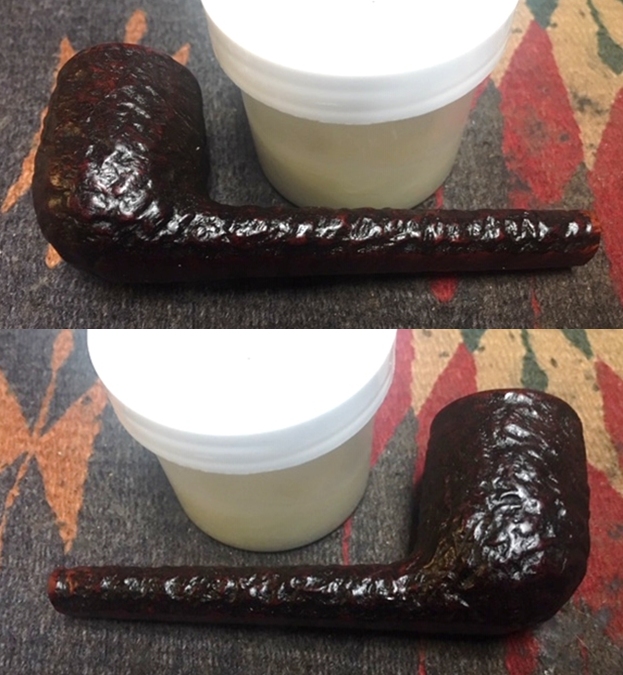
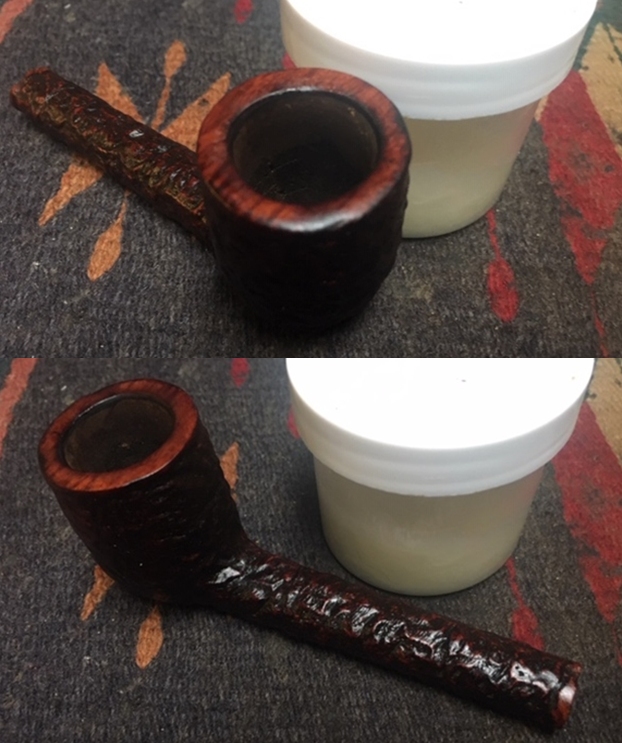
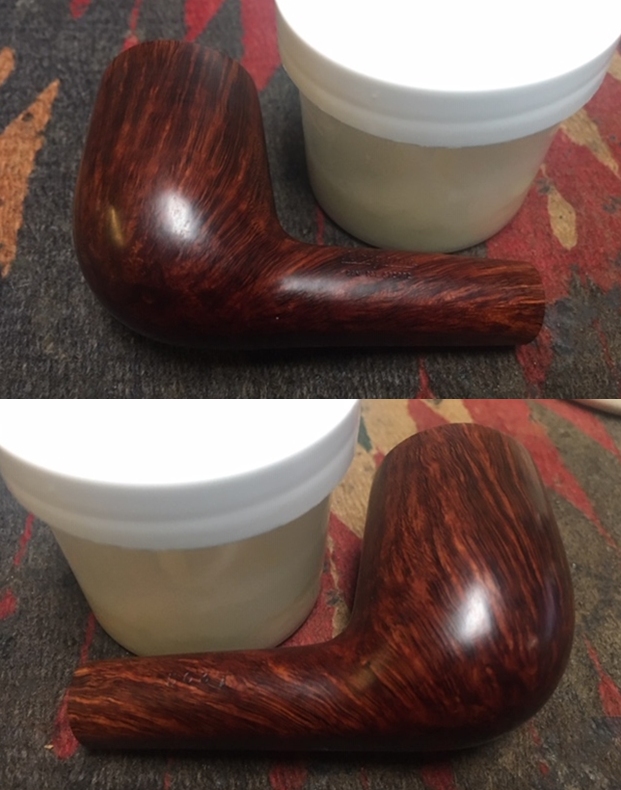
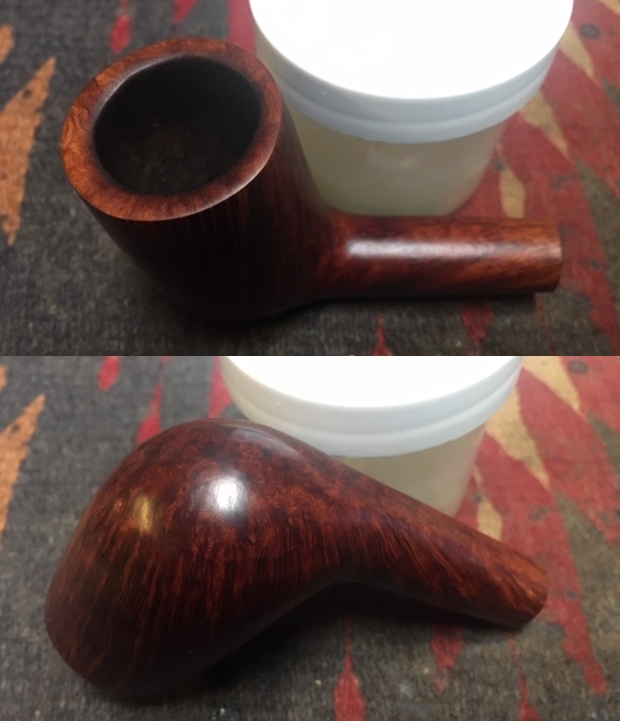
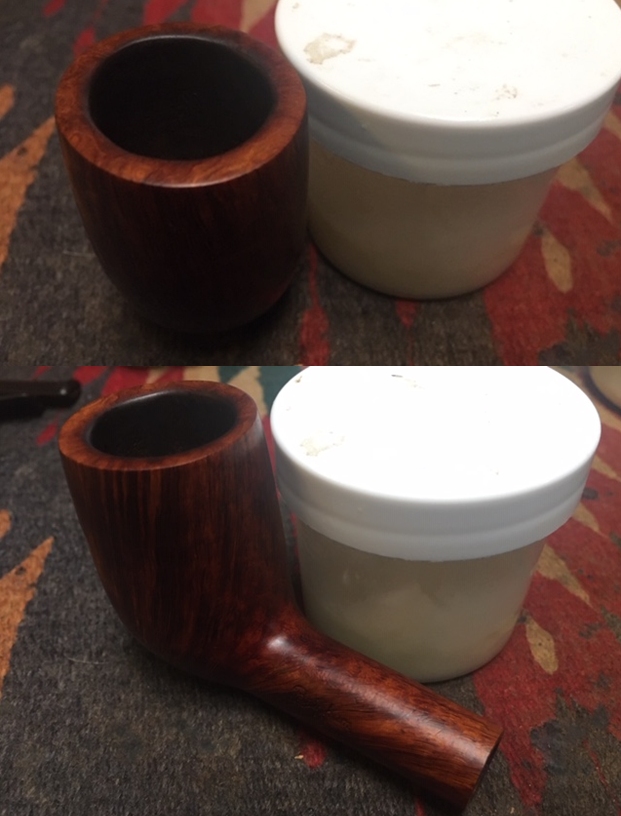
 I rubbed the bowl and rim down with Before & After Restoration Balm. I worked it into the surface of the briar with my fingertips to clean, enliven and protect it. I let the balm sit for a little while and then buffed the pipe with a cotton cloth to raise the shine. I really like watching the Balm do its magic and bring the briar alive.
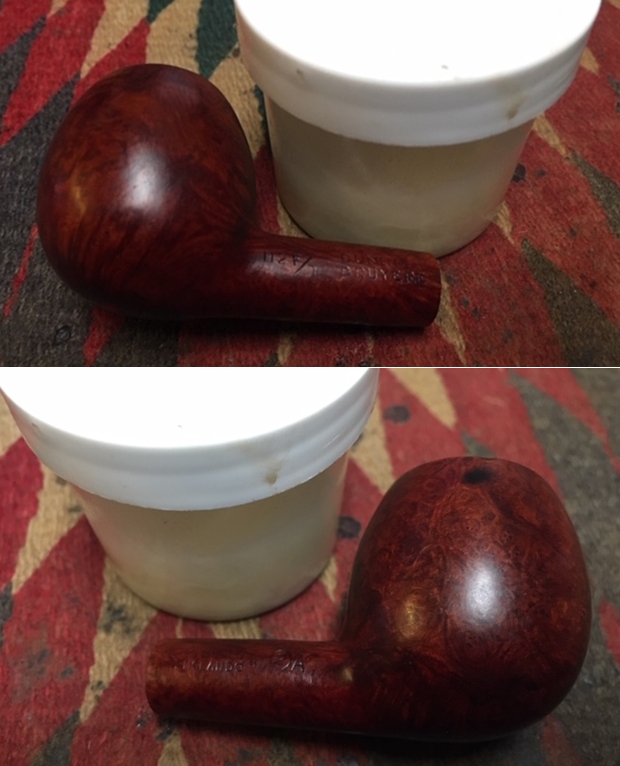
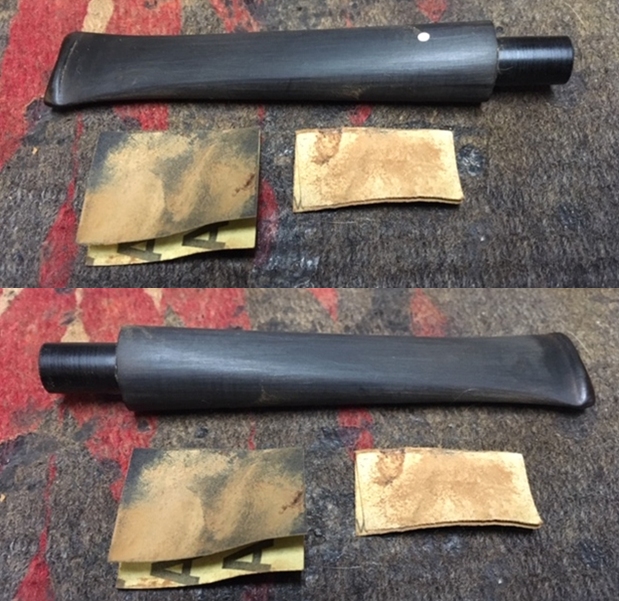
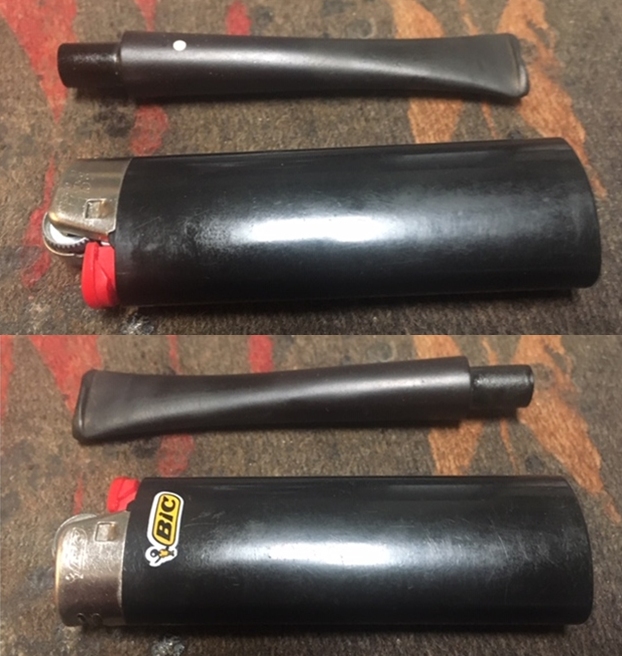
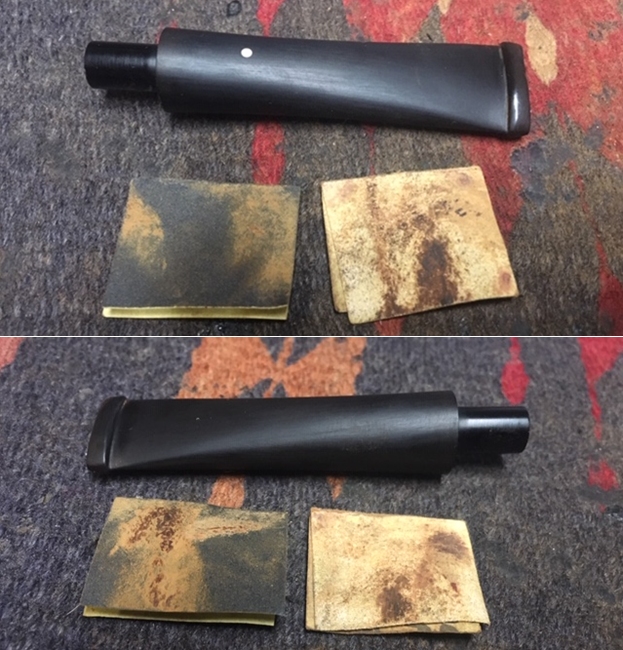
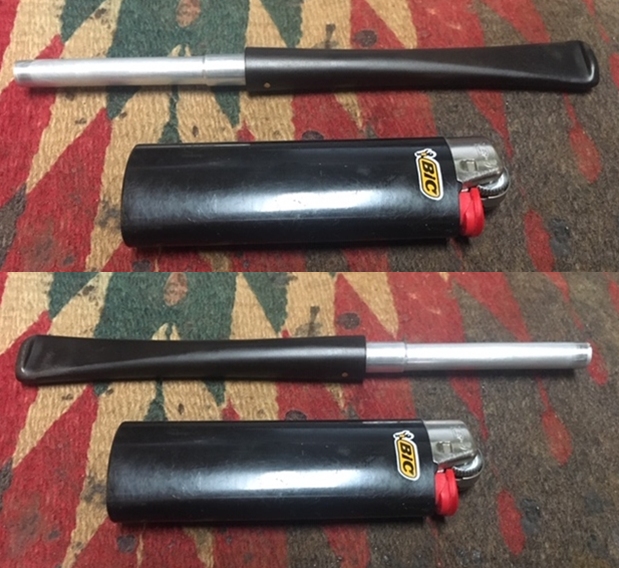
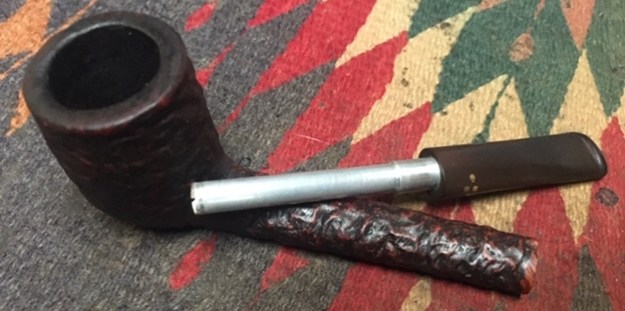
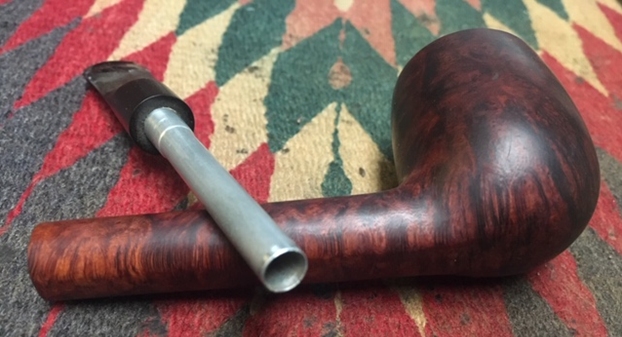
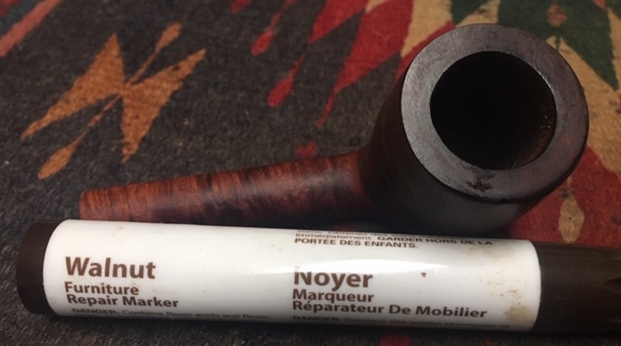
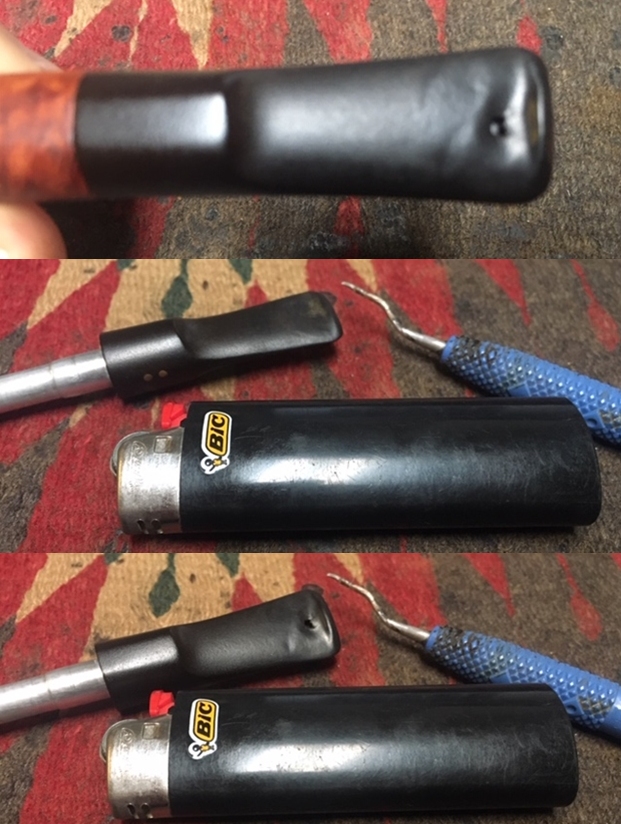
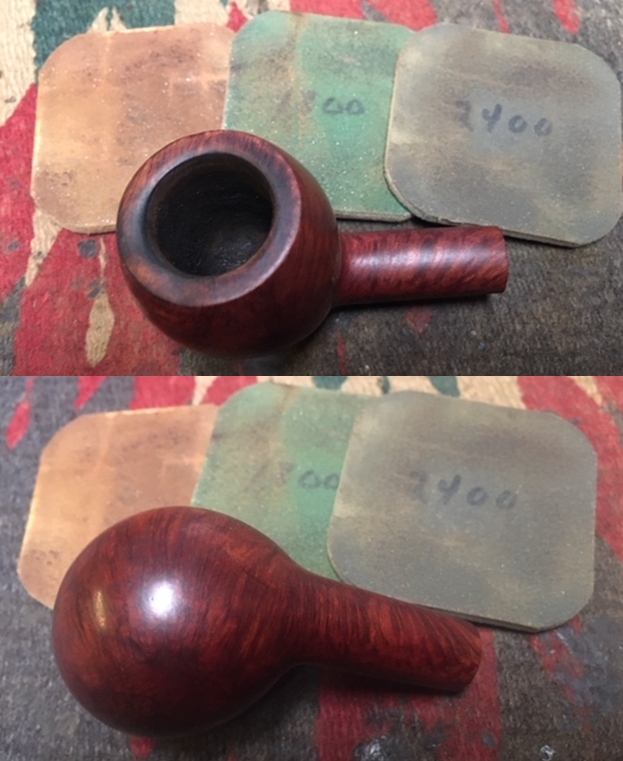
 With the bowl done it was time to address the stem. The dents in the top and underside were the right depth for me to lift them. I sanded the surface of the stem with 220 grit sandpaper to remove the remaining oxidation in the vulcanite. I polished it with 400 grit wet dry sand paper.
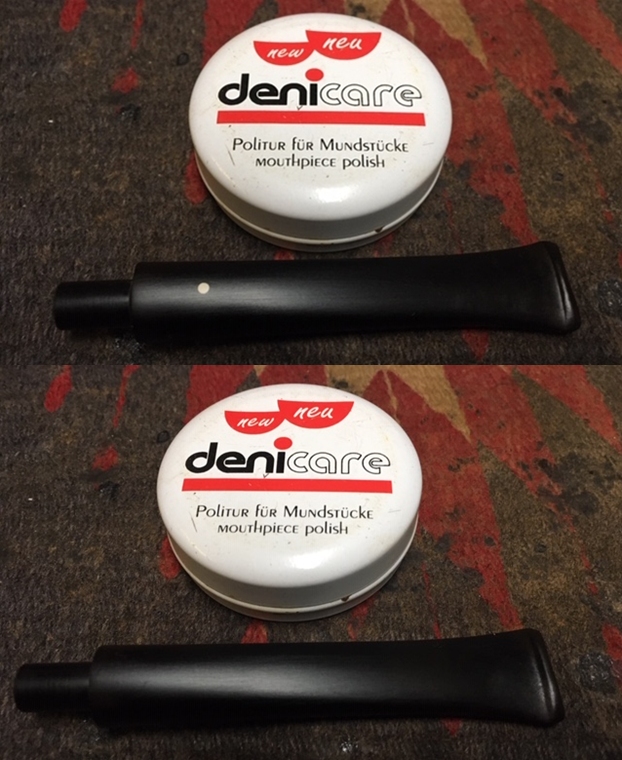
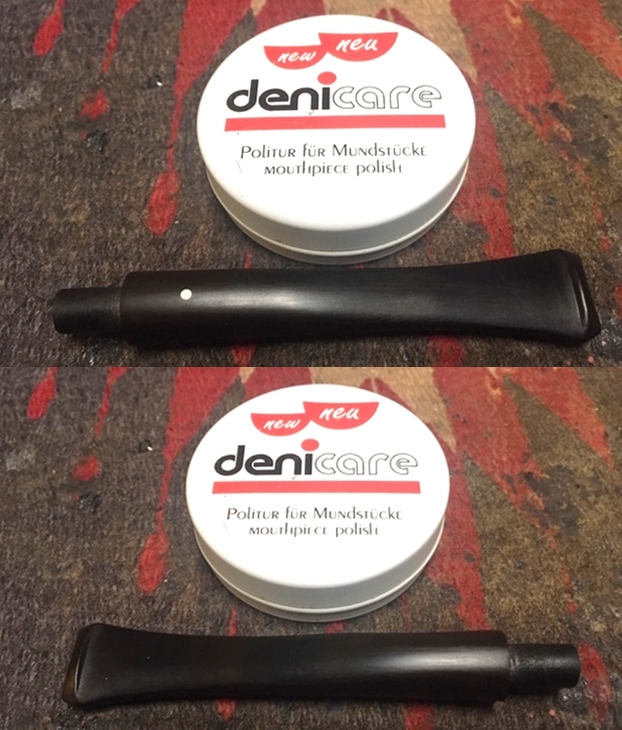
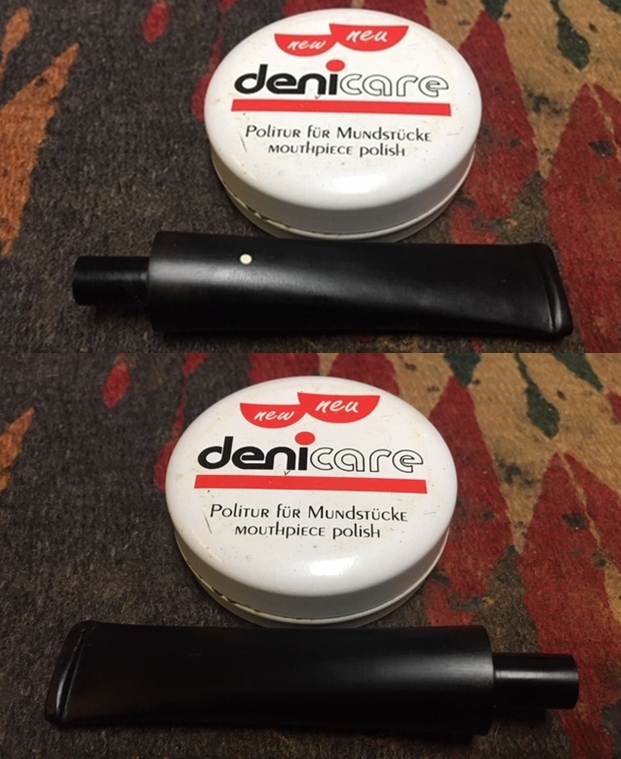
  I rubbed the stem down with Denicare Mouthpiece Polish. I have a few tins of this laying around so I am trying to use them up. It does a pretty good job polishing the stem.
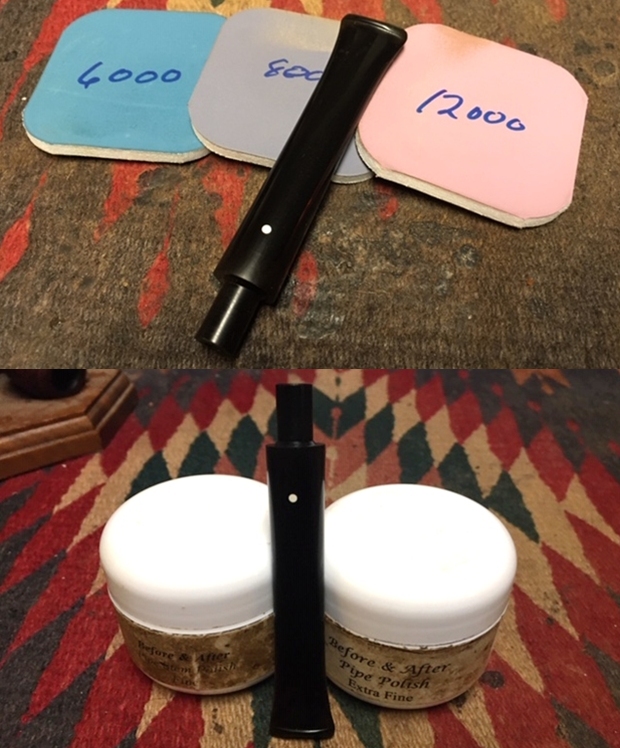
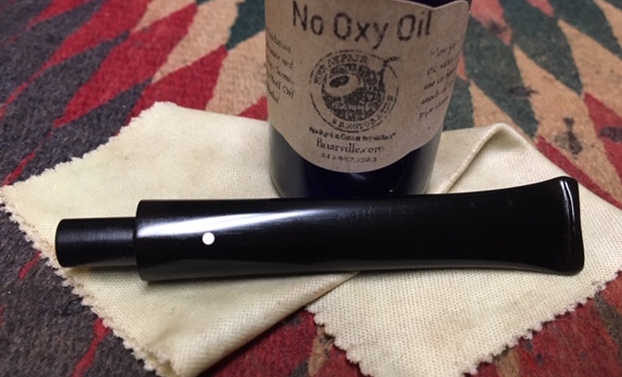
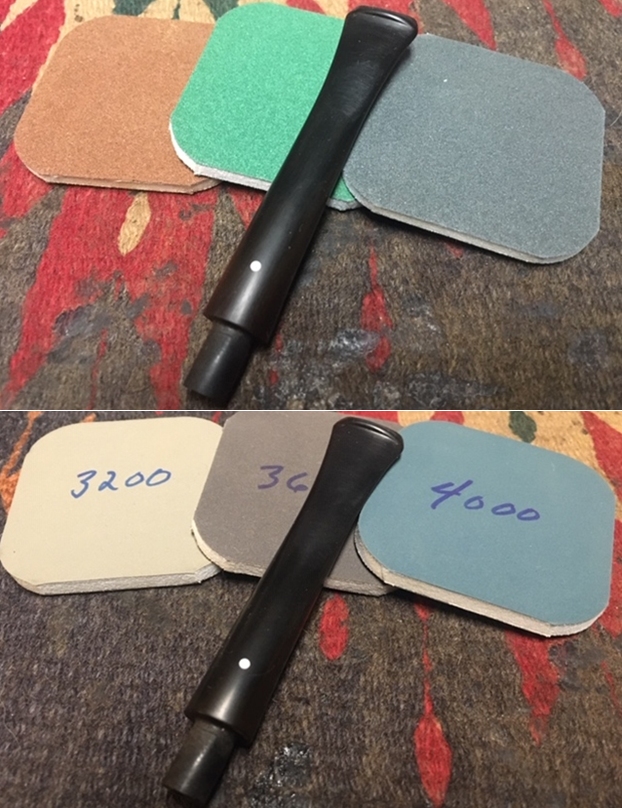
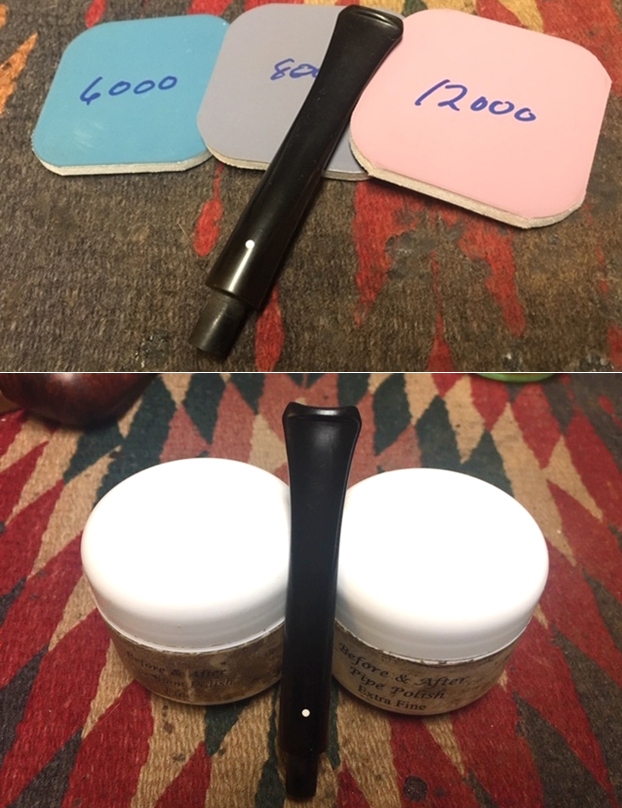
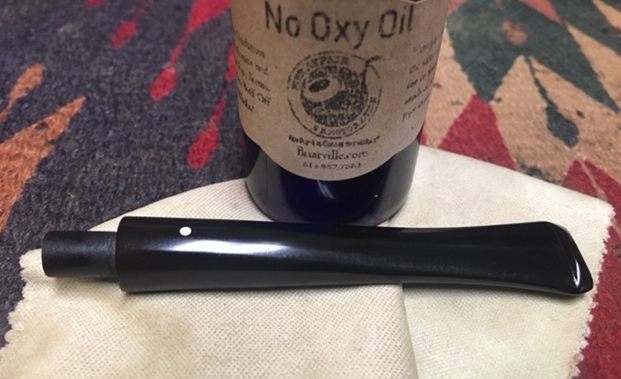
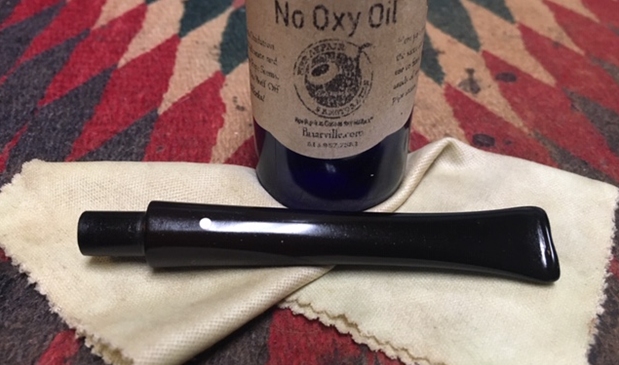
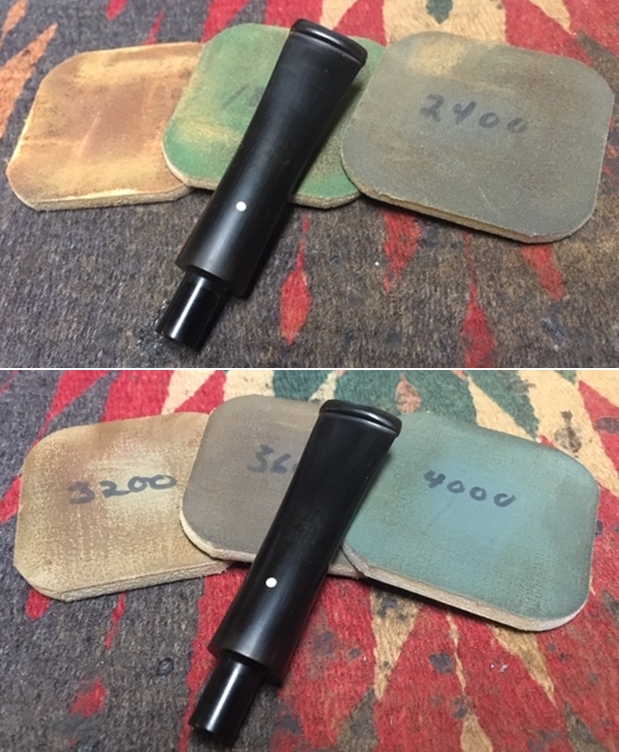
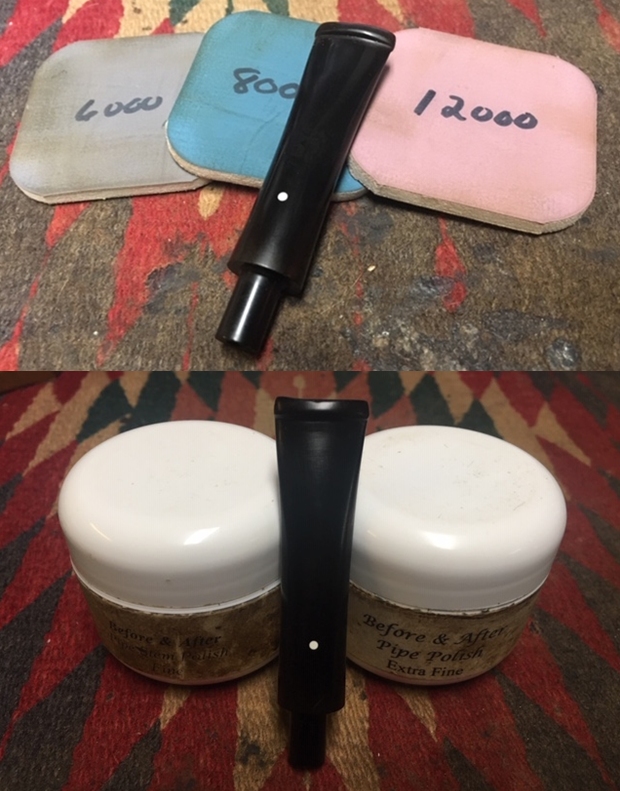
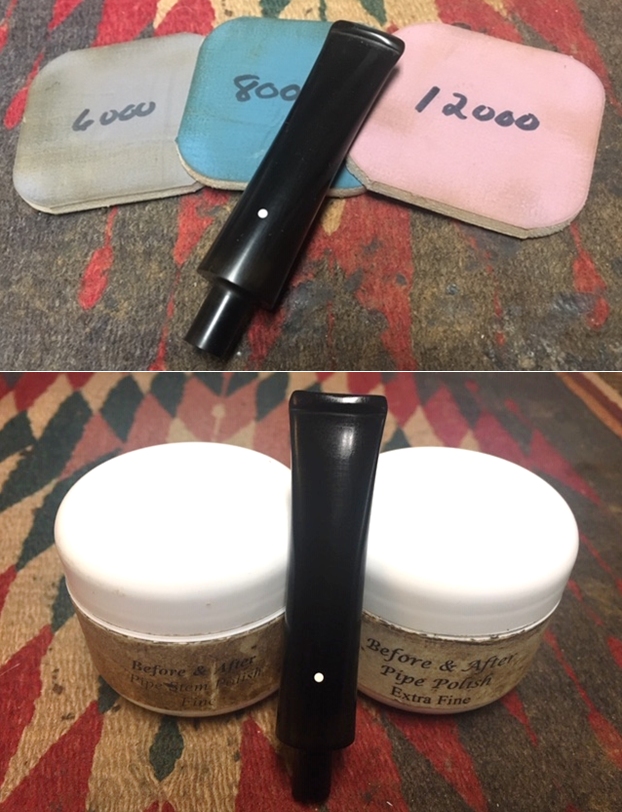
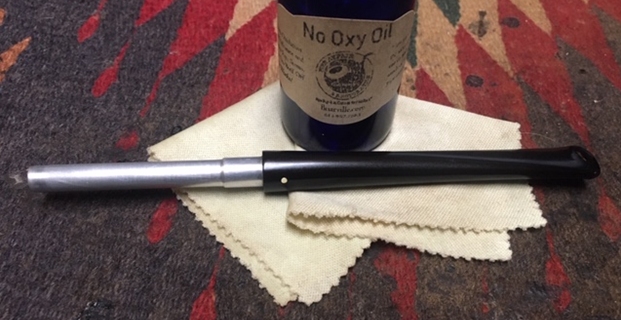
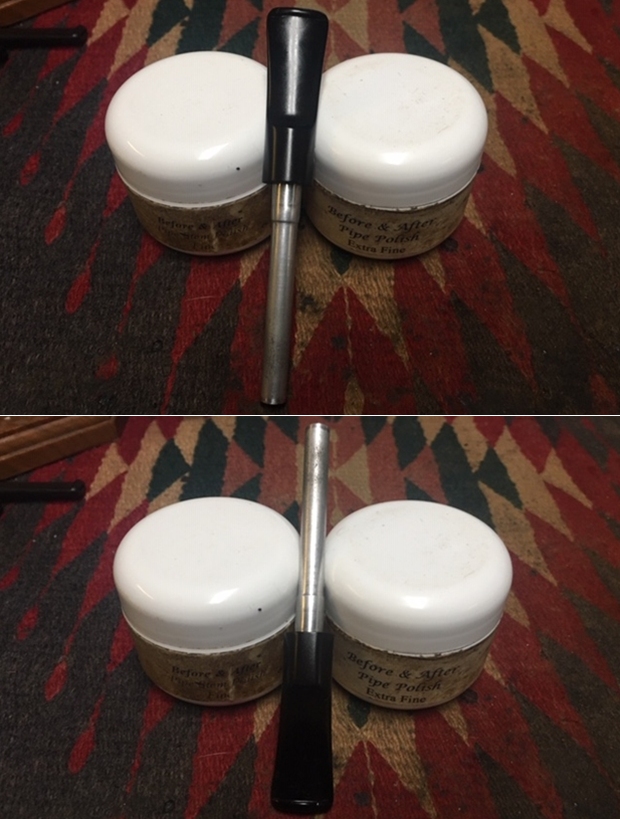
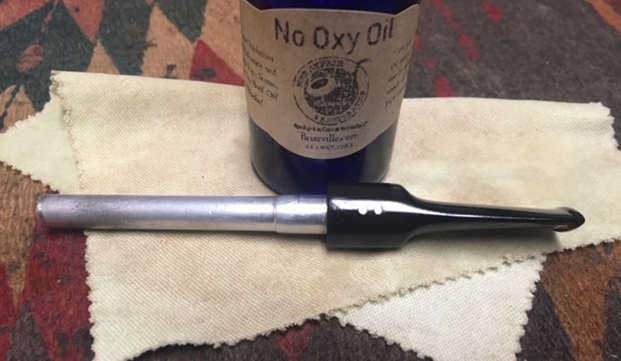
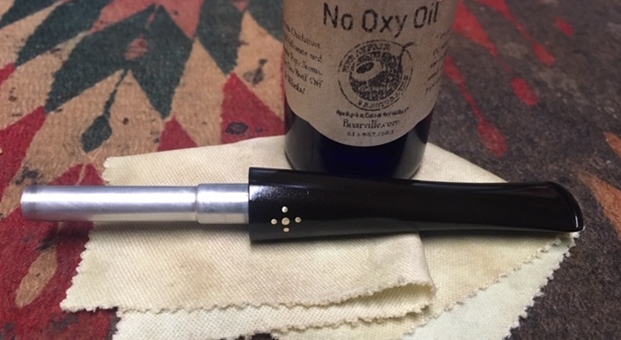
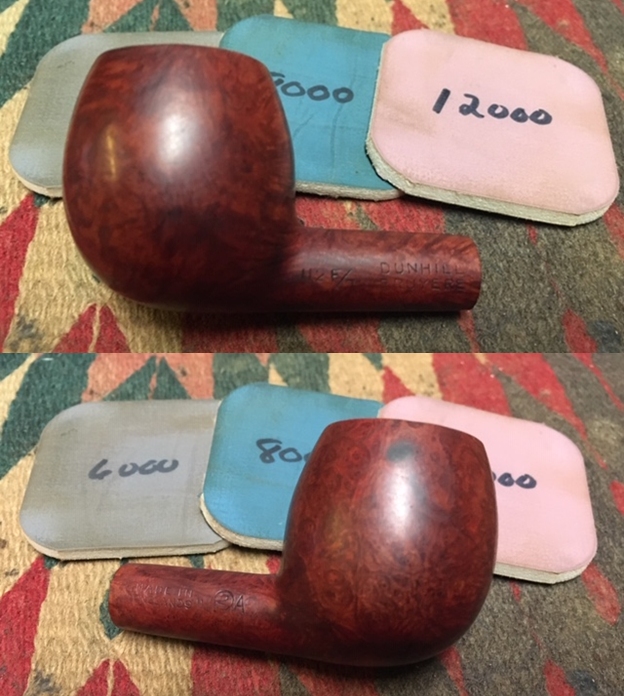
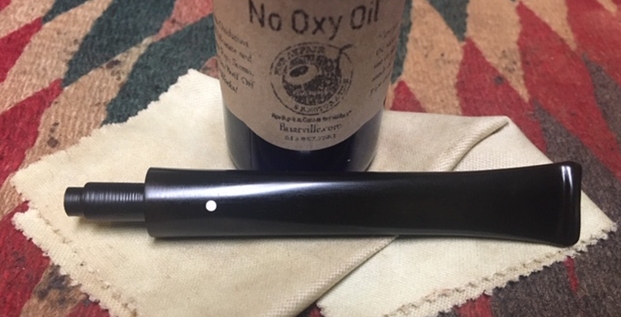
 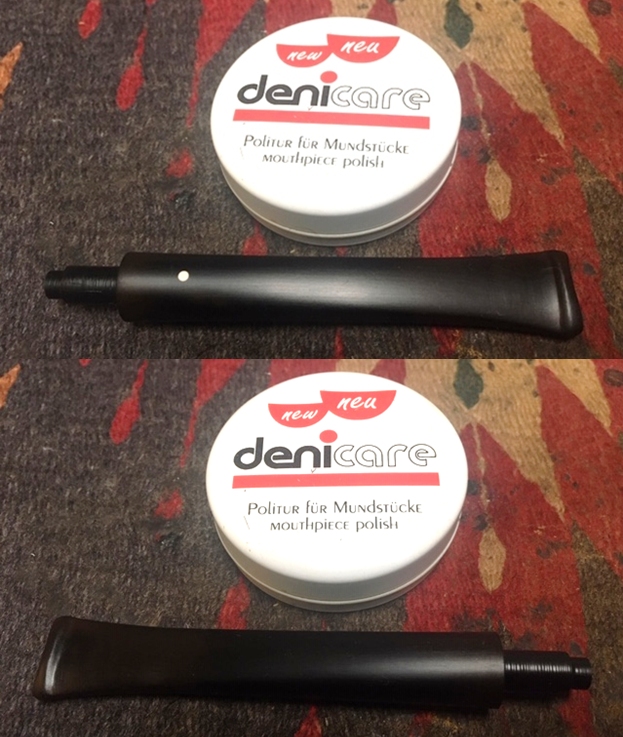 I polished the stem with micromesh sanding pads – wet sanding with 1500-12000 grit sanding pads. I wiped it down after each pad with a damp cloth to remove the sanding dust. I polished it further with Before & After Pipe Polish – both Fine and Extra Fine. I finished by rubbing the stem down with some “No Oxy Oil” to protect the vulcanite. I am experimenting with the product from Briarville and tracking how it works so I can write a review of it.
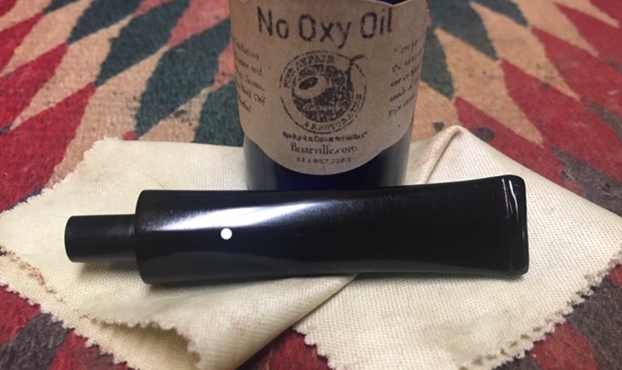
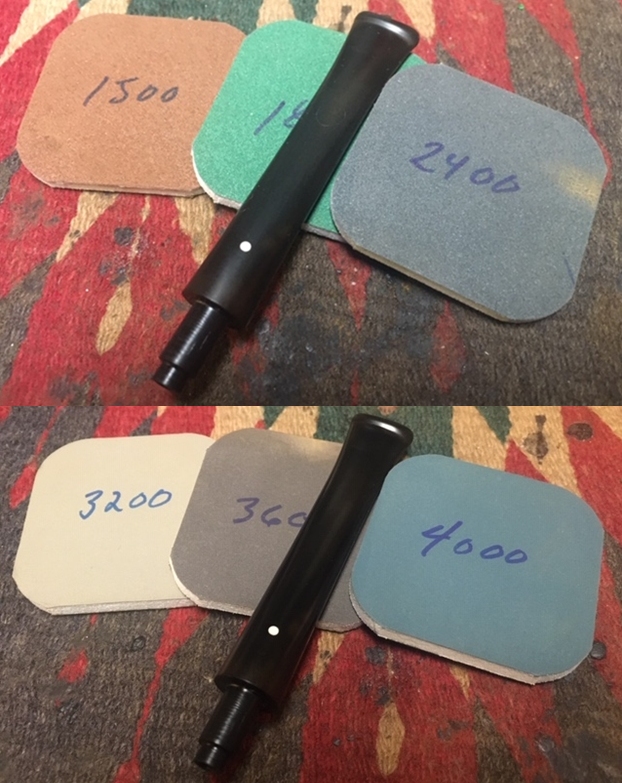
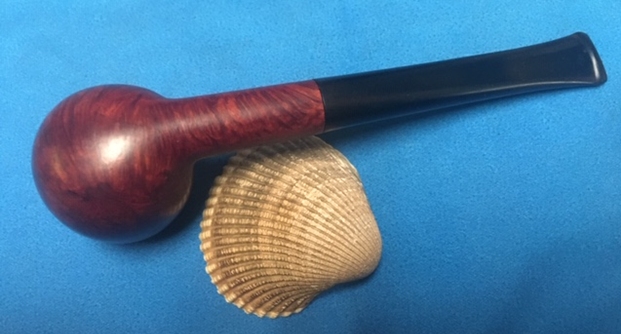
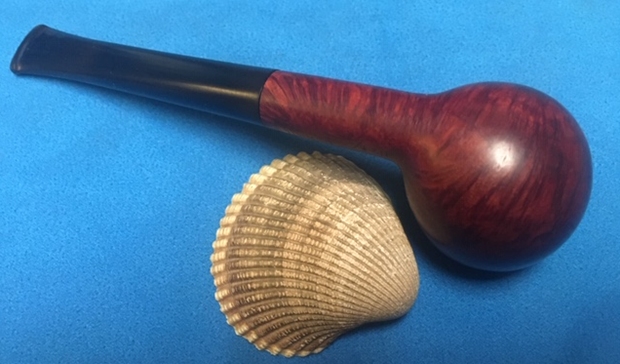
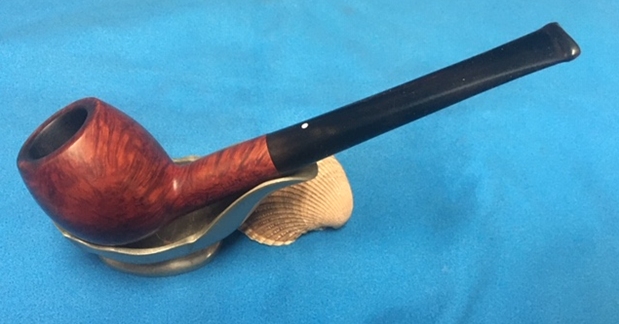
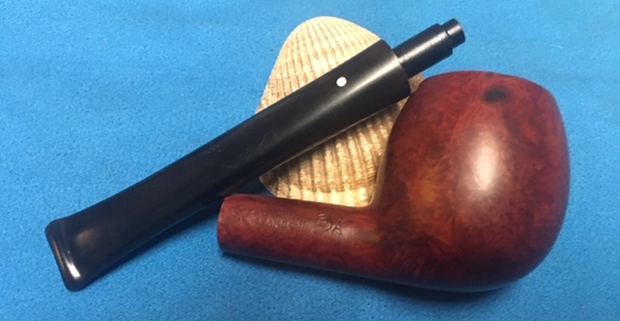
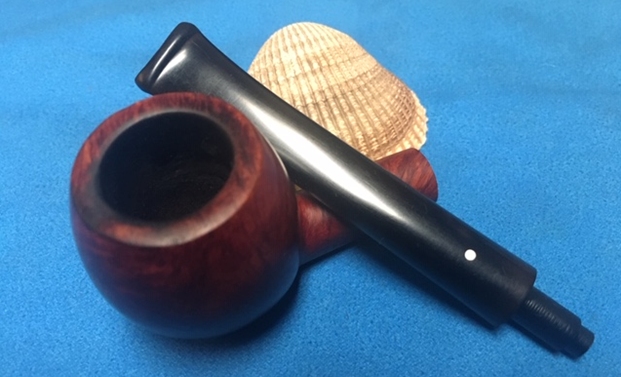
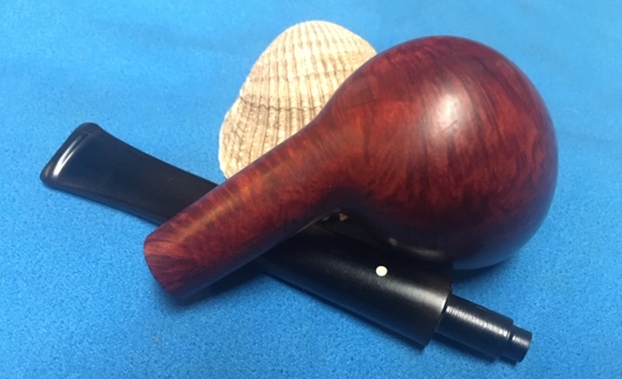
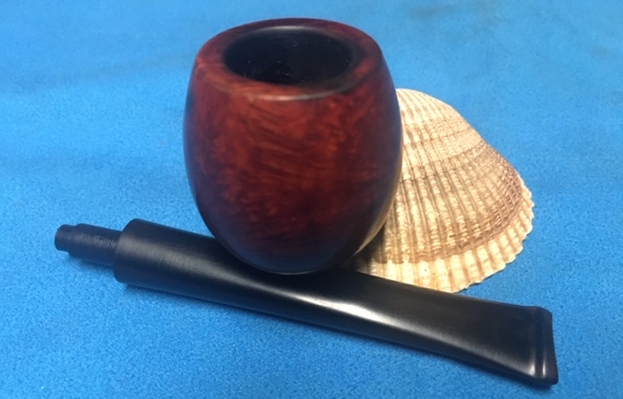
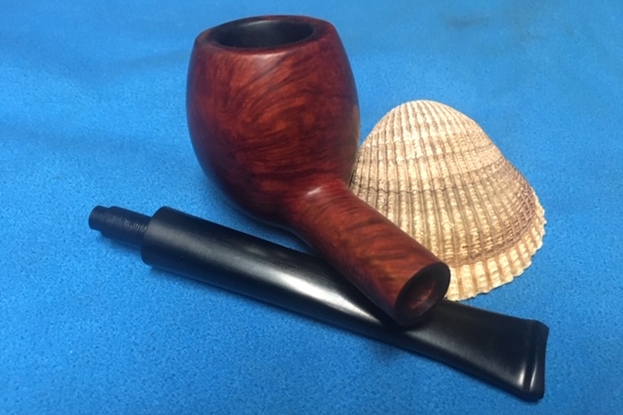
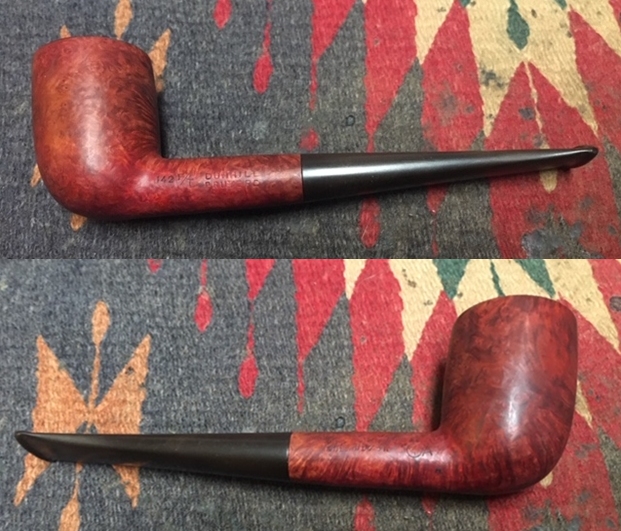
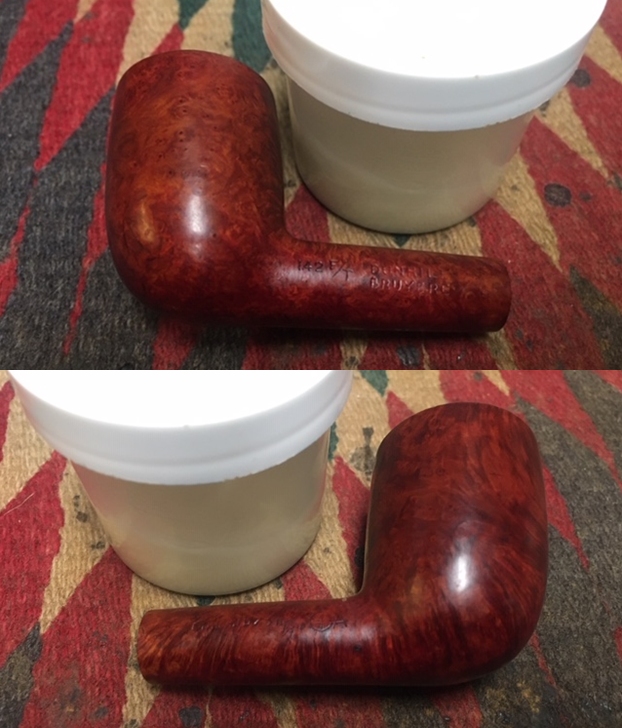
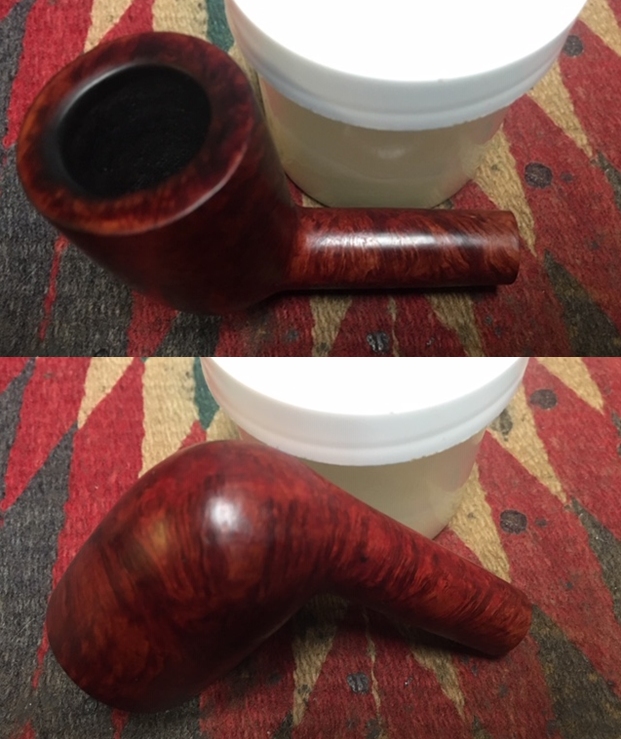
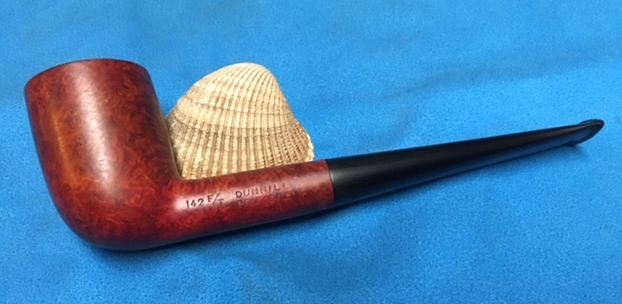
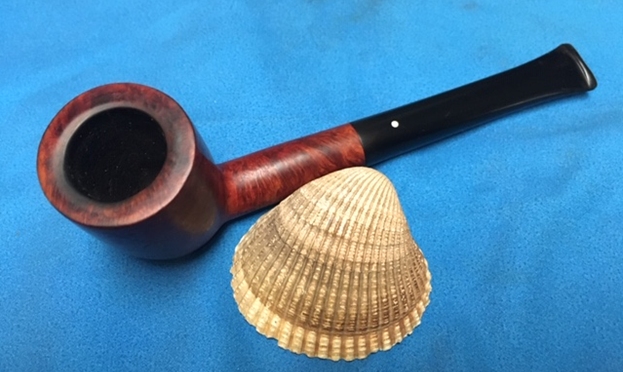
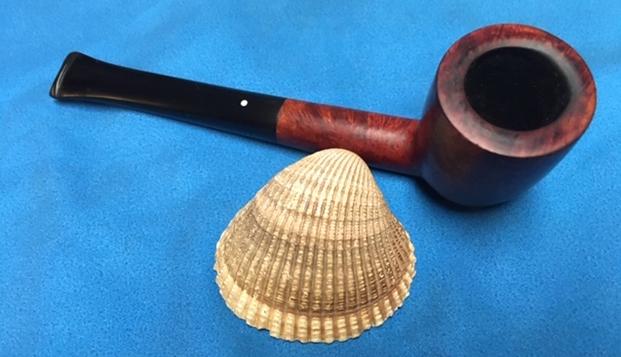
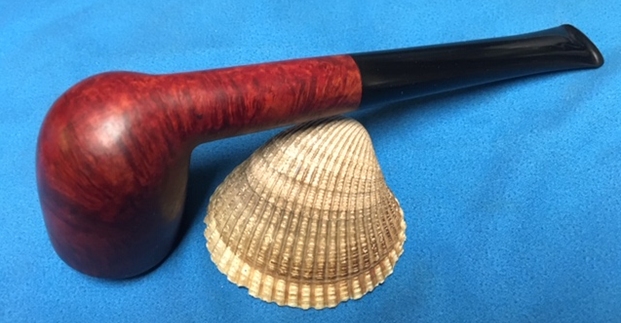
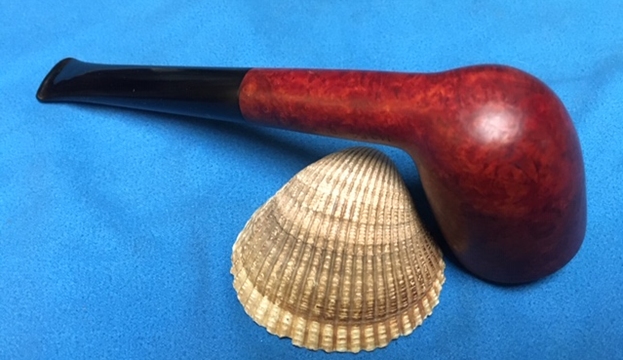
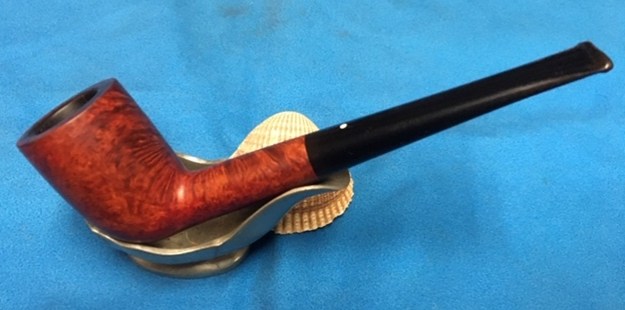
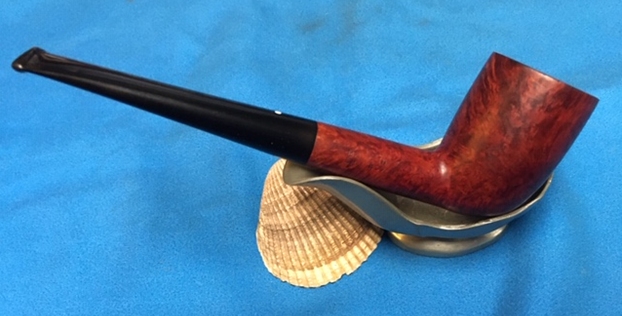
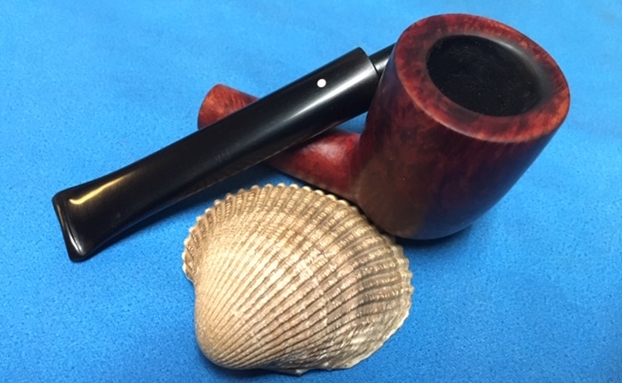
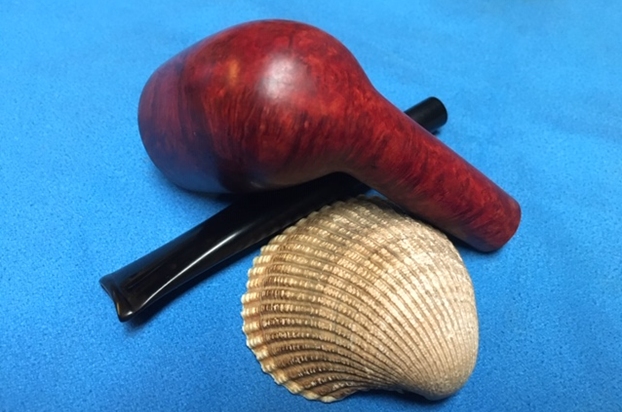
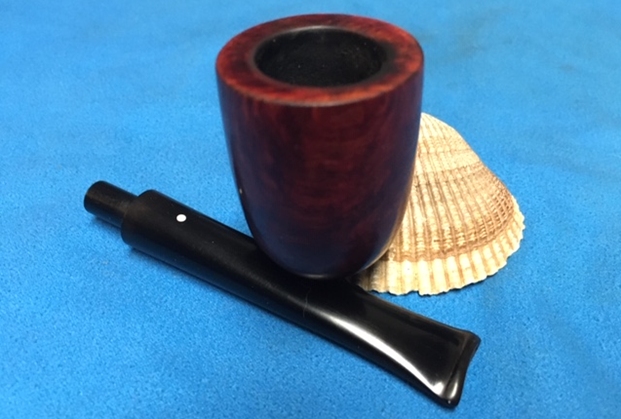
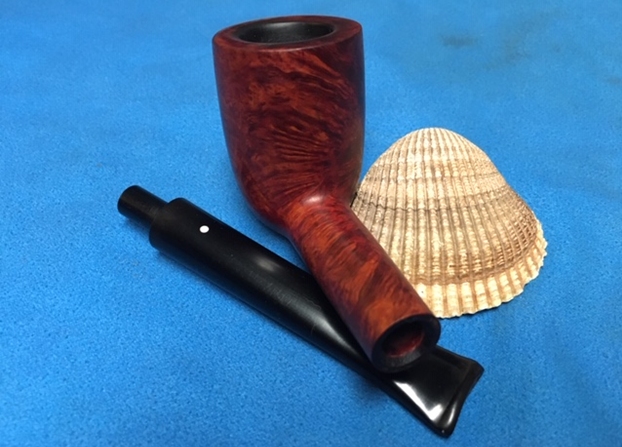
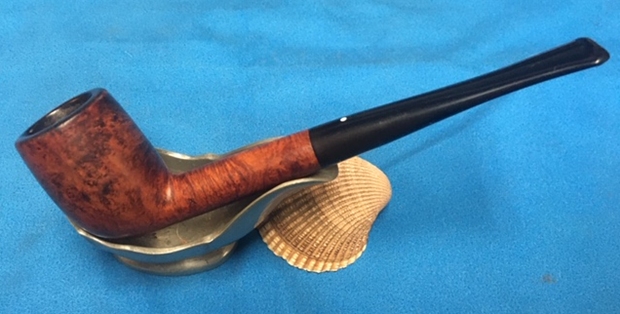
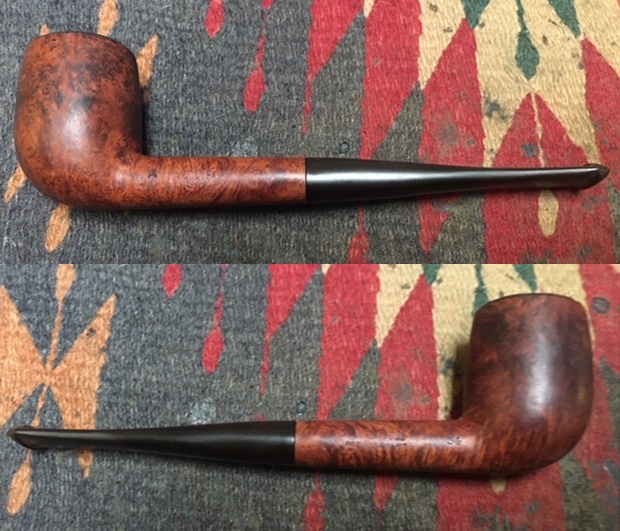
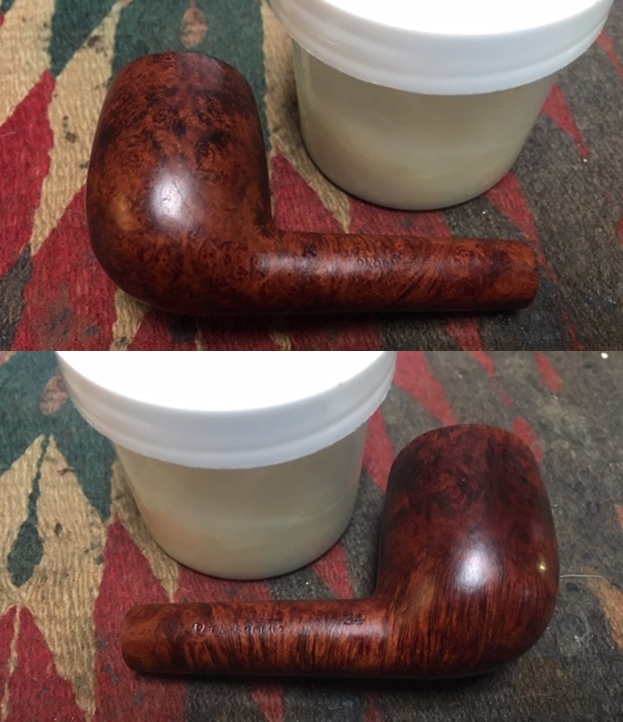
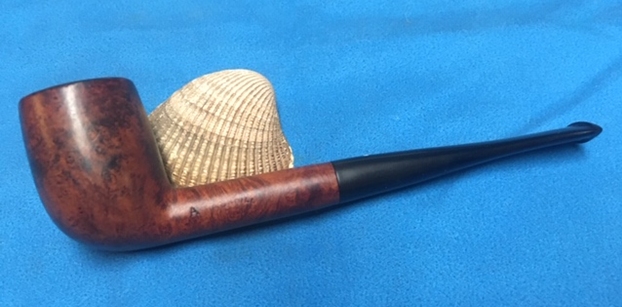
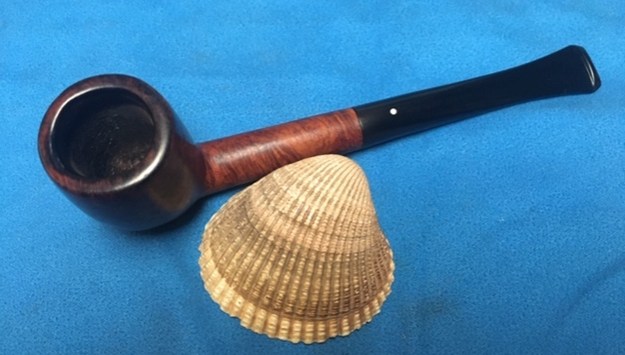
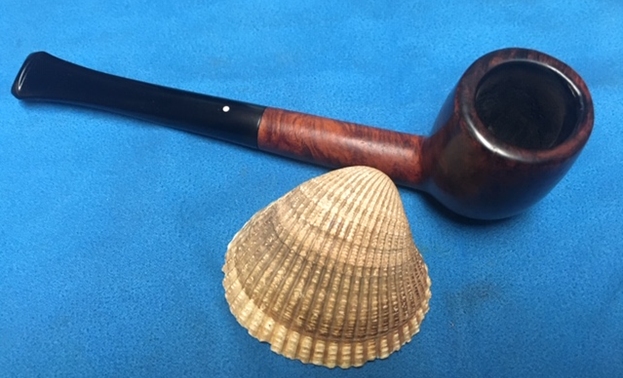
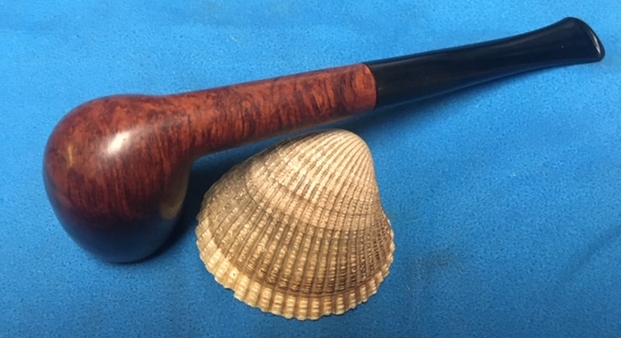
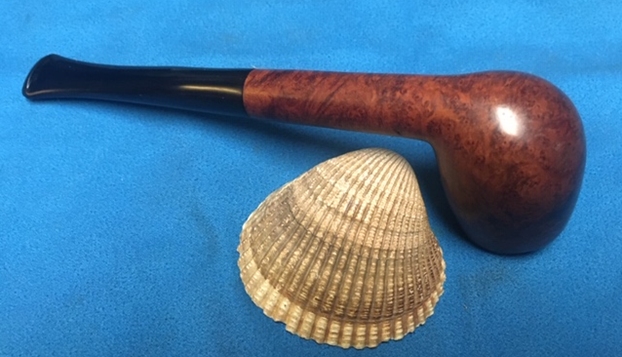
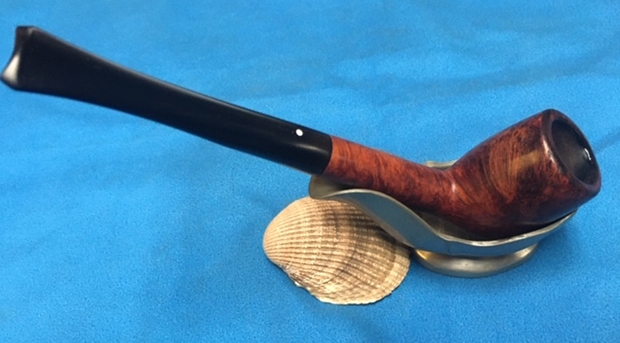
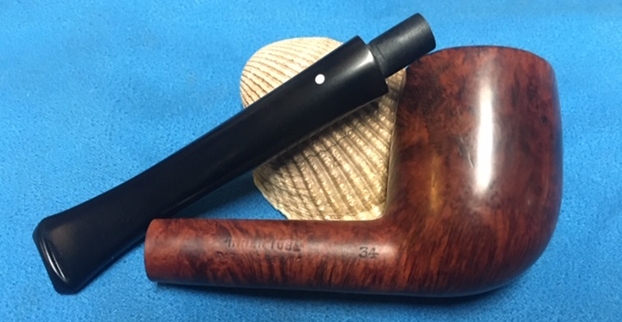
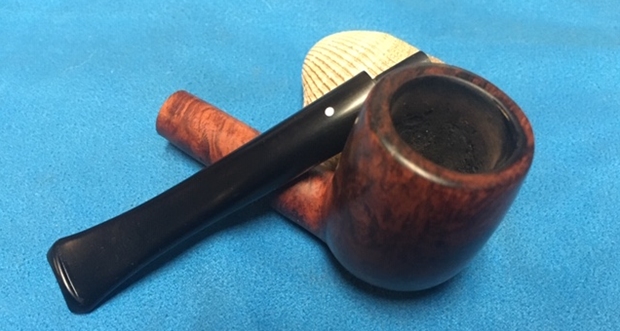
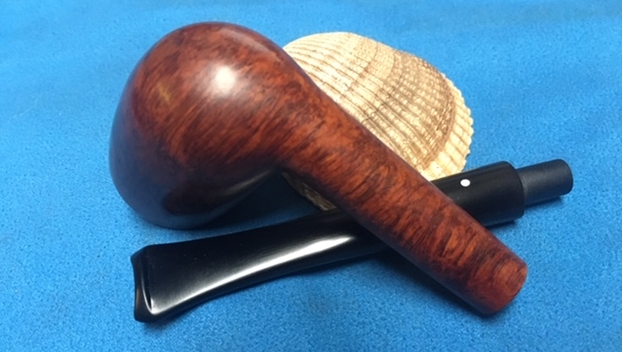
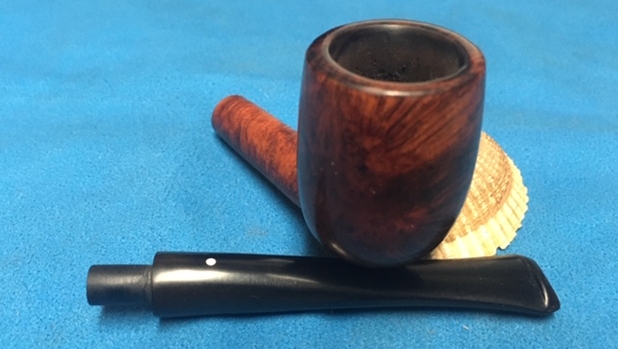
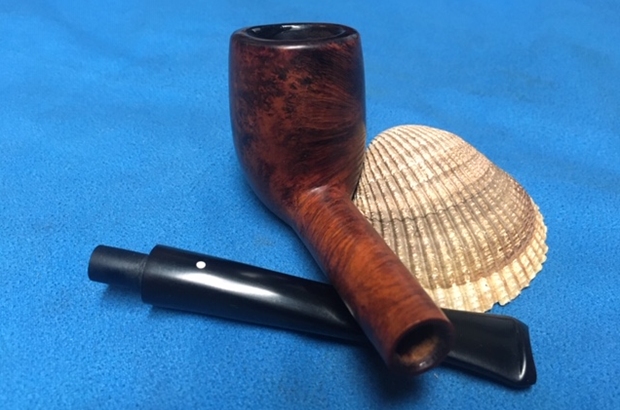
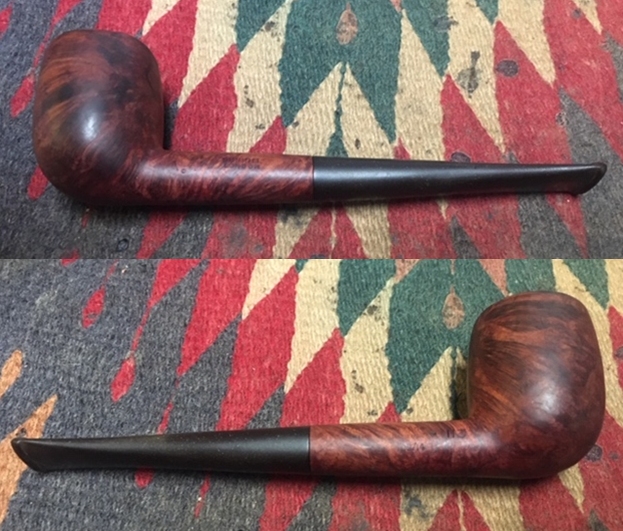
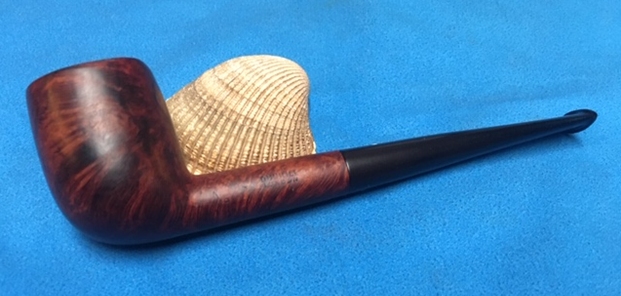
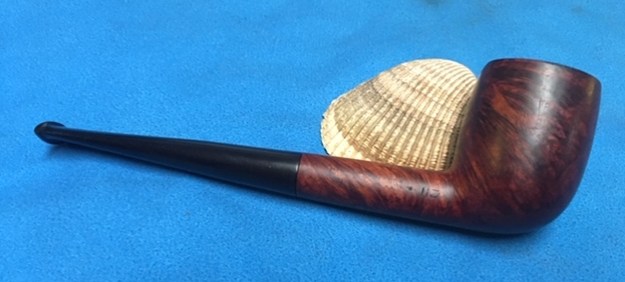
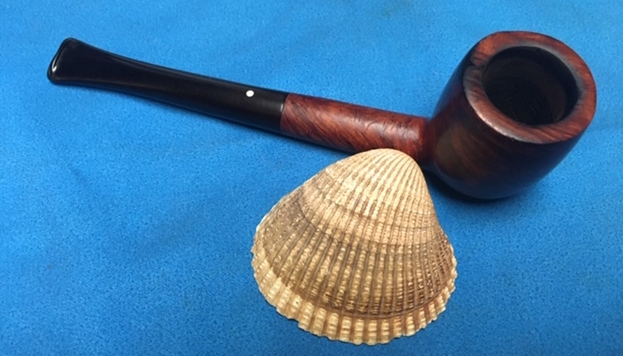
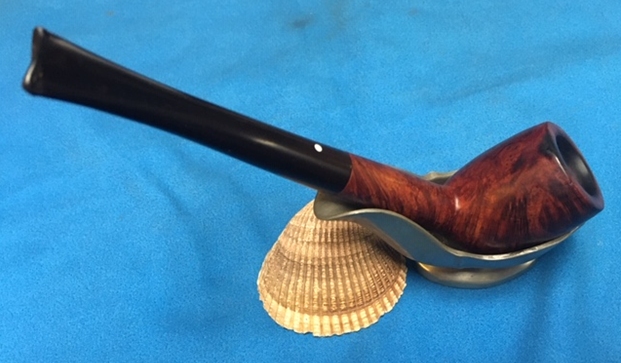
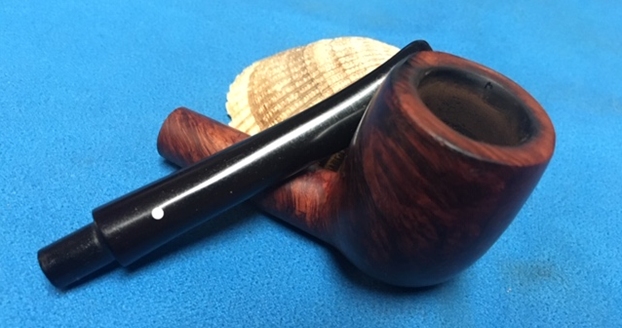
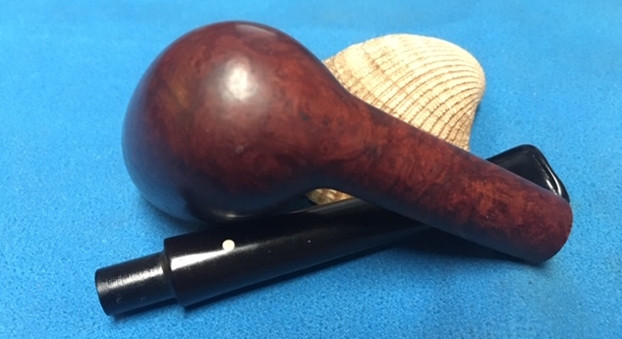
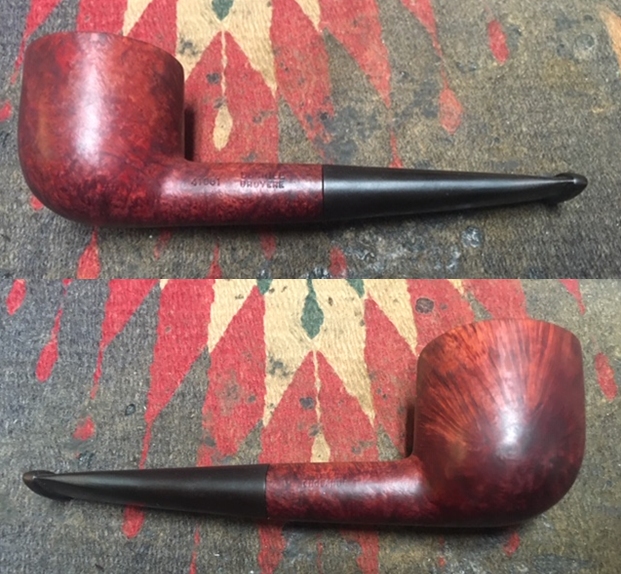
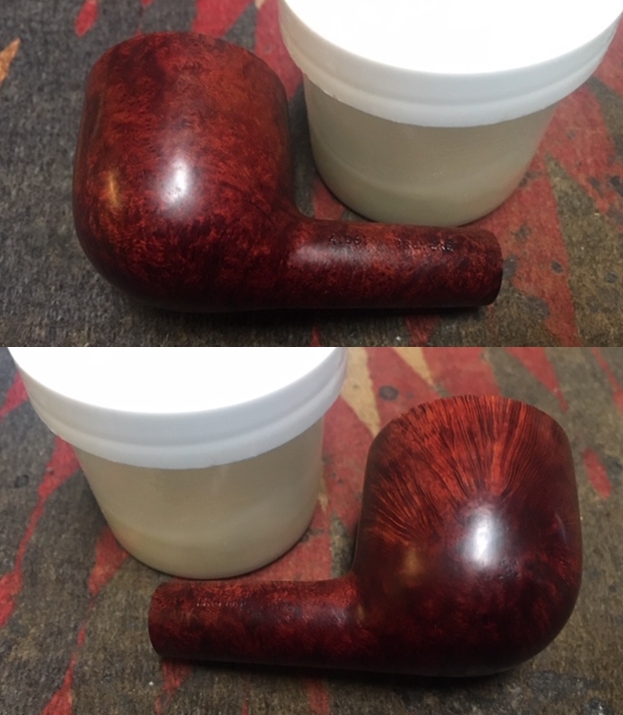
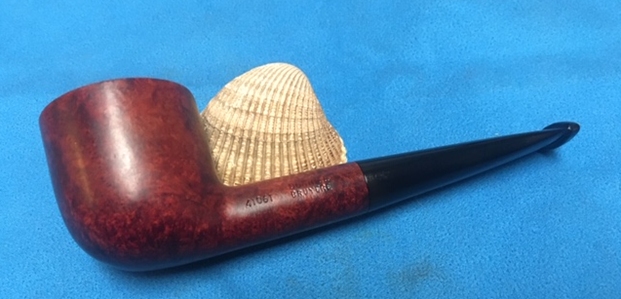
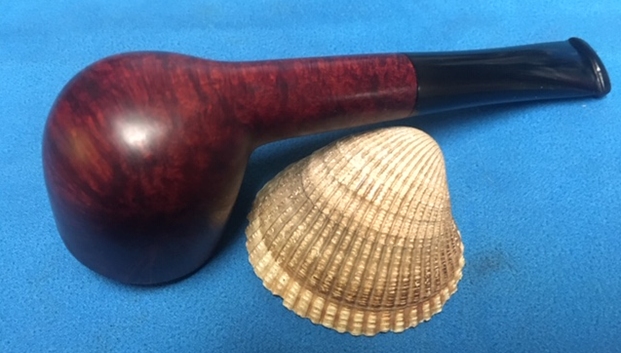
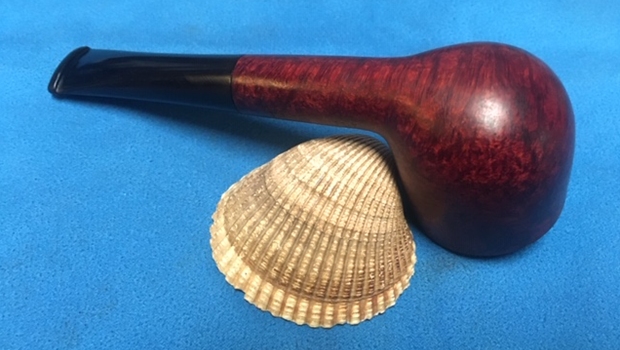
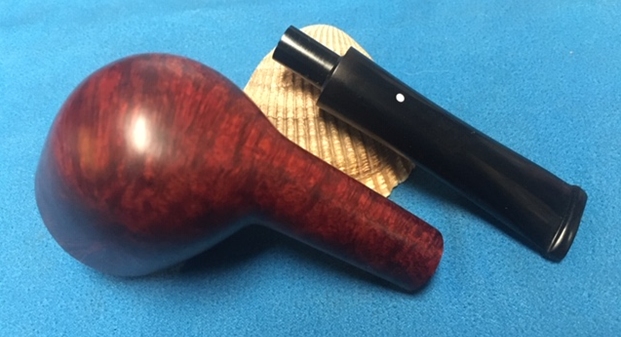
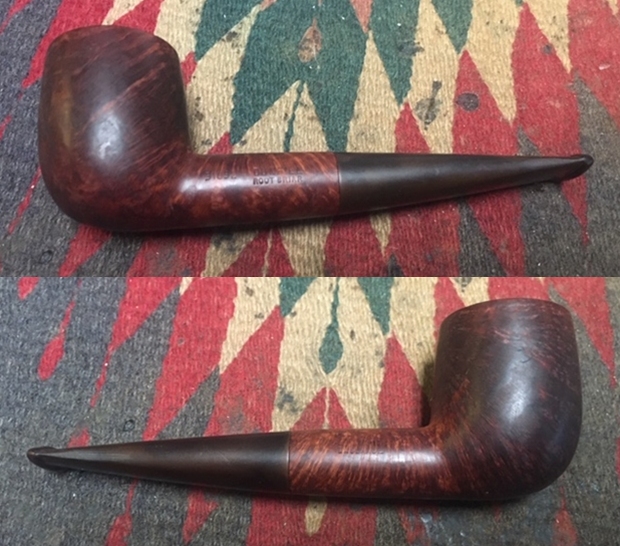
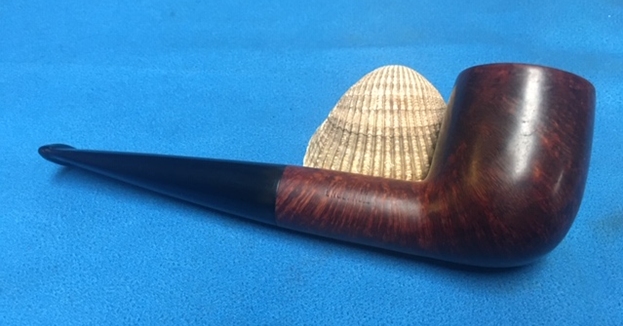
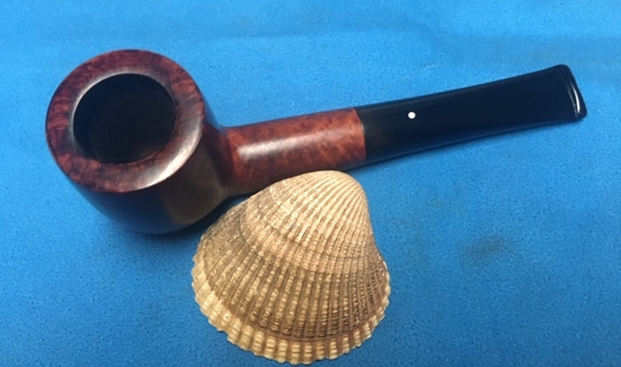
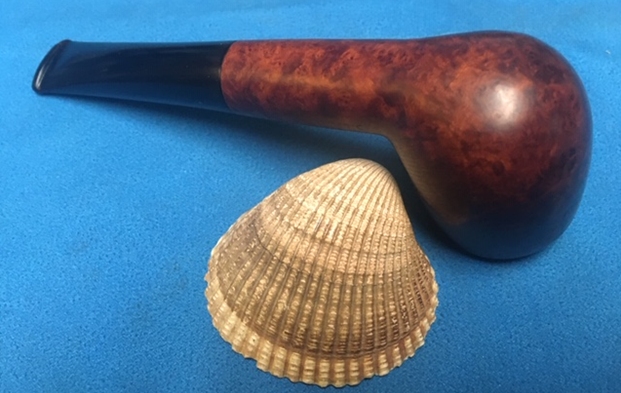
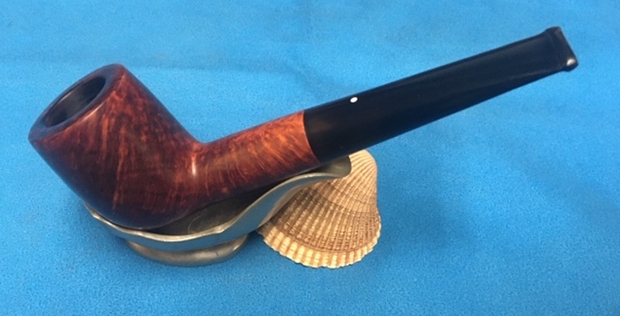
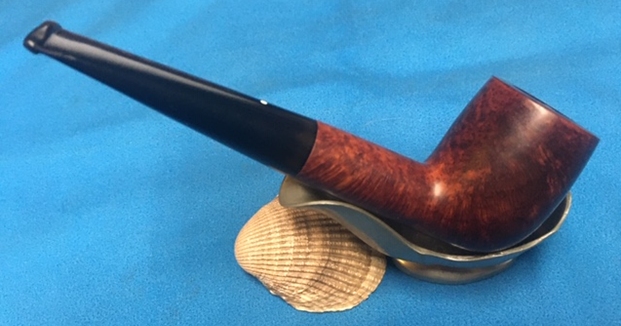
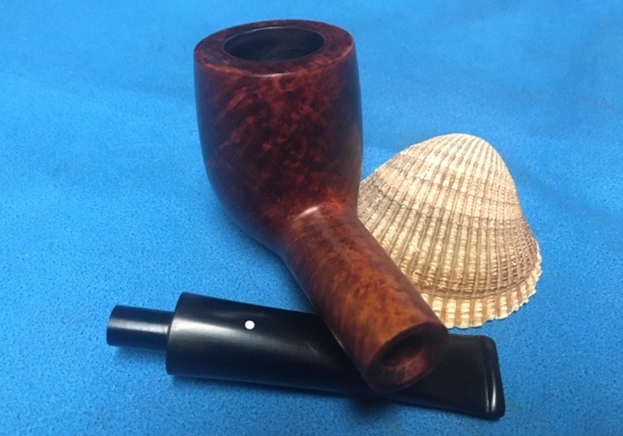
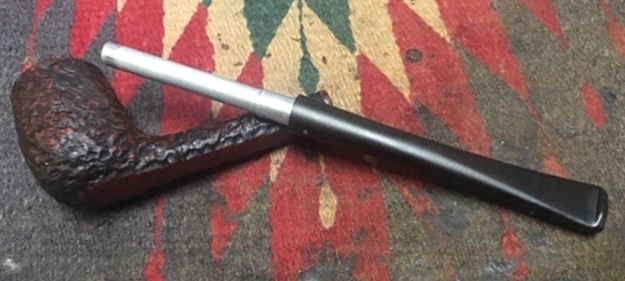
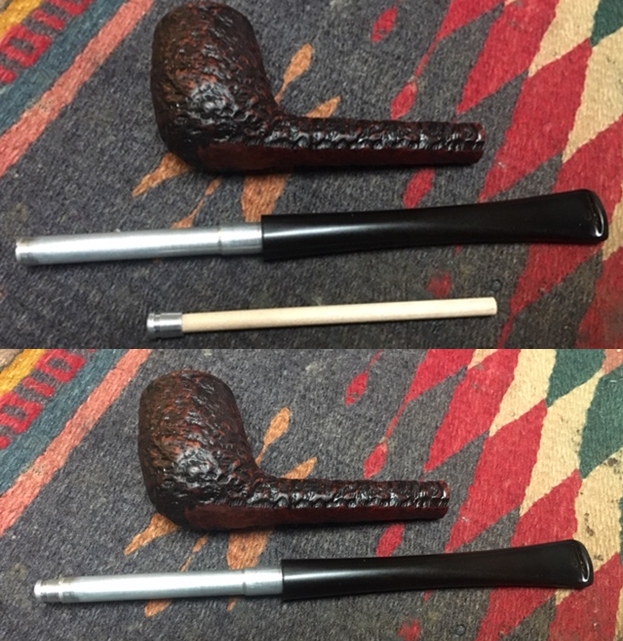
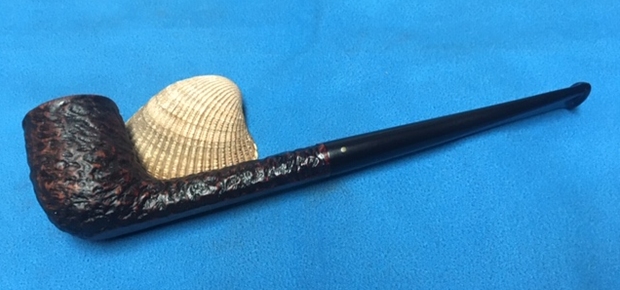
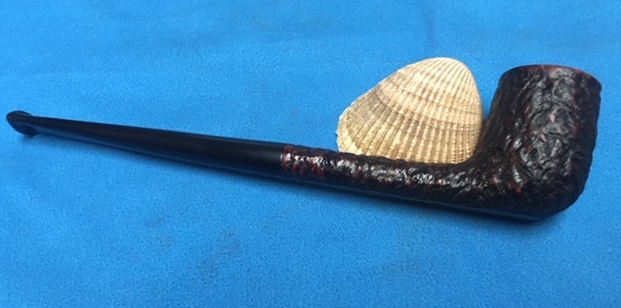
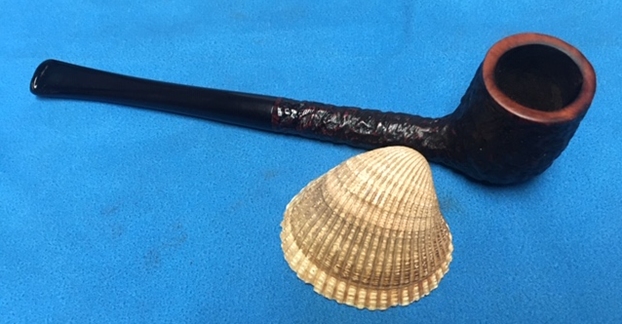
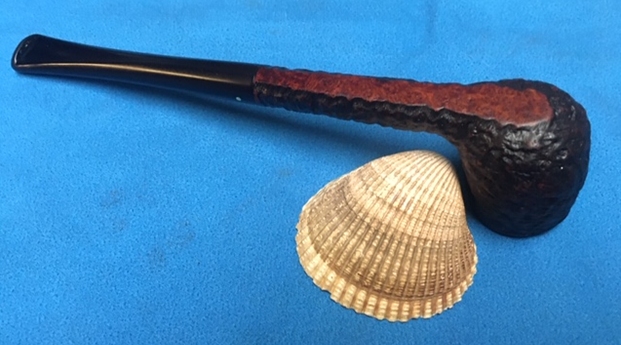
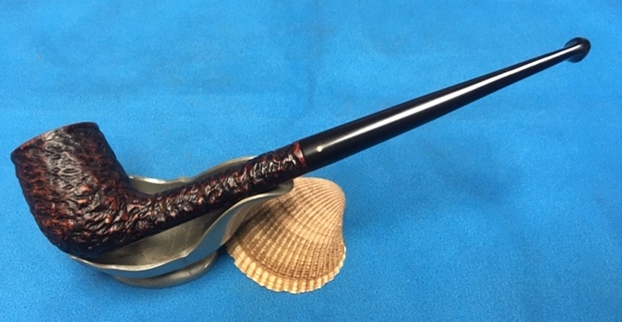
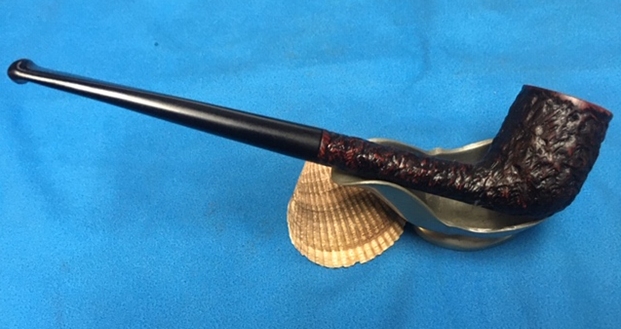
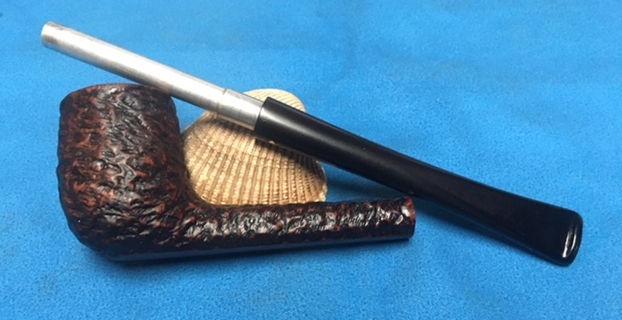
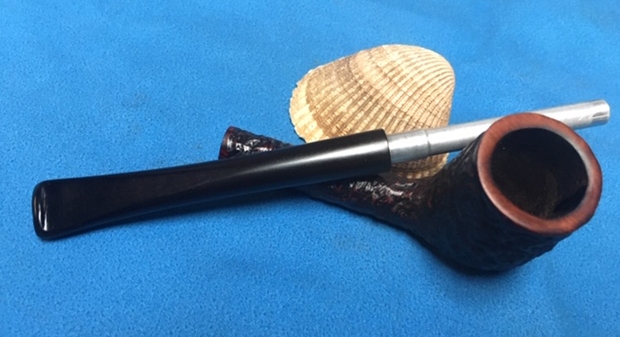
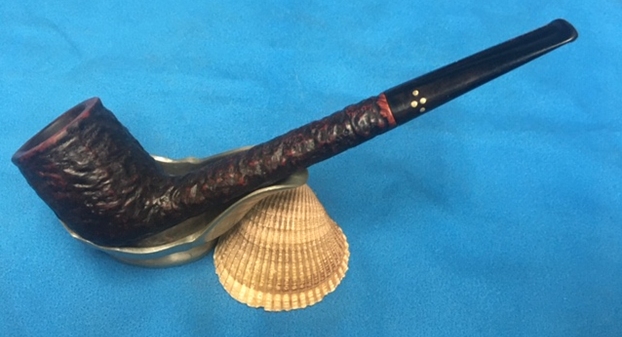
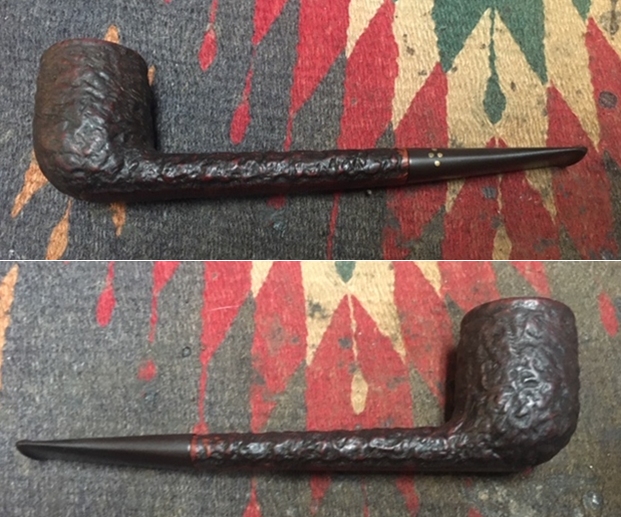
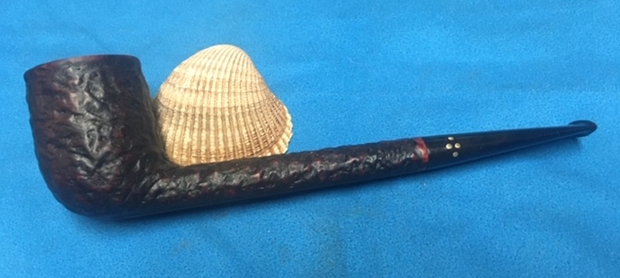
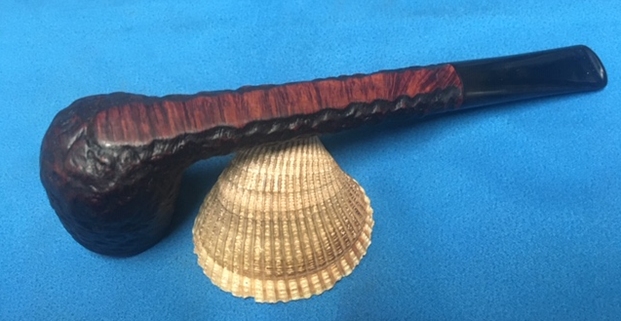
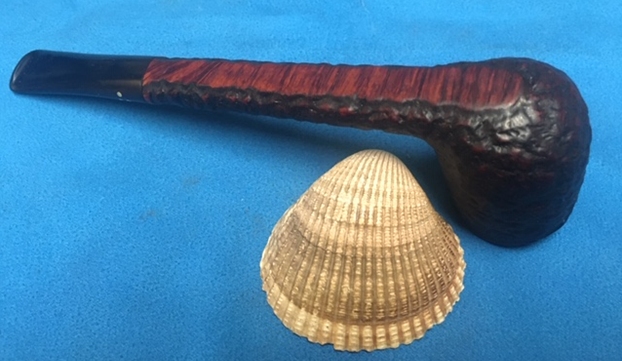
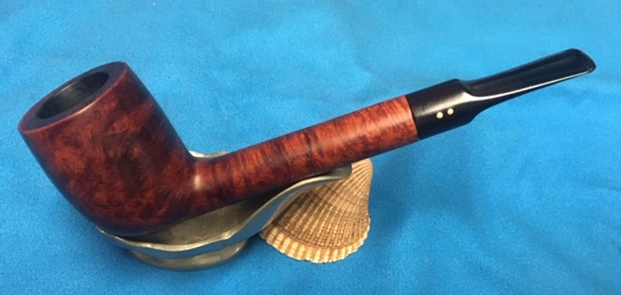
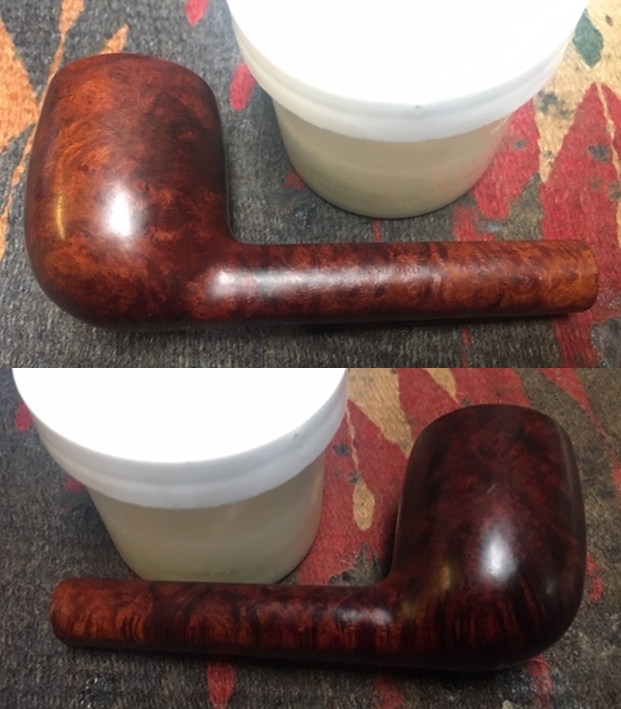
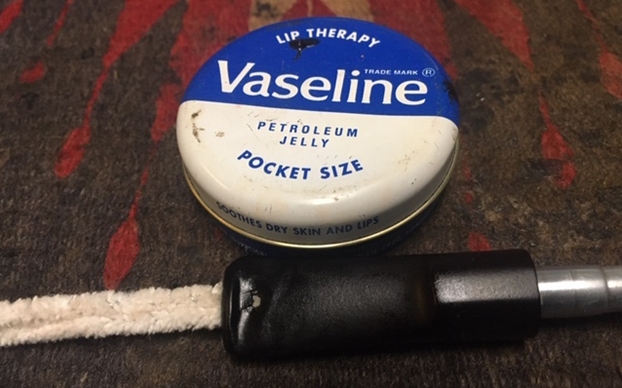
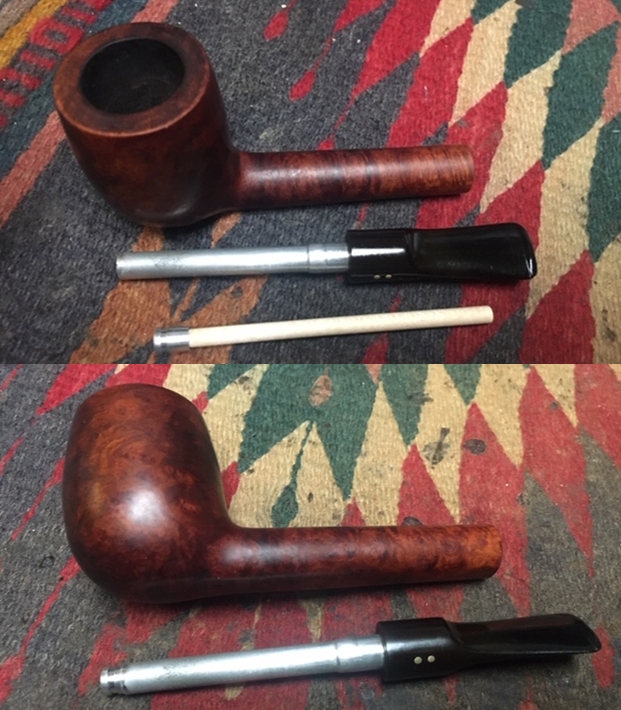
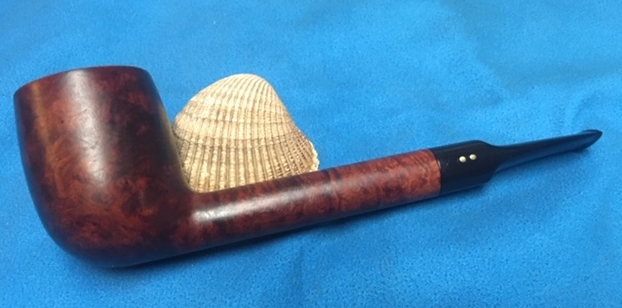
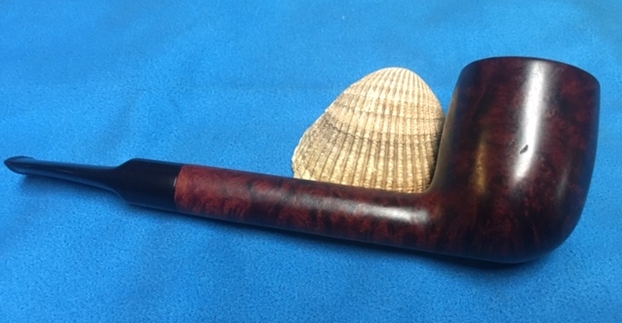
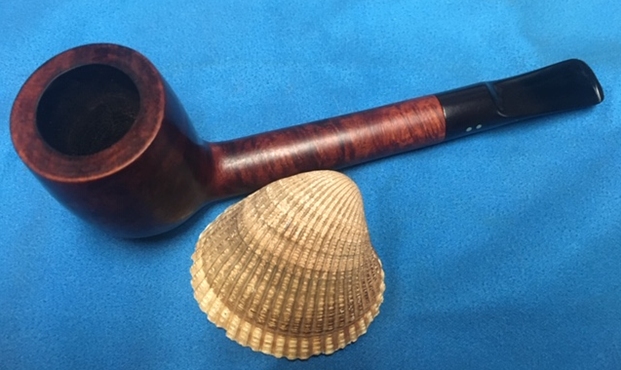
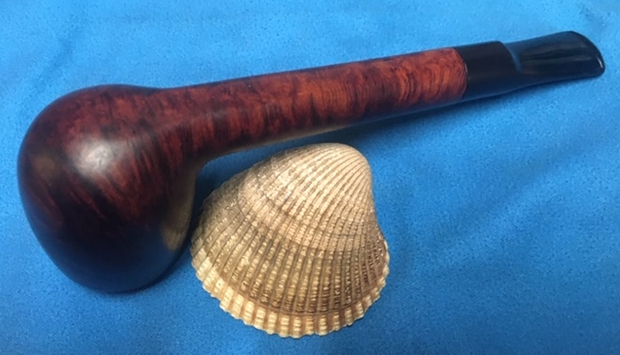
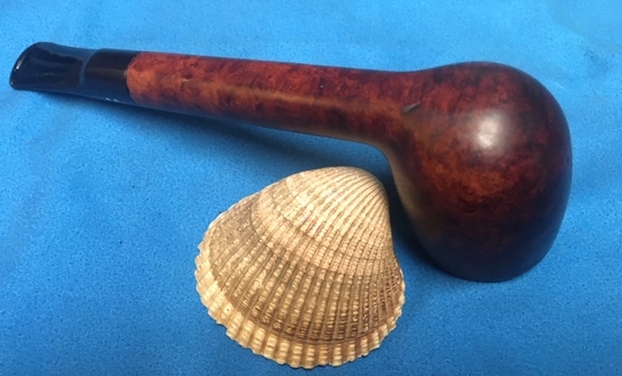
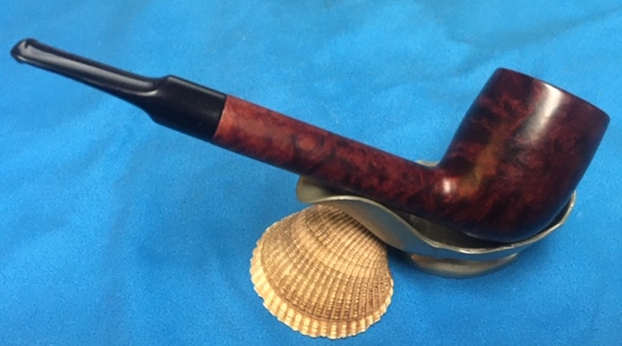
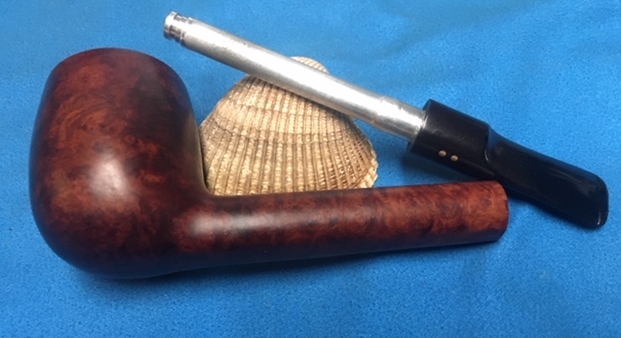
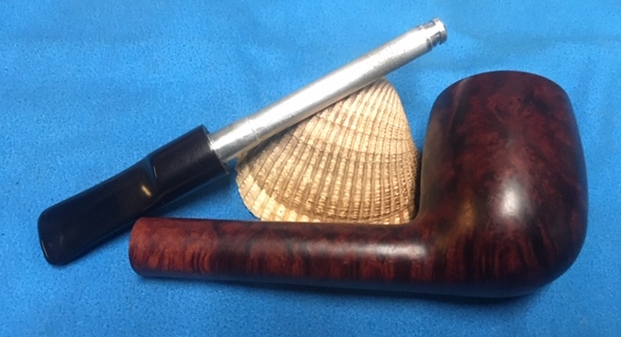
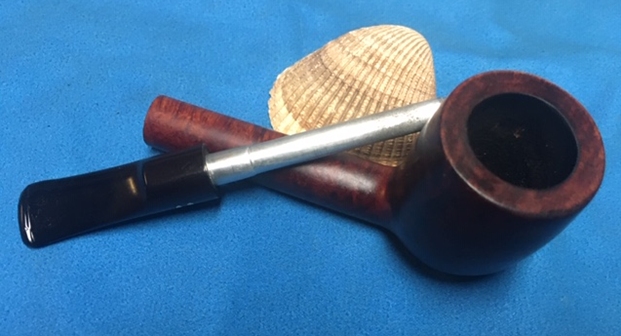
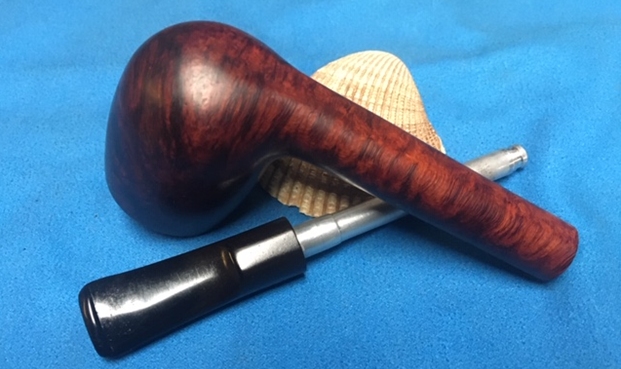
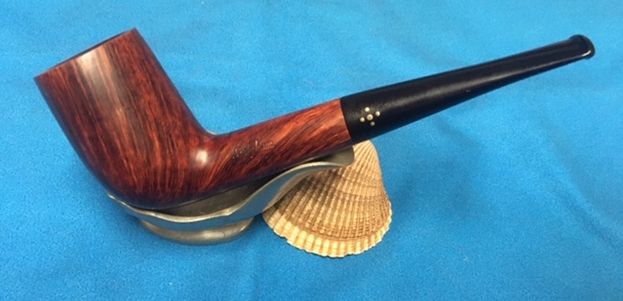
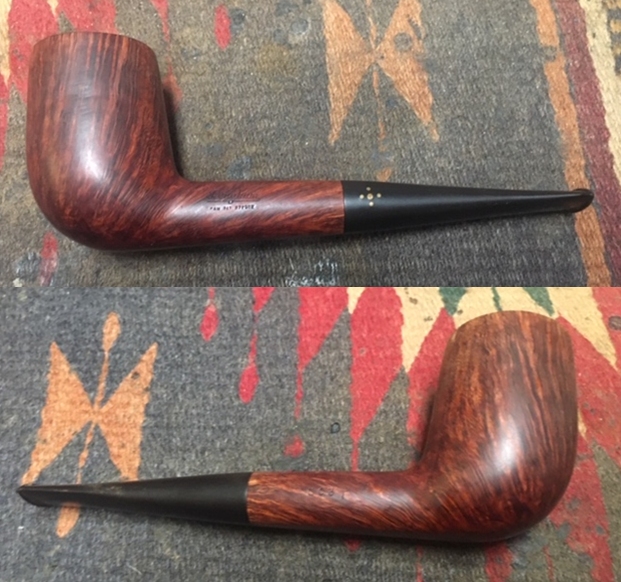
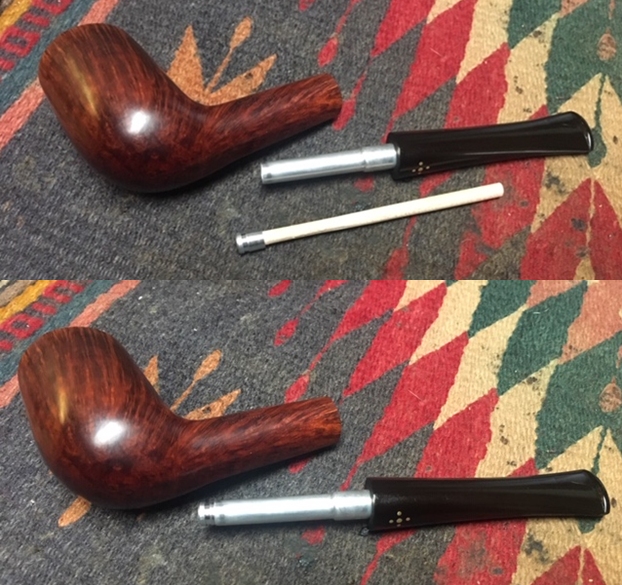
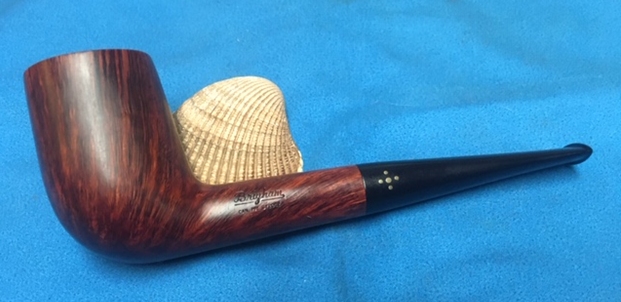
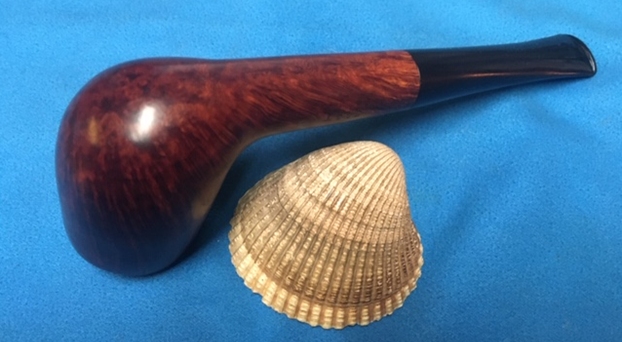
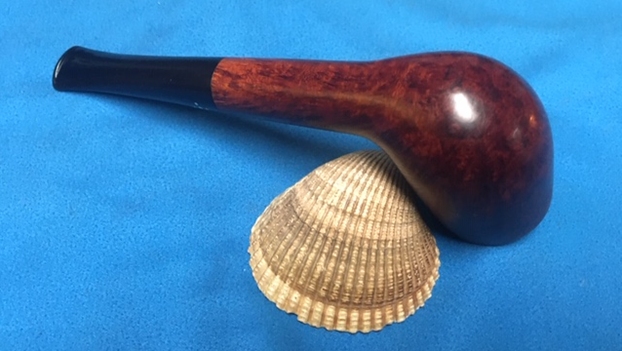
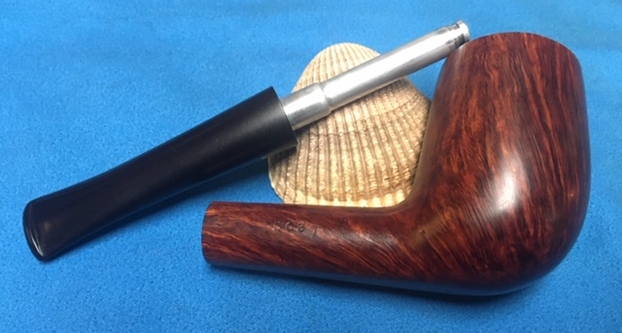
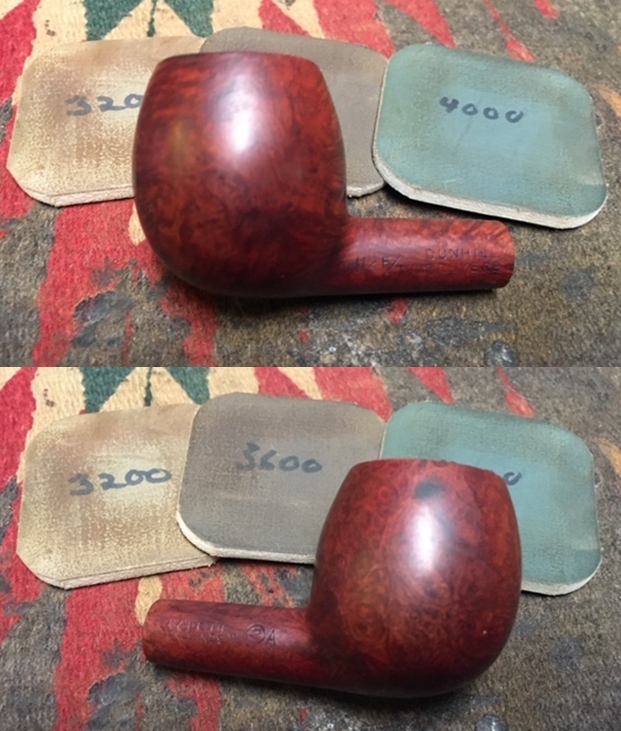
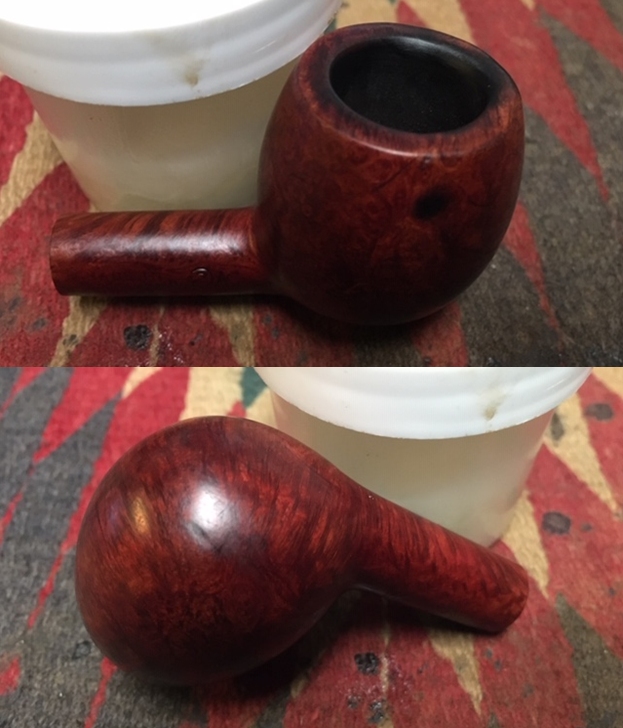
 Once again at this point in the restoration process I am excited to be on the homestretch. This is the sixth of the Dunhill smooth pipes in Bob’s estate that I am working on. It is a beautiful Dunhill Bruyere 112 F/T Apple made in 1969 and shipped or sold in 1971. Like each of the pipes in Bob’s estate I really look forward to this point in the process when it is put back together, polished and waxed. I put the bowl and stem back together. I polished the bowl and stem with Blue Diamond to polish out the scratches in the briar and the vulcanite. The nicks on the right outer rim edge and the small burn mark look better – minimized a bit. I gave the bowl and the stem multiple coats of carnauba wax. I buffed the pipe with a clean buffing pad to raise the shine. I hand buffed it with a microfiber cloth to deepen the shine. The pipe polished up pretty nicely. The grain around the bowl and shank really came alive with the wax and polish. The black of the tapered vulcanite White Spot stem is a beautiful contrast to the reds and browns of the finished bowl and shank. This was another Dunhill that was a lot of fun to work on thanks to Jeff’s cleanup work. The pipe is comfortable pipe to hold in the hand. The finished pipe is shown in the photos below. The dimensions of the pipe are Length: 5 ¾ inches, Height: 1 ½ inches, Outside diameter of the bowl: 1 ¼ inches, Chamber diameter: ¾ of an inch. This 1969 Bruyere Apple is a beauty should last for many more years. It is one that will be on the rebornpipes store very soon. If you are interested let me know. I have a lot more of Bob’s estate to work on of various brands. Perhaps one of those will catch your attention. Thanks for reading this blog and my reflections on the pipe while I worked on it. This is an interesting estate to bring back to life.