Blog by Dal Stanton
I’ve been eyeing this pipe on my side desk for some time. It has been calling to me and I decided today to respond. It came to me as a gift from dear Bulgarian friends, CC and Svetly.  CC, is a nickname for Svilena. CC came into our lives as a translator in the context of our work here in Bulgaria with the Daughters of Bulgaria – women and girls who have been trafficked and sexually exploited. She translated various manuals and training modules from English into Bulgarian which were used in a recovery program for women who were seeking a new life. In time, our relationship with CC expanded as she helped us with translating for various teams who had come to Bulgaria to learn more about our work. Eventually, her husband, Svetly came into our relationship sphere as well. Truly, a renaissance man of faith, Svetly is an author of books and composer of songs and is a good singer himself! Then, their three children became known to us – young adults and gifted much like their parents. One child specifically, Ellie – to me, ‘El’, came into our lives in a special way and has been living with us for the past few years while she completes her university program here in Sofia studying Chinese culture and language. Our lives are richer here in Bulgaria because of friends like CC and Svetly.
One of the wonderful pastimes of CC and Svetly is their love of collecting things by going to bazaars, antique markets and outdoor flea markets where they find unsuspecting treasures and either fashion or repurpose them for their personal use or they resell them at a profit. On several occasions during their treasure hunts, The Pipe Steward has benefited from pipes they have found ‘in the wild’ and donated to be restored benefiting the Daughters of Bulgaria! Then there are other occasions, where their pipe treasures are specially directed to me as gifts. One such treasure is awaiting restoration – an 11 1/2-inch French Churchwarden which belonged to Svetly’s father. My deal with El is that when I restore her grandfather’s Churchwarden, she will be the first one to try it out on my Man Cave balcony where pipe fellowship is allowed! Another treasure from Svetly and CC that found me was the Swan Neck Meerschaum now on my worktable.
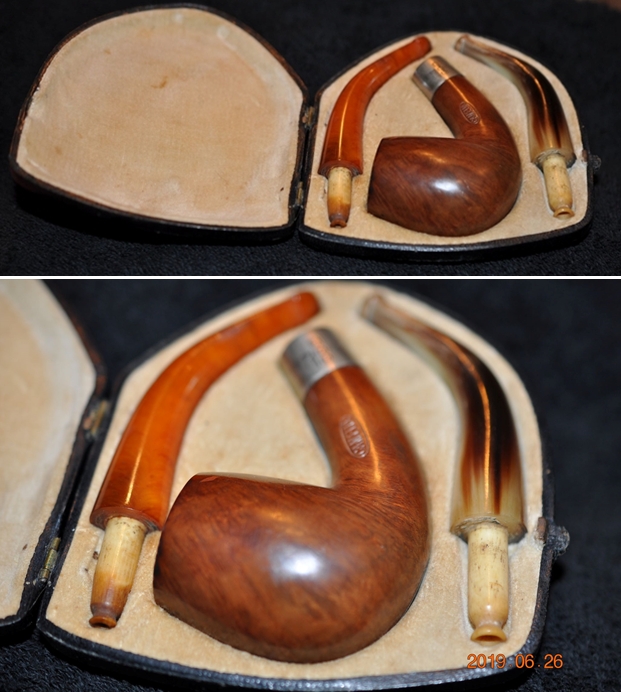
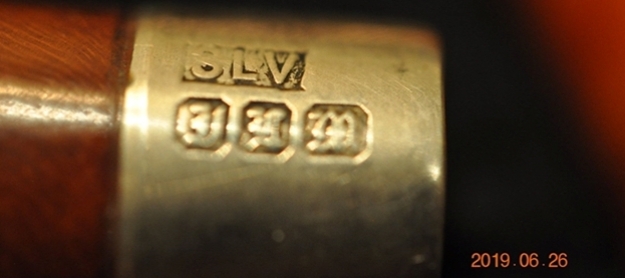
CC had texted me some days earlier with pictures of the Swan Neck Meerschaum perched atop her computer. She had found it in a huge outdoor flea market called the ‘Russian Market’ near Plovdiv, Bulgaria’s second largest city where CC and Svetly live. She had already acquired the Meerschaum and was hoping that I could help with valuing it so that it could potentially be resold at a profit. These pictures she sent were my first views of this unbelievably graceful pipe – an Egg shaped bowl held out elegantly by a long flowing Swan Neck shank.  There were no markings on the pipe or on the ancient case that held it. The only information CC had from the seller at the Russian Market was that he had acquired the pipe from an antique dealer in France. Looking at all the pictures she sent we batted around questions regarding the age of the pipe and the stem’s composition – was it amber or Bakelite or something else?
My final summation to CC was that it was difficult to date with any certainty, but I believed the pipe to be an older vintage because of the stem material, the fact that it had an orific button and that it was replete with amazing patina. I gave her an idea of what I would ask for it in The Pipe Steward Store and said it was a very collectable pipe which would be welcomed into anyone’s collection.
 Later, when the pipe unexpectedly arrived at my home with El, I thought CC wanted me to take a closer look to help value it. However, El corrected me making sure I understood that her mom and dad wanted it to be mine. Oh my…. My task now is renewing this treasured Swan Neck Meerschaum, a gift from treasured friends. Realization that it was intended as a gift for me immediately resulted in doing a smiling selfie with El and Swan Neck Meerschaum on display and sending it to Svetly and CC with many thanks!
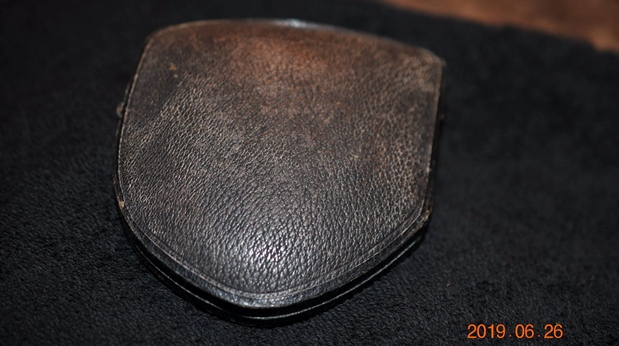
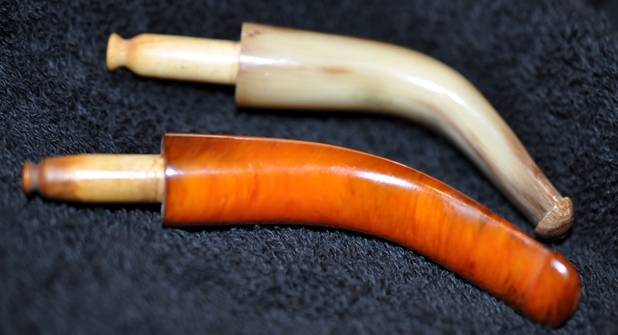
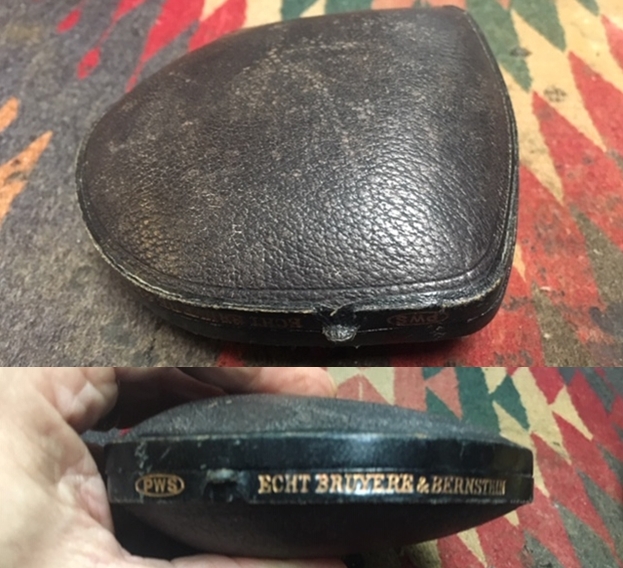
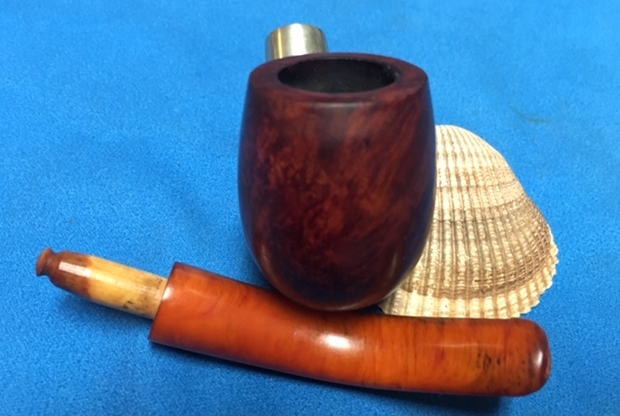
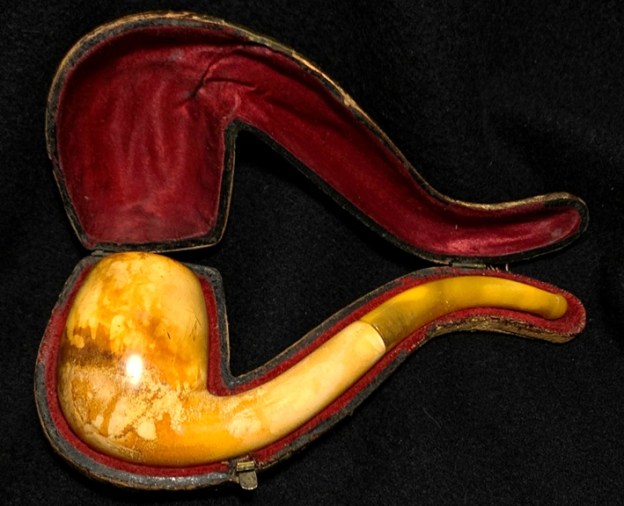
When the pipe finally arrived on my table, I took a closer look at it as well as the original case. The hand-crafted original case is itself an amazing artifact. My understanding from many trips to Istanbul, Turkey, talking to vendors in Meerschaum shops at the Grand Bazaar, is that each Meerschaum pipe has its own unique case fashioned for it. Why? Generally, each pipe is unique because of it being hand carved. The surface of the case is leather fitted over a wood shell. The sides of the case are worn, thin and bare.  The case clasping lock and hinges appear to be brass. The clasping lock is attached to the wooden frame with amazingly tiny nails, not screws. It is apparent that the case is old and has held up well though showing its age.
 After flipping the case over, I look more closely at the spring action clip that locks the case. When the case is closed, the short bar of metal is pushed back as it navigates the interlock bracket below and then snaps in place to close holding the case together.
 On the backside of the case, the hinges are also held in place with the minuscule nails.
 The lining inside is worn but holds its beauty. The red crushed velvet lining, according to my wife, is fashioned to line the internal surface to protect and cushion the Meerschaum inside. You can tell by the picture below that the side that is up-side-down is the side that holds the pipe when the case is opened. Its velvet still has some color and is thicker where the pipe lays than the other side.
 After examining the case, my curiosity was piqued and I searched the internet for something that might give me more understanding of Meer cases. I found this exceptionally helpful link dated January 18, 2015, in a PipesMagazine.com discussion thread asking the question, ‘Where do you get Meerschaum pipe cases made?’ My understanding of case making was altered after reading this! ‘Woodsroad’ posted this:
The old cases appear to be carved from a block of wood, carefully upholstered in leather. It would seem that there are more than a few trade secrets and special skills involved to get the fit and finish as nice as they did. Some of those old cases are works of art in and of themselves, with beautifully fitted interiors and expertly covered in leather. Follow this link [no longer works] to a transcription of an interview done in 1977 with the widow of a Boston meer carver. It seems, at the time, that carvers bought the case then carved the pipe to fit! The following excerpt begins on page 6.
 Q: So the cases were made before the pipes were… before the stems were put on?
A: Oh, yes. If he wanted a case to fit the pipe, he’d have to have the case down first and have the stem made like that. That’s quite the trade. In most cases, all blocks of wood, they are all solid wood. That’s all cut by hand. There used to be case makers, you can’t get a case maker today. There’s nobody around who makes cases anymore. If they did make them, why they’d charge so much it would be impossible to use them on a pipe.
Q: Who were some of the people who used to make the cases? Do you remember any of the names?
A: Yeah, but they’re all dead now. They were from down New York there. There was a Mr. Beck that I used to know, and he is dead now and his family is all dead now. I used to chum around with his daughters.
Q: Were there several pipe carvers and they all knew each other, or …?
A: Oh, yeah, there used to be a lot of them around… not pipe carvers, I would say, but… like one would make the case, one would cover the cases, one would put the lining in, one would cover them with the leather on the outside, you know. That was all… sort of a family affair, I guess. They used to live here in Jamaica Plain. A whole lot of them lived around handy so they would see one another and they would go down to the pub and have a glass of beer or something.
So, the pipe is made to fit the case, not the other way around as I’ve understood! If this Meerschaum pipe could talk AND if this Meer case could talk, what a story they would tell! I cannot say with certainty, but the case seems old enough with its characteristic to be from the early 1900s – only a guess based upon a feel!
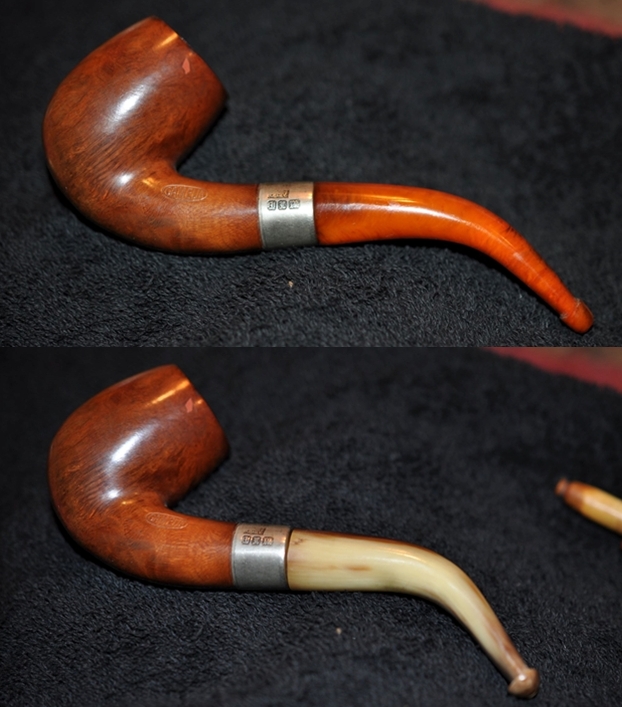
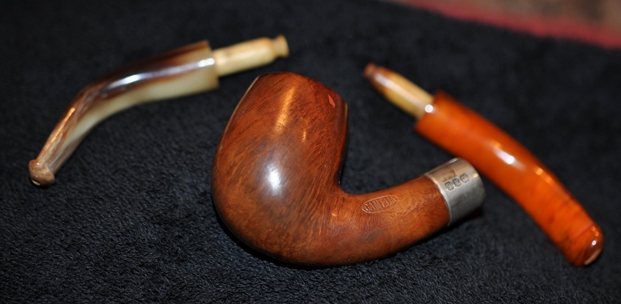
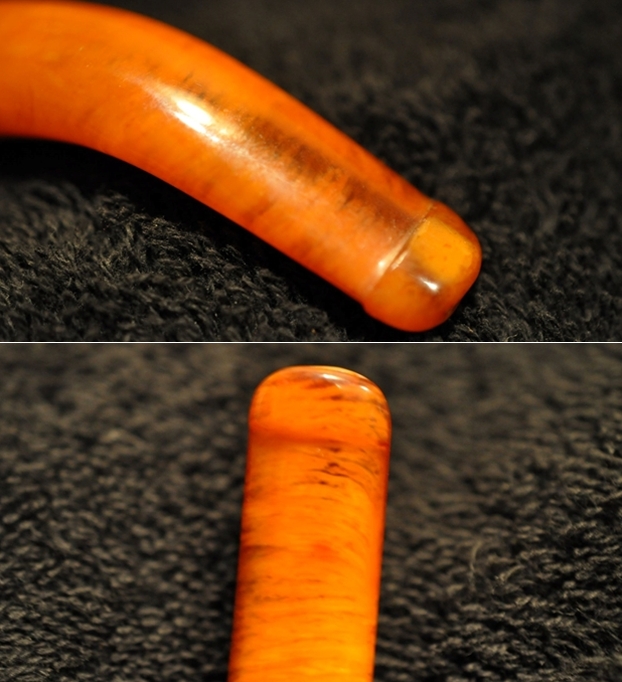
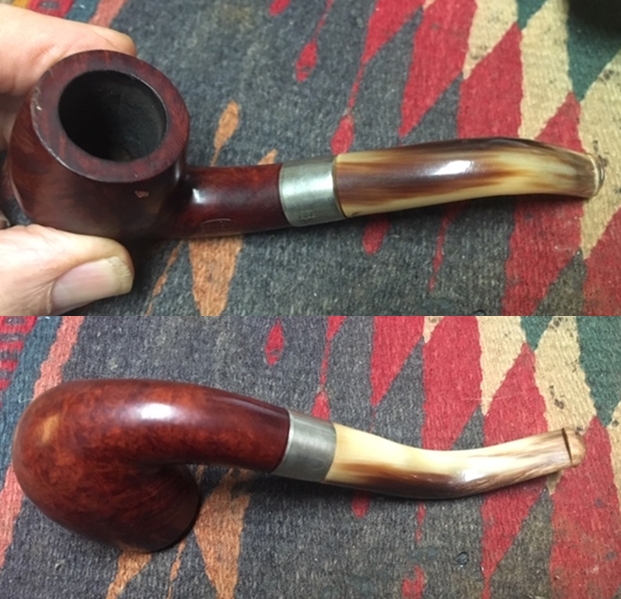
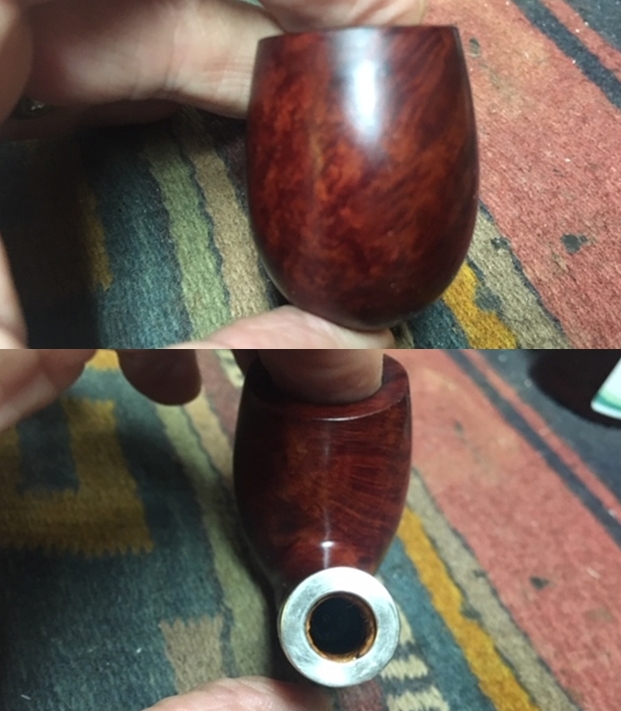
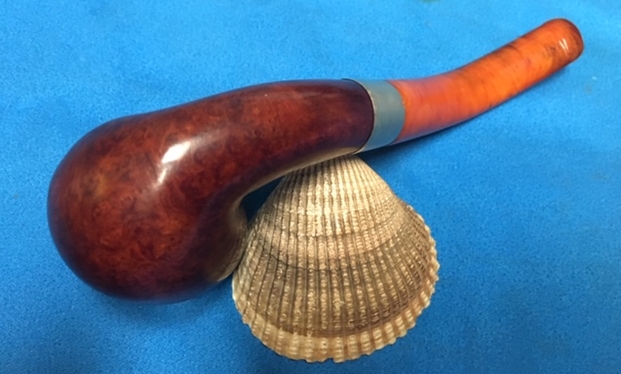
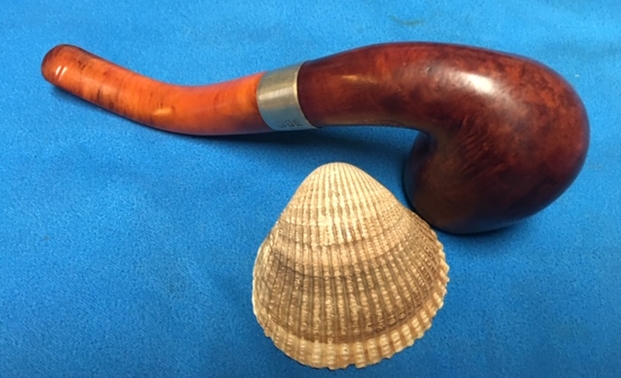
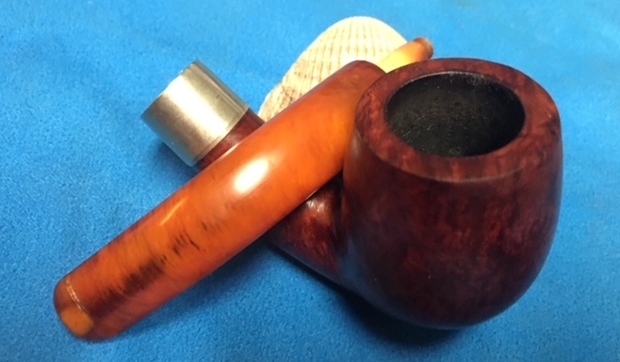
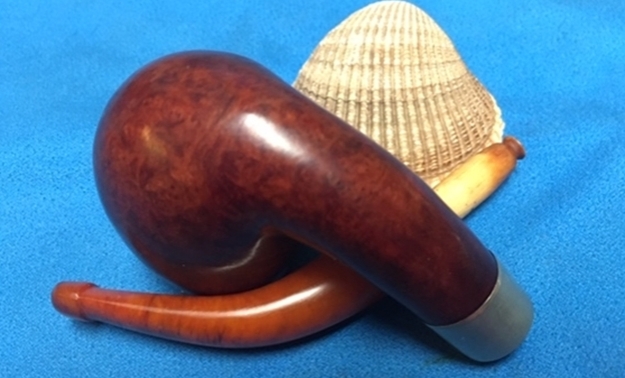
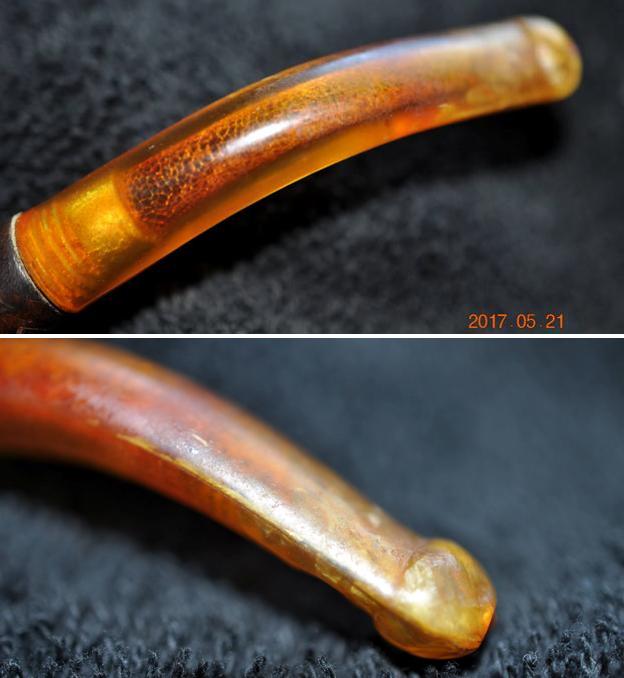
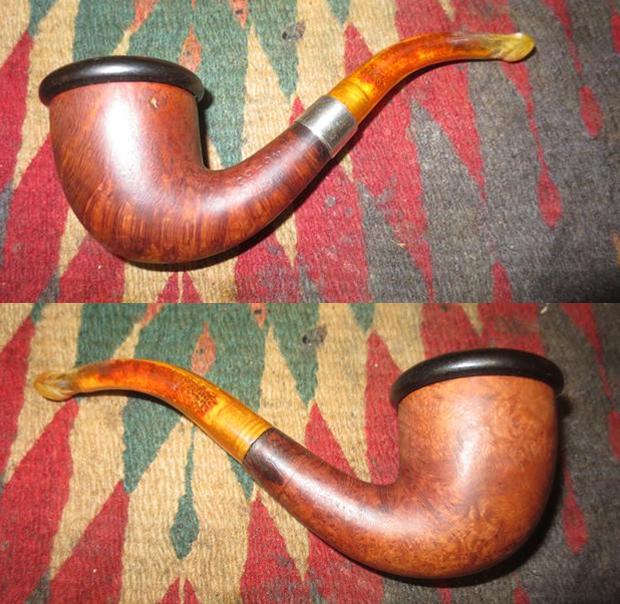
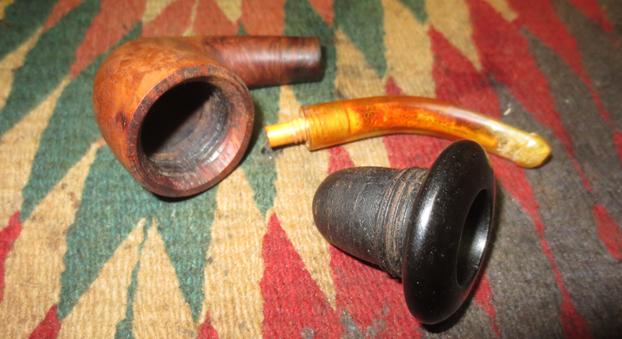
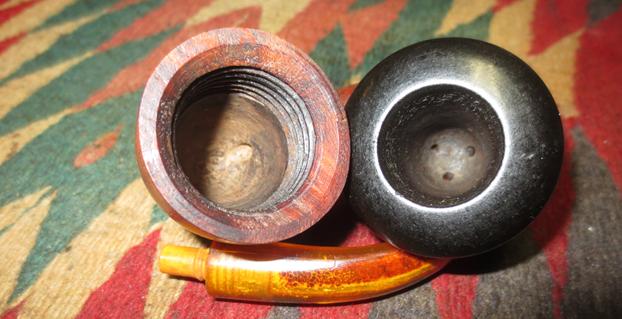
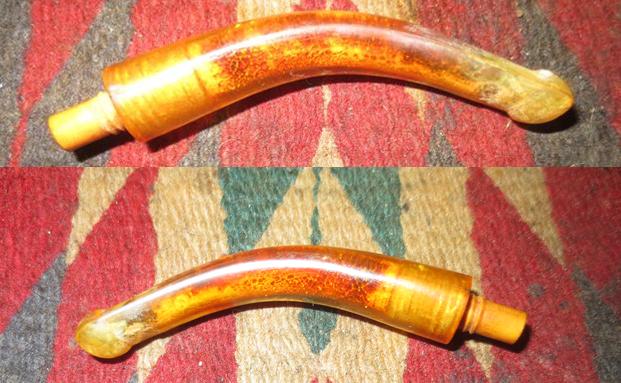
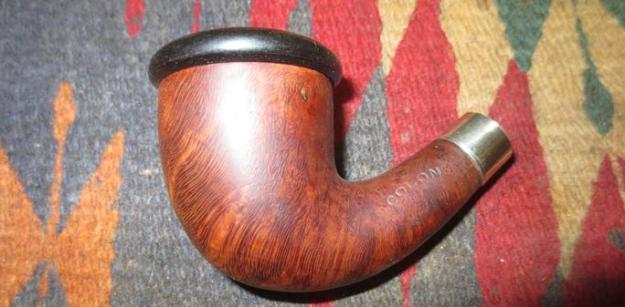
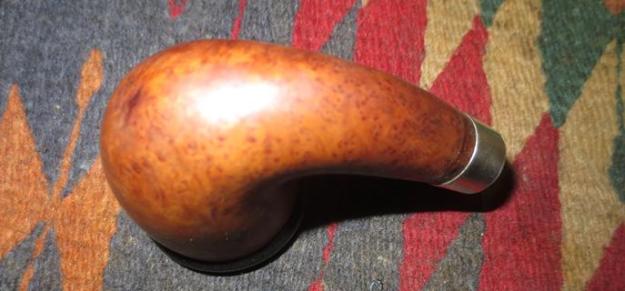
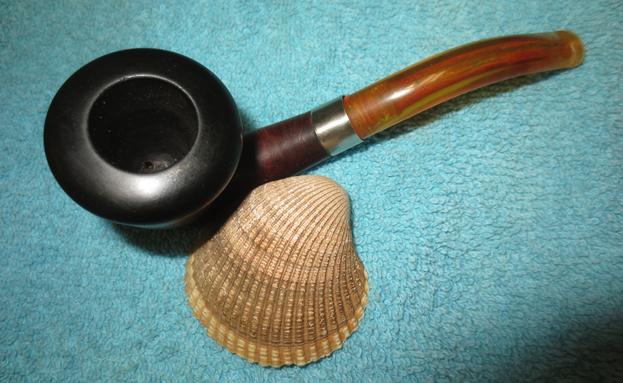
With the case fully appreciated, I take some pictures looking more closely at the Swan Neck Meerschaum. If it is true that the cases are made first and then the pipe follows, the carver of this Meerschaum probably did a double take when he saw the case’s long flowing channel carved out for the shank and stem! When I first laid my eyes on this pipe, adjectives that came to mind trying to describe the feel of the pipe were, ‘majestic’ or ‘stately’ or ‘elegant’ or ‘graceful’. The pipe is not diminutive. The length is 6 1/4 inches, the Egg shaped bowl height: 2 ¼ inches, rim width: 1 1/4 inches, chamber width: 7/8 inches and the chamber depth is an ample 1 7/8 inches promising a bowl packed with my favorite blend with a lot of time to reflect about life, faith, family and friends! The patina has developed over the entire stummel with a warm honey or butterscotch yellow. The surface has interesting dark spots that don’t appear to be normal patina but a different kind of spotting – I’m not sure. As I look at the surface, I also see something I don’t normally see on Meerschaums. The pictures above and below show the reflection of the light on the bowl surface. There appears to be a varnish-like coating covering the Meerschaum surface. I’ll need to check this out.
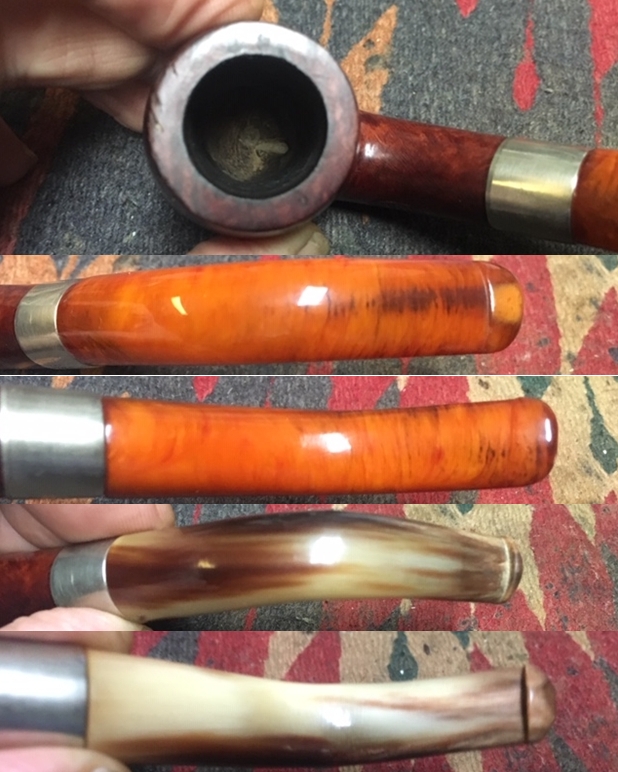
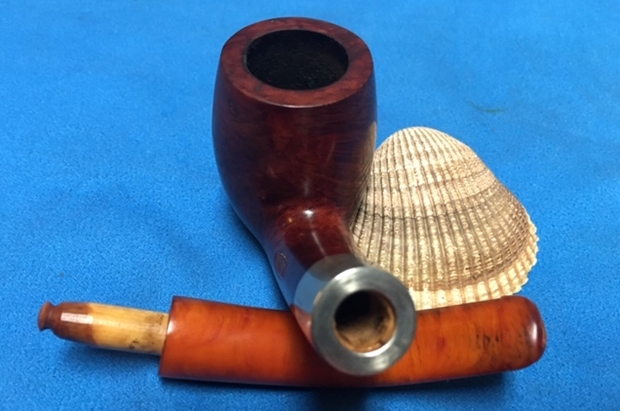
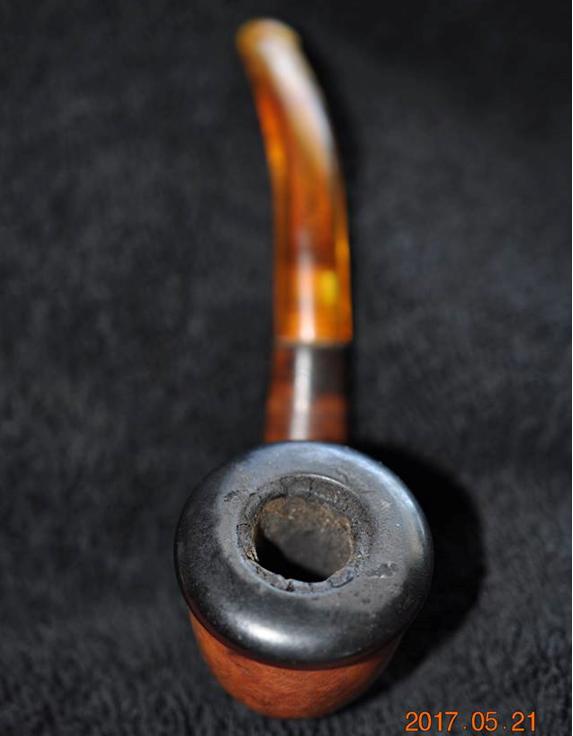
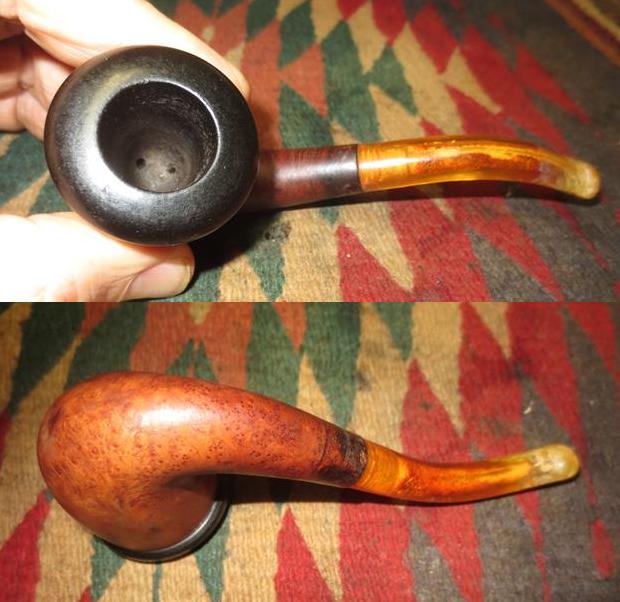
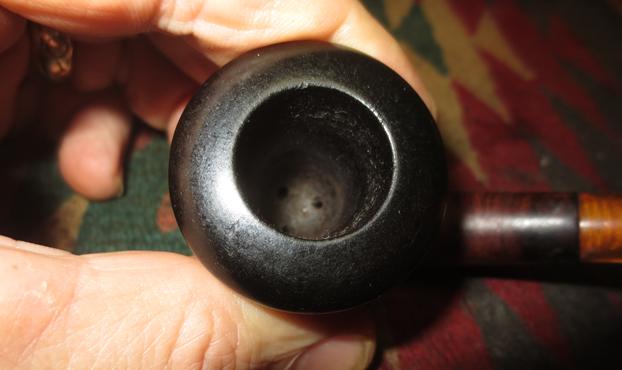
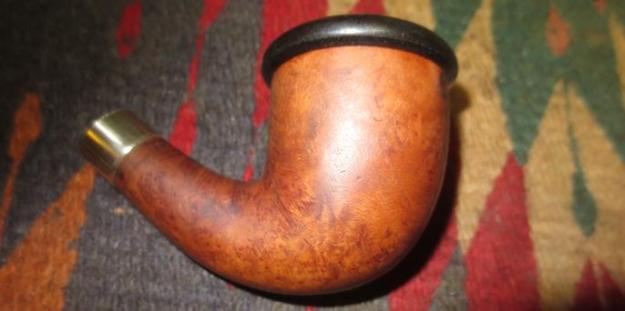
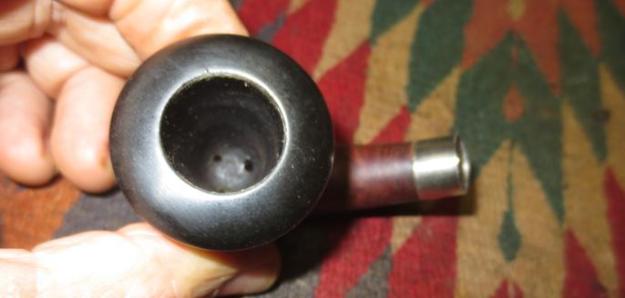
 The rim has a heavy cake of lava flow covering it and the chamber is also showing a moderately thick cake. I’ll clean the carbon cake to liberate the Meerschaum underneath. Meerschaum pipes need no cake protection as do briar pipes. This is one of the reasons Meerschaum pipes are unique – one can put them into service repeatedly without resting the pipe. Lock, load, and go again!
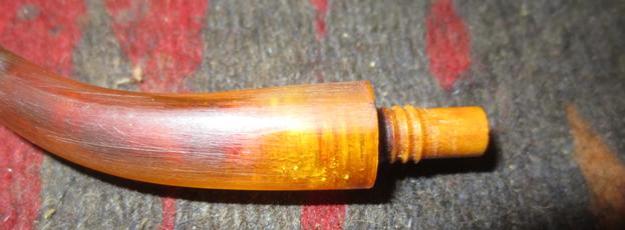
 The stem is the traditional ‘yellow’ of Meerschaum pipes. The Orific button possibly helps with the dating of the pipe. Orific buttons, or ‘rounded’ are dated from the late 1800s to when they generally phased out in the 1920s when they were replaced predominantly by straight slotted buttons.
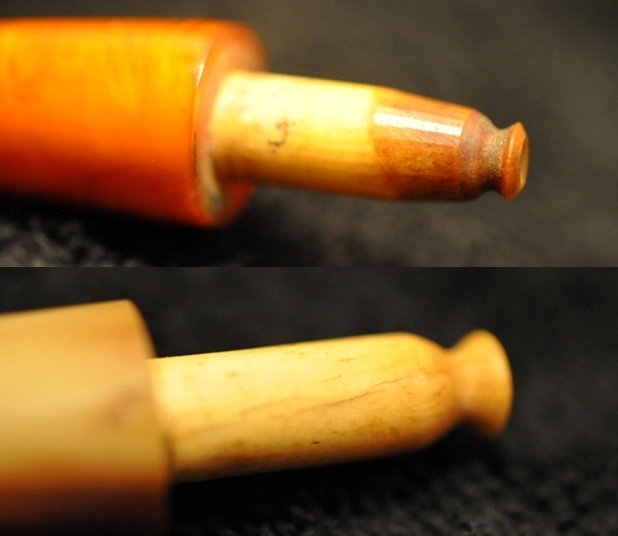
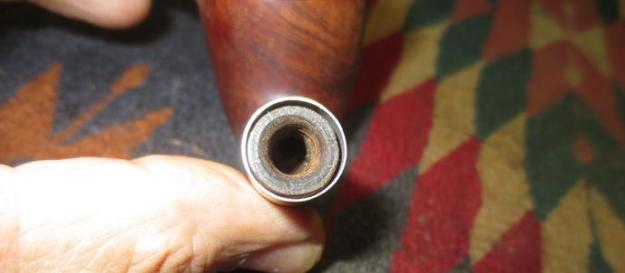
 The norm also during this period was that the tenons or connectors of the stummel and stem were made of bone, not acrylic or plastics. I unscrew the stem and examine the threaded connector. I see that the threaded part of the connector screwed into the mortise is thread tightened. After unscrewing the connector from the mortise I take a picture of the connector and the thread used to help tighten the fitting. From initial appearance, my thought was that it is plastic or a hard rubber, but the texture is rougher. I’ll clean it and see what I can determine!
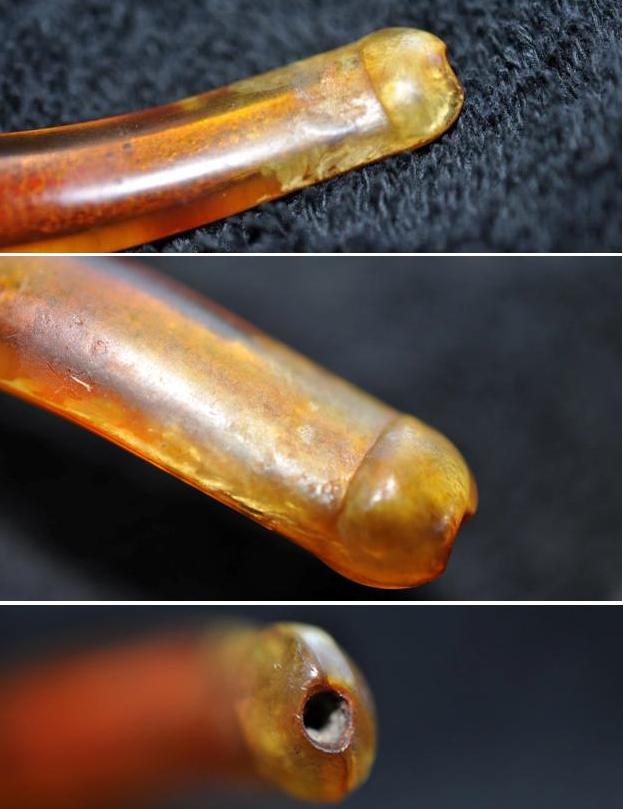
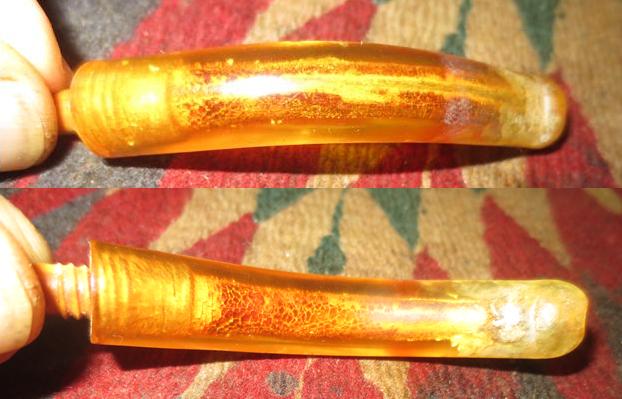
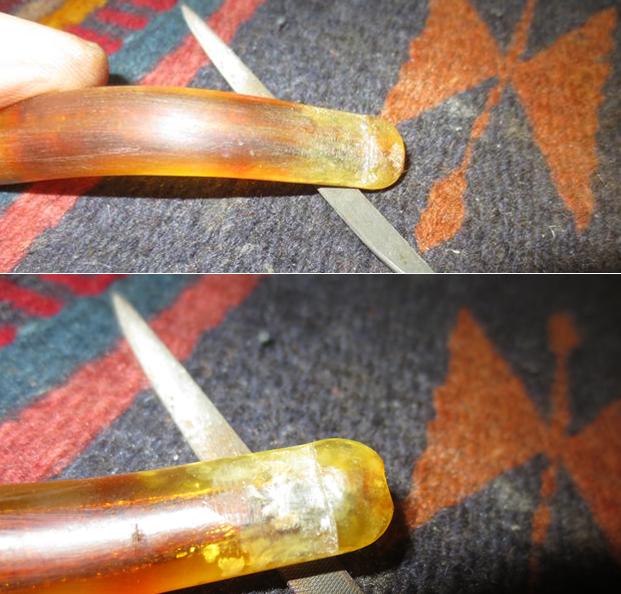
 When texting with CC about the value of this vintage pipe, the obvious question came up regarding the material out of which the stem was made? On the fly as we were discussing this, we came to the consensus that the stem was probably made of Bakelite but we weren’t sure. Bakelite (fenolic resin) is a plastic compound that was called ‘compressed amber’ by the Ottomans produced between 1907 and 1928 (See LINK). I need to seek more information about confirming the composition of the stem. Looking at the condition of the stem, both the upper and lower bit show some significant tooth compressions around the button. These will need to be addressed.
  There is also an interesting chip on the lower side of the stem facing. This chip causes me to question our original thought that this stem is made of Bakelite – I’m not sure, but does Bakelite chip like this?
 With the question of the composition of the stem in the fore, a simple search on the internet comes up with several sources of information of tests that help determine the composition. Most of these sites are concerned about those who collect jewelry. Both amber and Bakelite are among today’s valuable collectibles. Of course, genuine amber is of more value and articles are full of warnings about vendors passing off an amber look-alike as the genuine item. As a result simpler ‘field’ tests have been devised that help one to determine with greater certainty what the composition of a piece of jewelry is when one is at an antique store or an outdoor flea market! Two sites I found especially helpful that helped me to determine that this stem is indeed amber and not Bakelite. Two sites I found especially helpful and both were catering more toward the jewelry crowd, not the pipe stem crowd (See: Jewelry Magazine and ‘How to Detect Fake Amber?’ at Nammu.com)!
To give an abbreviated version of my discovery process, I first tried the smell test which in one article I read, is a way to determine if the material is indeed Bakelite, which in today’s collectables market is a valuable commodity. The test is rubbing a portion of the material with one’s thumb until the heat buildup caused by the friction, causes a chemical (formaldehyde) odor that one can smell by putting the nose next to the hot spot on the material tested. There was definitely an odor emitted by the Swan Neck’s stem when I rubbed my thumb sufficiently to generate the telltale odor. Conclusion – so this is probably Bakelite.
The next test I tried was a ‘make-shift’ semichrome test (see table on left from Jewelry Magazine). I used the silver polish that we have on hand which was the closest thing we have on hand. With a degree of uncertainty as to whether the liquid I was using would do the trick, I put some silver polish on a cotton pad and rubbed a small portion on the underside next to the stem facing – not wanting to try this test in a more visible place. If the material is Bakelite, yellow should come off on the cotton pad as some of the resin is drawn from the surface. My results were negative – no yellow hue was showing up on the cotton pad. Conclusion, maybe, not Bakelite – the test was a bit unreliable.
Another subjective test I read was that Bakelite and other synthetics tend to have more uniformity than natural amber. What is amber? From the same Jewelry Magazine article:
Baltic Amber is a fossilized form of resin that was secreted by trees of tropical and semi tropical forests. Baltic Amber is mostly formed by the resin of coniferous trees, as well as by the resin of tropical trees. There are a lot of counterfeits of amber that are sold as genuine ambers. These counterfeits can be: compressed amber, Bakelite, katilin, recolored ones, copal and plastic.
So the idea is that since amber results from natural processes, that there will be imperfections visible, bubbles, lack of uniformity of color. Hmm. Definitely no uniformity in the Swan Neck stem.
 At this point, my thinking has switched to confirming the possibility that it is indeed amber. The nugget that convinced me that the stem was amber was discovered as I read more about testing FOR amber. I discovered that the heat test with the thumb ALSO produces an odor when done on genuine amber, but of a very specific odor – a pine scent. With my first hat testing try, I was simply trying to dial in an odor, period. I repeated the test and the scent of this stem is definitely pine not chemical formaldehyde!
I did one more test for confirmation of amber. The floating test is done with dissolving 8 to 10 teaspoons of salt in a glass of water and to see if the item floats. The article described the chemical composition of amber and the resin, etc., that makes it float and fakes sink. The results are revealed in the picture below! After the stem floated, I immediately texted CC with the news of the amber stem’s confirmation and offered to give the pipe back to her. Since she was working in the garden of her and Svetly’s new home in the village, she sent an audible message in reply, laughing and saying that giving the pipe to me now was only sweeter! Stem mystery solved.
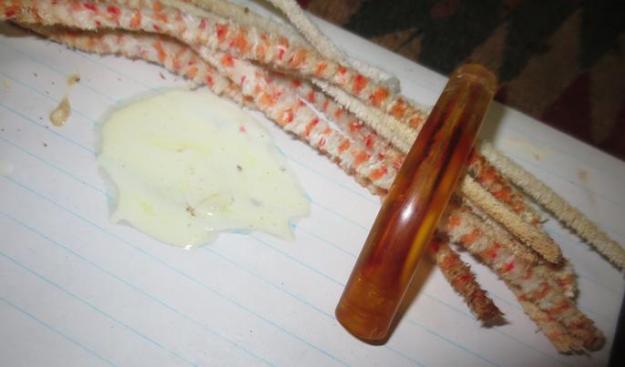
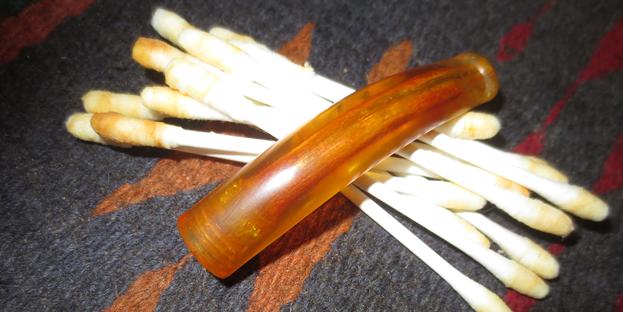
To begin the reclamation of the graceful Swan Neck Meerschaum with an amber stem (!) I begin the general cleaning of the pipe. I start with the stem, using pipe cleaners for the airway and cotton buds for the mortise cavity. The threaded mortise cavity is full of old dark grime. I use the buds and isopropyl 95% to work on the grime.  I also use the small dental spoon to reach in to the cavity to scrape the dark grunge wedged in the transition from the mortise and airway. It took some time, but using a sharp dental probe, I run the point methodically through the threads of the mortise to dislodge the old buildup. After some time of cleaning, The internals of the amber stem were looking good.
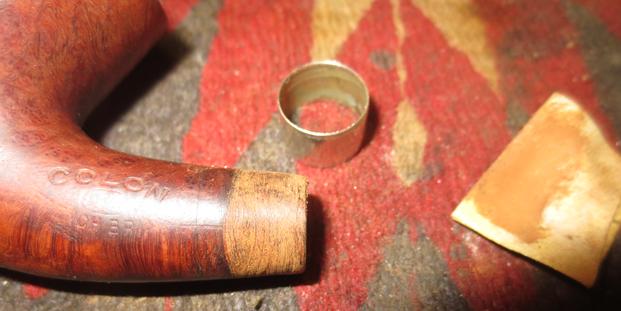
 Next, I look at the threaded connector that I unscrewed from the mortise to clean. I unwind the thread which has acted as an expander to hold the smaller connector in place. I clean the connector with isopropyl 95% to clear the threads and airway of grime. It seems evident that this connector is not original. It feels plastic and it doesn’t fit the threads of the mortise diameter and hence, the thread to expand its diameter to grab the thread channels of the mortise. The connector is the same size as the stem.
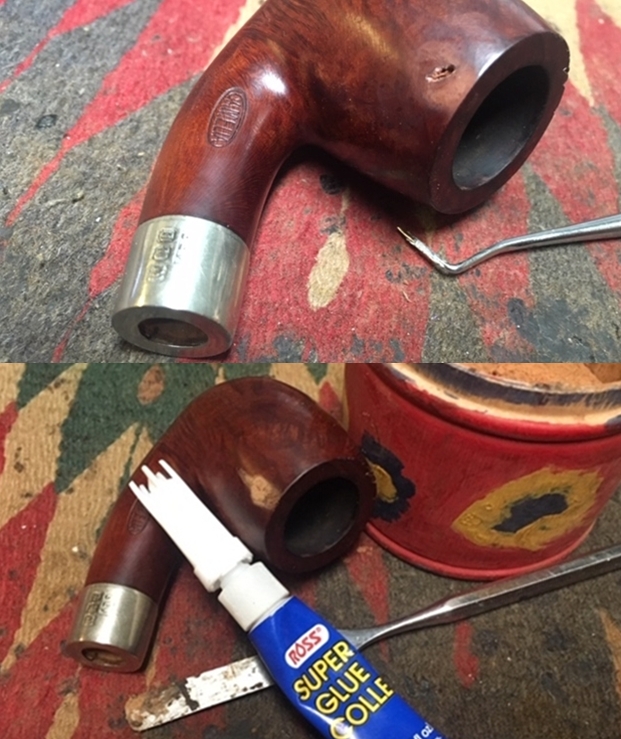
 Well, it all was going so well until it wasn’t. Disaster. It has taken me some time to come back to this project because of what happened next. I was considering how I might provide a better connection between the stem and stummel and I was testing the fit of a push/pull acrylic tenon’s size with the amber stem and the amber broke…. There is no way to describe the shock followed by the deep sense of unbelief and then self-incrimination of asking myself, why I did what I did to cause the break? I had to walk away from from this project – I couldn’t look at the pieces. Gradually, this micro tragedy found its way into the broader context of life’s larger problems and tragedies and perspective slowly regains a footing. I was then able to return to the ‘scene of the crime’ and take these pictures and continue from here.
 Putting the pieces together again to view the aftermath and to assess the damage and response, produced some moderate hope. The break can be mended with CA glue and it should blend well. There is a gap on the button-side of the break where there was shatter impact which will fill with clear CA glue. The break lines can be mitigated and blended with sanding but probably will remain visible. The challenge is applying CA glue to weld the pieces together and not fowl the threads in the mortise with glue.
 I use extra thick CA glue to attach the main piece. I follow with regular CA glue to fill the shatter point gap. After applying the glue and reattaching the pieces, I set the stem aside for the glue to cure thoroughly.
 Next, moving on to the Meerschaum Swan Neck stummel, the chamber needs cleaning of the cake buildup which is not needed with Meers.
  I use the Savinelli Fitsall tool to scrape the cake from the chamber walls and then follow with sanding the chamber. I wrap 240 paper around the Sharpie Pen and sand the chamber to clear the carbon buildup. My aim is to restore the smooth, fresh Meerschaum surface.
 The chamber looks good. Moving on!
 The rim is caked with lava flow and grime. To break up the crusted buildup, I give the stummel a soft topping using medium and light grade sanding sponges. The purpose is not to remove Meerschaum but simply to clean the rim.
 The sanding sponges did a great job. There continues to be some dark spots on the aft part of the rim, but this does not concern me.
 Next to clean the external surface, undiluted Murphy’s Oil Soap works well. Using a cotton pad, I scrub the external Meer surface. The soap will not remove patina. This is a unique surface for a Meerschaum. It’s not like anything I’ve seen before.
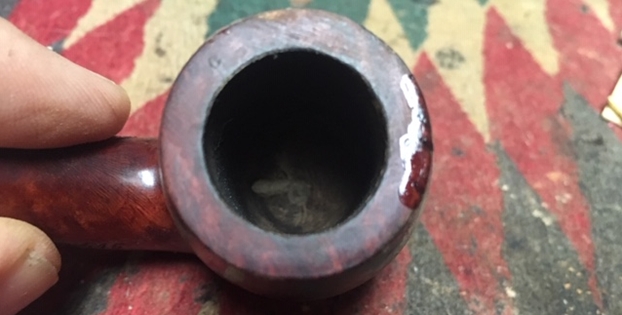
 Next, the internals are cleaned with cotton buds and pipe cleaners wetted with isopropyl 95%. It does not take much effort.
 Looking now at the rim. It has cleaned up well with the sanding sponge topping. To clean it more, I use a piece of 240 piece of sanding paper to remove the black ring around the internal edge of the rim.
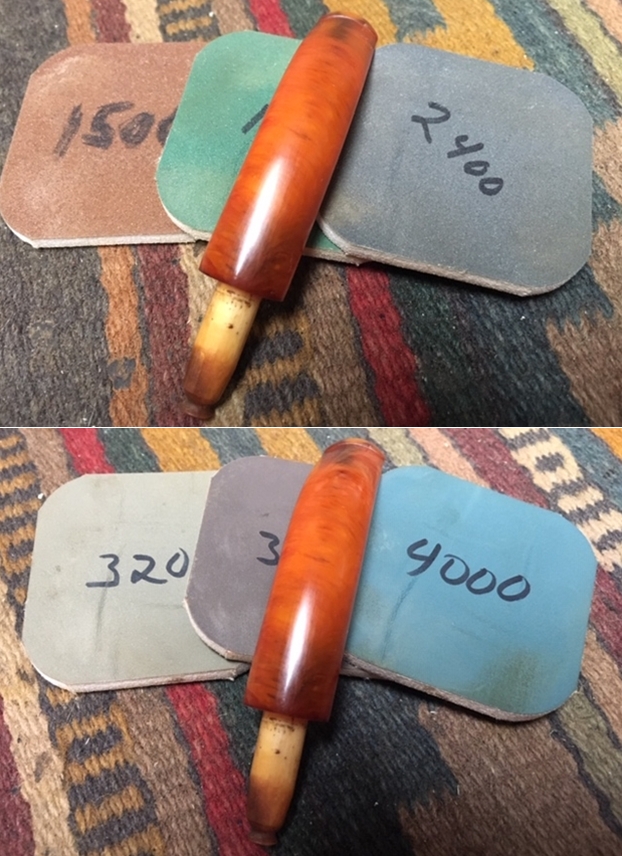
  Next, the Meerschaum stummel is dry sanded with the full regimen of micromesh pads – 1500 to 12000. The sanding cleans the surface of the Meerschaum and it shines up wonderfully through the process. I believe that the block of Meer is unique. The strange coloration in the Meerschaum are not spots and blemishes, but the color of the Meerschaum itself. The micromesh brings this out very distinctively.


 I put the stummel aside and turn back to the stem. The amber break repair has cured well enough now for me to work on the other issues of the amber stem. The upper and lower bit and button have bite compressions that need addressing.
 Using regular CA glue, I fill the compressions and use an accelerator to hold the glue in place. I fill compressions on both the upper and lower bit area as well as on the button.
 Earlier I had identified a chip on the stem facing that I also fill with regular CA glue and use an accelerator to hold the glue in place and to quicken the curing process.
 The amber break repair is ready to be sanded. I’m anxious to see how the break repair will look. I’m hopeful that the sanding will hide the fact that it happened! Using 240 sanding paper I sand to remove the excess dried CA glue on the surface. I also sand the chip fill on the edge which essentially becomes invisible. I’m pleased with how the repair is shaping up.
  Next, I go to work on the bit and button. I start by using a flat needle file to shape the button lip and to file down the patch on both the upper and lower bit. I follow this by sanding the bit with 240 sanding paper.
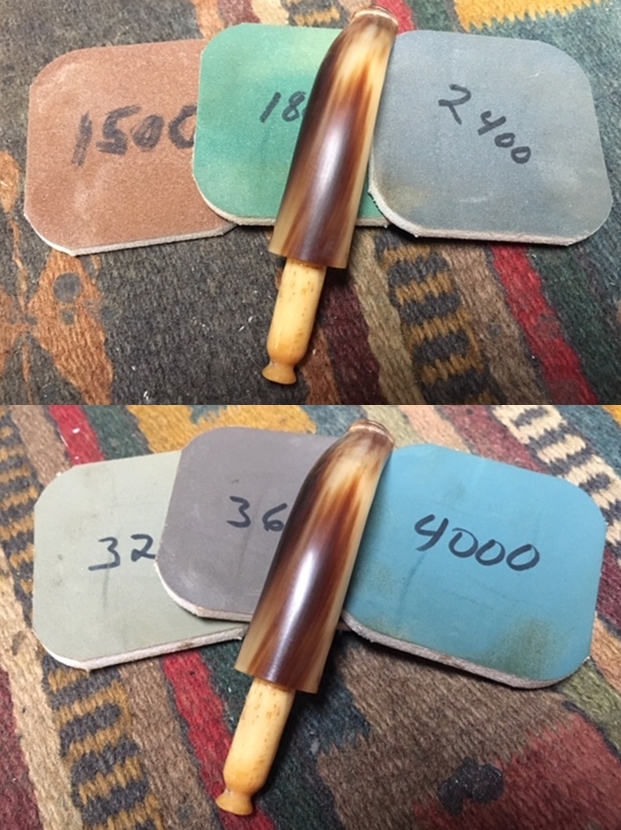
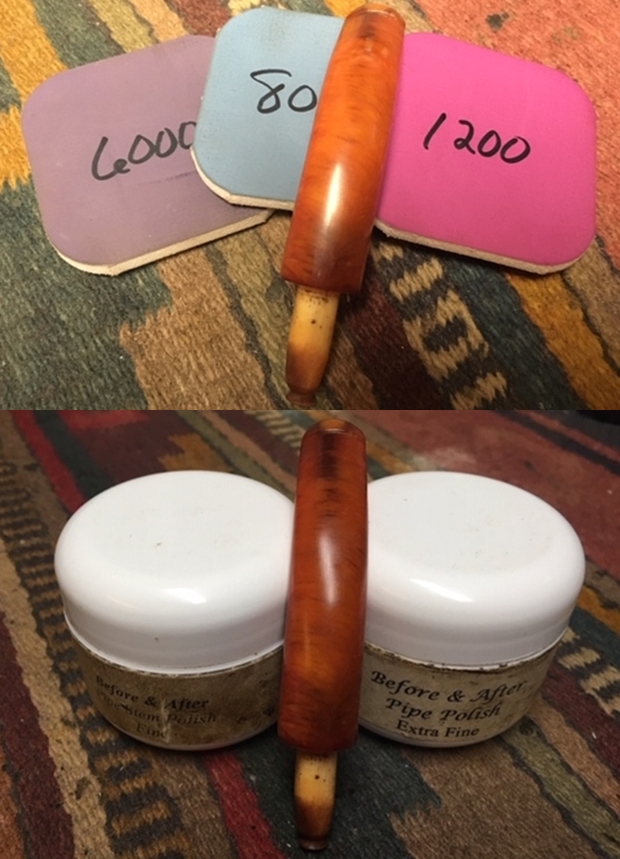
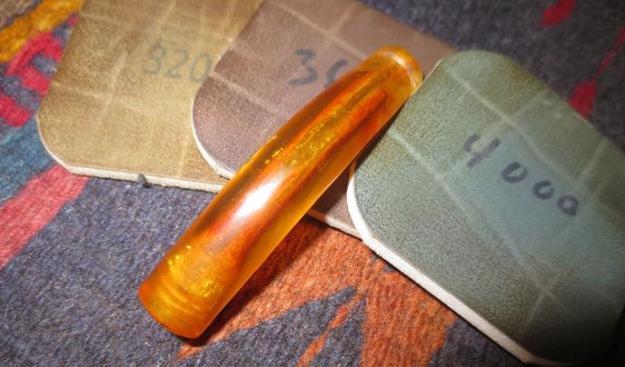
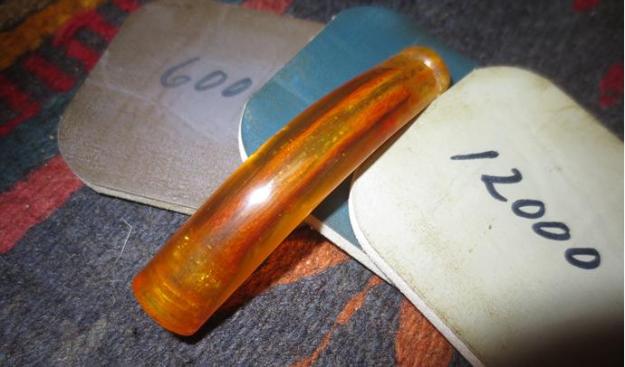
 The stem is looking great. Next I wet sand the entire stem with 600 grade paper followed by applying 000 steel wool.
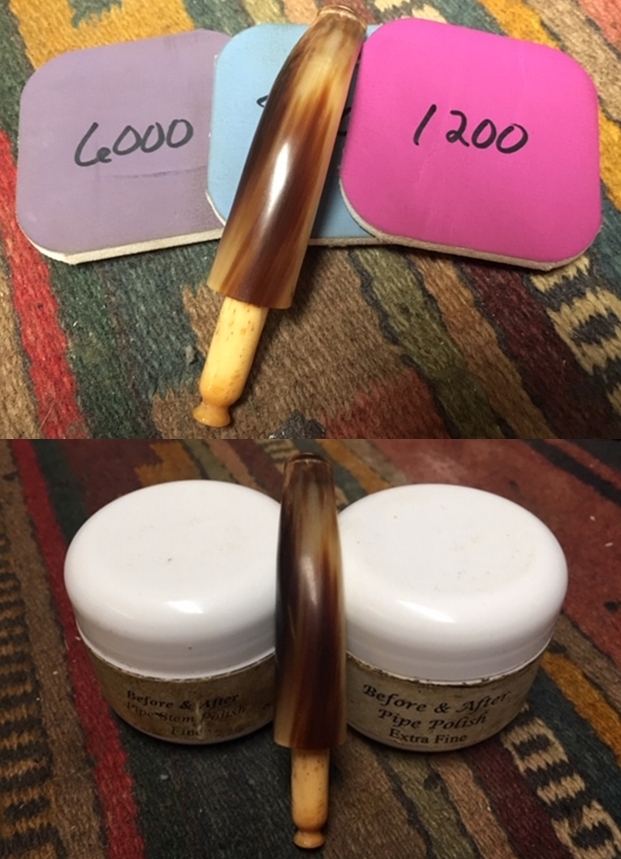
 Next, the full regimen of micromesh pads are applied starting with wet sanding with pads 1500 to 2400. This is followed with dry sanding with pads 3200 to 4000 and 6000 to 12000. Between each set of 3 pads, Obsidian Oil is lightly applied to the stem. I’m very pleased with the repairs on the stem. They are all essentially invisible, including the break!
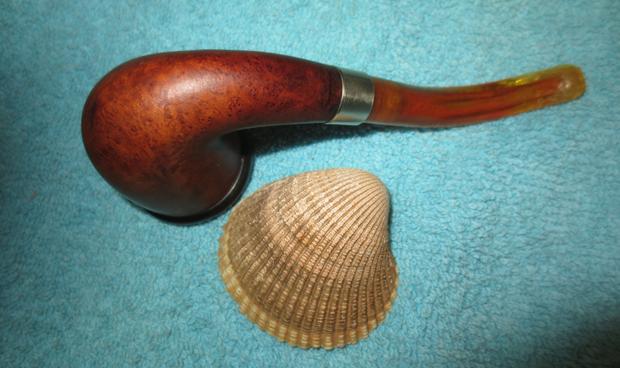
 Next, to protect and further shine the Swan Neck Meeschaum bowl, I apply beeswax. With the wax in the mason jar, I warm it with the hot air gun. As it warms it liquefies. I then use a horse hair paint brush to paint the beeswax onto the stummel. I position the hot air gun so that it continues to warm the wax as it’s applied to the stummel. It is easier this way to spread a thin layer over the stummel. After applying the beeswax thoroughly over the stummel, I put it aside to allow it to cool. When the Meerschaum stummel has cooled, I use a microfiber cloth to wipe off the excess wax and to buff the stummel.
  Now in the homestretch. In light of the amber breakage caused by trying to fit the stem with a new screw in tenon, I’m going with the ‘Olde World’ approach to keep the threaded connector and rewind the thread and screw it into the mortise. It works well! I then attach a cotton cloth buffing wheel to the Dremel, set at the slowest speed and gently apply Blue Diamond compound to the amber stem. After completing this, a felt cloth is used to wipe off the compound dust and another cotton cloth wheel is mounted and carnauba wax is applied to the amber stem alone. Following this, a microfiber cloth is used to give the pipe a hand buffing to raise the shine. I do not forget the vintage case. I brush the interior with a bristled brush and apply a leather conditioner to the exterior.
I love this Swan Neck Meerschaum and the amber stem is the proverbial frosting on the cake. The stem (and I) survived the tragic break but it is invisible now. This gift will always be treasured by me not just for the graceful beauty of the pipe itself and for its probable century old vintage, but because of the hearts and hands that gave it. Thank you Svetly and CC! You are treasured friends.
Trying out my new friend on my 10Th floor Man Cave balcony with a bowl amply filled with Lane BCA, a great blend for conditioning Meerschaum!