by Steve Laug
At the end of last week, I received an email from Terrica in Florida regarding some pipes that she wanted me to clean up for her. I have included her first email below:
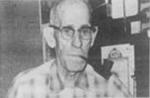
I would like to send my deceased father’s old tobacco pipes for cleaning. I will not be using the pipes but would like to get them cleaned up so I can keep them on display.
I wrote back asking what the pipes looked like in terms of condition. I also wanted to know her general wishes on the clean up and how far she wanted me to go with it. She responded as follows and sent photos of the two pipes that I have included below.
Thank you very much for responding. As you can see, these are very inexpensive pipes. My deceased dad likely purchased them at a local drugstore. I have no doubt that they have never been cleaned.
I will never be using them, but I would at least like them presentable. Thank you very much, Terrica
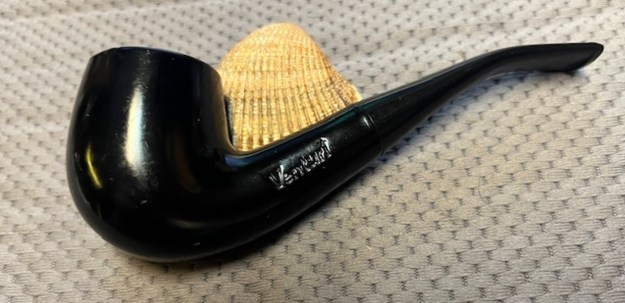
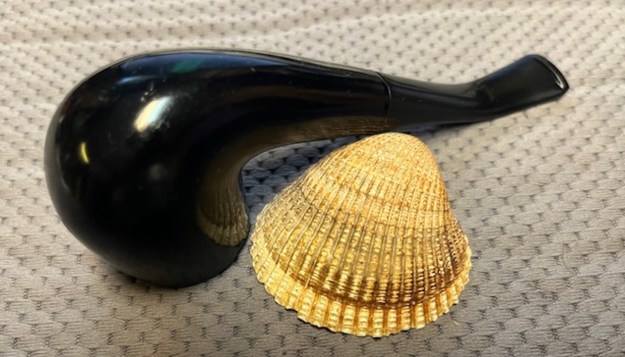
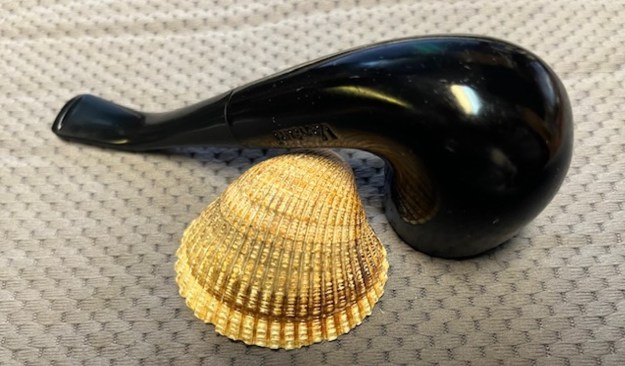
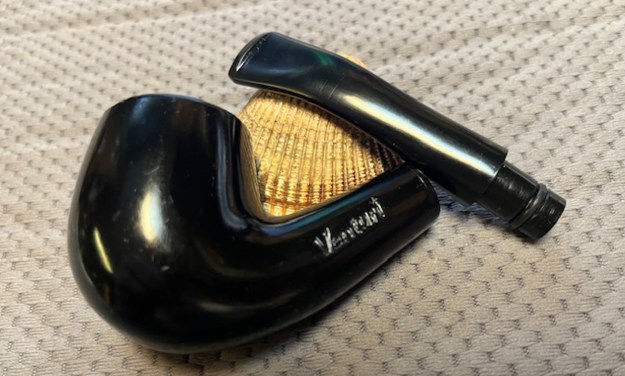
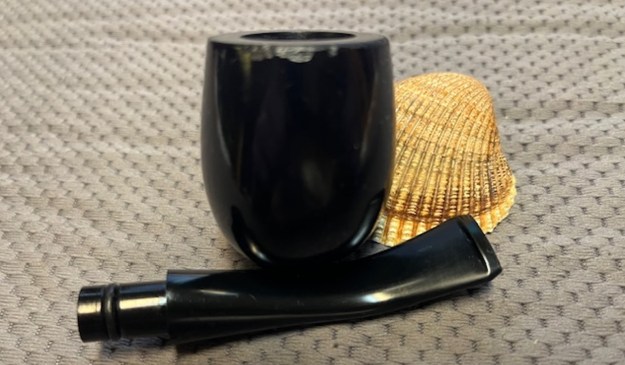
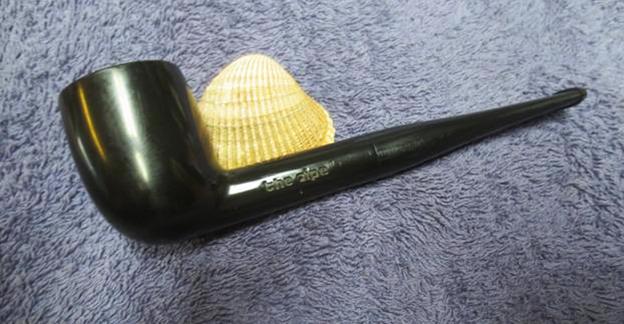
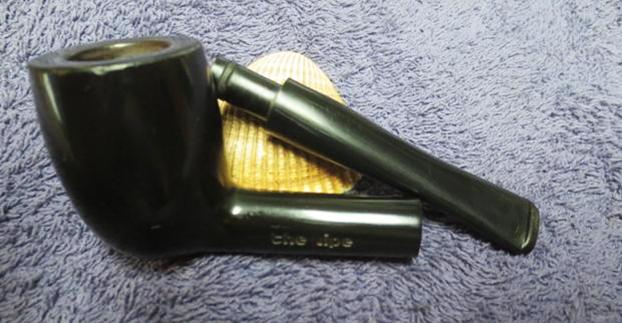
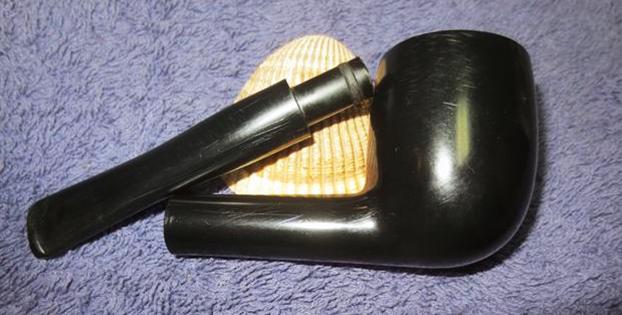
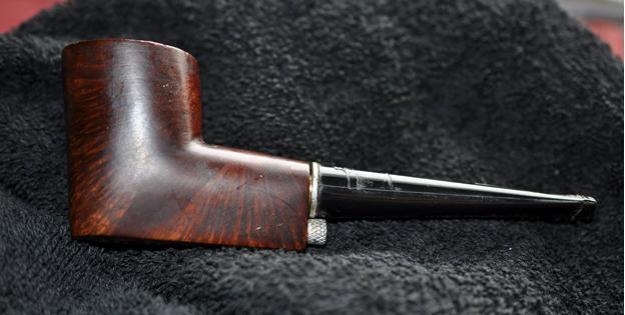
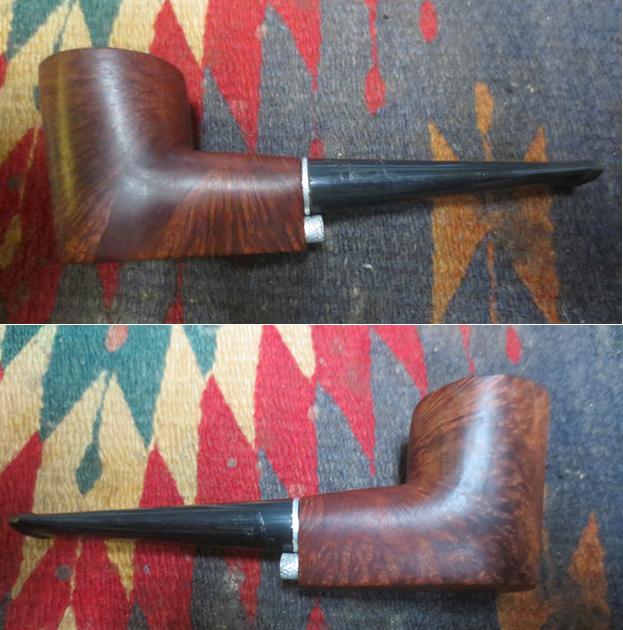
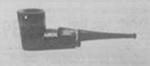
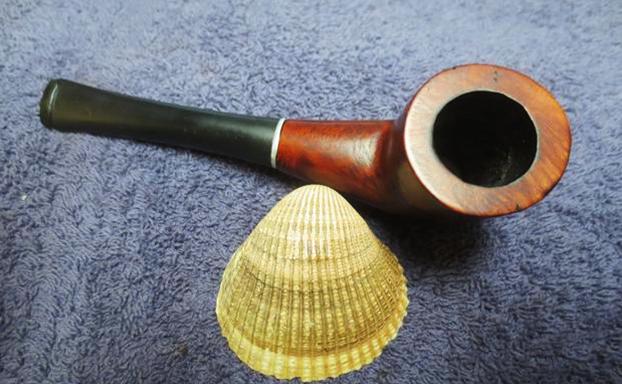
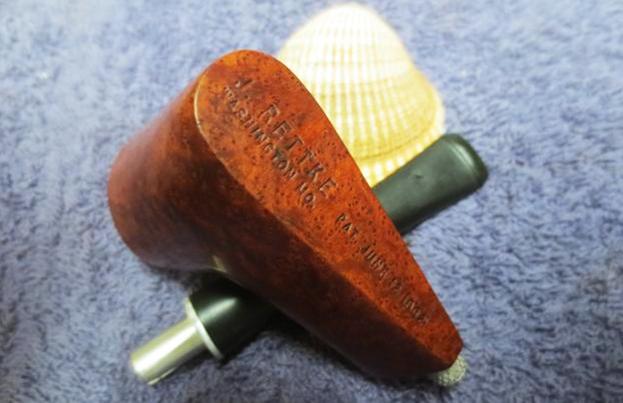
I took a look at the photos and was able to discern that the top pipe was a Medico Gold Crest Pot shaped pipe that had a thick cake in the bowl and was very dirty with grime ground into the finish. The stem, other than being very dirty did not have deep tooth marks. There was tooth chatter and grime on the vulcanite filter stem that would need to be cleaned up and removed. The second pipe was stamped Venturi and was made out of a resin that was used in The Pipe, The Smoke and the Venturi. This was a bent Billiard. It was dirty and had a cake in the bowl. The stem was also very dirty and had some tooth chatter on the surface.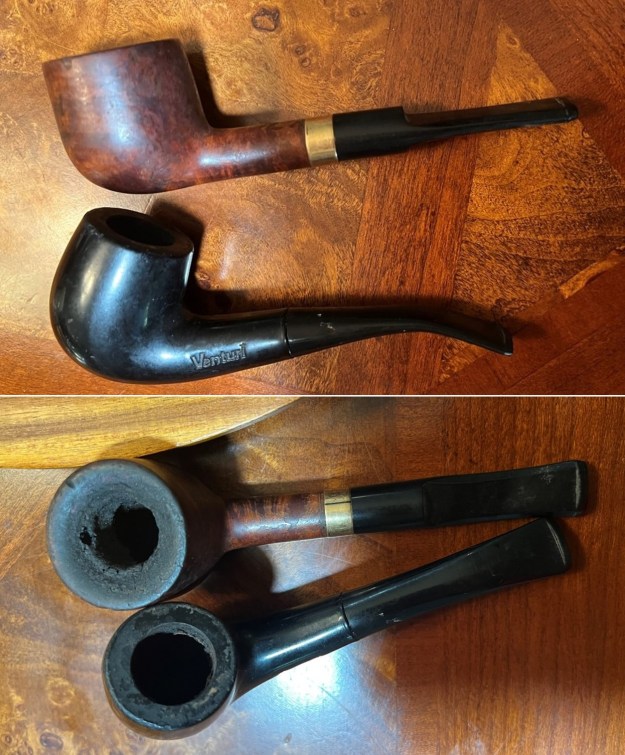 I chose to work on the Venturi first. The finish was dirty and there were nicks around the outer edge of the rim top. The rim top was very dirty with some lava build up and there was a moderate cake in the bowl. The stamping on the left side of the shank was clear but had a lot of dust in the stamping. The stem appears to be nylon rather than rubber but I am not sure. There surface as dirty and had some build up ahead of the button on both sides. There was some tooth chatter on both sides ahead of the button edge. The pipe surprisingly did not have a stench of the tobacco that had obviously been smoked in it. The style of the build up/cake make me think of a drug store tobacco of the style of Prince Albert or Sir Walter Raleigh. I will certainly l know more once work on the second pipe. I took photos of the pipe before I started my work on it.
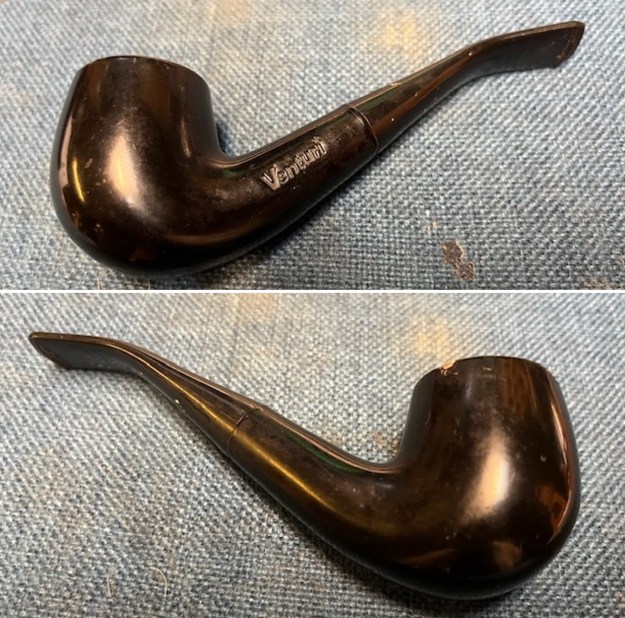
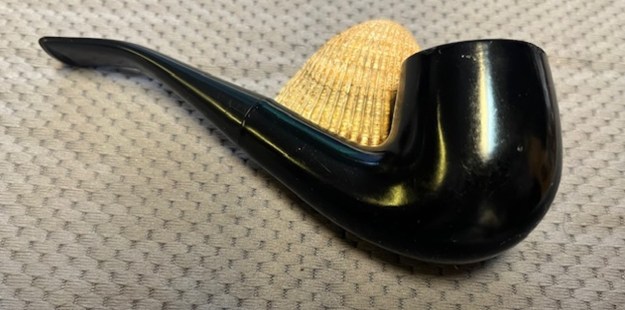
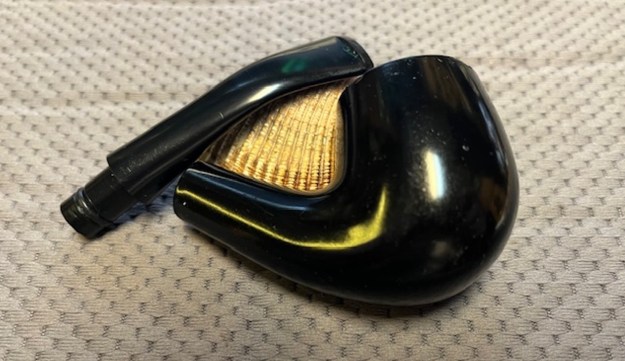
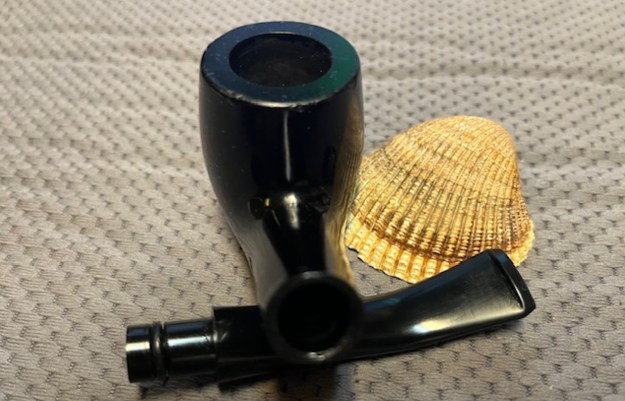
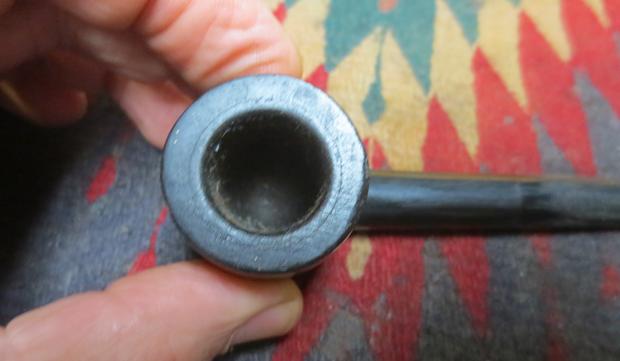
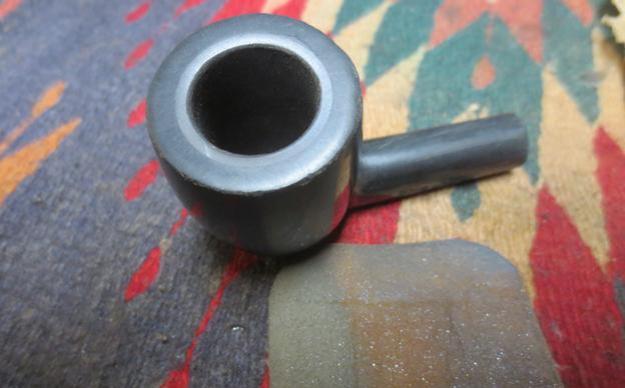
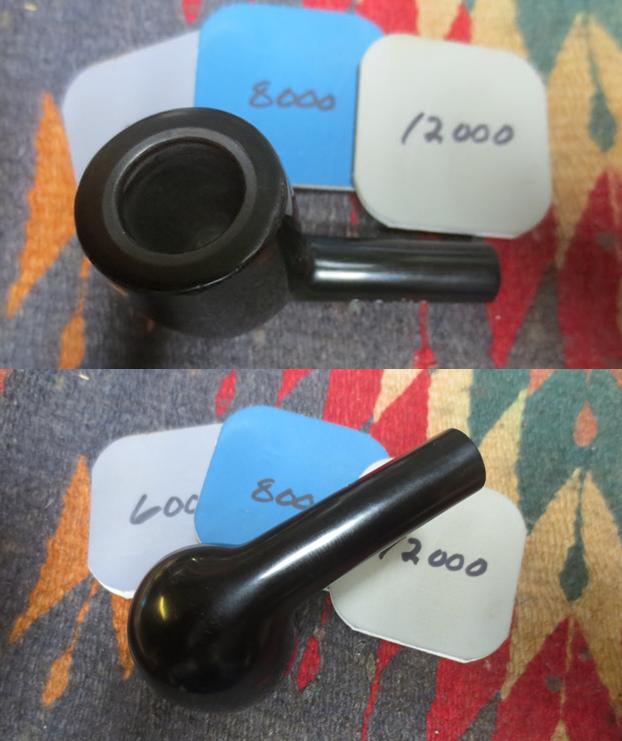
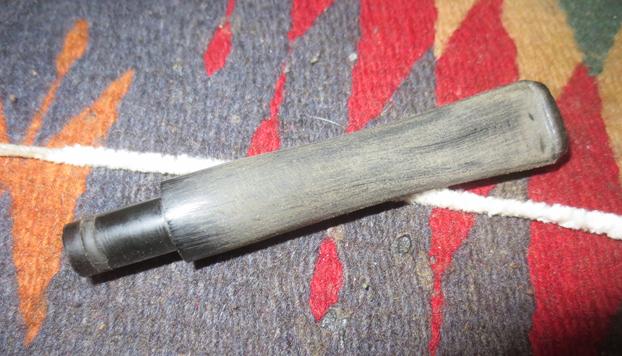
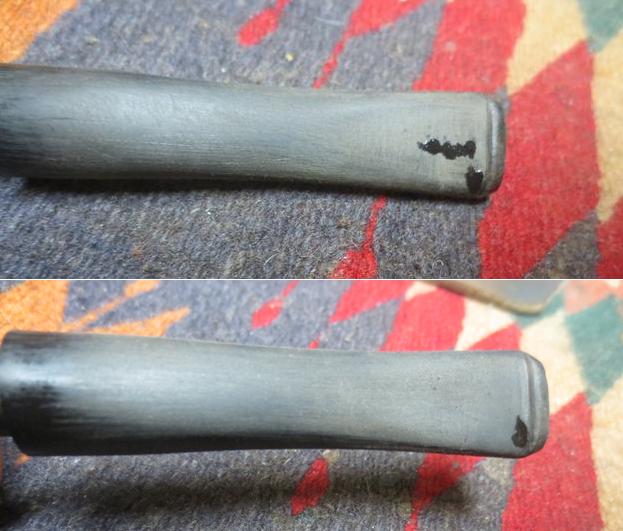
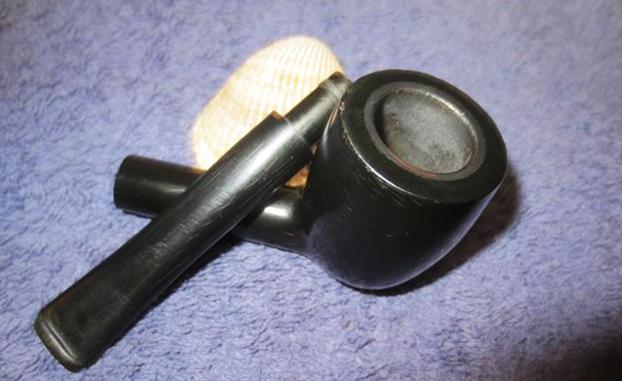
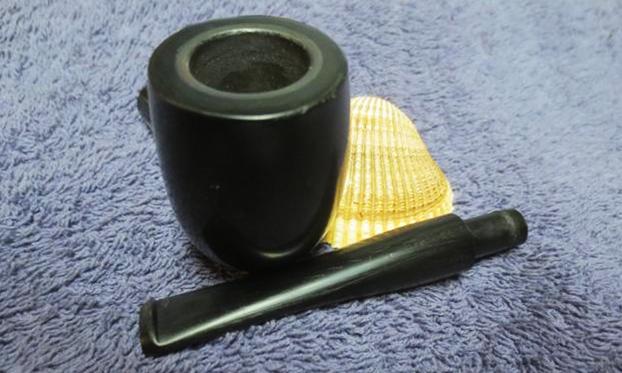
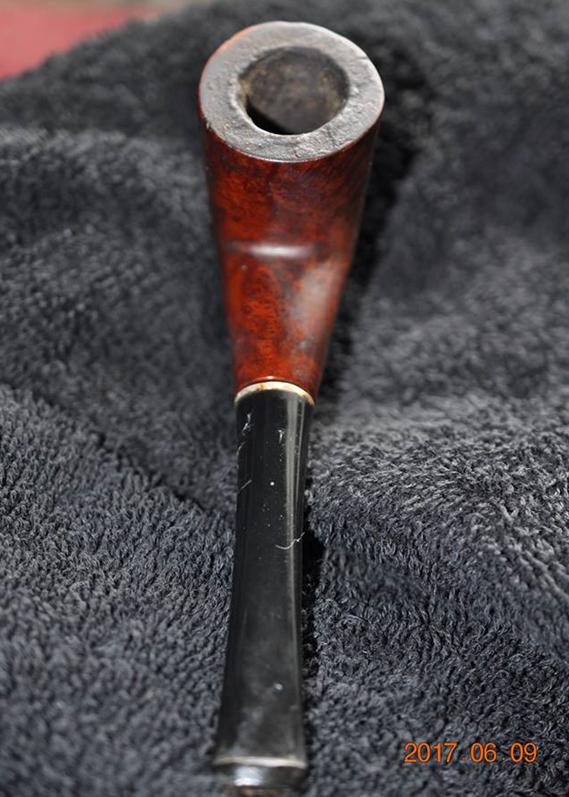
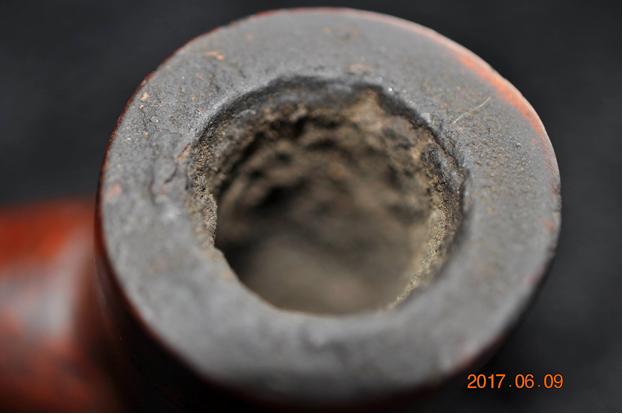
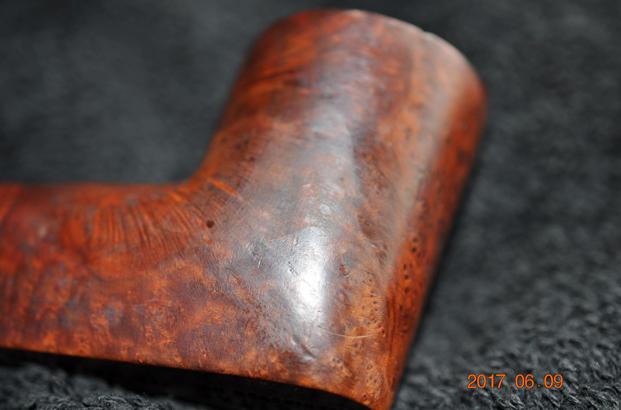
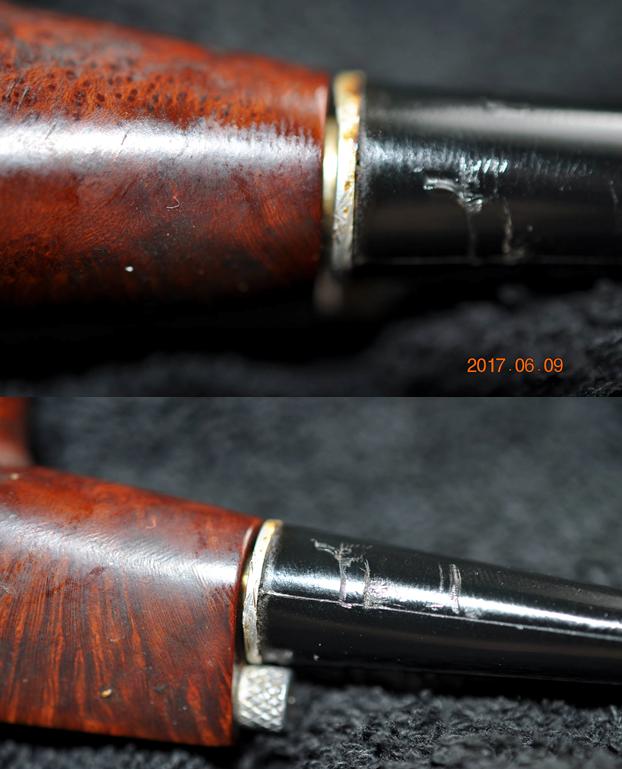
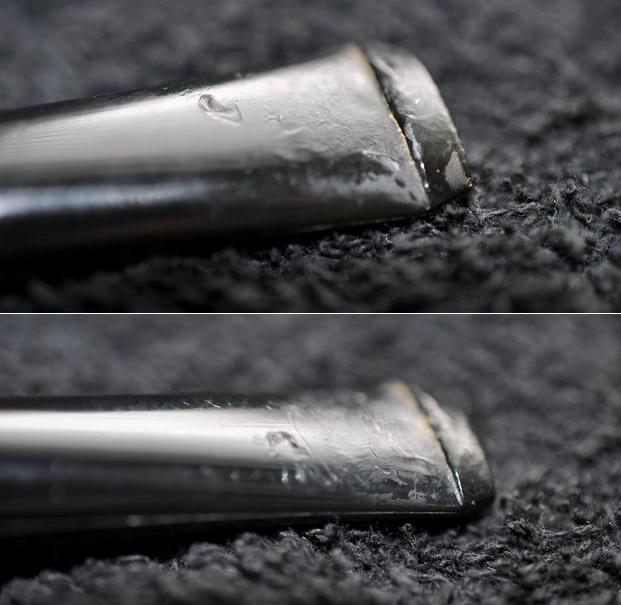
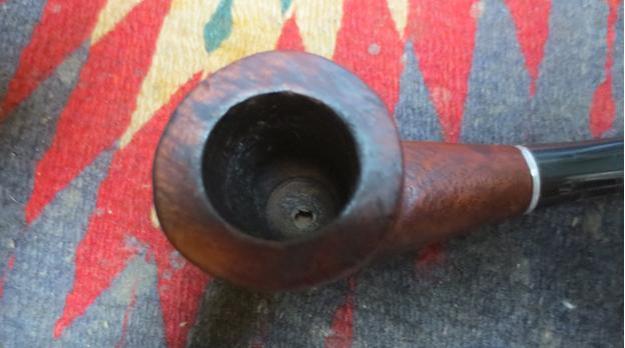
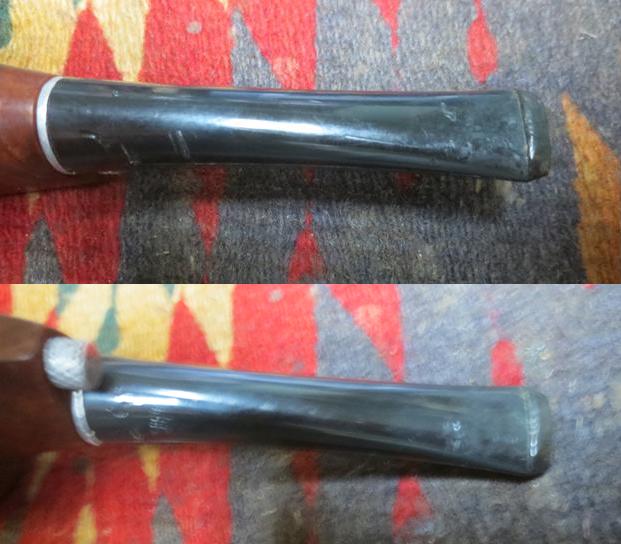
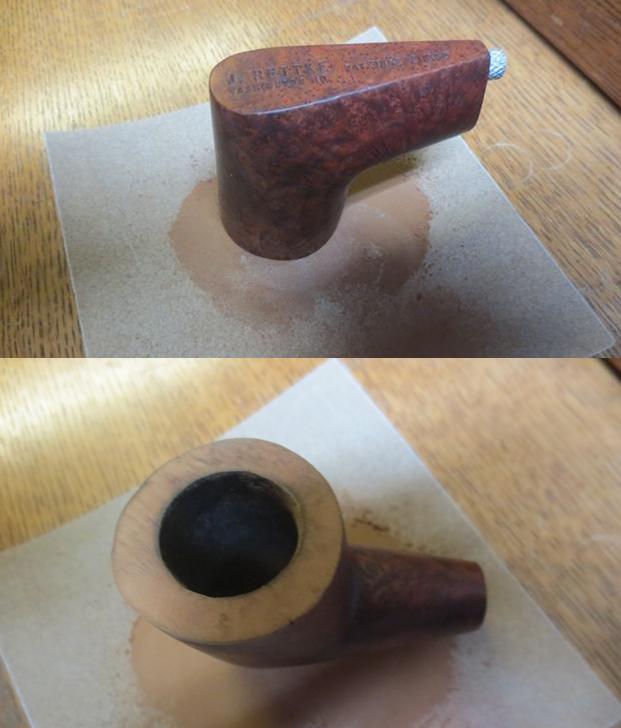
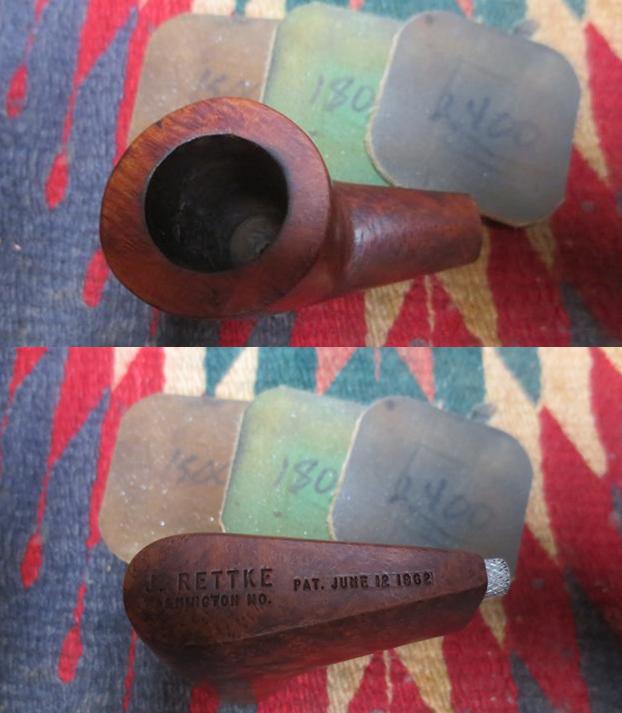
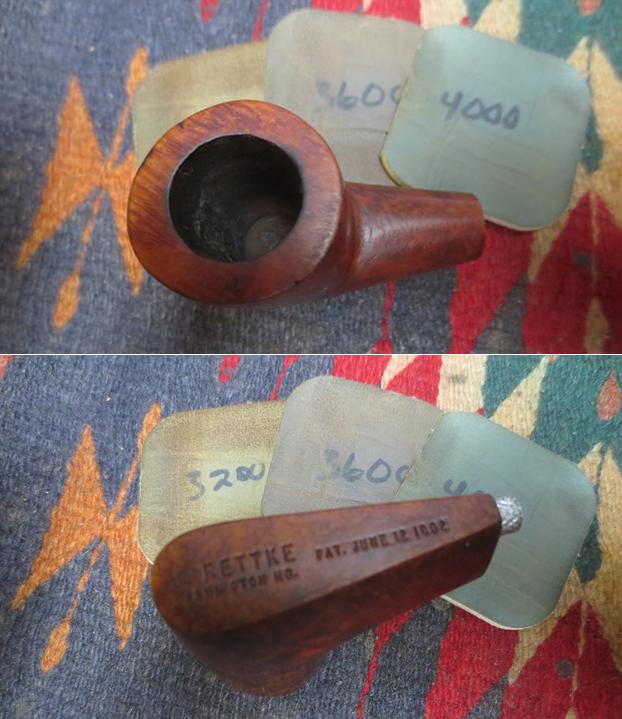
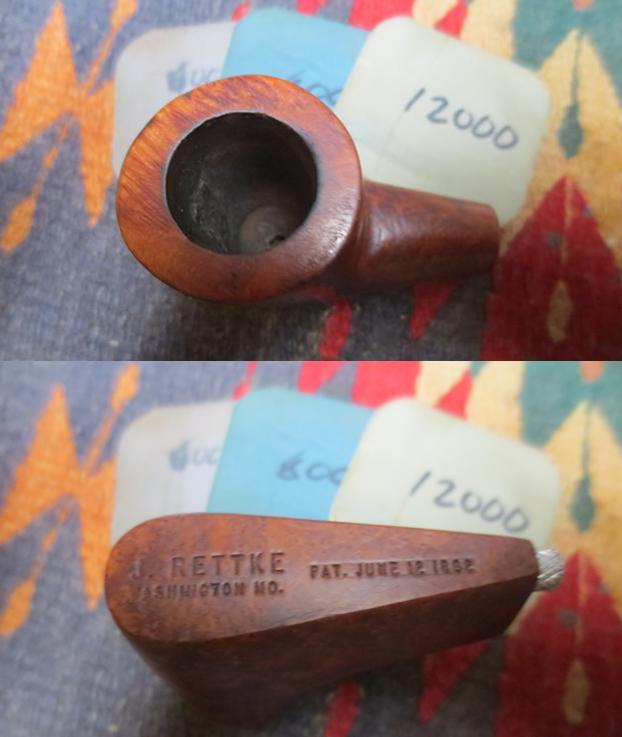
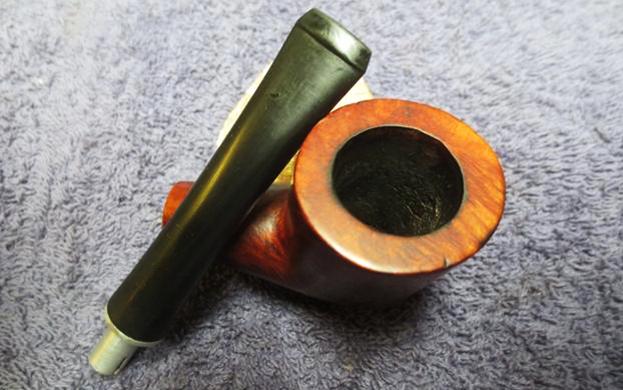
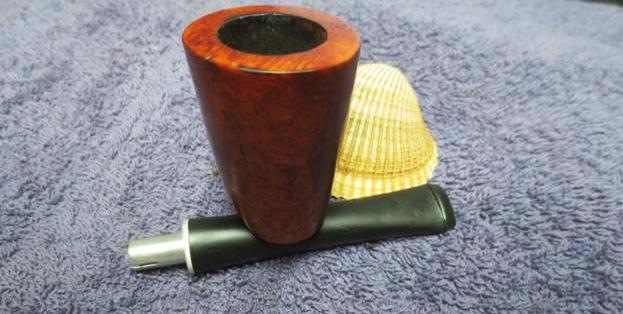
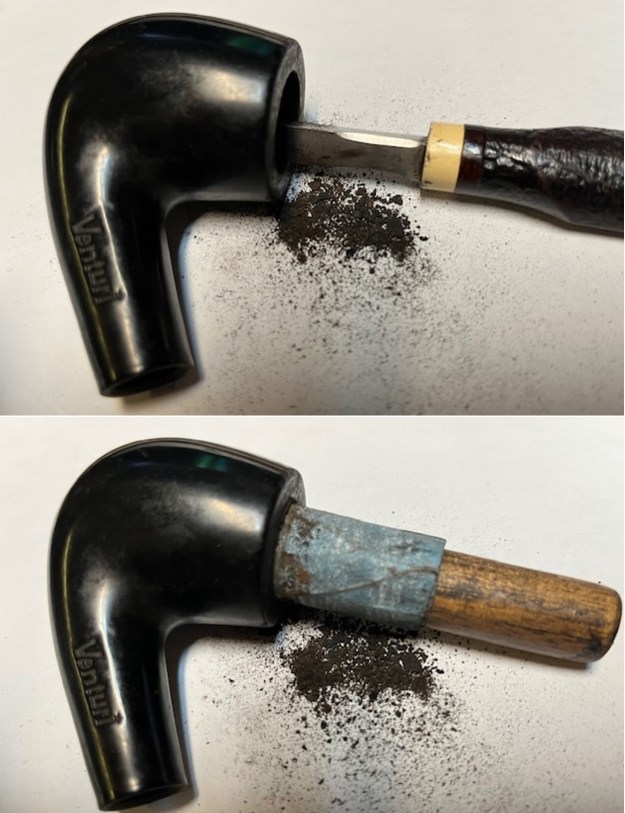
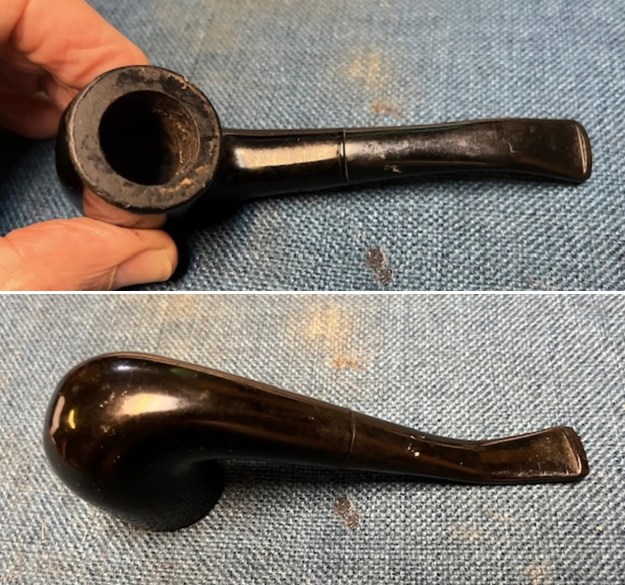 I took photos of the rim top and the stem to show the condition. You can see the cake in the bowl and the overflow of lava on the rim top. The photos of the stem show the tooth marks and chatter on the top and the underside of the stem.
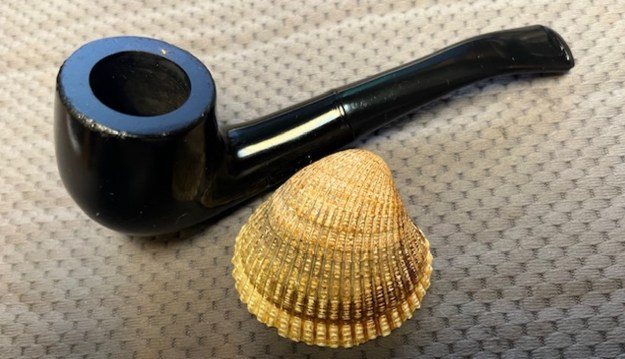
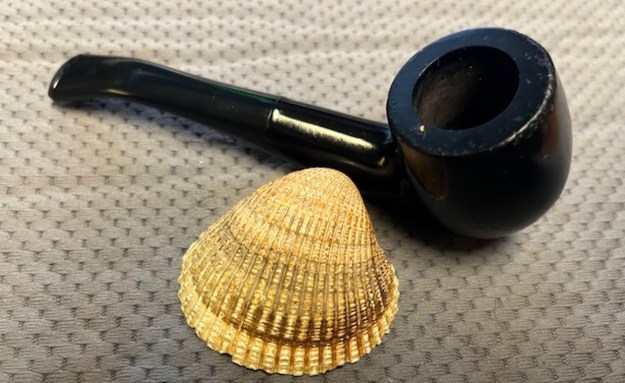
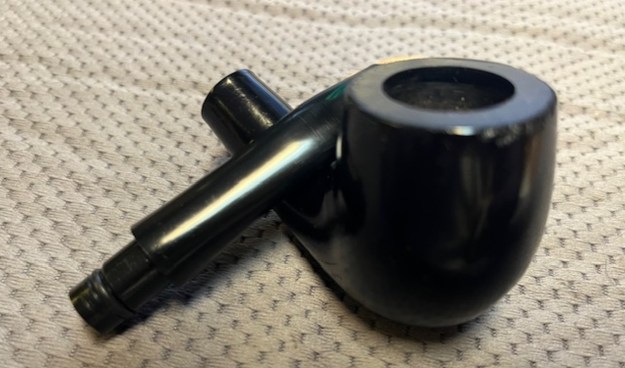
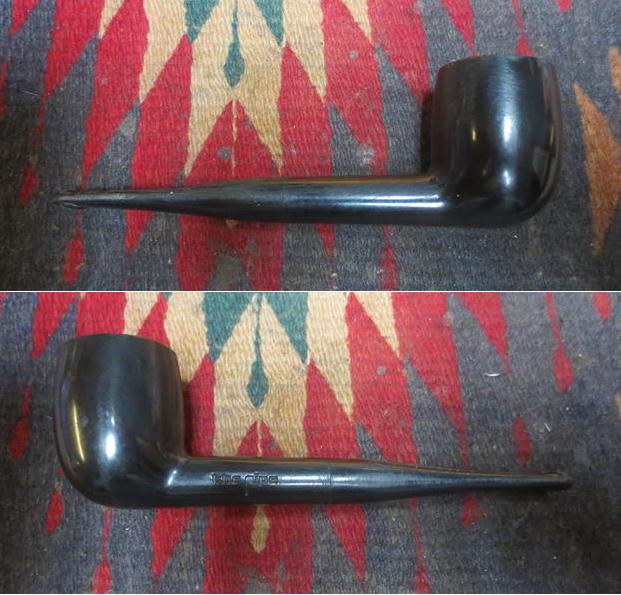
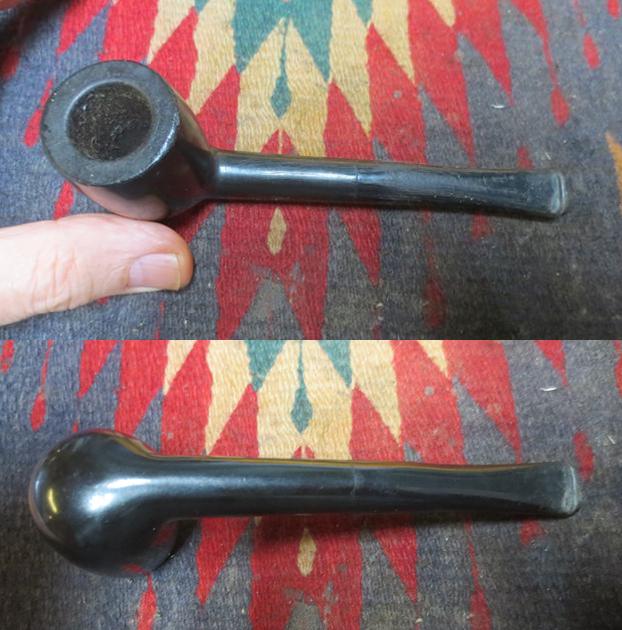
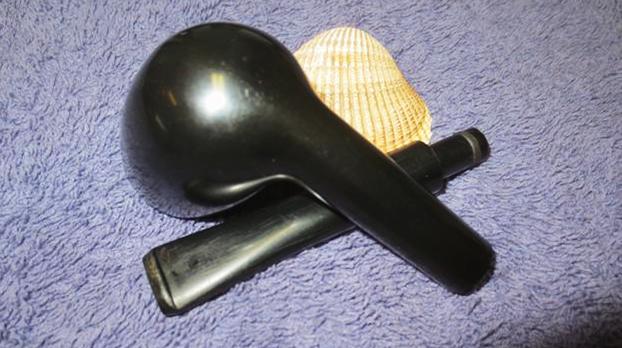
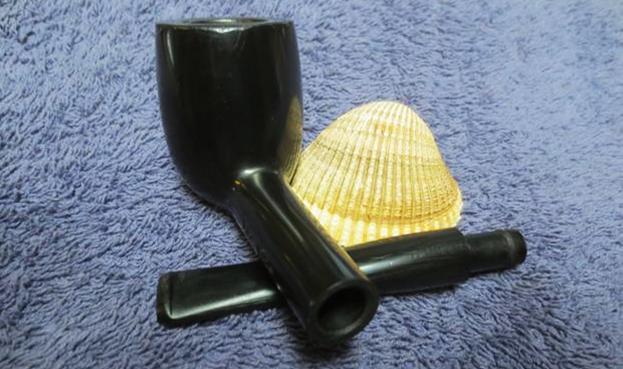
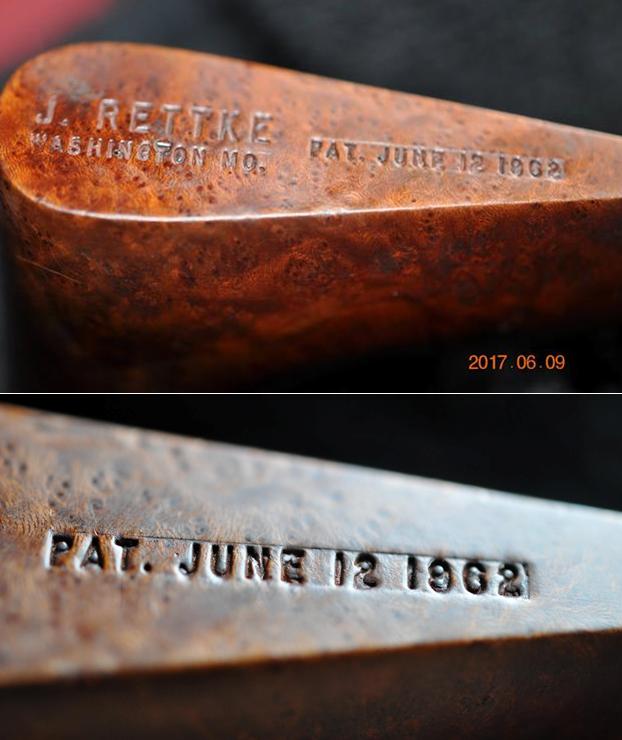
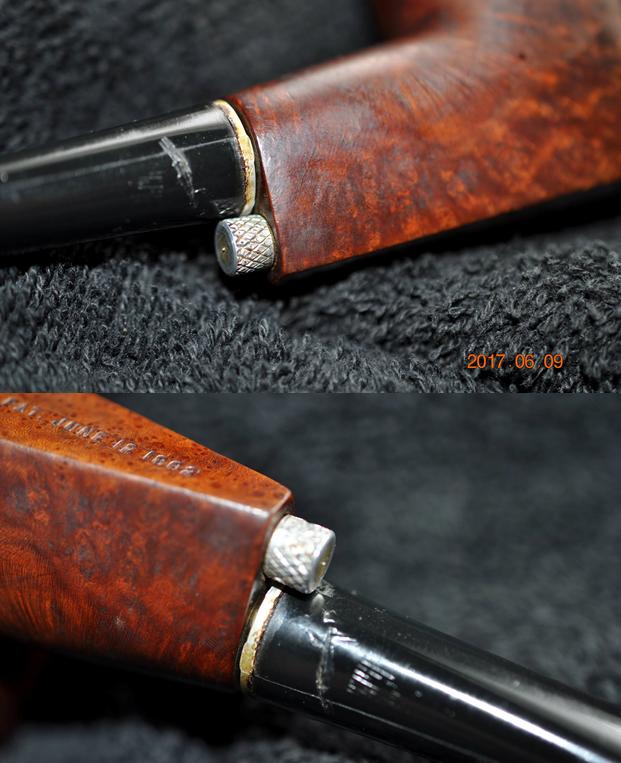
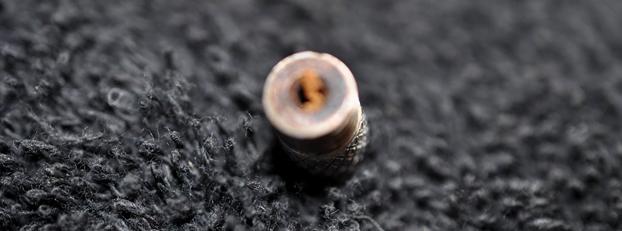
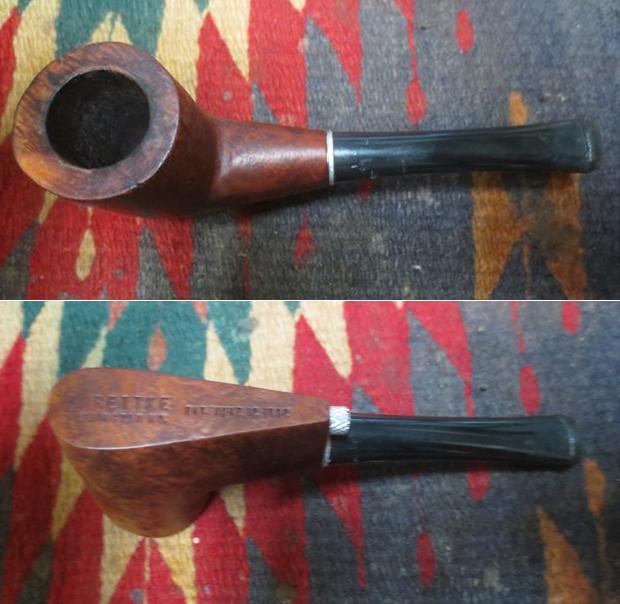
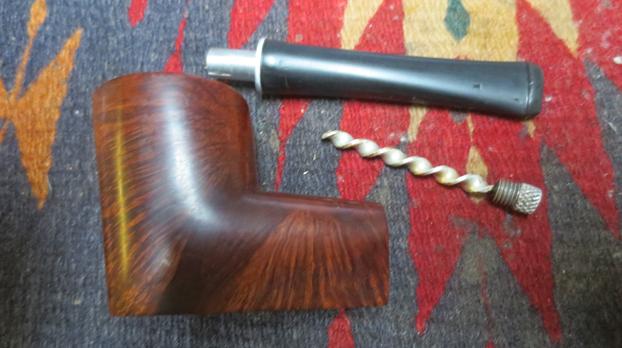
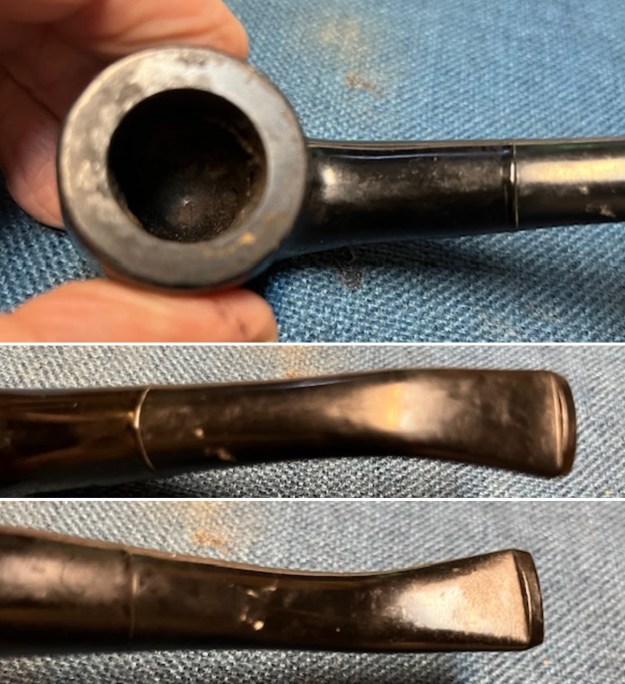 I took a photo of the stamping on the left side of the shank to capture it. The left side read as noted above. I removed the stem and took a photo of the parts to give a sense of the look of the pipe.
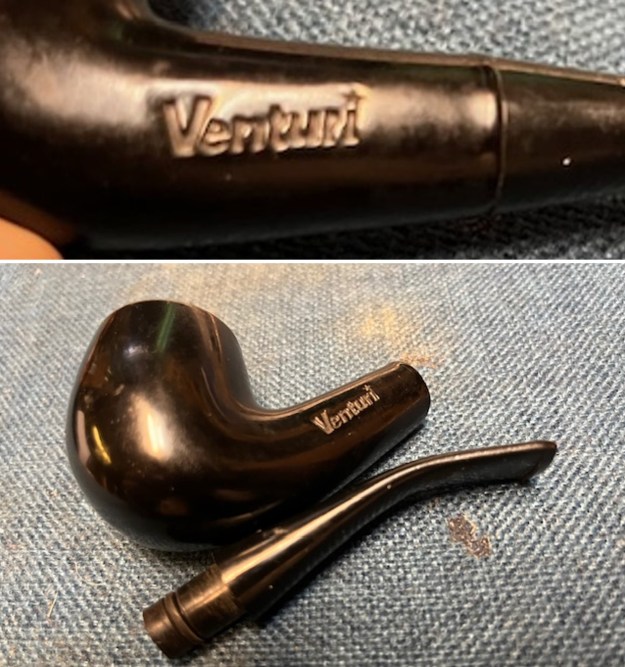 I decided to gather some background on the Venturi pipe. I knew that it was connected to The Pipe. I was pretty certain that it was made out of the same phenolic resin as The Pipe but in tis case it was without any bowl liner. Now to check out the site that is dedicated to The Pipe on other versions of the phenolic resin pipes that were issued by the same company. The site was operated by Doctor Billie Taylor. I turned to the section on the history of the brand to gather some information (http://thepipe.info/history/index.html). I quote from the site to garner the information I need.
 Veteran pipe smokers were not enthusiastic about the pyrolytic graphite pipes, regardless of where they were made. They said the pipes smoked hot and wet and made the tobacco taste bitter. These may have been unfair criticisms because smokers of meerschaum and briar pipes build certain habits that reduce or eliminate the advantages of the pyrolytic graphite bowl liner. They packed tobacco in the bowl too tightly. They allowed a cake to build up and then scraped the bowl, damaging the liner. They puffed too vigorously, reducing the venturi effect of combustion in the liner. They used aromatic and strong tobacco blends which have much truer flavor in this kind of pipe than in others. Also, these pipes produce far less “goo” than briars or meerschaums, but do need to have a pipe cleaner run through them during and immediately after a smoke to control condensation. When this was done, instead of a collection of several pipes being needed to allow time for moisture to dry out between smoking each one, only one or two were necessary to provide a satisfactory rotation. When not, one of the important advantages of the pipes was lost. Either way, the experienced pipe smoker was unlikely to buy very many of the pipes.
Venturi, of course, tried very hard to increase the appeal of the pipe to the traditional pipe smoker and attract more new pipe smokers. One such attempt was called “the rare woods” collection. Eight rare hard woods, teak, mahogany, cocobolo, purple heart, sycamore, rosewood, Tasmanian Oak, and an ironwood, were plasticized in a vacuum chamber and used for the shell. Not many of these were manufactured. In fact, only rosewood pipes seem to have been actually manufactured. The teak. purple heart, and sycamore in my collection are prototypes.
Another attempt to improve sales was putting a pyrolytic graphite bowl liner in a genuine imported briar shell. Again, not many of these were made, apparently because “instant break-in” was not as popular as it had been hoped it would be. Both the Rare Wood and Imported Briar pipes prototypes were carved and machined in England before actual production was begun in a Los Angeles machine shop. Super-Temp also sent a few hundred pyrolytic graphite bowl liners to England for experimental installations. However, both models were ultimately entirely produced in the United States. There was also an attempt to market the bowl liners as a refurbishment and upgrade to traditional briar pipes.
 In 1970, Venturi’s lease on its third floor space in the Hearst Building expired. The Bay Area Rapid Transit (BART) system was being constructed right under Venturi’s windows so, since most of its employees lived out of the city anyway, the company relocated to 1610 Rollins Road, Burlingame, California.
Also, about this time, Long sold his remaining interest in Venturi to Wes Myers and Bob Dailey moved on to found another marketing company.
A free-form pipe stand made of polyester resin was introduced in 1969. The PIPE ROCK, as it was called, was a pipe rest for one, two, or three pipes, sometimes with a hole for matches. The material is extremely light so the stands were weighted to about 2 pounds and then well-padded and leather covered on the bottom to protect the surface on which they rested. The hollows for the pipe bowls were smoothly finished while the exterior of the rack was a rough, rock-like finish. The PIPE ROCK came in a black and hot pink box with a holder/display stand and display card. The text on the card encouraged potential buyers to get this unique pipe rest. The one-position PIPE ROCK sold for $7.50, the two-position price was $8.50 while the three-position cost $10.00…
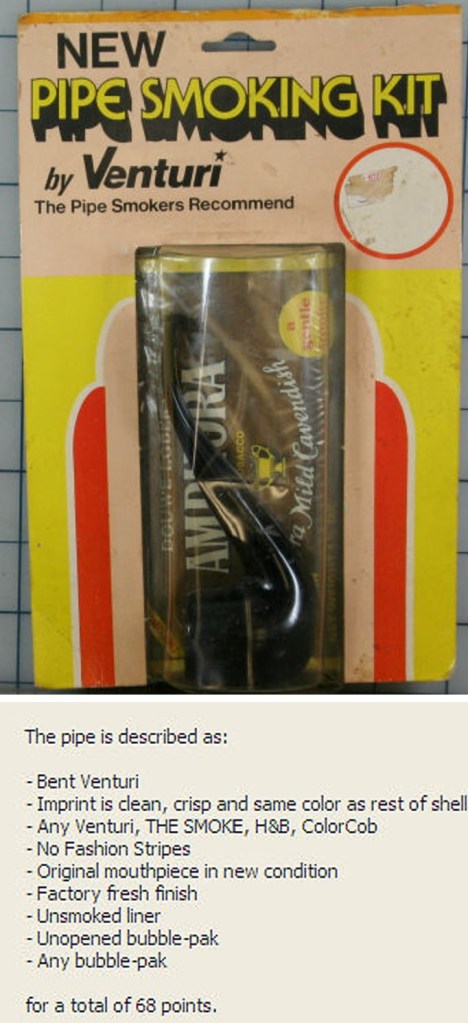
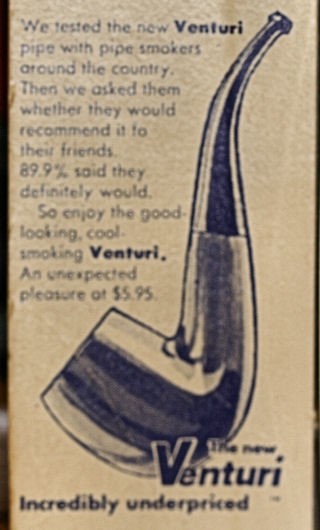
….Late in 1971 or early 1972, manufacture of a pipe made entirely of phenolic resin without any bowl liner was begun in an effort to reduce the price of the pipes and increase sales volume. These pipes were named the Venturi models and were priced about $5.00. These all-plastic pipes were successful and began to assume an ever increasing percentage of sales. They were offered in three basic shapes (Bent, Billiard, and Pot) of five colors each: Blue, Ebony, Green, Red, and White. Many of these pipes were sold in various promotional packages consisting of a bubble card which included a 2-ounce roll-up pouch of tobacco and a small brochure. Here a link to the packaging on the Venturi pipe (http://thepipe.info/history/bbblpcks.html).
Now it was time to turn my attention to the pipe itself. I started my work on it by reaming the bowl with a PipNet reamer. I used the first cutting head and took the cake back to bare briar. I cleaned up the reaming with a Savinelli Fitsall Pipe Knife and removed all the remnants of the cake. I scraped the rim top with the flat edge of the blade at the same time and removed most of the thick lava build up. I sanded the walls of the bowl with a piece of dowel wrapped in 220 grit sandpaper. The walls look very good at his point in the process. 
 I cleaned out the shank, the airway and the mortise as well as the airway in the stem with alcohol, cotton swabs, hard bristle and soft bristle pipe cleaners. It was a very dirty pipe which just meant that it had really been enjoyed by the previous pipe man.
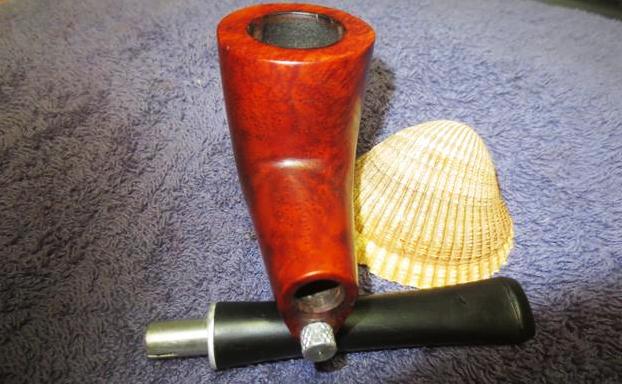
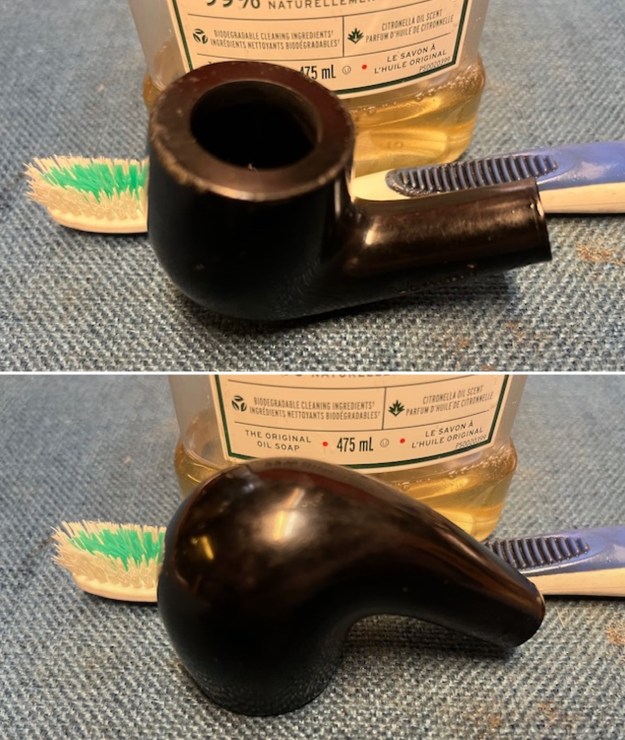
 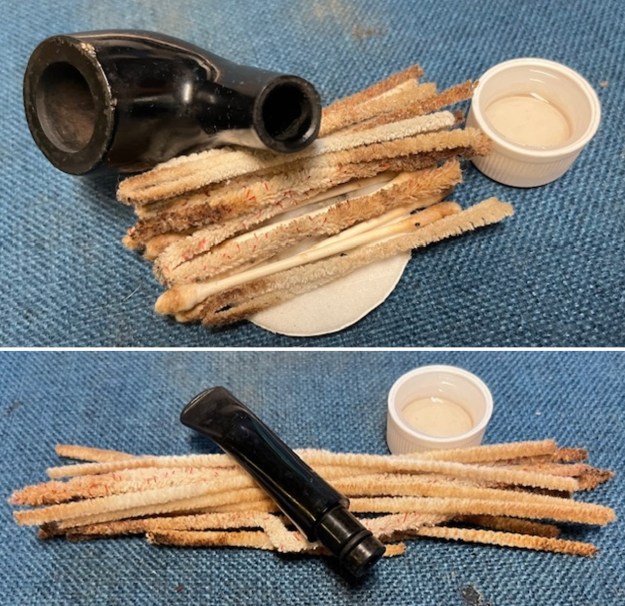 I scrubbed the exterior of the bowl and shank with a tooth brush and undiluted Murphy’s Oil Soap. I scrubbed the lava on the rim top and overflow on the outside of the bowl with the soap. I rinsed the briar with warm water to remove the grime and debris of the scrubbing. It looked significantly better after the scrubbing. Once I cleaned the bowl with the soap it looked much better.
 I touched up the scuffs on the outer edge of the bowl with a black stain pen. Though it was still a little rough the black stain touched up the damage and blended it into the surround resin bowl.
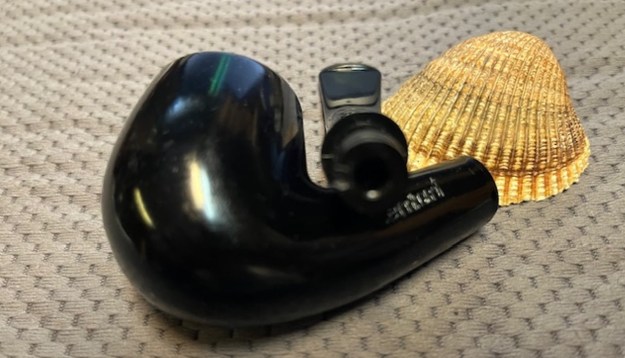
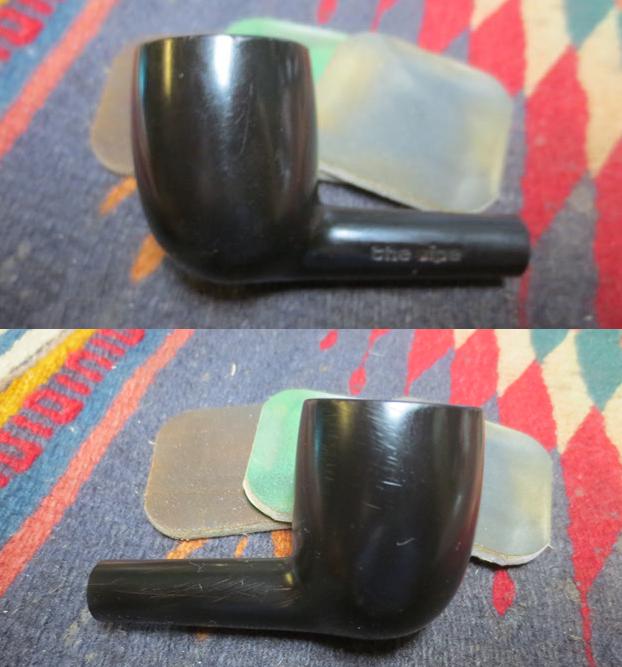
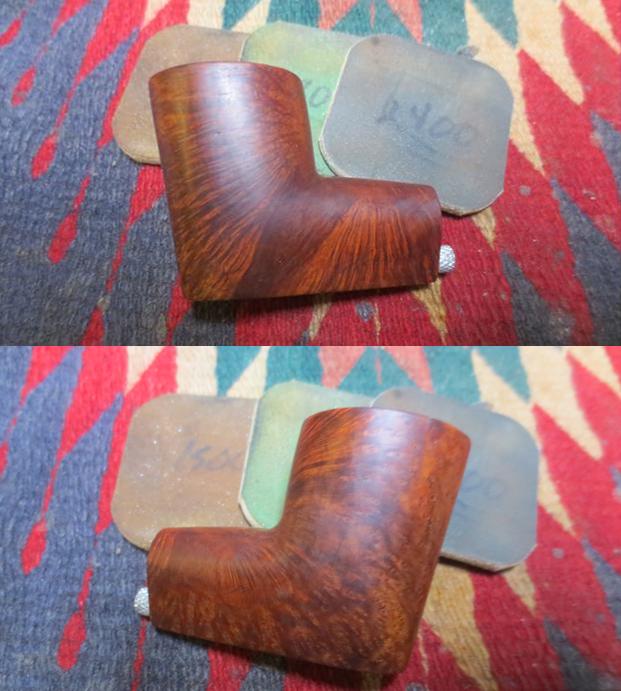
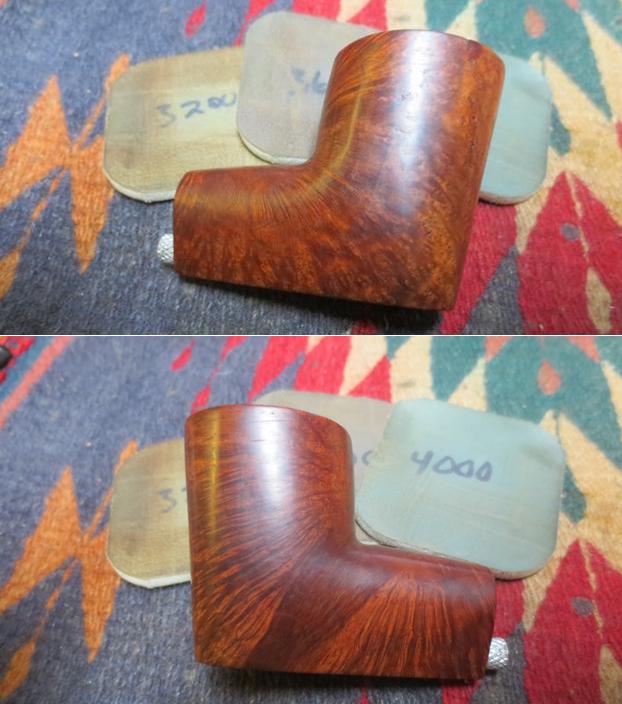
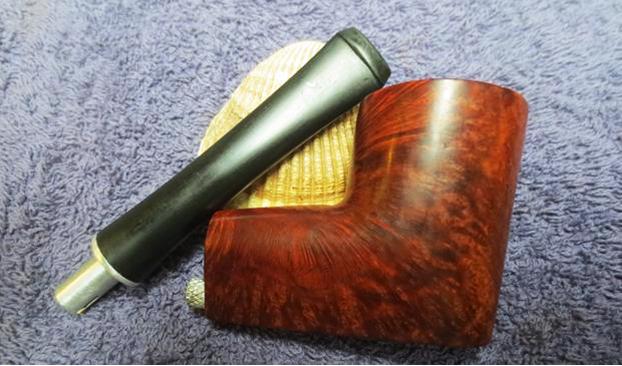
 I rubbed the bowl and shank down with Before & After Restoration Balm to deep clean the finish on the bowl and shank. The product works to clean, enliven and protect the briar and not resin but I thought it would work to a deep shine to the resin finish. I worked it in with my fingers to get it into the surface. I let it sit for 10 minutes then I wiped it off and buffed it with a soft cloth. The bowl began to have a rich shine. I took some photos of the bowl at this point to mark the progress in the restoration. It is a beautiful bowl.
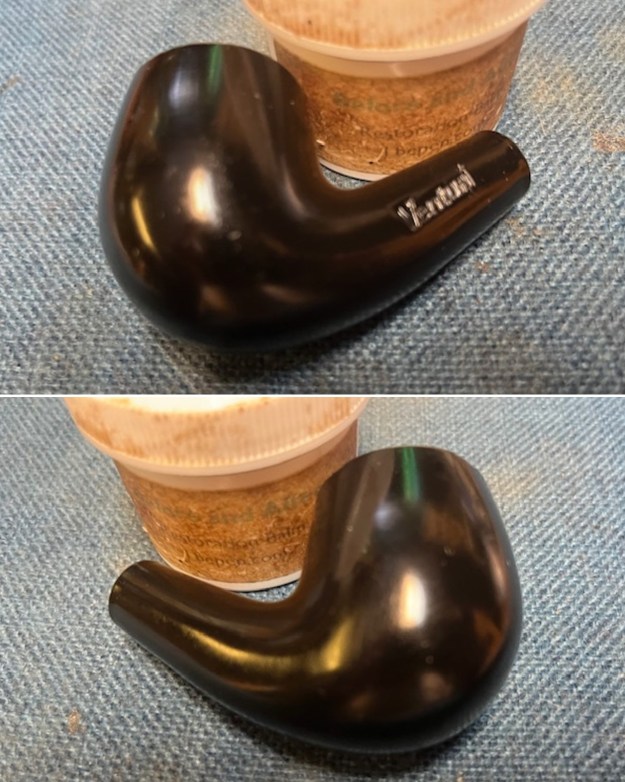
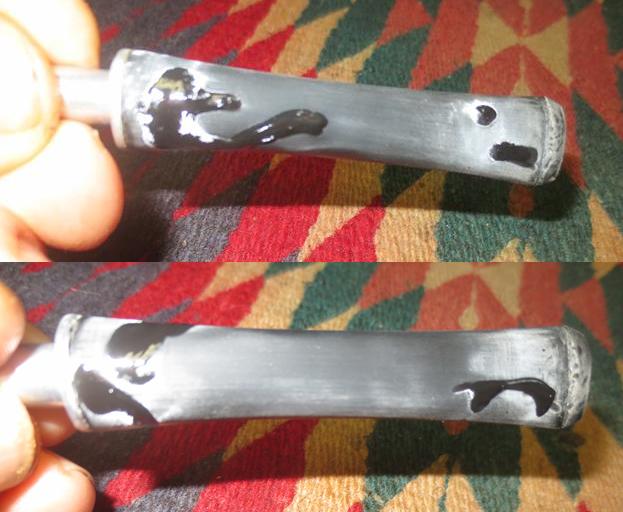
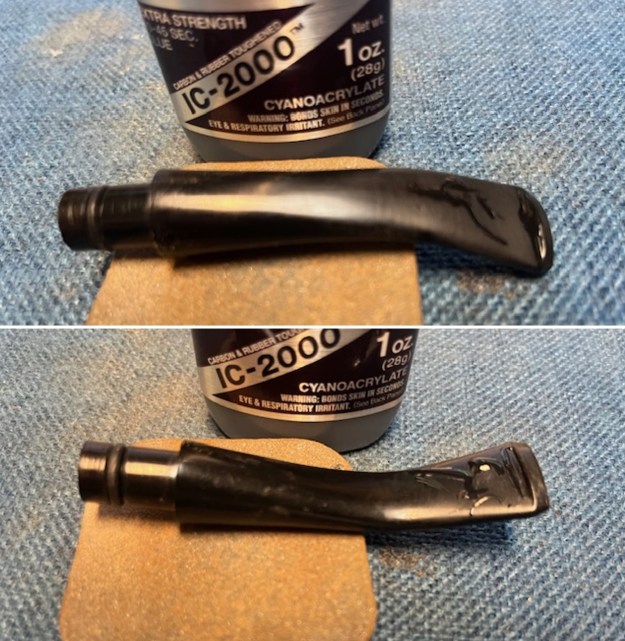
 I set the clean and polished bowl aside and turned my attention to the stem. I “painted” the surface of the stem with the flame of a lighter to try and raise the tooth marks. It surprisingly worked well. I filled in what remained with black rubberized CA glue. Once the glue repair cured I sanded it smooth with 220 grit sandpaper to smooth it out. It was smooth and all that remained was to polish it.
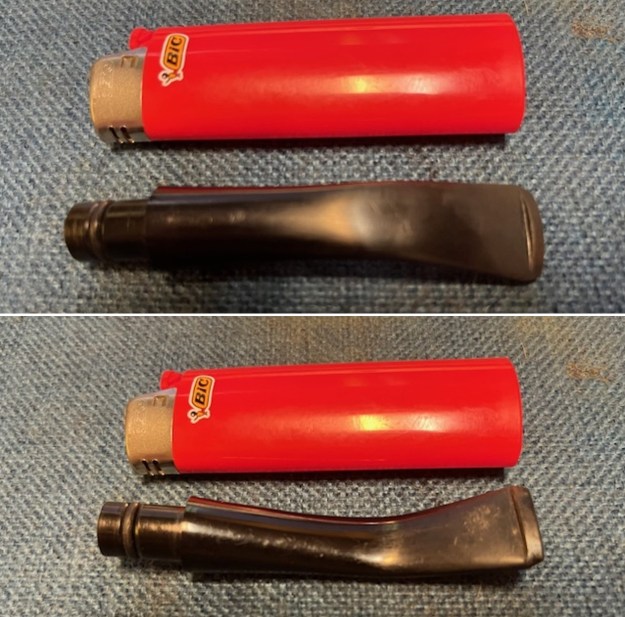
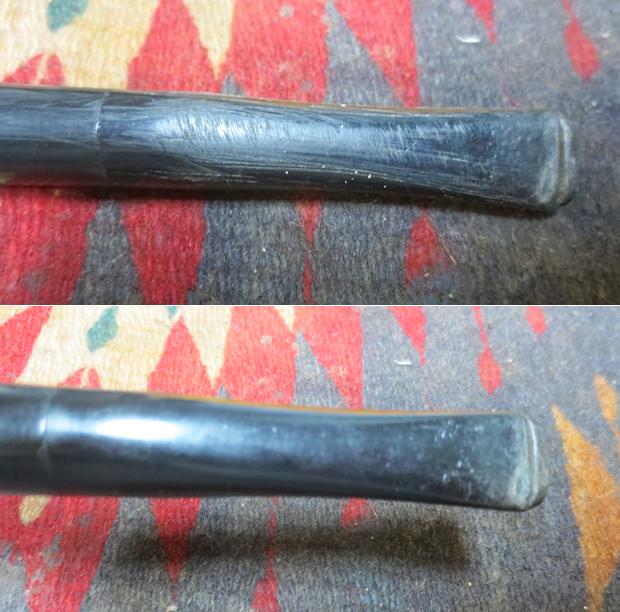
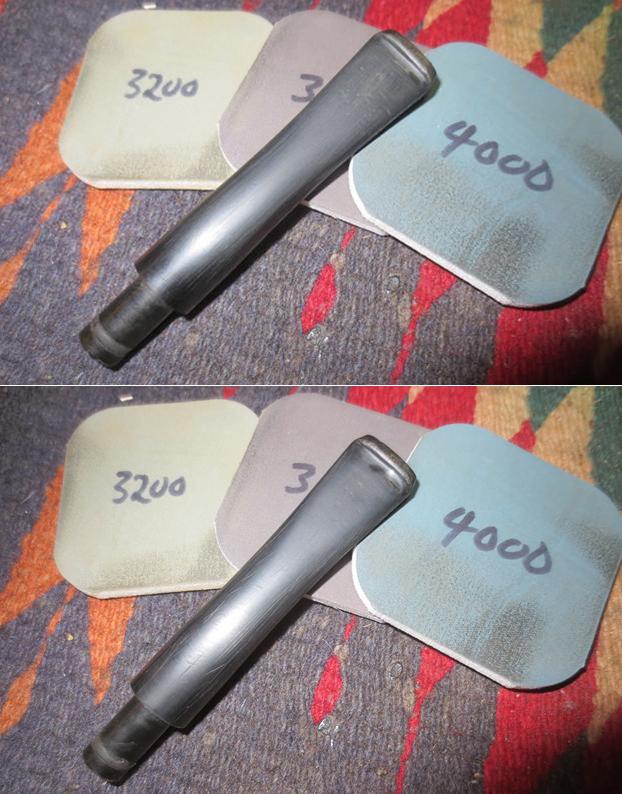
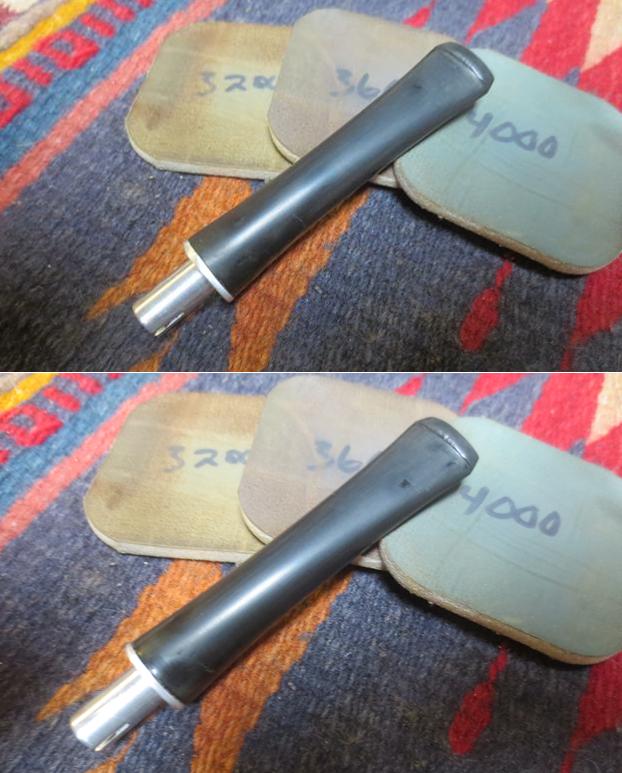
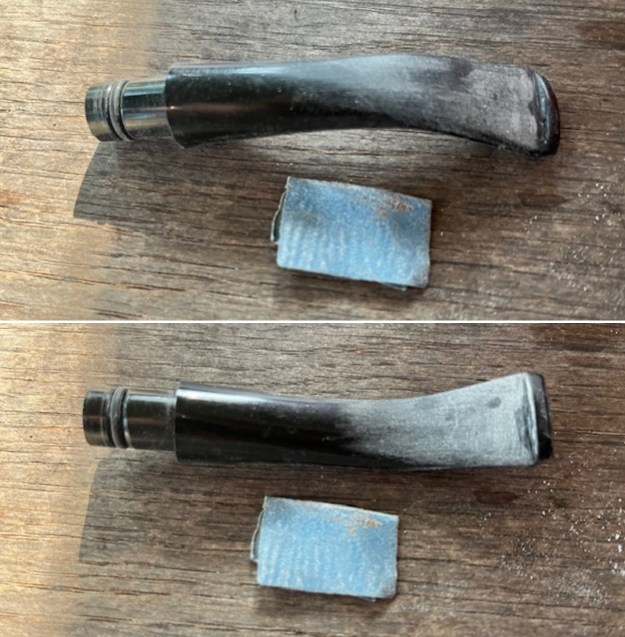 I wiped the stem down with olive oil and sanded the surface with the 2 x 2-inch sanding pads – 320-3500 grit pads to clean up the sanding marks on the stem surface. I wiped it down after each sanding pad and by the final 3500 grit pad the stem started to really shine.
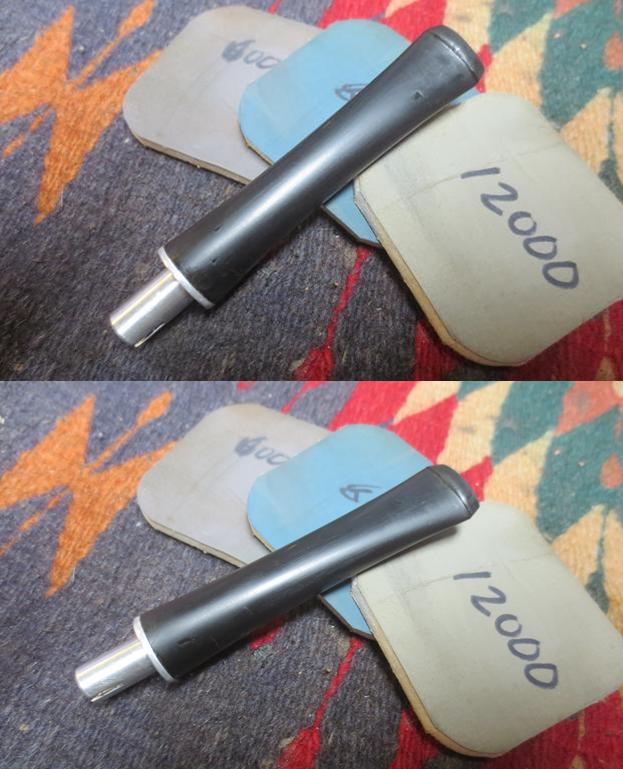
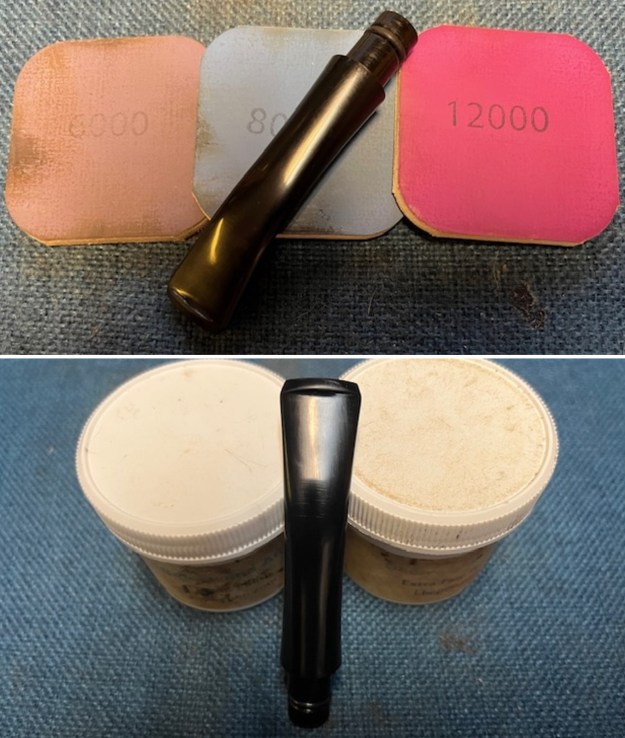
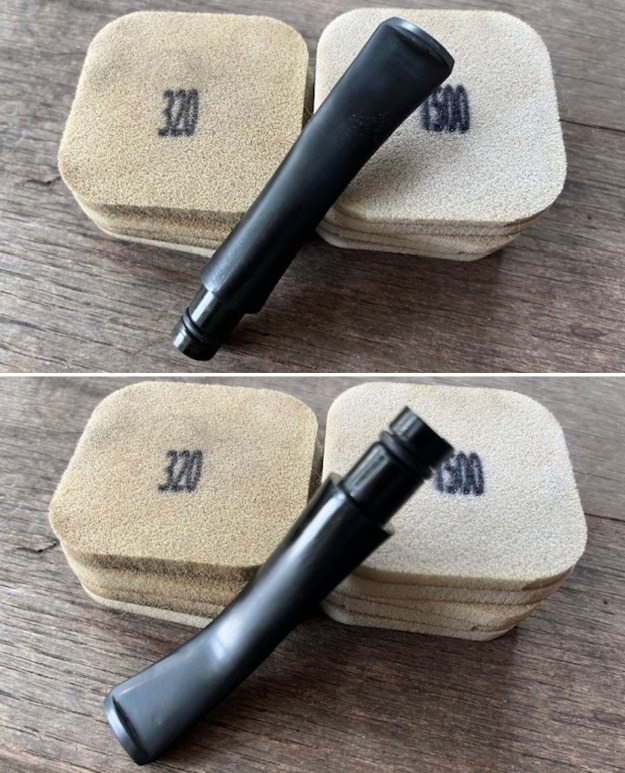 I polished the stem with micromesh sanding pads – dry sanding with 1500-12000 grit pads. I wiped the stem down after each sanding pad with Obsidian Oil. I gave the stem a final polish with Before & After Pipe Stem Polish both Fine and Extra Fine. I rubbed the stem with them and then gave them a final coat of Obsidian Oil. I set it aside to dry.
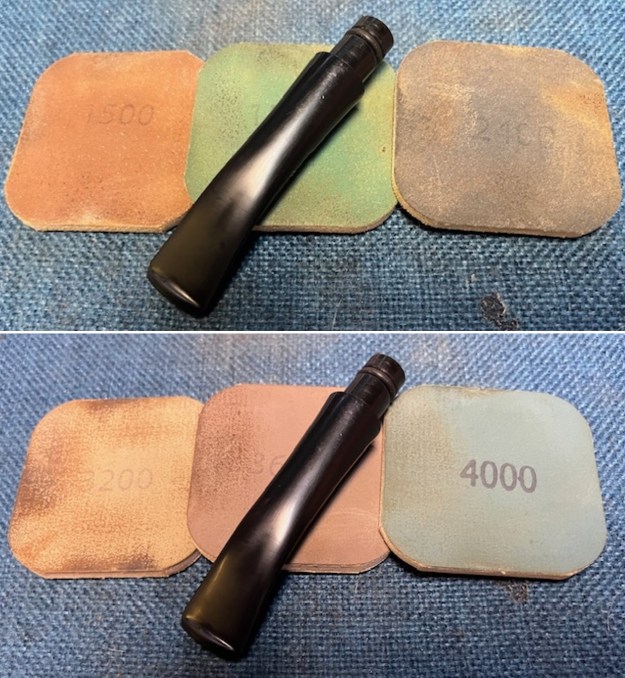
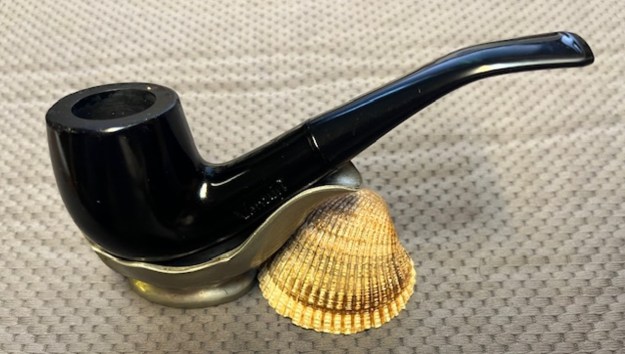
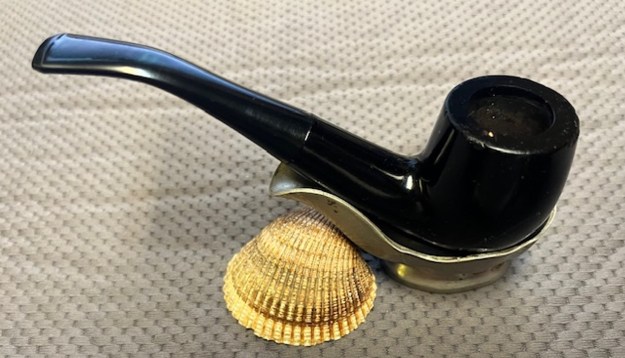
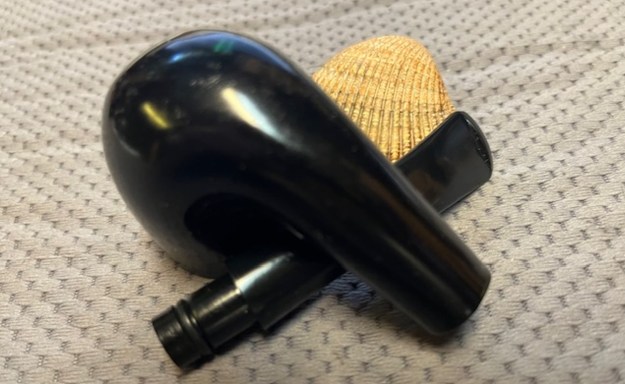
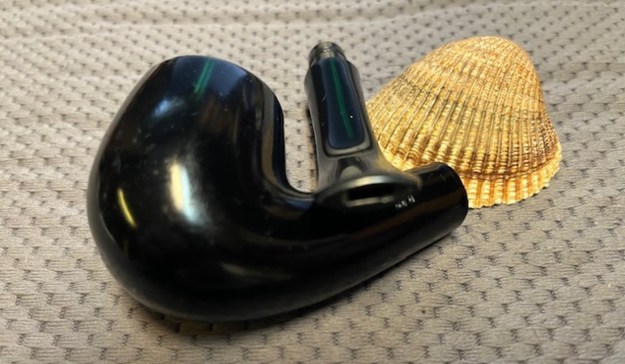
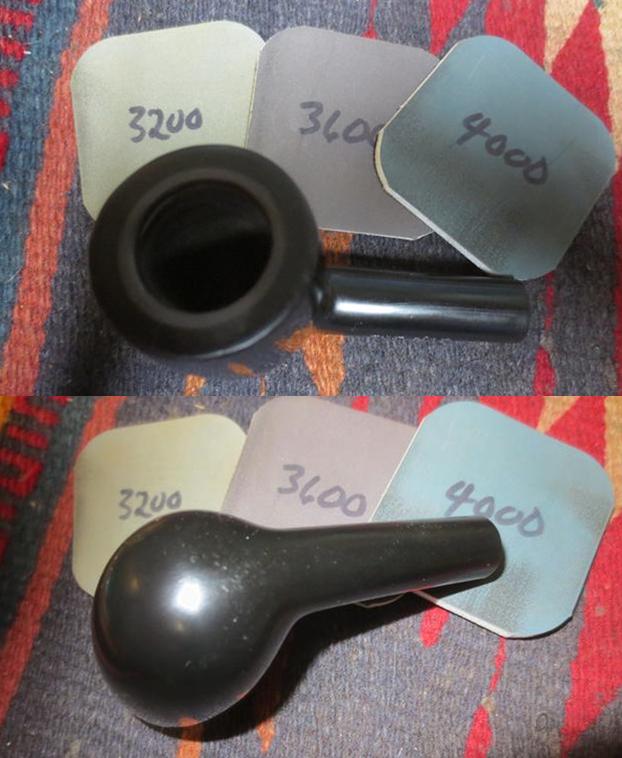
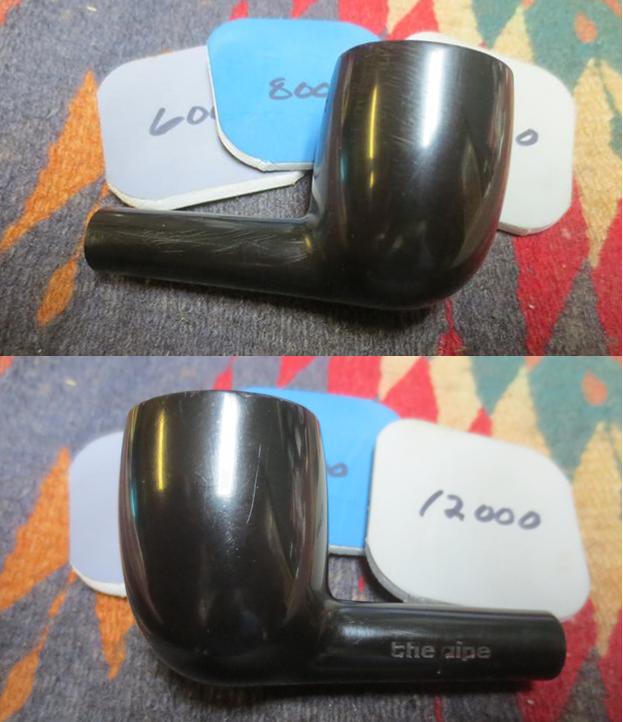
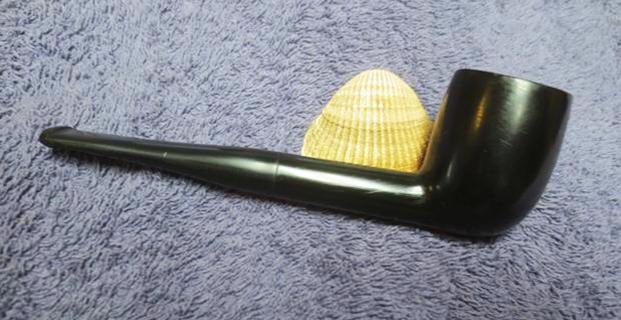
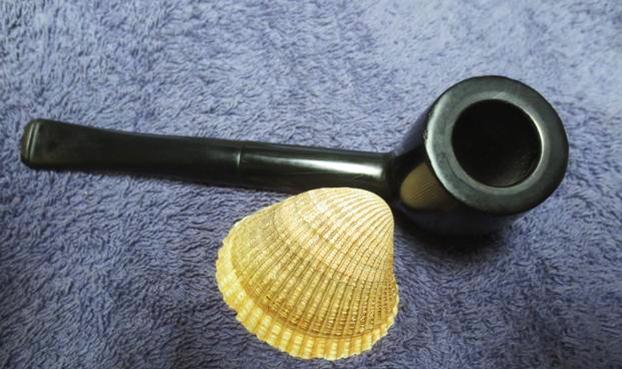
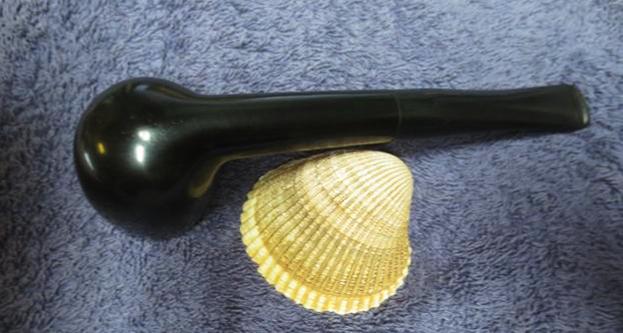
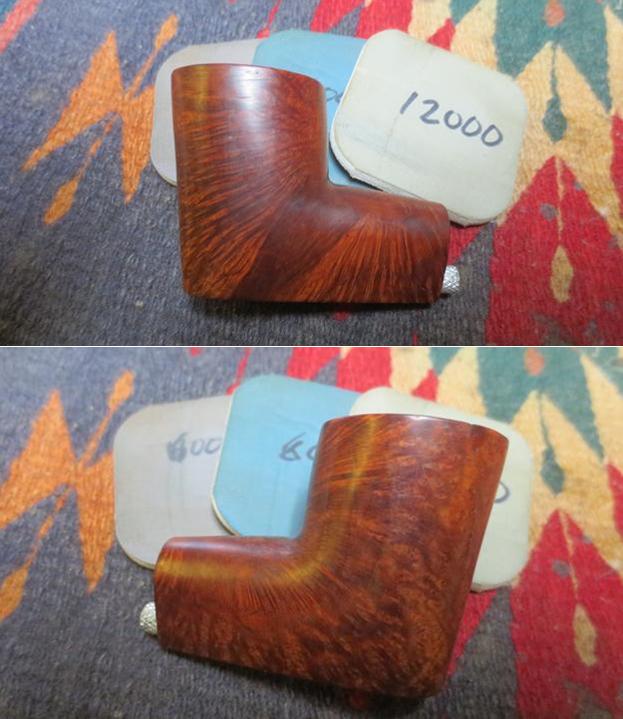
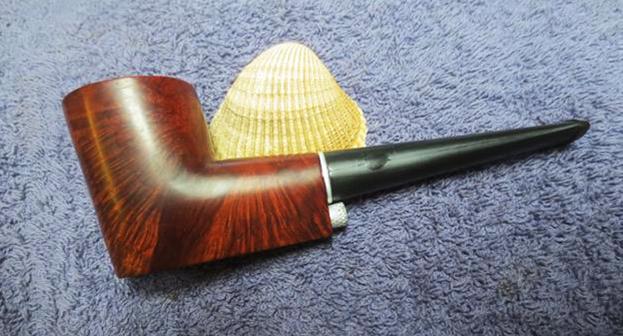
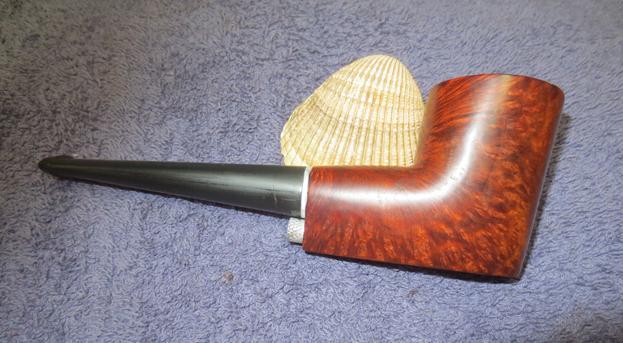
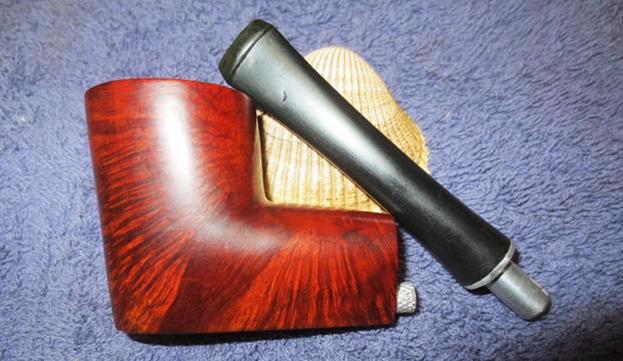
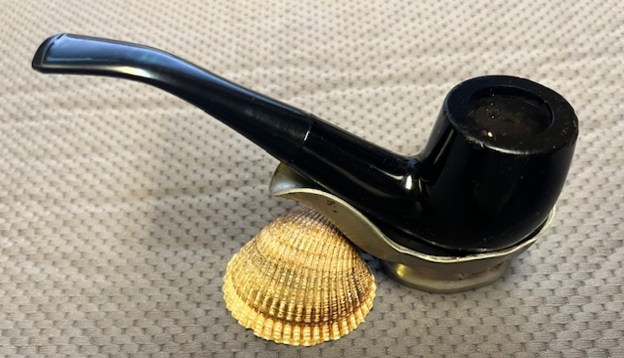
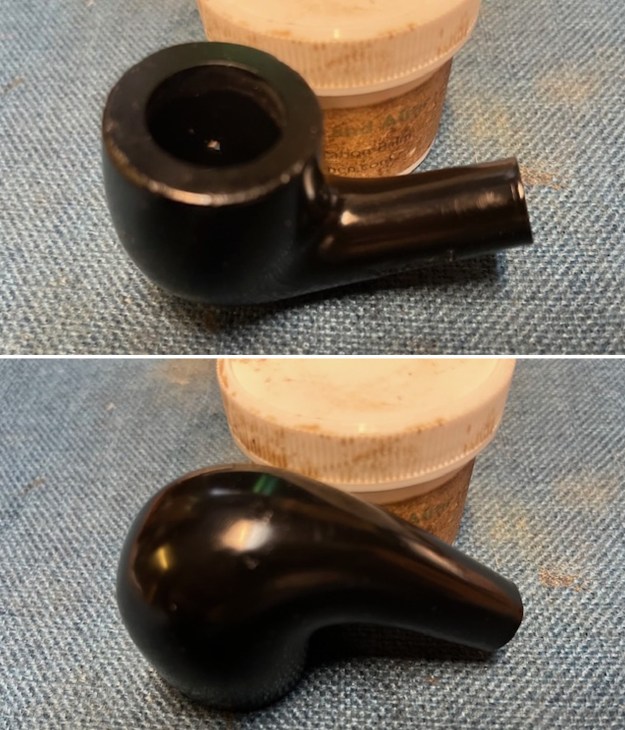
 I am excited to finish this Venturi Bent Billiard with a nylon taper stem. I put the pipe back together and buffed it with Blue Diamond on the buffing wheel. I gave the bowl and stem multiple coats of carnauba wax. I buffed the pipe with a clean buffing pad to raise the shine and then by hand with a microfibre cloth to deepen it. It is fun to see what the polished bowl looks like with the polished stem. This Black Venturi Bent Billiard is great looking and the pipe feels great in my hand. It is light and well balanced. Have a look at it with the photos below. The dimensions are Length: 5 inches, Height: 1 ¾ inches, Outside diameter of the bowl: 1 ¼ inches, Chamber diameter: ¾ of an inch. The weight of the pipe is 61 grams/2.15 ounces. This first of Terrica’s Dad’s pipes is a beauty. Once I have finished the second one I will send them back to here. I look forward to hearing what she thinks of both of these resurrected beauties. Both should be great memories of her late Dad.
As always, I encourage your questions and comments as you read the blog. Thanks to each of you who are reading this blog. Remember we are not pipe owners; we are pipe men and women who hold our pipes in trust until they pass on into the trust of those who follow us.