by Steve Laug
At the end of last week, I received an email from Terrica in Florida regarding some pipes that she wanted me to clean up for her. I have included her first email below:
I would like to send my deceased father’s old tobacco pipes for cleaning. I will not be using the pipes but would like to get them cleaned up so I can keep them on display.
I wrote back asking what the pipes looked like in terms of condition. I also wanted to know her general wishes on the clean up and how far she wanted me to go with it. She responded as follows and sent photos of the two pipes that I have included below.
Thank you very much for responding. As you can see, these are very inexpensive pipes. My deceased dad likely purchased them at a local drugstore. I have no doubt that they have never been cleaned.
I will never be using them, but I would at least like them presentable. Thank you very much, Terrica
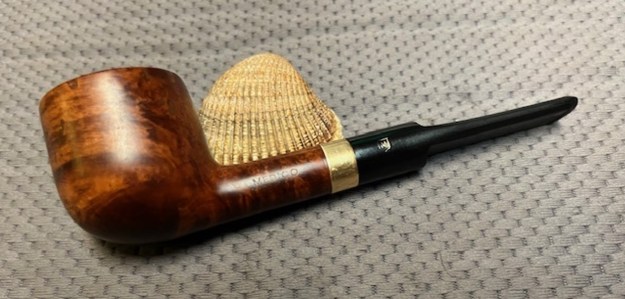
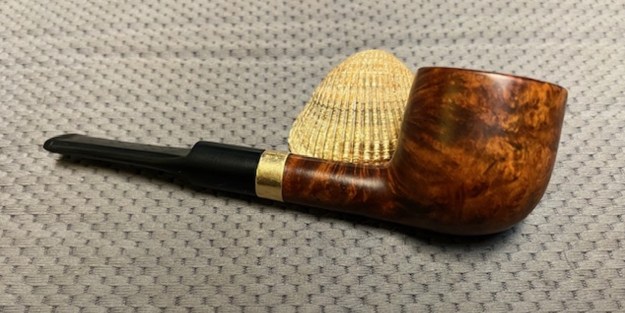
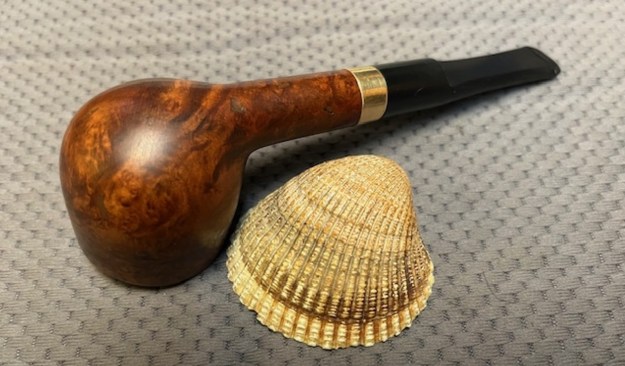
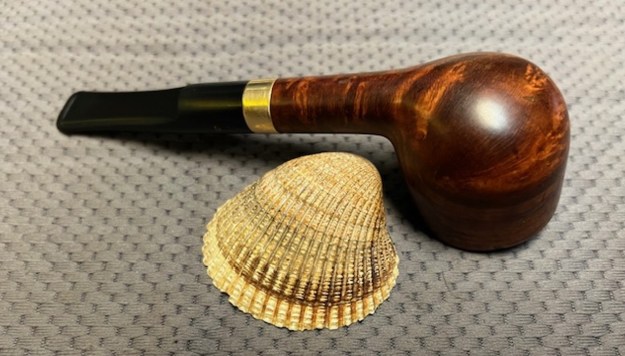
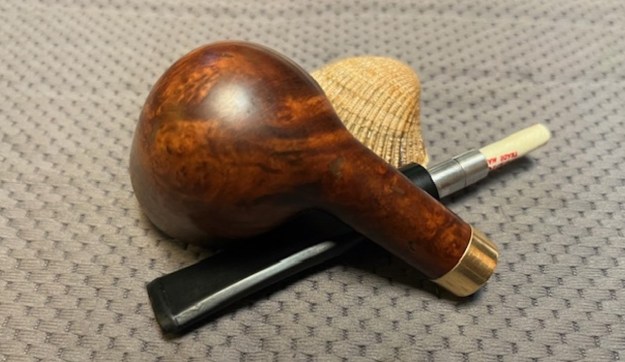
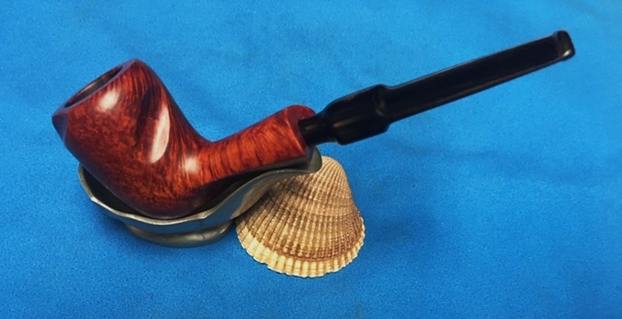
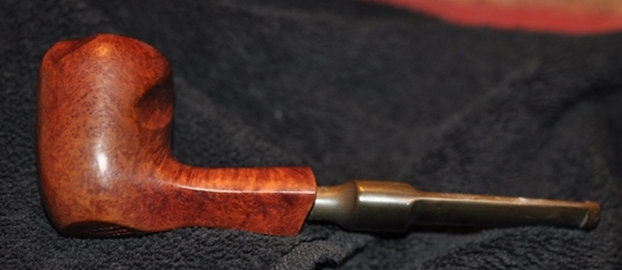
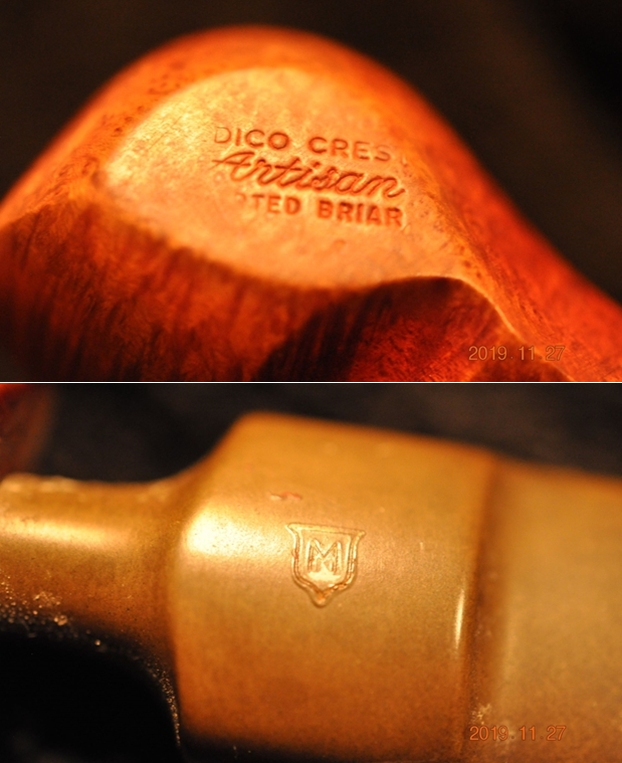
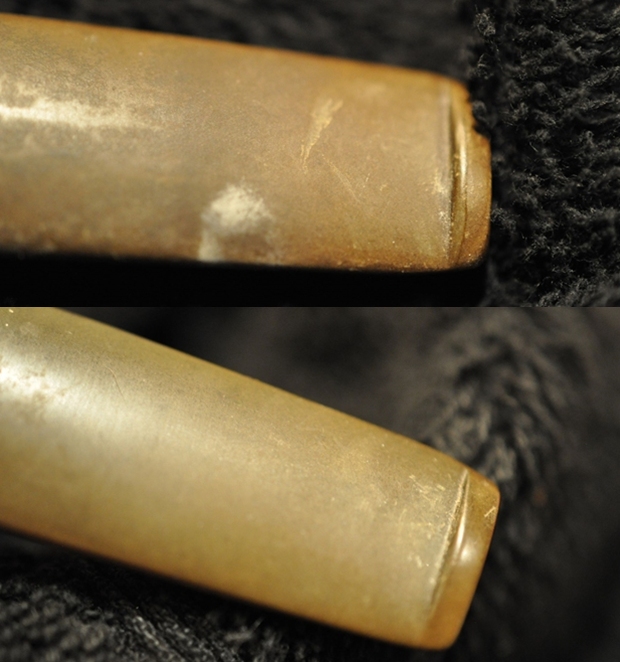
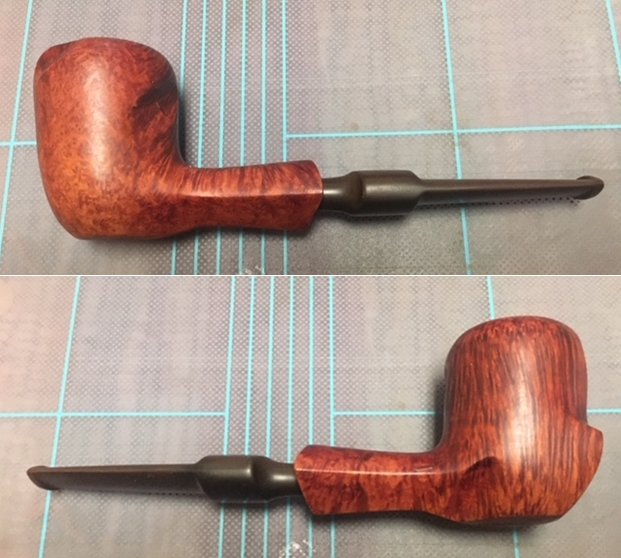
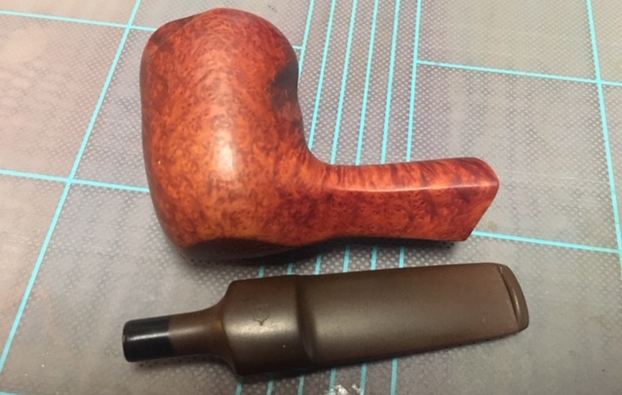
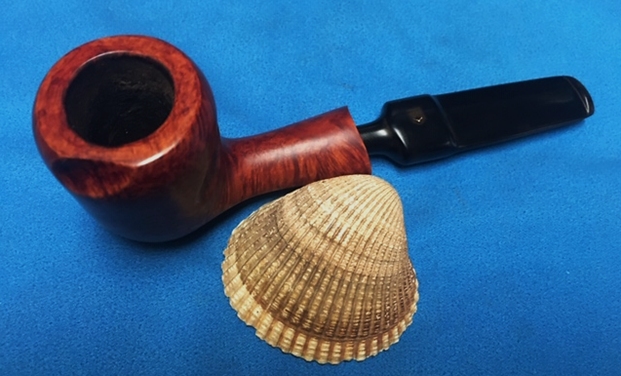
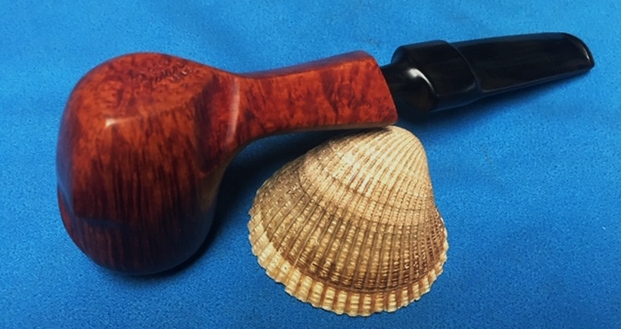
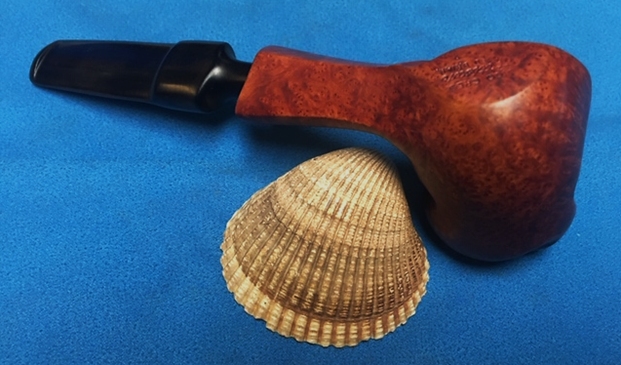
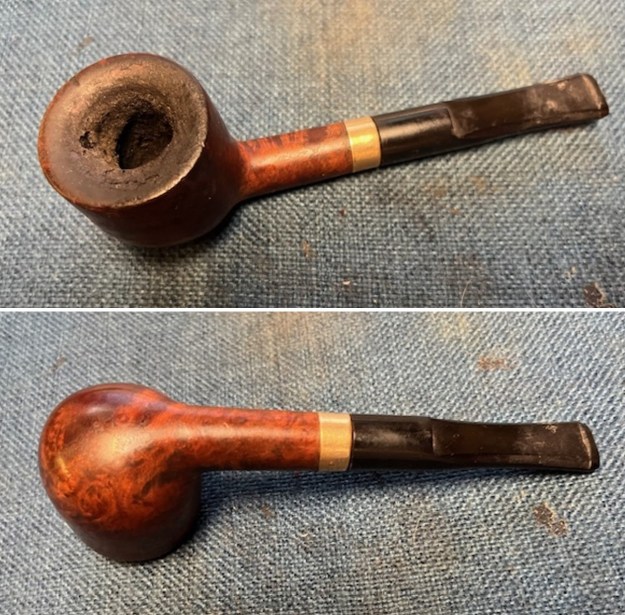
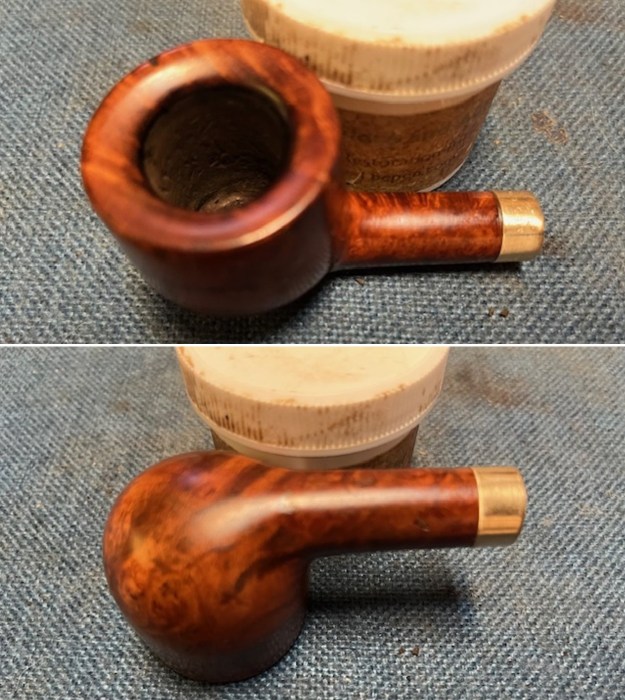
I took a look at the photos and was able to discern that the top pipe was a Medico Gold Crest Pot shaped pipe that had a thick cake in the bowl and was very dirty with grime ground into the finish. The stem, other than being very dirty did not have deep tooth marks. There was tooth chatter and grime on the vulcanite filter stem that would need to be cleaned up and removed. The second pipe was stamped Venturi and was made out of a resin that was used in The Pipe, The Smoke and the Venturi. This was a bent Billiard. It was dirty and had a cake in the bowl. The stem was also very dirty and had some tooth chatter on the surface.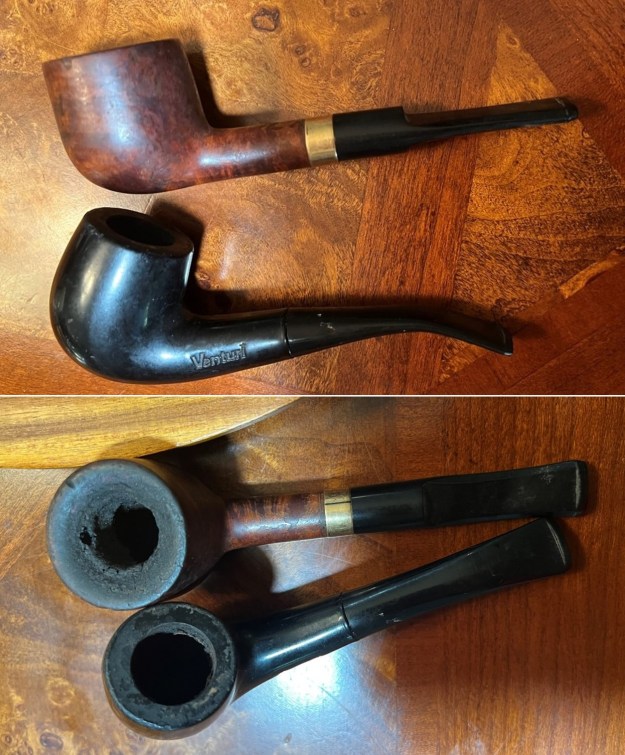 I chose to work on the Medico Gold Crest next. The finish was dirty and there were nicks around the outer edge of the rim top. The inwardly bevelled rim top was very dirty with a thick lava build up and there was a thick cake in the bowl. The stamping on the left side of the shank was clear but had a lot of dust in the stamping. It read as noted above – Medico [over] Gold Crest [over] Imported Briar. On the right side of the shank it is stamped 149 (shape number). There is a 14K gold plated band on the shank that is stamped Medico [over] 1/30 14K RGP. The “1/30 14K RGP” likely refers to the gold content of the band, indicating it is a 14K gold rolled gold plate. The stem appears to be a Medico synthetic rather than rubber but I am not sure. There surface as dirty and had some build up ahead of the button on both sides. There was some tooth chatter on both sides ahead of the button edge. The pipe smelled of the tobacco that had obviously been smoked in it. The style of the build up/cake make me think of a drug store tobacco of the style of Prince Albert or Sir Walter Raleigh. I will certainly l know more once work on the second pipe. I took photos of the pipe before I started my work on it.
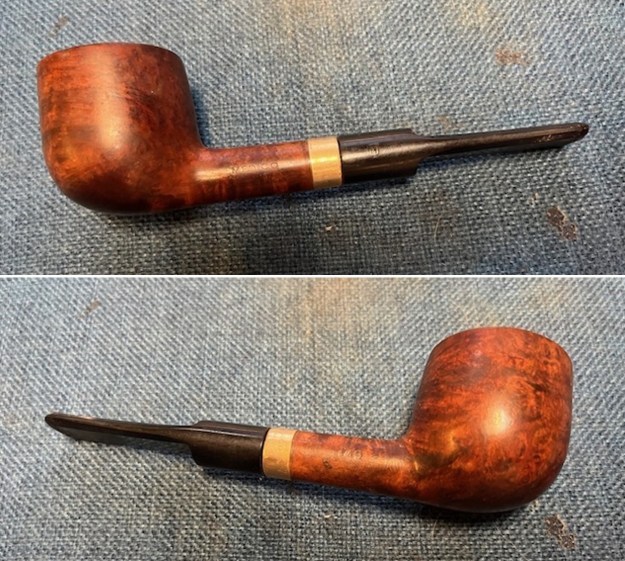
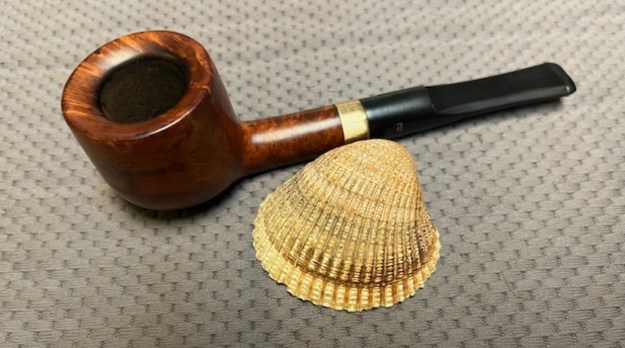
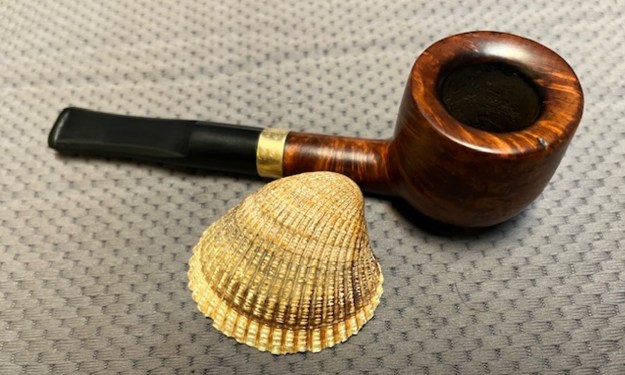
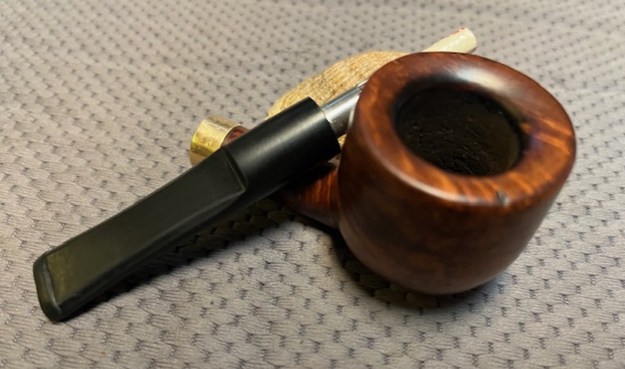
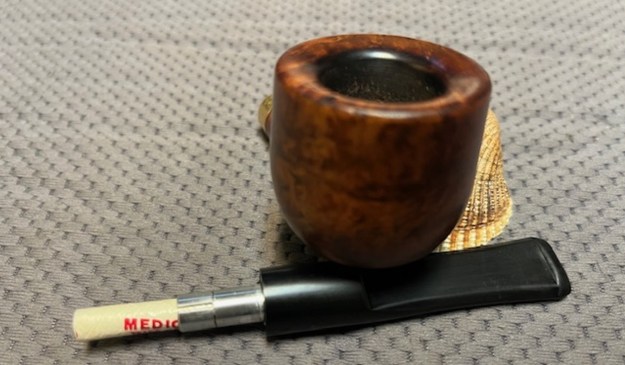
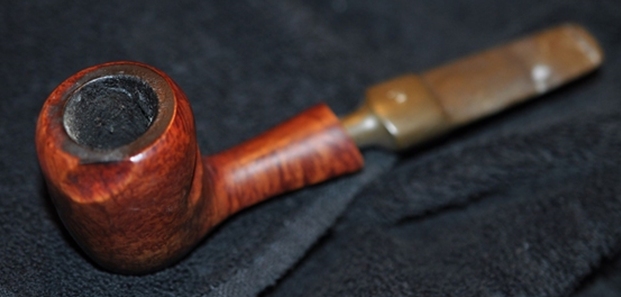
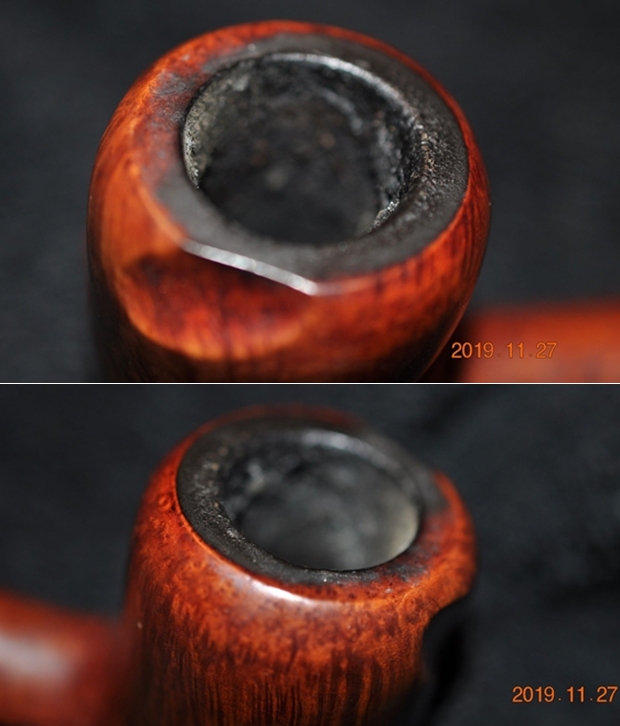
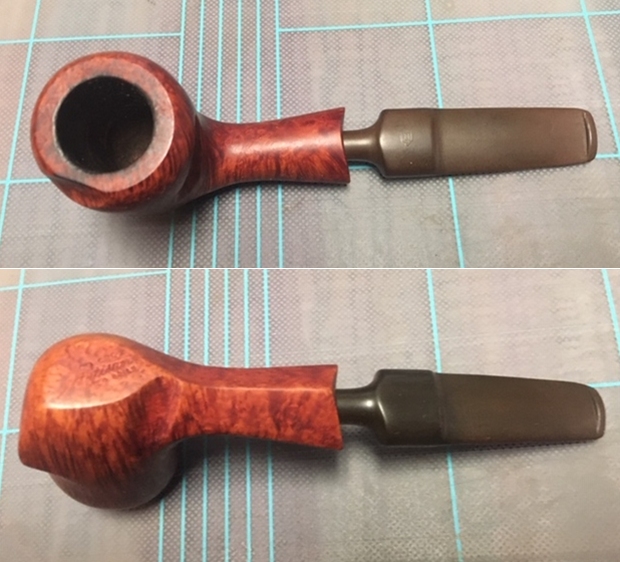
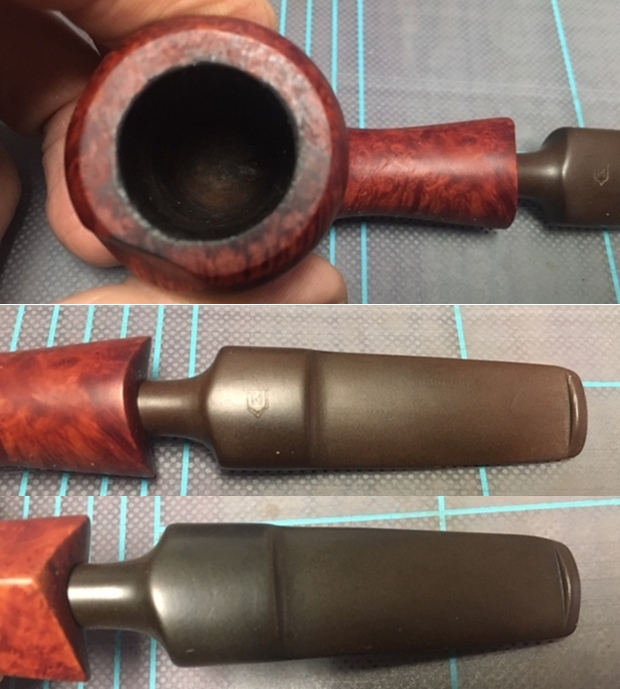
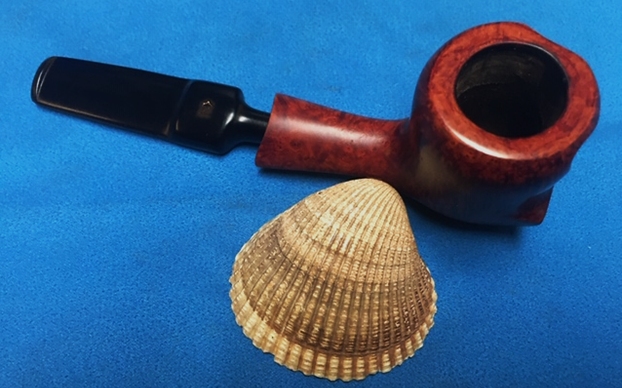
 I took photos of the rim top and the stem to show the condition. You can see the cake in the bowl and the thick overflow of lava on the rim top. The photos of the stem show the tooth marks and chatter on the top and the underside of the stem.
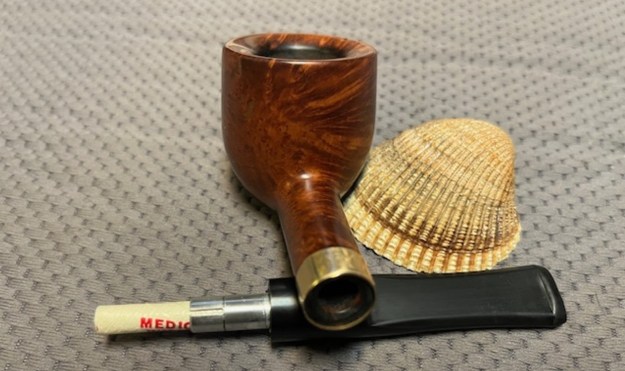
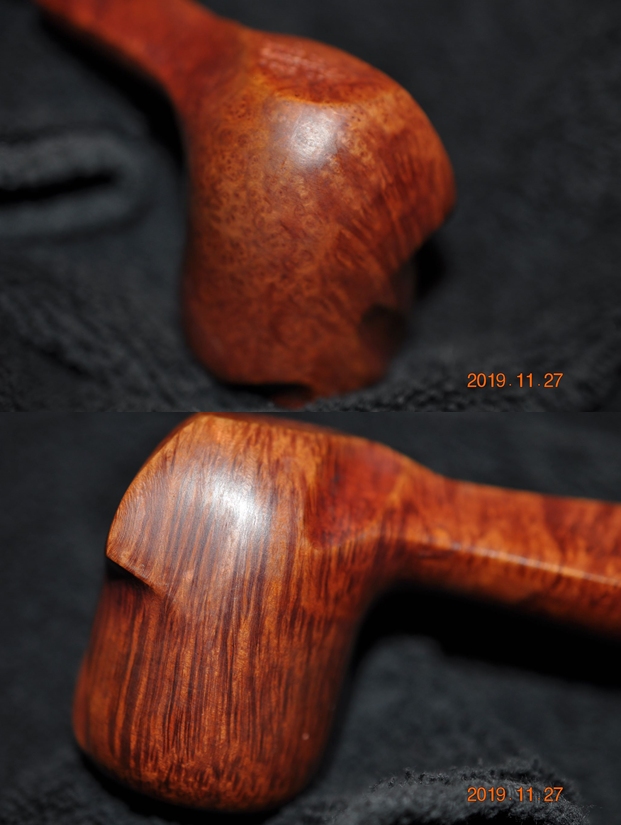
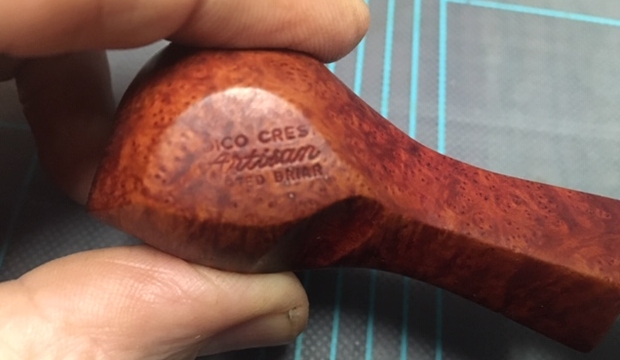
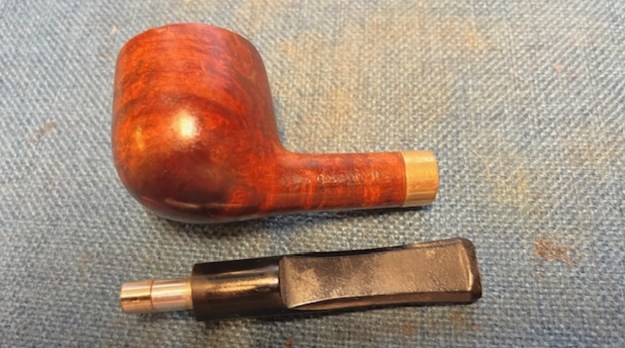
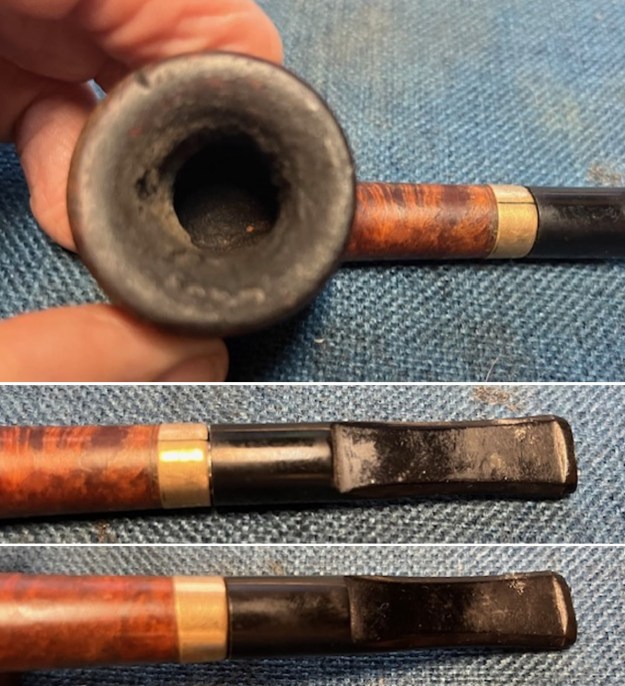 I took a photo of the stamping on the left side of the shank to capture it. The left side read as noted above. I removed the stem and took a photo of the parts to give a sense of the look of the pipe.
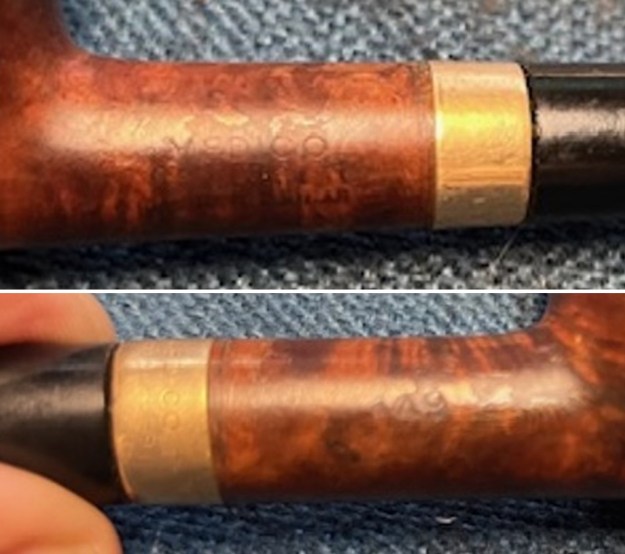
 I paused in the restoration to gather backgound on the brand. I turned first to Pipephil’s site to see what I could learn (http://www.pipephil.eu/logos/en/logo-medico.html). I have included a screen capture of the section on the Gold Crest. The stamping shown in the capture below is identical to the one that I am working on.
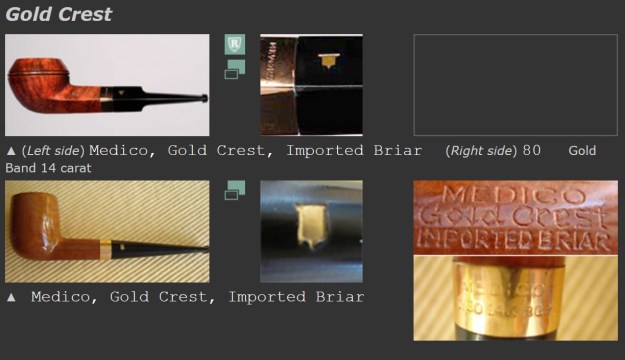 From there I turned to Pipedia to see if I could gather more information on the brand as a whole and specifically the Gold Crest Line (https://pipedia.org/wiki/Medico). I quote below:
Medico was created in 1933, and is still produced by S.M. Frank. The brand is famous for its pipe filters, which were launched in the same year. Since 1966, some models have been made in Brylon, a synthetic material, and others in briar. The brand was also sold by the English company Cadogan and Oppenheimer Pipe. Symbol: M inside a shield, although early pipes, like the example bellow, had a + sign, like a Medic would have on their sleeve.
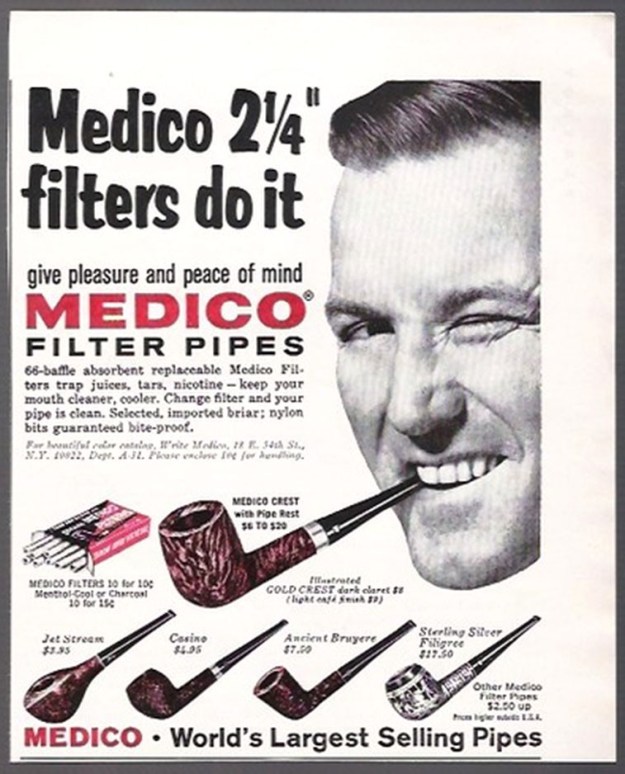
I have also included some of the advertising flyers that were on the site as well. They give a sense of the pipe’s look and feel and the old descriptions are great to read. 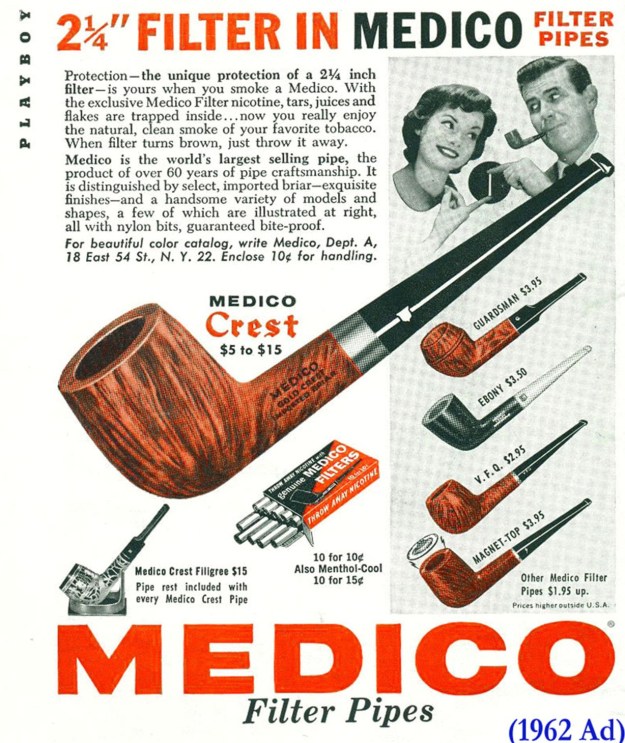
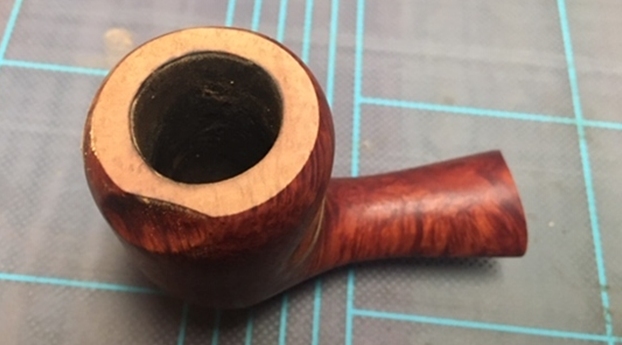
 Now it was time to turn my attention to the pipe itself. I started my work on it by reaming the bowl with a PipNet reamer. I used the first cutting head and took the cake back to bare briar. I cleaned up the reaming with a Savinelli Fitsall Pipe Knife and removed all the remnants of the cake. I scraped the rim top with the flat edge of the blade at the same time and removed most of the thick lava build up. I sanded the walls of the bowl with a piece of dowel wrapped in 220 grit sandpaper. The walls look very good at his point in the process.
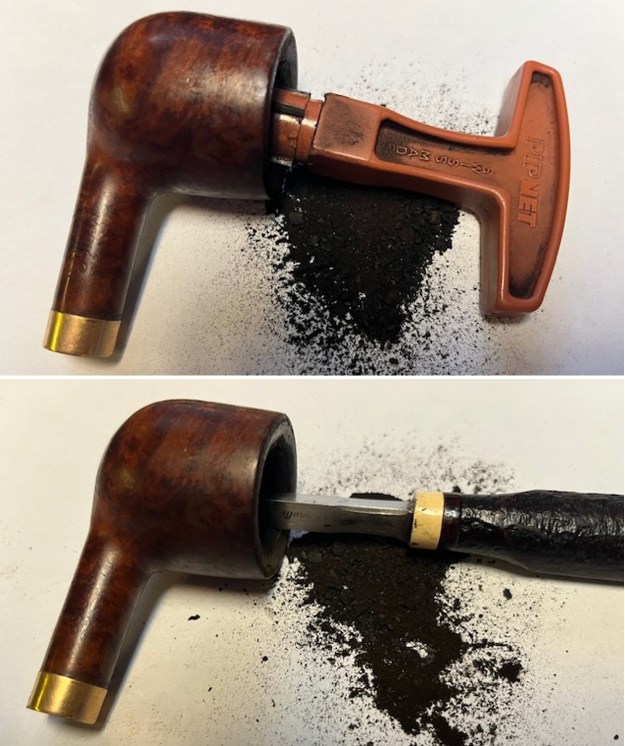
 I cleaned out the shank, the airway and the mortise as well as the airway in the stem with alcohol, cotton swabs, hard bristle and soft bristle pipe cleaners. It was a very dirty pipe which just meant that it had really been enjoyed by the previous pipe man.
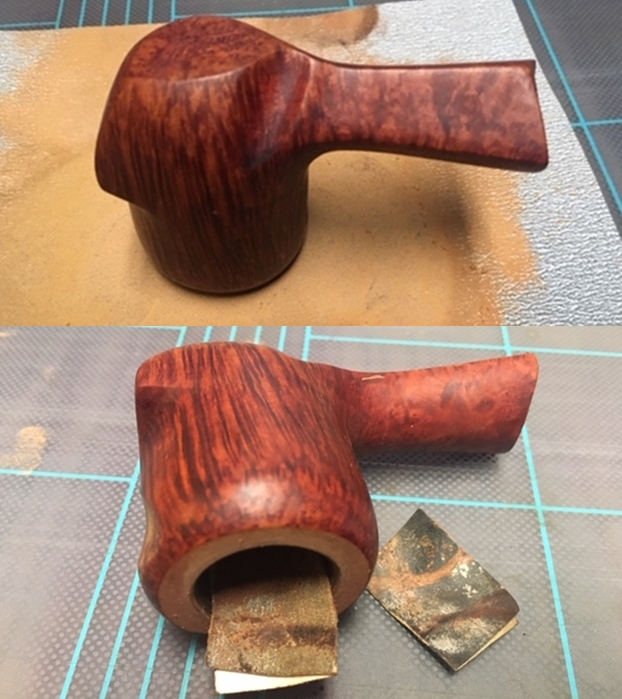
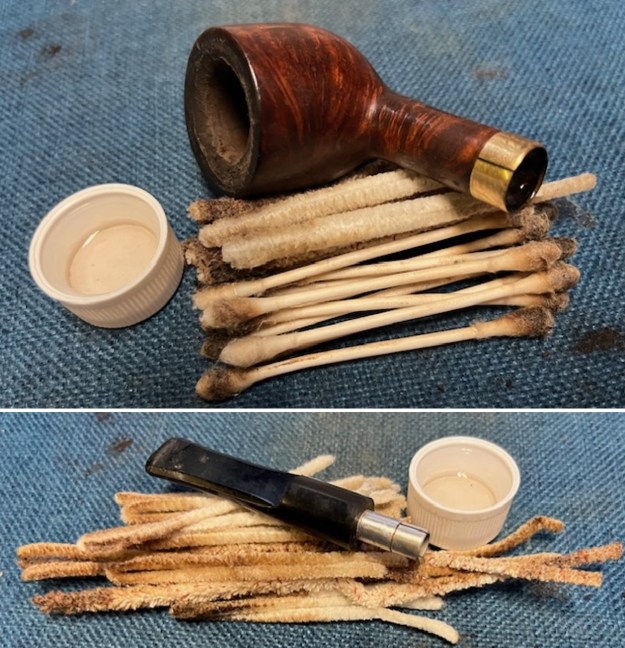 I scrubbed the exterior of the bowl and shank with a tooth brush and undiluted Murphy’s Oil Soap. I scrubbed the lava on the rim top and overflow on the outside of the bowl with the soap. I rinsed the briar with warm water to remove the grime and debris of the scrubbing. It looked significantly better after the scrubbing. Once I cleaned the bowl with the soap it looked much better.
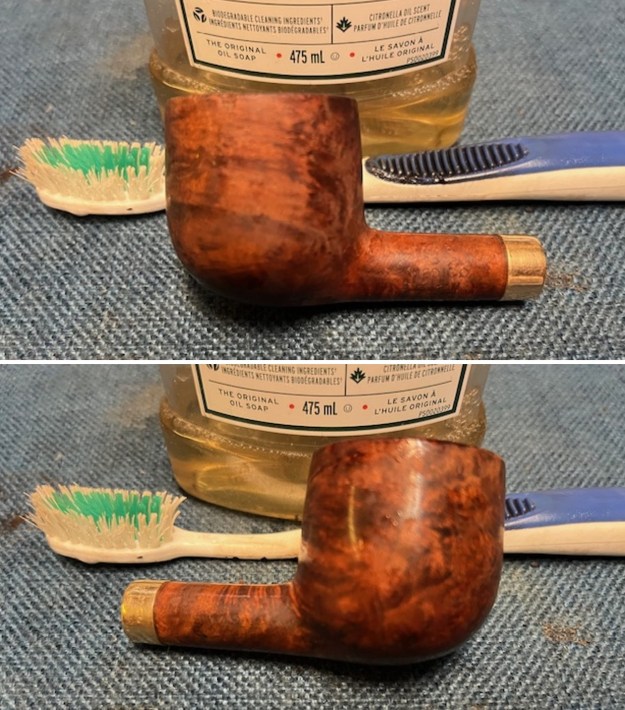
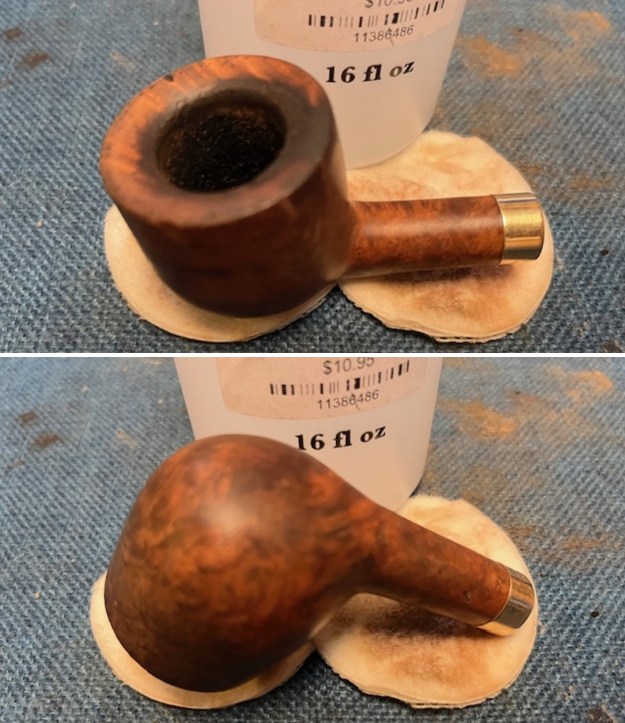
 I wiped the bowl down with acetone on cotton pads to remove the spotty varnish coat on the bowl and to break up the darkening on the top of the rim.
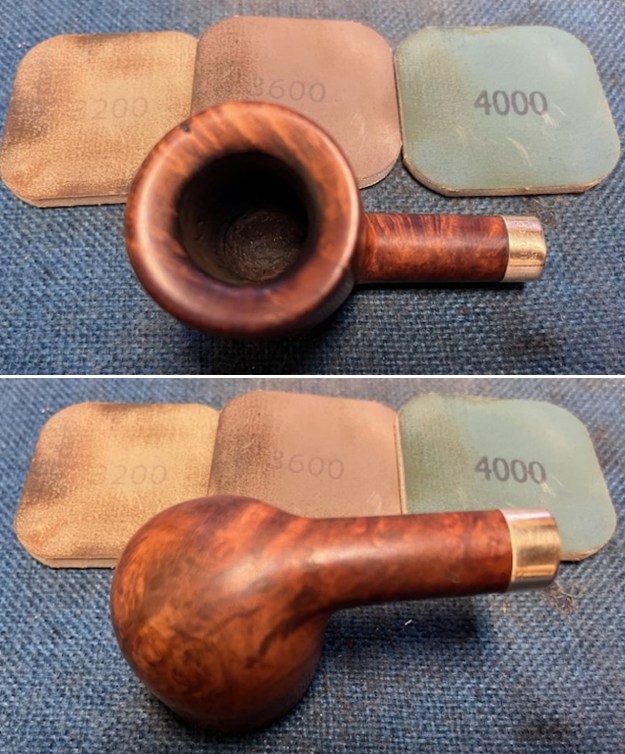
 I worked over the darkening on the back topside and inner edge of the bowl with 220 grit sandpaper. It took a lot of elbow grease but it was getting better with each piece of sandpaper.
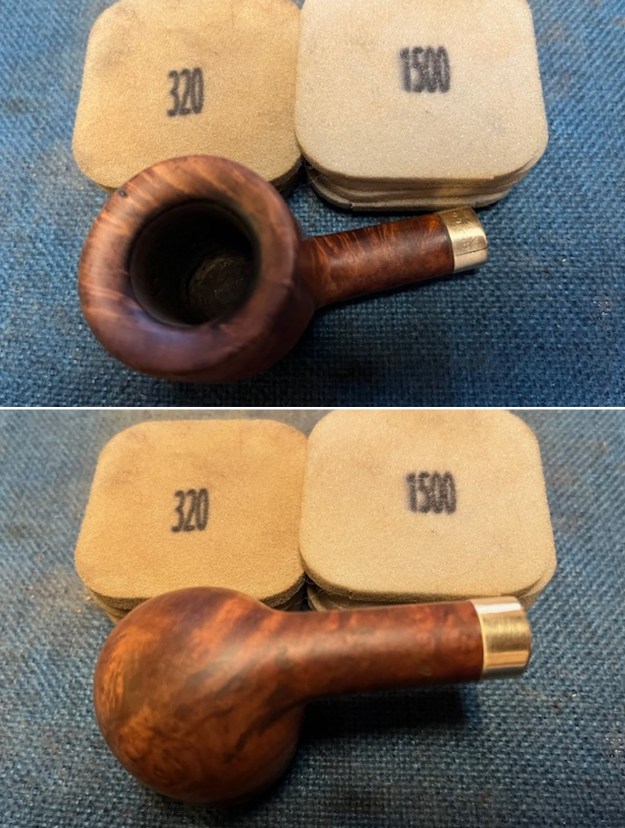
 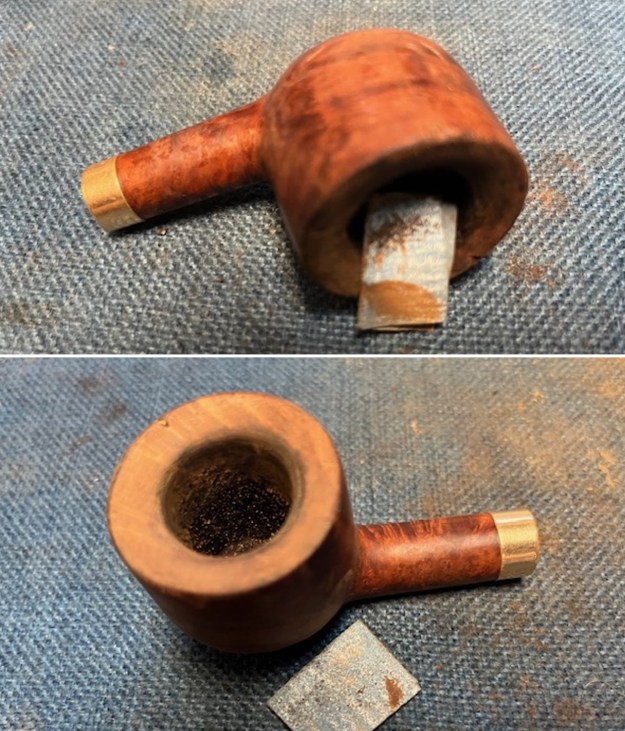 I sanded the briar further with 320-3500 grit 2×2 inch sanding pads. I wiped the bowl down with a damp cloth after each sanding pad. It began to look very good.
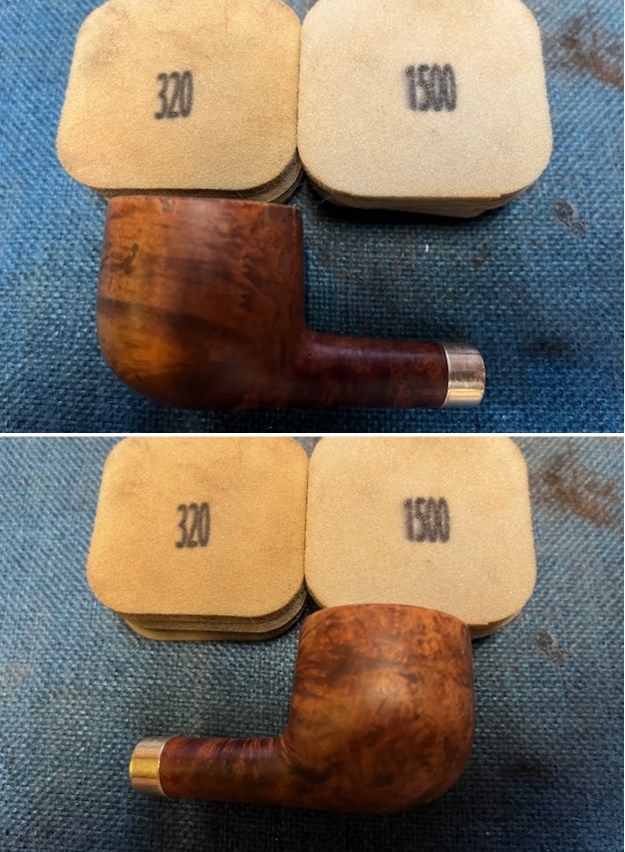
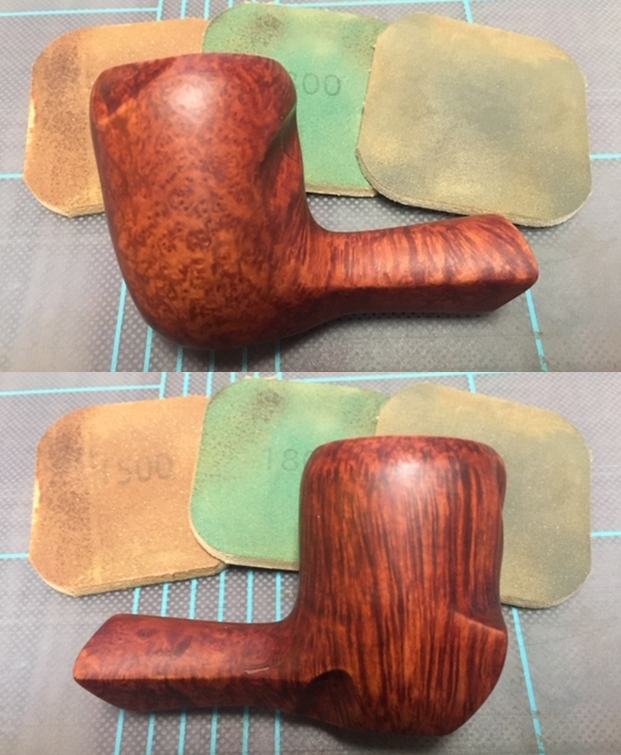
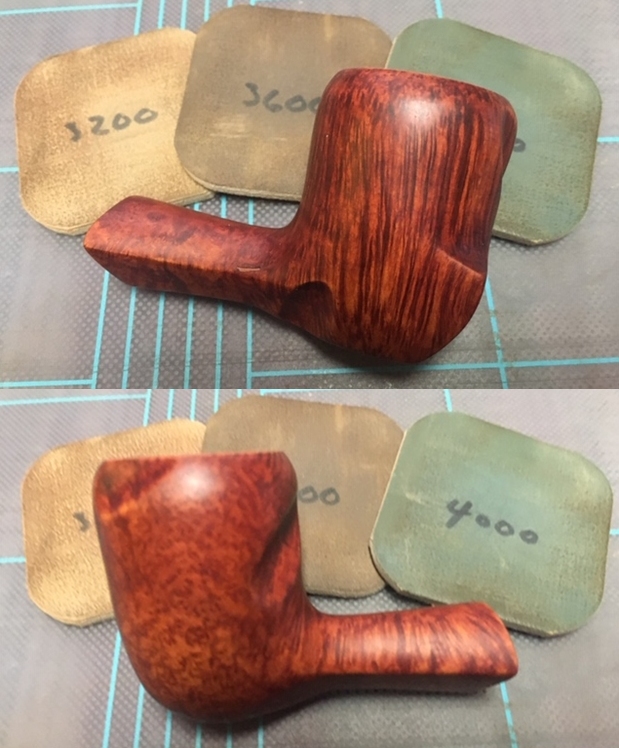
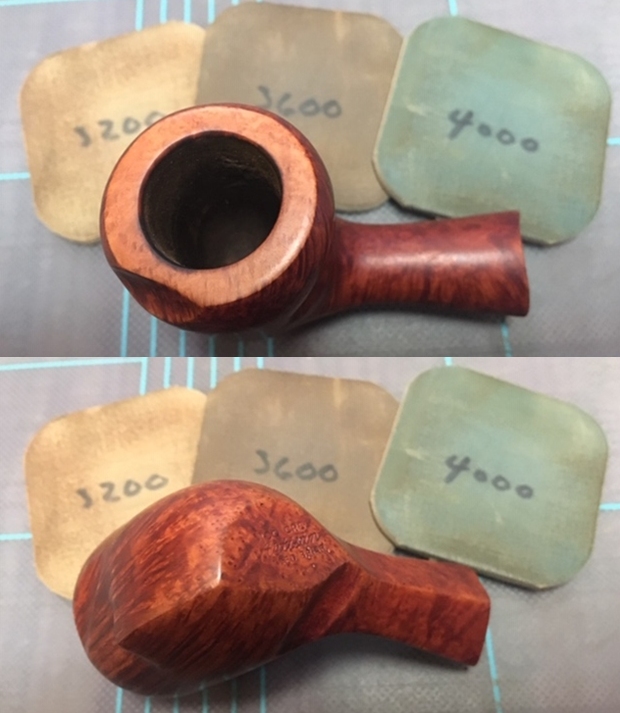
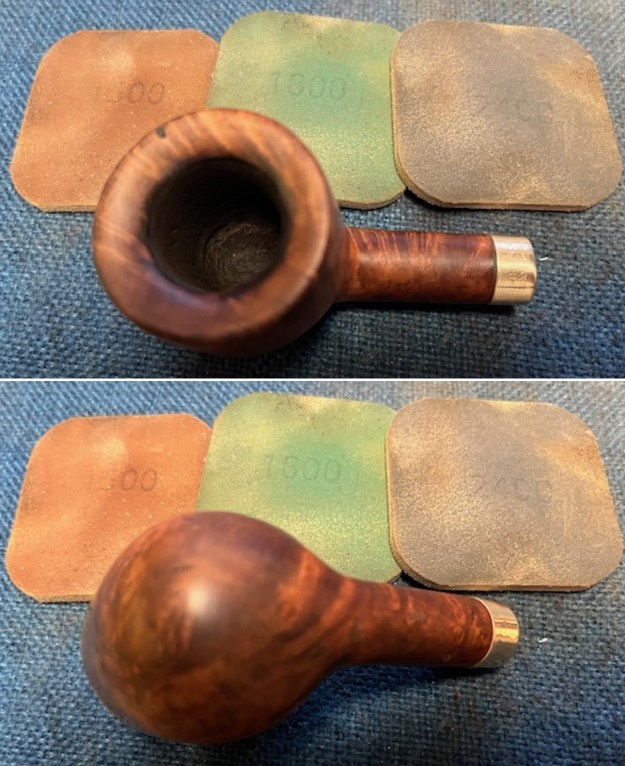
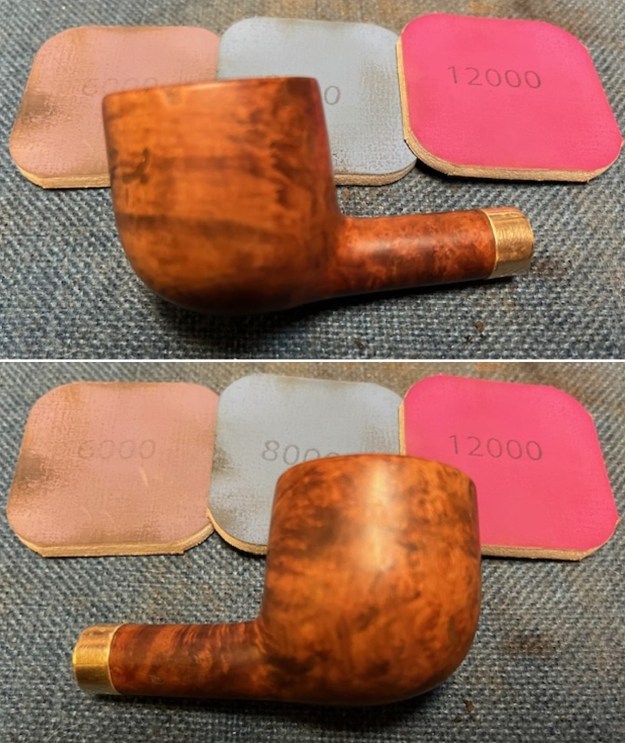
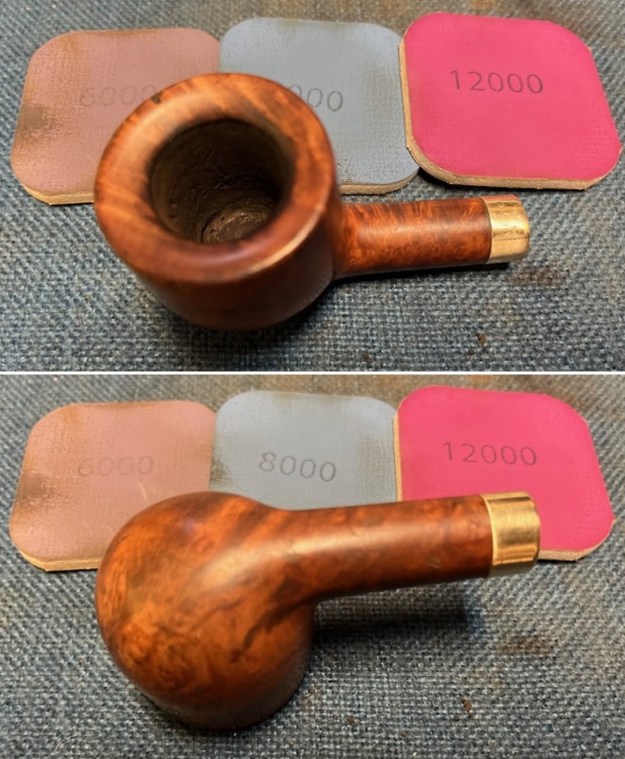
 I polished the briar bowl with micromesh sanding pads – dry sanding with 1500-12000 grit pads. I wiped the bowl down after each sanding pad with an olive oil cloth. By the final sanding pad the bowl had taken on a significant shine.
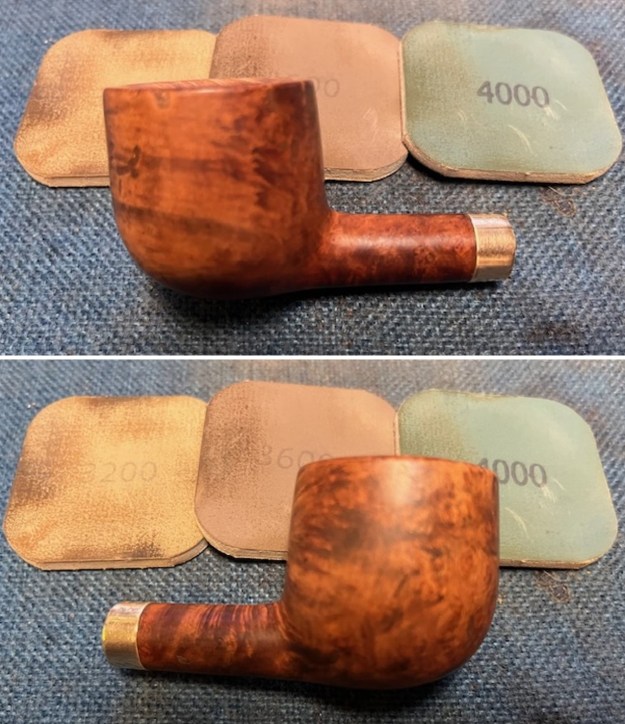
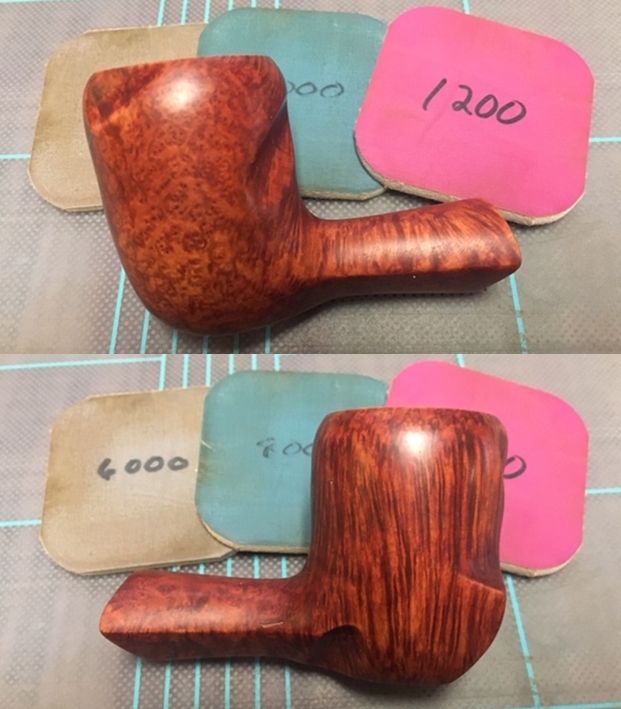
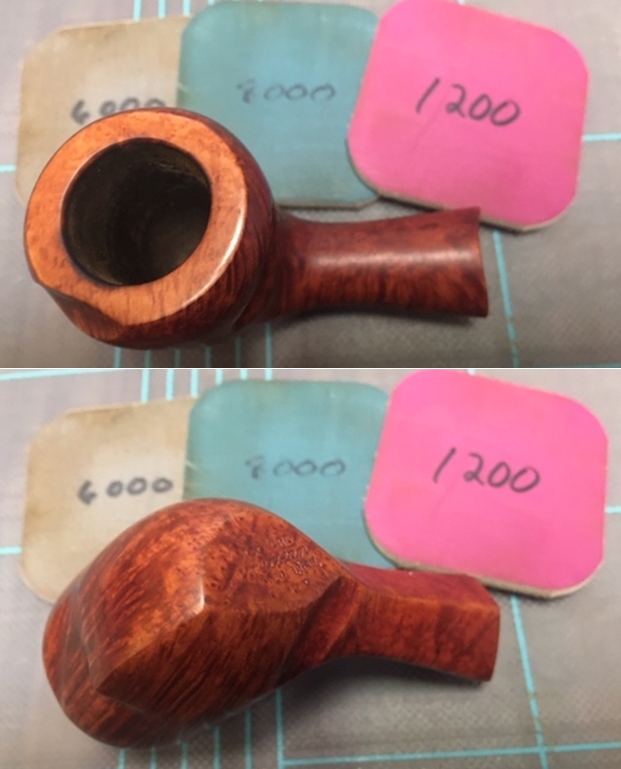
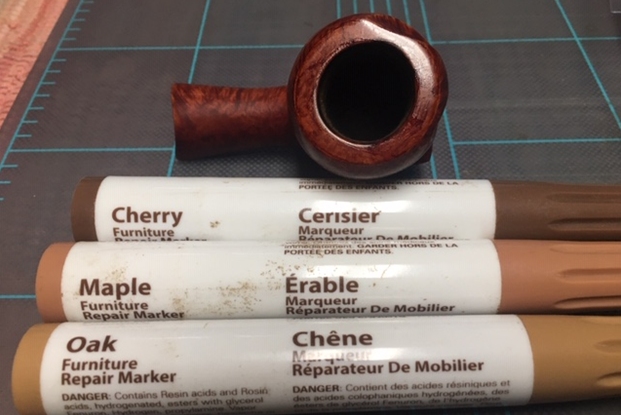
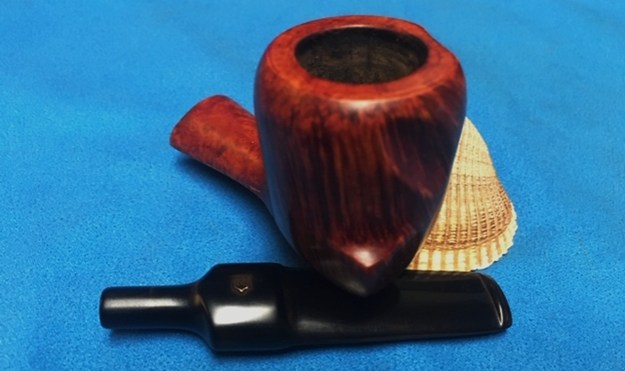
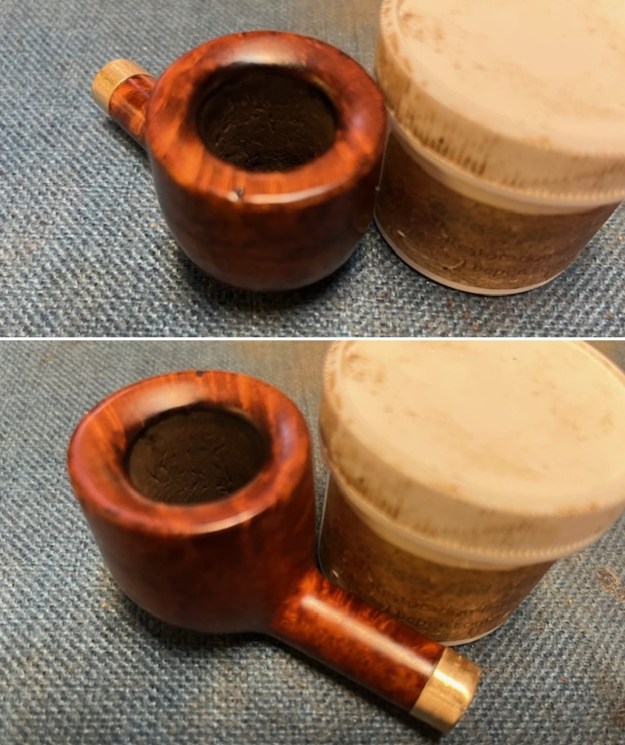
 I rubbed the bowl and shank down with Before & After Restoration Balm to deep clean the finish on the briar bowl and shank. The product works to clean, enliven and protect the briar and gives the briar a rich shine. I worked it in with my fingers to get it into the surface. I let it sit for 10 minutes then I wiped it off and buffed it with a soft cloth. The bowl began to have a rich shine. I took some photos of the bowl at this point to mark the progress in the restoration. It is a beautiful bowl.
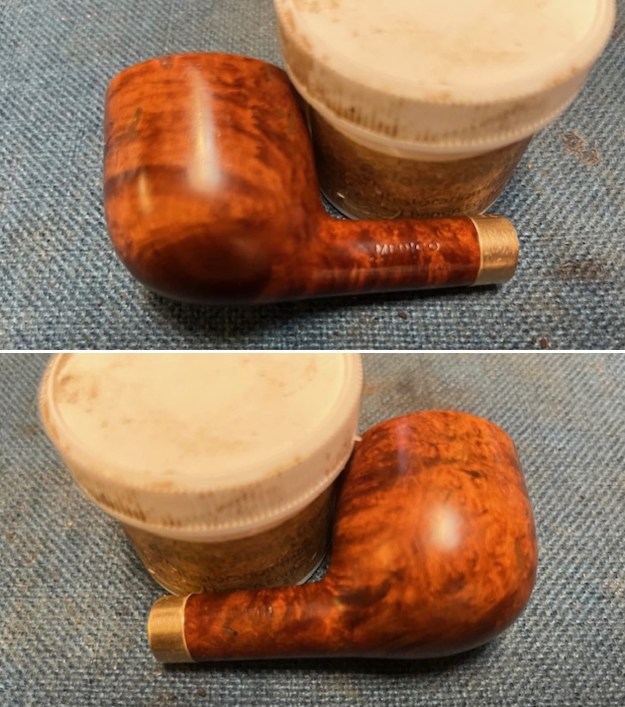
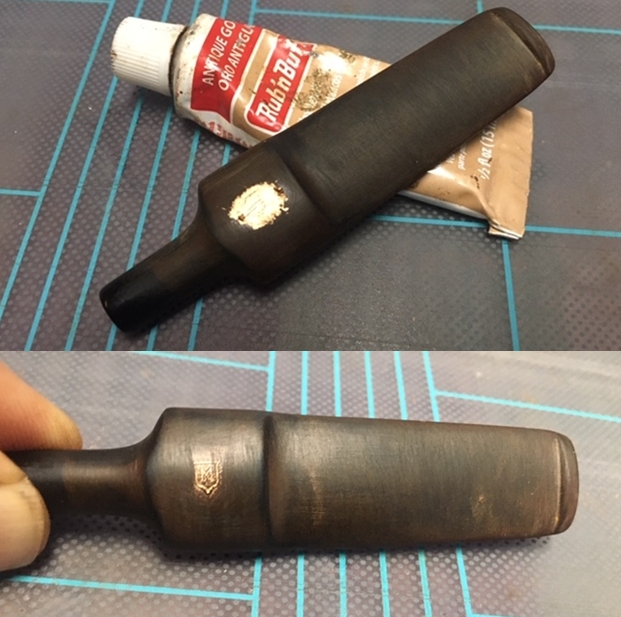
 I set the clean and polished bowl aside and turned my attention to the stem. I sanded the stem smooth with 220 grit sandpaper to clean up the marks and chatter. It was smooth and all that remained was to polish it.
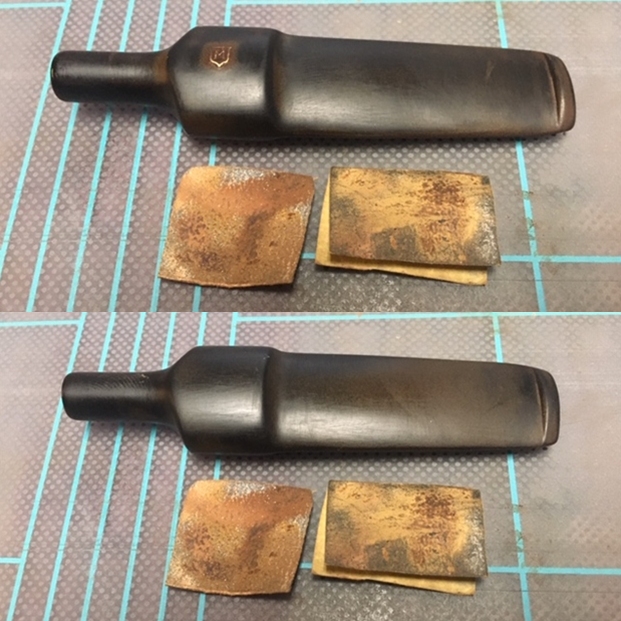
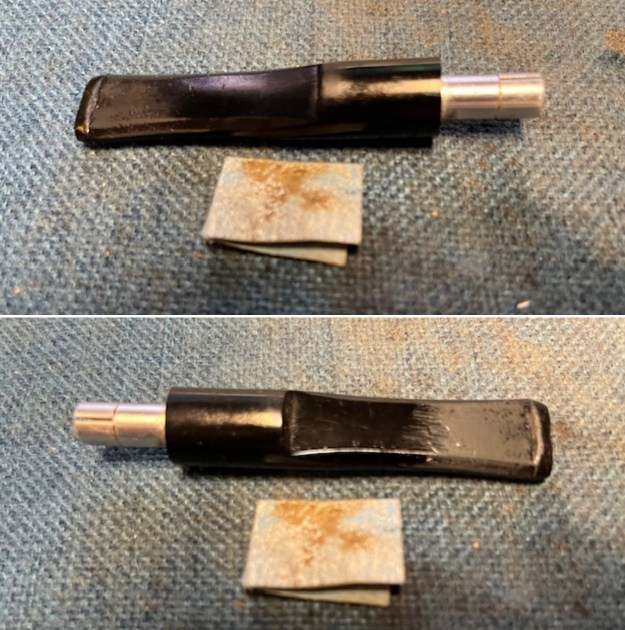 I wiped the stem down with olive oil and sanded the surface with the 2 x 2-inch sanding pads – 320-3500 grit pads to clean up the sanding marks on the stem surface. I wiped it down after each sanding pad and by the final 3500 grit pad the stem started to really shine.
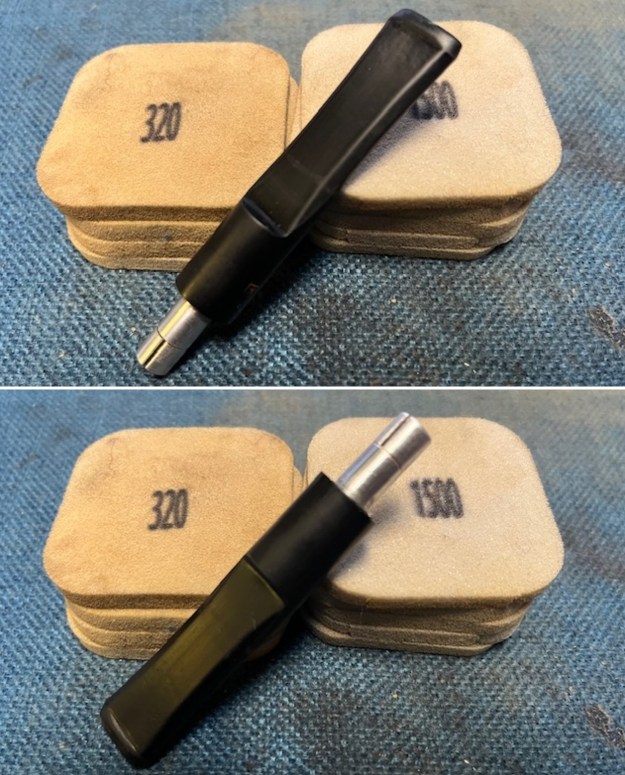 I touched up the faint M shield on the left side of the stem with Rub’n Buff Antique Gold. I worked it into the stamping with a tooth pick. I buffed it off with a paper towel and wiped the stem down with some Obsidian Oil. It is faint in spots but looks very good.
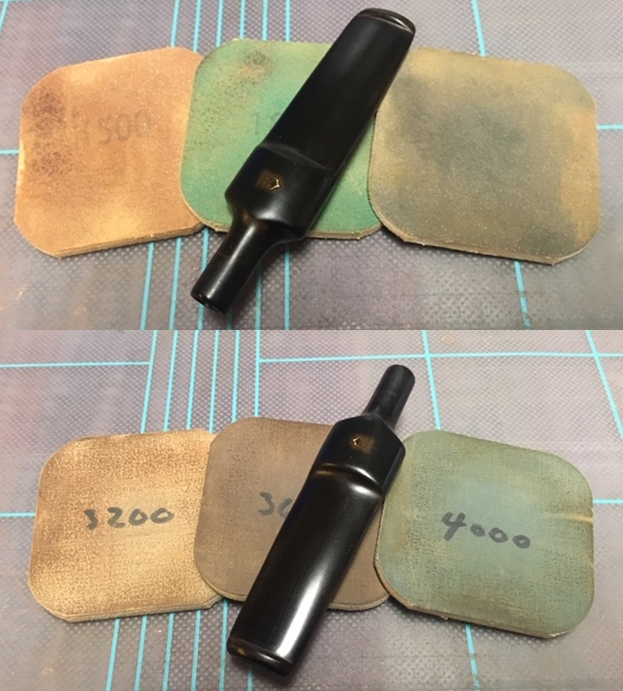
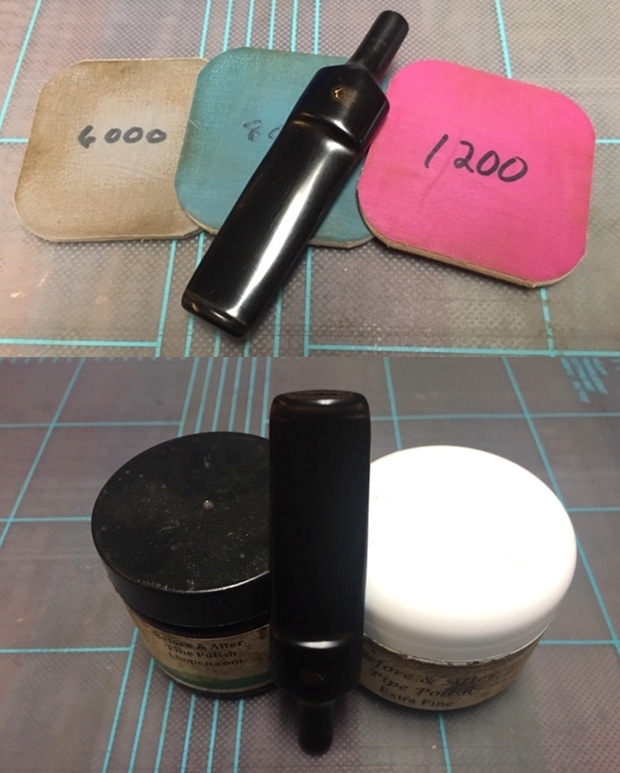
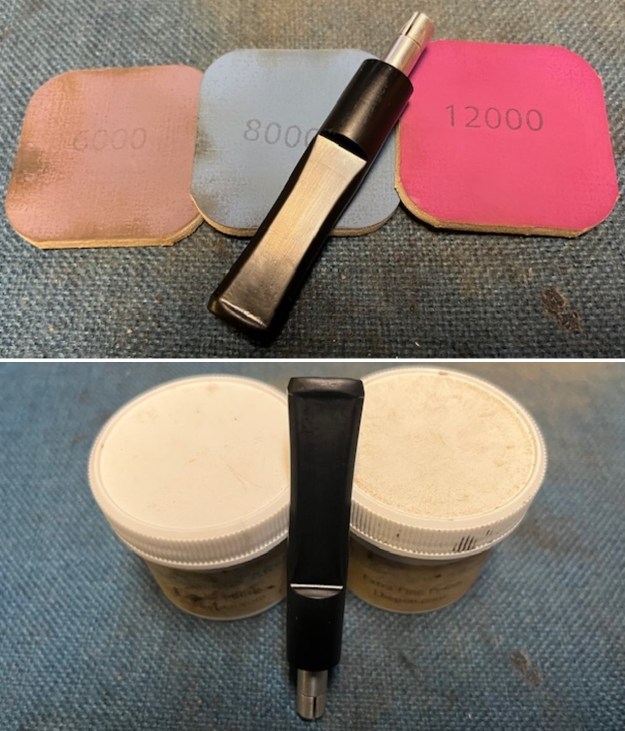
 I polished the stem with micromesh sanding pads – dry sanding with 1500-12000 grit pads. I wiped the stem down after each sanding pad with Obsidian Oil. I gave the stem a final polish with Before & After Pipe Stem Polish both Fine and Extra Fine. I rubbed the stem with them and then gave them a final coat of Obsidian Oil. I set it aside to dry.
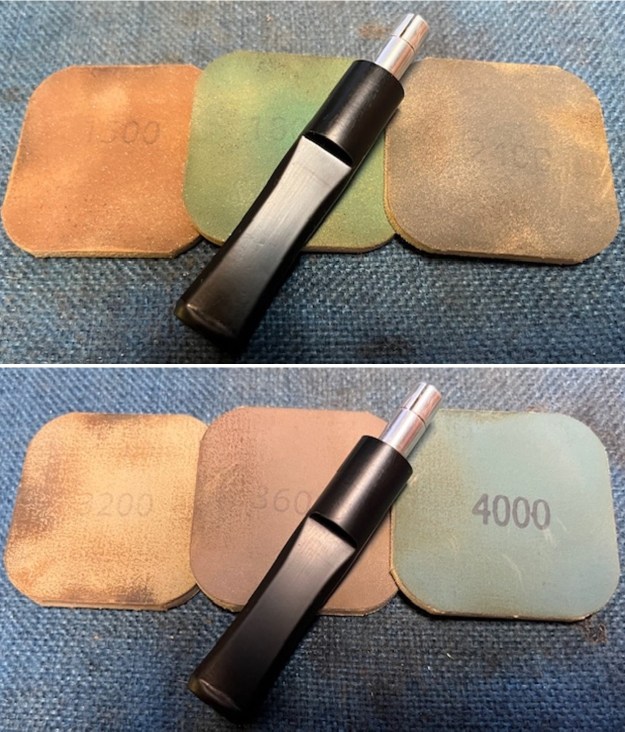
 I fit the metal tenon with a new Medico Paper Filter. Even though the pipe probably would not be smoked I thought it was important to put it together the way it was originally.
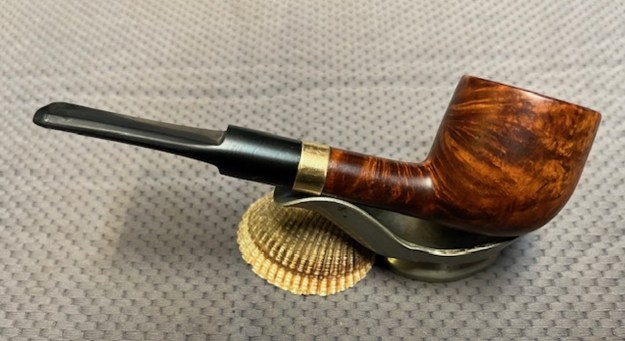
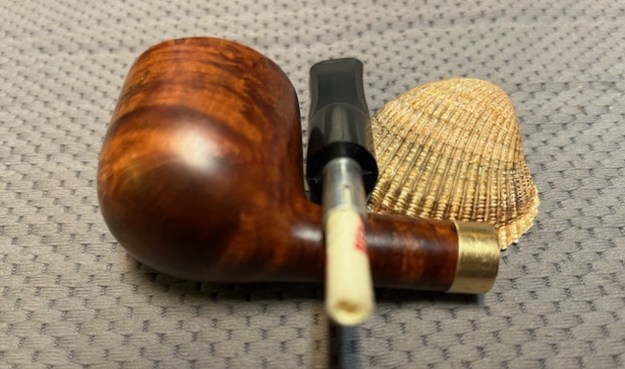
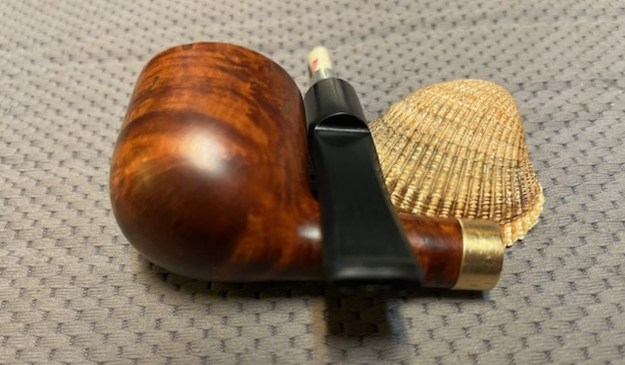
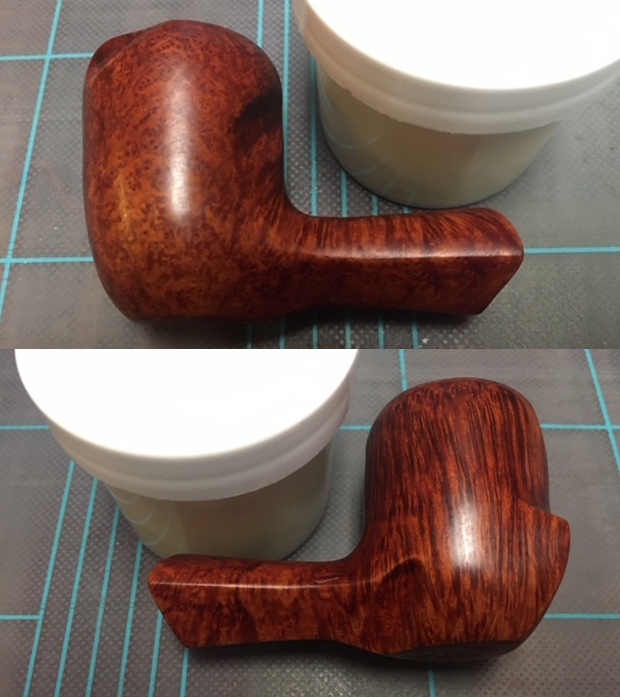
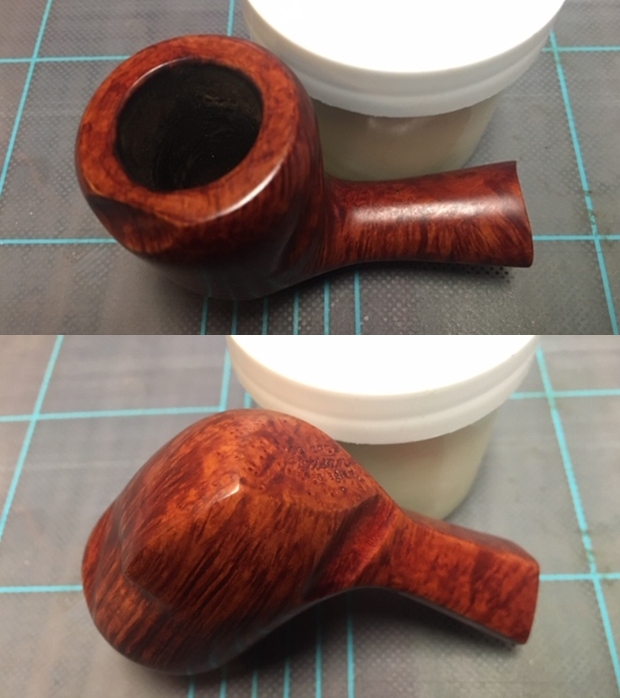
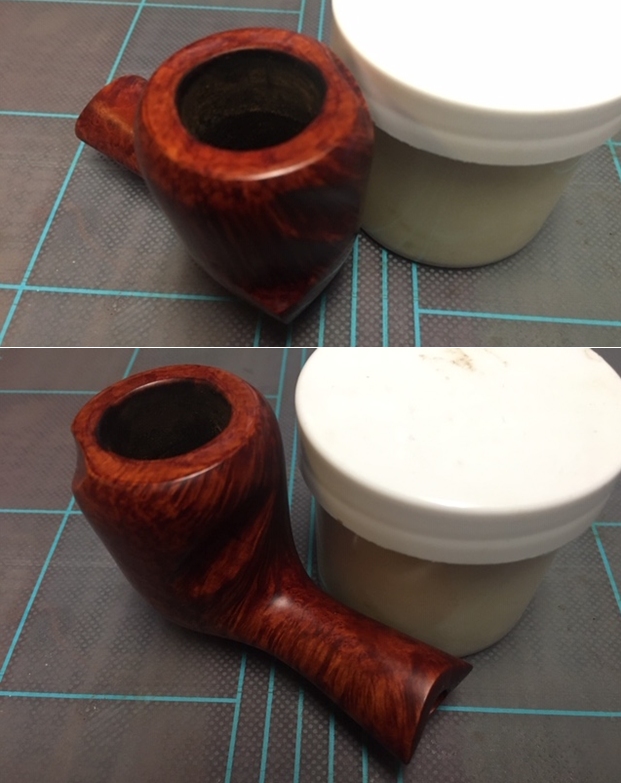
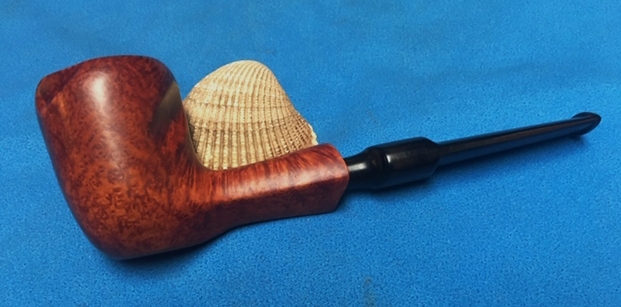
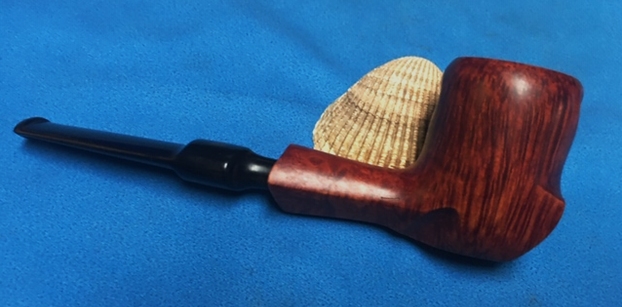
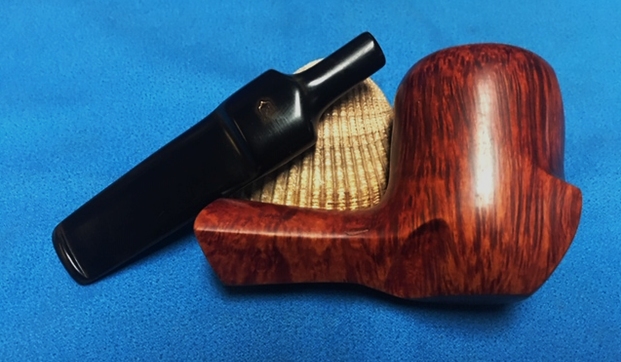
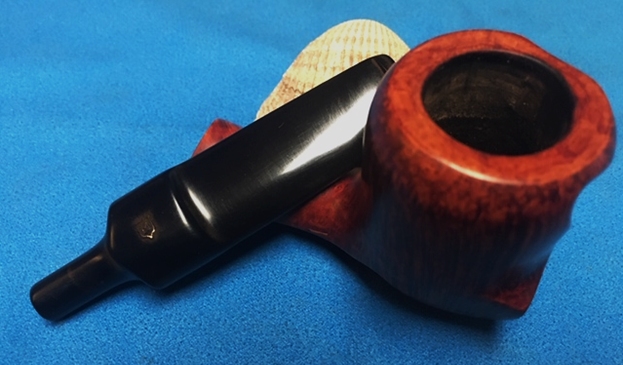
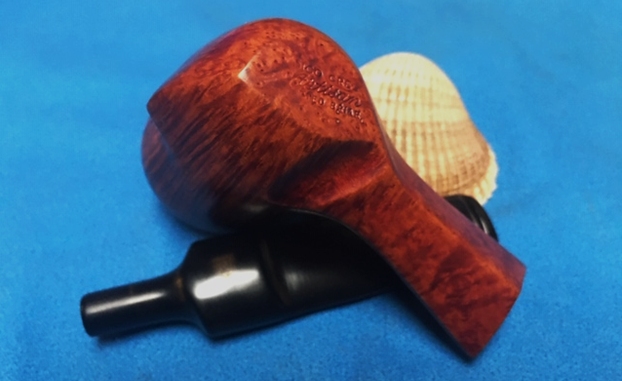
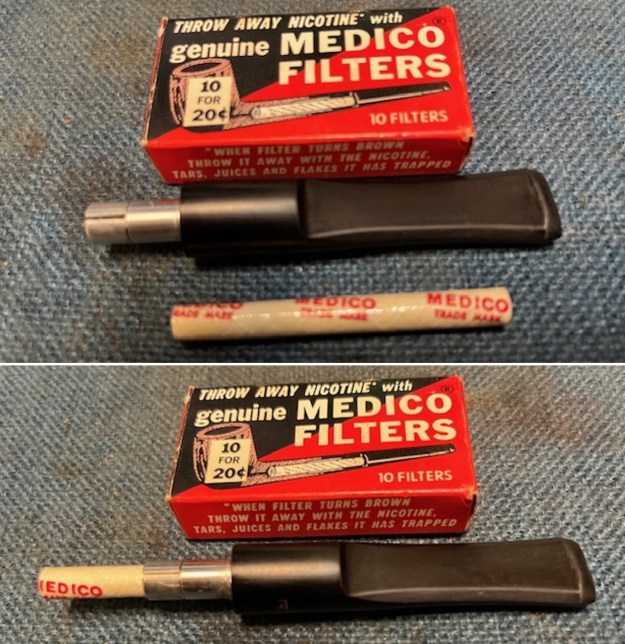 I am excited to finish this Medico Gold Crest Gold Banded Pot with a saddle stem. I put the pipe back together and buffed it with Blue Diamond on the buffing wheel. I gave the bowl and stem multiple coats of carnauba wax. I buffed the pipe with a clean buffing pad to raise the shine and then by hand with a microfibre cloth to deepen it. It is fun to see what the polished bowl looks like with the polished stem. This Medico Gold Crest Pot is great looking and the pipe feels great in my hand. It is light and well balanced. Have a look at it with the photos below. The dimensions are Length: 5 ½ inches, Height: 1 ½ inches, Outside diameter of the bowl: 1 ½ inches, Chamber diameter: 7/8 of an inch. The weight of the pipe is 43 grams/1.52 ounces. This second and last of Terrica’s Dad’s pipes is a real beauty. I will be packing the pair up and sending them back to her later this week. I look forward to hearing what she thinks of both of these resurrected beauties. Both should be great memories of her late Dad.
As always, I encourage your questions and comments as you read the blog. Thanks to each of you who are reading this blog. Remember we are not pipe owners; we are pipe men and women who hold our pipes in trust until they pass on into the trust of those who follow us.