by Kenneth Lieblich
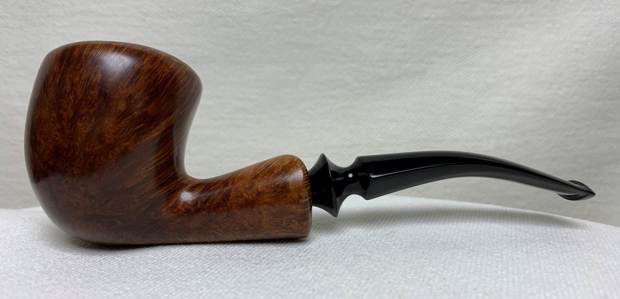
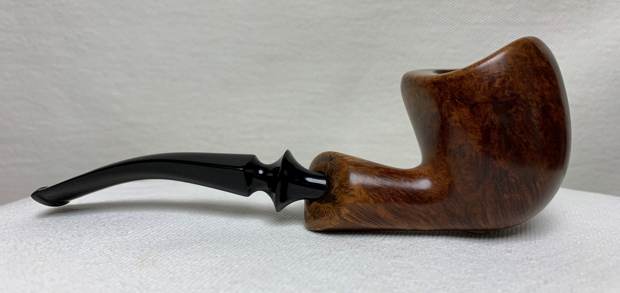
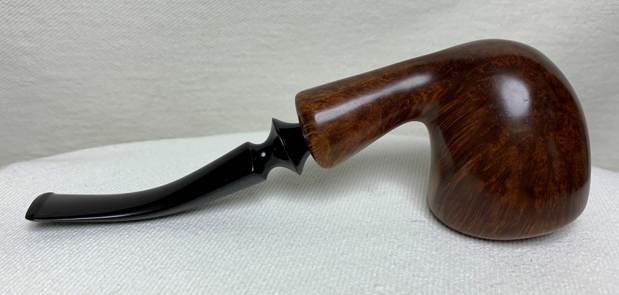
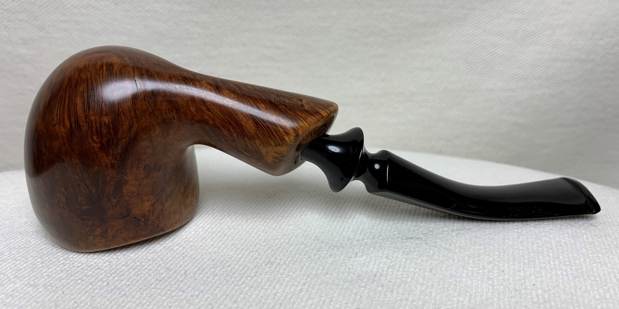
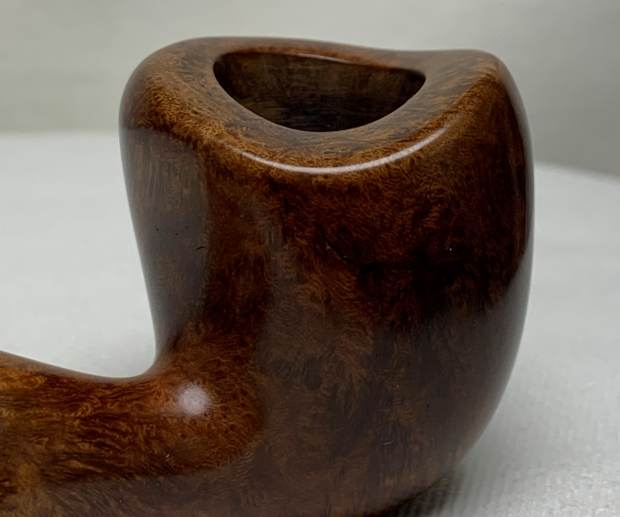
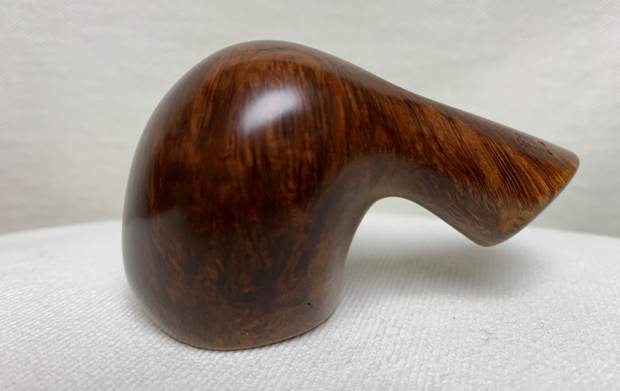
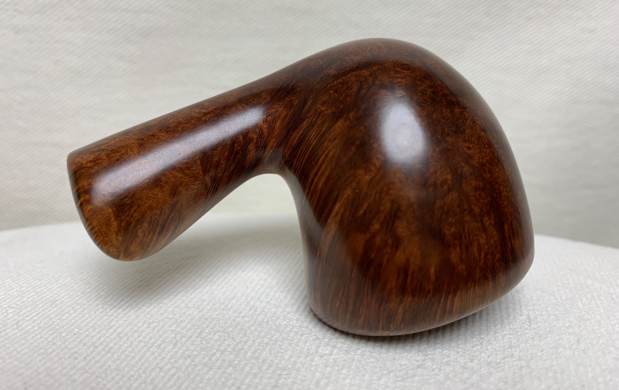
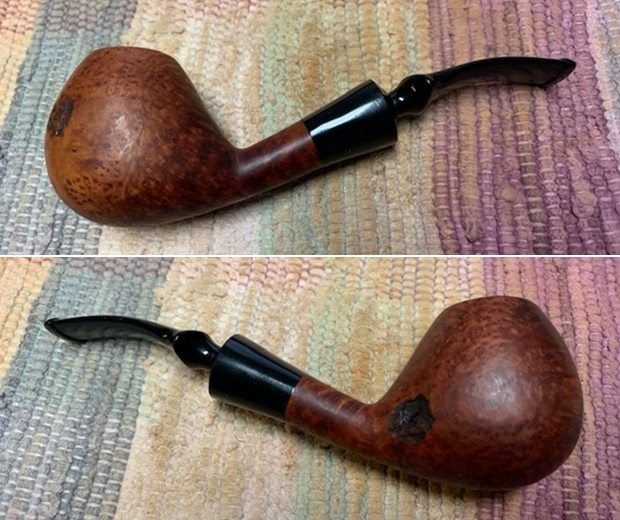
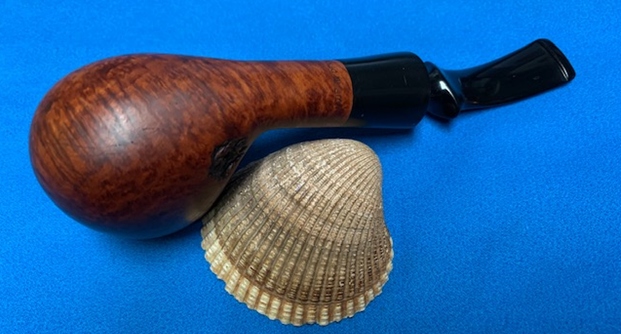
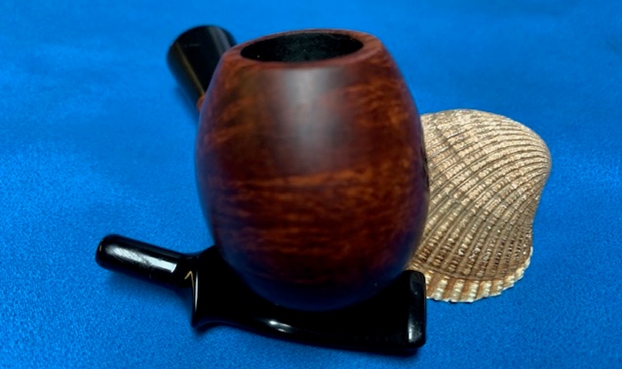
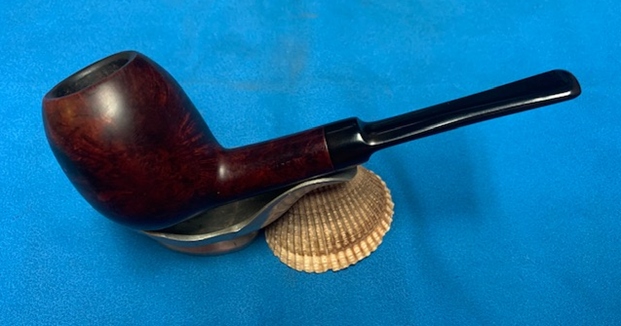
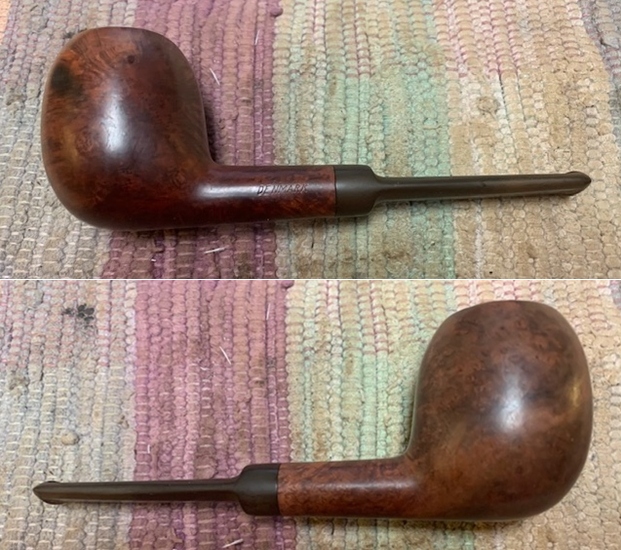
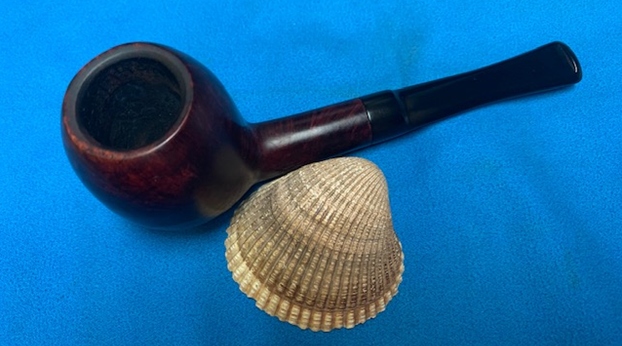
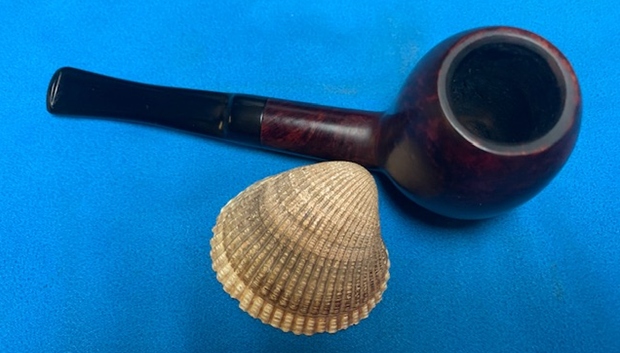
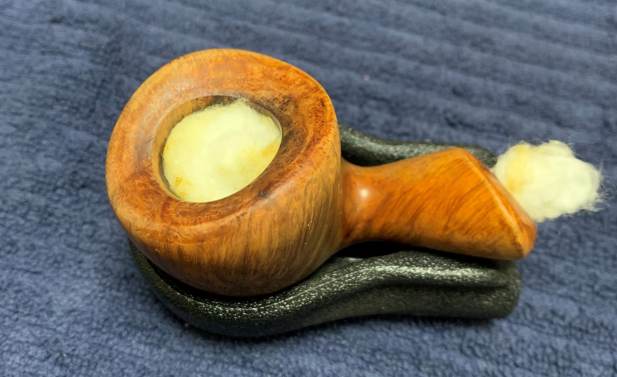
Next on the chopping block is a charming Danish pipe, likely by Bari. I say “likely” because it does not specifically name Bari on the pipe, but Steve assured me that he has seen other Bari pipes like it. He feels comfortable calling it a Bari and that is more than good enough for me. His imprimatur is worth its weight in gold! 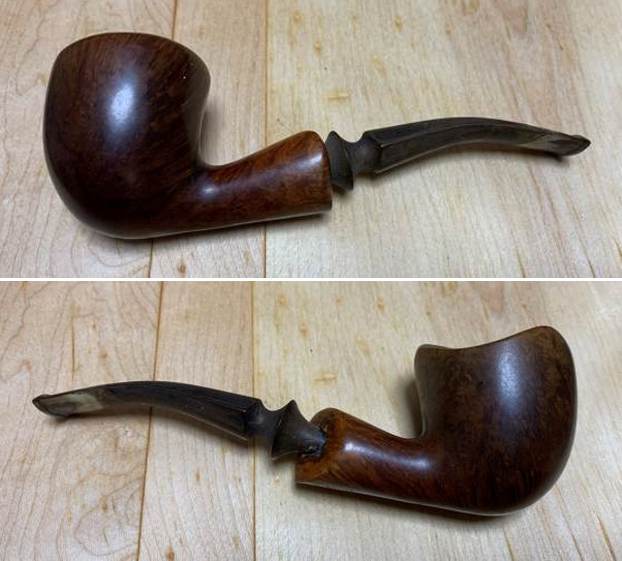
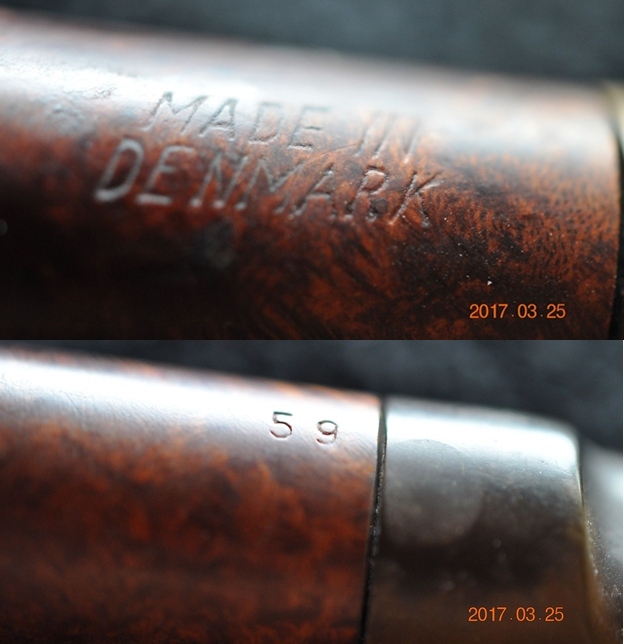
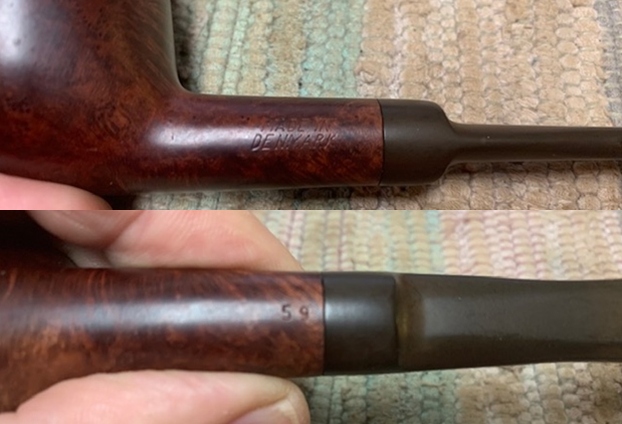
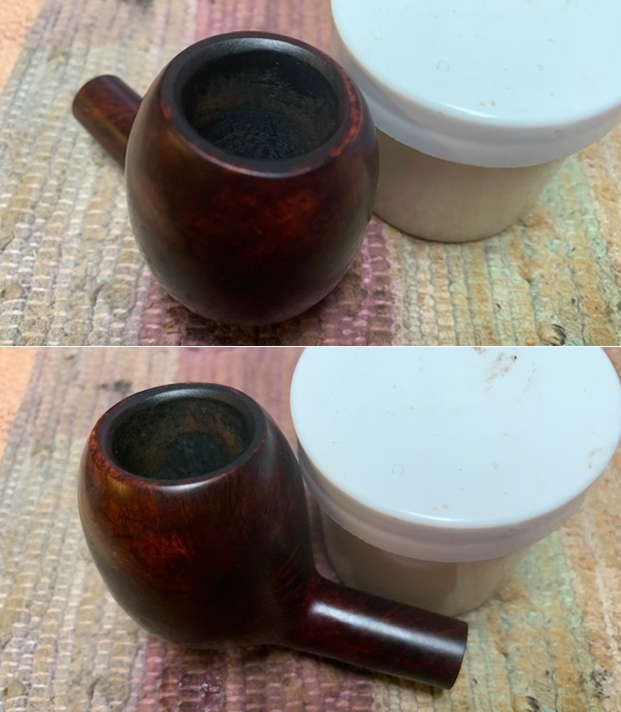
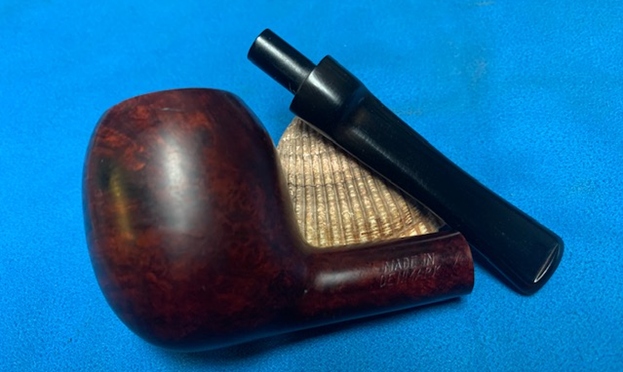
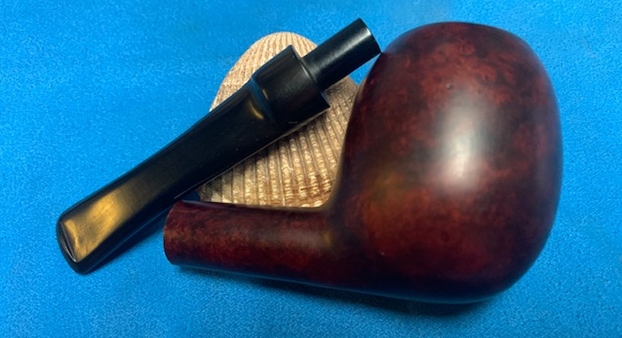
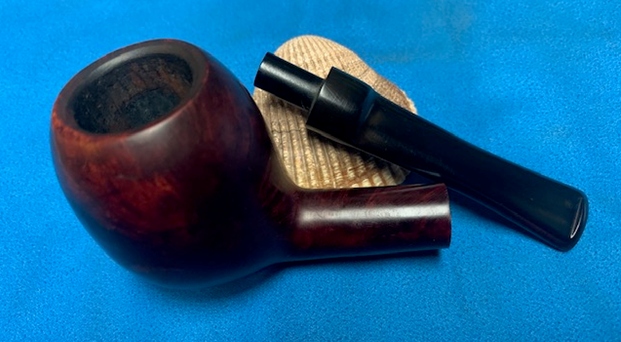
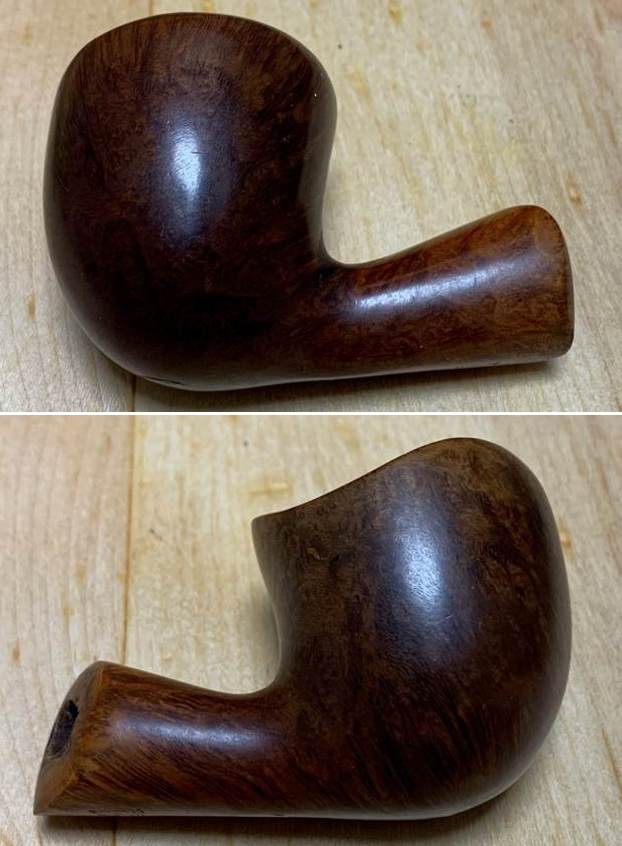 There was only one marking on the pipe – the underside of the stummel read Made in [over] Denmark. There was no shape number or any other identifying marks.
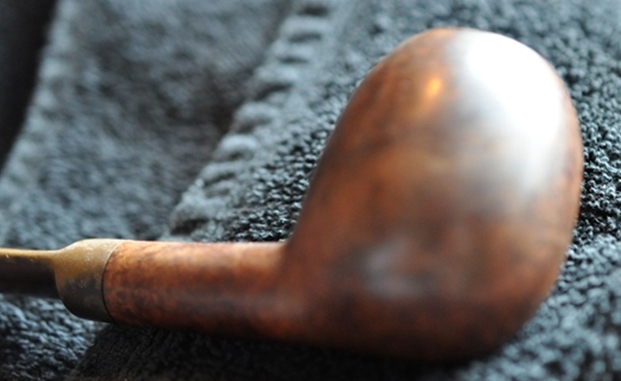
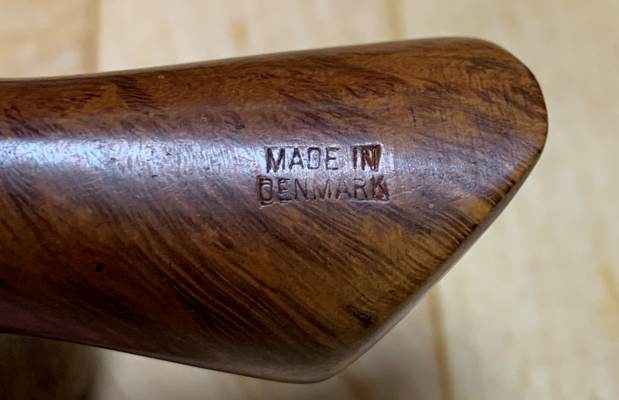 This freehand pipe is quite beautiful and many of its curves are reminiscent of ski slopes from my youth. It is a pretty pipe and feels light and comfortable in the hand.
From Pipedia, here is a very brief history of the Bari company:
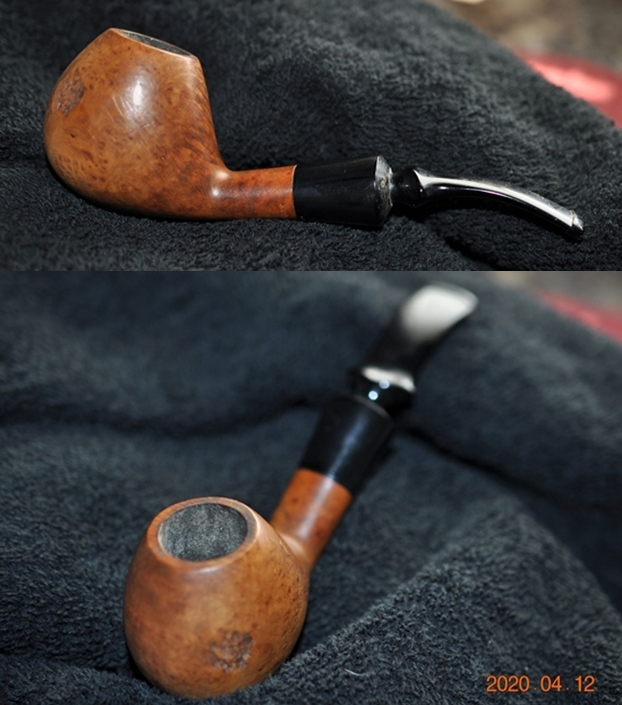
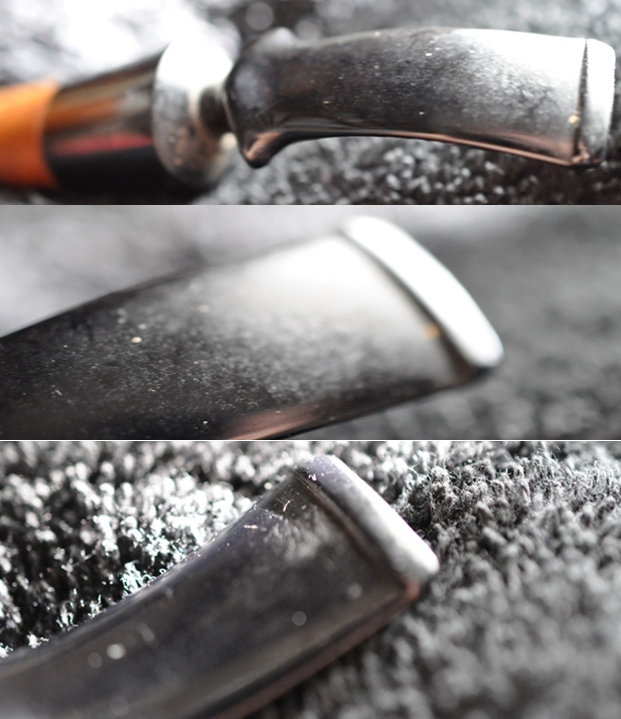
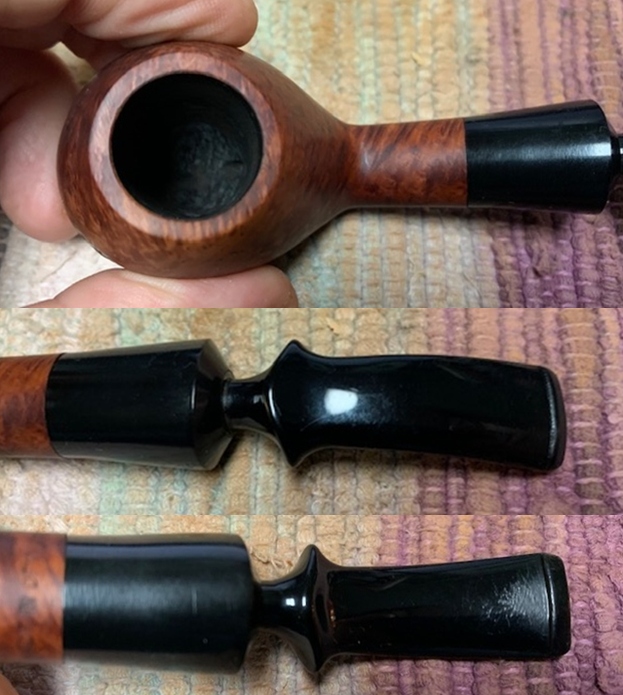
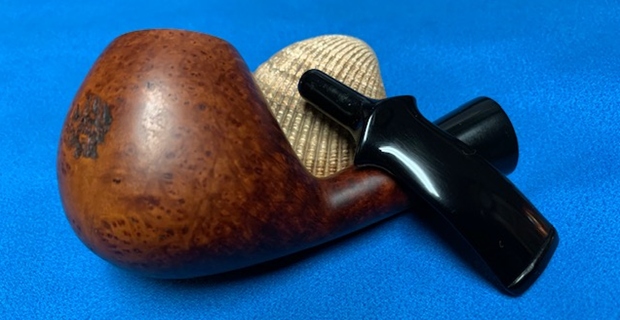
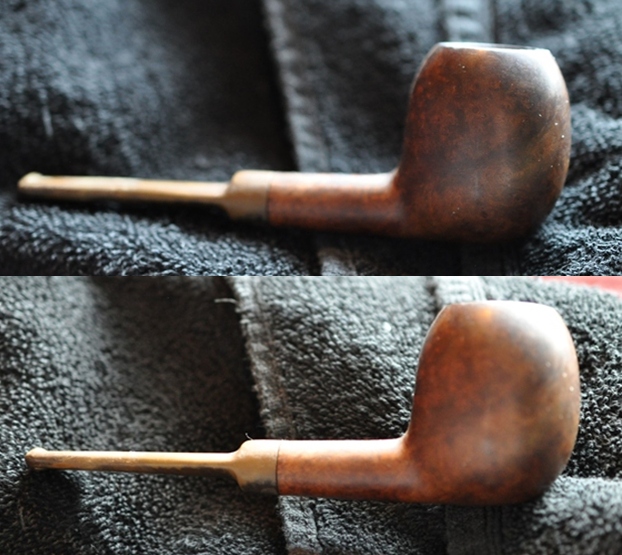
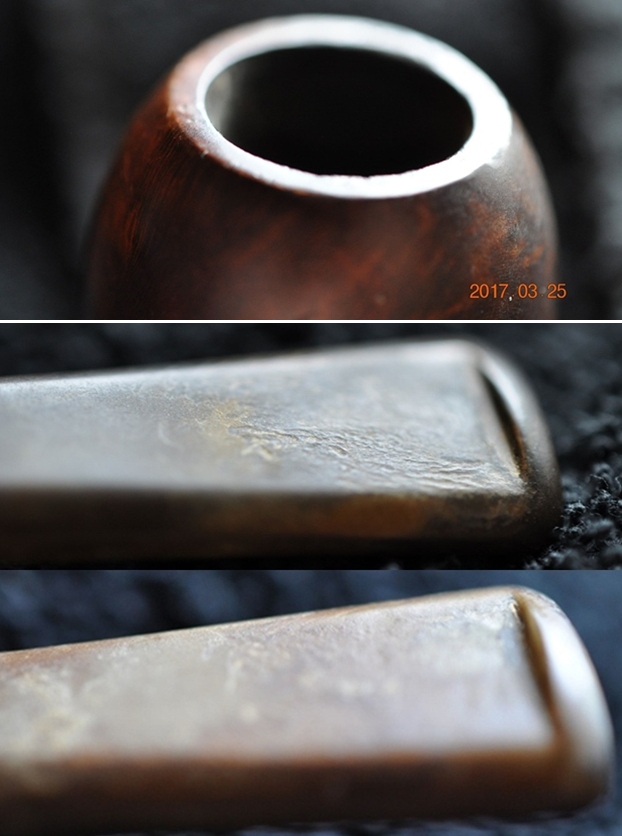
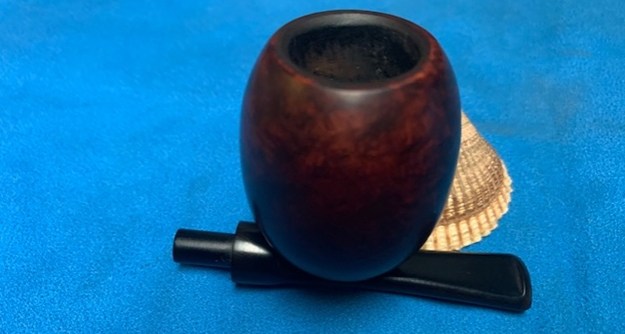
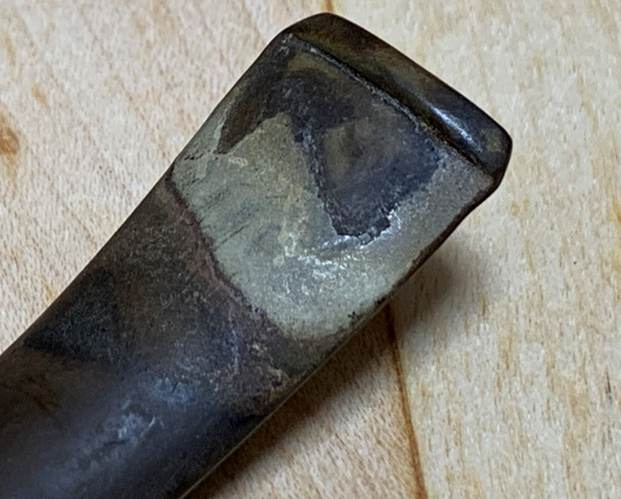
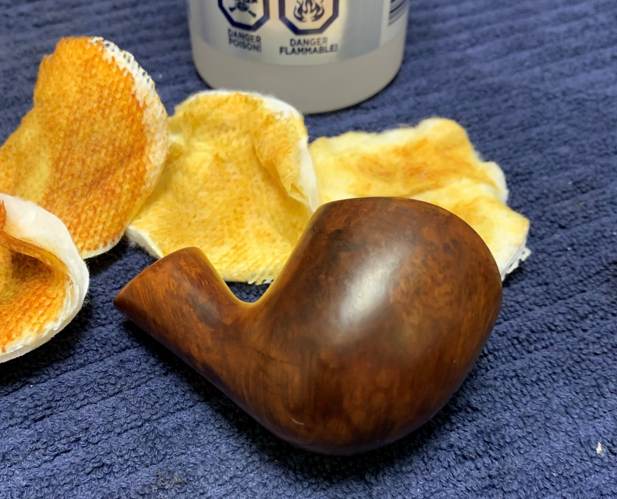
Bari Piber was founded by Viggo Nielsen in Kolding around the turn of 1950-51. Viggo’s sons Kai Nielsen and Jørgen Nielsen both grew into their father’s business from a very young age and worked there till 1975. Bari had very successfully adapted the new Danish Design that had been started mainly by Stanwell for its own models. When Viggo Nielsen sold Bari in 1978 to Joh. Wilh. von Eicken GmbH in Hamburg, Bari counted 33 employees. From 1978 to 1993 Åge Bogelund and Helmer Thomsen headed Bari’s pipe production. Thomsen bought the company in 1993 re-naming it to Bari Piber Helmer Thomsen. The workshop moved to more convenient buildings in Vejen. Bari’s basic conception fundamentally stayed the same for decades: series pipes pre-worked by machines and carefully finished by hand. Thus no spectacular highgrades but solid, reliable every day’s companions. On to the pipe: it was in decent shape, but there were a few issues. The stem had a bit of oxidation and a LOT of calcification, though fortunately, very few bite marks.
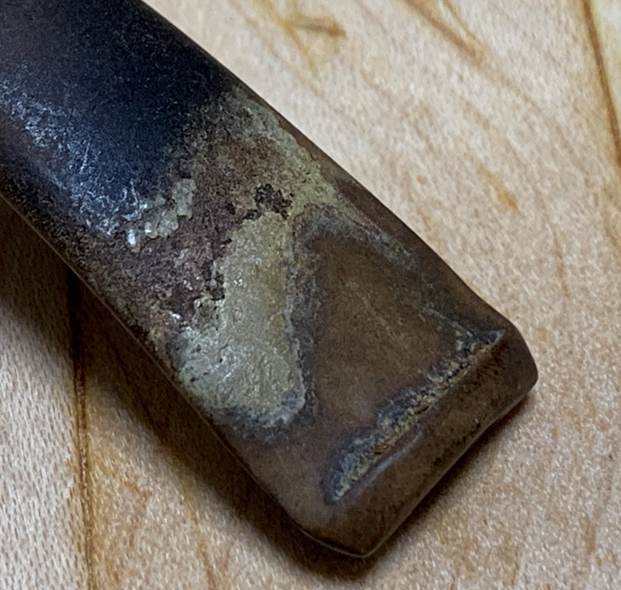
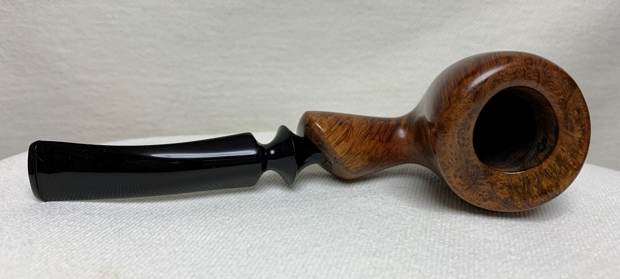
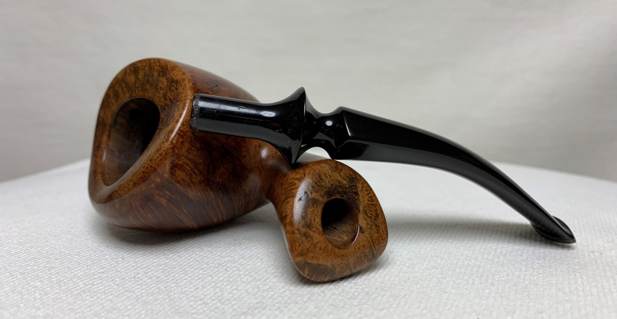
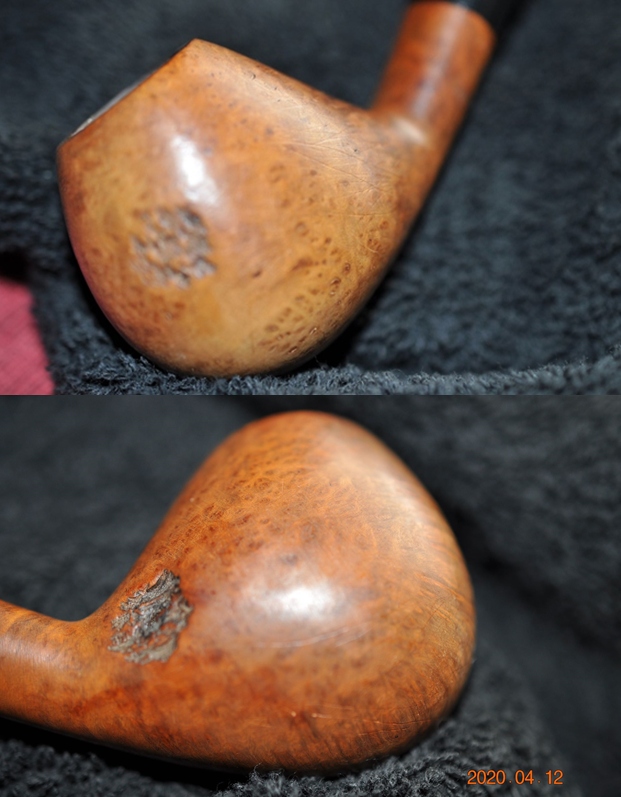
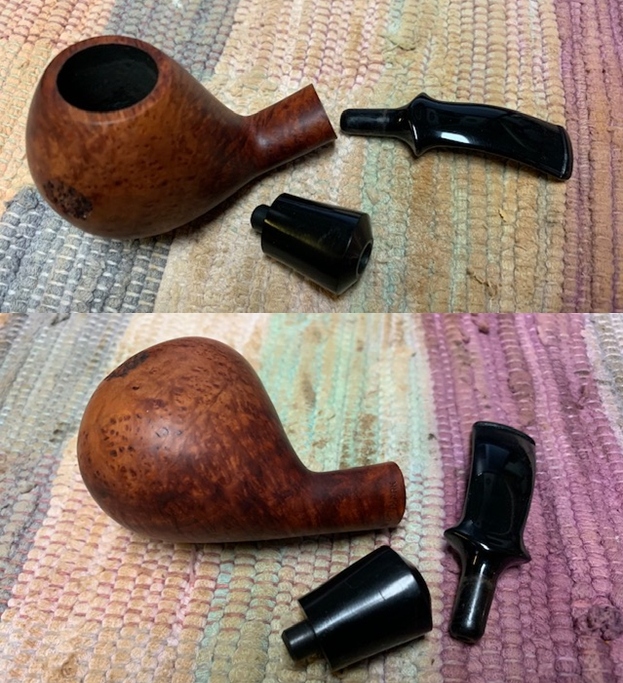
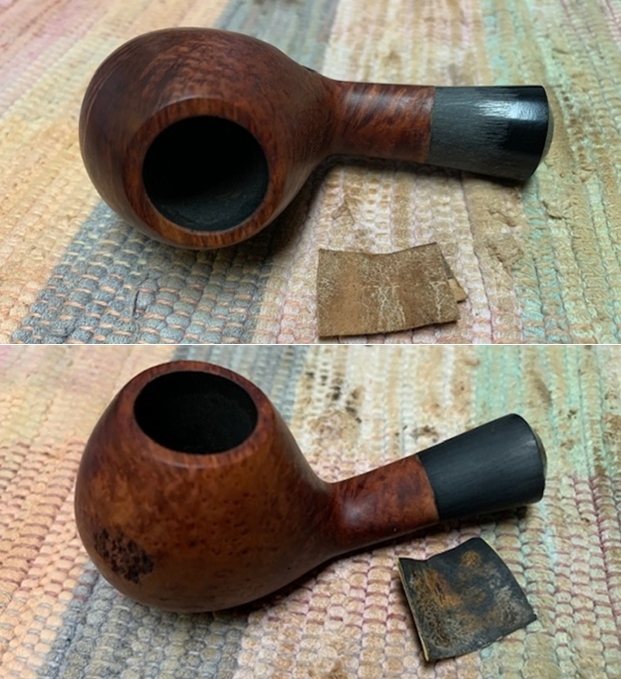
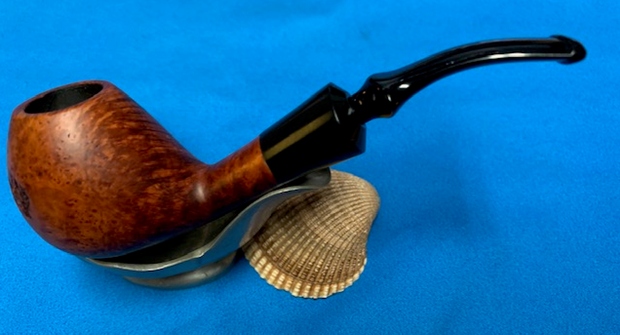
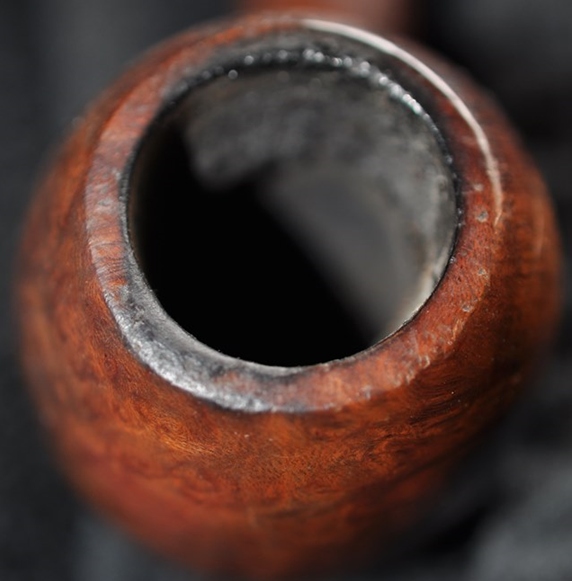
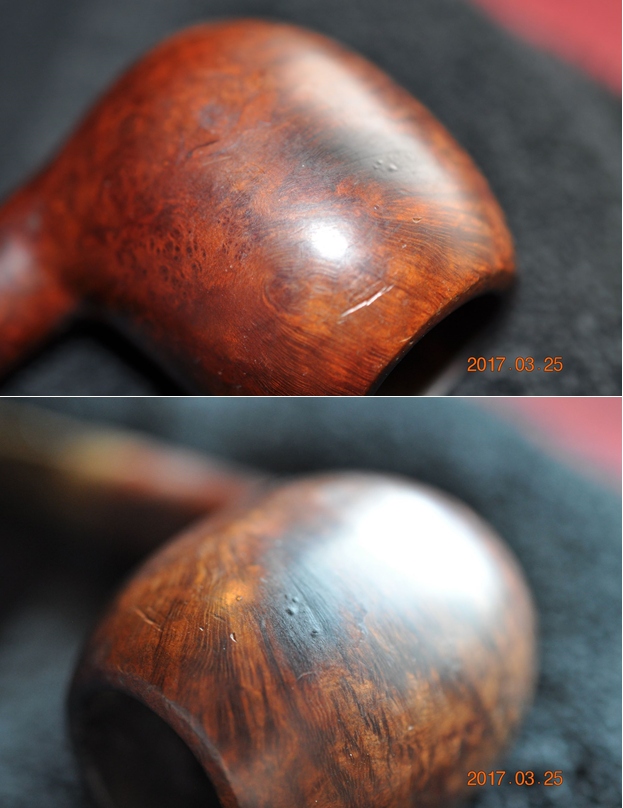
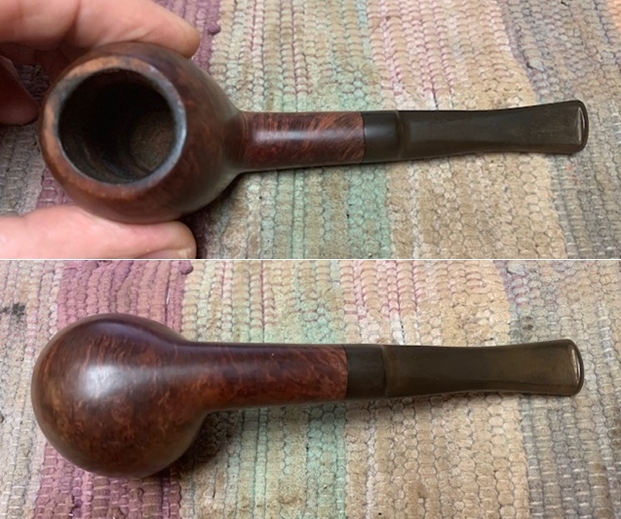
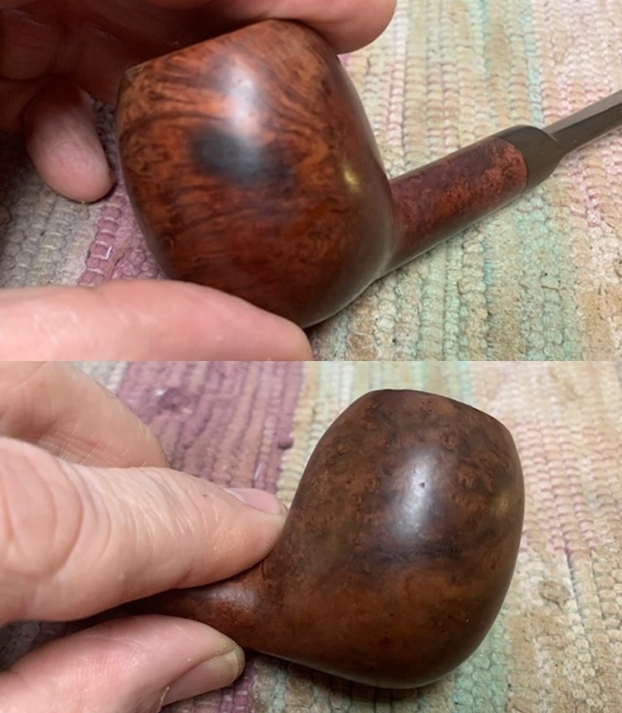
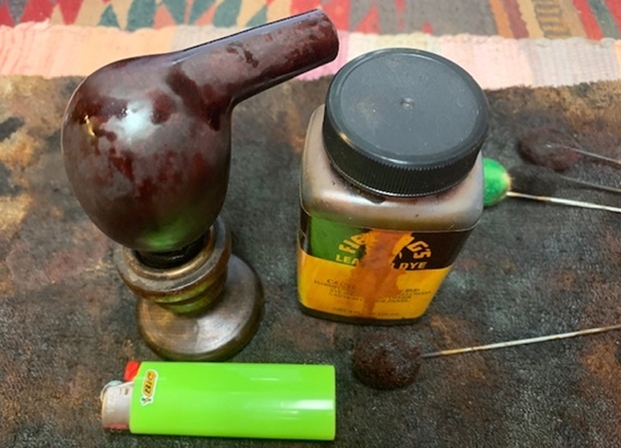
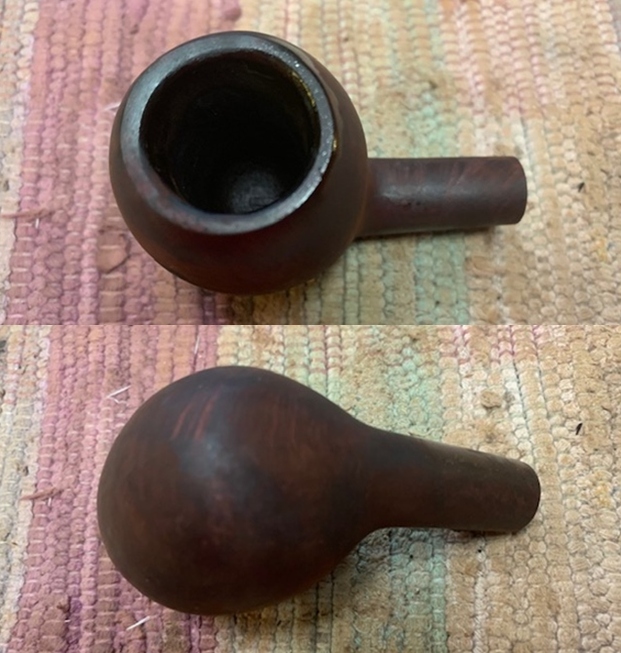
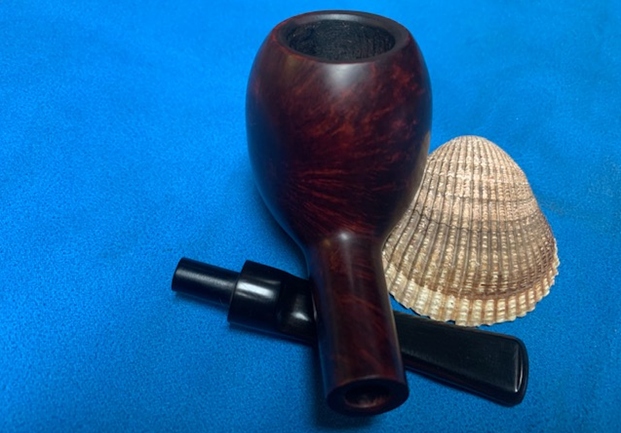
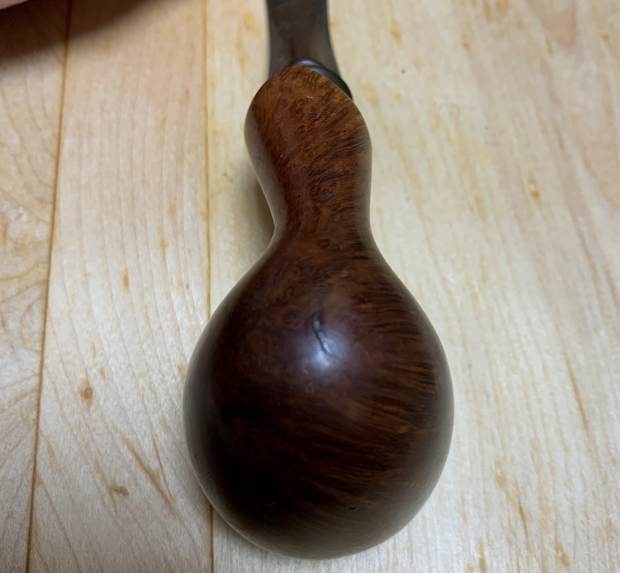
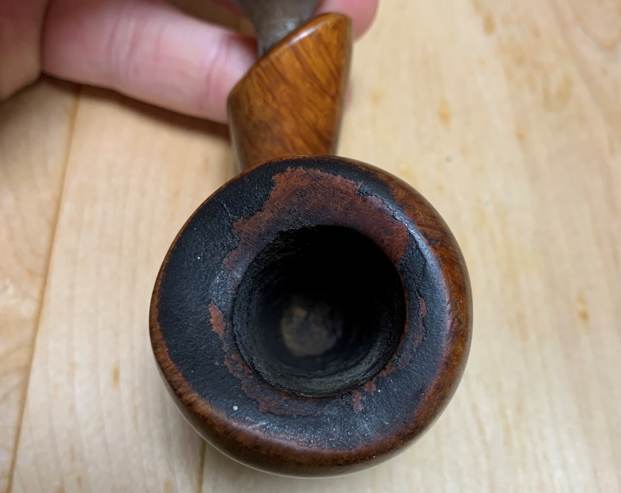
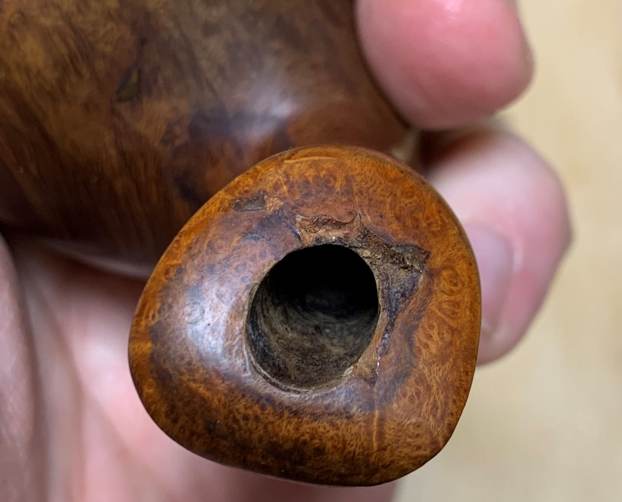
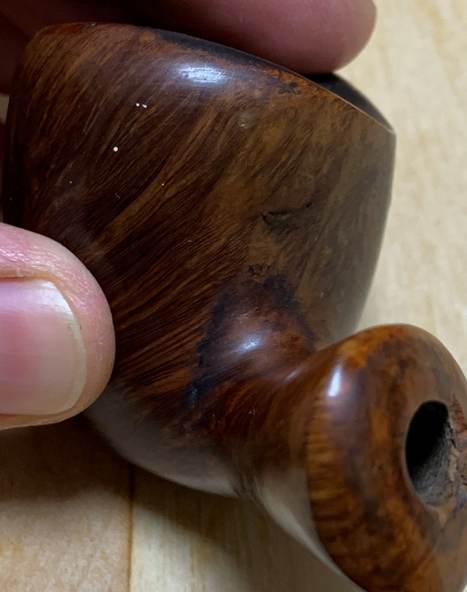
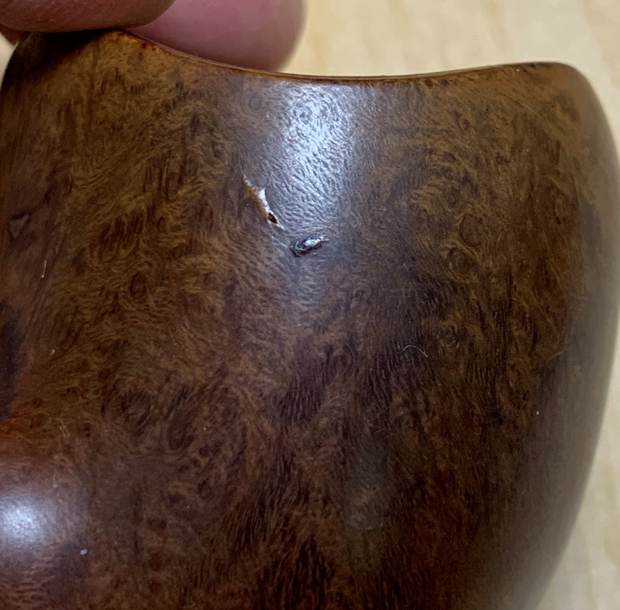
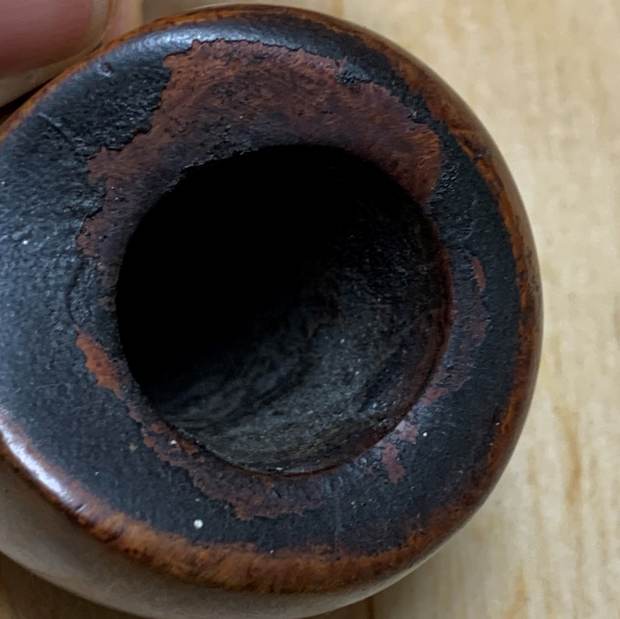
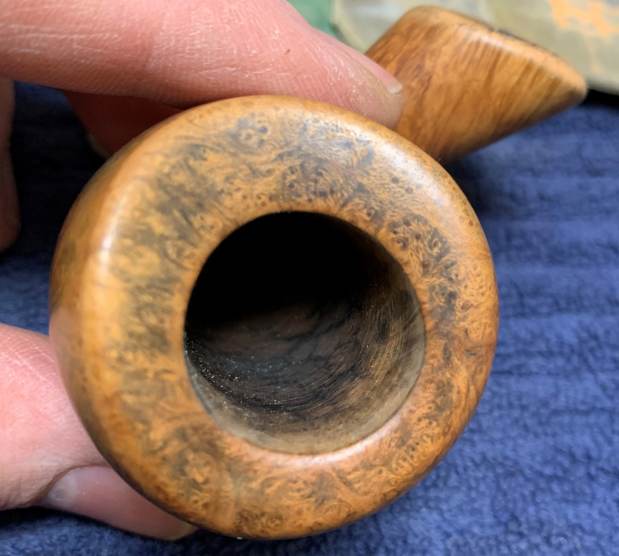
 The stummel also had a few issues. The outside of the bowl had some dings and a couple of fills that needed to be addressed. The wood also had some stains and paint splatter. There was lava and debris on the rim, and a small burn mark. Most significantly, there was a chunk missing from around the mortise end of the shank. Some serious repair work was needed there!
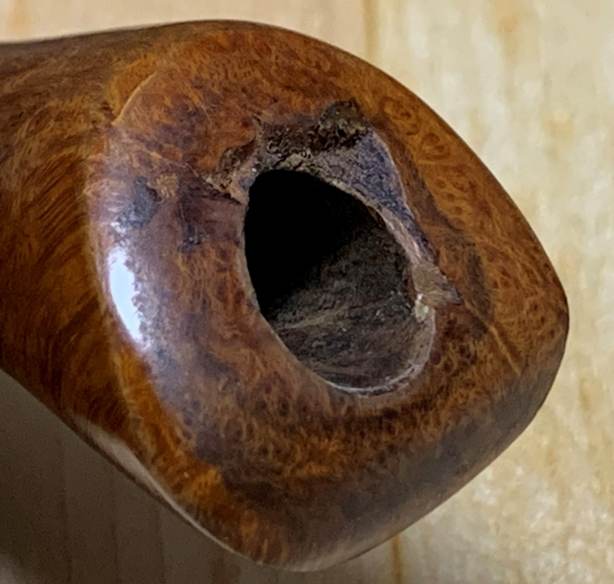
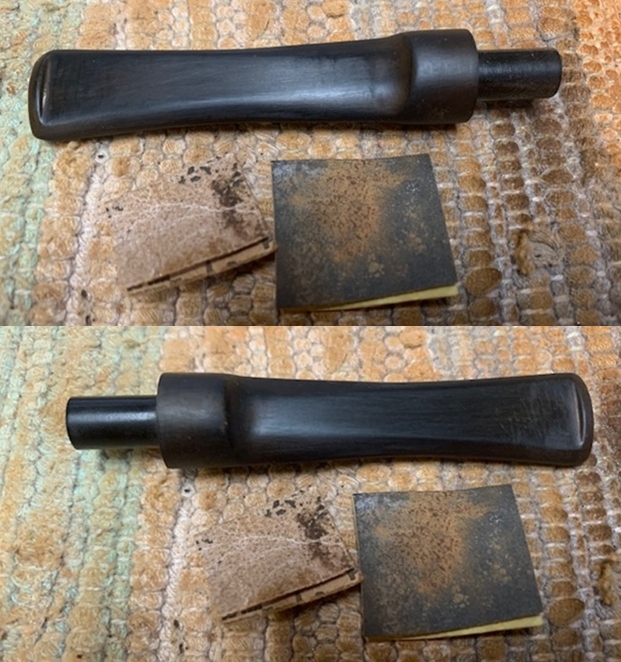
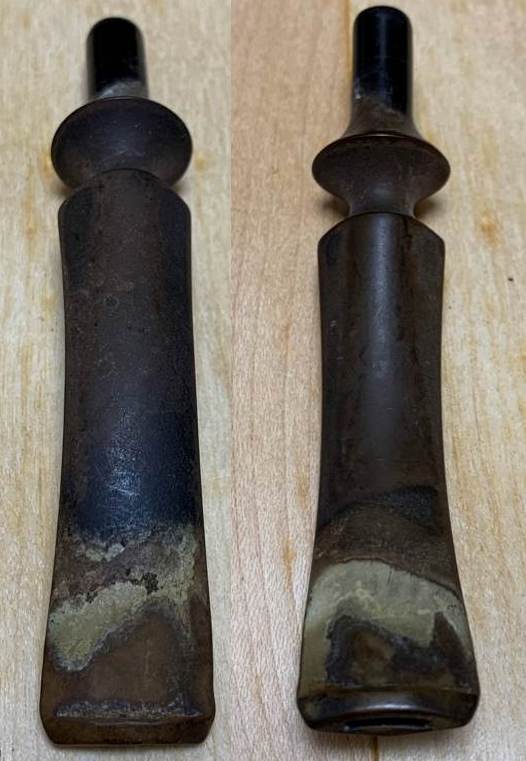
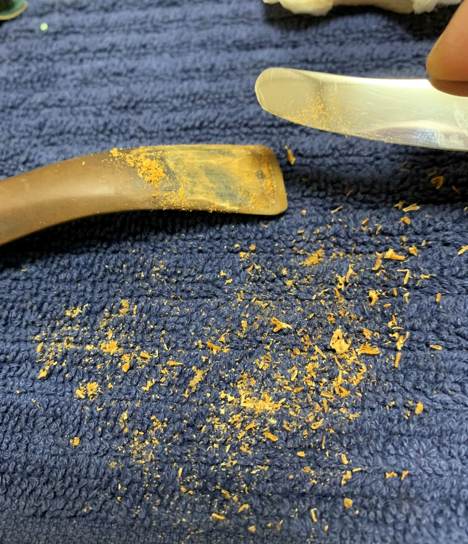
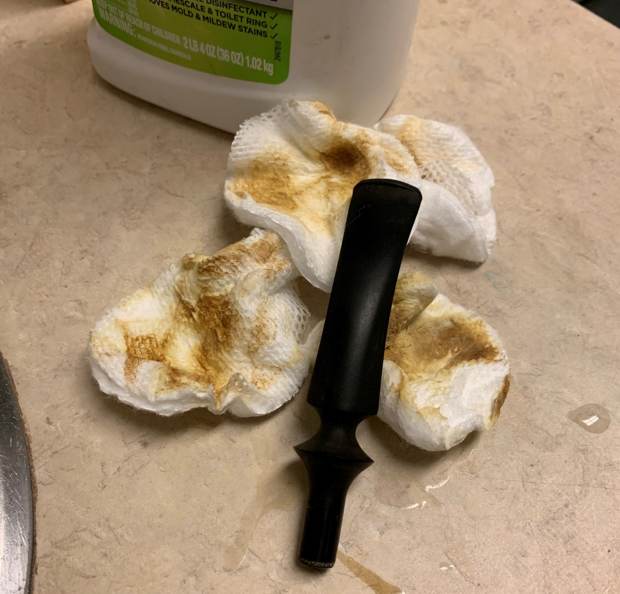
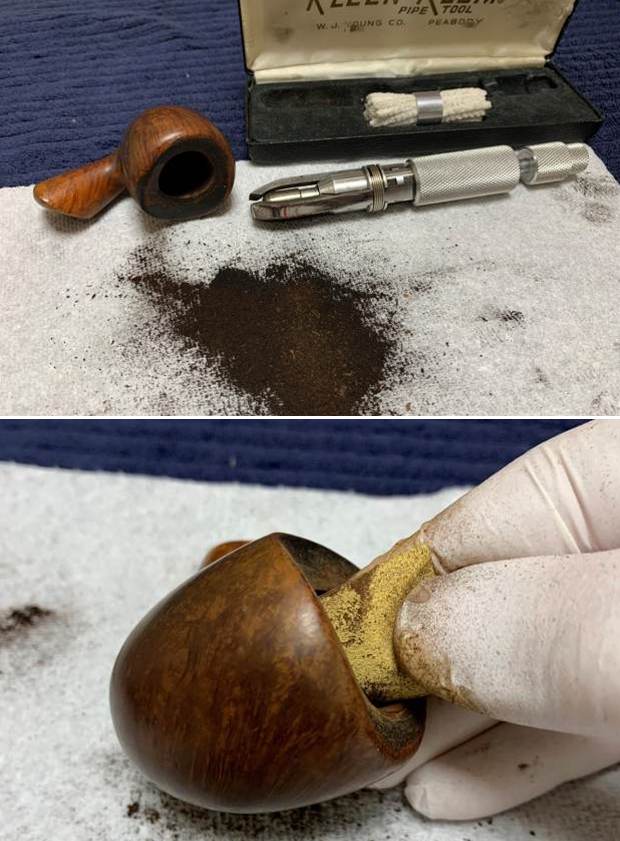
 The stem was first on my list. I wiped down the outside of the stem with Murphy’s Oil Soap on some cotton pads. There was so much calcification on the stem that I decided to take a blade and gently scrape it all off. You can see in the photos how much came off!
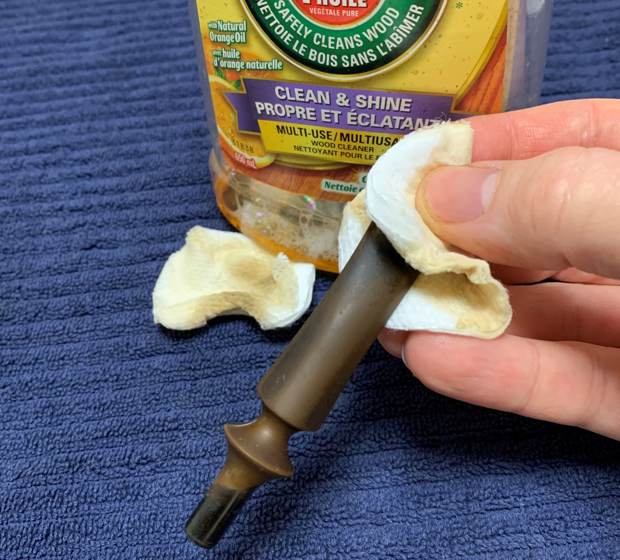
 I also took a BIC lighter and ‘painted’ the stem with its flame in order to lift the few bite marks and dents. This was moderately successful in raising the damage. Then, I cleaned out the insides with pipe cleaners and isopropyl alcohol. It was pretty dirty and required quite a few pipe cleaners.
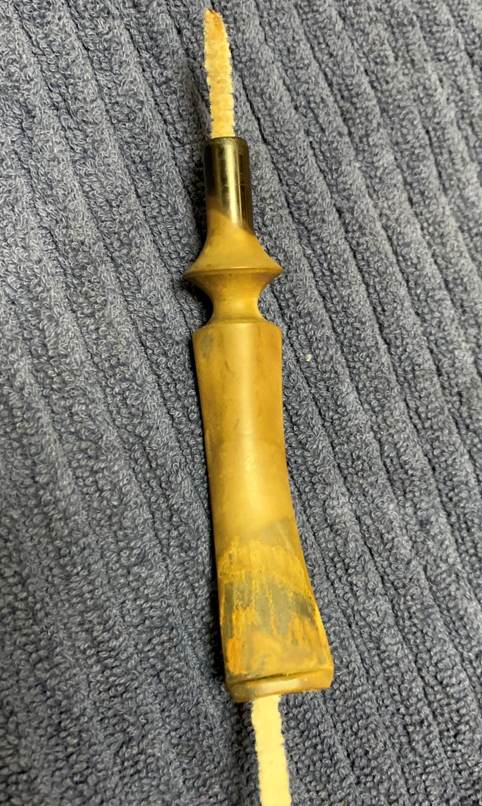
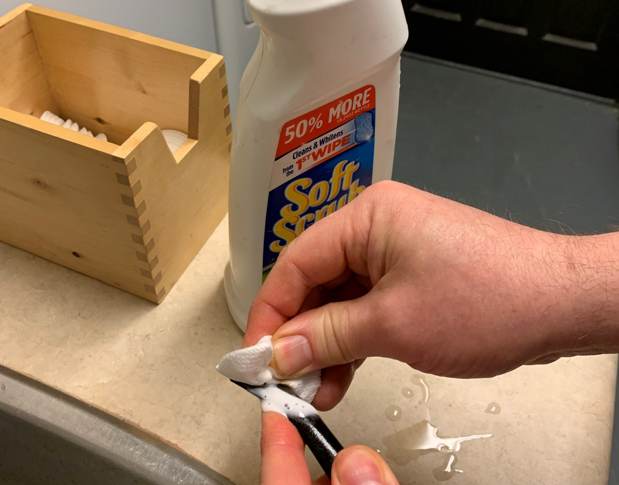
 Once this process was done, the stem went for an overnight soak in the Pipe Stem Oxidation Remover. The following day, I cleaned all of the de-oxidizing mess off with alcohol, pipe cleaners, et cetera. The oxidation had migrated to the surface and would be fairly straightforward to remove. I scrubbed with SoftScrub on some cotton pads to remove the leftover oxidation on the stem.
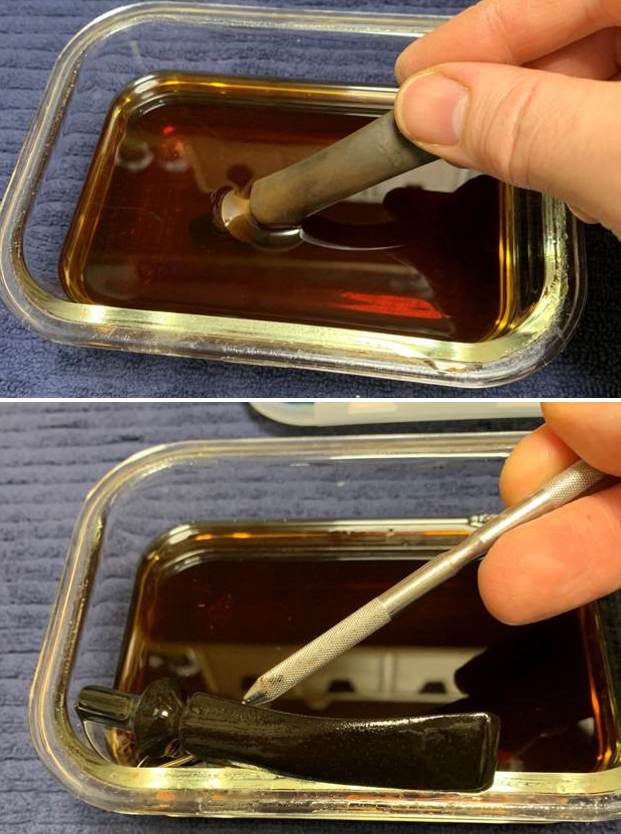
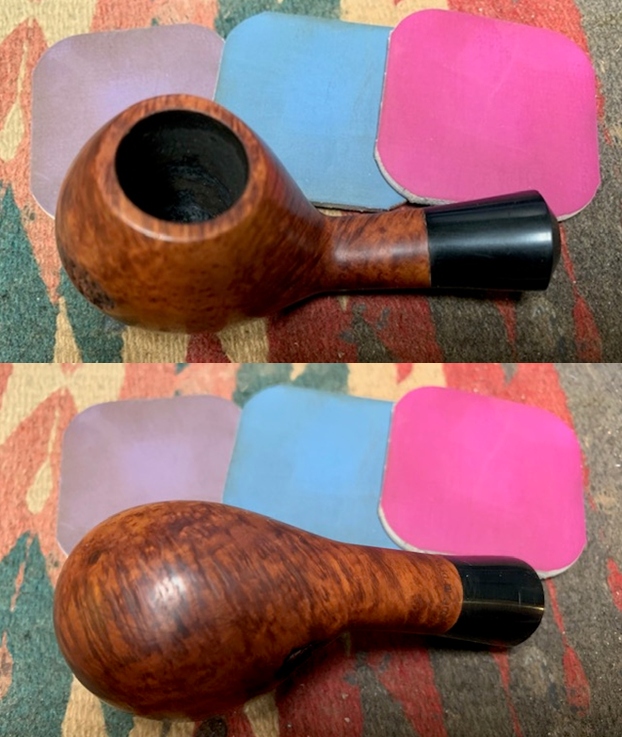
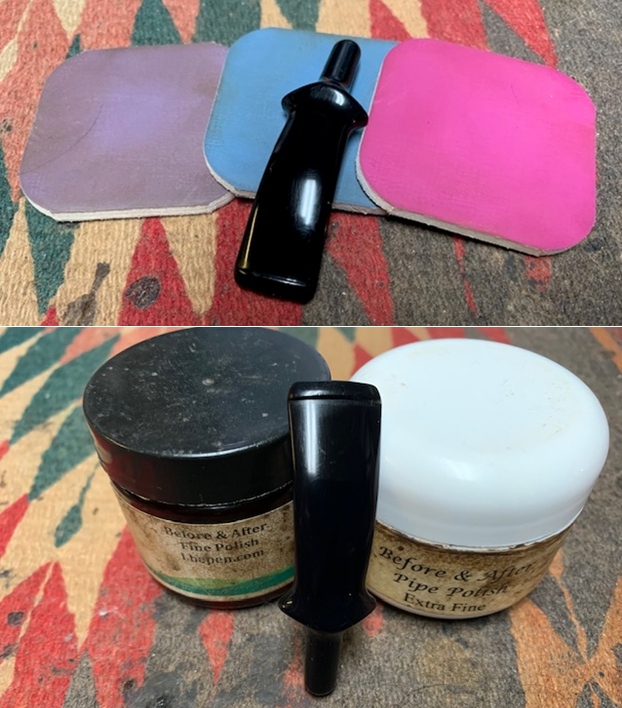
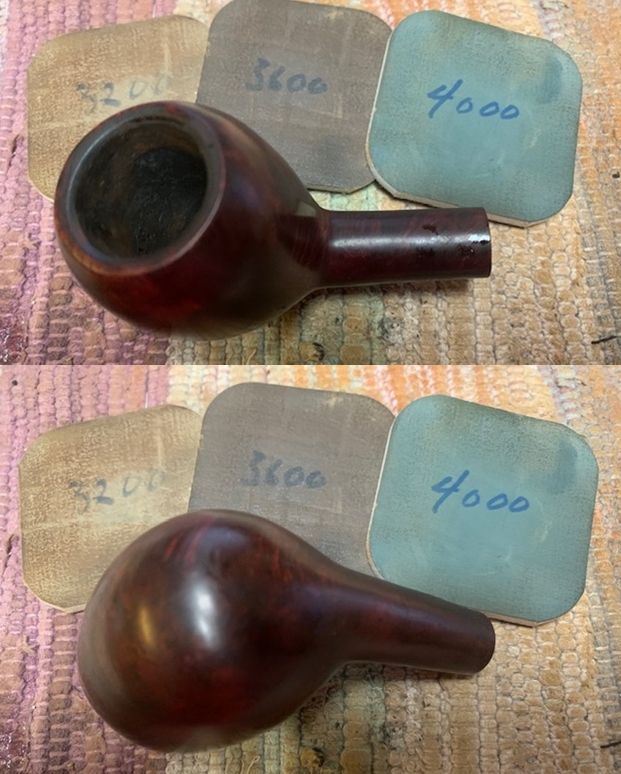
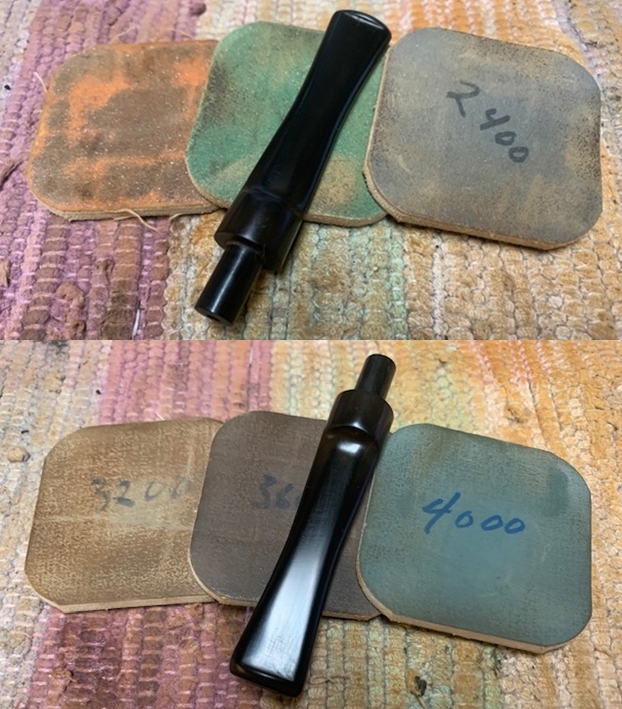
 I built up the dents on the stem with cyanoacrylate adhesive and let them fully cure. Then I sanded the adhesive down with 220-, 400-, and 600-grit sandpapers to meld seamlessly into the stem. Finally, I used all nine Micromesh pads (1,500 through 12,000 grit) to bring out the lovely black lustre on the stem. I also used Obsidian Pipe Stem Oil in between each pad scrubbing.
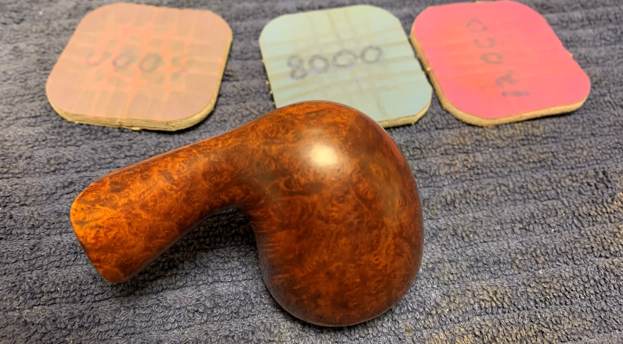
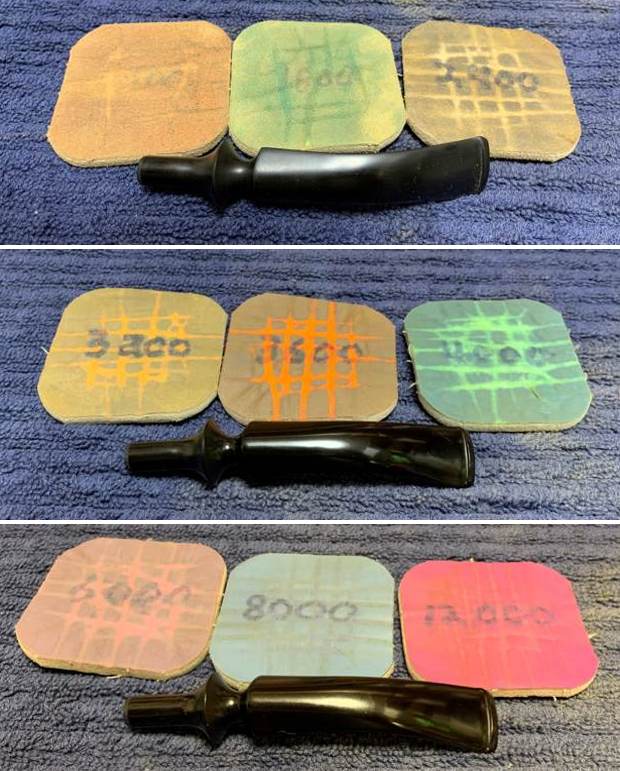 On to the stummel, and the usual cleaning procedures were in order for this pipe. I first decided to ream out the bowl. I used both the PipNet Reamer and the KleenReem to remove the built-up cake and followed that with 220-grit sandpaper to eliminate as much as I could. I took the bowl down to bare briar, as I wanted to ensure there were no hidden flaws in the walls of the bowl. Fortunately, there were none.
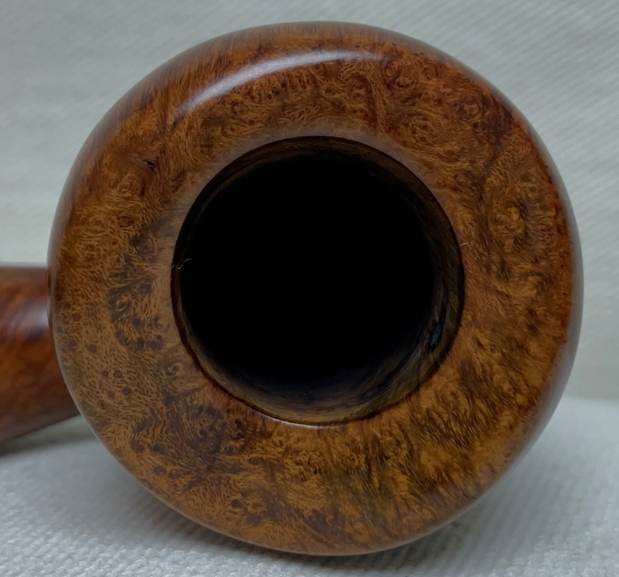
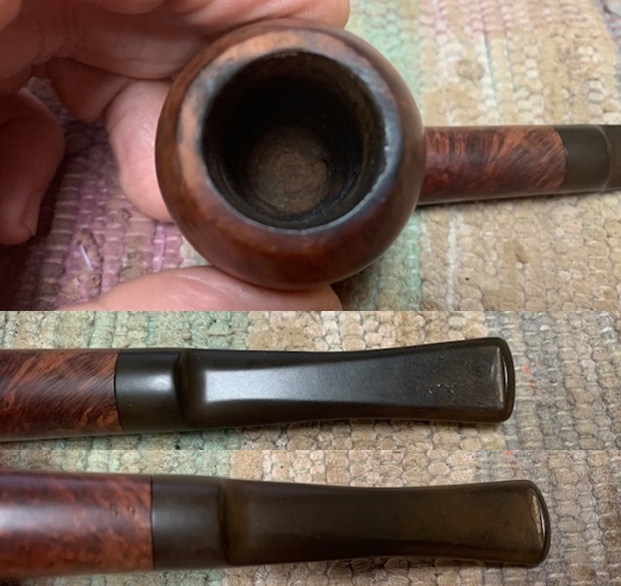
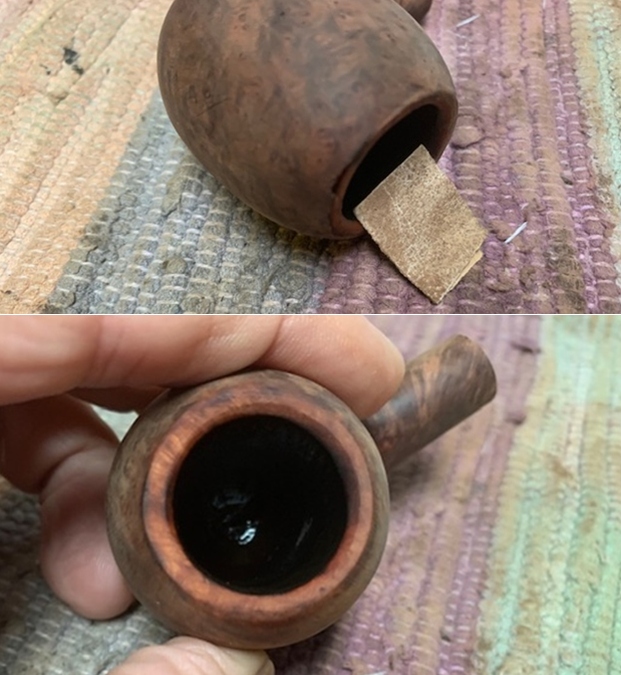
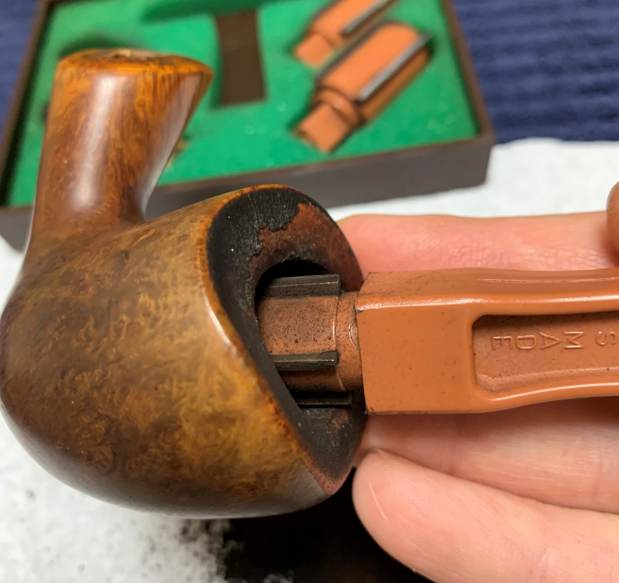
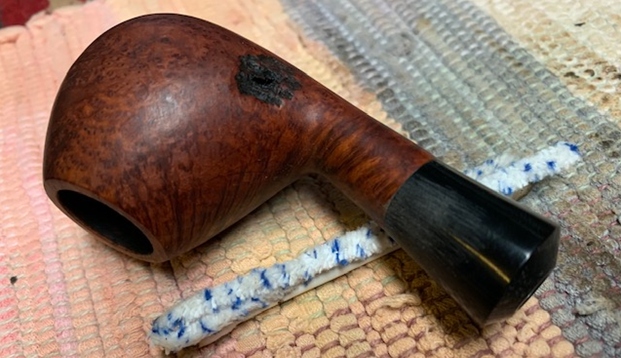
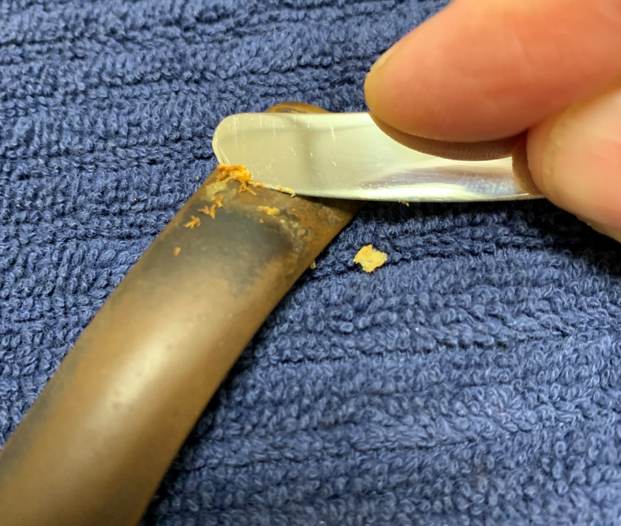
 I used a small butter knife to gently chip away at the lava on the rim and used more Murphy’s with a scrub brush to remove any remainder. This actually worked quite well. I then moved on to cleaning the outside of the stummel with Murphy’s Oil Soap and some cotton pads. That removed any latent dirt that blighted the wood.
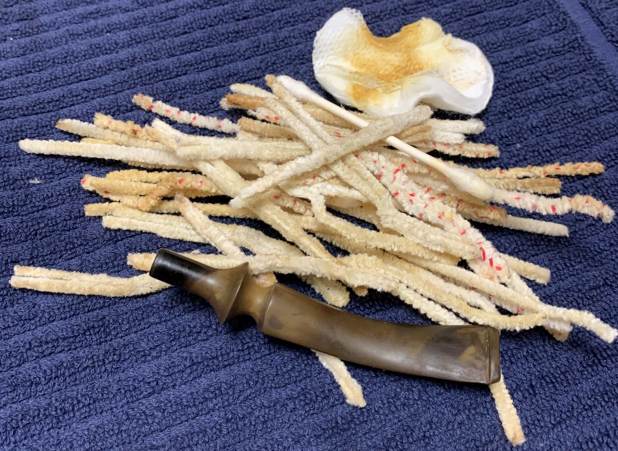
 I then proceeded to clean out the insides of the shank with Q-tips, pipe cleaners, and isopropyl alcohol. There was some filth inside this stummel and it took quite a bit of cotton to get it clean. I followed that up by cleaning the insides with some dish soap and tube brushes.
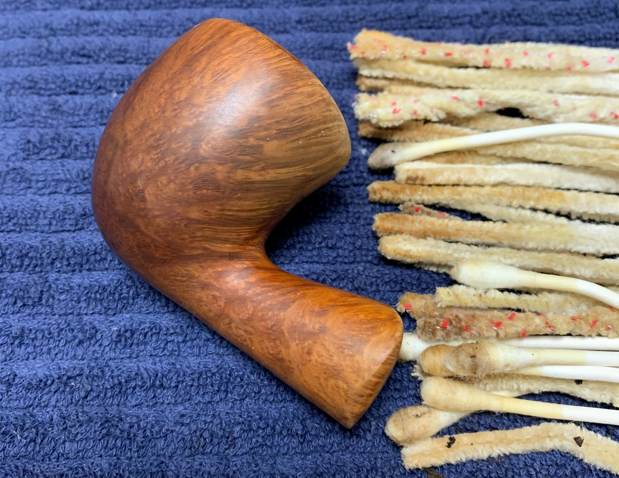 A de-ghosting session also seemed in order, so I thrust cotton balls into the bowl and the shank and saturated them with 99% isopropyl alcohol. I let the stummel sit overnight. This caused the oils, tars and smells to leach out into the cotton.
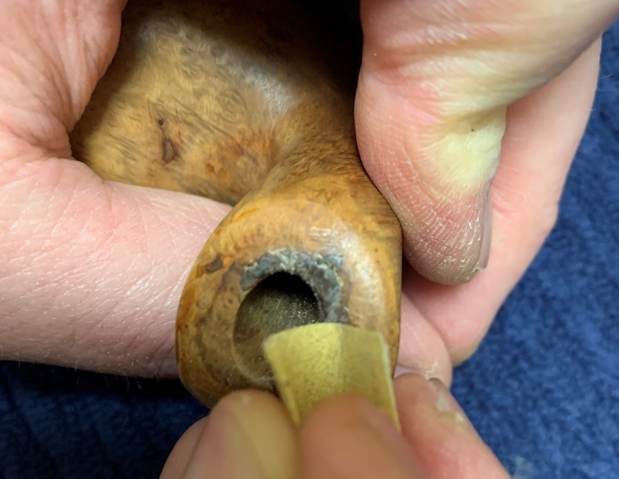
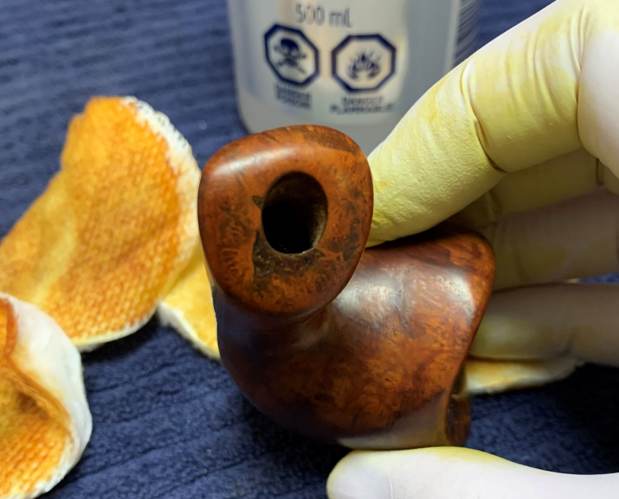
 Now it was time for the serious work: to fix the large gouge in the mortise, at the end of the shank. There were several problems to be addressed: to ensure that the repair was structurally sound, so it could withstand the wear and tear of the tenon going in and out; to ensure that the repair looked reasonably consonant with the surrounding wood, and to ensure that the inside of the mortise was smooth and conformed perfectly to the shape of the tenon. The repair was made with a mixture of briar dust and cyanoacrylate adhesive. This ensures a strong repair and one that looks similar to the surrounding wood.
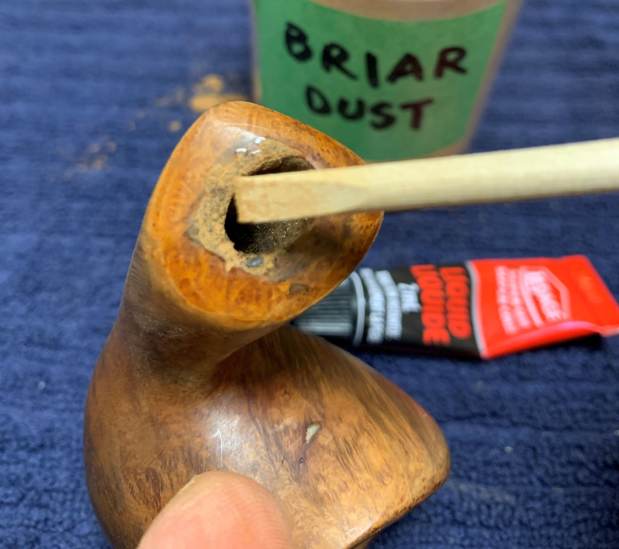

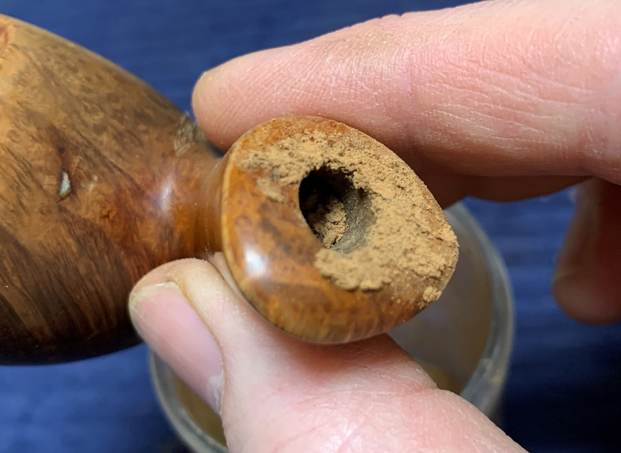
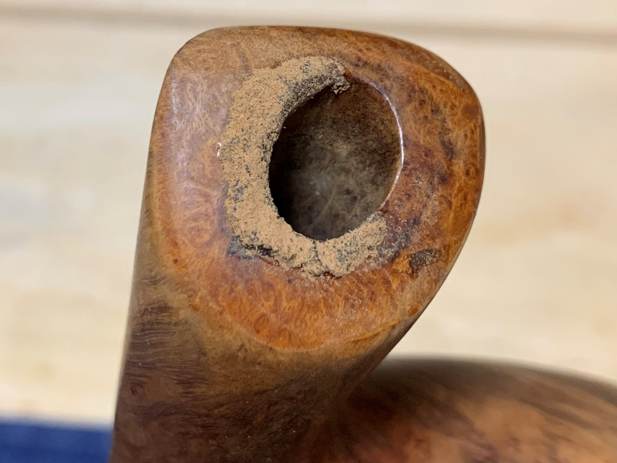 As it turned out, I had to build up the repair more than once to achieve the results I wanted. It was fairly straightforward to sand down the flat end of the shank, but it was very difficult to ensure that the inside of the mortise matched perfectly with the tenon. Honestly, it took a bit of trial and error to get it right. I sanded the repair down with a file and 200- and 400-grit sandpaper until it was level with the surrounding briar.
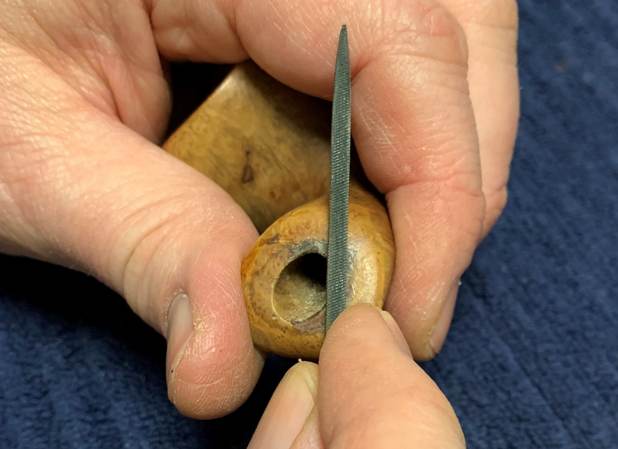
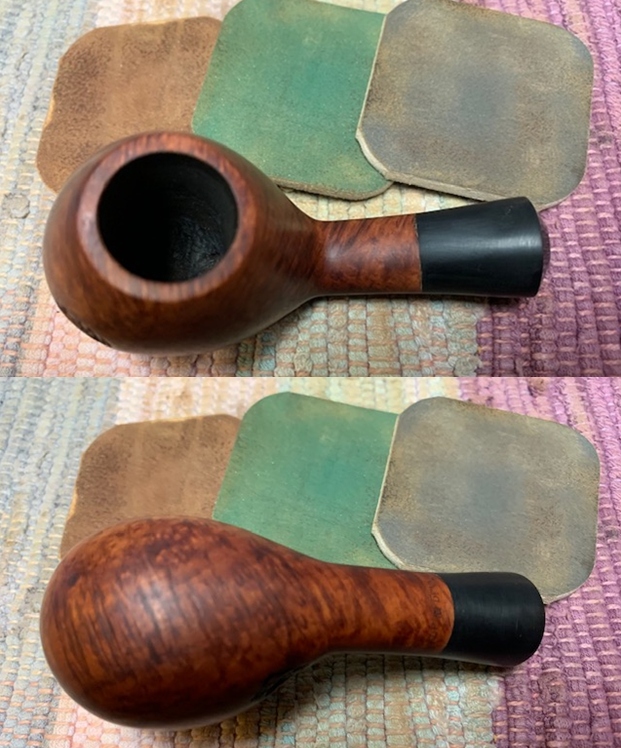
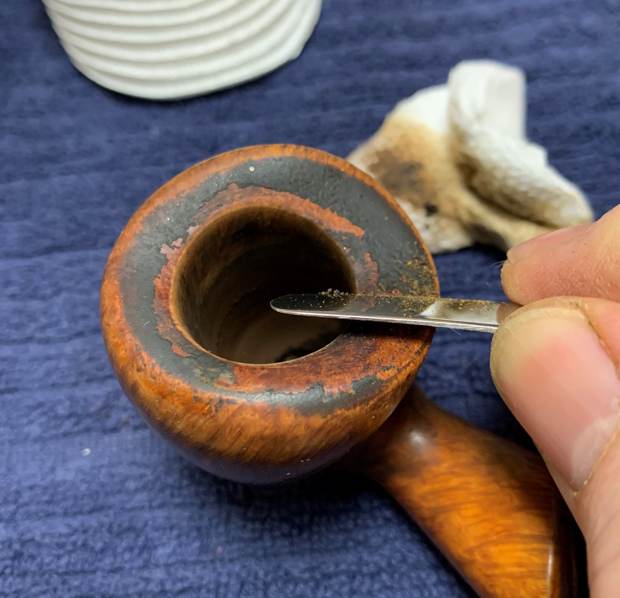
 Having completed that, I was able to address the small nicks on the rim and the bowl. I dug out my iron and a damp cloth to try to raise the nicks. The hot and moist steam can often cause the wood to swell slightly and return to shape. There was some movement – not a lot, but it was better than doing nothing. The repair was not perfect, but the remaining scratches would be improved by sanding.
  Now I could address the burn on the rim. I took some oxalic acid, used several Q-tips, and rubbed. The burn improved quite a bit. The burn was very superficial and did not affect the integrity of the wood at all.
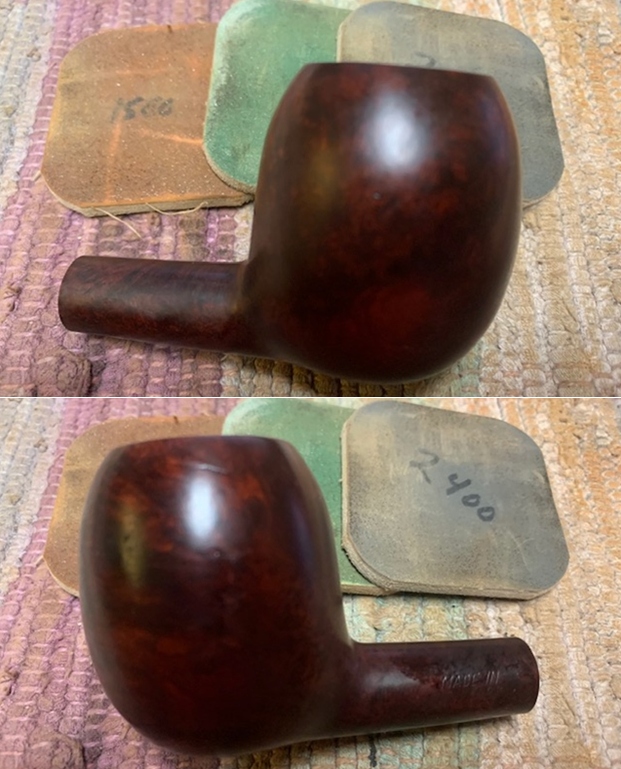
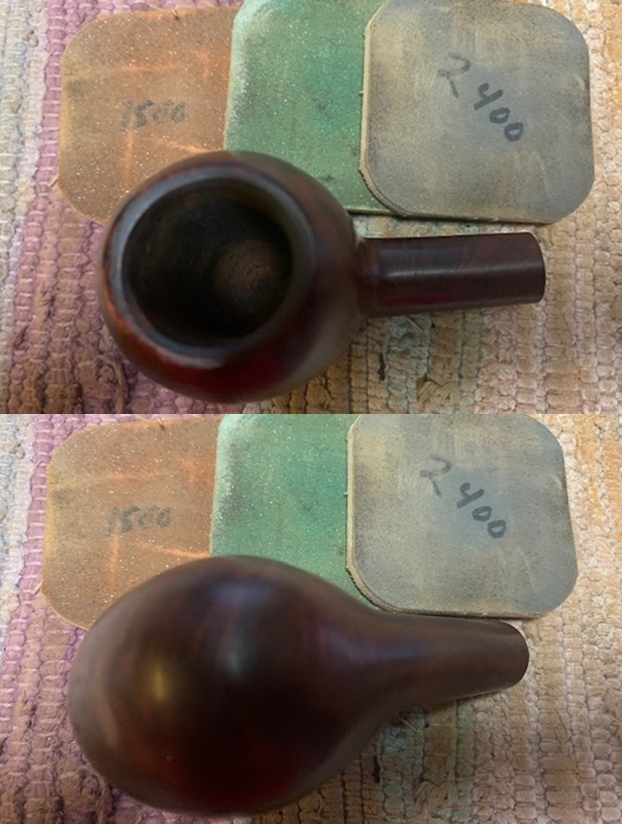
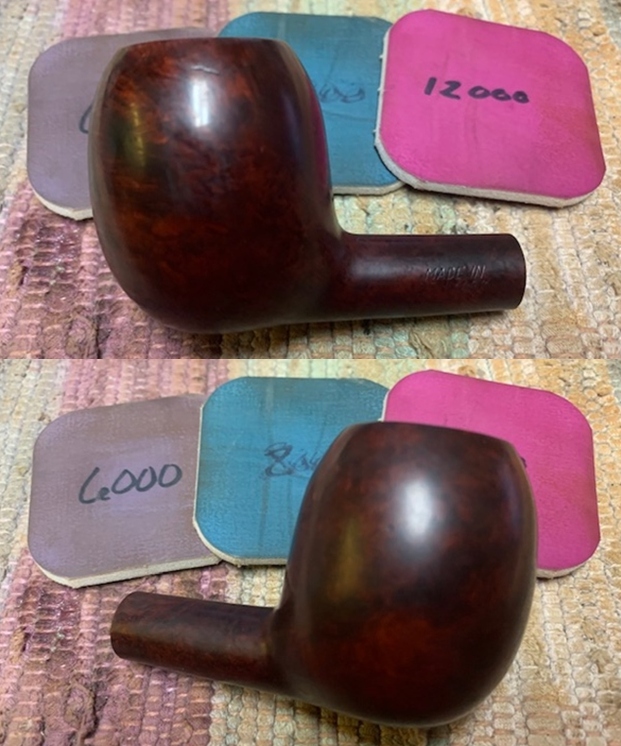
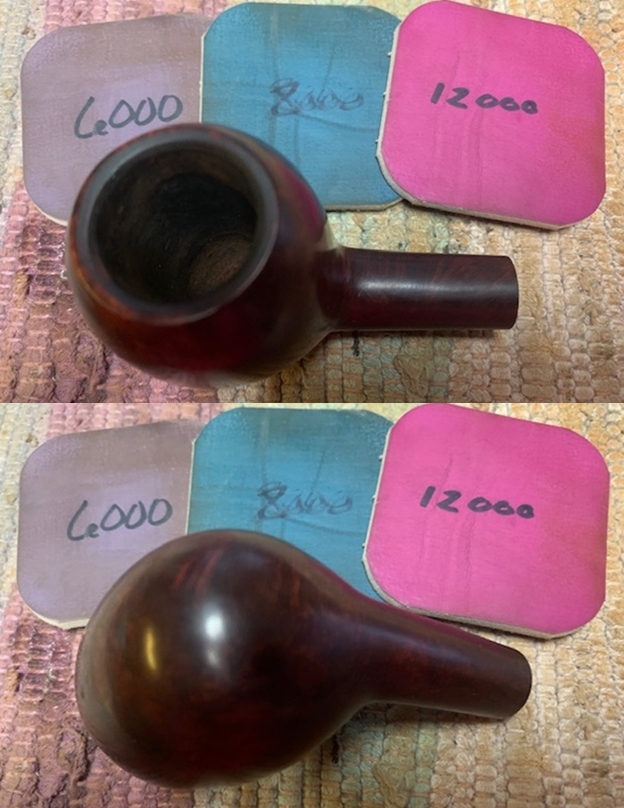
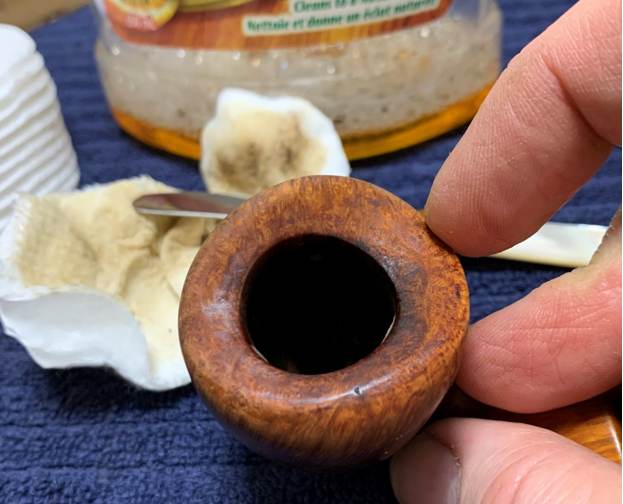
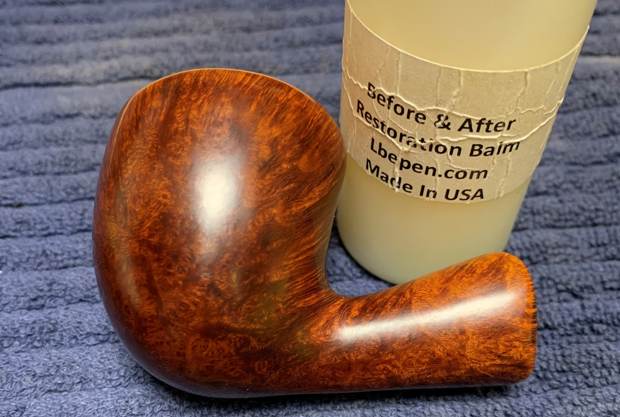
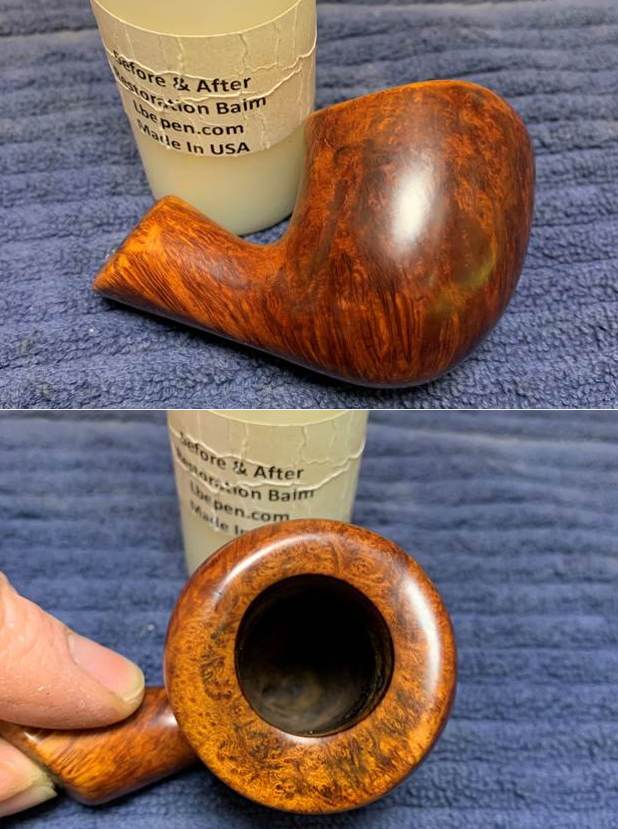
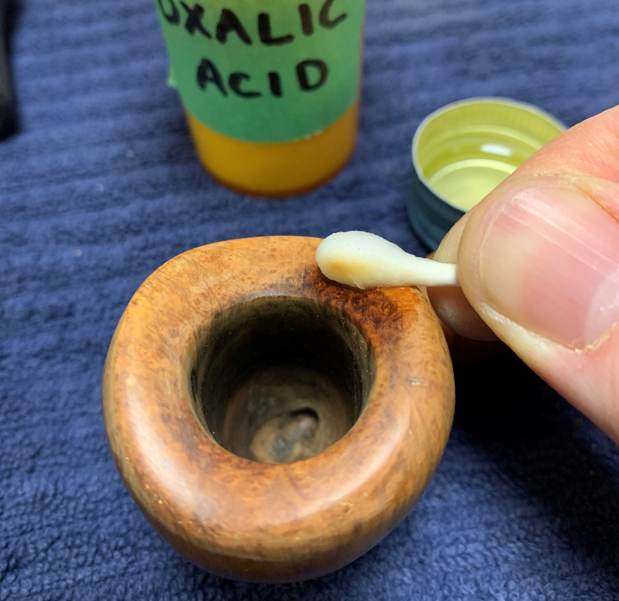 After removing the burn and checking in on the mortise repair to ensure its integrity, I used all nine Micromesh pads (1,500 through 12,000 grit) on the stummel to finish it off. After that, a light application of Before & After Restoration Balm brought out the best in the stummel’s grain. This is a very elegant Danish pipe.
 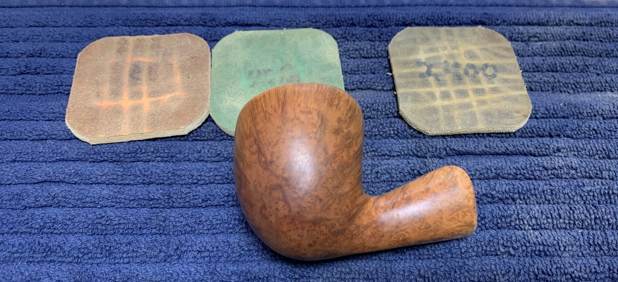 At this point, I checked in with Steve to see what he thought of the restoration so far. He made the excellent suggestion of applying a layer of Fiebing’s Black Leather Dye to the rim and the mortise-end of the shank. After applying the dye, flaming it, and letting it set, I wiped those areas down with isopropyl alcohol to remove most of the dye. The goal here was to accentuate the grain on those particular areas of the pipe with only residual amounts of black dye.
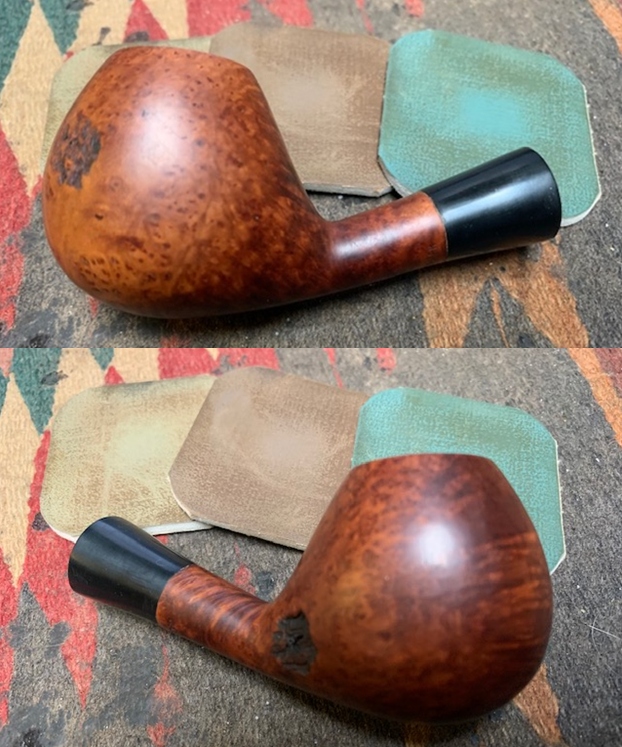
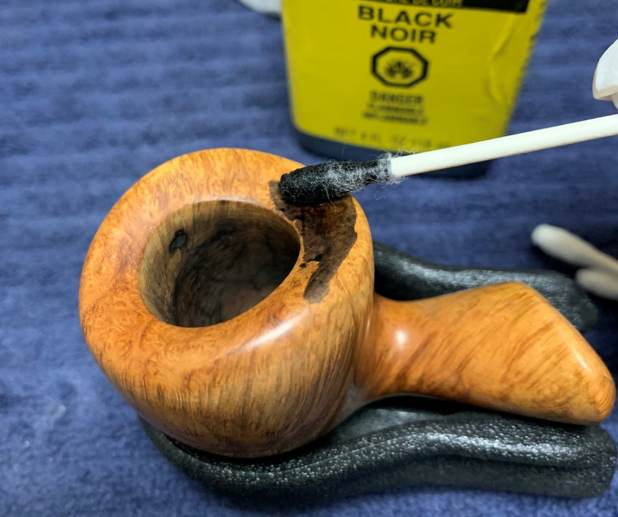
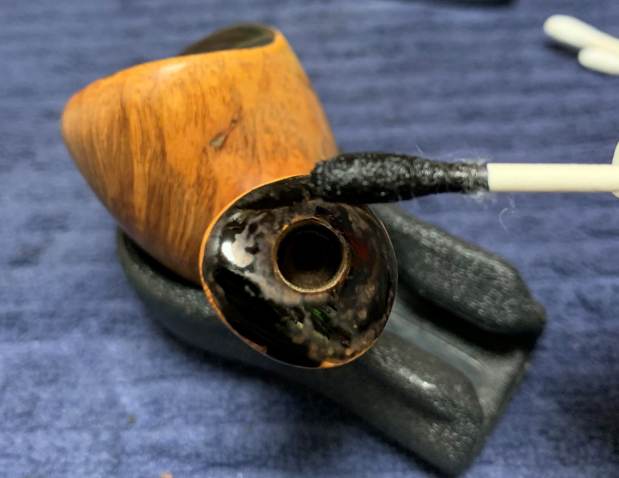
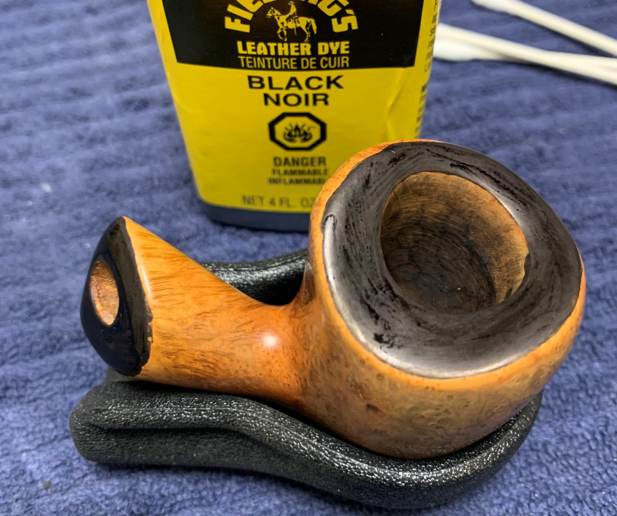
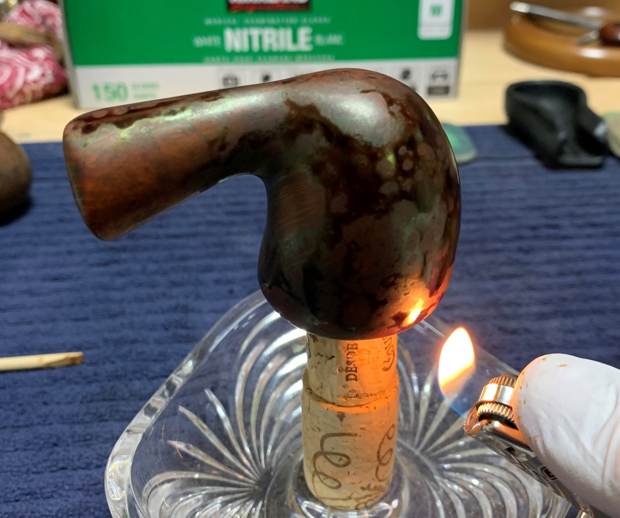
 In order to further the external beauty of this pipe, I applied some of Fiebing’s Medium Brown Leather Dye over the entire stummel. As usual, I applied flame from a BIC lighter in order to set the colour. I then added a second coat – just to make sure. It looked so much better with a richer colour.
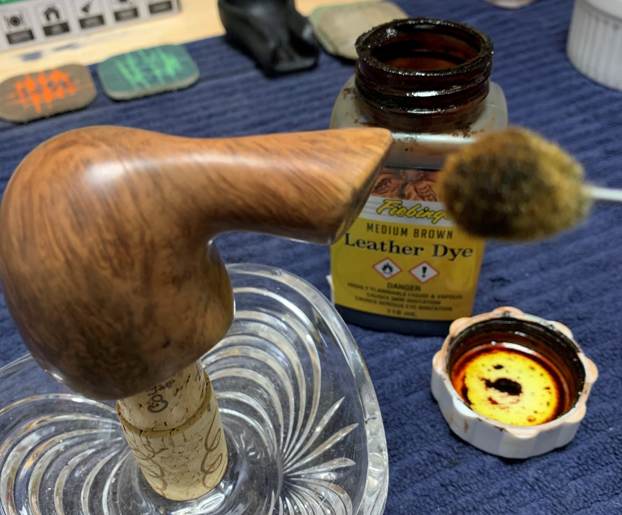
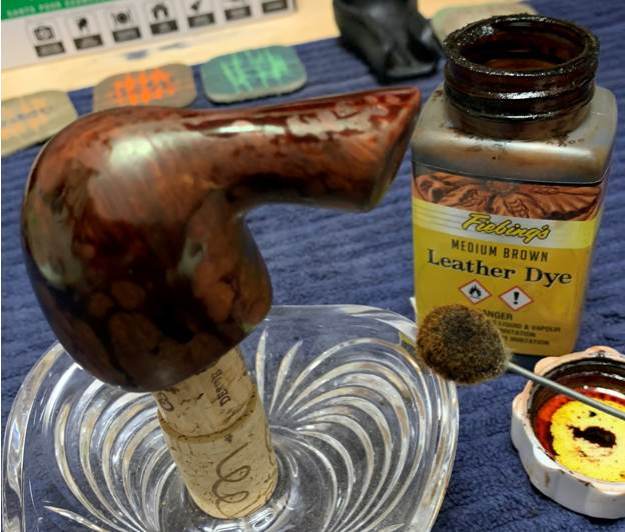
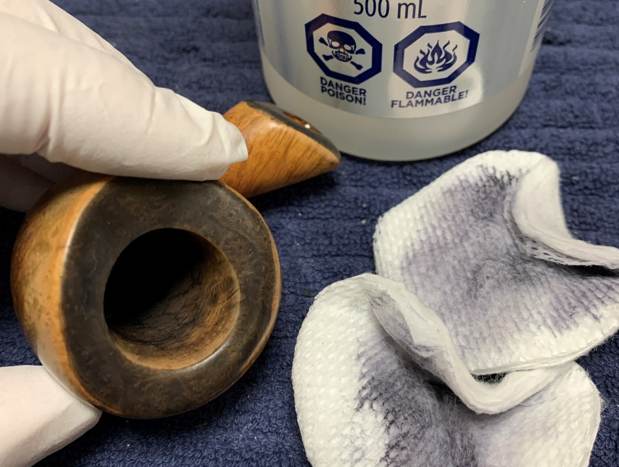
 I then used some isopropyl alcohol to wipe down the pipe and remove some excess dye.
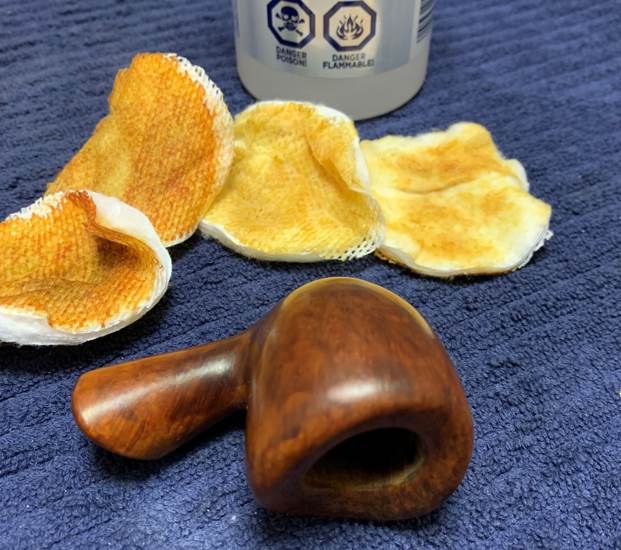

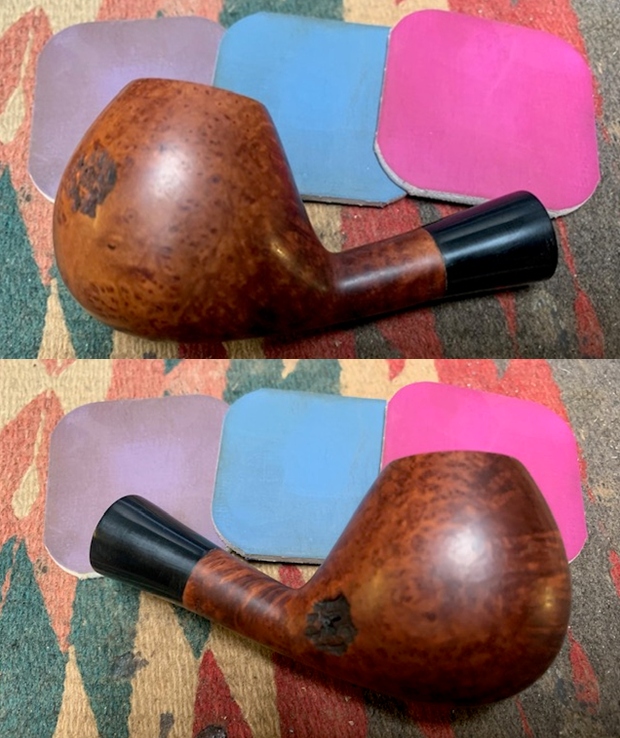
 At this point, I chose to re-sand the stummel with all of the micromesh pads. I followed up with some more Before & After Restoration Balm. What a wonderful result!
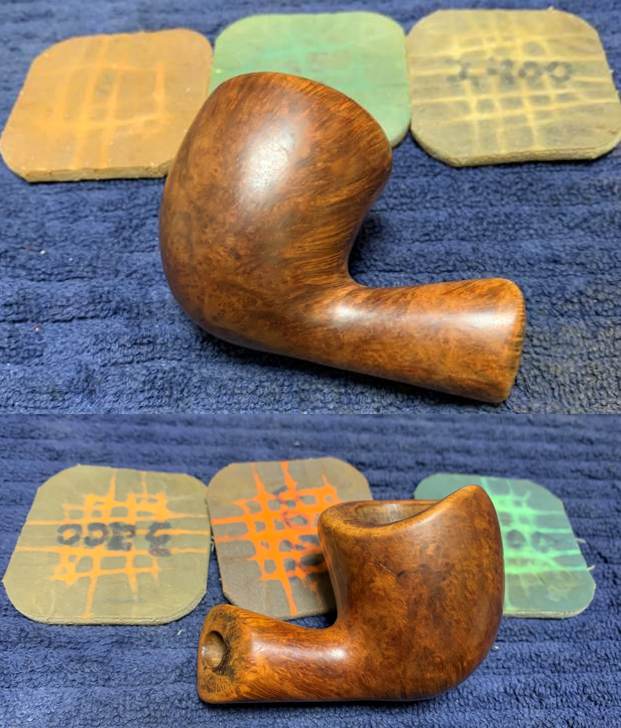
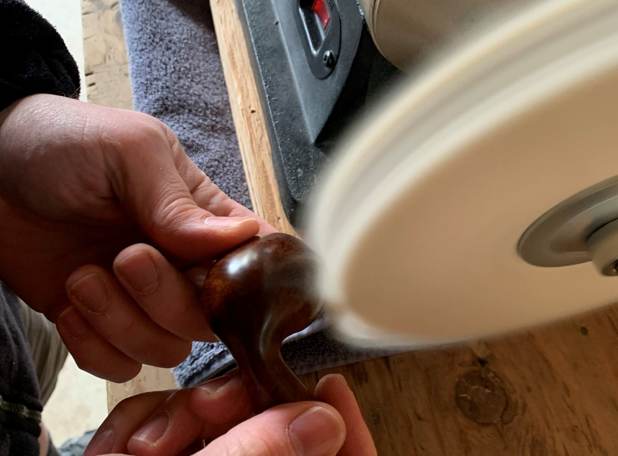
 Then it was off for a trip to the buffer.
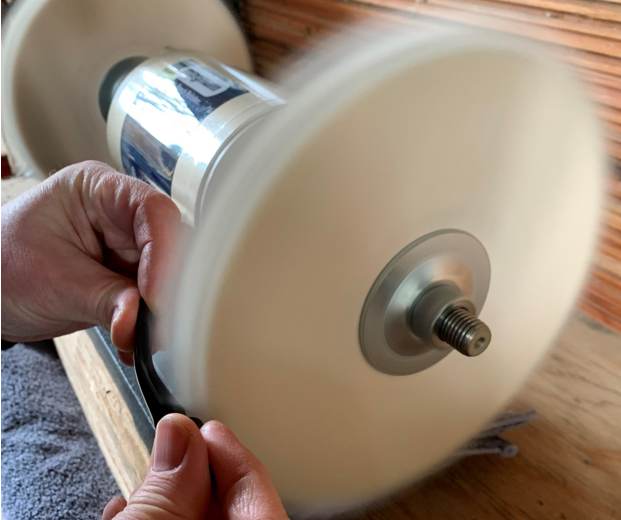
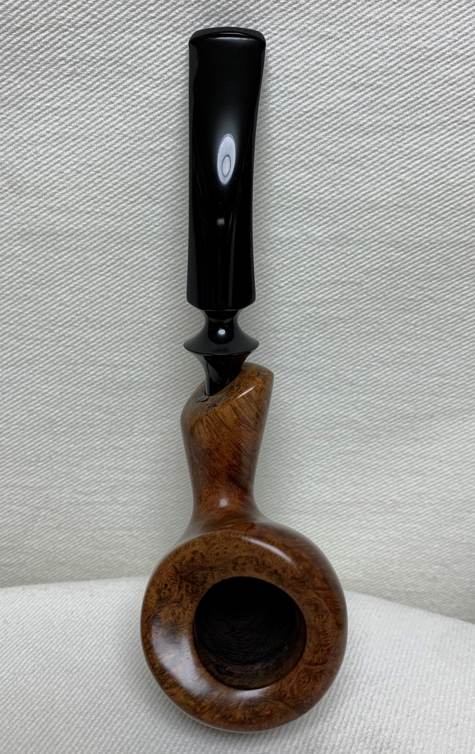
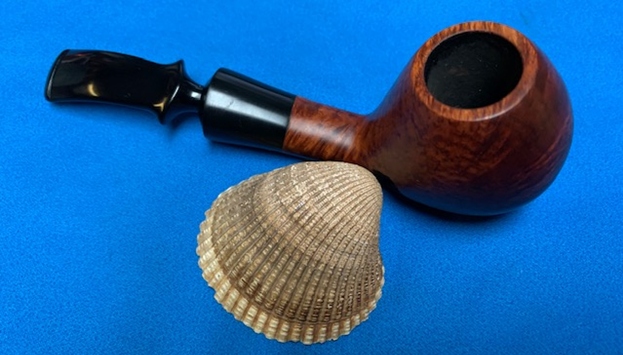
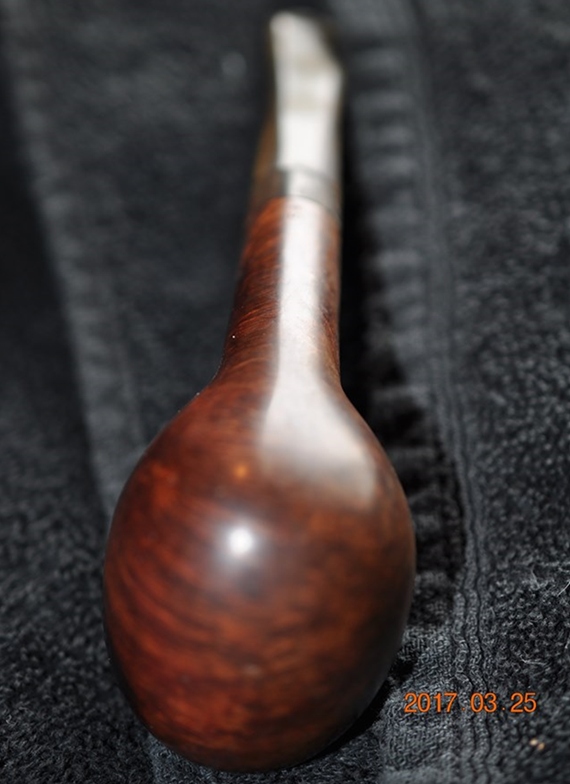
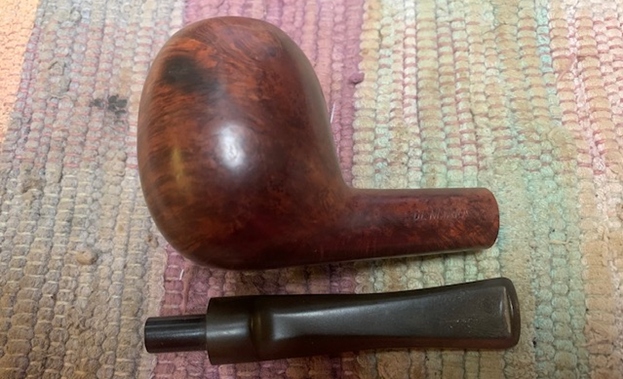
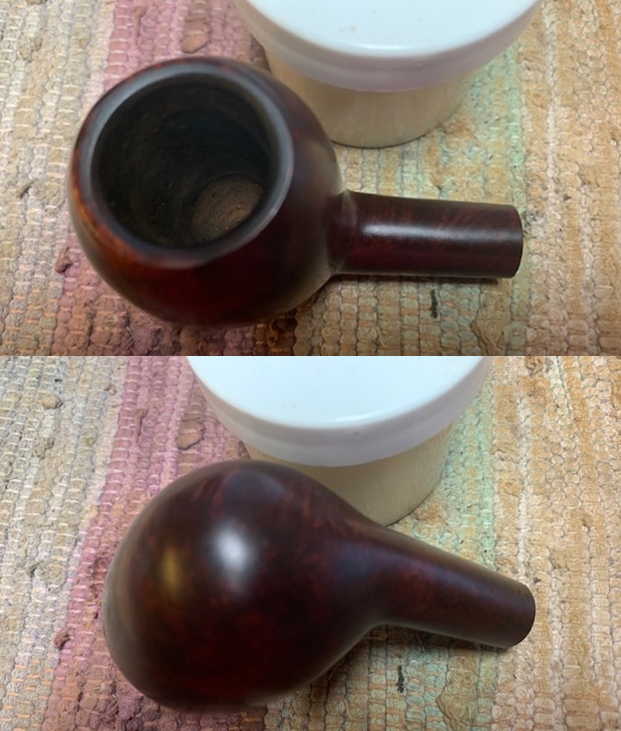
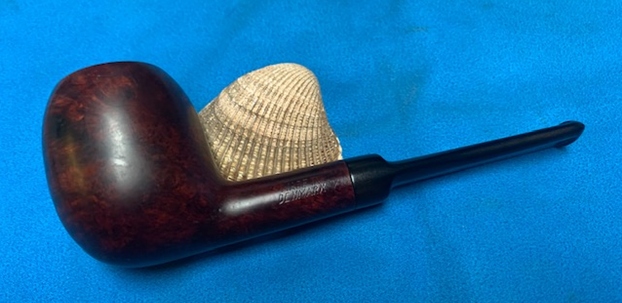
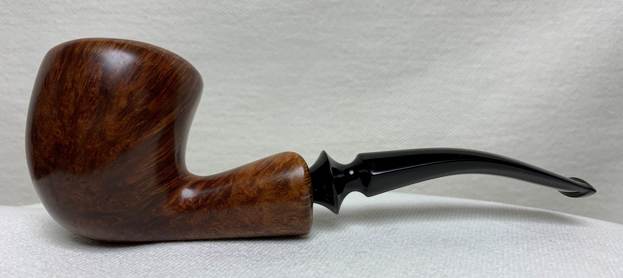
 A dose of White Diamond and a few coats of carnauba wax were just what this pipe needed. The lovely shine made the wood look absolutely beautiful. In fact, it turned out so well that this pipe has already sold! I know that the new owner will enjoy smoking it for many years to come. I hope you enjoyed reading the story of this pipe as much I as I did restoring it. If you are interested in more of my work, please follow me here on Steve’s website or email me directly at kenneth@knightsofthepipe.com. Thank you very much for reading and, as always, I welcome and encourage your comments.