Blog by Paresh Deshpande
The next pipe that I selected to work on was purchased on eBay way back in 2016 ! When the pipe reached us, I was aghast to see a charred and completely blackened foot of the stummel. There was no mention of the pipe being damaged anywhere in the description of the pipe uploaded by the Seller. To cut the ramble short, I communicated with the Seller about the condition of the pipe and was promptly issued with a complete refund, including the cost of shipping with a note that I could keep the pipe and a hope of continued patronage of his store on eBay. That’s the story of how this beauty came to me and now after all these years of restoring pipes, it finds its way to my work table. Unfortunately, way back then I never took any pictures of the purchased pipes and neither did I chronicle my collection and thus the reason for lack of pictures!
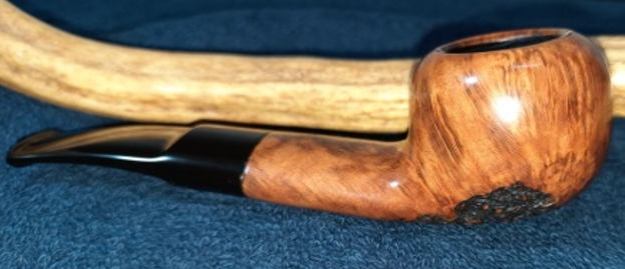
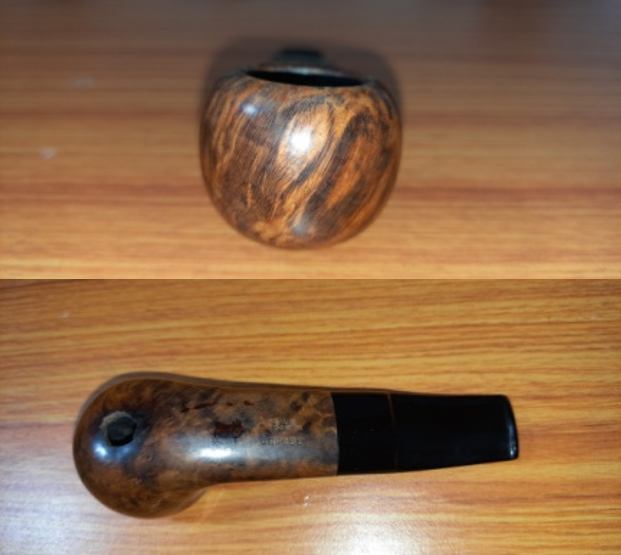
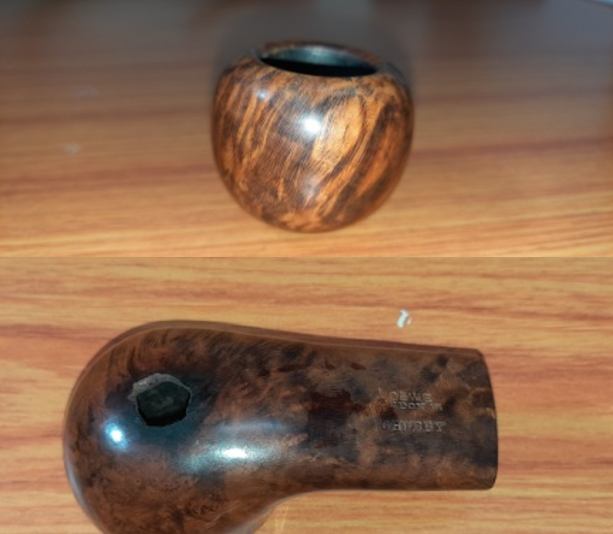
This beautiful smallish pipe has a unique shape that could be described as an oval shank squashed Tomato, if that’s any shape, and hence would loosely term this pipe as a Freehand. It is stamped over the top surface of the broad oval shank as “L & Co” in an oval over “GREAT BRITAIN”. The bottom surface of the shank is stamped “LOEWE” over “LONDON.W” over “CHUBBY”. The top surface of the high quality vulcanite saddle stem is stamped “L & Co” in an oval. This stamping over the stem is considerably worn out and though I would love to but unlikely to be highlighted. The stummel stampings, however, are deep and crisp. I have quite a few Loewe pipes in my collection and have researched this brand when I had worked on a couple from my inherited pipes. I knew that this brand from Haymarket, London was founded by Frenchman Emil Loewe in late 1850s and has the distinction of being first to manufacture Briar pipes. The company was taken over by Civic and later on as with most of the British marquee, was finally taken over by the Cadogan Group. Pipedia has a wealth of information which I went through again to refresh my memory. Here is the pipedia.org link to the article on Loewe pipes…Loewe & Co. – Pipedia
Further down the article, is a link (Dating Loewe Pipes – Pipedia) to date Loewe pipes by Michael Lankton which was of interest as it is very informative and is a highly recommended read for collectors of Loewe pipes.
For our intents the pipe I have is from the Civic Era (1964-1967), where the nomenclature was unchanged but the pipes certainly were, and 1967-1978 where the past goes out the window and decidedly un-Loewe-like 3 digit shapes numbers appear.
Loewe is my favorite pipe maker. How to rank them in terms of the many great London made pipes of their era? For me in the simplest of subjective terms, Loewe pipes from before the Civic Era are like Comoy’s, but even better. After Civic took over in 1964 I suppose the quality of Loewe was very comparable to a lower end GBD, which means they were still ok pipes but not up to previous standards. But those earlier pipes…to me they’re just as good as it gets.
One thing I’ve noticed is most of the old Loewes you see look rode hard and put up wet, which tells me that their owners loved them and smoked them, which is the highest praise any brand can gain.
From my research on it I can safely that the Loewe pipe on my table is from the Early Civic Era 1964 to 1967.
Initial Visual Inspection
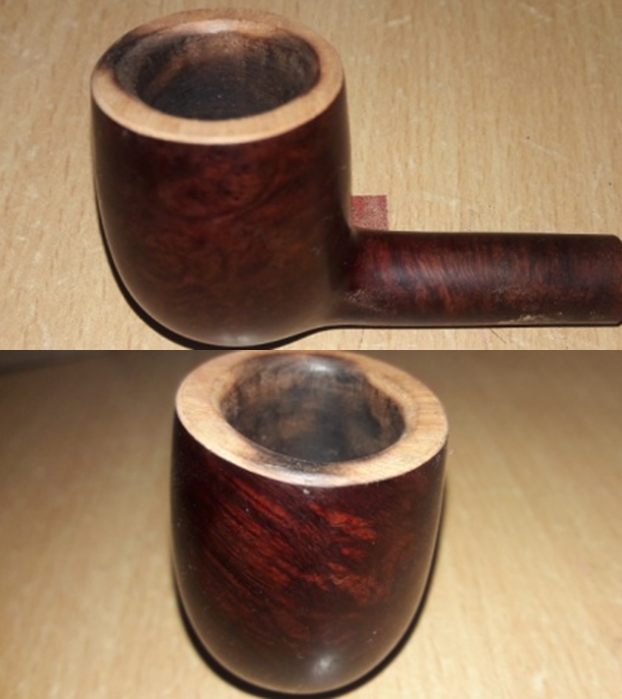
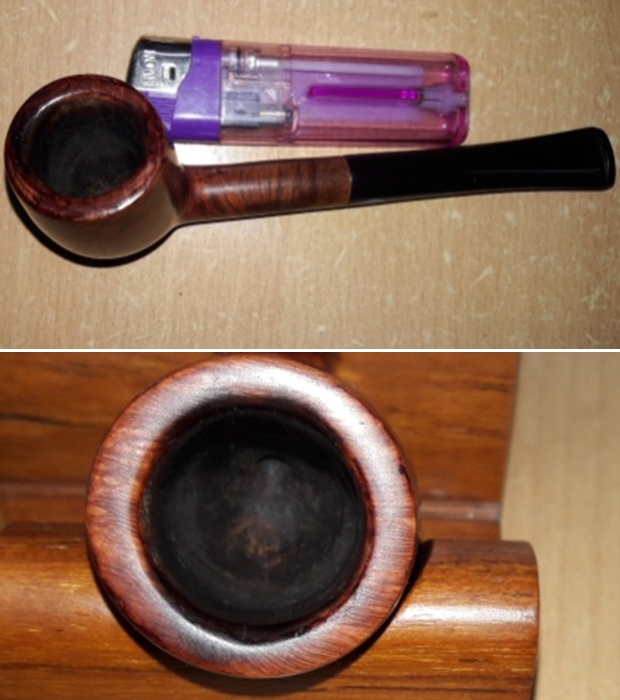
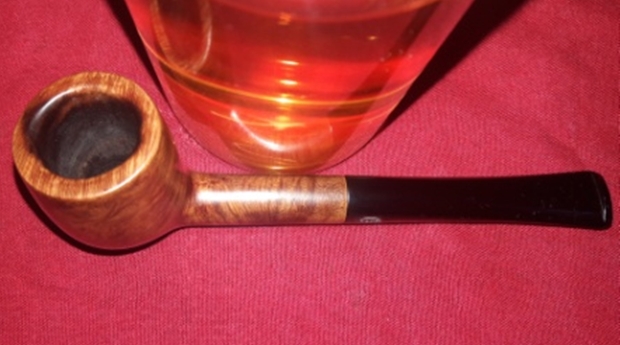
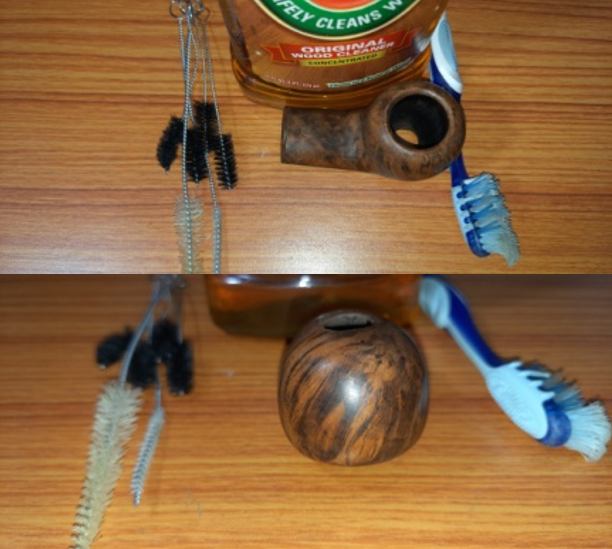
I have a faint remembrance of the pipe being in a decent state with minimal cake and a nice shining black stem. The major issue was the charred and blackened foot of the stummel. I remember having knocked at the charred surface to gauge the extent of burnout and was left with the gaping hole at the foot. There is a thin layer of cake in the chamber and the pipe does not appear to have seen heavy usage. The delicately beveled rim is in pristine condition and so is the stem. In my appreciation of the pipe’s condition, I think this burnout occurred very early in to the existence of the pipe probably caused by smoking the pipe too hot. Given below are a few pictures of the pipe as it sits on my work table.

 Detailed Inspection
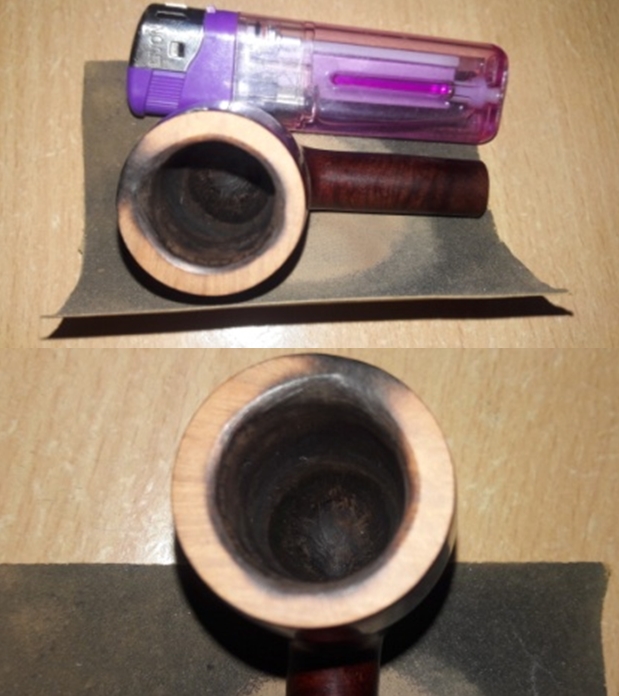
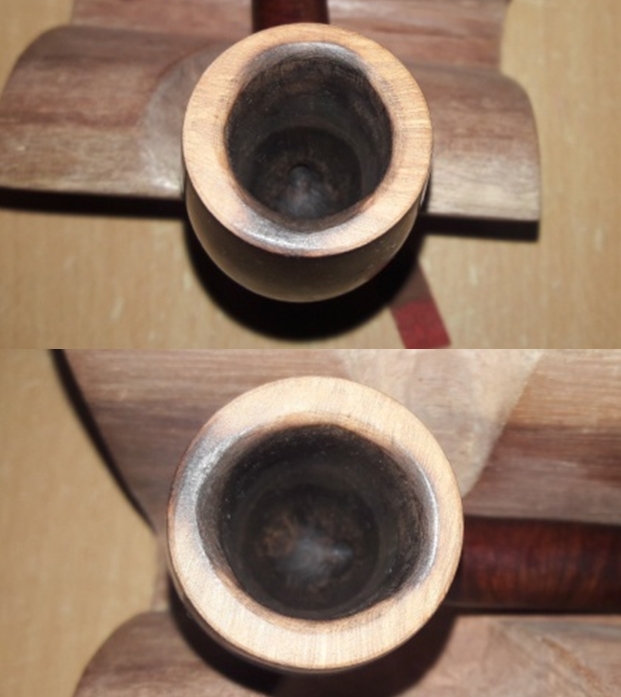
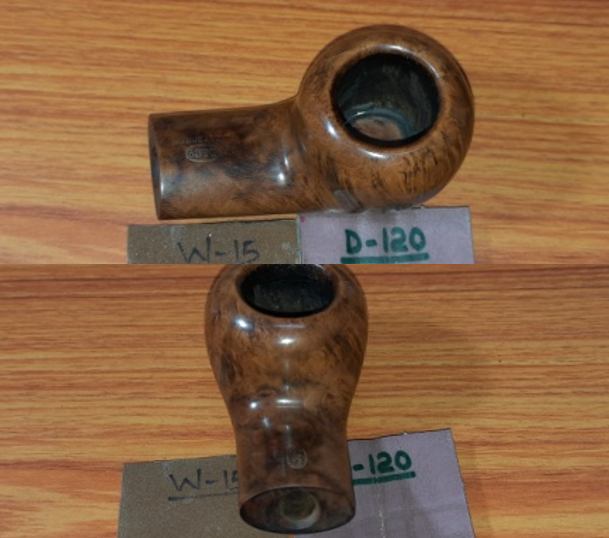
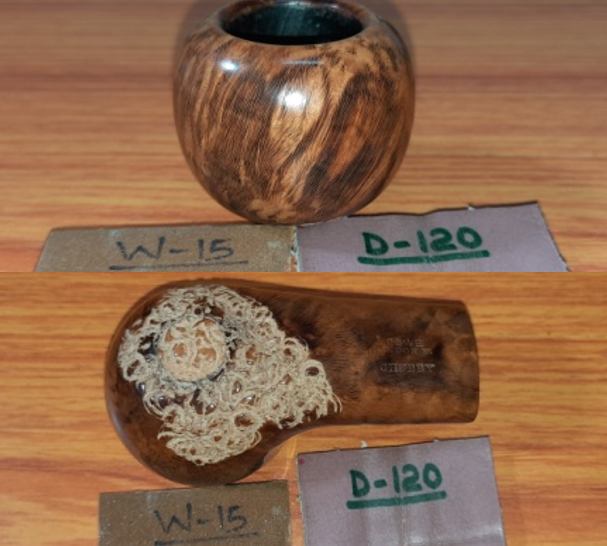
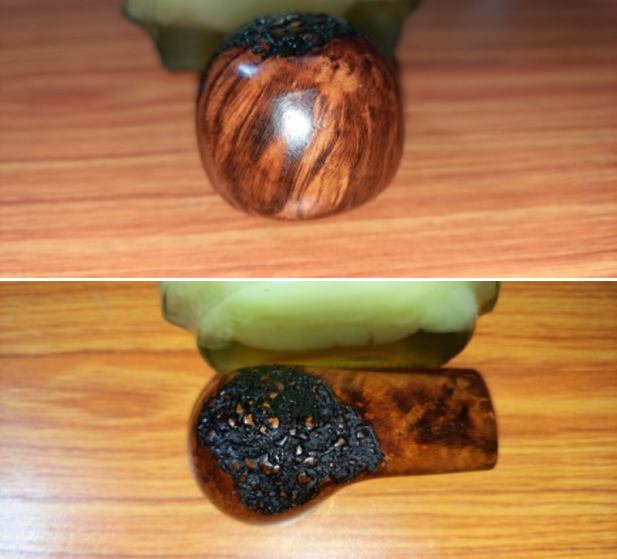
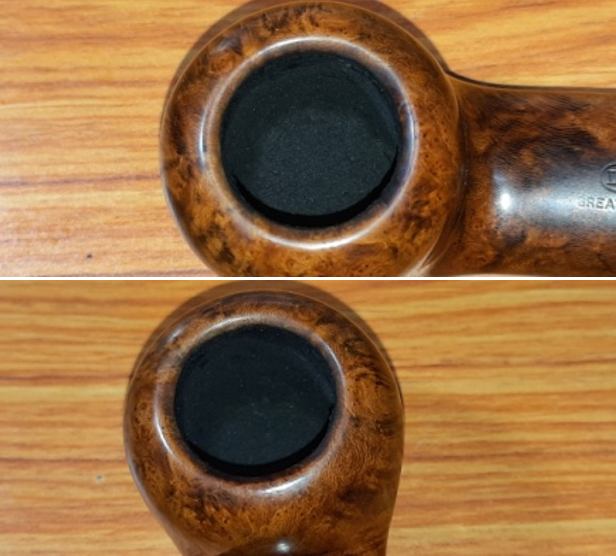
As I had mentioned earlier, I had not taken any pictures either of the burnout at the foot of the stummel or my fiddling to remove the charred briar from the damaged area. The chamber has a thin layer of cake and of course the huge gaping hole at the heel is sans any cake. The surface from where the charred wood was removed by me is highly uneven. The outer rim slopes inwards to form the thin rim top surface and has a delicate bevel to the inner rim edge and is in pristine condition. The minor darkening to the inner rim edge at 6 o’clock is superficial and it should clean up easily. Another issue that I have observed is that the draught hole is above the heel of the chamber. I need to figure out a way to build up the heel of the chamber to the level of the draught hole.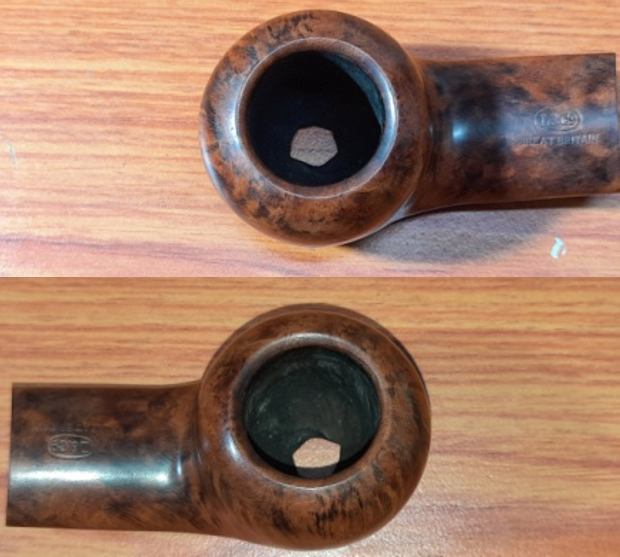
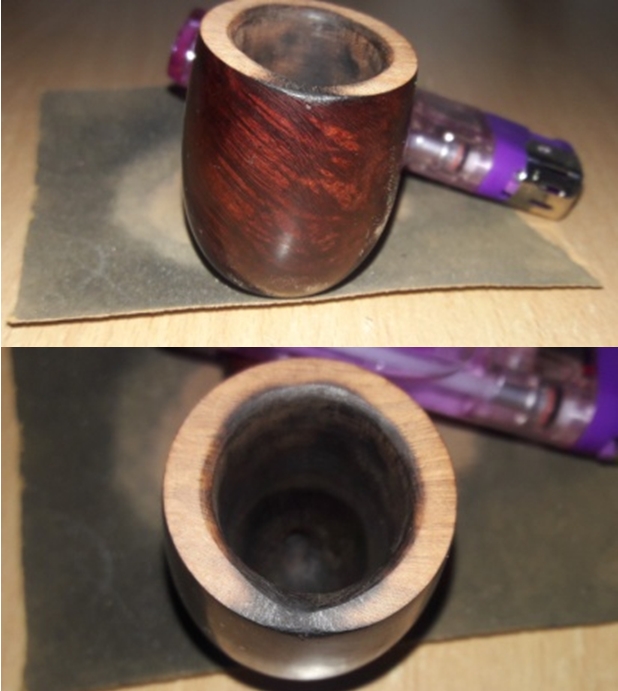
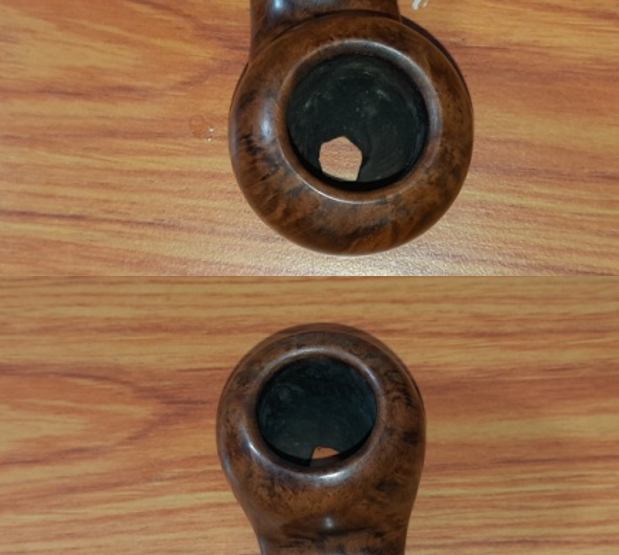 The only area that would need some serious work is at the heel of the stummel. The area adjoining the burn out still has remnants of the charred wood that would need to be addressed. The rest of the stummel exterior is in pristine condition and would benefit from some TLC to bring it back to its former stunning newness.
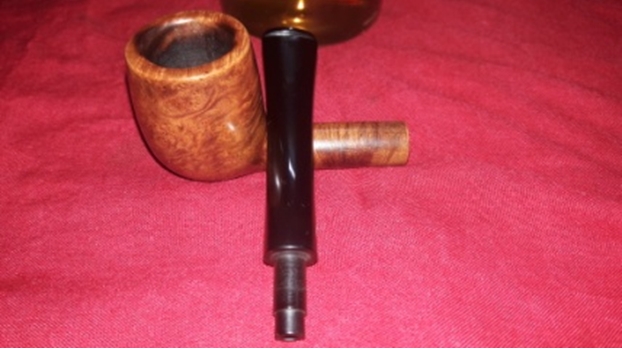
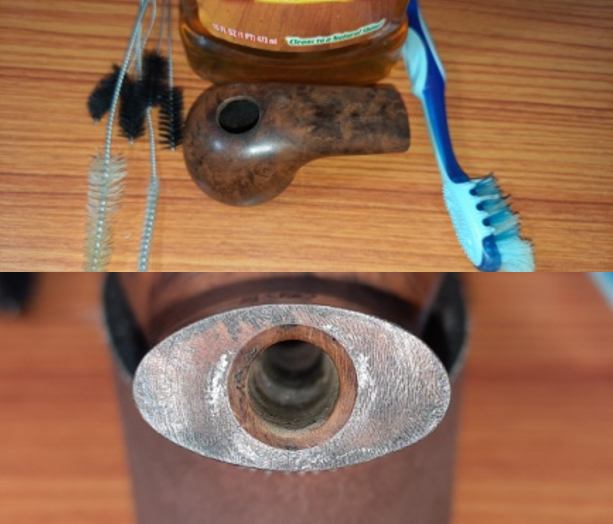
 The mortise is nice and clean and has just a few speckles of carbon and dust. This should clean up easily.
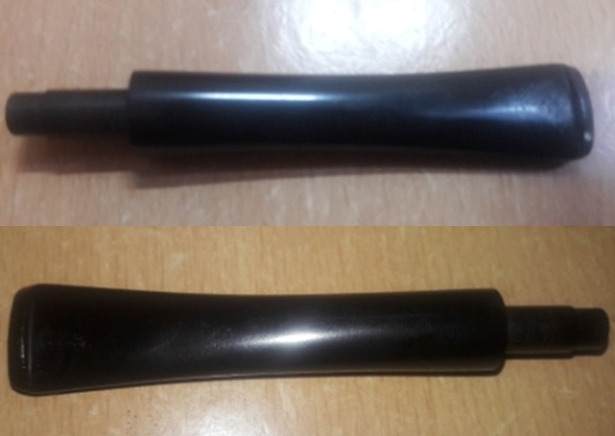
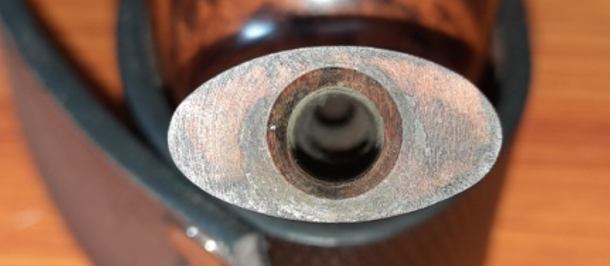 The oval broad stem is also nice, clean and surprisingly shiny. There are no bite marks or chatter or indentations in the bite zone. It is unfortunate that the stem logo is wiped out to a great extent. The one issue that needs to be addressed here is the loose seating of the tenon into the shank.
  The Process
The first step in restoring this particular pipe was the cleaning of the chamber. I used my fabricated knife to scrap off the thin carbon layer. That the cake was crumbly and completely dry made this cleaning a lot easier and faster. With a folded piece of 180 grit sandpaper, I took the cake down to the bare briar and also smoothed the chamber walls. A final wipe with a cotton swab moistened with isopropyl alcohol removed the carbon dust from the chamber and revealed a chamber sans any damage. The charred briar from around the burned out area on the foot of the stummel was further removed using my fabricated knife.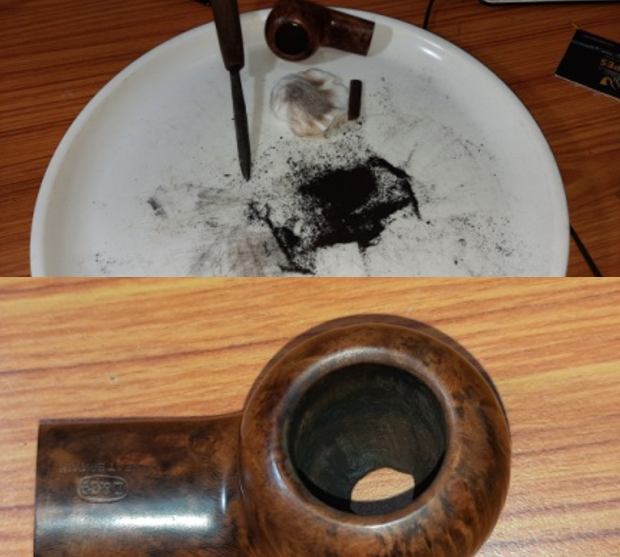
 Now that all the charred briar wood was removed, it was necessary to smooth out the edges of the burnt out area to ensure an even round hole for a snug fitting briar plug. I mounted a sanding drum onto my hand held rotary tool and evened out the edges. I continued the process of sanding till I could clearly make out solid briar peeking out from the edges.
 Next I marked out the inner diameter of the carved out burnout area over a block of briar using a marker pen. I cut a suitably sized block of briar to be shaped into a plug using a small hacksaw blade.
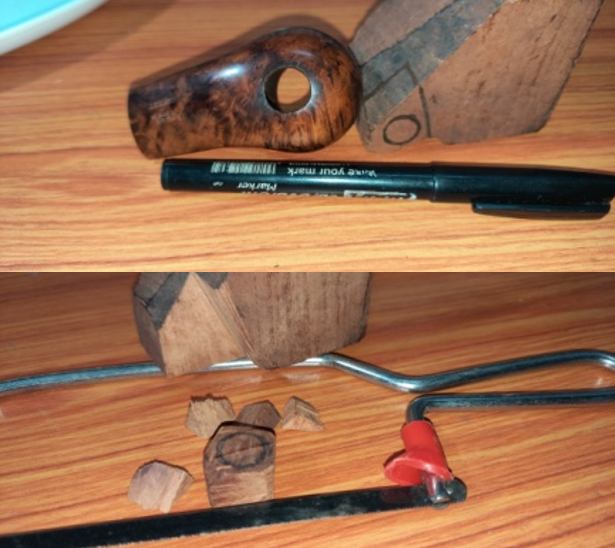 Using a sanding drum mounted on a rotary tool, I rough shaped the plug that would fit into the foot of the stummel. I deliberately left the top of the plug duly flanged (indicated with blue arrows). The general idea was to push the plug from inside the chamber to the outside so that the plug flanges will seat over the remaining intact heel of the chamber forming a new heel and also raising the heel to just below the draught hole.
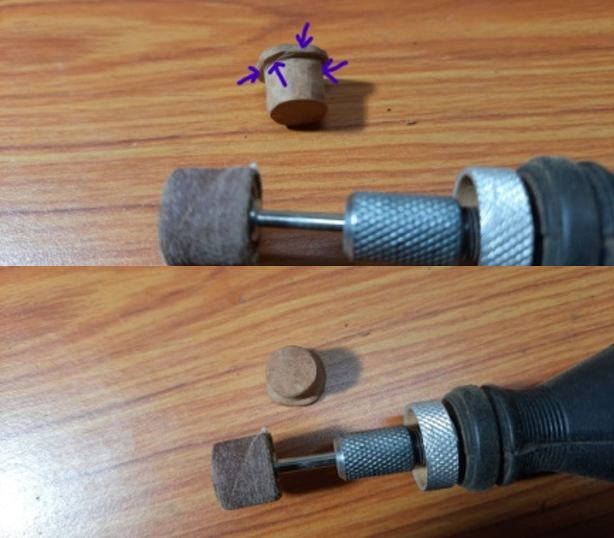
 Now that the plug and area to be plugged is all prepped up, I decided to complete the internal and external cleaning of the stummel before plugging the burned out area. I ran a pipe cleaner dipped in isopropyl alcohol through the mortise and along the shank walls. I scraped out the dried out oils from the shank walls using a sharp dental tool.
 I followed the internal cleaning of the shank with external cleaning of the stummel using Murphy’s Oil soap and a hard bristled tooth brush and dried it with paper napkins and cotton cloth. I simultaneously cleaned the shank internals with the detergent and a hard bristled shank brush.
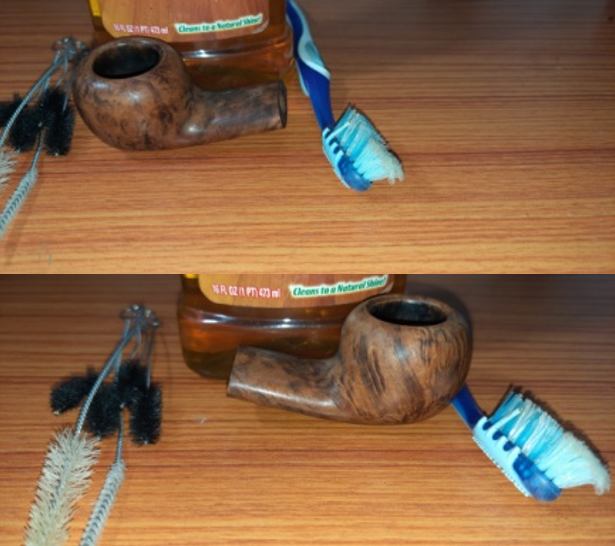
 Abha simultaneously cleaned the internals of the stem with anti-oil dish soap and brushes. She also cleaned the external surface with the soap and Scotch Brite pad.
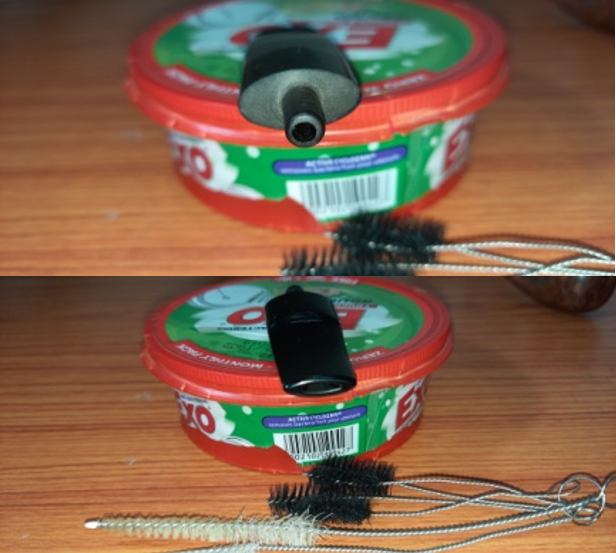 To fix the briar plug in to the heel of the chamber, I decided to apply a layer of JB Weld to the bottom of the entire heel. J B Weld is a two-part epoxy Cold Weld that consists of two parts; hardener and steel which are mixed in equal parts in a ratio of 1:1 with hardening time of 5-6 minutes and complete curing time of 6-8 hours. I poured the contents of the two tubes and mixed it well. With a flat bamboo frond, I applied this mix over the heel of the chamber from inside. I worked fast to ensure a complete and even spread of the epoxy mix over the bottom and then pressed the plug in place. I set the stummel aside for the epoxy to cure overnight.
 By the following morning, the epoxy had completely hardened. I turned the bowl over and filled the minor gaps between the briar plug and the adjoining stummel surface with medium CA superglue and set it aside while I went for my work. By the time I would return from my office in the evening, the glue would have hardened completely for further work.
 While the stummel repairs were under progress, Abha polished the stem with 1500 to 12000 grit micromesh pads. She wiped it lightly with a moist cloth and polished the stem surface with “Before and After Extra fine” stem polish developed by Mark Hoover. This polish helps in removing the minor scratches left behind due to sanding while imparting a nice shine to the stem. She finished the stem polishing and rubbed a small quantity of EVO into the stem surface and set it aside for the oil to be absorbed.
 By evening when I continued my work on this pipe, the J B Weld as well as the superglue had cured completely. Using a small hacksaw, I cut the protruding plug as close to the foot of the stummel as possible. I further match the plug with the rest of the stummel foot with a flat head needle file. I perfectly matched the plug with the rest of the surrounding surface by sanding with a folded piece of 220 grit sandpaper. The plug is now flush with the foot of the stummel while the flanges of the plug provide additional support to the plug from within the chamber. The floor of the heel is also raised and is just below the draught hole.
 I had reached that stage in restoration where an important decision was required to be taken which would affect the aesthetics of the pipe. To blend in the repair, I wanted to rusticate only the foot of the stummel and discussed this step with Abha. She was of the opinion that a perfect geometrical pattern does not go with the flow of the shape and recommended a free flowing rustication pattern. I sought her help in designing the free flowing pattern and marked it over the foot of the stummel with a marker. The design she marked makes for an interesting look.
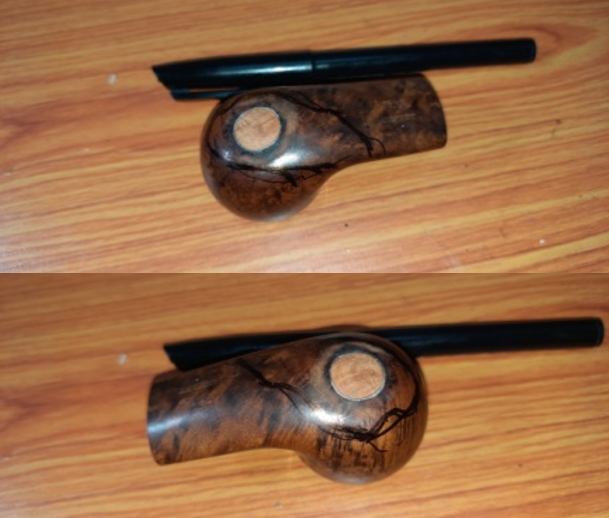 To rusticate, I firmly held the stummel in my left hand and with my right hand and began gouging out the briar. The technique is to firmly press the pointed four prongs of the modified Philips screwdriver into the surface, rotate and gouge out the removed chunk of briar. I worked diligently till I was satisfied with the rustications and the appearance of the stummel. I cleaned the debris off the rusticated surface with a brass wired brush. The high points in the rustications were lightly sanded down using a piece of 220 grit sandpaper.
 Next I polished the stummel using micromesh pads, wet sanding with 1500 to 12000 grit pads. I also polished the high spots in the rustication with the micromesh pads. I wiped the bowl with a moist cloth after each pad to clean the surface. The rusticated part of the stummel is now ready for a fresh coat of stain.
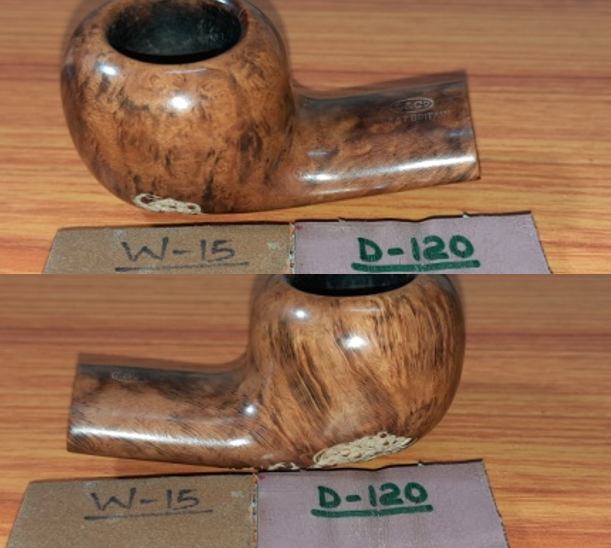
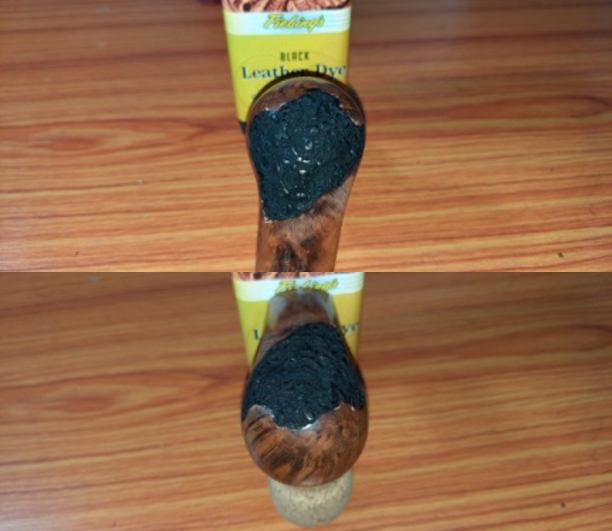
 I decided to stain the rusticated surface with a black dye which would contrast beautifully with the browns of the rest of the smooth surface. I heated the rusticated portion with my heat gun to open up the pores on the stummel so that the stain is well absorbed. I used Fiebing’s aniline black leather dye and liberally applied it over the heated surface, flaming it with the flame of a lighter. This helps in the setting of the stain in the grain of the briar. I ensured that every inch of the rusticated surface was coated with the dye while the smooth surfaces are not stained. I set the stummel aside for a day to set the dye into the briar surface.
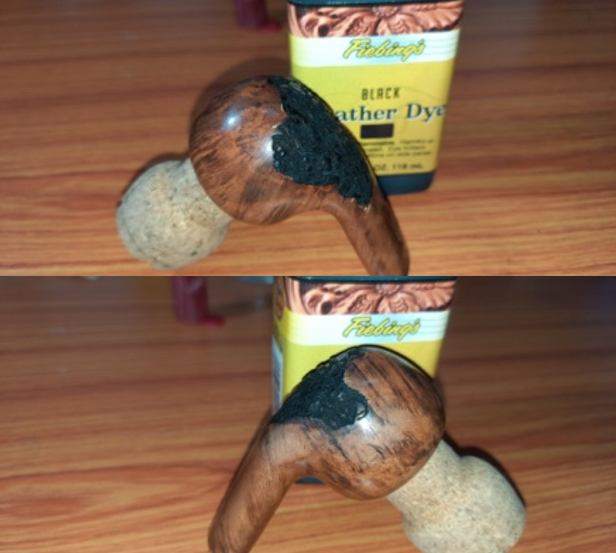
 24 hours later, the stain had set completely. To highlight the contrast of the high points in the rustication, I lightly sanded the high points with a worn out piece of 180 grit sandpaper followed by polishing by the method of dry sanding with 1500 to 12000 grit micromesh pads.
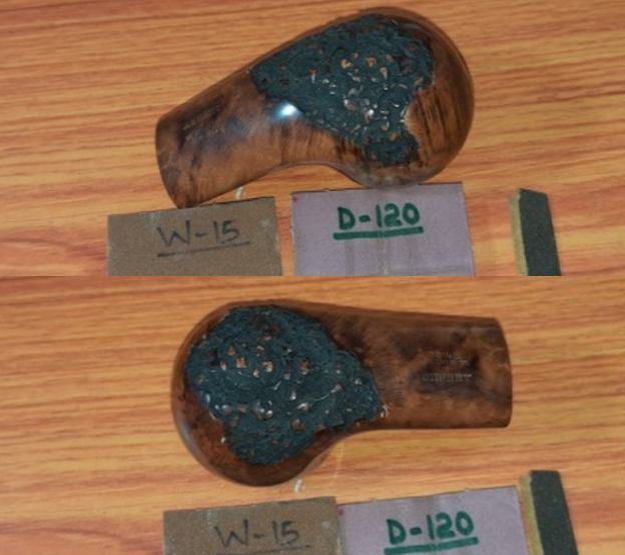 Next, I rubbed a small quantity of “Before and After Restoration Balm” into the briar with my fingertips, worked it deep into the sandblasts as well as the smooth surface and let it rest for a few minutes. The balm almost immediately works its magic and the briar now has a nice vibrant appearance over the smooth surface with the beautiful rusticated patterns on full display on the foot of the stummel. I further buffed it with a horse hair shoe brush.
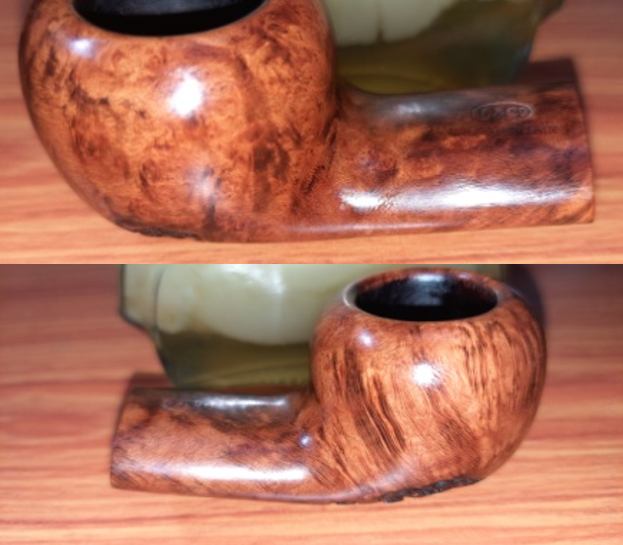
 The next issue that I addressed was that of the loose seating of the stem into the mortise. With the flame of a lighter, I heated the tenon with the flame of a lighter till it was pliable and inserted a drill bit that was a bit larger in diameter than the tenon opening. This helps in expanding the pliable vulcanite for a snug fit. I held the tenon under cold tap water for the tenon to cool down and set the increased diameter. The seating was perfectly snug with just the right amount of resistance.
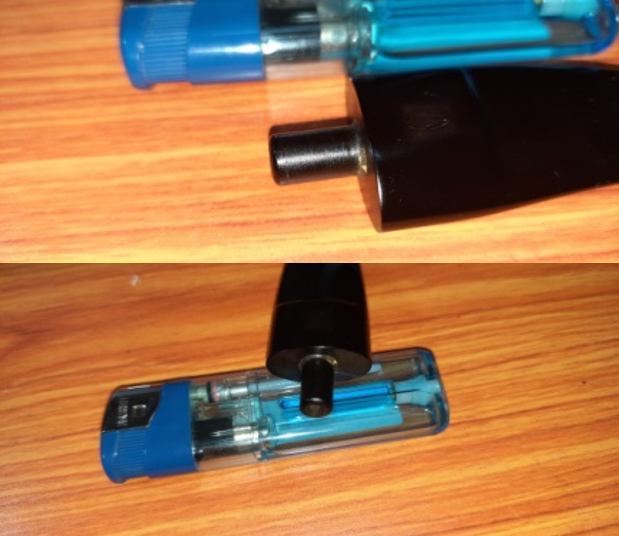 The last functional aspect which I addressed at this stage was the protection of the repairs to the heel of the chamber. I mixed activated charcoal and yogurt to a consistency which allows for an easy and even spread and evenly applied it on the inner walls and heel of the chamber. This coating helps in preventing the epoxy at the heel of the chamber from coming into direct contact with the burning tobacco, a sort of insulation and assists in quicker formation of a cake. I set it aside to dry out naturally for a week.
 To complete the restoration, I first mounted a cotton cloth buffing wheel that is dedicated for use with Blue Diamond, onto my hand held rotary tool. I set the speed at about half of the full power and polished the entire pipe after the stem and stummel were united. The Blue Diamond compound helps to erase the minor scratches that are left behind even after micromesh polishing cycle.
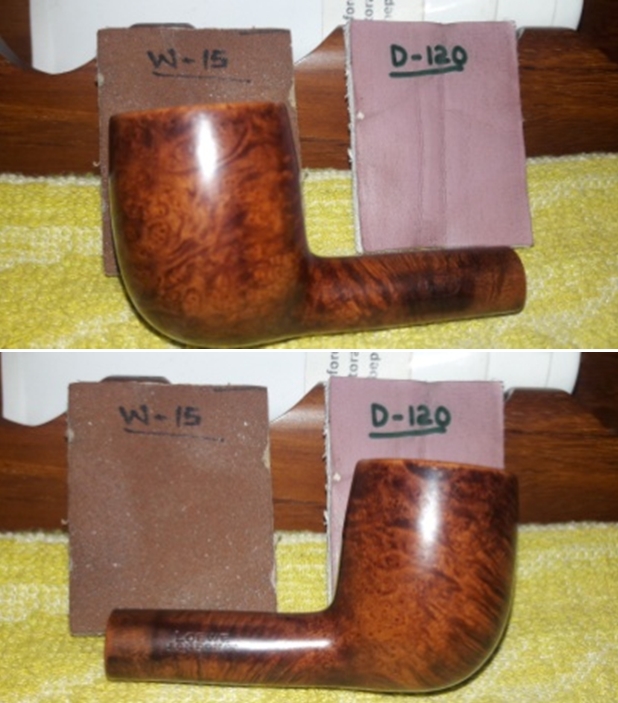
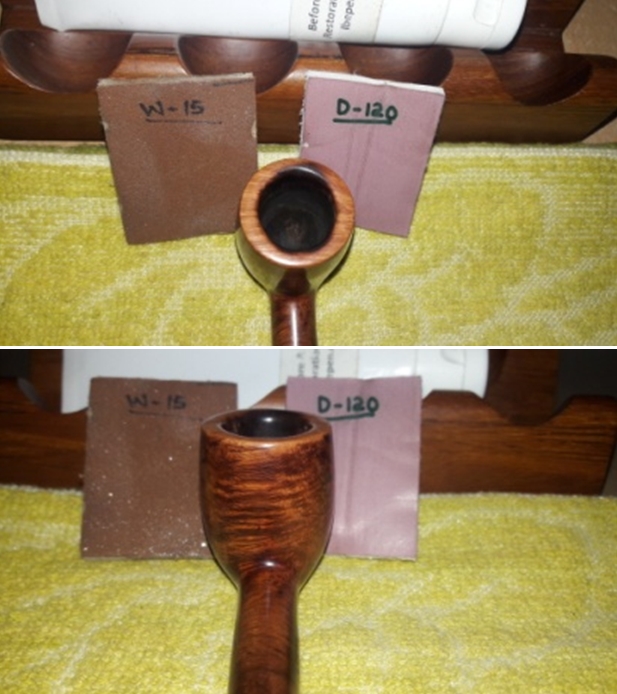
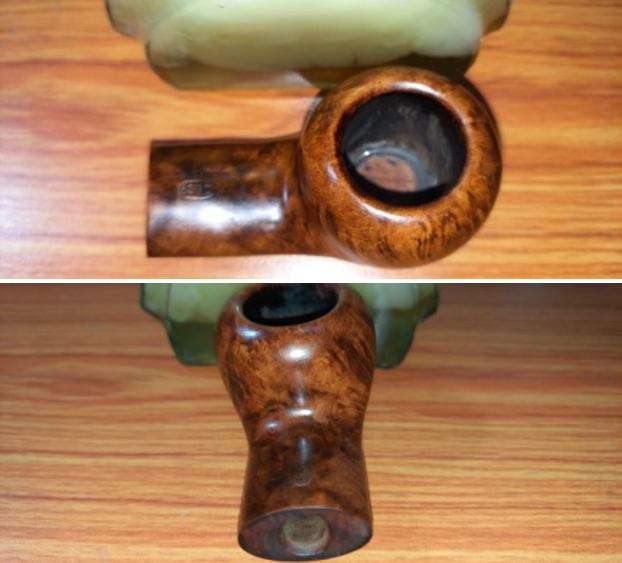
 I followed the Blue Diamond polish by applying several coats of Carnauba Wax with a cotton cloth buffing wheel dedicated to Carnauba Wax. I finished the restoration by giving the entire pipe a rigorous hand buffing using a microfiber cloth to deepen the shine further. The finished pipe looks amazingly beautiful and has been transformed from being a write off to being one in my rotation! The Pipe Gods are being very kind to me now-a-days and pray that they continue to be so. Following are the pictures of the restored pipe.