Tag Archives: Horn stems

Restoring Life to a Early 20th Century Gitana Depose Apple


Blog by Steve Laug

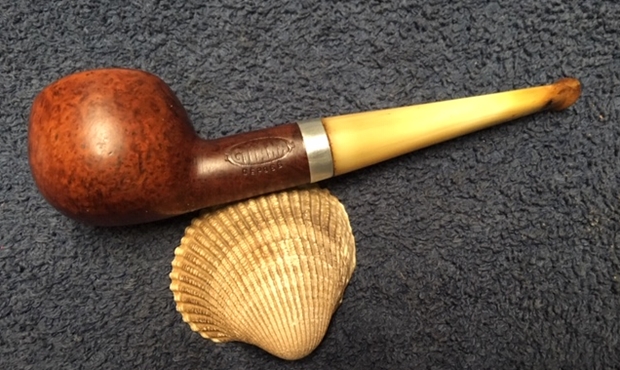
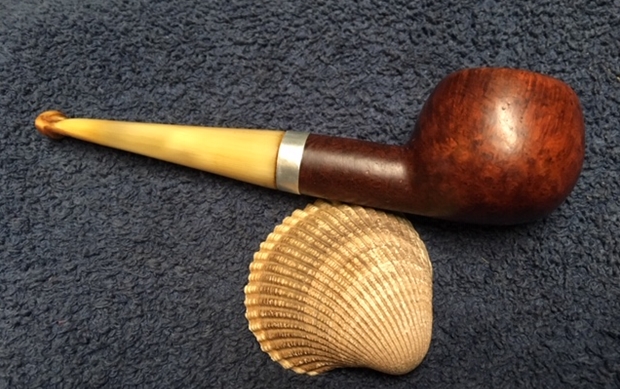
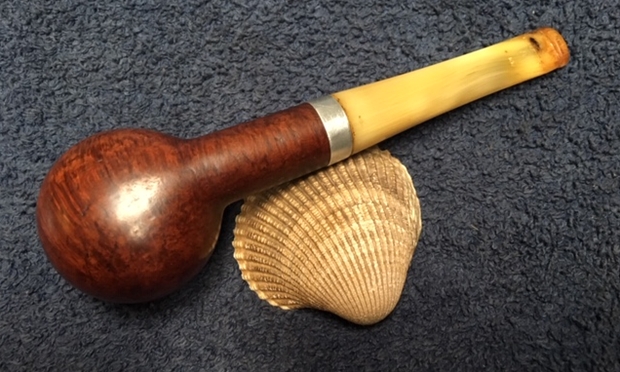
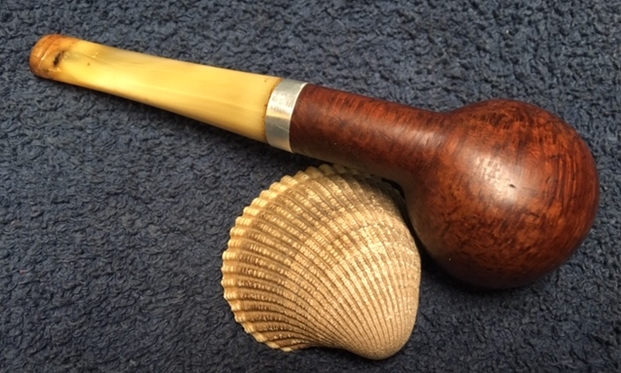
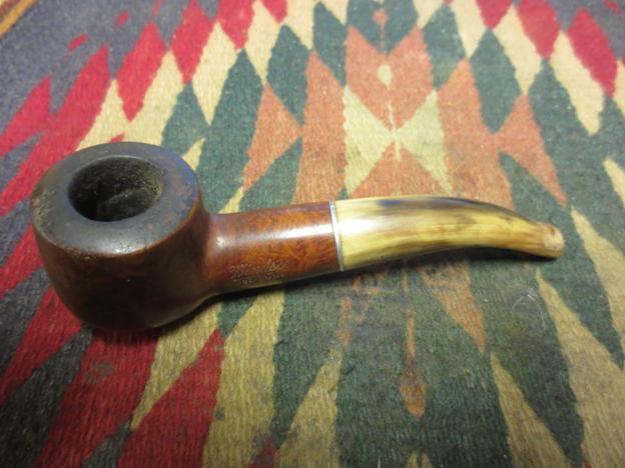
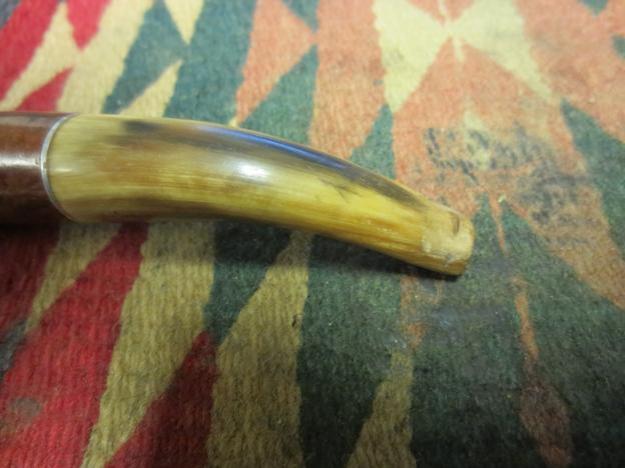
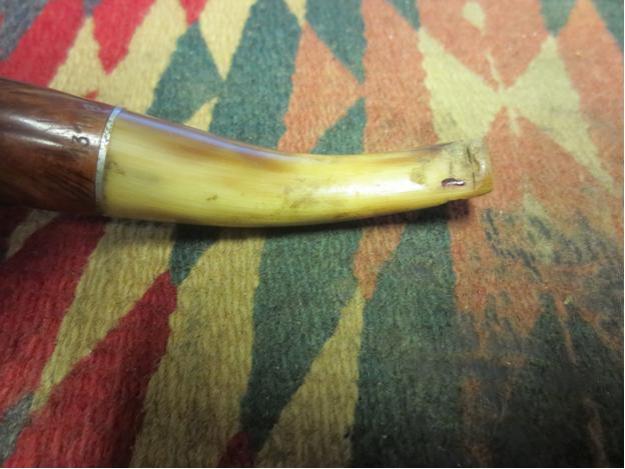
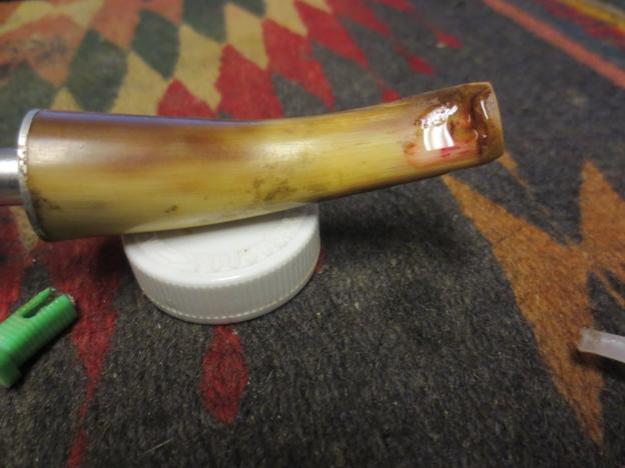
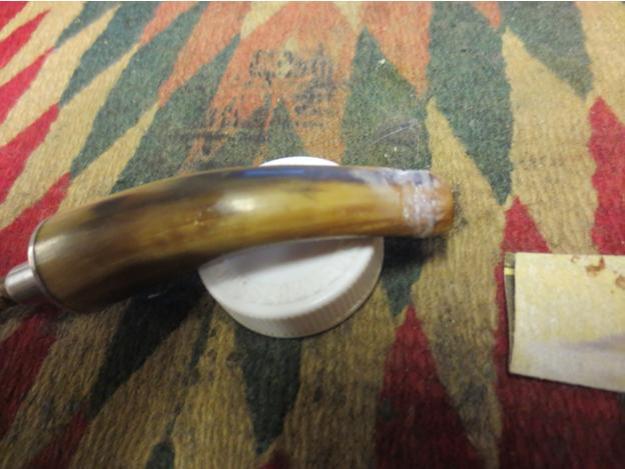
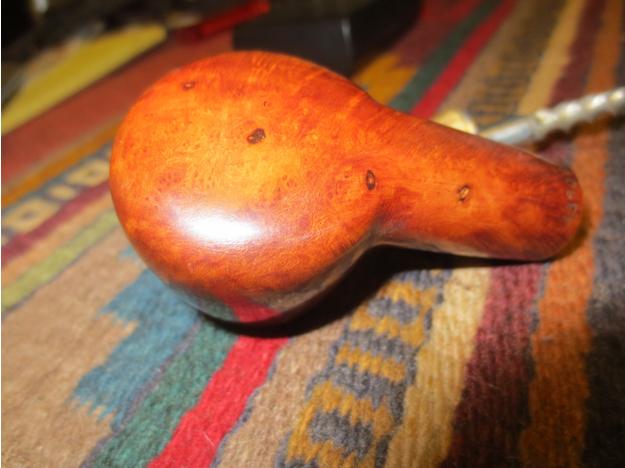
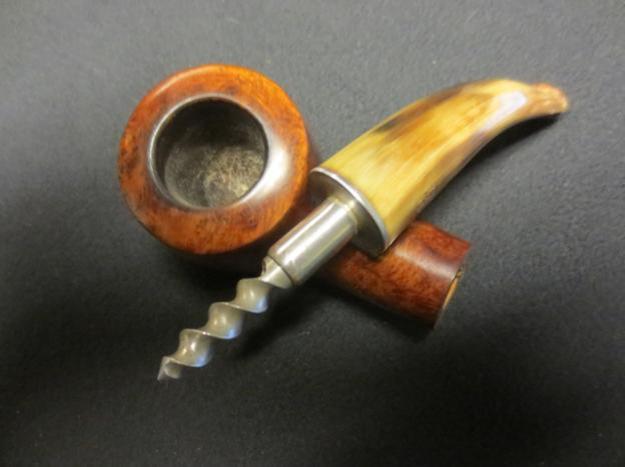
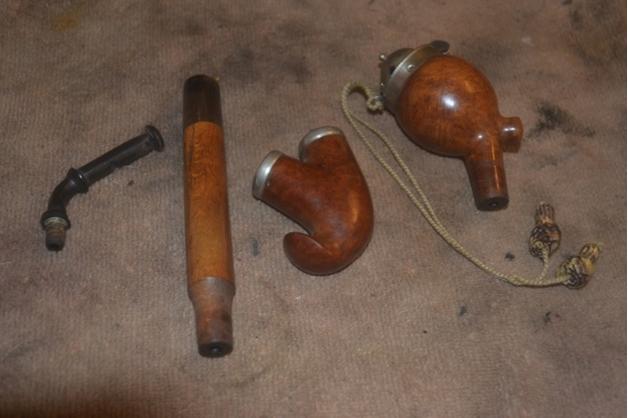
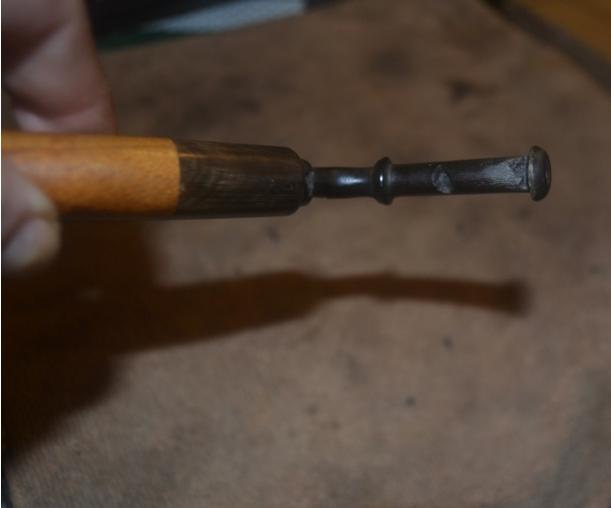
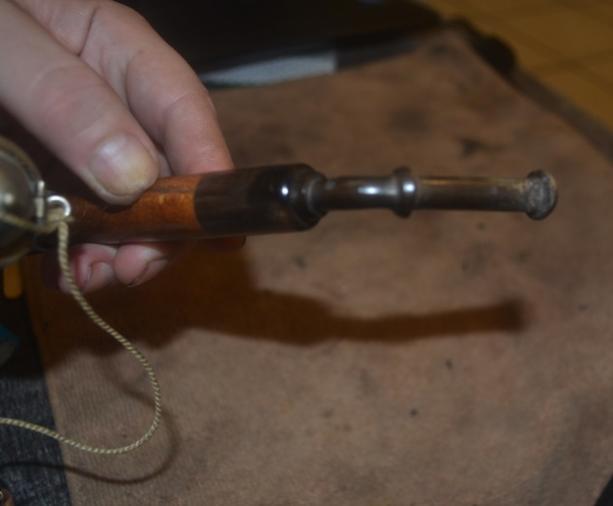
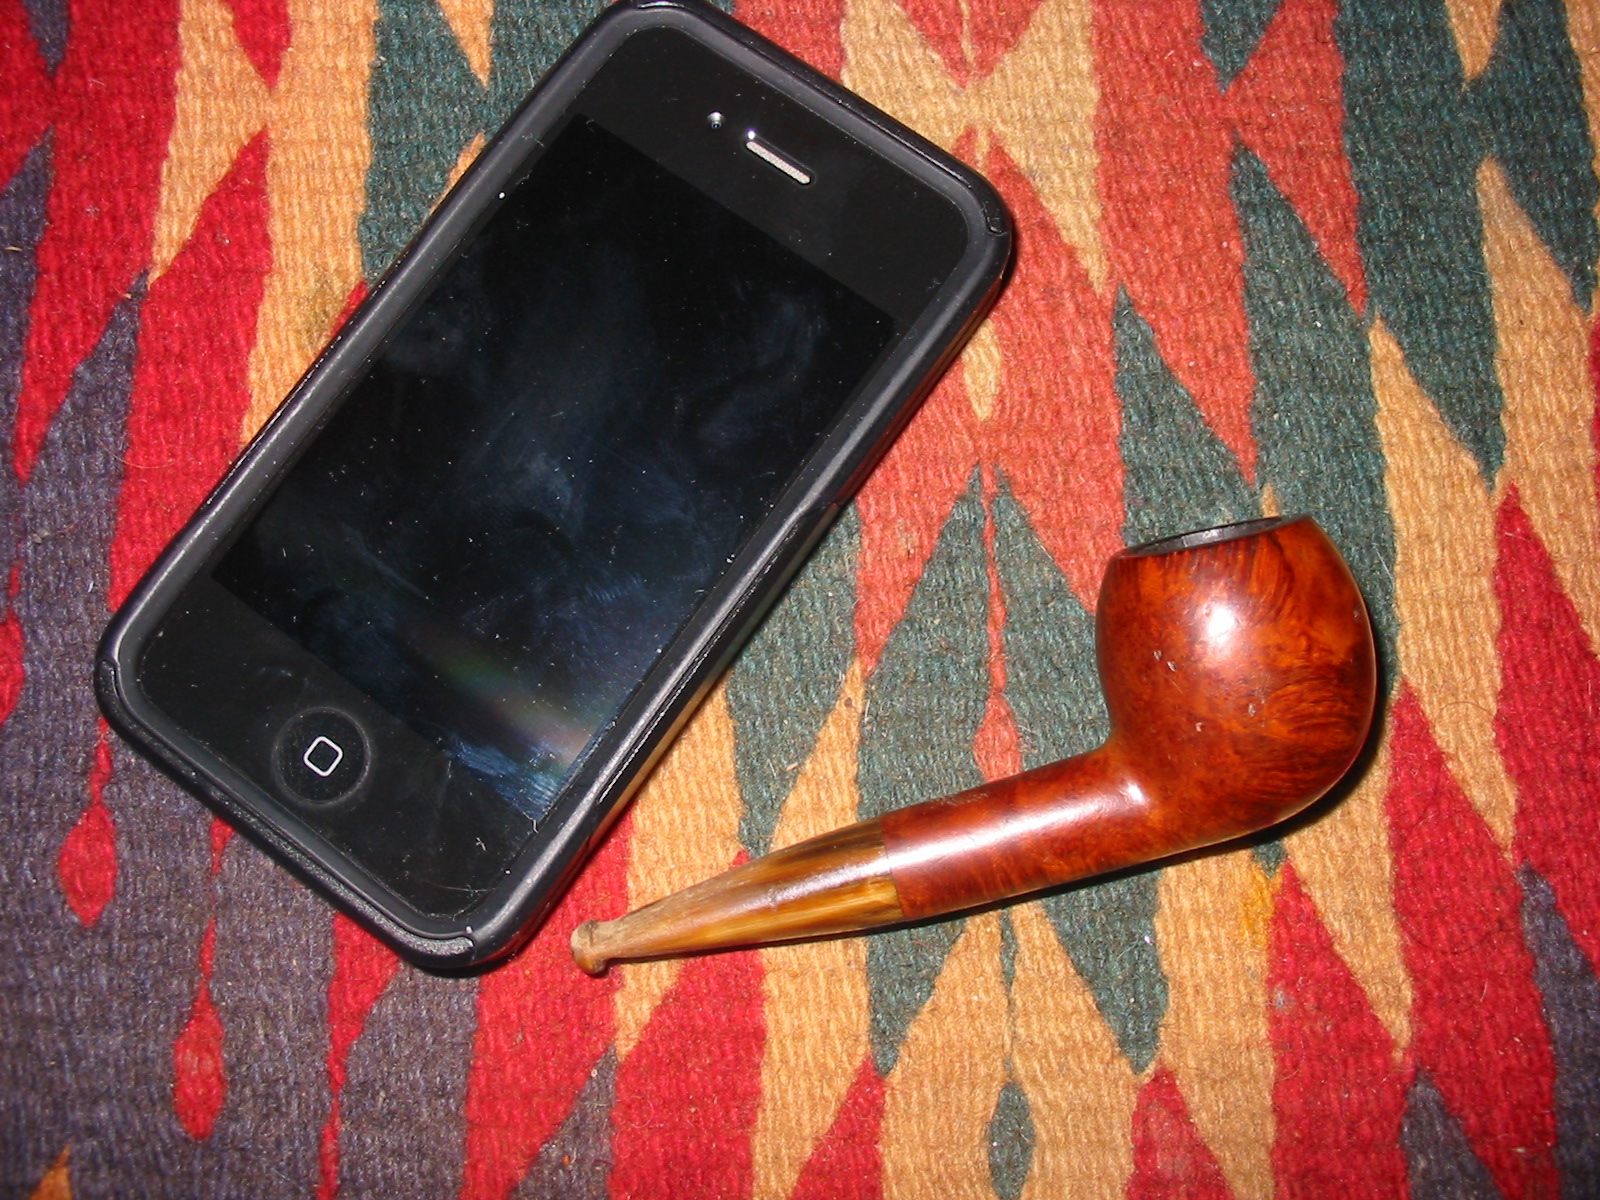
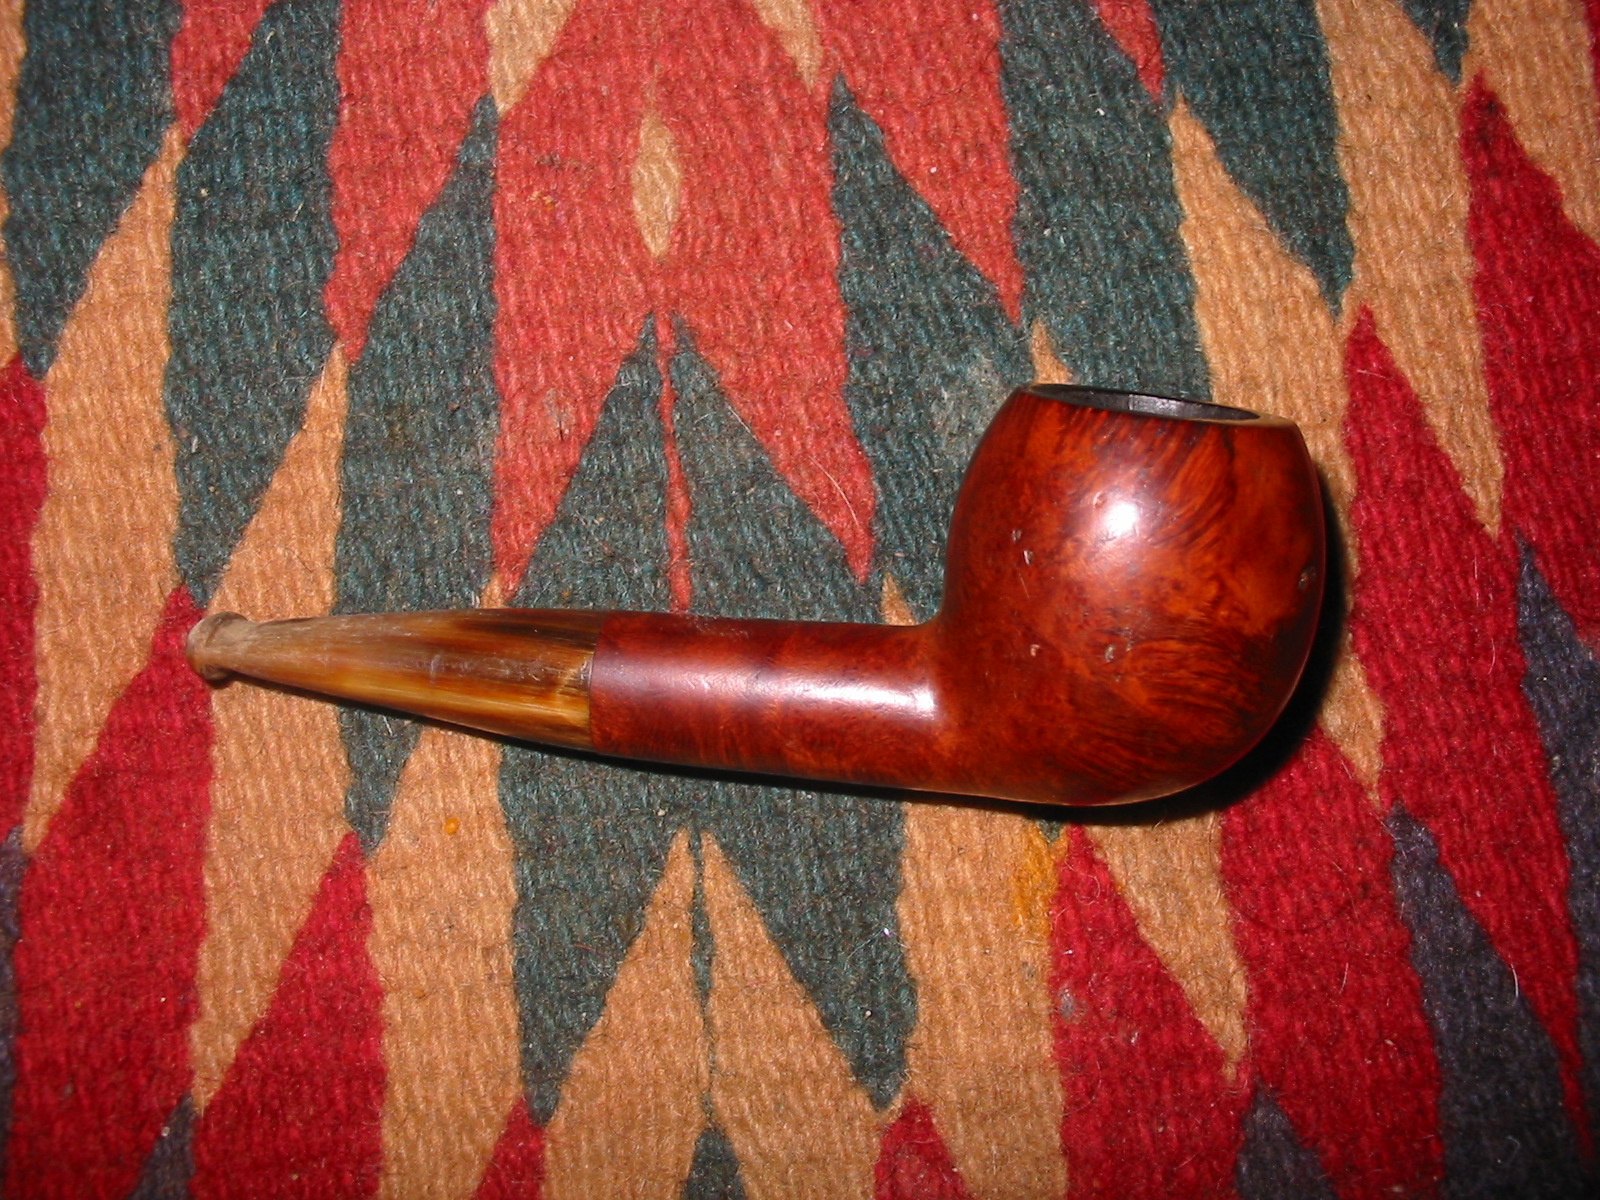
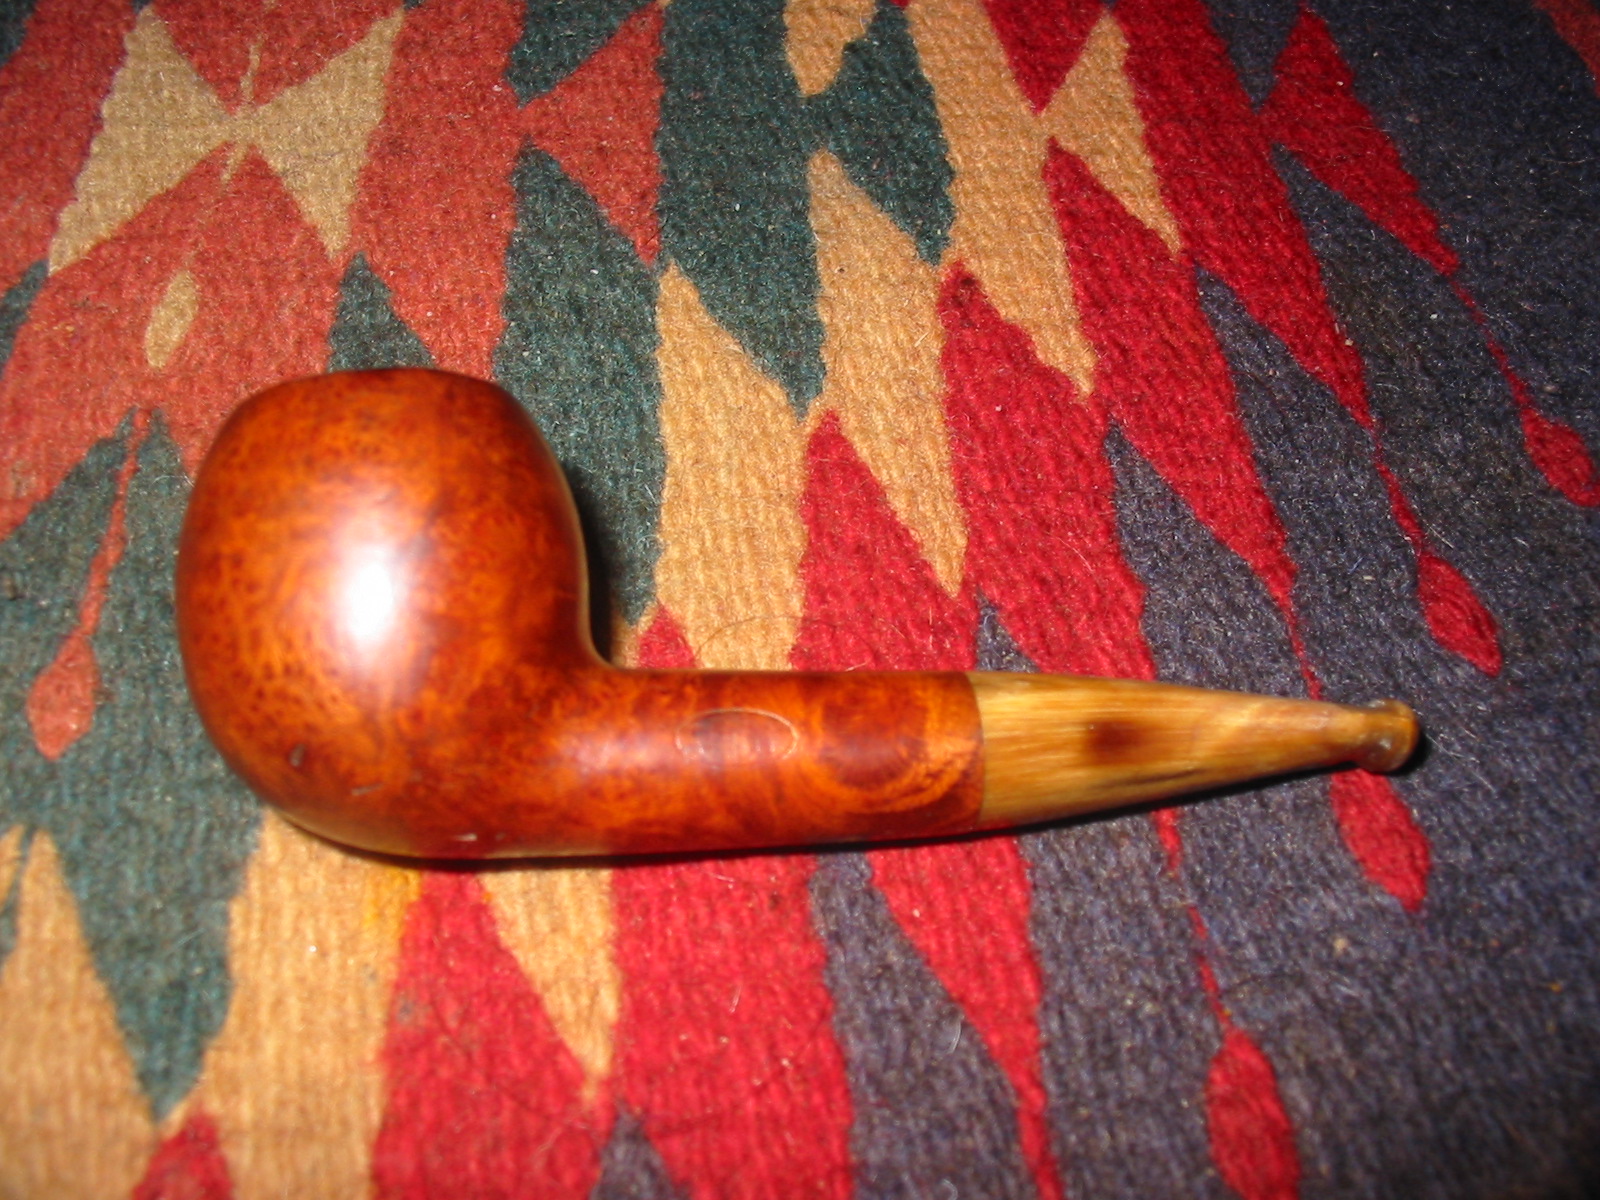
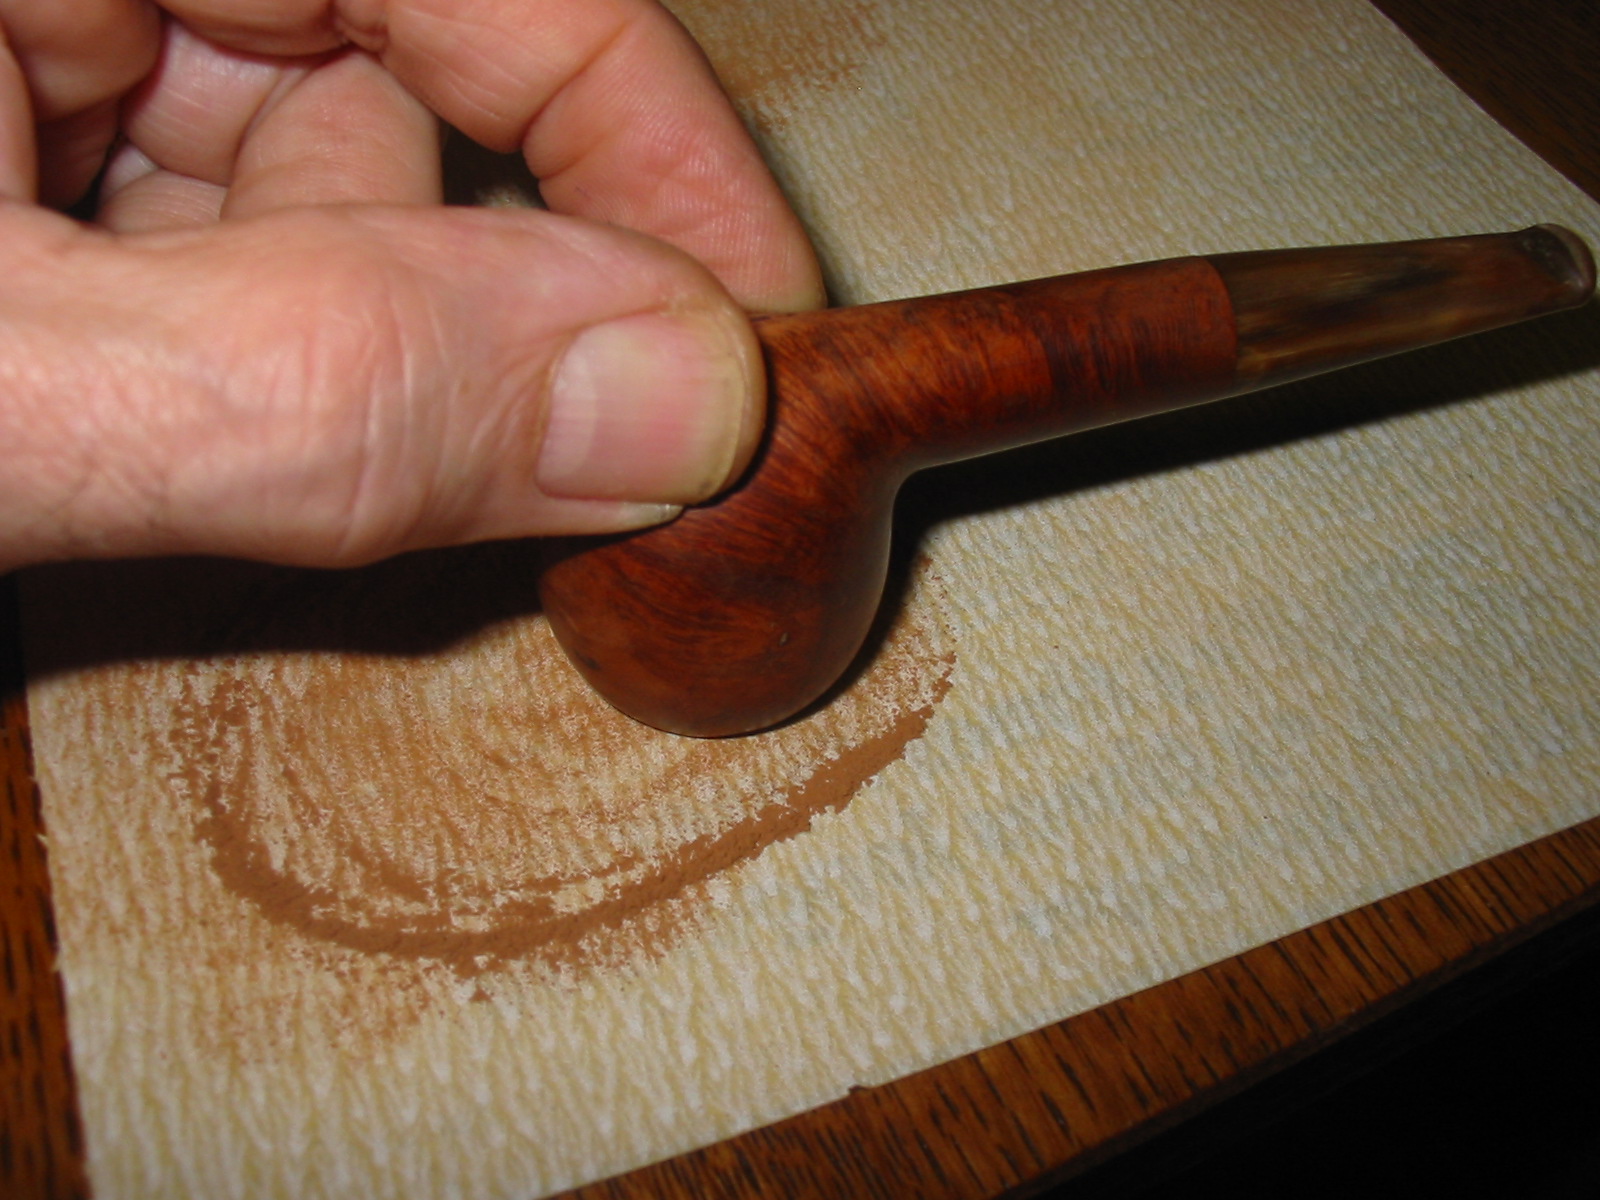
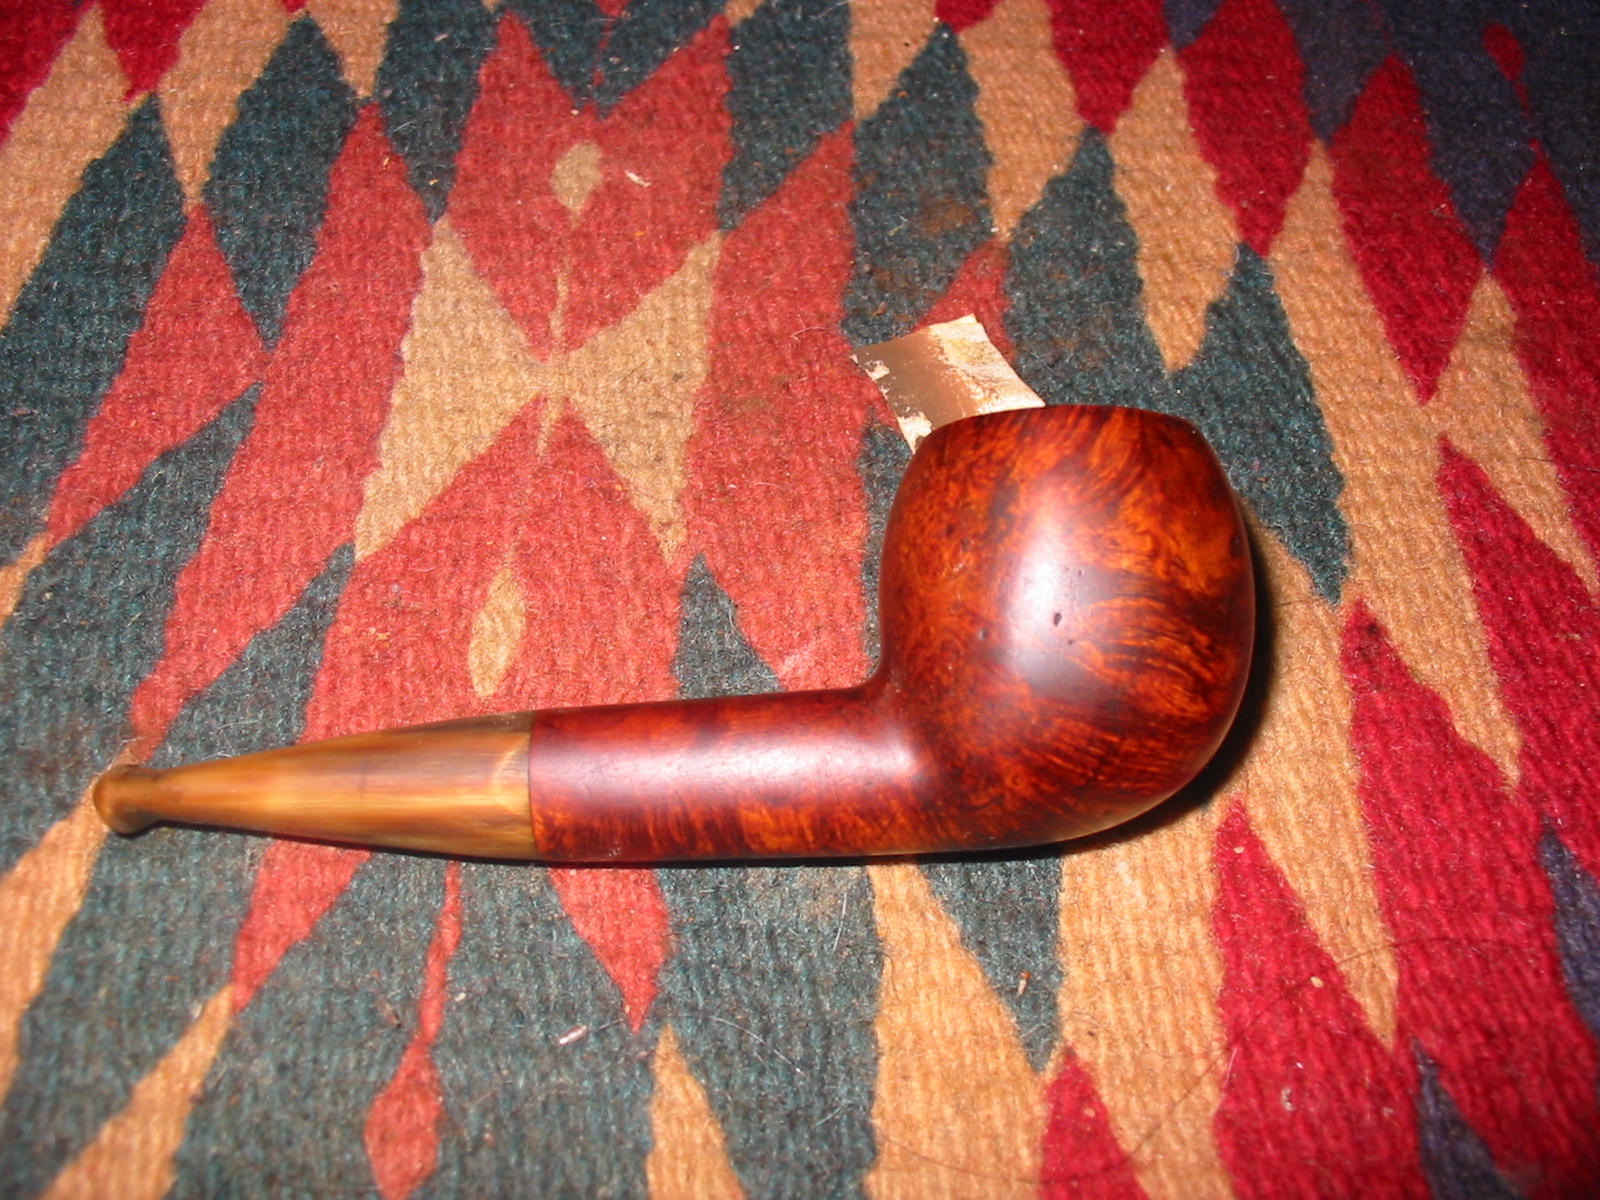
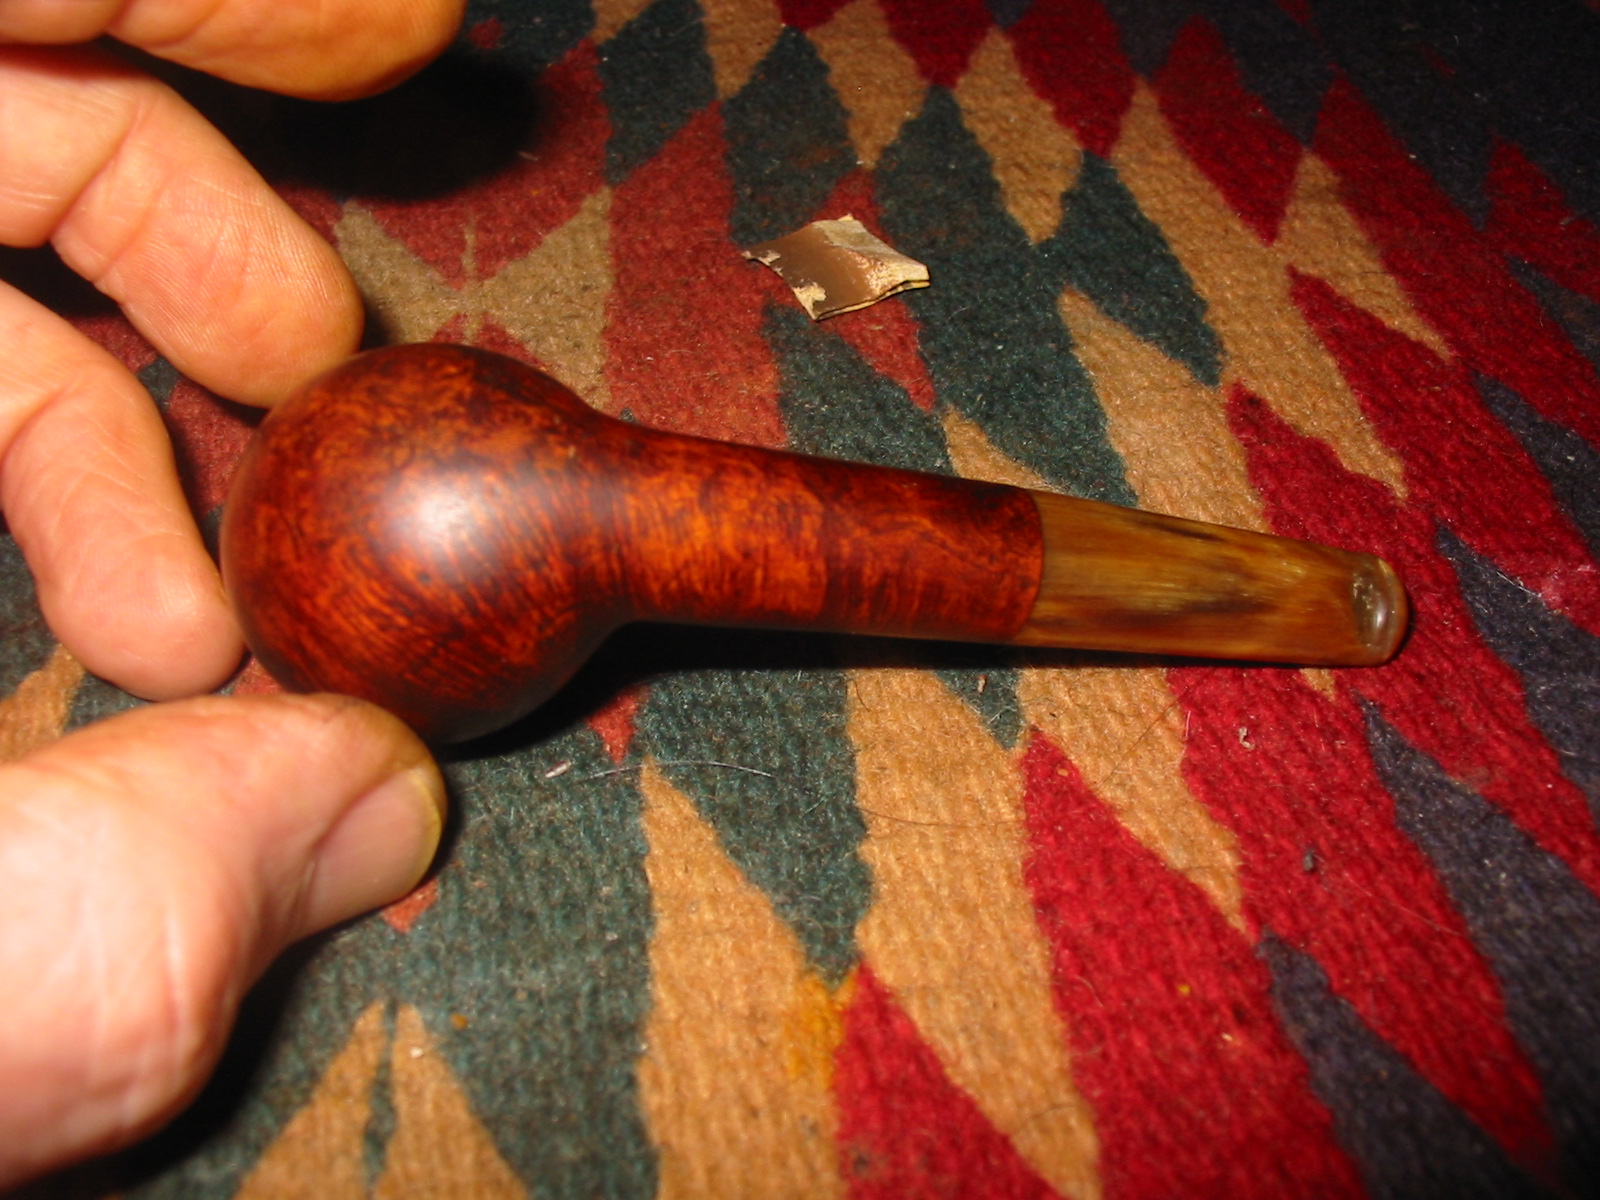
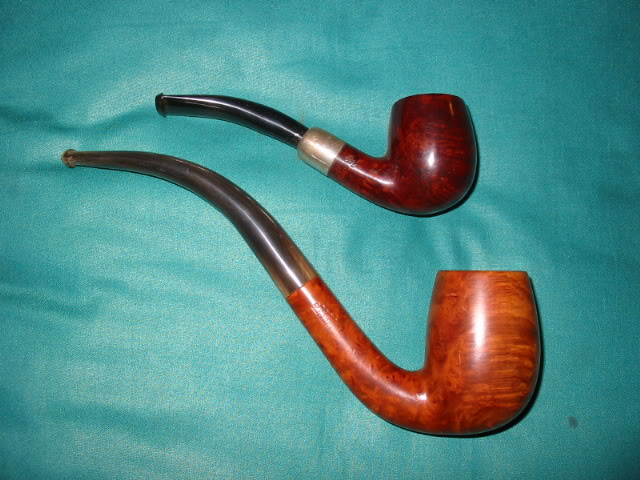
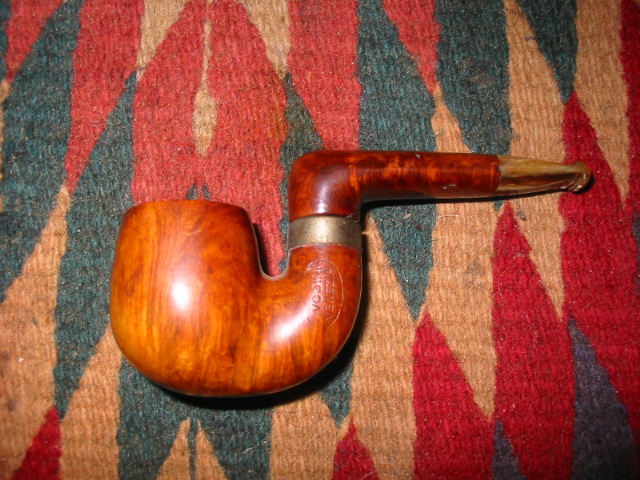
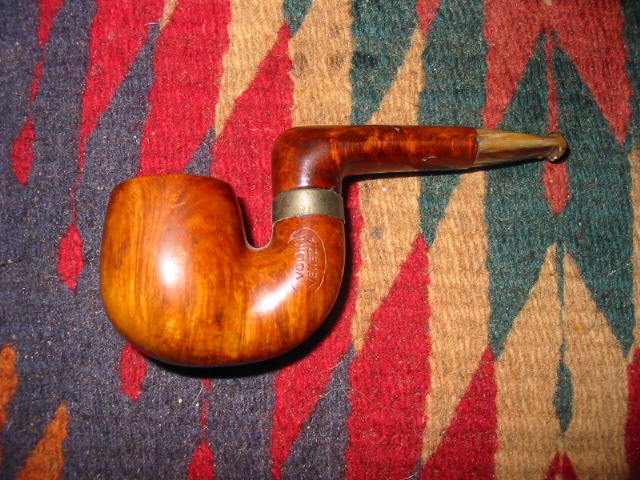
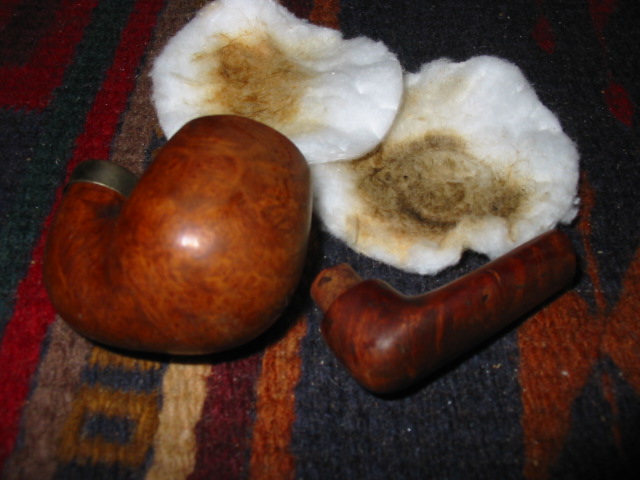
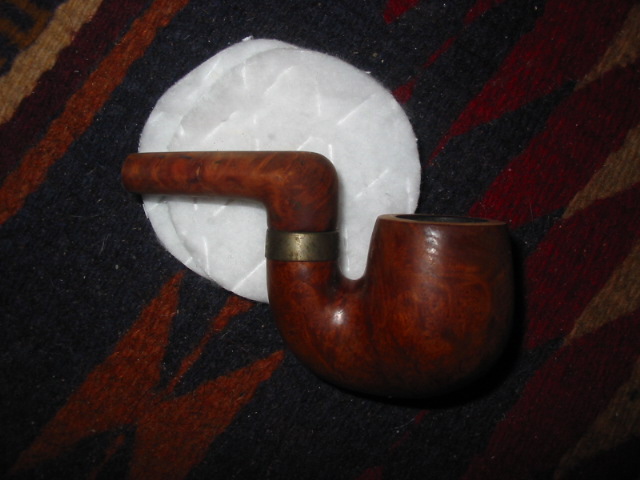
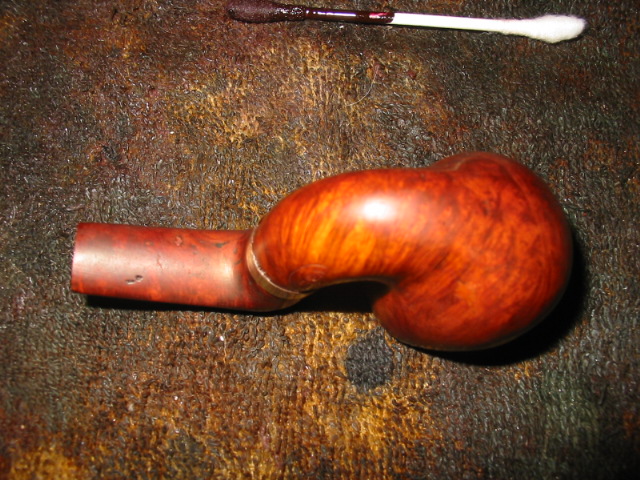
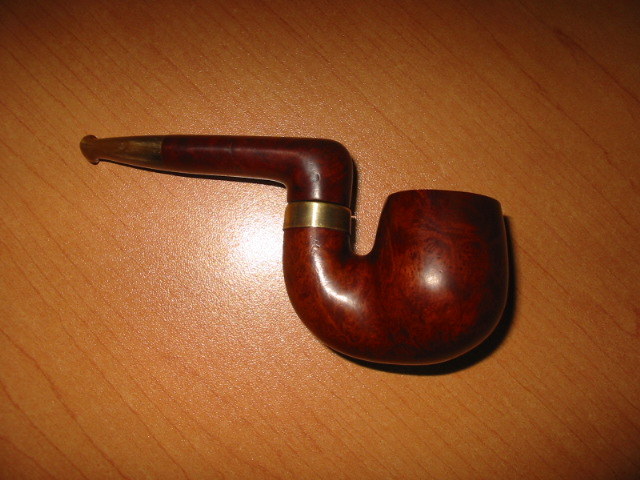
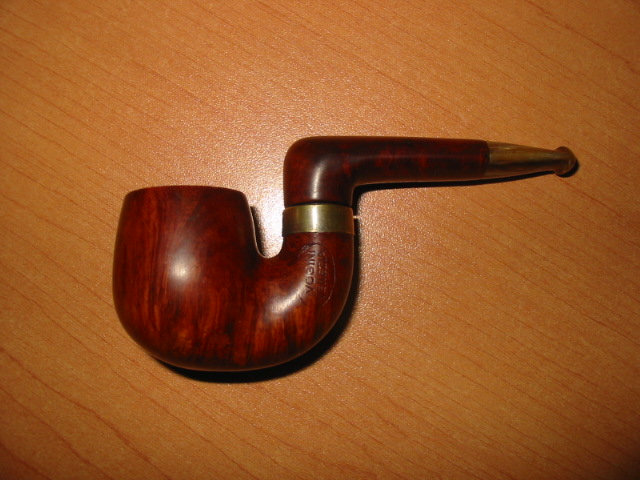
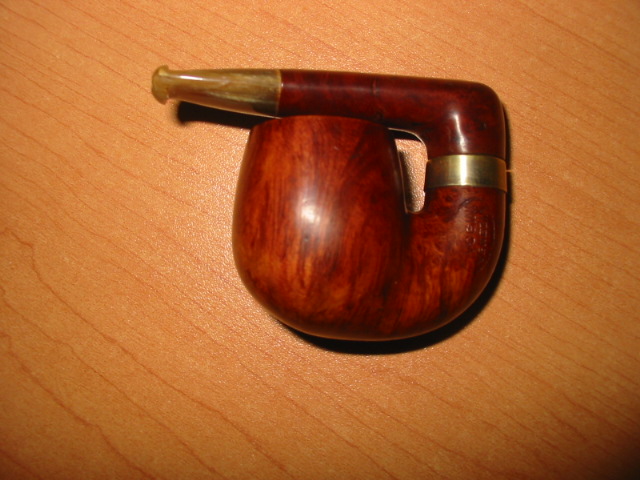
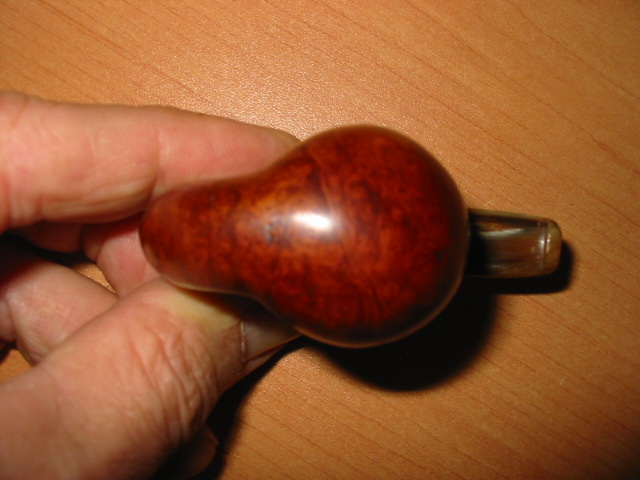
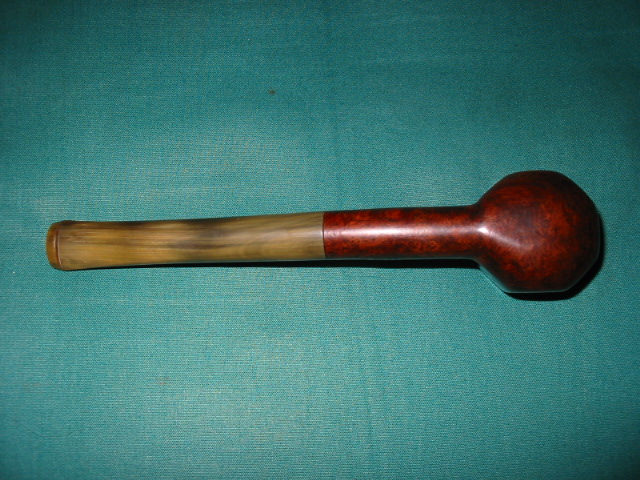
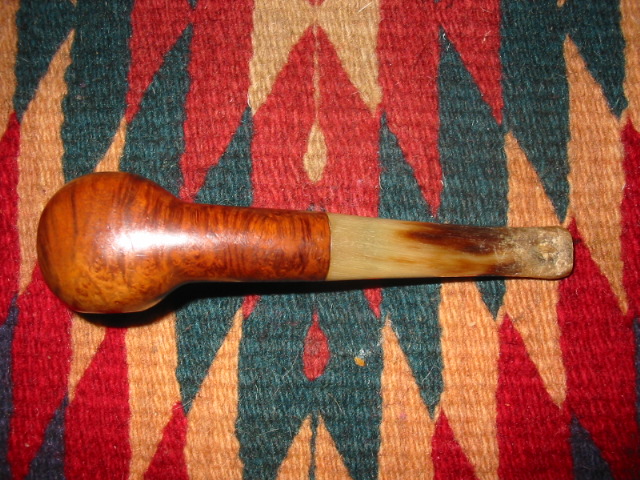
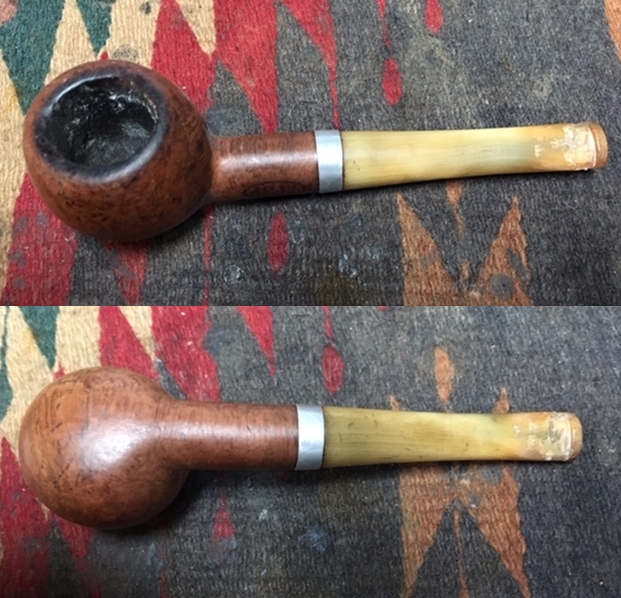
I was going through boxes of old pipes here, sorting and getting them ready to sell as grab bags. In the process I came across this pipe. It is stamped Gitana in an oval with an L on the left of the oval and G on the right side of the oval. Underneath the oval stamp is the word Depose. There is a polished aluminum band on the end of the shank. The briar is quite nice with birdseye around the bowl. The stem is horn and has a lot of tooth damage next to the button on both sides. There are deep troughs carved by the teeth in the horn material on both sides. The rim had a lot of damage from burn marks and the inner edge had been damaged by reaming with a knife. There was a white waxy substance on the inside of the bowl from the edge down about a ½ inch. There was a light cake in the bowl and some light lava on the bowl top. 
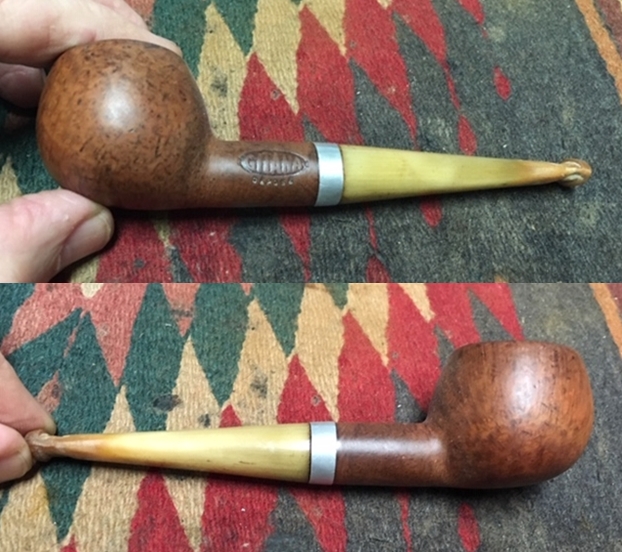
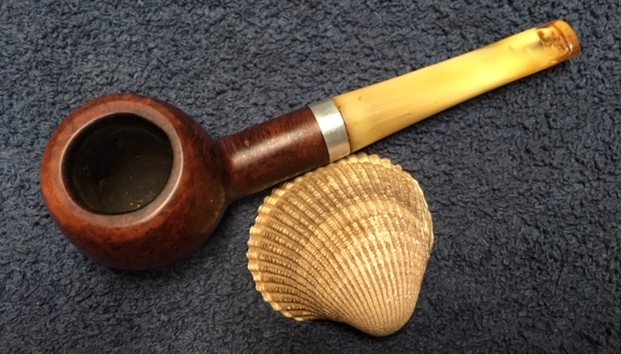
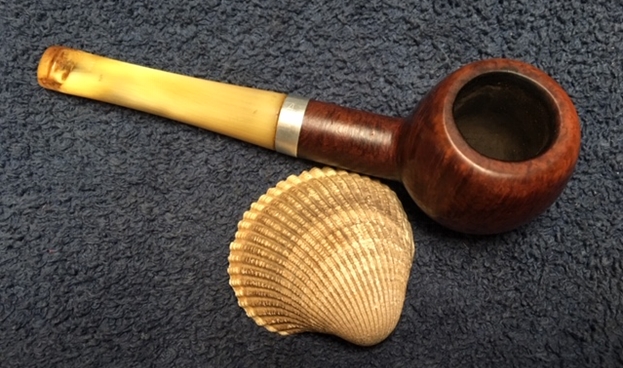
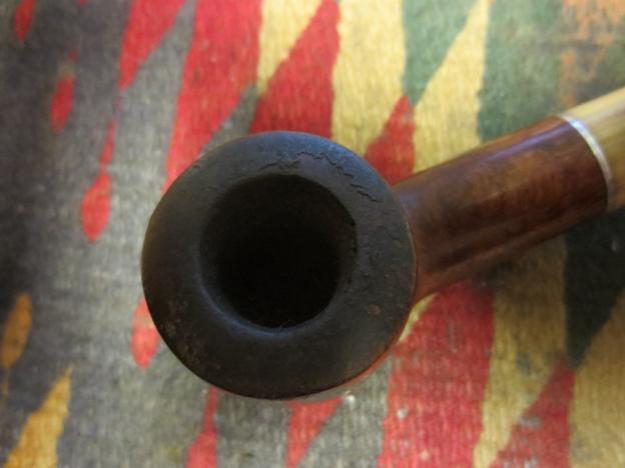
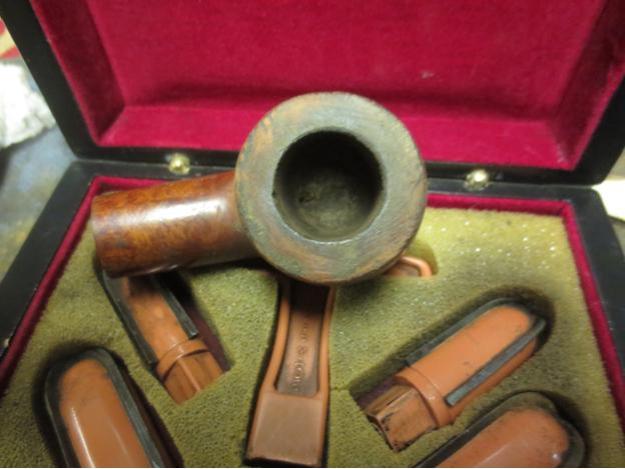
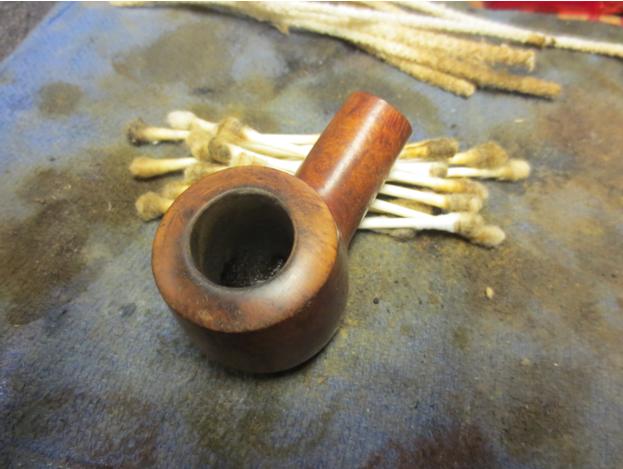
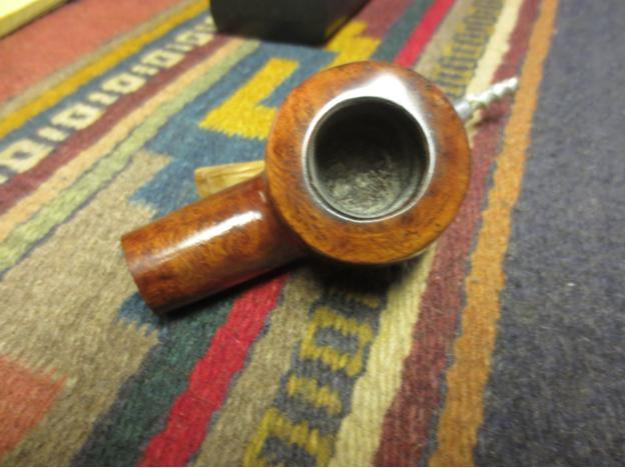
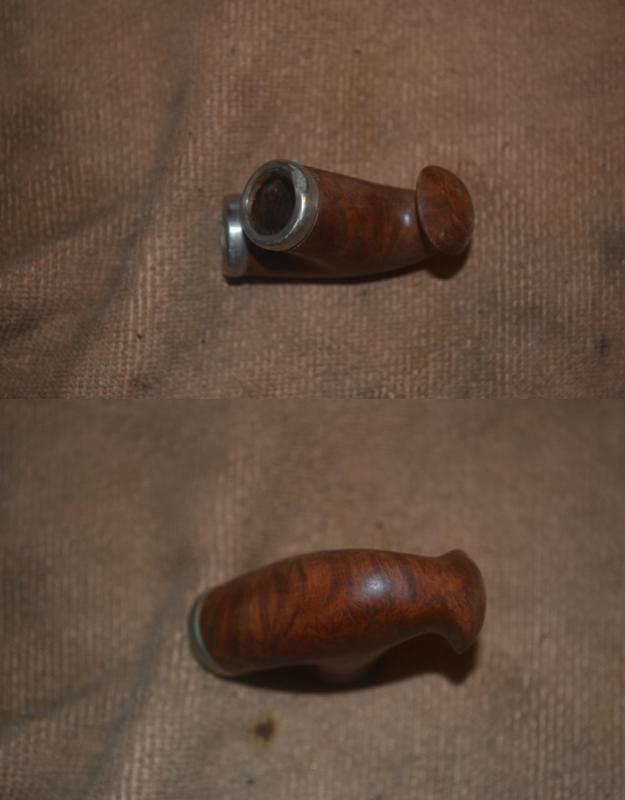
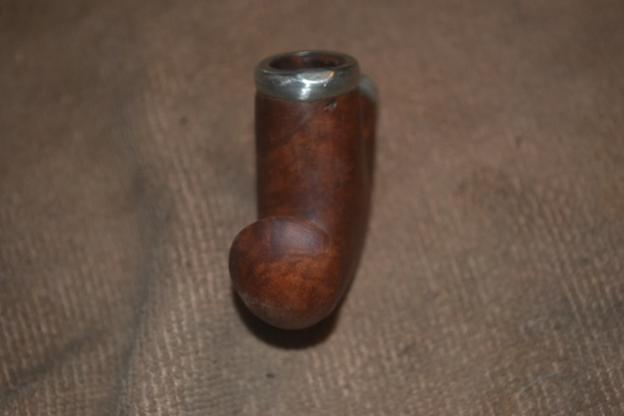
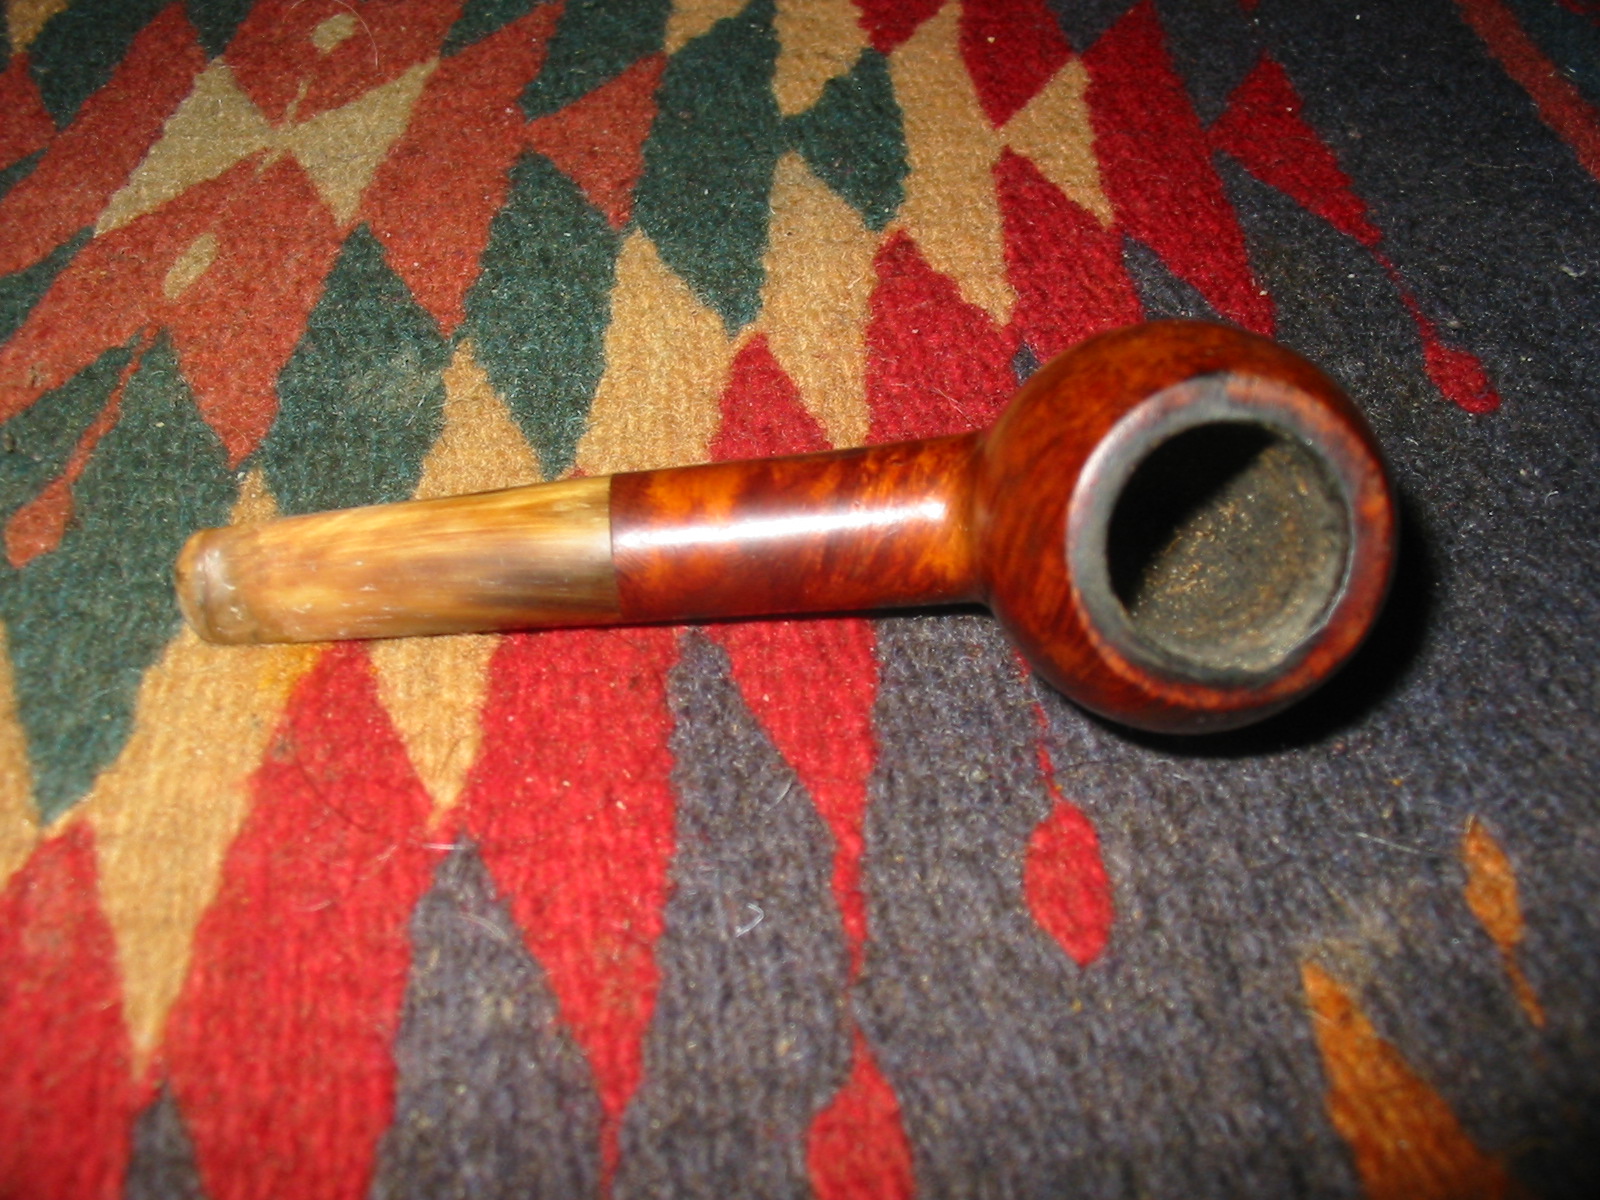
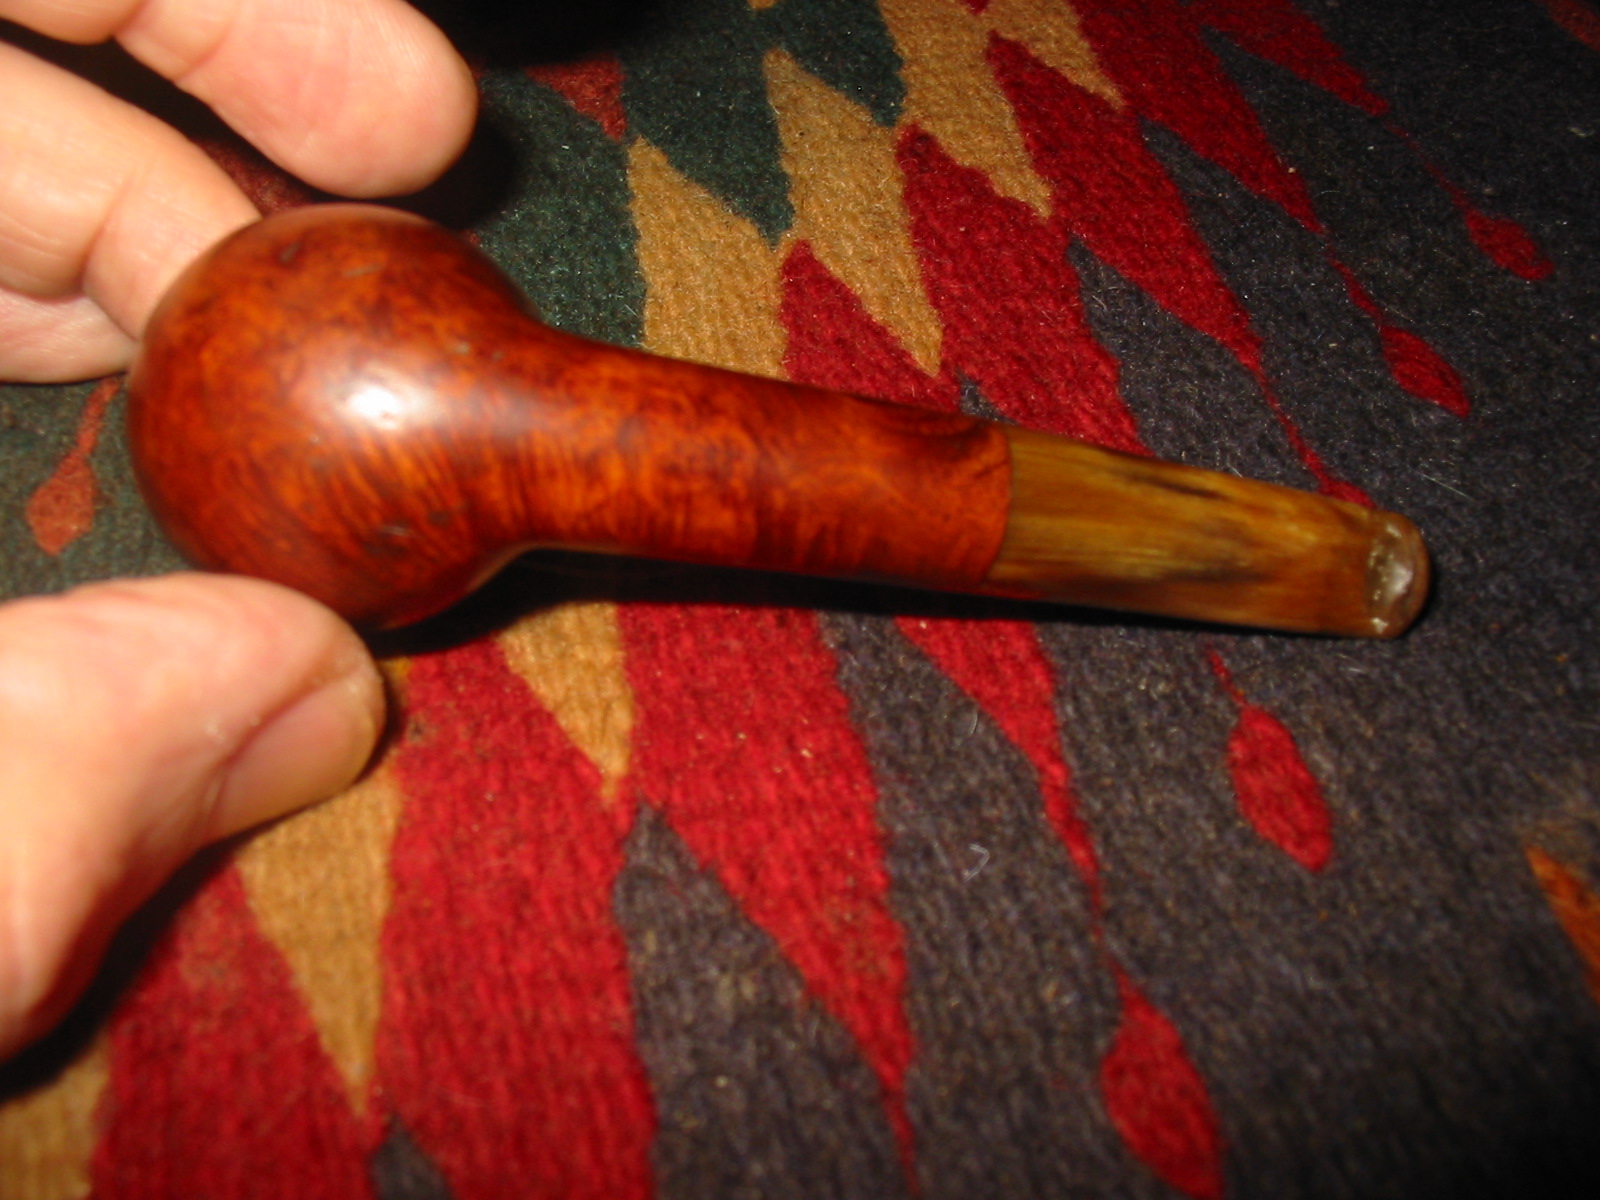
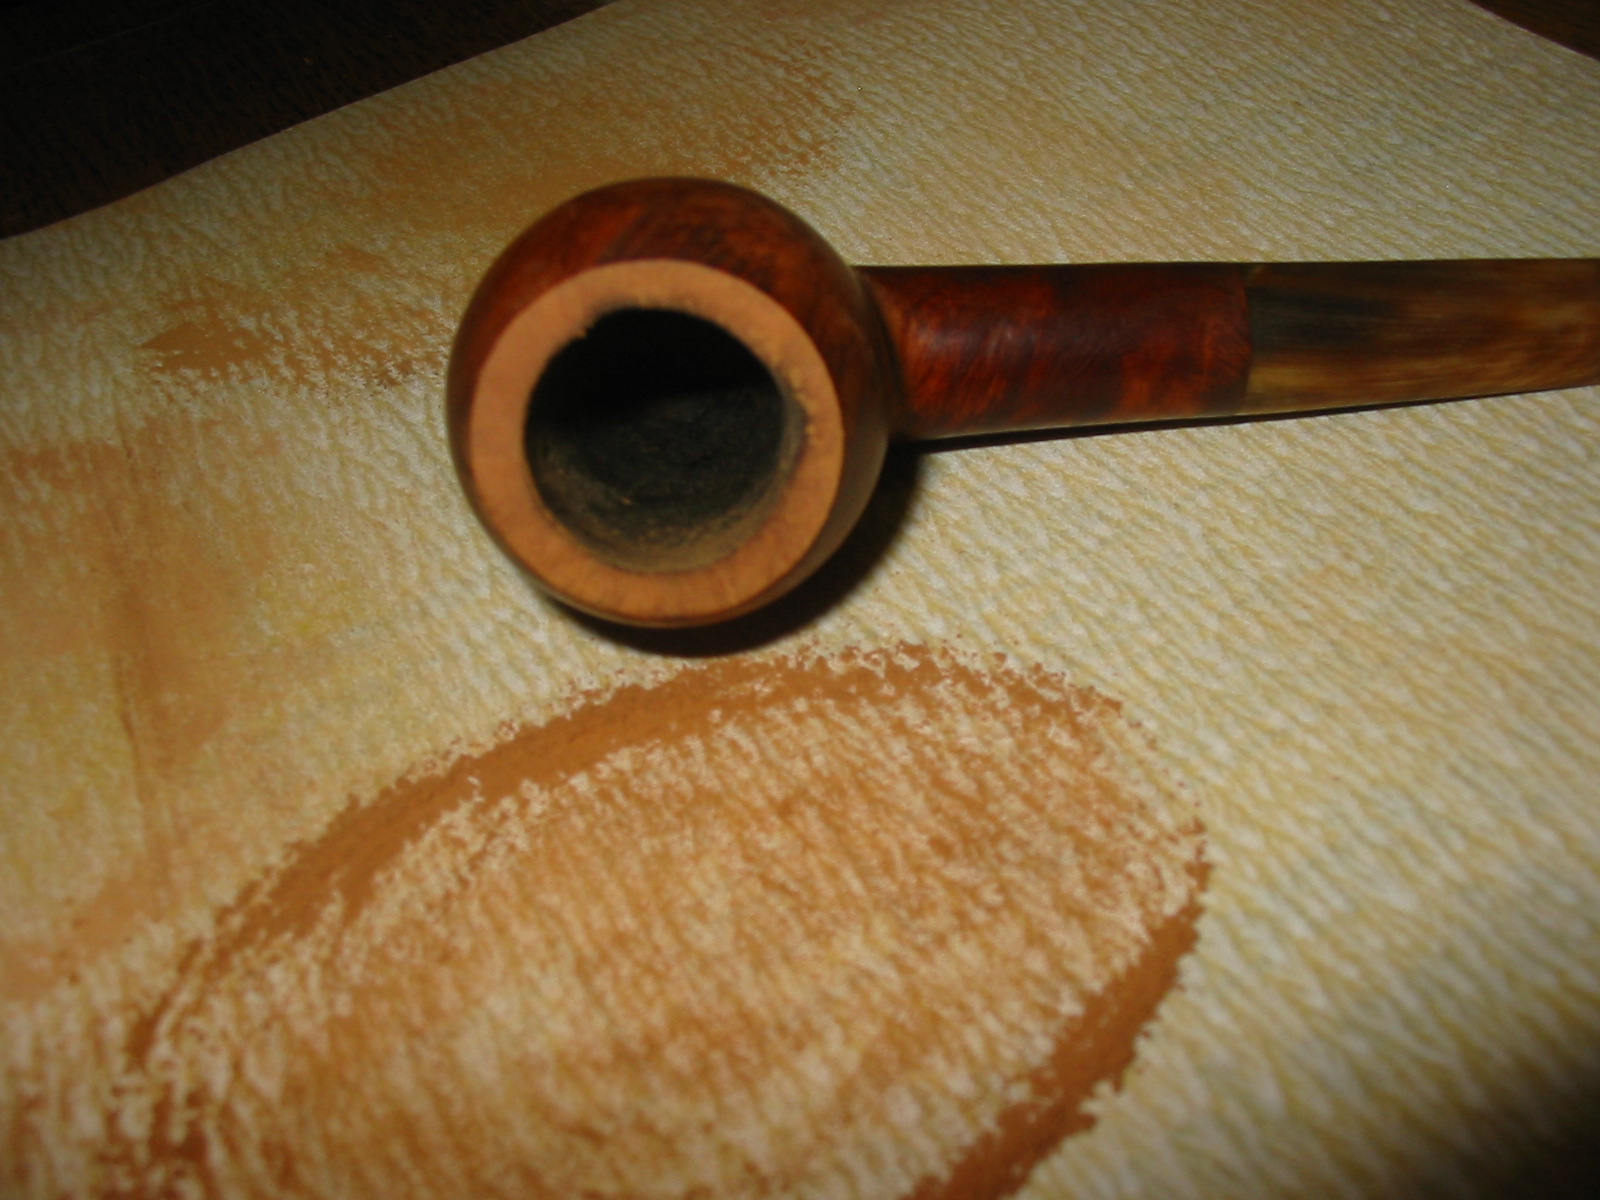
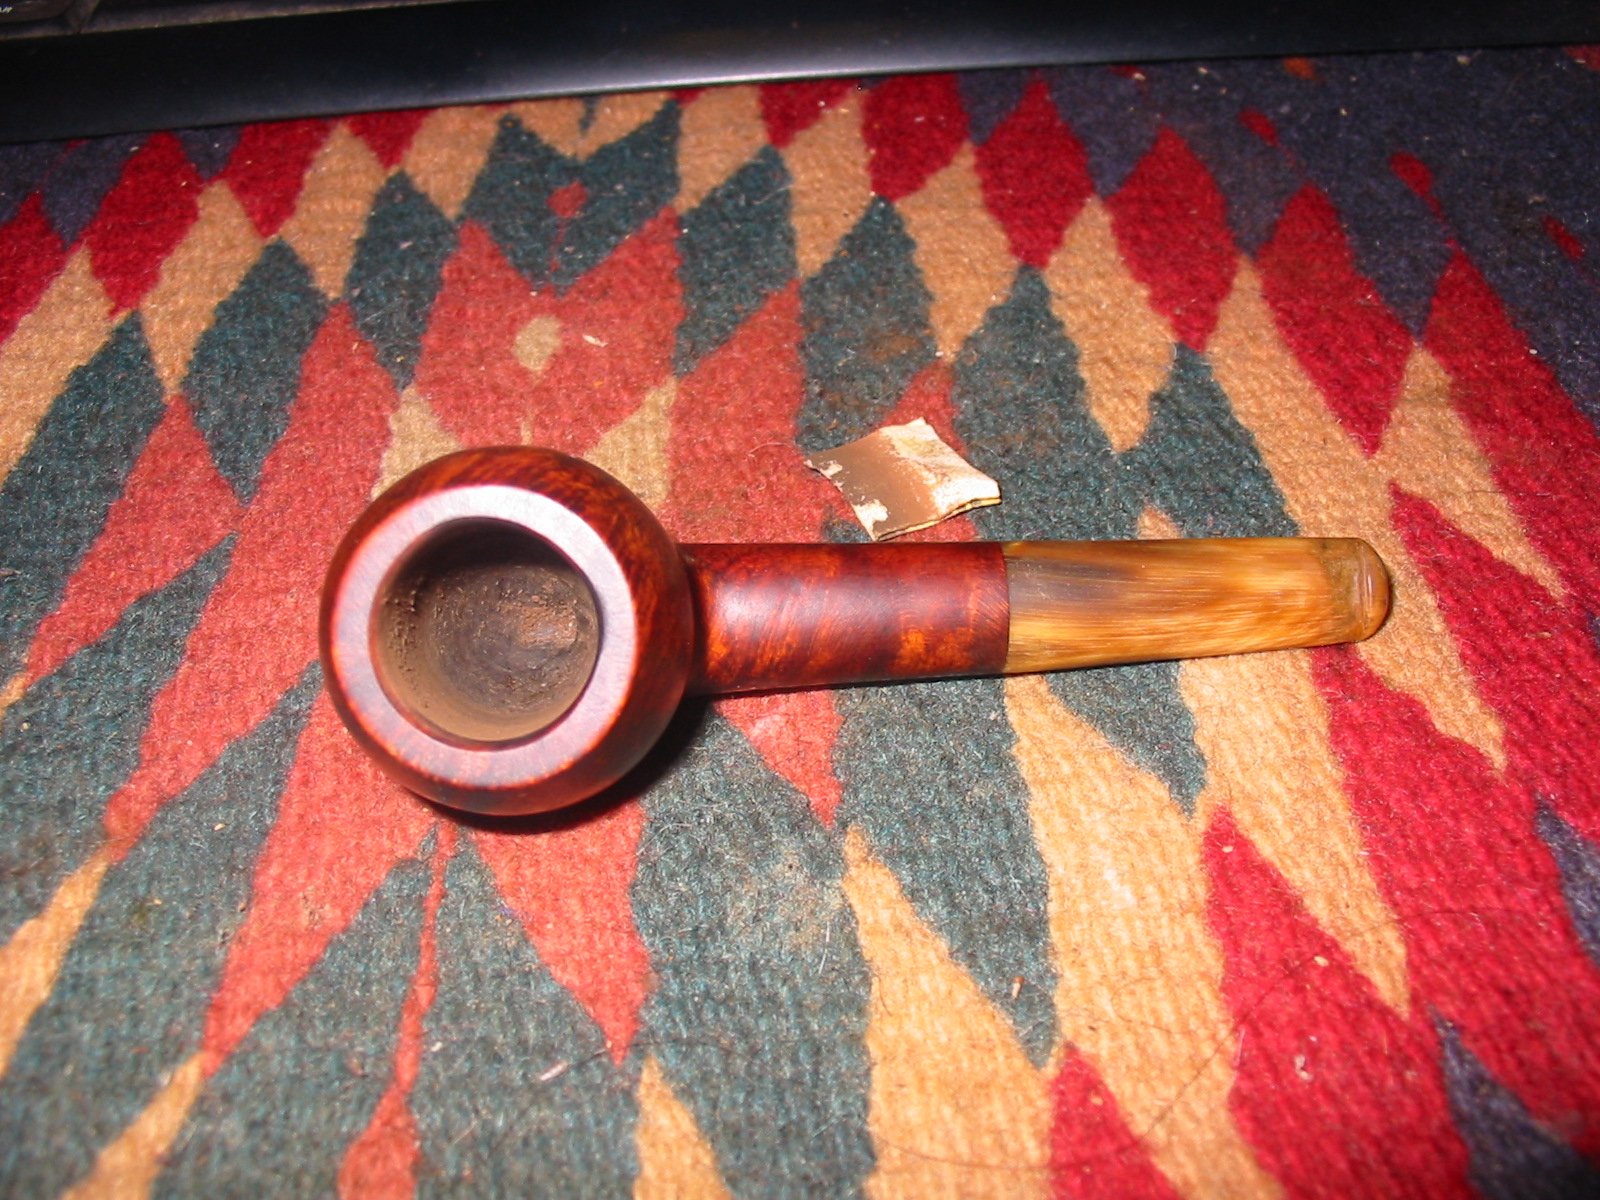
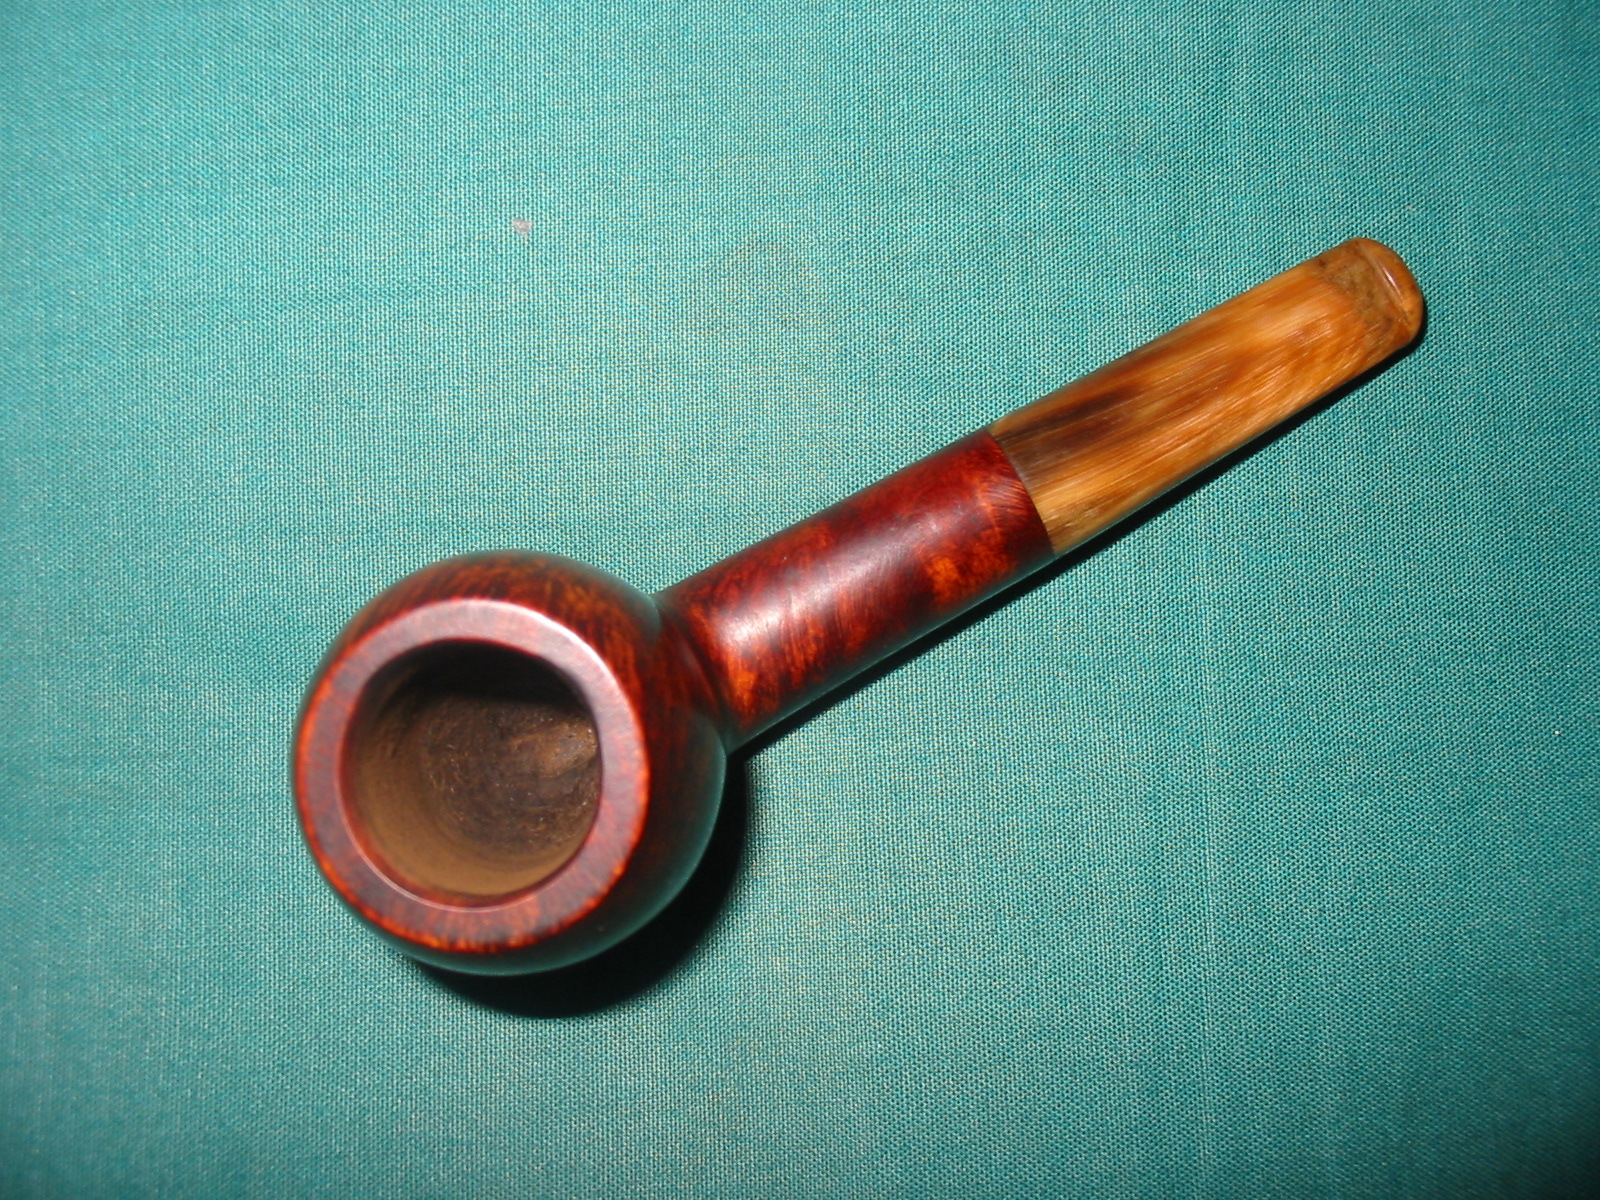
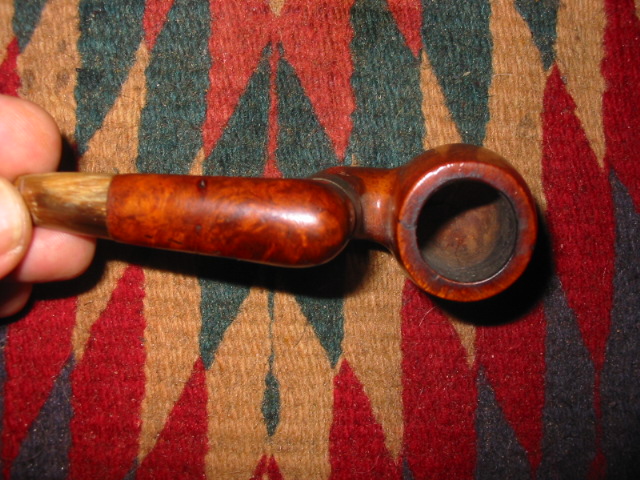
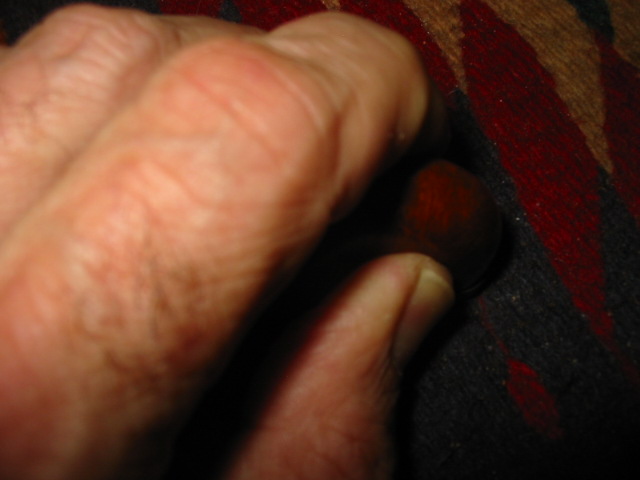
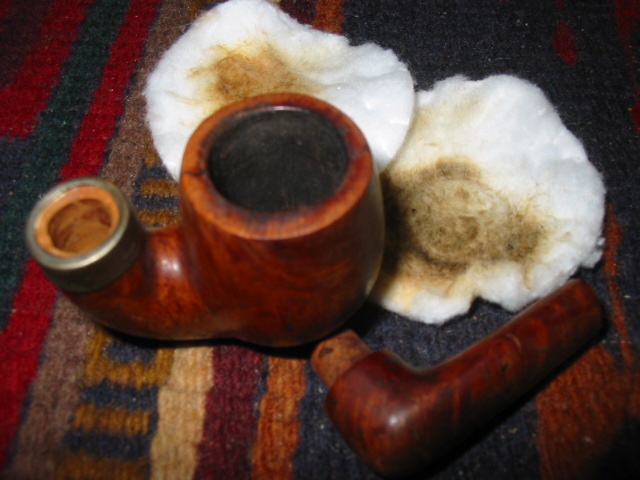
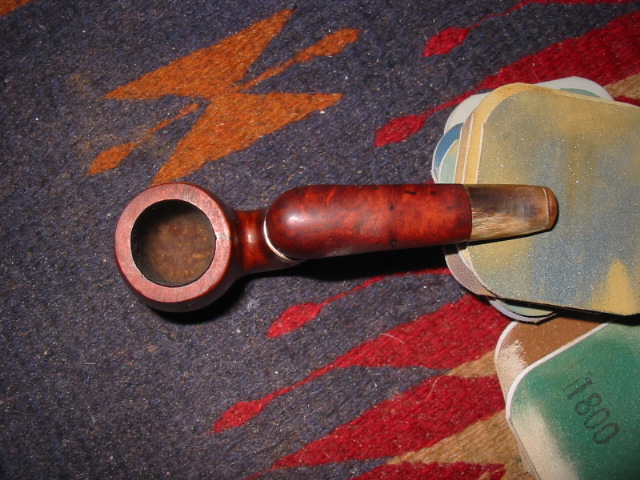
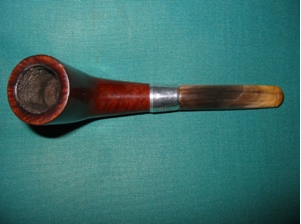
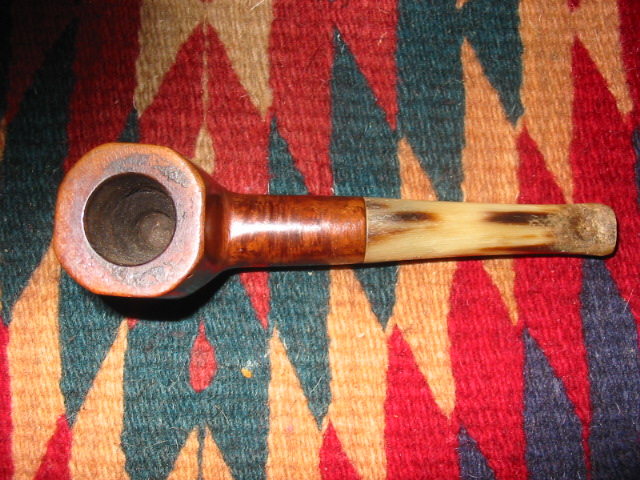
I took a close up photo of the rim top to show the damage to the inner edge of the bowl from the reaming job. The cake on the bowl sides and the tarry oil on the rim top are also visible. The briar at the top is quite damaged and will take some work to remove the knife cuts and deep gouges in the briar. The stem is also shown with the chewed damage on both sides.  
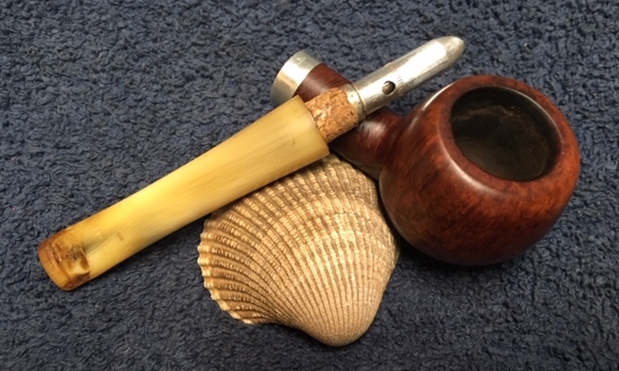
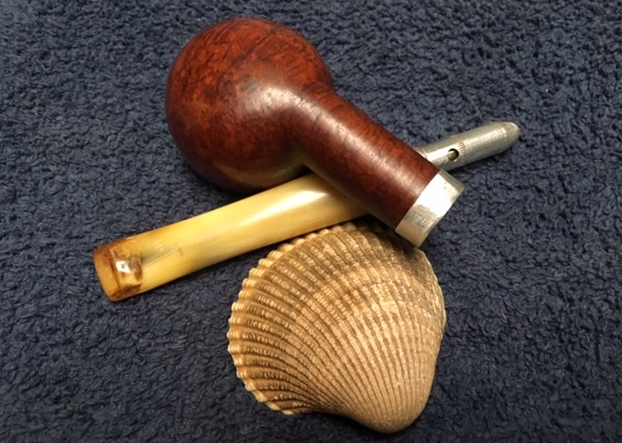
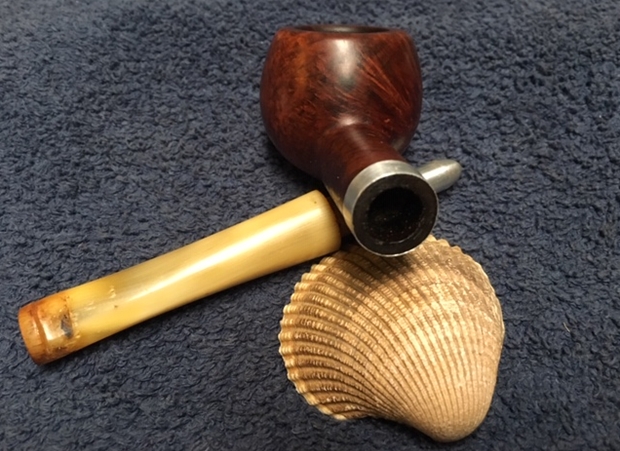
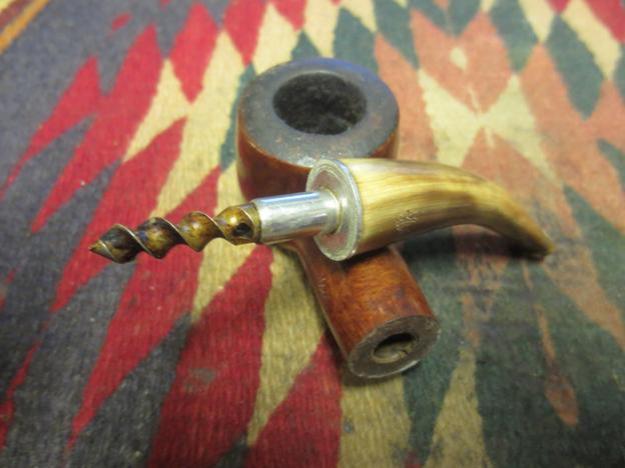
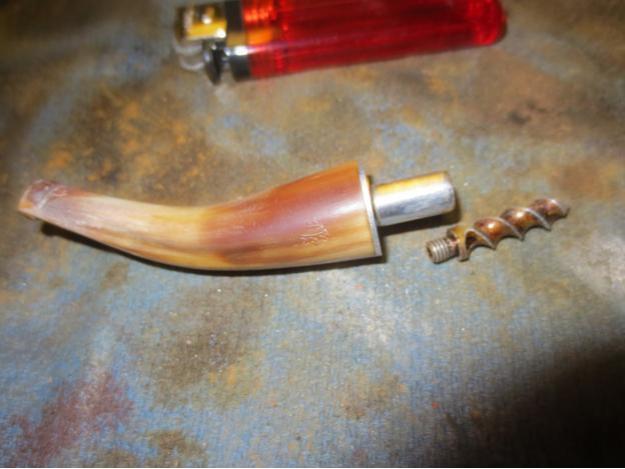
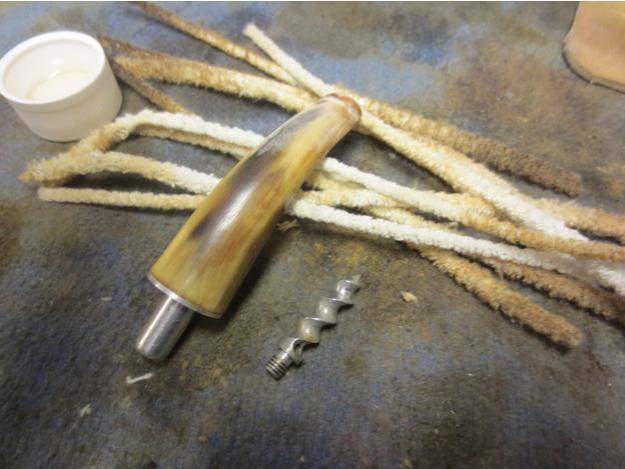
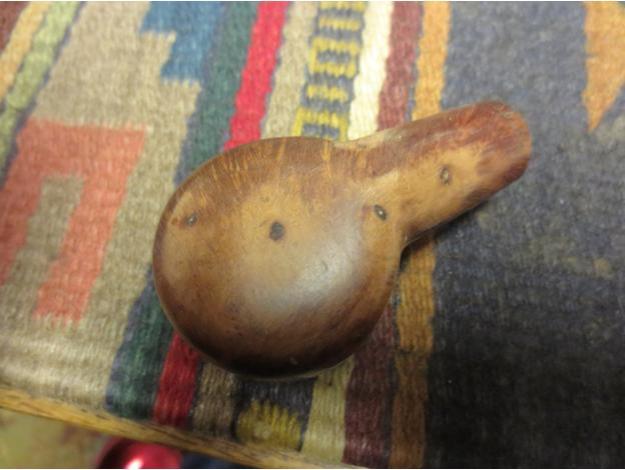
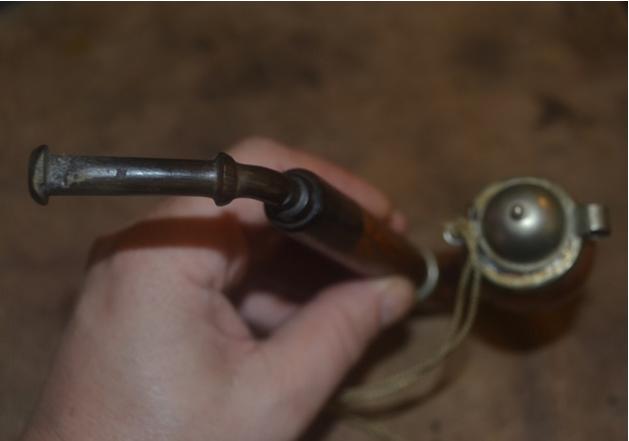
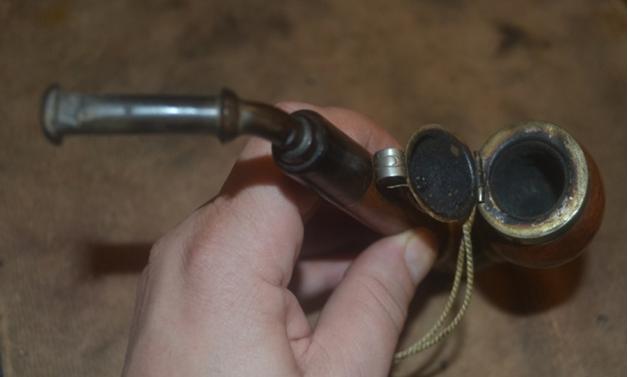
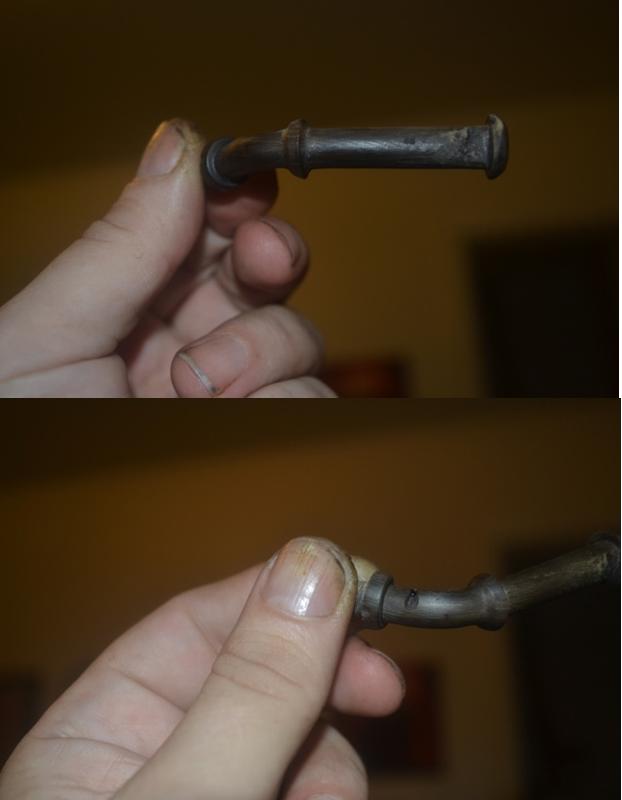
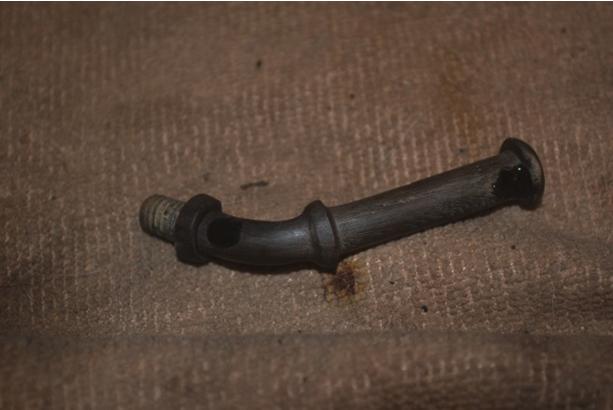
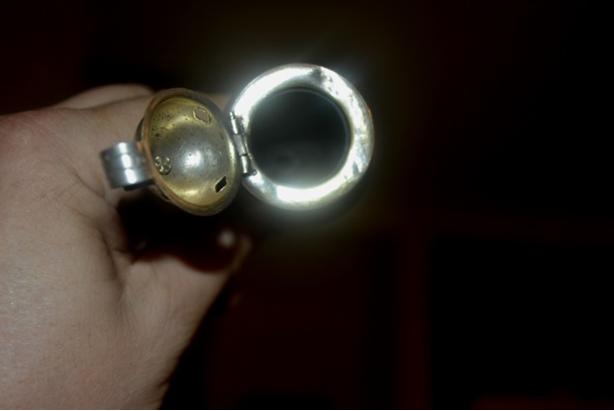
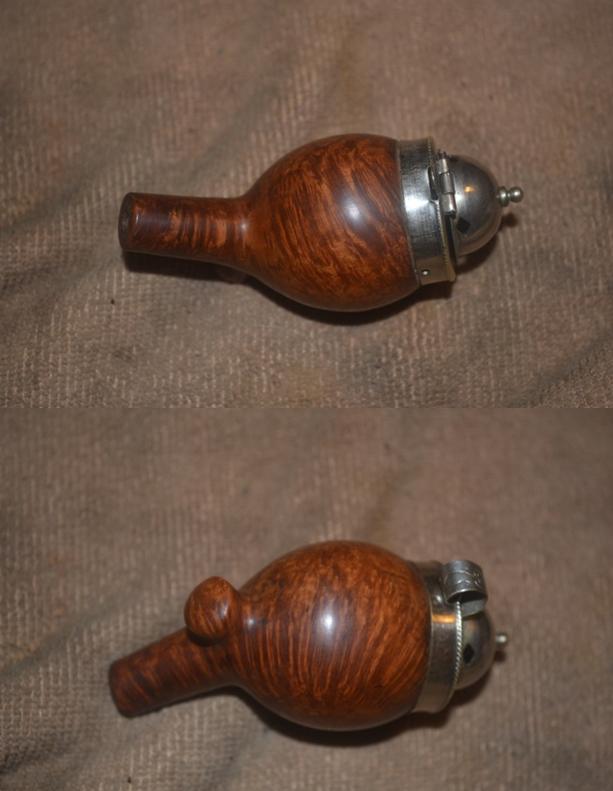
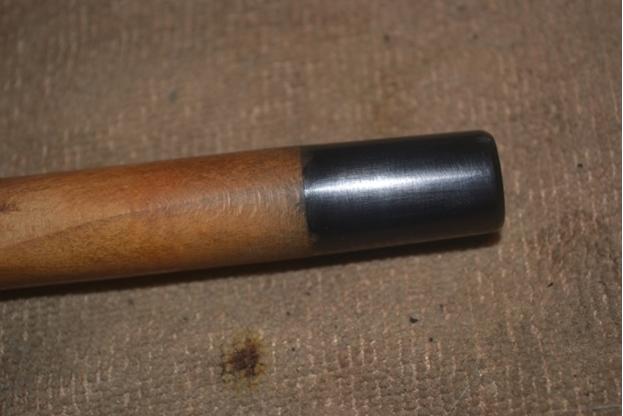
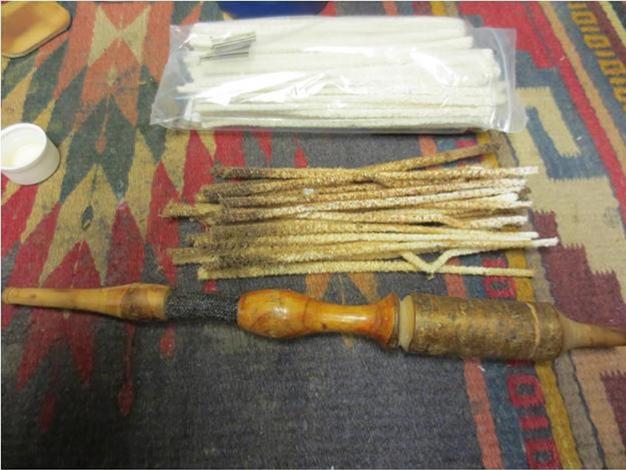
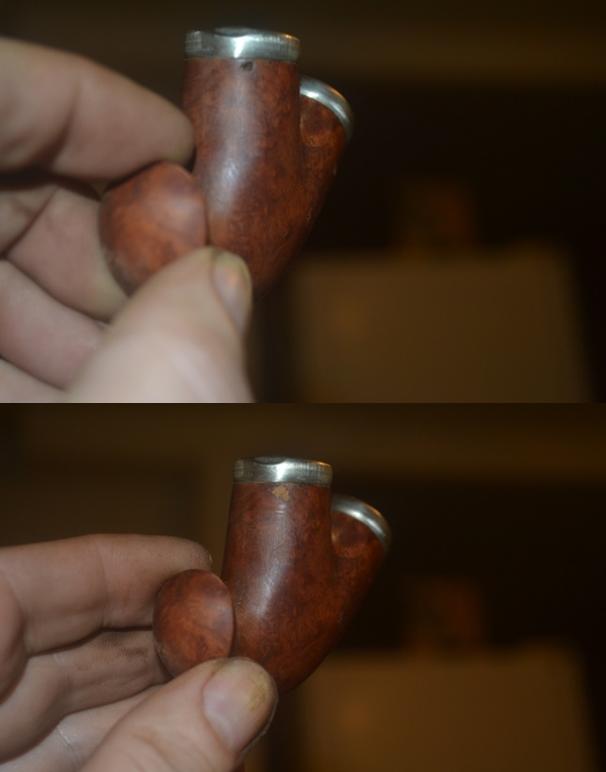
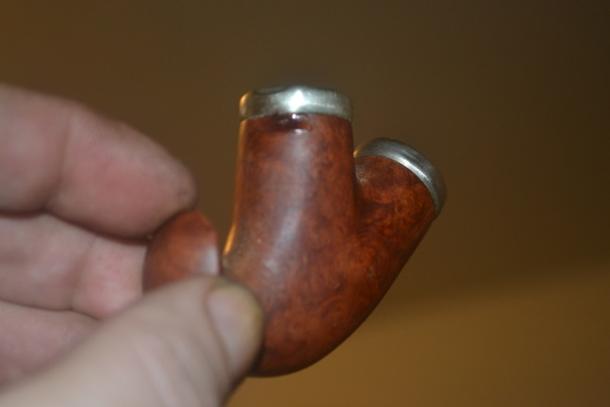
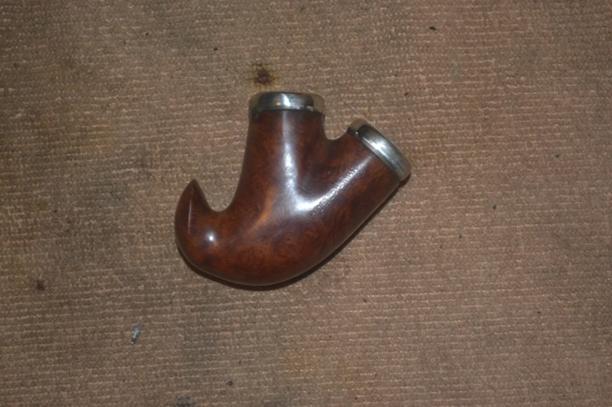
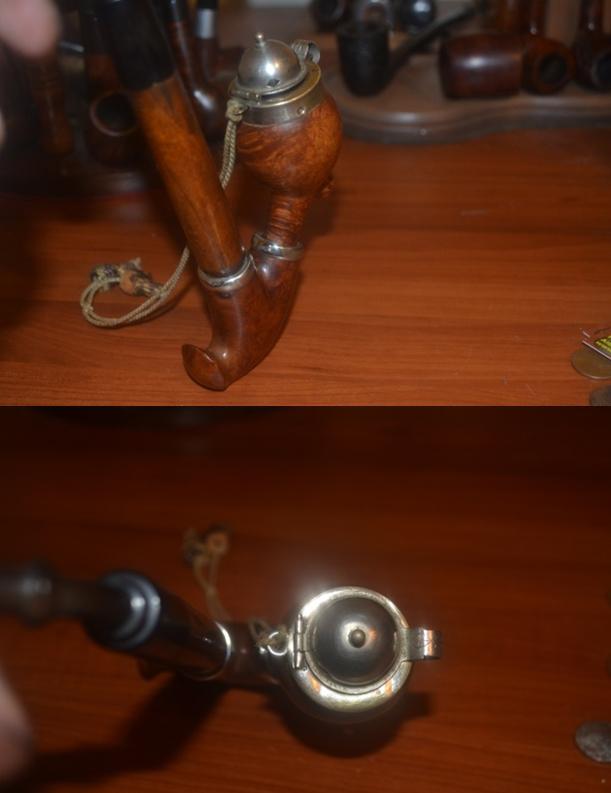
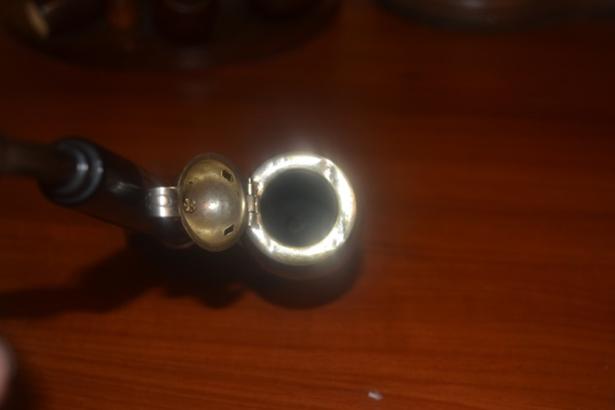
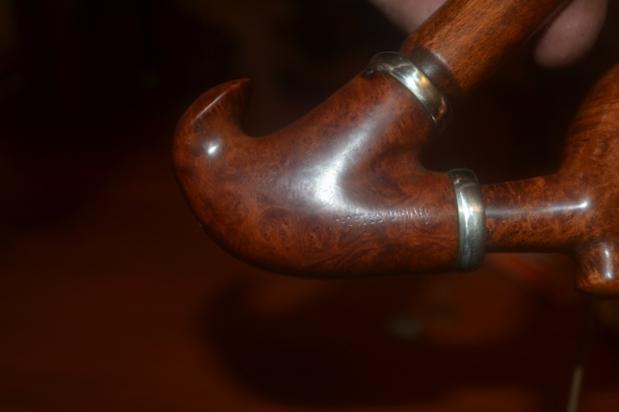
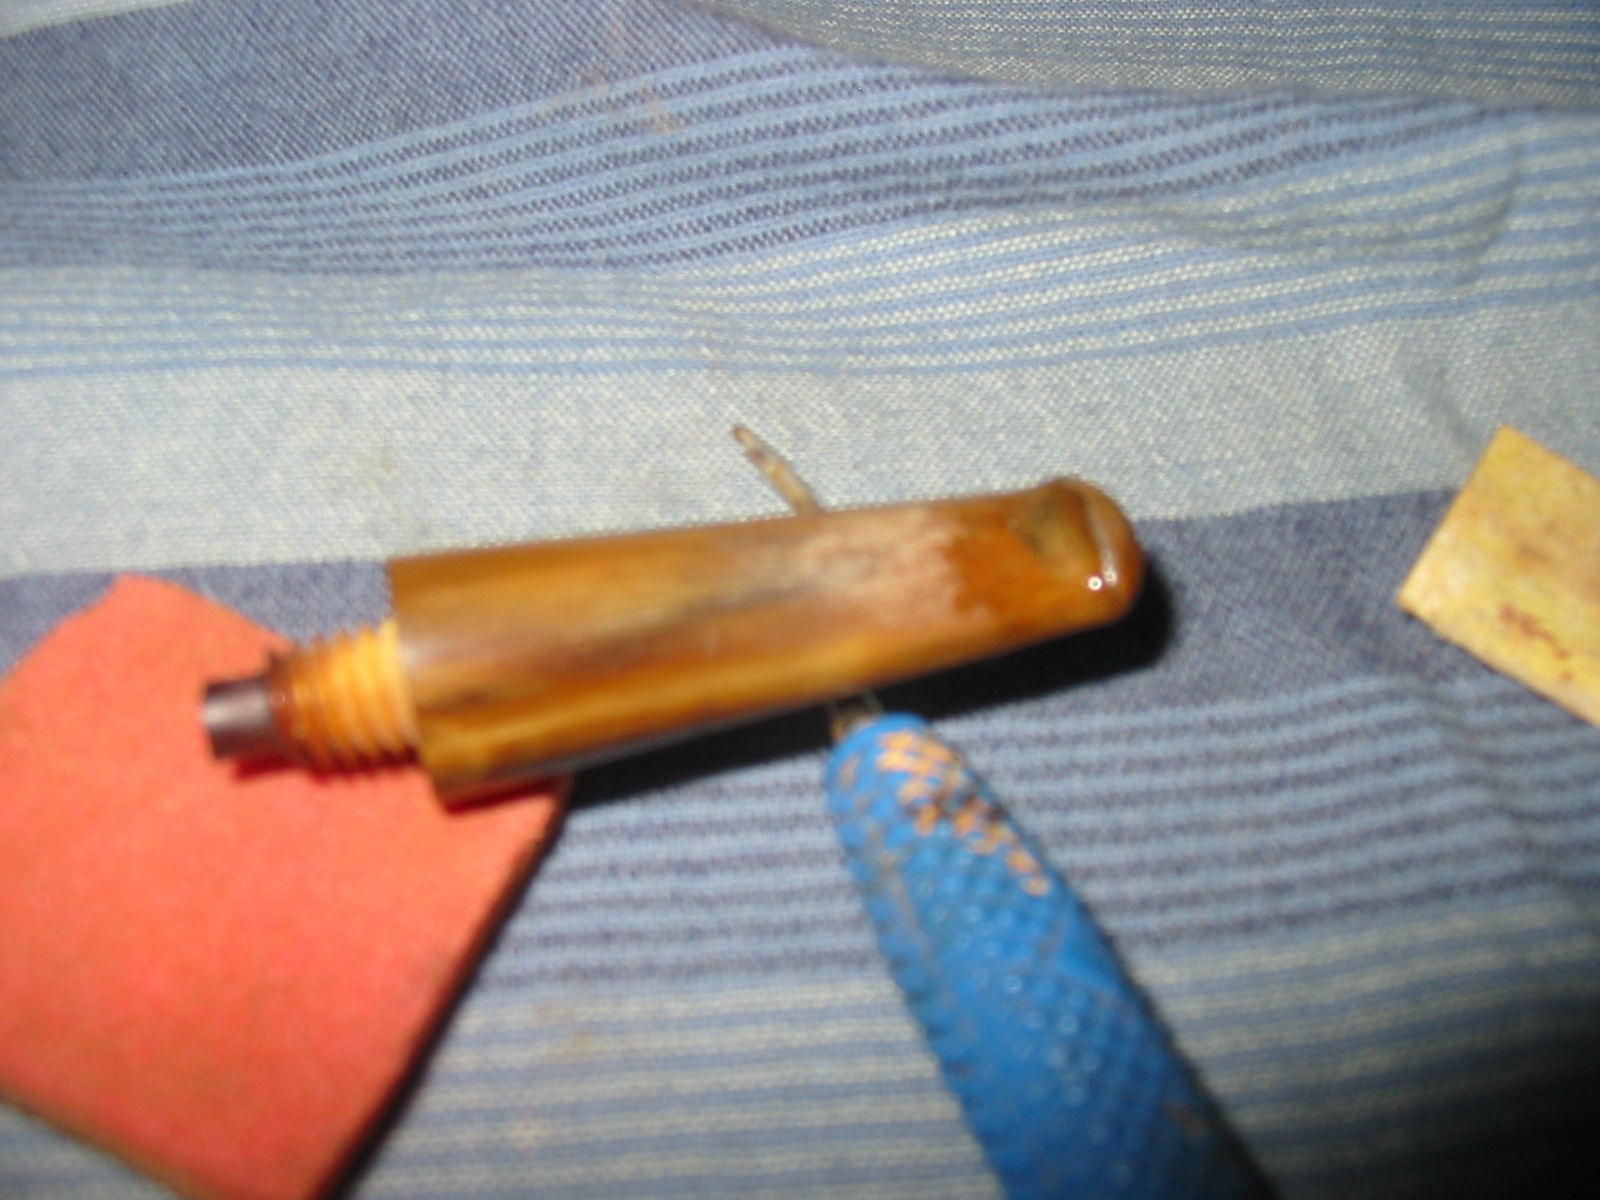
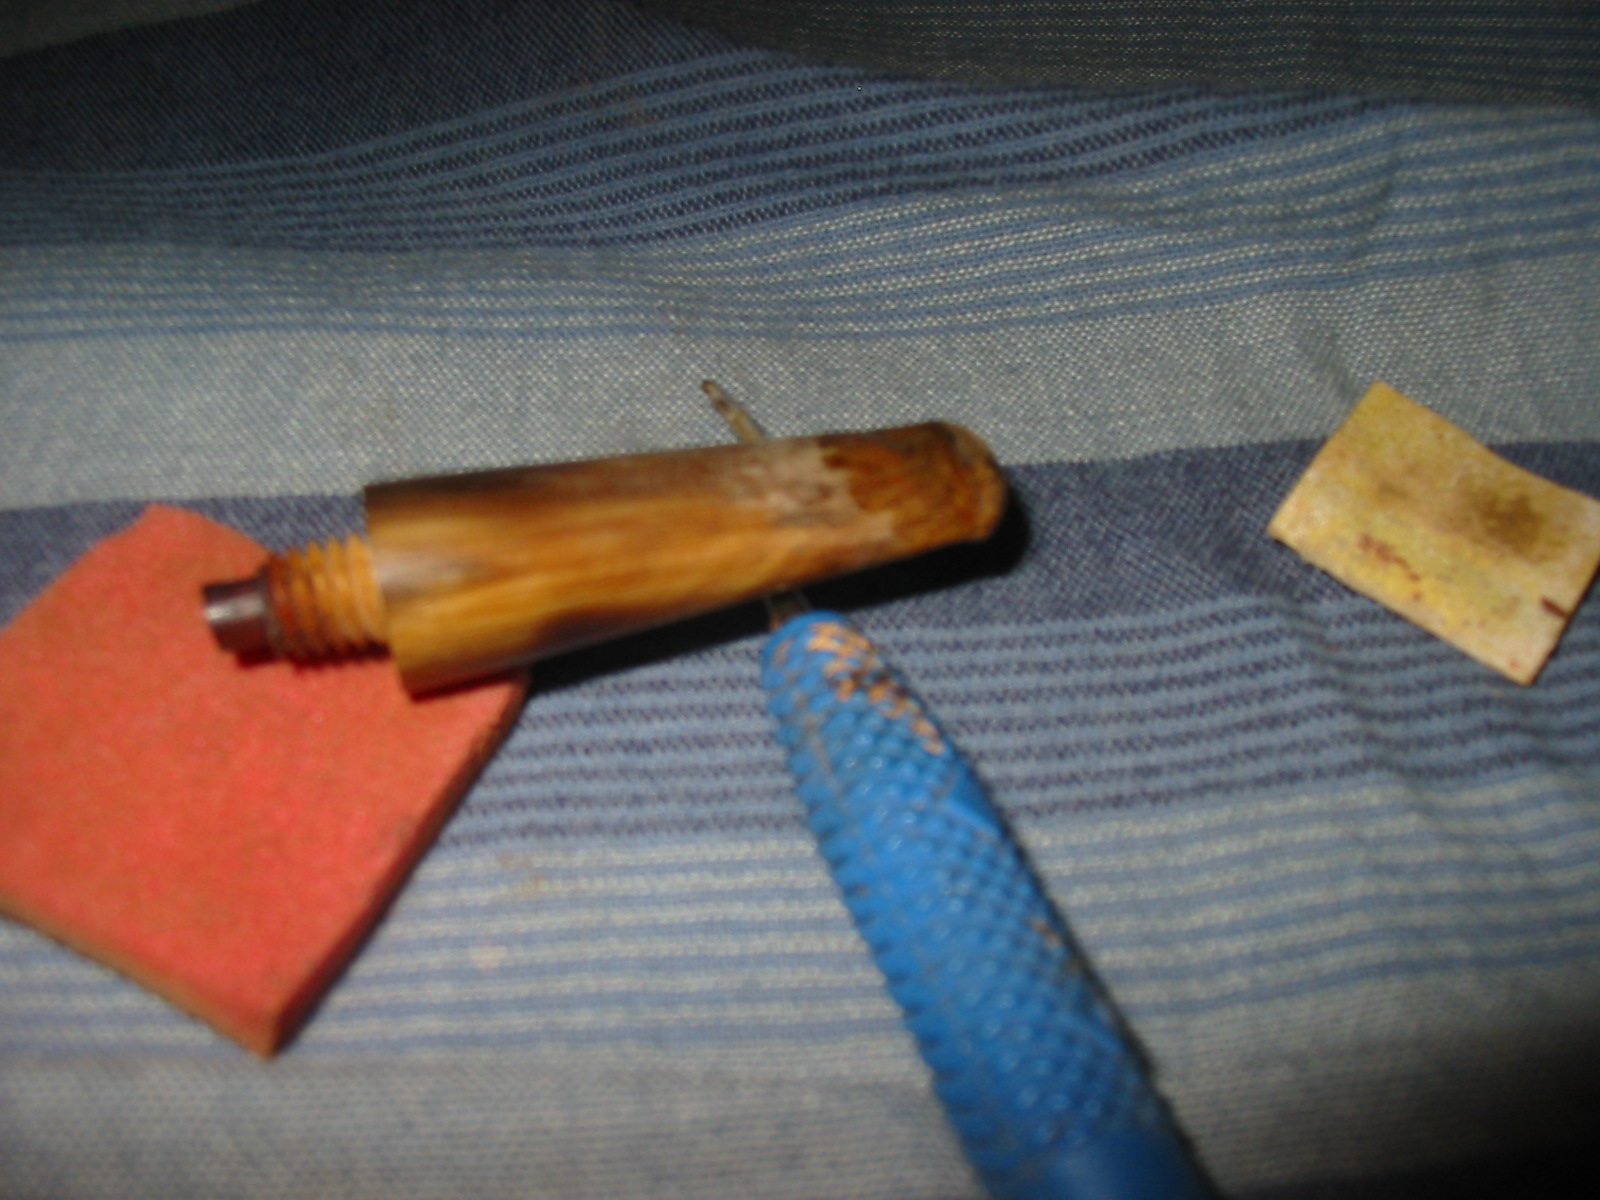
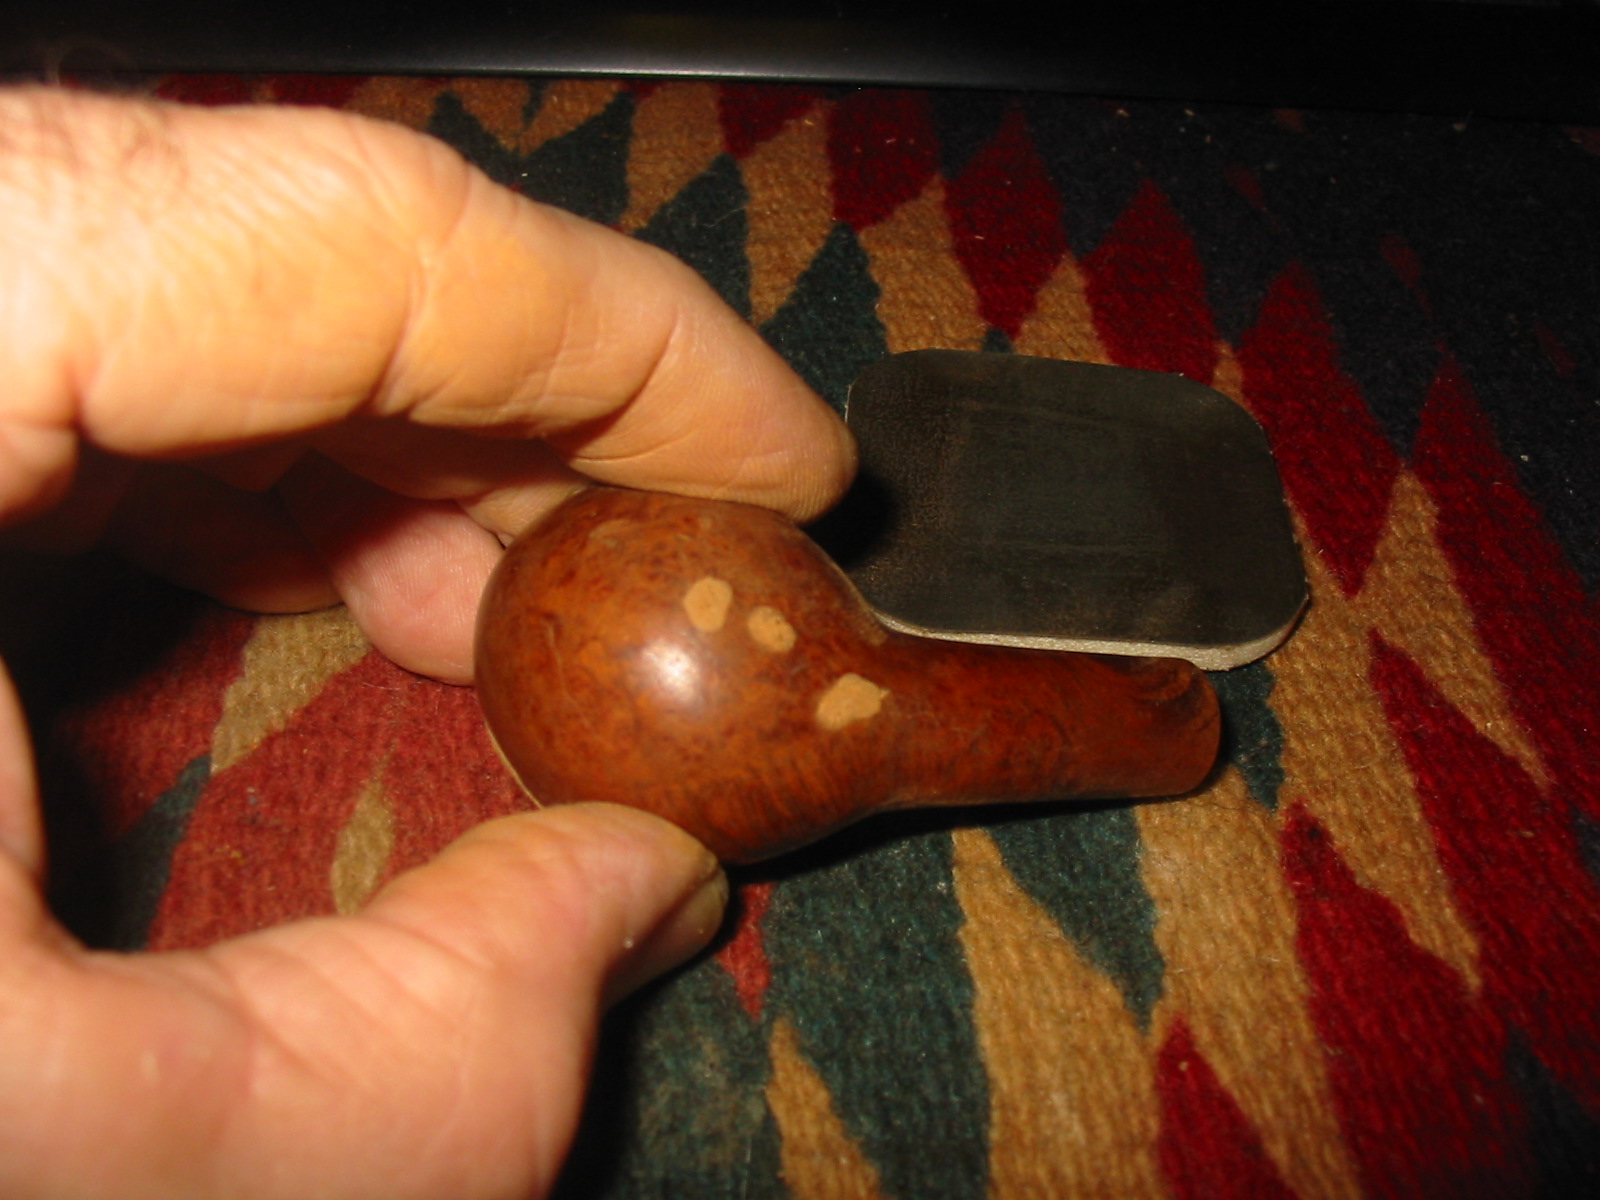
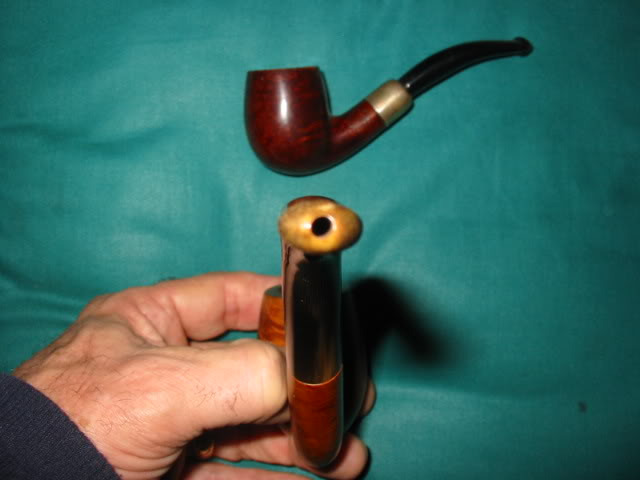
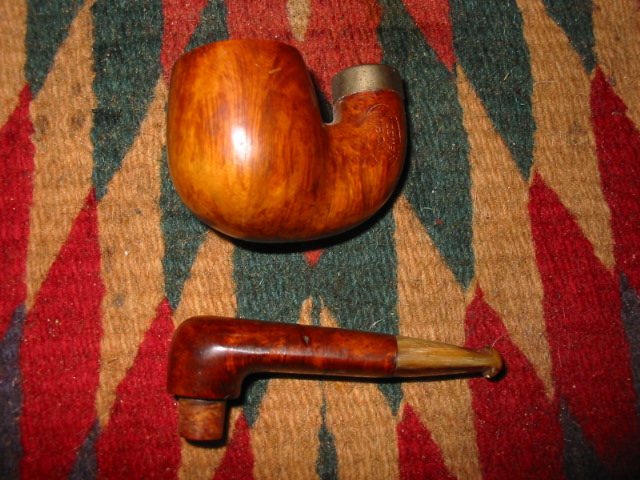
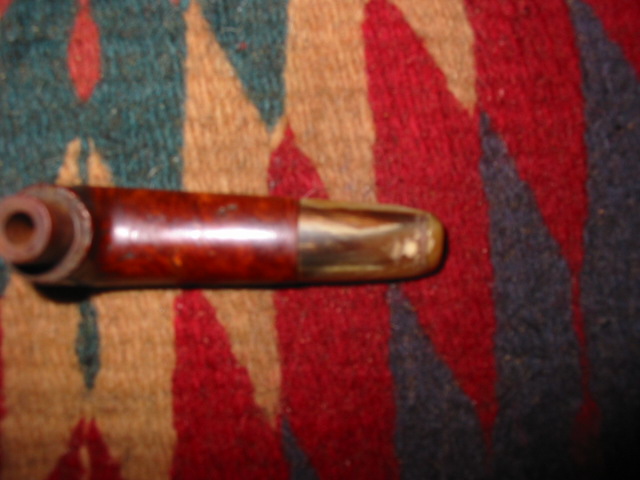
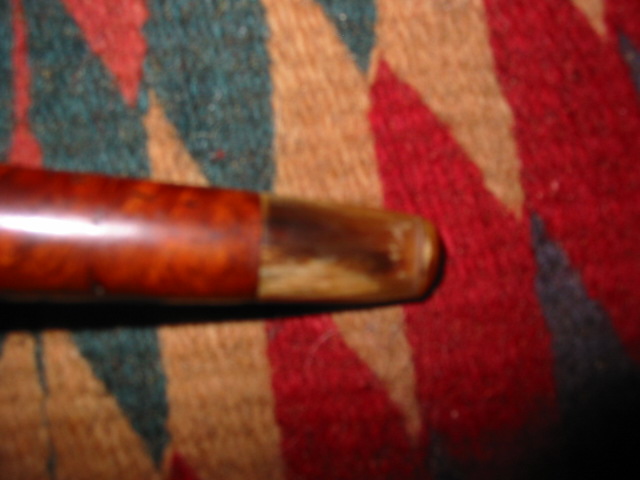
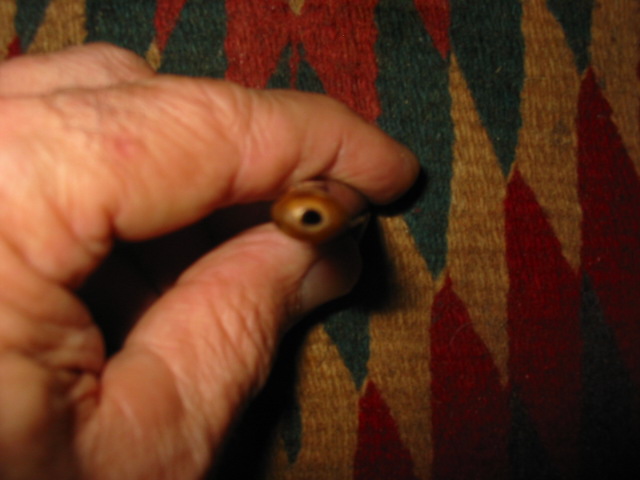
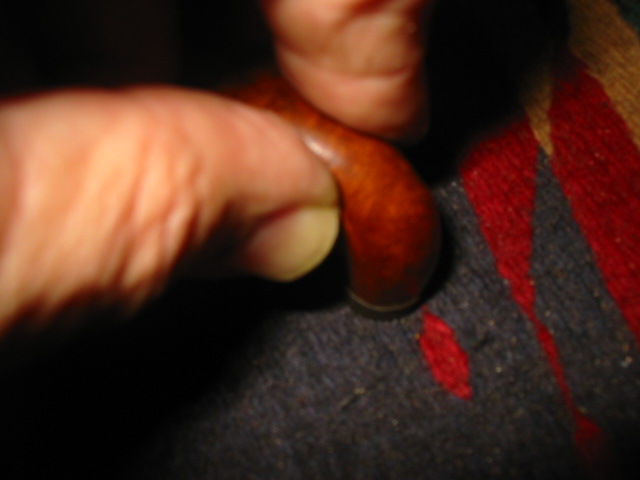
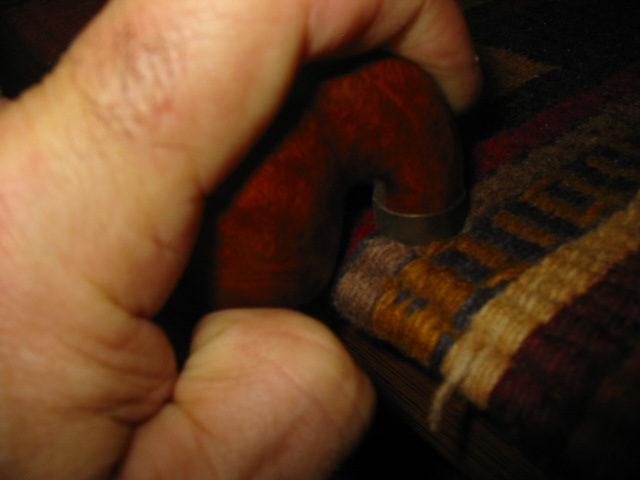
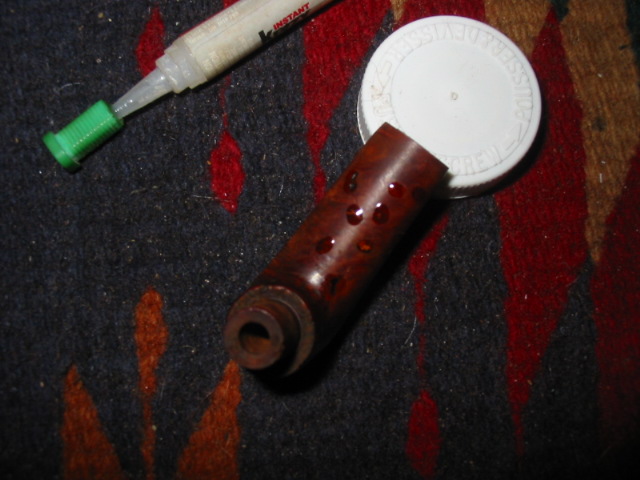
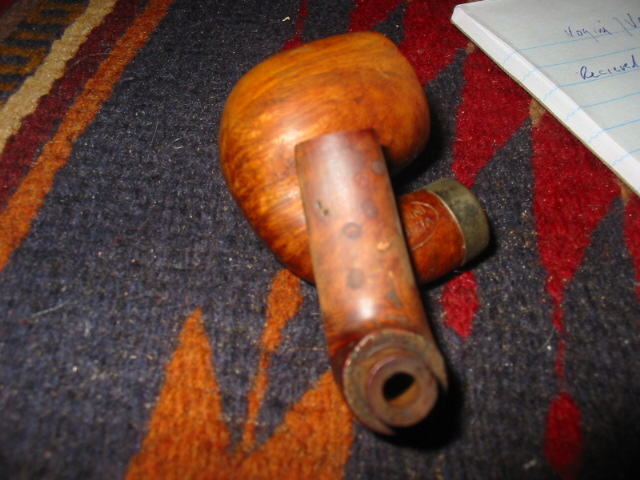
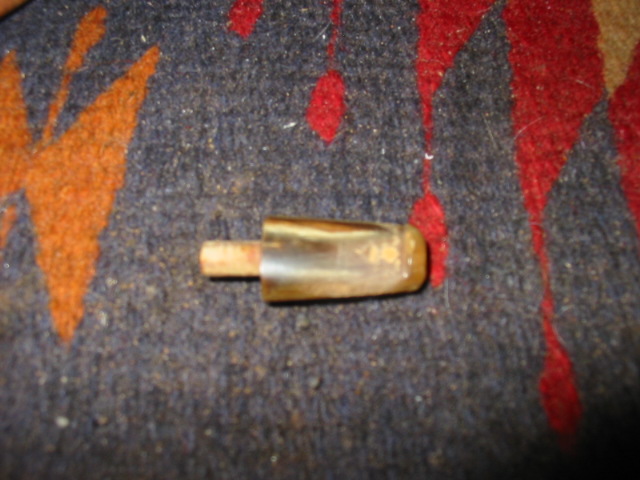
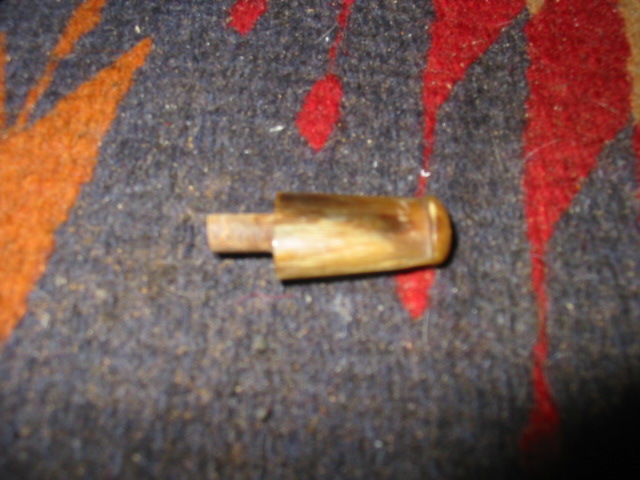
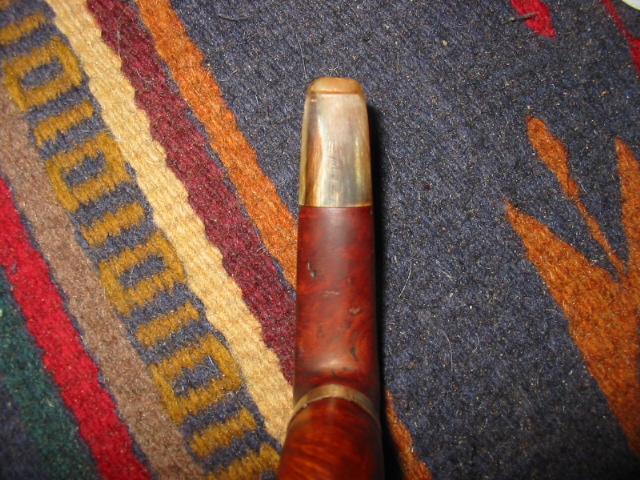
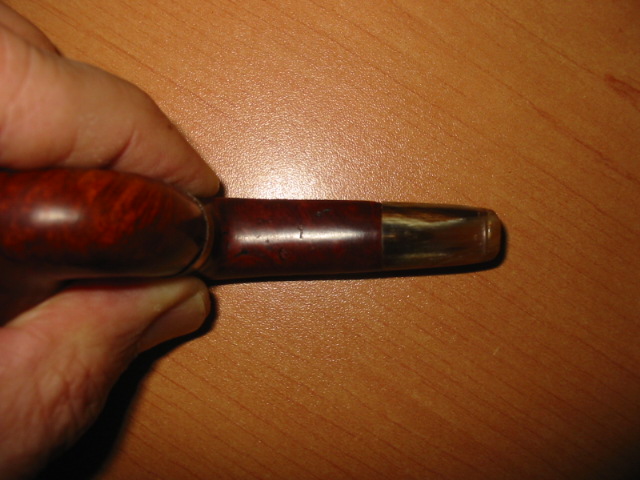
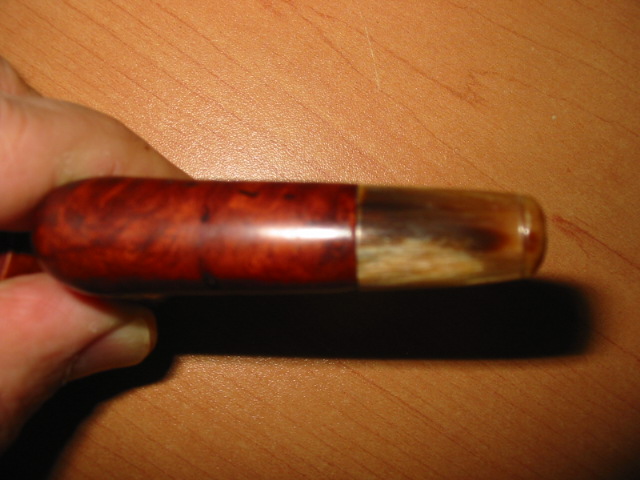
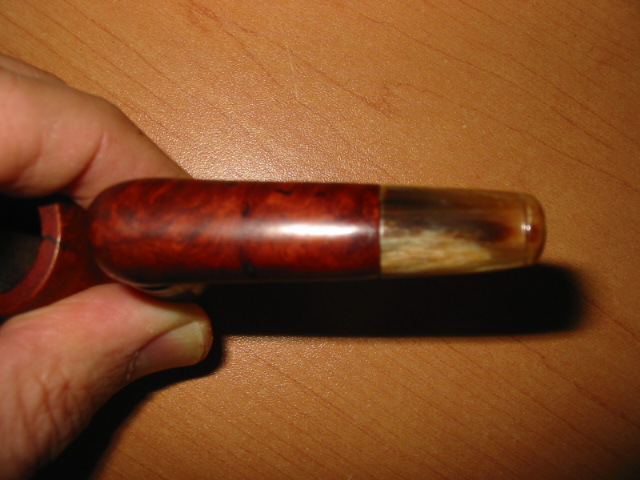
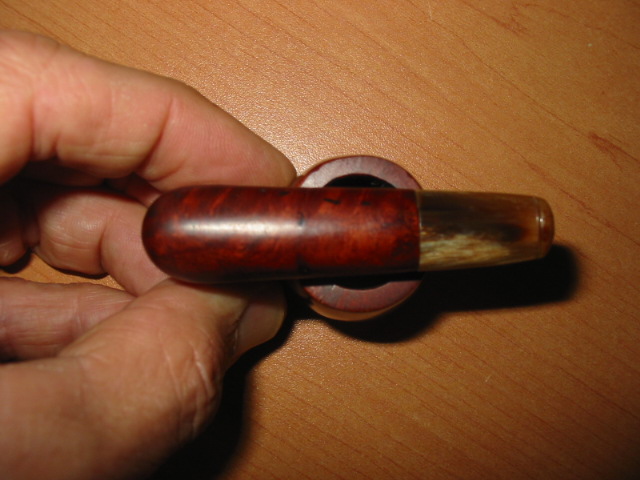
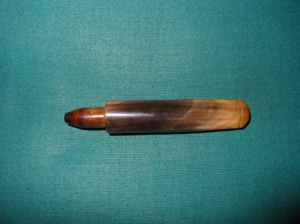
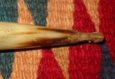
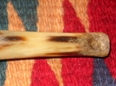
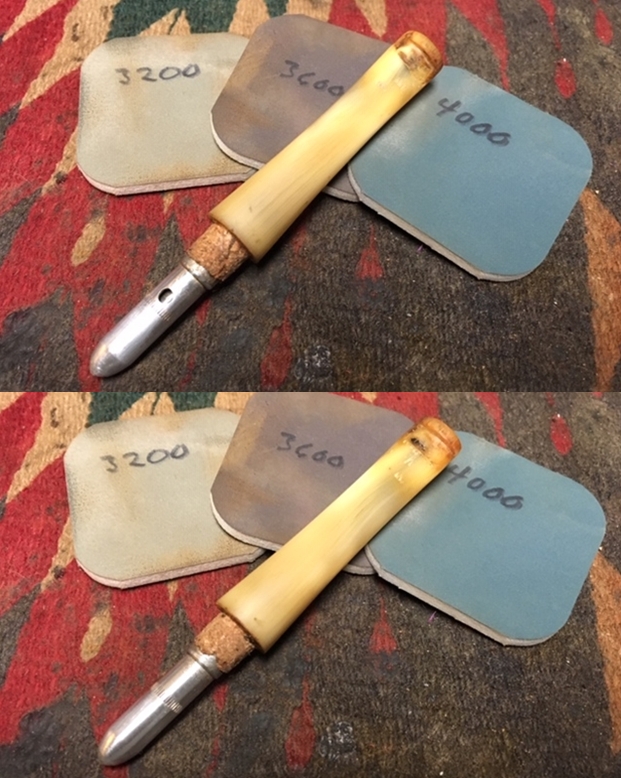
I removed the stem from the shank and was a bit surprised by the aluminum system that was inside. The tenon was aluminum and had a bullet shaped cap on the end of it. The cap had a hole in the top that allowed the smoke to be drawn through the airway in the stem. The previous own had wrapped the aluminum portion of the tenon with what looked like aluminum foil to build it up to fit tightly in the shank. The photos below show the tenon and the system. 
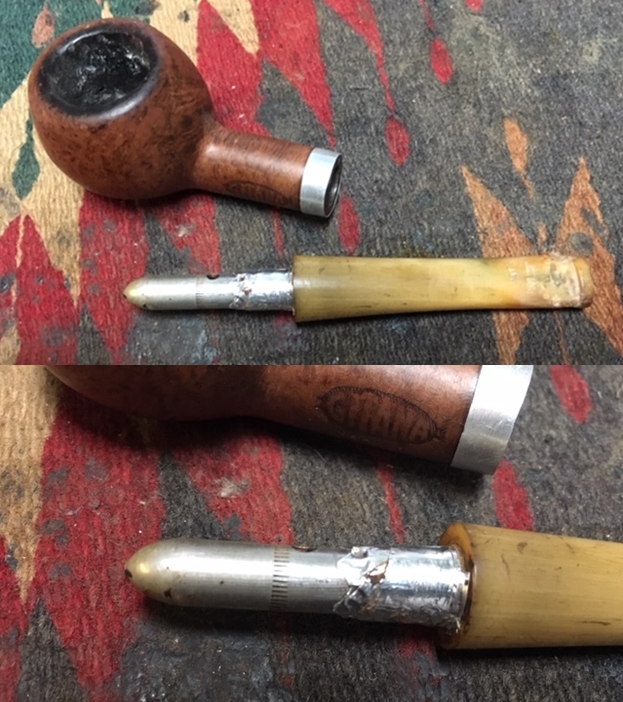
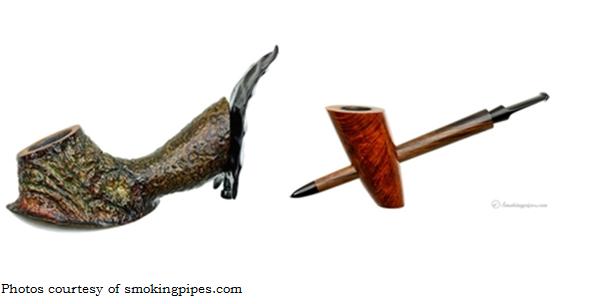
I was unfamiliar with the brand and was surprised by the tenon system. I did some searching online and could find nothing on the Gitana brand or the Gitana Depose brand. I did happen across a similar pipe on Smokingpipes.com. The writer who described the pipe for the site wrote the following which contained some really helpful information. I quote:

We were able to ascertain a little information about La Gitana, which was a French brand created by Chapel Frés…but this relic from the early 20th century still sports its original horn stem, coupled with a novel aluminum tenon arrangement that we can only assume is meant to trap moisture. Although we aren’t sure how well it achieves this, it does do quite well at looking like an old-school James Bond accessory. It fits securely within a cork-lined mortise, which many briars of this period tended to have. https://www.smokingpipes.com/pipes/estate/france/moreinfo.cfm?product_id=196840

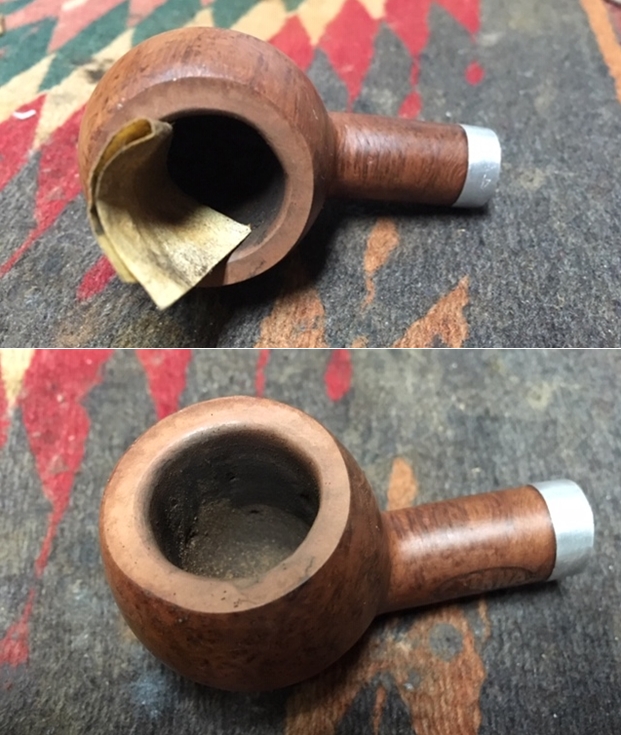
From that I learned that the brand was called La Gitana. It was a French made pipe from a company called Chapel Frés. It was made in the early 20th century and the author had described the tenon system like the one I had.  I also learned that the mortise had originally been cork lined to facilitate holding the tenon snuggly in the shank. This was what was missing in the pipe I had and it had been replaced with the foil mess that is seen in the above photos.

Armed with the name Chapel Frés I looked on Pipedia under French Pipe Companies and found the brand there. It stated that it came from that factory and the brand had been founded in 1904 in Saint-Claude, France. Here is the link https://pipedia.org/wiki/Chapel_Fr%C3%A9s.

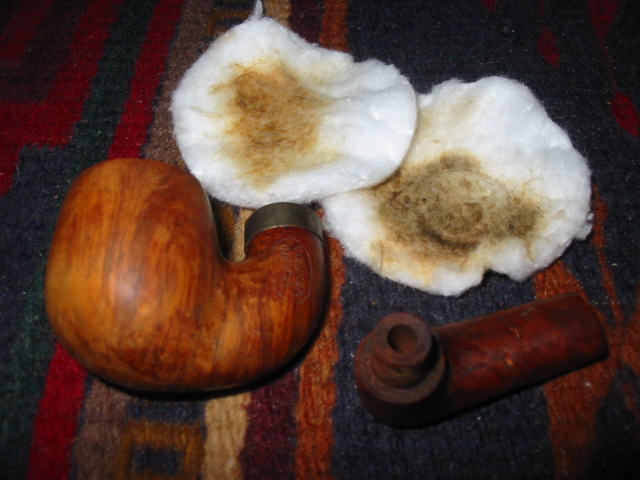
Armed with that information I started my cleanup of the stem. I scraped away the foil that was wrapped around the tenon. I examined the bullet shaped cap on the tenon and figured out that it unscrewed from the tenon. I cleaned the metal underneath alcohol, cotton swabs, pipe cleaners and steel wool. I cleaned out the airway in the shank at the same time. The tube in the end of the tenon looked clean. I used alcohol, cotton swabs and pipe cleaners to clean out the inside of the bullet cap. I cleaned out the walls in the shank with pipe cleaners, cotton swabs and alcohol. It was a very dirty pipe that once it was clean had an interesting look to it. 
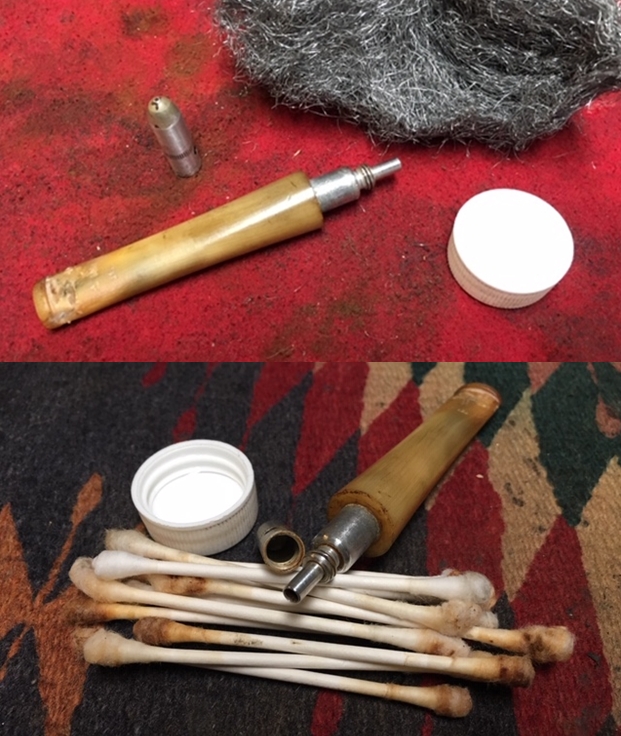
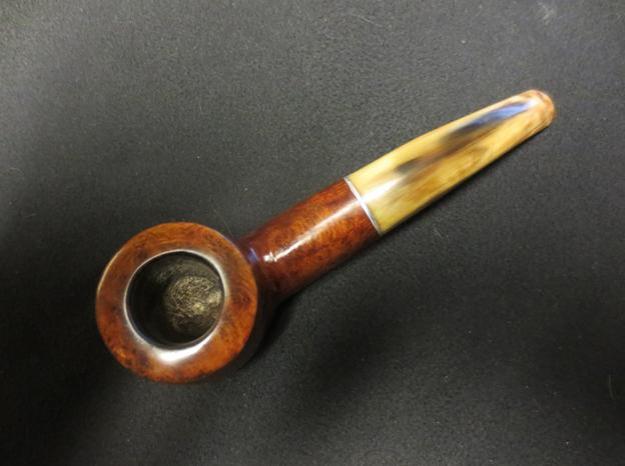
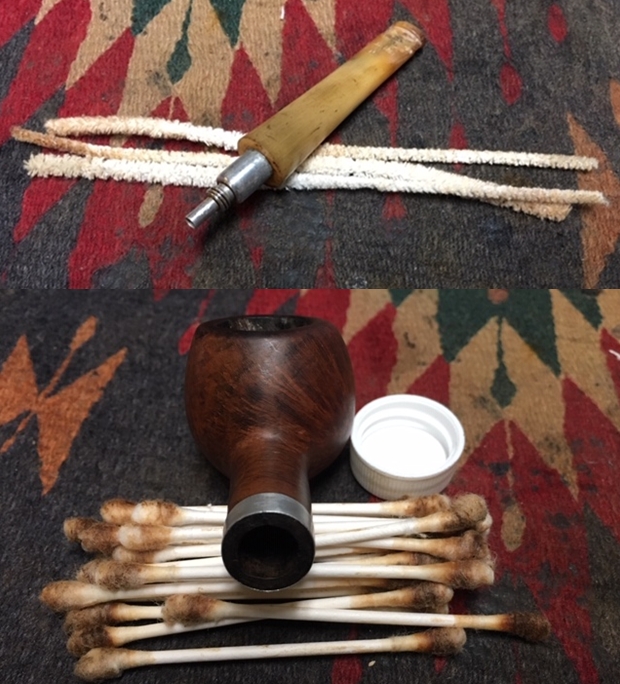
I cleaned up the inside of the bowl with a Savinelli Fitsall Pipe Knife. I scraped the walls clean of the carbon build up. I sanded the walls of the bowl with a piece of dowel wrapped with 220 grit sandpaper.
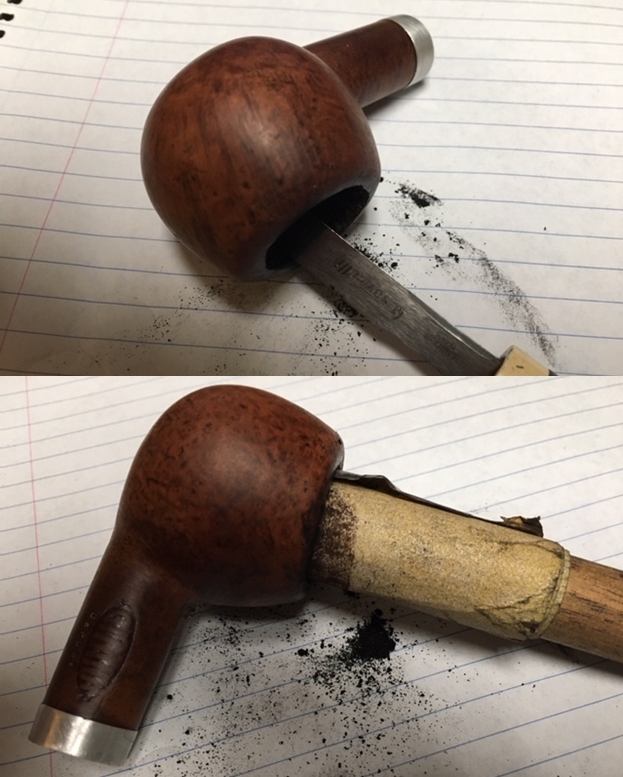
To remove the damage on the rim top I topped the bowl until the damaged areas were removed and the rim top was clean. I used a folded piece of sandpaper to smooth out the inner edge of the rim and bring it back to round as much as I could. 
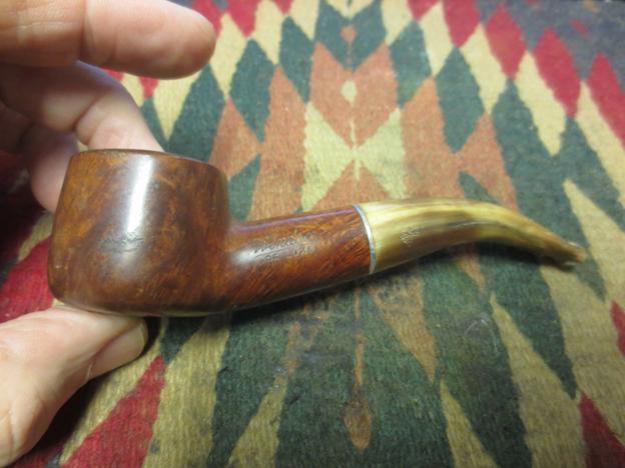
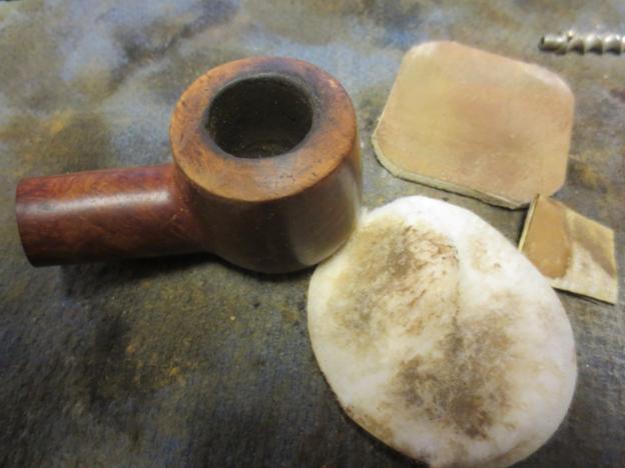
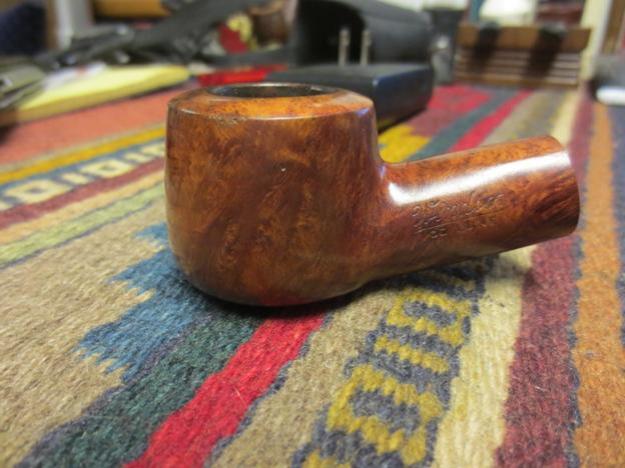
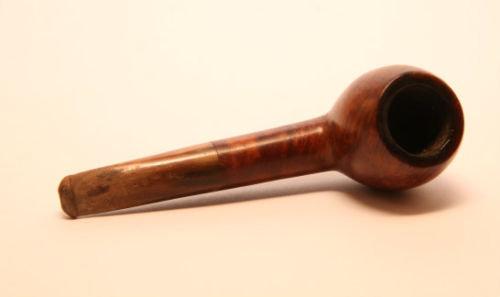
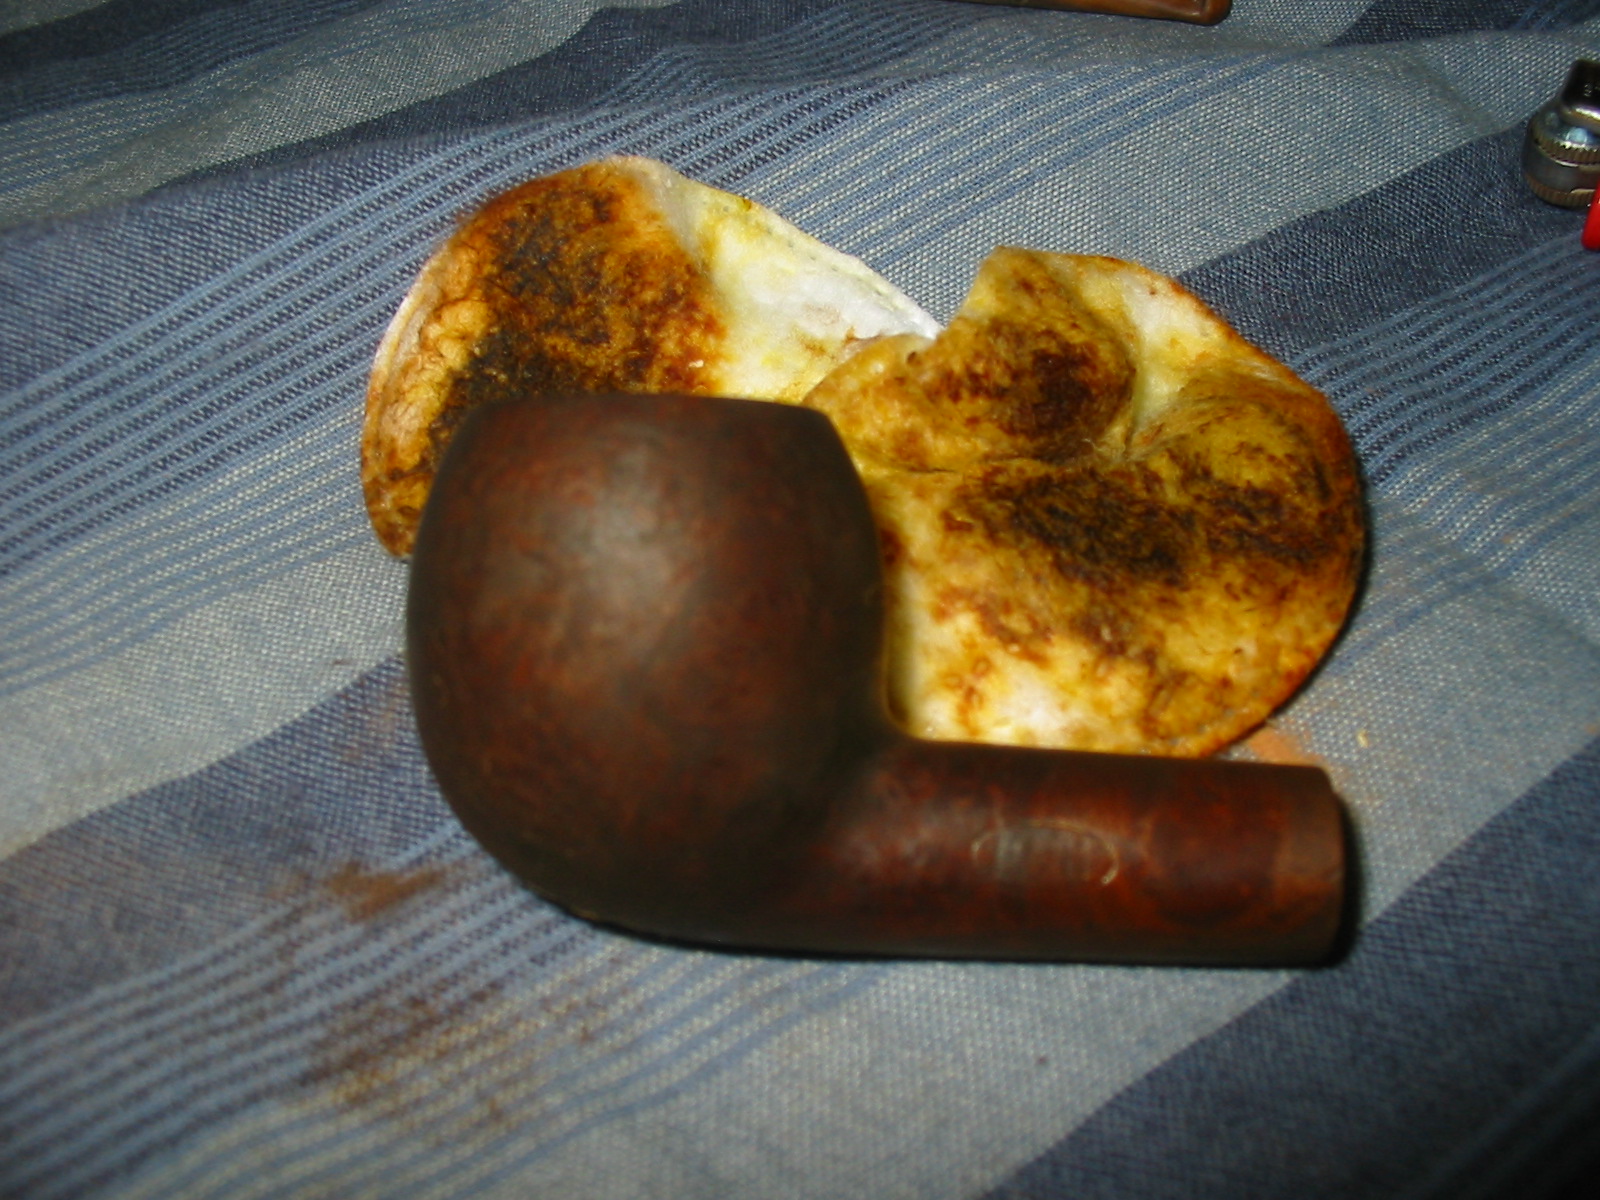
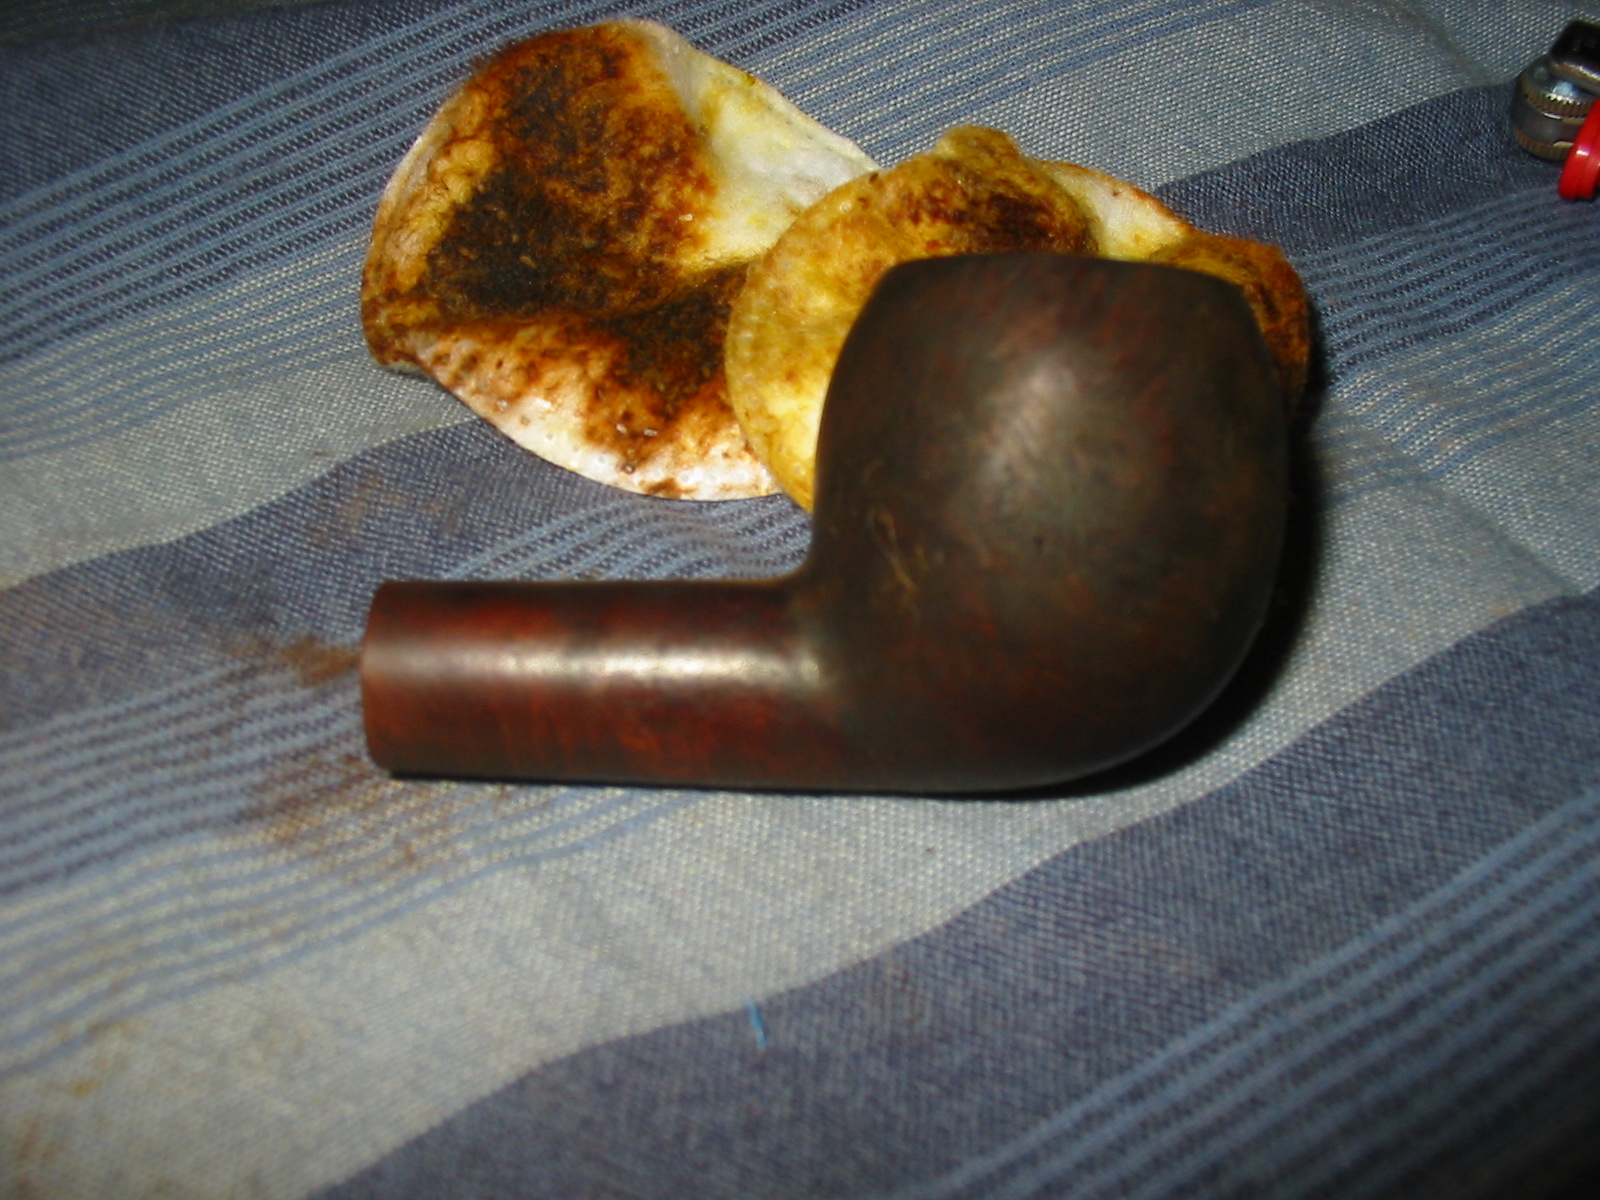
I washed down the exterior of the bowl with acetone on a cotton pad to remove the finish and the grim on the briar. The pipe looked really good at this point. I needed to round down the outer edges to bring it back to the shape it was when I started but for now it was clean. 
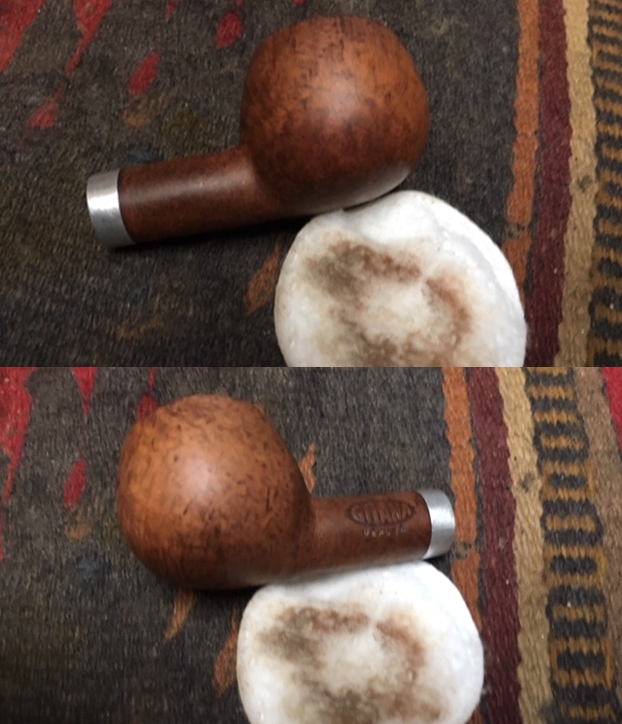
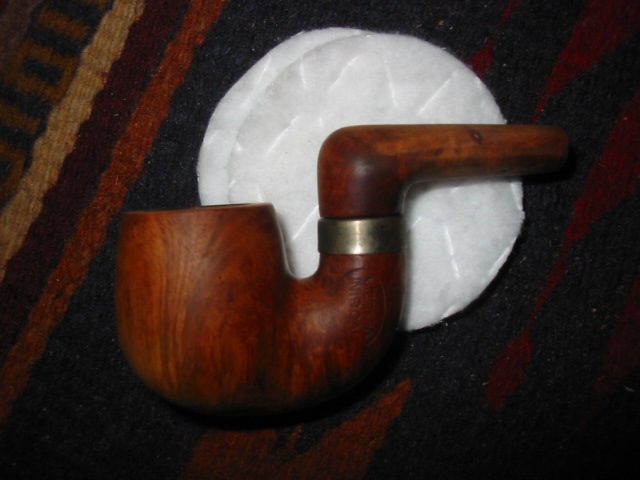
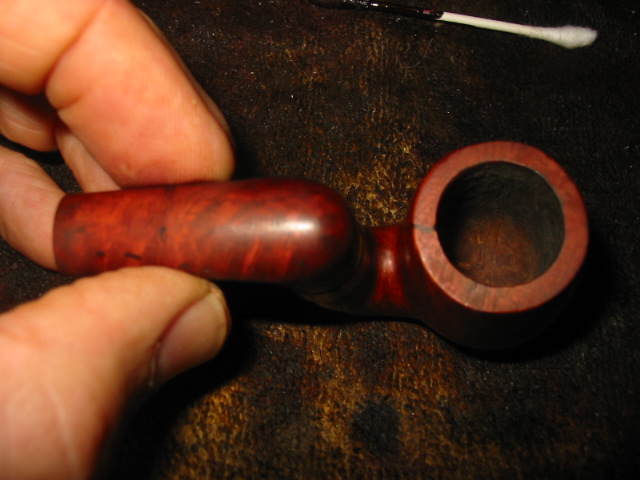
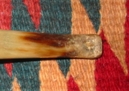
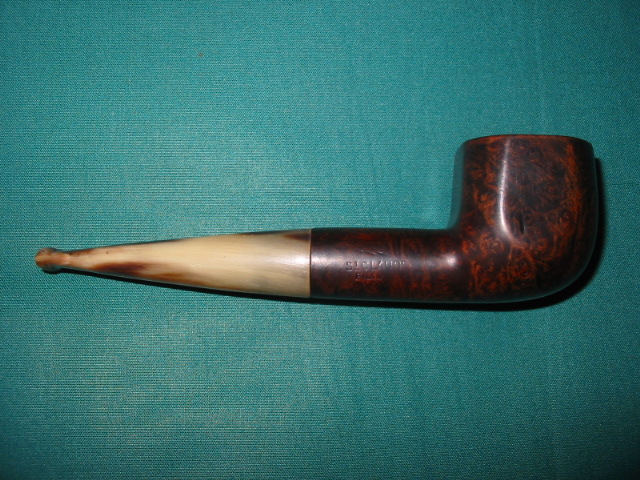
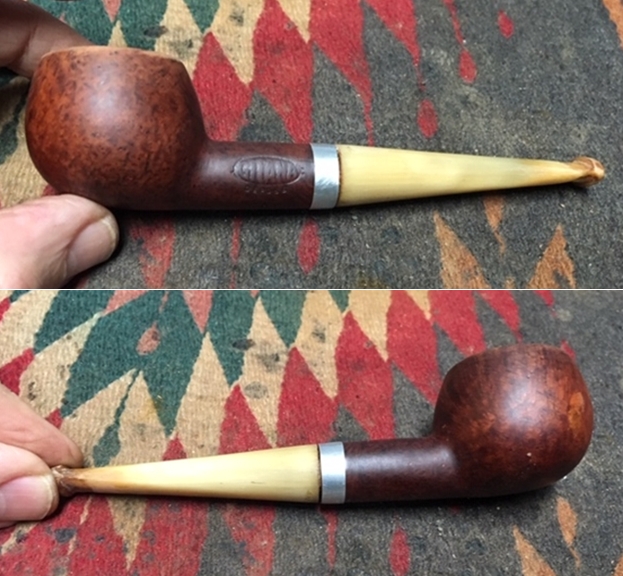
I took a photo of the stamping on the left side of the shank. The stamping is quite readable and clear.
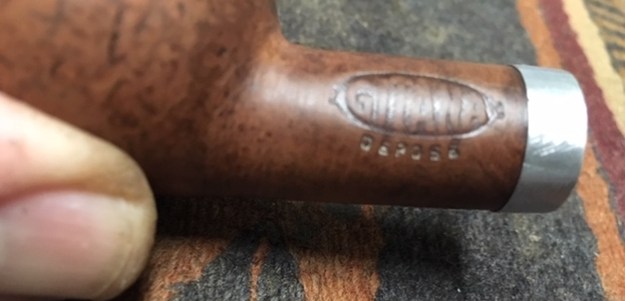
The tenon had some sticky substance for the glue on the foil on the tenon end. The tenon and threads still needed more cleaning to remove the oils.I filled in the tooth marks and troughs in the surface of the horn with clear super glue. I set the stem aside to dry.
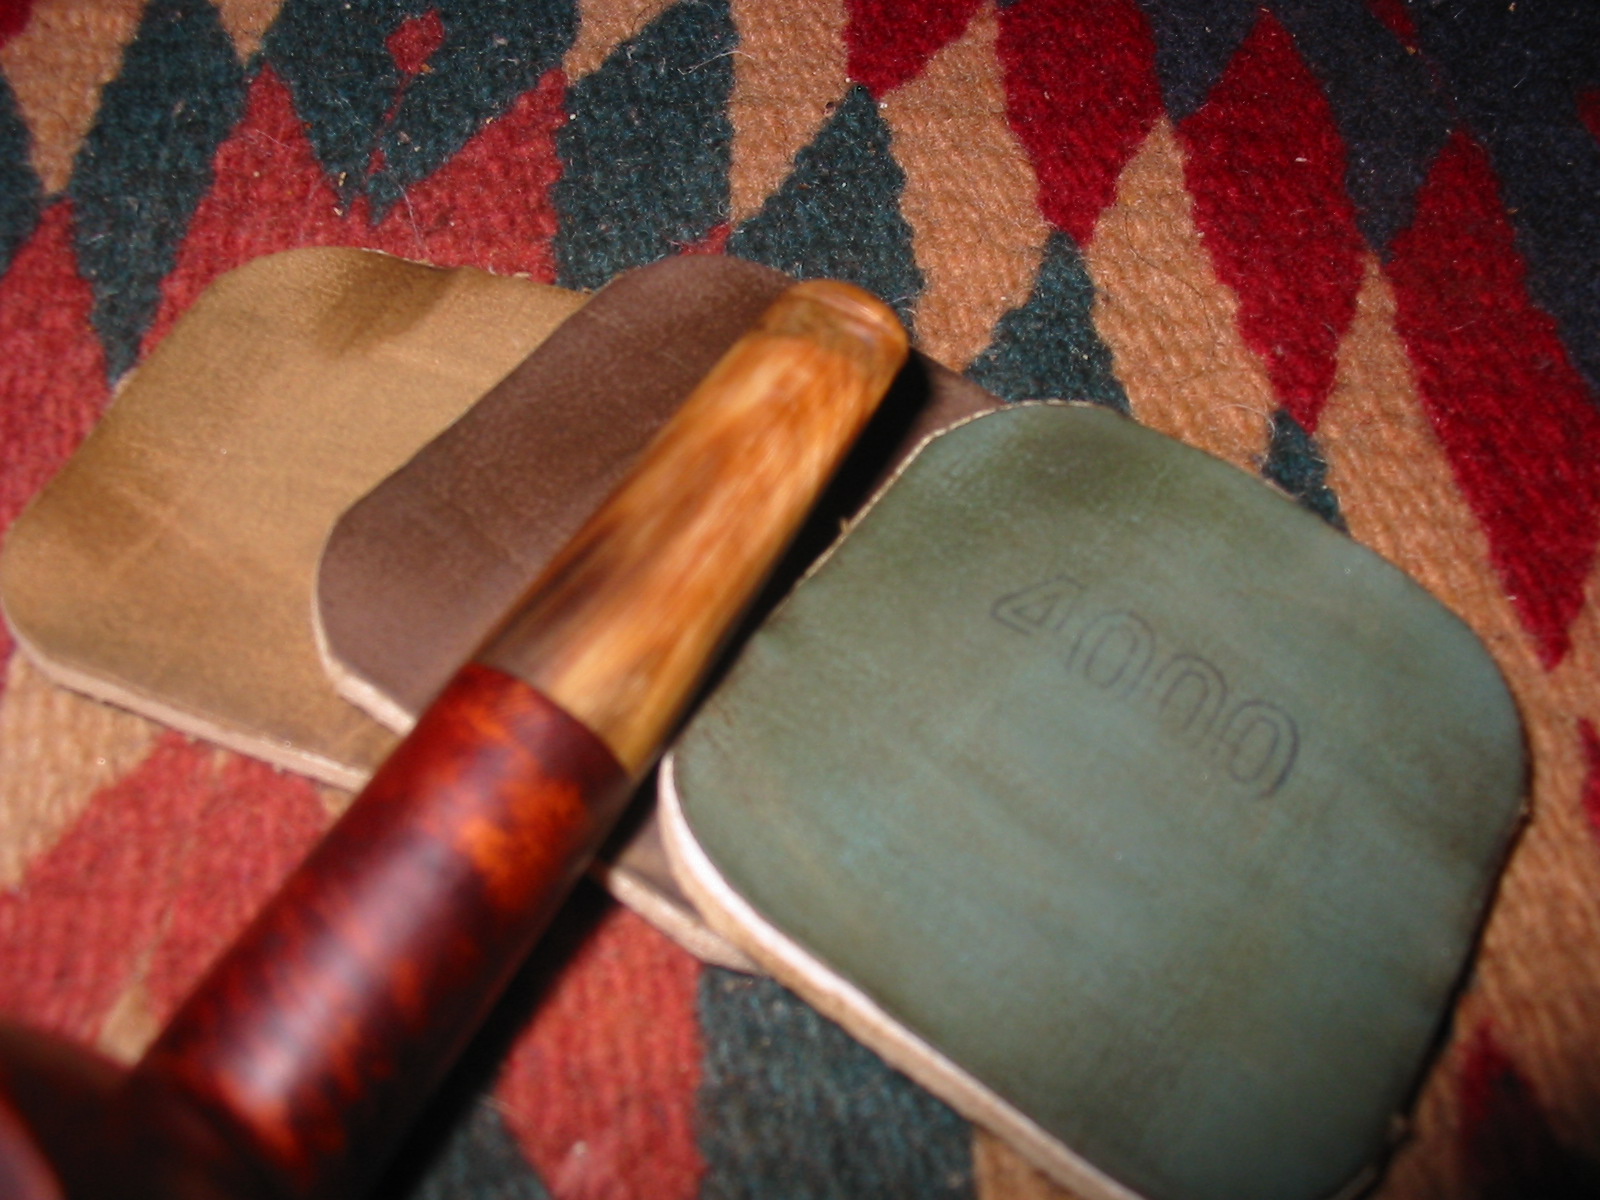
I decided to try to fit a cork in the shank to line it as suggested above. I cut away some of the excess cork from a wine cork I had. I trimmed it down with a Dremel and sanding drum until the diameter was close to the inside of the shank. I drilled it out with a series of drill bits starting small and working my way up to one that was close to the size of the tenon. I sanded down the cork exterior until it was a fit in the shank. I pressed it in place in the shank.
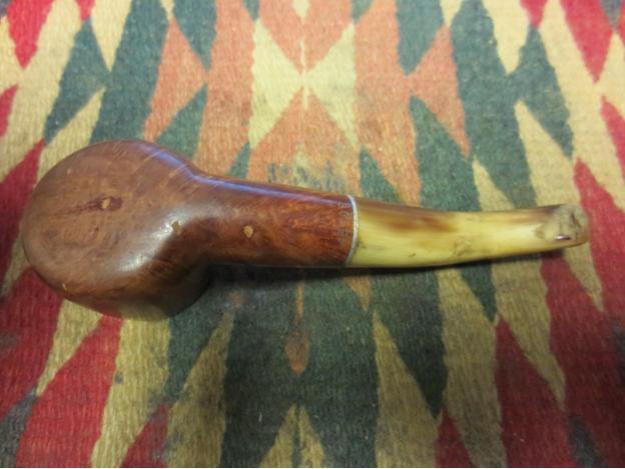
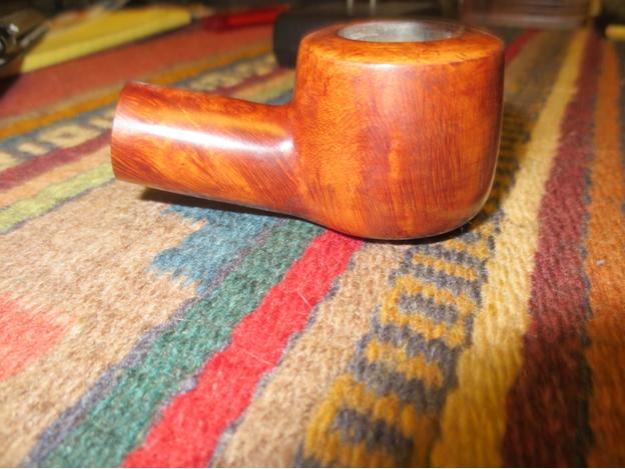
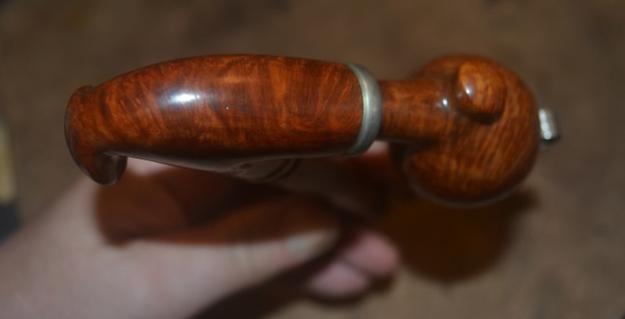
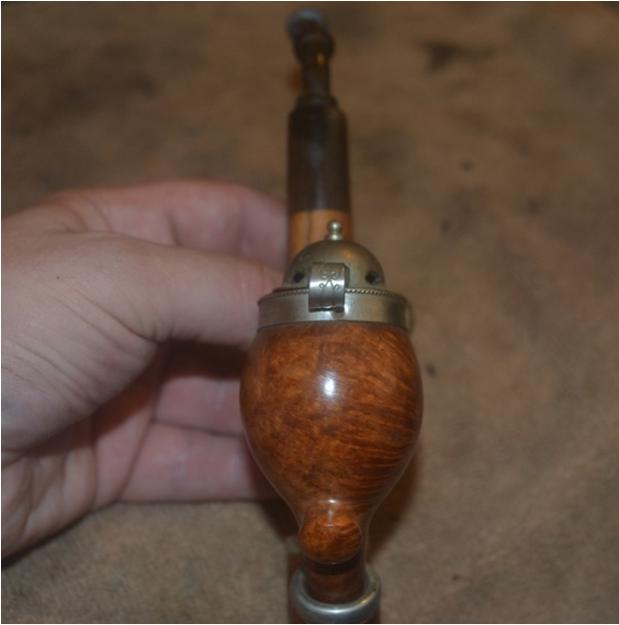
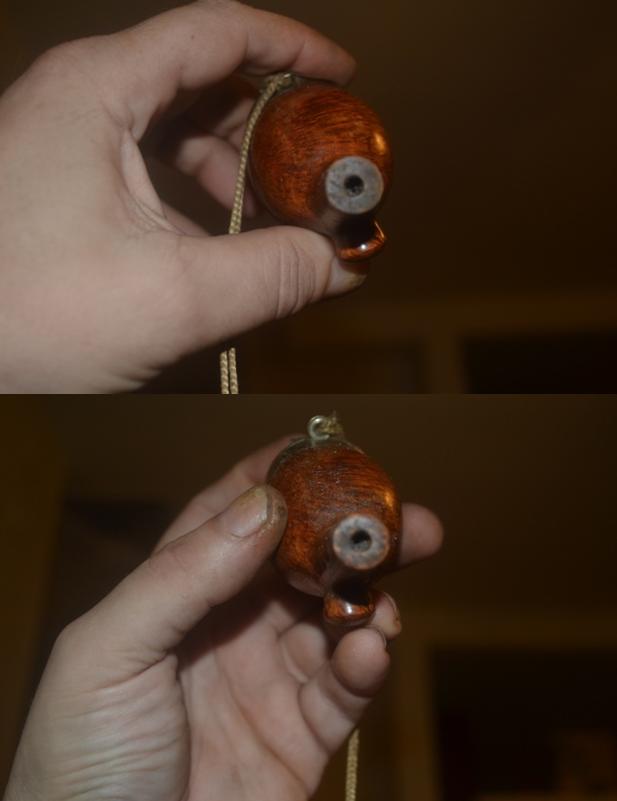
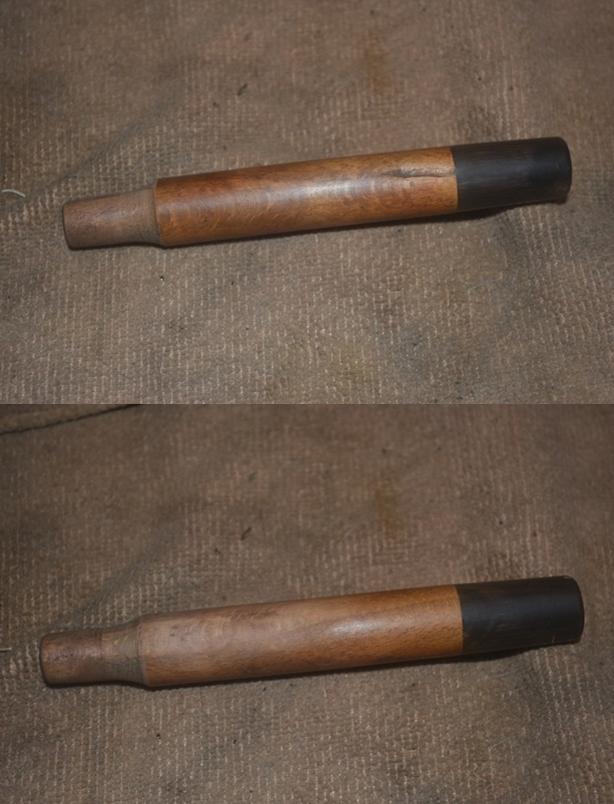
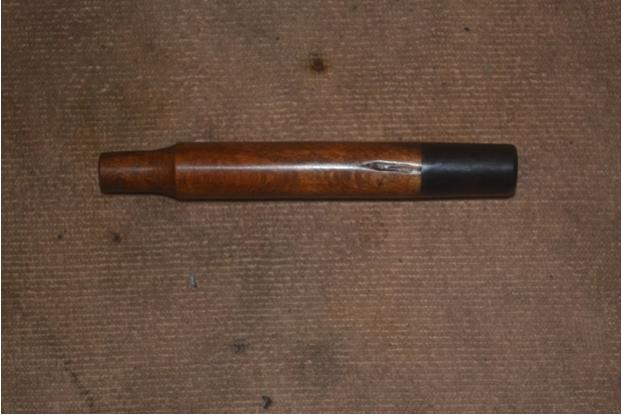
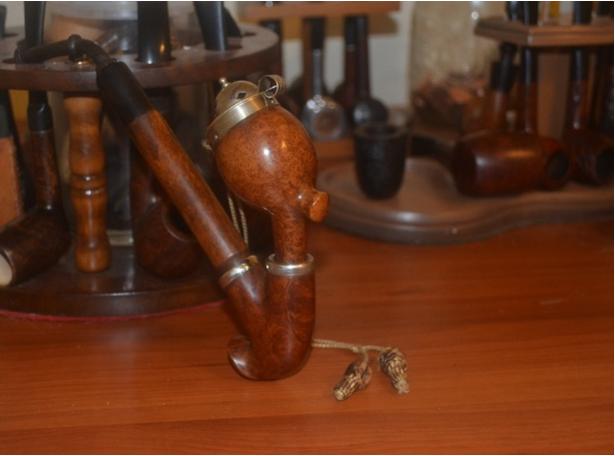
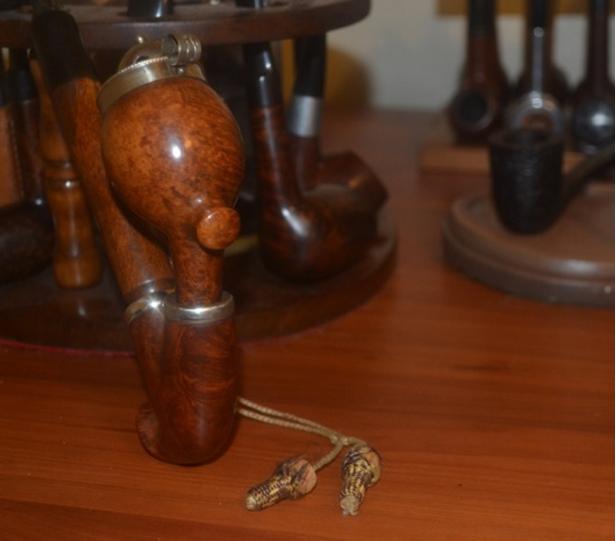
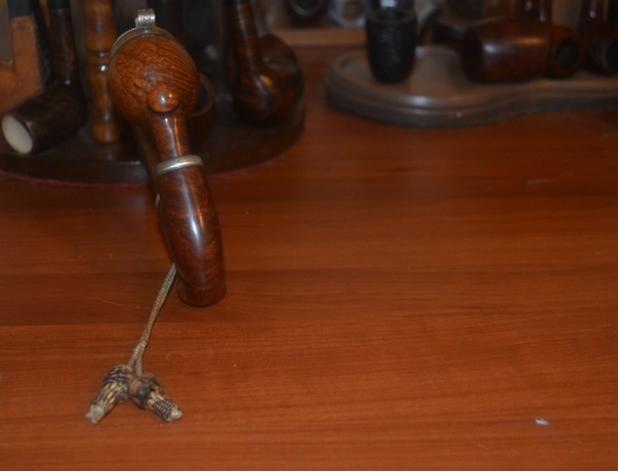
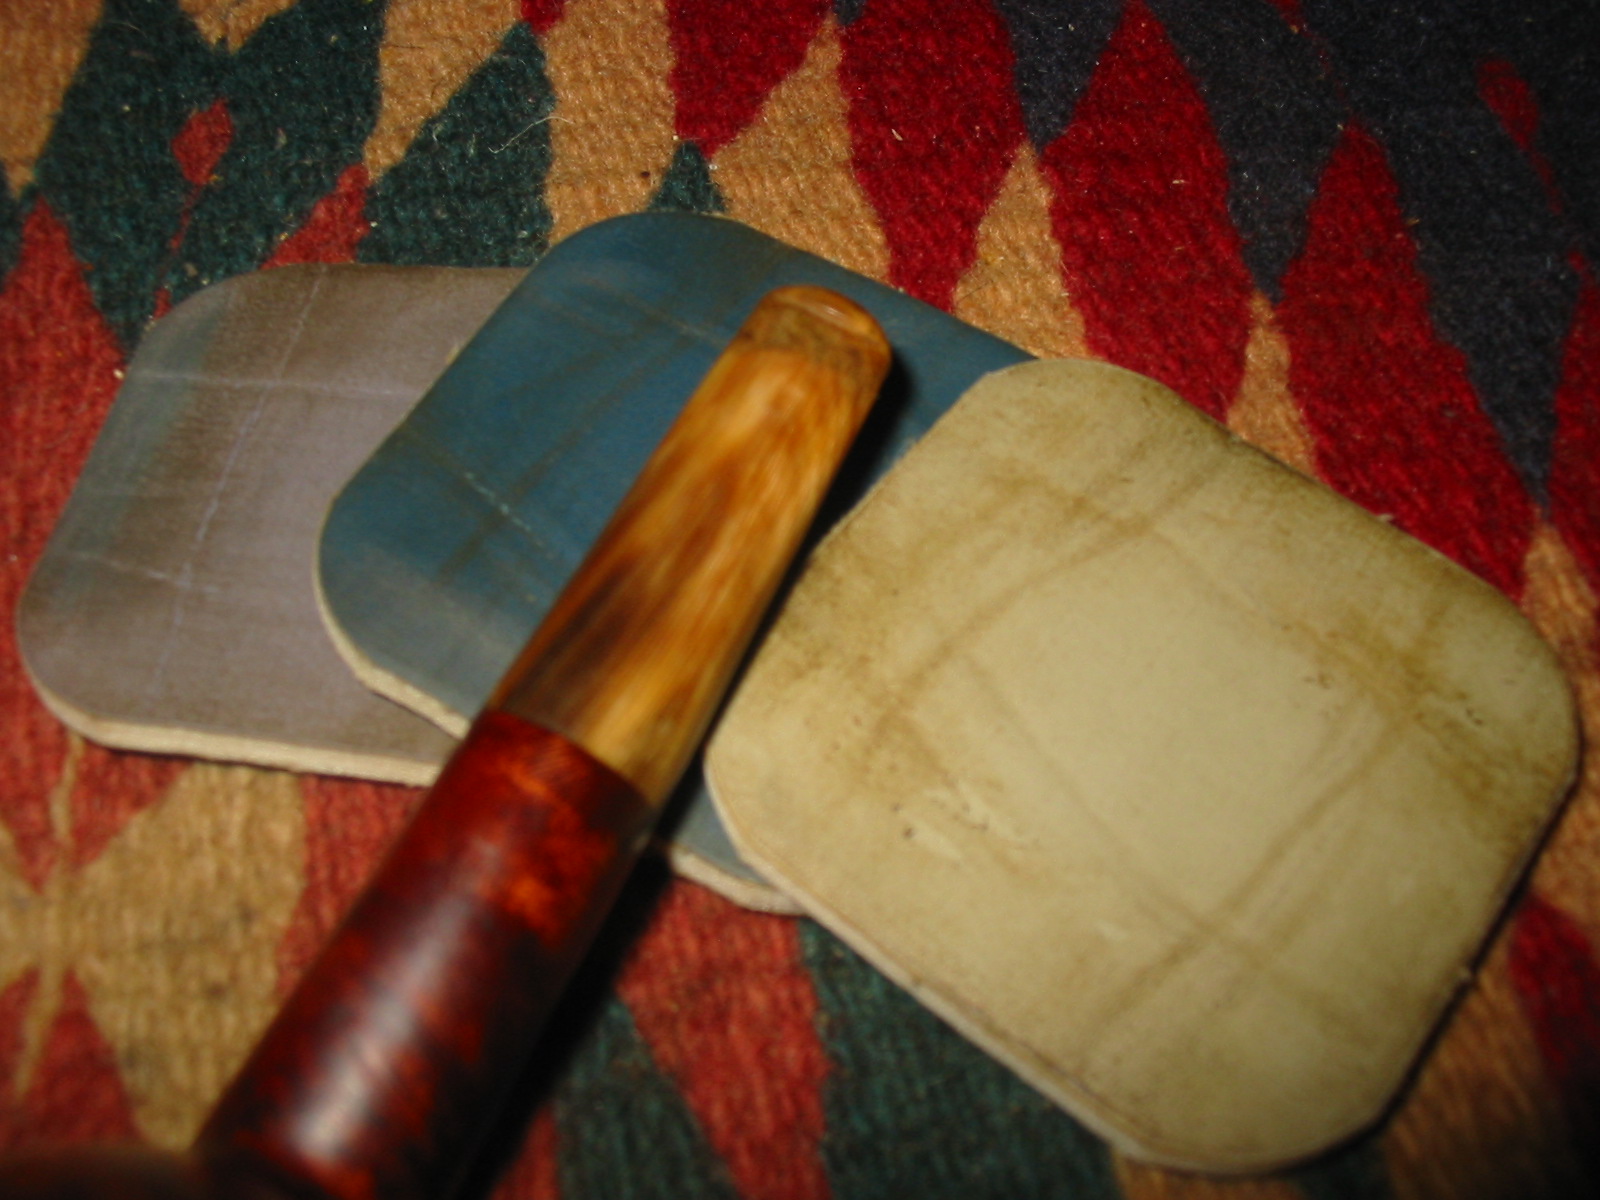
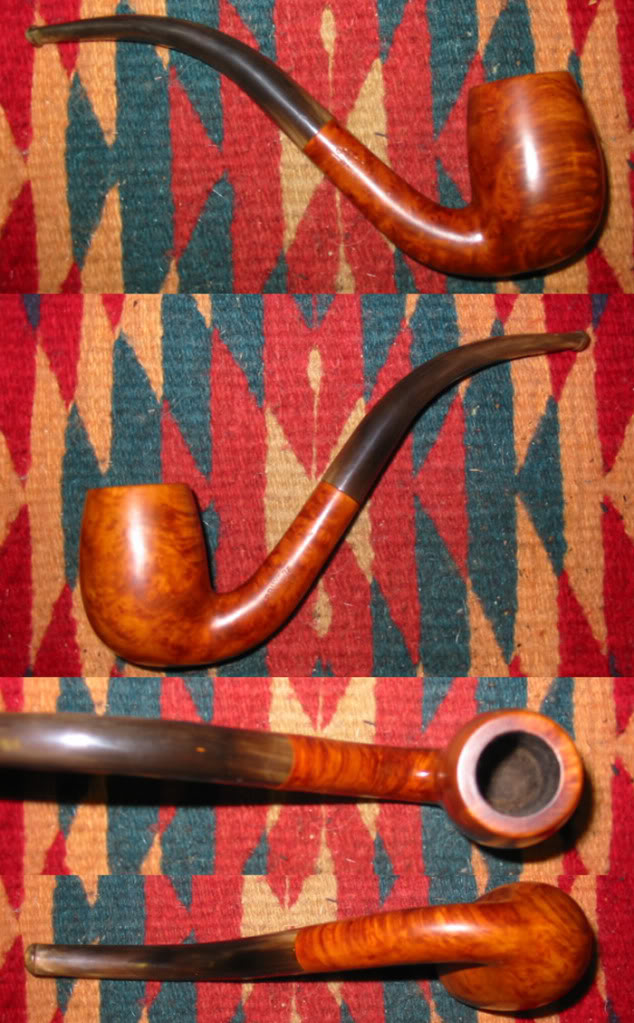
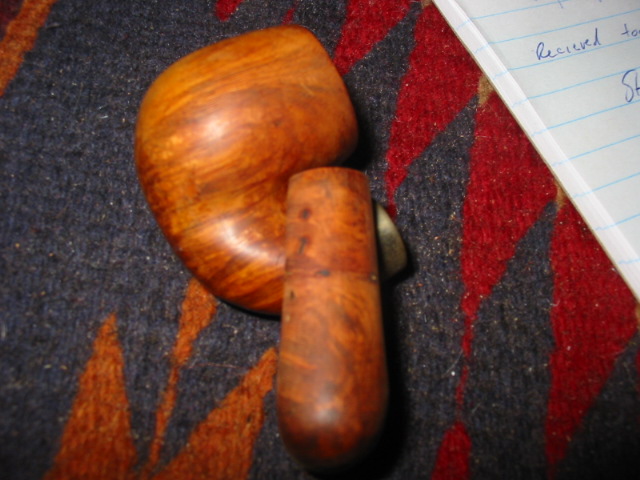
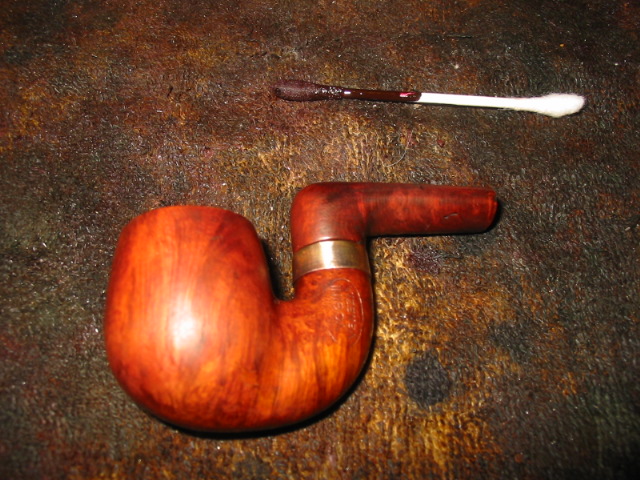
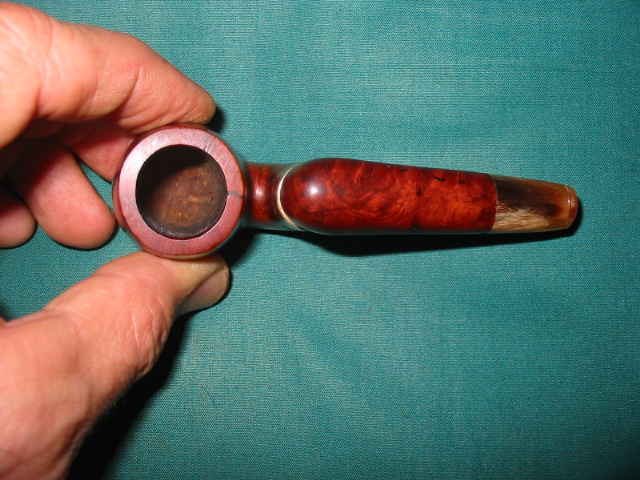
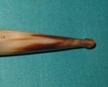
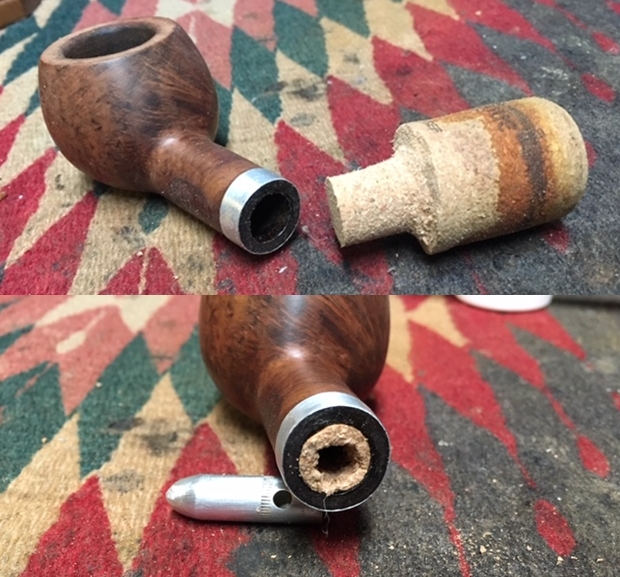
I used a needle file to thin down the inner walls of the cork lining. It needed to be very thin to allow the tenon to fit in the shank. I tried to put the tenon in the shank. The fit was still not right. The cork was too thick to allow a fit. I pulled it out of the shank and slid it over the tenon. I sanded it down with sandpaper and files until it was a good fit. I glued the cork on the tenon and let it dry. When it cured I rubbed the cork down with Vaseline to soften it and allow it to slide into the shank. The fit was very good. I took some photos to show what the pipe looked like at this point in the restoration (I had also started the shaping on the bowl top). 
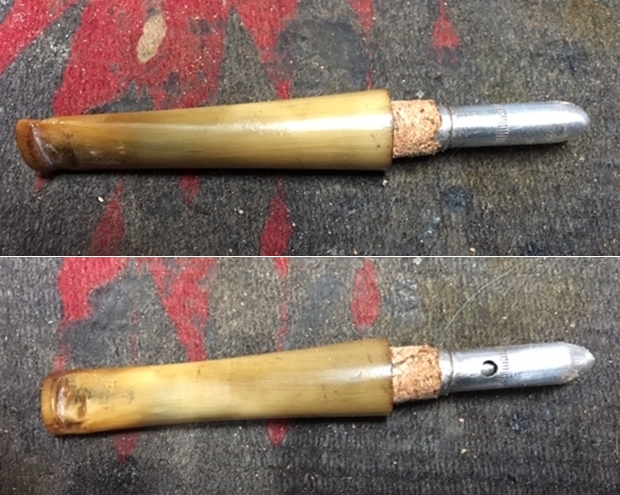
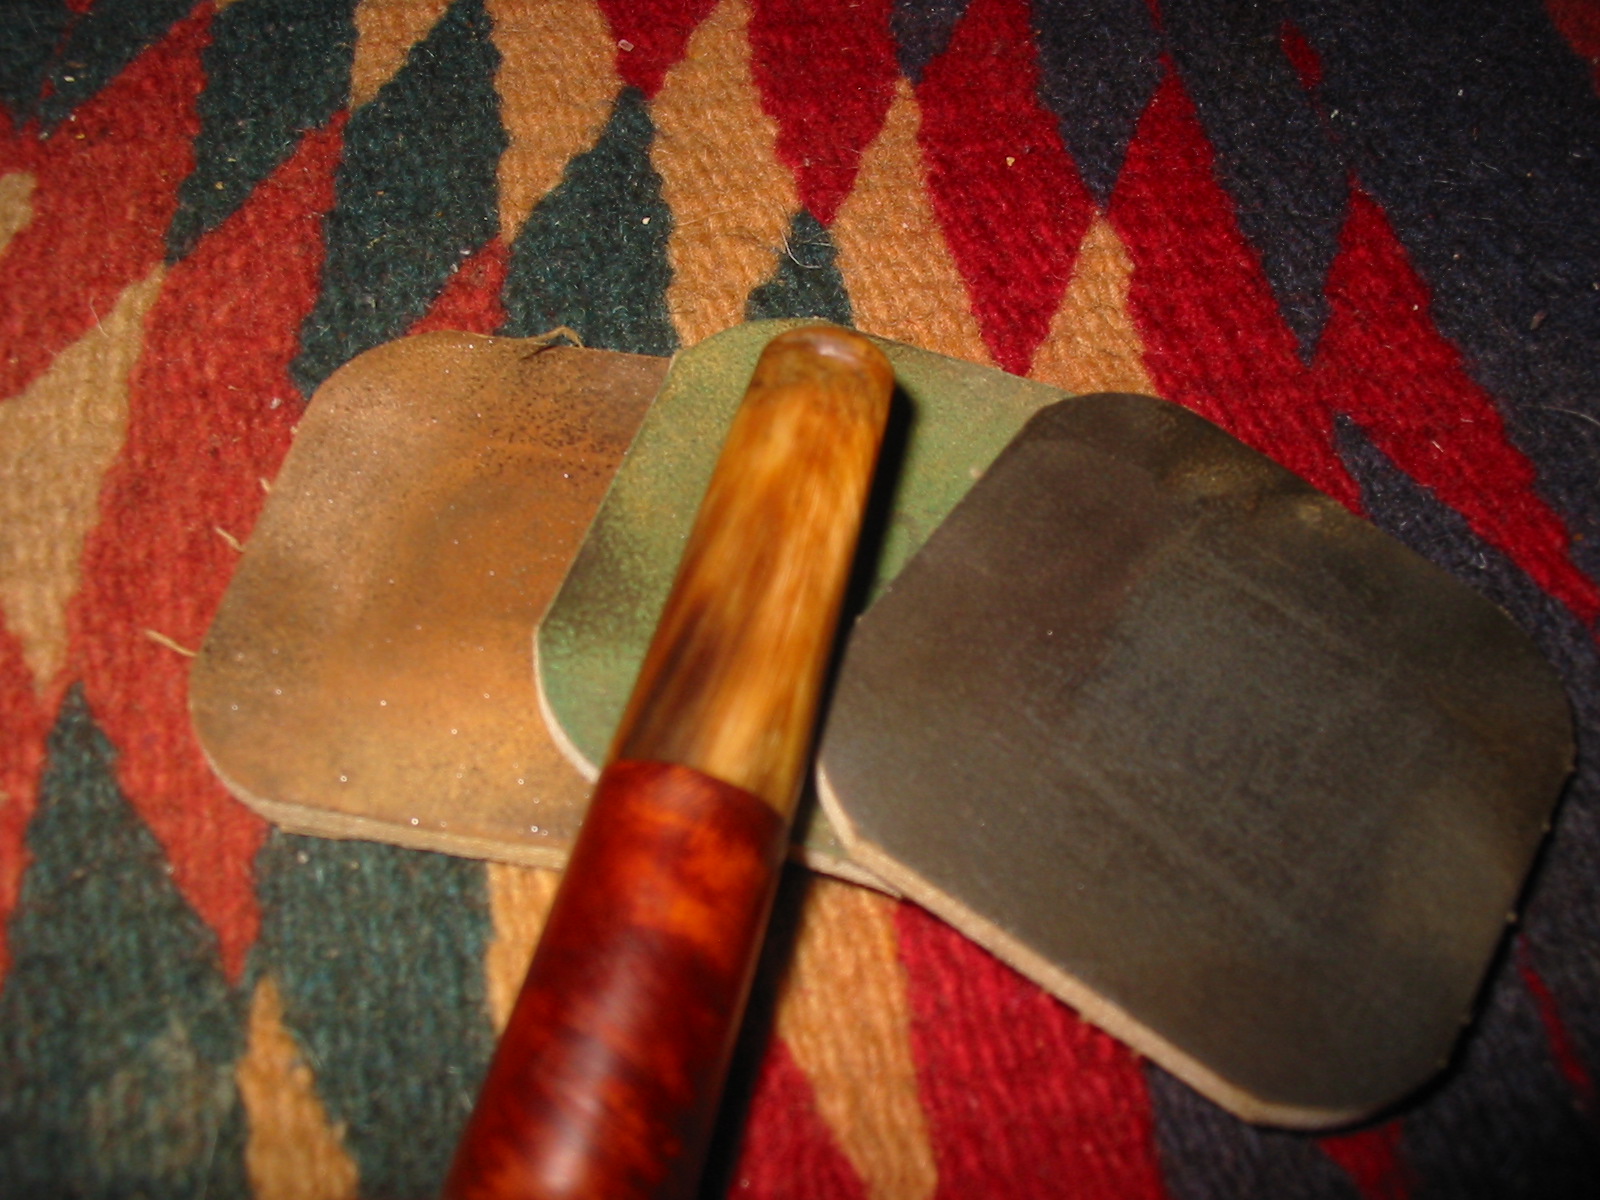
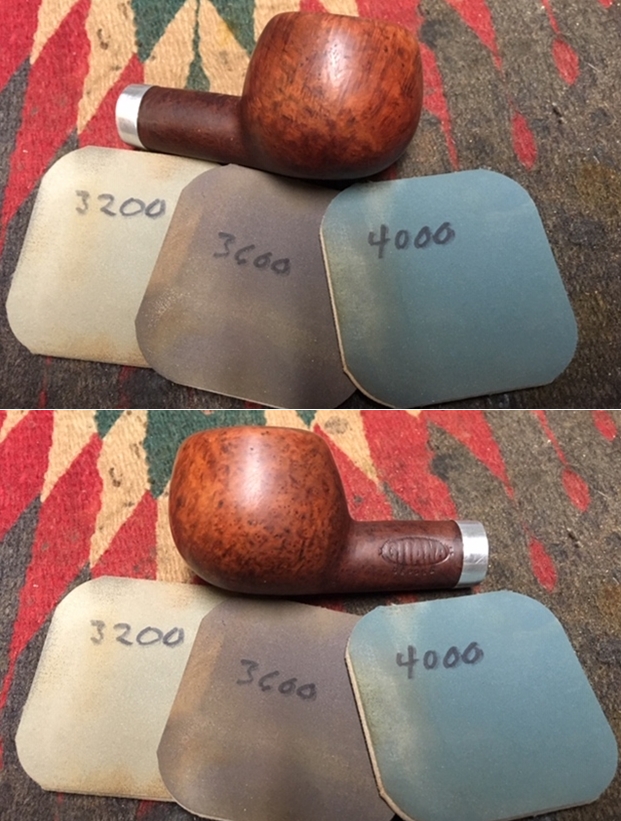
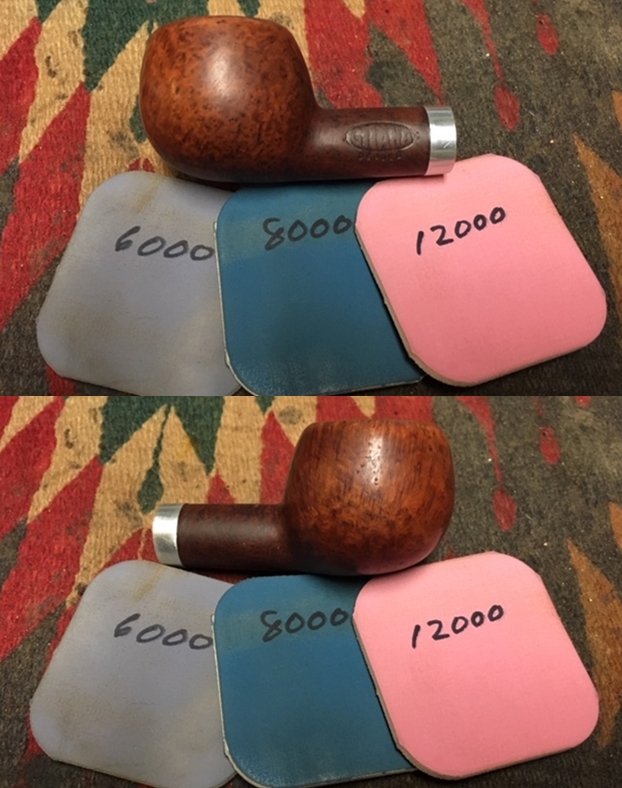
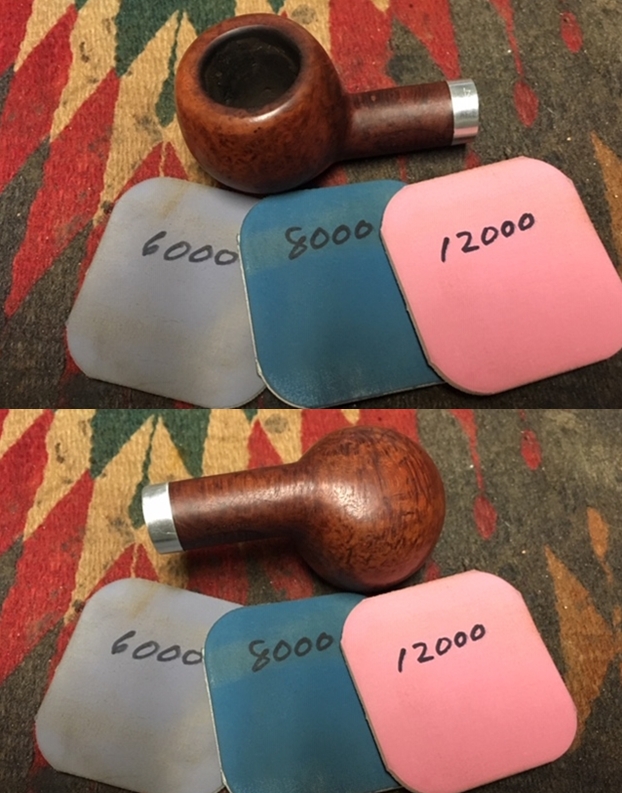
I polished the briar with micromesh sanding pads – wet sanding it with 1500-2400 grit pads and dry sanding with 3200-12000 grit pads. I wiped it down with a clean cloth after each pad. The grain began to pop and really stand out. 
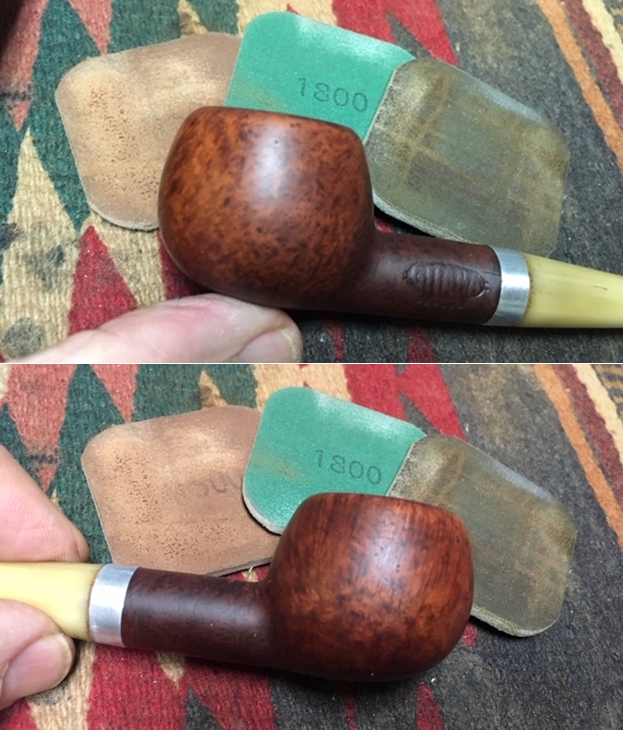
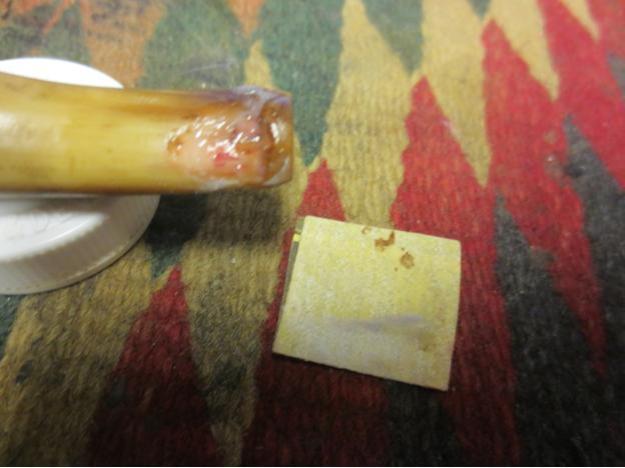
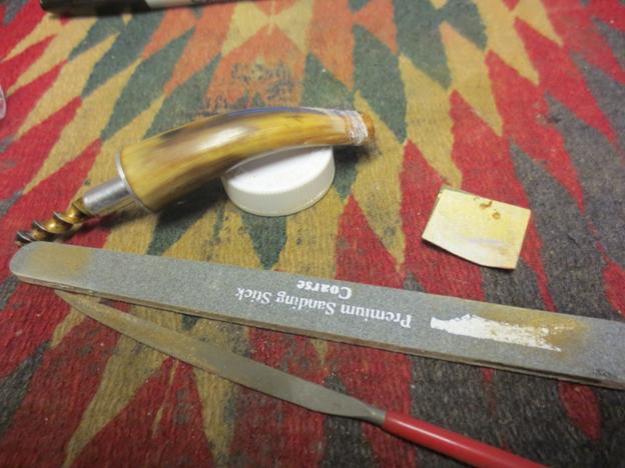
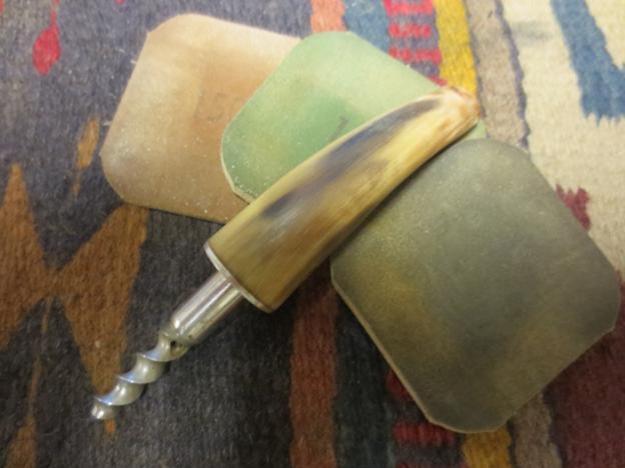
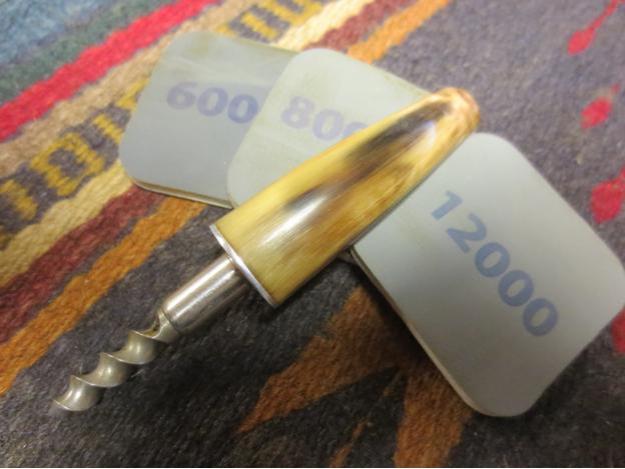
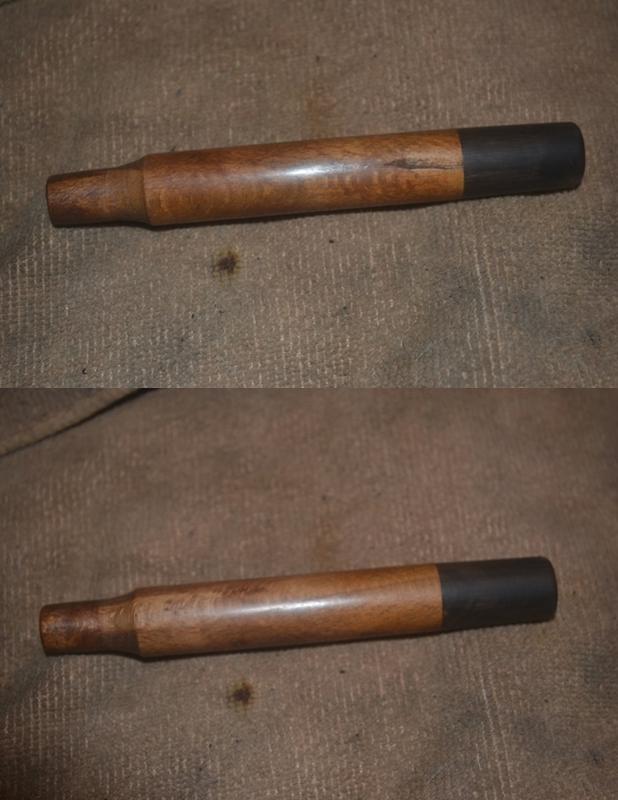
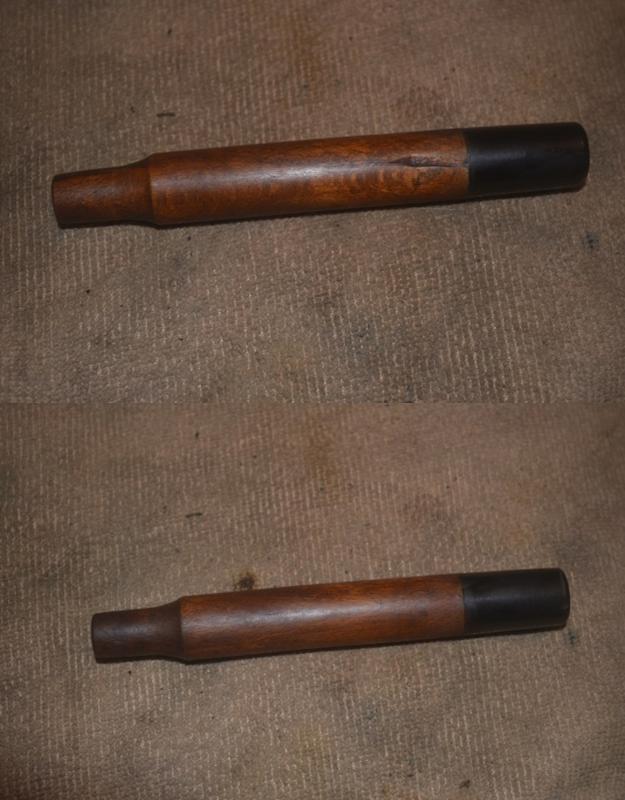
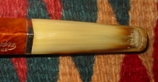
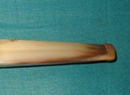
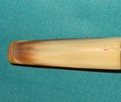
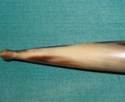
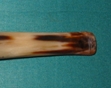
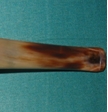
Once the glue repairs cured I sanded them with 220 grit sandpaper to smooth out the repairs. I sanded them to blend them into the surface of the horn. I polished the stem with micromesh sanding pads – wet sanding with 1500-2400 and dry sanding them with 3200-12000 grit pads. I wiped the stem down with Obsidian Oil after each pad. I gave it a final coat and let it dry. The following photos show both sides of the stem. 
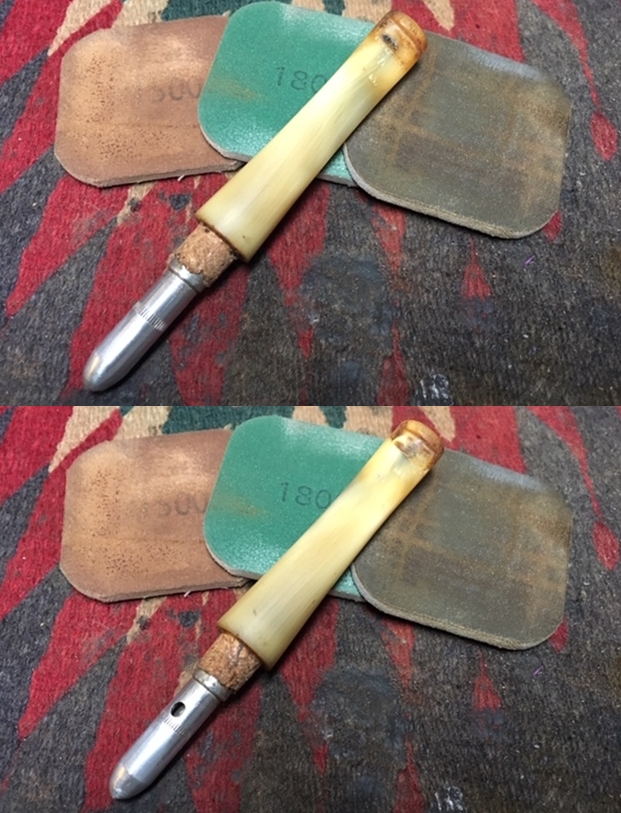
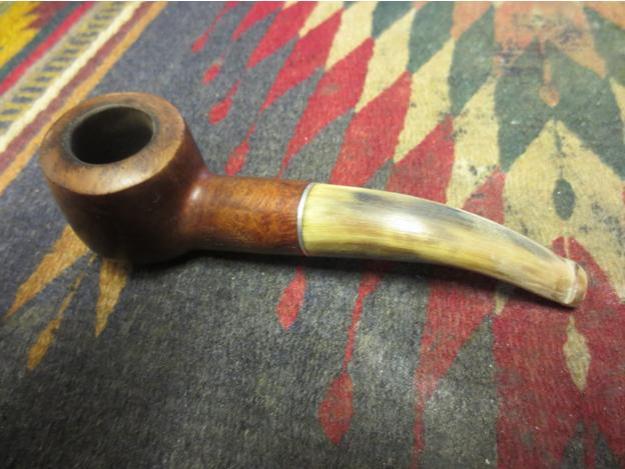
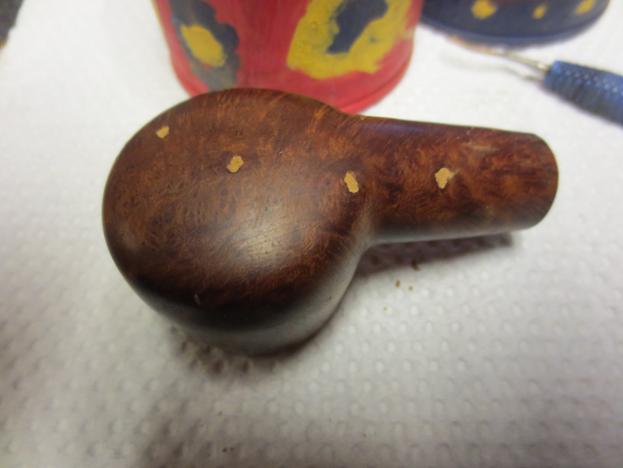
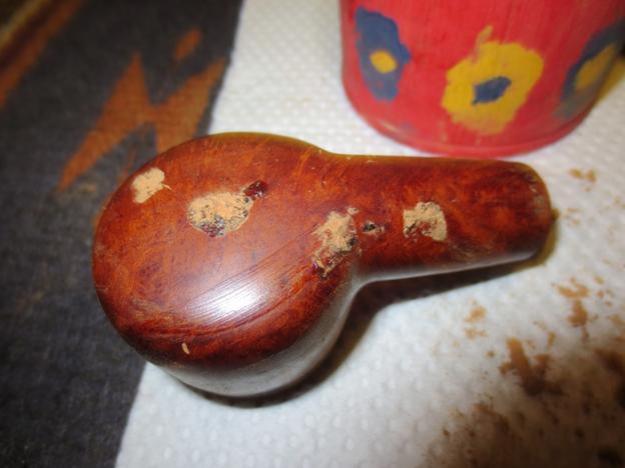
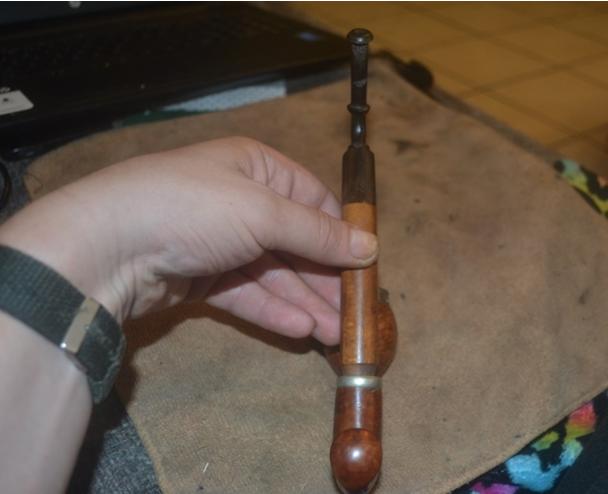
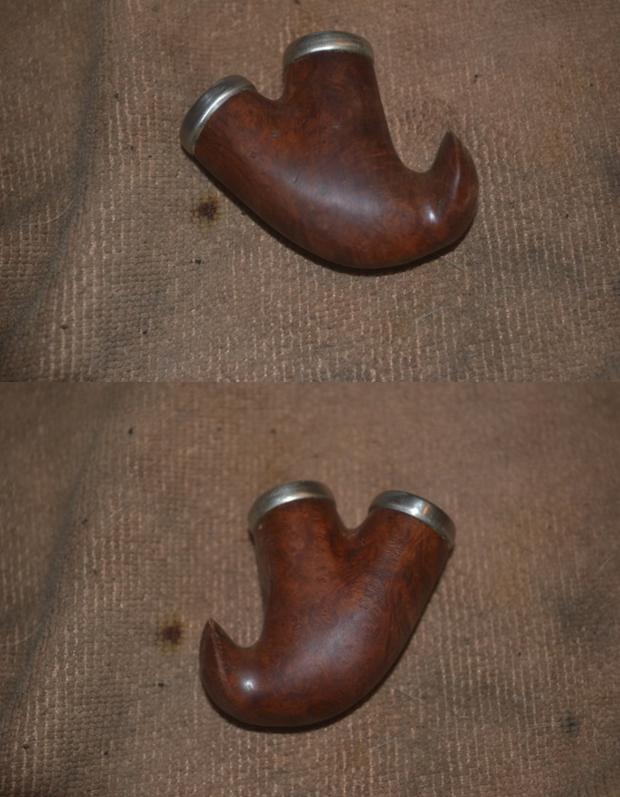
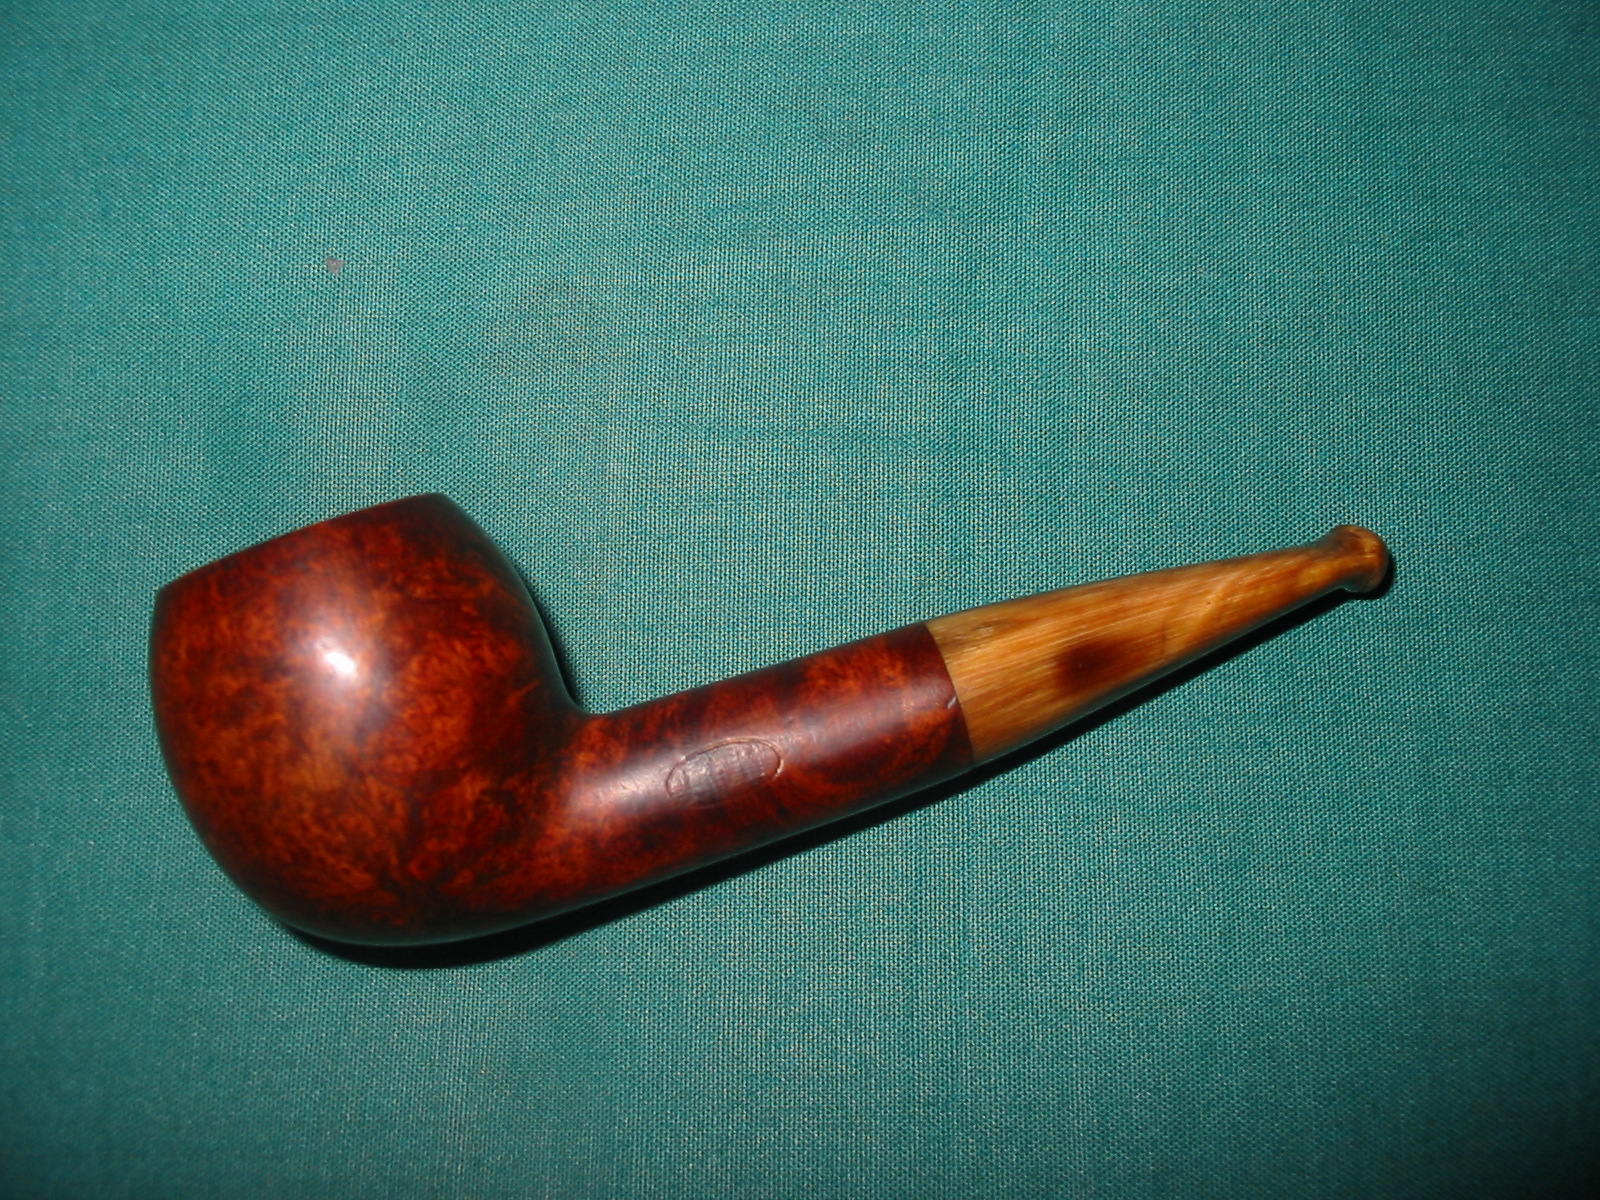
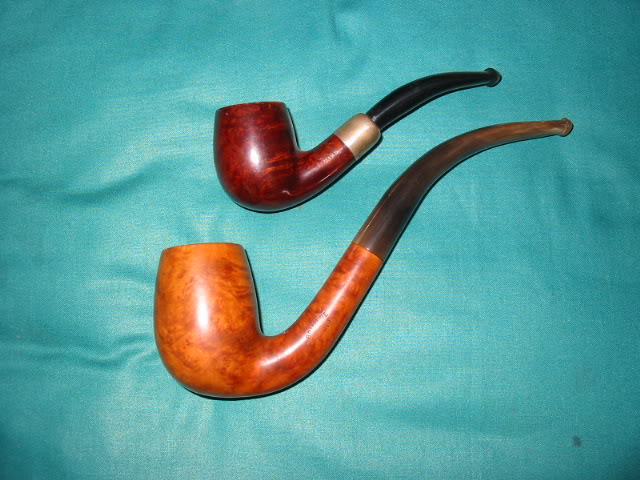
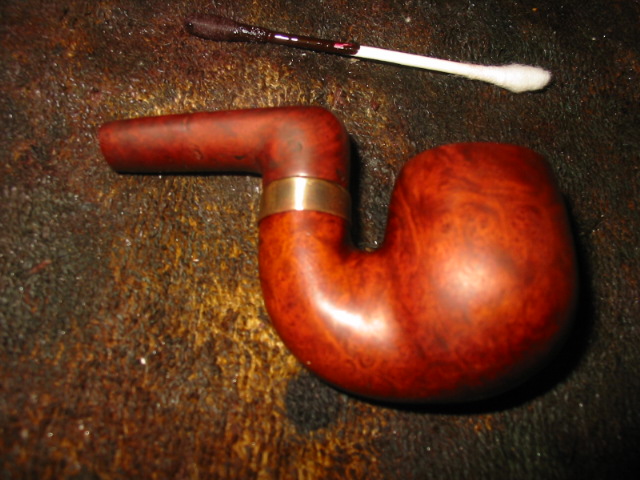
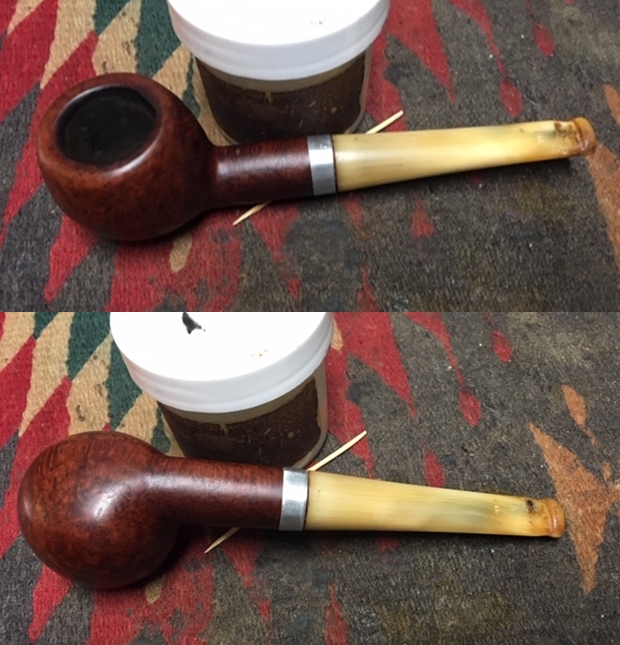
I worked Before & After Restoration Balm into the briar and the horn stem with my fingertips to clean, enliven and protect the wood and the horn. I let the balm sit for about 20 minutes and buffed it off with a soft cotton cloth. I took photos of the pipe at this point in the process to show what the bowl and stem looked like. I am happy with the look of the pipe. 
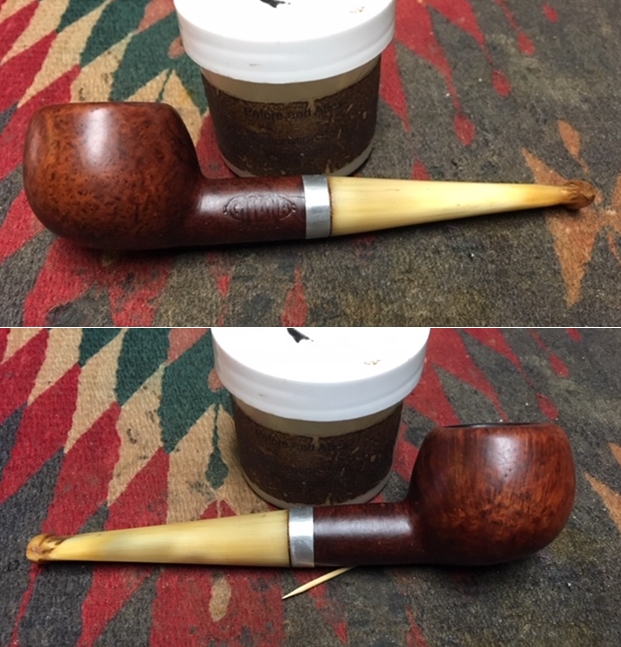
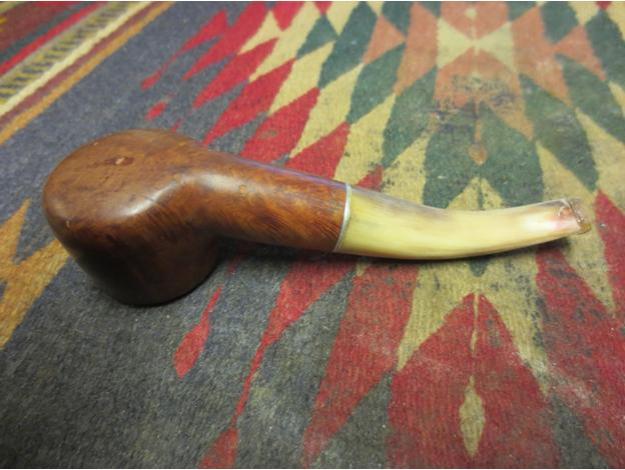
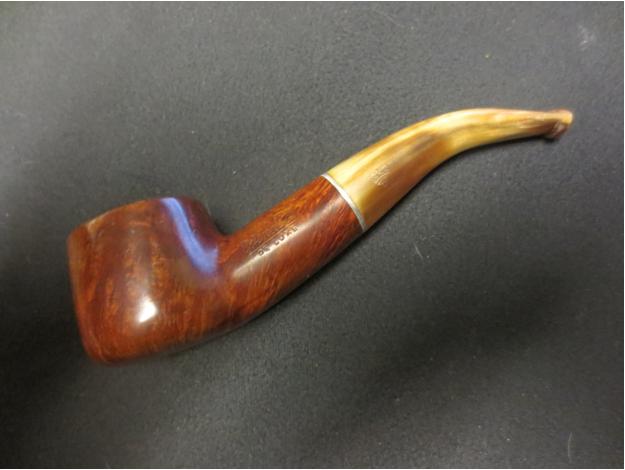
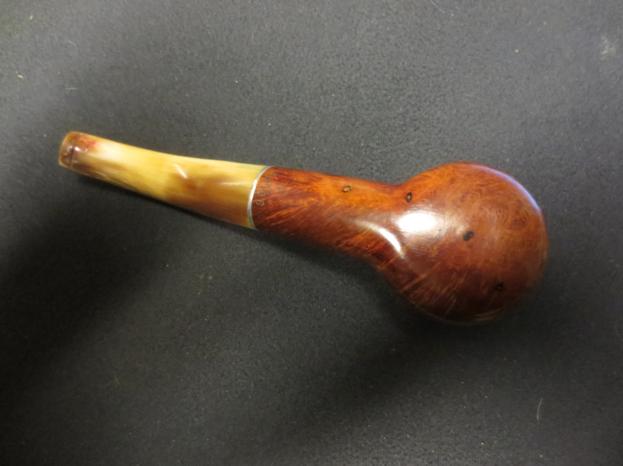
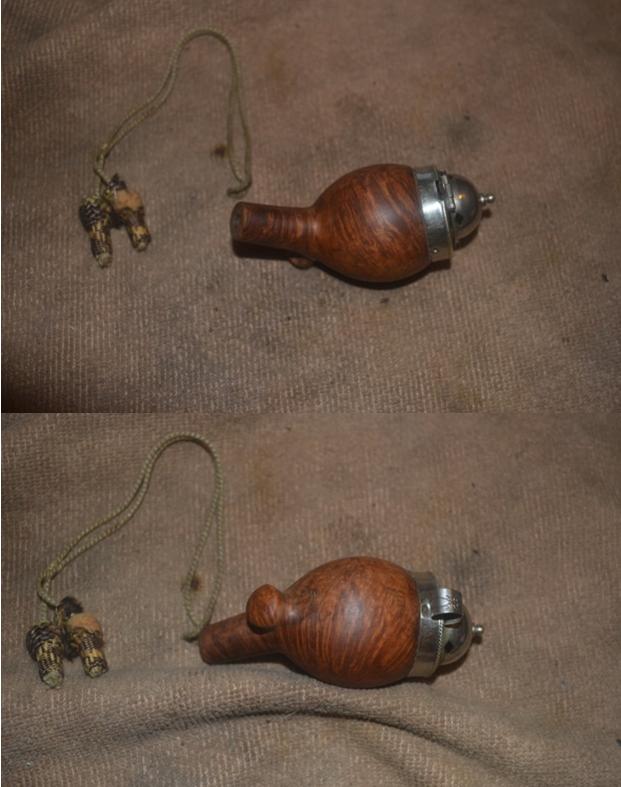
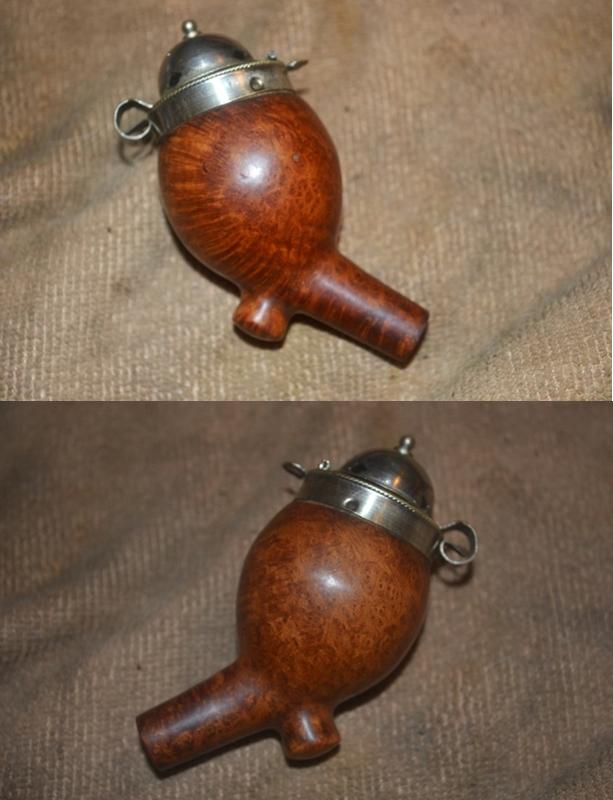
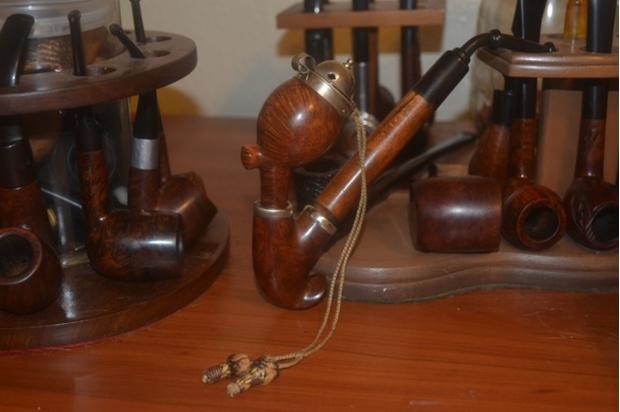
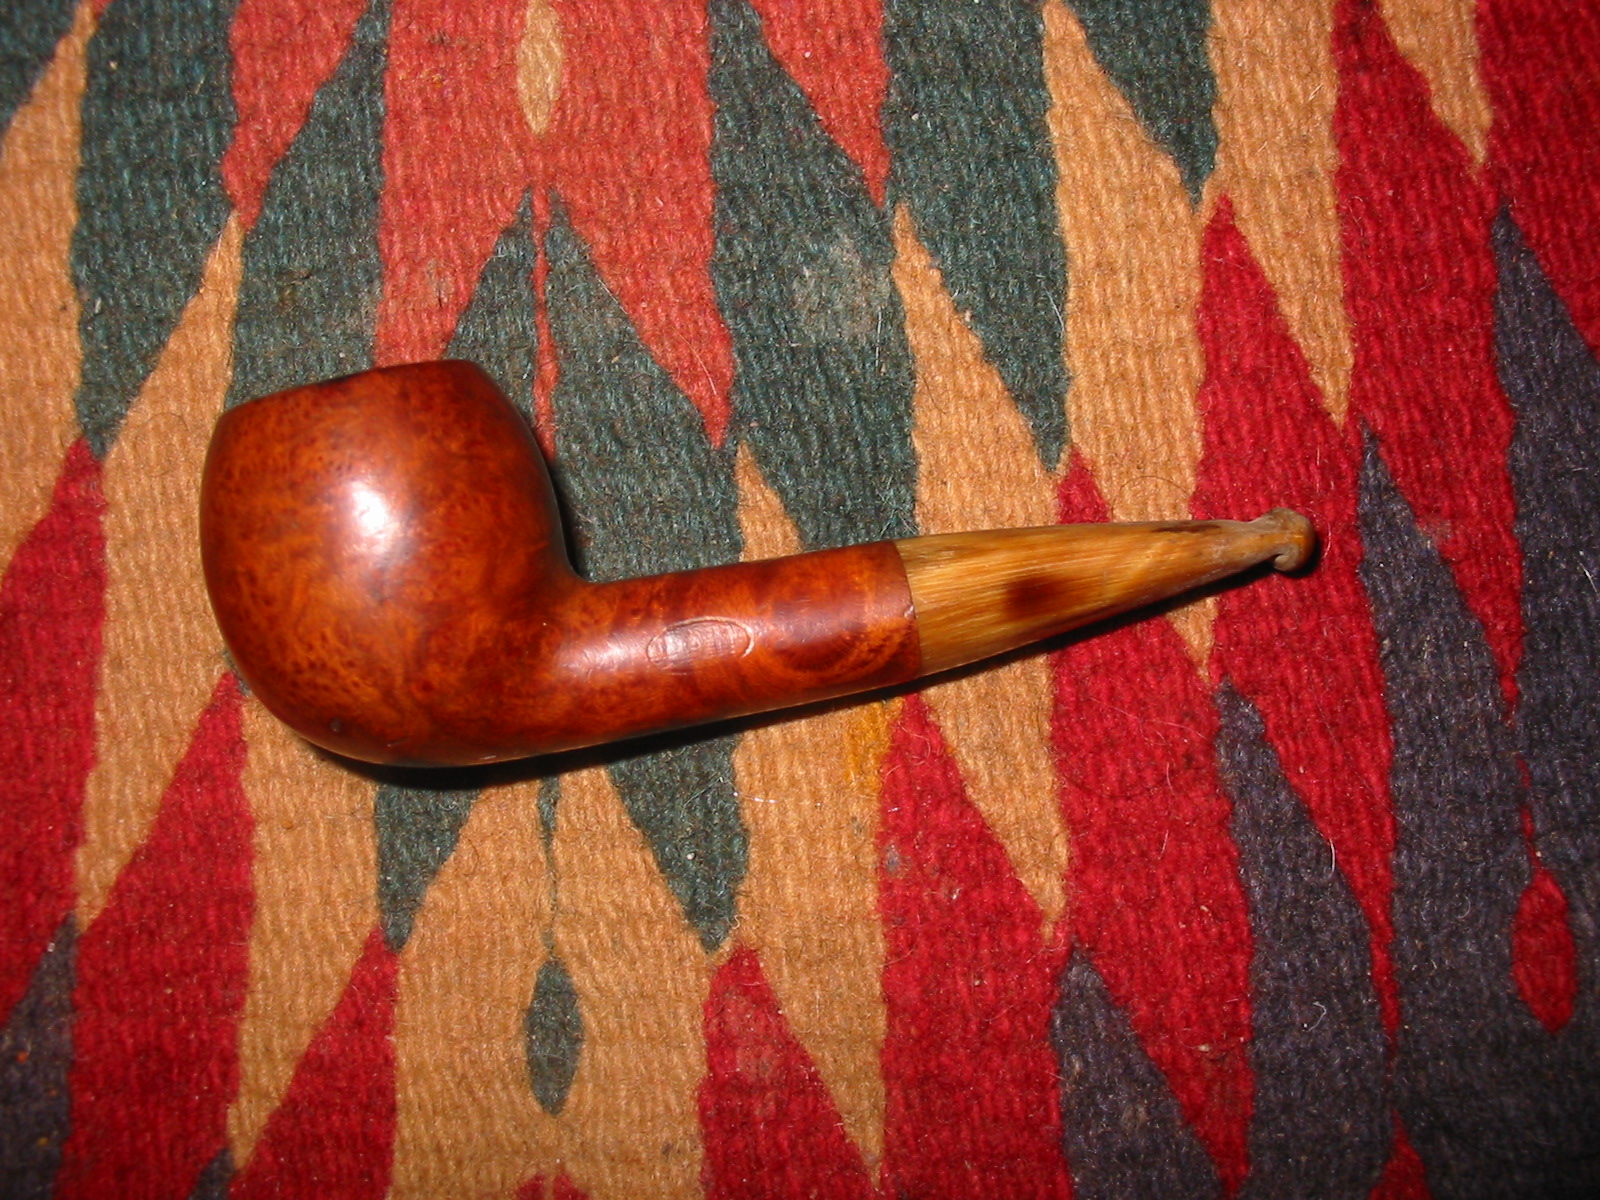
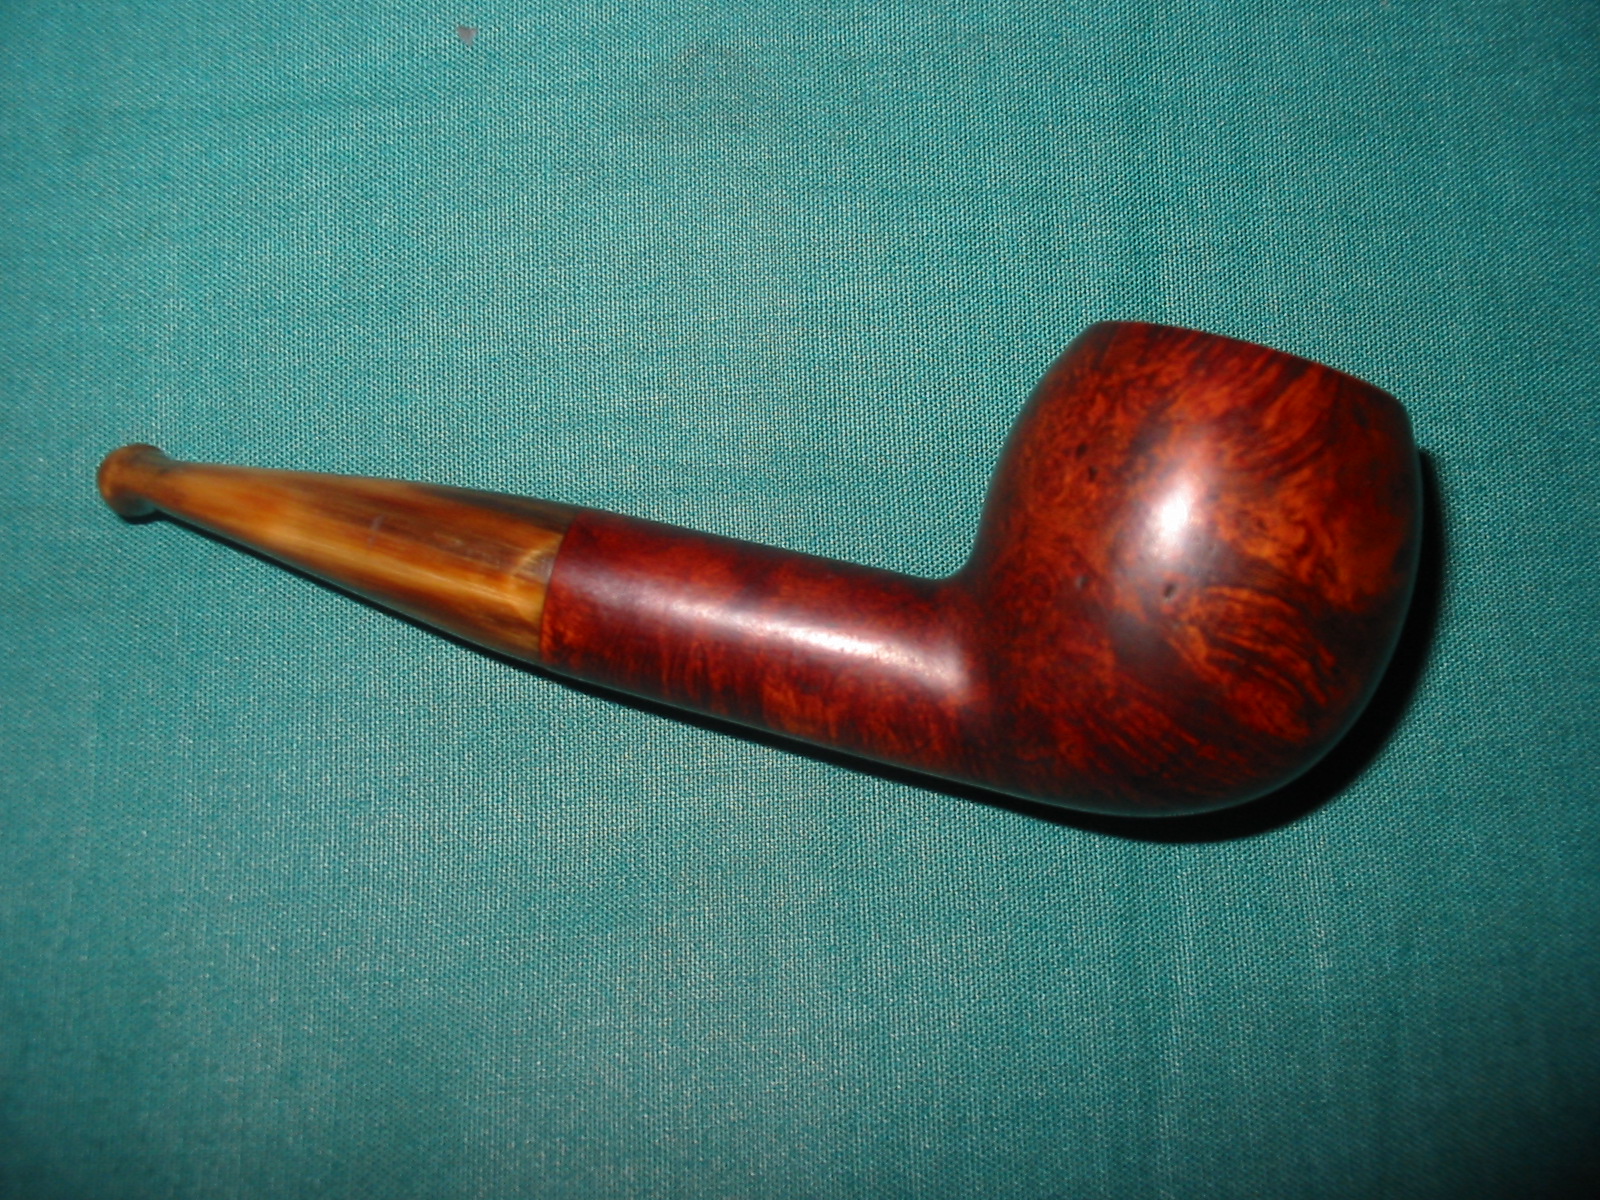
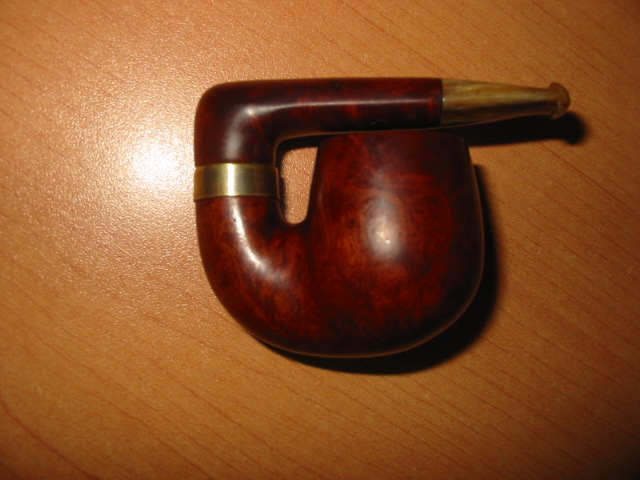
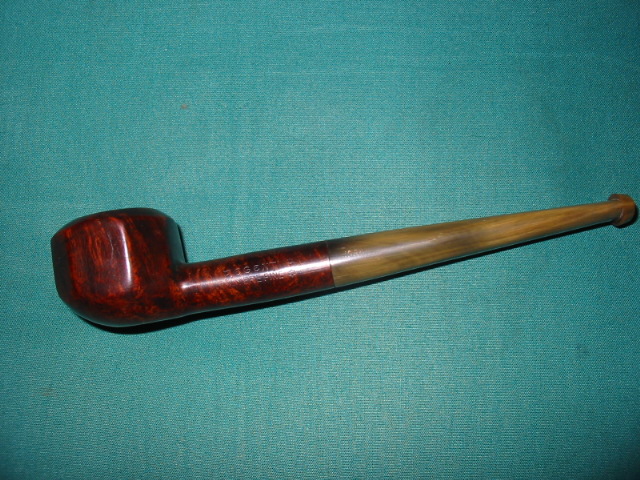
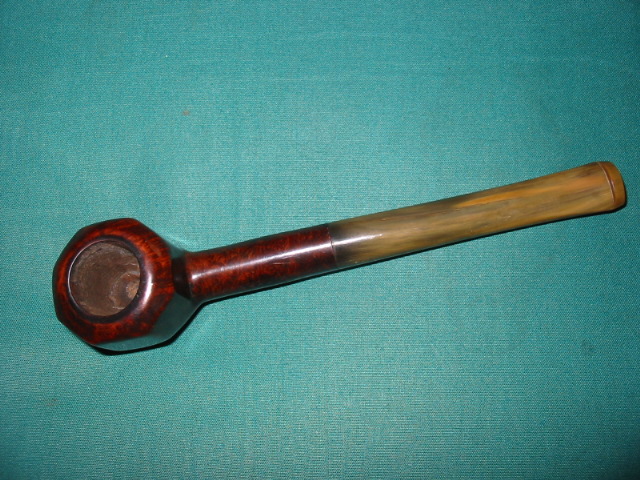
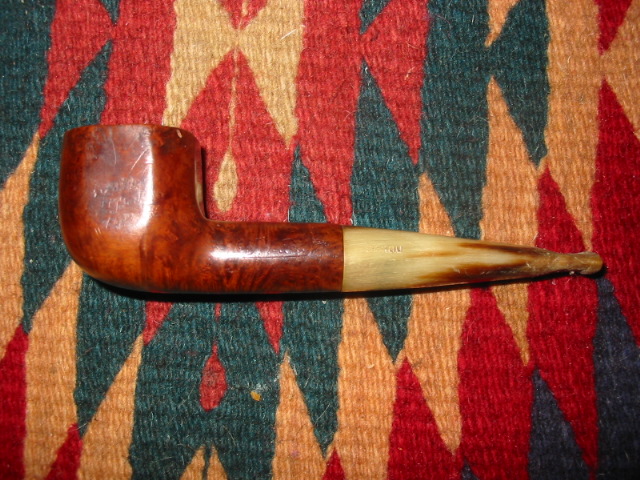
I polished the bowl and stem with Blue Diamond to polish out the scratches in the briar and horn. I gave the bowl and the stem multiple coats of carnauba wax. I buffed the pipe with a clean buffing pad to raise the shine. I hand buffed it with a microfiber cloth to deepen the shine. The pipe polished up pretty nicely. The original patina on the bowl came alive with the buffing and worked well with the polished striated horn stem. The pipe has a rich look. The finished pipe is shown in the photos below. The shape, finish and flow of the pipe and stem work give the pipe a very classic look. The dimensions of the pipe are Length: 5 1/2 inches, Height: 1 1/2 inches, Outside diameter of the bowl: 1 1/2 inches, Chamber diameter: 3/4 of an inch. Thanks for reading this while I worked on it. It was interesting and unusual piece to restore and I really enjoyed the work.

Restoring a Windsor De Luxe 13106 Unique with a Horn Stem


Blog by Steve Laug

When I saw this old horn stem pipe on Ebay UK I immediately put in a bid and I won the pipe. It had a great striated horn stem that had lots of deep colours. The area in behind the button on the top and the bottom of the stem was really damage with large chunks of horn missing. On the underside of the stem there was a dark red stain in the striations of the horn near the button. The stem has a metal push tenon with a twisted stinger apparatus screwed into the end of the tenon. The metal ring between the shank and the stem was attached to the stem. The stem had a faint crown stamped in the horn. The bowl had a thick cake and the rim was heavily covered with lava that flowed over from the bowl. The underside of the bowl had a half-dozen fills in it that were shrunken and filled with white putty. The stamping on the shank said Windsor in a script with a flouring line underneath. Stamped under that was De Luxe. On the underside of the shank next to the stem it was stamped 13106. I have no clue as to the provenance of the pipe – WMTP says that there are several makers in England that made the brand. All have stamping that is slightly different. The finish on the bowl looked to be in decent shape under the grime and build up on the sides of the bowl. (Anyone have any ideas on the maker let me know).horn1

horn2

horn3

horn4 I took close up photos of the stem to give an idea of the damage that I would be working with on this pipe. On both sides of the stem there was serious damage in the form of missing chunks of horn. These chunks were missing in the sharp edge of the button and in the surface of the horn itself. The first and second photos show the top and bottom sides of the stem. In the second photo below there is a dark line at the bottom edge of the stem next to the button – that is the red mark that was in the surface of the horn. The third photo below shows the profile of the stem and clearly shows the missing chunks in the horn.horn5

horn6

horn7 The close up photo of the rim below shows the overflow of lava on the surface that would need to be removed to assess damage to the bowl and rim.horn8 The twisted aluminum stinger apparatus was hefty and at first glance seemed to be stuck in the tenon. I tried to turn it and pull it and it would not budge. I would need to heat it to see if I could loosen the tars that bound it to the tenon.horn9

horn10 I decided to work on the stem first. I enjoy working on and repairing horn stems. I find great satisfaction in bringing them back to life and bringing out the rich glow that come from a polished piece of horn. In this case I sanded out the damaged areas with 220 grit sandpaper to smooth the edges of the holes and to clean up the debris. I wiped it down with a cotton pad and alcohol to clean off all the debris. I decided to add a little colour to the horn before filling in the hole so that the darker striation would continue to the button. I used a black permanent marker to colour in a stripe from the place it ended on the undamaged portion back to the button. I filled in the damaged areas on the surface of the stem and on the button with clear super glue. The area on the underside where the red spot was cleaned up a bit but the red bled through. I added multiple coats of the glue to build up the areas. I overfilled them so that I had material to work with in reshaping the button and the stem surface.horn11

horn12

horn13

horn14 Once the glue dried I used a needle file and a coarse sanding stick to recut the edge of the button and clean up the top face of the button. I wanted a clean defined area that matched the undamaged part.horn15 I sanded the entire stem, carefully avoiding the area of the stamping with 220 grit sandpaper to blend the repair into the surface of the stem and to shape the button. I heated the metal tenon with a lighter and was able to unscrew the stinger from the end.horn16 I worked on the shape of the button and the flow into the button with sandpaper and sanding sticks. The shiny areas in the photo below next to the button are the patches of superglue. Much polishing still remains to be done at this point but the surface is smooth to the touch.horn17

horn18 I cleaned up the stinger with 0000 steel wool to remove the tars and tarnish. I cleaned out the inside of the stinger with pipe cleaners, cotton swabs and alcohol.horn19

horn20 I reamed the bowl with the PipNet reamer and took the cake back to bare wood. I wanted to check out the inside of the bowl for damage or cracks. Fortunately it was very clean.horn21

horn22 I scrubbed the rim with alcohol and cotton pads to remove the tars. It was very hard so I also used a 1500 grit micromesh sanding pad. I was able to get most of the build up off the rim. There was some darkening that I would need to sand with a more aggressive grit of sandpaper. I scrubbed the exterior of the bowl down with acetone on cotton pads as well to remove the grime and old finish.horn23With the basic work done on the exterior I cleaned out the shank and the airway in the stem. I also scrubbed out the inside of the bowl with alcohol, cotton swabs and pipe cleaners.horn24

horn25 I put the pipe back together to get a look at how things were coming along. I wanted to see what the repaired stem looked like. In the photos below you can see the new look of the stem from all angles. I am pleased with the overall repair of the stem.horn26

horn27

horn28

horn29 I took the stem off the pipe and worked on it with the micromesh sanding pads – wet sanding with 1500-2400 grit pads and dry sanding with 3200-12000 grit pads. I rubbed the stem down with Obsidian Oil between each pad as I have found when working with horn that the oil gives it a better bite into the material and helps raise the shine.horn30

horn31

horn32

horn33

horn34 I lightly buffed the stem with Blue Diamond and then gave it several coats of carnauba wax. I buffed it with a soft flannel buff and then hand buffed it with a microfibre cloth.

With the stem done I turned to the finish on the bowl. I used a dental pick to remove the putty fills from the bottom of the bowl and shank. I wiped the bottom of the bowl down with alcohol and then packed briar dust into the holes where I had removed the putty. Once the dust was packed in I put a drop of clear super glue on top of the dust and then packed it down with the pick. I added more briar dust to top up the fill.horn35

horn36 When the patches had dried I sanded them with 220 grit sandpaper to remove the excess material and blend the surface of the patch into the bowl surface.horn37 I heated the briar and then stained it with a medium brown aniline stain. I flamed the stain to set it in the briar. I buffed the bowl with Blue Diamond on the wheel and then gave it several coats of carnauba wax to give it a shine. I hand buffed it with a microfibre cloth.horn38

horn39

horn40

horn41 I pushed the stem back in place and gave the entire pipe a final coat of wax and then buffed it with a clean flannel buff. I finished by buffing it by hand with the cloth. The finished pipe is shown in the photos below. It is a beautiful pipe and the horn just shines. I am looking forward to enjoying it in the days ahead. What would you call this shape? Any ideas?horn42

horn43

horn44

horn45

horn46

horn47

horn48 Thanks for looking.

Revamping a Bavarian Folk Wine Pipe Made in Italy


Guest Blog by Robert M. Boughton
Member, North American Society of Pipe Collectors
http://www.naspc.org
http://www.roadrunnerpipes.com
http://about.me/boughtonrobert
Photos © the Author

“Voters in the southern German state of Bavaria [April 7, 2010] voted for Germany’s strongest smoking ban, meaning lighting up in bars, restaurants and beer tents at Munich’s famous Oktoberfest will be ‘verboten.’”
― David Levitz, journalist, Agence France-Presse

INTRODUCTION
Who would have dreamed that those crazy, fun-loving Bavarians who have been hosting the annual Oktoberfest since October 12, 1810, the day Crown Prince Ludwig (later King Ludwig I) married Princess Therese von Sachsen-Hildburghausen; the culinary health scoffers who gave to the world such artery-hardening treats as Weisswurst, Schweinshaxe, schnitzel and spaetzle, and for snacks and dessert, laugen pretzels, apfelstrudel, Baverische crème and zvetchgenkuchen – would ban smoking in all public buildings just months before the bicentennial of the world’s biggest excuse to get betrunken?

Bavarians are even so fond of beer and schnapps that they have a great little saying: Saufen bis zum Verlust der Muttersprache, or drink until you forget your mother tongue. And if you’ve ever seen many German tourists, how many of them didn’t look like triple bypass candidates? Of course, everyone knows smoking kills more people than drinking and/or diet-related maladies…right?

One 31-year-old Garden Grove, California woman who lost her job and started a blog, and has written a book but is still searching for a publisher, has a particularly active gift of gab. She blogged, “Bavaria’s cuisine is a monster truck. It crumples the delicate-by-comparison culinary offerings of Spain, Italy, and France like tiny little Fiats and Peugots in its path… It is rich and doughy and filling and is the only thing on the planet that can soak up German beer. Every other fare will simply hide in the corner of your stomach, petrified at the sheer awesomeness of the brew that resides in there with it, and it will never get digested.” Perhaps the most succinct line from this particular blog is, “Germans do it with bigger sausages.” [http://www.everywhereist.com/7-badass-bavarian-foods-you-must-try/] I, for one, can’t wait until the book comes out.

If the world is going mad as far as singling out tobacco as the great evil, then Bavaria may now be the capitol for the insanity. Maybe all that ice bockbier and apfelstrudel have saturated their bodies and have nowhere left to go but the brains.

At any rate, there remains for those of us who still appreciate the virtues of pipes and their tobaccos the glorious contributions of German craftsmanship in general and Bavarian in particular.Rob1 And more along the lines of the subject of this blog:Rob2

Rob3 When I emailed Steve a few photos of my new acquisition from eBay, for less than $11, I was happy as usual to receive a response but, I must admit, a little disheartened to hear of the 20 hours he spent restoring the 1810 Meerschaum Bowl masterpiece above. Then I considered the facts that his folk pipe was part meerschaum, and of course suspected he had, as his masterful skills and (if I may be so bold) somewhat obsessive creative bent allow, more than just restored it. He had in fact, of course, re-worked parts of it, as I learned when I read with pleasure his July 7 account. I mentioned the conjecture that Steve is a born pipe maker to my mentor, Chuck Richards, who with not an inkling of surprise to me that Steve has made a few pipes in his time. I therefore hereby suggest a blog by our host on these endeavors, which I am certain I am not alone in my curiosity to hear about and see.

Alas, as shall be seen, my Bavarian Three-Piece Folk Wine Pipe – not counting the screw-in bit – pales in comparison, although it did present problems I had not before encountered. Starting with the bit, the eBay photos revealed one gash that appeared to be so deep that it must have pierced the air hole. As Lady Luck provided, however, such was not the case. On the other hand, there turned out to be three bad divots in the bit, not counting the severe wounds just below the lip, top and bottom, from grinding teeth. Then there were the countless scratches on every piece; the well-caked chamber; scorching of what I believe is the ornate but aluminum wind cap; a serious cleft in the alternative wood shank, the variety of which I have not yet determined, and a hole in the bottom piece, where the wine is placed, too deep for any fix other than wood putty.

All of these complications, I knew, would be nothing compared to the task of cleaning and sanitizing a pipe with a form that defied retorting. Noting this anticipated cleaning conundrum with a quip, “That’s entirely rhetorical,” in fact, was the reason for Steve’s second reply to my email where he mentioned the time he spent on his folk pipe.

By the way, I owe a final nod to Steve, as well as the owner of my local tobacconist who confirmed his assessment, for identifying my Bavarian folk pipe (which turns out to be a no-name Italian version) as being designed to add wine.

RESTORATION Rob4 This, as it happens, is how I decided to approach the restoration: piece by piece.Rob5

Rob6

Rob7

Rob8

Rob9

Rob10 Without thinking – you might say a bit compulsively on my own part – I already cleaned and polished the wind cap before snapping the last shot above.Rob11

Rob12

Rob13 Other than the almost unconscious cleaning and shining of the wind cap, inside and out, with Everclear-soaked cotton cloths, super fine steel wool and mostly 500-grit paper except for a few tough spots requiring 320, I saw no reason not to dive in with the bit. After all, filling the crevasses – and I can only imagine the drunken stumbling about that caused them – would take several days of layering with black Super Glue and drying time in between. The remainder of the restore was finished in a day and a half of intense work. I gave the bit a good soak in an OxiClean solution to start and cleaned out the mess inside with about six bristly cleaners dipped in Everclear before they came out clean.Rob14

Rob15

Rob16 With that process begun and the pipe disassembled, I returned to the main tobacco chamber (remember, this three-parter has a second chamber at the bottom for wine) and used my Senior Reamer to take out most of the fairly even though excess cake. After that I swabbed it out with some alcohol-soaked cotton gun cleaner squares and finished the removal of char and smoothing with 200-, 320- and 500-grit paper.Rob17 The yellowing of the cap’s inside area is the fault of my photography, not lack of attention. I know nothing of body work on cars, which is the kind of detail work the metal rim requires, and despite my restoration of this pipe for my own enjoyment, any tips on eliminating dings in metal, preferably without removing the entire rim piece, will be appreciated. Since the pipe is staying in my own collection, after all, I have a long time to work out that part.

I turned my attention to the outer bowl, first scrubbing out the draught hole with bristly cleaners soaked in alcohol – quite a few, in fact. Then I used 320-grit paper to remove both the old finish and the scratches, starting with the rough, un-sanded opening of the draught hole showing before and after below.Rob18

Rob19

Rob20 From 1500-4000 micromesh, I prepped the bowl for buffing. I liked the natural, lighter shade of the briar and chose not to re-stain it, proceeding straight to the buffer wheels. I used white Tripoli, White Diamond and carnauba.Rob21

Rob22 The shank was what I expected would take most of the work, and I was right. I sanded the wood with 200 and 320 paper, deciding the cleft in the unknown wood gave it a certain character. Besides, it wasn’t going anywhere without the kind of serious reshaping Steve is into.Rob23 I sanded it again with 500-grit paper and micro-meshed all the way.Rob24 The ferrule was dull and scratched.Rob25 I used micromesh on it and then Lincoln black boot stain, which I flamed, let cool and wiped clean with 4000 micromesh.Rob26 Finally, I used Lincoln brown stain on the shank’s wood and used 4000 micromesh to take off the ash.Rob27 I buffed it with white Tripoli, White Diamond and carnauba, and used red and white Tripoli on the ferrule.Rob28 Onto the final stage – the bottom chamber where the wine is added. Here it is after sanding with 320-grit paper.Rob29

Rob30

Rob31

Rob32 By the time I cleaned it out with bristly cleaners and Everclear, when added to those used for the other parts, I had a pile about as high as Steve’s from his meerschaum bowl folk pipe, only much grimier except for the last that came out clean.

Now take a closer look at the right side, first with the small hole that could neither be sanded away nor ignored, then filled with a dab of wood putty. I let it sit and harden until the next day, when I colored the putty with an indelible brown marker and squeezed a drop of Super Glue over the mark.Rob33

Rob34 Late that night, I sanded off the roughness of the dried Super Glue and smoothed the whole piece with micromesh. And here is the finished, waxed result, without re-staining.Rob35 At last, I was ready to assemble the separately restored parts and wipe it all down with a soft cotton rag.Rob36

Rob37

Rob38

Rob39

Rob40

Rob41

Rob42 The only nomenclature, just under the bottom ring in the last photo, reads Imported Briar over Made in Italy.

CONCLUSION
This restoration involved two firsts for me: filling a hole with wood putty, as basic as that is, and more significantly, the importance of considering each independent part of the whole. Never before had I encountered a pipe with more than a bit connected to a shank that in turn attached to the bowl. The simple addition of a second chamber for wine with two openings – one for the shank and the other for the regular tobacco chamber – forced me to approach the project from an angle that was novel to me. The ultimate restoration was a unique pleasure for me, and I am happy to report that the finished folk pipe smokes quite well, even without wine. I look forward to seeing how it works with Martinelli’s Sparkling Cider.

Now I have just a few final words on the Bavarian tobacco ban. It seems they tried the same thing in 2008, but the result was a scoff law that the authorities didn’t even try to enforce. Let’s hope that all of the pipe smokers in the southern German state of Bavaria unite to overcome the 61% of voters who decided to deny them the right to run their own lives.

An Old Horn Stem, Bone Tenon Apple Restored


Blog by Steve Laug

When I saw this old-timer on EBay I decided it had my name on it. The combination of shape and stem material are something that I love. It looked to be in pretty fair shape, just a bit of darkening at the rim, some nicks in the briar which is to be expected in a pipe this age. The stem looked all right – a few tooth marks on the surface but the horn material did not appear to have any splintering or cracks. The threaded tenon looked like it was a bone tenon and it too appeared to be in good shape. I put in my bid and was the only bidder. I have included the photos that the seller included in the sale. The pipe is delicate – a mere 4 inches.
Apple2

Apple3
The seller did not include any information on the stamping on the pipe. I wrote and they responded that it was not readable but that there was an oval on the left side of the shank. When it arrived I took it to my work table and did a cursory clean up and tried to read the stamping on the shank. I could see that the oval had remnants of gold in the marks. Under a bright light and using a jeweler’s loupe I could see that there was a letter visible on the right side of the oval that was readable – “N”. I wetted the stamping and looked more closely and could see what appeared to be the long straight leg of another letter on the left of the oval. It could easily have been a “K”, “R” or an “L”. On closer examination it seems to have a base on the bottom of the left leg. That would make it an “L”. So armed with that I did some digging in “Who Made That Pipe” and found several possibilities. The most likely was “LMN” and through continued observation of the logo I think that is what it is stamped. For me, a good part of the enjoyment of the hobby of refurbishing is the pipe mysteries that come along with the pipes I work on. So this pipe was going to be fun to work on and to research.
IMG_6620
I used the information in WMTP to research more into the maker of the pipe (at least according to the book). The pipe seems to have been made by a company called Jacobs, Hart & Co. England. I searched the various online directories of business in London at the time and found the following information on the hallmark site. It simply says that in 1889 in London there was a tobacco merchant named Joshua Michael Jacobs. I found his hallmark which interestingly is an oval as well with the JMJ letters stamped on the silver. I also found that members of the Jacobs family were gold and silver smiths as well as involved in the tobacco industry.

Apple4

At this point the trail went cold and I could find nothing else regarding the firm in the records. I knew that the family was involved in the industry but I could not find any information on the pipe brand itself. The only connection at this point was the listing in WMTP.

I searched the web for information on the second name in the company – Hart, and found that the name was held by an Australian who was a tobacco merchant as well. I have no idea about the migration from England to Australia but the link is certainly possible. I have included some information from the records I read through on the Hart family to show at least the tobacco connection.

The first document I found was a birth announcement for an Alfred David Hart. The birth announcement reads in part: “Born at Franklin Cottage, West-terrace, Adelaide. Birth certificate held – Father, general merchant, Franklin St., Adelaide, number Vol 3, pg 140 Adelaide.”

Further information found in the Biographical Register of Australia shows that he is included. Quoting in part: “Partner Feldheim, (I), Jacobs (qv) & Co (later Jacobs Hart & Co) tobacco merchants (emphasis is mine), managing director at William Cameron Bros & Co, tobacco manufacturers 1895; director of British Australian Tobacco Co from inception, chairman to 1925; dir Foster’s Beer Co: left estate of at least Pounds 183,252. The references given are: British Australian (Lond) 5 Apr 1928 cover p ii, 14 June 1928 p 21; Brisb Courier 12 Apr 1928 p 6; Argus 18 Feb1928 p 31; Vic LA PP 1894 2 no 37, p 417, Vic LA, V & P 1895 6 1 no D4 p 52, 62, 1895/6 2 no 3 p 8 ? 34.” http://metastudies.net/genealogy/PS04/PS04_230.HTM

The last bit of information on this partner in the company I found was his obituary. It too links him to the tobacco company that is associated with this pipe.

Hart, Alfred David (1851–1928)
http://oa.anu.edu.au/obituary/hart-alfred-david-13552
Mr. Alfred David Hart, who died on Thursday night at his residence in St. Kilda road, in his 78th year, was one of the founders of the modern tobacco trade in Australia. Mr. Hart was born in Adelaide in November, 1850, and he came to Melbourne in youth. His long association with the tobacco trade began at that time. For some years he was with Feldheim Jacobs and Co., and afterwards the firm became Jacobs Hart and Co., with establishments in Melbourne and Adelaide. At a later time Mr. Hart retired from the firm and became chairman and manager of Cameron Brothers and Co. Pty. Ltd. When the tobacco companies of Australia amalgamated he became chairman of directors in Melbourne of the British Australian Tobacco Company Pty. Ltd. From that position he retired in 1925, though he still held large interests. At one period Mr. Hart was chairman of directors of the Foster Brewing Company, and to the time of his death he was one of the directors of the Swan Brewery Company and chairman of directors of the United Insurance Company Ltd. Mr. Hart had many other business interests. He was the proprietor of Elizabeth House, the large building at the corner of Elizabeth and little Collins streets.

Apple5 That is the extent of that information as well. Once again there is no written link to the information noted in WMTP. I did some more research on the LMN brand and came across several pipes with that stamping for sale on various sites. Once of those was found on Worthpoint. It is pictured below. I have also included the link to the site. http://www.worthpoint.com/worthopedia/vintage-lmn-hallmarked-bent-chimney-169605160 I did find that LMN was registered as a trademark in Australia and belonged to WD & HO Wills Australia LTD. Here is the trademark information:

Trademark number 4727 was lodged on 30/07/1907 and has a status of Removed – Not Renewed. The applicant/owner of the trademark is registered as W D & H O Wills (Aust) Limited Business names for this company include AMERICAN PALL MALL, AMERICAN PALL MALL CO, BROWN & WILLIAMSON TOBACCO CO, BROWN & WILLIAMSON TOBACCO CO., BROWN & WILLIAMSON TOBACCO COMPANY, BROWN AND WILLIAMSON TOBACCO COMPANY, CIGARETTE DISTRIBUTORS, CUSTOMPHONE, GENERAL CIGAR CO, GEORGE TICKLE & CO, LAMBERT & BUTLER, OGDENS TOBACCO CO, THE NATIONAL TOBACCO COMPANY OF AUSTRALIA, THE STATESMAN CIGAR CO, TICKLES TOBACCO SERVICE, W.A. AND A.C. CHURCHMAN, WILLIAM BUTLER TOBACCO COMPANY

With that I decided to put my research to rest for a while and went to work on the pipe. The next photo gives a clear picture of the size of the pipe. I have it resting next to my iPhone 4 for comparison sake.
IMG_6621
The next four photos show the pipe as it was when I started the refurbishing. The bowl itself was in good shape. There were nicks and marks all around the bowl. On the bowl front there was an area where a fill had fallen out and left a deep hole in the briar. The bowl interior was fairly clean with a light cake and some remnants of tobacco left in the bowl. The inner edge of the rim had two areas that were burned. The burned area extended to the top of the rim in those two spots. The stem was quite clean. There was no evidence of the horn delaminating which was good news. Next to the button on both sides of the stem there were troughs left behind from tooth marks. There was tooth chatter over the surface, both top and bottom a 1/3 of the way up the short stem. The bone tenon was in excellent shape with no damage or broken threads. There was some staining on the end but other than that it was flawless.
IMG_6622

IMG_6623

IMG_6624

IMG_6625
Because I love the finished look of horn I worked on the horn stem first. I sanded the surface of the stem with 220 grit sandpaper to smooth out the tooth chatter and the deep troughs around the edges of the button. As I worked on them I realized that the horn material was thin in those spots. I roughened the surface and built it up with clear super glue. My goal was to level out the troughs and give a clean flow to the taper of the stem to the button. This took several applications of super glue. After each application dried I sanded it with 200 grit sandpaper and a medium grit sanding sponge to make sure that the surface was level before adding a new layer.
IMG_6626

IMG_6627
When the troughs were filled and level I screwed the stem back into the bowl and took some photos to check out the taper of the stem to the button. I wanted to make sure that the taper was smooth and the flow correct. I find that taking a photo gives me some distance from the pipe and I can examine it more critically than in real life at this point. I would need to work on the button area but the taper was correct.
IMG_6628

IMG_6629

IMG_6630

IMG_6631
I gave the bowl a light reaming with a PipNet reamer. I decided address the deeper nicks and crevices on the bowl with briar dust and superglue. Before doing that I wiped down the bowl with acetone on a cotton pad to remove the finish and clean the bowl.
IMG_6633
I packed briar dust into the nicks and holes in the briar and then added drops of super glue followed by more briar dust. I always over fill the patches as it is easier to sand the patches than to continue to fill them as they shrink. The next two photos show the patches.
IMG_6635

IMG_6636
I sanded the patches with 220 grit sandpaper to remove the thicker portion of the repairs and then followed up with a medium and a fine grit sanding sponge. The repairs are smooth and match the surrounding briar. They are dark spots but I have found that I don’t mind those as much as putty fills. I also have found that they can be blended into the briar more easily when stained with a dark brown or black aniline stain. They are still present but do not stand out.
IMG_6637

IMG_6638
To remove the burned areas on the inner edge and top of the rim I topped the bowl using a topping board and 220 grit sandpaper. I move the bowl across the sandpaper in a clockwise circular pattern – more out of habit than anything else though I find that it minimizes the scratches left behind and is easier to smooth out with later sanding.
IMG_6640

IMG_6641
I took the top of the rim down until the burn marks were minimized and the top of the bowl was smooth to the touch. I sanded the bowl top with a fine grit sanding sponge to remove scratches. I did not go on to sand with higher grit paper as I would be sanding after I stained the bowl. I wiped the bowl down with isopropyl alcohol and then applied and flamed the dark brown aniline stain. I repeated the process until I had good coverage on the bowl and rim. The stain was very dark and hid the grain. It was also very opaque and not what I wanted as the final stain on the bowl. I wiped the bowl down with isopropyl alcohol to remove much of the stain. Doing this removes the surface coat but leaves the stain deep in the grain of the briar.
IMG_6642

IMG_6643

IMG_6645
I buffed the bowl with White Diamond on the wheel to further remove some of the stain and smooth out the surface of the briar. I avoided the area of the stamping so as not to further damage the already faint stamping. I then folded a piece of sandpaper and worked on the inner edge of the rim to remove the damage and work the bowl back into round afterwards. I have included the photos below to give an idea of what the stain looked like at this point as well as the way the repairs were hidden by the stain. There is some great grain on this old pipe.
IMG_6646

IMG_6647

IMG_6648

IMG_6649
I sanded the bowl and stem with micromesh sanding pads. I wet sanded with 1500-2400 grit pads and dry sanded with 3200-12000 grit pads. I rubbed the stem down with Obsidian Oil to preserve the horn and renew it.
IMG_6634

IMG_6650

IMG_6651
I buffed the bowl and stem lightly with White Diamond and then gave the pipe multiple coats of carnauba wax. I buffed it lightly with a soft flannel buff and then hand buffed the area around the stamping. The finished pipe is shown in the photos below. The horn has a rich shine to it now and the briar looks very good. The contrast between the rich brown stain and the striations of colour in the horn stem give the pipe a distinctive look. There are still some battle scars that add character to the pipe in my opinion. Overall the pipe looks almost new. It is cleaned and ready for a smoke.
IMG_6652

IMG_6653

IMG_6655

IMG_6656

Refurbishing a horn stemmed Bruyere Garantie Beautiful Swan Necked Pipe


I picked this old timer up in an antique shop near Vancouver, quite a few years ago now. When I got it the bowl was almost black and dirty. The rim had a good 1/8 inch of grime and tar built up so that it looked like a plateau top. The finish was so opaque that you could not see the grain through it. The stem was dirty and to be honest with you all, when I got it I had no idea it was a horn stem. I worked hard to get the oxidation off it and all I got was more of the brown tones coming through. There was tooth chatter on the top and bottom of the stem. The chatter was kind of white coloured. I asked several guys about the stem and they also did not even think about a horn stem. I had the pipe in my collection for about 5 years or more before it dawned on me that it was a horn stem.

This is a big pipe and it is elegant. It is 8 inches long and the bowl is a little over 2 inches tall. It is stamped on the left side of the shank Bruyere in an arch over Garantie. On the right side it is stamped St. Claude in script over Bruyere. Once I stripped it down there are a few visible fills in the briar but they blend in quite well surprisingly – no pink putty on this one. I cleaned the rim meticulously by hand with warm soapy water on a damp paper towel. I scrubbed it until it was clean. I then sanded the bowl to remove the varnish coat and grime. I had not learned many of the tricks I use now so it was one of the first old timers that I refurbished. I wiped the bowl down with Isopropyl alcohol once I had sanded the majority of the finish coat off the pipe. It took quite a bit of time to carefully wipe away the finish around the stamping without damaging that. The bowl was finally cleaned and smooth – I remember sanding it with 1200 wet dry sandpaper to finish. Then I stained it with a medium brown wood stain – I have no idea if it was an alcohol stain, it well could have been Watco Danish Oil for all I know!

The stem took quite a bit of work to sand it smooth. I cleaned it up twice. Once when I first got it and then again when I figured out it was a horn stem. It is a big piece of horn and quite pretty in terms of the sheen and depth of colouration in it. I used the method I spelled out in a previous post on polishing horn stems and it is like new. I sanded it with wet dry sandpaper up to 2400 grit and then buffed it with lots of carnauba wax. Later I used the micromesh sanding pads on it and really gave it a depth of shine. The pipe is a great smoking pipe and is definitely a sitting pipe. It is a handful. The first picture shows the finished pipe. I wish I had some before photos but this was found in the days I never thought of doing that. So all I have is finished photos. The next series of photos show the size of the pipe in comparison to a nice little bent billiard that is about a group three sized pipe. The grain is quite nice. Nothing striking in terms of straight grain but there are several spots with nice birds eye and then the rest is swirling grain that almost seems to have movement to it. The stem is multicoloured and has the old orific (round) airhole in the button.

ImageImageImageImage

Chuck’s Gift Pipes Part 1 – a Horn Stemmed Venezia Vogini


Blog by Steve Laug

In celebration of his 1500th post on Smokers Forums, Chuck (Desertpipe) sent me an email regarding some packages that he was going to distribute to three folks on the Forums. Two of them came to the Vancouver area and one went to the East Coast of the US. I refurbished the older Barling that is heading east as a surprise to the new owner. (I posted the refurb on that old pipe on the blog https://rebornpipes.wordpress.com/2012/08/05/new-life-for-an-old-barling/ ) Now the wait for the package to come my way north and into my mail box begins.

Chuck posted on SF that he had mailed out the packages. On 08/23/12 I received this email from him regarding the package coming my way. It seems he has chosen two pipes for me to work on. I look forward to seeing them.

Steve,
Back a decade ago, when I first started getting serious about understanding pipes, I discovered the wonderful world of size. I dawned on me that the size of pipes had radically changed over the course of time, related to the quality, cost and strength of tobacco. I put together quite a collection of pipes from many decades, and also a collection of tobaccos from as many sources and time frames as I could.

The two pipes coming your way are from this collection. The red stemmed pipe will need your magic touch to return to perfect, and I look forward to your take on the restoration. The other is one of my two favorites of this type. It has all the bells and whistles that make one collect very old examples, and I bet it finds a permanent home in your collection.

Enjoy, my Friend,
Chuck

When I received the above email, my curiosity was piqued and I sent him an email asking about the age of the two pipes and this is his response via a reply email.

My best guess…..The red stem is early Redmanol time frame….puts it 1920’s/30’s? 14k gold filled band has no marks to help out.  The horn bit folder (so far beyond cool as to be in a class by itself) is before that, as far as I have been able to trace, turn of the Century or a bit before?

Now I am even more excited to see what the package contains once it arrives. I have a weak spot for older pipes. The tension of the wait increases!

Today, 9/4/2012 Chuck’s gift box arrived. I opened it to find a tin of C&D Opening Night and two nice little old timers. The first is an old WDC bent pot with a Redmanol stem. The other is a folding vest pocket pipe. The shank has a 90 degree bend and the stem is horn. These are going to be great to work on.

I chose to work on the folding vest pocket pipe first. It is stamped Vogini over Venezia in an oval on the upward bend of the bowl to meet the shank. When it arrived the bowl was clean. There were a few scratches on the rim. There were small dents on the left and right side of the bowl. The band was set crooked with the back side lower than the front making a good seat for the shank impossible. The shank is briar and is a 90 degree bent piece. It is very unusual. There were fills on both the top and the underside of the horizontal part of the shank. The stem is a nice piece of horn that is actually quite tiny. It has tooth chatter on the top and the bottom side of the stem. There are two tooth dents on the underside next to the button. The orifice hole in the button is slightly off centre. This is a great looking old timer that should clean up easily and look amazing!

I have done a bit of research and find that the Venezia brand is definitely Italian and is either a Cavicchi mark or La Rocco but not sure which was an early company. The mark may even go back further into history that I am aware and than Who Made That Pipe reports. If any of you have any ideas on the age and provenance of this pipe let me know by posting a comment. Thank you ahead of time for the information. ImageImageImageImageImageImageImageImageImageImage

On the evening it arrived I removed the band from the shank and glued, pressure fit it and reset it at a proper angle to seat the shank correctly. I used carpenters glue to reglue the band. I pressed it on and held it until it was set. I then wiped the bowl down with a cotton pad and acetone to clean off the grime and the remaining finish. I also wiped down the band to remove the oxidation that was built up on it. ImageImageImage

I cleaned off the briar shank and the bowl with some more acetone to remove the finish completely and to clean it so that I could begin to repair the fills in the shank. The first photo below shows the pipe after has been wiped down with acetone completely. I avoid using acetone on horn stems. In pictures 2, 3, and 4 you can clearly see the cotton pads that I use with the acetone to wipe the pipe down. These are circularly pads that I pick up at a local store in the makeup section. They are used to remove makeup but I find them perfect for using with alcohol and acetone wipes. I dampen them with the liquid and then wipe down the surface. The dirty pads in the pictures show the dirt and stain that has been removed from the surface of the pipe. ImageImageImageImage

Once the surface is clean, I picked the pink putty fills from the top and underside of the shank piece. I wanted to refill them with briar dust and super glue (pictures 1 and 2 below show the spots that were filled with the combination). ImageImage

I sanded the filled areas (pictured in the next two photos) until they were smooth dark spots on the surface of the wood using fine and extra fine sanding pads. I continued to sand down the surface of the shank and the bowl until the spots were basically blended into the wood as much as possible. I also sanded the rim and top of the bowl to remove the scratches. The bowl and rim were sanded with micromesh pads 1500-2400 grit. The shank was also sanded with the same grits. Photos 3-4 show that finished look of the spots. Once they were sanded to that point I wiped down the shank piece with a pad and isopropyl alcohol to clean off any remaining dust on the briar. ImageImageImageImage

I set the bowl aside and worked on the stem to remove the tooth chatter and the tooth marks on the underside. Horn is such interesting material to work with. I use a fine grit sanding sponge to remove the chatter and tooth marks. It is flexible so it is easy to conform to the curve of the stem. I also had to use emery cloth (fine grit) to remove the remaining marks left by the tooth dents. ImageImage

I restained the bowl and the shank with an oxblood aniline stain, flamed it and then buffed it with White Diamond to remove opacity of the stain and polish it. I wanted the bowl and stem to match in colour rather than the original look of the darker shank and lighter bowl. I gave the entirety several coats of carnauba wax and a light buff with a flannel pad on the buffer. ImageImageImageImage

From the above pictures you can see the colour of the shank and bowl are pretty close. I needed to do some work on the fit of the shank to the bowl. The briar tenon on that portion of the shank was loose fitting and could easily have fallen out at this point in the cleaning. I used a thin coat of super glue and sanded it down to make it a snug fit. Once the shank had a good flush fit and was snug to the bowl, I sanded it with micromesh pads 8000 and 12,000 grit to give it a shine. I gave it another coat of carnauba wax and set it aside.

ImageImageImage

I gave the tenon on the stem a thin coat of super glue as well and sanded it until the fit was snug. The stem had been loose and easily came out of the shank and would twist from side to side. The superglue made it fit perfectly. I continued to sand the surface of the stem with micromesh pads using the 1500 and 1800 grit pads before buffing it with White diamond. I went on to sand it with the pads from 2400-12,000 grit. Each successive sanding brought more of a shine to the stem. Once it was finished I gave it several coats of carnauba wax and buffed the whole pipe on the buffer to raise the shine. Image

Image

The final pictures were taken this morning (9/5/12) after a quick wipe down with a polishing cloth. The next series of five photos show the pipe with the shank and stem extended and ready to smoke. There are several shots to show the state of the horn stem after the sanding and polish. It has a beautiful natural sheen to it that is amazing and only possible in horn. There is almost a warm glow that seems to come from within the stem. You can see that the super glue patches in the fills and the sandpits are fairly well blended into the shank.  ImageImageImageImageImage

The next series of four photos show the folded pipe ready to be put in the vest pocket and carried with me to the next event where I want to take a small pipe which folds up nicely into a small square and slips into my pocket. The grain on this little pipe is amazing.

I would like to once again thank Chuck for his generous gift of this old timer. I look forward to firing it up and smoking it over the remaining years I am around. I love these unique old timers that add colour and character to my collection. I often wonder what stories they would tell if they could speak. Ah well, I will now add my story to the list of those who have smoked and enjoyed this beauty. ImageImageImageImage

Reclaimed a Horn Stem Oldenkott Panel


Blog by Steve Laug

I find that I enjoy smoking pipe with horn stems. The feel in the mouth is unique in range of pipe stem material. It is not hard like Lucite nor is it like Vulcanite. There is a very different feel in the mouth than anything else. I really don’t know how to describe it – it is smooth like well-polished Vulcanite or Lucite. It is soft like Vulcanite but somehow a different kind of softness. It has a luminescence that is beautiful when polished to a reflective sheen. It that almost indescribable feel that keeps me on the lookout for more horn stemmed pipes. I think that I have probably a half dozen in my rack at the moment. All but one of them is small bowled and lightweight. All of them are great Virginia Flake pipes and seem to be made for that style of tobacco.

Here  is a few of my horn stem pipes. Image

The pipe below is one I added recently. It is the fourth pipe from the left in the picture above. It is an Oldenkott pipe. When I got it the finish was rough as it seemed to have had a varnish or some kind of topcoat on the bowl that was flaking off and broken. The bowl was unevenly caked but the pipe showed promise. I reamed and cleaned it then put it in the alcohol bath while I worked on the stem. The stem had a few minor bit marks that I repaired by sanding them smooth. The tooth chatter disappeared in the same manner. I have found that with horn I have to be a bit careful with the sanding so that the horn itself does not sliver or splinter so I used micromesh pads exclusively on this one. I started with 1500 grit and sanded up to 6000 grit. Then I took the stem to the buffer and carefully buffed it with White Diamond.

After removing the bowl from the alcohol bath the finish coat of varnish was gone and the colour looked very nice so I sanded it with micromesh pads and then buffed the bowl with White Diamond. I reinserted the stem and gave the pipe several coats of carnauba to bring back the sheen to both the horn and the bowl. The final picture shows the unique tenon and filter apparatus on this pipe. It is aluminum and seems to work as a condensation chamber more than a filter. The shank and stem were clean on the inside and took very little work to clean out the tars that were present. ImageImageImageImageImage

Refurb on an Old “The Regent” – fit a horn stem


Just finished up with this pipe. I had a lot of fun with this one! It is an old horn shaped pipe. It is stamped The Regent and has a sterling silver band on it. The hallmarks are the reclined lion (sterling silver) the Anchor (Birmingham) and a mystery stamp – a five point star (no date sign like that on the British sterling sites). I was reading in Gary Schrier’s Calabash book this evening and came across a calabash with the same hallmarks. He said it was a Faux Birmingham made pipe. The calabash he had was a Manhatten made in New York City. The question is do I also have a Faux Birmingham pipe??

It was dirty and I reamed and cleaned the bowl and shank. It had a thick cake and a bit of cob webs in the bowl and shank. It also did not have a stem. It came to me as a bowl without a stem. I had an old horn stem in my can of scavenged pipe parts that was that right shape and whose tenon fit perfectly. It was about a 1/4 to large in diameter. I used my dremel to bring it close to a fit and then sanded it until it was a perfect fit. While I worked on it I removed the silver band in order to get the stem fit to be flush with the briar. When I was finished with the fit I polished the horn stem until it glowed with 400 and 600 girt wet dry sand paper, micromesh pads up to 4000 grit and then Tripoli and white diamond. Then I reset the band with a bit of superglue and then put on the stem and gave the silver a polish and the pipe a buff.

I have included a pic of the stem first to show you the look of the beautiful old horn stem. It has an orific button (single round hole in the button). It seemed to match the age of the pipe in terms of look.

Image

The rest of the pics are of the finished pipe. Thanks for looking.

ImageImageImage

Restoring Horn Stems


Blog by Steve Laug

I have had the pleasure of working on over a half dozen horn stems on some old pipes I have purchased and been given. Each of them presented a different challenge in terms of restoration. Several had the normal tooth dents and chatter that come as a normal part of the stems of many old pipes while other stems had been gnawed to the point of changing the profile of the stem forever. Horn is significantly different to work with than vulcanite or Lucite stems. In many ways it is softer and more pliant than either of the other materials. When it is in good order the sheen is almost translucent and there is deep almost internal warmth to them. In this article I want to talk about the process of reworking horn stems and restoring them to their former glory.

The first issue with horn stems I had to learn to work on was the tooth dents and tooth chatter that often covers the last half inch or more of the stem just ahead of the button. When I first attacked this I did it with a bit of fear and trepidation as I had all kinds of concerns about the laminate of the horn separating or delaminating. However, through the help of several of the folks on Smokers Forums, an online pipe smoking community, many of my concerns were alleviated. Here are some pictures of this first issue with horn stems. I took pictures of the top/side profile and the bottom/side profile of this particular stem as it highlights the issue.

ImageImage

Looking closely at the stems above you will see the tooth marks along the button area of the stem. This area was rough to the touch and was dry and almost flakey feeling. I was concerned that the horn had softened from the breakdown of the outer coating and wondered if it could be brought back. They were shallow though so I went to work on them with multiple grits of sandpaper to smooth out the surface. I used 240 grit to smooth out the roughness and then worked my way through 400 and 600 grit wet dry sandpaper. The trick with the latter two was to wet them as I sanded the stem. Each progressively higher grit smoothed out the roughness until it was smooth to touch. The wetness of the sandpaper made the grit really bite into the surface of the horn. I then used micro-mesh pads beginning with 1500 grit followed by 1800, 2400, 3200, 4000 and 6000. By the time I got to the 3200 the scratches in the surface were virtually gone – even under a bright light. Again the trick is to work with a bowl of water near at hand to wet the pads as you sand the stem. When I finished with the 4000 and 6000 there was a good sheen to the stems.

At that point in the process I took them to my buffer to finish the work. I used White Diamond polishing compound on the buffing wheel to give it a deep gloss finish. Then I gave a polish with carnauba wax and buffed to a glassy finish.

Here are some pictures of the finished stem minus the tooth chatter. The original issue had been addressed and the stem returned to its former beauty.

ImageImage

One quick note that I should mention is that horn will stink as you work it. Its smell has been likened to the smell of a tooth getting drilled by the dentist or burning hair. I found though, that as I worked with it I got used to it.

The second issue with horn stems that I had to learn to deal with was more serious. It involved deep tooth dents and a chewed stem. The stem pictured below was a real mess. The previous owner obviously gnawed it and clenched it so the horn was dented and chewed with the profile changed. The question for me was whether I would be able to raise the tooth dents and smooth the surface while reworking the profile of the old stem to make it look as much as possible like it did when it came out of production. Here are three pictures to give you a look at the stem in its state of disarray.

ImageImageImage

Looking closely at the stem pictured above you will see the depth of the tooth dents in the second and third picture and the serious loss of shape in the stem profile in the first picture. The profile shows the pinched look of the stem in front of the button and how thin the stem had been squeezed by chewing. My concern was whether there would be enough meat on the stem at that point to restore it without breaking through into the airway. The second and third pictures show the stem from the top and the bottom. In those two pictures you can see how deep the dents are in the surface of the stem. Also notice the virtual loss of the lip on the edge of the button. The stem appeared to be a loss.

From Chris Askwith, a talented young British pipe maker I learned a few tricks that I was anxious to try out on the stem (http://www.askwithpipes.com/). I had used the same tricks to lift dents out of the rims and sides of briar bowls so I was looking forward to seeing the process work as described by Chris. I steamed the dents and lifted the major depth of them by using a damp cloth laid on the surface of the dents and then heating a butter knife on the gas stove and applying the hot blade to the wet surface of the cloth on the stem. The gentle hiss and the presence of steam assured me that the steaming was working. You have to be careful as you work this process, checking repeatedly as you apply the knife and steam to make sure not to scorch or split the horn. Most of the deeper dents rose significantly and the more shallow ones came out completely.

I sanded the stem and cleaned up the chewed part starting with 240 grit sandpaper as I did with the stem above. I gradually worked my way through 400 and 600 grit wet dry sandpaper clean up and even out the surface. I worked on the profile and cleaned up the sharp edges of the button with a set of needle files to restore the right angles of the button and stem surface. There were still a few remaining spots on the stem where the tooth dents had cut the surface of the horn and would not lift with the steam. I addressed these by filling them with a few drops of clear super glue. The glue dried quickly and left a small bump in place of the dent. I sanded these with the sandpaper combo mentioned above until the surface was even and smooth. Once I had a clean and smooth surface to work with I then moved on to Micro-mesh pads beginning with 1500 grit followed by 1800, 2400, 3200, 4000 and 6000. By the time I got to the 3200 the scratches in the surface were virtually gone – even under a bright light. Again the trick was to work with a bowl of water near at hand to wet the pads as you sand the stem. When I finished with the 4000 and 6000 there was a good sheen to the stems. They were beginning to shine like glass.

I took the stem to my buffer and used White Diamond polishing compound to  buff the surface smooth and shiny. It was truly glassy in terms of look and feel. I finished the stem by applying a good coat of carnauba wax and buffing to polish the wax.

Here are some pictures of the finished stem minus the tooth dents and with a restored profile. Notice the restored profile of the stem in the first and second picture below. Notice the functional button and lip that has been restored. The third and the fourth picture show the top and bottom of the stem and show the way the super glue patch and the work with the steam and sandpaper restored the deep pits in the surface of the stem.

ImageImageImageImage

Because of the success I experienced with these two different issues with horn stems I have gone on to bid on others that need work. I have found those that only needed a buff and polish to restore them to their pristine condition and I have found others with similar problems to those shown above. The challenge of restoring them to the original beauty always is a draw to me. To smoke one of these old horn stem pipes is an experience that all pipemen should have. The work to restore them is worth the effort when you put the newly restored stem in your mouth for the first time. There is nothing quite like the feel of a “new” horn stem on your lips as you puff a favourite tobacco. And that is to say nothing of the good aged briar that is on the other end of the stem. Give restoring a horn stem a try. It is a pleasure! Won’t you join me for a bowl full in one of these old timers?

Steve Laug

June 8, 2012

Refurbished another horn stemmed pipe


I just finished the second little horn stemmed French pipe that I picked up recently. It is stamped P. Viou which is an old French brand made in St. Claude. It is a 5 inch long pot that is paneled as well. The bowl was in pretty good shape – I reamed and cleaned it. The finish was rough so I removed the varnish and the stain and re-stained it. It came out a bit darker than the original but it really highlights the grain. The rim is beveled in a bit, chamfered nicely.

The stem was a mess. The previous owner obviously gnawed it and clenched it so the horn was dented and chewed with the profile changed. I steamed the dents and lifted them with a damp cloth and hot knife. Most of them came out. I sanded the stem and cleaned up the chewed part. I then restored the profile and filled the remaining spots with super glue and then sanded and buffed. I like the end product.

Here are some before shots:

ImageImage

Image

Here is the refurbished pipe:

ImageImageImageImage