Tag Archives: historical information on John Bessai pipes

Revisiting an Iconic American Pipe Carver John Bessai and Restoring One Of His Creations.


Blog by Paresh Deshpande

Just last year, while surfing etsy.fr, I came across a pipe lot that contained some interesting pipes and included this John Bessai Zulu shaped sandblasted pipe. I had worked on a John Bessai pipe about six years ago and had also studied its history. In order to refresh my memory and reacquaint myself with John Bessai and his work, I browsed through rebornpipes.com. Given below is the link to the write up that I had done on John Bessai pipe about 6 years ago.

https://rebornpipes.com/2018/12/09/a-fresh-breath-of-life-for-a-unique-creation-by-john-bessai/

This and other article on John Bessai make for an interesting read. I now recollect that he was a pipe maker, repairman and tobacconist from Cleveland, Ohio, USA who opened his shop in 1898. He died before 1969.

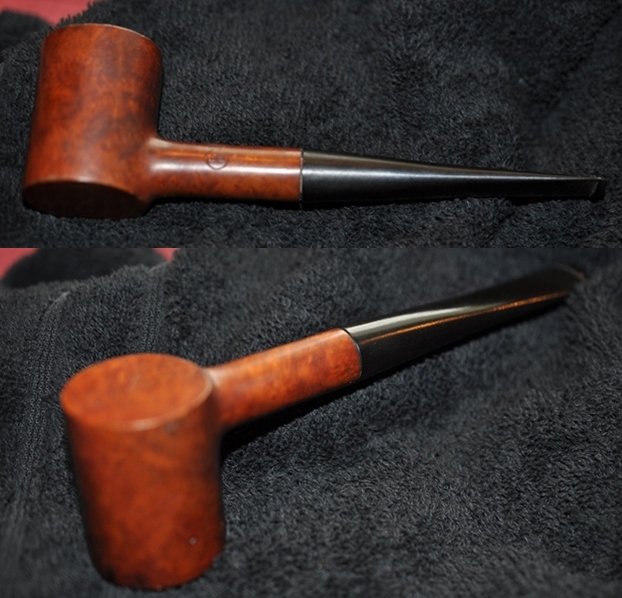
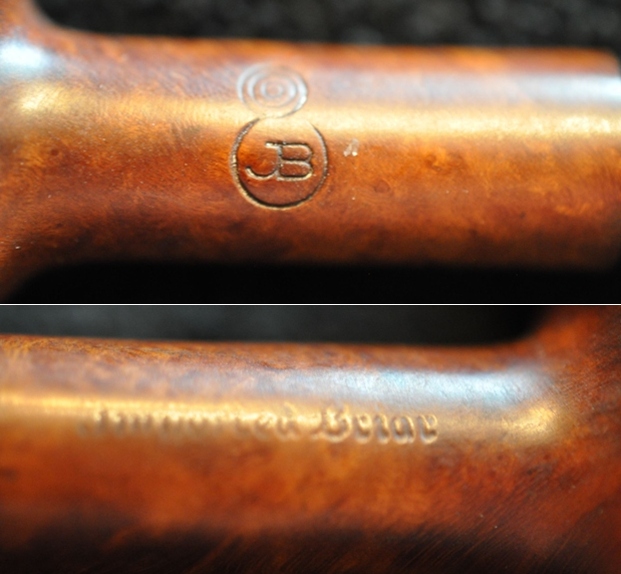
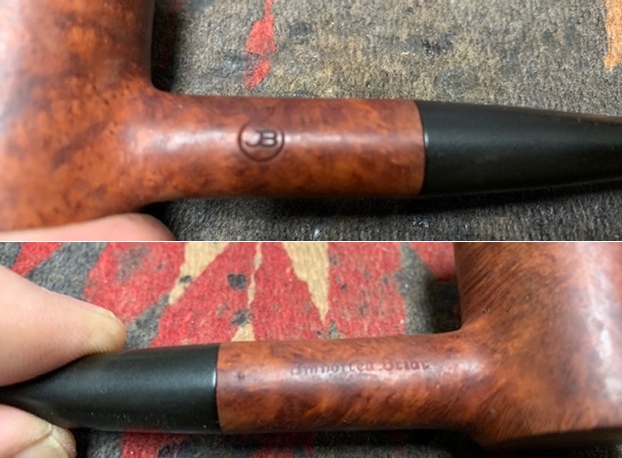
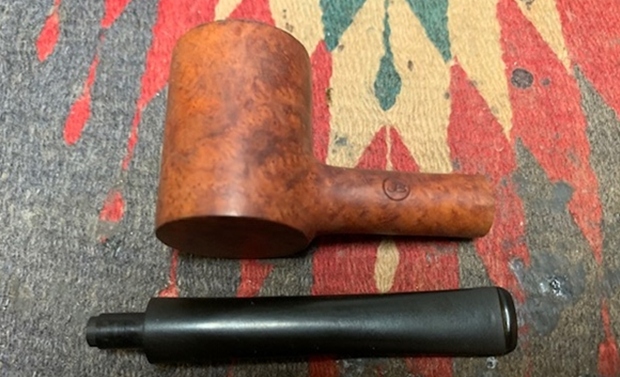
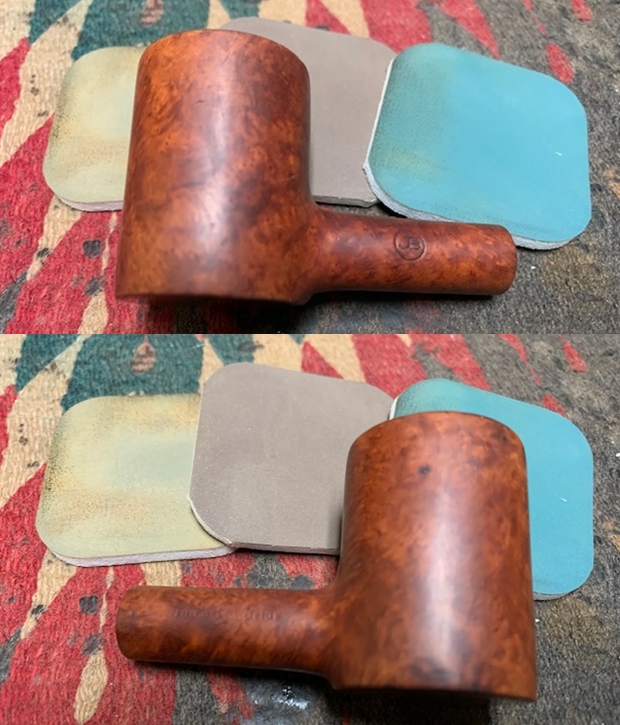
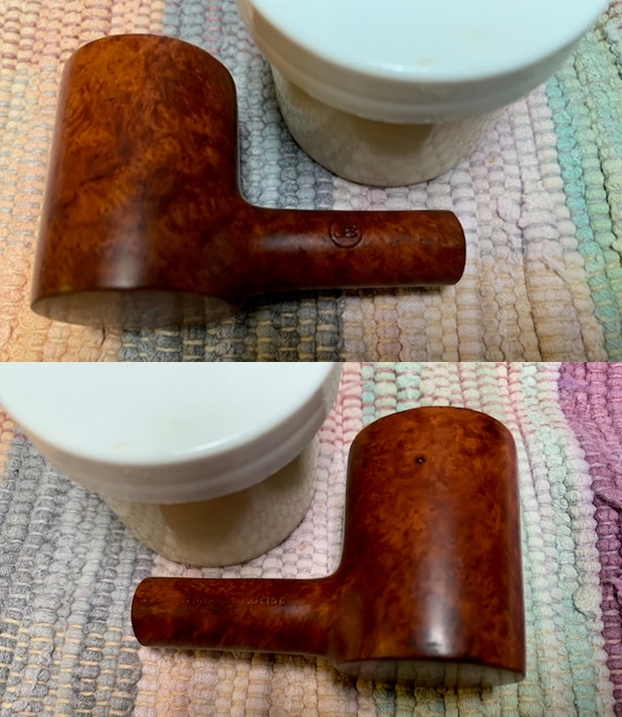
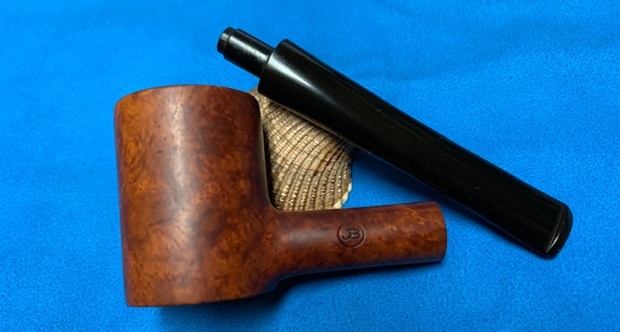
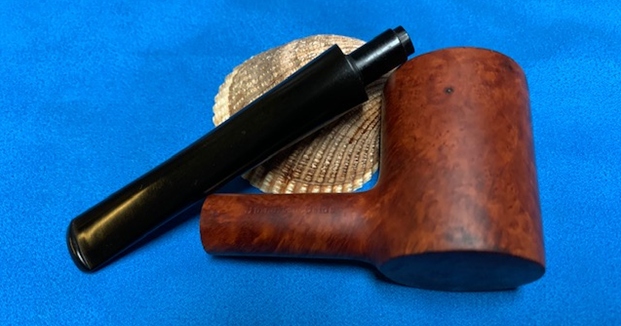
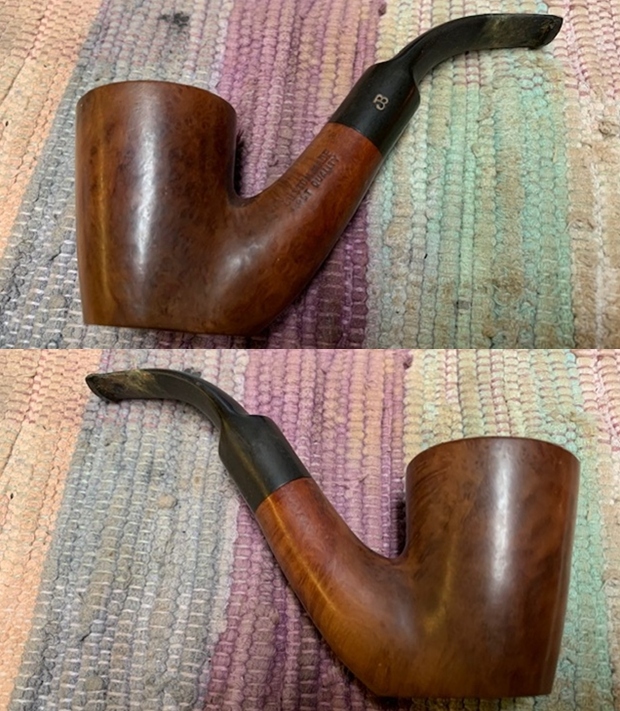
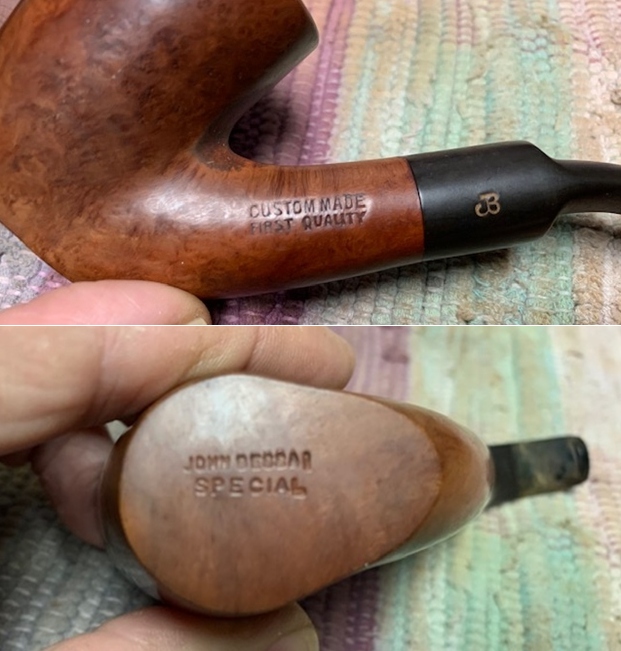
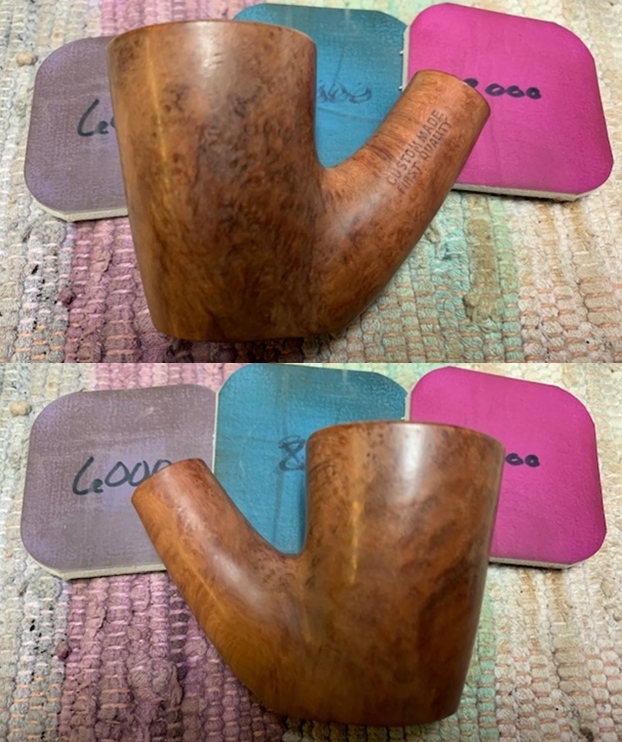
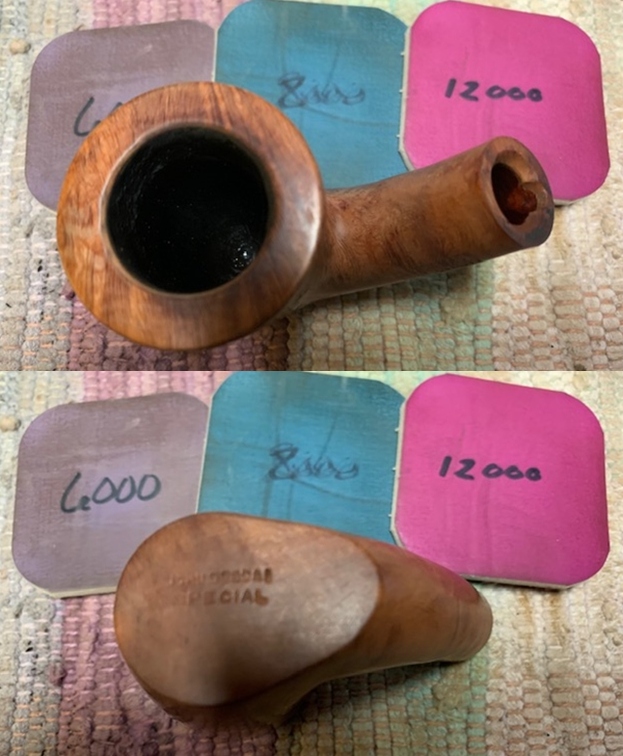
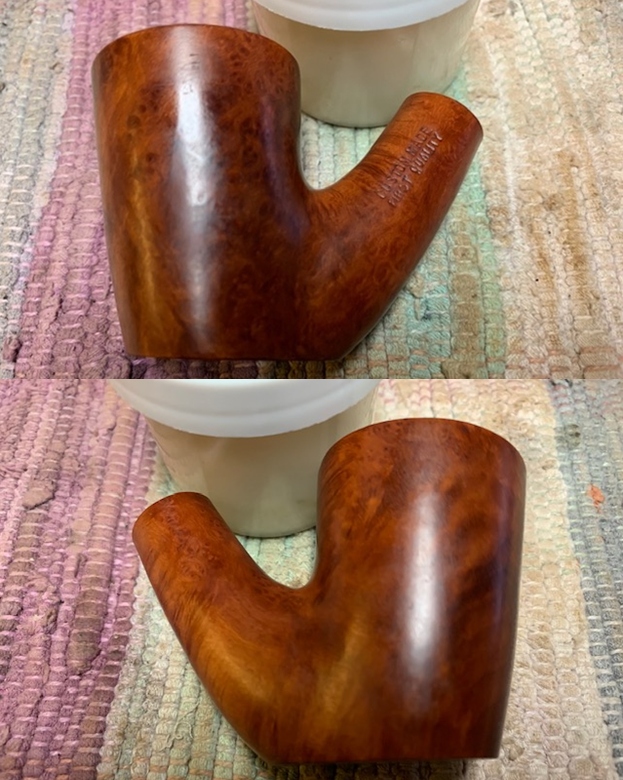
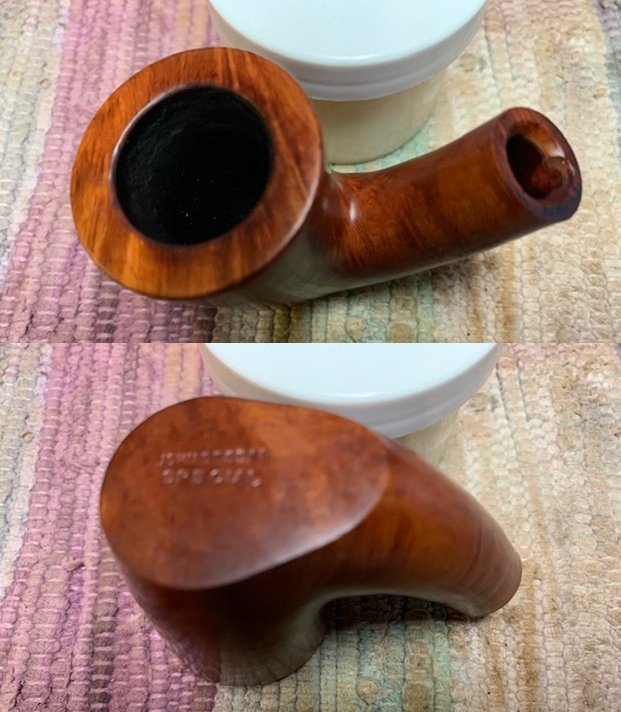
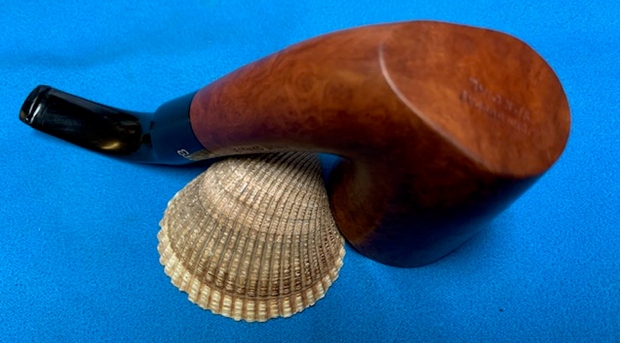
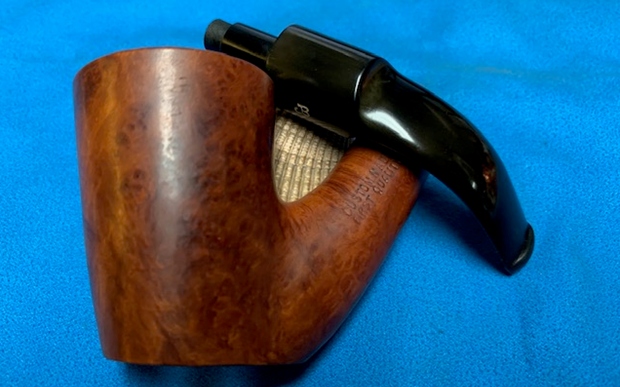
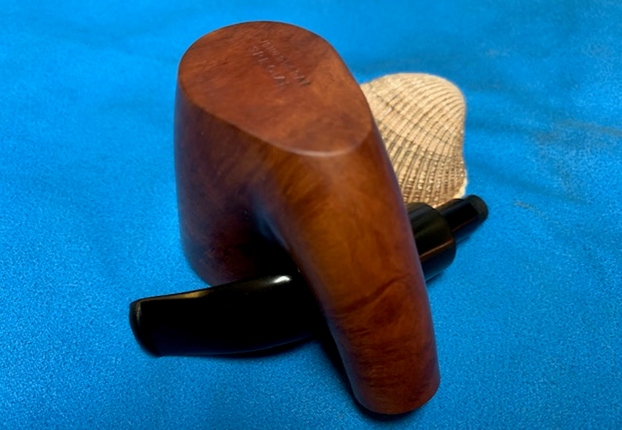
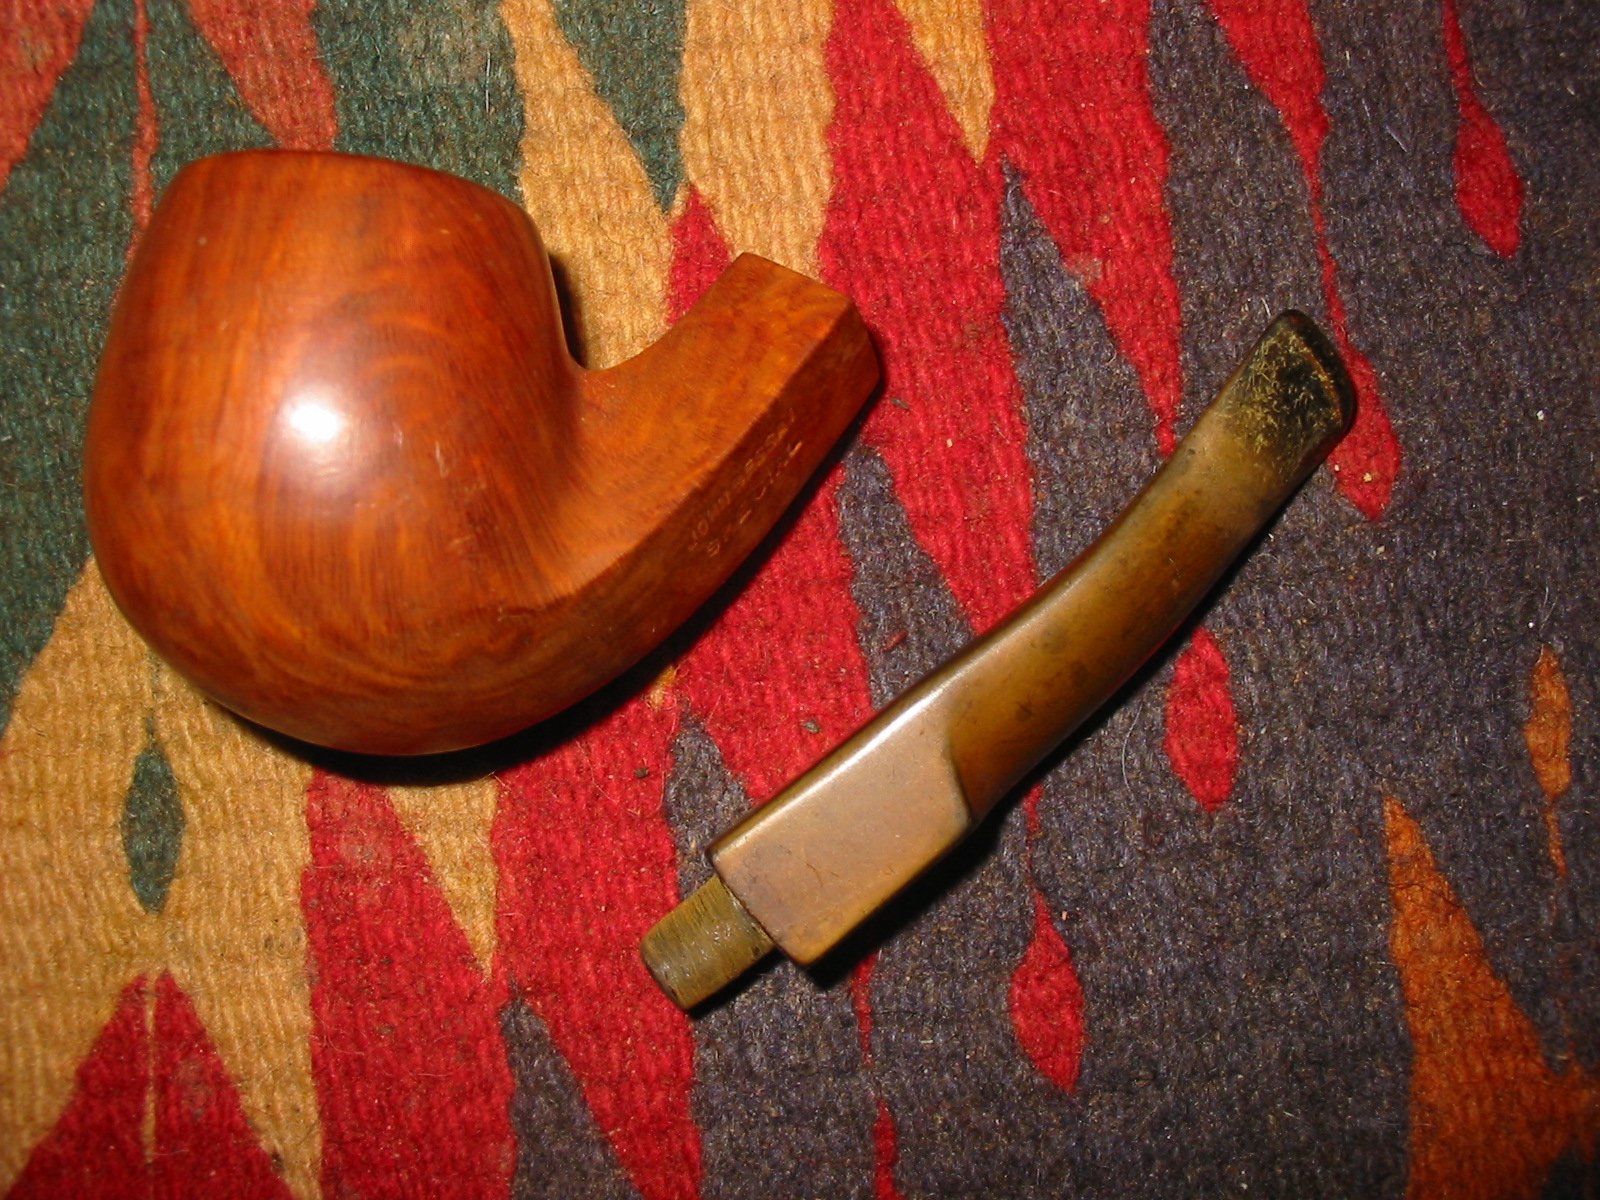
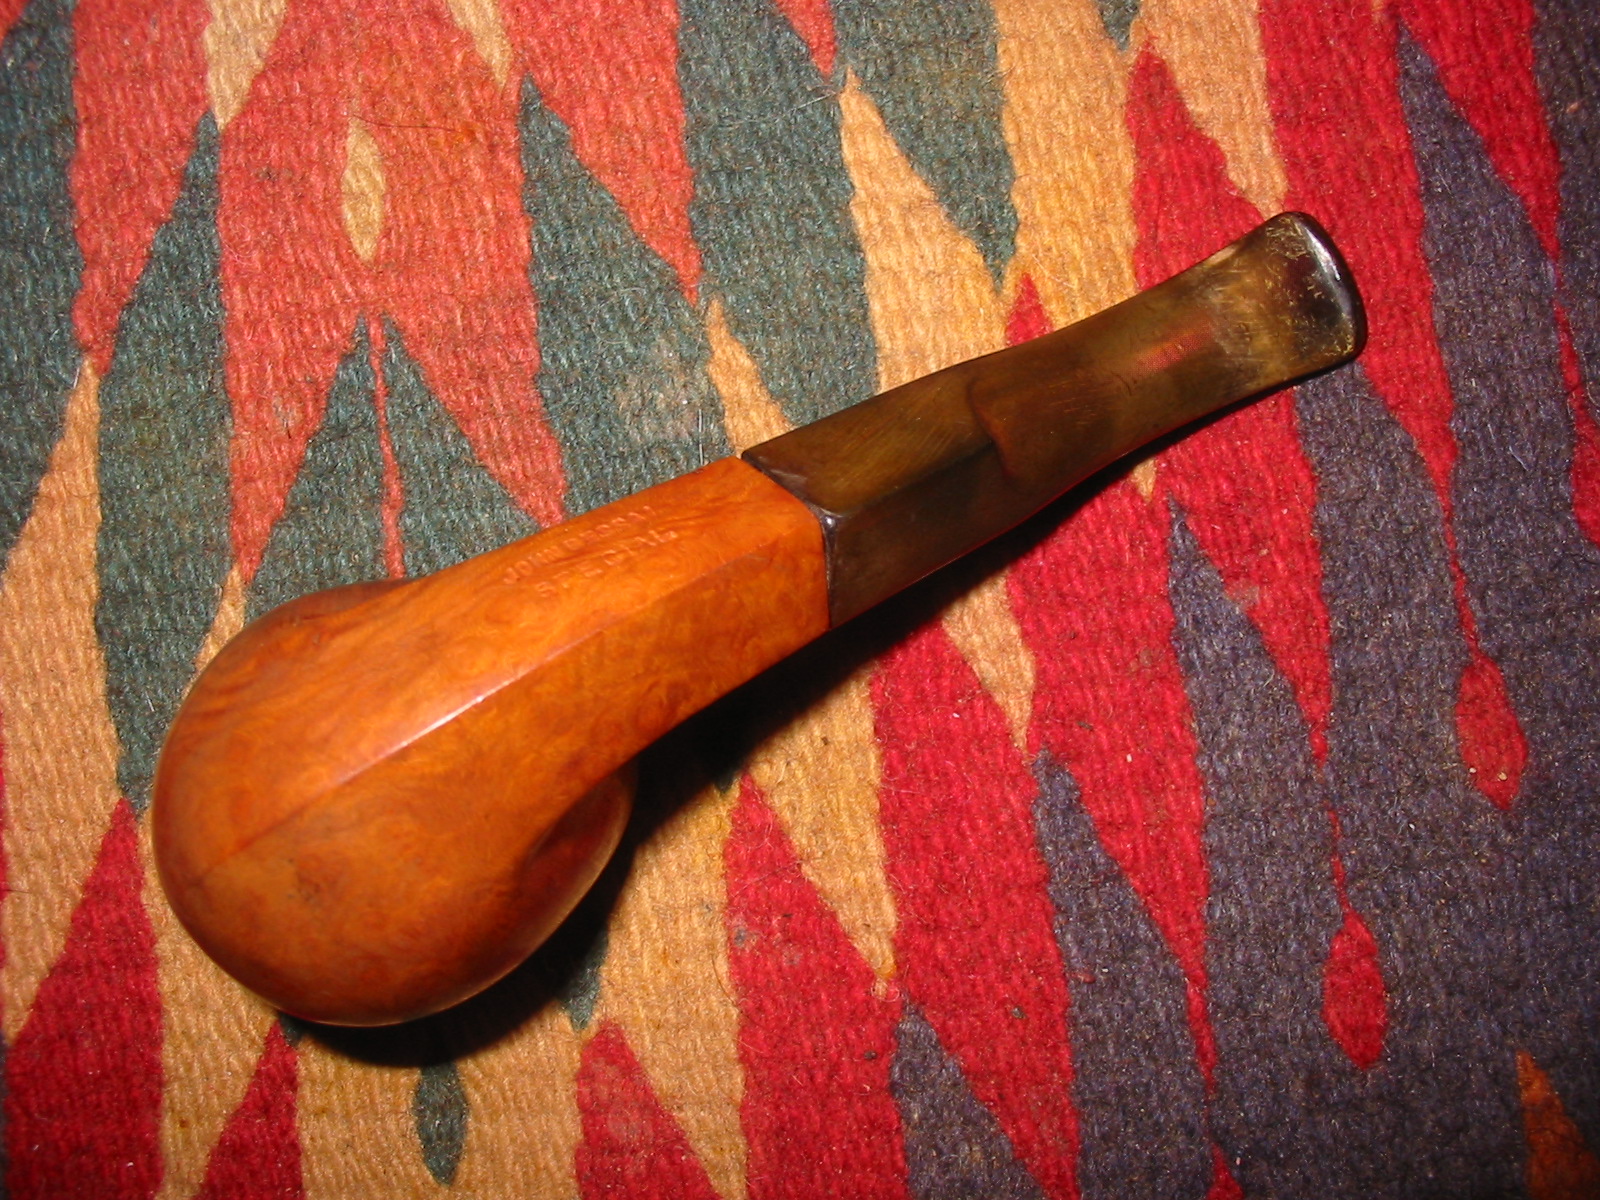
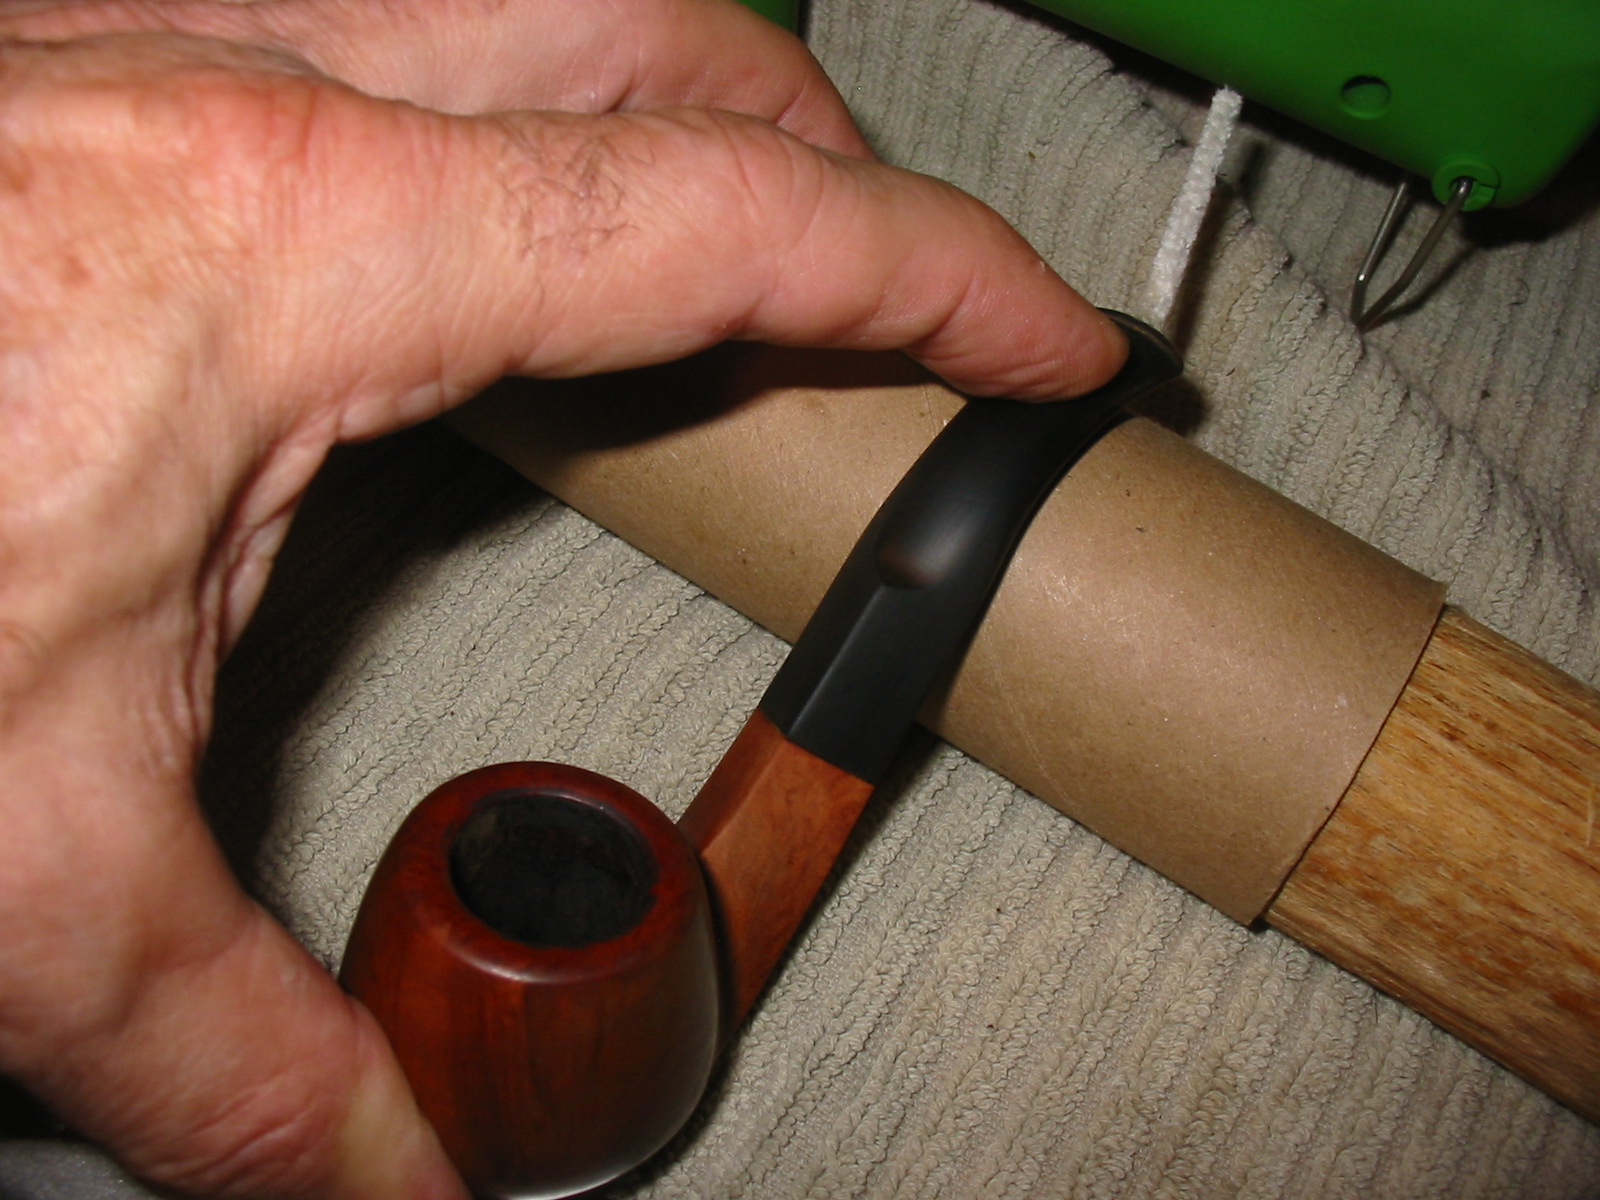
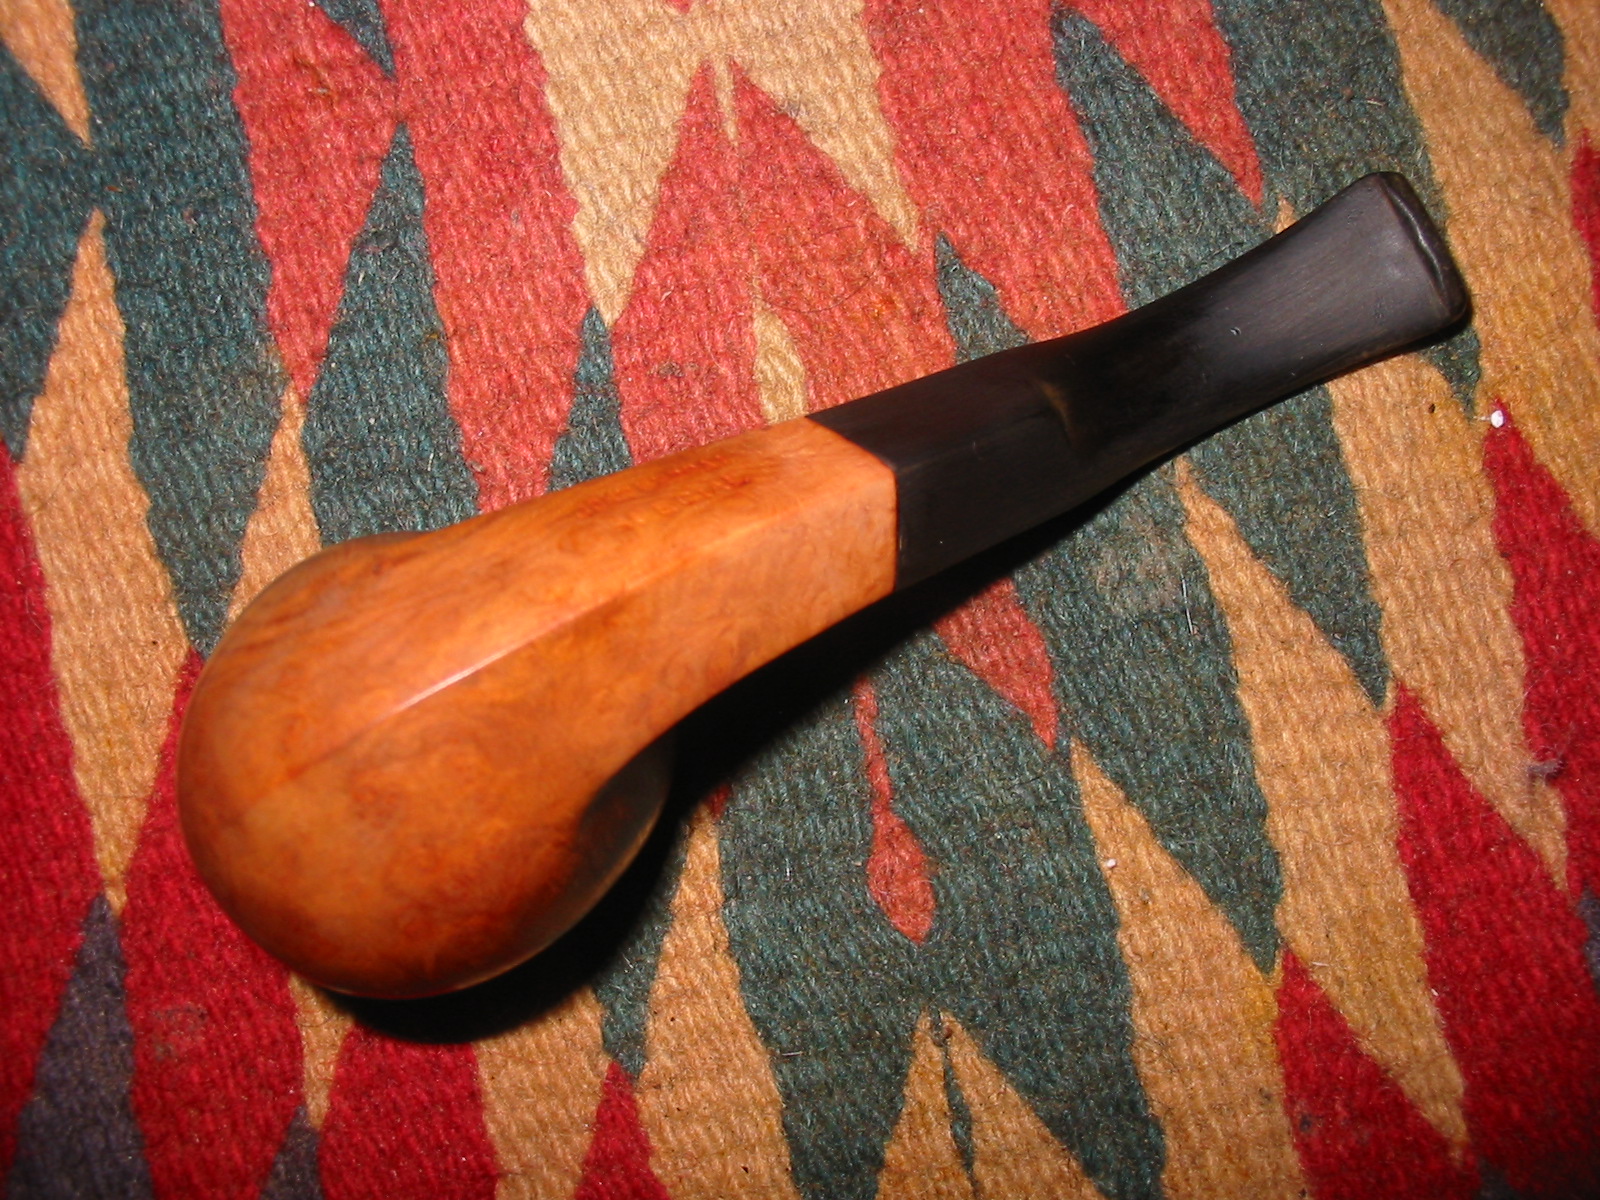
All John Bessai pipes were stamped with large letters “JB” either on shank or stem or both. The pipe on my work table is stamped as above on the stem.Pipes made by John were stamped on the shank or on the stummel with small “JB” since 1950 and the same is missing on this piece. However, “JOHN BESSAI” in full in block capital letters is stamped over the flat smooth surface on the bottom of the shank.The bull’s-eye stamping was abandoned since pre-1960s whereas the same can be clearly seen on the pipe that I am working on in the above picture.

Thus, based on the above information, with an amount of certitude, I can place this John Bessai creation to be from pre- 1950s.

Initial Visual Inspection
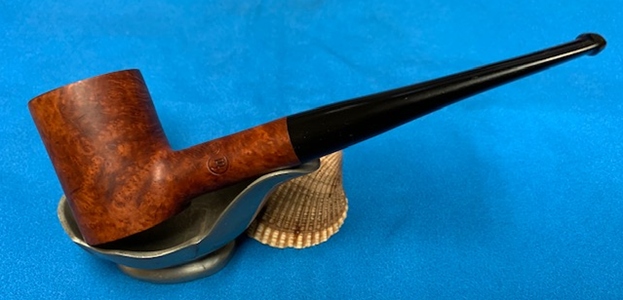
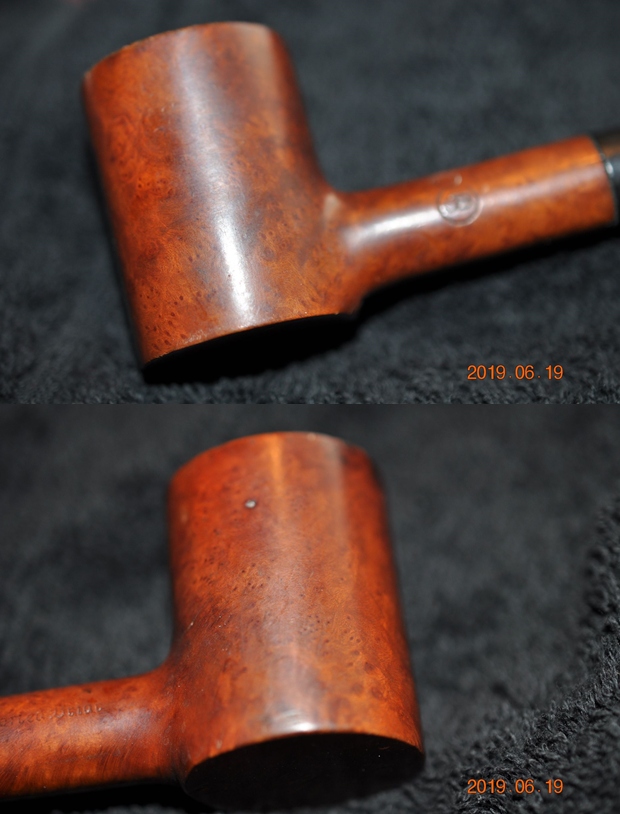
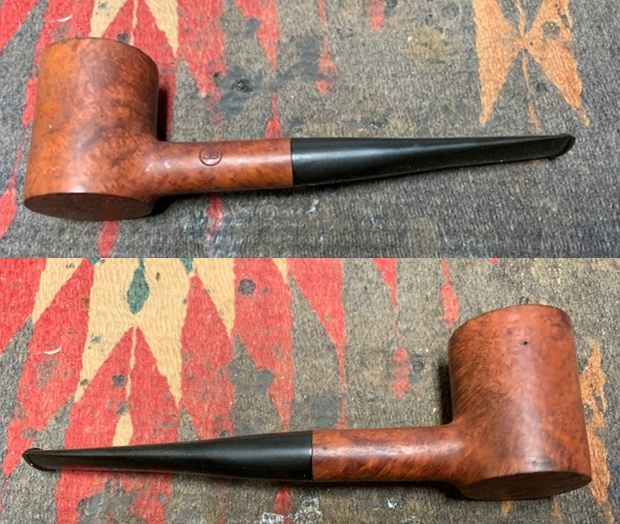
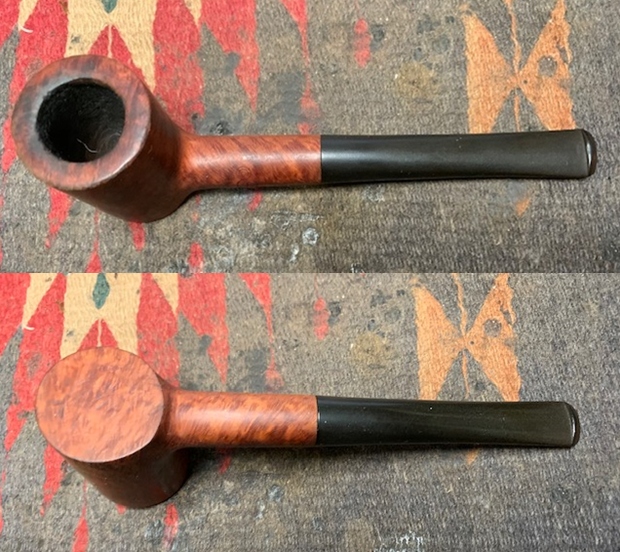
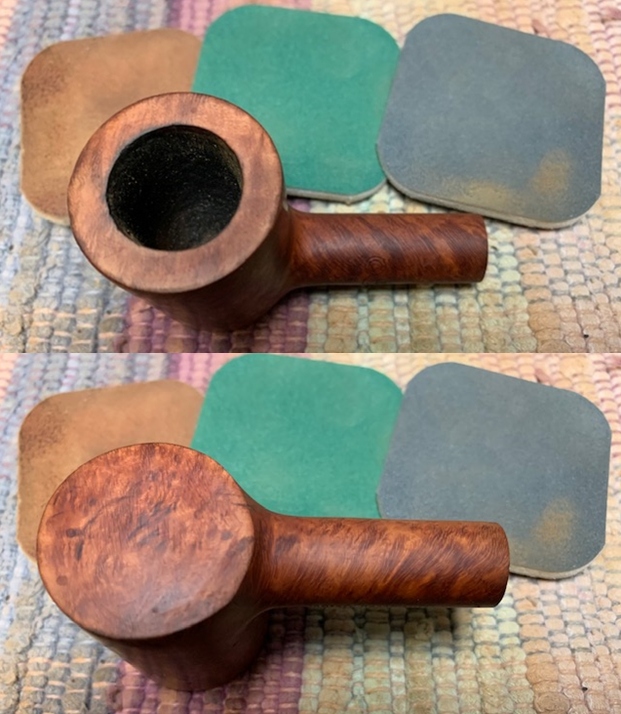
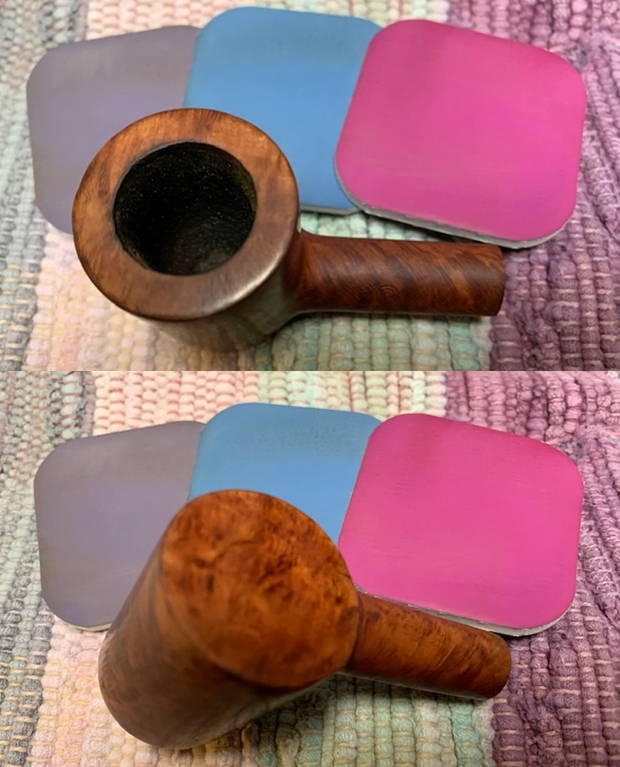
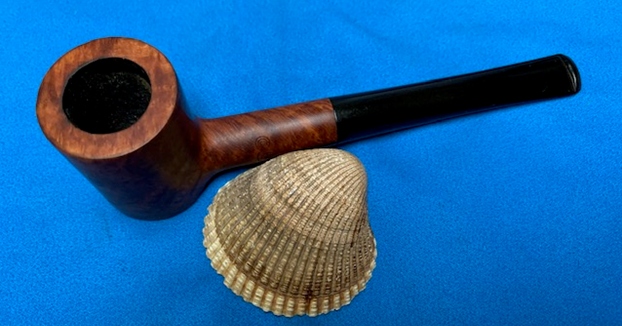
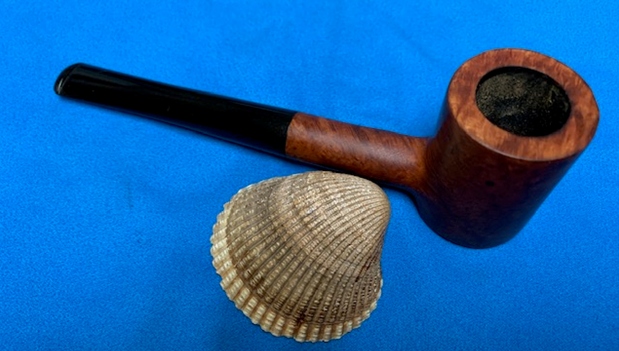
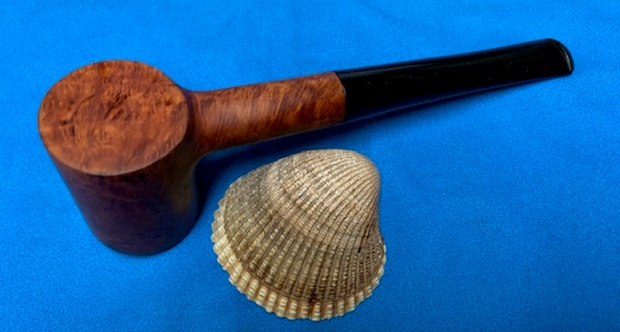
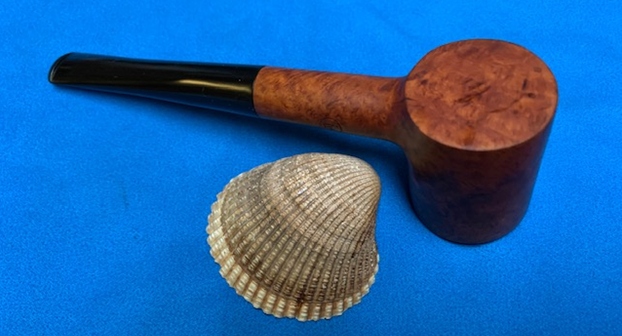
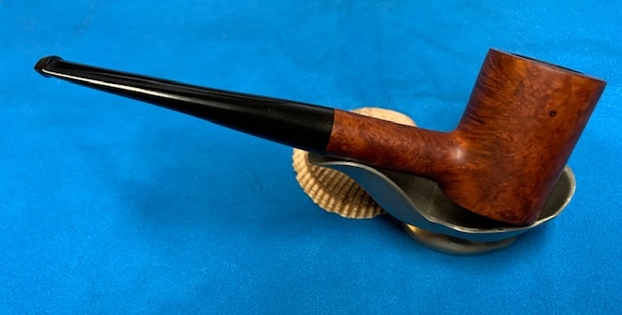
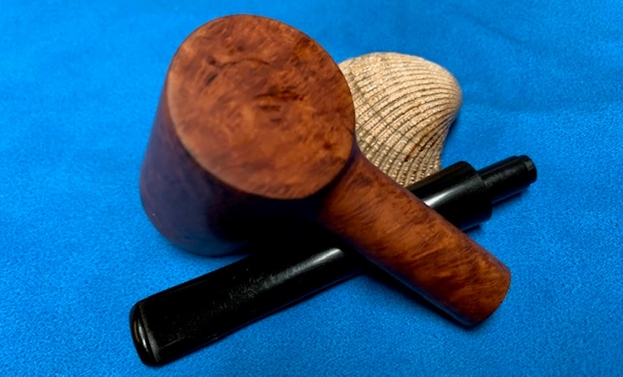
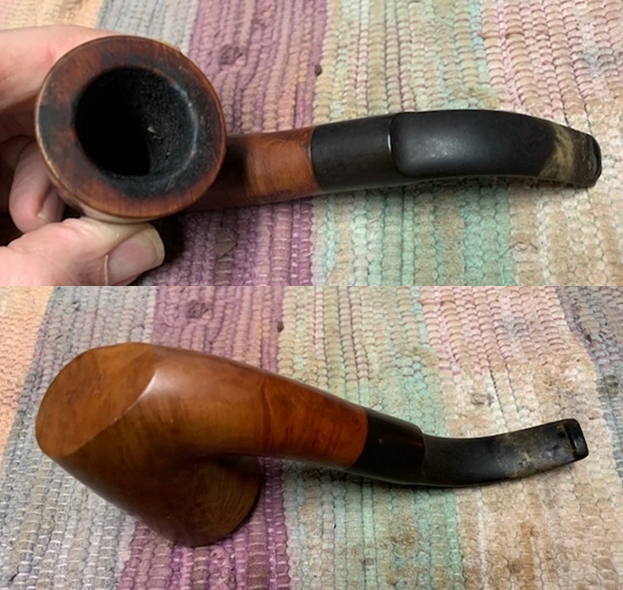
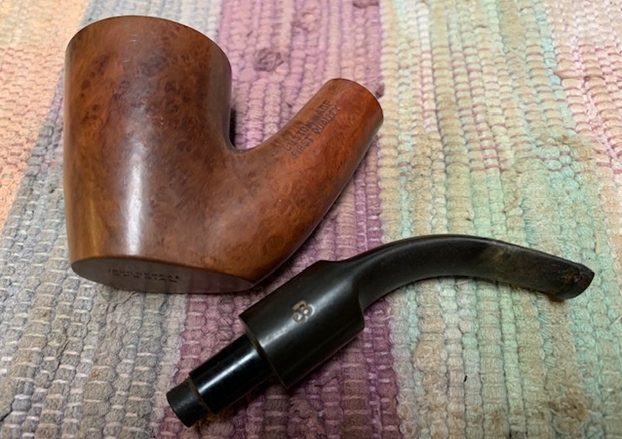
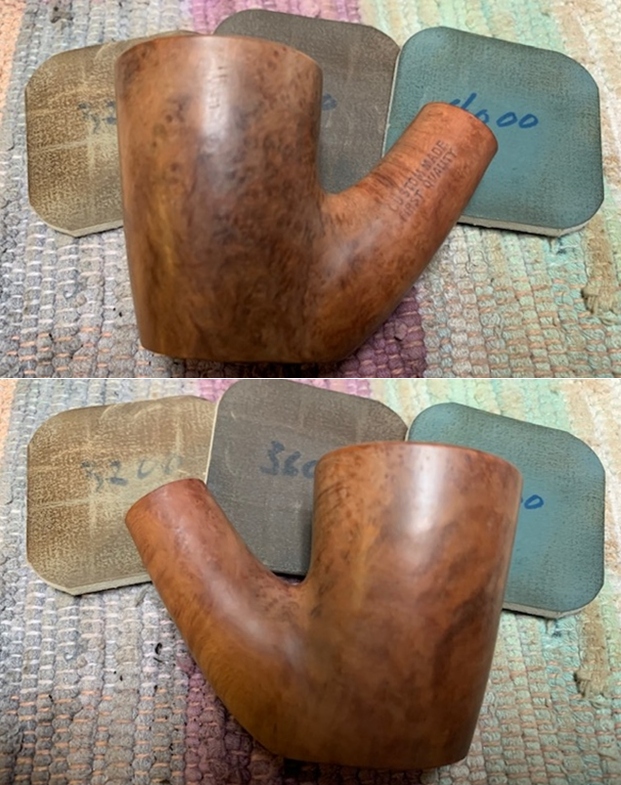
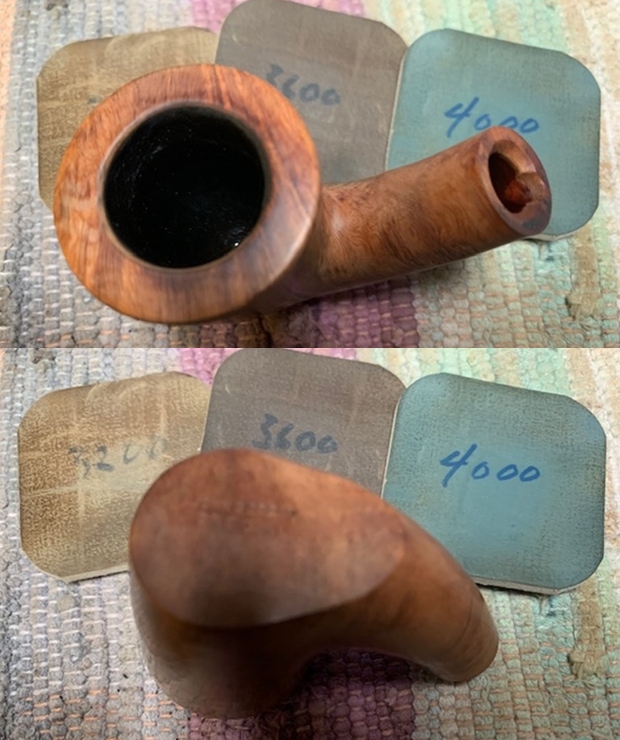
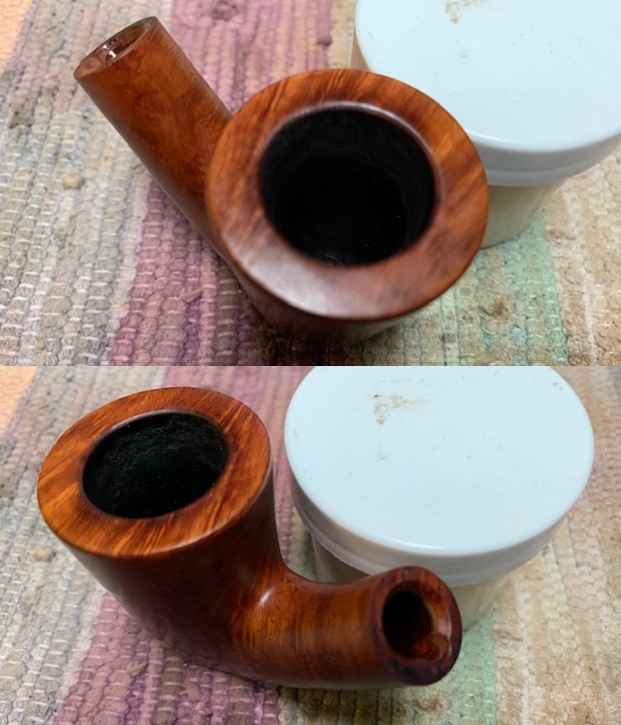
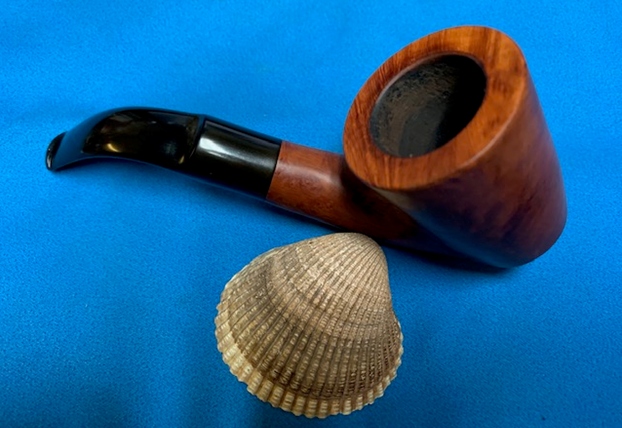
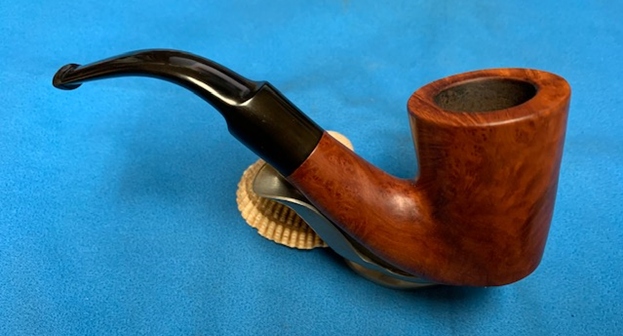
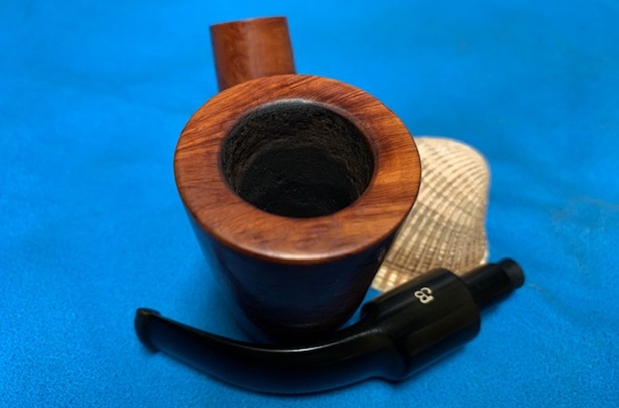
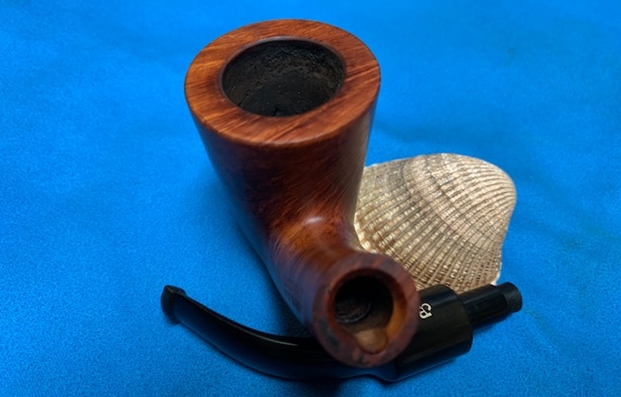
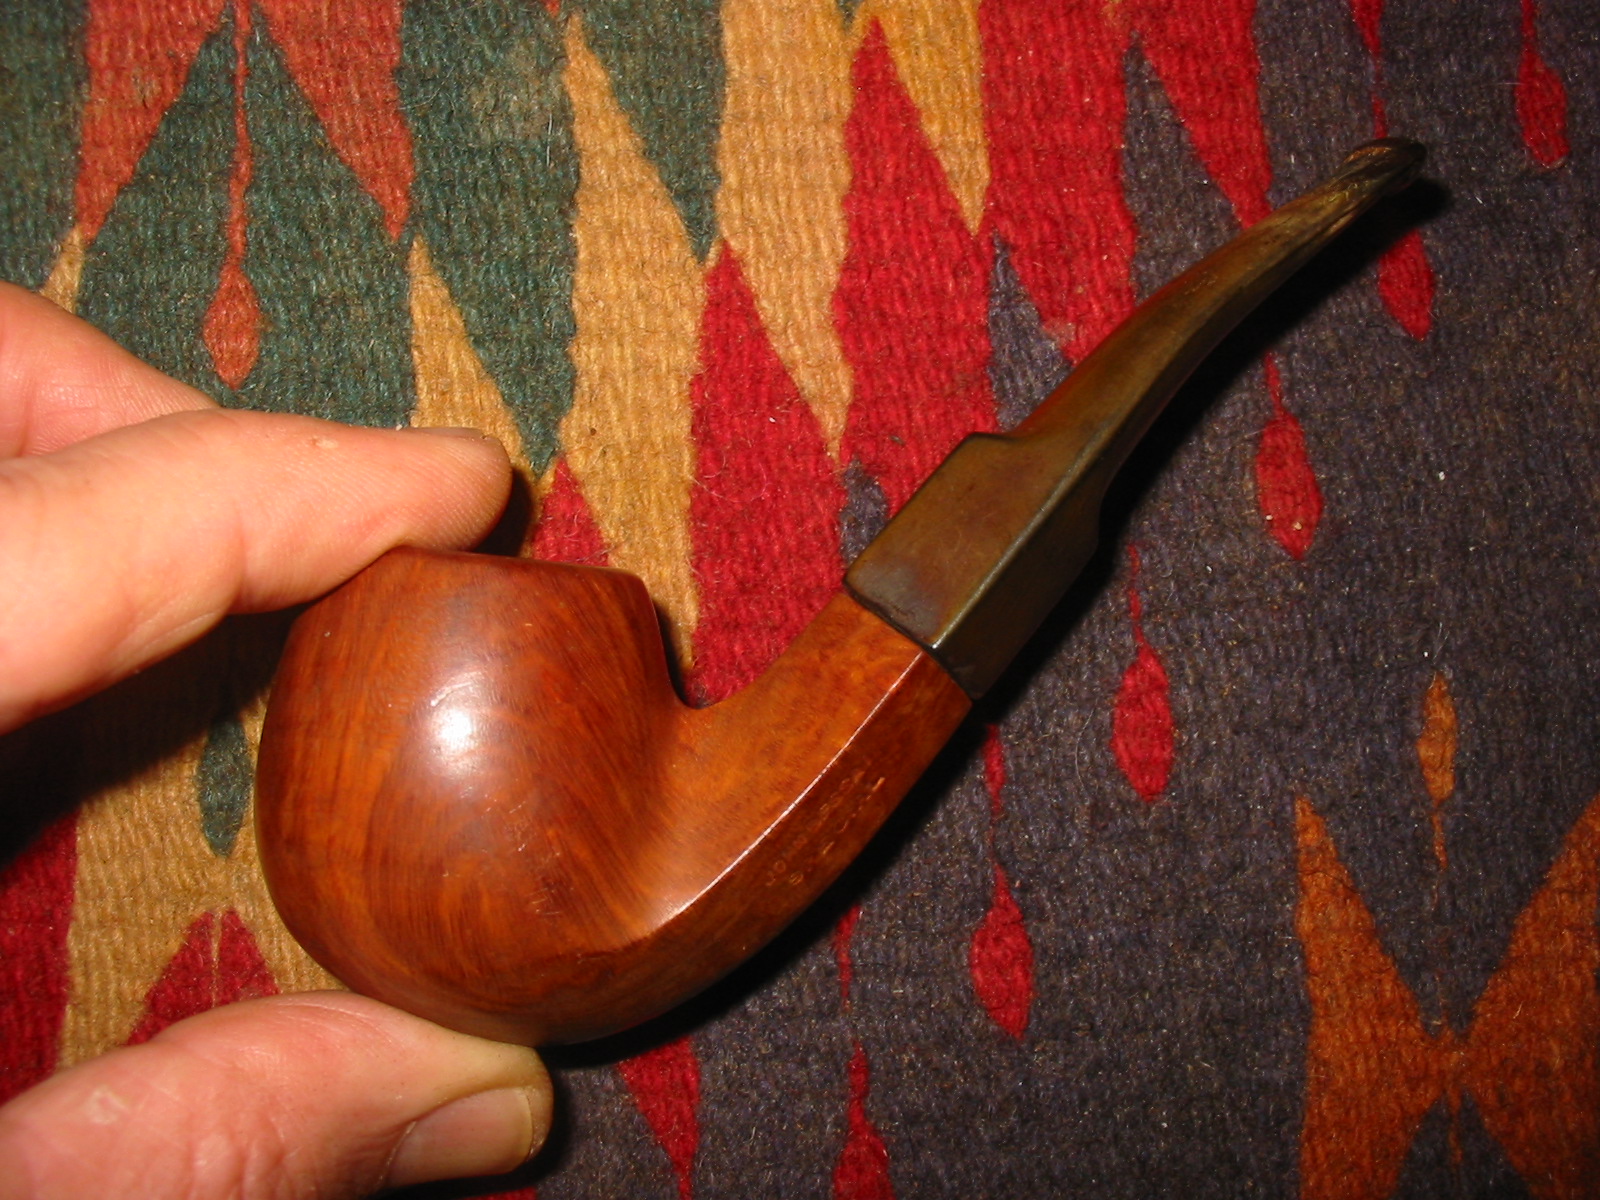
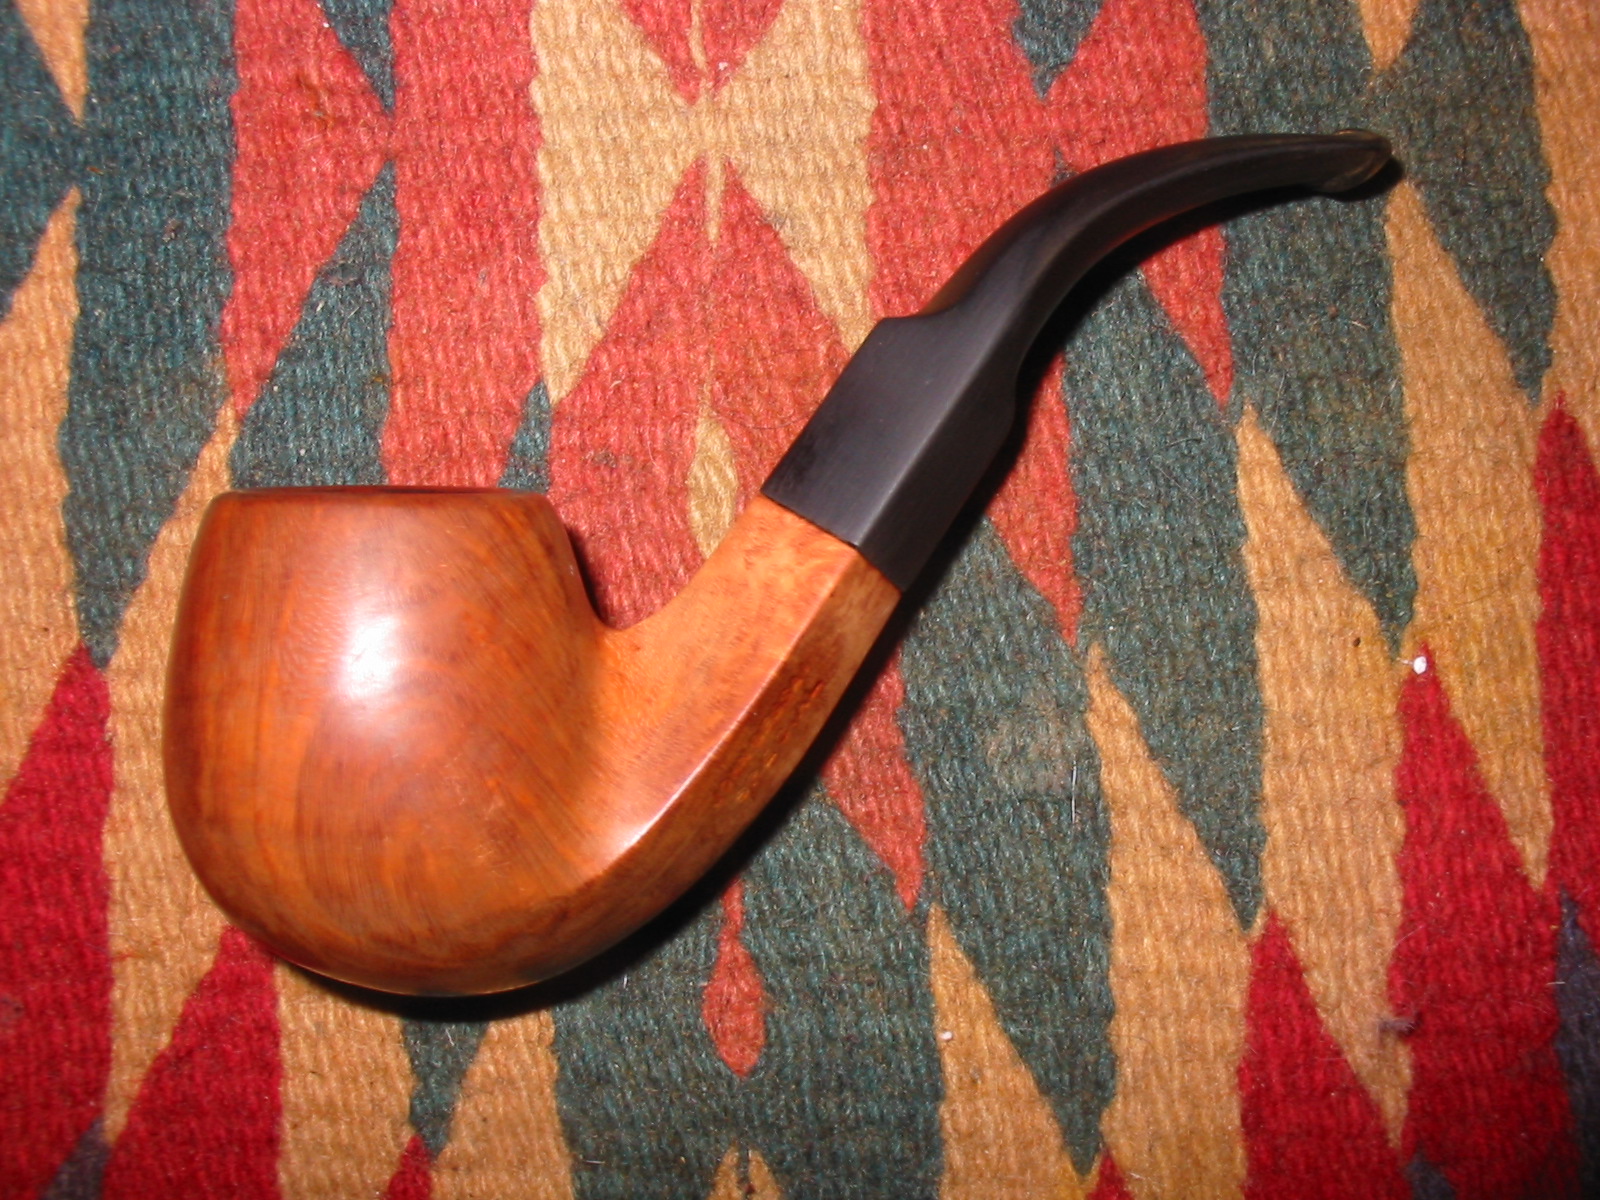
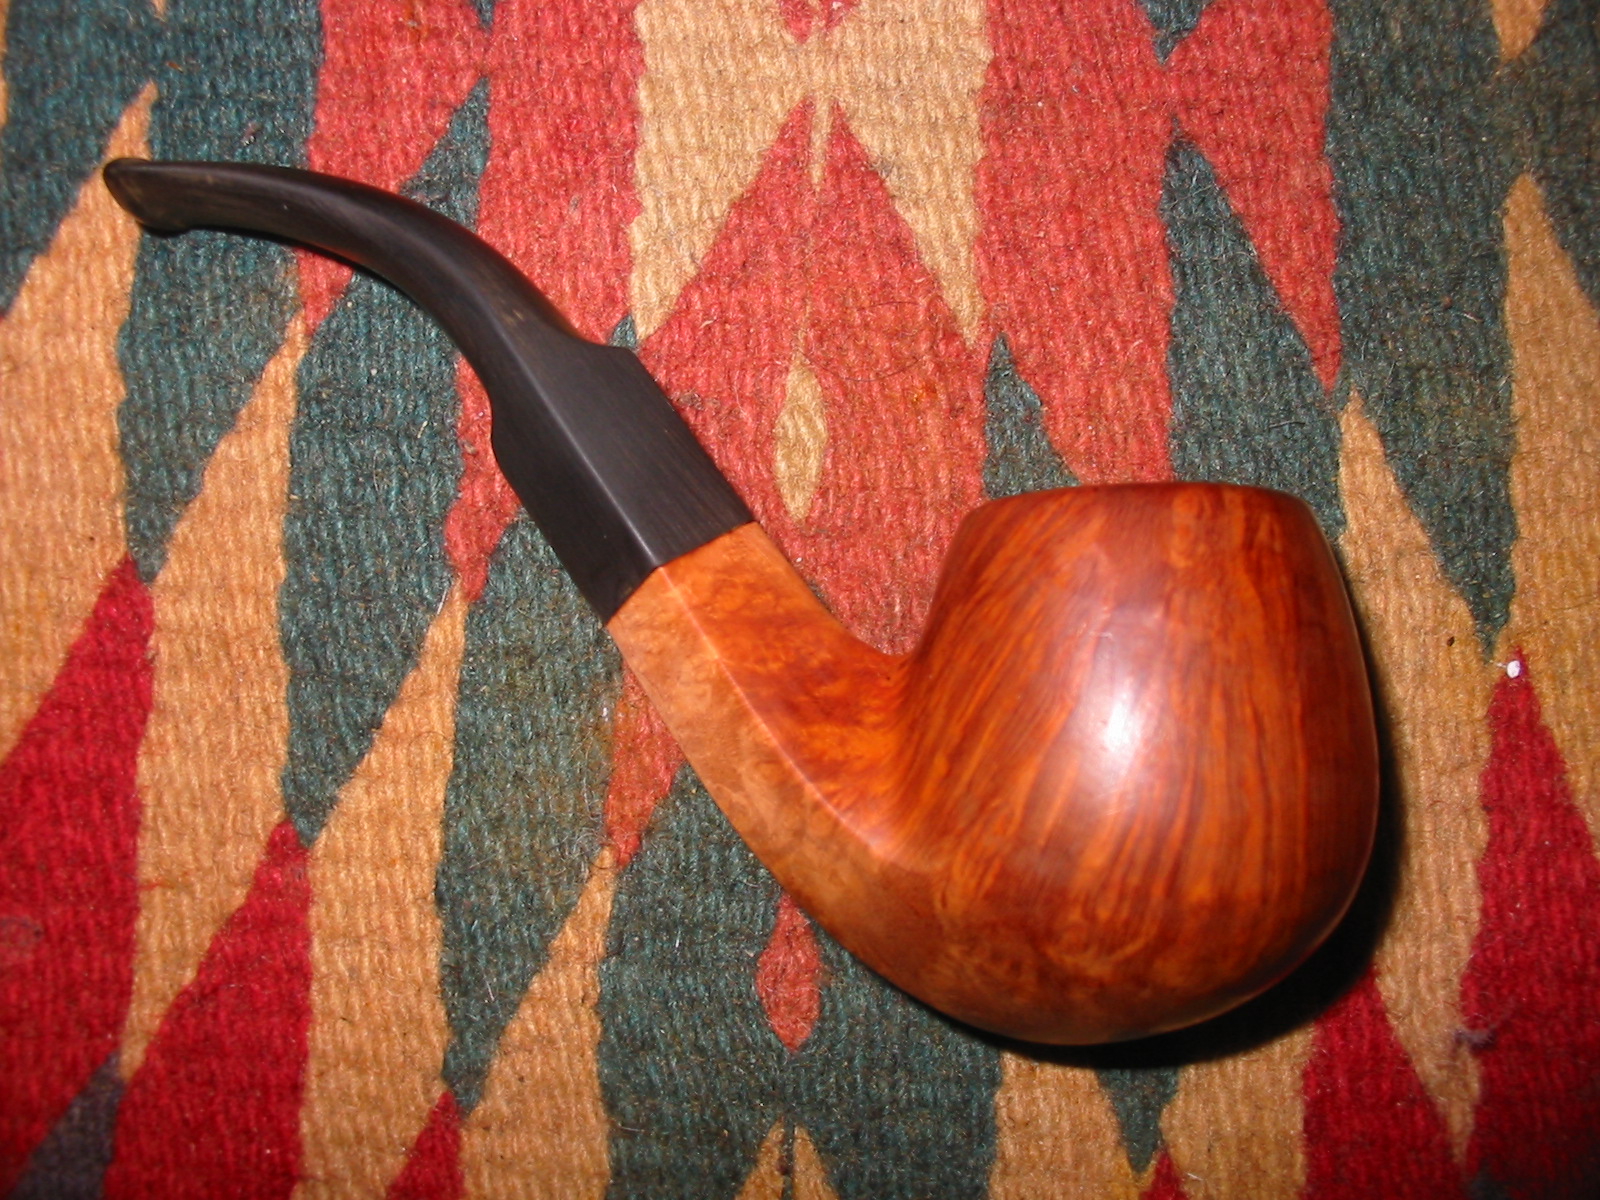
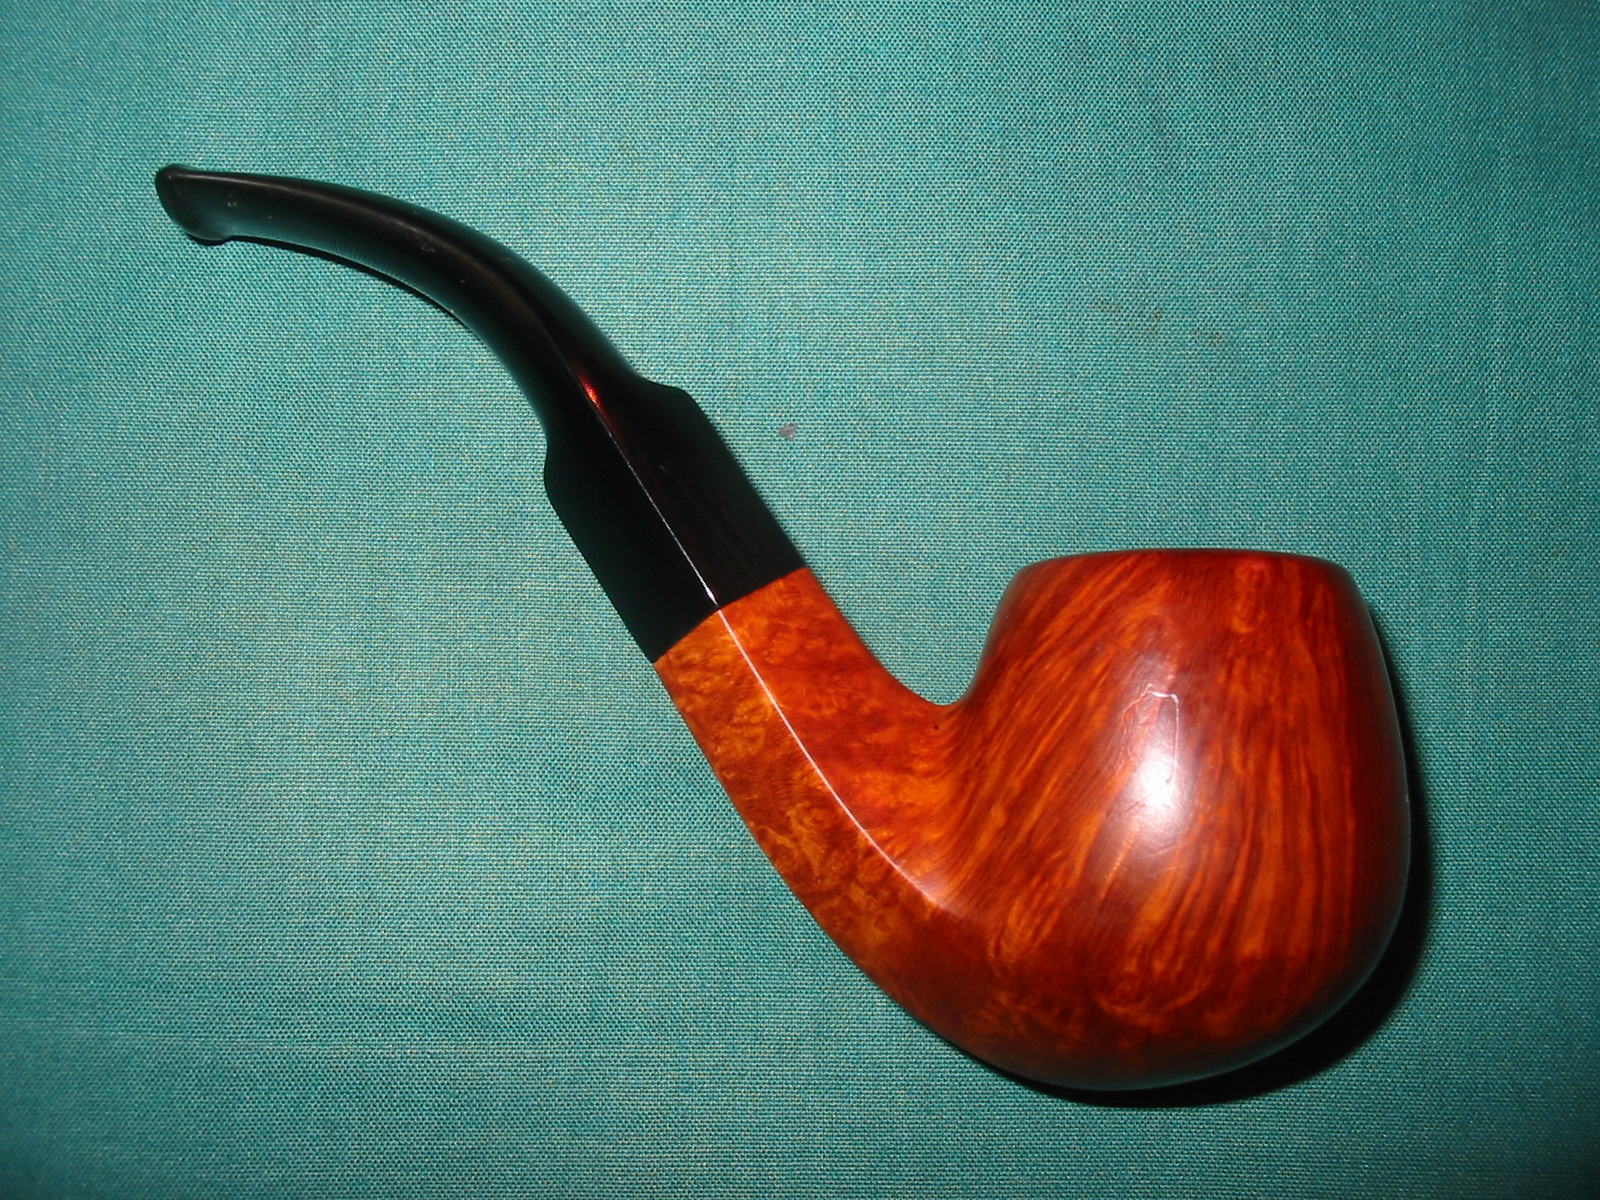
The shallow sandblasted Zulu shaped pipe looks clean and solid with no outwardly apparent damage/ issues. There is a thick layer of even cake in the chamber. The rim top surface appears darkened with small amounts of ash and oils accumulated in the 6 ‘O’ clock direction. The stummel surface is dull and dirty with hand oils and dust ground in to the shallow sandblast. The stem has minor tooth chatter in the bite zone with a couple of tooth indentation/ bite marks to both the button edges. Pictures of the pipe, as it sits on the work table, are shown below: Detailed Inspection
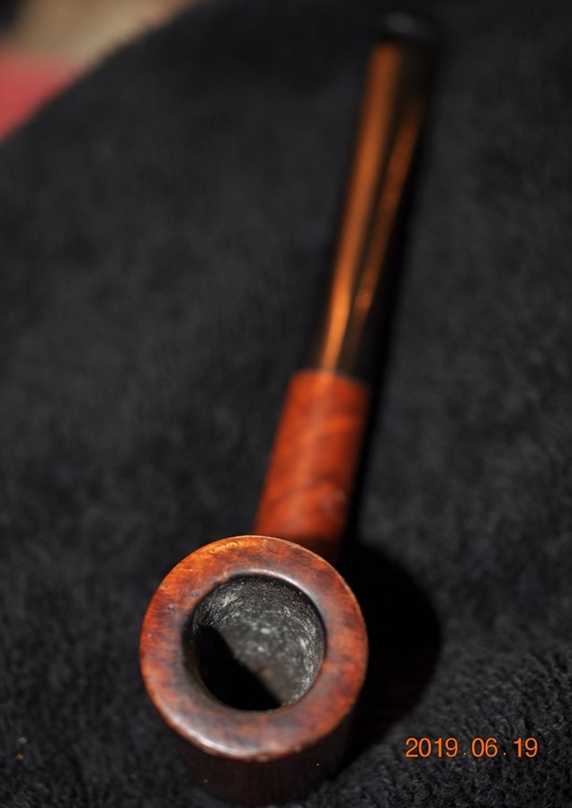
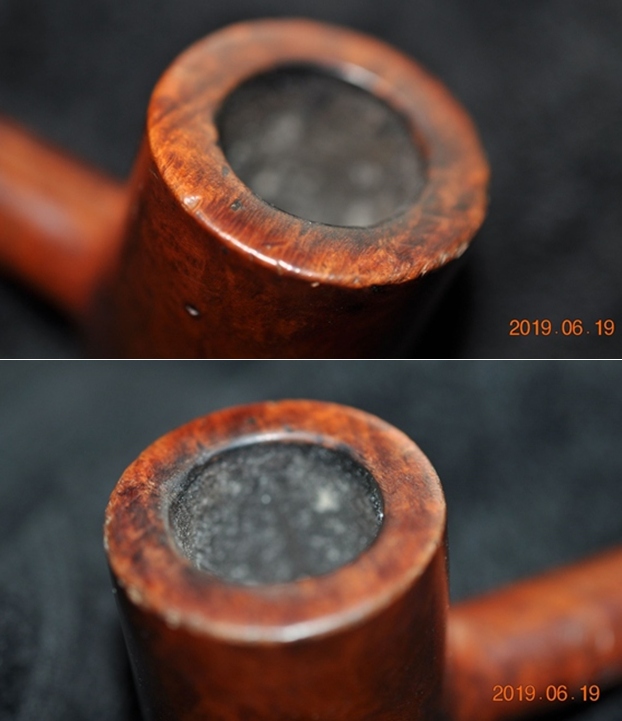
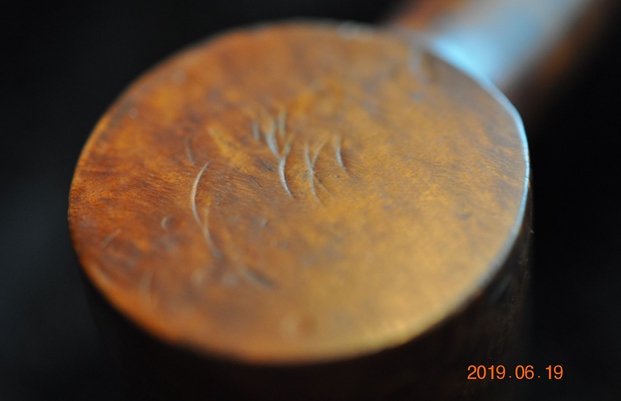
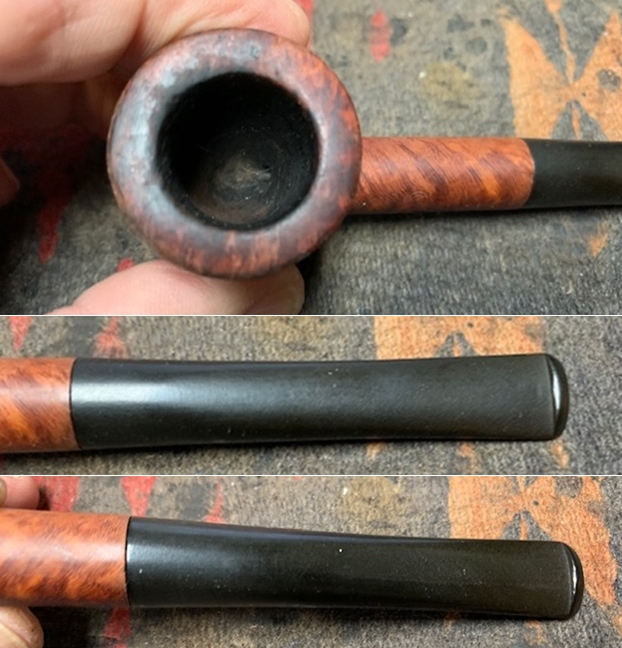
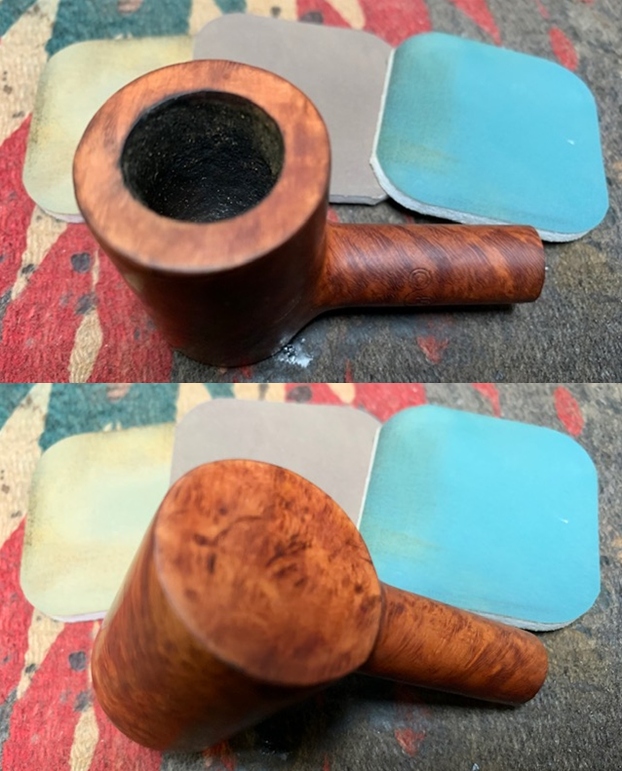
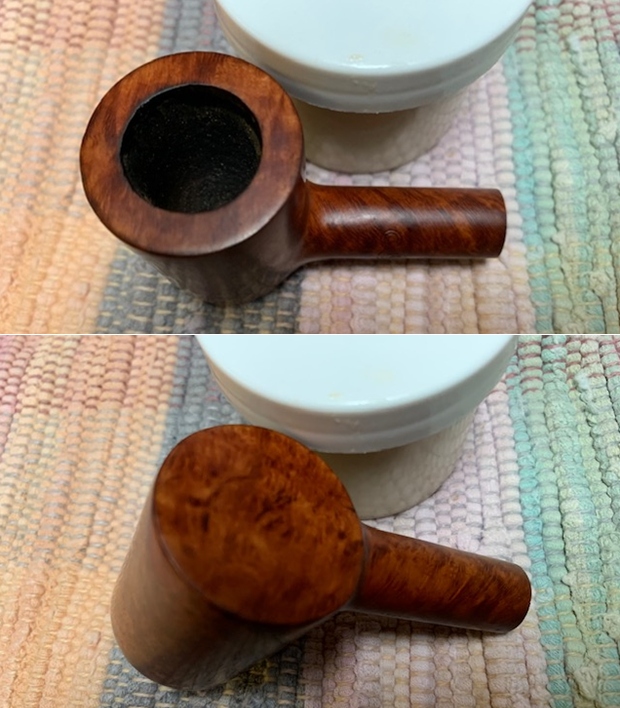
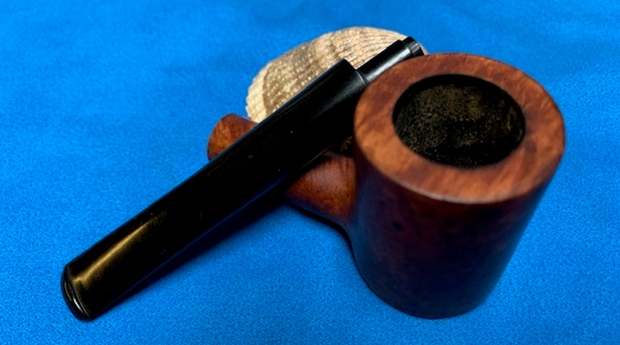
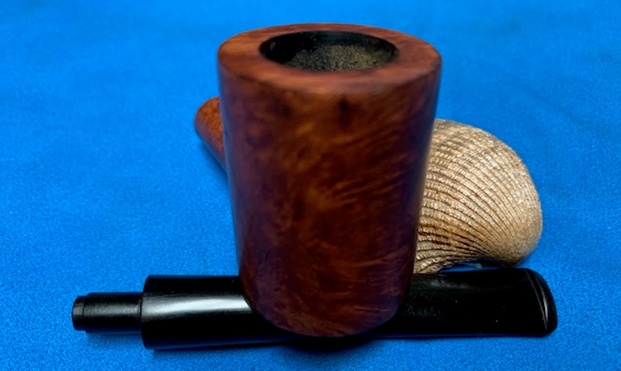
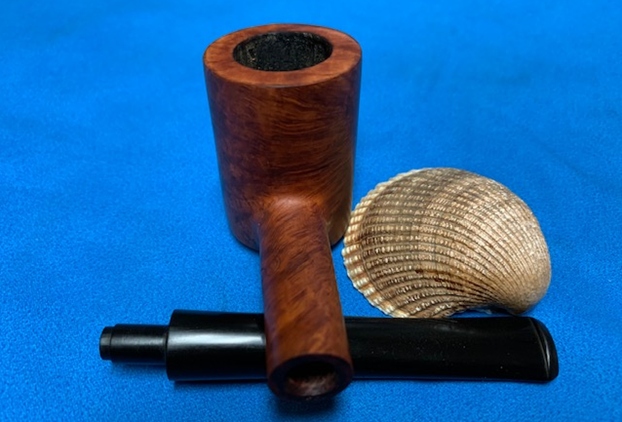
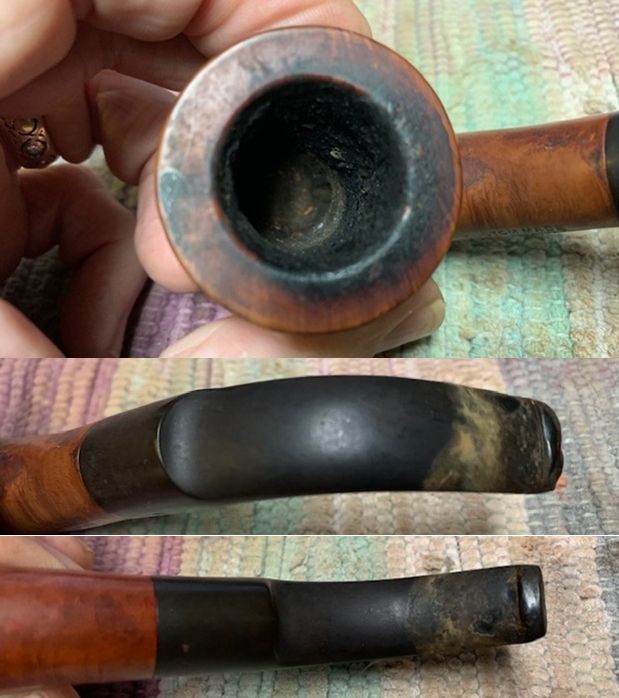
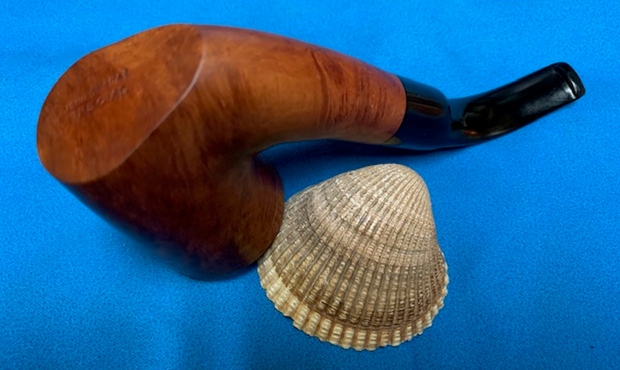
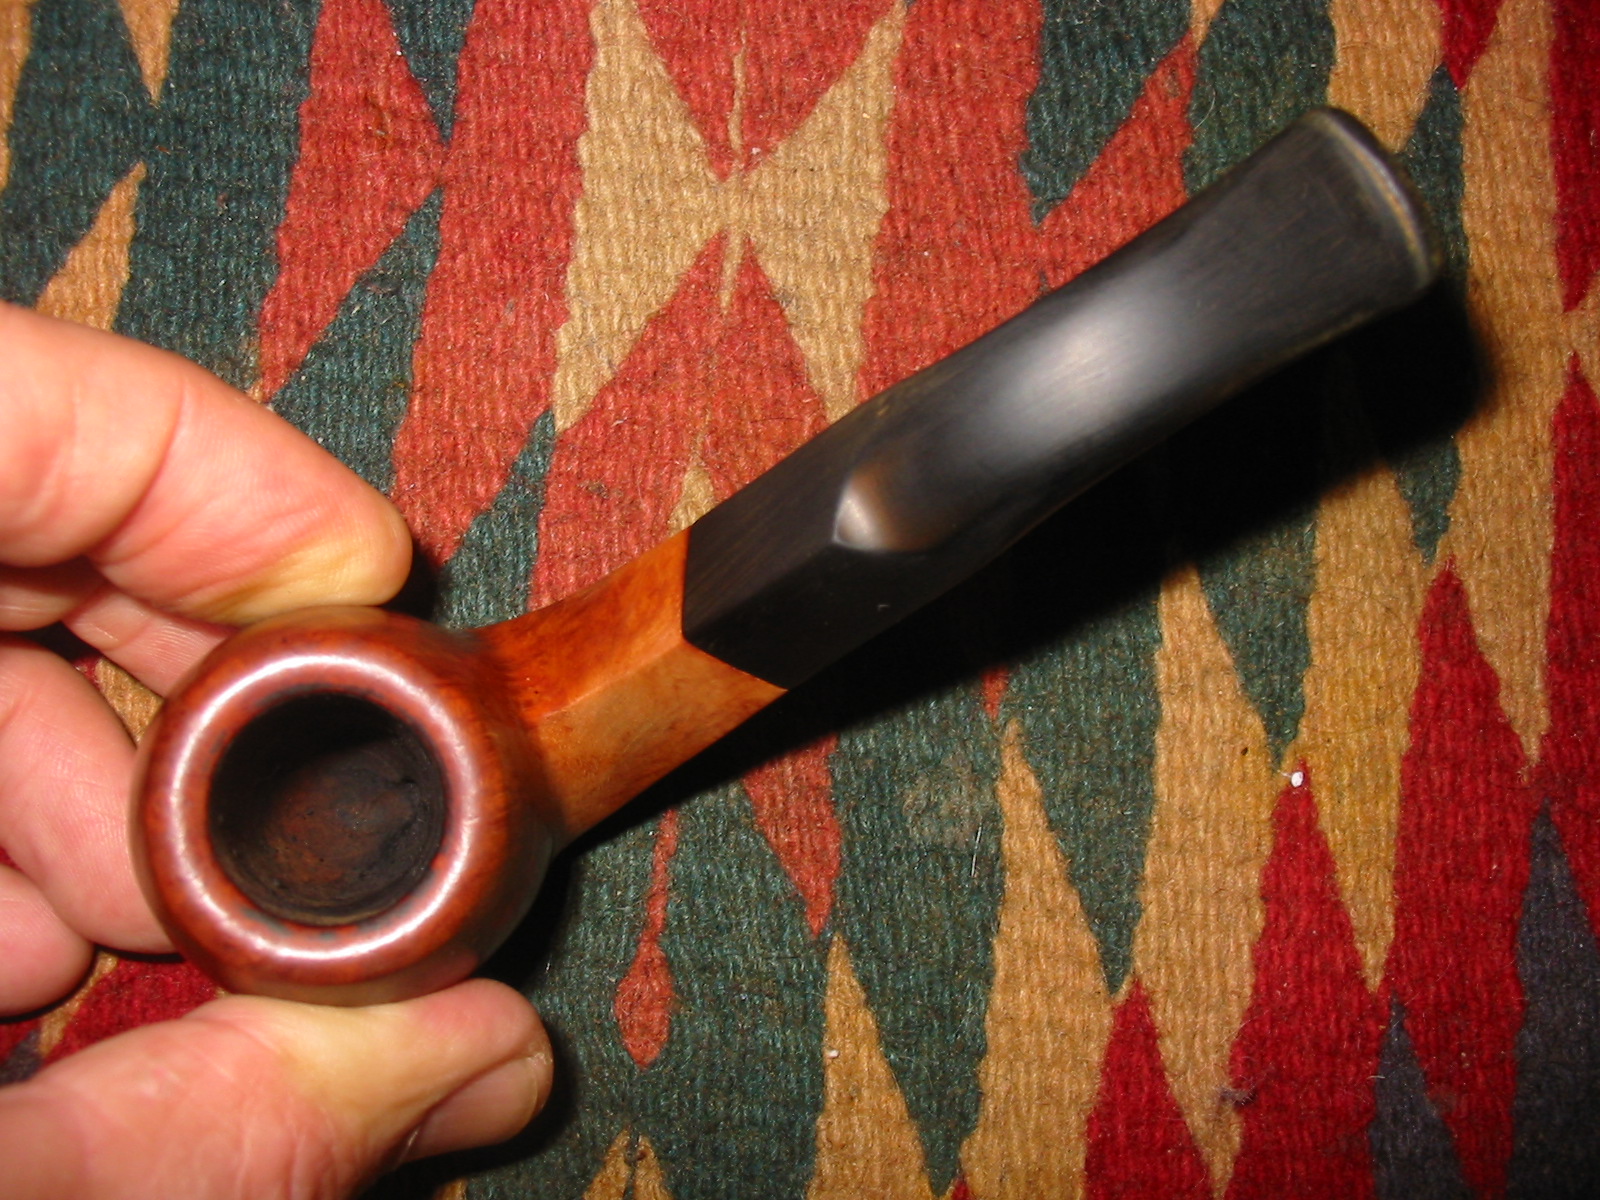
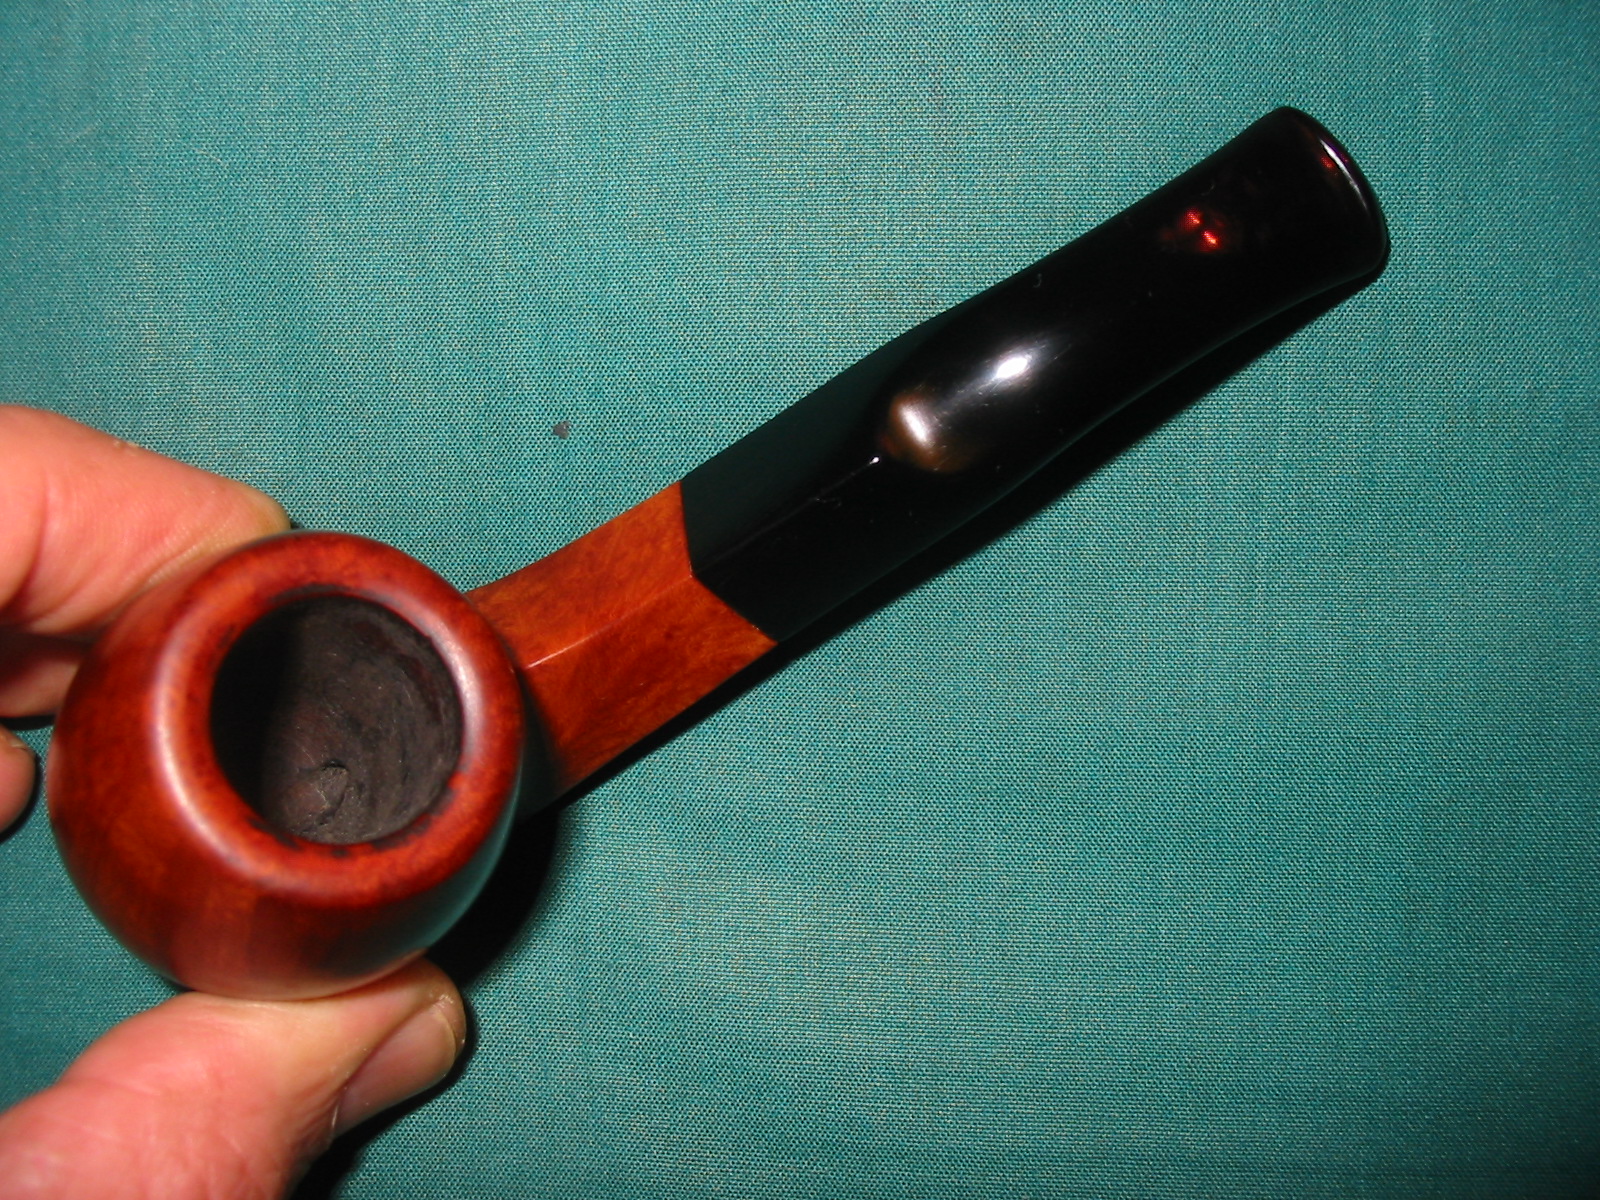
There are few pipes that I get to work on that are in such a decent condition and well looked after by the previous pipe man/ woman and this is one such pipe. There is a thick layer of cake in the chamber and it appears that it has been reamed to maintain it at the thickness of a dime. The rim surface flows inwards ever so slightly with a bevel to the inner rim edge and shows minor accumulation of lava overflow and darkening at 6 o’clock direction (encircled in yellow). The damage to the inner bevel here will be ascertained when the cake and rim surface is all cleaned up. The rim top is smooth and even with no signs of mishandling. The outer rim edge is also in good condition with a couple of very minor dents that were probably caused during the course of handling of the pipe. Presence or absence of heat fissures/ lines will be evident once the chamber walls are rid of all the cake.The stummel has some beautiful shallow sandblast with mixed grains visible over the surface. The stummel appears dull and lackluster as the hand oils had attracted some dust and grime that has accumulated over the surface and in to the grooves of the shallow blast. The stummel surface is solid to the touch and hence I do not anticipate any damage to the chamber walls. The mortise shows traces of accumulation of old oils and tars and would need to be cleaned. The smells from the shank and chamber are very strong and pungent. 
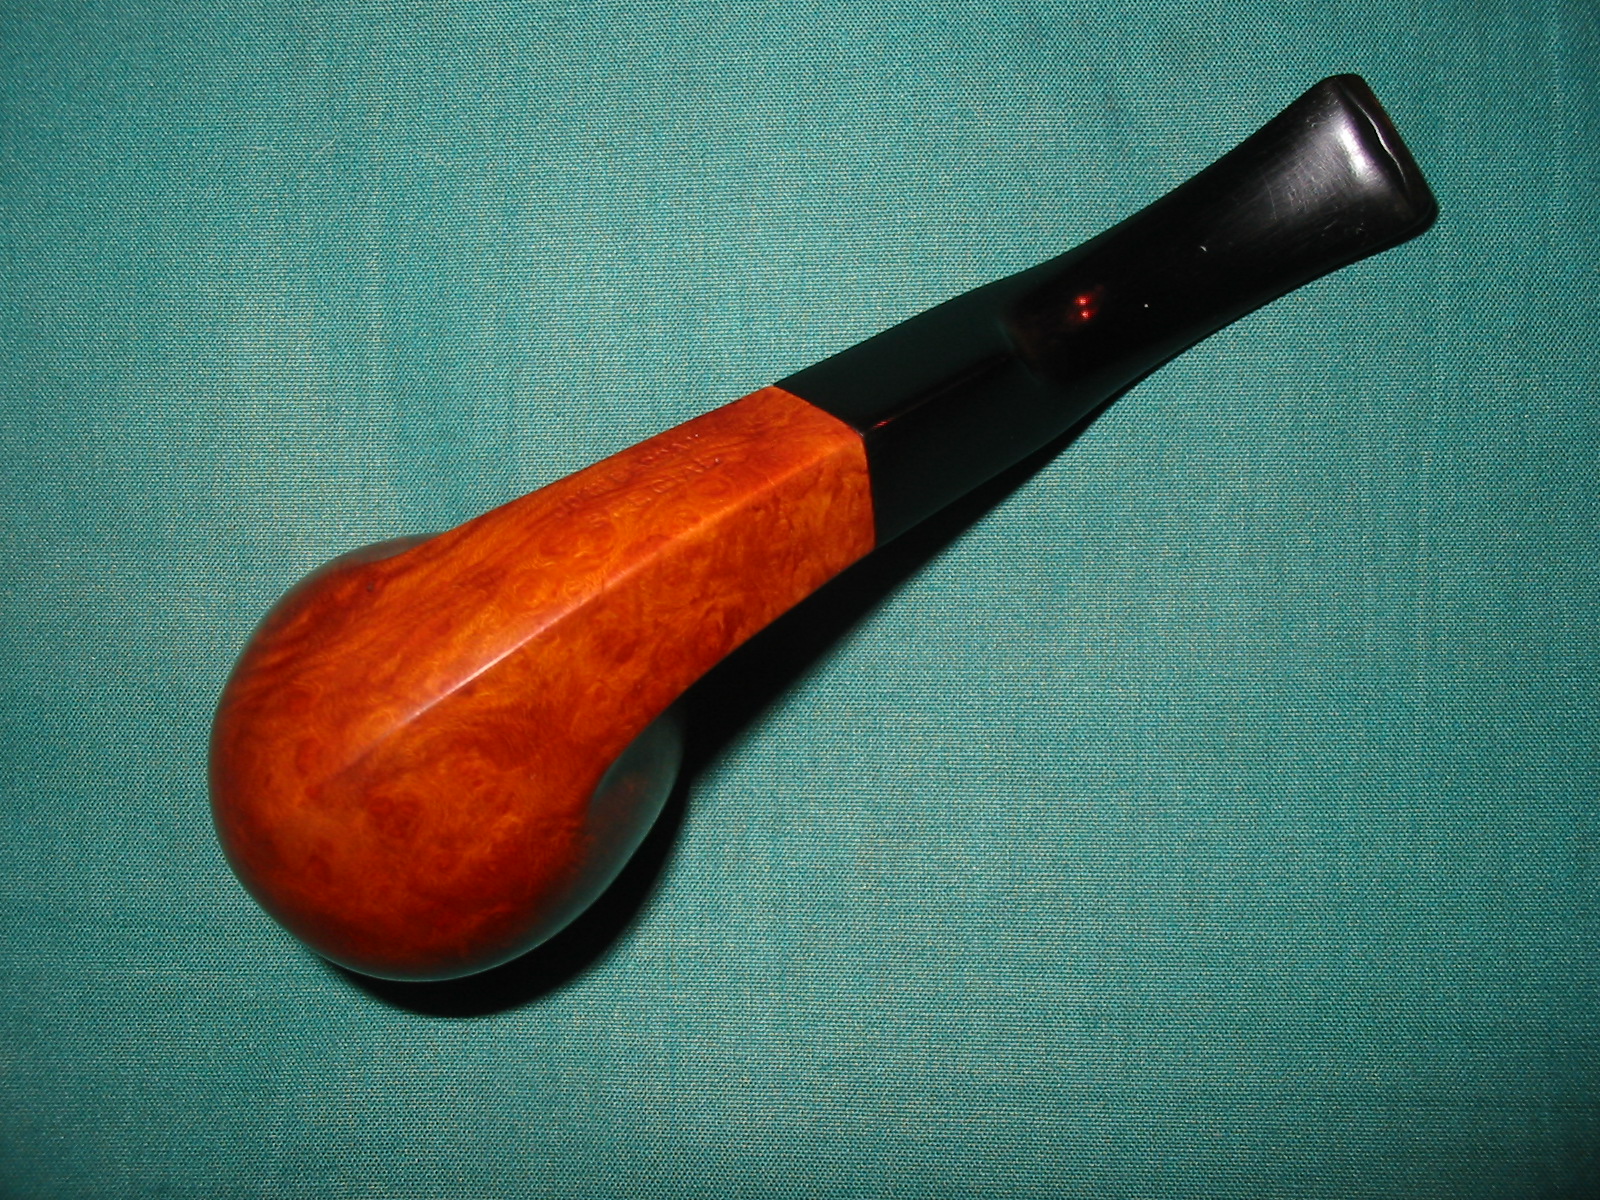
The high quality vulcanite stem has minor tooth chatter in the bite zone on either surface. Also a few tooth indentations (encircled in red) over the button edges on either side are discernible and would need to be rebuilt. Some dried gunk is seen over the tenon and in the horizontal slot. All in all, this is a clean stem with no major issues.The Restoration Process
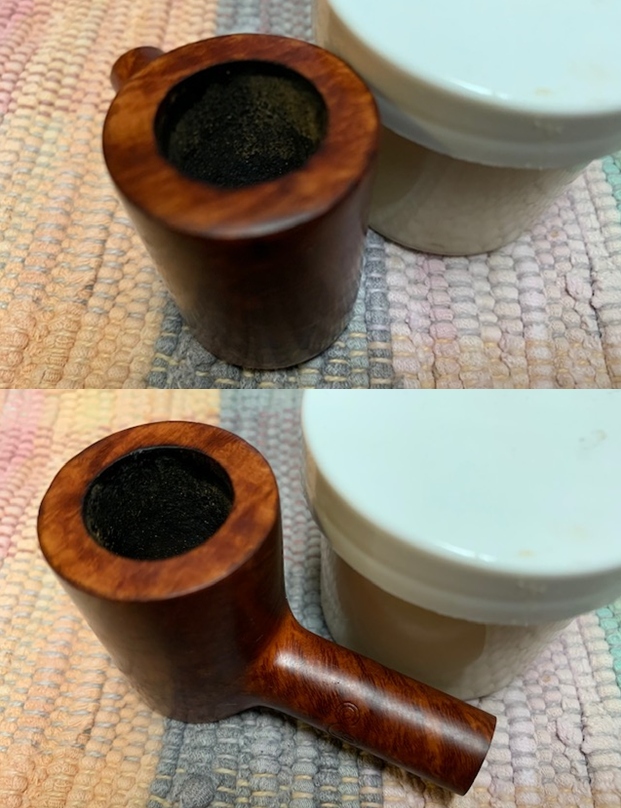
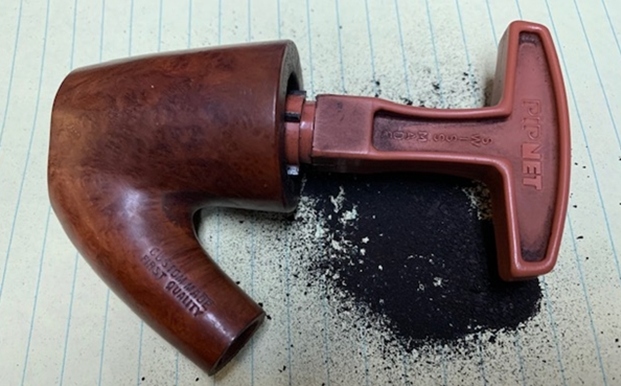
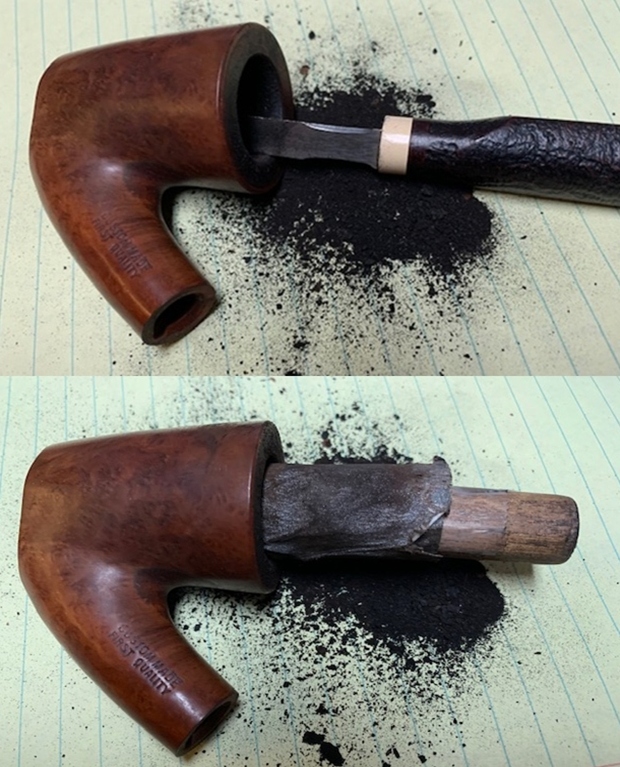
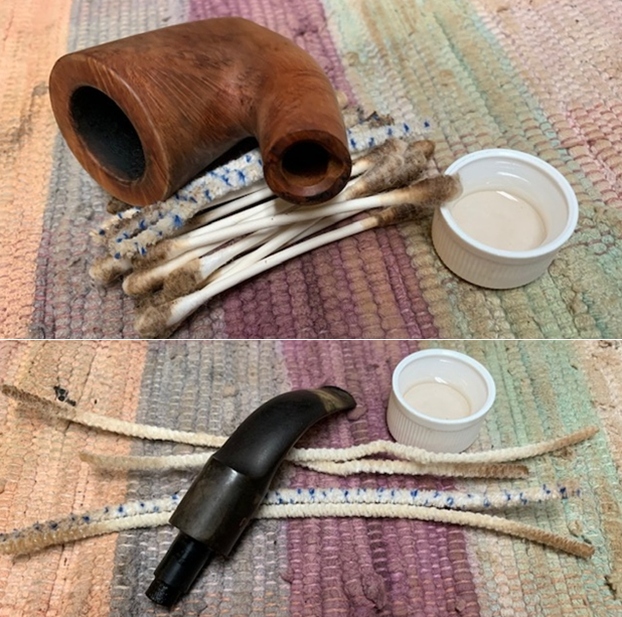
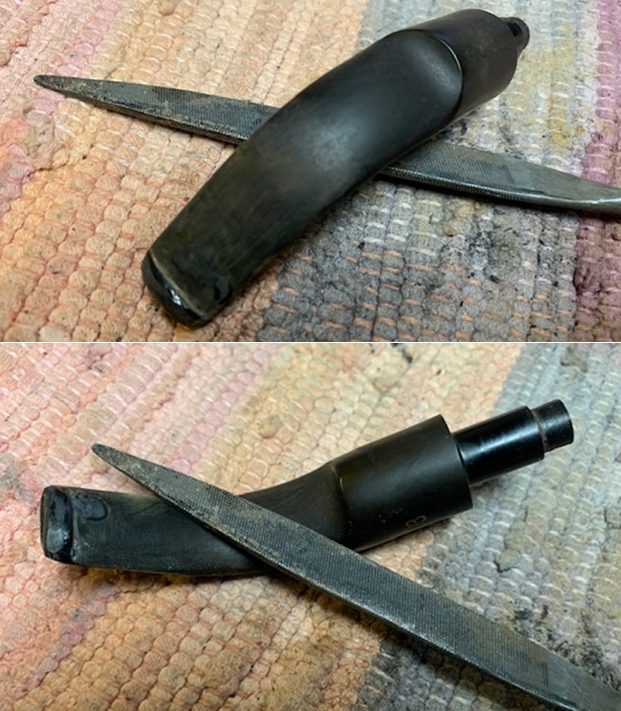
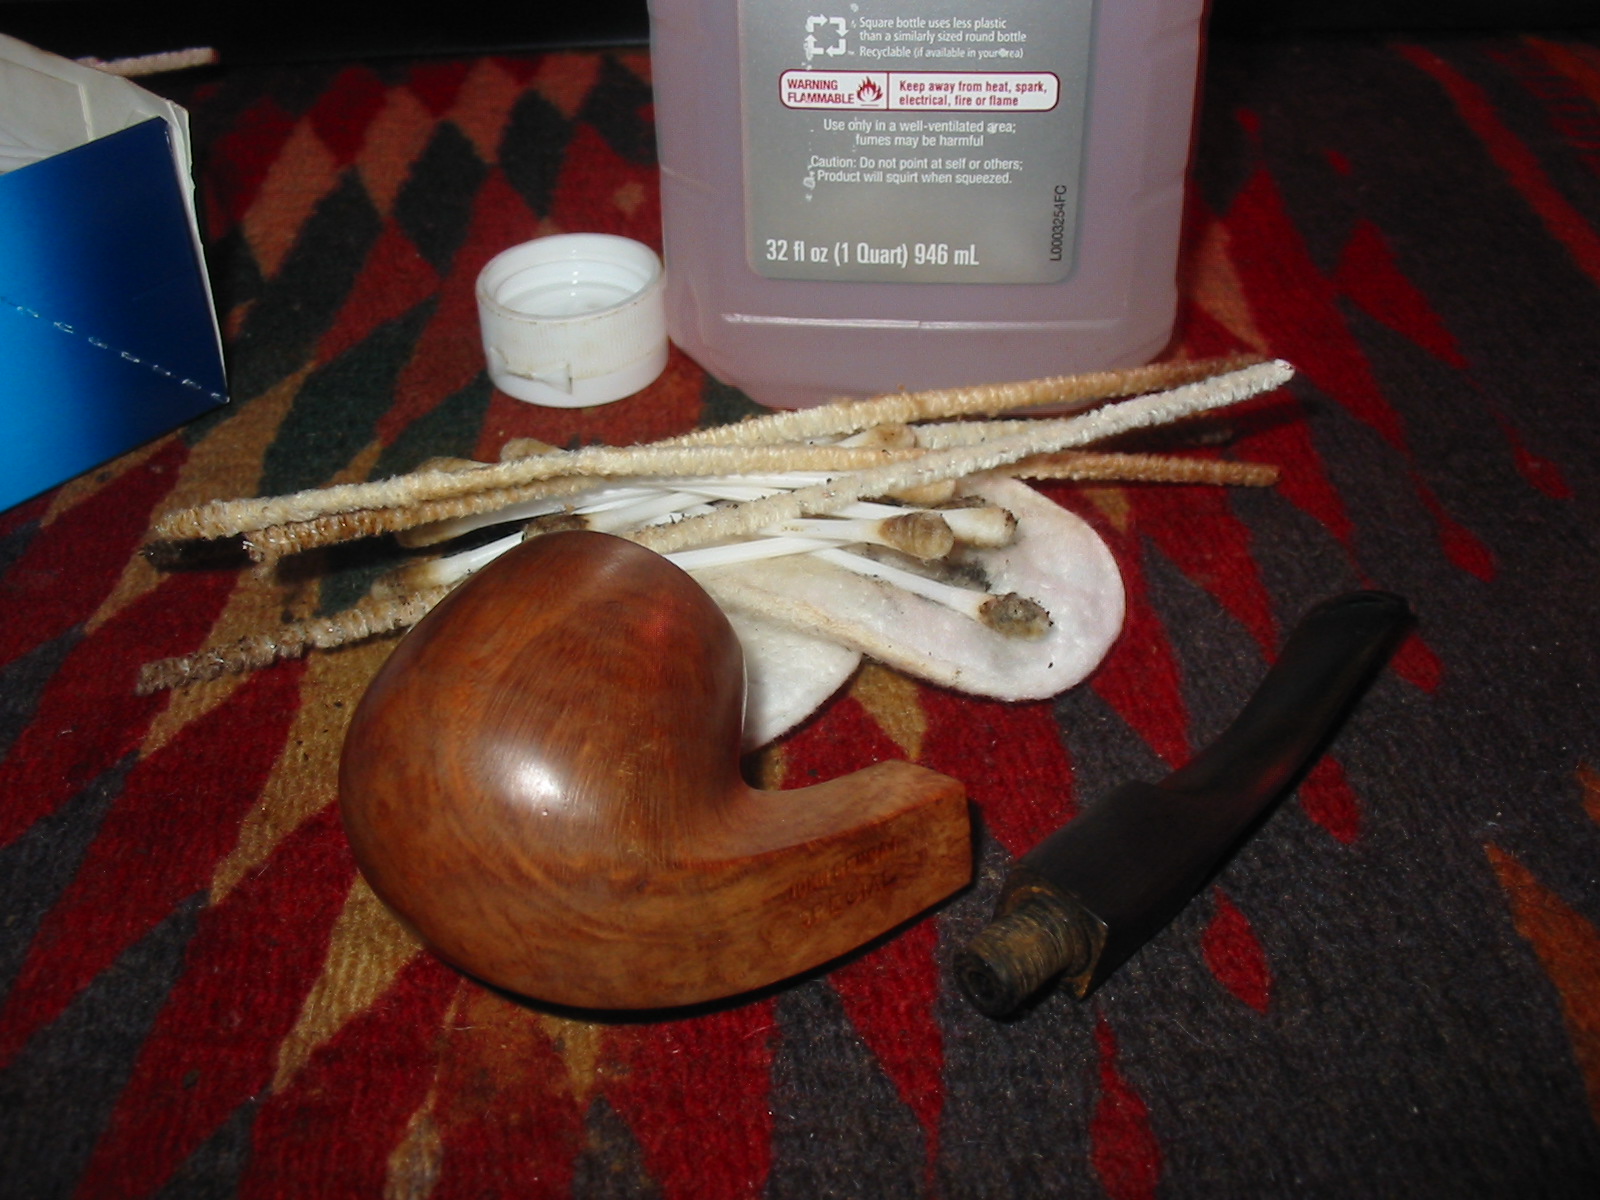
I started the restoration with cleaning of the stummel as I was keen to know the condition of the walls of the chamber. I worked on the stummel by first reaming the chamber with size 1 PipNet reamer head. With my fabricated knife, I further scraped the chamber walls to remove the remaining carbon deposits and also from areas inaccessible by the reamer head. I also scraped out the lava overflow from the rim top surface. Once the cake was reamed back to the bare briar, I used a 150 grit sand paper followed by 220 grit sand paper to remove all the traces of remaining cake and also to smoothen out the inner walls of the chamber surface. Finally, to remove the residual carbon dust, I wiped the chamber with a cotton pad wetted with 99.9% pure isopropyl alcohol. As expected the chamber walls are solid with no damage whatsoever.Next, I cleaned out the internals of the shank and mortise. Using my dental tool, I scraped out all the dried oils, tars and gunk that had accumulated in the draught hole and on the walls of the mortise. I finished the cleaning by running a few pipe cleaners dipped in isopropyl alcohol through the mortise. I shall continue with further cleaning of the shank internals using the cotton and alcohol bath. I had expected that after this initial cleaning of the chamber and shank internals, the ghost smells would have been greatly reduced, but that was not so. I decided to subject the chamber and mortise to cotton and alcohol bath. I packed the chamber with cotton and drew out a wick from the cotton and along with a folded regular pipe cleaner, inserted it into the mortise and through the draught hole into the chamber. I tightly packed cotton balls in to the remaining portion of the mortise. Thereafter, I soaked the cotton balls with isopropyl alcohol up to the brim. About half an hour later, the level of alcohol had gone down, having being absorbed by the cotton. I topped it up once again and set it aside overnight. By next afternoon, the cotton and alcohol had drawn out all the remaining oils and tars from the chamber and mortise. I ran pipe cleaners through the mortise and draught hole to clean out all the loosened tars and gunk that was lodged in the draught hole and mortise. The chamber and mortise now smelled clean, fresh and looked it too. I set the stummel to dry out naturally.
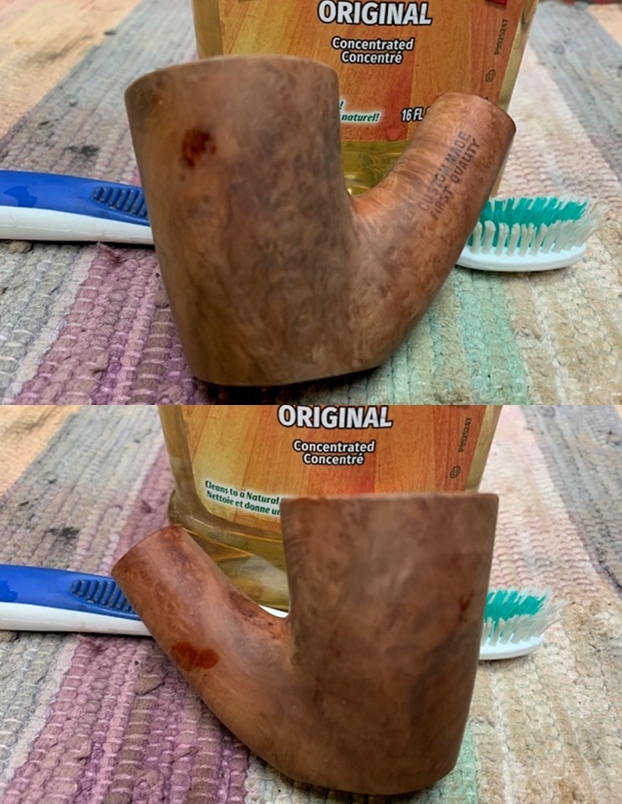
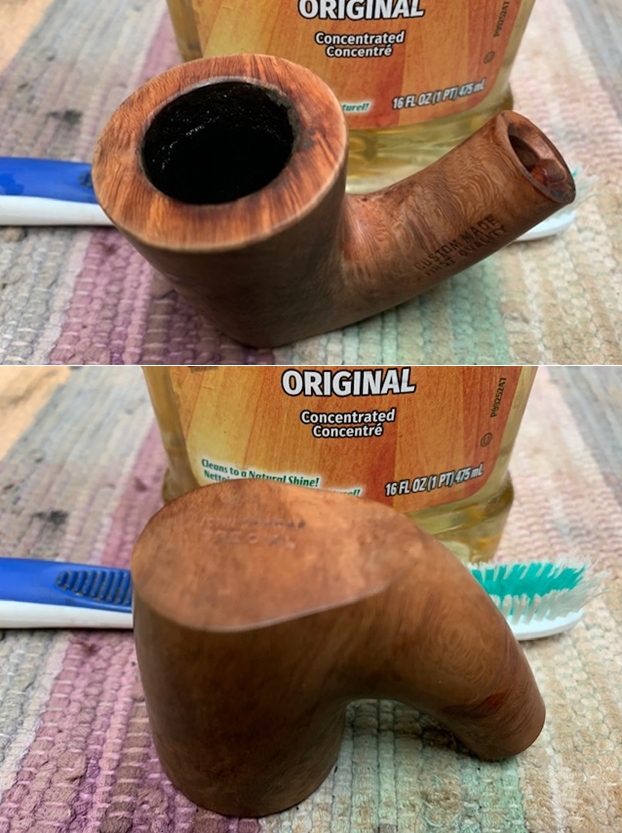
With the bowl internals clean, I moved to clean the exterior of the stummel. I used a hard bristled tooth brush and Murphy’s Oil soap to scrub the stummel and rim top. I rinsed the stummel under running warm water with anti oil dish washing detergent till the stummel surface was clean and dried it using paper towels and soft cotton cloth. The surface is now clean but appears bone dry.I simultaneously cleaned the shank internals with the detergent and hard bristled shank brush and set the stummel aside to dry out naturally. The strong ghost smells are history and the stummel now smells clean and fresh.
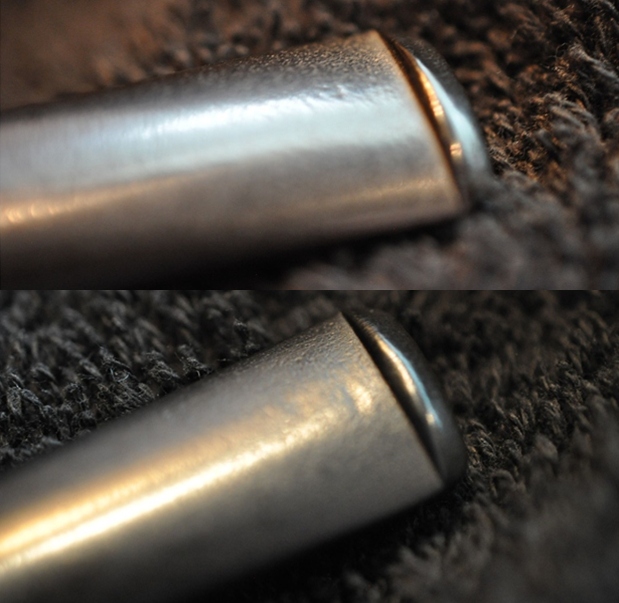
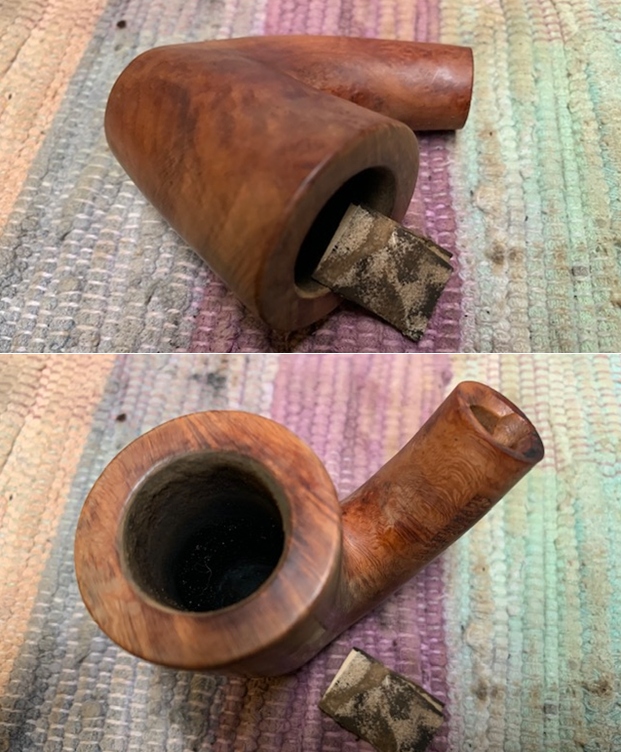
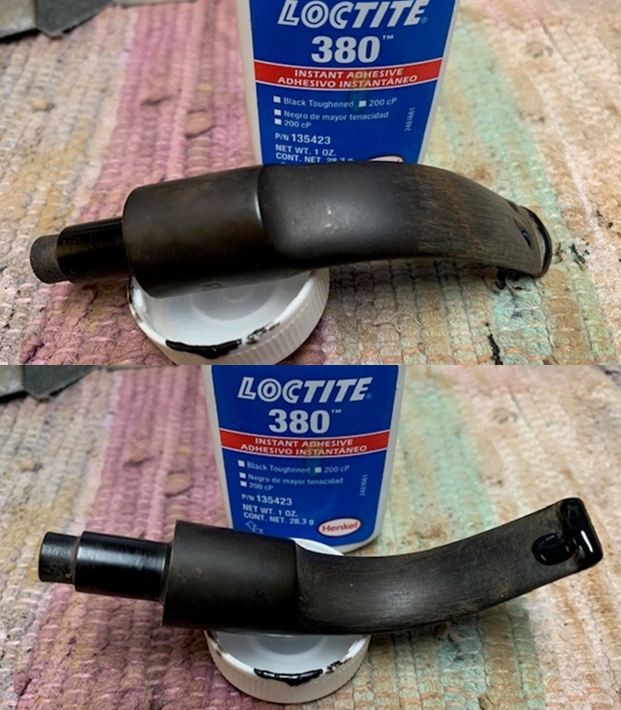
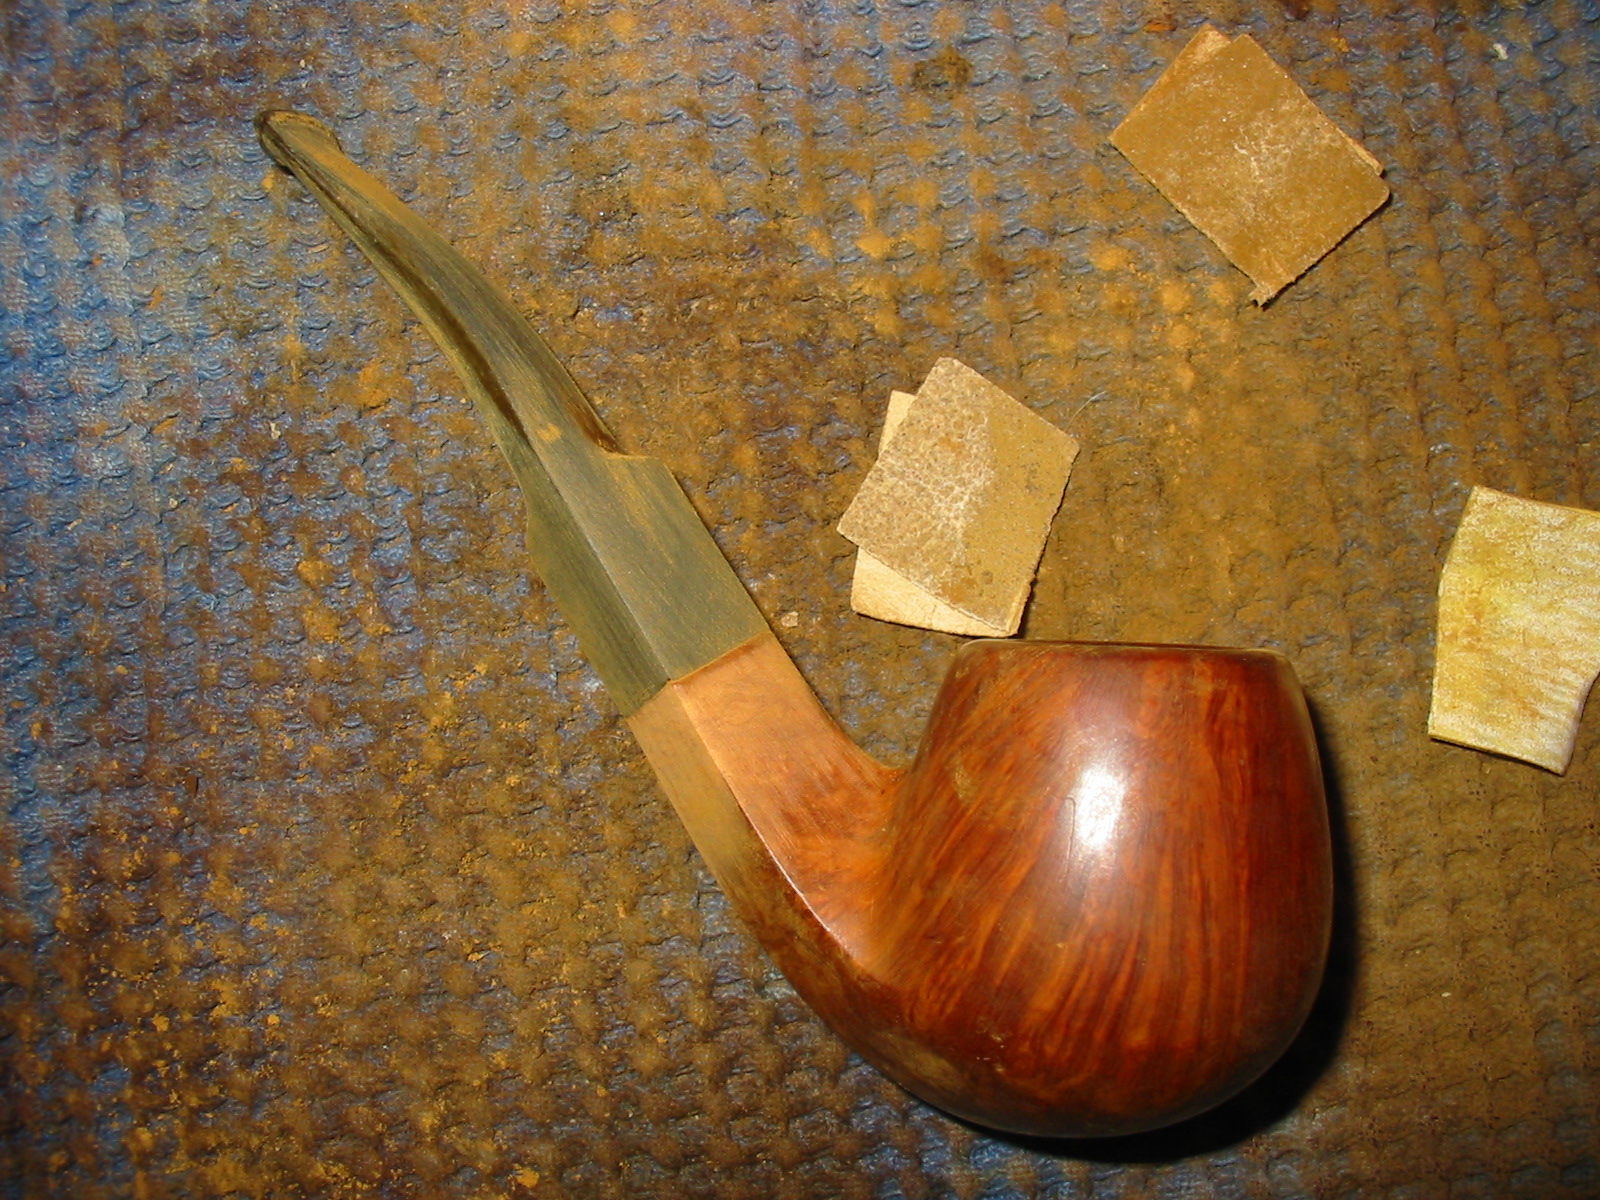
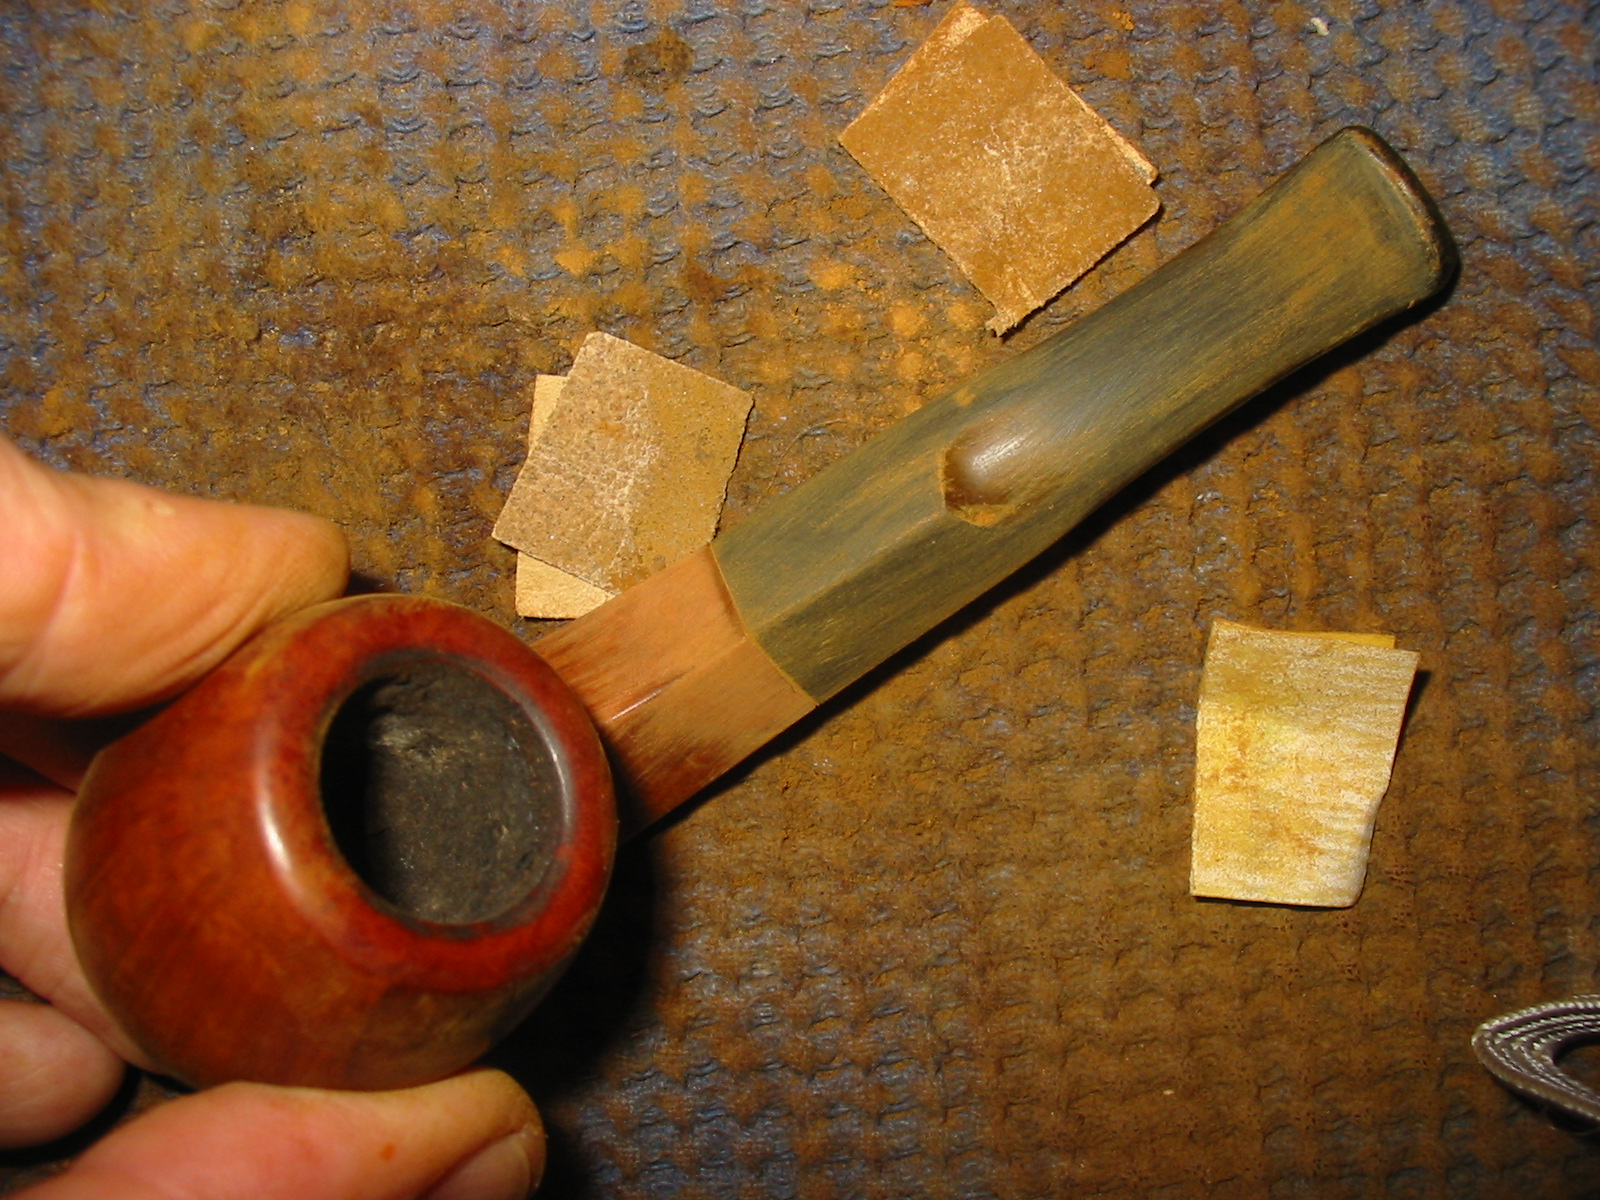
While the stummel was drying out, I worked on the stem. I began the refurbishing process by scraping out the dried gunk from the tenon end using a thin sharp knife and dental tool. I then ran a couple of pipe cleaners dipped in alcohol through the stem airway to clean it up. I shall be continuing the cleaning of the airway subsequently. This cleaning has revealed remnants (indicated by blue arrows) of an aluminum stinger that was cut during it’s time with the previous owner. I fail to understand the reason for this as the previous owner could have completely removed this stinger instead of cutting it at the tenon end. Well, there is no way that I can remove the remaining embedded portion of the stinger and since it does not interfere with either the smooth and effortless passage of a pipe cleaner or airflow through the airway, I let it be. However, I did open up and smooth out the cut face of the stinger with a round needle file.Next, I cleaned the stem airway using thin nylon shank brushes and anti oil soap. This helps in conserving pipe cleaners which are hard to come by here in India. I further scrubbed the stem surface with a Scotch Brit pad and soap to remove superficial oxidation from the surface. I rinsed the stem airway and surface under running tap water.I continued with external cleaning of the stem surface by dunking the stem into “Before and After Deoxidizer” solution developed by my friend Mark Hoover. The solution helps to draw out heavy oxidation to the surface making its further removal a breeze, while the minor oxidation is eliminated to a very great extent. I usually dunk stems of couple of pipes that are in-line for restoration and the Bessai is marked in green arrow. I generally allow the stems to soak in this solution overnight for the solution to do its work.
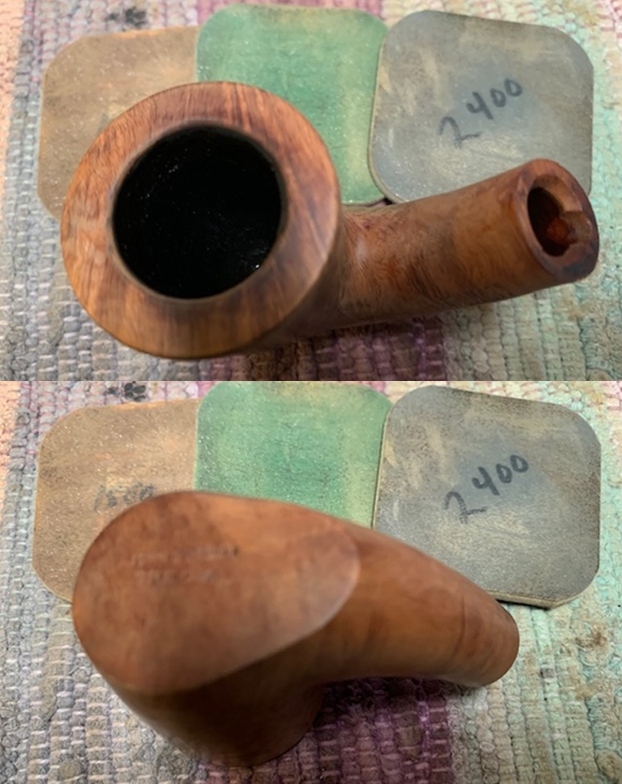
With stem soaking in the deoxidizer solution, I turned my attention back to the stummel refurbishment. I lightly topped the rim surface on a piece of 220 grit sandpaper. This helped to address the few minor dents over the rim outer edges, address the darkened rim top in 6 o’clock direction as well as further define the inner edges and bevel edges.Using a folded piece of 220 grit sandpaper pinched between my fingers, I sand the inner rim edge to remove the slight darkening seen in the 6 o’clock direction.
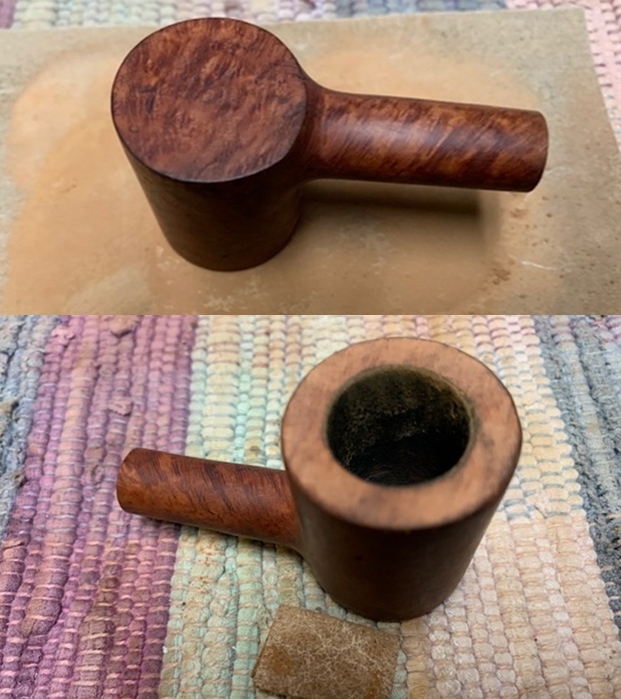
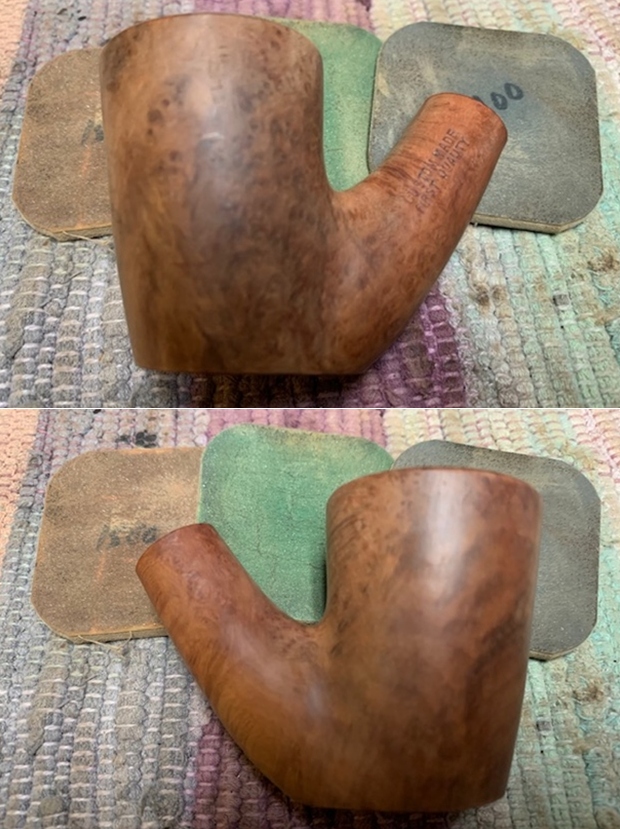
I rubbed a small quantity of “Before and After Restoration Balm” into the briar with my finger tips and let it rest for a few minutes. The balm almost immediately works it’s magic and the briar now has a nice vibrant appearance with the beautiful sandblast patterns on full display. I have been using this balm ever since I embarked on this journey and it is this part of restoration that I always look forward to. I further buffed it with a horse hair shoe brush. This pipe really oozes of a very high quality. Now that the stummel refurbishing was nearly done and also the stem had now been soaking for more than 24 hours, I removed the stem from the solution. I first scrubbed the stem surface with a Scotch Brite pad, always being mindful of the stem logo on the left side. I followed this scrubbing with a nice cleaning of the surface using a 0000 grade steel wool. I rinsed the stem under running water to rid the stem of the thick solution. I ran a couple of pipe cleaners to remove the deoxidizer solution from the airway.
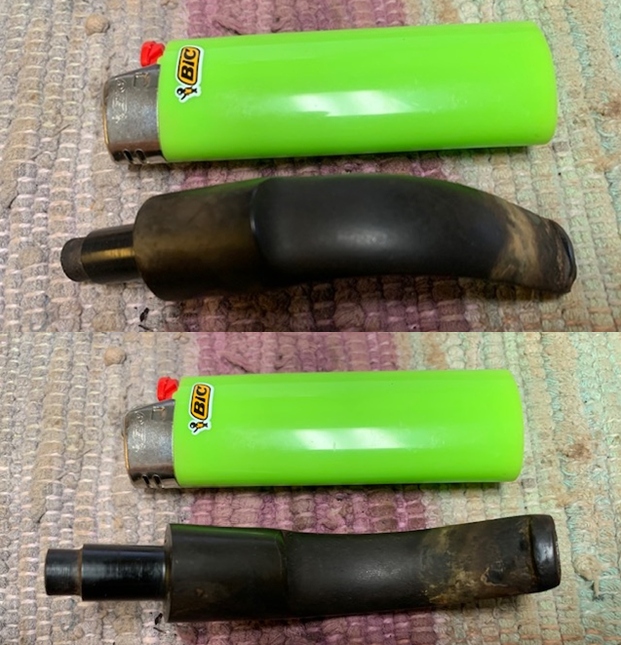
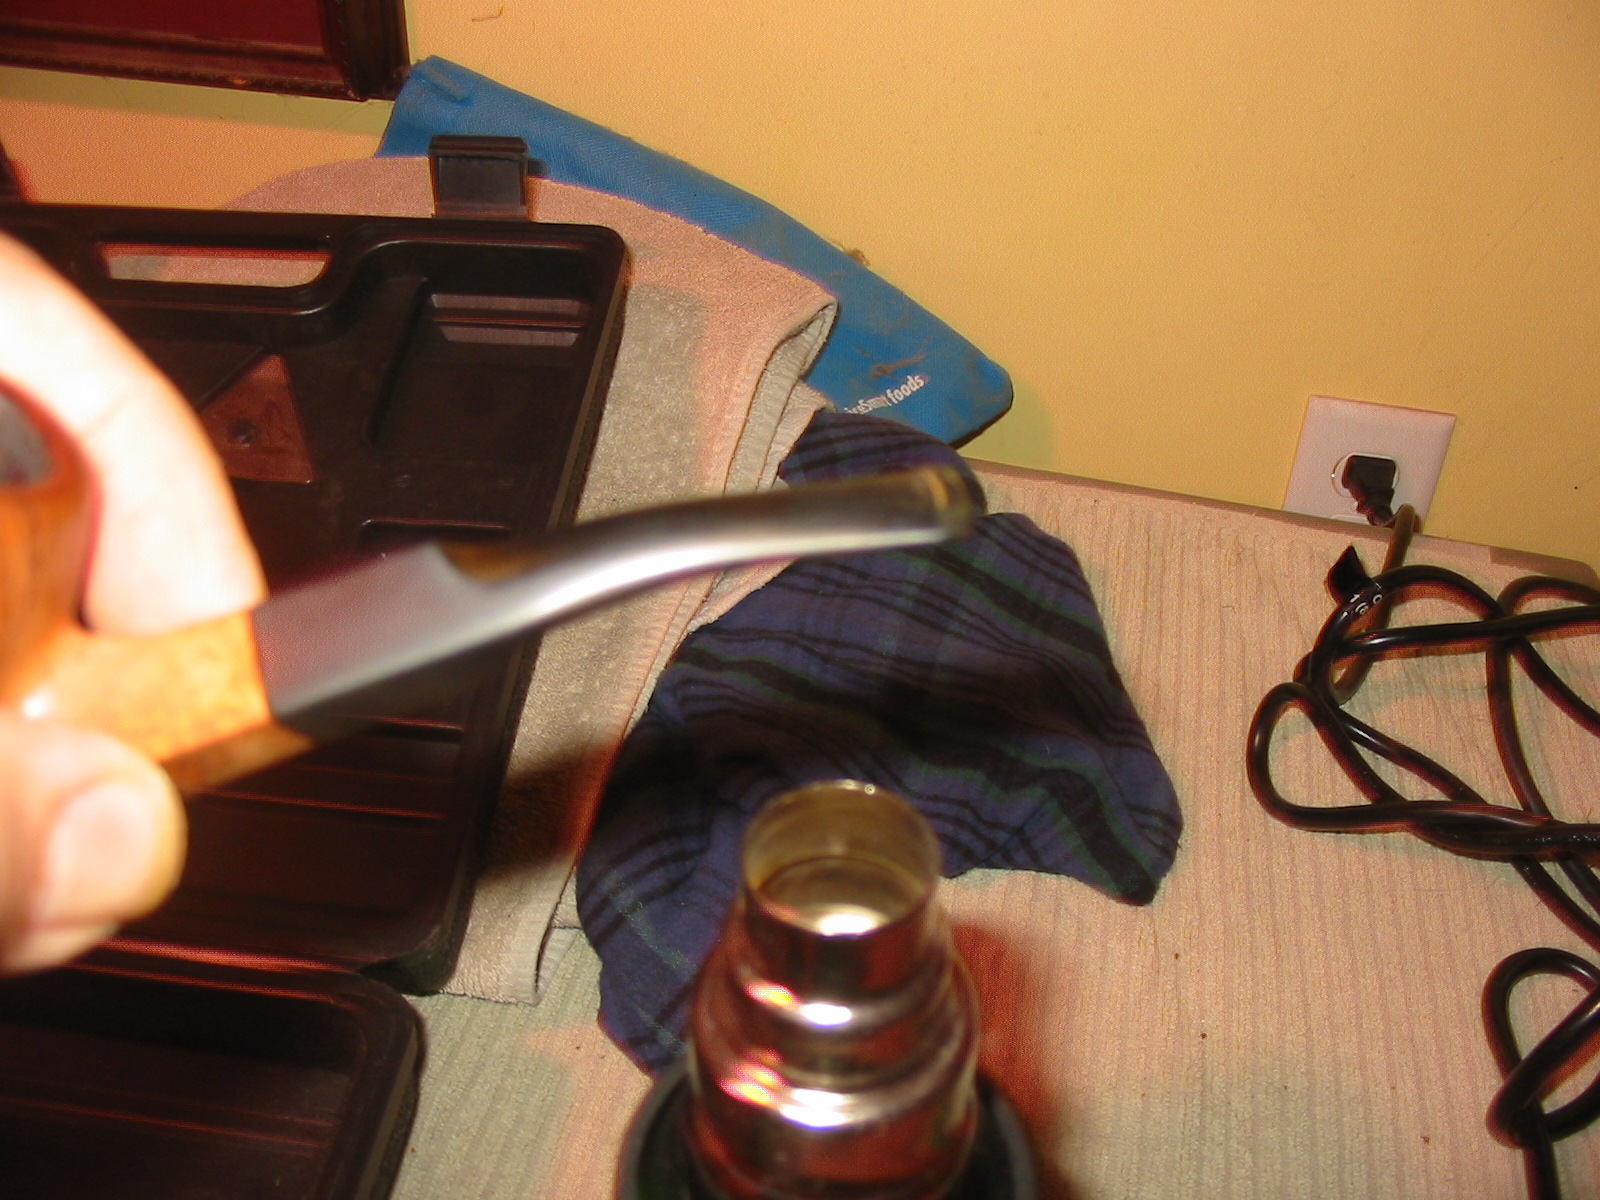
In order to address the tooth chatter in the bite zone on either surface, I flame the bite zone with a Bic lighter. The heat helps the vulcanite to expand and raise the chatter to the surface. Thereafter, through the sanding process, the surfaces will be matched with the rest of the stem surface. This step was able to address 90% of the tooth chatter and those that are not addressed here will need to be rebuilt.Continuing with the stem repair, I mixed superglue and activated charcoal powder and generously applied it over the bite zone on either side, including over the buttons and set it aside to cure.
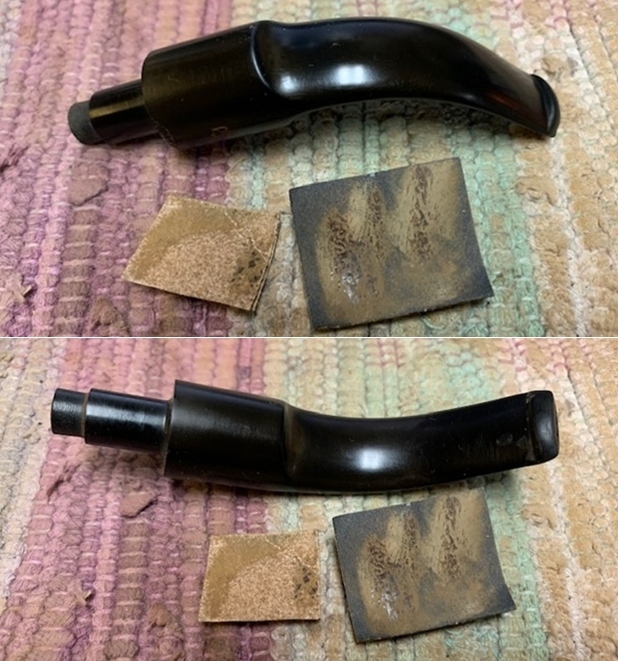
Using a flat head needle file, I reshaped the button and roughly matched the fills in the bite zone with the rest of the stem surface. I sand the bite zone in the stem surface with a piece of folded 220 grit sandpaper to even out the fills as well as remove the oxidation from the stem surface.
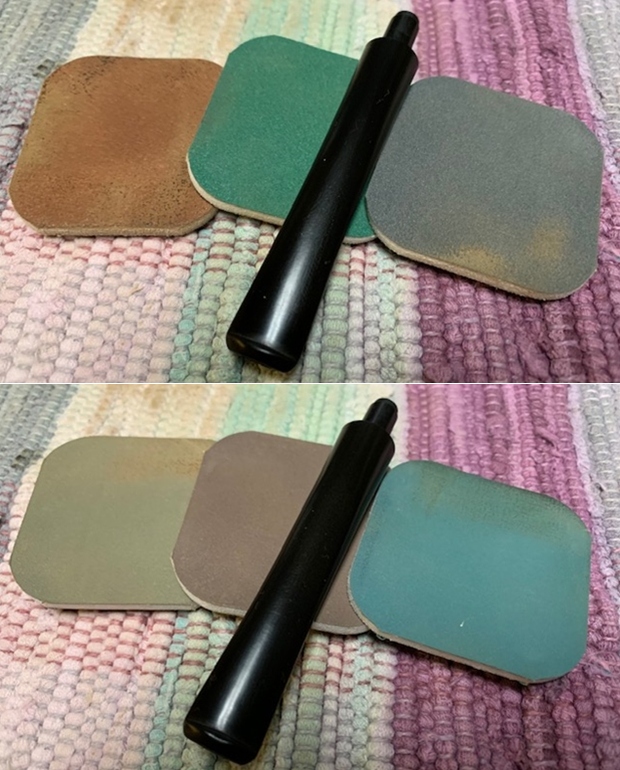
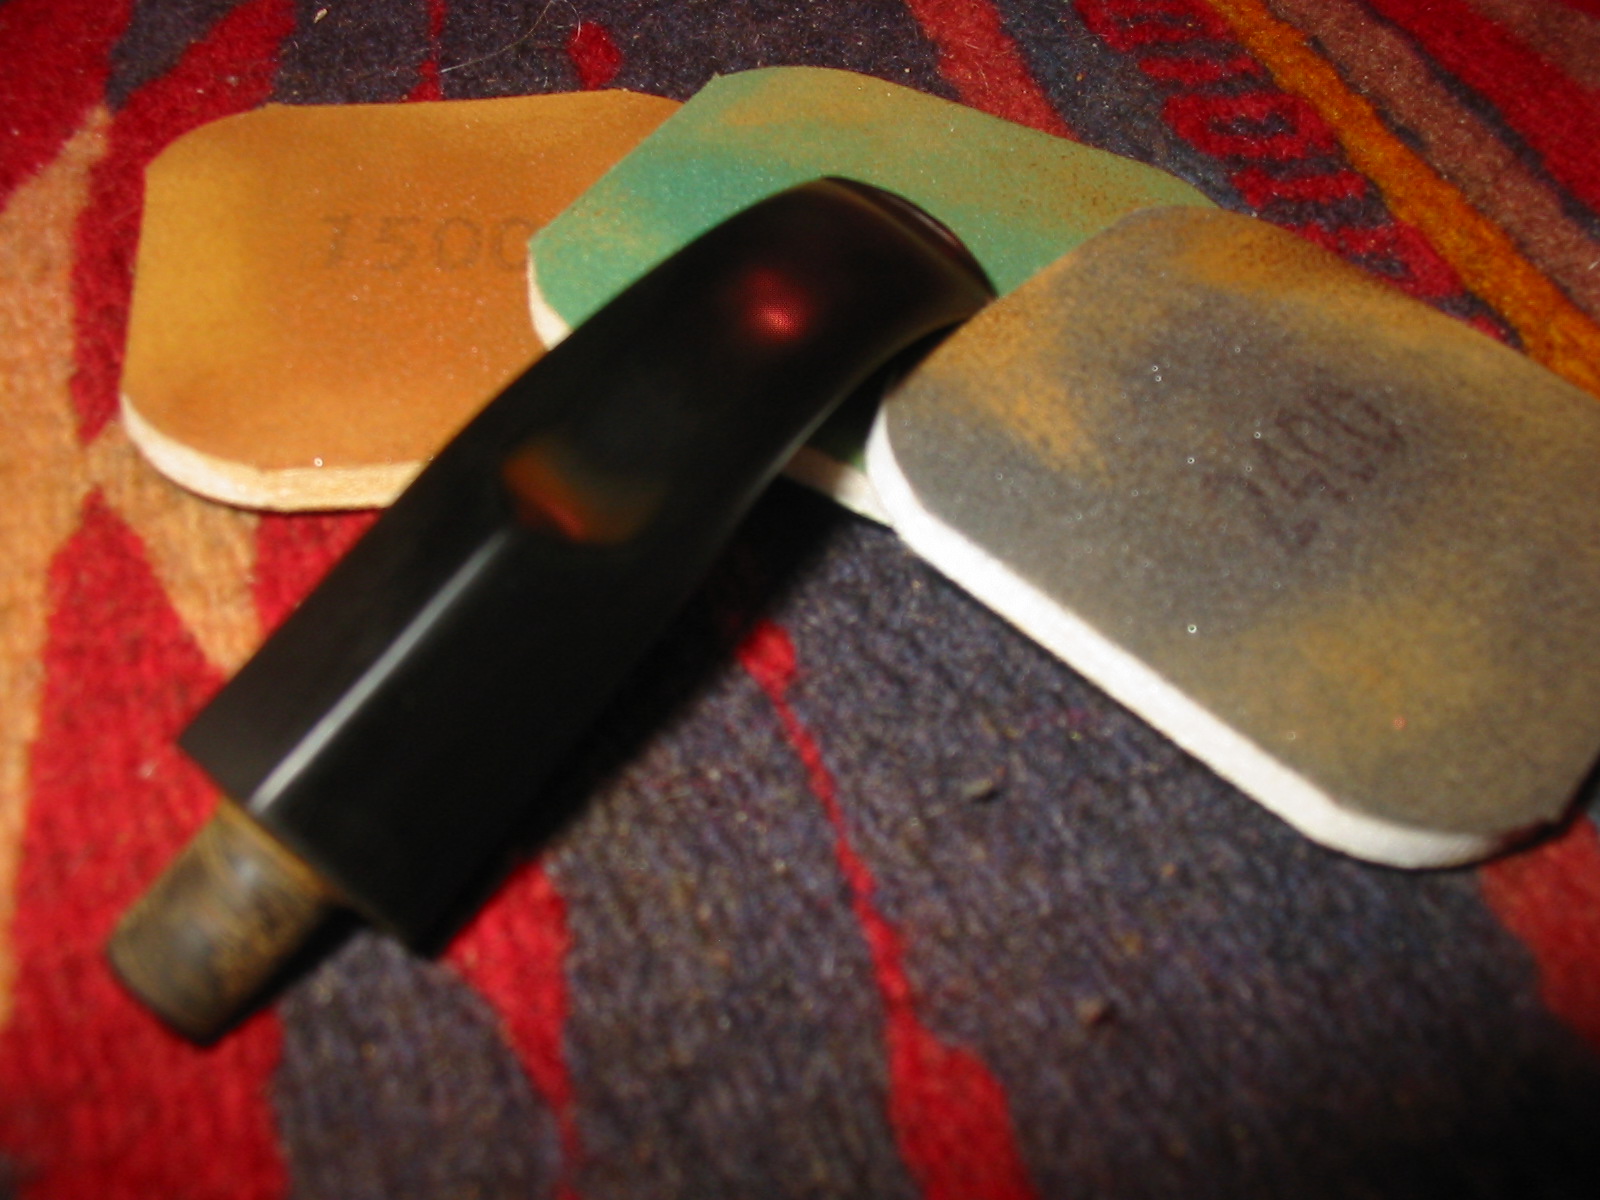
I wet sand the stem progressing through 400, 600, 800, 1000, 1500 and 2000 grit sand paper. I wiped the stem after each grade of sandpaper to view the progress being made and also identify areas on the stem surface that were still covered with traces of oxidation. I wiped the stem with EVO at the end of 2000 grit sanding and set the stem aside.Using a soft white graphite pencil, I freshened up the stem logo of JB.
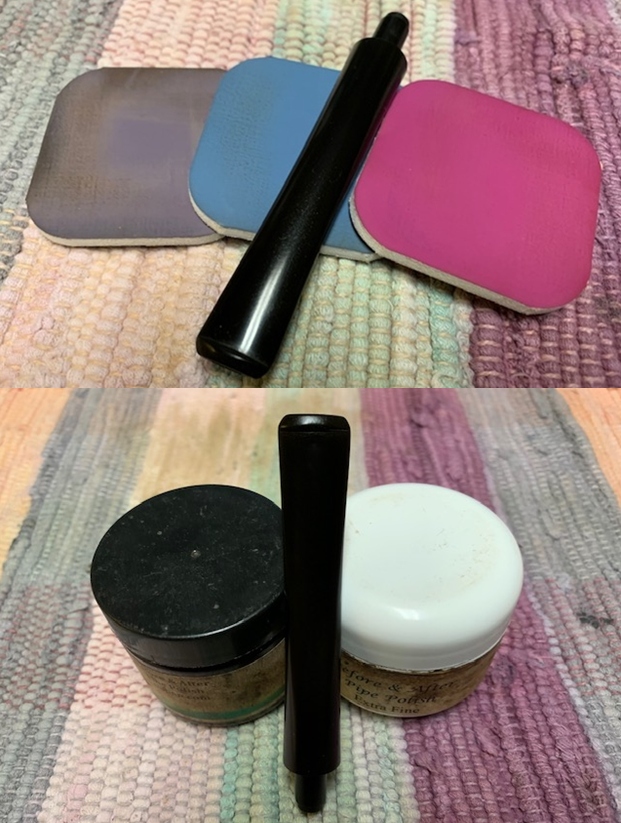
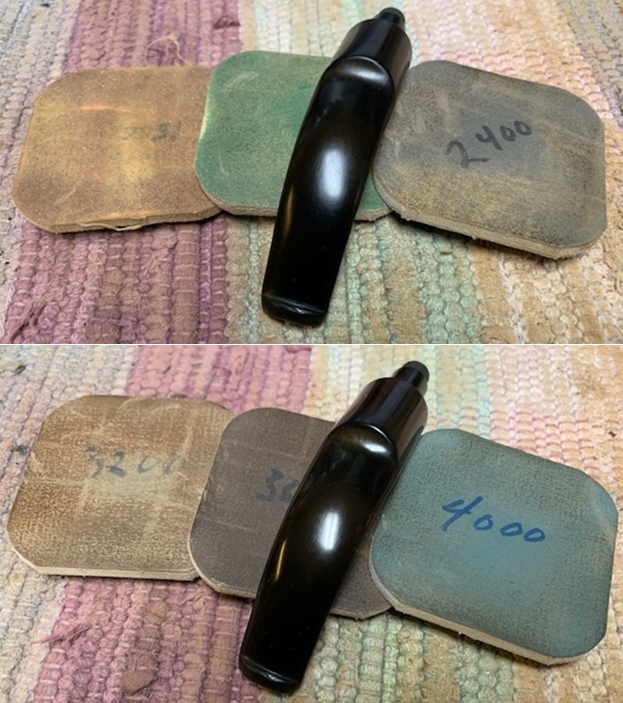
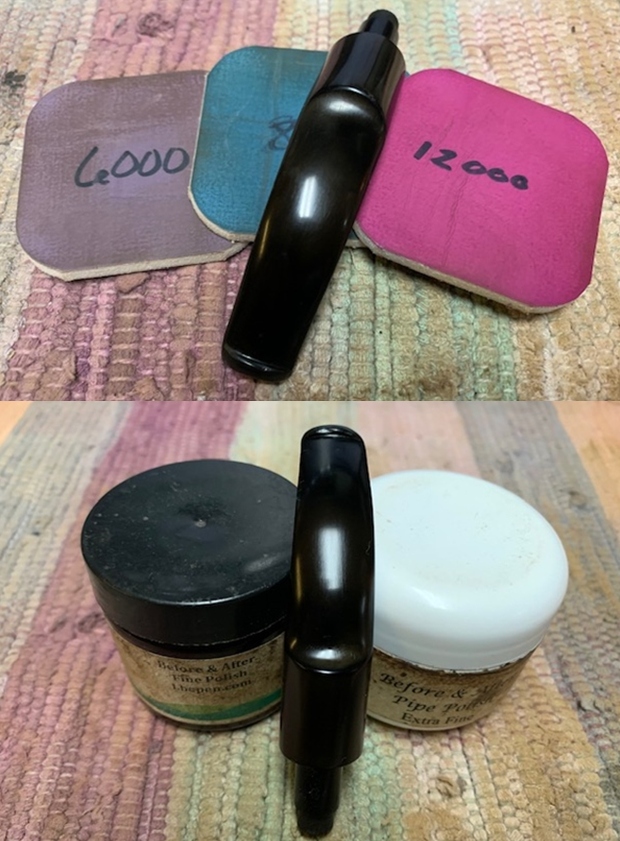
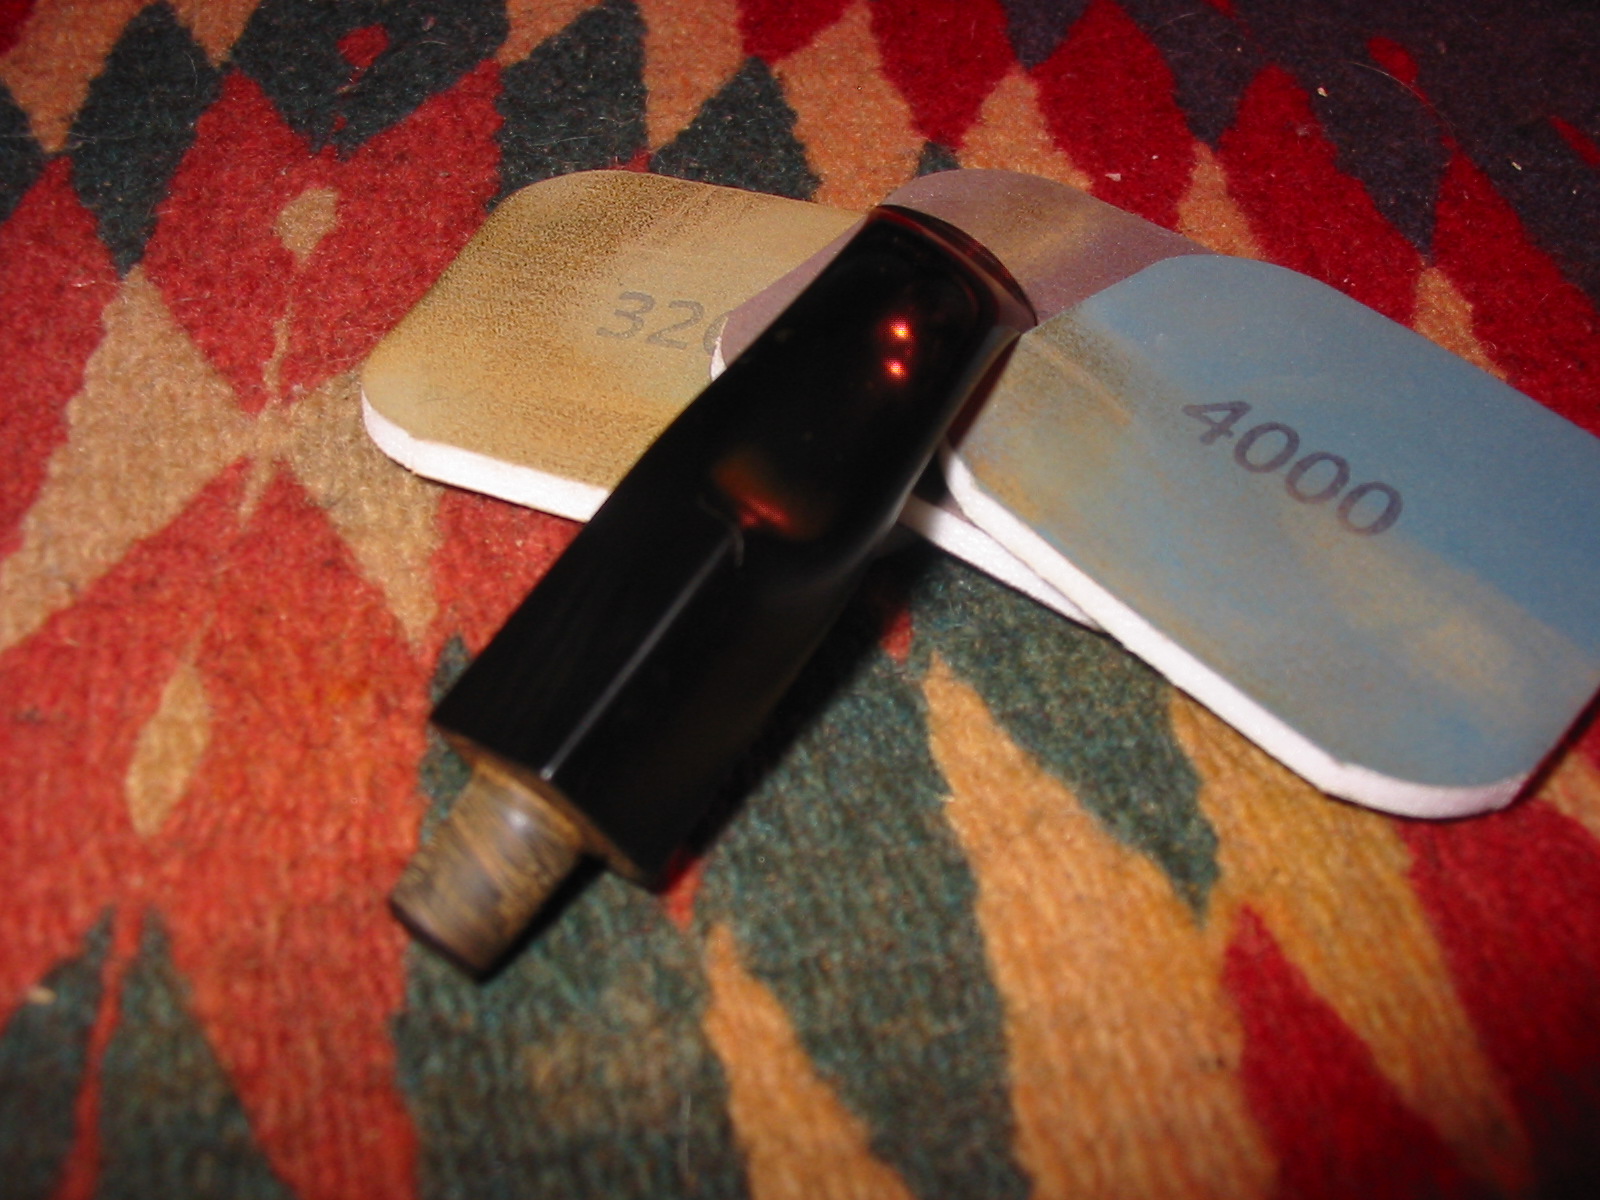
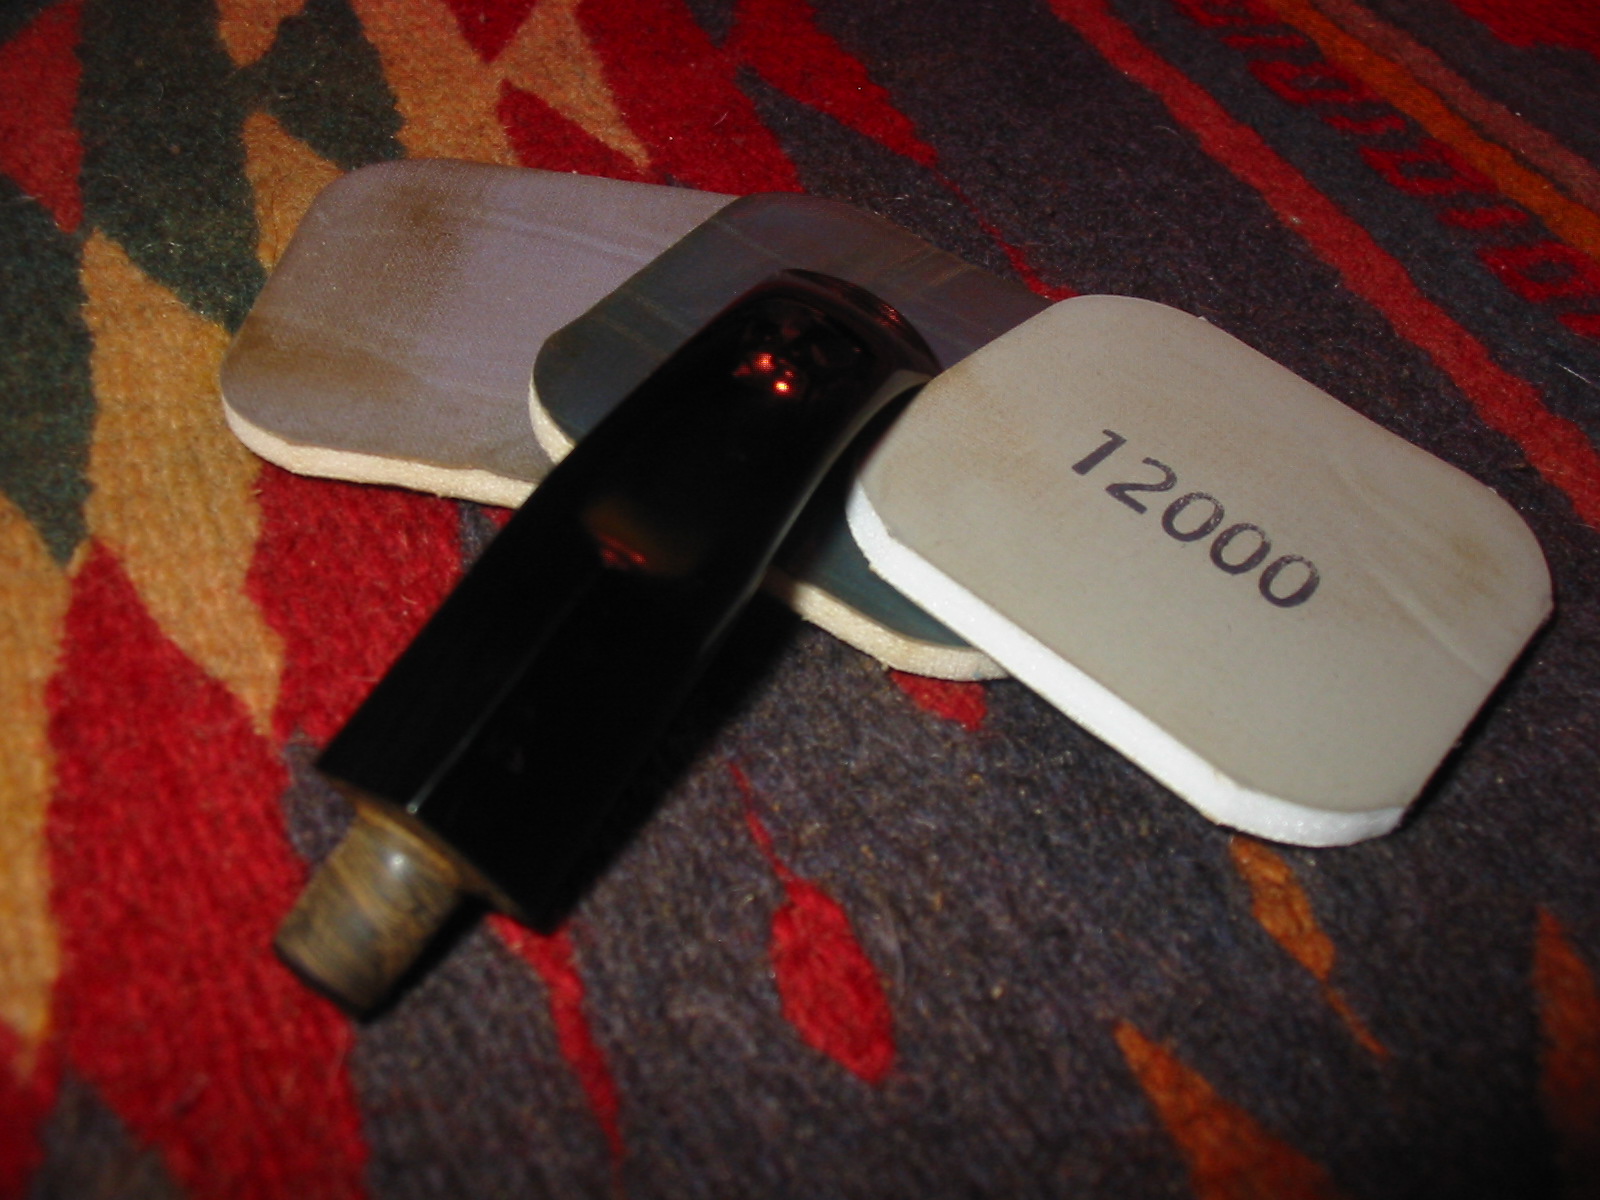
A polish by wet sanding using all 9 micromesh pads (1500 to 12000 grit pads) brought out the deep black shine of the vulcanite. I rubbed a small quantity of EVO to hydrate the stem and deepen the shine.
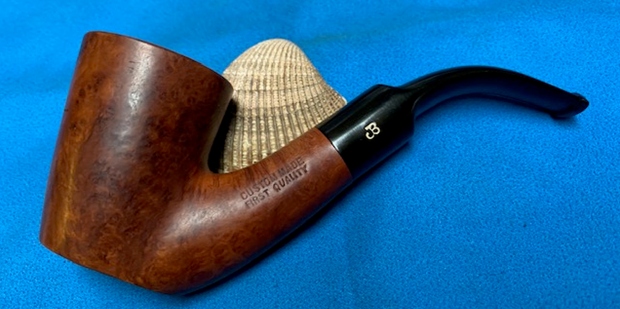
I have reached that stage in this project which can be considered as the home run. I polished the rim top and the entire stem with blue diamond using a cotton wheel mounted on to my hand held rotary tool. The blue diamond compound helps to eliminate the minor scratches that remain after the use of micromesh pads.
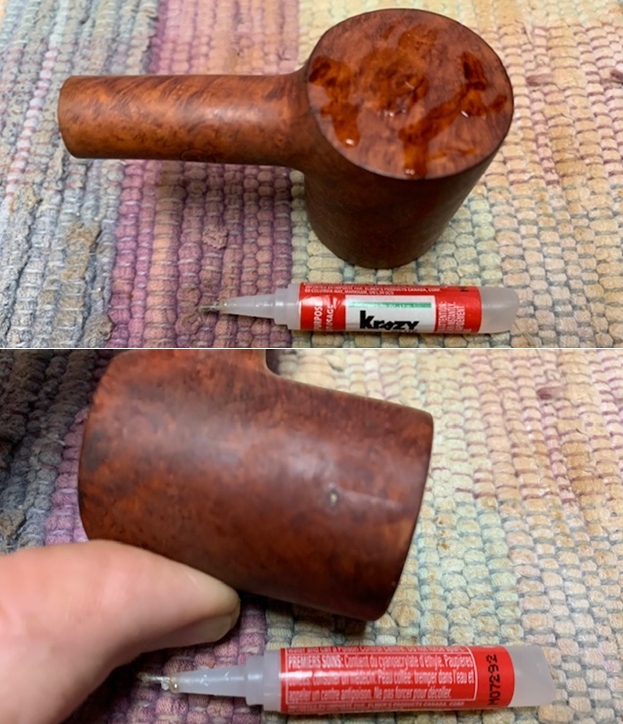
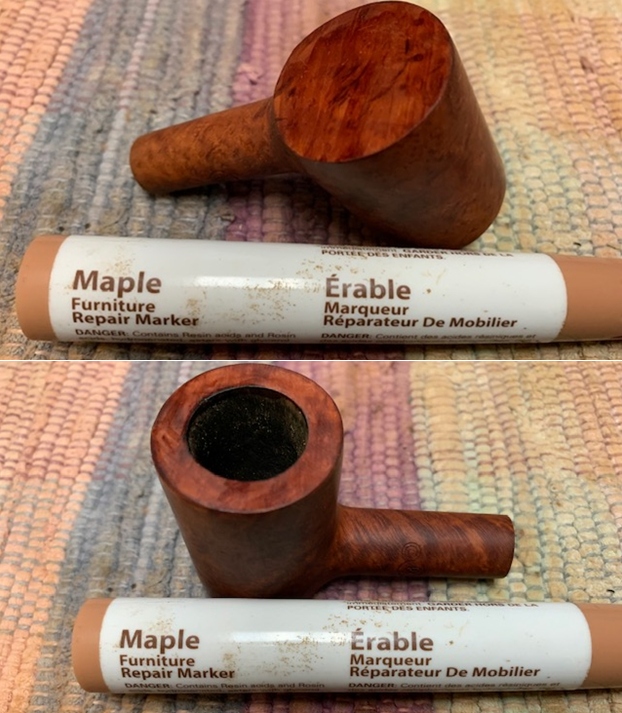
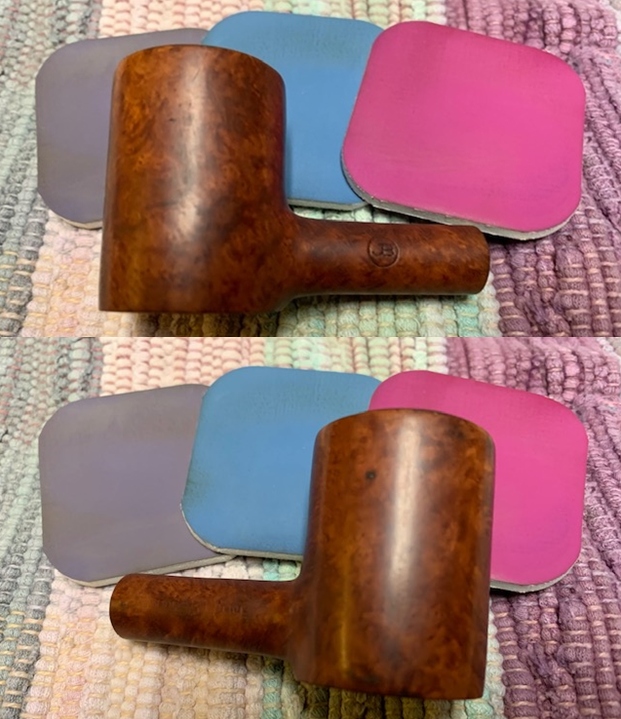
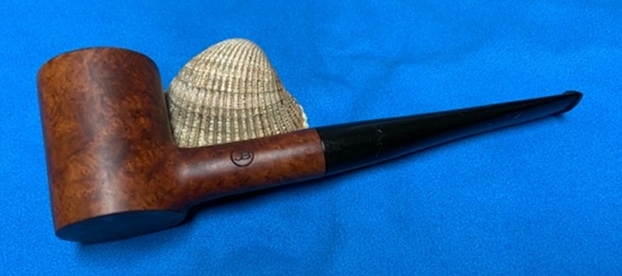
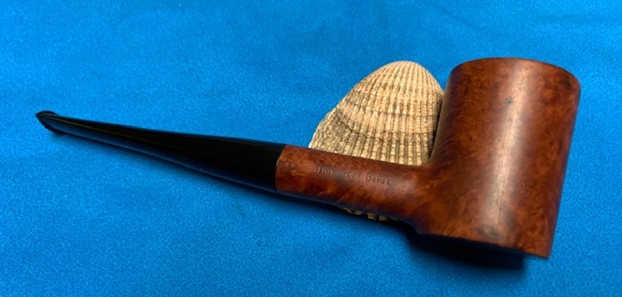
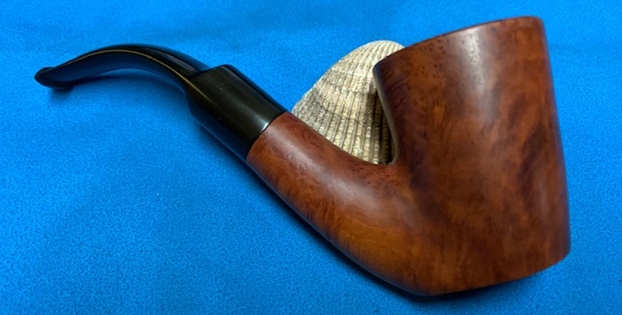
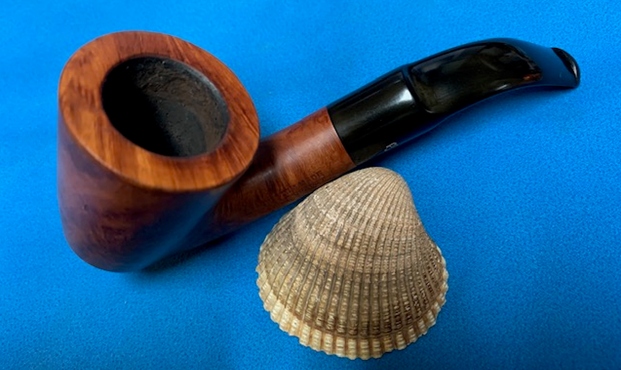
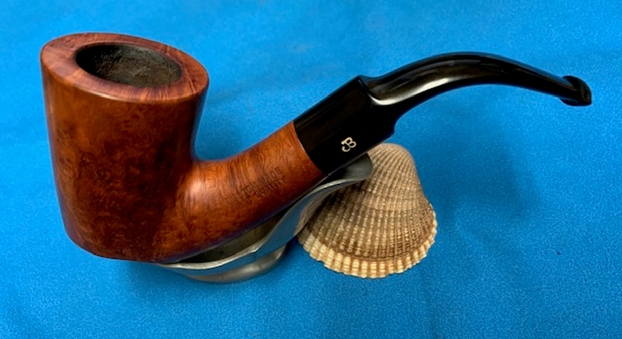
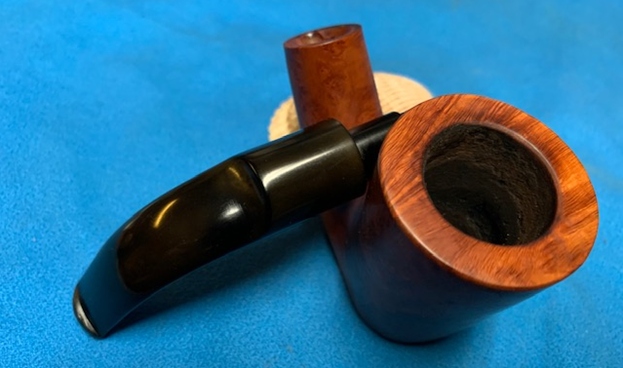
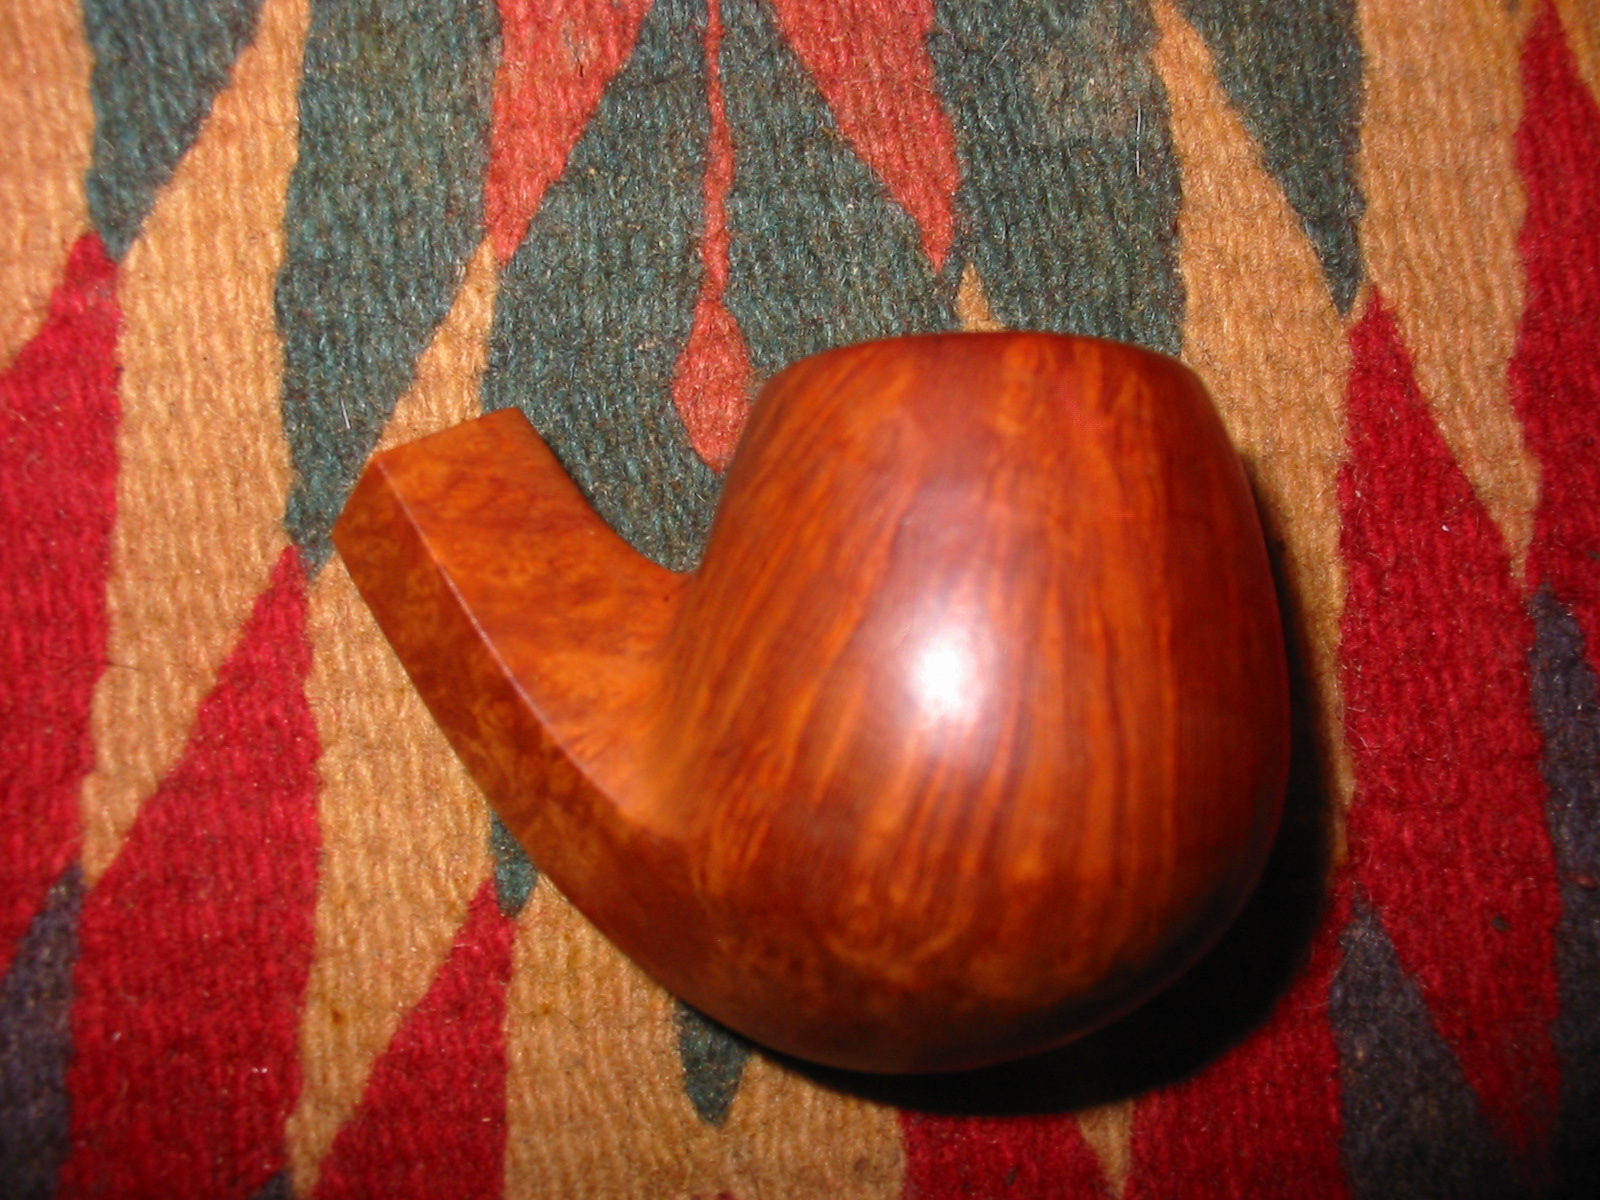
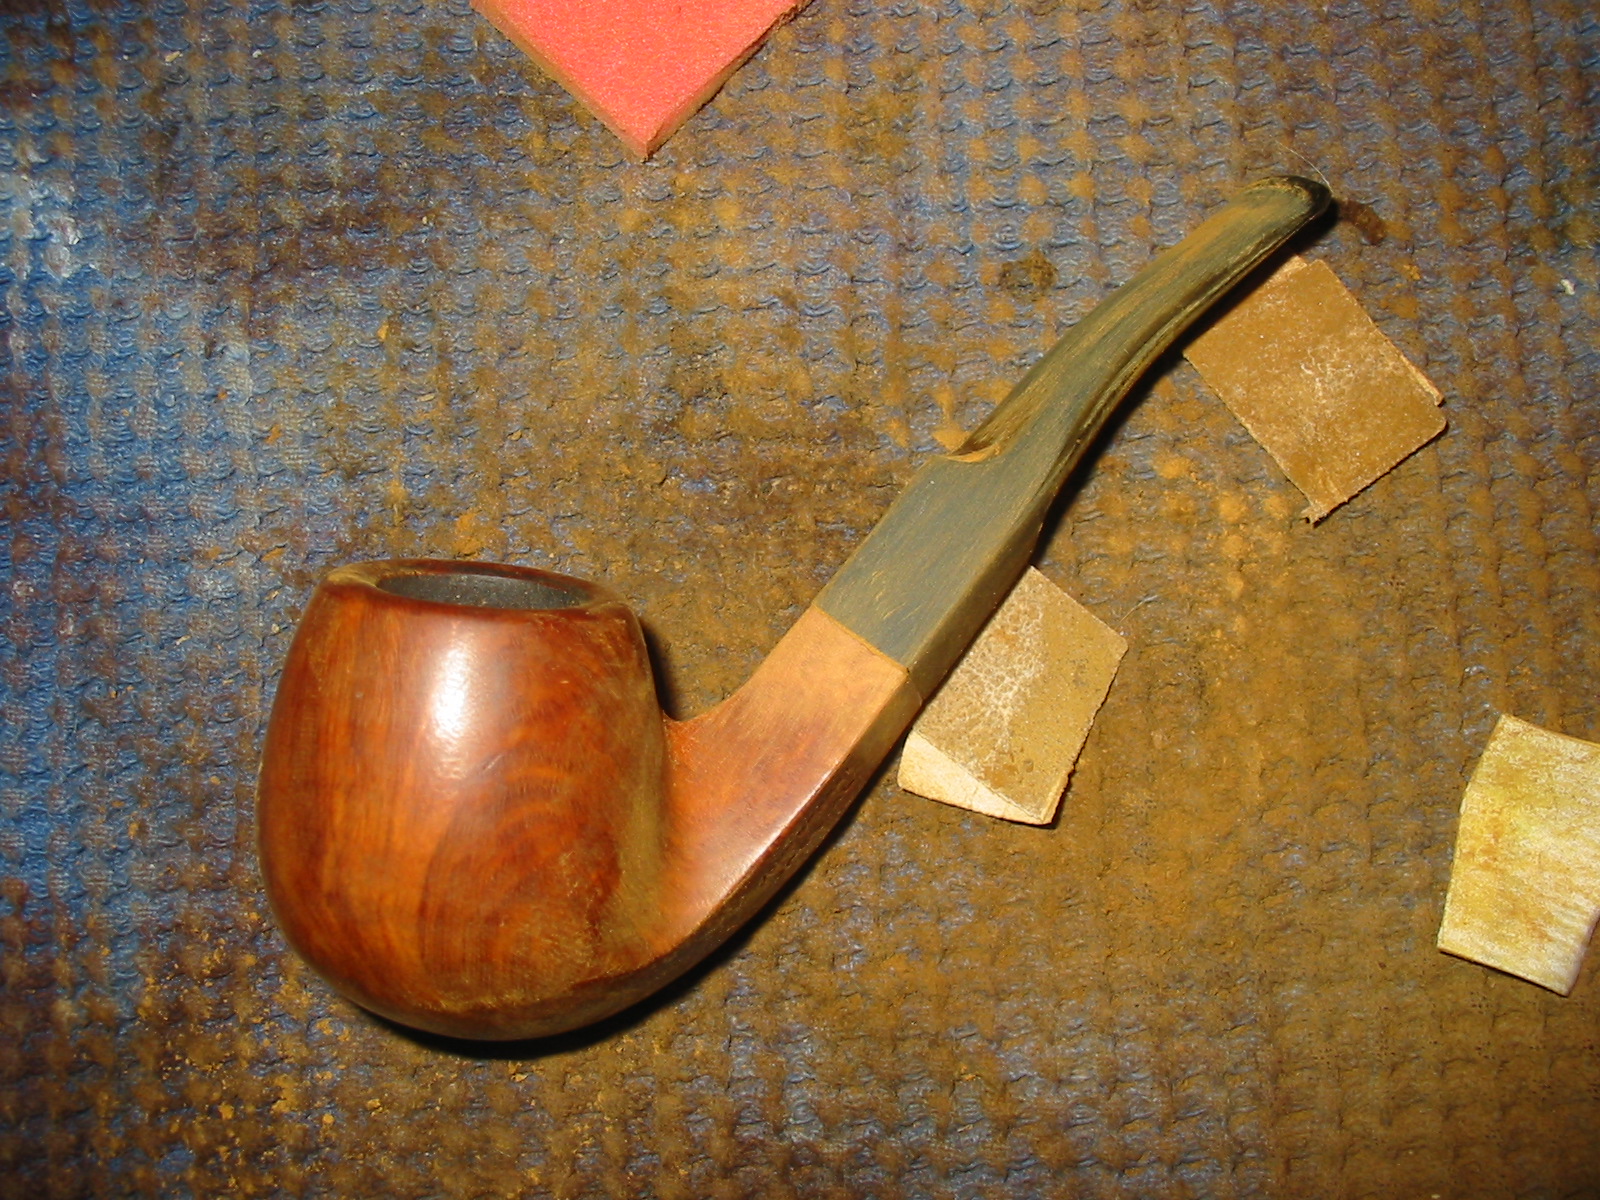
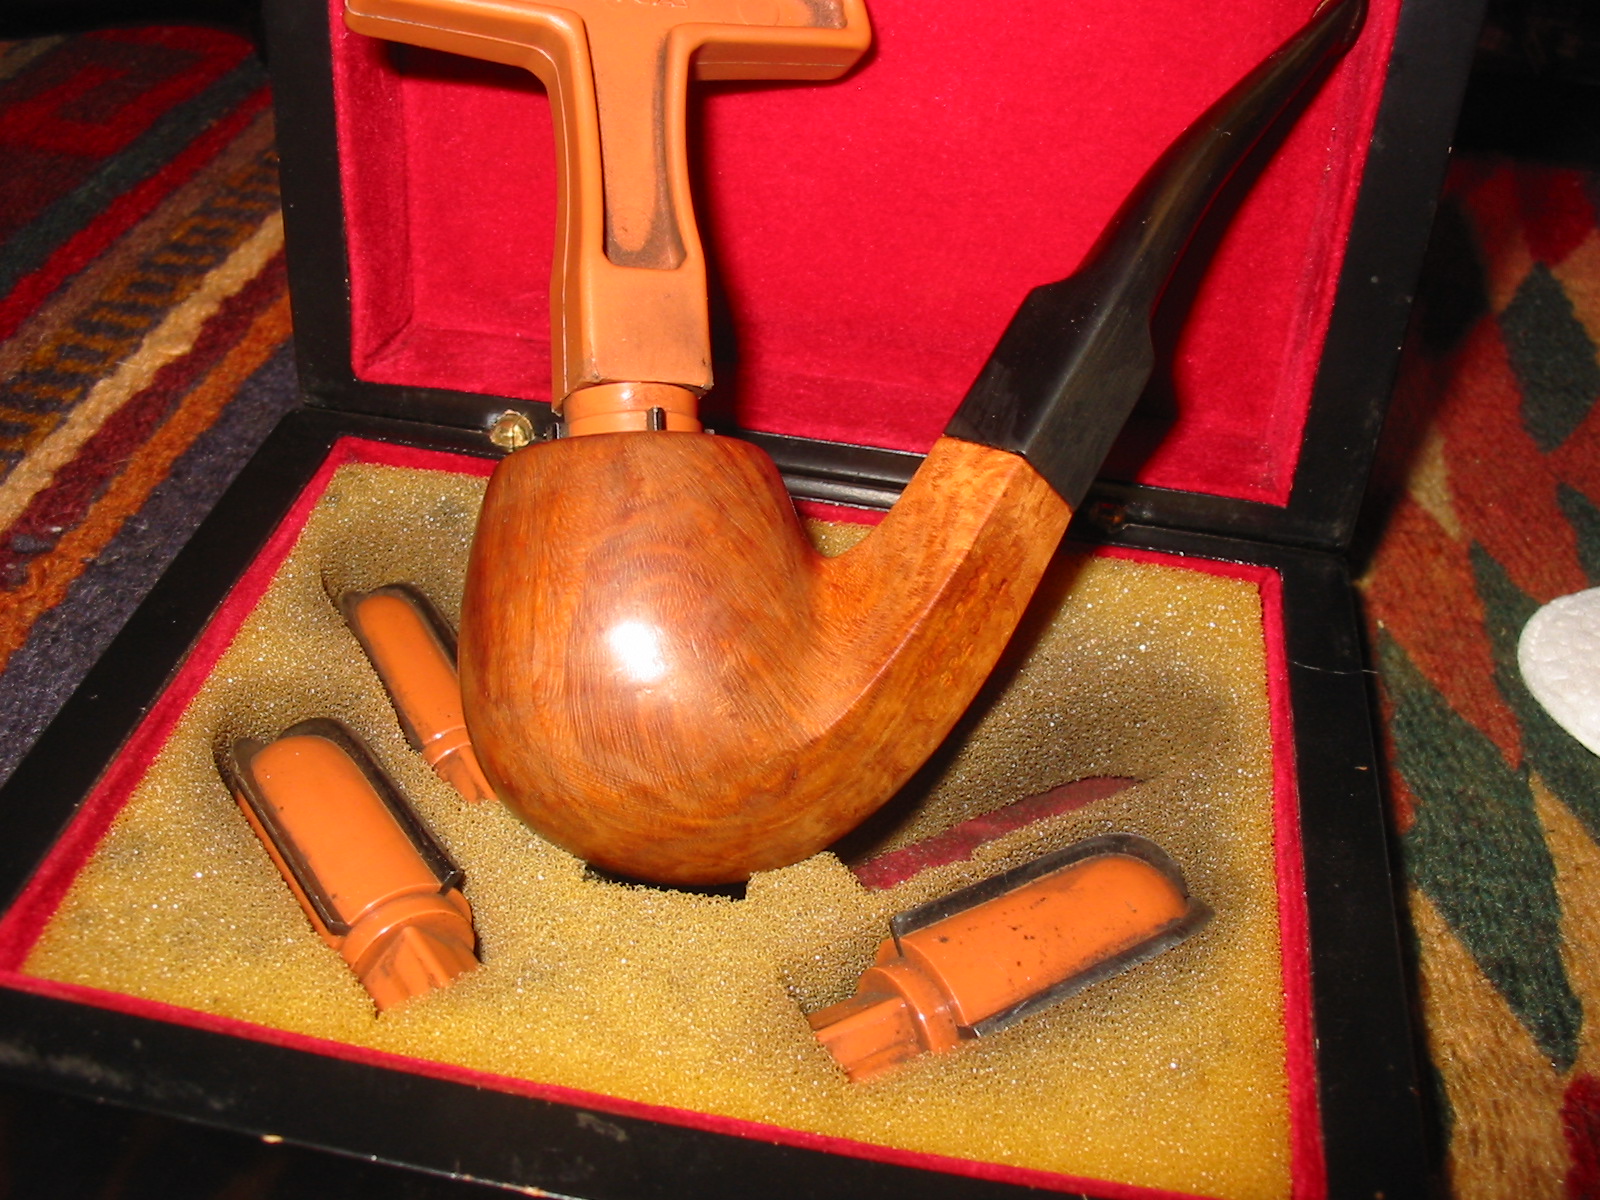
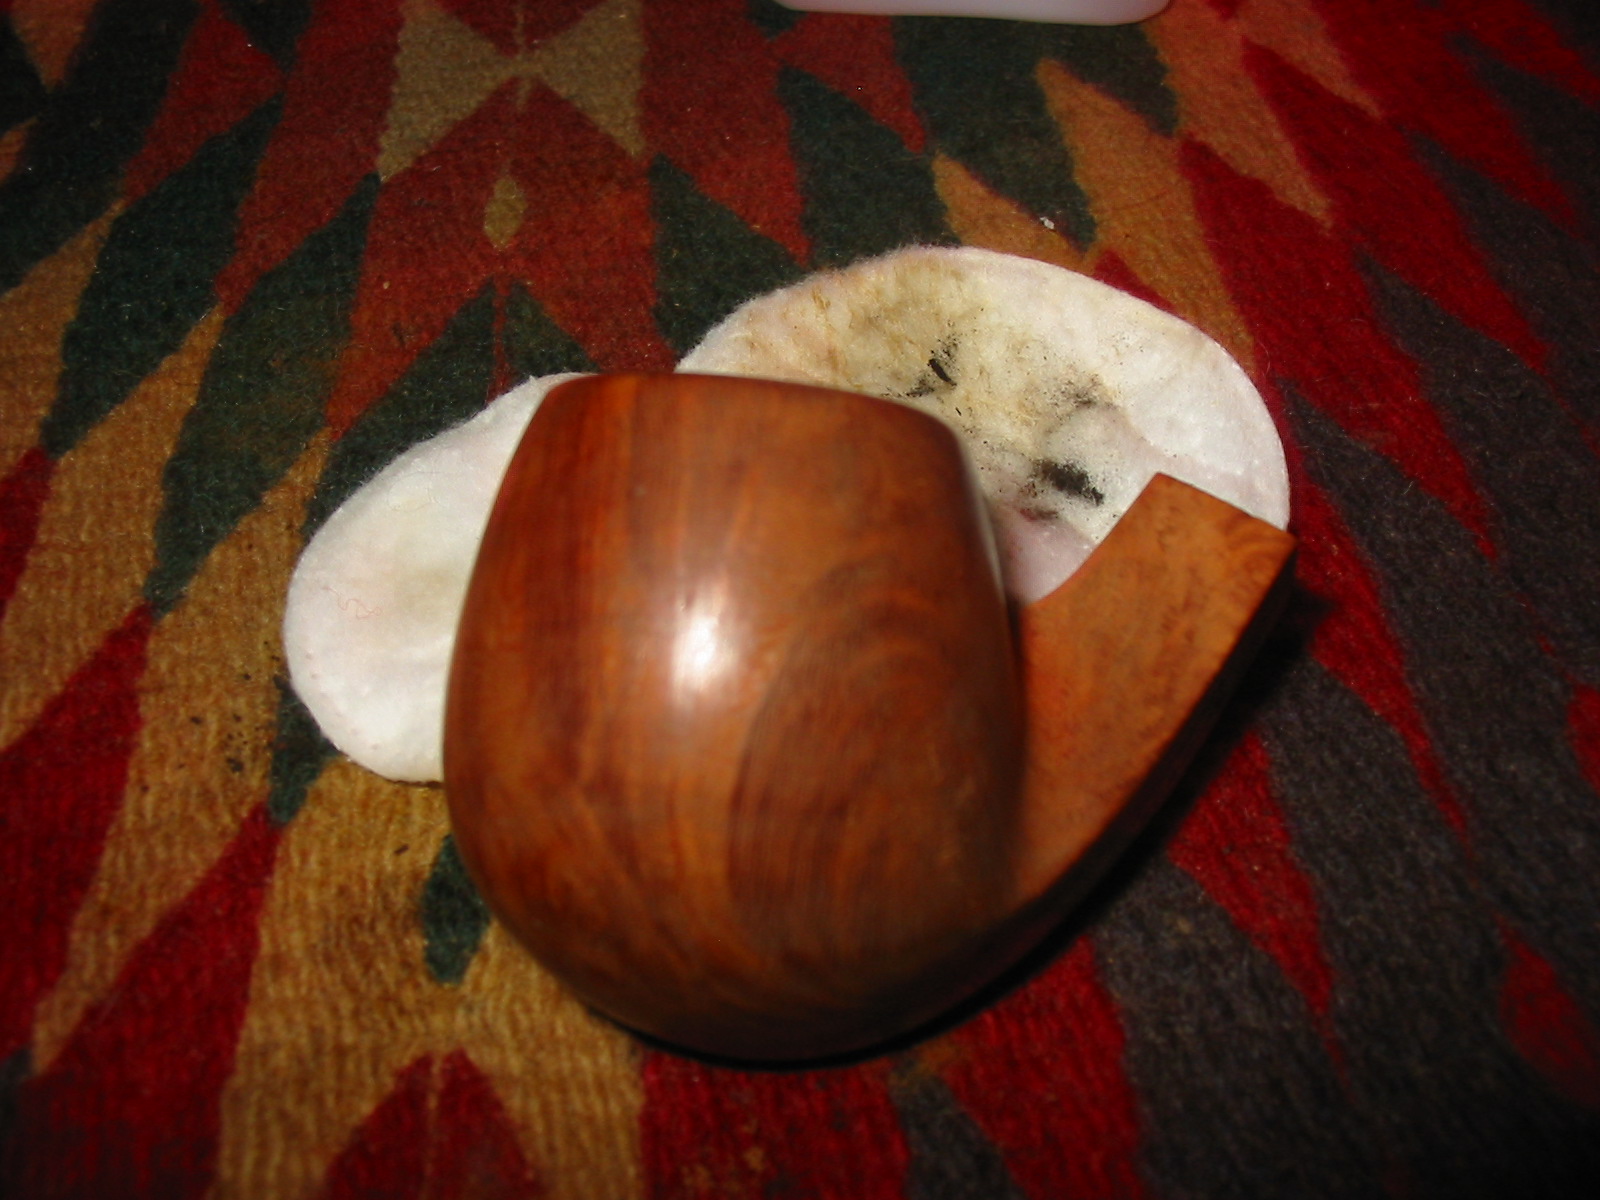
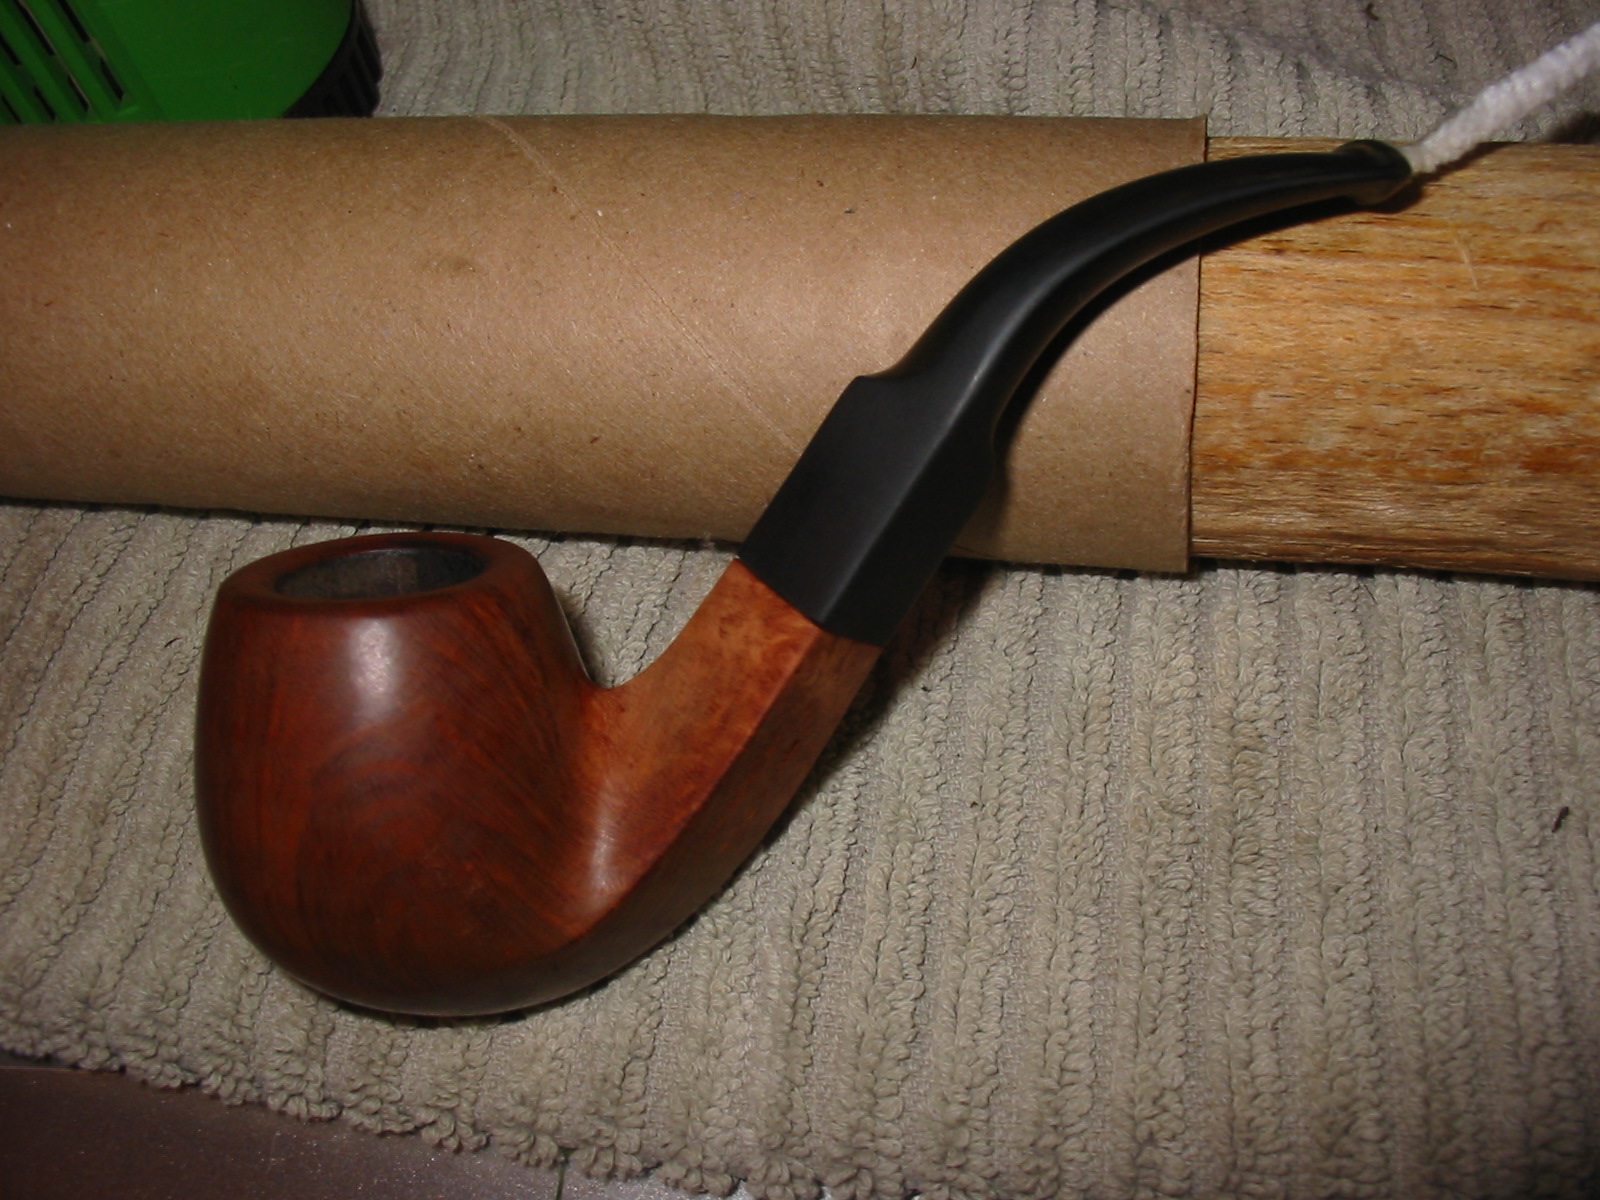
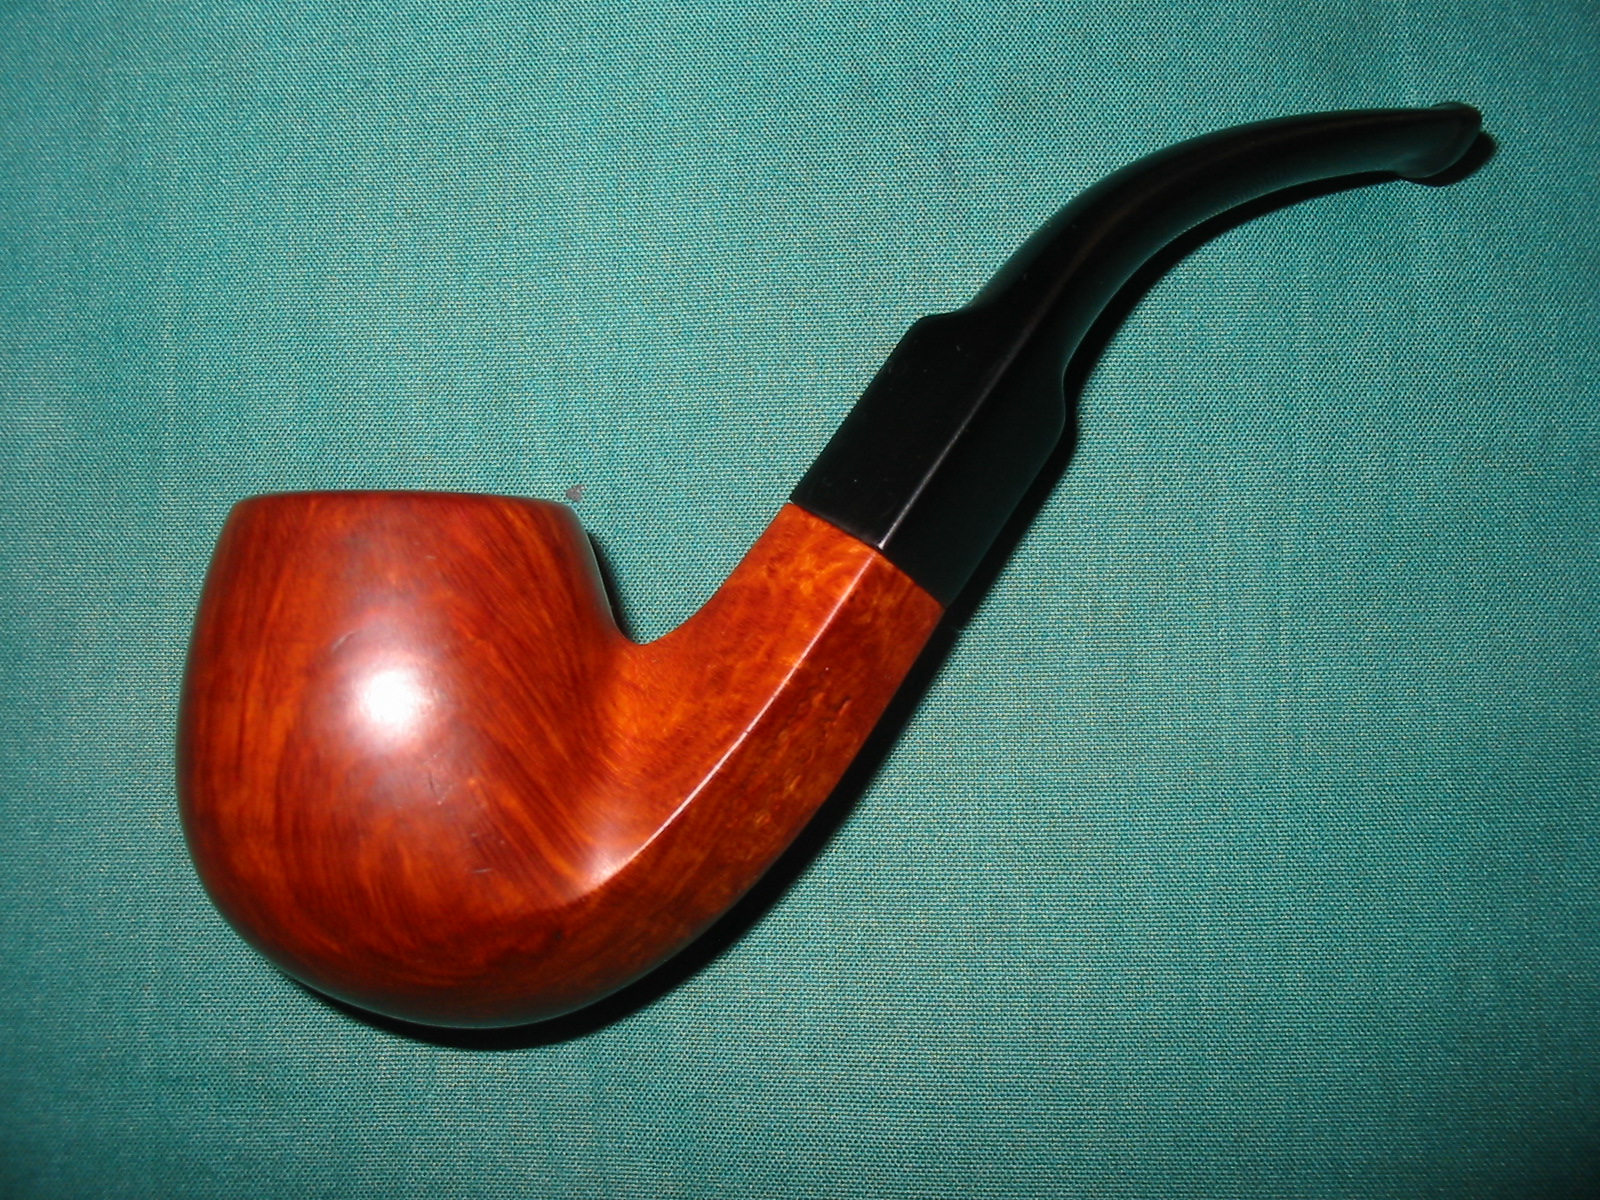
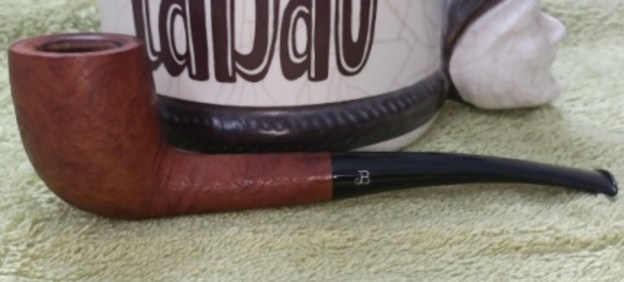
I completed this project by hand polishing the stummel with Halcyon II wax. I rubbed this polish deep into the rustications and after a couple of minutes, vigorously hand buffed the stummel with a microfiber cloth to a deep shine. I polished the stem with carnauba wax using my hand held rotary tool. This is a gorgeous classic looking Zulu and I consider myself fortunate to have the opportunity to work on this beauty and, as my Guru Steve says, carry forward the trust in this pipe till it is time to pass it on to the next pipe man or pipe woman. Here are a few pictures of the completed pipe for you to appreciate while I take the opportunity to thank you each of you for sparing your valuable time in joining me on this journey.

New Life for an Early John Bessai Poker


Blog by Steve Laug

The next pipe on the work table came to us from an online auction in Wilkes Barre, Pennsylvania, USA.  The pipe is an interesting looking piece – a smooth oil finished Poker shaped pipe with some nice grain around the bowl. The pipe is stamped on the left side of the shank and has a Bullseye target [over] JB in a circle and on the right side it is stamped Imported Briar. There was a lot of grime ground into the smooth finish on the briar. The bowl was heavily caked with a light lava coat on the top of the rim. The inside edges looked to be in good condition. There were some nicks in the briar on the top of the rim and the outer edges were beat up from being tapped against hard surfaces. The stem had tooth chatter and marks on the top and underside near the button. There were not markings or a logo on the taper stem. It had promise but it was very dirty. Jeff took some photos of the pipe before he started his cleanup work. He took photos of the rim top and bowl to give a clear picture of the thickness of the cake and tobacco debris as well as the damage on the rim top and outer edges. He also took photos of the top and underside of the stem to show the oxidation and the chatter and tooth marks. Jeff took photos of the sides and heel of the bowl to give a picture of what the briar looked like. There is some nice grain around the sides. You can also see the damage to the rim edges and the heel of the bowl in the photos below.  The stamping on the left and right sides of the shank are clear and readable and read as noted above. I have worked on quite a few Bessai pipes over the years and back in 2014 I restemmed a bowl. I wrote a blog on the pipe and did quite an extensive amount of research on the brand (https://rebornpipes.com/2014/07/14/restemming-and-restoring-a-john-bessai-special-diamond-shank-bent-brandy/). I am including that information here for ease of reference. If you have read it before feel free to skip ahead to the work on the pipe.

HISTORY & BACKGROUND

I started out with what I had found previously and written about on the blog. I quote the following paragraph from Pipedia http://pipedia.org/index.php?title=Bessai

John Bessai was a long time pipemaker, repairman and tobacco shop owner who operated his pipe shop at the “Old Arcade” in Cleveland, Ohio. The shop was opened in approximately 1898. It was a small 2-room shop where he hand-crafted his own pipes in the back room and could work when customers were not there. Like so many other shop made brand, John Bessai’s limited production was quickly acquired by regular customers and thus his craftsmanship remained little known outside of Ohio and the Midwest. While his name is known by pipe collectors in the Midwest, his work is seldom seen elsewhere! He died before 1969. Nevertheless, John Bessai left behind a small number of classic shaped pipes; all were made on-site. They are praised worthy of collecting and reflecting skills well beyond most American pipe makers. John Bessai’s logo “JB” appeared as one letter as the “back” of the “J” and the “back” of the “B” share a single line. The logo was stamped on the stem and on the left side of the shank. His son Herb Bessai took over the business and also continued making pipes. He closed the shop in about 1978.

I suspected that there would be more information three years later. I did some further research and came across the information found in the paragraph below on one of the pipe forums.

John Bessai was located in the Colonial Arcade at least into the late 1980s. After his death, his son Herb ran the shop. It was taken over after Herb’s retirement by a male and then name was changed to “Old Erie Pipes”. This was then located in the Erieview Plaza and when that mall closed, taken over by Cousin’s Cigars which has a store on Euclid Avenue near CSU, and a store on Chagrin Boulevard in Woodmere Village.

That small quotation gave me a bit more information of the state of the store after John’s death and Herb’s retirement. But I still wanted more information. I wanted to know about the history of the brand and if there was any information on the various grades in the brand and the stamping on the pipes. I wanted to know a bit of a timeline for the brands. Finally my digging paid off. ON one of the pipe forums I came across a link that led me to a gold mine of information gathered by a man after my own heart, Andrew Hross. He has a blog called Classic Pipe Shop on Blogspot. I have included the link below for those who want more information. Andrew has done an amazing job of gathering information on the Bessai Brand so rather than rewrite the history I am quoting portions of Andrew’s work on The John Bessai Pipe Clinic. (http://classicpipeshop.blogspot.ca/2014/04/the-john-bessai-pipe-clinic-information.html)

The John Bessai Pipe Clinic, 35 Colonial Arcade, Cleveland, OH 44115 – by Andrew HrossOwner(s): **John Bessai 1920s until his passing in 1969, **Herb Bessai ~1962-1983, **Daniel Gottschall 1984-~1993, **Purchased by Dad’s Smoke Shop / Cousin’s Smoke Shop and rolled into the Old Erie Smoke Shop about 1993. Cousin’s Cigars purchased the remaining stock of Bessai pipes near after Herb Bessai passed away in 2002.

Years of Operation: 1920s (unkown specific date at this time) – 1983. After 1983 the business was sold to Daniel Gottschall who later sold it to Cousin’s Cigar (Euclid Ave) around 1993. The name was changed to “Old Erie Tobacco Company”. They were forced to move to the Galleria when all the tenants of the Old Arcade were cleared out to make room for renovations. Their new address was The Galleria at Erieview, 1301 East 9th Street in Cleveland.

After this move the location wasn’t as busy as they had hoped and Cousin’s moved all the Old Erie Tobacco assets to their Euclid Avenue Store. The store has since moved to a St. Clair location after Cleveland State forced them out due to anti-smoking regulations on campus. Their St. Clair location offers many of John Bessai Pipe Clinic’s old tobacco blends.

Their new store opened in the Merriman Valley area in Akron, Ohio where the store manager John Coleman oversees the day to day operations. John was instrumental in helping me piece together a lot of loose ends during Bessai Pipe Clinic’s transition years.

My father visited their shop several times in the early 60s as he attended Fenn College (now Cleveland State University) as an undergrad before moving on to Ohio State University for his Masters. He’s way smarter than I am so I just go with the flow…

He mentioned meeting John at that time who quickly gave my father some pointers on smoking a pipe and how to take samples from the shop’s expansive sample jar collection. His pipes were on display in the shop although I don’t believe he had a lot of pipes on display at any given time due to production in-shop.

John’s son Herb took over the shop in the early 60s after he graduated from Cleveland State University / Fenn College (unclear) as he is listed as having played Basketball for CSU. Herb was also a helpful, informative and friendly individual. Articles exist from the Herald in 1962 where they interviewed Herb (with photograph) about the state of smoking in the new age of the early 60s. I visited the shop in the late 70s / early 80s with my father during a trip to Cleveland and couldn’t tell you much about the shop other than the guy working was very friendly. Back then it wasn’t unusual to be a kid and walk into a smoke shop with your father. Clearly I didn’t purchase anything but my father probably picked up some tobacco but I remember him looking at pipes displayed on a back wall. The shop was small but impressive.

If anyone has any pictures of the shop or old catalogs, I would love any additional information as it’s tough to come by 30+ years later!

Pipes offered by John Bessai Pipe Clinic: Most of the pipes that were offered by the John Bessai Pipe Clinic were fairly standard in shape… I would say most of the pipes Bessai offered were smooth pipes. My assessment would be 90% smooth and 10% rusticated / sandblasted…

…The story is that John crafted pipes in the back room or off site and finished them in house while the store wasn’t busy. Very little information is available on the accuracy of this statement. Some of his pipes from the late 1960s through the 1970s (John passed away in 1969) I feel were left over stock from previous turnings and sometimes showed fills or sand pits. Some of these pipes even carry Herb’s markings (see below). These pipes still smoke very well but are not as eye-appealing as other earlier pipes from the store’s career.

Stampings and rough dating of John Bessai Pipe Clinic Pipes: Which pipes did John make and which ones did Herb make/finish? All Bessai pipes carry his standard large JB stamp either on the stem or shank or both. Typically the JB on the stem is within a circle.

All pipes created by John Bessai’s hands reportedly contain the miniscule ‘jb’ stamp on the shank or body of the pipe. I have older pipes in my possession that do not contain this stamp (condenser, old stamps, etc) that were clearly shop made pipes. I feel he started using the tiny ‘jb’ stamp in the 50s to early 60s.

An interesting note about John Bessai’s stems – they always clean very nicely and aren’t prone to as much oxidation (that brownish / green color) as most dunhill and Charatan pipes tend to oxidize. His cuts to his stems were very impressive and often transitioned from diamond-shaped shanks almost architecturally. Very comfortable to smoke.

John Bessai Special Pipes:

… I have a couple Bessai Special pipes. These stand out either by large size, graining or possibly shape. Most Specials are unique pipes and are rare to find in comparison to his regular issue pipes.

John Bessai Special X pipes:

I only have one of these and it’s a beauty. This one is a larger bowl (around a group 4 dunhill) with deep colored grain and a hefty substantial shank. Special X pipes are probably the rarest of John Bessai pipes and should be sought out if possible. I’ve smoke mine roughly 4 or 5 times and it performs with the best of my pipes…

Herb Bessai Pipes:

Unfortunately none of these pipes that I’ve seen have astounded me with grain or general appearance. Having said this, these pipes smoke nicely and are a great value if you can find them. I have one that my father found at an Antique Show in the South. There’s another author shape on reborn pipe’s blog that someone refinished because of the amount of fills in the pipe. He also states it’s a wonderful smoker (Editor’s note: This is my pipe and the write up I did on the blog). These pipes are likely from the late 60s through the early 70s. I believe many pipes after this period were created en masse at a factory in the US. It is unclear what stamp was used on these later pipes…

Dating / Circa era Bessai Pipes: If the pipe carries a stamp stating Cleveland, O U.S.A. it’s considered an older production pipe (pre1960s). I’ve not seen any newer pipes with that stamp.

Bullseye stamping usually indicates an earlier pipe as that stamp seems to have been abandoned pre1960 as well.

Most of the earlier Bessai pipes have an unusual ‘stinger’ or condenser at the end of the tenon which is unique to Bessai pipes. They are either a hard plastic or created out of wood. They are typically easy to remove and could have been easily lost if misplaced. These pipes I would consider pre-1960 and possibly 1940s-early 1950s production based on their stamps and patina of the pipes.

1970s 1980s and beyond: My feeling on these pipes after John’s passing is that they purchased finished pipes from a large manufacturer and stamped them with the John Bessai or Bessai stamp (on shank and/or stem). Most of these shapes are standard among many stores from that period and offer less than spectacular grain (and sometimes fills). Stamps on these pipes are probably fairly plain and don’t have the tiny ‘jb’ stamp on the shank indicating it was produced by John Bessai.

I know that is a lot of information and if you want to you can skip ahead to read about the restoration. I started my restoration with cleaning the internals and the externals of the pipe. I cleaned out the inside of the pipe with pipe cleaners, cotton swabs and alcohol. It was a filthy pipe on the inside.

The pipe in hand was a John Bessai Circle JB Imported Briar. As noted above the pipe is stamped with a Bullseye Stamp that seems to have been abandoned pre-1960. So I am dealing with an earlier Bessai pipe. Now on to working on the pipe.

Jeff had cleaned up the pipe with his usual penchant for thoroughness. He reamed the pipe with a PipNet pipe reamer and removed the rest of it with a Savinelli Fitsall Pipe Knife.  He scrubbed the bowl with undiluted Murphy’s Oil Soap with a tooth brush. He rinsed it under running warm water to remove the soap and grime. He cleaned out the inside of the shank and the airway in the stem with alcohol, cotton swabs and pipe cleaners. He soaked the stem in Before & After Deoxidizer and rinsed it off with warm water. I took photos of the pipe once I received it.   The rim top cleaned up really well. The rim top and outer edge of the bowl show some damage. The stem surface looked very good with a few small tooth marks and chatter on both sides near the button. The stamping on both sides of the shank is clear and readable. The left side is stamped with a Bullseye [over] JB in a Circle. On the right side of the shank it is stamped Imported Briar.    I removed the stem and took a photo of the pipe to give a sense of the whole. The stem is tapered and narrow.Now it was time to do my work on the pipe. I topped the bowl on a topping board with 220 grit sandpaper. I repaired the damaged areas on the heel of the bowl and the sandpit on the right side of the bowl with clear super glue. I sanded the repaired areas smooth with 220 grit sandpaper to blend them into the surrounding briar. Once I had smoothed out the repairs I used a Maple stain pen to touch up the sanded area on the bottom of the bowl and the rim top. I knew that once I polished it with micromesh, it would blend in very well. I polished the repaired areas and the rest of the briar with micromesh sanding pads – wet sanding with 1500-12000 grit pads and wiping it down after each pad with a damp cloth.  I rubbed the bowl and shank down with Before & After Restoration Balm. I worked it into the surface of the bowl sides and shank with my fingertips to clean, enliven and protect the briar. I let the balm sit for a little while and then buffed with a cotton cloth to raise the shine. The grain came alive and the fills while visible look better than when I began. I set the bowl aside and turned to work on the stem. It was in good condition and the tooth marks were light so I figured they would polish out fairly easily. I polished the vulcanite stem with micromesh sanding pads – 1500-12000 grit pads. I wiped it down with Obsidian Oil after each sanding pad. I used Before & After Pipe Polish – both Fine and Extra Fine to further polish the stem.       This JB (John Bessai) Bullseye stamped Poker is a great looking pipe now that it has been restored.The smooth oil cured finish around the bowl is quite beautiful and highlights the grain and works well with the polished vulcanite taper stem. The repaired gouges on the heel look much better and are now smooth to touch. I put the stem back on the bowl and carefully buffed the pipe with Blue Diamond on the buffing wheel using a light touch on the briar. I gave the bowl and the stem multiple coats of carnauba wax on the buffing wheel and followed that by buffing the entire pipe with a clean buffing pad. I hand buffed the pipe with a microfiber cloth to deepen the shine. The finished John Bessai Poker fits nicely in the hand and feels great. Give the finished pipe a look in the photos below. The dimensions of the pipe are Length: 6 inches, Height: 1 ¾ inches, Outside diameter of the bowl: 1 ¼ inches, Chamber diameter: ¾ of an inch. I will be putting it on the rebornpipes store shortly. If you are interested in adding this pipe to your collection send me a message or an email. Thanks for reading this blog and my reflections on the pipe while I worked on it. There are many more to come!

Life for a well used American Made John Bessai Custom Made Special Bent Poker/Sitter


Blog by Steve Laug

A fellow Vancouver Pipeman named Alex continues to keep me busy with working on the pipes he is picking up. He has picked up some interesting American and English made pipes. The next of those pipes is Bent Poker that is a Sitter. It is quite a stunning pipe. From what I can see it is a flawless piece of briar. The grain is mixed around the bowl and shank. The pipe is stamped on the left side of the shank and the flat heel of the bowl. On the left side it reads CUSTOM MADE [over] FIRST QUALITY. On the heel it reads JOHN BESSAI [over] SPECIAL. There was a thick cake in the bowl and some lava overflowing onto the rim top. The thick lava and cake make it hard to ascertain the condition of the inner edge of the rim. The finish was very dirty with grime and oils ground into the surface of the bowl and shank. The vulcanite saddle stem is stamped with a JB (John Bessai) logo on the left side of the saddle. The stem was calcified, oxidized, dirty and had tooth marks and chatter on both sides near the button. Here are some photos of the pipe when I first received it.    I took a close-up photo of the rim to show the condition of the rim top, bowl and the inner edge of the bowl. You can see the thick cake in the bowl and the lava overflowing on the top of the rim. The stem had tooth damage and chatter on the button edges and the stem ahead of the button. The stamping on the side of the shank and heel of the bowl is shown in the photos below. It reads as noted above.  You can also see the JB logo on the left side of the saddle stem.   I removed the stem from the shank and took a photo of the flow of the pipe. The pipe was really going to look great once it was cleaned and polished.I have worked on quite a few Bessai pipes over the years and back in 2014 I restemmed a bowl. I wrote a blog on the pipe and did quite an extensive amount of research on the brand (https://rebornpipes.com/2014/07/14/restemming-and-restoring-a-john-bessai-special-diamond-shank-bent-brandy/). I am including that information here for ease of reference.

HISTORY & BACKGROUND

I started out with what I had found previously and written about on the blog. I quote the following paragraph from Pipedia http://pipedia.org/index.php?title=Bessai

 John Bessai was a long time pipemaker, repairman and tobacco shop owner who operated his pipe shop at the “Old Arcade” in Cleveland, Ohio. The shop was opened in approximately 1898. It was a small 2-room shop where he hand-crafted his own pipes in the back room and could work when customers were not there. Like so many other shop made brand, John Bessai’s limited production was quickly acquired by regular customers and thus his craftsmanship remained little known outside of Ohio and the Midwest. While his name is known by pipe collectors in the Midwest, his work is seldom seen elsewhere! He died before 1969. Nevertheless, John Bessai left behind a small number of classic shaped pipes; all were made on-site. They are praised worthy of collecting and reflecting skills well beyond most American pipe makers. John Bessai’s logo “JB” appeared as one letter as the “back” of the “J” and the “back” of the “B” share a single line. The logo was stamped on the stem and on the left side of the shank. His son Herb Bessai took over the business and also continued making pipes. He closed the shop in about 1978.

I suspected that there would be more information three years later. I did some further research and came across the information found in the paragraph below on one of the pipe forums.

John Bessai was located in the Colonial Arcade at least into the late 1980s. After his death, his son Herb ran the shop. It was taken over after Herb’s retirement by a male and then name was changed to “Old Erie Pipes”. This was then located in the Erieview Plaza and when that mall closed, taken over by Cousin’s Cigars which has a store on Euclid Avenue near CSU, and a store on Chagrin Boulevard in Woodmere Village.

That small quotation gave me a bit more information of the state of the store after John’s death and Herb’s retirement. But I still wanted more information. I wanted to know about the history of the brand and if there was any information on the various grades in the brand and the stamping on the pipes. I wanted to know a bit of a timeline for the brands. Finally my digging paid off. ON one of the pipe forums I came across a link that led me to a gold mine of information gathered by a man after my own heart, Andrew Hross. He has a blog called Classic Pipe Shop on Blogspot. I have included the link below for those who want more information. Andrew has done an amazing job of gathering information on the Bessai Brand so rather than rewrite the history I am quoting portions of Andrew’s work on The John Bessai Pipe Clinic. (http://classicpipeshop.blogspot.ca/2014/04/the-john-bessai-pipe-clinic-information.html)

The John Bessai Pipe Clinic, 35 Colonial Arcade, Cleveland, OH 44115 – by Andrew Hross

Owner(s): **John Bessai 1920s until his passing in 1969, **Herb Bessai ~1962-1983, **Daniel Gottschall 1984-~1993, **Purchased by Dad’s Smoke Shop / Cousin’s Smoke Shop and rolled into the Old Erie Smoke Shop about 1993. Cousin’s Cigars purchased the remaining stock of Bessai pipes near after Herb Bessai passed away in 2002.

Years of Operation: 1920s (unkown specific date at this time) – 1983. After 1983 the business was sold to Daniel Gottschall who later sold it to Cousin’s Cigar (Euclid Ave) around 1993. The name was changed to “Old Erie Tobacco Company”. They were forced to move to the Galleria when all the tenants of the Old Arcade were cleared out to make room for renovations. Their new address was The Galleria at Erieview, 1301 East 9th Street in Cleveland.

After this move the location wasn’t as busy as they had hoped and Cousin’s moved all the Old Erie Tobacco assets to their Euclid Avenue Store. The store has since moved to a St. Clair location after Cleveland State forced them out due to anti-smoking regulations on campus. Their St. Clair location offers many of John Bessai Pipe Clinic’s old tobacco blends.

Their new store opened in the Merriman Valley area in Akron, Ohio where the store manager John Coleman oversees the day to day operations. John was instrumental in helping me piece together a lot of loose ends during Bessai Pipe Clinic’s transition years.

My father visited their shop several times in the early 60s as he attended Fenn College (now Cleveland State University) as an undergrad before moving on to Ohio State University for his Masters. He’s way smarter than I am so I just go with the flow…

He mentioned meeting John at that time who quickly gave my father some pointers on smoking a pipe and how to take samples from the shop’s expansive sample jar collection. His pipes were on display in the shop although I don’t believe he had a lot of pipes on display at any given time due to production in-shop.

John’s son Herb took over the shop in the early 60s after he graduated from Cleveland State University / Fenn College (unclear) as he is listed as having played Basketball for CSU. Herb was also a helpful, informative and friendly individual. Articles exist from the Herald in 1962 where they interviewed Herb (with photograph) about the state of smoking in the new age of the early 60s. I visited the shop in the late 70s / early 80s with my father during a trip to Cleveland and couldn’t tell you much about the shop other than the guy working was very friendly. Back then it wasn’t unusual to be a kid and walk into a smoke shop with your father. Clearly I didn’t purchase anything but my father probably picked up some tobacco but I remember him looking at pipes displayed on a back wall. The shop was small but impressive.

If anyone has any pictures of the shop or old catalogs, I would love any additional information as it’s tough to come by 30+ years later!

Pipes offered by John Bessai Pipe Clinic: Most of the pipes that were offered by the John Bessai Pipe Clinic were fairly standard in shape… I would say most of the pipes Bessai offered were smooth pipes. My assessment would be 90% smooth and 10% rusticated / sandblasted…

…The story is that John crafted pipes in the back room or off site and finished them in house while the store wasn’t busy. Very little information is available on the accuracy of this statement. Some of his pipes from the late 1960s through the 1970s (John passed away in 1969) I feel were left over stock from previous turnings and sometimes showed fills or sand pits. Some of these pipes even carry Herb’s markings (see below). These pipes still smoke very well but are not as eye-appealing as other earlier pipes from the store’s career.

Stampings and rough dating of John Bessai Pipe Clinic Pipes: Which pipes did John make and which ones did Herb make/finish? All Bessai pipes carry his standard large JB stamp either on the stem or shank or both. Typically the JB on the stem is within a circle.

All pipes created by John Bessai’s hands reportedly contain the miniscule ‘jb’ stamp on the shank or body of the pipe. I have older pipes in my possession that do not contain this stamp (condenser, old stamps, etc) that were clearly shop made pipes. I feel he started using the tiny ‘jb’ stamp in the 50s to early 60s.

An interesting note about John Bessai’s stems – they always clean very nicely and aren’t prone to as much oxidation (that brownish / green color) as most dunhill and Charatan pipes tend to oxidize. His cuts to his stems were very impressive and often transitioned from diamond-shaped shanks almost architecturally. Very comfortable to smoke.

John Bessai Special Pipes:

… I have a couple Bessai Special pipes. These stand out either by large size, graining or possibly shape. Most Specials are unique pipes and are rare to find in comparison to his regular issue pipes.

John Bessai Special X pipes:

I only have one of these and it’s a beauty. This one is a larger bowl (around a group 4 dunhill) with deep colored grain and a hefty substantial shank. Special X pipes are probably the rarest of John Bessai pipes and should be sought out if possible. I’ve smoke mine roughly 4 or 5 times and it performs with the best of my pipes…

Herb Bessai Pipes:

Unfortunately none of these pipes that I’ve seen have astounded me with grain or general appearance. Having said this, these pipes smoke nicely and are a great value if you can find them. I have one that my father found at an Antique Show in the South. There’s another author shape on reborn pipe’s blog that someone refinished because of the amount of fills in the pipe. He also states it’s a wonderful smoker (Editor’s note: This is my pipe and the write up I did on the blog). These pipes are likely from the late 60s through the early 70s. I believe many pipes after this period were created en masse at a factory in the US. It is unclear what stamp was used on these later pipes…

Dating / Circa era Bessai Pipes: If the pipe carries a stamp stating Cleveland, O U.S.A. it’s considered an older production pipe (pre1960s). I’ve not seen any newer pipes with that stamp.

Bullseye stamping usually indicates an earlier pipe as that stamp seems to have been abandoned pre1960 as well.

Most of the earlier Bessai pipes have an unusual ‘stinger’ or condenser at the end of the tenon which is unique to Bessai pipes. They are either a hard plastic or created out of wood. They are typically easy to remove and could have been easily lost if misplaced. These pipes I would consider pre-1960 and possibly 1940s-early 1950s production based on their stamps and patina of the pipes.

1970s 1980s and beyond: My feeling on these pipes after John’s passing is that they purchased finished pipes from a large manufacturer and stamped them with the John Bessai or Bessai stamp (on shank and/or stem). Most of these shapes are standard among many stores from that period and offer less than spectacular grain (and sometimes fills). Stamps on these pipes are probably fairly plain and don’t have the tiny ‘jb’ stamp on the shank indicating it was produced by John Bessai.

I know that is a lot of information and if you want to you can skip ahead to read about the restoration. I started my restoration with cleaning the internals and the externals of the pipe. I cleaned out the inside of the pipe with pipe cleaners, cotton swabs and alcohol. It was a filthy pipe on the inside.

The pipe in hand was a John Bessai Special. As noted above these stand out either by large size, graining or possibly shape. Most Specials are unique pipes and are rare to find in comparison to his regular issue pipes. It is certainly the first SPECIAL I have worked on.

Now it was time to work on the pipe itself. I reamed the thick cake back to the walls with a PipNet pipe reamer using the first two cutting heads. I followed up – cleaning the remnants of cake on the walls with a Savinelli Fitsall Pipe Knife. The final step for me to assess the condition of the walls of the bowl is to sand it with 220 grit sandpaper on a piece of dowel. I sanded the walls smooth. I was happy with the condition of the inside walls of the chamber.  I scrubbed the exterior of the bowl with a tooth brush and undiluted Murphy’s Oil Soap to get the grime and debris out of the briar. I rinsed it with running water and dried it off with a towel. With that the outside was clean… progress!      I cleaned out the mortise, shank in the briar and airway in the stem with pipe cleaners, cotton swabs and 99% isopropyl alcohol. The pipe was dirty with lots of tars and oils.       I worked on the damage to the inner edge of the bowl with 220 grit sandpaper to remove as much of the damage as possible and bring the bowl back to round. I took a photo of the rim top after the cleanup to show the progress in cleaning up the edges.     I polished the briar with micromesh sanding pads – wet sanding with 1500-12000 grit pads and wiping the bowl down with a damp cloth after each pad. The grain is really beginning to stand out and the rim top is blending in quite well.    I worked some Before & After Restoration Balm into the surface of the briar with my fingertips to clean, enliven and protect it. I let the balm sit for a little while and then buffed with a cotton cloth to raise the shine. The following photos show the bowl at this point in the restoration process. I am very happy with the results.   I set the bowl aside and turned my attention to the stem. I painted the tooth marks in the stem with the flame of a lighter to lift them to the surface. It worked quite well but there were a few small tooth marks left in the surface.I repaired the tooth marks in the vulcanite and rebuilt the edge of the button with Black Loctite 380 Adhesive. Once the repairs had cured I used a needle file to recut the edges of the button and flatten out the repairs.        I sanded the stem surface and button with 220 grit sandpaper to smooth out the repairs and blend them into the surface. I also worked to remove the remaining oxidation on the stem surface. I started the polishing with 400 grit wet dry sandpaper.   I polished the stem with micromesh sanding pads – wet sanding with 1500-12000 grit sanding pads and wiping it down after each pad with Obsidian Oil. I polished the stem with Before & After Stem Polish – both Fine and Extra Fine. I wiped it down a final time with Obsidian Oil when I finished.        This John Bessai Special Bent Poker with a vulcanite saddle stem turned out to be a real beauty. John Bessai really maximized the grain with the shape of the pipe. Everything about the pipe – the finish, the rim top and the cut of the briar work well to highlight the grain around the bowl. I polished stem and the bowl with Blue Diamond polish on the buffing wheel and the finish just popped and came alive. I gave the bowl and the stem multiple coats of carnauba wax. I buffed the pipe with a clean buffing pad to raise the shine. I hand buffed it with a microfiber cloth to deepen the shine. The pipe polished up pretty nicely. The pipe took on life with the buffing. The rich brown finish works well with the polished vulcanite stem. The finished pipe has a rich look that is quite catching. Have a look at it with the photos below. The shape, finish and flow of the pipe and stem are very well done. The dimensions are Length: 5 inches, Height: 2 inches, Outside diameter of the bowl: 1 ½ inches, Chamber diameter: 7/8 of an inch. The John Bessai Special will back in the box of pipes that I am working on for Alex. I am looking forward to what he will think of this one. Thanks for walking through the restoration with me as I worked over another estate pipe.

Restemming and Restoring a John Bessai Special Diamond Shank Bent Brandy


Blog by Steve Laug

I was gifted a box of pipe bowls that needed varying degrees of work and a few odds and ends of pipe parts that now reside in my cans of parts. The bowls have refilled my refurbishing box. The first of these that I chose to work on is a beautifully grained, flawless piece of briar made into a diamond shank brandy. It is stamped on the left underside of the shank – John Bessai over Special. There is no other stamping on the pipe at all. The rim of the bowl is rounded. The pipe bowl is in excellent condition with no problems with the finish. The bowl needed reaming as it had an uneven cake on one side and on the upper portion. The shank is dirty with tars and oils but otherwise in good shape. The drilling and finish on this pipe is perfect. It is a beauty. From a previous Bessai pipe that I had found nearly three years ago I knew a little bit of history. I had hunted to gather information at that time.
IMG_7318

IMG_7319

IMG_7320

IMG_7321
HISTORY & BACKGROUND
I started out with what I had found previously and written about on the blog. I quote the following paragraph from Pipedia http://pipedia.org/index.php?title=Bessai

1. “John Bessai was a long time pipemaker, repairman and tobacco shop owner who operated his pipe shop at the “Old Arcade” in Cleveland, Ohio. The shop was opened in approximately 1898. It was a small 2-room shop where he hand-crafted his own pipes in the back room and could work when customers were not there. Like so many other shop made brand, John Bessai’s limited production was quickly acquired by regular customers and thus his craftsmanship remained little known outside of Ohio and the Midwest. While his name is known by pipe collectors in the Midwest, his work is seldom seen elsewhere! He died before 1969. Nevertheless, John Bessai left behind a small number of classic shaped pipes; all were made on-site. They are praised worthy of collecting and reflecting skills well beyond most American pipe makers. John Bessai’s logo “JB” appeared as one letter as the “back” of the “J” and the “back” of the “B” share a single line. The logo was stamped on the stem and on the left side of the shank. His son Herb Bessai took over the business and also continued making pipes. He closed the shop in about 1978.”

I suspected that there would be more information three years later. I did some further research and came across the information found in the paragraph below on one of the pipe forums.

2. “John Bessai was located in the Colonial Arcade at least into the late 1980s. After his death, his son Herb ran the shop. It was taken over after Herb’s retirement by a male and then name was changed to “Old Erie Pipes”. This was then located in the Erieview Plaza and when that mall closed, taken over by Cousin’s Cigars which has a store on Euclid Avenue near CSU, and a store on Chagrin Boulevard in Woodmere Village.”

That small quotation gave me a bit more information of the state of the store after John’s death and Herb’s retirement. But I still wanted more information. I wanted to know about the history of the brand and if there was any information on the various grades in the brand and the stamping on the pipes. I wanted to know a bit of a timeline for the brands. Finally my digging paid off. ON one of the pipe forums I came across a link that led me to a gold mine of information gathered by a man after my own heart, Andrew Hross. He has a blog call Classic Pipe Shop on Blogspot. I have included the link below for those who want more information. Andrew has done an amazing job of gathering information on the Bessai Brand so rather than rewrite the history I am quoting portions of Andrew’s work on The John Bessai Pipe Clinic.

http://classicpipeshop.blogspot.ca/2014/04/the-john-bessai-pipe-clinic-information.html

3. The John Bessai Pipe Clinic, 35 Colonial Arcade, Cleveland, OH 44115 – by Andrew Hross
a. Owner(s):
**John Bessai 1920s until his passing in 1969
**Herb Bessai ~1962-1983
**Daniel Gottschall 1984-~1993
**Purchased by Dad’s Smoke Shop / Cousin’s Smoke Shop and rolled into the Old Erie Smoke Shop about 1993.

Cousin’s Cigars purchased the remaining stock of Bessai pipes near after Herb Bessai passed away in 2002.

b. Years of Operation:

1920s (unkown specific date at this time) – 1983. After 1983 the business was sold to Daniel Gottschall who later sold it to Cousin’s Cigar (Euclid Ave) around 1993. The name was changed to “Old Erie Tobacco Company”. They were forced to move to the Galleria when all the tenants of the Old Arcade were cleared out to make room for renovations. Their new address was The Galleria at Erieview, 1301 East 9th Street in Cleveland.

After this move the location wasn’t as busy as they had hoped and Cousin’s moved all the Old Erie Tobacco assets to their Euclid Avenue Store. The store has since moved to a St. Clair location after Cleveland State forced them out due to anti-smoking regulations on campus. Their St. Clair location offers many of John Bessai Pipe Clinic’s old tobacco blends.

Their new store opened in the Merriman Valley area in Akron, Ohio where the store manager John Coleman oversees the day to day operations. John was instrumental in helping me piece together a lot of loose ends during Bessai Pipe Clinic’s transition years.

My father visited their shop several times in the early 60s as he attended Fenn College (now Cleveland State University) as an undergrad before moving on to Ohio State University for his Masters. He’s way smarter than I am so I just go with the flow…

He mentioned meeting John at that time who quickly gave my father some pointers on smoking a pipe and how to take samples from the shop’s expansive sample jar collection. His pipes were on display in the shop although I don’t believe he had a lot of pipes on display at any given time due to production in-shop.

John’s son Herb took over the shop in the early 60s after he graduated from Cleveland State University / Fenn College (unclear) as he is listed as having played Basketball for CSU. Herb was also a helpful, informative and friendly individual. Articles exist from the Herald in 1962 where they interviewed Herb (with photograph) about the state of smoking in the new age of the early 60s. I visited the shop in the late 70s / early 80s with my father during a trip to Cleveland and couldn’t tell you much about the shop other than the guy working was very friendly. Back then it wasn’t unusual to be a kid and walk into a smoke shop with your father. Clearly I didn’t purchase anything but my father probably picked up some tobacco but I remember him looking at pipes displayed on a back wall. The shop was small but impressive.

If anyone has any pictures of the shop or old catalogs, I would love any additional information as it’s tough to come by 30+ years later!

c. Pipes offered by John Bessai Pipe Clinic:
Most of the pipes that were offered by the John Bessai Pipe Clinic were fairly standard in shape… I would say most of the pipes Bessai offered were smooth pipes. My assessment would be 90% smooth and 10% rusticated / sandblasted…

…The story is that John crafted pipes in the back room or off site and finished them in house while the store wasn’t busy. Very little information is available on the accuracy of this statement. Some of his pipes from the late 1960s through the 1970s (John passed away in 1969) I feel were left over stock from previous turnings and sometimes showed fills or sand pits. Some of these pipes even carry Herb’s markings (see below). These pipes still smoke very well but are not as eye-appealing as other earlier pipes from the store’s career.

d. Stampings and rough dating of John Bessai Pipe Clinic Pipes:
Which pipes did John make and which ones did Herb make/finish? All Bessai pipes carry his standard large JB stamp either on the stem or shank or both. Typically the JB on the stem is within a circle.

All pipes created by John Bessai’s hands reportedly contain the miniscule ‘jb’ stamp on the shank or body of the pipe. I have older pipes in my possession that do not contain this stamp (condenser, old stamps, etc) that were clearly shop made pipes. I feel he started using the tiny ‘jb’ stamp in the 50s to early 60s.

An interesting note about John Bessai’s stems – they always clean very nicely and aren’t prone to as much oxidation (that brownish / green color) as most dunhill and Charatan pipes tend to oxidize. His cuts to his stems were very impressive and often transitioned from diamond-shaped shanks almost architecturally. Very comfortable to smoke.

John Bessai Special Pipes:
… I have a couple Bessai Special pipes. These stand out either by large size, graining or possibly shape. Most Specials are unique pipes and are rare to find in comparison to his regular issue pipes.

John Bessai Special X pipes:

I only have one of these and it’s a beauty. This one is a larger bowl (around a group 4 dunhill) with deep colored grain and a hefty substantial shank. Special X pipes are probably the rarest of John Bessai pipes and should be sought out if possible. I’ve smoke mine roughly 4 or 5 times and it performs with the best of my pipes…

Herb Bessai Pipes:
Unfortunately none of these pipes that I’ve seen have astounded me with grain or general appearance. Having said this, these pipes smoke nicely and are a great value if you can find them. I have one that my father found at an Antique Show in the South. There’s another author shape on reborn pipe’s blog that someone refinished because of the amount of fills in the pipe. He also states it’s a wonderful smoker (Editor’s note: This is my pipe and the write up I did on the blog). These pipes are likely from the late 60s through the early 70s. I believe many pipes after this period were created en masse at a factory in the US. It is unclear what stamp was used on these later pipes…

e. Dating / Circa era Bessai Pipes:
If the pipe carries a stamp stating Cleveland, O U.S.A. it’s considered an older production pipe (pre1960s). I’ve not seen any newer pipes with that stamp.

Bullseye stamping usually indicates an earlier pipe as that stamp seems to have been abandoned pre1960 as well.

Most of the earlier Bessai pipes have an unusual ‘stinger’ or condenser at the end of the tenon which is unique to Bessai pipes. They are either a hard plastic or created out of wood. They are typically easy to remove and could have been easily lost if misplaced. These pipes I would consider pre-1960 and possibly 1940s-early 1950s production based on their stamps and patina of the pipes.

1970s 1980s and beyond: My feeling on these pipes after John’s passing is that they purchased finished pipes from a large manufacturer and stamped them with the John Bessai or Bessai stamp (on shank and/or stem). Most of these shapes are standard among many stores from that period and offer less than spectacular grain (and sometimes fills). Stamps on these pipes are probably fairly plain and don’t have the tiny ‘jb’ stamp on the shank indicating it was produced by John Bessai.

RESTORATION
I went through my can of stems and found an older diamond-shaped saddle stem that fit quite well in the shank of the Bessai. The tenon was a little big so I sanded it with the Dremel and sanding drum until it fit snugly in the shank. The stem was an estate stem so it was dirty and had tooth chatter and some small indentations from teeth on the top and bottom of the stem near the button. It was slightly larger than the shank so that it would need to be sanded until it fit the line and shape of the shank.
IMG_7306

IMG_7307

IMG_7317
I sanded the stem and shank with 150 and 220 grit sandpaper to bring all sides and angles to match the shank angles and sides. I sanded the stem to remove the tooth marks and the tooth chatter in the process.
IMG_7322

IMG_7323

IMG_7324

IMG_7325
I sanded the stem and shank with a medium and fine grit sanding sponge to remove the scratch marks left behind by the sandpapers.
IMG_7326

IMG_7327
I reamed the bowl with a PipNet reamer to remove the uneven build up of cake in the bowl.
IMG_7328
I wiped down the surface of the briar with acetone on cotton pads to remove the finish on the bowl and make restaining it simpler.
IMG_7329
I cleaned out the bowl and the shank with isopropyl alcohol (99%) on cotton swabs and pipe cleaners until the bowl and shank were clean. I cleaned out the stem with pipe cleaners and alcohol as well. I also beveled the airway on the end of the tenon to make the flow more open.
IMG_7330
I set up a heat gun and heated the stem to bend it to fit the shape of the pipe. I inserted a pipe cleaner in the stem and then bent it over a rolling pin and set the bend with cool tap water.
IMG_7331

IMG_7332

IMG_7333
I wiped down the bowl and stem with isopropyl alcohol. The grain on this pipe is quite stunning so once it is restained and the stem finished it will be a beautiful pipe.
IMG_7335

IMG_7339

IMG_7342

IMG_7343
I stained the bowl with a medium brown aniline stain and flamed it, I gave it more stain and flamed it again. I then sanded the stem with medium and fine grit sanding sponges and then with my usual array of micromesh sanding pads. I wet sanded the stem with 1500-2400 grit pads and dry sanded with 3200-12,000 grit pads. Between each set of three pads I rubbed the stem down with Obsidian Oil.
IMG_7344

IMG_7345

IMG_7346
When I finished sanding with the final grits of micromesh I gave it another coat of Obsidian Oil and then buffed the stem and bowl with White Diamond. I gave the bowl and the stem multiple coats of carnauba wax and used a soft flannel buffing pad between coats to polish it. The finished pipe is shown below. The new coat of stain and the shine on the stem give the pipe a new and clean look. It is ready for its inaugural smoke. The background history sets the stage for a deeper appreciation of the pipe once I fire it up. It should smoke very well.
IMG_7347

IMG_7348

IMG_7349

IMG_7350