by Steve Laug
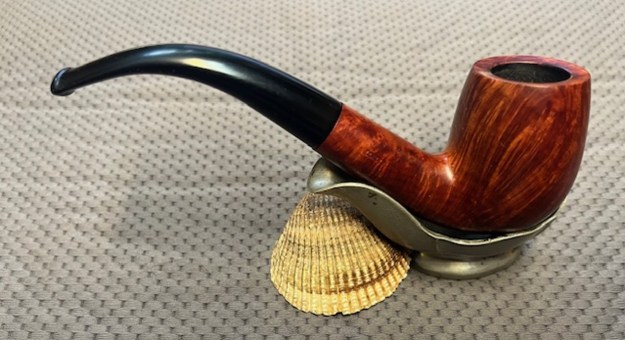
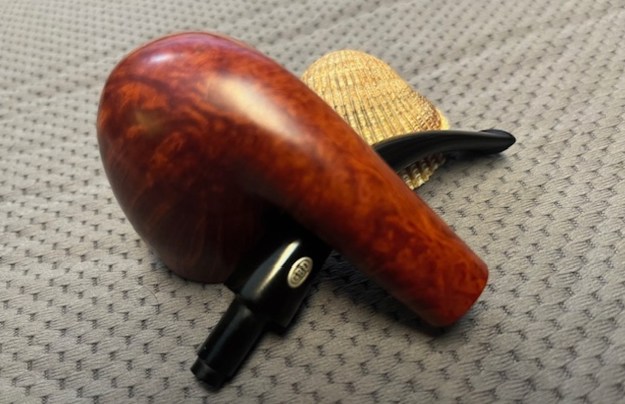
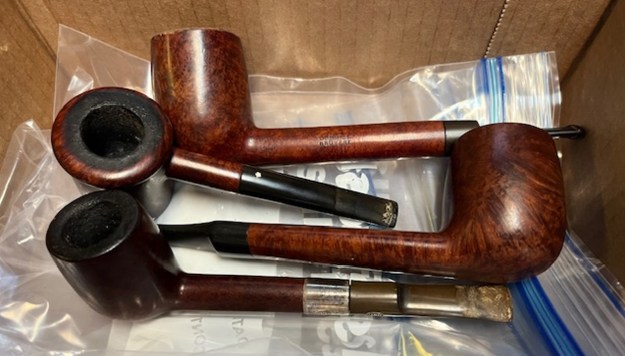
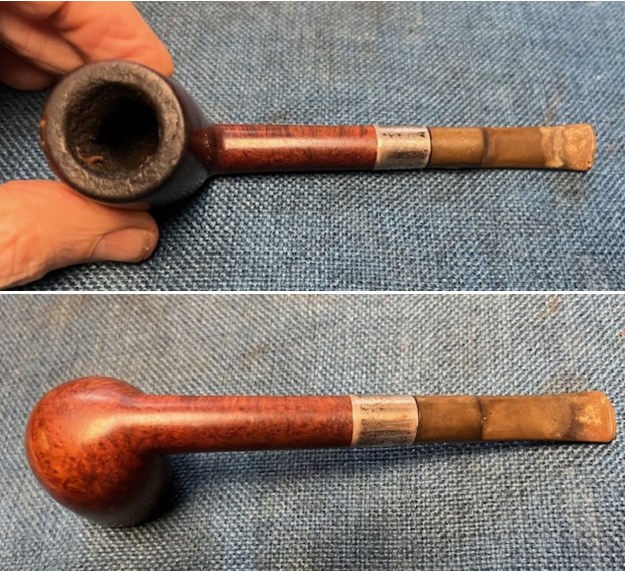
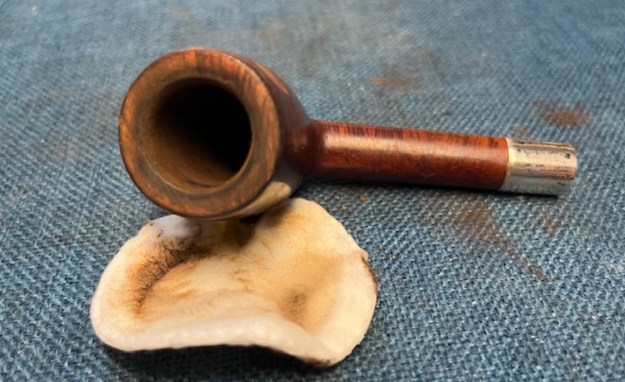
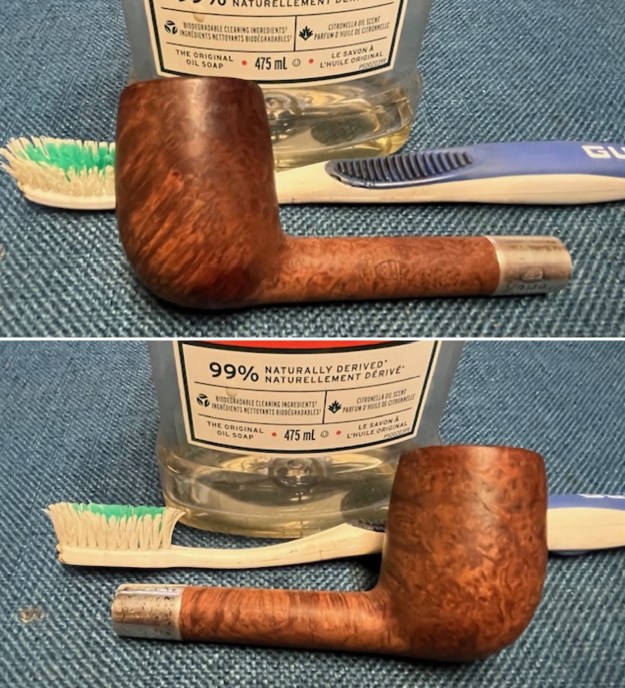
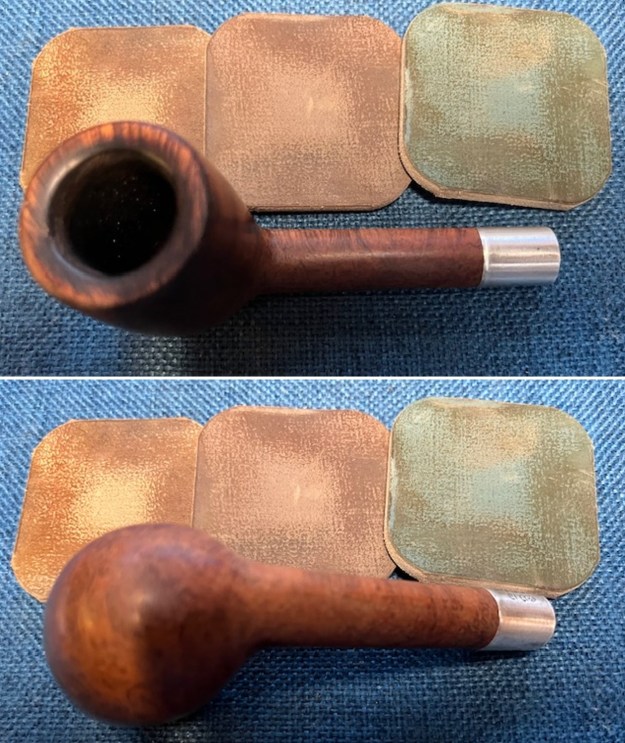
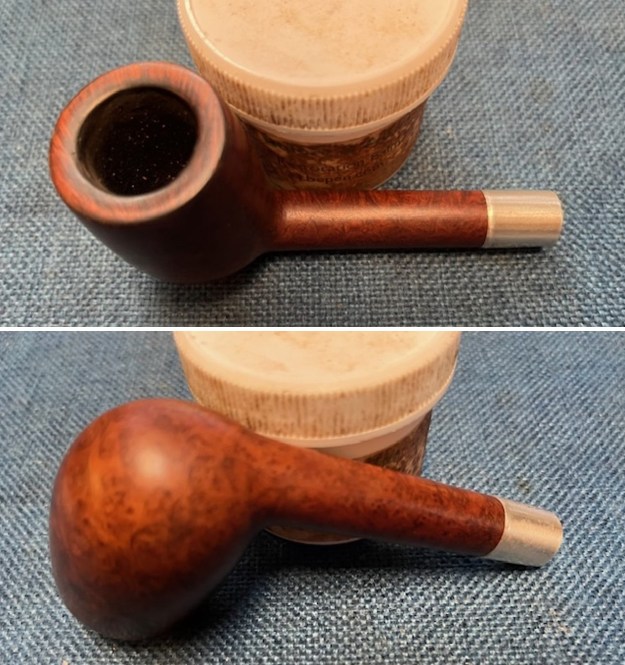
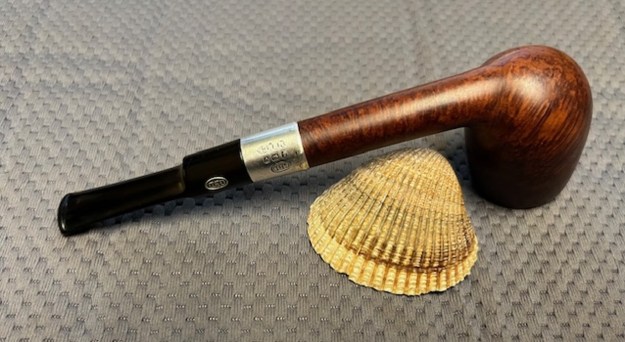
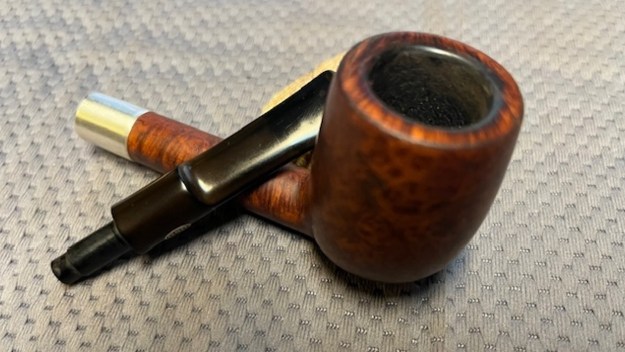
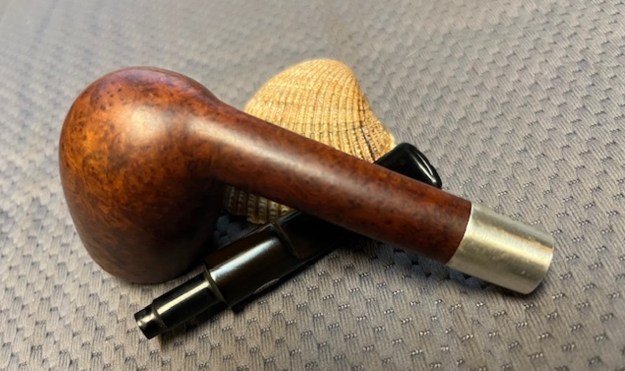
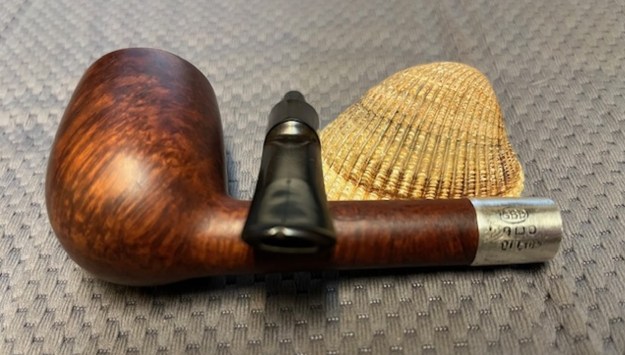
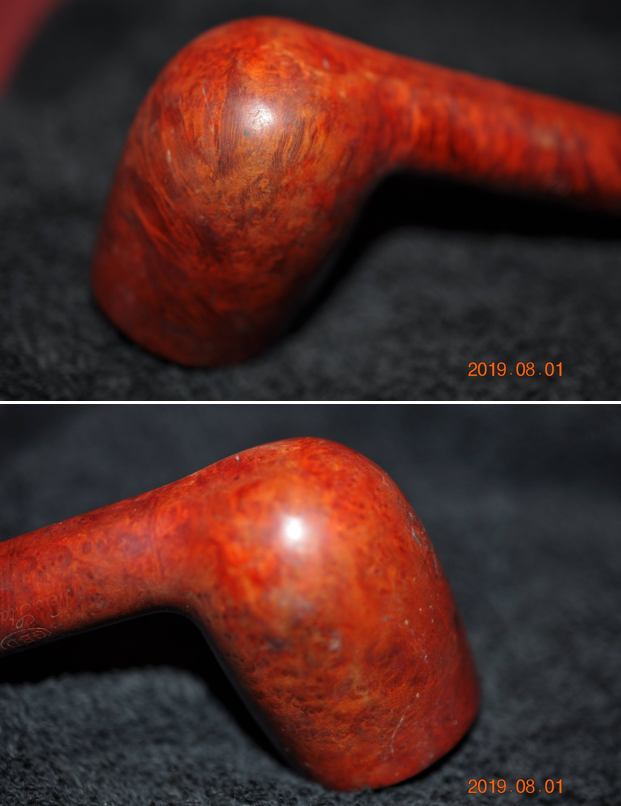
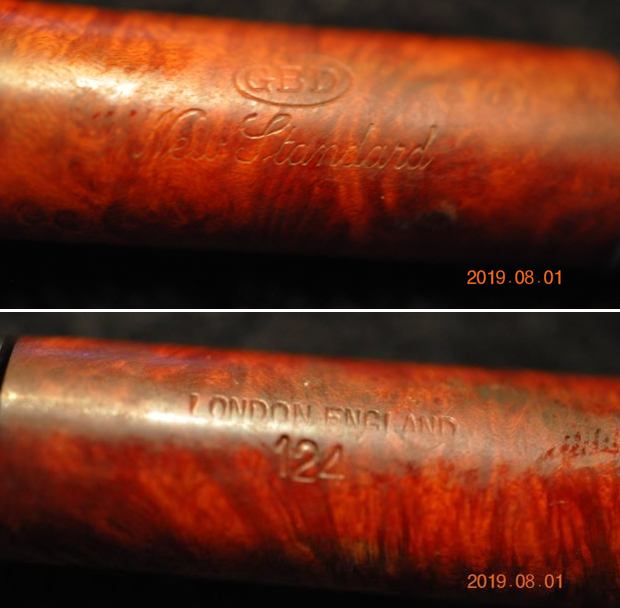
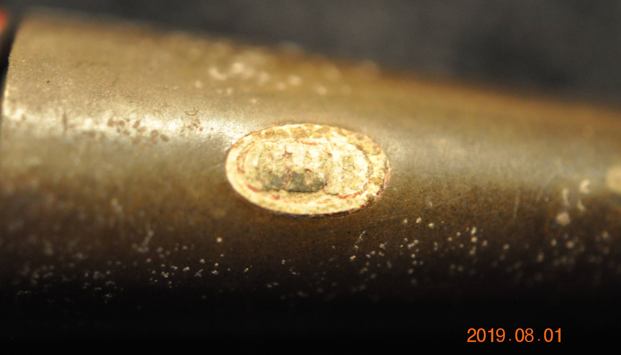
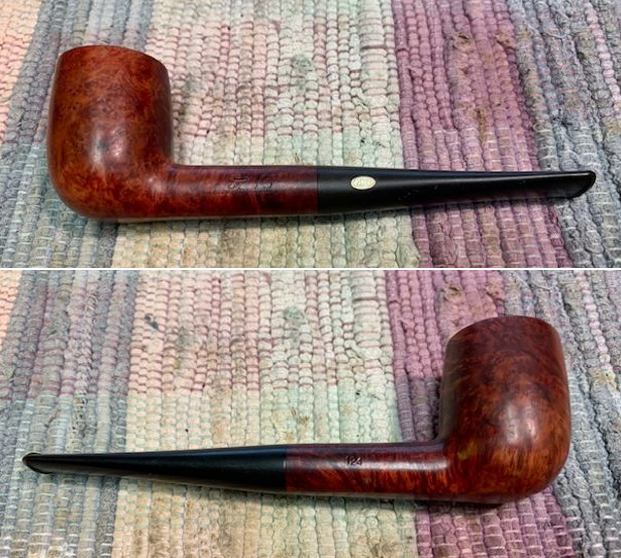
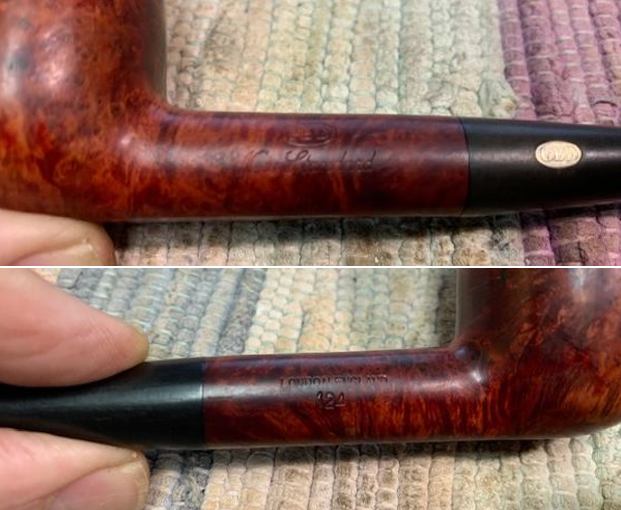
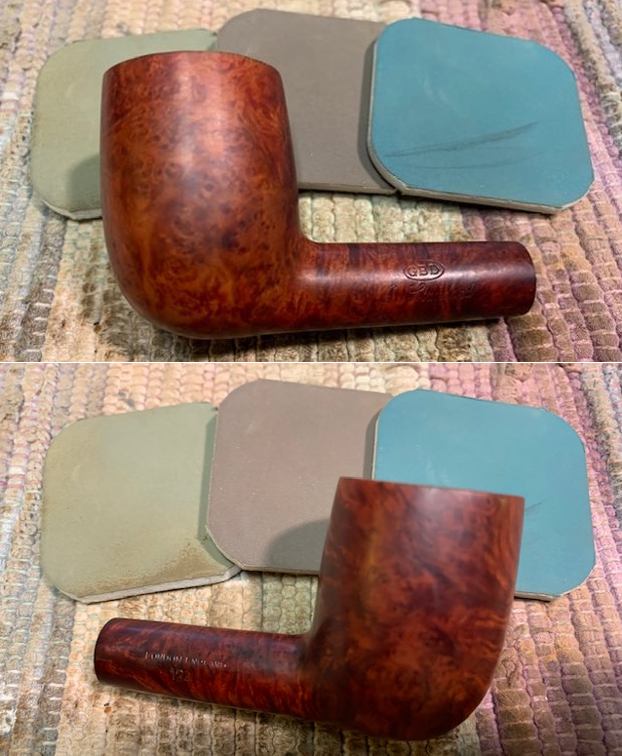
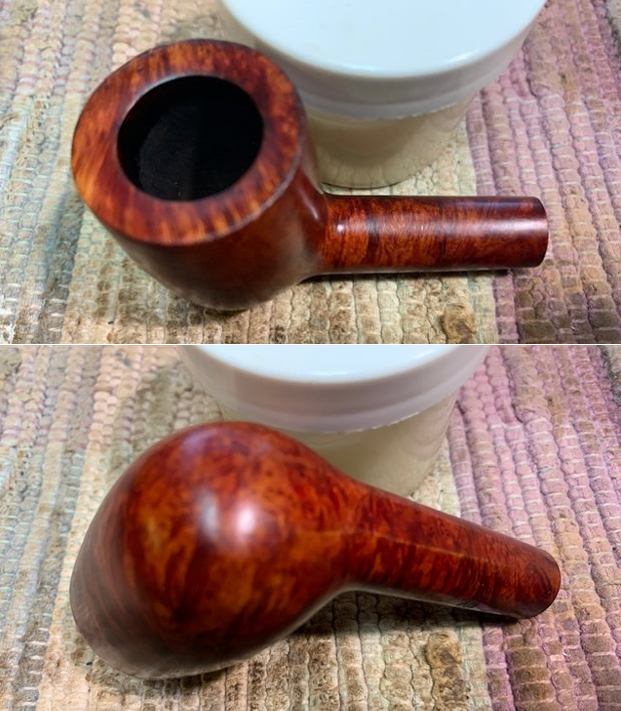
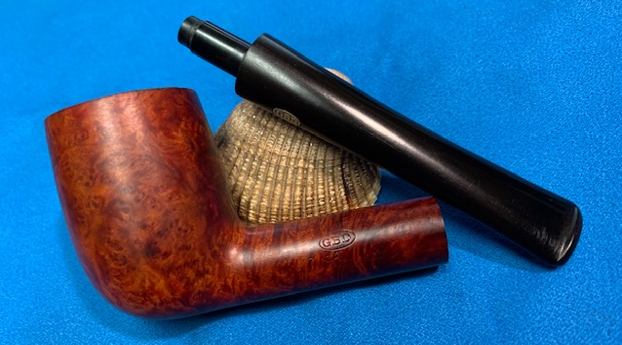
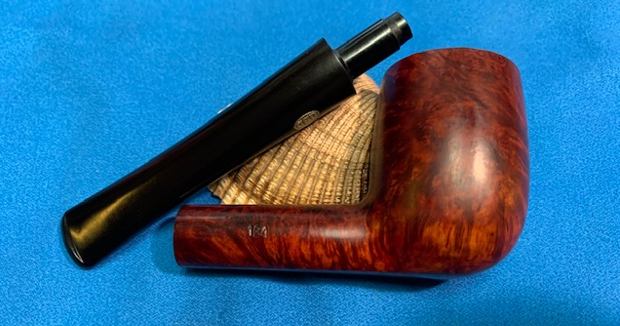
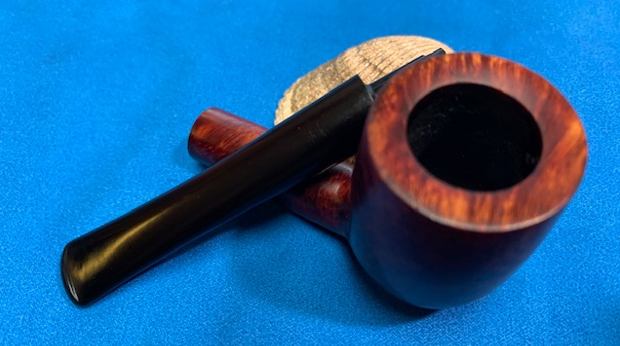
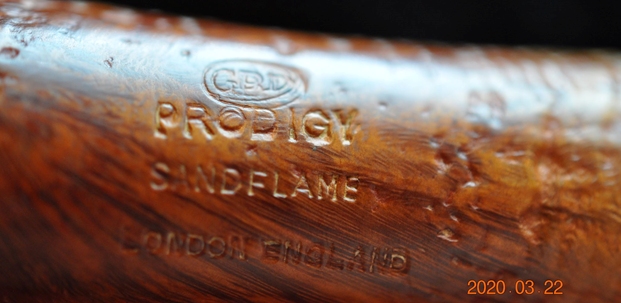
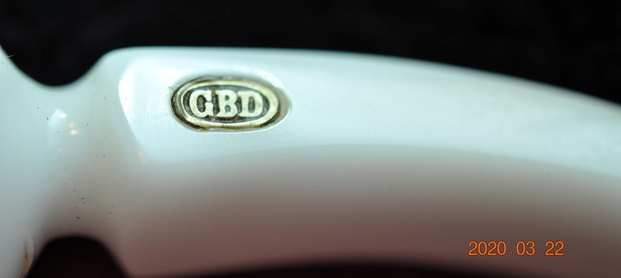
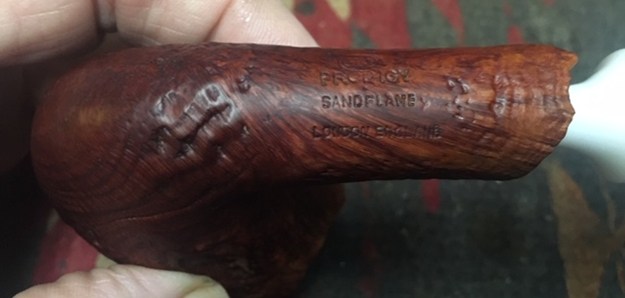
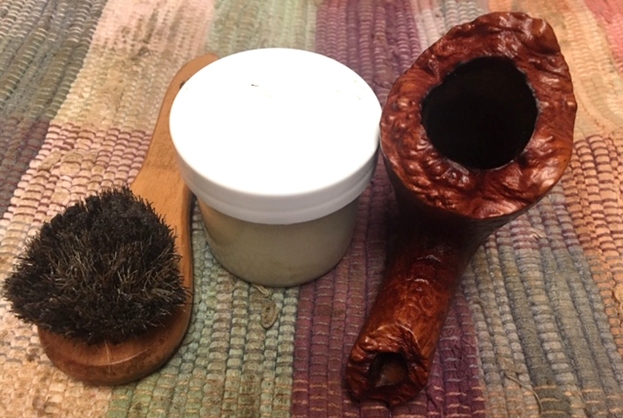
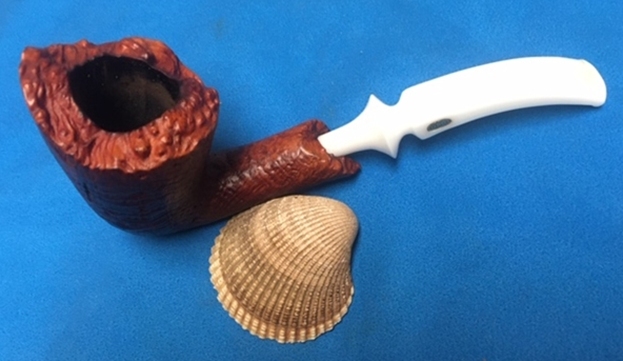
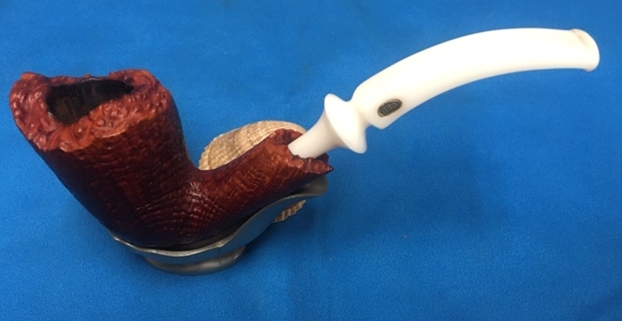
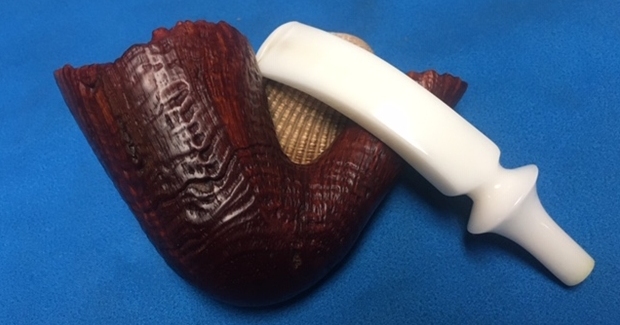
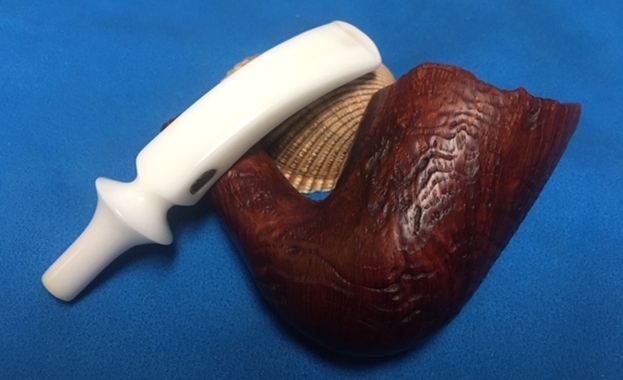
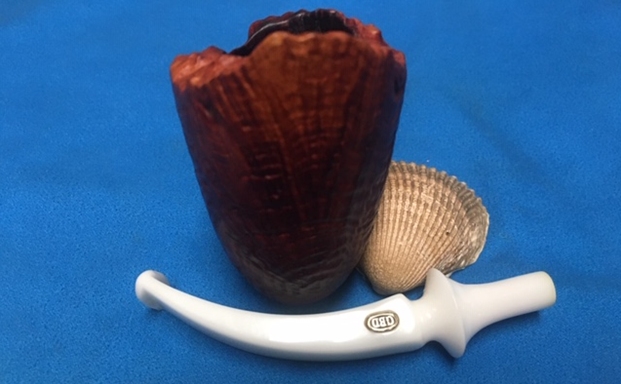
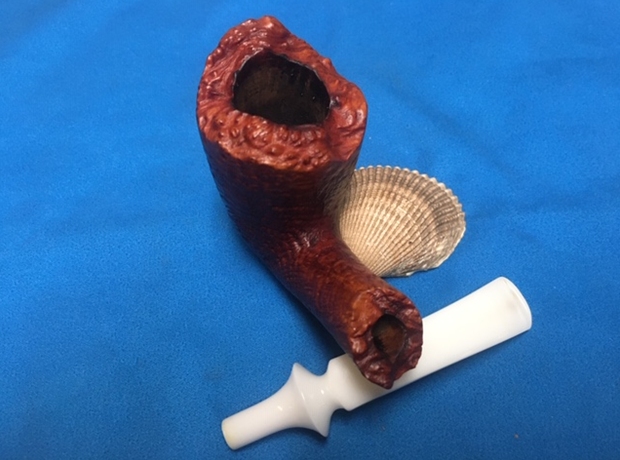
A while back I was asked by a customer and friend, Jack to take on some projects for him. I have worked on a few pipes for him over the years so we seem to have a standing agreement that I will clean up his pipes. This time he sent a batch containing 11 pipes – six Bertrams, an Arlington, a GBD, an old WDC Triangle Bakelite and one marked Texaco. All of them were in various conditions and would need different types of work. I took a photo of the pipes before I started working on them.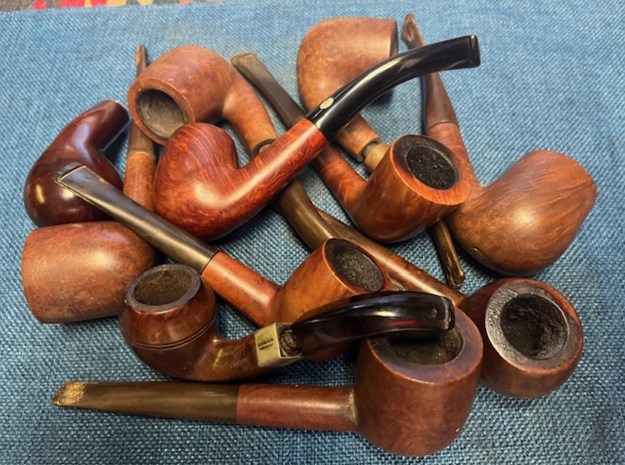 I chose to work on the GBD Bent Billiard next. The shape is very nice, with the rich red/brown finish that highlights the grain around the bowl and shank. It is a great shape with a taper vulcanite stem with a GBD roundel on the left side. The finish was dirty with grime ground into the finish around the bowl sides. There was a thick cake in the bowl and lava overflow on the top of the rim – heavy around the entire rim top. The edges – inner and outer both appeared to be okay under the lava coat. The pipe is stamped on the left side of the shank and reads GBD in an oval [over] New Standard. On the right side it reads London England [over] the shape number 508. The stem was in very good shape with no oxidation. There was light tooth chatter on both sides near the button. The taper stem has a brass GBD roundel on the left side that looks good. I took some photos of the pipe before I started the clean up work.
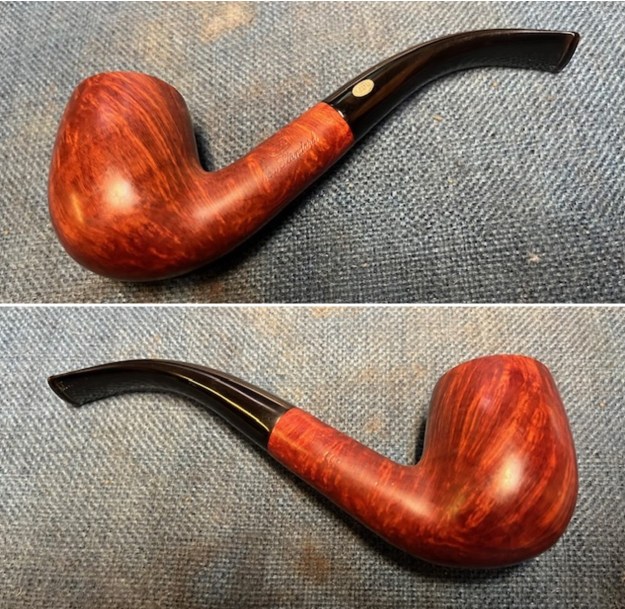
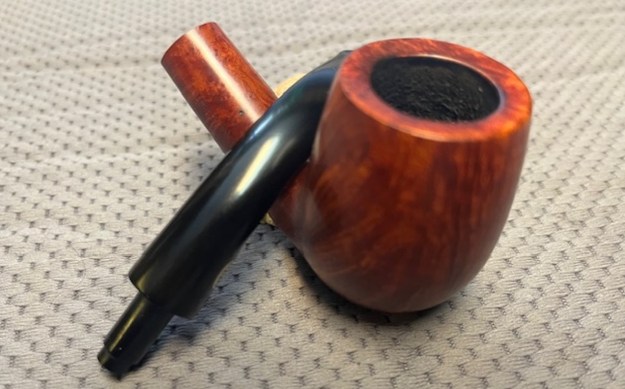
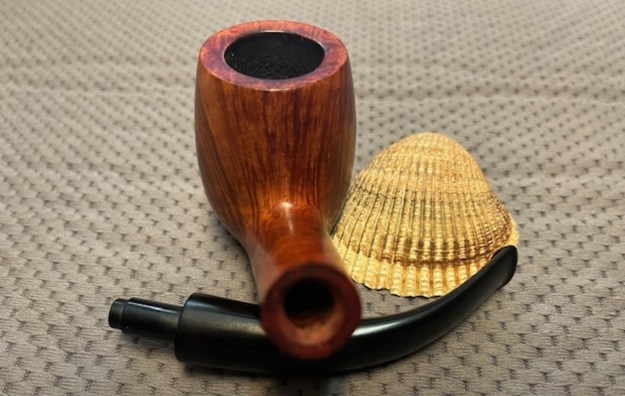
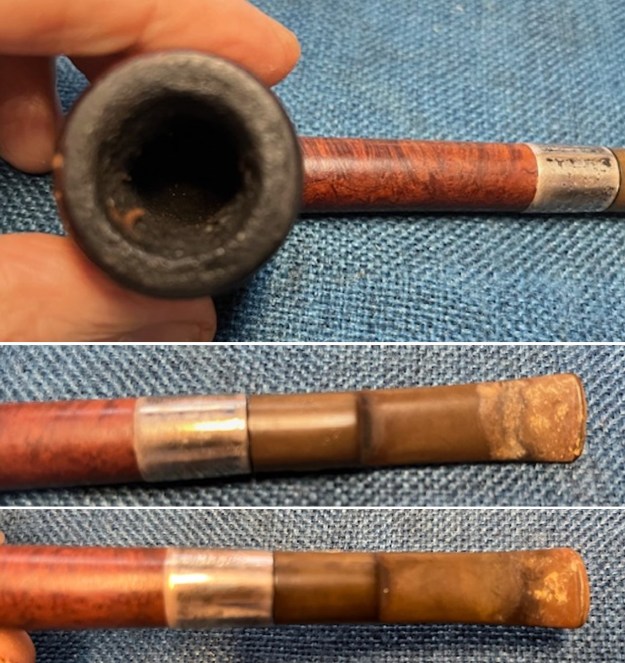
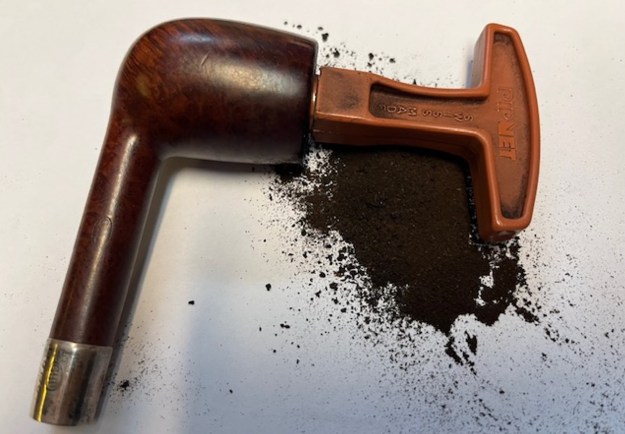
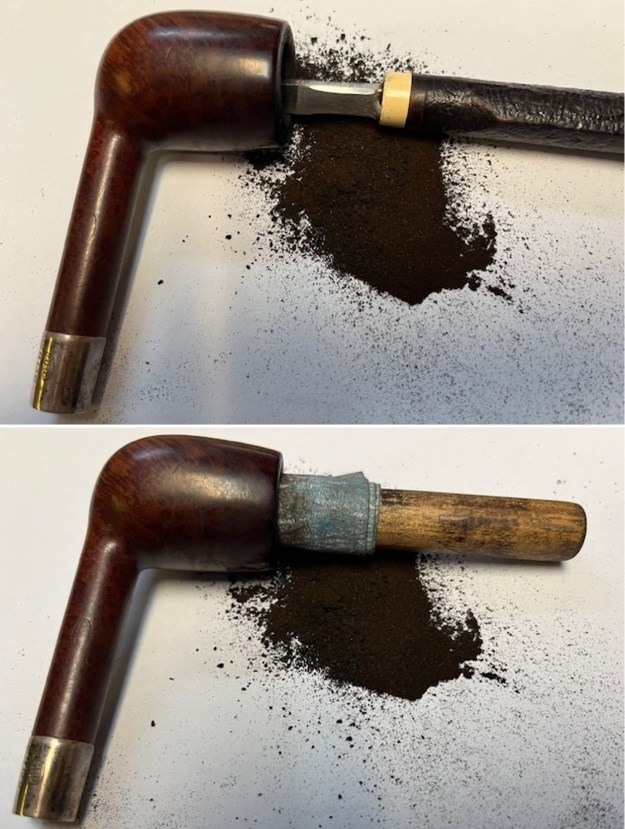
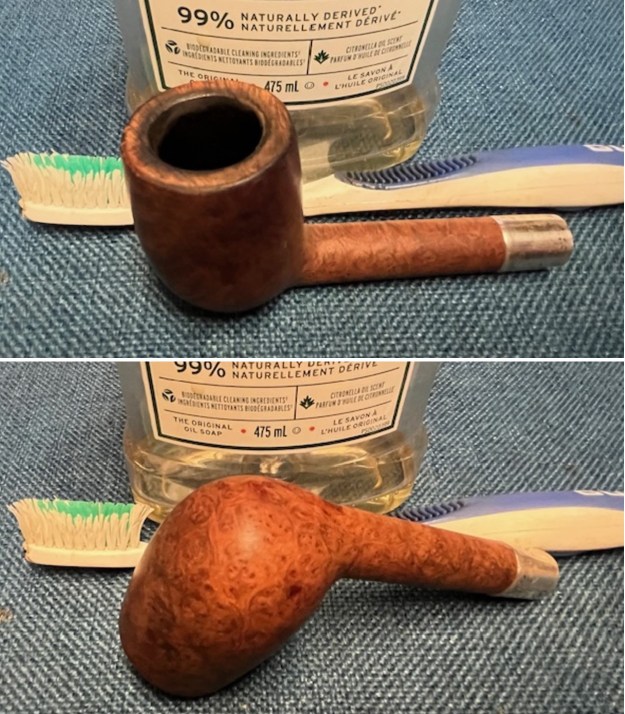
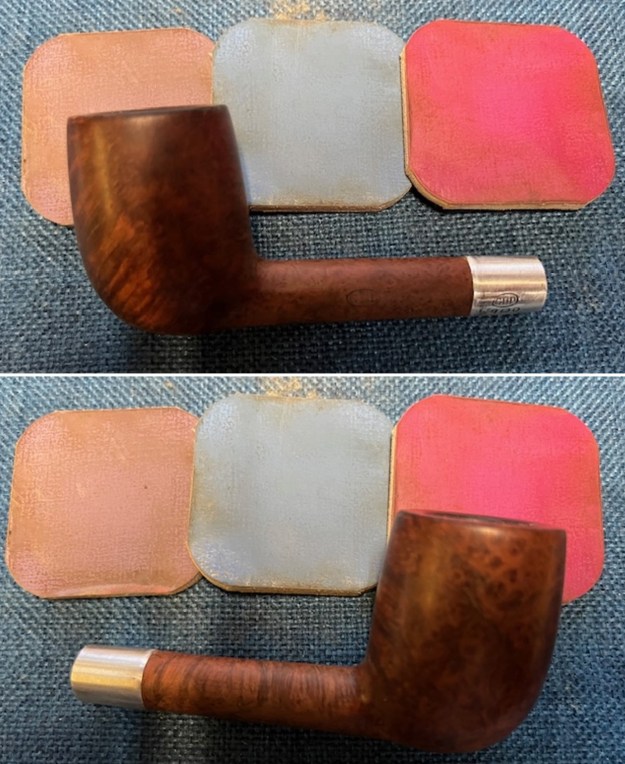
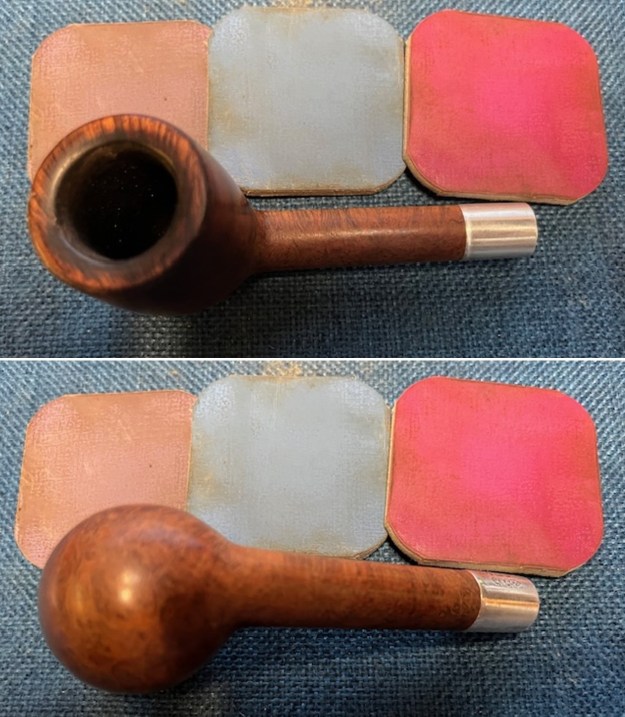
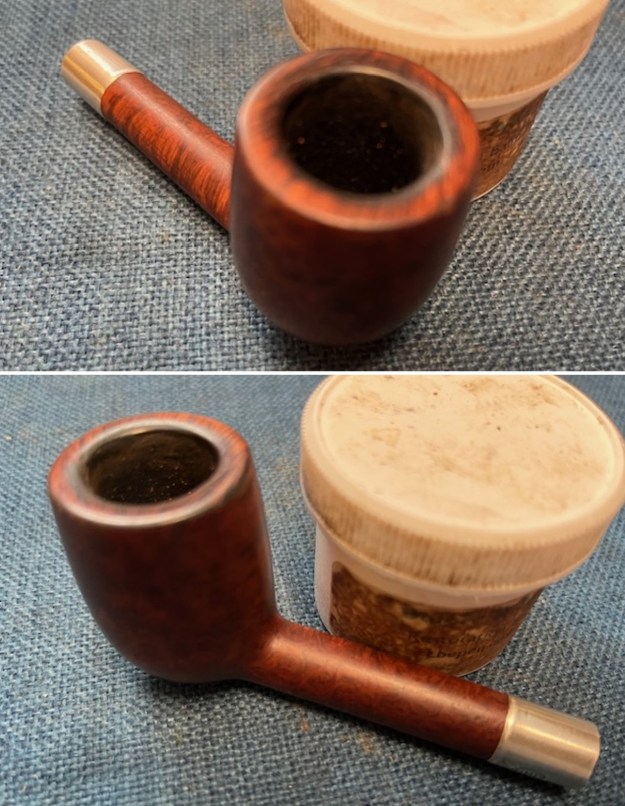
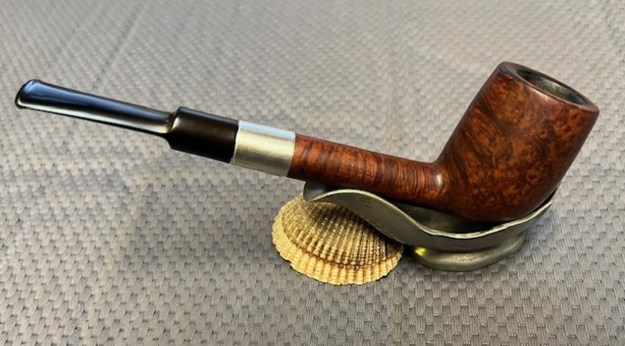
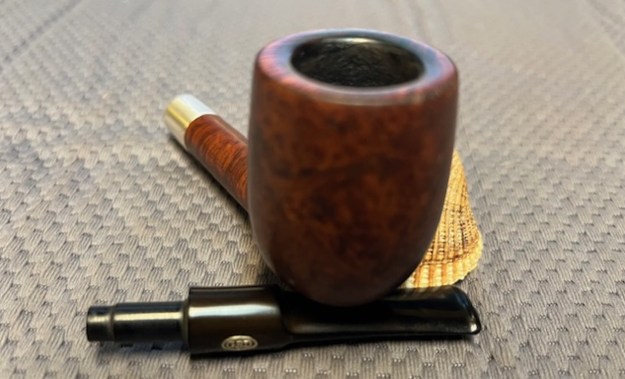
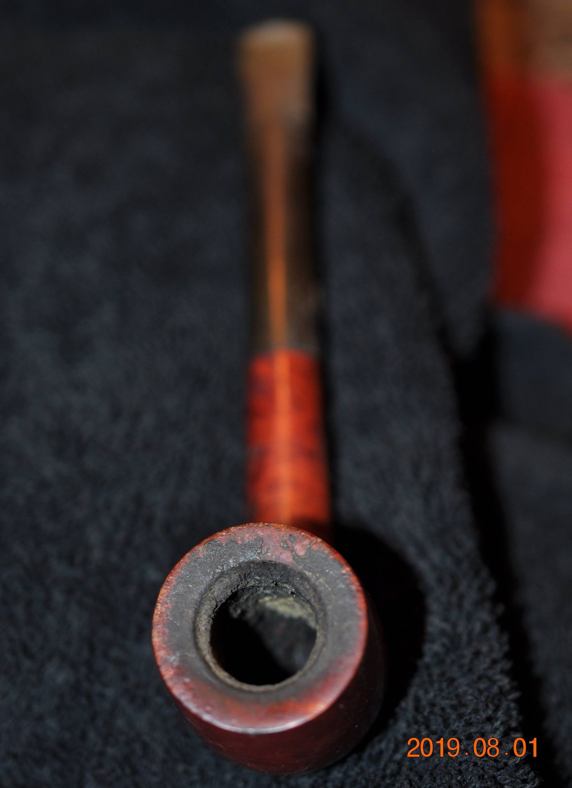
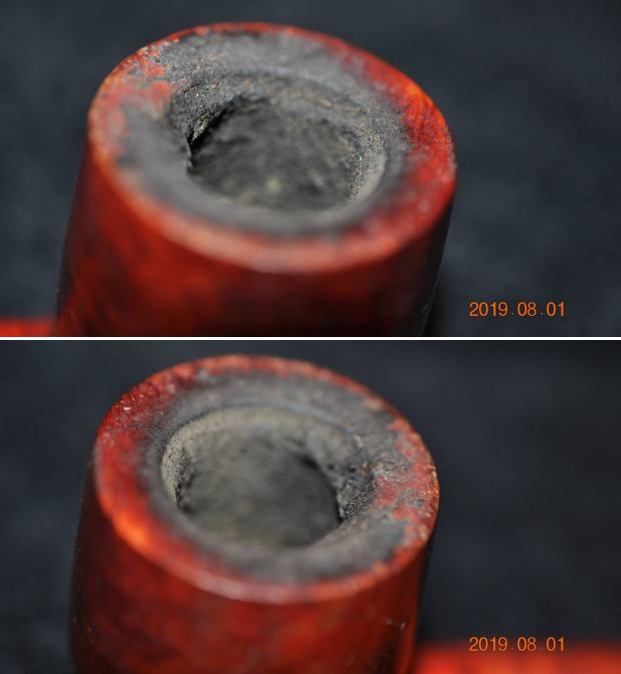
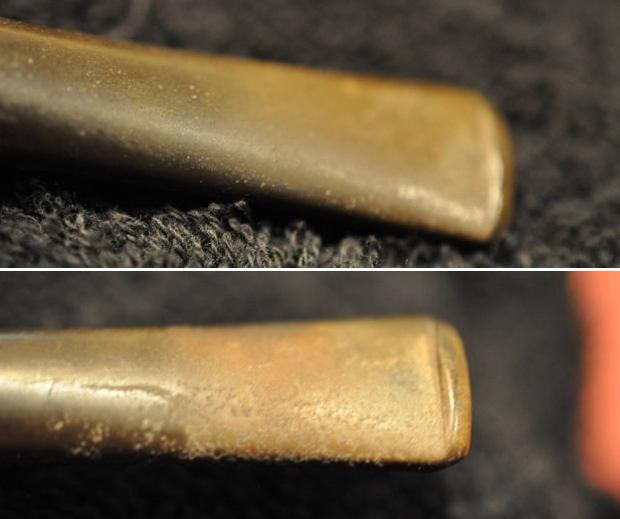
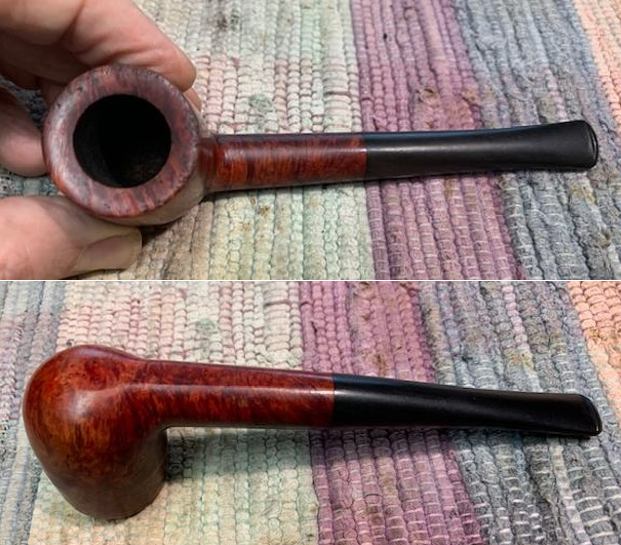
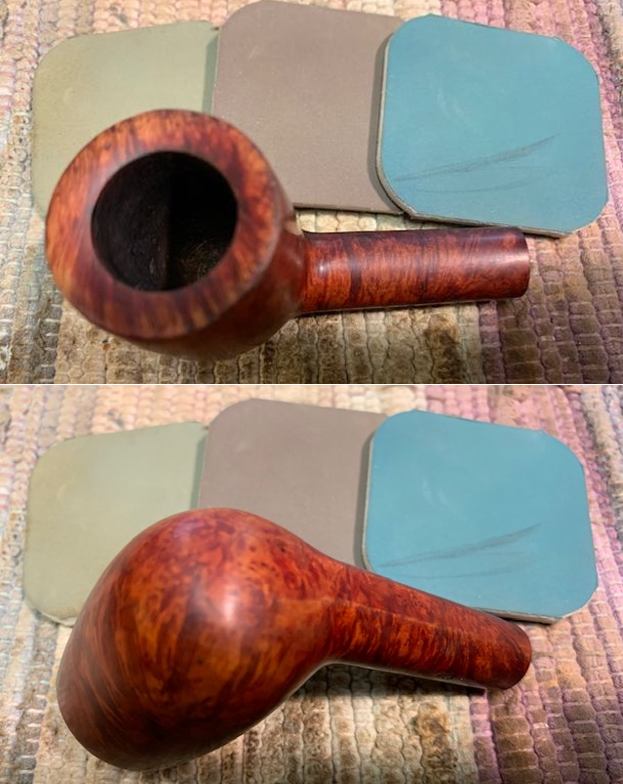
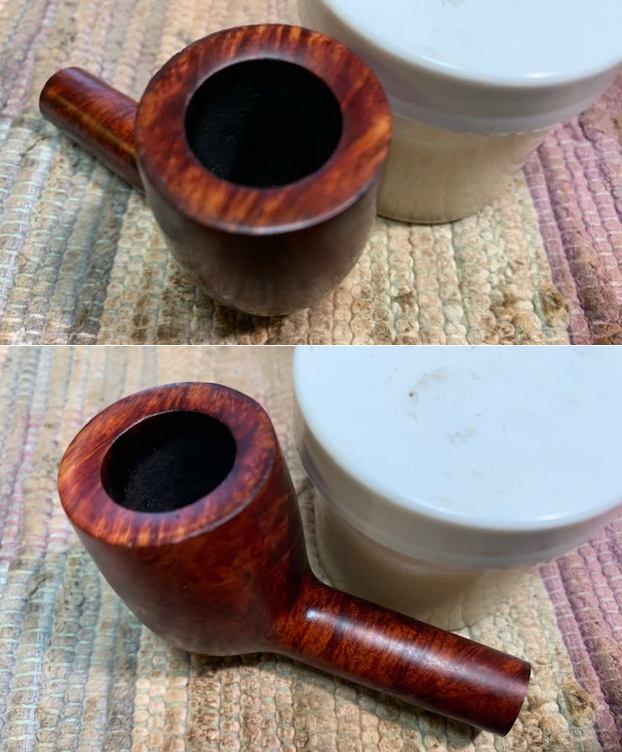
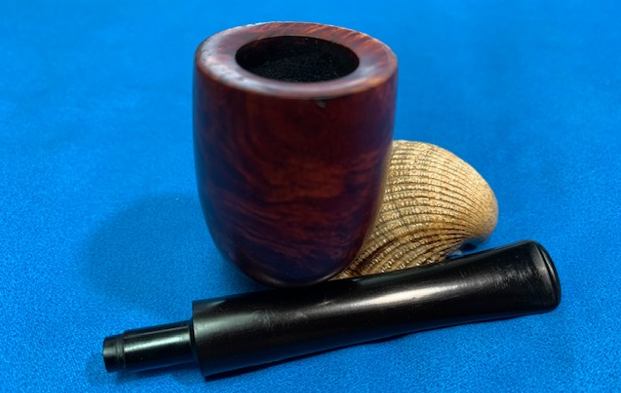
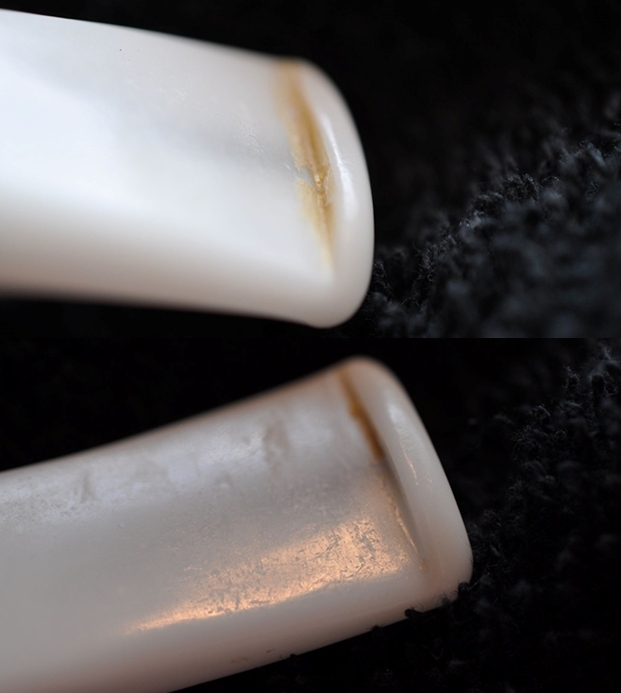
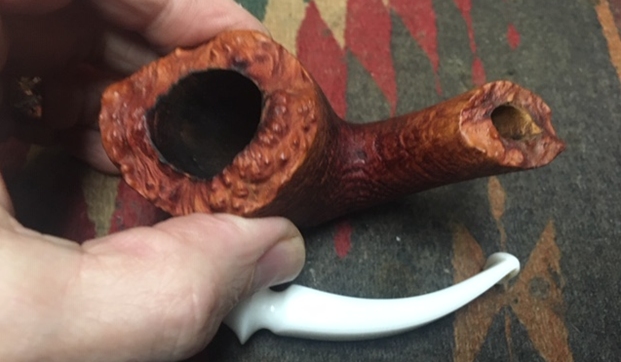
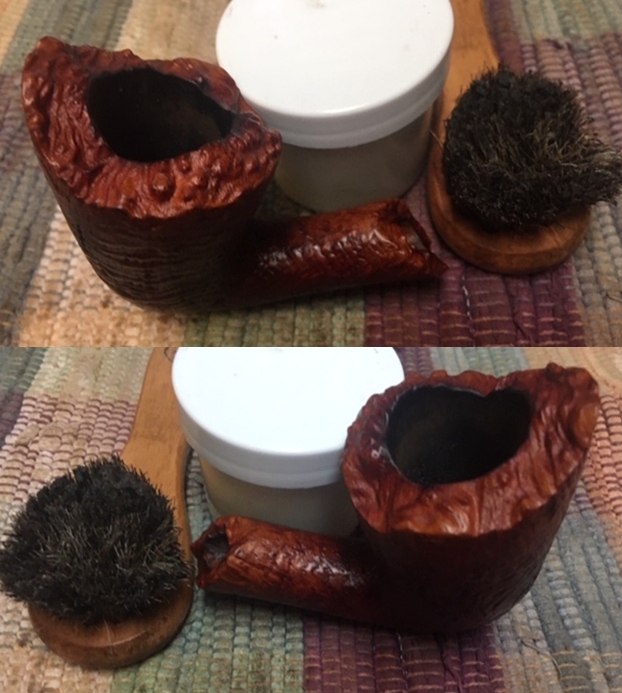
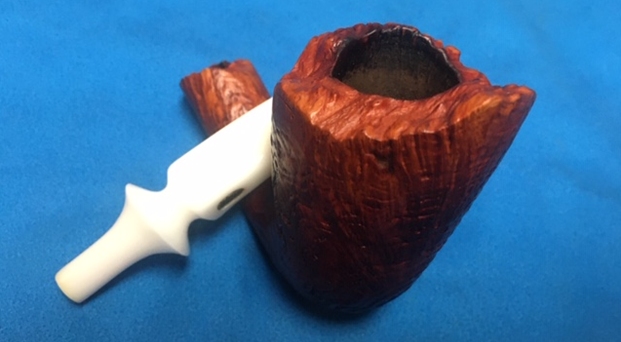
 I took photos of the rim top and the stem to show the condition. You can see the thick cake in the bowl and overflow of lava on the rim top. The photos of the stem show the light tooth chatter on the vulcanite on the top and underside ahead of the button.
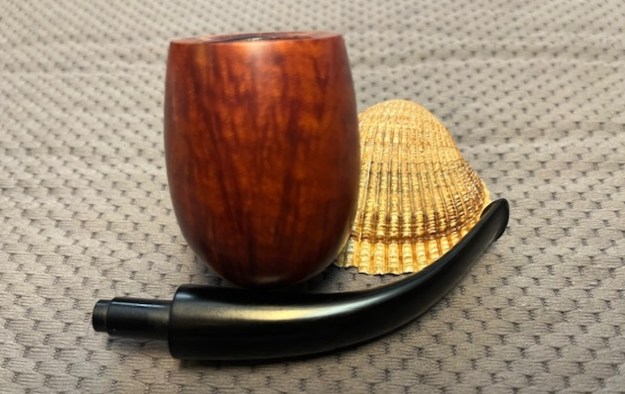
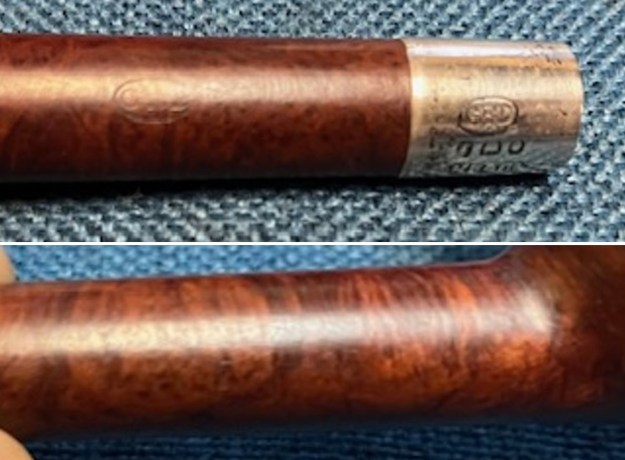
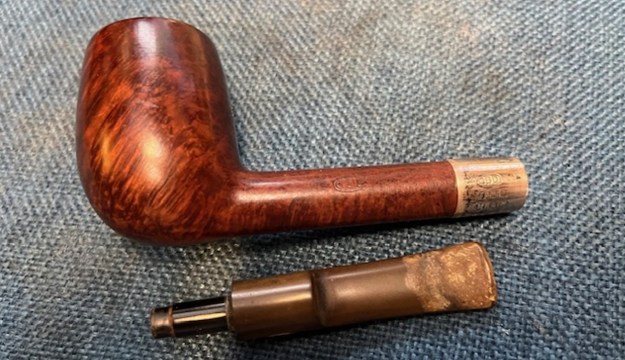
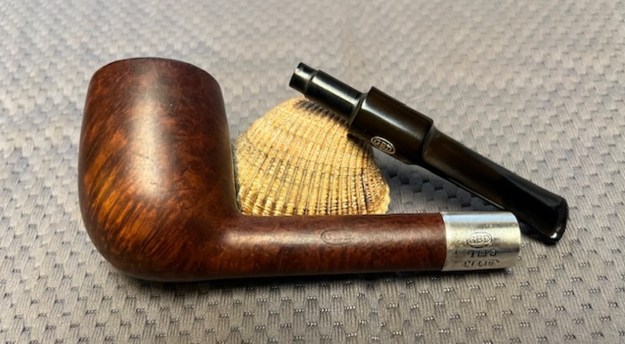
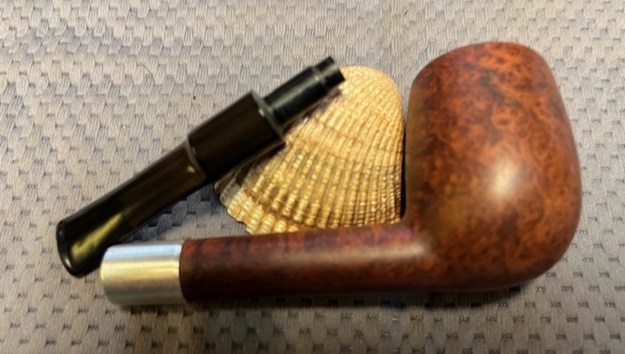
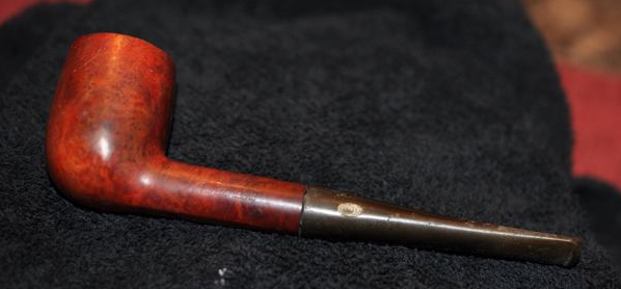
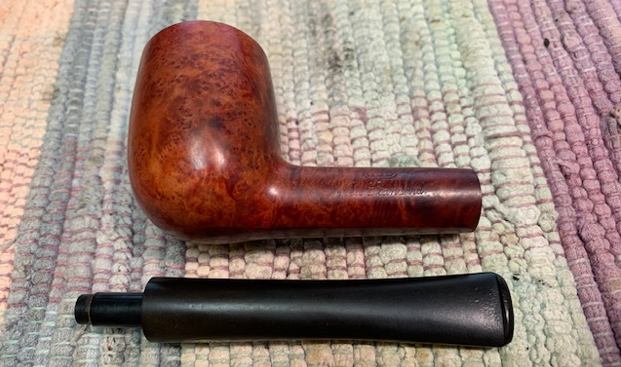
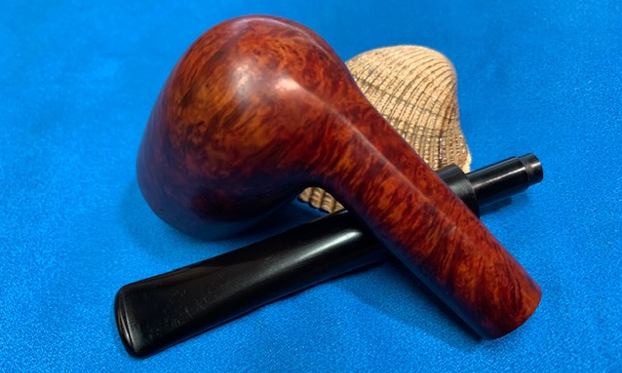
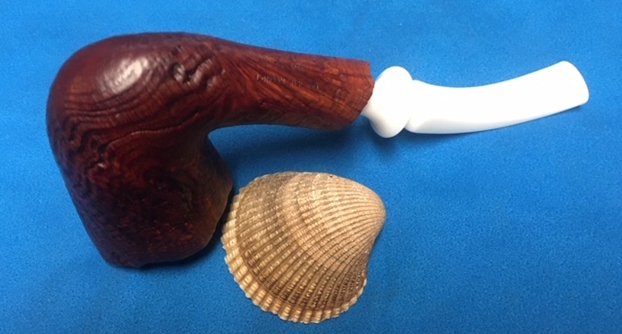
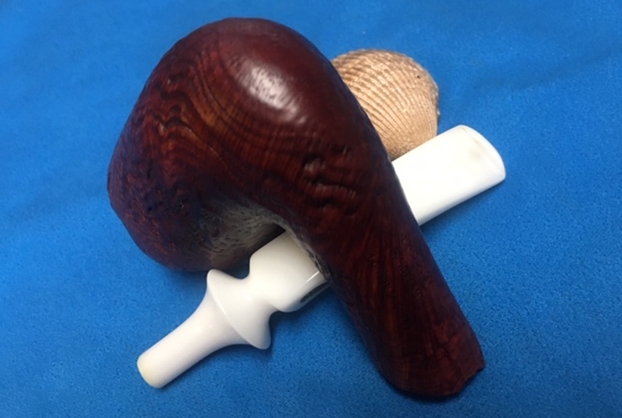
 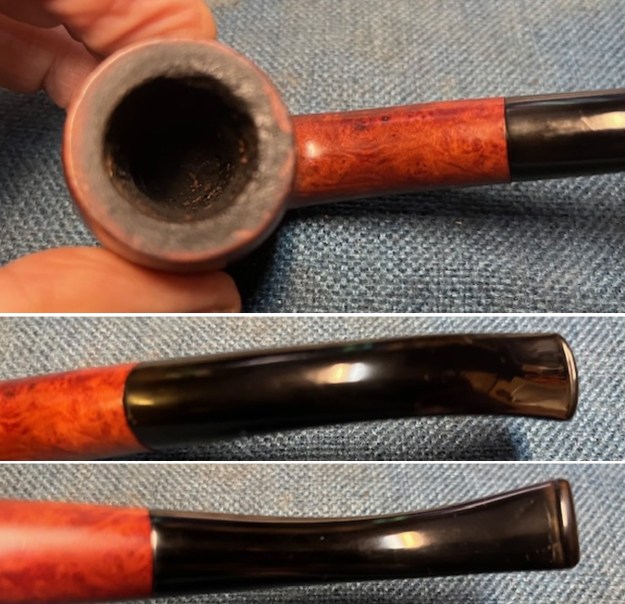 I took photos of the stamping on the sides of the shank to capture it. It was clear and readable as noted above. I removed the stem from the shank and took a photo of the look of the pipe. It is a real beauty.
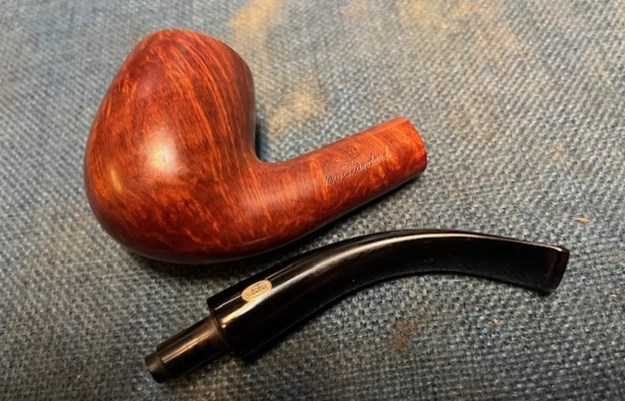
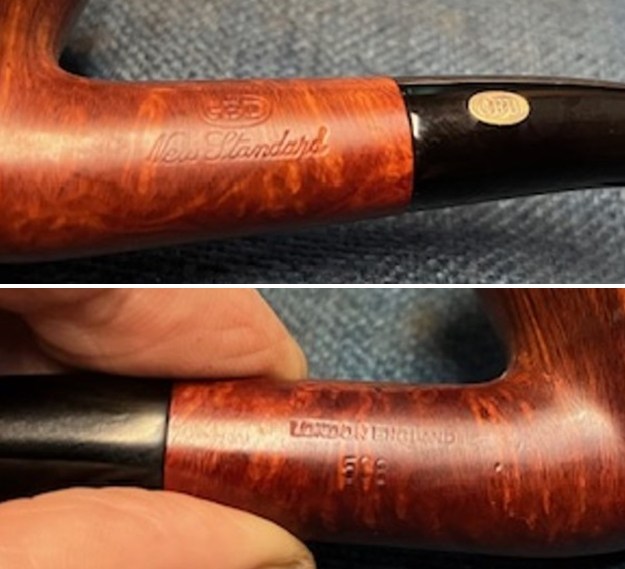
 I turned to Pipephil’s site and looked for information on the GBD New Standard I was working on (http://pipephil.eu/logos/en/logo-gbd.html). As always there was a good, brief description of the history of the brand.
Brand created in 1850 in Paris by Ganneval, Bondier and Donninger. Marechal & Ruchon Cie first, then C.J. Verguet Frères (closed in 1970) owned GBD from 1903 to 1970 and manufactured these pipes in the St Claude (Fr) plant.
Sometime in the 1970s Cadogan company (Oppenheimer group) took over GBD. Prior to this time, the pipes were stamped “London England” in a straight line, even if they were sometimes crafted in France.
I turned to Pipedia (https://pipedia.org/wiki/GBD) to see what I could find on the GBD Brand and the New Standard Line. There was a few tidbits scattered in the body of the material.
The New Standard was introduced in order to give the popular Standard of the 20s a higher rank in value…
… The following list comprises the better grades in descending order: Pedigree, Pedigree I, Pedigree II, Straight Grain, Prodigy, Bronze Velvet, Virgin, Varichrome, Prestige, Jubilee, New Era, Prehistoric, International, Universe, Speciale Standard, Ebony, Tapestry, New Standard, Granitan, Sauvage, Sierra, Penthouse, Legacy, Concorde.
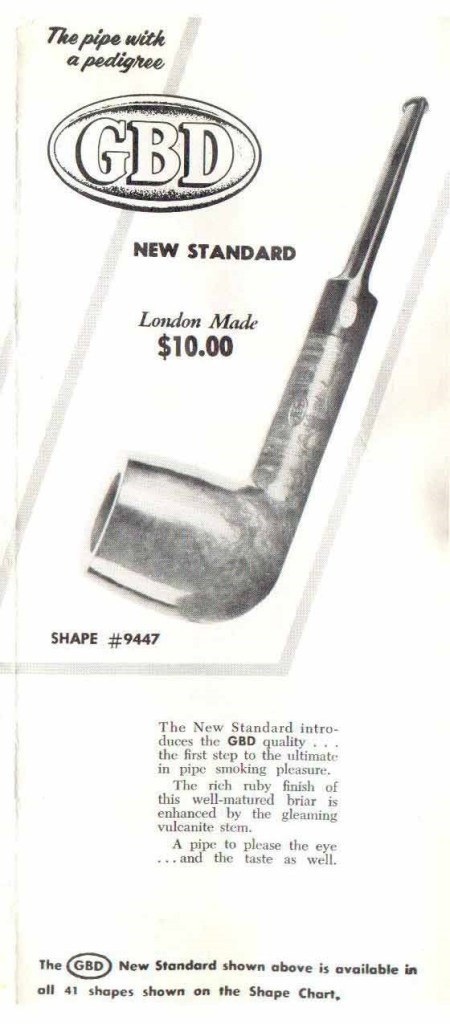
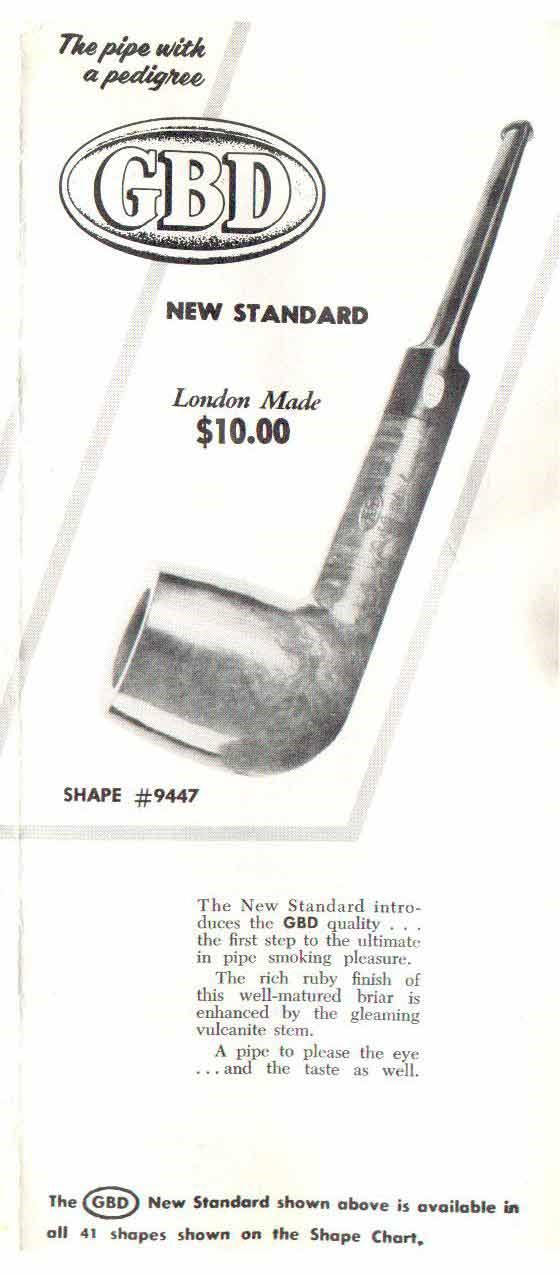
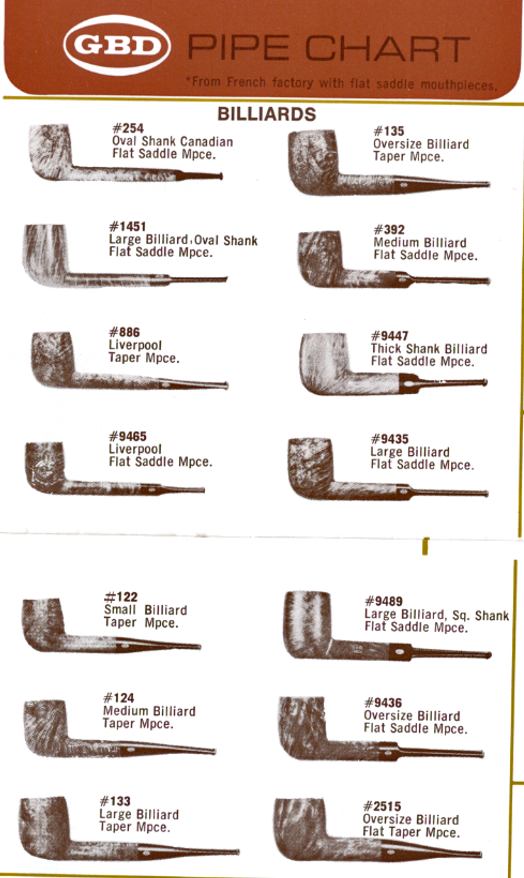
I also found two advertising fliers on the brand – one with the variety of shapes for the New Standard London Made and the other with a saddle billiard and a longer description of the pipe.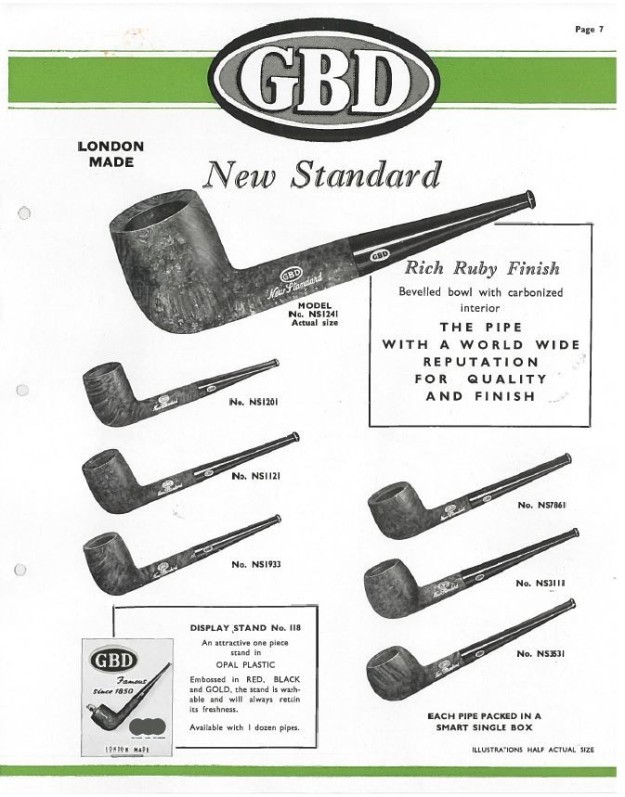
 I also found a shape chart that had the 508 pictured and described as a Large Bent Billiard with a taper mouthpiece (https://pipedia.org/images/5/56/GBD_1961Flyer_ShapeChart6.jpg).
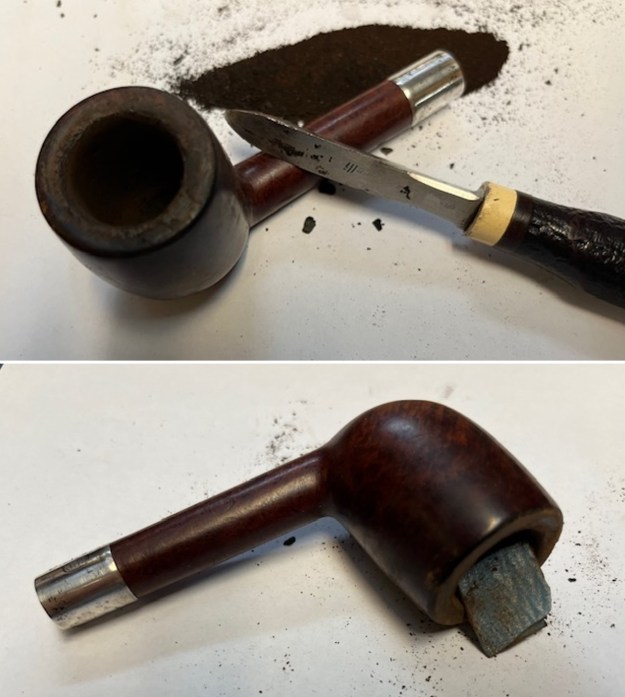
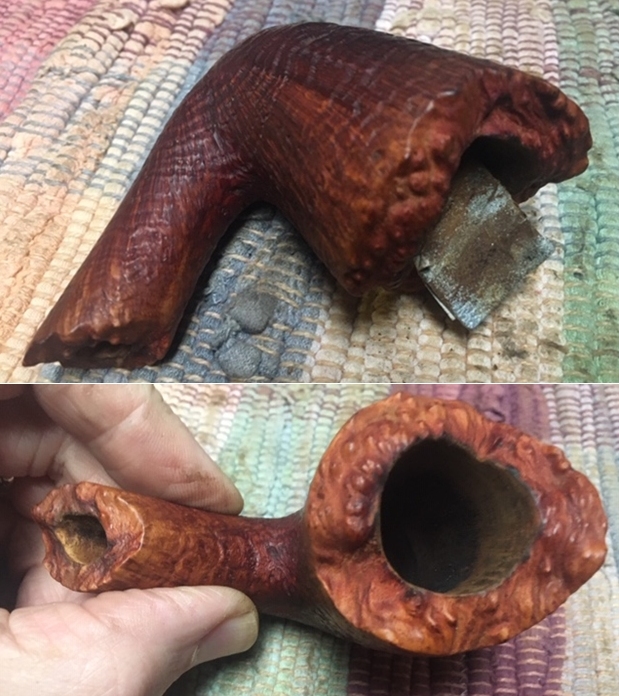
 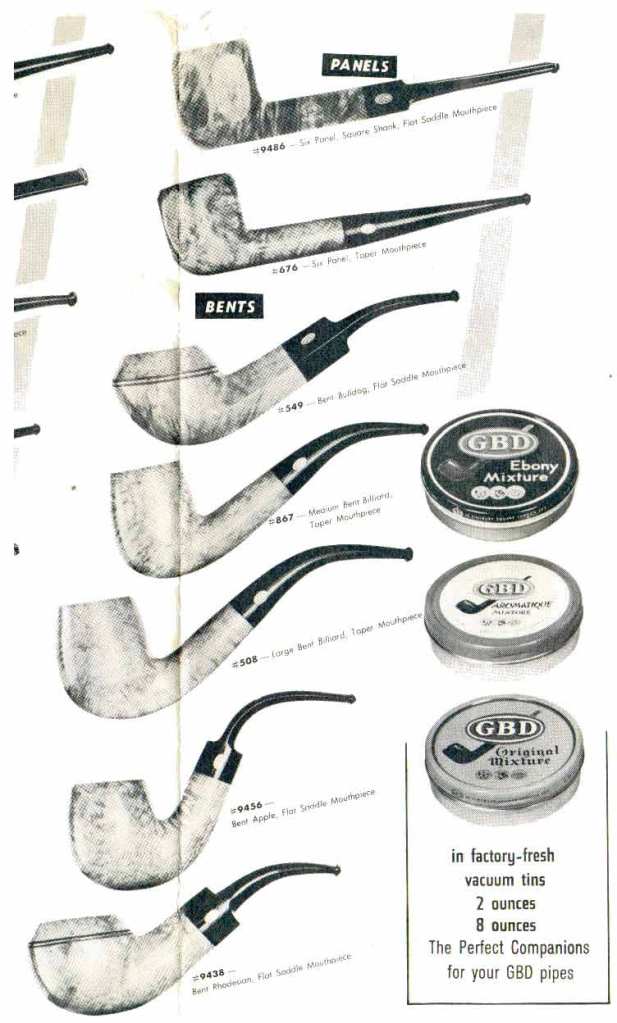 I started my work on the pipe by reaming the bowl with a PipNet reamer. I used the first cutting head and took the cake back to bare briar. I cleaned up the reaming with a Savinelli Fitsall Pipe Knife and removed all the remnants of the cake. I scraped the rim top with the flat edge of the blade at the same time and removed most of the thick lava build up. I sanded the walls of the bowl with a piece of dowel wrapped in 220 grit sandpaper. The walls look very good at his point in the process.
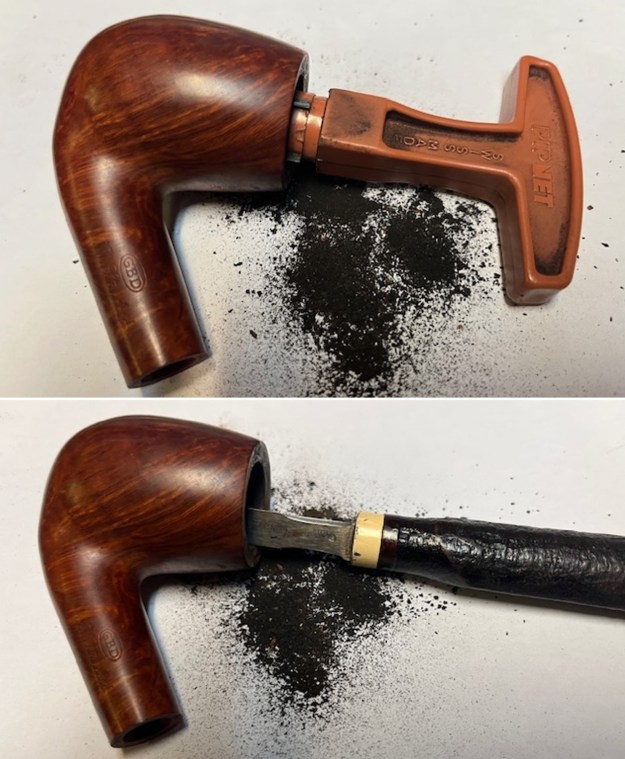
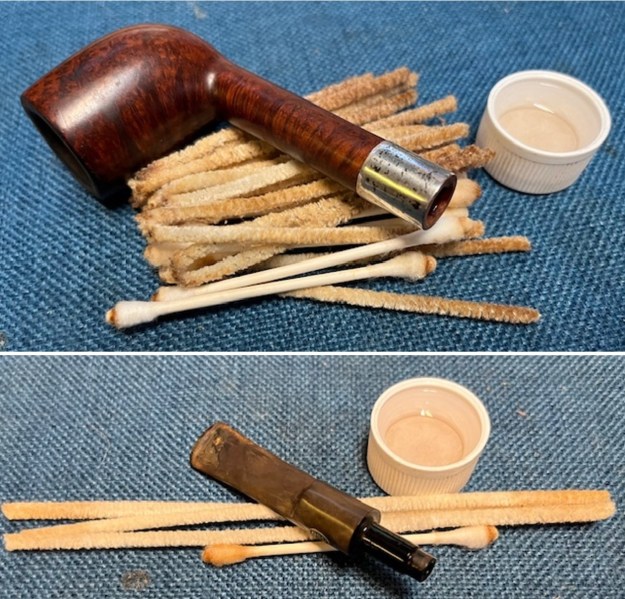
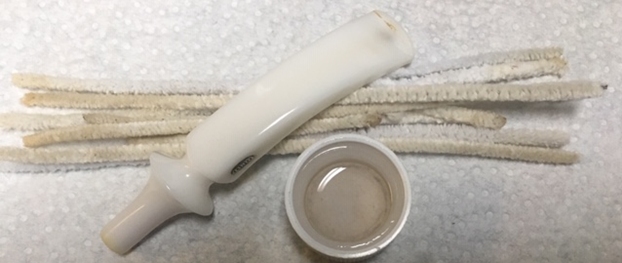
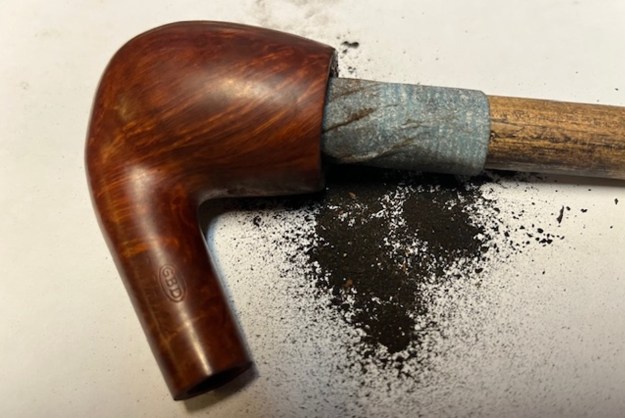 I cleaned out the shank, the airway and the mortise with alcohol, cotton swabs, hard bristle and regular pipe cleaners. It was a very dirty pipe which just meant that it had really been enjoyed by the previous pipe man. I cleaned the airway in the stem with alcohol, cotton swabs and pipe cleaners in the same way as I did the shank. It also was very dirty.
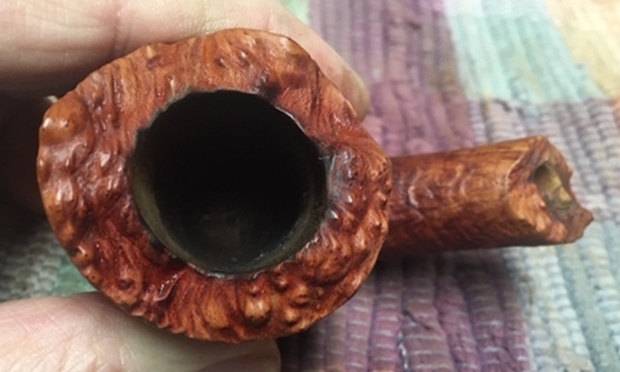
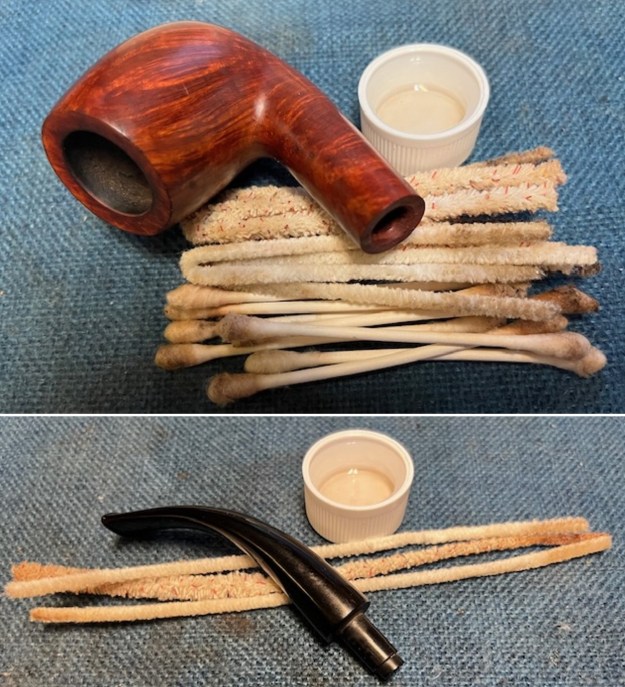 I cleaned up the buildup on the inner edge with a piece of sandpaper. I sanded the top of the rim with the piece of 220 grit sandpaper and was able to remove the darkening.
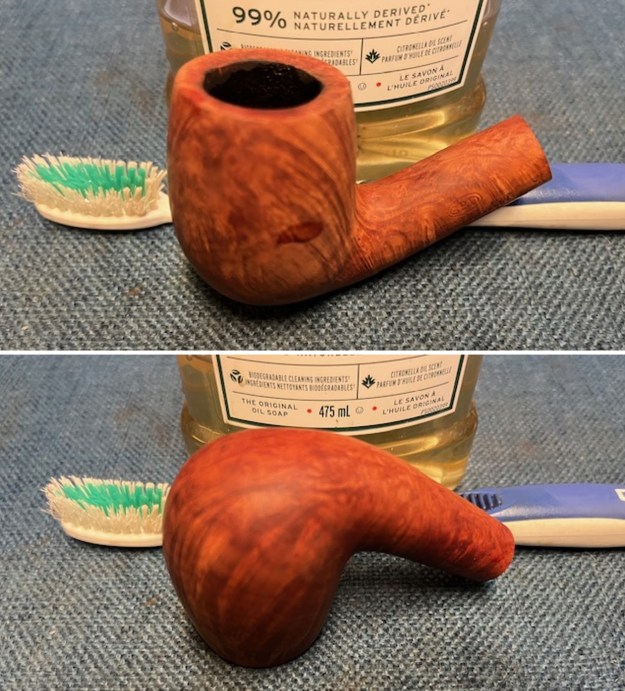
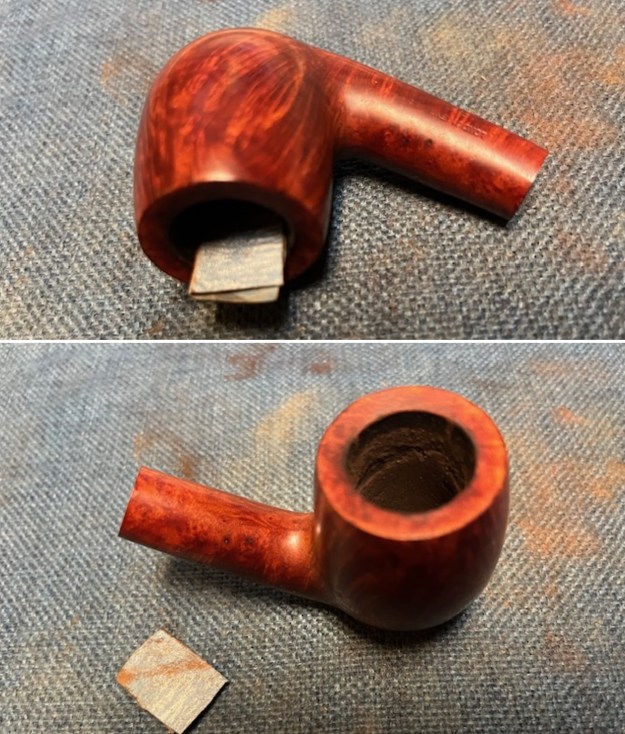 I scrubbed the exterior of the bowl and shank with a tooth brush and undiluted Murphy’s Oil Soap. I scrubbed the lava on the rim top and overflow on the outside of the bowl with the soap. I rinsed the briar with warm water to remove the grime and debris of the scrubbing. It looked significantly better after the scrubbing. The darkening on the rim top is very clear.
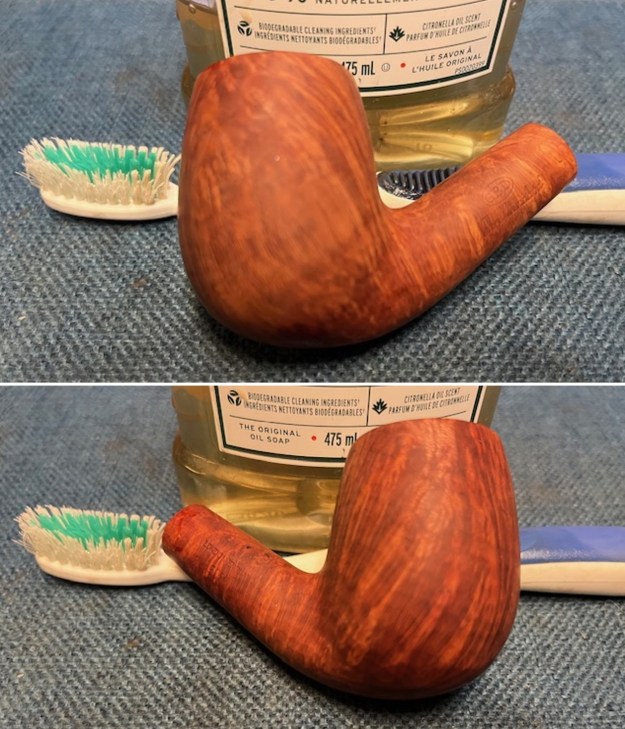
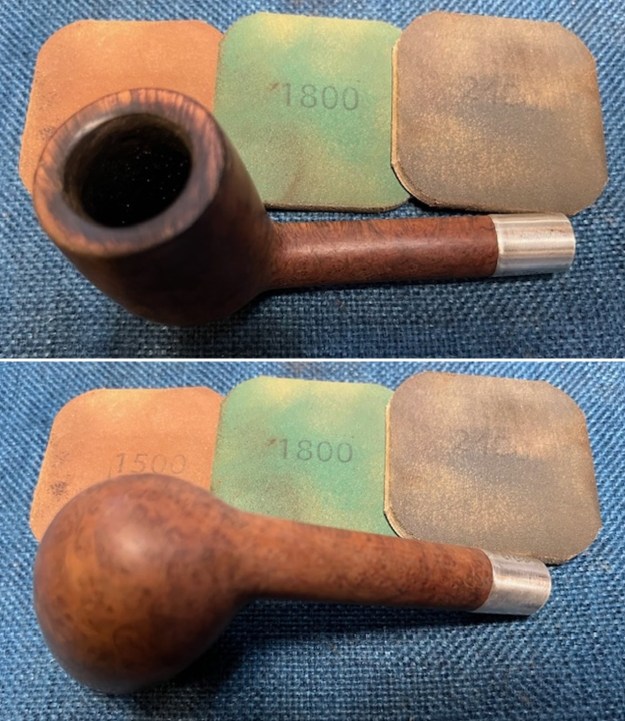
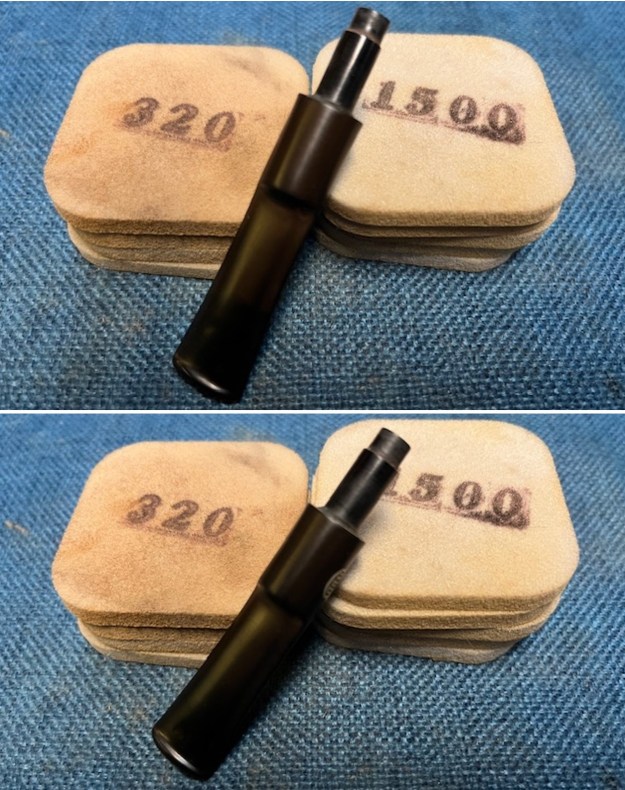
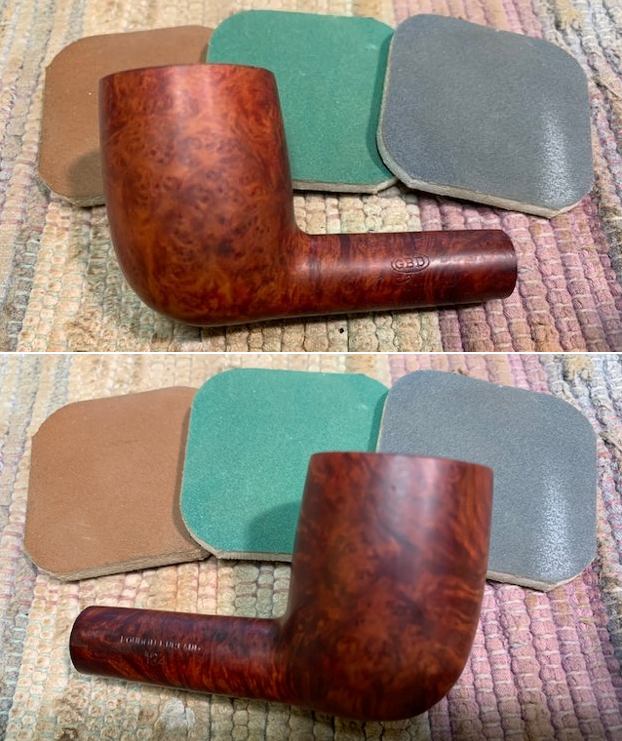
 I sanded the bowl and shank with 320-3500 grit sanding pads to finish the rim top and the bowl and shank. The briar began to take on a rich shine and the darkening on the top was gone. The photos tell the story.
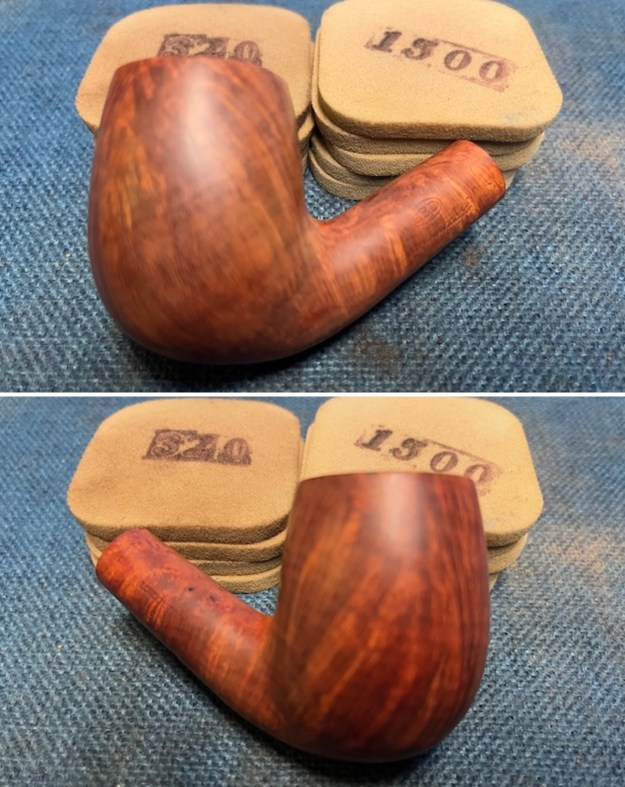
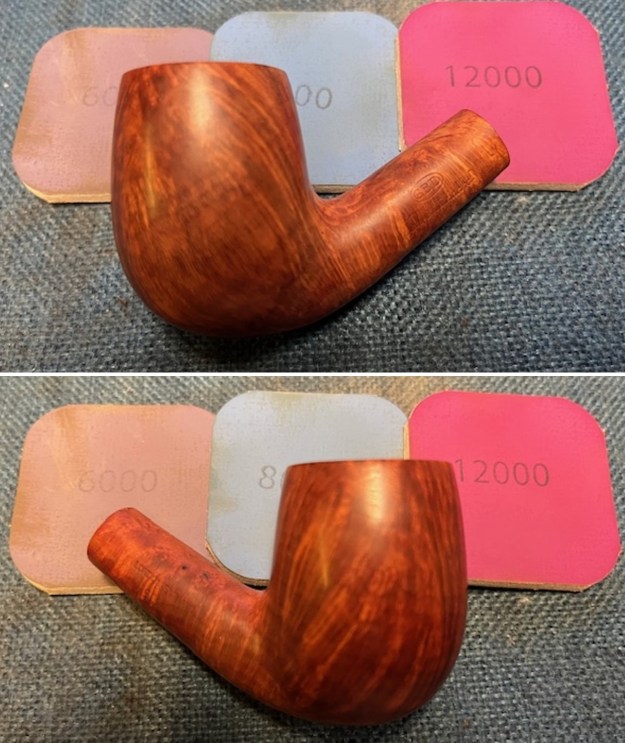
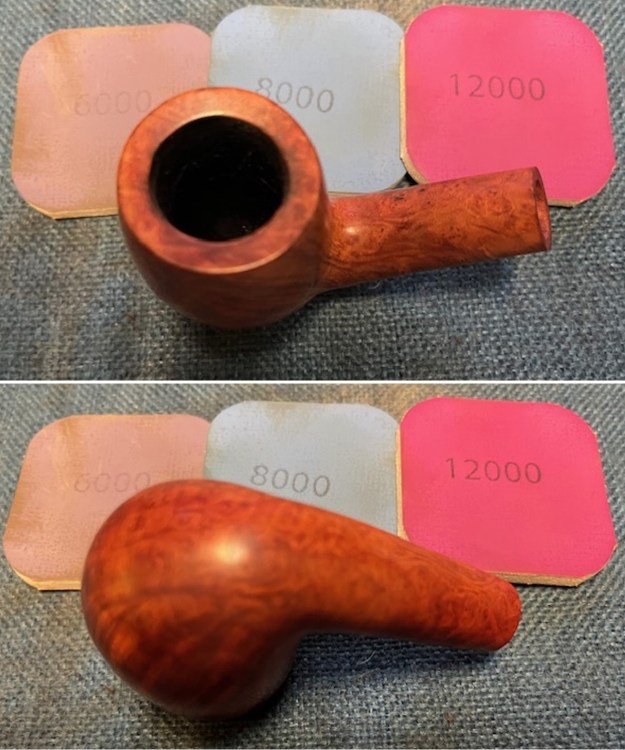
 I polished the smooth rim top with micromesh sanding pads – dry sanding it with 1200-15000 grit pads. I wiped the bowl down with a damp cloth after each sanding pad. The grain started to rise to the surface as I polished it.
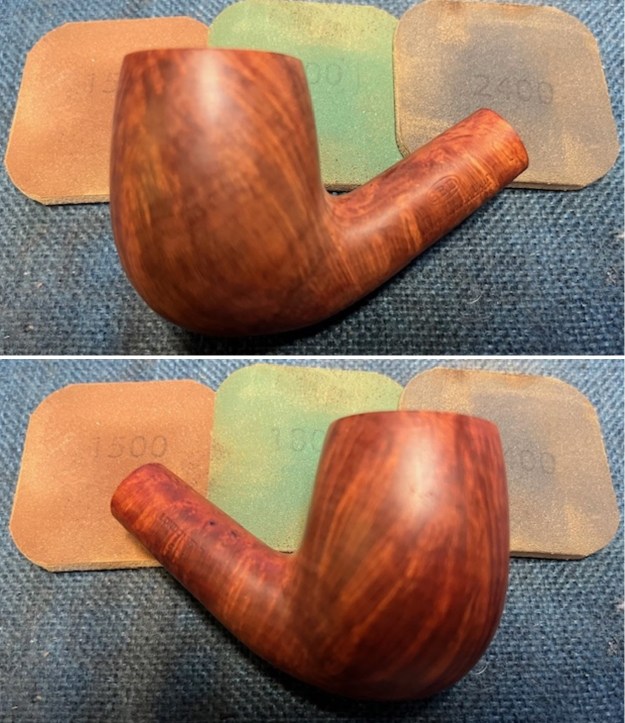
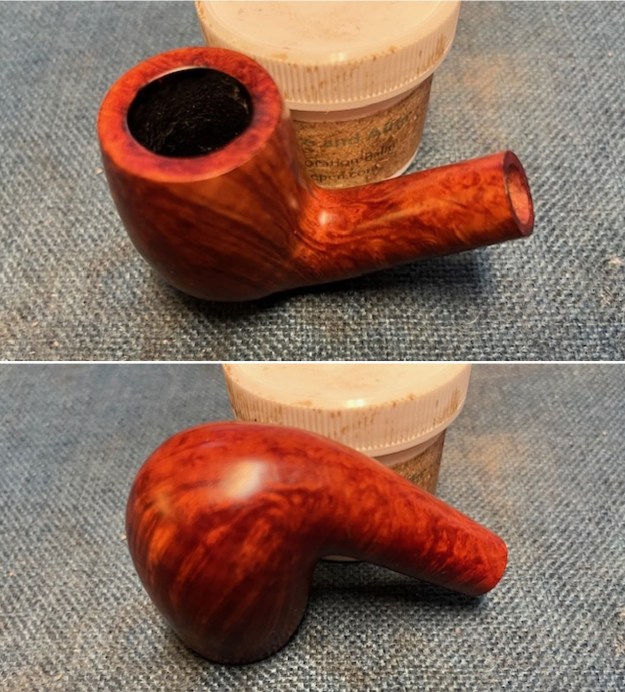
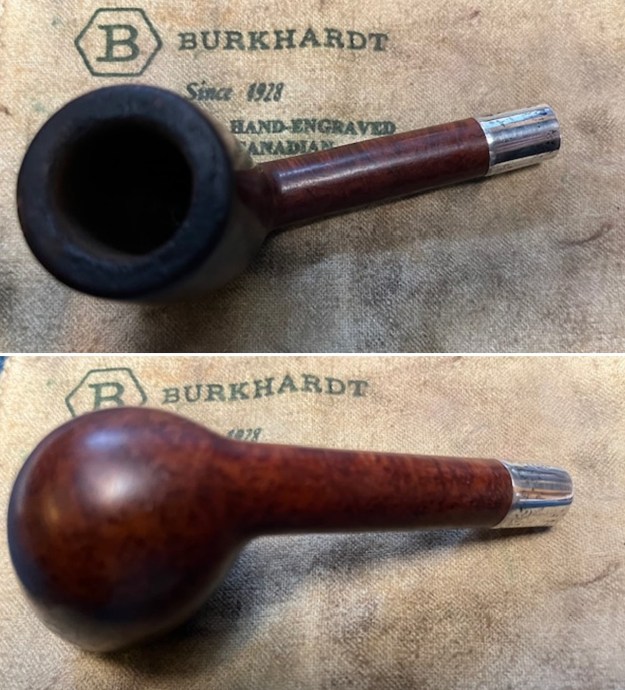
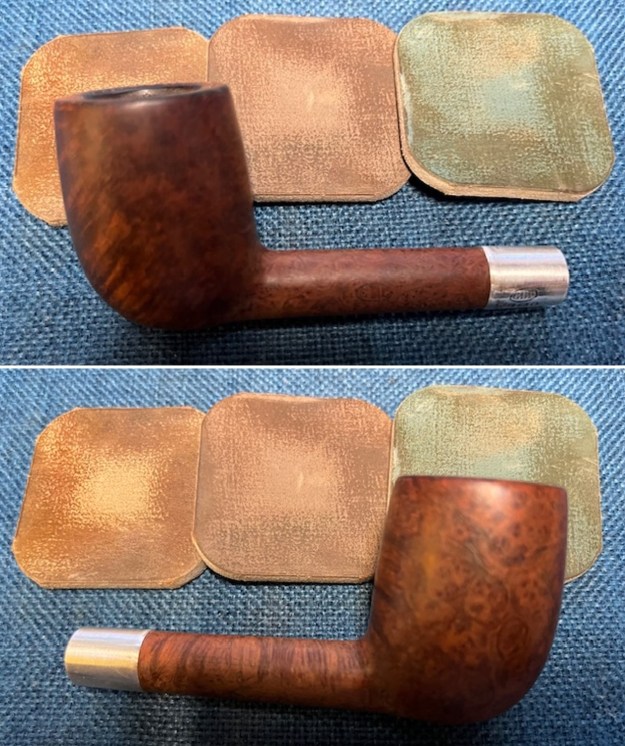
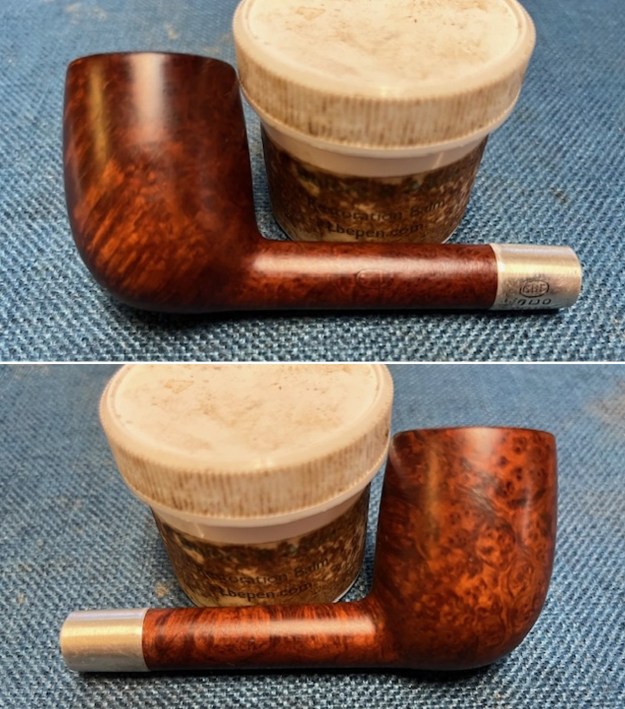
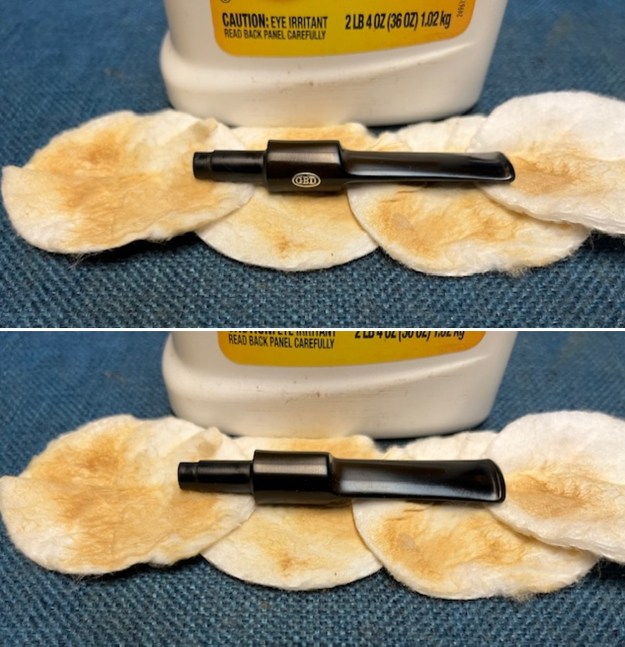
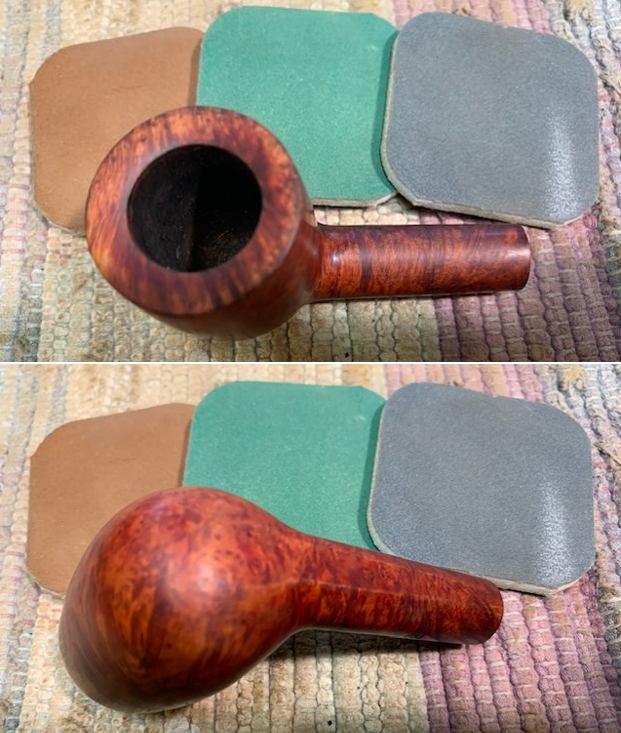
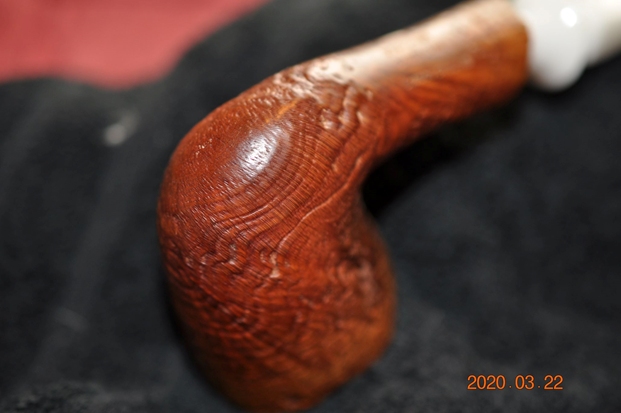
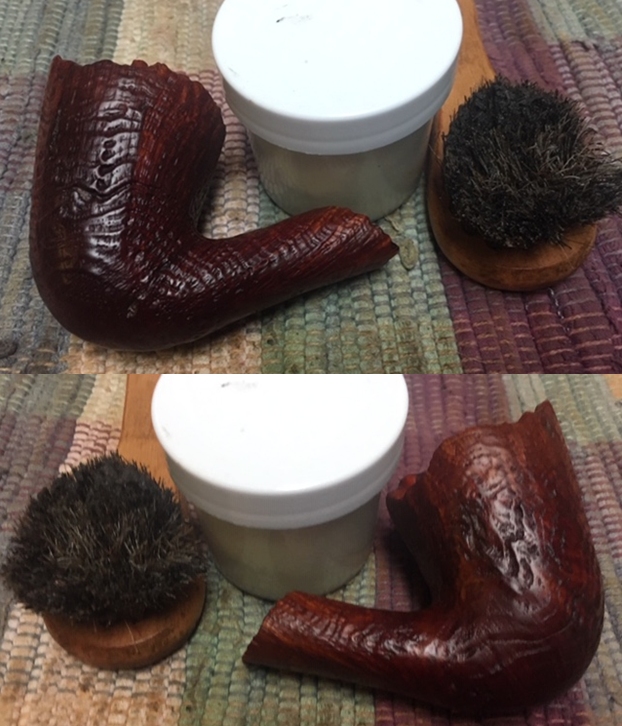
 I rubbed the bowl and shank down with Before & After Restoration Balm to deep clean the finish on the bowl and shank. The product works to clean, enliven and protect the briar. I worked it in with my fingers to get it into the briar. I let it sit for 10 minutes then I wiped it off and buffed it with a soft cloth. The briar really began to have a rich shine. I took some photos of the bowl at this point to mark the progress in the restoration. It is a beautiful bowl.
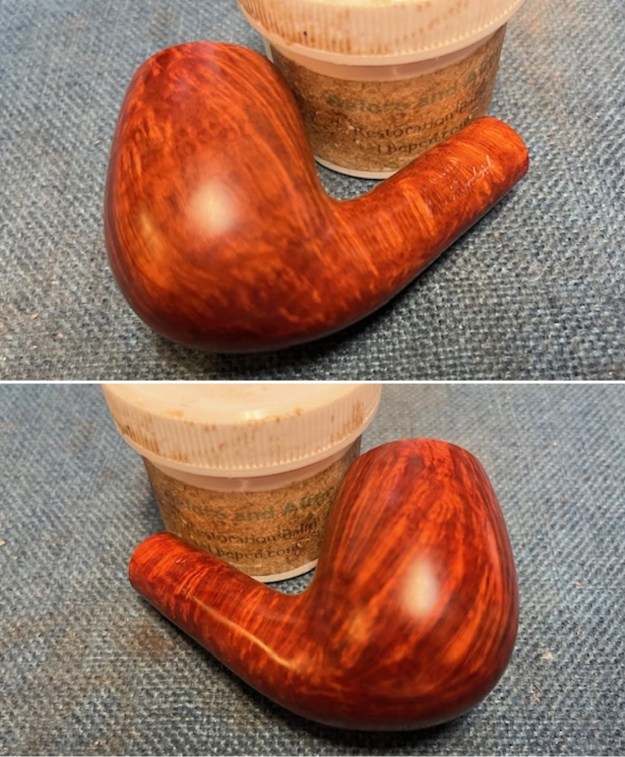
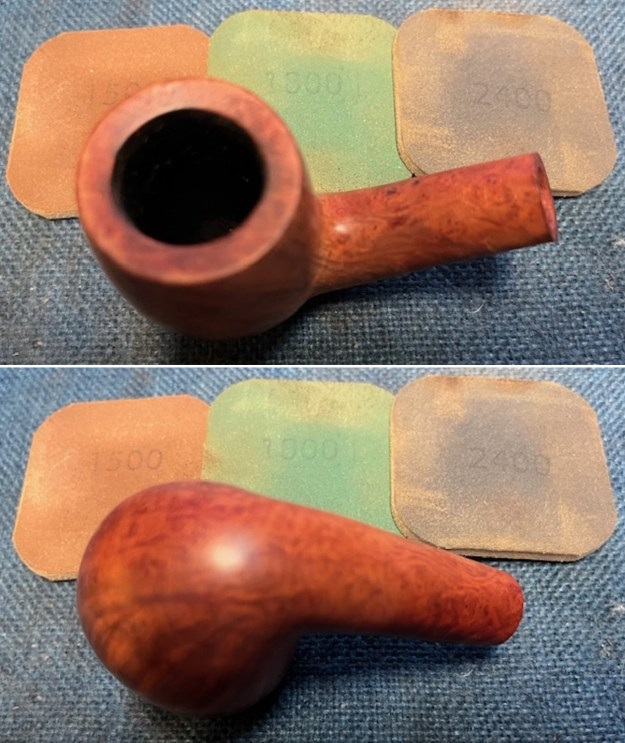
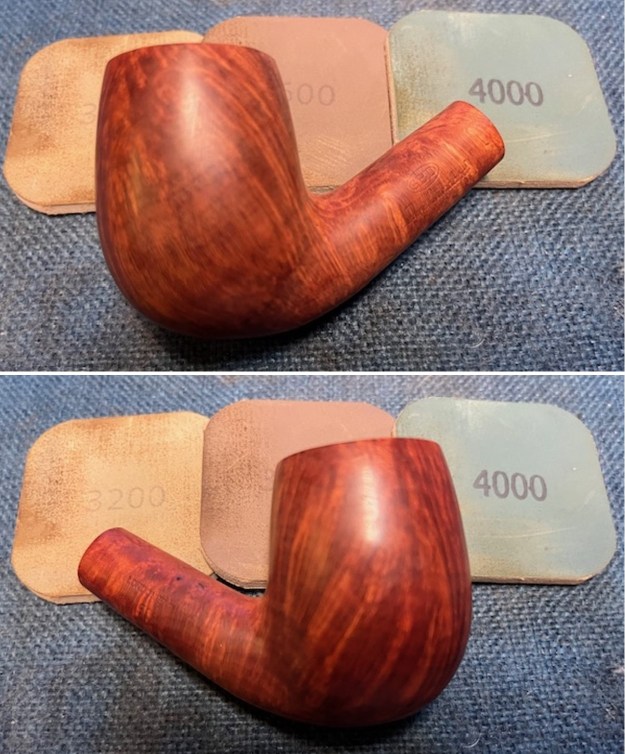
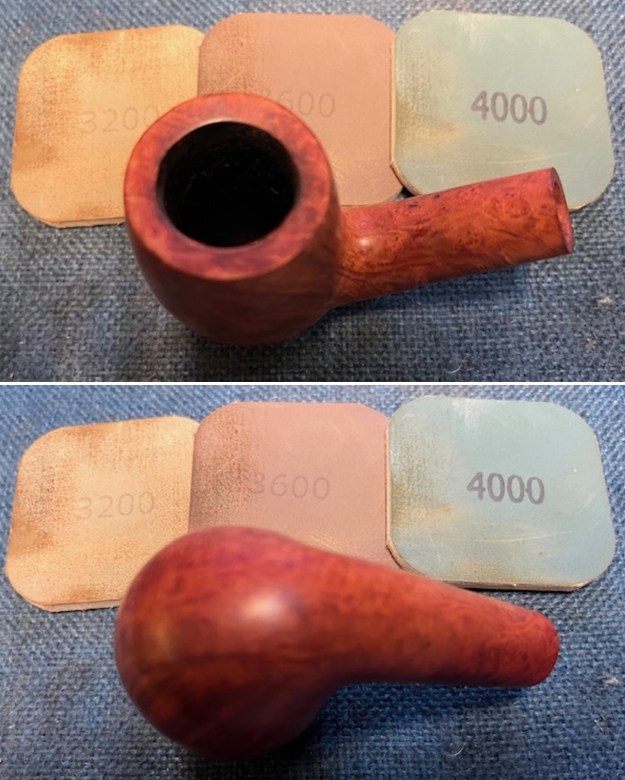
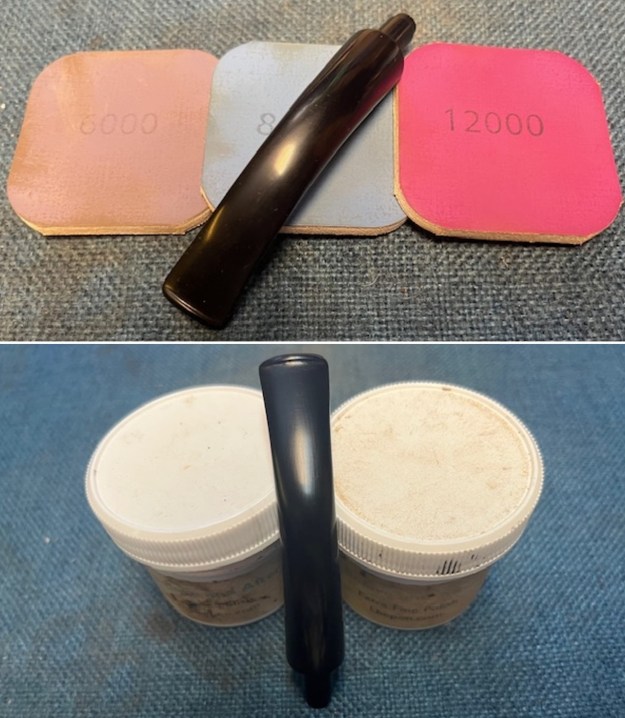
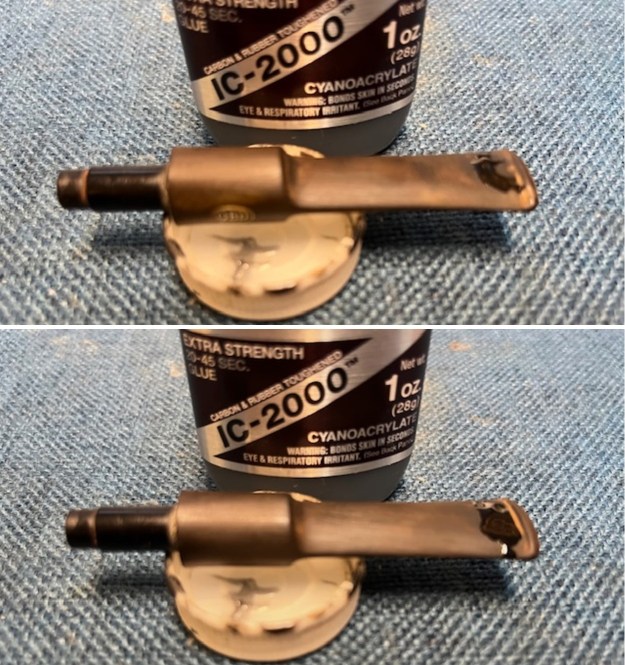
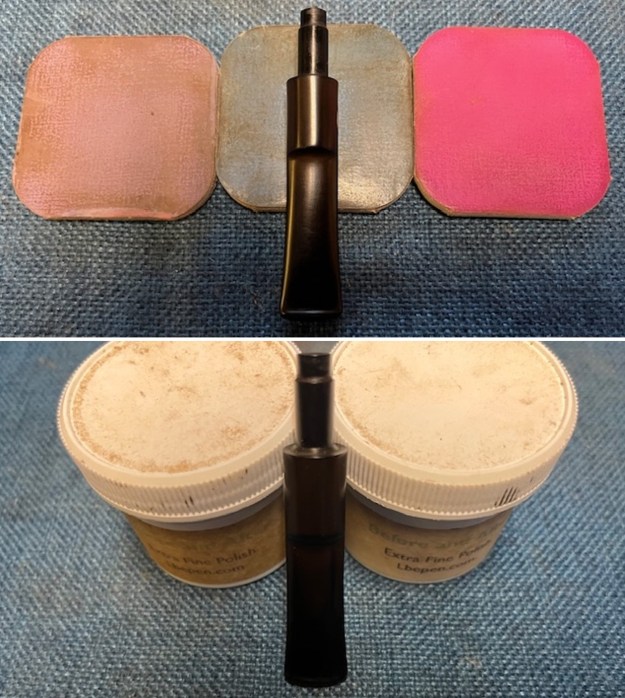
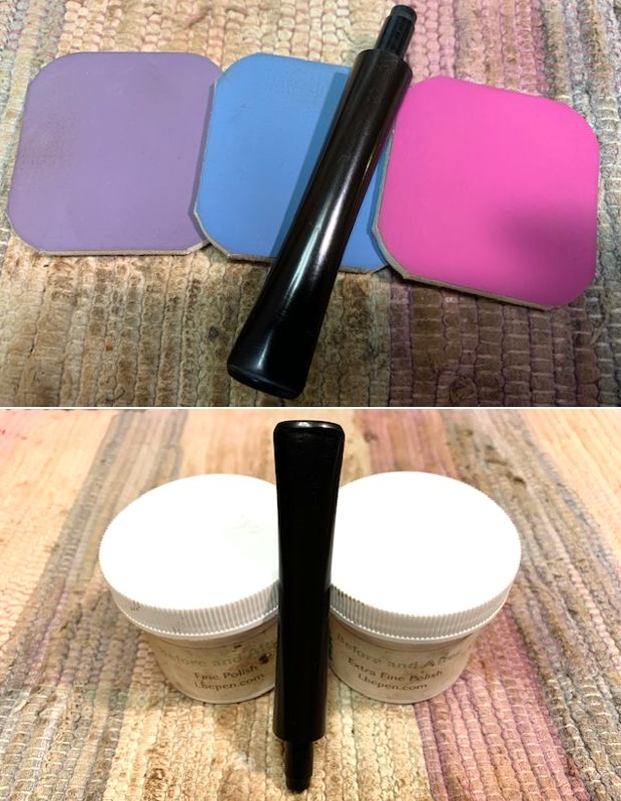
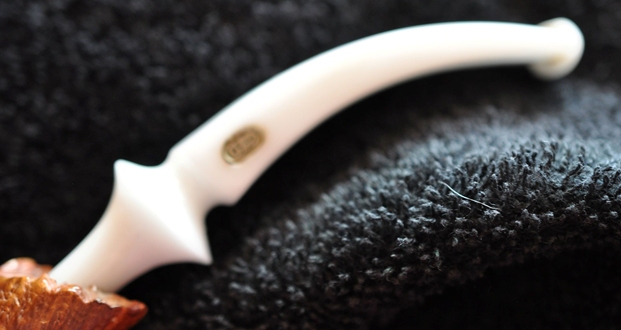
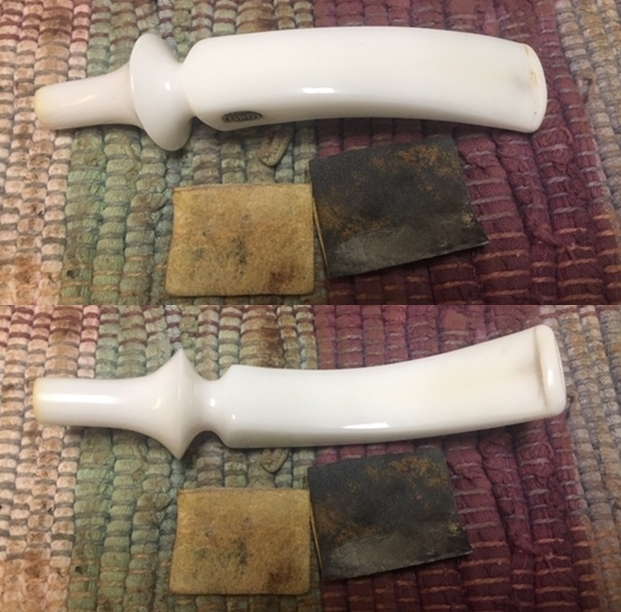
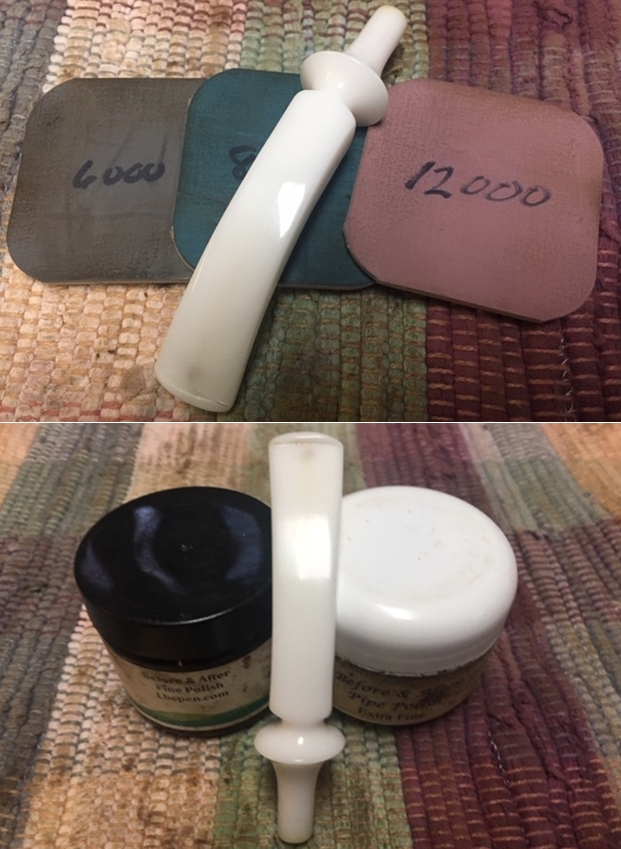
 I polished the stem with micromesh sanding pads – dry sanding with 1500-12000 grit pads. I used the first 3 pads – 1500,1800 and 2400 grit pads to work out the tooth chatter. I further polished the stem with the remaining pads. I wiped the stem down after each sanding pad with Obsidian Oil. I polished the stem with Before & After Pipe Stem Polish – both Fine and Extra Fine. I gave it a coat of Obsidian Pipe Stem Oil. It works to protect the stem from oxidizing. I set it aside to dry.
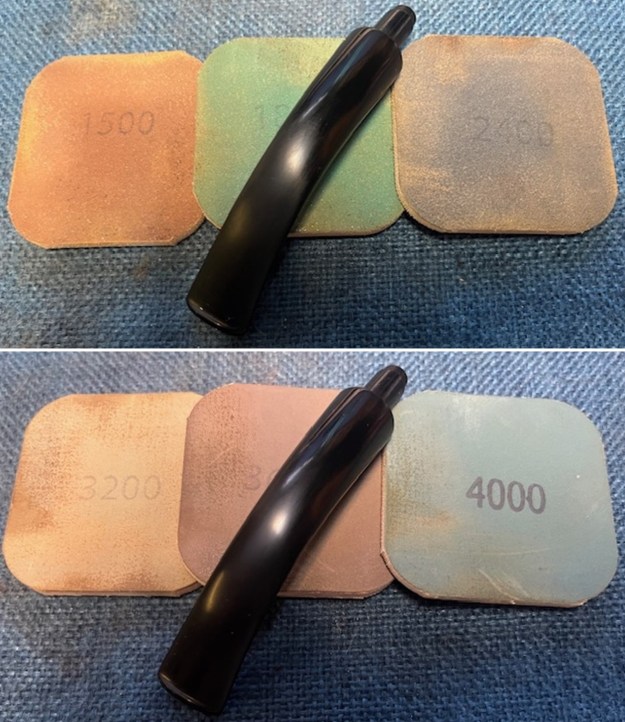
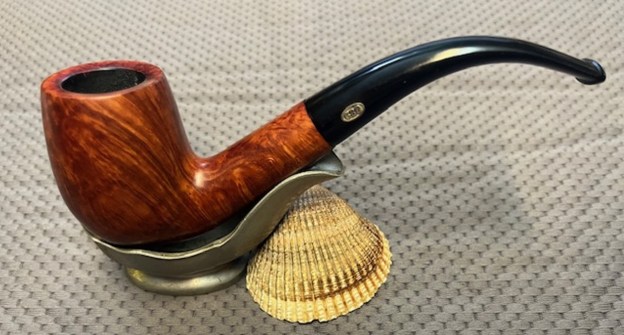
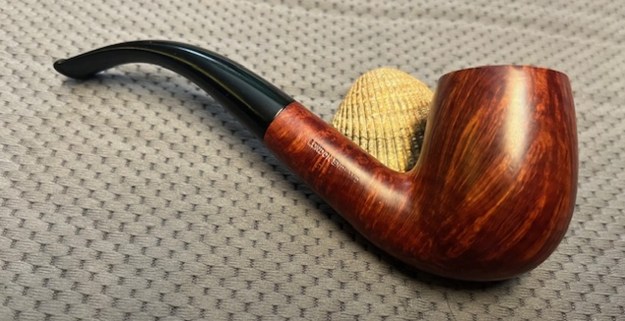
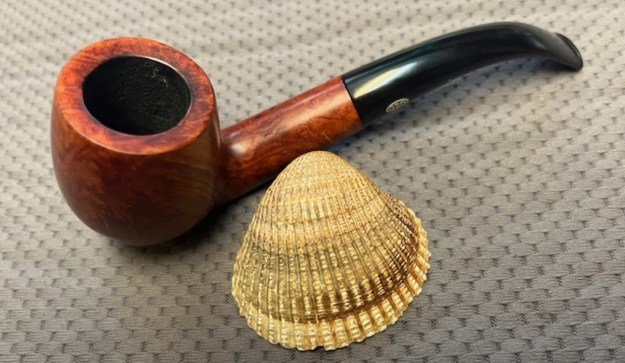
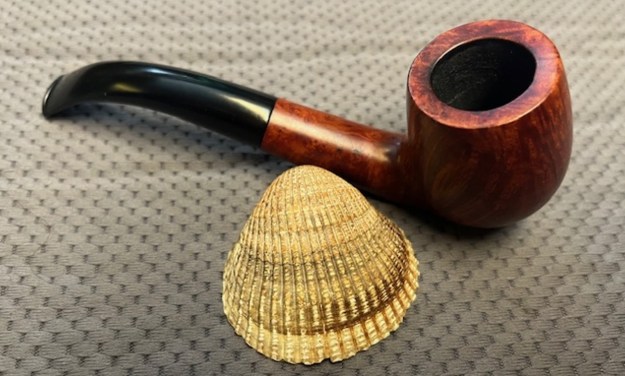
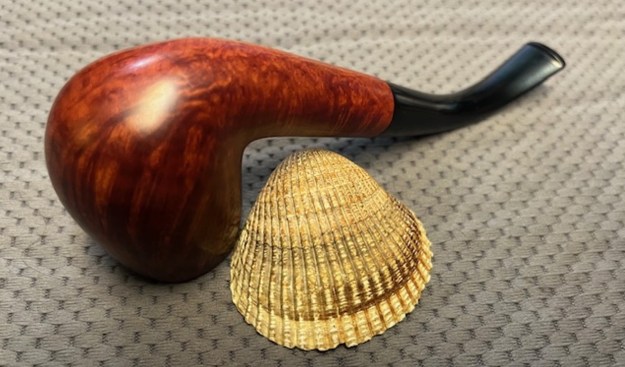
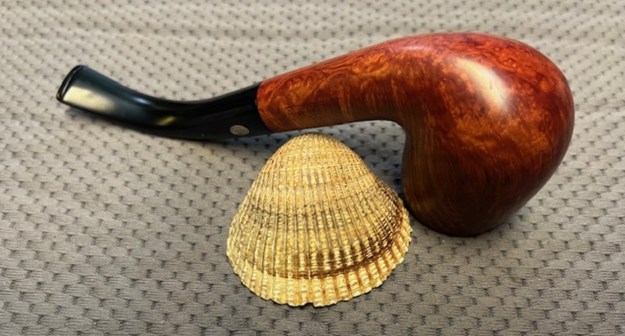
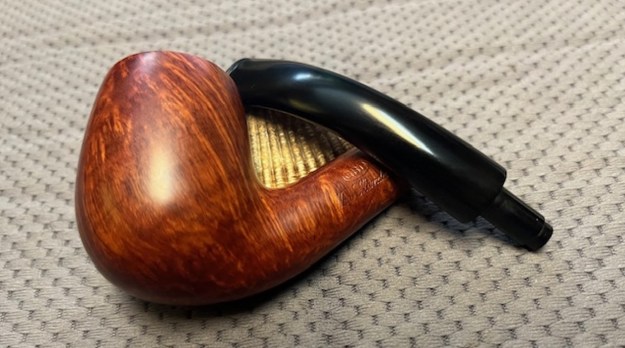
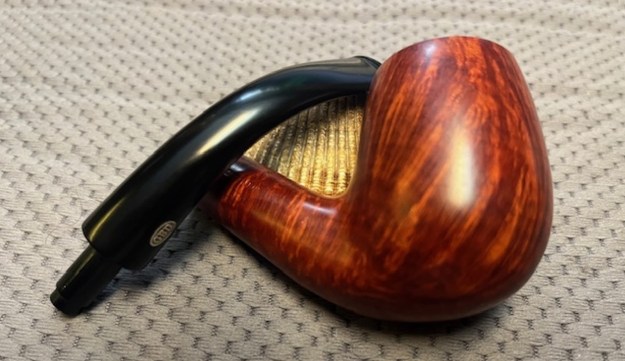
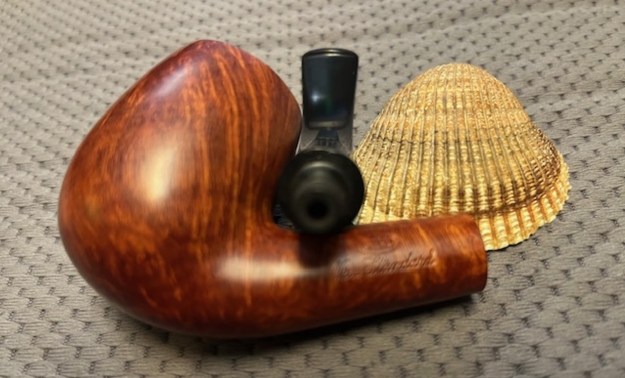
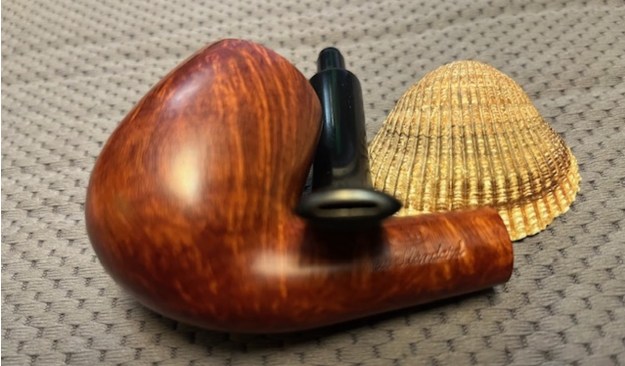
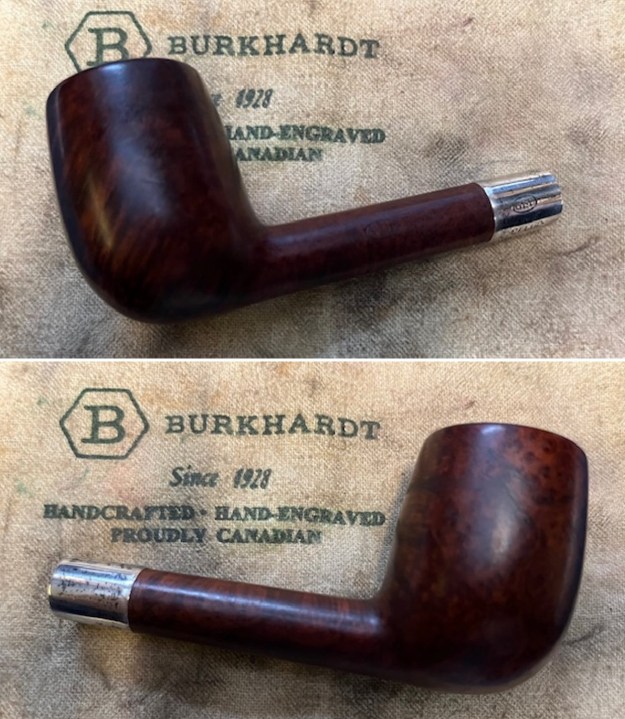
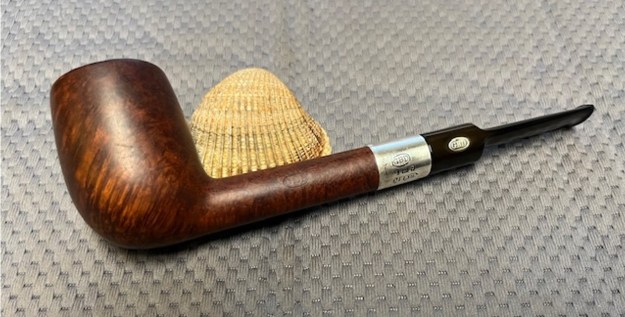
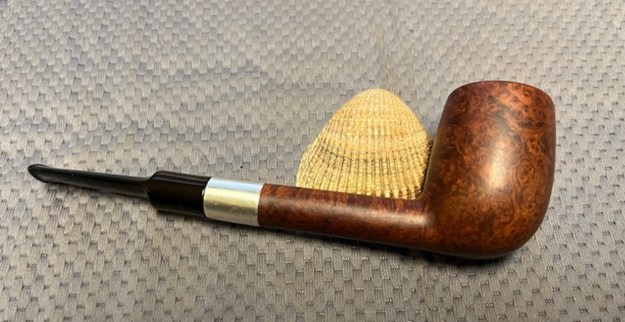
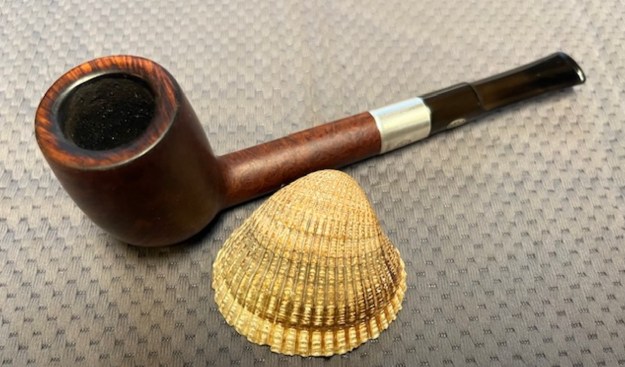
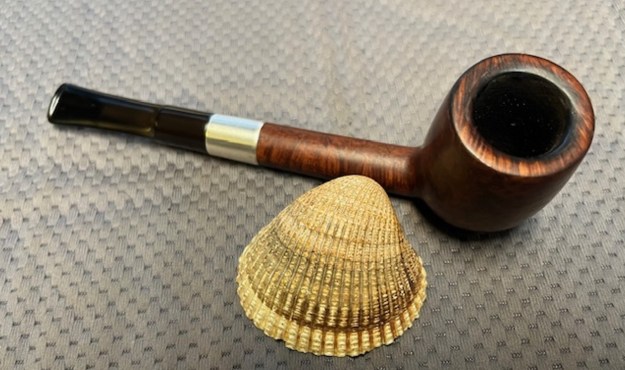
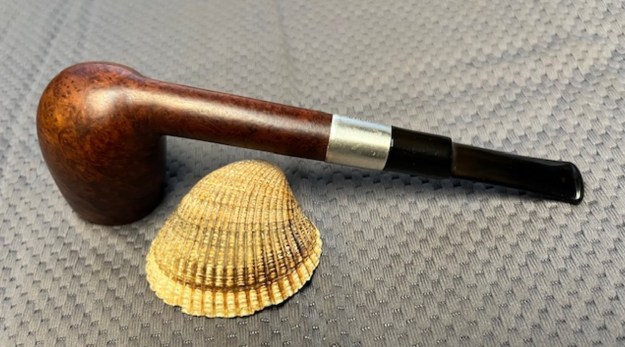
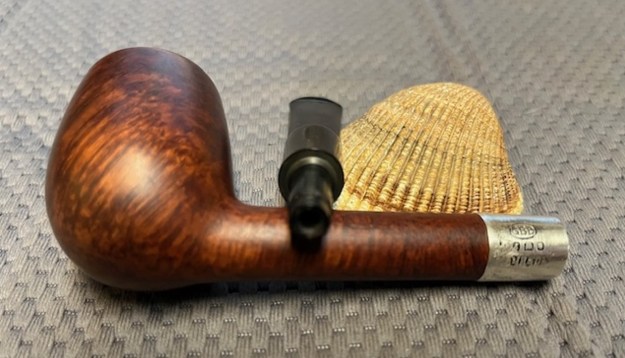
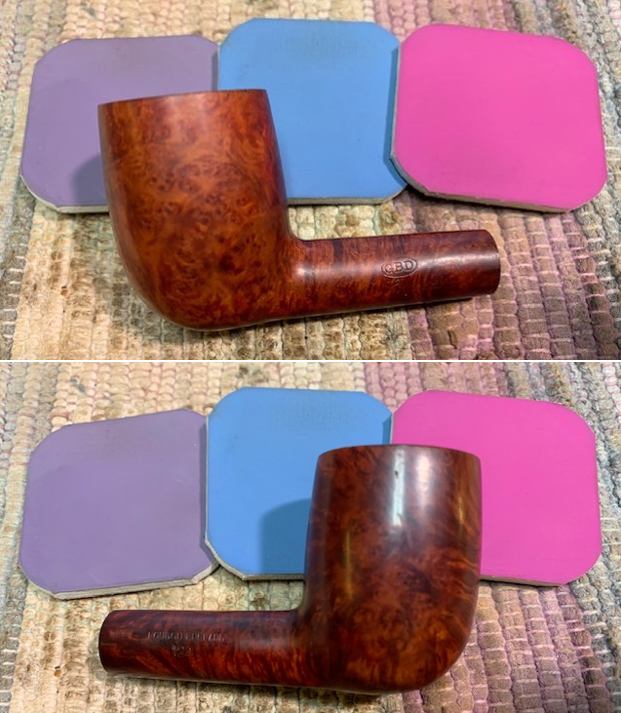
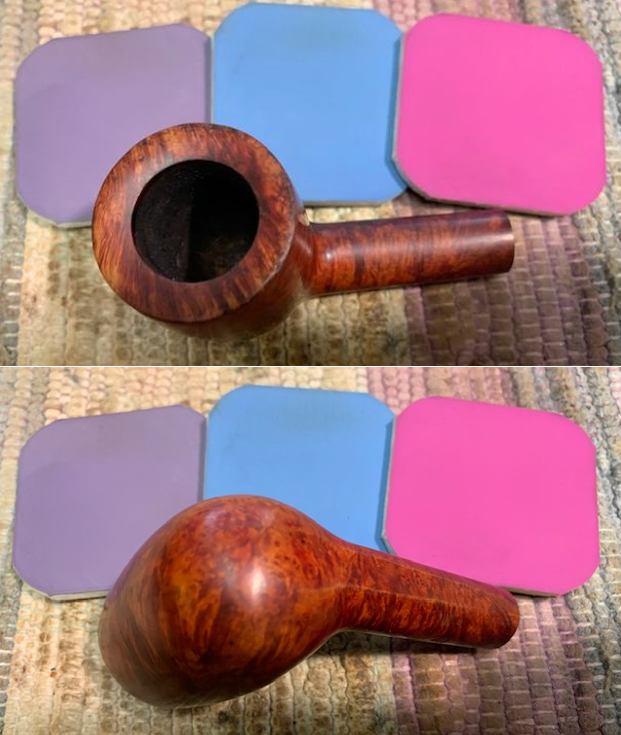
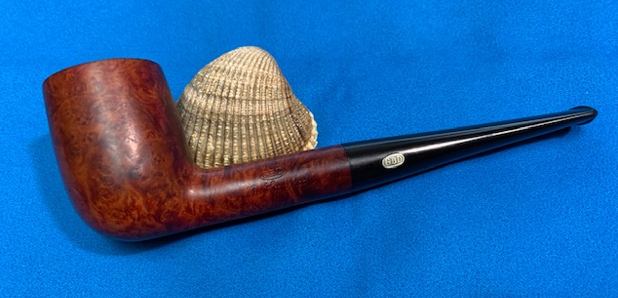
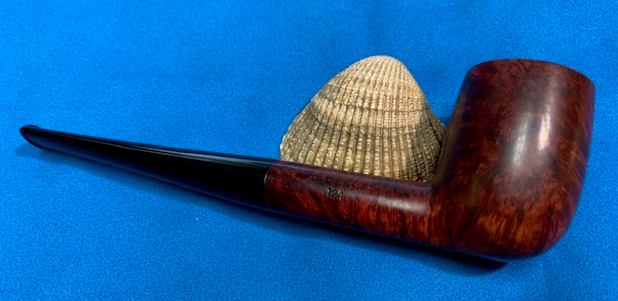
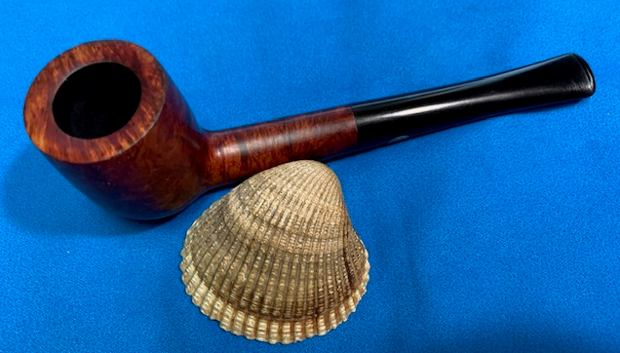
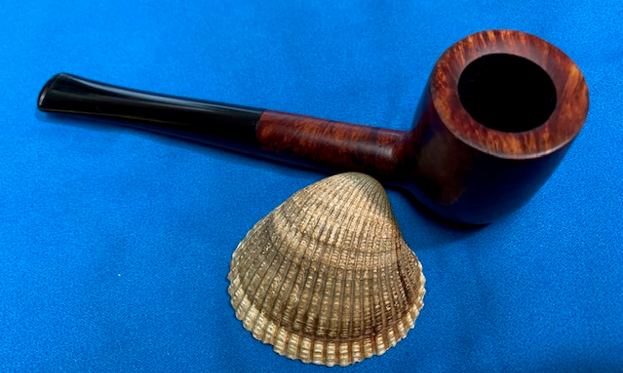
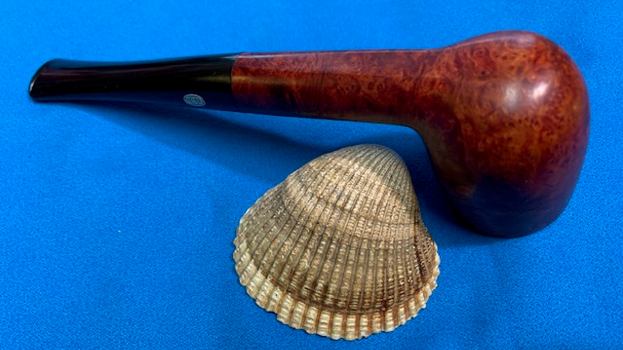
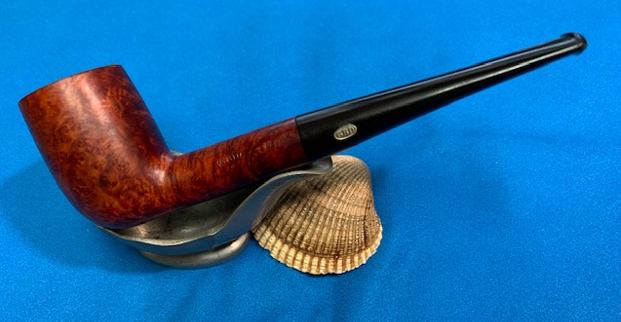
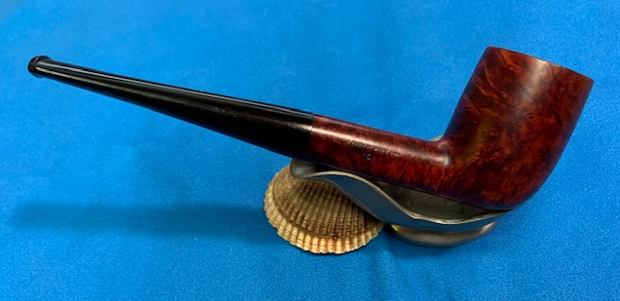
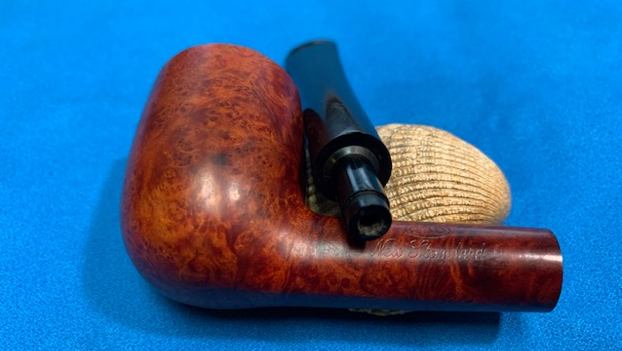
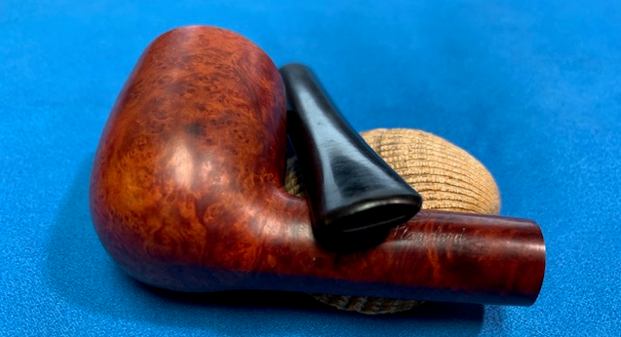
 This GBD New Standard 508 Bent Billiard is a great looking pipe now that it has been restored. The ruby coloured wash/stain around the bowl is quite beautiful and highlights grain very well. The ruby coloured finish works well with the polished vulcanite taper stem. I put the stem back on the bowl and carefully buffed the pipe with Blue Diamond on the buffing wheel using a light touch on the briar. I gave the bowl and the stem multiple coats of carnauba wax on the buffing wheel and followed that by buffing the entire pipe with a clean buffing pad. I hand buffed the pipe with a microfiber cloth to deepen the shine. The finished GBD New Standard Bent Billiard sits nicely in the hand and feels great. Give the finished pipe a look in the photos below. The dimensions of the pipe are Length: 5 ½ inches, Height: 2 inches, Outside diameter of the bowl: 1 ¼ inches, Chamber diameter: ¾ inch. The weight of the pipe is 48 grams/1.69 ounces. I will be adding it to Jack’s box of finished pipe while I finish the next seven pipes.
As always, I encourage your questions and comments as you read the blog. Thanks to each of you who are reading this blog. Remember we are not pipe owners; we are pipe men and women who hold our pipes in trust until they pass on into the trust of those who follow us.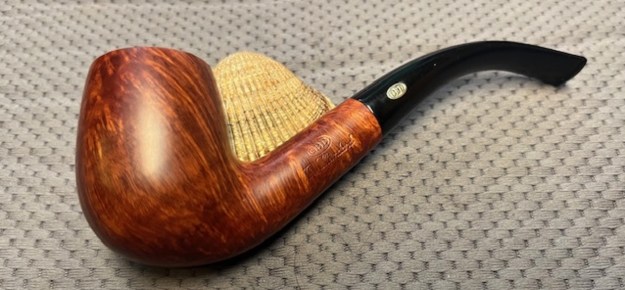


