Blog by Charles Lemon and Steve Laug
Charles posted this on his Dadspipes blog this morning and I reblogged it here on rebornpipes. I was thinking about it this evening and thought it was worth saving in total on both blogs so not only have I reblogged it but I also have put it here in the archives of this blog. That way it is easily accessible on both blogs. This was a fun project for both of us to do. We spoke this afternoon and already are working on another collaboration… Keep an eye out for it on both blogs.
The door opened and a man walked into the bar, pausing briefly in the doorway to allow his eyes to adapt to the dim light inside. The place was what optimists would euphemistically call a dive. The establishment was empty except for a few drunks and a large, bored-looking man behind the counter wiping glasses with a rag that was presumably once white but was now an indeterminate shade of grey.
The man walked through the room, turned in at a doorway marked “Gents” and scanned the room – two stalls, a urinal and a grimy sink – before spotting what he sought. Moving across the room, he fed a handful of coins into a coin-operated machine advertising cheap cologne. There was a rattle and then a small rectangular device dropped into a waiting hand. The man pushed his thumb against a small pad on the otherwise blank rectangle. A laser washed briefly up and down the pad and then a voice was heard.
“Good morning, Agent. You have been selected to join a small, two-man strike force for a delicate and potentially disastrous assignment. Your mission, should you choose to accept it…..”
A while back, Steve Laug of Reborn Pipes and I had a conversation about the limits of pipe restorations. Was a pipe ever truly beyond repair? We responded in the negative, and decided to put our theory to the test with this mission, code-named Operation Long Shot. We wanted a pipe that was so far gone that most people would immediately write it off as firewood or worse, the sort of thing barely recognizable as a pipe.
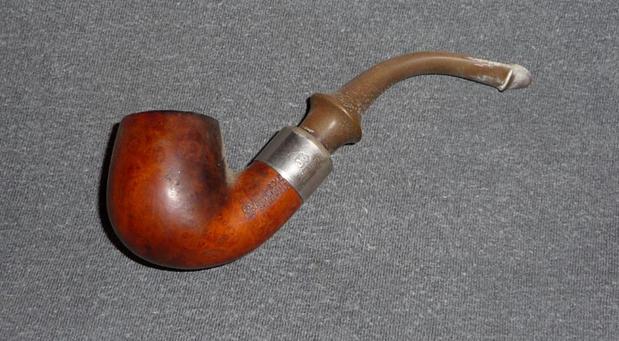
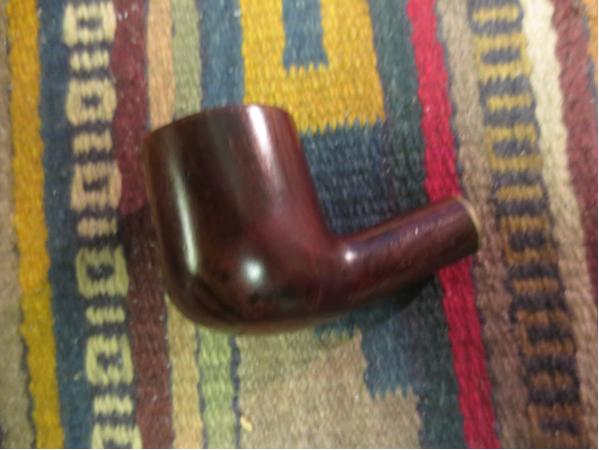
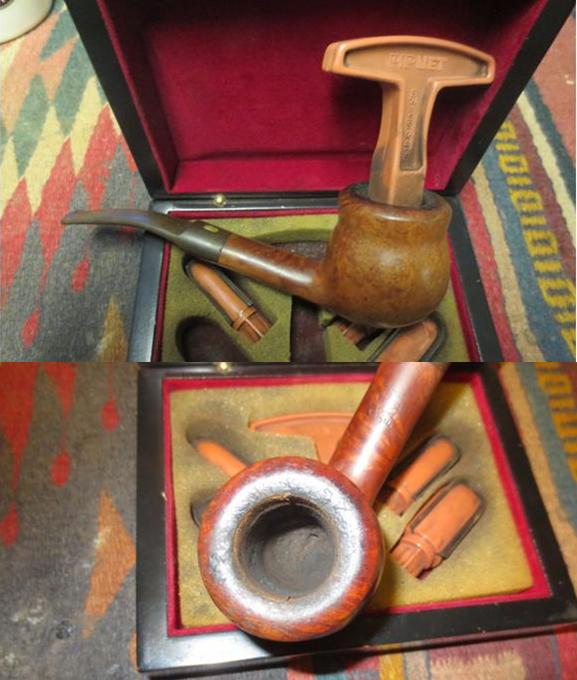
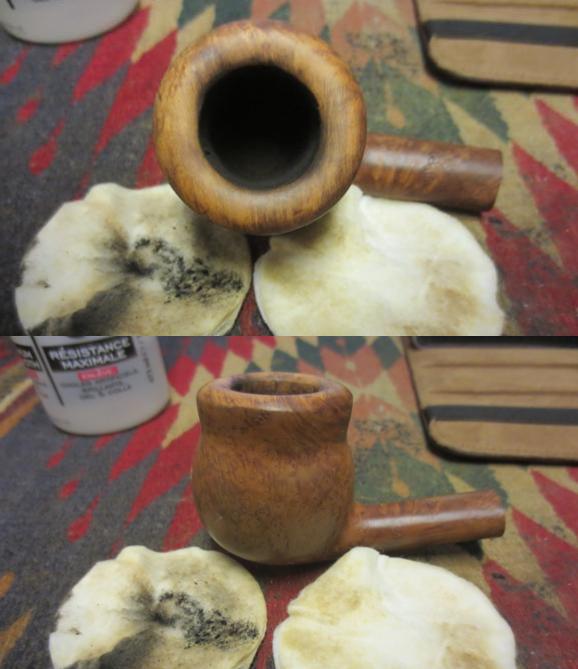
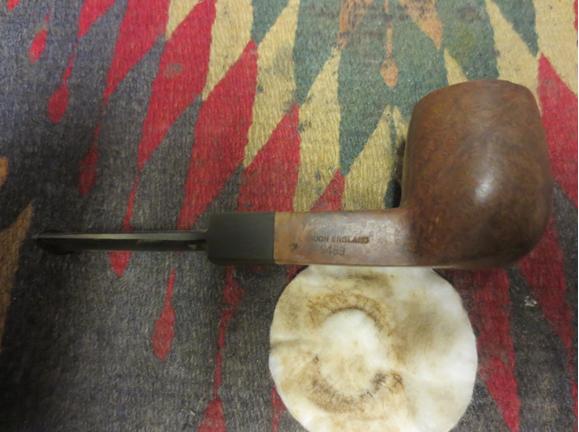
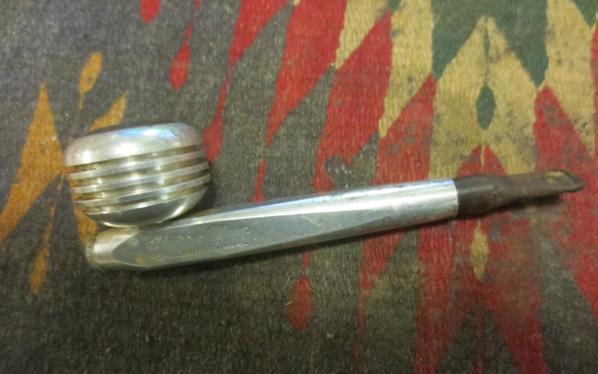
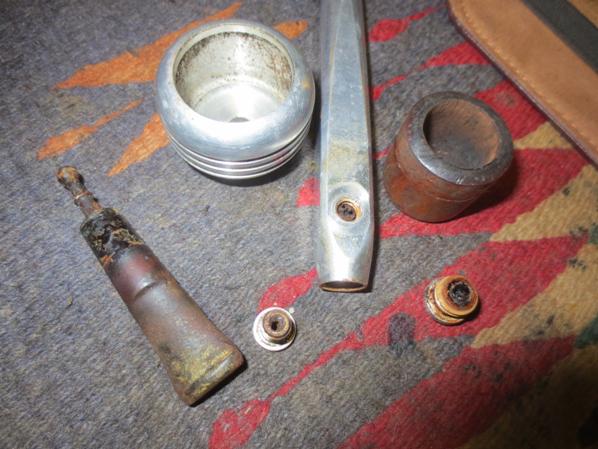
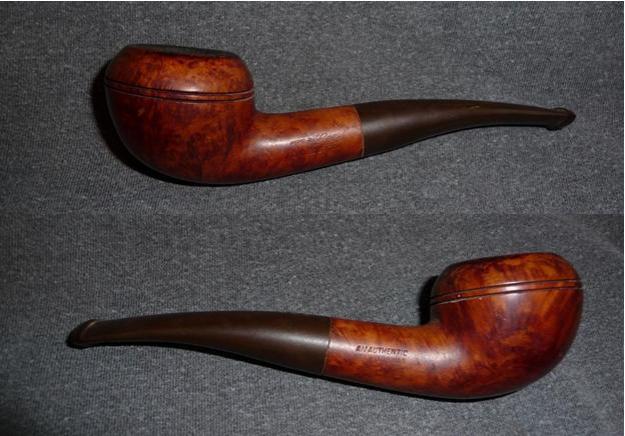
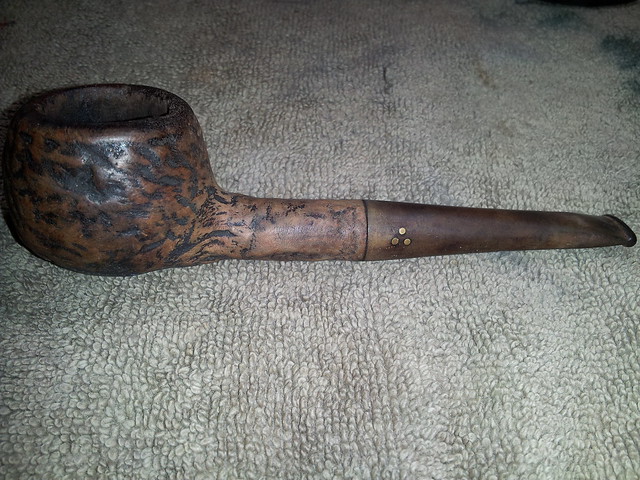
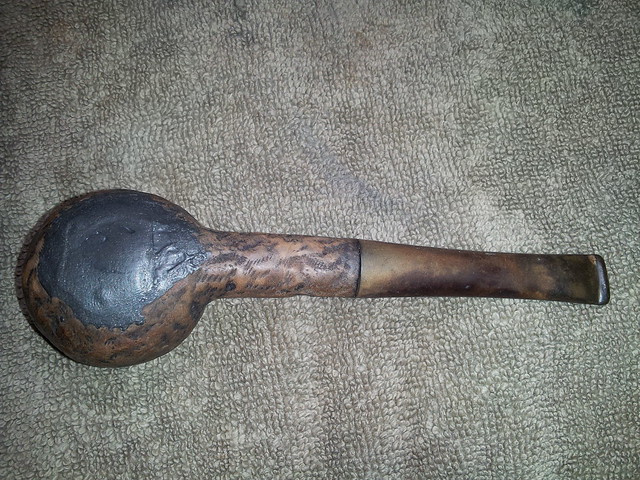
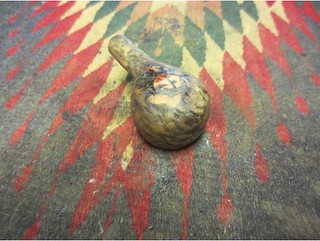
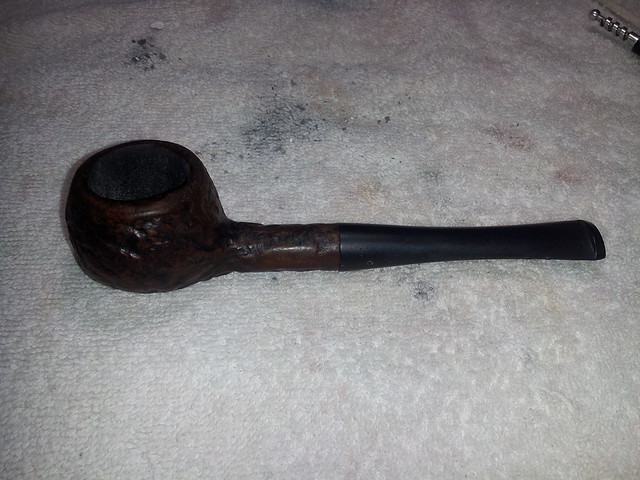
We selected as our test subject this Brigham 3-Dot Prince. As you can see in the photos below, it was in terrible condition when I came across it in a jumble of estate pipes I picked up about six months ago. I had been holding onto it with some vague notion of using it for spare parts.
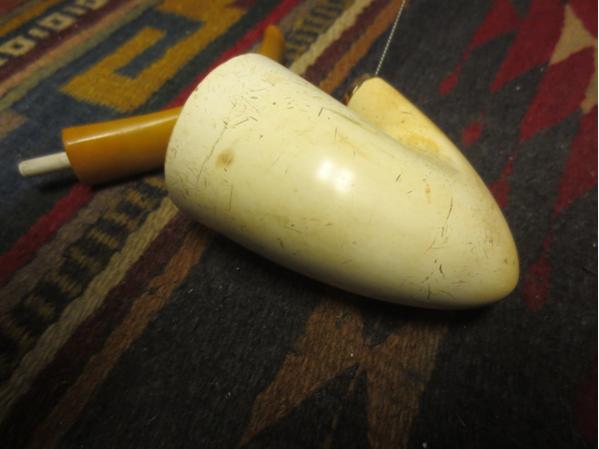
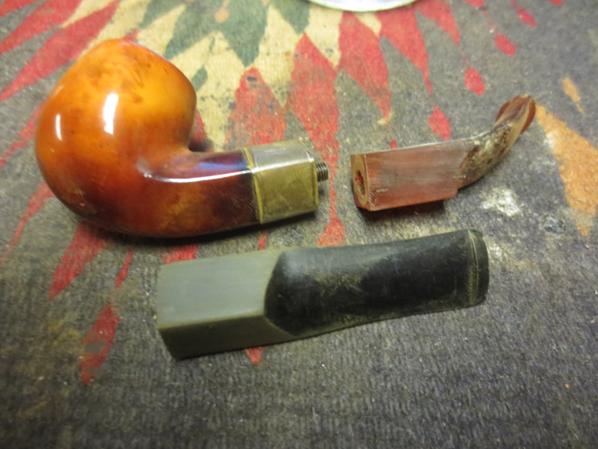
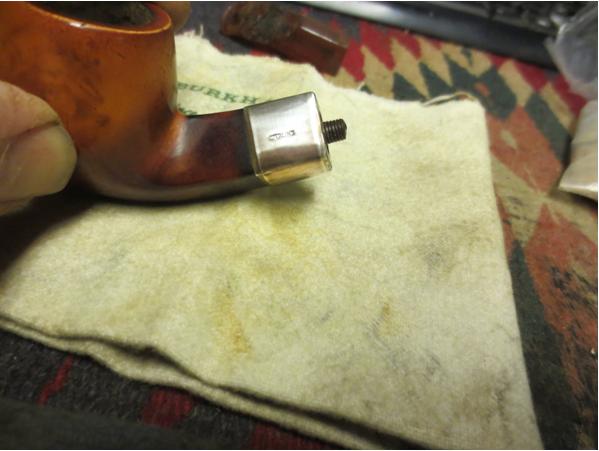
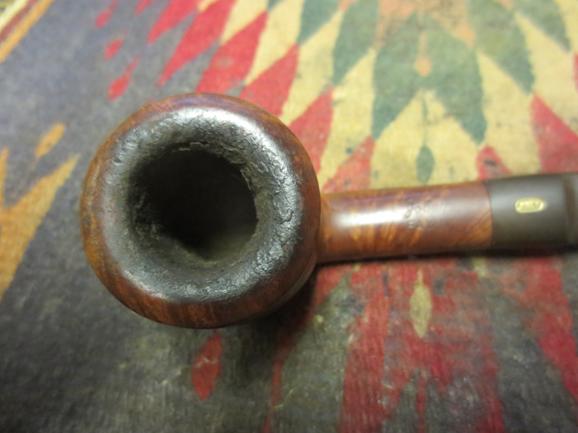
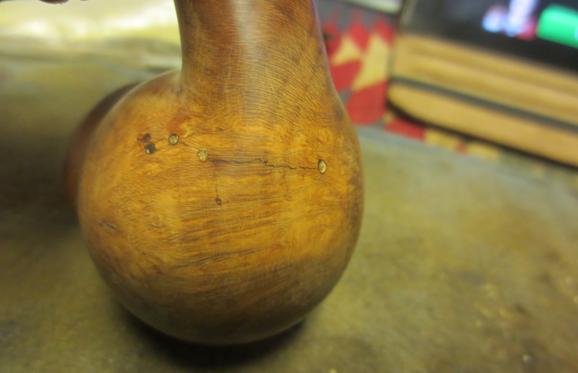
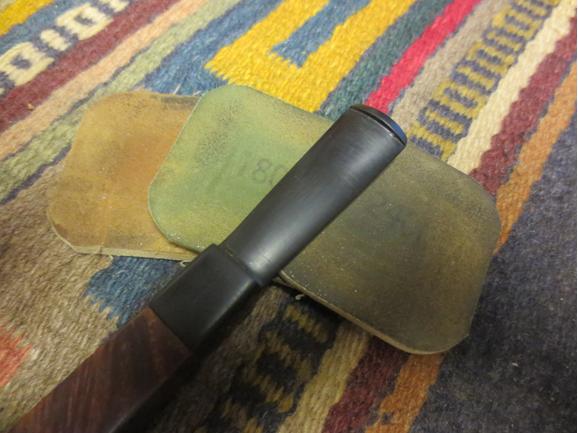
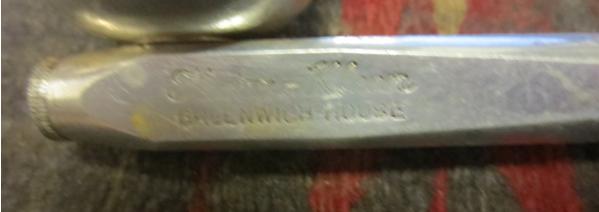
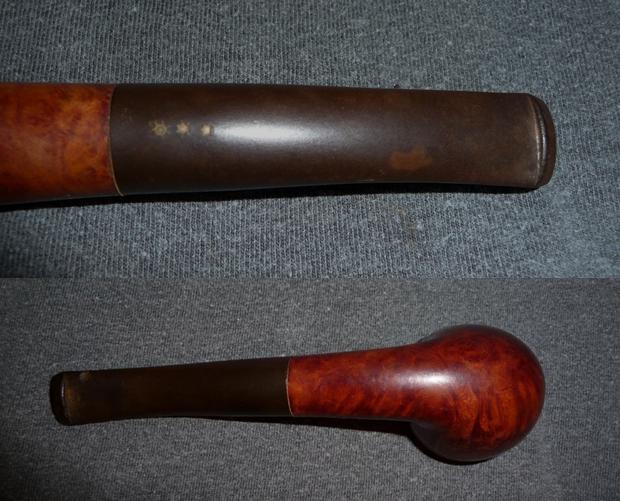
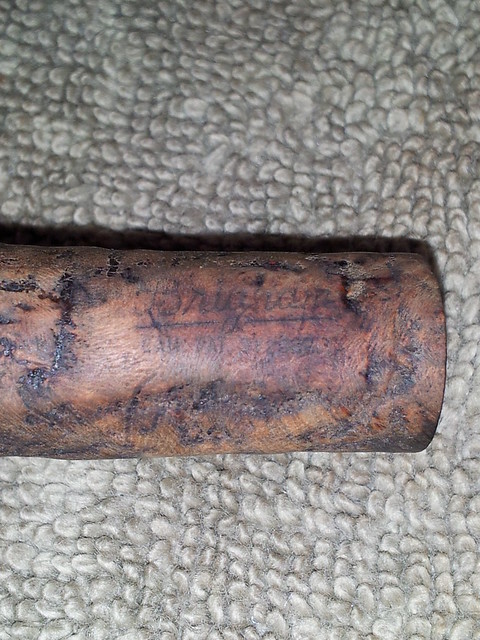
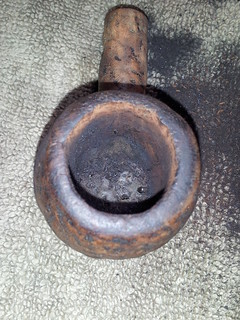
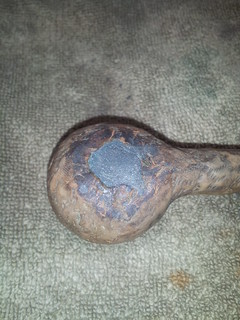
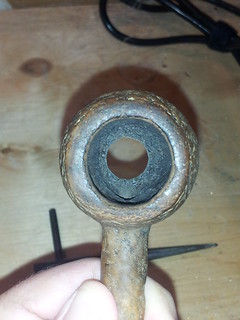
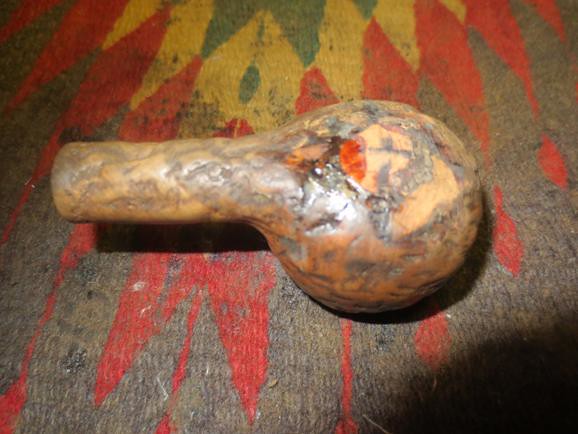
The pipe was filthy, crusted with dirt and debris. The old finish was long gone, and the nomenclature was almost entirely worn away. Wiping the shank with a bit of water, however, revealed the thin, flowing script of the early Brigham logo stamped over “Can Pat 372982”. That stamp places the production date of this old warrior in the 1938-1955 range.
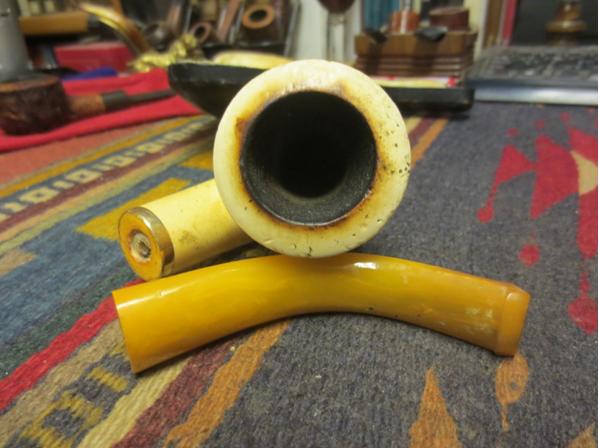
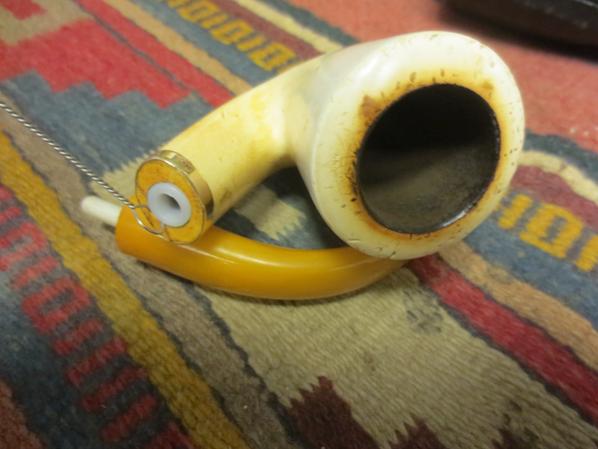
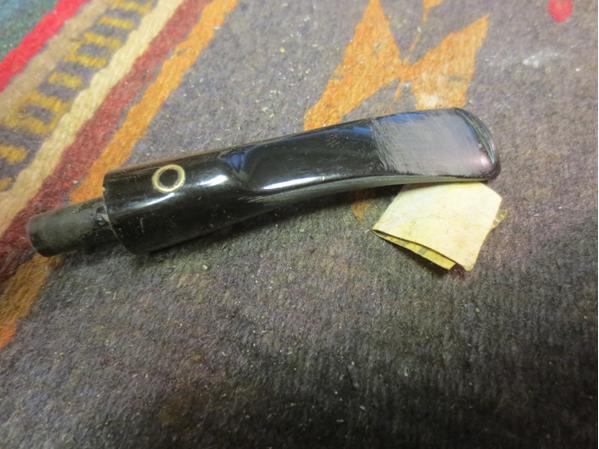
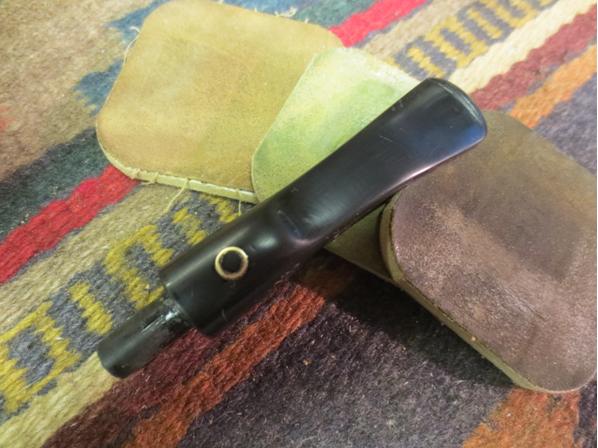
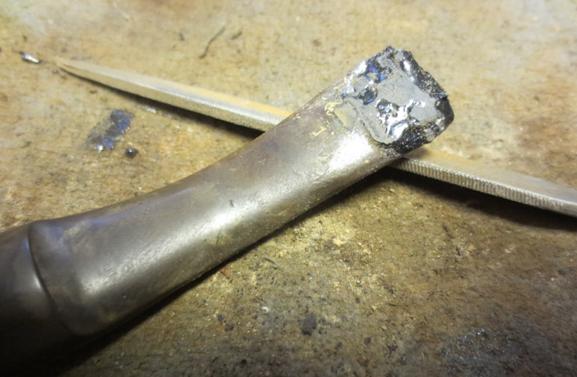
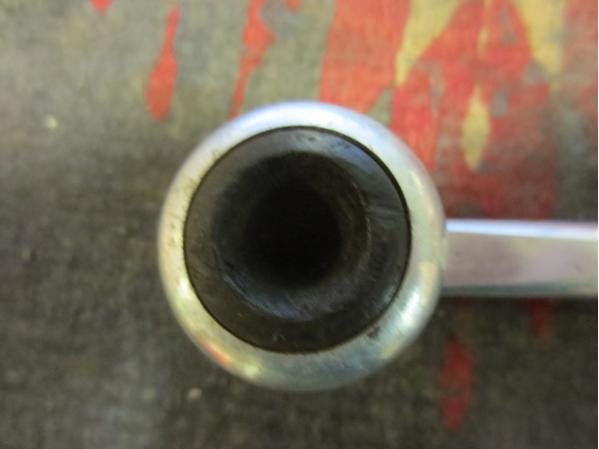
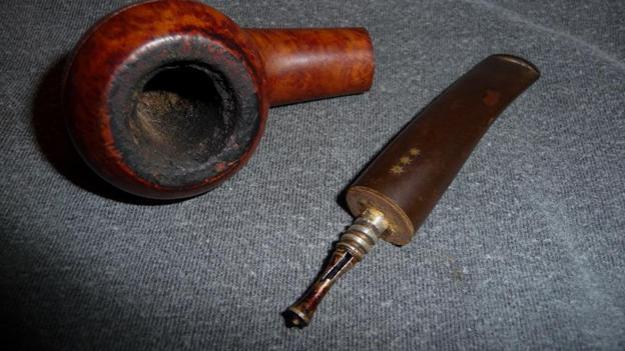
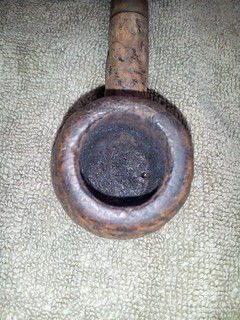
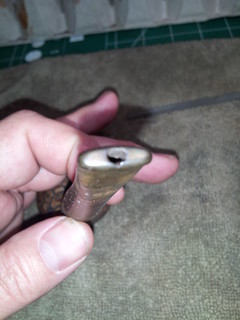
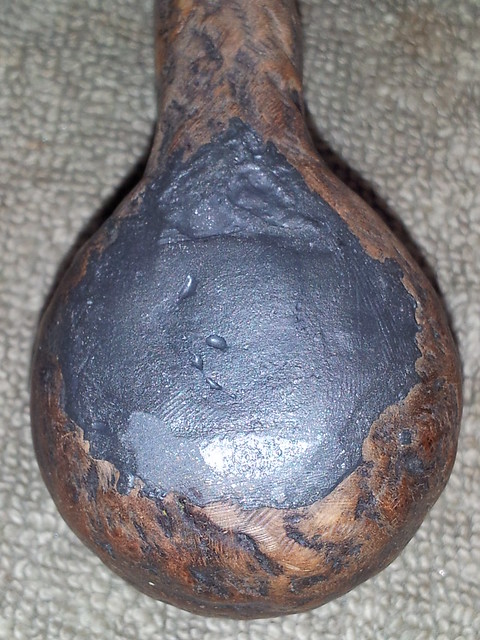
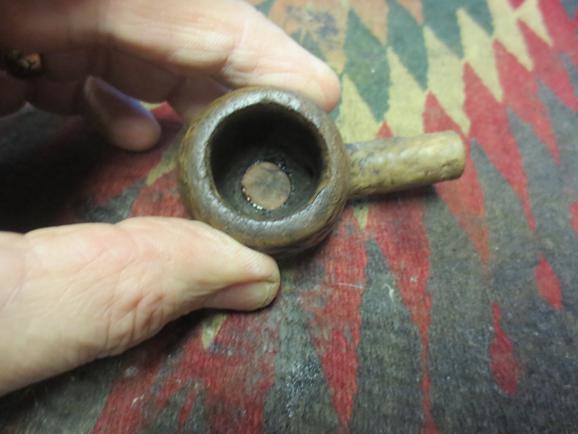
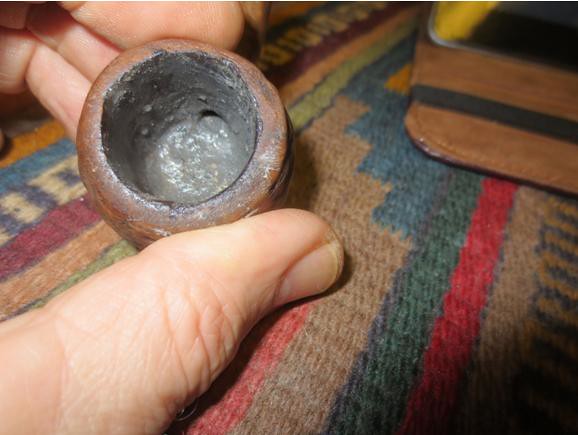
The pipe stem carried the three brass dots of Brigham’s mid-grade 300 series, but was deeply oxidized a gruesome yellow/green colour. It had been brutally chopped off at the bit and a crude button cut into the raw end. To add insult to injury, the bowl had suffered a burnout through the bottom, which had been “repaired” as delicately as the stem with a large clod of epoxy which spread over most of the bottom bowl surface. The interior of the bowl was in no better shape – the epoxy fill had been roughly wiped around the chamber floor, and the draft hole had been worn or burnt open to about double its original diameter. All in, this pipe was a train wreck, though evidently much prized by its previous owner who had refused to give up on it.
Mission Log: Agent Lemon. Phase I – Cleanup and Salvage
This restoration would be a great challenge, but Steve and I were up for it. We agreed to tag-team the job: I would clean up the stummel and salvage what I could from the hacked up stem, and then mail the briar across the country to Steve in Vancouver, BC. He would plug the burnout and tidy up the stummel and then send the pipe home to me in Kitchener, ON for re-stemming and the final fit and finish.
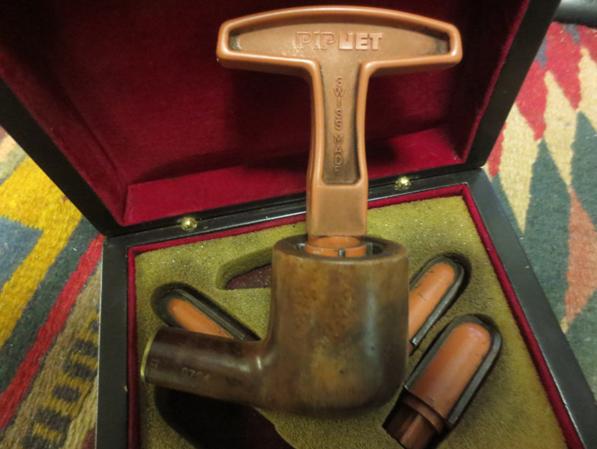
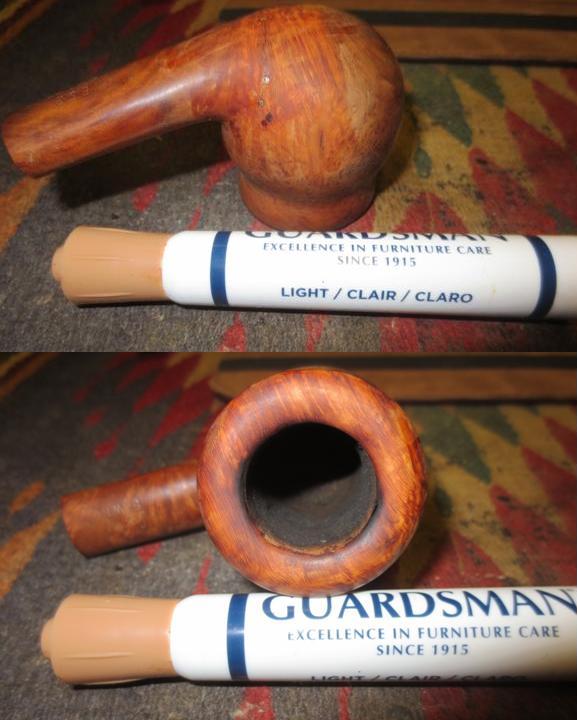
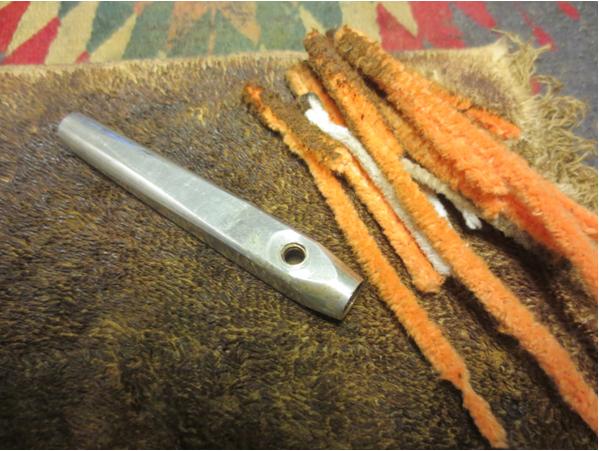
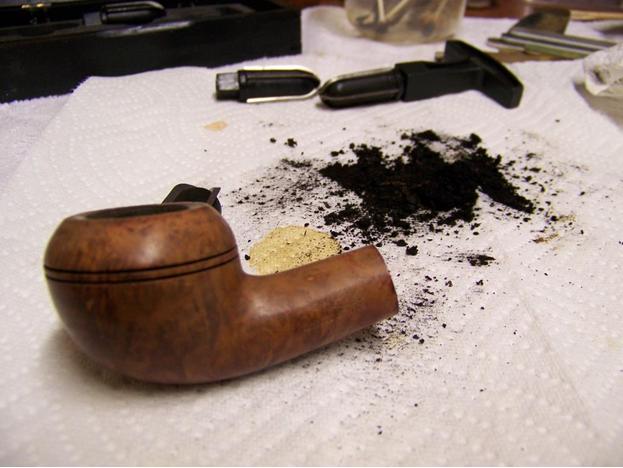
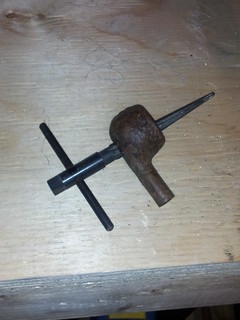
Wanting to get the pipe off to Steve as quickly as possible, I got going on the reaming and cleaning work. I used my Castleford reamer to remove as much carbon from the bowl as I could. I reamed very carefully, expecting the bowl to crumble in my hands, but the old girl held together. I think most of what came out was actually more dirt than cake, but at least the chamber walls looked ok except for the enlarged draft hole. I scrubbed the exterior of the stummel with Murphy’s Oil Soap and a soft toothbrush, and then dropped the briar into an isopropyl alcohol bath to soak overnight.
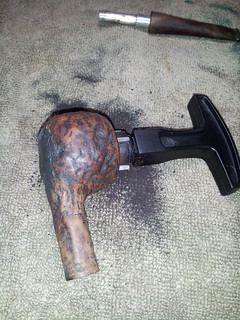
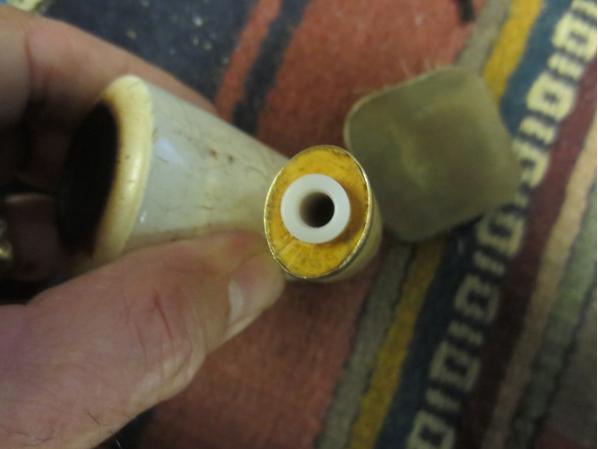
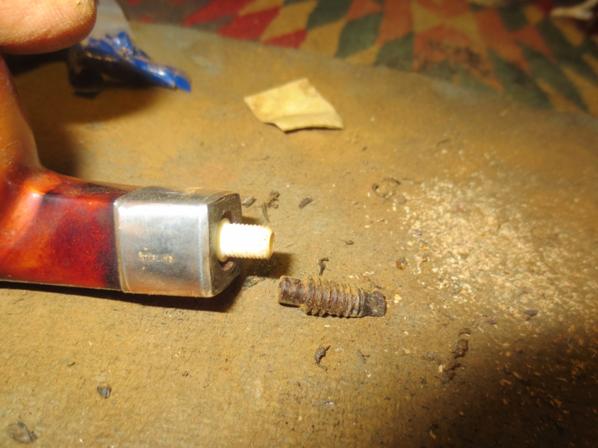
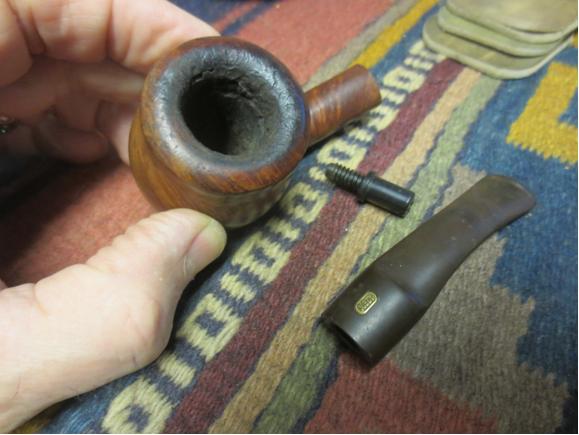
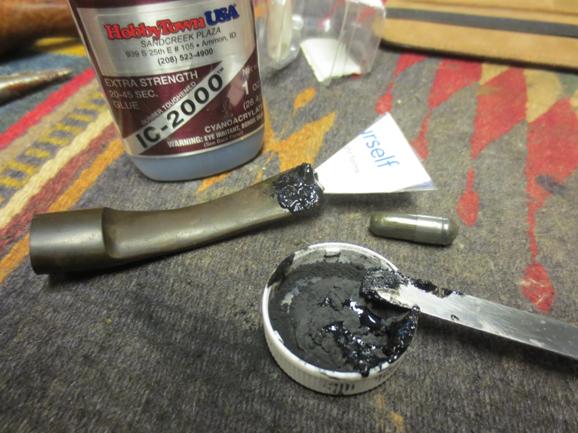
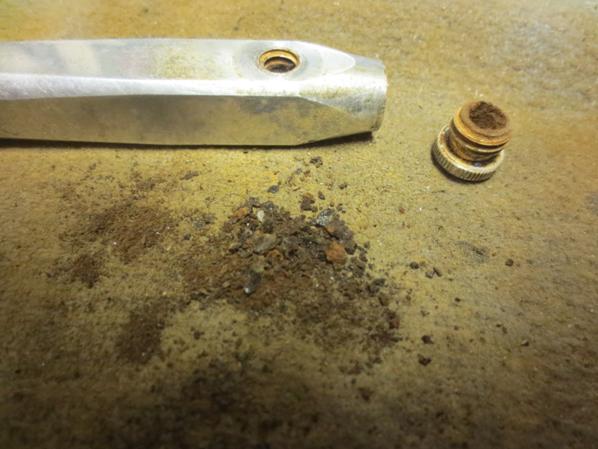
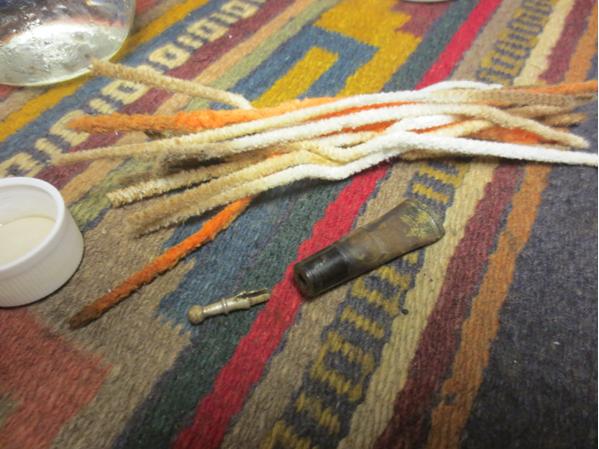
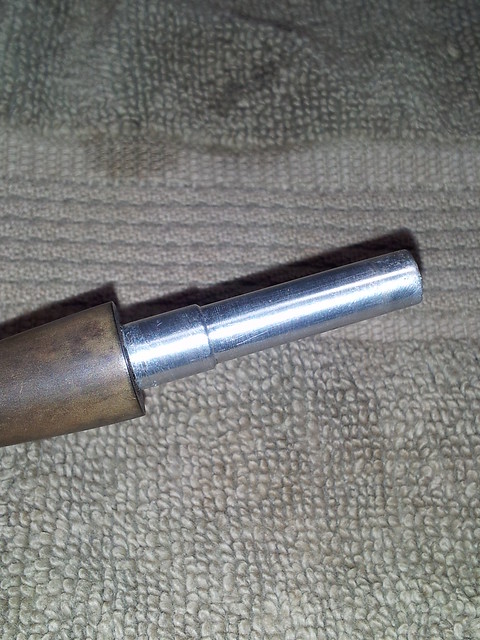
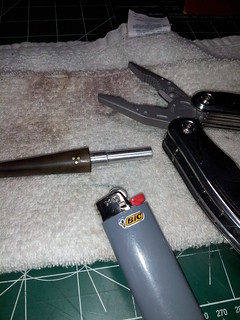
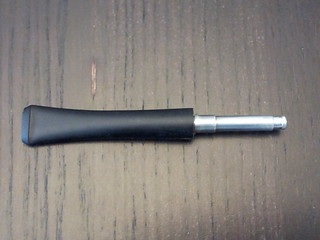
While the stummel soaked, I had a good look at the stem. I have another Prince shape in my Brigham collection, and a quick comparison showed that the stem for this old pipe was missing about an inch of length. I decided that I would need to work up a new stem to replace the old one. A vulcanite stem would be relatively easy to get hold of, but an aluminum Brigham tenon was quite another matter. As the tenon on the junk stem was still in good shape (or would be after a good cleaning), I decided to salvage it to implant in the replacement stem. I heated the tenon and the end of the stem over a lighter flame until the vulcanite softened, then gently twisted the aluminum tenon out of the stem. One of the brass dots decided to come with it, demonstrating how Brigham used the first brass pin to help hold the tenon/filter holder in the stem.

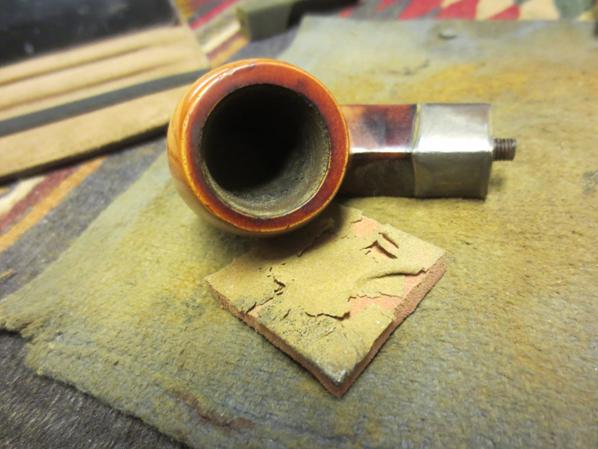
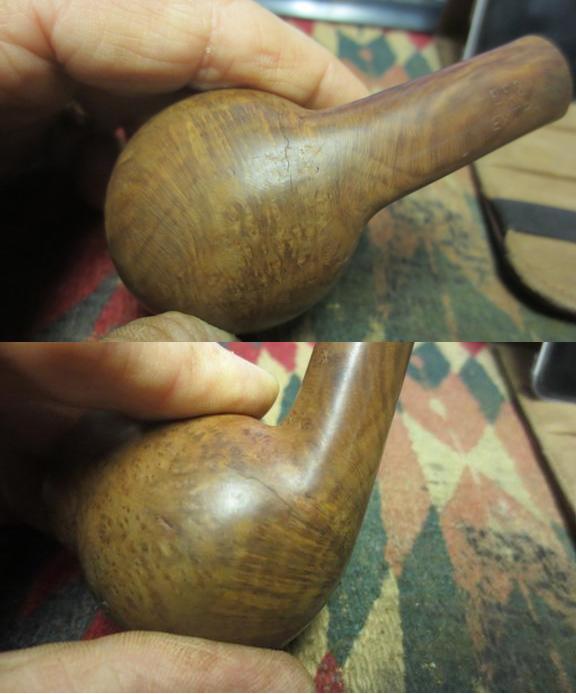
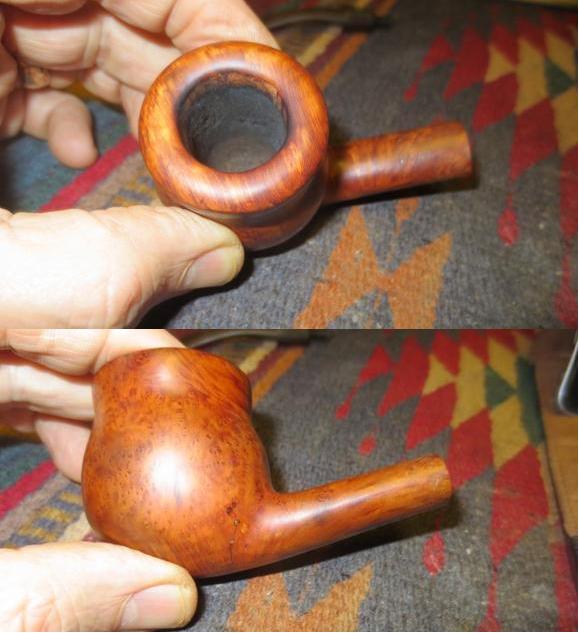
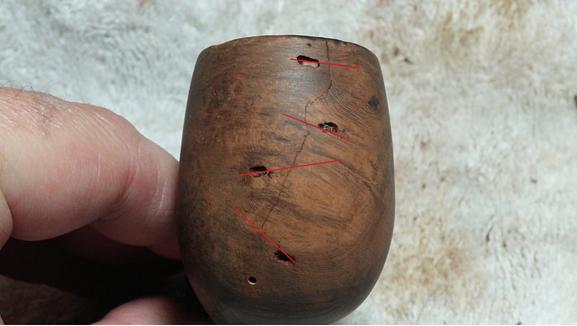
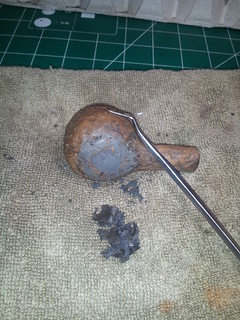
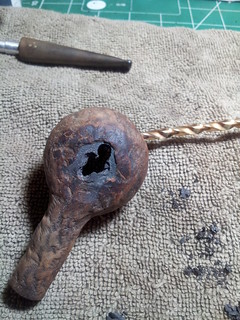
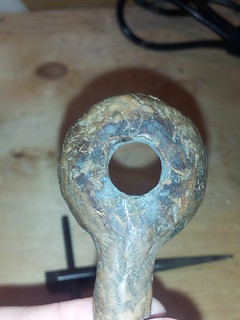
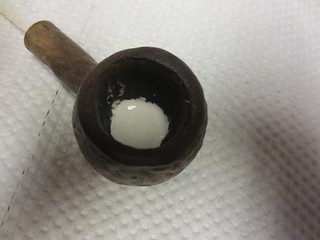
The next morning, I pulled the stummel out of the alcohol bath and scrubbed it down with an old towel. This is when I ran into the first bit of luck on this project – the alcohol soak had softened the wide but thin patch of epoxy spread across the bottom of the bowl. I quickly grabbed a dental pick and scraped as much of the old adhesive from the briar as I could. I managed to remove most of the softened epoxy, revealing a central core of harder fill about 5/8″ in diameter. This then, was the original burnout.

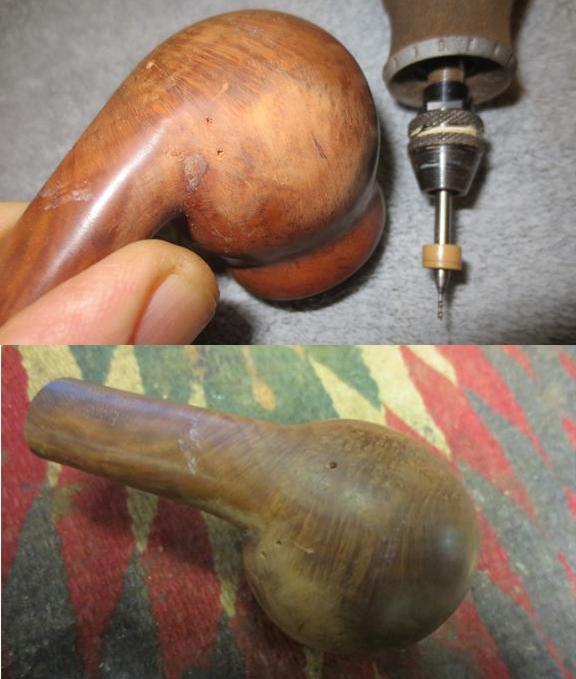
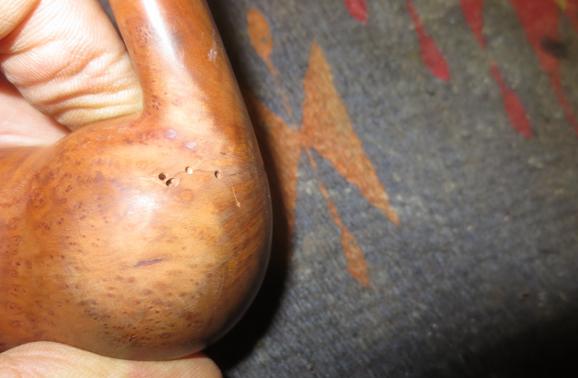
I drilled out the core epoxy and used a tapered reamer to trip the opening to an even circle with fresh briar all around. This would be the hole Steve would need to plug.
My first stage of the mission was complete, so I packed the stummel securely and entrusted it to Canada Post for shipment to Steve in Vancouver.
Mission Log: Agent Laug. Phase II – Bowl Repair & Refinish
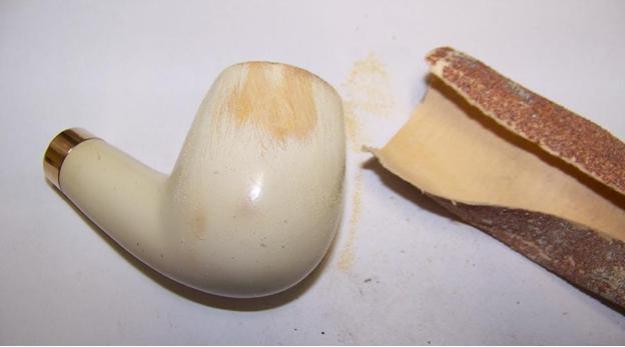
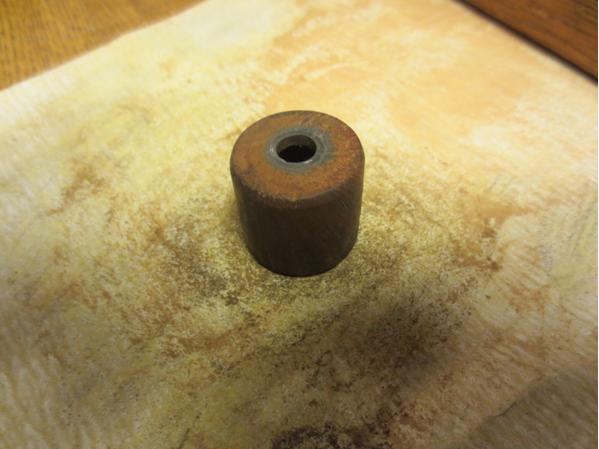
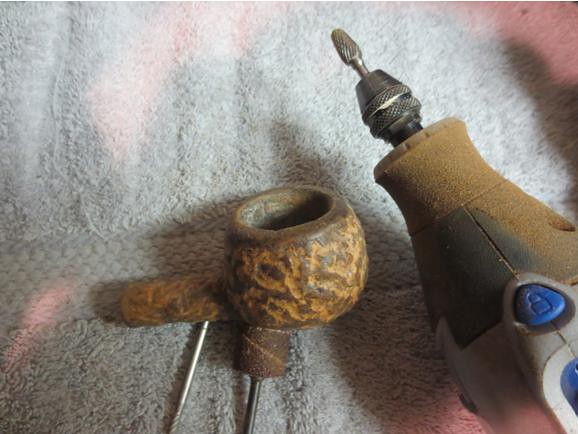
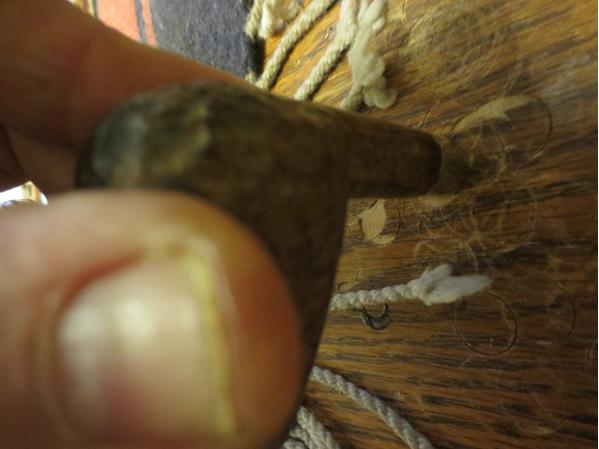
Charles Lemon of DadsPipes and I decided to collaborate on a refurbish that captured some of the essence of our conversation that we shared on our blogs regarding restoration. This old Brigham had major issues with the stem and the bowl. Charles tackled the stem and did the cleanup work on the bowl and then sent the stummel to me to work on. When it arrived I took it out of the small box and had a look at what he had sent to me. He had cleaned out the bowl which had been plugged with JB Weld and opened up the burn out in the bottom of the bowl. He drilled out the plug and when I got it the bowl had pretty much most of the bottom missing. I cut the side out of an old briar bowl I cannibalized for parts and shaped it for the plug. It was thick enough and big enough for me to cut the plug. I cut it and shaped it with a Dremel and sanding drum. The next two photos below shows the plug after the initial shaping. It is still too large in diameter and also needs to be flattened on the inside.
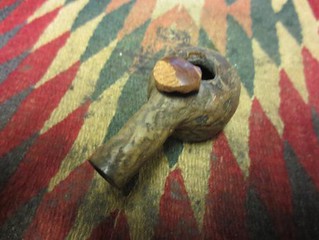
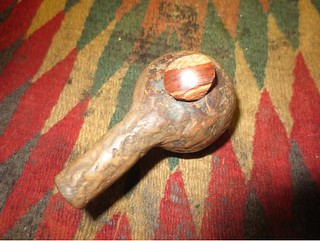
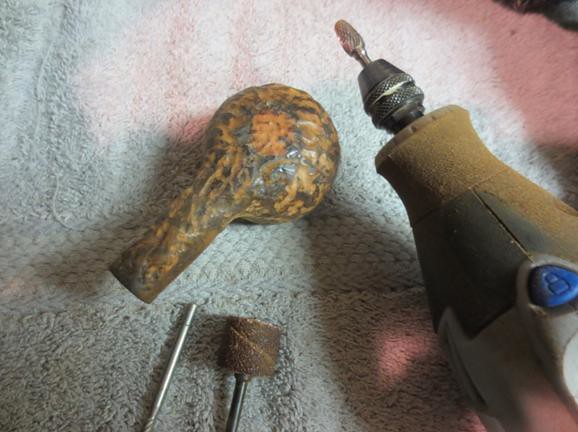
I continued to shape and fine tune the plug until it fit into the hole in the bottom of the bowl. I flattened the inside surface to match the angles of the bowl bottom. The next two photos show that the plug is just about ready to press into place. Just a little more material needs to be sanded off the edges before it is a fit.
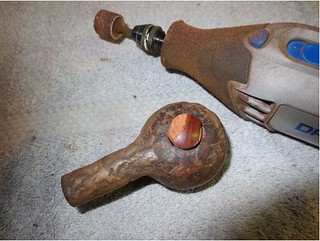
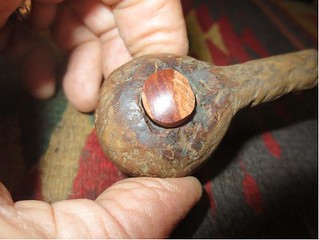
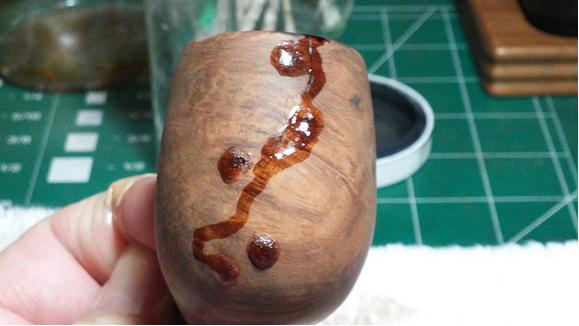
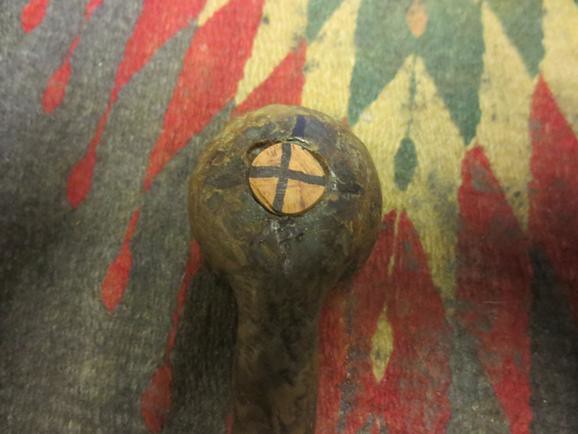
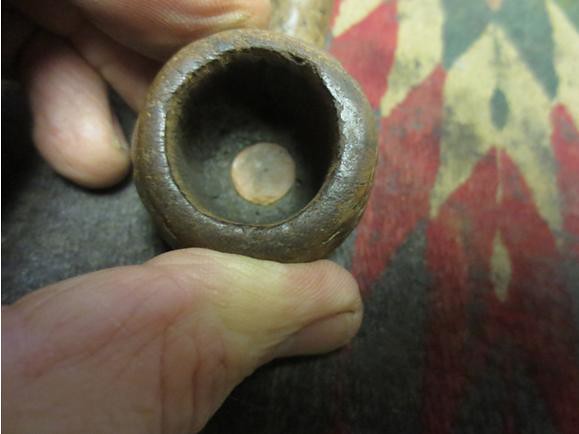
I sanded the edges with the Dremel and sanding drum until I had a good fit and then pressed it into the bottom of the bowl. I sanded the outer surface of the plug with the Dremel and sanding drum until it was flush with the surface of the bowl. I used a black sharpie to draw a cross on the bottom of the bowl so that I could align the plug once I put the glue on and pressed it into place. I then coated the edges of the plug with slow drying super glue and pressed it into the hole in the bowl. The next two photos show how the plug looked in place from the outside and the inside of the bowl.
I used a dental pick to clean out the edges of the plug and bowl on the outside and then filled them with super glue and briar dust to take care of the chips and damage to the bowl bottom. Once it dried I sanded the bottom of the bowl with 220 grit sandpaper to blend in the plug.
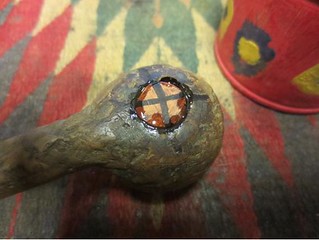
The next two photos show the state of the bowl repair at this point in the process. The plug has been set in the bowl and the crevices around the plug have been filled and repaired. The inside of the bowl is smooth and the plug sits nicely in place.
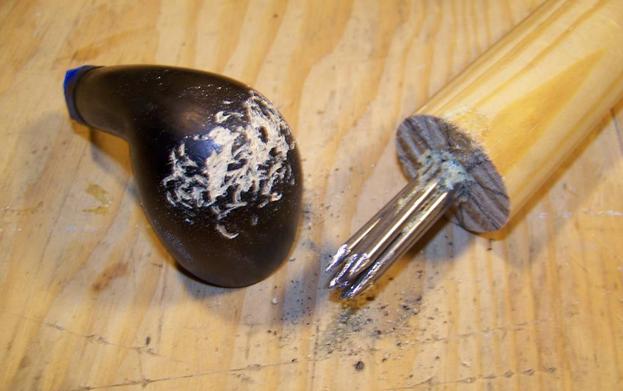
At this point in the process others may use JB Weld or Pipe Mud to finish up the bottom but I have found that a thin coat of Plaster of Paris gives a little bit of added protection to the bowl and also levels out the bowl bottom. In this case the bowl had a low spot in front of the entrance to the airway. I mixed a batch of Plaster, put a pipe cleaner in the airway and put it in the bottom of the bowl to level it out.

When the Plaster dried I applied a coat of pipe mud to the bowl bottom and sides, filling in some of the crevices in the bowl sides and smoothing out the surface. I used a dental spatula to press the pipe mud in place on the bowl sides and a pipe nail to press it into the bottom of the bowl.
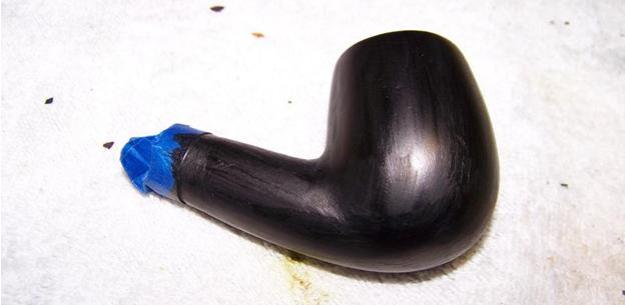
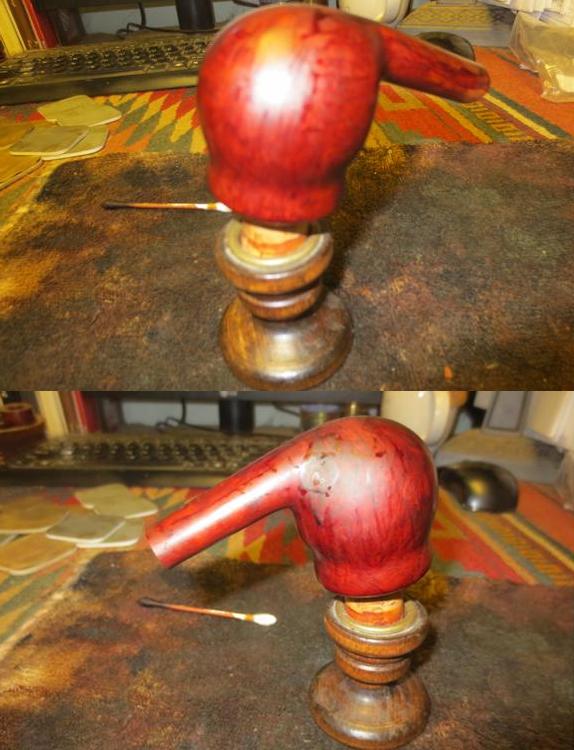
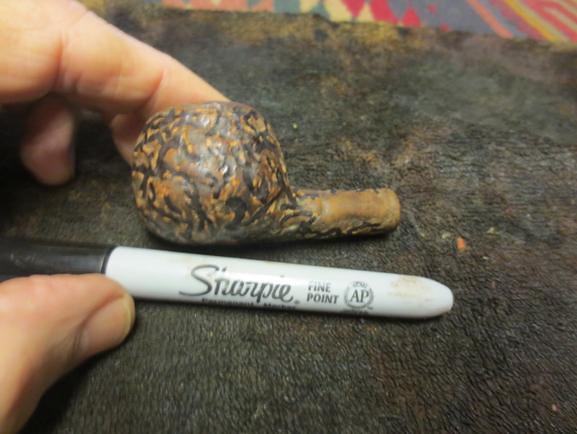
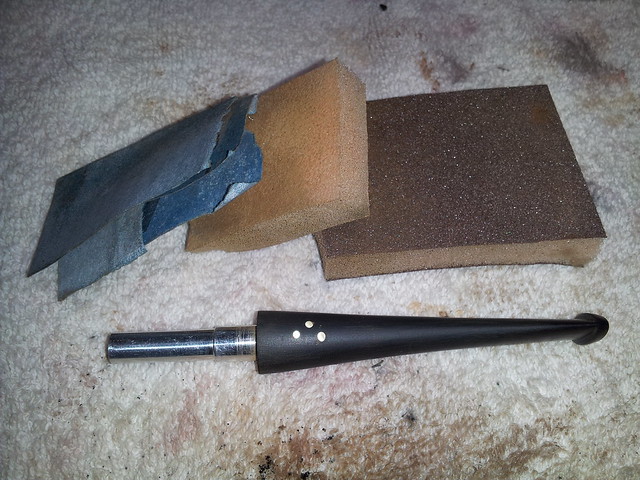
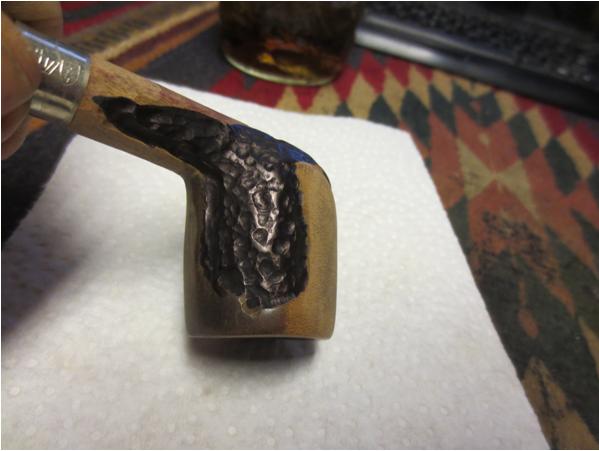
I set the bowl aside at this point to cure for two days and then worked on the rustication of the bowl. I used a dental burr to follow the pattern on the bowl sides and deepen them. I cut a similar pattern on the bottom of the bowl with the burr. I used the burr to clean up the rustication on the shank as well – carefully avoiding the area where the faint Brigham stamping remained.
I used a black Sharpie permanent marker to stain the grooves in the bowl. I wanted a dark under tone to the bowl after I stained it. I like the way the stain looks with this underneath in the grooves.
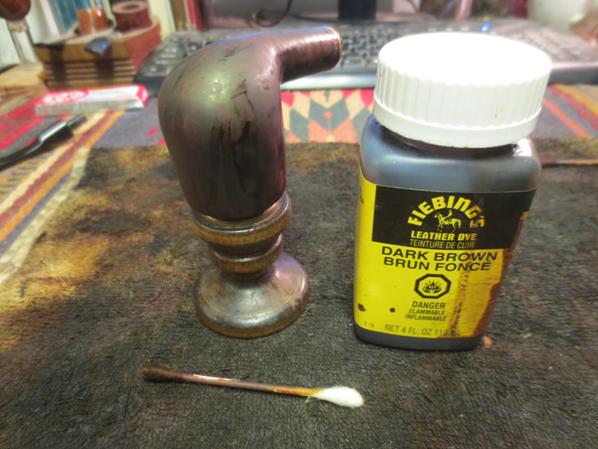
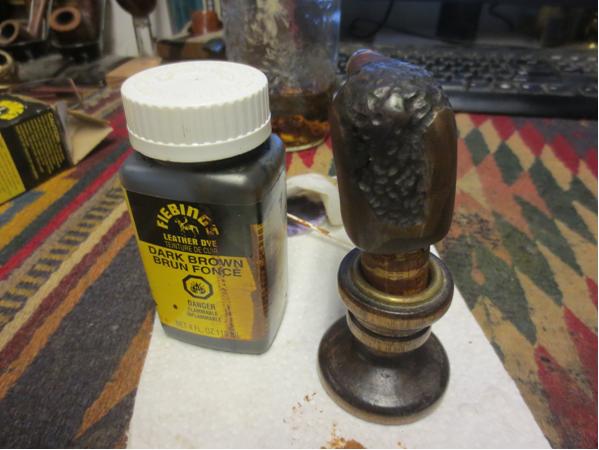
I stained the bowl with a dark brown aniline stain and flamed it.

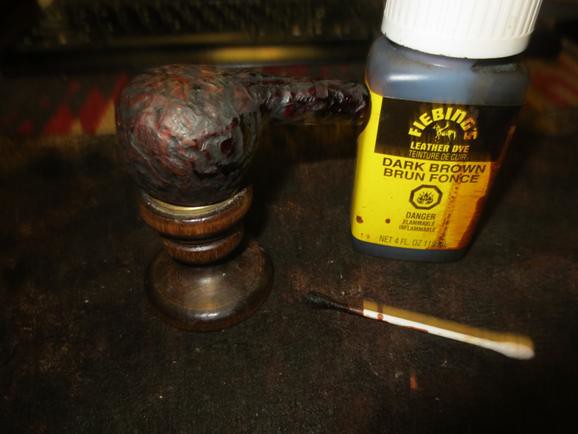
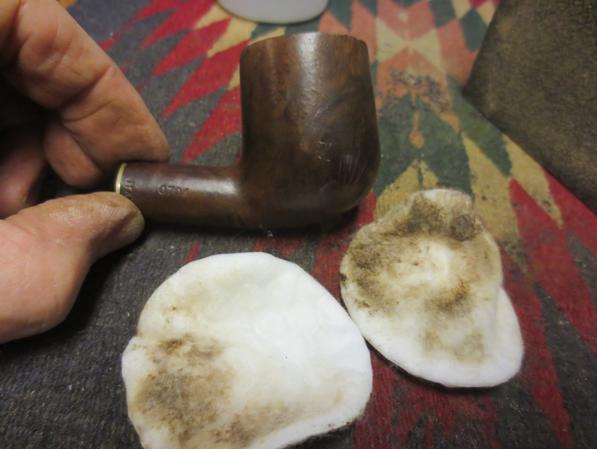
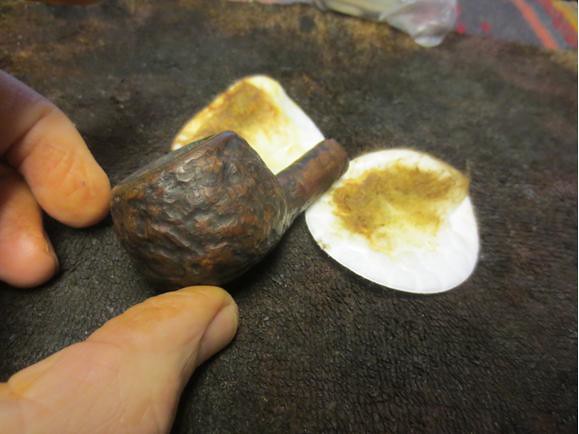
I wiped it down with alcohol on cotton pads to give it some more transparency and create the contrast with the black in the grooves of the rustication. I sanded the rim with a 1500-2400 grit micromesh sanding pad to smooth it out and to add to the contrast of the smooth rim.
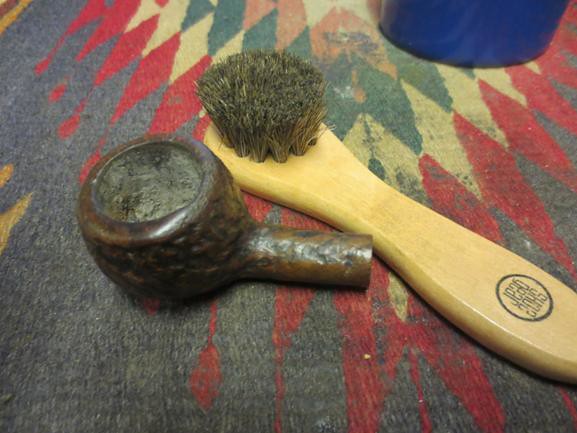
I hand rubbed in several coats of Conservators Wax and then buffed the bowl with a shoe brush.
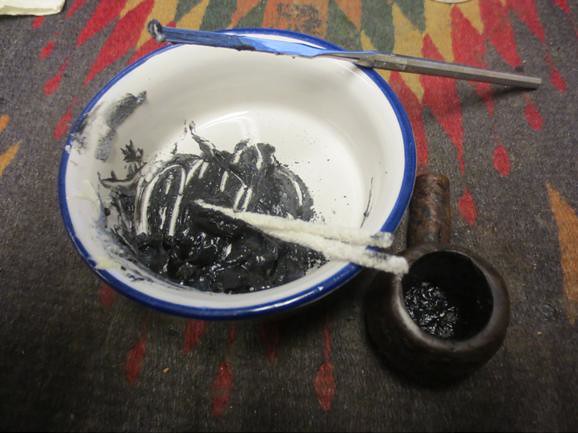
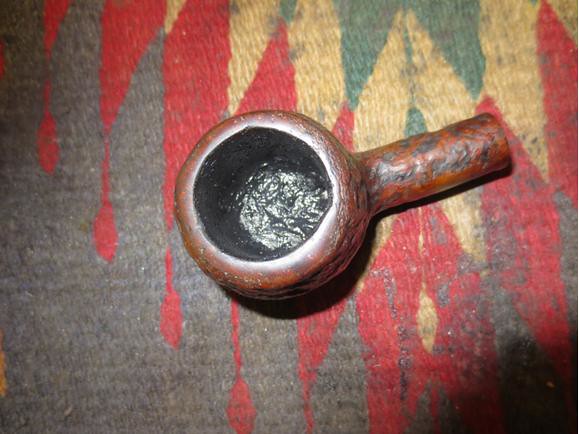
I mixed up a bowl coating of charcoal powder and sour cream and painted it on the inside walls of the bowl to give it further protection. When the bowl coating dried, it was time to pack the stummel back up for its return trip to Ontario.
 s
s
Mission Log: Agent Lemon. Phase III – Stem Work
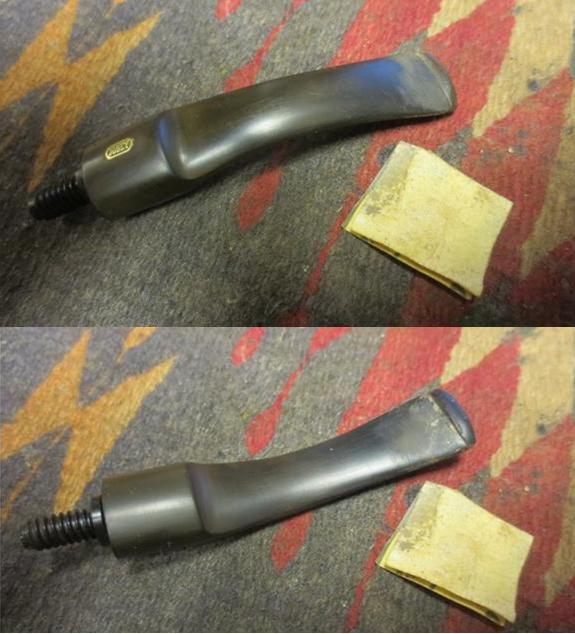
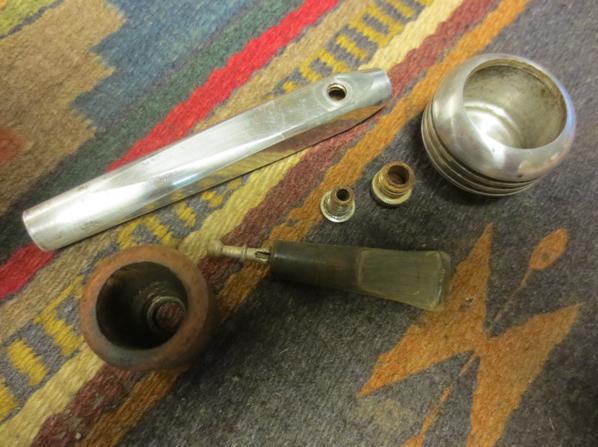
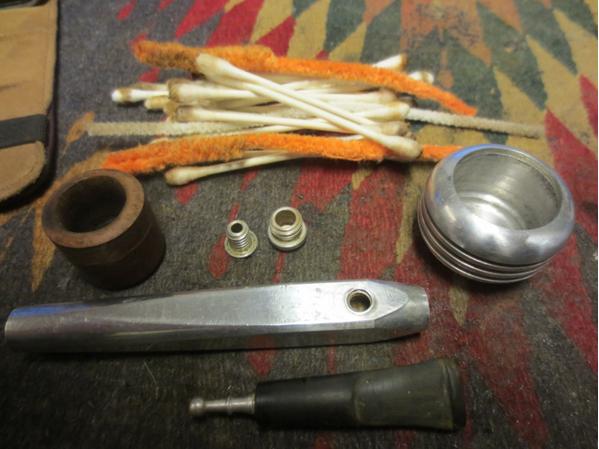
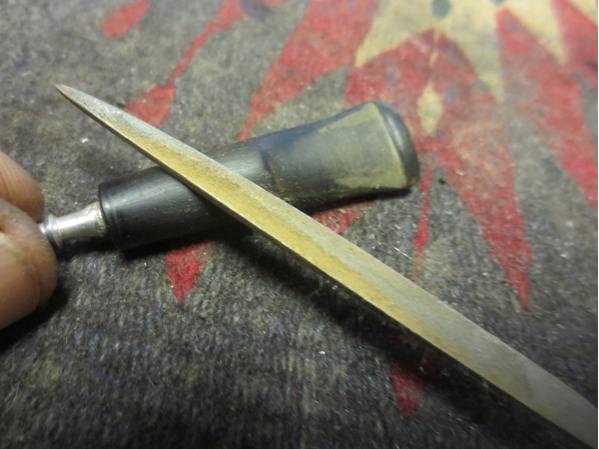
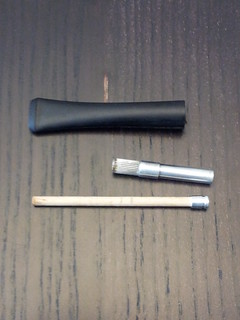
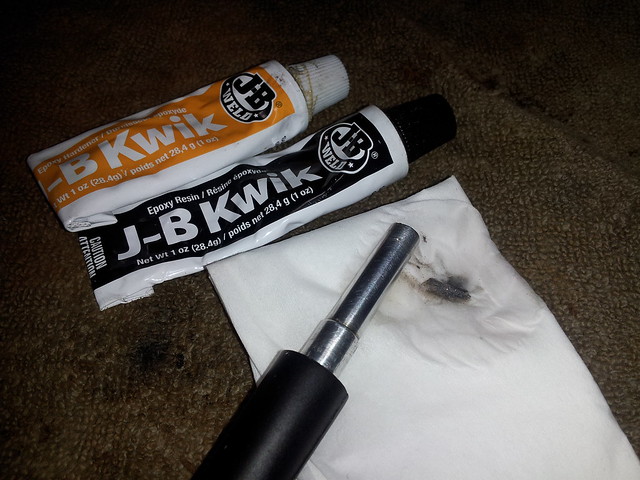
Recreating a Patent Era Brigham stem requires only a few items – a vulcanite stem of appropriate length and sufficient diameter to hold a Brigham rock maple filter, an aluminum Brigham tenon/filter holder, a few drill bits and some epoxy.
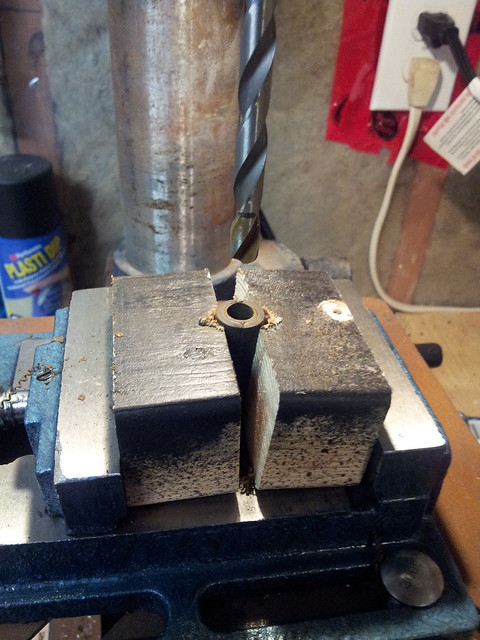
I found a suitable stem in my box of stems, using a Brigham Prince pipe from my collection as a reference. I used a hacksaw to remove the vulcanite tenon, and then clamped the stem into a simple drilling jig in my drill press. The stem must be perfectly aligned in the press or you risk drilling through the side of the stem instead of down the airway. The goal is to enlarge the airway to make room for the filter, and then drill out a mortise in the face of the stem to accept the aluminum tenon/filter holder. A quick test fit verified my drilling, so I glued the original tenon into the new stem with a bit of JB Weld and let the assembly cure.
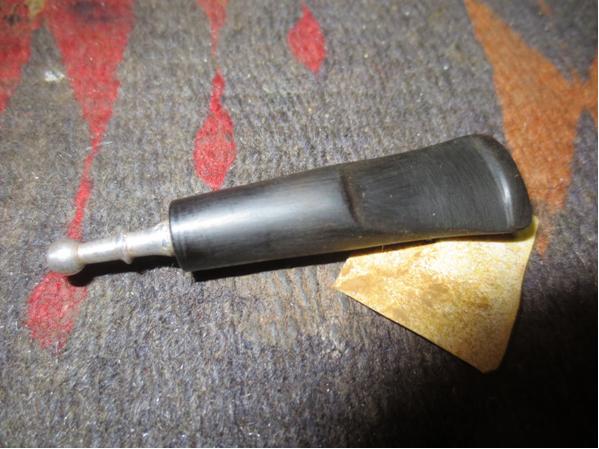
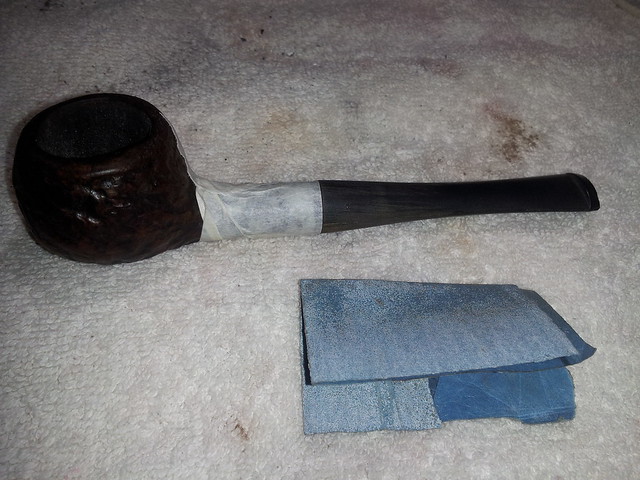
When the repaired stummel arrived from Vancouver, I could fit the replacement stem. As I was working with the original tenon, it wasn’t a great surprise when the stem fit nicely into the shank. A little bit of filing and sanding to remove the stem’s molding marks and reduce the diameter to match the shank, and I was ready to install the Brigham dots.
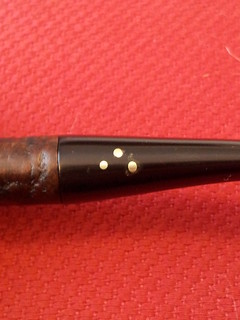
The dots are made by inserting 1/16″ brass rod into holes drilled in the side of the stem. The first pin is located approximately 5/16″ from the end of the stem at the centre line, and the other pins in the 2, 3, and 4-dot patterns are built off the first dot. As this was a 300-level pipe, I’d be installing three pins in a triangle pattern. The first pin is the bottom left dot of the triangle.
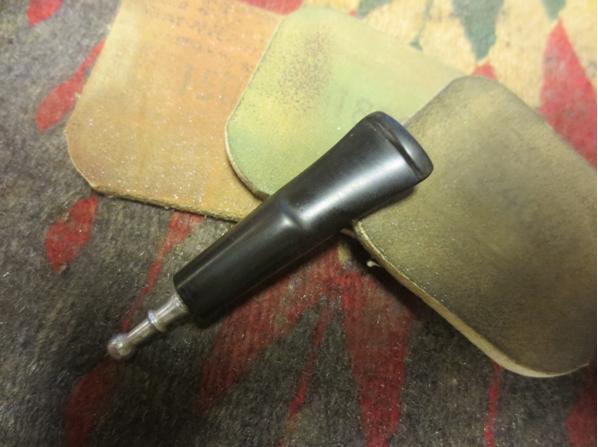
I marked out the pinning pattern with a Sharpie and then drilled the holes, being careful not to drill through into the stem’s airway. Short segments of brass rod were then glued into the holes with clear CA glue. When the glue had cured, I used a combination of files and sandpapers to bring the dots flush with the surface of the stem. A final polishing with micromesh pads to remove any remaining scratches prepped the stem for buffing. Just before doing so, I gave the stem a 1/8th bend by holding it over the heat gun until pliable and shaping it over a round form. A dip in cool water set the bend in place.

Mission Log: Impossible Accomplished
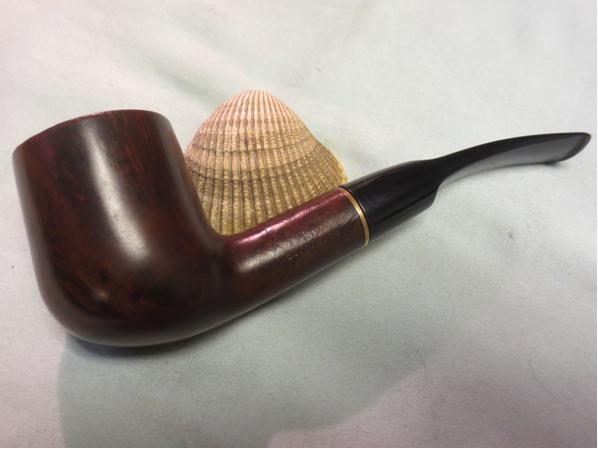
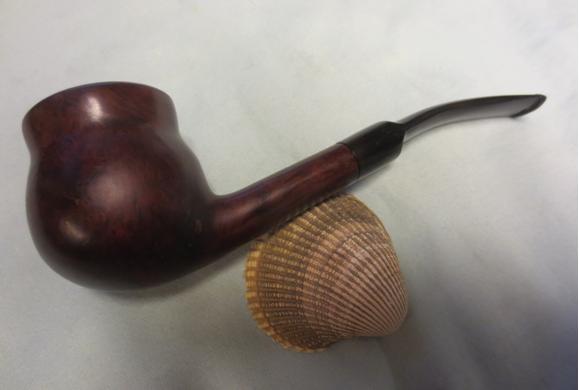
The restored pipe sits on the desk in front of me. I hardly recognize it as being even remotely related to the broken-down shell of a pipe Steve and I started with only a few short weeks ago. Shipping the patient back and forth took a lot of time, but the results of this cross-country collaboration speak for themselves. This Patent Era Brigham 313 looks ready for another 60 years of smoking pleasure. Steve did a truly magnificent job on the stummel, and the new stem looks like it’s been there all along. I think we both learned something new during this restoration, and we proved our theory (in grand fashion) as we did it – every pipe, no matter the condition, can be restored to useful service with the right combination of skill and will.
I hope this project inspires other pipe refurbishers to take a second look at that written-off pipe you’ve held onto for some reason. I’m willing to bet there’s still a great smoke hiding in that old briar somewhere. It’s up to you to find it.
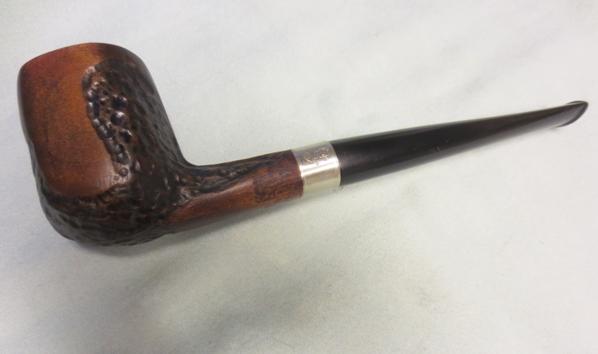
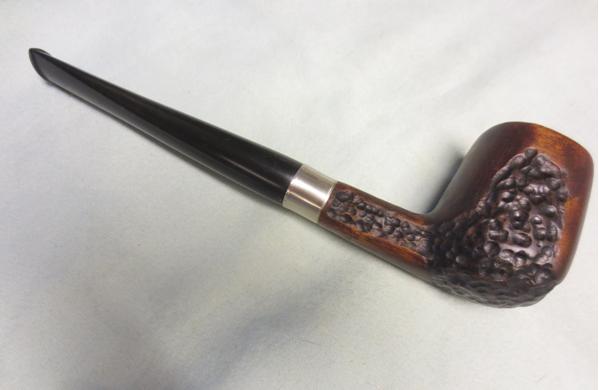
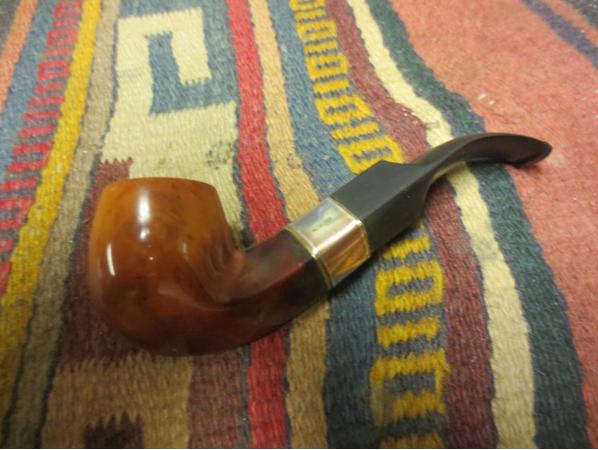
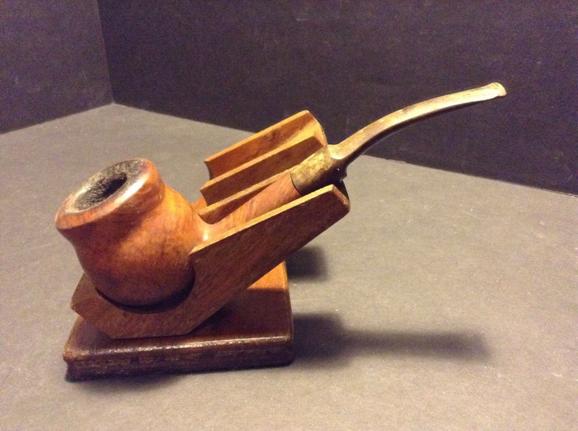
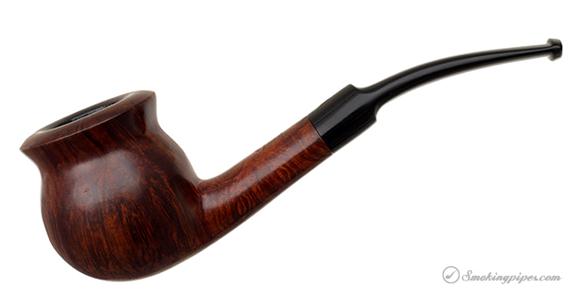
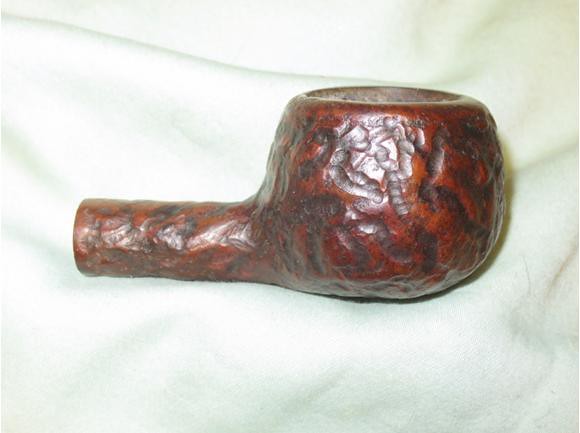
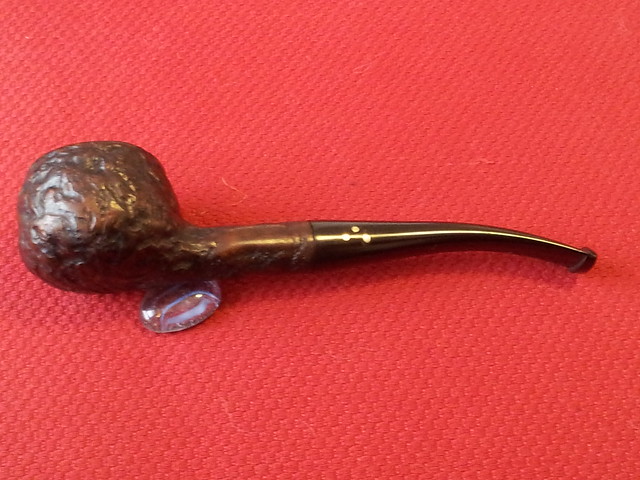
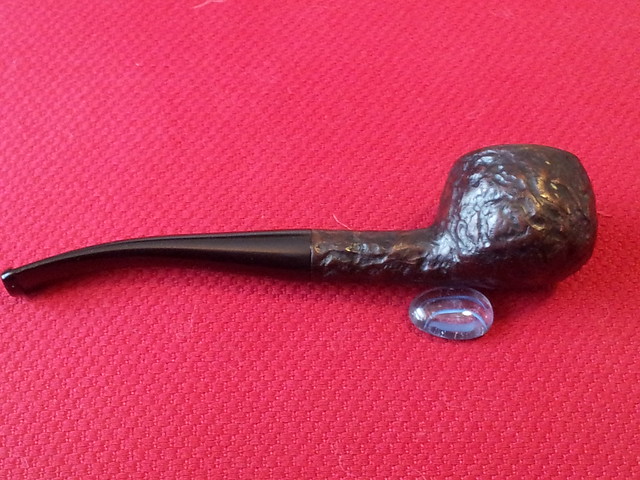
Here’s the finished pipe.
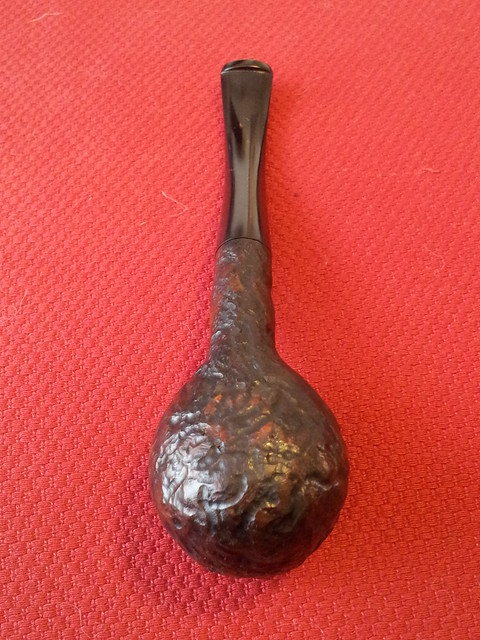


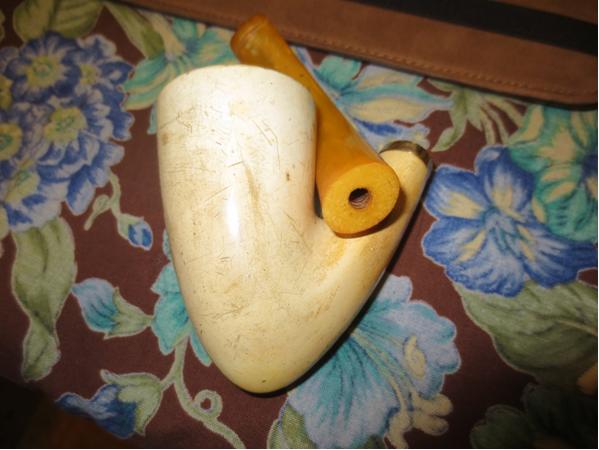
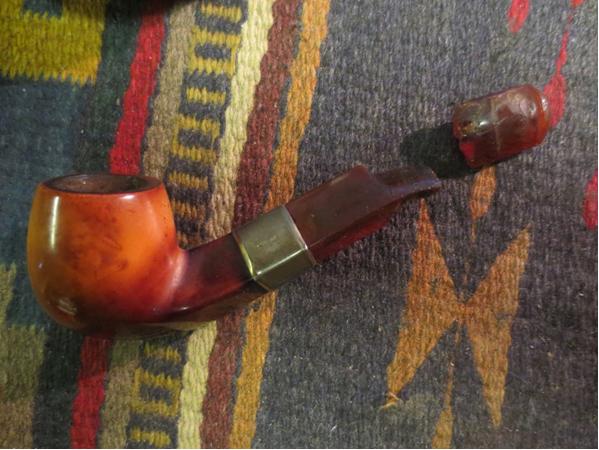
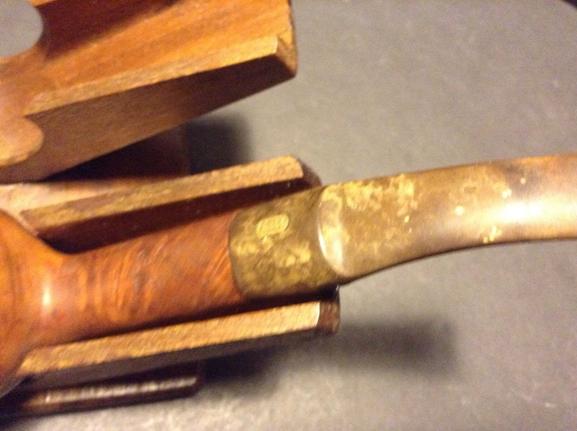
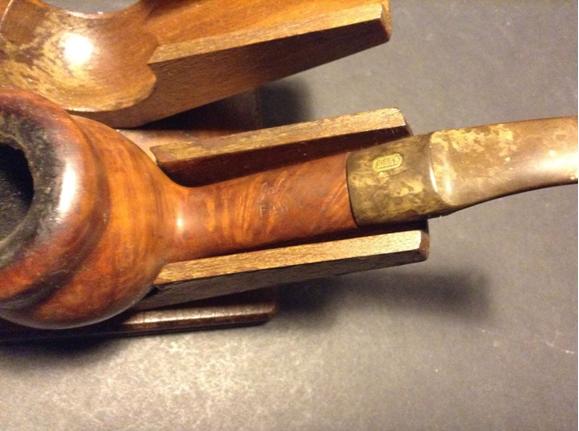
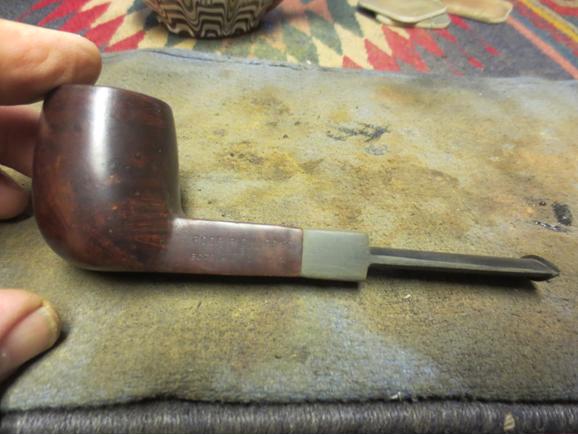
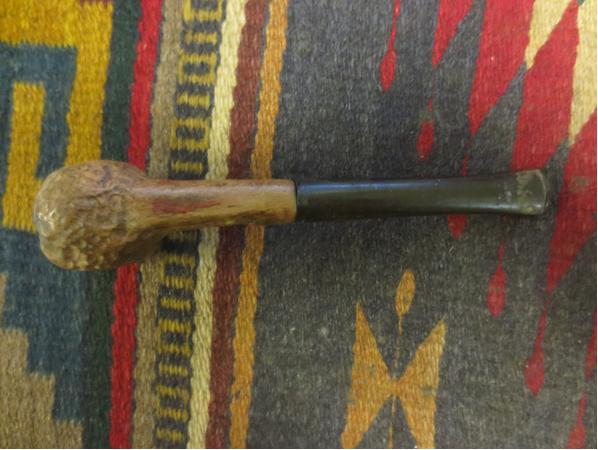 I took a close up photo of the shank/stem union to show what I am talking about when I say that they do not match.
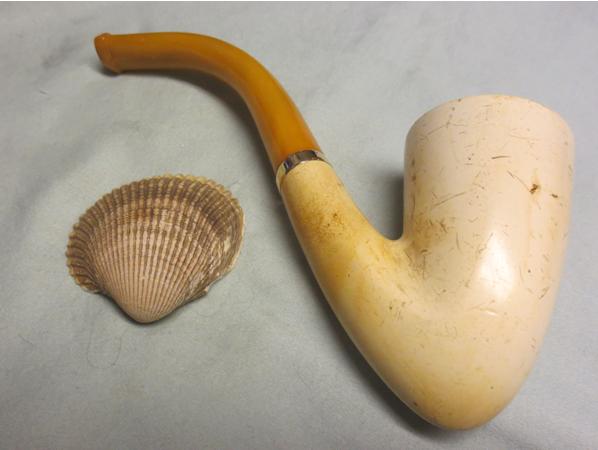
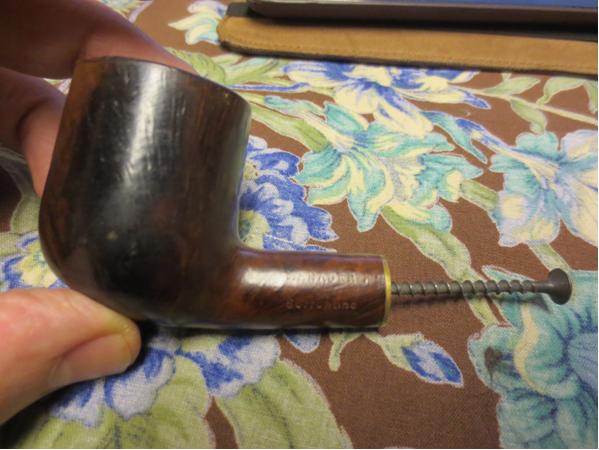
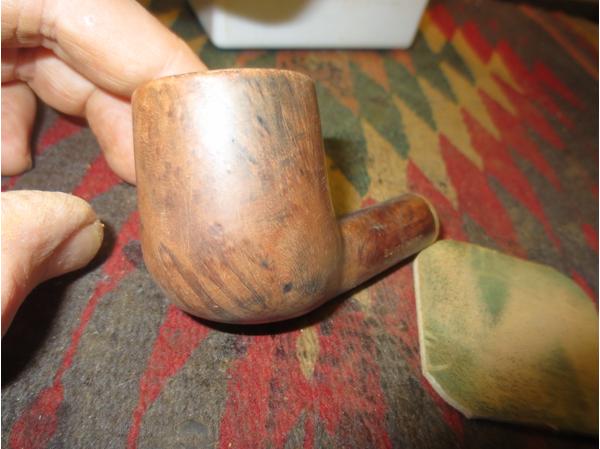
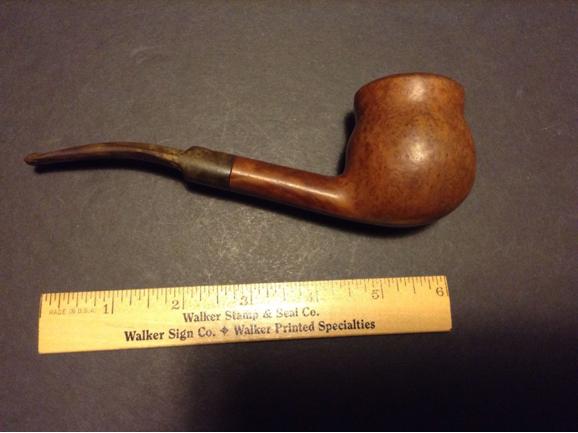
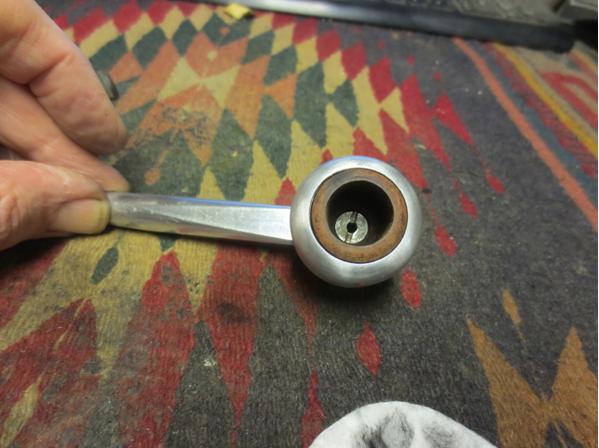
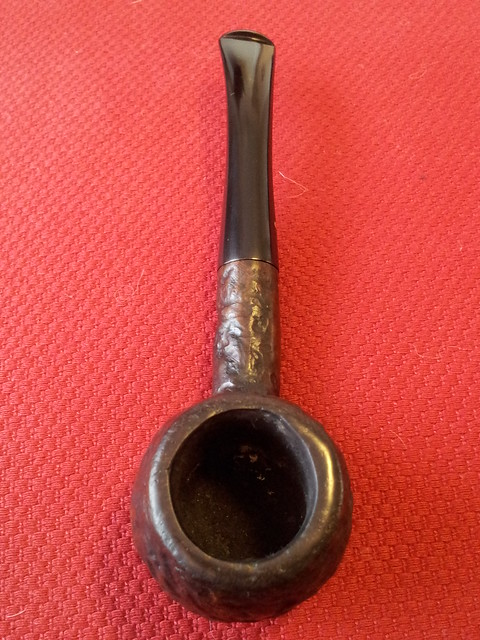
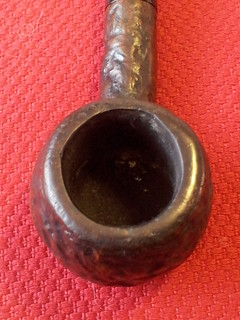
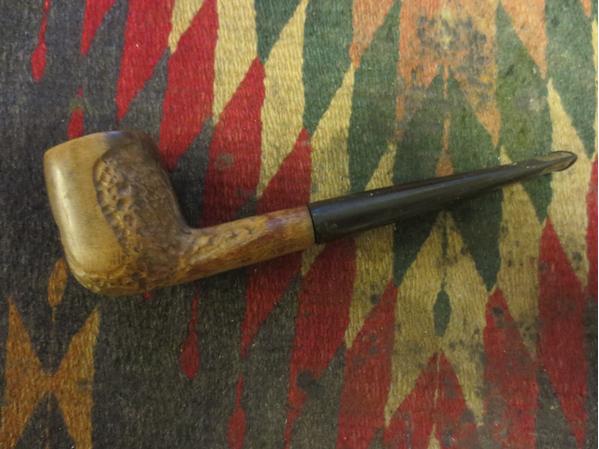
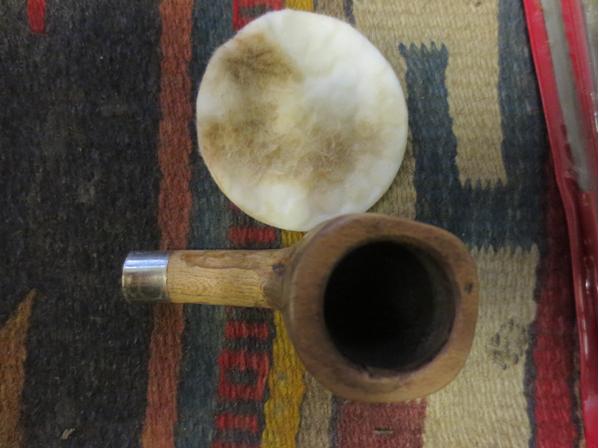
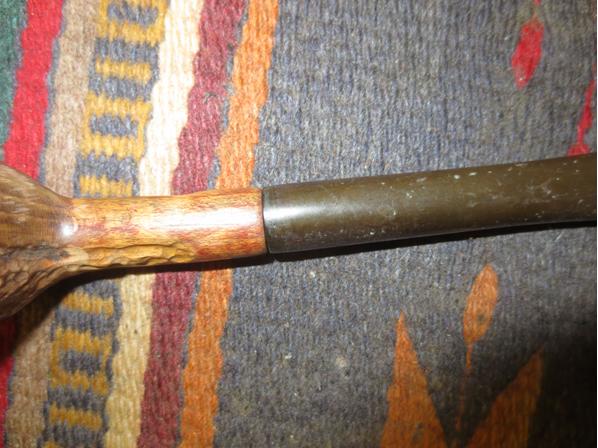 I have also included a photo of the bowl to show the “almost round” bowl. It looked as if the carver had tried to bevel the inner edge of the rim.
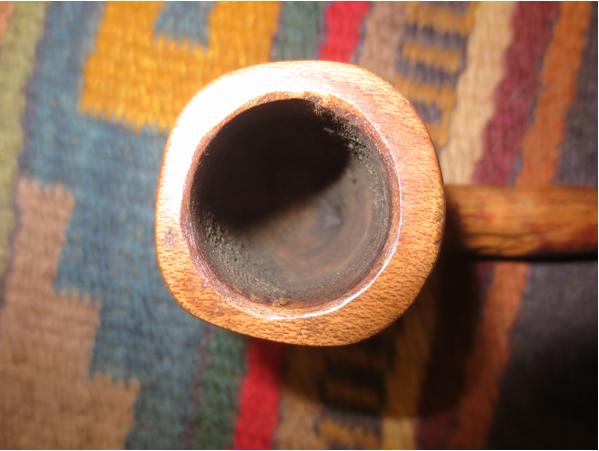 The stem was oxidized and had some spots and build up on the surface. At the stem/shank union it was rough and there were some deep scratches.
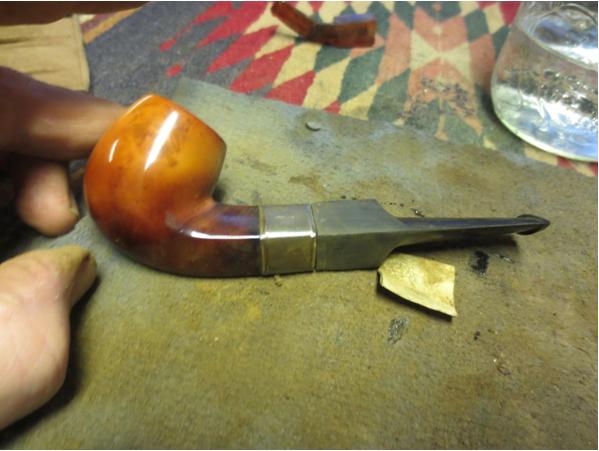
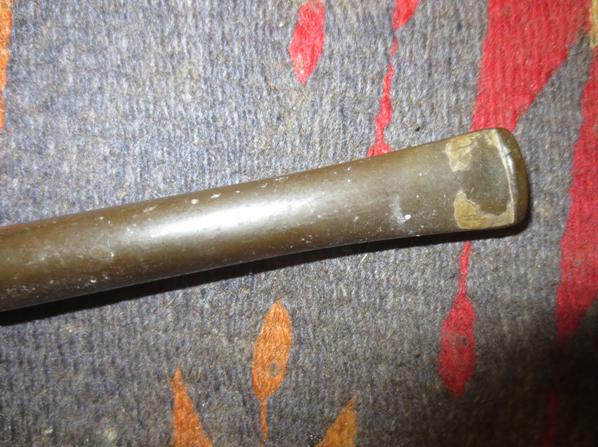 To take care of the bad angle on the shank I used the topping board to face the end. It squared up pretty neatly. The out of round shank and stem required something a little different. I decided to use a nickel band to break up the shank and stem union and give me a round edge to bring the stem against. That way I could at least make the stem round and clean up the junction. I used the Dremel and sanding drum to round out the shank enough to take the band. I smoothed out the flow of the shank to the bowl and round the top of the shank. Once I had the area sanded for the band I pressed the band lightly onto the shank and then heated the band with a heat gun. Once it heated and expanded I pressed it into place on the shank.


 The band fit well with the shank and actually dressed up the pipe. I wiped the bowl down with acetone on cotton pads to remove the finish and prepare the bowl for a contrast stain.

 I used a black Sharpie pen to colour/stain the rustication on the whole pipe. I wanted that portion of the pipe to contrast with the smooth portions of the walnut.
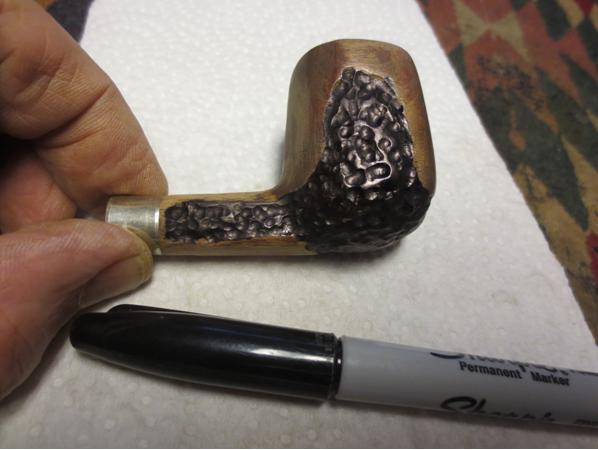

 I wiped the bowl down with alcohol on cotton pads to lighten the shiny black of the Sharpie and dull it slightly. I then stained and flamed the bowl with a dark brown aniline stain mixed 50/50 with alcohol to make it more of a wash. I stained the entire bowl including the black portion to make sure to get stain into all of the grooves.
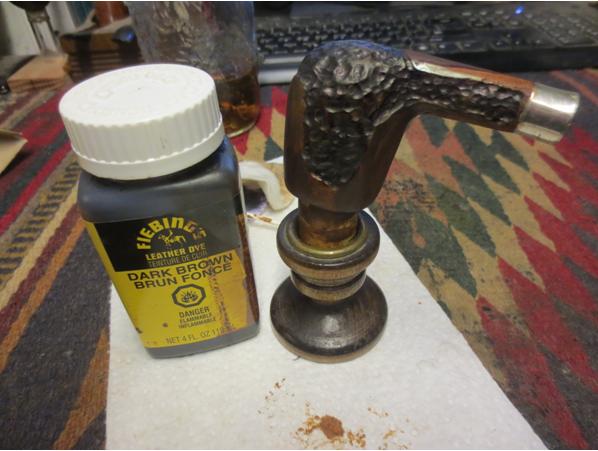

 I buffed the bowl with Blue Diamond on the wheel paying particular attention to the smooth portions of the bowl. I wanted the contrast to be stark between the rusticated parts and the smooth parts.
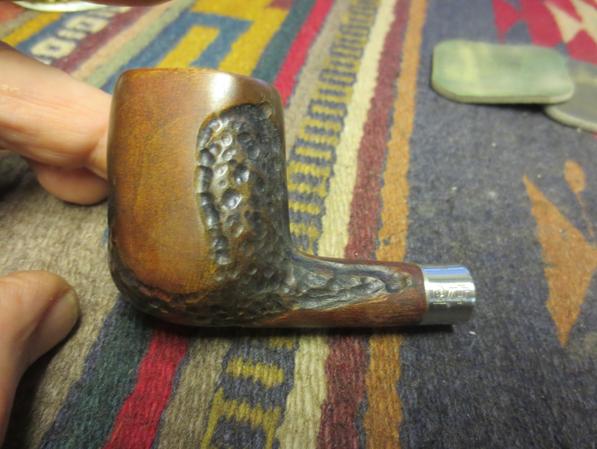


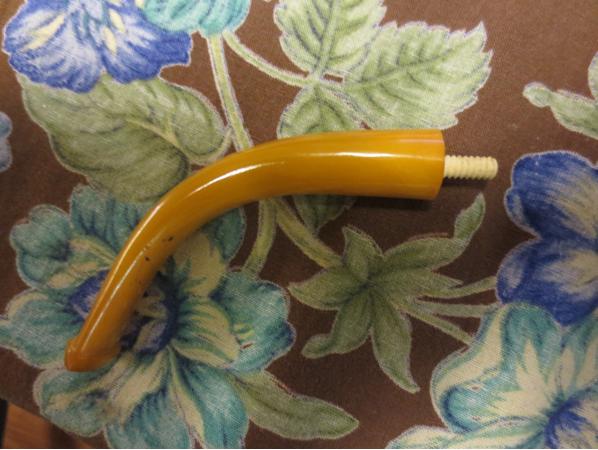
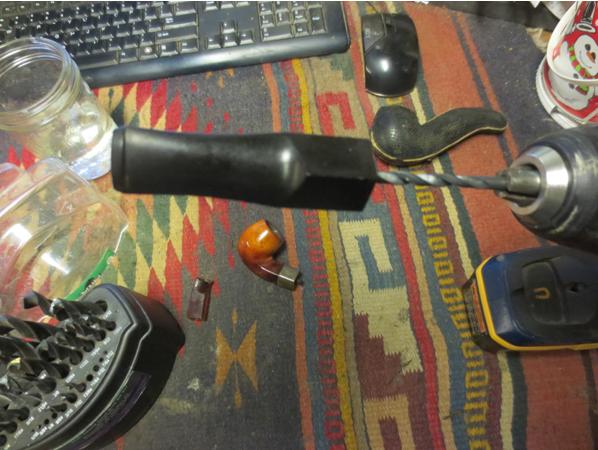
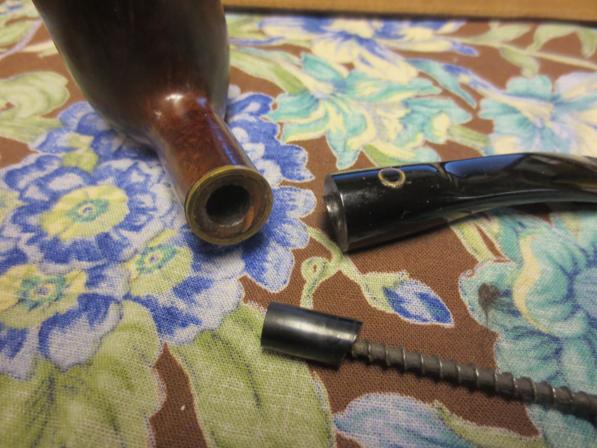
 I cleaned out the airway in the stem with pipe cleaners and alcohol. I was surprised with how clean it was.
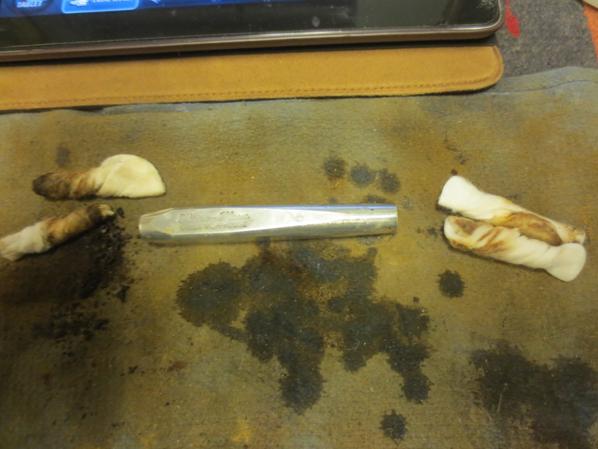
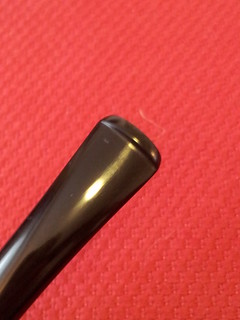
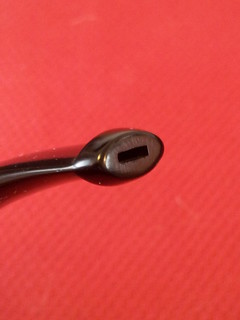
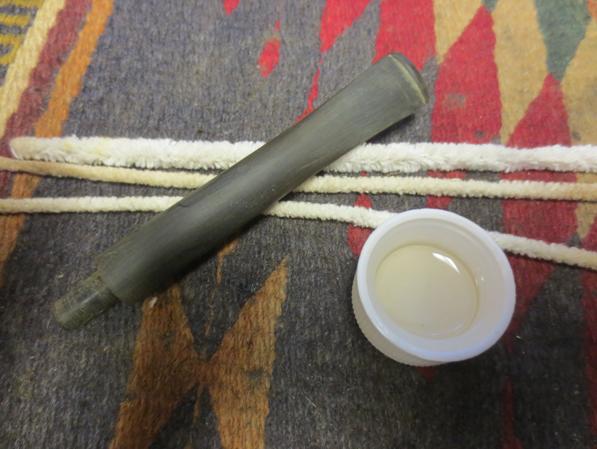 The carver who had fit the stem to the pipe had not finished working on the slot. It looked like he had started by using a small cutting wheel to cut a line across the airway in the end of the stem. That was all that had been done to the slot at this point.
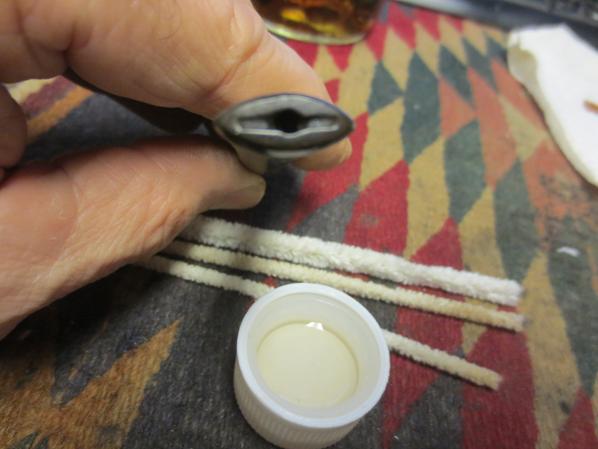 I used needle files and sandpaper to open up the airway and shape the slot. I smoothed out the transition from the cut to airway and made the entire slot more oval. The general shape of the airway is a Y with it following the curve of the button and creating an open airway. A pipe cleaner slides easily into the airway with the new open end.
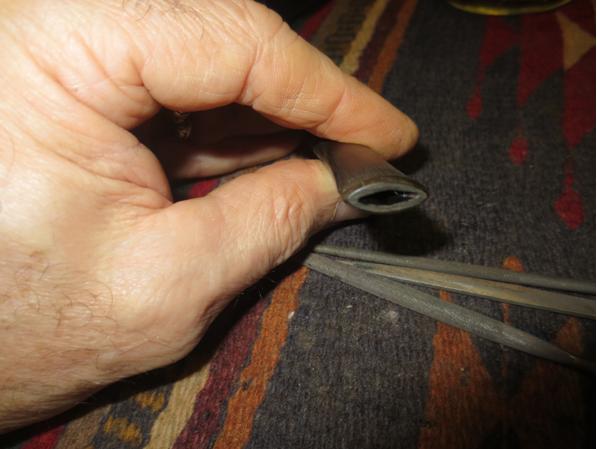 To prepare the mortise to accept the curve of where the tenon met the stem, I beveled the inside edge of the mortise with a knife. I also beveled the end of the tenon into a funnel while I had the knife out. When I pushed the stem into the shank it fit snugly against the end of the tenon.
 I took out the stem and cleaned out the airway to the bowl and the mortise with pipe cleaners, cotton swabs and alcohol. I scrubbed it until it was clean.
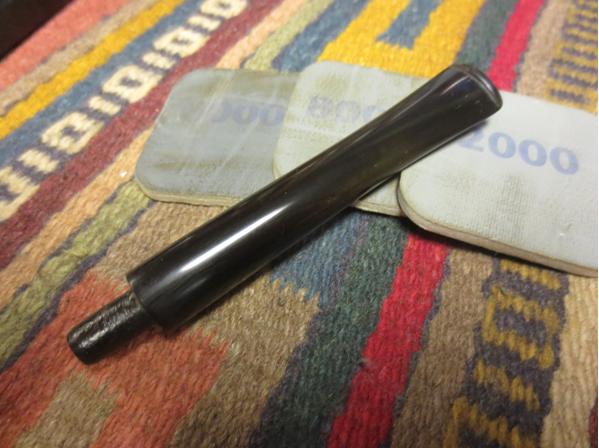
 I sanded the stem with 220 grit sandpaper to break up the oxidation and also to remove some of the dings and marks on the stem surface. I wet sanded the stem with 1500-2400 grit micromesh sanding pads. I rubbed the stem down with Obsidian Oil and then dry sanded it with 3200-4000 grit pads. I gave it another coat of oil and then finished sanding with 6000-12000 grit pads. I gave it a final coat of oil and let it dry.
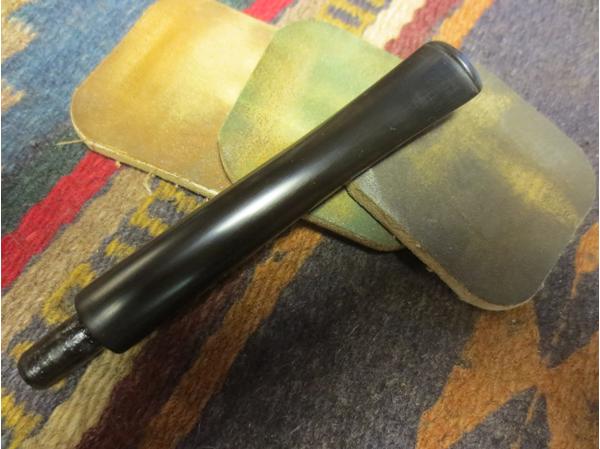

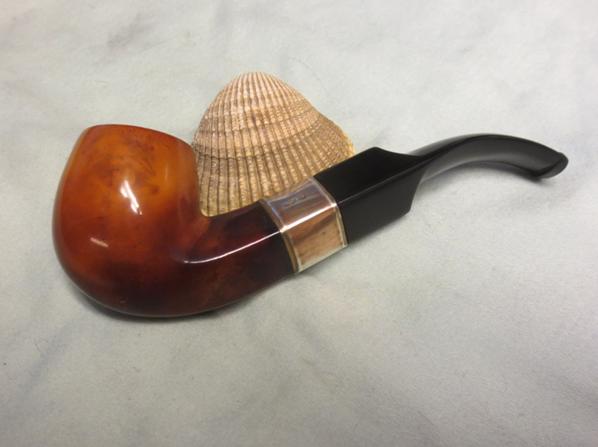
 I sanded the smooth portions of the bowl with micromesh sanding pads to lighten the stain there. I lightly buffed the bowl and buffed a bit harder on the stem with Blue Diamond on the buffing wheel. I gave the stem multiple coats of carnauba wax and buffed it with a clean buff. I applied some Conservator’s Wax to the bowl and hand buffed it with a shoe brush. The finished pipe is shown in the photos below. It came out pretty well with the adjustments and tweaks that I added. The band sets off the bowl and stem. The contrast stain works with the walnut. The smooth and the rusticated finish go well with the stains I chose. It is now a better looking workable pipe. Thanks for looking.