中國雞翼木頭
Jichimu Wood Pipes – Guest Blog by Robert M. Boughton
“I think there should be collaboration, but under my thumb.”
—Elia Kazan, 1909-2003, Movie and Stage Director
Introduction
All jokes aside, however waggish, every successful endeavor in life, from beginning to end, involves collaboration. I emphasize the word successful since, of course, Man has free will as a prerogative and always, therefore, the choice to go it alone – to be able to say at the final moment, as Frank Sinatra rejoiced in song, “I did it my way.” As a writer, for example, I may be competent, but even Ernest Hemingway had Maxwell Perkins as his brilliant editor for most of his literary career, and Elia Kazan (quoted above) directed such movie titans as Marlon Brando, Vivien Leigh, Gregory Peck and on multiple occasions Karl Malden, all of whom had something to do with their two-time Academy Award-winning master’s ultimate success. The word collaborate, from the Latin co for together combined with laborare, meaning, as one might guess, to labor or work, also has a negative connotation. The four-year French Vichy Regime’s coöperation with the Nazis during World War II, in which certain French military and civilian leaders surrendered to Germany in exchange for a deluded pretense of self-government without such details as a new constitution, comes to mind. Yet the same negative collaboration of these traitorous Frenchmen led to the positive sort, including the infamous underground Resistance Movement, and in turn became instrumental in the Allied invasion of Normandy and the ultimate liberation of France.
If perhaps on less historic and adventurous levels, most of us, throughout our lives, seek the help and experience of friends and even the kindness of strangers, so the concept of collaboration came easily to me. I long ago learned to ask questions when I did not know the answers. Again, I emphasize the phrase for the most part: my dear dad, who is still with us, is a genius and by consequence a fount of enlightenment on at least a passable level in almost every study of human knowledge (except literature, which when brought up created an odd defensiveness in the man). While he was happy to explain to me in detail diverse topics — including what makes the sky blue, the technical elements of Old Master paintings, the rudiments of handwriting analysis, the basic design and operation of a combustion engine and the concept of imaginary numbers — for definitions or spellings of words or synonyms and antonyms, my father in his own inner crucible reached critical mass when I was about 13 and started referring me without hesitation to his huge, old, worn editions of Webster’s Unabridged Dictionary and Roget’s Thesaurus until I learned to seek them out myself. Of course, I did not much care for my dad’s well-meaning if snarky habit of advising me to engage my brain before my mouth, but I am grateful nevertheless for the gift of research he taught me. Now I prefer my own complete Oxford English Dictionary and the Oxford American Thesaurus or a great online alternative for the latter.
To be honest, though, for most of my life I have been the one doing the majority of seeking of knowledge from other people, whether asking outright or trying to get the desired information in a more oblique manner, or as a writer employing my powers of observation to study the characteristics, voices and other nuances that raconteurs everywhere simmer together in their stories. And so I had an uncommon, almost uncomfortable, tingle of pride when the refinishings and restorations of the two jichimu churchwarden bowls that are the topic of this blog were complete and I asked Chuck Richards (my fellow local pipe club member and the master restorer responsible for the main work on one of the pair}, with all sincerity, what I could have done better to prepare and wax by hand my project – and his reply was, “Absolutely nothing.” Then, just this past month, Chuck gave me a real loop at our club meeting when he began to speak about a 19th century Colossus Pipe Factory (CPF) Best Make, real gold-banded, amber-stemmed, turned bowl lion’s head Meerschaum he had acquired in trade and mentioned that he had a challenge. After he unveiled the damaged but gorgeous golden Meer and passed it around the room for all of us to adore, and suggested that the details of its maker were a mystery to him, Chuck smiled and revealed that the challenge was for me to take the invaluable CPF home and see what I could dig up online about its origins. To say the least, I was dumbstruck by Chuck’s trust in me. To be more specific, I was honored beyond words that he wished to collaborate again on a different project than that which I will soon begin to address. Maybe I’ll get back to the CPF another time. By the way, I didn’t find much online that Chuck didn’t already know. The exercise was only a test he knew I would enjoy.

Robert M. Boughton,
Photograph © Robert M. Boughton

Chuck Richards.
Photographs © Robert M. Boughton
Jichimu Wood, and a Note on One Pretender
Jichimu, or 中國雞翼木頭 (the literal translation of chicken wing wood), is a beautiful, unique, porous wood named for its tight, feathery quality resembling the wings of some chickens or pheasants that can change in color depending on the lighting or different angles of view. Thus it has come to be known in common language as chicken wing or phoenix tail wood. The estimation of this hardwood as one of China’s three most valued materials for antique furniture and other craft work is unequivocal.
 There are, in fact, two kinds of jichimu: old and new. The old variety, being denser and purplish-brown, when cut straight allows for the magnificent patterns described above. The new growth has purplish-black, straight, unclear grains (some purple, others black). The wood is coarse, straight and rigid and therefore apt to split. It is of the old jichimu that our refinishing and restoration projects are concerned. The use of jichimu in royal furniture appears to date to the Ming Dynasty (1368-16
 44) and to have ended in the mid-Qing Dynasty (1644-1911), and although old jichimu still existed, it reportedly was replaced in woodworking in general by the new variety and other woods at the same time. This explains why my chancing upon not only one but two virtual twin old jichimu churchwardens –they themselves being rare specimens of this type of pipe making – was, to say the least, fortuitous.

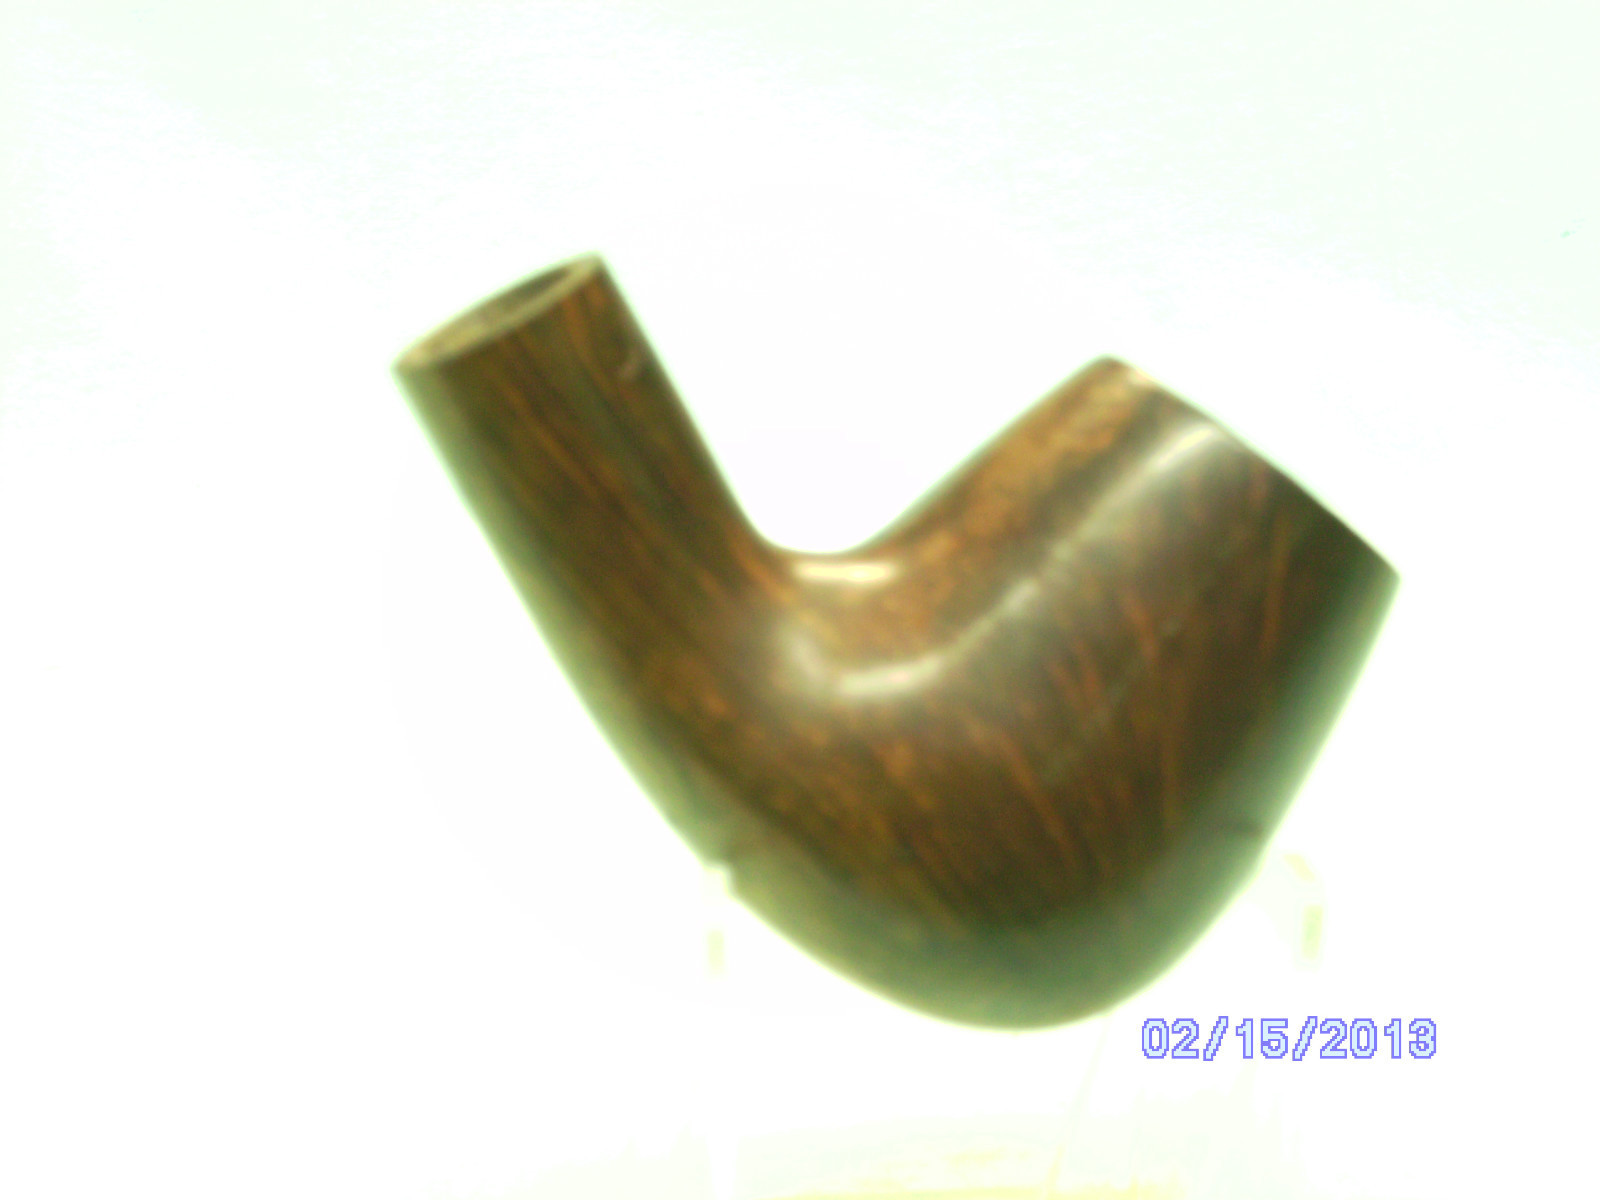
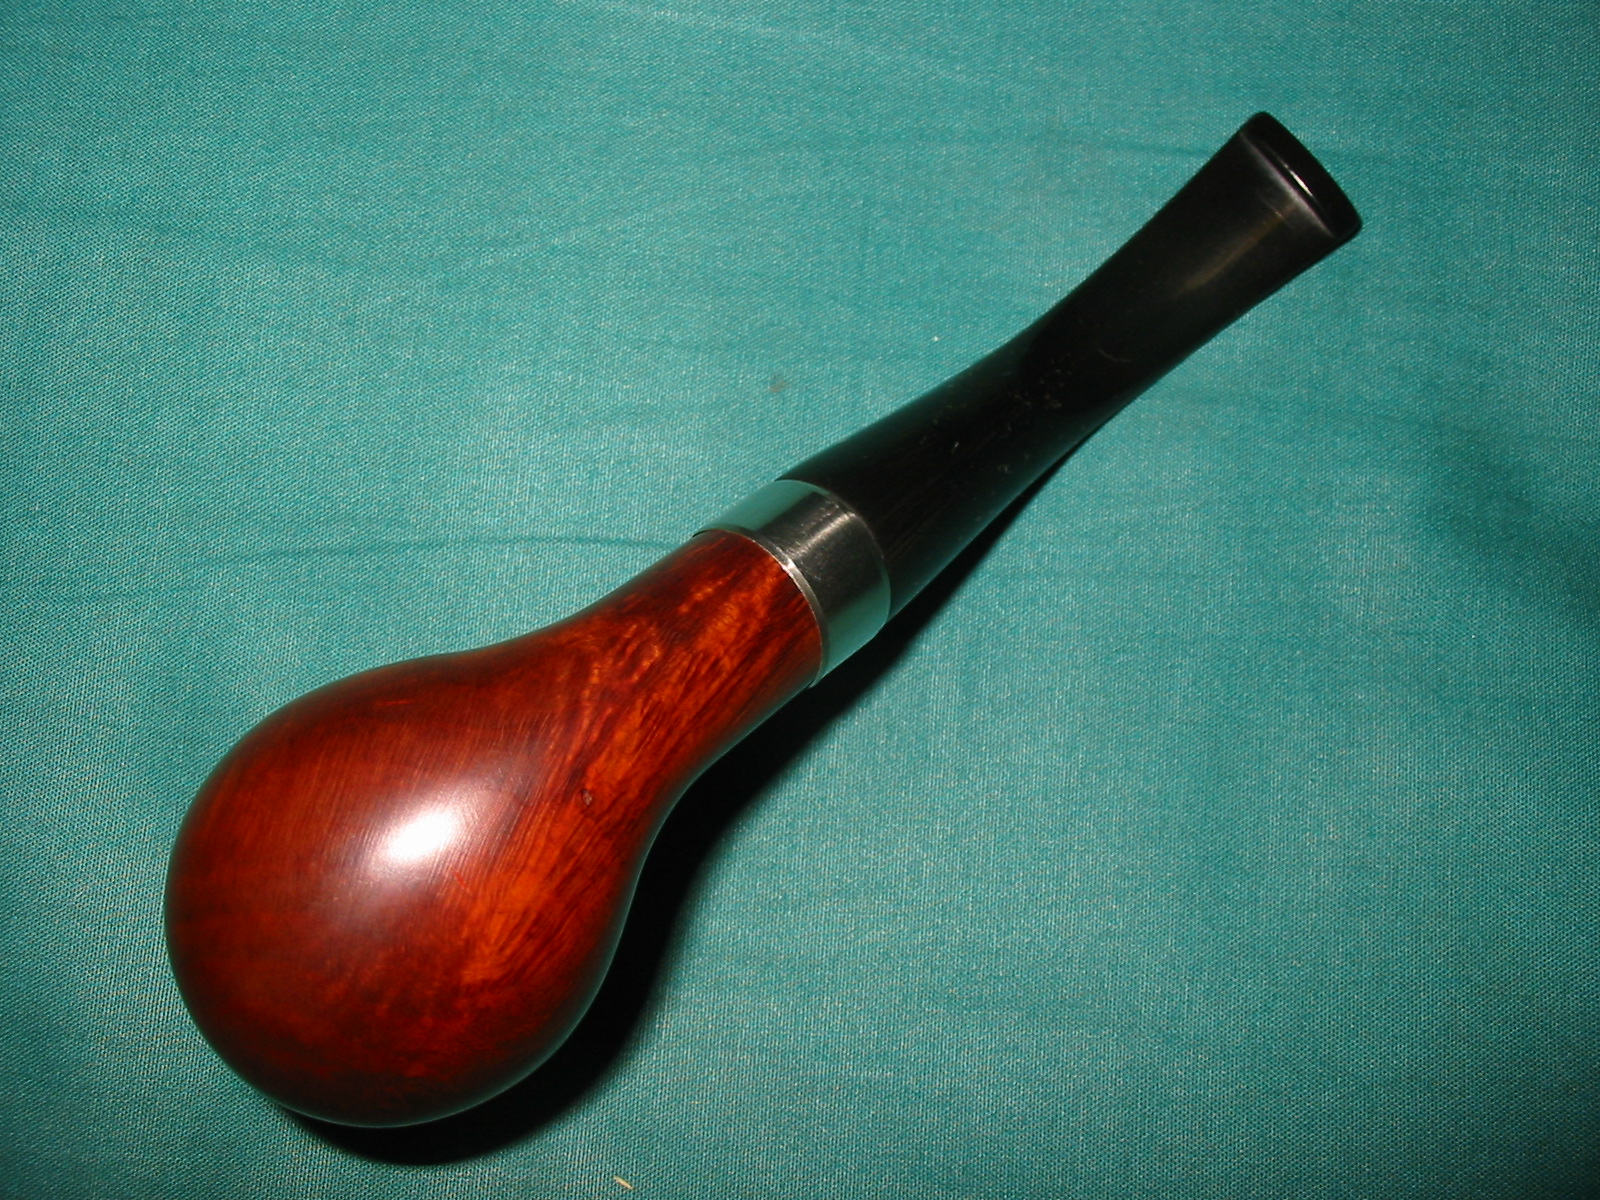
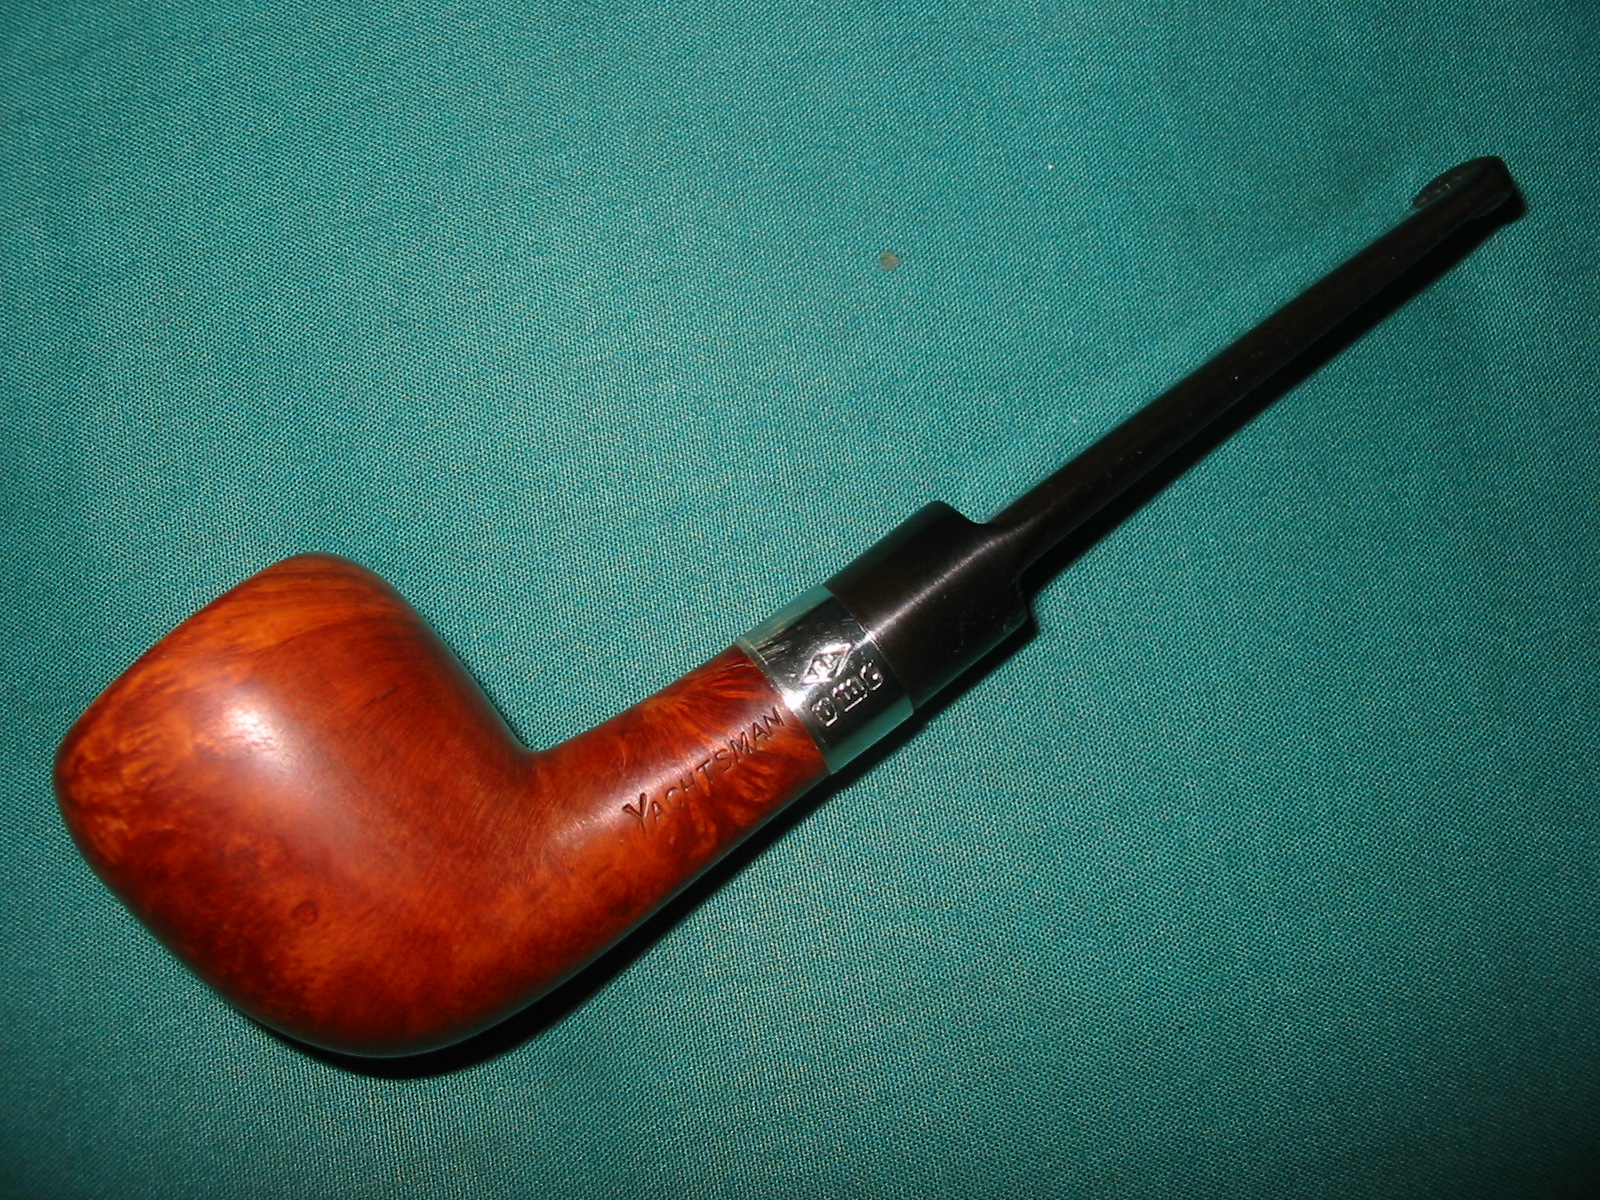
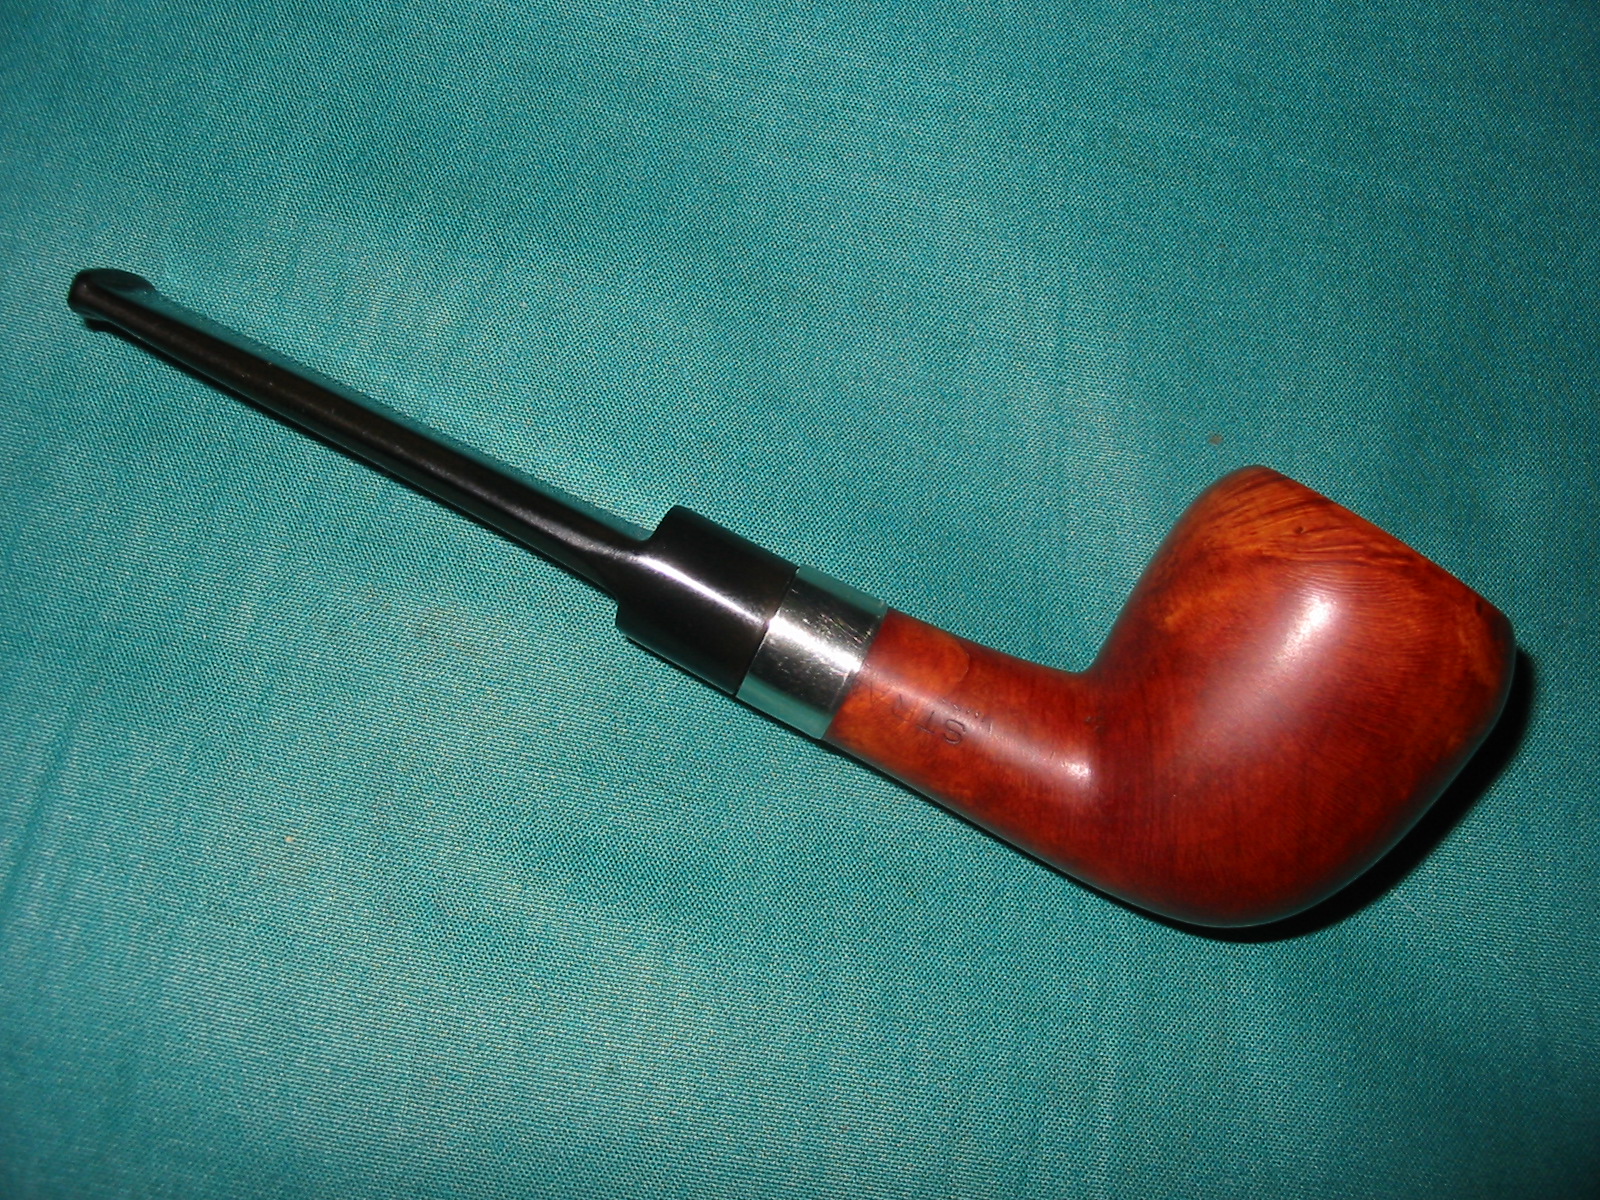
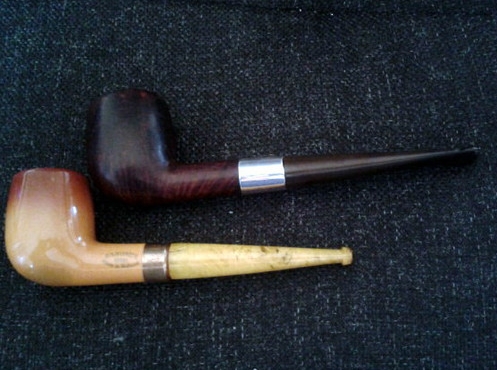
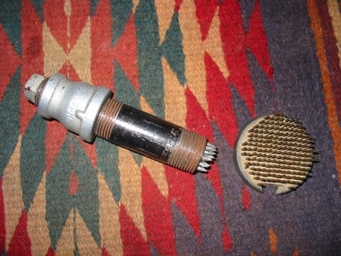
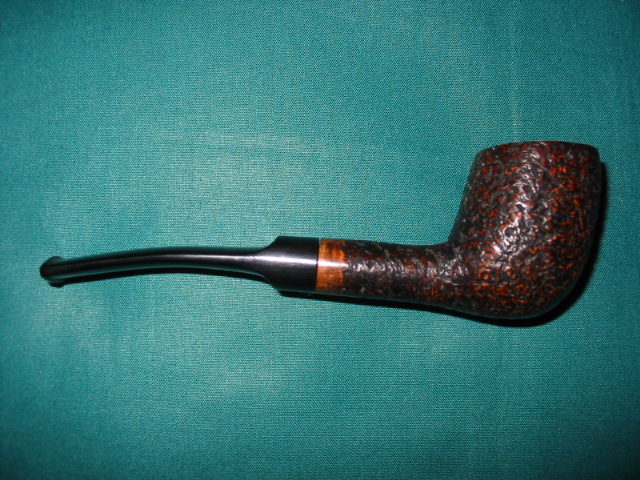
Jichimu pipe.
Photograph courtesy of and © Steve Laug.
While the most common use for jichimu isfurniture, in particular antique, just a few other items made with the favored and rare wood include chopsticks, bows for classical stringed instruments such as violins and cellos, iPhone cases – and, of course, smoking pipes.
African Wenge Pipe.Photo © Robert M. Boughton.
Now for a special warning about certain smoking pipes that are being advertised on Websites such as eBay as Chinese Chicken Wing Wood, of the genus Ormosia henryi. At least in most cases, these pipes (which appear authentic in almost every way) are in fact made of Wenge wood, a similar-looking but lesser-quality for pipes African genus (Millettia laurentii). While still made from a very exotic wood, Wenge pipes lack the richer coloration and attributes more suitable for durable smoking pipes. I found out the hard way: I bought one on eBay from a dealer in the People’s Republic of China with an excellent reputation, but I cannot bring myself to gripe at the total cost of $14.62 including free shipping. When the pipe arrived early, I noticed the Wenge marking on the right side of the pipe and thought it must be the maker or location. Imagine my surprise when I Googled the name and came up with the truth. Still, the Wenge smokes well and is one odder pipe for my collection, as well as a great conversation piece.
How Two Old Wood Jichimu Churchwardens Found Me
A funny thing happened during a trip to my local head shop a few years back, where I was, alas, well known. No, I was not a patron of the establishment for, shall I say, its illicit wares. In fact, although I am reluctant to admit the truth in so public and permanent fashion, I must, in order to clarify the reason I believe these two all but twin jichimu bowls found me rather than the other way around, make this digression. You see, I found myself these years ago in this fine example of everything a well-rounded head shop should be, however rebuked its sort as a whole, after I had for the most part begun buying all of my pipe necessities at my local tobacconist. But that night, I was in desperate need of pipe cleaners, which I knew the head shop just around the corner from where I lived carried, and my regular source had been closed for almost two hours. What was I to do?
Of course, without a qualm I rushed to my car, risking a boondoggle because of the nefarious nature of my neighborhood (known in Albuquerque as the War Zone thanks to its high rate of violent crime). I made my zigzag dash through long blocks of murky streets, slowing for multiple speed bumps and making a Byzantine course around all of the road barriers – these obstacles being in place to aid police in the apprehension of armed robbers and other dangerous felons – and in this fashion accomplished my mission through the free fire zone that would have taken a mere three block walk straight down my street and a brief jog across Route 66 had I been willing to risk a more than possible firefight with unknown strangers and perhaps even having to shoot the drug-addled ne’er-do-wells in this wild southwest Stand Your Ground state. At any rate, I arrived intact at the head shop and was greeted as a friendly by the night crew despite my several-month absence. As I told them what I needed, however, out of the corner of my eye I noticed in the glass case that the shop’s former meager stock of tobacco pipes had increased, and for the better.
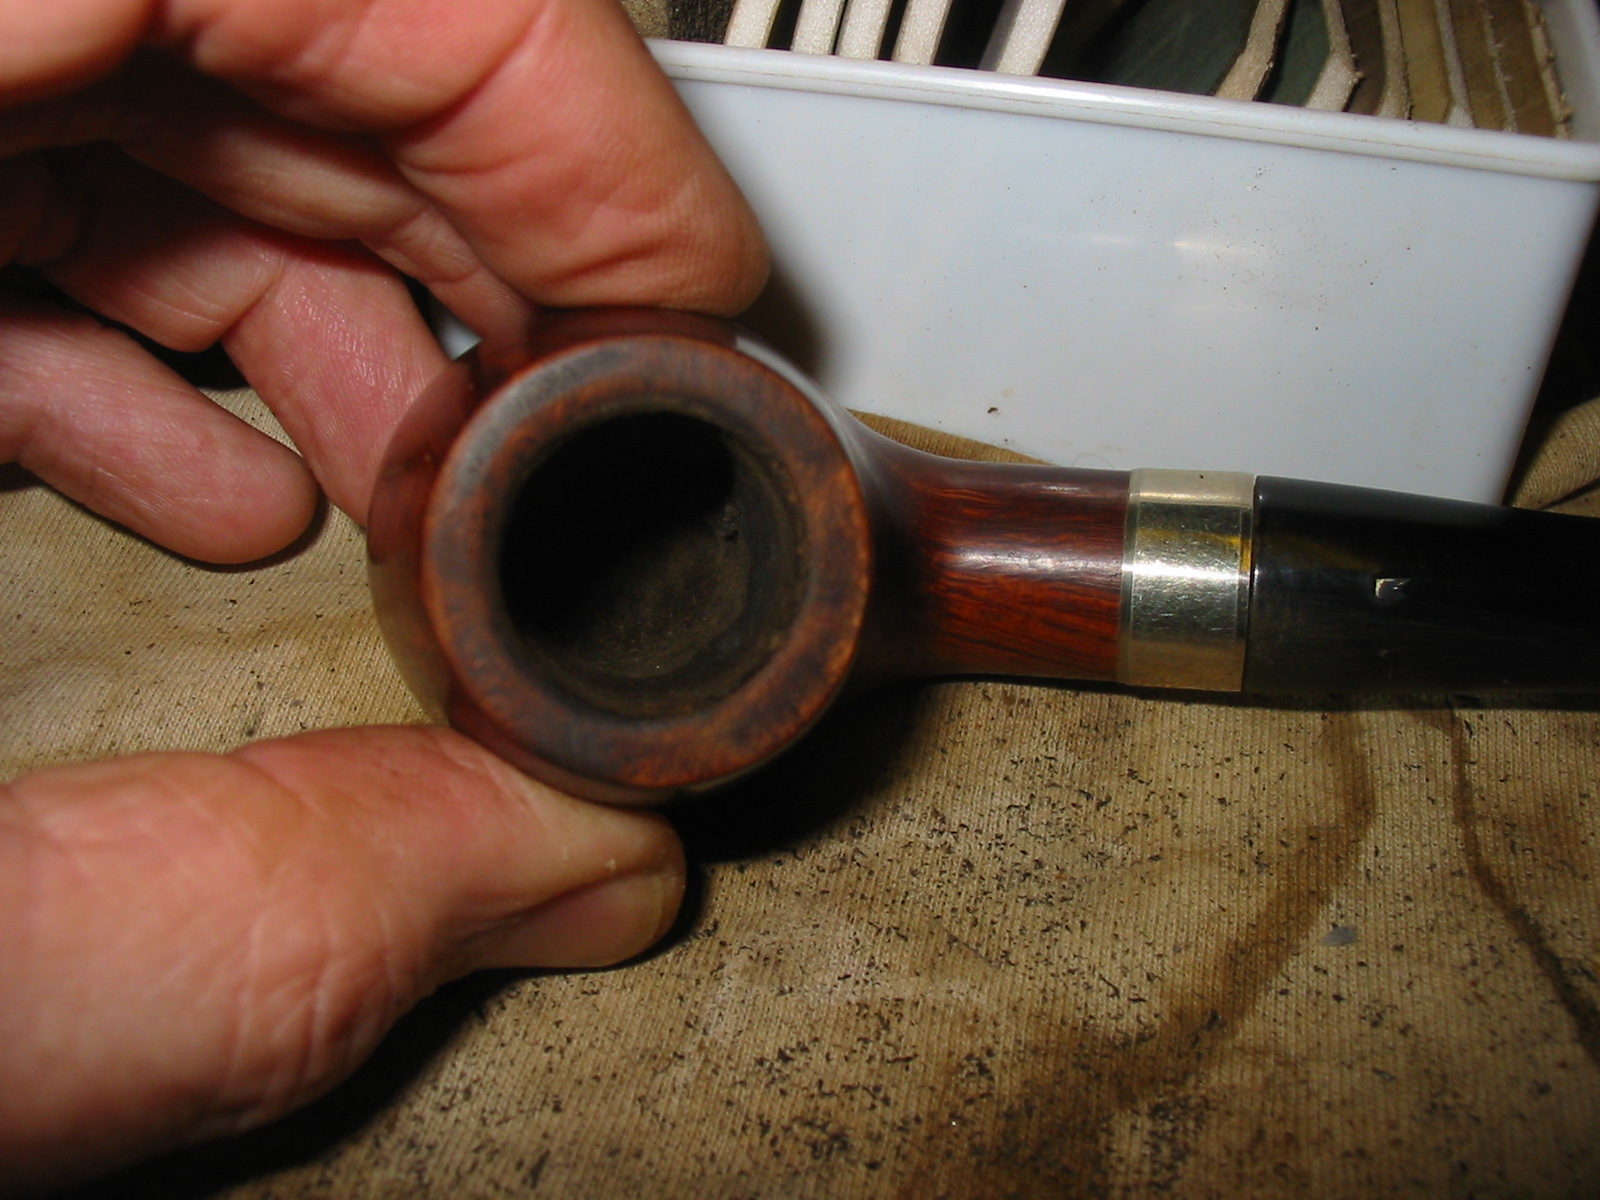
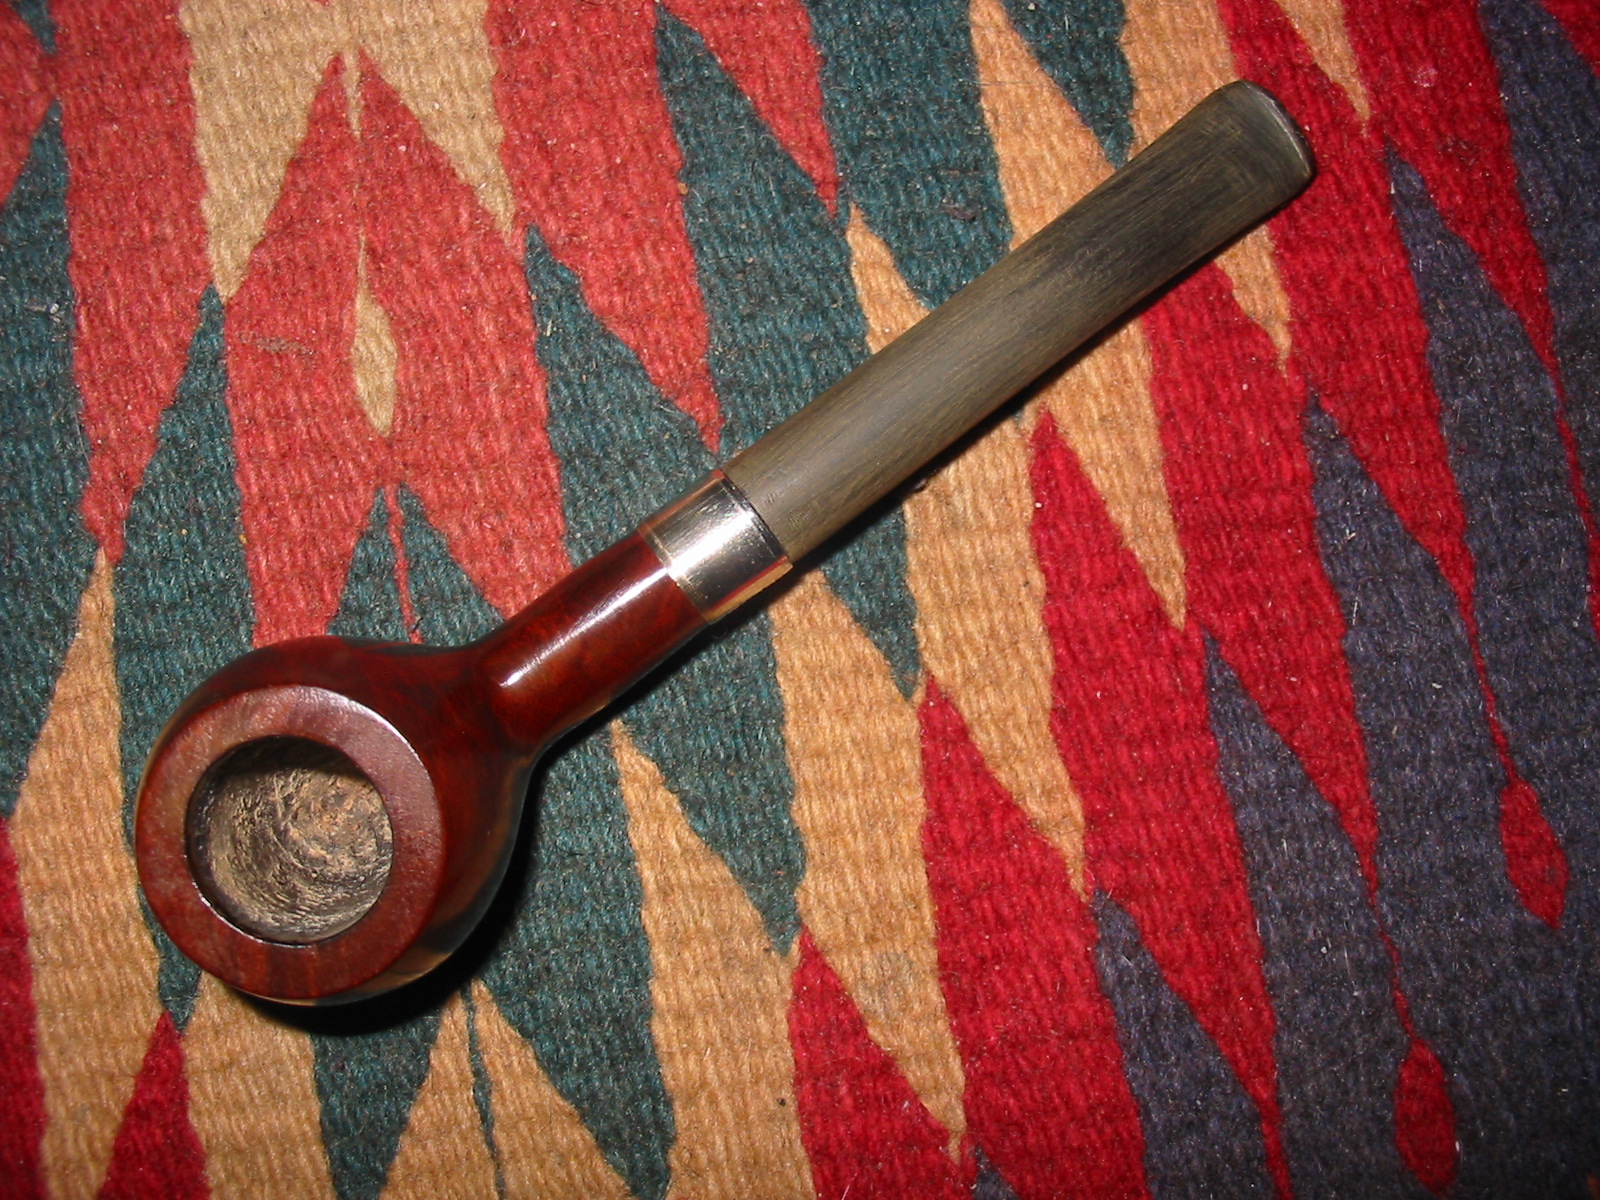
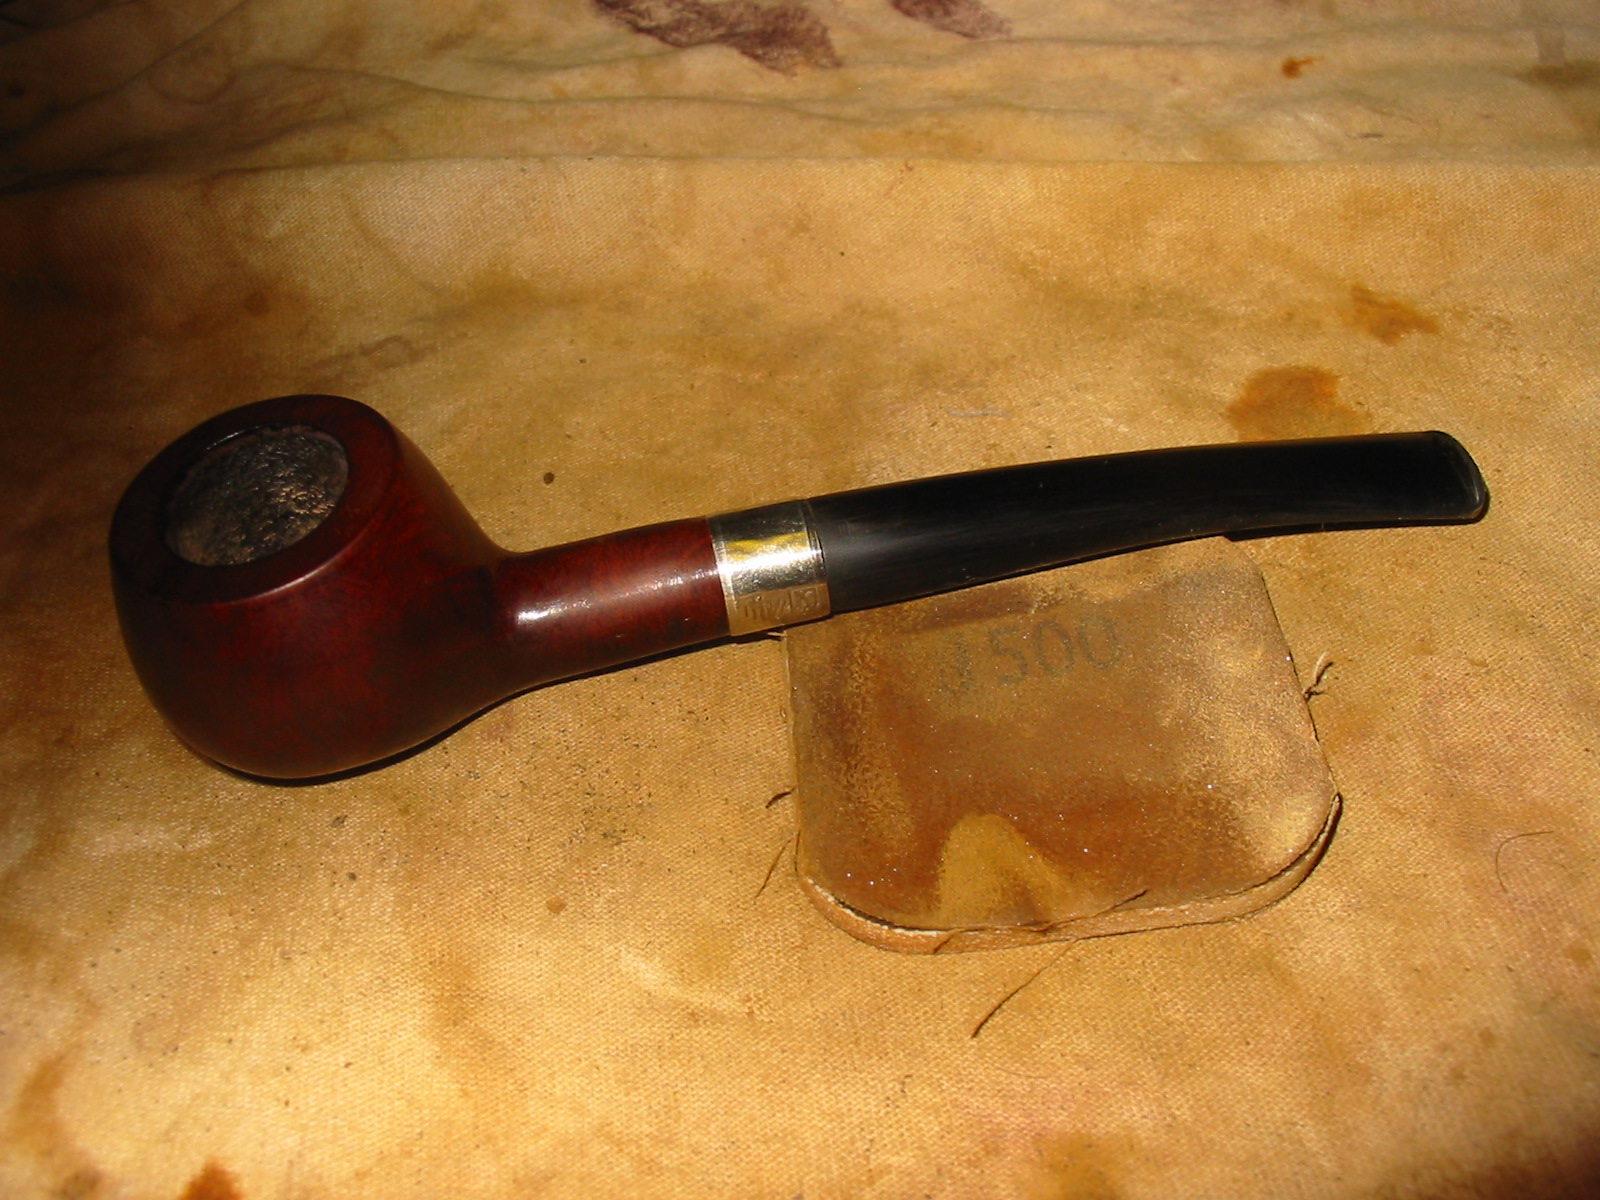
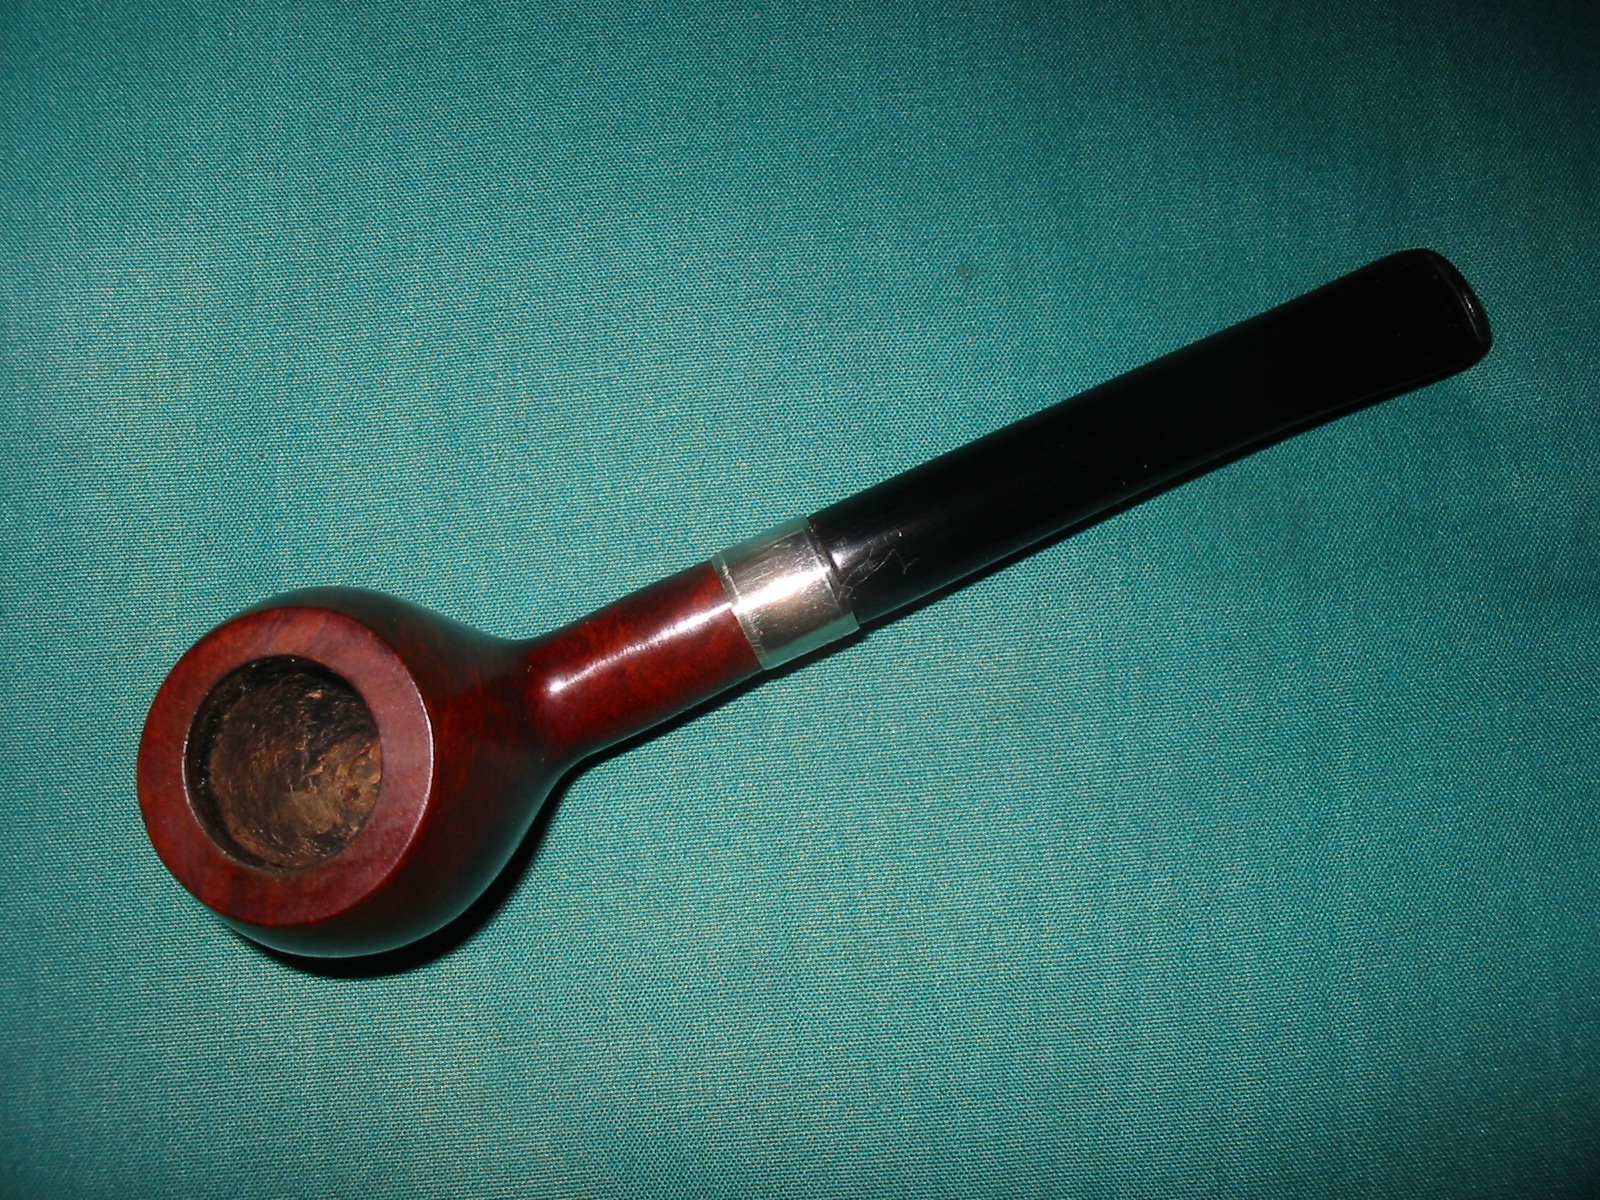
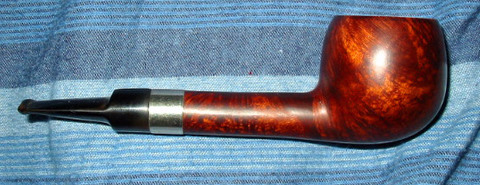
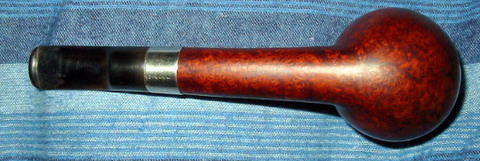
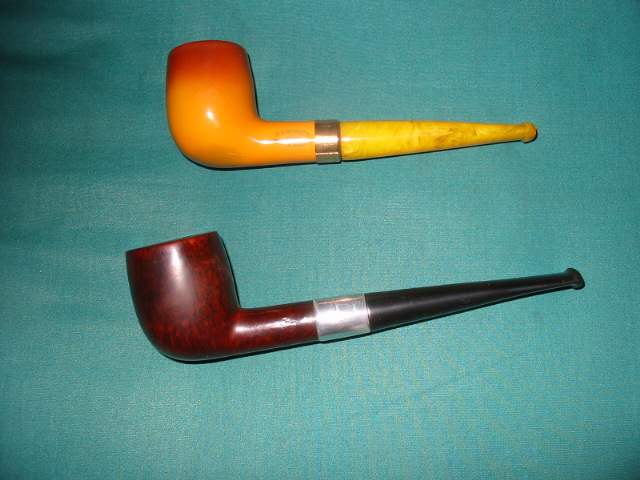
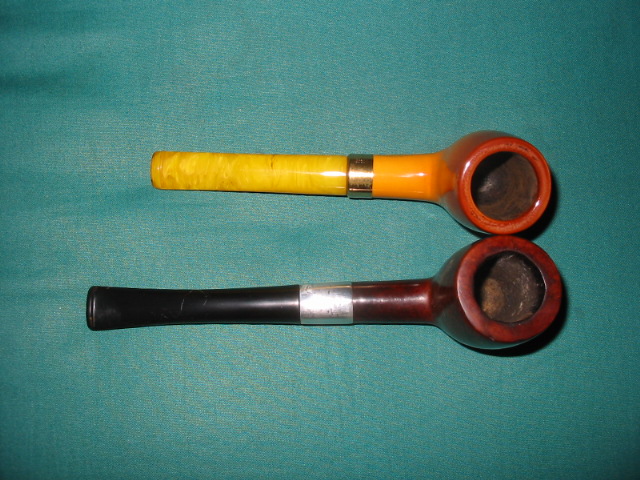
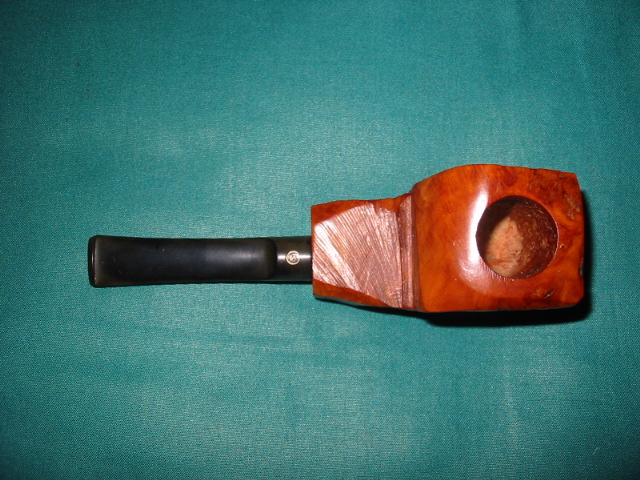
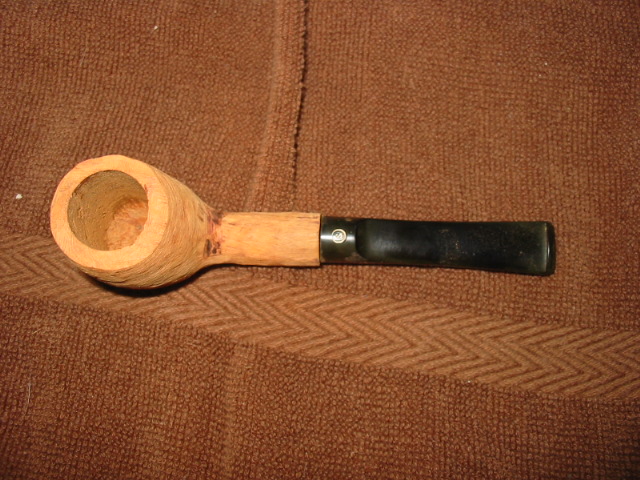
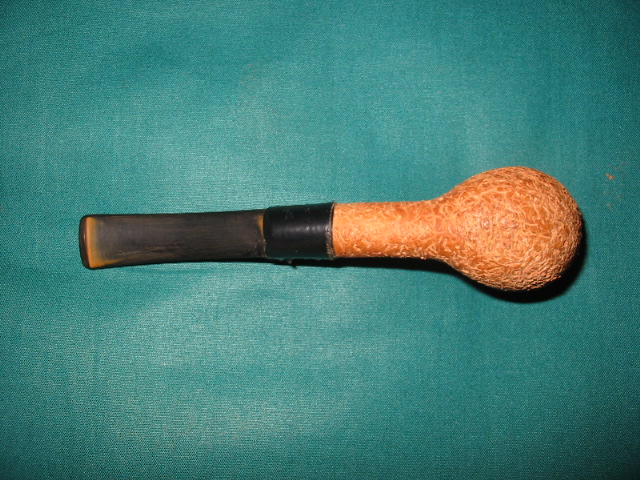
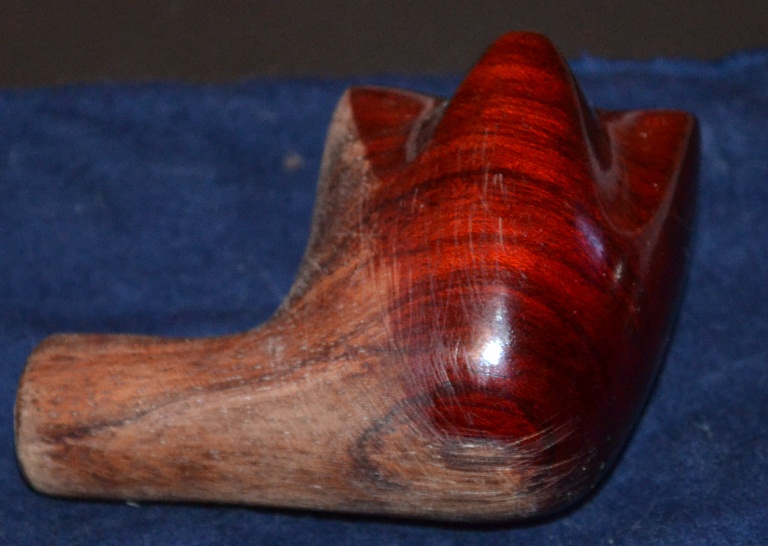
Suffice it to say I was compelled to have a look, and the result was love at first sight, or at least lust, for the huge, thick, lustrous bowl and that which I could see of the apparent wavy lines of grain alone. The stem itself appeared to be of shiny black Lucite and crafted with intricacy that included a wider, beveled round base section that then tapered and curved upward into the bit. But the bowl – well, the bowl on its own merits had an intoxicating, alluring effect on me. As a whole, the pipe I beheld was one of the most curious looking churchwardens upon which I had ever laid eyes. The extraordinary pipe, with its ample bowl (1-3/4” x 2” outer and 1-1/4” x 1-3/8” inner), five-pronged head and shiny dark reddish although perhaps overdone coating seemed almost a fantastic contrast to the typical, more Elven-style churches in fashion. Upon caressing and inspecting the pipe, which I was amazed to find could accommodate my index finger almost to the second joint with wiggle-room, in part by instinct I concluded $30 was a no-brainer. At the time, the idea that the type of wood from which the pipe was carved would ever prove to be anything but briar never even occurred to me.
I must admit at this point that I was surprised not only when the stem broke but by how little time I had to enjoy my new churchwarden, which turned out to be quite a good smoker, before the sudden and catastrophic damage occurred without even any warning. One minute I was sitting at my computer and smoking the church; the next, the stem snapped, and by chance I caught the bowl between my legs on its way to the hard tile floor. Although every instinct in me opposed the idea, I had some Super Glue on hand and considered re-connecting the stem until I discovered not two but three pieces were involved, two large and one very small and jagged – and that they were cheap plastic.
Thinking without much hope that the head shop might have a spare stem on hand, and not knowing at the time that I could order a good one online, I returned whence I purchased the original. Not to my surprise, the shop did not have a replacement for the stem except, to my astonishment, in the form of another, near twin version of the original product intact. With some trepidation (after all, $30 is nothing to throw away, and I still was in the dark about the rareness of the wood from which each pipe was carved), I surrendered to the clerk’s laid-back upsell, despite my nagging suspicion that even in a head shop there existed a drawer, cupboard or box somewhere in the back area that contained a plethora of exchanged, discarded or otherwise abandoned samples. Still, deep within the left side of my brain as I bought the whole pipe again – this one of which had but the slightest darker grains along the front and back of the bowl – was the idea that I might at some point locate suitable stems for both and sell or trade one of the two atypical churchwardens to an appreciative aficionado. As an afterthought, I even went so far as to scrutinize the new stem for cracks or other imperfections. In short, because of my original trip to the local head shop for some tobacco pipe cleaners and subsequent additional purchase of one still-unidentified jichimu churchwarden, the stem of which soon broke calling for another visit to the shop hoping only to find a stem, I ended up with two old wood jichimu churches. Sure, I believe in coincidences, but this was too much.
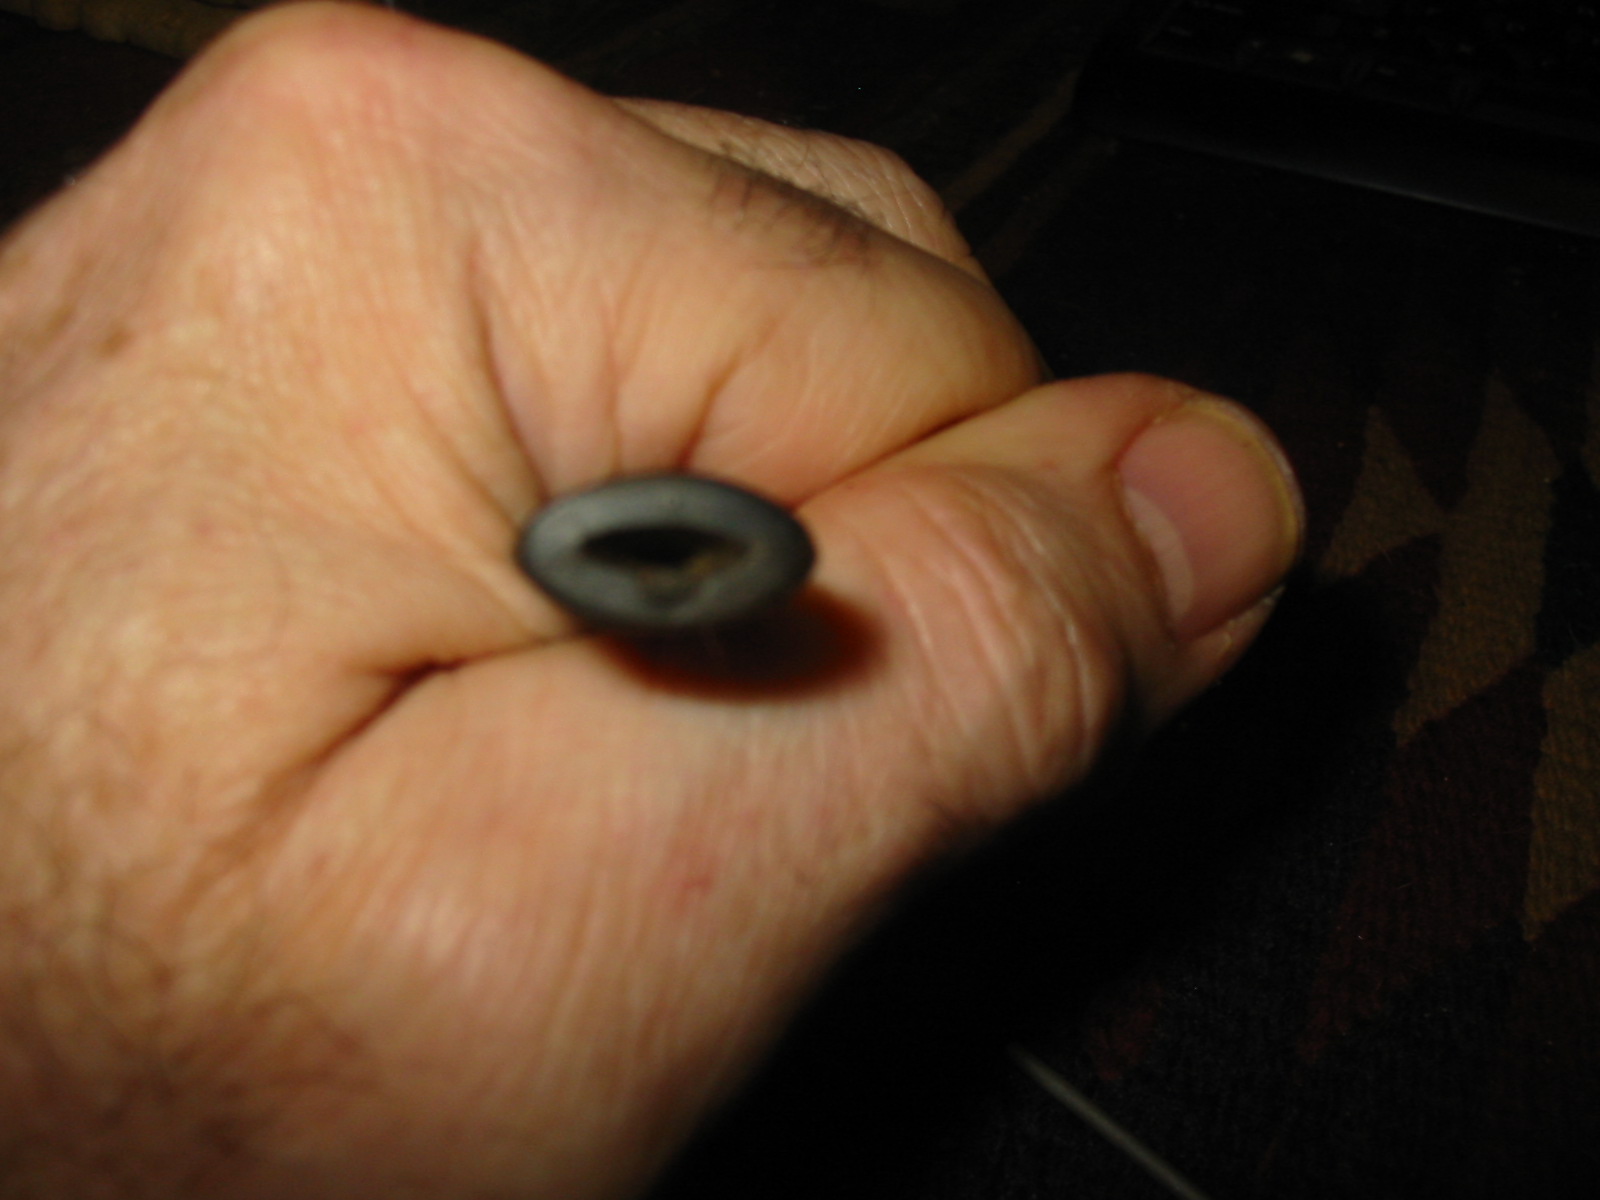
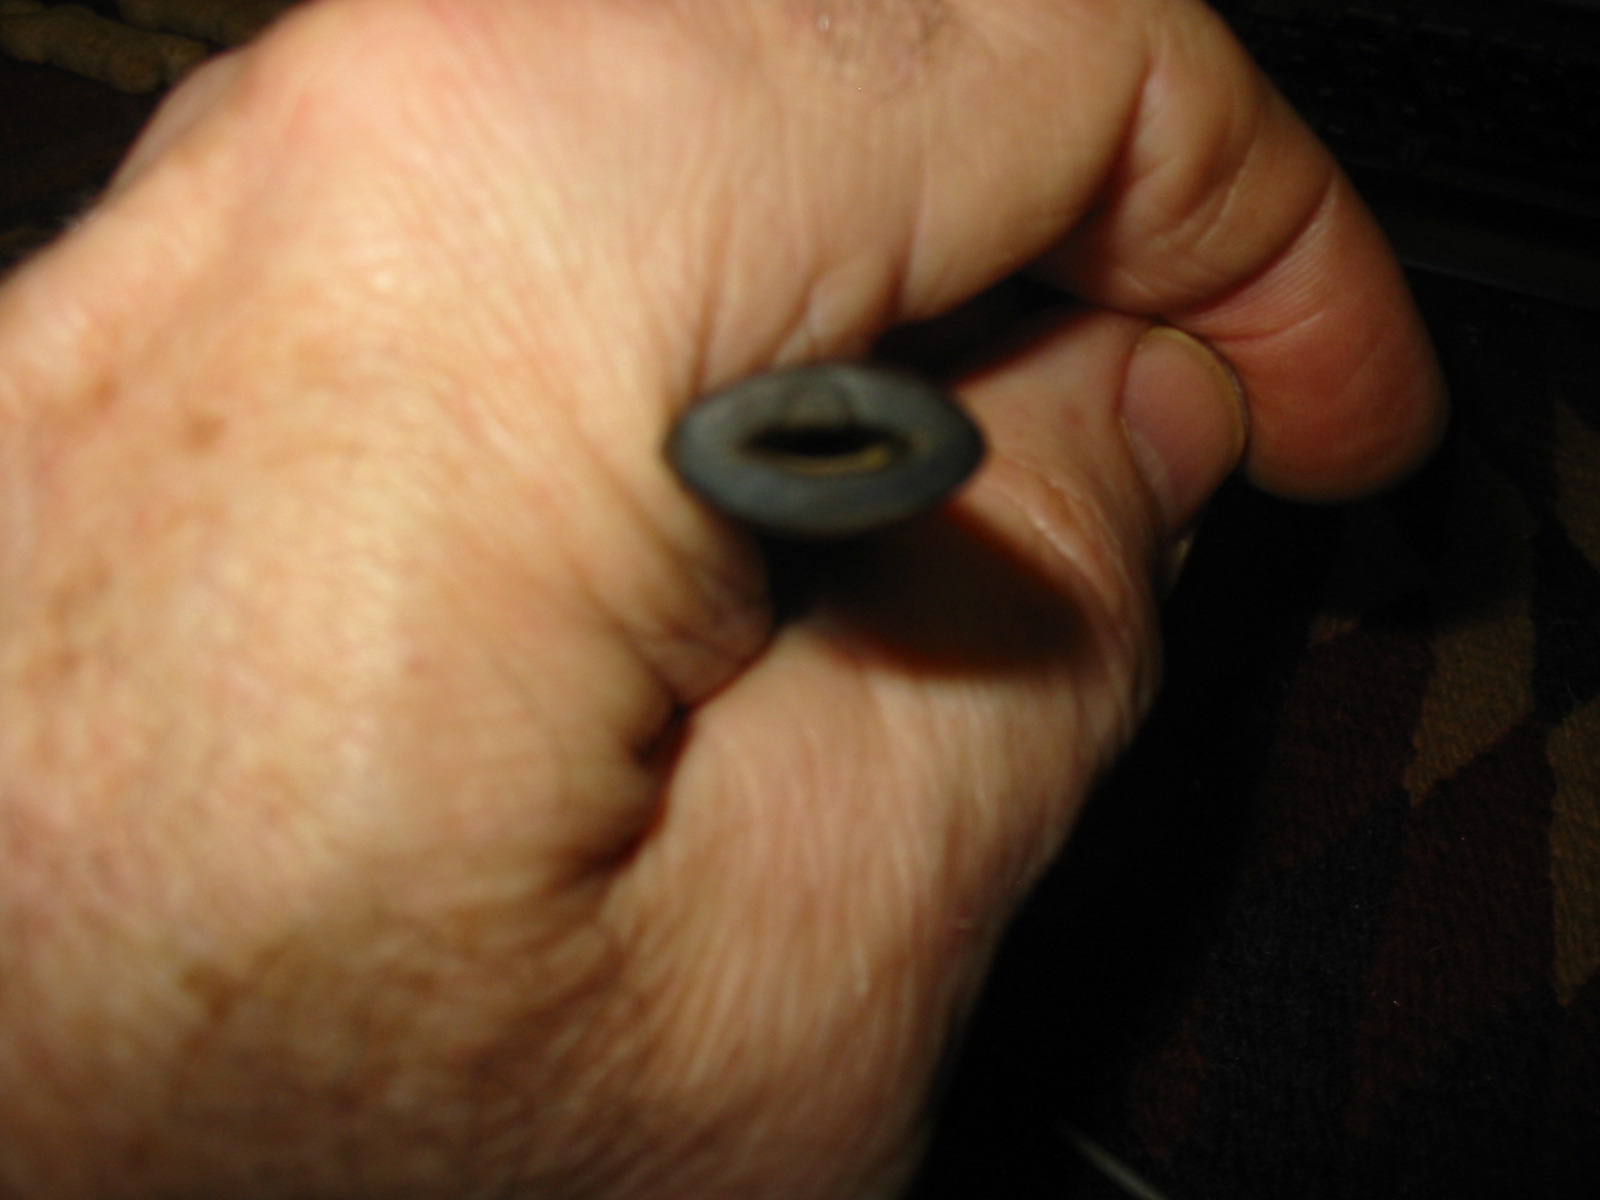
I hope by now you can foresee the next part. After a few satisfying smokes of the new pipe – in fact, just enough to break in the bowl – the prior misadventure was revisited. Through neither any fault of my own nor evident structural flaw, did the stem just break again in mid-smoke, and what was more, showed eerie signs of interference by way of the three pieces I located just as in the previous incidence. I am sure anyone reading this will either think me outright mad or be able to imagine why my thoughts turned to the notion, however uncanny, that perhaps I was not meant to smoke these pipes for preternatural reason(s) unknown. At times simple anger is the best natural response, however, and with that in mind I tossed both of the then useless bowls and the bottom half of one of the 9mm stems into the glass jar of the only stand I had at the time, a little nine-piper I found at a garage sale about 23 years ago. There the two ever-alluring disembodied heads, as it were, would stare out at me from time to time with their come-hither looks.
Early Collaborative Restorations

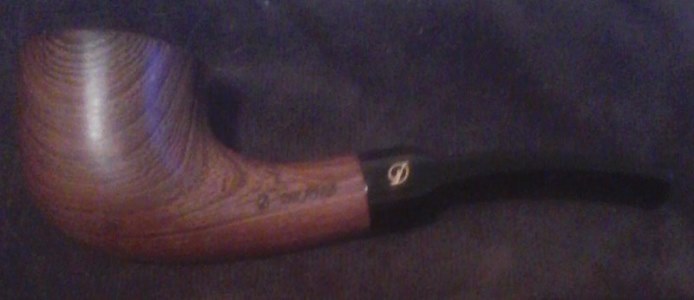
La Grande Bruyère Before. Photo © Robert M. Boughton.
La Grande Bruyère After. Photo © Robert M. Boughton.
Around that time, although I’m not at all sure of the date, I began dabbling in refinishing pipes. I started with a La Grande Bruyère mini made in Czechoslovakia that I bought – again at a garage sale – sometime in the late 1980s and never smoked until one night when I took it out and examined it with a magnifying glass to make out the brand and decided to clean and try it. To my surprise, it was a wonderful smoke. So I carefully stripped all of the tacky red varnish and uncovered a beautiful dark grain. I continued sanding until the tiny pipe was baby smooth, then took it to Chuck and asked how much wax would cost. He just said “Give it here,” which I did and proceeded to the pipe shop’s sitting area. Five minutes later he motioned me over. I was shocked but very pleased to see that Chuck had waxed it by hand, and the transformation was spectacular.
I had several old Italian no-names from my early days of pipe smoking (I started in 1989) that had serious blackening along the rims of the bowls, some moderate to nasty dings and most of all coatings which offended me so much that my perhaps most basic nature made me wonder what lay beneath. You see, I’m curious that way. I winged it again, but in the mean time I bought a small jar of Halcyon II Wax to finish them. Although I later learned that type of wax is best for rusticated pipes, it ended up working just fine on my three natural finish experimentations. I ended up giving all three no-names to cigar-smoking friends who were interested in pipes, and by doing so won them over, at least in part. They really only needed a nudge. I kept the La Bruyère for myself.
The Jichimu Restores
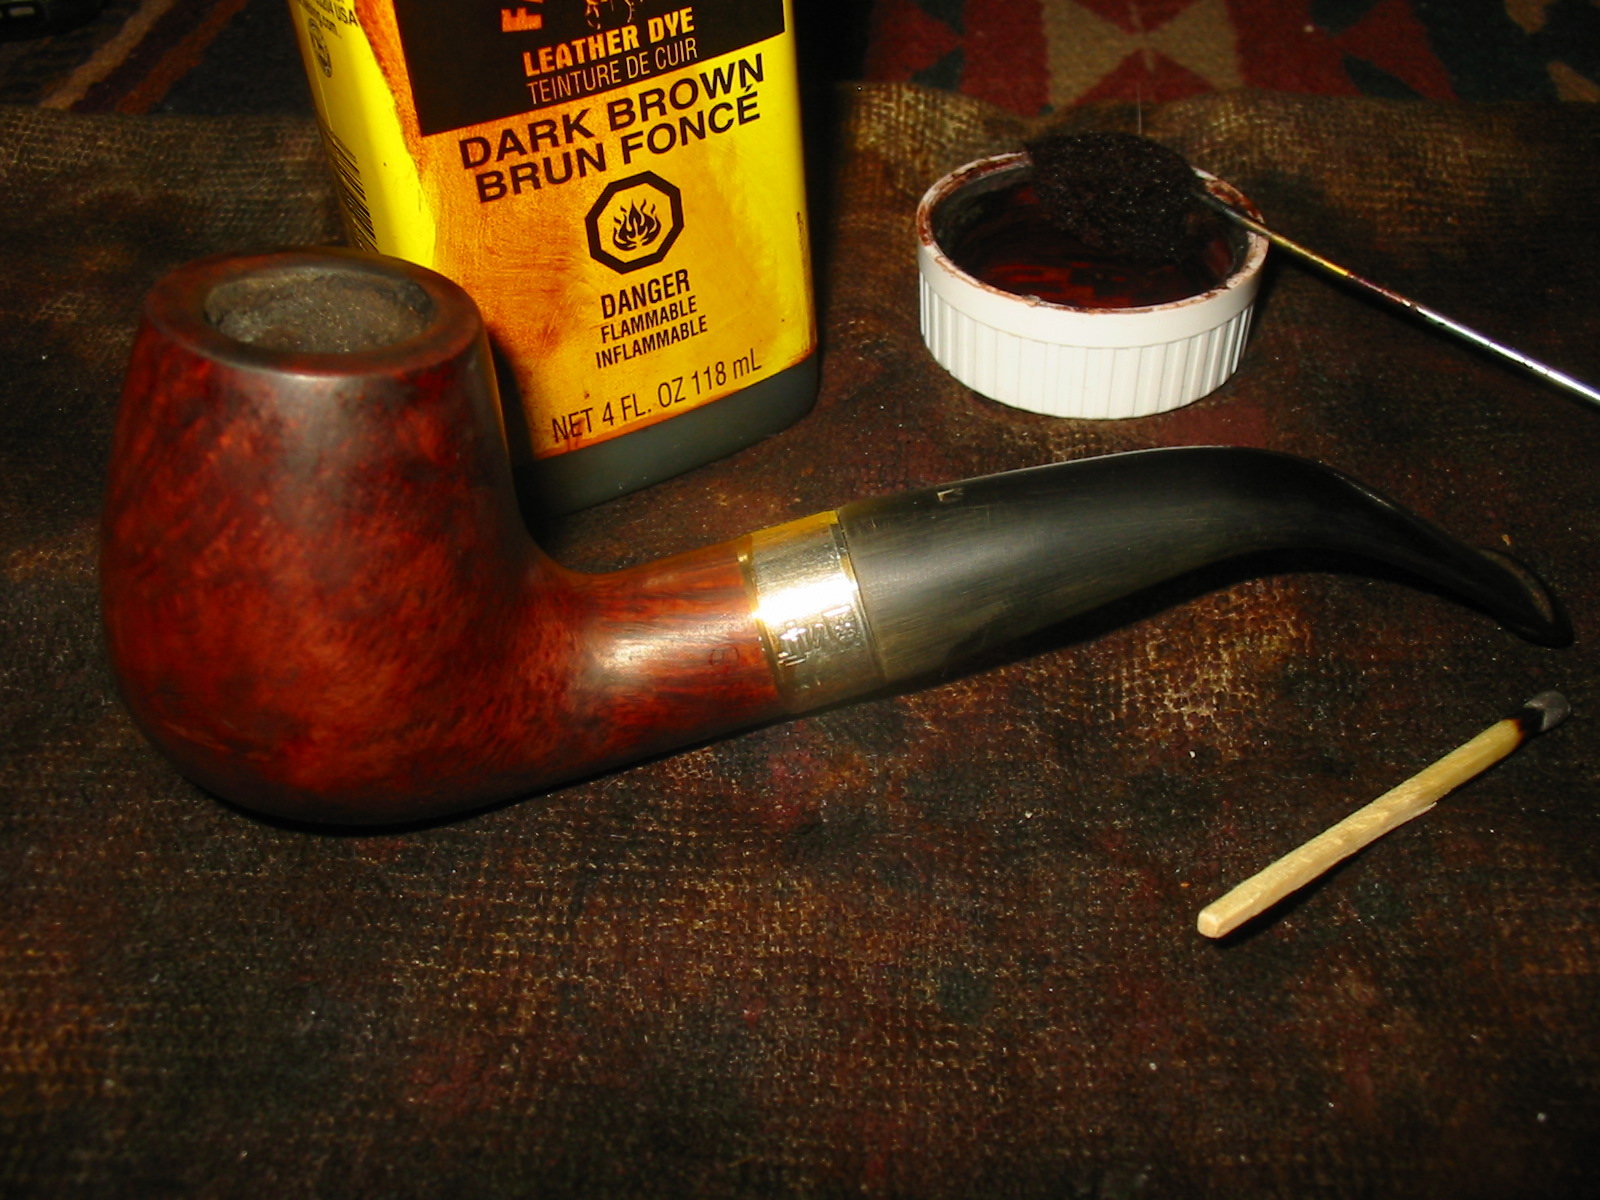
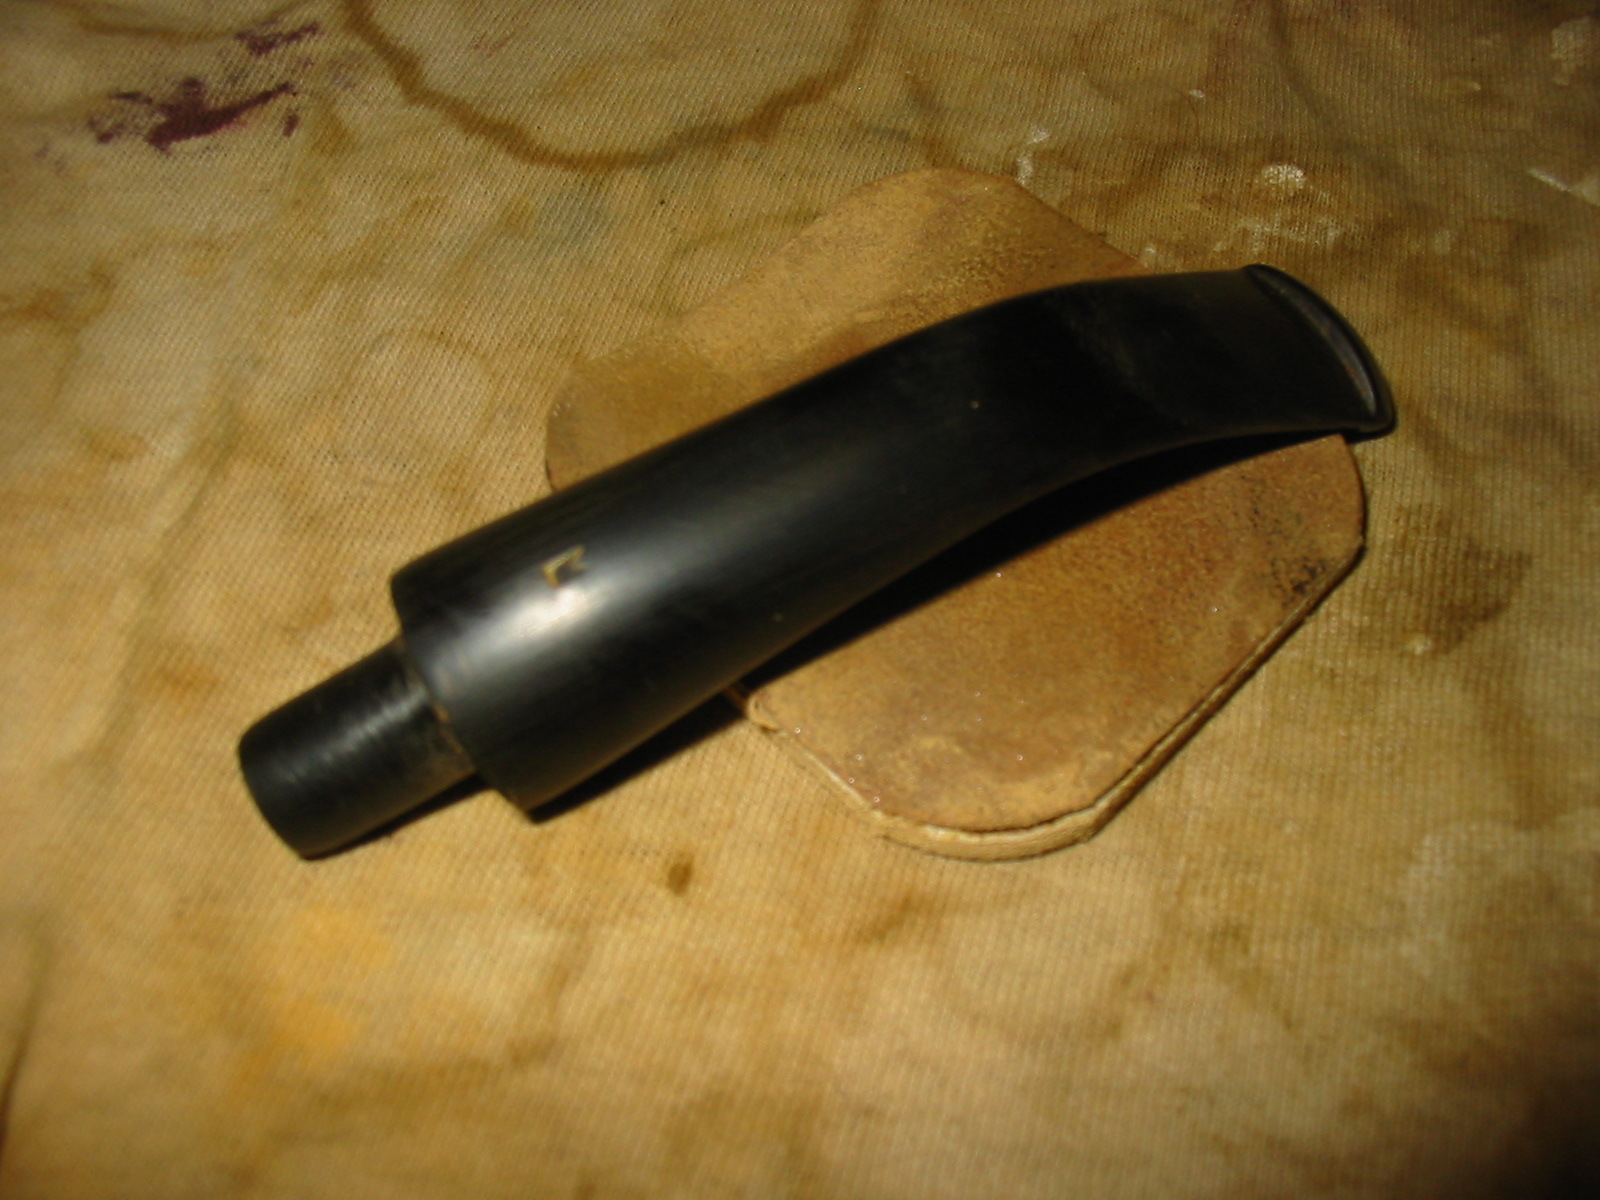
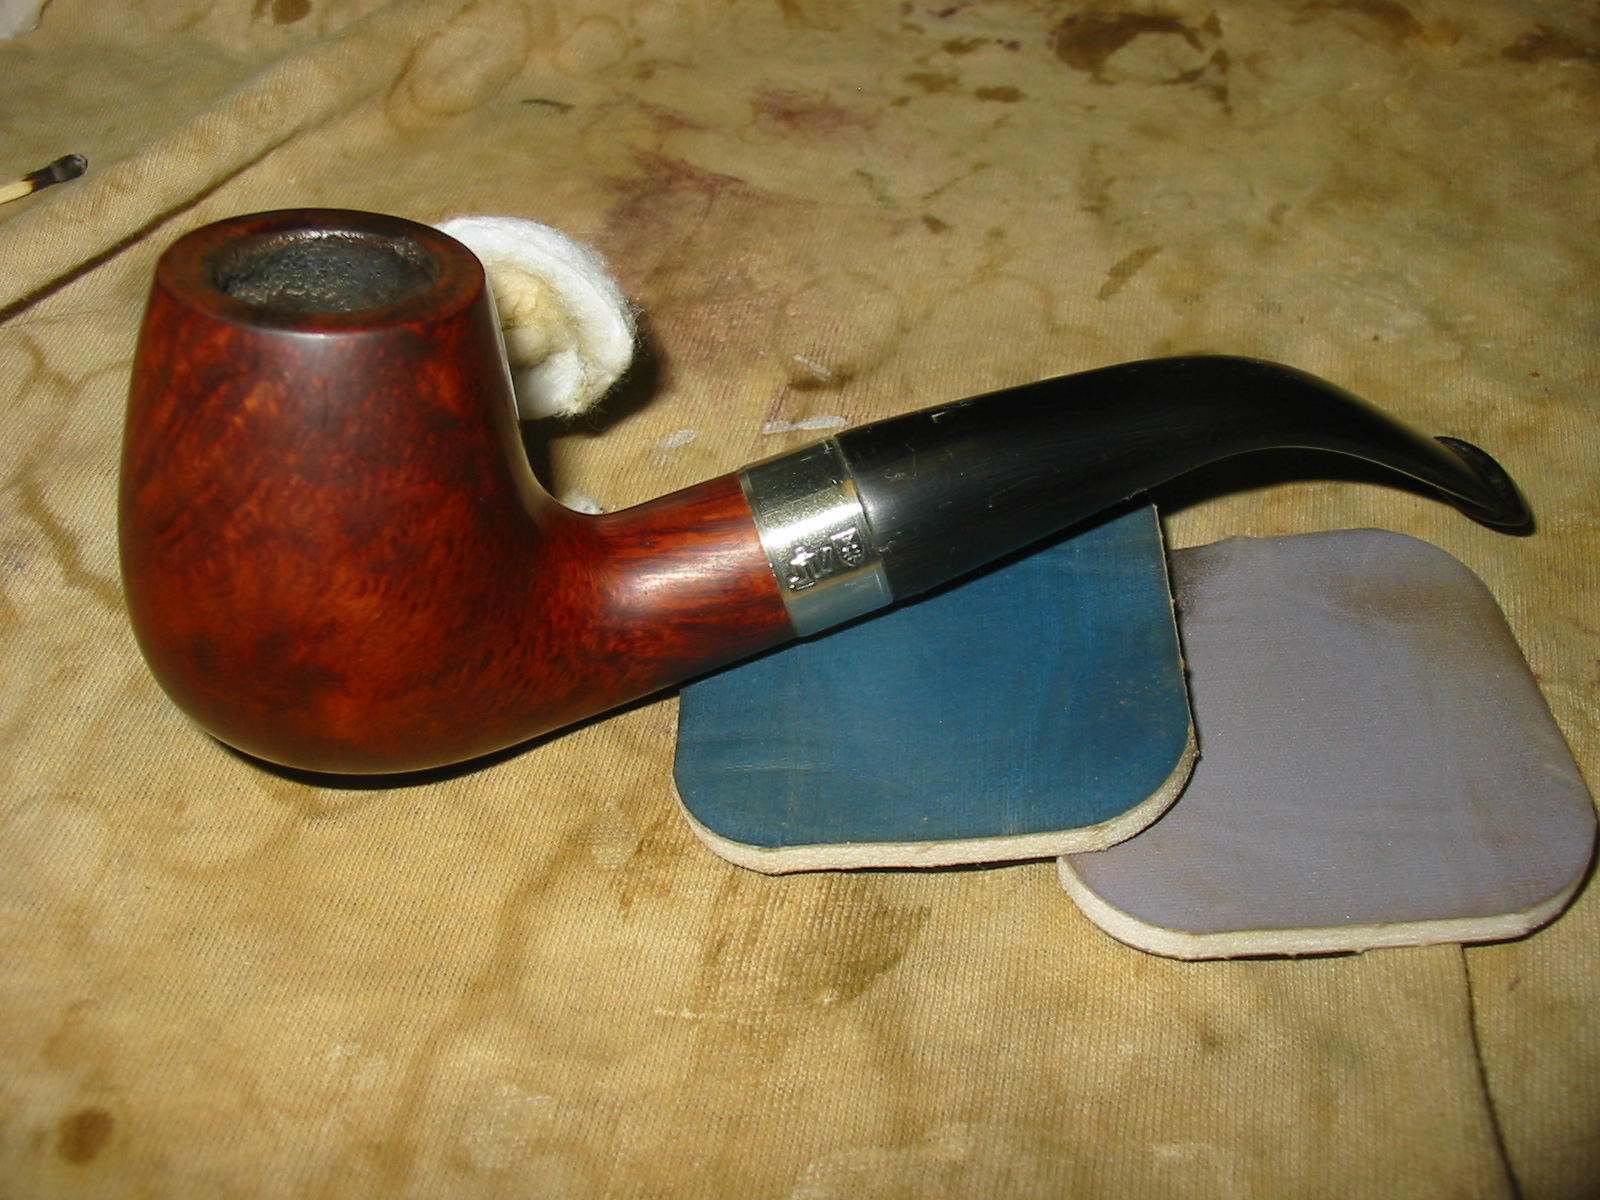
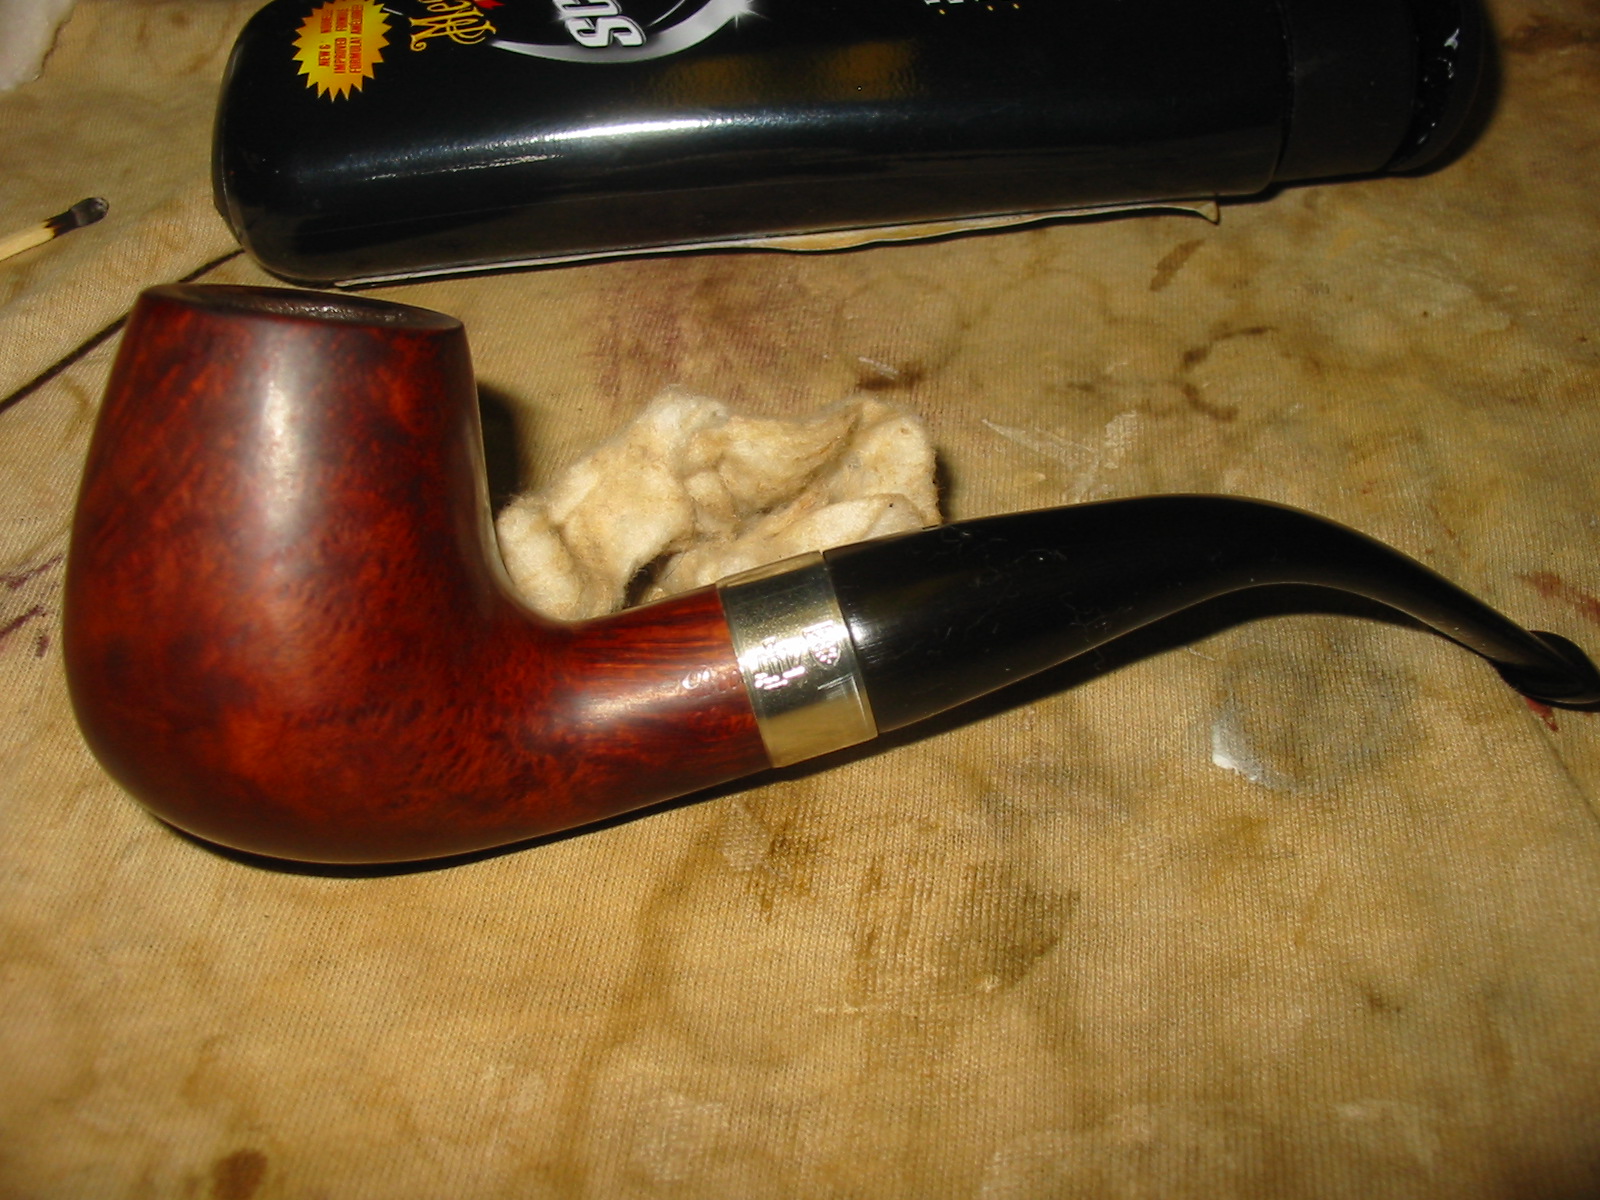
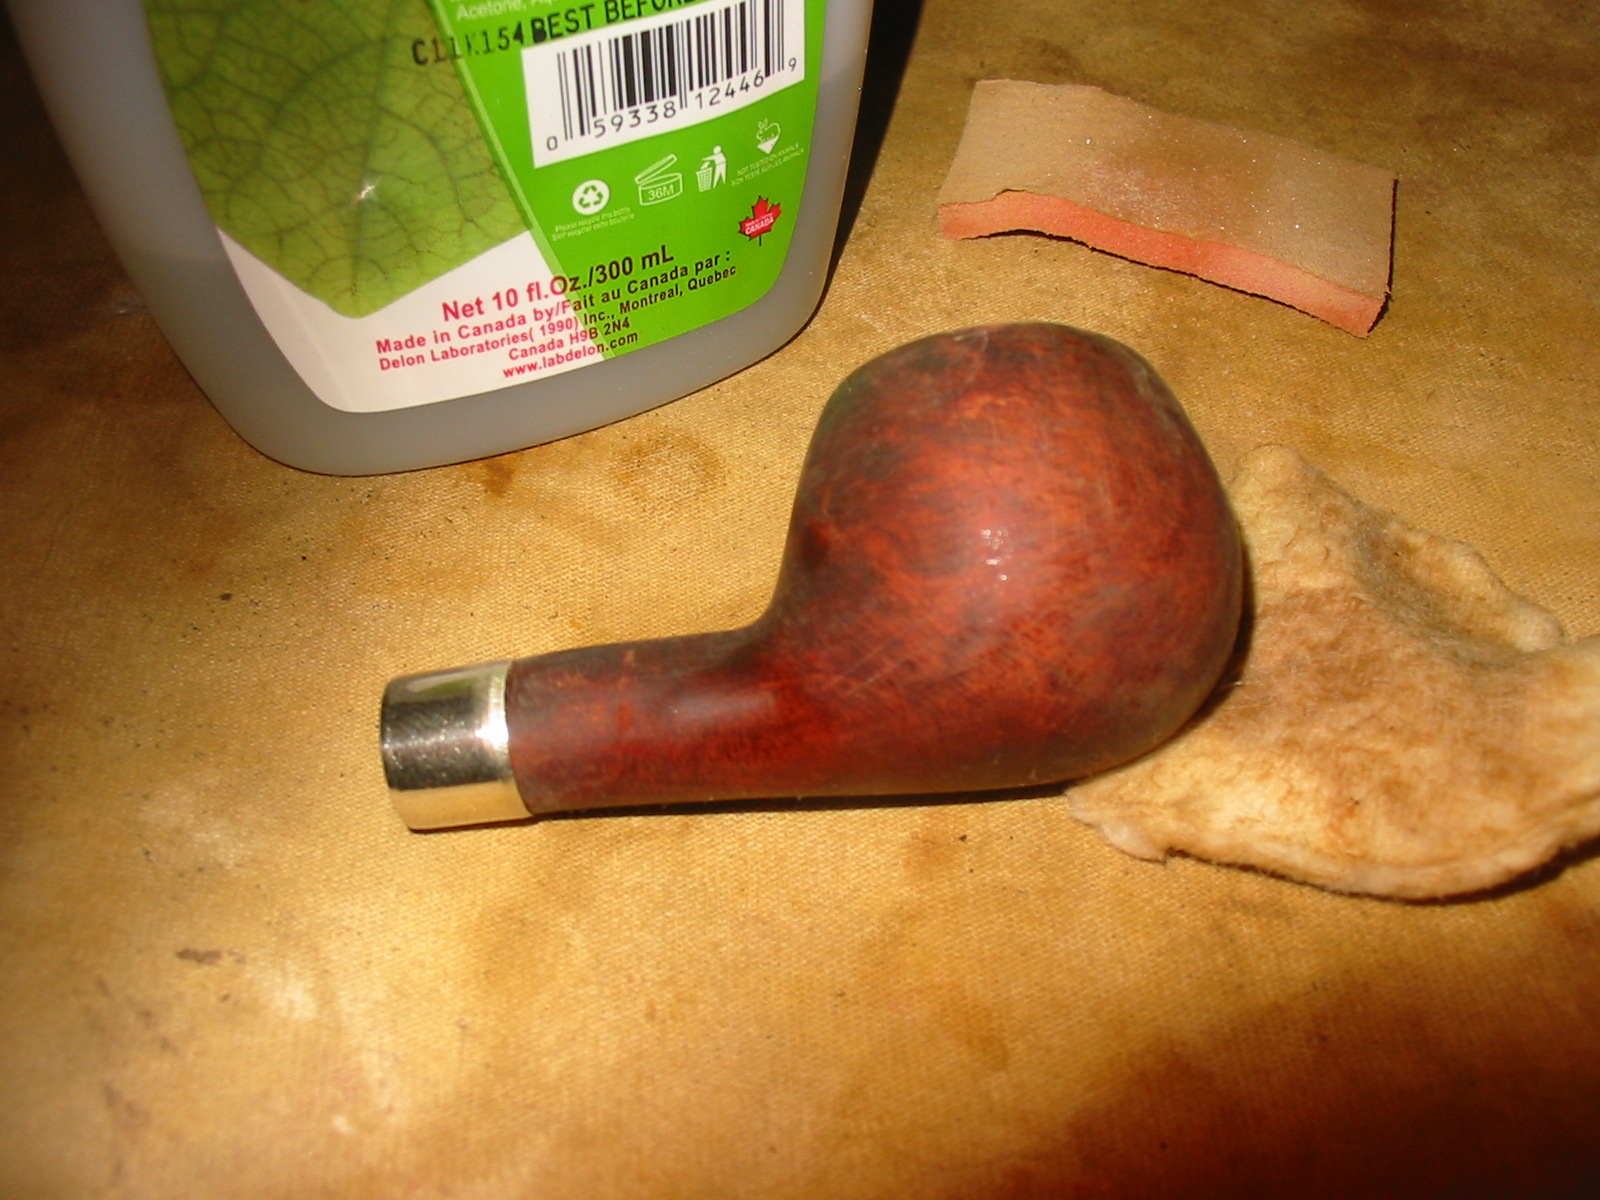
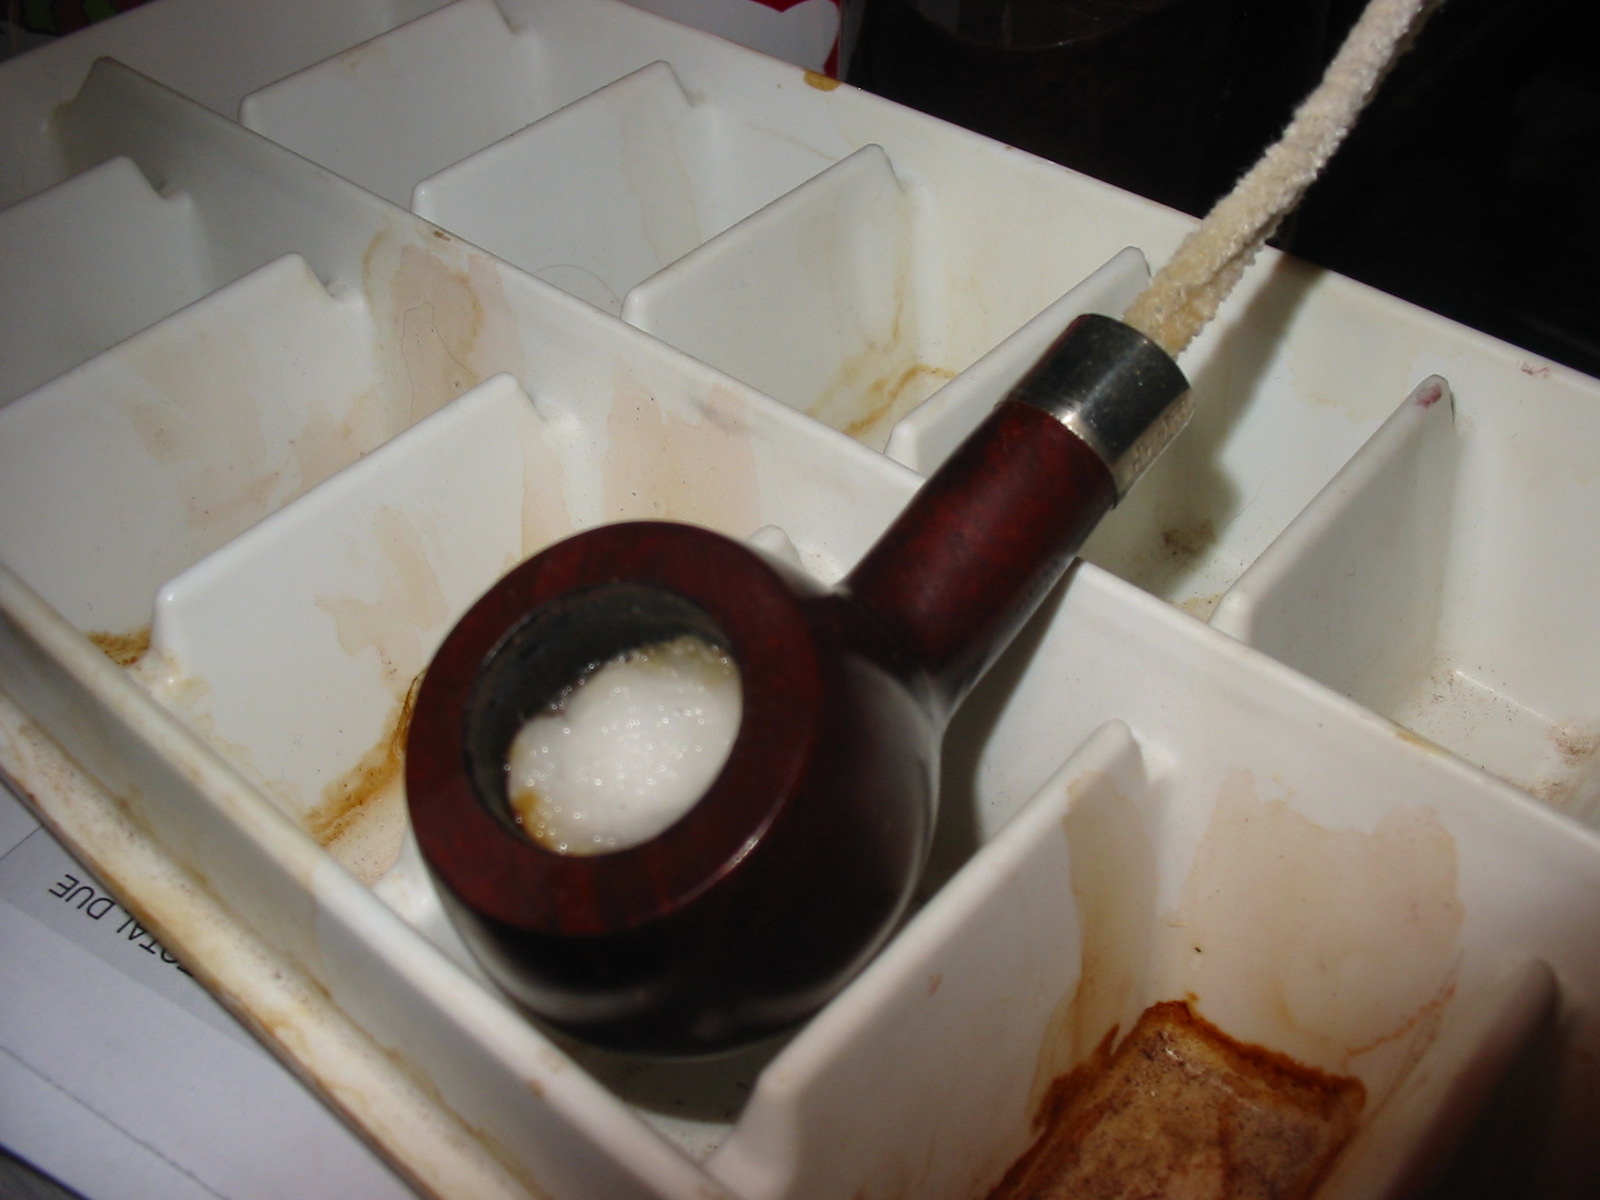
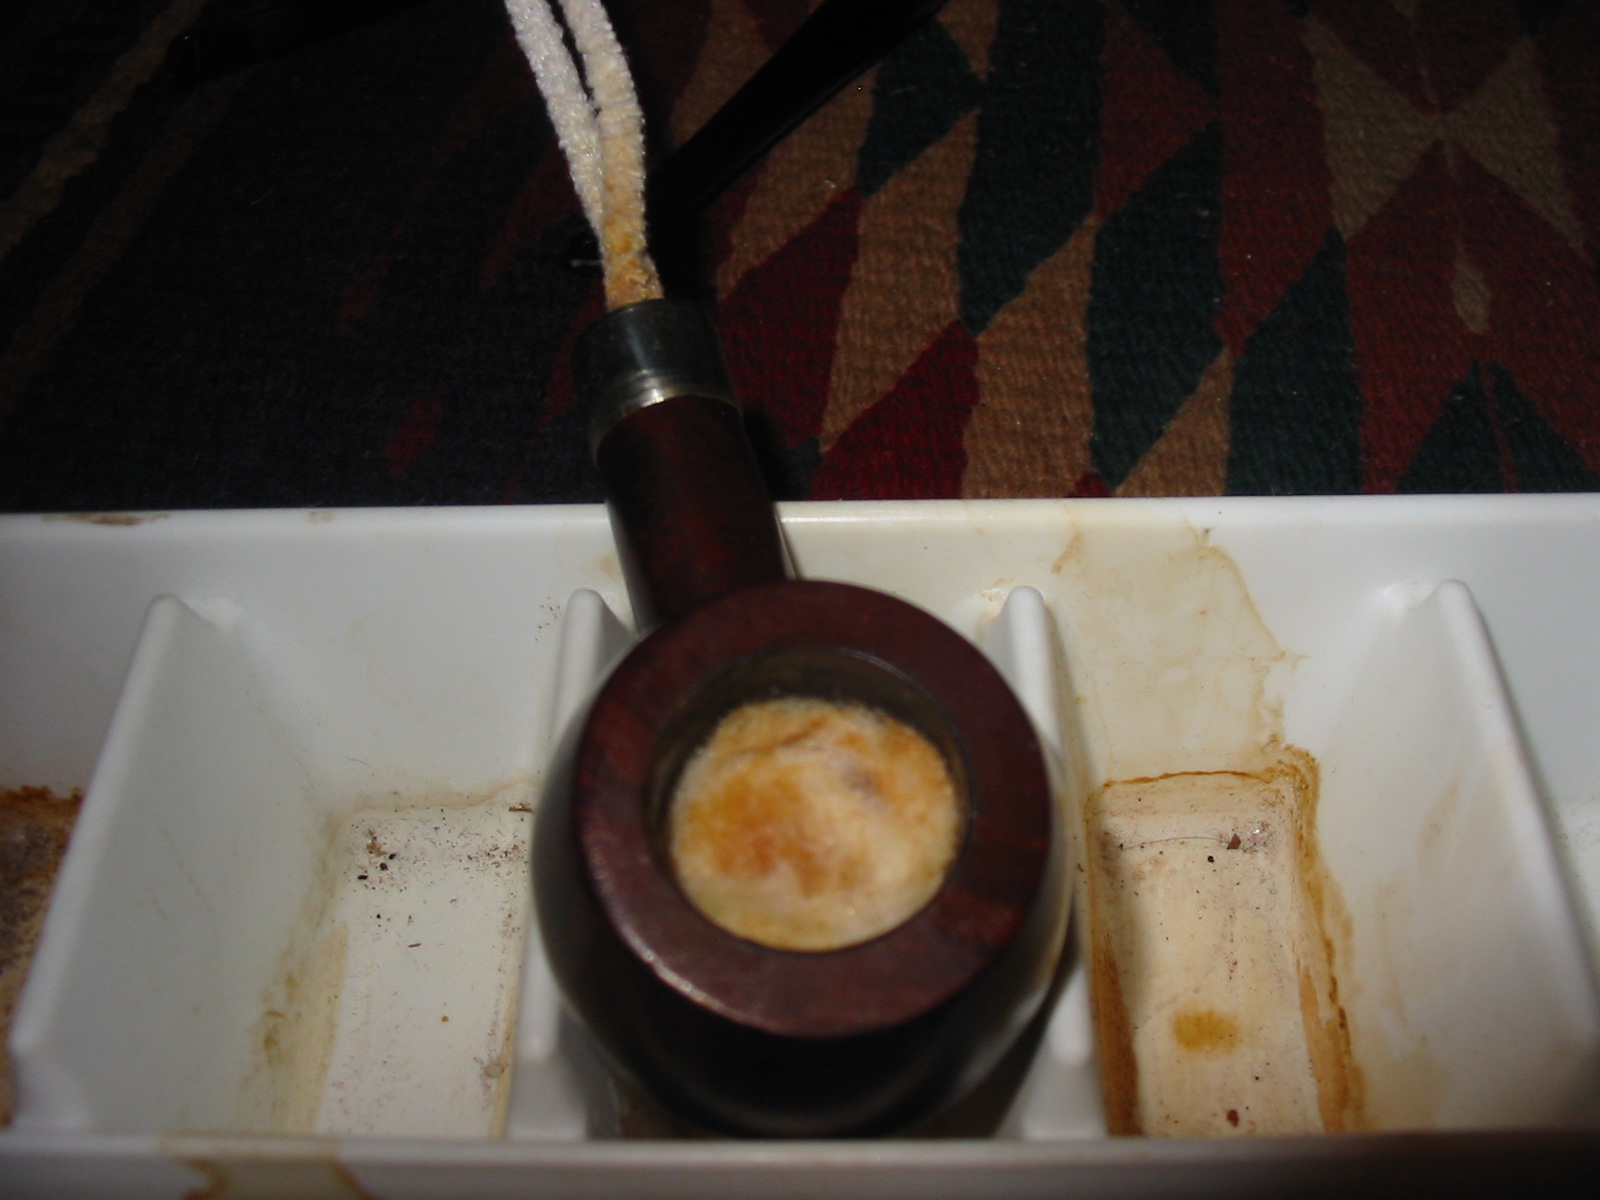
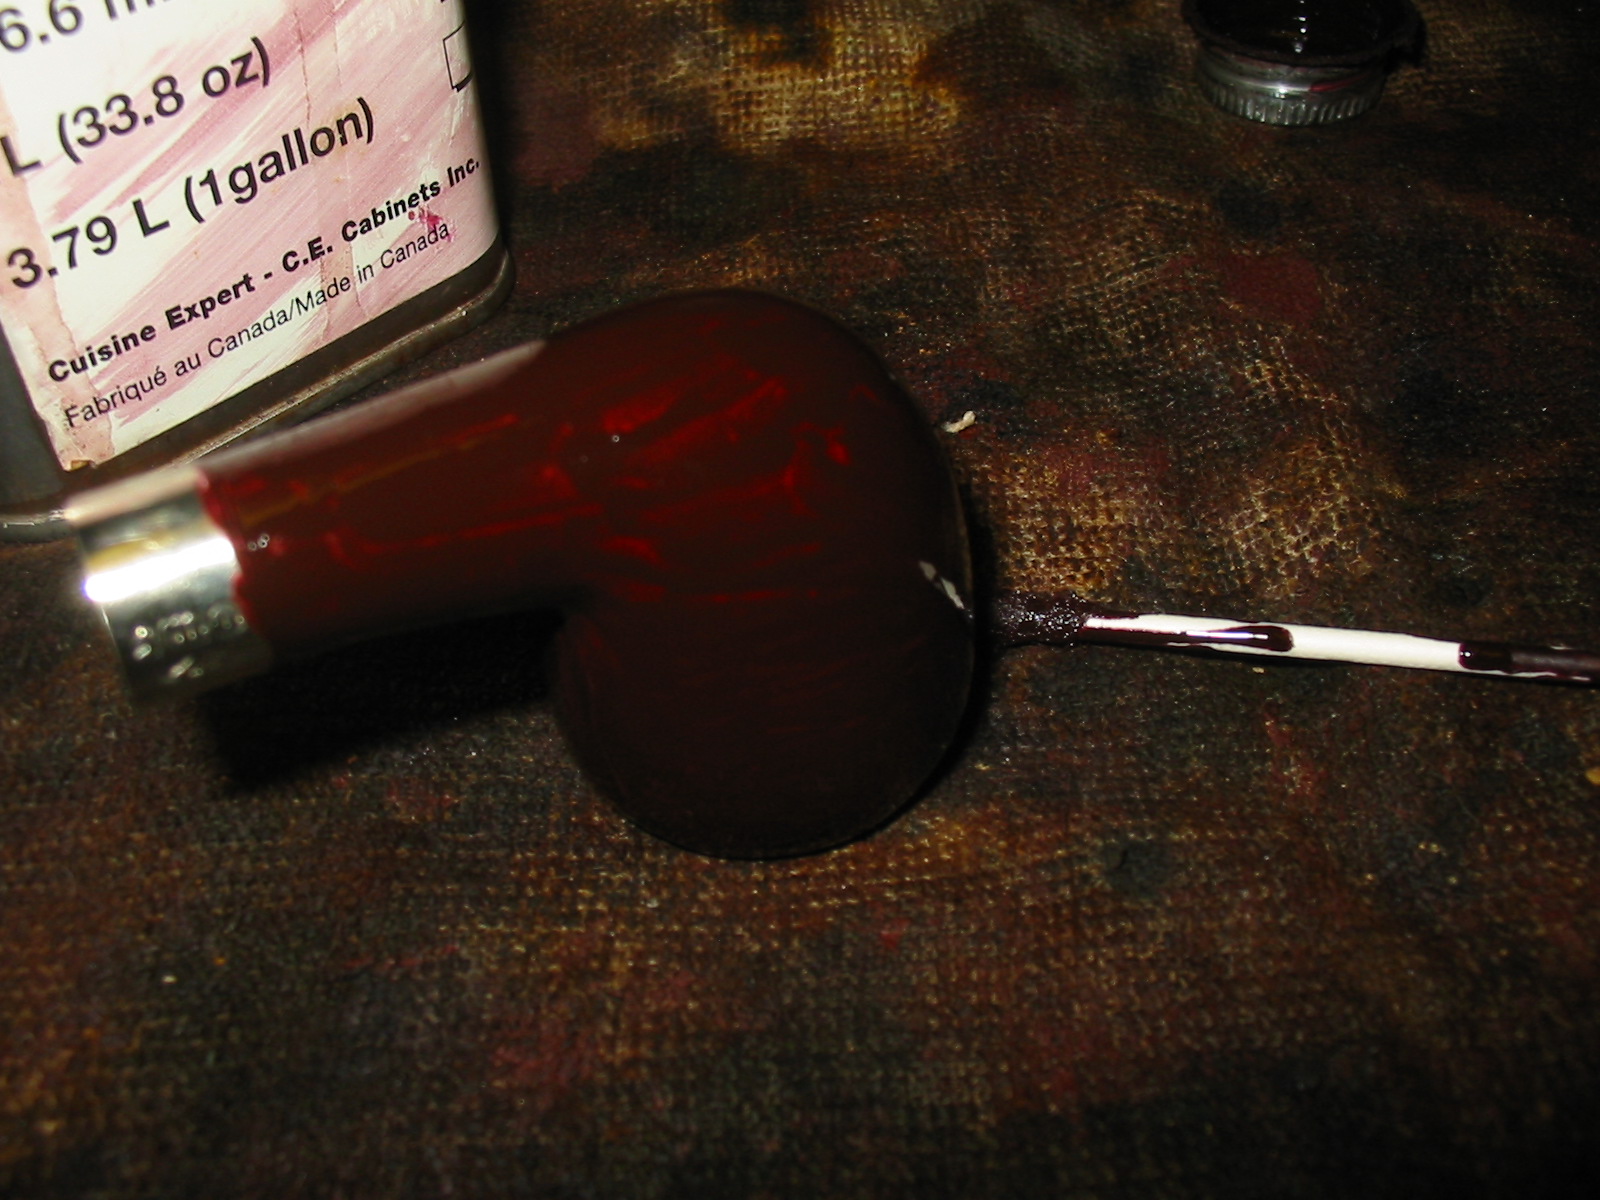
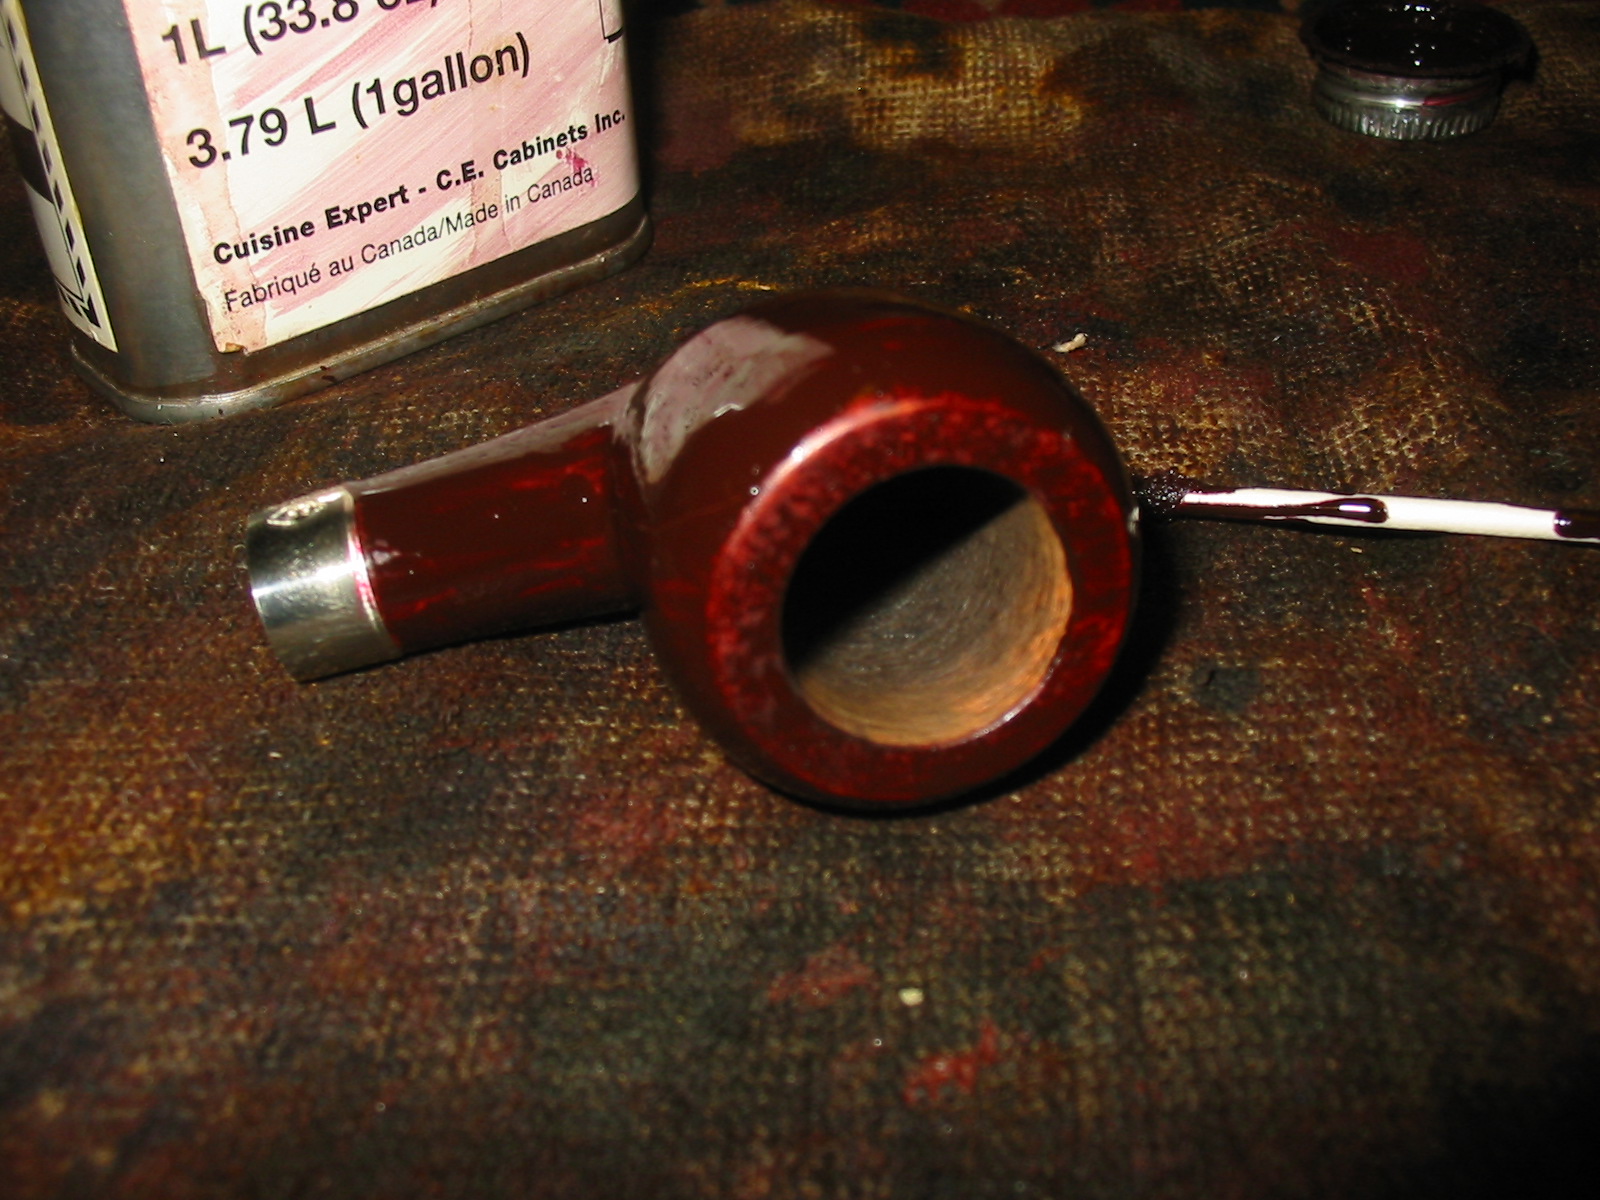
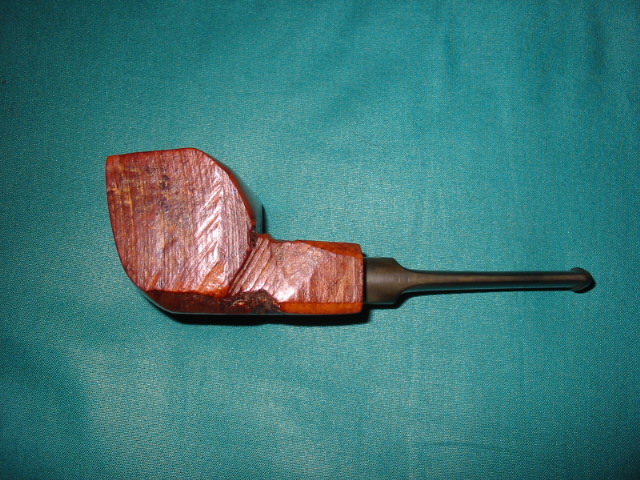
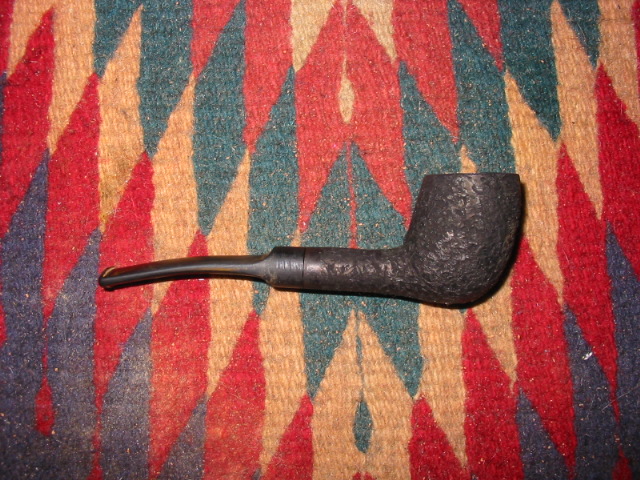
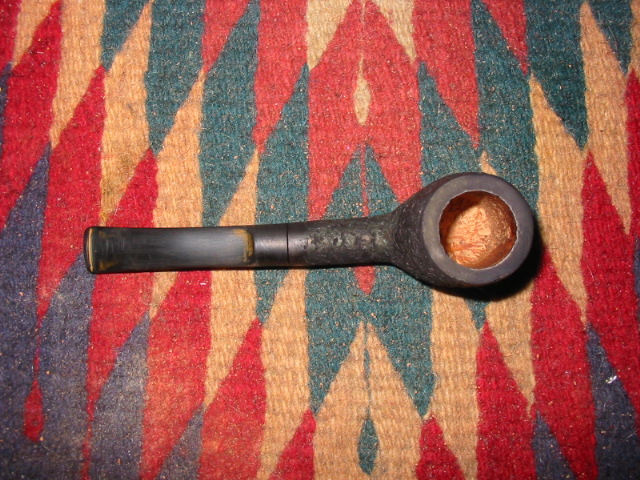
At last, I arrive at the tale of the restorations of the jichimu churchwarden bowls, one wholly by Chuck after my refinishing of it and one by me except for a final quick machine buffing as I do not yet own the proper equipment. Because of the broken stems, these two restorations were the first I had encountered on my own that were borne of true necessity, other than what I have heard of the backgrounds and solved problems with the many beautiful restores I have had the pleasure and good fortune of buying from Chuck, although, as the next photo shows, the coatings were real horrors. I suspect some sort of polyurethane glaze was used in the originals, thereby inhibiting these beautiful pipes’ ability to breathe, a crime I deem unforgiveable due both to the rareness of the old jichimu wood I liberated with my loving if strenuous sanding and that wood’s natural porousness.
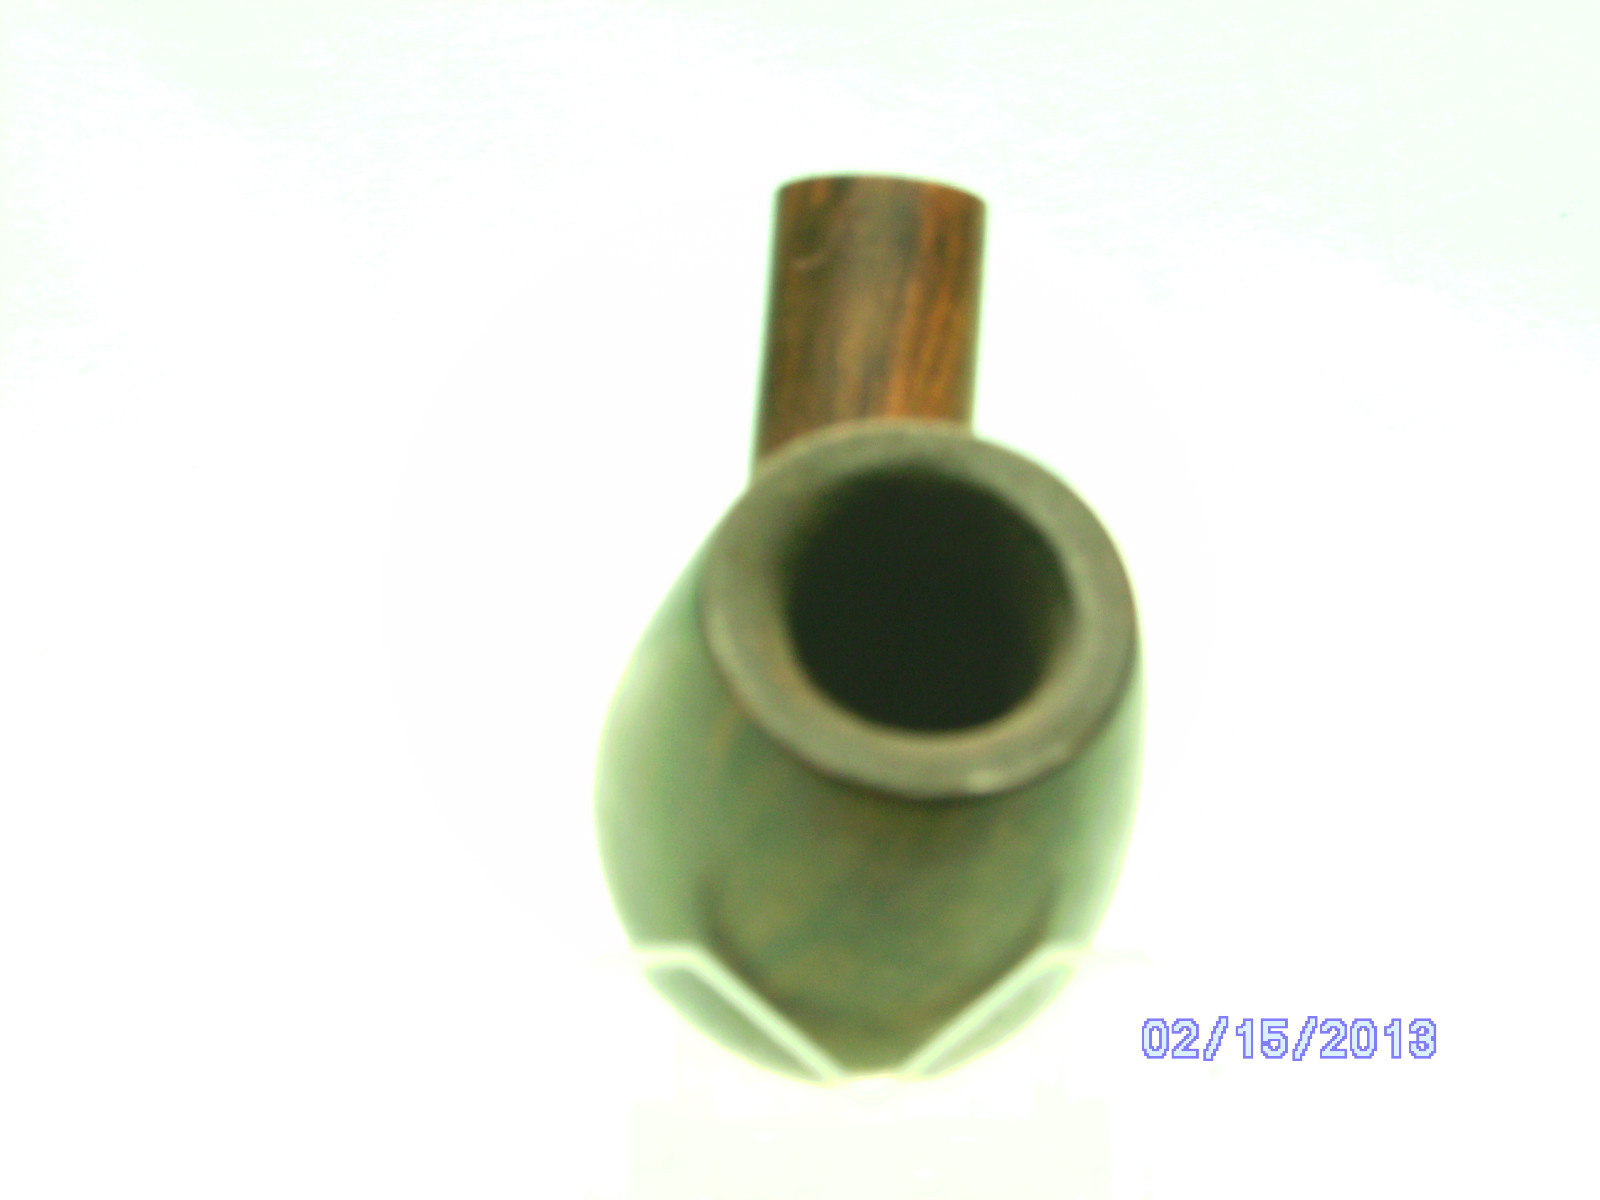
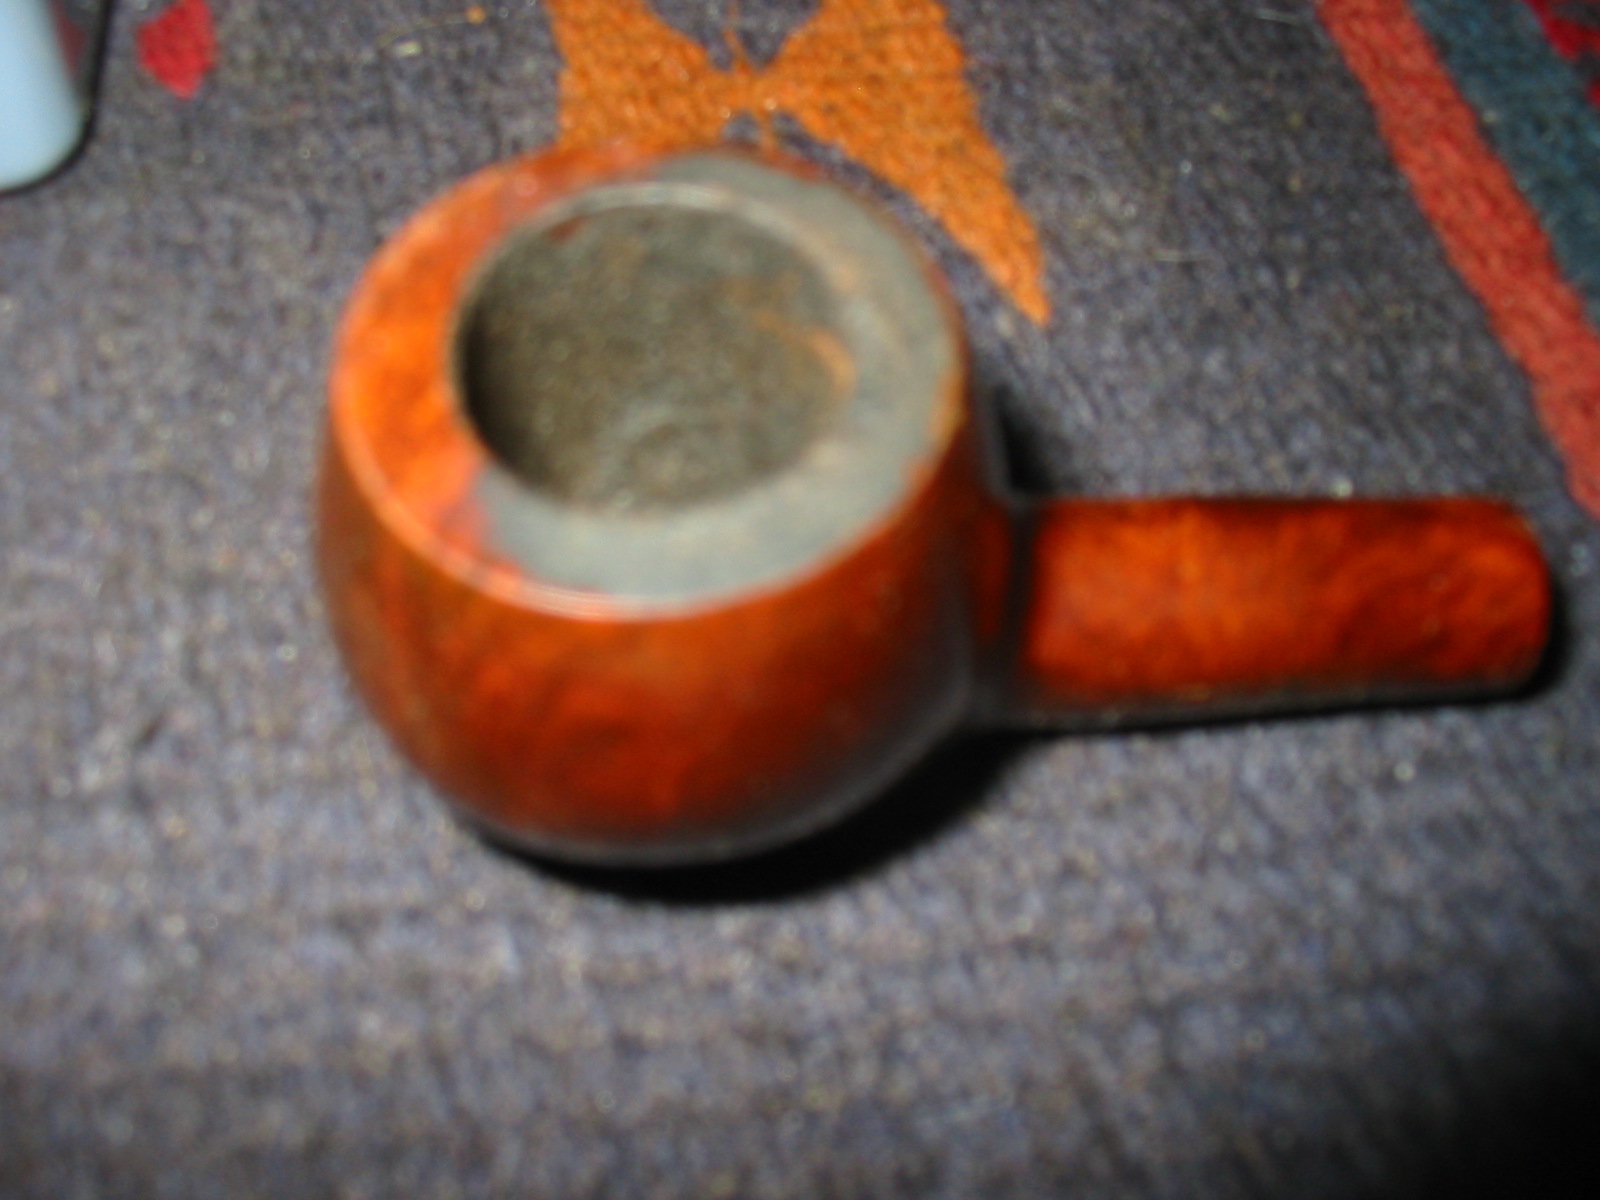
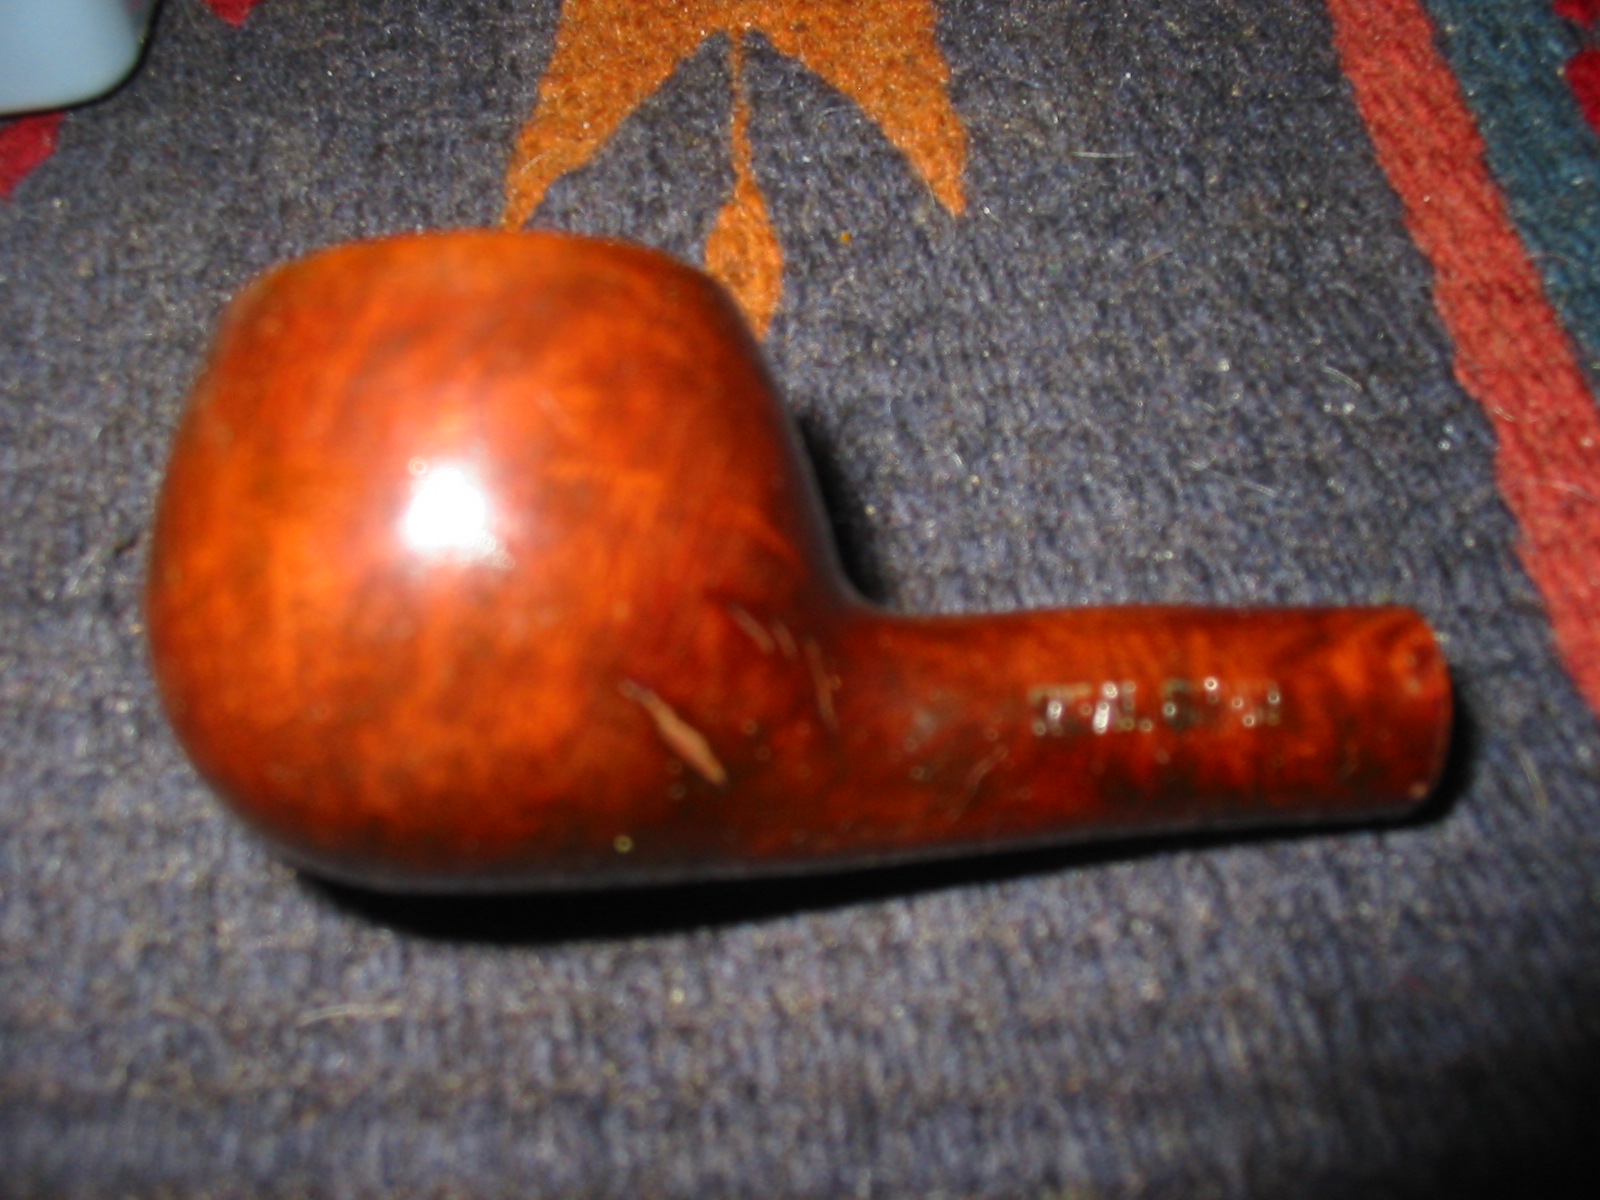
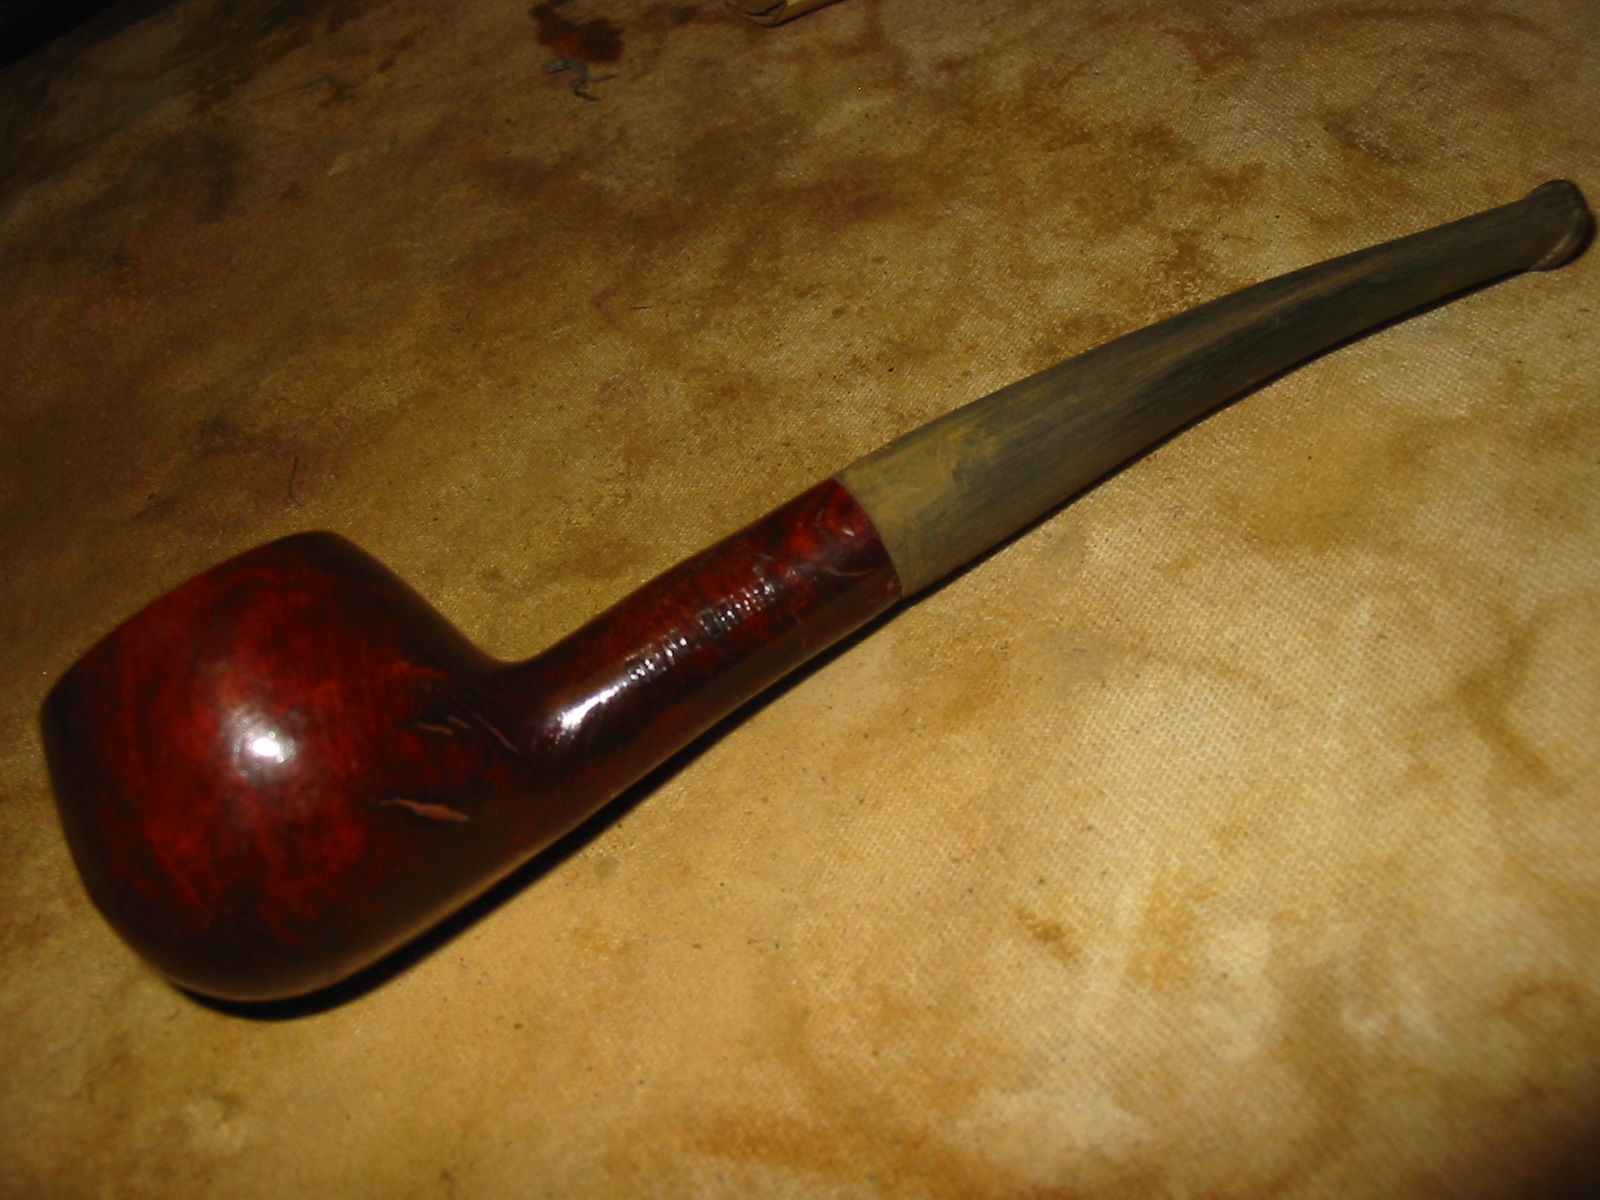
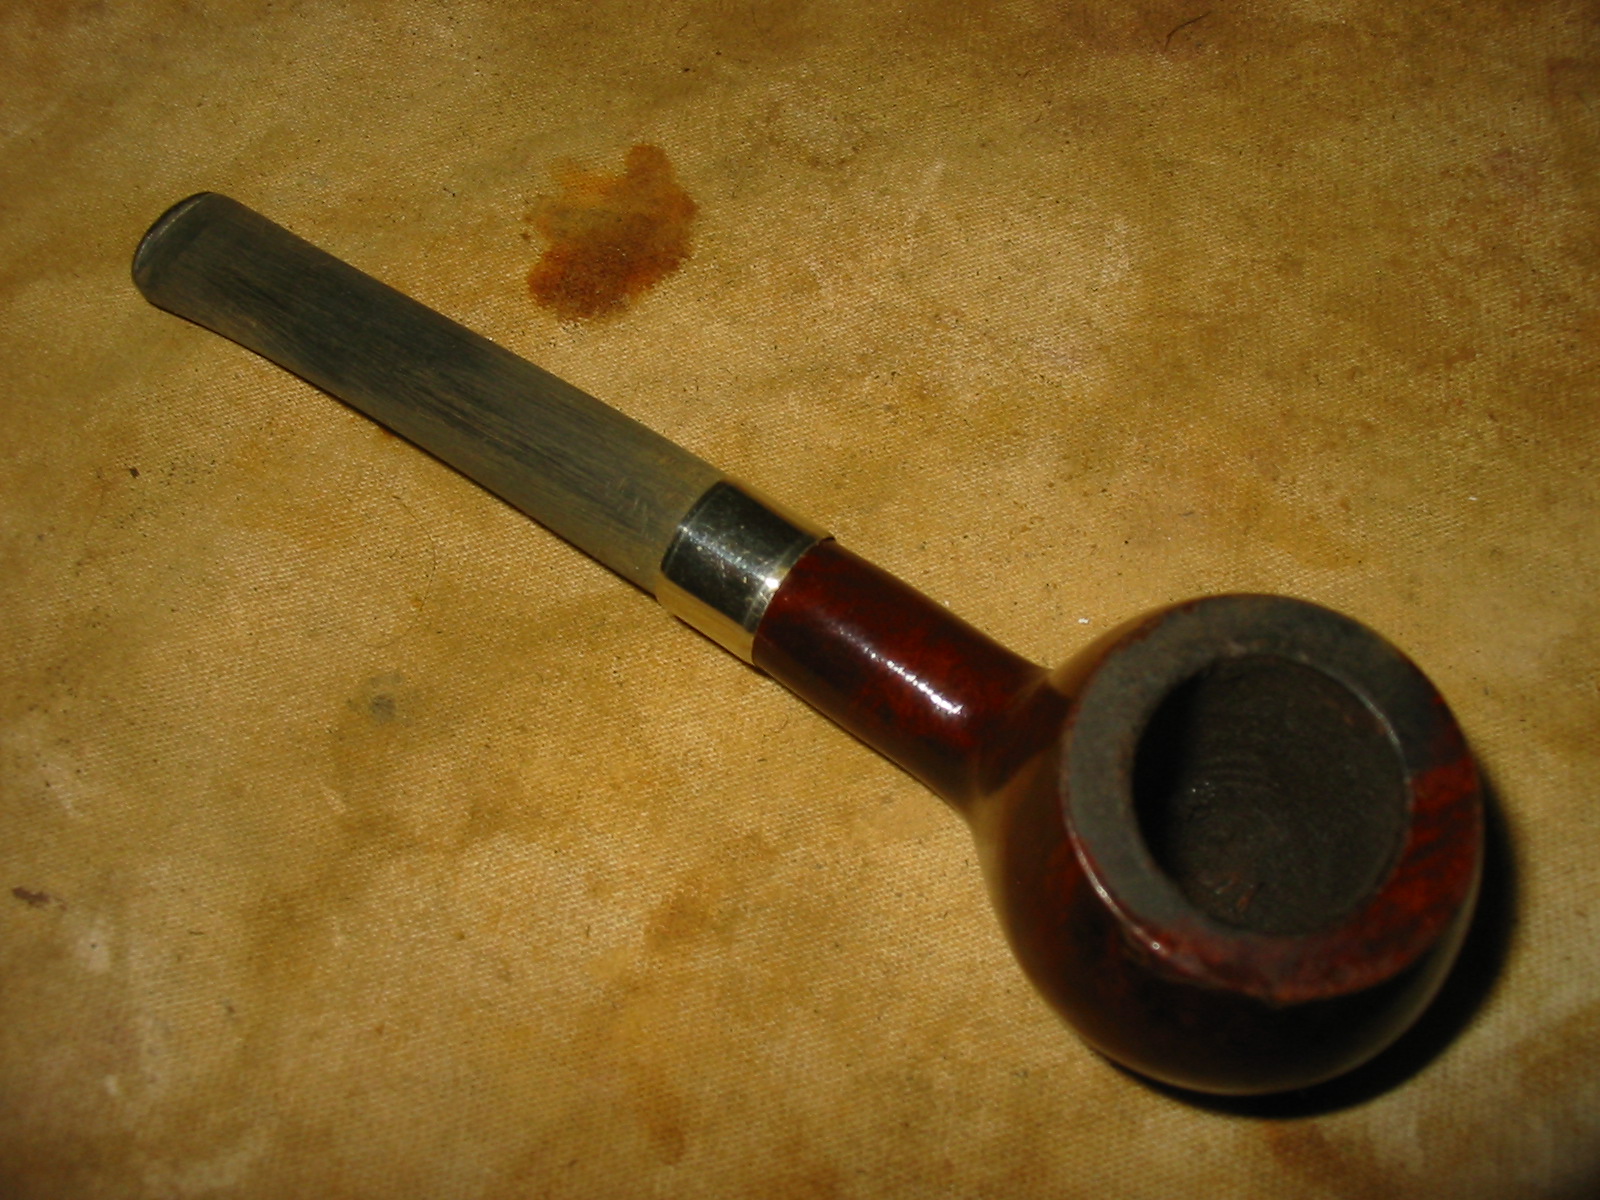
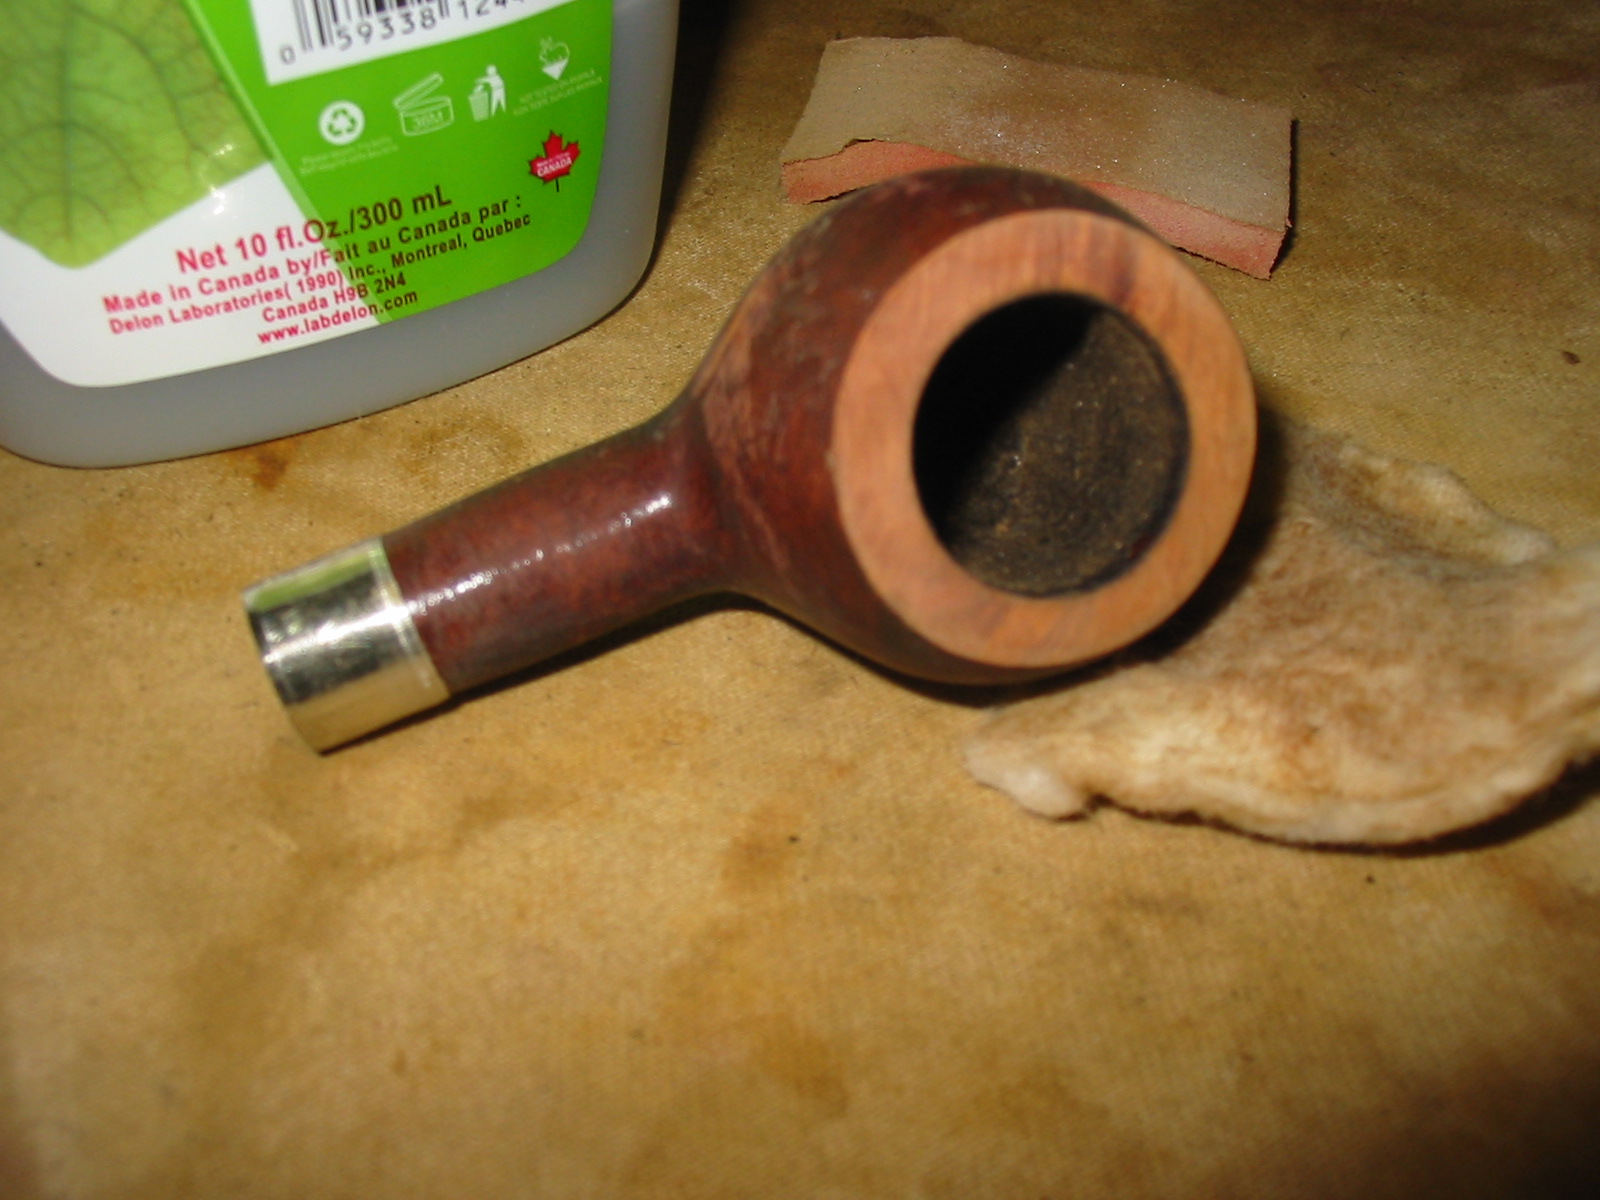
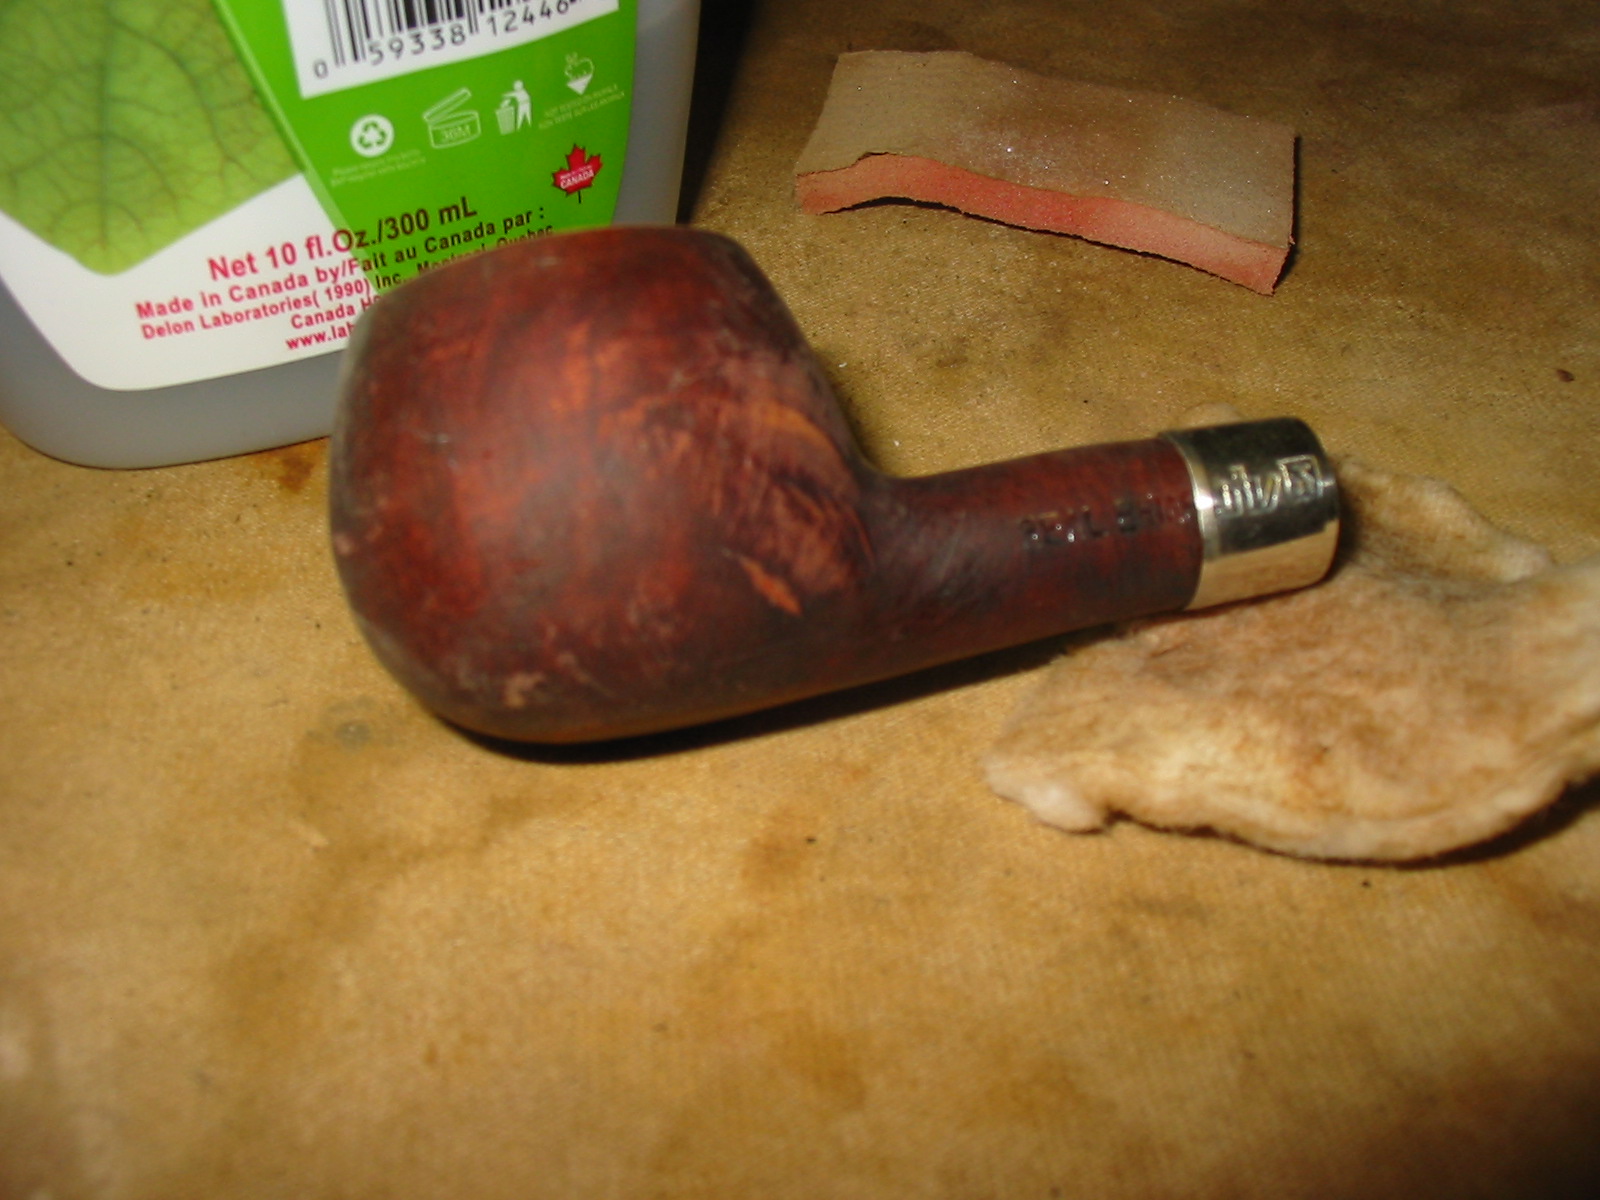
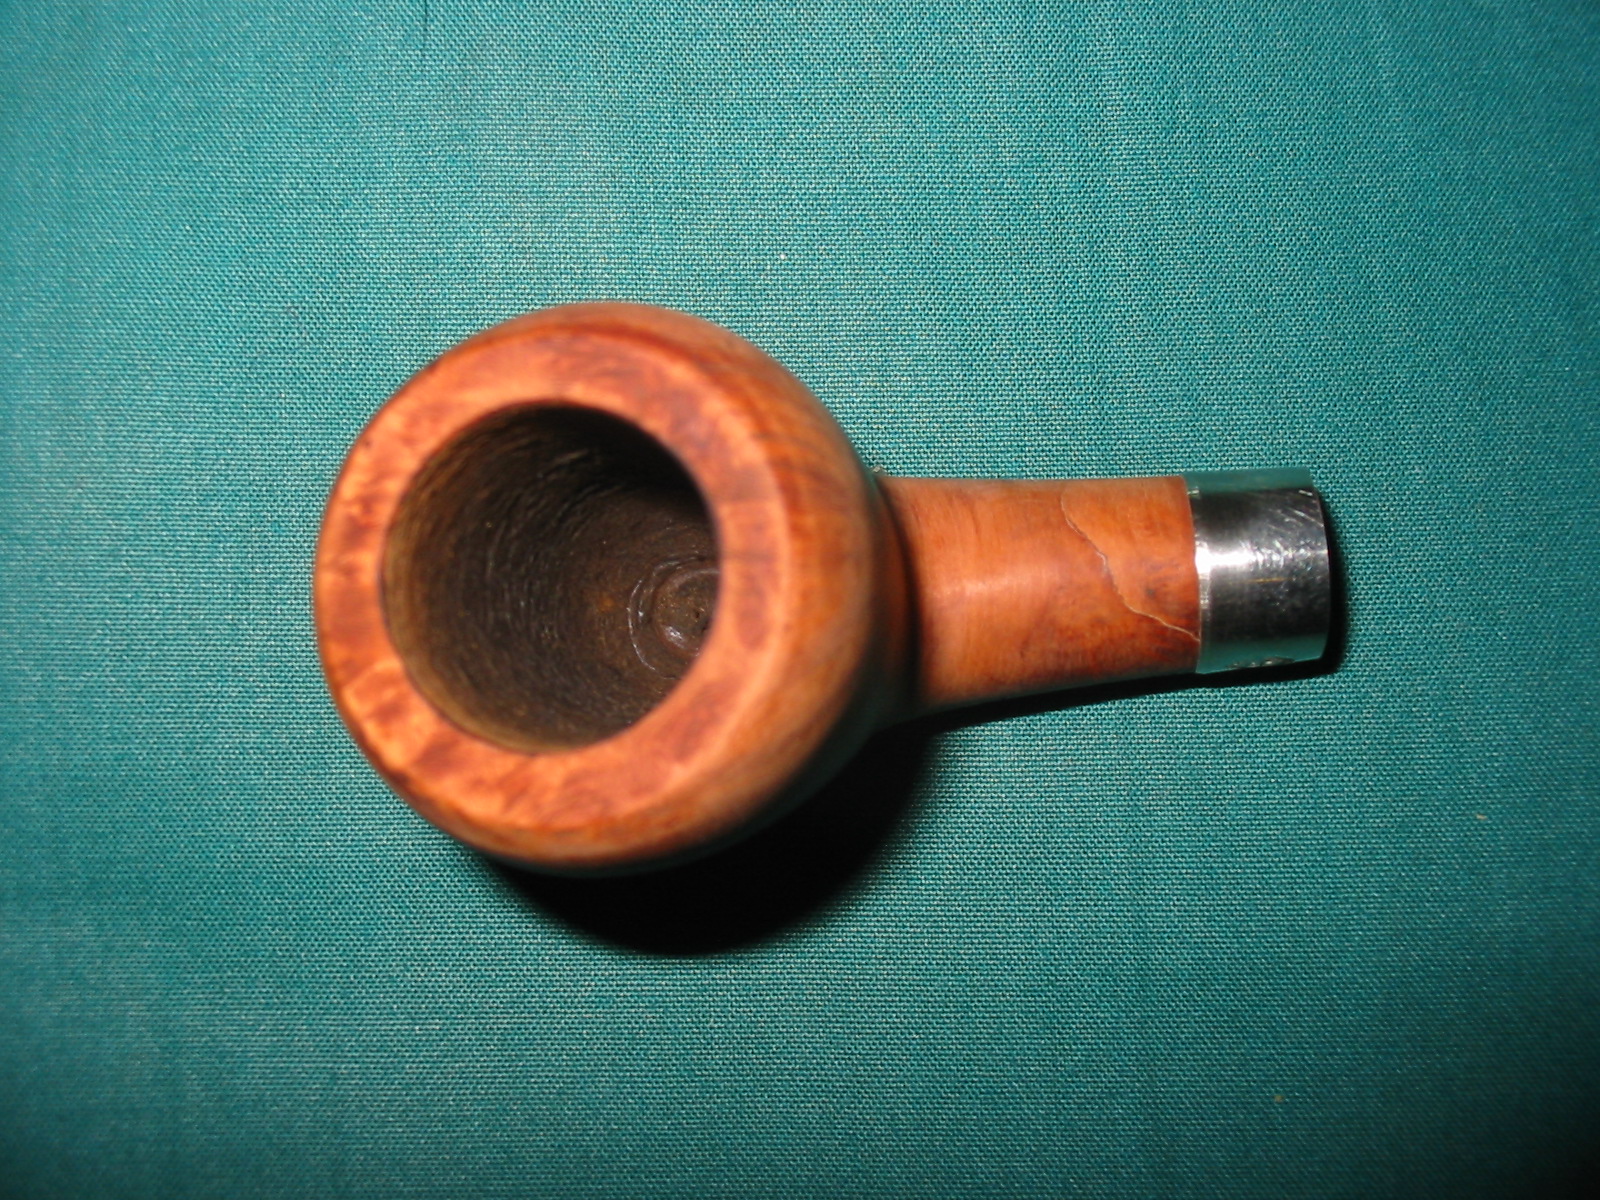
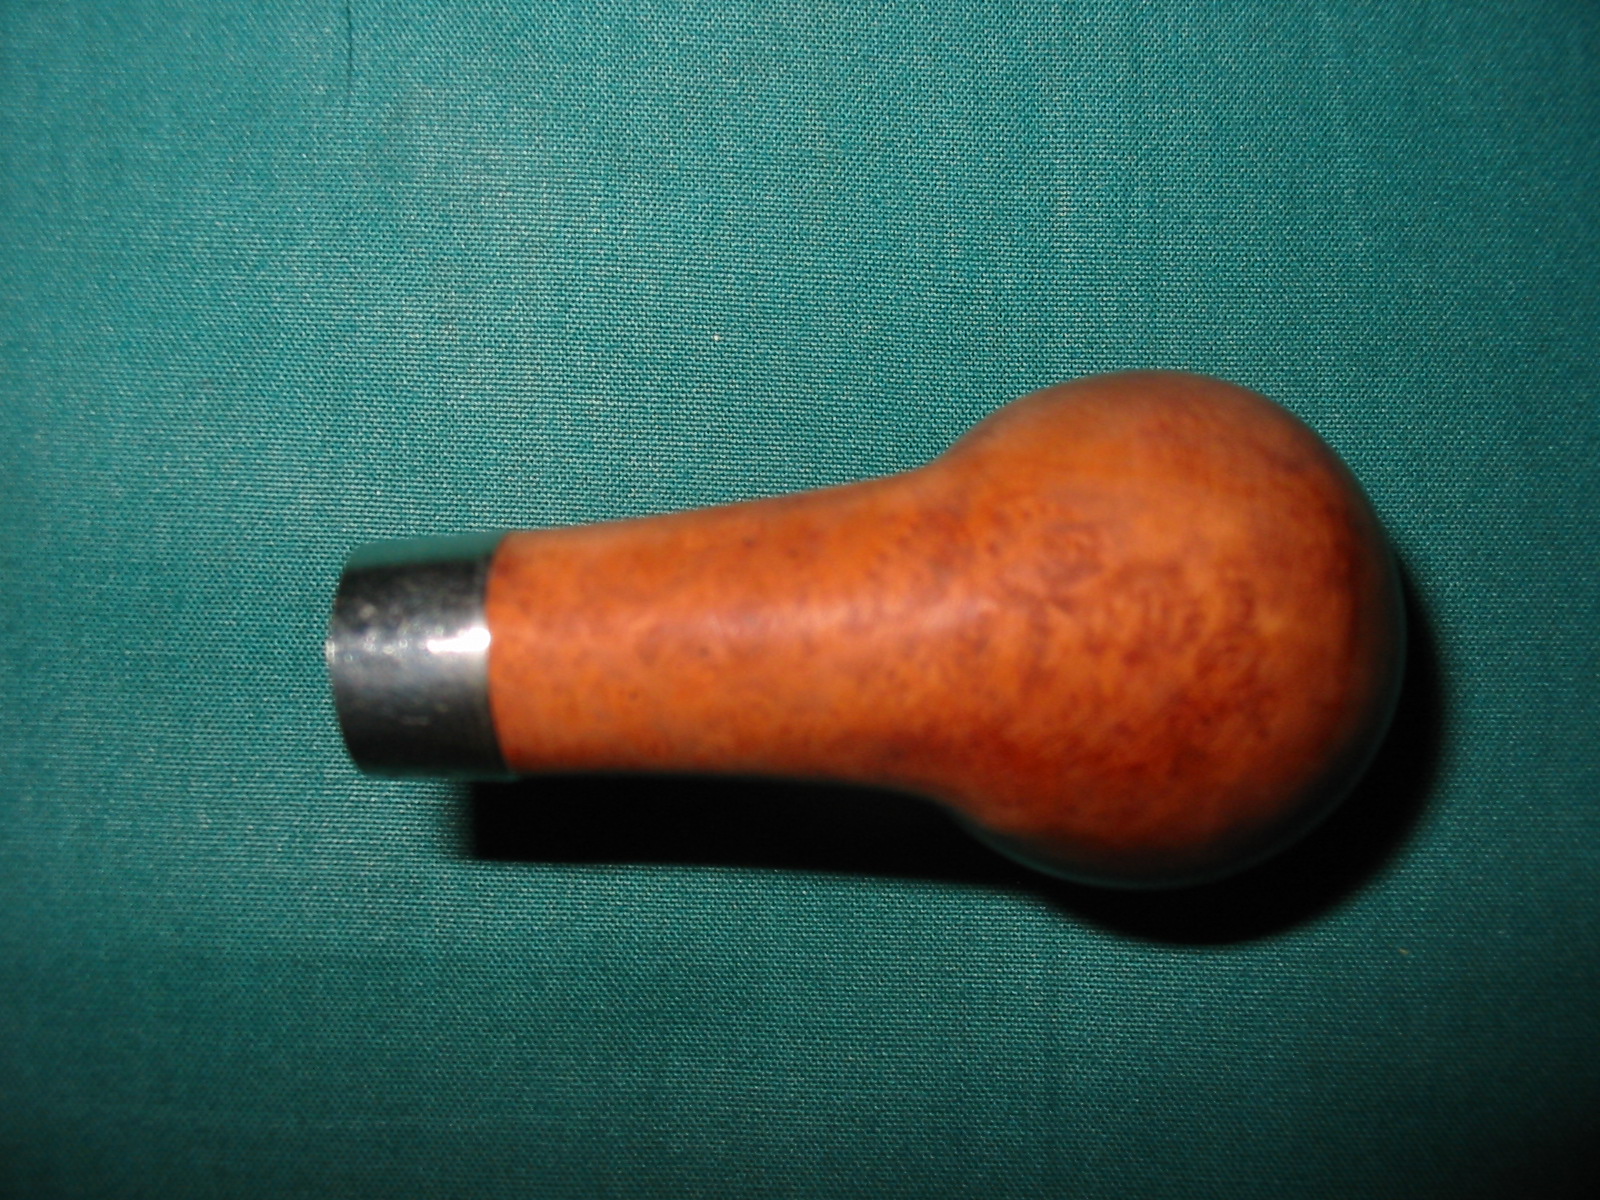
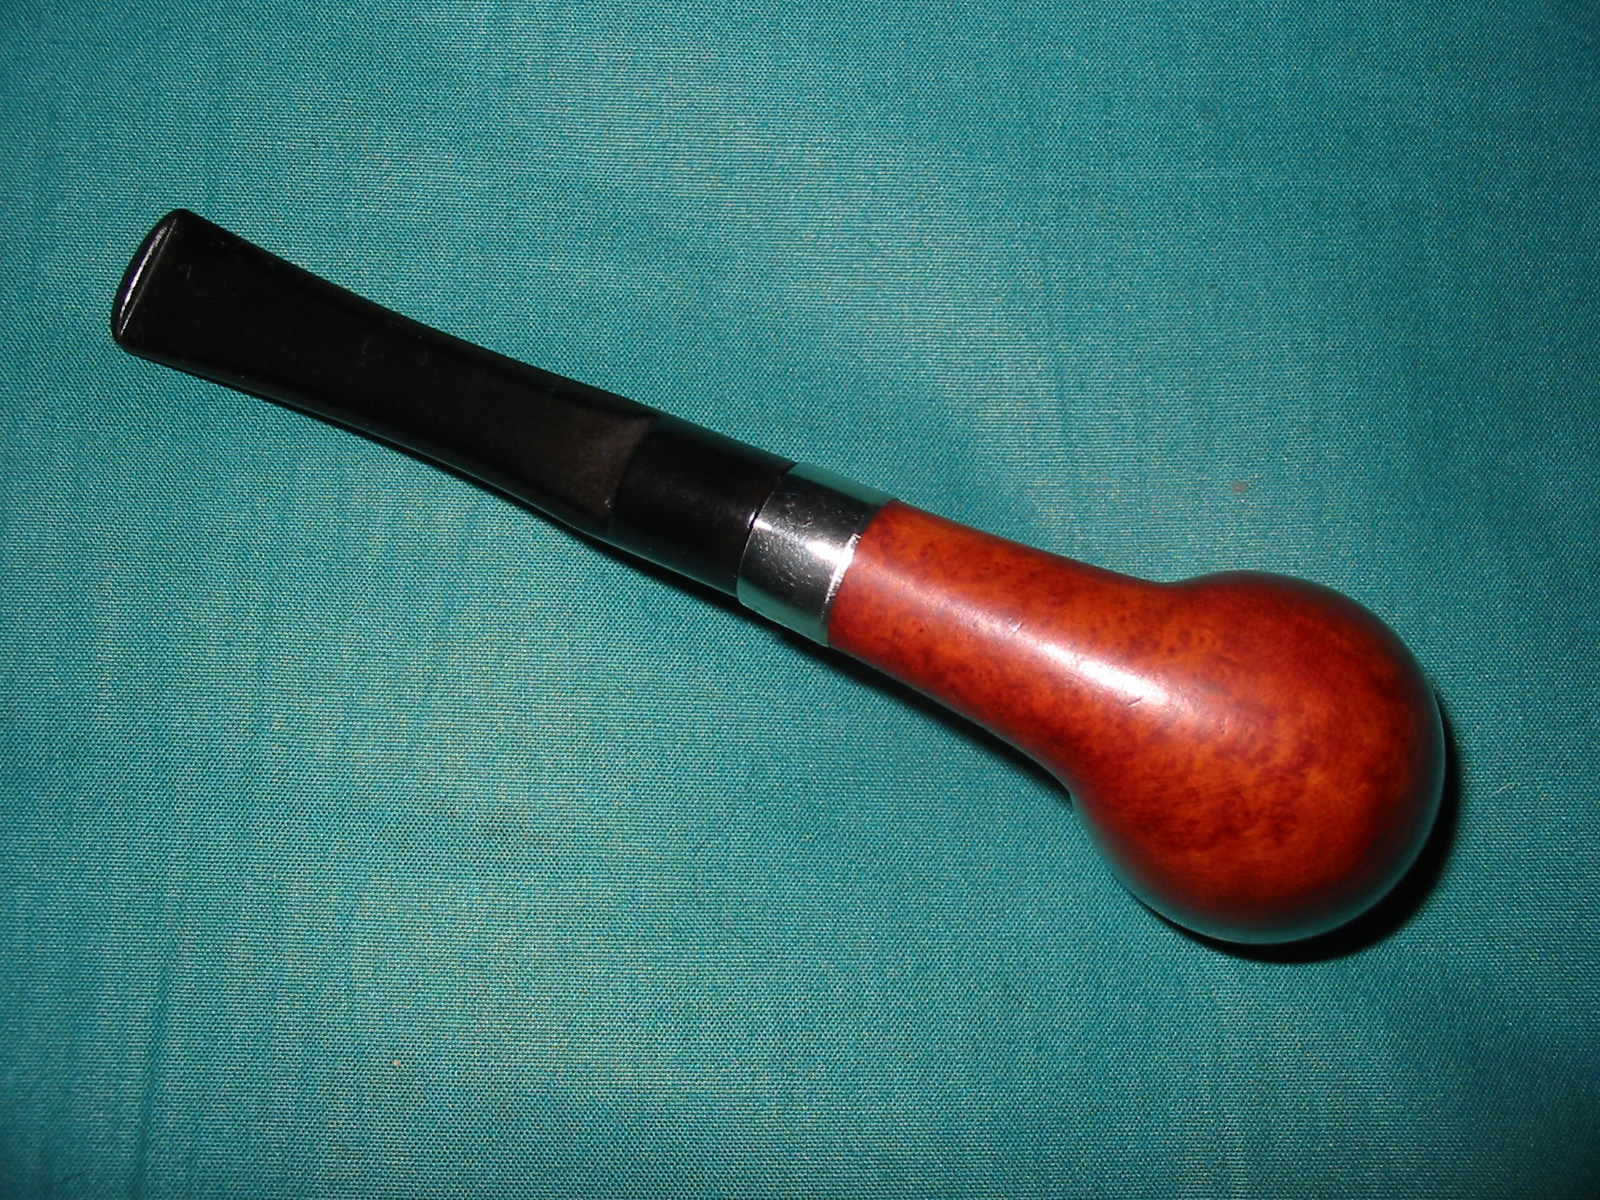
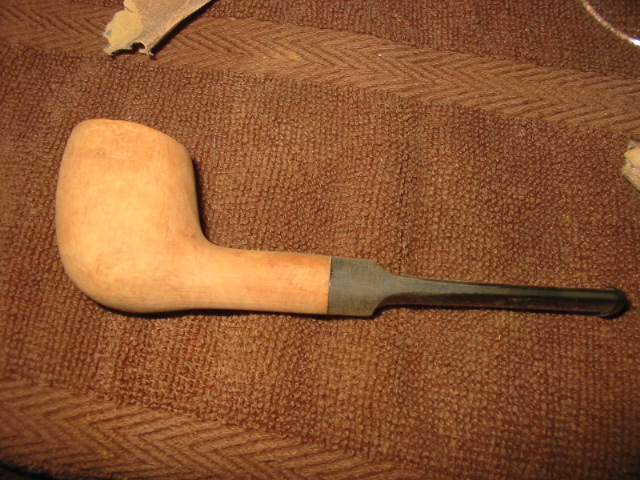
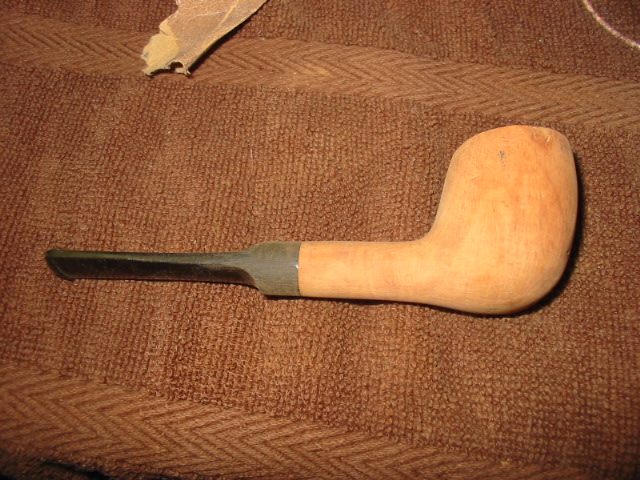
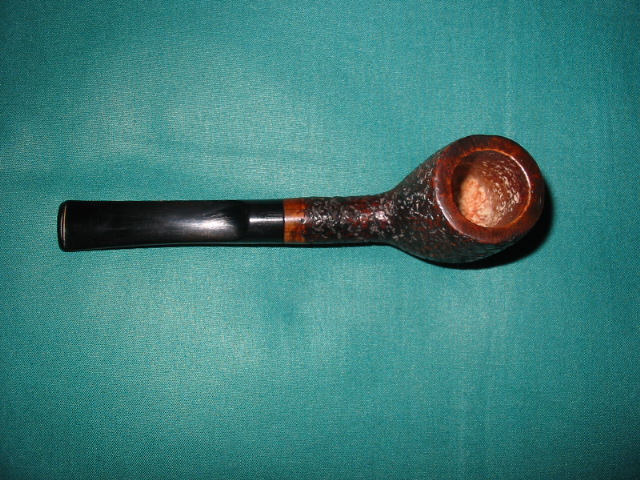
Jichimu pre-restore. Photo © Robert M. Boughton.
This was the bowl I handed over the counter to Chuck at our favorite tobacconist, hoping (and therefore having even a little doubt, which of course proved silly) he could identify its dark reddish, feathery wood. The master restorer took the large bowl from me and, with the briefest squint behind his eyeglasses, through which I noticed a sparkle of slight amusement mixed with a subtle but unmistakable distaste, said:
“It’s Chinese Chicken Wing Wood.”
I remember the slight sting of what I perceived to be a note of contempt in his pronouncement, however well contained and no doubt unintended, as I paused before asking, “Is that good or bad?”
“It’s neither good nor bad,” Chuck said in his baritone voice and shrugged in this enigmatic way he has. “It just is.”
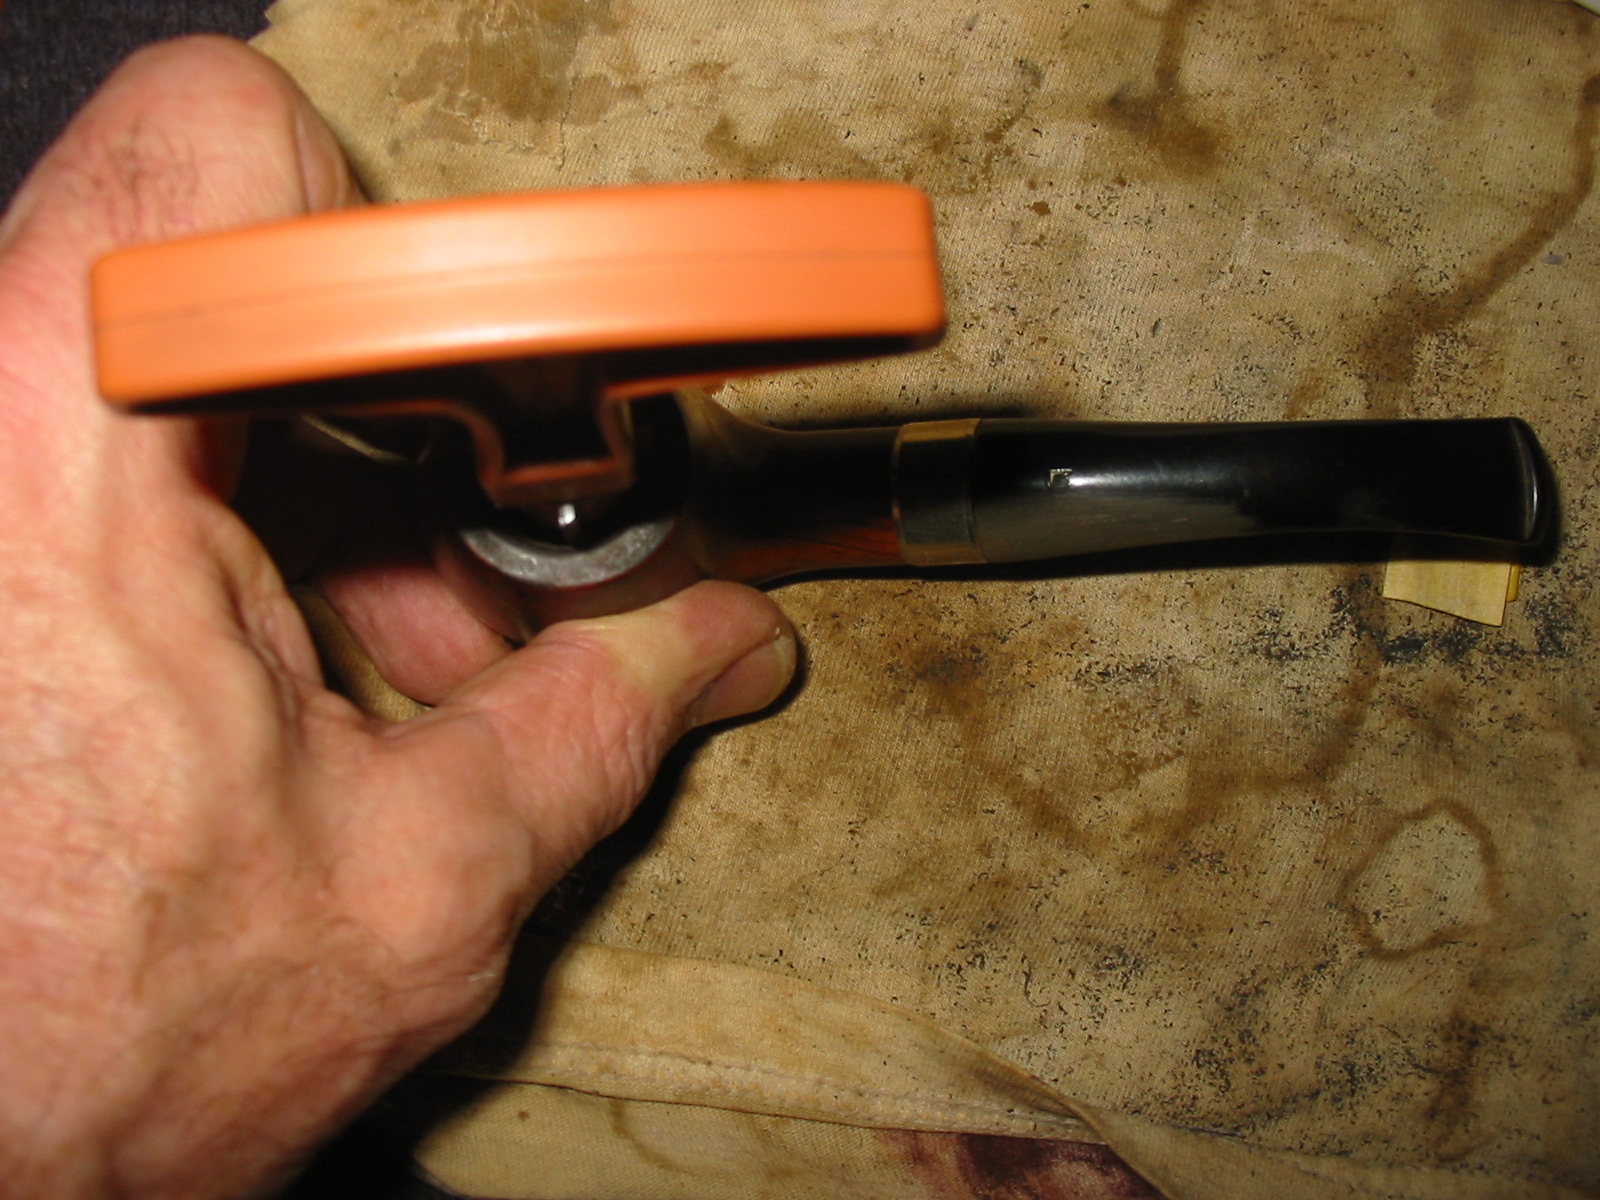
Now, I swear to the truth of this next part upon all that is holy to me, which by the way is considerable: I will never forget flashing back to the iconic ‘70s TV series “Kung Fu,” with David Carradine as Kwai Chang Caine and Keye Luke as Master Po, and Chuck was Master Po snatching the pebble from my outstretched palm – again! Being unable to maintain the absurd private response to an innocent comment in no way intended to insult me, I recovered myself and grinned. I later learned (by doing the unimaginable – asking Chuck)that his primary concerns about smoking a Chinese Chicken Wood Wing pipe were the possibilities of toxicity and what he considered to be likely high maintenance to keep the pipes undamaged because of their soft, porous nature. I was unable to find any negative toxicity information for the jichimu wood genus (other than the serious dangers involving any kind of wood dust inhalation), and as for maintenance, I treat the restored jichimu I kept for myself with the same respect I afford any of my other fine pipes, such as my Meerschaums and Peterson’s: in this case, by storing it in a pipe box.
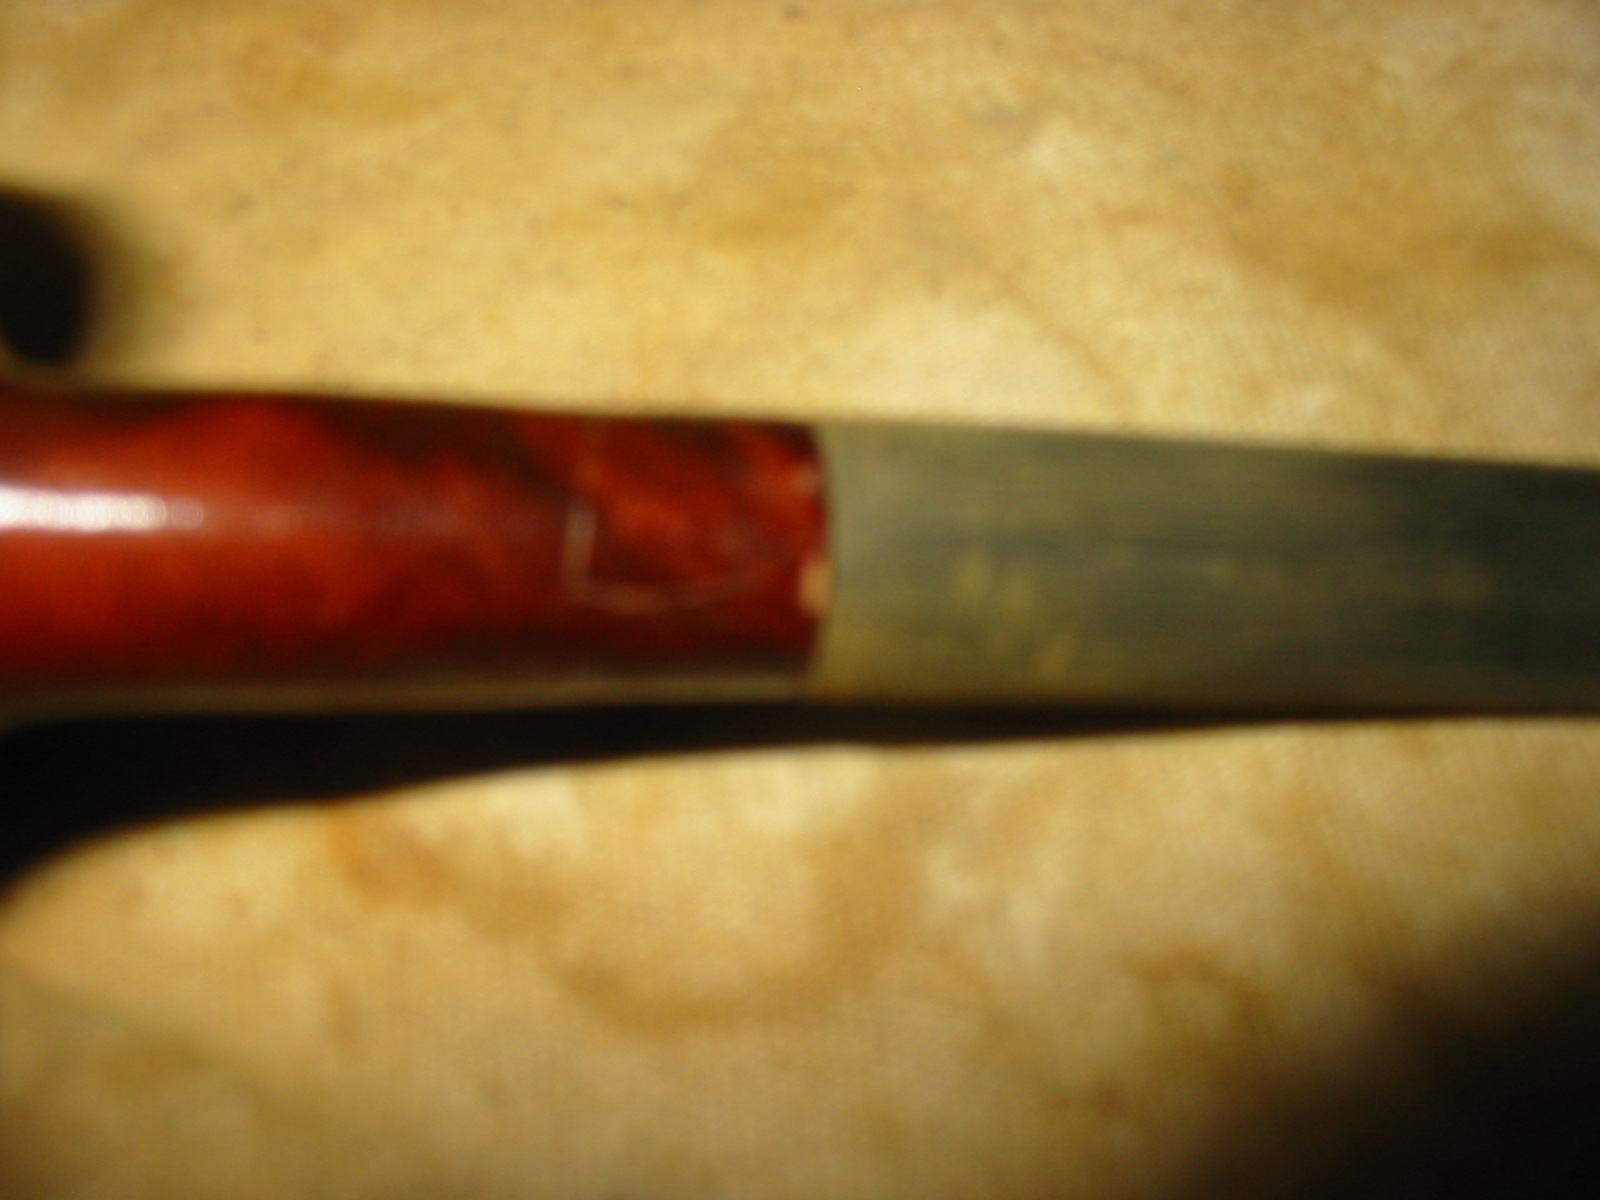
At any rate, Chuck examined the bowl I wanted to keep for my own use and, of course, with his quick, keen eye noted the crack in the top of the shank’s stem opening. Knowing far less then than I do now of pipe restoration (which remains little), I suggested covering it with a metal band of some sort. I recall being so proud of that idea! Chuck, being diplomatic, said that indeed would be part of the solution, but the real problem was finding the right type and color of wood from which to shave enough particles to mix in some sort of Super Glue concoction. Again I made a suggestion, this time redwood, a small piece of which I happened to have on hand at my home. Chuck thought about the idea for a second before telling me to bring the wood to the shop for him to check out, but there was no hurry because he would have to do the restoration after the holiday store sale madness and pressing personal projects were behind him.
Meanwhile, I prepped the bowl with considerable sanding and buffing by hand, work I later realized at best made Chuck’s task a tad easier in that he would only have to spend a minute or so doing the job properly on his electric wheel. The hand sanding and buffing I chalked up to valuable experience (as well as being relaxing and pleasant activities), and should be tried first by all refinishing or restoration beginners, just as anyone new to but serious about photography should start with an older standard SLR film camera to learn the true elements of the art form, including developing the film and printing photos in a dark room, before moving to digital and mastering the dubious practice of Photoshopping on a PC.

Ashley at meeting. Photo© Robert M. Boughton.
Seldom since I was a child had a holiday season seemed to take as long to pass as this last one. In fact, I had a certain pleasant and childish giddiness and anticipation about Chuck’s restoration of my cherished Chinese churchwarden. I kept myself distracted with my own restoration of the second jichimu bowl, of which I had already determined to make a gift to a young lady who attends our weekly pipe club meetings as often as work allows (she has, I believe, three jobs). Ashley has two distinctions in our club, one being that she is the only female member and the other that she smokes churchwardens exclusively. Who better to give a pipe which, although I knew it would be a lovely specimen by the time I was finished with it, nevertheless amounted to a twin of one I owned? Since Ashley is married to another pipe smoker and club member, Stephen, the gift was platonic in its intent, but still I was careful to broach the subject with him one night when I found him by himself by asking if he thought his wife would appreciate not only the idea of the gift but, of more importance to me, the unusual wood. In fact, I put it bluntly, would the jichimu be something Ashley enjoyed smoking? I admit I was relieved when Stephen assured me she would love it, and I asked him not to tell her anything about my plan. Stephen was more than willing to go along. I even completed a “first draft” of the restore during this time.
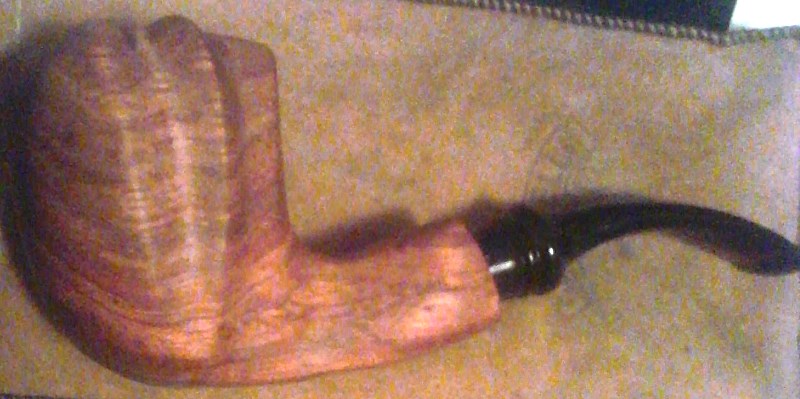
Photo © Robert M. Boughton.
Meanwhile, back to Chuck’s restoration work, after the holiday crush at the shop: he’d had time to mull over the ideas that took time to come together in his head for this project that, for personal reasons we have never discussed but have become apparent to me in the intervening months, somehow meant more to him than the average restoration. Somehow none of the rarest, most damaged pipes presenting Chuck with the kinds of severe tests of his masterful skills that he had needed to employ in the past and will continue to utilize in the future seemed more important to him than the simple job I had asked him to perform with my well-sanded and unblemished (other than the small crack in the shank) jichimu bowl I had entrusted to his care. After all, I had only expected him to fix the crack, wax and buff the bowl on his electric wheel, add a nice-looking metal band of some sort and top it all off with a good stem, preferably of a reddish colorized Lucite variety if he could find one. And of course I expected to pay for it, although he made it clear in the beginning he would cut me a deal.
The key difference between what I wanted from Chuck and how he approaches any job, I soon came to understand, was in Chuck’s great expectations. While I expected Chuck to have a fast and easy job of making my bowl look as beautiful as I thought it could be and at the same time able to smoke with the addition of a stem, his ideals are far higher than that. When at last he began to fill me in on his plans for the pipe – such as the fact that he had found a better match of wood for shavings to fill the crack in the shank than the redwood I had left for him a couple of months earlier, and that they were from an empty cigar box he found in the back of the shop – I discerned in his eyes an excitement I had never seen there before. That, believe it or not, was my first clue as to how seriously Chuck had taken this “job.” He explained in detail the process by which he would fill the crack and then attach and seal the band and would add only that he had found “the perfect” stem of which he was certain I would approve. Of course, since the bowl was a churchwarden and that was the type of stem I had requested, I assumed that was what it would be. But Chuck, being in charge, had far grander designs in mind. I have to wonder who was the true child at Christmastime.
So, to cut to the chase as it were, I was sitting at home late one afternoon checking my emails when I found one from Chuck that read, as I recall, “Well, are you ready to come get your pipe or not?” I must have re-read that brief message several times, shaking with excitement, before picking up my phone to call the shop and make sure he was there. He was, and his laugh could not disguise his own excitement. So, telling him I would be right there, I fumbled a few jars of tobacco together and was out the door in a flash.
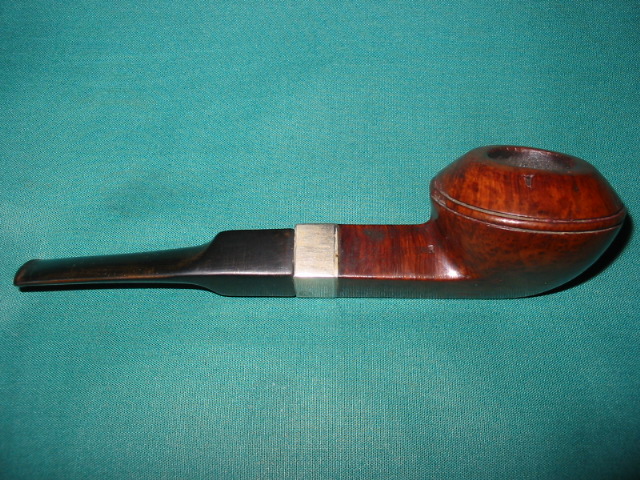
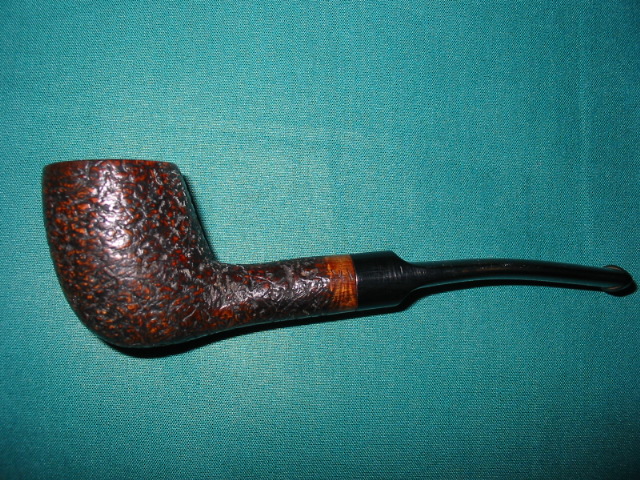
When I arrived maybe 15 minutes later, Chuck was literally glowing, his face beaming with anticipation and a certainty that I would be satisfied. Still, I have a feeling that deep inside him was a fear of possible disappointment on my part that had to be utterly alien to him. Here is what he unveiled to me:
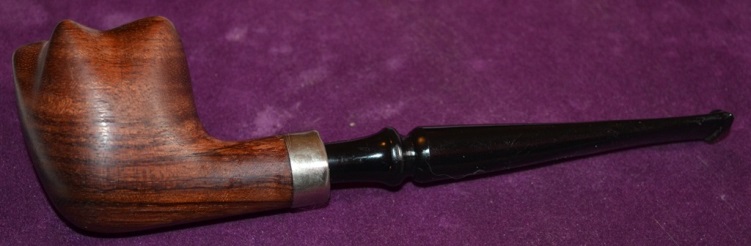
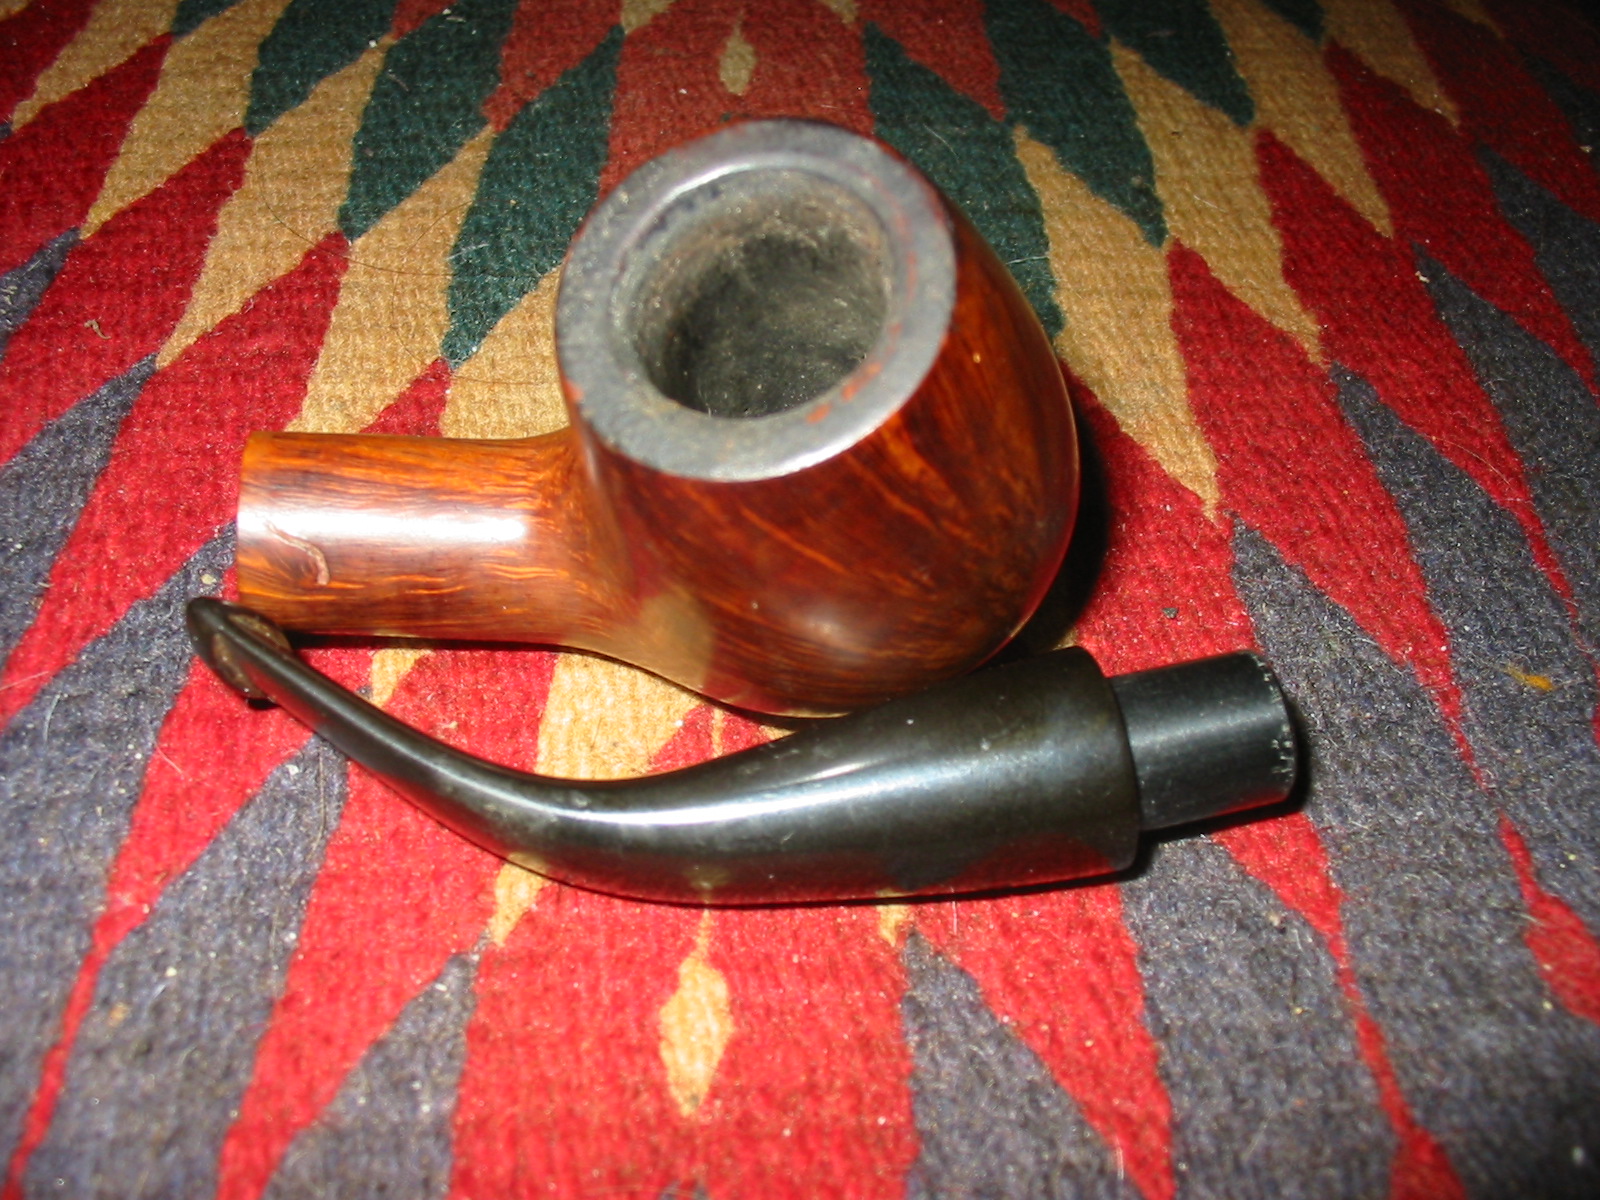
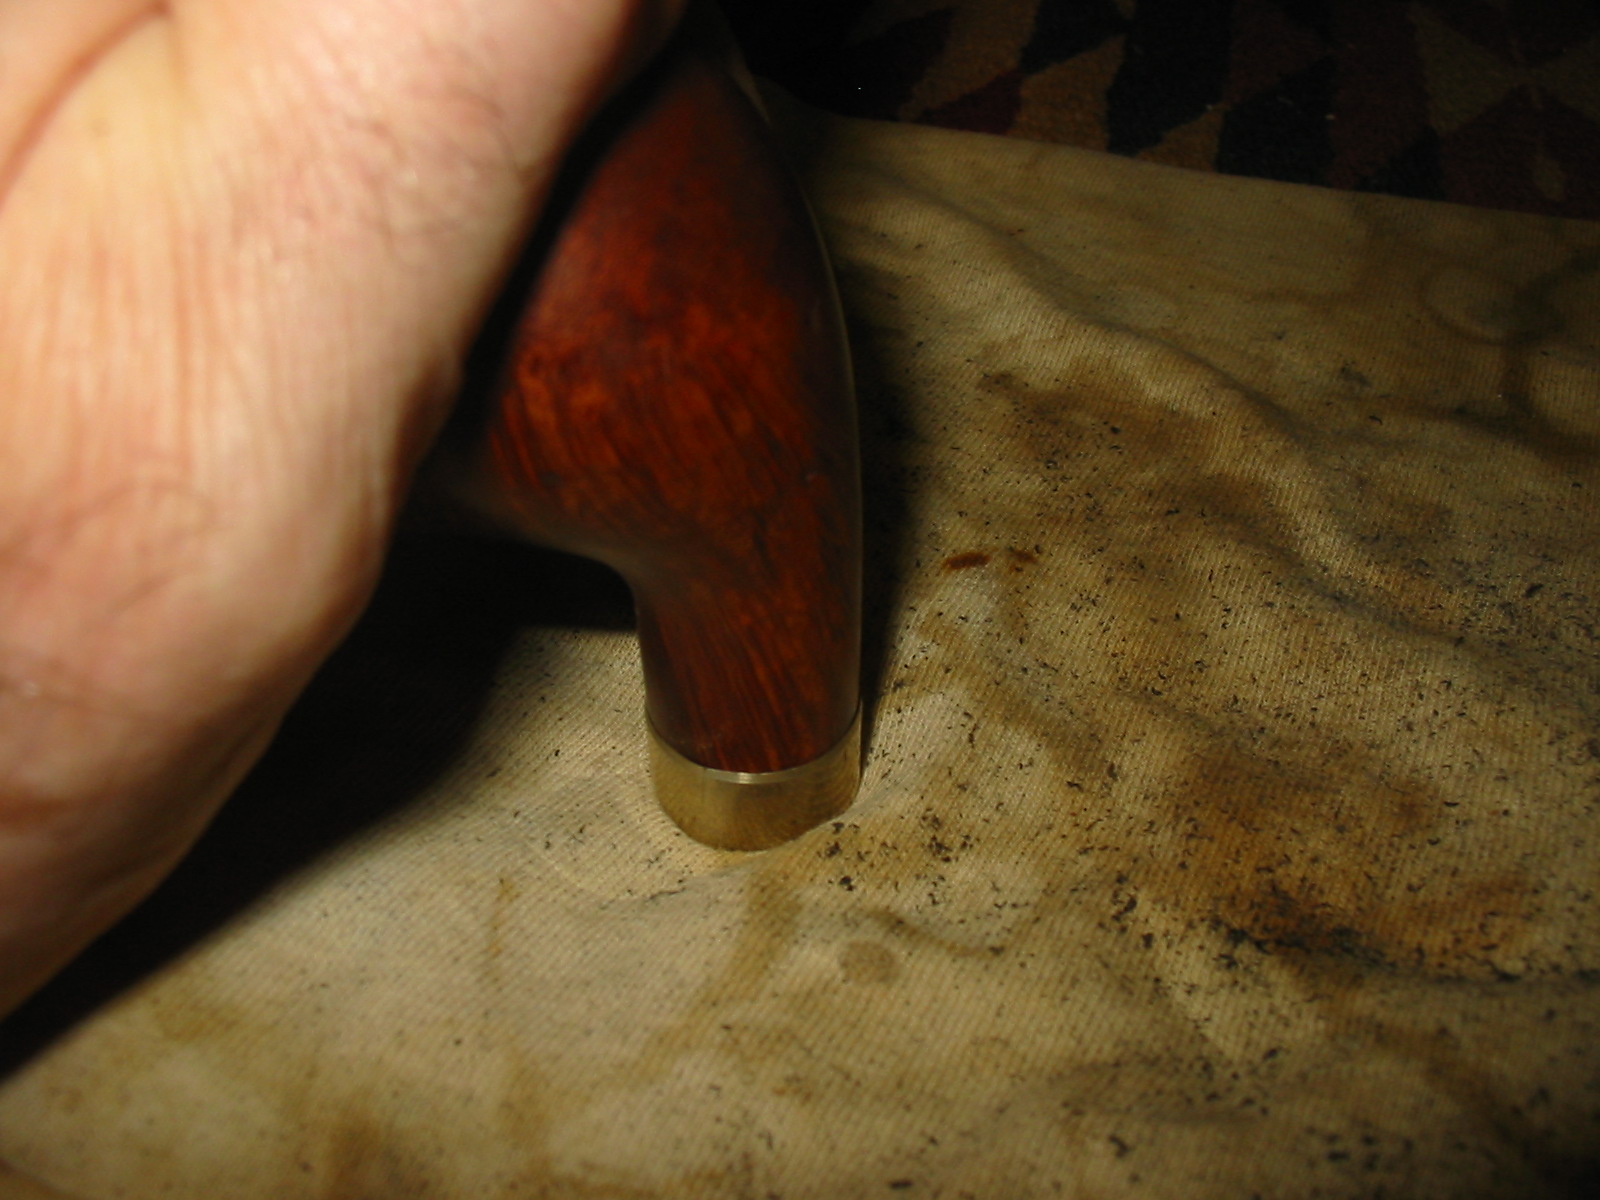
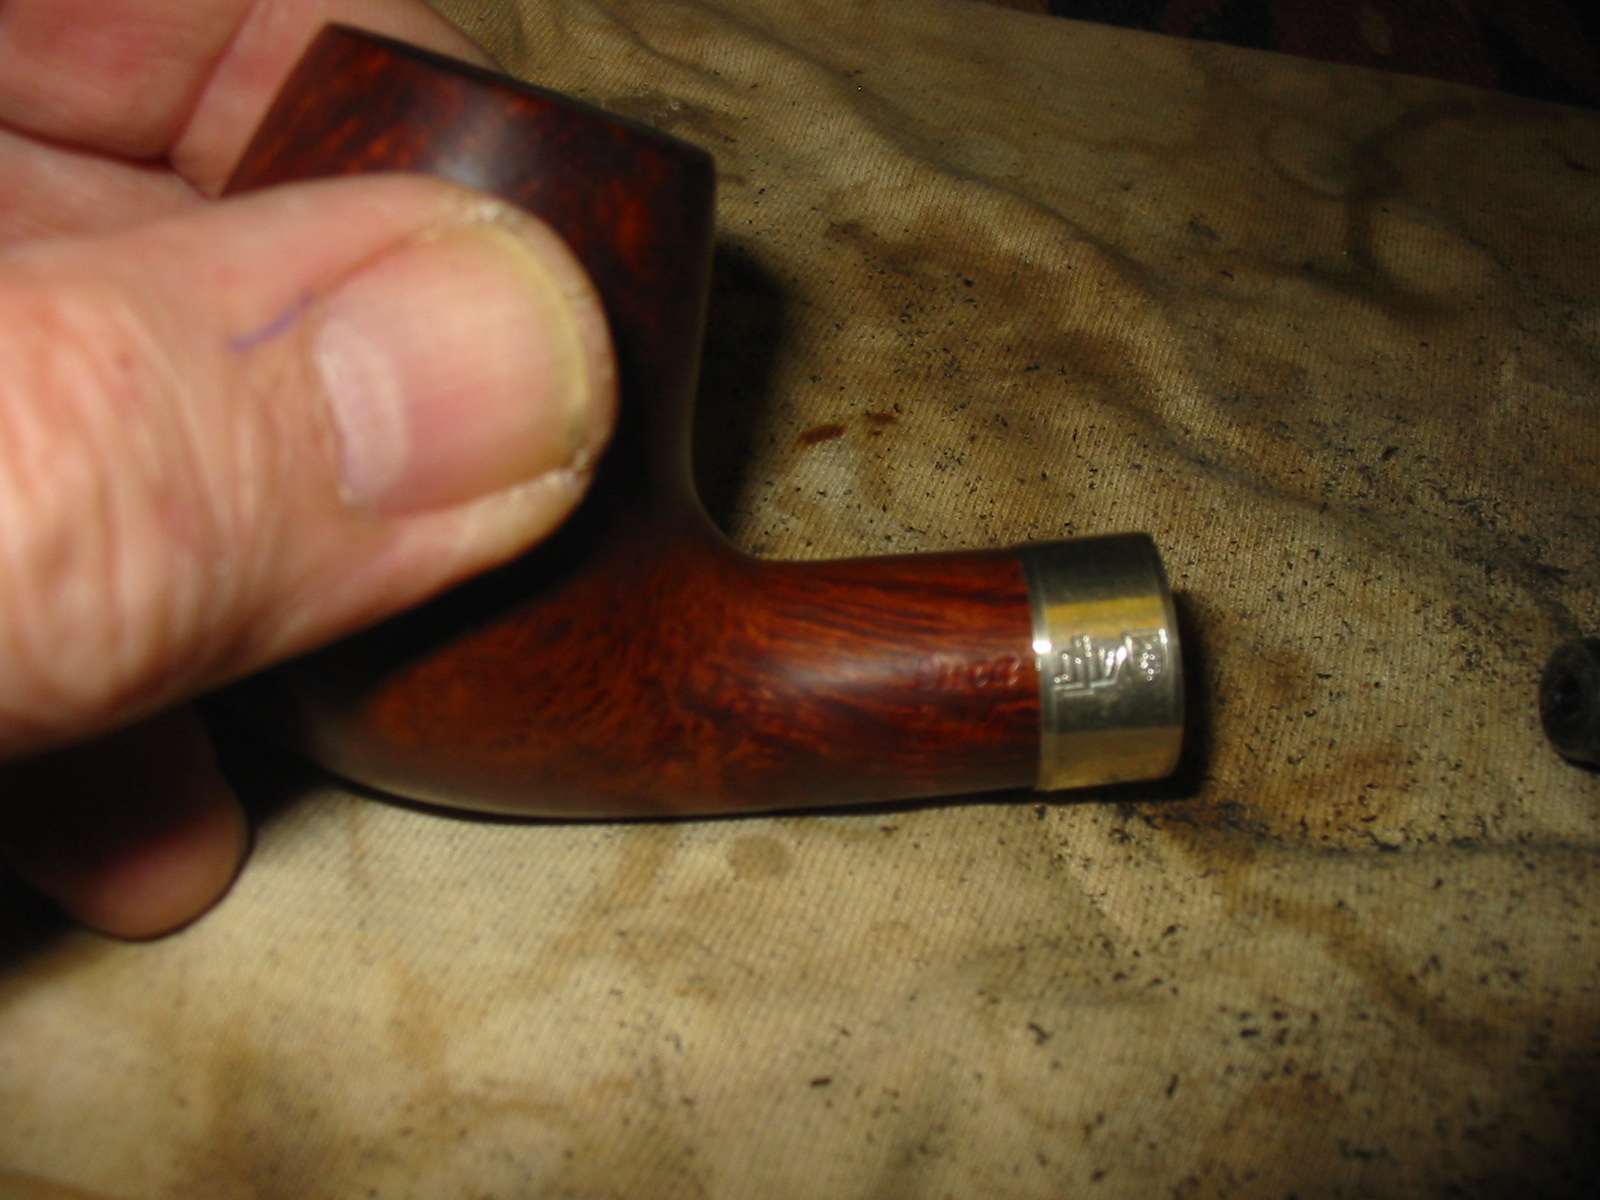
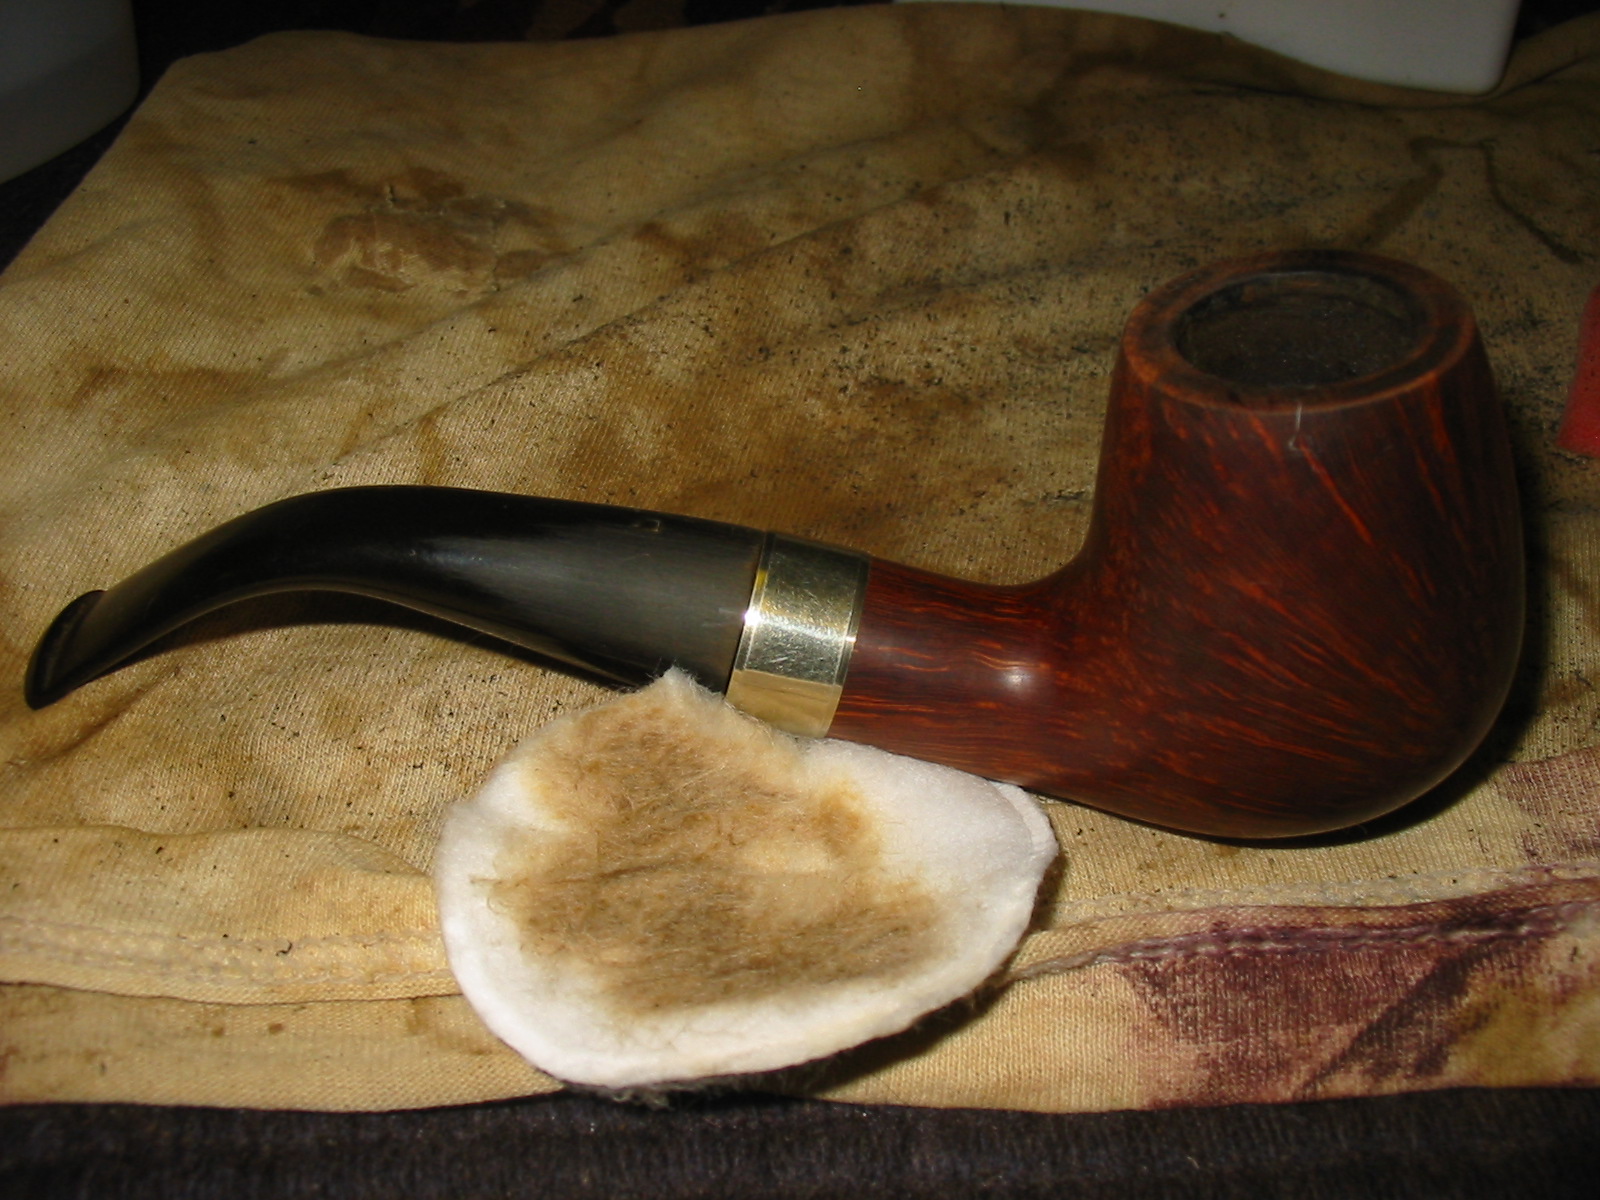
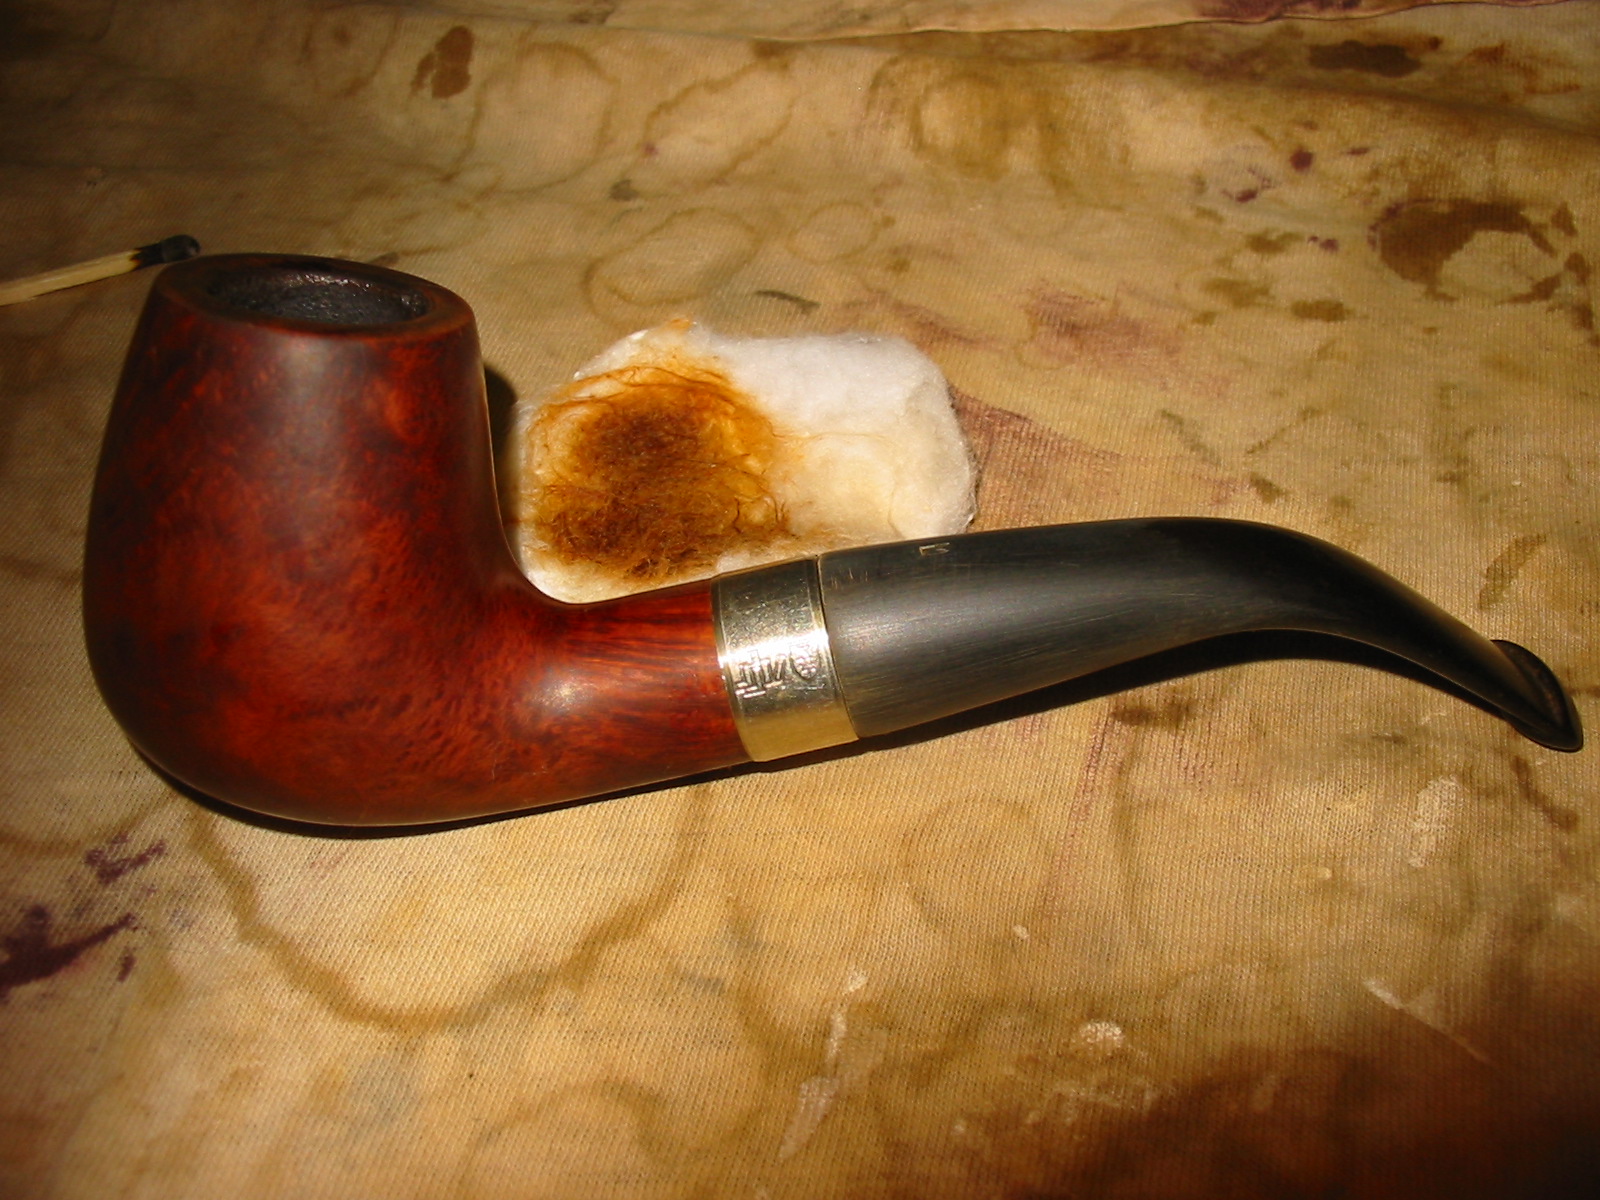
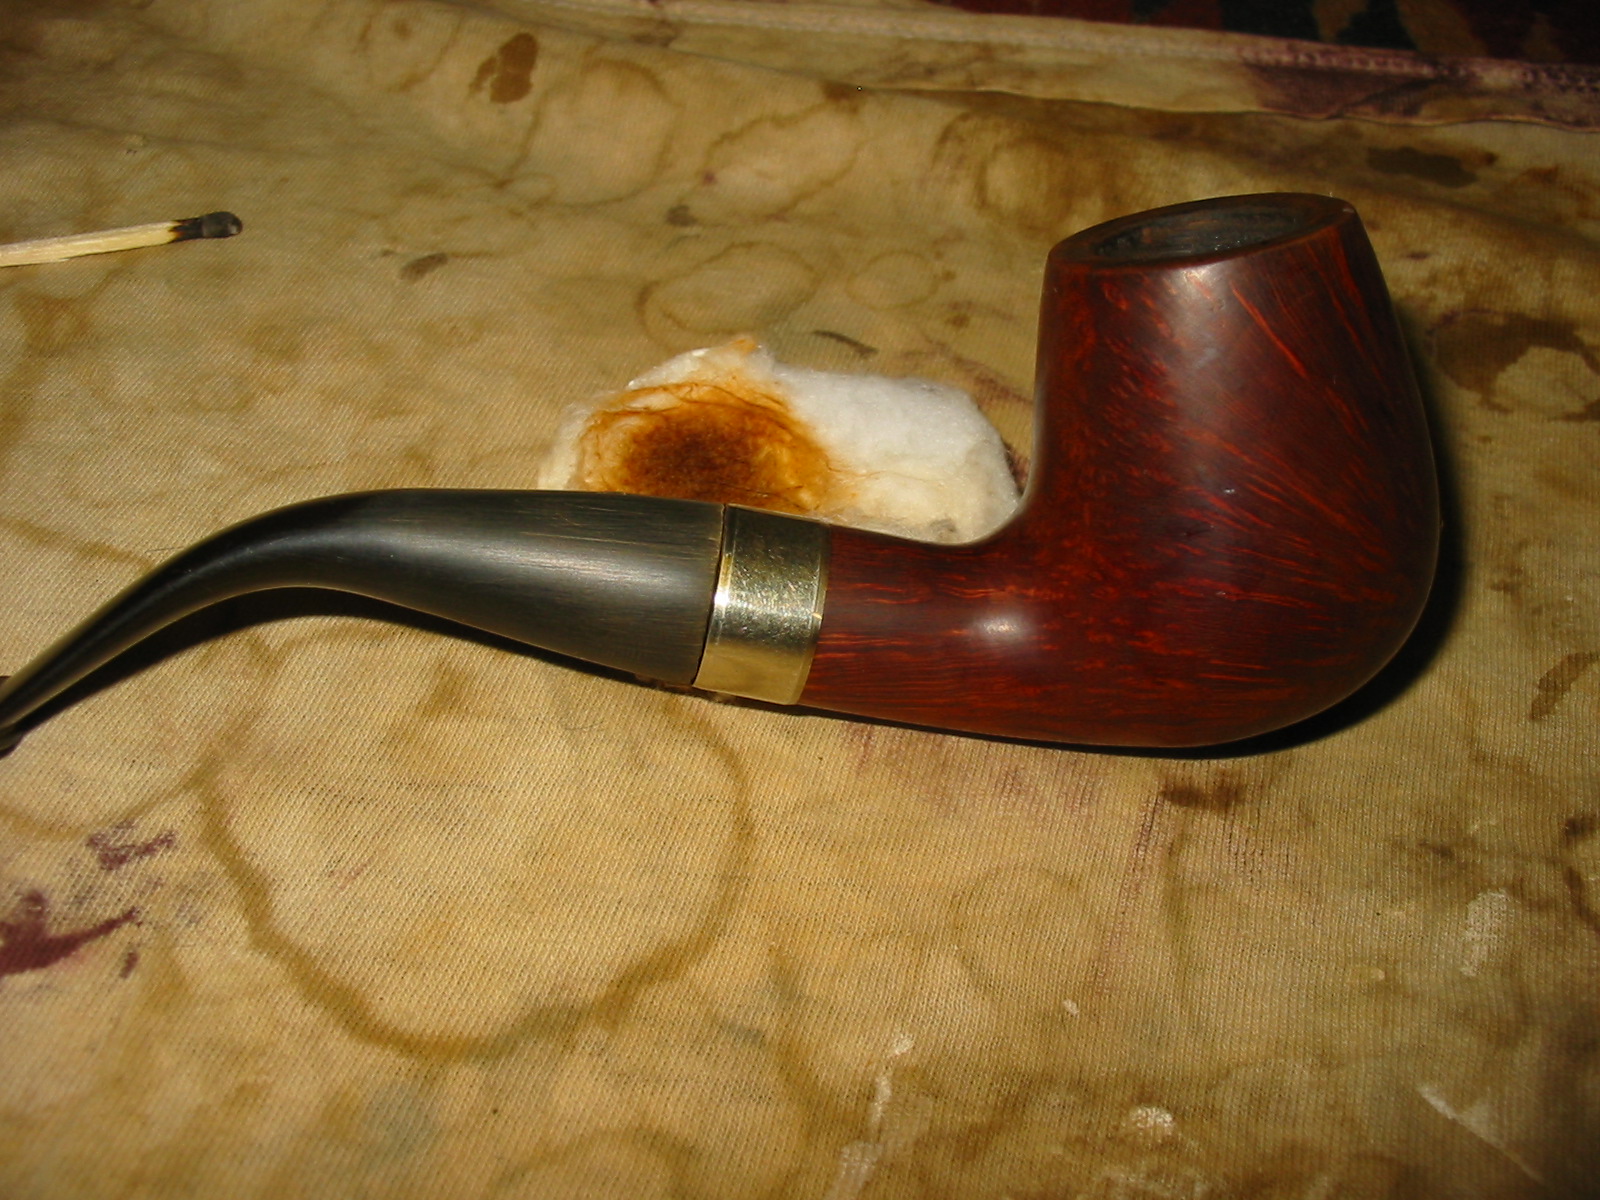
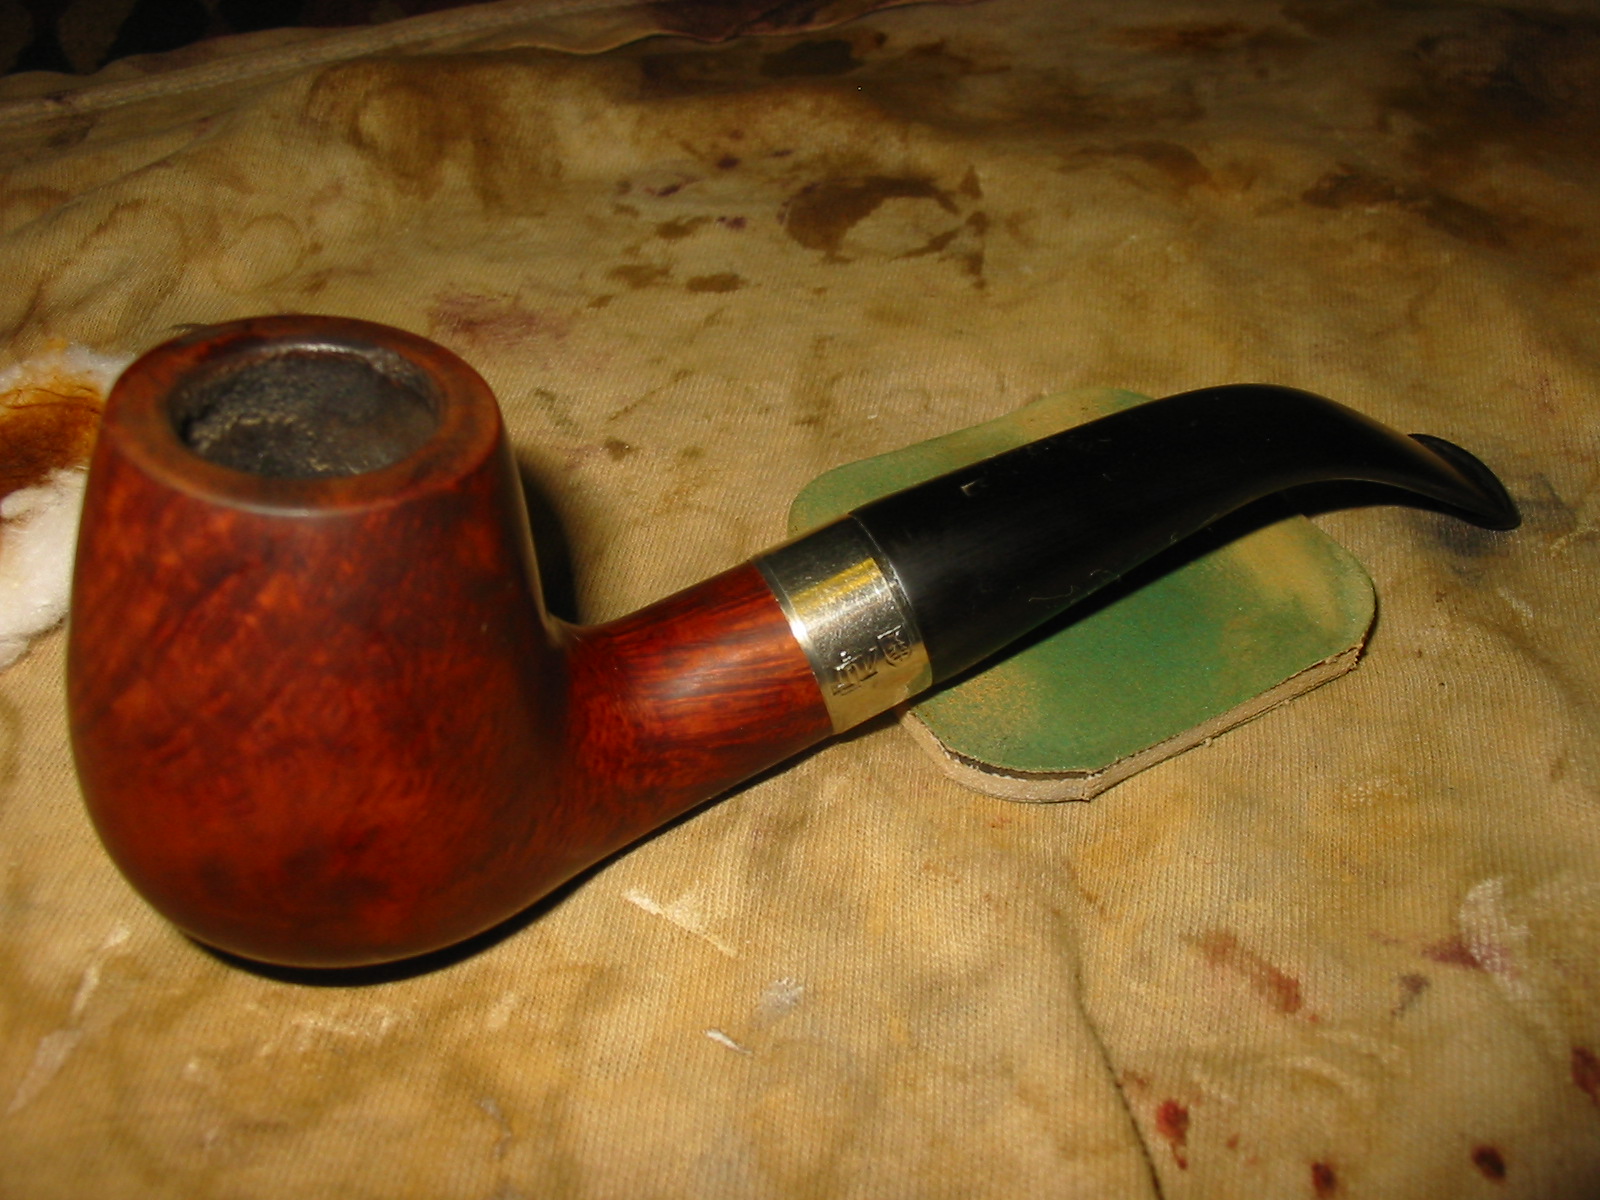
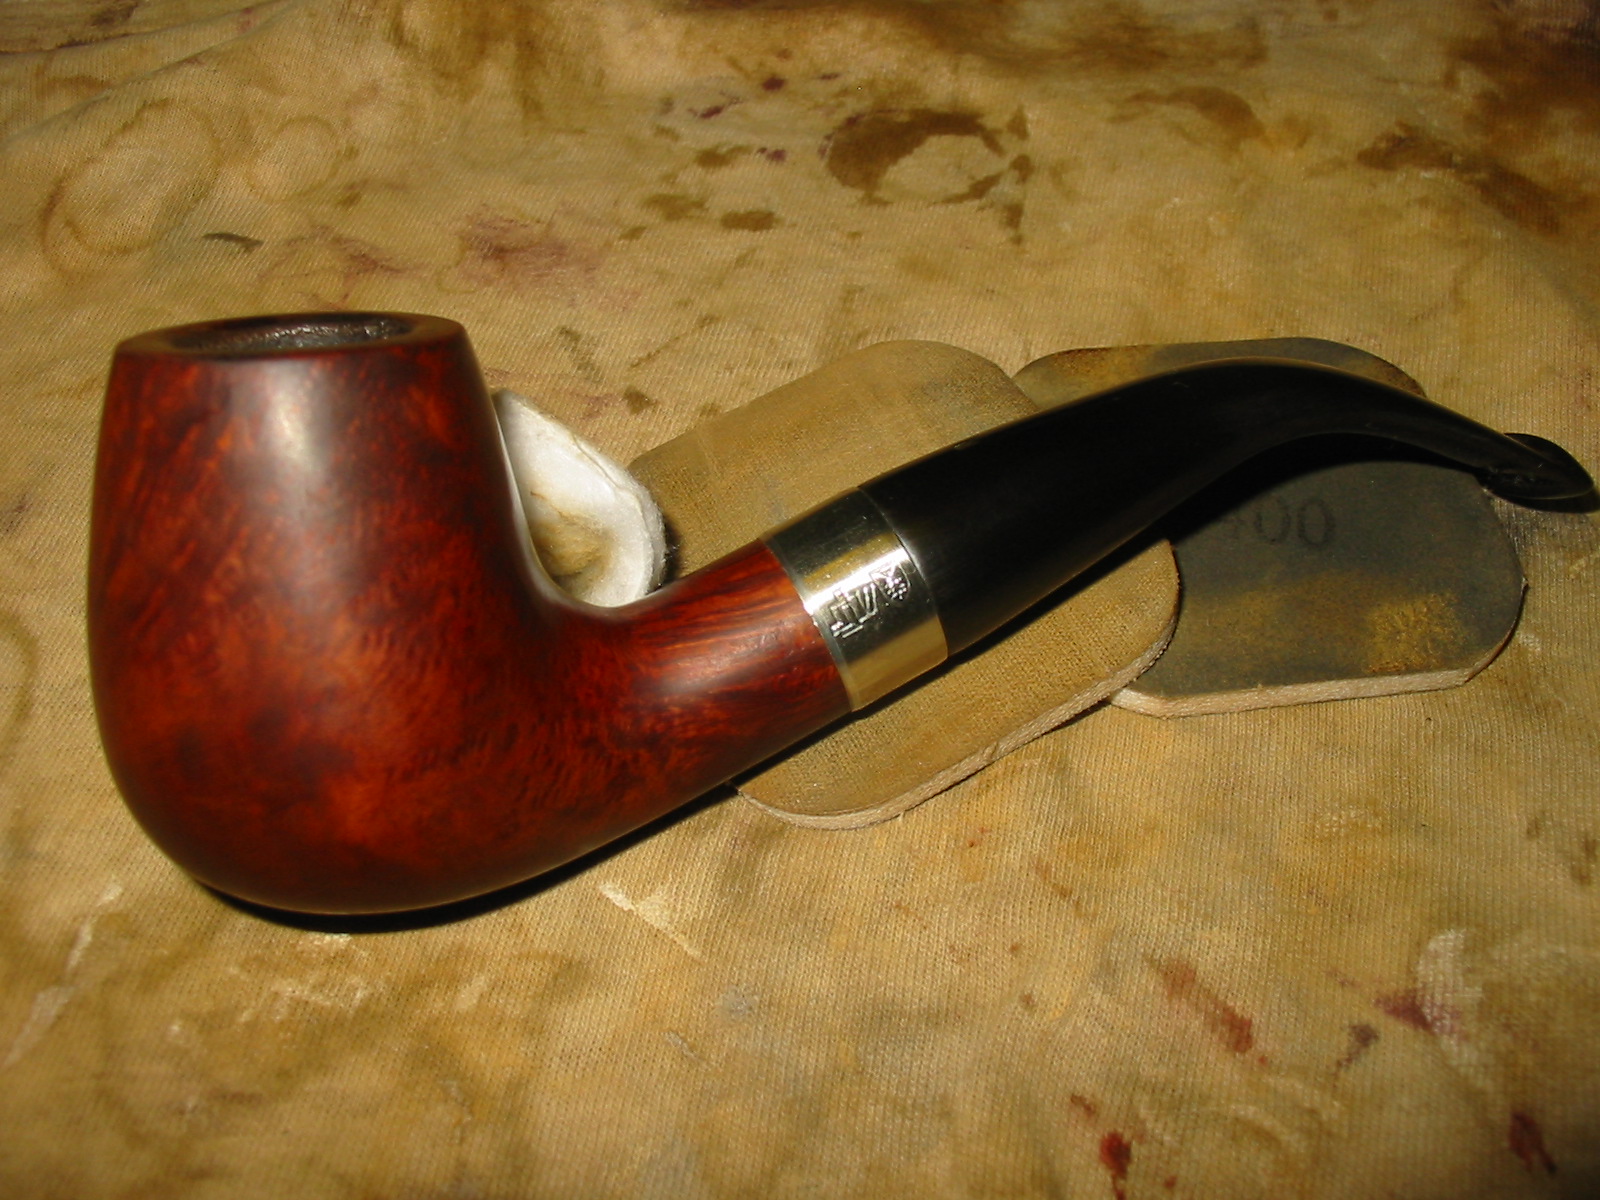
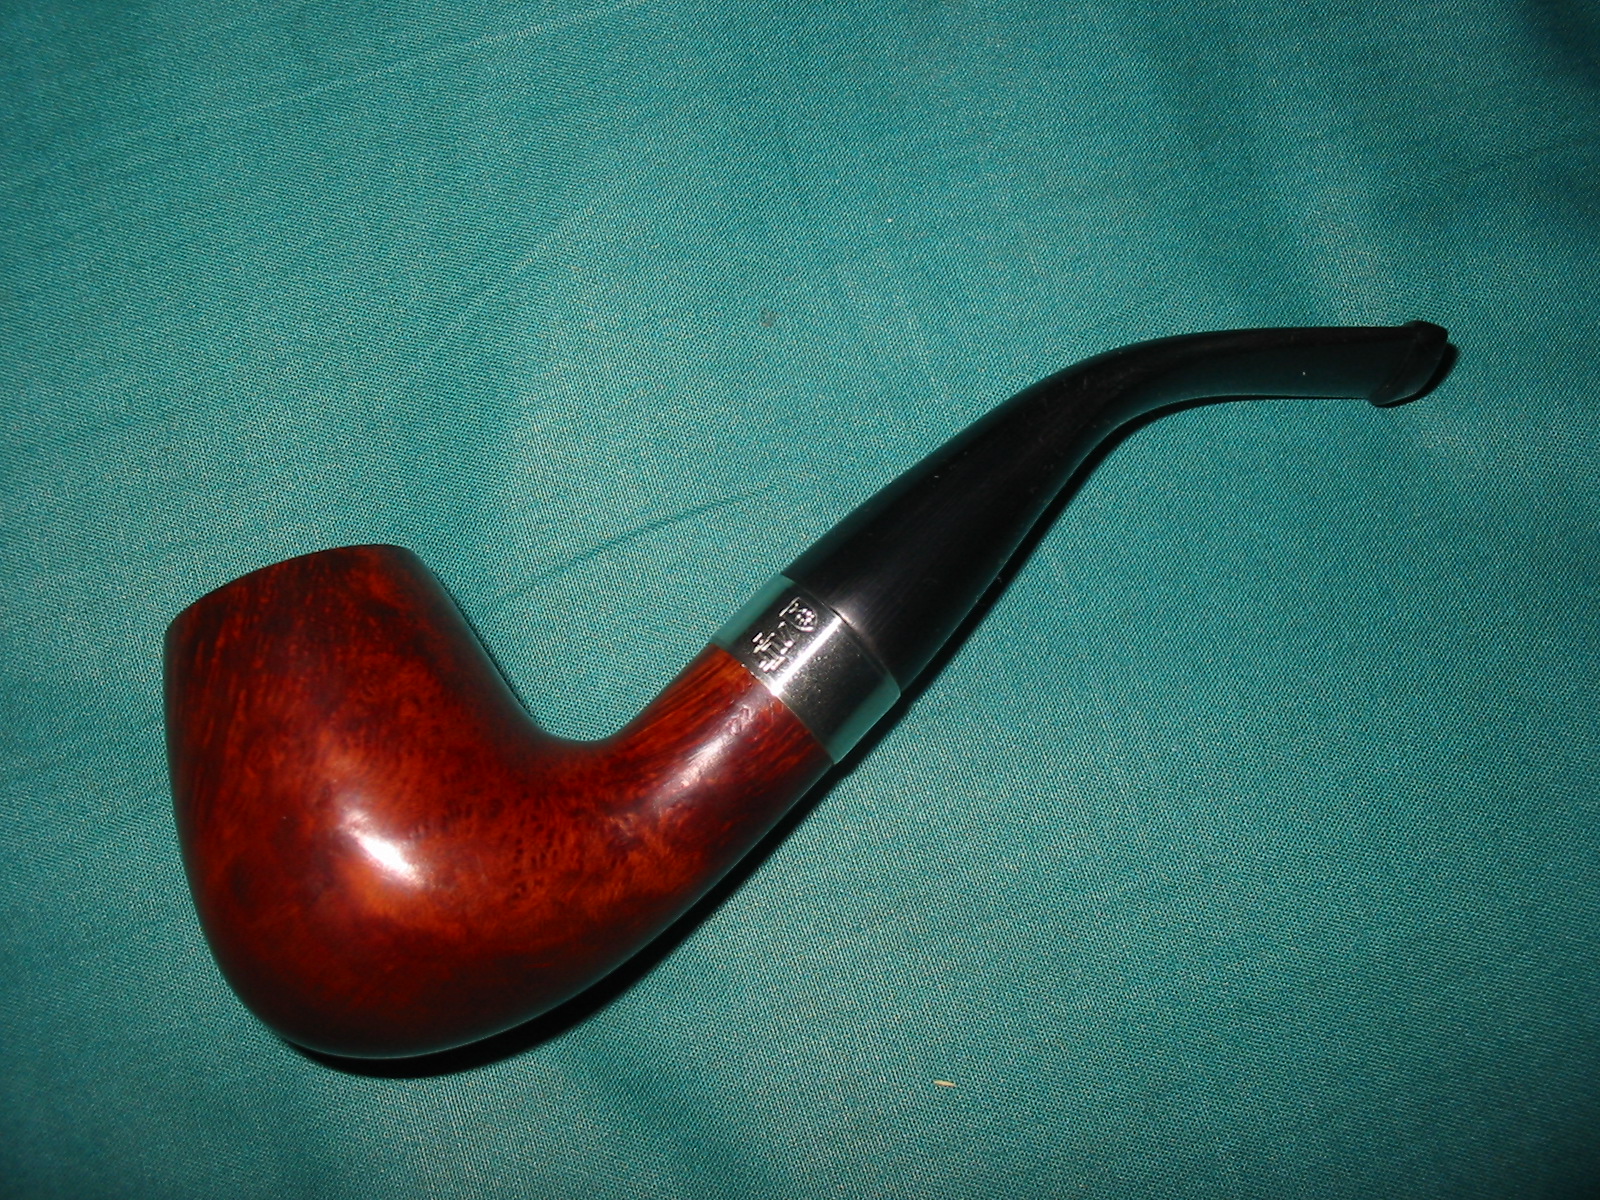
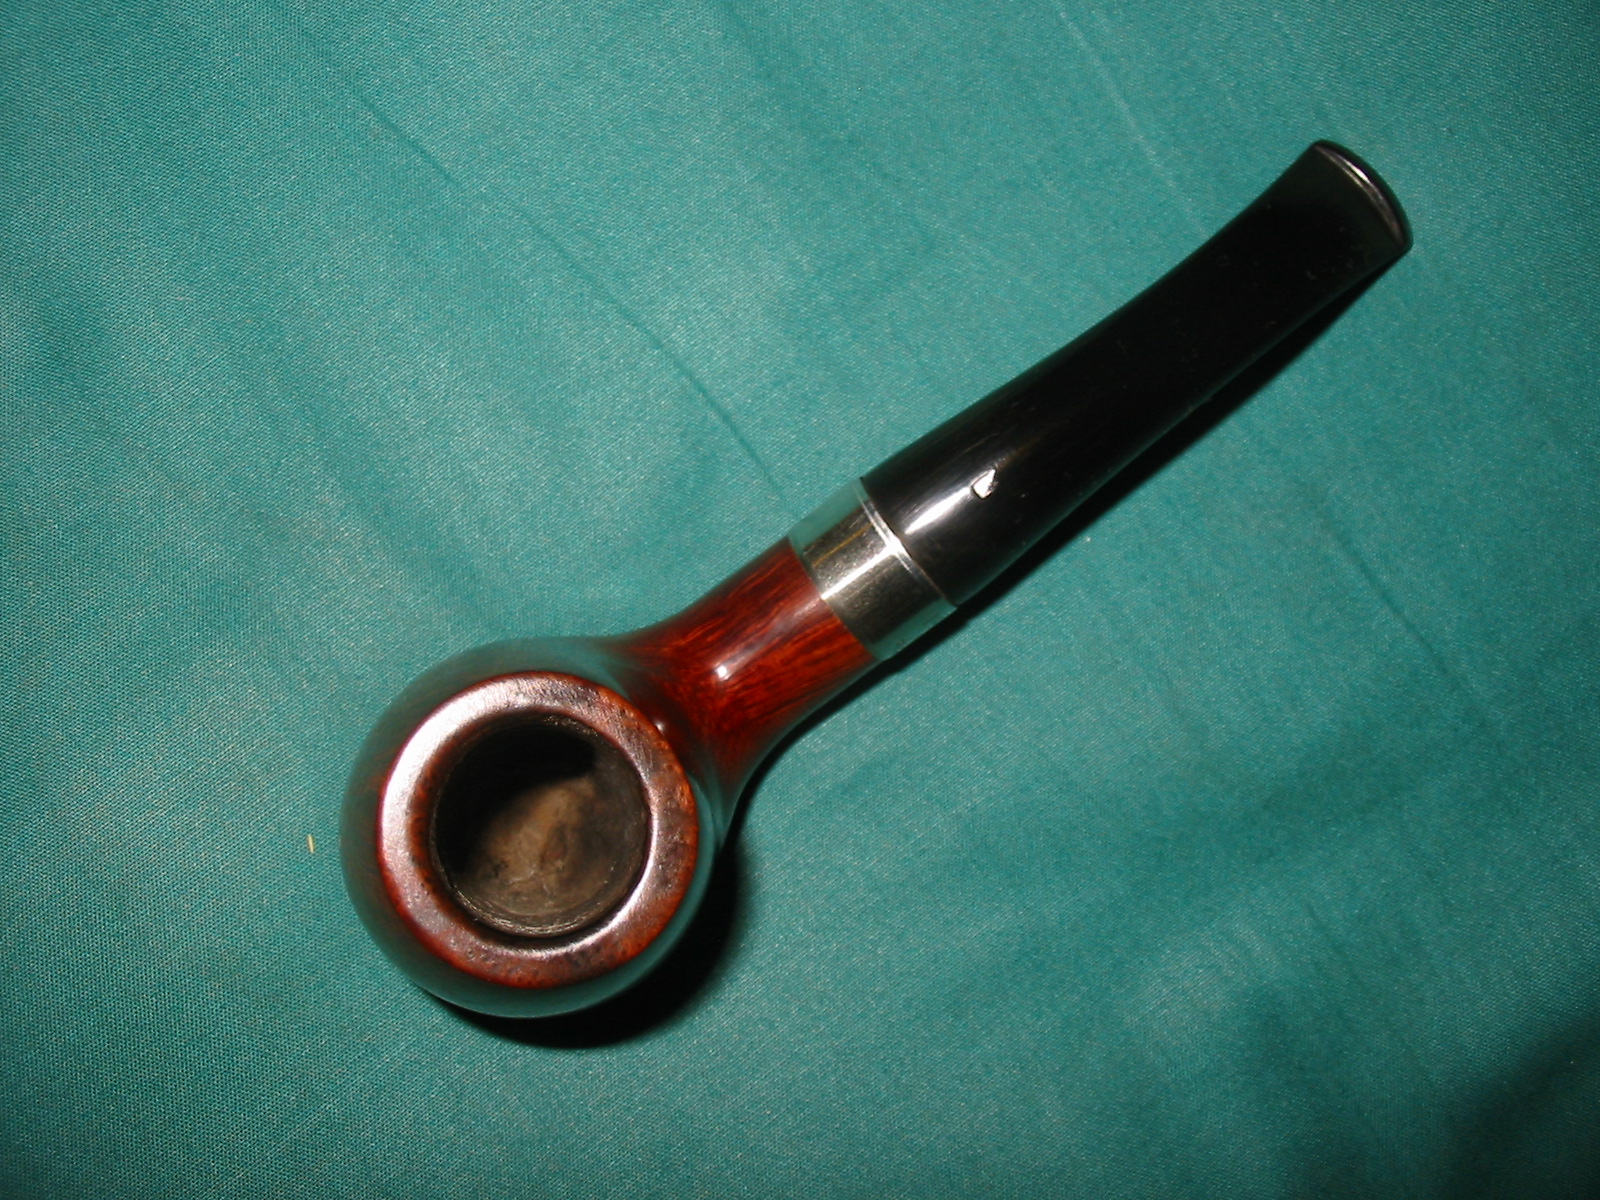
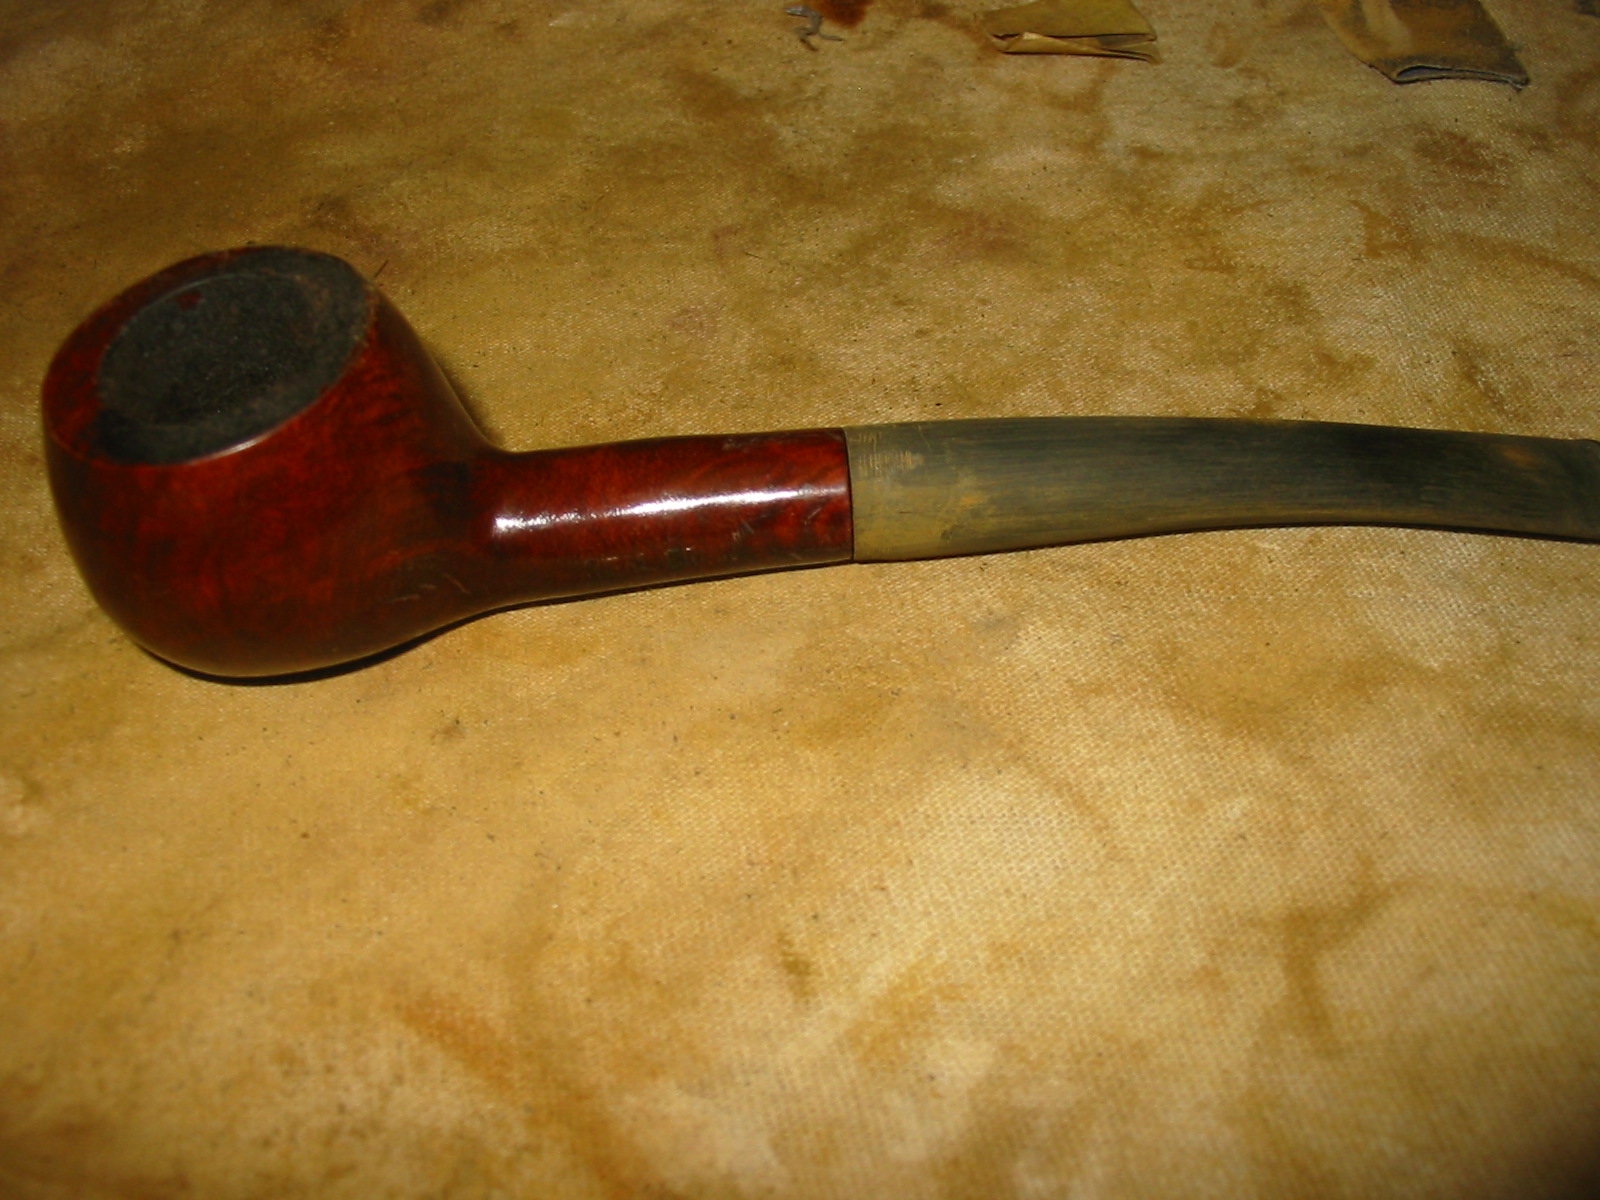
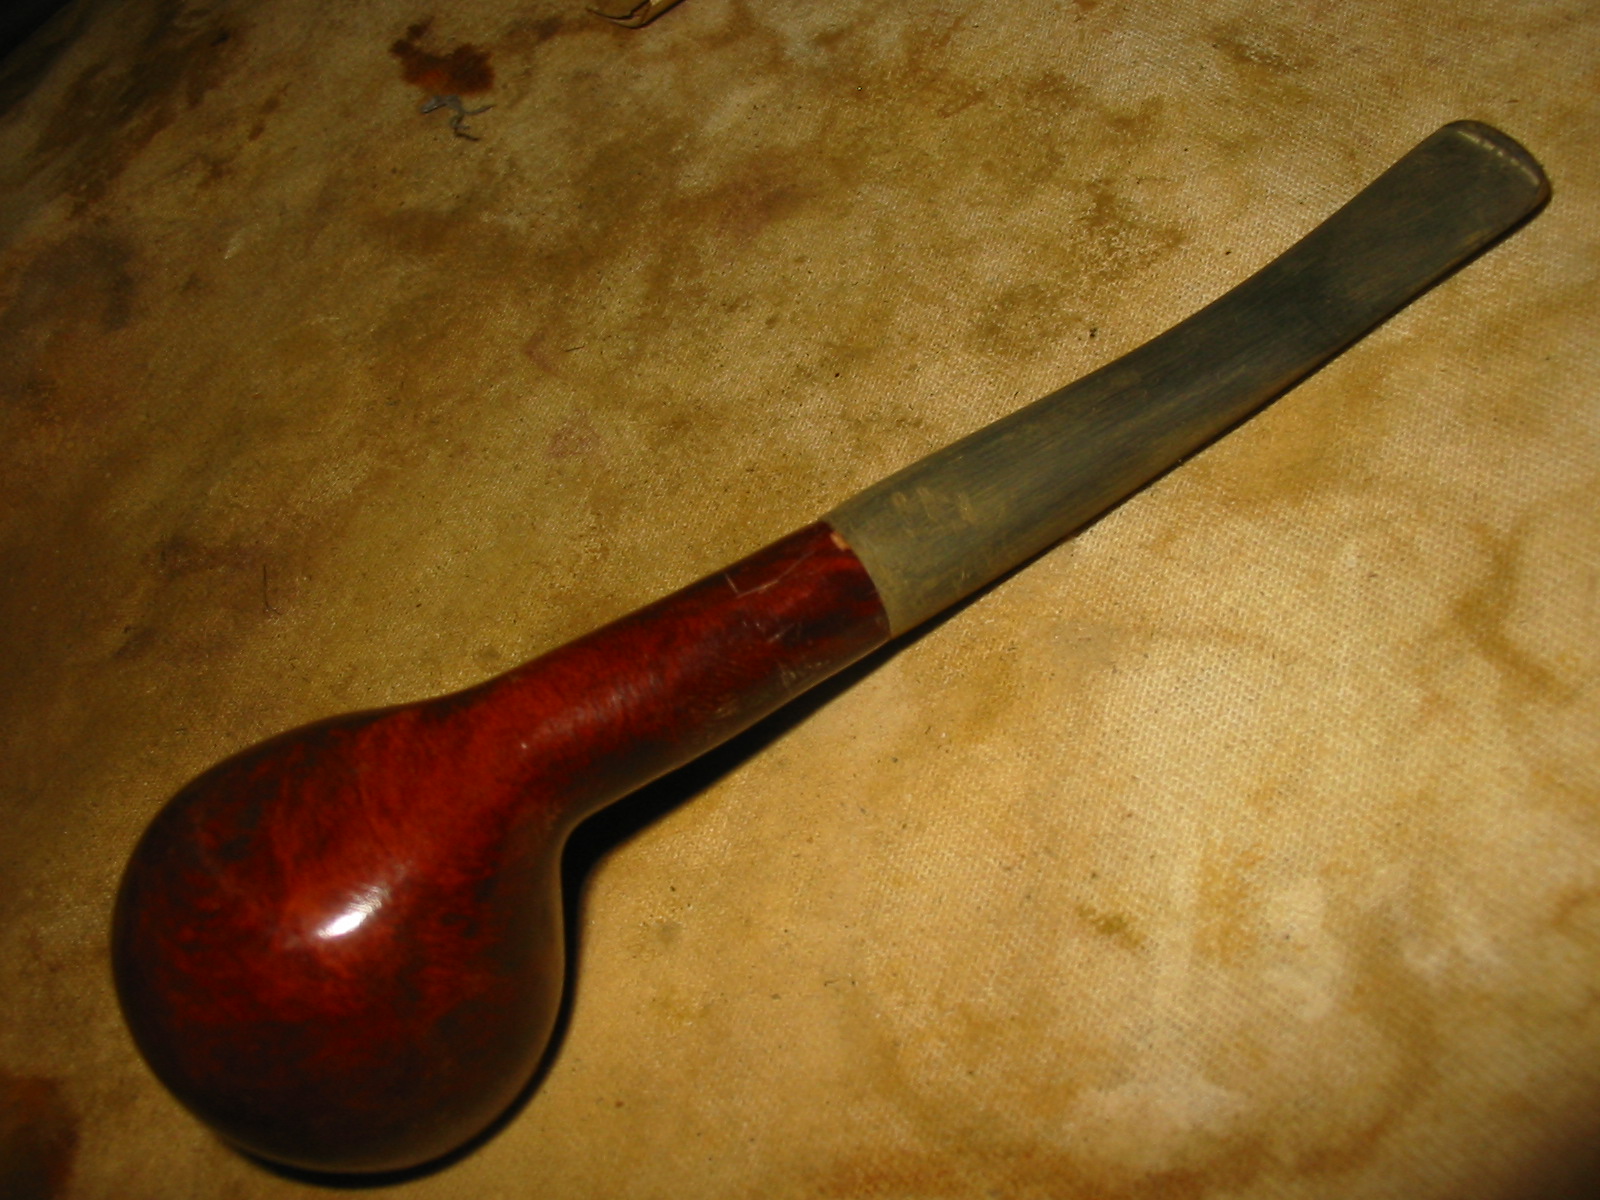
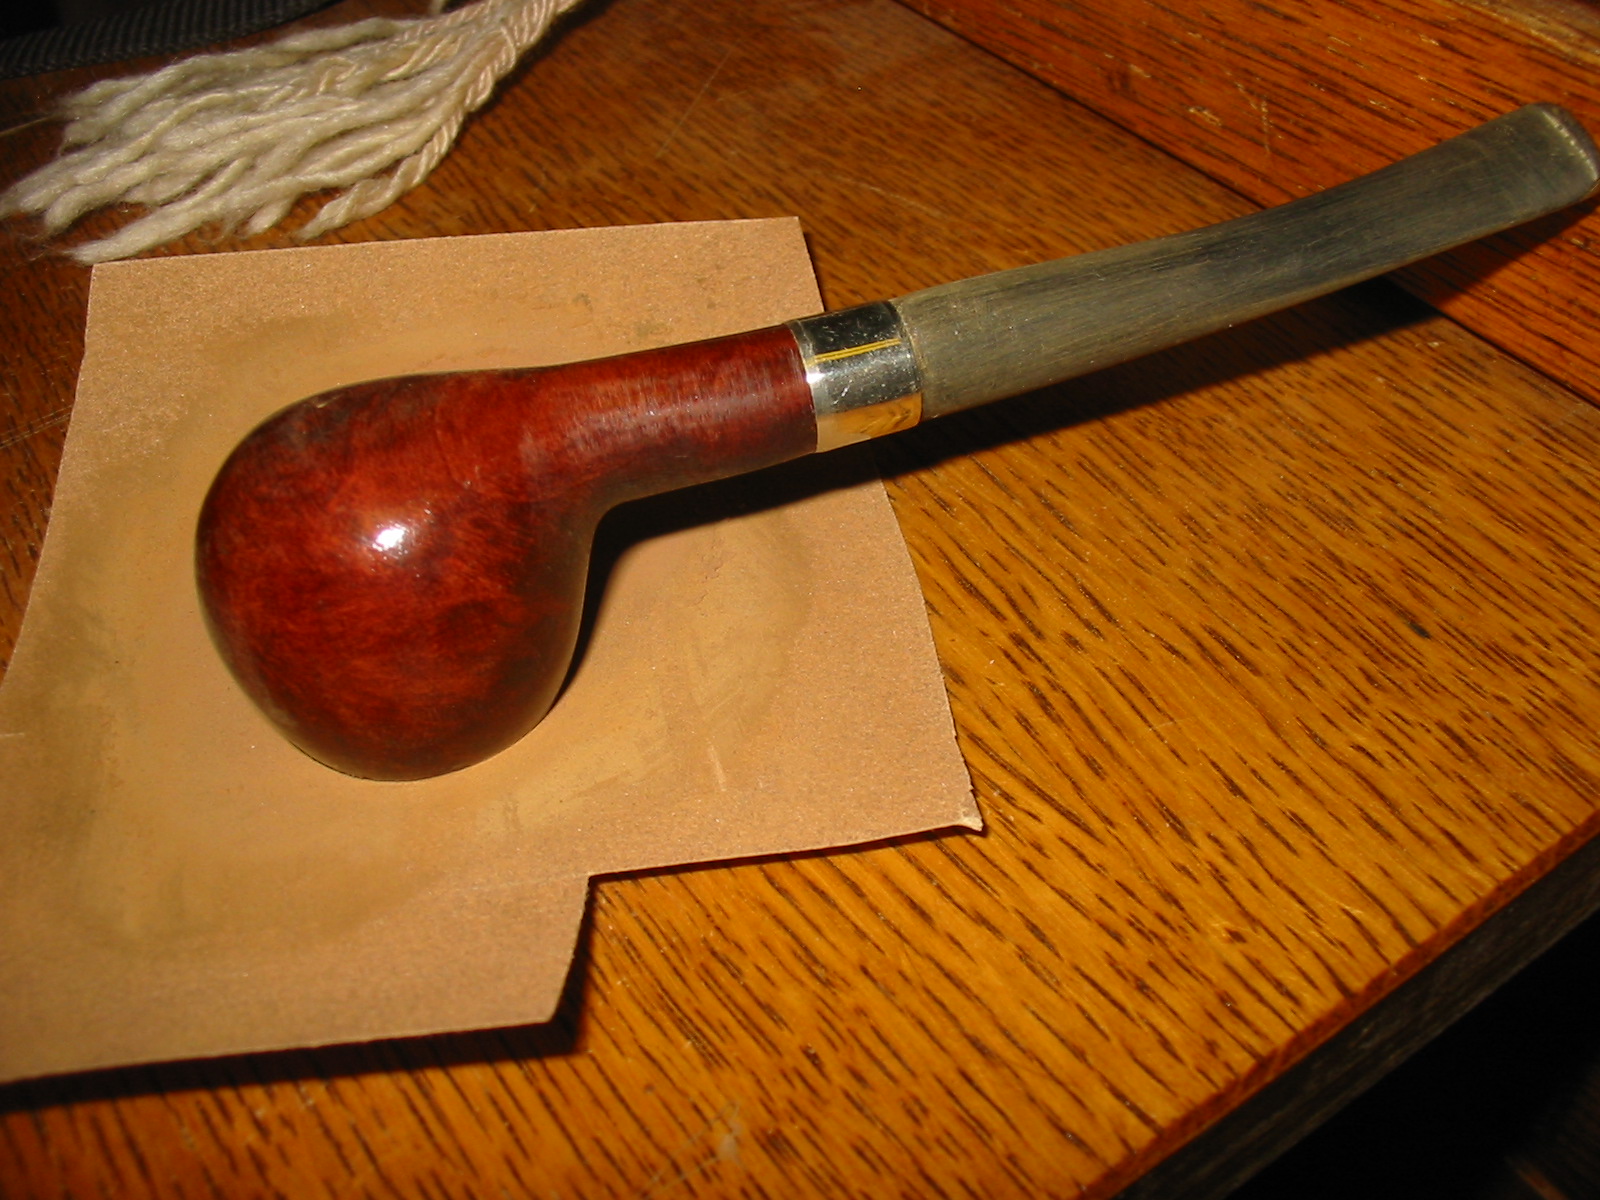
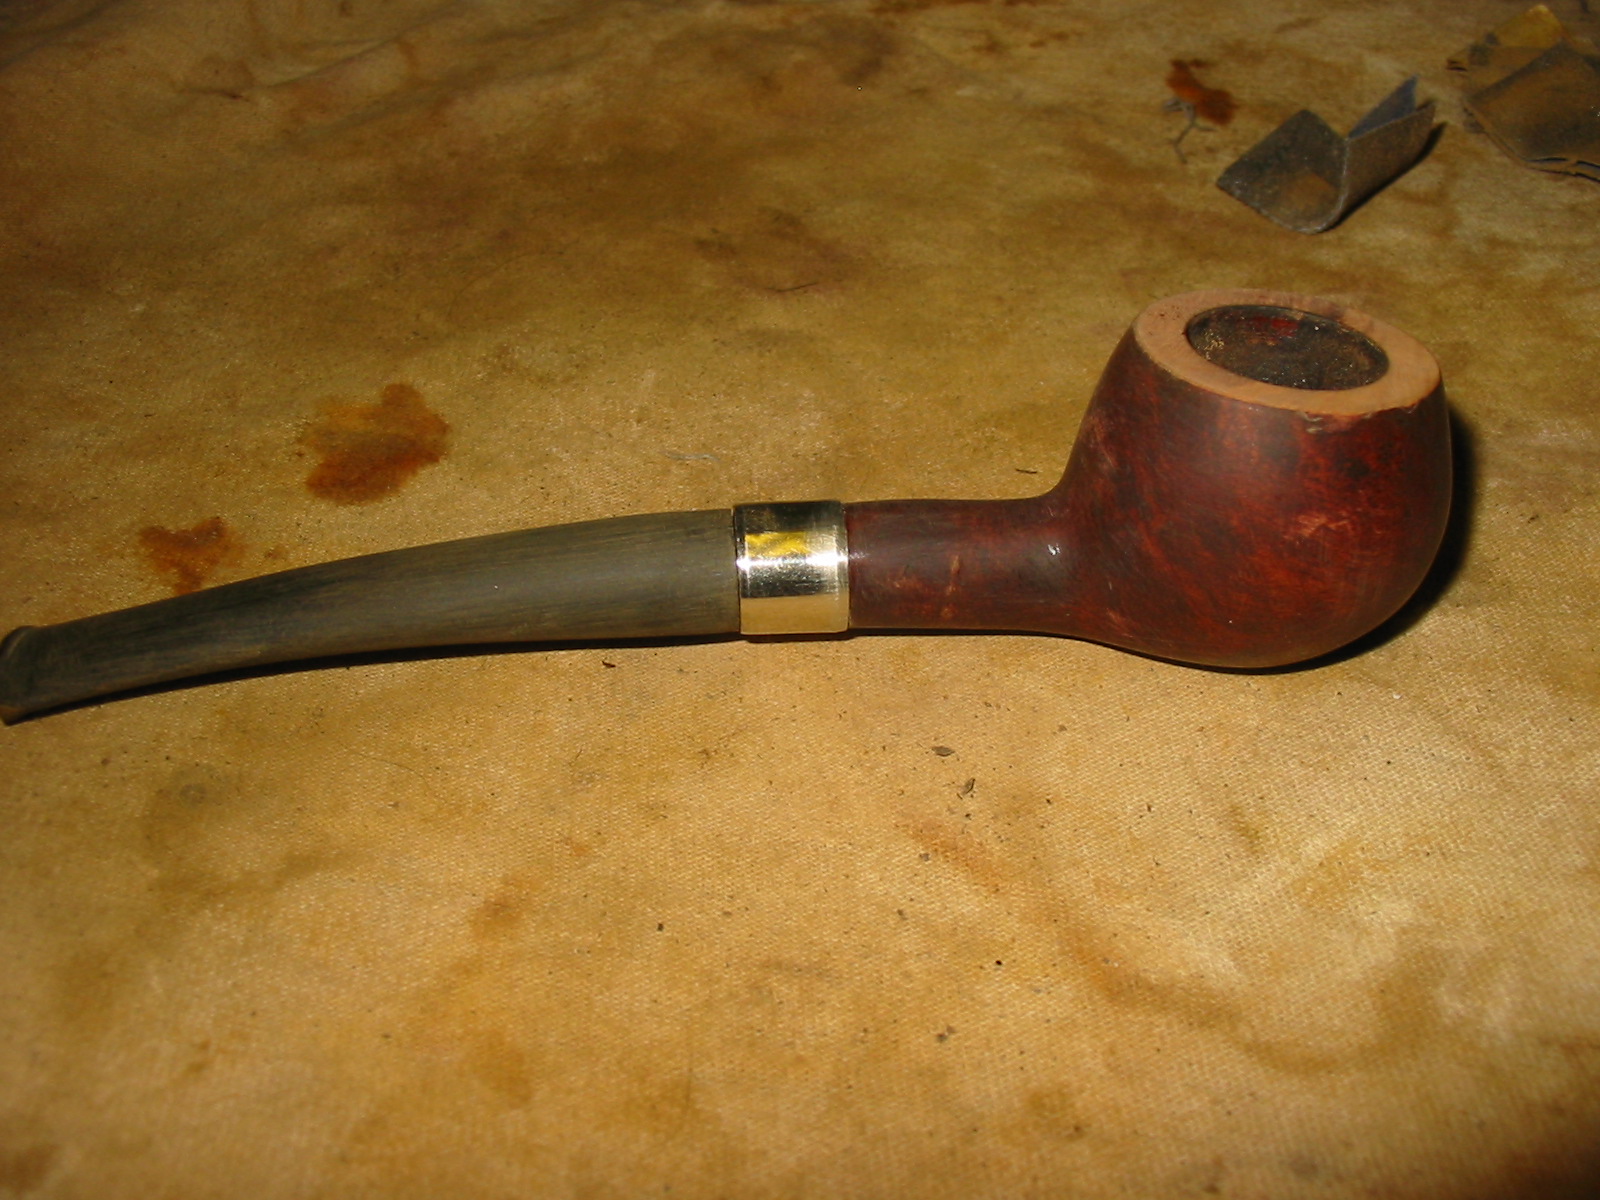
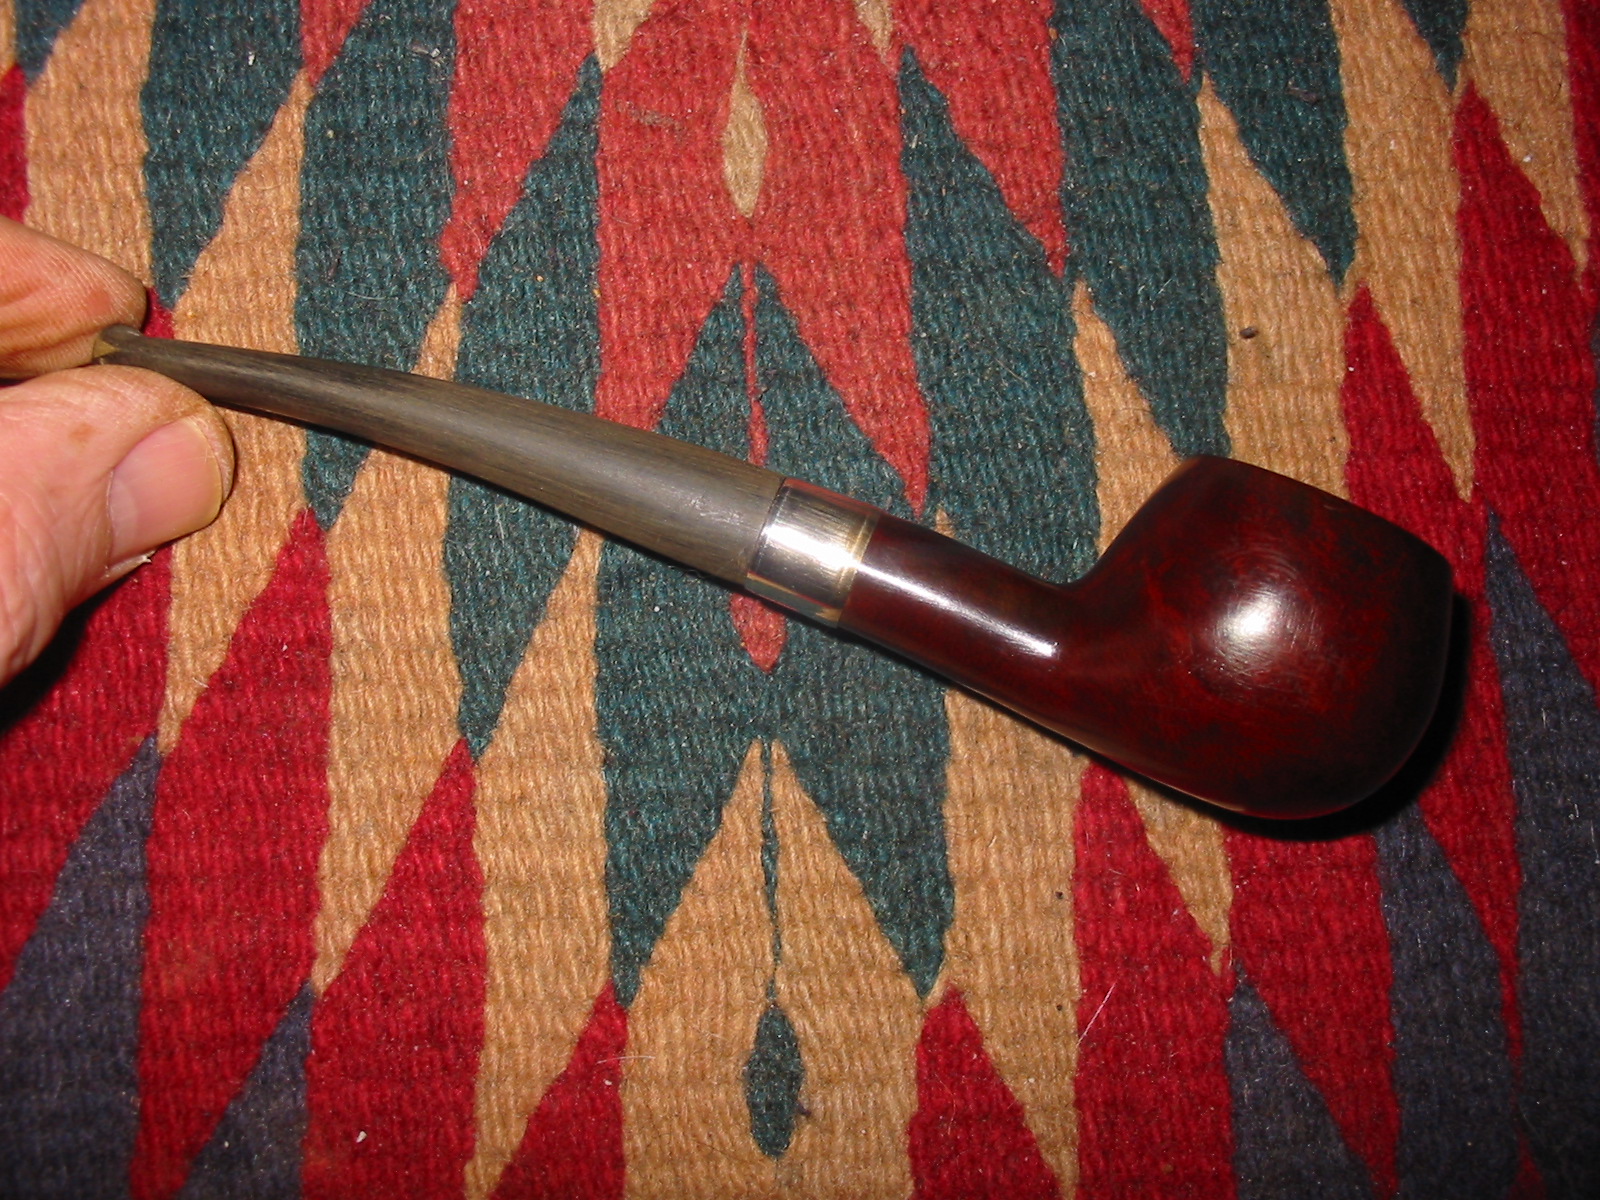
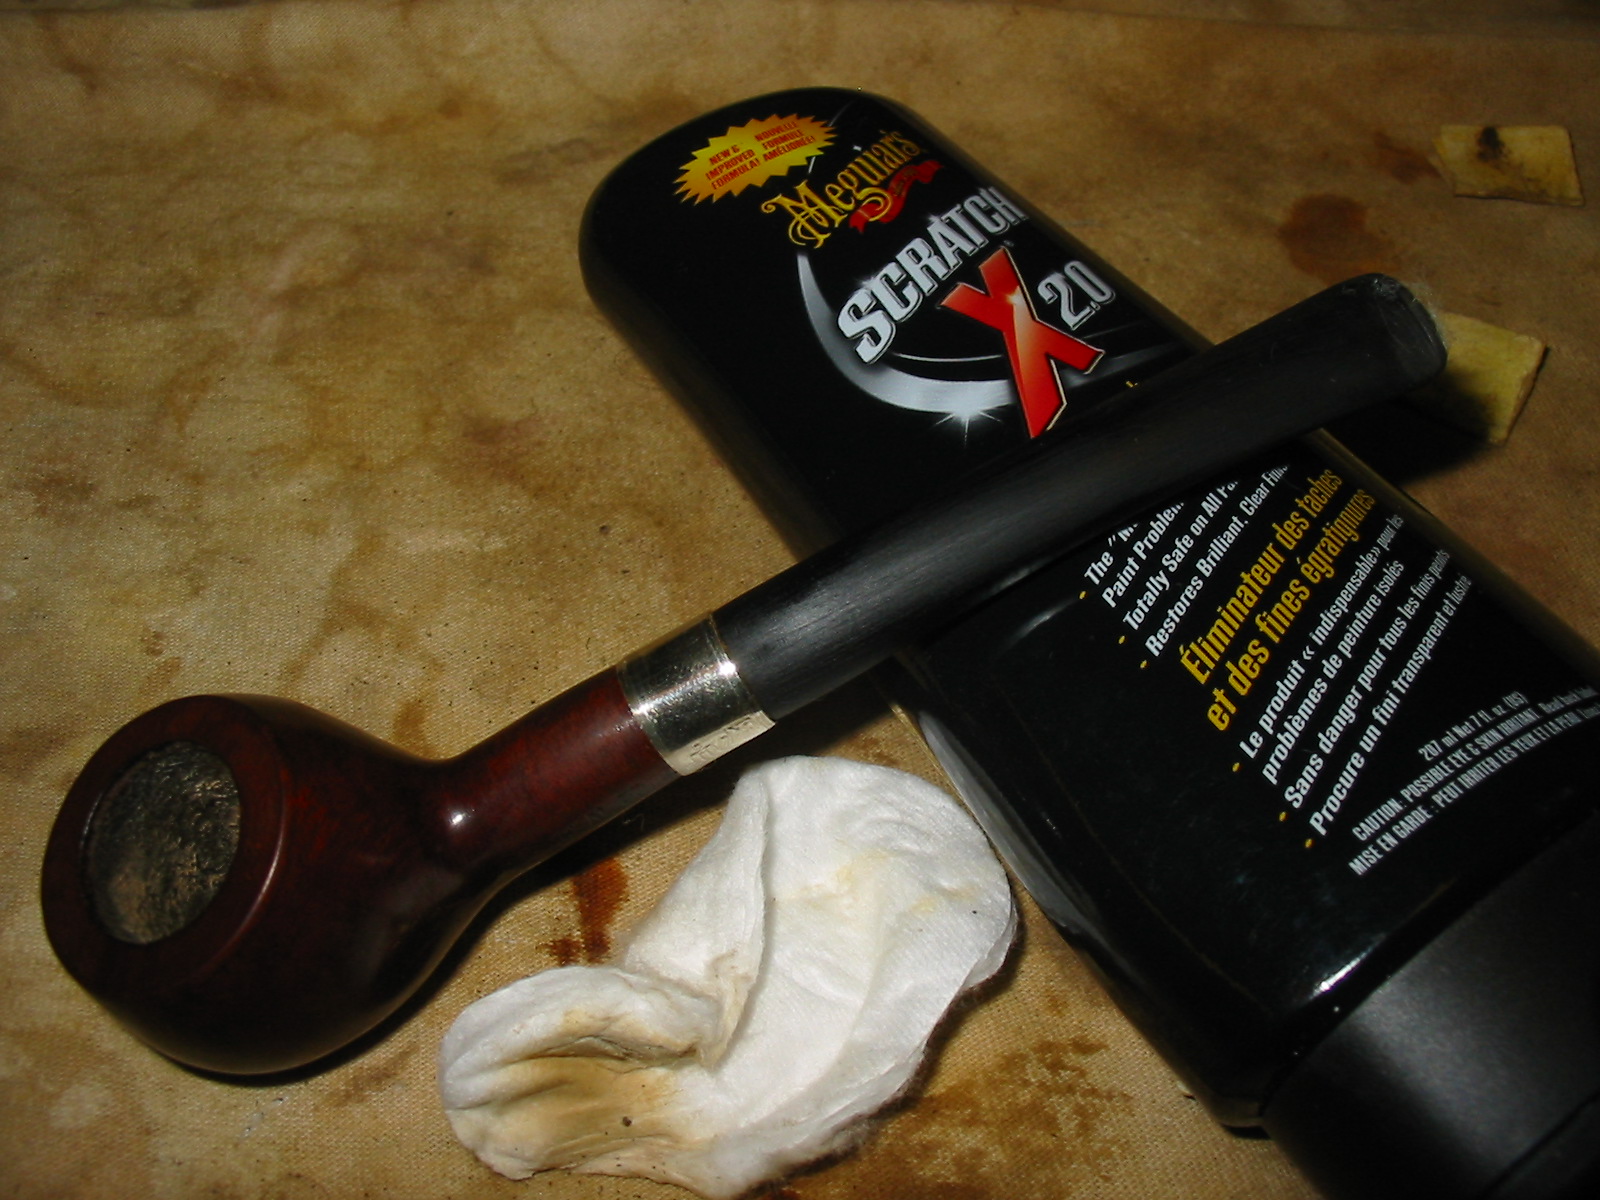
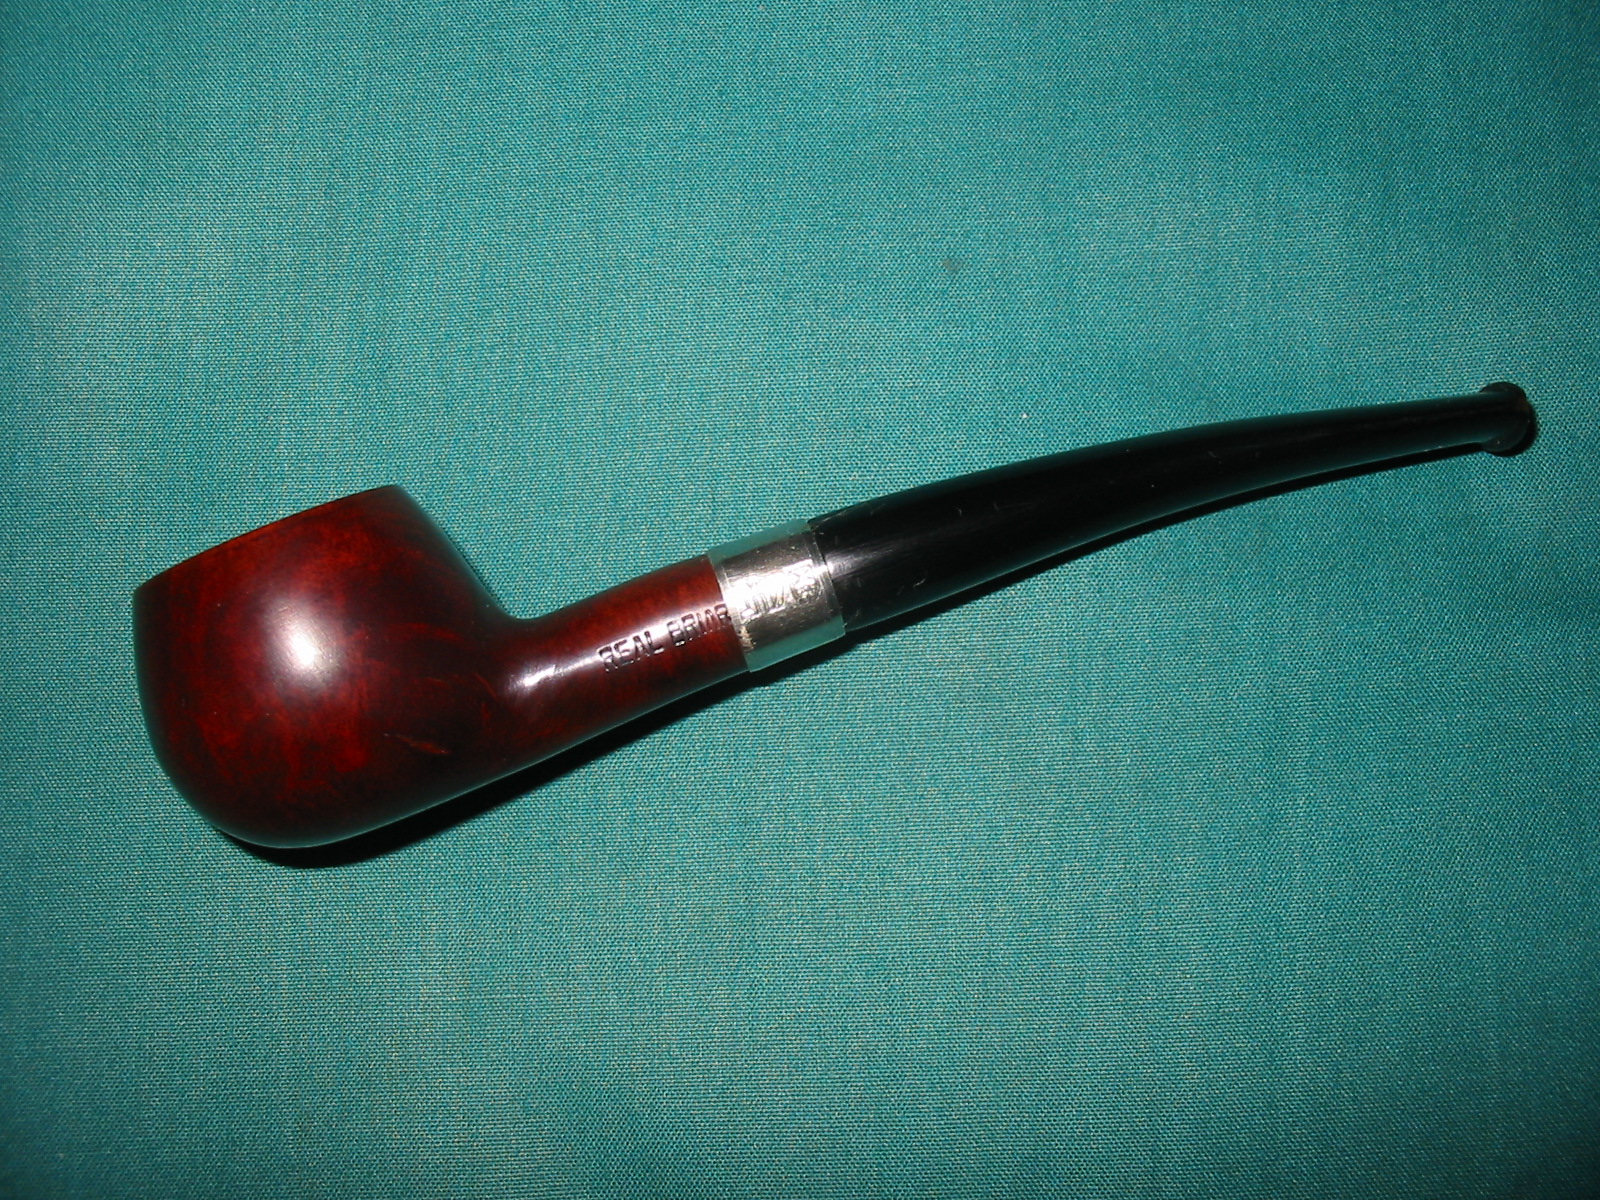
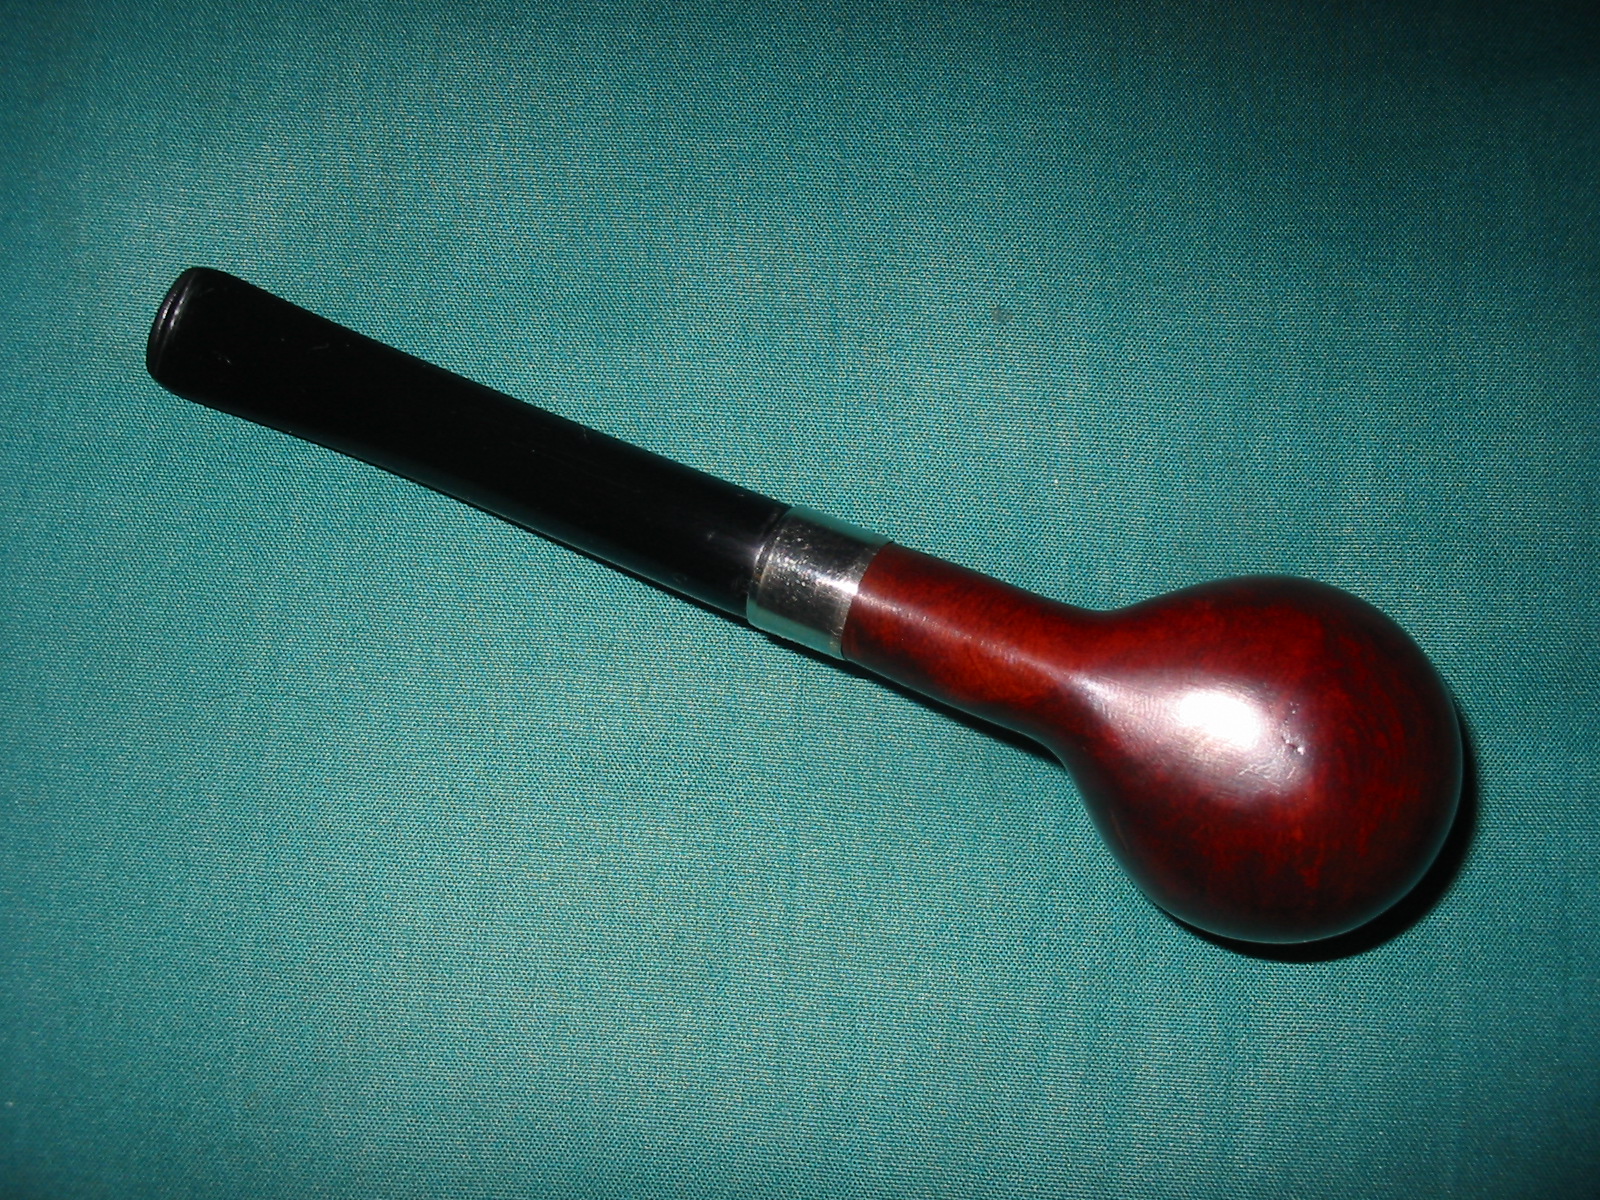
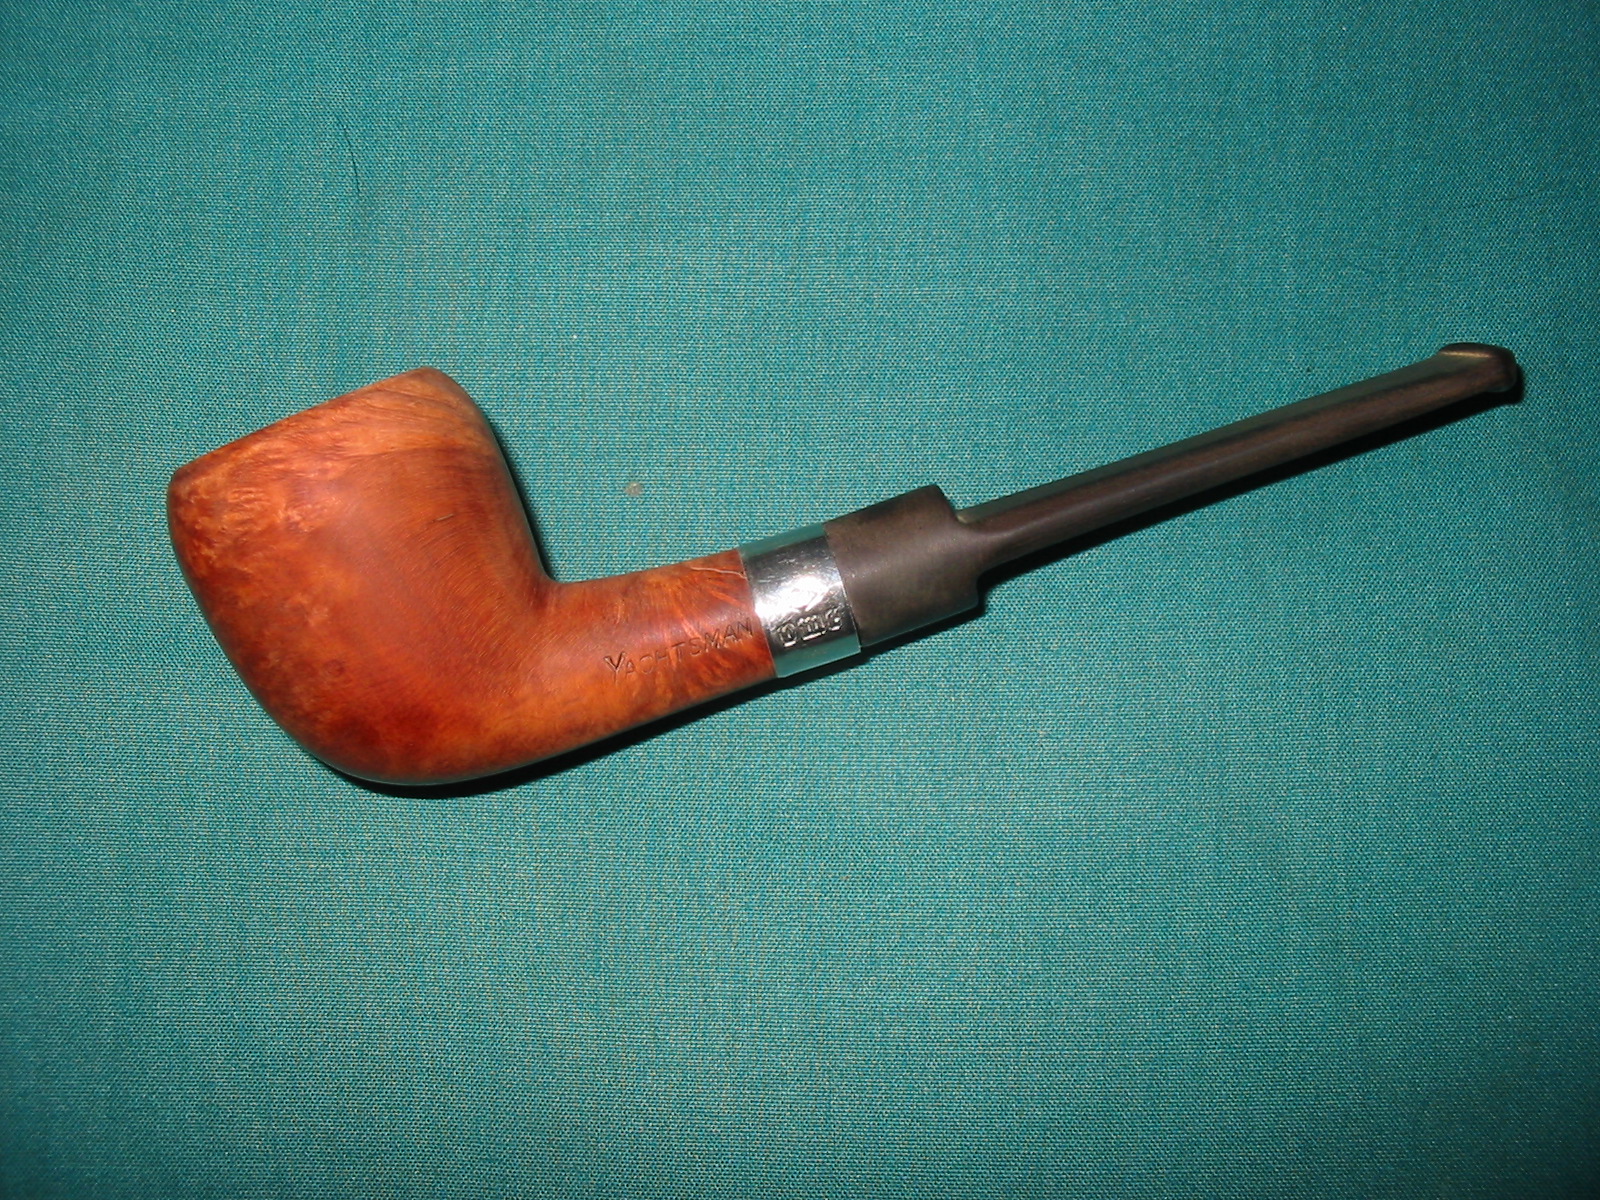
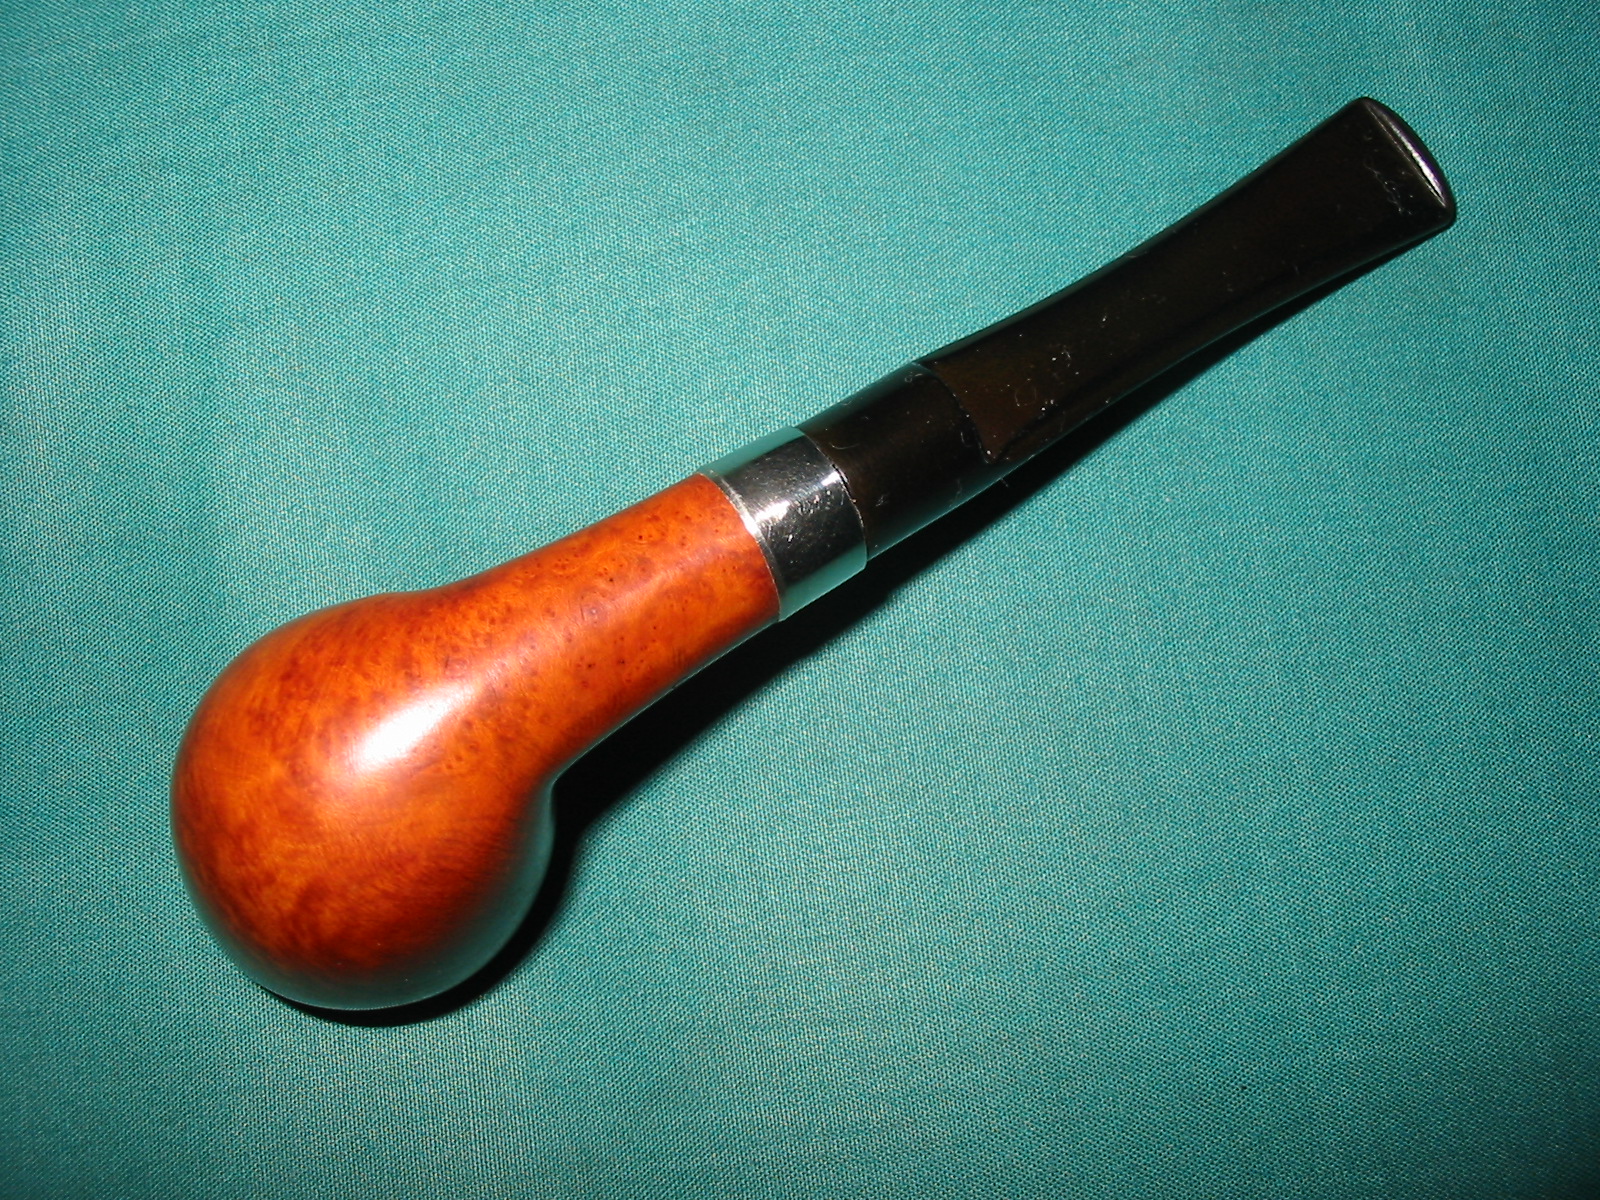
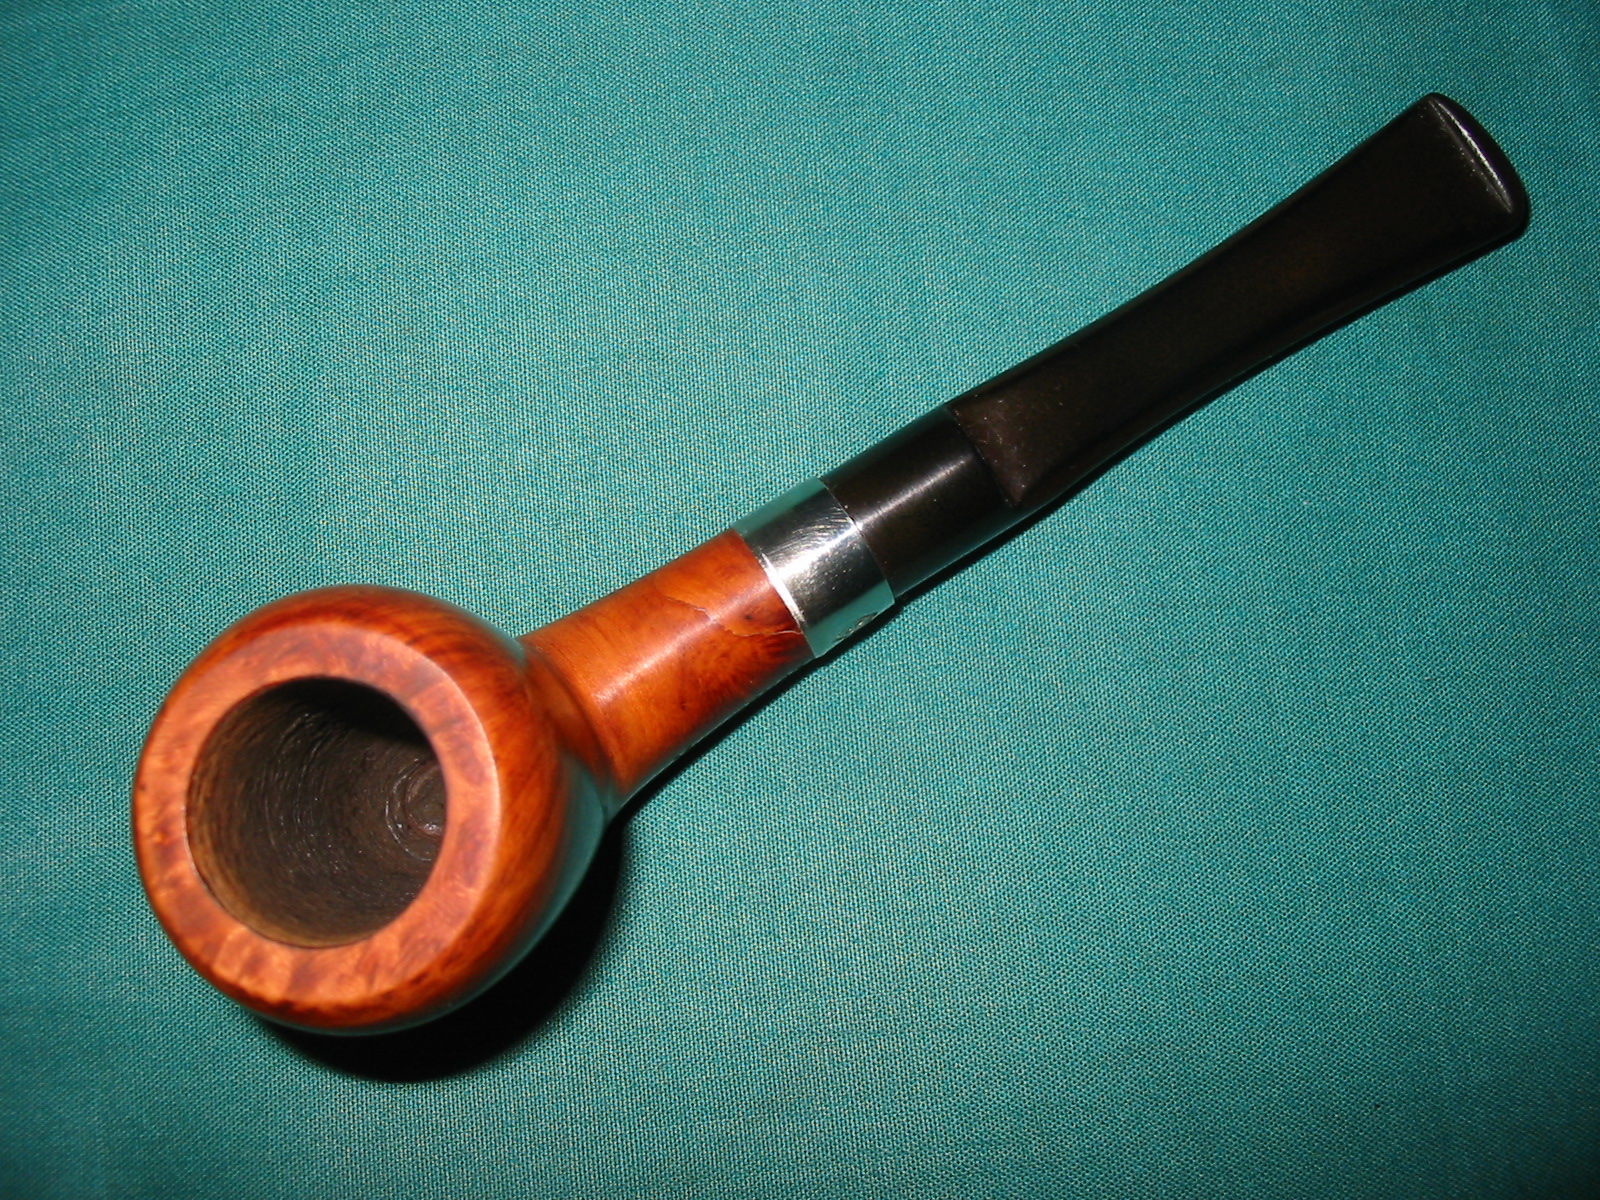
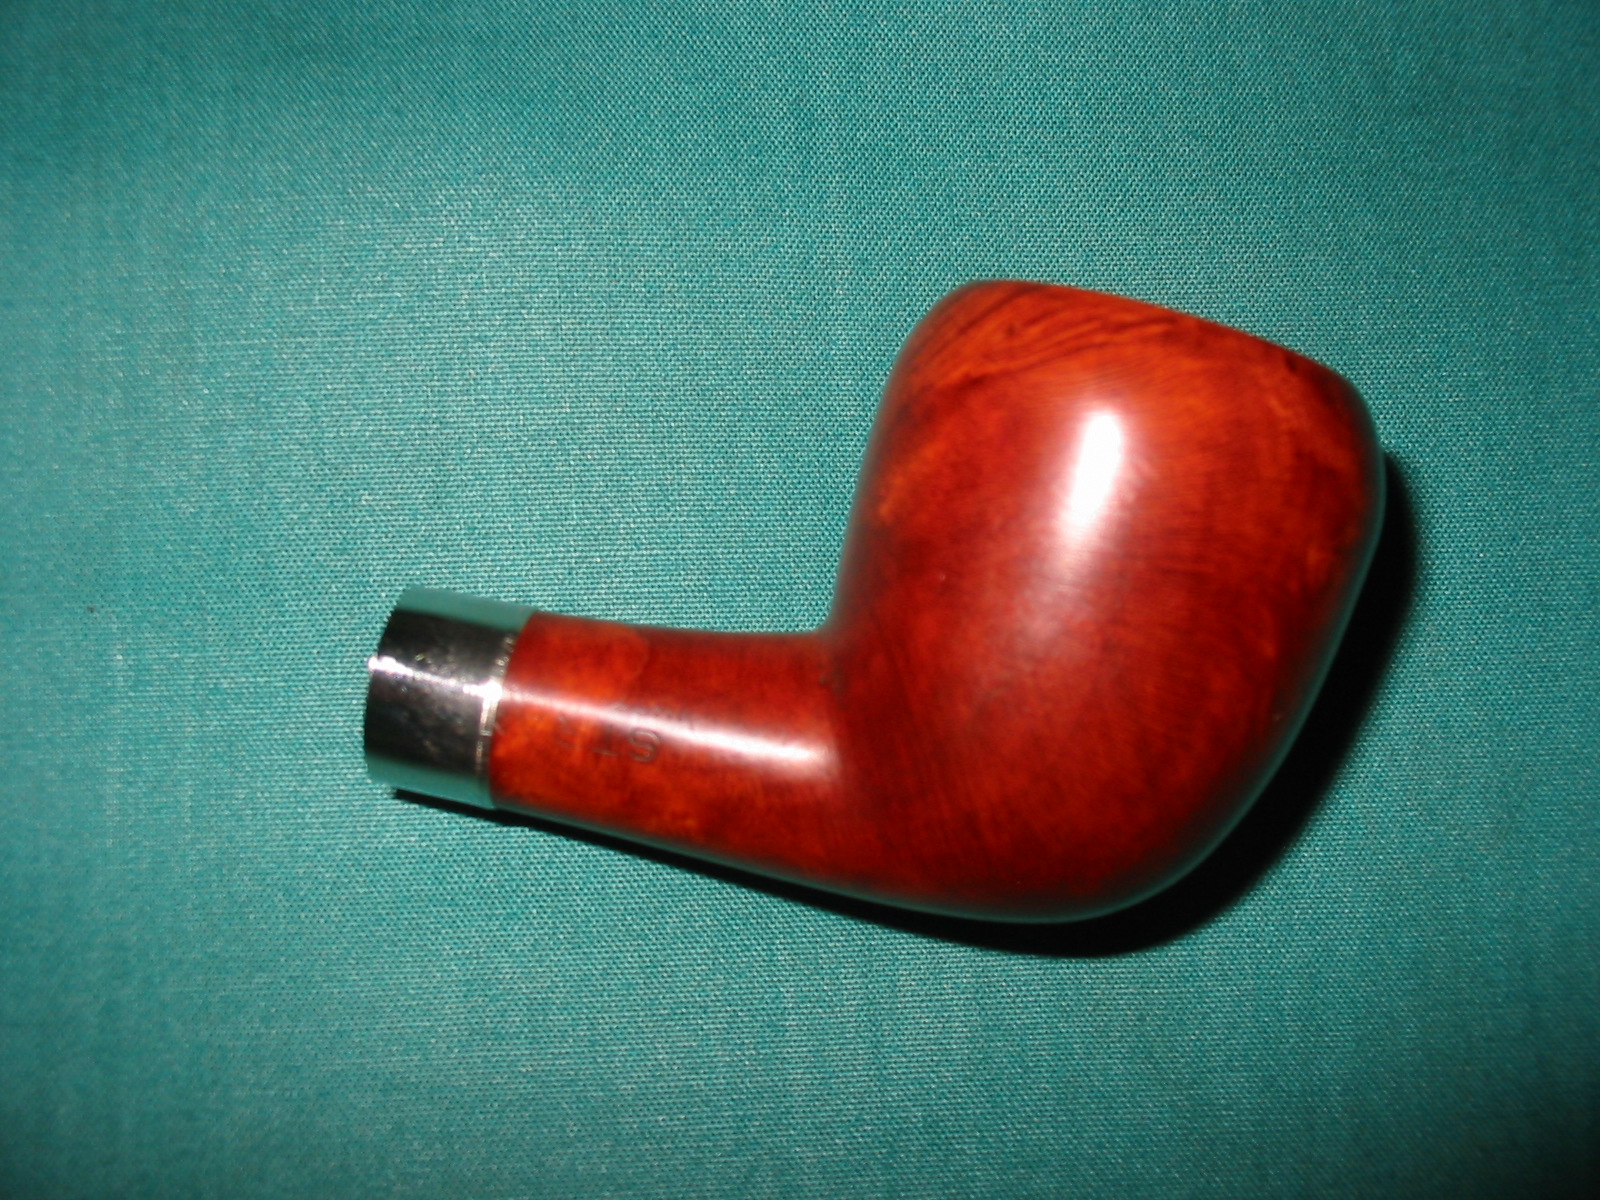
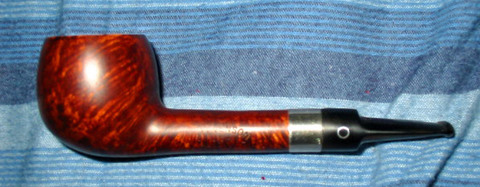
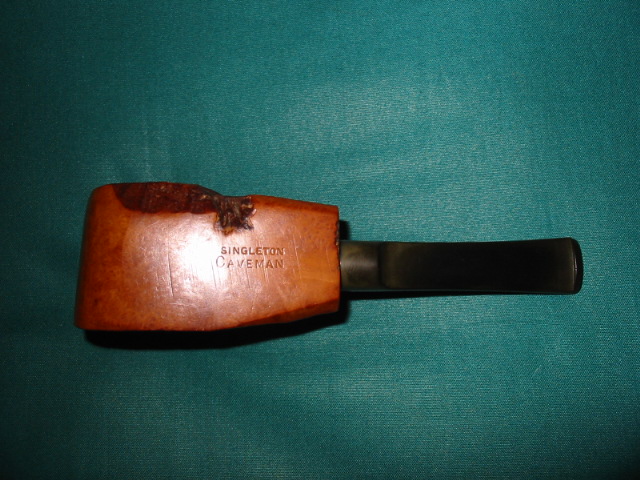
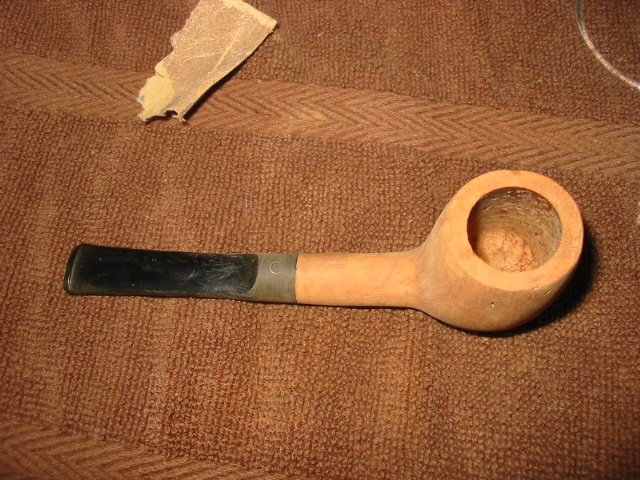
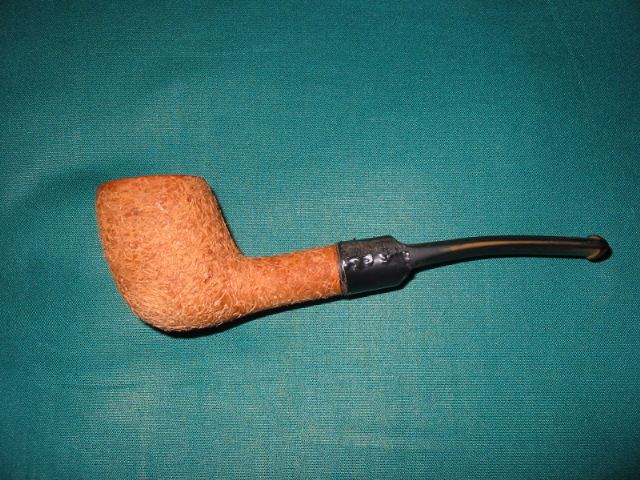
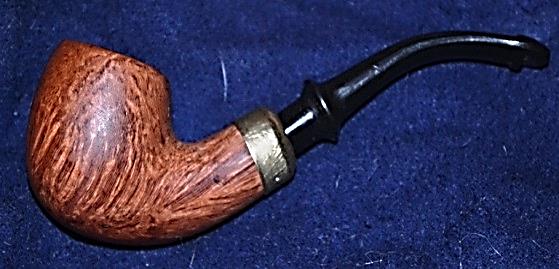
Chuck Richards Jichimu Restore. Photo © Robert M. Boughton.
Need I say I was, for lack of any more suitable a word, stunned by the work of art Chuck had created from my once shellacked and smothered but promising jichimu bowl? As I recall, in fact, I went a little fuzzy in the head and had to concentrate on not swooning, a very rare reaction for me. At first I was even speechless, for whatever I had expected from Chuck based on the simplistic guidelines I had suggested, he had, it was obvious, ignored in favor of his own better instincts. As a result, instead of giving me a new and improved version of the original churchwarden, Chuck had embraced the ultimate spirit of the term restoration, bestowing upon the lone bowl a new life that combined both elegance and even a better sense of Chinese style than any churchwarden ever could have accomplished.
“Well, do you like it?” Chuck said after I stood there gaping a tad too long, and I snapped out of my reverie to look at him, my face flushed with gratitude.
“Are you kidding?” I replied. “I love it! It’s better than anything I imagined!”
So of course the time had come for the vulgar but necessary formalities of payment arrangements, but Chuck was already prepared with an itemized bill. Scribbled on a small paper napkin which he slid forward across the counter were three lines of chicken scratch I had to squint at and read everything for context to realize formed the names of his three favorite tinned tobaccos. At that point I was sure he was having fun with me, and said so, but he was serious. In exchange for the hours of loving labor Chuck had invested in this project, not to mentions parts, all it was going to cost me was maybe $55.
And so I returned to my project and set about re-doing the preparatory process of stripping down the bowl I had already sanded, buffed and even hand-waxed. Somehow, taking a much closer gander at the bowl after deciding I wanted to make a special gift of it to someone who possesses an acute appreciation for fine churchwardens, my earlier perception that the only addition the bowl still needed was a decent stem went out the window. All I can think now is that I must have been blinded in my rush to the finish line.This, I suspect, is a common urge among restorers.There were still dark, even scratchy, areas on the front and back of the bowl where the grain, I was certain, could show with still more brilliance. Although I had been told by someone in my pipe community that the direction of sanding did not matter, I recalled something I had seen on TV’s original NCIS. The episode had a scene where some suspect was working on his yacht, sanding the beautiful wooden deck, and Gibbs (who had his own never-ending boat project) acknowledged that the man was doing it the right way – “always with the grain.” Plus I remembered the same advice from my father, who is also an expert at carpentry.
Then, suddenly, after stripping the new-old coating from the bowl with coarse paper, I switched to a finer grade and began on the front of the bowl with sure, steady strokes following the grain where it turned upward a little. After a short time, I cleared off all the fine dust, and gazing at the beautiful, much more even and feathery lines I had set free, felt that warm, glowing reward only someone who works with his hands on anything with potential to be better and succeeds at his task will ever understand. As if in a trance, I kept at it until my arm ached, and when I was finished with the front let my enthusiasm carry me onward to the backside, which responded with equal elegance. Admiring the reborn pipe bowl, I was satisfied at last that it was in all truth ready for buffing. This practice has its detractors, but I like to use fine steel wool for the final gentle buff, being extra careful, of course, to remove the entire resulting metallic residue with a dry cloth. With that done, I was ready to apply my wax sparingly with a finger until the entire outer bowl was covered. Giving it time to dry, I wiped it smooth and clean with a soft cotton T-shirt that was too old and small for me to wear and ended up repeating the wax step once more.
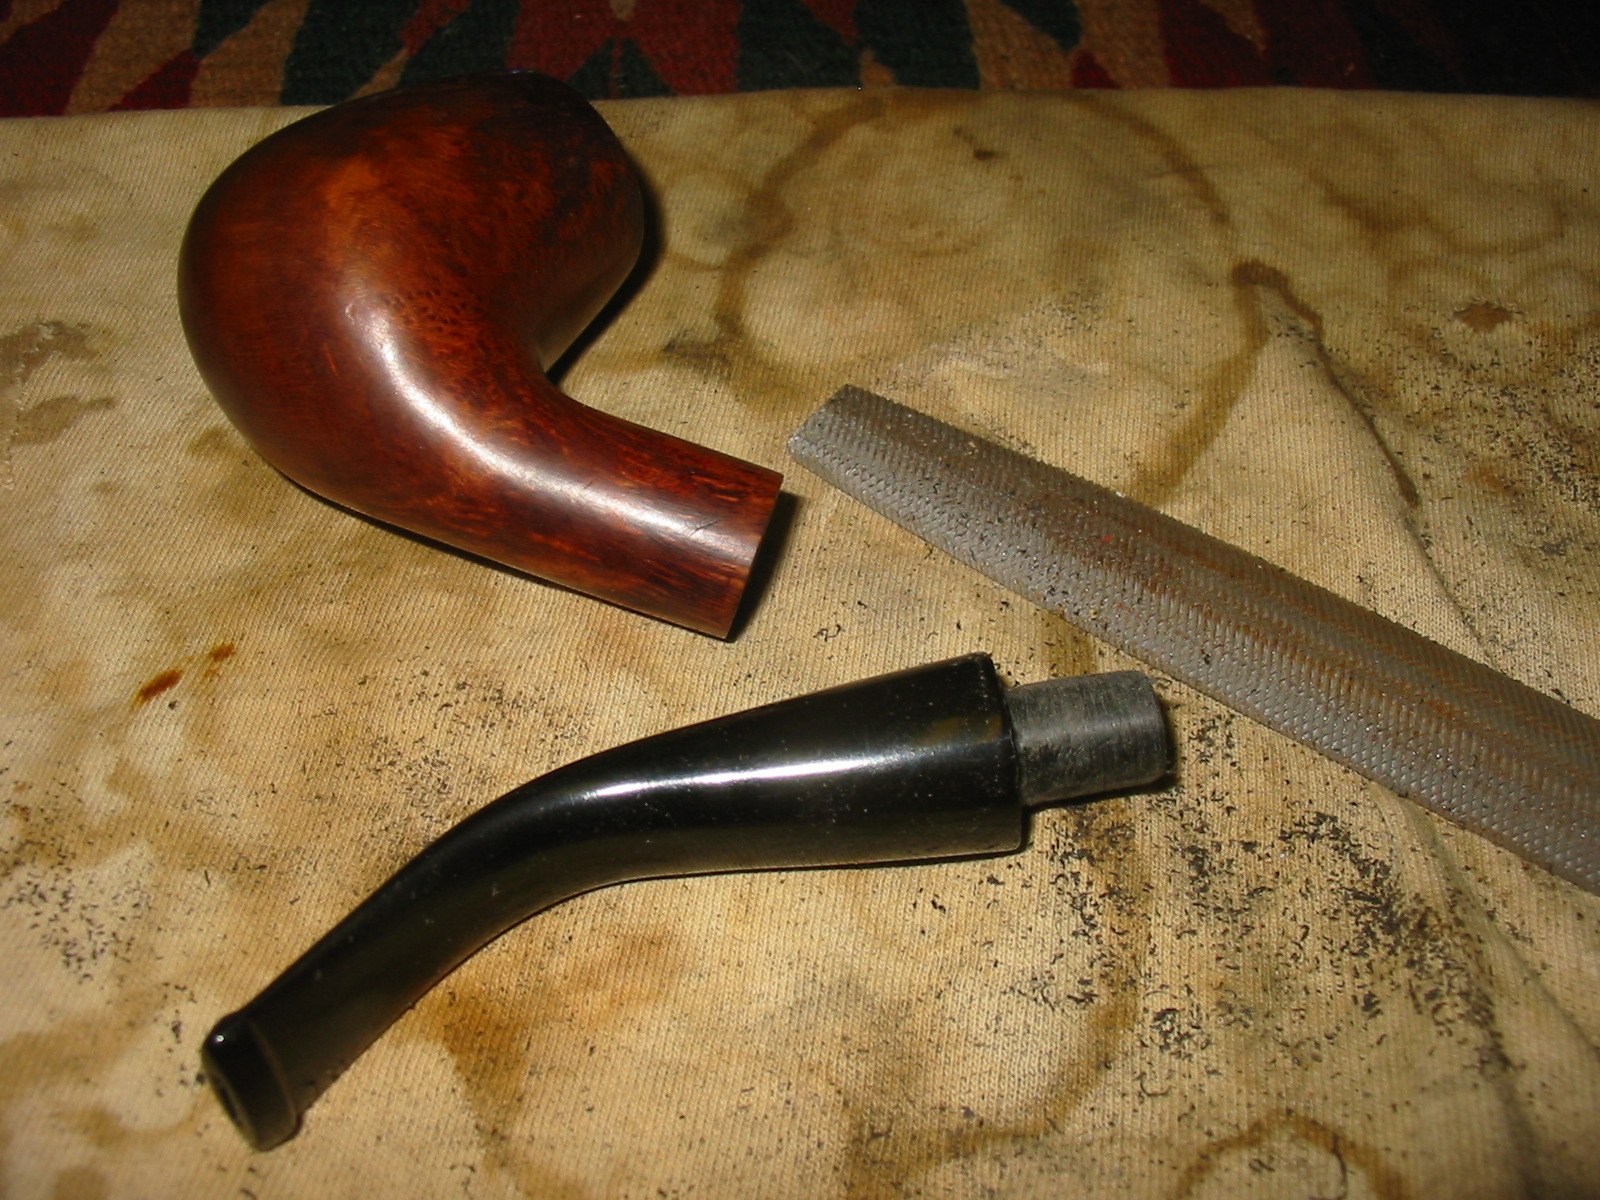
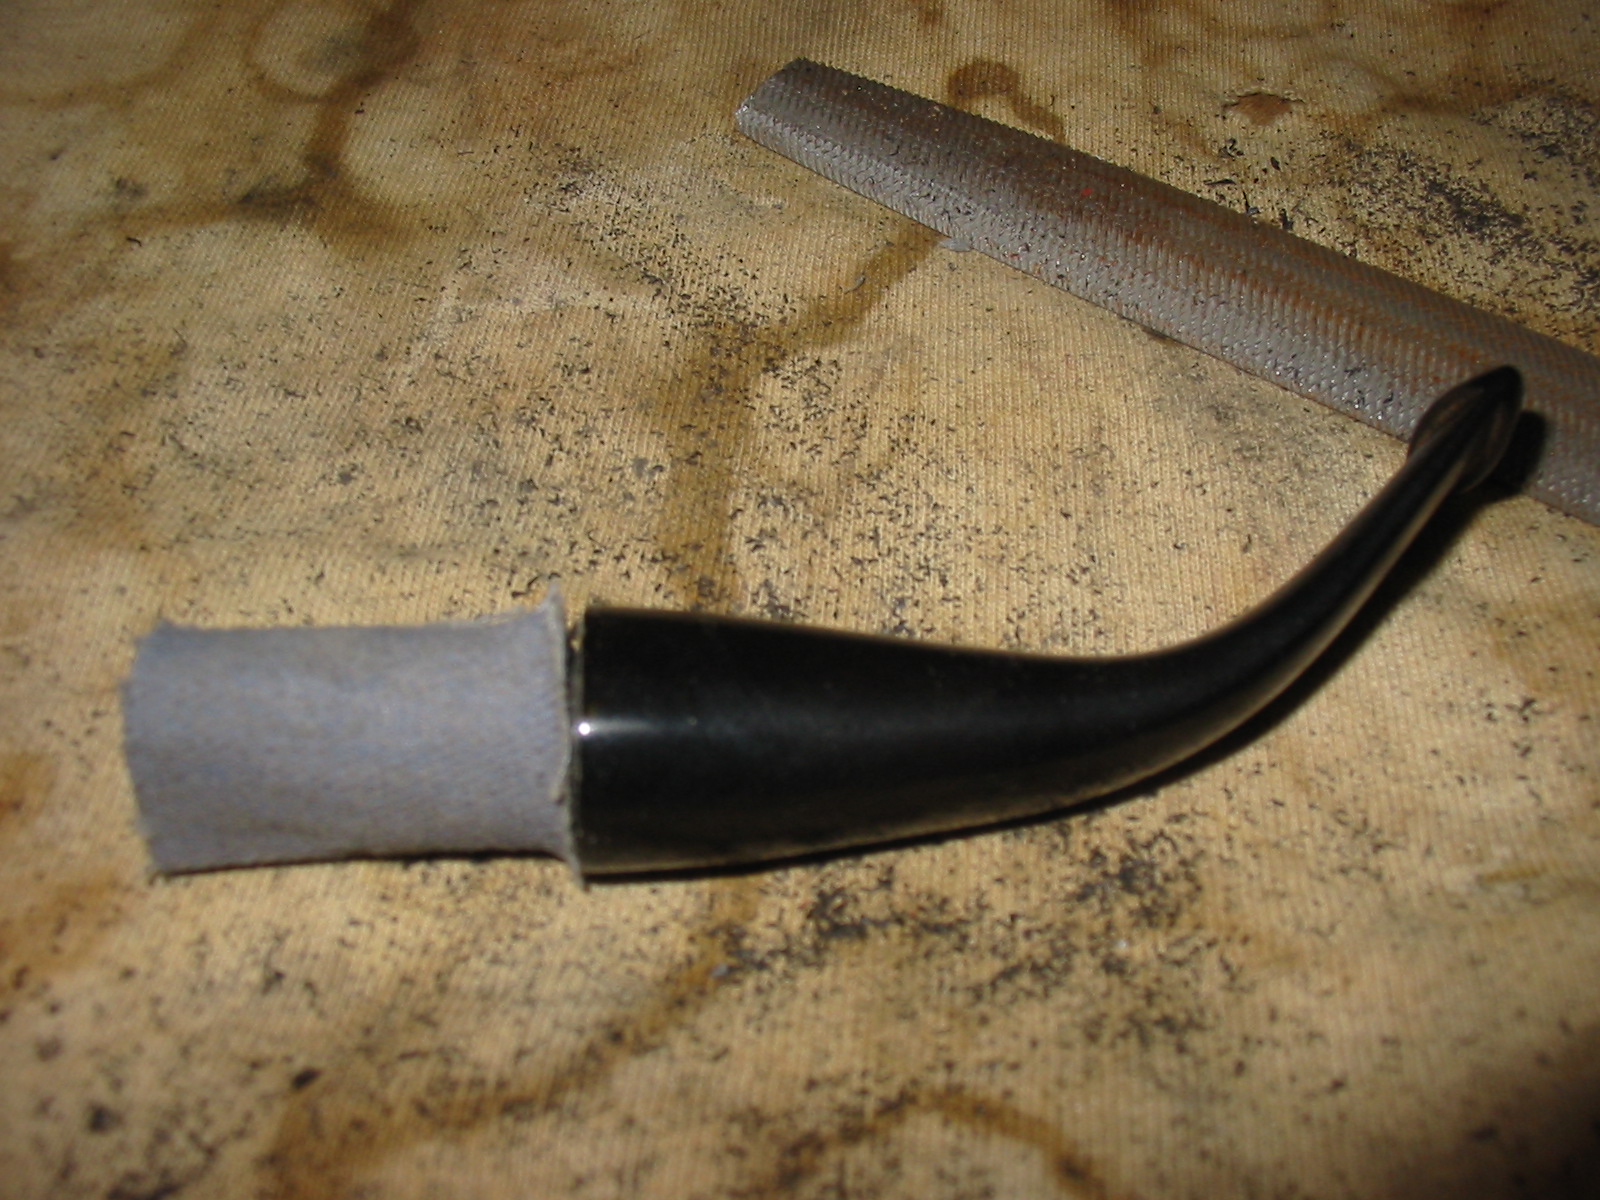
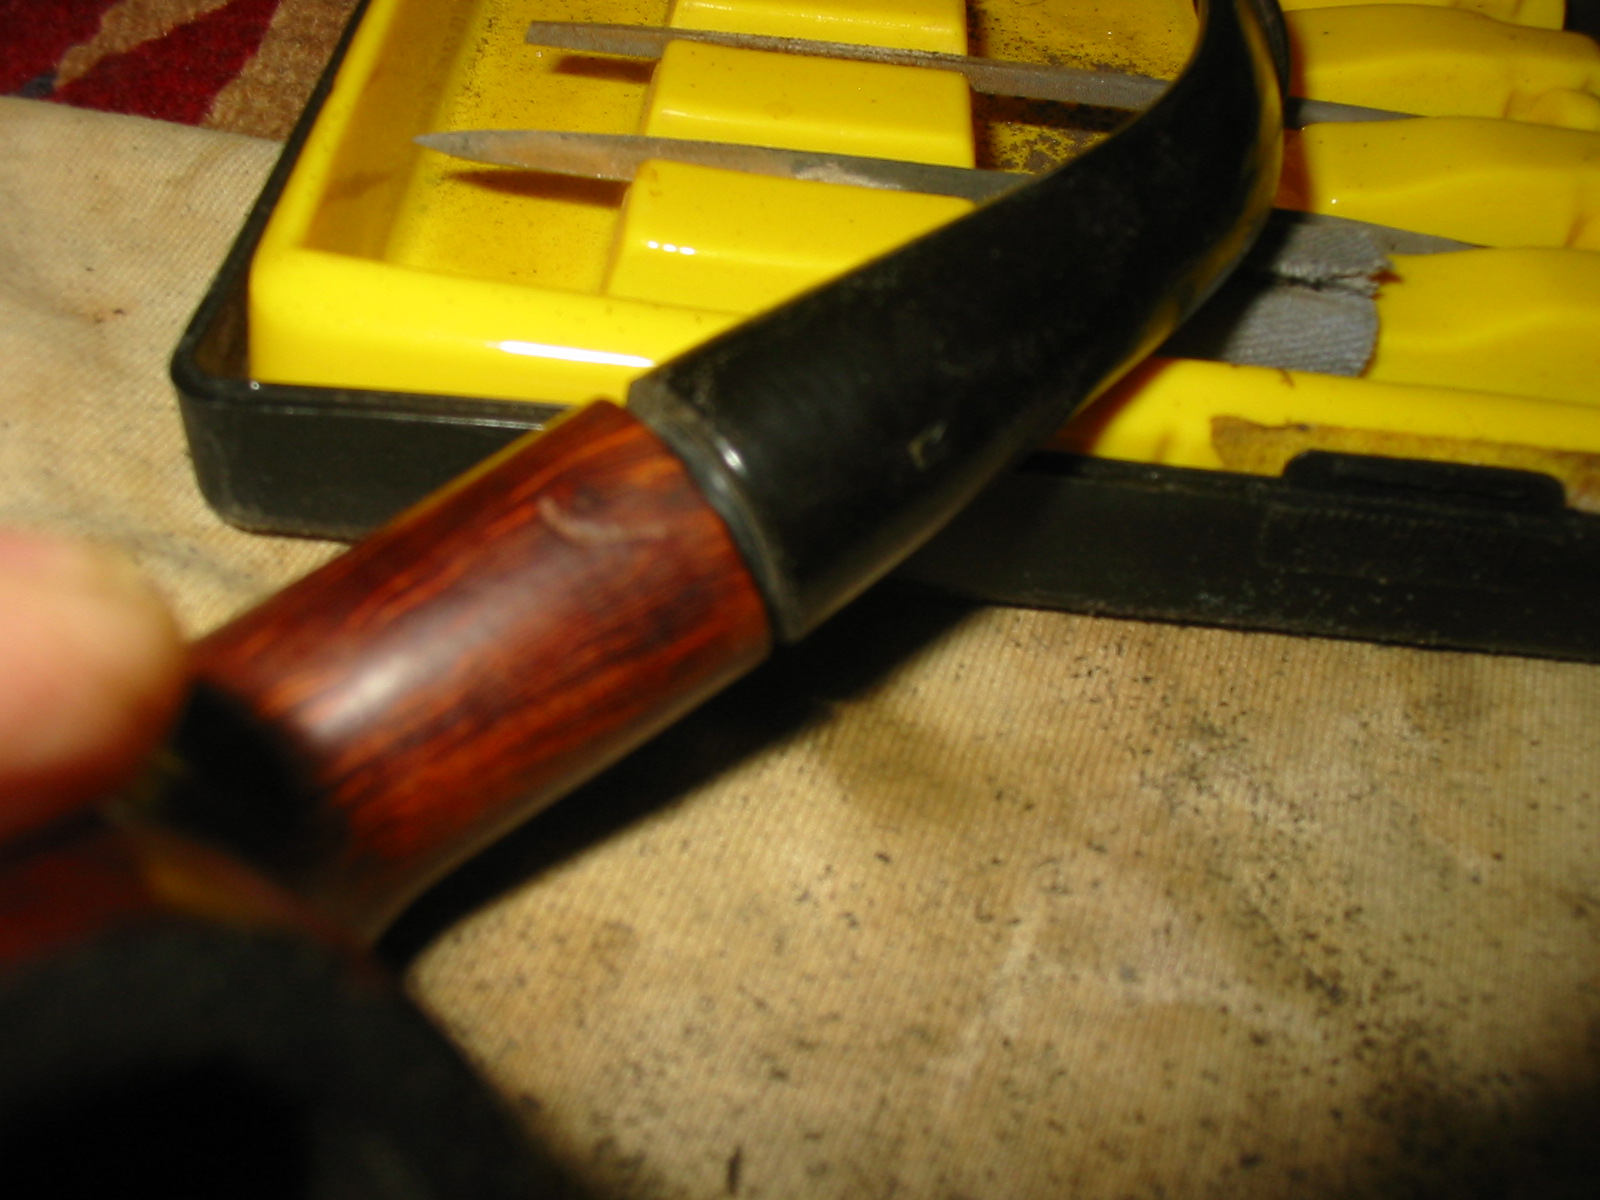
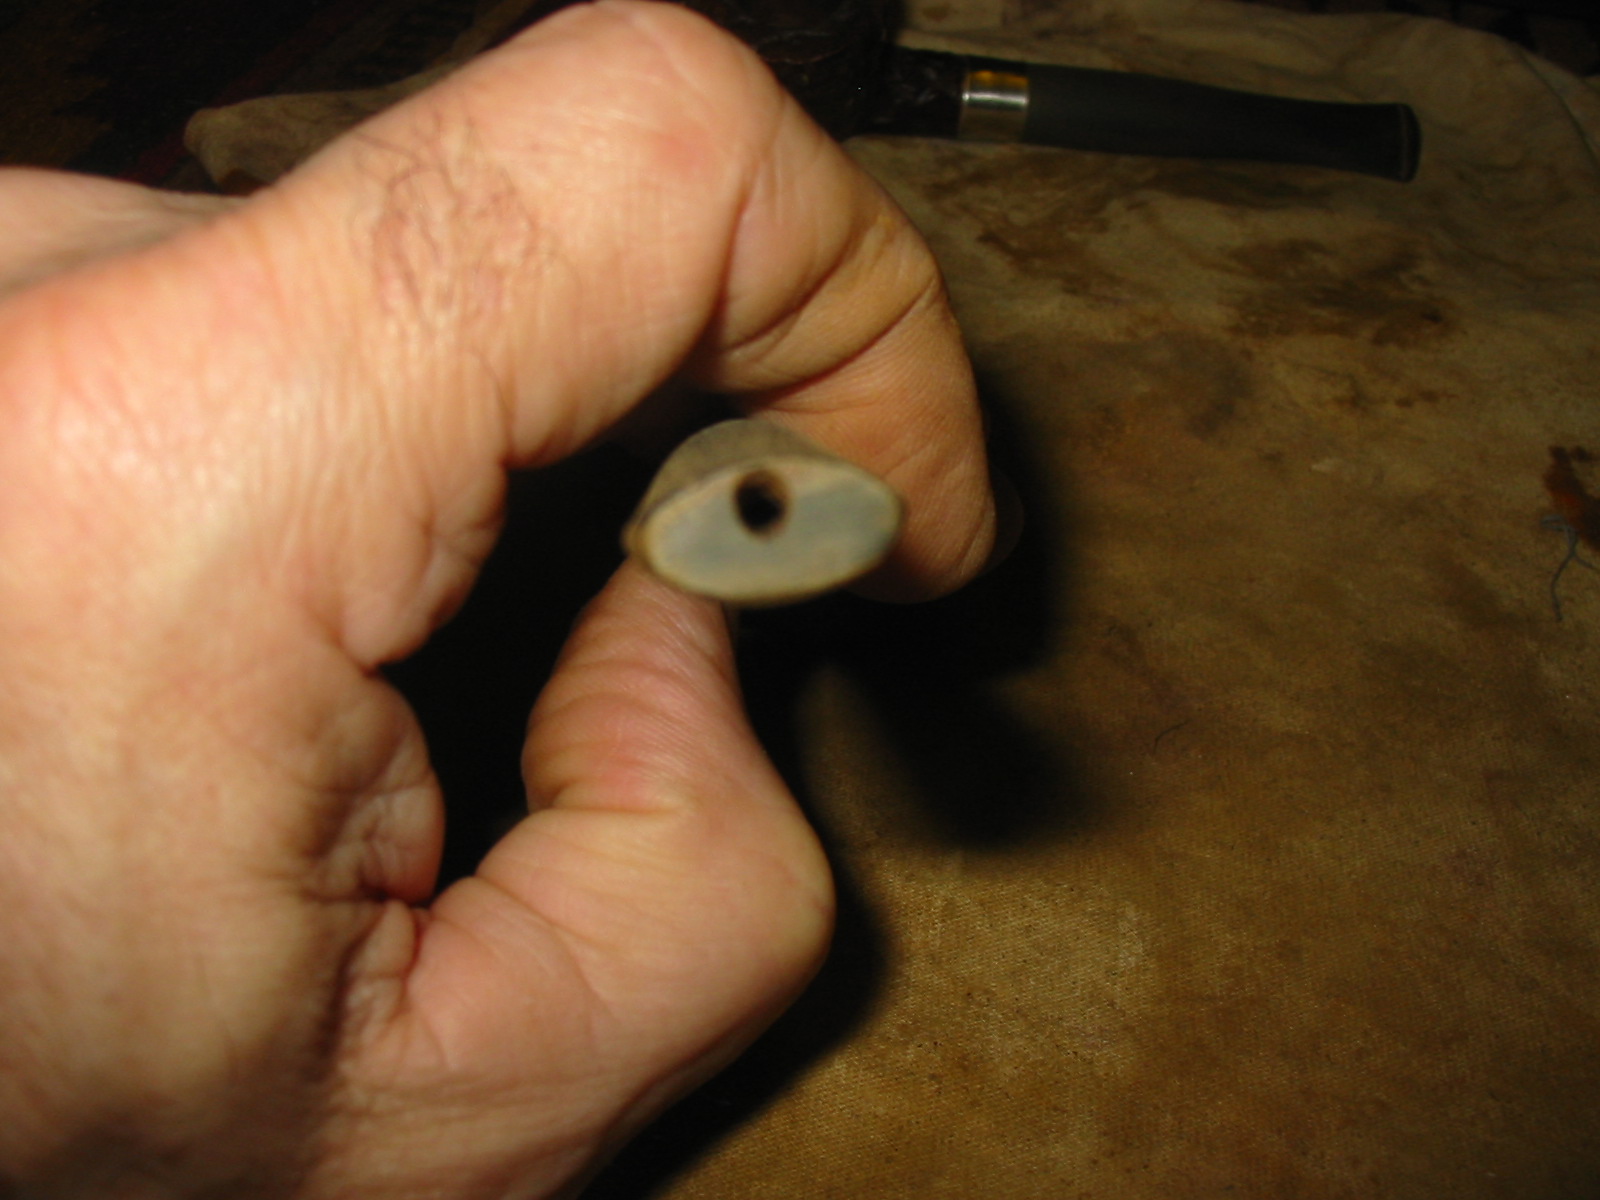
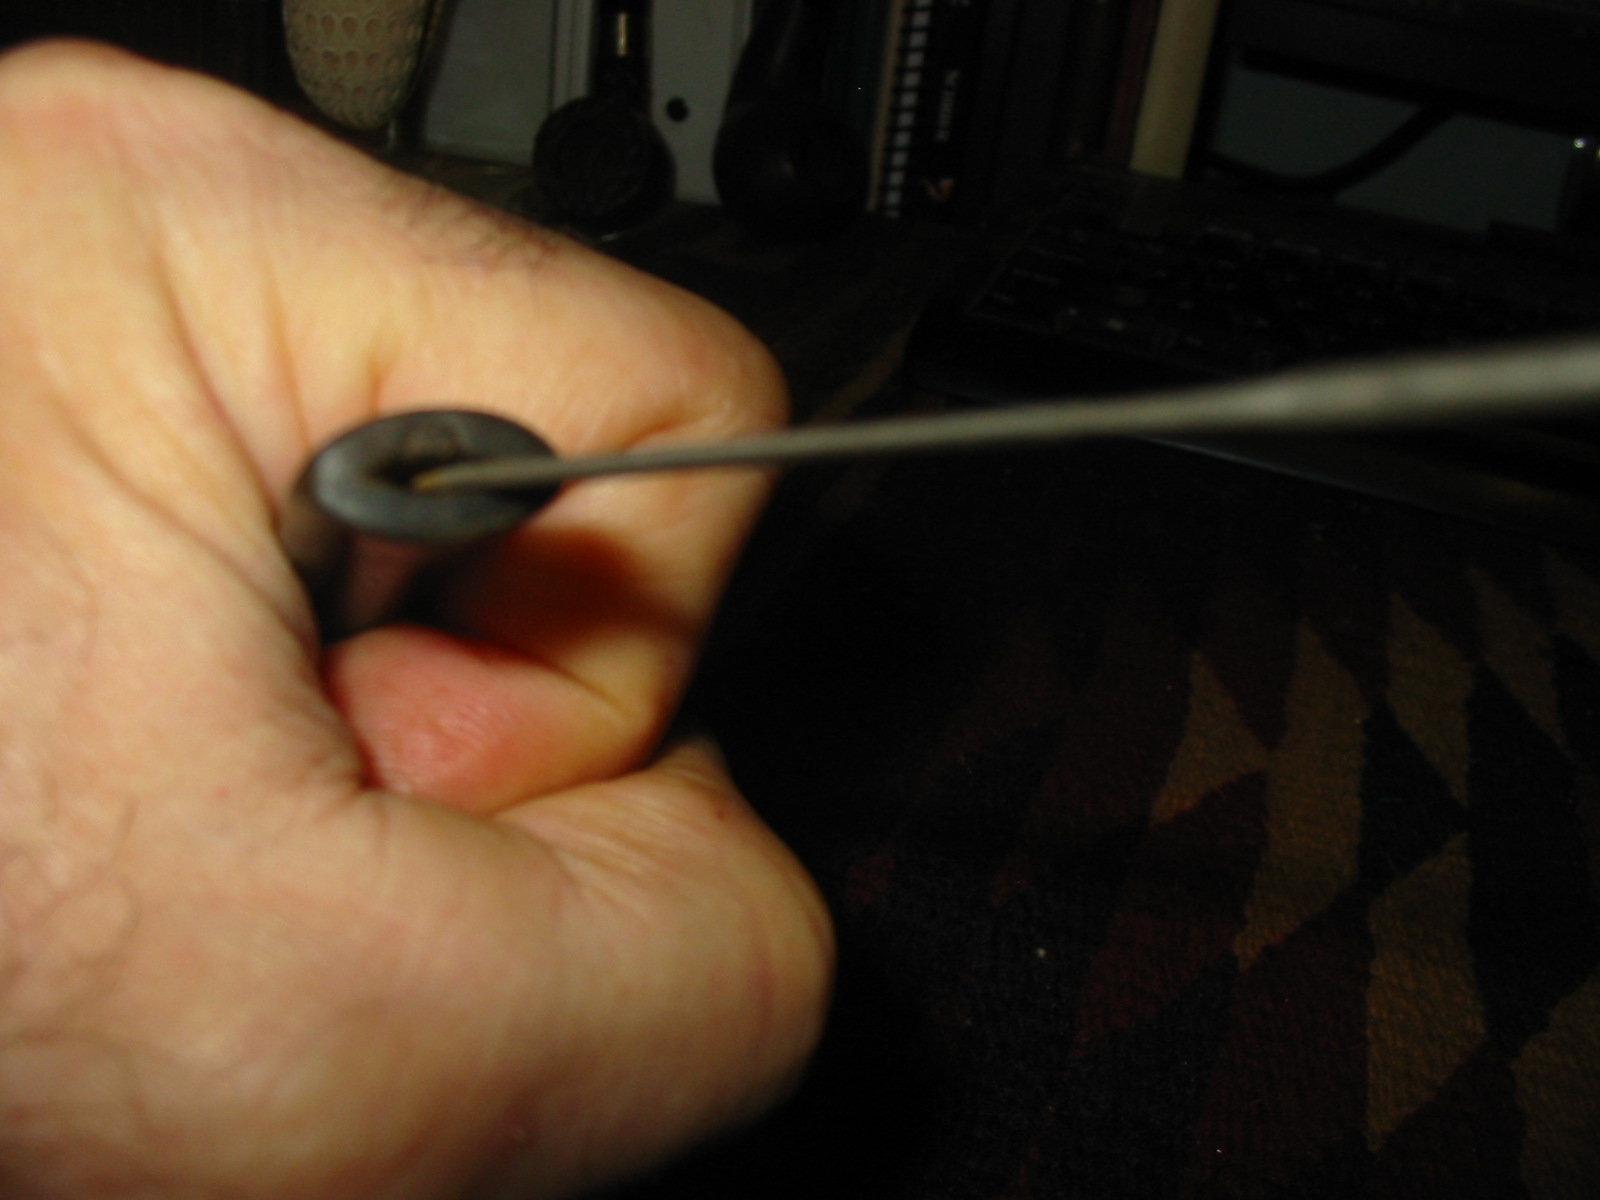
After cleaning and sterilizing the bowl and shank with alcohol, I knew that was the best I could do– again, I pined for an electric buffing wheel – and had only the long black Lucite stem Chuck had given me on which to sand down the tenon to fit the shank of the bowl. That was all I needed to do, he said, suggesting the job would be easy. Indeed, with an electric wheel it would be, but with the tools I had at my disposal – such implements of potential destruction as sandpaper and a wood file – I harbored, to use a nicety, misgivings. After all, I know my limitations and am almost always first to admit them, which I will now prove. Trying to sand down the tenon by hand got me nowhere, so I switched to the wood file. Now, there are mistakes, and then there are total write-offs. Within just a few seconds’ time I found myself staring in horror at the resulting apparent near mayhem I had perpetrated upon the unfortunate, innocent opening end of the tenon. Even after sanding the mangled, tapering pooch-job I had made of it, I still was left with only a smooth (if such it could ever be called again) version of the atrocity that reminded me of every time I ever tried to use one of those electric head grooming sheers on myself – you know, the kind with which barbers go to school to learn to operate on complete strangers with enough skill that they won’t be sued for the results but that are offered in stores in cheaper versions guaranteed to be so easy to do it yourself, only you can’t sue yourself for the one gaping bald gash that always results sooner or later and leaves no option but to shave off all the rest to make the disaster even.
Luckily, I had two things going for me: 1) I knew when to quit for the night and pray that Chuck would be at the store the next day for more of that collaboration, and 2) Chuck had given me a stem with a tenon so long I could afford one screw-up, even after I had already clipped off about a half-inch of the excess. I knew Chuck was going to tell me I had to get rid of the evidence of my muddled first attempt at stem fitting the same way and at least had the courage to show him the scope of my “bad” in the fullness of its butchery, hoping only that he wouldn’t make too much fun of me as he said the words himself. Part of me now likes to think Chuck was wise enough to anticipate just such a mishap,, and that’s why he gave me a stem that once had such an enormous tenon in the first place. The next day, with the shameful proof of my ineptitude tucked deep within my coat pocket, I ventured into the tobacco shop and spotted Chuck at the far end of the long counter that ran to the back on the right side. He glanced up from what he was doing at the sound of the door chime, saw who it was and continued working. He knew my routine, which I followed then with nervous mind a jangle, walking to the sitting area and setting down my heavy tote bag filled with a variety of excellent pipes and tobaccos from which I could sit a while and choose at leisure. Taking my time to claim my favorite comfortable cushioned chair – the only one with a full view of the store because it panders to my life-long discomfort of having my back to a room – I was all-too-soon settled in and made my way with the vile stem in hand to Chuck.
Of course when I displayed to him the mess I had made, Chuck was as gracious as ever, which is not to say lacking in some bemused gruffness, but I was put at ease with a wonderful combination of relief and kinship when he did his best, I have no doubt, not to break into outward laughter. He could read my face despite its poker table nature and allowed only a genuine grin of appropriate amusement to show on his. The grin said at once, without a word yet spoken, “Been there…done that,” even if not with the same aptitude.
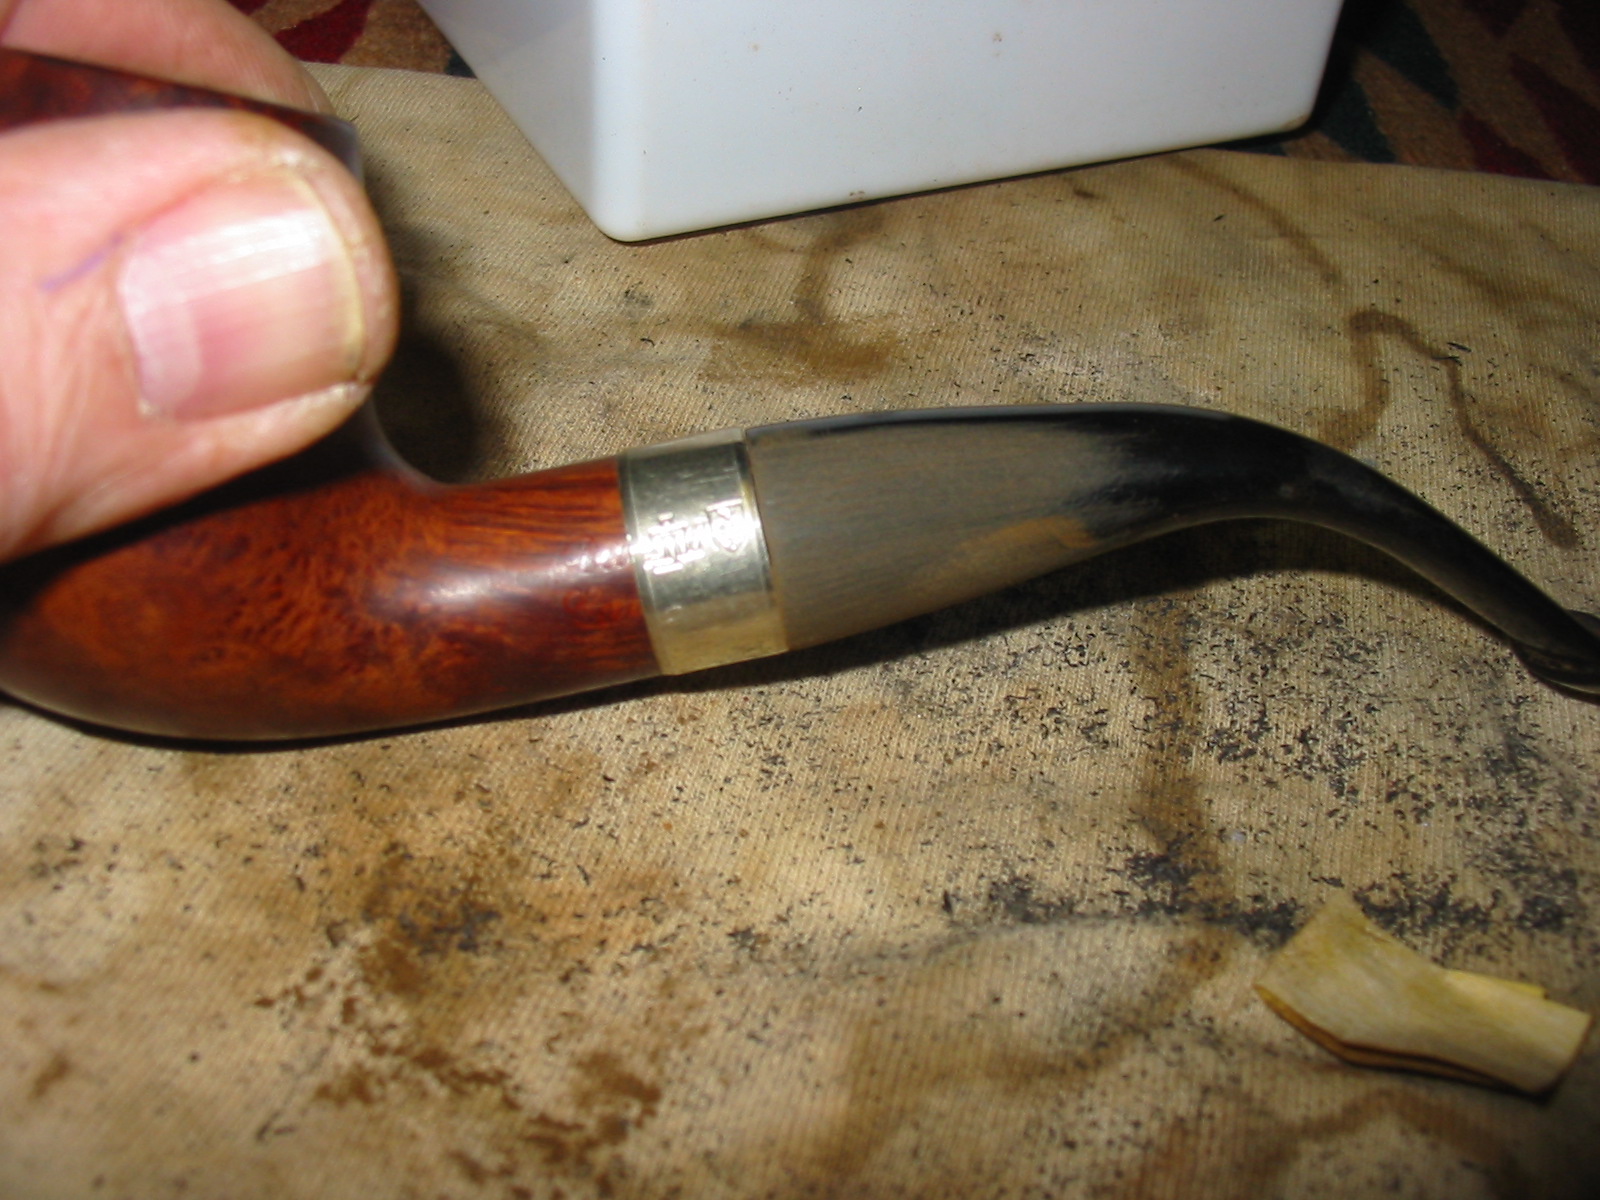
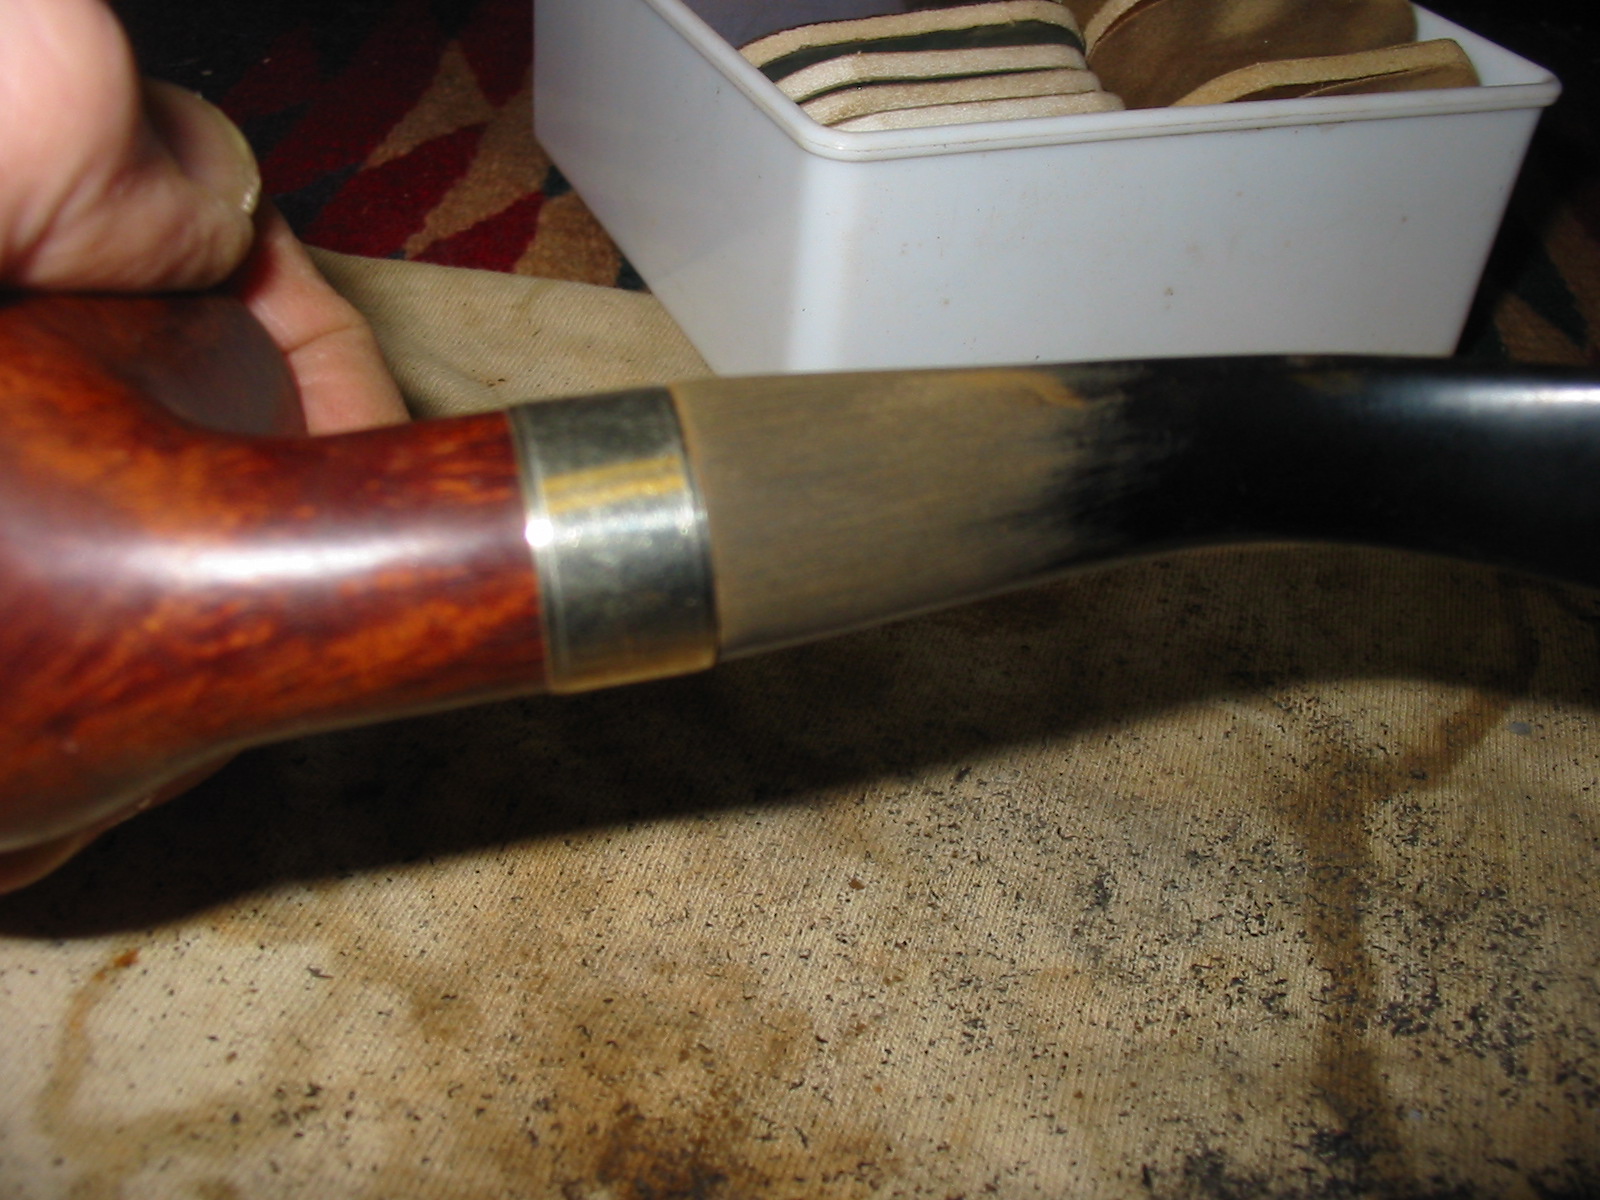
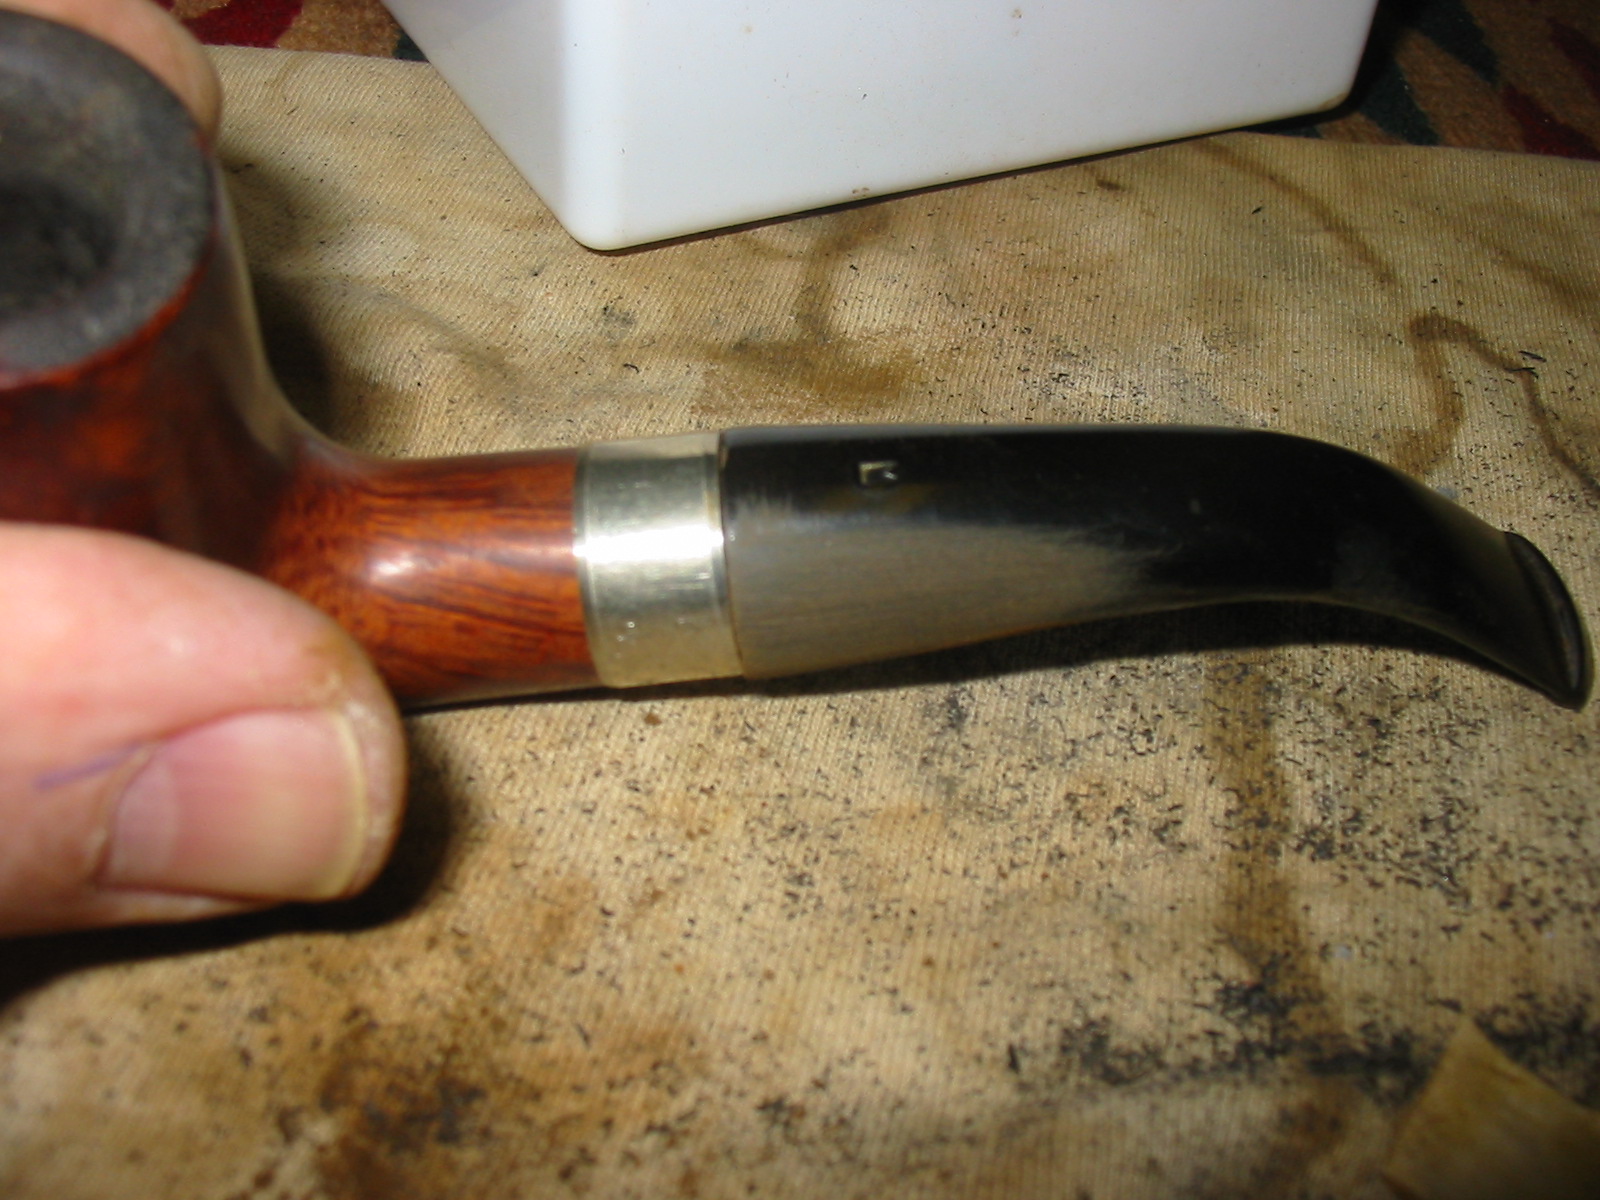
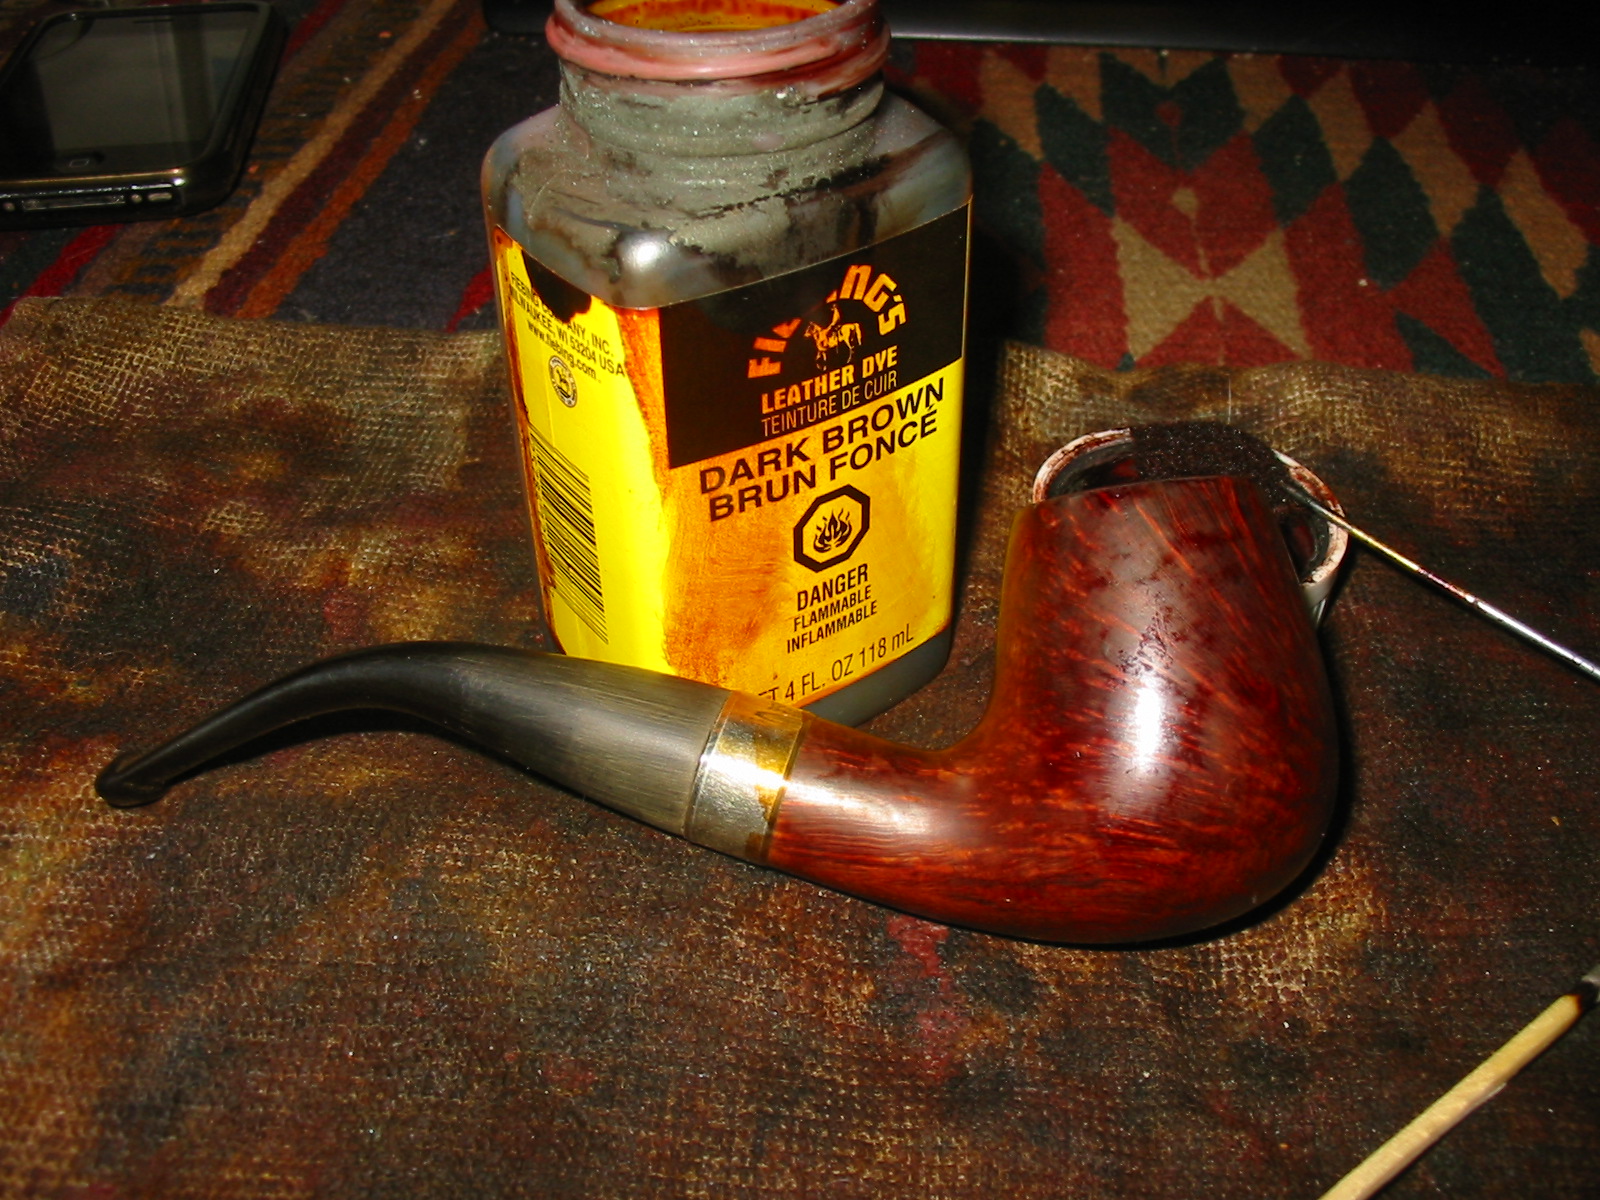
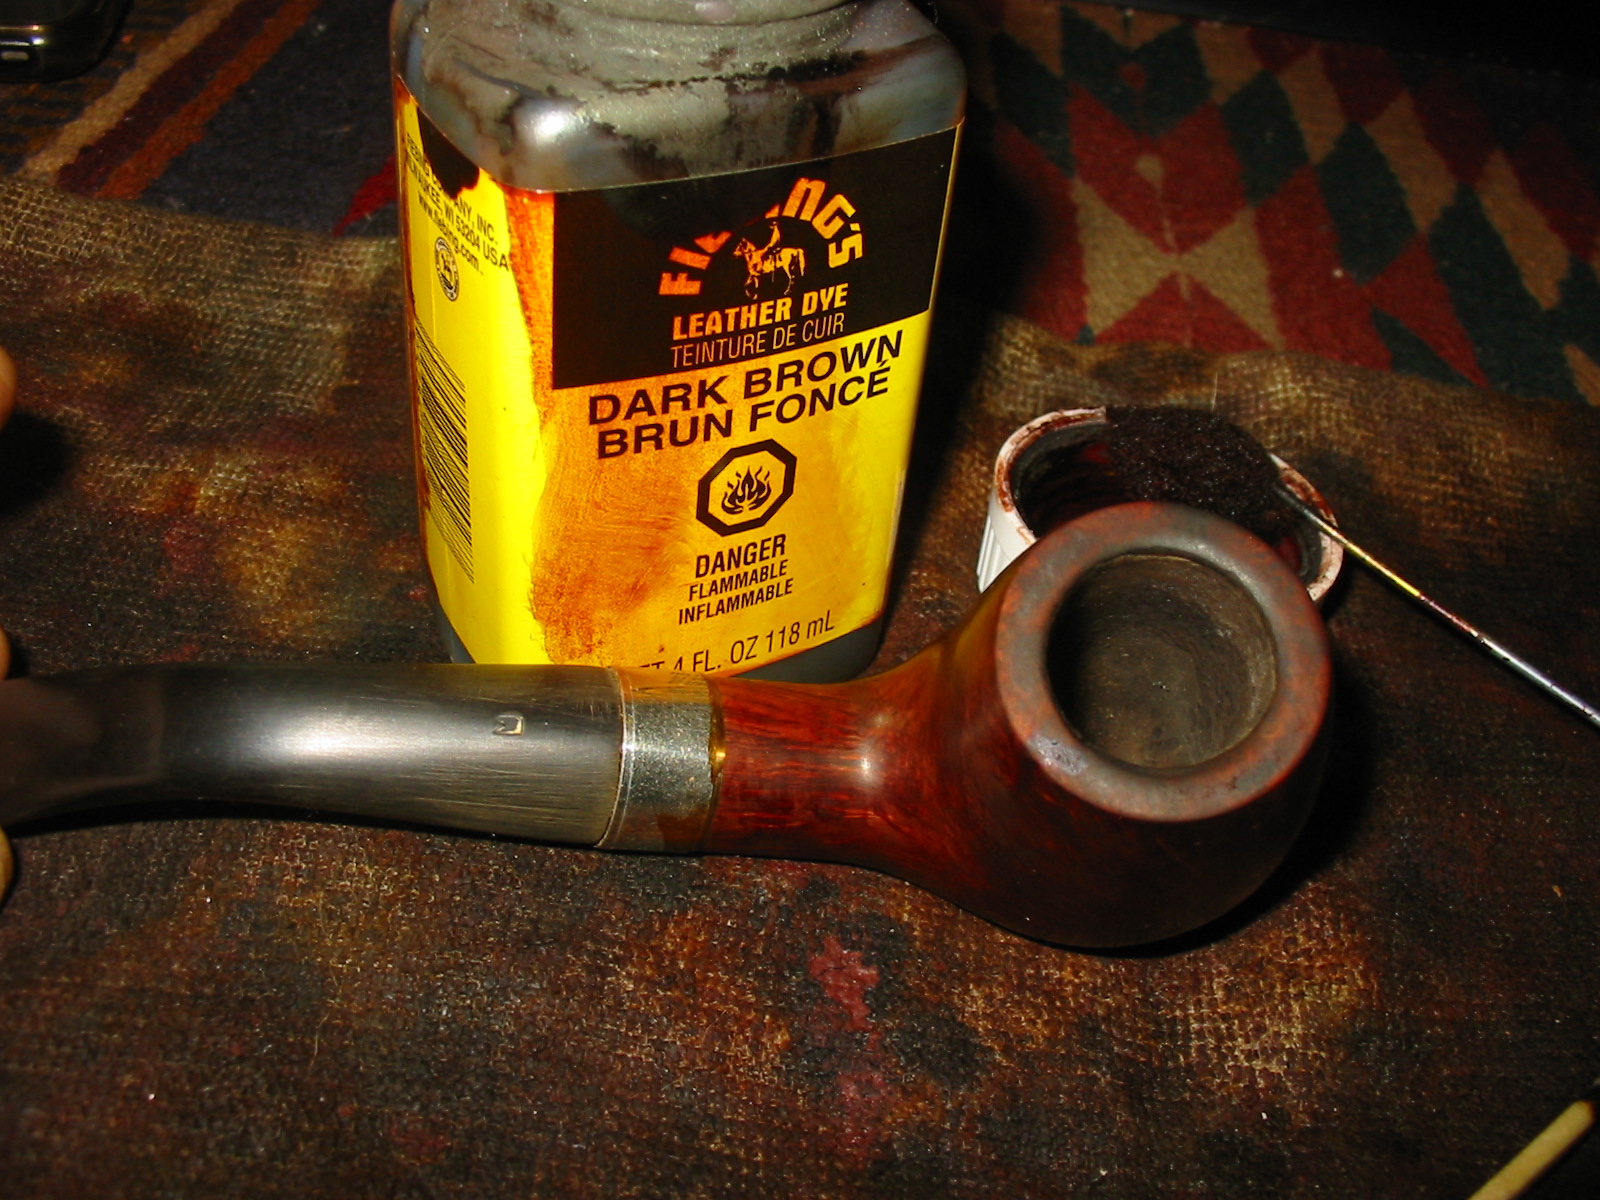
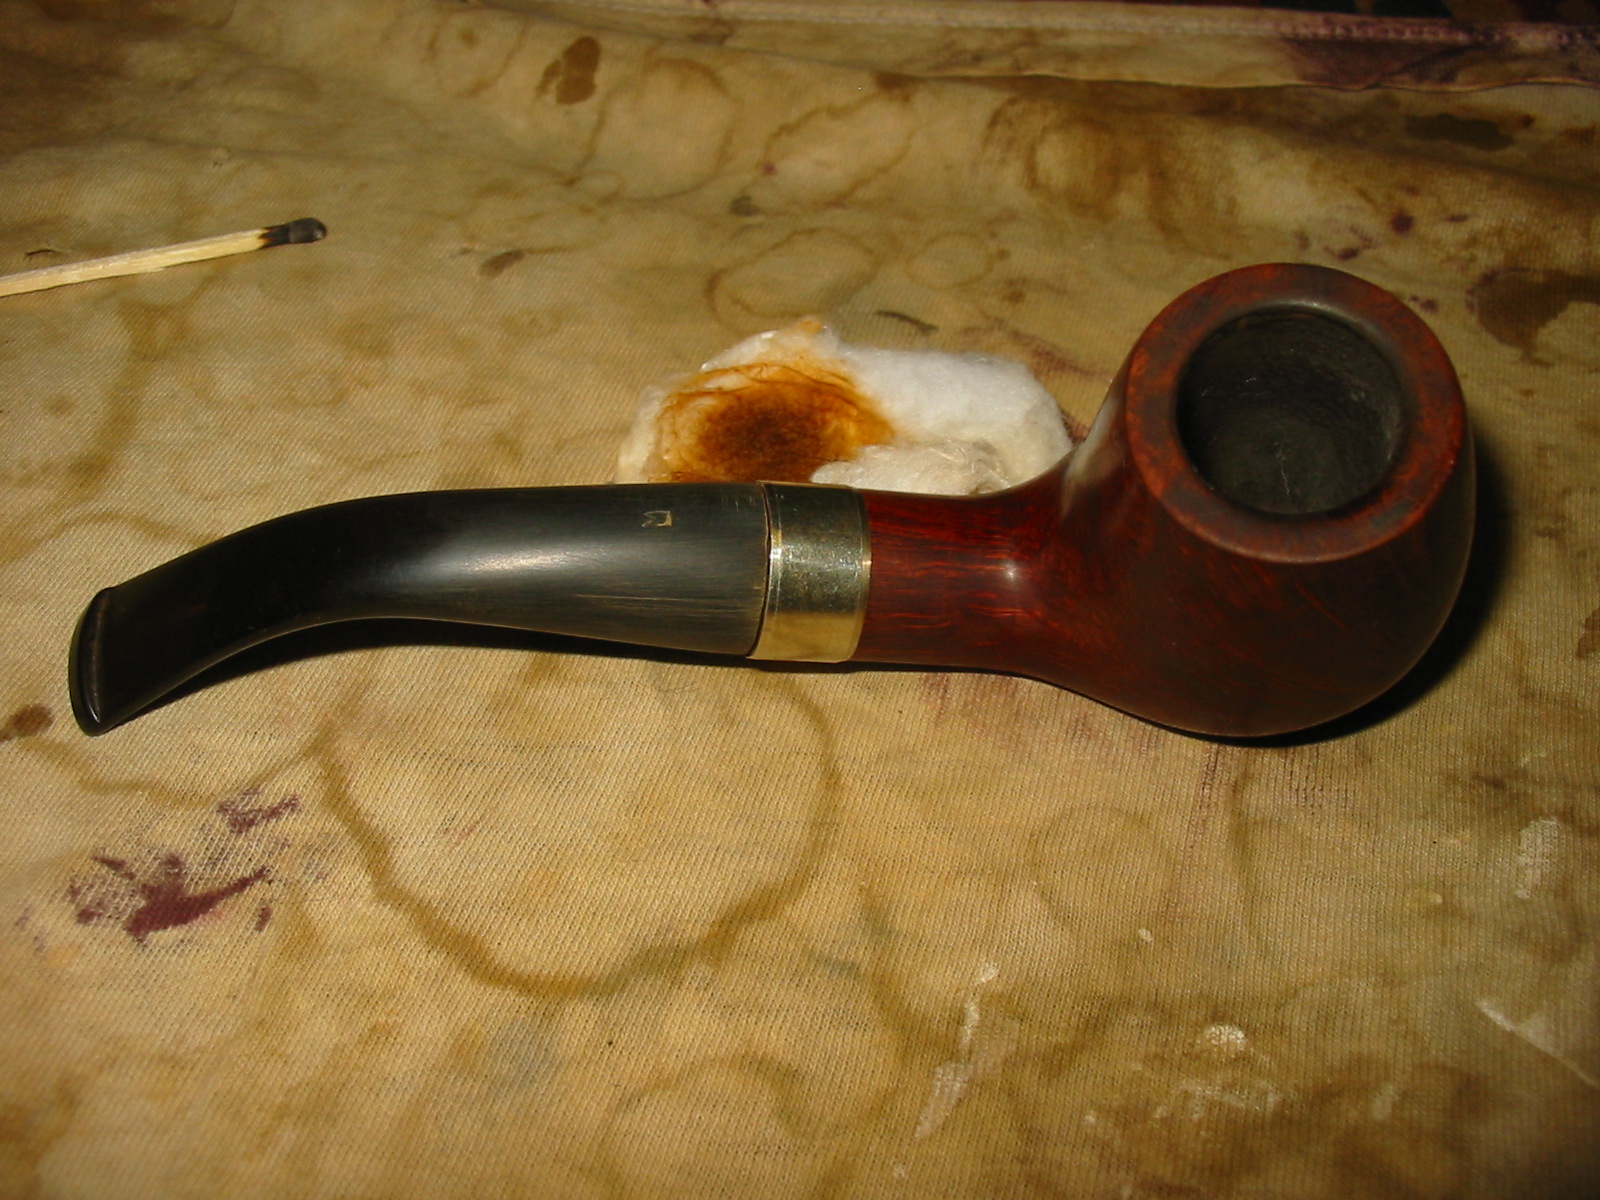
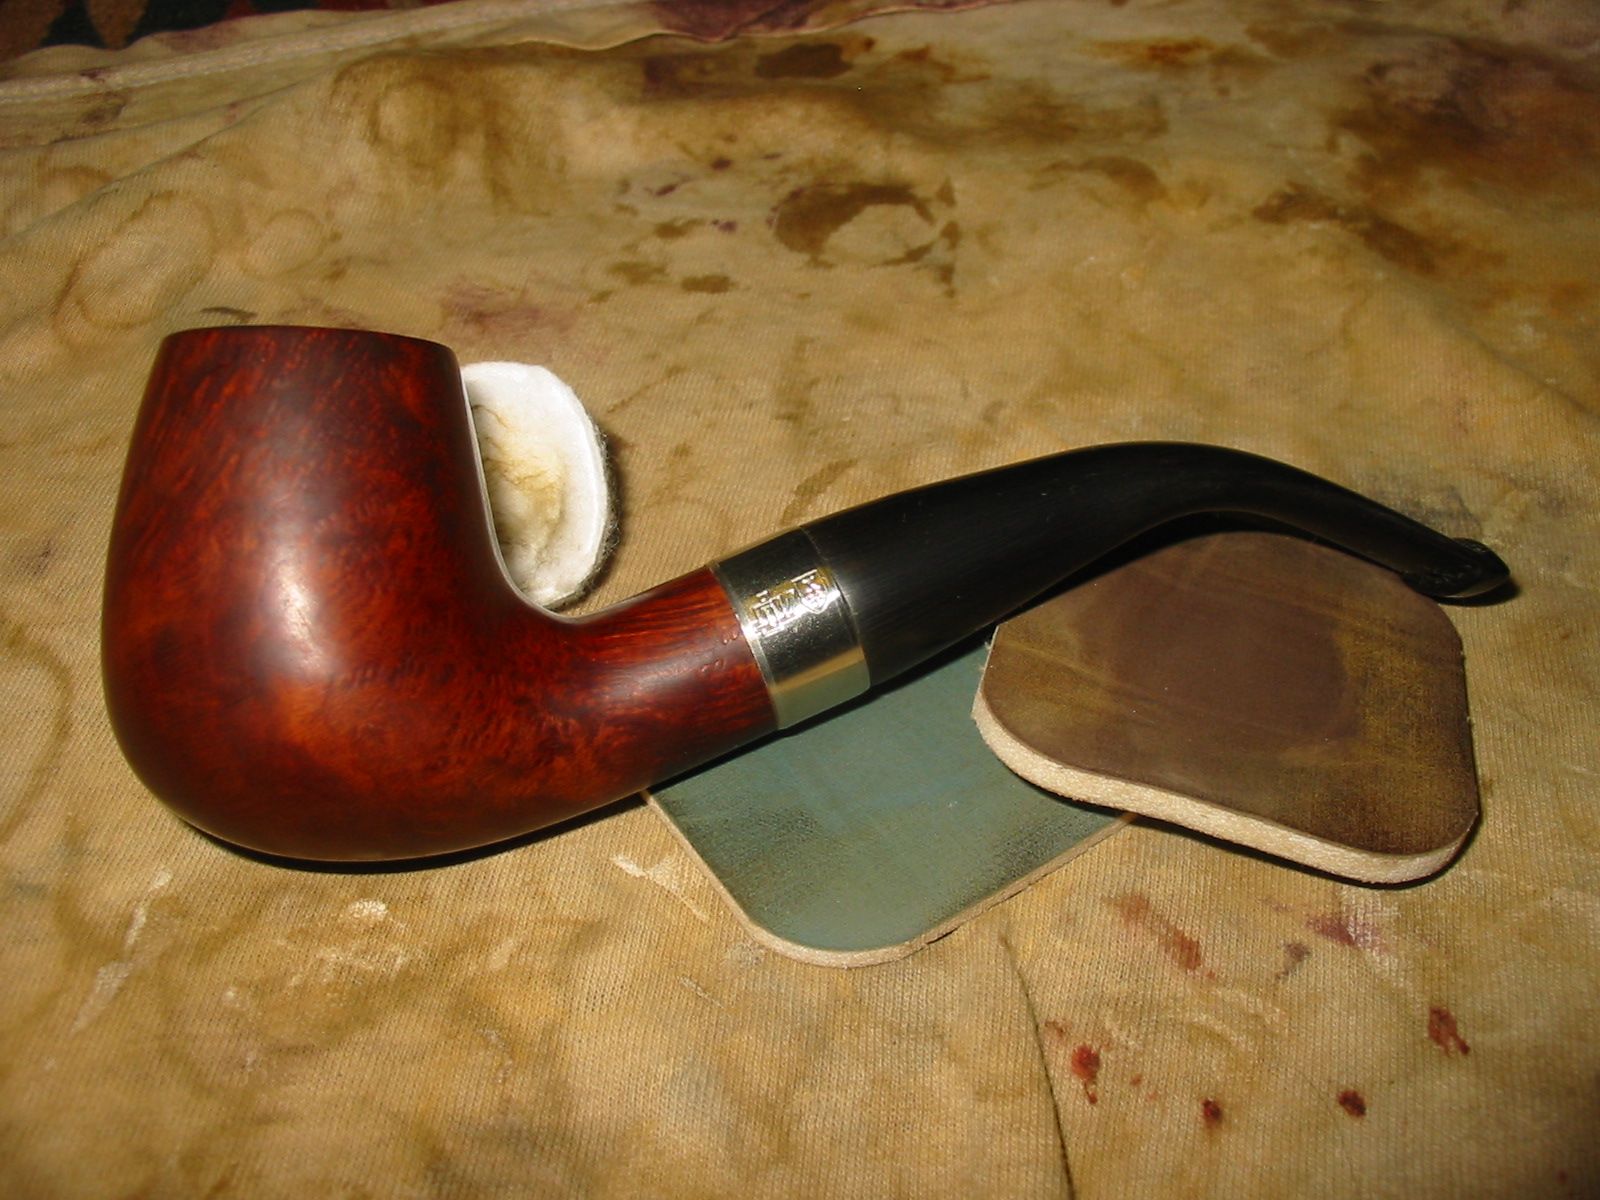
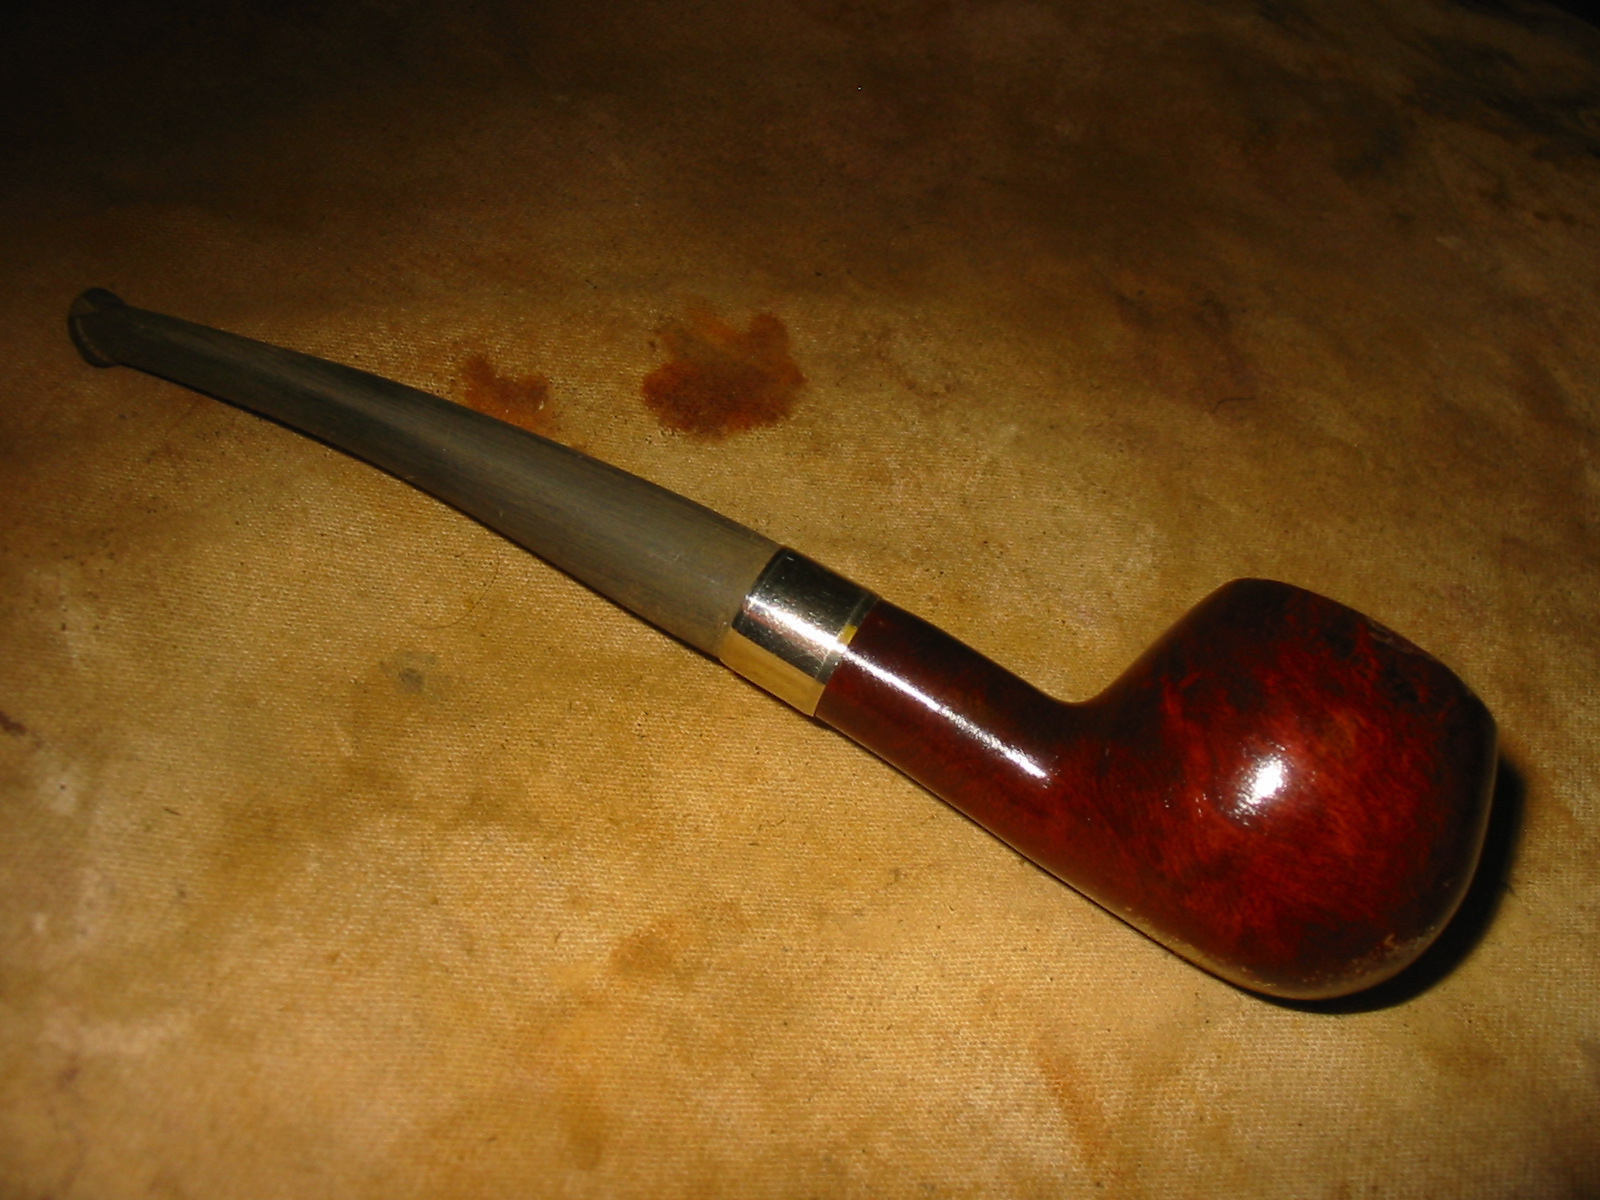
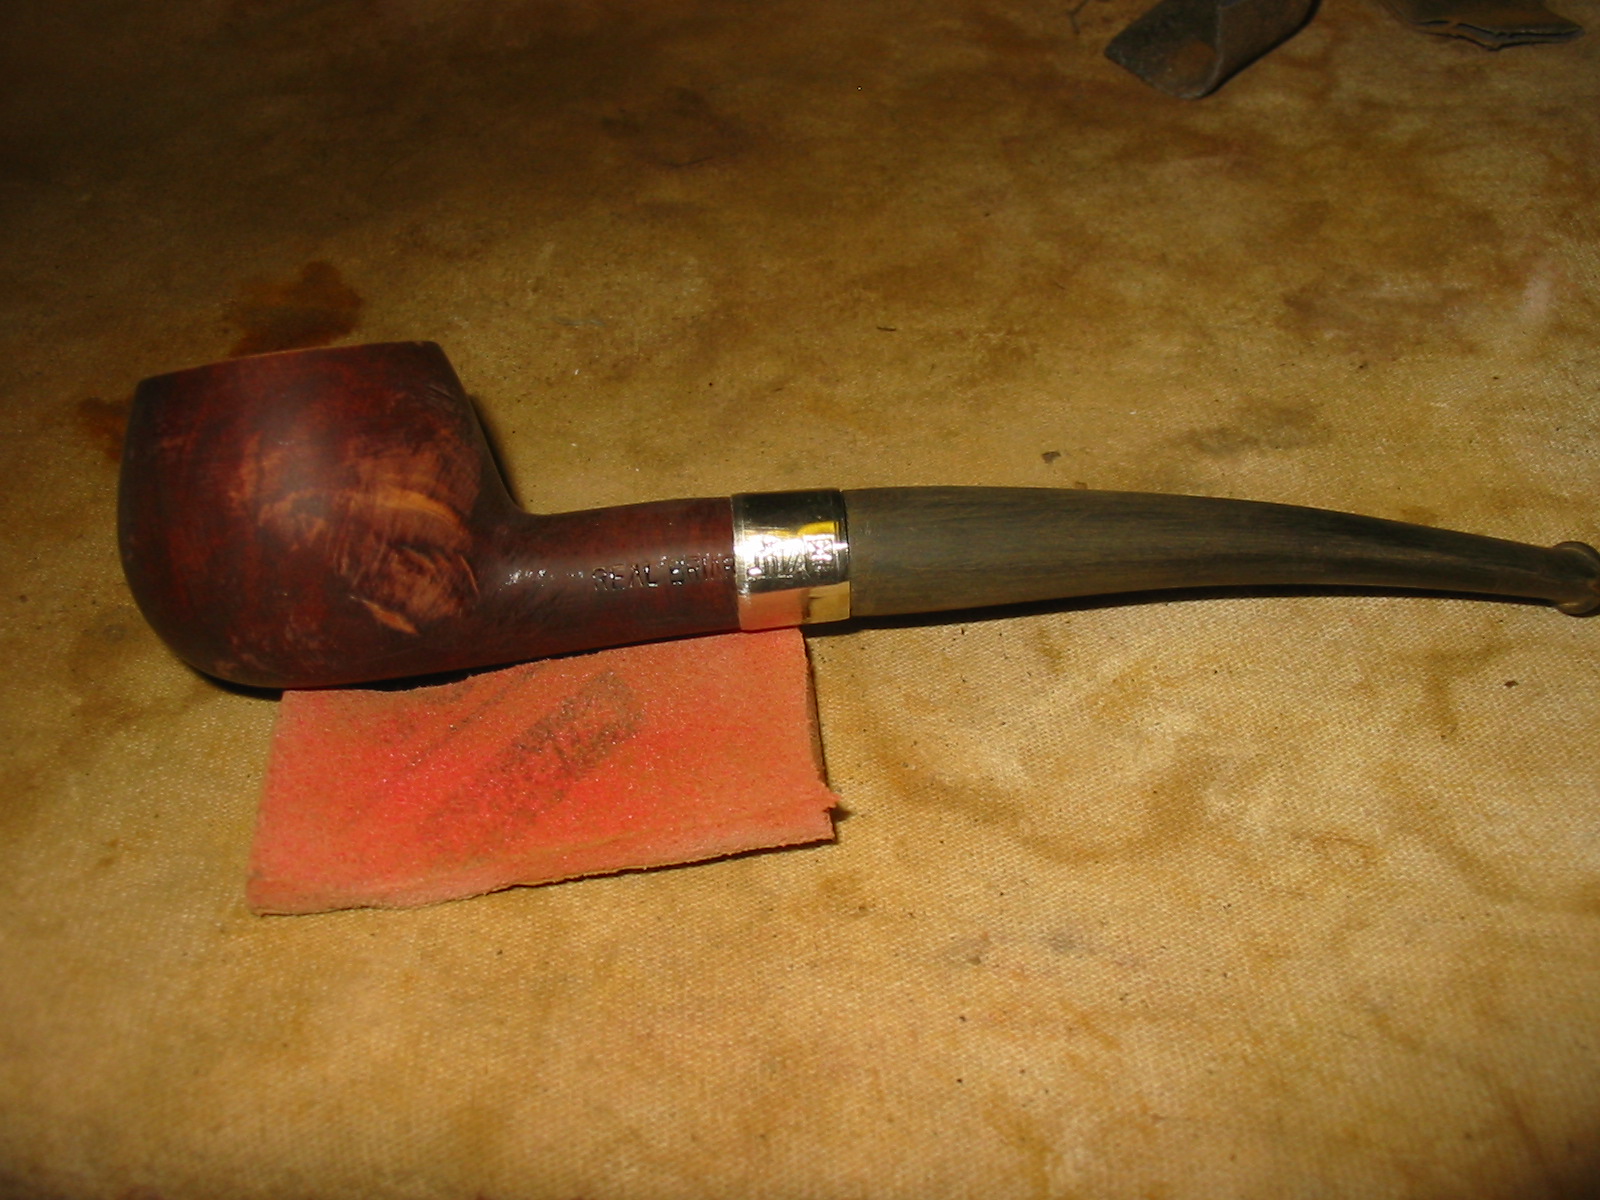
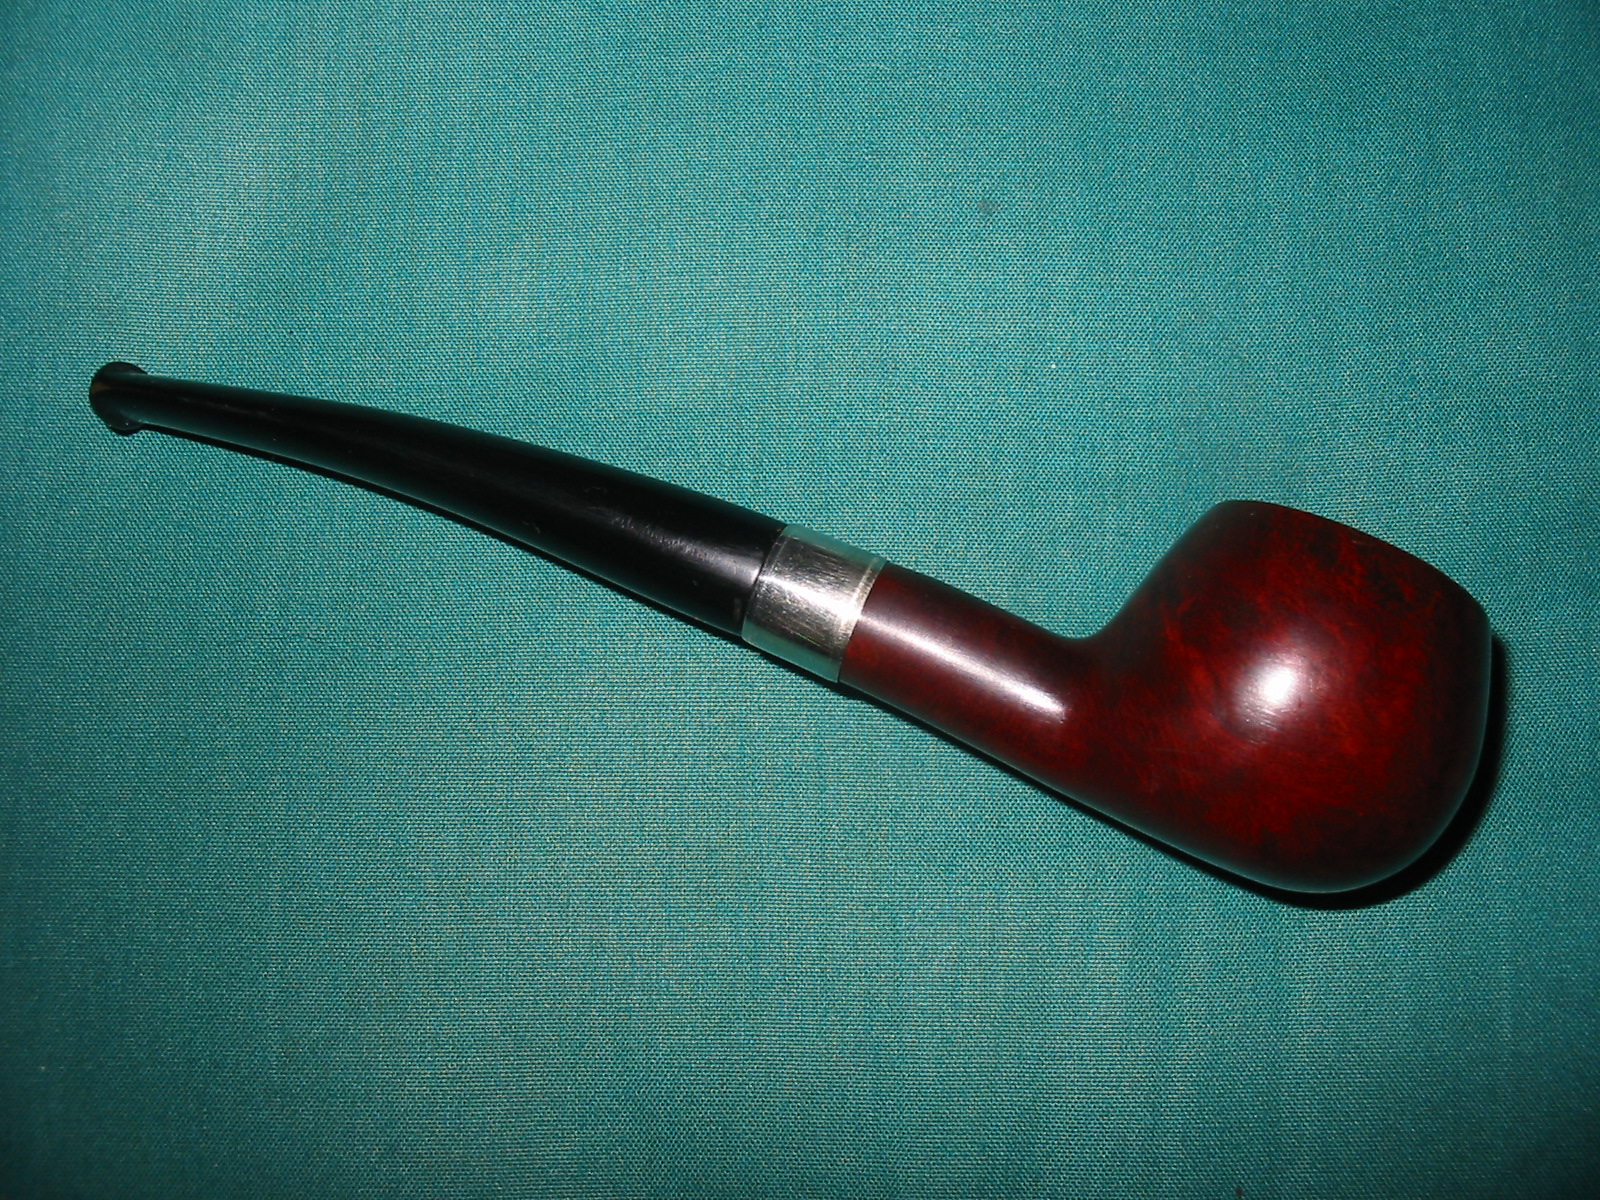
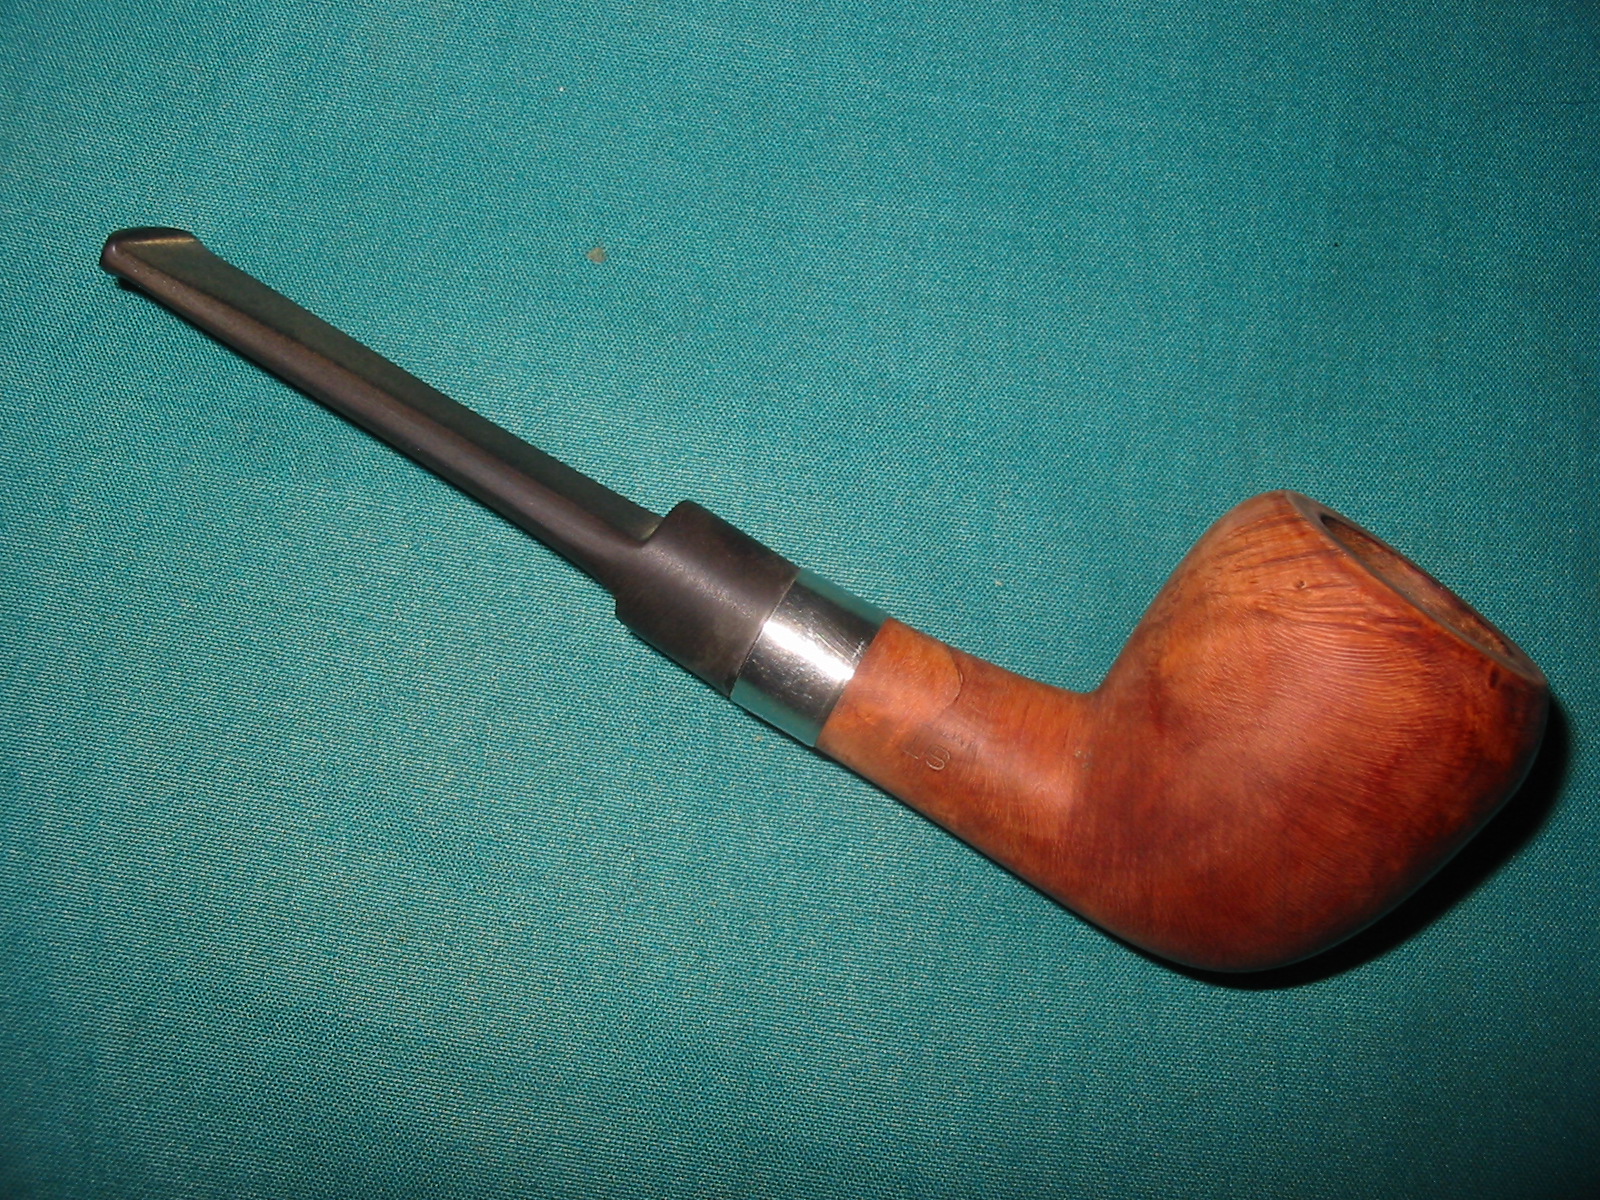
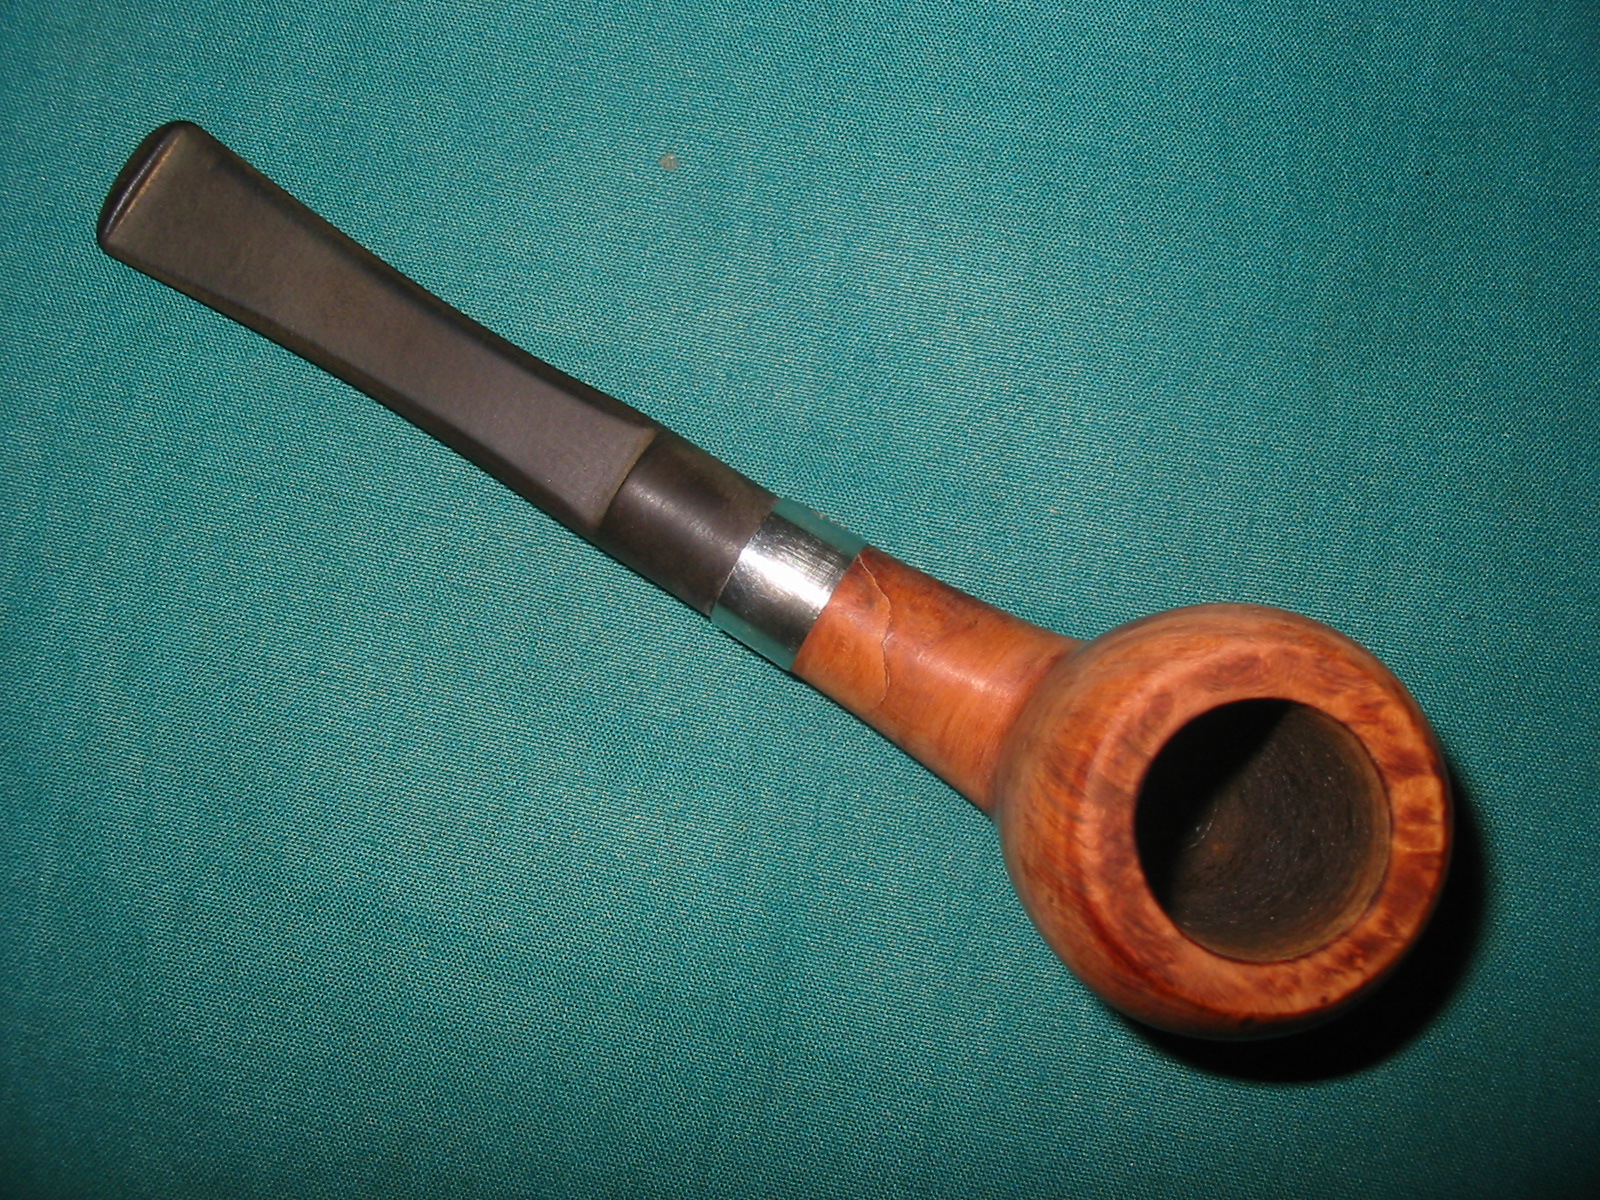
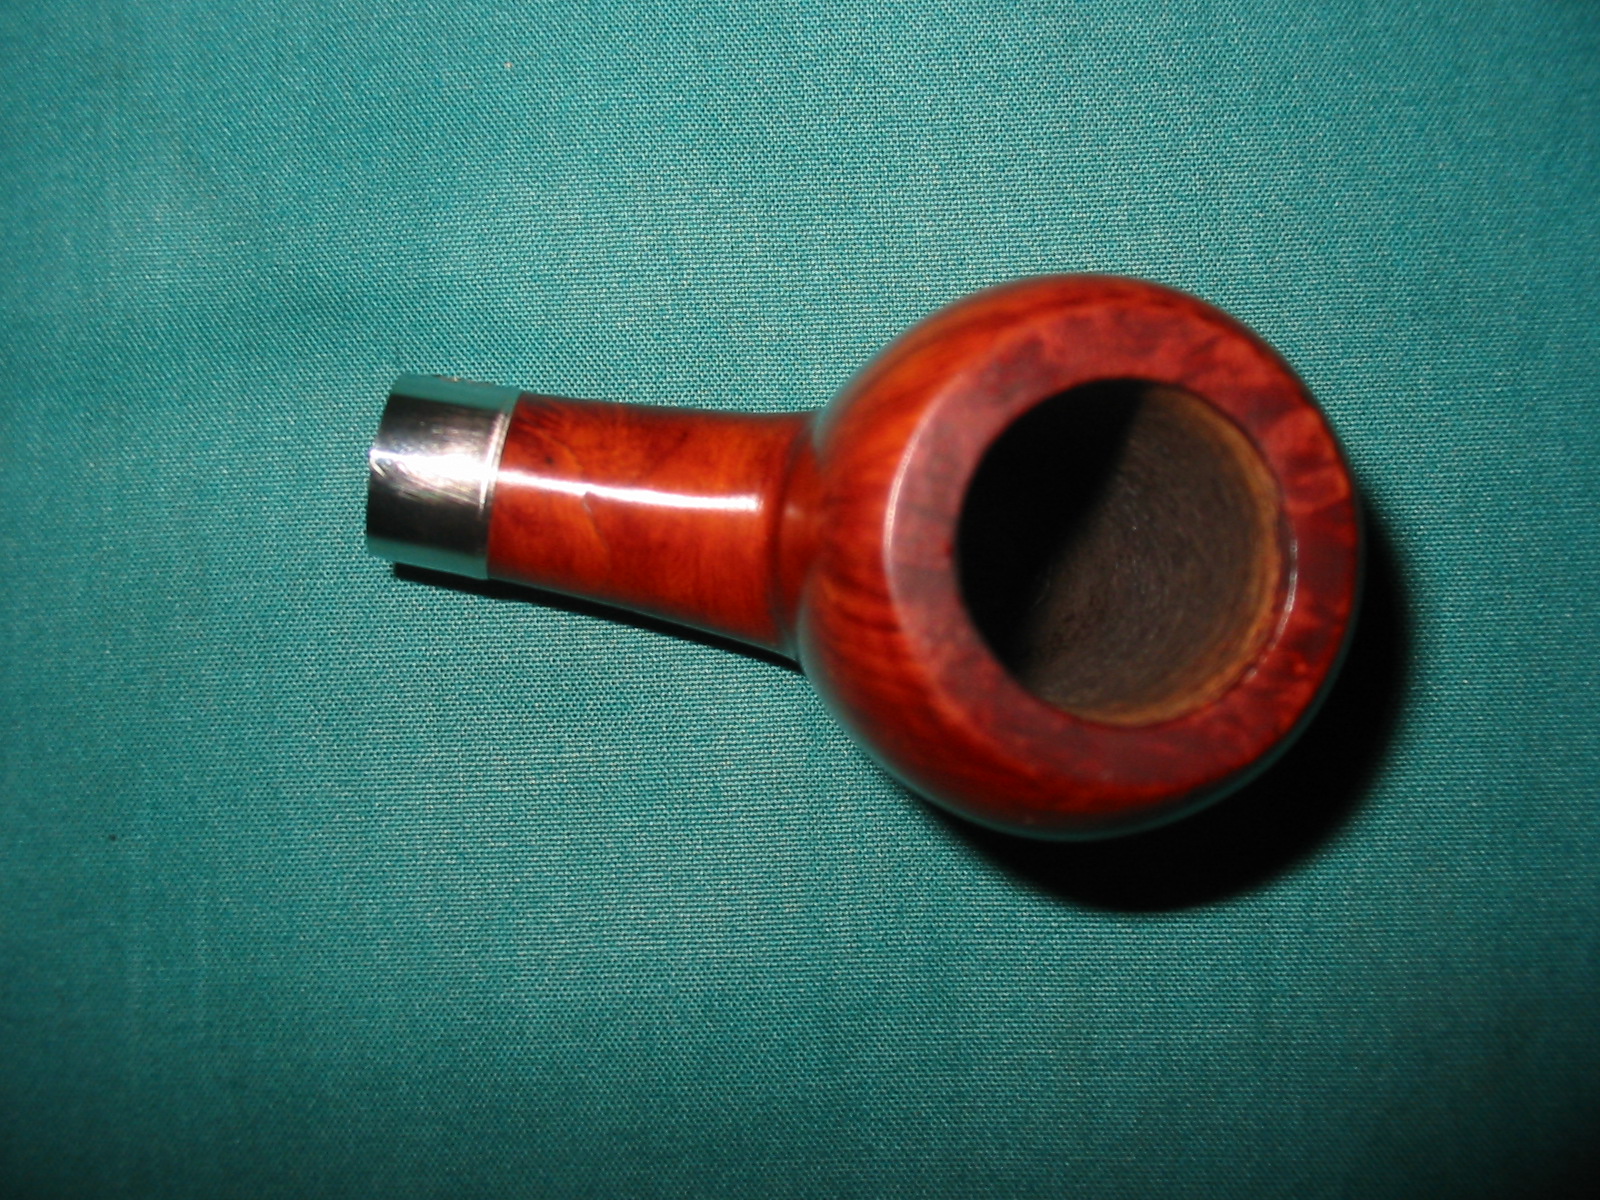
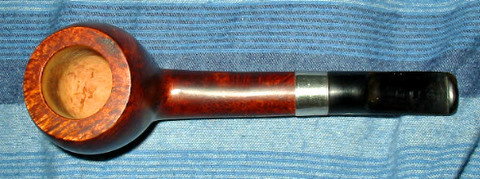
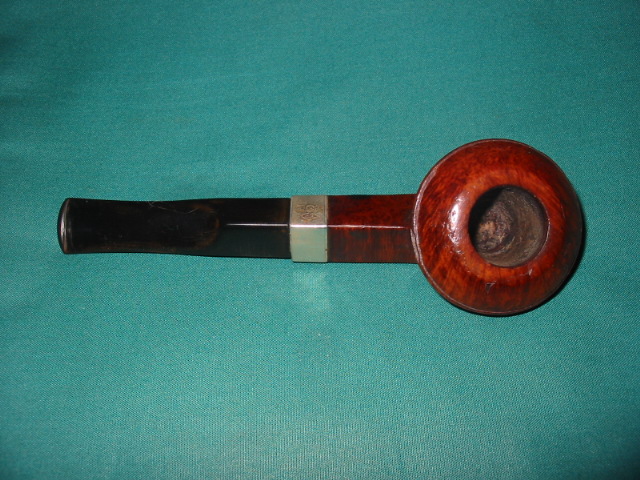
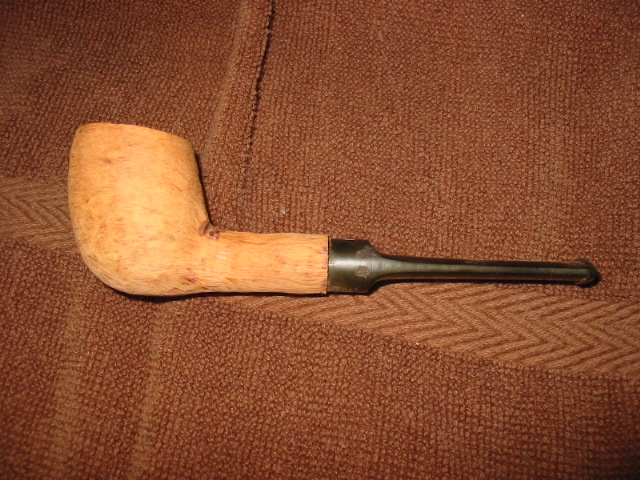
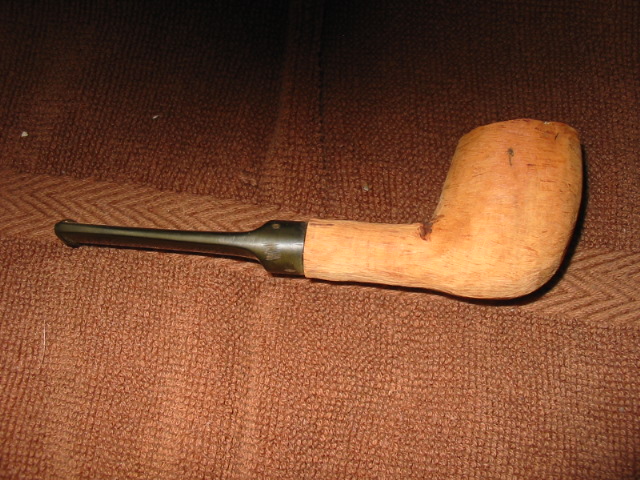
I sit here at my laptop as I near the conclusion of the tumultuous account of the tale of two jichimus, smoking a soothing bowl of Rattray’s Brown Clunee in my own Chinese Phoenix Wood. (I like the mythological sound of that better.) The second bowl needing only the stem and a final quick wheel buff by Chuck, I managed a passable job on the church stem – at least enough to make it fit the shank snugly – and polished the Lucite to a fine luster.
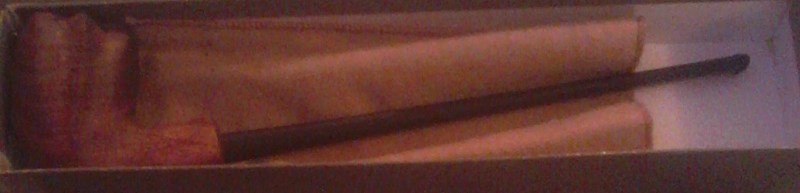
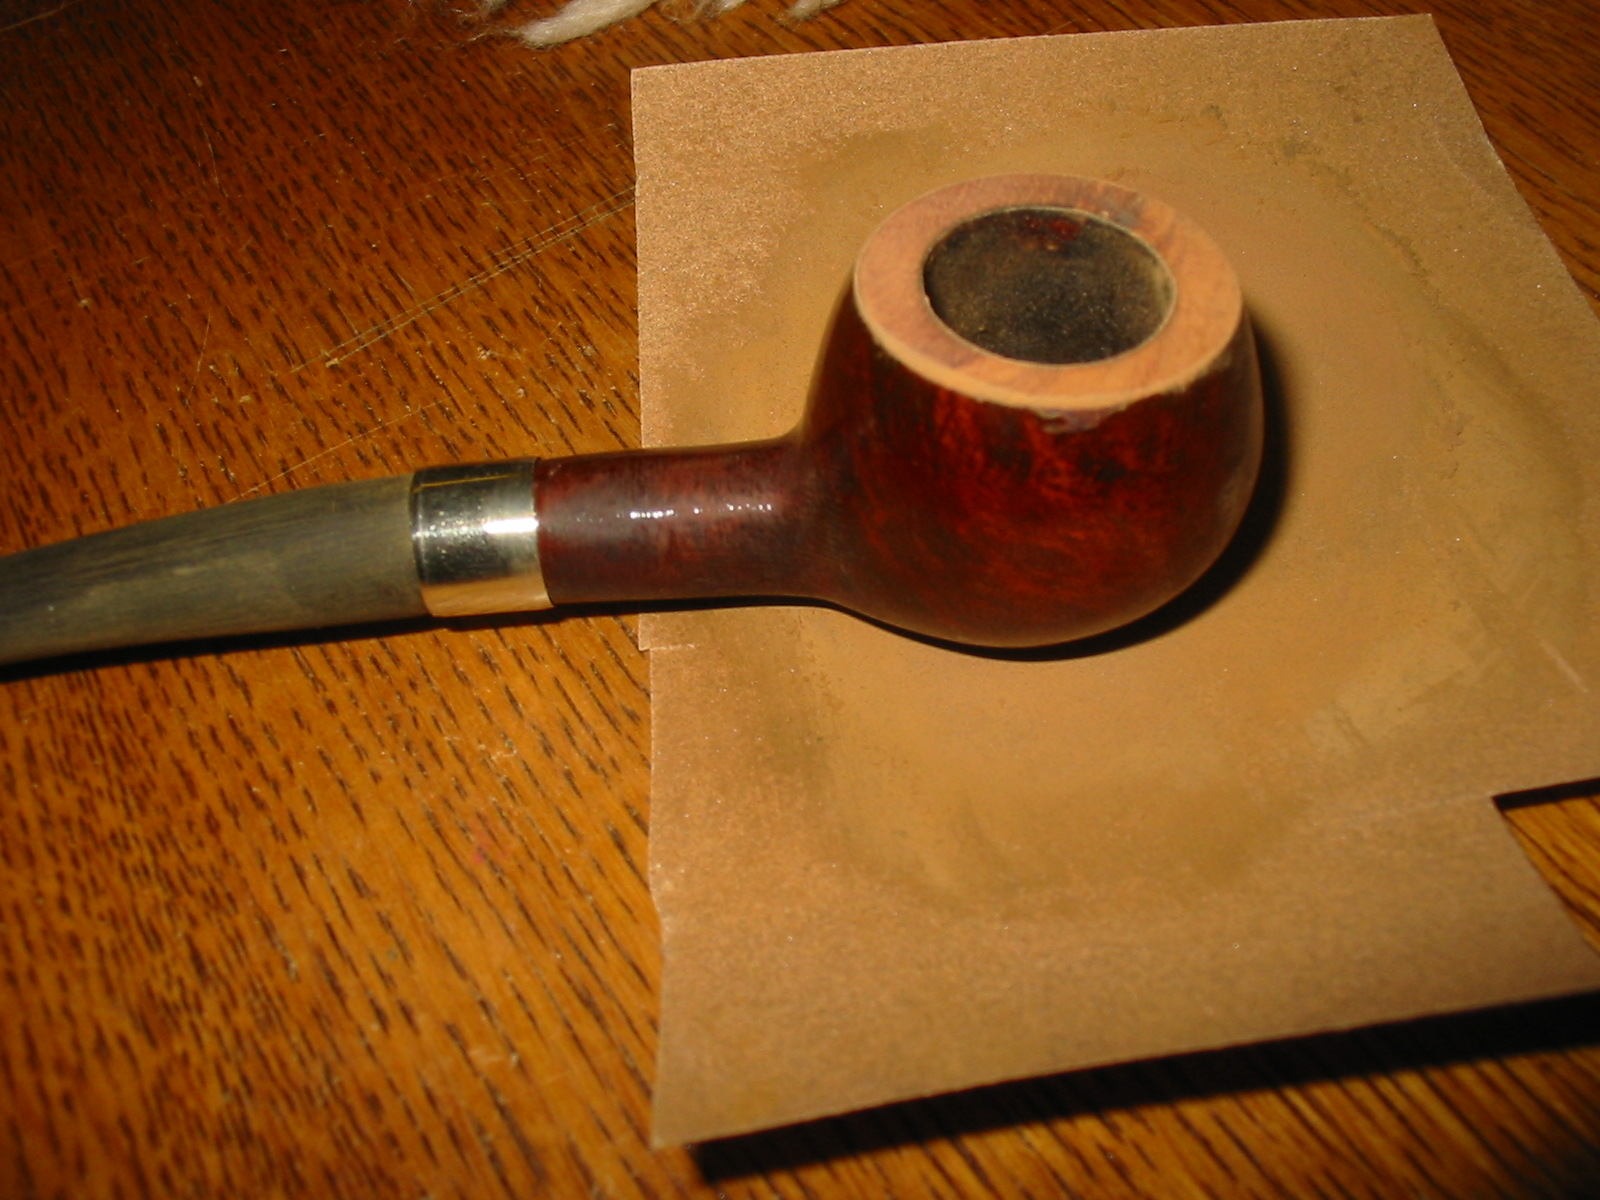
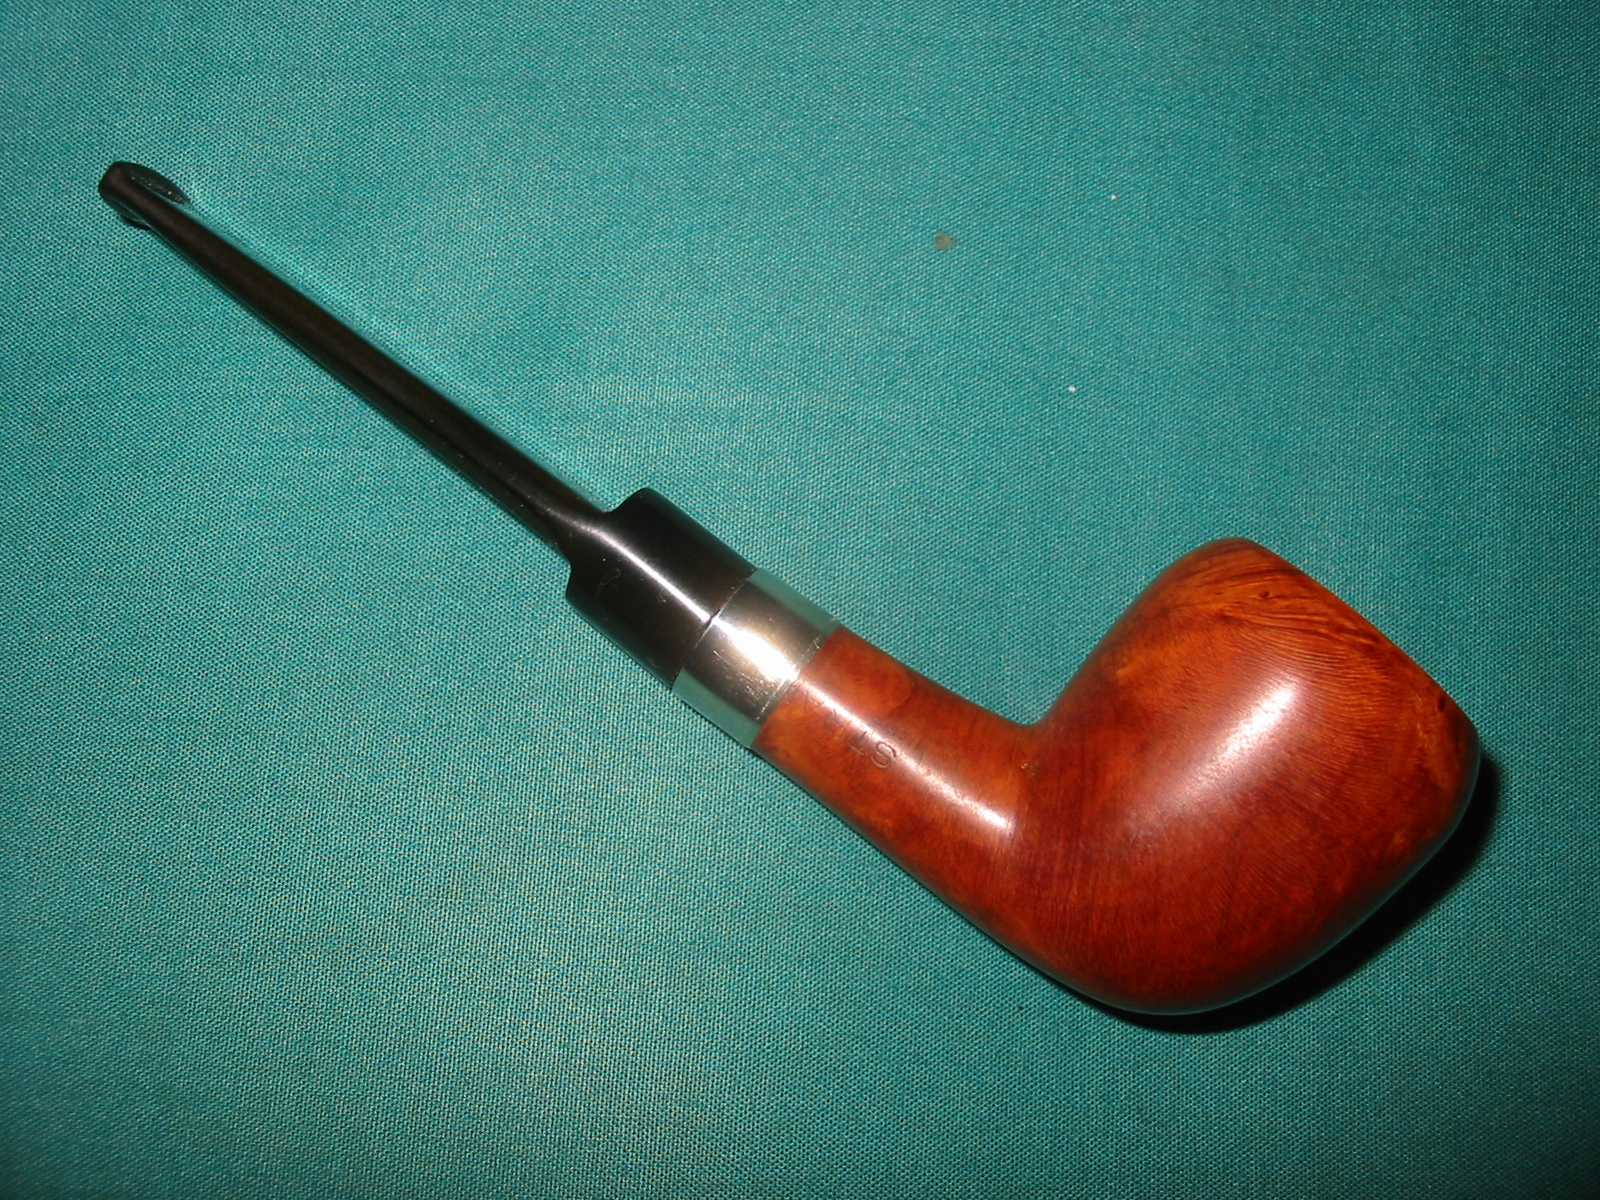
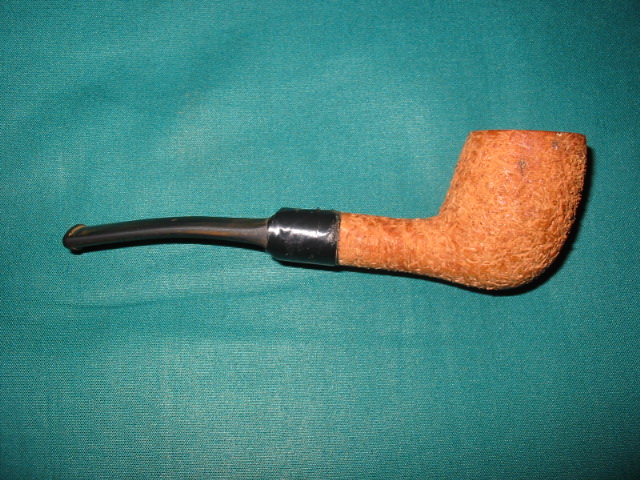
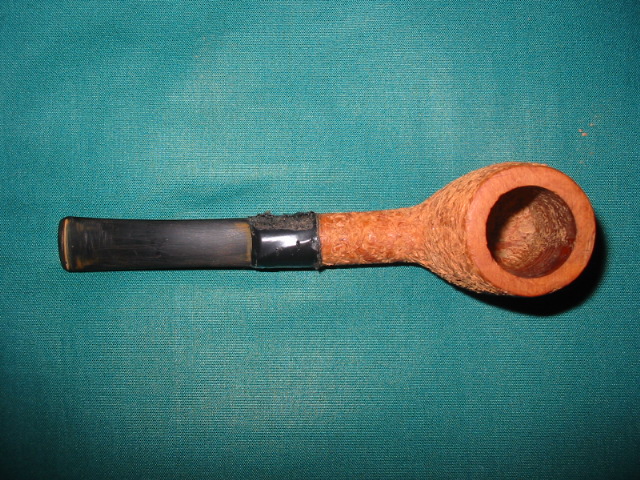
Robert Boughton jichimu restore. Photo © Robert M. Boughton.
When the time came to present the pipe to Ashley at our weekly meeting, which she attended knowing something was up but having no idea what it was, I recommended upon giving it to her that she might consider finding a replacement stem, or at least arranging to have it curved. But she filled the bowl in delight and lit it up for the first time, and the look of satisfaction and pleasure on her face were all I needed to put the project to bed. She insists to this day that the jichimu is one of the coolest, smoothest smoking pipes she owns.
Conclusion
The end of any serious undertaking tends to be followed by a period of time that can be described as both exhilarating to a degree but more of a let-down over-all, and the only cure for this edgy malaise is a new game plan to replace the last. The conclusion of the jichimu restoration project, not the least of which is marked for me by this writing,leaves not an actual dearth in my life except for the heartfelt kind, for I found in my meager contributions to it a new calling of which I had only imagined I might one day have a genuine calling and now know the suspicion, or dream, is more than that. As I suggested earlier in this account, I have long known the pleasure of using my hands in woodwork, in particular the simple tactile nature of wood itself, and of taking apart such things as old furniture and stripping off the old paint and varnish to be improved – after attentive, deliberate, meticulous preparation – with fresh new replacements. Now, on the verge of acquiring an electric buffing wheel because the time has clearly come to stop passing off that final touch, I know I have a future in pipe restoration if not their actual making.
In my near future, therefore, I see several tasks I have been procrastinating, most of them remaining literary in nature but the third having a distinctly different approach to woodworking than pipe restoration: a very old padded rocking chair that has remained unused outside, over time collecting dirt and losing more and more of its stuffing, its fine brass screws, nuts, washers and bolts tarnishing, its lack of attention and use leaving it, as it were, almost lonely – if indeed a natural born writer with a flair for woodwork could personify an old rocker.
But I expect I will have to start my own blog to tell the tale of that restoration.
完