Tag Archives: finishing

Restoring one from my own collection – an Andreas Bauer Billiard


Blog by Steve Laug

The next pipe I chose to work on came from an auction back in May of 2018 in Beaumont, California, USA. It came in a nice burgundy leather case with a cream coloured lining. The case is marked on the outside and reads FINEST CULTURED AMBER on the front edge and MADE IN AUSTRIA on the back edge. Those two stamps caught my attention. I always have an eye out for Austrian Made Meerschaums and the Finest Cultured Amber made me wonder what that was.Inside the case the lid was stamped as well and bore the AB logo with Genuine Block Meerschaum around the letters. It is also stamped Hand Made. The case is fitted to a beautiful lightweight meerschaum billiard with what the case describes as a Cultured Amber Stem. I was looking forward to working on this one and potentially adding it to my own collection as it is quite stunning.
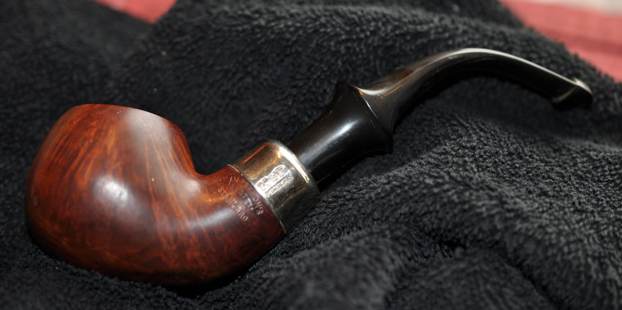
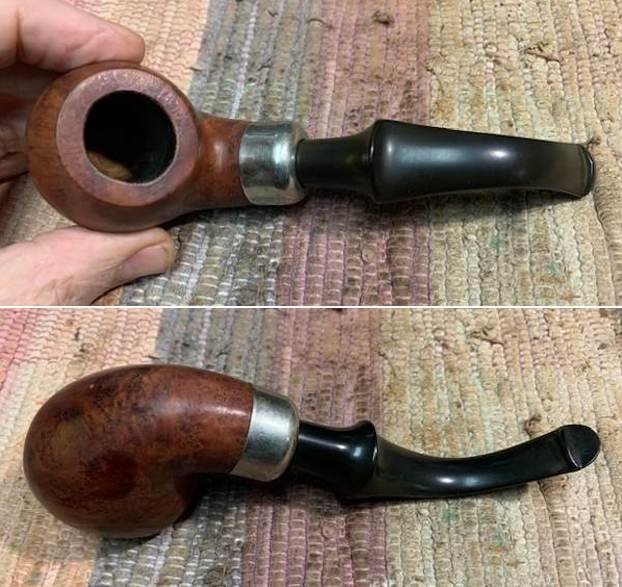
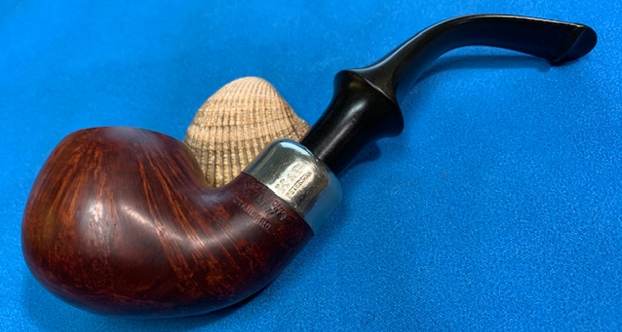
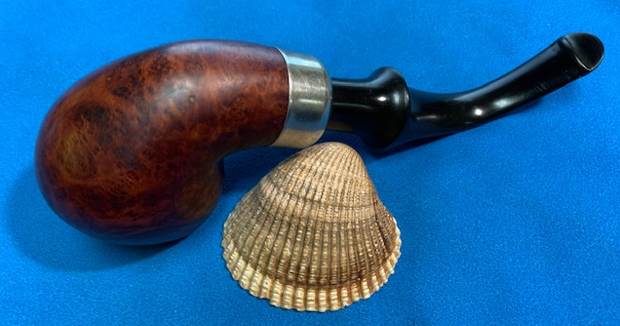
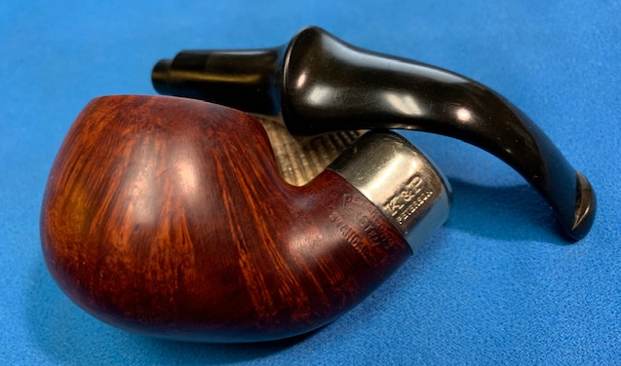
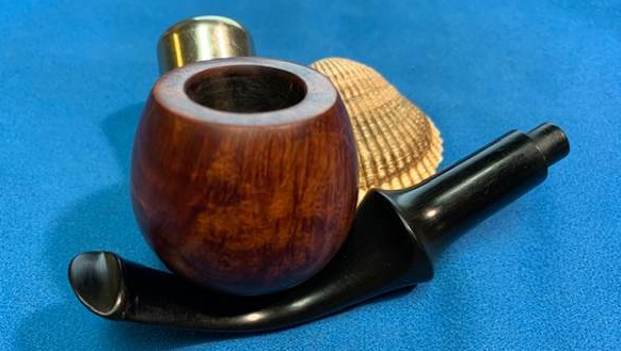
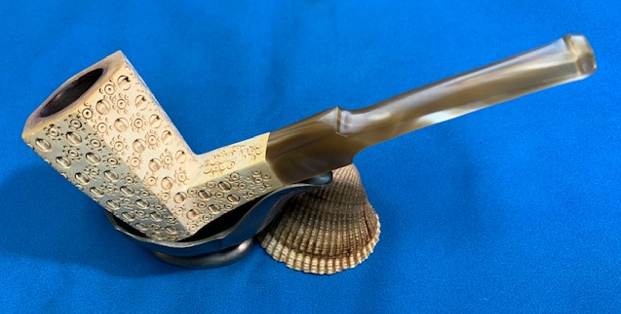
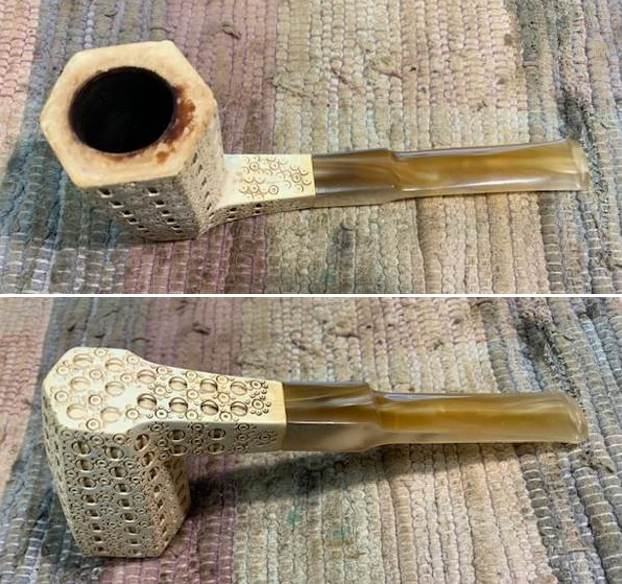
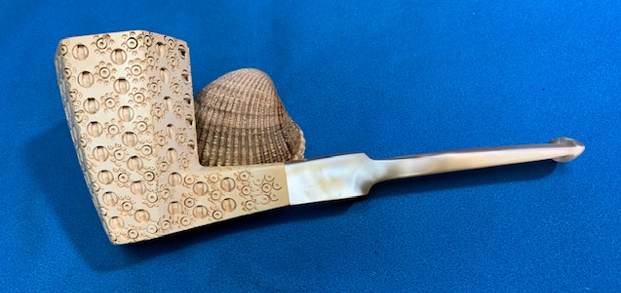
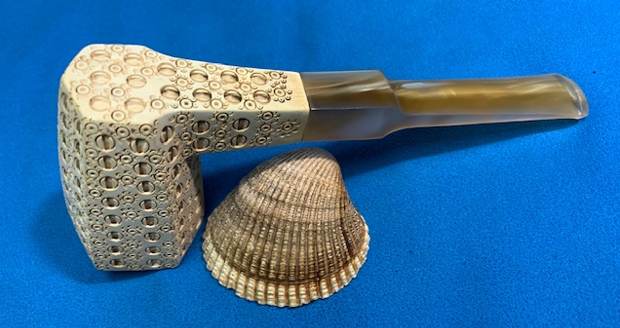
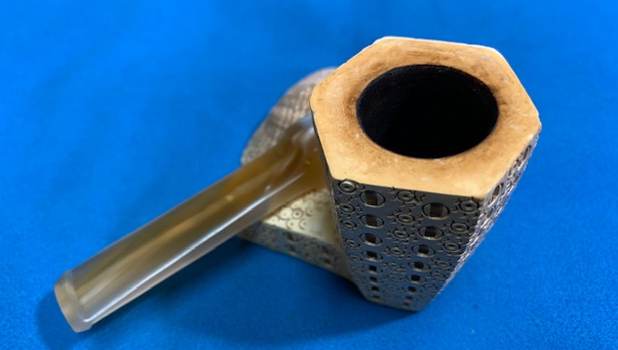
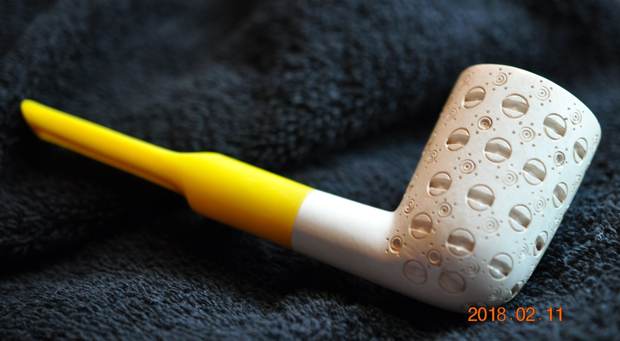
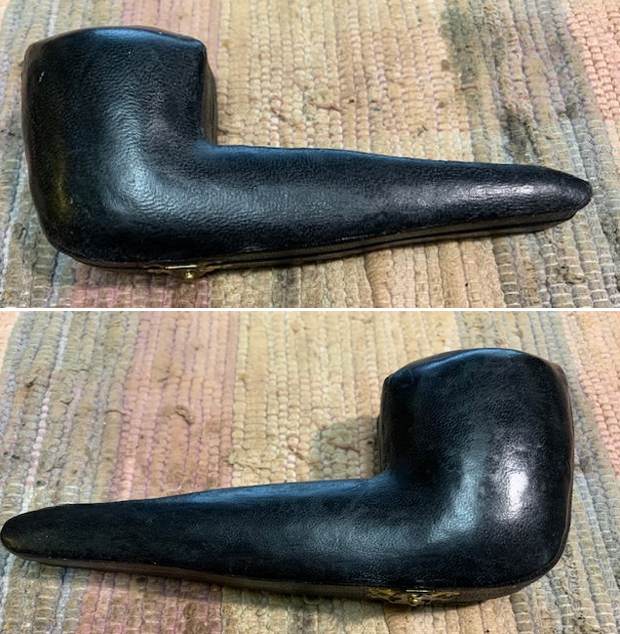
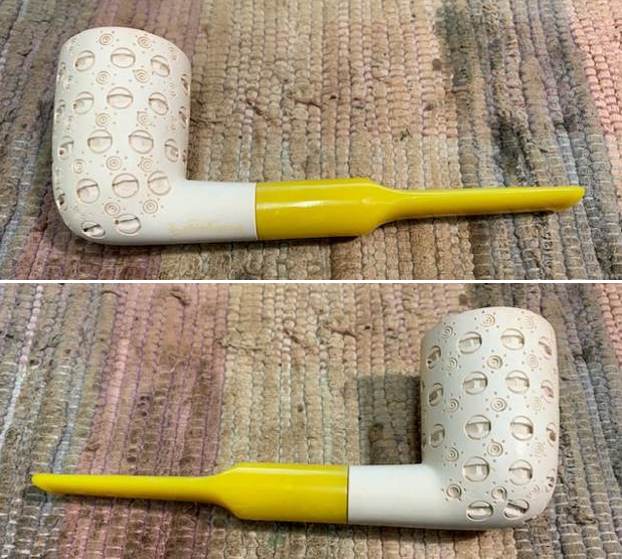
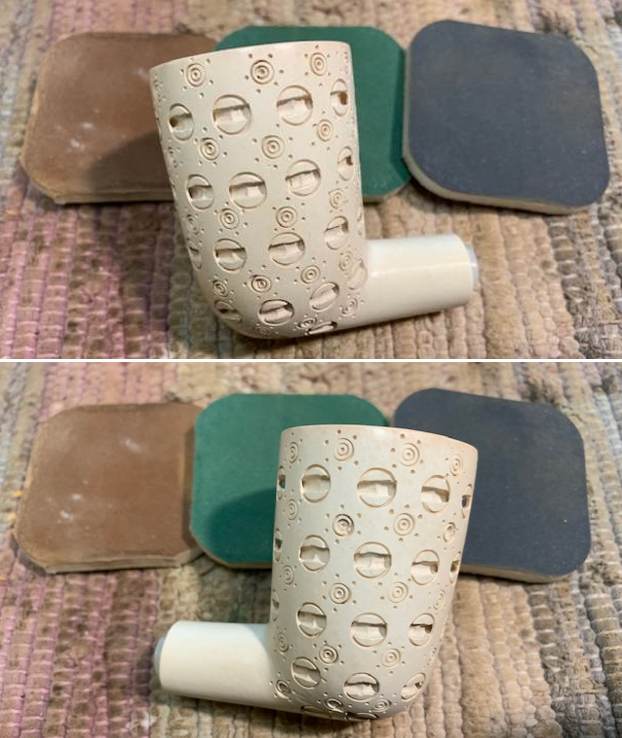
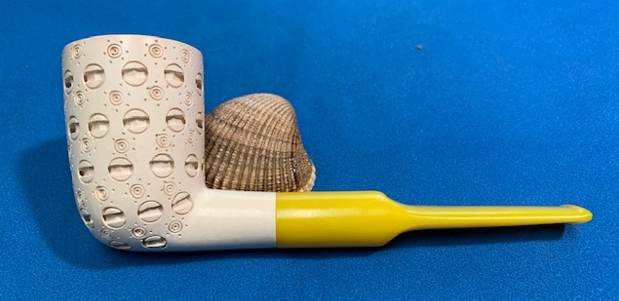
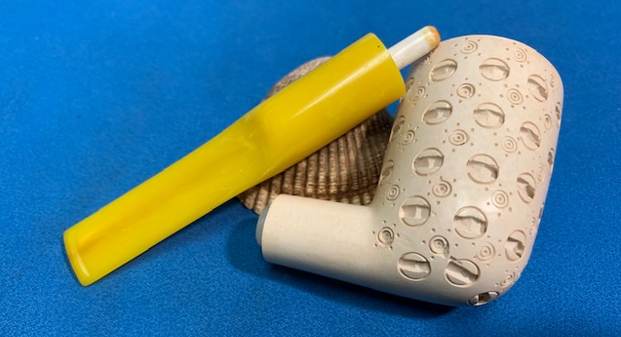
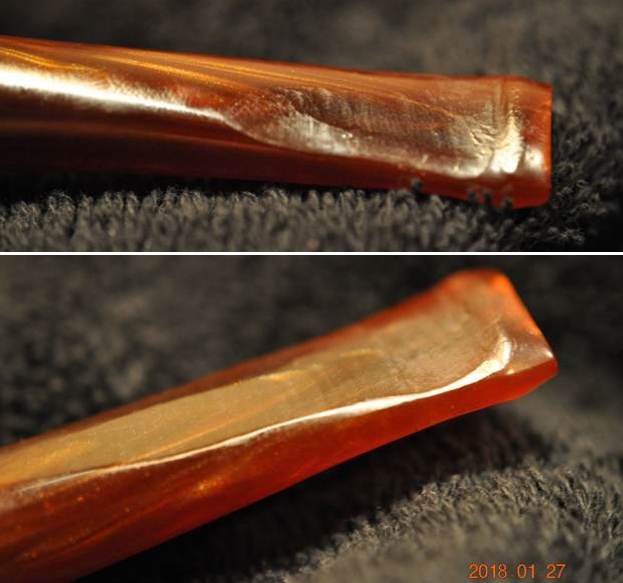
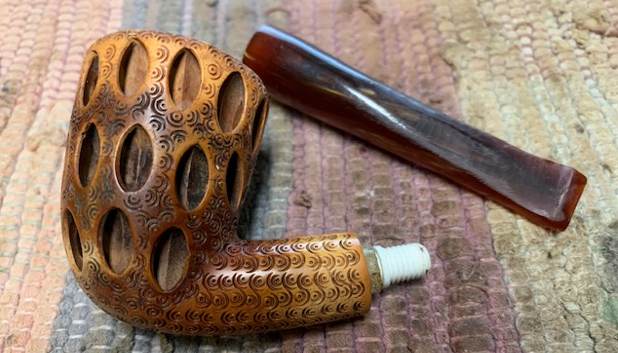
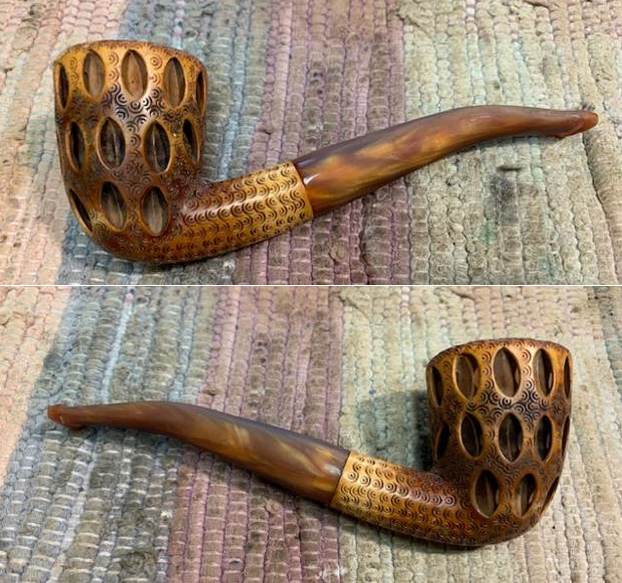
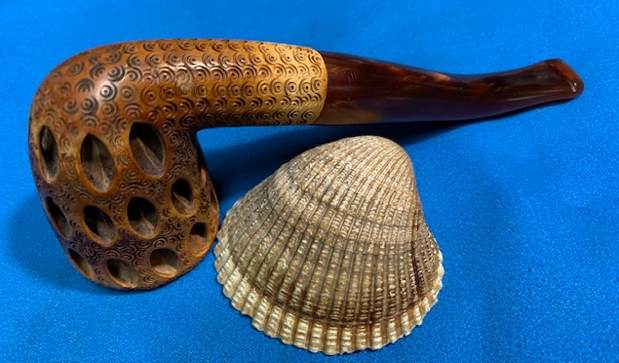
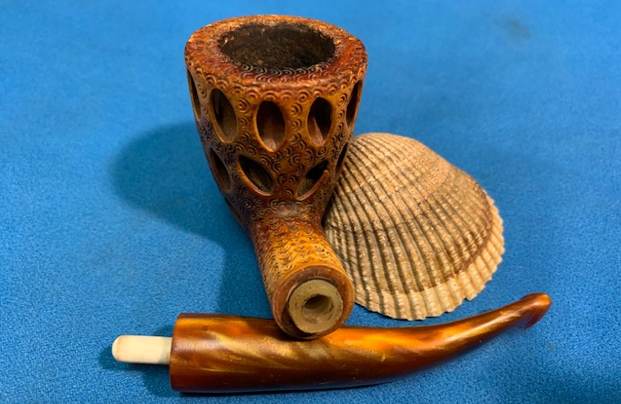
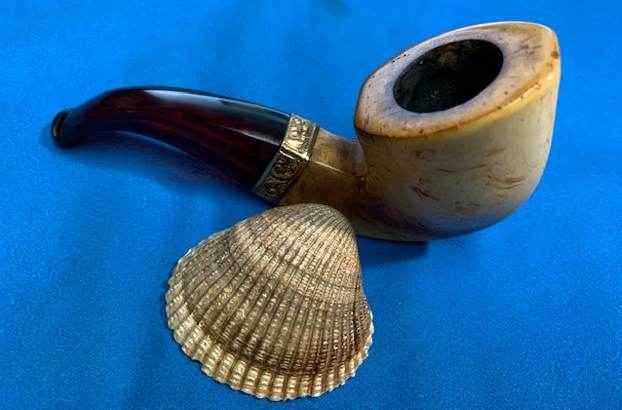
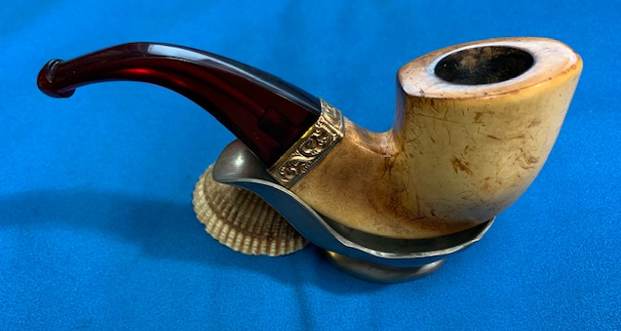
Jeff took the pipe out of the case and took a photo of it. It is quite clean. The rim to has some darkening and a bit of tars/lava on the back inner edge of the bowl and some developing patina around the rest of the rim top. The stem is very clean with light tooth chatter. The swirls in the stem are rally quite beautiful and very unique to Bauer Meerschaum pipes.         
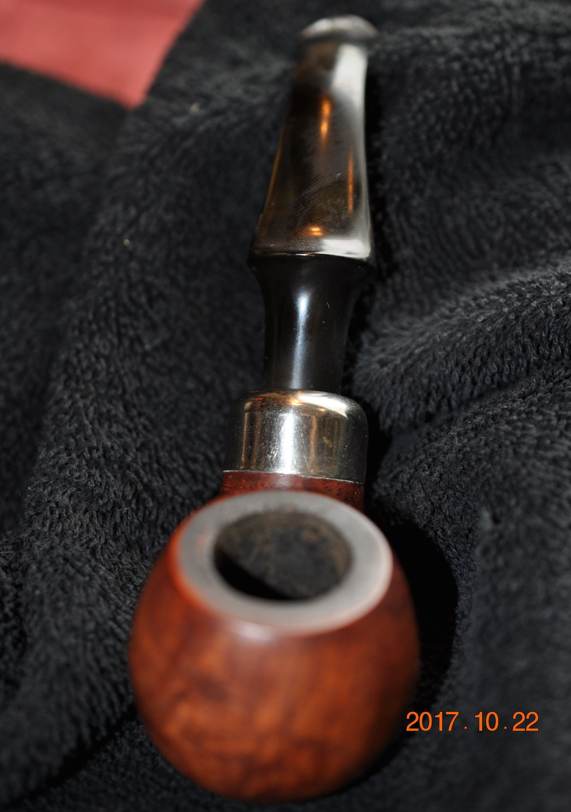
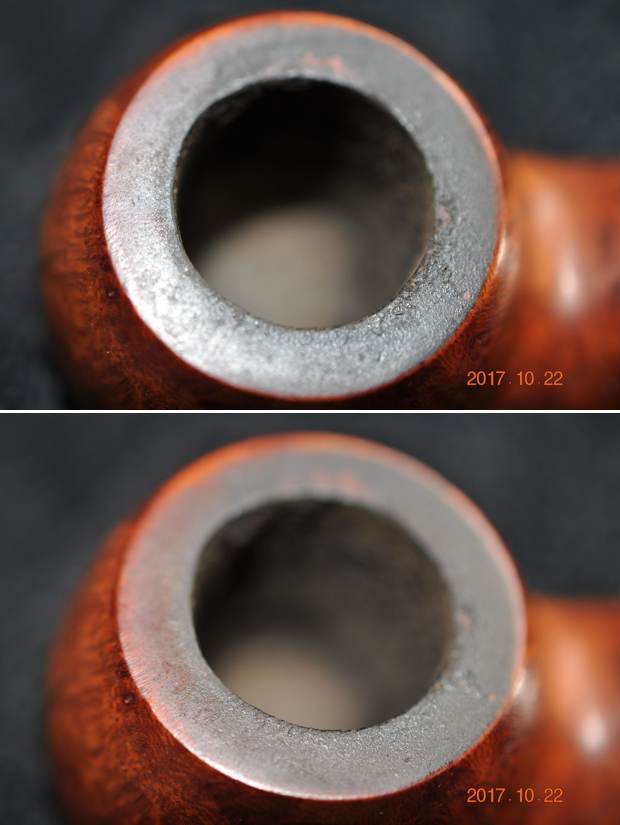
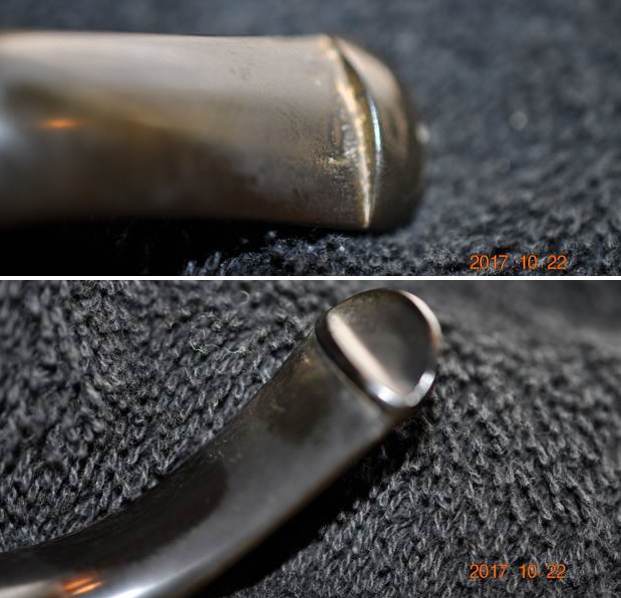
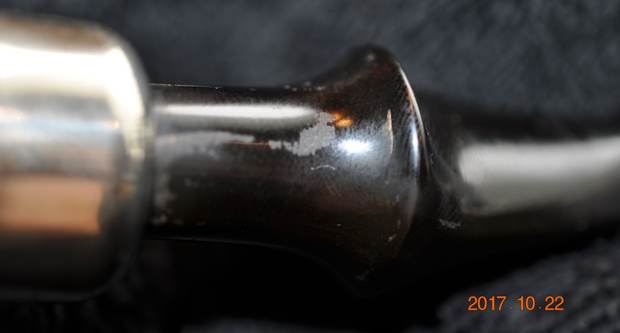
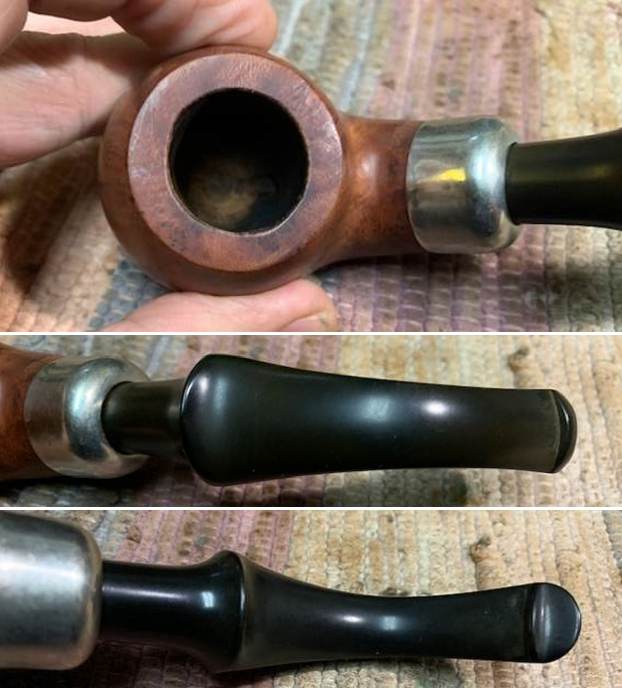
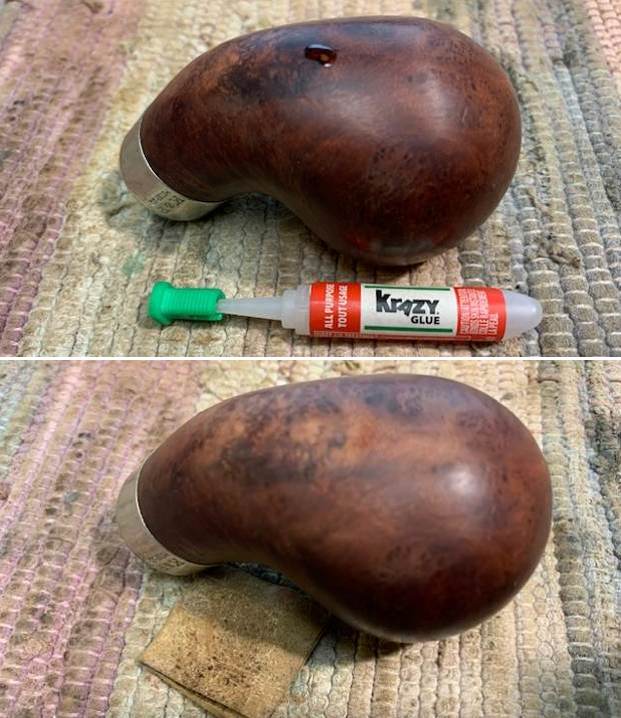
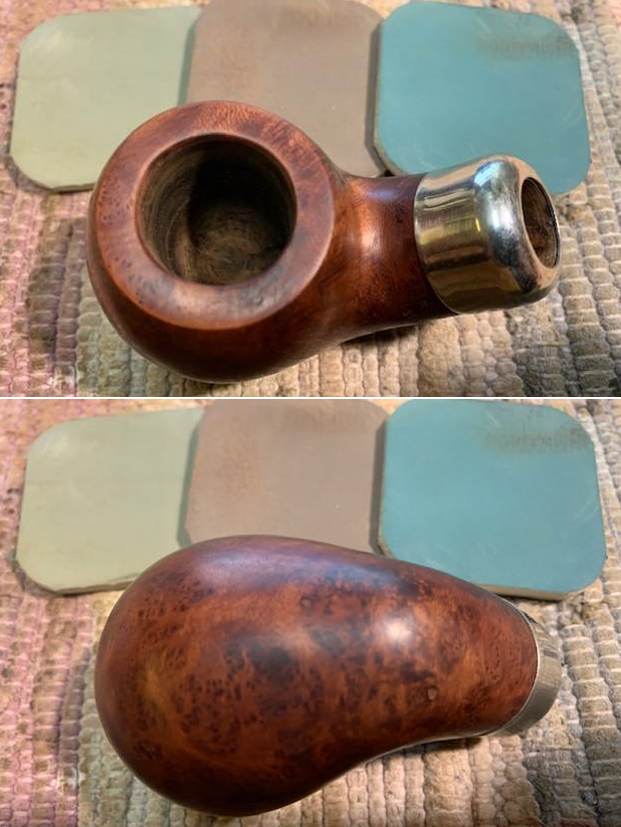
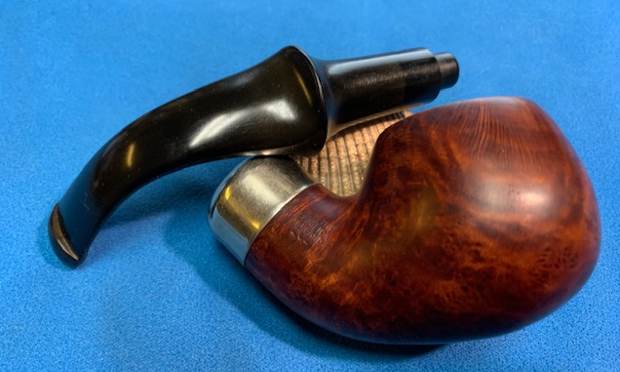
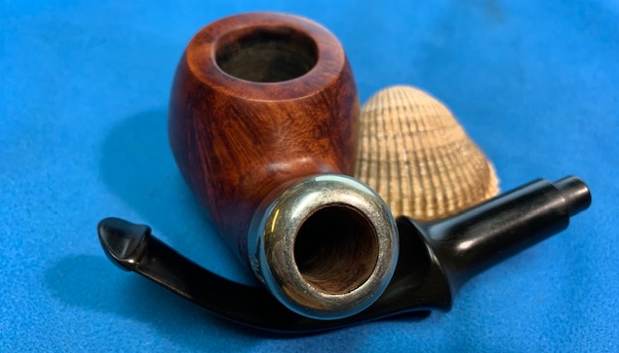
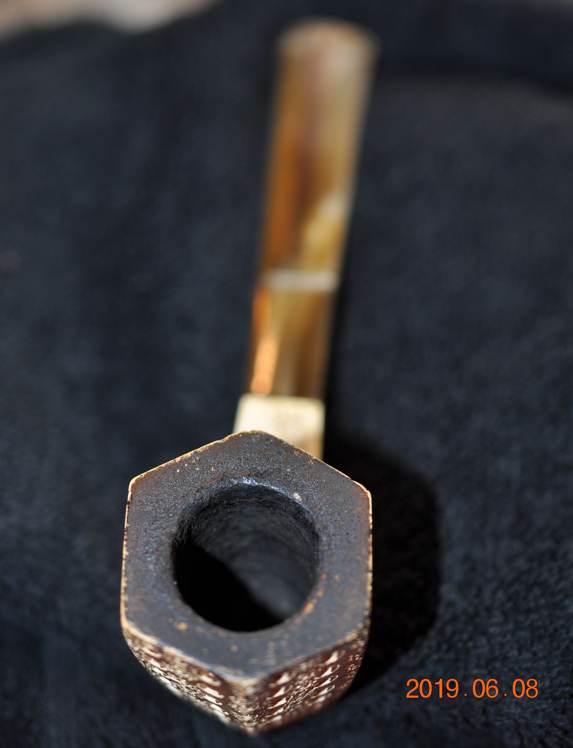
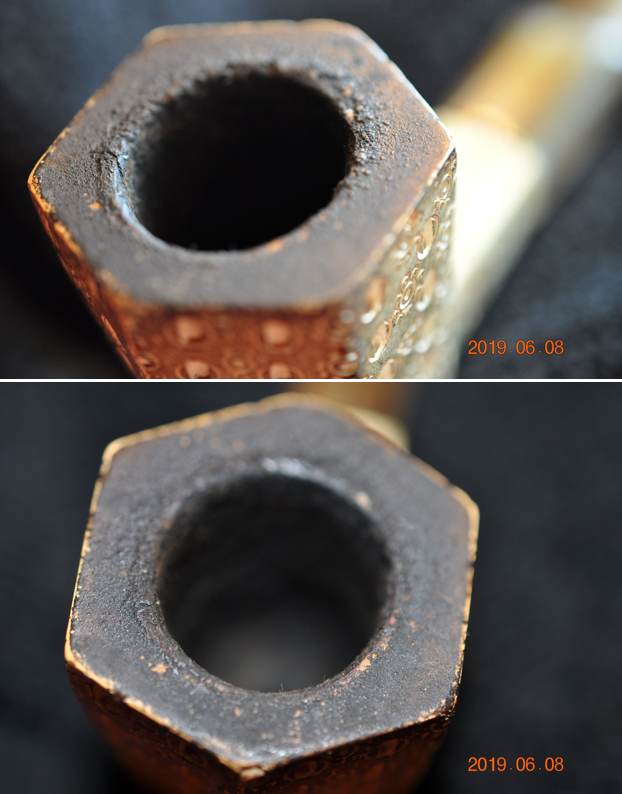
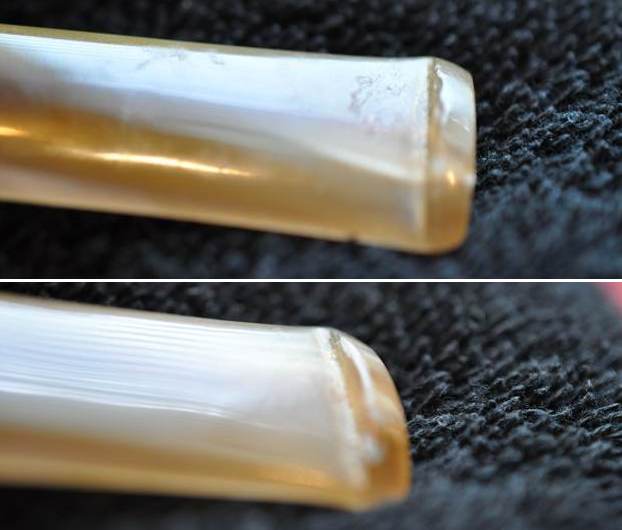
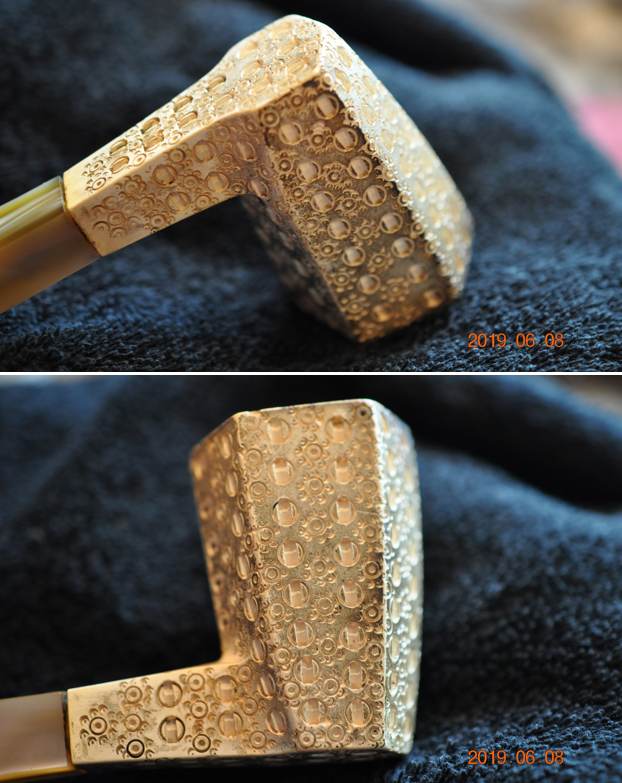
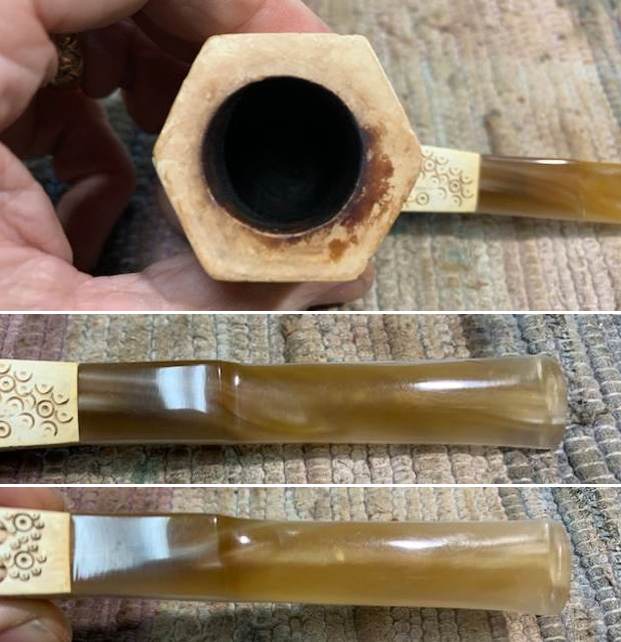
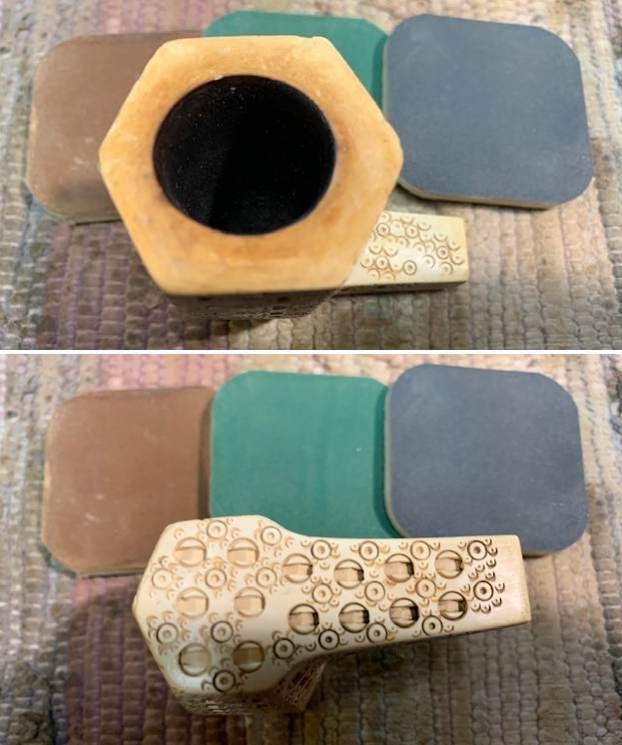
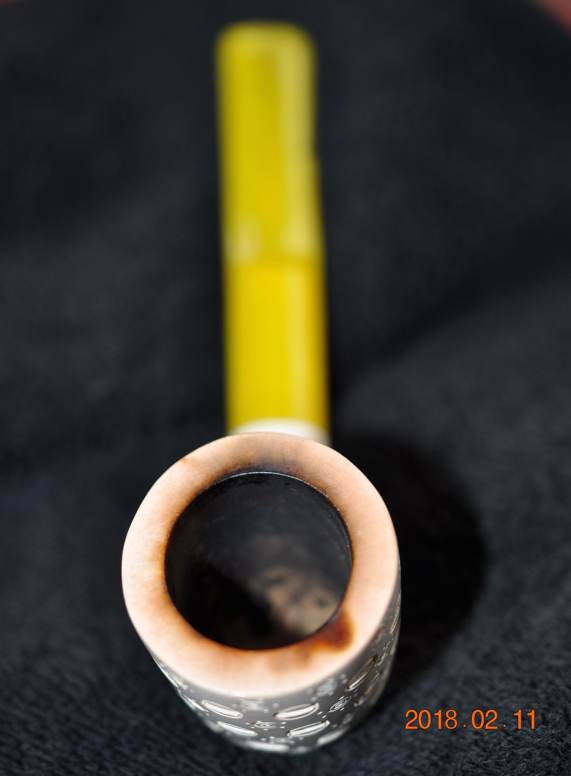
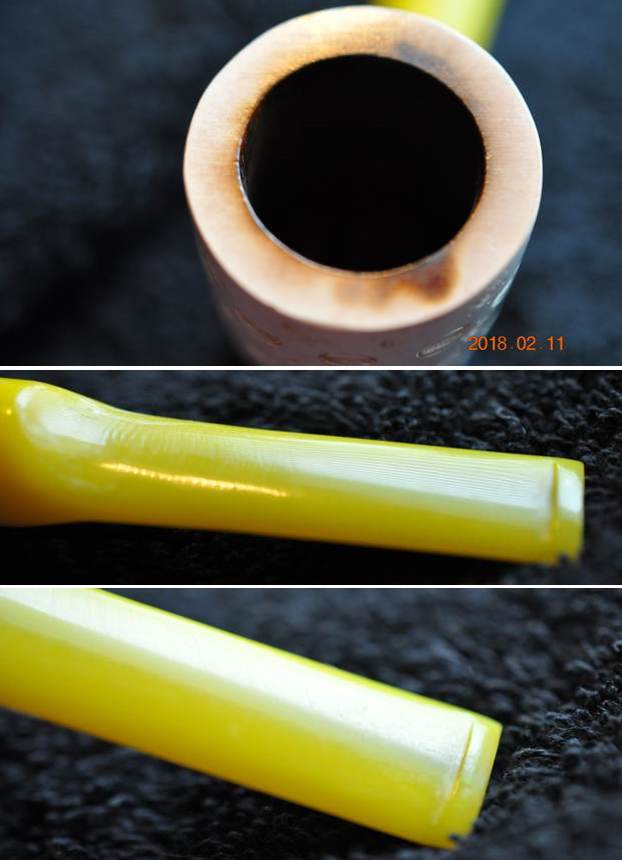
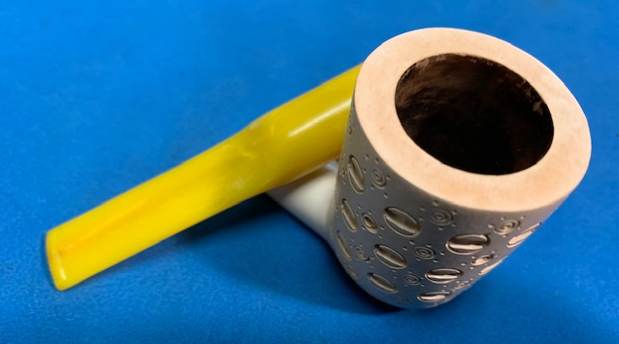
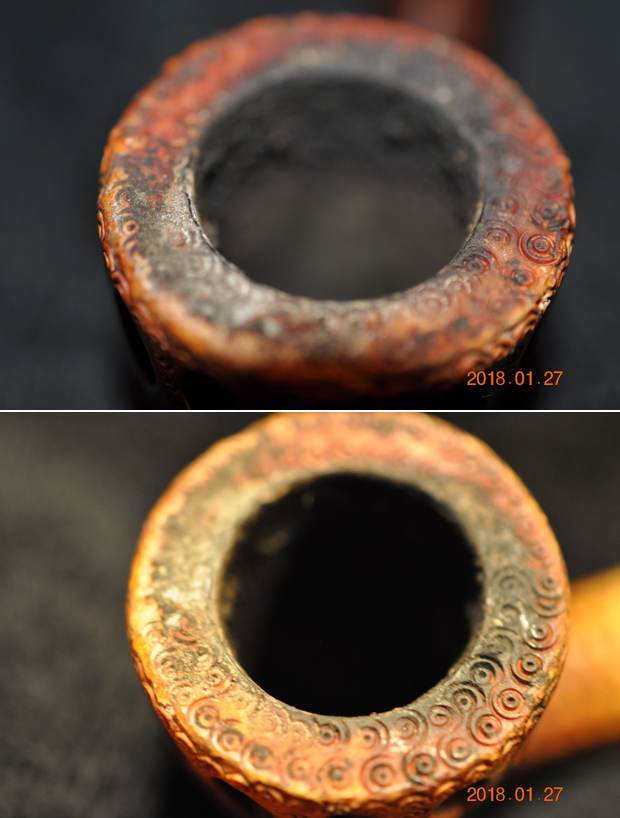
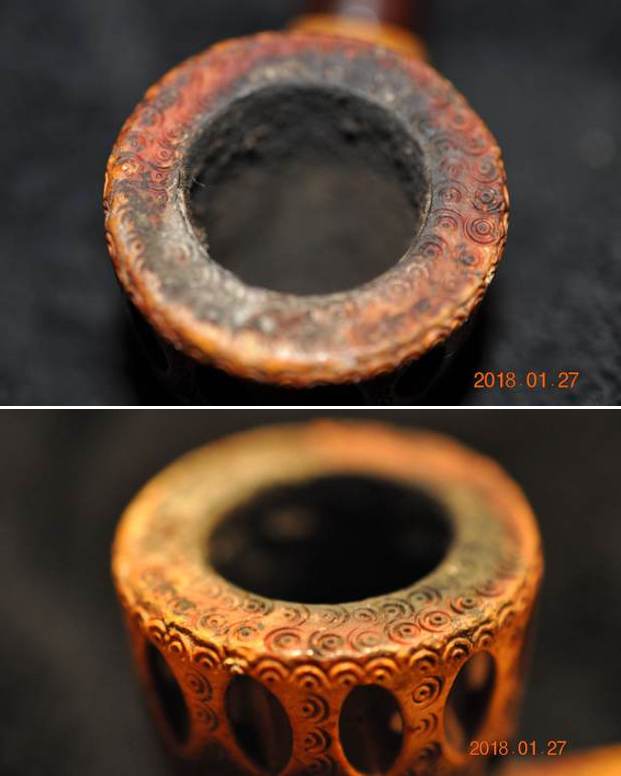
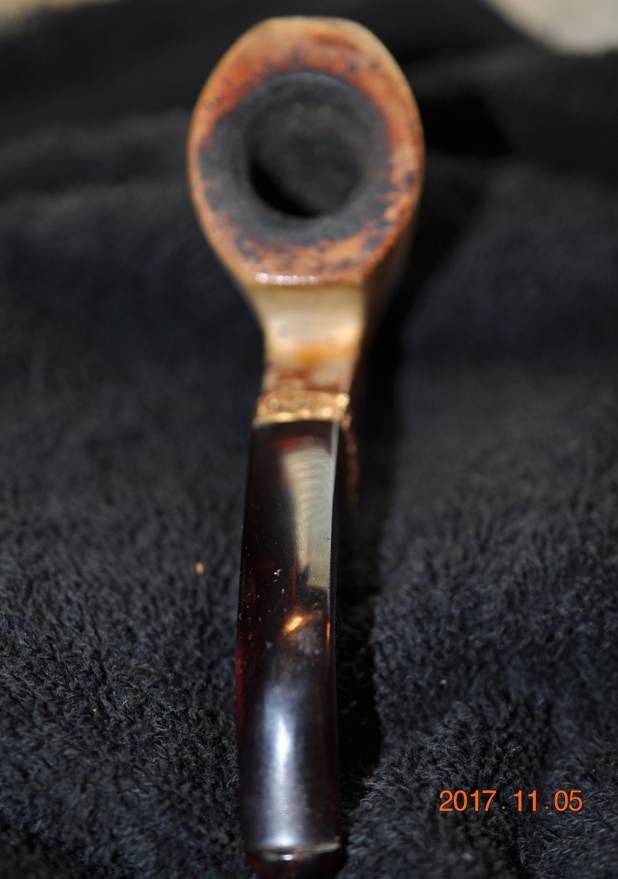
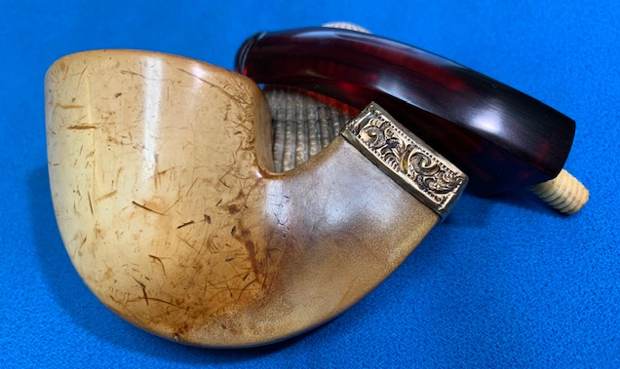
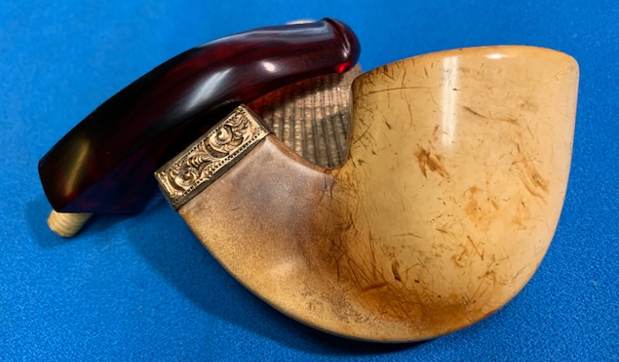
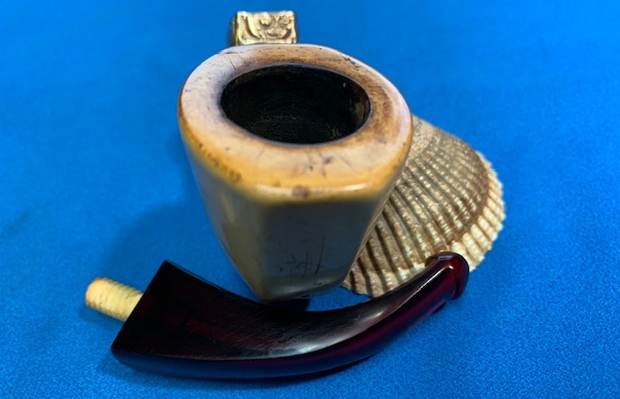
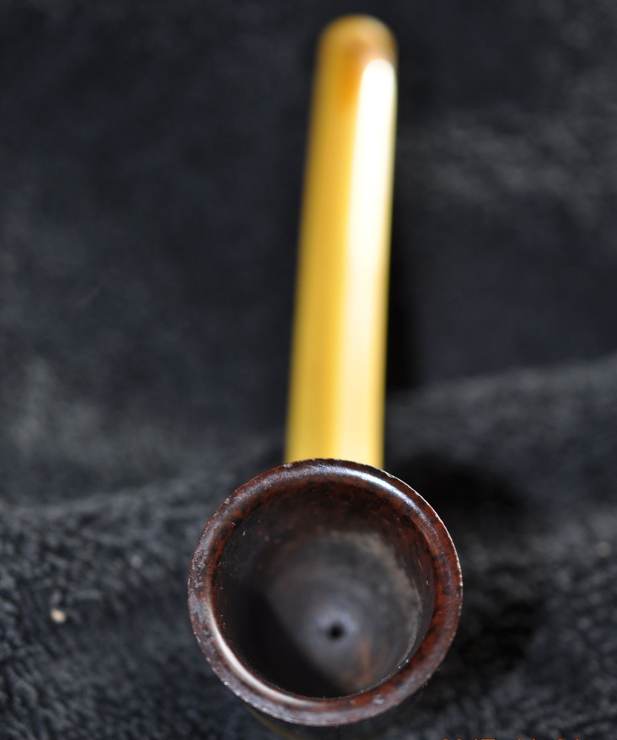
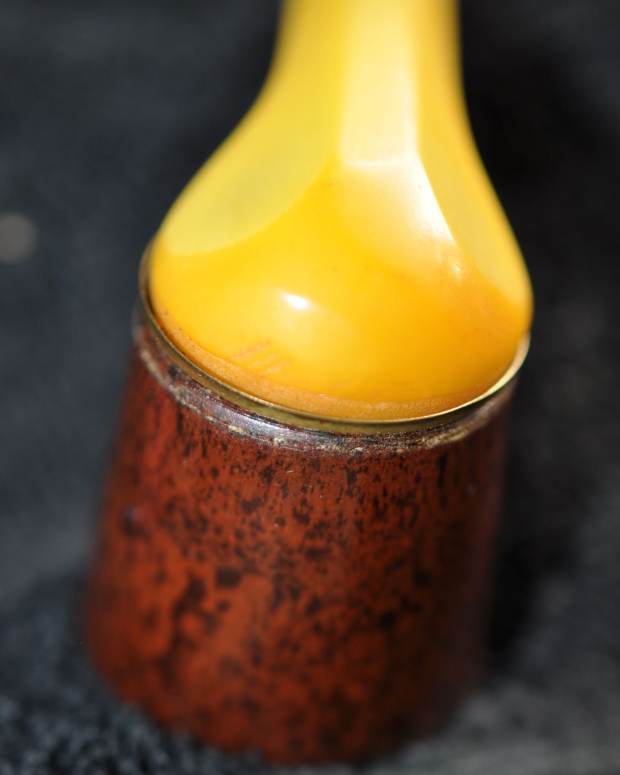
He took photos of the rim top and the stem to show the condition. You can see the issues on the rim top and stem as I noted above. There are also some light scratches on the rim top itself. It should clean up quite well. 
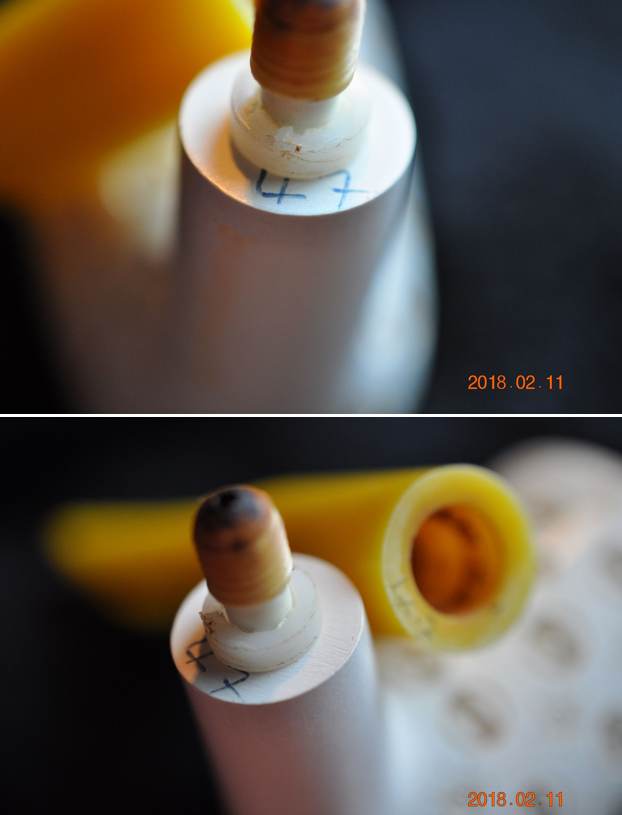
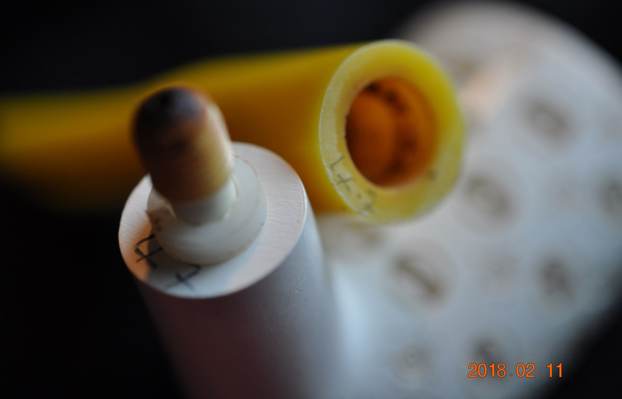
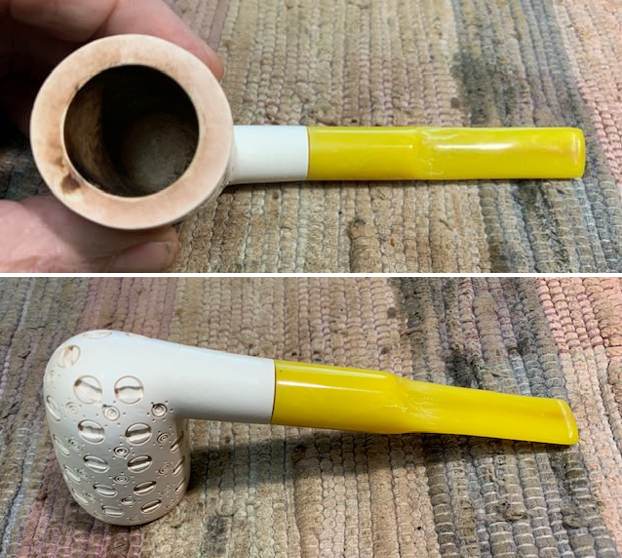
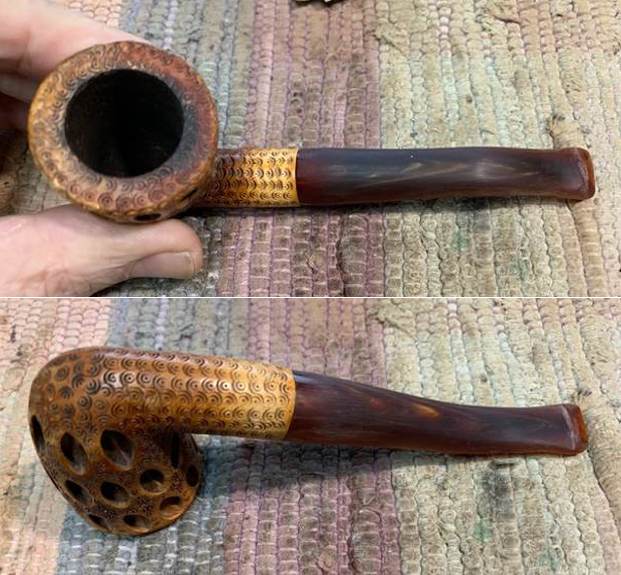
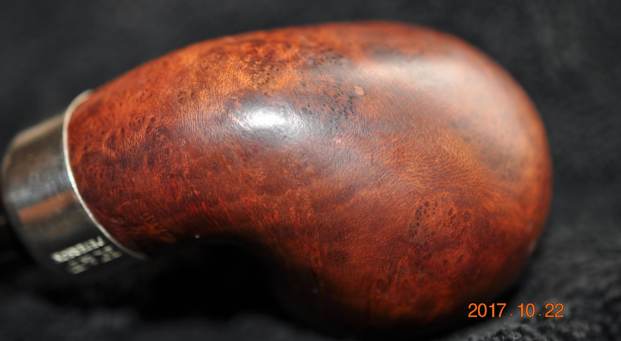
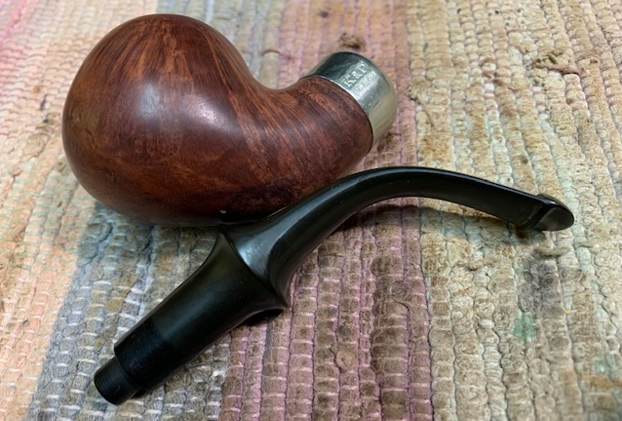
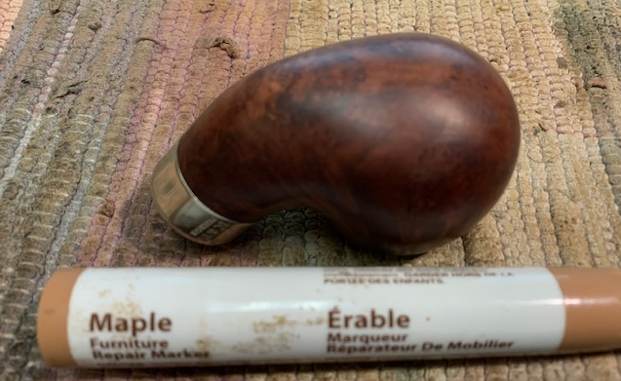
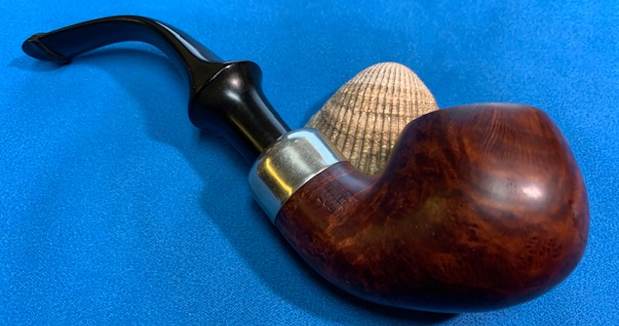
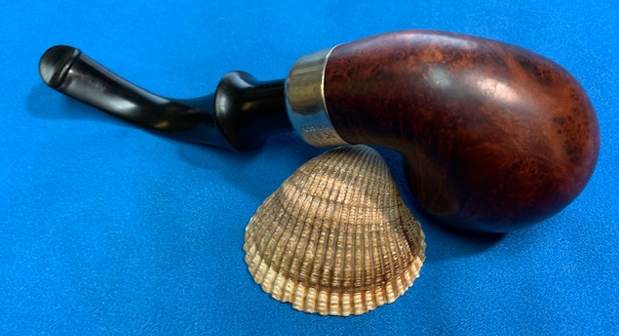
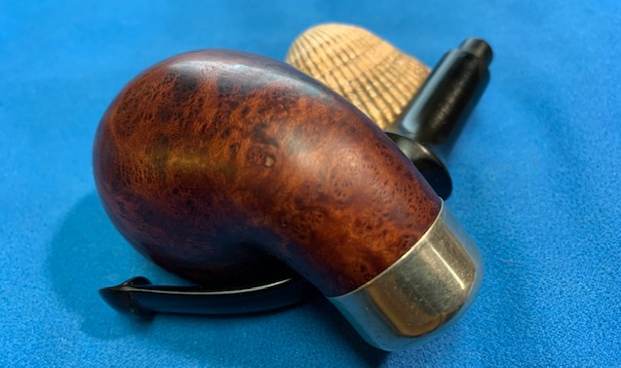
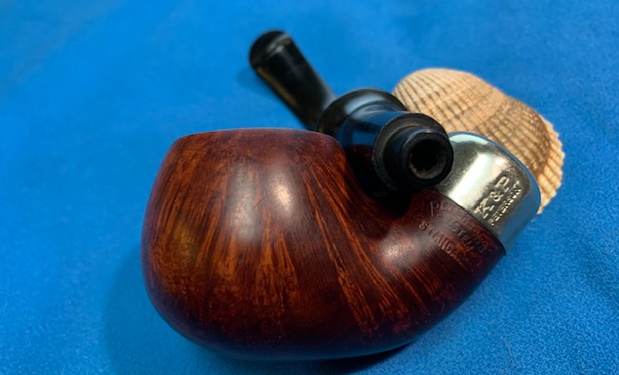
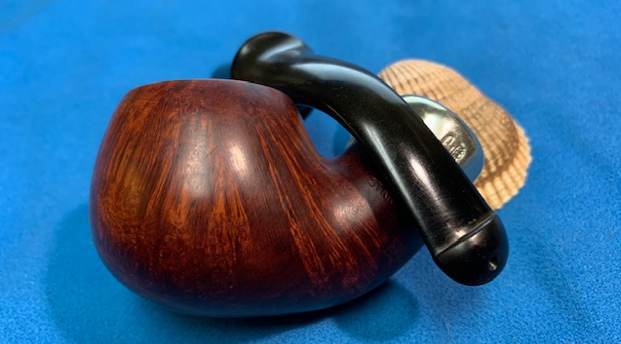
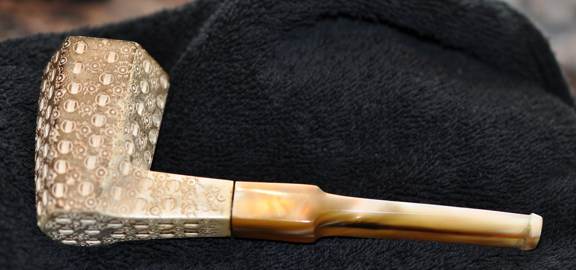
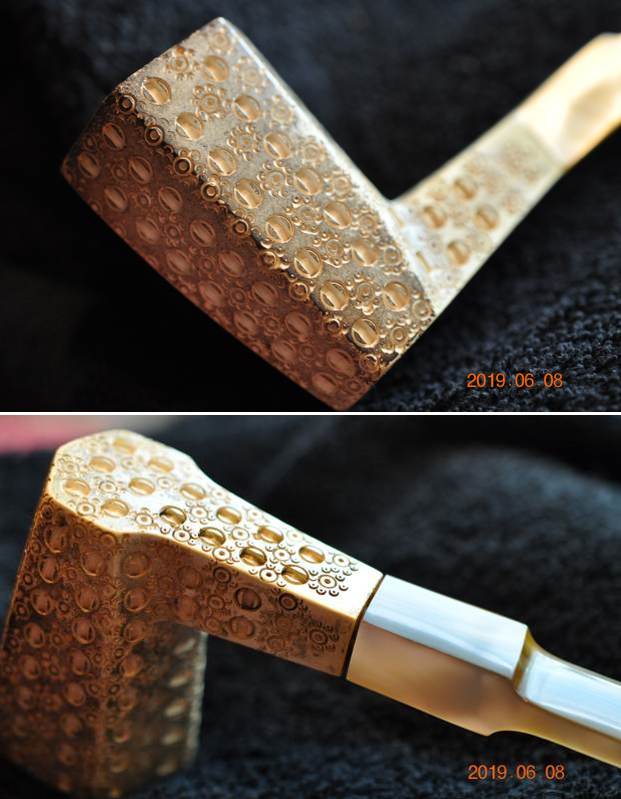
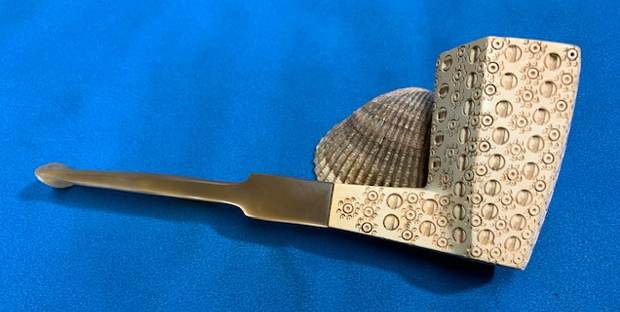
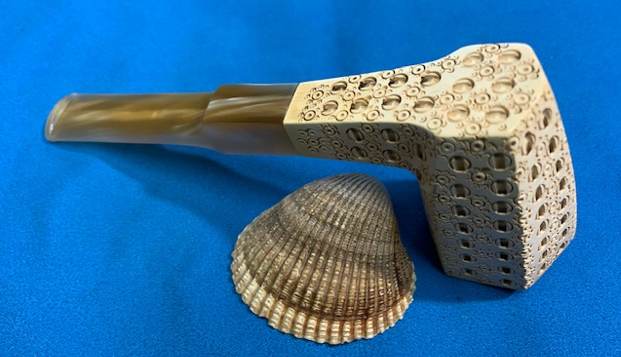
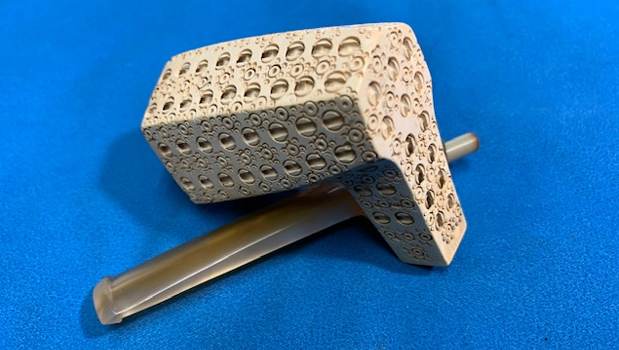
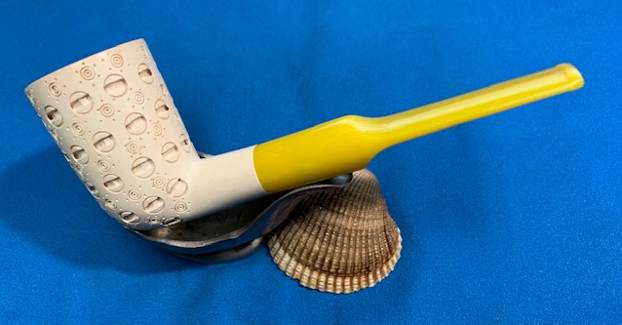
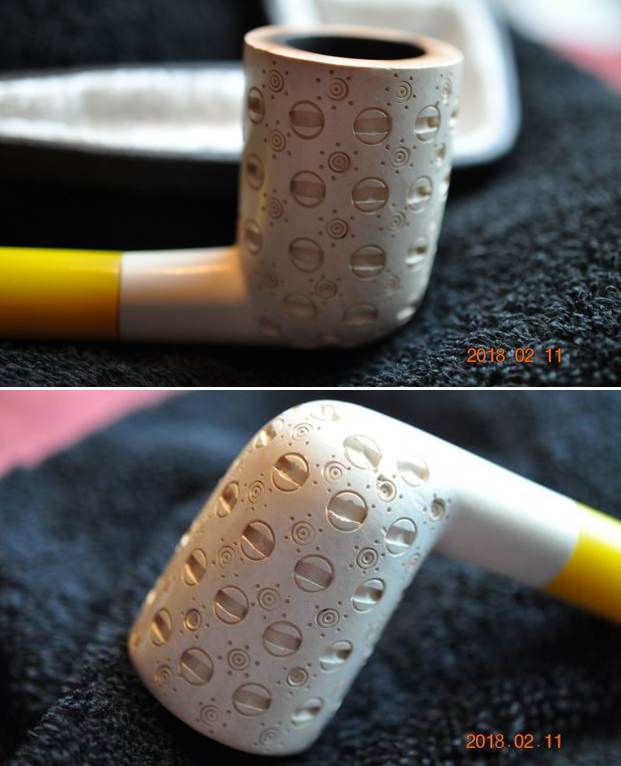
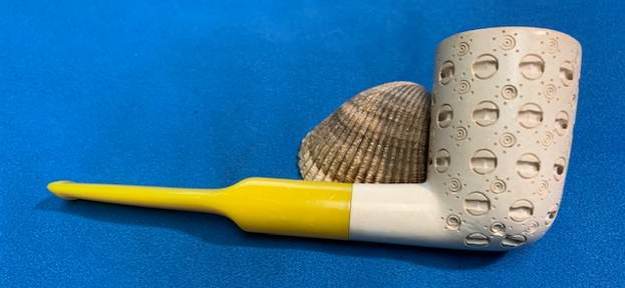
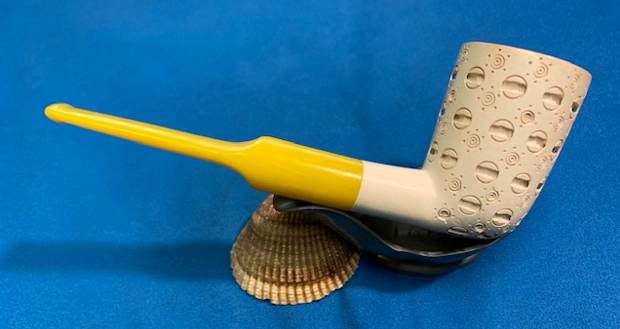
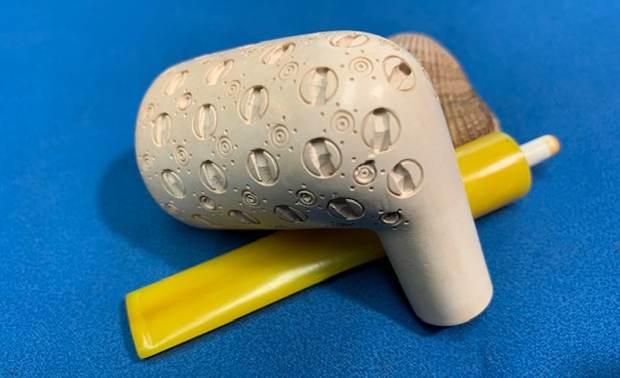
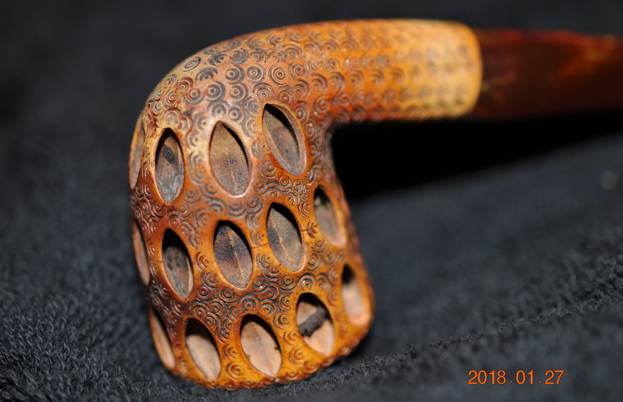
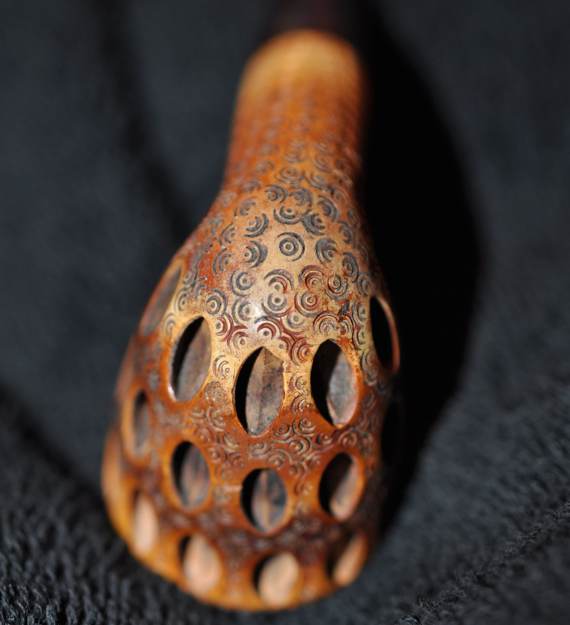
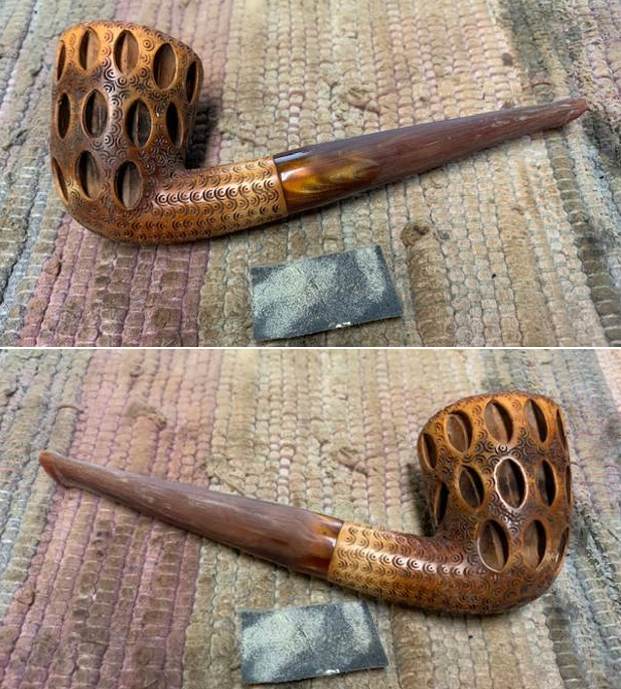
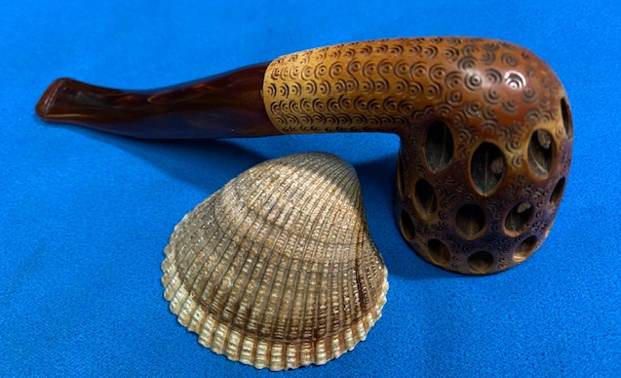
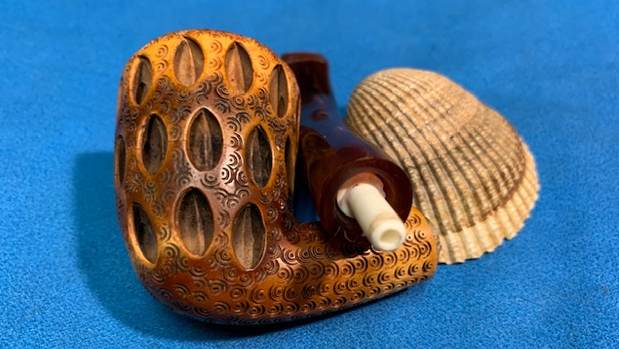
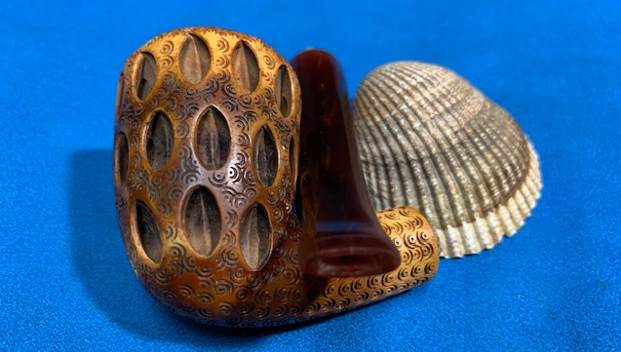
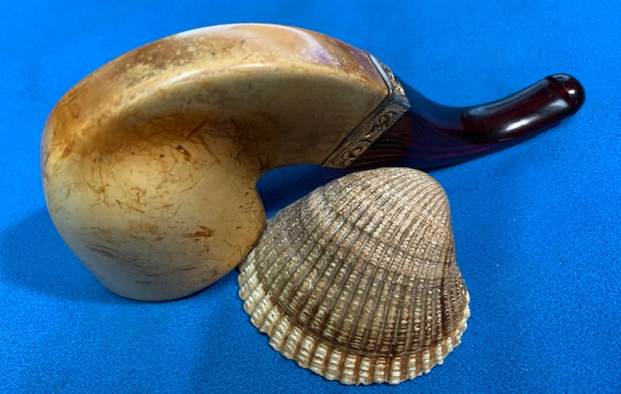
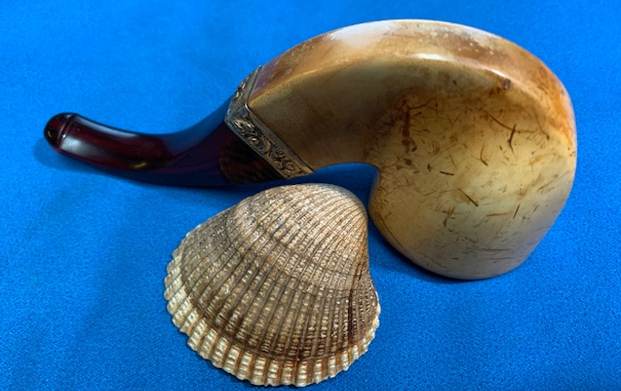
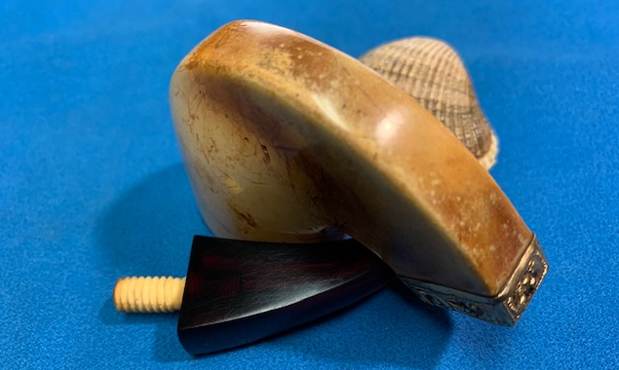
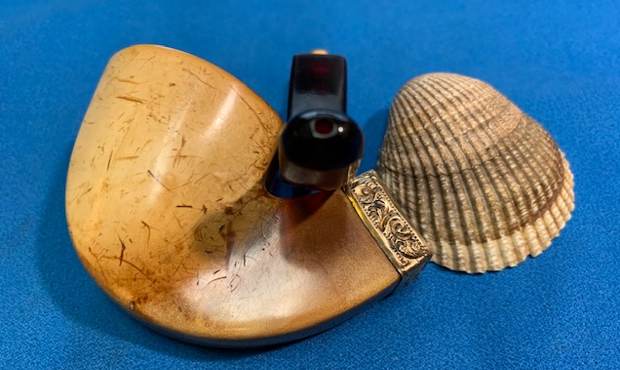
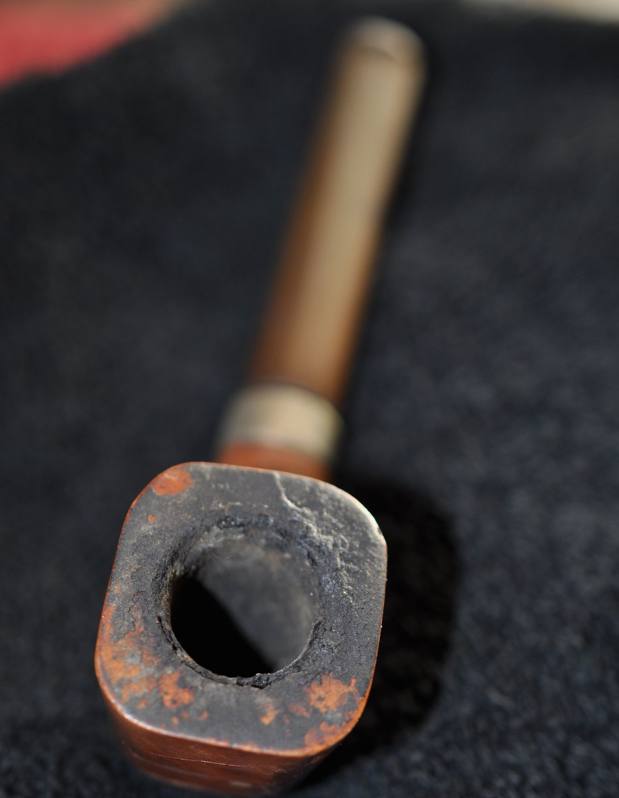
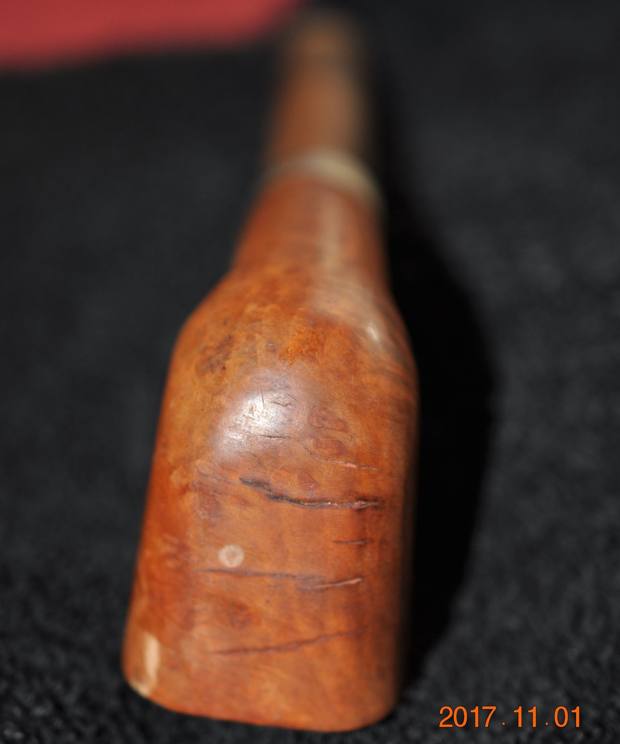
Jeff took a photo of the side and heel of the bowl. Even though the picture is a bit out of focus you can see the graceful lines of the pipe. It is probably the lightest meerschaum I have worked on. Everything about is speaks to the classiness of this beauty.To confirm the that the logo is indeed from and Andreas Bauer pipe I did a quick Google search and picked up a few pictures of his pipes in their cases that show the same logo and markings on the case lid. My thinking about the logo was confirmed through this quick check. I also found one smaller photo that showed the markings on the exterior of the case. Both the Made in Austria stamp on the back edge and the Finest Cultured Meerschaum stamp on the front of the case. The interior stamps also matched the one that I was working on. It was interesting to also note that in all of the photos I looked at in the search had the same kind of stem composition as the one that I was working on today.

I wanted more information on the brand and also some help in understanding what the Finest Cultured Amber stamping meant on the case. I was familiar with Amber but not the concept of Cultured Amber. It made me think of the difference between Cultured Pearls and Natural Pearls. I wondered if this was similar.

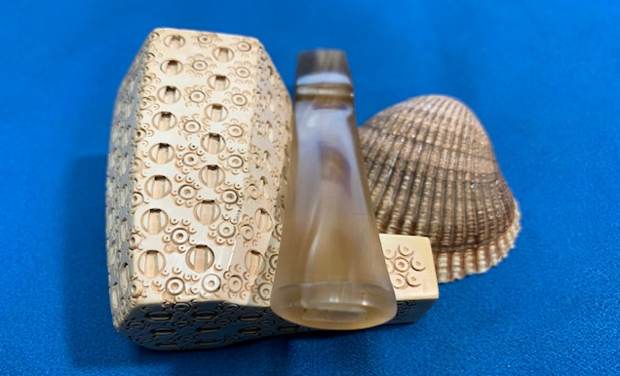
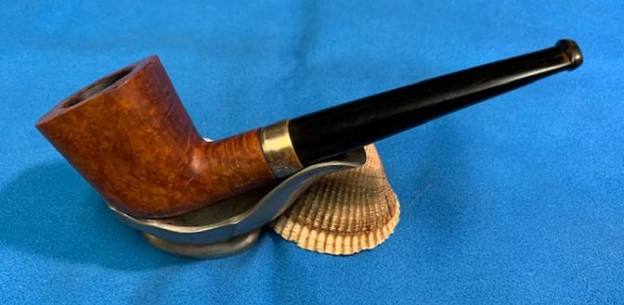
I turned to the first link given on Google to the estate pipe section of smokingpipes.com (https://www.smokingpipes.com/pipes/estate/misc/moreinfo.cfm?product_id=204496). The link took me to tall billiard with a description by Eric Squires that gave me some information on the Cultured Amber stamp. I have included the photo and the description below.Bauers are known for being particularly high quality meerschaums. They are also known for having a curious stem material, “amberoid”. It looks like very nice acrylic, but it takes a static charge like natural amber. That latter aspect is easily explained, as amber itself was one of the main ingredients used to create amberoid. This Billiard is one of only three Bauers I’ve ever personally seen, but three has been enough to notice something else about the stems: despite their material being amber-based, they don’t seem to suffer from the usual wear of pure amber, such as crackling and cracking. – Eric N. Squires

Thanks for the information Eric. It seems that Bauer developed an “Amberoid” or man made amber that looks a lot like acrylic but is like natural amber takes a static charge. He also notes that the material wears better than natural amber.

Another pipe on smokingpipes.com had some more information on the brand in an intro by Bear Graves (https://www.smokingpipes.com/pipes/estate/misc/moreinfo.cfm?Product_ID=46253). I quote the pertinent information below and have made it bold.

Founded in Vienna in 1908, Andreas Bauer quickly developed what would become the single largest producer of meerschaum pipes up until the second Word War. In most “normal” planes of existence, there is supposed to be a trade-off between quality and quantity, but (evidently) the word never got to Andreas Bauer; at the very height of their production they were raking in Gold Medals for excellence and design (such as the one they were awarded at the 1937 Paris World Exhibition).

Then, or now, to own a Bauer meerschaum is to own an iconic meerschaum, the likes of which have never been surpassed… –Bear Graves

I then turned to Pipedia (https://pipedia.org/wiki/Andreas_Bauer) expecting to find a lot of information on the brand but was surprised by the brevity of what I found there. I quote from the site in full below.

Andreas Bauer of Vienna was probably the most famous brand manufacturing Meerschaum pipes – the best of the best. But prior to 1990 Bauer merged with Koncak Meerschaum of Eskisehir / Turkey. Today Strambach of Vienna is the last of all the Austrian Meerschaum manufacturers.

 I found some more information on Worthpoint that was included with a pipe that was being sold (https://www.worthpoint.com/worthopedia/andreas-bauer-block-meerschaum-hand-1778055263). For the most part it confirms what I had learned to this point. I quote:

Andreas Bauer Company Andreas Bauer of Vienna was probably the most famous brand manufacturing Meerschaum pipes – the best of the best. The company was founded 1906 in Vienna, Austria by Andreas Bauer. In 1942 Ernst Bauer became head of the company up to 1971. In 1972 the company was sold to the family Mrstik. In 1990 Bauer merged with Koncak Meerschaum of Eskisehir / Turkey. Bauer Meerschaum Pipes are something very special to smoke. Meerschaum has the characteristic to reabsorb humidity, thus permitting a very cool and dry smoking, furthermore Meerschaum has a very low specific weight, allowing to build very light. This pipe is made pre-merger and dates from 1982. In the late 1970’s early 80’s Bauer used a replication for their amber stems, Cultured amber (Acrylic, Amberiod). Back in the Golden days, Bauer Meerschaum pipes were fitted with fossil amber bit on a bone tenon. “It’s unlikely that pipes of this quality will ever be produced again” Fossil amber application made the smoking of their pipes a very fragile object. Their new adopted stem material still gives the same amber effect and offers the smoker a more robust pipe, that you will enjoy for many years.

With that information I have come to believe that this pipe was made during the late 1970s and early 1980s prior to the merger with Koncak. It is from the period when Bauer used the Cultured Amber stem material that they had come up with. Now it was time to work on the pipe itself.

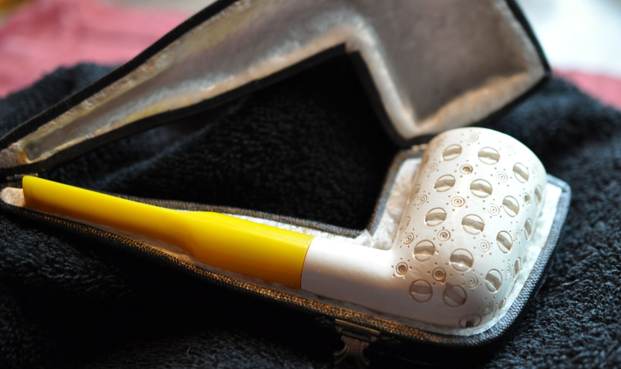
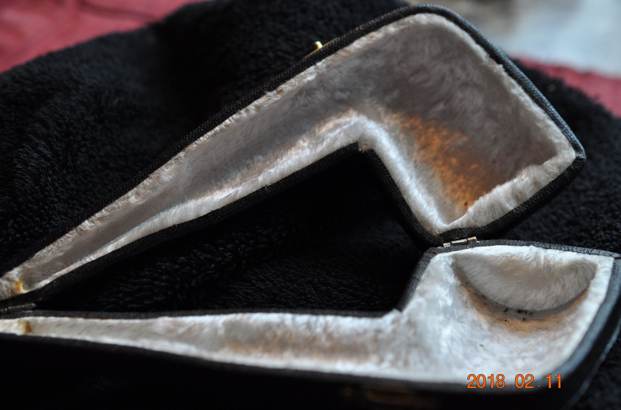
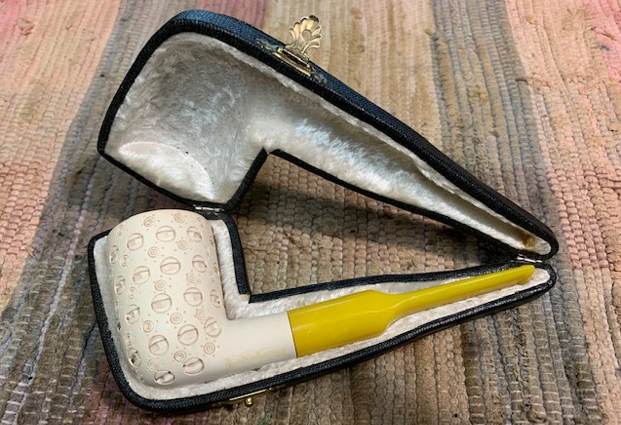
Jeff had cleaned up the pipe with his usual thoroughness. He carefully reamed the pipe with a Savinelli Fitsall Pipe Knife. He scrubbed the bowl with undiluted Murphy’s Oil Soap with a tooth brush. He rinsed it under running warm water to remove the soap and grime. He cleaned out the inside of the shank and the airway in the stem with alcohol, cotton swabs and pipe cleaners. He cleaned the stem Soft Scrub cleanser and rinsed it off with warm water. I took photos of the pipe 3 years later when I finally got around to working on it. First the case and then the inside of it. It really is a beauty to behold. 
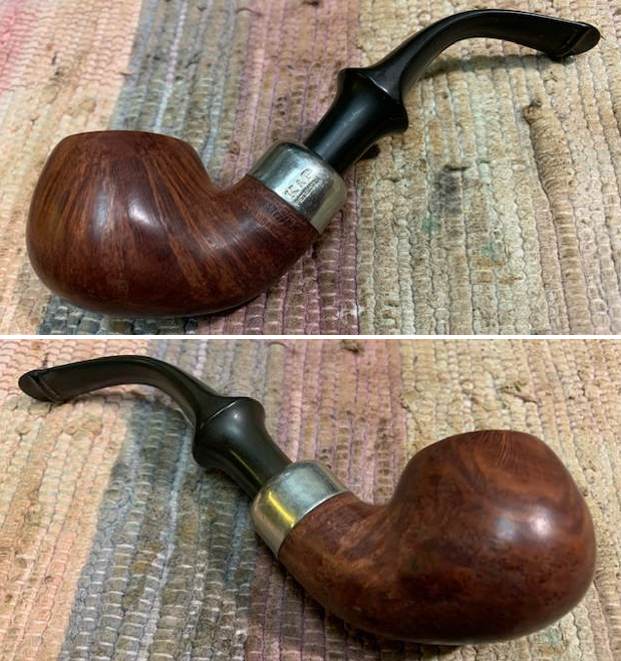
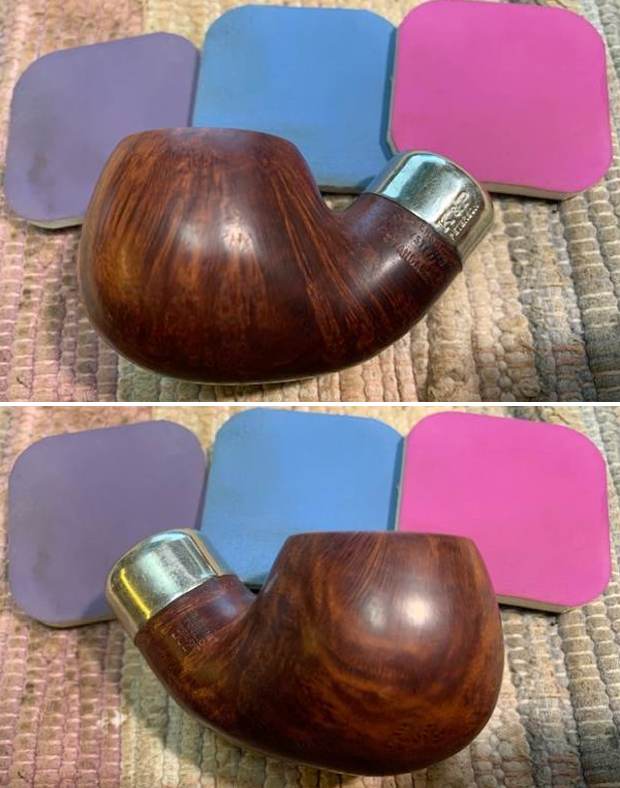
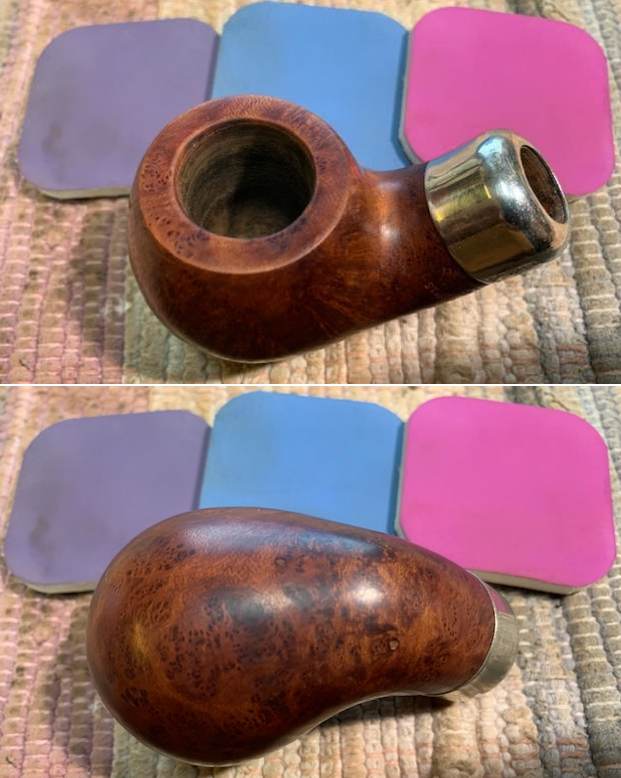
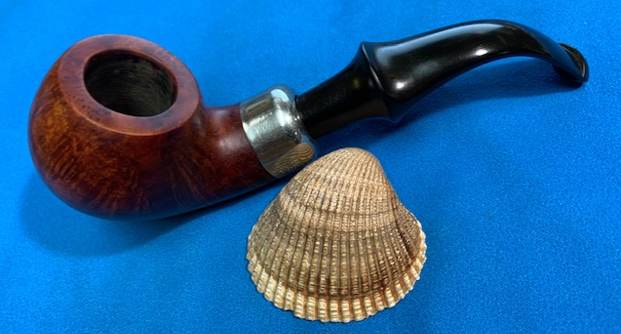
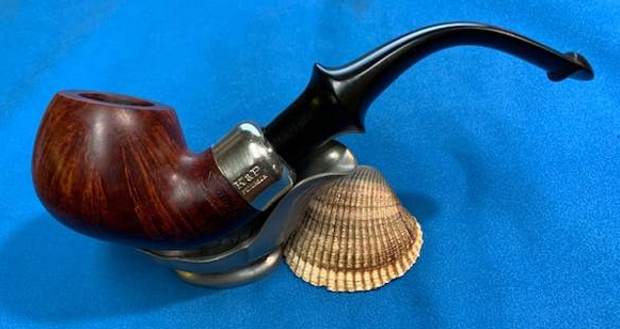
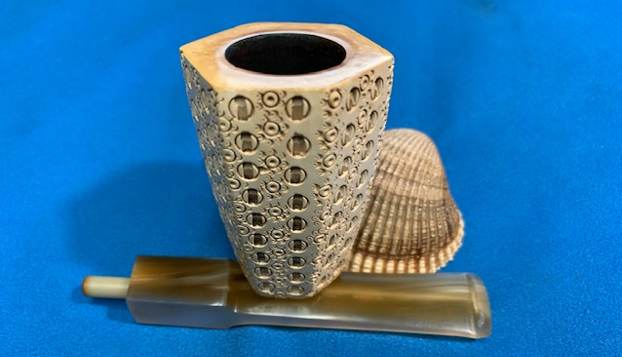
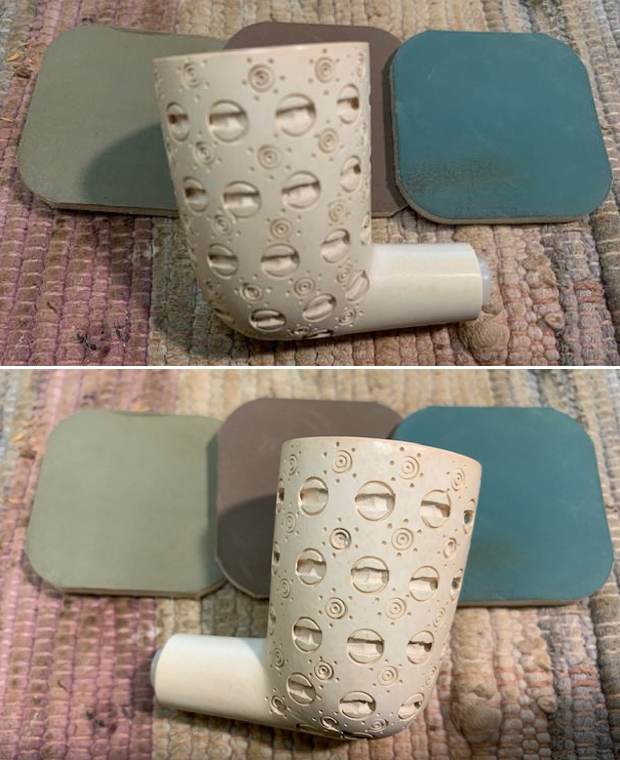
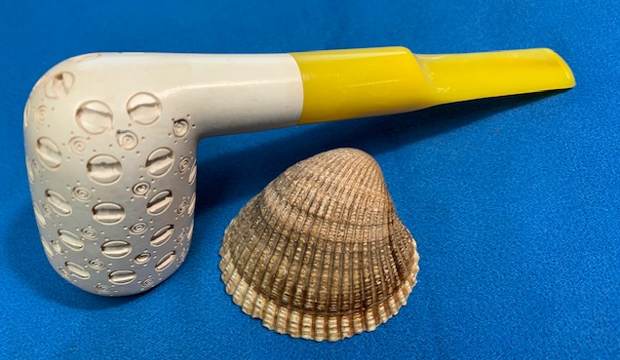
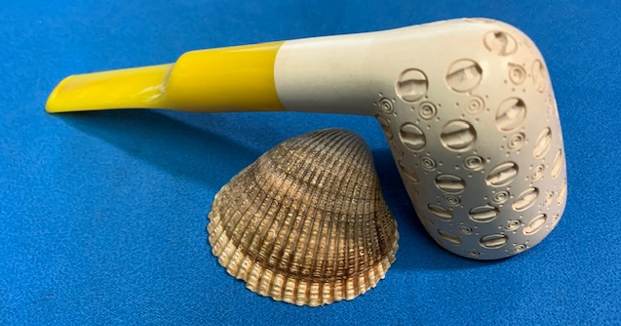
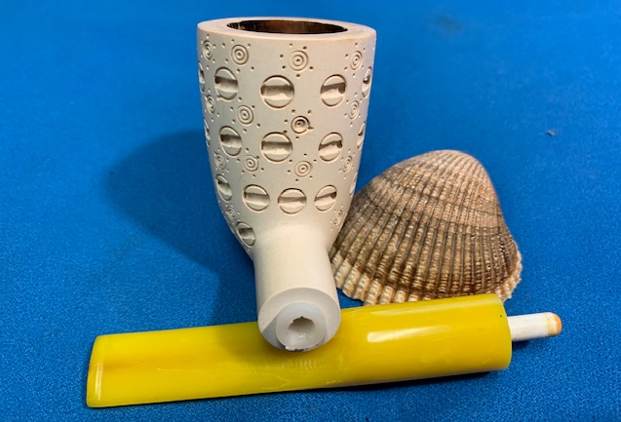
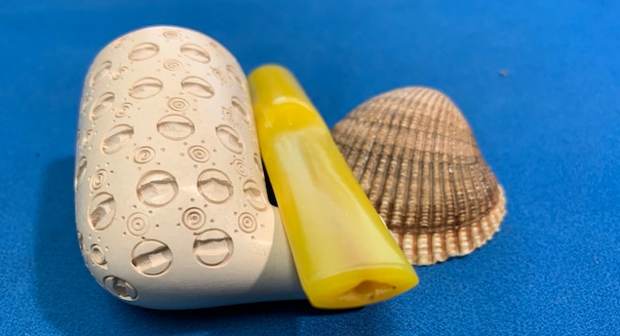
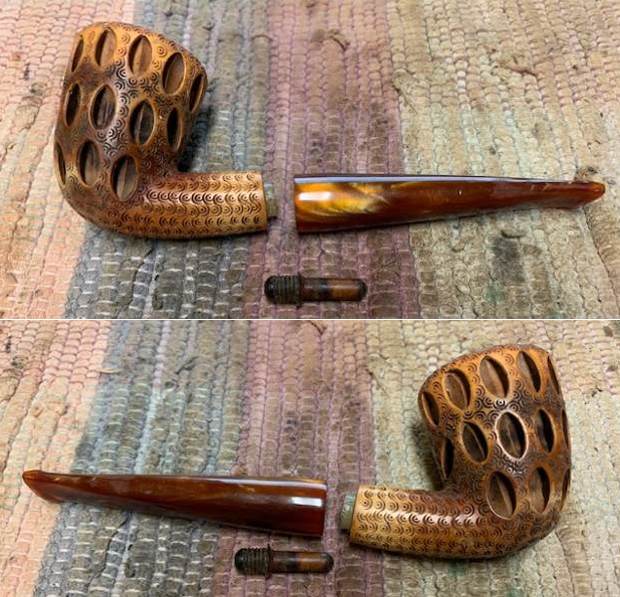
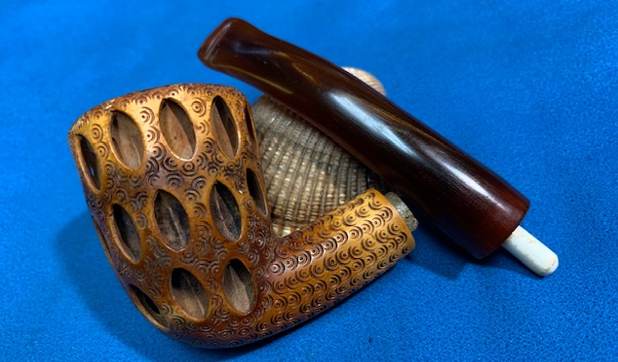
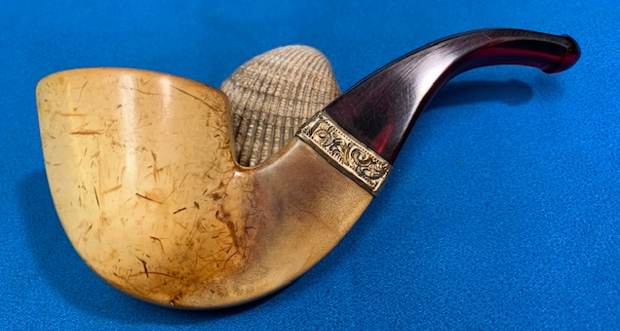
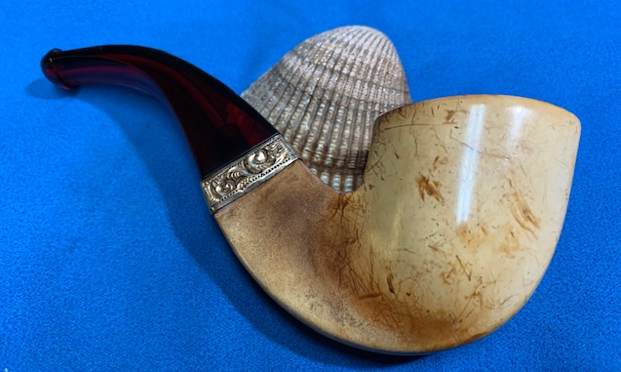
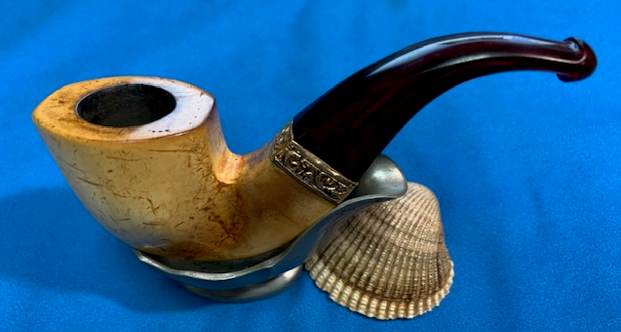
I removed the pipe from the case and took some photos of the pipe. I am quite stunned by how beautiful it was after Jeff’s cleanup. I would not need to do a lot of work to bring it back to full beauty. Just a clean up and possible a rewaxing would bring it to life. 
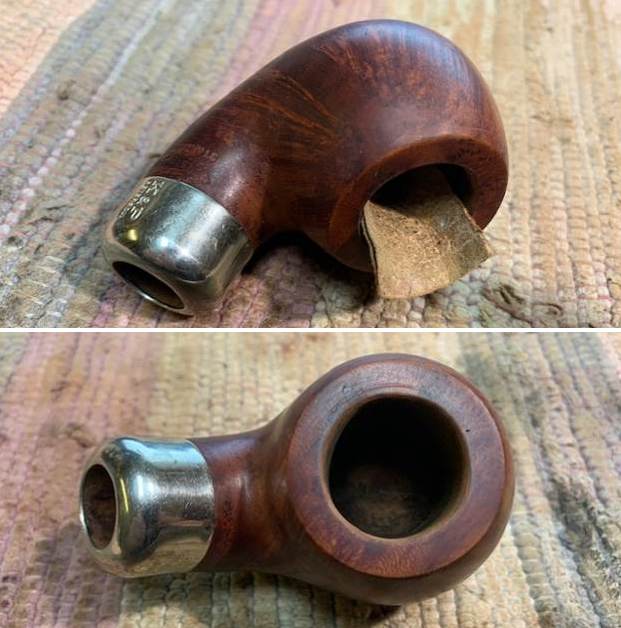
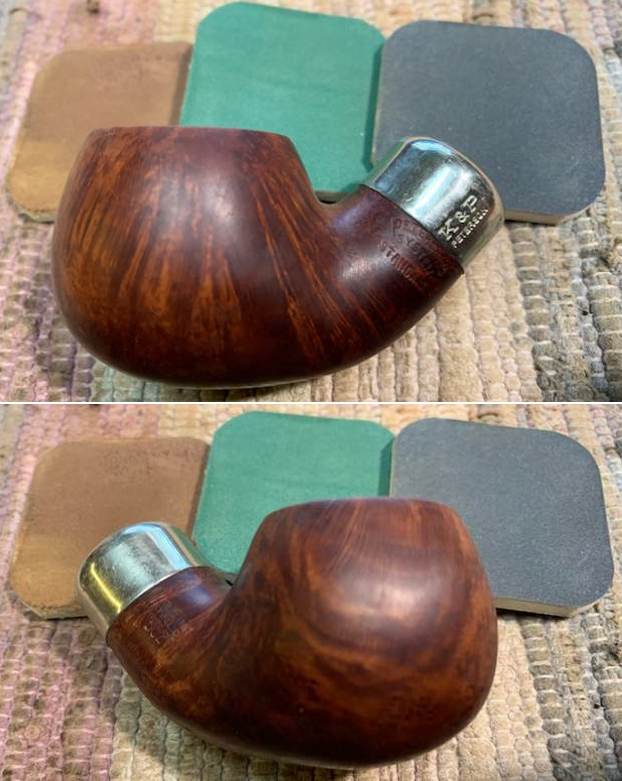
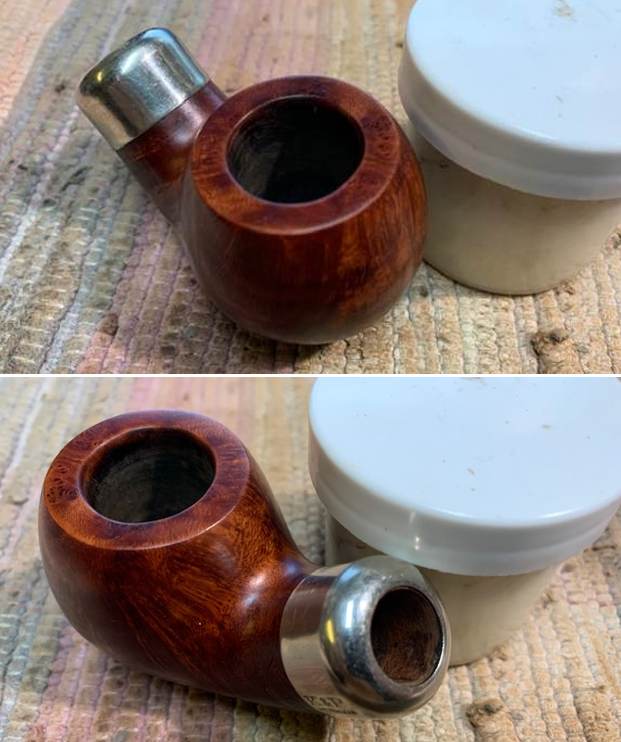
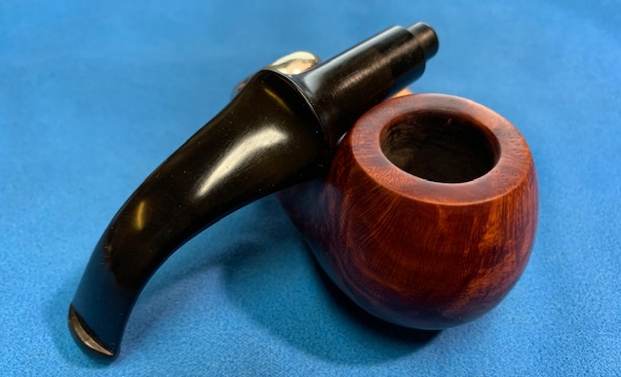
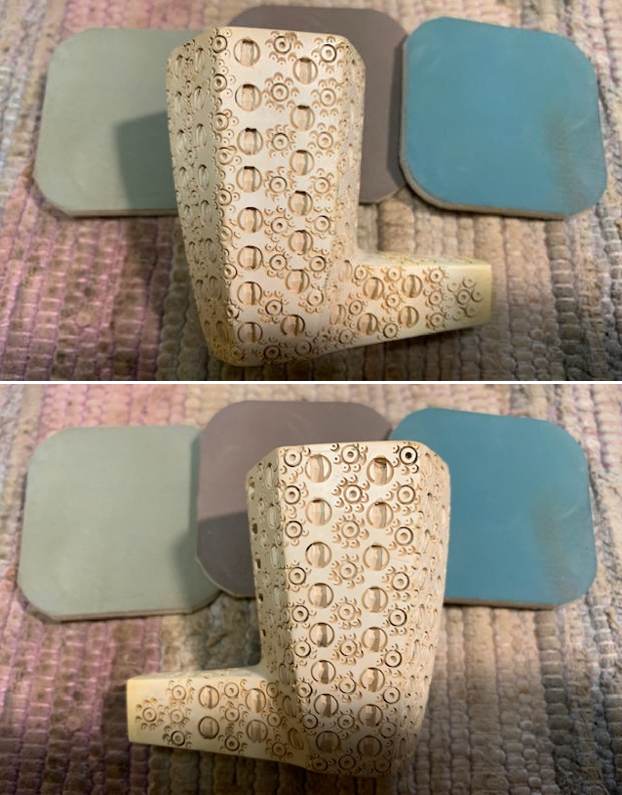
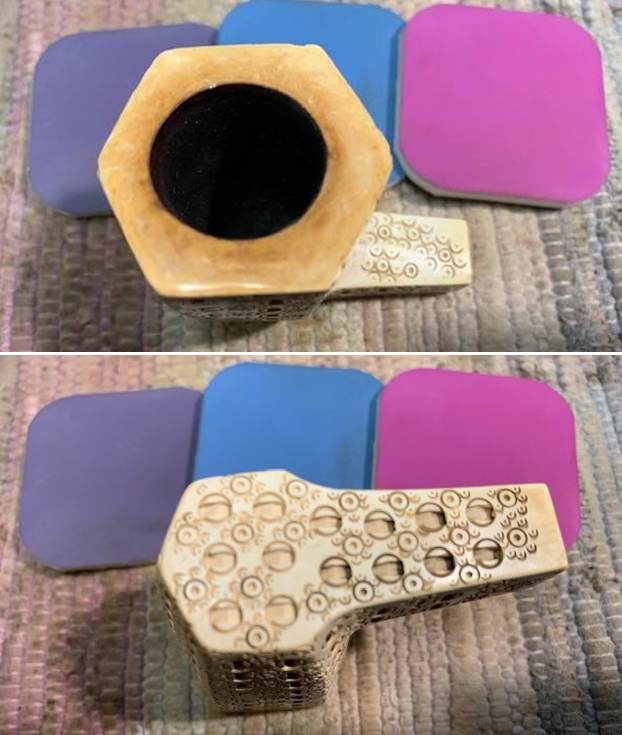
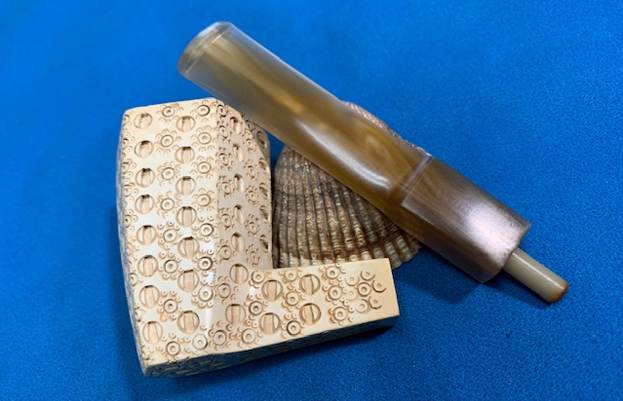
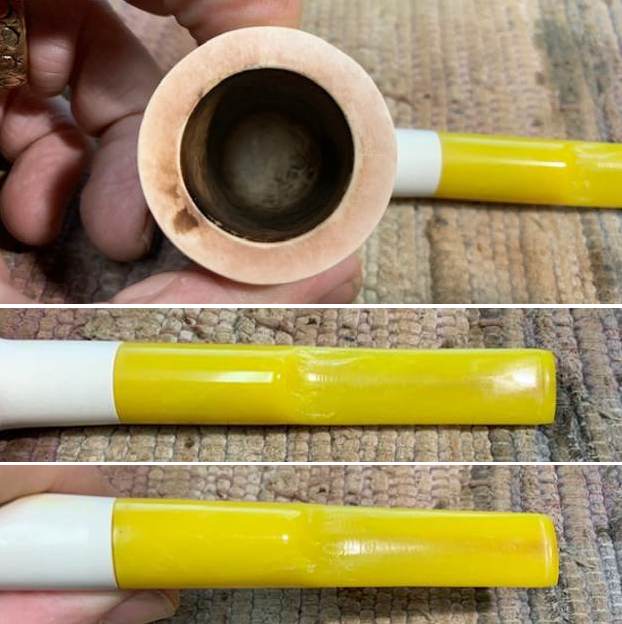
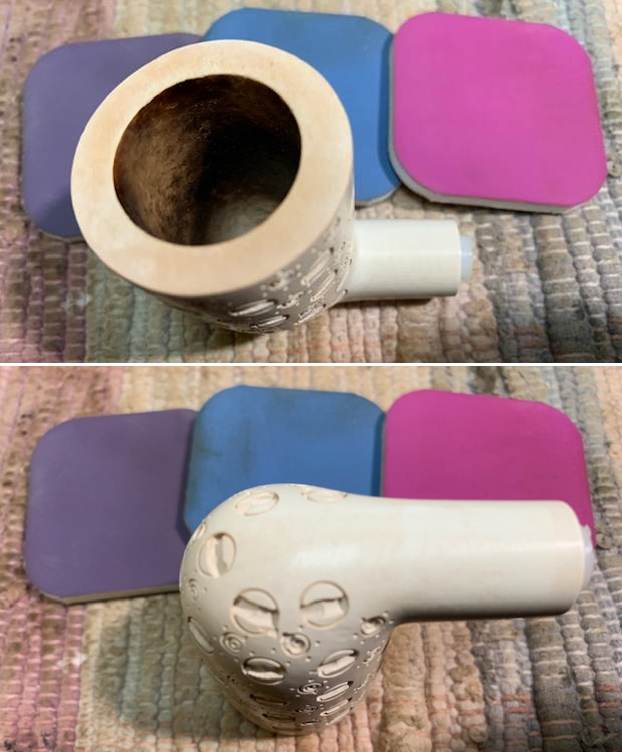
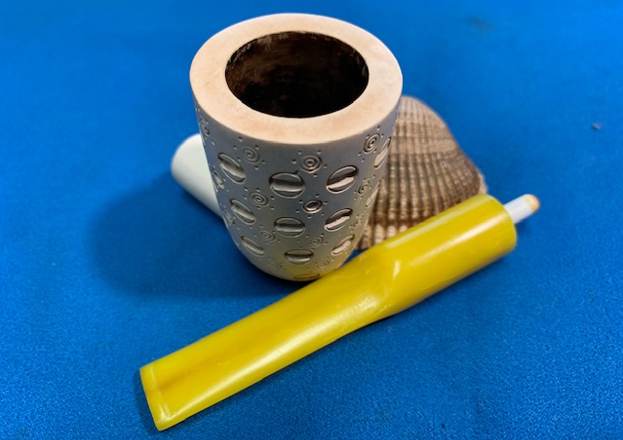
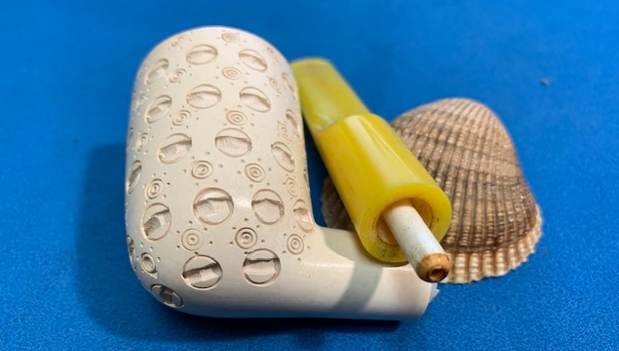
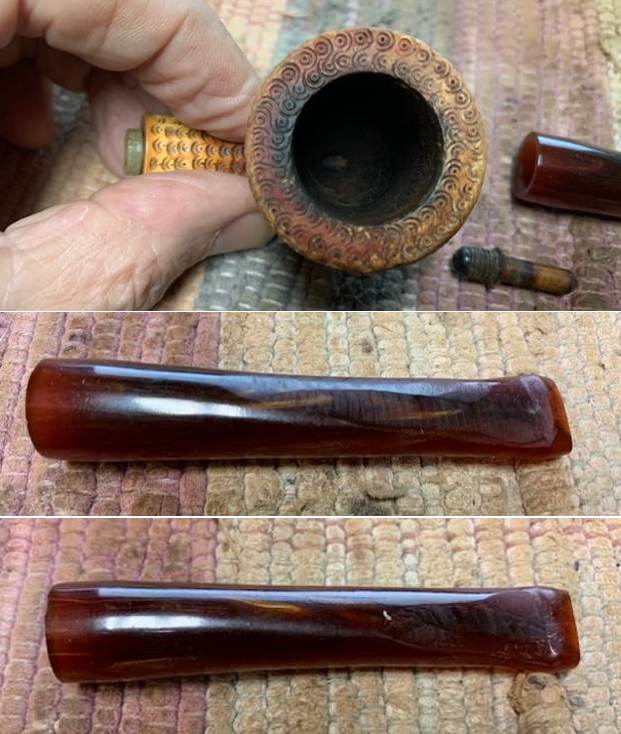
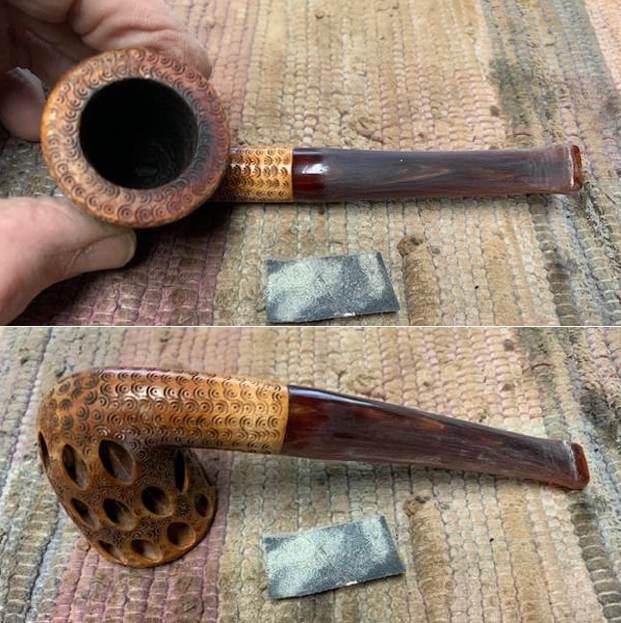
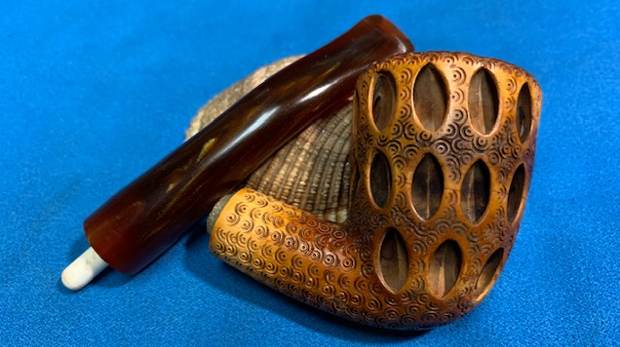
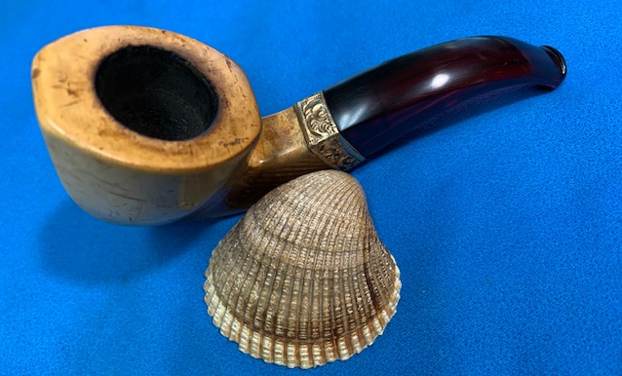
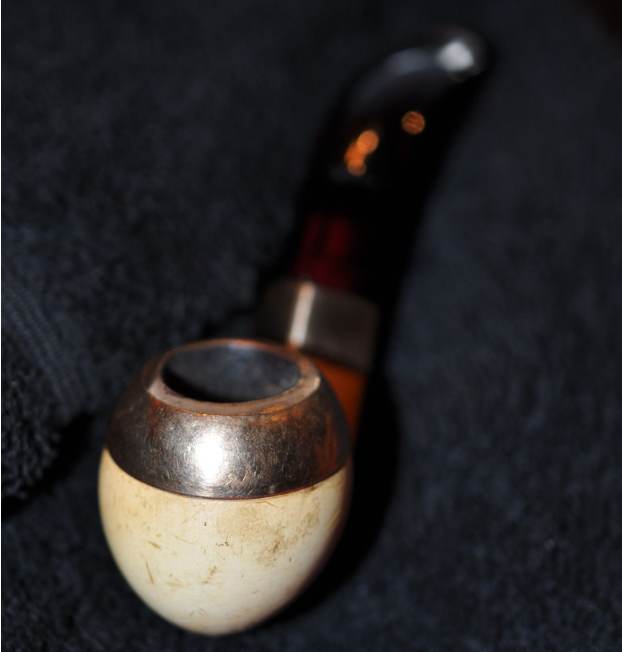
The rim top and inner edge of the rim looked very good with some slight darkening on the rim top. The stem surface looked very good with some very light tooth marks and chatter on both sides near the button. 
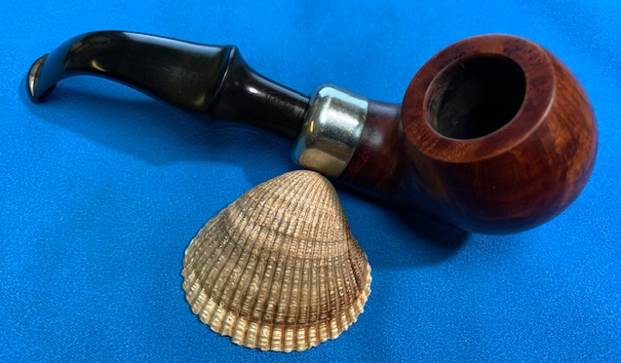
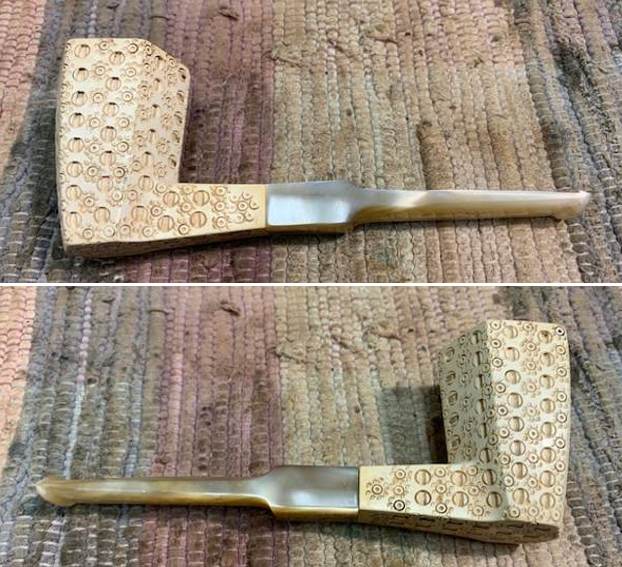
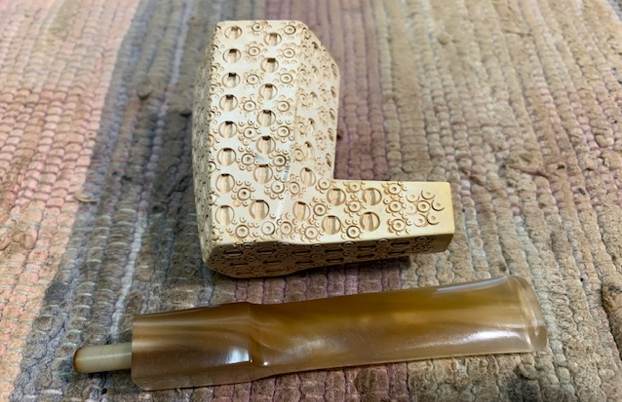
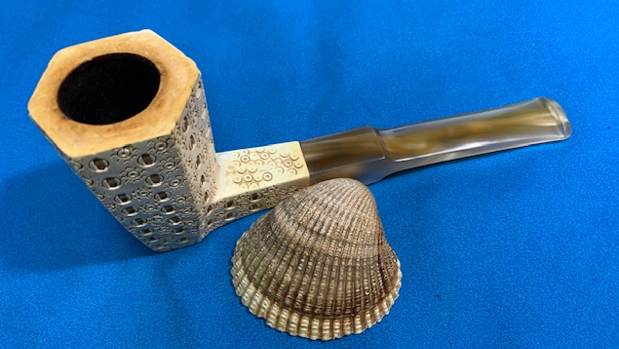
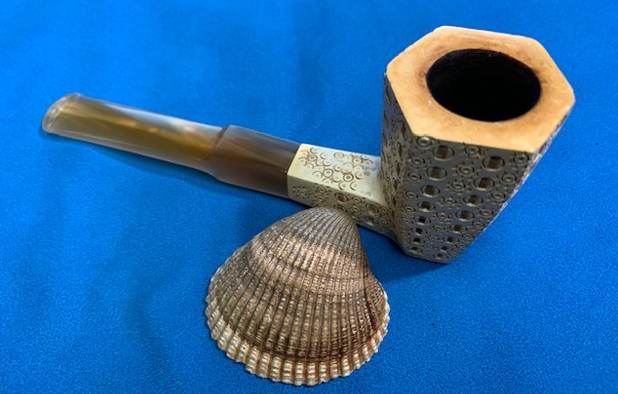
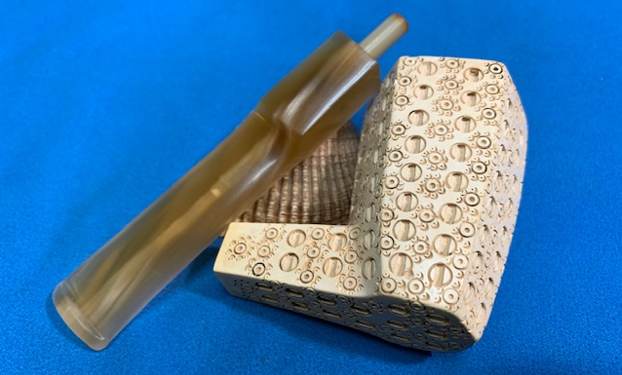
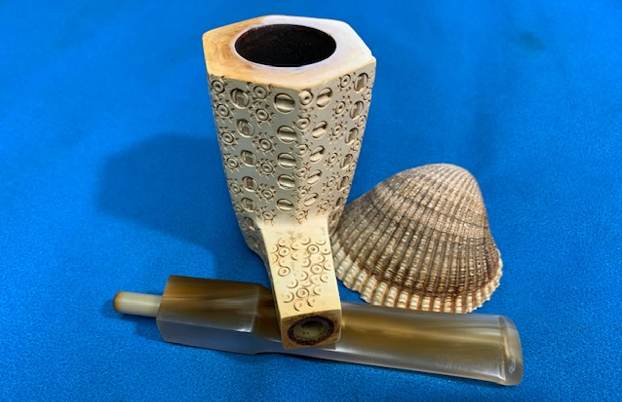
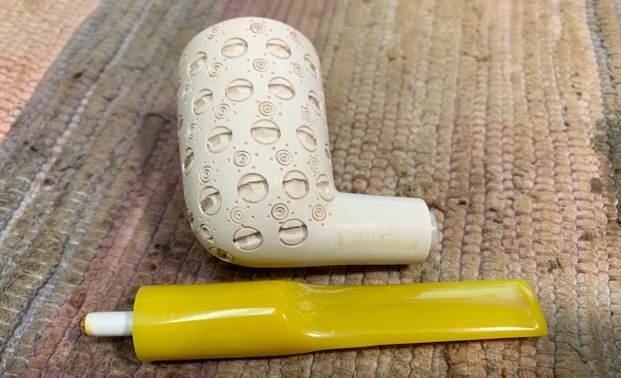
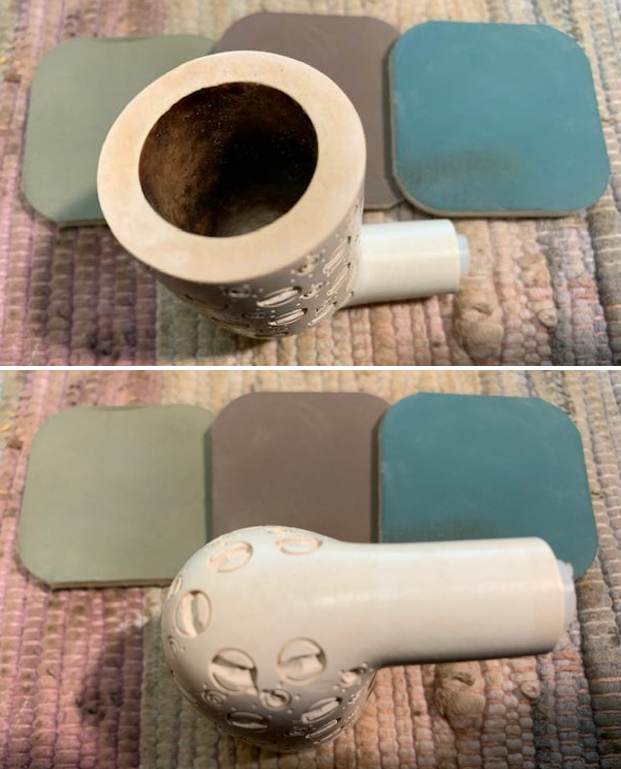
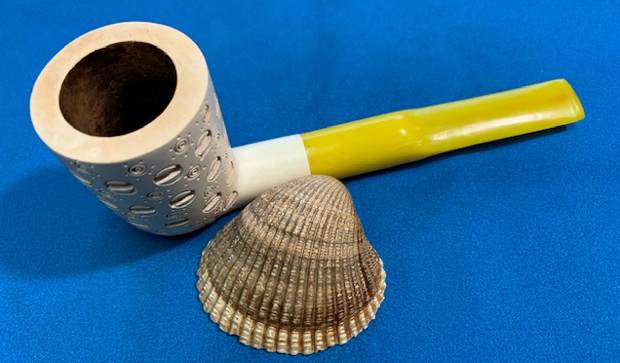
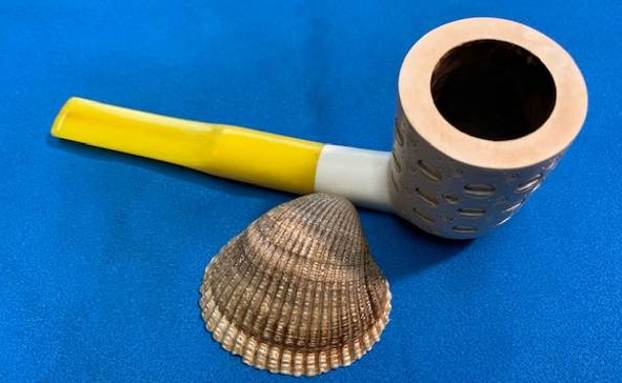
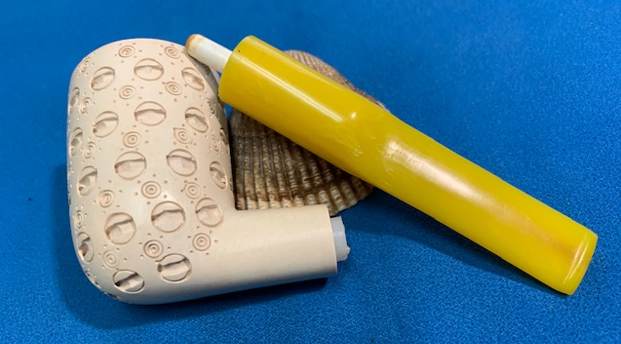
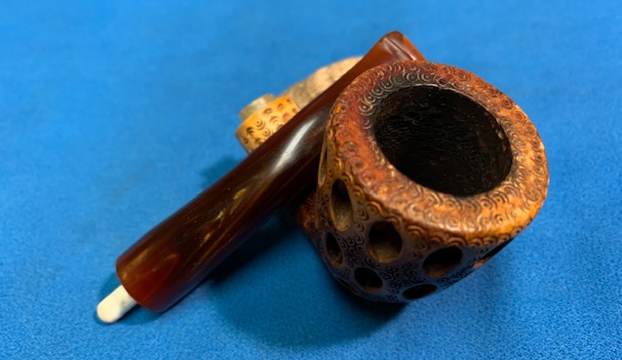
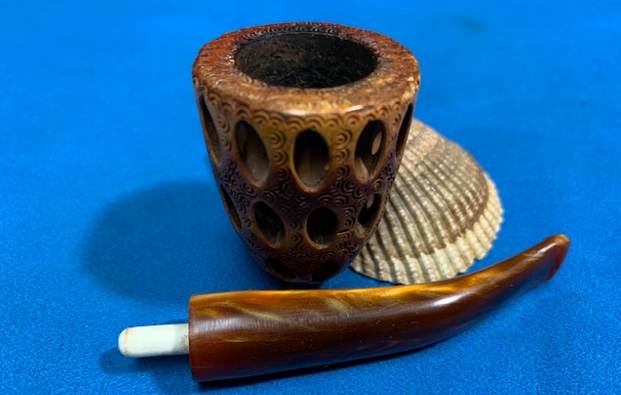
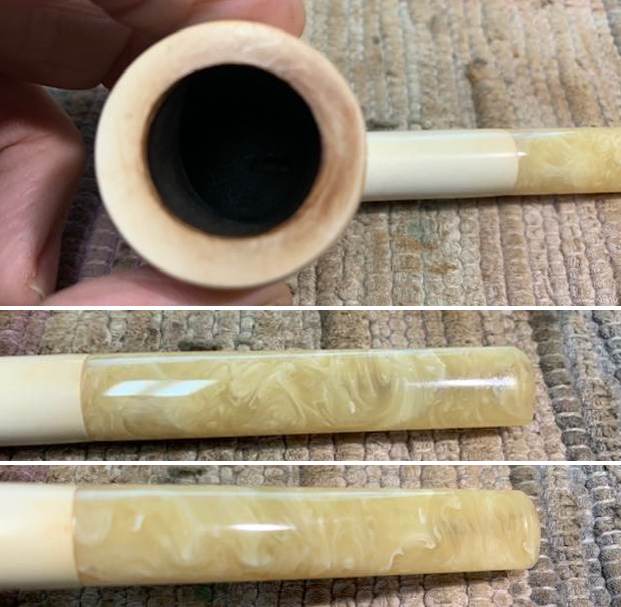
I removed the stem and took a photo of the pipe to give a sense of the whole. The has a white nylon integrated tenon that fits snug in the shank. The stem is absolutely gorgeous with the swirling material.
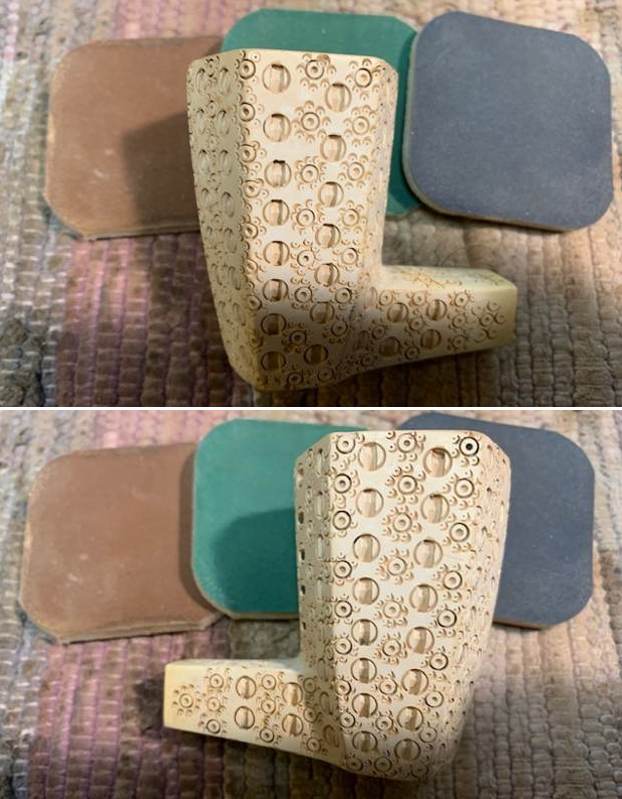
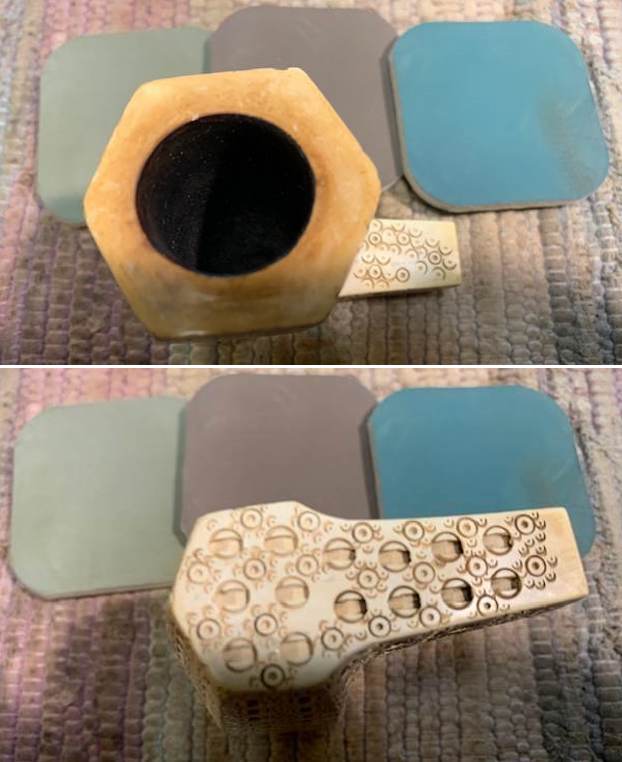
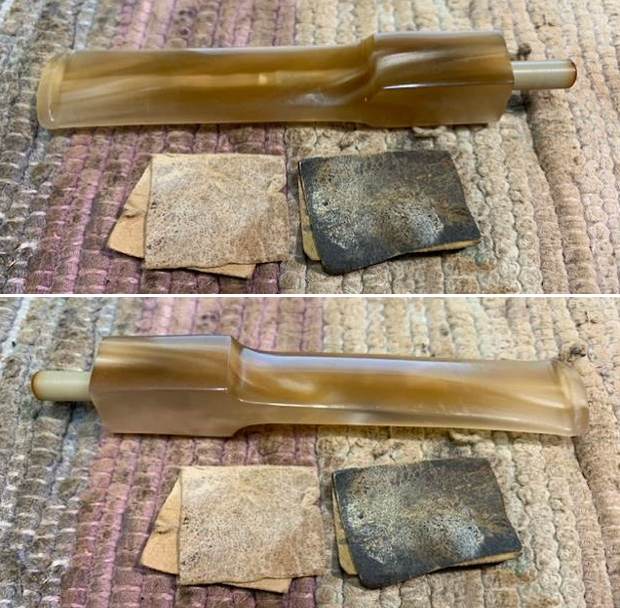
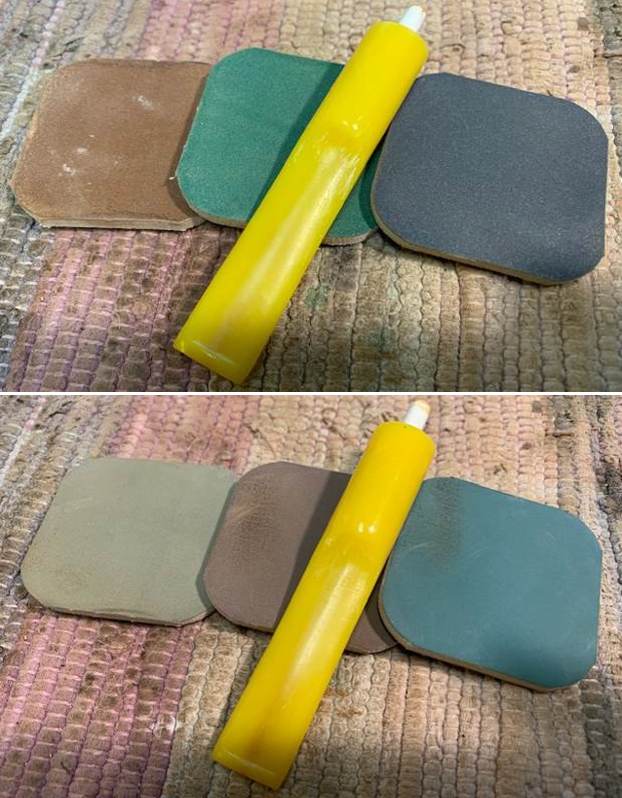
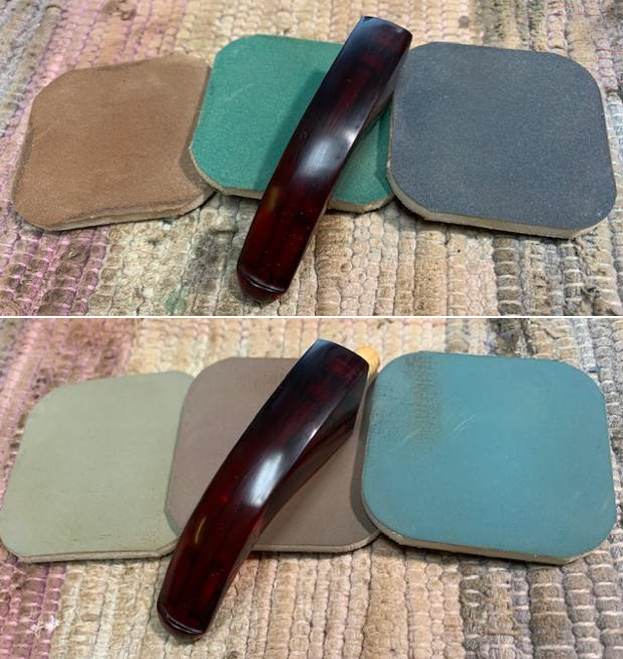
I polished the smooth meerschaum with micromesh sanding pads – wet sanding with 1500-12000 grit pads. I worked on the darkening of the rim top at the same time. I wiped the bowl down after each pad with a damp cloth. I wanted it to be as smooth as possible before I rewaxed the bowl. 
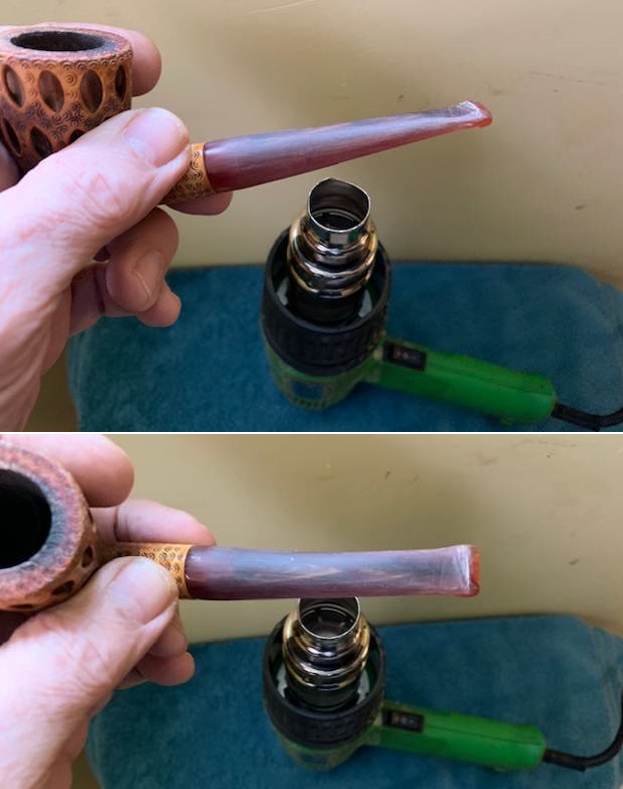
I heated some beeswax in a small metal pan with my heat gun. Once the wax was melted I coated the meerschaum with the liquid wax both by dipping the bowl in it and painting the rest of it with a paint brush. I put a cork in the bowl for a handle and used the heat gun to melt the wax on the bowl and wiped it off with a paper towel. I polished it with a soft cotton cloth to raise the shine on the meerschaum. I was really happy with the way the pipe had turned out. 
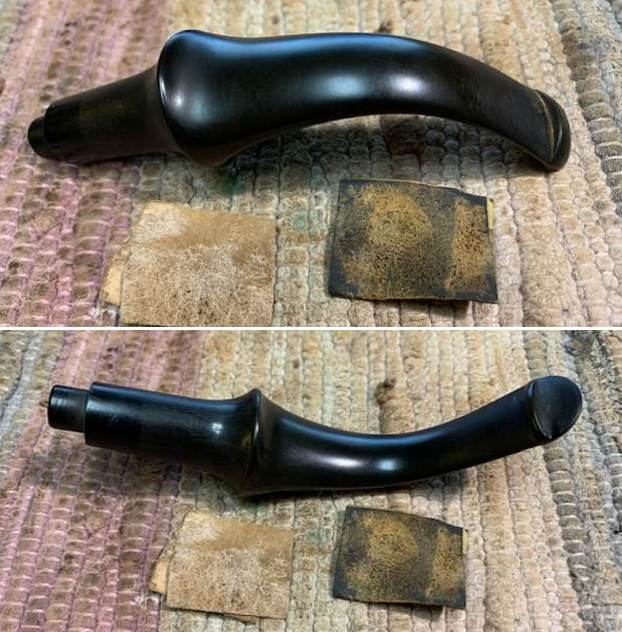
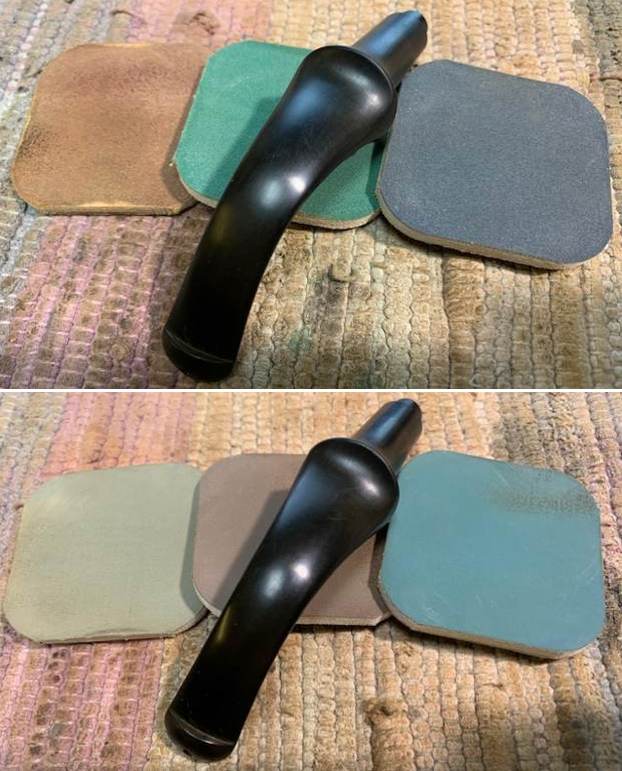
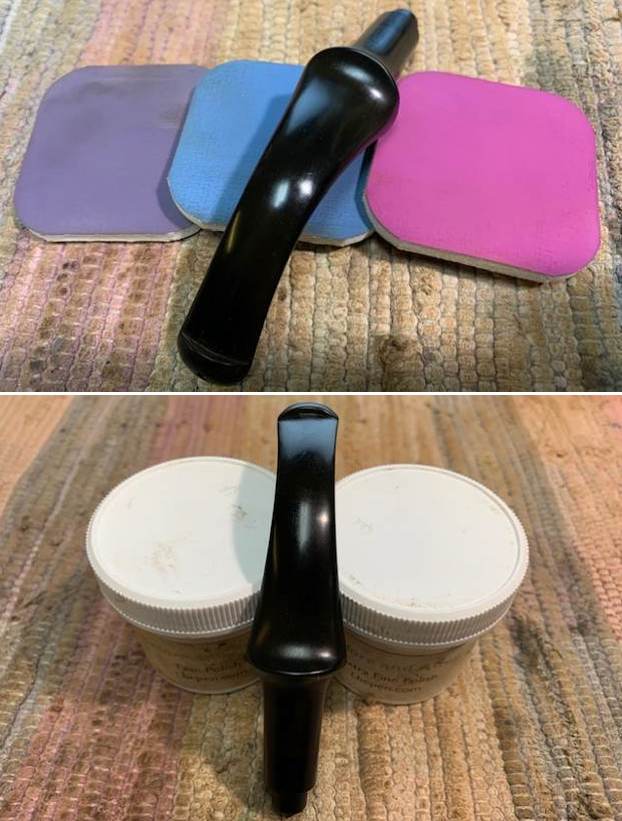
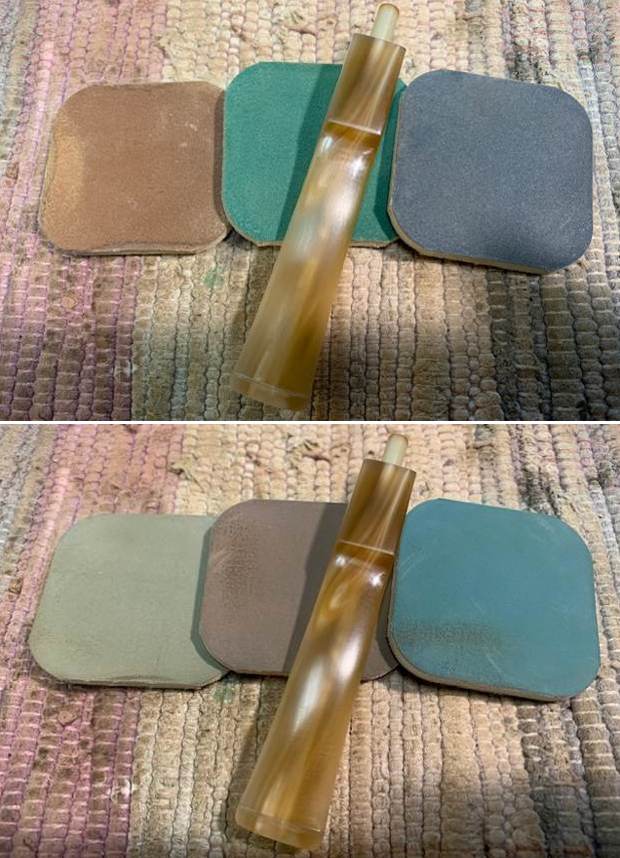
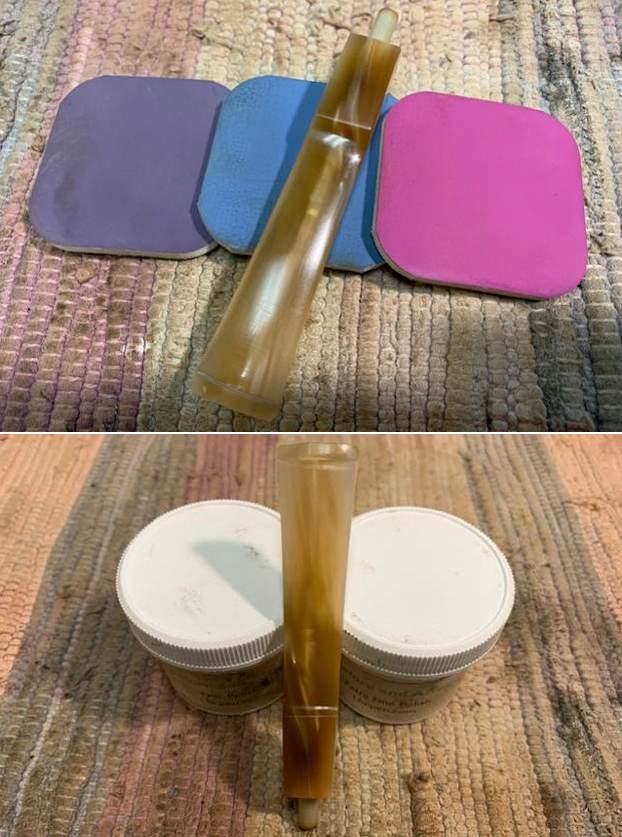
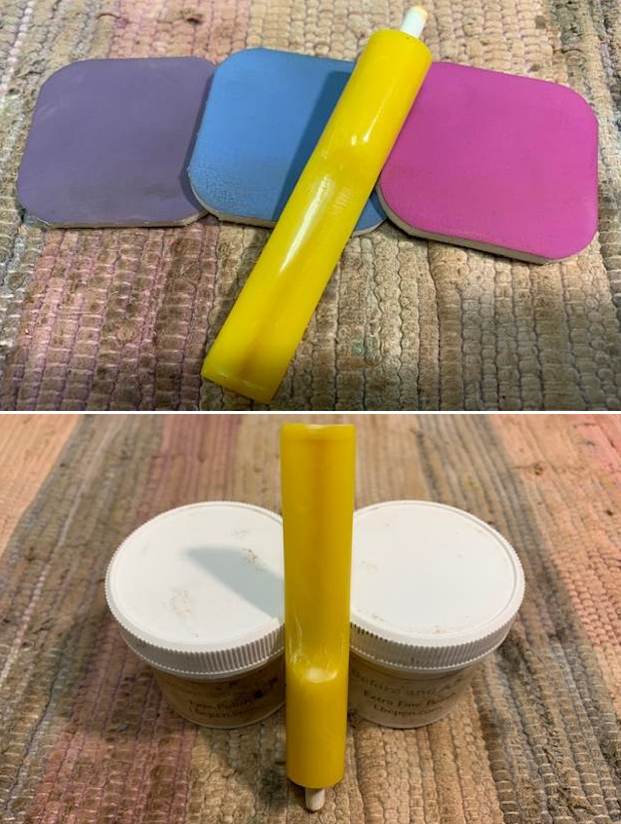
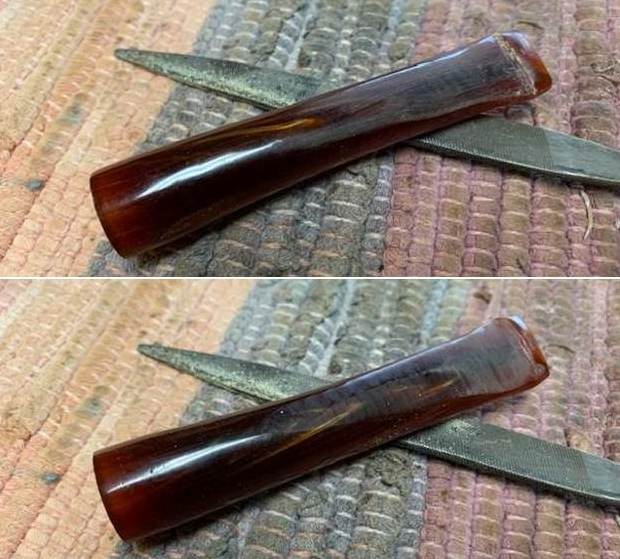
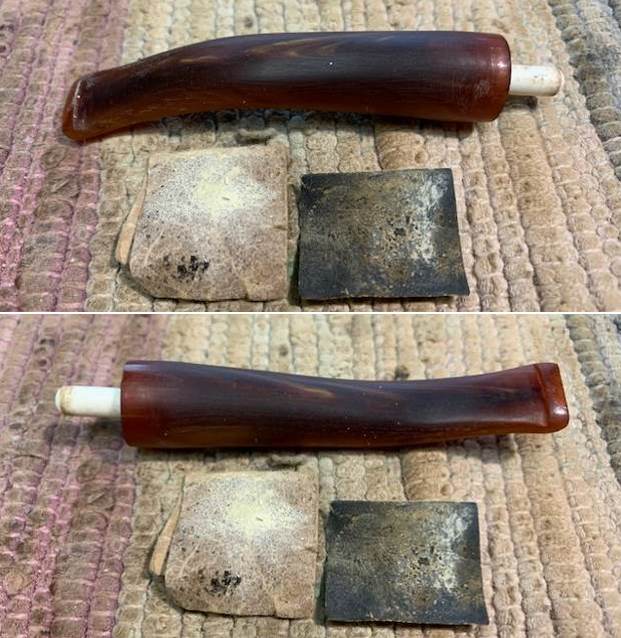
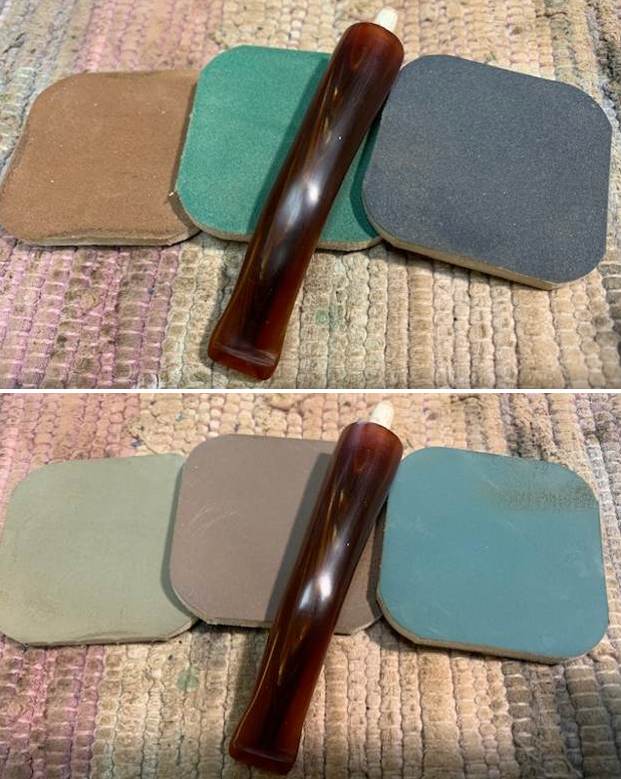
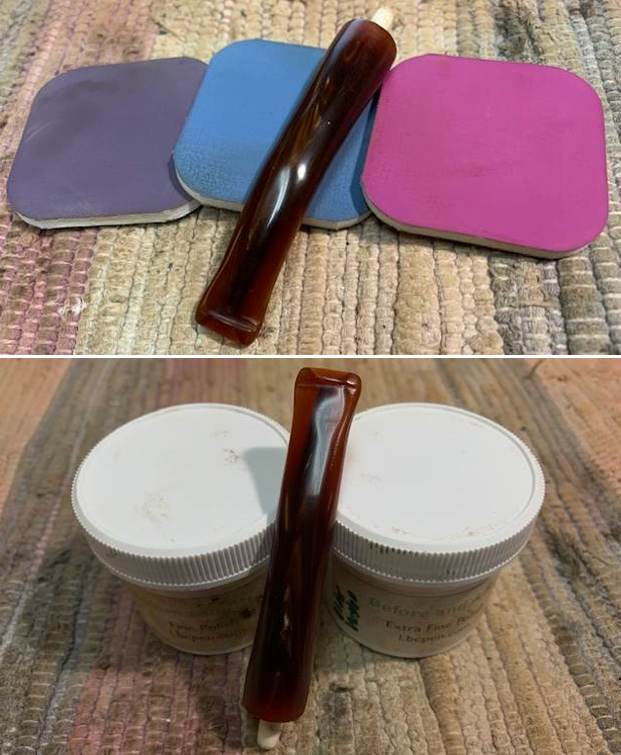
I set the bowl aside and turned my attention to the stem. I polished out the chatter and faint tooth marks with micromesh sanding pads. I dry sanded it with 1500-12000 pads and wiped the bowl down after each pad with a cloth and Obsidian Oil. I finished polished it with Before & After Fine and Extra Fine stem polish. I wiped it down with the cloth and Obsidian Oil one final time and set aside to dry. 
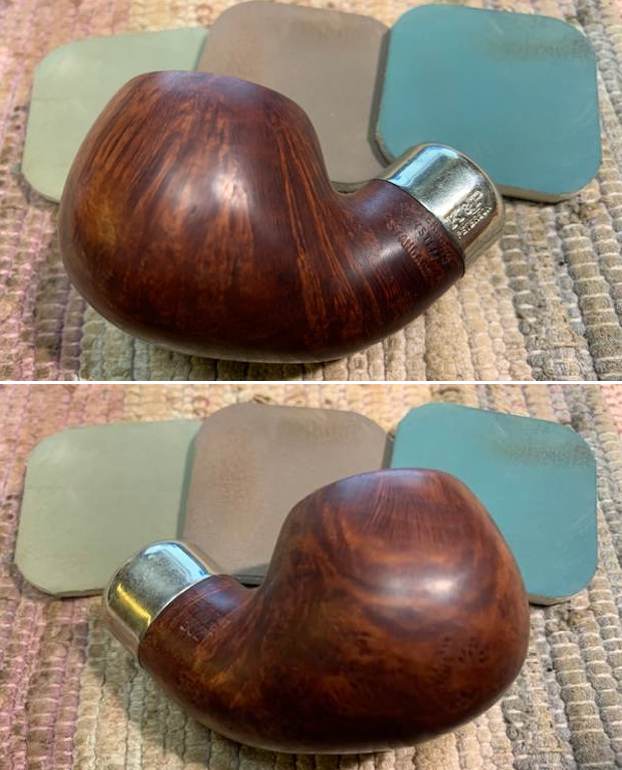
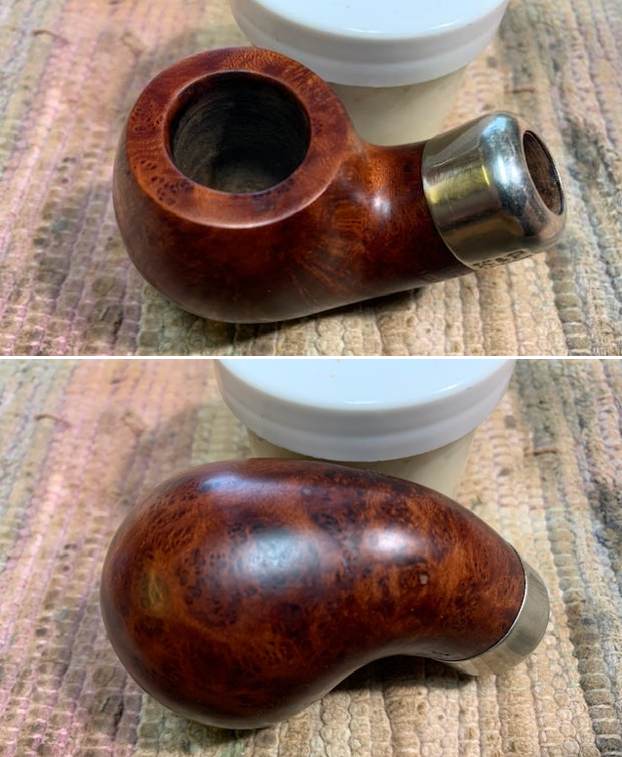
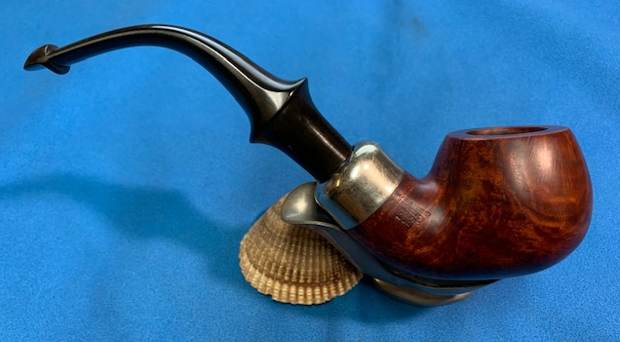
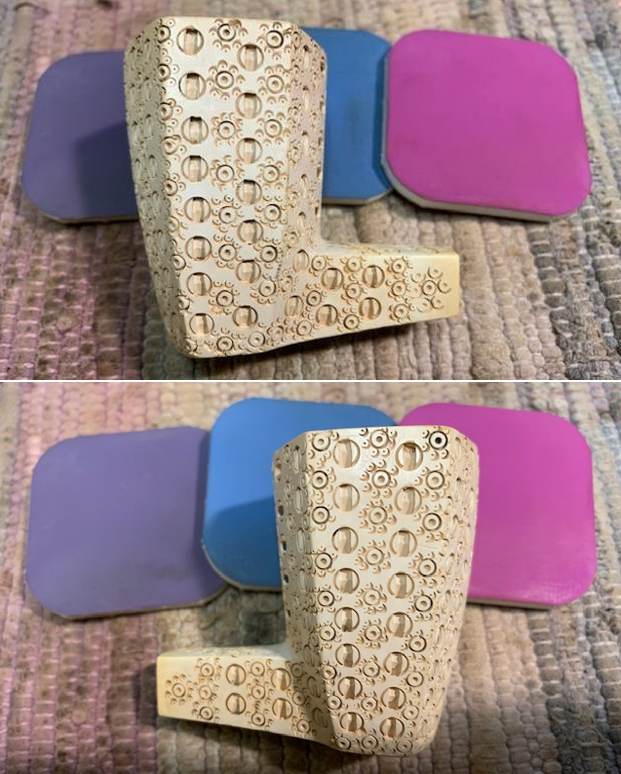
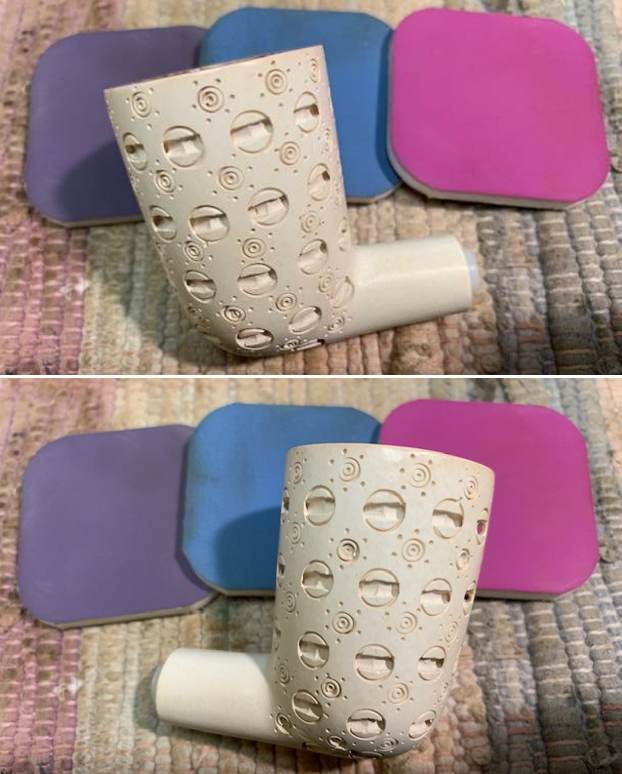
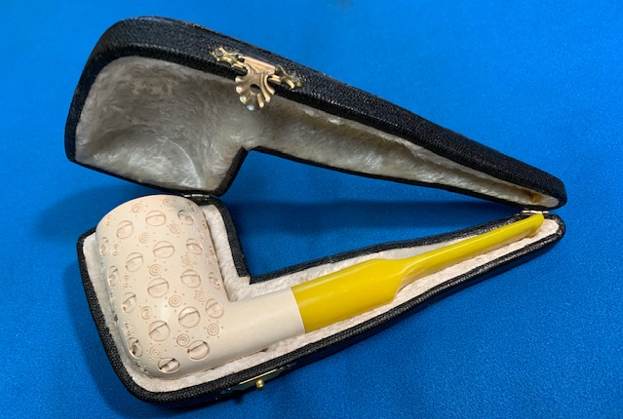
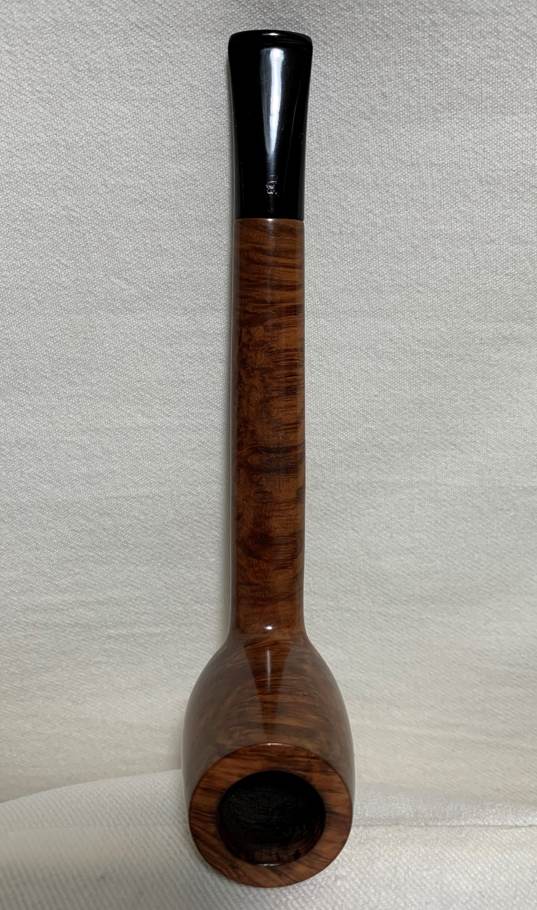
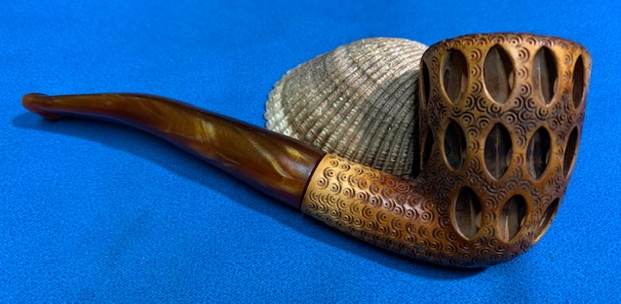
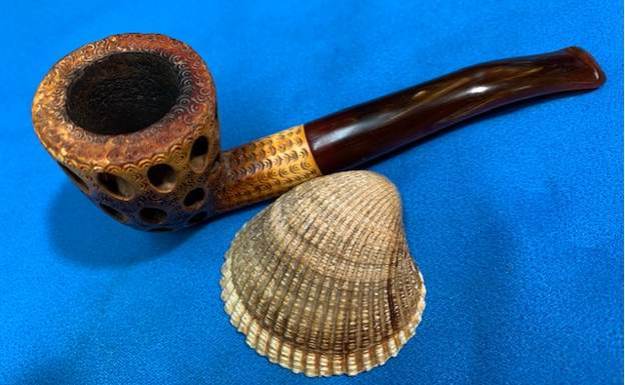
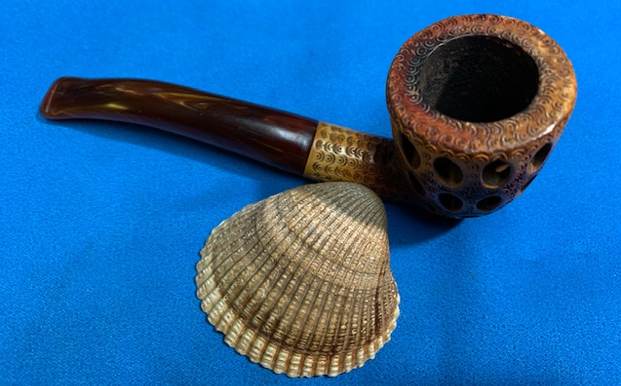
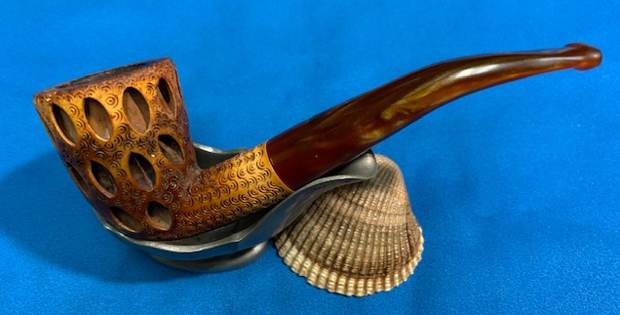
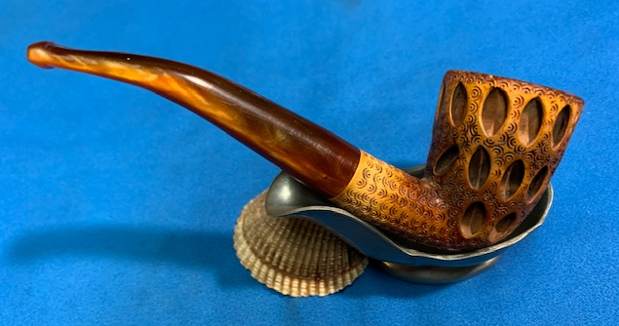
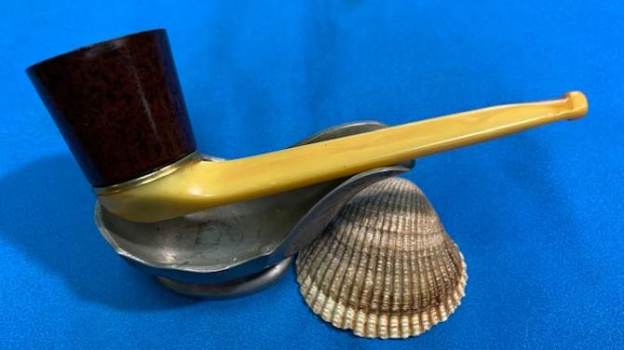
This Andreas Bauer Hand Made Meerschaum Billiard with a Cultured Amber Taper stem is a beautiful pipe. With the addition of the beeswax the meerschaum took on a slightly darker patina. The polished light weight meerschaum that shines through the polished finish is stunning. I put the stem back on the bowl and carefully buffed the pipe with a clean buffing pad. I hand buffed the pipe with a microfiber cloth to deepen the shine. The finished Bauer Meerschaum Billiard fits nicely in the hand and feels great. Give the finished pipe a look in the photos below. The dimensions of the pipe are Length: 5 inches, Height: 1 ¾ of an inch, Outside diameter of the bowl: 1 ¼ inches, Chamber diameter: ¾ of an inch. The weight of the pipe is 26 grams/ .92 oz. I have been keeping my eye open for a Bauer Meerschaum Billiard for a long time so this one will stay with me. Thanks for reading this blog and my reflections on the pipe while I worked on it. There are many more to come!

Restoring a Peterson’s Republic Era System Standard 302 Bent Apple


Blog by Steve Laug

The next pipe on the work table came to us from an antique store in October, 2017 in Pocatello, Idaho, USA. It is a smooth Peterson’s System Standard pipe with a saddle vulcanite stem. The pipe is stamped on the left side of the shank and reads Peterson’s [over] System [over] Standard. On the right side it is stamped Made in the Republic of Ireland and underneath that is the shape number 302. The shape number stamp is partially double stamped over the COM stamp. It is a shape that Peterson’s called a Bent Apple. The nickel ferrule is stamped K & P [over] Peterson. The finish had a lot of grime ground into it and it was very dirty. The bowl was moderately caked and there was a lava coat on the flat rim top and the inner edge of the rim. The inner edge had some nicks and damage and the rim top had a lot of scratches that looked like the rim top had been scraped with a knife. The stem was lightly oxidized and had light tooth chatter and marks on the top and underside near the P-lip style button. The dirty Bent Apple shaped pipe showed promise. Jeff took photos of the pipe before he started his cleanup work.  He took photos of the rim top and bowl to give a clear picture of the thickness of the cake and the condition of the rim top and edges. He also took photos of the top and underside of the stem to show the oxidation, calcification and chatter and tooth marks. Jeff took a photo of the side and heel of the bowl to give a picture of what the briar around the pipe looked like.He took photos of the stamping on the shank and the nickel ferrule. It reads as noted above and is clear and readable.    I am including the information from Pipedia’s article on Peterson pipes. It is a great read in terms of the history of the brand (https://pipedia.org/wiki/Peterson). I have included a bit of the pertinent history here.

1950 – 1989 The Republic Era – From 1950 to the present time, the stamp for this era is “Made in the Republic of Ireland” in a block format generally in three lines but two lines have been used with or without Republic being abbreviated.

I knew that I was dealing with a Republic Era pipe made between 1950-1989. It was a smooth Peterson’s System Standard 302 Apple with nice grain. The finish was stained with a combination of brown stains. Now it was time to work on the pipe.

Jeff had cleaned up the pipe with his usual penchant for thoroughness. He reamed the pipe with a PipNet Pipe Reamer and cleaned up the remnants with a Savinelli Fitsall Pipe Knife.  He scrubbed the bowl with undiluted Murphy’s Oil Soap with a tooth brush. He rinsed it under running warm water to remove the soap and grime. He cleaned out the inside of the shank and the airway in the stem with alcohol, cotton swabs and pipe cleaners. He soaked the stem in Before & After Deoxidizer and rinsed it off with warm water. I took photos of the pipe 3 years later when I finally got around to working on it. The rim top and inner edge of the rim looked very good with a bit of damage on the inner edge and on the rim surface leaving the bowl slightly out of round. The stem surface looked very good with some tooth marks and chatter on both sides near the button. I took a photo of the stamping on the shank. It is clear and readable as noted above.     I removed the stem and took a photo of the pipe to give a sense of the whole. The stem is a typical Peterson’s System stem. I started my work on the pipe by working over the rim top and the inner edge of the bowl to clean up the damage. Once finished the rim top and edge looked much better.  I repaired one small deep nick in the heel of the bowl by filling it in with clear super glue. Once it cured I sanded it smooth to blend it into the surrounding briar. I touched up sanded area with a Maple stain pen to blend it into the surrounding briar. I polished the briar with micomesh sanding pads – wet sanding with 1500-12000 grit pads. I wiped the bowl down after each pad with a damp cloth.  I rubbed the bowl down with Before & After Restoration Balm. I worked it into the surface of the bowl sides and shank with my fingertips. The product works to clean, enliven and protect the briar. I let the balm sit for 15 minutes and then buffed with a cotton cloth to raise the shine.    I set the bowl aside and turned to work on the stem. I smoothed out the chatter and tooth marks with 220 grit sandpaper and started polishing it with 400 grit wet dry sandpaper.  I polished the vulcanite stem with micromesh sanding pads – 1500-12000 grit pads. I wiped it down with a damp cloth after each sanding pad. I used Before & After Pipe Polish – both Fine and Extra Fine to further polish the stem.    This Peterson’s System Standard 302 Bent Apple with a vulcanite saddle stem is a great looking pipe now that it has been restored. The beautiful grain that shines through the polished finish is stunning. I put the stem back on the bowl and carefully buffed the pipe with Blue Diamond on the buffing wheel. I gave the bowl and the stem multiple coats of carnauba wax on the buffing wheel and followed that by buffing the entire pipe with a clean buffing pad. I hand buffed the pipe with a microfiber cloth to deepen the shine. The finished Peterson’s System Standard 302 fits nicely in the hand and feels great. Give the finished pipe a look in the photos below. The dimensions of the pipe are Length: 6 inches, Height: 2 inches, Outside diameter of the bowl: 1 ¼ inches, Chamber diameter: ¾ of an inch. The weight of the pipe is 50gr/1.76oz.  I will be putting this pipe on the rebornpipes store shortly. You will find it in the Irish Pipemakers section. If you are interested in adding this pipe to your collection send me a message or an email. Thanks for reading this blog and my reflections on the pipe while I worked on it. There are many more to come!

Restoring a Paneled Hexagonal Meerschaum Square Shank Dublin Sitter


Blog by Steve Laug

The next pipe on the table is an interesting meerschaum Paneled Hexagonal Meerschaum Square Shank Dublin Sitter with geometric designs and sun bursts around the bowl sides and shank. The rim top was smooth. There was no marking on the pipe to help identify the maker. It is a nicely made pipe by an anonymous carver. There was a nylon insert in the shank and the tenon was nylon or Delrin and was a push tenon inset in the acrylic stem. The stem is a saddle style acrylic in variegated brown/tan/gold. The finish on the bowl was very dirty and grey looking. The top of the rim had a thick coat of lava on it. There was a thick cake in the bowl that would take some care to remove. The square acrylic saddle stem was dirty and the airway was blackened with tars. There was light chatter and marks on both sides near the button. Jeff took some photos of the pipe before he started his clean up work. He took close up photos of the bowl to show the thick cake in the bowl and the lava on the rim top. The stem photos show the tooth chatter and marks on the top and underside near the button. Jeff took some photos of the sides and heel of the bowl to show the pattern that had been carved around the bowl and shank. The bowl was also filthy and had a grey hue of dirt and grim on the finish. Jeff had cleaned the pipe thoroughly. He had reamed it carefully with a PipNet reamer and cleaned that up with a Savinelli Fitsall Pipe Knife. He worked slowly so as not to damage the inner edge of the bowl. He had scrubbed the exterior of the meerschaum with undiluted Murphy’s Oil Soap and a soft tooth brush. He was able to remove the grey tinge of the filth on the sides of the bowl and shank. He cleaned out the interior of the shank and airway with alcohol, pipe cleaners and cotton swabs. He cleaned out the acrylic stem with alcohol, cotton swabs and pipe cleaners to remove the debris and oils in the airway. The bowl has the look of a tall Panel Hexagonal Dublin. The exterior of the bowl looked very good as did the stem. There was still some dark spots on the rim top on the front left side. I took photos of the pipe when it arrived here. I took some close up photos of the rim top and stem. You can see the marks on the back side of the rim top. The tooth chatter on both sides of the stem were quite light.I removed the stem from the shank and took a photo of the parts of the pipe. It is well proportioned and looked really good.I decided to start my work on the pipe by polishing the bowl with micromesh sanding pads. I worked over the rim top with the pads at the same time. I used micromesh pads – dry sanding with 1500-12000 grit pads and wiped the bowl down with a damp cloth after each pad. I was able to remove the dark spots and give the bowl a shine. I set the bowl aside and turned my attention to the stem. I sanded out the tooth marks on both sides of the stem with 220 grit sandpaper. I started the polishing with 400 grit wet dry sandpaper.I polished the newly shaped acrylic stem with micromesh sanding pads – dry sanding with 1500-12000 grit sanding pads. I wiped it down after each sanding pad with a cloth containing some Obsidian Oil. I know Obsidian Oil does nothing for acrylic but I have found that it removes the small particles left behind by the polishing. I finished polishing the surface with Before & After Pipe Stem Polish – both Fine and Extra Fine and buffed it off with a cotton cloth. I gave it a final coat of obsidian Oil and set it aside to dry. It is a beautiful looking variegated brown/tan/gold acrylic stem. This Carved Meerschaum Hexagonal Panel Dublin Sitter turned out to be yet another fun pipe to work on and I was excited to see it come back together. The pipe had a light patina on the rim top and around the bowl and shank. I chose not to rewax it because of the shine that on the bowl. I put the stem back on the bowl and lightly buffed the pipe with a clean buffing pad to raise the shine. I hand buffed the pipe with a microfiber cloth to deepen the shine. The rich polished hexagonal meerschaum on the bowl looks really good with the polished variegated brown/yellow/golden acrylic stem. The bowl and stem came together looking quite spectacular. Give the finished pipe a look in the photos below. I can only tell you that it is another pipe that is much prettier in person than the photos capture. The dimensions of the pipe are Length: 6 inches, Height: 2 ¼ inches, Outside diameter of the bowl: 1 ½ inches, Chamber diameter: 7/8 of an inch. The weight of the pipe is 53 grams/1.87 ounces. This is truly a great looking Meerschaum. Thanks for walking through the restoration with me as I worked over another beautiful pipe. I will be putting it on the rebornpipes store in the Ceramic and Meerschaum Pipe Section. If you are interested in the pipe send me an email or a message. Thanks for your time.

Taking a Breather and Restoring this Geometric Pattern Meerschaum Dublin


Blog by Steve Laug

The next pipe on the table is an interesting meerschaum Dublin with geometric designs around the bowl sides and shank. The rim top was smooth. There was no marking on the pipe or on the case to help identify the maker. It is a nicely made pipe by an anonymous carver. The stem is a modified/customized saddle style acrylic in yellow/gold. It is a nice complement to the white of the meerschaum. The finish was surprisingly clean though the top of the rim had some dark spots and lava on it. There was a  thin cake in the bowl that was not too much to deal with. The stem is also quite clean and there was light chatter and marks on both sides near the button. Jeff took some photos of the pipe before he started his clean up work. The first two photos show the pipe in the case and the case without the pipe. It is quite clean and in good condition. Jeff removed it from the case and took photos of the pipe. It is a really nicely made pipe.He took a close up photo of the bowl to show the marks and the lava on the rim top. There was some darkening on the front and back of the top side. The stem photos show the tooth chatter and marks on the top and underside near the button.Jeff took some photos of the sides and heel of the bowl to show the pattern that had been carved around the bowl and shank. Jeff also took photos of the push style tenon. It came out of the stem when turned but remained in the shank. You can also see what appear two numbers 77 on the end of the shank and the stem. My assumption is that the numbers match the parts when the pipe was made. Jeff had cleaned the pipe thoroughly. He had reamed it carefully with a PipNet reamer and cleaned that up with a Savinelli Fitsall Pipe Knife. He worked slowly so as not to damage the inner edge of the bowl. He had scrubbed the exterior of the meerschaum with undiluted Murphy’s Oil Soap and a soft tooth brush. He cleaned out the interior of the shank and airway with alcohol, pipe cleaners and cotton swabs. He cleaned out the acrylic stem with alcohol, cotton swabs and pipe cleaners to remove the debris and oils in the airway and the threads of the push tenon. Once it was clean he turned the tenon into the stem. I took photos of the pipe when it arrived here. The first two photos show the condition of the black case. It was in excellent condition. The third photo shows the pipe in the opened case. It was a great looking pipe. I took the pipe out of the case and took photos of the cleaned pipe. The bowl has the look of a tall Dublin. The exterior of the bowl looked very good as did the stem. There was still some dark spots on the rim top on the front left side. I took some close up photos of the rim top and stem. You can see the marks on the rim top that I noted above. The tooth chatter on both sides of the stem were quite light.I removed the stem from the shank and took a photo of the parts of the pipe. It is well proportioned and looked really good.I decided to start my work on the pipe by polishing the bowl with micromesh sanding pads. I worked over the rim top with the pads at the same time. I used micromesh pads – dry sanding with 1500-12000 grit pads and wiped the bowl down with a damp cloth after each pad. I was able to remove the dark spots and give the bowl a shine. I set the bowl aside and turned my attention to the stem. Since the tooth chatter was quite shallow I polished the newly shaped acrylic stem with micromesh sanding pads – dry sanding with 1500-12000 grit sanding pads. I wiped it down after each sanding pad with a cloth containing some Obsidian Oil. I know Obsidian Oil does nothing for acrylic but I have found that it removes the small particles left behind by the polishing. I finished polishing the surface with Before & After Pipe Stem Polish – both Fine and Extra Fine and buffed it off with a cotton cloth. I gave it a final coat of obsidian Oil and set it aside to dry. It is a beautiful looking golden, yellow acrylic stem. This Carved Meerschaum Dublin with Geometric Patterns turned out to be another fun pipe to work on and I was excited to see it come back together. It was a clean pipe that did not take Jeff too much work to ream and clean. My work was also simpler than expected. I chose not to rewax it because of the shine that still showed on the bowl. I put the stem back on the bowl and lightly buffed the pipe with a clean buffing pad to raise the shine. I hand buffed the pipe with a microfiber cloth to deepen the shine. The rich polished meerschaum on the bowl looks really good with the polished yellow/golden acrylic stem. The bowl and stem came together looking quite spectacular. Give the finished pipe a look in the photos below. I can only tell you that it is much prettier in person than the photos capture. The dimensions of the pipe are Length: 5 ¾ inches, Height: 2 ¼ inches, Outside diameter of the bowl: 1 ½ inches, Chamber diameter: 1 inch. The weight of the pipe is 36 grams/1.27 ounces. This is truly a great looking Meerschaum. Thanks for walking through the restoration with me as I worked over another beautiful pipe. I will be putting it on the rebornpipes store in the Ceramic and Meerschaum Pipe Section. If you are interested in the pipe send me an email or a message. Thanks for your time.

A Pipe of Distinction


Blog by Kenneth Lieblich

Next on the chopping block is a very personal pipe – and one that is staying in my collection. The photo you see below is of my late grandfather, in the early 1970s, smoking a charming Bewlay Canadian pipe. It is this pipe’s restoration that I am recounting today. I do not know where my grandfather acquired it (or under what circumstances), but I suppose it does not ultimately matter. My grandfather was an enthusiastic pipe smoker and he clearly enjoyed this one. I am definitely looking forward to cleaning this one up. It has a value well beyond dollars.The pipe is from The House of Bewlay and is a Canadian shape. What a charming and elegant pipe! In order to read the markings correctly, I used my old trick of rubbing chalk over them (like a gravestone) and that helped a lot. The pipe’s markings read Bewlay [over] Twenty. The other side of the pipe shows the shape number, 003 [over] London Made. This sort-of corresponds with a Bewlay catalogue from the late 60s, as you can see in the photos. I say, “sort-of”, because the brochure shows shape numbers 001 and 002. I do not know the exact date of the pipe, but it is likely from the late-1960s or early-1970s. Let us read a bit more about Bewlay from the Pipedia article:

The English brand of Bewlay & Co. Ltd. (formerly Salmon & Gluckstein Ltd.), was in business from the early 20th century until the 1950s. The brand ended up being sold and taken over by Imperial Tobacco Co. The shop chain closed in the 1980s but there seems to be one shop still in business on Carr Lane in the city of Hull. Bewlay pipes were made by prestigious firms. Notably Barling, Charatan, Loewe & Co., Sasieni, Huybrecht, and Orlik. So understandably, the English considered a Bewlay pipe a quality pipe.

Anyway, on to the pipe – and what a beauty it was. However, it was not without its issues. The stummel had the following problems: lava on the rim, a notable burn to the rim, plenty of cake in the bowl, a couple of nicks to the bowl, and a tired, worn-out colour of wood. By the way, the strange “stains” to the bowl are, in fact, old bits of newspaper. After my grandfather died, the pipes were wrapped in newspaper and stuck in a box. The newspaper got wet at some point in the intervening years. Meanwhile, the stem had its own set of problems: some oxidation and calcification, minor tooth marks and dents, a filthy stinger, the ‘B’ logo was a bit worn, and (worst of all) a large chunk of vulcanite missing from the bit! This pipe was going to be a bit tricky, and I needed to be especially careful to ensure the missing vulcanite would be repaired properly – so it could be used for many years to come. The stem was first on my list. This stem has a stinger in it – and it was being quite stubborn about coming out of the tenon! I opted to warm the stem and stinger with a hair dryer and this provided just enough softening of the internal goo to allow me to pull it out. The stinger then went for a soak in some lemon-infused isopropyl alcohol. I let it set for several hours and then cleaned it off and it looked much improved. I then finished it with some metal polish and moved on. I wiped down the outside of the stem with Murphy’s Oil Soap on some cotton pads. I also took a BIC lighter and ‘painted’ the stem with its flame in order to lift the bite marks and dents. This was fairly successful in raising the damage. Then, I cleaned out the insides with pipe cleaners and isopropyl alcohol. Once this process was done, the stem went for an overnight soak in the Before & After Hard Rubber Deoxidizer. The following day, I cleaned all of the de-oxidizing sludge off with alcohol, pipe cleaners, et cetera. The oxidation had migrated to the surface and would be fairly straightforward to remove. I scrubbed vigorously with SoftScrub on cotton pads to remove the leftover oxidation. I also built up some tiny dents on the stem with cyanoacrylate adhesive and let it fully cure.Now it was time to make a patch for the missing chunk of vulcanite. This patch was made with a mixture of cyanoacrylate glue and activated charcoal powder. This created a black, resilient mush that would be very hard-wearing when cured and would work perfectly for this repair. Thanks to Steve’s instruction, I first plugged up the stem’s draught hole with a pipe cleaners coated in petroleum jelly. This ensured that any of the cyanoacrylate and charcoal mush would not accidentally plug up the air passage in the stem. This was a tricky business and it took some real patience and effort to make it work. As the photos show, after I applied the cyanoacrylate and charcoal mush, it looked pretty darn ugly, but I was expecting that. I also managed to get some of the bits of pipe cleaner bristles into the repair! No big deal – those were quickly excised. After the curing, I pulled out the Dremel rotary tool and began to remove the excess material. This was also the preliminary step in shaping the button. To carry this process on, after the Dremel, I used a miniature file to further shape the button and make it suitable for sanding. I used another file on the inside to ensure there were no rough edges in the bore. I then sanded the stem down with 220-, 400-, and 600-grit sandpapers to meld seamlessly into the stem. This ensures that it keeps its shape and looks like it should. I then used all nine Micromesh pads (1,500 through 12,000 grit) to bring out the lovely black lustre on the stem. I also used Obsidian Pipe Stem Oil in between each pad scrubbing. It is worth noting that a repair this big on a stem will never be completely invisible, but I was very pleased with how I managed to make the stem of my grandfather’s pipe look so good. Just before finishing with the Micromesh pads, I took the opportunity to repair the “B” logo on the stem. It had faded – both by loss of paint and also by fingers inadvertently smoothing out the “B” over time. So, I added some acrylic paint with a paint brush, let it dry, and buffed it to make it look good. The “B” is back, but, as later photos reveal, a little bit has disappeared into history.On to the stummel, and the usual cleaning procedures were in order for this pipe. I used both the PipNet Reamer and the KleenReem to remove the built-up cake, and followed that with 220-grit sandpaper to remove as much as I could. I wanted to take the bowl down to bare briar to ensure there were no hidden flaws in the walls of the bowl. Fortunately, there were none. I then proceeded to clean out the insides of the shank with cotton swabs, pipe cleaners, and isopropyl alcohol. There was quite a bit of filth inside this stummel – it took many pipe cleaners et cetera to clean it out.I followed that up by cleaning the insides with some dish soap and tube brushes. I then moved on to cleaning the outside of the stummel with Murphy’s Oil Soap and some cotton pads. That removed the bits of aforementioned newspaper and any remaining dirt. I also soaked the rim in Murphy’s for a while just to loosen up the lava. In order to remove the lingering bits of lava and fix any nicks on the rim, I “topped” the pipe – that is to say, I gently and evenly sanded down the rim on a piece of 220-grit sandpaper. This effectively removed the lava, without altering the look of the pipe. After that, a light application of Before & After Restoration Balm brought out the best in the stummel’s grain. What a difference that made! There is some beautiful wood under the grime! Having completed that, I was able to address the small nicks on the stummel. I dug out my iron and a damp cloth to try and raise the nicks. The hot and moist steam can often cause the wood to swell slightly and return to shape. There was some movement – not a lot, but it was better than doing nothing. I filled the remaining divots with cyanoacrylate adhesive and let it cure. Now, with the nicks filled, it was time to sand down the stummel. I used all nine Micromesh pads (1,500 through 12,000 grit) to wet/dry sand everything smooth. Then I added a bit more Before & After Restoration Balm. Then it was off for a trip to the buffer. A dose of White Diamond and a few coats of carnauba wax were just what this pipe needed. The lovely shine made the wood look absolutely beautiful. This is a wonderfully crafted pipe and has a very elegant feel to it. It took a lot of work, but I am proud of it and the final product is (hopefully) worthy of my beloved grandfather’s memory. Obviously, this is one pipe that I am keeping for myself and adding to my collection. I am sure that I will be enjoying this one for many years to come. I hope you enjoyed reading the story of this pipe as much I as I did restoring it. If you are interested in more of my work, please follow me here on Steve’s website or email me directly at kenneth@knightsofthepipe.com. Thank you very much for reading and, as always, I welcome and encourage your comments.

Reworking a Messy Hack Job on a Stem of a Lace Carved Meerschaum Dublin


Blog by Steve Laug

I am kind of on a meerschaum restoration binge so I thought I would have a look at my box of meerschaums to restore. I pulled out this nice looking lace carved Dublin meerschaum with a great patina. Jeff received an email from a fellow early in January, 2018 who lived in Los Fresnos, Texas, USA. He told us that he had a few pipes that had been his grandfather’s and he was selling them off for the family. This pipe was one of those. We love to pick up pipes with a bit of the back story attached so we did it. The exterior of the pipe was dirty but still quite beautiful. The bowl had a thick cake in it and there was lava on the rim top. It was obviously a well loved and oft smoked pipe. The stem was a mess with what looked like a reshaping done with a pocket knife that had left all kinds of hack marks and cuts in the surface. To my thinking it was done by the previous pipeman who had customized it to his liking for a more comfortable fit. The push tenon was old and tired and the threads holding it in the stem were stripped so that it was a very loose fit and would need to be replaced. The pipe had potential but would need a lot of work to bring it back. The stem would take the most time as I would need to smooth out the damage and reshape it properly. Jeff took photos of the pipe before he went to work on it. He took photos of the rim top and included different angles to capture condition of the bowl and rim top. You can see the lava build up on the rim top carving and edges as well as the thick cake in the bowl. He also took some photos of the stem to show the hacked condition of the acrylic and what would need to be done to reshape it. Jeff took some photos of the heel of the bowl and side to give a sense of the patina already yon this beauty. The under bowl (inside the lace) has really darkened and adds depth to the carving. Very nice! Jeff had cleaned the pipe thoroughly. He had reamed it carefully with a PipNet reamer and cleaned that up with a Savinelli Fitsall Pipe Knife. He worked slowly so as not to damage the inner edge of the bowl. It was a mess. He had scrubbed the exterior of the meerschaum with undiluted Murphy’s Oil Soap and a soft tooth brush. He cleaned out the interior of the shank and airway with alcohol, pipe cleaners and cotton swabs. He cleaned out the hacked acrylic stem with alcohol, cotton swabs and pipe cleaners to remove the debris and oils in the airway and the threads of the push tenon. Once it was clean the thread no longer held the tenon in the stem. I took photos of the pipe when it arrived here. It has real potential to be a great looking pipe. I took some close up photos of the bowl, rim top and both sides of the stem to show what they looked like before I started my part of the work. They are quite clean but the stem particularly is very roughly carved.I went through my jar of tenons and found a push tenon that was close to the original size of the one that had been used. The threads on the stem end fit perfectly but the push tenon portion was slightly too big. I would need to reduce the diameter slightly to get a perfect fit.I used a small flat file to flatten out the ridges and waves in the top and underside of the stem. I also used it to recut the button and sharpen the edge for more definition. A lot more shaping work to go but it is going to work well.I fit the push tenon in the shank portion and it was smooth and snug but removable by my fingers with little problem. I thread it in the stem portion and tightened it. I would put the stem on the shank to further shape the stem.With the stem in the shank I sanded the stem with 220 grit sandpaper to further shape the stem and to remove the deep gouges and file marks from the previous pipeman’s work on it. It began to take shape with each pass of the sandpaper. With the shaping on the stem basically finished and the rough sanding done I decided it was time to bend the stem to match the flow of the bowl. I heated it with a heat gun until the acrylic became flexible. I carefully bent it while on the pipe to make sure that the bend was not angled to either side. I wanted to take care of one of the shaping issues that I noticed in my work. The stem was tweaked slightly toward the right side. I knew I could not do much to change that but I could minimize it a bit in the bending. I bent softened stem to the right angle and cooled it quickly under water to set the bend. I took photos of the newly bent stem to show how it looked. I wanted the bend to reflect the bowl angles. I wanted the pipe to sit in the mouth with the bowl flat rather than angled down. The bend I put in worked to achieve that perfectly. I was also happy how the bend actually did minimize the rightward tweak of the stem. It looked much better. With the bend correct I went back to some final shaping of the stem surface. I worked on it with 220 grit sandpaper to get the shape I wanted. While not perfect it is a vast improvement from where it was when we purchased it. Once I had that I started the polishing of the stem with 400 grit wet dry sandpaper. It was starting to look really good!I polished the newly shaped acrylic stem with micromesh sanding pads – dry sanding with 1500-12000 grit sanding pads. I wiped it down after each sanding pad with a cloth containing some Obsidian Oil. I know Obsidian Oil does nothing for acrylic but I have found that it removes the small particles left behind by the polishing. I finished polishing the surface with Before & After Pipe Stem Polish – both Fine and Extra Fine and buffed it off with a cotton cloth. I gave it a final coat of obsidian Oil and set it aside to dry. It is a beautiful looking variegated brown/copper/gold acrylic stem. This Lace Carved Meerschaum Dublin turned out to be another fun pipe to work on and I was excited to see it come back together. With the grime and debris gone from the finish it was a beauty and the patina was quite nice. I chose not to rewax it because of the intricate lacework of the carving. I did not want to fill it in. I put the stem back on the bowl and carefully buffed the pipe with a clean buffing pad to raise the shine. I hand buffed the pipe with a microfiber cloth to deepen the shine. The rich polished meerschaum on the bowl looks really good with the polished variegated acrylic stem. It all came together better than I expected. Give the finished pipe a look in the photos below. I can only tell you that it is much prettier in person than the photos capture. The dimensions of the pipe are Length: 5 ½ inches, Height: 2 inches, Outside diameter of the bowl: 1 ½ inches, Chamber diameter: ¾ of an inch. The weight of the pipe is 37 grams/1.31 ounces. This is truly a great looking Meerschaum. Thanks for walking through the restoration with me as I worked over another beautiful pipe. I will be putting it on the rebornpipes store in the Ceramic and Meerschaum Pipe Section. If you are interested in the pipe send me an email or a message. Thanks for your time.

Reclaiming a Uniquely Shaped Cased Bent Opera Meerschaum with a Redmanol Stem


 Blog by Steve Laug

This afternoon I finished a nice little meerschaum apple with a gold rim cap and gold band on the shank and a Ruby Bakelite/Redmanol stem (https://rebornpipes.com/2021/12/25/next-on-the-table-is-a-blinged-out-meerschaum-bent-apple-with-a-ruby-bakelite-stem/). I posted it on the blog and it sold almost before it was on the store. I was contacted by another friend for the same pipe and had to tell him that it sold. I did however have another interesting one in the box that he might be interested in seeing. The pipe was also a meerschaum with rectangular shank, rolled gold band on the shank and a Red Bakelite stem. We purchased of Ebay from Queensbury, New York, USA. This pipe was heavily smoked and needed a lot of work but showed promise. The leather cover on the case was in was worn but still in decent condition. There was some wear on the edges of the case but the hinges and lock worked very well.Don’t you want to know what is inside of this case? Do you want to compare it with the other meerschaum I wrote about? Well… I will get there. Jeff opened the case to show us what the pipe looked like inside. The lining of the case was worn and had a faded green colour to it. There was not identifying stamp on the lid. The rolled band was ornate and filigreed. It really was a beautiful looking older pipe. Jeff took a photo of the pipe in the case. It look like it had been smoked hard and often. The case was filled with chunks of tobacco and ash and the rim top was covered with thick lava. The meerschaum however was really beginning to take on some nice patina – particularly on the shank. Have a look at this beauty!He removed it from the case and really it is the first look of the profile of this interestingly shaped old timer. I would almost call it an Opera pipe but it is a bit big for that. It is however longer and thinner than a standard bowl. Otherwise it is a squashed bent Dublin. It is really filthy but look at the patina on the shank and the rolled gold band on the shank. It is really quite lovely. The second photo below shows the top view of the pipe. You can see the cake in the bowl and the lava on the rim top but do not miss the shape of the bowl. It is a unique one for sure. Jeff took some close up photos of the rim top to show the lava build up and the very thick cake in the bowl. It really made me wonder what the inner edge of the bowl looked like. You can also see some of the scratches on the side of the bowl. It is a mess but… The stem is very nice and actually surprisingly unchewed. There are light tooth marks and chatter on the stem surfaces but nothing deep and the shape is also quite unique. The rolled gold band on the shank is also very ornate.He took some photos of the sides and heel of the bowl to give a sense of the wear and tear on the pipe. You can see it has been a hard worn and greatly used pipe. It must have been a terrific smoker and someone’s favourite go to pipe. I really like the look of the patina on the shank. The mottled reds and browns are very nice. Jeff had cleaned it thoroughly. He had reamed it carefully with a PipNet reamer and cleaned that up with a Savinelli Fitsall Pipe Knife. He worked slowly so as not to damage the inner edge of the bowl. It was a mess. He had scrubbed the exterior of the meerschaum with undiluted Murphy’s Oil Soap and a soft tooth brush. He cleaned out the interior of the shank and airway with alcohol, pipe cleaners and cotton swabs. He carefully cleaned out the Bakelite stem with clean water and pipe cleaners to remove the debris and oils in the airway and the threads of the bone tenon. I took photos of the pipe when it arrived here. The first two photos show case after he had cleaned it in the process. The third photo shows the pipe in the fitted case The overall look of the pipe after cleaning shows the tiredness and worn look of the bowl sides. The stem on the other hand is quite remarkably unscathed and the bone tenon almost looks new. The pipe is a beauty in the rough and definitely needs some TLC. I took a close up photo of the bowl and rim top to show the condition of the cleaned bowl and rim. You can see the clean bowl and the many scratches and darkening on the back edge and top of the rim. I also took some photos of the stem to show how it looked. It was remarkably clean. Even the tooth chatter and marks were very minor.I unscrewed the stem from the shank to see an almost new looking threaded bone tenon on the stem. Amazingly it was free of damage and had not been over or under-turned in the shank.I decided to start my work on this pipe by addressing the damage to the inner edge of the rim and the rim top. I used a folded piece 220 grit sandpaper to work over both. I was able to remove most of the damage on the inner edge and a fair bit on the rim top with the sandpaper. It definitely is an improvement.I polished the briar and the shank with micromesh sanding pads – dry sanding with 1500-12000 grit pads. I worked on the rim top and make it even better looking. I figured that once I heated it to rewax they would look significantly different (Time will tell). I wiped the bowl down after each pad with a damp cloth. The meerschaum began to shine and the scratches were less intrusive. The photos tell the story!   Now it was time to wax the meerschaum bowl. I melted a block of beeswax and dipped the pipe I in the mix and painted the wax with a cotton swab into the hard to reach spots on the shank corners. I heavily coated the bowl with the liquid wax. I let the wax harden dry then I used the cork as a handle while I heated it with a heat gun. As the wax melted I wiped it off with a paper towel. I let the excess drip back into the container. The bowl began to really take on some patina even though the scratches also stood out more. Those scratches were part of the story of the pipe’s journey. I buffed it with a soft cloth and took pictures of the pipe at this point in the process of the restoration. The wax did its magic and the patina was rich and deep. Even the scratches looked better to me! The pipe is well traveled and the scratches help tell the story. I set the bowl aside and turned to deal with the stem. I polished the Bakelite stem with micromesh sanding pads – dry sanding with 1500-12000 grit sanding pads. I wiped it down after each sanding pad with a cloth containing some Obsidian Oil. I finished polishing it with Before & After Pipe Stem Polish – both Fine and Extra Fine and buffed it off with a cotton cloth. I gave it a final coat of obsidian Oil and set it aside to dry. It is a beautiful looking ruby coloured stem. This beautiful no name Bent Opera shaped Meerschaum with a Bakelite stem was another fun pipe to work on and I really was looking forward to seeing it come back together again. With the grime and debris gone from the finish it was a beauty and after the waxing with Beeswax the patina was quite nice. The rolled gold filigreed band on the shank is an added bonus. I put the stem back on the bowl and buffed the pipe with Blue Diamond on the buffing wheel.  I buffing it with a clean buffing pad on the buffer to raise the shine. I hand buffed the pipe with a microfiber cloth to deepen the shine. The rich polished meerschaum on the bowl looks really good with the polished ruby Bakelite stem. It is very well done. Give the finished pipe a look in the photos below. I can only tell you that it is much prettier in person than the photos capture. The dimensions of the pipe are Length: 5 inches, Height: 2 inches, Outside diameter of the bowl: 1 1/8 inches x 1 ¾ inches, Chamber diameter: 7/8 of an inch. The weight of the pipe is 39 grams/1.38oz. This is truly a great looking Meerschaum. Thanks for walking through the restoration with me as I worked over another beautiful pipe. This beauty has already been spoken for and is reserved for the next pipeman. I hope to send it out in the mail tomorrow. Thanks for your time.

Next on the table is a Blinged Out Meerschaum Bent Apple with a Ruby Bakelite Stem


Blog by Steve Laug

We finished up around the tree and our Christmas Breakfast so now there is a quiet time before we eat again. I decided that a snowy Christmas day in Vancouver demanded the right pipe to be worked on so I think I chose appropriately. We bought the pipe I chose at an auction from a fellow in Los Angeles, California, USA. Though it is not shiny white and new looking it is a meerschaum ball/apple/ornament with a gold rim cap and shank band that are quite blinged out and beautiful. The bowl had a thick cake and there was a light lava overflow on the rim. The gold coloured rim cap looked good underneath the lava and oils. The exterior of the bowl and shank was smooth and starting to develop some colouring on the shank and sides. The finish had a lot of scratches and some dark spots on the bottom side of the diamond shank near the band. The pipe did not have any stamping on the shank or band. The rim cap had some nicks and dents in it but they did not detract from the beauty of the pipe. The shank band was also scratched but not dented. The Bakelite (Redmanol) stem was in excellent condition with light tooth marks on the surface in front of the button. I expected the stem was screwed onto the shank but that would be revealed soon enough. Jeff took photos of the pipe before he started his cleanup work. Jeff captured the condition of the bowl and rim top with the next series of photos. You can see the work that is ahead of us in the photos. The cake is very thick and heavy. The rim looked like it might have some damage on the top and inner edge of the cap. The photos of the stem show the shape and the top and underside of the stem. It is dirty and there is some gummed stickiness on the underside where there must have been a price sticker. The tooth marks and chatter was very light on both sides. Jeff took some great photos of the sides of the bowl and heel showing what is underneath the developing patina and the scratches in the surface of the meerschaum. It will be interesting to see what happens as the pipe is cleaned and restored. He removed the stem from the shank. You can see the threaded tenon end in the shank of the pipe and the wide open airway in the stem. It looks to me that there is a push tenon in the shank and the threading was for anchoring it in the stem. I took it out of the box of pipes and looked it over. It was amazingly clean. Jeff carefully reamed it with a PipNet pipe reamer and cleaned up the reaming with a Savinelli Fitsall Pipe Knife. He scrubbed out the internals with alcohol, pipe cleaners and cotton swabs until the pipe was clean. He scrubbed the exterior of the bowl with Murphy’s Oil Soap and a tooth brush to remove the grime and grit on the meerschaum and the lava and oils on the rim top. The bowl looked very good. He scrubbed the stem with Soft Scrub to remove the grime and rinsed it off with warm water. It came out looking far better. Now it was time for me to do my work on the pipe. I took photos before I started my part of the work. I took some photos of the rim top and stem. The rim top is clean but you can see some of the dents in the gold cap. I am afraid that they will remain a permanent part of the pipe’s story. The bowl itself looks very clean. The close up photos of the stem shows that is it very clean and the tooth marks are visible.The way the stem lined up with the shank made me wonder about the tenon system that was used. From Jeff’s photos it looked like the threaded portion sticking out of the shank was part of a push tenon system. If that was true then I truly believe that someone had replace the original bone tenon on what I think is actually an older pipe with a new push tenon system. The stem has an orific opening on the end and it is definitely made of Bakelite. I unscrewed the stem from the shank and then pulled the tenon free from the shank end. It was indeed a push tenon. I took a photo of the bowl and stem to give a sense of the proportion of the pipe. It is a classic looking apple for sure.I polished the briar and the shank with micromesh sanding pads – dry sanding with 1500-12000 grit pads. I worked on the two dark spots on the underside of the shank and was able to determine they were not burn marks but rather spots that had taken on a dark patina.I figured that once I heated it to rewax they would look significantly different (Time will tell). I wiped the bowl down after each pad with a damp cloth. The meerschaum began to shine and the scratches were less intrusive. The photos tell the story!   Now it was time to wax the meerschaum bowl. I melted a block of beeswax and dipped the pipe I in the mix and painted the wax with a brush into the hard to reach spots on the shank corners. I heavily coated the bowl with the liquid wax. I let the wax harden dry then I put a cork in the bowl to provide a handle while I heated it with a heat gun. As the wax melted I wiped it off with a paper towel. I let the excess drip back into the container. The bowl began to really take on some patina and the dark spots changed in colour. I buffed it with a soft cloth and took pictures of the pipe at this point in the process of the restoration. The wax did its magic and the patina was rich and deep. Even the scratches looked better to me! I set the bowl aside and turned to deal with the stem. I polished the Bakelite stem with micromesh sanding pads – dry sanding with 1500-12000 grit sanding pads. I wiped it down after each sanding pad with a cloth containing some Obsidian Oil. I finished polishing it with Before & After Pipe Stem Polish – both Fine and Extra Fine and buffed it off with a cotton cloth. I gave it a final coat of obsidian Oil and set it aside to dry. It is a beautiful looking ruby coloured stem. This beautiful no name Bent Apple shaped Meerschaum with a Bakelite stem was another fun pipe to work on and I really was looking forward to seeing it come back together again. With the grime and debris gone from the finish it was a beauty and after the waxing with Beeswax the patina was quite nice. I put the stem back on the bowl and buffed the pipe with Blue Diamond on the buffing wheel.  I buffing it with a clean buffing pad on the buffer to raise the shine. I hand buffed the pipe with a microfiber cloth to deepen the shine. The rich polished meerschaum on the bowl looks really good with the polished ruby Bakelite stem. It is very well done. Give the finished pipe a look in the photos below. I can only tell you that it is much prettier in person than the photos capture. The dimensions of the pipe are Length: 4 ½ inches, Height: 1 ¾ inches, Outside diameter of the bowl: 1 inch, Chamber diameter: ¾ of an inch. The weight of the pipe is 35grams/1.23oz. This is truly a great looking blinged out Meerschaum Bent Apple. Thanks for walking through the restoration with me as I worked over another beautiful pipe. I will be adding it to rebornpipes store in the Ceramic and Meerschaum Pipes section if are interested in adding it to you collection. Let me know by email or message. Thanks for your time.

Restoring a Unique Bakelite Dublin with a Removable Bowl


Blog by Steve Laug

This next pipe on the table is a really unique looking piece. It is like a Bakelite version of a Falcon Metal pipe but I think it is older than them. The pipe had a yellow Bakelite single unit base and stem with a metal decorative ring and a brown Bakelite bowl. There is no mark or stamp any where on the base or on the bowl to identify the maker of the pipe. Jeff bought it from an antique store on September 09, 2017 in Salt Lake City, Utah, USA. The pipe had been well smoked. There was a light cake in the bowl and a bit of lava on the rim top. The base was dirty inside and there were light tooth marks on the top and underside of the mouthpiece. Jeff took some photos of the pipe before he started his clean up work. Jeff took some closer photos of the bowl and the sides of the stem. The rim top looks to be in good condition. The inside of the bowl has a thin cake in the bottom half of the bowl. The rim top is dirty. The stem/base is clean but has some light tooth marks on both sides. He took a picture of the base of the bowl and sides of the bowl. It is a very nice looking Bakelite bowl and base. There was some buildup and sludge on the bottom of the bowl and the base. The brass ring was loose and worn looking. It is not clear to me if the brass ring is meant to be on the base or on the bowl.Jeff unscrewed the bowl from the base and what a collection of tars and oils had collected in hollow of the base and on the surface where the bowl sat when screwed in. He also took photos of the ring. The threaded base of the bowl was filthy with tars, oils and shards of tobacco on the surface. This unique Bakelite base and bowl is an incredibly light and almost indestructible pipe. It is the kind of pipe that can be put in the pocket and carried along. The filthy pipe had cleaned up well. Jeff had reamed the bowl with a Savinelli Fitsall Pipe Knife to remove the light cake. He then scrubbed the outside of the bowl and base with undiluted Murphy’s Oil Soap and rinsed it off. He cleaned the inside of the shank and the airway in the shank and stem with alcohol, cotton swabs, and pipe cleaners. The Bakelite cleaned up remarkably well. The grain in the bowl portion was very nice. The gold base ring was thin and clean and looked very good. The base and stem is Bakelite as is the bowl. There are some faint tooth marks and chatter. It has an orific button (round air hole) on the end of the button. I took some photos of the pipe to show the condition when I received it. It was an interesting piece of pipe history from someone’s collection and it had been well smoked. I took close up photos of the bowl and rim top and the stem to show their condition. You can see the clean bowl. There were some light nicks and scratches on the Bakelite rim top that would need to be polished out but it was nice looking. The stem and base looks really good. There was some darkening on the end of the stem and the bottom of the base but it was very clean. There was some light tooth chatter on both sides.I took the pipe apart and took photos of the parts to show how it all worked. The base had tobacco stains and tars but was very clean. Have a look at the parts. I polished the yellow Bakelite base and mouthpiece with micromesh sanding pads – dry sanding it with 1500-12000 grit sanding pads. I wiped it down after each pad with a cloth impregnated with Obsidian Oil. I worked some Before & After Restoration Balm into the surface of the base and stem. I find that it works well to clean, preserve and protect Bakelite as much as it does briar. I like the way it works and the way the base looks when it is polished. I spread some white all purpose glue on the ledge on the base to anchor the brass band on the top. I used a dental spatula to spread the glue around the surface of the Bakelite. I pressed the band in place on the base and screwed the bowl on top to press it down into the glue until the band cured.I polished out the scratches and nicks on the rim top with micromesh sanding pads. I worked my way through 1500-12000 grit pads and wiped the top and bowl down with Obsidian Oil on a cloth to protect the surface after each pad. I worked some Before & After Restoration Balm into the surface of the Bakelite bowl. I find that it works well to clean, preserve and protect Bakelite as much as it does briar. I like the way it works and the way the base looks when it is polished.I really enjoyed refurbishing this unique Bakelite Base and removable Bowl because I love the final touches that make it sing. I put the bowl and stem back together to have a look at the whole with all it of it polished. I carefully buffed the bowl and stem with Blue Diamond on the wheel. I gave it several coats of carnauba wax and buffed the pipe with a clean buffing pad to raise the shine. I hand buffed it with a microfiber cloth to deepen the shine. It is fun to see what the polished bowl looks like with the silver plated band and the polished yellow Bakelite base and stem. This unique Bakelite Dublin System is light weight and it is clean and ready load up with a favourite tobacco. Have a look at it in the photos below. As noted above, Its measurements are Length: 4 ½ inches, Height: 1 ¾ inches, Outside diameter of the bowl: 1 ¼ inch, Diameter of the chamber: 1 inch. The weight of the pipe is 26 grams/.92 oz. I will be putting it on the rebornpipes store in the American (USA) Pipemakers section. If you would like to add it to your collection let me know by message or email. Thanks to each of you who are reading this blog. Remember we are not pipe owners; we are pipemen and women who hold our pipes in trust until they pass on into the trust of the next generation. 

A Rare Find – a CPF (Colossus Pipe Factory) Panel Dublin


Blog by Steve Laug

The next pipe on the worktable is another interesting piece of pipe history that comes from the bag of old pipes that I have been working on intermittently. This one is an interesting panel Dublin with a round shank. The bowl was a mess both inside and out. It must have been a great smoking pipe. The bowl had a thick cake with a thick overflow of lava on the rim top and edges. The finish on the briar was a mess. The front of the bowl had a lot of flaws that ran along the cross grain on the bowl. The fills in the flaws had fallen out and the grain was open. The band was stamped in gold and read Genuine French Briar in an oval with French in the centre of the stamp. The shank was banded with a silver plated band that was stamped C.P.F. in an oval with three false hallmarks above that stamp. The stem was vulcanite that had oxidized and had tooth marks on the top and underside near the button. It has a push tenon and an orific button on the end. The fit in the shank was very tight and it did not fit tightly against the band face. Jeff took photos of the pipe before he started his clean up. He took photos of the rim top and the stem to show the condition of both. The rim top and bowl had a thick cake and overflowing lava coat. The stem showed the oxidation that was deep in the vulcanite and the tooth marks and chatter on both sides ahead of the button.Jeff took some photos of the flaws in the front panel of the bowl. You can see that they follow the grain across the bowl. They go across the bowl and evenly spaced down the bowl front. There are also some paint spots on the front of the bowl.He took photos of the stamping on the left side of the shank and the band on the shank end. It is clear and readable on both of them.A short description would be that it is a heavily smoked Panel Dublin with a silver plated band and vulcanite push stem. It is stamped on the left side of the shank and reads Genuine [arched over] French [arched over] Briar all in an ovals shape. The band on the shank end is stamped with three faux hallmarks that I have seen on many C.P.F. pipes [over] C.P.F. in an oval. I have a collection of C.P.F. pipes here that I have worked to build up over the years in all different sizes and shapes as well as a variety of materials. This old Panel pipe will fit well into that collection. I wrote a blog a few years ago on the brand that gives a clear history and defines the meaning of the C.P.F. stamp. Here is the link to the blog and a pertinent quote that I am including below.

(https://rebornpipes.com/2013/04/14/some-reflection-on-the-historical-background-on-cpf-pipes/).

From my research I believe that we can definitively assert that the C.P.F. logo stands for Colossus Pipe Factory. The brand was purchased by KB & B sometime between 1884 and 1898 and that it continued until 1915. That time frame gives help in dating some of the older CPF pipes you or I might find. It can be said that prior to the dual stamping it is fairly certain that the pipe is pre-1884 to 1898. After the dual stamping it can be placed post 1898 until the closure of the brand line in 1915. CPF made beautiful pipes. I believe Sam Goldberger was correct in his assertion of the potential carvers that made the pipes being of European training and the classic shapes and well aged briar. That coincides with all the CPF pipes that I have come across.

This well shaped hard smoked C.P.F. is a real beauty. The rim top is worn but clean now that Jeff has done his magic clean up. He reamed the bowl with a PipNet pipe reamer and cleaned up the reaming with a Savinelli Fitsall Pipe Knife. He scrubbed the outside of the bowl with undiluted Murphy’s Oil Soap and rinsed it off. He scrubbed out the inside of the shank and the airway in the shank and stem with alcohol, cotton swabs, and pipe cleaners. The finish is dull and lifeless but there is some great grain poking through the dry briar. The gold stamping is faint but readable. The silver plated band is lightly corroded on the left side near the stem. The marking on the band is readable. The stem is vulcanite. There are some faint tooth marks and chatter. It has an orific button (round airhole) on the end of the button. I took some photos of the pipe to show the condition when we received it. It was dusty, dirty and had some grime worked into the surface of the briar from sitting unused in someone’s collection. I took close up photos of the bowl and rim top and the stem to show their condition. You can see the clean bowl and the heavily damaged inner edge of the rim. The rim top has a lot of scratches and marks in it. The stem has some oxidation remaining as well as a misfit of the tenon against shank band.I took a photo of the stamping on the left side of the shank. You can see that it is faint but still was readable.I removed the stem from the shank and took a photo of the parts to give a sense of the beautiful proportions of this nice little pipe. I think it will be quite stunning once it is restored.I took a photo of the flaws in the surface of the bowl front. I filled them in with clear CA glue to smooth out the surface. Once the repairs cured I sanded them smooth with a folded piece of 220 grit sandpaper. The surface looked much better once the repair was blended in. With the flaws repaired I addressed the faded stamping on the shank side. I worked in some Rub’n Buff Antique Gold into the stamping with a tooth pick. I buffed off the excess gold with a soft cloth.I polished the briar with micromesh sanding pads and dry sanded with 1500-12000 grit pads. I wiped the bowl down with a damp cloth after each pad to remove the sanding debris and dust. By the end the bowl was taking on a natural shine and the grain really stood out. I rubbed the bowl and shank down with Before & After Restoration Balm. I worked it into the surface of the bowl sides and shank with my fingertips to clean, enliven and protect the briar. I let the balm sit for 10 minutes, then buffed with a cotton cloth to raise the shine. The Balm did its magic and the grain stood out on the briar. I set the bowl aside and turned to deal with the stem. I scrubbed it with Soft Scrub to break down the oxidation that was deep in the vulcanite. I was able to remove a large portion of it that way. I then sanded it with 220 grit sandpaper to remove more. I started polishing it with 400 grit wet dry sandpaper. I polished out the scratches and more of the oxidation in the surface of the vulcanite with micromesh sanding pads – 1500-12000 grit pads. I wiped it down with Obsidian Oil after each pad. I used Before & After Pipe Polish – both Fine and Extra Fine to further polish the stem. I gave it a final coat of Obsidian Oil and set it aside to dry. I really enjoyed refurbishing this old C.P.F. French Briar Panel Dublin because I love the final touches that make it sing. I put the bowl and stem back together to have a look at the whole with all it of it polished. I carefully buffed the bowl and stem with Blue Diamond on the wheel. I gave it several coats of carnauba wax and buffed the pipe with a clean buffing pad to raise the shine. I hand buffed it with a microfiber cloth to deepen the shine. It is fun to see what the polished bowl looks like with the silver plated band and the polished black vulcanite stem. This richly finished C.P.F. Dublin is light weight and it is clean and ready load up with my favourite tobacco. Have a look at it in the photos below. As noted above, Its measurements are Length: 5 ½ inches, Height: 1 ¾ inches, Outside diameter of the bowl: 1 ¼ inch x 1 ¼ inch, Diameter of the chamber: ¾ of an inch. The weight of the pipe is 36 grams/1.27 oz. This is one will be joining other C.P.F. pipes in my personal collection of the brand as it is a unique addition. Thanks to each of you who are reading this blog. Remember we are not pipe owners; we are pipemen and women who hold our pipes in trust until they pass on into the trust of the next generation.