Tag Archives: Dr. Grabow

Restoring a Dr. Grabow Westbrook 42


Blog by Steve Laug

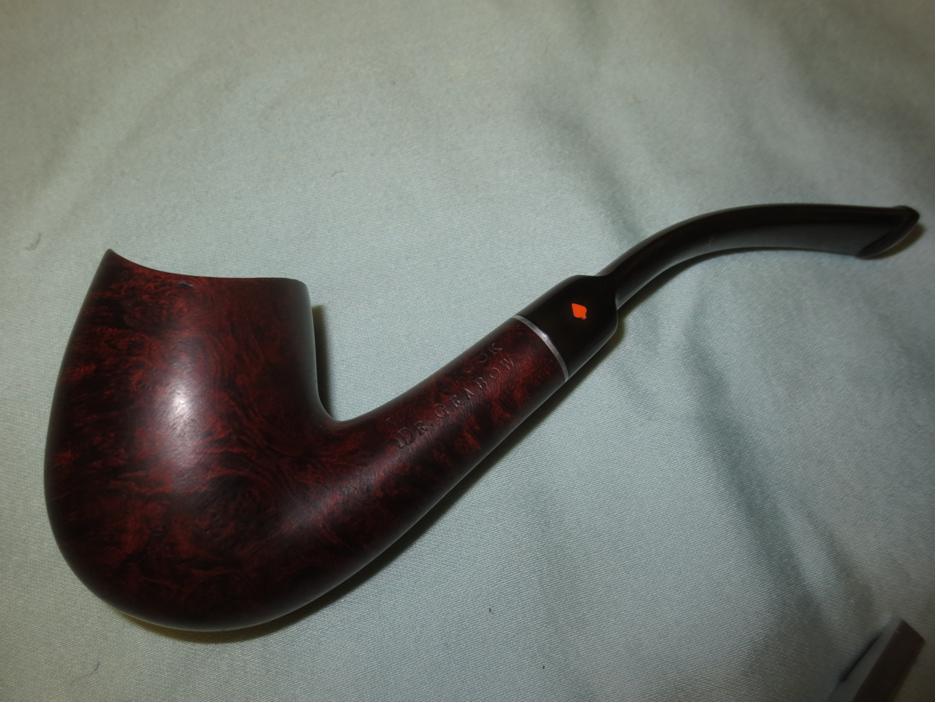
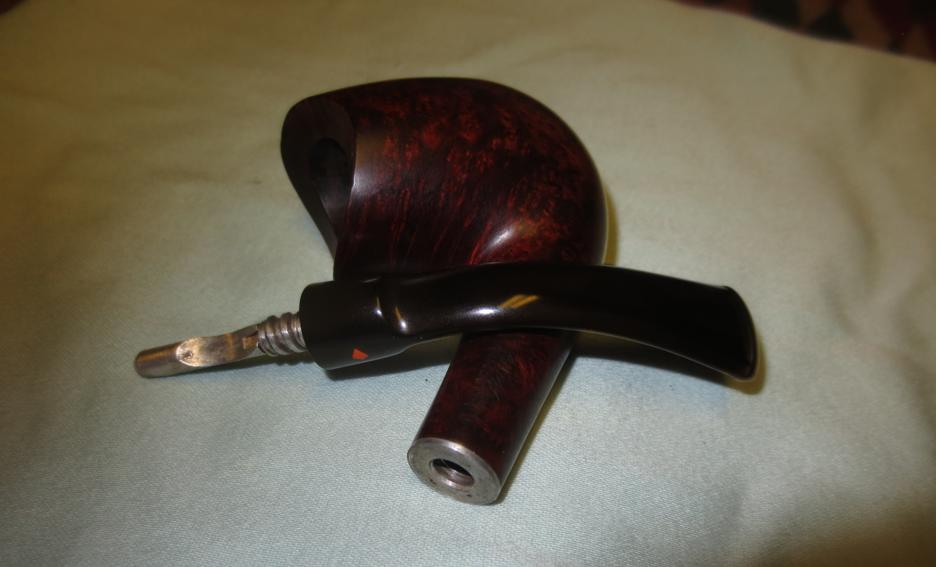
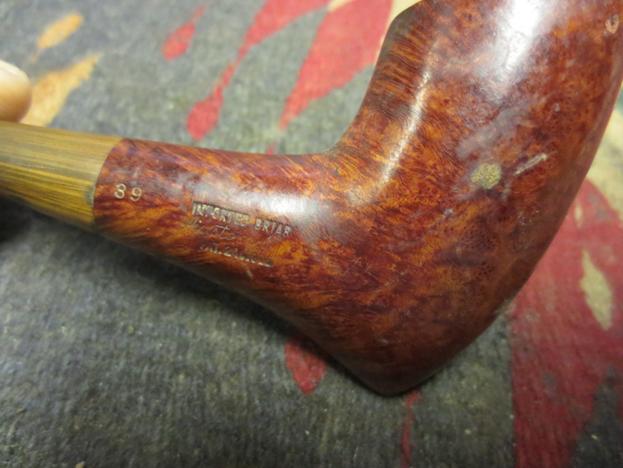
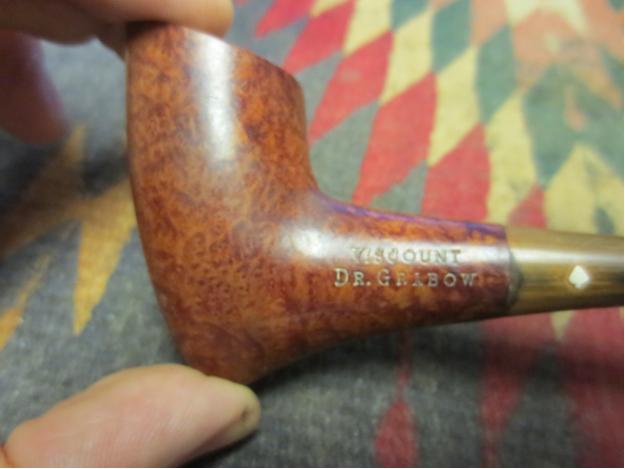
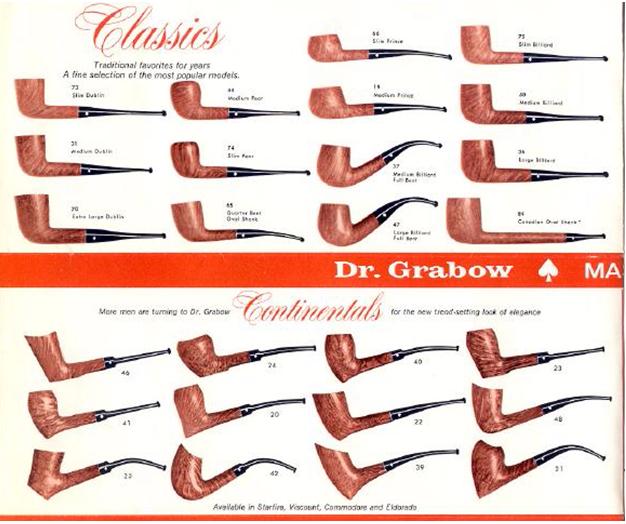
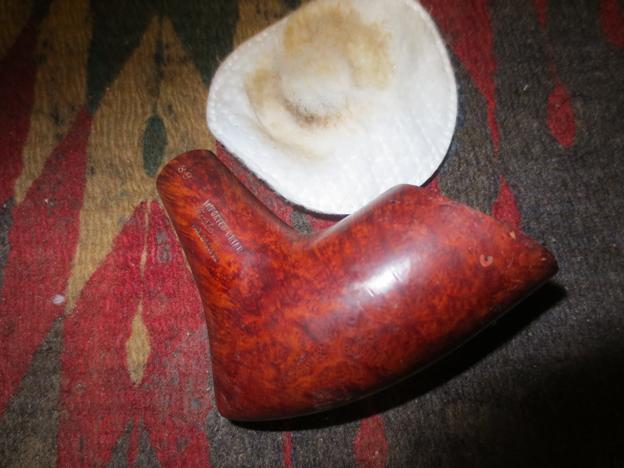
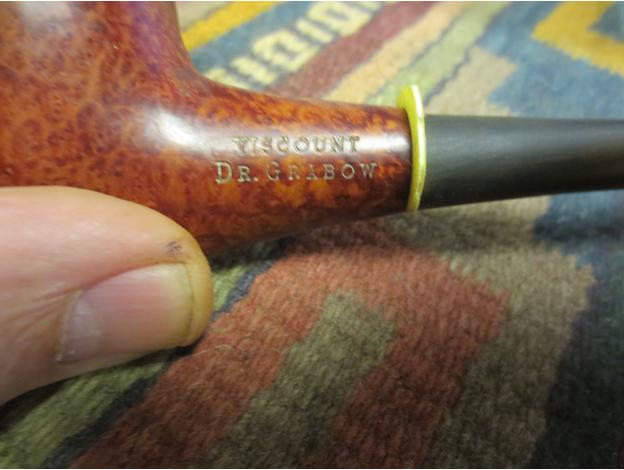
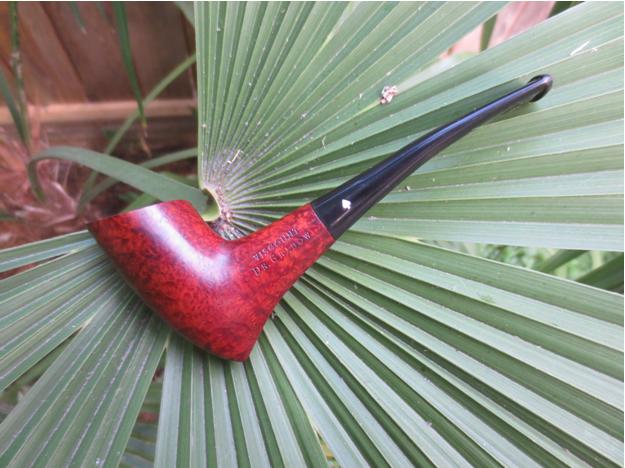
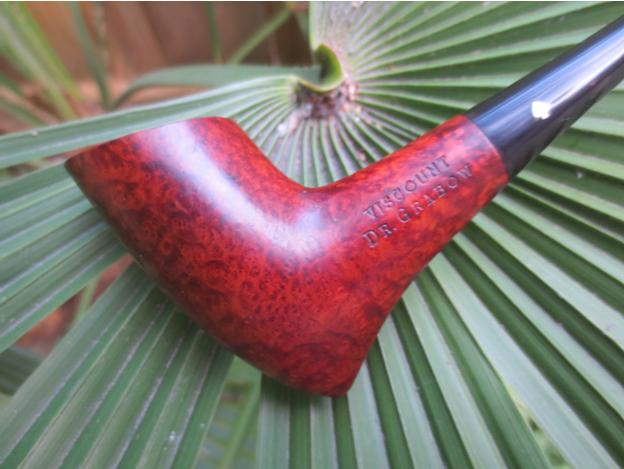
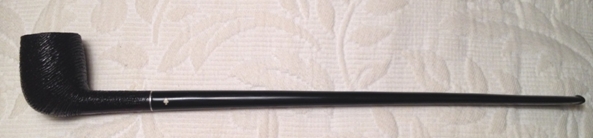
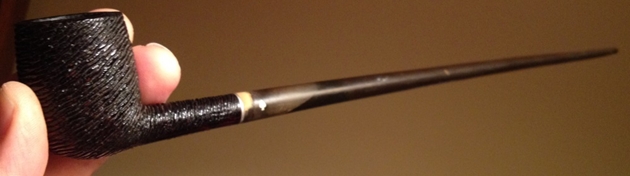
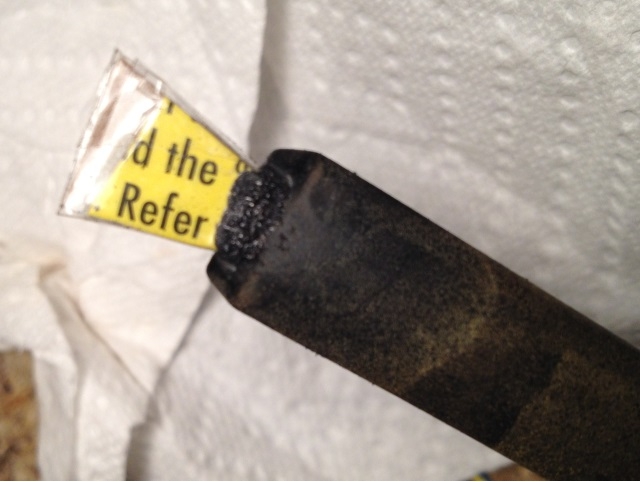
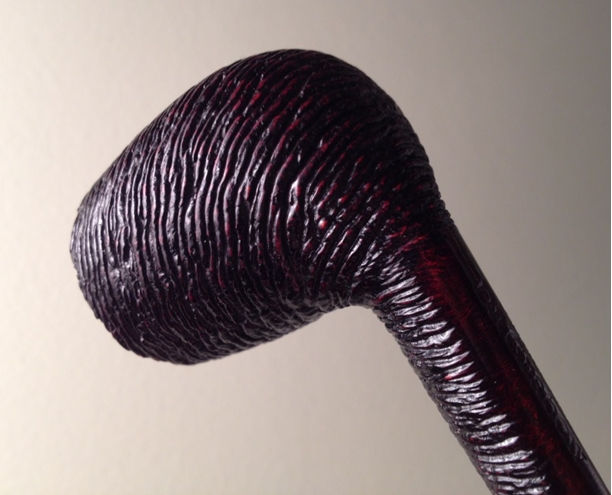
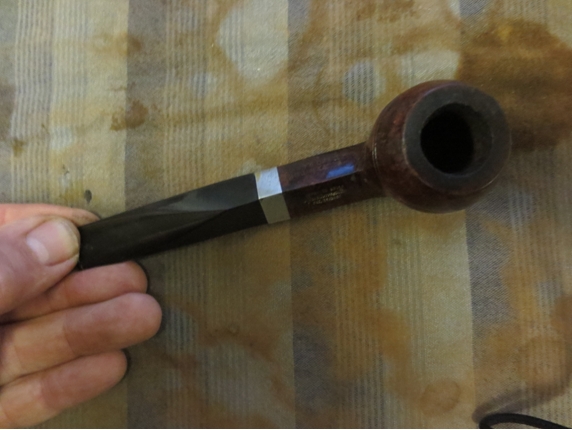
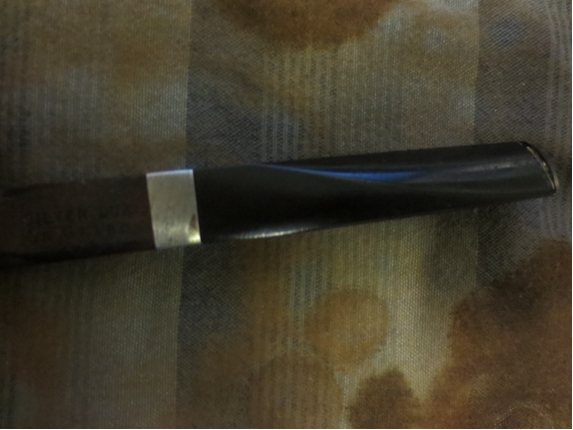
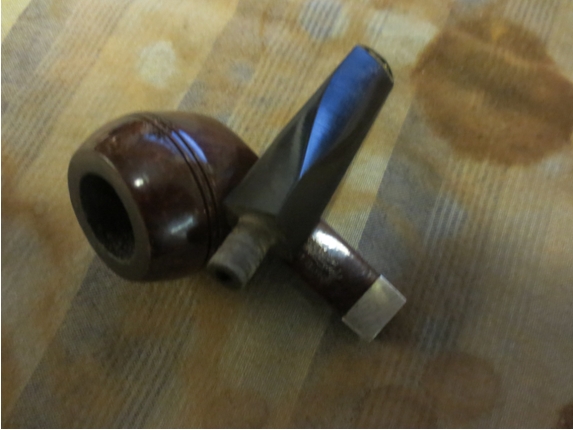
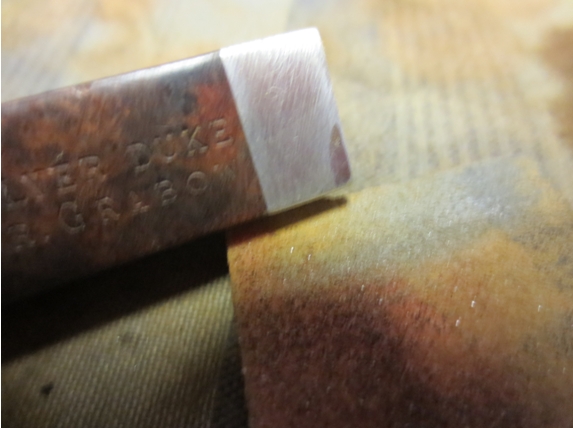
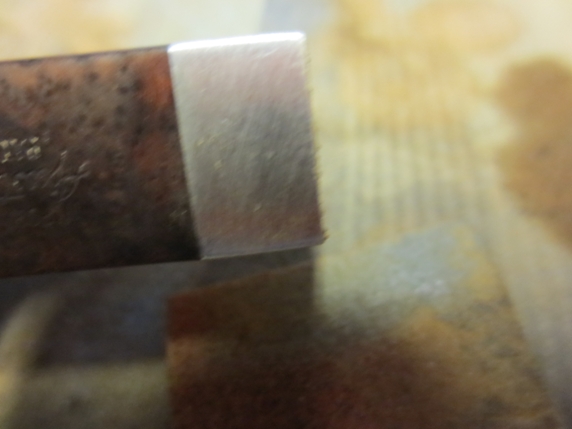
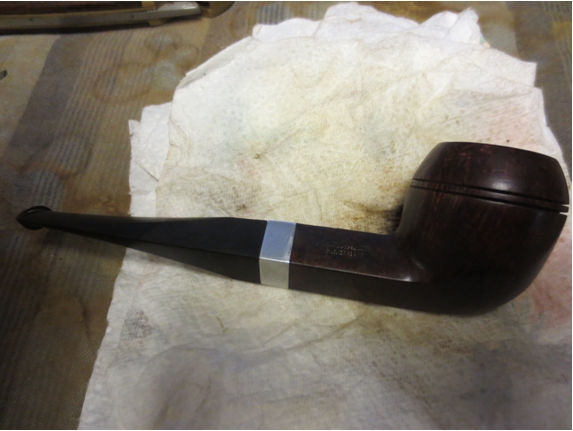
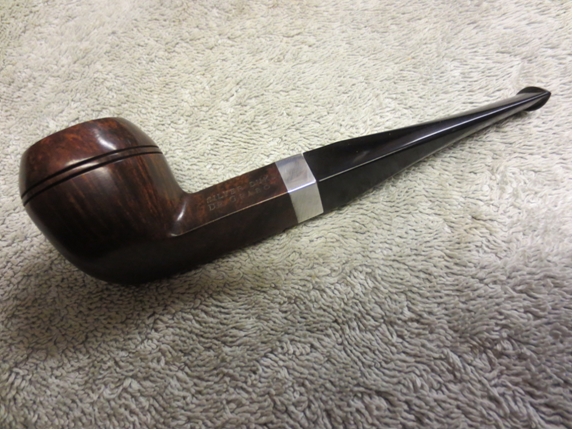
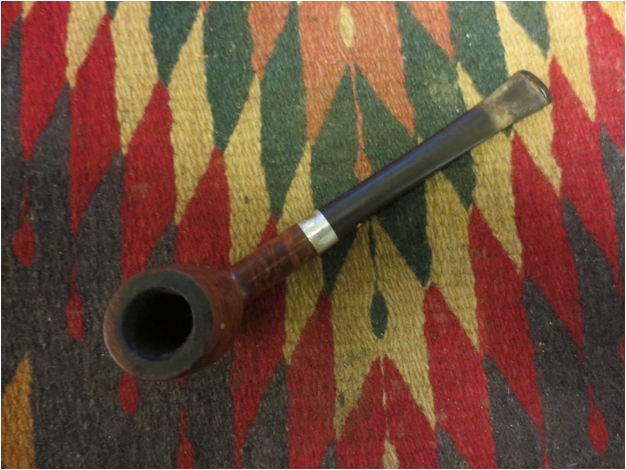
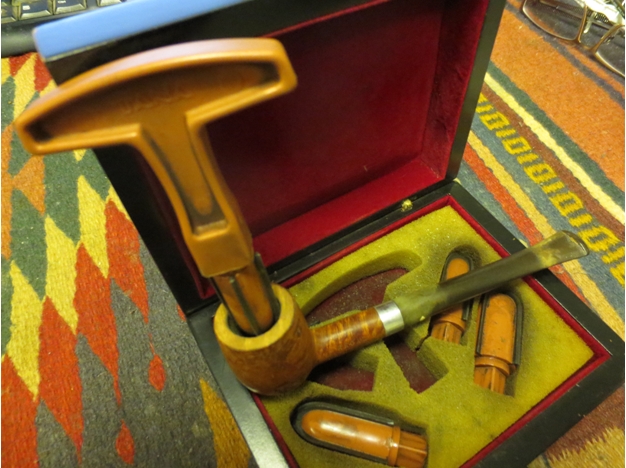
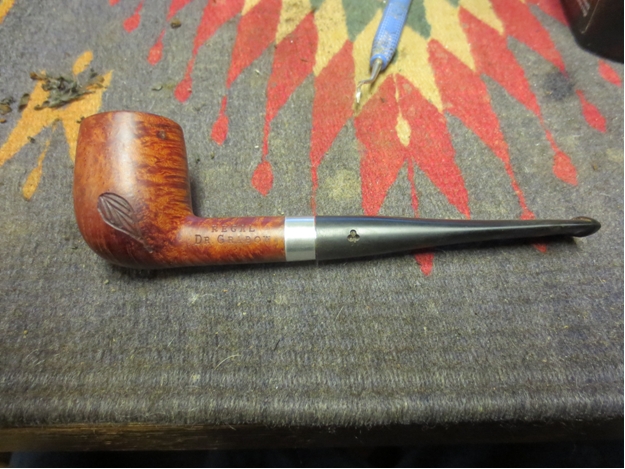
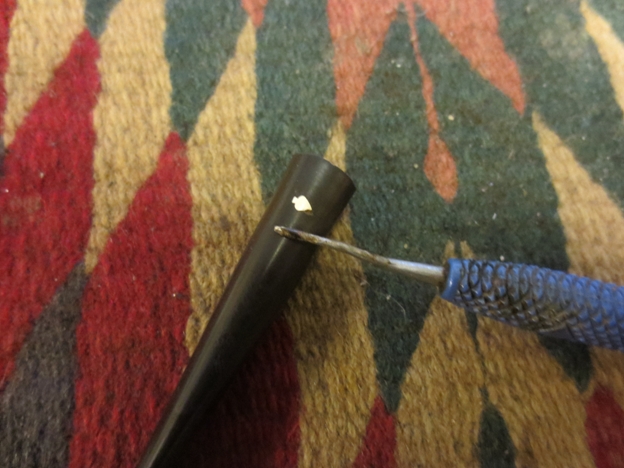
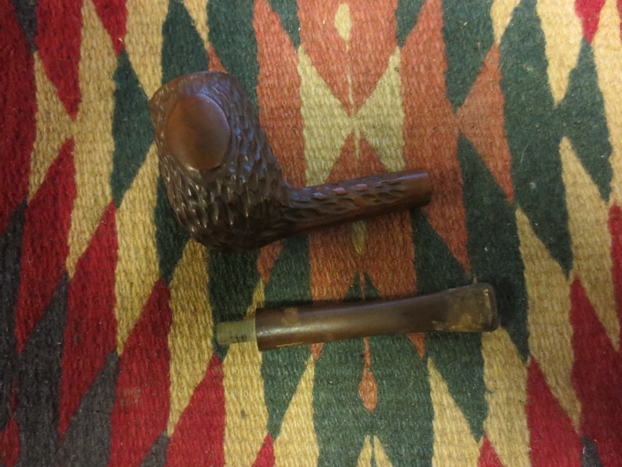
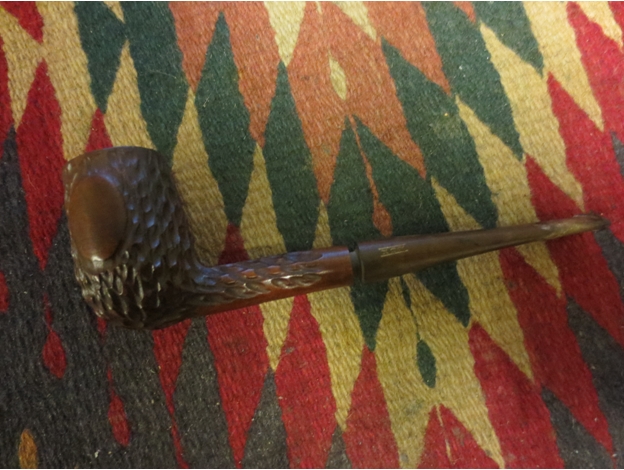
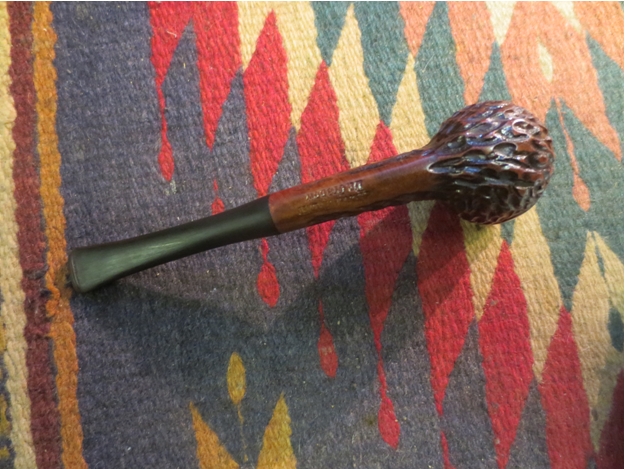
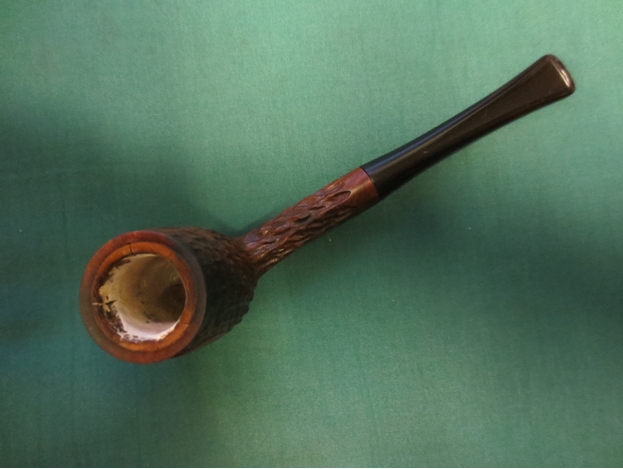
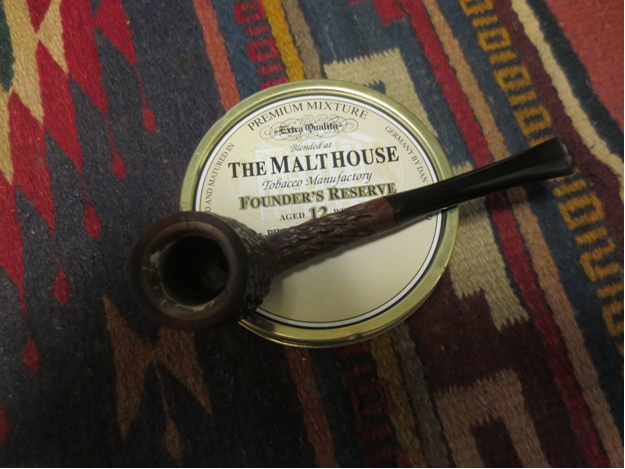
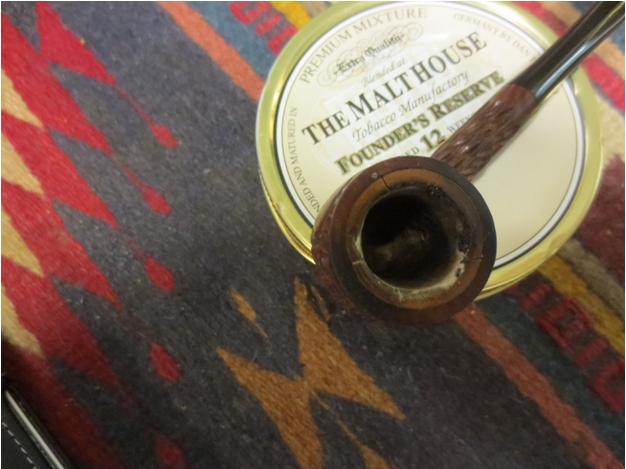
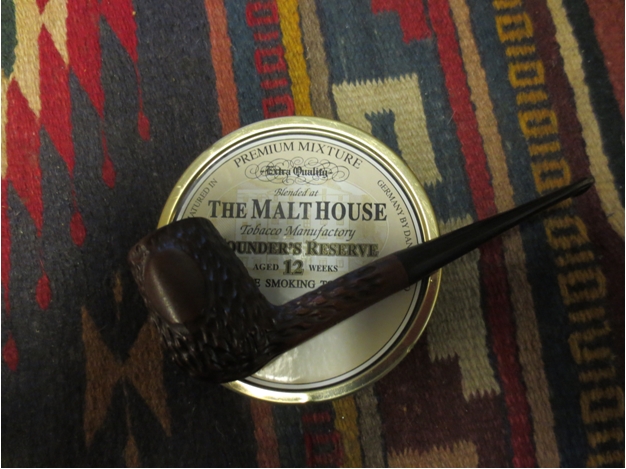
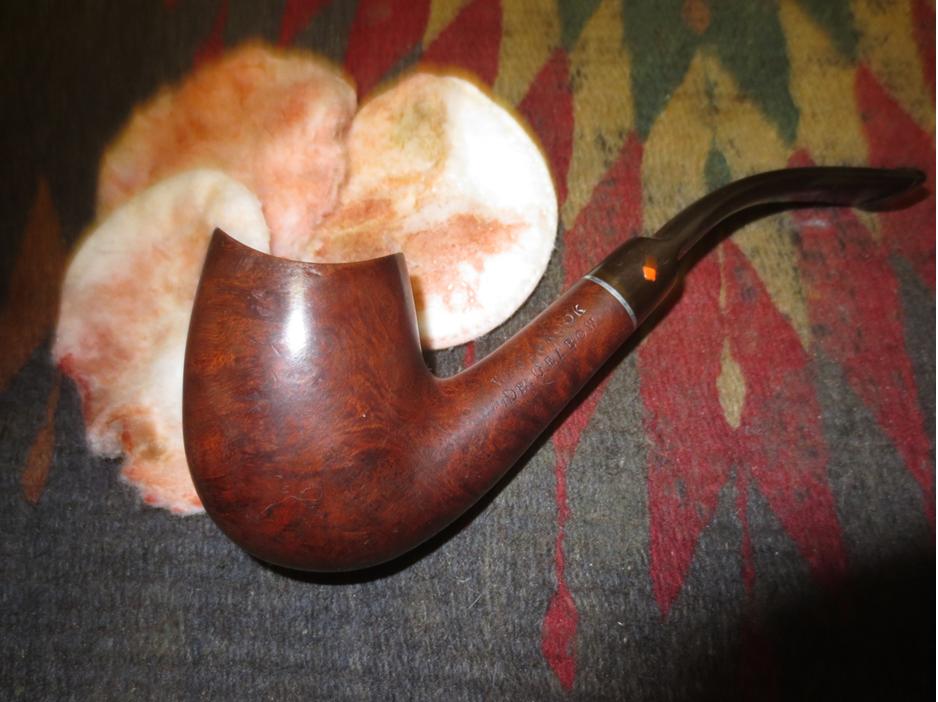
In a box of pipes I was gifted there was a pipe stamped WESTBROOK over Dr. Grabow on the left side of the shank. On the right side it is stamped Imported Briar over Adjustomatic over PAT. 2181833. I did some searching on the web and found that it was a shape number 42. I found plenty of photos of wire carved Westbrook 42s but only one of a smooth alongside of the wire carved. This pair was pictured on the Dr. Grabow Collectors Forum and belongs to Troy Wilburn. Mine is similar to the smooth one but the look of the stem is more of a true saddle like the wire carved one.Doc1 
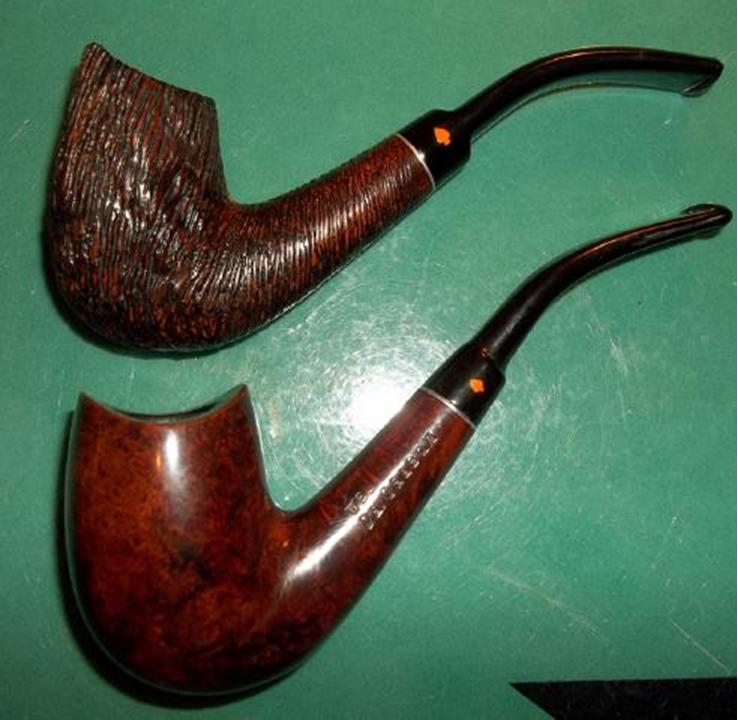
The grain on it was beautiful under the peeling varnish finish. There was a lot of birdseye and swirls with some mixed flame and straight grain. There were small nicks on the left side near the rim and on the front edge of the rim. The stem was oxidized but otherwise clean. The internals were pretty clean. The bowl had some slight carbon build up. The stinger apparatus was missing but I have one thanks to Troy that will fit perfect.Doc2

Doc3

Doc4

Doc5

Doc6 
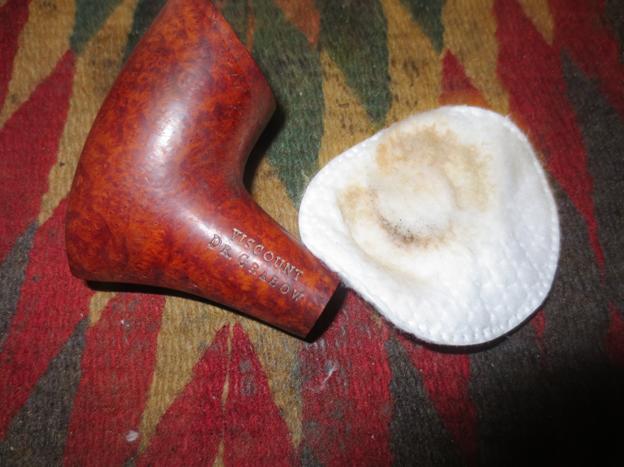
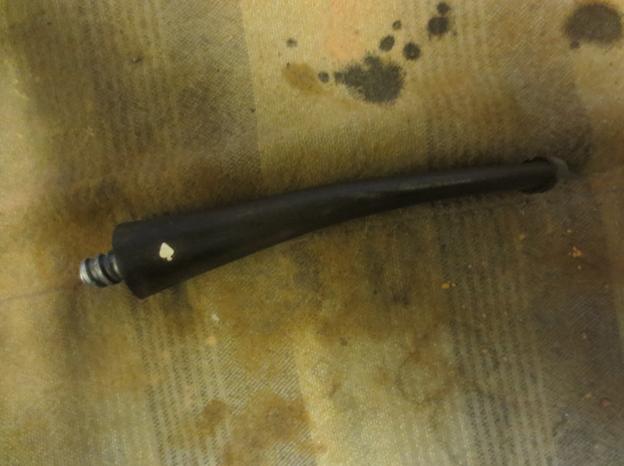
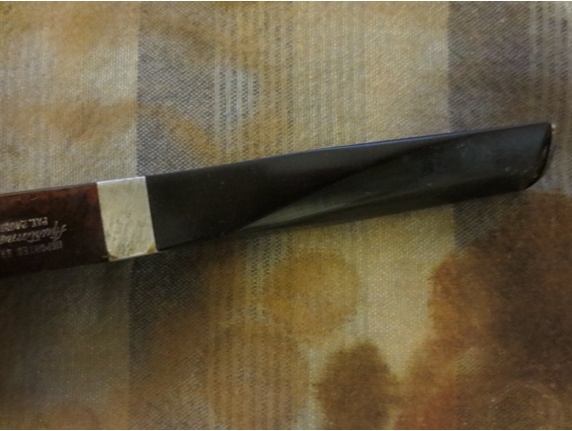
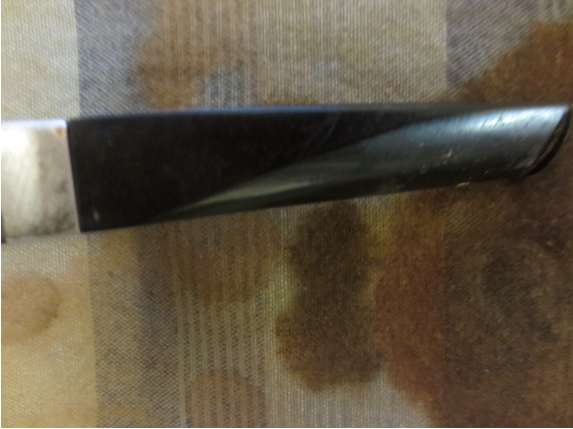
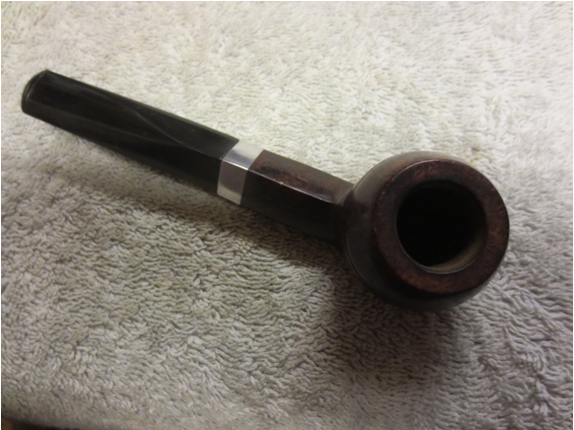
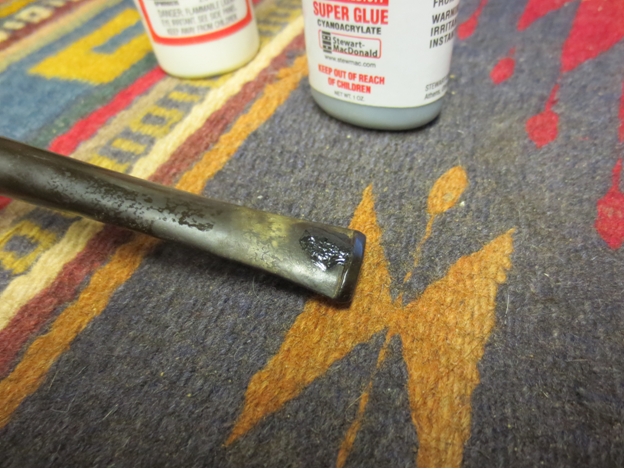
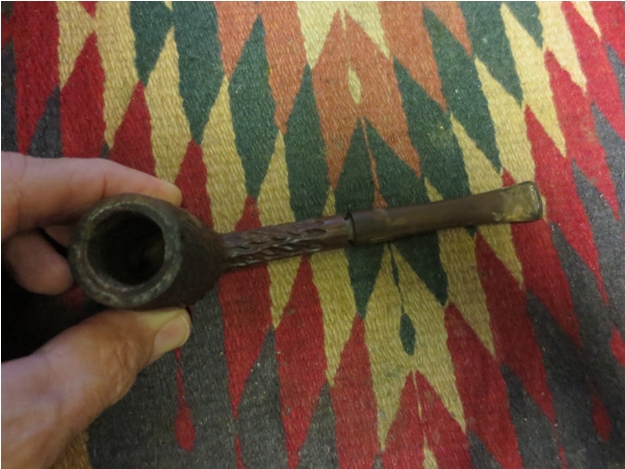
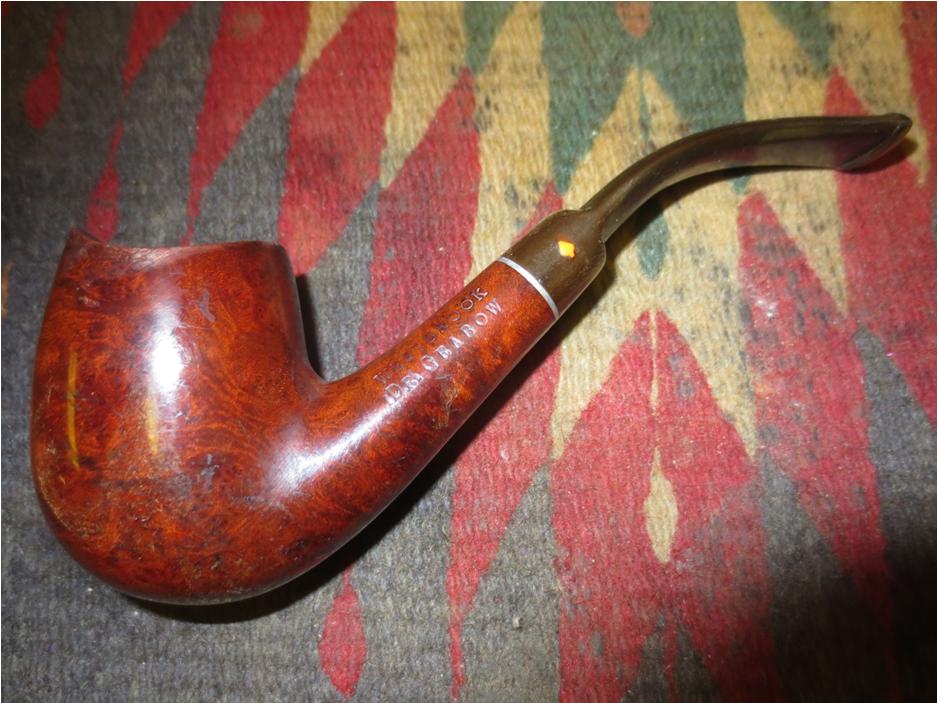
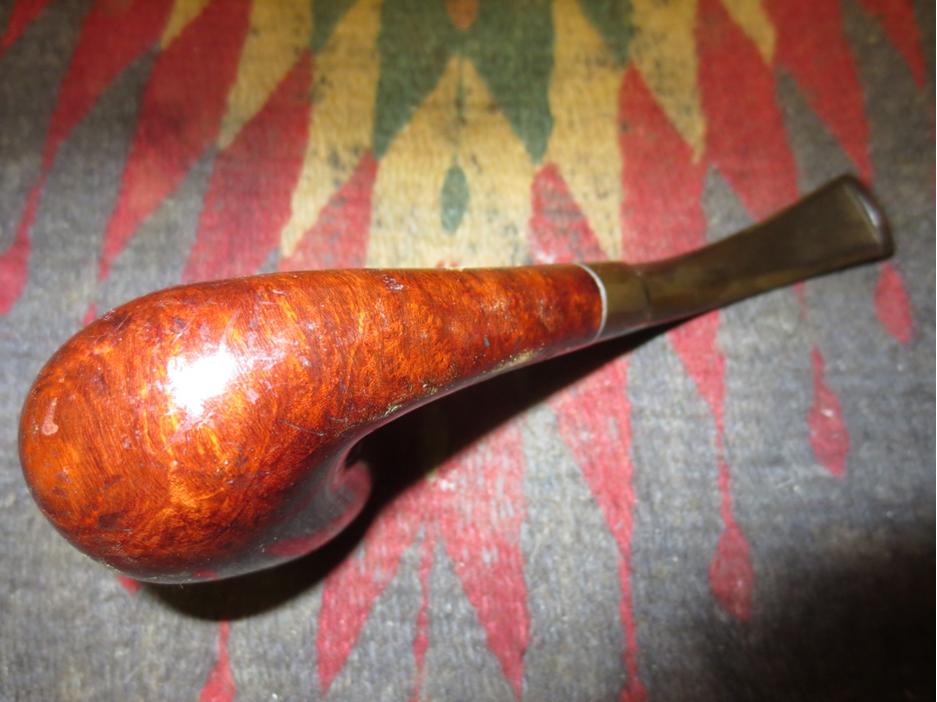
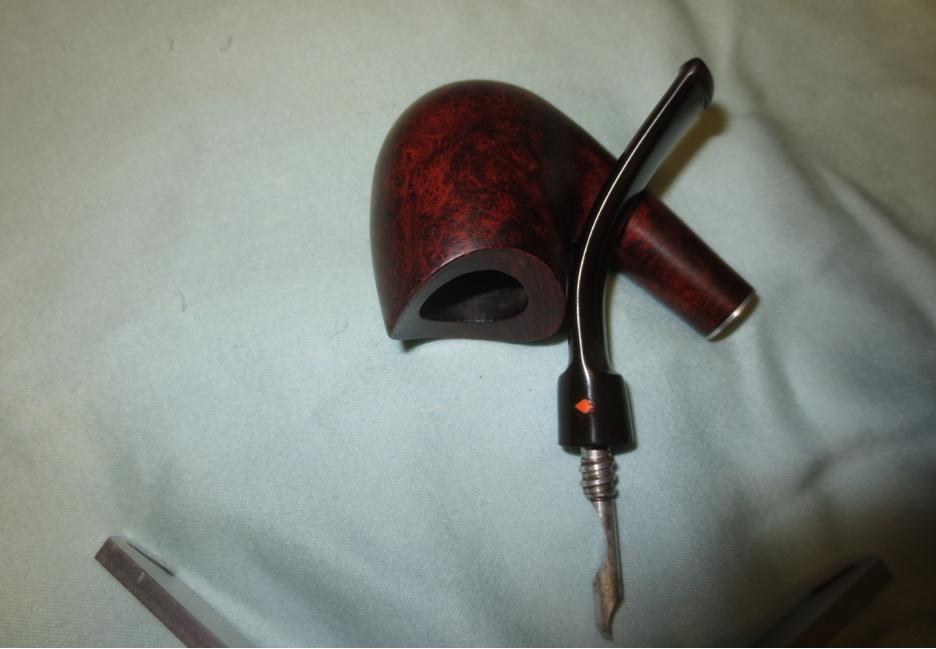
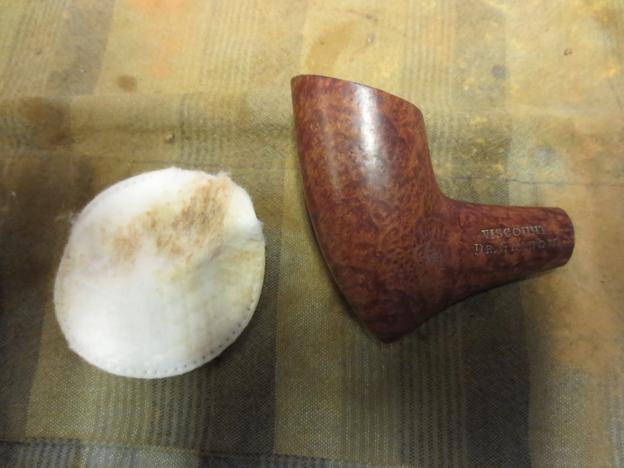
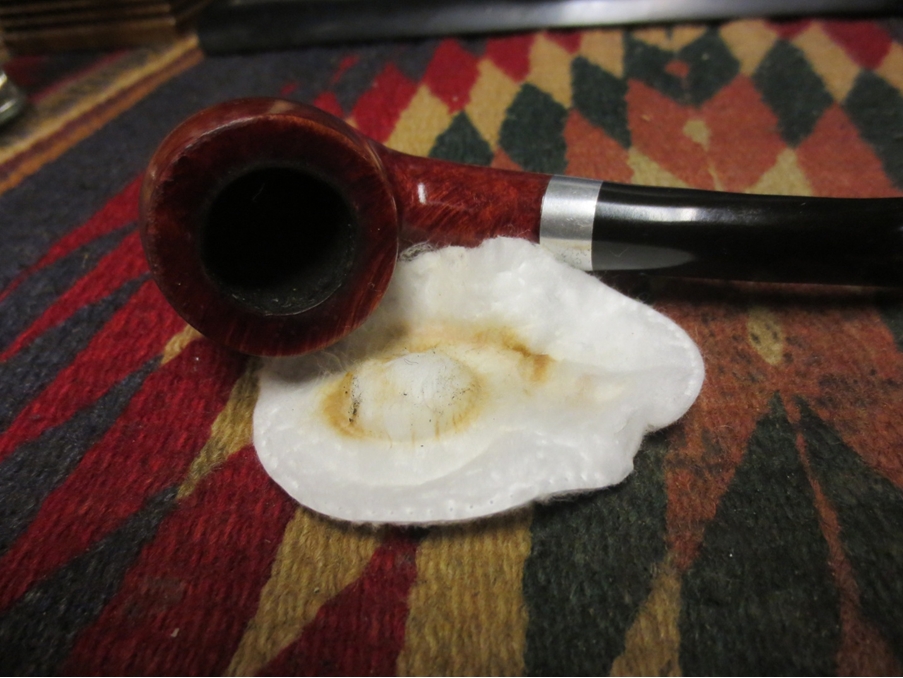
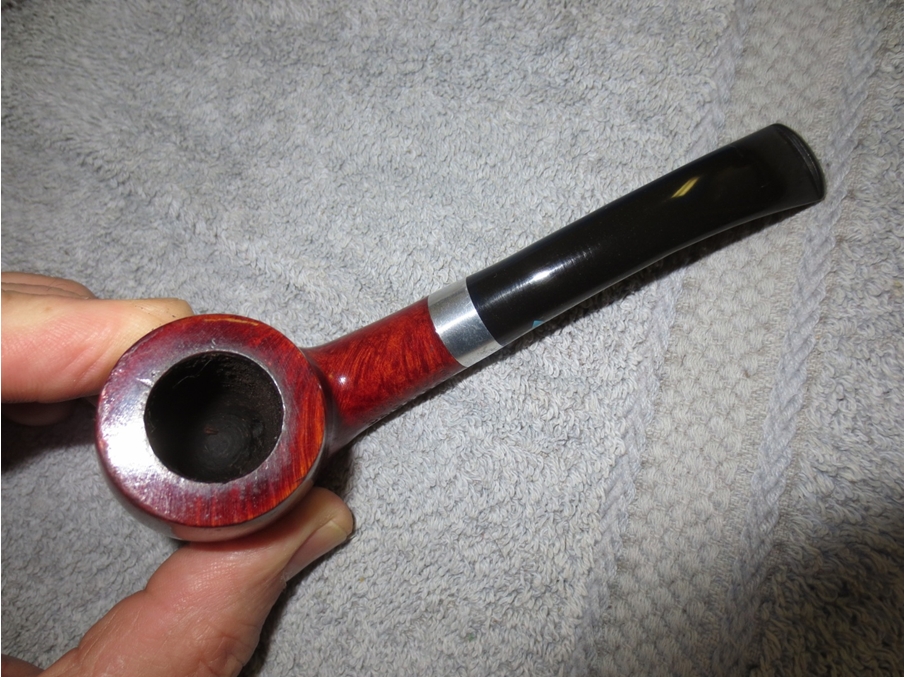
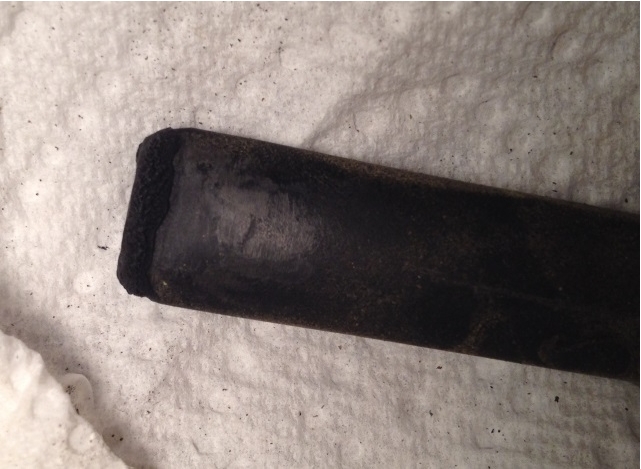
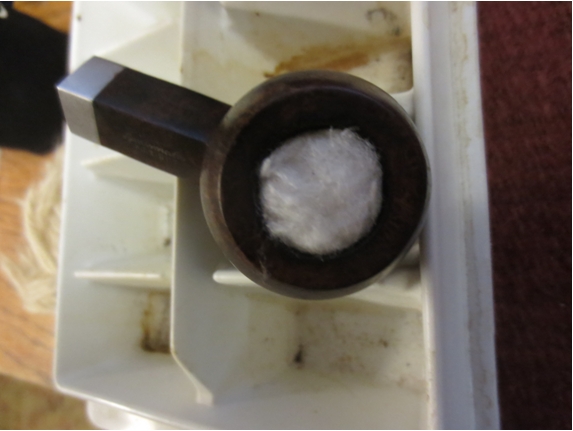
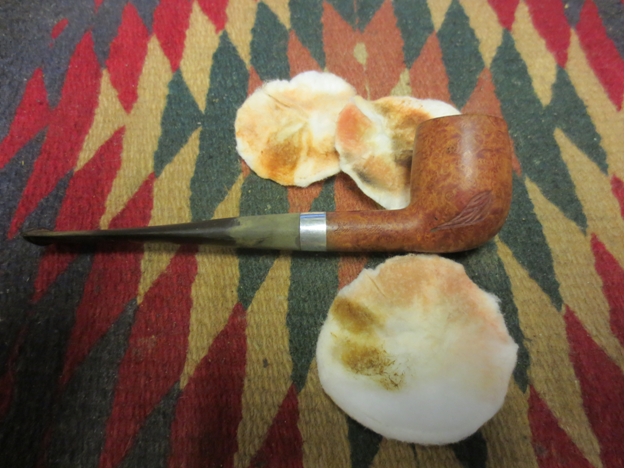
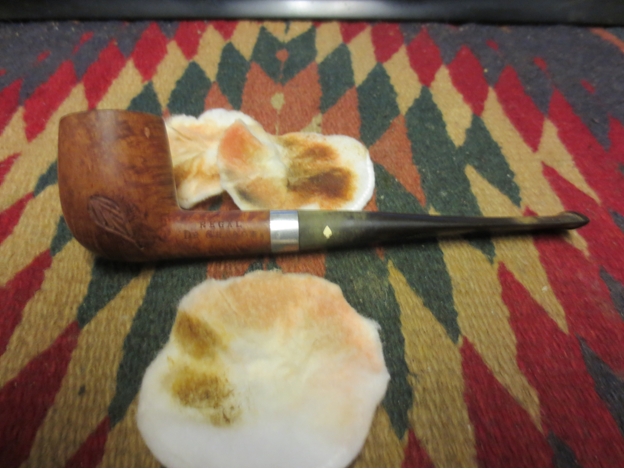
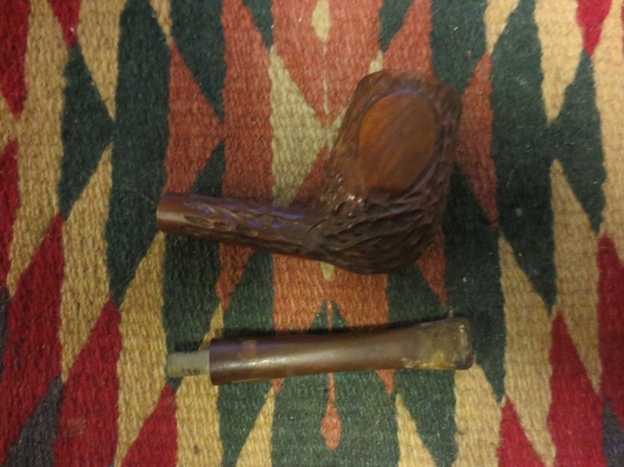
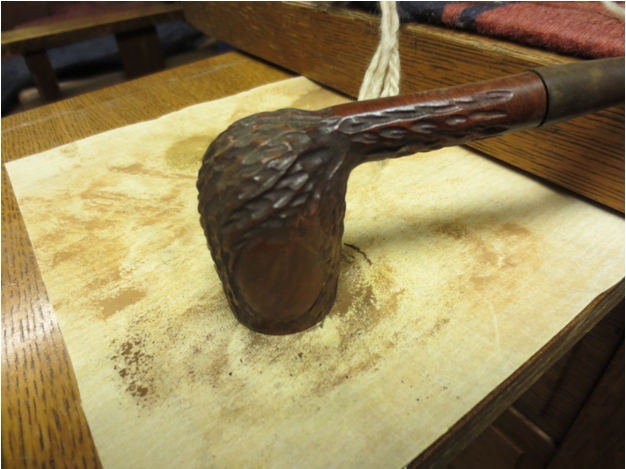
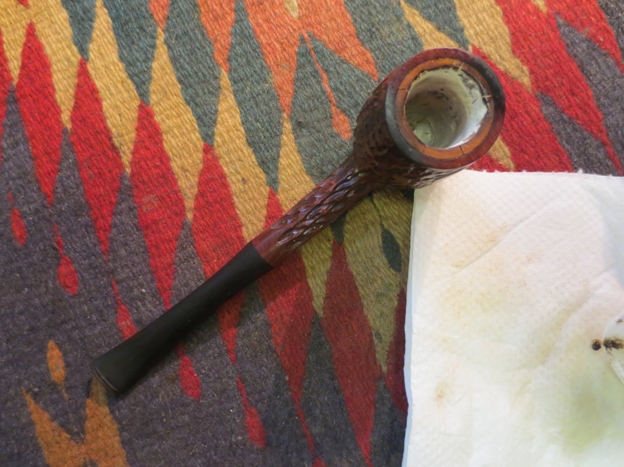
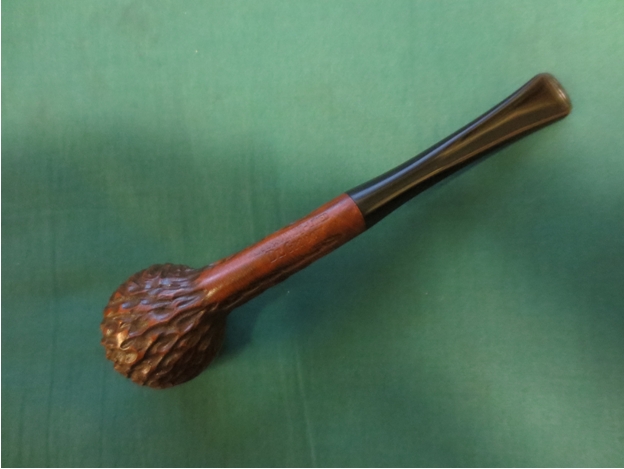
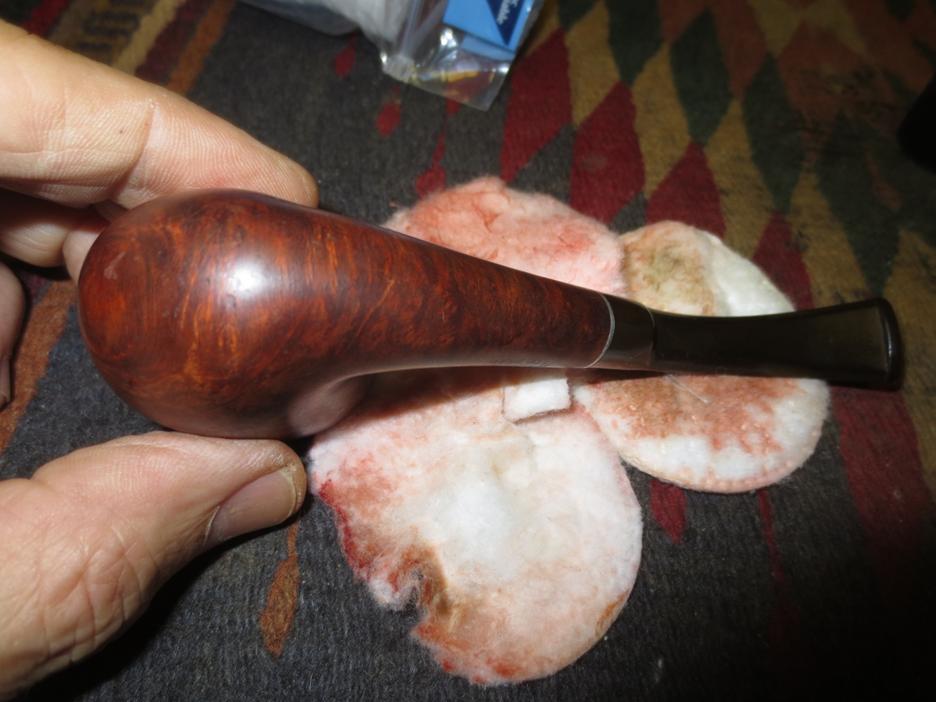
I scrubbed the bowl with acetone on cotton pads to remove the bubbled and peeling varnish or lacquer coating. It took some elbow grease but it came out pretty well. With that coat gone you can begin to see the grain on the sides, top and bottom of the bowl.Doc7

Doc8

Doc9

Doc10 
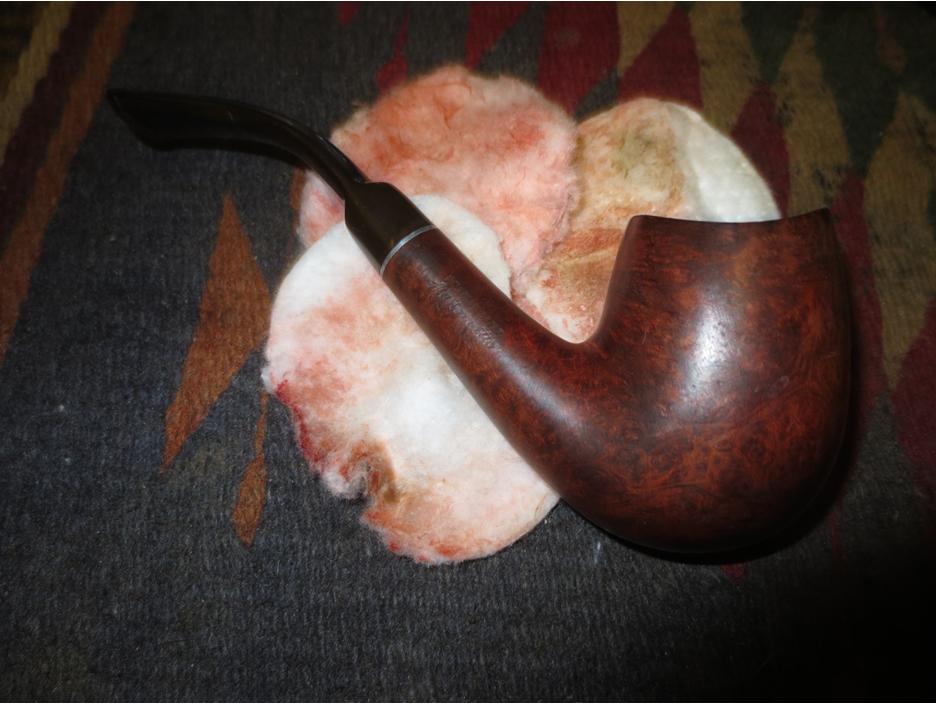
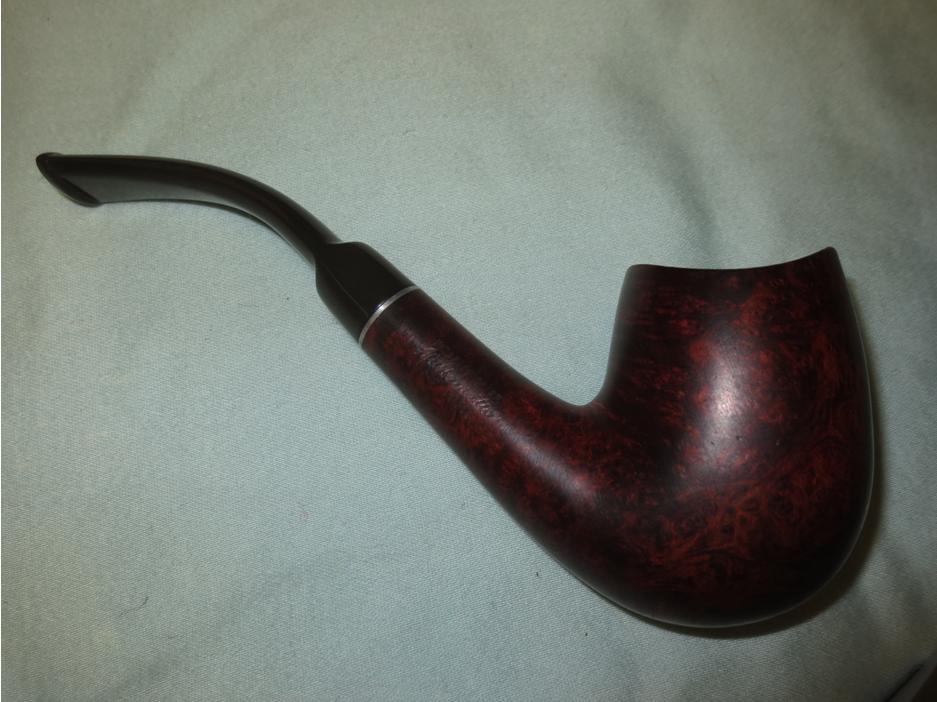
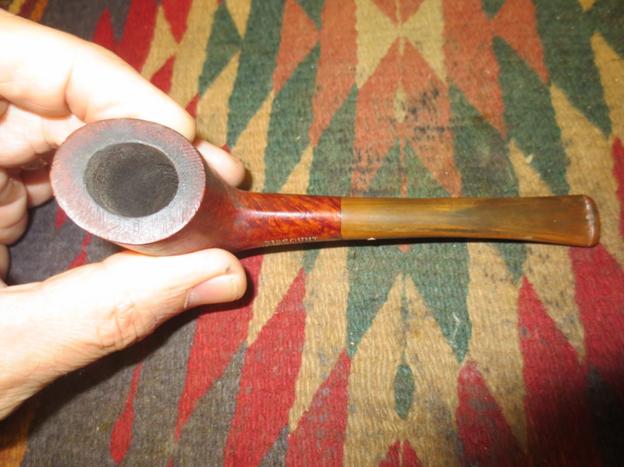
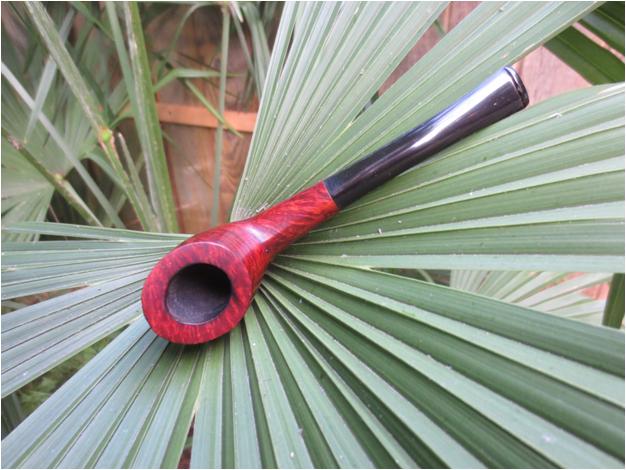
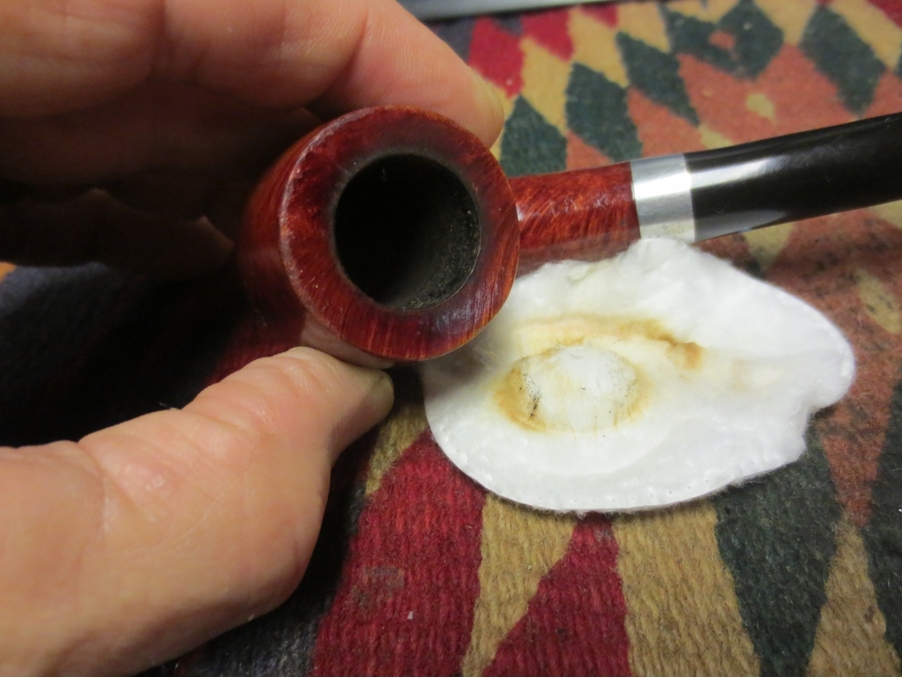
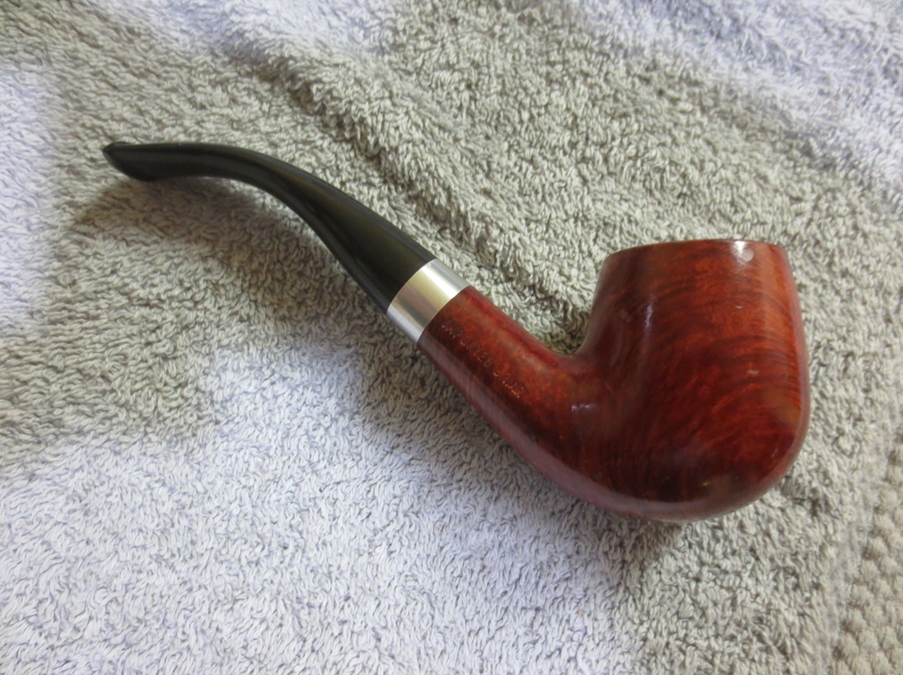
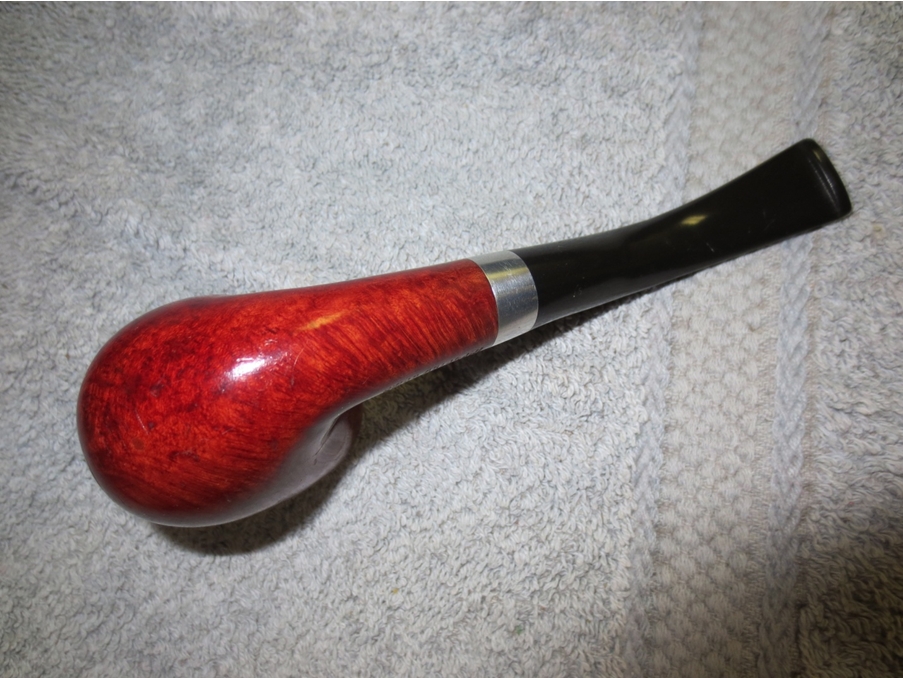
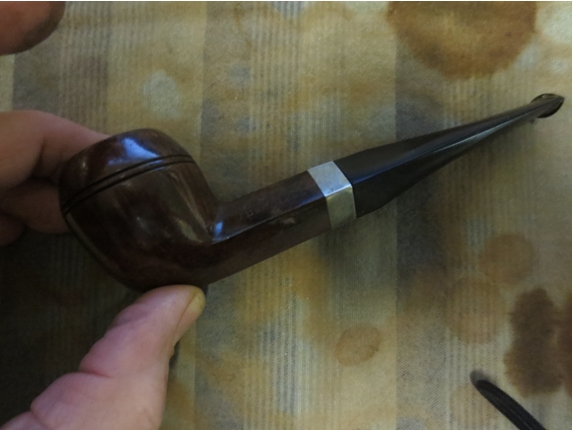
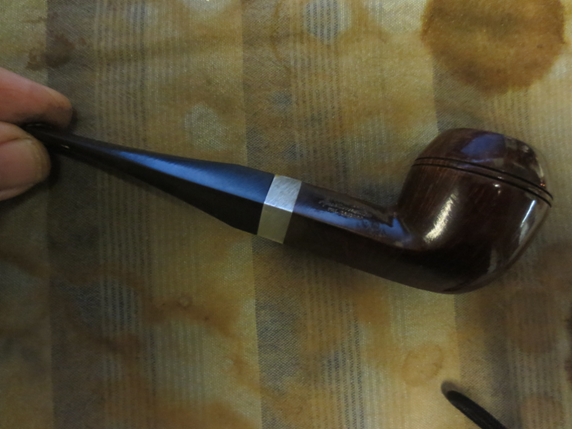
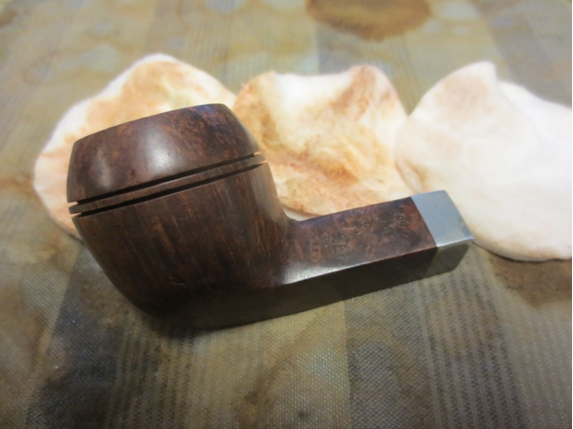
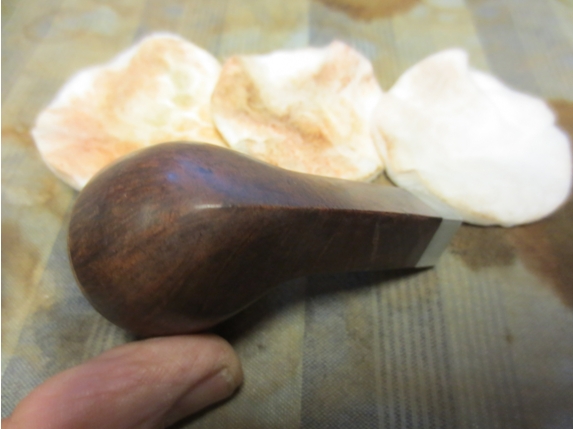
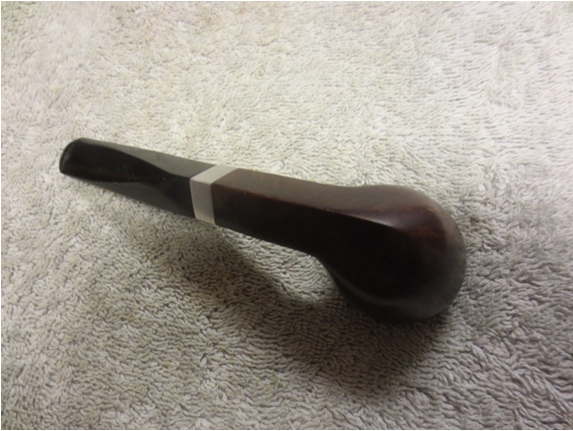
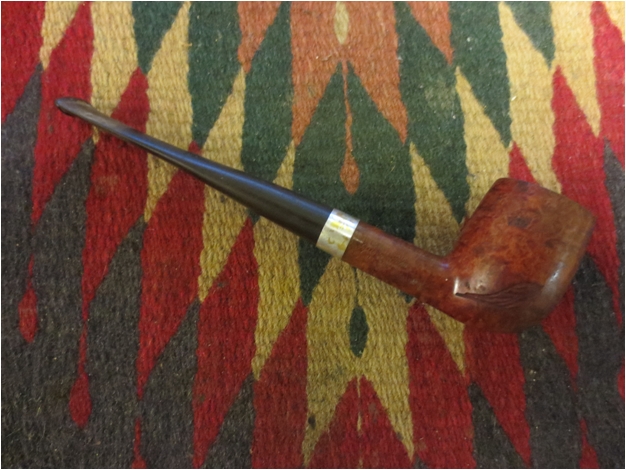
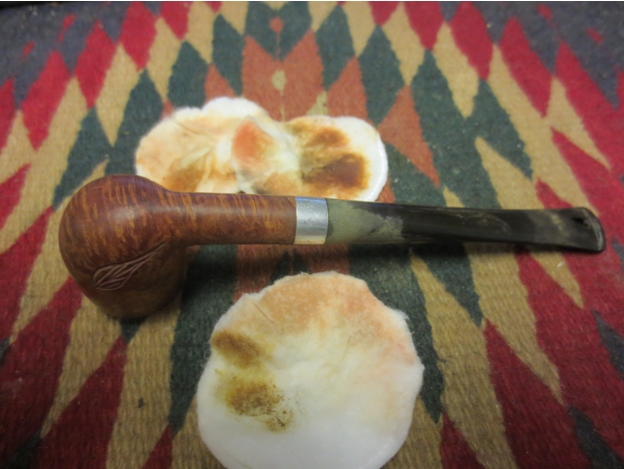
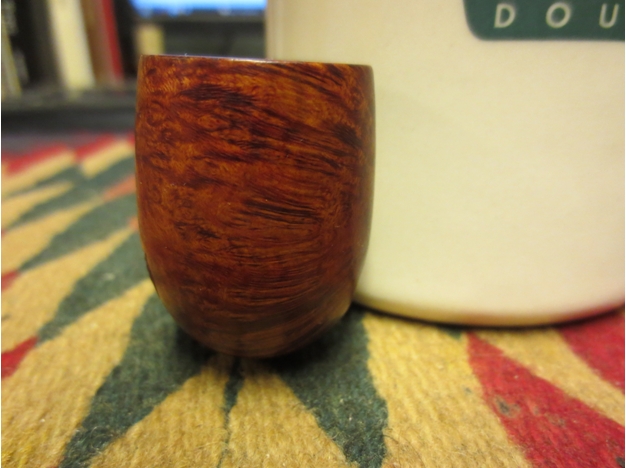
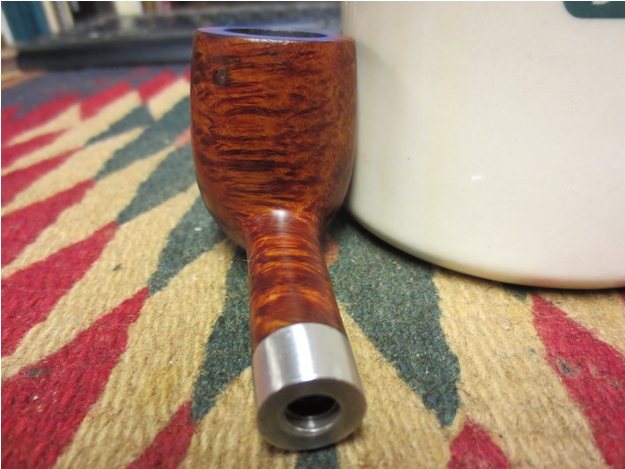
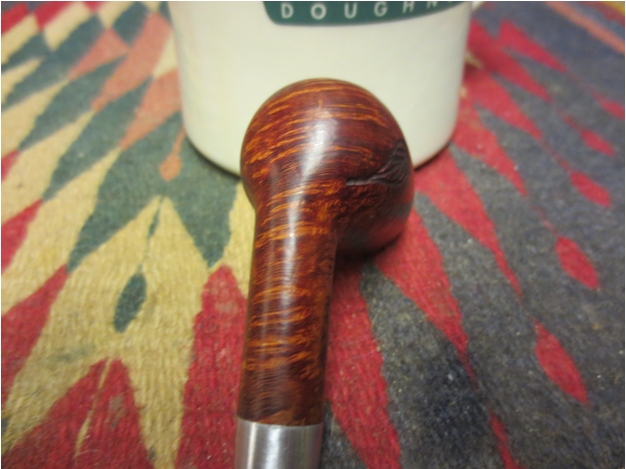
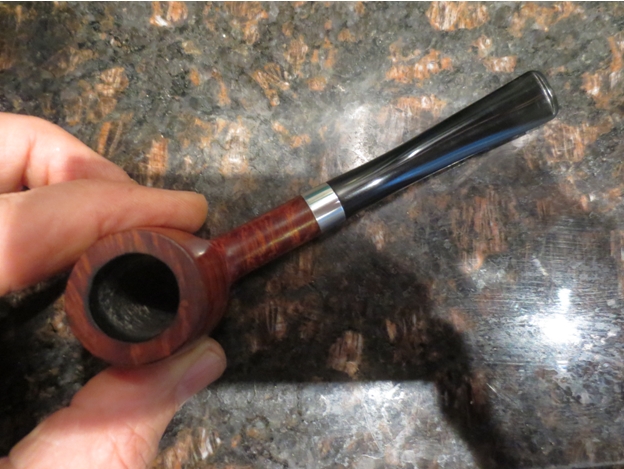
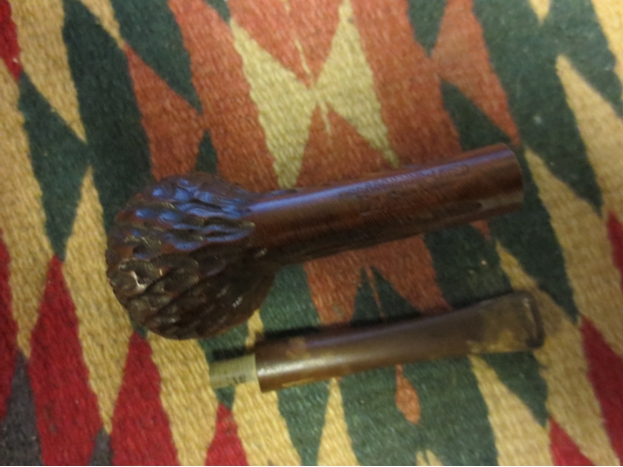
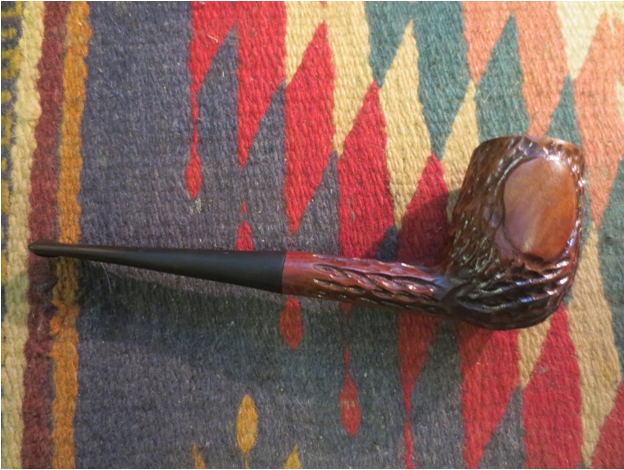
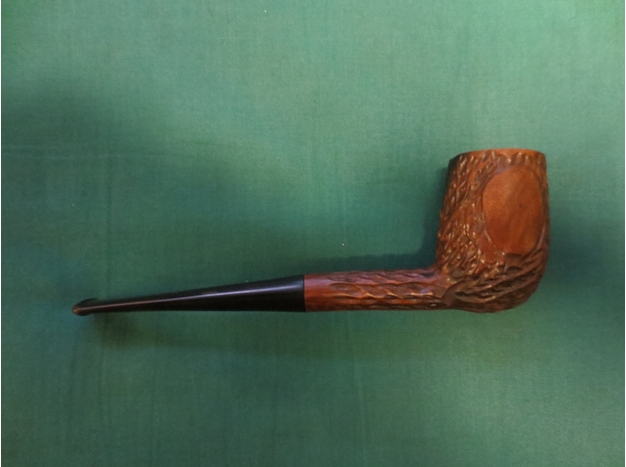
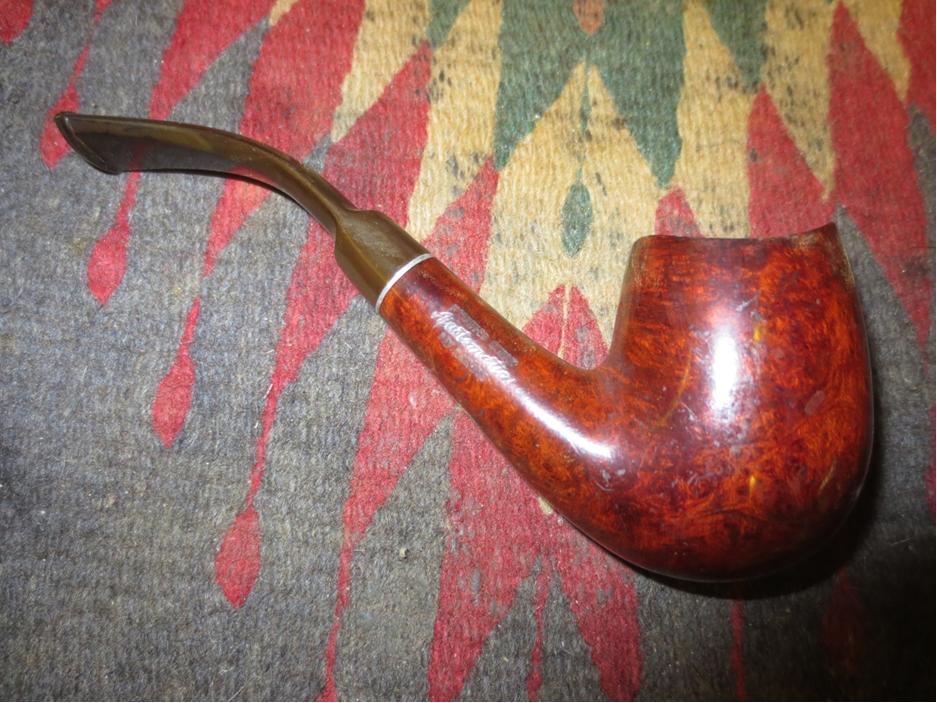
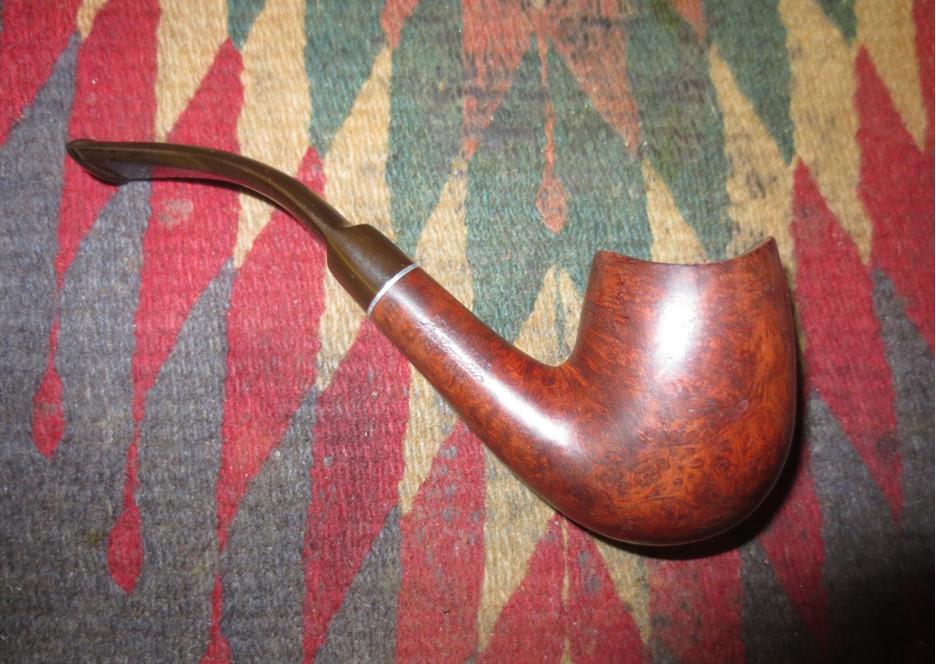
I wiped it down a final time with isopropyl alcohol and took the next photos to show the grain on this little beauty! It is a great piece of briar and what appeared to be fill were not but rather just chips of varnish that came off.Doc11

Doc12

Doc13

Doc14 
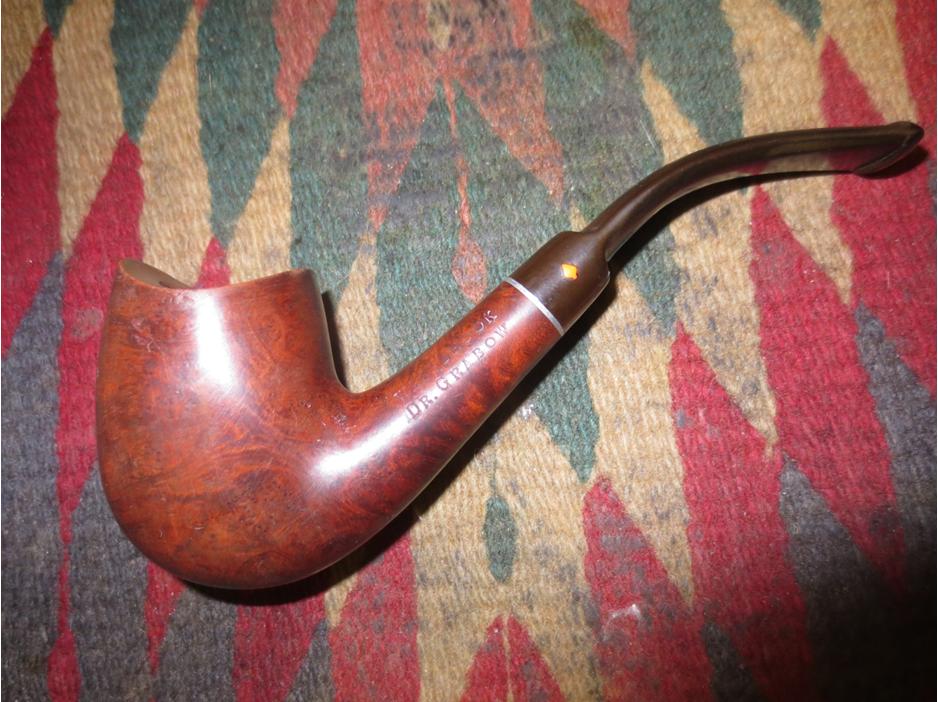
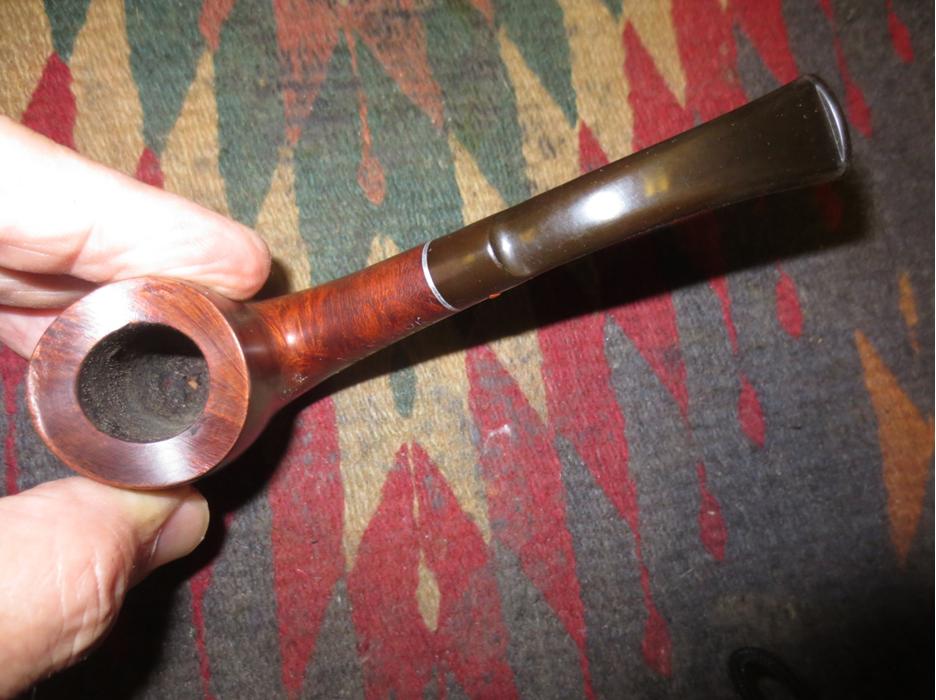
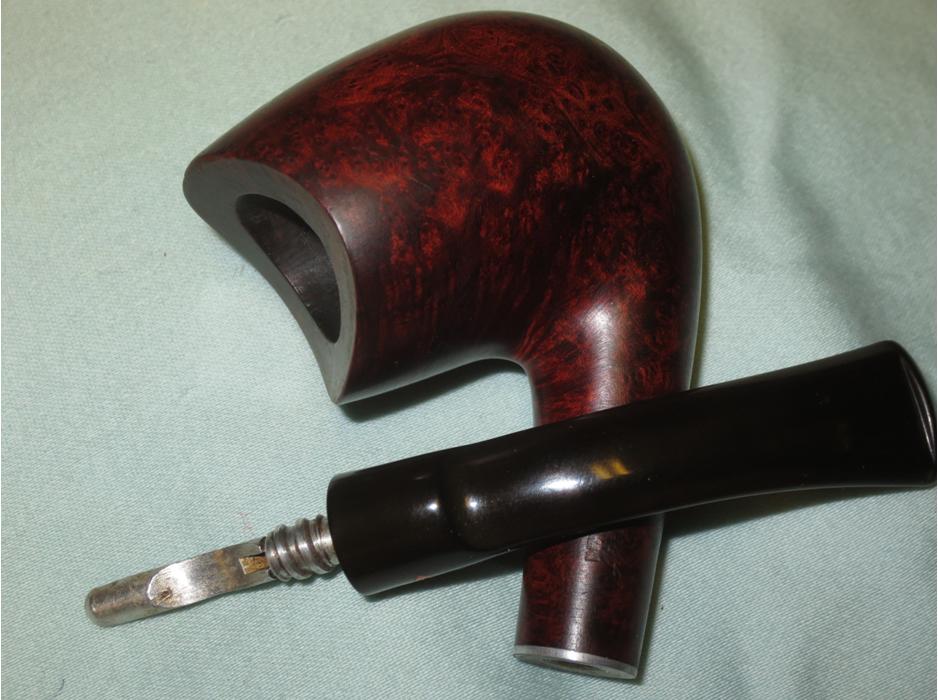
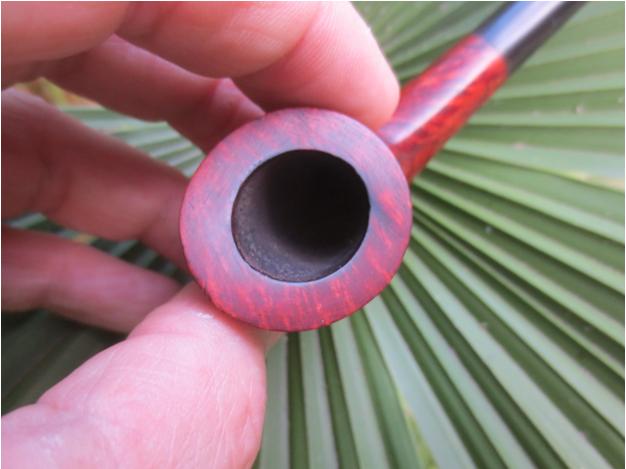
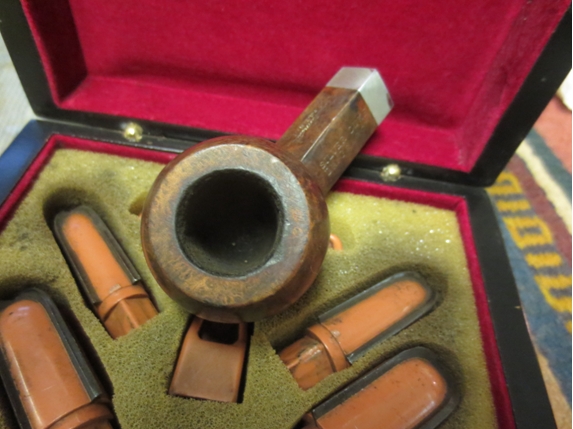
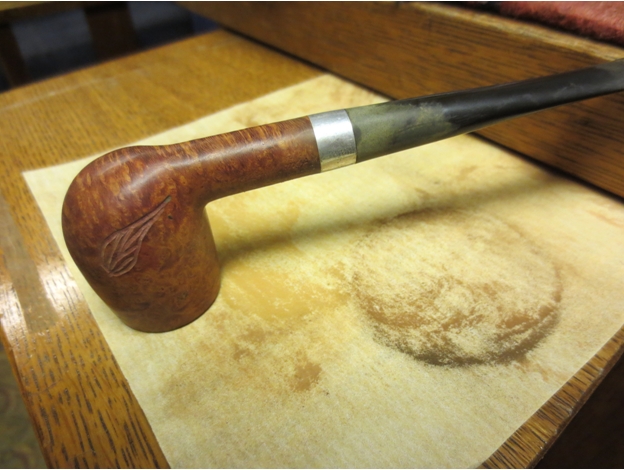
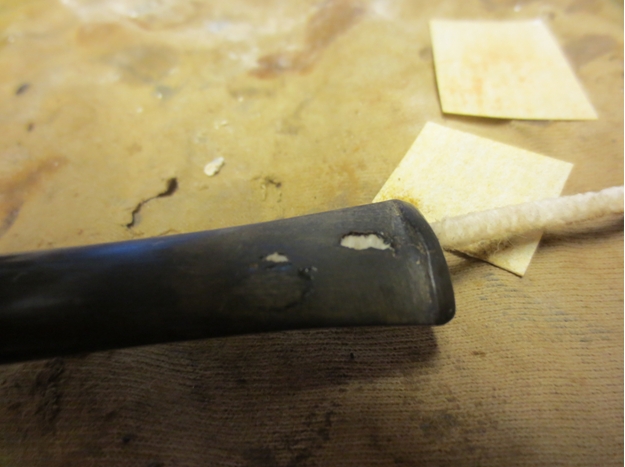
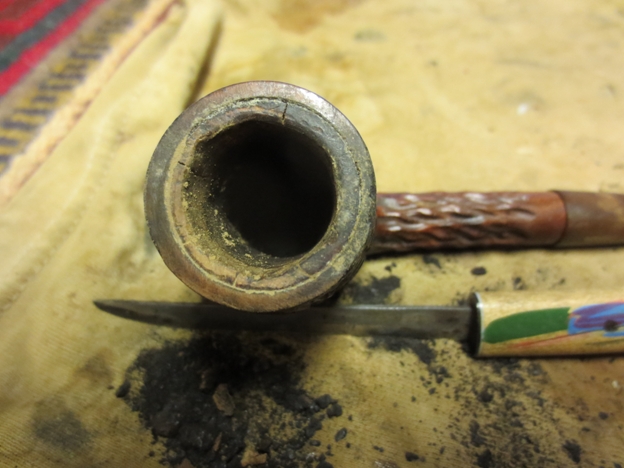
The front edge of the rim and the left side nicks would need to be sanded to smooth them out. The entire bowl would also need to be sanded with micromesh to remove the bits of varnish stuck on the briar and also smooth out some of the scratches in the briar.Doc15 
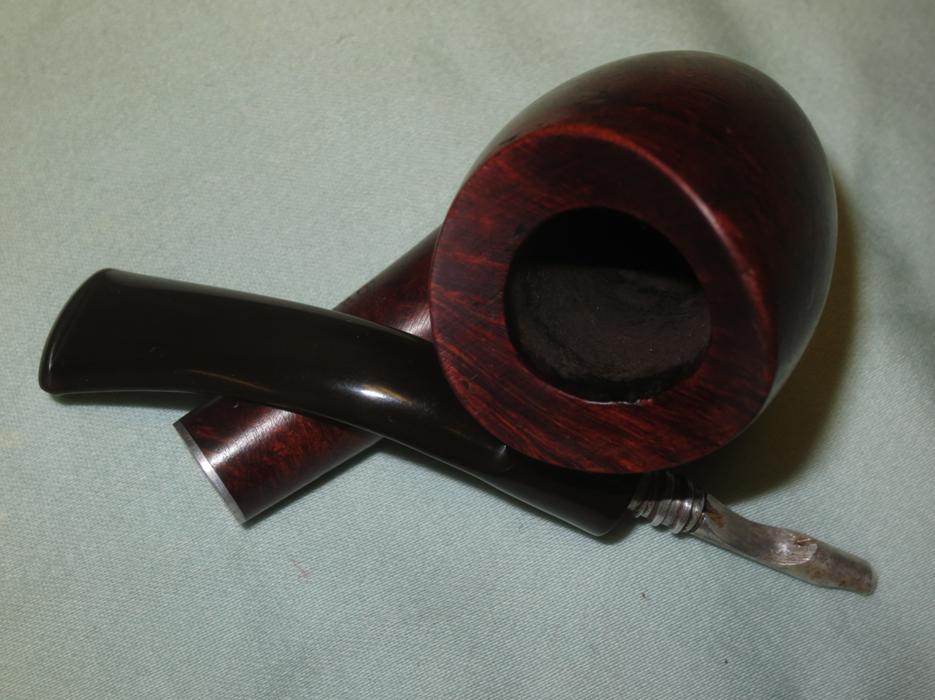
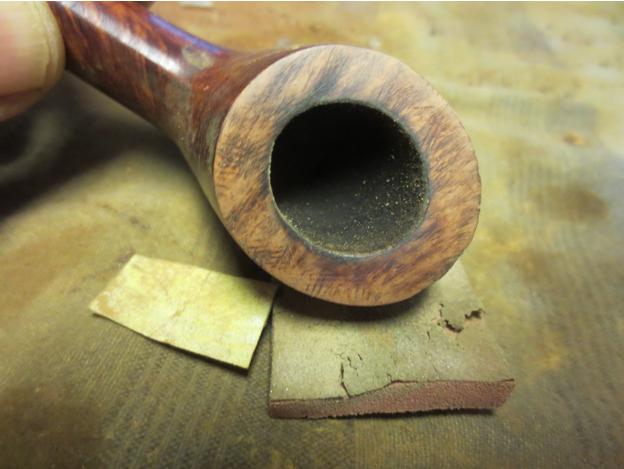
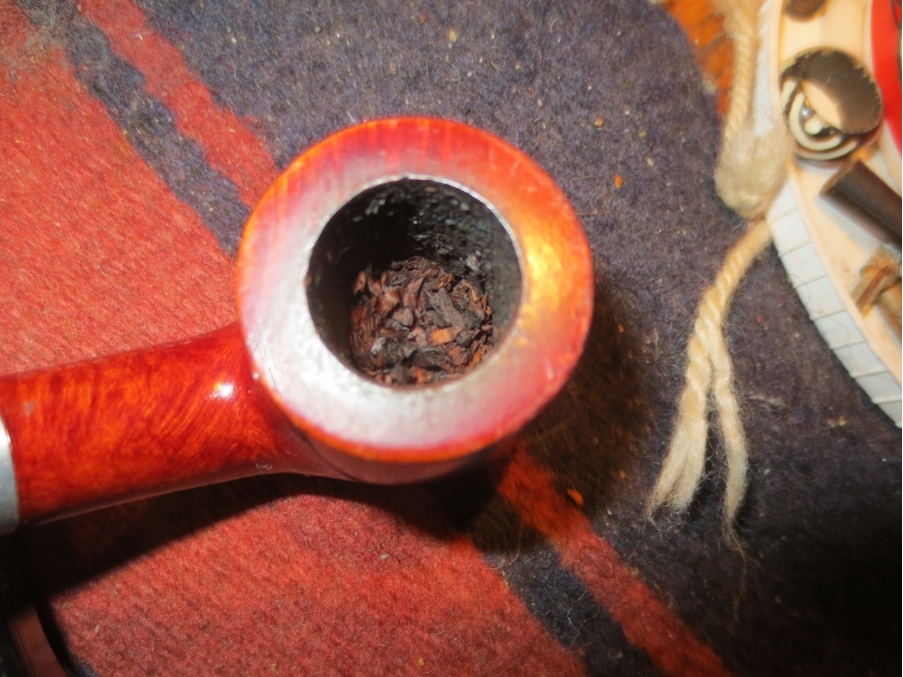
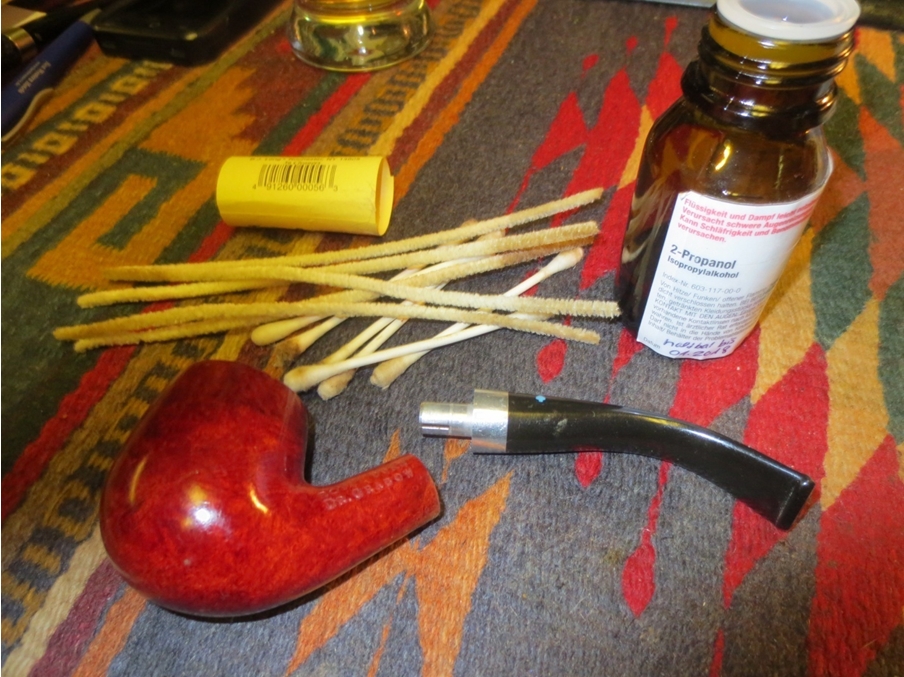
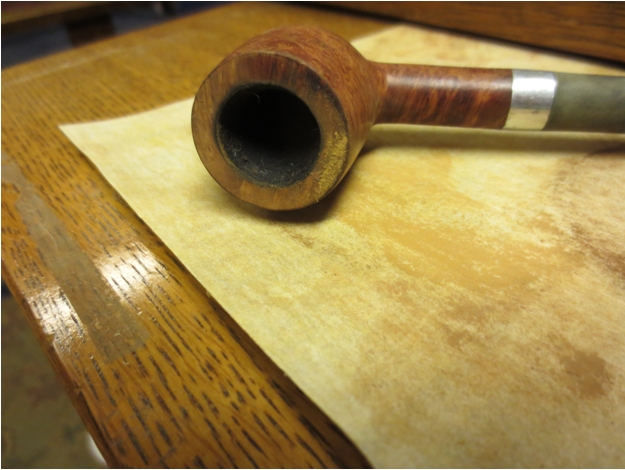
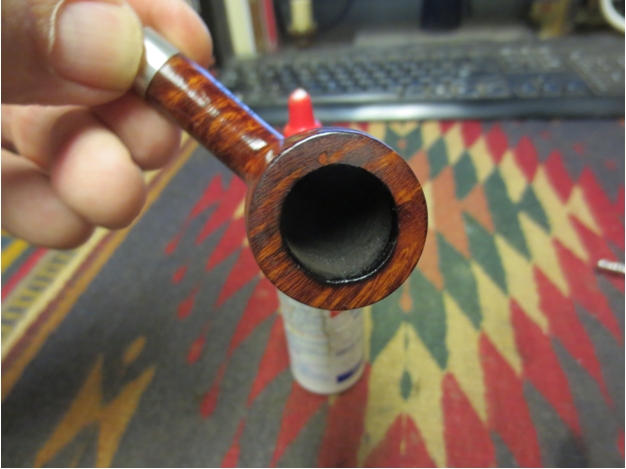
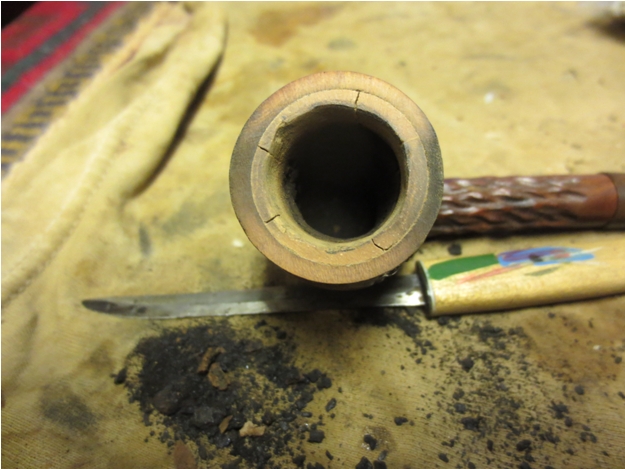
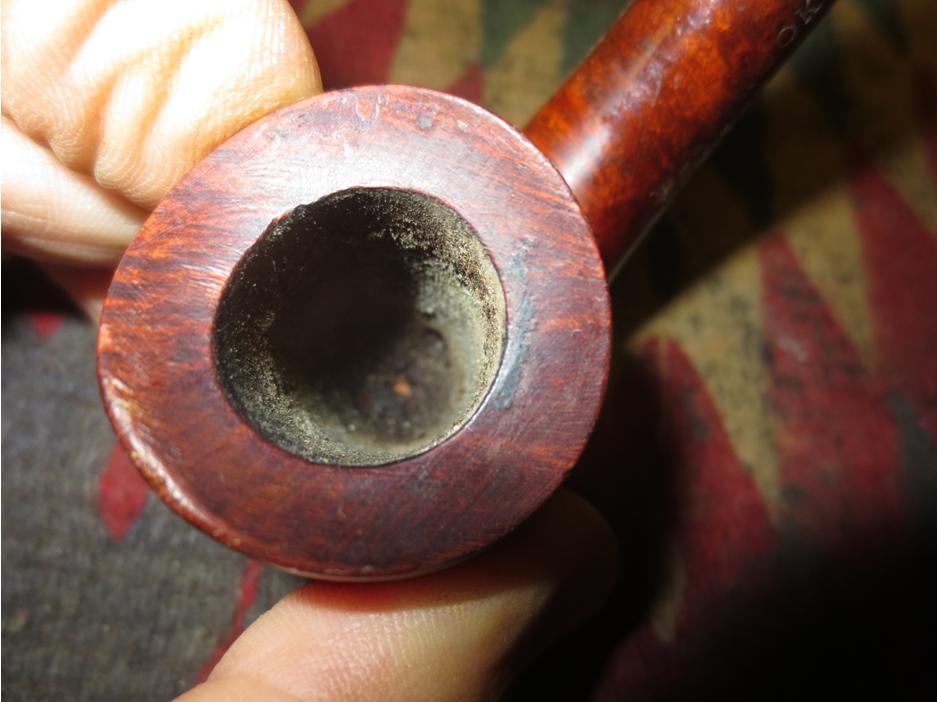
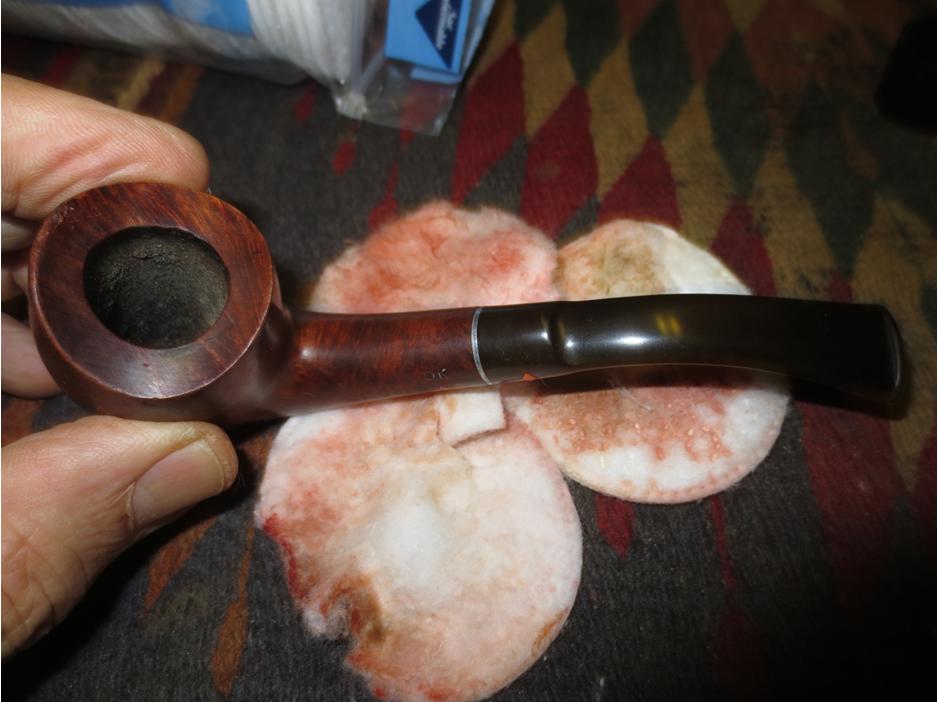
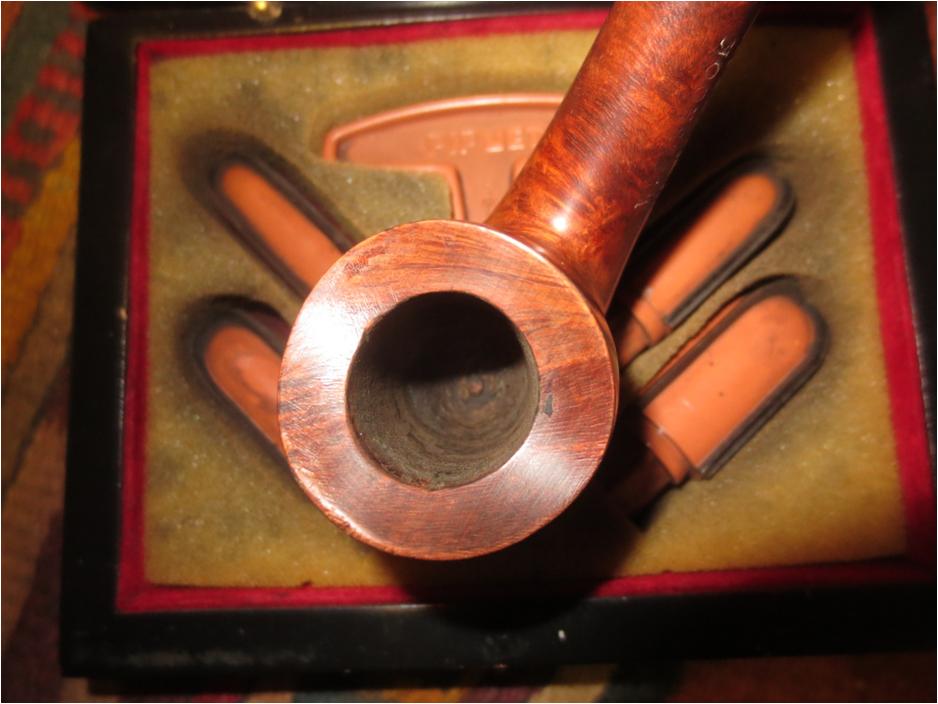
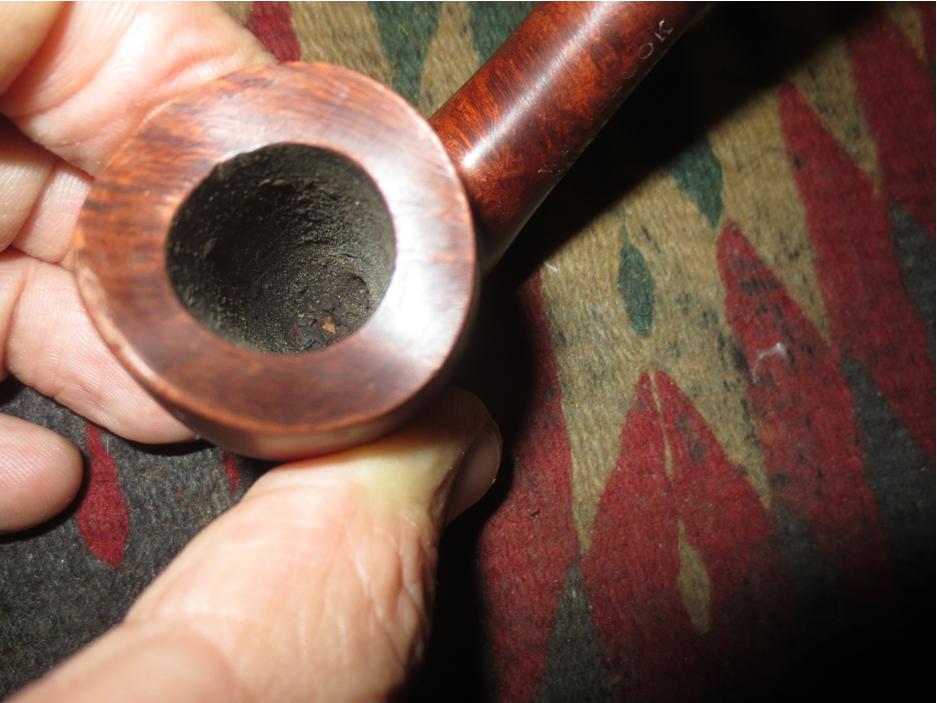
I reamed the bowl with a PipNet reamer and took the cake back to just a thin coating. I left a little on the sides and bottom of the bowl to protect the bowl. I cleaned out the bowl and shank with pipe cleaners, cotton swabs and alcohol to remove the grime.Doc16

Doc17 
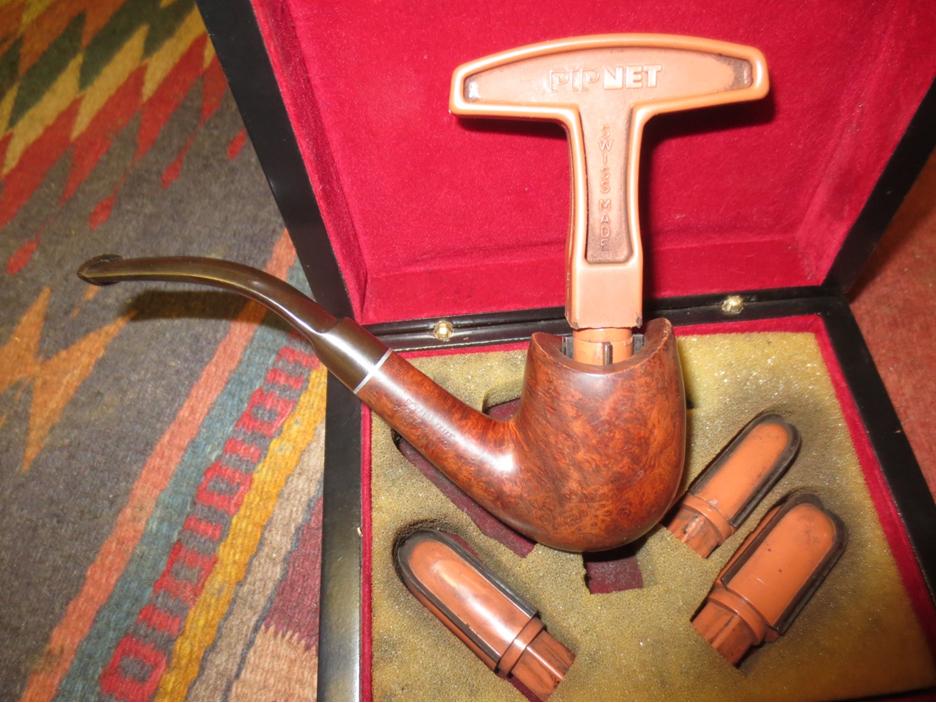
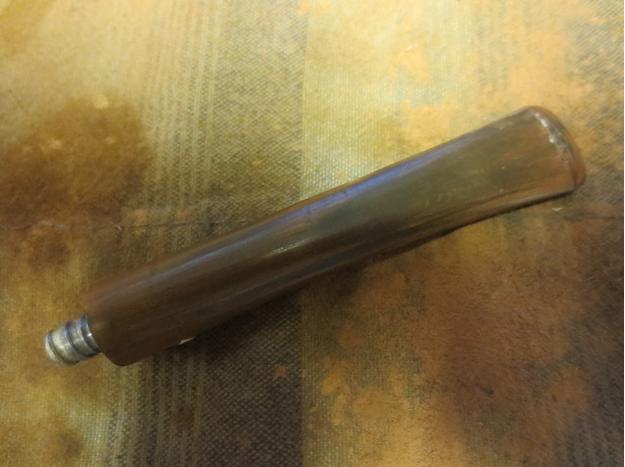
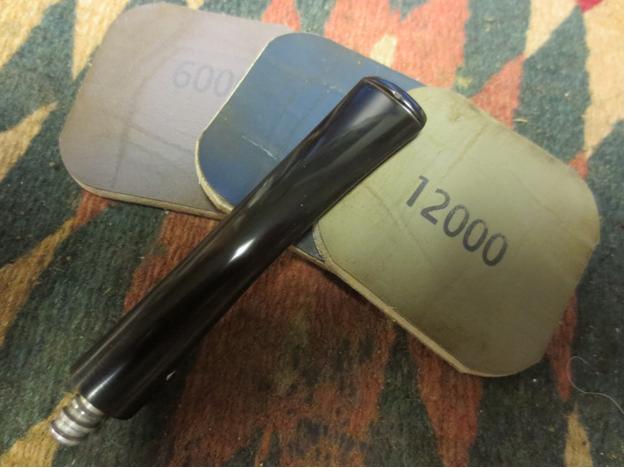
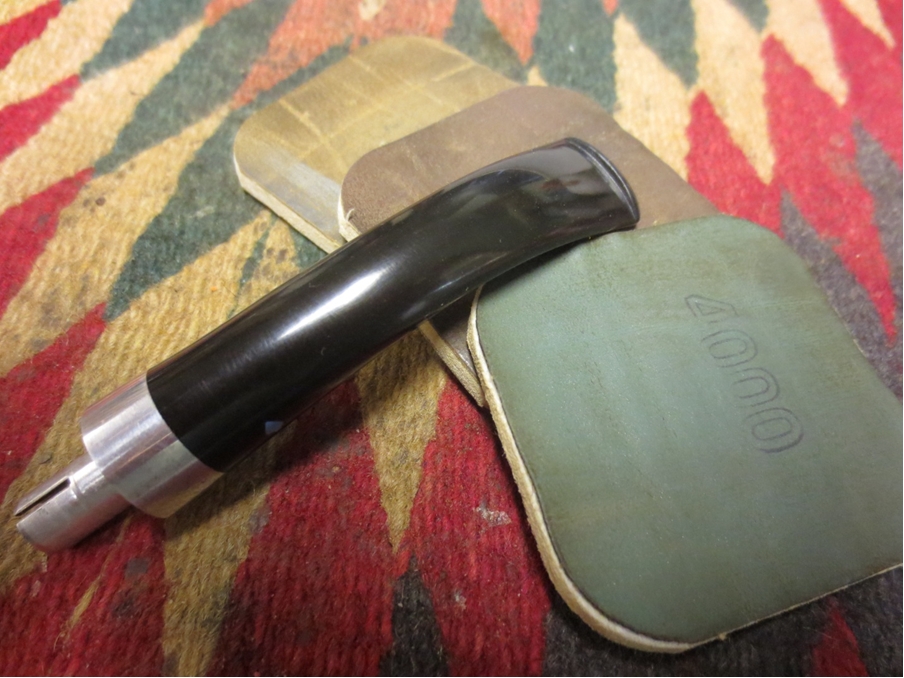
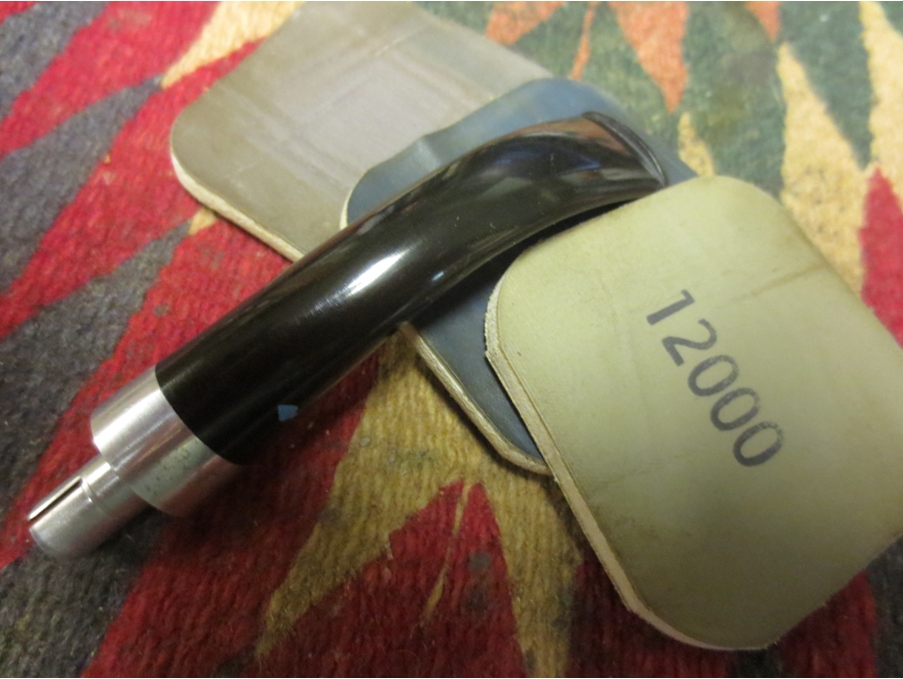
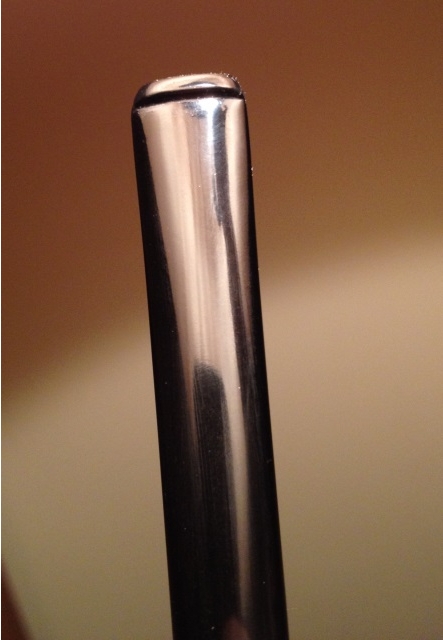
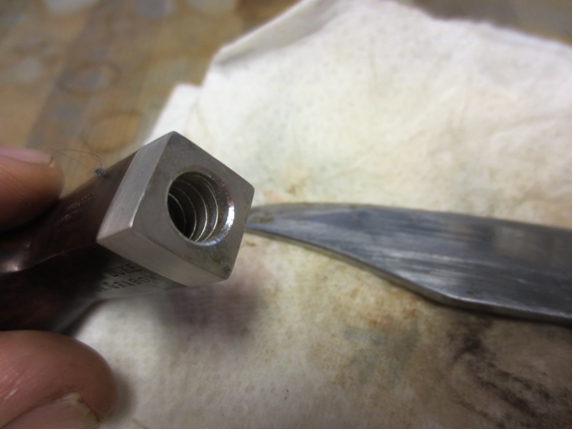
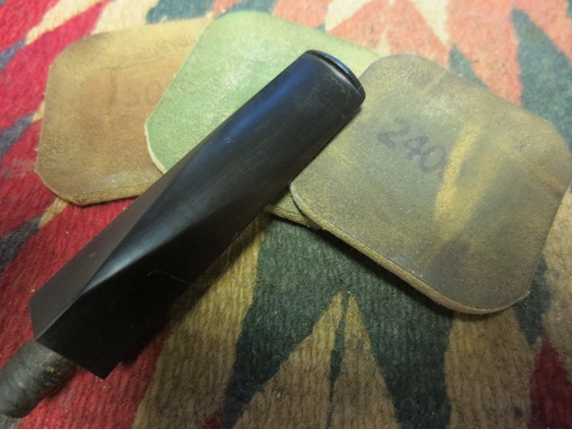
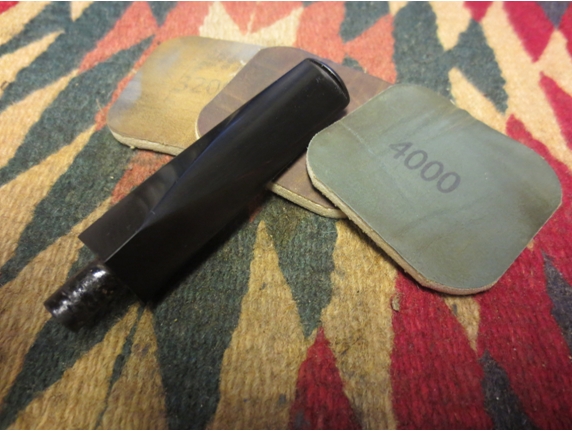
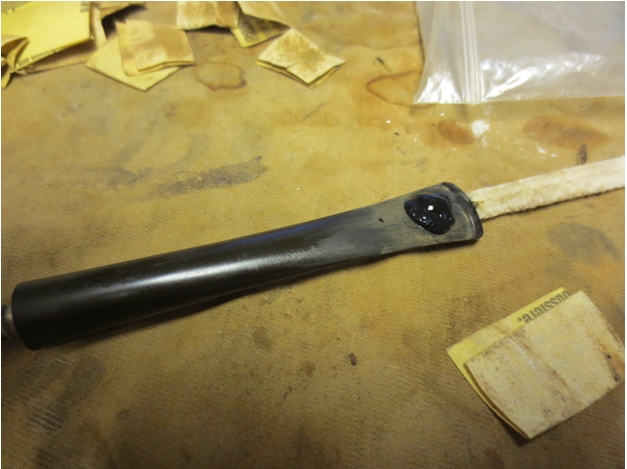
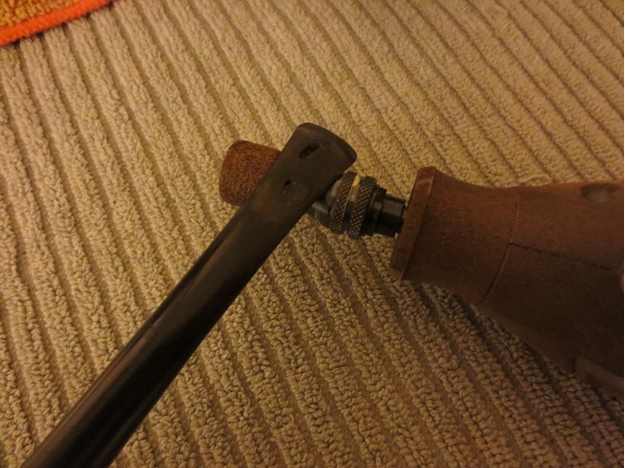
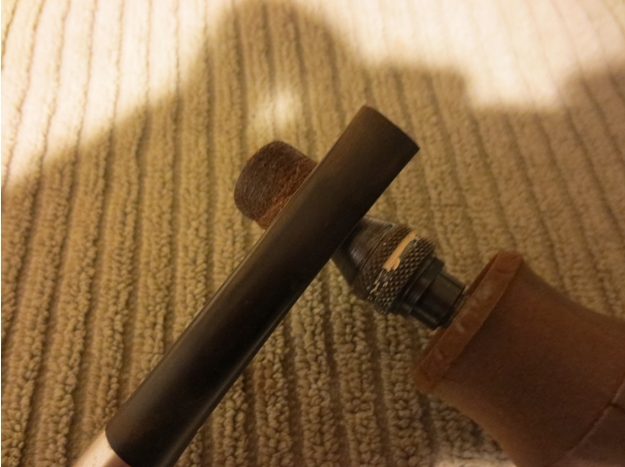
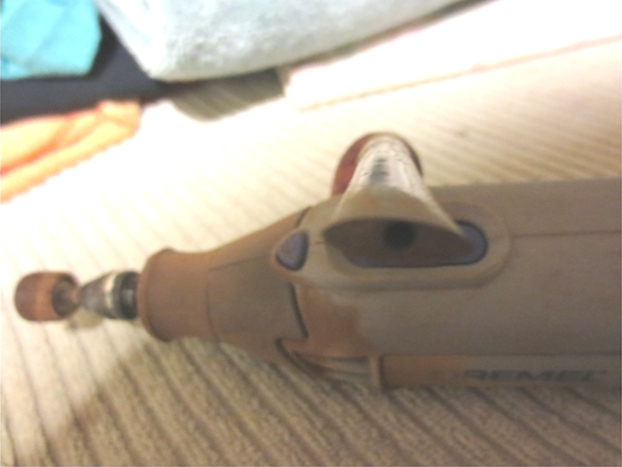
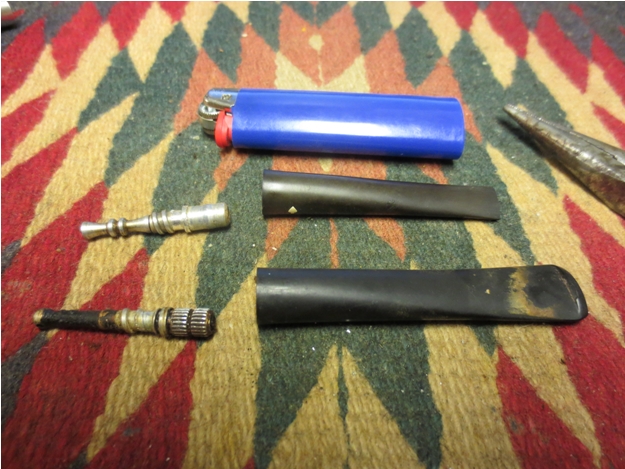
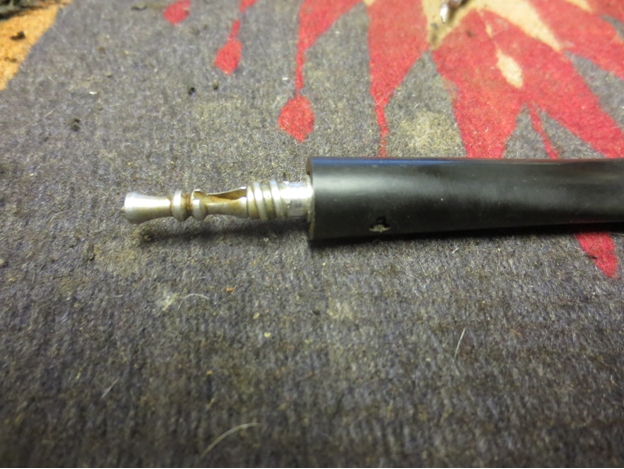
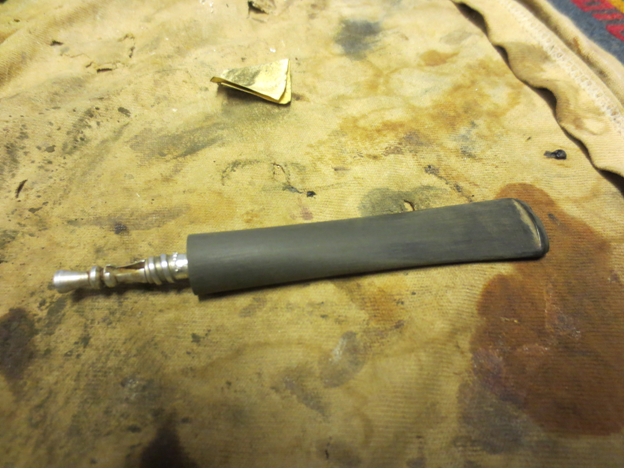
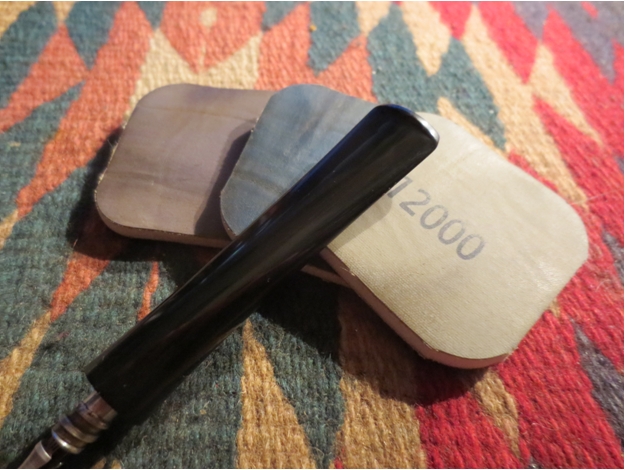
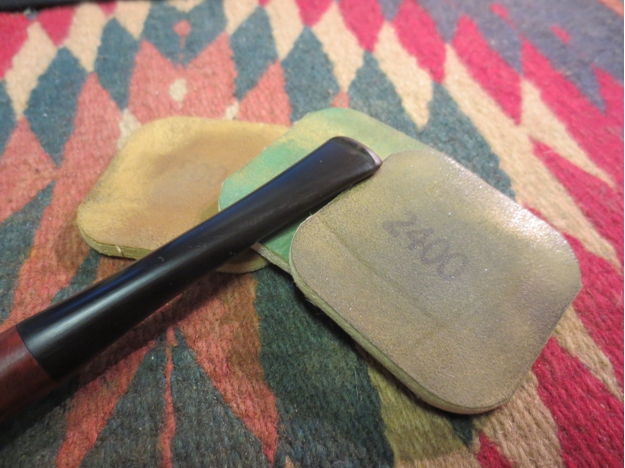
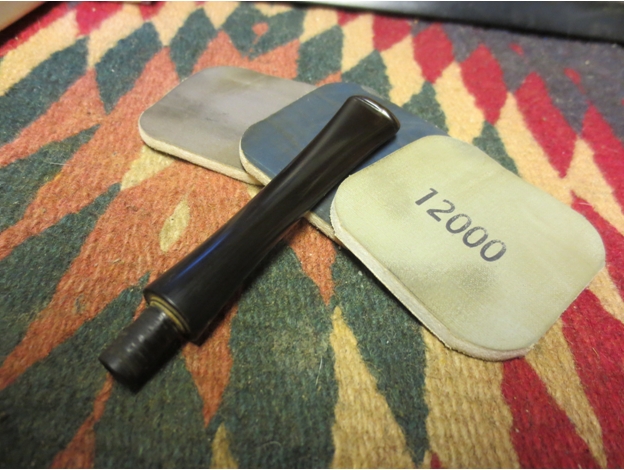
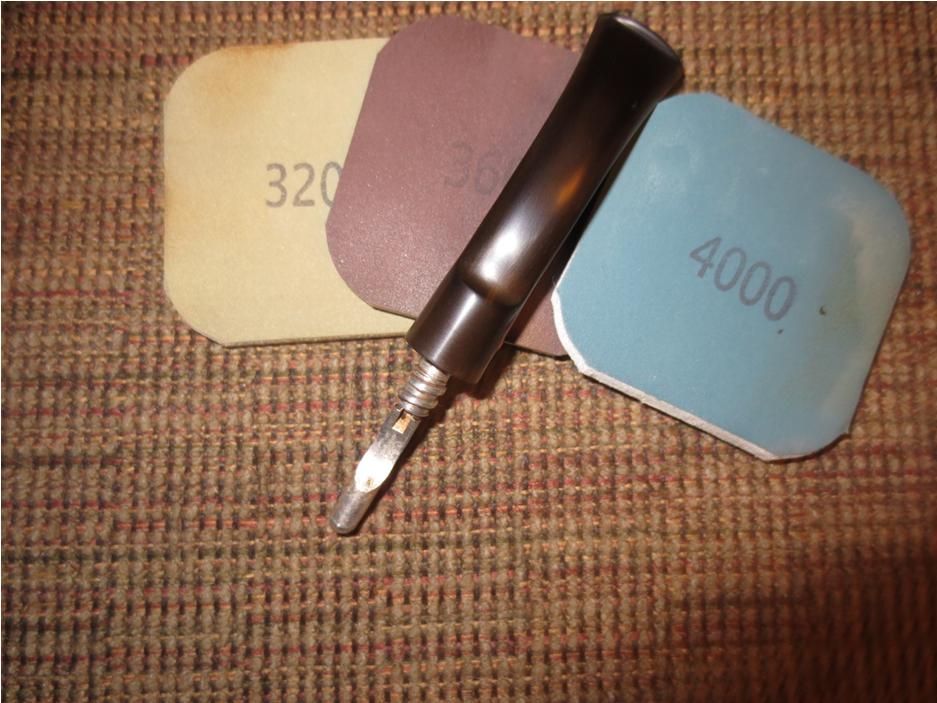
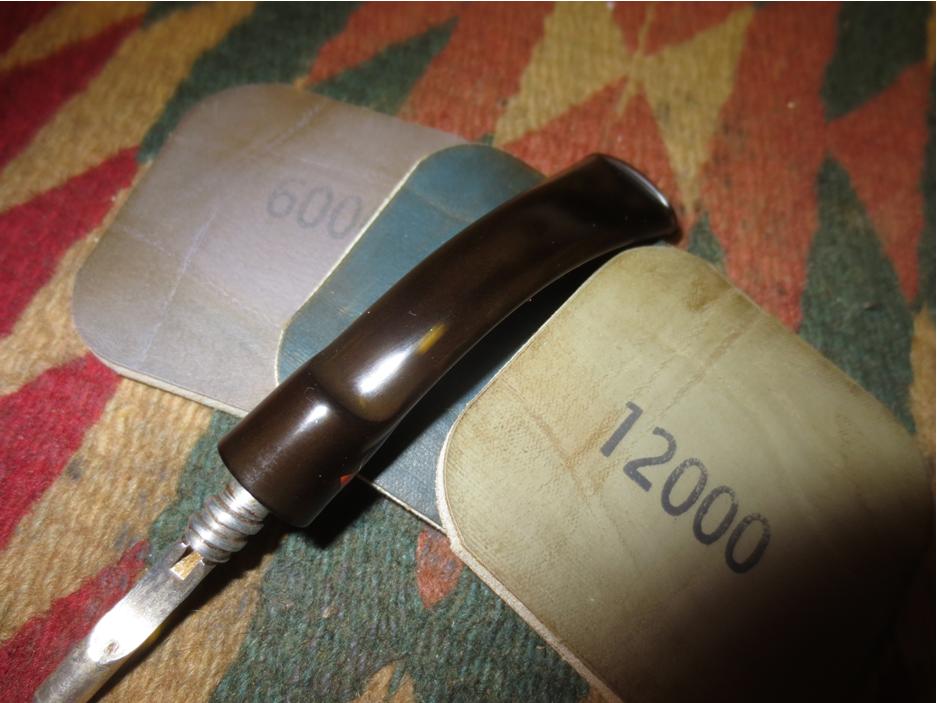
I sanded the rim of the bowl and bowl sides with micromesh sanding pads. I smoothed out the damage on the front of the bowl and on the side. I also worked on the stem. I wet sanded it with 1500-2400 grit pads and dry sanded with 3200-12000 grit pads. I rubbed it down with Obsidian Oil in between each set of three pads. I cleaned the metal threaded tenon with steel wool and then added the spoon stinger in the tenon to make the pipe complete.Doc18

Doc19

Doc20 
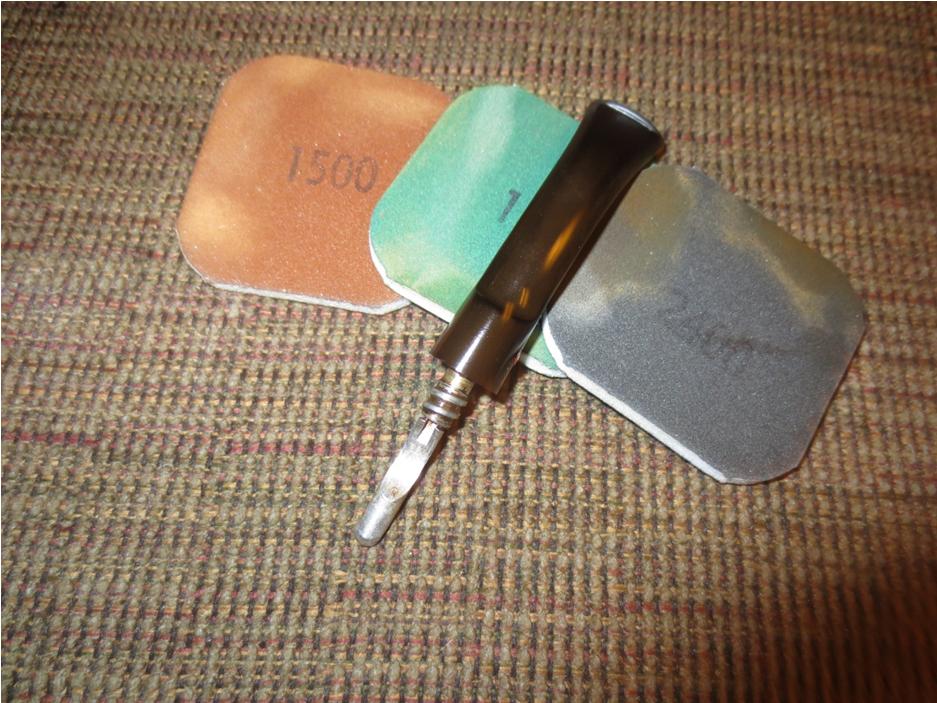
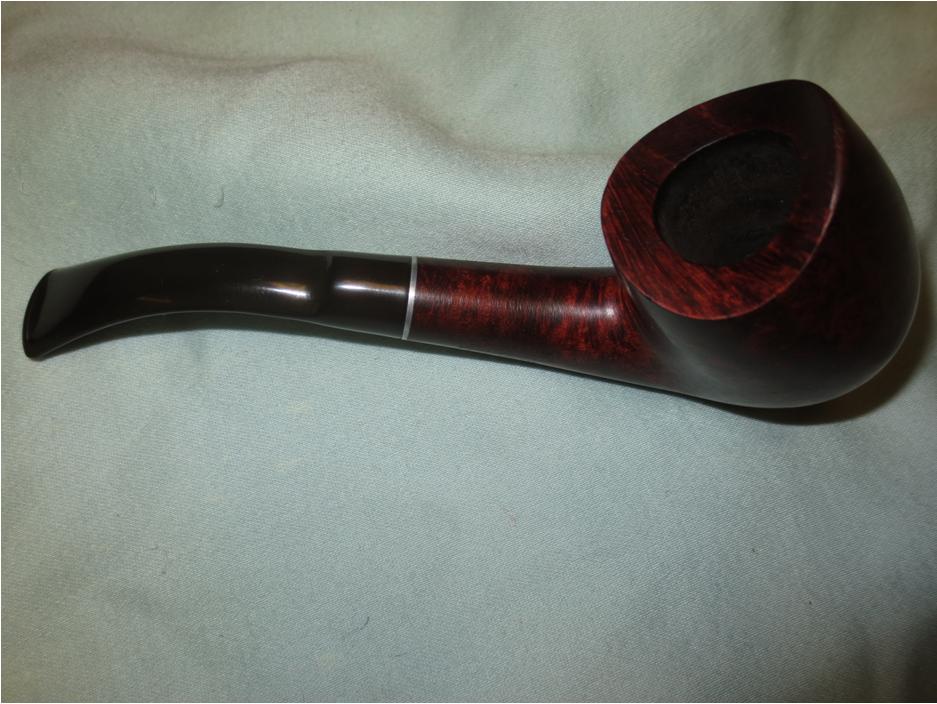
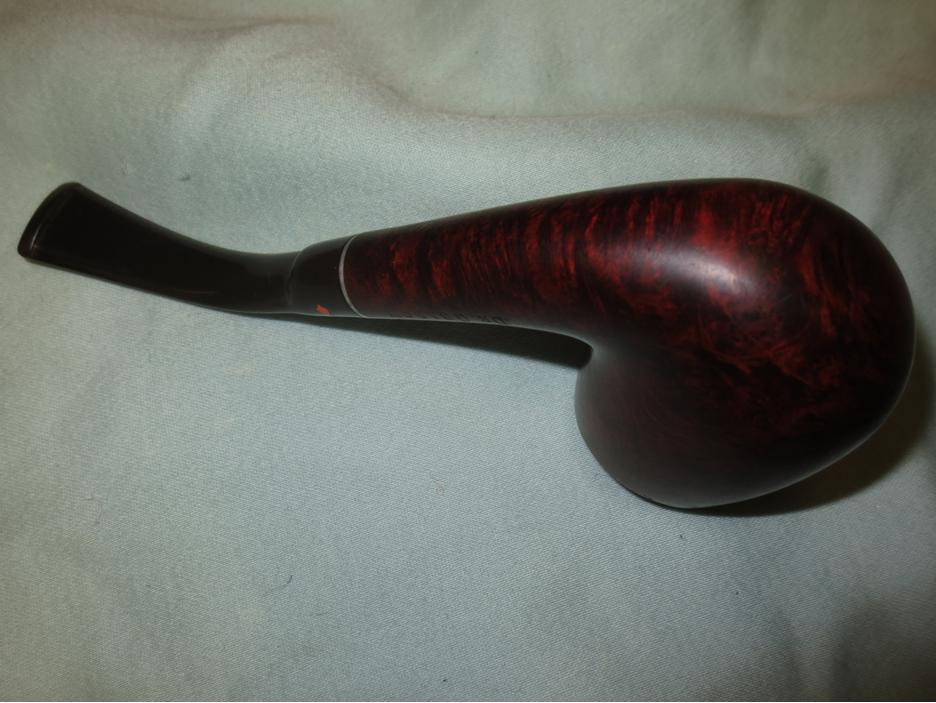
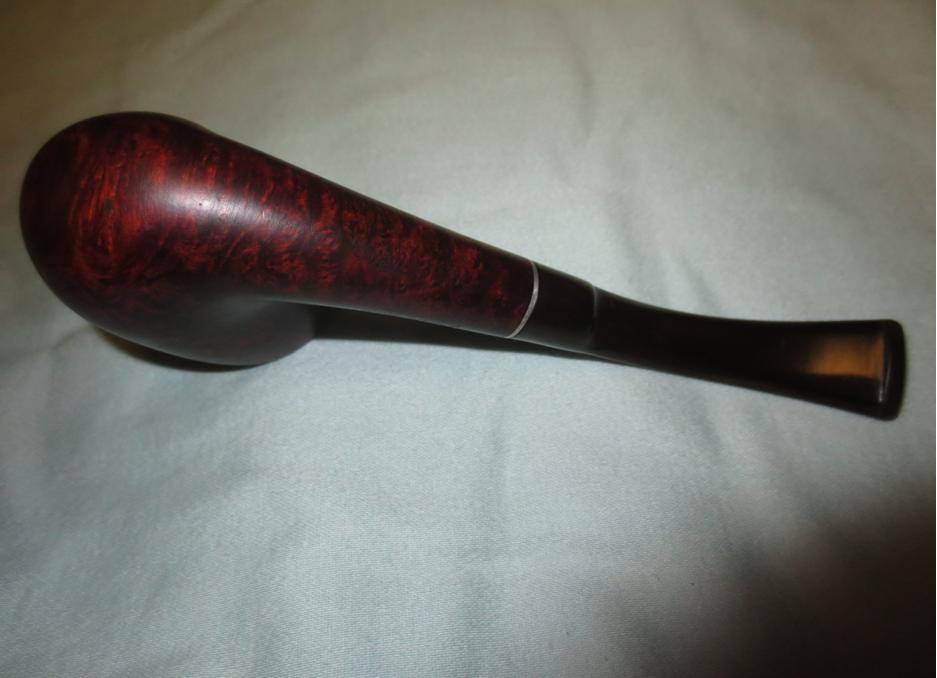
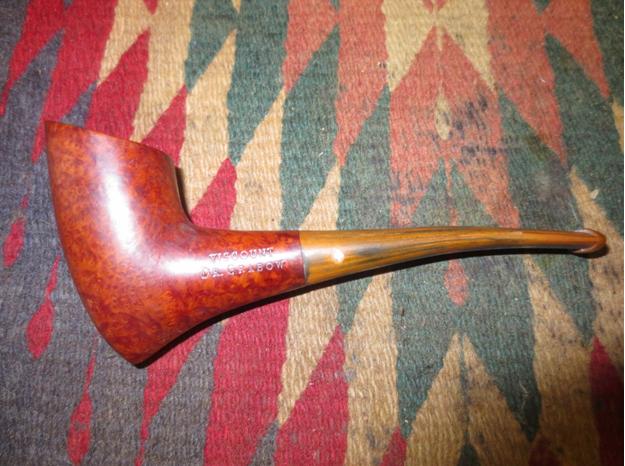
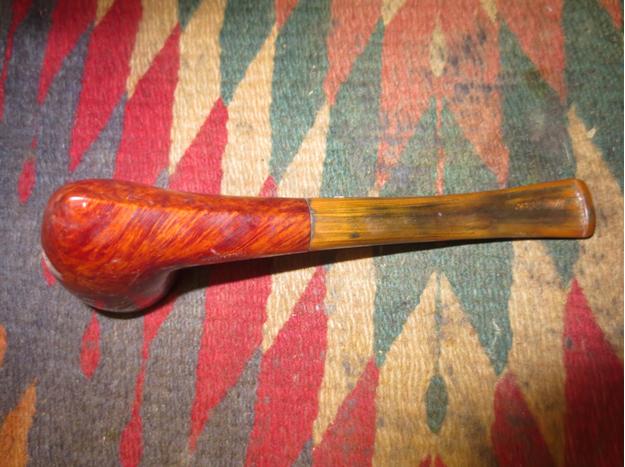
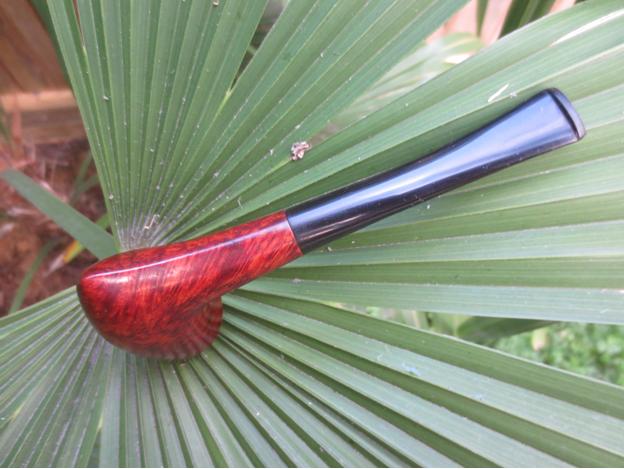
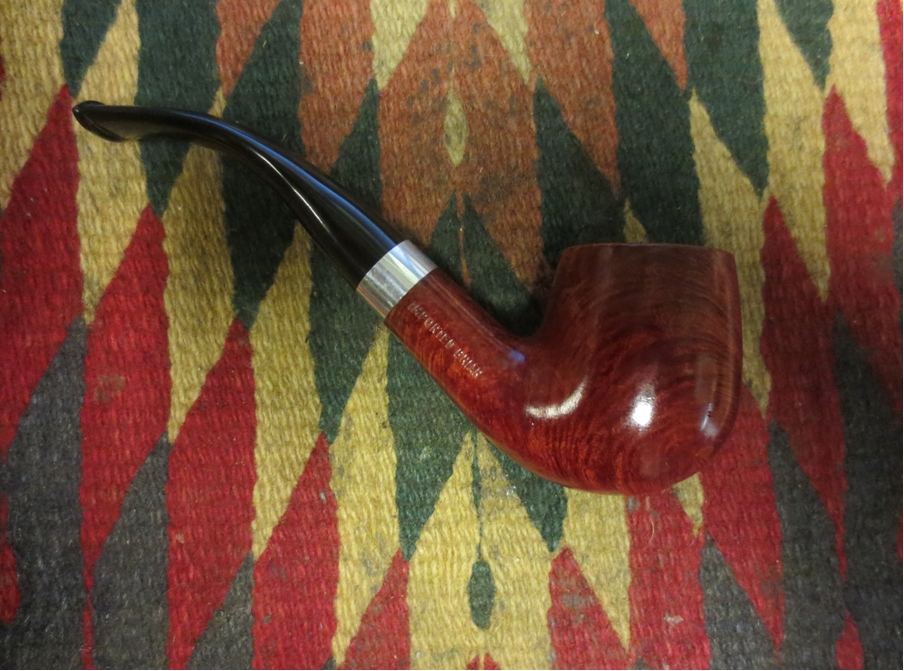
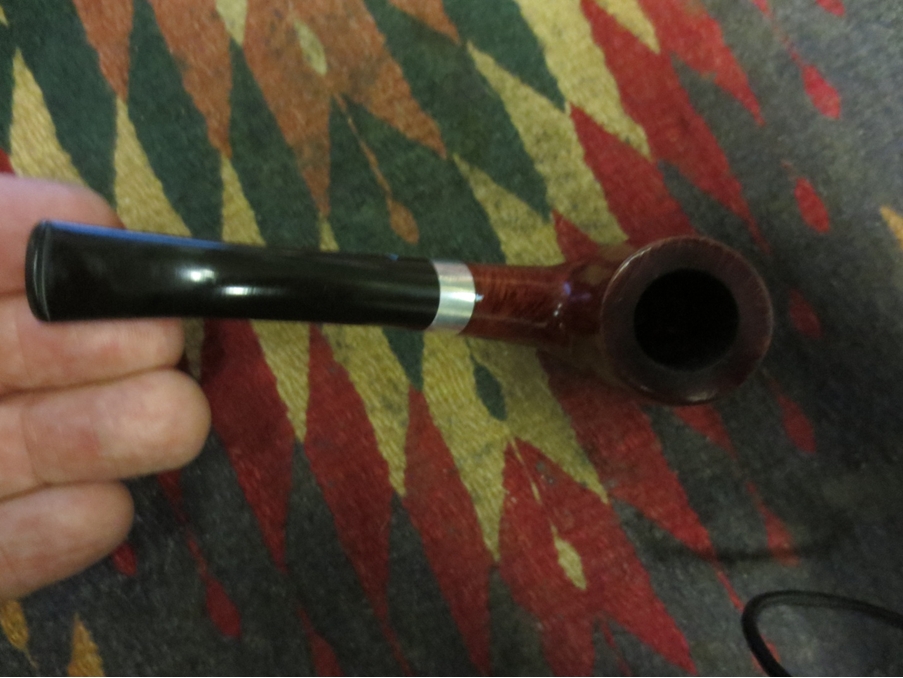
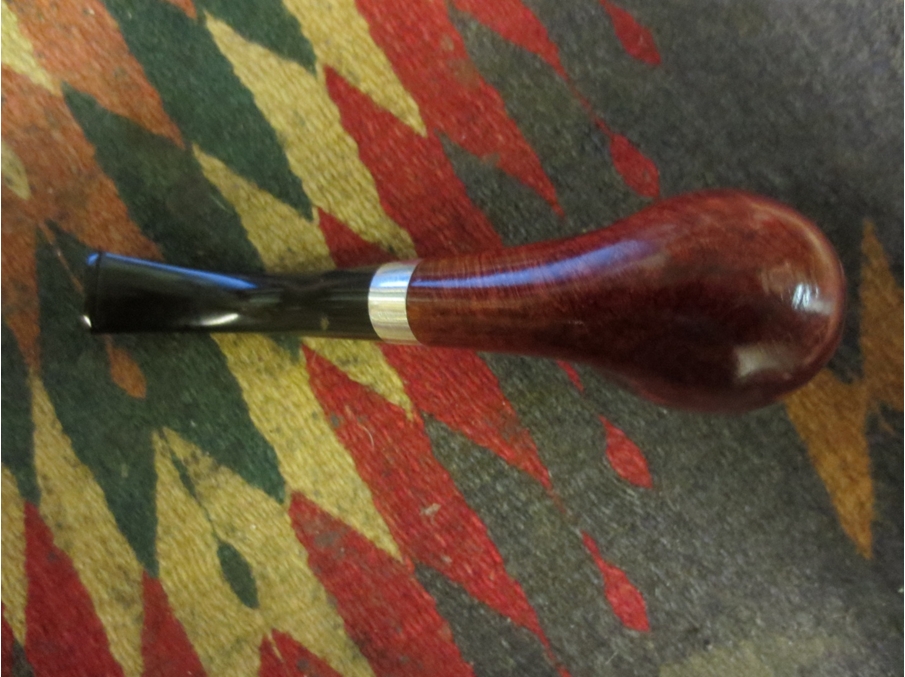
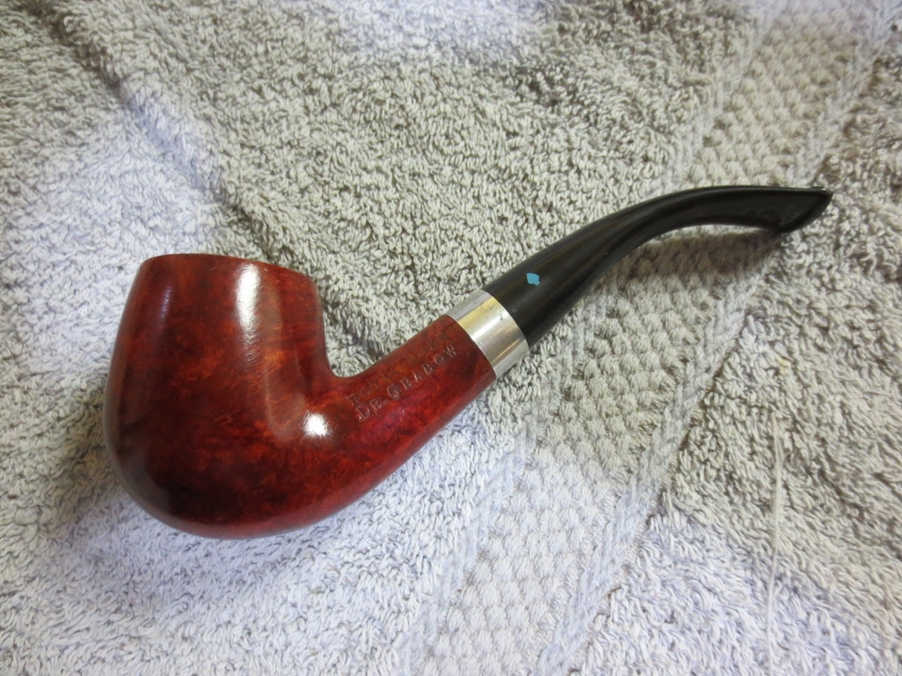
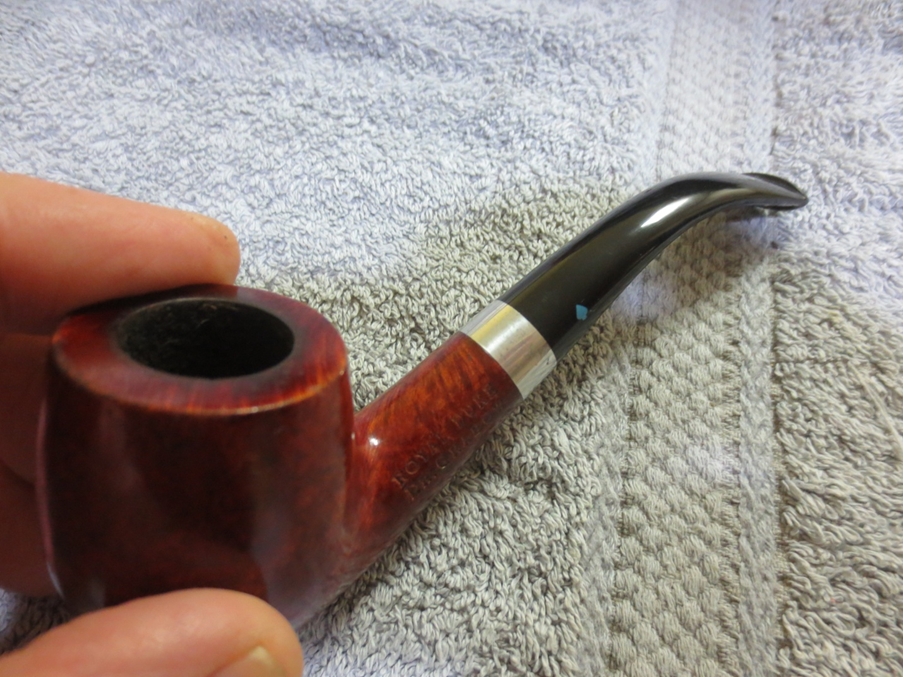
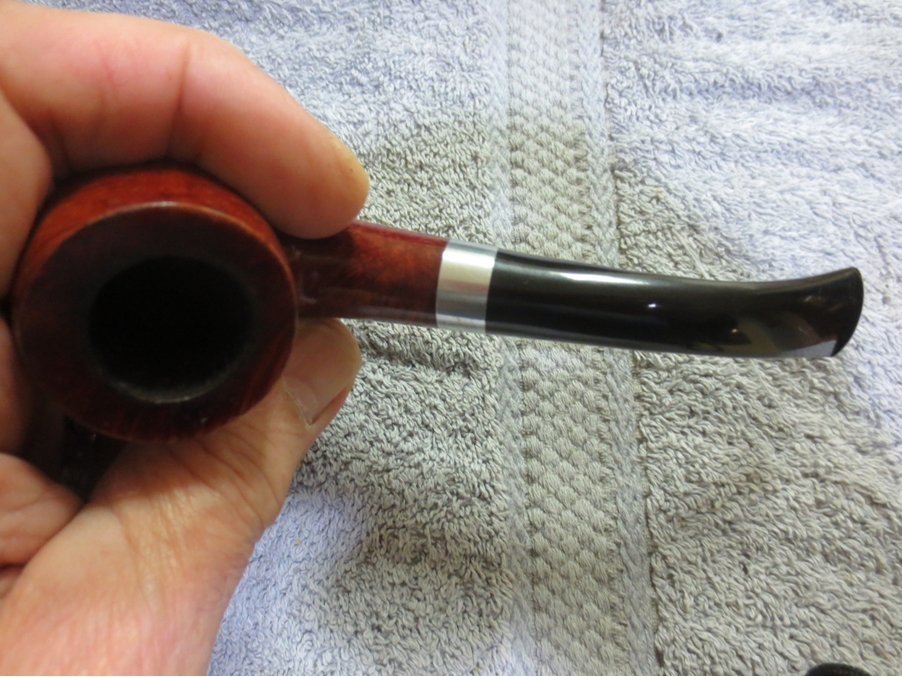
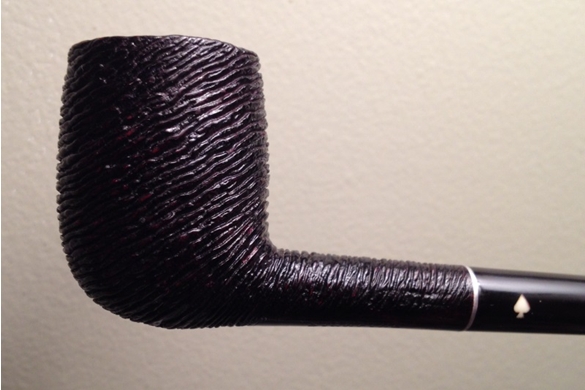
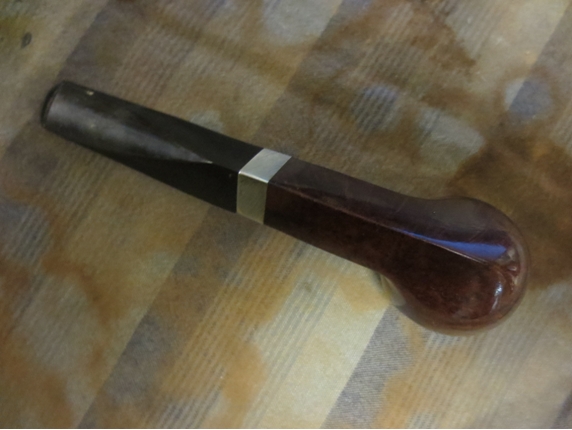
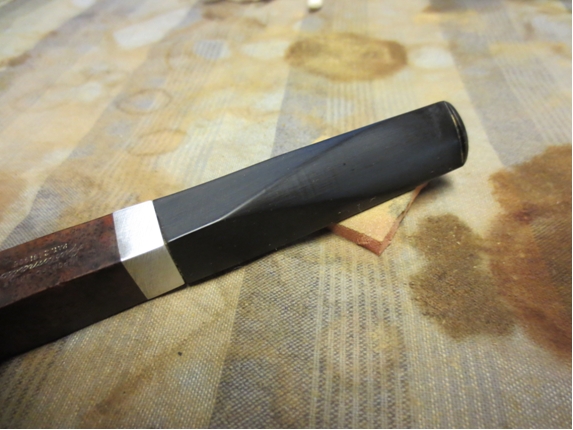
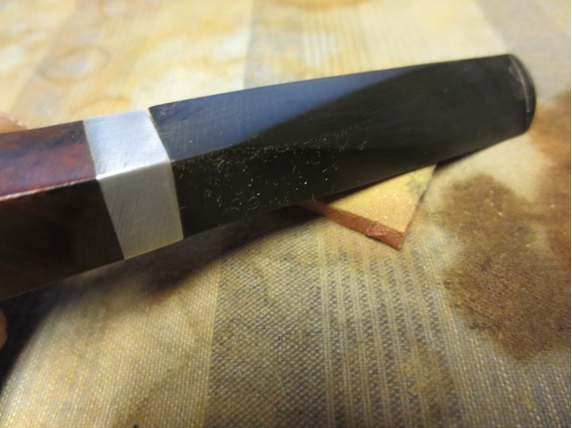
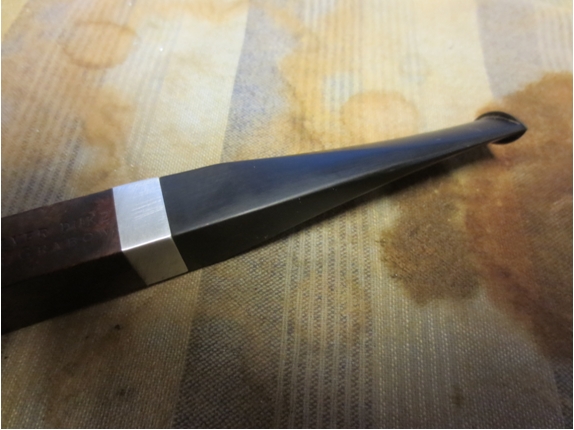
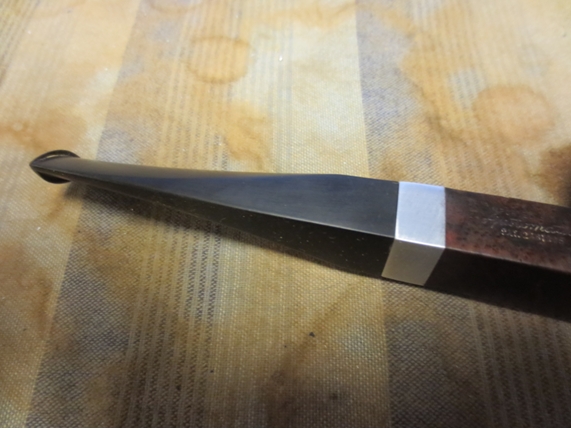
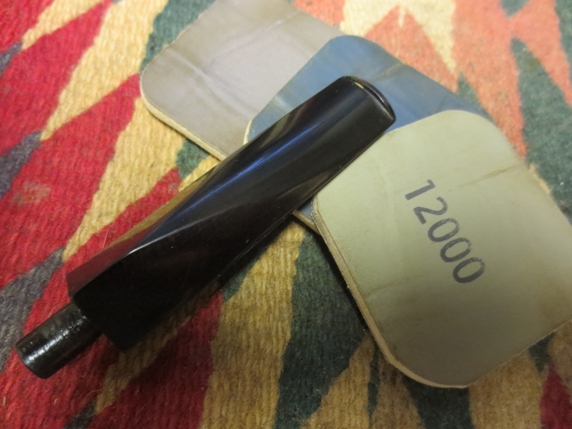
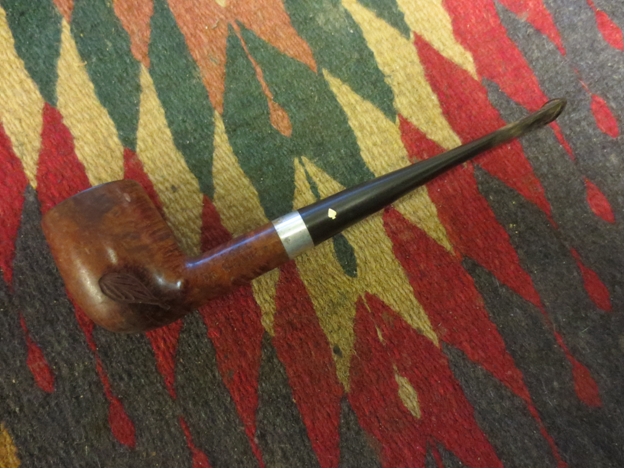
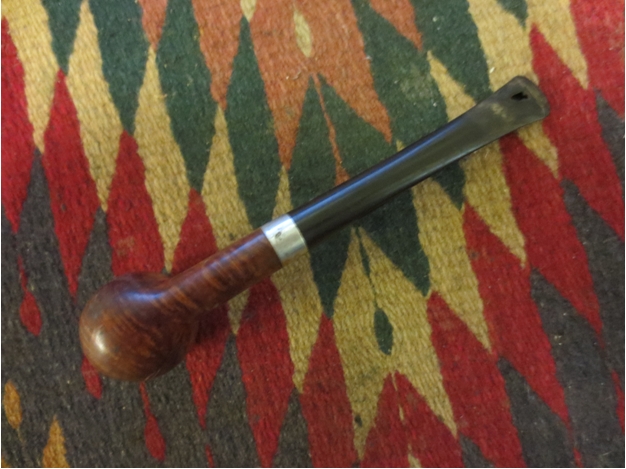
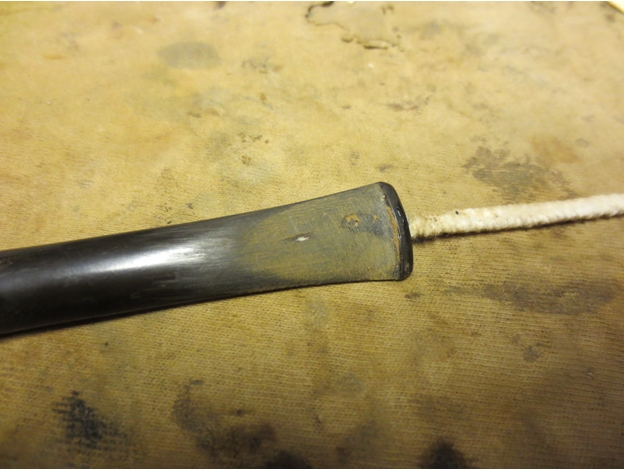
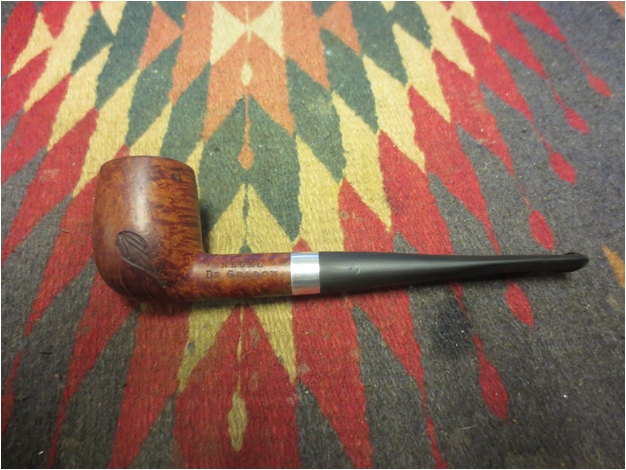
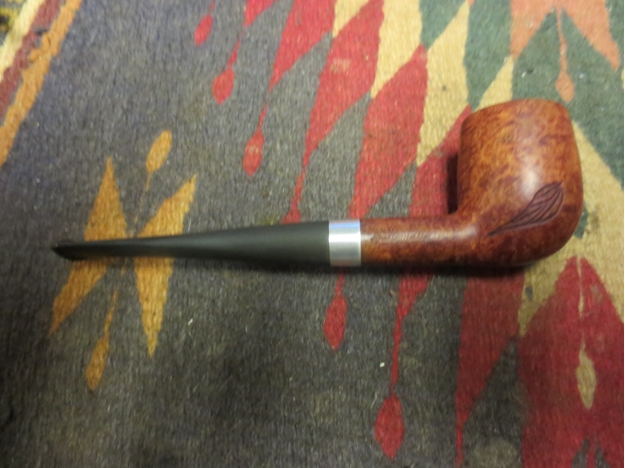
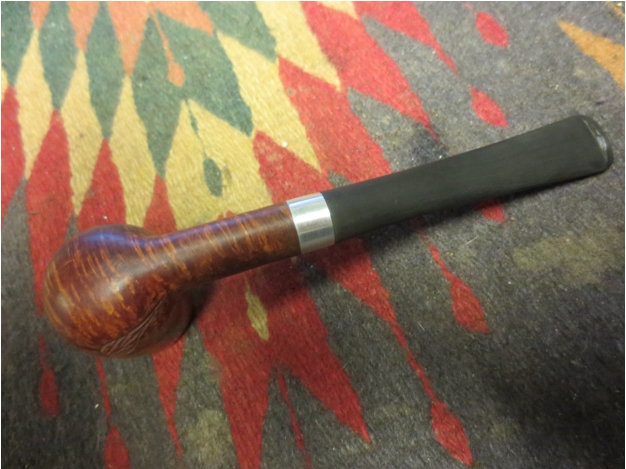
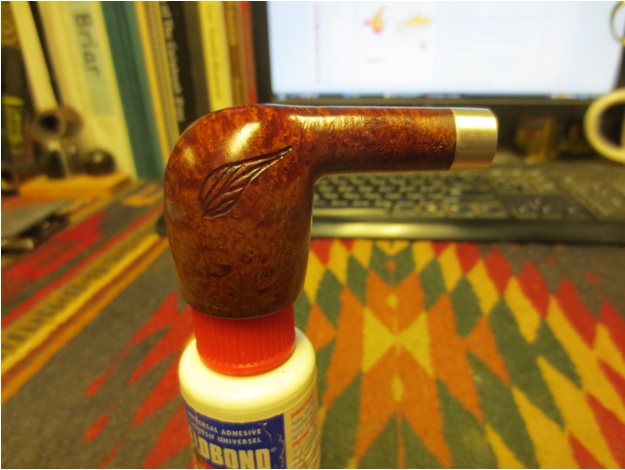
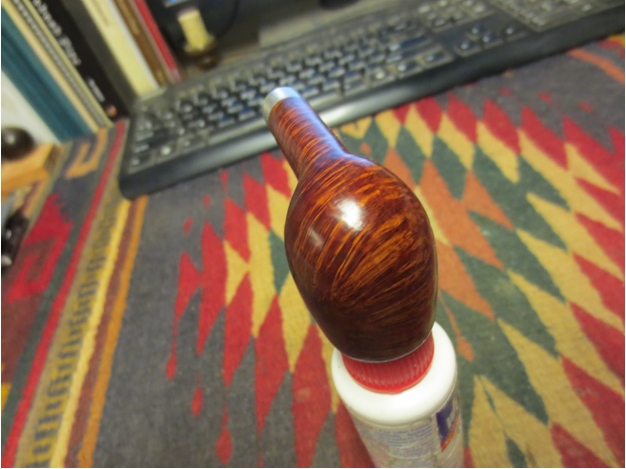
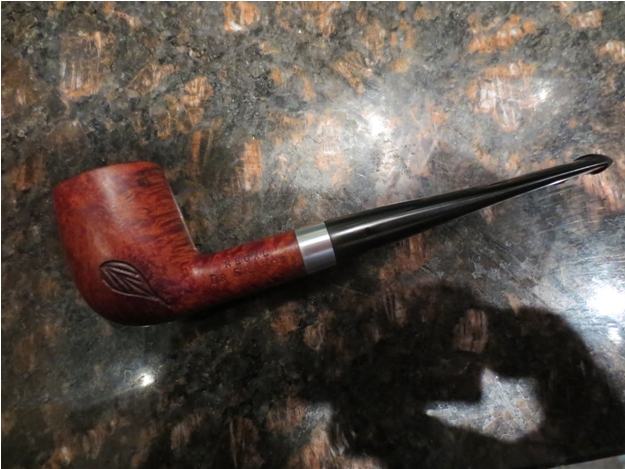
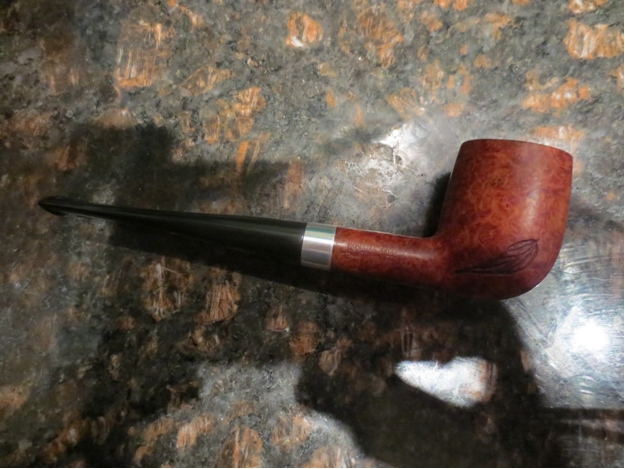
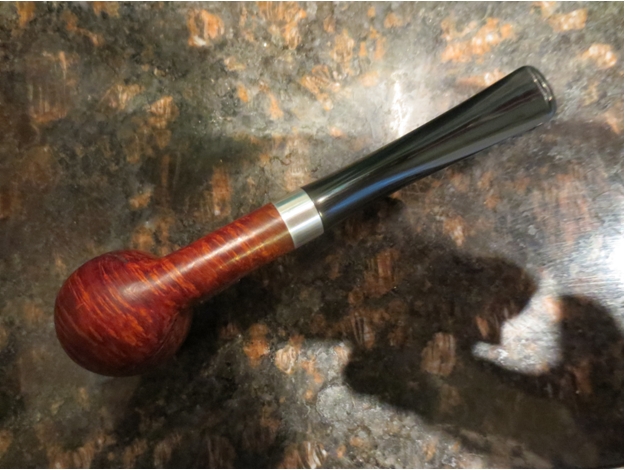
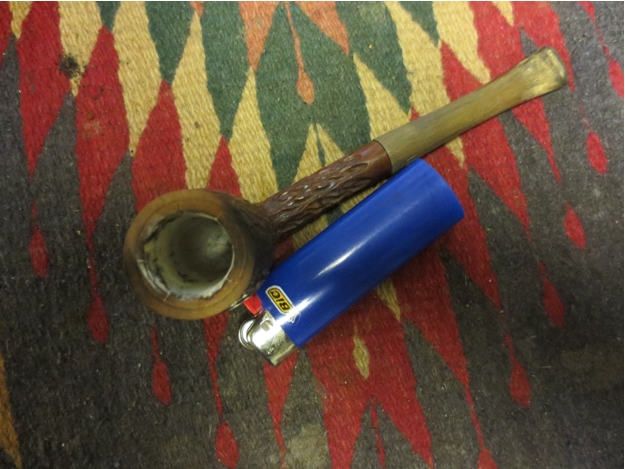
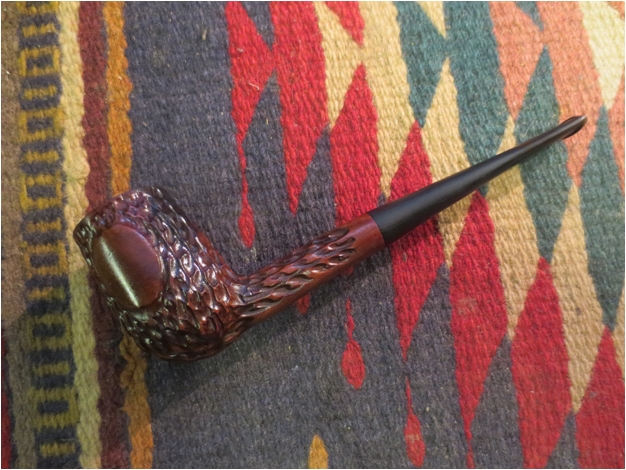
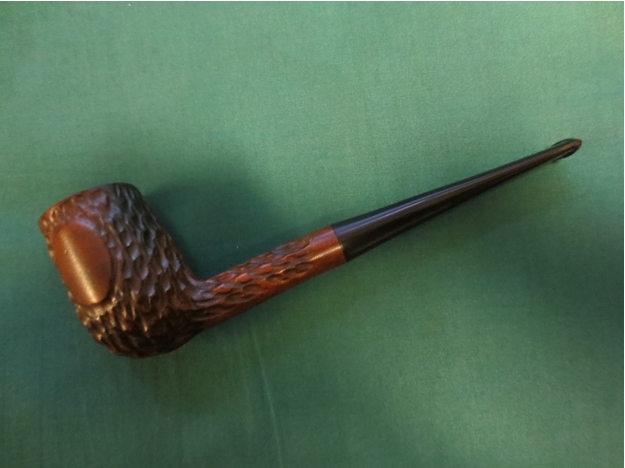
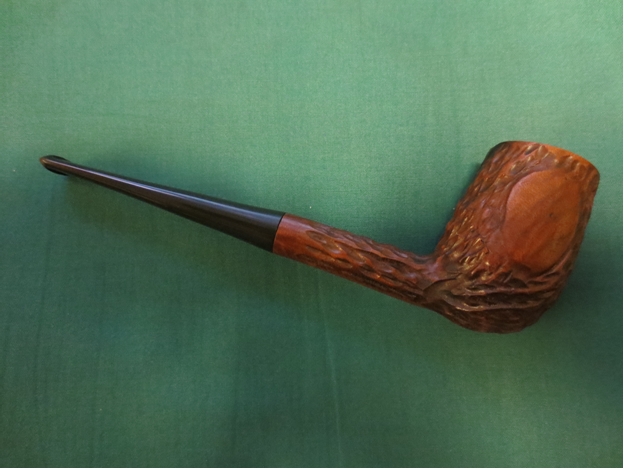
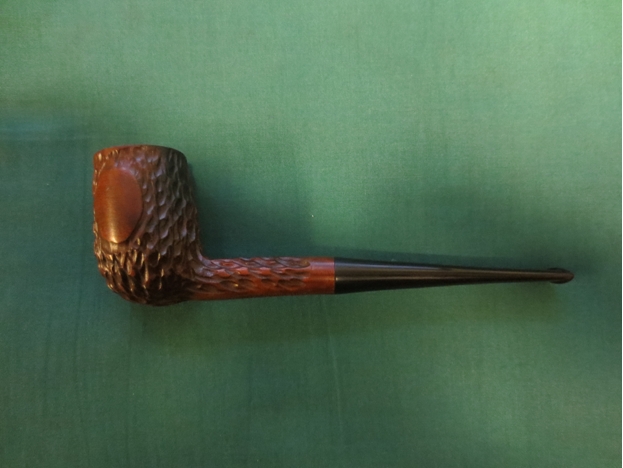
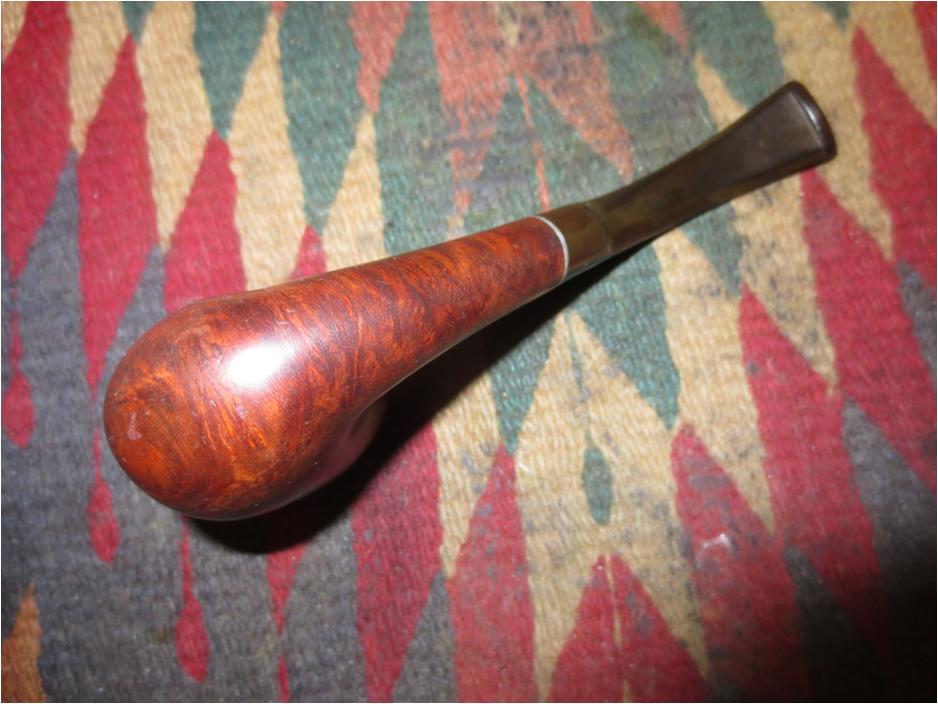
The oxidation on this one was tough to get off the stem. I took it to the buffer and use some Tripoli, White Diamond and then Blue Diamond and I finally beat it. I took it back to the work table and sanded it again with the last three grits of micromesh – 6000-12000 grit. I rubbed it down again with Obsidian Oil and then gave both the bowl and stem multiple coats of carnauba wax. I buffed it with a clean flannel buff and then hand buffed it with a microfibre cloth. The finished pipe is shown below.Doc21

Doc22

Doc23

Doc24

Doc25

Doc26

Doc27

Doc28

Doc29

Restoring a Dr. Grabow Viscount 39 Continental


Blog by Steve Laug

I was gifted this beautifully grained Grabow Viscount Shape 39 in a box of pipes that needed to be reconditioned and repaired. It was a shape that I had seen pictures of but I had never seen one in person. Holding it in hand led me to have a few questions regarding it. It is stamped on the left side of the shank Viscount over Dr. Grabow and on the right side 39 near the shank and then Imported Briar over Adjustomatic over Pat.2461905. I posted the questions and some photos of the pipe on the Dr. Grabow Collectors Forum as I have found the folks there to be extremely helpful and knowledgeable about all things Grabow.

Here are the questions:
1. Any idea on the dates of this one.
2. The rim top has ridges but I am not sure if they are scratches or original. They are in no particular pattern and the rest of the bowl is smooth. Did this shape have a rusticated rim?
3. Did it have the Grabow scoop stinger as it is missing in this one?
4. The Grabow spade on the stem is raised above the surface. Was this normal? I have not seen it before.

I concluded my questions with a short comment on the pipe. The briar is amazing – birdseye on the sides and cross grain on the front and back of the bowl.

The pipe needed some work as can be seen from the above questions. The stem was rough. It was oxidized and had been scraped clean with a knife or other tool and left ridges and scratches all over the stem. It gave it a striped look. The rim had a hatched rustic pattern on it and had probably fallen prey to the same knife wielding owner. The finish was actually quite good underneath the dirt and sticky spots that may have come from price tags on the bowl or labels. I was surprised that it did not have any lacquer or varnish coat over the briar. It was just stained briar and would be quite easy to clean up.Cont1

Cont2

Cont3

Cont4 It was not long before I got a reply from Ted over on the Dr. Grabow Collectors Forum. He answered all of the questions that I had regarding this particular pipe and did them in reverse order. Here is his reply.

Yes, The grain is great. A fine example.

4) Spade on the stem has raised over time. It was flush when it left the factory. Even if it comes out (unlikely) it is a relatively easy fix. Joe and Ed have bunches of spades that they picked up off the factory floor.

3) It had the scoop (72B) cleaner. Unfortunately I don’t have any left. Someone will get you one.

2) Rim scratches weren’t there when it left the factory. Someone cleaned the top a little too vigorously.

1) This is fun…… The Continentals started in 1959/60 and their heyday was 1964-1966. Almost none were produced after 1967 because the sales just weren’t there. Shape stamped with a vulcanite stem makes me believe it was made in 66/67. I can’t speculate as to when it was sold… just made.

Here are some close up photos of the rim and the grain on this beautiful little pipe.Cont5

Cont6

Cont7 Troy Wilburn sent me some catalogue photos of the Continental Line. There are some unique and interesting shapes. I thought you might enjoy seeing the photos.Cont8

Cont9

Cont10

Cont11 I did a light reaming of the bowl with a sharp pen knife being careful to keep it vertical and not damage the inner edge of the rim.Cont12 I scrubbed the bowl, shank and stem airway with pipe cleaners, cotton swabs and alcohol. These metal mortise inserts collect a lot of “gunk” behind them and it takes some work to remove all of the debris and oils from the shank.Cont13 I scrubbed down the exterior of the briar with isopropyl alcohol to remove the sticky areas and also the general grime that was built up on the bowl and shank.Cont14

Cont15

Cont16 I lightly sanded the stem with 220 grit sandpaper and also a medium and fine grit sanding sponge to loosen the oxidation. Then I dropped it in a bath of warm Oxy Clean to soften and bring the oxidation to the surface.Cont17

Cont18

Cont19 While the stem soaked I worked on the scratches and hatch work on the rim surface. It was not only dirty but it looked like someone had scraped off the tars with a knife and left a rough hatch pattern all over the surface of the rim. I sanded it with 220 grit sandpaper to remove the scratches and smooth it out once again. I then sanded it with a medium and a fine grit sanding sponge to reduce the scratches left behind by the sandpaper.Cont20

Cont21 I sanded the rim down with micromesh pads, wet sanding with 1500-2400 grit pads and then dry sanding with 3200-4000 grit pads. I wiped the bowl down with alcohol once more to remove the dust and sanding grit.Cont22

Cont23

Cont24

Cont25 Troy mentioned that these older Continentals were not stained but general just had a light oil coat on the natural briar. It appeared that this was true on this old pipe but the patina that had developed over the years since 1966-67 had darkened the briar. I used a medium brown stain pen to touch up the rim as it matched the patina exactly.Cont26 I took the stem out of the bath and dried it off with a coarse cotton cloth. The oxidation was greatly reduced and the stem was ready to work on.Cont27

Cont28 I put a plastic washer between the stem and the shank and sanded the stem with 220 grit sandpaper and the sanding sponges to remove the hard to get oxidation at that point.Cont29 I took the stem off again and finished sanding with the sandpaper and sanding sponges.Cont30 Then it was time to work on the polish of the stem. I wet sanded with 1500-2400 grit micromesh sanding pads and then rubbed the stem down with Obsidian Oil. I dry sanded with 3200-4000 grit pads and repeated the oil. I finished with 6000-12000 grit pads, gave the stem a final coat of oil and when it dried buffed the stem with Blue Diamond on the wheel.Cont31

Cont32

Cont33 I gave the entire pipe a light buff with Blue Diamond and then gave it multiple coats of carnauba wax. I buffed it with a clean flannel buff to raise the shine. I took it back to the work table and hand buffed it with a microfibre cloth to bring out a deeper shine. The finished pipe is shown in the photos below. It turned out to be a beautiful piece of briar and a unique looking pipe. The old briar is rich with colour and warmth.

I want to thank the Dr. Grabow Collectors Forum and Ted of that Forum for their help on this pipe. I also want to thank Troy for the catalogue pages and for sending me the spoon stinger to insert to completely finish the restoration of the Continental. Thanks for looking.Cont34

Cont35

Cont36

Cont37

Cont38

Cont39

Cont40

Cleaning up a Dr. Grabow Royal Duke Bent Billiard


Blog by Steve Laug

One of my pipe finds last weekend was a Dr. Grabow Royal Duke Bent Billiard. It was in pretty decent shape. The rim had a little buildup and darkening but no damage. The bowl itself was lightly smoked but was half full of unsmoked tobacco. The stem had some scratches and small marks on the surface of the top and bottom. There were no tooth marks though and that was a bonus. The aluminum cap on the stem was oxidized. There was a Medico filter in the aluminum shank that was almost black. The finish was in good shape. There were some scratches and small dents in the briar on the bottom of the bowl. Overall the pipe was in pretty decent shape and needed a thorough cleaning. It was an easy refurbish.Grabow1

Grabow2 Because it was an easy cleanup I decided to see if I could gather any information on the history of the Royal Duke. I posted on the Dr. Grabow Collectors Forum and put pictures of the pipe there to see if I could get some help on the brand. I got some great responses and information from the folks there. The first of them came from Ted D. who was a past CEO of Dr. Grabow in Sparta. Here is what he wrote:

“Royal Duke was the first paper filter pipe made by Grabow. The name and construction were bought from Continental Briar Pipe Co. in the early 50’s. Continental made the “Royal Duke of Dundee” and “Duke of Dundee”. Royal has been made continuously since then, and is still made. It went through several minor changes through the years. With a “before” picture I might get within a 10 year period… maybe closer. Td” Grabow3 Spadefan on the same forum also posted this for me: The Grabow Timeline post:

http://drgrabows.myfreeforum.org/viewtopic.php?t=4834&start=0 shows Royal Duke starting somewhere in the broad timeframe of 1955 – 1964. Royal Duke continues in production today. Here are a few quotes from forum member DRBridges, one of the forum’s “founding fathers” and “Old Timer” TED that place the blue spades on early production Duke series filter pipes until abt. 1993/4. Here are the money quotes:

“HL&T began replacing the older Dr. Grabow model names after 1955 with new models. These included the “Ajustomatic” ELDORADO, REGAL, SAVOY, STARFIRE, VISCOUNT, and the “Duke Filter” DUKE, GRAND DUKE, and ROYAL DUKE. The early “Ajustomatic” pipes displayed a white spade emblem. The early “Duke Filter” pipes diplayed a blue spade. The early push stem [without filter] pipes displayed a yellow spade. Additional models were introduced during the 1960s and 70s, and all later Dr. Grabow pipes displayed a white spade emblem.” DRBridges

“Through the 1950s, 60s, 70s, and 80s, DG filter pipes used blue spades, except for the ajusto Dukes. They all went white in the early 1990s. Mortise and tenon DG pipes used yellow spades. Ajustomatics were white.” DRBridges

“We were still using the colors in 1991. I guess they changed about 93/94.” ted

So it looks like blue spades were used exclusively on Duke lines of filter pipes from their introduction sometime 1955-1964 through 1993/4. Anyone have more info on blue spades?Grabow4I posted photos of the pipe as Ted requested and then received another answer from him that helped date the pipe. He wrote: “I think it’s the old Spruance Southern lacquer. That and a vulcanite bit will put it at 1975 +- 5.. td”

Knowing that information gave me some helpful information on the pipe I had. I liked the idea that it came from the era in which I finished my high school and entered university. It came from the same era as my first pipe purchased in the early 1970’s. The photos below show the state of the rim and the half filled bowl of tobacco.Grabow5 The pipe has some absolutely beautiful grain that swirls around the bowl.Grabow6

Grabow7 I scraped the tobacco out of the bowl, threw away the paper filter and then cleaned out the shank and stem with pipe cleaners, cotton swabs and isopropyl alcohol.Grabow8 Because the bowl had an intact coat of lacquer that was not damaged I scrubbed the rim with saliva and cotton pads. I was able to remove all of the buildup on the surface and some of the darkening.Grabow9

Grabow10 I sanded the stem with micromesh sanding pads to remove the scratches and damage to the surface. I wet sanded with 1500-2400 micromesh until the majority of the marks were removed. I dry sanded with 3200-12,000 grit pads to further polish the vulcanite.Grabow11

Grabow12

Grabow13 I gave the stem several coats of Obsidian Oil and then buffed it with Blue Diamond on the buffing wheel. I gave it several coats of carnauba wax and buffed it with a clean soft pad to raise the shine on the stem. I lightly buffed the bowl so as not to damage the lacquer. The finished pipe is shown in the photos below.Grabow14

Grabow15

Grabow16

Grabow17

Grabow18

Grabow19 I want to give a shout out to the Dr. Grabow Collectors Forum. They are great folks and always ready to help. If you have not checked them out head on over and have a look at their site. http://drgrabows.myfreeforum.org/index.php Thank you folks for your help on this one and on others that I have worked on. It is greatly appreciated.

Using Charcoal & Cyanoacrylate glue to do a Stem Repair on a Dr. Grabow Starfire Churchwarden


Blog by Joe Mansueto -“JoeMan” (Dr. Grabow Collectors Forum)

Joe sent me the following email and an attached link for the article that follows. He has done some excellent work and I have followed it on Pipe Smokers Forums and also on the Dr. Grabow Collectors Forum. It is a pleasure to be able to post his work here on rebornpipes. Welcome and thank you Joe.

“Steve – I’ve looked in on your blog a number of times. Thanks for posting some really good information, and featuring the work of other guys in the field. One of the things I learned here which I had not done before was the use of Plaster of Paris to mend cracked / broken meer-lined bowls. That was helpful…and I think that was one of your own posts. I’d been looking for a better solution…thanks.”

“I’m not looking to get published so much as I’m happy to help other guys with refurb processes. I learned a LOT of things from others who’ve been at it for many years more than I, and have also developed a few of my own techniques…as I’m sure most of us have! Cleaning out gunk…refitting a stem…rusticating….topping a bowl…staining…refinishing…de-oxidizing stems…repairing chips…etc…these are all things I do on a regular basis. Recently, I took my hand to making pipes, and made 2 of them during a stay-home vacation…came out pretty good! But, I see myself primarily as a refurb guy…I really enjoy making an old broken-down relic of a pipe gleam again. If I were to count, I suppose I’ve refurbished most of a thousand pipes over the last 4 years. No…I don’t have 1,000 pipes…most have gone to others by way of sale, trade or gift. I suppose I do have 200 pipes in my collection however.”

“One of the things that most refurb guys seem to struggle with most is chewed / eaten stems. Those nasty tooth indentations…or worse yet…missing chunks from the button. I’ve heard of guys using super-glue, heat, JB Weld, vulcanite dust & glue, and other mad-scientist approaches. There are many good approaches to repairing a stem. The most effective approach I’ve personally found is Cyanoacrylate and activated charcoal. Ed James (AKA Ozark Southpaw online) is just about the best talent I’ve seen in all-things pipes. He too learned from others over many years, but what an innovator this gentleman is. I visited his shop when I was on the road over 2 years ago, and I’ve learned a lot from him. One of his own experiments a few years ago was mixing CA with activated charcoal and comparing the result with other repairs. It was a great discovery, and at the time he did it and shared it on the forum, I’d not seen anyone else doing it that way. I’m not saying it’s the ‘best method’…because you know how some pipe guys can get into struggles over their method being best…but I’ve personally not seen anything more successful. Ed James has not done too many of these CA/charcoal repairs himself…but once he discovered, tested and shared it, I took it and ran with it. Do with this info as you please or nothing at all…but here is one example of the process…”

“At the time of that Starfire churchwarden refurb, I had done a couple hundred stem repairs. Since the time of that refurb, I’ve surely done a couple hundred more, and have tweaked my own process here and there. I’ve done some of these repairs on pipes for myself, but more for pipes which I’ve then sold, as well as others who bring them to me. This one served as a good example, since it was one of the worst cases that I documented. Most of those I’ve done, I’ve not documented at all.” – Joe Mansueto “JoeMan” (Dr. Grabow Collectors Forum)

Here is Joe’s blog:

Just recently got this pipe from Sam (DG forum name SamCoffeeMan – hasn’t been here in a while) along with the Grabow Unique. When I expressed interest in it…Sam said that he’d “cut off 1/2” of the stem, and file out a new button. I said…nnnooooo…leave it original and I’ll fix it.

I am sure the stem is original to the pipe. The stem is identical to the stem on my Linkman Grabow 6033, it is perfectly registered, and the wire carving is that of an ‘early’ Starfire, as you’ll see below. That said, this was surely among the last of the churchwardens to leave the Grabow factory.
Joe1 The previous owner should have had a sandwich instead of smoking this pipe…Joe2

Joe3 This can be fixed!

Bleach soak first, then an isopropyl alcohol scrub of the surgery site to assure the CA will stick best.

The form I used is 2 thicknesses of cereal box cardboard, cut to the shape of the tapered slot opening, wrapped in shiny packing tape. Since both sides of the button were nearly identically eaten, there was nothing to keep the form properly seated. So, I taped the form to a pipe cleaner and pulled it into place as tight as I could, then centered it top to bottom…if that makes sense.Joe4 CA mixed with activated charcoal, applied in multiple layers…Joe6

Joe7 Using a needle file to shape between layers…Joe7 Just about done shaping, ready for multiple-stage wet sanding…Joe8 Buffing…done.Joe9

Joe10 Some of you will know which shape number this medium billiard would be. Bowl height is nearly 1 3/4″, ID is 3/4. Overall length is 11 3/4″.Joe11 This is an older Starfire for sure. It’s got the very deep wire carving which is continuous over the entire pipe as I believe Tom pointed out about Belvedere.Joe12

Joe13 This was originally posted on The Dr. Grabows Collectors Forum. Here is the link: http://drgrabows.myfreeforum.org/sutra87253.php#87253

Cleaning up a Dr. Grabow Silver Duke Bulldog


Blog by Steve Laug

This old Dr. Grabow Silver Duke Bulldog is a bit of a variation on a restoration for me. Someone earlier had replaced the Adjustomatic stem with a push stem. Whoever made the stem did an amazing job cutting it to fit perfectly with the angles of the shank. I say it is amazing because on these old pipes none of the angles are the same and matching all the points of the diamond shank is a lot of tedious hard work (at least for me and I have done a few of them). Add to that the stem was converted to a push stem instead of the normal threaded stem. It is a high quality vulcanite also as it did not have any oxidation.Duke1

Duke2 All I would have to do was sand out the blade or file marks on the stem and the metal mortise cap. The finish was very shiny and had some bubbles on the rim along with a tar build up. It was like a thick varnish. I always remove these top coats and wax and oil the bowl to make the grain stand out. The briar was pretty clean with only two recognizable fills that I could see, though well blended into the stain coat on the pipe. The bowl had a thin uneven coat of cake that would need to be reamed.Duke3

Duke4 The pipe was stamped Silver Duke over Dr. Grabow on the left side of the shank and Imported Briar over Adjustomatic in script over Pat. 2461905. That confirmed the replacement stem. The only thing wrong with the stem was that it had lots of marks in the surface left from either a saw that was used to cut the angles or the files. The stem was not smooth and shiny like the bowl but was rough to touch with small ridges on the surface from the cut marks. The metal mortise insert had matching marks so it looks to me that the stem was cut on the shank. The thin button is perfect. A taper stem on a bulldog is something I have always liked better than a saddle so this one looked great to me.Duke5

Duke6

Duke7

Duke8 The tenon was also ridged. I have found that when the adjusting screw is loose on my tenon turning tool I get a tenon that looks like this one. It also has a slightly deeper groove next to the bottom of the tenon where it joins the stem. These issues would need to be addressed. It would take a little bit of finessing to clean up the ridges and keep the fit of the stem snug in the metal mortise but it could be done.Duke9

Duke10 I could see some nice grain under the shiny varnish coat. It was cloudy and the rim had a slight build up of tars and oils. I wiped the bowl down with acetone on cotton pads. The varnish came off and left the pad orange. I had to keep the acetone pads wet otherwise the varnish gummed up on the surface and the pads stuck to the briar. After a lot of scrubbing (three pads and much acetone to keep a wet edge) the finish was gone and the grain stood out in its beauty.Duke11

Duke12

Duke13

Duke14 I reamed the bowl with a PipNet reamer and took the cake back to the bare briar in order to provide a smooth surface for a new cake to be developed.Duke15

Duke16 I scrubbed out the shank and airway with cotton swabs, pipe cleaners and isopropyl alcohol. I scrubbed until it was clean. In this case the deepest part of the mortise was clean quickly. Most of the oils and tars came out of the metal threads of the Adjustomatic tenon insert. Even cleaning that did not take too many pipe cleaners before it was shiny. I also scrubbed the end of the shank insert to remove the varnish and tars left on the end.Duke17 I sanded the scratched aluminum mortise insert/cap with a fine grit sanding block to minimize some of the scratches and remove the cut marks left behind from the manufacture of the stem. It took a bit of sanding but I was able to remove the deepest ones. The rest would polish out with sanding sponges and micromesh sanding pads.Duke18

Duke19 I sanded the stem with the sanding block and then with a medium and fine grit sanding sponge. I sanded until the deeper scratches were minimized and the surface was free of the earlier ridges. I also sanded the area around the top and bottom surfaces next to the button to remove the tooth chatter that was there.Duke20

Duke21

Duke22

Duke23 I rubbed the briar down with a folded paper towel lightly coated with olive oil. I wanted to highlight the grain and give some life to the finish before waxing it so I used the oil. Once it is wiped on and absorbs it has a glow that I like. I cover that with carnauba in the end and the finish shines and has warmth that was lacking in the previous varnish coat.Duke24

Duke25

Duke26 The stem did not seat well in the mortise. The flat surface of the aluminum insert needed to be beveled to let the tenon sit right in the mortise. I used a sharp knife to bevel the inner edge of the mortise to accept the tenon correctly and close up the gap between the stem and shank.Duke27

Duke28 I put the stem back on the bowl and the fit against the shank was now snug with no gap. The beveling of the inside of the mortise achieved what I was hoping and the fit was perfect.Duke29

Duke30 When the shaping of the replacement stem had originally been done the blade or file had rubbed against the shank in two places on the bottom sides of the diamond. It looked to me that it had rubbed off the varnish coat and also some of the stain so that the spots looked lighter than the rest of the shank and bowl. I used a dark stain pen to touch up these areas on the shank and blend them into the finish of the rest of the pipe.Duke31 With the first steps in refinishing the bowl done I wanted to remove the ghosts that were in the bowl. There was an aromatic smell that I wanted to remove. I stuffed cotton balls into the bowl and set the bowl upright in an old ice cube tray. I use an ear syringe to fill the bowl with isopropyl alcohol. The bowl would sit for the day absorbing the oils from the briar into the cotton and alcohol. As the alcohol evaporated the tars would remain in the cotton.Duke32

Duke33 I let the bowl sit and while the cotton and alcohol did its magic I worked on the stem with micromesh sanding pads. I wet sanded with 1500-2400 grit pads to remove the remaining surface scratches and begin to polish the vulcanite.Duke34 I used some clear super glue to fill the ridges on the tenon and smooth it out before going on to sand the stem with the remaining grits of micromesh sanding pads. I rubbed the stem down with Obsidian Oil after the first set of three pads and then again after the second set. I find that the oil helps the higher grit pads to really cut into the surface and help polish the vulcanite.Duke35

Duke36 The bowl had been sitting for about three hours so far. I took a picture of the cotton to show the colour that was beginning to leach into it from the bowl.Duke37 I let the bowl soak for another hour and very little more came to the cotton. I pulled the cotton pads out of the bowl and ran a cotton swab through the bowl and shank to clean up the remaining alcohol there. I ran a pipe cleaner through the airway into the bowl to dry it out. I put the stem on the bowl and took it to the buffer. I buffed the pipe with White Diamond and then gave the bowl and stem multiple coats of carnauba wax. I finished by buffing it with a soft flannel buff. The finished pipe is shown below.Duke38

Duke39

Duke40

Duke41

Duke42

Duke43 While I worked on this pipe I have been posting updates and asking for information on the Dr. Grabow Collectors Forum (http://drgrabows.myfreeforum.org/index.php) and gotten a lot of information from the folks there. I found out that I can order an original stem for this pipe by sending them the bowl and some money for the stem and shipping. I may well do that one day. I raise a bowl to them and dedicate this blog post to the members of that site. Thanks for the help.

Rebuilding a Dr. Grabow Regal Adjustomatic Patent Billiard


One of the few pipes with a stem included in my gift box of bowls was a nice little Dr. Grabow Billiard. It had a long stem that clearly fit the shank of the pipe and gave it an elegant look and feel. At first glance I figured this one would clean up quite easily. The varnish finish on the bowl was worn and spotty with pieces of the varnish coat peeling off the surface of the briar. The rim was coated with a thick layer of tars and oils but looked sound. The bowl had a thick cake particularly from mid bowl to the bottom of the bowl. It was very hard and was not crumbling at all. It had however, closed the bowl to a large degree. The mortise was part of the aluminum band on the shank. It was a threaded cast piece that was fitted against the briar and was oxidized. The internals were quite clean. The bowl was stamped on the left side: REGAL over Dr. Grabow. On the right side it was stamped Imported Briar over Adjustomatic over PAT. 2461905. I have written about the patent on the Adjustomatic tenon/stem in an earlier post on rebornpipes: https://rebornpipes.com/tag/dr-grabow-adjustomatic/ I included patent information and diagrams on that page so I will not repeat that material in this post. The stem had thick calcification on the top and bottom sides of the stem and looked like it had one time sported a softie bit. When I turned the stem over there was a large hole in the underside from the button forward. IMG_1924 IMG_1925 IMG_1926 IMG_1927 I wiped down the bowl with acetone on a cotton pad to remove the damaged varnish and prepare the bowl for possible restaining once the rim had been cleaned off. It took some scrubbing but I was able to get rid of the varnish from the surface and out of the grooves in the carved leaves on both sides of the bowl. It turned out that underneath the peeling varnish there was some very nice grain on the pipe. The top and bottom of the shank and the front and back of the bowl were really nice cross grain. There was a small nick in the back of the bowl near the top of the rim that had a small fill otherwise the briar was flawless. The sides were very nice birdseye grain. This was going to be a stunning pipe once it was finished. IMG_1928 IMG_1929 IMG_1930 I wiped down the buildup on the rim and was unable to even dent the hard tar. I lightly topped the bowl on a topping board to take of the buildup and not affect the rim itself. I carefully removed the tars, checking every move across the sandpaper to make sure that I was not damaging the surface of the rim. IMG_1931 IMG_1932 Once I had cut through the buildup the briar was in very good shape. I used a PipNet reamer with the smallest cutting head to remove the carbon cake in the bowl. Even the smallest head was hard to turn against the rock hard cake of this bowl. I carefully worked it back and forth, being careful not to tip the cutting head to either side and lose the roundness of the bowl. Once I had gotten the head in as far as possible I used a pen knife to work on the bottom portion of the bowl and then reworked the reamer in that area. IMG_1933 I decided to try to patch the hole in the stem. I cleaned hole and put Vaseline on a pipe cleaner. I inserted it in the airway then sprayed accelerator on the stem, put black superglue on the hole and let it sit. The hole was quite large and I was not sure that the repair would hold. I applied the glue in several layers building up the patch until it was quite thick. I sprayed it with the accelerator each time to speed the drying time. IMG_1934 IMG_1935 IMG_1936 I sanded the patched area with 150 and 220 grit sandpaper to smooth out the patch and then reapplied more black super glue and accelerator. IMG_1937 I set the stem aside and let it cure. In the morning I sanded the stem patch until it was smooth in the process my fingernail went through the stem above the patch. I explored the thickness of the stem up the stem and found that I could push through the airway quite a distance up the stem (Photo 1 below). After that fiasco I noticed that the patch was also quite unstable. I was able to push out the patch with my fingernail. The stem after patching and pushing through the repair is shown in Photo 2. IMG_1943 IMG_1944 At this point it was clear that a stem patch would not work on this stem. With the thinness of the vulcanite extending up the stem about an inch it was not clear how far that would go. I was going to need to do something different. I cut off the stem with a Dremel and sanding drum. IMG_1945 IMG_1946 After cutting it off I could see the problem – airway was drilled very high in the stem. There was no room for cutting a new button on the stem and opening up the slot. The top of the stem was thin for another inch toward the tenon. I had to come up with something very different to address this issue. IMG_1947 I had an old Kaywoodie stem in my can of stems that was about the same diameter as the damaged one. It was missing the club logo in the side of the stem but had a club shaped hole. I heated the stinger on the KW stem with a lighter and then was able to remove it with a pair of needle nose pliers. IMG_1948 I also heated the Grabow stem with the lighter and worked on it with the pliers. It came out slowly. I finally screwed it into the bowl and turned it until the stem came off. I then unscrewed the tenon from the bowl. I tried it in the KW stem and it was just a little bit bigger than the hole in the stem. I would need to drill it one size larger to get a fit. IMG_1949 I used my cordless drill to drill it out. It had to be slightly larger and slightly deeper than the KW stinger apparatus. To make room for the lip on the aluminum piece I used a sharp knife to bevel the inner edge of the hole to accommodate the lip. IMG_1950 IMG_1951 The Grabow tenon/adjustomatic apparatus fit in the shank and I pressed it into place to see if the fit was correct. I then removed it and used a white all purpose glue to hold it in place. There was a removable stinger end for the tenon so I reinserted that in place and the new insert was ready. IMG_1952 IMG_1953 The fit of the stem against the shank was perfect. The diameter of the stem was slightly larger than the diameter of the shank so I would need to sand it to make them match. I tried to remove the Grabow insert from the old stem so that I could use it on the new stem. I tried to pick it out with a dental pick but was not able to remove it. IMG_1954 IMG_1955 I filled the club hole with black superglue and then sanded it smooth. I used 220 grit sandpaper to work on the diameter of the stem. I also sanded the end of the stem around the button to remove the tooth marks and chatter. IMG_1956 The next series of four photos show the stem after all of the sanding and shaping. The new stem looked quite good with the bowl. The fit was perfect and the lines and flow of the angles was exactly what I was looking for when I started. IMG_1957 IMG_1958 IMG_1959 IMG_1960 I sanded the stem with a medium and fine grit sanding sponge and then refilled the small holes around the patched club logo with more superglue. I sanded the patch down with 220 grit sandpaper and resanded it with the sanding sponges until it was smooth. The photo below shows the two stem side by side. IMG_1965 I sanded the stems with micromesh sanding pads – wet sanding with 1500-2400 grit pads and dry sanding with 3200-12,000 grit pads. I rubbed it down with Obsidian Oil between each set of three grits of micromesh. I buffed the stem with White Diamond and then gave it a final coat of Obsidian Oil and set it aside to work on the bowl. IMG_1966 IMG_1967 IMG_1968 I buffed the bowl with White Diamond and carefully buffed around the stamping on the sides. I polished the aluminum shank band with the higher grades of micromesh pads and then a polishing cloth to remove the scratches and bring up the shine. The next series of four photos show the polished bowl before I worked on it with some 8000-12,000 grit micromesh pads. IMG_1938 IMG_1939 IMG_1940 IMG_1941 IMG_1942 I gave the bowl a wiped down coat of Danish Oil and walnut stain. I wanted to give the briar a shine coat but not add much colour to the finish. It really made the grain pop on this one. IMG_1961 IMG_1962 IMG_1963 IMG_1964 Once the oil had dried I buffed the bowl with White Diamond and then gave it several coats of carnauba wax. I buffed it with a soft flannel buff. I put the stem back in place and gave the bowl and stem several more coats of wax and buffed to a shine. The finished pipe is shown below. The look and feel of the pipe is like new. It is cleaned, restemmed, refinished and ready to fire up with its inaugural bowl of tobacco. It should last a long time and serve its owner well – whether I keep it or pass it on to another pipeman. (I decided to take these final photos on a piece of marble counter top to see if I could get a good contrast on the photos.) IMG_1970 IMG_1971 IMG_1972 IMG_1973

Restoring a Dr. Grabow Meerschaum-Lined Stack


Blog by Steve Laug

Another of the bowls I was gifted was a tall Meerschaum lined rusticated stack with a smooth spot on both sides of the bowl and the end of the shank. It is stamped on the underside of the shank, MEERSCHAUM-LINED over Dr. Grabow. The bowl exterior had some darkening on the back side of the bowl and the grooves of the bowl were caked. The rim had damage and the meerschaum lining was rough on the inside edge of the bowl. There were cracks in the meerschaum bowl insert on the rim. The bowl itself was cracked and missing from about mid bowl to the bottom of the bowl. The meerschaum pieces were lying in the bottom of the bowl and there was no stem for the pipe.

I did not know anything about the meerschaum lined Dr. Grabows and this one had a distinct look of an Italian made pipe. I went to my source on line for Grabow information the Dr. Grabow Forum (http://drgrabows.myfreeforum.org/sutra238.php). There I found a post on the meerlined pipes. It read in part as follows… “Meerschaum lined pipes were originally imported from M. Gasparini in Italy for Grabow. Sparta finally figured out how to do them and only imported the “plugs”. Early Grabow Meerschaum lined pipes were stamped Italy with no spade. After 1989 Dr. Grabow got rid of Italy and added the spade.” So, my sense of it being Italian was correct. It also dates this pipe as pre-1989. IMG_1848 IMG_1849 IMG_1850 IMG_1851 I had an old stem in my can of stems that would be a good fit for this pipe. I needed to sand the tenon slightly to get a snug fit against the shank. The diameter of the stem was slightly larger than the diameter of the shank and would need to be sanded down to make a matched fit. IMG_1852 IMG_1853 I used a pen knife to clean up the inside of the bowl. There was carbon build up on the lower part of the bowl about mid bowl that was holding together the broken pieces of the meer lining. I scraped away the carbon and removed the broken pieces of meerschaum that remained on the lower edge of the bowl insert. IMG_1854 I topped the bowl with a topping board and 220 grit sandpaper to remove the damage to the rim and the lining top. IMG_1855 I did not remove much of the bowl top but took off enough to make the bowl top and the rim top flush and smooth. In the photo below the cracks in the bowl insert are visible around the top edge of the bowl. IMG_1856 I used clear superglue to fill the cracks on the top edge of the insert and sanded them down. I mixed a batch of plaster of Paris and used the dental pick, the cuticle tool that I was gifts and a pipe nail to build up the interior of the bowl and replace the bottom half of the insert that was missing. I inserted a pipe cleaner in the shank and then packed in the plaster around the airway and tamped it in place on the bottom with the pipe nail and on the sides with the cuticle tool. I used one of the stain pens that I have to stain the rim to match the bowl. IMG_1857 IMG_1858 IMG_1859 I inserted my damp index finger into the bowl and rubbed down the sides of the bowl to smooth them out. I also pushed the plaster on the bottom of the bowl to more thoroughly pack it in place. I sanded the stem with 150 grit sandpaper to reduce the diameter of the stem and then 220 grit sandpaper to smooth out the stem. IMG_1860 I scrubbed the bowl down with acetone on a cotton pad to remove the finish and clean up the exterior of the bowl. I then rubbed it down with olive oil and let it soak into the finish. I also rubbed down the stem with the oil as I find that it makes sanding the stem easier to do. IMG_1861 IMG_1862 IMG_1863 IMG_1864 I sanded the stem with micromesh sanding pads – wet sanding with 1500-3200 grit pads and dry sanding with 3600-12,000 grit pads. I wiped it down between each of the sets of three pads with Obsidian Oil. Once it was dry I buffed the stem with White Diamond and then with carnauba wax. IMG_1865 IMG_1866 IMG_1867 I put the stem back on the pipe and buffed it with White Diamond. I lightly buffed the bowl with carnauba wax and the stem more heavily. I finished by buffing the pipe with a soft flannel buffing pad to raise the shine. The finished pipe is shown below. The thin shank and the thin diameter of the stem give the pipe a delicate look. It is very light weight and fits well in the hand. I am going to let the plaster of Paris repair dry and cure for several days before I load a bowl and give it an inaugural smoke. IMG_1868 IMG_1869 IMG_1870 IMG_1871 IMG_1872 IMG_1873

UPDATE: I just smoked this one after it had cured for two days. I loaded a bowl of The Malthouse Founder’s Reserve in the bowl and smoked it to the bottom of the bowl. It smoked cool and dry. The plaster of Paris is darkening nicely and will soon match the rest of the meer lining of the bowl.
IMG_1874 IMG_1875 IMG_1876