Blog by Kenneth Lieblich
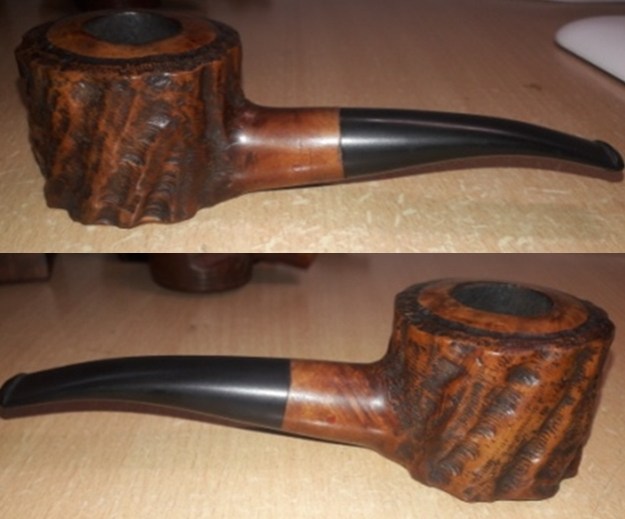
Next on the chopping block is this handsome and rugged Custom-Bilt Oom Paul. I acquired this pipe with Steve at one of those antique fairs where the term ‘antique’ is most loosely applied. Editorial comments aside, the fair was good fun and Steve and I enjoyed ourselves. This pipe piqued my interest because I know that there are many admirers (or should I say ‘fanatics’?) of Custom-Bilt pipes. Clearly, this one had had an active life and looked awfully tired now, but I felt I could bring it back to its best.


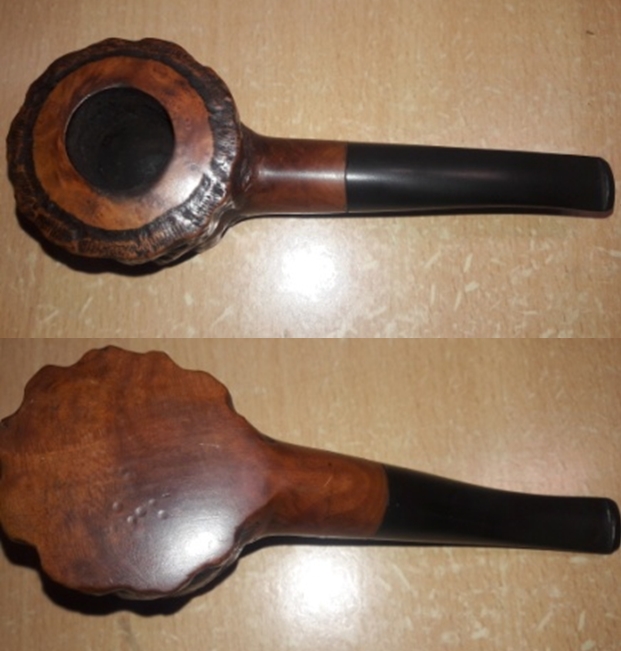
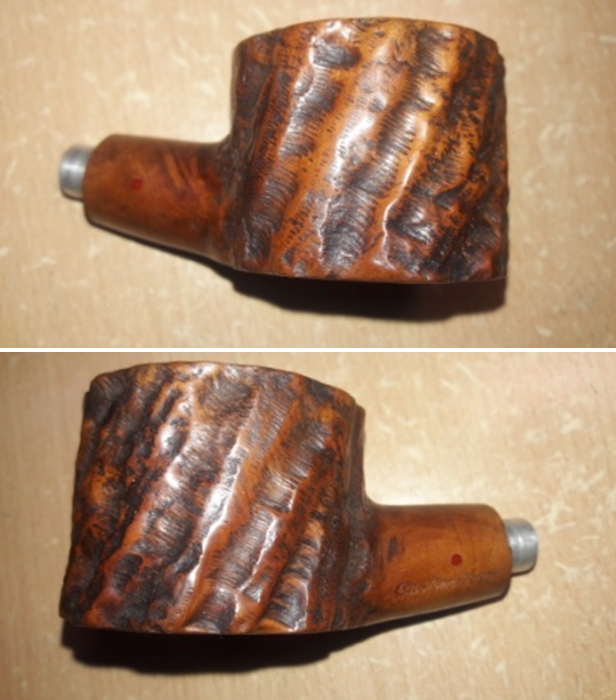
 As you can see, the pipe has the classic Custom-Bilt rustication on it. These marks are reminiscent of Tracy Mincer’s original work and are seen as something of a hallmark of the brand, nowadays. On the left side of the shank, the markings were as follows: Custom-Bilt [over] Imported Briar. No markings on the right side and no markings on the stem.
 The history of Custom-Bilt pipes is an interesting one and the most comprehensive source of information comes from The Custom-Bilt Pipe Story by Bill Unger. By all the accounts that I’ve heard, it is a very good book. I haven’t had the chance to read it myself, but it would appear to be the fount of knowledge on these pipes. If you’ve got a copy of Unger’s book that’s you’d like to get rid of, please drop me a line!
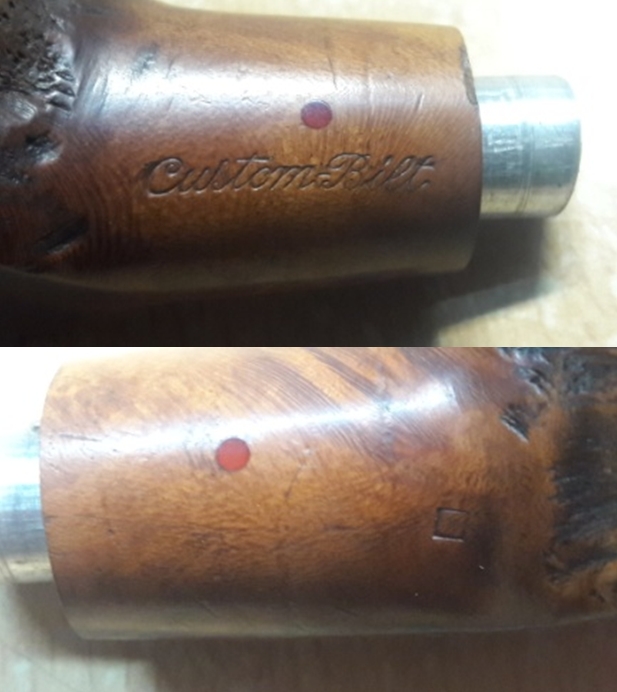
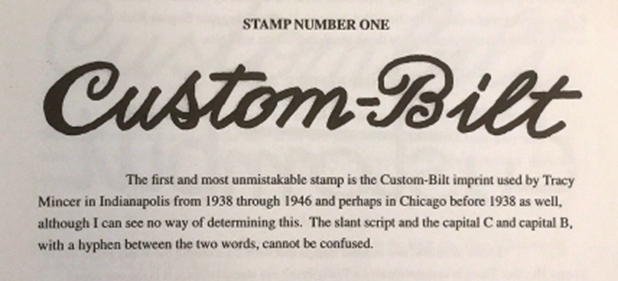
 Pipedia’s article on Custom-Bilt consists primarily of review’s of Unger’s book. It offers a cursory view of the markings and their approximate dating. My pipe’s markings correspond to “Stamp Number Three” as seen below, even though the markings on my pipe are not identical to that one. Thus, this pipe seems to be from the Wally Frank era.
 Pipephil provided a bit more information on the brand, although not strictly related to my pipe.
 Finally, the pipesrevival.com website has yet more information on Custom-Bilt pipes. This page seemed to confirm that my pipe is from the Wally Frank era, but my interpretation of the photos, etc. is that this is from the early part of that era – probably the early 70s. It is difficult to be sure, but that seems reasonable. In any event, if you are interested in these pipes, I recommend reading all three websites.
 I figure that this pipe must have been a good smoker because it had been thoroughly used and there was plenty of wear from its long life. This wasn’t a difficult restoration, but there were a lot of steps and it took longer than usual. The stem was heavily oxidized. There were a few minor scratches and a couple of notable tooth dents, and the inside was definitely dirty.
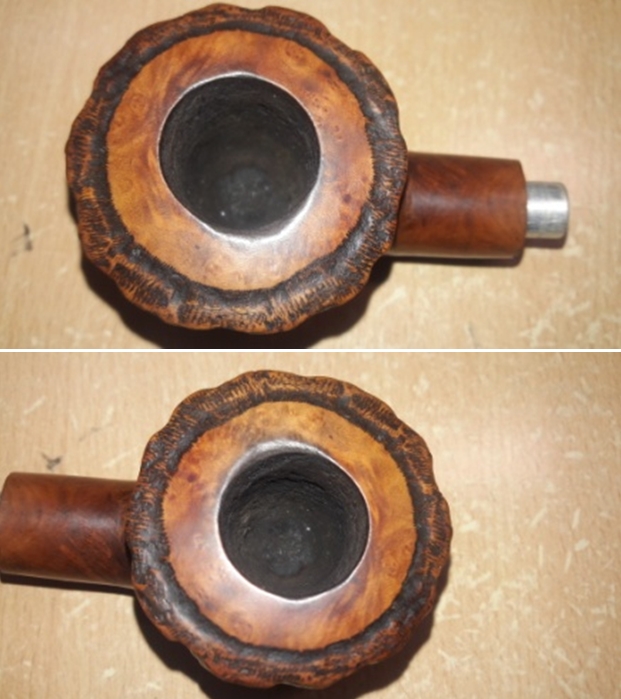
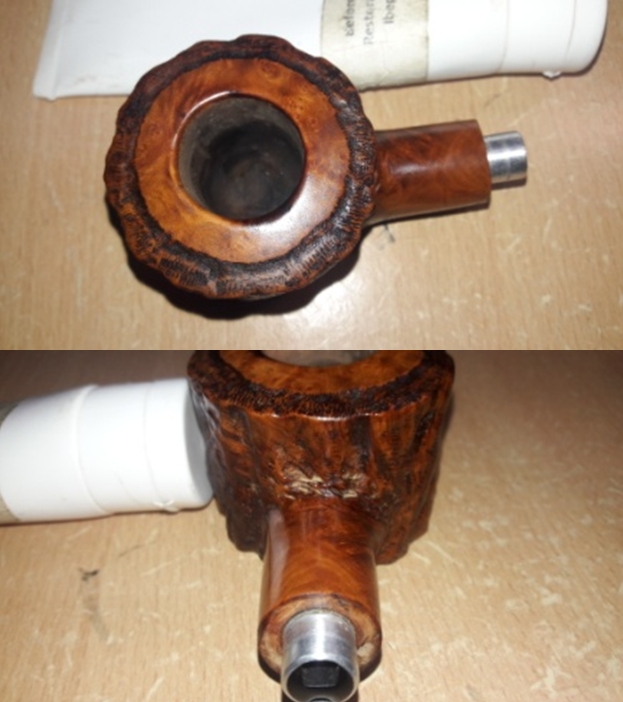
 However, the real issues were on the stummel. It had accumulated much dirt and debris over the years. The bowl had tons of cake inside and the rim was coated in lava (and potentially burn marks). The front edge of the rim was damaged, presumably from banging out dottle on a hard surface over the years. The grooves of the rustication were embedded with debris and there was a notable burn mark on the back-right part of the bowl, near the shank. Meanwhile, on the left of the bowl, there were a couple of fills (including a major one) that would need addressing. I haven’t even mentioned the miscellaneous scratches, dents and other marks all over the place!
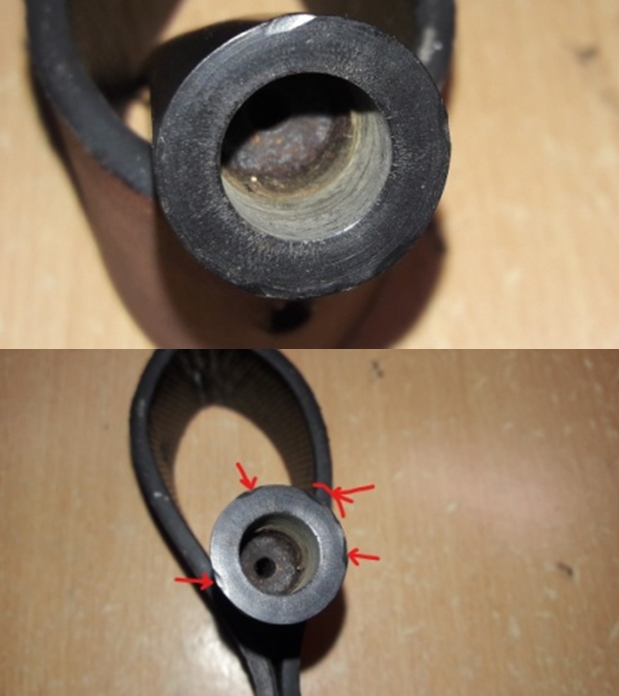
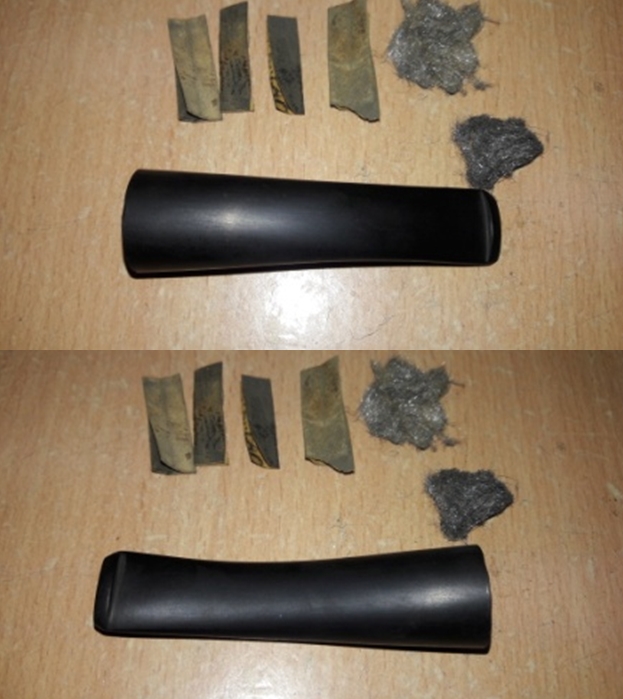
 Let’s get restoring. The stem was first on my list. I wiped the outside with Murphy’s Oil Soap on some cotton pads. I also took a BIC lighter and ‘painted’ the stem with its flame to lift the few bite marks and dents. However, it did not do much. Then I cleaned out the inside with pipe cleaners and isopropyl alcohol. Given the amount of oxidation, this one needed the usual overnight Pipe Stem Oxidation Remover bath. The following day, I cleaned all of the de-oxidizing mess off with alcohol, pipe cleaners, et cetera. The oxidation had migrated to the surface and I scrubbed with SoftScrub on some cotton pads to remove the leftover oxidation.


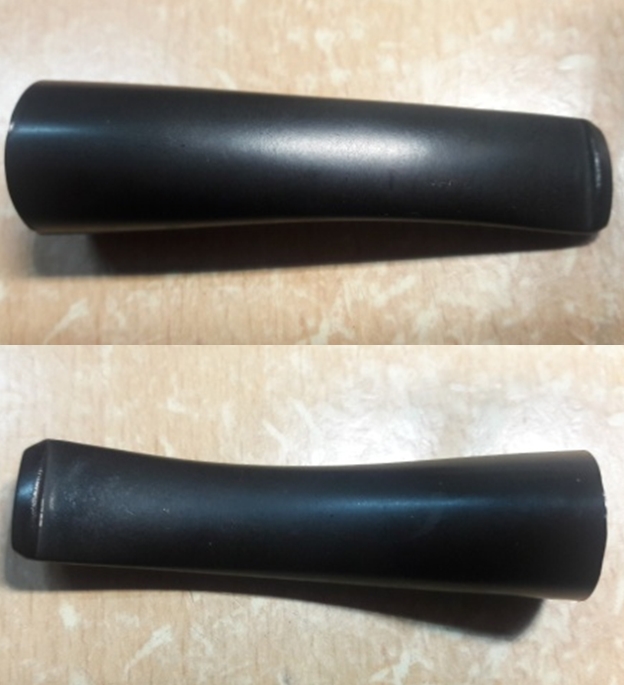
 With that done, I built up the dents on the top and bottom of the stem with black cyanoacrylate adhesive and let them fully cure. I then sanded the adhesive down with 220-, 400-, and 600-grit sandpapers to meld seamlessly into the stem. I then used all nine Micromesh pads (1,500 through 12,000 grit) all over to bring out the lovely black lustre on the stem. I also used Obsidian Pipe Stem Oil in between each pad scrubbing.
 You may notice that the stem looked odd – well, you are right. Over time, it gradually straightened itself out. I wanted the end of the stem to be roughly parallel with the rim of the bowl, so I brought out my heat gun and heated the vulcanite stem to make it malleable. The heat gun is very powerful – it doesn’t take long! When soft, I gently curved the stem over a wooden dowel. The dowel provides a firm surface and a proper curve. Once I had the bend I wanted, I left the stem to cool and set itself in place.
When I was done, I noticed some unusual “stretch marks” on the stem where I’d bent it. Then I asked Steve about it and learned that it does happen occasionally. Suffice it to say, it was extremely annoying as I had to go back and sand that section again. Lesson learned: bend the stem before sanding it!
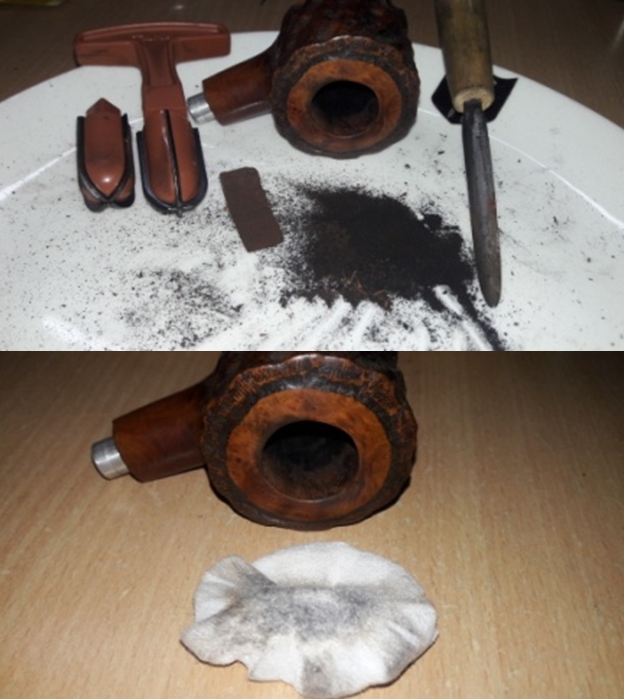
 All that finished, I set the stem aside and I began work on the very dirty stummel. Firstly, I decided to ream out the bowl. I used both the PipNet Reamer and the KleenReem to remove the built-up cake and followed that with 220-grit sandpaper taped to a dowel to eliminate as much as I could. I took the chamber down to bare briar, as I wanted to ensure there were no hidden flaws in the wall. Fortunately, there were none. As the photos show, there was quite a mound of debris.
 I then proceeded to clean out the insides of the shank with Q-tips, pipe cleaners, and lemon-infused isopropyl alcohol. It was ridiculously dirty and took up the country’s supply of cotton to get it clean. I followed that up by cleaning the insides with some dish soap and tube brushes.
 Next, I used cotton rounds and a toothbrush to scrub the outside of the stummel. Due to the lava on the rim, I carefully used a knife to scrape away as much as I could. All that scrubbing accentuated some very ugly fills which had been repaired with typical red putty.
 To exorcize the ghosts of tobaccos past, I decided to de-ghost the pipe. I thrust cotton balls into the bowl and the shank and saturated them with 99% isopropyl alcohol. I let the stummel sit overnight. This caused any remaining oils, tars and smells to leach out into the cotton.
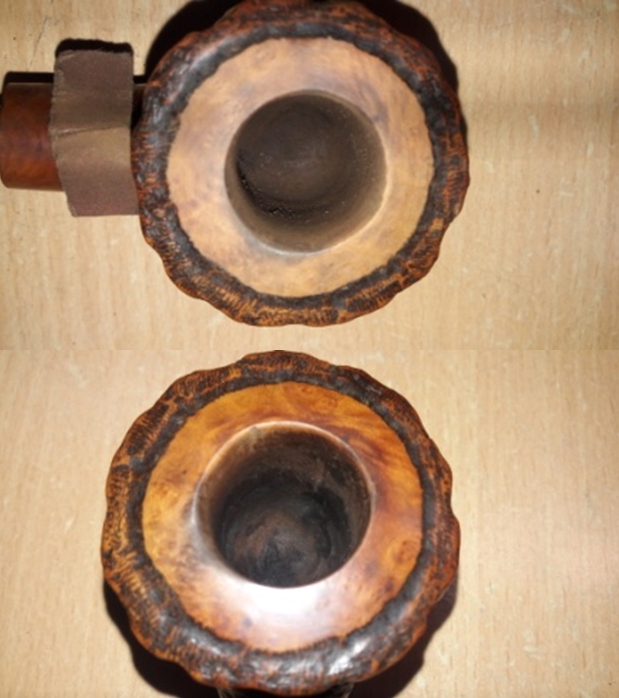
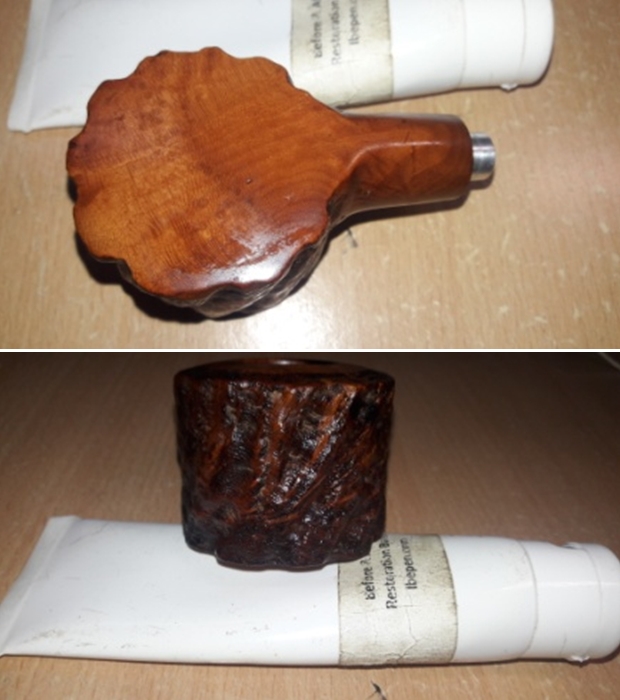
 Although it helped, the de-ghosting was not as successful as I hoped. As a result, I plopped the stummel in my alcohol bath overnight. This removes old stain and cleans debris, odours etc. As you can see, after the bath, the stummel looked rather naked but much cleaner.

 I next used a dental pick to dig out the awful putty in those fills, as I felt I could do better. I redid the fills with a mixture of cyanoacrylate adhesive and briar dust. The main fill on the back of the bowl was in an awkward position for sanding and making it consonant with the surrounding wood was tricky. In any event, I used some miniature files and various grits of sandpaper to make it look good.

 Next was the burn on the backside. I took some oxalic acid, used several Q-tips, and rubbed and rubbed and rubbed. The burn dramatically improved and any stain I would later apply would cover it up. Fortunately, the burn was very superficial and did not affect the integrity of the wood at all.
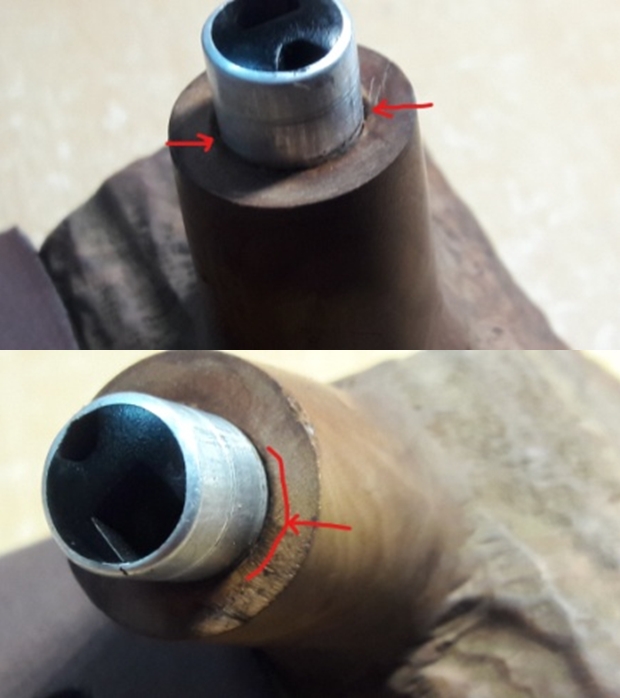
 To remove the nicks on the rim, I “topped” the pipe – that is to say, I gently and evenly sanded down the rim on a piece of 220-grit sandpaper. This effectively removed the damage, without altering the look of the pipe. However, since I did not want to top the pipe too much, the bashed-in front edge of the pipe would have to be addressed differently. I dug out my iron and a damp cloth to attempt a repair. The hot and moist steam can often cause the wood to swell slightly and return to shape. There was some movement – not a lot, but it was better than doing nothing. I opted to ever-so-slightly round the rim of the pipe in such a way that looks both natural and handsome.
 Then I sanded the stummel down with all nine Micromesh pads (1,500 through 12,000 grit). The smooth areas got all nine pads, whereas the rusticated areas on received only the last four. Although almost all of the nicks were removed, a hint of a couple of wounds remains. This is part of the story of this pipe – it is its history.
 Due to all the necessary work for this pipe, I needed to restore the colour, so I stained it with Fiebing’s Medium Brown Leather Dye. First, I brought out my heat gun and spent a couple of minutes thoroughly heating the wood, so it would be as receptive as possible to the stain. I needed the brown to penetrate well into the wood, to give the best results. I applied dye with a cotton dauber. I flamed it with my BIC lighter, let it set, then coated it again with dye, flamed it again, and let that set too. I decided to let the pipe sit overnight. This dye is alcohol-based, so I used isopropyl alcohol to wipe down the pipe and remove excess stain. My intent was not to create a new look for this pipe, but rather to restore the original colour.
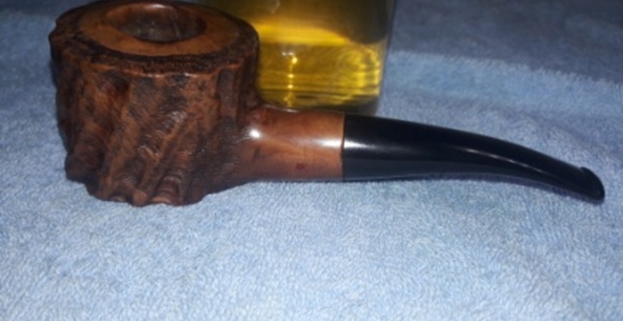
 Finally, I took it to the buffer and used some White Diamond and a few coats of Conservator’s Wax. This pipe took a lot of work, but it was worth it. This Custom-Bilt looks fantastic again and is ready to be enjoyed again by the next owner! I am pleased to announce that this pipe is for sale! If you are interested in acquiring it for your collection, please have a look in the ‘American’ pipe section of the store here on Steve’s website. You can also email me directly at kenneth@knightsofthepipe.com. The approximate dimensions of the pipe are as follows: length 4¾ in. (120 mm); height 5⅛ in. (130 mm); bowl diameter 1½ in. (38 mm); chamber diameter ⅞ in. (22 mm). The weight of the pipe is 2⅜ oz. (69 g). I hope you enjoyed reading the story of this pipe’s restoration as much as I did restoring it. If you are interested in more of my work, please follow me here on Steve’s website or send me an email. Thank you very much for reading and, as always, I welcome and encourage your comments.