Tag Archives: contrast staining

Restoring a Frozen Kirsten Companion K Straight Pipe


Blog by Steve Laug

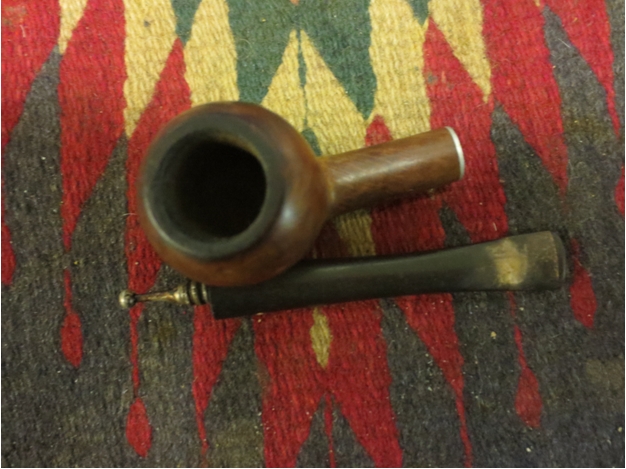
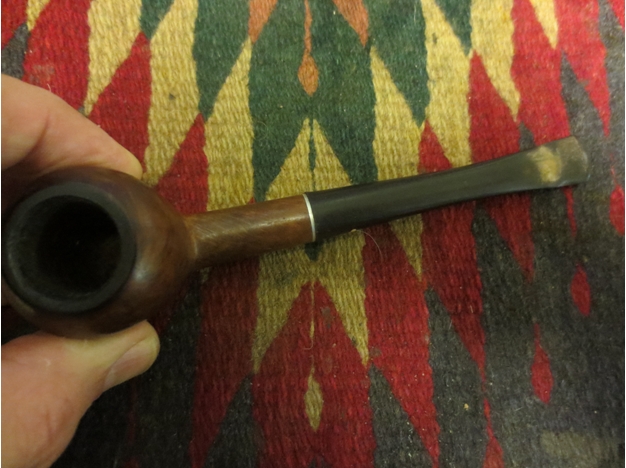
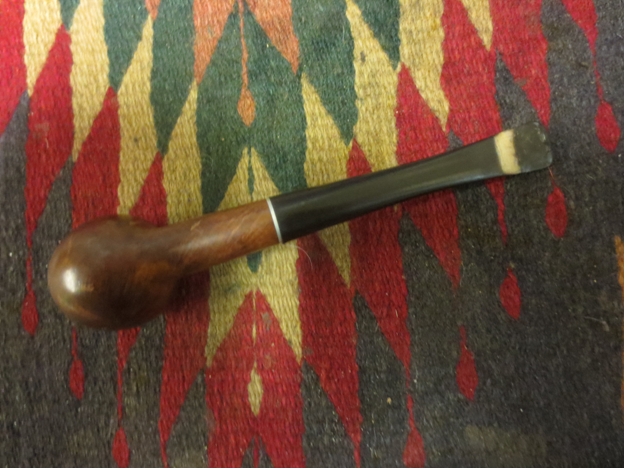
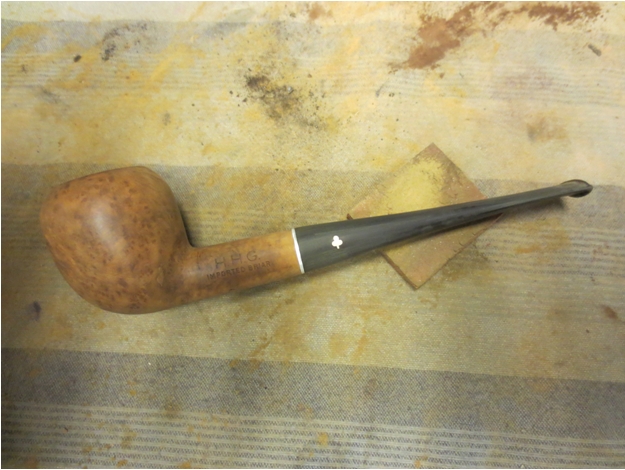
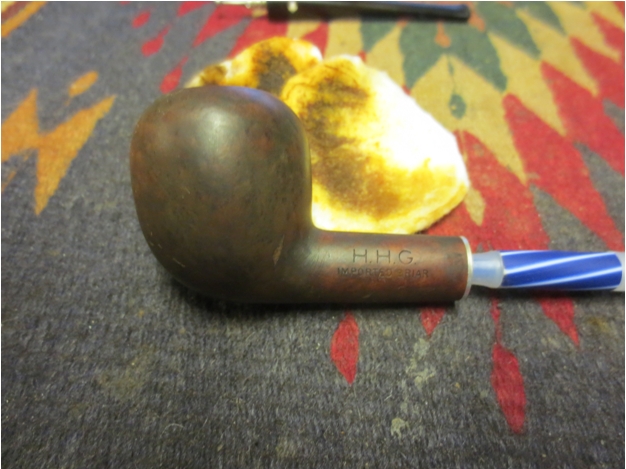
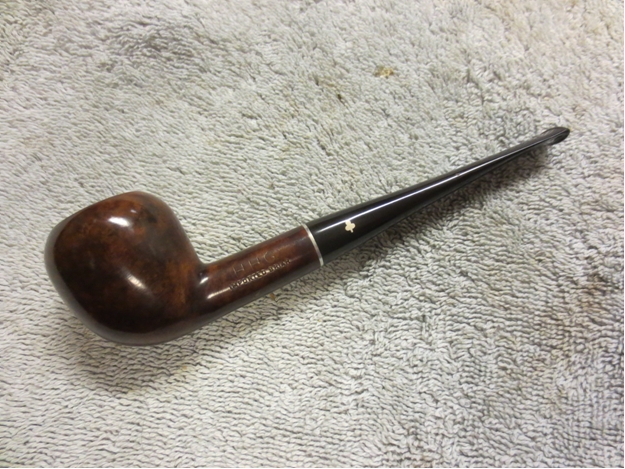
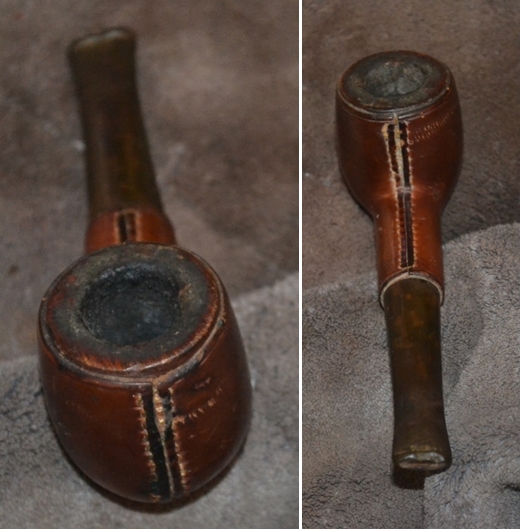
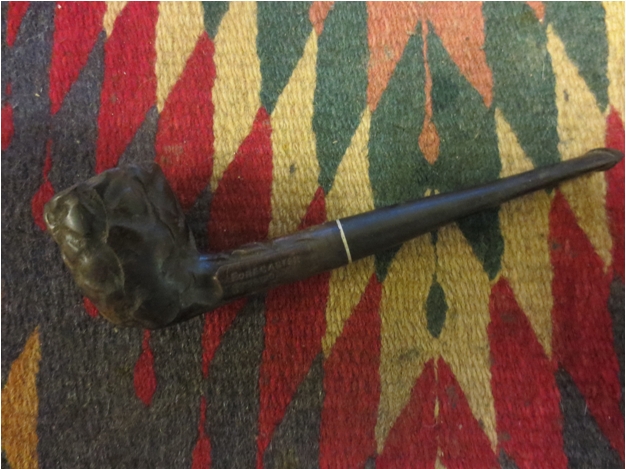
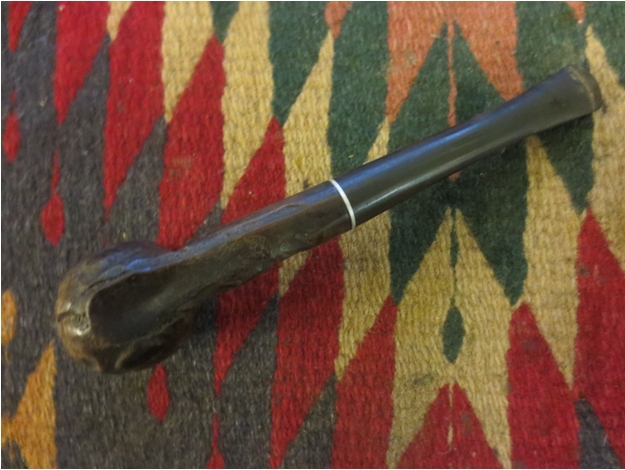
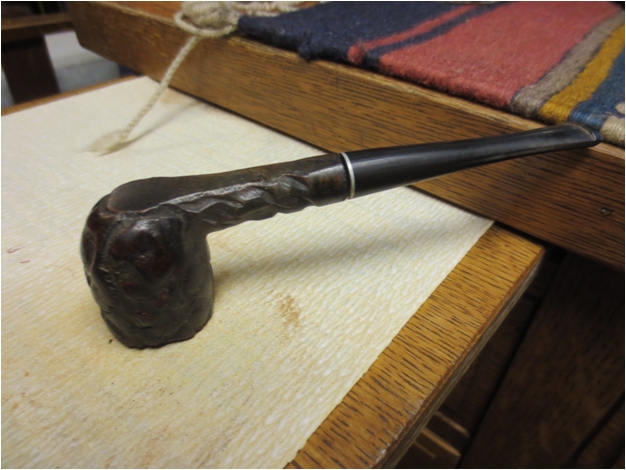
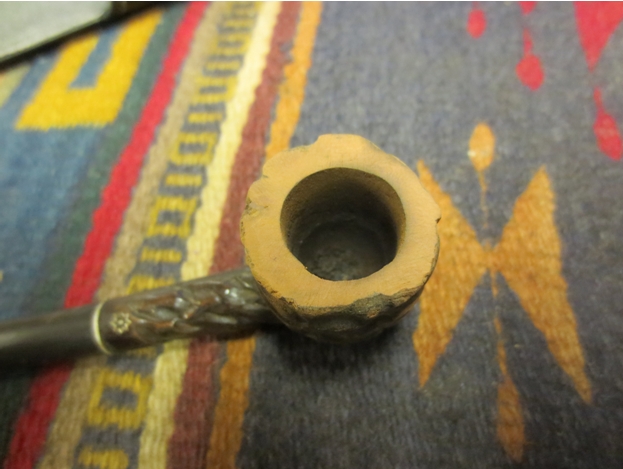
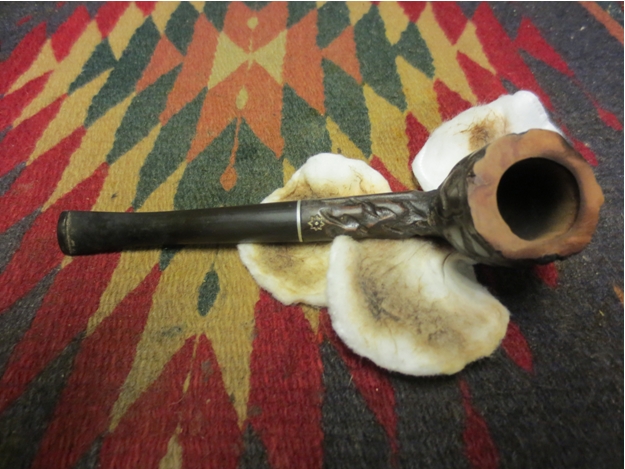
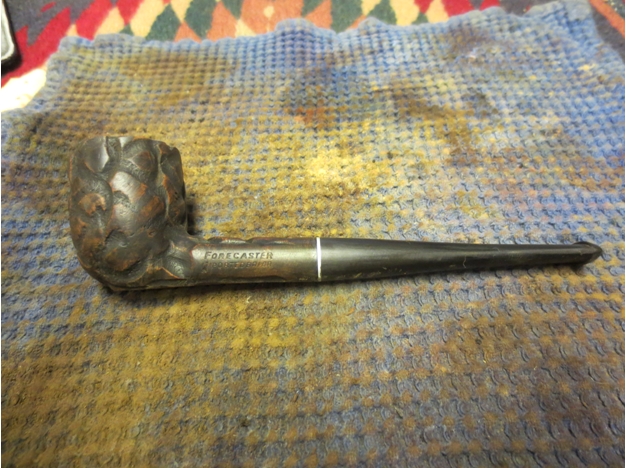
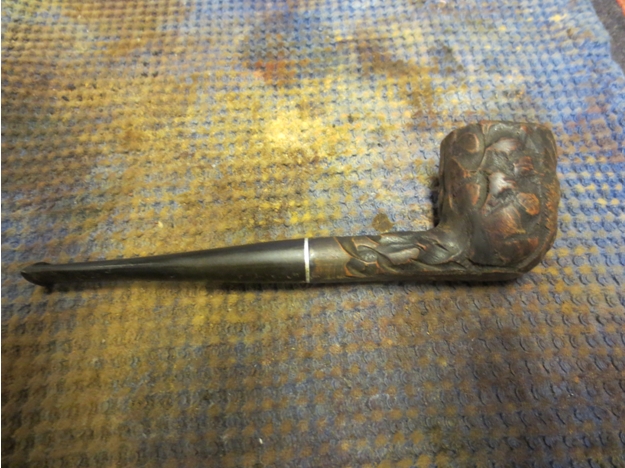
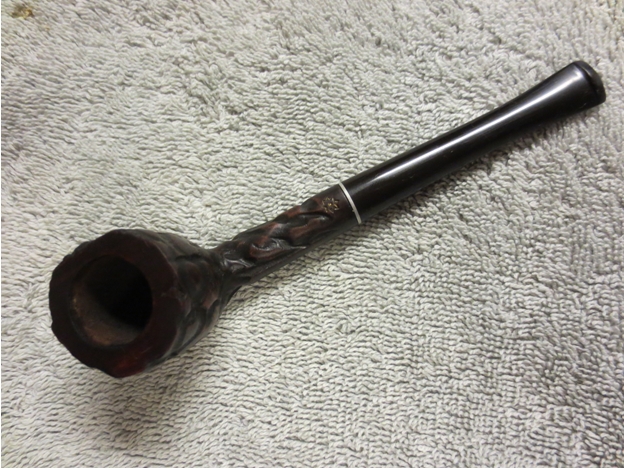
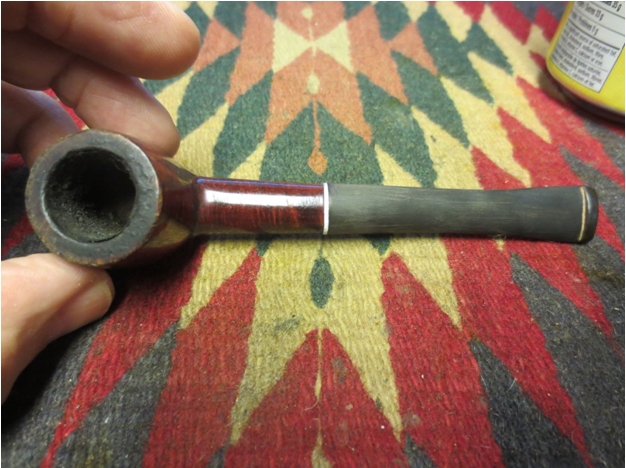
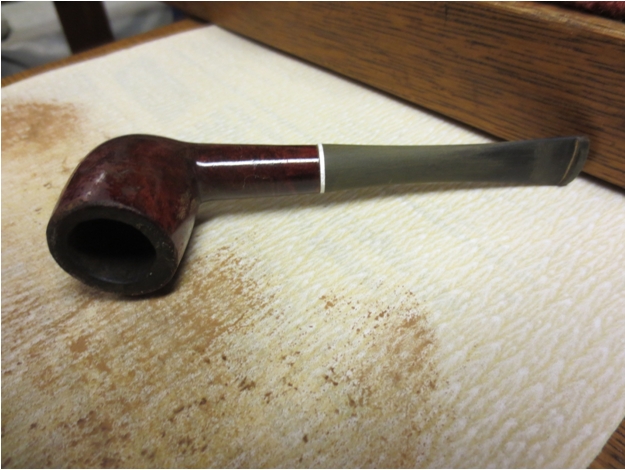
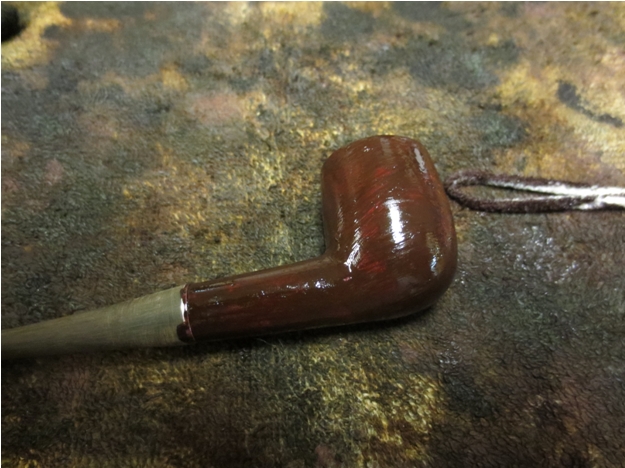
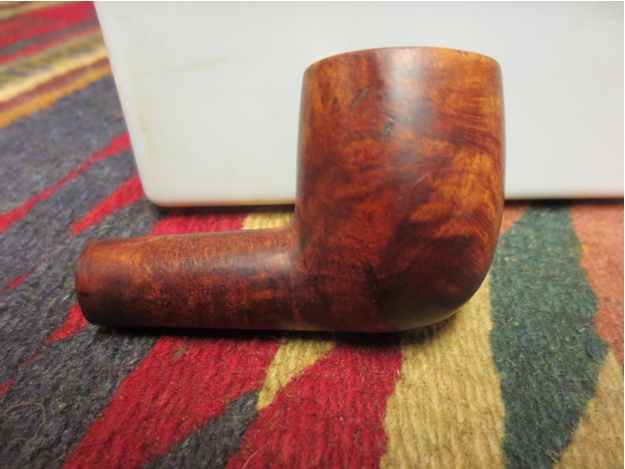
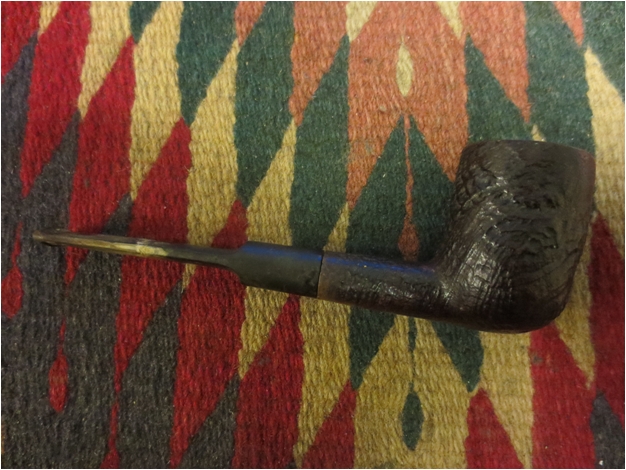
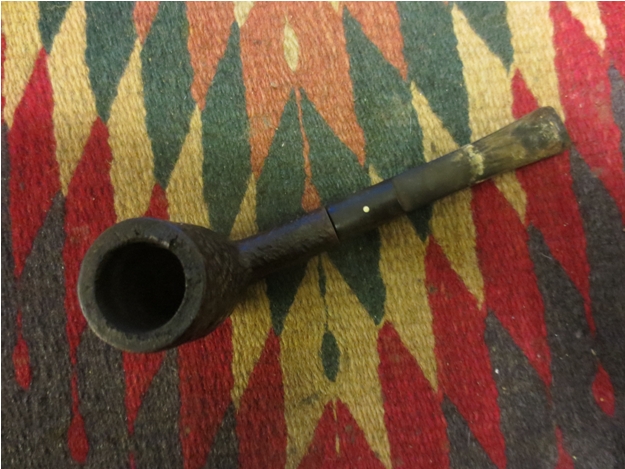
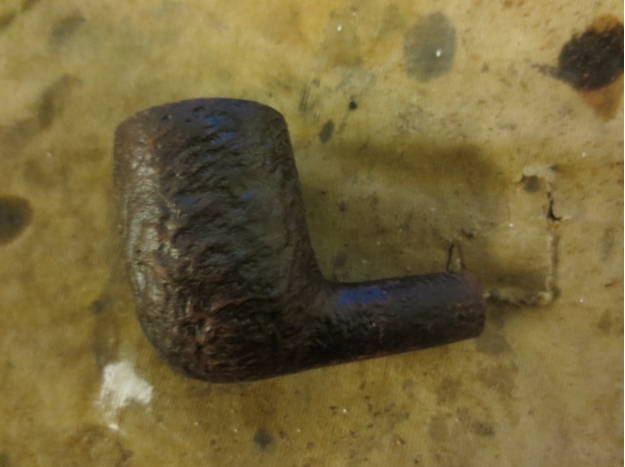
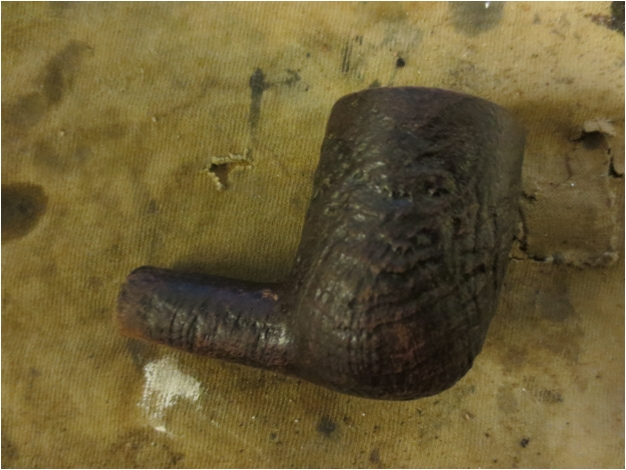
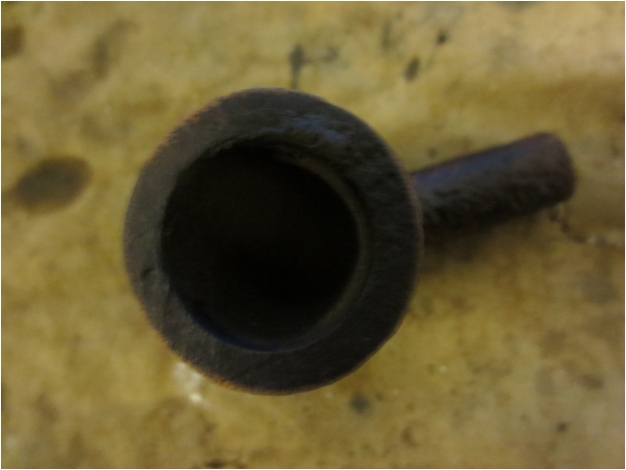
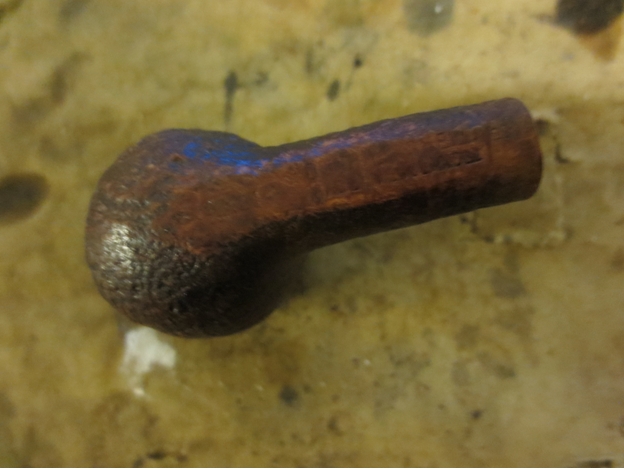
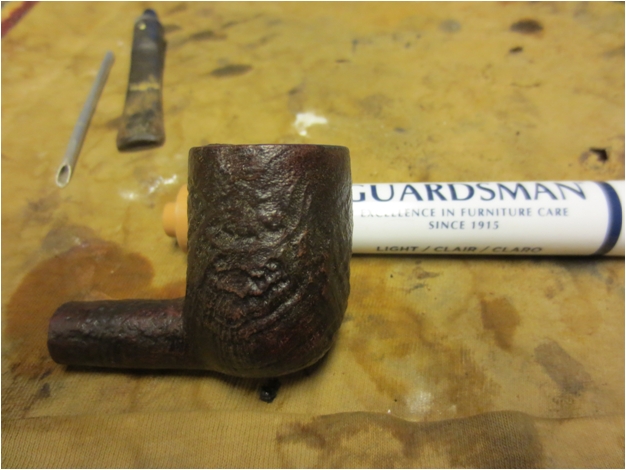
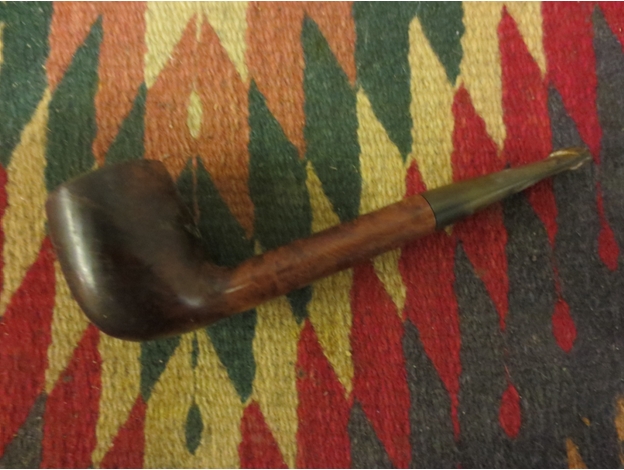
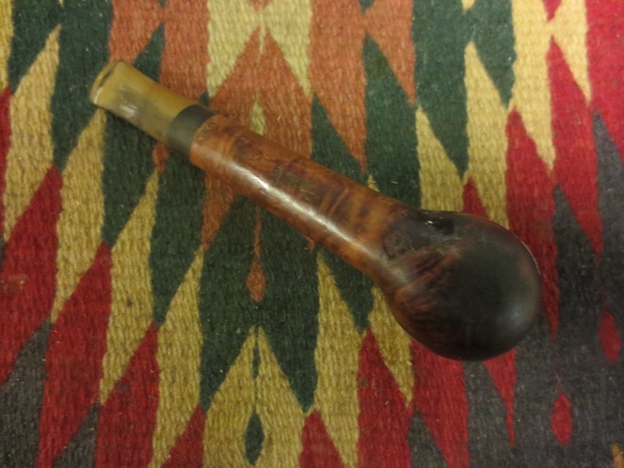
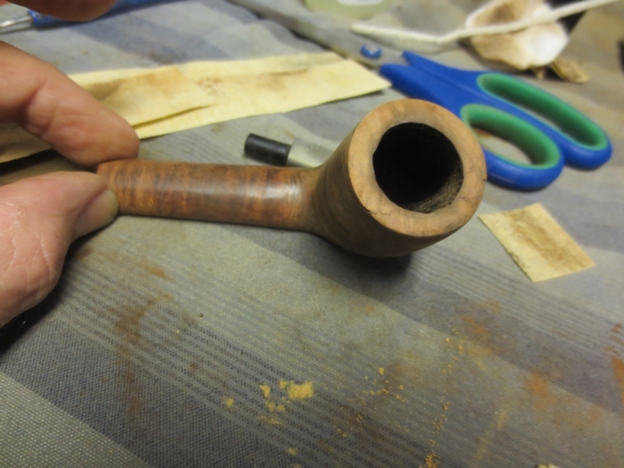
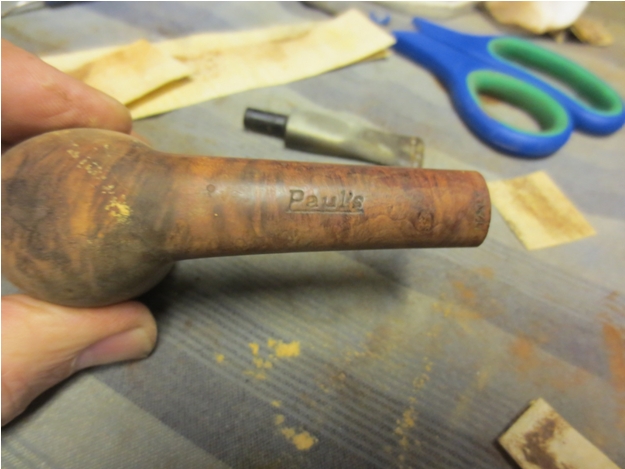
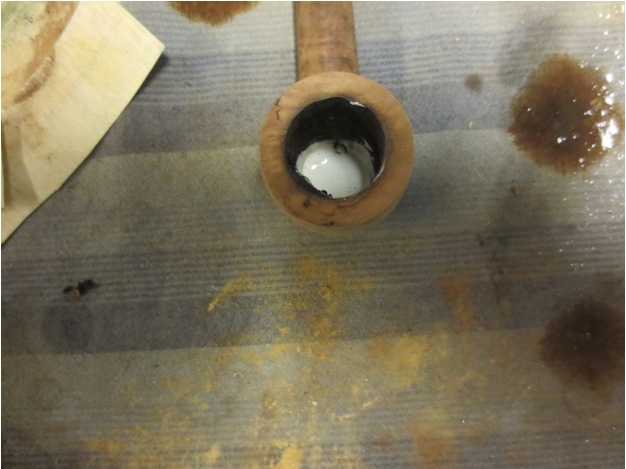
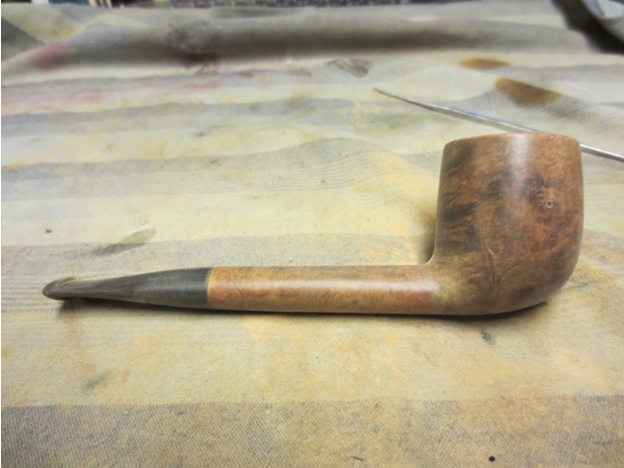
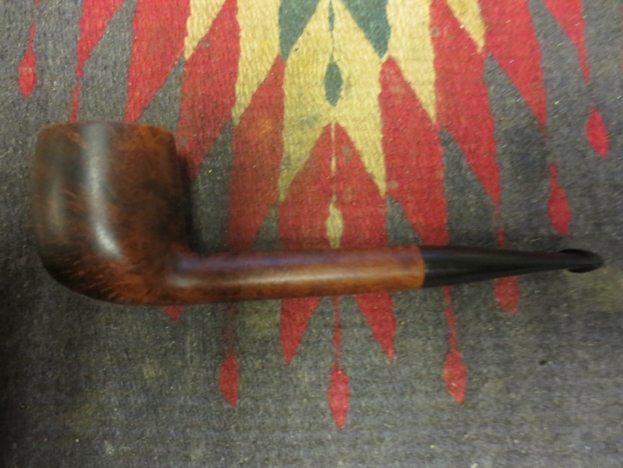
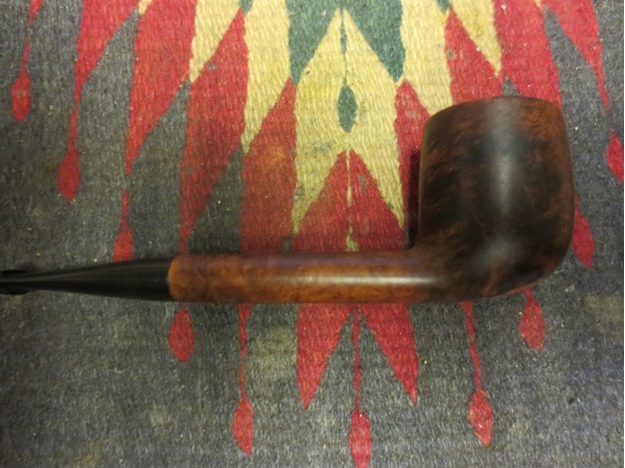
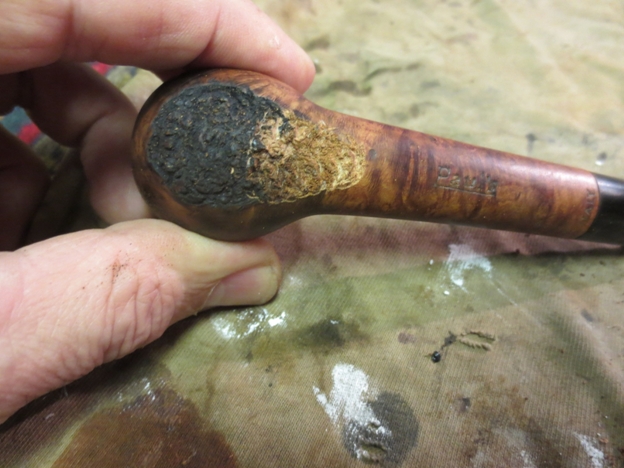
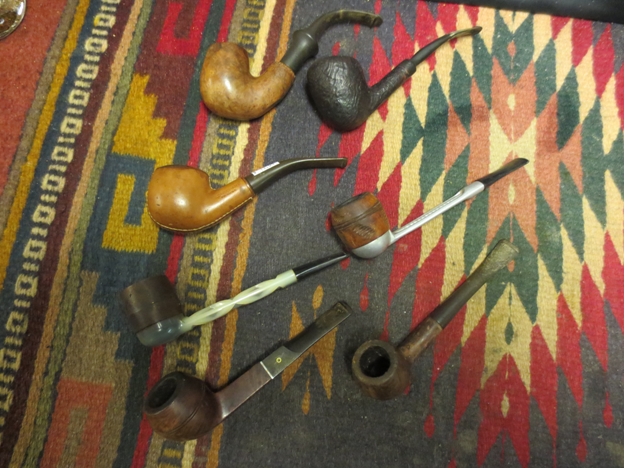
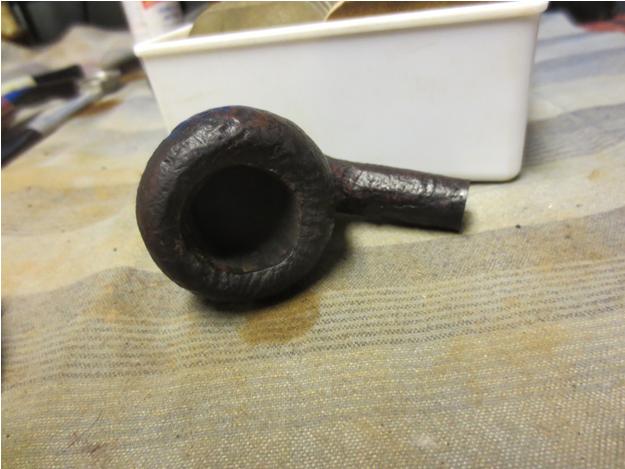
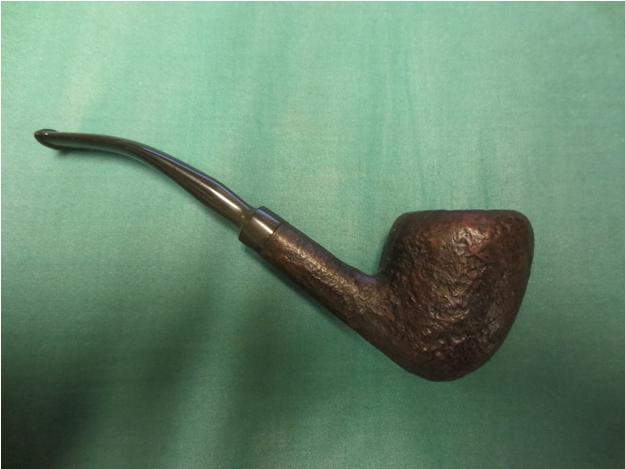
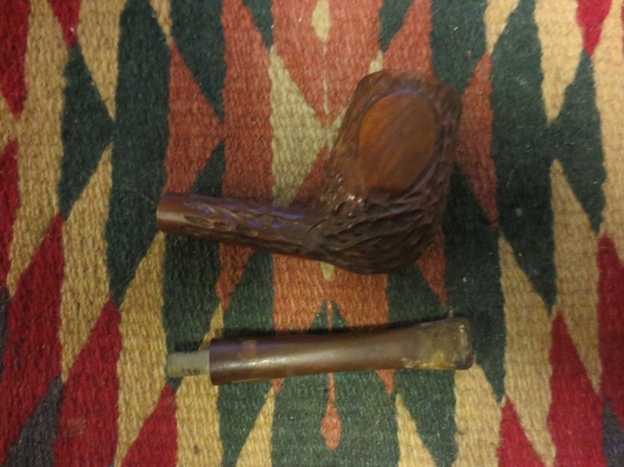
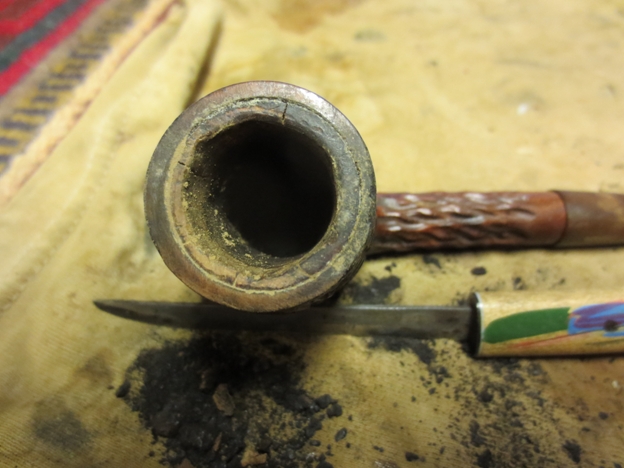
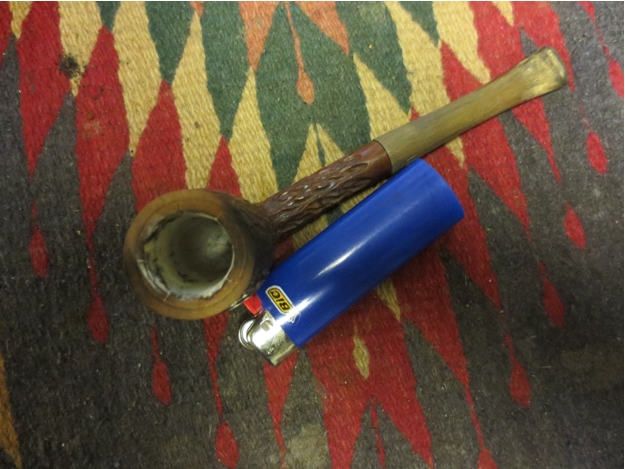
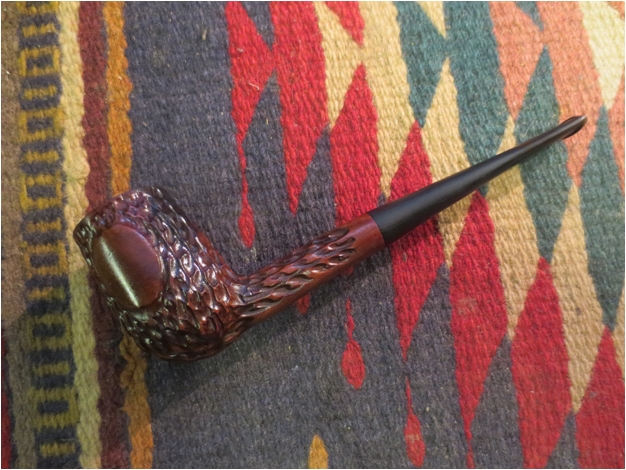
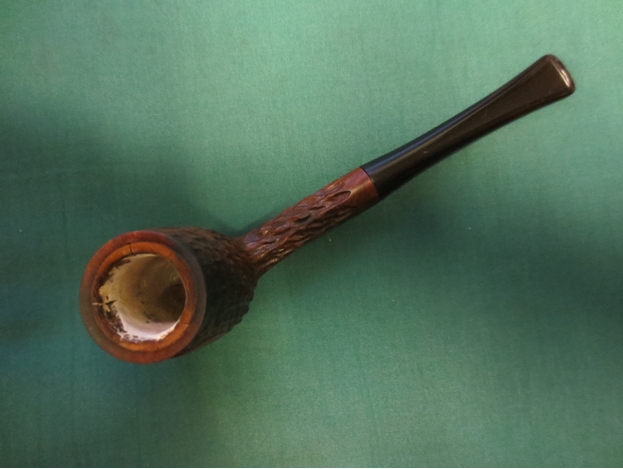
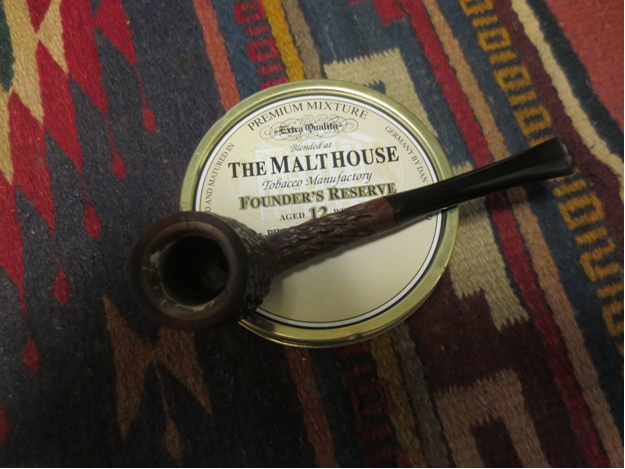
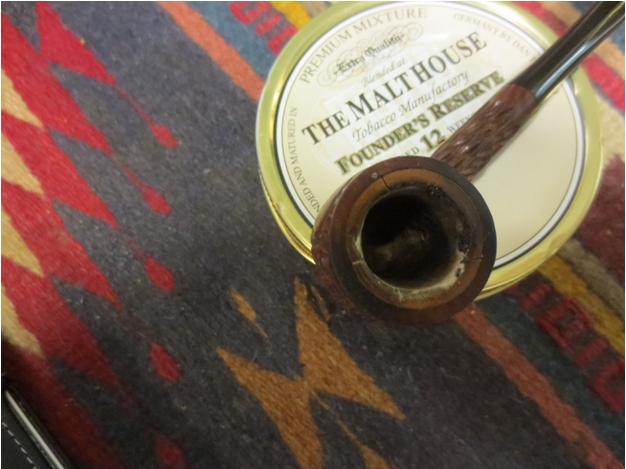
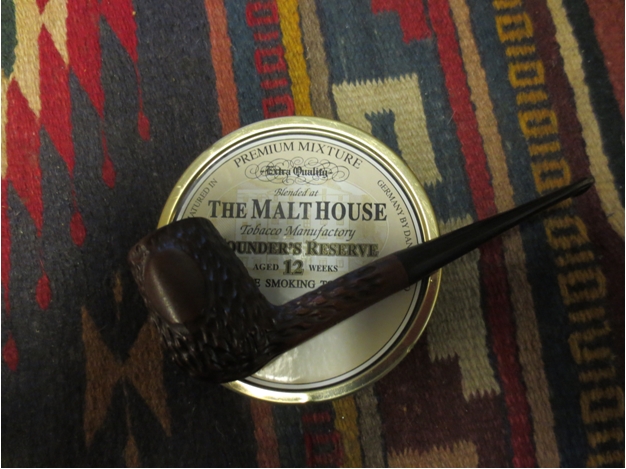
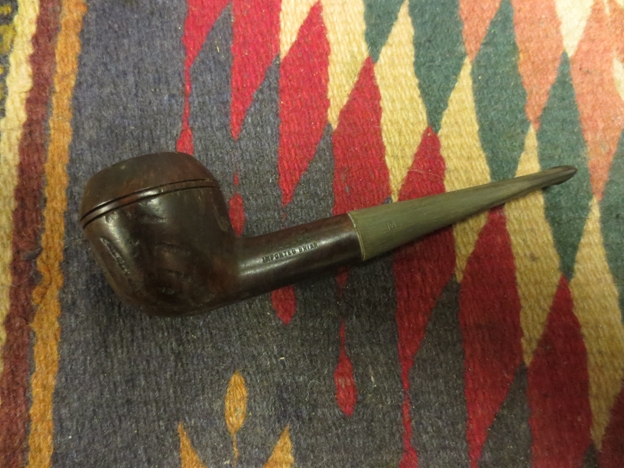
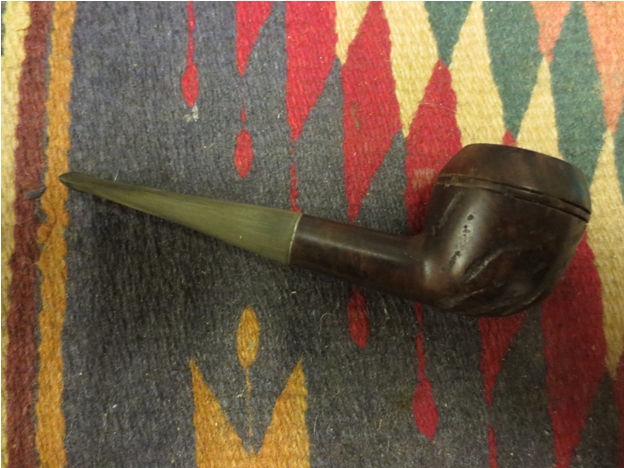
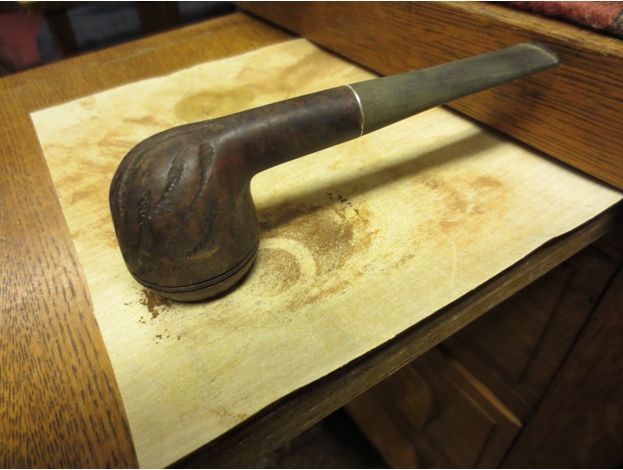
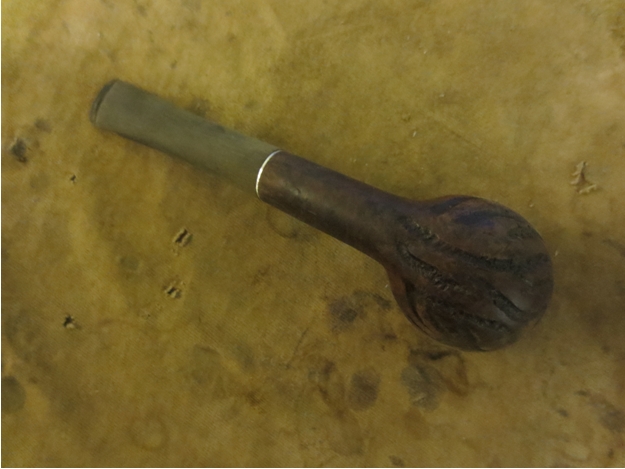
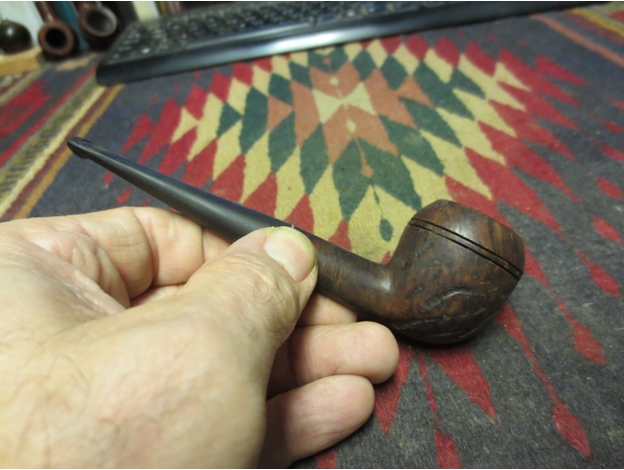
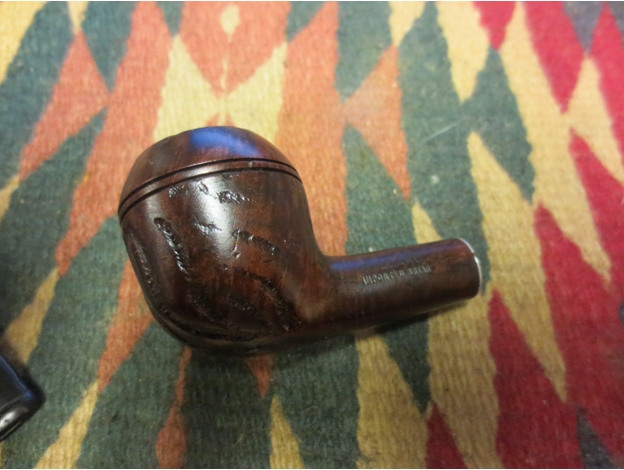
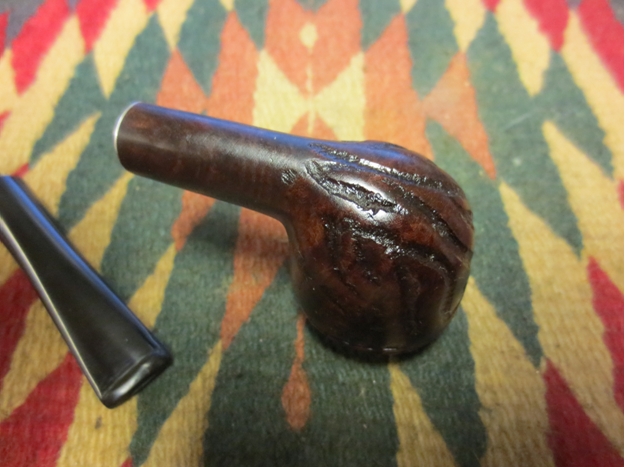
The last pipe I picked up on my recent Alberta trip was a Kirsten style straight pipe. The metal shank is stamped on the left side Companion and on the underside it is stamped Made in U.S.A and then K. On the top of the shank the previous owner scratched in his initials FWE. The bowl was stuck on the shank. The finish on the bowl was worn and dirty. The rim of the bowl had a thick tarry buildup and had some deep dents in the surface. There was a thick cake build up on the inside of the bowl that was shaped like a cone – the bottom was very narrow and the top was wide open. Normally the bowl on Kirsten pipes are more U-shaped with the walls similarly open to the bottom of the bowl where the drilled screw goes through. The stem had a tooth mark on the top and the bottom side near the button. The stem was frozen in the metal shank and I could not twist it at all. The airflow adjustment end cap that normally twists to either open or dampen the airflow was also frozen in place. The metal barrel and end cap had scratches and marks on it. The end cap ridges were worn and looked like someone had used a pair of pliers on it to try to break it free.IMG_2531 IMG_2532 IMG_2533 IMG_2534 
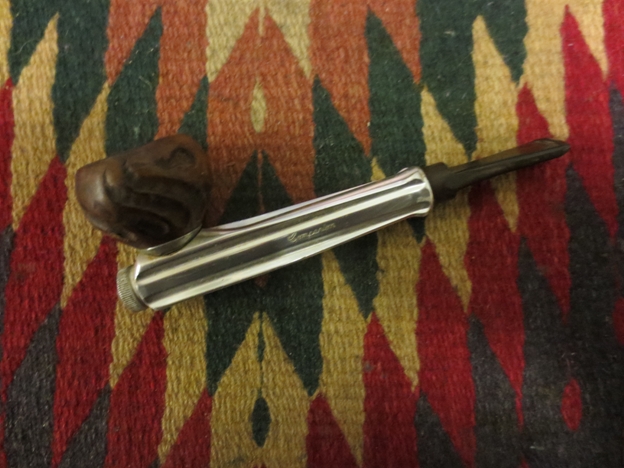
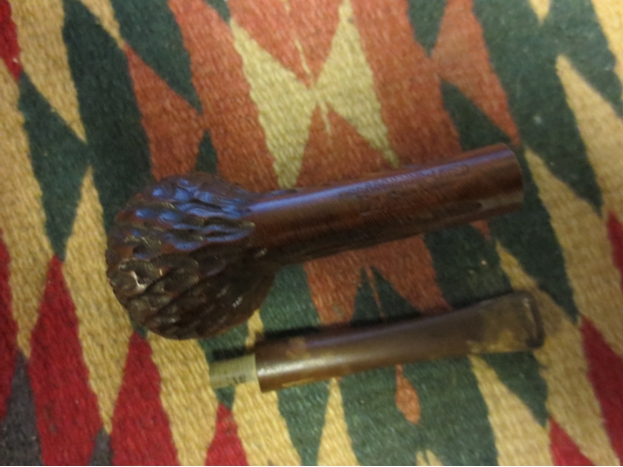
I was able to twist the bowl off the barrel by carefully turning it back and forth slightly to break it free. The tars in the barrel threads and on the drilled out screw in the bowl were really gummed up and dirty.IMG_2535
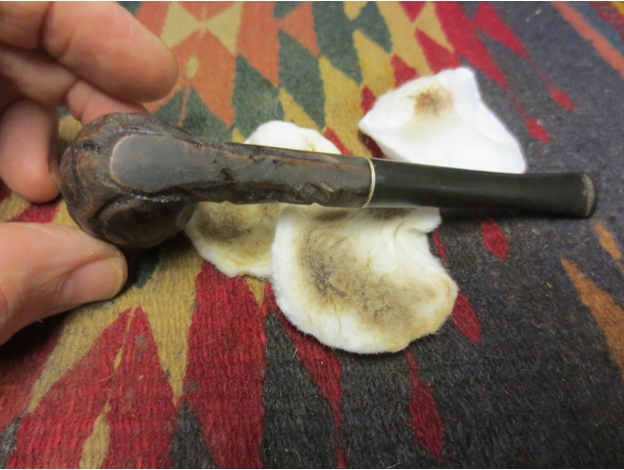
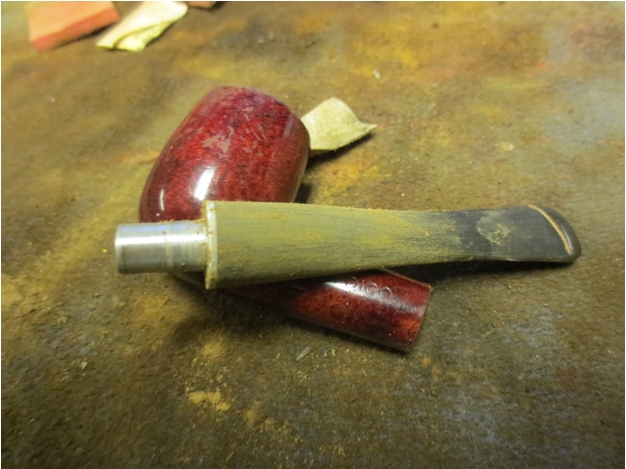
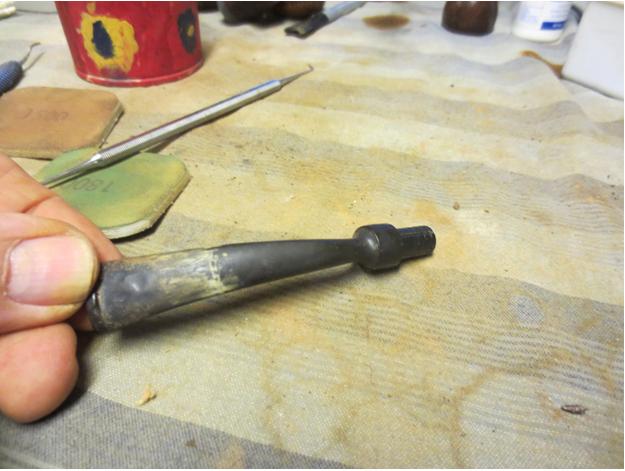
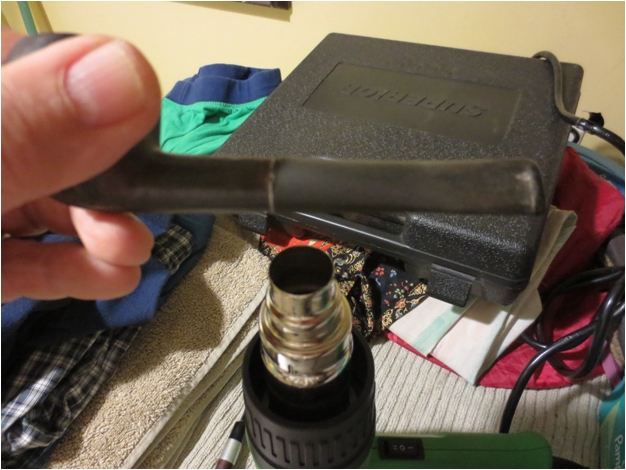
I put the barrel in the freezer and left it there during dinner. After dinner I took it out and was able to twist the stem from the barrel. Once I removed the stem and the metal tube plunger it was extremely tarred and sticky. The second photo below shows the black tars of the interior of the barrel and plunger.IMG_2536 IMG_2537The end cap was still frozen in the barrel. I filled the barrel with alcohol and set it in an ice-cube try to let it soak. I knew that the tars on the plunger were also what held the end cap in place binding the metal of the barrel and the cap to each other. Typically the end cap had a rubber grommet on it that held it in place with a friction fit. In this case it appeared that the rubber grommet was compressed against the metal on the inside of the barrel and bound it in place.IMG_2538
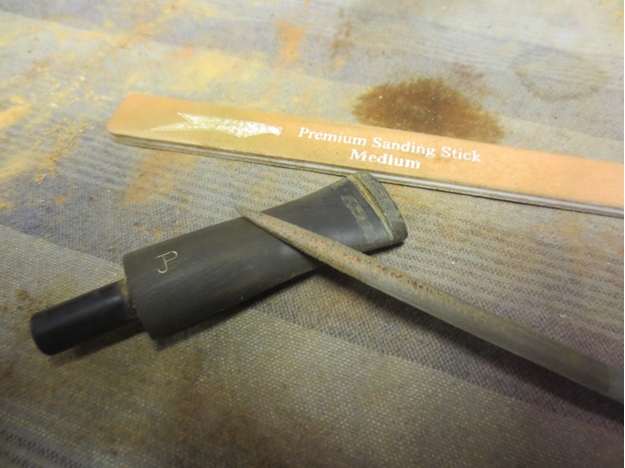
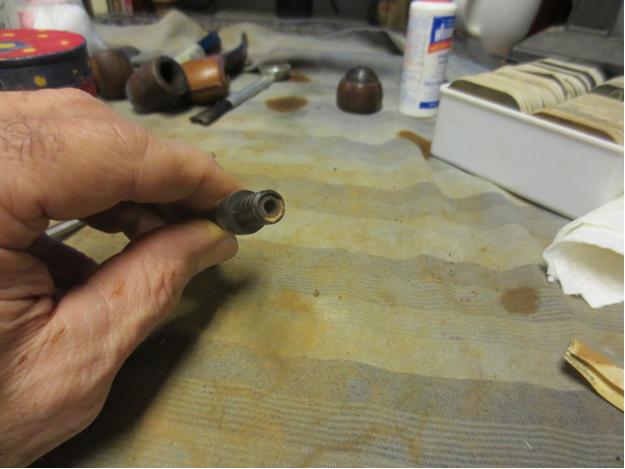
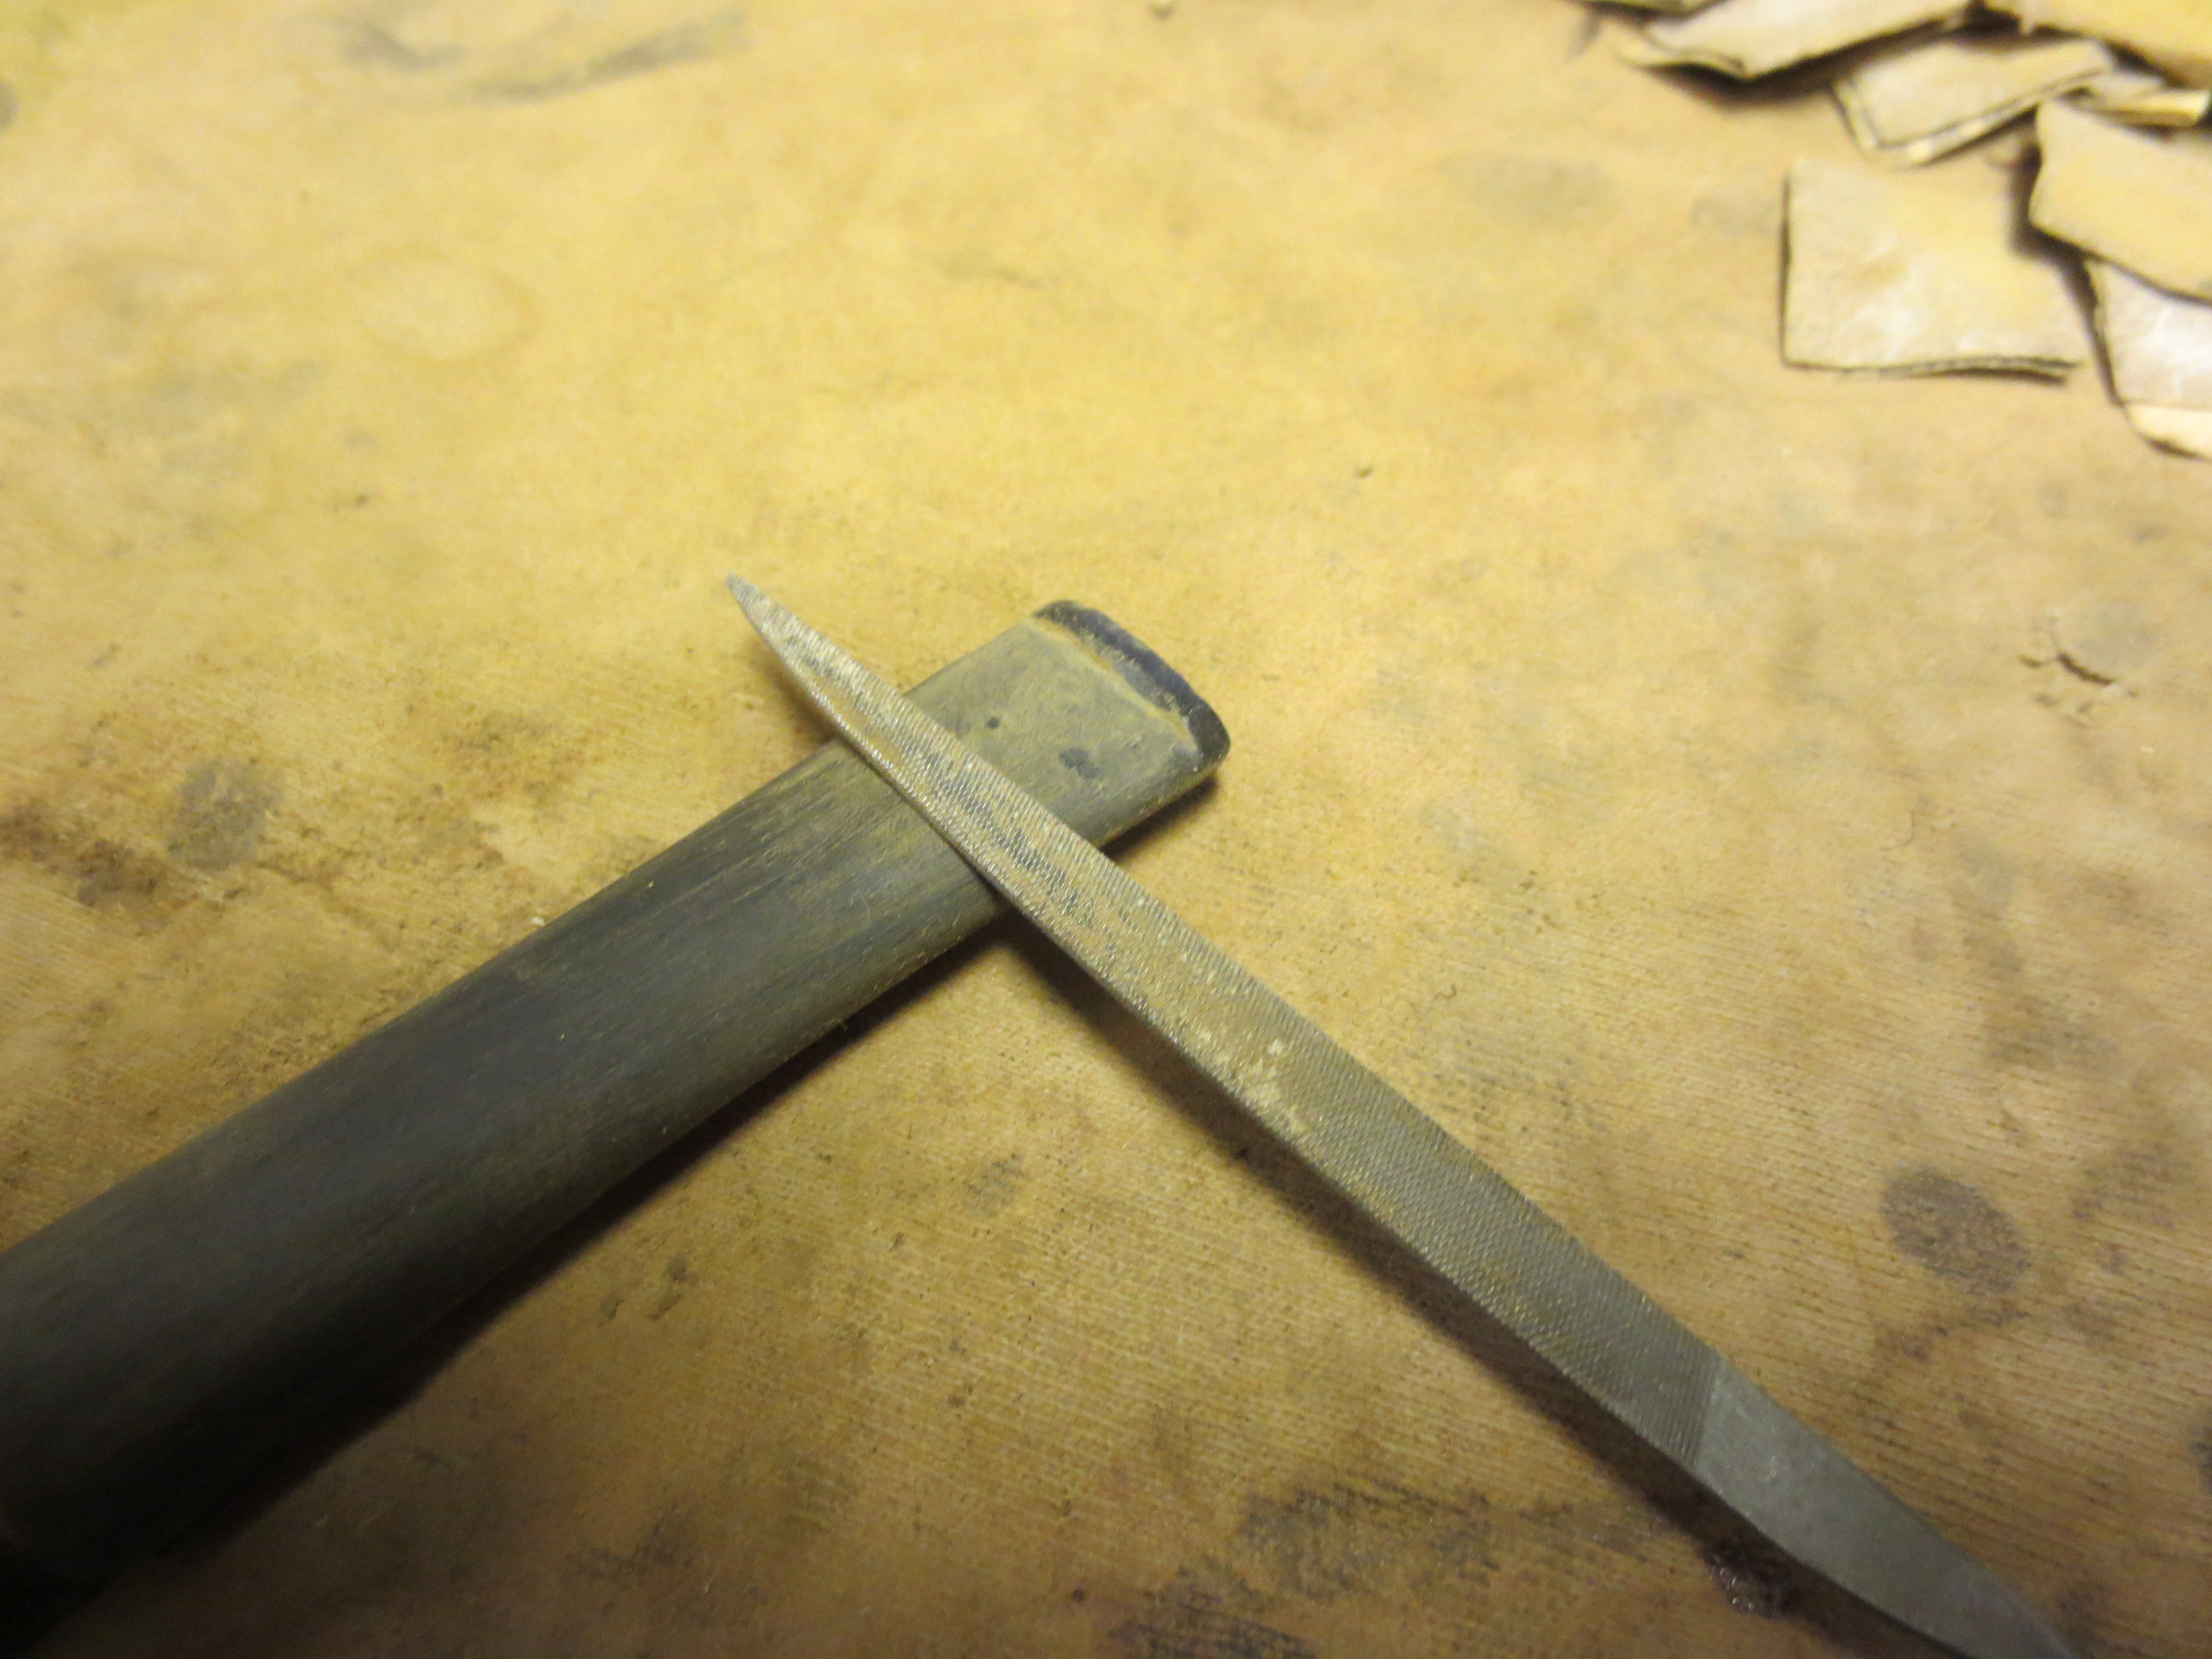
I cleaned the plunger and sanded the stem with 220 grit sandpaper to remove the hard tarry build up on it. I wiped it down with alcohol and then sanded it until the plunger was shiny and clean. I cleaned out the inside of the stem and the plunger with both bristle and regular pipe cleaners.IMG_2539 IMG_2540
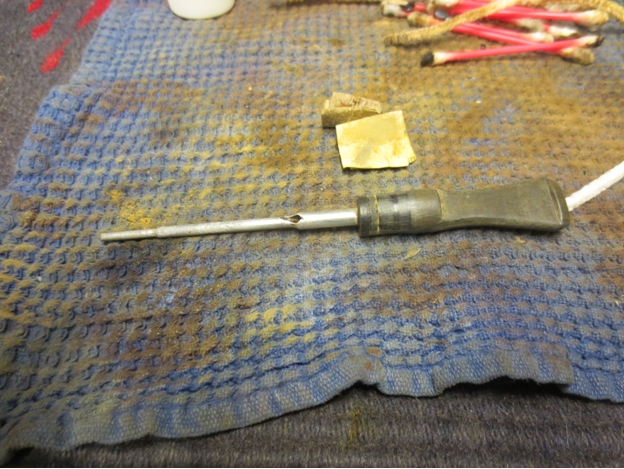
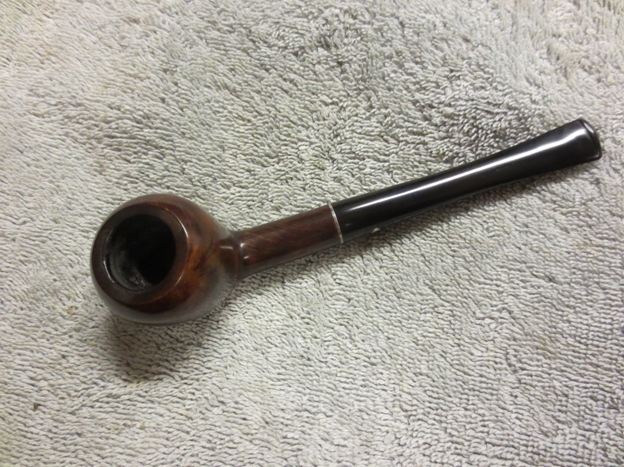
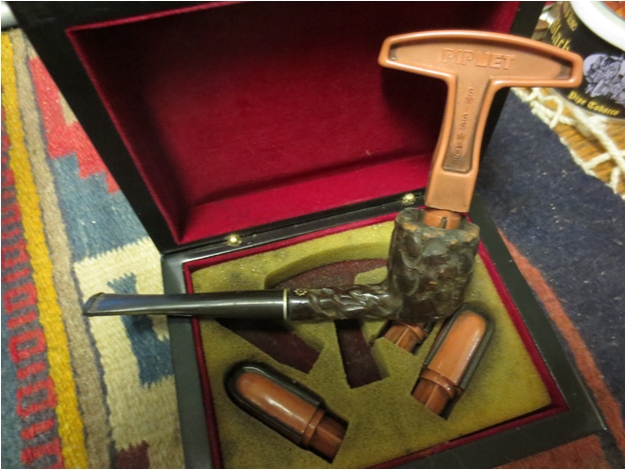
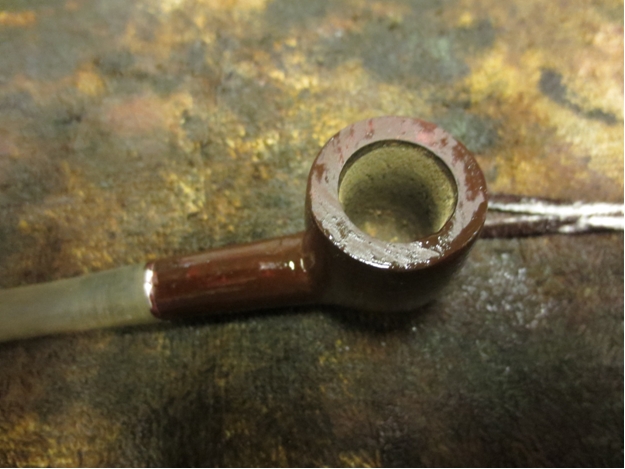
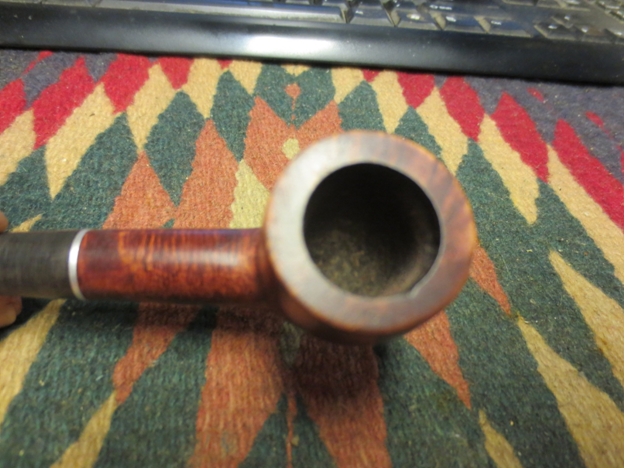
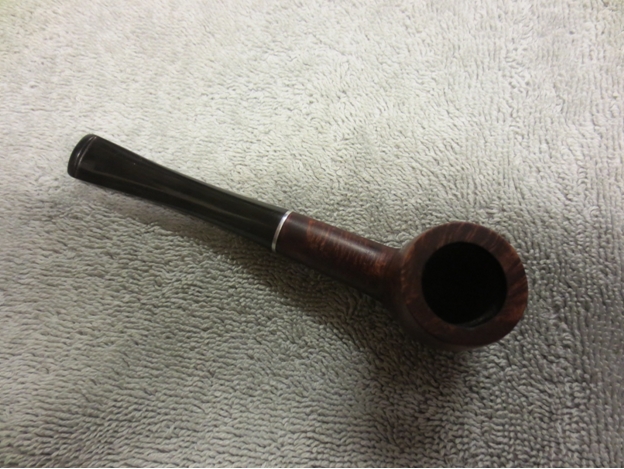
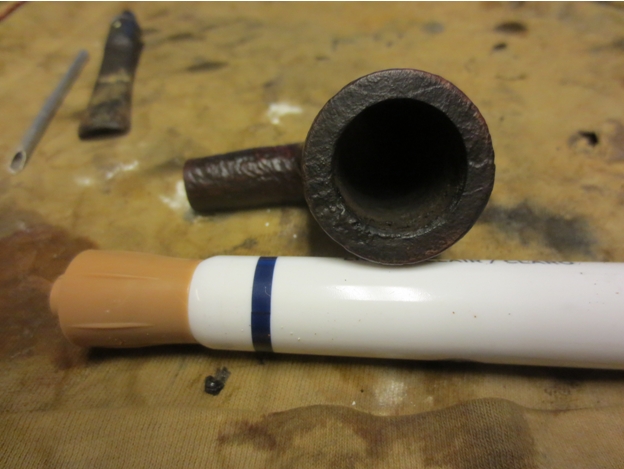
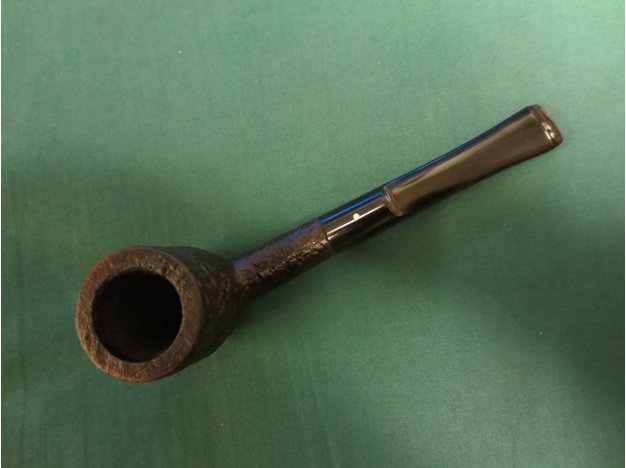
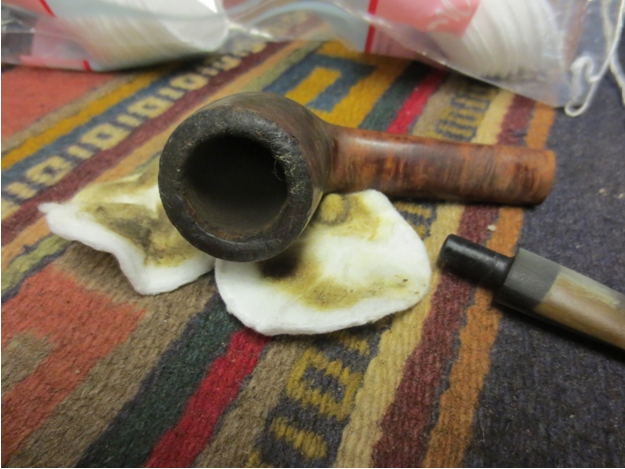
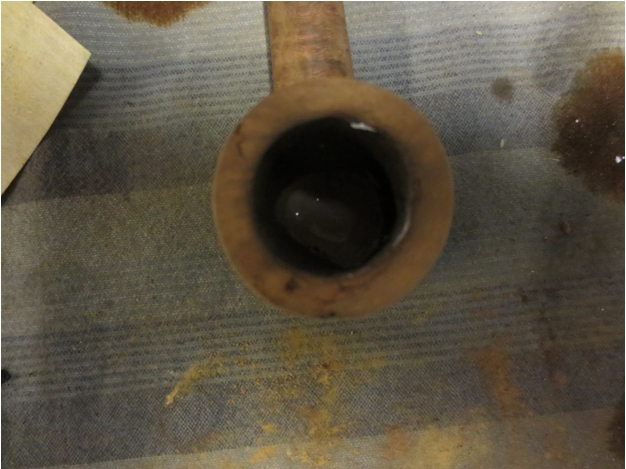
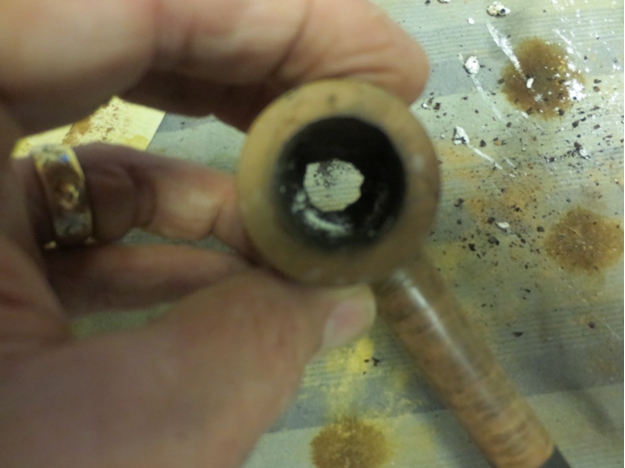
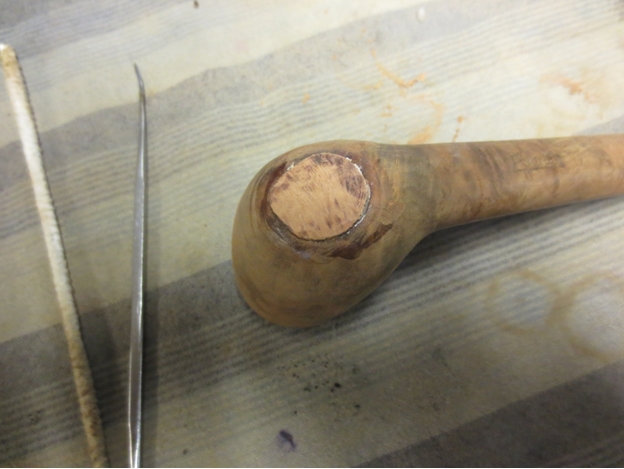
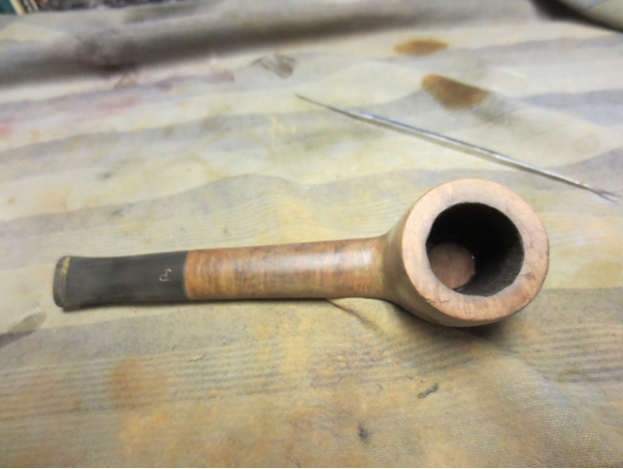
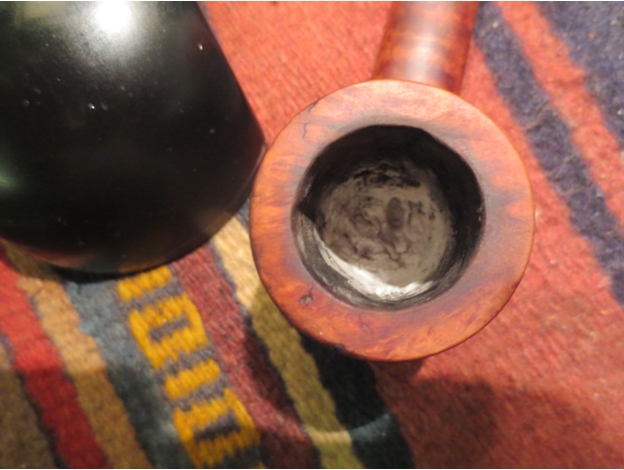
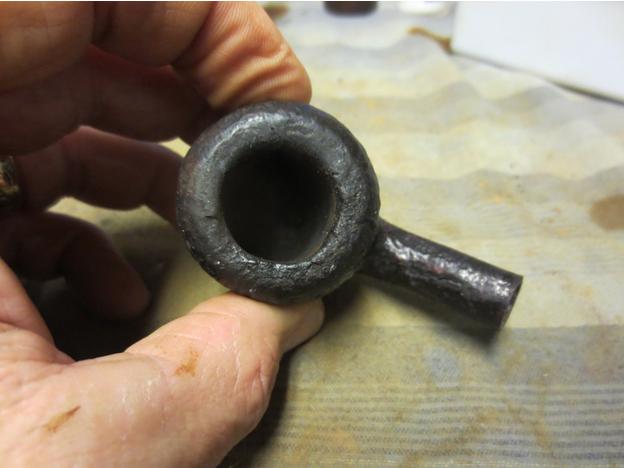
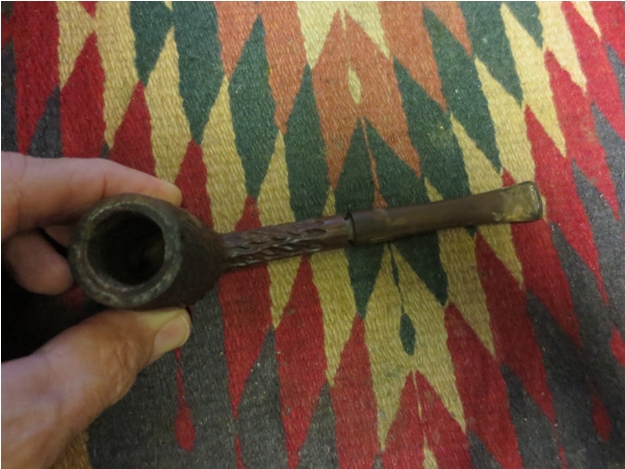
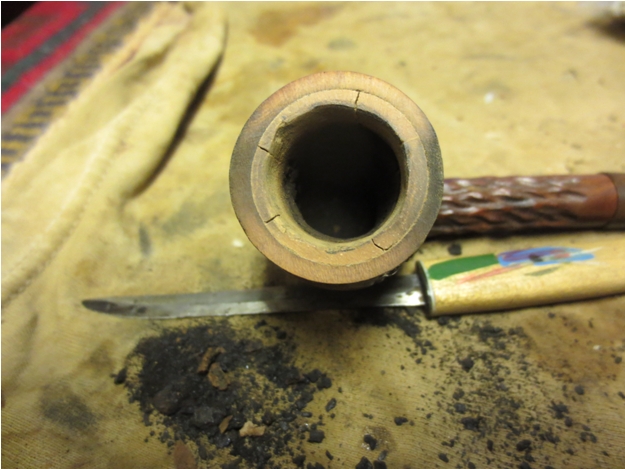
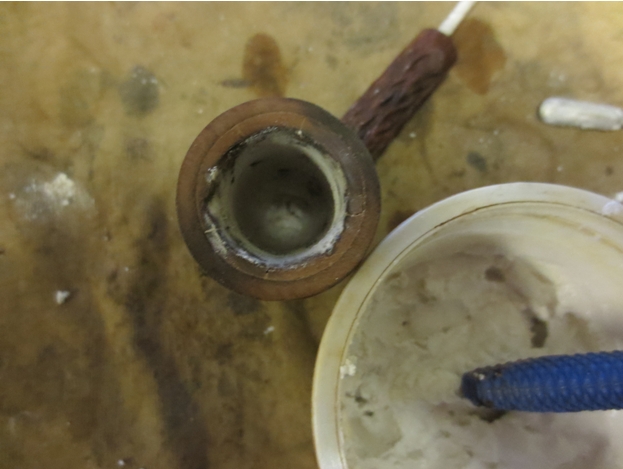
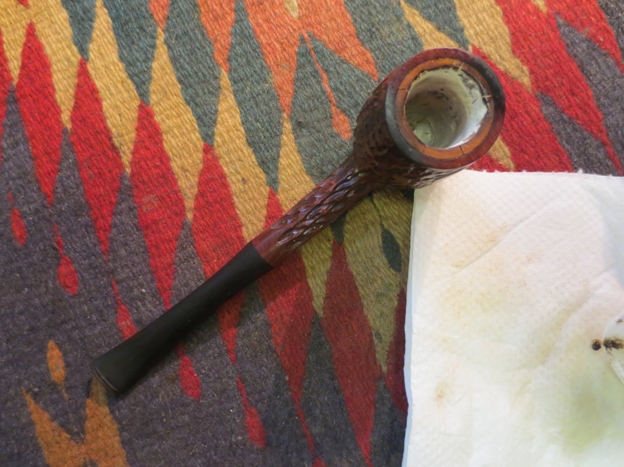
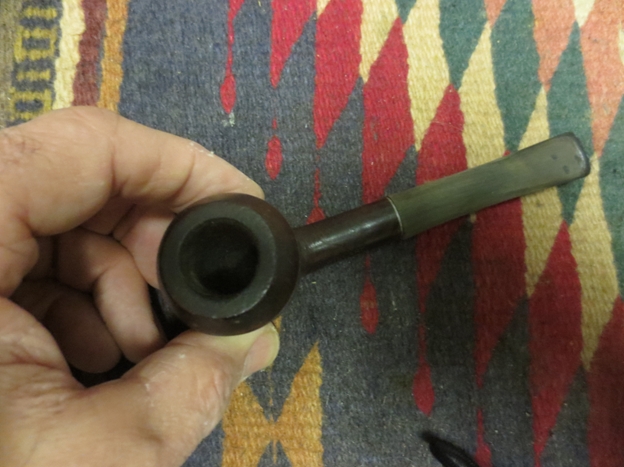
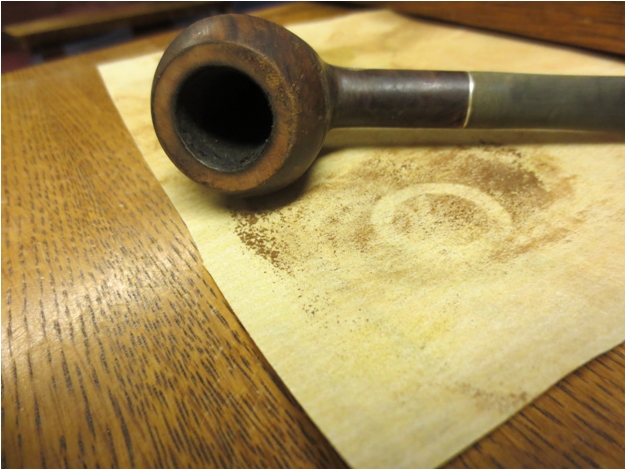
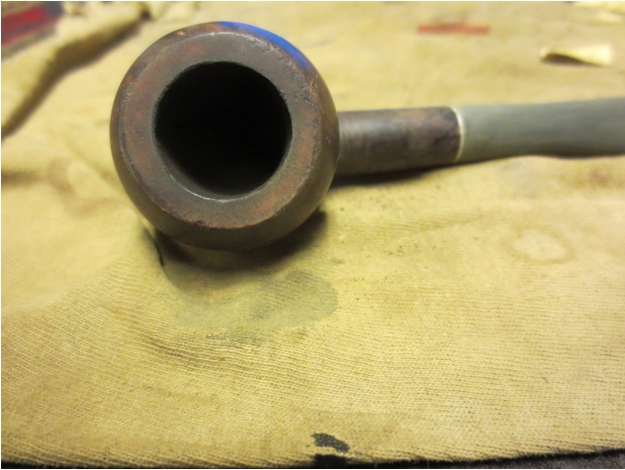
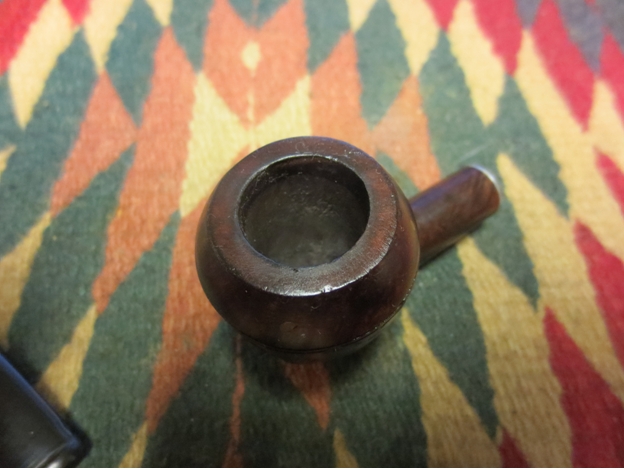
I reamed the bowl with a PipNet reamer and used all sizes of the cutting heads to ream back the carbon build up in the bowl.IMG_2541 IMG_2542 IMG_2543
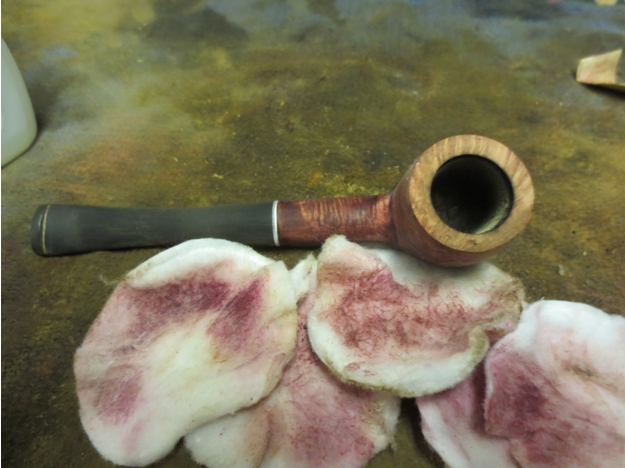
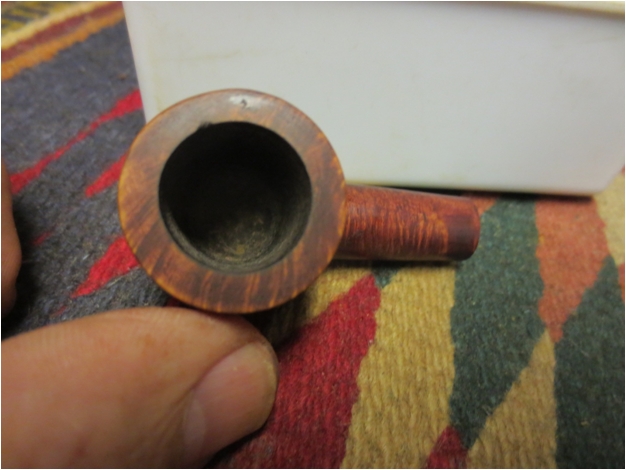
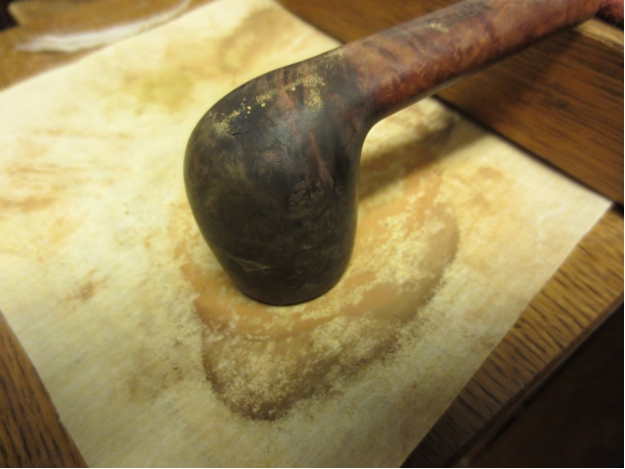
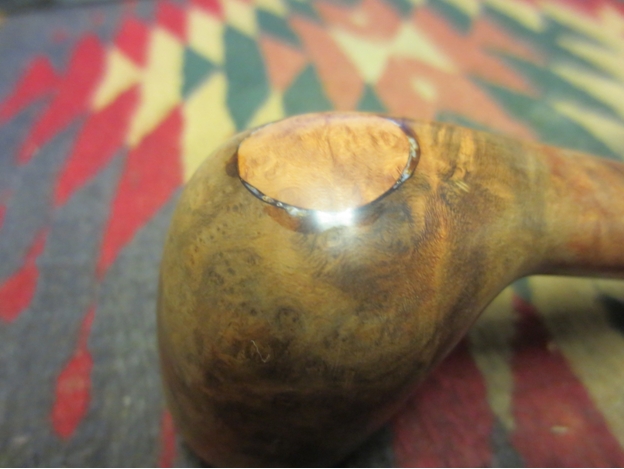
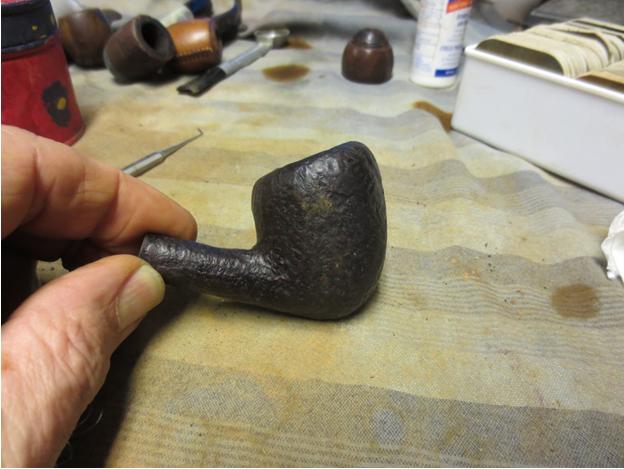
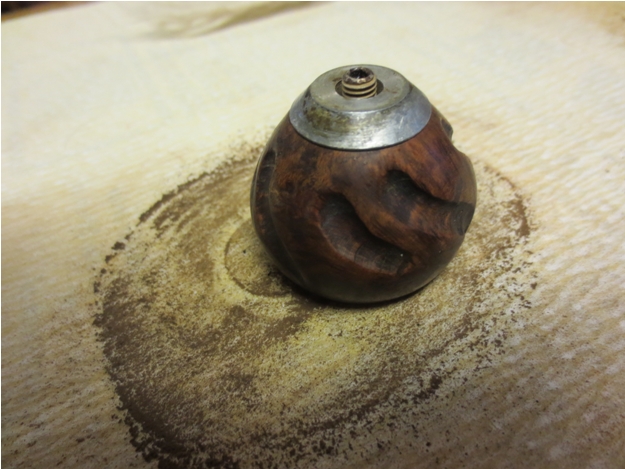
The bowl was badly dinged and hammered leaving some deep denting. I topped the rim with a topping board to clean up the damaged top edge.IMG_2544 IMG_2545
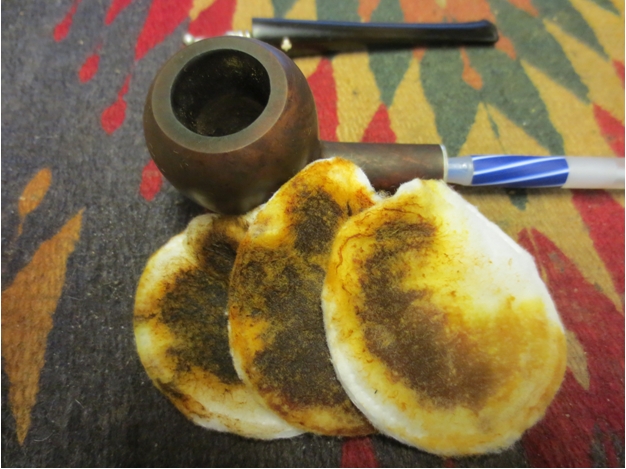
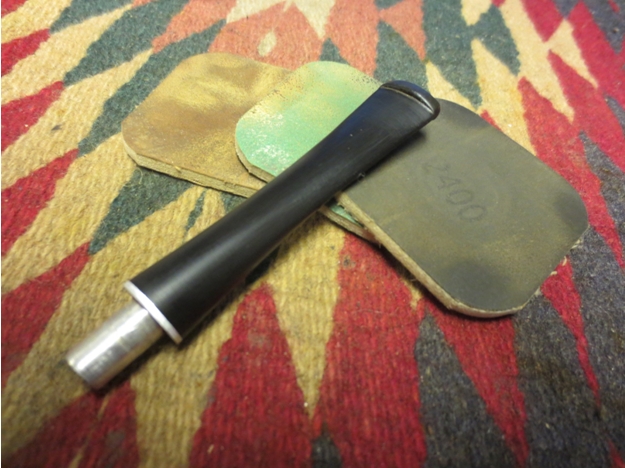
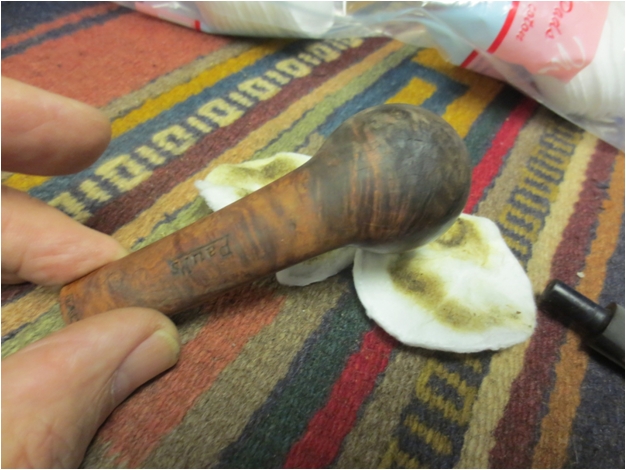
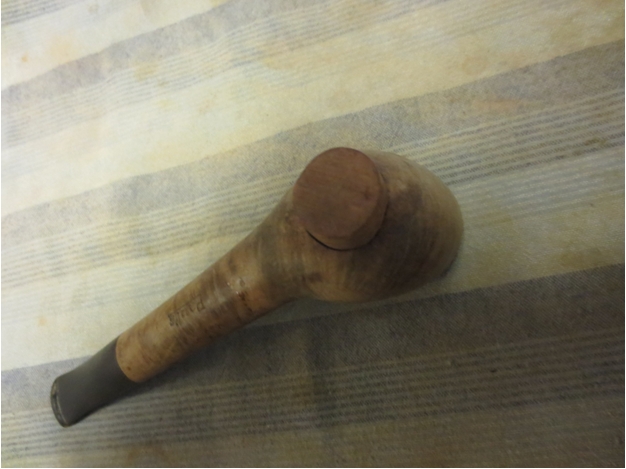
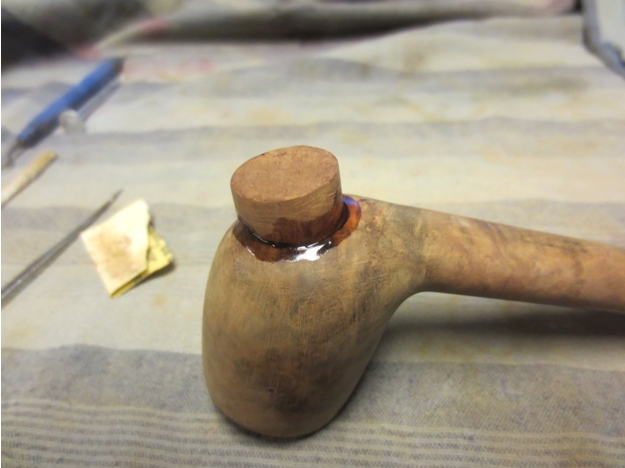
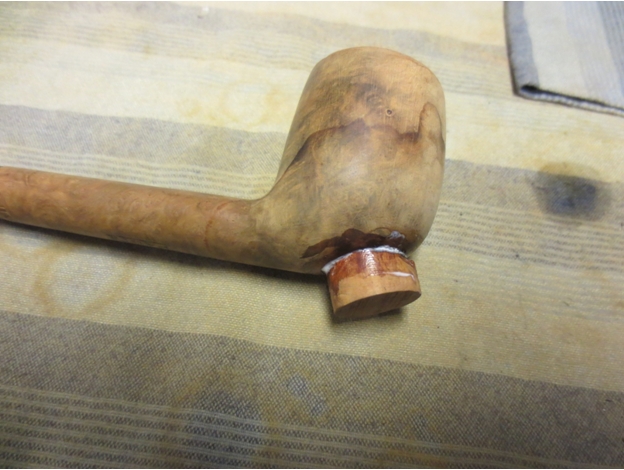
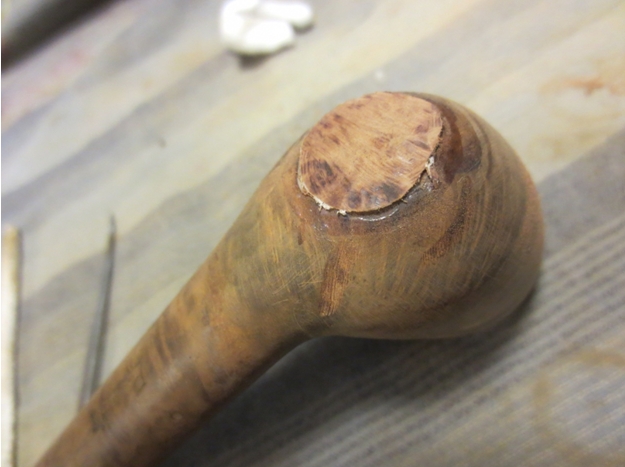
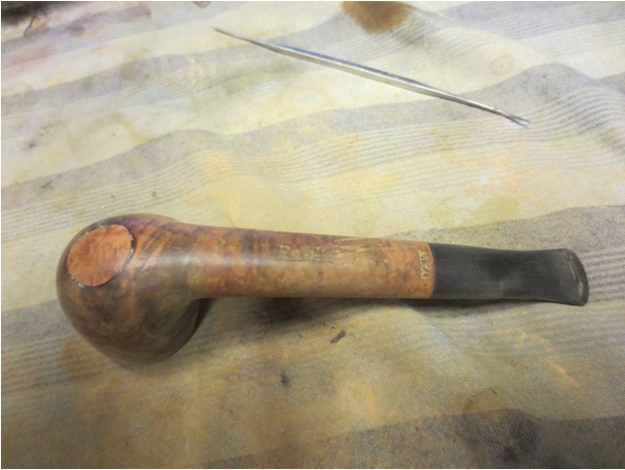
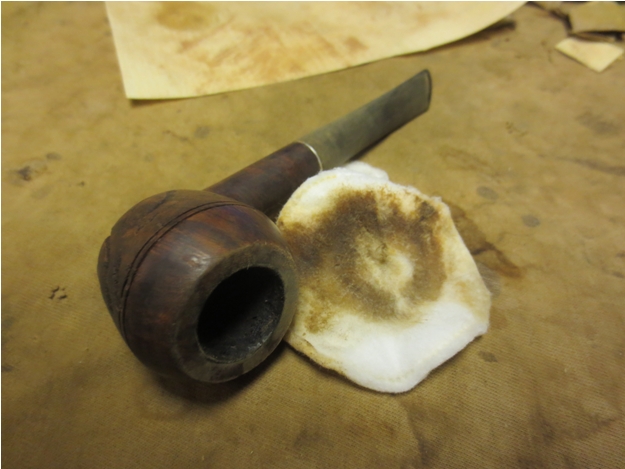
I wiped down the bowl with alcohol on cotton pads and then used a flat blade screwdriver to remove the screw from the bottom of the bowl and remove bottom cap on the bowl. I wiped down the inside of the cap and cleaned the screw with a brass bristle tire brush. I wiped it down with alcohol and then sanded the outside of the cap and screw with 1500-2400 grit micromesh sanding pads to polish them.IMG_2546 IMG_2547
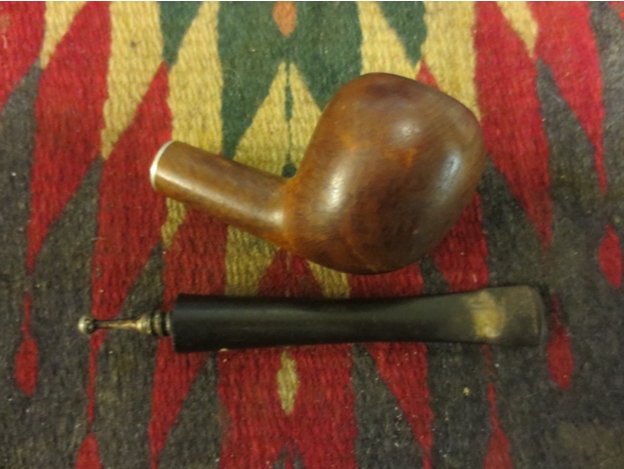
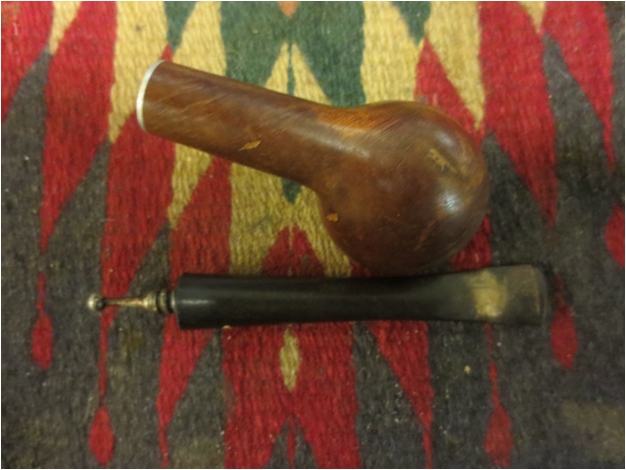
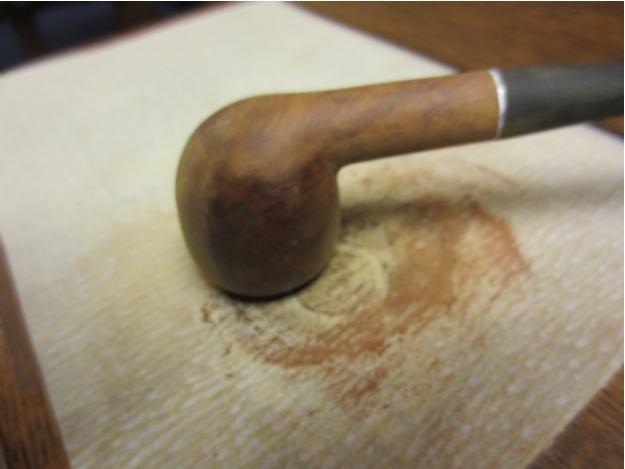
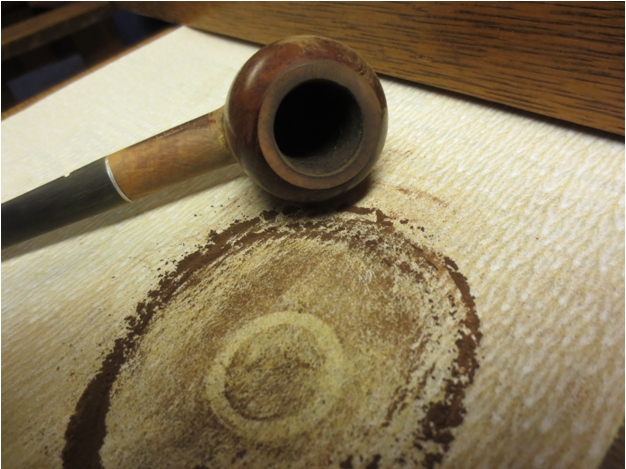
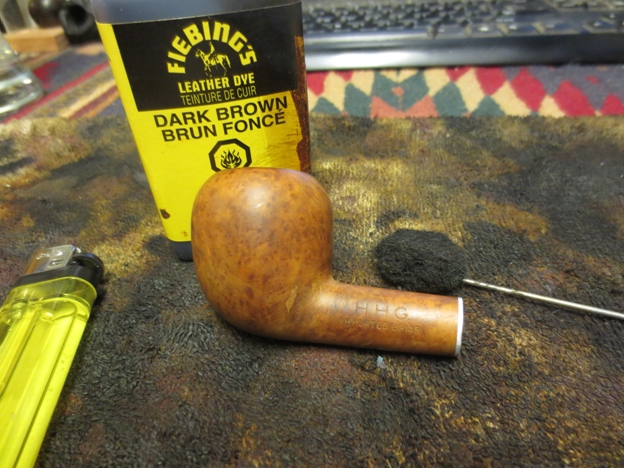
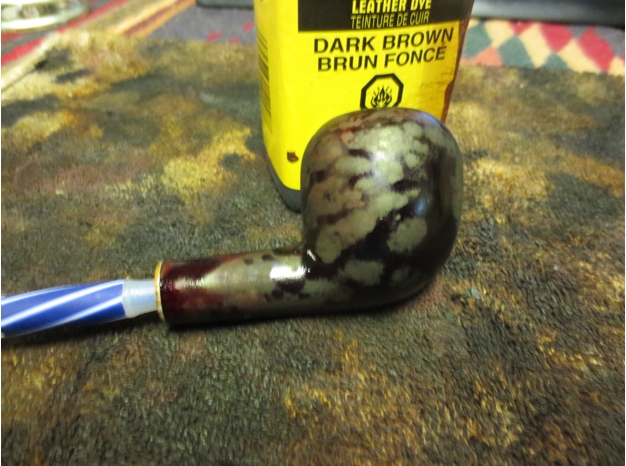
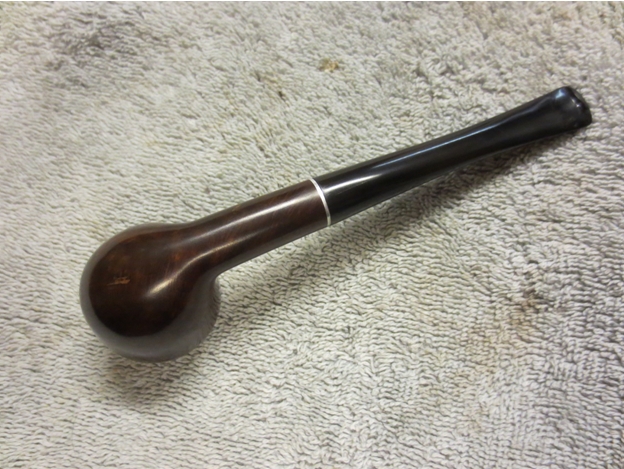
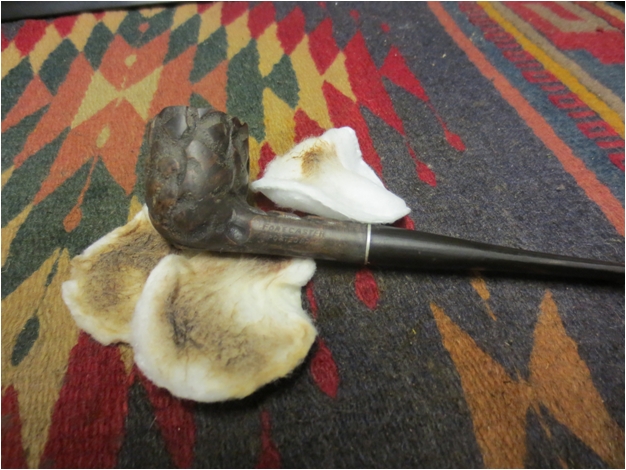
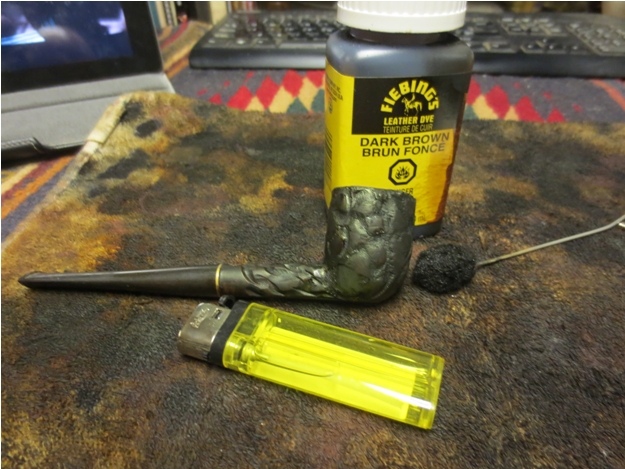
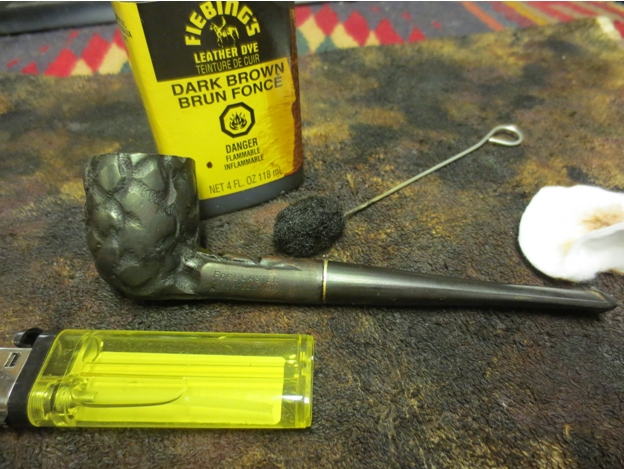
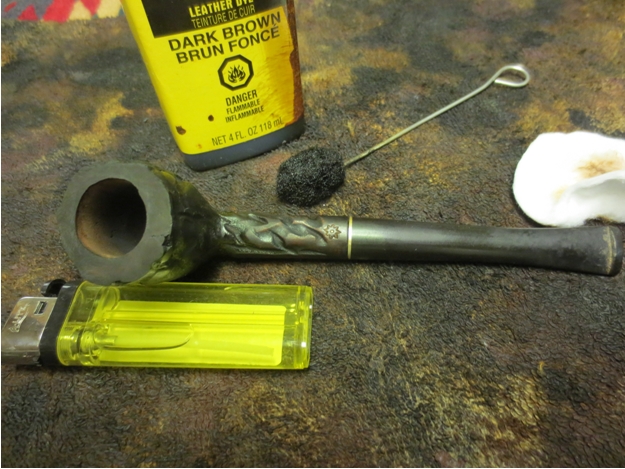
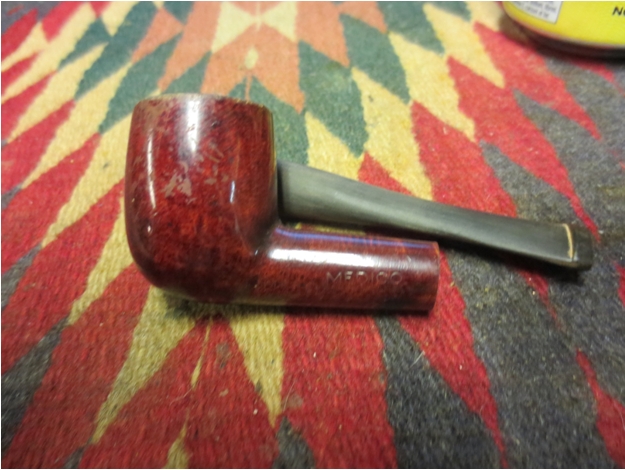
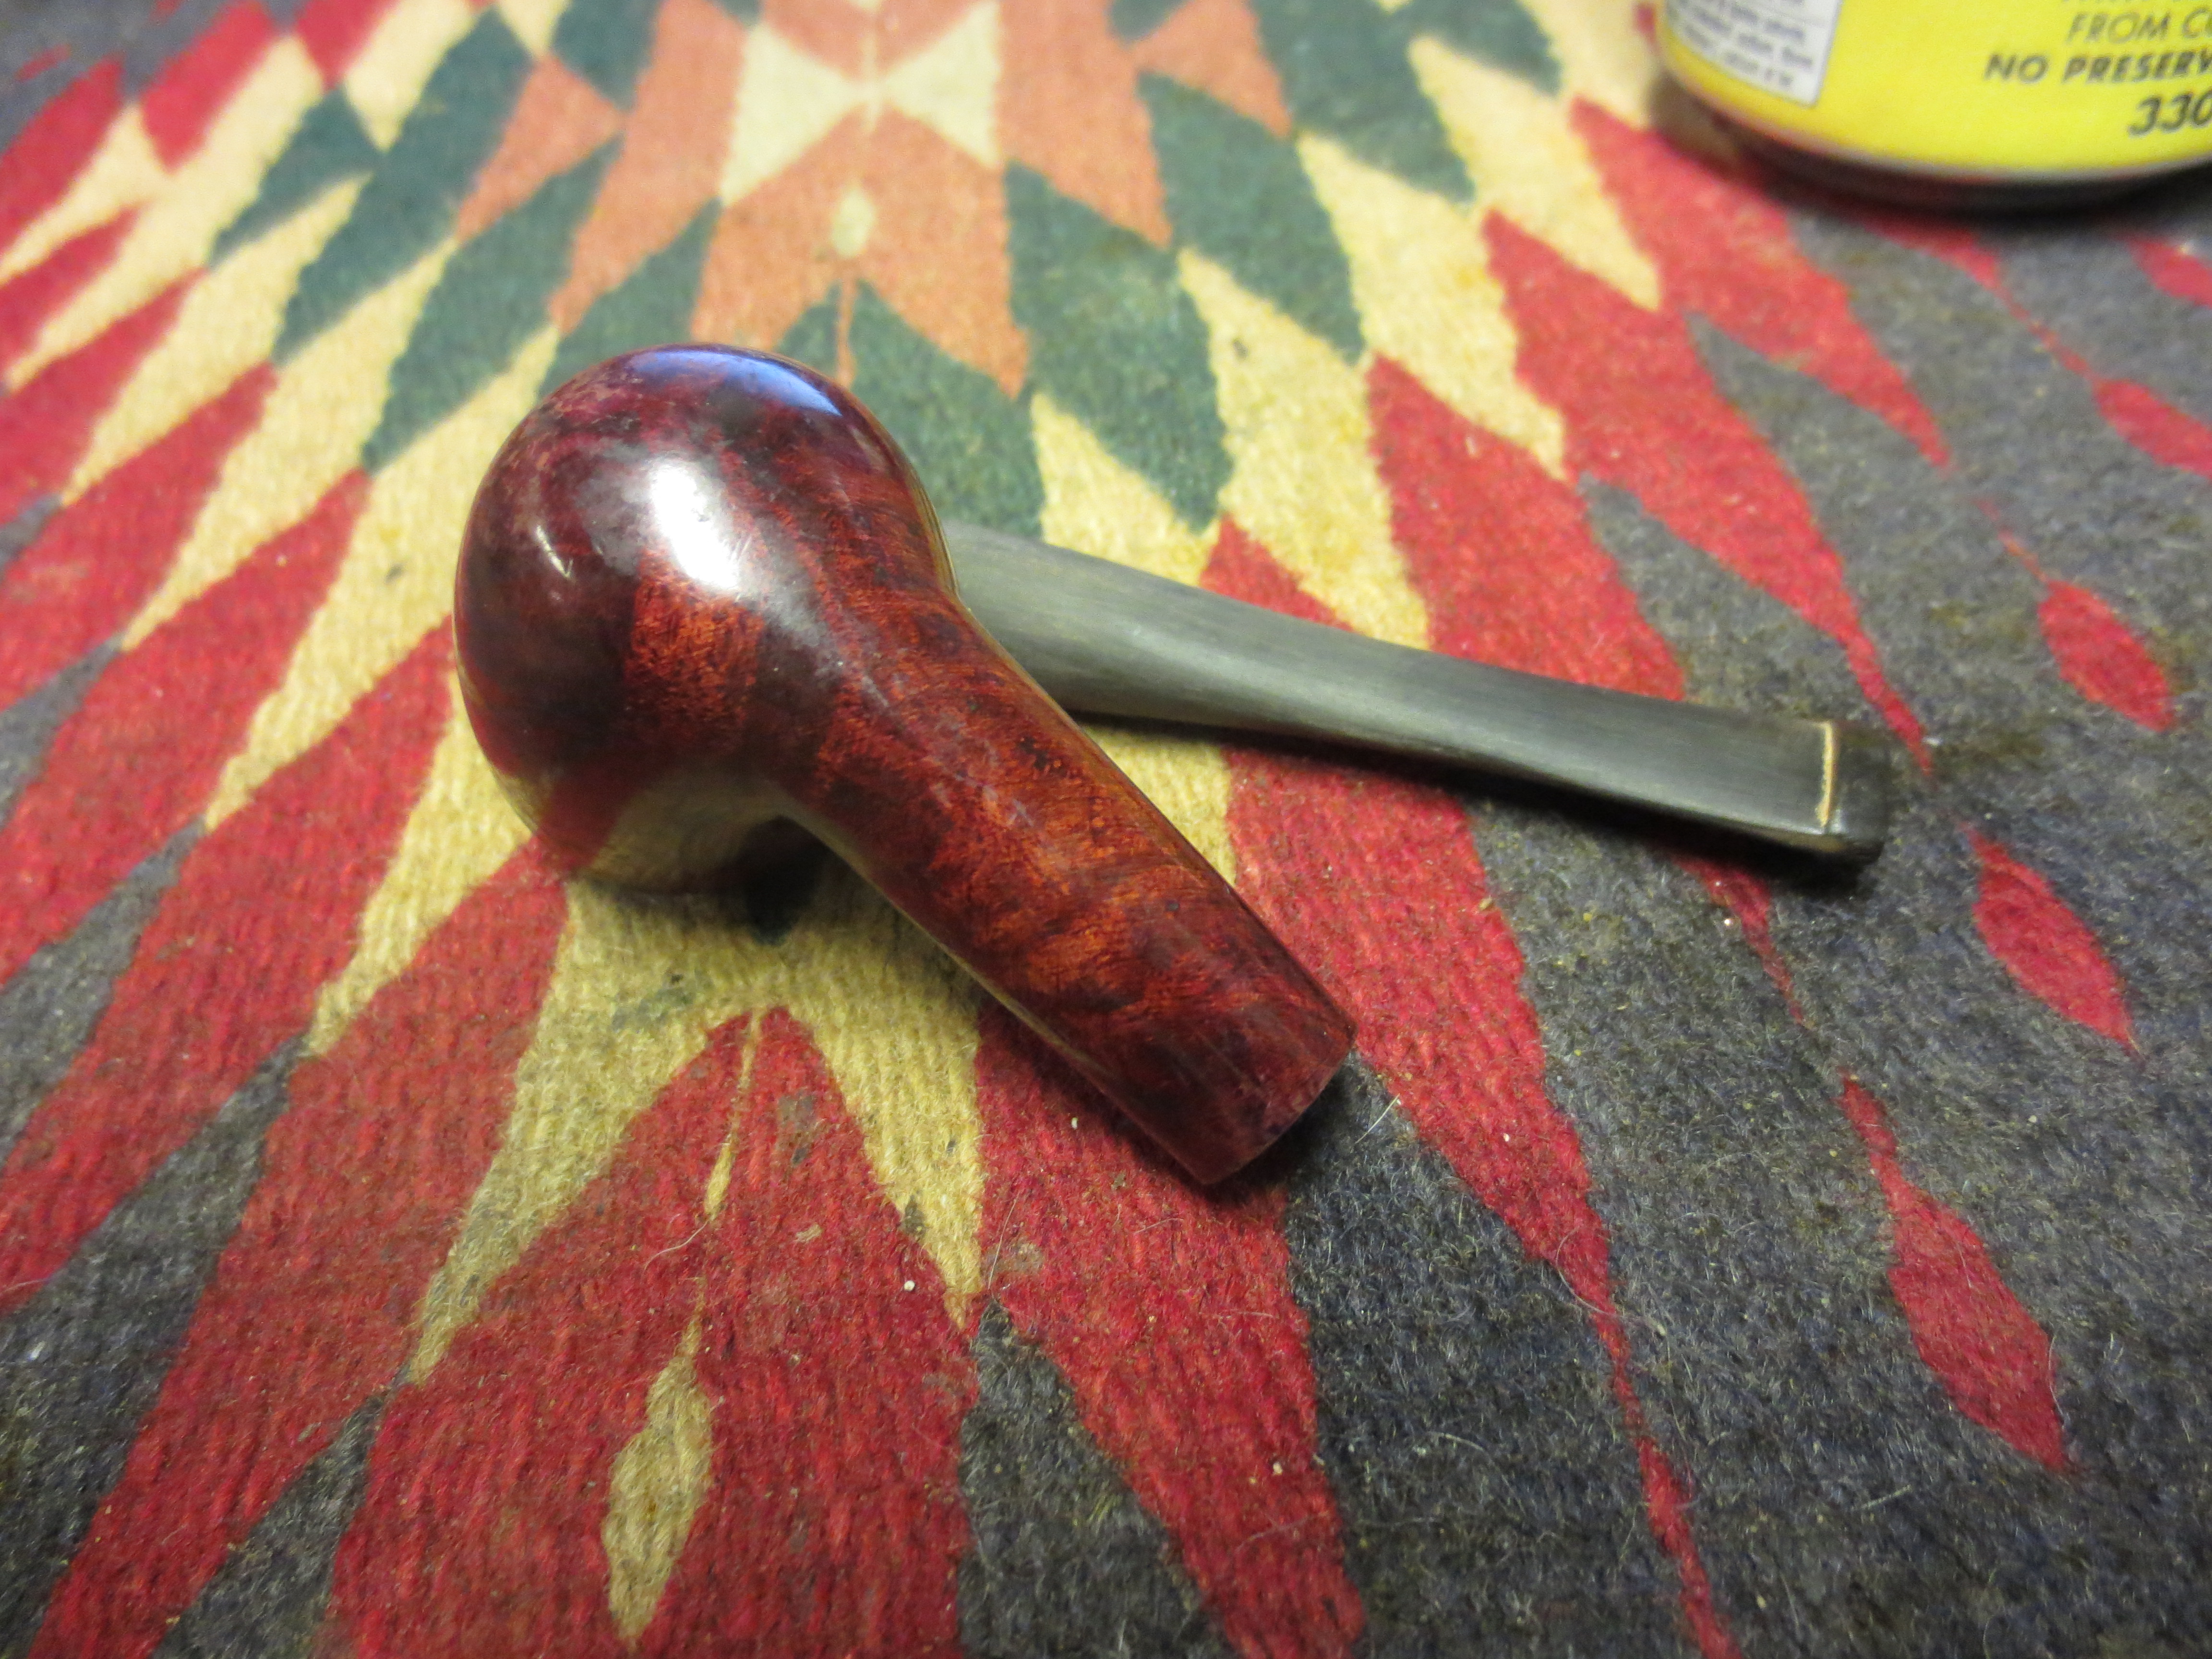
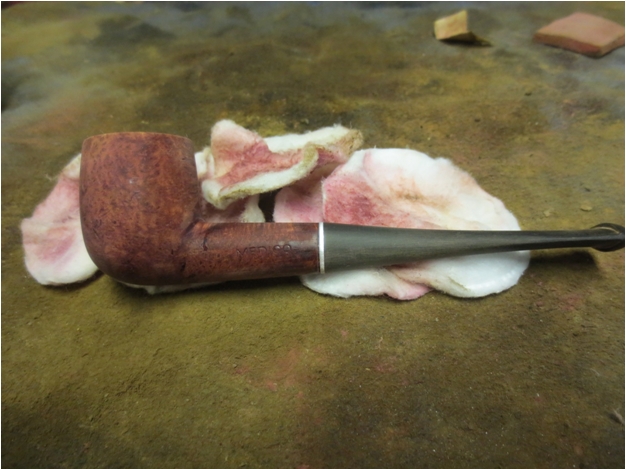
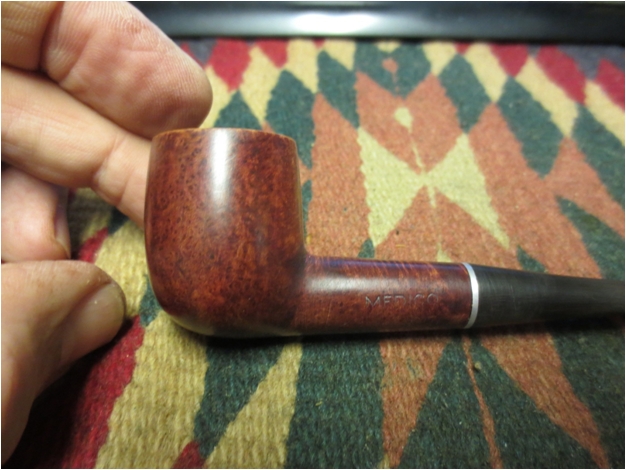
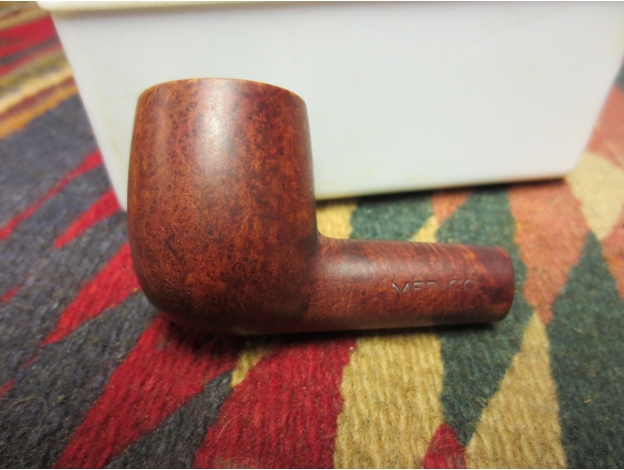
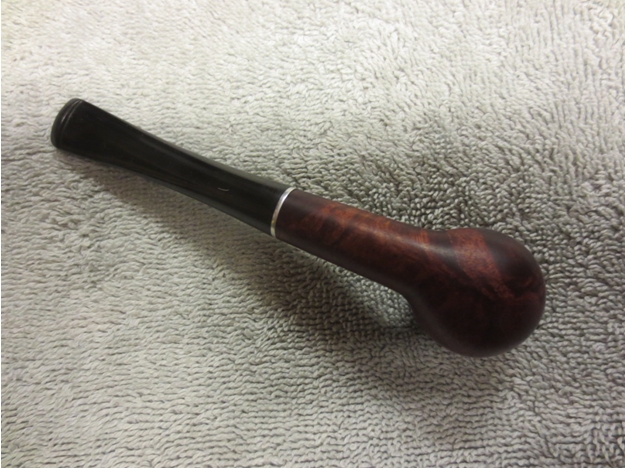
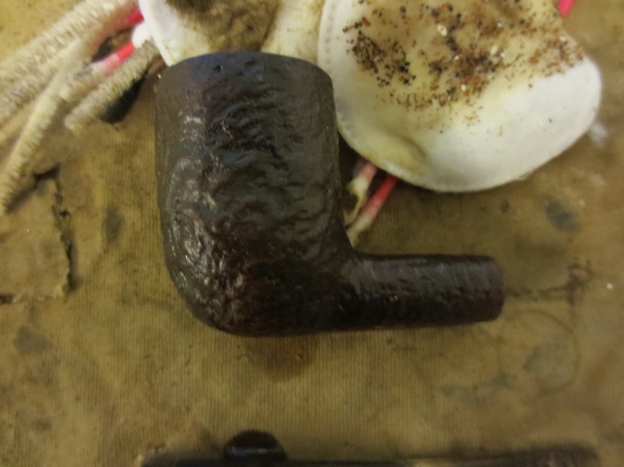
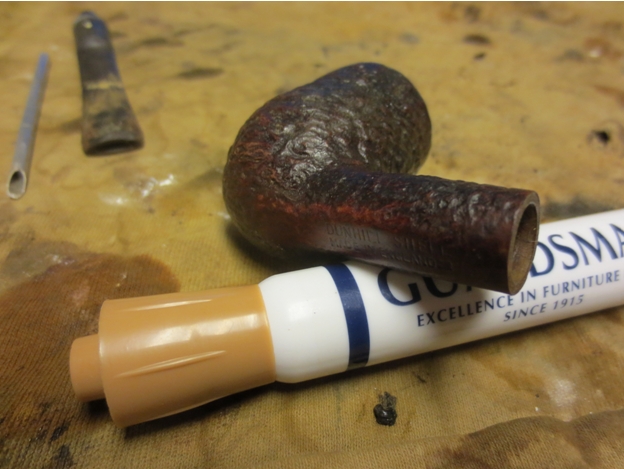
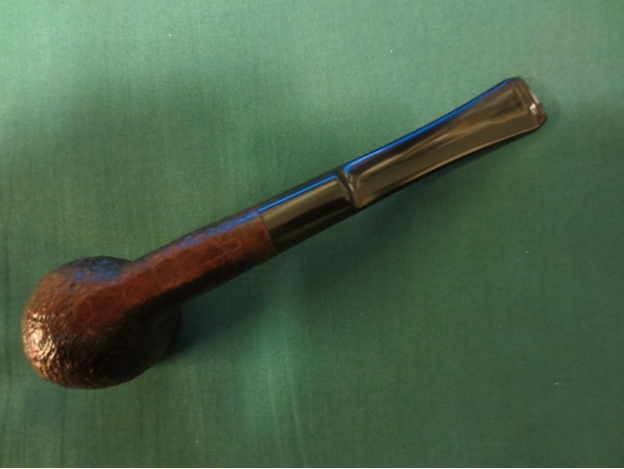
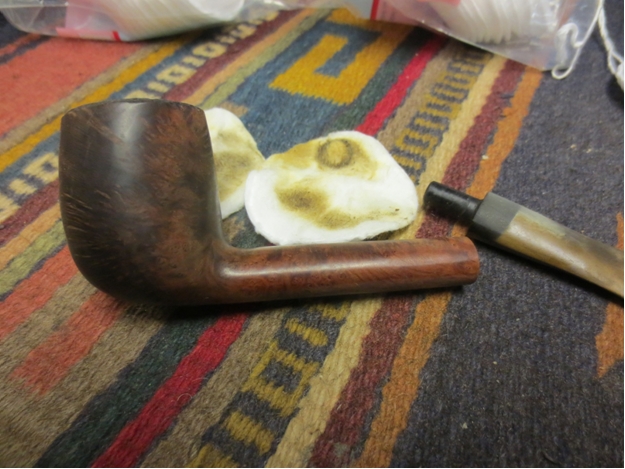
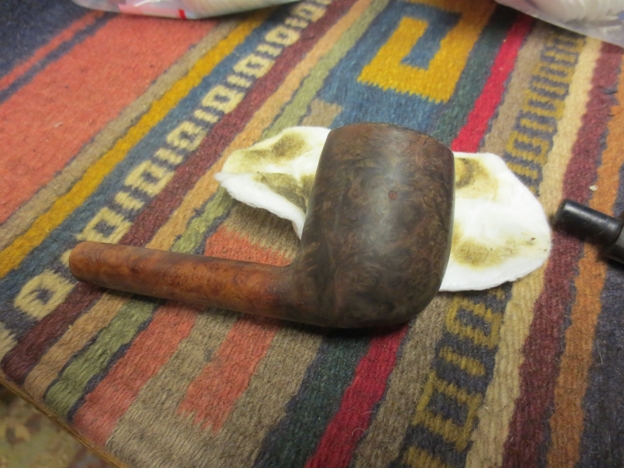
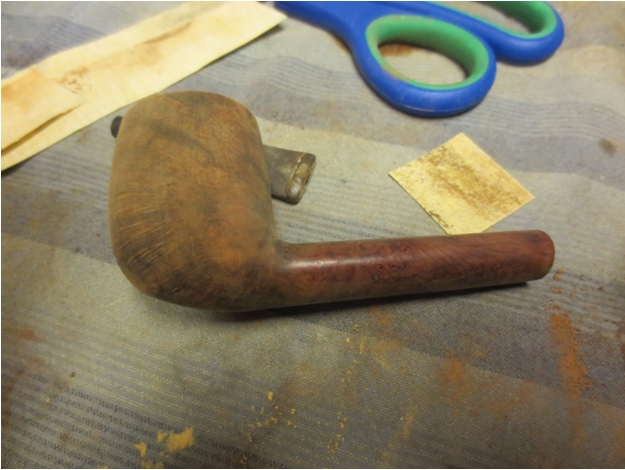
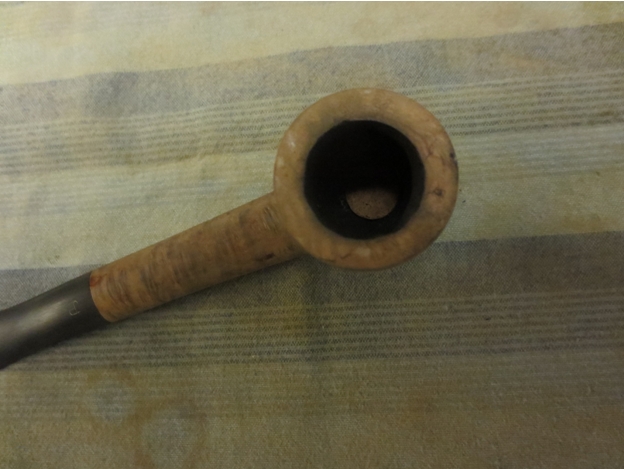
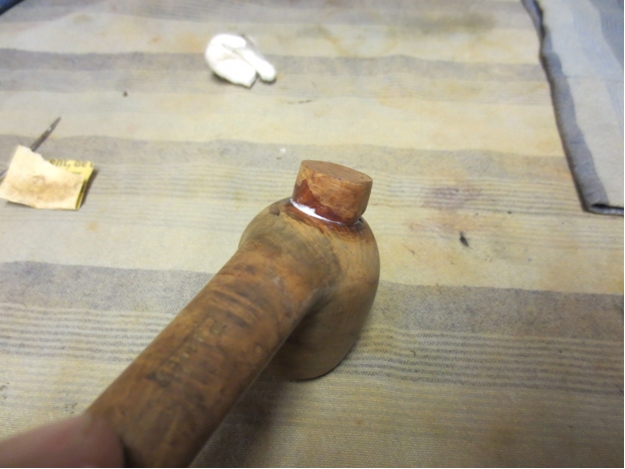
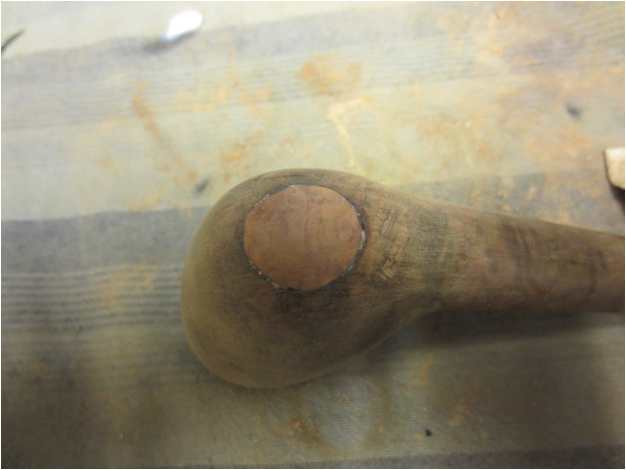
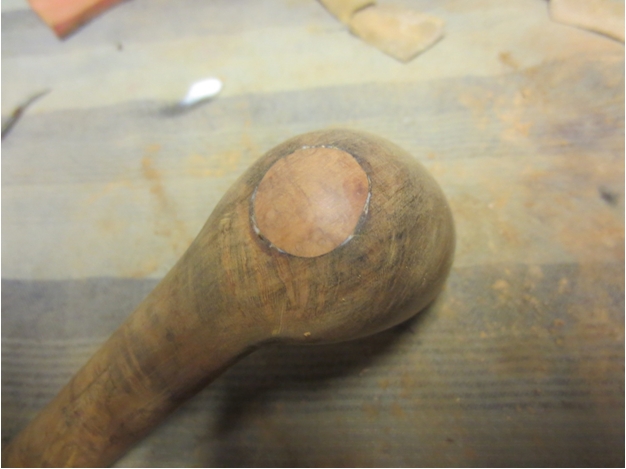
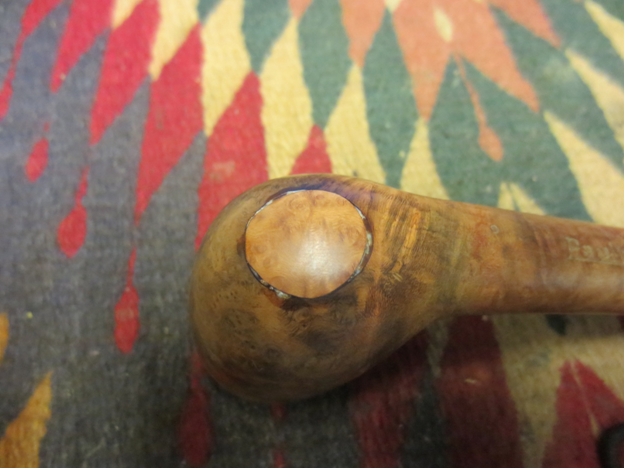
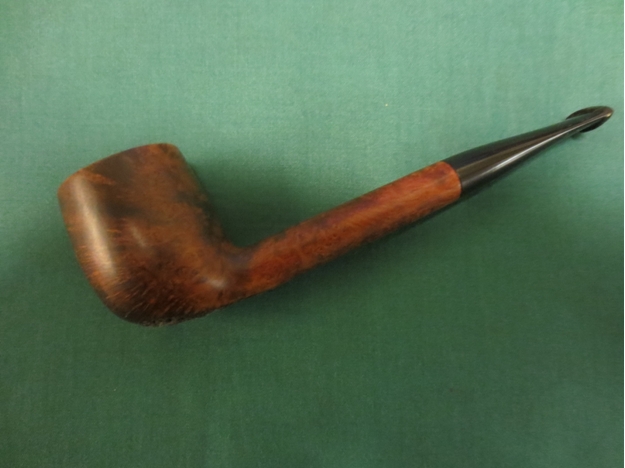
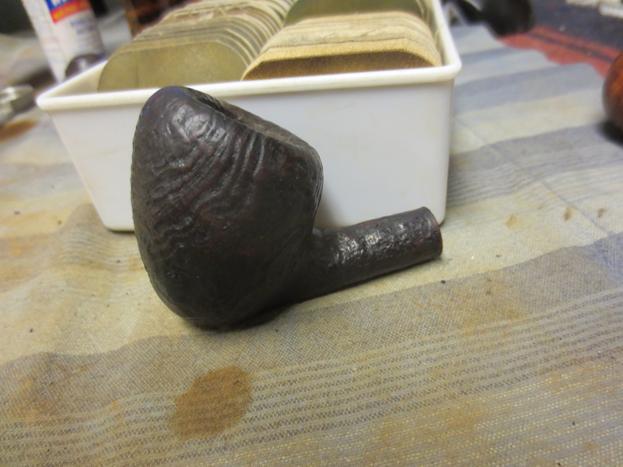
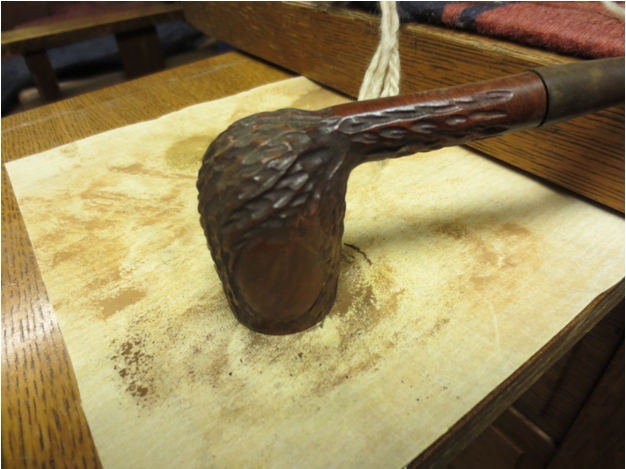
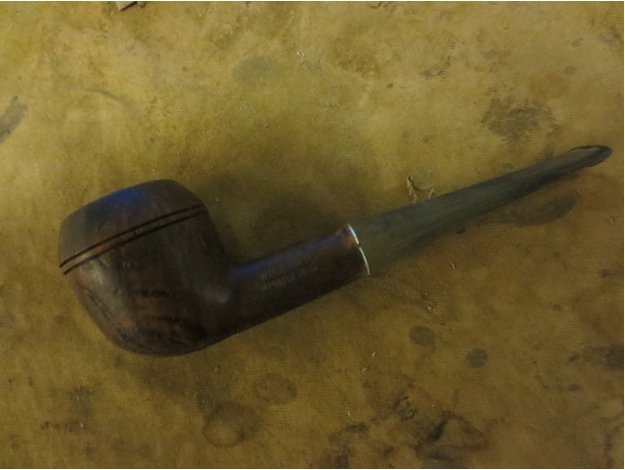
The rim had two rather large fills that needed to be hidden with stain. I used the stain pens to restain the rim and the bowl. I started with the lightest colour pen and finished with the darkest colour.IMG_2548I buffed the bowl with White Diamond and then gave it several coats of carnauba wax. I put the metal cap back in place and turned the screw into the bottom of the bowl.IMG_2549 IMG_2550
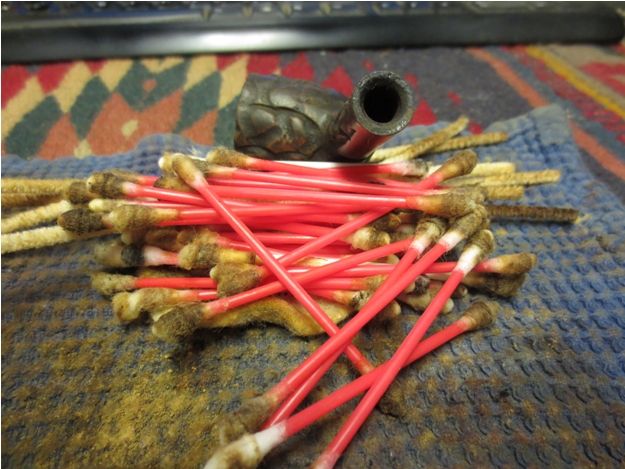
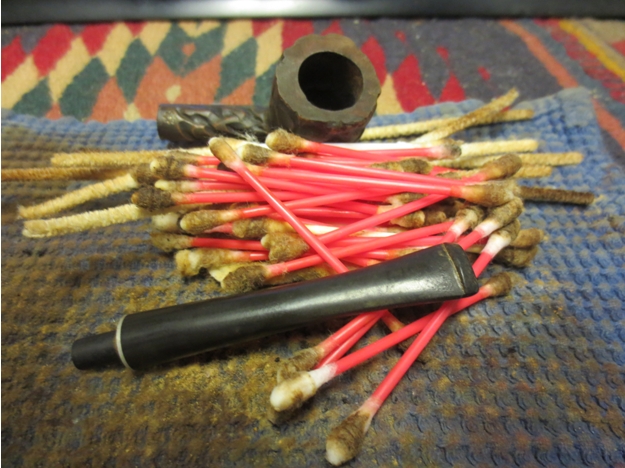
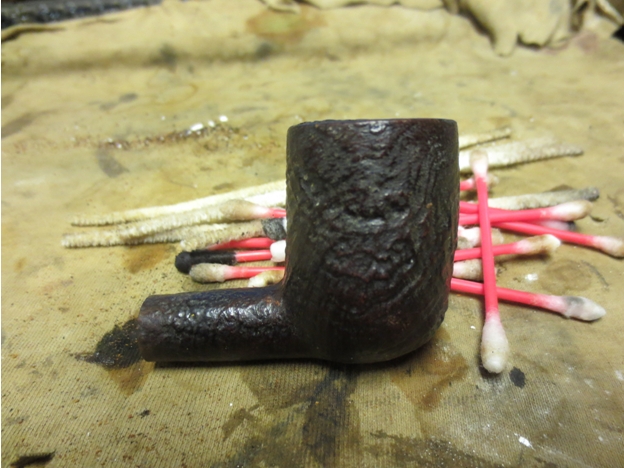
The end cap still did not come off after I had soaked it with alcohol. I used a Robertson head screw driver with a long shank and inserted it in the barrel. I hammered the end with a hammer and tried to drive it out of the barrel. It cam half way out but I could not budge it further. I boiled a cup of water and let the barrel and end cap sit in it to see if I could loosen the tars. I repeated this three times with the cooling of the water. I then inserted the screw driver and was able to drive out the cap. It was covered with a black tar build up and the inside of the barrel was also thickly coated. I cleaned out the inside of the end cap and the barrel with cotton swabs, pipe cleaners and alcohol. I rubbed down the rubber grommet on the stem and the end cap with Vaseline to soften them again and then inserted them in place in the barrel.IMG_2551
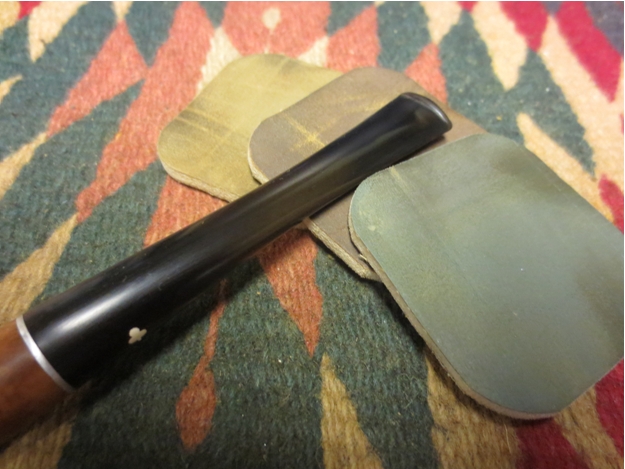
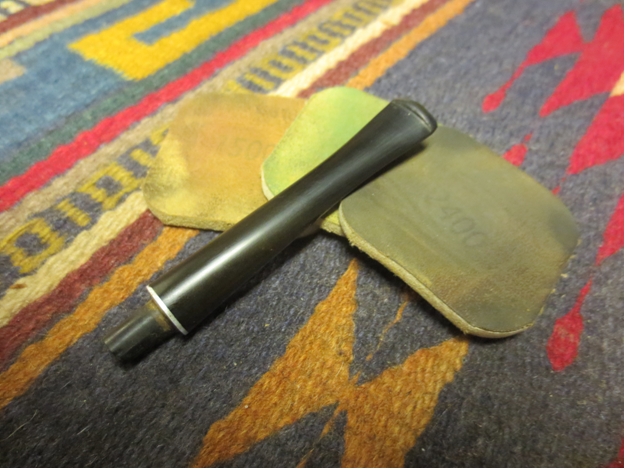
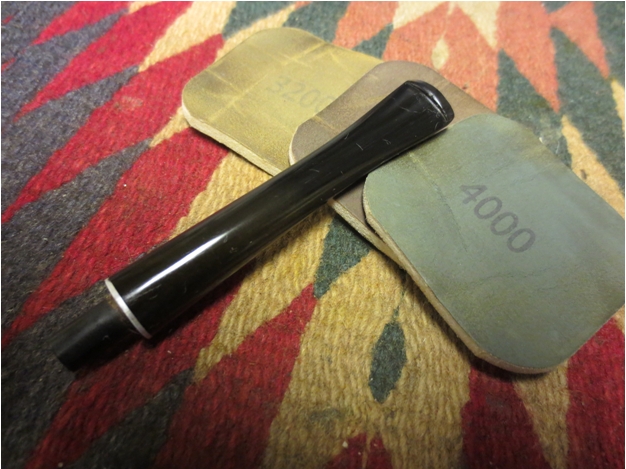
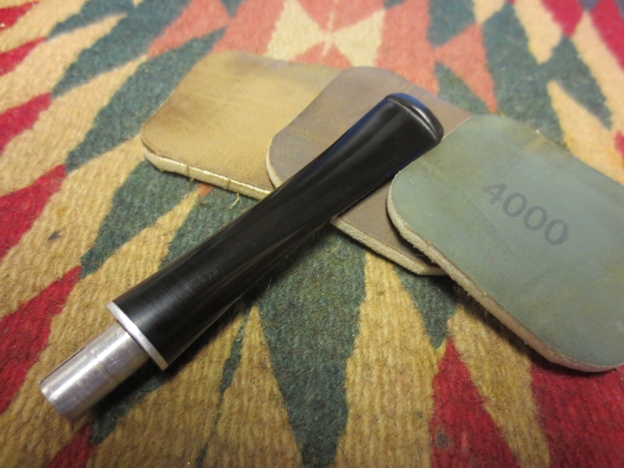
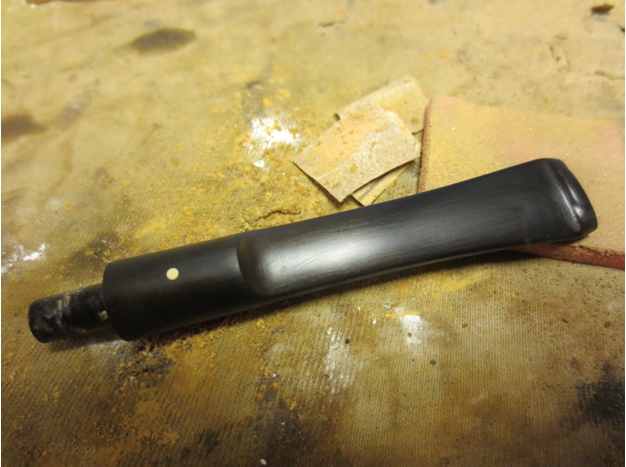
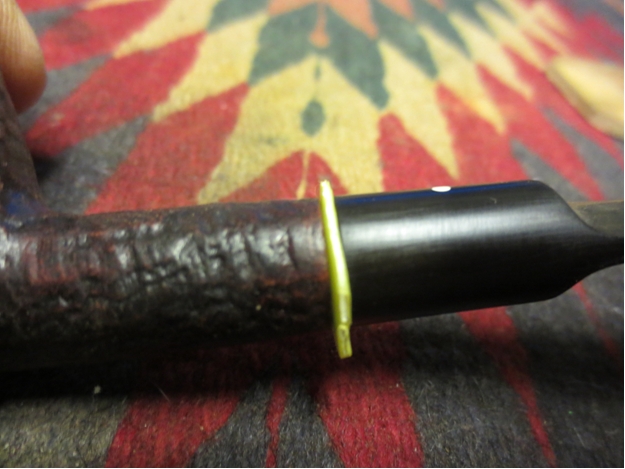
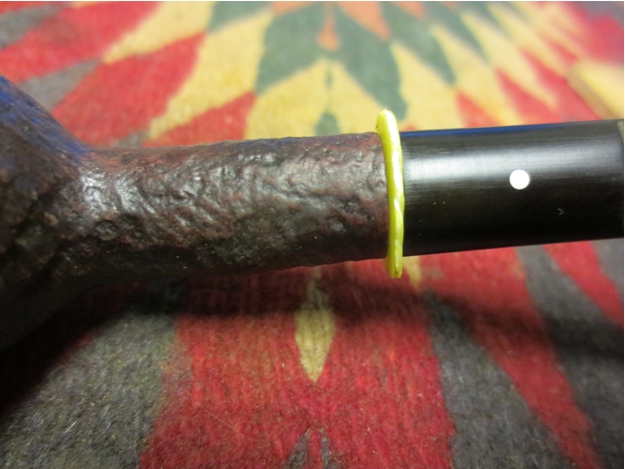
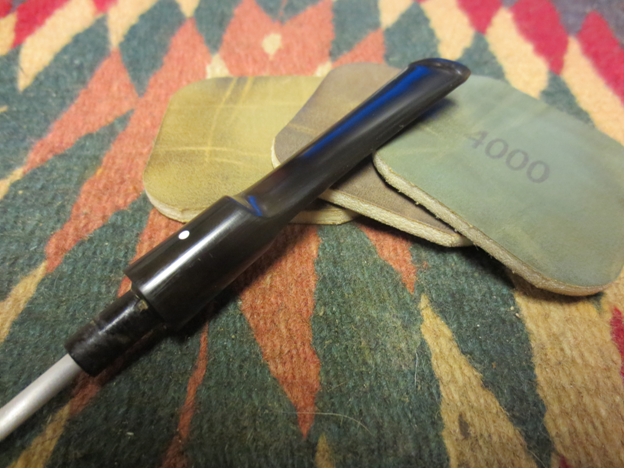
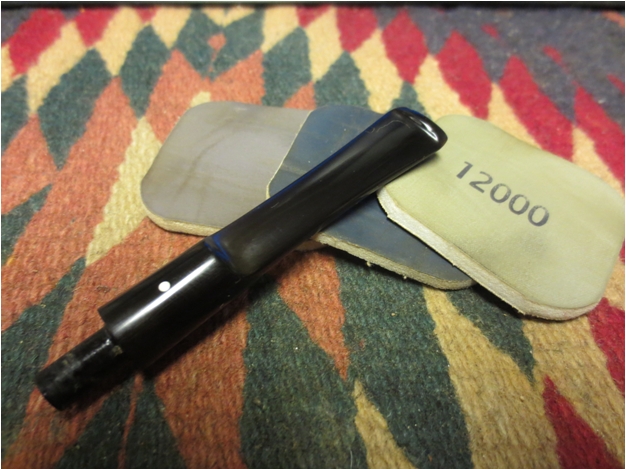
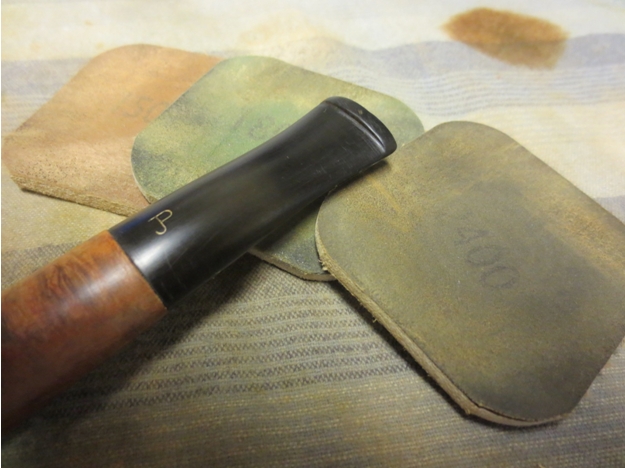
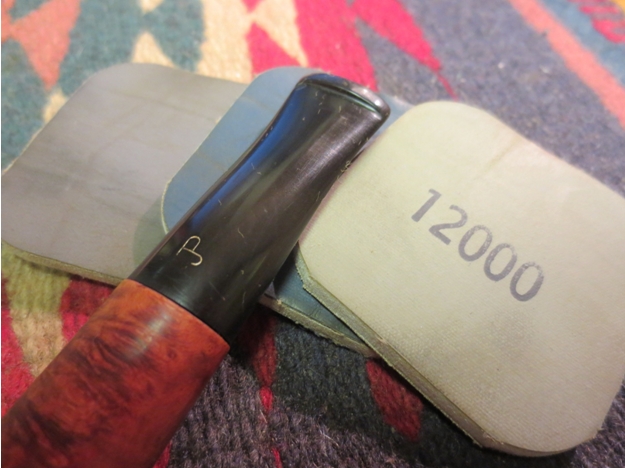
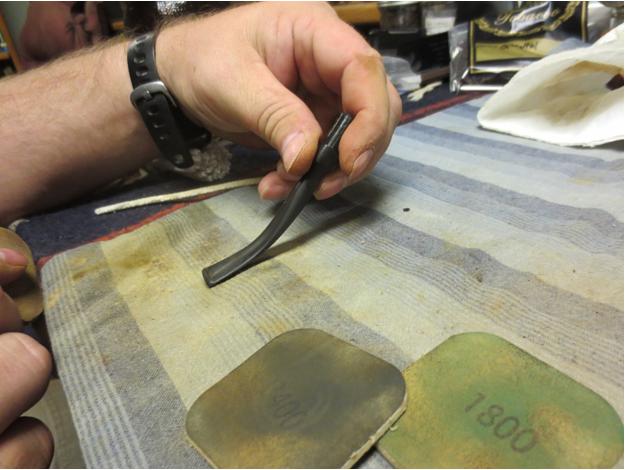
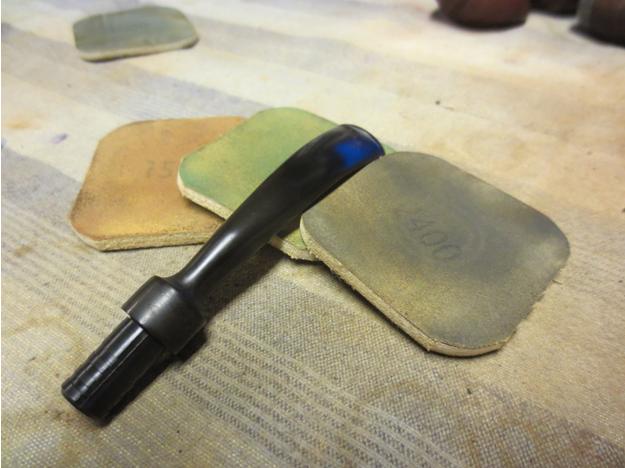
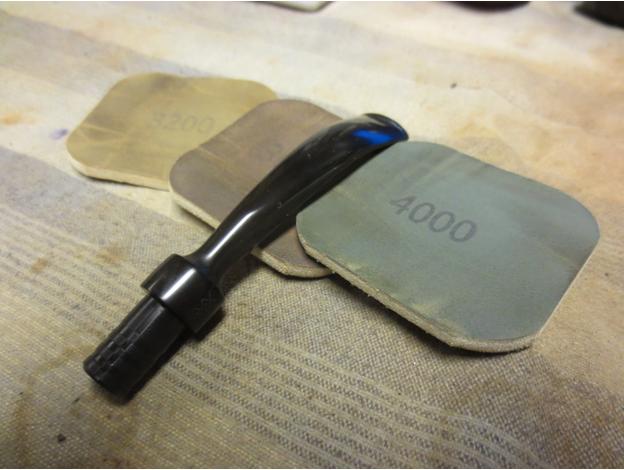
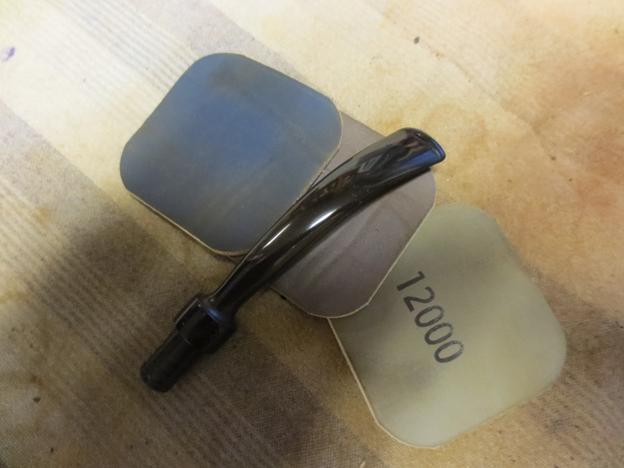
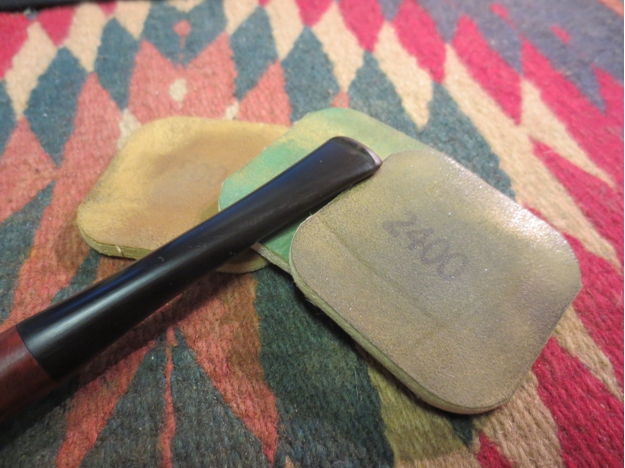
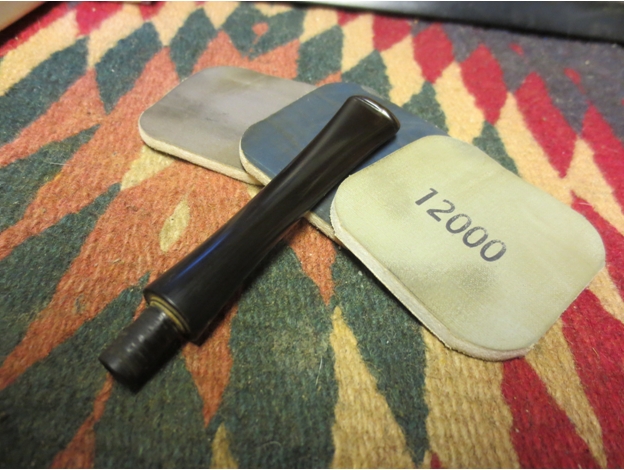
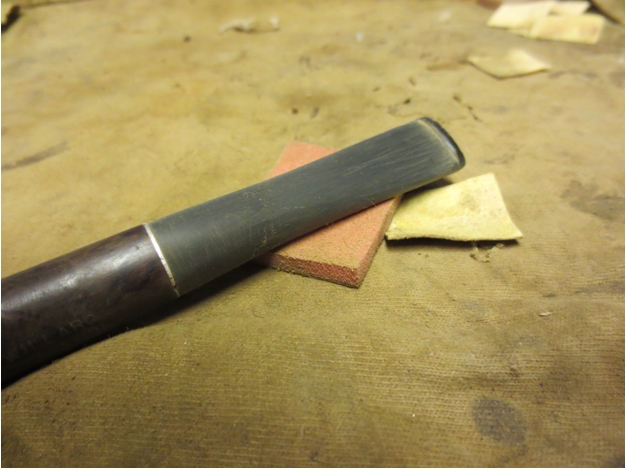
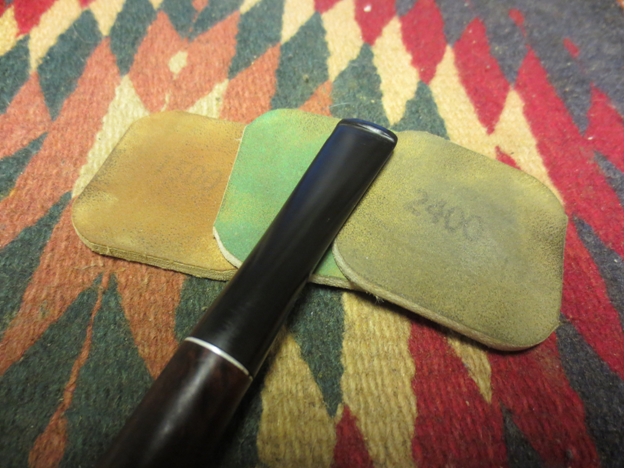
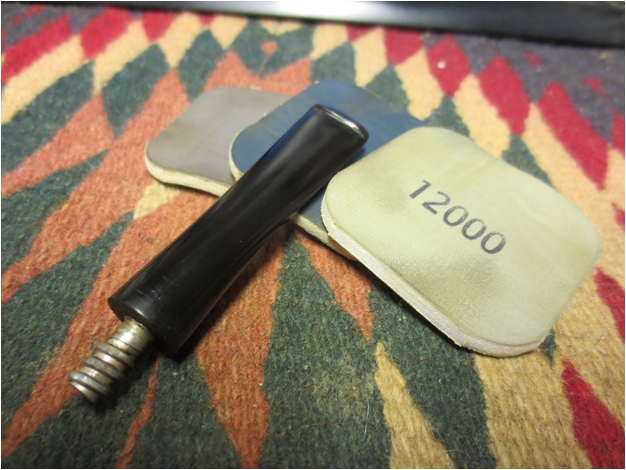
I sanded the stem with 220 grit sandpaper and then medium and fine grit sanding sponges to remove the tooth marks and the oxidation. I then sanded it with micromesh sanding pads – wet sanding with 1500-2400 grit pads and dry sanding 3200-12,000 grit pads. I rubbed the stem down with Obsidian Oil between each set of three pads. I gave the stem a final buff with White Diamond and then gave it several coats of carnauba wax to give it a shine.IMG_2552 IMG_2553 IMG_2554
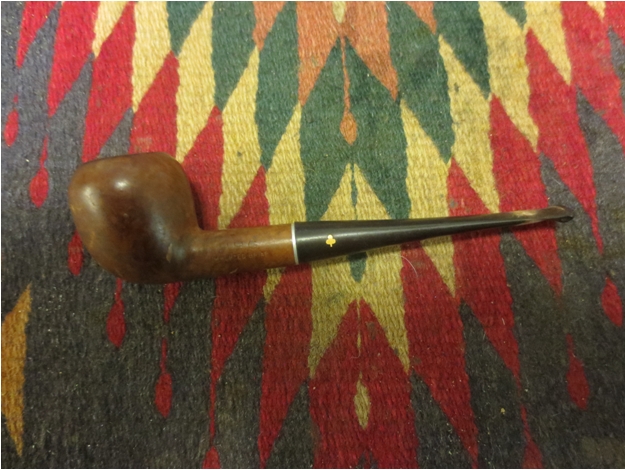
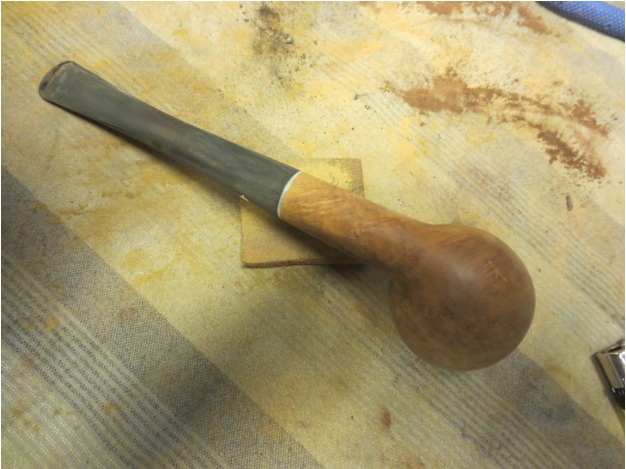
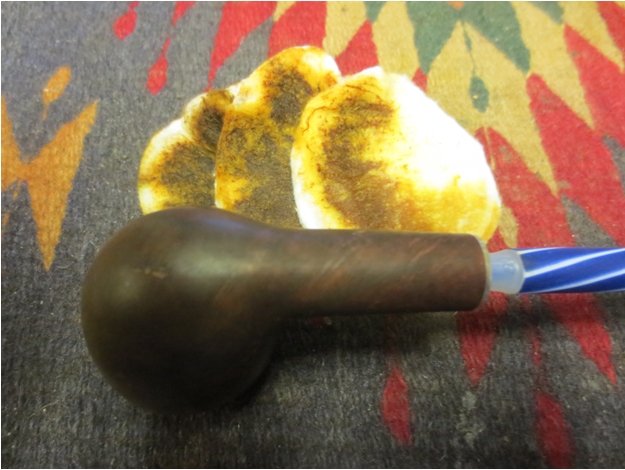
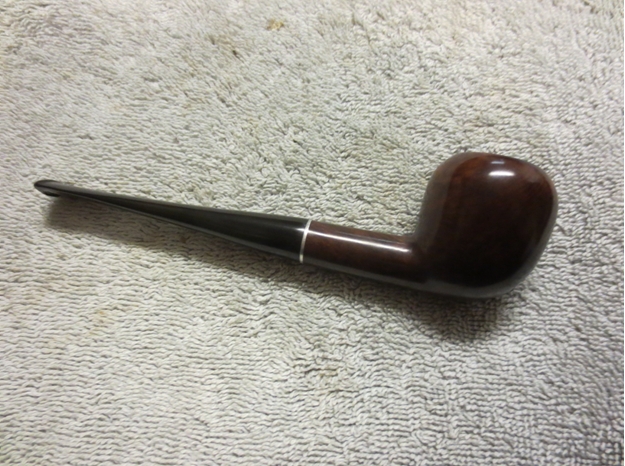
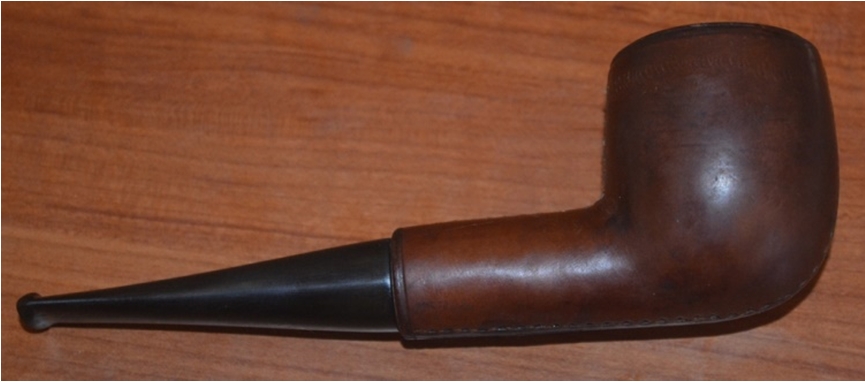
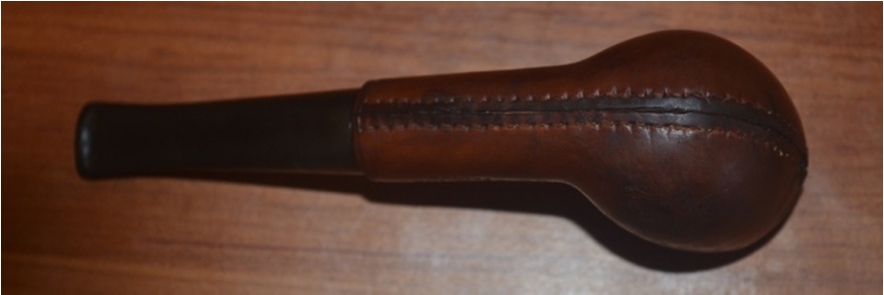
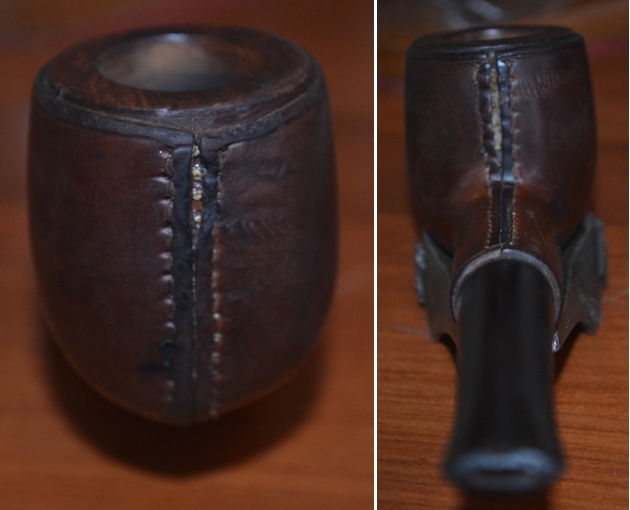
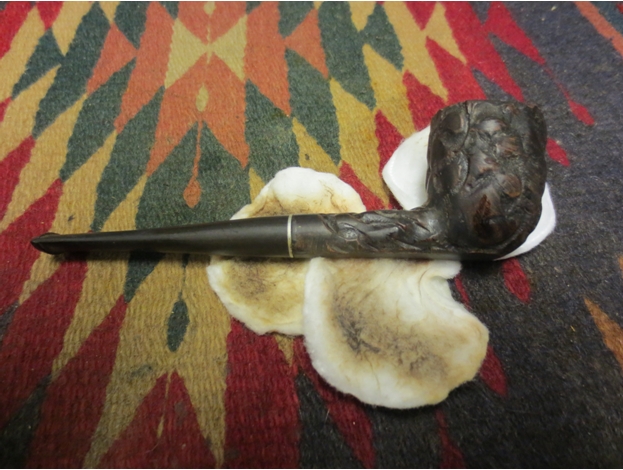
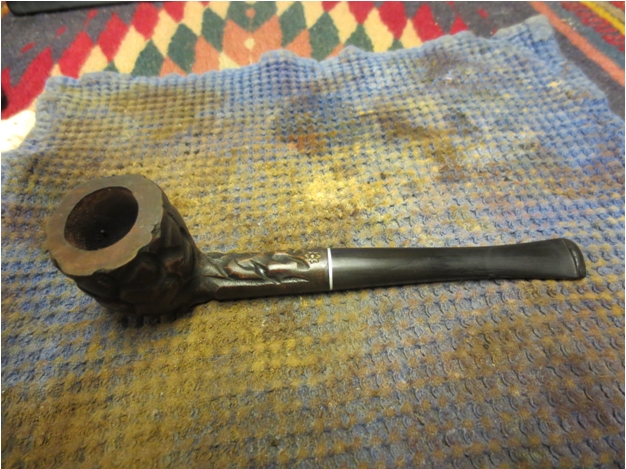
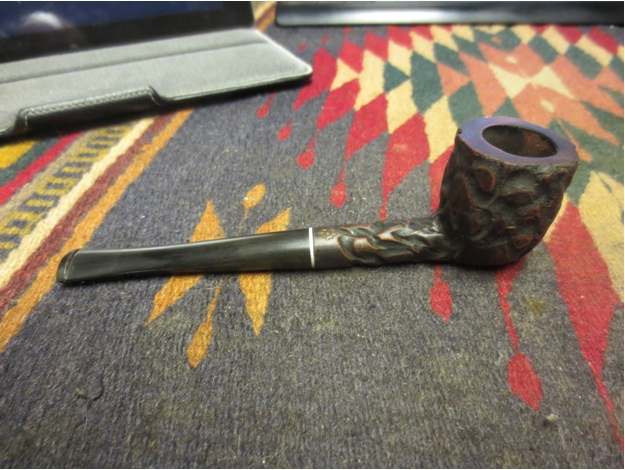
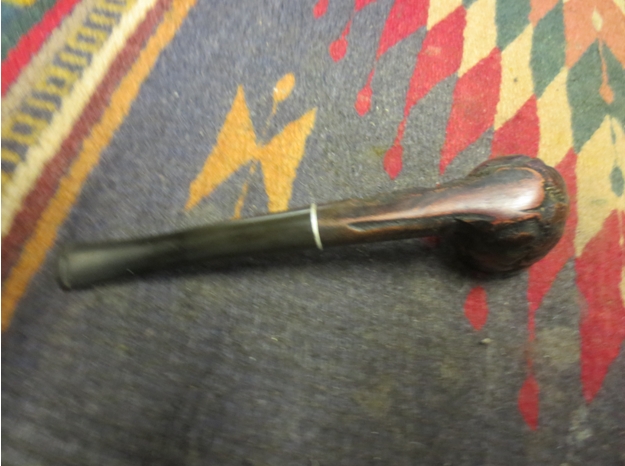
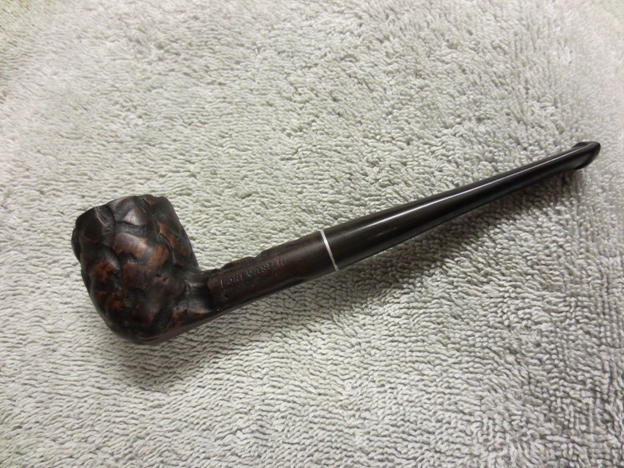
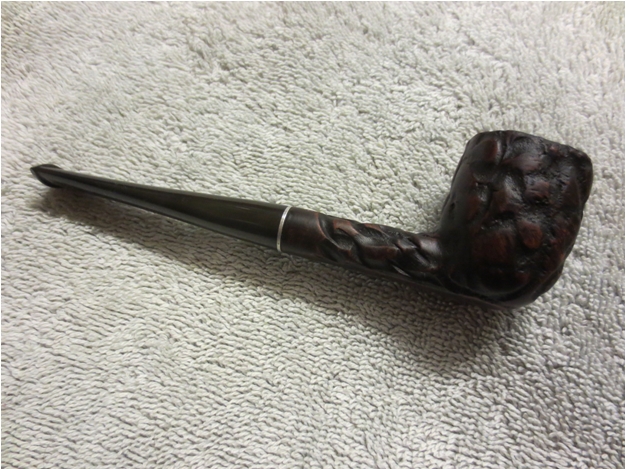
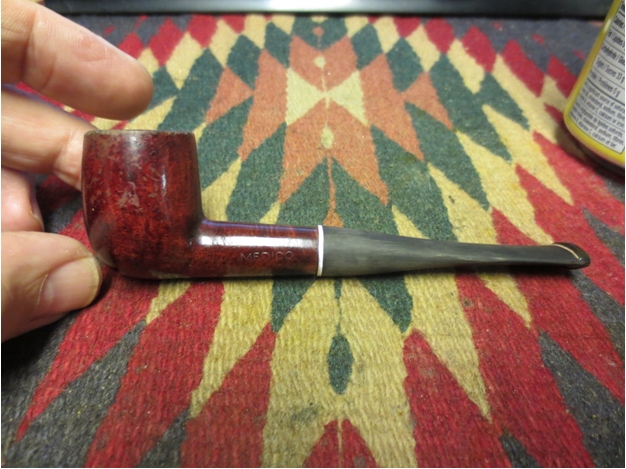
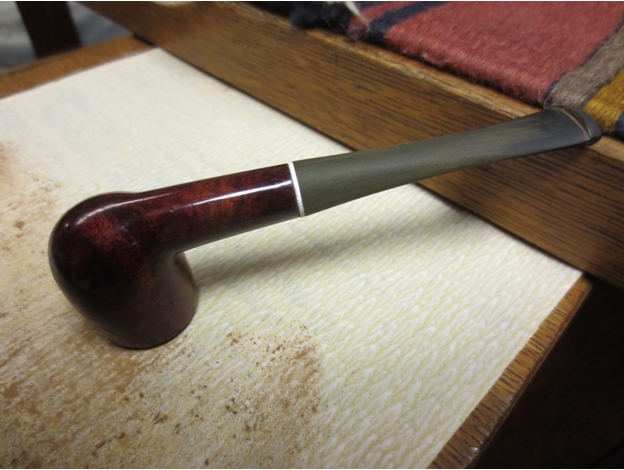
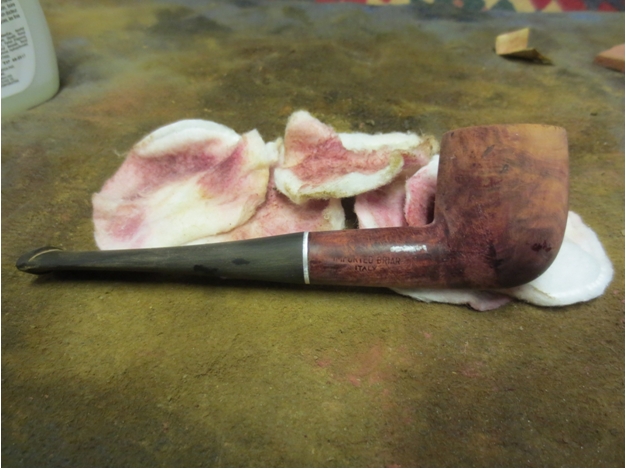
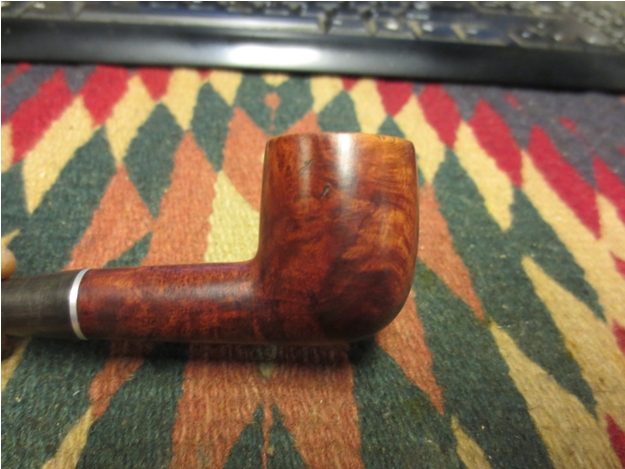
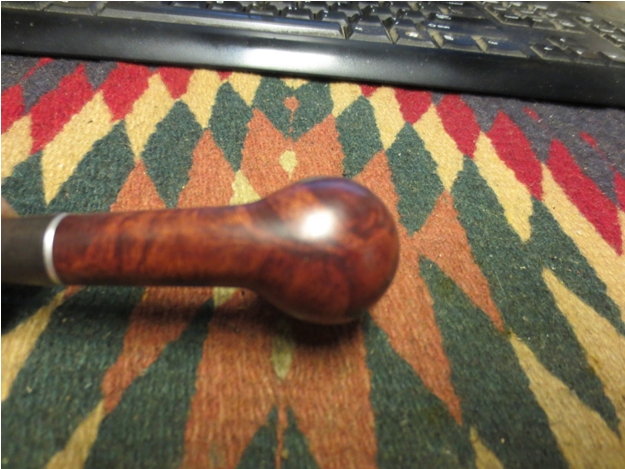
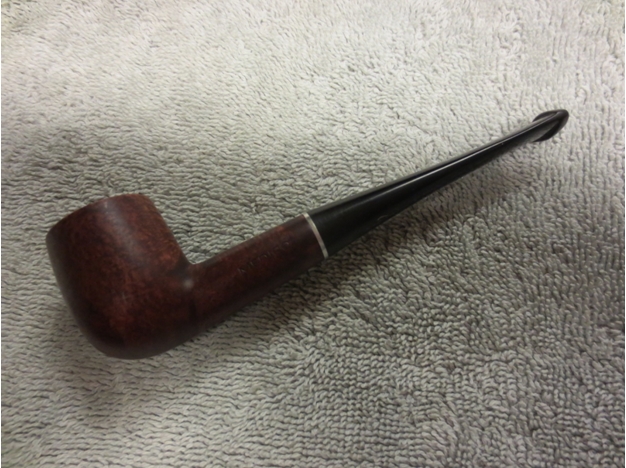
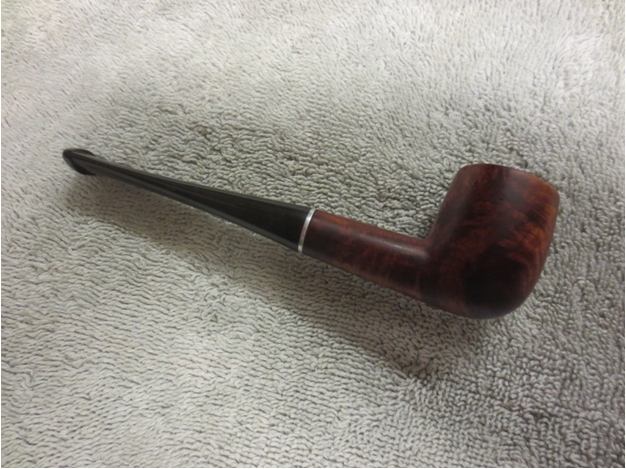
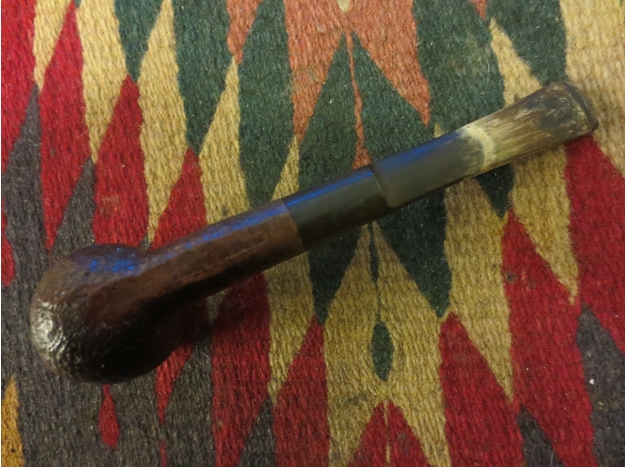
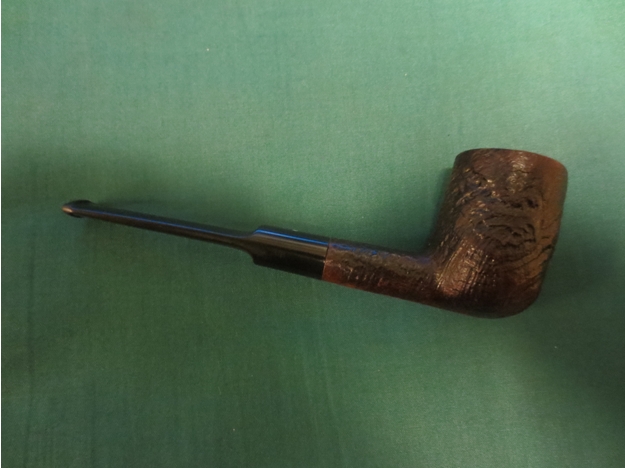
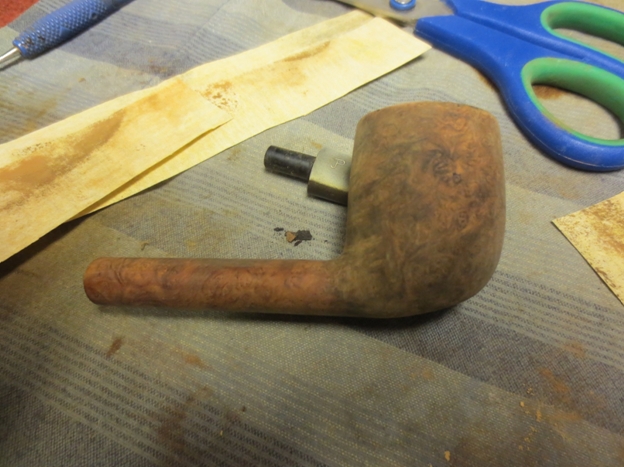
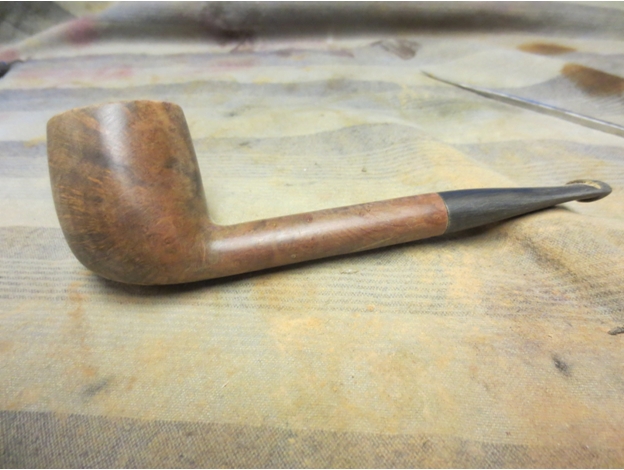
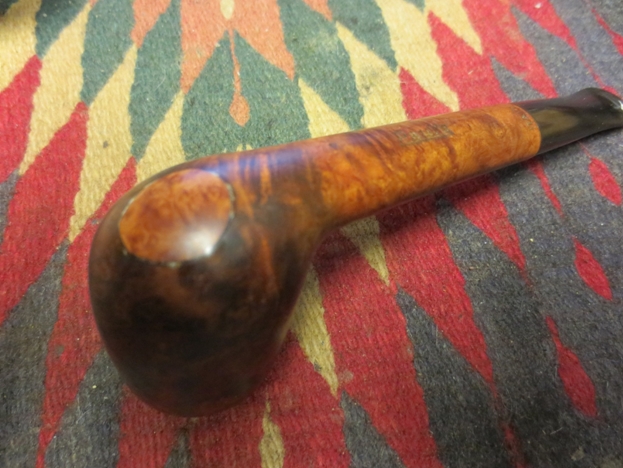
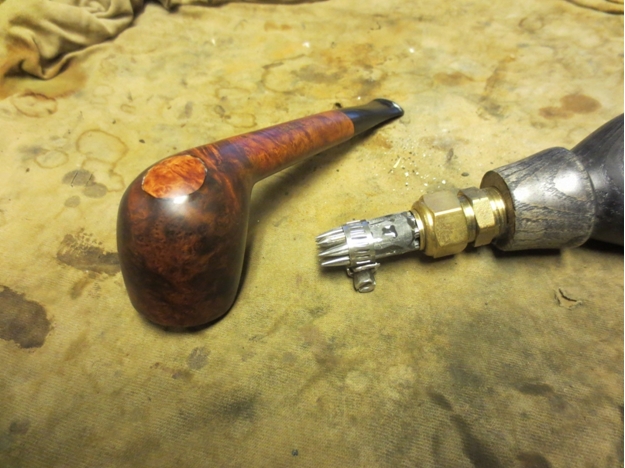
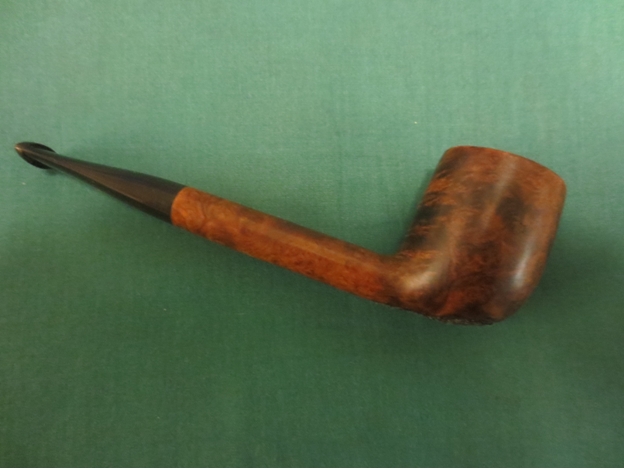
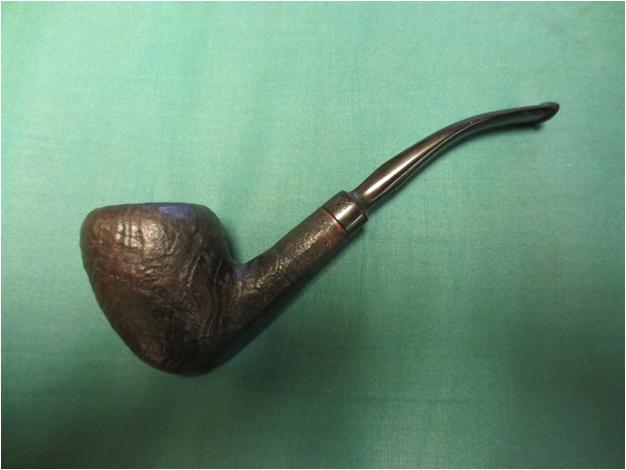
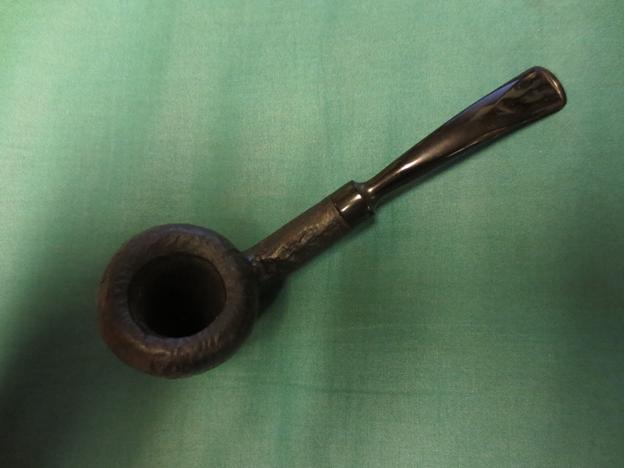
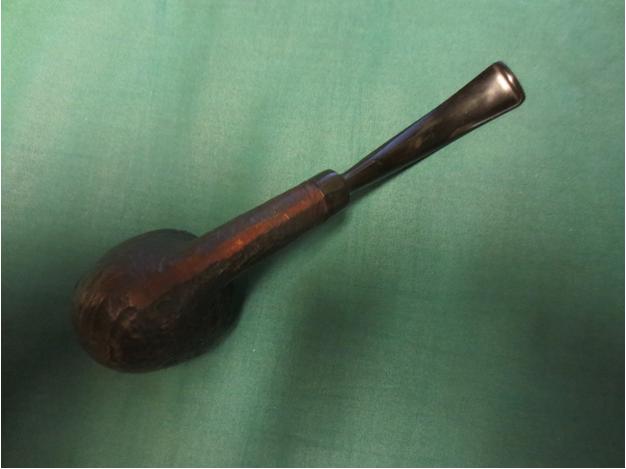
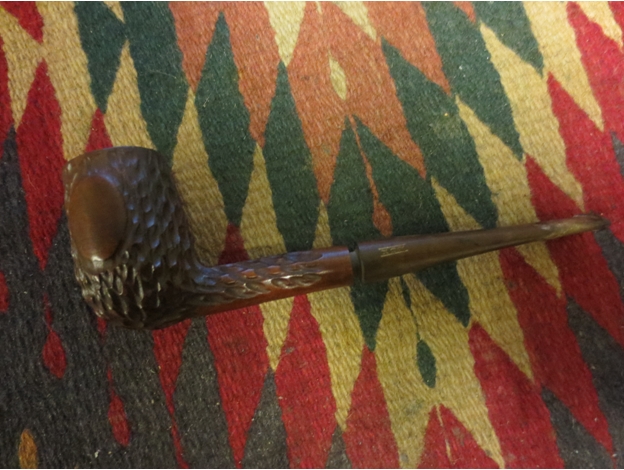
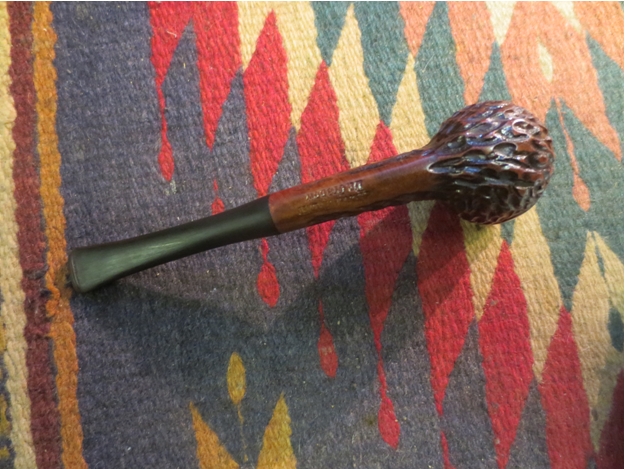
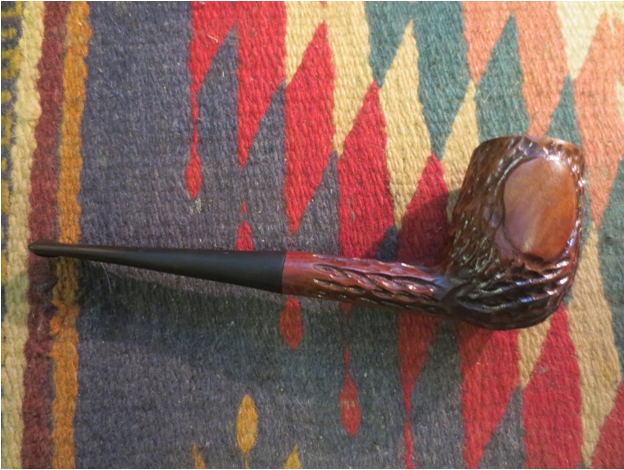
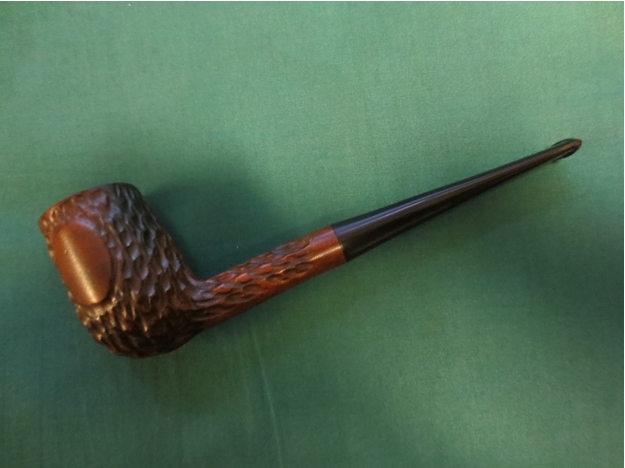
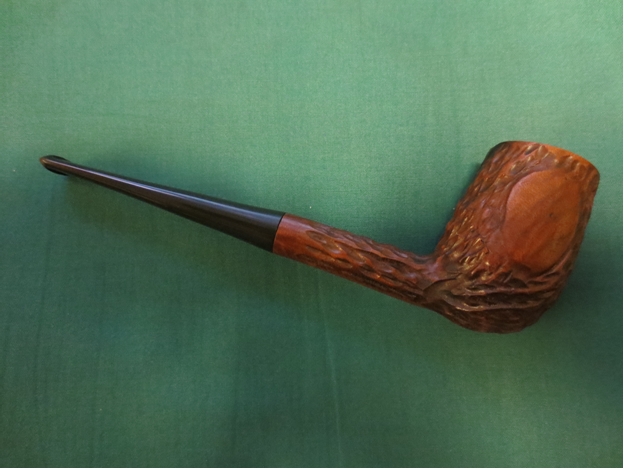
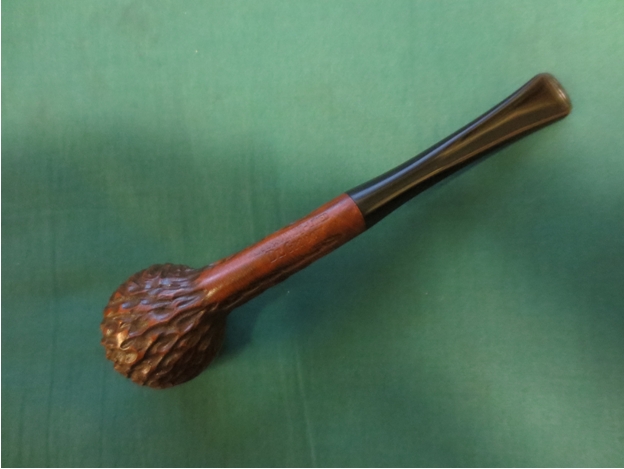
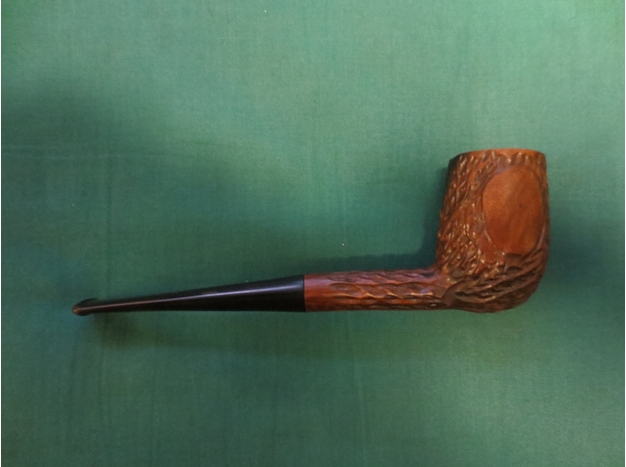
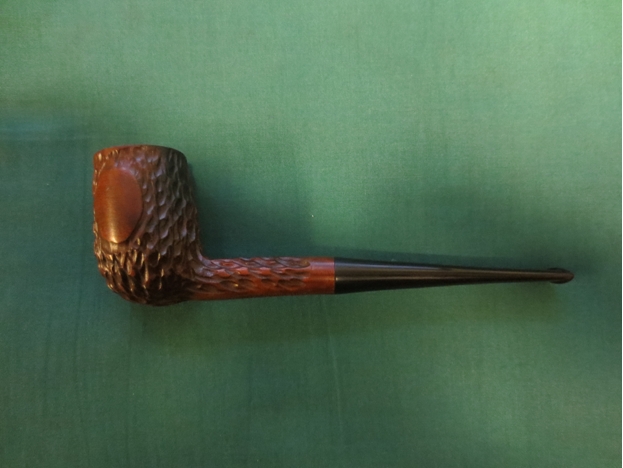
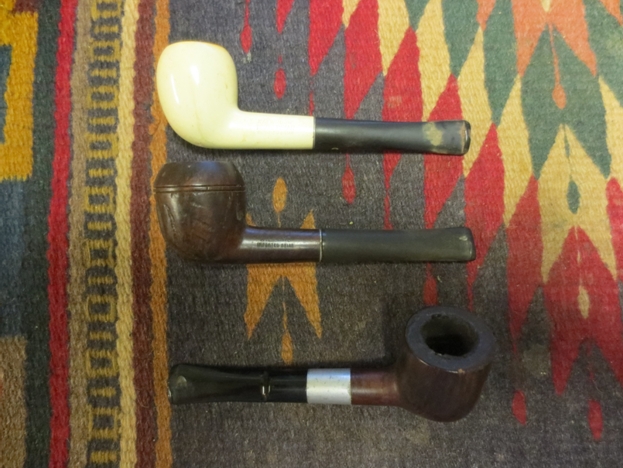
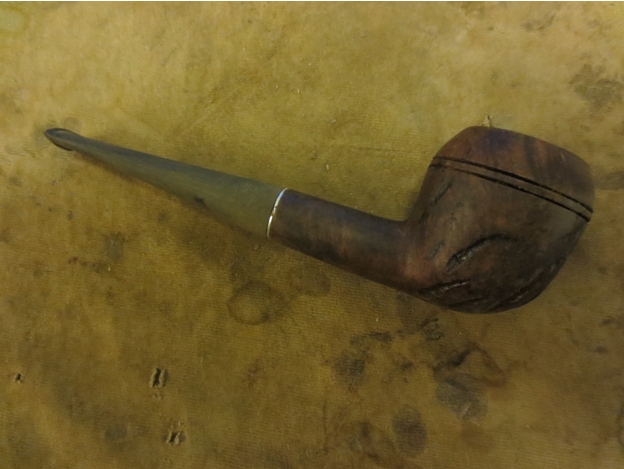
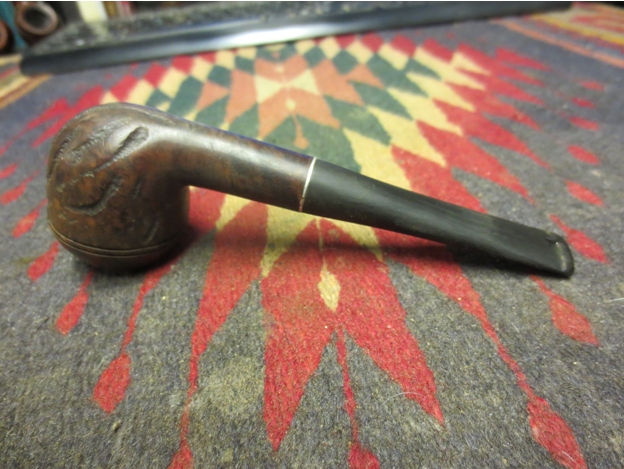
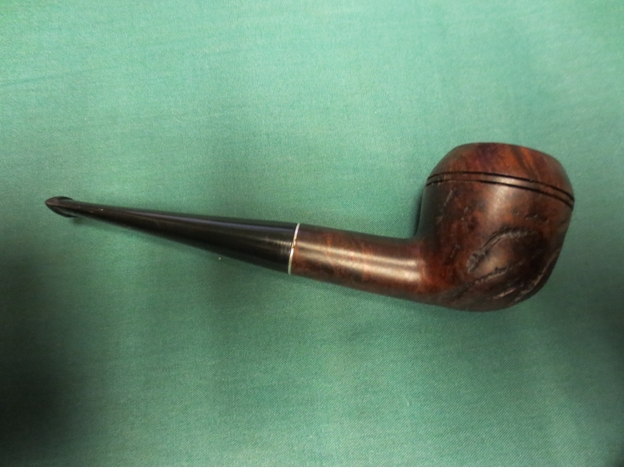
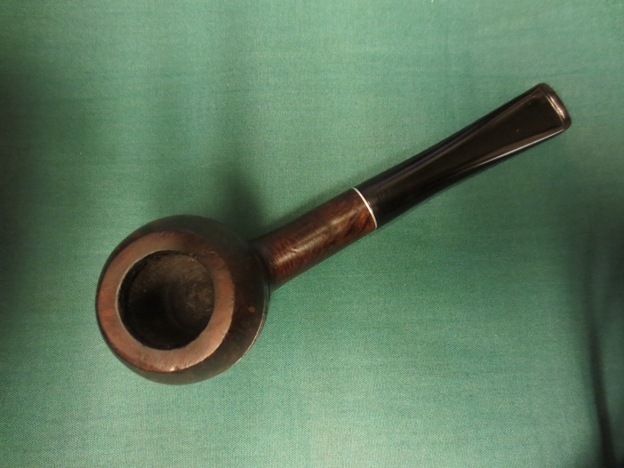
The finished pipe is shown below. I rubbed the stem down with some Conservator’s Wax – a microcrystalline wax and hand buffed it with a shoe brush. I avoid using the buffer on metal as it turns the pads black and does not shine the metal. I put it back together and it is ready for its inaugural smoke. I have two other Kirstens that are great smokers and this one with be added to that number until the day I pass it on to someone along the way.IMG_2555 IMG_2556 IMG_2557 IMG_2558

Bringing an acorn shaped bowl back to life – wondering if there was a point to this exercise.


Blog by Steve Laug

When I took this old bowl out of the box – last of two pipes to refurbish in my box – I looked at it and wondered what the point would be to clean it up. It had three large and visible fills on the bowl back left side and bottom of the shank and bowl. The finish was shot and it did not have a stem. I sorted through my can of stem and found a threaded Kaywoodie stem that had a short stinger and some scored threads. I tried it in the metal mortis on this pipe and it actually fit perfectly with no overage. The stamping on the old bowl remains a mystery to me – it is stamped on the left side of the shank as follows: HHG over Imported Briar. There is no other stamping at all on the pipe. So far I am unable to find any information on it at all. Who Made That Pipe has the listing but says maker unknown. I do know that the Imported Briar stamping makes it likely that the pipe is an American made pipe post WWII. Other than that I am at a loss. The two fills were solid and undamaged and the putty was a light brown. The finish was shot and opaque. It was hard to see what the grain looked like underneath. The rim was darkened but undamaged.IMG_2484 IMG_2485 IMG_2486The photo below shows the three fills that were very present on the bowl. The potential grain shows through on the bottom of the shank and led me to have a little hope that underneath the opaque ruined finish would be some nice grain.IMG_2487I screwed the stem in place on the shank to have a look at the shape and fit with the pipe. It actually looked quite good with the long, slender stem. The stem had oxidation and calcium build ups on the top and bottom but would clean up nicely.IMG_2488 IMG_2489 IMG_2490I wiped down the bowl with alcohol (ran out of acetone) and scrubbed the surface to remove the finish. Without the acetone I would need to sand the bowl. I set up a topping board and used 220 grit sandpaper to remove the thick darkening on the rim. I lightly topped it so as not to change the profile or look of the pipe.IMG_2492 IMG_2493 IMG_2494I sanded the bowl and stem with 220 grit sandpaper and then with a medium and fine grit sanding sponge to remove the remnants of the old finish on the bowl and the buildup of calcium on the stem. Some nice birdseye grain was underneath the finish on the right and left sides of the bowl.IMG_2495 IMG_2496 IMG_2497 IMG_2498I cleaned the metal tenon with alcohol and then sanded the rough areas on the threads to clean up the aluminum damage. I sanded the stem with 220 grit sandpaper and medium and fine grit sanding sponges to remove the tooth indentations that were underneath the calcified buildup. I used a Bic lighter to paint the surface of the stem and lift the tooth dents. Once they had lifted I redefined the crease of the button with needle files. I sanded it with micromesh sanding pads – wet sanding with 1500-2400 grit pads and dry sanding with 3200-12,000 grit pads. I rubbed it down with Obsidian Oil between each set of three sanding pads. When I finished sanding with the 12,000 grit pad I buffed it lightly with White Diamond and gave it another coat of Obsidian Oil. I set it aside while I worked on the bowl.IMG_2499 IMG_2500 IMG_2501I wiped down the bowl one final time with alcohol before staining it with a dark brown aniline stain. I applied the stain and flamed it and repeated the process until the coverage was even.IMG_2502 IMG_2503I wiped down the bowl with alcohol on cotton pads to remove some of the dark heavy colour of the brown stain and to make it more transparent. Once I had it to the point where I could see through the stain to the grain I quit wiping it down. The trick was to make the stain transparent enough to highlight the grain but at the same time minimize the three fills.IMG_2504 IMG_2505 IMG_2506 IMG_2507Once I had the stain at the place I wanted I put the stem back on the pipe and took it to the buffer. I buffed the bowl with red Tripoli to polish and buff through the dark areas that remained on the stain coat. I buffed the bowl until it met the look I was aiming for. I then buffed the bowl and stem with White Diamond and gave them multiple coats of carnauba wax. I buffed it finally with a soft flannel buff to raise the shine. The finished pipe is shown below. It actually came out quite well and should provide a great yard pipe for someone down the line. I expect this will be another pipe that I gift to a pipeman I meet along the way.IMG_2508 IMG_2509 IMG_2510 IMG_2511If anyone has some clues as to the maker of this pipe let me know. It turned out to be worth working on after all. I am pleased with what came out of an otherwise ignoble old pipe bowl without a stem that had been sitting in my box for quite awhile as I ignored it and worked on other bowls and stems.

The Original Lonchamps Pigskin Pipe and the Restoration of One – Robert M. Boughton


Guest Blog by Robert M. Boughton
Member, North American Society of Pipe Collectors
http://www.roadrunnerpipes.com
http://about.me/boughtonrobert
Photos © the Author

“Nothing is so perfectly amusing as a total change of ideas.”
— Laurence Sterne, 18th century Irish born English novelist and humorist

INTRODUCTION
Imagine it, the idea of covering a nice, good briar pipe in pigskin, or, as is more realistic, decent briar but pocked with so many problematic blemishes that conventional pipe-making wisdom would have it rusticated or coated with high quality varnish of some color and buffed to a high sheen. Yet some clever Frenchman, tired of the norm, cogitated on the puzzling problem until, in 1945, he came up with the idea of wrapping the bowl and shank in pigskin. And thus Longchamp, a brand of Forestier & Cie, was born to be the first maker and sole distributor of the new innovation, at least until other brands got with the program.

This particular leather-clad pipe came to me from the Internet, as so many subjects of my recent and future blogs did, because I spotted it in a lot and looked up Longchamp online. That is how I learned that the French company’s shop in St. Claude, renowned for so many other fine examples of the craft, fashioned the wooden shapes and sent them off to Paris where the actual pigskin coats were made and sewn on by local artisans.

I already bought two pigskins, both bulldogs, by other makers. The green Versailles, an export brand of Ropp, sold a few weeks ago. The tan Derby, an Italian make, remains available. The dark brown Longchamp, a billiard, makes a nice alternative as a different shape and color.

RESTORATION
In a façade of good upkeep, the pigskin itself was impeccable, needing only polishing. The real victims of the previous owner were the rim, chamber and stem.Robert1 Robert2 Robert3 Robert4 Robert5I’m getting plenty of experience with rim and chamber restoration, and as the photos above show, this is no exception. Don’t ask me how it’s possible, but when I finished reaming this one and sanding it with 150-grit paper, there was more carbon than bowl space. If it were tobacco, there would be enough to fill at least three bowls.Robert6But the finished wood, including the rim from which I was able to remove with super fine steel wool all of the burns that appeared to be so serious I suspected someone had used a cigar torch on it, makes the labor of love worth it.Robert7Just a little patient work with 1500 micromesh brought back the nice grain and took away the small nick. I re-did the rim with brown boot stain, flamed it and removed the resulting light layer of black flakes with gentle use of 2400 micromesh, going with the grain.

Reading the instructions on the label helped me avoid following my impulse to squeeze out a huge gob of the Cadillac Boot and Shoe Care polish I bought for the purpose of restoring the shine to the pigskin. I would have smeared it all over the leather and was amazed that so little of the stuff went so far. Like Dippity-do, just a dab will do you.

Now, the scrapes and discoloring of the stem took some time to undo with 220-grit paper followed by 1500 micromesh. I polished it with the usual red Tripoli (several turns on the buffer) and White Diamond.

The one thing about this restore that seemed wrong as far as the briar was concerned was not being able to remove the pigskin to get to the wood and at least clean it up. I suppose my innate curiosity would have compelled me to take this step if I possessed the skill to sew the leather back together! But as it was, the rim being the sole part of the wood that showed, it was all I needed to buff. I gave it the works, of course, with white Tripoli, White Diamond and carnauba waxes.

The final touch was returning the Longchamp galloping horse and rider logo on the stem with a white crayon marker. And of course, somewhere in there I cleaned and sanitized the pipe.Robert8 Robert9 Robert10 Robert11 Robert12CONCLUSION
Although I am not a big football fan, I was pretty good at running with the ball whenever I got it back in the day during my childhood. Something in me hated to be taken down, and so I became quite good at twisting and squirming my way out of the grips of opposing players when they got their hands on me, or dodging them altogether.

Until my recent experiences with leather-covered pipes, that was my only run-in with pigskin.

There was nothing redeeming about this ugly old pipe…


Blog by Steve Laug

I am getting down to the bottom of my refurbishing box yet again. This is one of three pipes that are left to work on. It is one ugly old pipe to my tastes. Certainly it is one that I have left until there are few to choose from to work on. There truly was nothing redeeming about the look of it. The rough cut billiard with a bark like rustication pattern did nothing for me. The left side of the shank is stamped Forecaster over Imported Briar. The bottom of the bowl had been flattened to make the pipe a sitter. But even that was done poorly as it was to one side and the pipe sat with a list. The finish was worn out but appeared to have been a dark thick stain that was opaque enough to hide all the briar. The outer rim of the bowl had been badly beaten up from hitting against some hard surface and left to be a ragged rough edge around the bowl. One thing that gave this tired old pipe a unique, eye-catching touch was that the top of the shank had been stamped with an eight point star and then inlaid with gold paint. The bowl had a thick soft cake all the way down reducing the diameter of the bowl by almost half. The stem had a metal spacer that gave the appearance of a stem with a metal tenon as well. But when I removed the stem I found that it had a vulcanite tenon. The stem was badly oxidized and had some deep scratches in the surface.IMG_2440 IMG_2441 IMG_2442 IMG_2443I reamed the bowl with a PipNet reamer using the smallest cutting head and worked my way up to the head that would take the cake back to the bare wall of the pipe.IMG_2444The top was so damaged that it needed to be topped. In looking it over I was not sure how much of the rim I could remove without dramatically changing the look of this pipe so I would proceed slowly. I set up a topping board with 220 grit sandpaper and slowly topped the bowl. I sanded it until I had removed as much of the damaged portion of the rim as I could without changing the shape. The rustication made the bowl look out of round but is actually still round. The right side is more rusticated at the top edge than the left so it looks unusual from the top down photo below.IMG_2445IMG_2446I wiped down the finish with acetone on cotton pads until I had removed the heavy dark finish. It took a lot of scrubbing to get through the grime and then the varnish coat. Underneath the dark top coat it appeared that there was a walnut stain that highlighted the grain on the high spots of the bowl. The grooves and valleys were dark with a black stain. The contrast had some potential.IMG_2447 IMG_2448 IMG_2449 IMG_2450I sanded the smooth parts of the bowl and rim with medium and a fine grit sanding sponges to smooth out the scratches in the bowl and on the topped rim. I wiped it down with isopropyl alcohol and then stained it with a dark brown aniline stain. I applied it and flamed it and repeated the process until the coverage was even.IMG_2451 IMG_2453 IMG_2454The bowl was very dark brown but it was at least evenly stained. I would have to do some more work on it to get the contrast that I wanted between the rustication and the smooth parts of the briar. I cleaned out the shank and bowl with isopropyl alcohol, cotton swabs and pipe cleaners until they came out clean. I cleaned the stem at the same time until it also was clean.IMG_2455 IMG_2457I wiped the bowl down with isopropyl alcohol to remove some of the heavy dark brown stain and make it more transparent. I then sanded the bowl with a fine grit sanding sponge to remove some more of the stain on the high spots and to match the colour of the stain on the rim. I sanded the stem with the sanding sponges at the same time to minimize the scratches on the vulcanite.IMG_2458 IMG_2459 IMG_2460I buffed it with White Diamond and took it back to the worktable to work on the stem and bowl some more. I wanted the stain to be a bit more transparent and the contrast between the high spots and the crevices to show clearly.IMG_2461 IMG_2462 IMG_2463I still needed to deal with the list to one side when I set the pipe down on a flat surface. I probably should have done this before I stained the bowl but forgot to do so in cleaning up the mess. I decided it was better late than never so I dealt with it next. In examining it I found that it was not centered on the bottom of the bowl and shank but was off to one side. I sanded flat portion to take down the higher side and even out the flat bottom. I used 220 grit sandpaper and then a medium and fine grit sanding sponge to flatten it out and remove the list. When I was satisfied with the way the bowl sat I refinished it with a stain pen to darken it and blend it into the stain of the rest of the bowl.IMG_2464I sanded the stem with micromesh sanding sponges – wet sanding with 1500-2400 grit pads and dry sanding with 3200-12,000 grit pads. Between each set of three pads I rubbed the stem down with Obsidian Oil and let it soak into the vulcanite before proceeding with the next set of pads. When I finished I gave it a final coat of oil and then buffed it with White Diamond to a shine.IMG_2474 IMG_2475 IMG_2476I buffed the entire pipe with White Diamond and then gave it several coats of carnauba wax and buffed it with a soft flannel buff. The finished pipe is shown below. It is still an ugly pipe in my opinion but there is something redeeming about the ugliness. I suspect it will make a great yard pipe for someone and will deliver a good smoke. It must have been a good smoking pipe in its day – otherwise why would its previous owner have smoked it to the point of near death!IMG_2477 IMG_2478 IMG_2479 IMG_2480

The Sentimental Journey Continued – Restoring a Second Medico, a Smooth Billiard


Blog by Steve Laug

In a previous post called a Sentimental Journey I wrote of why Medico’s always get attention when they cross my desk. Last evening I reached into my box of pipes to be refurbished and pulled out the next pipe to clean up and it too was Medico – this time it was a smooth billiard. The finish was worn and the varnish was peeling off the bowl. The rim was badly knocked around so there was damage on the outer edge at the front of the bowl and the back. There was a heavy build up on top of the damage and the bowl had a thick cake at mid bowl – not much at the top or bottom. The stamping was the same as the previous pipe – MEDICO on the left side of the shank and Imported Briar Italy on the right side. A bonus for me was that the stem I had work on for the little Rhodesian fit this one and only needed adjustment in the diameter of the stem. It had the metal tenon that was generally on Medico pipes and would hold the Medico paper filter as per design. The rest of the stem was vulcanite not nylon which was a bonus.IMG_2408 IMG_2409 IMG_2410 IMG_2411I cleaned out the shank and fit the stem in place to see how much sanding I would need to do to match the diameter of the shank. It did not look like it would take very much to bring it in line. I would need to sand the aluminum band on the stem at the same time so I would need to be careful to not create dips or valleys next to it on the softer vulcanite when sanding.IMG_2412 IMG_2413I sanded the stem with 150 grit sandpaper to reduce the diameter of the stem.IMG_2414I reamed the bowl with a PipNet reamer using the smallest cutting head to clean it out.IMG_2415To clean up the rim damage I topped the bowl with 220 grit sandpaper to take down the rim and reduce the rough pitting on the outer edge. I also sanded around the edge of the rim to smooth out the remaining roughness.IMG_2416IMG_2417IMG_2418I wanted to get rid of the peeling varnish on the bowl so I wiped it down with acetone on cotton pads to remove it. It took a lot of scrubbing as the varnish was very stubborn.IMG_2419IMG_2420IMG_2421I sanded the bowl and the rim with 220 grit sandpaper and then with medium and fine grit sanding sponges to remove more of the finish and reduce the scratching on the bowl. I sanded it with a medium and fine grit sanding sponge before wiping it down one last time with alcohol. I decided to stain it with an aniline based oxblood stain. I applied it and then flamed it to set it in the grain.IMG_2422 IMG_2423I rubbed the excess stain off with an alcohol dampened cloth and then hand buffed it with a shoe brush. This old Medico had some really nice grain and was a far better piece of briar than I had expected.IMG_2424 IMG_2425 IMG_2426 IMG_2427 IMG_2428I sanded the bowl with 1500-2400 grit micromesh sanding pads and then buffed it with White Diamond to smooth out the bowl further. I gave it a coat of carnauba wax and buffed it lightly.IMG_2429 IMG_2430 IMG_2431 IMG_2432I finished the work on the stem fit and then sanded it with micromesh sanding pads – wet sanding with 1500-2400 grit pads and dry sanding with 3200-12,000 grit pads. I rubbed it down with Obsidian Oil and moved through each successive set of three pads. Once I had finished sanding it I rubbed it down a final time with the oil and gave it a buff with White Diamond.IMG_2433 IMG_2434 IMG_2435I put the pipe back together and gave it a final buff with White Diamond and then multiple coats of carnauba wax. I buffed it with a soft flannel buff to finish and polish the wax. The finished pipe is shown in the next series of photos. It is a small light weight billiard with fairly decent grain and a few character marks. The new stem fits well and it looks better than it did when it left the factory. It should provide a great smoke to another pipeman. This is one that I will inevitably gift to someone along the way.IMG_2436 IMG_2437 IMG_2438 IMG_2439

Restoring a Dunhill Shell Billiard 42121


Blog by Steve Laug

Of all my finds on my recent pipe hunt this little Group 4 Dunhill Shell is one of the favourites. It has a great sandblast that really had some nice craggy grain. The finish was in good shape. The rim was dirty and had a slight build up of oils and tars. The bowl was caked with a thick cake. The stem was oxidized and also had a calcium buildup for the first inch of the stem. The stem had an inner tube inside that was slightly bent that kept the stem from seating correctly in the shank. There were several shallow bite marks on the top and bottom sides of the stem near the button. Internally the stem and shank were surprisingly clean.IMG_2201 IMG_2202 IMG_2203It is stamped on the underside of the shank with 42121 Dunhill Shell over Made In England and next to the D of England was an underlined and superscript 20 next to that was an underlined 23. Using John Loring’s Dunhill Briar Pipe book the dating is 1980 as seen by the underlined 20 slightly elevated and following the D. The underlined 23 indicate that it was sold in 1983, due to the one year guarantee.IMG_2204The next photo shows the buildup on the rim that needed to be dealt with in a cleanup and restoration of the pipe.IMG_2205I cleaned out the shank and the stem with pipe cleaners, cotton swabs and 99% isopropyl alcohol until the cotton swabs and pipe cleaners came out clean.IMG_2206 IMG_2207I scrubbed down the bowl with undiluted Murphy’s Oil Soap on cotton pads and then rinsed it off with running water. I dried it with a cotton towel.IMG_2208IMG_2209IMG_2210IMG_2211IMG_2212I scrubbed the rim with a soft bristle brass tire brush to clean off the tars and oils and open up the sandblast on the rim. I scrubbed it with a soft cotton pad and alcohol to remove the pieces left behind by the wire brush.IMG_2213I touched up the finish around the edges of the bowl rim and the end of the shank. I also touched up spots on the sides of the bowl and the bottom of the shank. I used the Guardsman Stain pens that Greg sent me to do the touch up work. I chose to use the lightest stain pen as it matched the colour of the bowl precisely. When I use these pens I always start with the lightest stain and work toward the darkest until I get a match.IMG_2214 IMG_2215 IMG_2216 IMG_2217I sanded the stem with 220 grit sandpaper and then with medium and fine grit sanding sponges to remove the oxidation and the calcium deposits. I “painted” the tooth marks with the flame of a Bic lighter to lift them closer to the surface and then sanded what remained with 220 grit sandpaper and the sanding sponges.IMG_2218Taking a cue from Al Jones I made a plastic washer to put between the shank and the stem to make the sanding of the saddle simpler. I could sand right up to the edge without damaging the end of the stem and rounding the edges.IMG_2219 IMG_2220 IMG_2221I sanded the stem with my usual array of micromesh sanding pads – wet sanding with 1500-2400 grit pads and dry sanding with 3200-12,000 grit pads. Between each set of three pads I rubbed down the stem with Obsidian Oil before moving on to the next set of three. When I had finished with the 12,000 grit pad I took the pipe to the buffer and buffed the stem with White Diamond.IMG_2222 IMG_2223 IMG_2224I lightly buffed the bowl and the stem once again with the White Diamond and then used Halcyon II wax on the bowl and carnauba on the stem. I hand buffed the pipe with a shoe brush and raised the shine. The finished pipe is shown below. I am looking forward to loading an aged bowl of McClellands 5100 and having the inaugural smoke in this beauty.IMG_2225IMG_2226IMG_2227IMG_2228

Changing Directions in the midst of a Refurb – Plugging a Burnout in a Paul’s Canadian


Blog by Steve Laug

I am finally getting around to cleaning up the pipes I found on my recent pipe hunt. I decided to choose what I thought would be the easiest one. It was filthy and greasy. The top looked like it had been used as a hammer. I figured that it would clean up quickly and I liked the look of the briar that was peeking through. The bowl was stamped PAUL’S on the underside of the shank and Italy across the end of the shank. There is a stylized P on the stem. There was a sticky glue on the briar in several places that I think came from the price tag that was on the pipe. The bowl was really dirty and over reamed. The bottom of the bowl was almost flat. But there was a buildup of carbon from the top down about half way and there was tobacco fragments in the bowl bottom. The sides were no longer parallel and the airway entered above the bottom of the bowl. The stem was oxidized and had tooth chatter on the top and bottom of the stem.Plug1 Plug2 Plug3 Plug4I cleaned up the sides of the bowl interior with a PipNet reamer and used a dental pick to remove the detritus on the bottom of the bowl.Plug5I scrubbed the exterior of the briar with acetone to remove the grit, grime and grease from the finish. It actually took off the grime and took it down to the nice grain that I had seen peeking through. I think that the briar is oil cured as there is an oily texture to the wood.Plug6 Plug7 Plug8 Plug9 The top was so beat up that it had to be topped to smooth out the damage and restore the clean edges. I set up a topping board and worked on the top until it was smooth and the outer edges were sharp and well defined.Plug10 Plug11 Plug12I sanded the bowl with 220 grit sandpaper and a medium and fine grit sanding sponge to further clean up the finish. There was some darkening on the sides and bottom of the bowl and I wanted to bring it back to the same look as the shank and the rim. The idea was to bring the pipe back to clean and natural finish so that if I stained it the blend and matching would be much easier.Plug13 Plug14 Plug15 Plug16I decided to soak the bowl in an alcohol bath to remove some of the oils and grease on the surface. While it soaked I worked on the stem.Plug17I sanded the stem with 220 grit sandpaper to remove the oxidation, calcium buildup and tooth chatter. I carefully sanded around the stamping on the stem to preserve it.Plug18 Plug19I used a needle file and a sanding stick to rework the edges of the button and sharpen the crease.Plug20 Plug21I took the bowl out of the alcohol bath and dried it off. Once the inside had air dried it was time to raise the bottom of the bowl to the bottom of the entrance of the airway. I mixed a batch of plaster of Paris and packed it in the bottom of the bowl until it was level. Things were looking good at this point. Once it was dried I would give it a coat of pipe mud and it would be good to go.Plug22 Plug23That was when things began to go south for me! I was sanding the bowl bottom and had found a spot that seem to give as I sanded on it. I had wondered if the bowl bottom was too thin from the over reaming but had not seen the soft area of the briar. I used a dental pick to exam the spot and with very little effort the end of the pick went right through the bowl bottom! BURNOUT. I poked around some more and found that there were several very soft spots. This was not what I wanted to find on what I thought would be a very easy clean up!! YIKES.Plug24With very little effort the entire area that was darkened broke away. I used a drill to clean up the ragged edges and make the hole round. I used a Dremel with a sanding drum to even out the edges and used it on the inside of the bowl to bring it back into round on the side where there had previously been a slope from a bad over reaming job.Plug25 Plug26 Plug27I had a round piece of briar left over from a plug I had cut for another burnout I had repaired. I smoothed out the bottom of the plug and fit it into the hole in the bowl. Once the fit was good and snug I glued it in place with wood glue then a top coat of super glue.Plug28 Plug29 Plug30 Plug31 Plug32 Plug33 Plug34 Plug35While the glue was hardening I used the Dremel and sanding drum to take off the excess briar from the plug.Plug36 Plug37I sanded the plug with 220 grit sandpaper to shape it to the curves of the heel of the pipe. The spots that appear as gaps around the plug are where the glue has already dried hard. These will disappear as the glue cures and hardens.Plug38 Plug39I sanded the entire pipe with a medium and fine grit sanding sponge and then wet sanded with 1500-2400 grit micromesh sanding pads to remove the scratches from the finish and blend in the patch with the surface of the briar.Plug40 Plug41 Plug42 Plug43 Plug44 Plug45 Plug46I left the pipe overnight to give the glue time to cure. In the morning I sanded the bottom area of the bowl to smooth it out as the areas around the patches had swollen above the patch when they dried.Plug47Since the briar had been oil cured I decided to rub it down lightly with some olive oil and let it soak in. The next four photos show the pipe after the light rub down with oil.Plug48 Plug49 Plug50I spent a bit of time thinking about the next steps in the process. I had a decision to make – whether to leave the plug smooth and just stain the pipe and keep it glaringly present or to rusticate the bottom of the bowl and blend the plug into the rustication pattern. I decided to rusticate it. I took out the rusticator that Chris made for me and drew a boundary line around the area on the bottom of the bowl that I wanted to rusticate.Plug51 Plug52I pressed the rusticator into the briar and twisted it until the surface was roughened I used a brass bristle wire brush to knock off the loose briar and smooth things out. I buffed the rustication with White Diamond to smooth the high points.Plug53I stained the rusticated area with a black aniline stain and flamed it to set the stain. I sanded the lines around the rustication and the peaks on the rustication as well to get the look I wanted for this piece.Plug54 Plug55When I came home from work this evening I decided to extend the rustication back along the shank. I used the rusticator to work the briar and then stained the entire rustication with a black aniline stain.Plug56 Plug57I sanded the stem with my usual array of micromesh sanding pads to bring out the shine. I wet sanded with 1500-2400 grit pads and dry sanded with 3200-12,000 grit pads. I rubbed the stem down with Obsidian Oil between each set of three pads.Plug58 Plug59 Plug60I mixed a batch of Plaster of Paris to rebuild the bottom of the bowl and raise the part that was untouched by the plug to the same height as the plug and to the bottom of the entrance of the airway from the bowl. I inserted a pipe cleaner in the airway and put the mix into the bowl. I tamped in the plaster mix with a pipe nail and the cuticle tool. It dried to touch fairly quickly and I wiped down the walls of the bowl with a cotton swab and water. I smoothed out the bottom of the bowl the same way. Once the plaster has cured I will give the bottom of the bowl and walls a thin coat of pipe mud to preserve and protect the new plug and the freshly shaped briar on the walls of the pipe.Plug61I buffed the bowl and stem with White Diamond and then gave it multiple coats of carnauba wax. I buffed it with a soft flannel buff to raise a shine. The finished pipe is shown in the photos below. The soft colour of the oil cured briar and the light coat of olive oil bring out the grain. The contrast of the rustication on the bottom of the bowl and the black stain on that gives the bowl a fresh look. One of the side benefits of the added rustication is that the bowl is now a sitter whereas before the rounded bottom of the shank made that impossible. The pipe needs to cure for a few days and then I will give it an inaugural smoke.Plug62 Plug63 Plug64 Plug65.

John’s First Restoration – A Danish Sovereign Peewit #30


When John and I got home from our pipe hunt we spent the evening and the next morning working on the pipes he had found. We figured that the best way for him to learn how to refurbish pipes was to work on this lot together. That way he would learn as he worked with me on the pipes and we could discuss any issues that might arise during the process of the cleanups. He was intrigued with the idea and liked working with his hands so it seemed like this might be a part of the pipe smoking hobby that he could use to unwind and clear his thoughts from the heavy work of his day to day work as a Presbyterian minister. For his first pipe to refurbish he chose to restore a Danish Sovereign Peewit Shape #30. It is shown in the picture below and is the second pipe in the first row at the top. Walking through the entire process with him on this pipe and one of the others that he did taught him everything from removing the cake, cleaning the finish on a bowl and restaining it to cleaning and polishing a stem to the point that it shone. IMG_2050 Once again I forgot to take photos of the pipe before we started but remembered after I had reamed it with a PipNet reamer. The bowl was badly caked and the rim had a thick buildup of tars and oils. The briar had a nice blast on it and the stain was worn in quite a few spots. The stem was odd on this particular pipe. The tenon had a sleeve on it that added diameter. It appeared that somewhere along the way the shank had been redrilled larger than the original tenon so the sleeve was a necessity. The bowl was drilled way off centre to the right so the airway entered the bowl on the right side of the bottom of the bowl. The bowl itself was round but the pipe itself was way out of round with far more briar on the right side than the left. Danish1 Danish2 Danish3John scrubbed the bowl with a tooth-brush and Murphy’s Oil Soap to remove the grime and the old finish. He used a dental pick to remove the remainder of the buildup on the top of the rim. He rinsed it under running water to remove the soap and grime and dried it with a soft cloth. He used a dark brown stain pen (thanks Greg) to match the stain on the bowl in those areas on the shank and rim where the stain had worn off. He buffed the bowl with White Diamond and then gave it several coats of carnauba wax and hand buffed it with a shoe brush. Danish4 Danish5 Danish6The stem needed a lot of attention. There were some tooth dents in the surface of the stem on the top and bottom side. We set up the heat gun and heated the vulcanite to lift the dents. We also adjusted the bend in the stem while we were at it with the heat gun.Danish7 Danish8 The next photo of the end of the tenon shows the sleeve that had been added to the tenon to increase the diameter. Danish9John sanded the stem with 220 grit sandpaper to remove the calcification and the oxidation. He also used that to sand out the remnants of the tooth marks after we heated the stem. He then sanded the stem with a medium and fine grit sanding sponge to remove the scratch marks left behind by the sandpaper. Once finished he moved on to sand with micromesh sanding pads – wet sanding with 1500-2400 grit pads and dry sanding with 3200-12,000 grit pads. I had him rub the stem down with Obsidian Oil between each set of three pads. He buffed the stem with White Diamond and then we waxed it with some Renaissance Wax (he will not have access to a buffer at home so I was trying work as much as possible without one).Danish10 Danish11 Danish12 Danish13I had John give the pipe another coat of Renaissance Wax and buff it with a shoe brush to raise the shine. The finished pipe is shown below in all of its new sheen. I think John will enjoy smoking this one. I know when I refurbished my first pipe it seemed to smoke exceptionally well. I think it is the time spent bringing it back to life that makes this happen. Great job on this one John, it is a refurbished pipe to be proud of. Be sure to let us know how it smokes when you fire it up.Danish14 Danish15 Danish16 Danish17

Restoring a Dr. Grabow Meerschaum-Lined Stack


Blog by Steve Laug

Another of the bowls I was gifted was a tall Meerschaum lined rusticated stack with a smooth spot on both sides of the bowl and the end of the shank. It is stamped on the underside of the shank, MEERSCHAUM-LINED over Dr. Grabow. The bowl exterior had some darkening on the back side of the bowl and the grooves of the bowl were caked. The rim had damage and the meerschaum lining was rough on the inside edge of the bowl. There were cracks in the meerschaum bowl insert on the rim. The bowl itself was cracked and missing from about mid bowl to the bottom of the bowl. The meerschaum pieces were lying in the bottom of the bowl and there was no stem for the pipe.

I did not know anything about the meerschaum lined Dr. Grabows and this one had a distinct look of an Italian made pipe. I went to my source on line for Grabow information the Dr. Grabow Forum (http://drgrabows.myfreeforum.org/sutra238.php). There I found a post on the meerlined pipes. It read in part as follows… “Meerschaum lined pipes were originally imported from M. Gasparini in Italy for Grabow. Sparta finally figured out how to do them and only imported the “plugs”. Early Grabow Meerschaum lined pipes were stamped Italy with no spade. After 1989 Dr. Grabow got rid of Italy and added the spade.” So, my sense of it being Italian was correct. It also dates this pipe as pre-1989. IMG_1848 IMG_1849 IMG_1850 IMG_1851 I had an old stem in my can of stems that would be a good fit for this pipe. I needed to sand the tenon slightly to get a snug fit against the shank. The diameter of the stem was slightly larger than the diameter of the shank and would need to be sanded down to make a matched fit. IMG_1852 IMG_1853 I used a pen knife to clean up the inside of the bowl. There was carbon build up on the lower part of the bowl about mid bowl that was holding together the broken pieces of the meer lining. I scraped away the carbon and removed the broken pieces of meerschaum that remained on the lower edge of the bowl insert. IMG_1854 I topped the bowl with a topping board and 220 grit sandpaper to remove the damage to the rim and the lining top. IMG_1855 I did not remove much of the bowl top but took off enough to make the bowl top and the rim top flush and smooth. In the photo below the cracks in the bowl insert are visible around the top edge of the bowl. IMG_1856 I used clear superglue to fill the cracks on the top edge of the insert and sanded them down. I mixed a batch of plaster of Paris and used the dental pick, the cuticle tool that I was gifts and a pipe nail to build up the interior of the bowl and replace the bottom half of the insert that was missing. I inserted a pipe cleaner in the shank and then packed in the plaster around the airway and tamped it in place on the bottom with the pipe nail and on the sides with the cuticle tool. I used one of the stain pens that I have to stain the rim to match the bowl. IMG_1857 IMG_1858 IMG_1859 I inserted my damp index finger into the bowl and rubbed down the sides of the bowl to smooth them out. I also pushed the plaster on the bottom of the bowl to more thoroughly pack it in place. I sanded the stem with 150 grit sandpaper to reduce the diameter of the stem and then 220 grit sandpaper to smooth out the stem. IMG_1860 I scrubbed the bowl down with acetone on a cotton pad to remove the finish and clean up the exterior of the bowl. I then rubbed it down with olive oil and let it soak into the finish. I also rubbed down the stem with the oil as I find that it makes sanding the stem easier to do. IMG_1861 IMG_1862 IMG_1863 IMG_1864 I sanded the stem with micromesh sanding pads – wet sanding with 1500-3200 grit pads and dry sanding with 3600-12,000 grit pads. I wiped it down between each of the sets of three pads with Obsidian Oil. Once it was dry I buffed the stem with White Diamond and then with carnauba wax. IMG_1865 IMG_1866 IMG_1867 I put the stem back on the pipe and buffed it with White Diamond. I lightly buffed the bowl with carnauba wax and the stem more heavily. I finished by buffing the pipe with a soft flannel buffing pad to raise the shine. The finished pipe is shown below. The thin shank and the thin diameter of the stem give the pipe a delicate look. It is very light weight and fits well in the hand. I am going to let the plaster of Paris repair dry and cure for several days before I load a bowl and give it an inaugural smoke. IMG_1868 IMG_1869 IMG_1870 IMG_1871 IMG_1872 IMG_1873

UPDATE: I just smoked this one after it had cured for two days. I loaded a bowl of The Malthouse Founder’s Reserve in the bowl and smoked it to the bottom of the bowl. It smoked cool and dry. The plaster of Paris is darkening nicely and will soon match the rest of the meer lining of the bowl.
IMG_1874 IMG_1875 IMG_1876

Rejuvenating a Willard Straight Rhodesian


Another of the bowls from the gift box was this Willard Rhodesian. It was in pretty good shape other than being dirty and stemless. The bowl had a broken cake at the top of the bowl and remnants of tobacco left in the bowl. The rim was dirty and lightly caked with some damage caused from tapping the rim on something. The outer and inner edges of the bowl were undamaged. The interior of the shank was dirty. The shank was fitted with a threaded mortise that would take a threaded stem. I had a stem in m can of stems that fit well in the shank, was overturned but workable. The diameter of the stem was larger than the shank. The photo below shows the stem on the pipe in the middle of the threesome. IMG_1750 I set up a heat gun and held the stem about three inches above the heat. The first photo below shows the stem in place. To heat it I removed it from the bowl and heated the metal tenon. When it was warm I screwed it back in place and twisted it. I had to reheat it several times to get the alignment correct. The second photo shows the aligned stem. IMG_1752 IMG_1755 I sanded the stem with 150 grit sandpaper to reduce the diameter of the stem. I also sanded the slope to the button to highlight the tooth marks on the stem. IMG_1809 IMG_1810 IMG_1811 I used a needle file to sharpen the inner edge of the button and make the angles more distinct. IMG_1812 I wiped down the bowl with acetone to remove the grime and clean up the finish. I did not want to lighten the finish as much as to clean off the light coat of varnish on the briar. IMG_1814 IMG_1813 I lightly topped the bowl to clean up the rim damage. I used a sanding board and 220 grit sandpaper to remove the damaged briar and then followed that by sanding with a medium and a fine grit sanding block. IMG_1815 IMG_1816 I continued to sand the stem to match it to the diameter of the shank. I used 220 grit sandpaper to finish the sanding and shaping of the stem. I worked on the tooth marks on the top side and underside of the stem with 220 grit sandpaper until they were no longer visible. IMG_1817 IMG_1818 IMG_1819 IMG_1820 I reamed the bowl with a PipNet pipe reamer beginning with the smallest cutting head and working up to the one that was the same diameter as the bowl. I reamed the bowl back to bare wood. IMG_1821 IMG_1822 I sanded the stem with a medium and fine grit sanding sponge to reduce the scratches left behind by the 220 grit sandpaper. IMG_1823 There was one stubborn tooth mark that I could not get out on the underside of the stem next to the button. I cleaned the area with alcohol and then used clear super glue to repair it. I sprayed the path with an accelerator so that I could sand the patch sooner. IMG_1824 IMG_1825 IMG_1826 IMG_1827 I sanded the stem with micromesh sanding pads – wet sanding with 1500-3200 grit pads and dry sanding with 3600-12,000 grit pads. I rubbed down the stem with Obsidian Oil between each group of three micromesh sanding pads and then when I finished sanding with the 12,000 grit pad I buffed it with White Diamond. IMG_1828 IMG_1829 IMG_1830 I buffed the bowl and shank with White Diamond and then gave it a coat of Danish Oil and walnut stain to protect and preserve the finish. When it was dry I buffed the pipe with White Diamond and then gave it several coats of carnauba wax. IMG_1835 IMG_1836 IMG_1837 IMG_1838 The finished pipe is shown in the photos below. The new stem fits well. In fact it looks like it came with the pipe. The repairs to the stem are not visible. The bowl itself dried well and buffing the finish gave it a softer look. The finished pipe was given several more layer of carnauba wax and then buffed with a soft flannel buffing pad. It is now ready for many more years of service to another pipeman. IMG_1844 IMG_1845 IMG_1846 IMG_1847