Blog by Steve Laug
While this is the third and last of the trio I ended up finishing it second. The little panel prince has some added challenges that I was not expecting so it will actually be finished last even though I started on it second. Ah well the surprises of pipe restoring are part of fun.
Last week I received an email from a fellow named Stanley who had gotten my info from the local Pipe and Cigar shop. He wrote that he had a trio of Comoy’s pipes that needed to be worked on. Two of them were Grand Slam Pipes and one was a Tradition. We connected via email and he said he would drop them off this week for me to work on. I am including part of his email so you have a sense of what I would be working on. I am also including the two photos that he attached to the email for me to see.
Hey Steve,
I had recently the chance to talk to a very kind and excellent gentleman over at City Cigar; I unfortunately was never able to get his name. However I mentioned I was looking for some replacement stems and he gave me your info…
…The pipes in question are attached in photos, I’ve never done any sort of pipe restoration in my life but I have attempted to take the cake down with a pocket knife. If you’d do it, would you be able to do a ream/clean on the three, as well as deal with the stems?
If possible, I’d prefer to save the original stems by repairing them, but it seems to me that most people remedy this problem with a replacement stem. Whatever you think is best I will go with.
If you think that I’d be better off without the stinger insert in the shape 64, then would you be able to remove it? I’m afraid I’d break the stem if I tried haha.
The 484b also seems to have a crack starting near the “Comoy’s Grand Slam” part of the shank, where it meets the stem. Is it possible to deal with this?
That is all! Please let me know what you think!
Thanks! Stanley 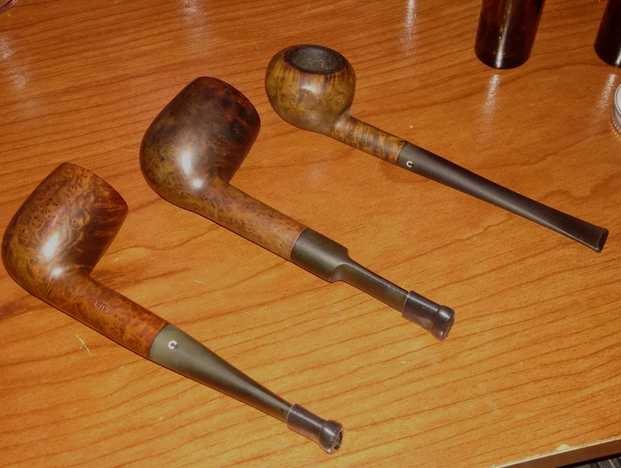
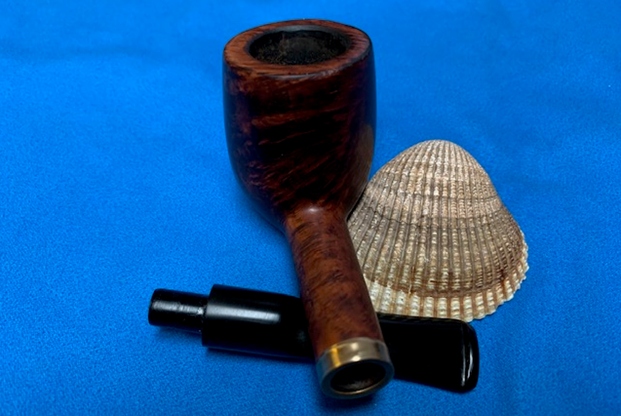
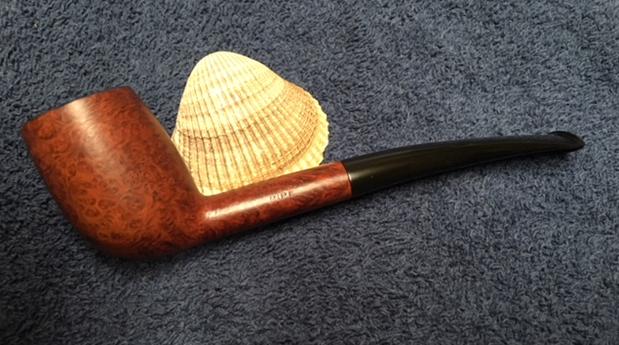
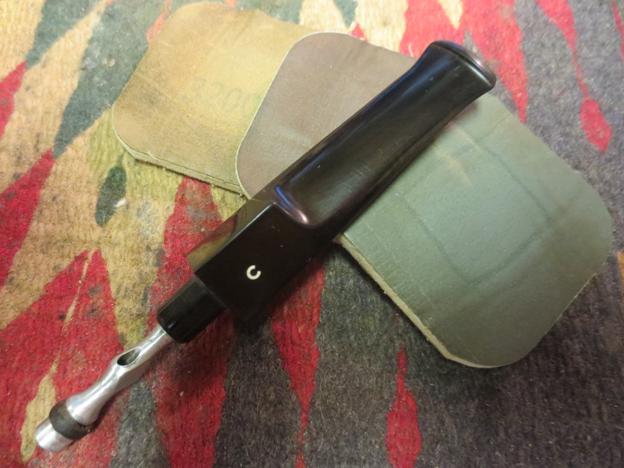
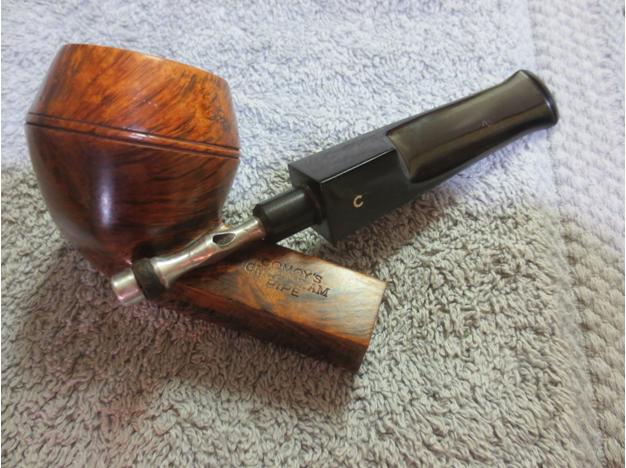
 Last night Stanley stopped by and dropped off the three pipes. I took photos of pipes as there were when I opened the bag they were in. All three pipes were very dirty but the reaming had been started as noted in his email. The stems all had bite throughs on the underside. The bottom pipe in the photo below is a Grand Slam Pipe shape 64 Billiard. The stem has a 3 part C on the left side. The middle pipe is a Tradition 3591 Prince with 8 flattened panels on the bowl near the top. The stem also has a bite through and a missing divot. It also has a 3 part C on the left side. The top pipe in the photo is also Grand Slam Pipe 484B with a replacement stem that also has a bite through. The shank is also cracked on the left side.
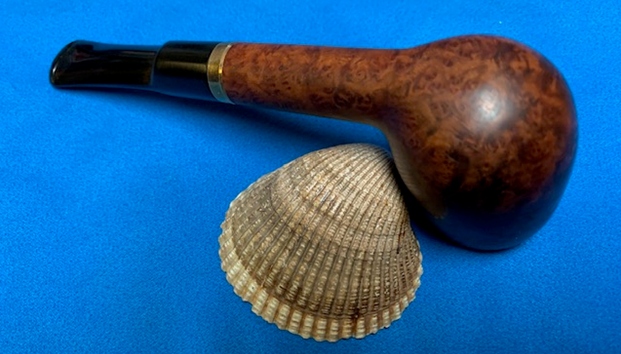
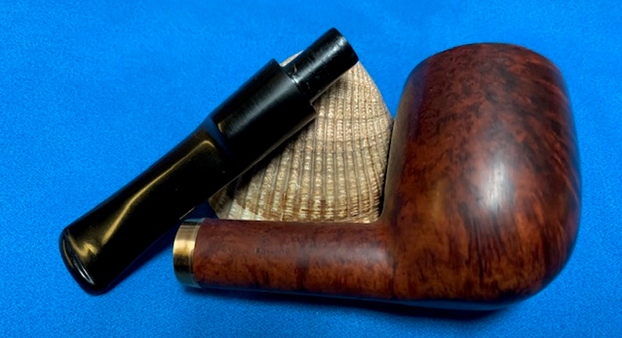
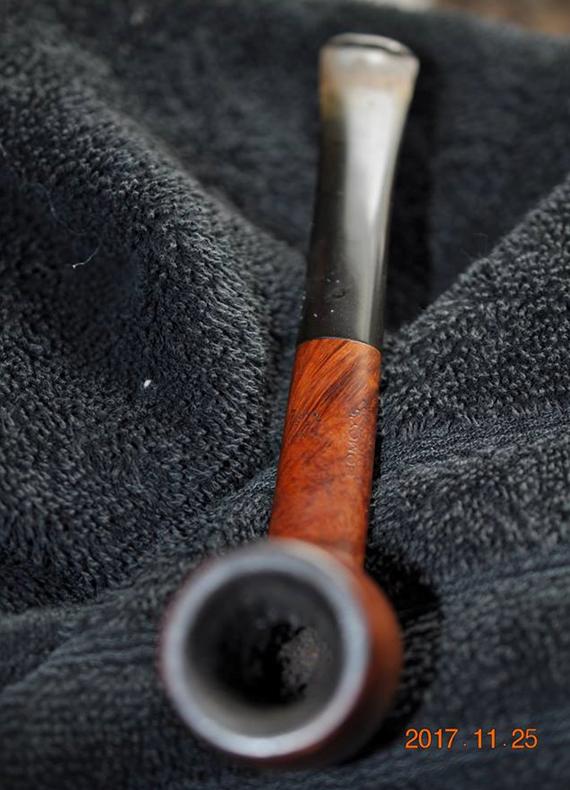
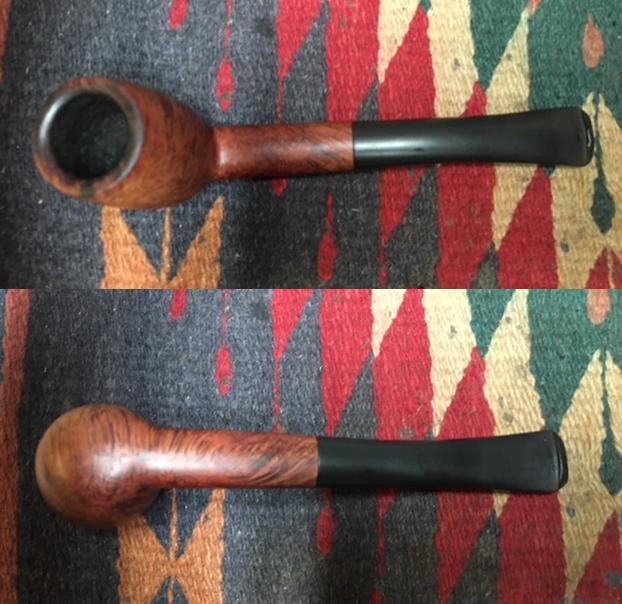
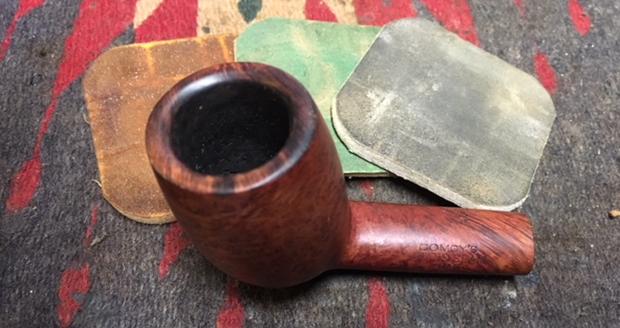
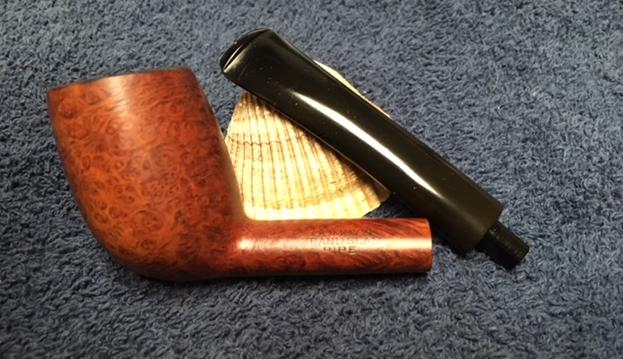
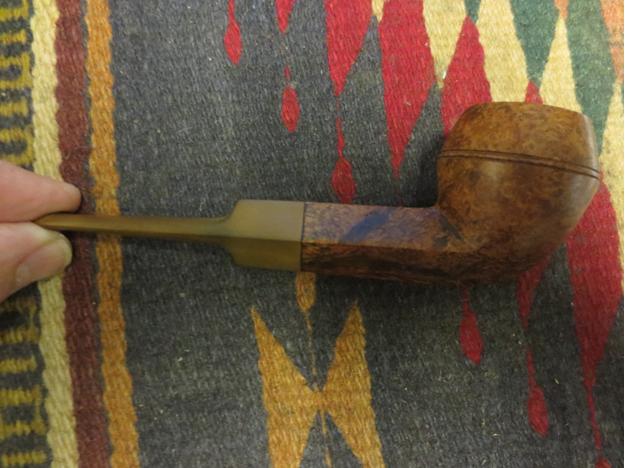
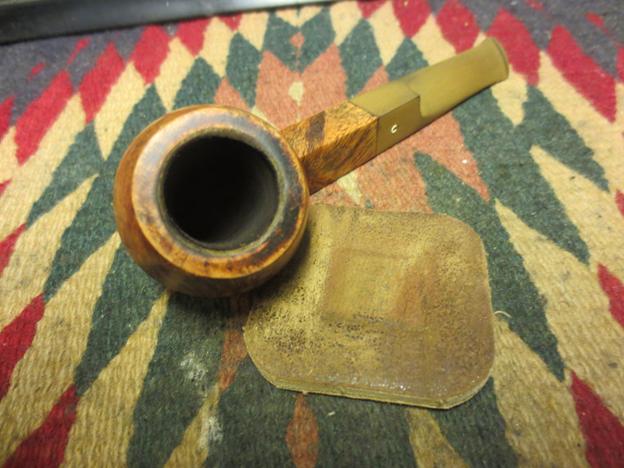
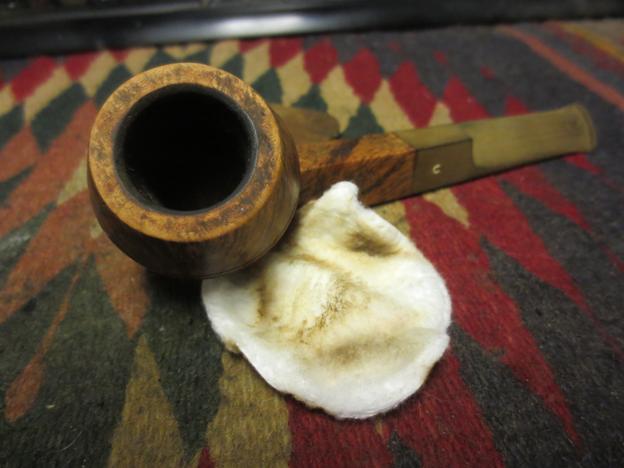
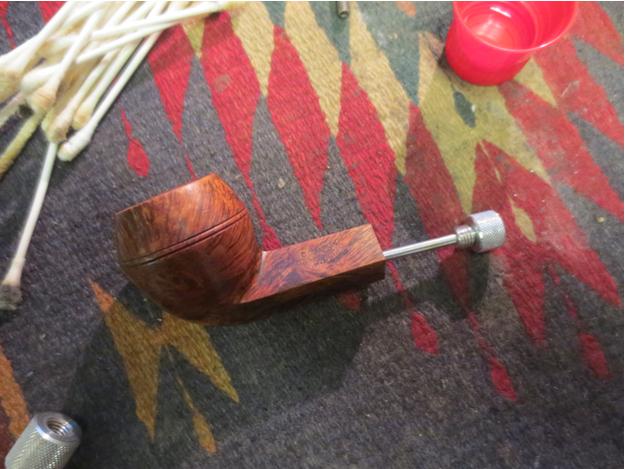
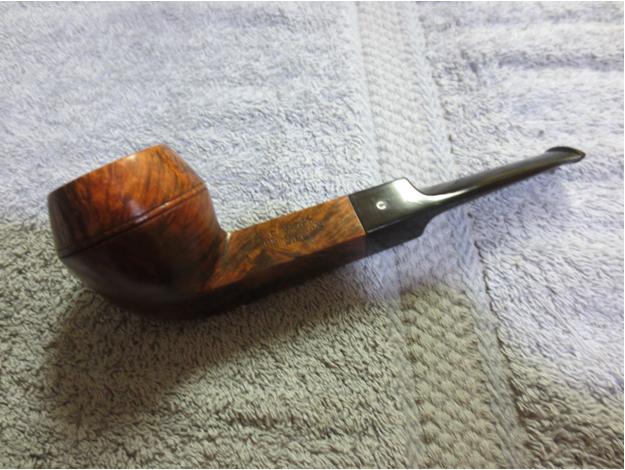
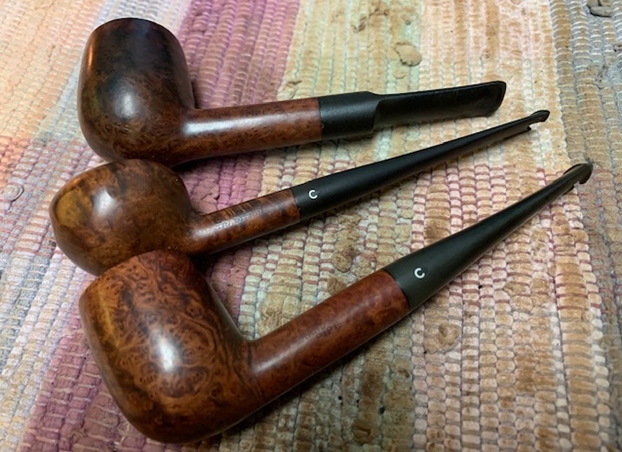 I decided to finish the last pipe of the trio while I waited for some stem repairs to cure on the second pipe – the Tradition Prince. I had left the pipe in the worst condition to work on last. It was another Grand Slam Pipe shape 484B or maybe 4846 as it is hard to read. It was in rough condition. The finish has a lot of dirt and dark grime ground into the briar but it appears to have some nice grain underneath all of that. I hope to be able to set that free with cleaning. It was probably a Comoy’s Billiard but somewhere along the way it had been given a replacement stem that turned it into a saddle billiard. The stamping is faint but with a light and lens reads COMOY’S [over] Grand Slam [over] Pipe. On the right side it has the shape number 484B(?6) next to the bowl/shank junction and that is followed by a very faint Comoy’s COM stamp that reads Made in London in a circle [over] England. There was a crack in the shank about an inch long on the left side extending into the Grand Slam Stamp. It is a hairline but is a definite issue. It appears that when it was restemmed the shank cracked. The pipe is dirty so it is not readily apparent. The bowl had been scraped but there was still a moderately heavy cake. There was an overflow of thick lava on the top of the rim and on the inner bevel of the bowl. The top and outer edge had been hammered and had a lot of damage. The replacement saddle stem was pitted and rough. There was a large bite through on the underside. This was the pipe I was the most worried about when I assessed the damage. I took photos of the pipe before he started his cleanup work.
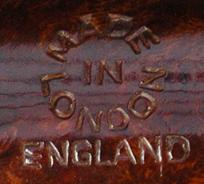
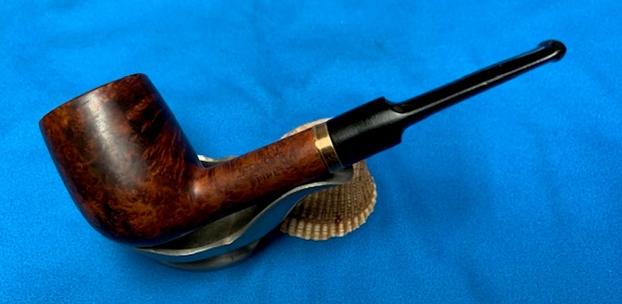
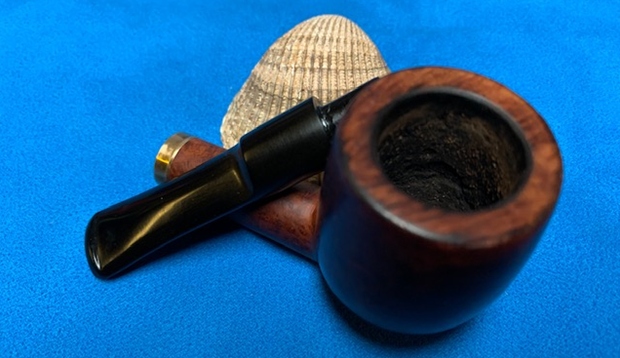
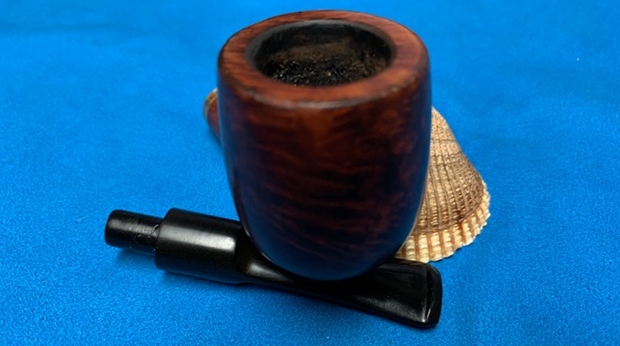
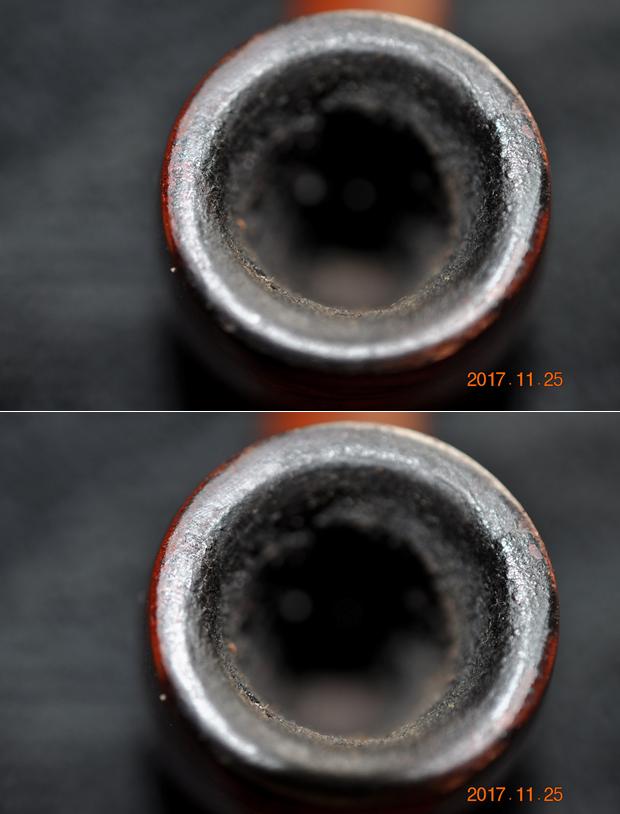
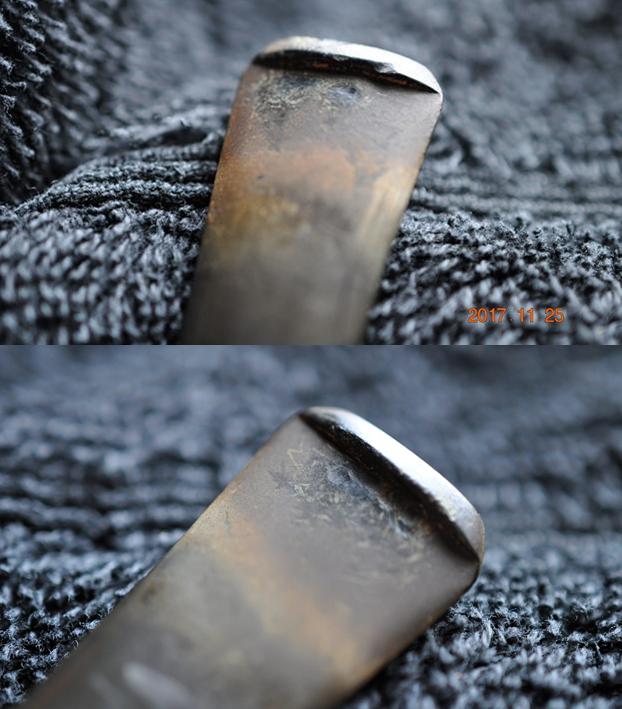
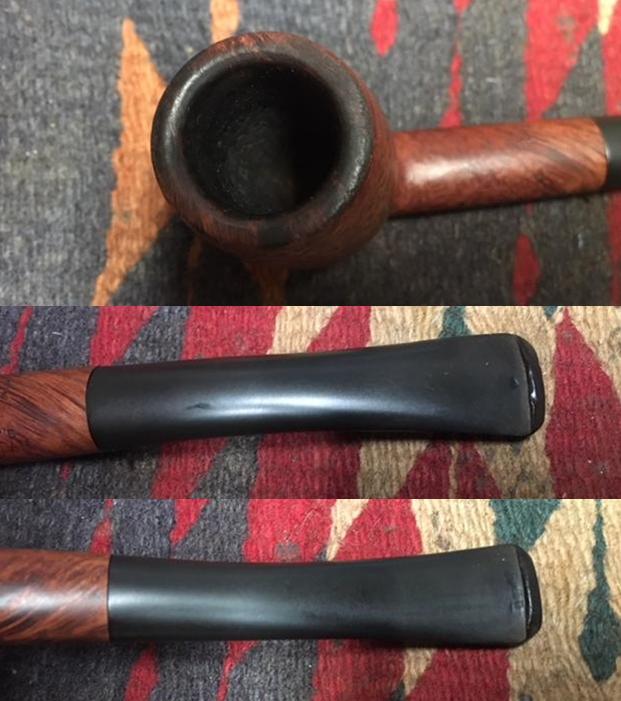
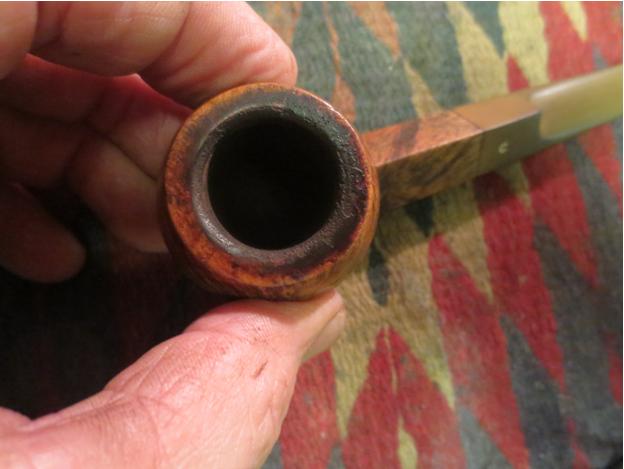
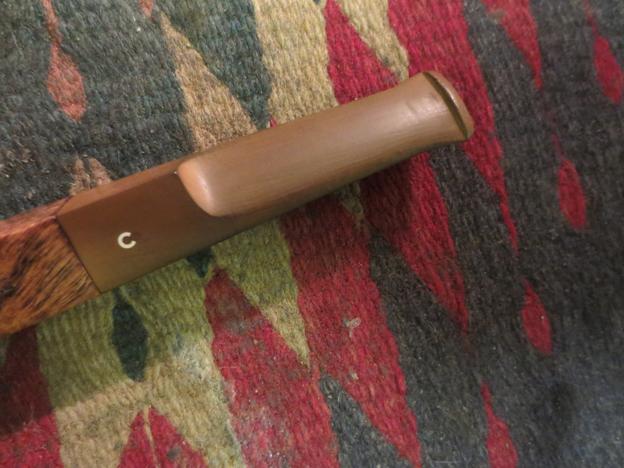
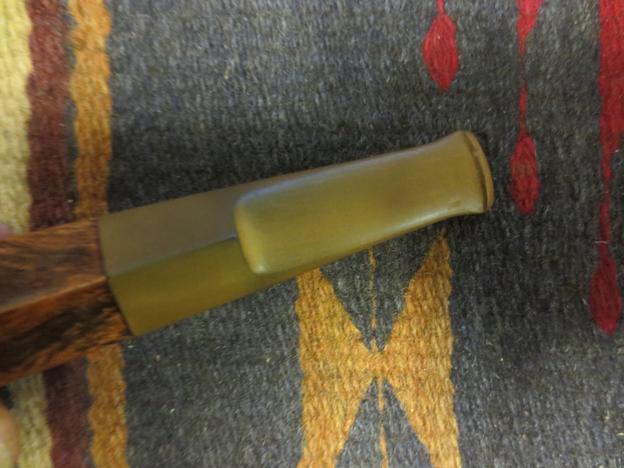
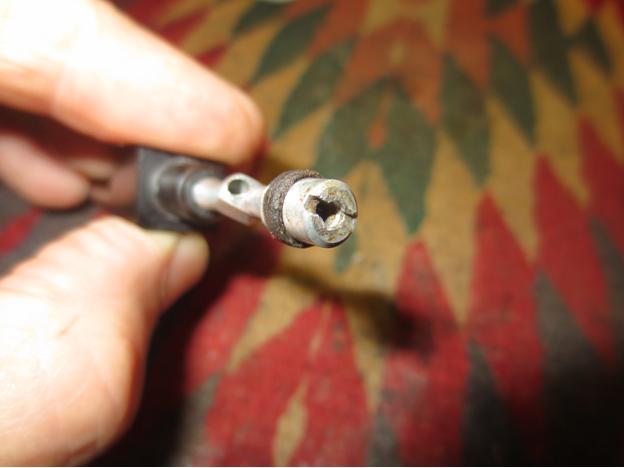
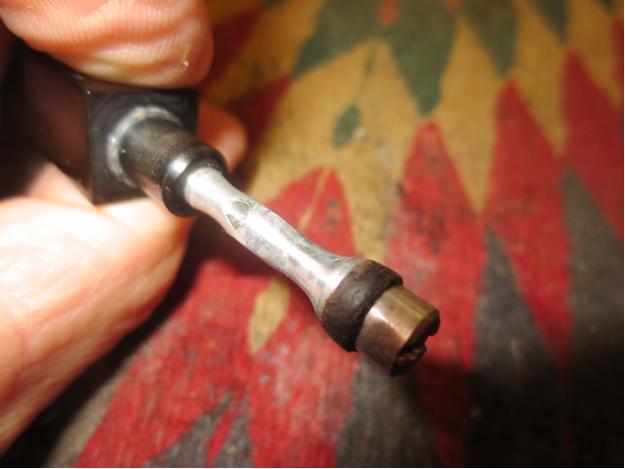
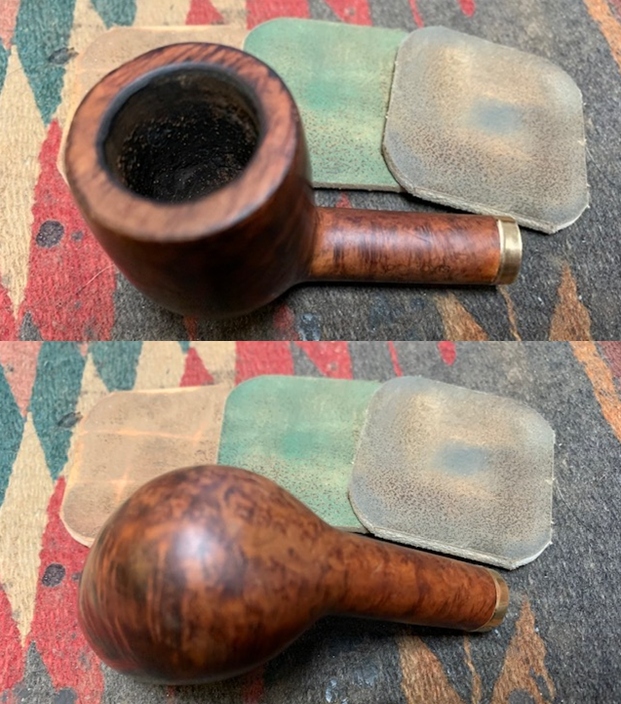
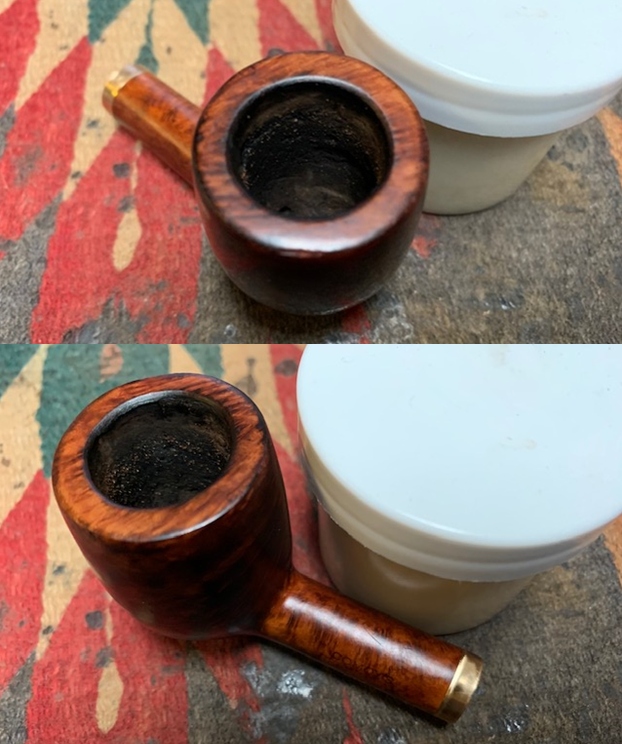
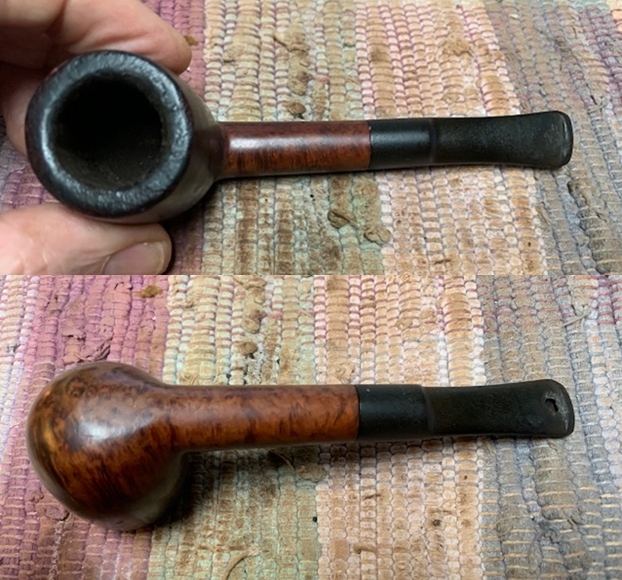 I took photos of the rim top and bowl to give a clear picture of the thickness of the cake and the overflow of lava on the rim top. You can see the thick lava and the damage to the inner and outer edge of the bowl. I also took photos of the top and underside of the stem to show the condition of the stem surface and the bite through on the underside.
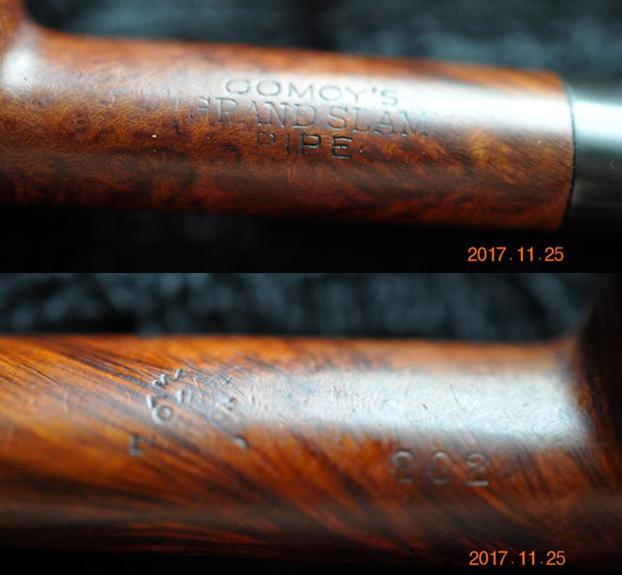
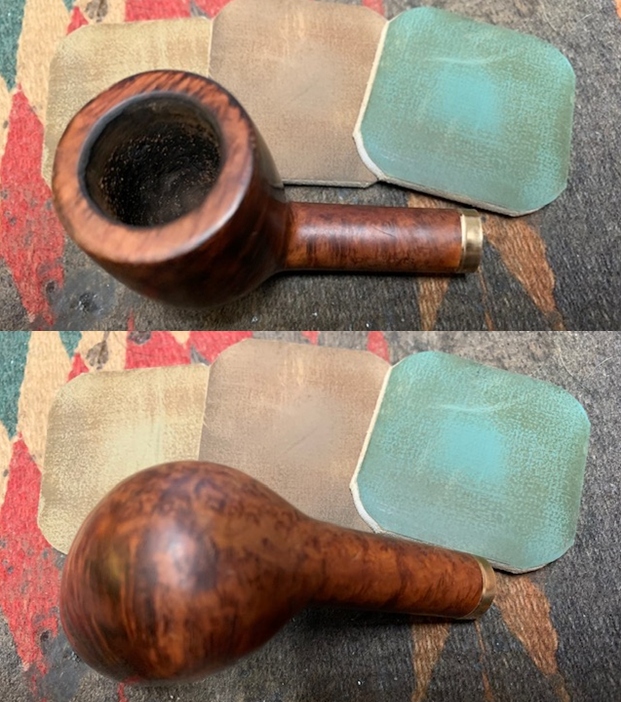
 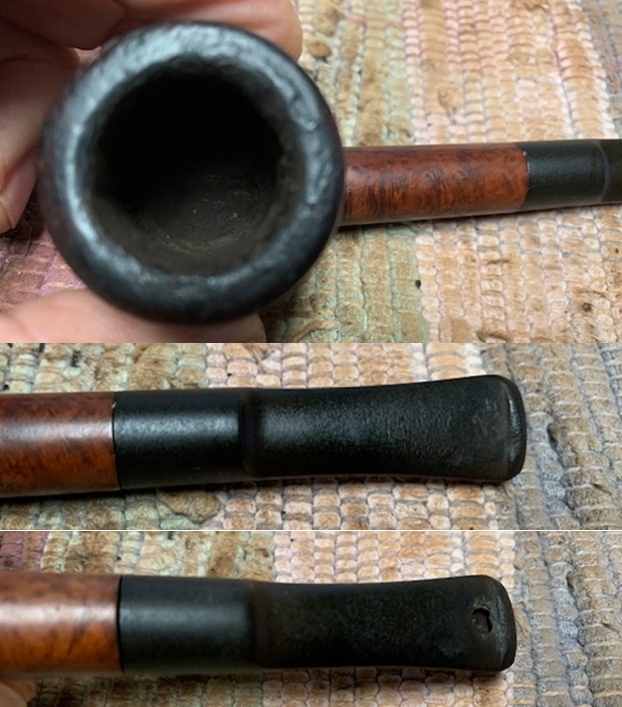 I took photos of the stamping on both sides of the shank. They are faint but read as noted above.
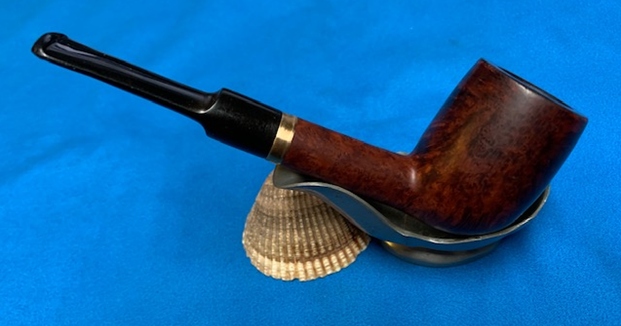
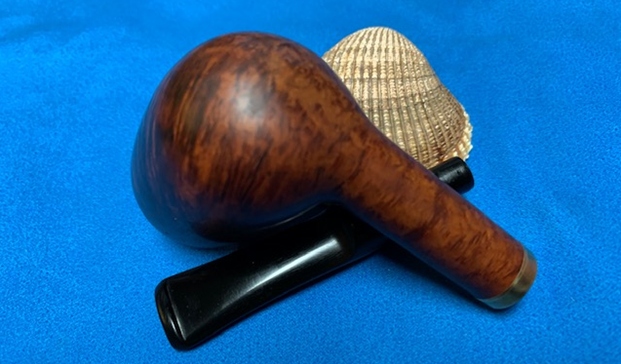
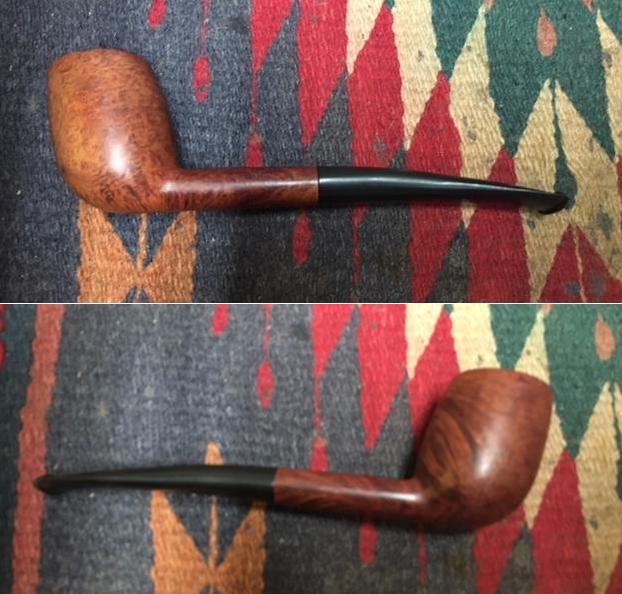
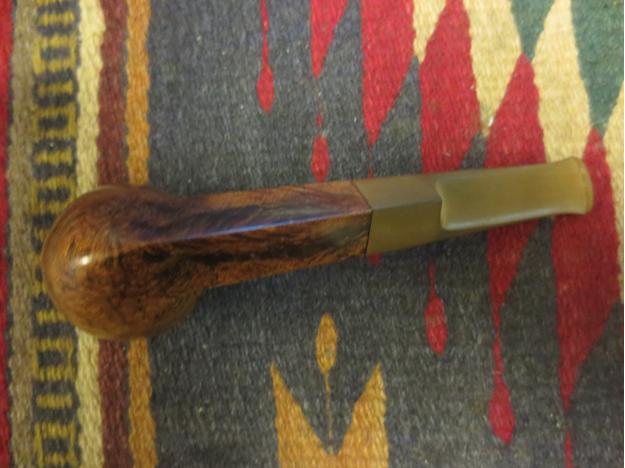
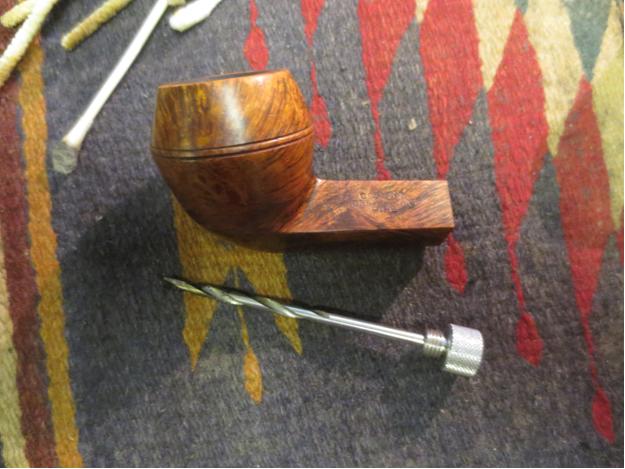
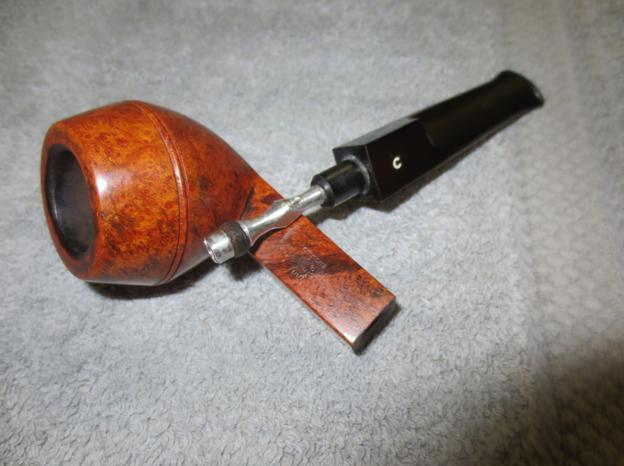
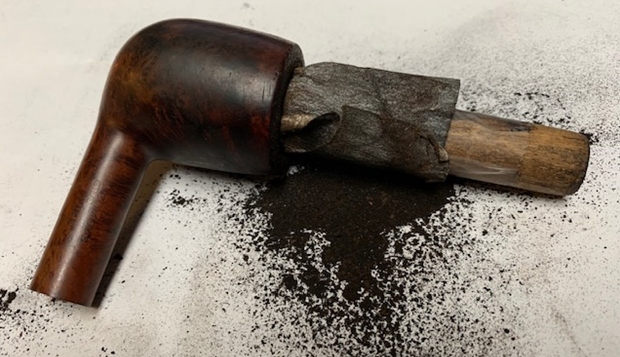
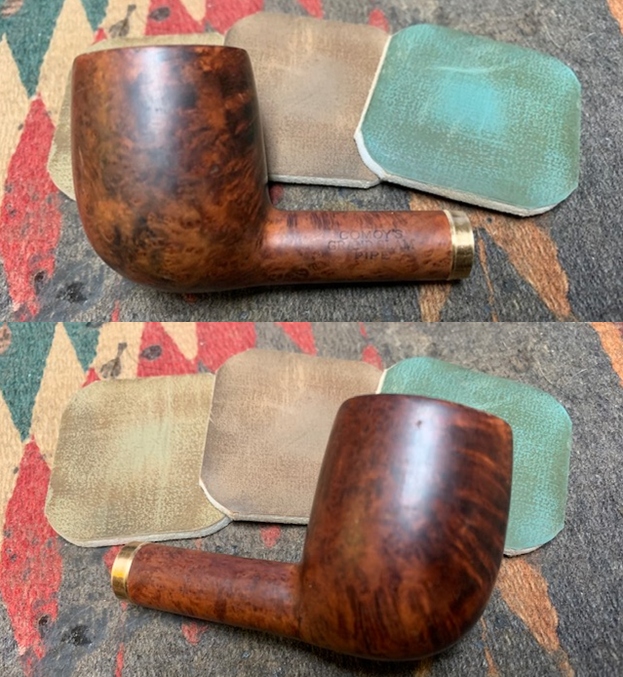
 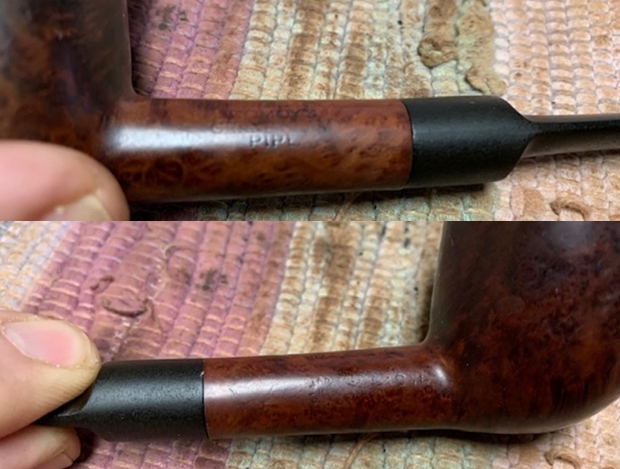 I removed the stem and took a photo of the pipe to give a sense of the whole. It is a well shaped billiard. Once the stem was off I noted that tenon had a thick coating of wax as did the shank which made me wonder if that had cause the crack.
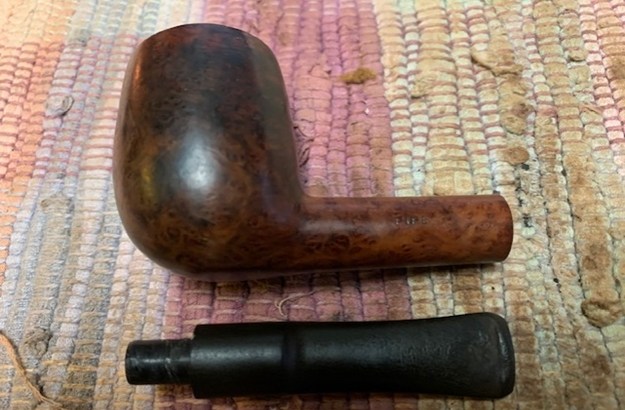 I looked on Pipephil’s site for information on the Comoy’s Grand Slam Pipe and found the following information I have included a screen capture (http://www.pipephil.eu/logos/en/logo-comoy.html). The one I am working on is like the second one in the screen capture below. It has has a replacement saddle stem so there is no C on left side. The stamping on the shank is the same as the one I am working on.
 I turned to the article on Pipedia about dating Comoy’s pipes but the style of the stamping (https://pipedia.org/index.php?title=Comoy%27s_Dating_Guide#1917_to_the_end_of_the_1930.27s_.28at_least_1938.29). I have include the section in the screen capture below that date this pipe to the 1950s.
Now the Comoy’s stamp can be found in three variants in the 1950s
- A simple block-letter style without serifs but with the C larger than the other letters and the apostrophe before the “S”.
- A return to the slightly more fancy block letters with serifs and the apostrophe. (It seems that some grades carried different stamps, or at least that the stamping changed in different years for some grades.)
- A simple block-letter style without serifs and without the apostrophe and with the “C” the same size as the rest of the letters. This stamp was probably not used very long.
- A simple block-letter style without serifs but with the apostrophe before the “S” and with the “C” the same size as the rest of the letters.
 Made in London England
Appears in two versions. This is again stamped in a circle with “MADE” at the top, “IN” in the middle, and “LONDON” at the bottom, with “ENGLAND” in a straight line beneath. It can be assumed that this stamp was first used in the export drive in the early 1950s. On a Bulldog Sandblast from the early 50s the Comoy name no. 2 above was used together with “MADE IN LONDON” over “ENGLAND”. There are no known examples of pre-WW II Comoy’s stamped in this way. The second version is the same as above but in a “rugby ball ” shape. This shape is verified on Comoy´s “Extraordinaire” pipes.
That article gave me some helpful information regarding the pipe that I was working on. I knew that the stamping and logos identified the pipe as having been made in following WW2 and from what I can see from the above information it is a 1950s era pipe.
I reamed the bowl with a PipNet pipe reamer using the 2nd and 3rd cutting head to remove the remaining cake back to briar. I followed up with a Savinelli Fitsall pipe knife to remove the remnants of cake. I sanded the walls of the bowl with a piece of 220 grit sandpaper wrapped around a piece of dowel.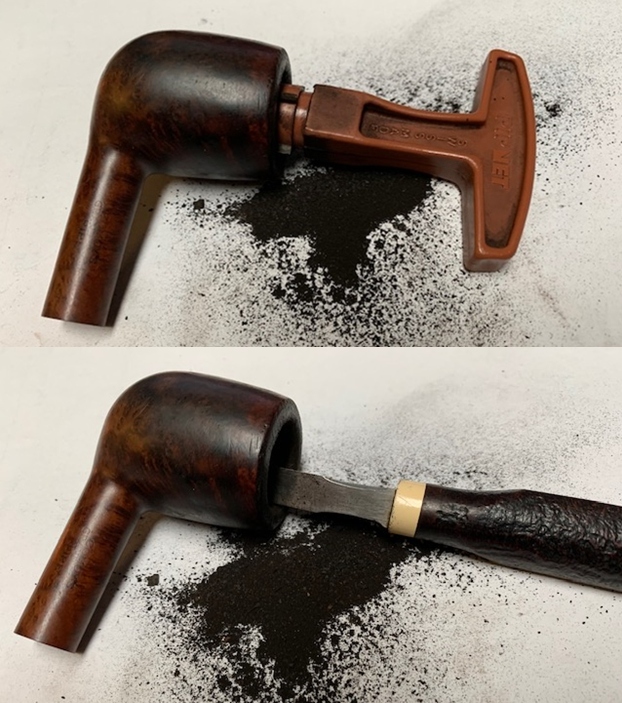
 I scrubbed out the mortise and the airway in the shank and the stem with alcohol, cotton swabs and pipe cleaners.
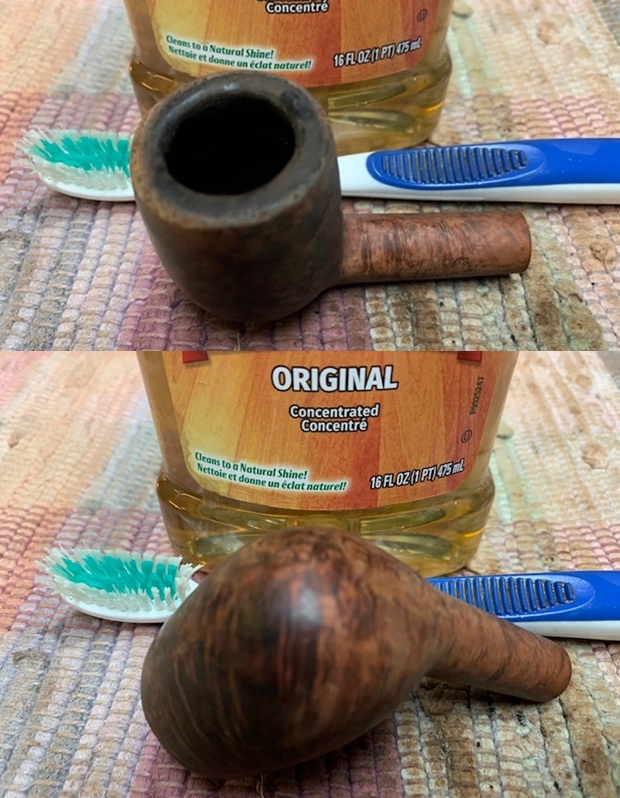
 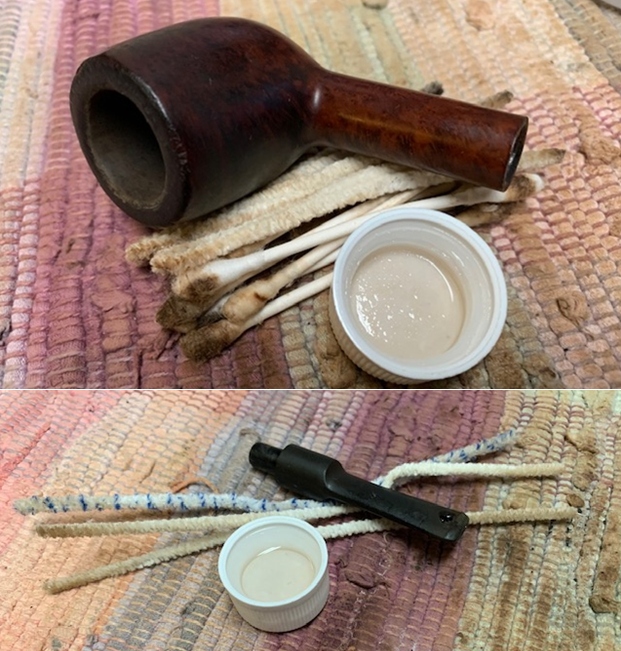 I scrubbed the exterior of the bowl, rim, shank and stem with a tooth brush and Murphy’s Oil Soap to remove the oils and tars on the rim and the grime on the finish of the bowl. I rinsed it under running water and dried it off with a soft cloth.
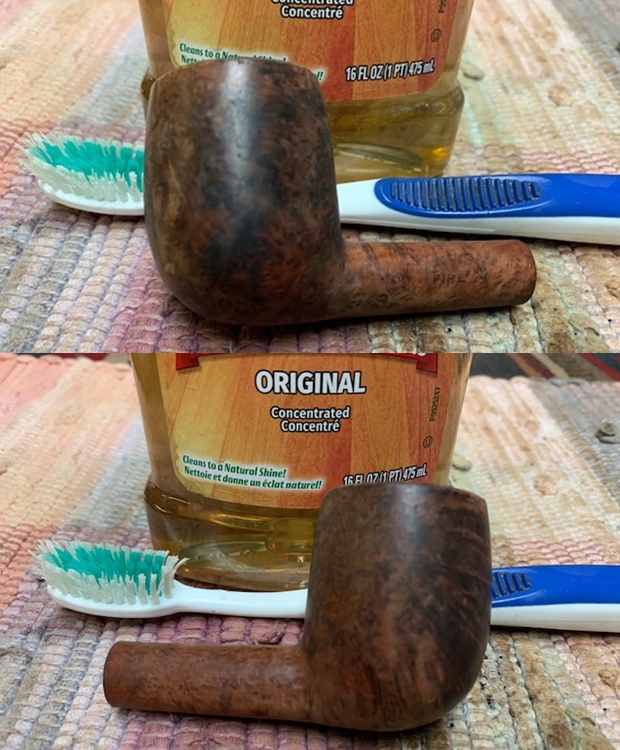
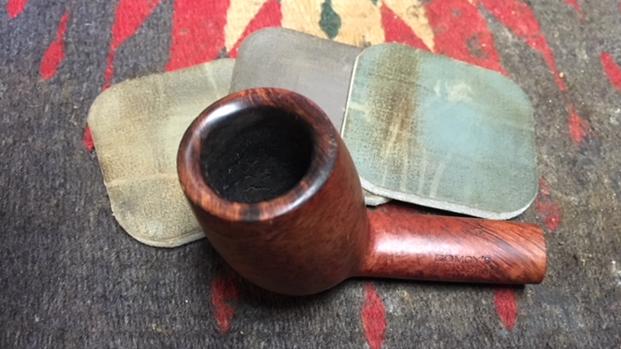
 I was topped the bowl on a piece of 220 grit sandpaper and a topping board to smooth out the damage on the surface of the rim and reduce the damage on the edges. I used a folded piece of 220 grit sandpaper to clean up the beveled inner edge of the rim.
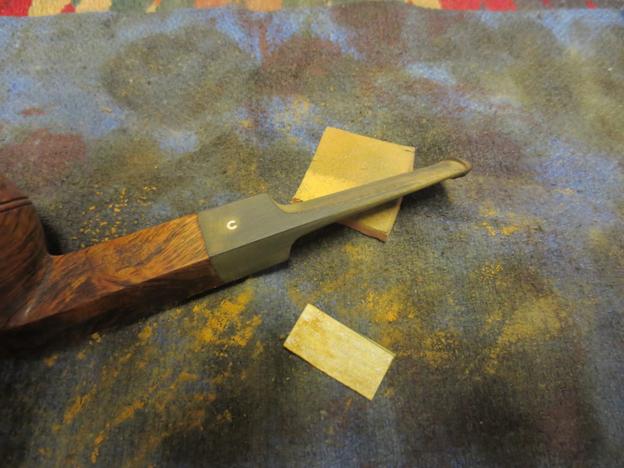
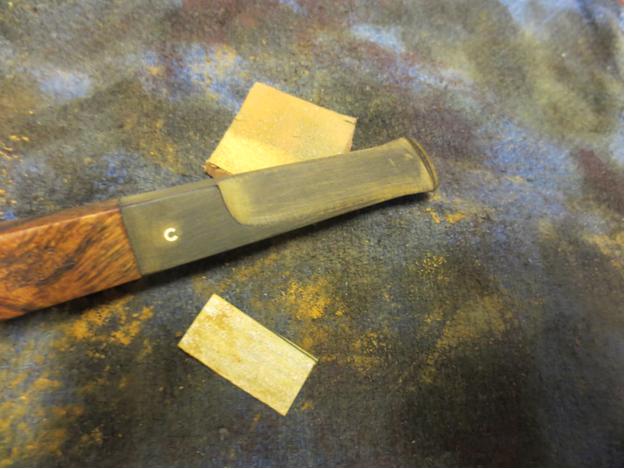
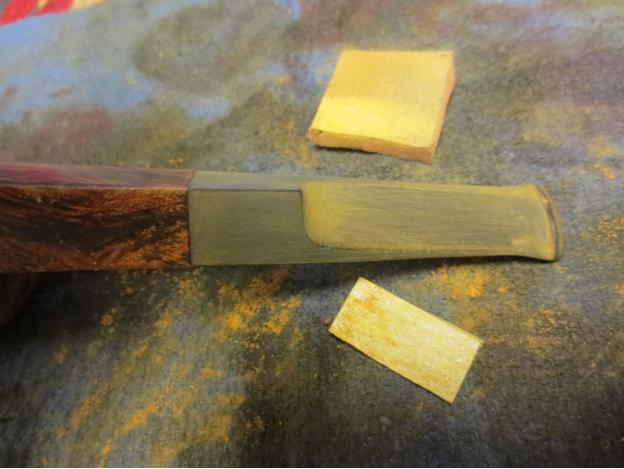
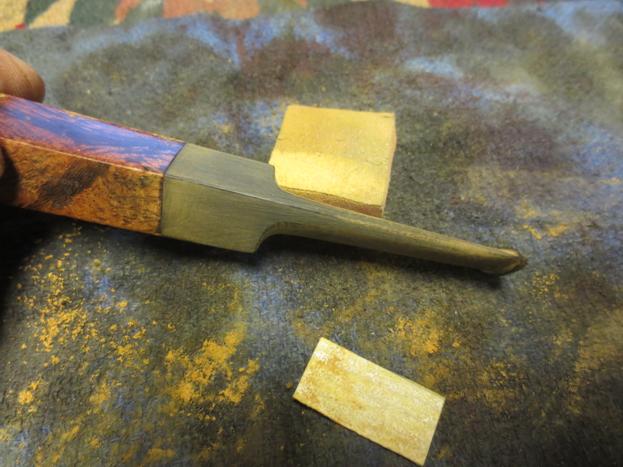
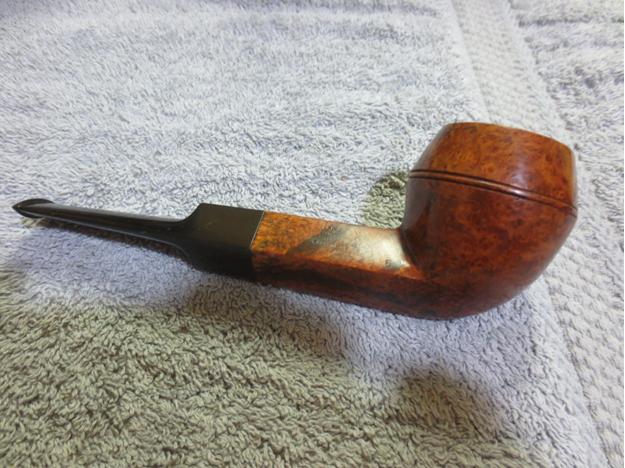
 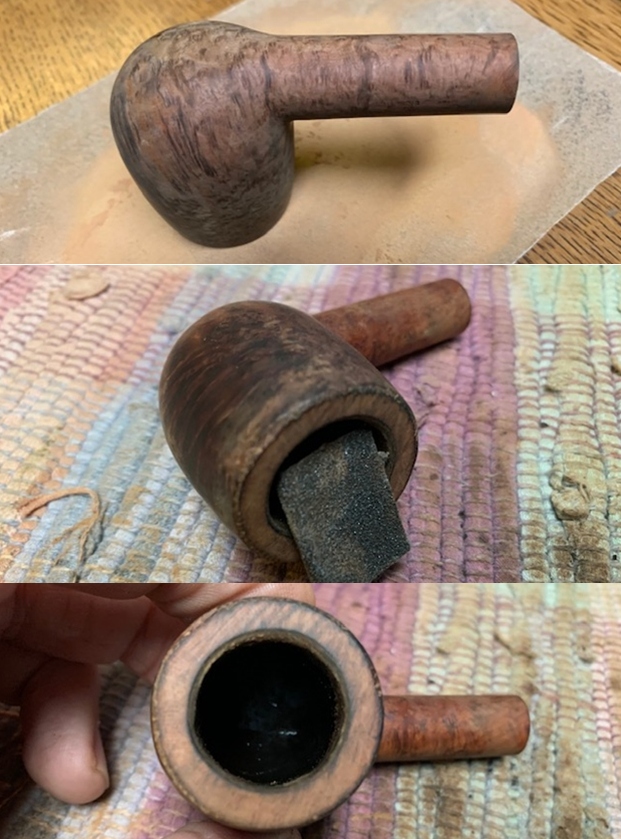 With the general cleanup finished I decided to address the cracked shank. I have circled the area of the crack in red in the photo below. I removed the stem and spread the crack slightly and used a tooth pick to put super glue in the crack. I pressure fit a thin band on the end of the shank to bind it together. The band allowed the glue to cure and the crack virtually disappeared. The band is thin enough not do obscure the stamping on the shank sides.
 I polished the bowl and the rim top, sides and shank with micromesh sanding pads – wet sanding with 1500-12000 grit pads and wiping it down after each pad with a damp cloth. I carefully avoided the stamping on the shank so as not to damage the stamping.
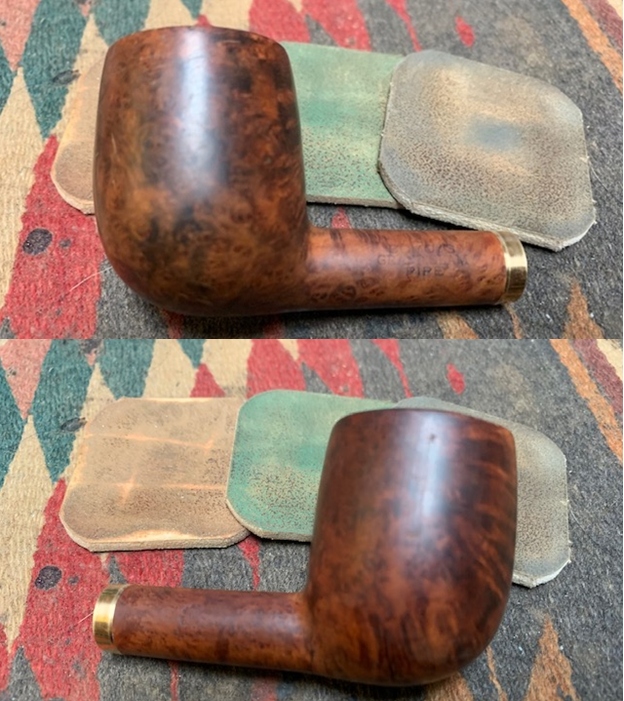

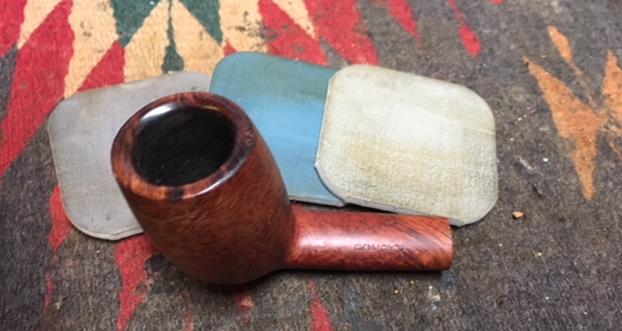
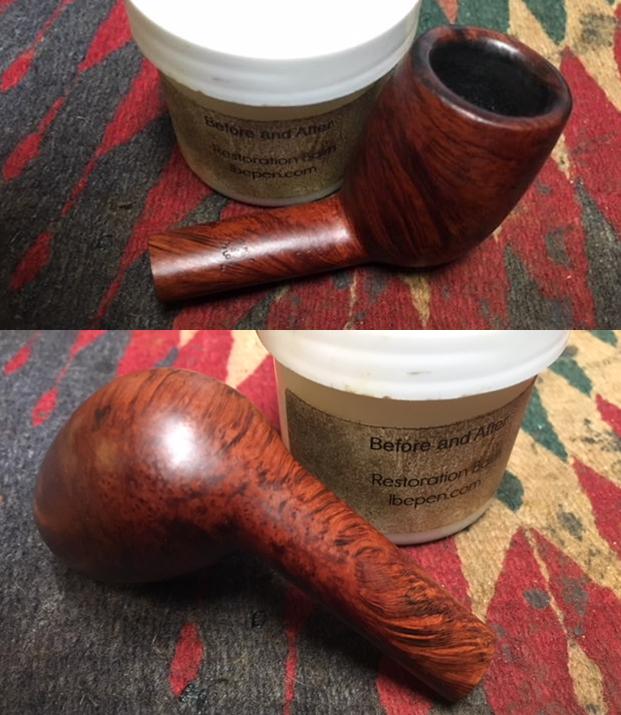
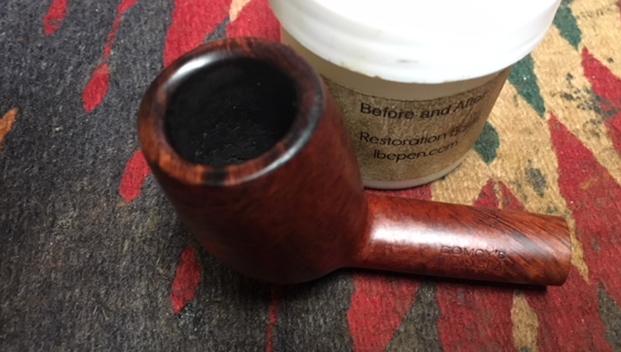
 I rubbed the bowl and shank down with Before & After Restoration Balm. I worked it into the surface of the bowl sides and shank with my fingertips to clean, enliven and protect the briar. I let the balm sit for a little while and then buffed with a cotton cloth to raise the shine.
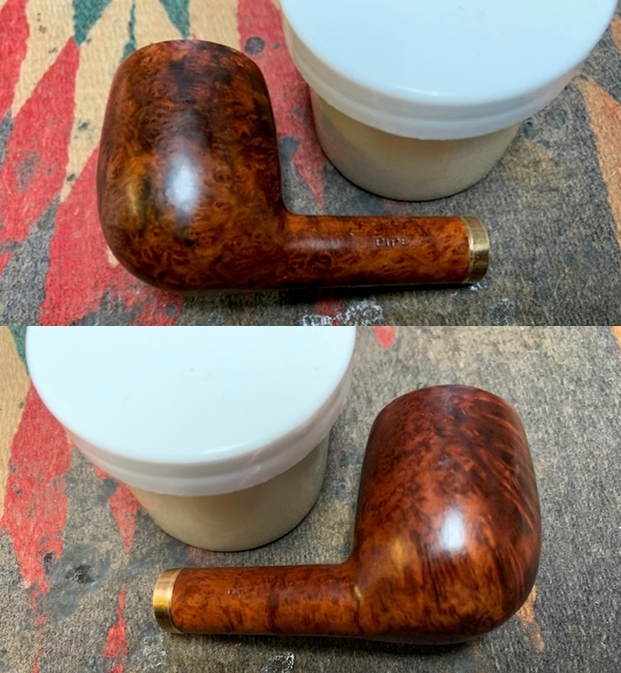

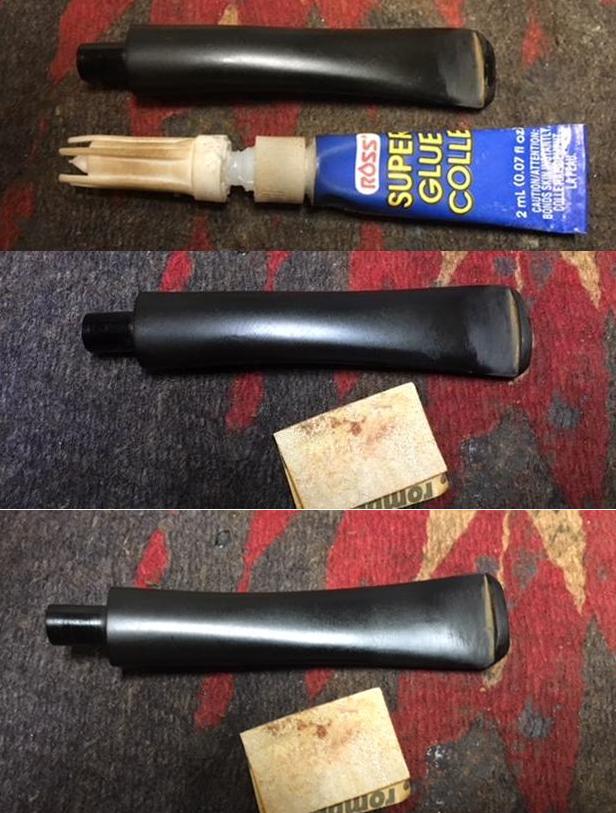
 I set aside the bowl and turned my attention to the stem repairs. I cut a piece of cardboard for a pallet, put aside two charcoal capsules, and set out the spatula and the Loctite 380 black CA glue. I greased a pipe cleaner with Vaseline and inserted it in the stem. I filled in the hole in the stem with a mixture of charcoal powder and Loctite. I used the spatula to fill in the bite throughs on all of the stems. I sprayed the repair with an accelerator to set the glue and removed the pipe cleaners from the stems.
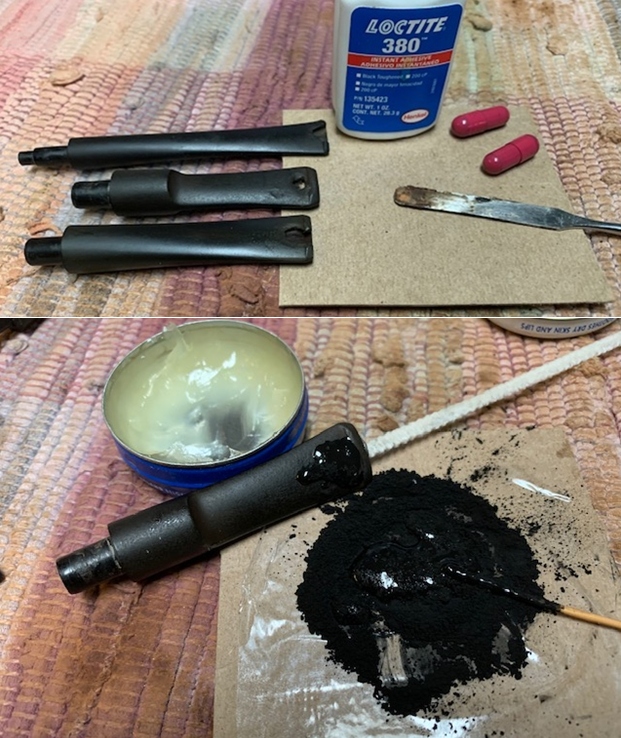
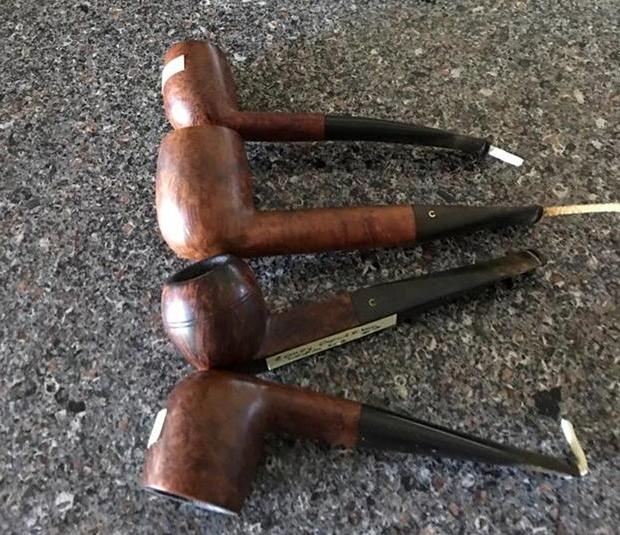
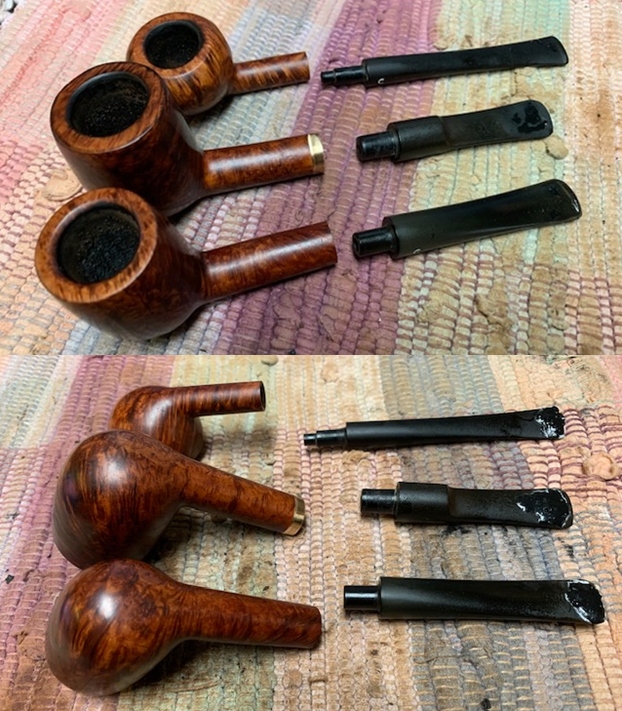
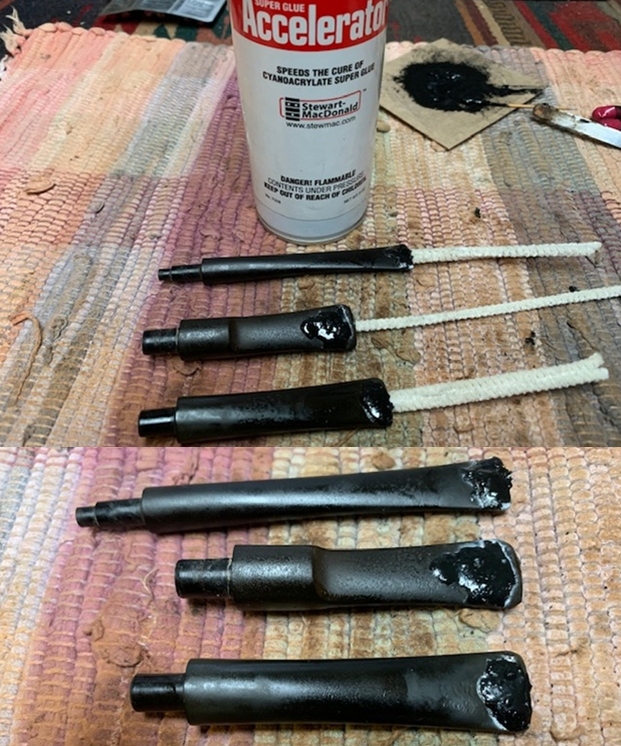 I filled in the deep tooth marks on the top side of the stem with black super glue and set the stems aside to let the repairs cure. I took a photo of the three pipes at this point to give a feel for where things stood.
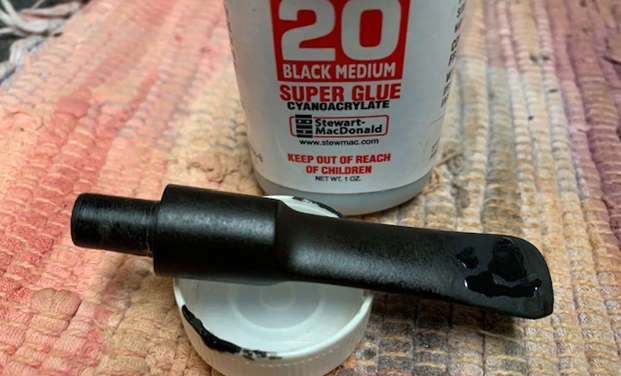
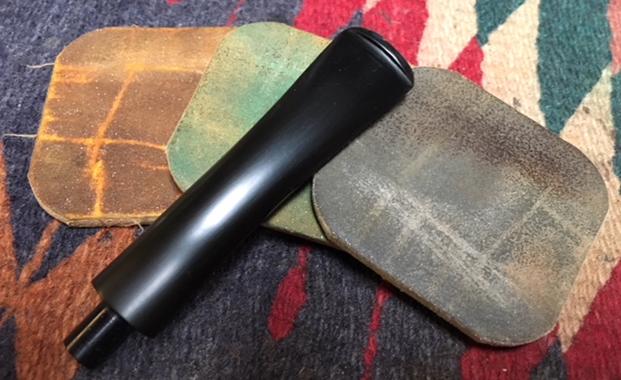
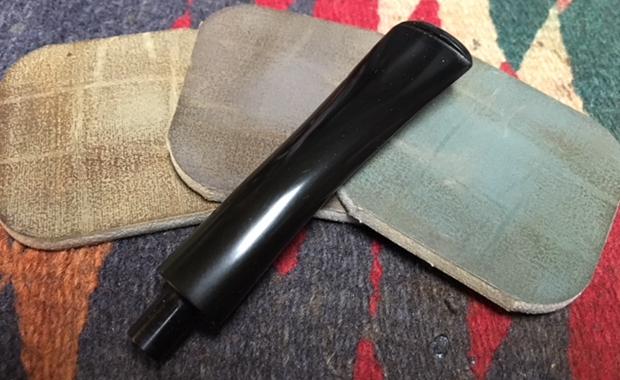
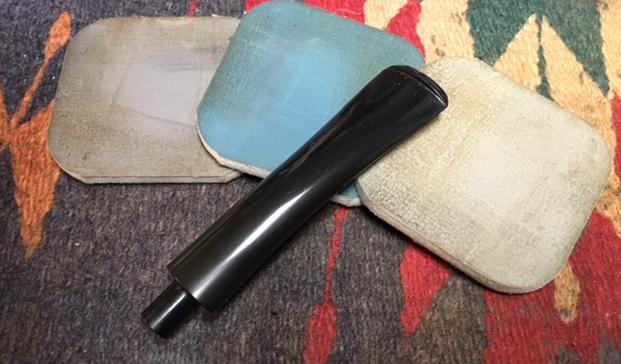
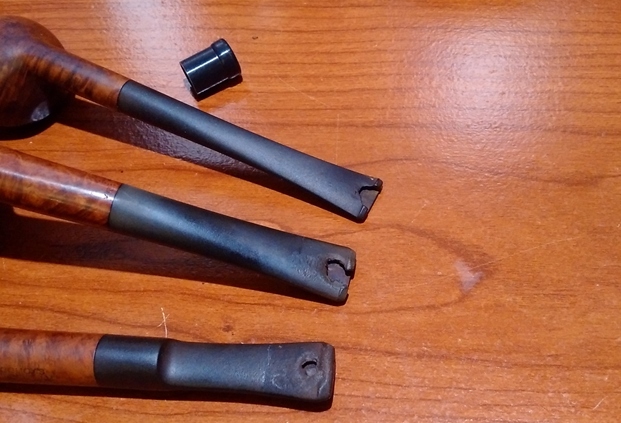
 I smoothed out the repairs with a needle file and started blending them into the surface of the stem. I sanded the remaining repairs with 220 grit sandpaper to further blend it into the stem surface. I started polishing it with 400 grit wet dry sandpaper.
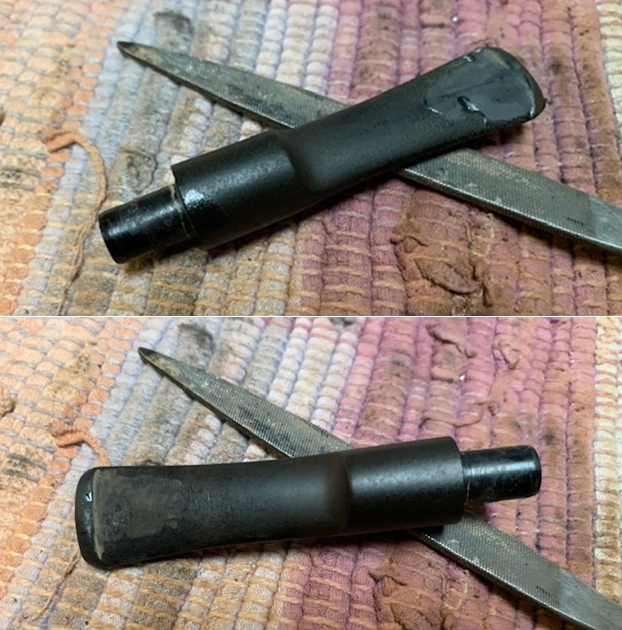
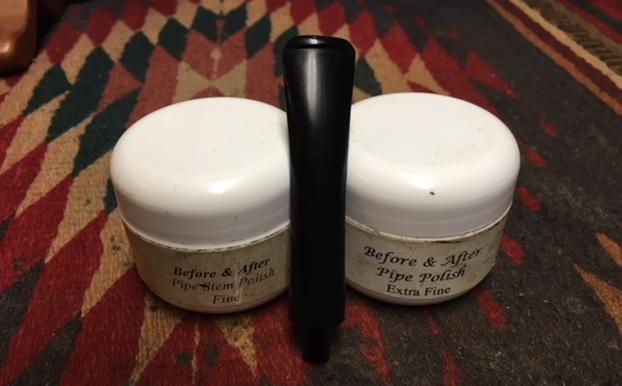
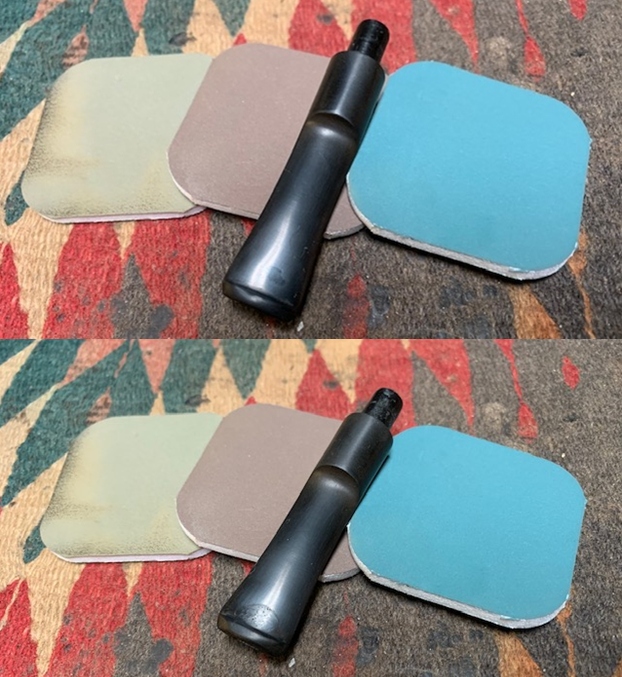
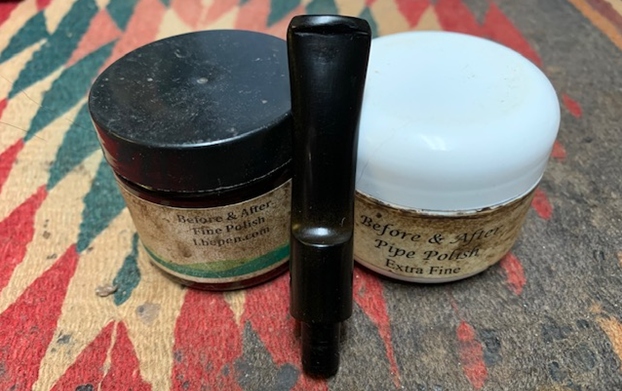
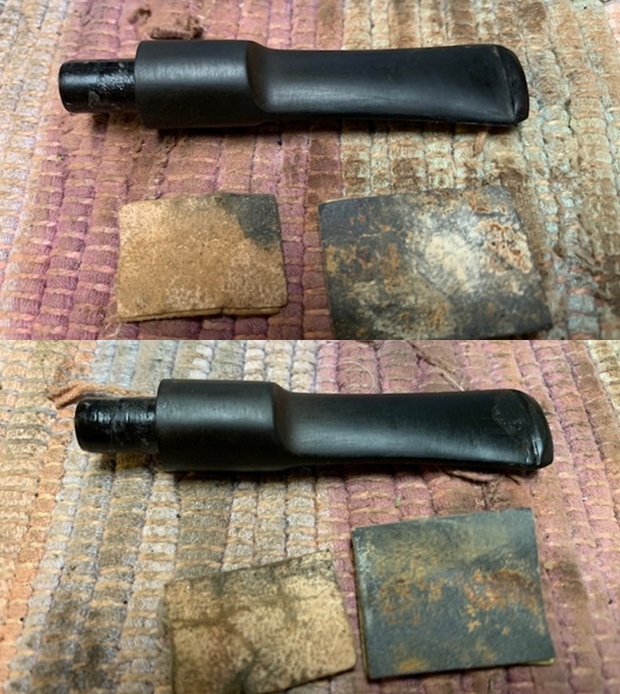 I polished the vulcanite stem with micromesh sanding pads – 1500-12000 grit pads. I wiped it down with a damp cloth after each sanding pad. I used Before & After Pipe Polish – both Fine and Extra Fine to further polish the stem.
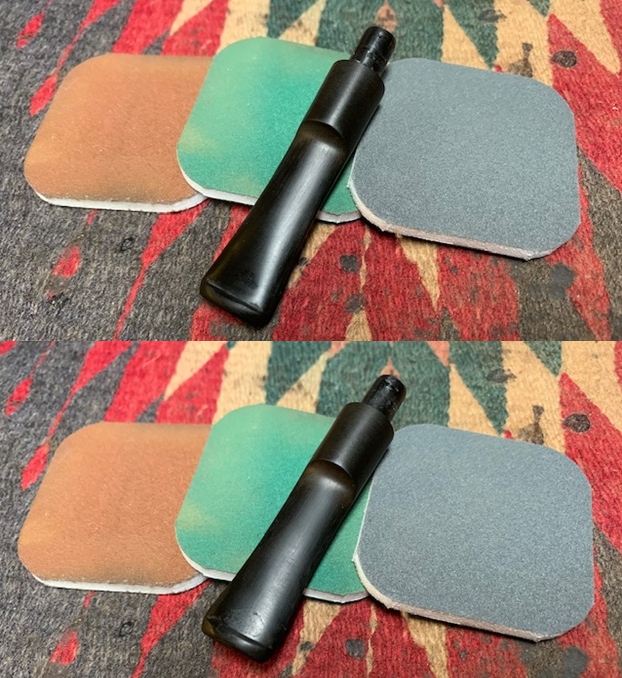

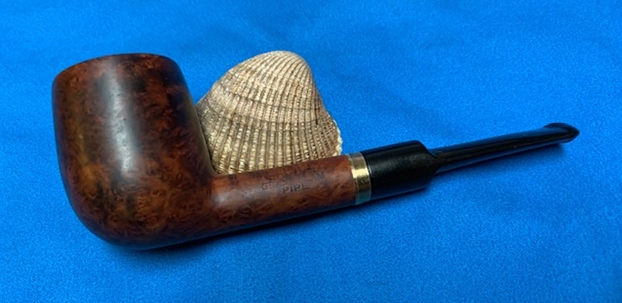
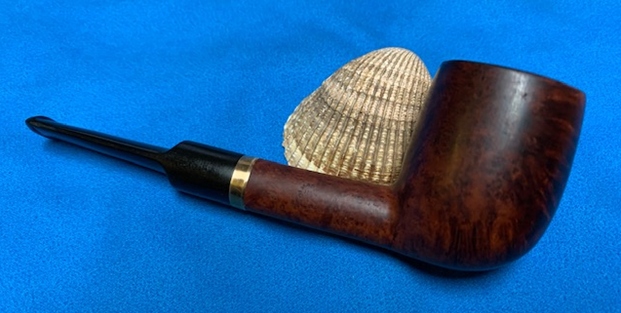
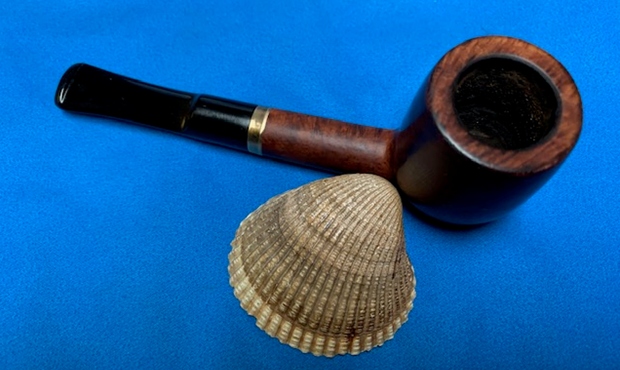
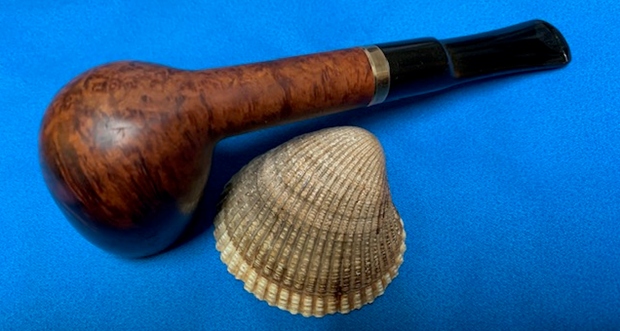
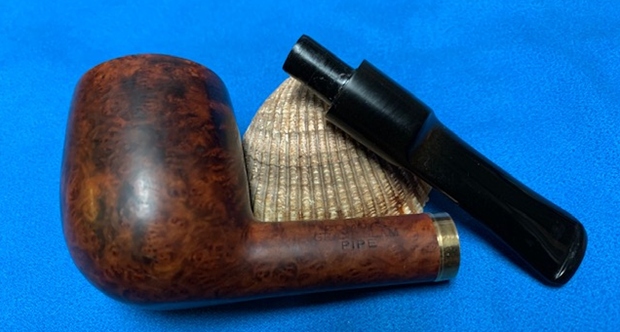
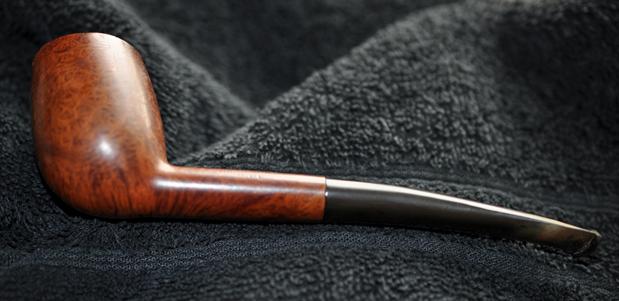
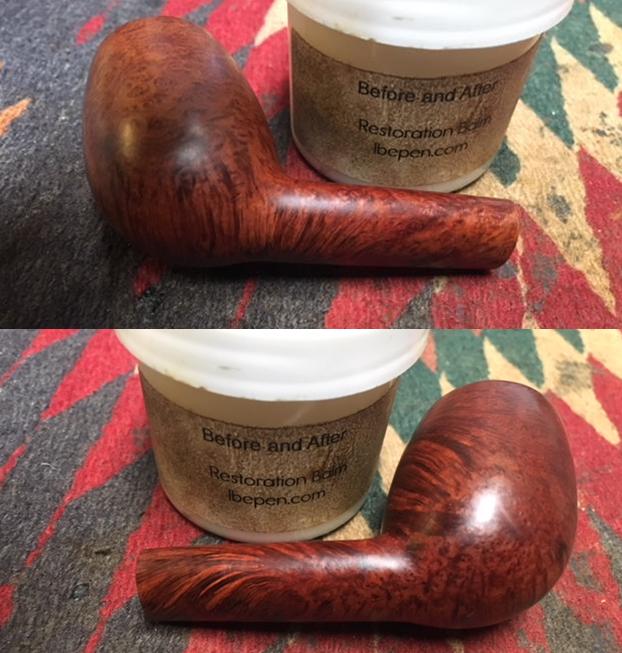
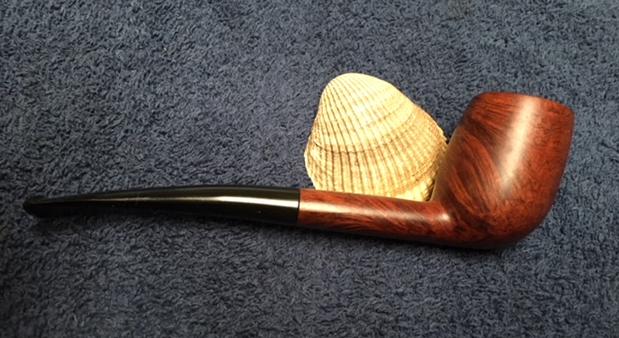
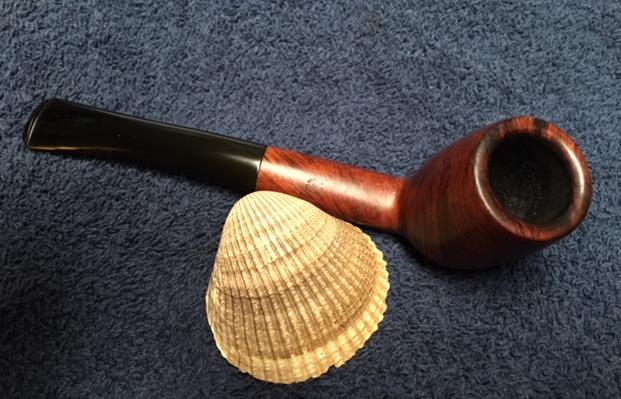
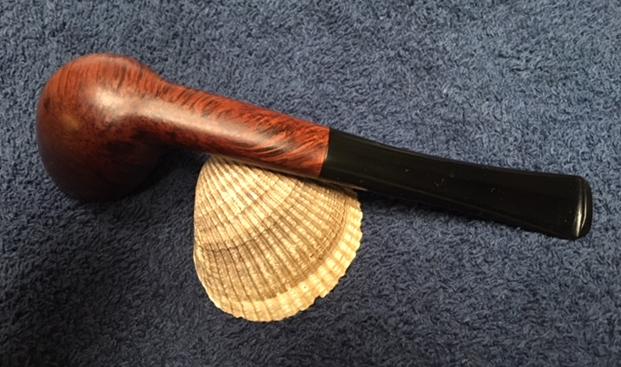
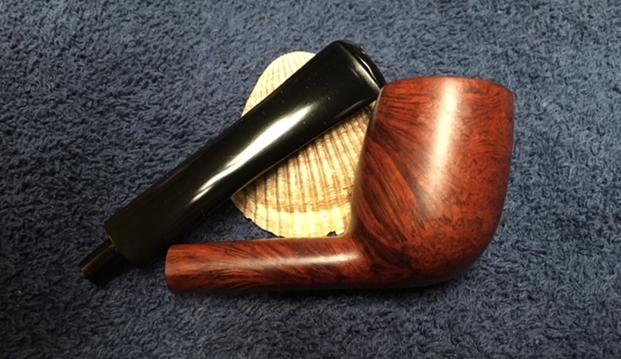
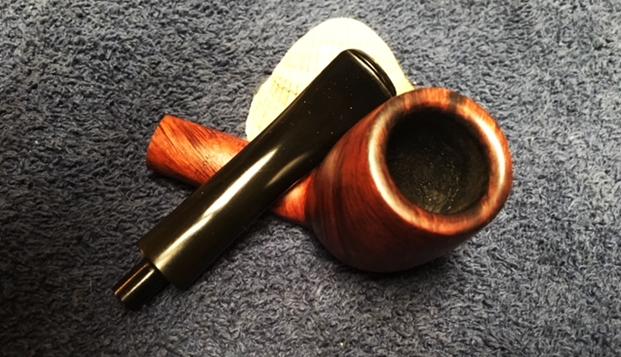
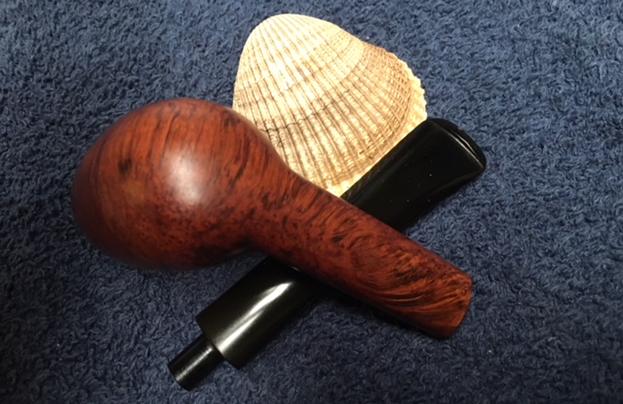
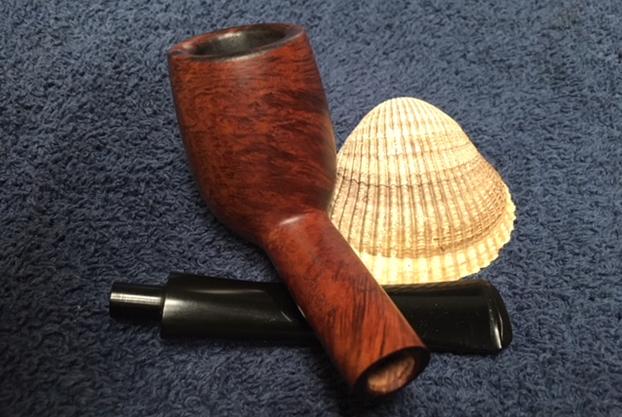
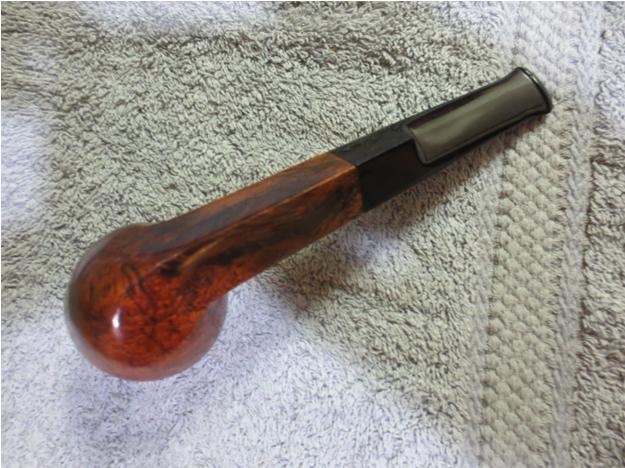
 This 50s era Comoy’s Grand Slam Pipe 484B Billiard with a replacement vulcanite saddle stem turned out to be a nice looking pipe now that it has been restored. I did a lot of work on the bowl and repaired the bite through on the stem. The rich browns and blacks of the contrasting stains came alive with the polishing and waxing. The thin brass shank band adds a touch of class to the pipe. I put the stem back on the bowl and carefully buffed the pipe with Blue Diamond on the buffing wheel using a light touch on the briar. I gave the bowl and the stem multiple coats of carnauba wax on the buffing wheel and followed that by buffing the entire pipe with a clean buffing pad. I hand buffed the pipe with a microfiber cloth to deepen the shine. The finished Comoy’s Billiard is a beauty and fits nicely in the hand and looks very good. Give the finished pipe a look in the photos below. The dimensions of the pipe are Length: 5 ½ inches, Height: 1 ¾ inches, Outside diameter of the bowl: 1 ¼ inches, Chamber diameter: ¾ of an inch. I am looking forward to what Stanley thinks of his repaired pipe. He had said the threesome were his favourite pipes. While this was the last of the threesome it pushed ahead of number 2 in the queue so there is one more to come! Thanks for reading this blog and my reflections on the pipe while I worked on it. There are many more to come!