Tag Archives: Carnauba wax

Restoring a Beautiful Redmanol Old Timer


by Kenneth Lieblich

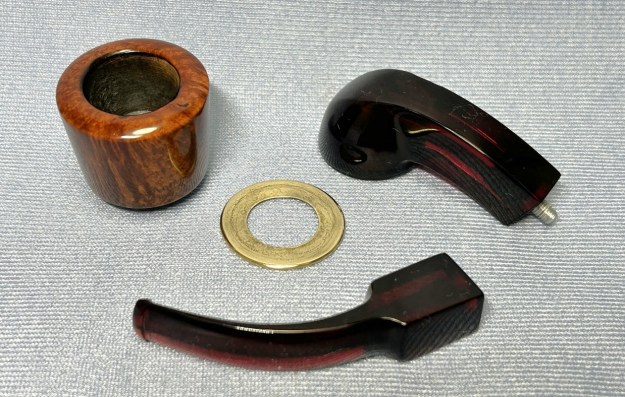
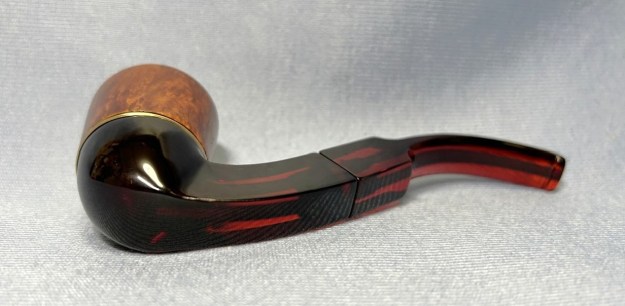
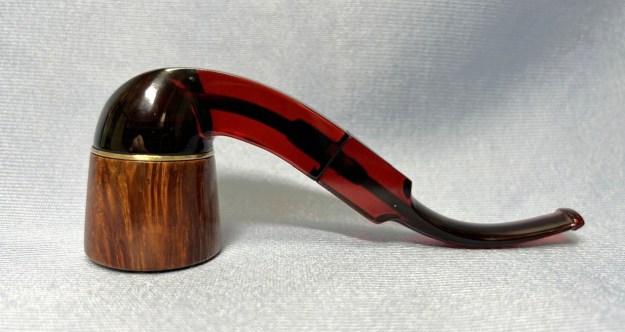
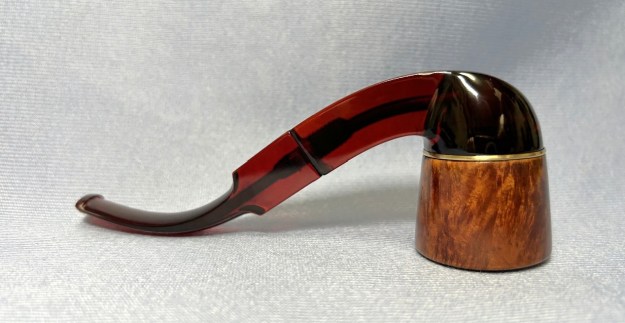
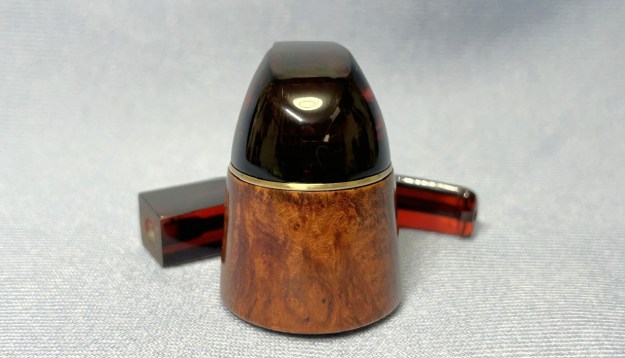
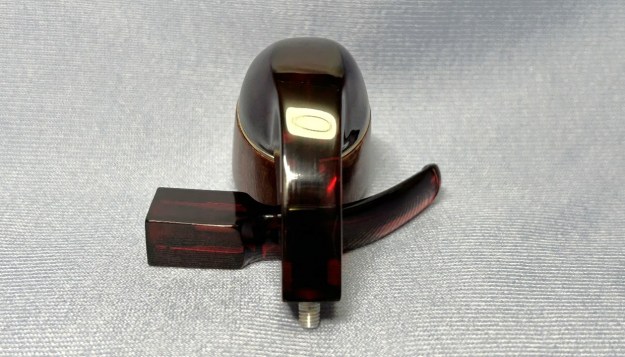
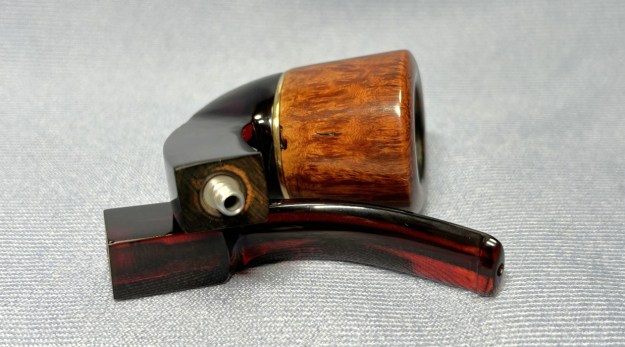
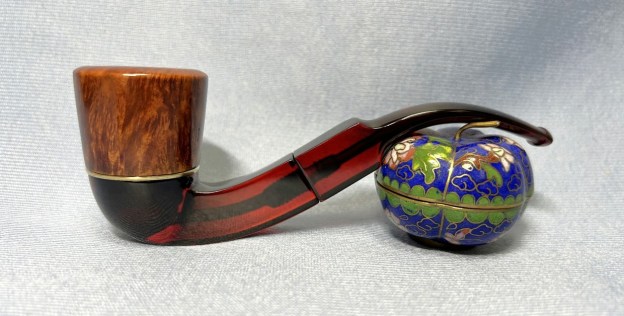
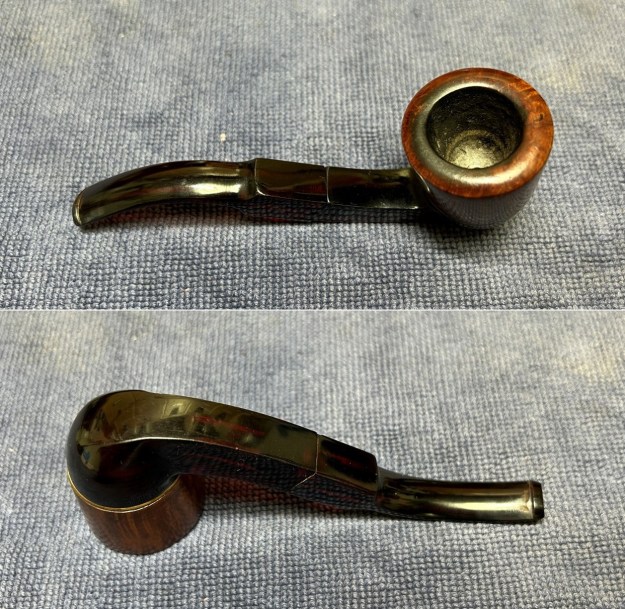
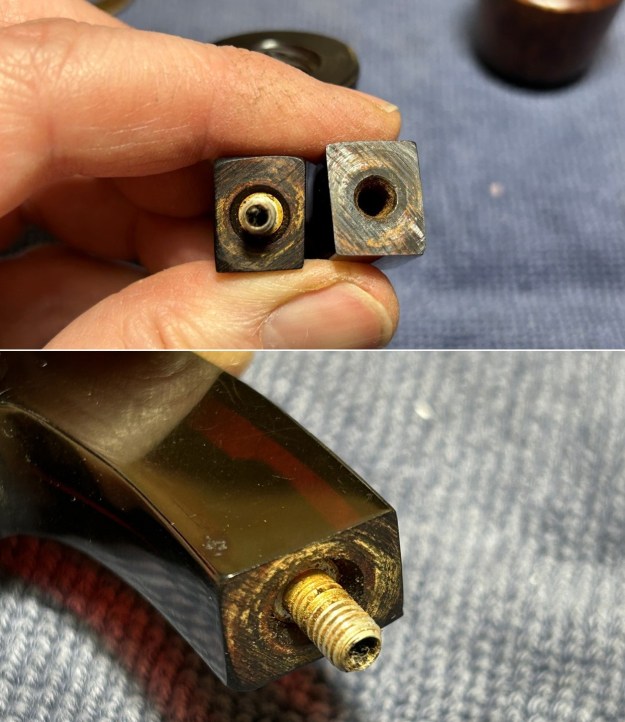
A fine gentleman (and regular customer) from Seattle recently sent a box of pipes for me to restore for him. Various and sundry reasons prevented me from photographing most of the pipe restorations, but I did snap some shots of this one and it is worth checking out. This is a nifty bent Dublin made primarily from Redmanol (more on that later). The stem and most of the stummel are made entirely from Redmanol and are two separate pieces. In this case, the mortise and tenon are reversed from most pipes: the screw tenon is in the shank and the mortise is in the stem. The bowl is made of briar and screws into the Redmanol bowl. Separating the briar from the Redmanol is a ring of brass. This restoration was quite a bit of work, but I could not be more pleased with how it turned out in the end. The pipe is really quite charming and reminiscent of a different era. The pipe has no markings at all, so I cannot describe the maker to you with any authority. However, Steve has written up several blog posts on Redmanol pipes from makers such as MLC, WDC, and KB&B. Here is one of his articles on a pipe not too dissimilar from the one I’m restoring. So, what is Redmanol? It is an early 20th century type of plastic – a sort of Bakelite, if you will. On Pipedia, there is an excellent article on Redmanol (and gutta percha) written by the doyen of pipe literature, Ben Rapaport. I highly encourage you to read the whole article here, but here is an excerpt:

Then came Redmanol. In 1913, Lawrence V. Redman established the Redmanol Chemical Products Company in Chicago to produce a plastic, similar to Bakelite, made from the action of formin on carbolic acid. “Redmanol. Perfect molding material. Redmanol Chemical Products Co., 644 West 22nd Street, Chicago, was initially advertised as a molding compound to replace metal, rubber, fibre, wood, porcelain and other plastic materials. … suited to make pencils, buttons, pool triangles, acid containers” (Factory. The Magazine of Management, July 1923, 393). “’Redmanol,’” the new substitute for amber, a Chicago invention, seems to be making a hit from the start” (“Chicago Factories Await Readjustment,” United States Tobacco Journal, November 14, 1914, 13).

What is Redmanol? Here are a couple definitions, the first from the Redmanol company: “REDMANOL. The Material of a thousand uses. REDMANOL is sold as TRANSPARENT REDMANOL which has every physical property of Baltic amber, except that REDMANOL is more lustrous and has perfect transparency. The transparent REDMANOL is used for dental and surgical instruments and electrical insulation and is the material which has largely replaced amber in smokers’ supplies” (Directory. Chicago Section. American Chemical Society, 1911).

The second is from a tobacco industry leader. “Redmanol is a secret compound, the result of years of experiment and research work to find a substance for cigar and cigarette holders and stems which would possess the beauty of natural amber but none of the frailties. It is, in fact a man-made amber, being chemically known as synthetic amber, and has proved so admirable a substitute for natural amber that it is doubtful that the later [sic] will ever again be used to the extent it formerly was. …All in all Redmanol makes use of the most perfect and satisfactory mouth-pieces yet devised. Our customers are evidently aware of this fact as is amply demonstrated by the enormous increase in sales in our stores this year of Redmanol cigar and cigarette tubes” (“Pipe Points Worth Remembering. Redmanol,” The United Shield, November, 1919, 13).

And the third is from a journal article. “Redmanol, a similar substance [to Bakelite], is made using formin instead of formaldehyde, and on melting this with phenol it gives a clear, amber-colored, transparent substance that is plastic and can be bent and worked into shape. On further heating it becomes hard and insoluble and similar to bakelite except for its color and transparency. Redmanol, by virtue of its resemblance to real amber and its many desirable properties of insolubility, non-inflammability, the ability to mold easily before hardening, and its imperviousness to corrosive substances, is used for making hundreds of useful and ornamental objects, some of the most familiar being pipe stems, cigar and cigarette holders, and knife handles” (J. Maple Wilson, Jr., “The Relation of Chemistry to the Home,” Journal of Chemical Education, Vol. 3, No. 6, June, 1926, 670).
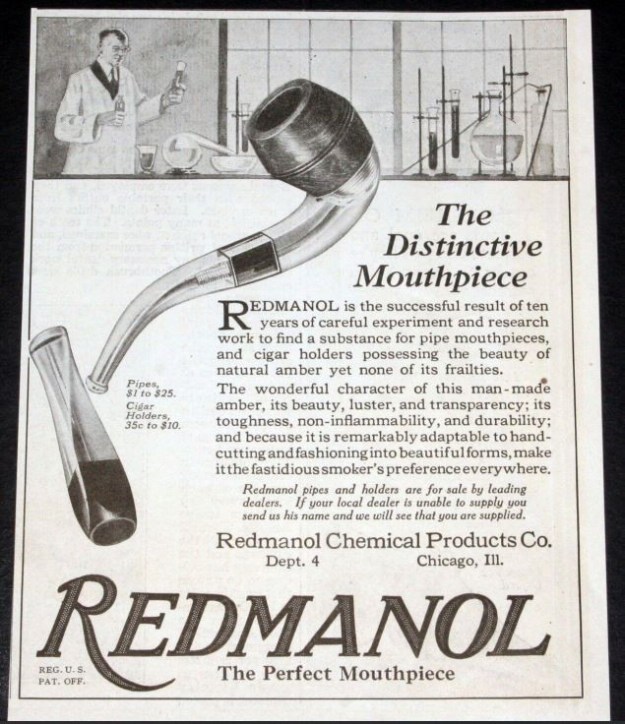
Then later in the same article:

According to Steve Laug who has studied this much more than I: “Original Bakelite, whatever the color, still looked like plastic, while deep red, translucent Redmanol was so close to amber of the same color that it often requires an expert to differentiate the two. Bakelite was produced in at least these colors: golden yellow, ruby, emerald, amethyst, and jet. Real amber comes in several colors: non-reflective deep-cherry red, golden, and yellow. Most often, Redmanol was a clear or translucent red. Deep-red Redmanol was so close to amber of the same color that it often required an expert to differentiate the two. It certainly didn’t help when ads for Redmanol products stated: “Odorless, taste-less, unbreakable, non-inflammable, and retains its amber color.”

It’s difficult to be accurate on the date of this pipe, but anywhere from the 1910s through the 1930s is a safe bet. Basically, this beauty is about a century old.Let’s take a closer look. The pipe is in terrific condition for its age! The Redmanol parts have a few minor scratches and dents, but no cracks or structural problems. The screw tenon is as dirty as anything, but that’s no big deal. The brass ring is similarly dirty, but not damaged at all. Finally, the briar bowl is also dirty and has a few minor nicks. It should clean up very nicely.

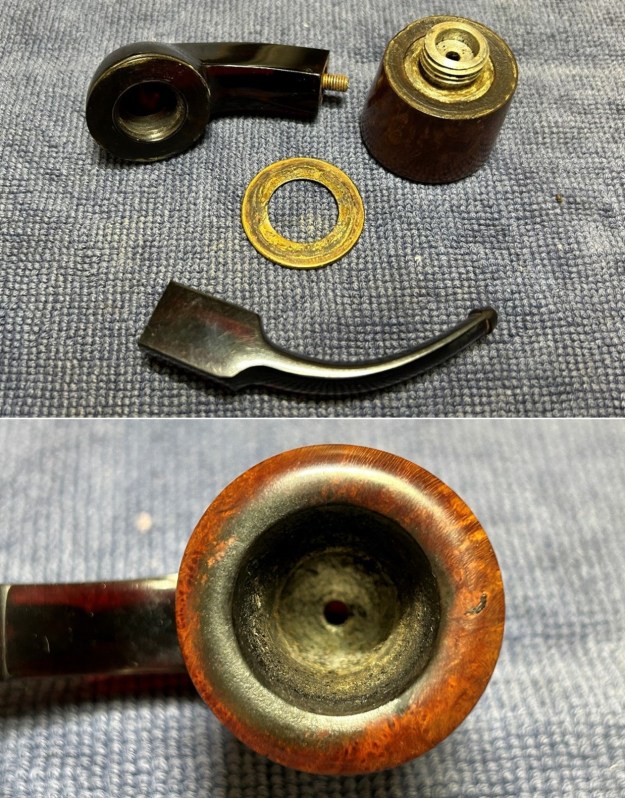
I used oil soap on a few cotton rounds and wiped down the stem and stummel to provide an initial cleaning before moving on to the next steps. The primary cleaning came next. I disinfected the inside of both stem and stummel with pipe cleaners and cotton swabs dipped in 99% lemon-infused isopropyl alcohol. I scrubbed thoroughly to make sure the interior was very clean. I paid particular attention to the tenon and cleaned it further with some 0000-grit steel wool.
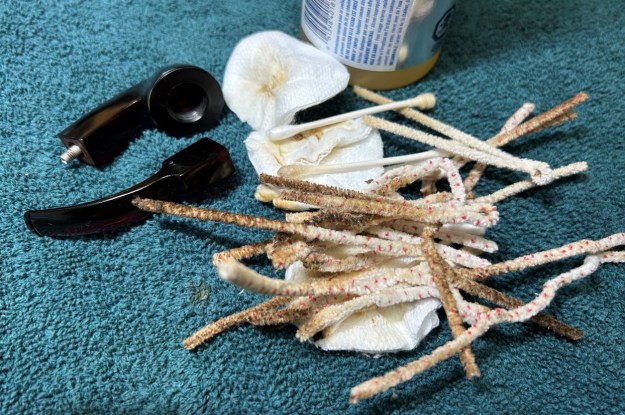
The next step of the cleaning process was to scour the inside of both stem and stummel with some soap and tube brushes. This was the culmination of a lot of hard work in getting the pipe clean.

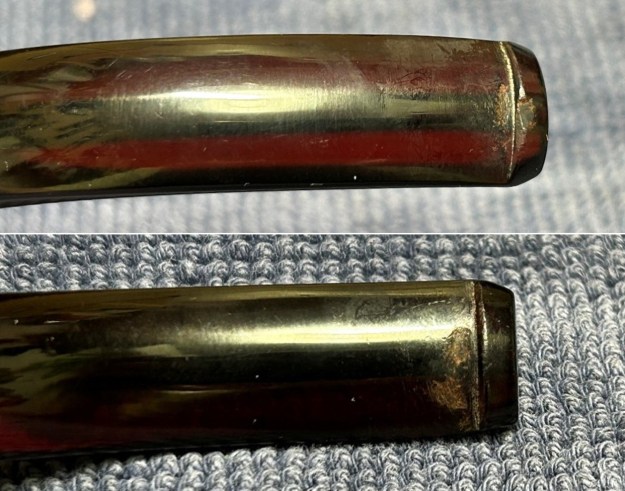
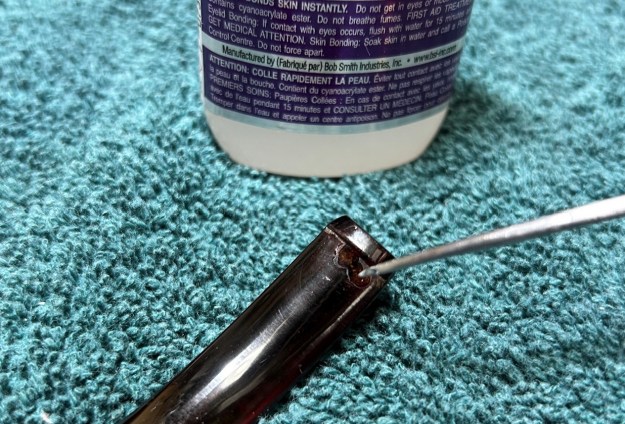
As the stem was now clean and dry, I set about fixing the tooth marks in the Redmanol. This was done by filling those divots with clear cyanoacrylate adhesive. I left this to cure and moved on. 
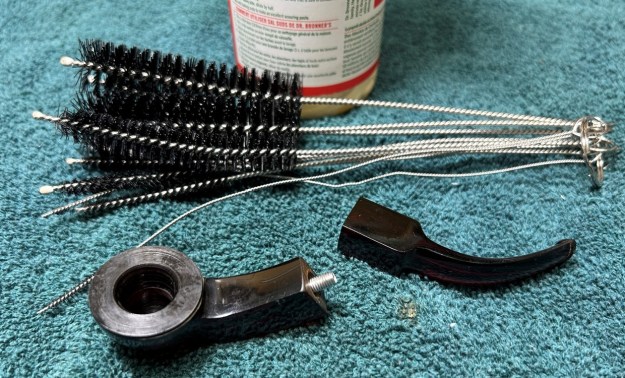
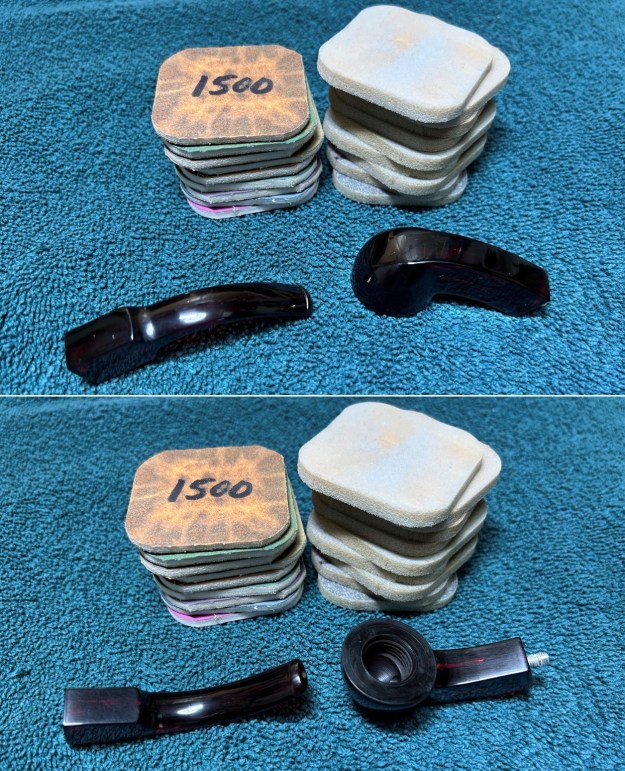
The next step is sanding and I’m not going to sugar coat this: sanding Redmanol is pretty dreadful. First, I reduced the bulk of the cyanoacrylate repairs. I removed the excess adhesive as near to the surface as possible, without cutting into the Redmanol. I had to focus especially on a tricky area of the stummel where there were some deep scratches. I taped that area off, so it could be done properly. Following that, I used all nine grey sanding pads and all nine of the micromesh sanding pads (1,500 through 12,000 grit) to sand out flaws, even out the Redmanol, and provide gentle polishing of the finished surface. I also applied pipe-stem oil while using the last five micromesh pads. There was a wonderful, clear, amber-like glow to the stem and stummel when I was done. 
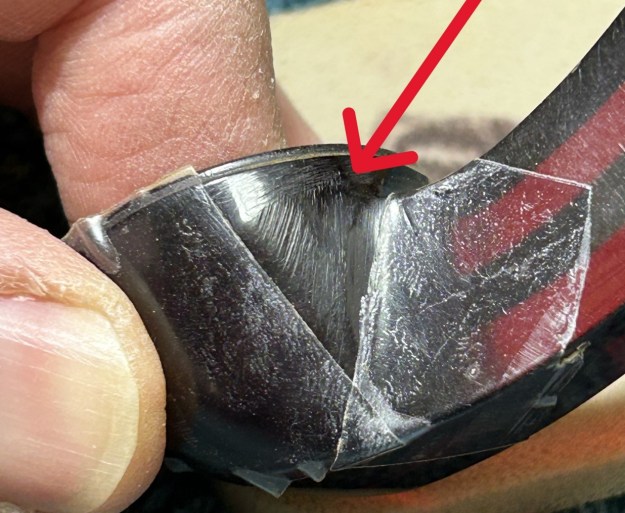
I then grabbed the brass ring with both hands – sorry, couldn’t resist. This was quite straightforward. I tried cleaning it with some lemon-infused 99% isopropyl alcohol on cotton rounds. This didn’t really do anything, so I switched over to polishing with 0000-grit steel wool. This worked very well and the ring looked lovely again. 
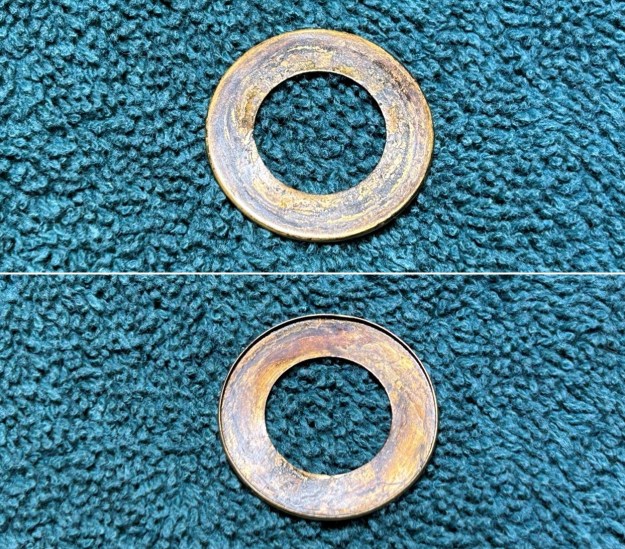
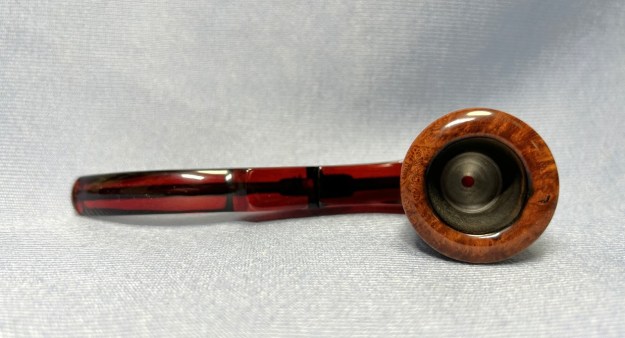
Next on to the briar bowl. First, I reamed out the bowl – that is to say, remove all the cake inside the bowl. This accomplished a couple of things. First (and most obviously), it cleaned the bowl and provided a refurbished chamber for future smoking. Second, when the old cake was removed, I could inspect the interior walls of the bowl and determine if there was damage or not. As the bowl was fairly clean already, I used only a piece of sandpaper taped to a wooden dowel. This ensured that all the debris was removed. I also took a piece of machine steel and gently scraped the lava away from the rim. The metal’s edge is sharp enough to remove what I need, but not so sharp that it damages the rim.
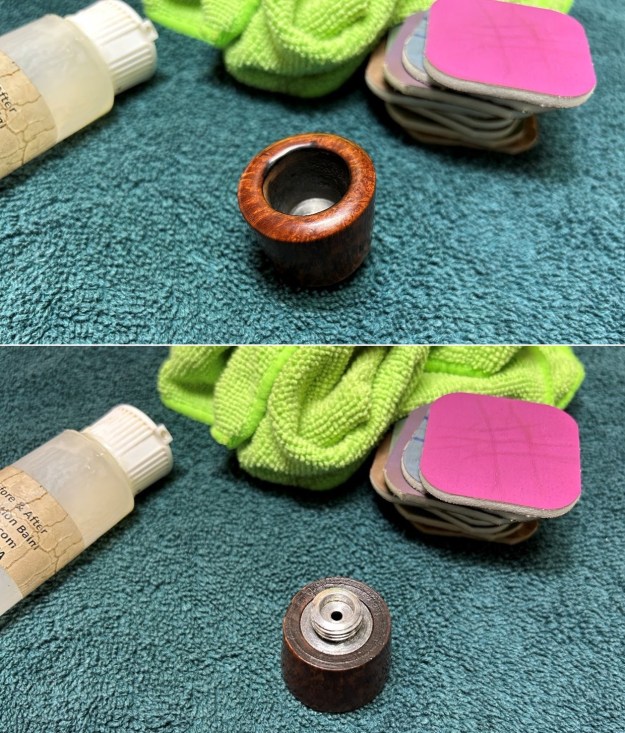
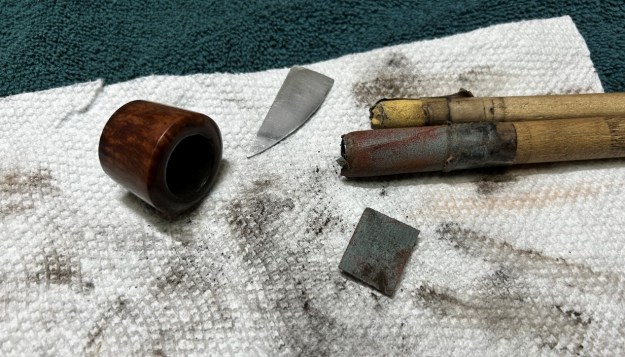
To tidy up the briar, I also wiped down the outside with some oil soap on cotton rounds and used a toothbrush in the crevices. This did a good job of cleaning any latent dirt on the surface of the briar. Just like the stem and stummel, the last step of the cleaning process was to scour the inside of the bowl with some soap and tube brushes. I also scrubbed the aluminum bottom of the bowl with 0000-grit steel wool. Looked fantastic.
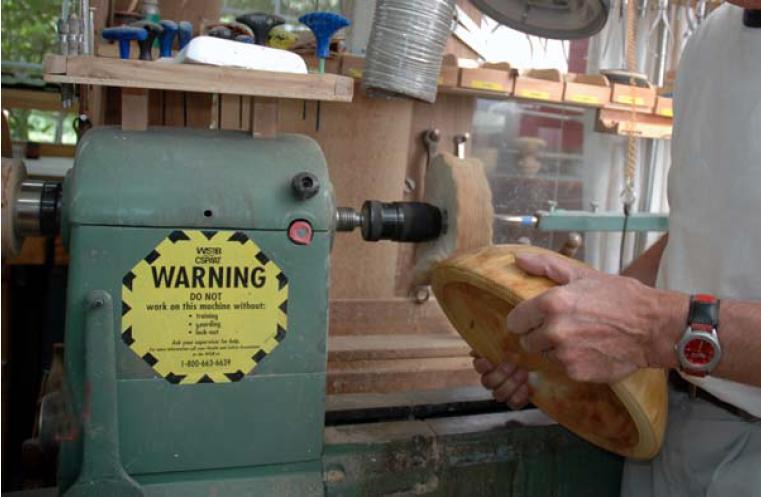
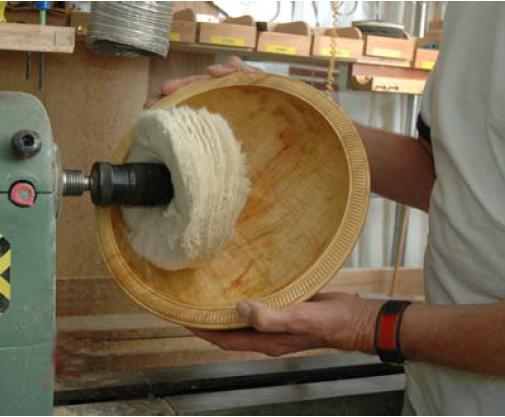
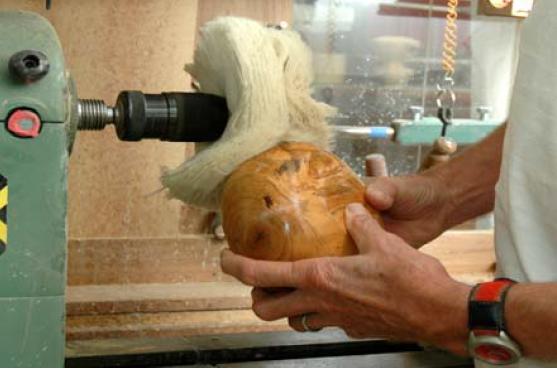
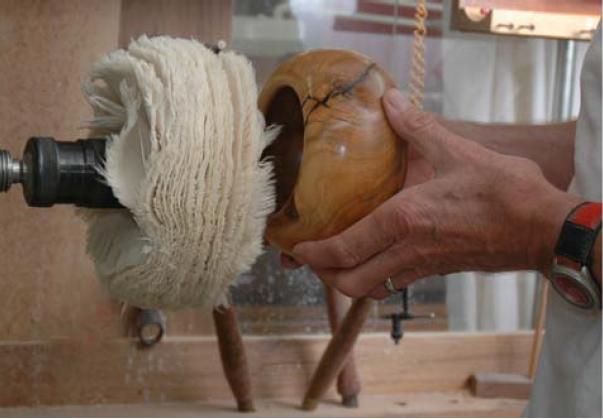
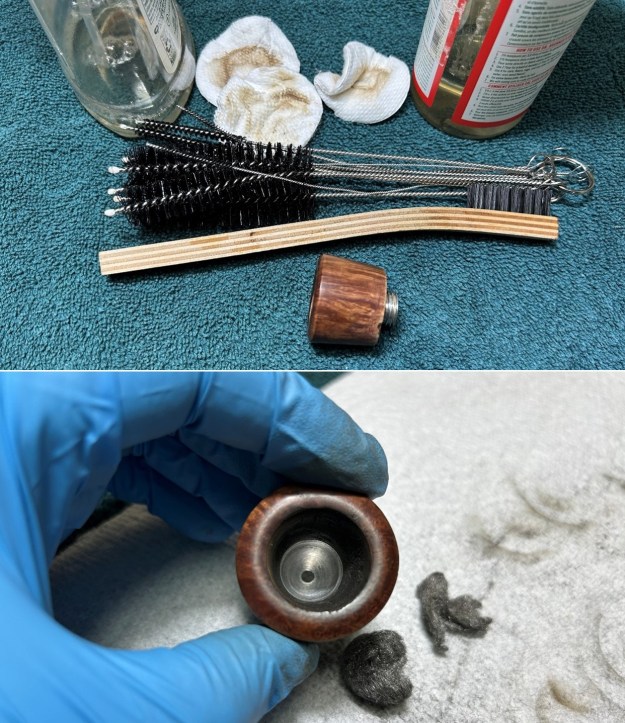
I used all nine micromesh pads (1,500 through 12,000 grit) to sand the outside of the bowl and finish it off. This sanding minimizes flaws in the briar and provides a beautiful smoothness to the wood. I rubbed some LBE Before & After Restoration Balm into the briar and let it sit for 30 minutes or so. The balm moisturizes the wood and gives a beautiful depth to the briar. I then buffed the bowl with a microfibre cloth. For the final step, I took the pipe to my bench buffer and carefully polished it – first with a blue diamond compound, then with three coats of carnauba wax. This procedure makes the pipe look its best. 
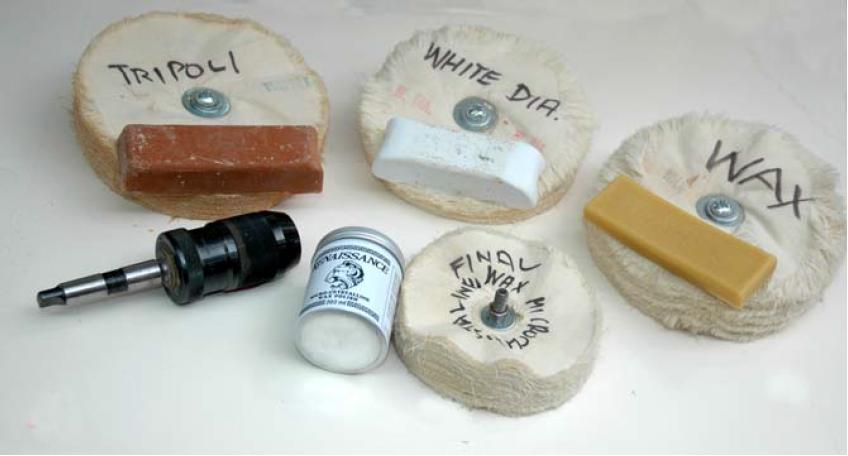
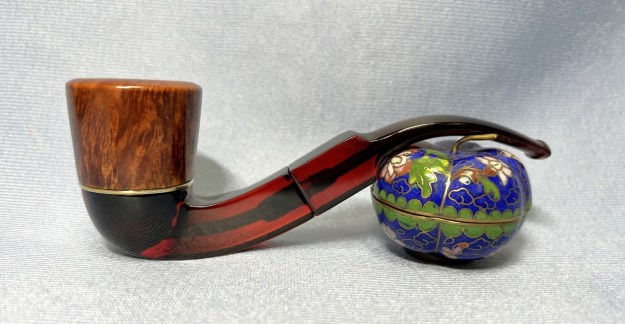
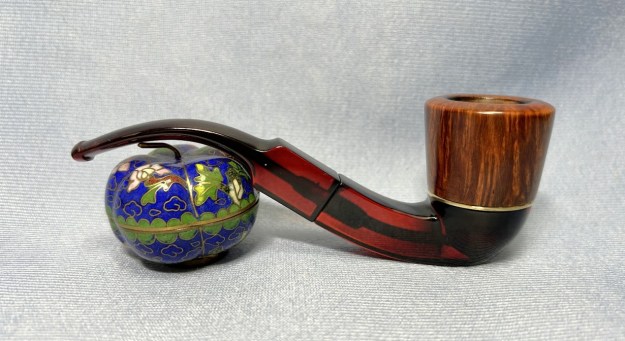
All done! This no-name Redmanol bent Dublin pipe looks fantastic again and is ready to be enjoyed by my friend in Seattle. It was a pleasure to work on. It’s a gorgeous pipe. The approximate dimensions of the pipe are as follows: length 5¼ in. (134 mm); height 1⅞ in. (48 mm); bowl diameter 1⅜ in. (35 mm); chamber diameter ¾ in. (20 mm). The weight of the pipe is 1⅝ oz. (47 g). I hope you enjoyed reading the story of this pipe’s restoration as much as I enjoyed restoring it. If you are interested in more of my work, please follow me here on Steve’s website or send me an email at kenneth@knightsofthepipe.com. Thank you very much for reading and, as always, I welcome and encourage your comments.

Beall Wood Buff System Modified & Used – Eugen Schlaak


Many years ago now, I was searching for information on the Beall Wood Buff System and came across this article by Eugen Schlaak, a woodworker from Niagara Falls Ontario Canada written August 15, 2006. I devoured his article on the system and on the modification he made to it for his own use. I found his write-up on the various supplies he used also helpful. I remember hunting down the Beall system and gathering supplies based on Eugen’s recommendations. While they are written for wood turners and hobbyist bowl makers the principles and tools are very applicable to those of us who work with the restoration of pipes for a hobby. The article below is the complete text of Eugen’s article. Enjoy the read! – Editor

Many systems always existed for polishing properly sanded work produced on the wood-turning lathe, but all components required to achieve good end results had to be assembled by the wood turner and in many cases also had to be purchased from different sources.

Some years ago the BEALL Tool Company started marketing a kit with all the necessary components, such as the wheels, buffing compounds and the hardware required to fix the different wheels to the lathe output shaft or a freestanding motor.

This kit is called “The Beall Wood Buff” system and is an easy, three-step wood polishing system which produces astonishing results on bare or oiled wood. It mainly consists of three graded polishing wheels, Tripoli compound, White Diamond compound and Carnauba wax.
The buffing system can be used on any surface finish, not only on penetrating finishes, but extreme care has to be taken that the heat created by the buffing wheel does not melt the finish previously applied to the surface, such as on a lacquer finish.

I have been using this system since its inception with much success, but I added another additional step to the polishing routine, by using a coat of “Renaissance” brand micro-crystalline wax as the final step. This product is marketed as a furniture conservator’s wax which protects any surfaces against finger marks and airborne pollutants, as well as providing some moisture resistance. This particular brand is manufactured by Picreator Enterprises Ltd, in London England and is available through many woodturning supply stores in Canada and the USA. This combination of micro-crystalline waxes (petrochemical based) is also widely used by art galleries and museums all over the world on many other surfaces besides wood, such as on leather.

The major components, including a keyless chuck are shown in Figure 1.

Figure 1

Figure 1


There are many ways to mount these polishing wheels to the lathe and/or motor shafts and all components for this task are included in the kit produced by Beall Tool Company.

In my shop I have used a keyless chuck with an attached # 2 Morse taper shaft adapter in my head stock spindle and properly inserted this assembly will not come loose during usage, as is evident in later illustrations.

A model “SUPRA “, 5/8” capacity keyless chuck produced by “RHOEM” in Germany (shown in the photos), including the adapter, can add as much as $ 200.00 to your tool inventory, if you purchase this chuck intended to be used for the machine shop environment and metal work. But this one is very accurate easy to tighten and will last forever.

But for use on the wood-turning lathe there are many less expensive chucks available produced off shore.

A keyed chuck will also suffice, but considerable time can be saved using a key less chuck when the buffing wheels are changed frequently. Fig. 2 shows a typical assembly using the heavy duty “RHOEM” chuck. A slight tap with a soft mallet may be required to seat the Jacobs taper securely in the lathe drive spindle at the headstock.

Figure 2

Figure 2


In addition to the standard 8” diameter buffing wheels, ball type goblet buffs as shown in Fig.3 are also available from Beall and smaller buffing wheels can be purchased from other manufacturers, the smallest ones are available from companies supplying tools for the denture and jewelry industry and are shown in Fig. 4 together with a ¼” drill rod extension for reaching into deeper hollow vessels.
Figure 3

Figure 3

Figure 4

Figure 4

Over the years I have collected a wide assortment of different size wheels and the most common wheel buffs used in my daily routine are stored within easy reach of my lathe, Fig 5. A fairly new set of wheels at 8” diameter is shown and my first set I purchased which is almost worn down to 6” diameter. I addition to the standard wheels shown in the photo, there is a wheel of very soft cotton to polish the final coat of micro-crystalline wax at low speed.

It is also a good idea to permanently mark each wheel for the procedure it is intended for, because the factory applied descriptions are hard to read.

Figure 5

Figure 5

So much for the tools you need to purchase, let me describe the process as suggested by the Beall Tool Company in their instructions supplied with the buffing system:

While most woods may be buffed bare, a more durable finish will be achieved if a sealer or penetrating oil finish is applied first. Sand your work to at least 220 grit, but I power sand to 400 grit, which of course results in a higher gloss on the buffed piece.

After sanding I apply one or more coats of a good quality penetrating oil finish such as “Minwax” Antique Oil, “Watco” Clear Danish Oil or tung oil. When the oil is completely dry the buffing process can begin.

The process begins with the all-linen Tripoli Wheel and the red Tripoli Compound, Figure 6.
Apply a generous amount of compound to the spinning wheel and begin buffing the work piece. You must hold it tight and position it slightly below the center of the wheel, so the wheel cannot “grab “ the piece. You will be surprised how much damage can be caused to your prize winning turning if it leaves you grip. I have heard of turners placing a heavy padded blanket on the lathe bed and behind it, to avoid too much damage just in case you lose your grip, especially on irregular shaped pieces or items which have a ragged rim, which easily can be caught by the revolving wheel.

Several applications of the compound maybe required if you work on a larger item.

Figure 6

Figure 6

On a new wheel a heavier application of the compounds may be necessary, than later, when the wheel is loaded.

The next step requires the softer, linen-cotton blend White Diamond Buff and the harder, drier White Diamond Compound. Only a relatively small amount of this compound is applied to the revolving wheel and the work piece is buffed lightly. If there is any residue left from the Tripoli, it will be removed at this time during the final polishing. Fig. 7 shows the inside of a larger bowl being polished. Again: HOLD ON TIGHT, when the wheel gets near the rim!

At this stage I want to point out that I do not like an arrangement where all the polishing wheels are mounted on one shaft. As is evident from this photo that a large bowl like the one shown could not be polished on the inside with all wheels spaced and mounted on one shaft. But it could be time-saving if turnings only require to be polished on the outside.

Figure 7

Figure 7

The final step in polishing is applying the pure Carnauba wax, known as one of the hardest waxes available and the third wheel, an all-flannel wheel, is used. Once the wheel has been charged with the yellow carnauba wax a few times, only VERY SMALL additional applications will be needed. Just touching the wheel for a second will deposit enough wax to polish.

If the wheel gets loaded with too much wax, streaks of melted wax will appear on the surface being polished and at times it is almost impossible to remove these blemishes by additional polishing.

This last step of buffing the work piece very lightly on the wax wheel will quickly produce a beautiful protective sheen, Fig 8.

Figure 8

Figure 8

As mentioned previously, I add an additional step by lightly covering the surfaces with a coat of micro-crystalline wax. This type of wax is available from various suppliers to the wood-turning trade and can be used sparingly and a small tin will last for a long time. Only a light polishing at a low-speed is required after this wax has dried for a short time and after the surface does not feel sticky to the touch any more.

I use a dedicated clean soft cotton flannel wheel for this last polishing step.

From the steps described above it is evident that buffs with different compositions are used: The Tripoli Wheel is a somewhat stiff all-linen fabric, the White Diamond Wheel has linen plies interspersed with softer cotton ones and the Wax Wheel is very soft all cotton flannel fabric.

Many turners advocate assembling their own system by searching and buying the individual components and therefore save some money. I have tried this method, but in the end the cost was about the same and I was never 100% sure I had the right wheels for composition, diameter and thickness. So at this point I suggest for a beginner turner to purchase a fully assembled kit.

Other turners are suggesting to have dedicated motors for each wheel with about 1750 rpm. That seems to be a good idea, but we turners already have the “Motor”, the wood-turning lathe, why not make use of it? The biggest advantage of doing this is that most lathes have some sort of speed control, which is very advantageous when polishing inside hollow vessels or forms of various diameters. Whilst a buffing wheel at full rotational speed cannot be inserted into a vessel, which has an opening smaller than the wheel itself at a low-speed the wheel can be squeezed and forced into the opening and all the steps of polishing can be achieved safely, but at a slightly slower speed, see Fig.9 and 10.

Figure 9

Figure 9


Figure 10

Figure 10

For smaller type turnings or goblets, smaller type wheels or ball type goblet buffs as shown in Fig. 3 and 4 can be utilized. But I find that the goblet buffs with the special tapered mounting pins are filling up quickly with compound or wax and become very stiff in a short time. These buffs, made by the Beall Tool Company, require frequent cleaning with a nail type rake or coarse wire brush to keep them “fresh”.

The use of such a buff is shown in Figure 11.

Figure 11

Figure 11

Because of the different construction of each buffing wheel, it is most important to change wheels between each step in the buffing process.

The White Diamond and wax wheels never require cleaning or washing. Once they are loaded, only fresh compound or wax are needed as required. They are actually getting better with age, but a bit smaller in diameter!

If the Tripoli compound becomes too built-up on the all-linen wheel it has to be cleaned. In order to do this, simply back a piece of coarse grit sandpaper with a piece of scrap wood or use a fine wire brush and hold it up against the spinning wheel until the built-up is removed. I find that I have to this only on very few occasions.

A bit of a safety advice when using the polishing wheels:
Always wear eye protection and a suitable dust mask. The Tripoli Compound contains silica quartz and may cause temporary irritation of eyes, ears, nose and the respiratory tract and prolonged excessive inhalation may result in a respiratory disease.

Do not wear loose clothing while performing any polishing procedure, but that applies of course to any work around the woodturning lathe

I have attempted to describe a finish and polishing process, with which I am very familiar. I have used it for many years in addition to other finishes, such as lacquers etc. For simplicity and speed in any wood-turning shop, it is hard to beat the system described here, not necessarily the assembled Beall system but any system using the same components from various suppliers.
Many of the instruction shown here are gathered from the clearly written operating instructions, which accompany every kit supplied by the Beall Tool Company.

Figure 12 shows some typical bowls finished and photographed for this article and I welcome any comments and/or corrections with regards to the above described procedures.

Figure 12

Figure 12

Using a Buffing Wheel


Blog by Steve Laug

Using cloth buffing wheels to buff the finish on a refurbished pipe can work wonders by smoothing the surface giving the pipe a “like new shine”. However, a disclaimer needs to be stated up front – buffing will not remove scratches or imperfections and buffing can make things a mess if not done properly.

I use The Beall System buffing wheels on two bench grinders that I have stripped down. The system employs a three-step procedure using three different 8 inch buffing wheels. The first wheel uses Tripoli as a buffing compound; the second uses White Diamond (aluminum oxide). The third is used to apply carnauba wax and bring the finish to its final luster. So that I do not have to change the wheels between buffs I use the two bench grinders that I have stripped down. I removed the grinding stone wheels, the guards and left only the arbor on each side. I used the washers from the grinder stones and an extra washer to hold the pads/wheels firmly. I put the pads I use for White Diamond and Tripoli on one buffer and the carnauba and added a fourth clean felt pad on the other. I thus can work down the row – Tripoli, White Diamond, carnauba and then a clean flannel wheel to bring up the shine. The picture below shows the Beall system. It includes three buffing pads – clearly stamped for the product they are designed to apply, one bar each of Tripoli, White Diamond and carnauba. The cylinder standing in the centre is an arbor that can be attached to a single shaft motor so that the wheels can be spun on and off quickly. The long shank in the bottom of the picture is an extension that can be attached to the arbor to give some distance from the motor should you need it. If you use a bench grinder those two parts are not necessary.

Image

The photo below shows the wheels with the mounting screw that can be either screwed into the arbor unit as pictured in the one wheel on the buffer or they can be removed and the pads turned on to the spindles of the bench grinders as I picture in my setup.

Image

The kit can be purchased through the Beall Tool Company through their website at www.bealltool.com or Lee Valley Tools through their online catalogue at http://www.leevalley.com/en/wood/page.aspx?p=20092&cat=1,190,43040,43042 Both sites provide the ability to order individual components of the system. The Beall website also has a description of the system along with instructions. There are links to videos where Jerry Beall gives lessons on buffing.

In the essay below I will describe my set up and how I use it along with some quick reminders for you as you work with your buffer.

MY SETUP

I use two 6 inch bench grinders that I bought from a tool liquidator near my home for my buffers. They are both 1750 RPM motors mounted on a stand with an arbor on each end. The stand that is part of the grinder keeps the wheels above the surface of the work table and at a comfortable height. I place my buffers on my work table so that they are at waist height for ease of buffing and because I don’t want to have to stoop down to buff. I stand to buff because I have more control over the angles which I hold the pipe against the wheel. Each wheel is held in place by a cup washer on each side and a nut that threads on to the end of the arbor. The shaft is the same size as the holes in the buffing wheels so I place the first cup washer on, twist the wheel in place, put a simple washer and then the cup washer on the outside to get a good tight fit. If the wheel is loose it can move around the spindle or shaft and do damage to the wheel and allow it to shift on the spindle.

Image

The blue buffer above is my work horse – the left side holds the White Diamond wheel and the right side the Tripoli wheel. You can see from the picture that the pads have worn down and are the way I like to use them. There are no more loose strings or fabric. The wheels are charged in the picture above with the amount of both products that I use on them. I find that if I over charge them with product it just gums up on the stem and makes a mess of things rather than polishing them.

Image

The yellow buffer above is my secondary or polishing buffer. The wheels are not as worn as the ones on the blue grinder because I use them less frequently in the process of buffing. It is used for the final polishing. The left side is a clean flannel wheel with no product on it. It still loses strings when I buff with it. It is soft and gives the carnauba a real shine. The right side is the carnauba wheel. It too is charged with wax and ready to use. I am careful how much wax I load the wheels with as too much can really make a mess.

When I first mounted the wheels the recommendation that I was given was to “clean” the wheels initially by backing a sheet of 100-grit sandpaper with a small board and touching the sandpaper to the wheel. I chose not to do so, because the description of the mess deterred me. It said that the air around the buffer would be filled with fibers and lint. I decided to live with this while I broke them in with the polishing compounds.

Some people have built enclosures around the wheels to attach a dust collector to catch whatever comes off the wheels. I have added a picture below to show the shield that can be used. It is a pretty elaborate shield. I have used cardboard boxes in the past to catch the lint and dust and the pipes that occasionally fly away! I generally do not use a shield because I find that it was in the way when I work on the pipes. I want a fully open wheel to work with. Besides there was far less debris produced after the wheels were put in service and loaded with compound. I do however put a thick towel or a piece of carpet under the buffer wheel as it picks up the dust, etc. and can easily be vacuumed for cleanup.

ImageImage

The first thing to do when you set up your buffing system is to charge the wheels with buffing compound. They key to remember is that it doesn’t take much for a wheel to be fully charged. Many people overdo on the charging and gum up the wheels and make a mess of the pipes they polish. Less is more is the rule of thumb. With the wheel rotating at speed, touch the bar of compound to the wheel only for a second or two and without forcing the bar into the fabric. The Tripoli is a dark reddish-brown color so you get a visual indication of the amount that’s been applied. With the white diamond and wax, it’s harder to judge. In the picture below you can see the White Diamond on the left, the Tripoli in the middle and the carnauba wax on the right side. Those bars should last a long time. I have found over the 10 + years that I have had my buffer that I had to replace the Tripoli at about year 5, followed a year later by the White Diamond. I still am using the same bar of carnauba.

Image

My suggestion is to do a bit of experimenting with a pipe that you are not afraid to damage or have thrown across the room. Try differing amounts of charge on the Tripoli wheel and note the effect. Begin with “obviously too little” and work your way to “probably too much.”  Do a similar test with the White Diamond and the carnauba wax. If you suspect you have too much charge on the wheel, some of it can be removed by lightly touching the sharp edge of a board to the wheel.

I hold the pipe in my left hand with a thumb or finger in the bowl so that I have a good firm hold on it. Practice buffing the pipe with each of the materials to get a feel for them. Each one is on a slightly different pad so they handle differently and the materials are different in their feel on the wheel. If you happen to put too much of any of the materials on the wheel and the pipe gums up you can wipe it down with Isopropyl alcohol and restart the process. Practice until you are comfortable with the feel of the pipe in your hand.

When you are buffing use a light touch. Pressing the pipe bowl against the wheel with considerable force only increases the heat generated where the wheel contacts the bowl. Pressing it hard against the stem can cause the vulcanite to burn or melt and make more work for you rather than less. A light touch is critical to getting a good finish and polish. Keep the pipe bowl moving as you are buffing, turning it so every surface get a good buff, with the stems the same thing is true so that the heat production is not concentrated in one area. I never buff a pipe bowl and stem separately. The buffer can round edges on the stem or the shank and the junction between the two is permanently damaged and the value and look of the pipe is affected.

A FEW SIMPLE REMINDERS

  1. Pay attention carefully and focus on the work. The equipment can hurt you so be careful! In regard to personal safety, just use common sense. A buffing wheel can grab loose sleeves, long hair, or dangling jewelry very quickly, so pay attention and be careful.
  2. While your safety is a potential hazard the greater one is the wheel can grab the pipe and take it out of your hands in a heartbeat. That is why I hold it the way I do – both hands, one with the thumb or finger in the bowl. This is a real issue; do not take it lightly.
  3. Always keep a firm grip on the pipe. It takes some thought and practice to grip the pipe firmly while applying it to the wheel with a light touch. The tendency is to hold it lightly, in keeping with the light touch.
  4. Be careful when buffing a pipe around the rim and bowl opening because the wheel can grab the edge of an opening.  Also, be alert when buffing near the rim because the reddish powder from the Tripoli and a white powder from the White Diamond gets into the inside of the bowl. It will need to be wiped out carefully with a cotton swab.
  5. The wheels can grab a small-diameter stem because the strings of the fabric tend to wrap around it if you press it too far into the wheel. The safest way to present the stem is with its length pointing in the direction the surface of the wheel is moving.
  6. Don’t try buffing metal bands, stingers or metal caps or rims.  It will work but will permanently discolor the buffing wheels.