by Steve Laug
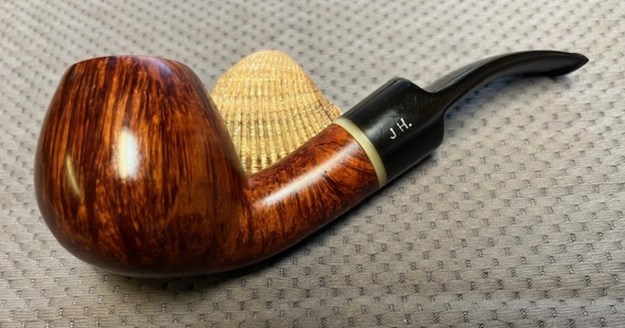
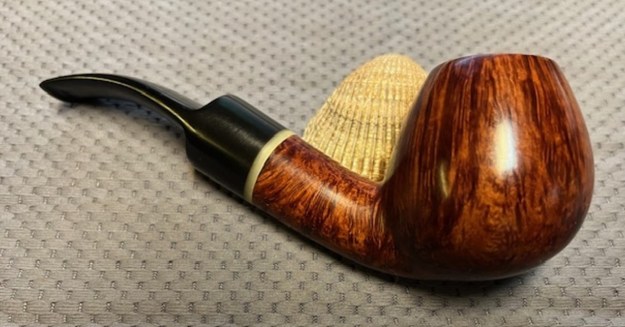
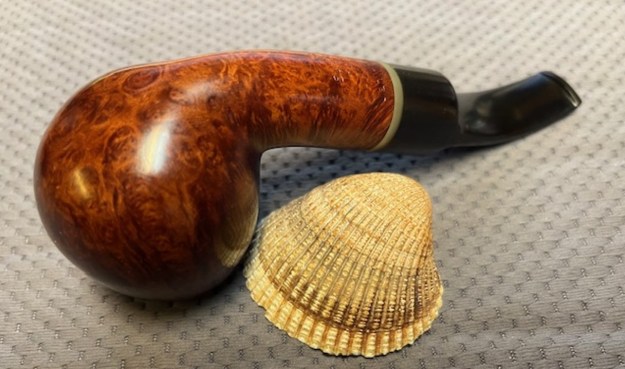
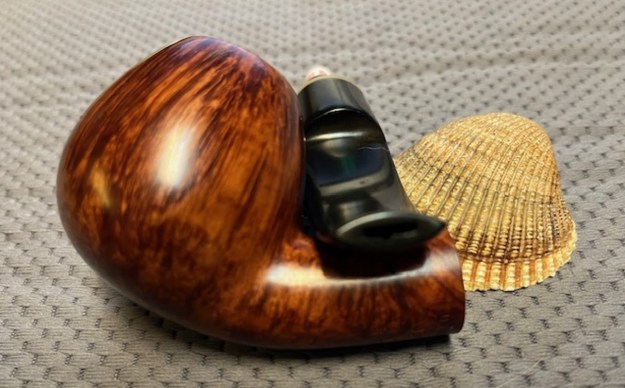
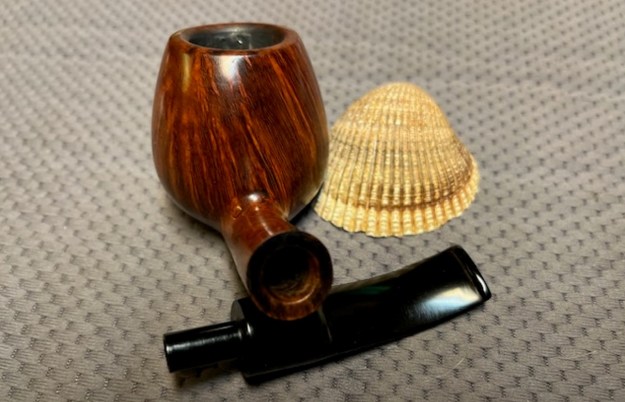
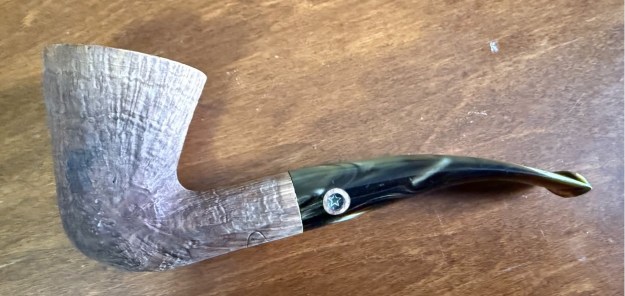
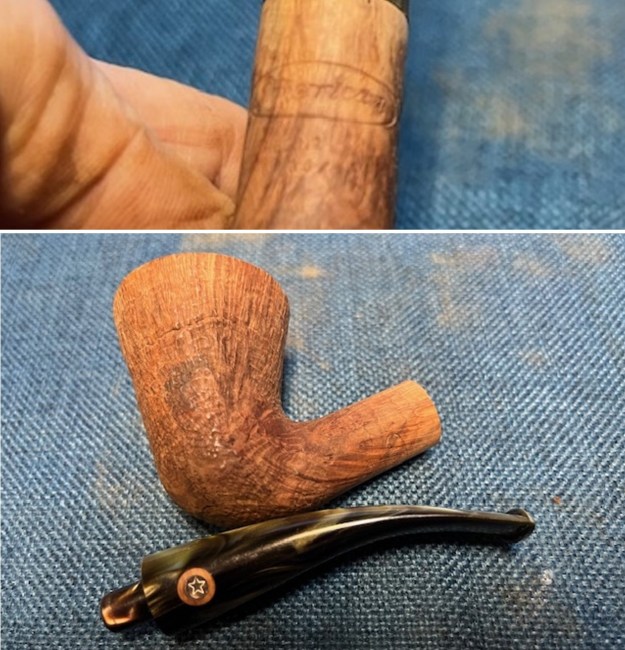
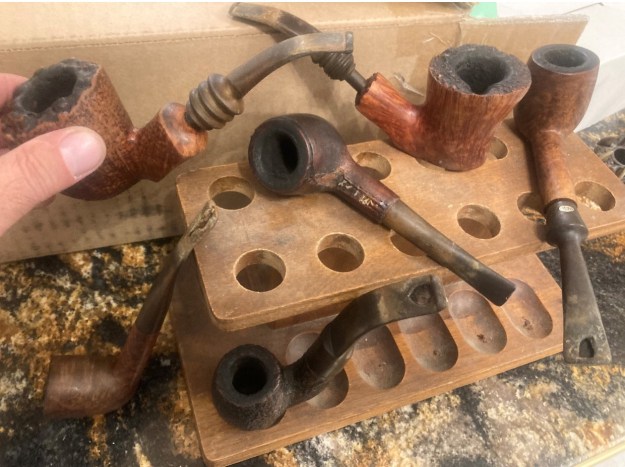
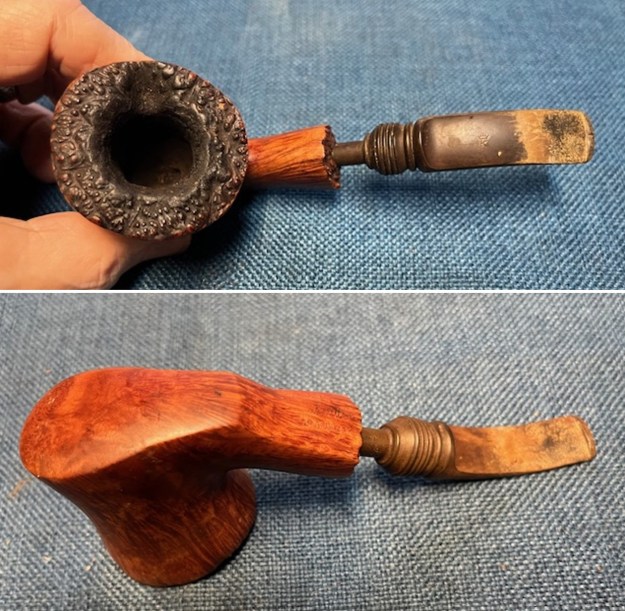
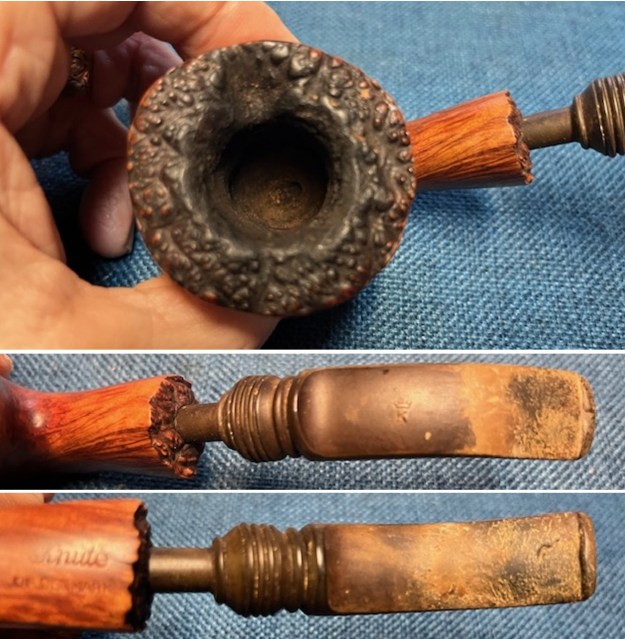
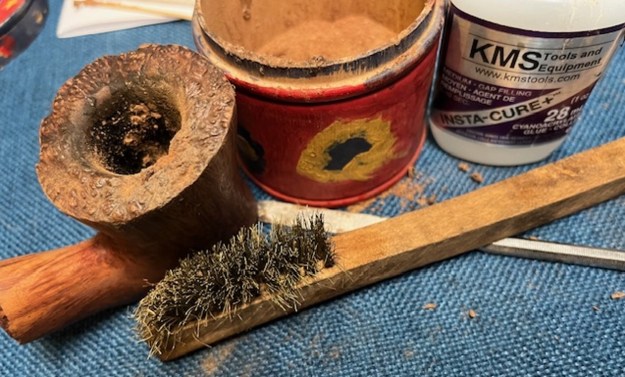
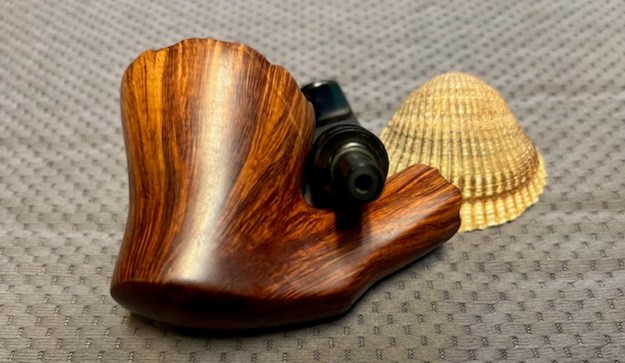
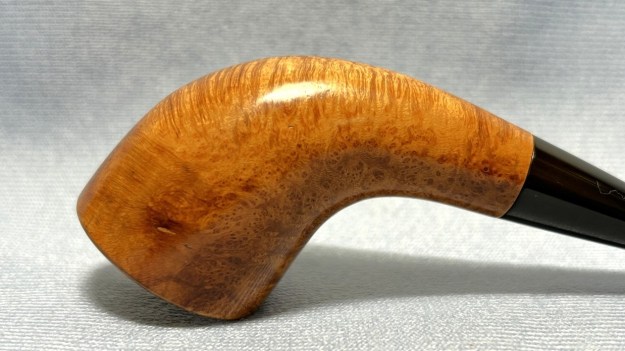
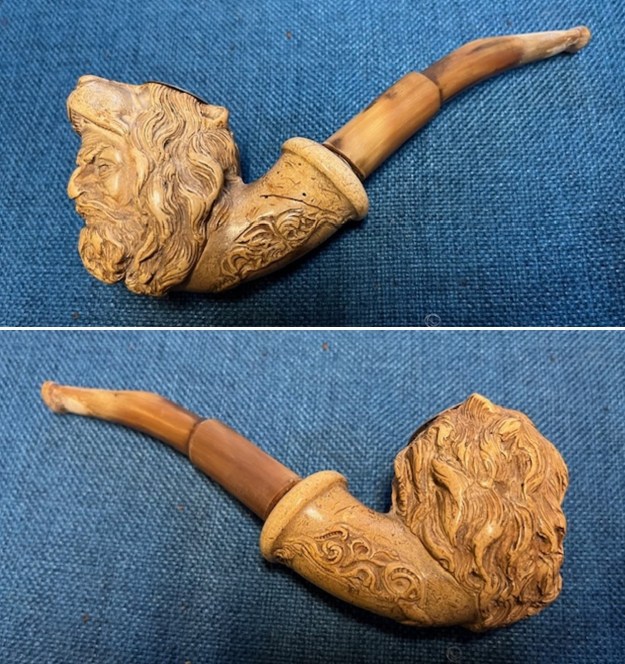
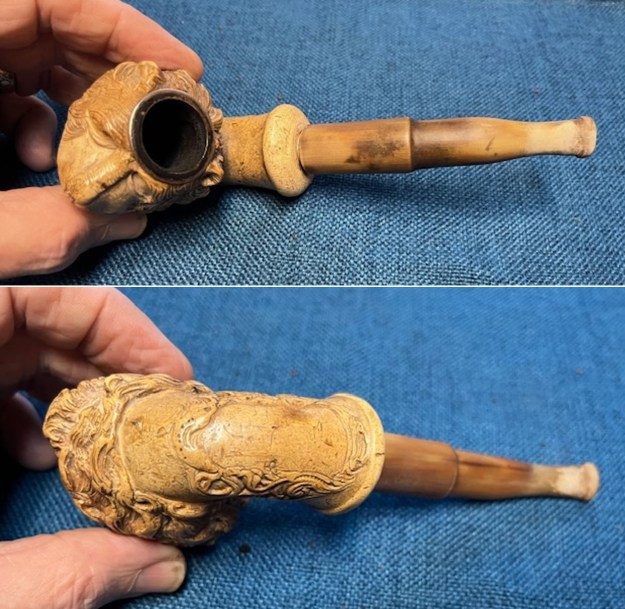
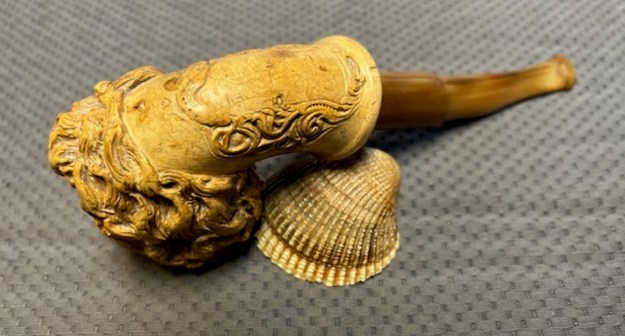
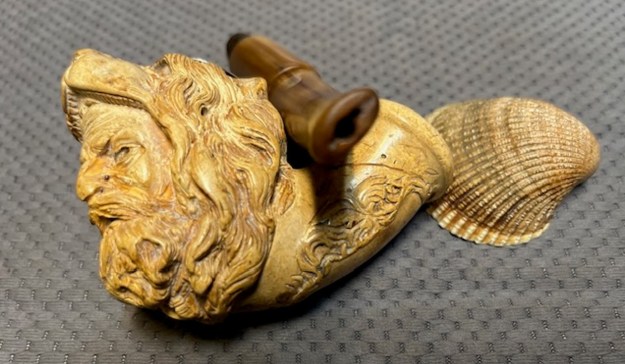
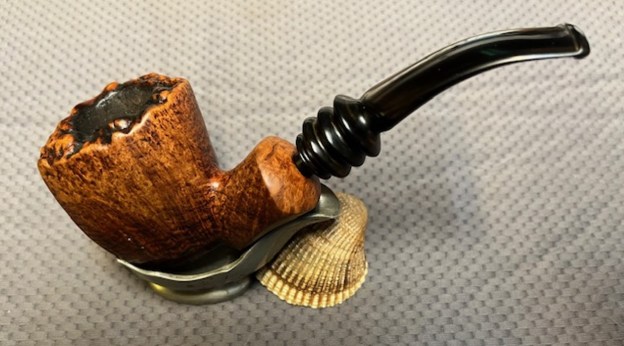
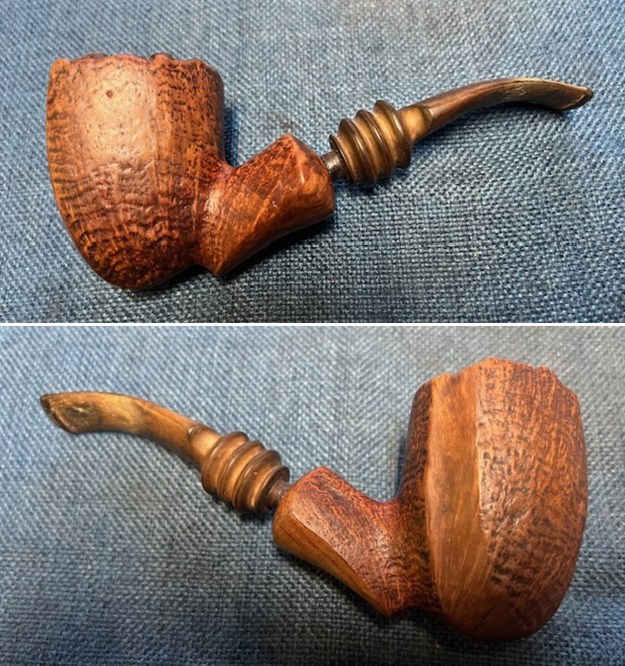
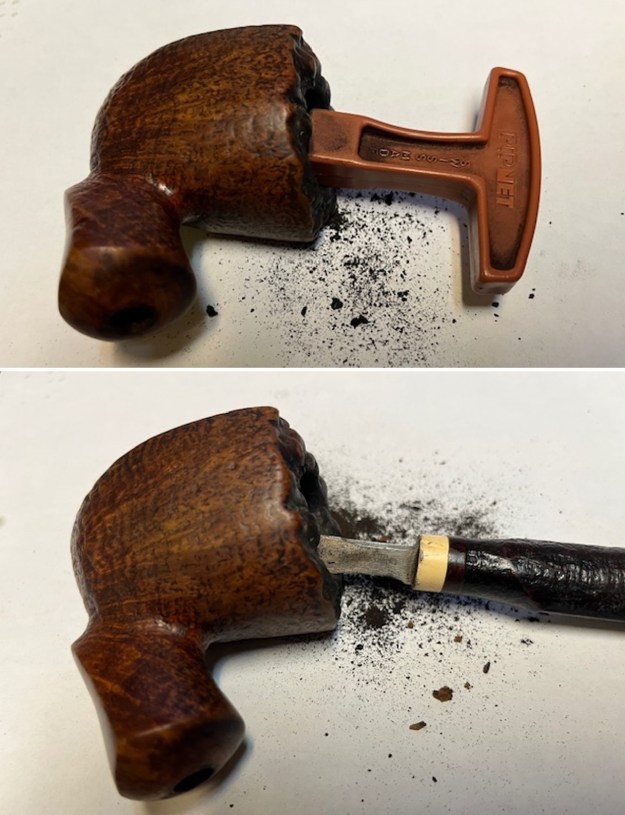
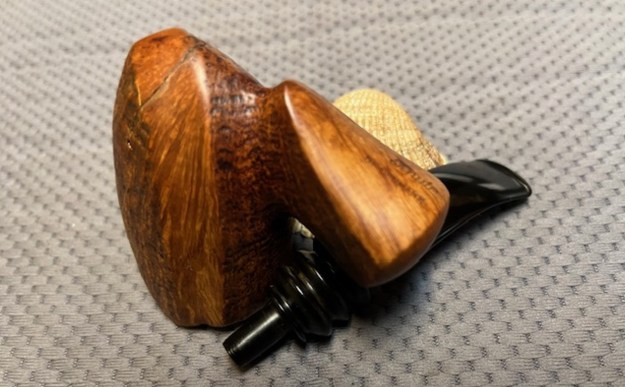
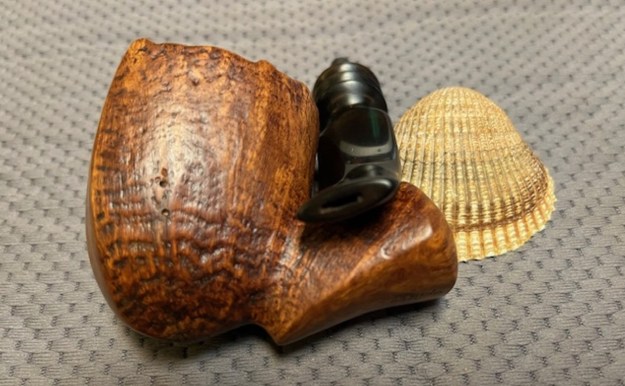
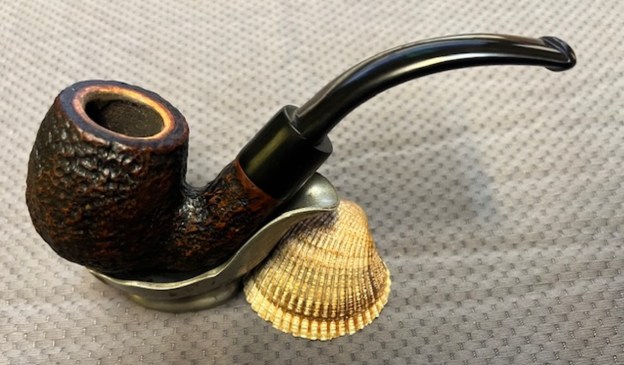
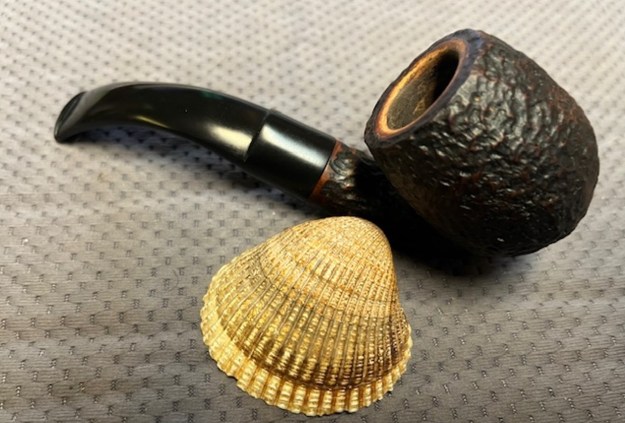
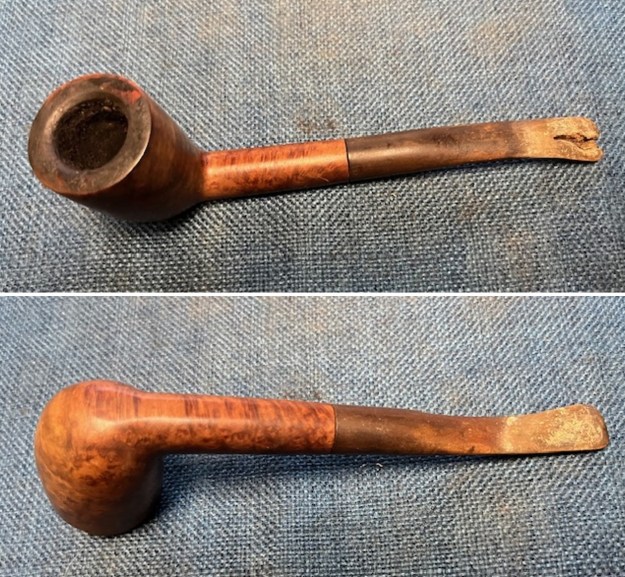
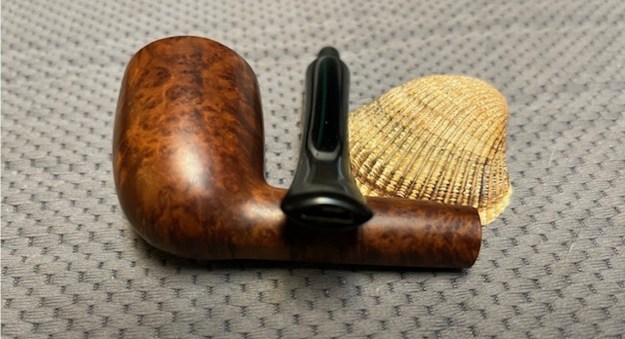
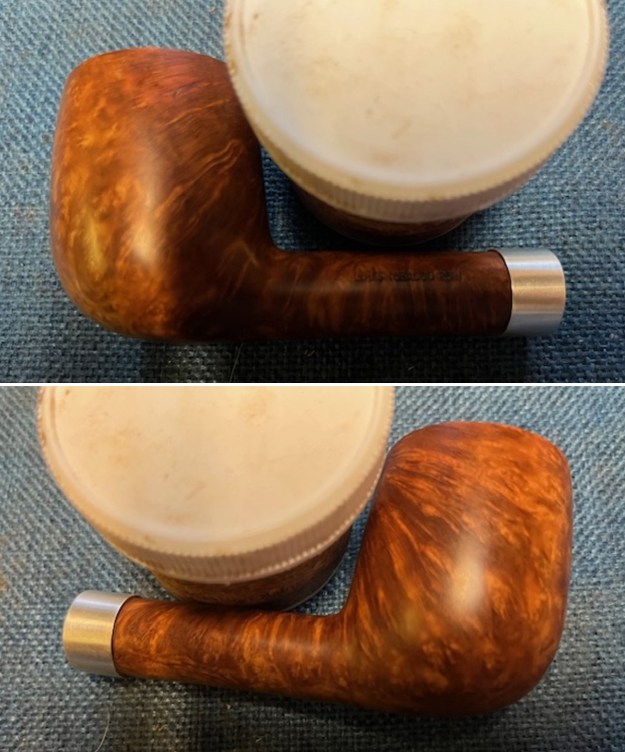
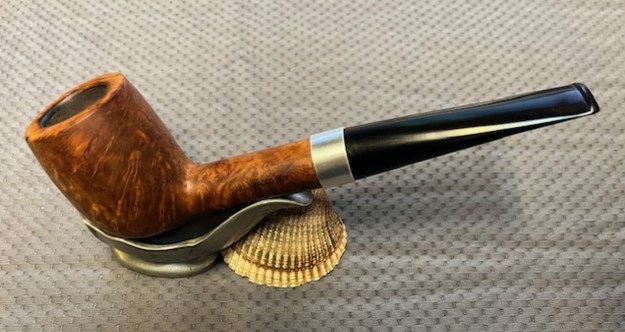
I was recently contacted by a fellow here in Vancouver about some pipes he had. He was referred to me by a local pipe shop. I was unclear if he wanted them cleaned or exactly what. When he came on the weekend he brought six pipes in two pipe boxes for me to have a look at. I spoke with him about the cost of restoring them. It finally became clear to me (I guess I am slow) that he wanted to sell the pipes. He was tasked with the job by his sister in law as the pipes were from her late husband’s collection. As I unpacked them it was clear that they were some nice pipes and some were higher grade. All but one was smoked and had the heavy smell of fruity aromatics to them. Some had cake in the bowl and lava on the rim. Of the six, four of them had significant rim damage – bowls out of round, burn marks, cut marks. The saddest part is that the damage was most significant on the higher end pipes. Most of them had tooth marks in the stems. Obviously, they had been his late brother in laws favourites and he had enjoyed them. He left them with me and I went over them, researched the brands and wrote up an offer for him to present to his sister in law. By the end of the day we had a deal. The six pipes now have a new home and the fruity smell needs to be exorcised!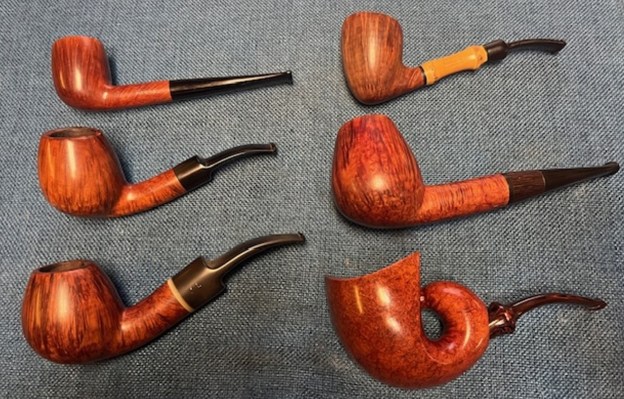 I finished the last of the repairs that I had in my queue yesterday and returned to work on the lot above. I chose to work on the third of these pipes. It is a beautiful looking but another sadly abused pipe that is readily recognizable as Danish Made. It is stamped on the underside of the shank and reads C (grade stamp) [over] Svendborg [over] Danish [over] Hand Carved [over] Jan Hansen. The bowl had beautiful straight grain around sides. The shape is impeccably done. The finish was dirty but otherwise all was good it appeared. The rim top was clean of cake and lava. The inner edge of the bowl was damaged all the way around and was slightly out of round. The bowl had been recently reamed and it was clean. There was a pipe cleaner trough from the entrance of the airway into the bowl and the opening was widened into the trough. It was definitely damaged and my guess would be an overzealous reaming that widened the trough and left the bottom damaged. The filter stem was slightly oxidized and had light tooth marks and chatter on both sides of the stem ahead of the button. There is a horn like acrylic spacer on the shank end of the stem. The J.H. stamp on the left side of the stem was faded but still readable. It also came with a soft felt pipe sock.
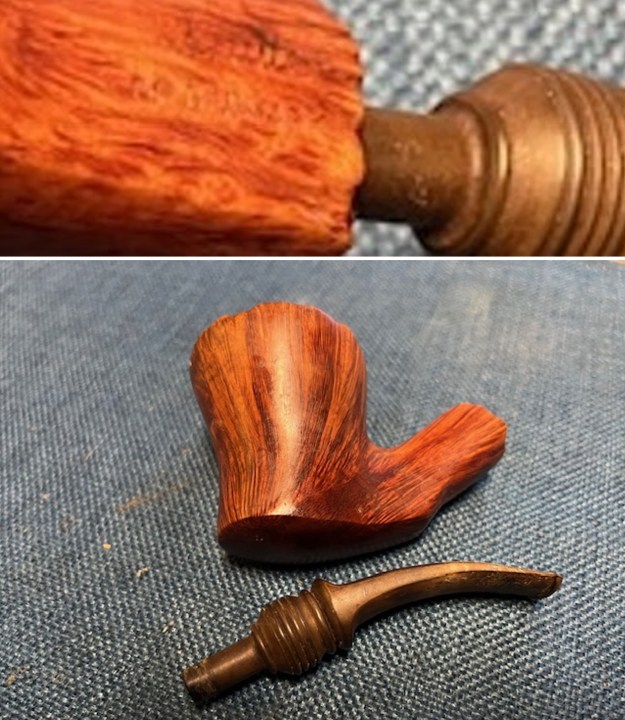
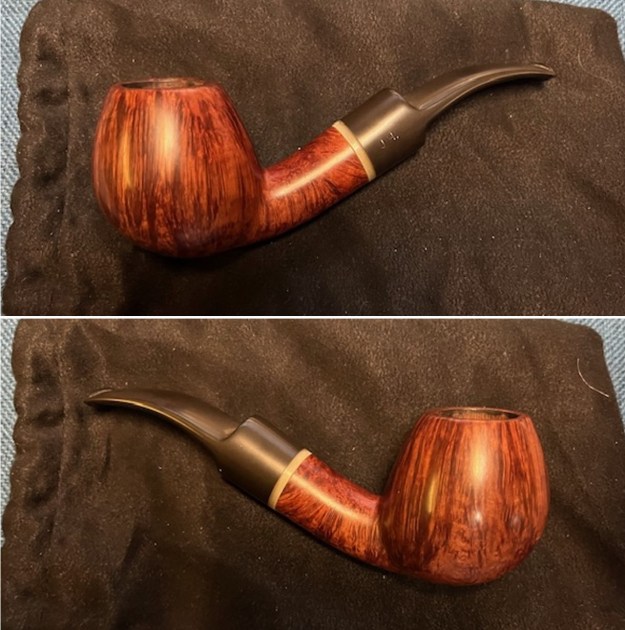
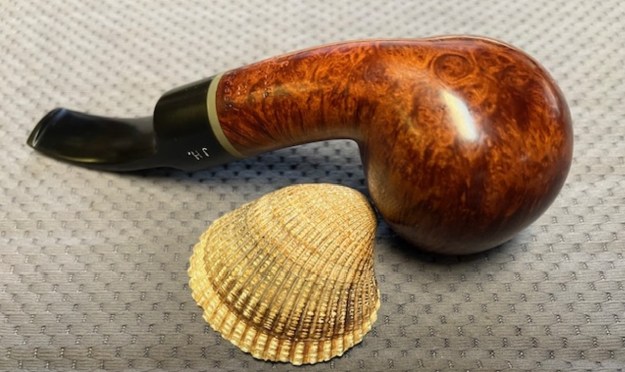
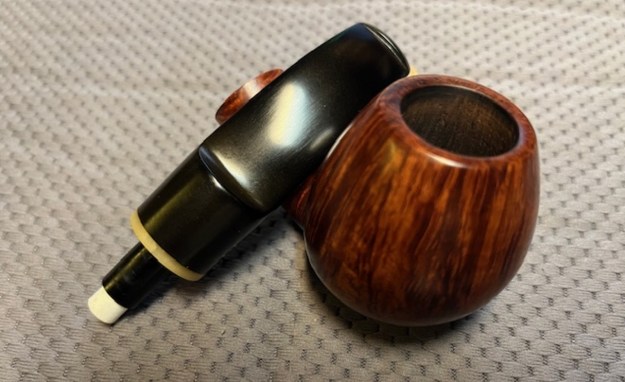
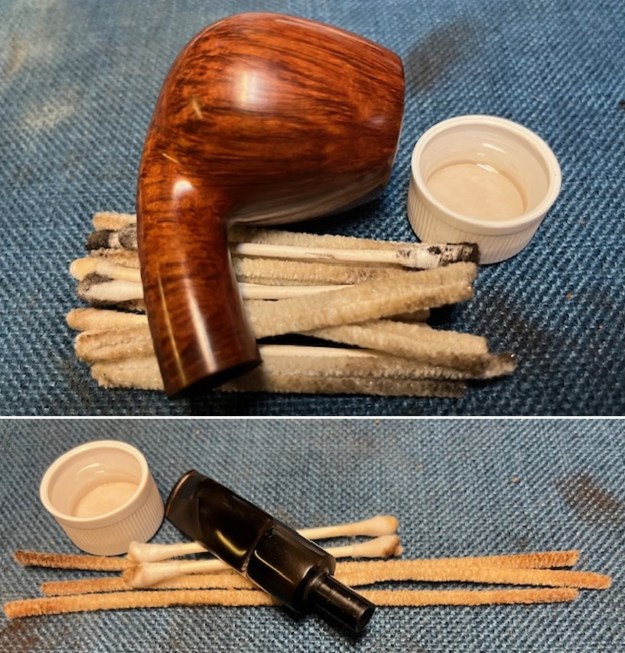
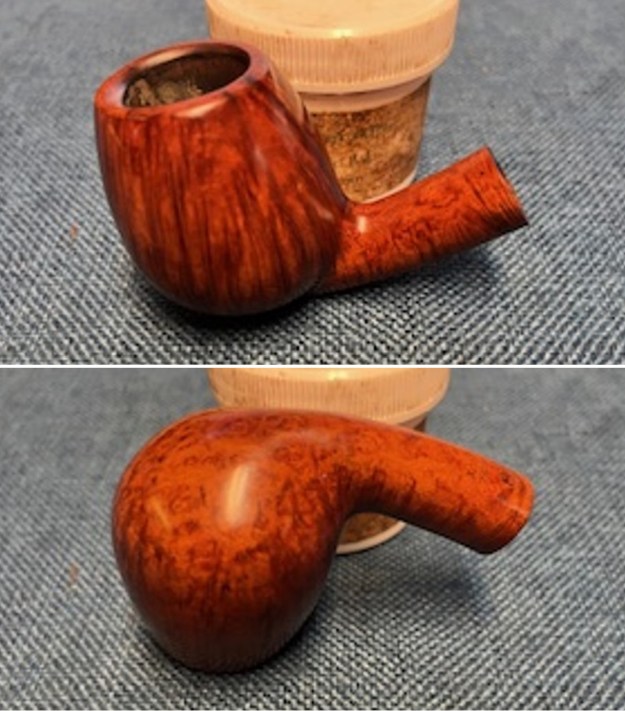
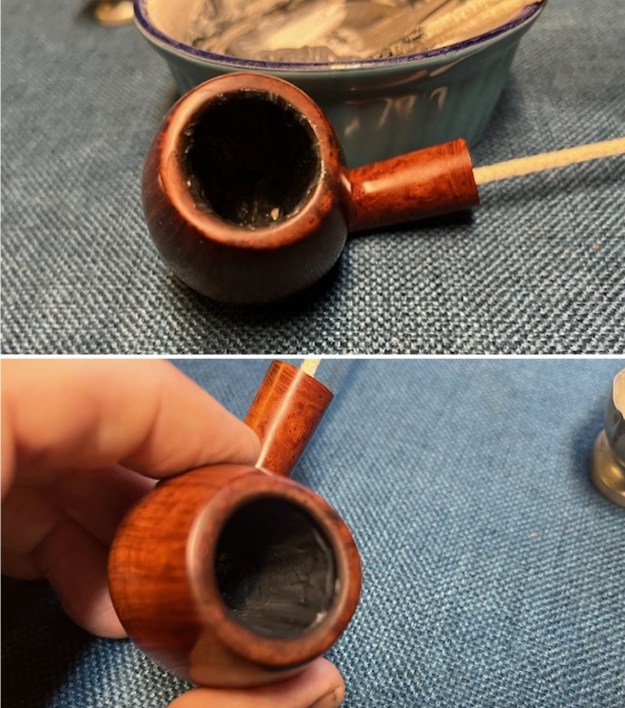
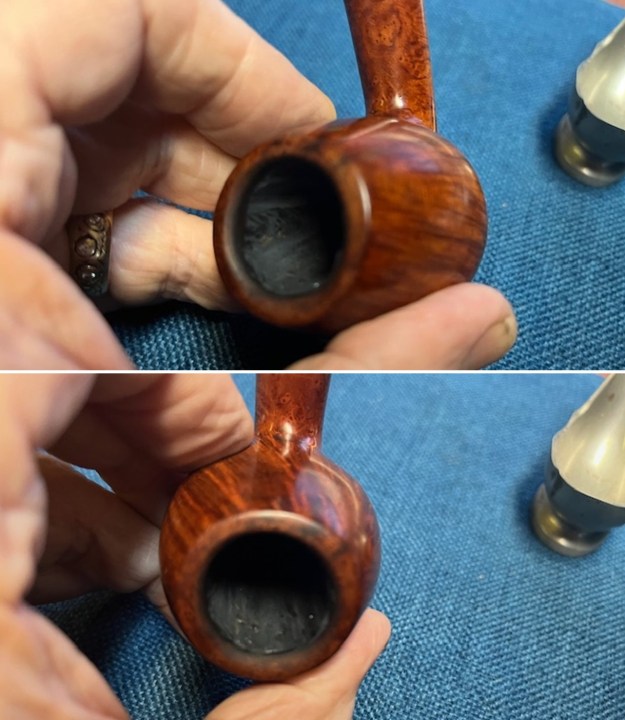
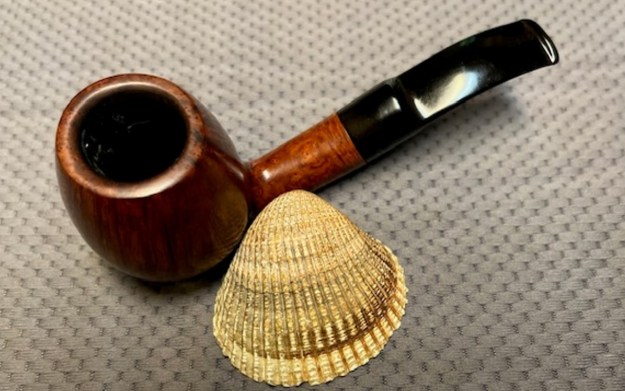
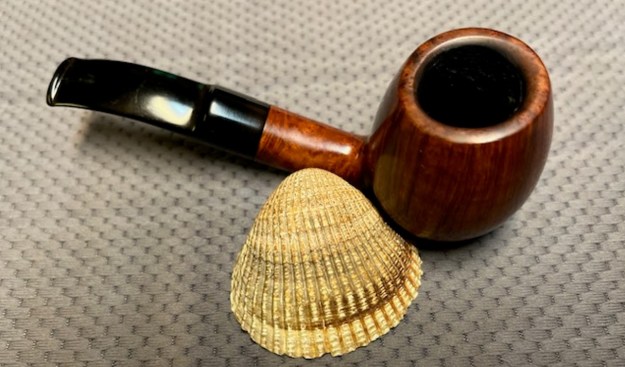
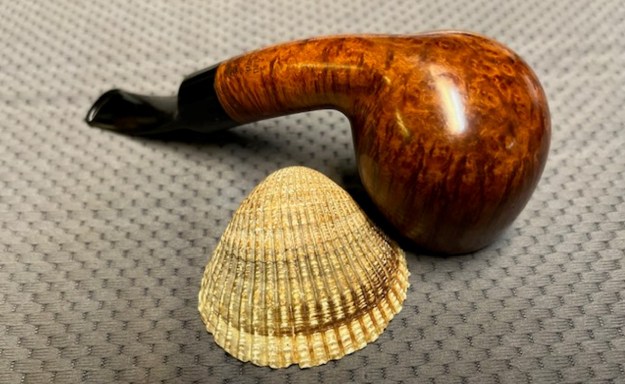
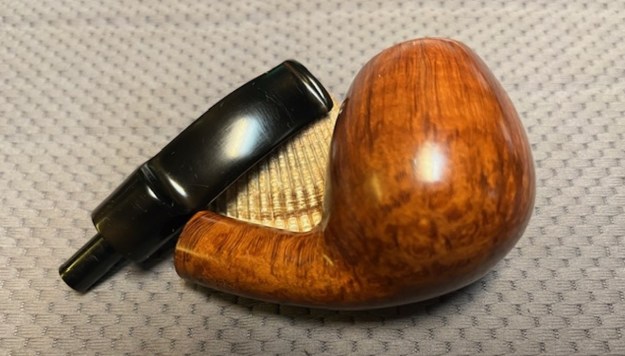
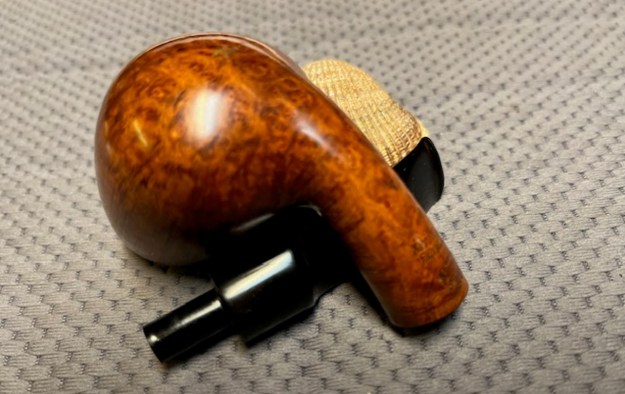
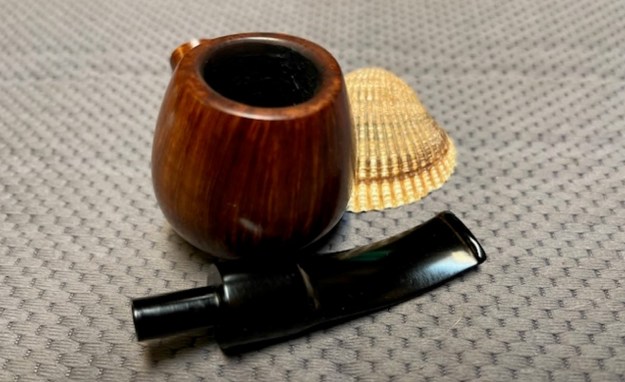
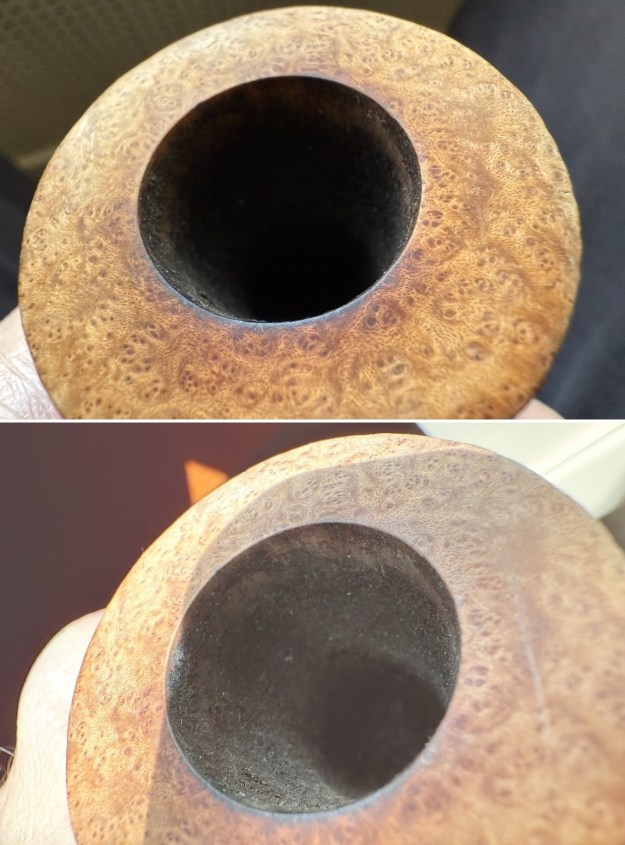
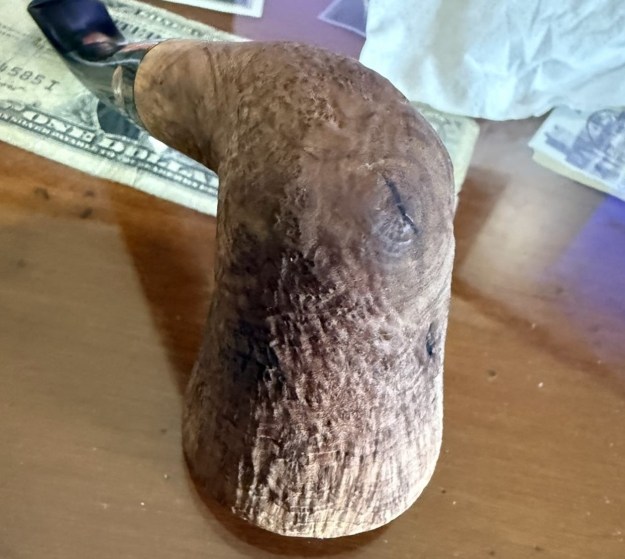
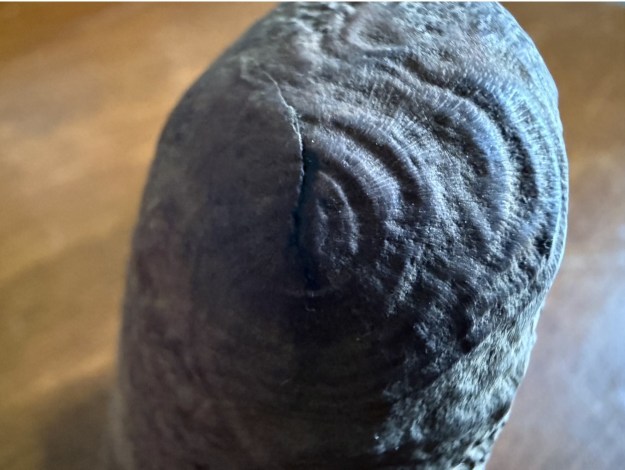
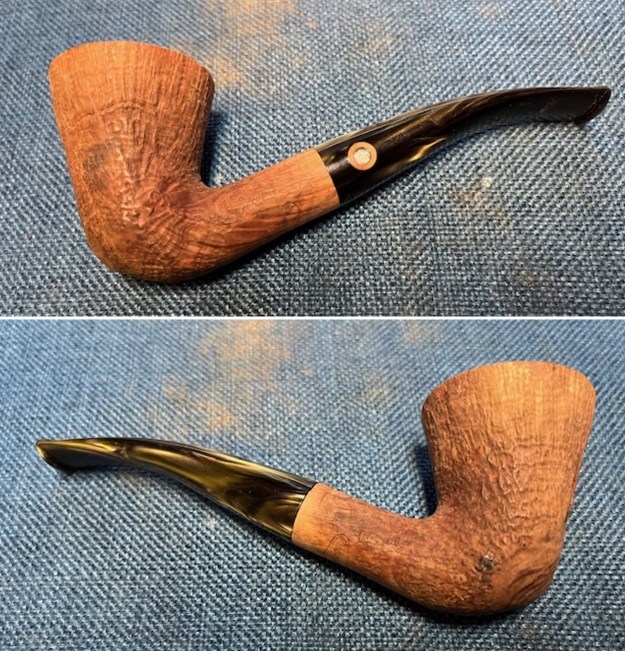
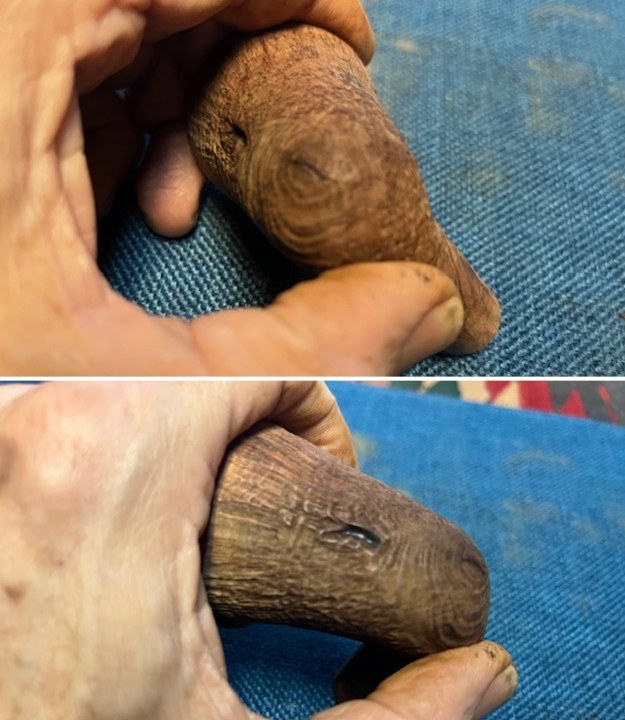
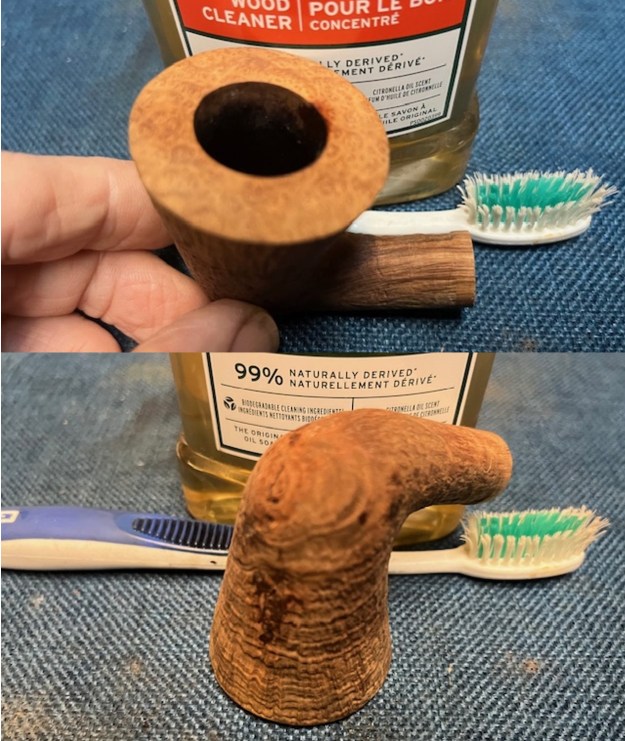
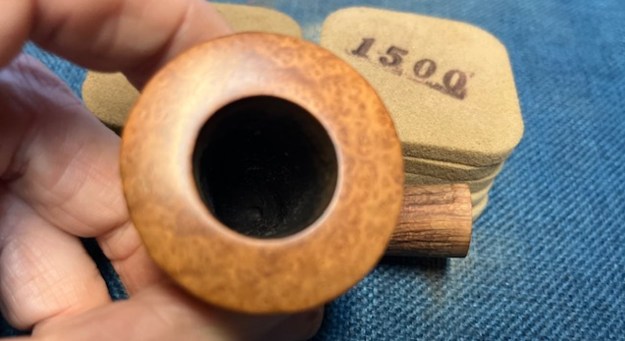
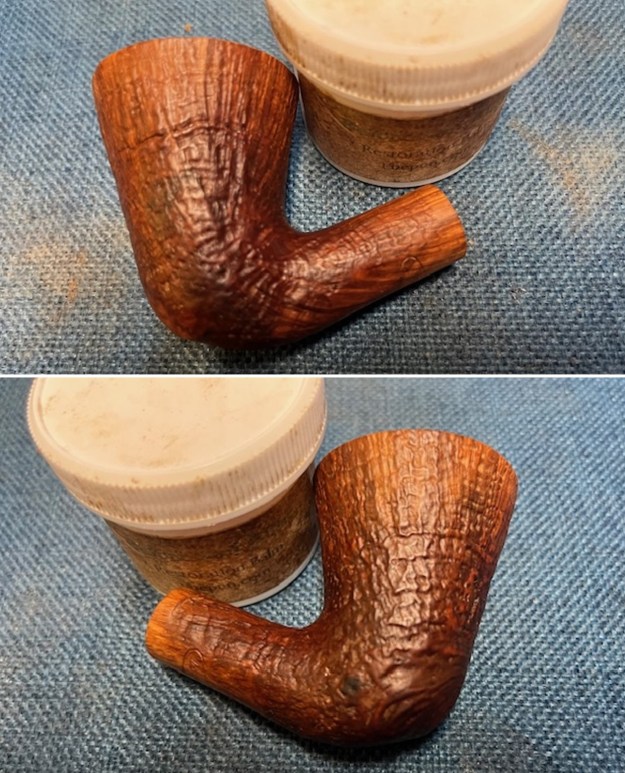
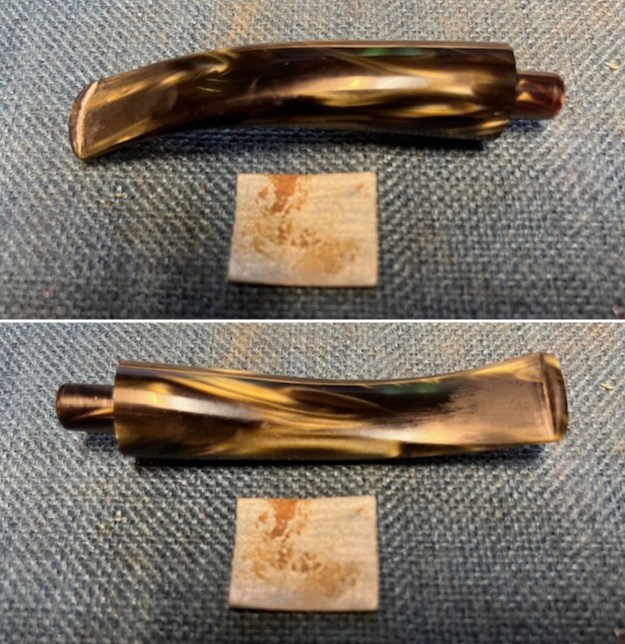
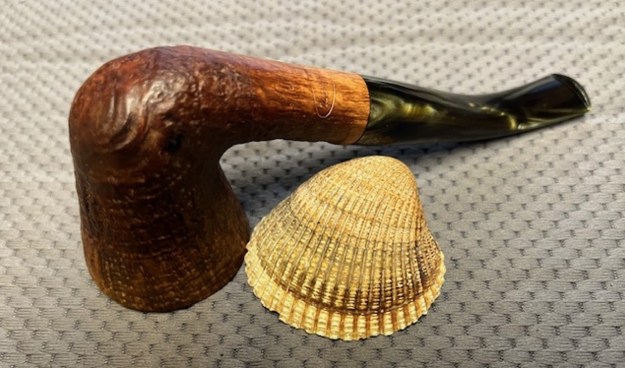
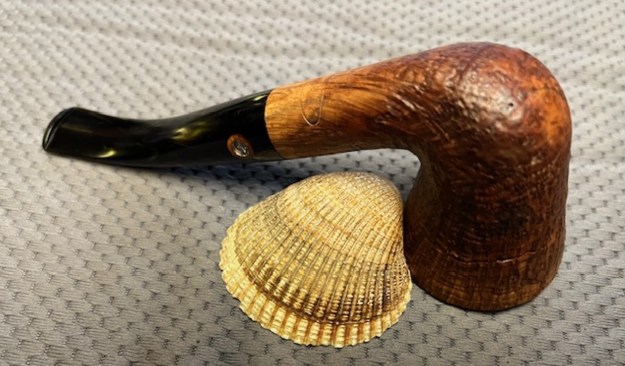
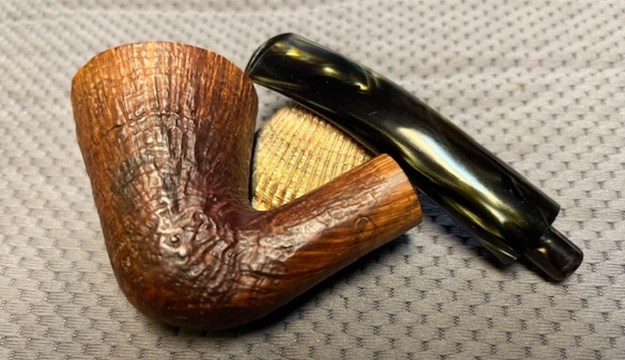
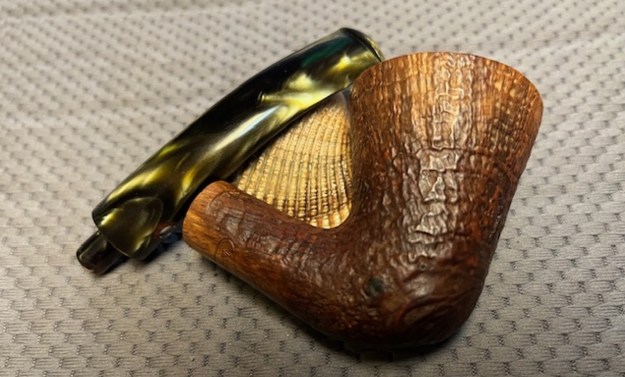
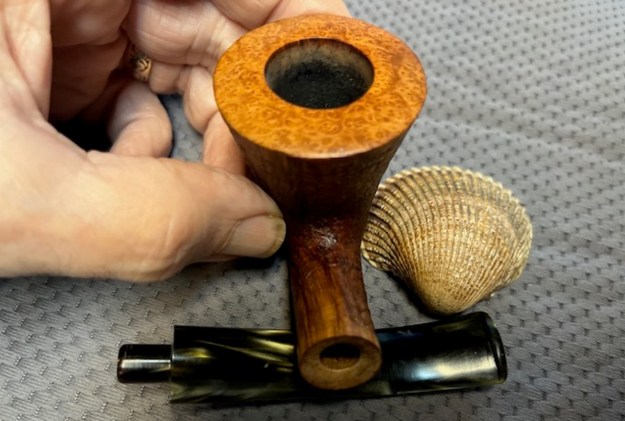
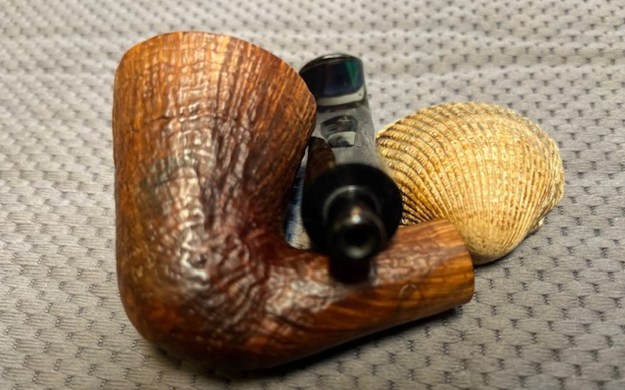
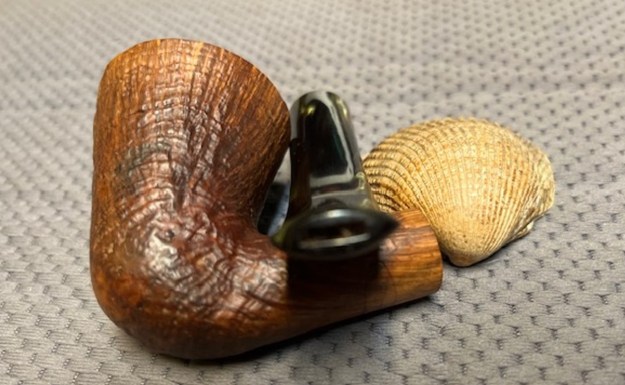
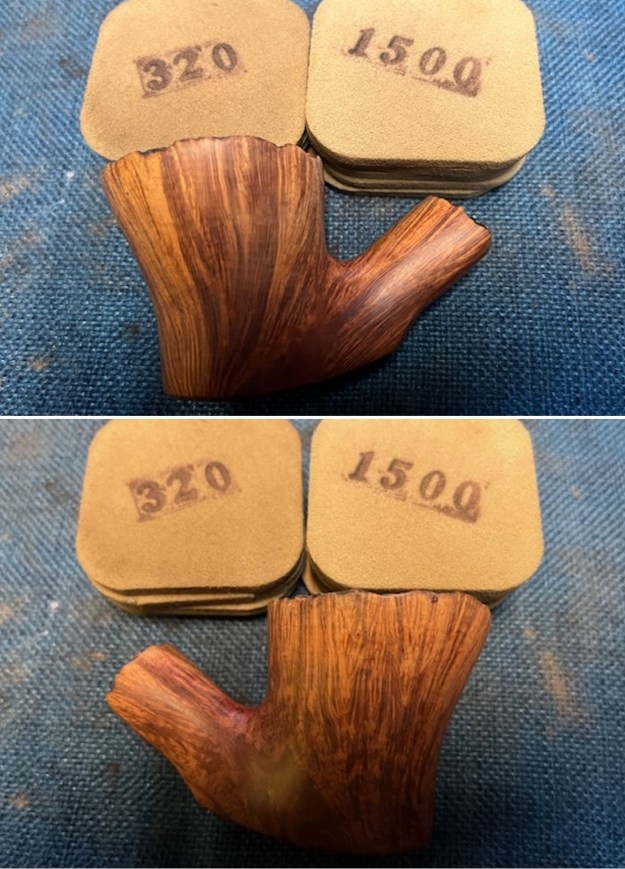
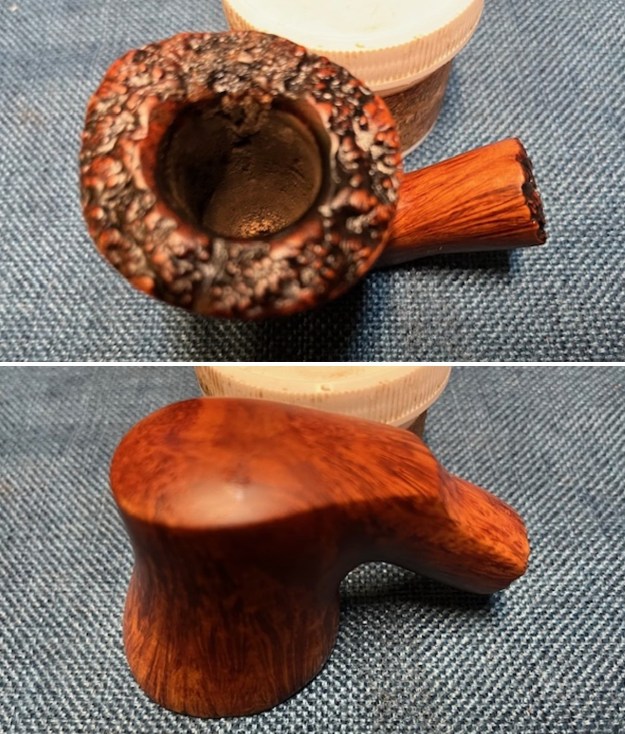
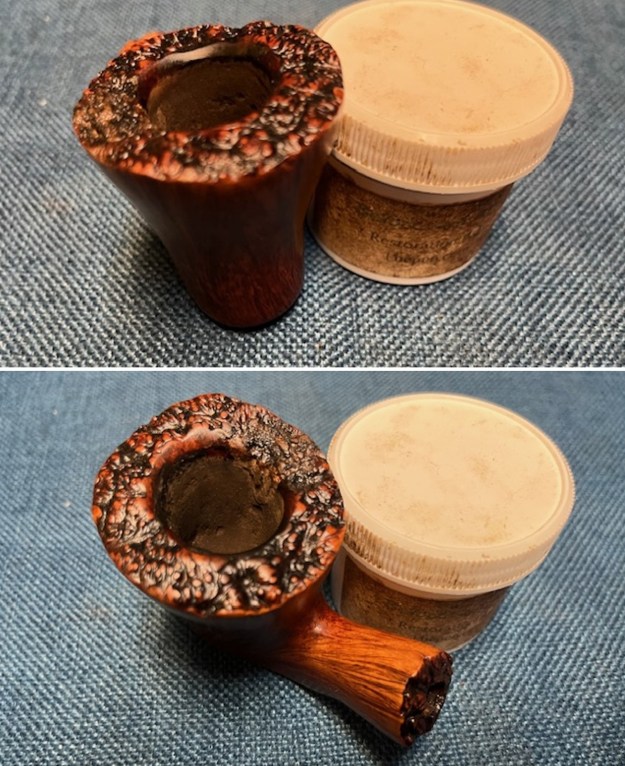
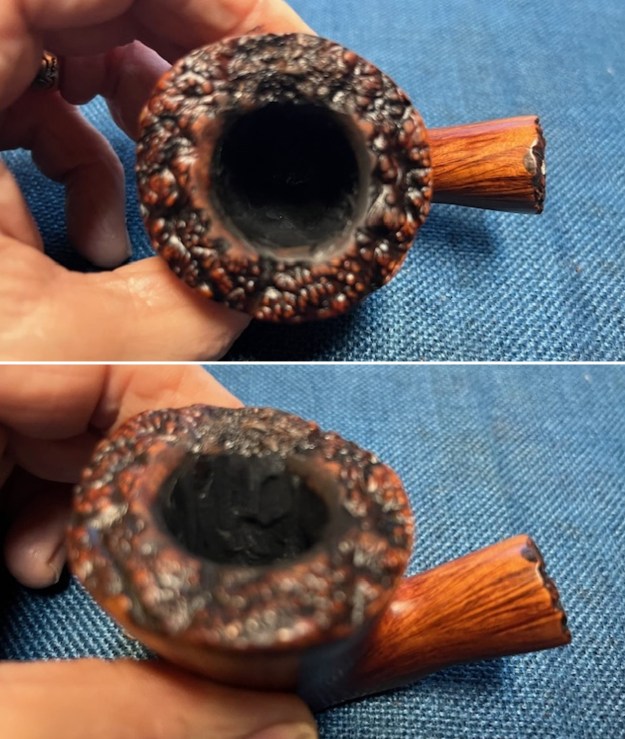
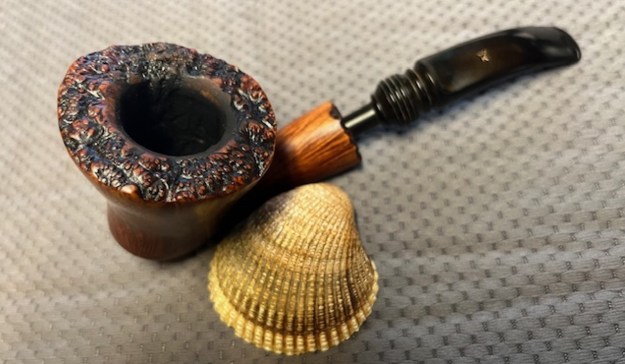
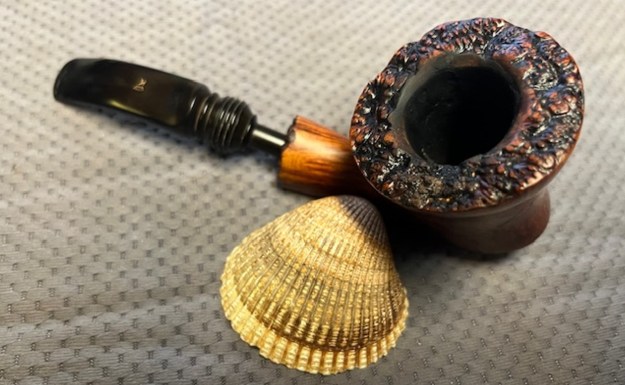
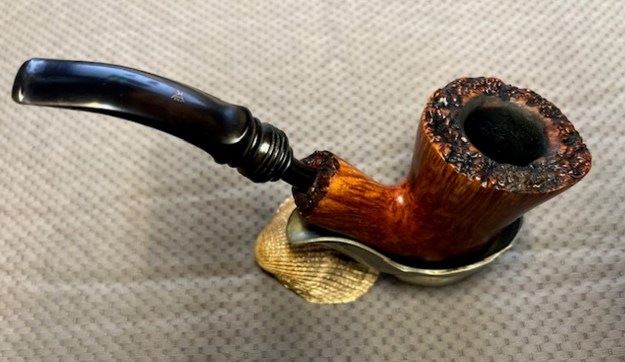
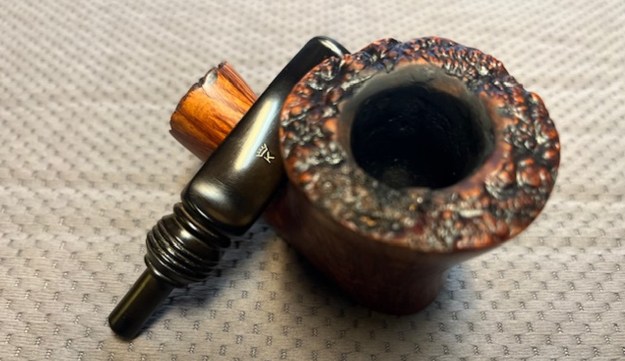
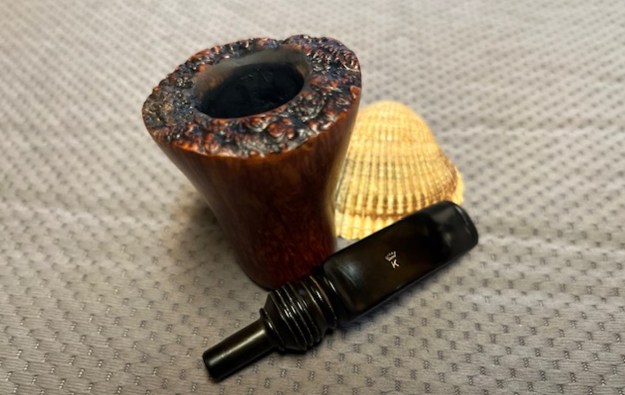
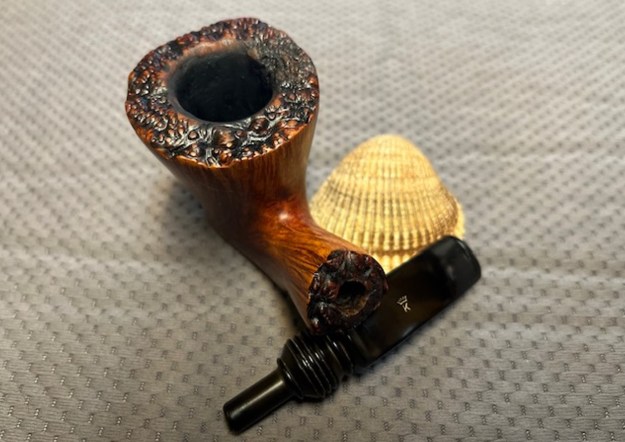
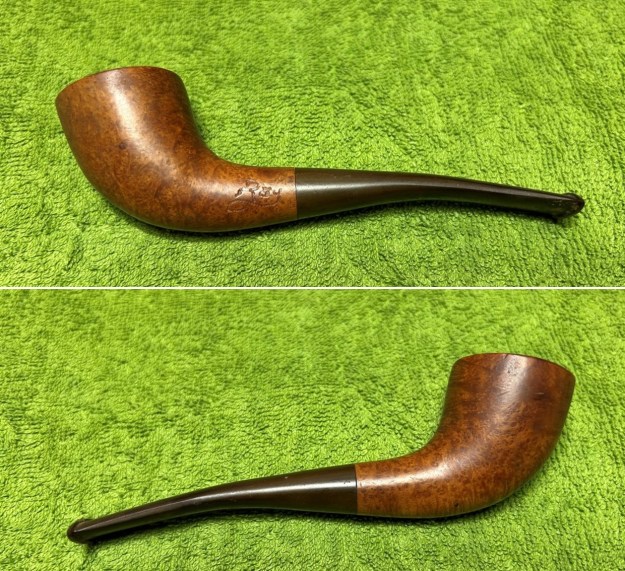
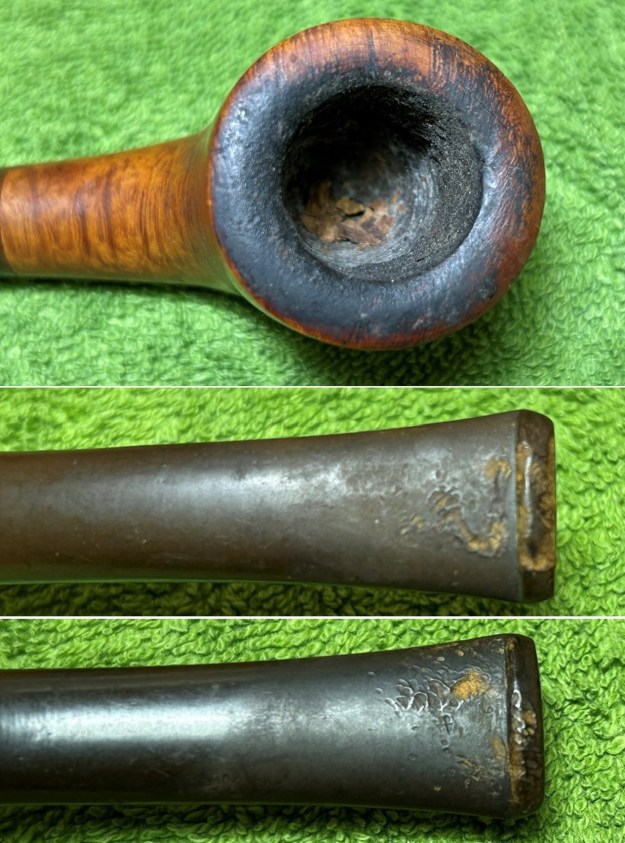
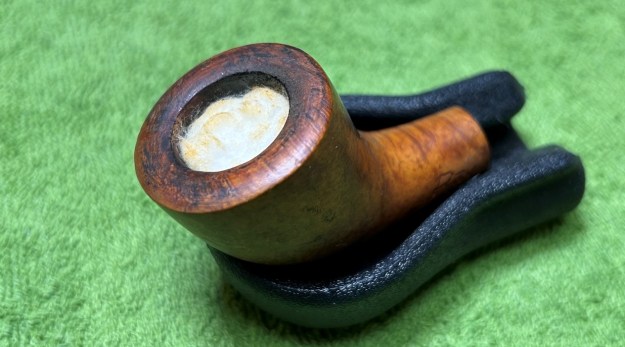
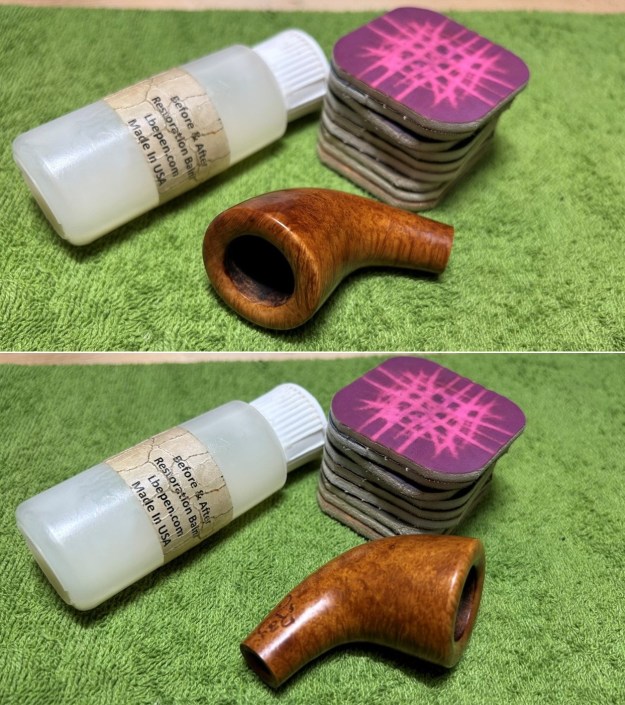
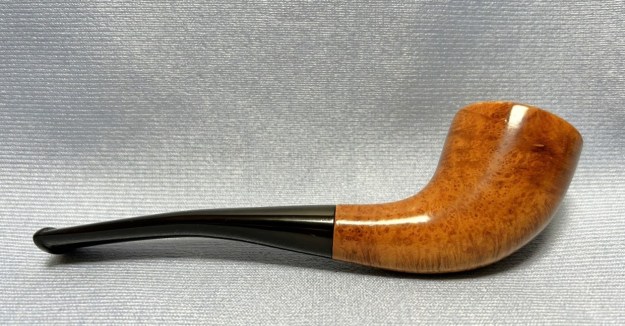
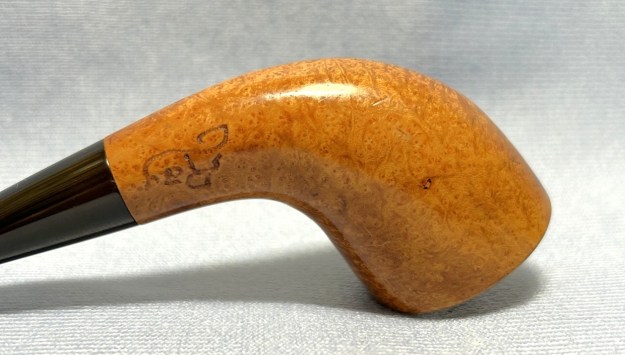
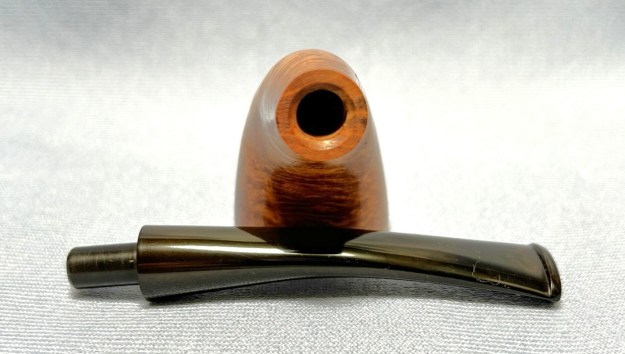
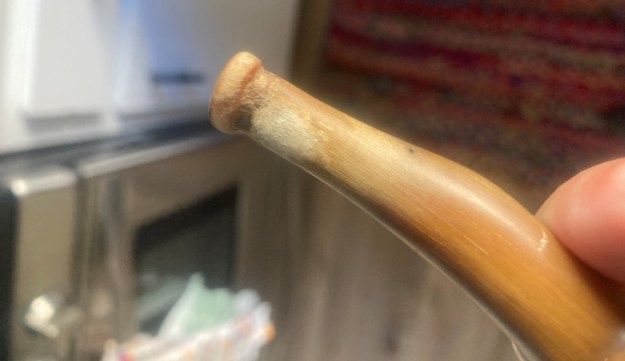
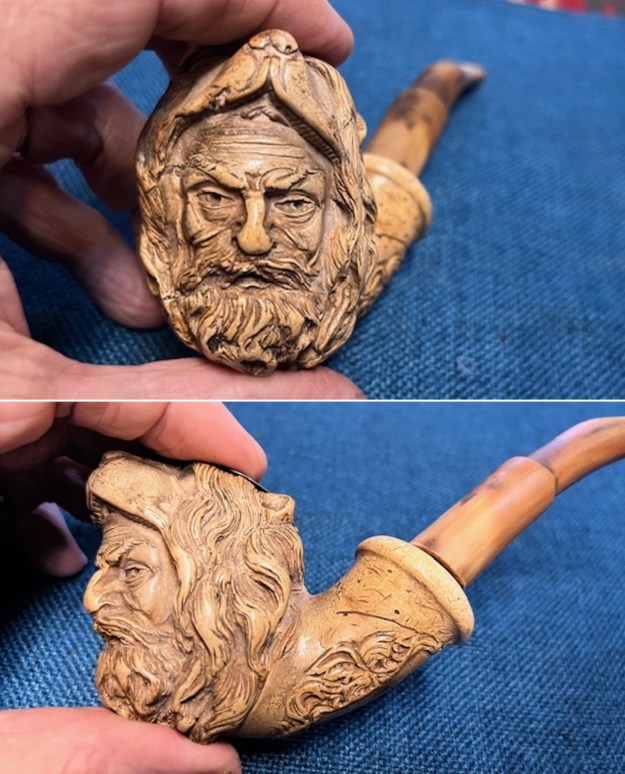
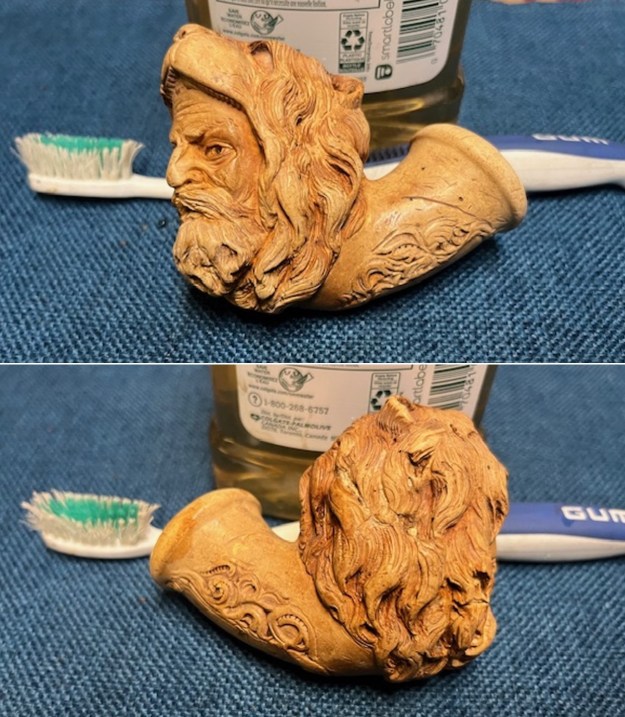
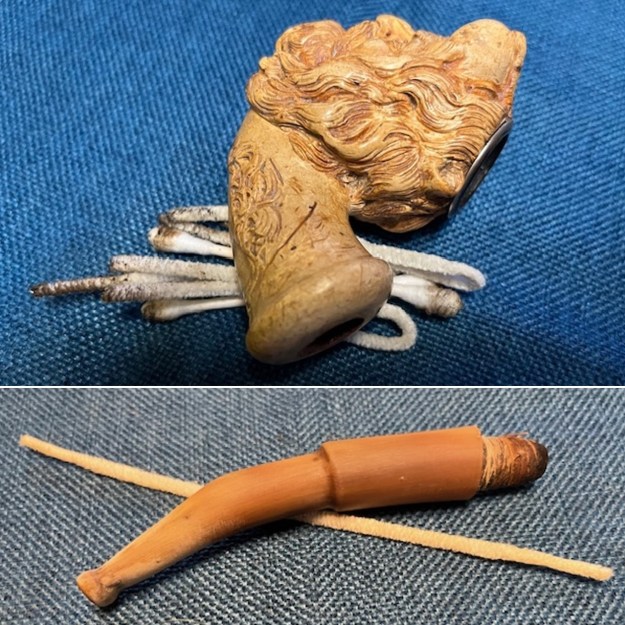
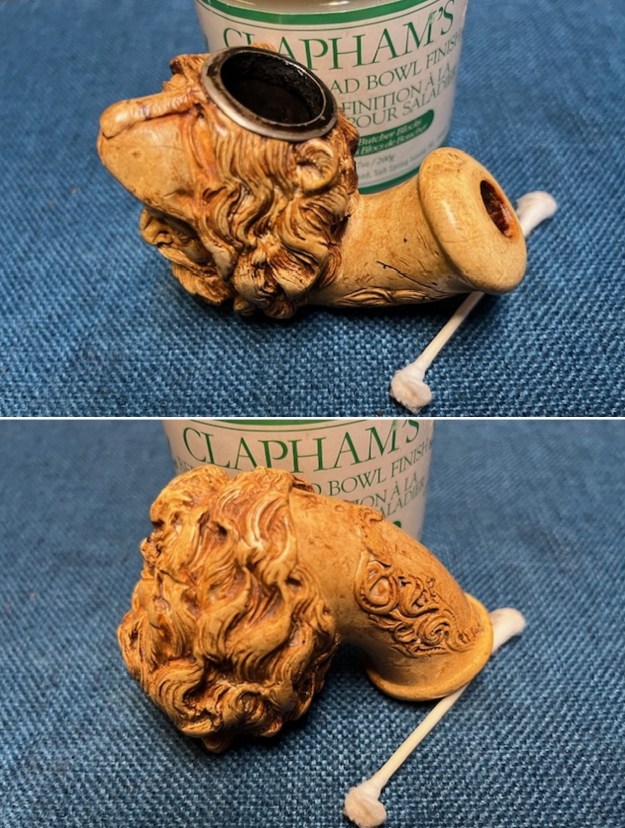
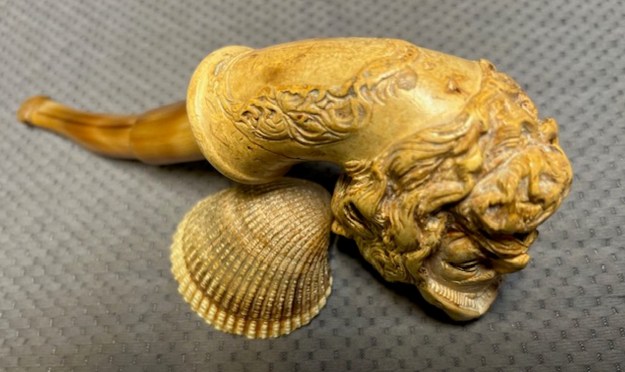
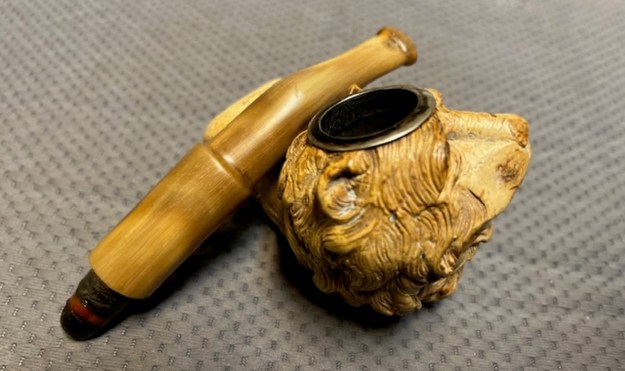
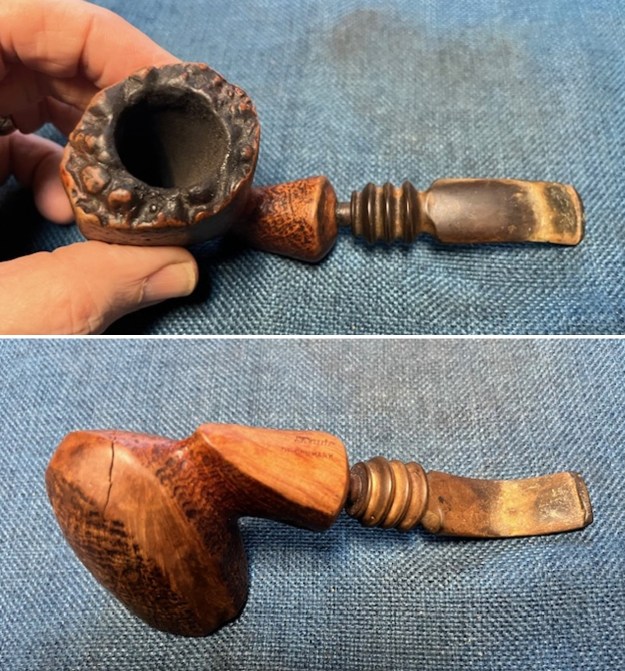
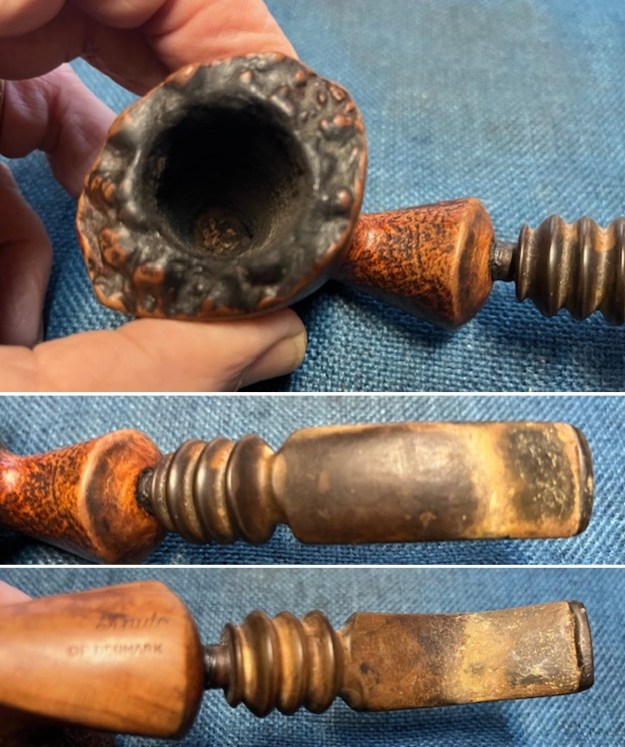
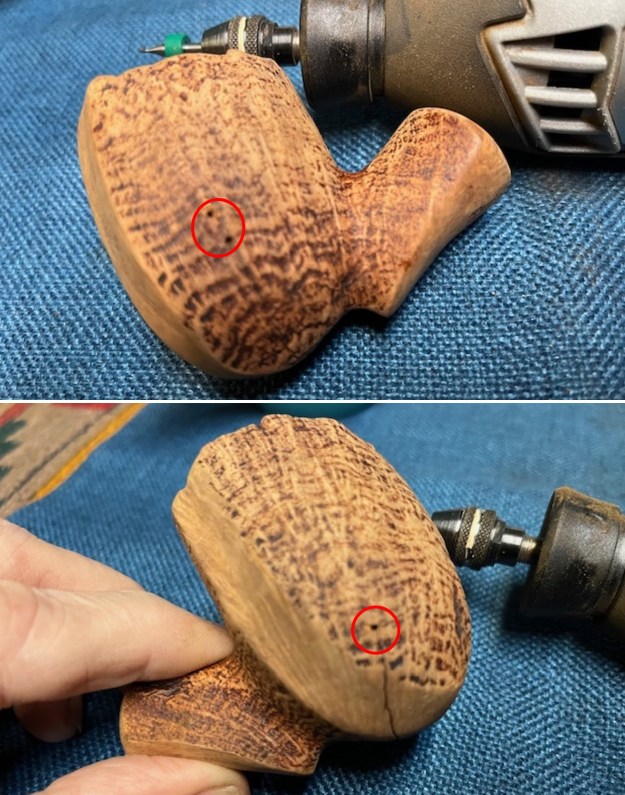
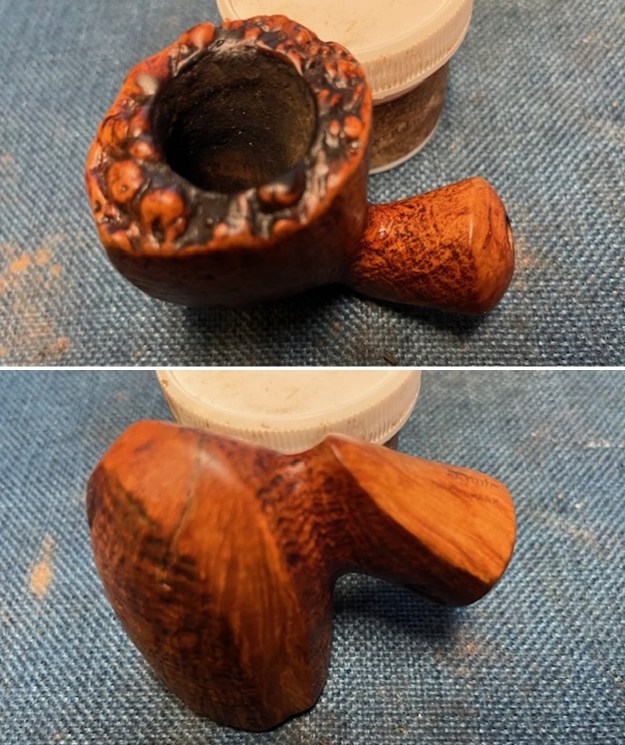
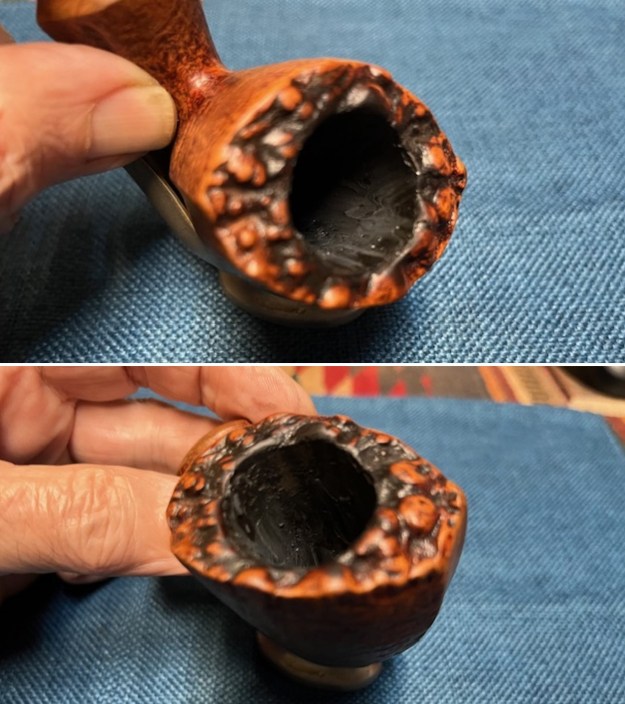
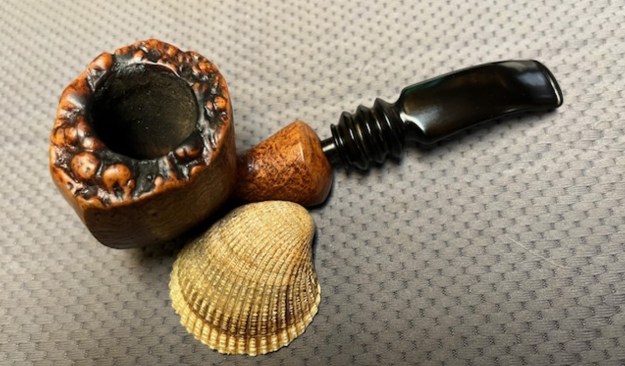
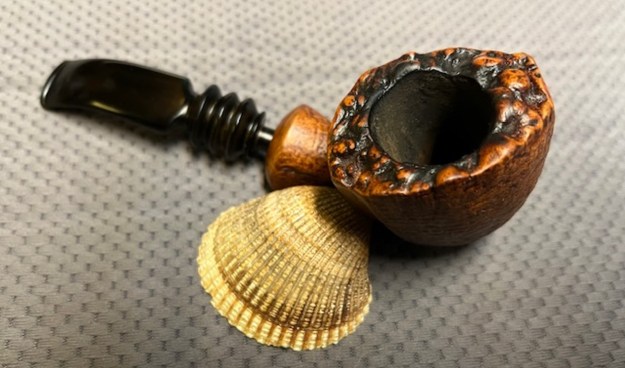
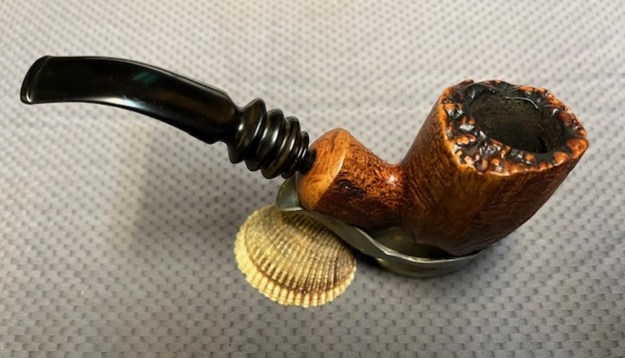
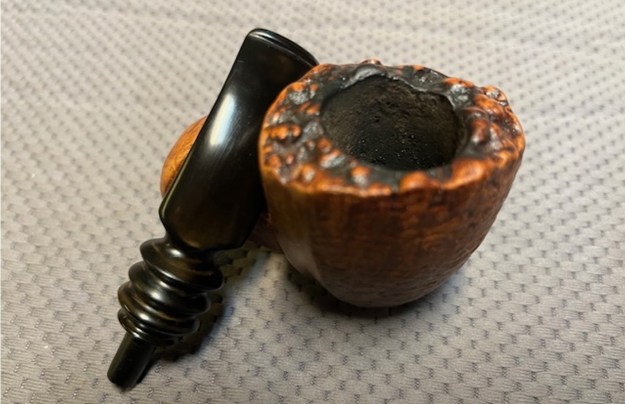
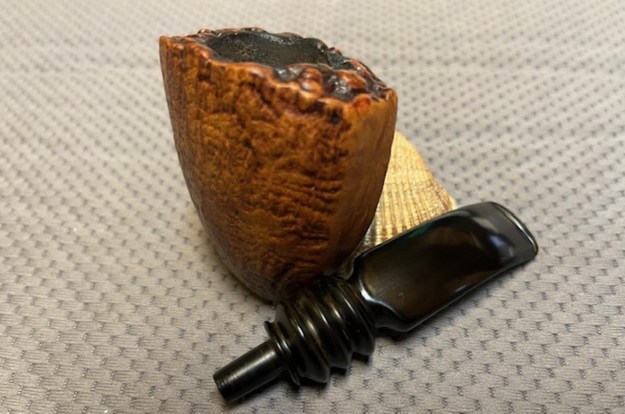
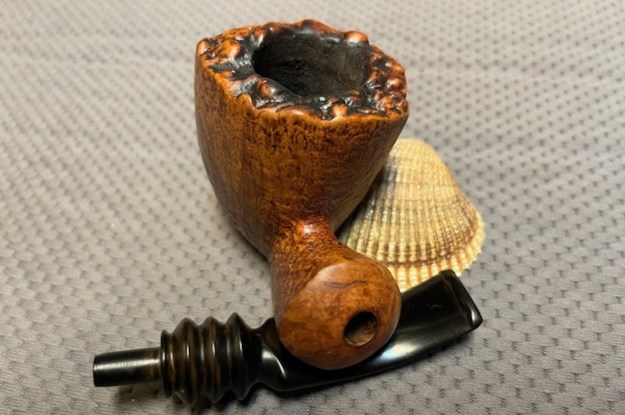
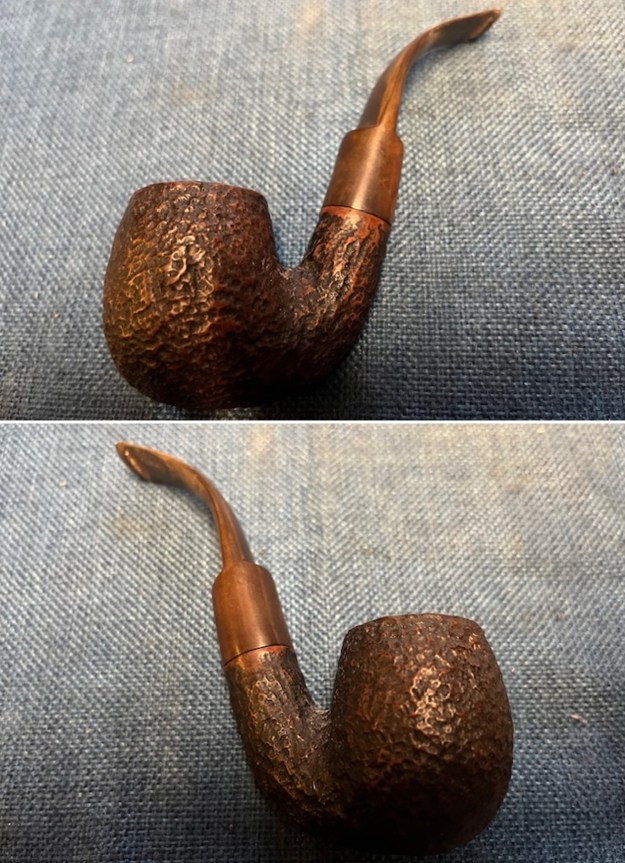
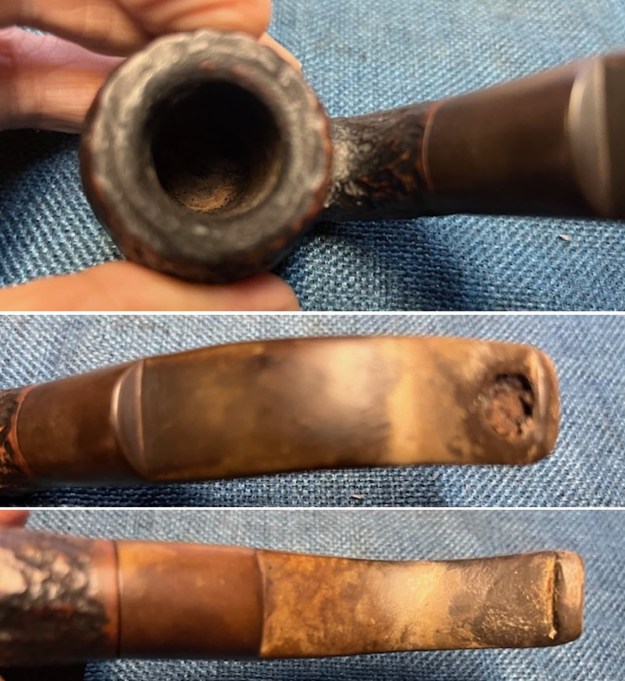
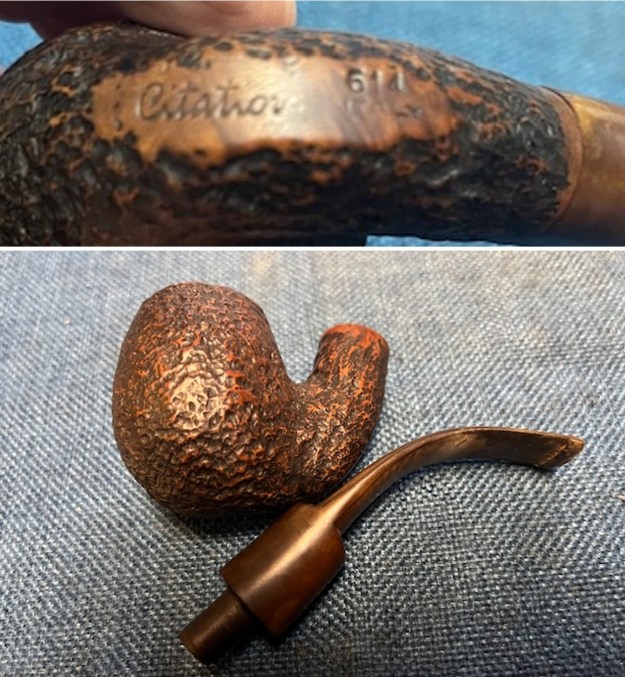
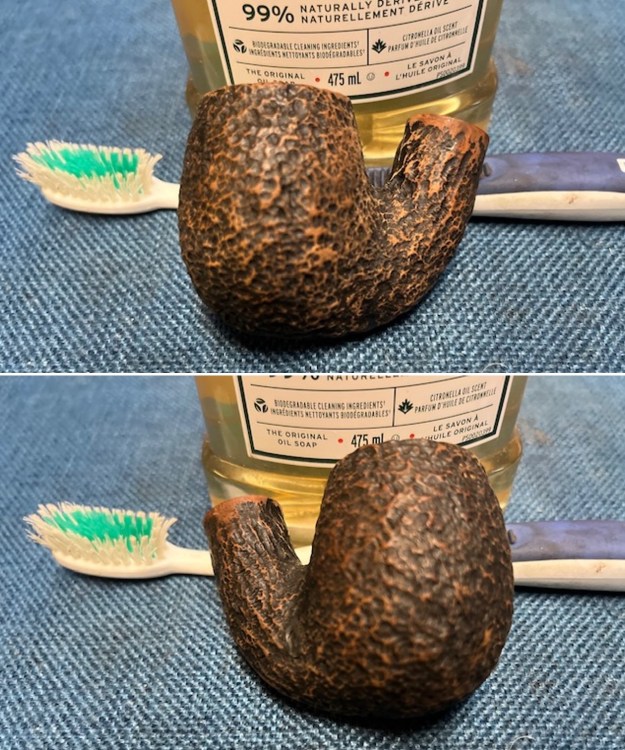
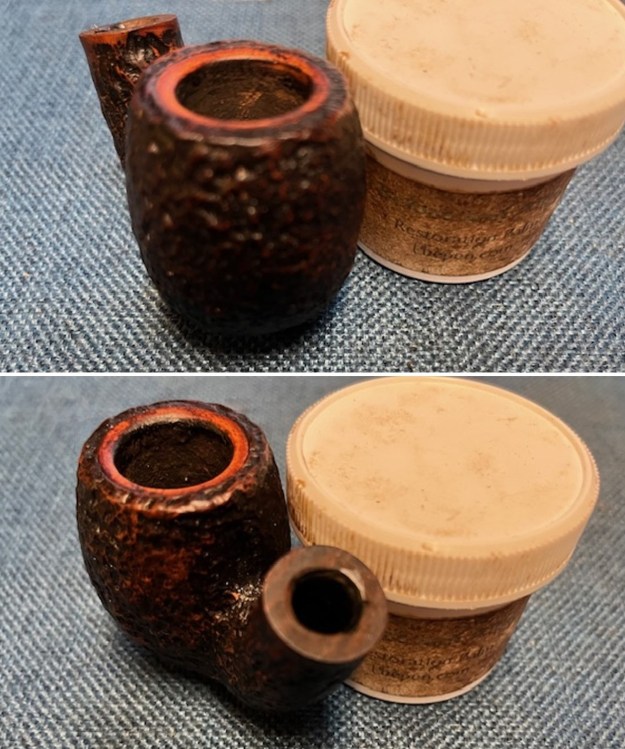
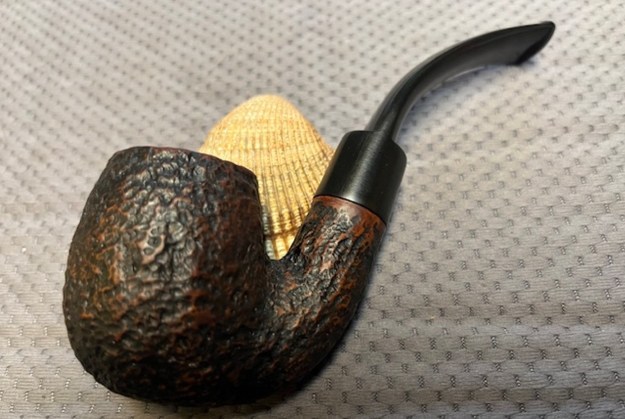
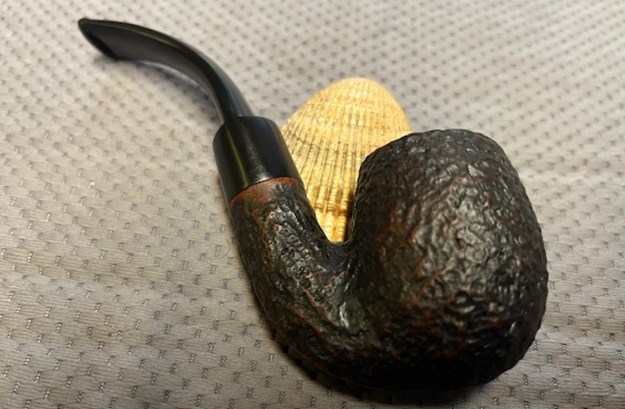
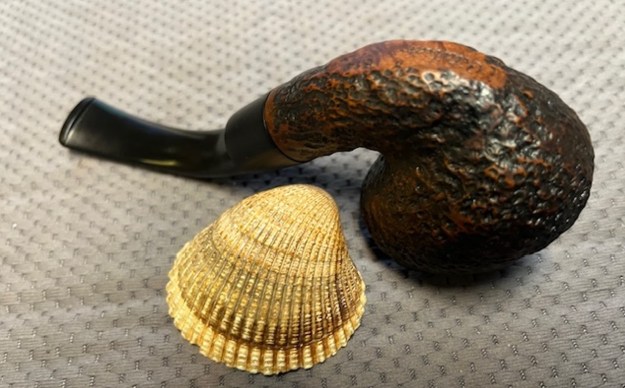
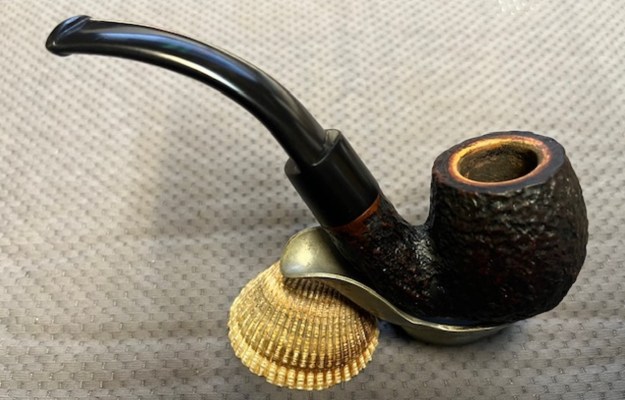
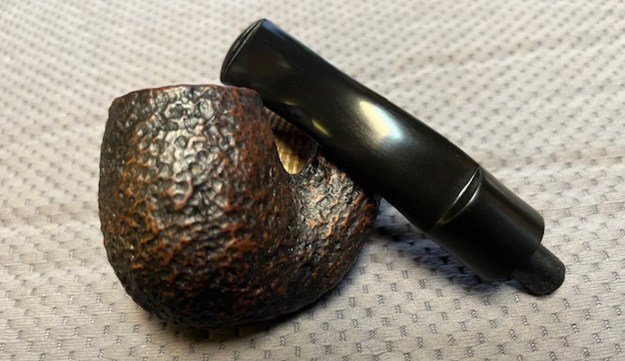
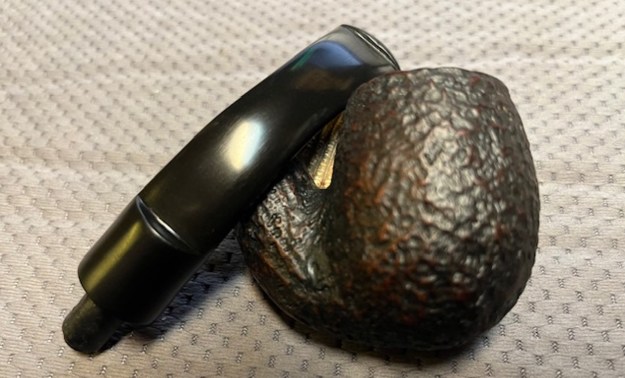
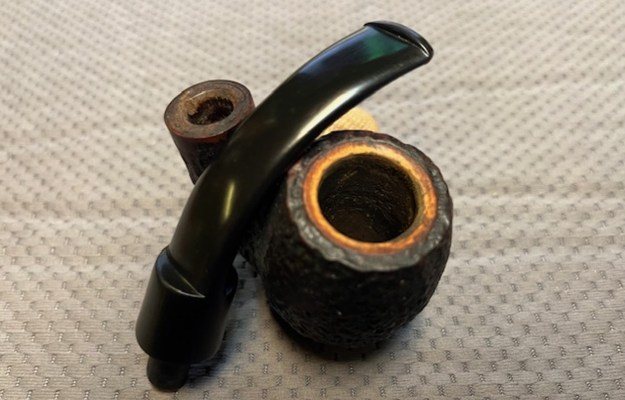
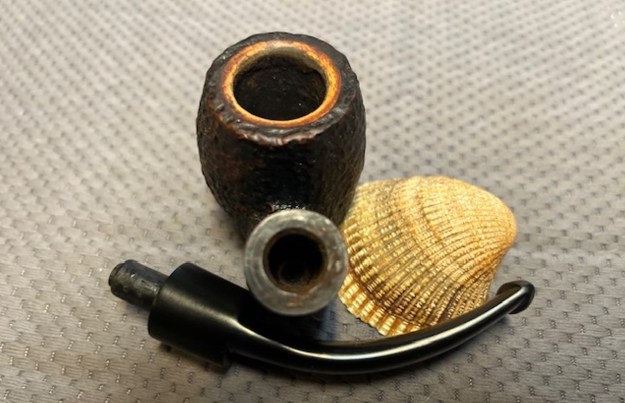
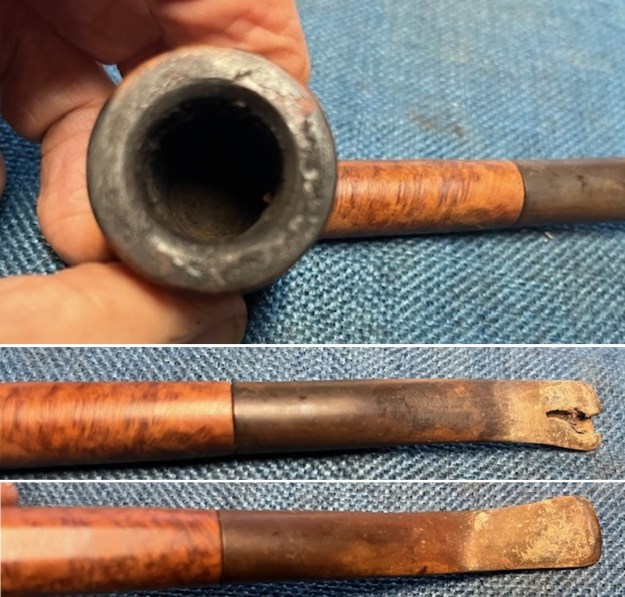
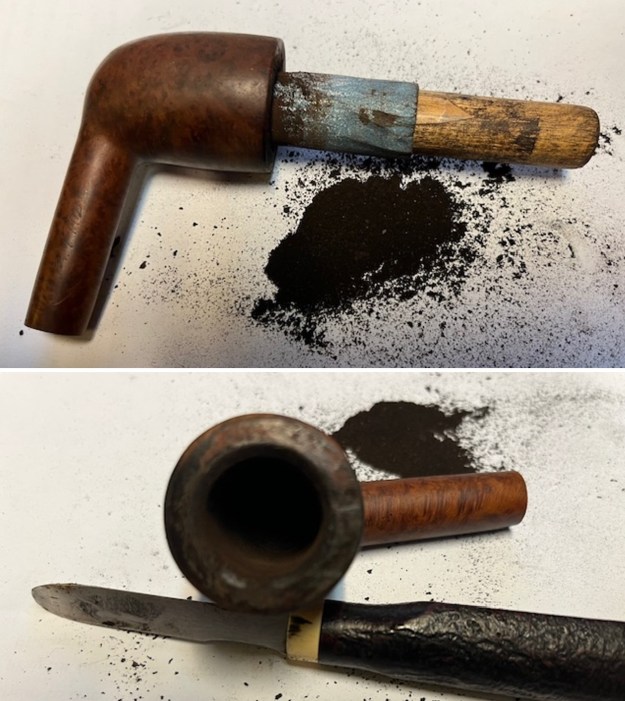
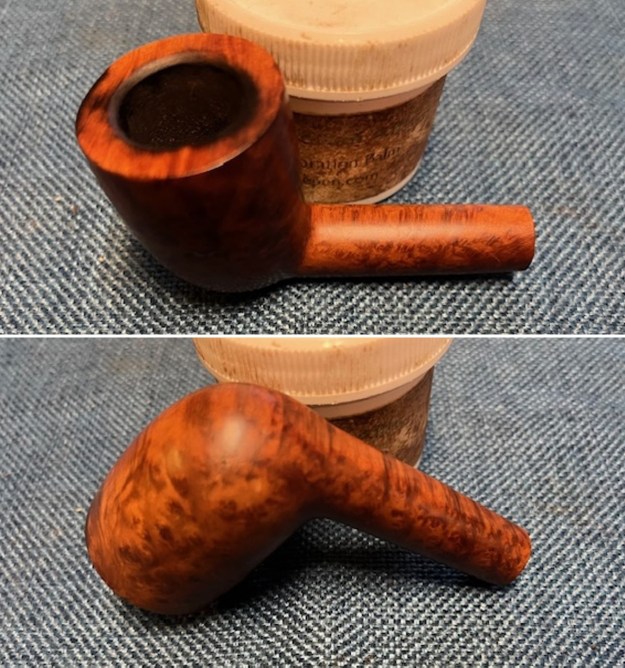
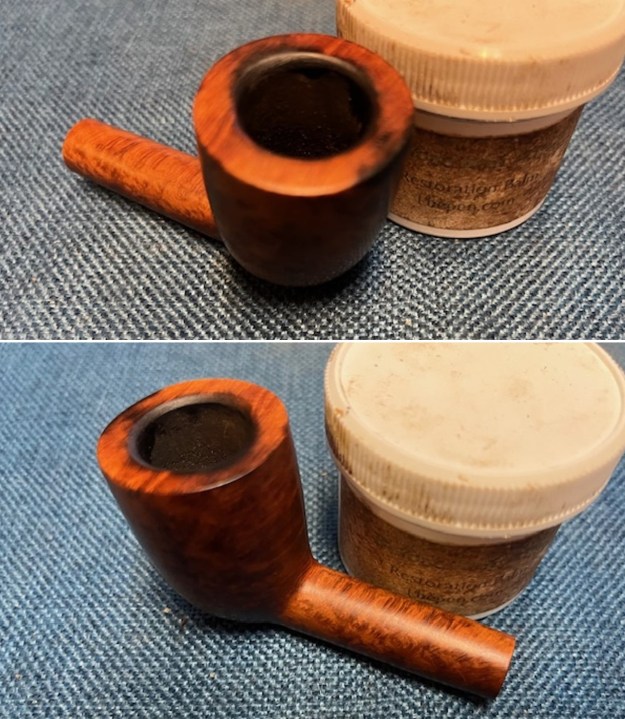
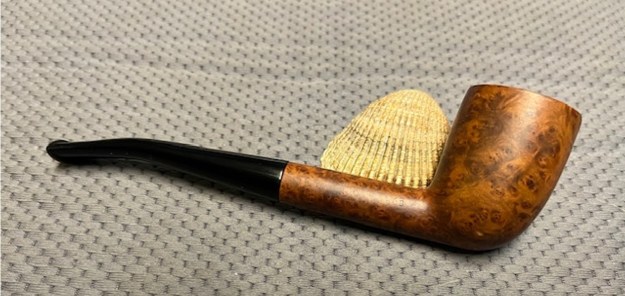
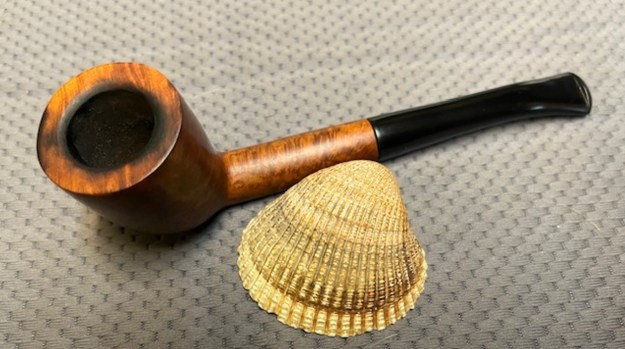
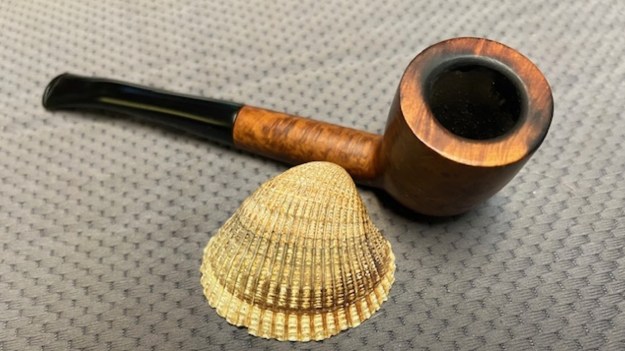
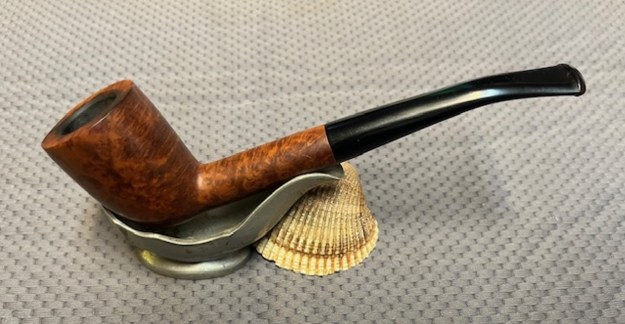
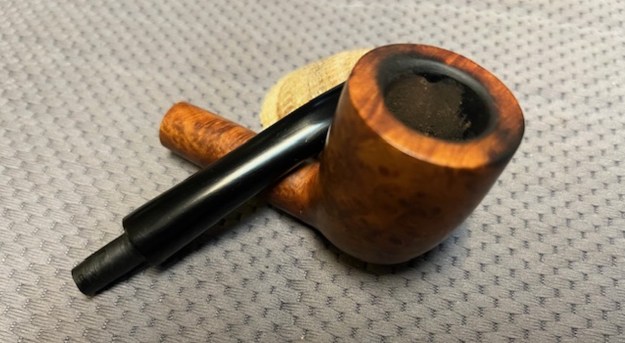
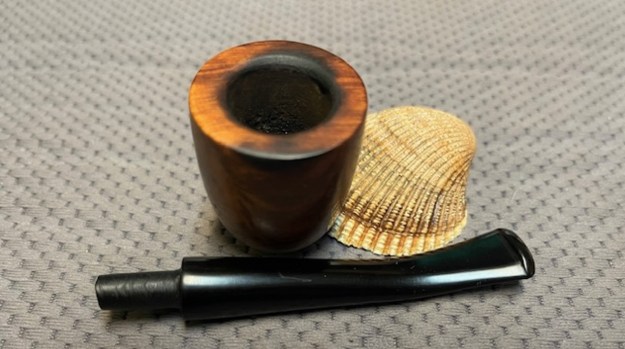
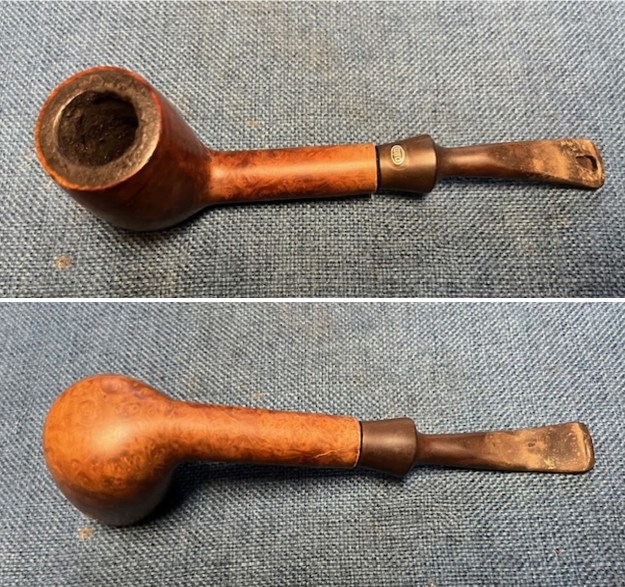
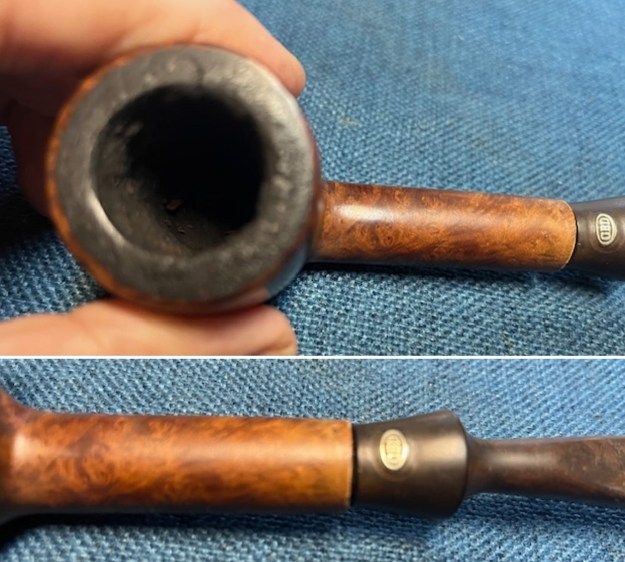
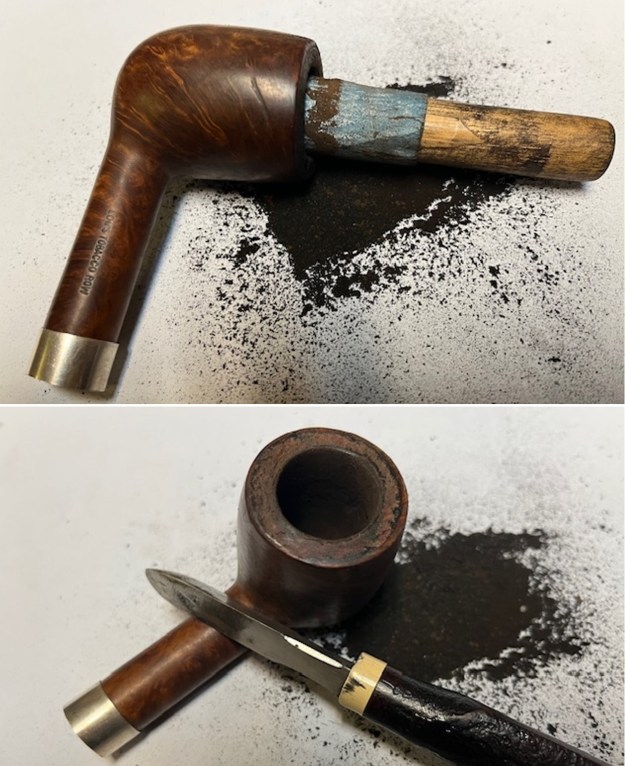
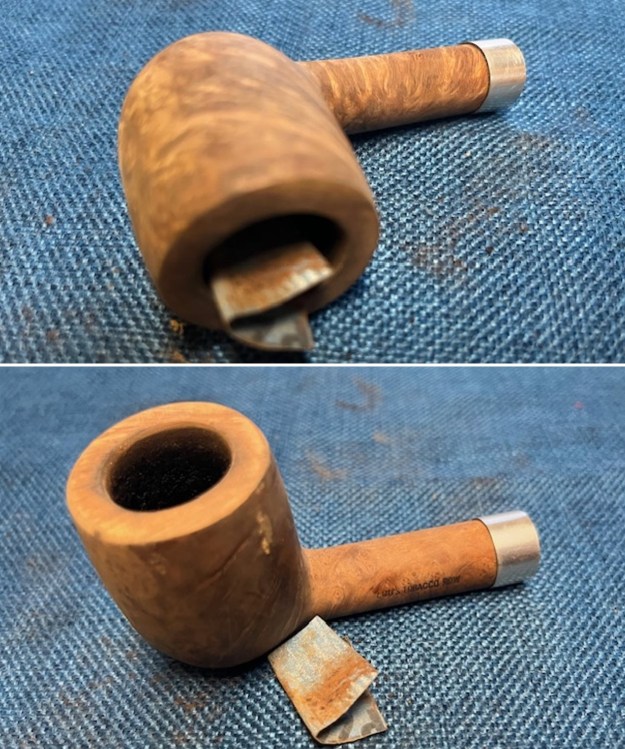
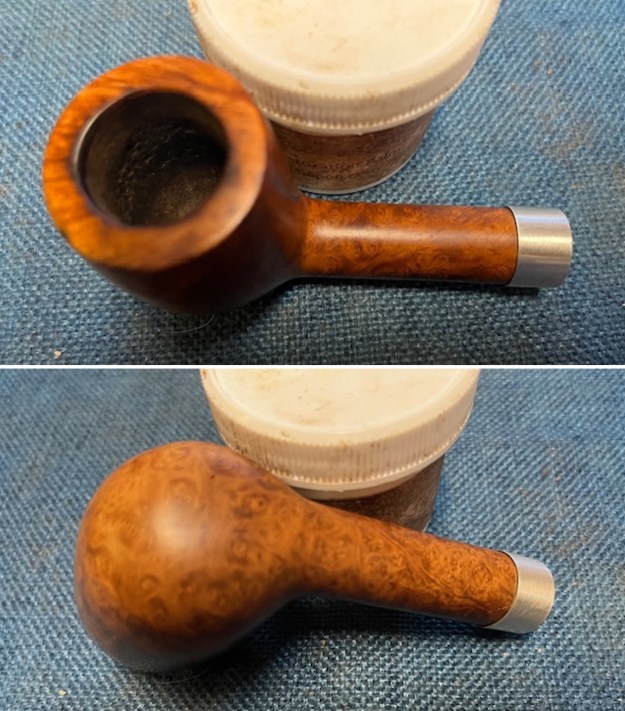
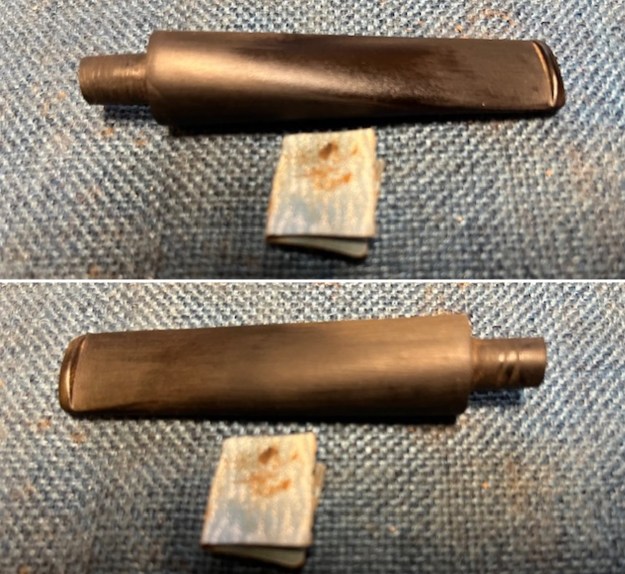
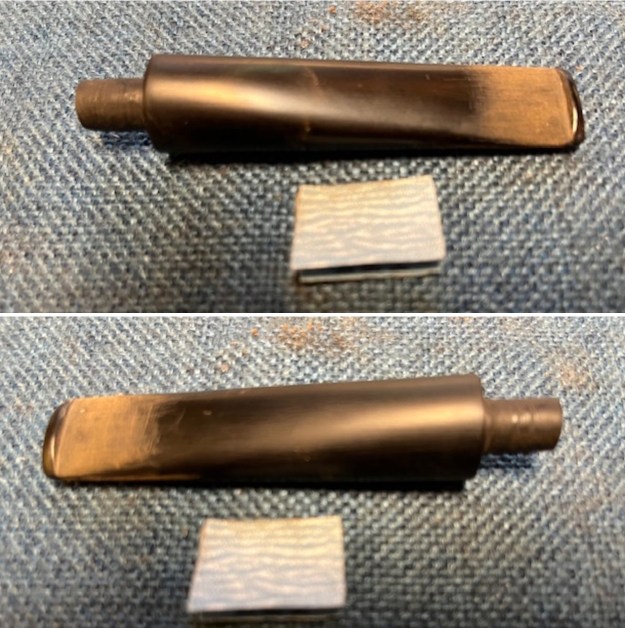
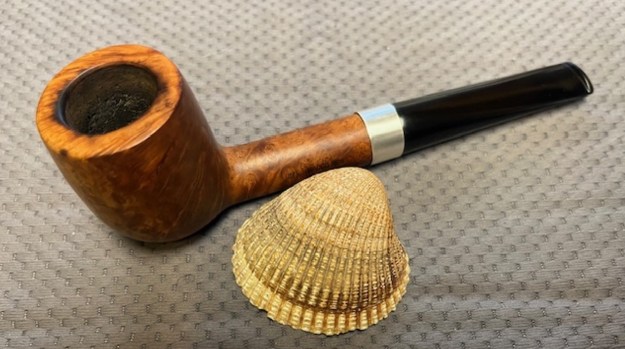
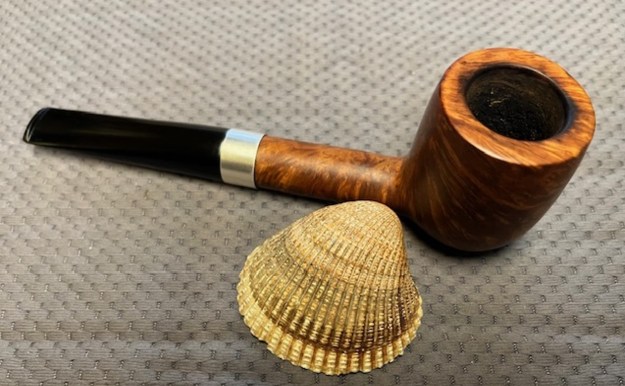
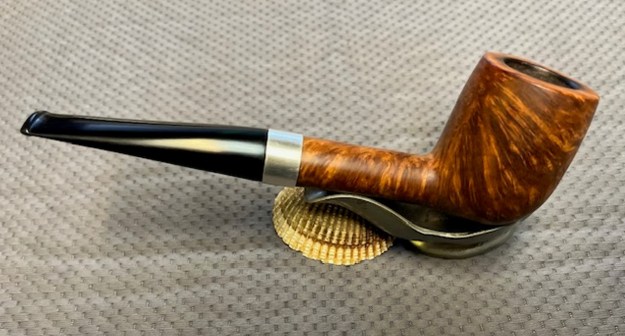
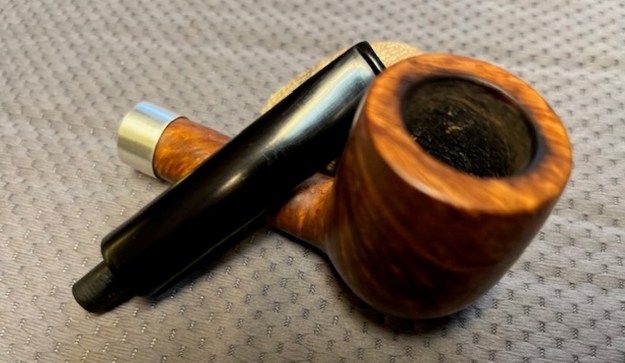
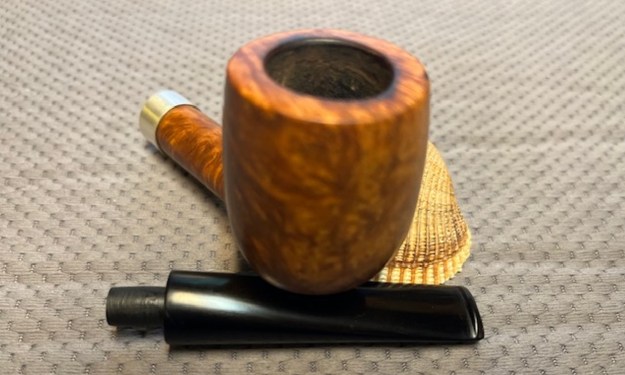
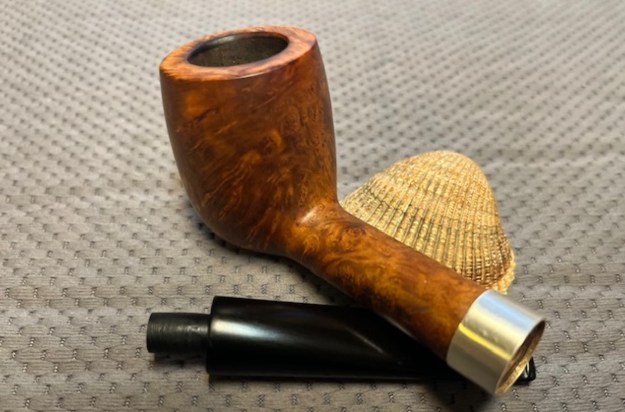
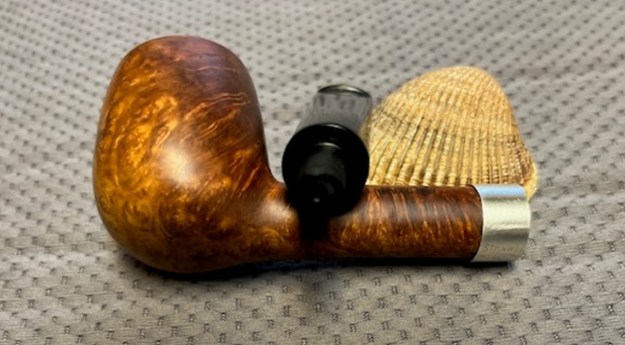
 I took photos of the bowl and rim top to give you an idea of what I see. Once again it is too bad that Word does now allow for the inclusion of smells because this sweet vanilla is filling my work area. I have a candle going to mask the smell a bit. You can see the damage to the rim top and inner edge of the bowl. The bowl is clean. The stem is lightly oxidized and has light tooth marks and chatter on both sides ahead of the button.
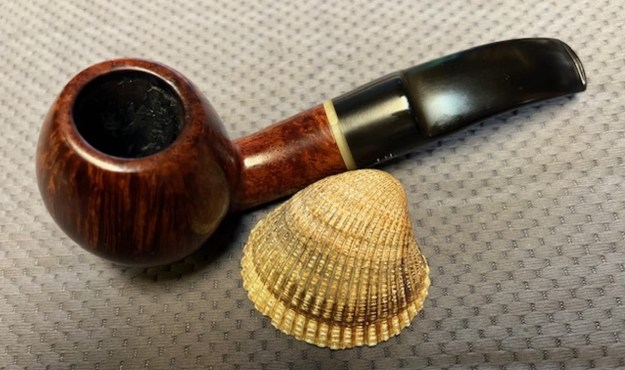
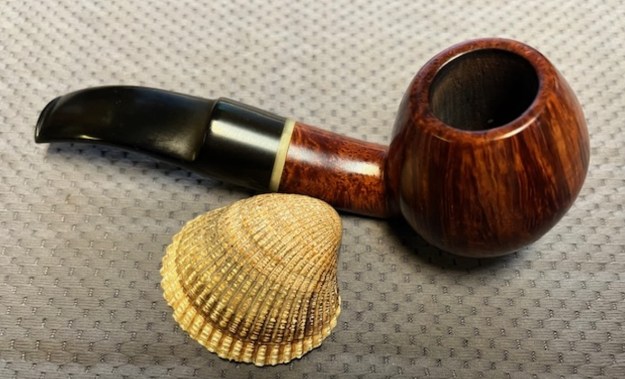
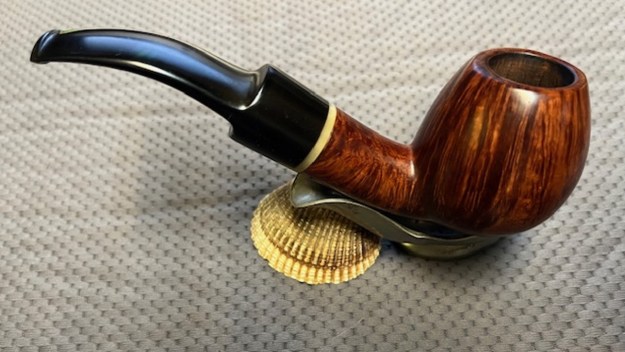
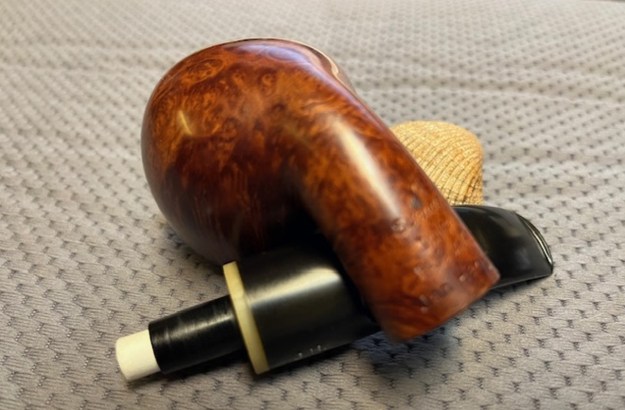
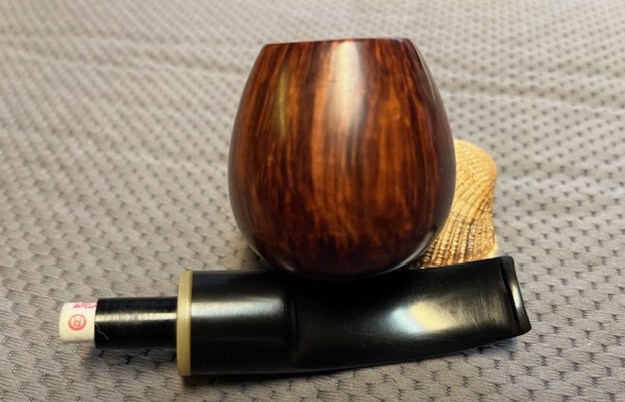
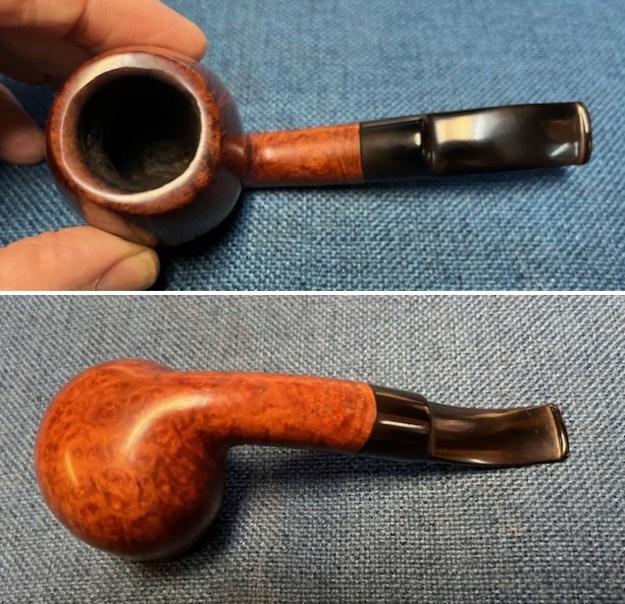
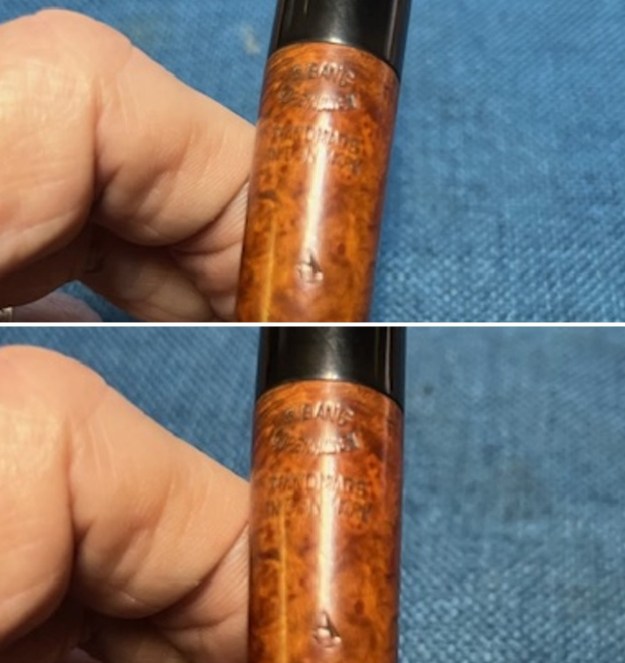
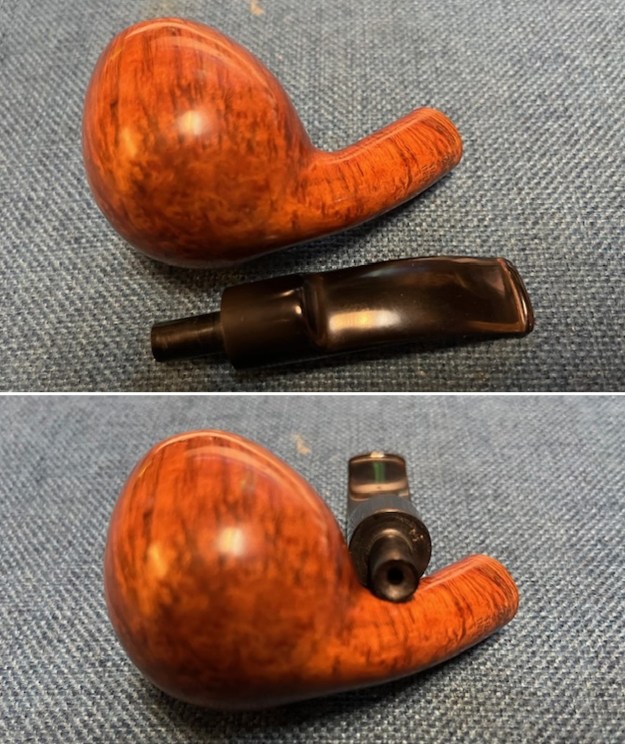
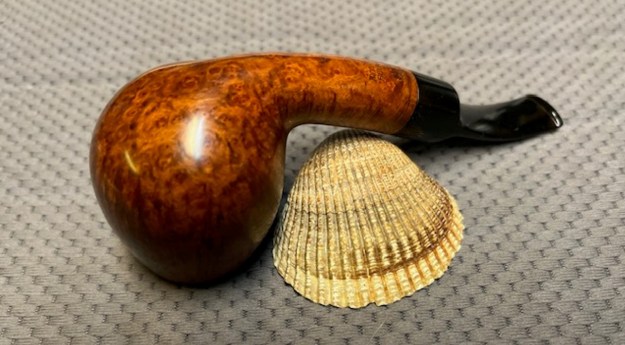
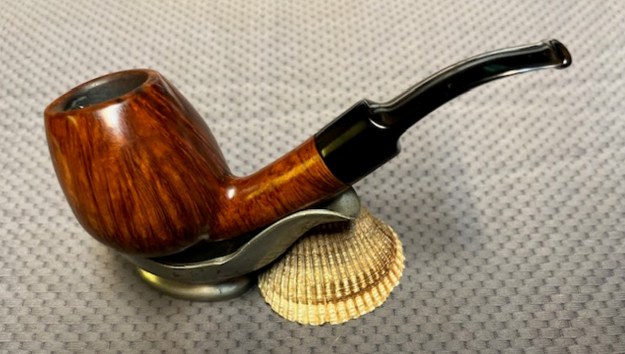
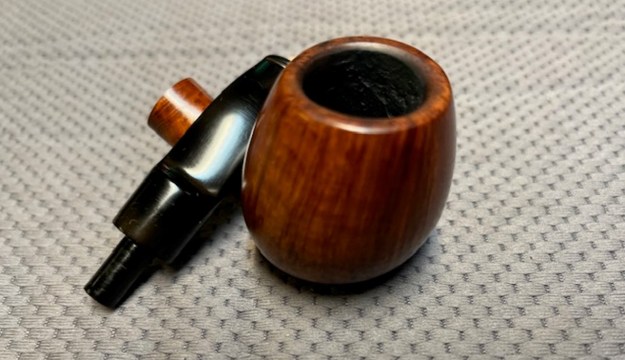
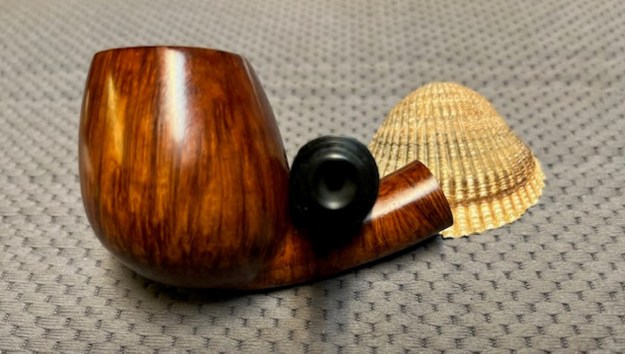
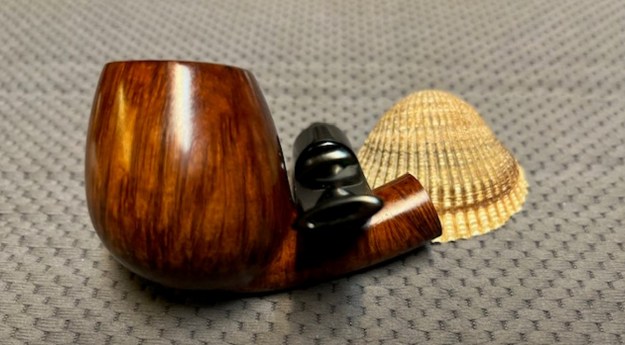
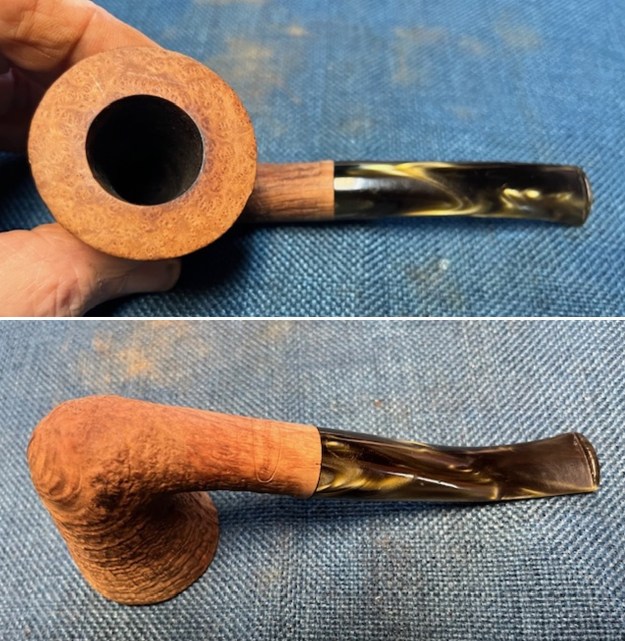
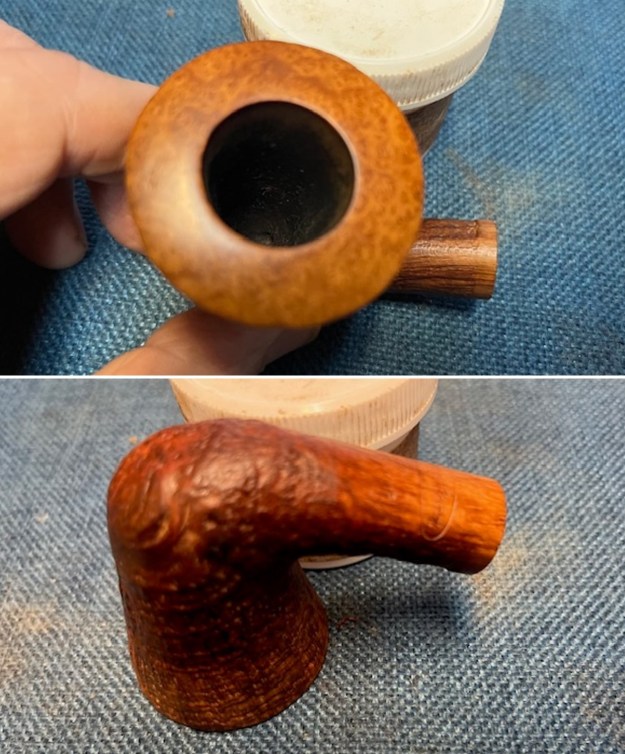
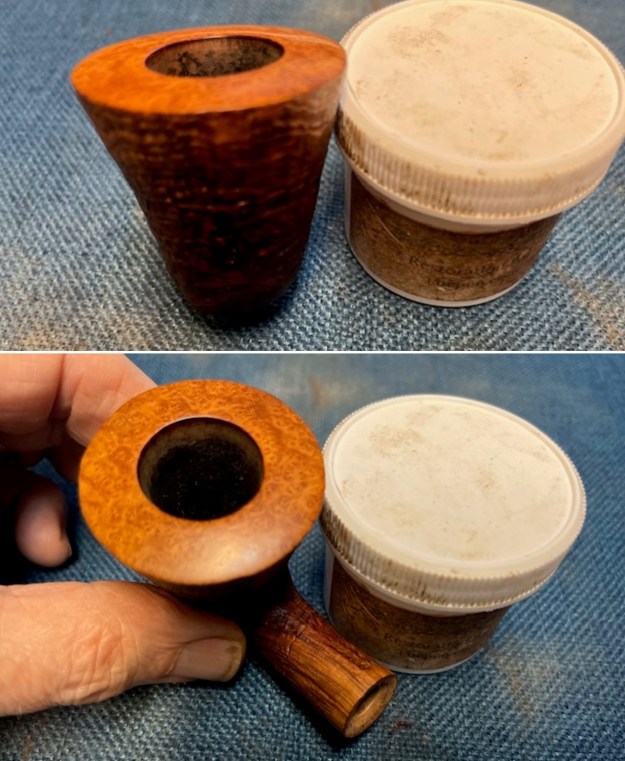
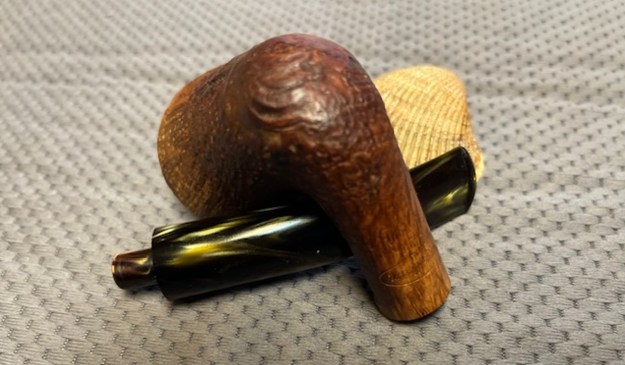
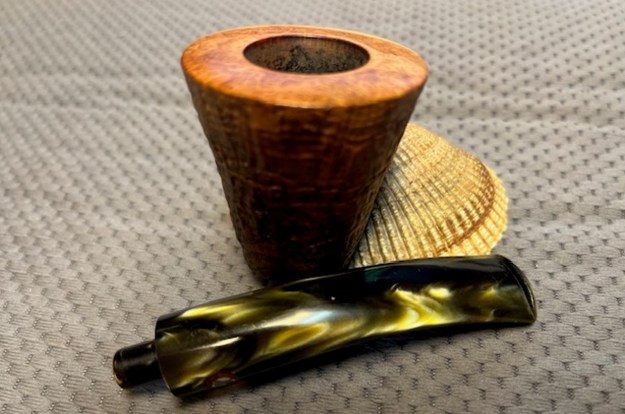
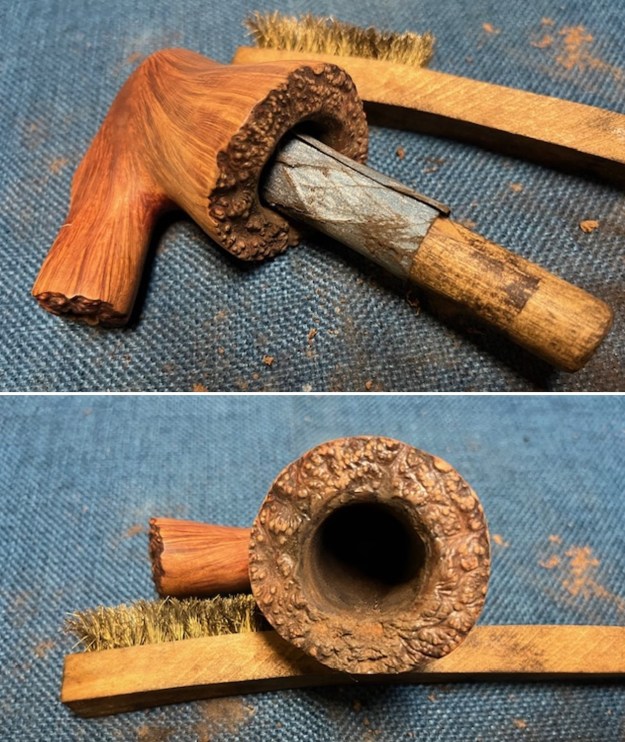
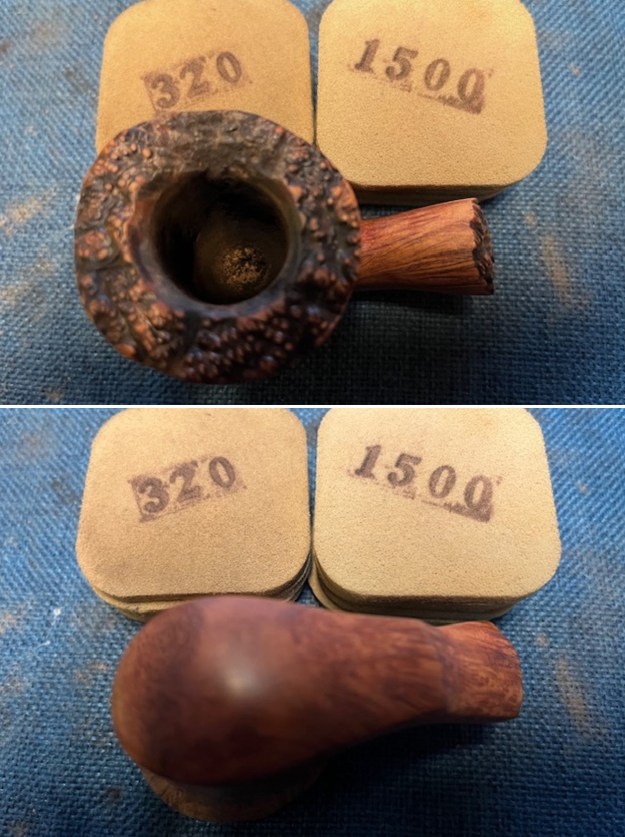
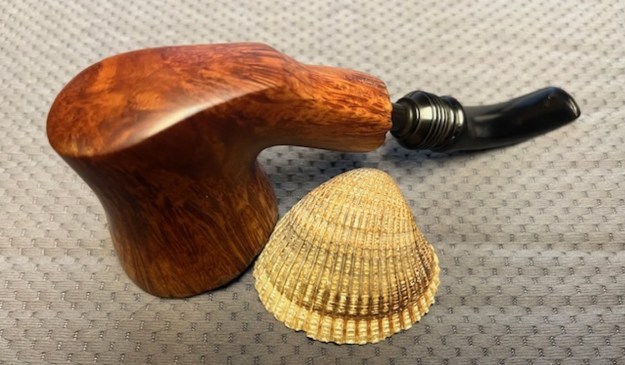
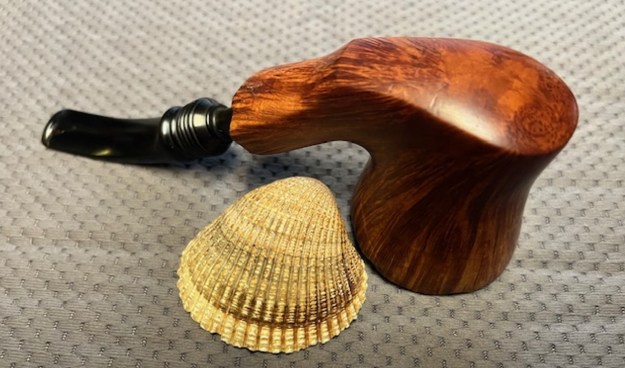
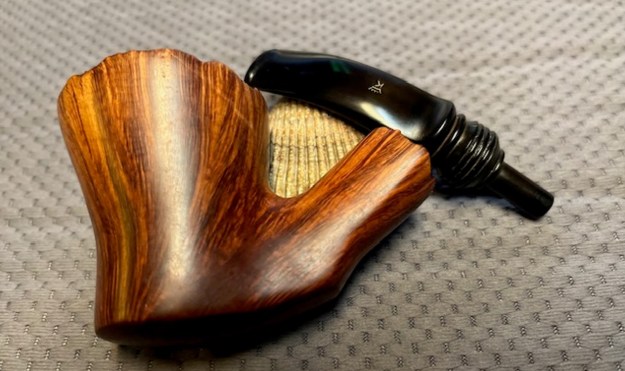
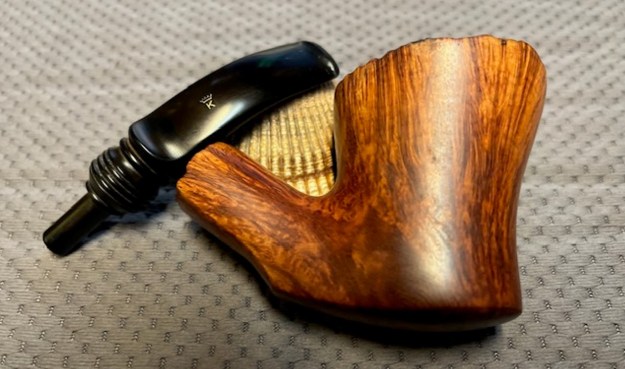
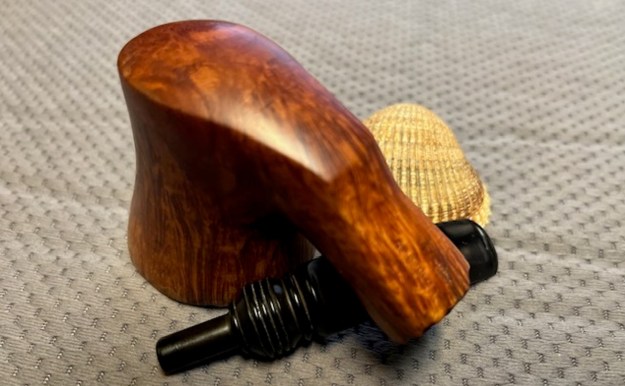
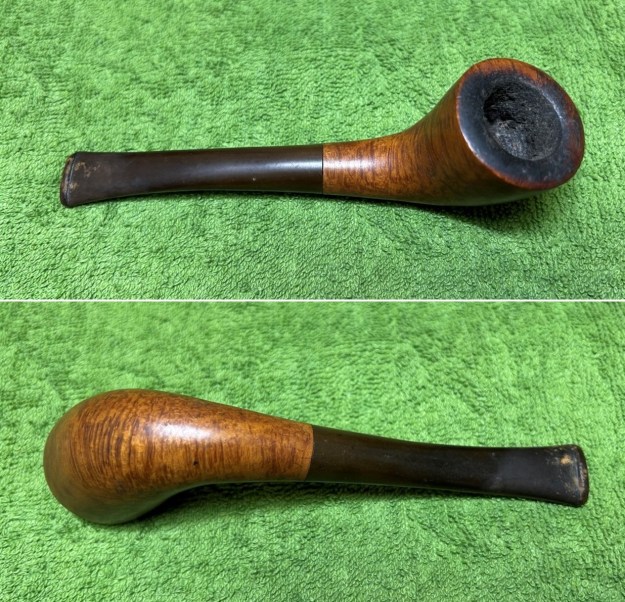
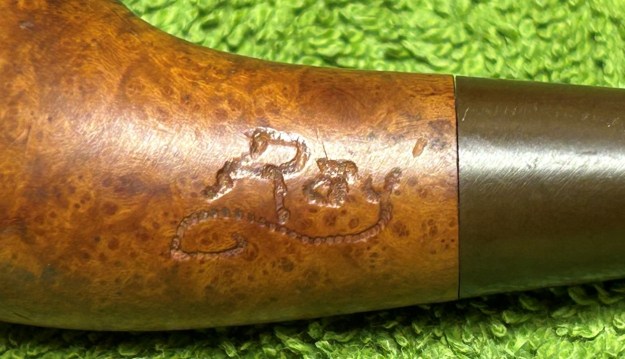
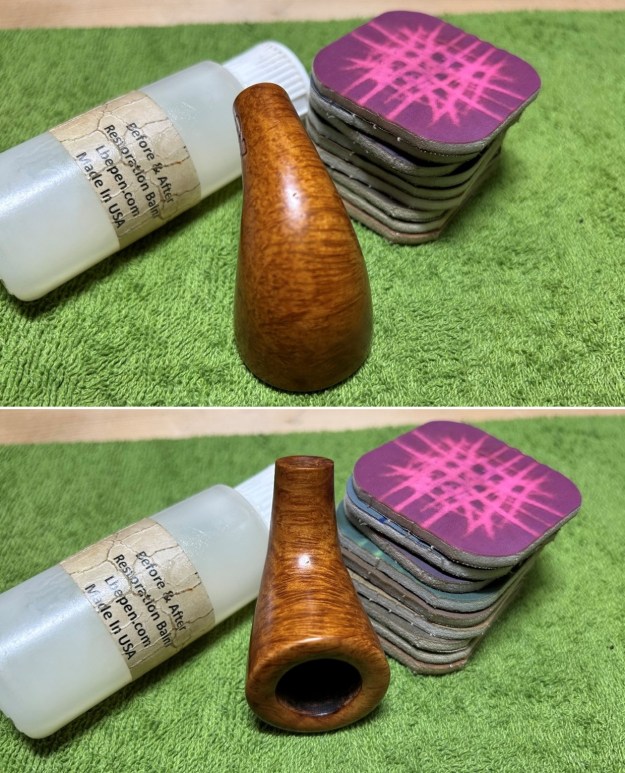
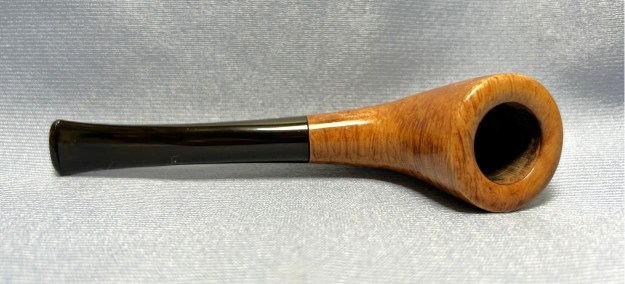
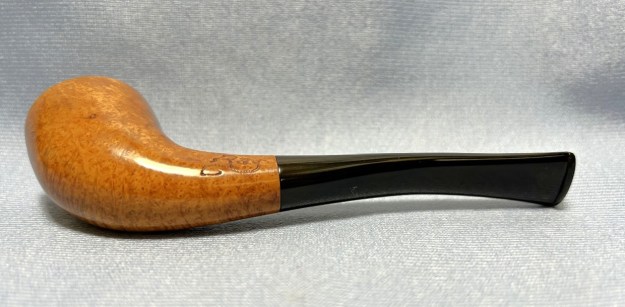
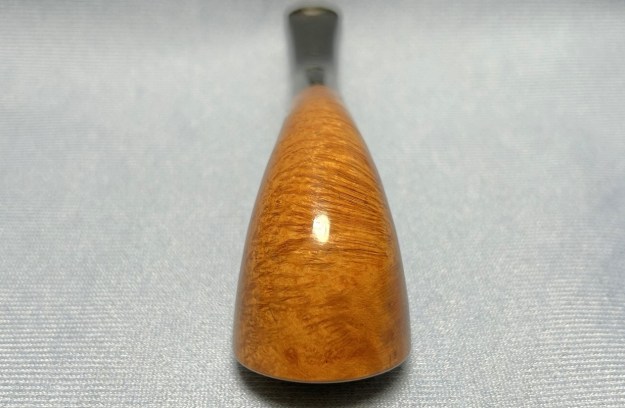
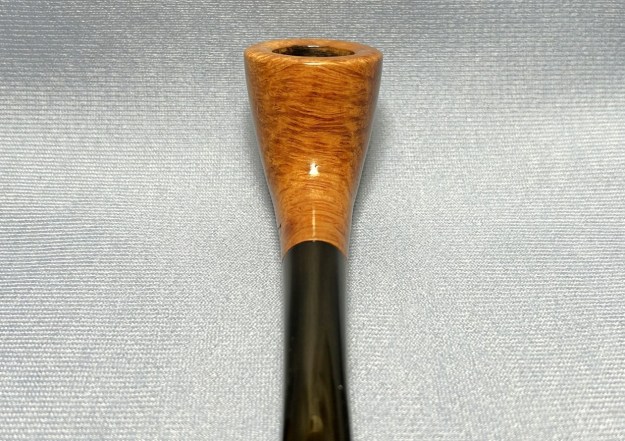
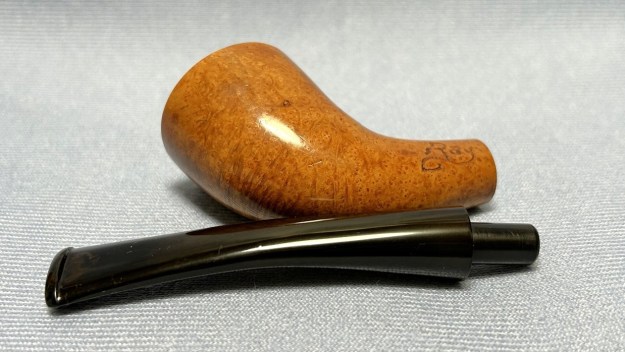
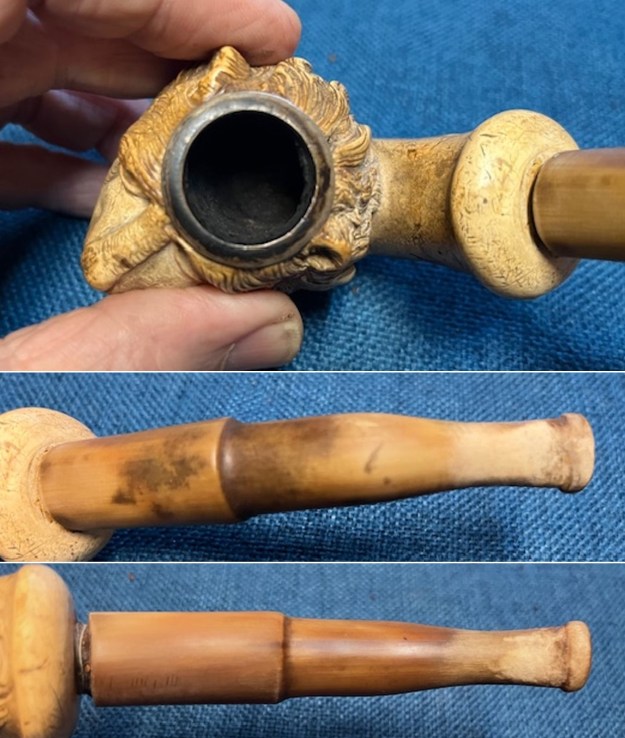
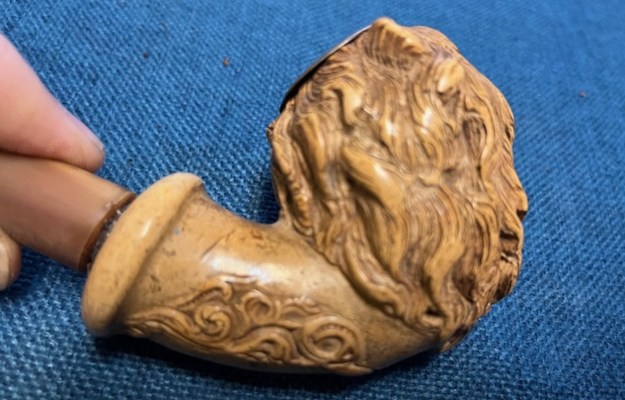
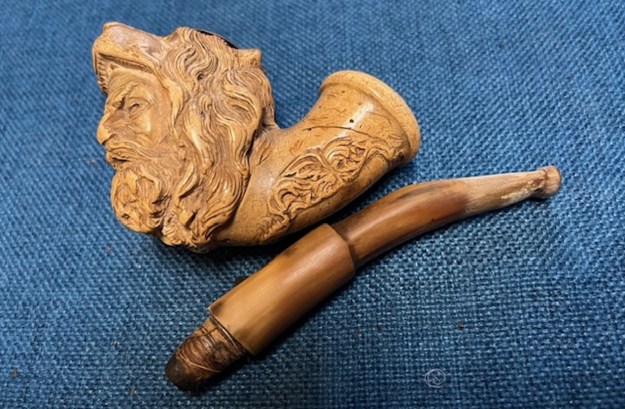
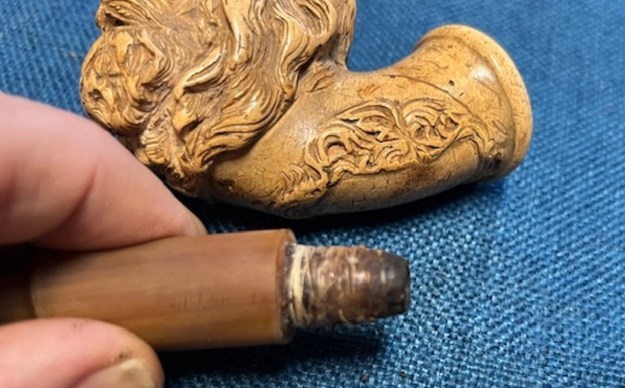
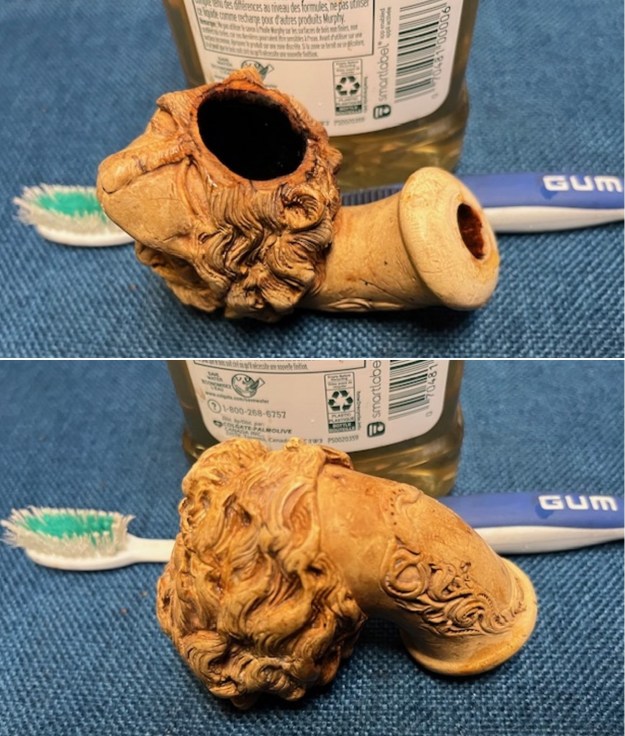
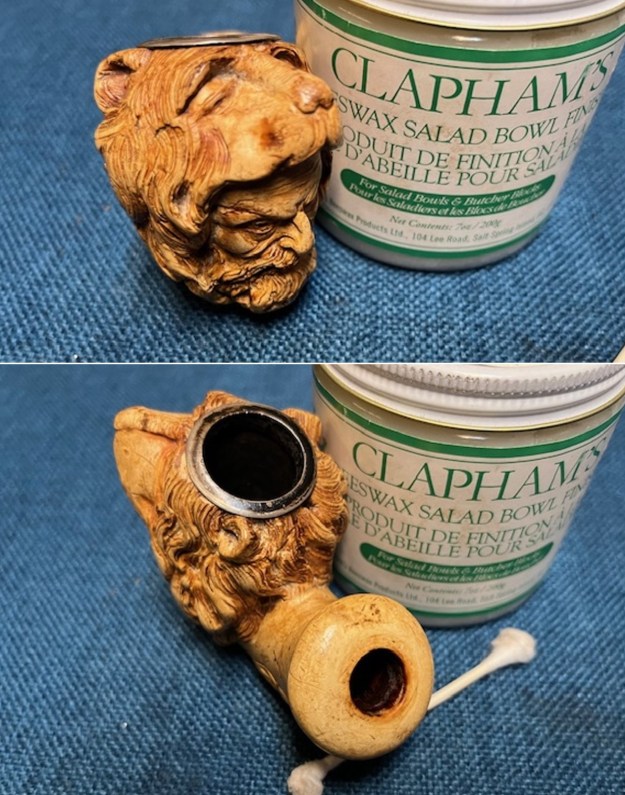
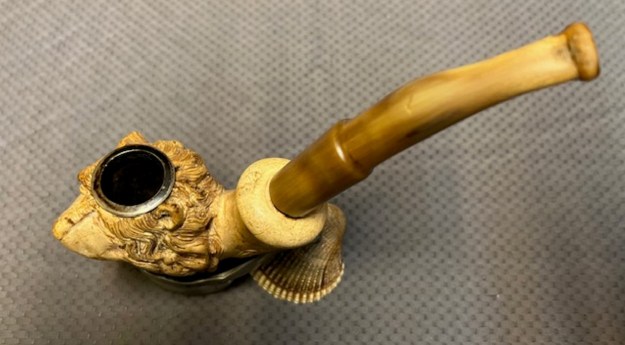
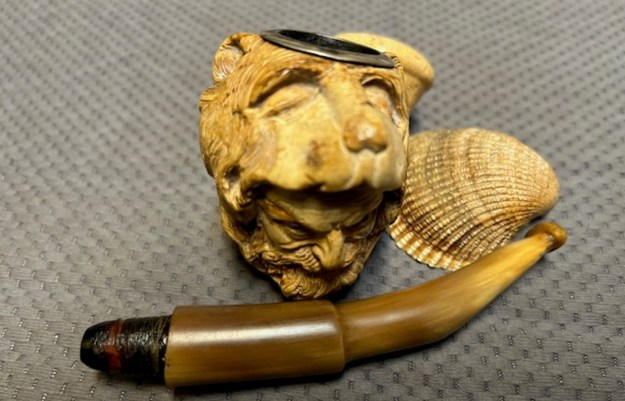
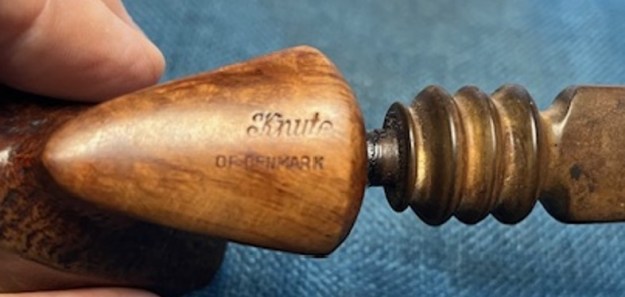
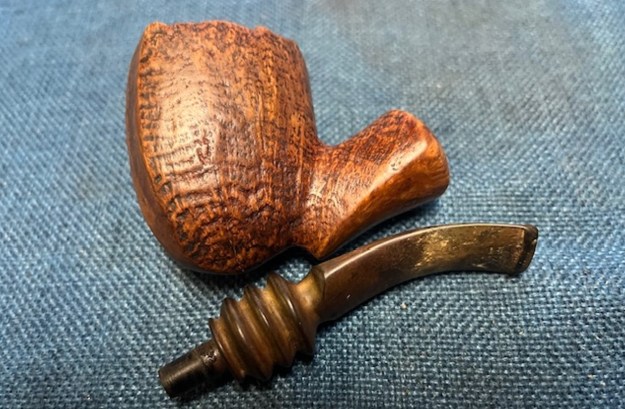
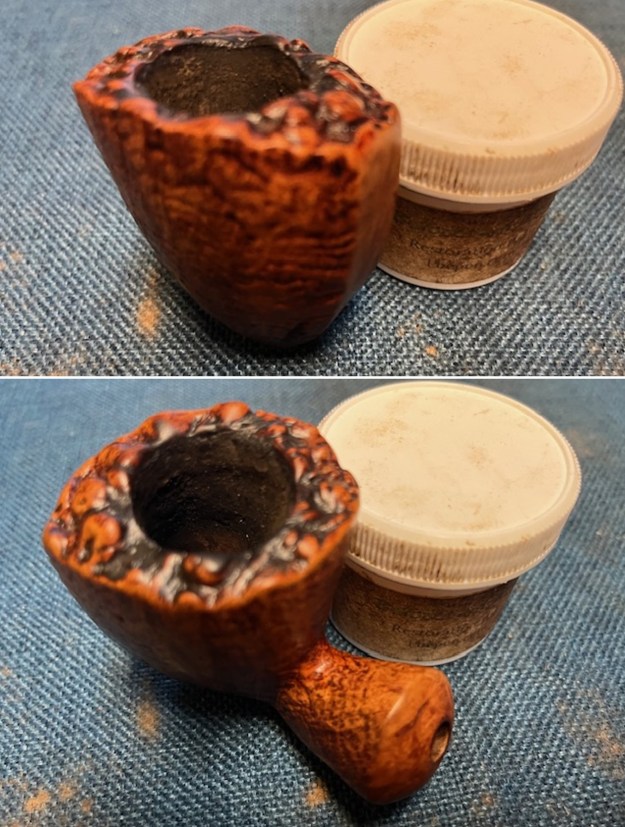
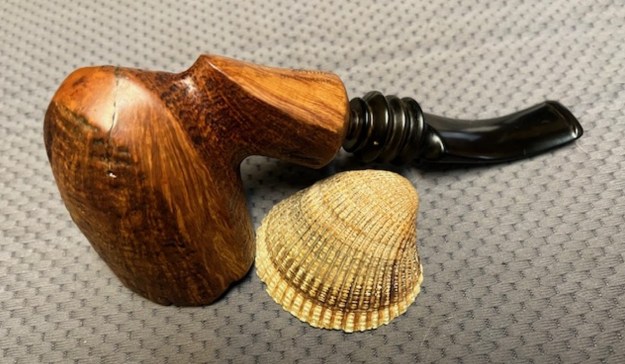
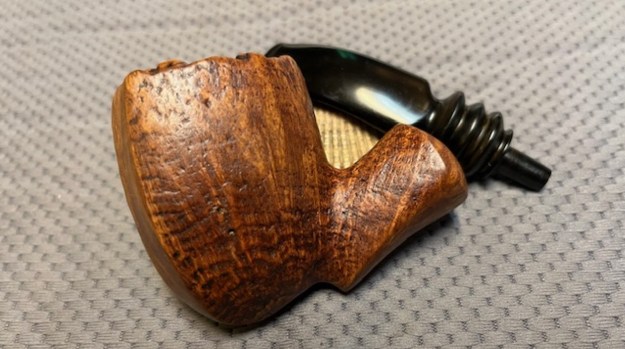
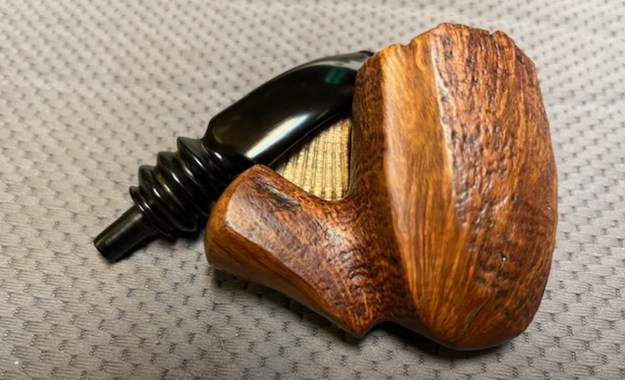
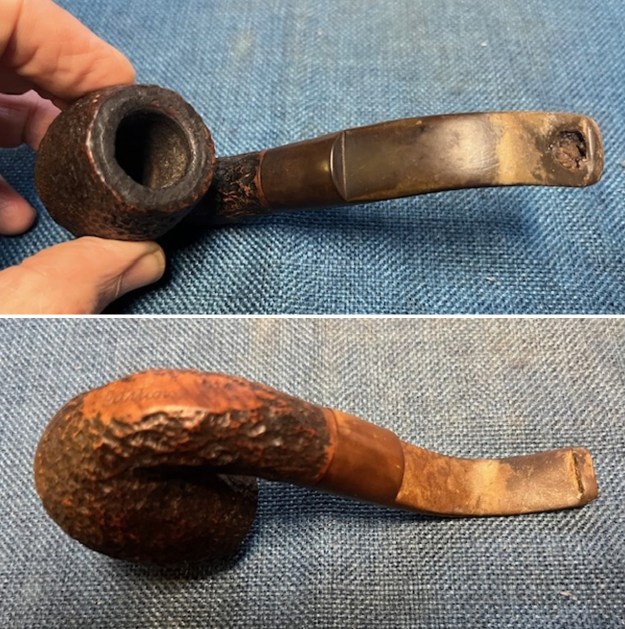
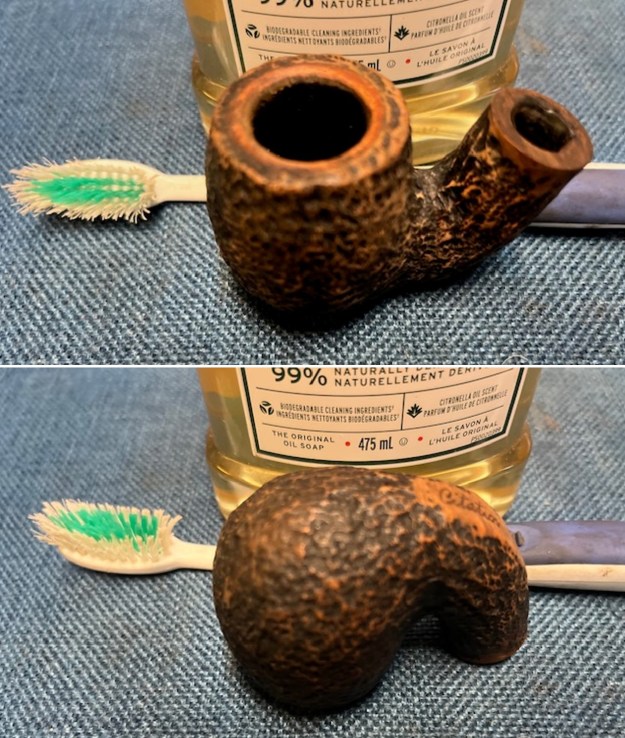
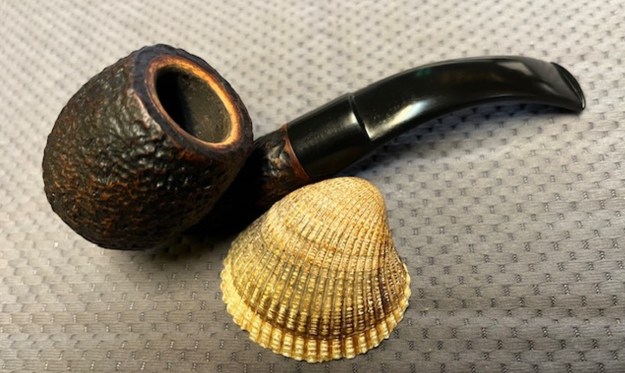
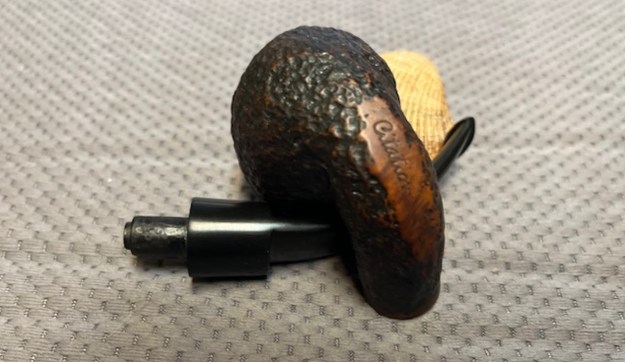
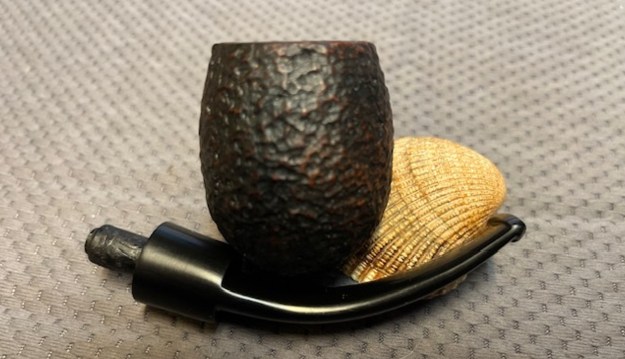
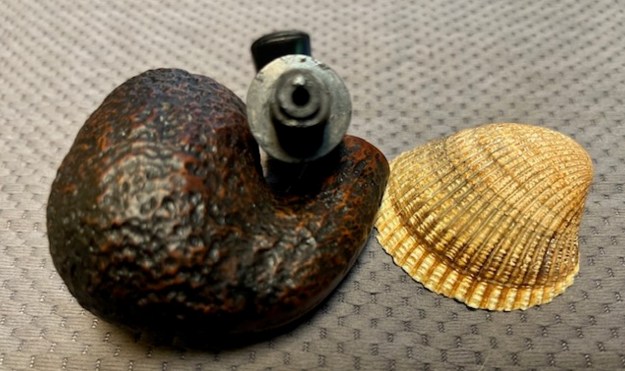
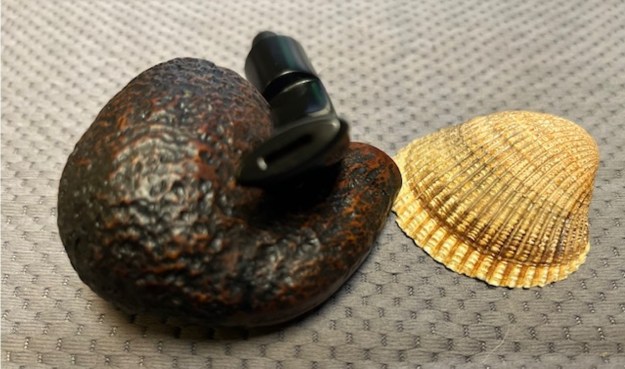
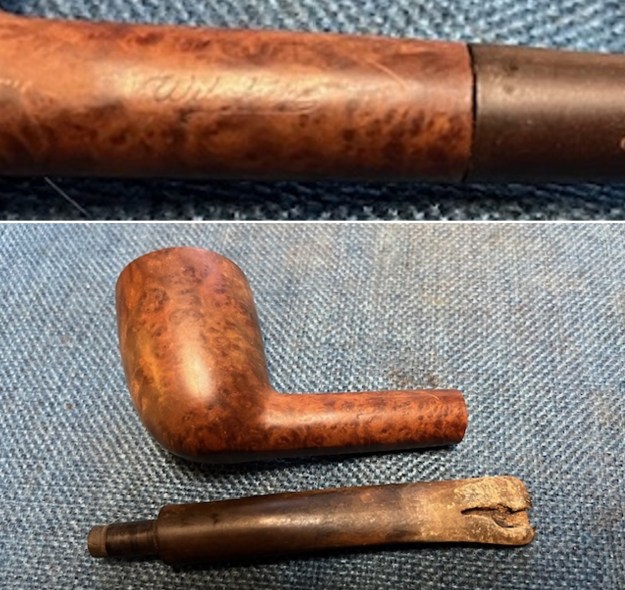
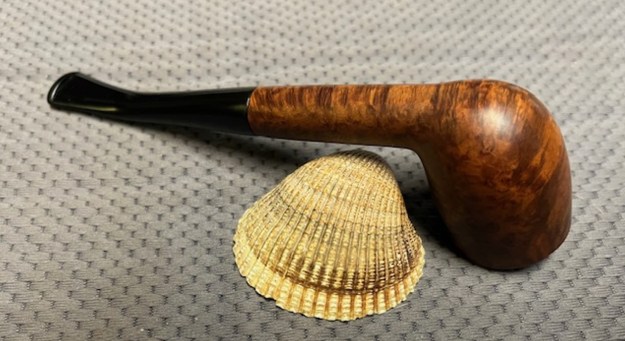
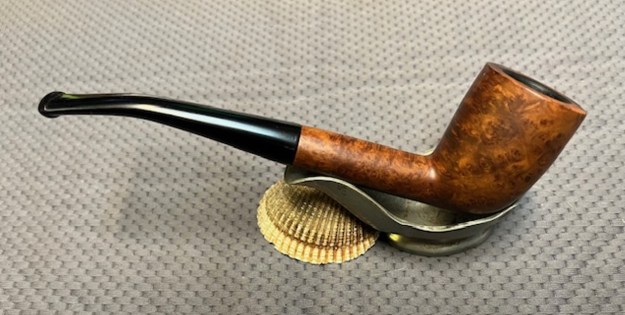
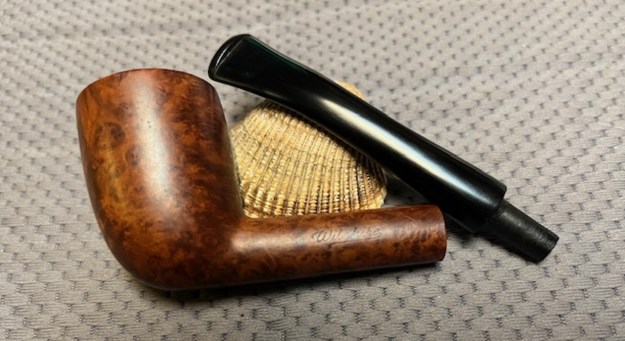
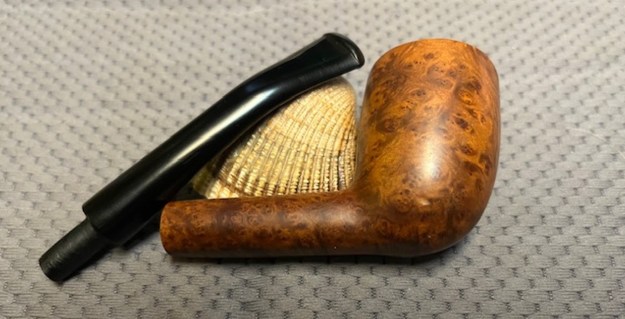
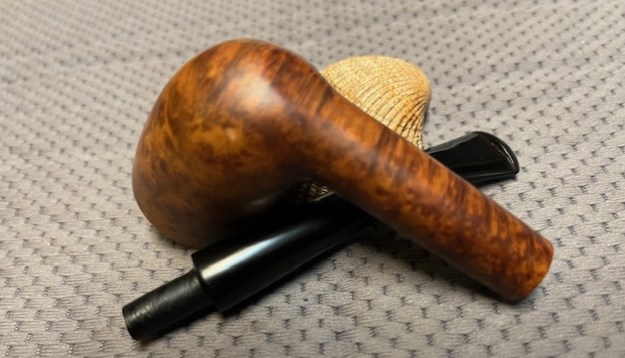
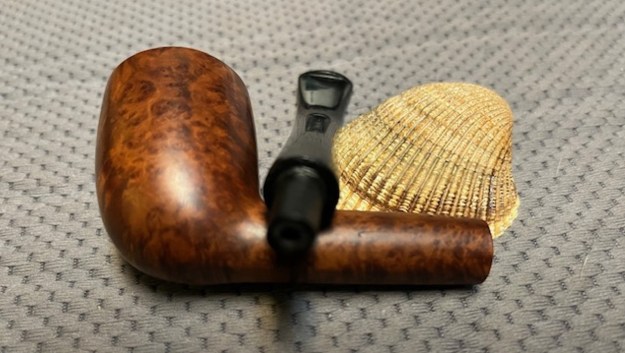
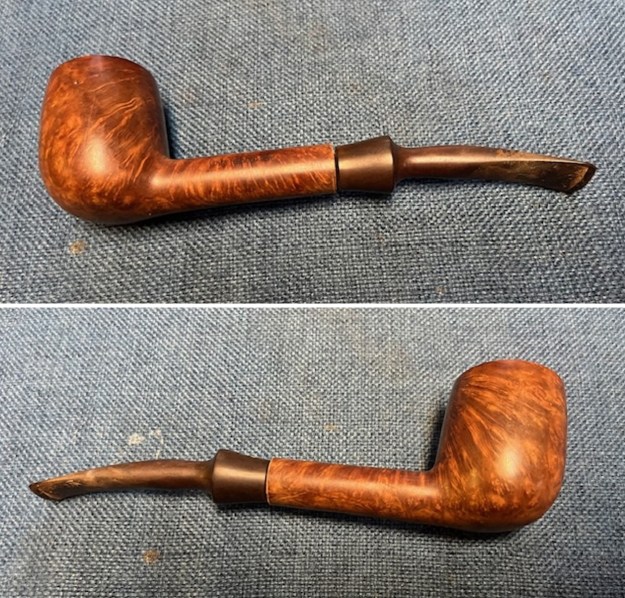
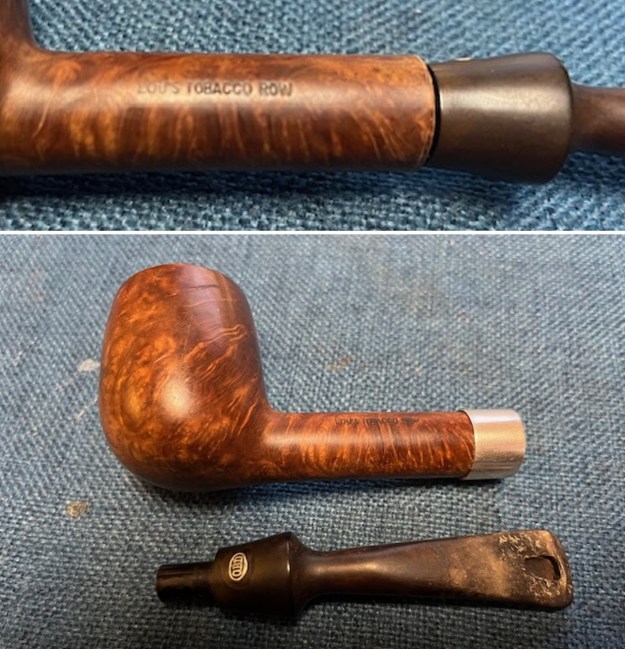
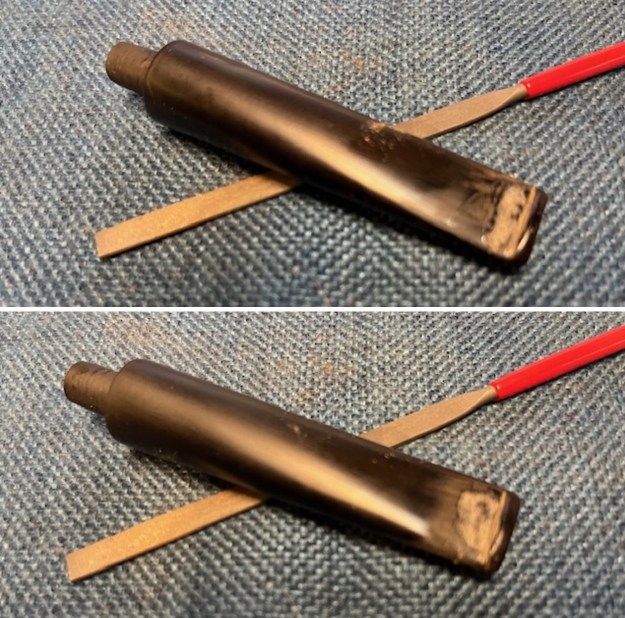
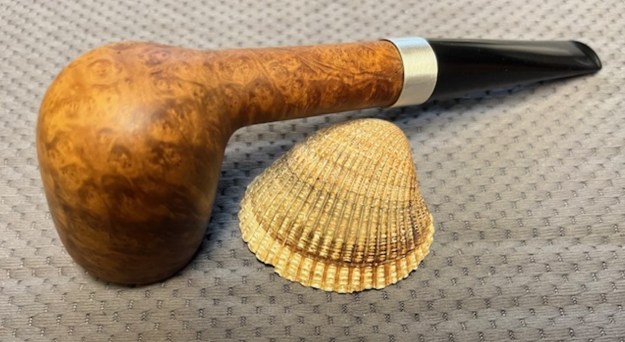
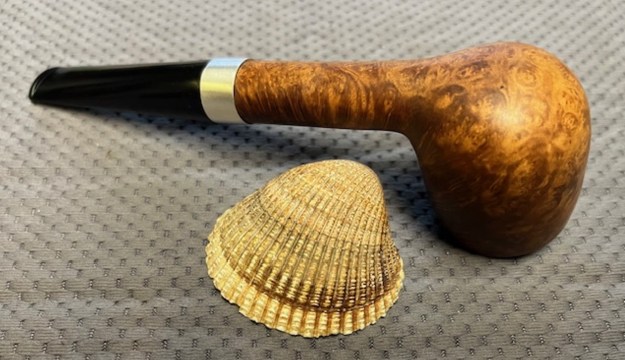
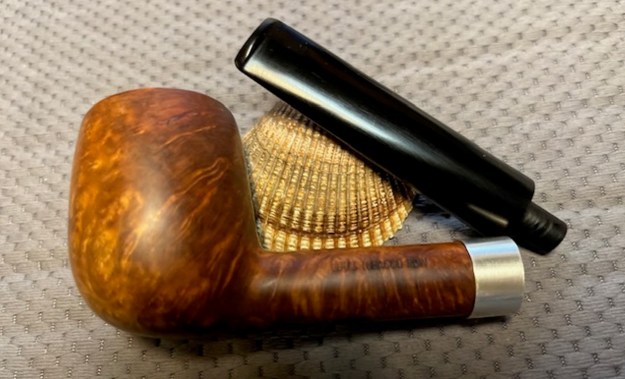
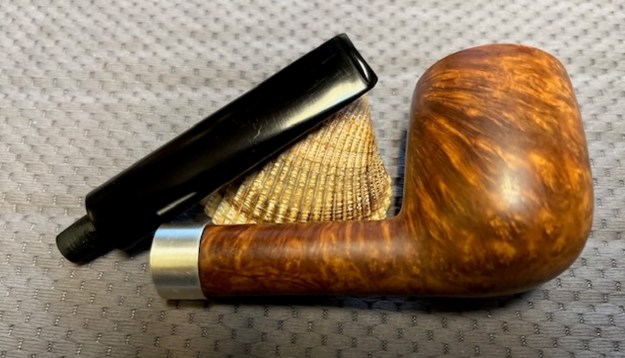
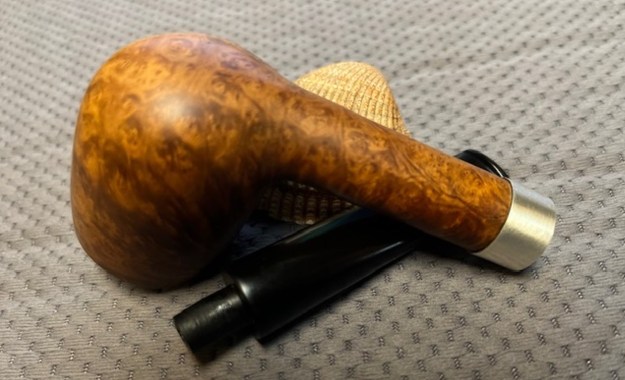
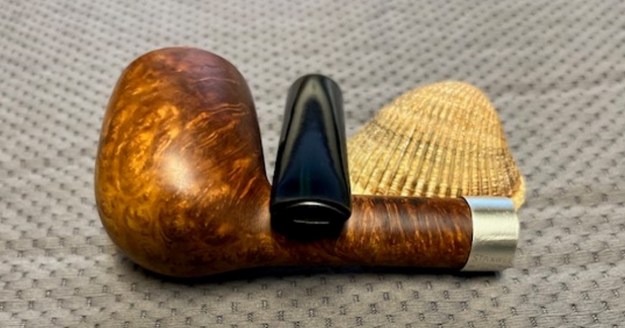
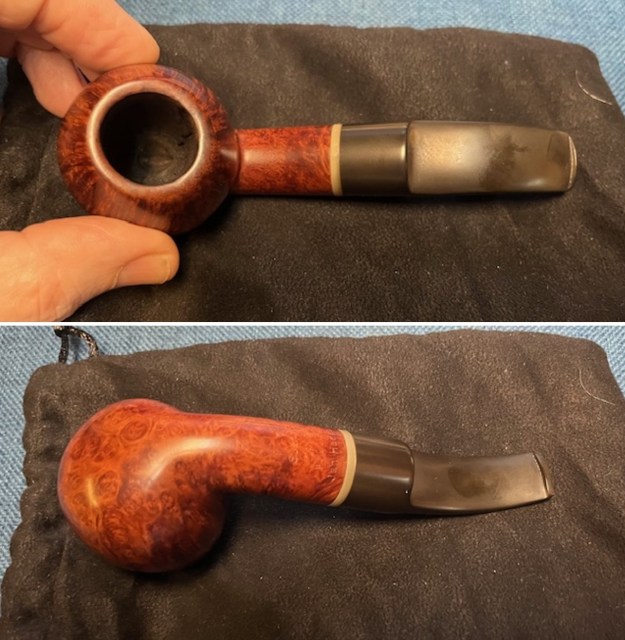
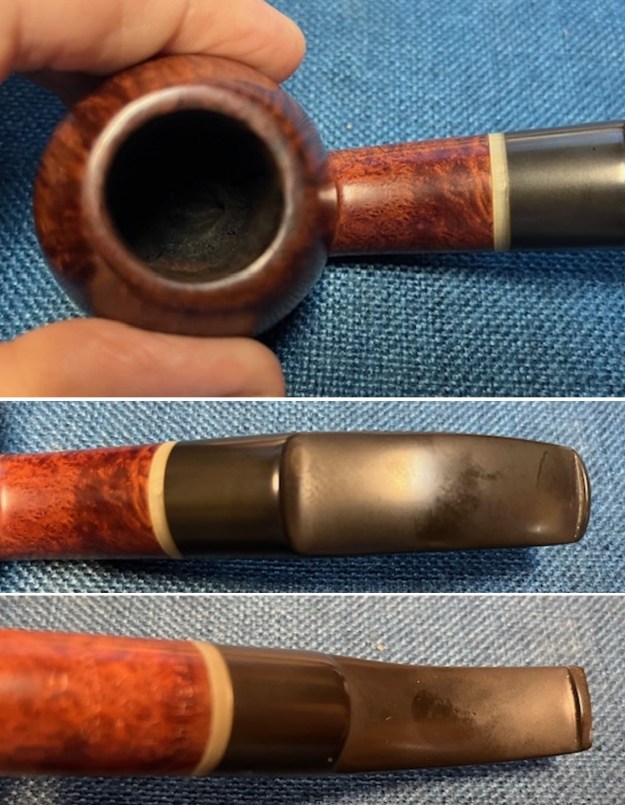 I took a photo of the stamping on the underside of the shank. It is clear and readable as noted above. I took a photo of the bowl with the stem removed to give a sense of the proportion and appearance of the pipe.
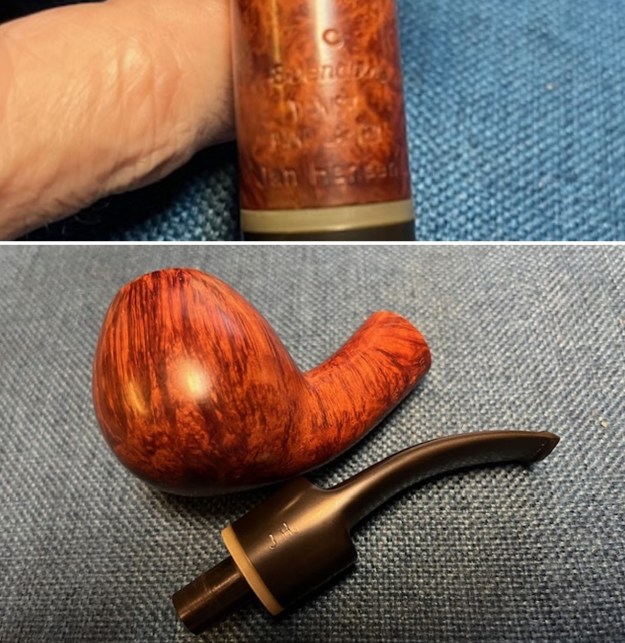 To help me understand the stamping a bit more I turned to Pipephil’s site and read what it said about Svendborg Hand Carved pipes (http://pipephil.eu/logos/en/logo-s14.html). I have included a screen capture of the section below as well as the side bar information below the capture.
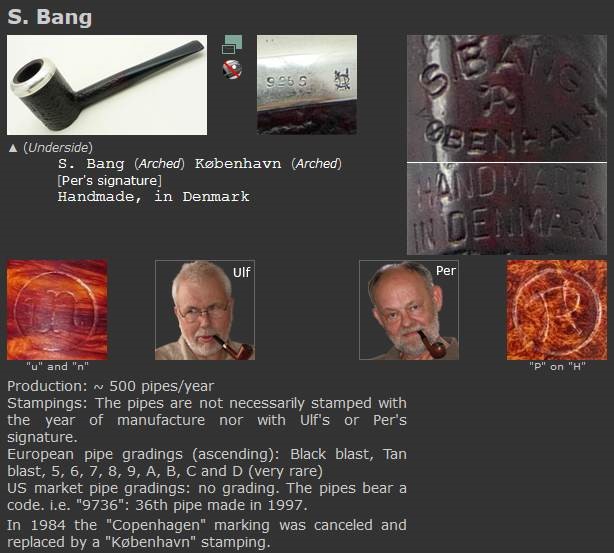
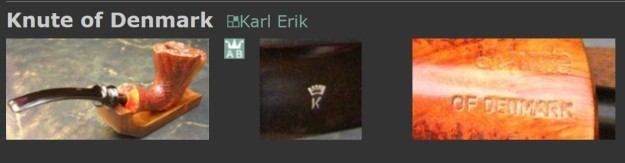
 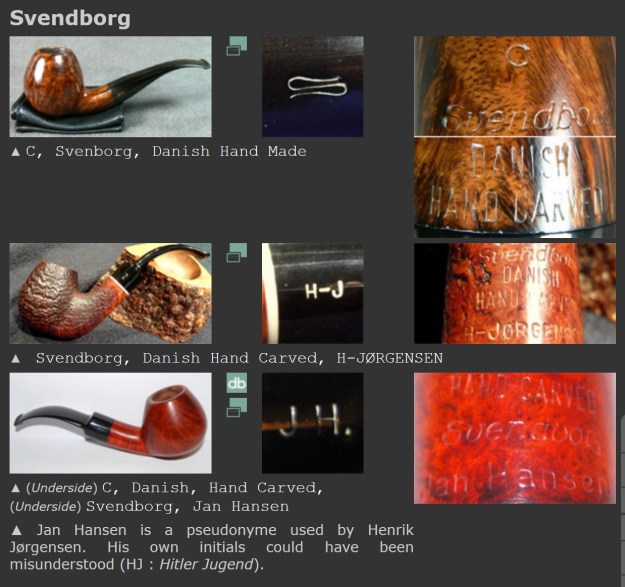 Brand founded in 1970s by Henrik Jørgensen, Poul Ilsted and Tao Nielsen. They bought an old factory (Nordisc Pibefabriker) in Svendborg on Funen island. Poul and Tao gradually bow out from machine manufactured pipes (1982) and Henrik Jørgensen manages the brand until its take over by Design Berlin (D) in the late 90ies. Kaj C. Rasmussen jointed the firm for several years. 17 employees worked for this brand under Henrik Jørgensen direction
From the information I found there the Jan Hansen stamping was clear for me. It is a pseudonym used by Henrik Jorgensen. His own initials would not have been used as they could easily be misunderstood. HJ was used for Hitler Jugend. That helps me understand a bit more. I know that the pipe is like the third pipe in the above photo and bears the same stamping and shape. My assumption is that the pipe was made after Ilsted and Nielsen bowed out which would put the date of the carving between 1982 and the late 90’s when Design Berlin took over. The Danish Hand Made stamping also confirms that assumption.
Next I turned to Pipedia for more information and detail (https://pipedia.org/wiki/Svendborg). I find that the articles there fill in some interesting information on the relationships and history of a given brand. In this case I found that also true. I quote pertinent pieces of the article. If you would like more information follow the above link.
Jens Tao Nielsen and Poul Ilsted Bech met each other when working together for Erik Nørding and soon became close friends. Both felt a bit tired to make nothing but bizarre fancy shapes and agreed they wanted to produce pipes of more style and more classicism. They decided to establish their own brand “Tao & Ilsted” – But how to do it?
A good fortune brought them in contact with Henrik Jørgensen, a passionate pipe lover and a wealthy Copenhagen banker who was willing to retire from bank business and change his career to become a pipemaker. The trio joined in 1969 and decided to start a new pipe brand together. Nielsen and Ilsted started to search for a suitable workshop while Jørgensen took care of the finances. In early 1970 the partners found an old, closed down pipe factory in Svendborg on Funen, and bought it shortly after for a mere 16.500 Danish Kroner. It was the earlier Nordic Pipe Factory – Nordisc Pibefabriker – maybe the oldest Danish pipe factory. And now it became the home of Svendborg Piber…
…But in spite of it’s magnificent success the trio fell apart after less than two years, when wilful Poul Ilsted stepped out declaring he didn’t want to make serial pipes anymore, but wanted to make individual specimens… Strange enough, he approached this aim returning to Nørding!
Ilsted’s argumentation doesn’t seem to be absolutely fair: even though Svendborg turned to produce mainly serial pipes under Seiffert’s influence each of the three partners was free to work on his very own one of a kind pieces as well! Since it was Seiffert’s basic idea to profit from – especially – Tao ‘s and Ilsted’s creativity to design new shapes. There are many knowledgeable collectors who confirm that these early Svendsborg pipes class among the most individual, innovating and exciting designs Danish pipecrafters created at that time…
The firm developed well and prospered throughout the 1970’s but around 1980 dissensions between Tao and Jørgensen occured. Tao: “Most pipes were delivered to the United States and whereby the Americans tried to dictate us the conditions. It was not only so that their taste and their view on aesthetics were simply horrible – no, moreover they wanted that the pipes should be as cheap as possible. That did not suit my plans at all, for I strove for high quality and artistic freedom in the end.”
Tao and Jørgensen, who tended to accommodate the US customers’ wishes, could not find a compromise on their different opinions, and so Tao left the firm in 1981 and opened his own pipe workshop near the harbour of Svendborg.
…Henrik Jørgensen continued Svendborg Piber bravely for more than a decade on his own until he finally sold the brand to Seiffert around the midst of the 1990’s. Seiffert, focusing on their mainstay brand Sillem’s, sold Svendborg – a ghost brand now – again before 2000 and the current owner is Planta’s Design Berlin.
The article also included this set of pages from a catalogue that were interesting as they included the Handcarved line. The philosophy that drove the brand is also there to read.
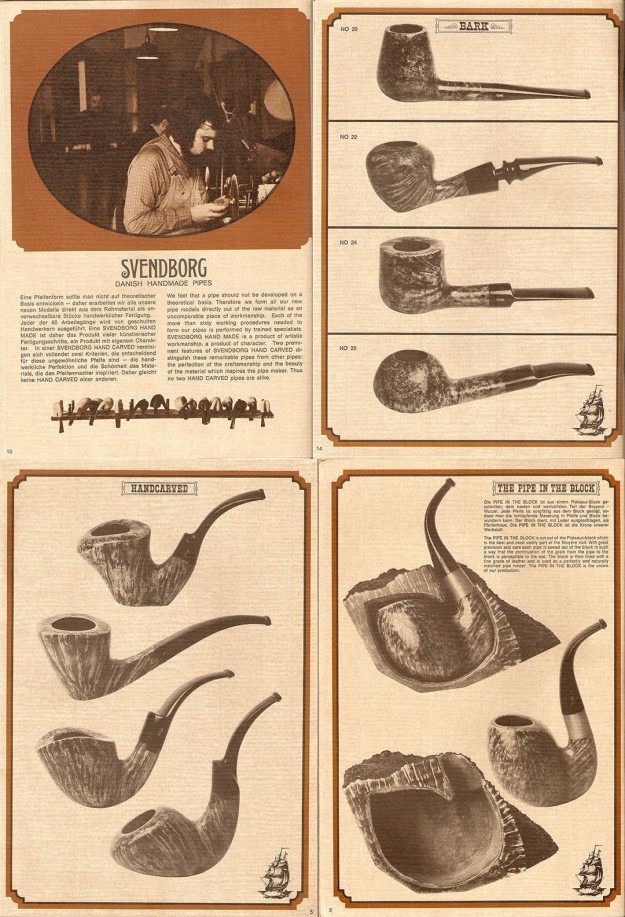
Catalog page, courtesy Doug Valitchka
That gives a good picture of the history and development of the Svendborg brand and the connection to some of the great carvers of Danish pipe history. It also confirmed the identification of Jan Hansen as a pseudonym used by Henrik Jorgensen. Armed with that information I turned to work on the pipe in hand.
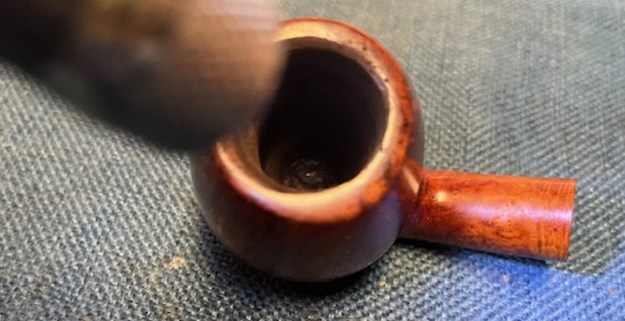
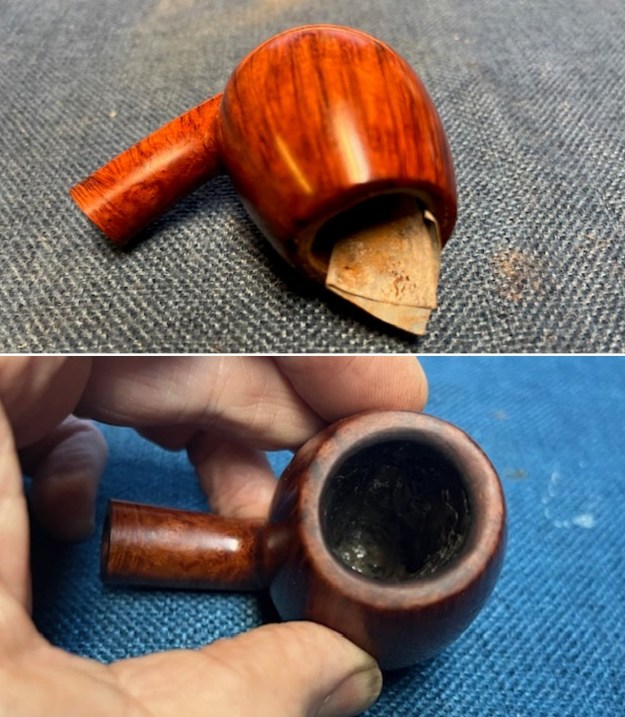
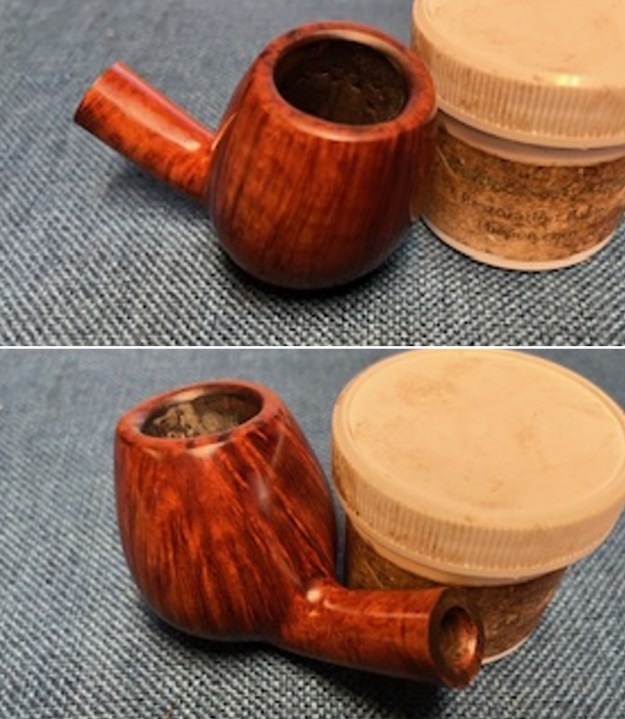
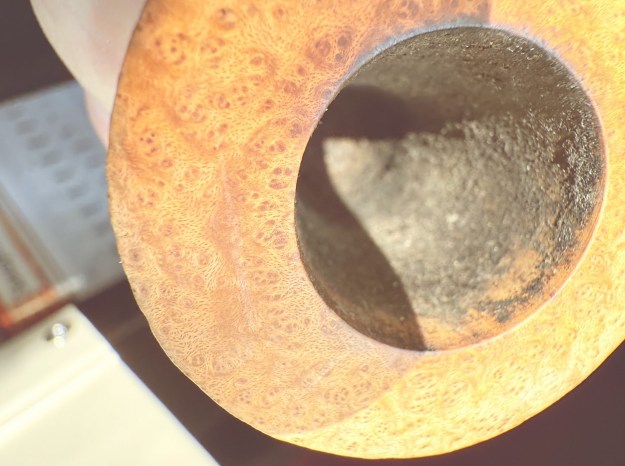
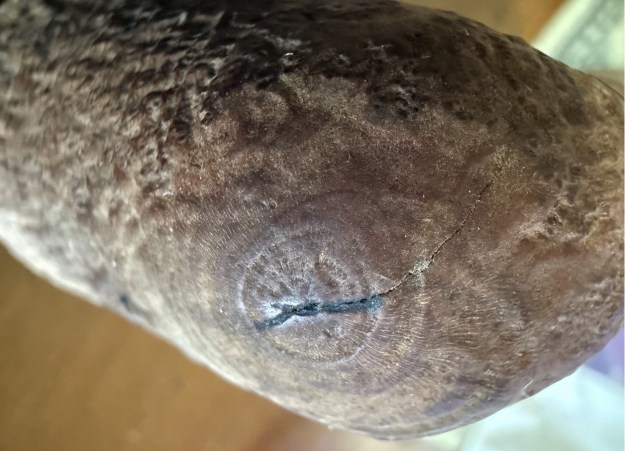
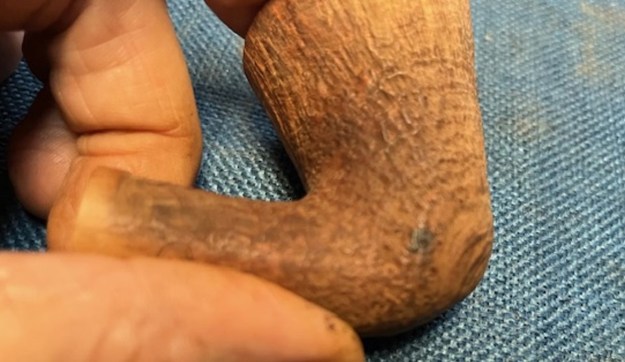
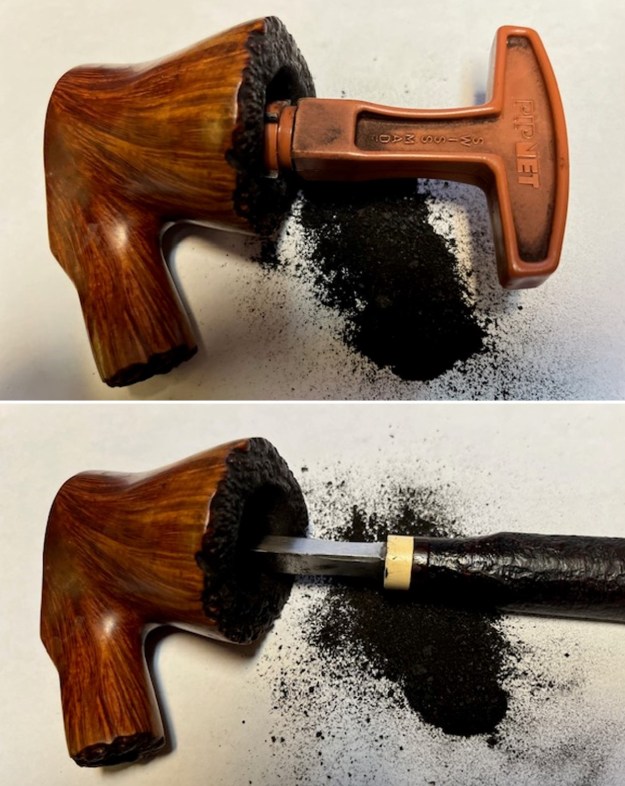
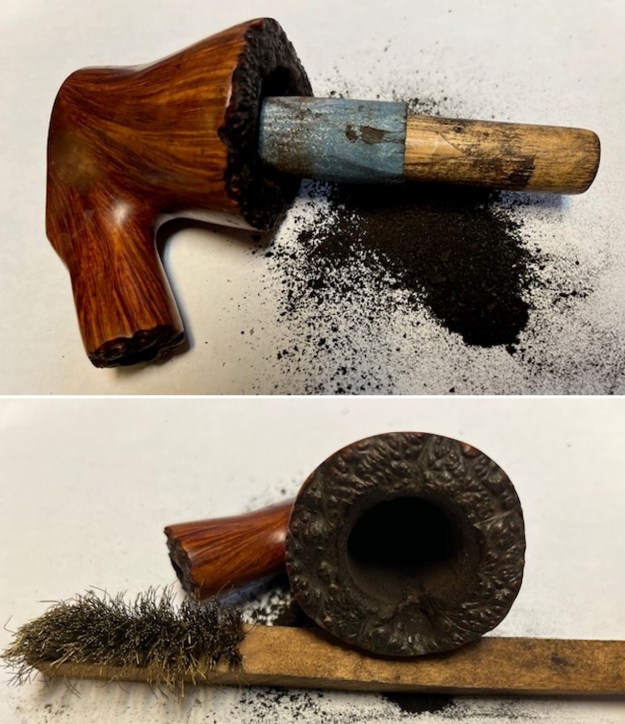
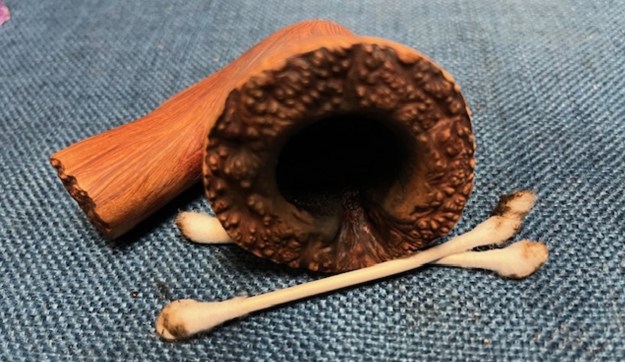
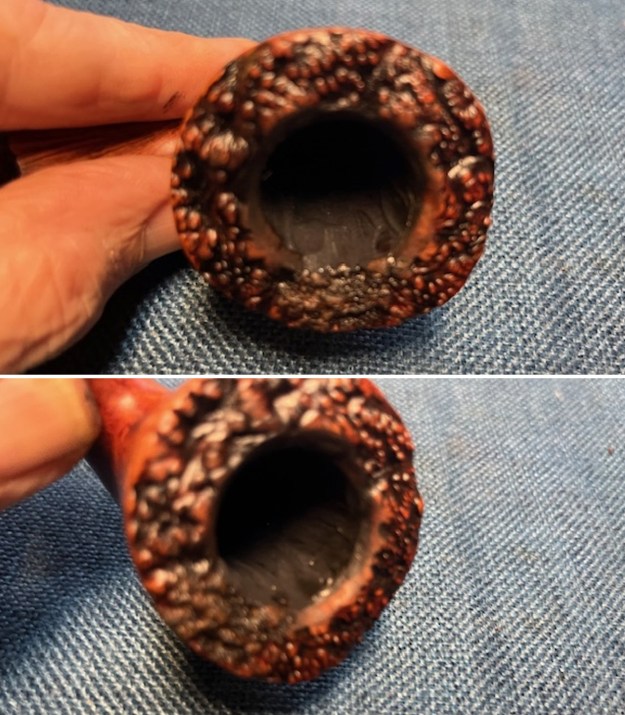
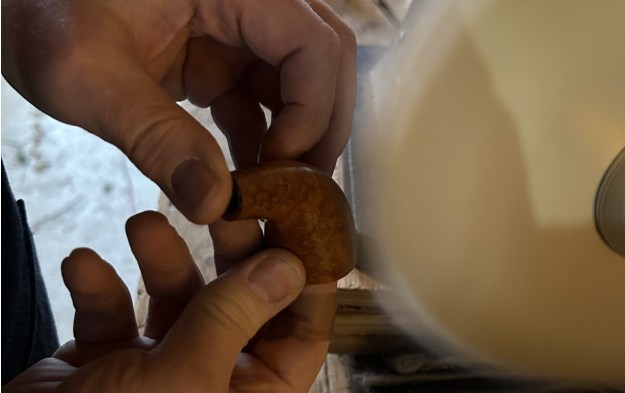
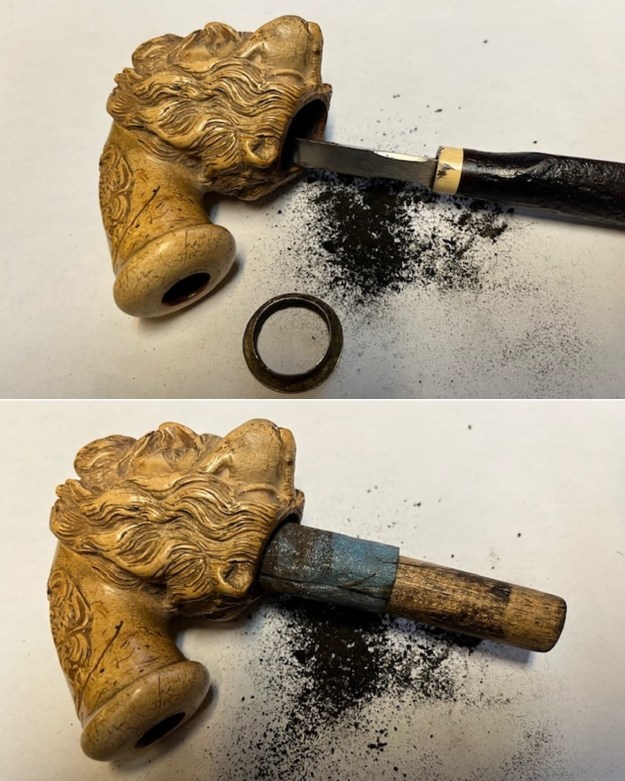
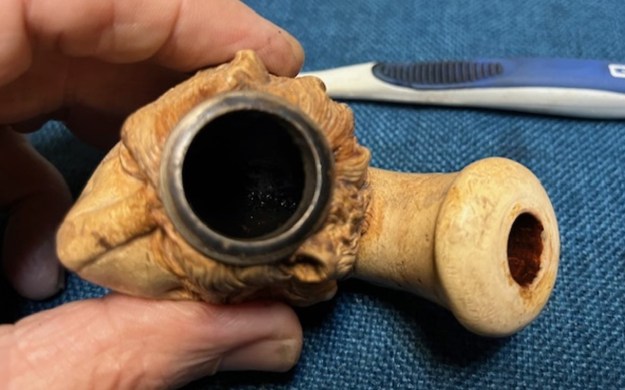
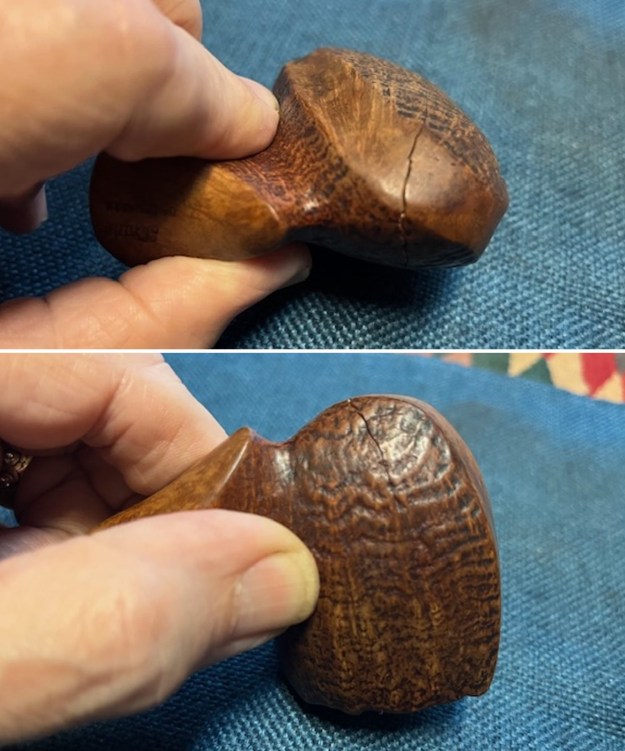
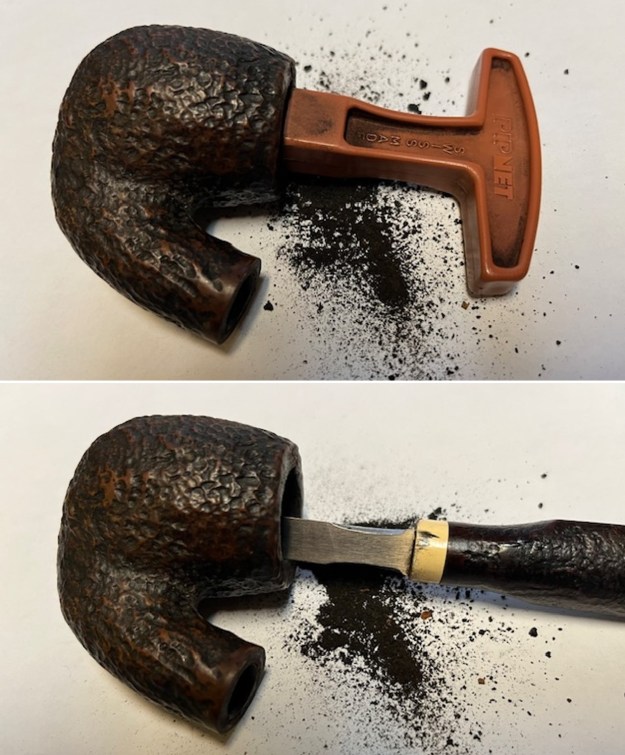
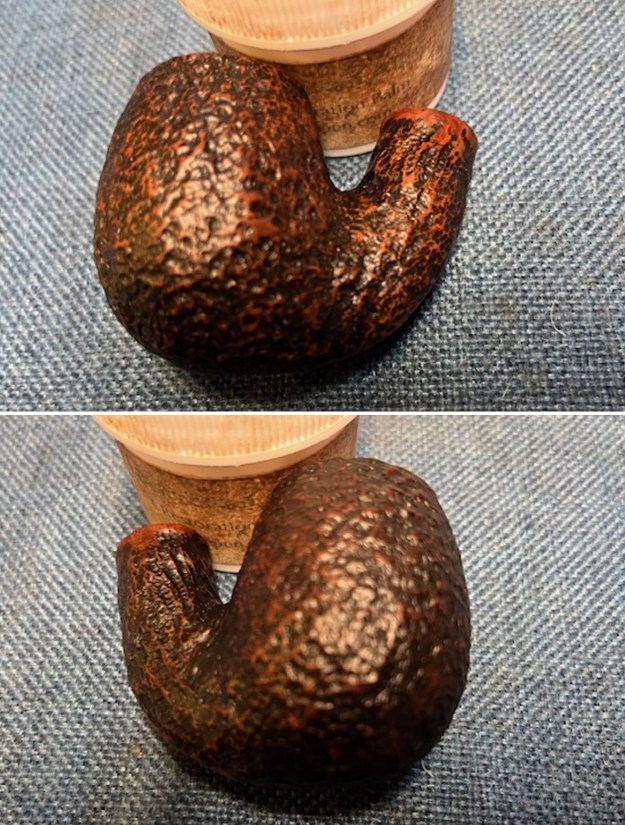
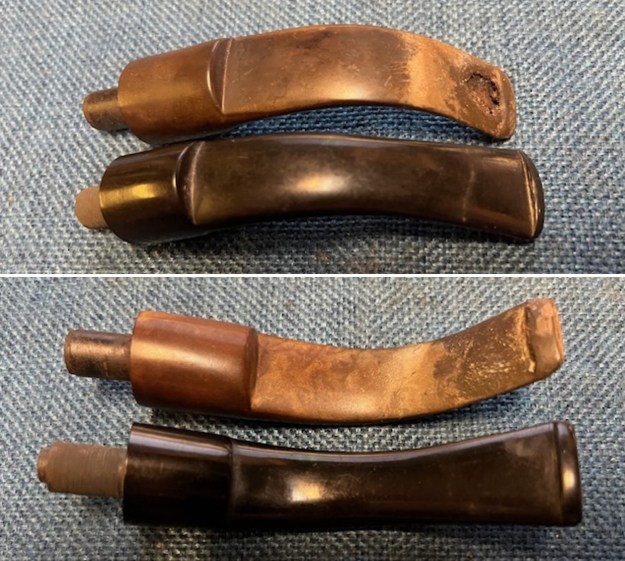
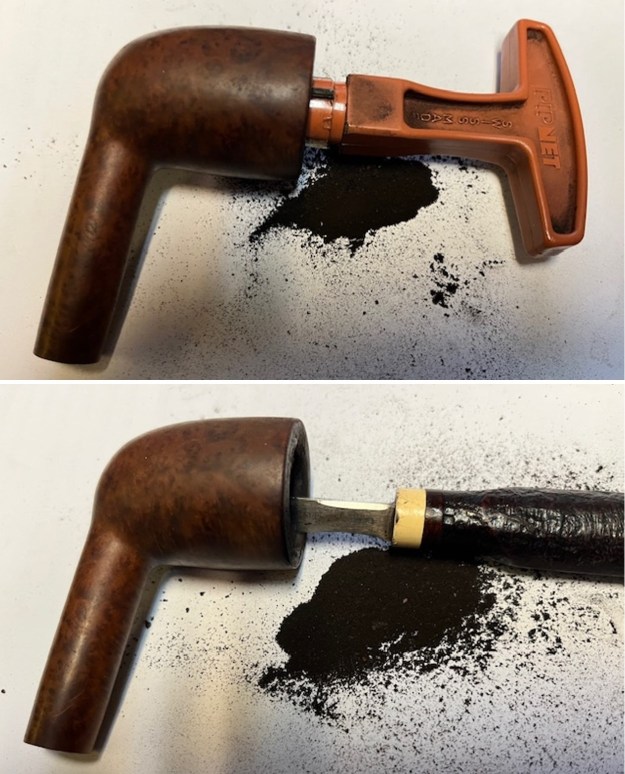
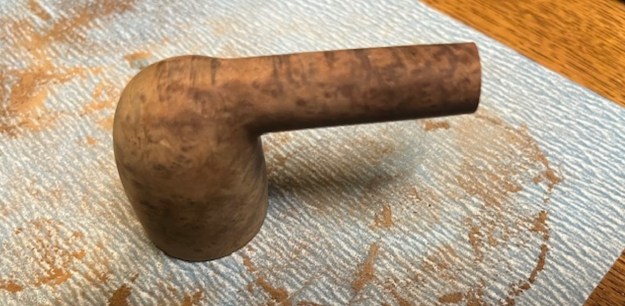
I reamed the bowl with a Savinelli Fitsall Pipe Knife to take back the cake to bare briar. I sanded the walls smooth with some 220 grit sandpaper wrapped around a piece of dowel. I have to say that I was spooked by what I found on the S. Bang Brandy I just finished. I ran my fingers over the sides of the bowl and gladly they were smooth. As mentioned above the bottom of the bowl showed a trough carved in the bottom of the bowl. It appeared to be carved by zealous use of pipe cleaners. There was a ridge around the bottom of the bowl around the trough. I was able to ream out the ridge with the Pipe Knife. It looked much better. I took a photo of it as best as I could but it is hard to see.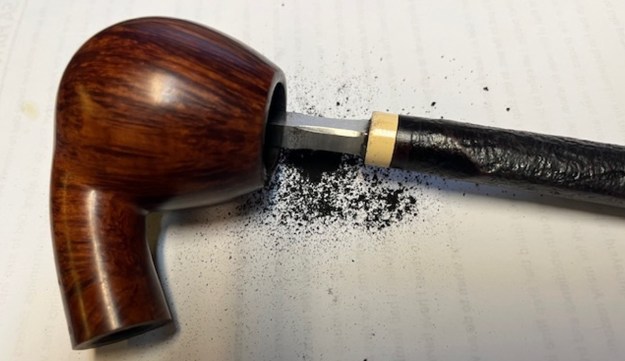
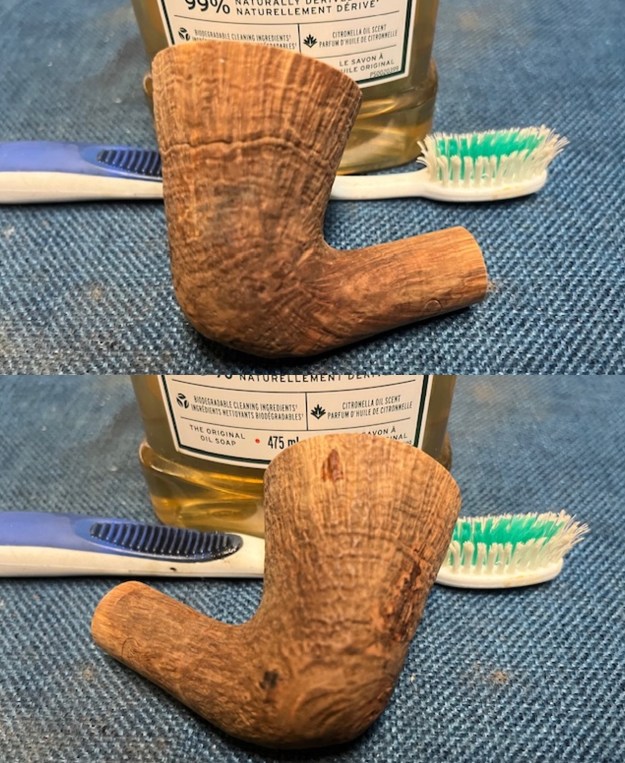
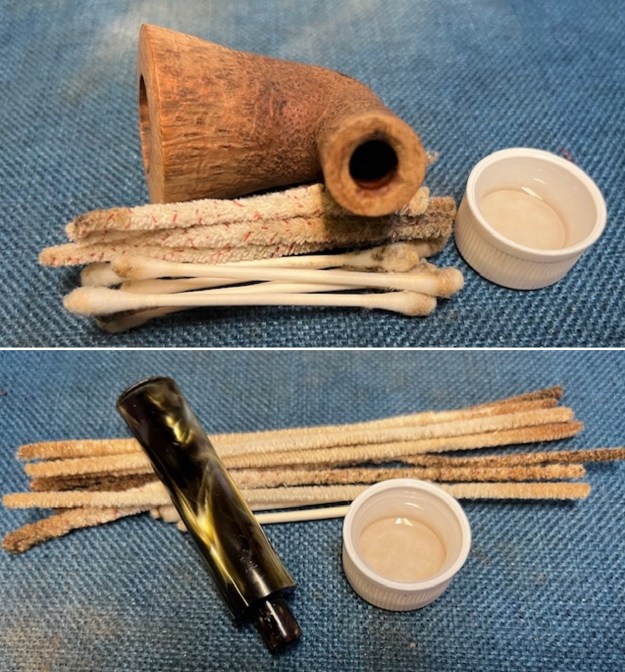
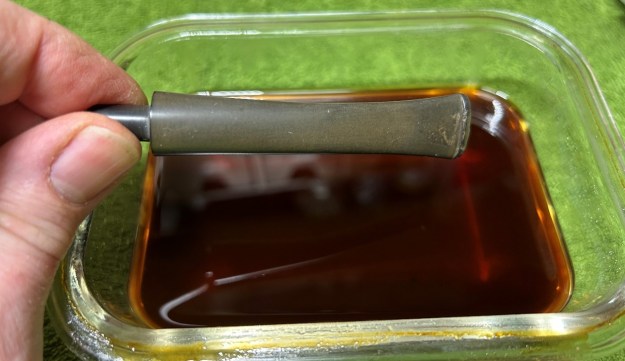
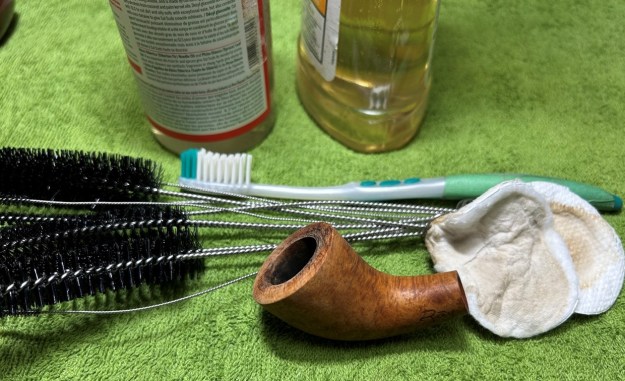
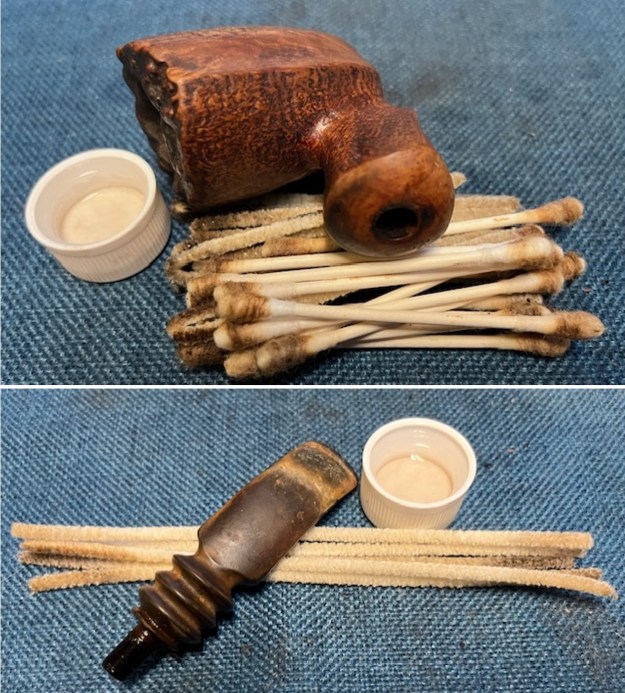
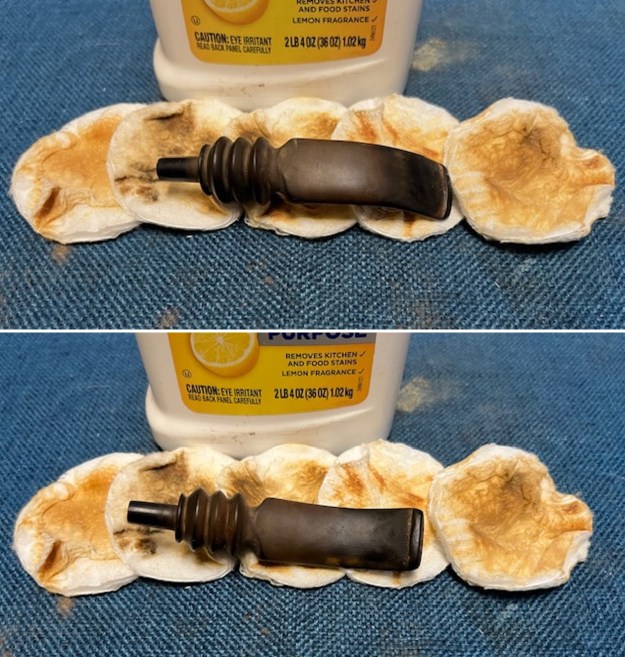
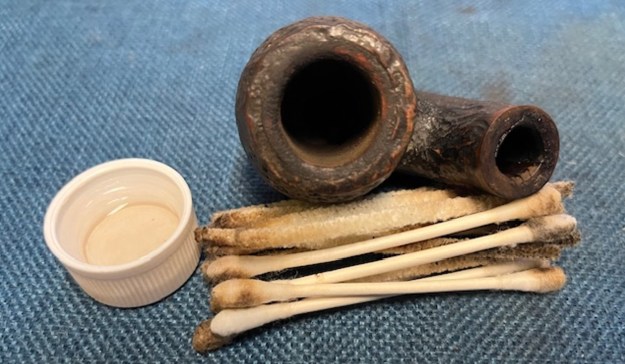
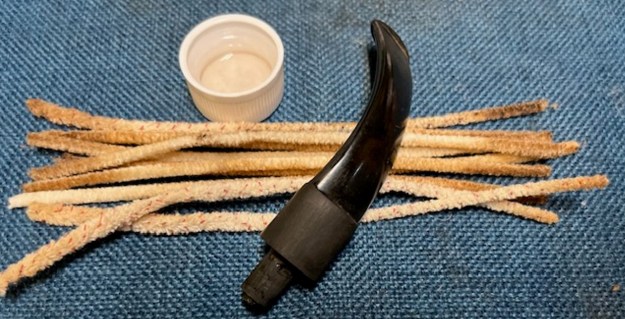
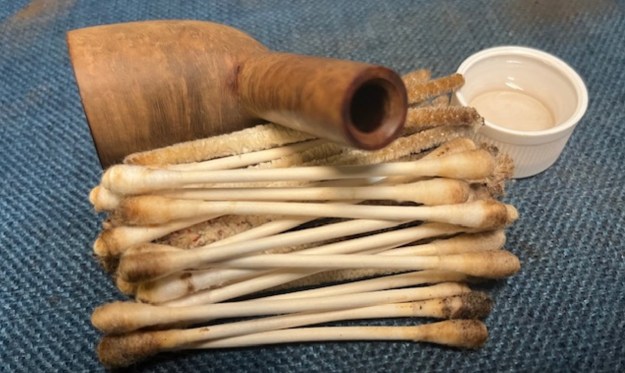
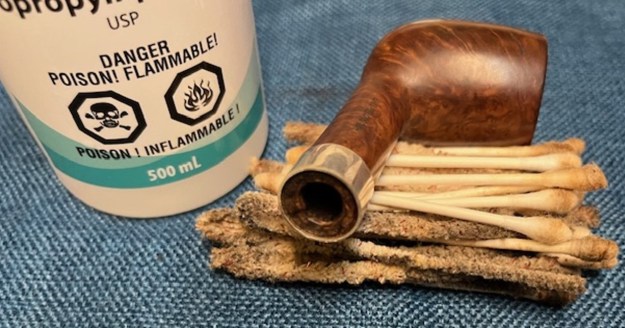
 I cleaned out the stinky, fruity smelling tobacco oils and tars in the shank and the airway in the stem. I used 99% isopropyl alcohol, cotton swabs and pipe cleaners and was able to remove the debris and some of the stench.
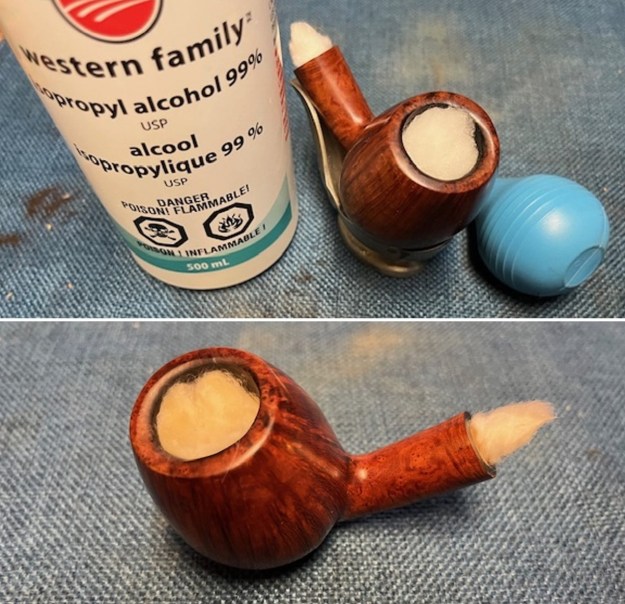
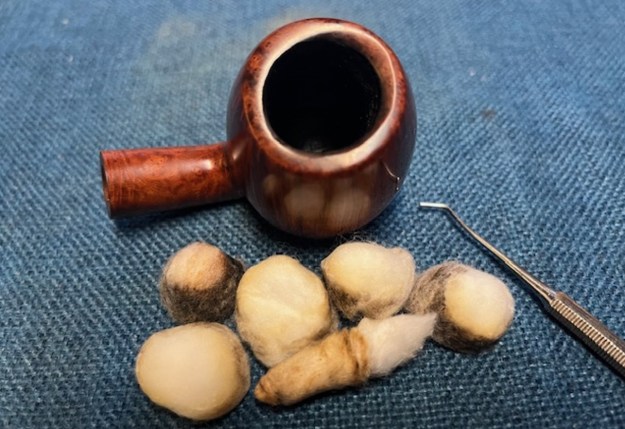
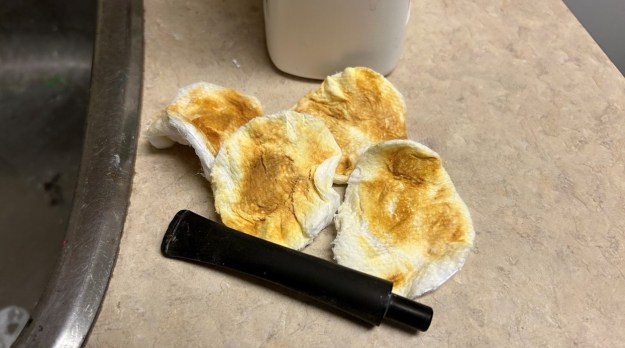
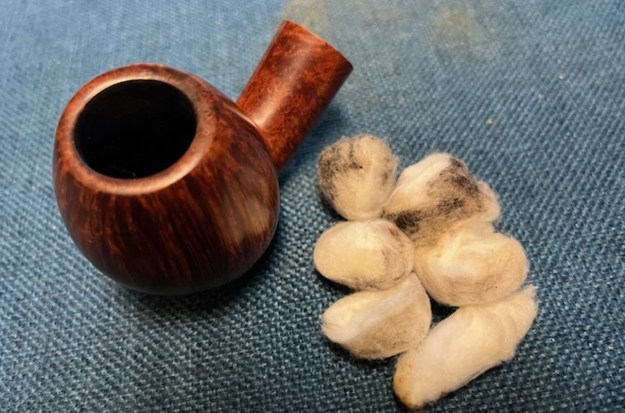
 I needed to “deghost” the bowl and try to exorcise the smell. I stuffed bowl with cotton bolls and used an ear syringe to fill it with alcohol. I set it aside to let the alcohol do its work and wick the oils into the cotton. While it sat for the afternoon, I did some other work. The next morning when I came back to it the cotton and alcohol had wicked out the oils and tars. The cotton was brown and the bowl smelled much better.
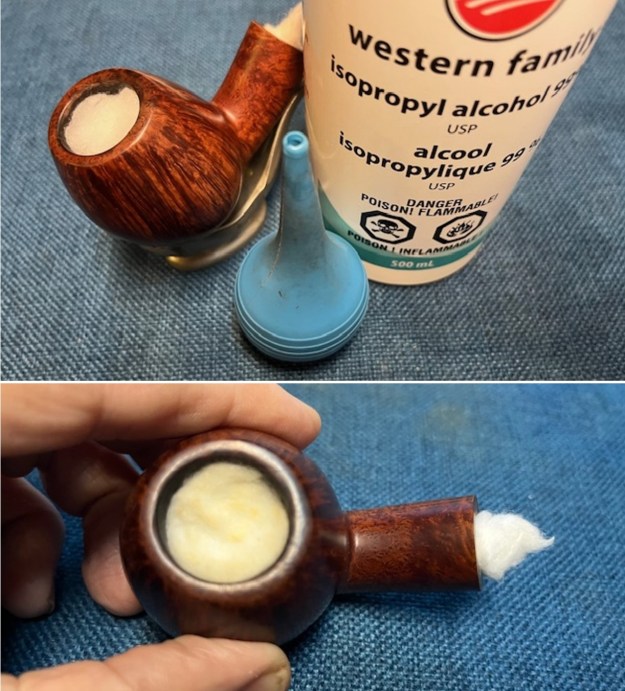
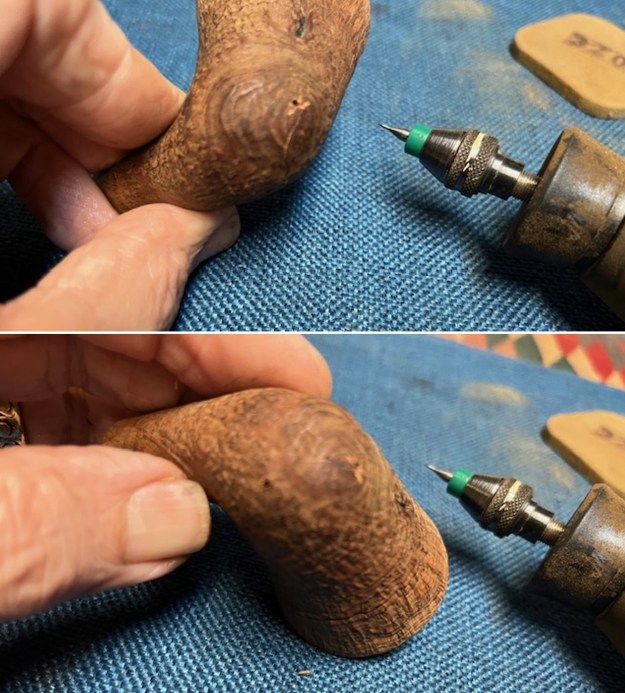
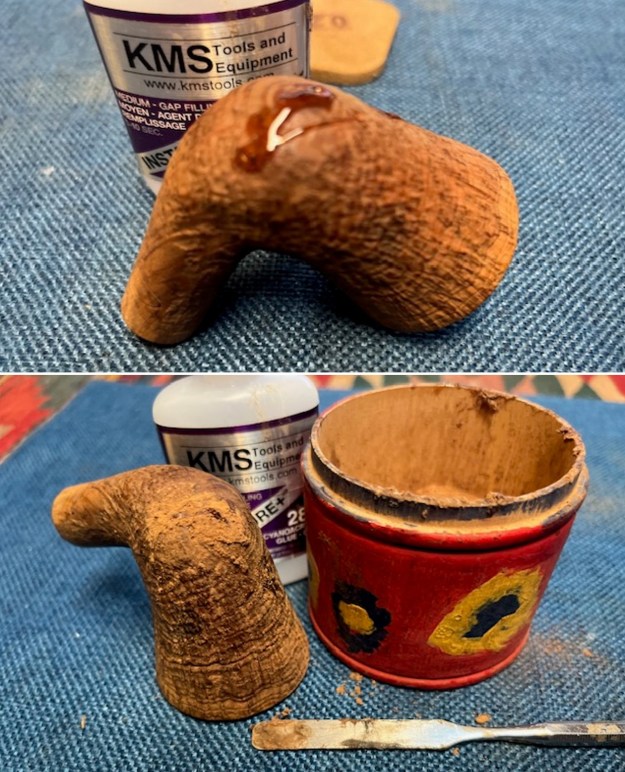
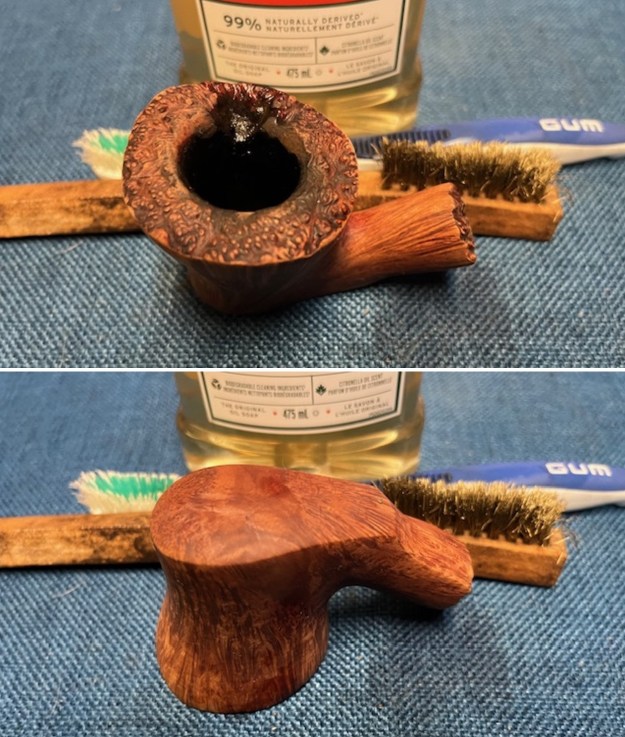
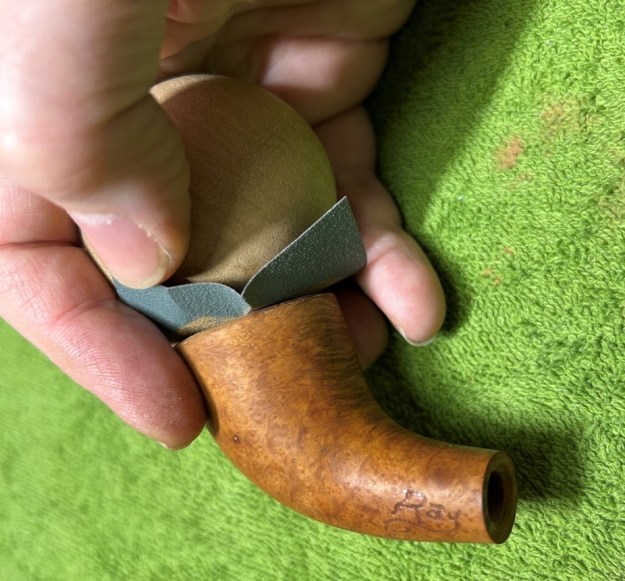
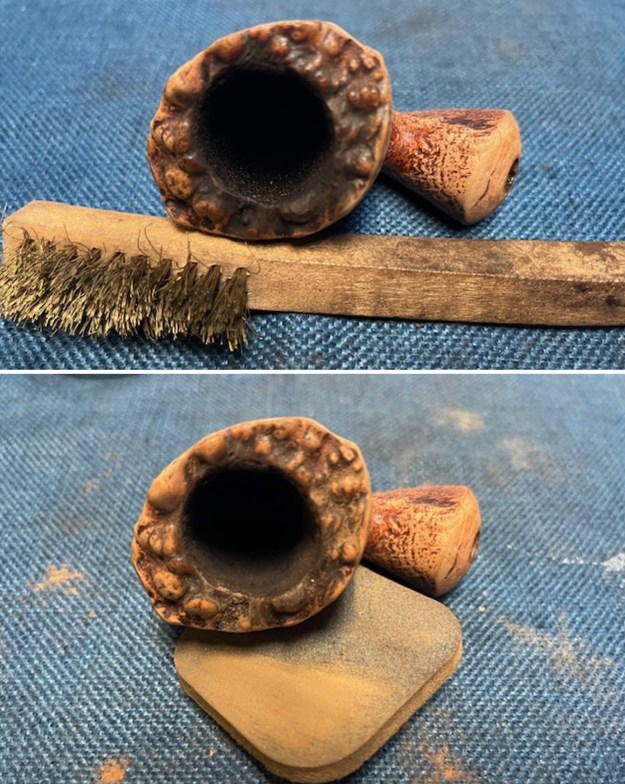
 The damages demanded some restoration and repair. I started with the rough inner edge of the rim. I used a folded piece of 220 grit sandpaper to minimize the damage on the inner edge of the rim and smooth it a bit. I was careful to not change the profile of the rim top and edges.
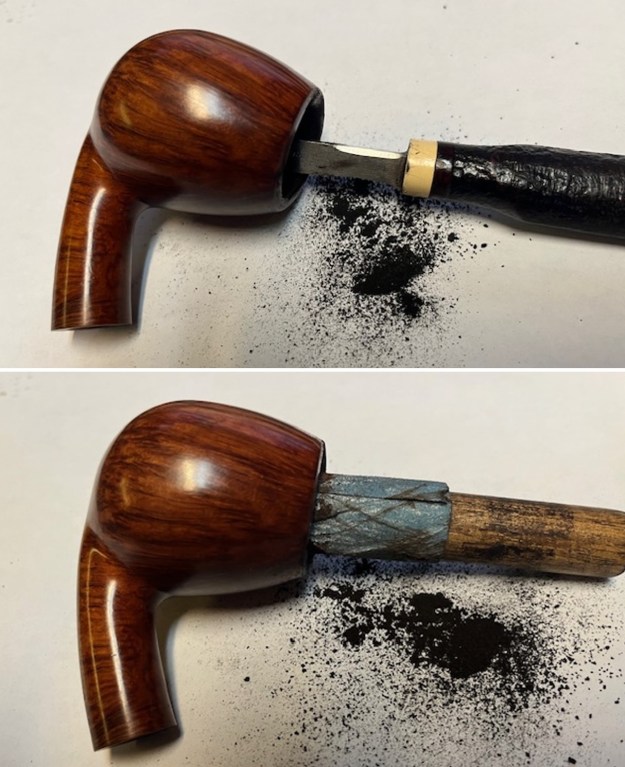
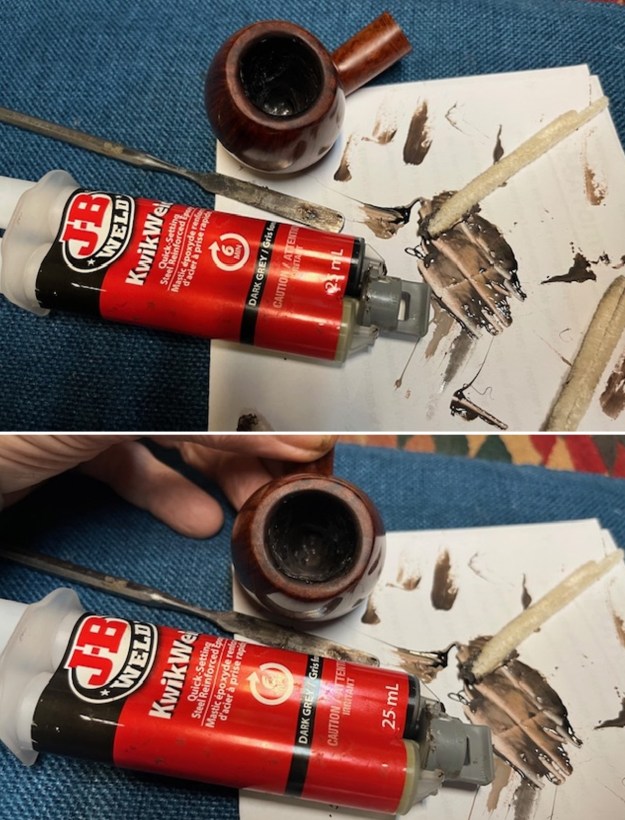
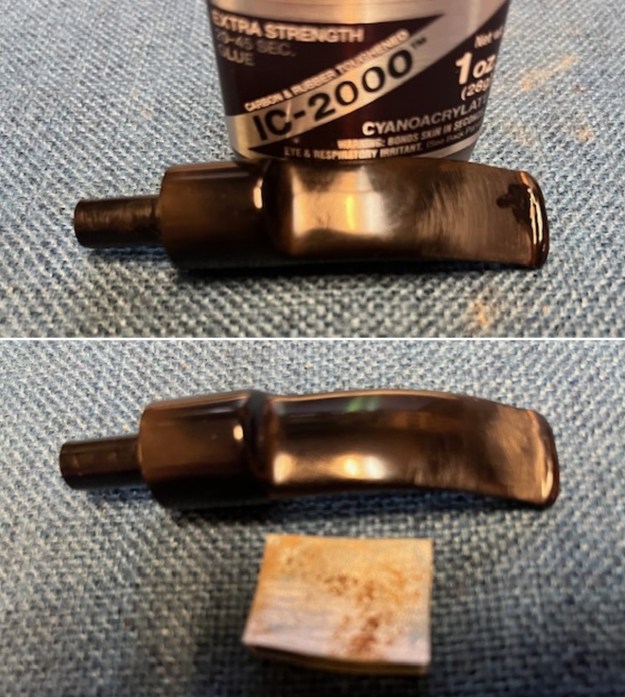
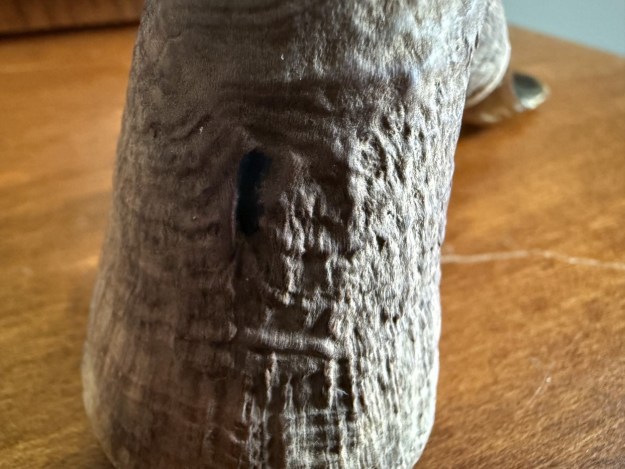
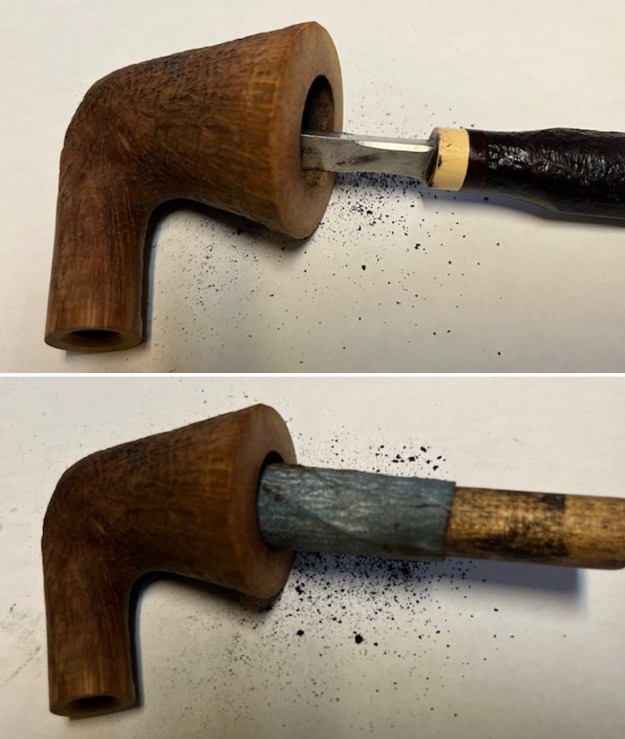
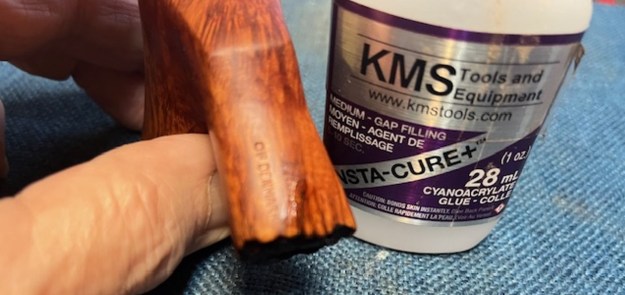
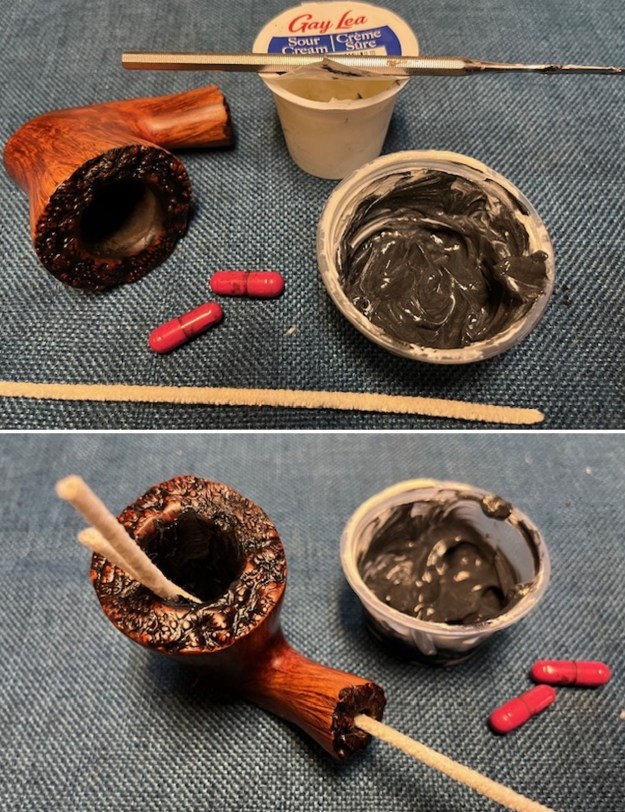
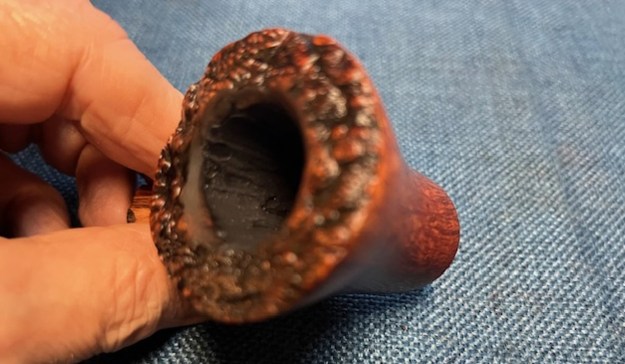
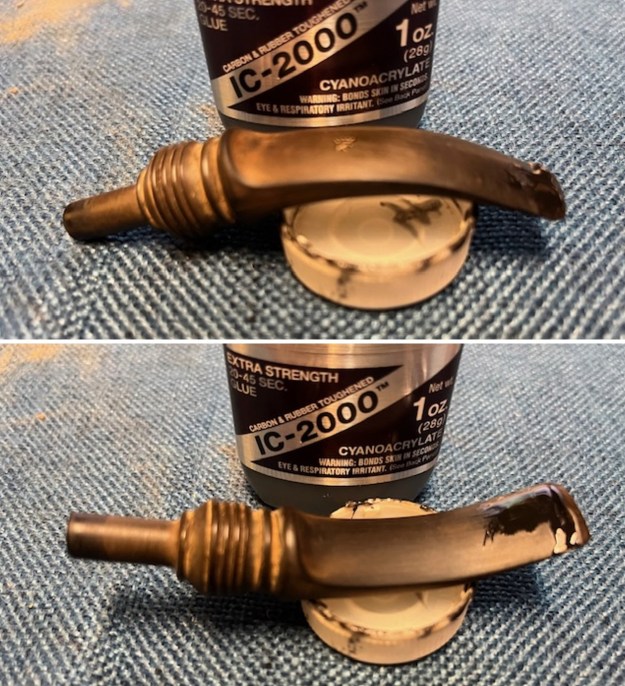
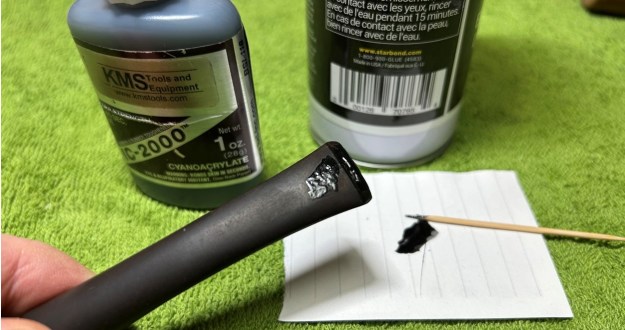
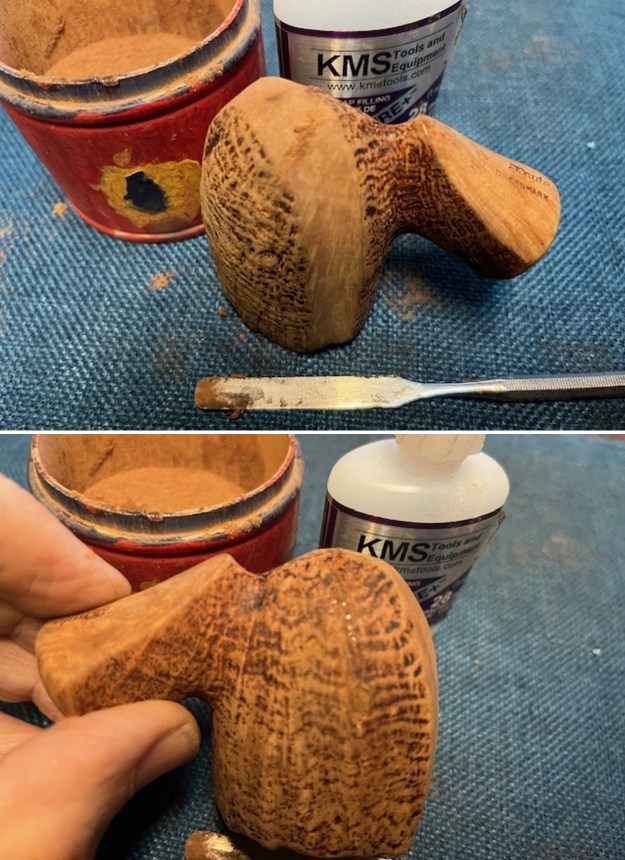
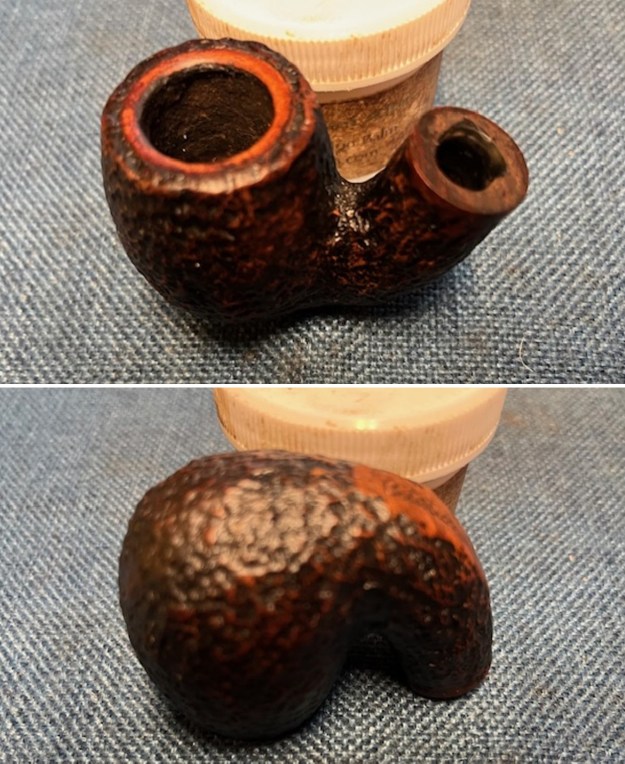
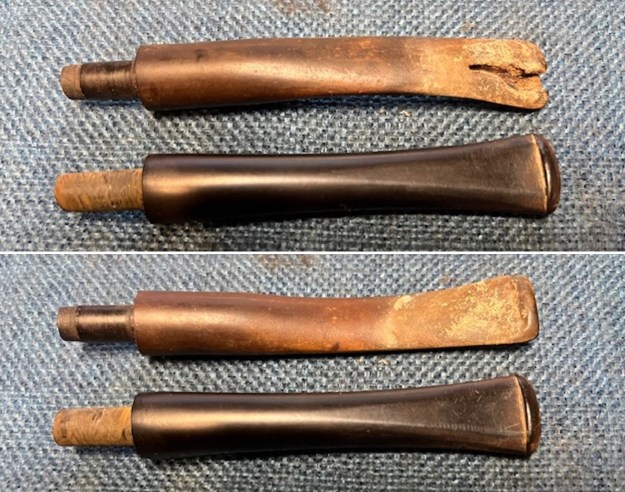
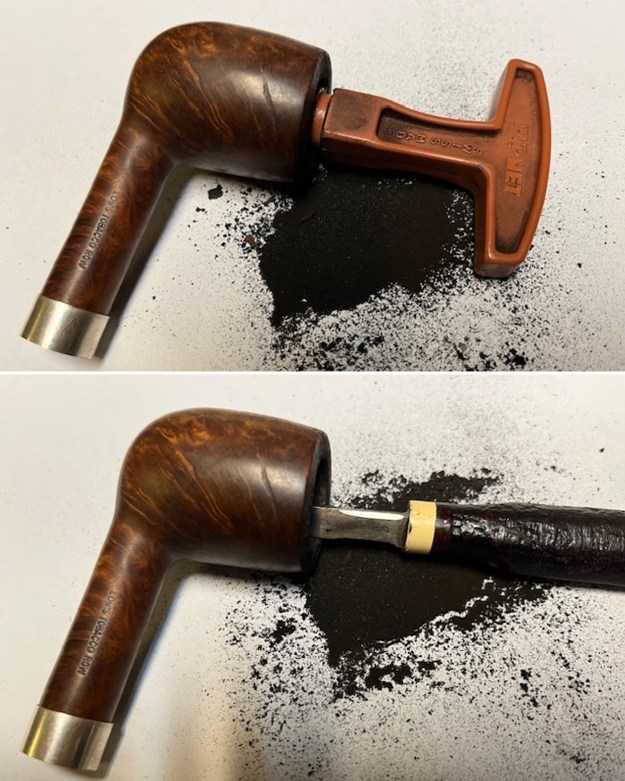
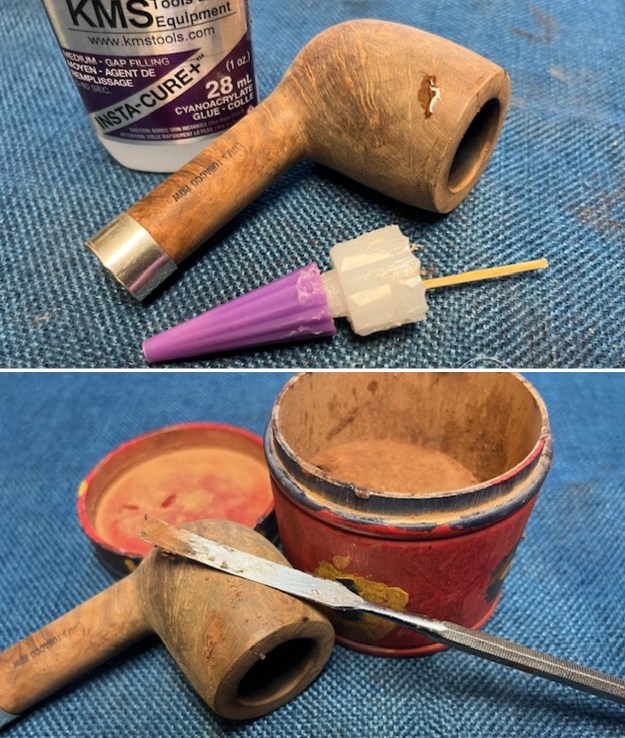
  There was what looks like a pipe cleaner cut trough on the bottom of the bowl and some over zealous reaming that took the bowl bottom below the entry of the airway into the bowl. This is another mess that is actually sad when you consider the quality of the pipe. It is another high-end pipe that was badly abused. I mixed up a batch of JB Weld and put a pipe cleaner in the shank to keep the airway from plugging. I pressed the mixture into the bottom of the bowl with a folded pipe cleaner. I pressed it into the heel with a pipe nail. Unlike the S. Bang, this one was pretty clean of damage on the bowl sides. I put the bowl upright to allow the repair to cure. Once it cured I would need to sand it smooth and clean up the repairs. The first photo shows the overreamed and gouged spot in the heel of the bowl. The next photos show the repair process and tools.
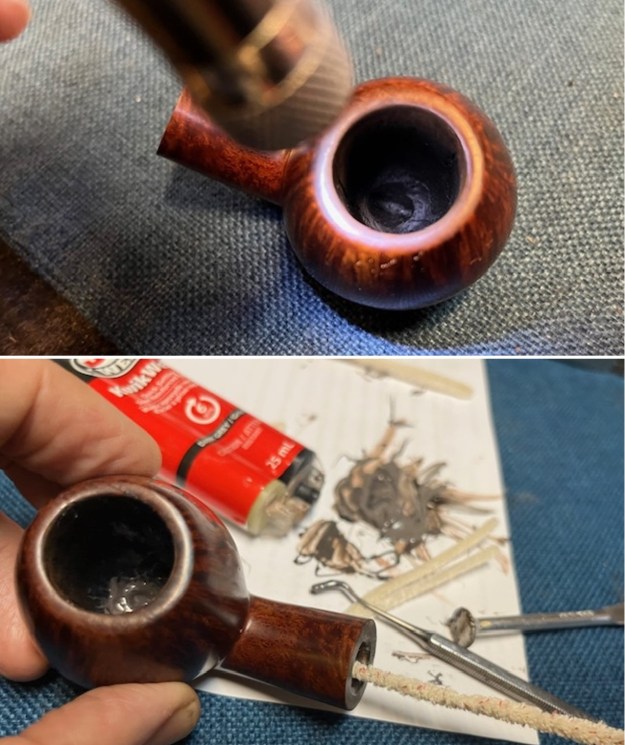
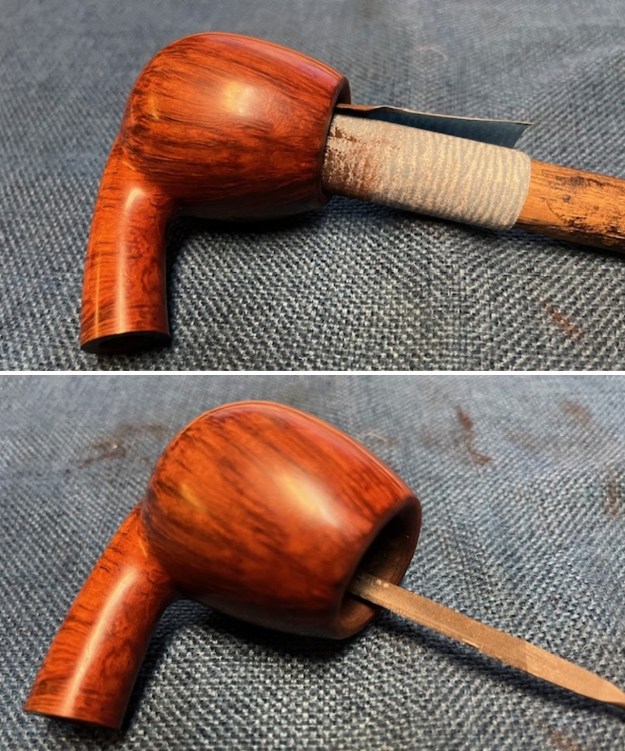
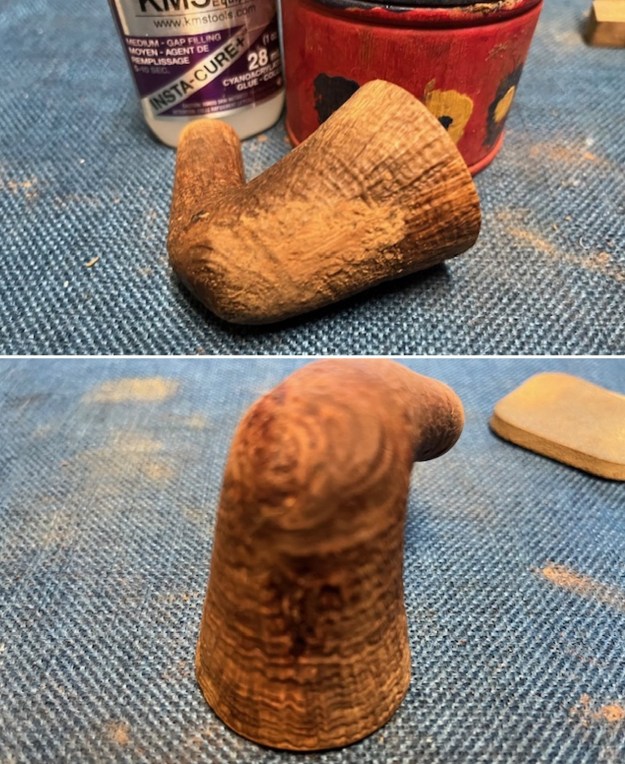
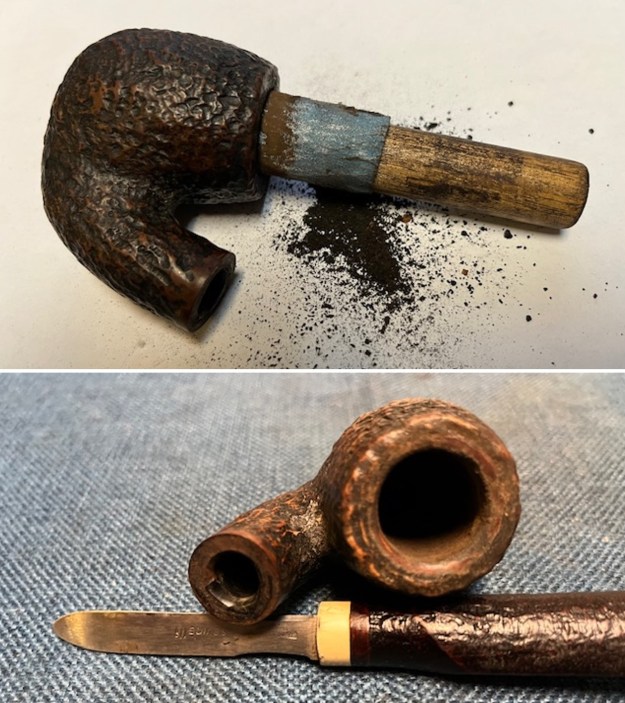
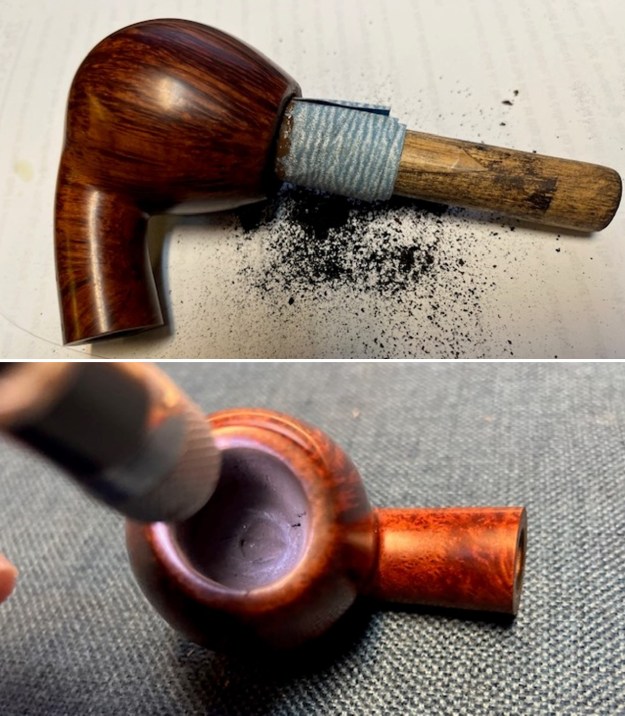
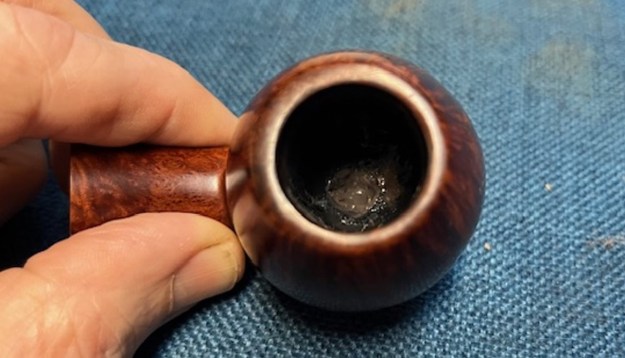 Once the repair cured (the next morning) I sanded the bottom with 220 grit sandpaper on a dowel and small needle files to smooth them out and minimize the amount of JB Weld in the bowl. Once the Weld has hardened it takes some time. Once finished I wiped the walls and heel of the bowl down with some isopropyl to remove the debris.
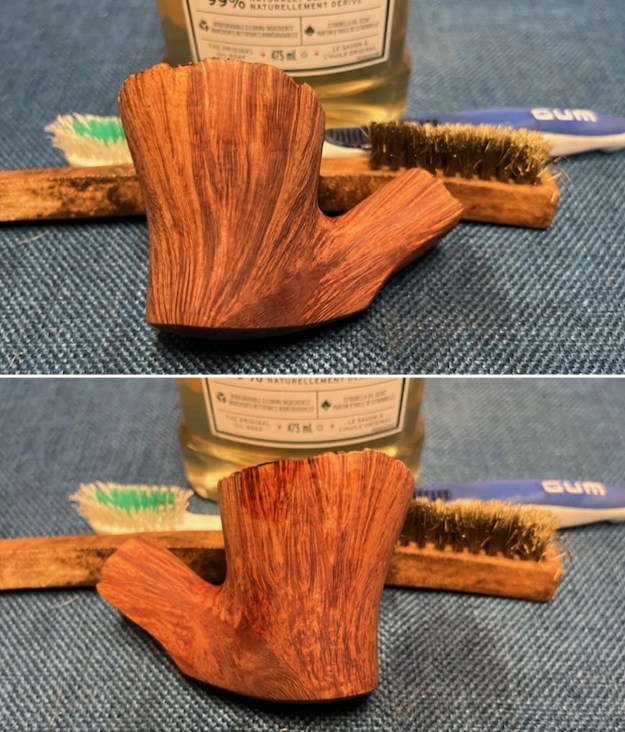
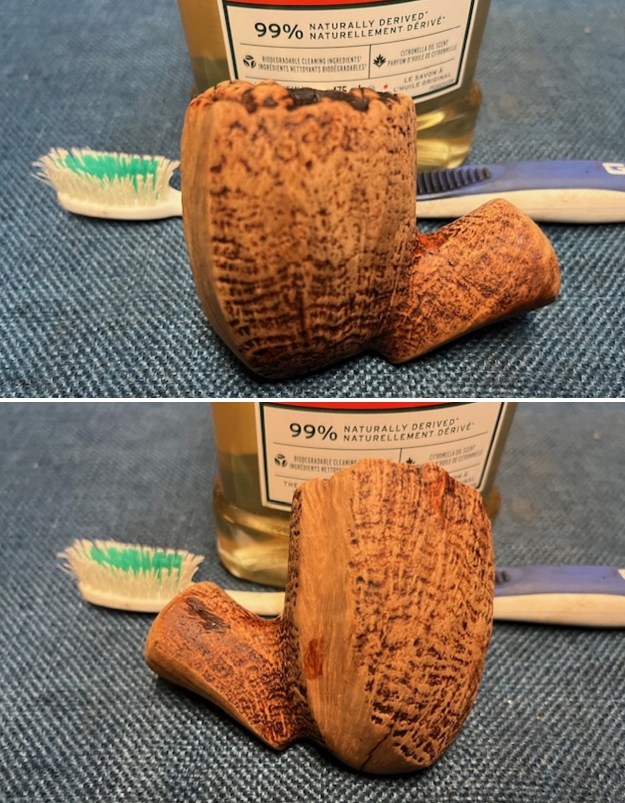
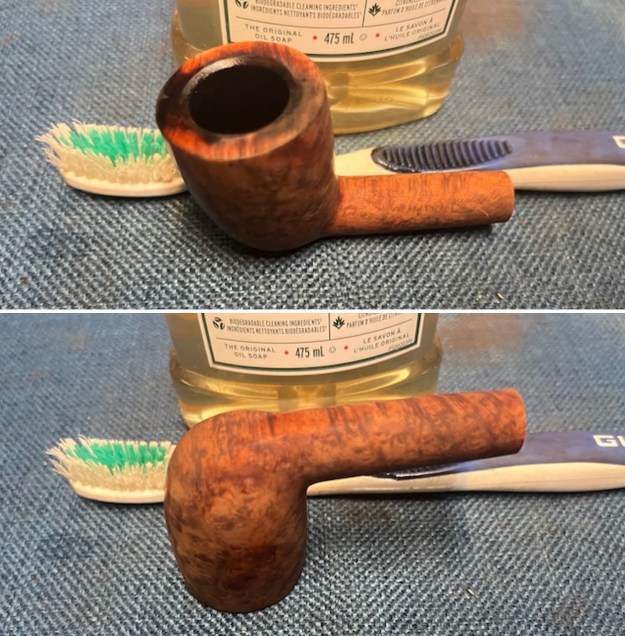
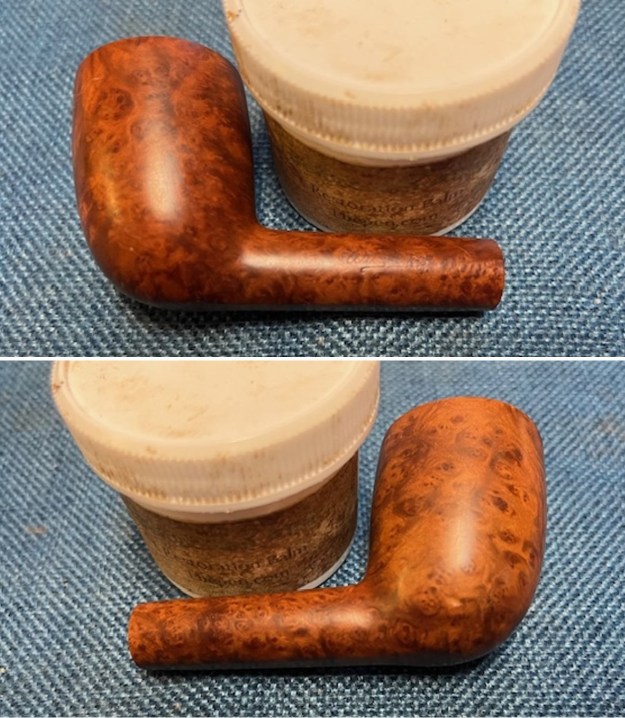
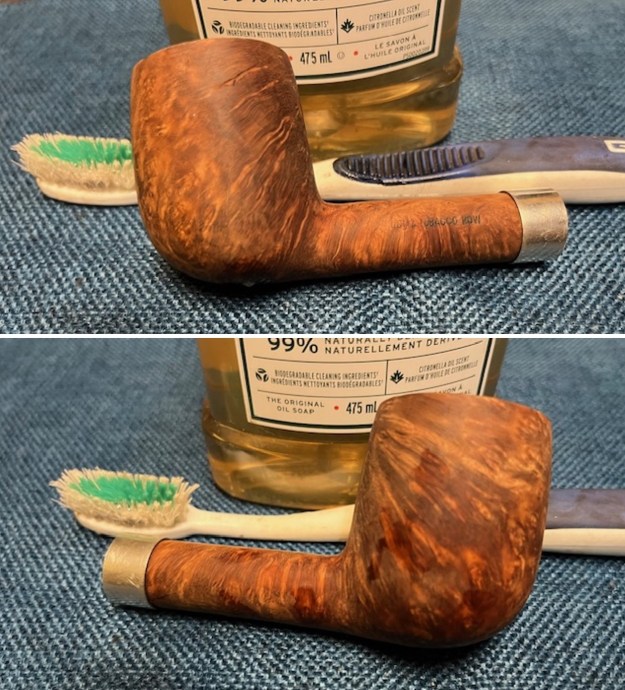
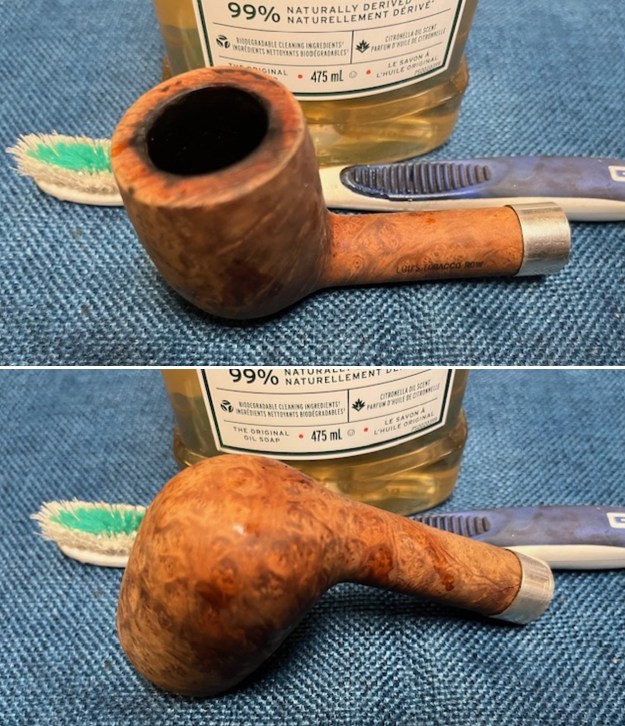
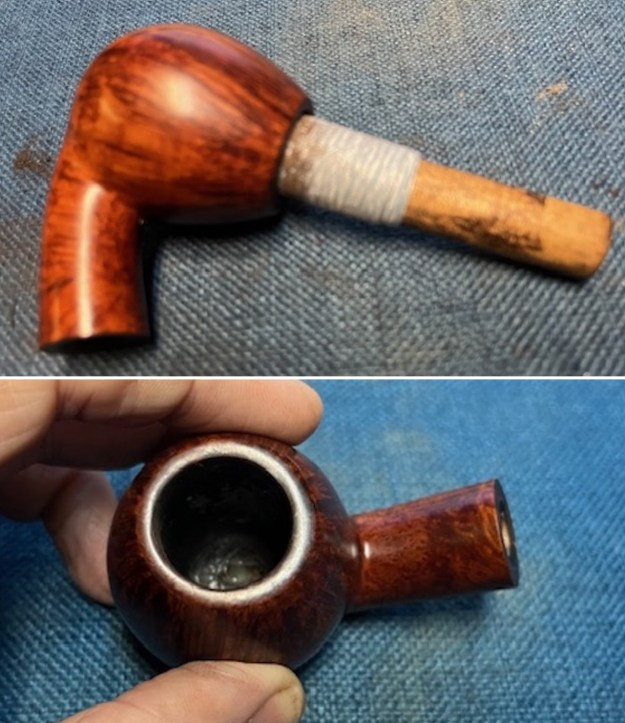 I rubbed the bowl and shank down with Before & After Restoration Balm. I worked it into the surface of the briar with my fingertips to clean, enliven and protect the briar. I let the balm sit for a little while and then buffed with a cotton cloth to raise the shine. The Balm did its magic and the grain stood out.
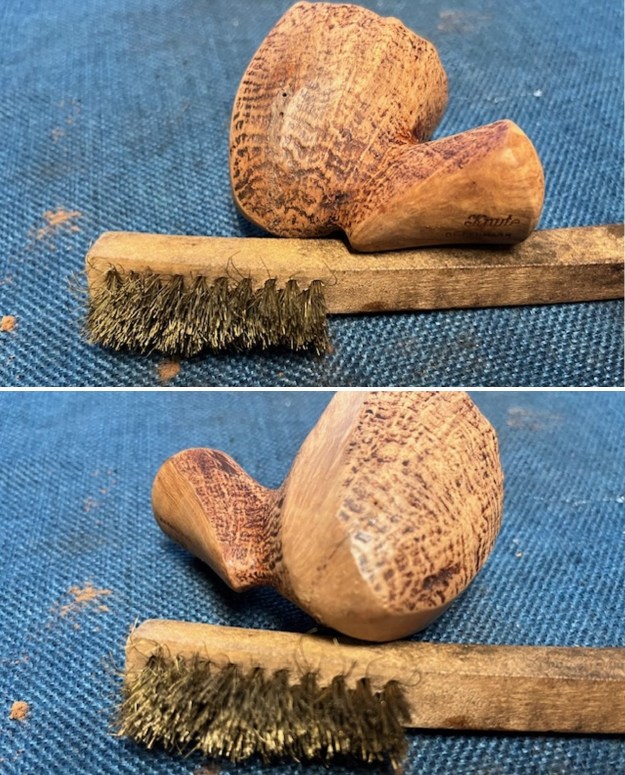
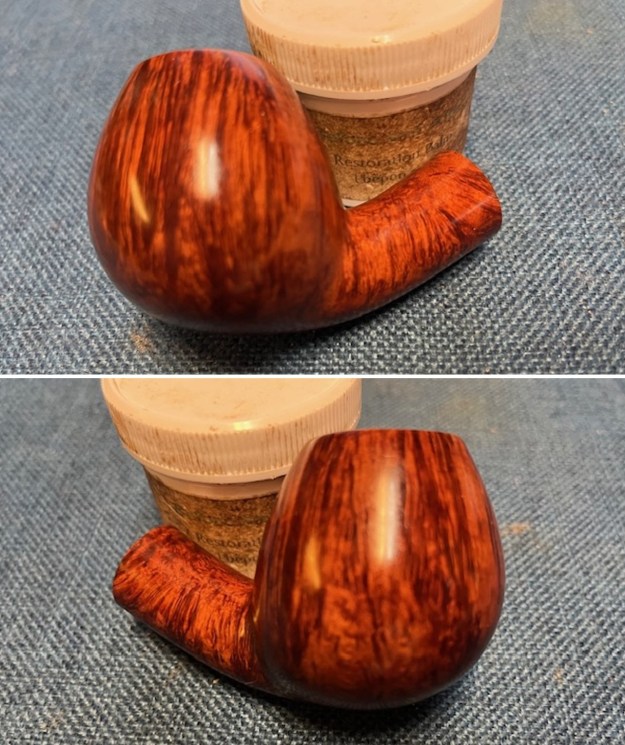
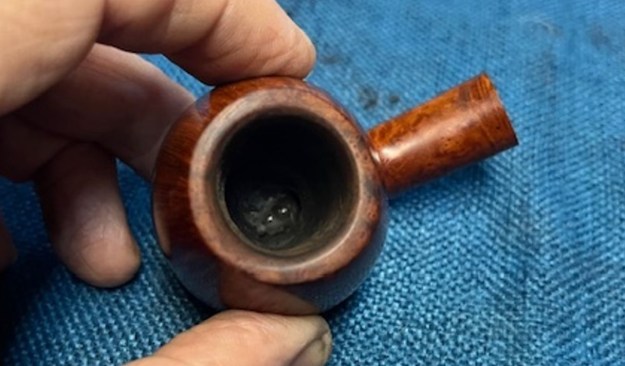
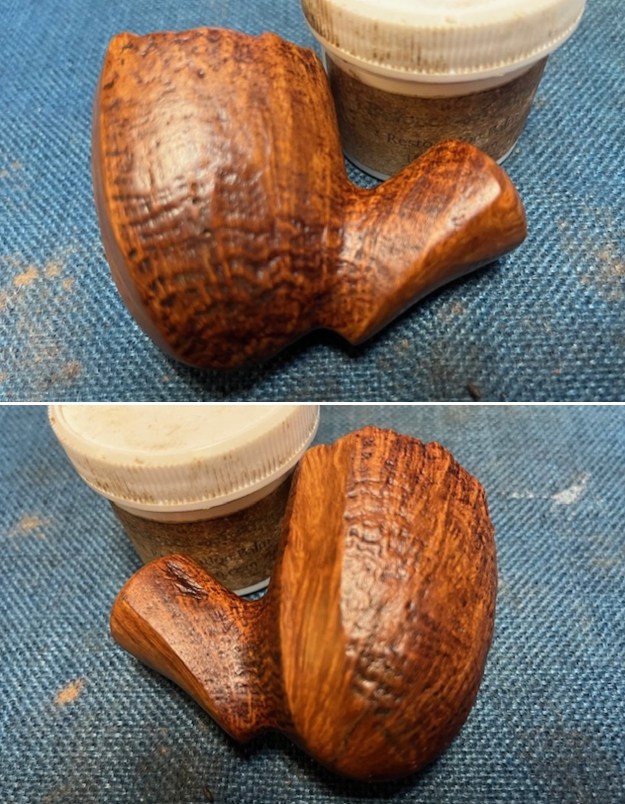
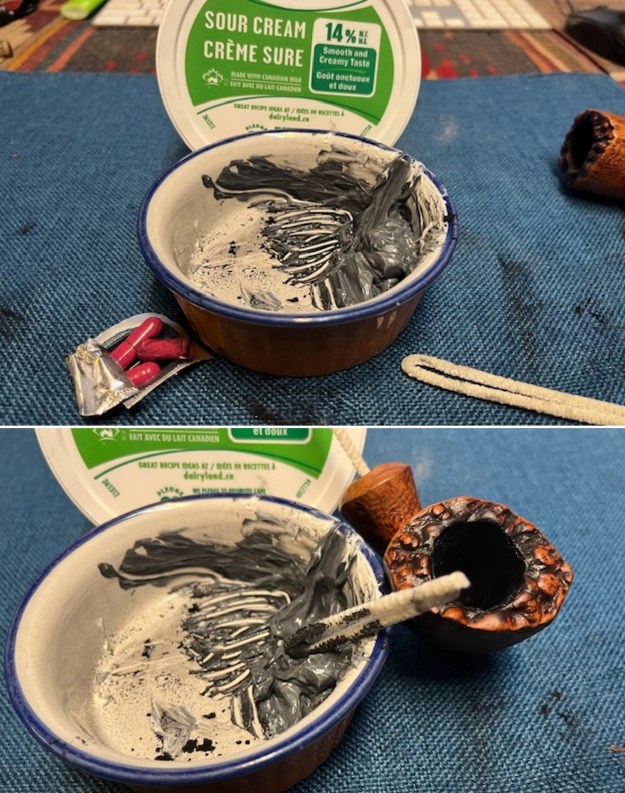
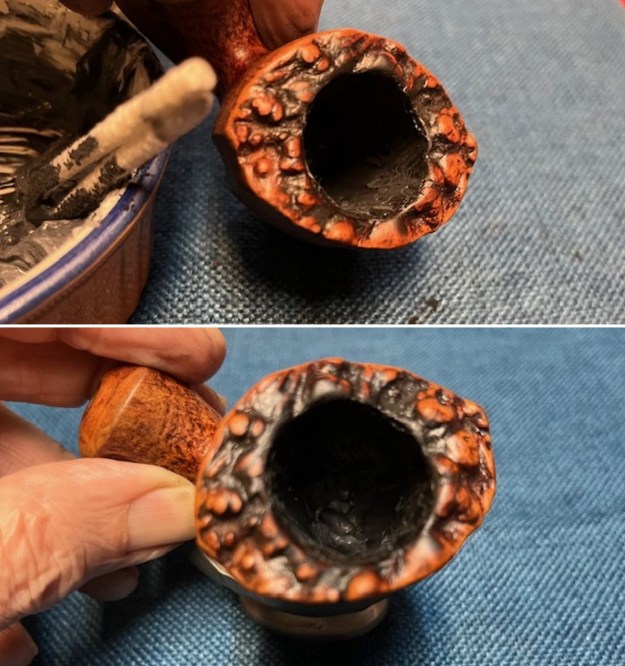
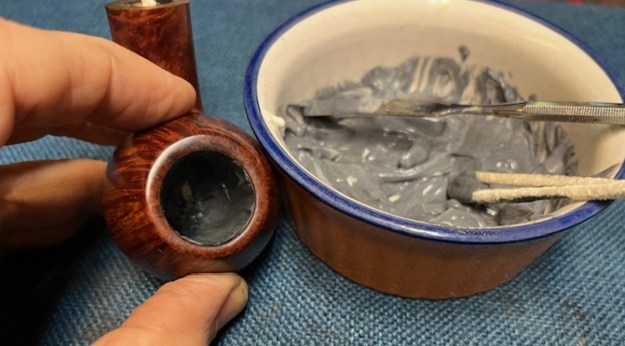
 I mixed up a batch of bowl coating – sour cream and activated charcoal powder to give a top coat and to facilitate the build up of a cake in the bowl. I applied it to the bowl with a folded pipe cleaner and painted it on the bottom and the sides. Once finished I set it aside to cure over night.
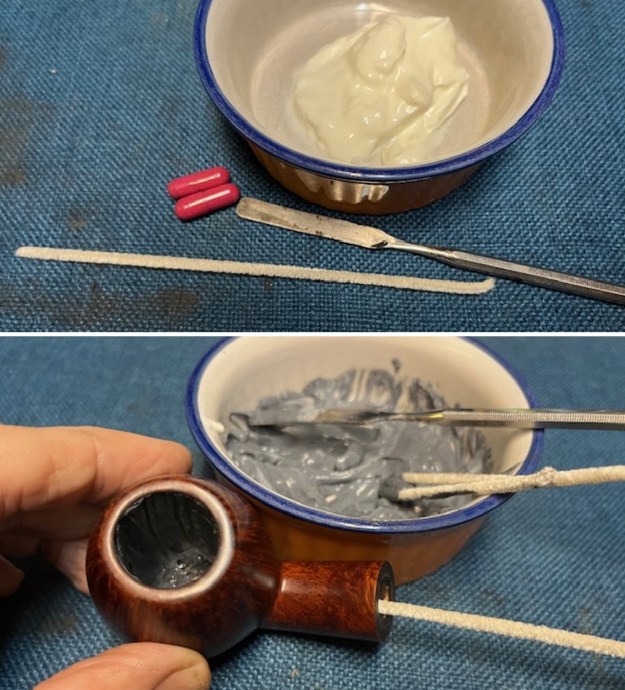
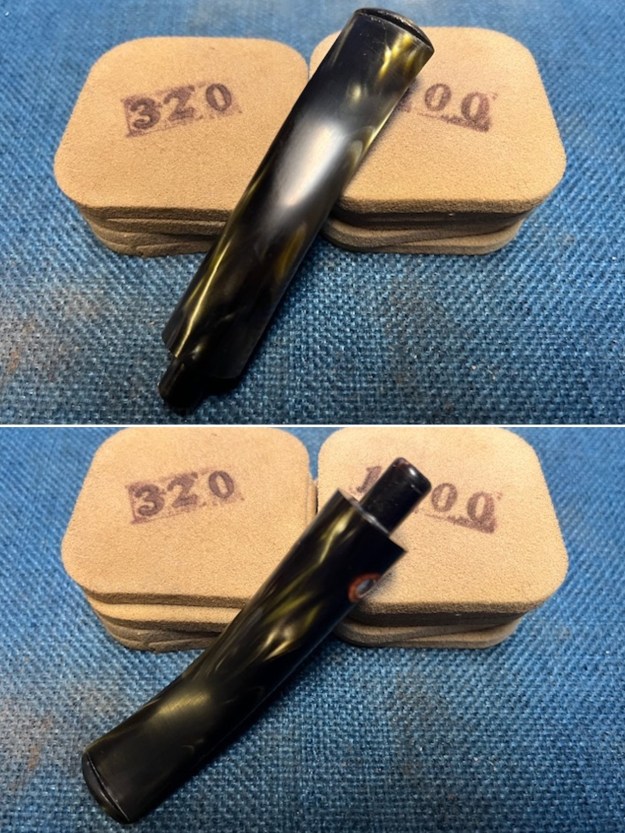
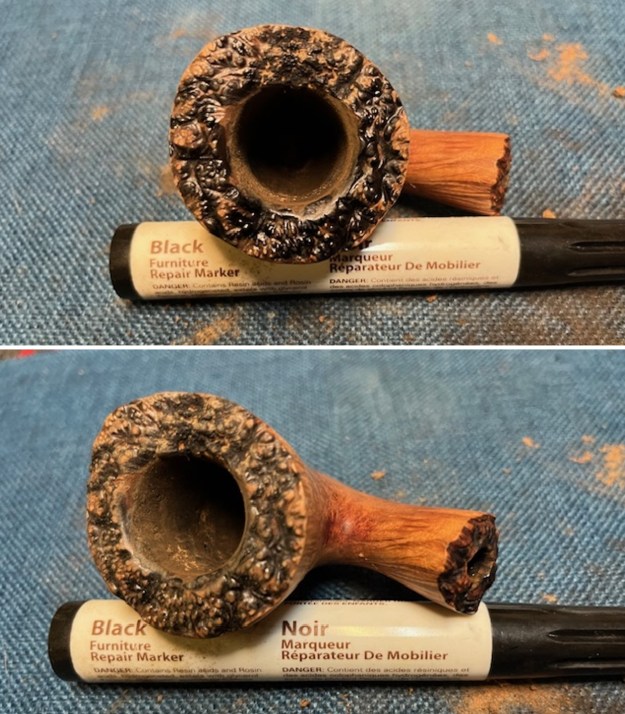
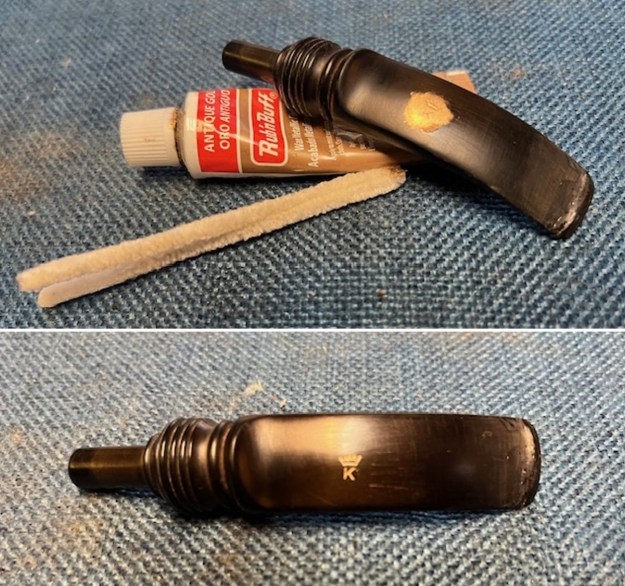
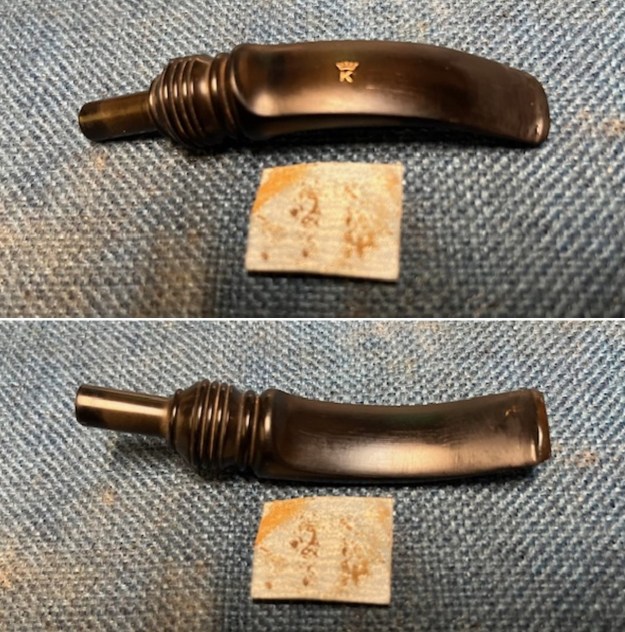
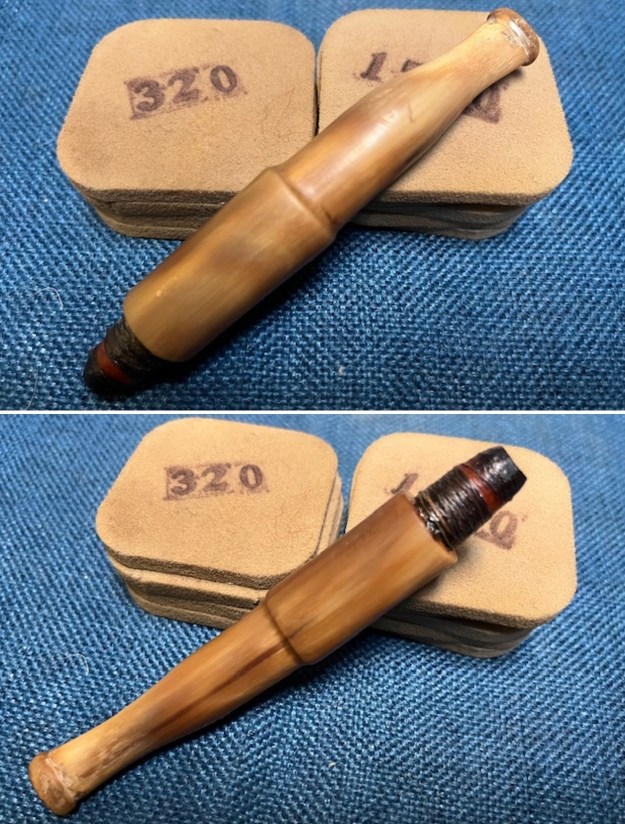
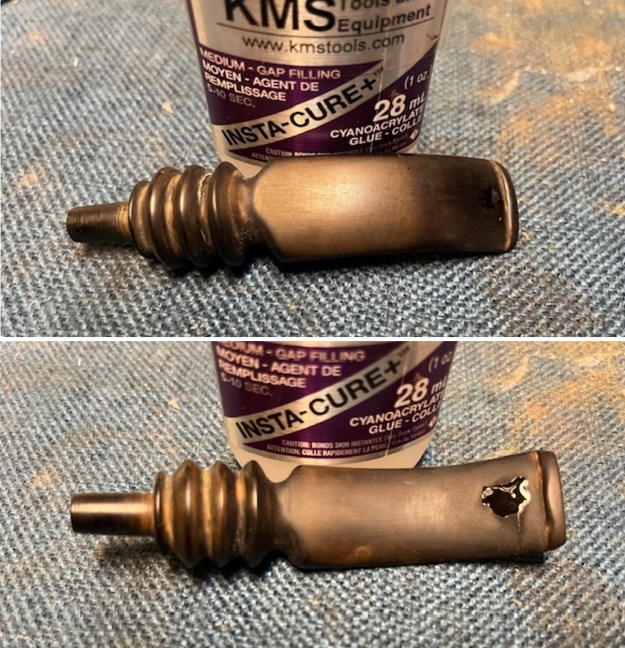
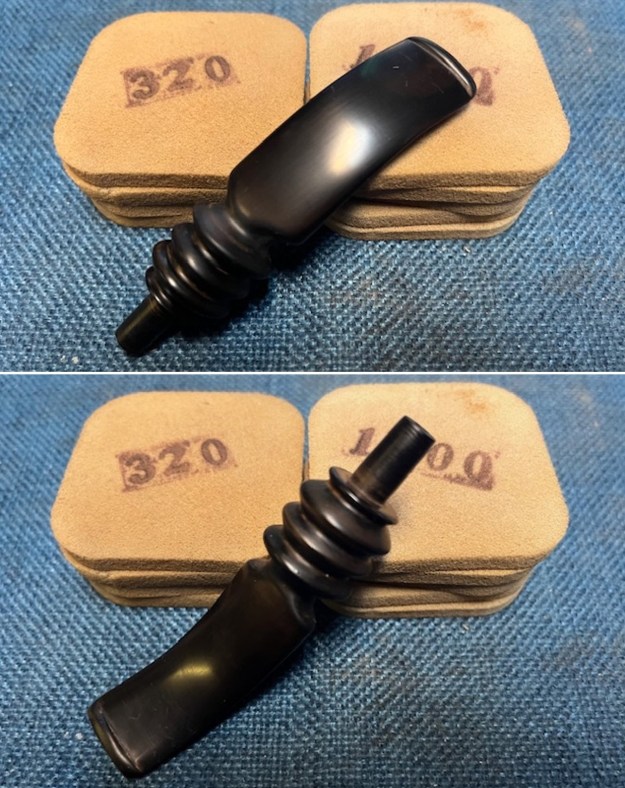
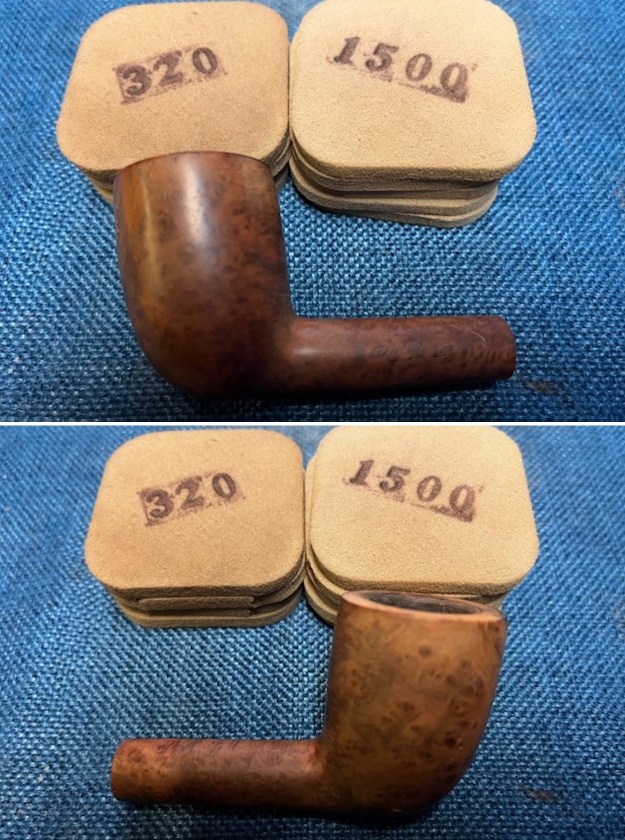
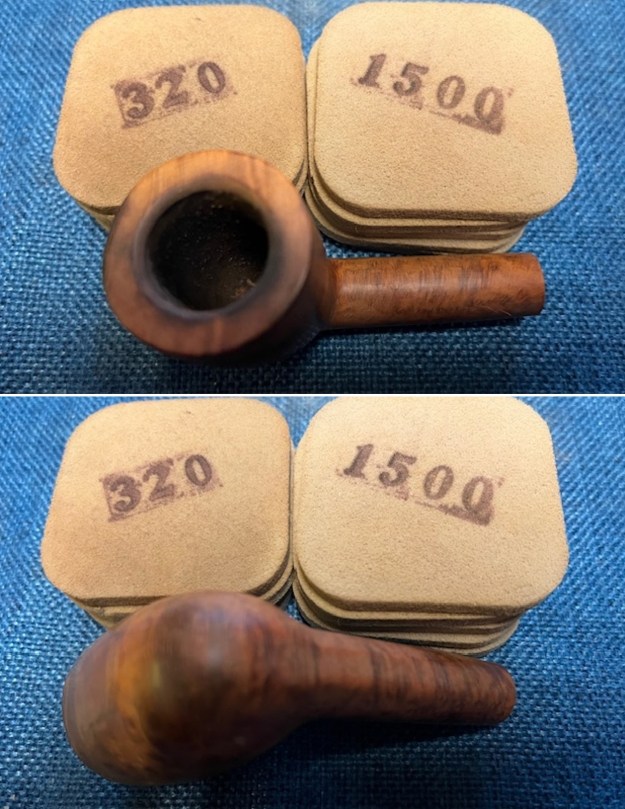
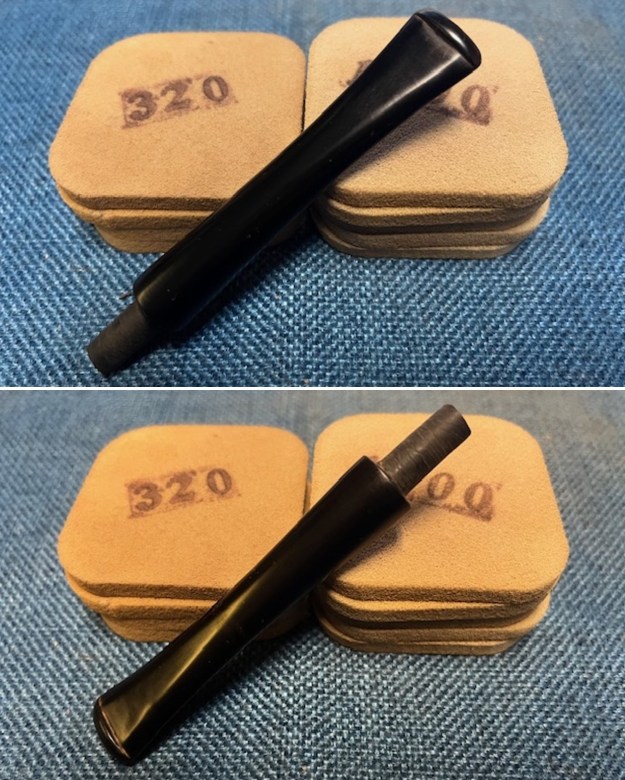
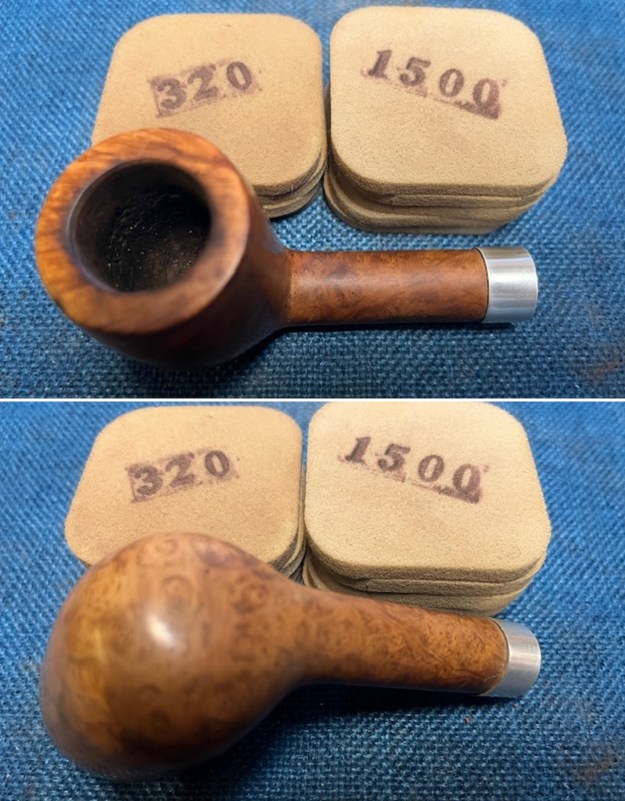
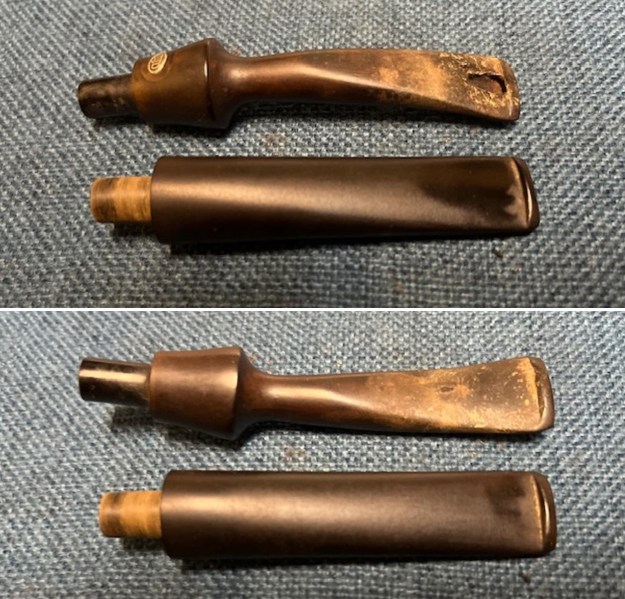
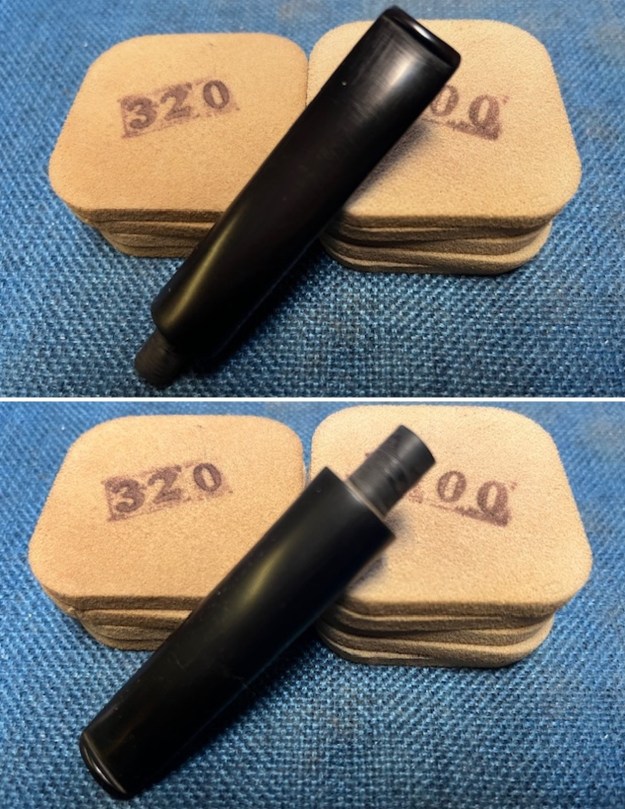
 I set aside the bowl and turned my attention to the stem. I touched up the J.H. Logo stamp on the left side of the saddle stem with white acrylic fingernail polish. I rubbed it into the stamping with a tooth pick. Once it had cured I scraped it off with a pen knife and then lightly sanded it off with a 320 grit sanding pad. It looked very good.
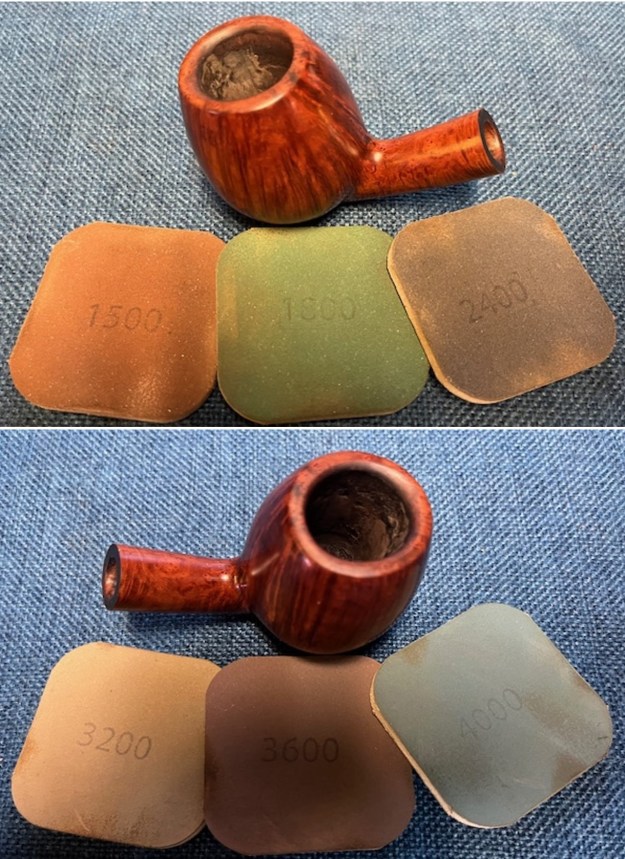
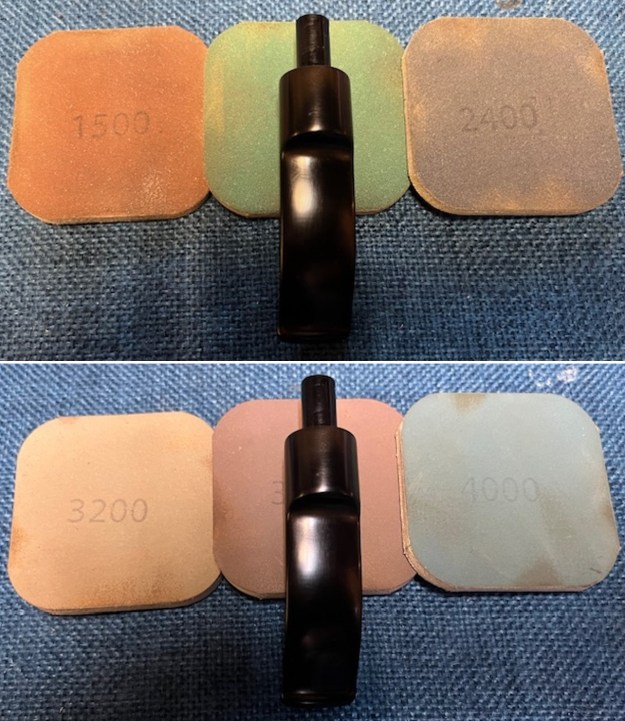
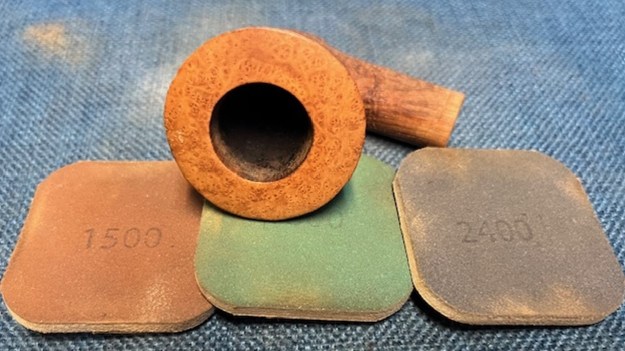
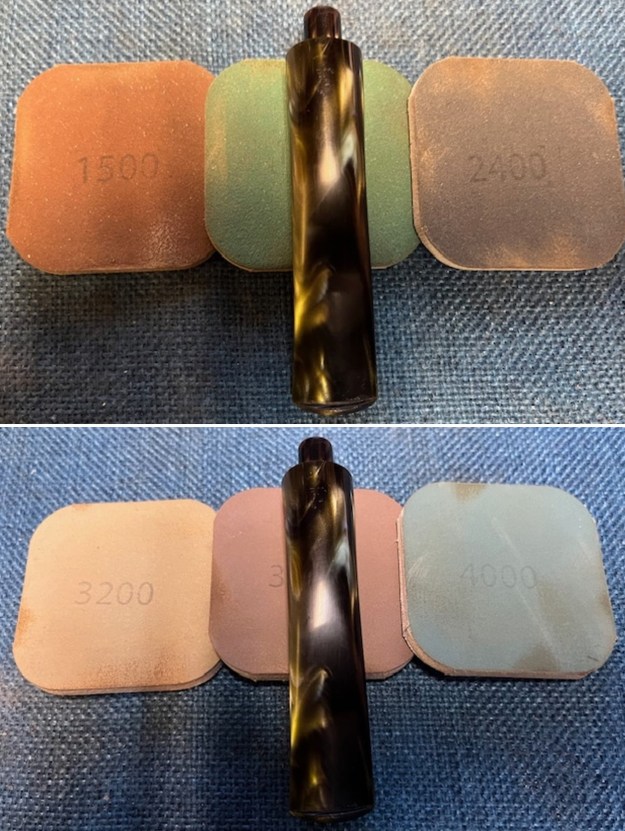
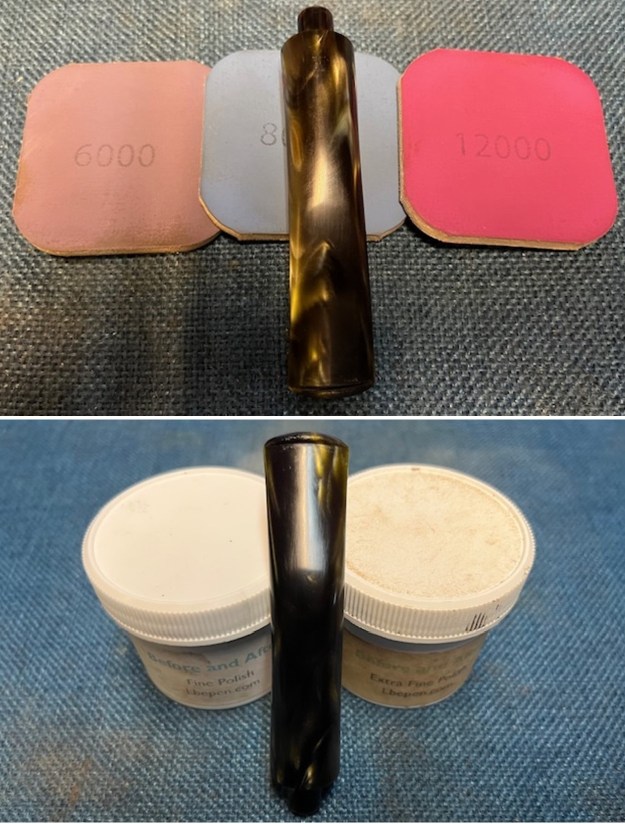
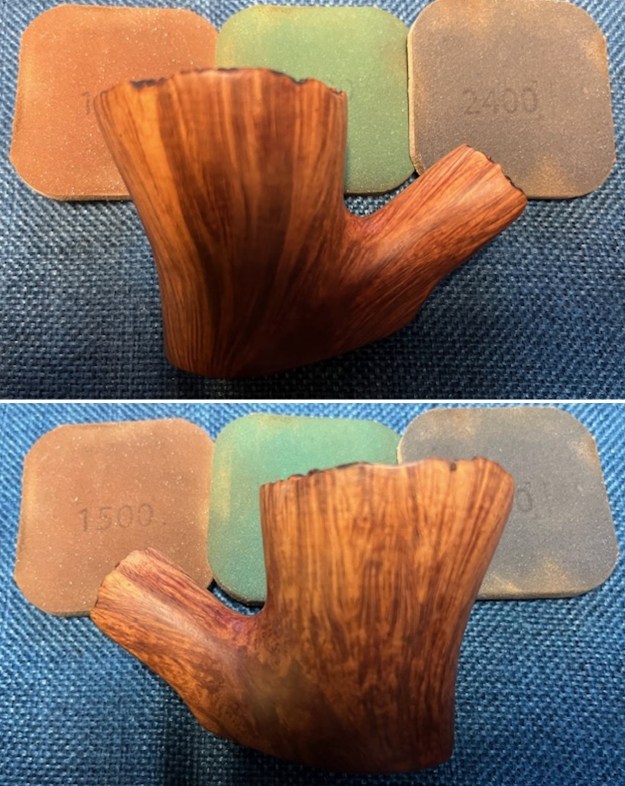
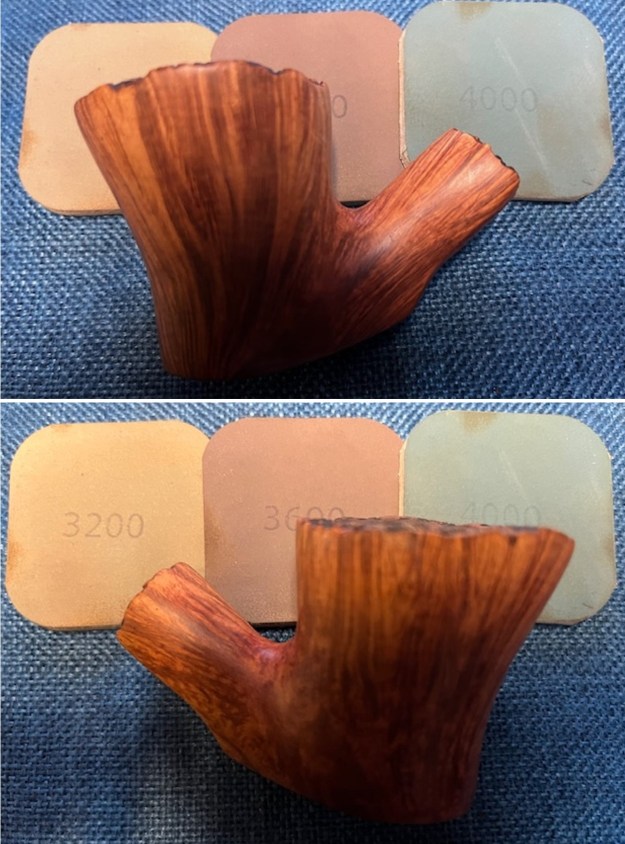
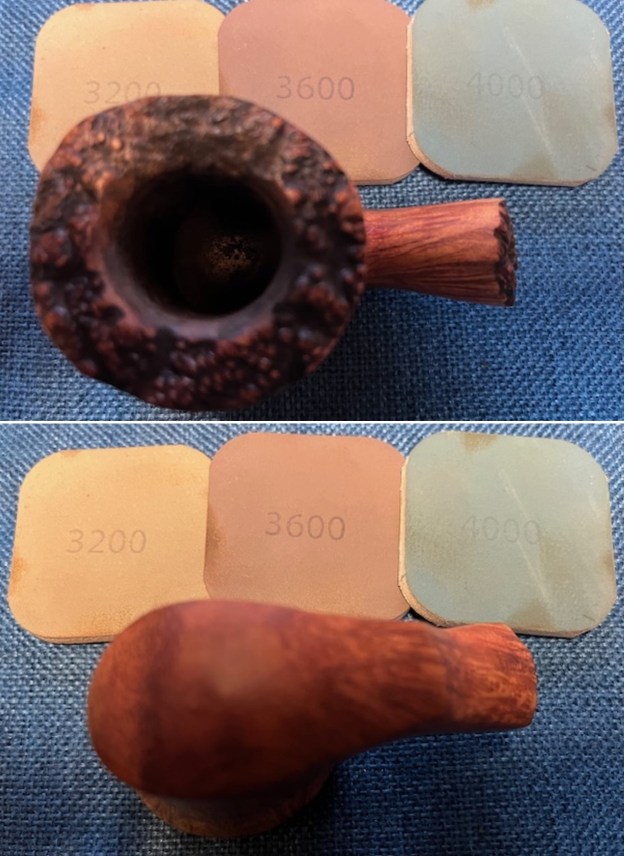
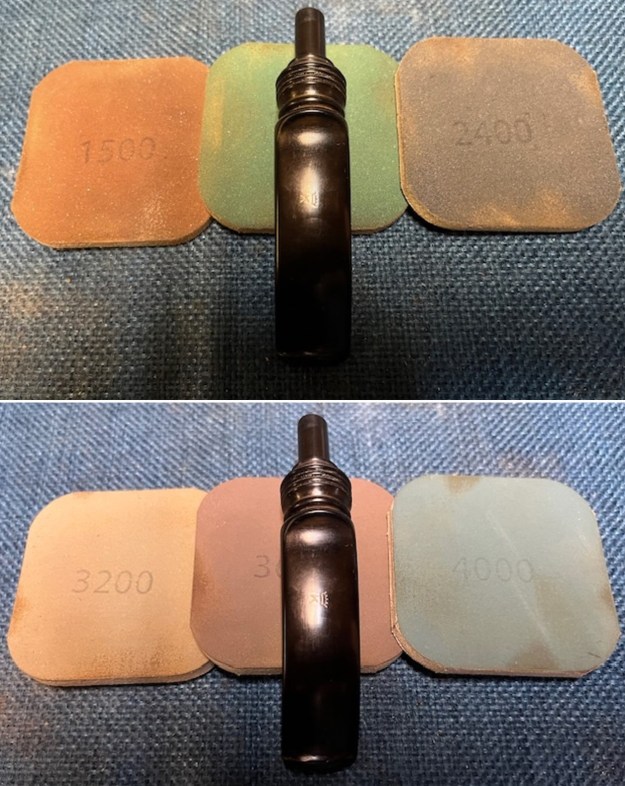
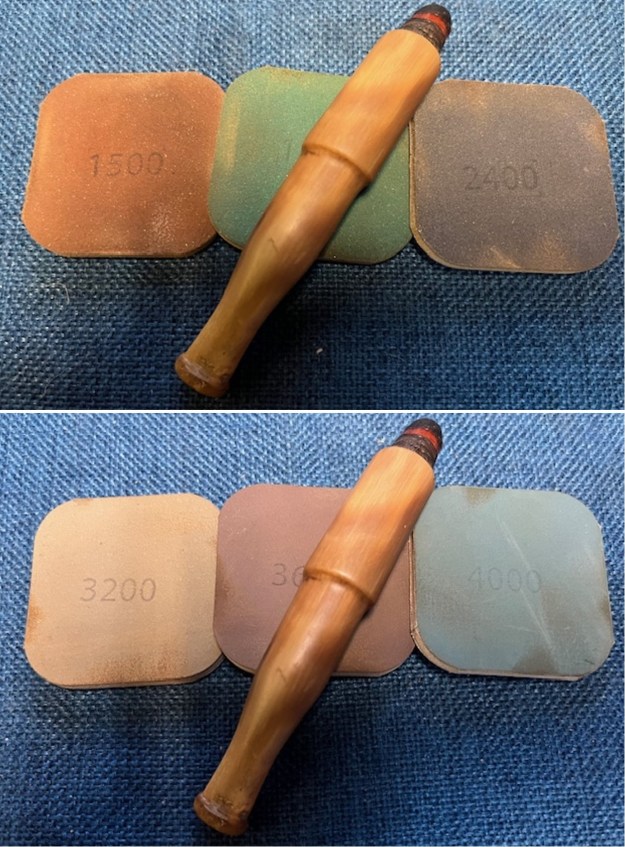
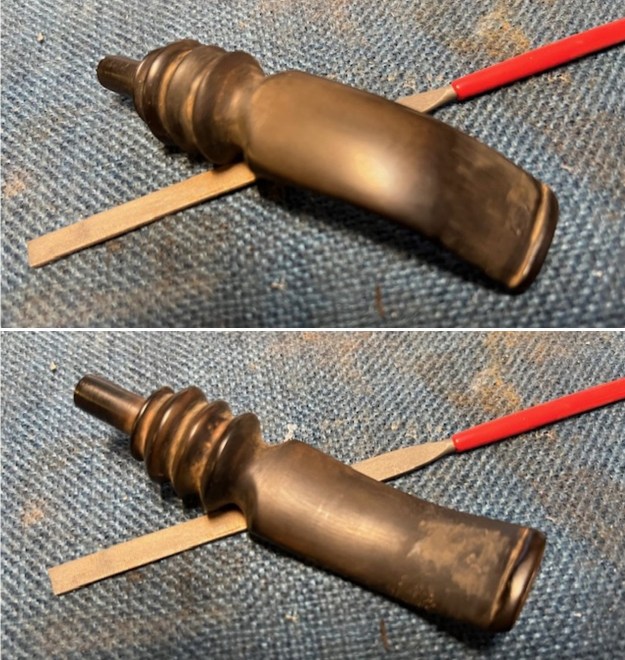
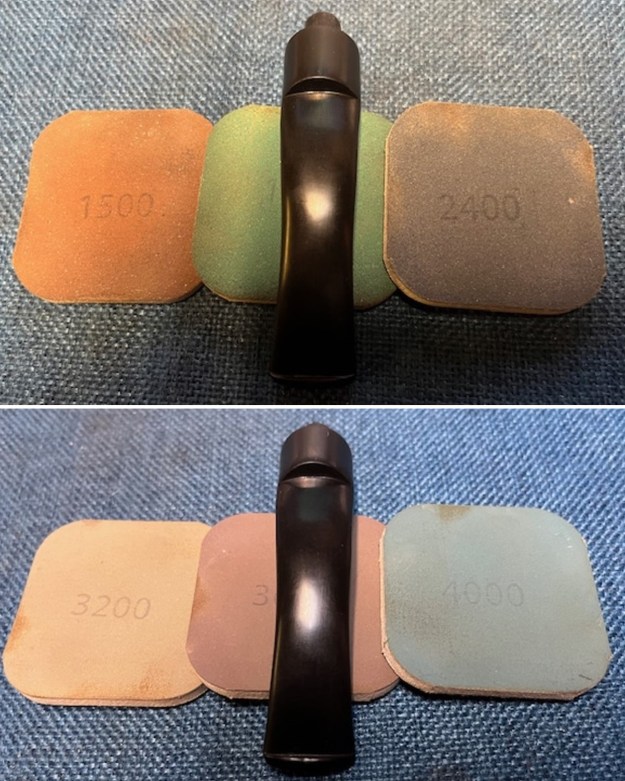
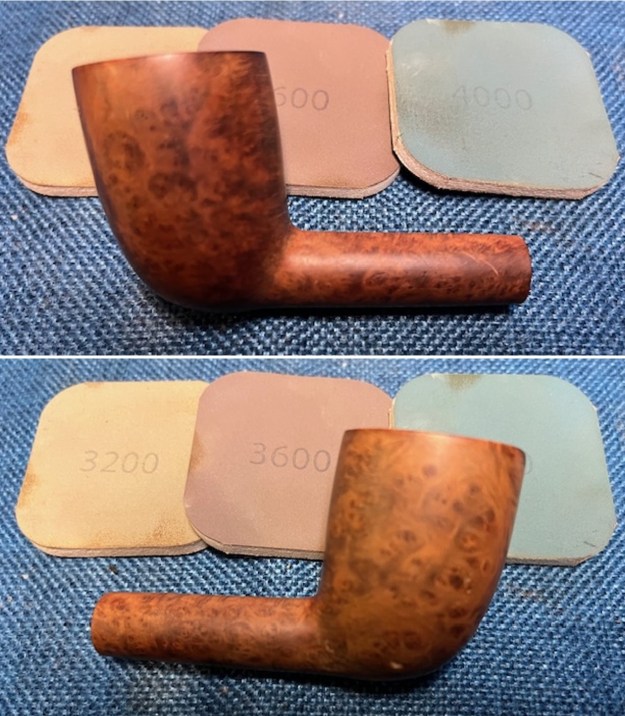
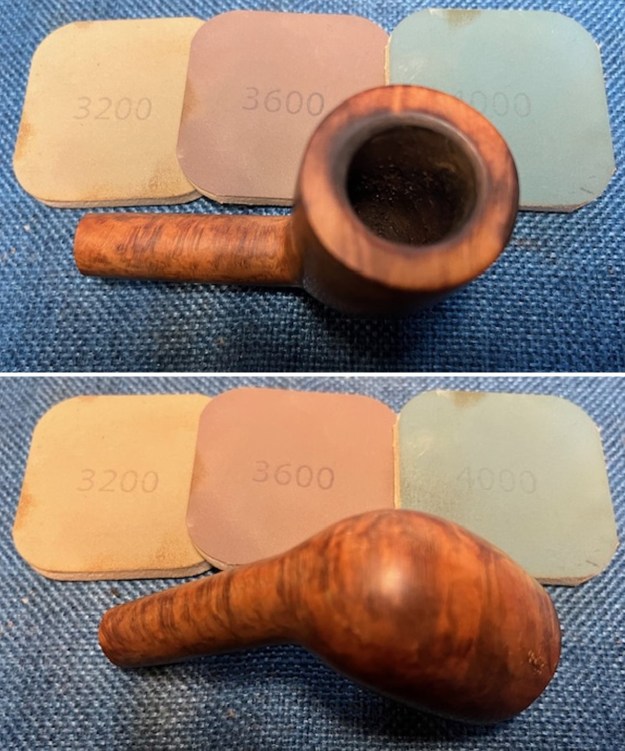
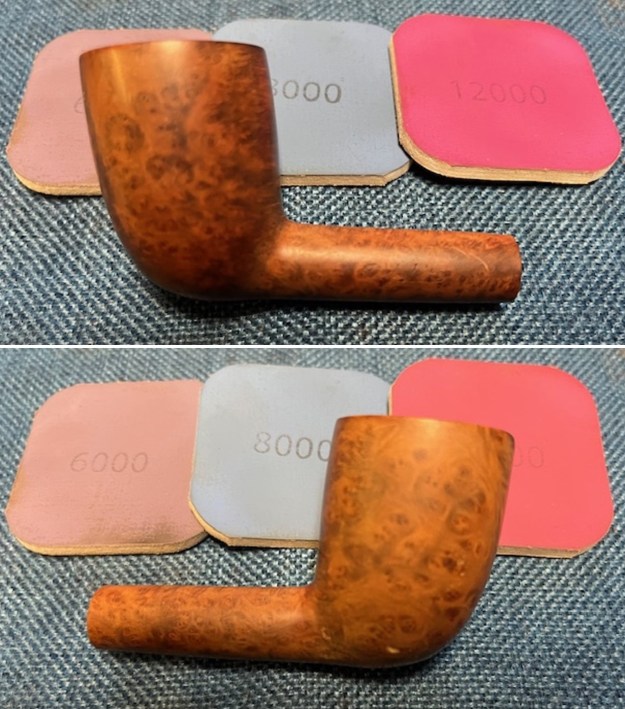
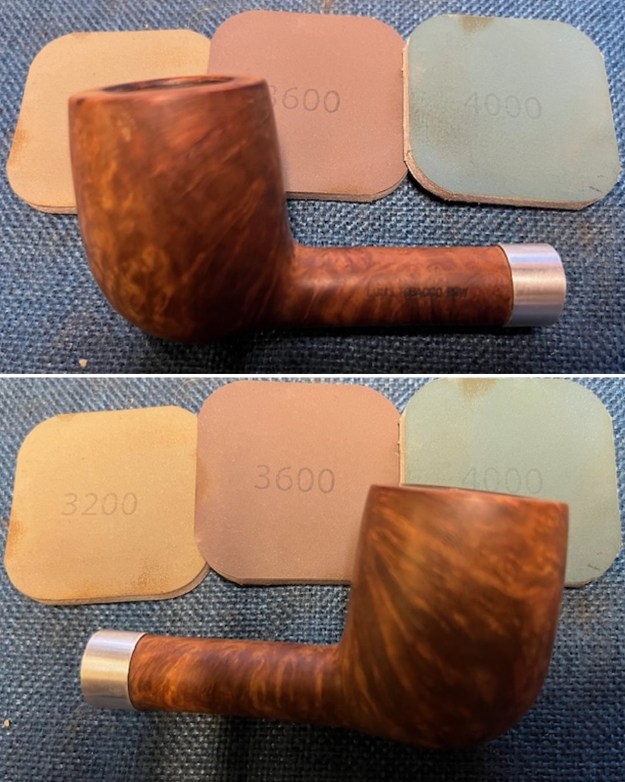
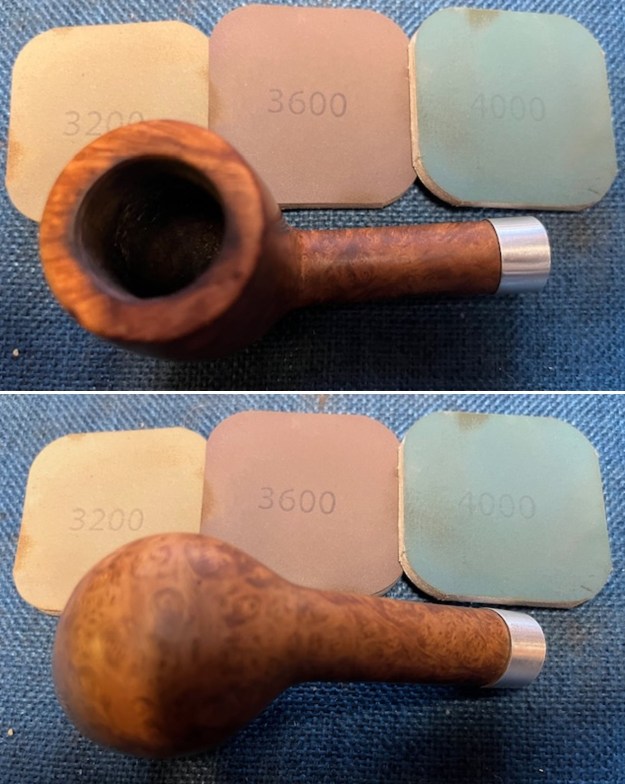
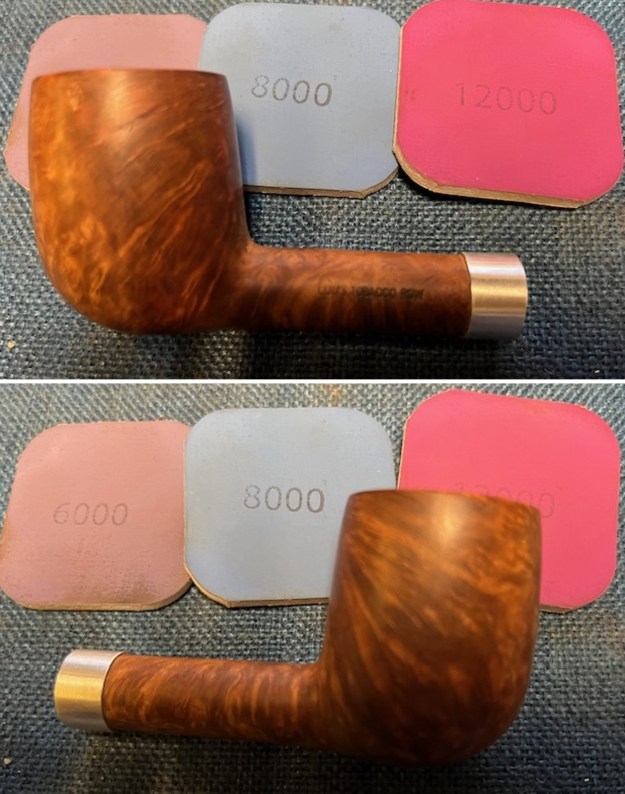
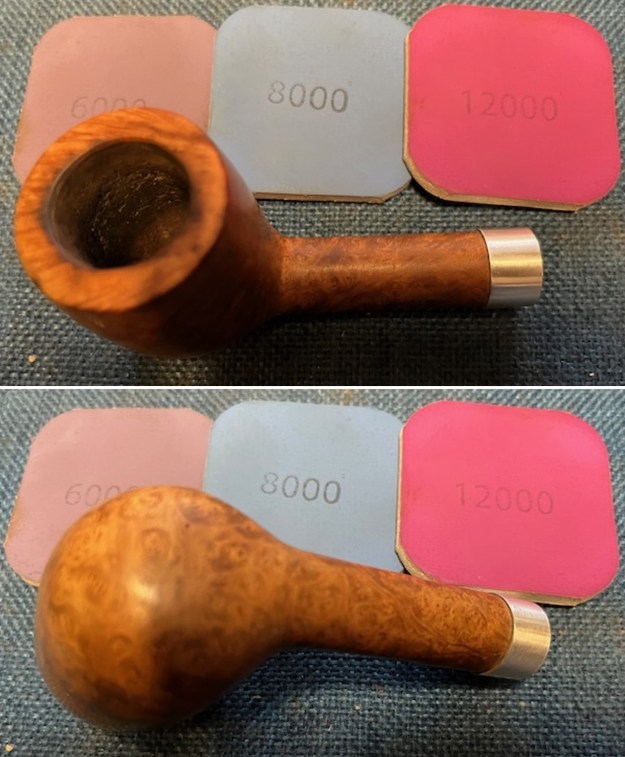
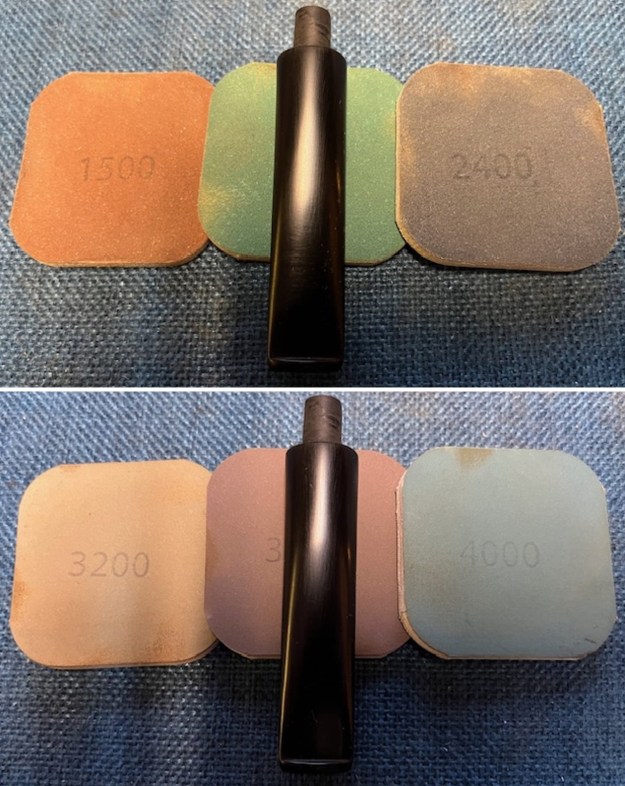
 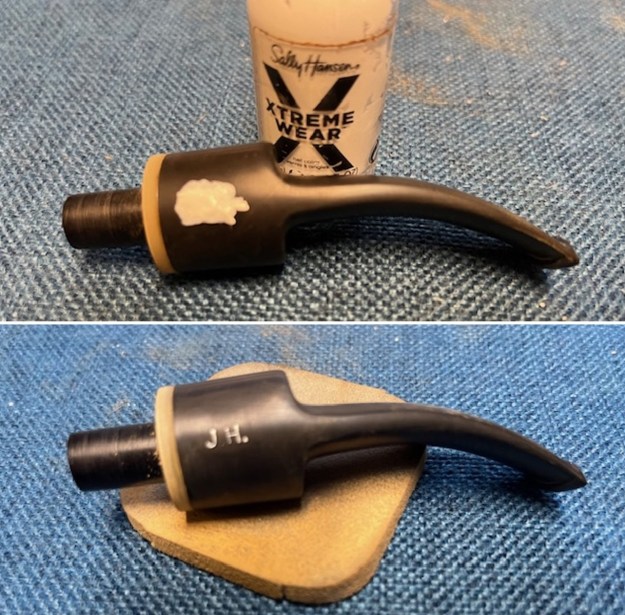 The bite marks and chatter were not too deep and I was able to polish them out and remove the light oxidation with 320-3500 grit sanding pads. I wiped the stem down after each pad with an Obsidian Oil cloth. It was beginning to look very good.
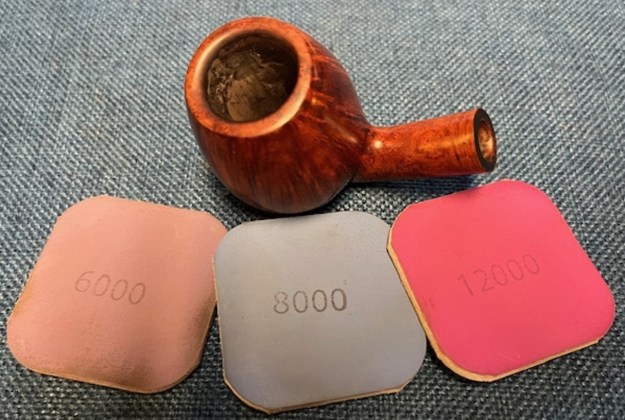
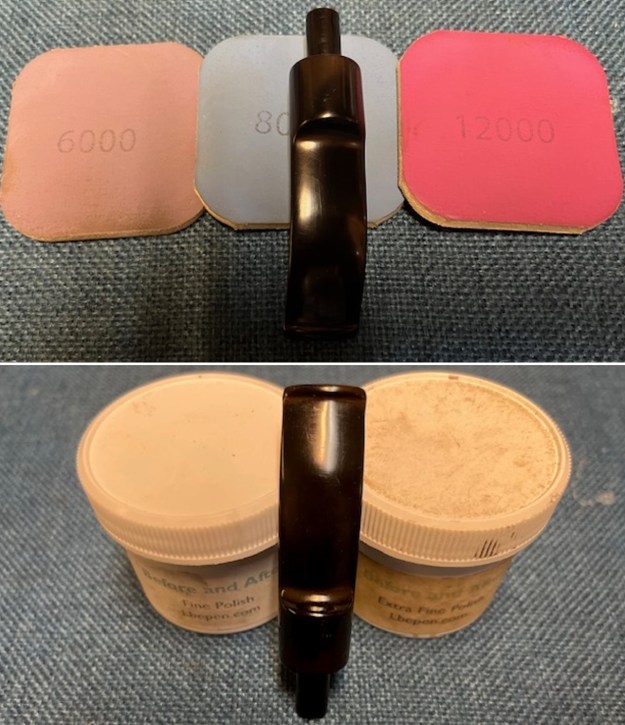
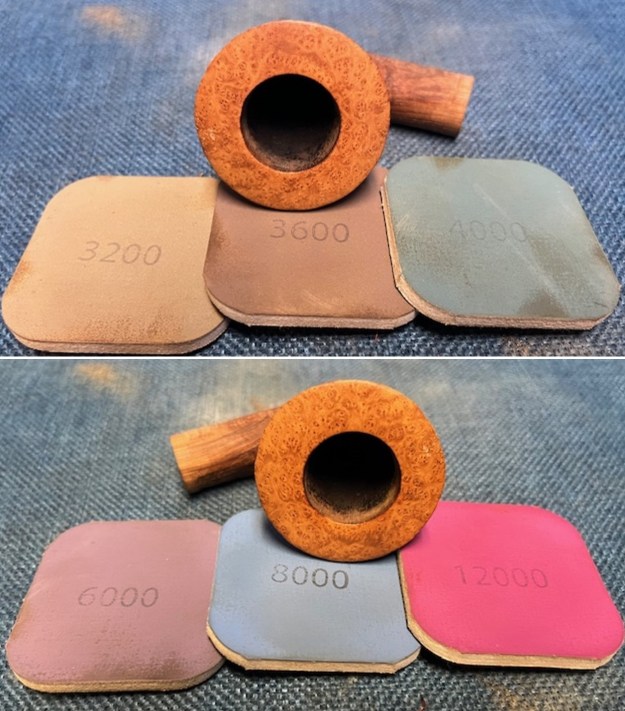
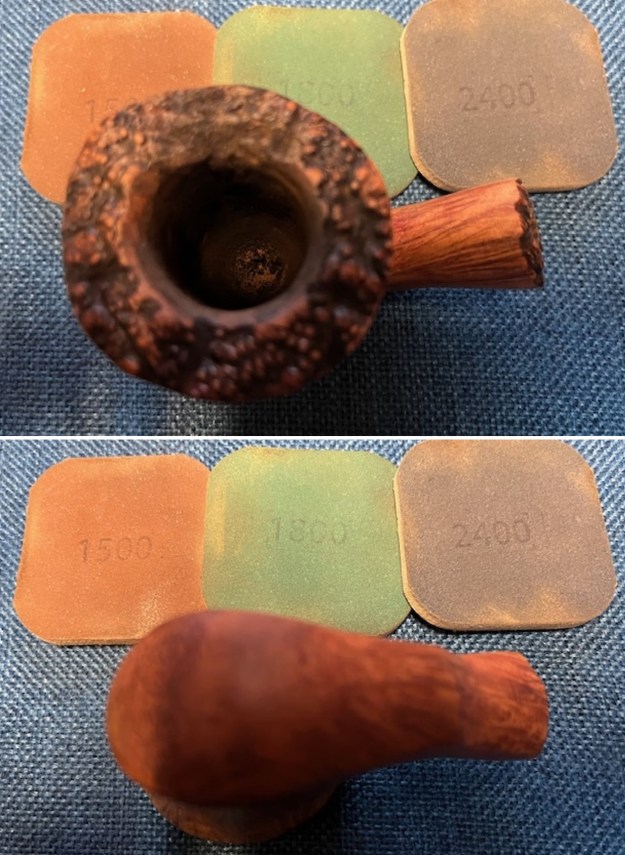
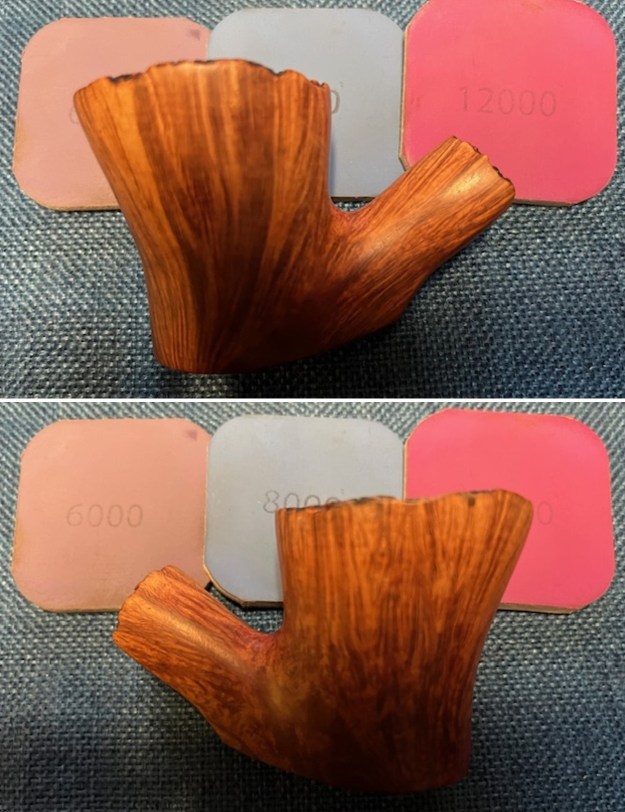
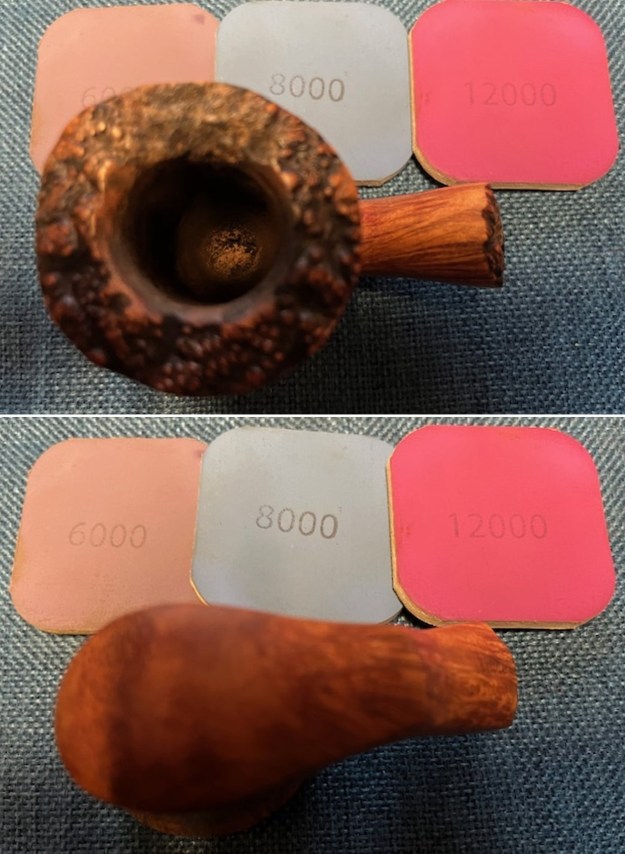
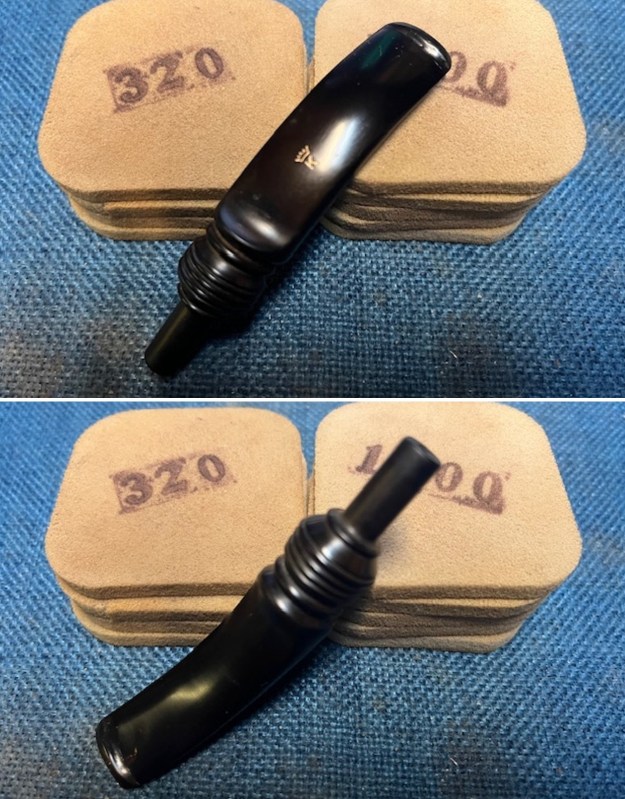
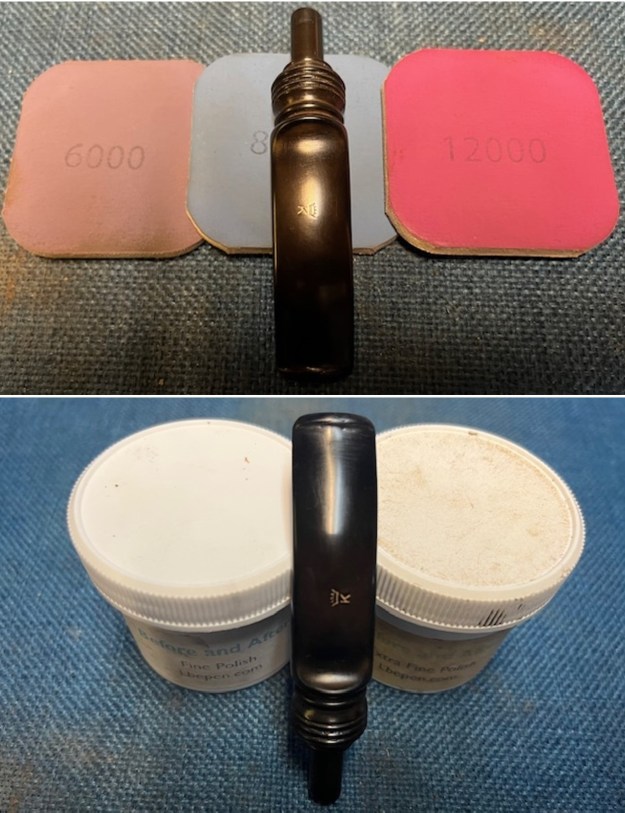
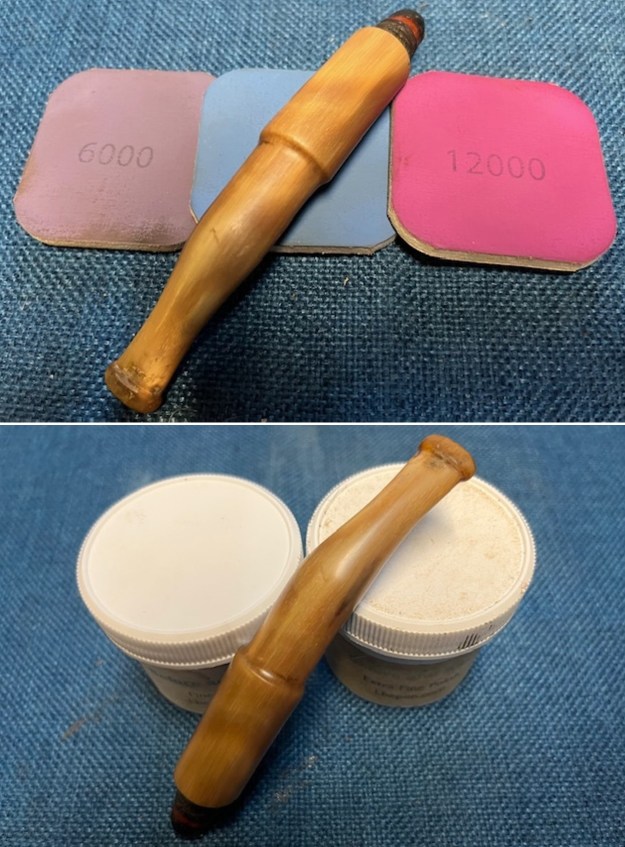
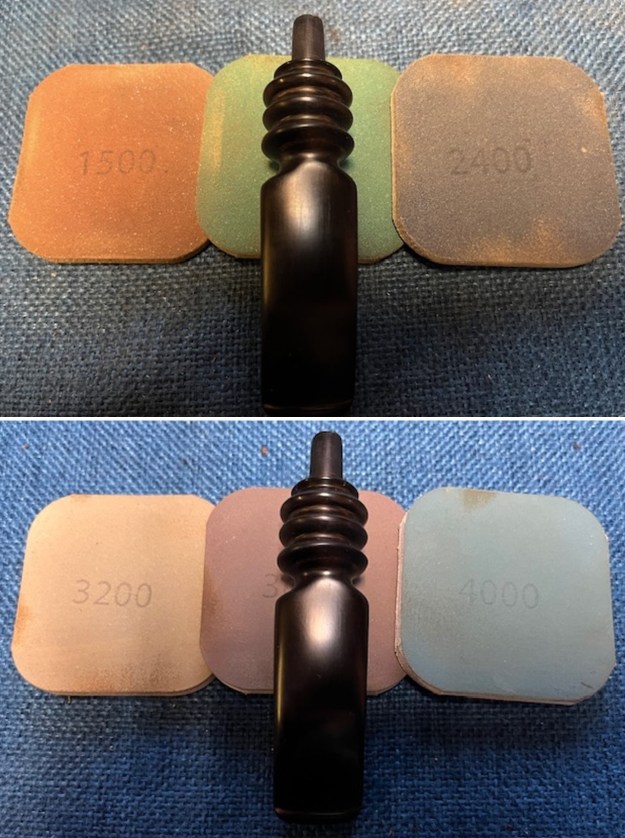
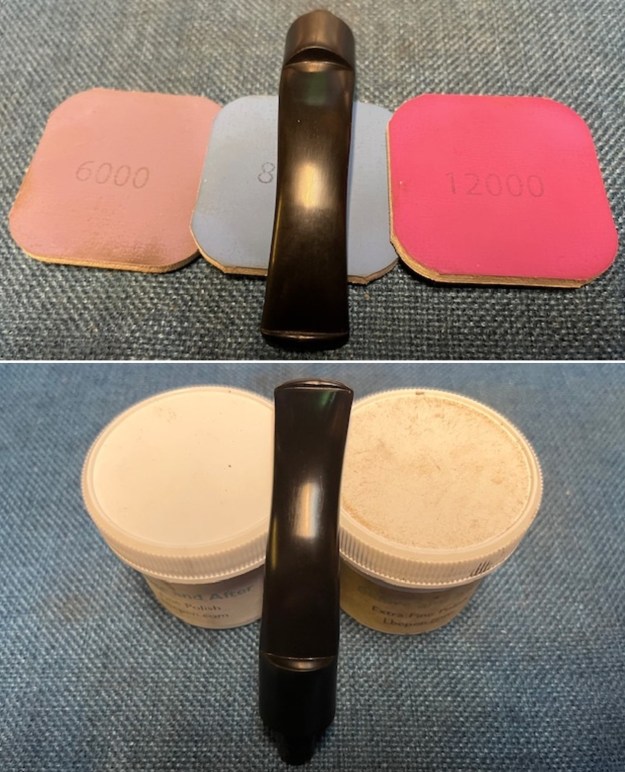
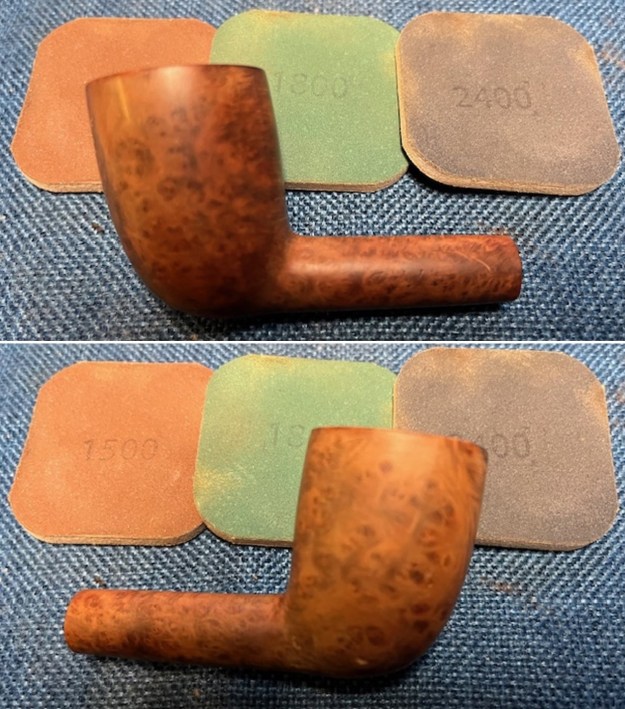
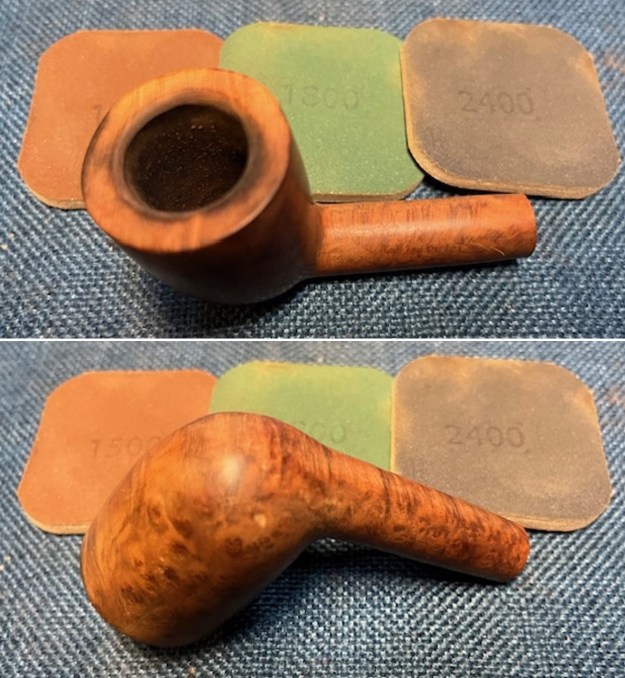
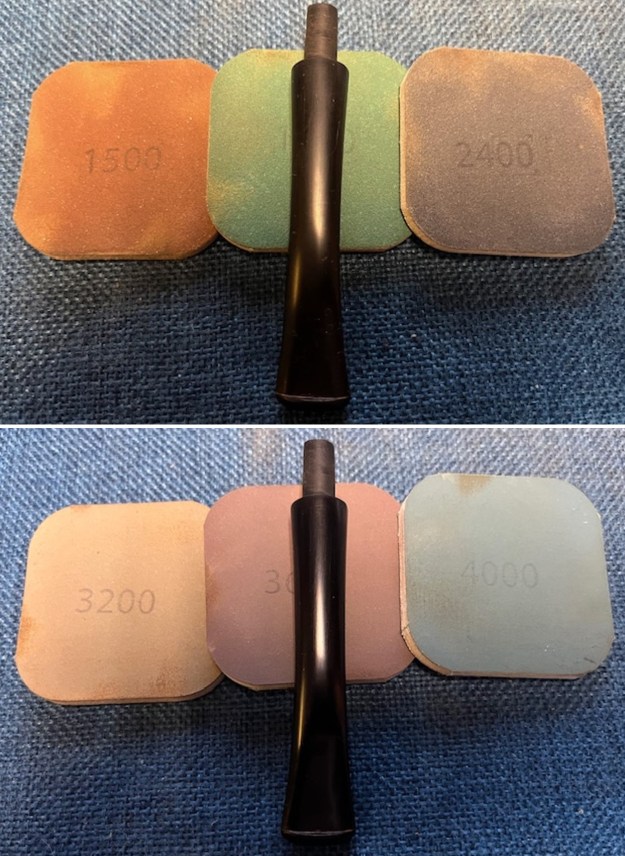
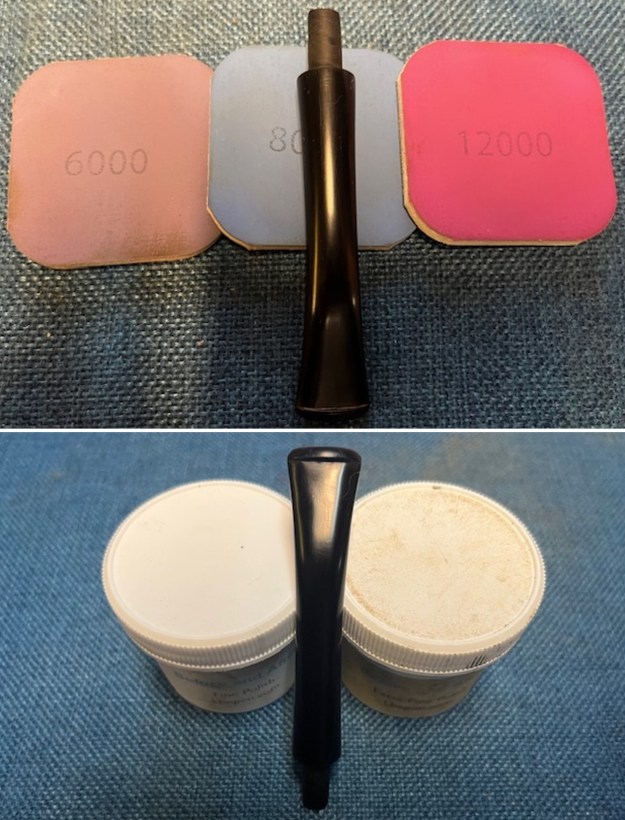
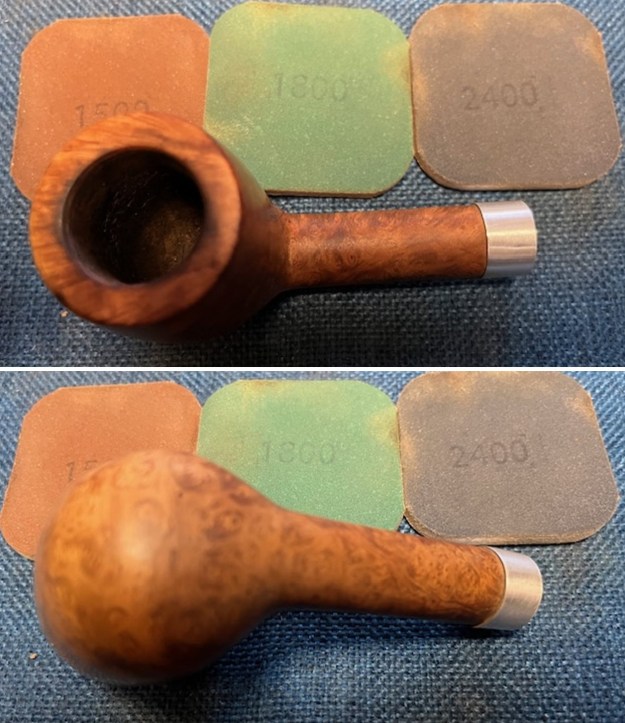
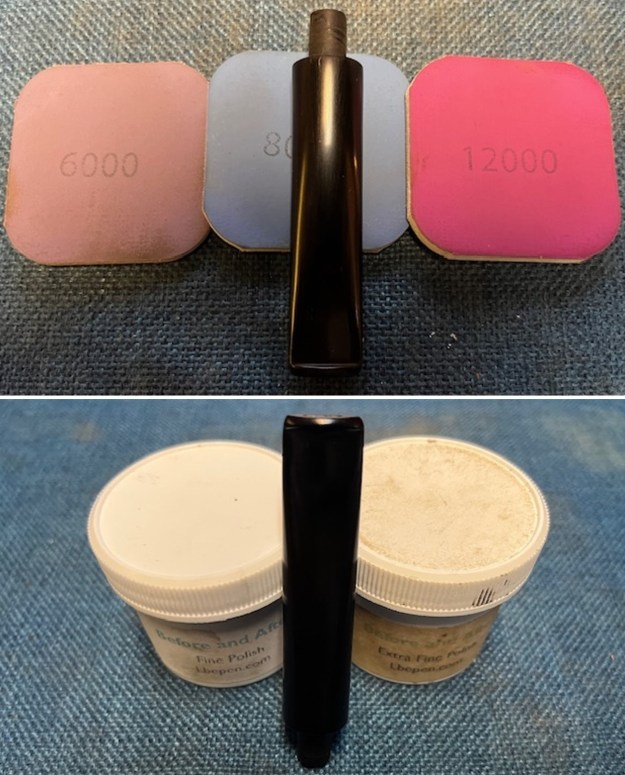
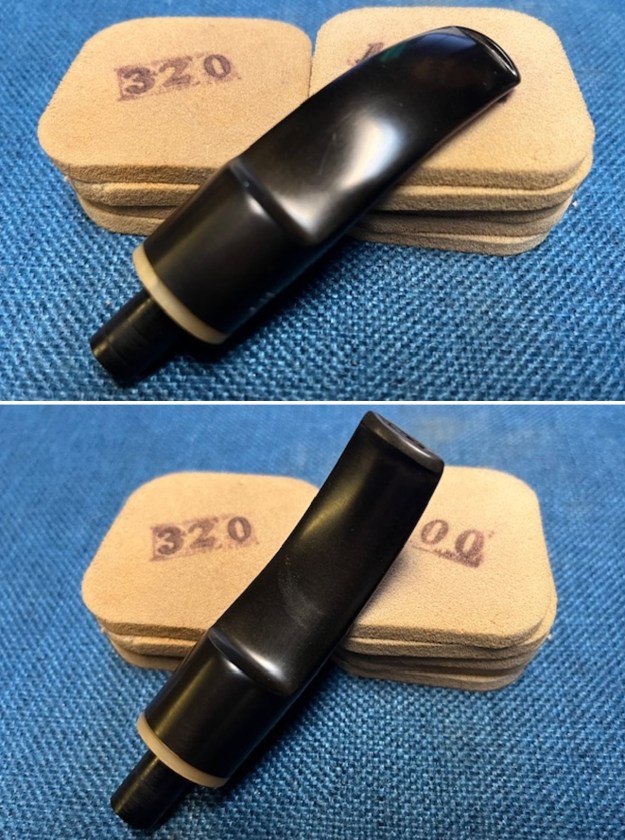 I polished the stem with micromesh sanding pads – 1500-12000 grit pads. I wiped it down with a damp cloth after each sanding pad. I used Before & After Pipe Polish – both Fine and Extra Fine to further polish the stem.
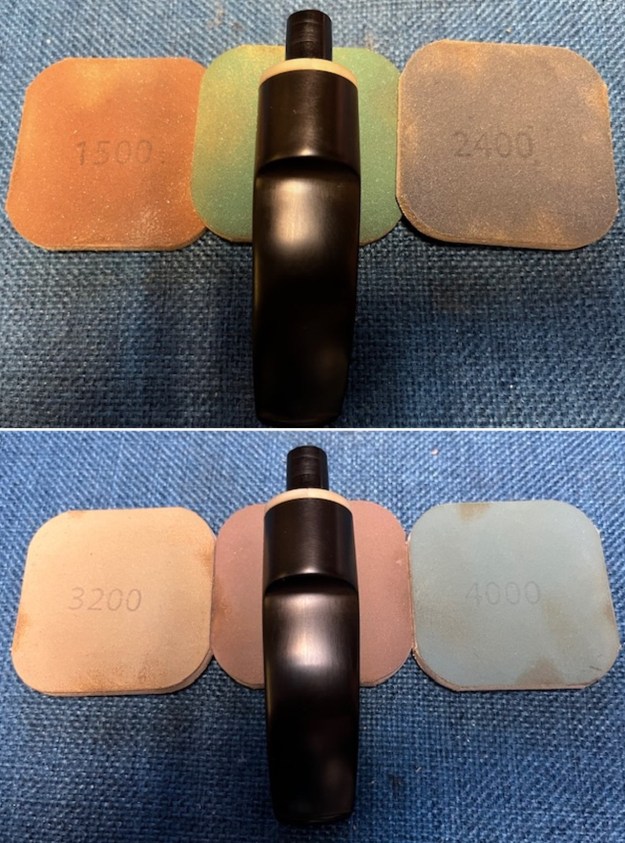
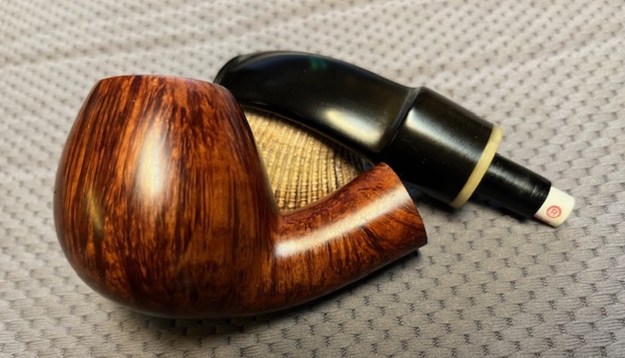
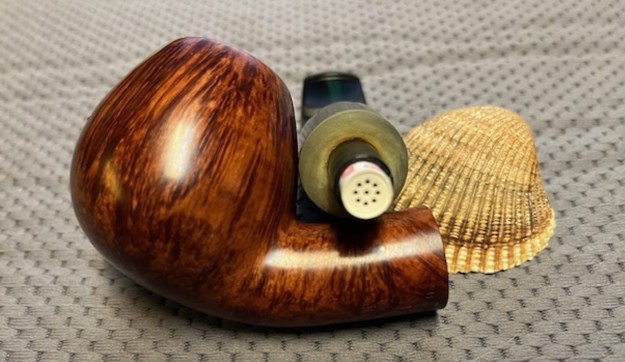
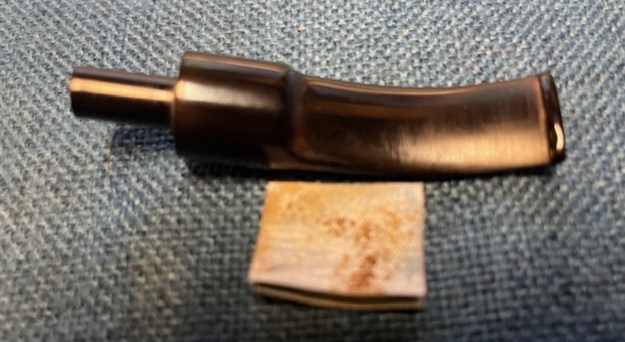
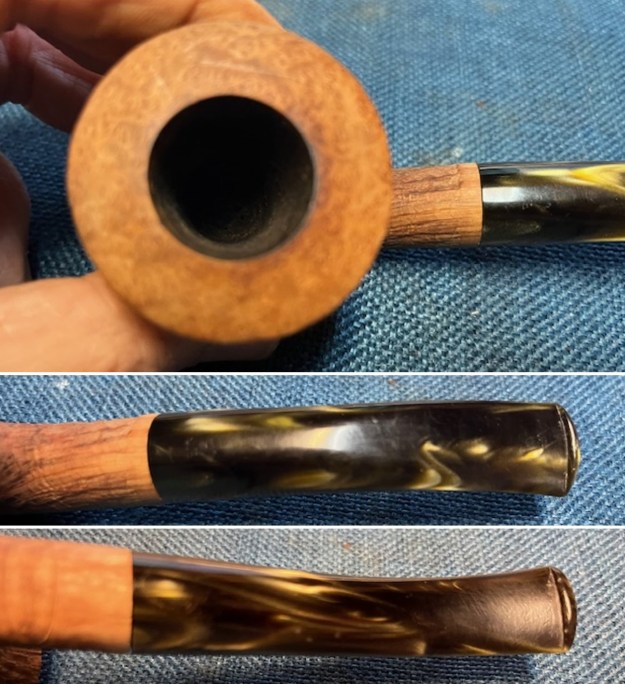
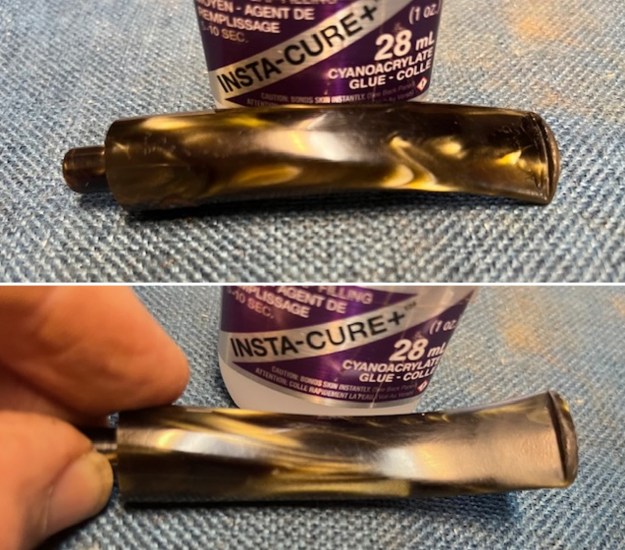
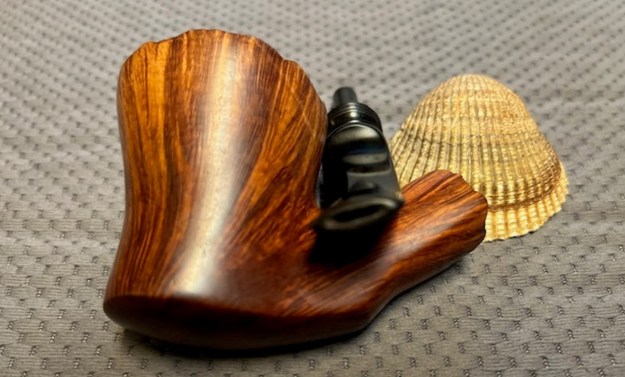
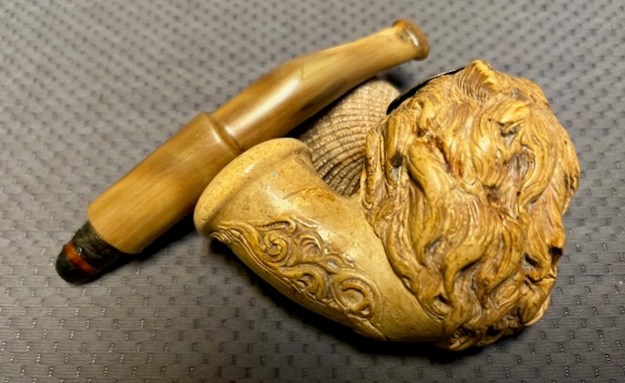
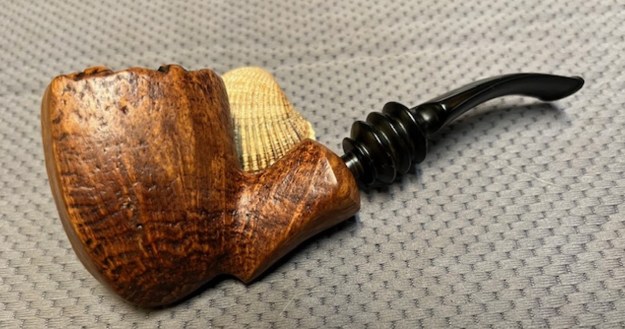
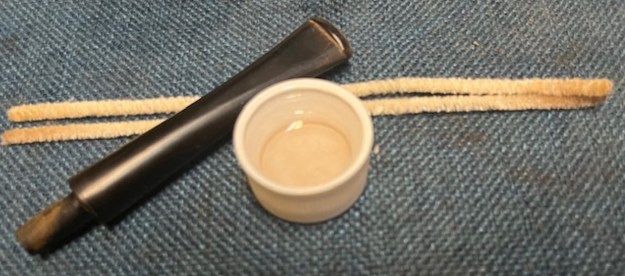
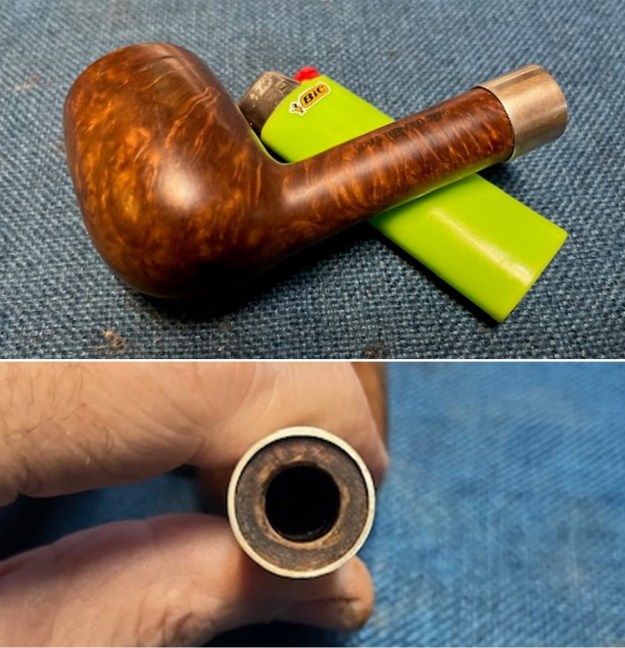
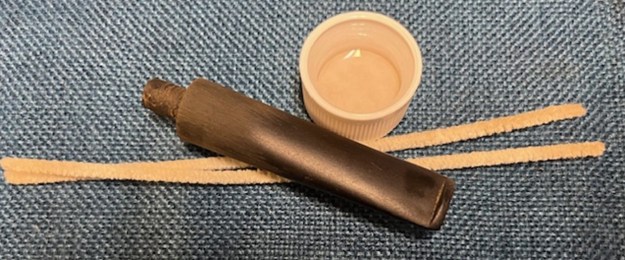
 I fitted the stem with a Dr. Perl Junior 9MM filter made by Vauen. The pictures below show the brand, the filter and the fit of the filter in the tenon.
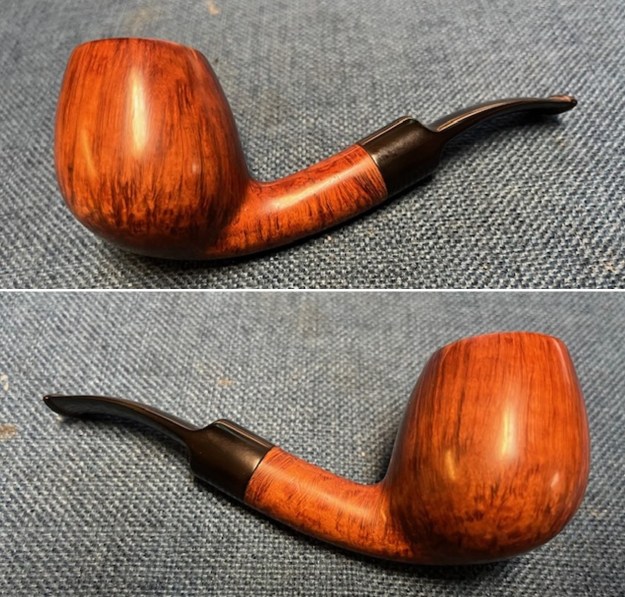
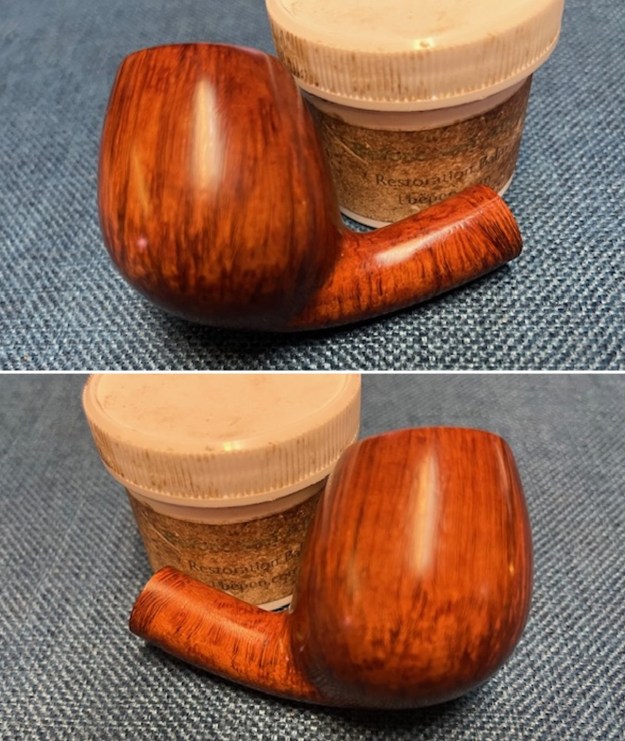
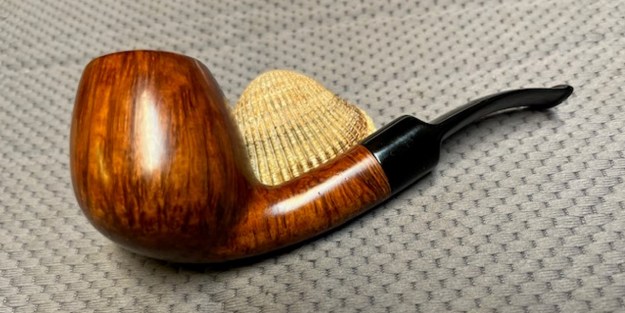
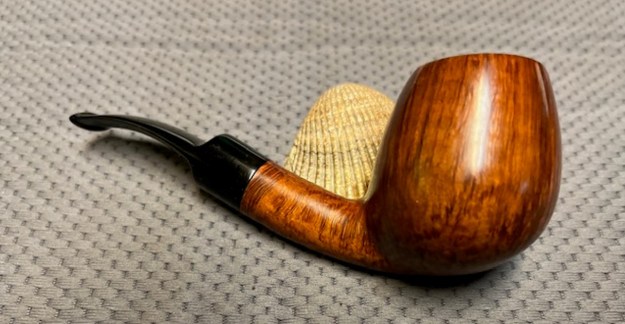
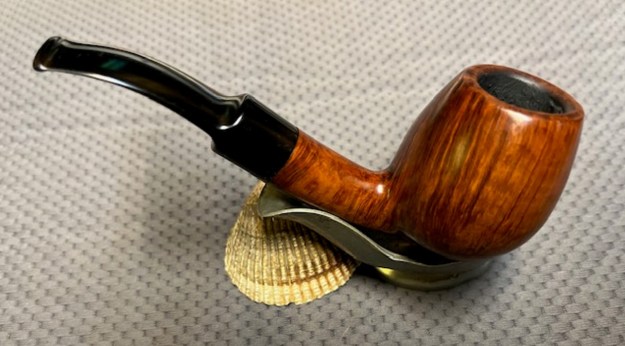
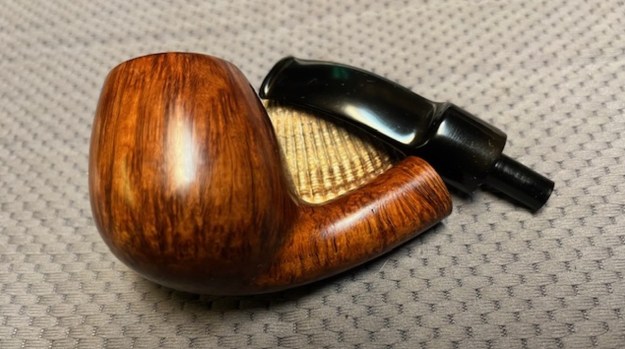
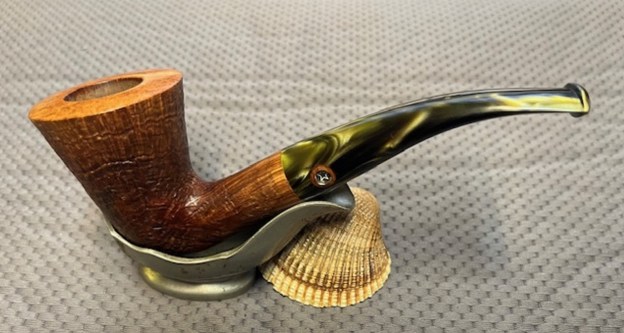
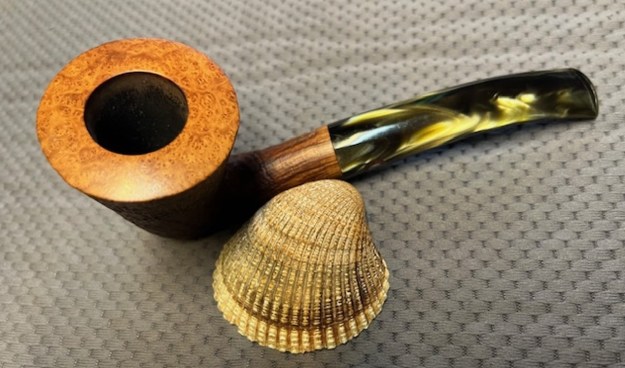
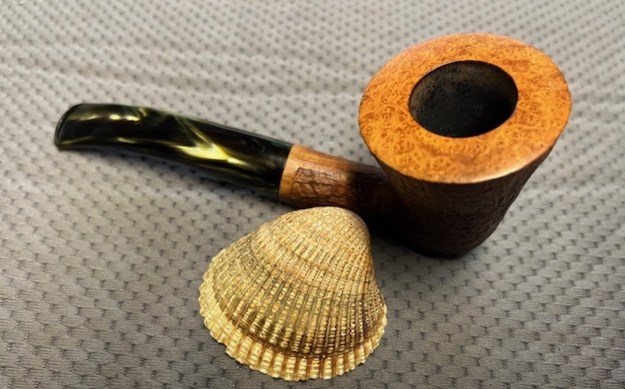
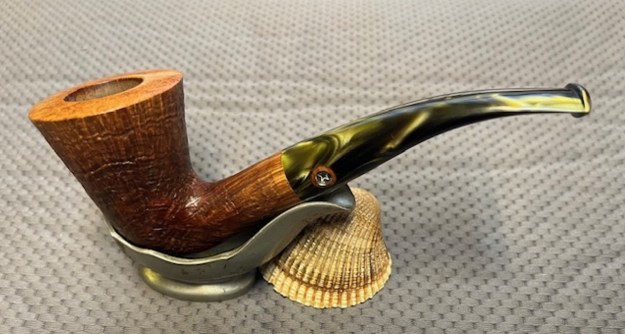
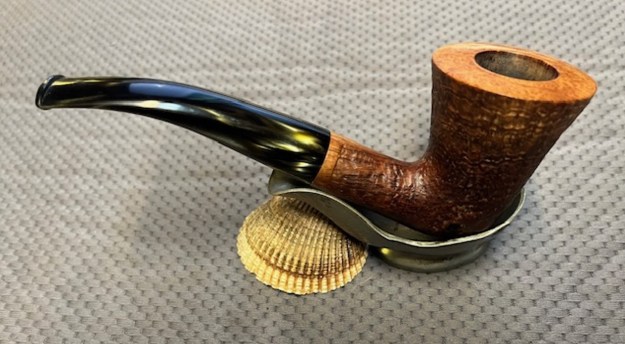
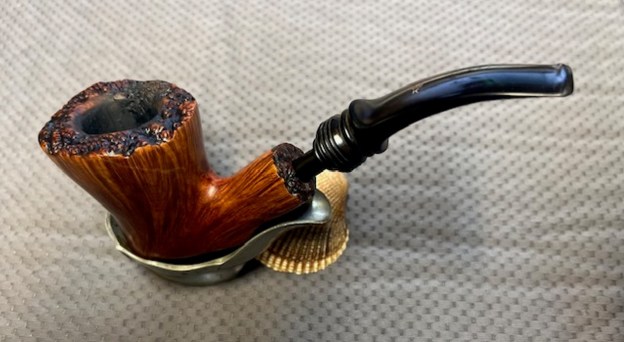
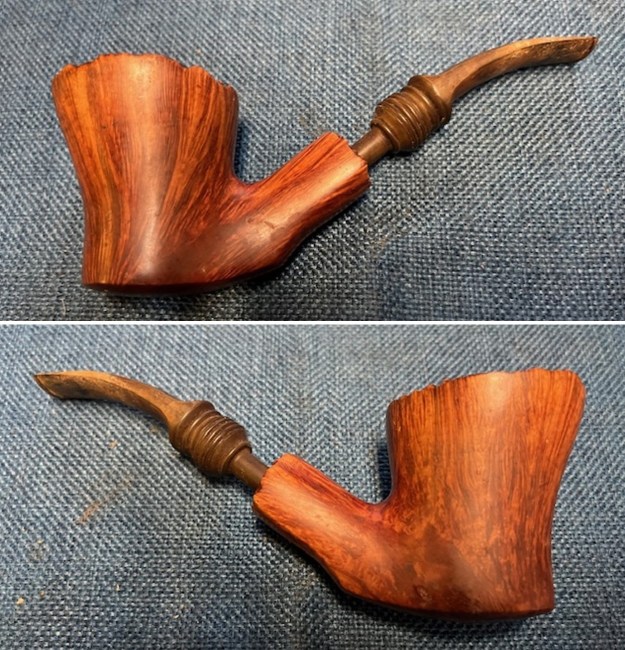
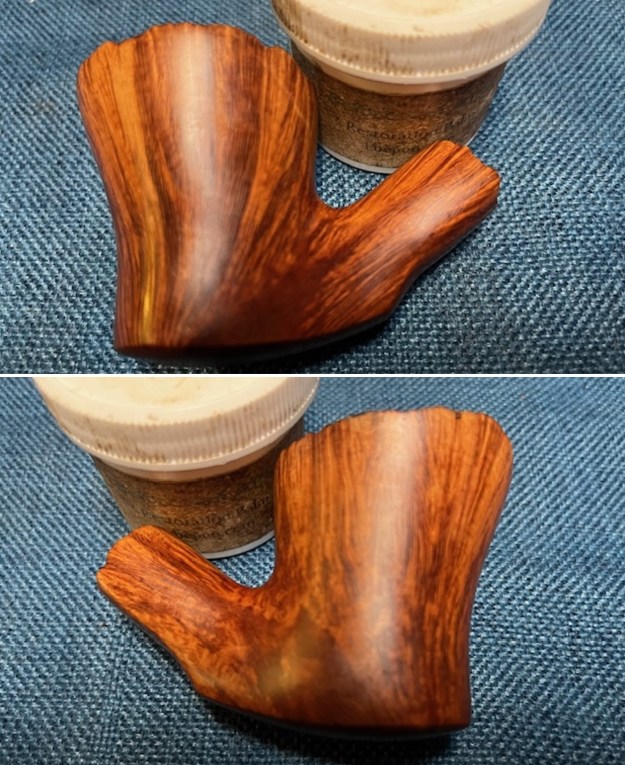
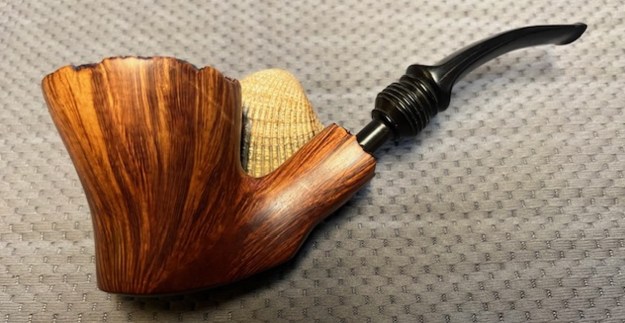
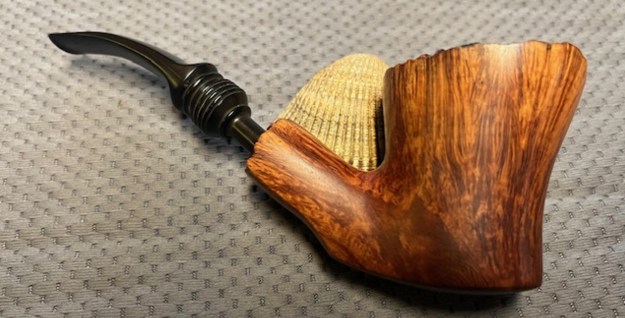
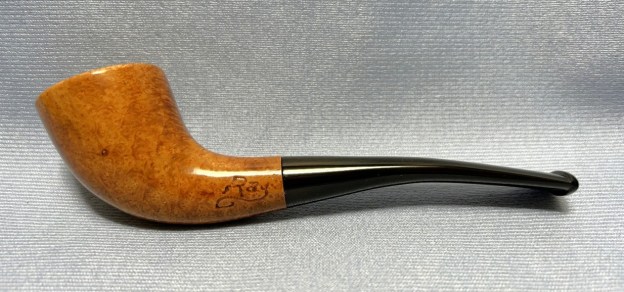
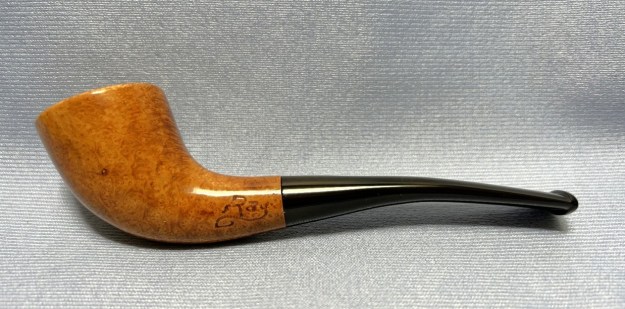
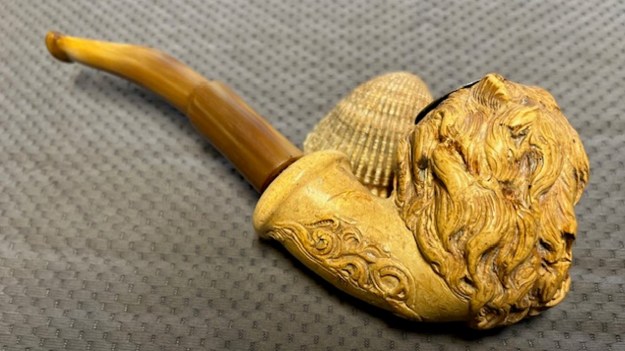
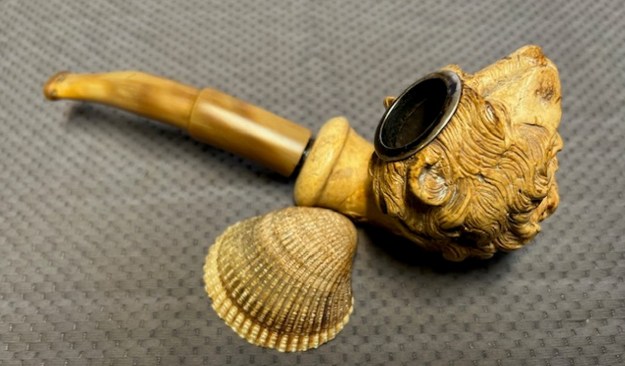
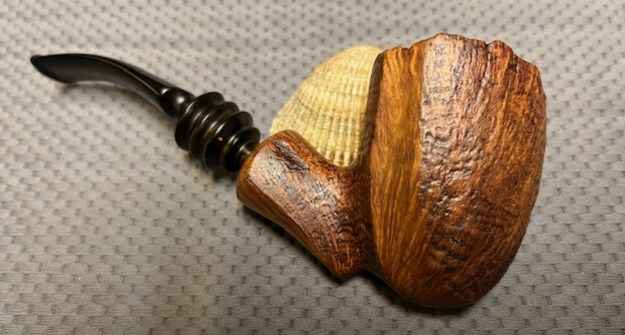
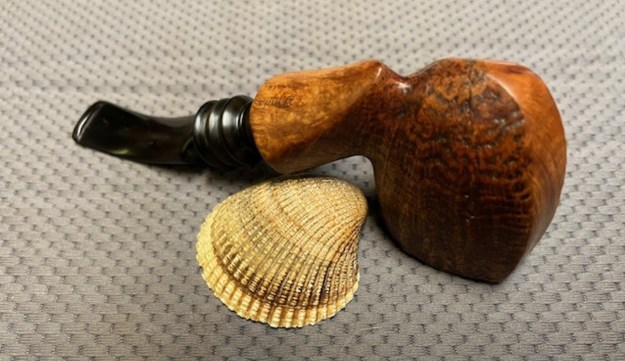
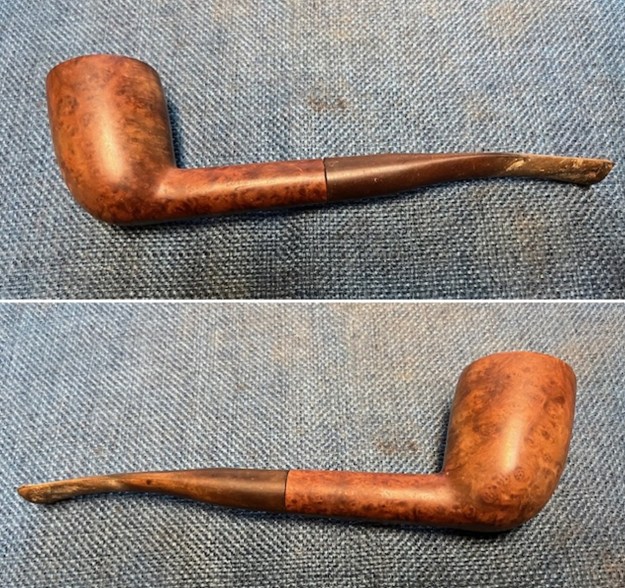
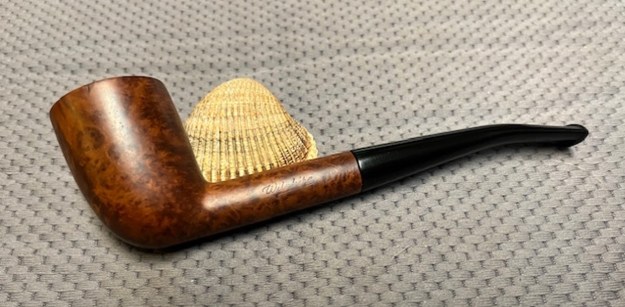
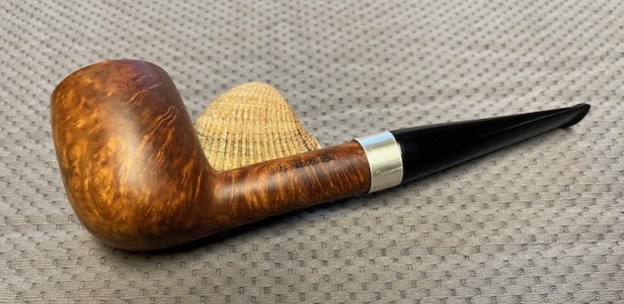
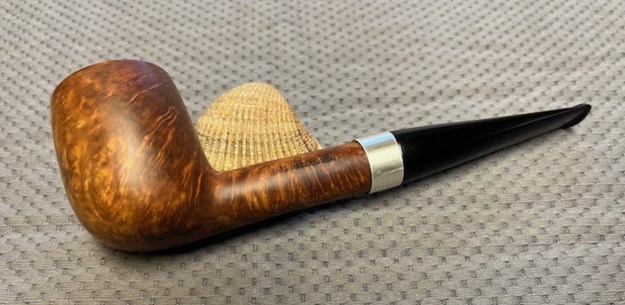
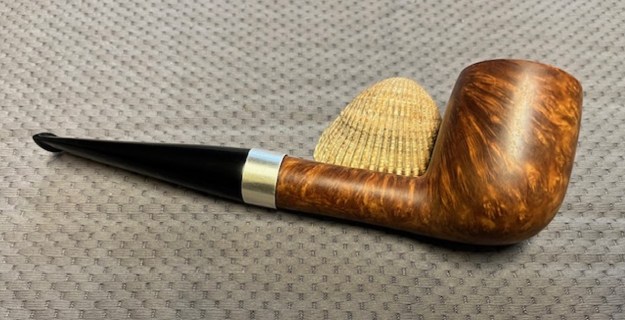
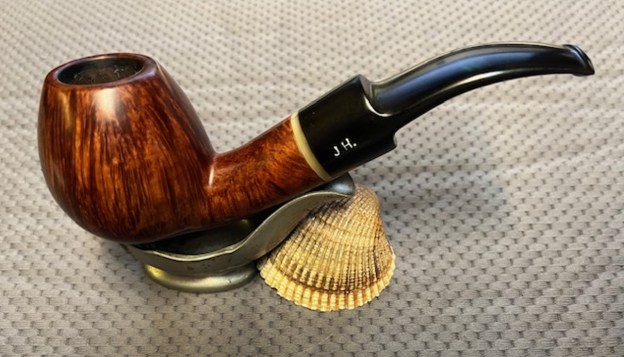
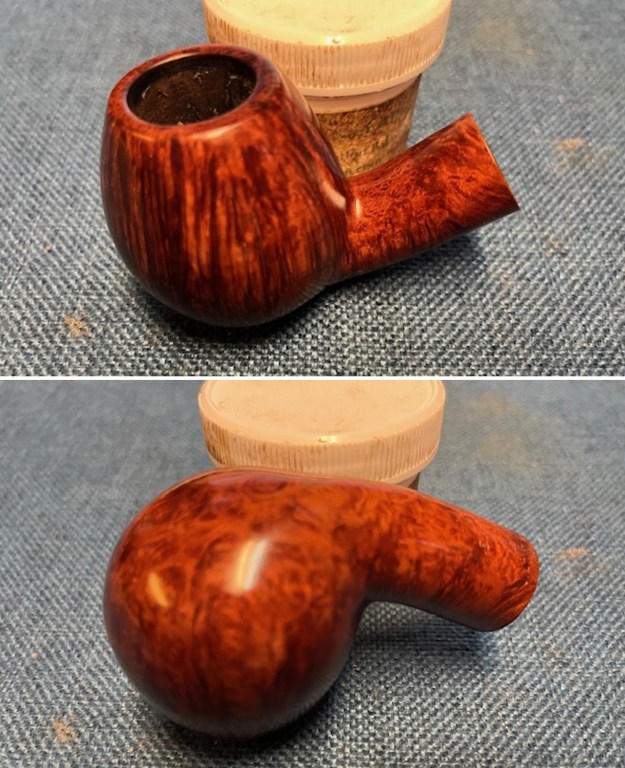
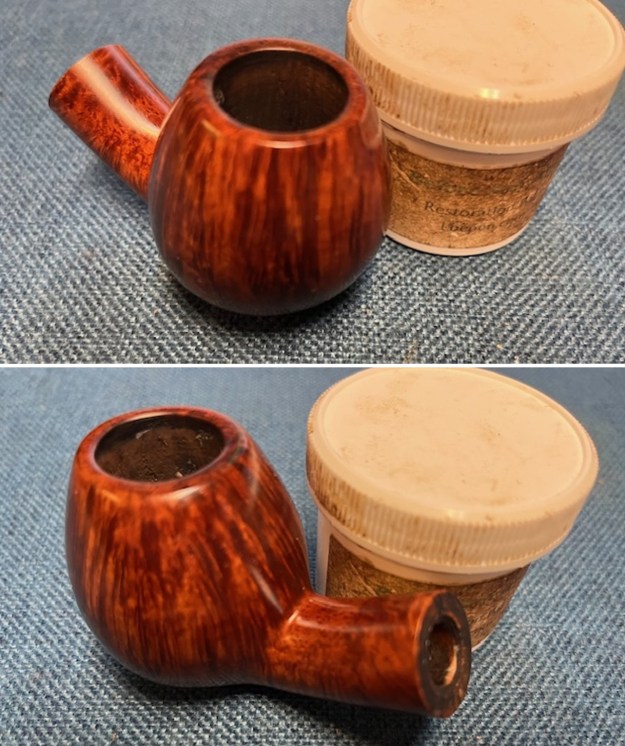
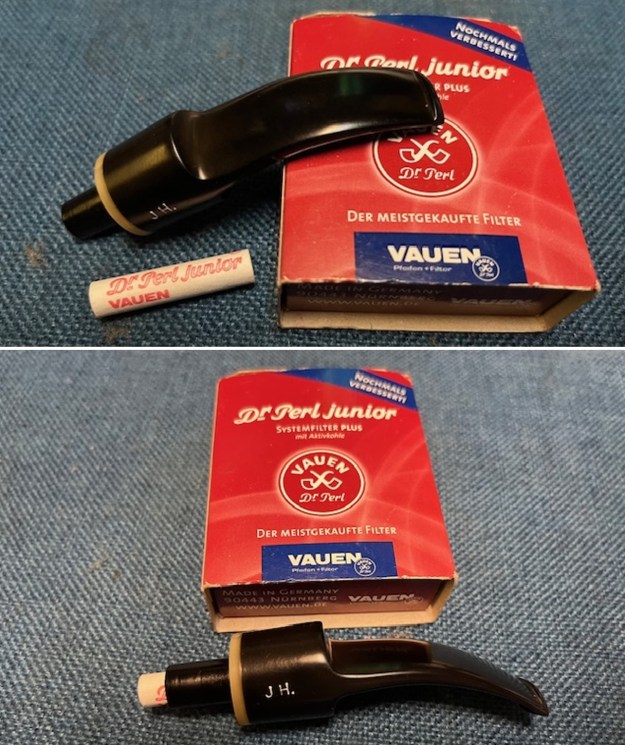 I put the repaired and reworked Jan Hansen Svendborg Danish Hand Carved C Grade Bent Brandy and its vulcanite saddle filter stem back together. The rich browns and blacks of the contrasting stain makes the grain come alive with the polishing and waxing. I carefully buffed the pipe with Blue Diamond on the buffing wheel using a light touch on the briar. I gave the bowl and the stem multiple coats of carnauba wax on the buffing wheel and followed that by buffing the entire pipe with a clean buffing pad. I hand buffed the pipe with a microfiber cloth to deepen the shine. The finished Svendborg Danish Hand Carved Bent Brandy really is a beauty and fits nicely in the hand and looks very good. Give the finished pipe a look in the photos below. The dimensions of the pipe are Length: 6 inches, Height: 2 inches, Outside diameter of the bowl: 1 inch, Chamber diameter: ¾ of an inch. The weight of the pipe is 2.50 ounces/70 grams. This pipe will soon be on the Danish Pipe Makers Section of the rebornpipes store if you would like to add it to your collection. Send me a message or an email. Thanks for reading this blog and my reflections on the pipe while I worked on it.