Blog by Steve Laug
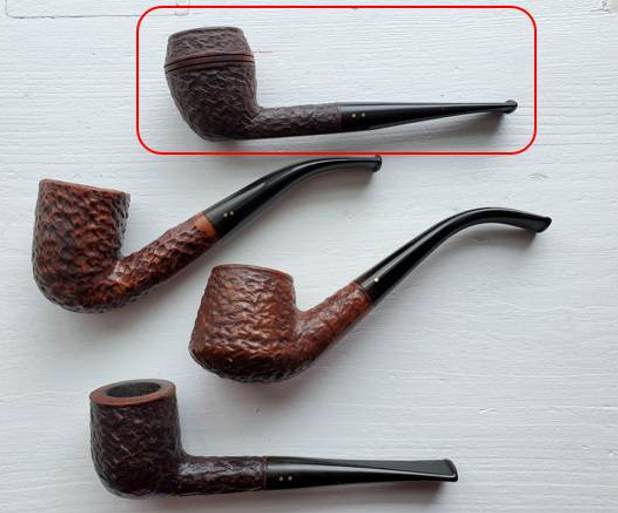
On Saturday, April 27 Kenneth and I went to an antique and collectible sale at an arena in New Westminster, BC, Canada. I wrote about the adventure and posted it in a previous blog last weekend (https://rebornpipes.com/2024/04/28/you-have-to-join-kenneth-and-me-on-a-great-morning-pipe-hunt/). On the hunt I picked up four pipes that I have listed below:
- Jeantet Fait Main Bent Freehand Dublin 4 with a diamond shank
- Jeantet Fait Main Bent Apple 9 with a uniquely shaped shank and stem
- Republic Era Peterson’s System Pipe 1307 Bowl sans stem
- Brigham Made in Canada 625 Squat Straight Bulldog
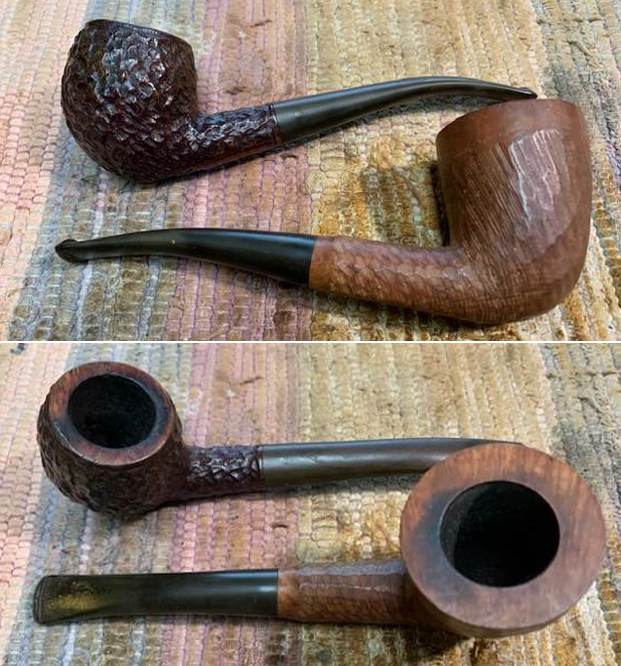
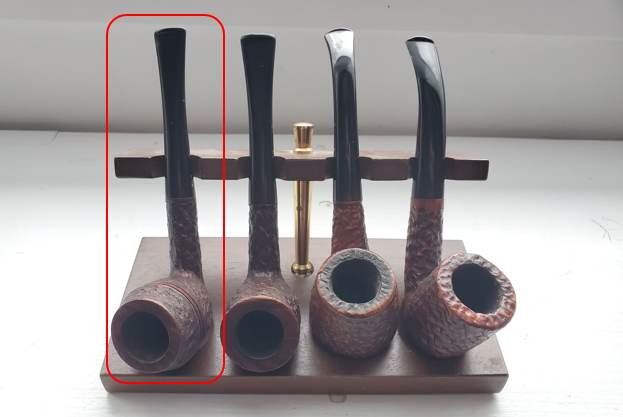
I have included photos of the foursome below. They are in the order of the list above.

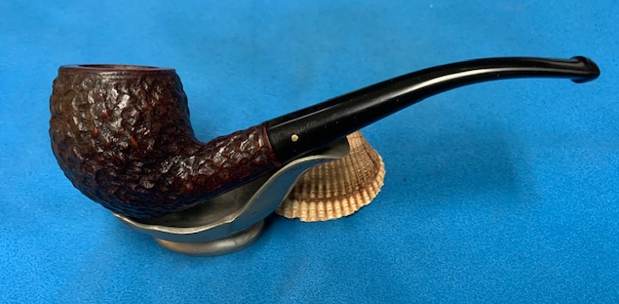
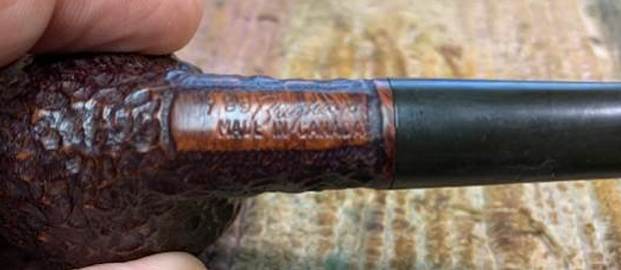
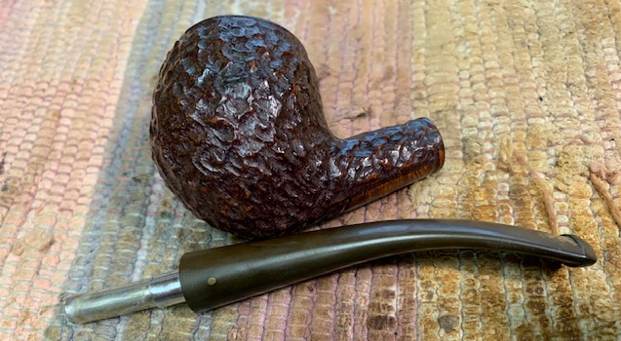
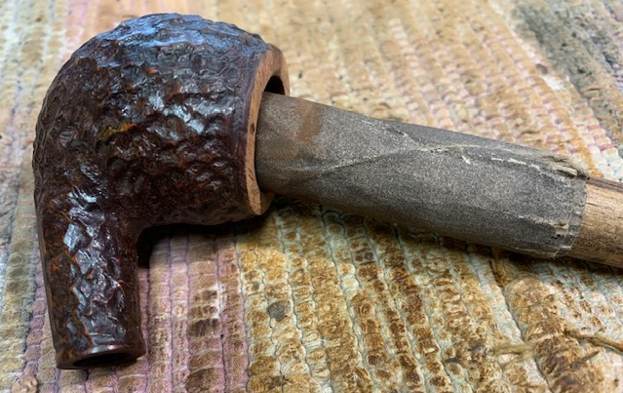
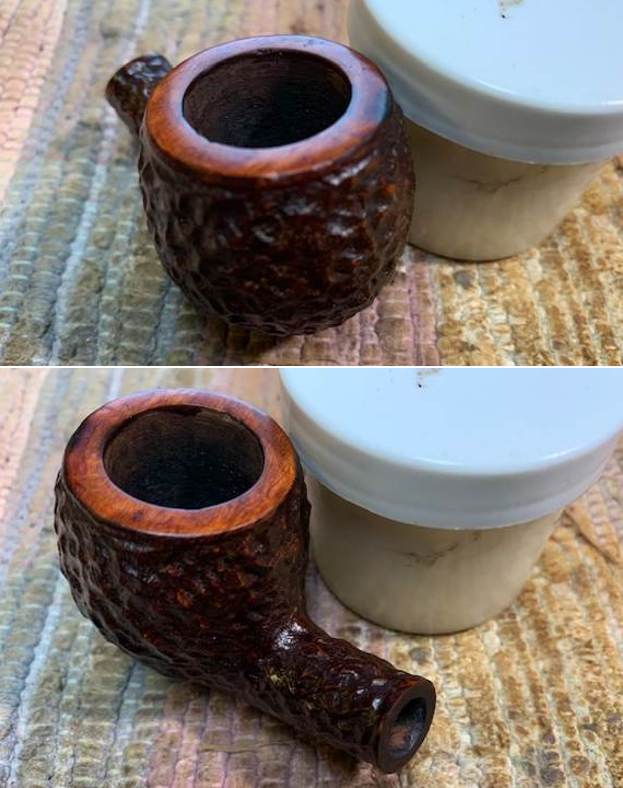
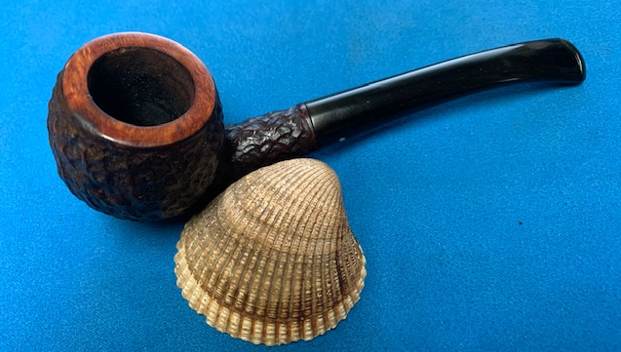
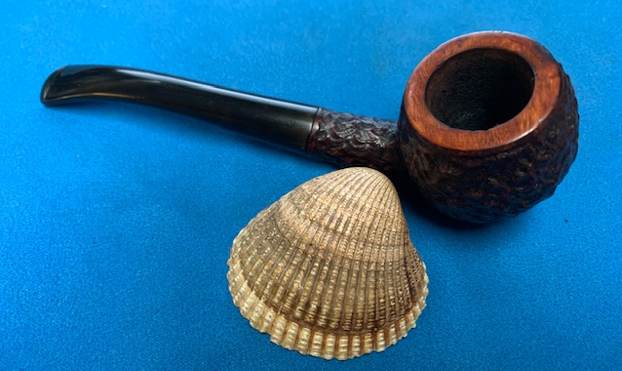
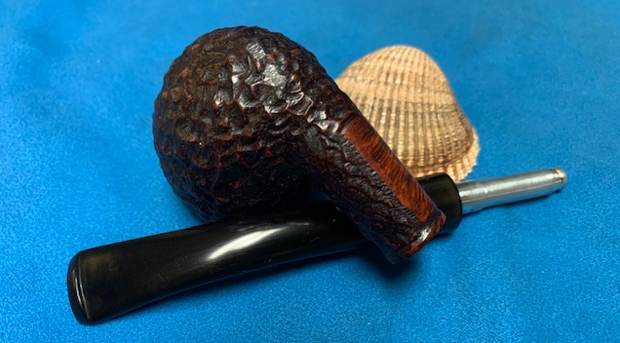
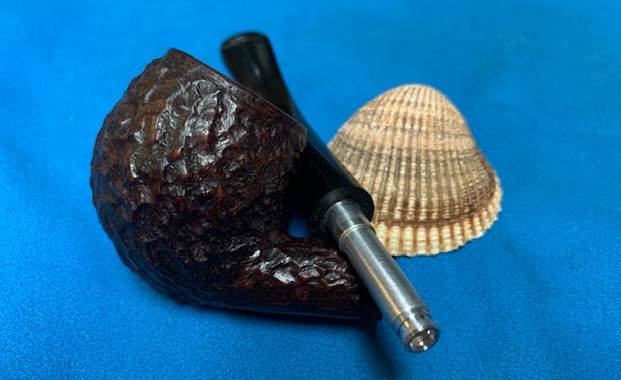
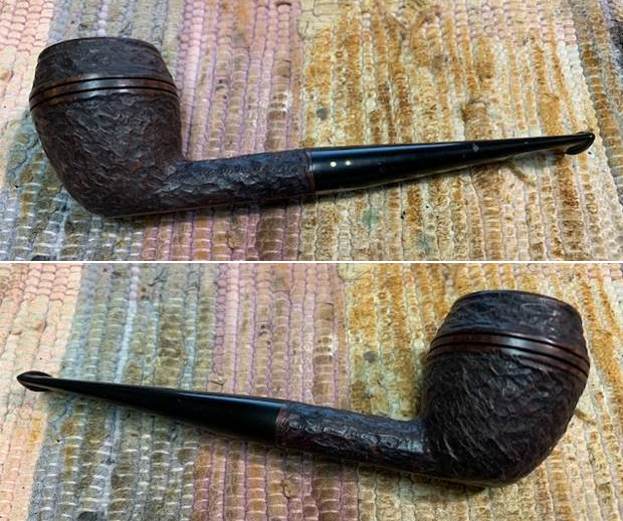
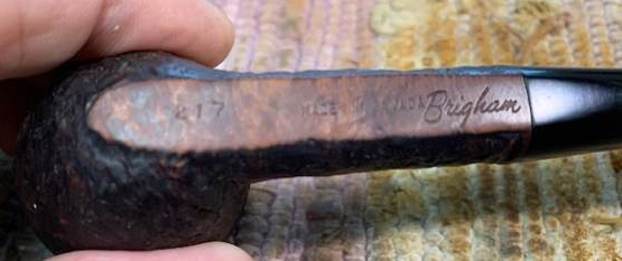
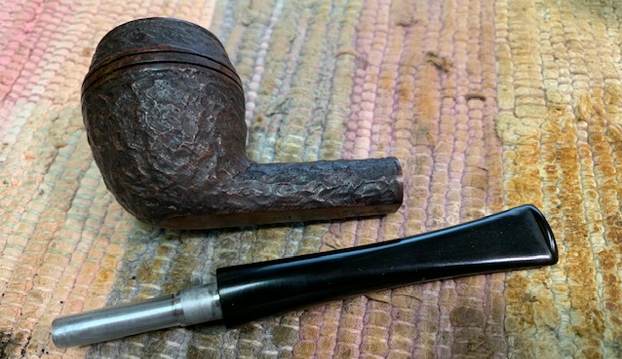
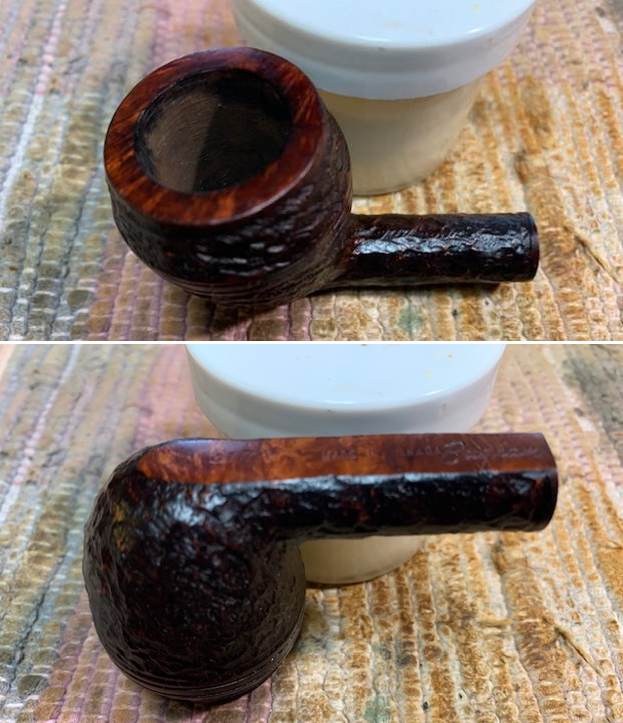
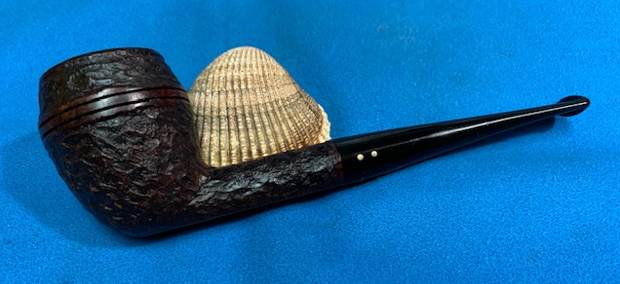
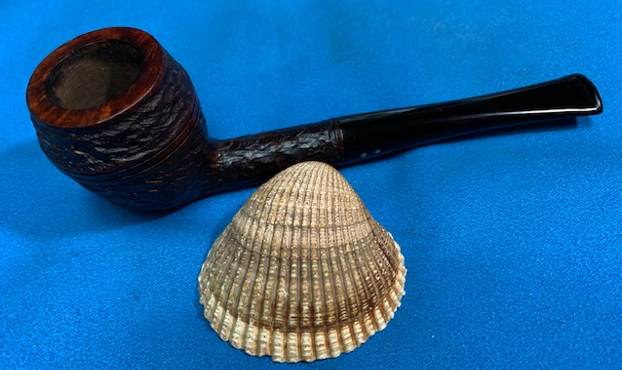
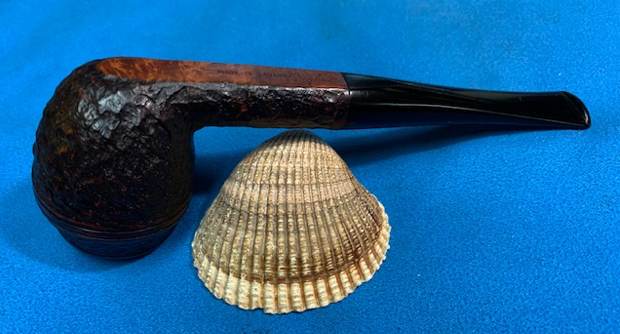
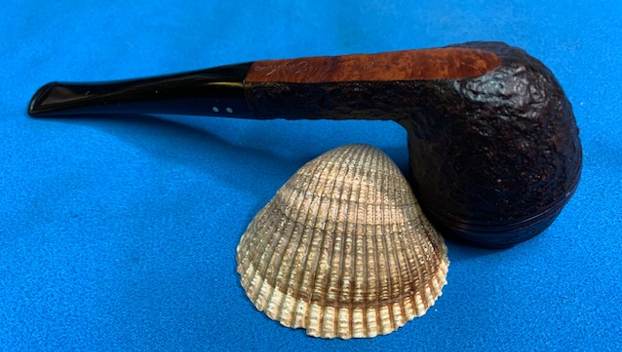
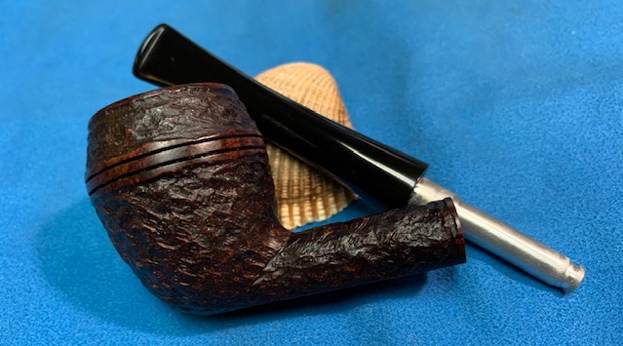
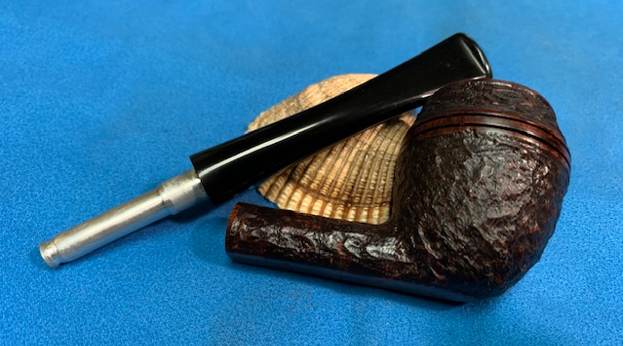
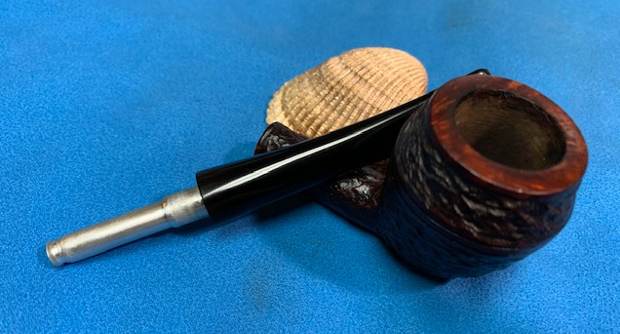
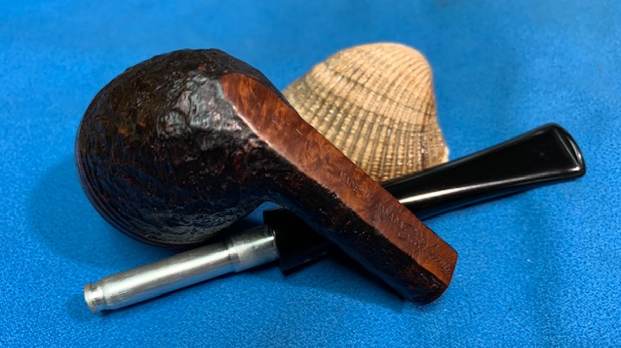
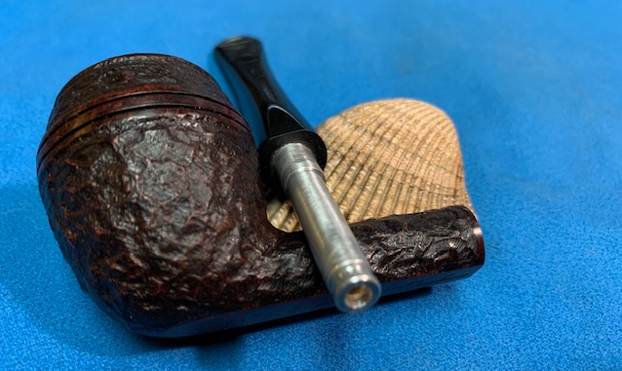
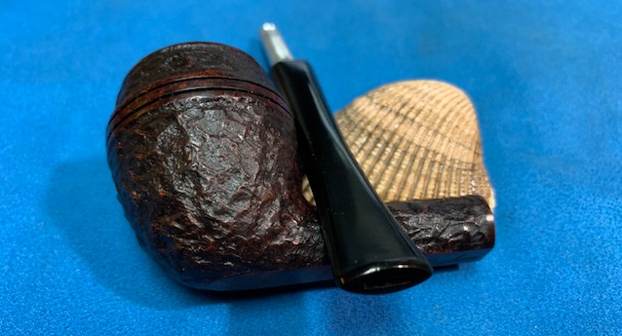
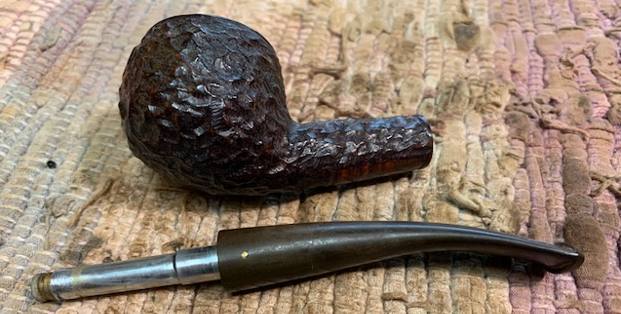
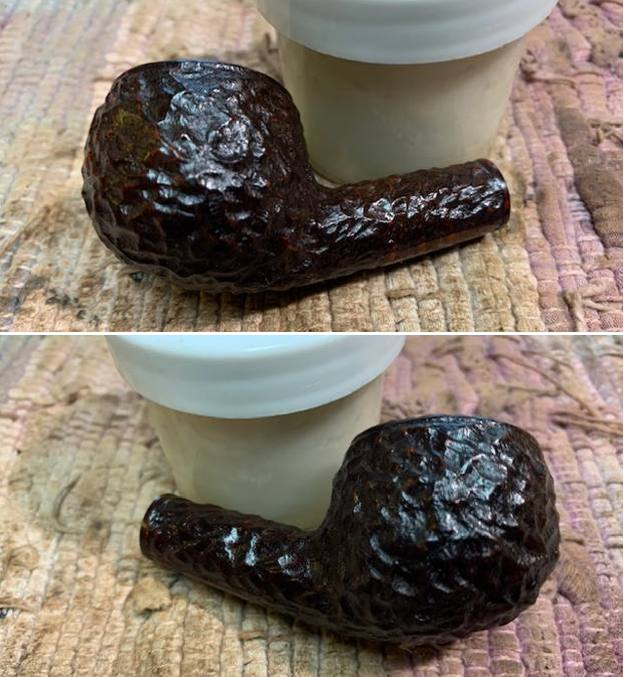
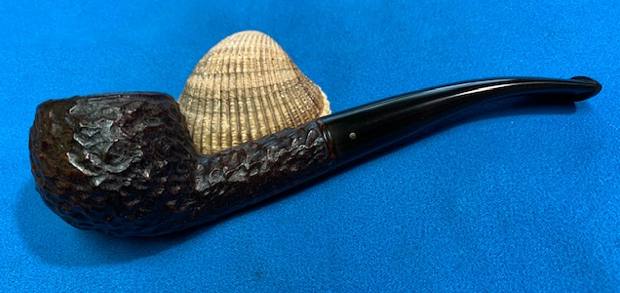
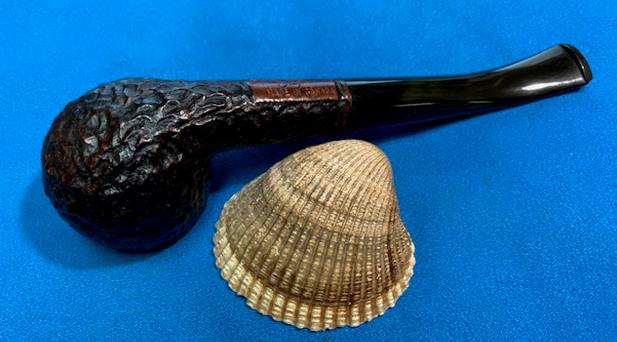
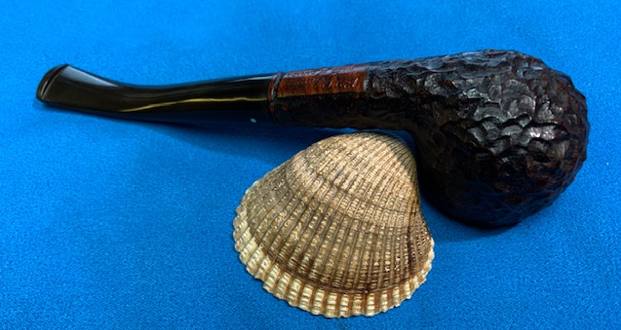
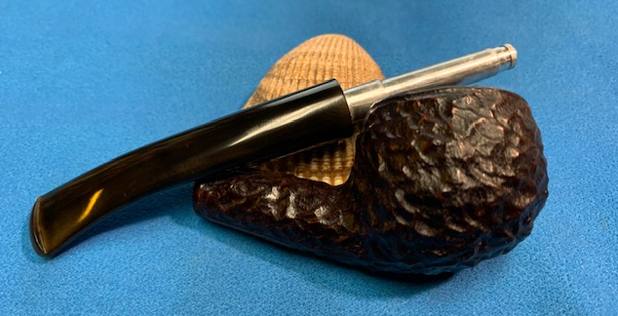
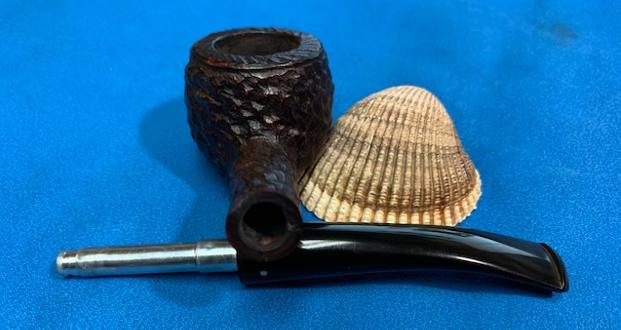
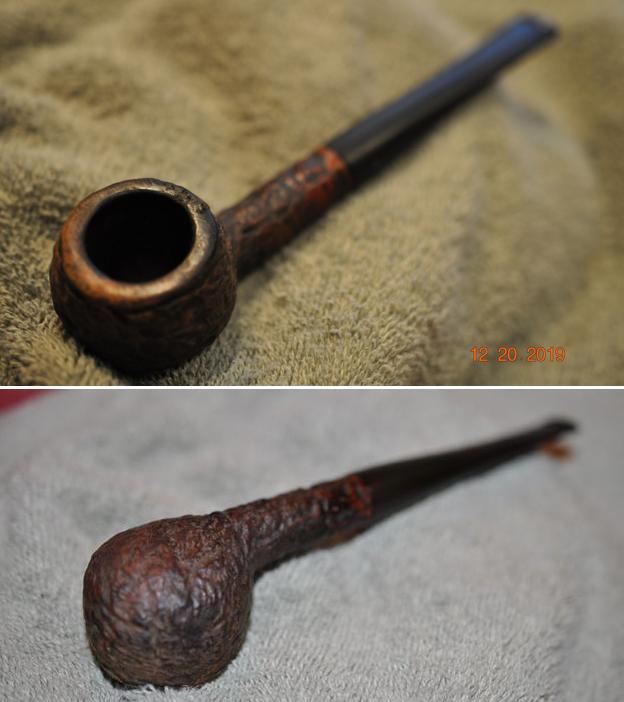
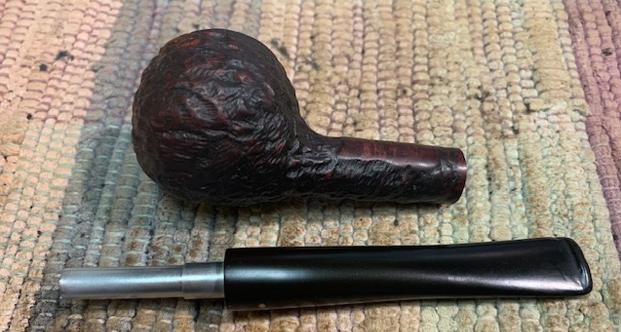
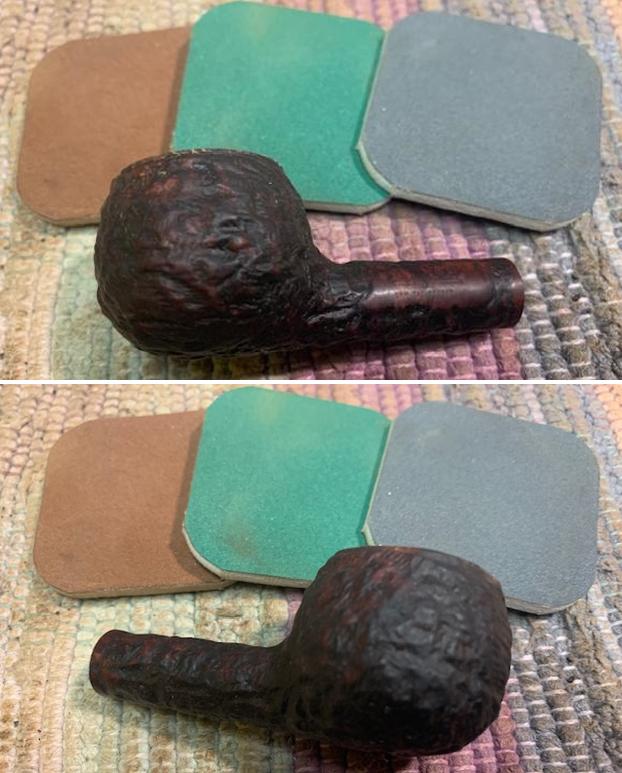
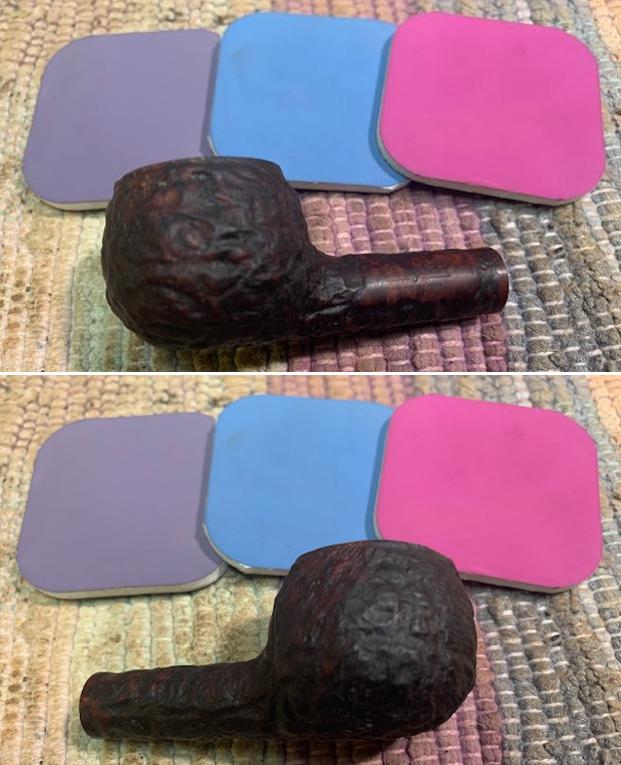
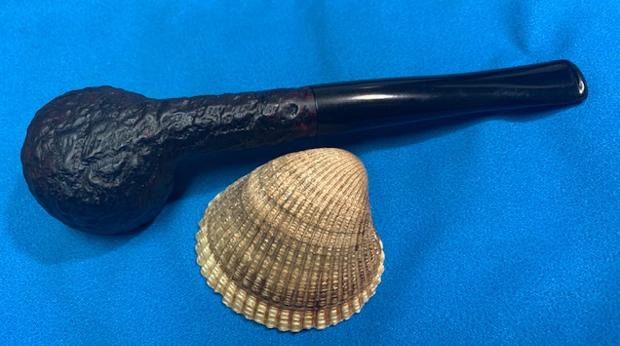
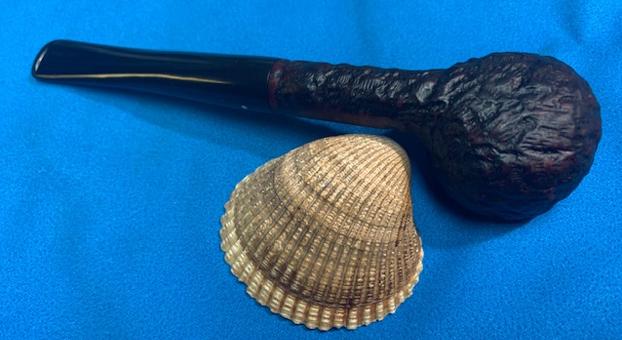
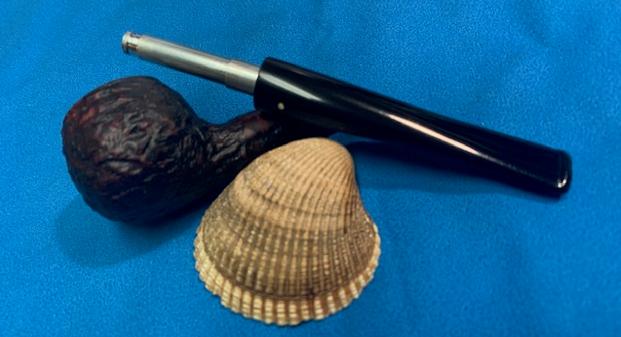
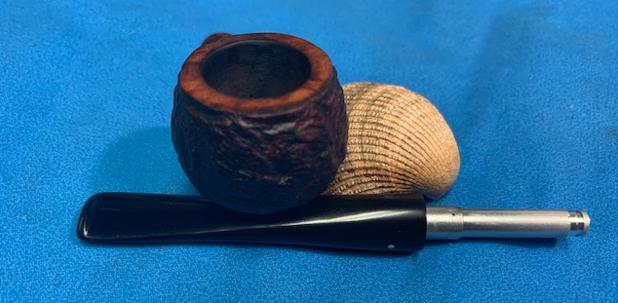
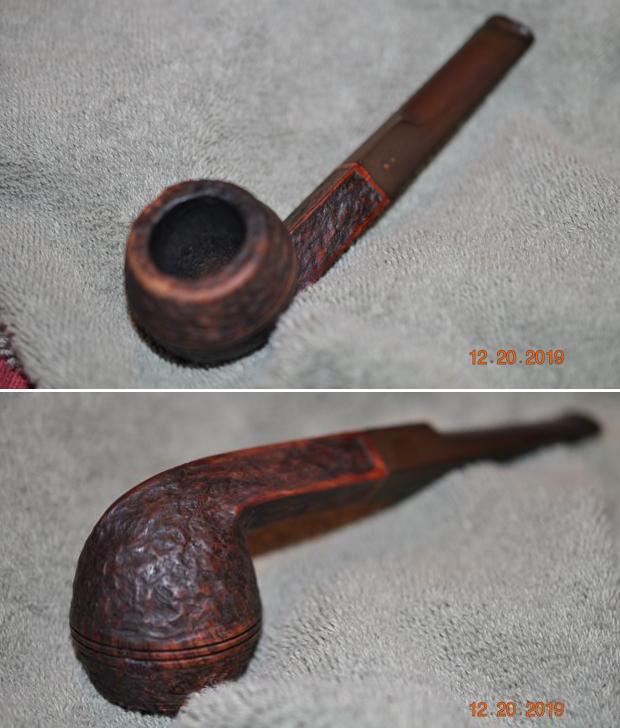
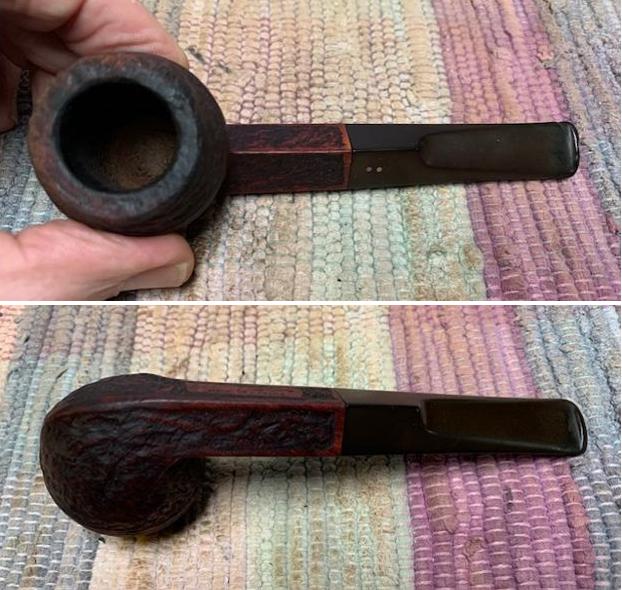
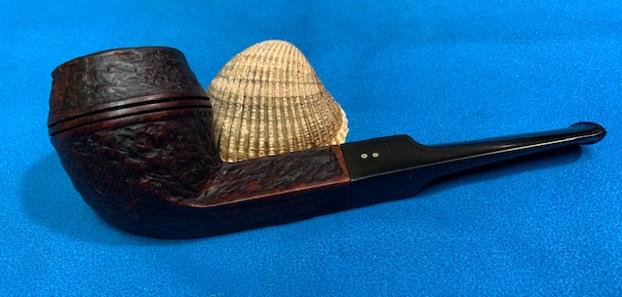
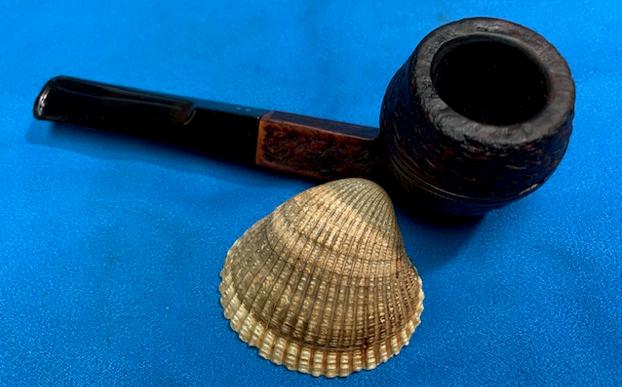
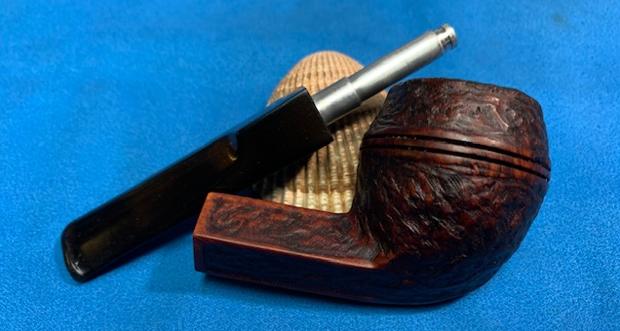
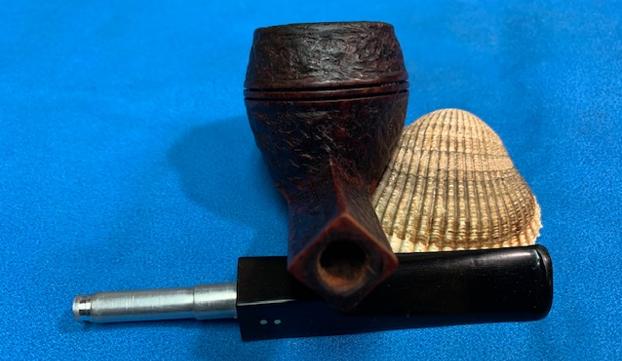
 I chose to work on the final pipe in the above photos. It is shown in the photos below and is stamped 625 next to Brigham [over] Made in Canada on a smooth panel on the left underside of the diamond shank. There are three vertical brass dots that are corroded and dark on the left topside of the diamond stem. It is squat straight Bulldog shape with a smooth cap, twin rings below the cap and a rusticated bowl and shank. The pipe has some great grain around the rim cap. The rim top is clean and shows some darkening on the back topside. The inner edge of the bowl is damaged and slightly out of round. The bowl had a light to moderate cake on the walls and some spots of lava on the rim top. The briar is dry and lifeless with some grime and grit ground into the briar. The stem was oxidized and had some tooth marks on the top and underside ahead of the button. The stem was frozen in place in the shank and was not removable. From my experience I would guess that the aluminum tube in the shank had begun to oxidize and that combined with the tars and oils had bound the tenon apparatus to the briar in the shank. I had a feeling it was going to be a real pain to separate the stem and the shank. The photos below show what I saw when I examined the pipe.
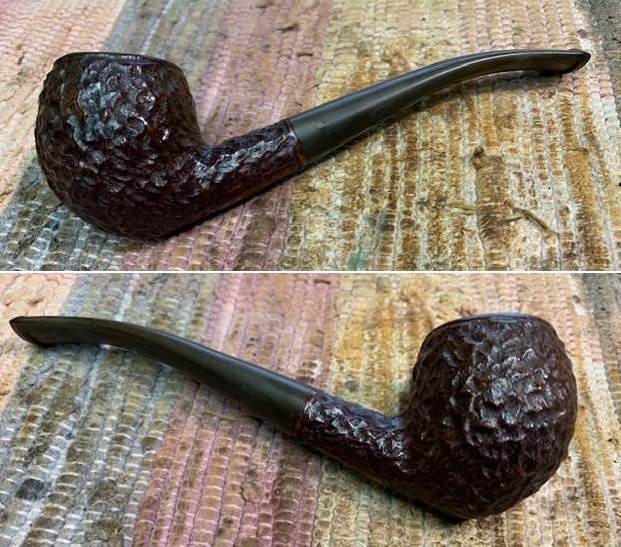
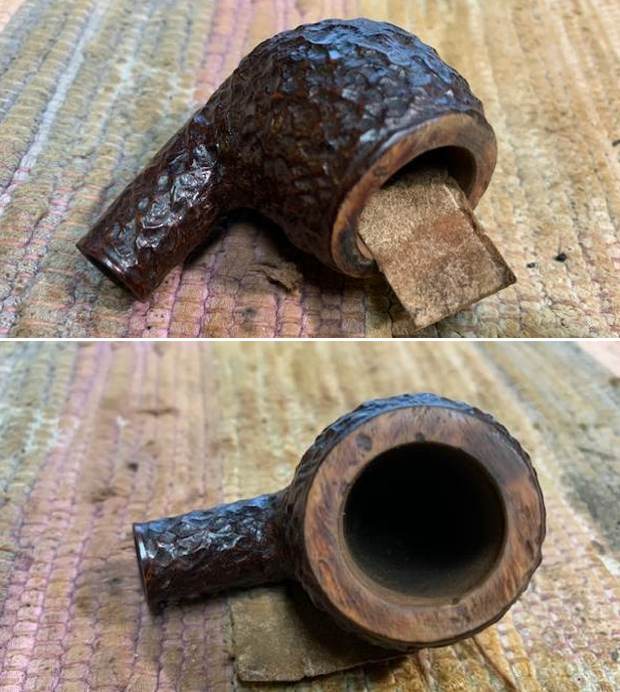
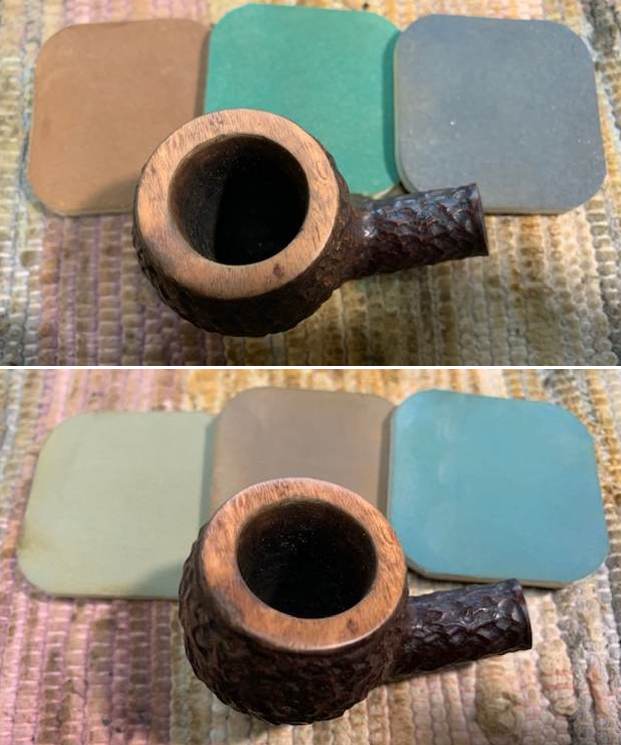
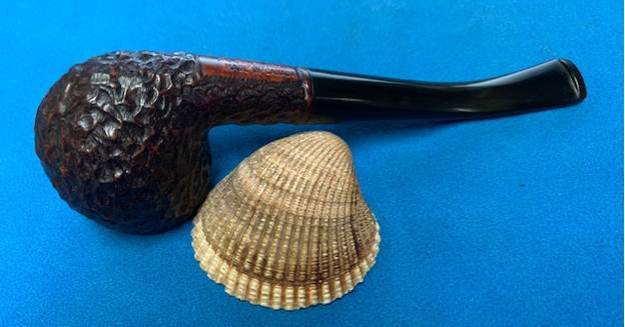
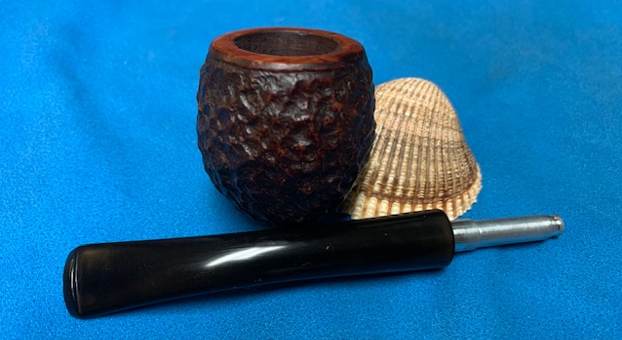
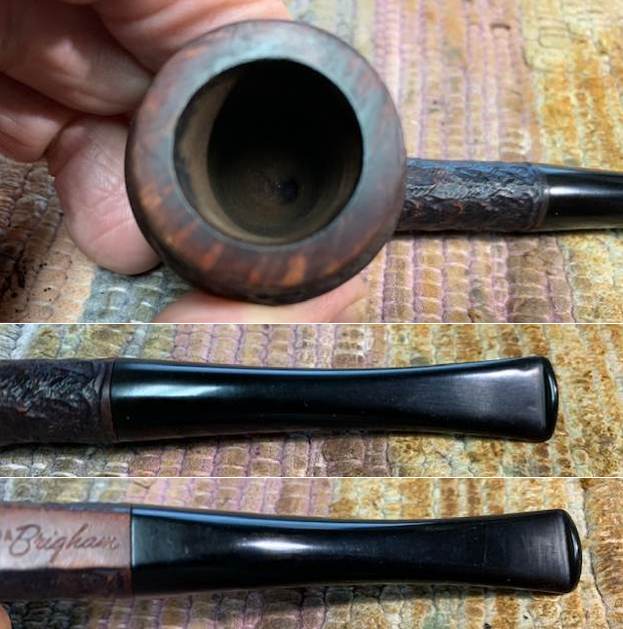
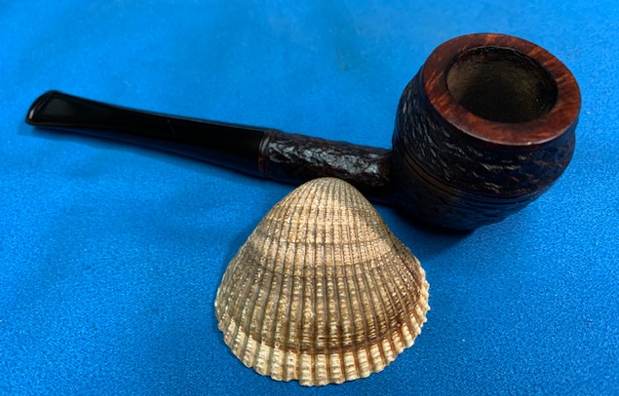
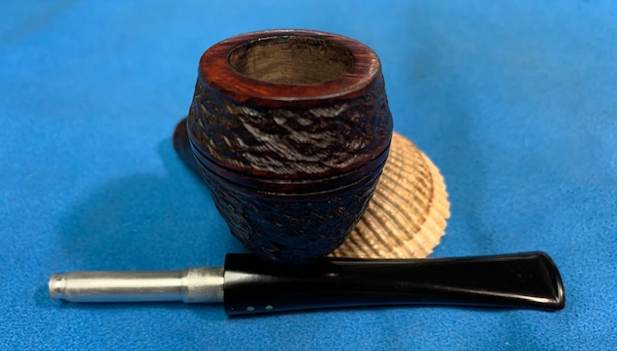
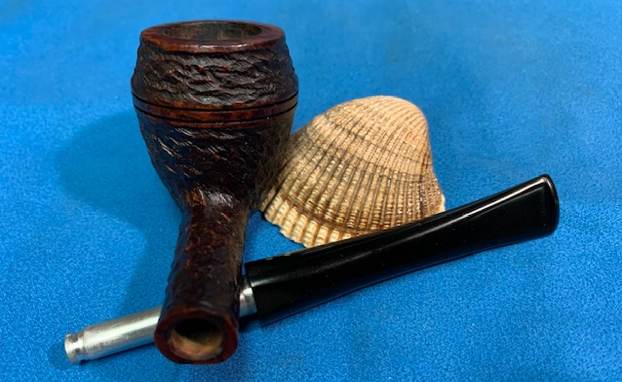
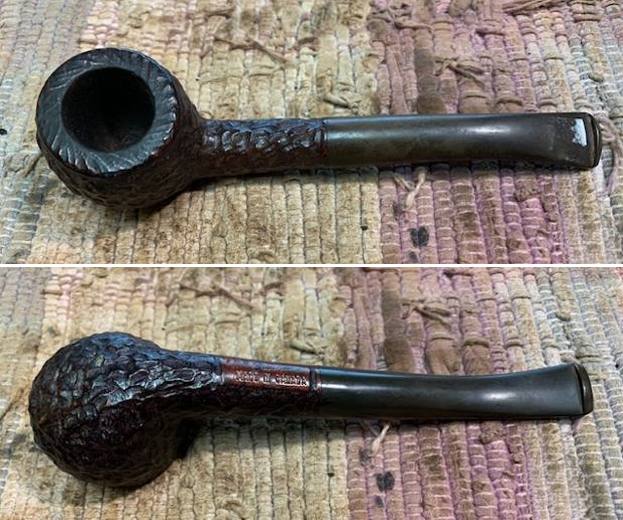
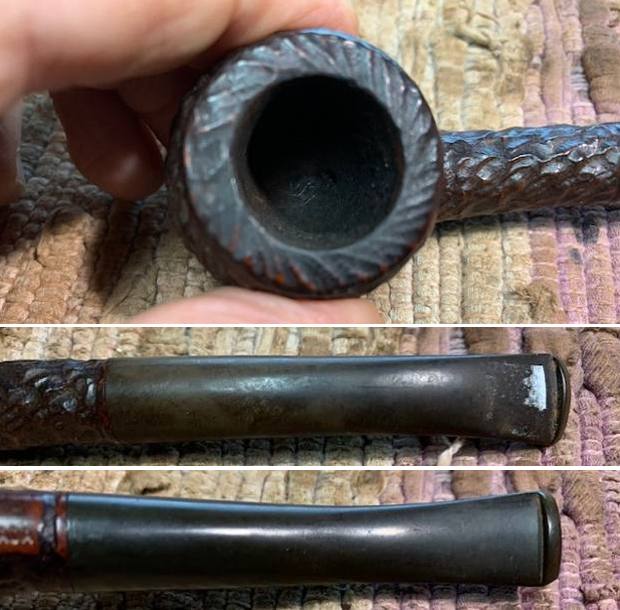
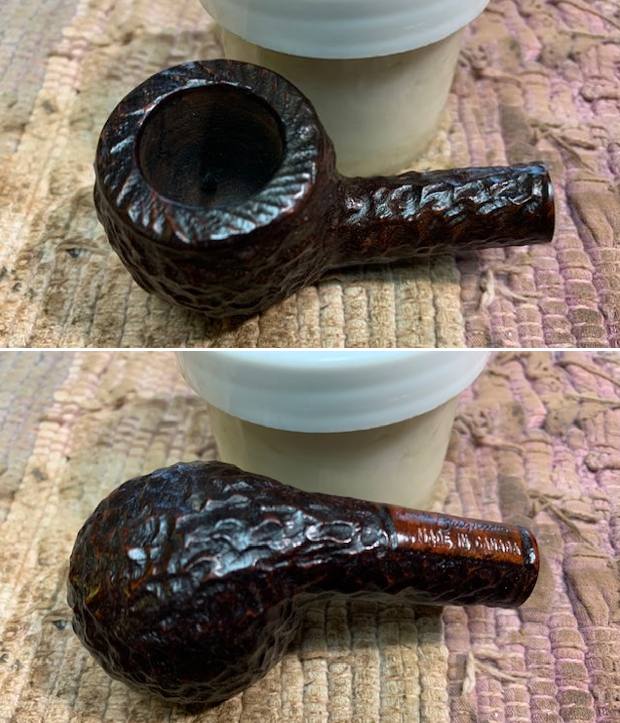
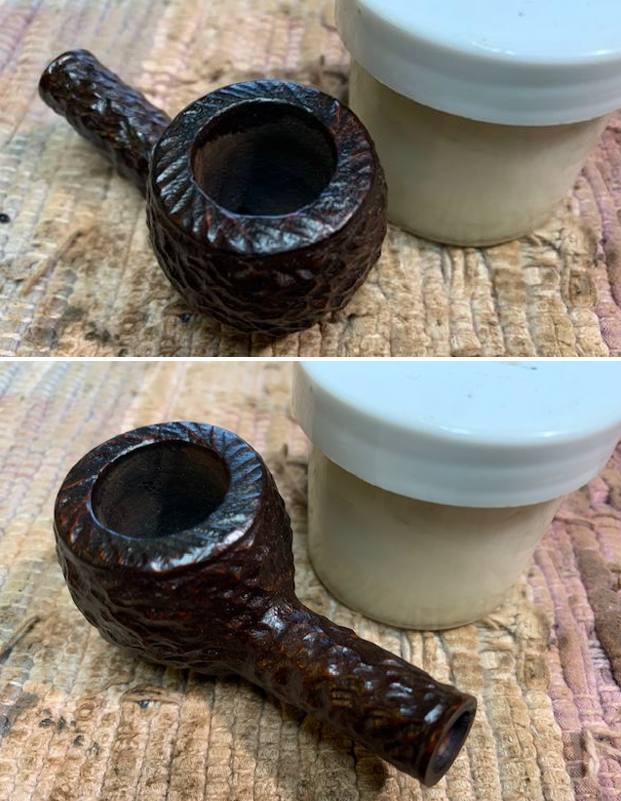
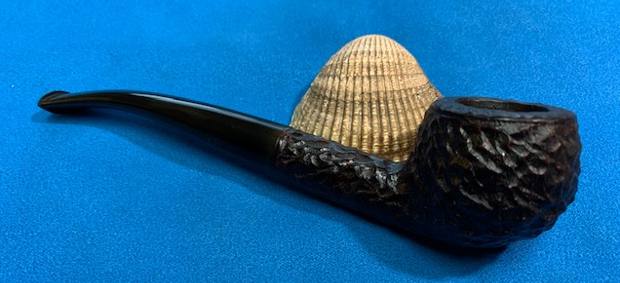
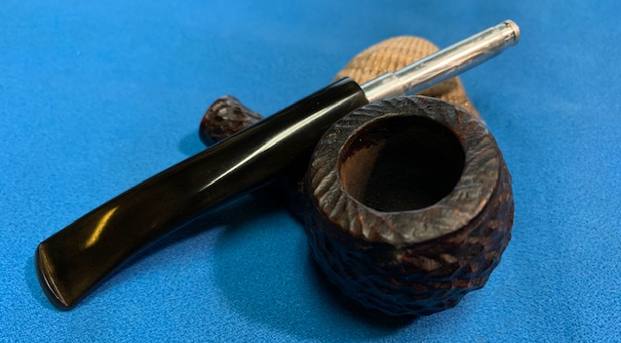
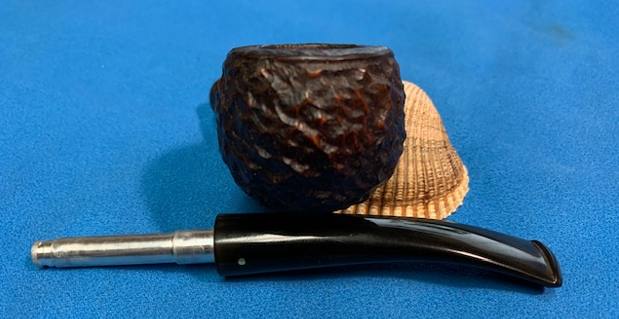
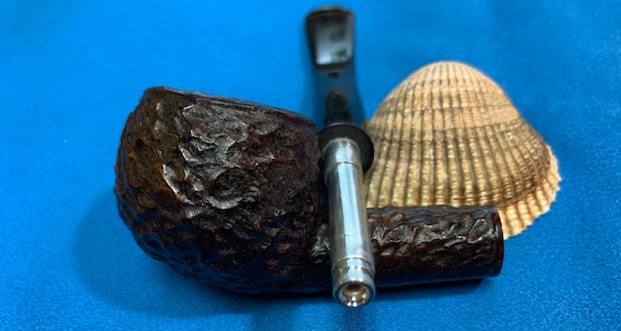
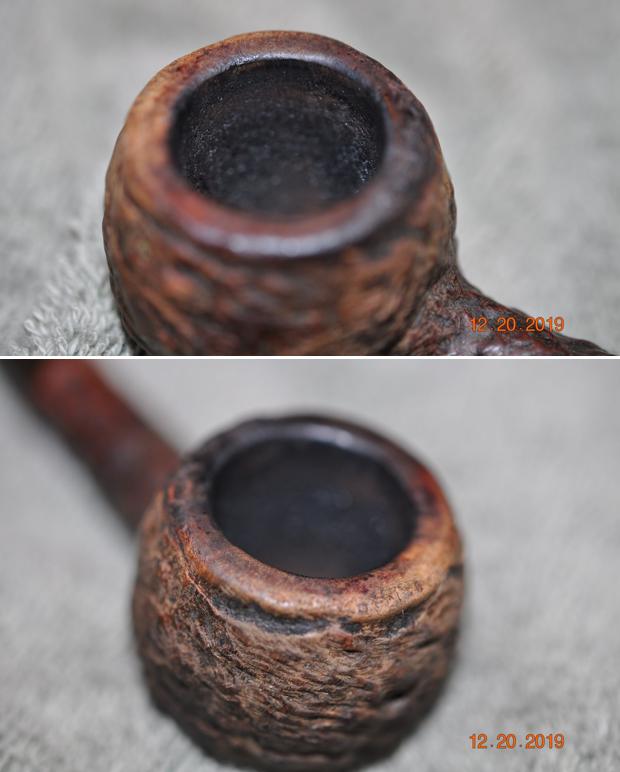
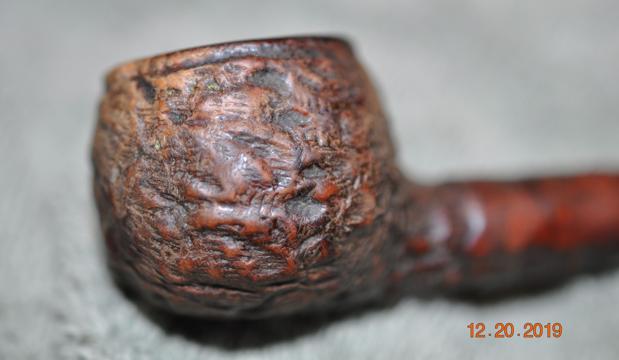
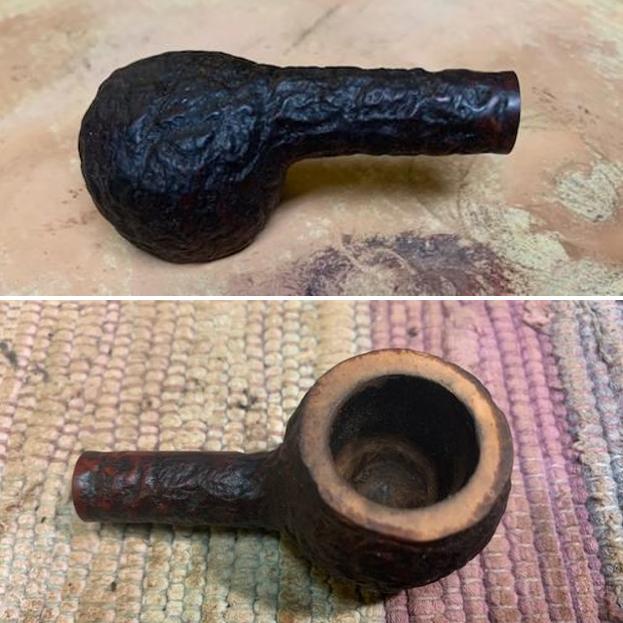
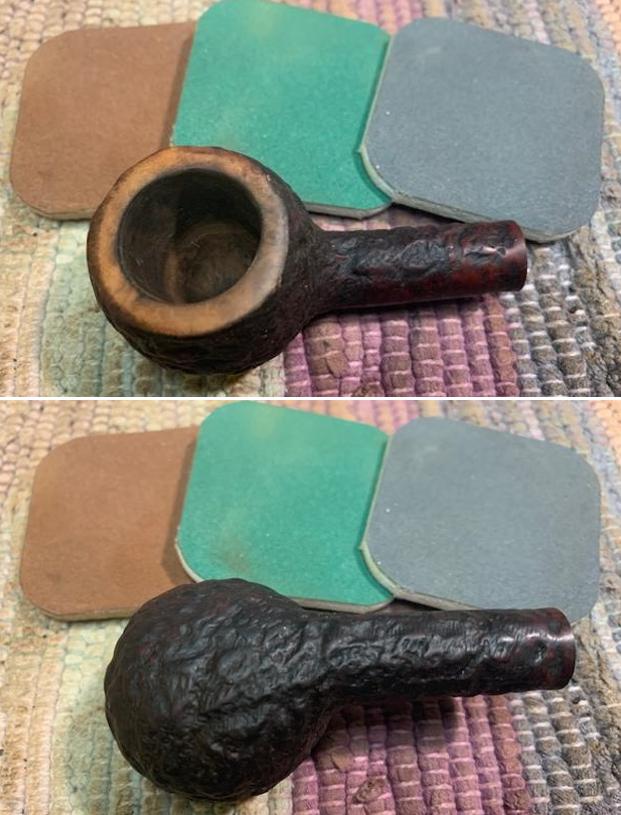
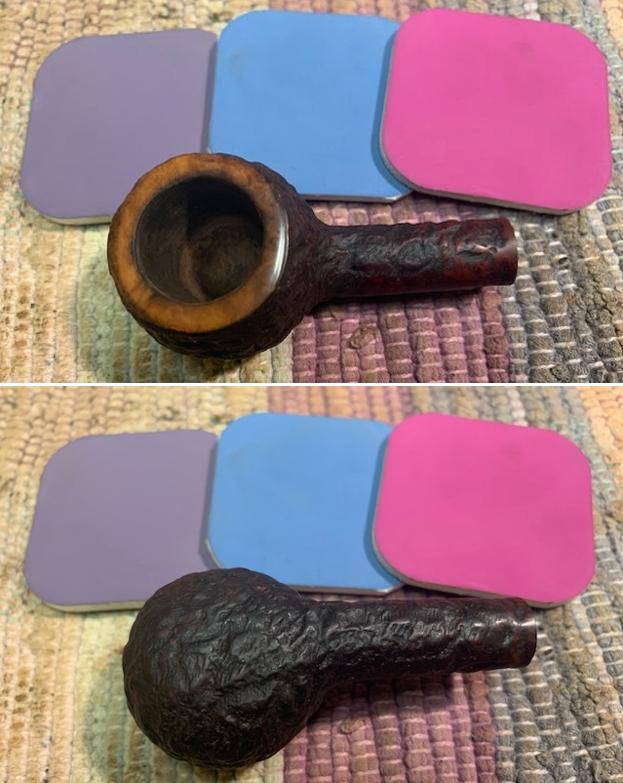
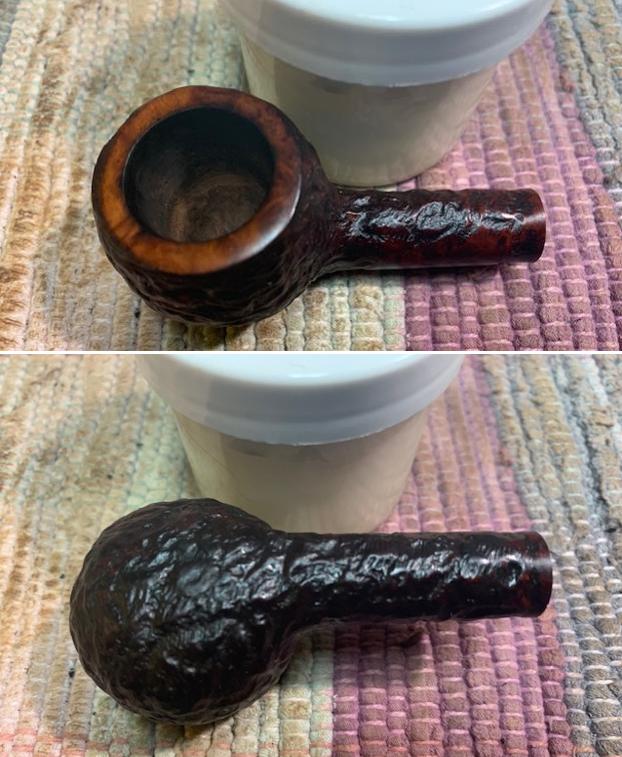
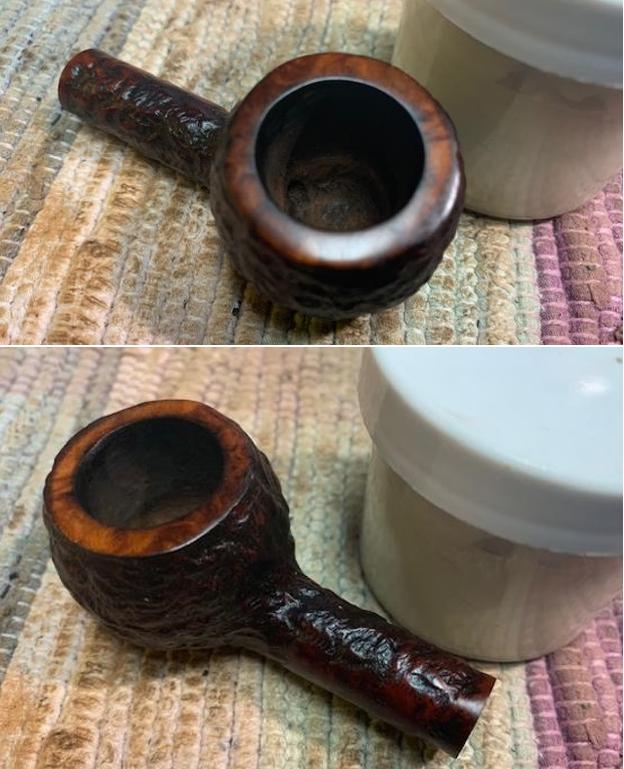
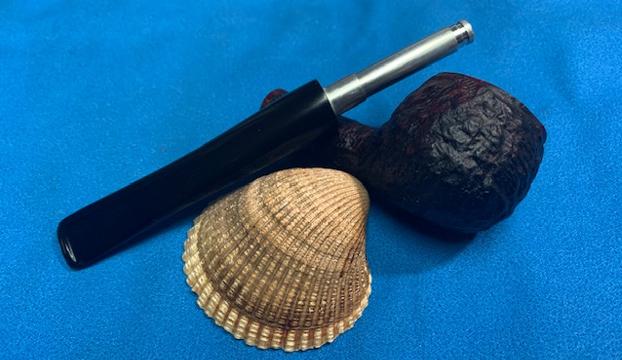
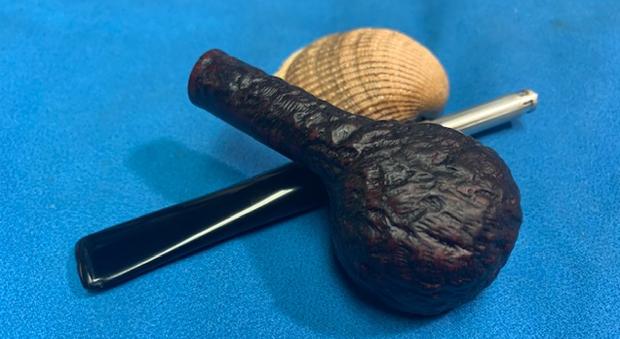
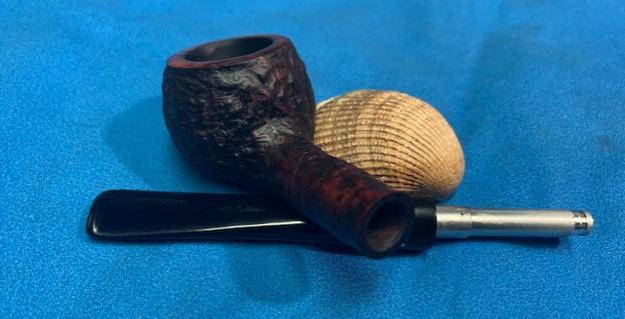
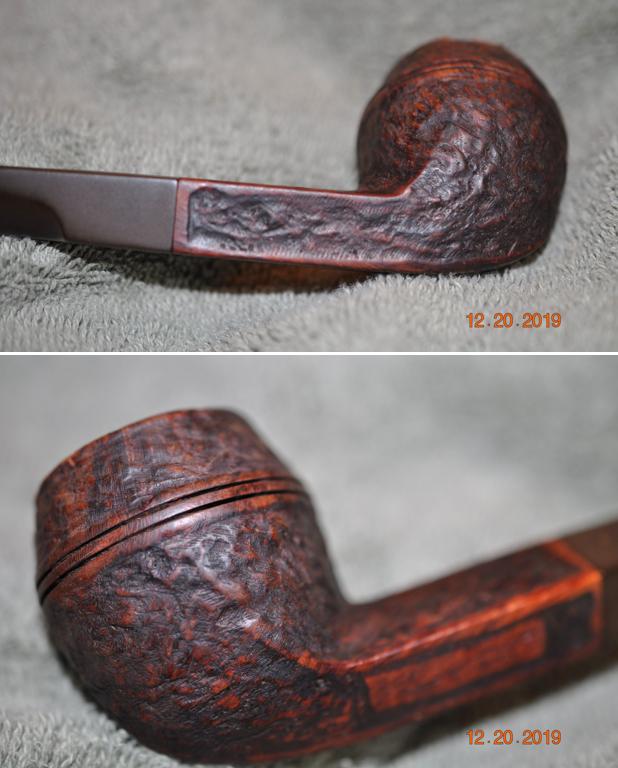
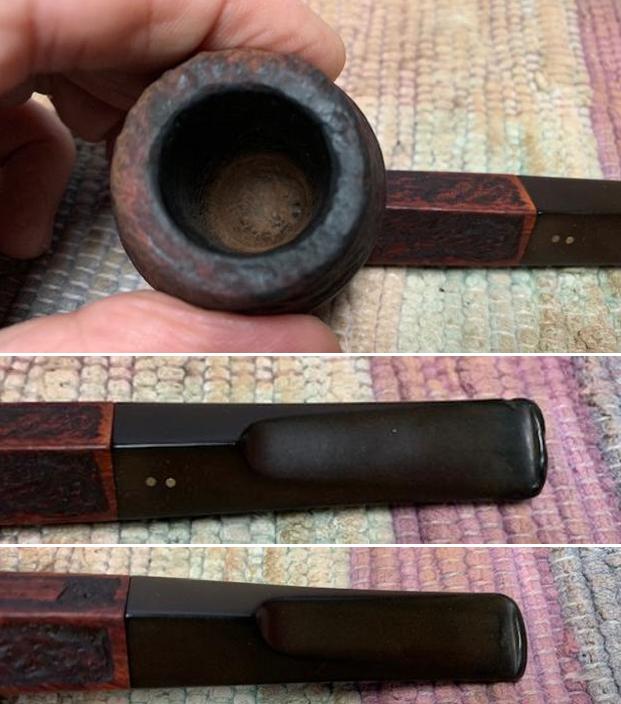
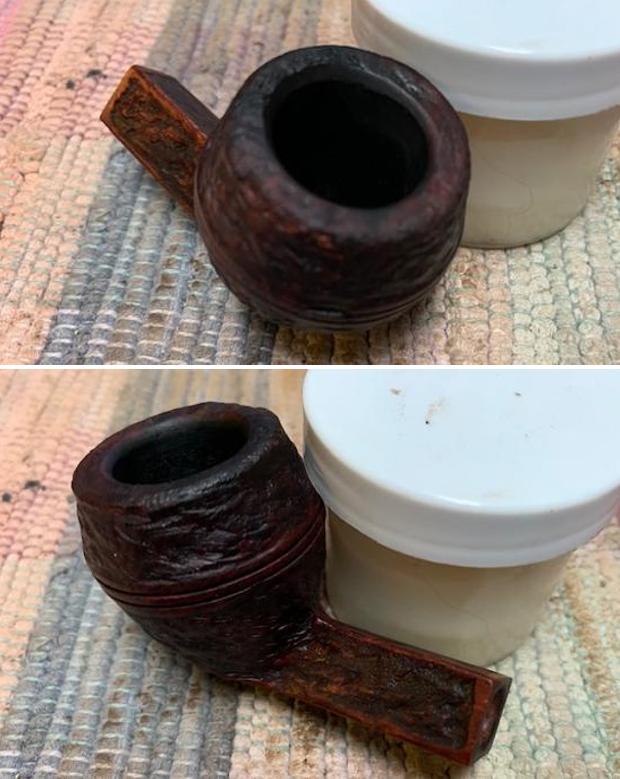
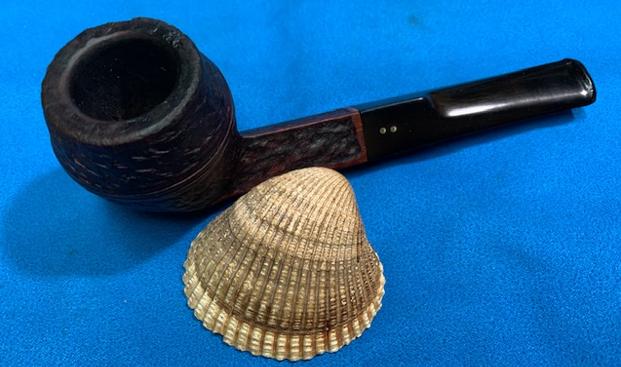
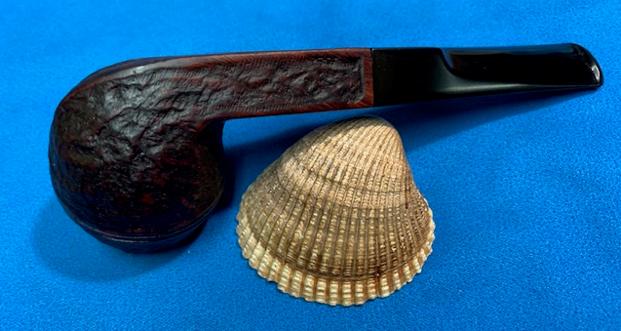
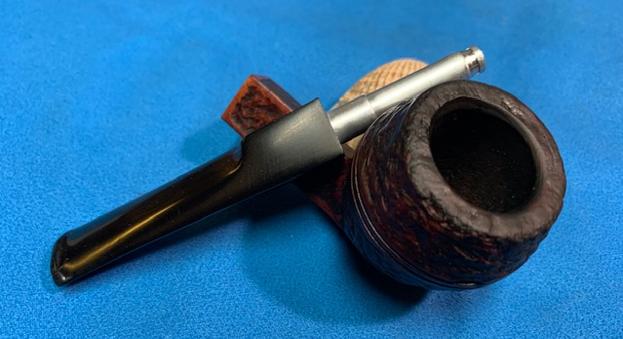
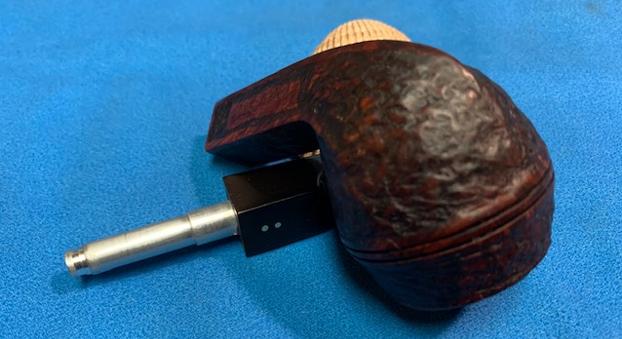
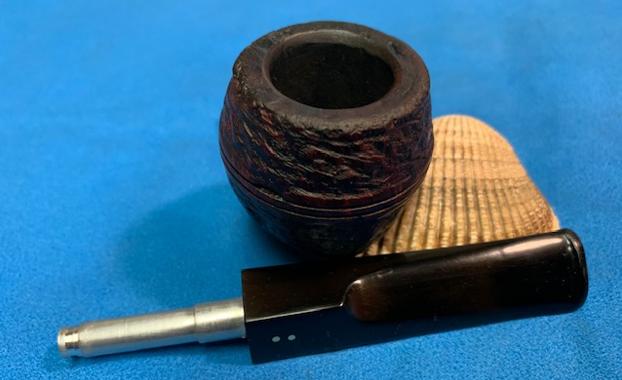
 I took photos of the bowl and rim top to show the condition of the bowl. The rim top has some darkening and scratches in the smooth surface. There was some damage around the inner edge of the bowl and there is a moderate cake in the bowl. The stem is oxidized and is very dirty from the shank to the button. There are tooth marks and chatter on the stem on both sides ahead of the button. Remember the stem is not removable at this point.
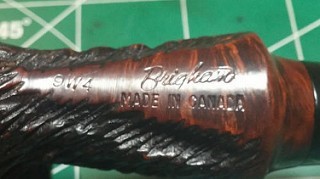
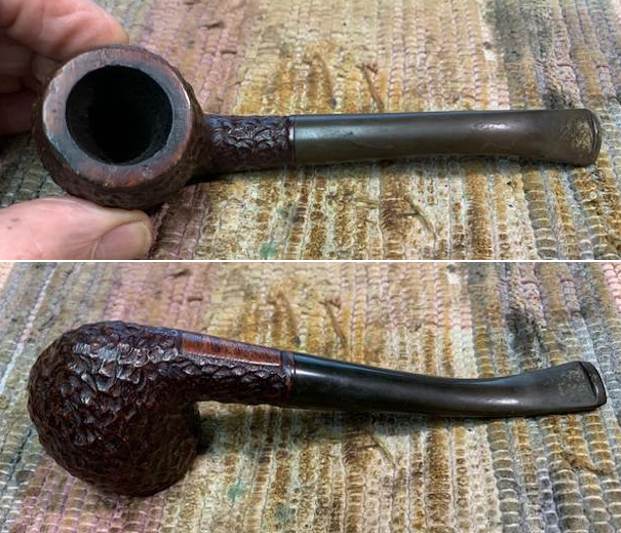
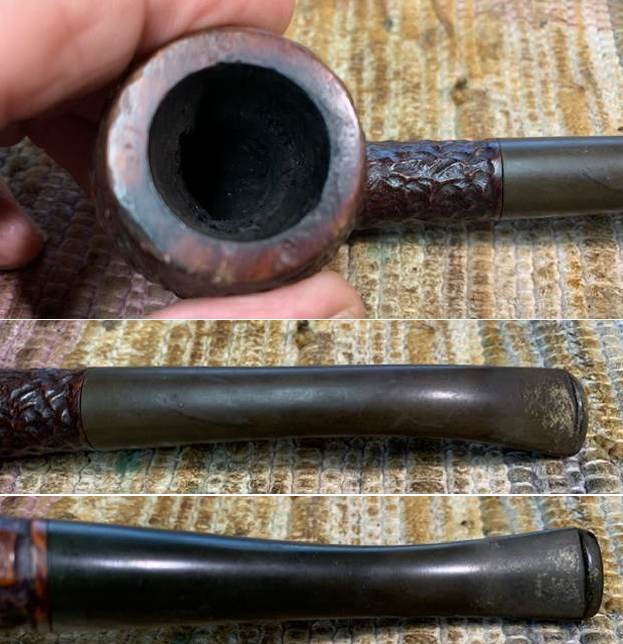
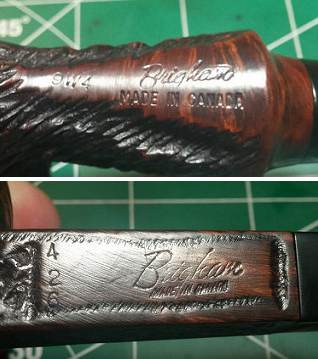
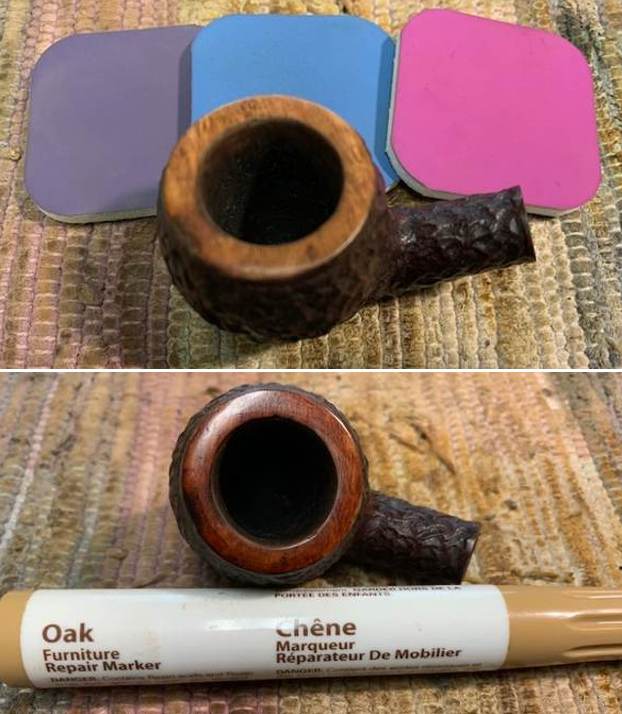
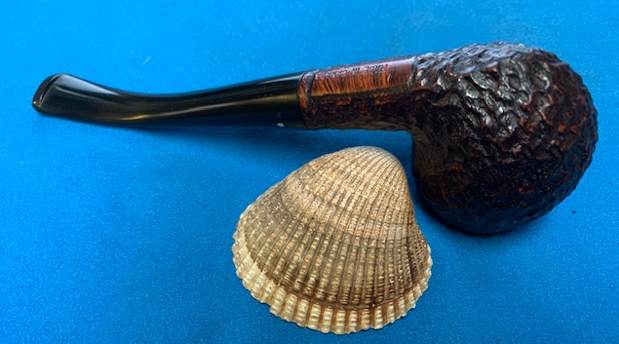
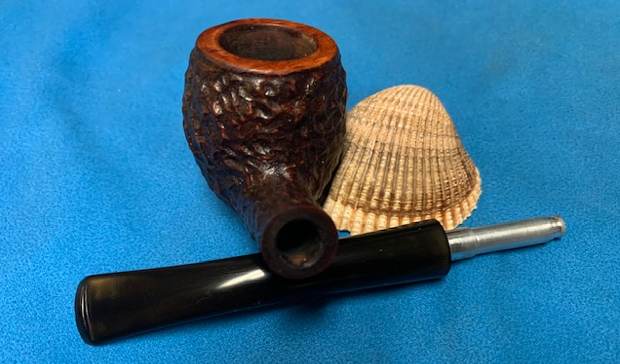
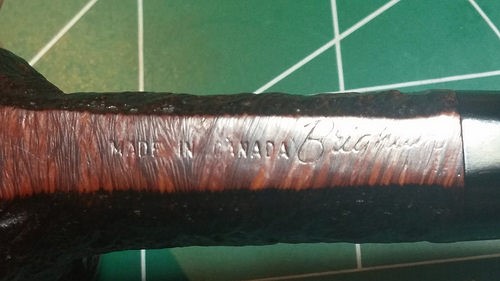
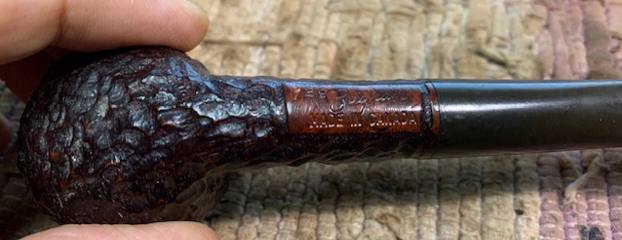
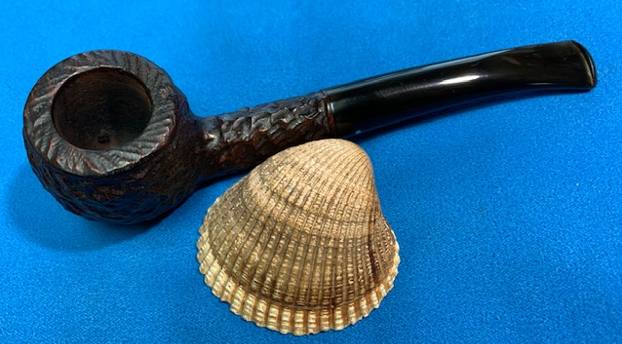
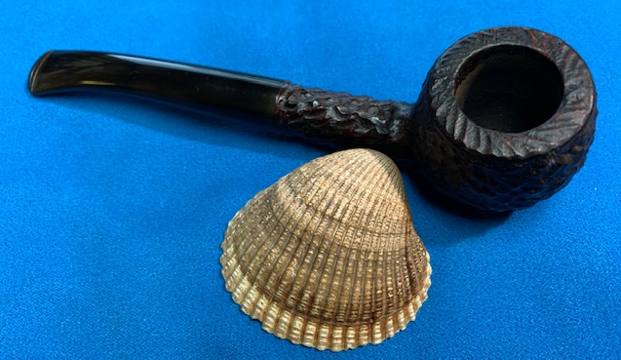
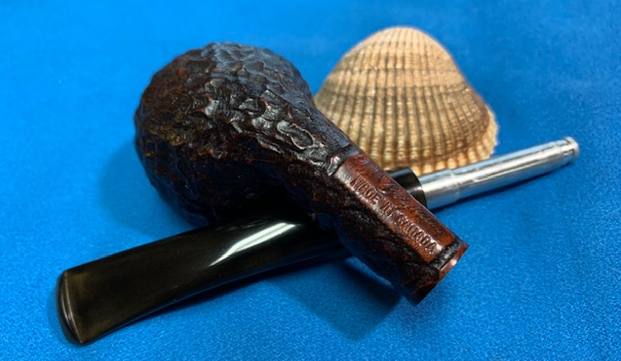
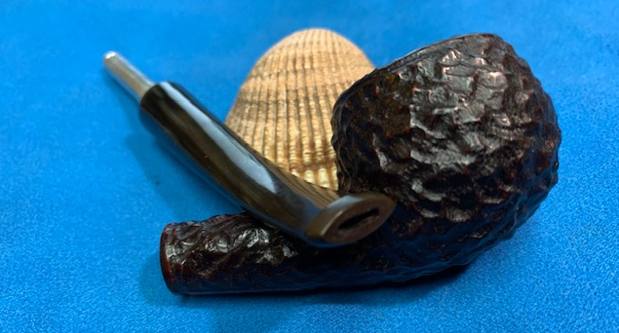
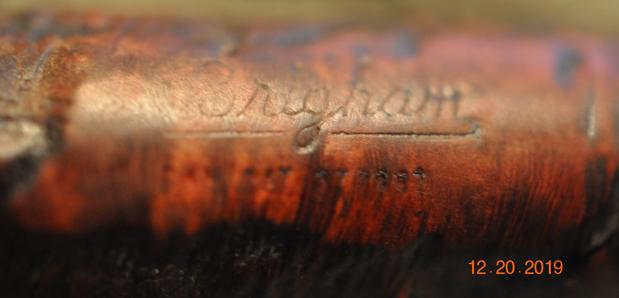
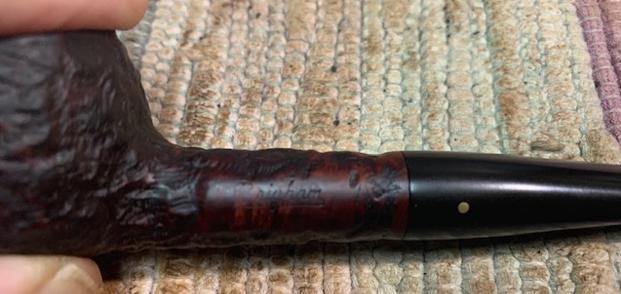
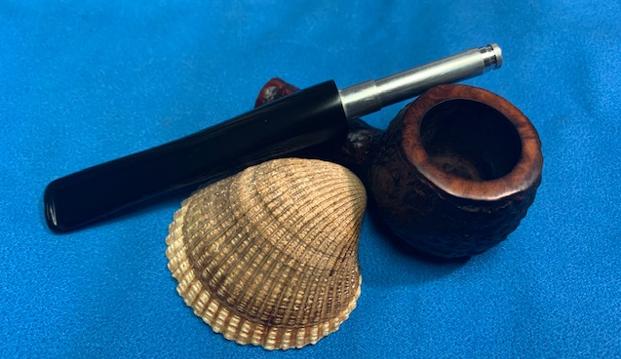
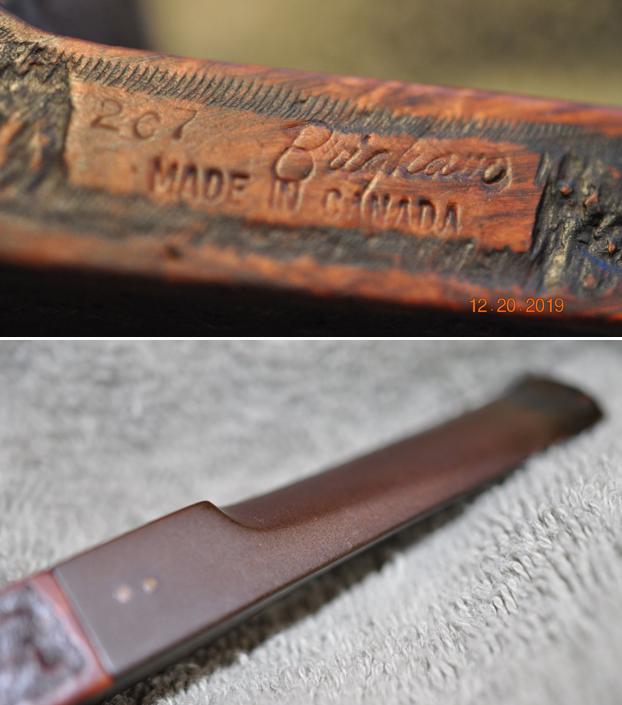
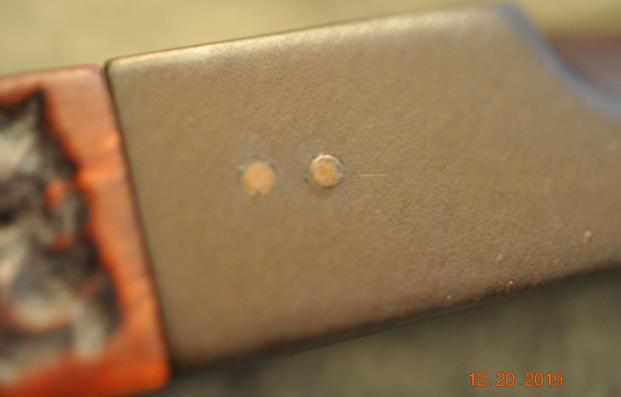
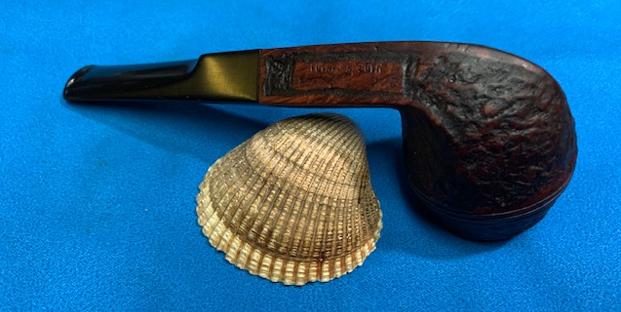
 I took photos of the stamping on the topsides of the shank. It reads as noted above. It is faint in spots but is still very readable. There are three brass dots stacked vertically on the top left side of the diamond stem. They are oxidized but are present.
 The next best thing to talking with Charles Lemon of Dad’s Pipes is to read the article he wrote on dating Brigham pipes on Pipedia. Charles has done a magnificent job of collating the material on the brand into this article and giving a historical flow of the eras of the Brigham pipe since its beginning in 1906. Thank you Charles for you work on this as it is a one of a kind resource. (https://pipedia.org/wiki/Brigham_Pipes_%E2%80%93_A_Closer_Look_at_Dots,_Dates_and_Markings).
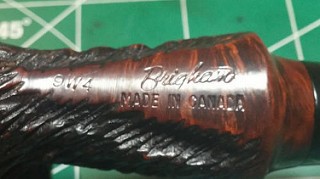
Around the late 1960s or early 1970s, at the beginning of what I’ve called the Canadian Era (roughly 1970 – 1980), the stampings changed again as Brigham moved to modernize its logo. Pipes are stamped with the 3-digit shape number and “Brigham” over “Made in Canada”. Note these two variants of this stamping.
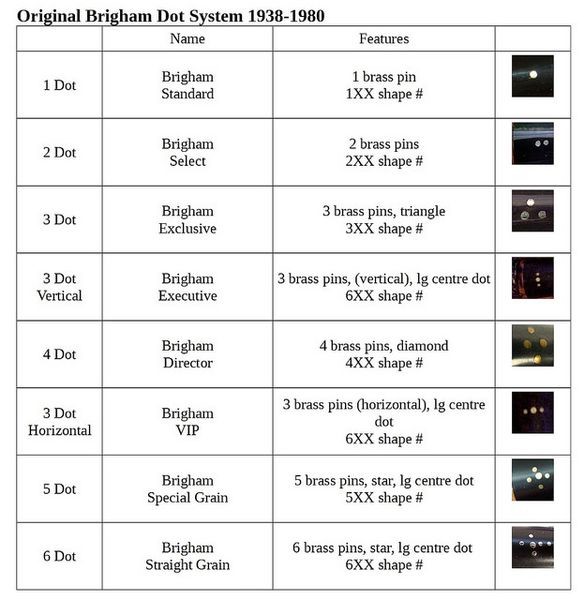
Canadian Era Stamps I then turned to Charles Lemon’s book, “Brigham Pipes A Century of Canadian Briar” to confirm the meaning of the 625 shape number and the placement of the three dots on the stem side. I have collated the information I found there below.
The shape # 625 indicates a 600-series shape 25. The shape 25 is a Medium Squat Bulldog. The text in the list of shapes in the back of the book says it has a taper stem but the photo shows the same pipe I have with a saddle stem. The saddle stem on this one is the original stem so I believe the photo in the list is correct rather than the description. The block letter “Made in Canada” stamp was used in the Canadian Era, approximately 1970 through 1979. The stamp on the pipe I am working on is like the first one above so I believe it was made in 1978. The stem carries the vertical 3-Dot pattern of the Brigham Executive grade, which pairs with the 600-series shape number.
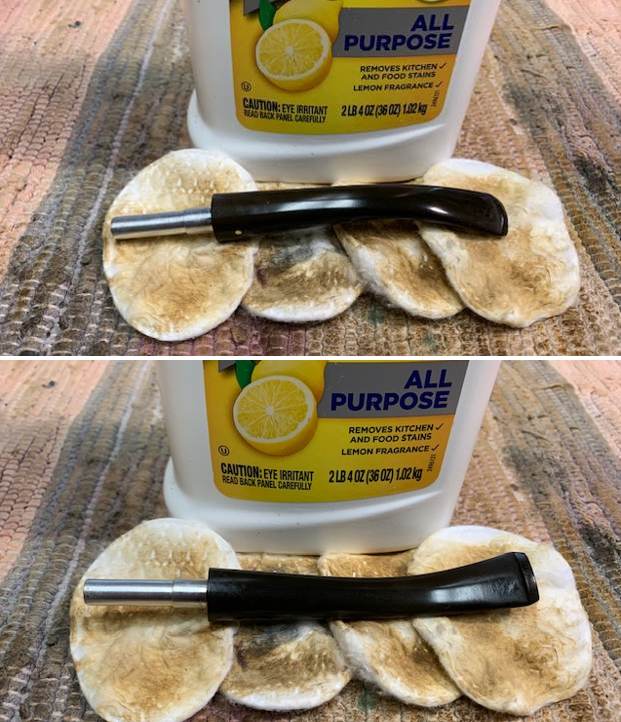
Armed with that information I turned to work on the pipe. I decided to tackle the stuck stem first. It was actually the first of the four pipes that I worked on. I used all the tried and true methods for removing stuck stems and I have to tell you that none of them worked. I left it in the freezer for increasingly longer times – starting with 15 minutes and finally leaving it in overnight. Nothing worked. It did not budge at all. I heated the shank and stem with a heat gun working it carefully over the surface so as not to burn either the briar or the vulcanite. Again, no amount of heat or time made any difference at all. I put the pipe in the microwave and heated it carefully with no success. I was not going to give up on it. I would beat this stuck stem one way or another. But, do understand that all of these procedures took me from the day I found the pipe on April 27 until May 10th. In between all the other methods I used a pipe cleaner to apply alcohol at the joint of the stem and shank with no success. I used the same method with acetone and again no success.
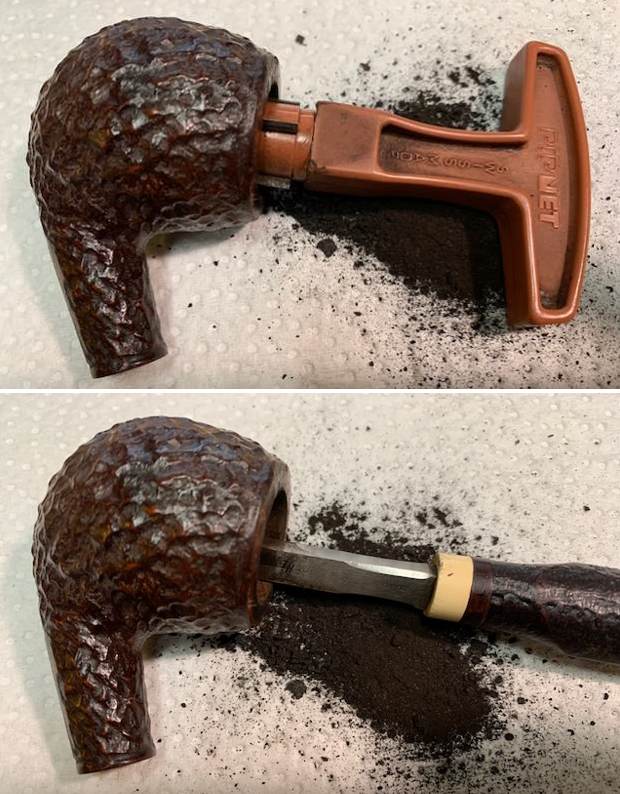
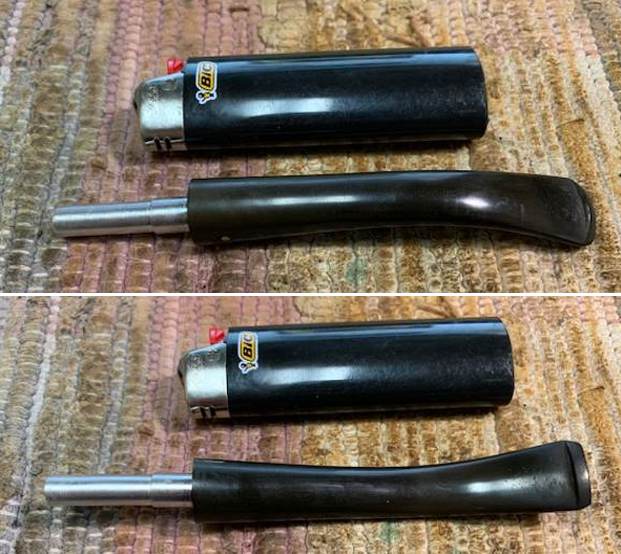
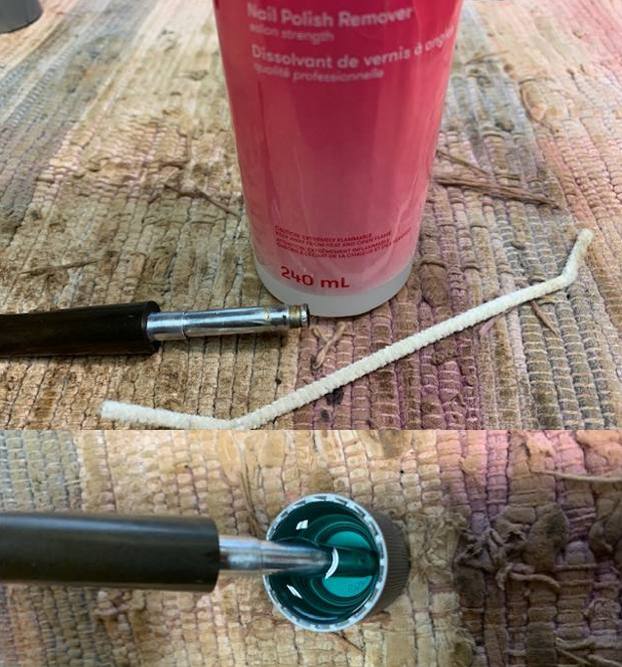
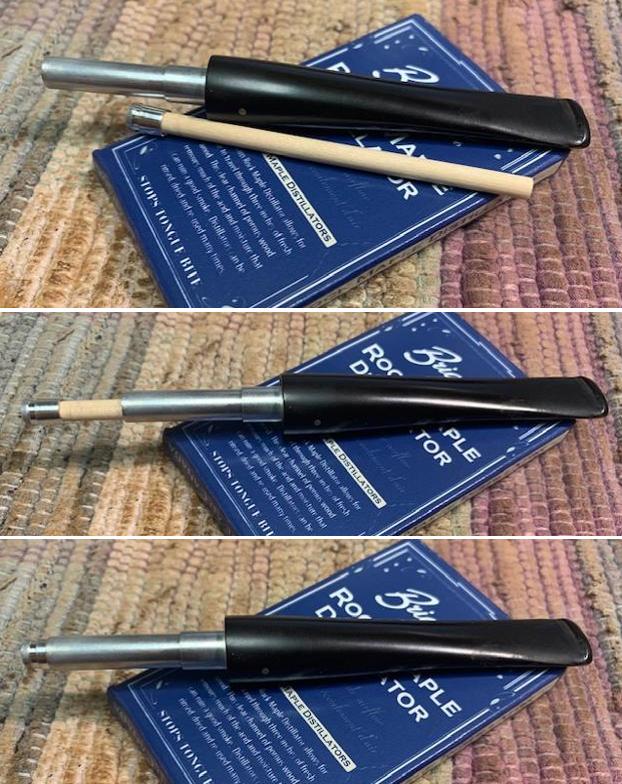
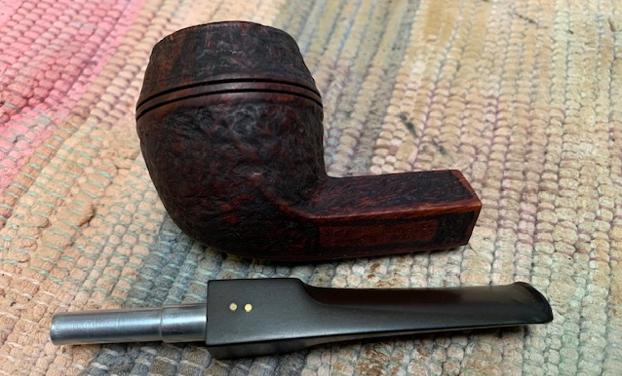
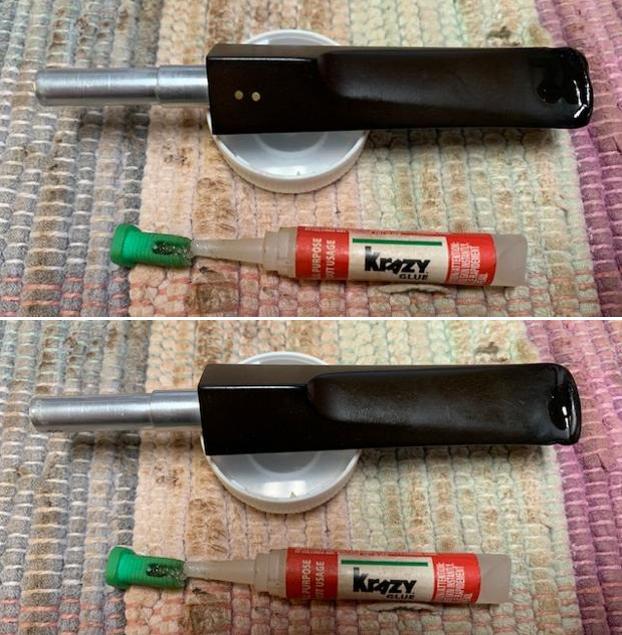
Finally, I inserted a folded pipe cleaner in the slot and pushed it as far as it would go into the stem. I wanted to block off the button and the inside of the hard maple filter that Brighams have in the elongated aluminum tenon. Once it was inserted I filled the bowl with acetone (fingernail polish remover) and let it sit until it evaporated. I repeated the process morning, noon and night before bed. Nothing was working to beat the frozen stem. Finally, this morning I was on the phone with my brother and the fill of acetone had evaporated so I decided to wiggle it while we talked. Low and behold, shiver me timbers, be still my beating heart, whatever phrase you want to you it moved just slightly! With a cry of exhilaration, I knew I was going to beat this stuck stem situation. I wiggled the stem all the way through the conversation and just before we closed the Facetime call the stem turned and was able to turn it free. The amount of sludge (I don’t know what else to call all the white build up in the shank and on the tube) was absolutely awful. I don’t know if I have ever seen it this thick. It was pitting the aluminum and the inside of the briar had a thick coat that filled in the gap between the tube and the walls. It was a huge mess. But that was not the end of the stuck tenon and parts! The maple hard wood filter with an aluminum cap was absolutely stuck in the tube. I could not remove it with pliers. I heated it with a lighter and tried it once more with no success. So… I resorted to an old alcohol bath I have here and have not used for over a year or more. I took the cap off the container that held the darkened alcohol and dropped the stem into the mix tenon down. It sat in the mix for at least and hour before I got back to it. I removed it from the container and used the pliers to grab the aluminum end and turn it. Sounds easy right? Wrong… I have had these aluminum tips snap off and leave the hardwood stuck in the tenon. I gingerly wiggled the end while carefully pulling on it and low and behold it let loose and the entire tube and tip was free! Once again the inside of the tube was a mess but the acetone had done a bit of work softening the goop on the aluminum walls.
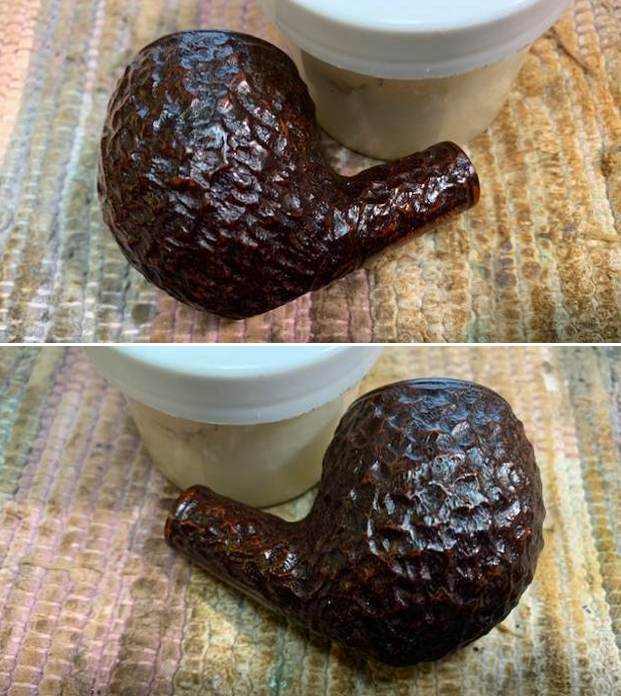
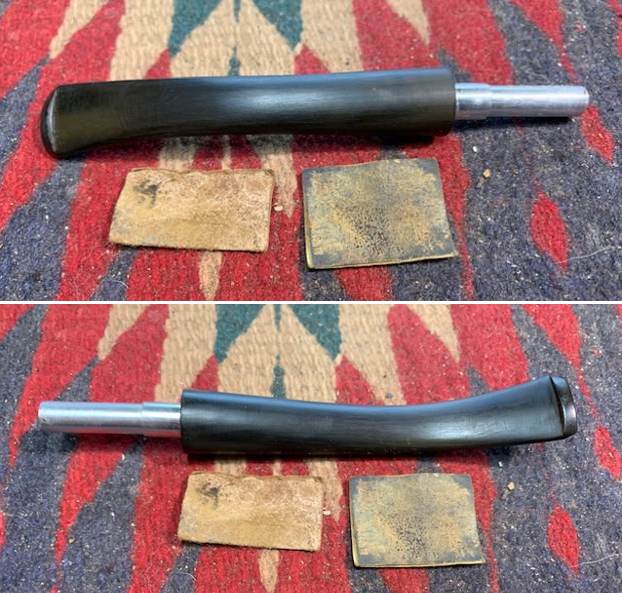
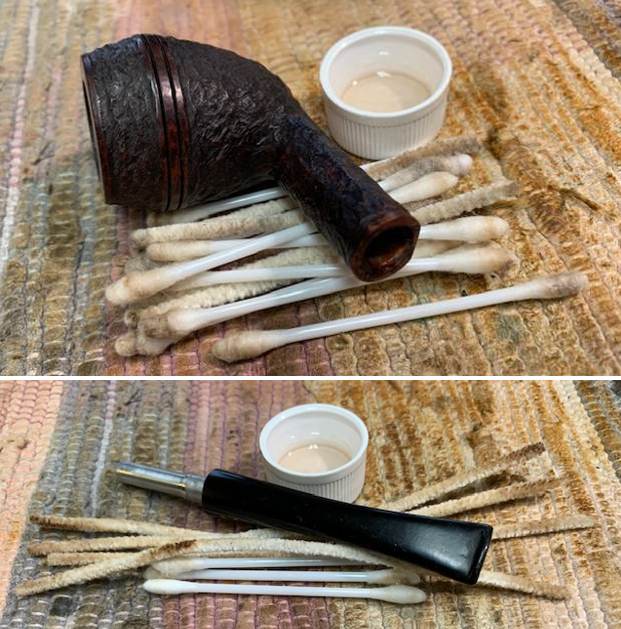
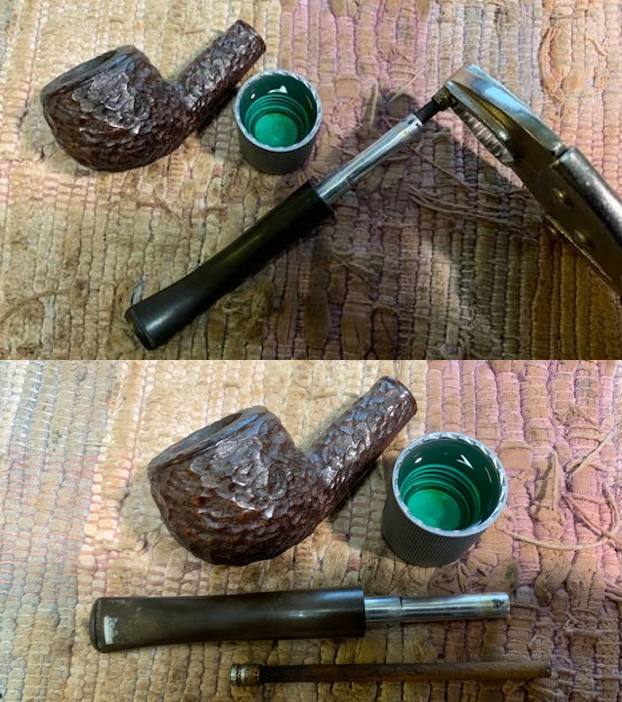
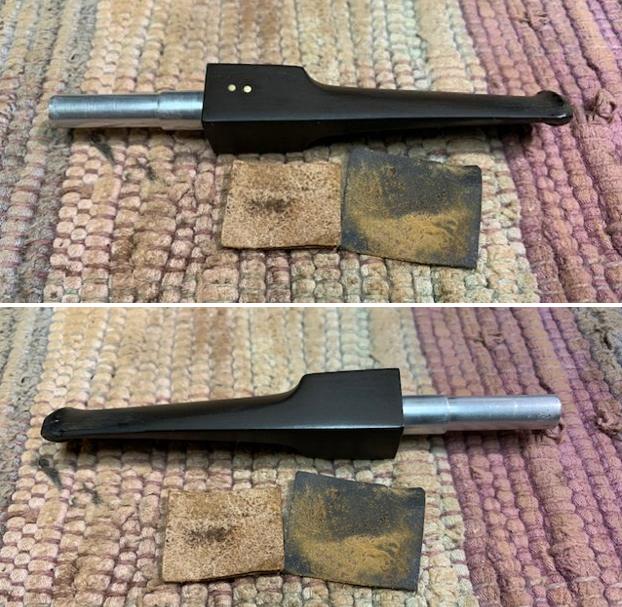
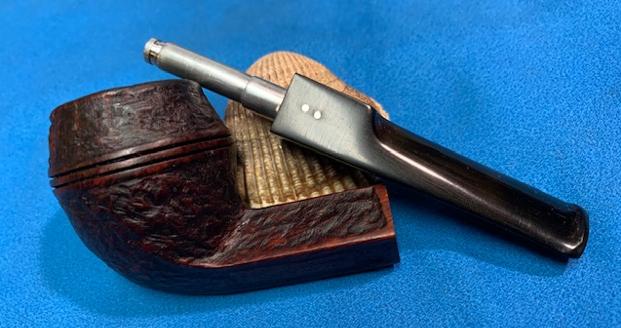
 I was excited to say the least. It took literally 10 days short of a month to get this stem removed from the shank. You don’t even know how many times I was tempted to pitch the pipe in the trash and move on to other pipes. I even buried it on a corner of the desk that I don’t use much for daily work but it had a bit of a siren call and I could not ignore it. Today I beat it! Today I won this seemingly insignificant battle. But to me it felt epic to win. I took photos of the parts in celebration of the win. You can see the corrosion on the aluminum tip of the hard wood insert. You can also see the slight thinning of the tube just ahead of the tip – it could easily have snapped leaving me with yet another mess! The aluminum tenon is also corroded and has some of the white “aluminum oxide” build up around the length. The inside of the mortise is also thickly coated with a furry white insulation.
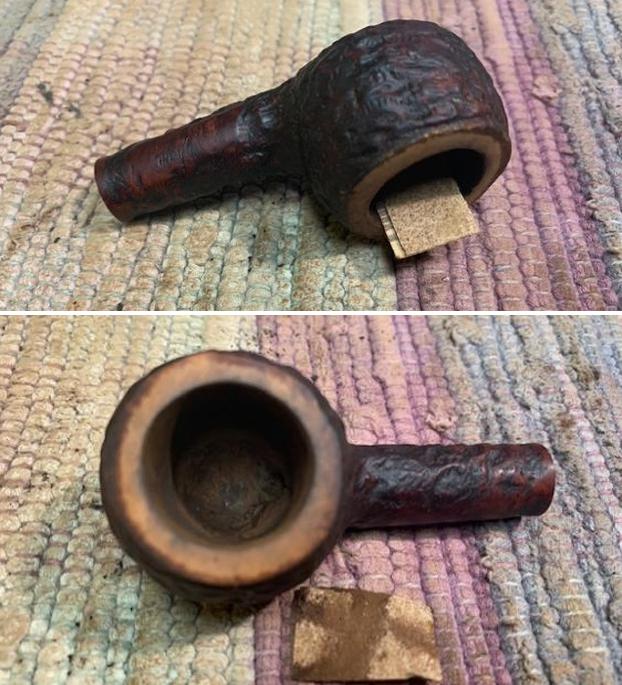
 Now that it was apart it was time to do a bit of cleaning before I could even begin working on it. I wanted to remove as much of the white fuzzy oxide on the inside of both the shank and the aluminum tenon tube as possible before going further. I pitched the hard wood filter in the garbage as it would be replaced when the work was finished. I cleaned out the shank with a pen knife to scrape away the debris then clean it with cotton swabs, pipe cleaners and alcohol until they came out significantly cleaner. I did the same with the aluminum tube tenon. Remember this was step one of the clean! I would do much more before this pipe was actually finished.
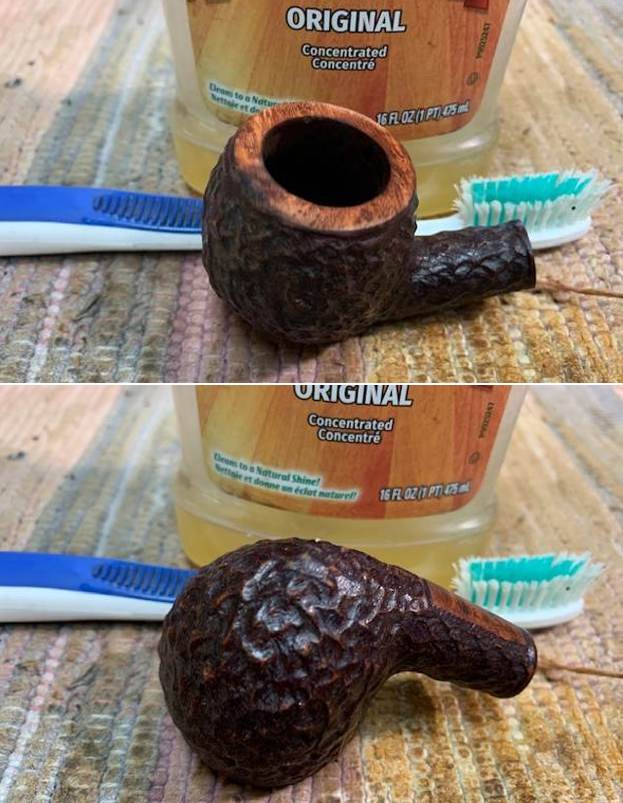
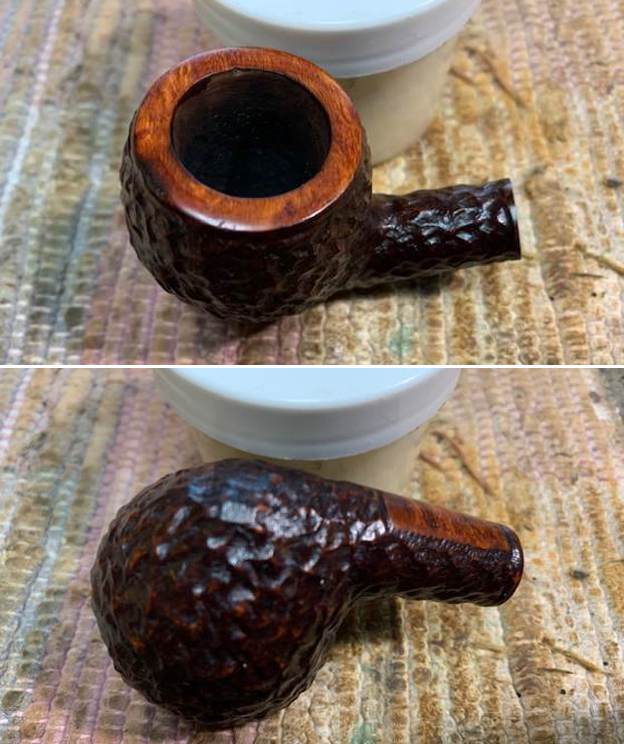
 I guess one of the benefits of the bowl soaking with acetone for two weeks is that the cake absolutely dissolved and I was able to wipe it out after each evaporation and refill of the bowl. It was surprisingly clean. I cleaned up the remnants of the cake on the walls with a Savinelli Fitsall Pipe Knife. I sanded the bowl sides with 220 grit sandpaper wrapped around a piece of dowel. The bowl walls showed no heat damage or checking and were almost bare briar in the bottom half of the bowl.
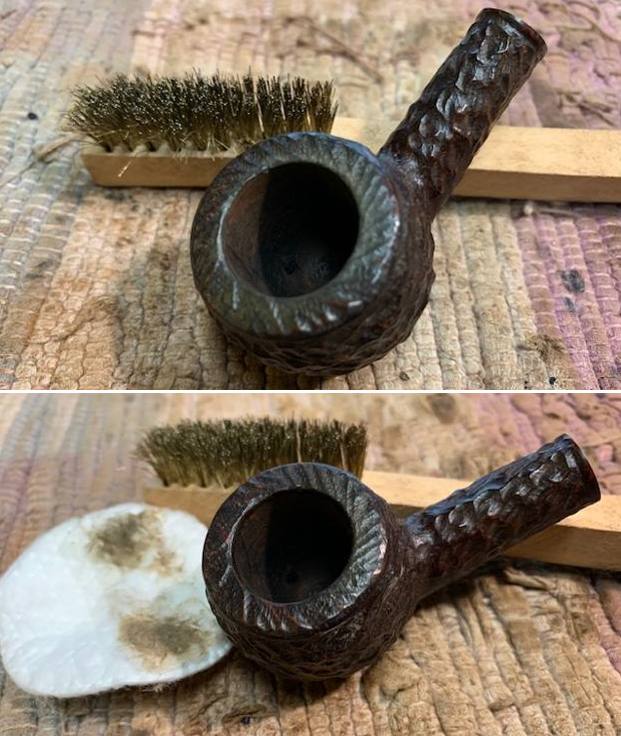
 I used a folded piece of 220 grit sandpaper to clean up the inner edge to remove the damage and nicks in the surface. It did not take too much to smooth out the damage on the inner edge and make it look much better.
 I scrubbed the externals bowl and shank with Murphy’s Oil Soap and a tooth brush. I rinsed it off with warm water to remove the grime and debris from the scrubbing. I scrubbed the inside of the shank and the aluminum tenon tube with Murphy’s as well using a set of shank brushes. The white is all gone and the pipe actually smells amazing!
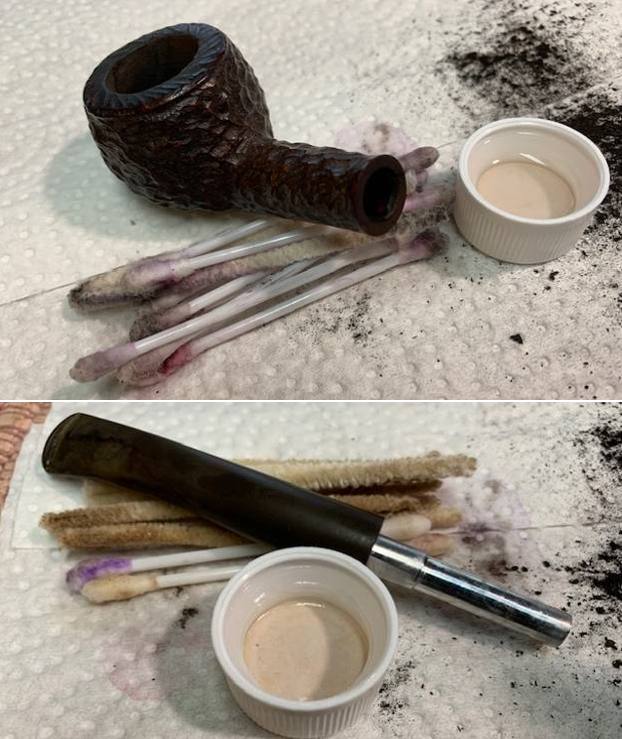
 I cleaned out the internals of the bowl, mortise and the airway in the shank and the stem a second time with alcohol, pipe cleaners and cotton swabs to make sure it was clean inside. I was not expecting a lot of dirt and debris after the double scrubbing it had already received but I wanted to make sure. Because of the length of the tube I had to strategically fold the pipe cleaners to scrub the tube. Shining a light through it now shows it just shines… whew.
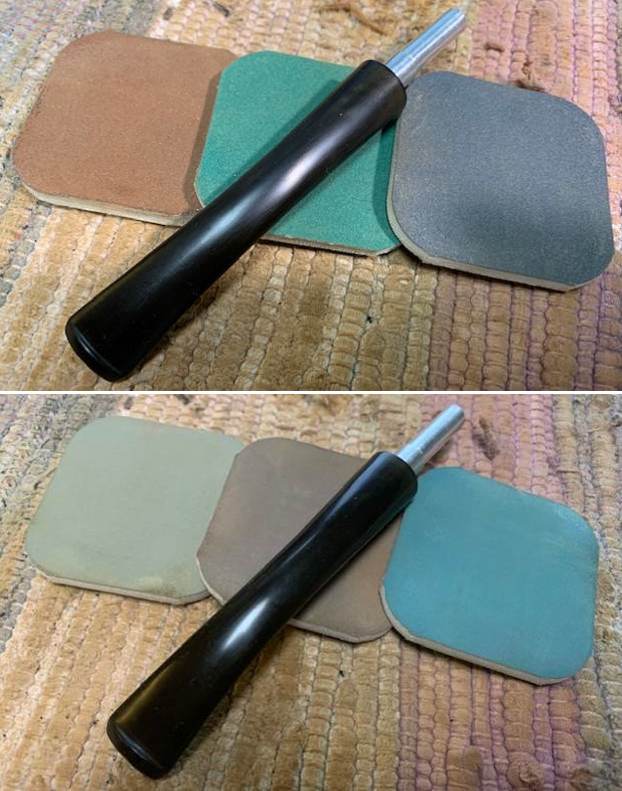
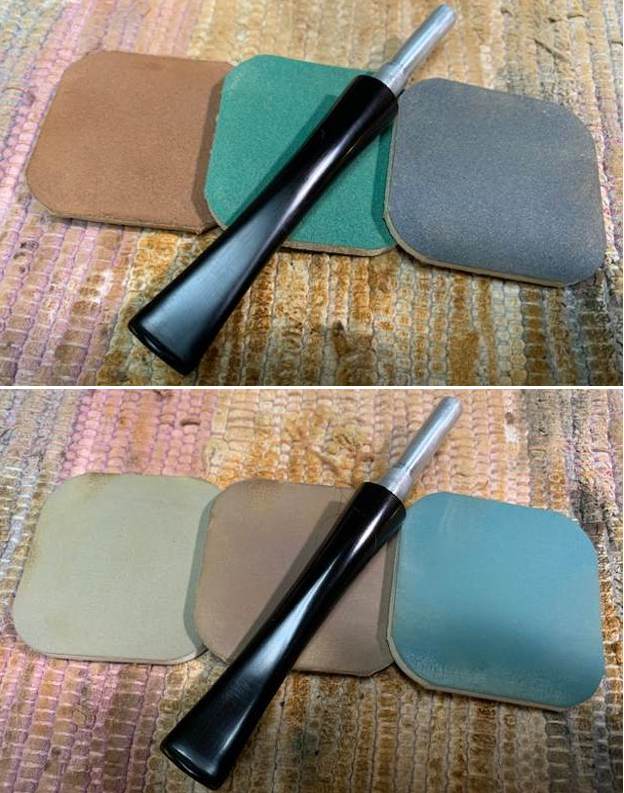
 I sanded the surface of the briar with 320-3500 grit sanding pads. It took on a real shine on the briar as I worked through the pads. I wiped it down after each sanding pad with a damp cloth to remove the sanding dust and debris left behind.
 The pipe had cleaned up so well that I turned to polish the briar with micromesh sanding pads. I dry sanded it with 1500-12000 grit sanding pads and wiped the bowl down after each pad with a damp cloth. By the final pads the briar really had a shine.


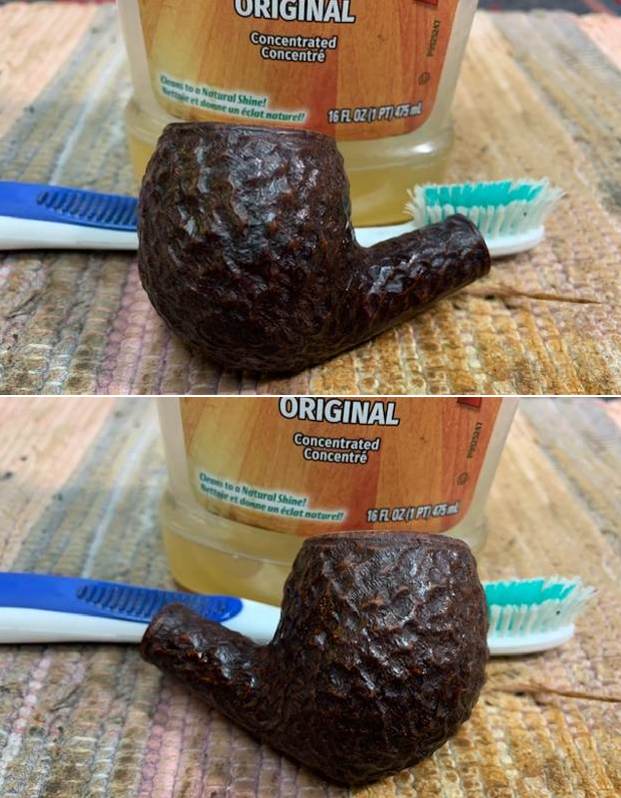
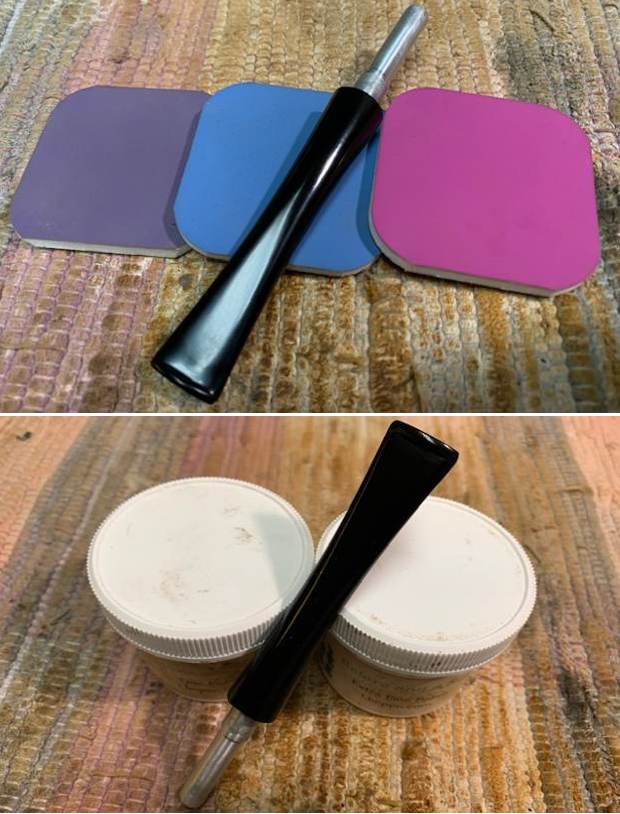
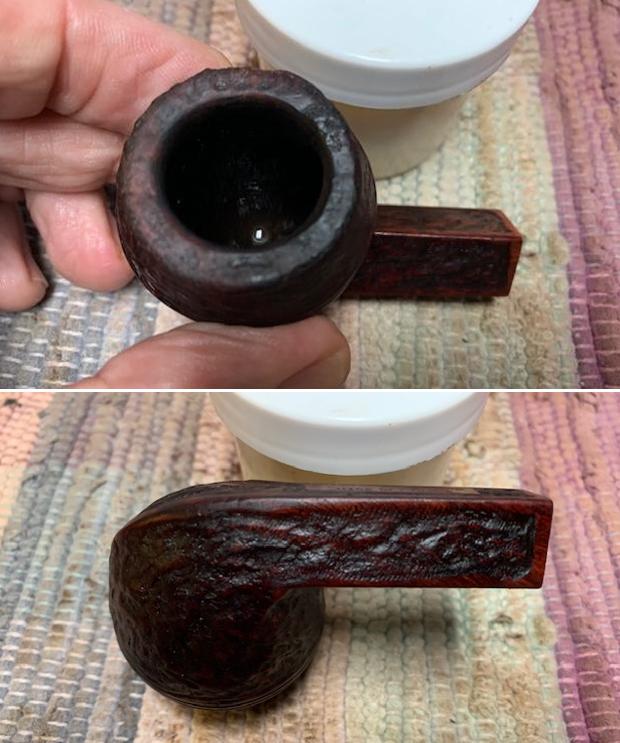
 I rubbed the briar down with Before & After Restoration Balm. I worked it into the briar with my fingertips and a shoe brush. The product works to clean, enliven and preserve the briar. I let it sit for 10 minutes then I buffed it with a cotton cloth to deepen the shine. The briar really came alive with the balm.

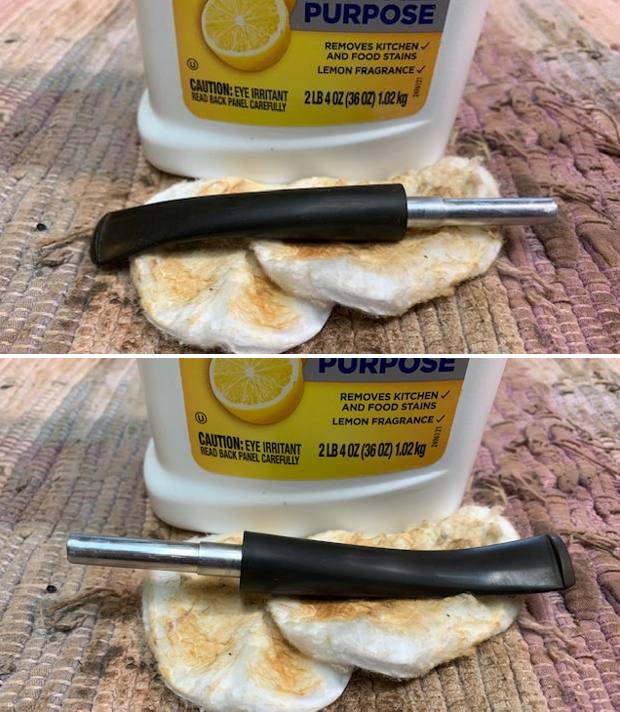
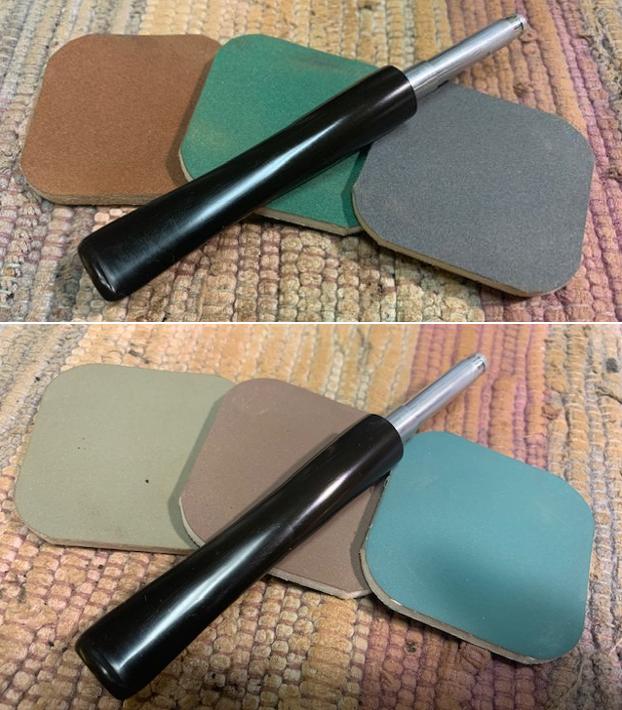
 I set aside the bowl and turned my attention to the stem. To help remove the oxidation I scrubbed the stem with Soft Scrub Cleanser and cotton pads. It took some elbow work but the stem definitely looked better and the sulphur smell of the oxidation is gone!
 I “painted” the tooth marks on the stem with the flame of a Bic lighter to lift them. I was able raise them some. I filled in what remained with some clear CA glue and set it aside to cure. In the morning I used some small files to flatten the repairs into the surrounding surface of the stem. I sanded the repaired areas with 220 grit sandpaper to further flatten them. The stem was beginning to look good.

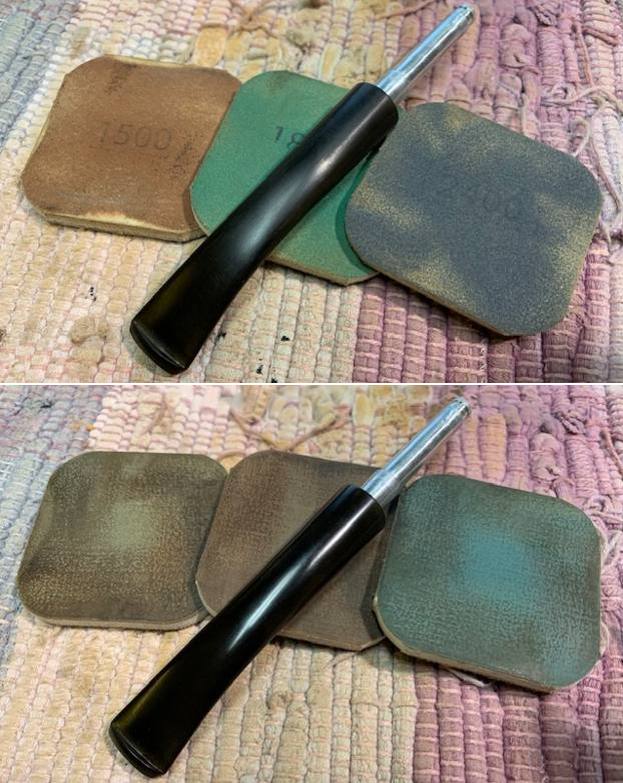
 I sanded the surface with 320-3500 grit sanding pads to further clean up the spots of oxidation on the surface of the stem. I wiped it down with a soft damp cloth following each sanding pad to remove the sanding debris. I also worked on the aluminum tube tenon with the pads. I was able to remove debris and smooth out the pits in the aluminum. There is some staining on the tube that I was not able to remove.
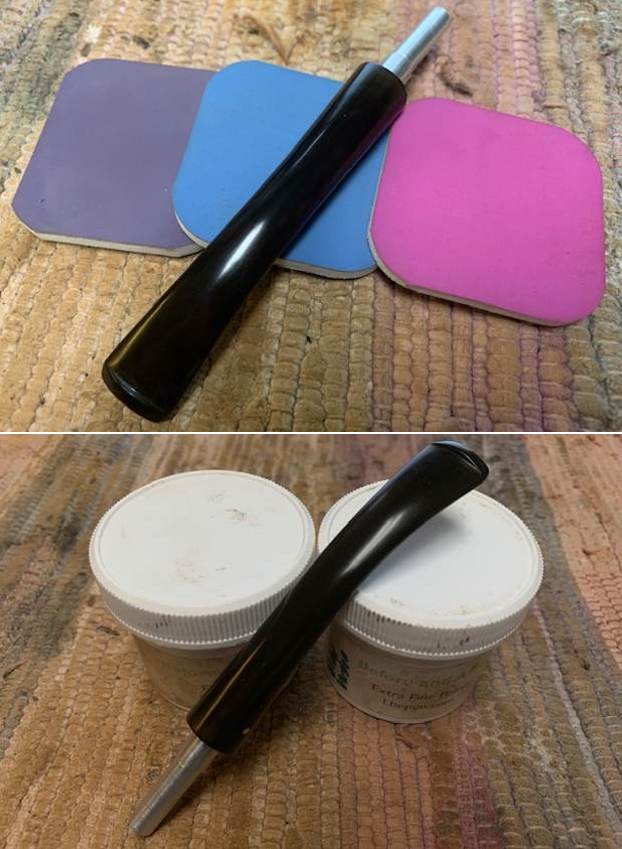
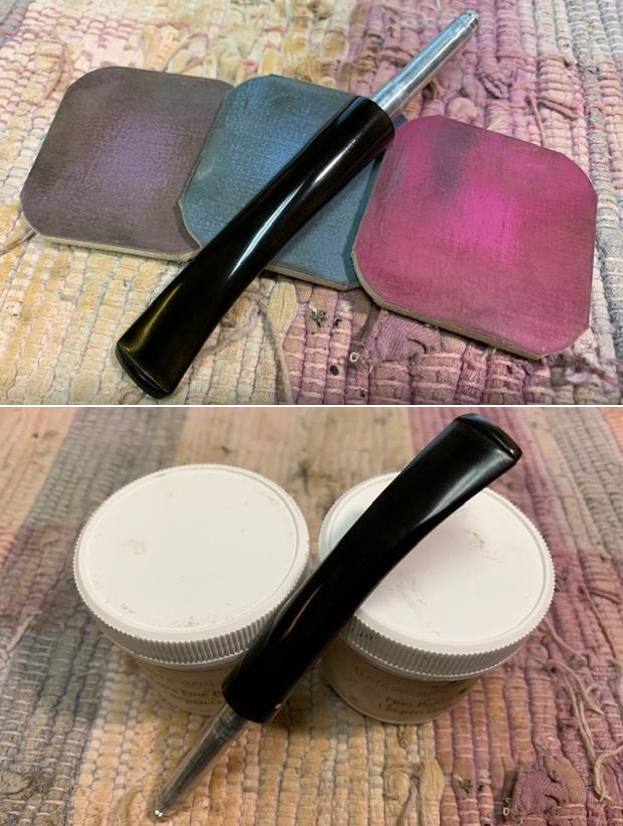
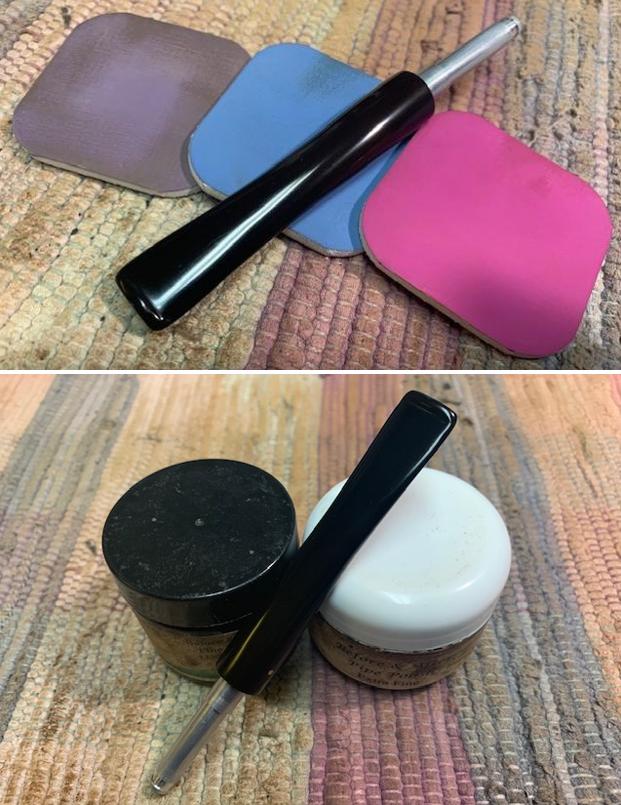
 I polished out the scratches with micromesh sanding pads – dry sanding with 1500-12000 grit pads. I wiped the stem down after each sanding pad with Obsidian Oil. I polished it with Before & After Pipe Stem Polish – both Fine and Extra Fine. Once I had finished the polishing I gave it a final coat of oil and set it aside to dry. I also used the pads on the aluminum as well and made some more progress.
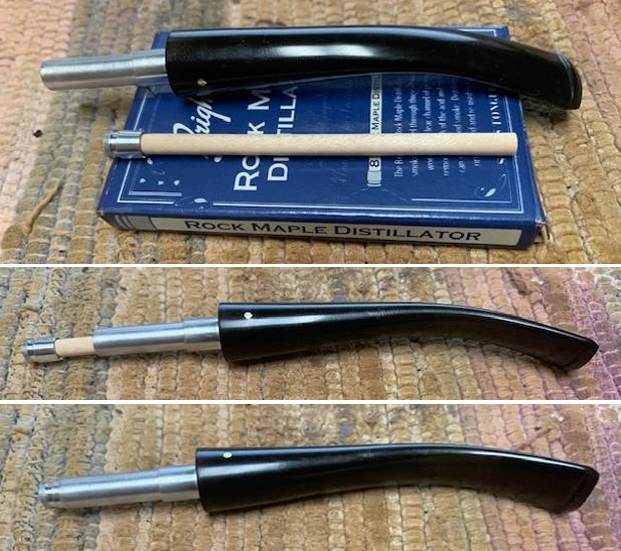
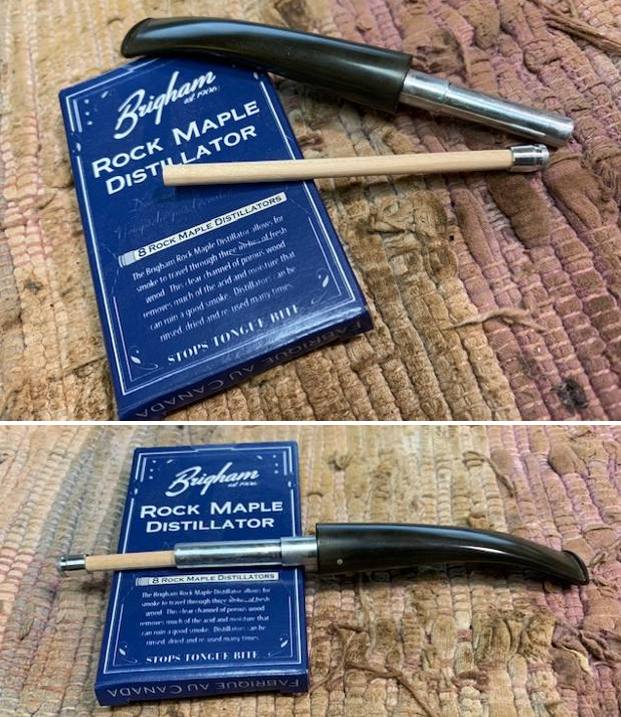
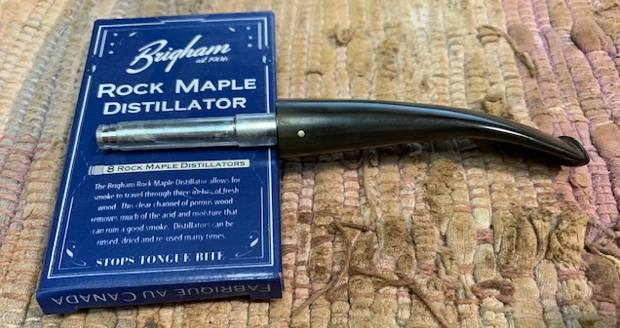
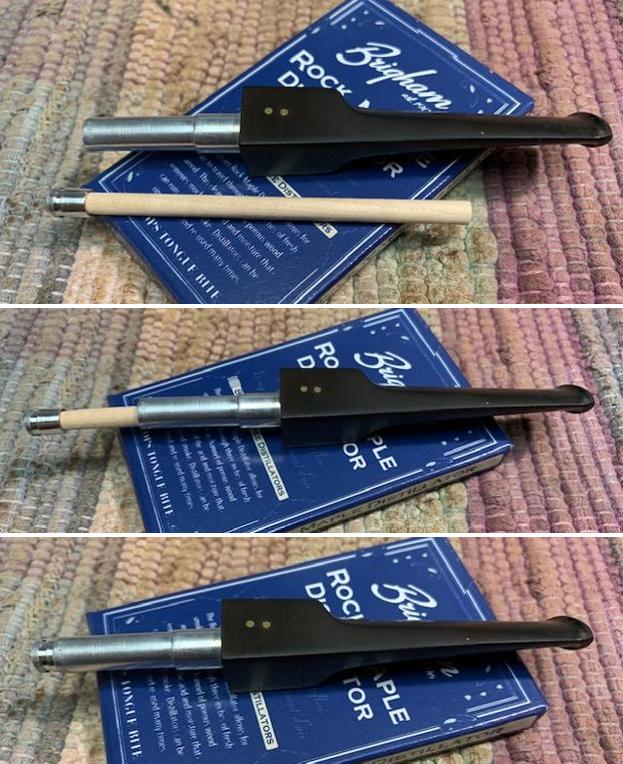
 I found my box of Brigham Rock Maple Distillators and took a clean one from the box to replace the one that was stuck in the pipe when I received it. The beauty of these is that they can easily be rinsed out with alcohol or warm water to remove the tars and oils and reused.
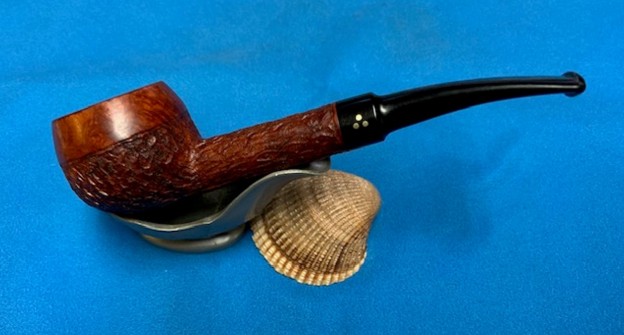
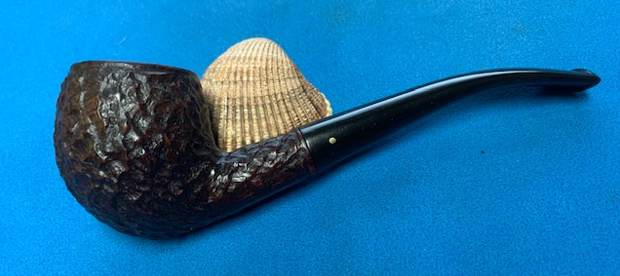
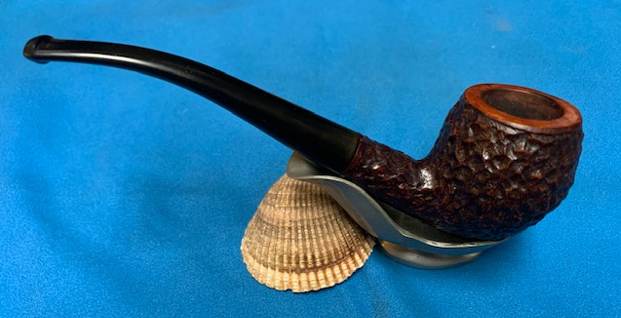
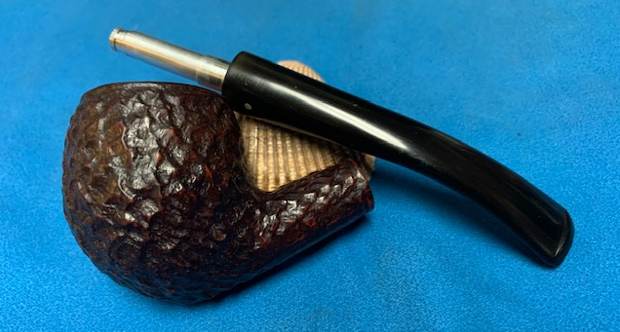
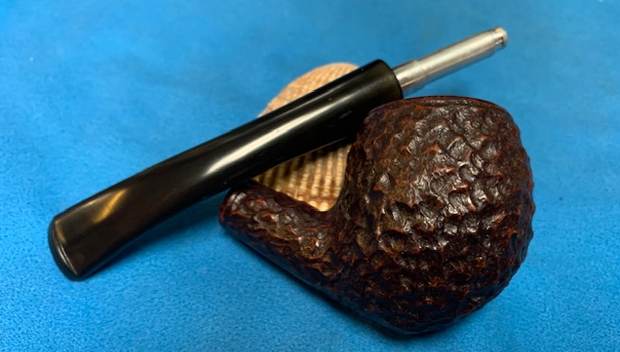
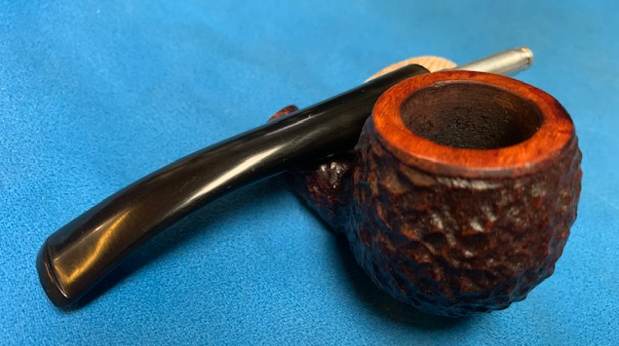
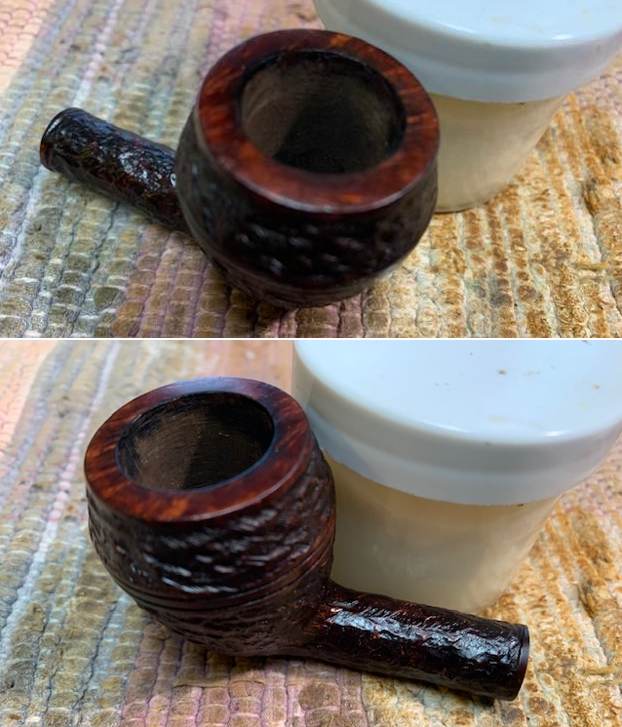
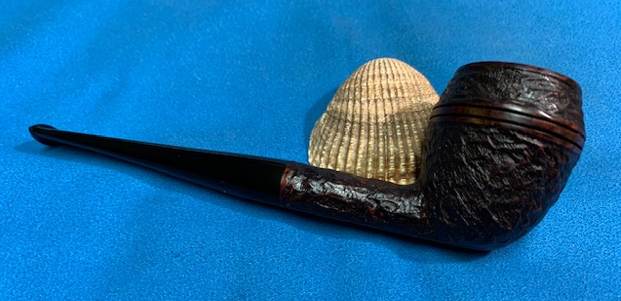
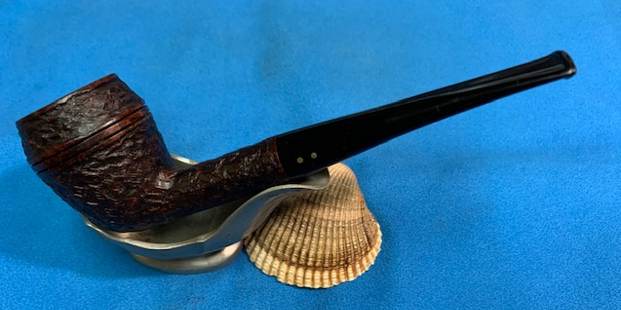
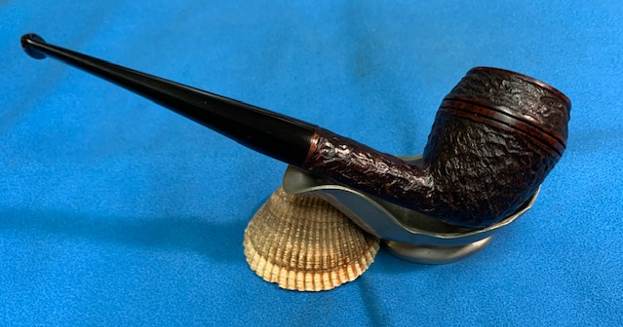
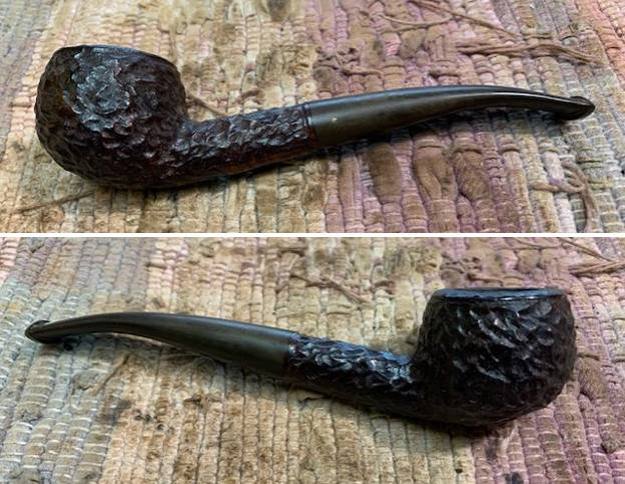
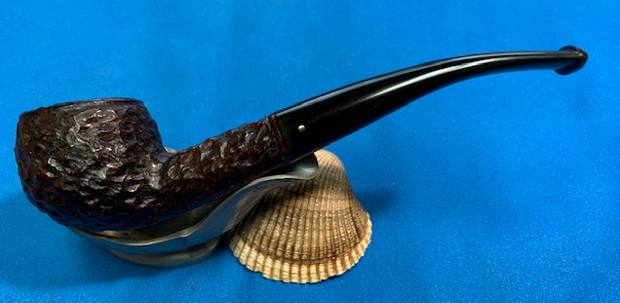
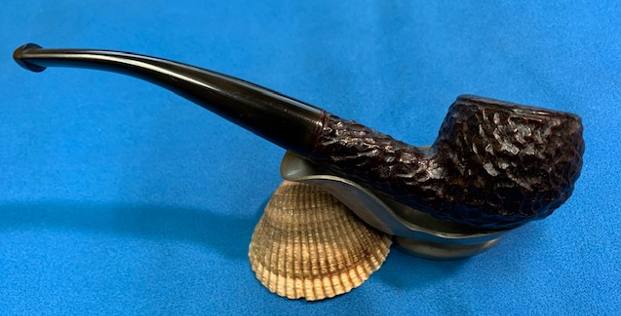
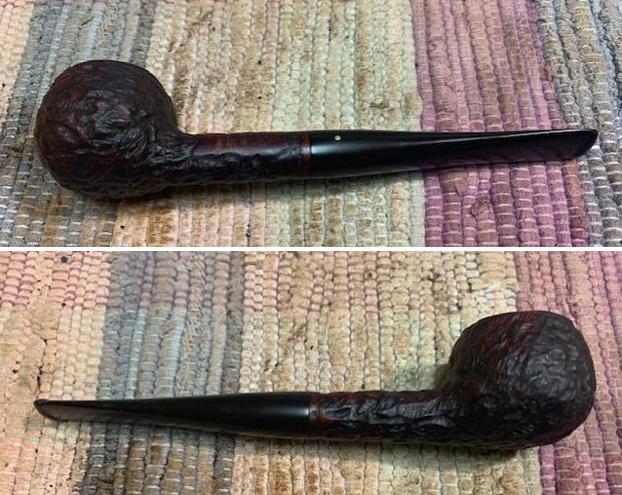
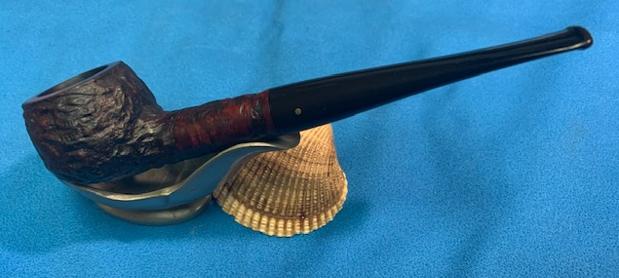
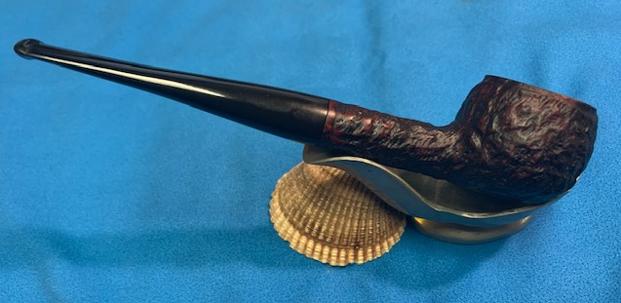
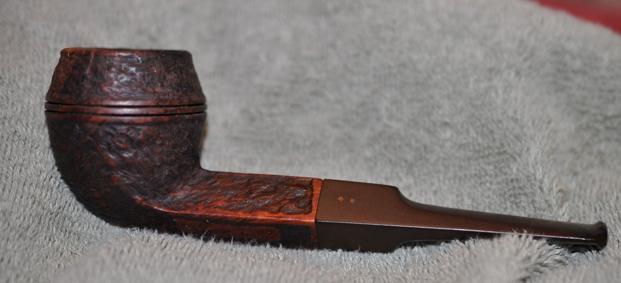
 I put the bowl and stem back together. I buffed the bowl and stem with Blue Diamond to polish out the scratches in the briar and the vulcanite. I gave the bowl and the stem multiple coats of carnauba wax. I buffed the pipe with a clean buffing pad to raise the shine. I hand buffed it with a microfiber cloth to deepen the shine. The pipe polished up pretty nicely. The Brigham Squat Bulldog with the rusticated bowl and shank and smooth bull cap is quite beautiful and it has some beautiful grain around the rim cap. The contrast of swirling grain looked good with the polished black vulcanite. This Brigham Squat Bulldog 625 is really a beauty. The finished pipe is shown in the photos below. The dimensions of the pipe are Length: 5 ½ inches, Height: 1 ½ inches, Outside diameter of the bowl: 1 ¾ inches, Chamber diameter: 7/8 of an inch. The weight of the pipe is 1.27 ounces/36 grams. Thanks for reading this blog and my reflections on the pipe while I worked on it. With it I have finished the Antique Show finds and am on to other pipes in the queue.