Tag Archives: bowl topping

Giving new life to a Savinelli Product – a David’s Choice Canadian


Blog by Steve Laug

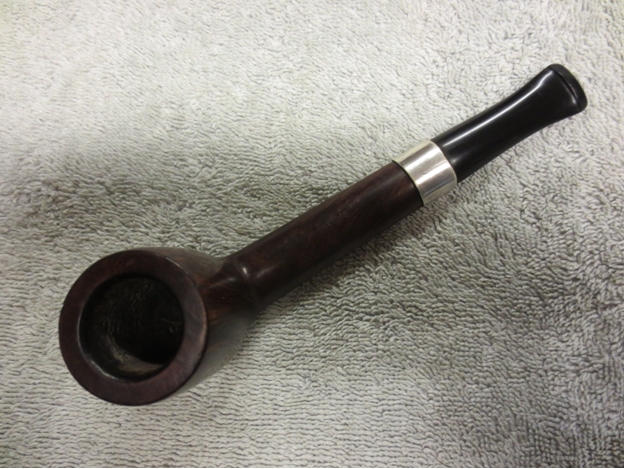
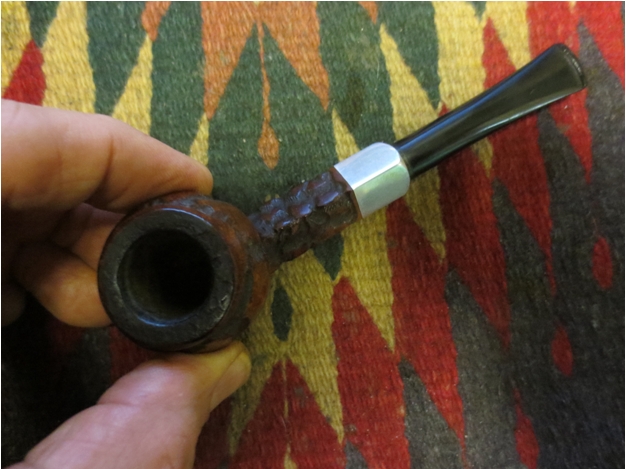
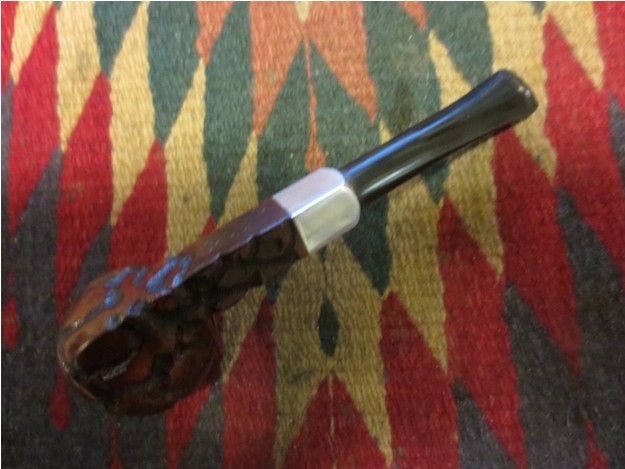
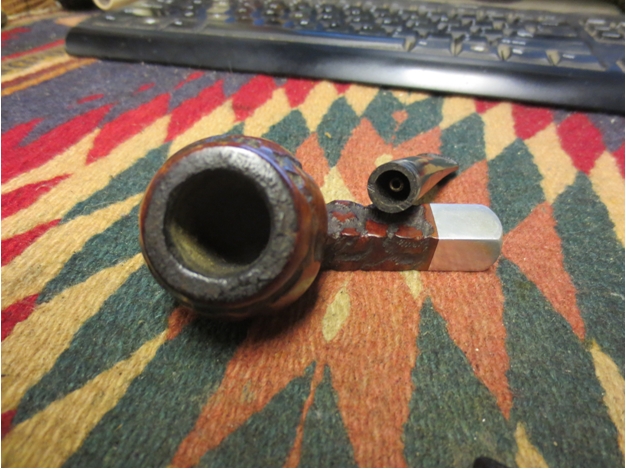
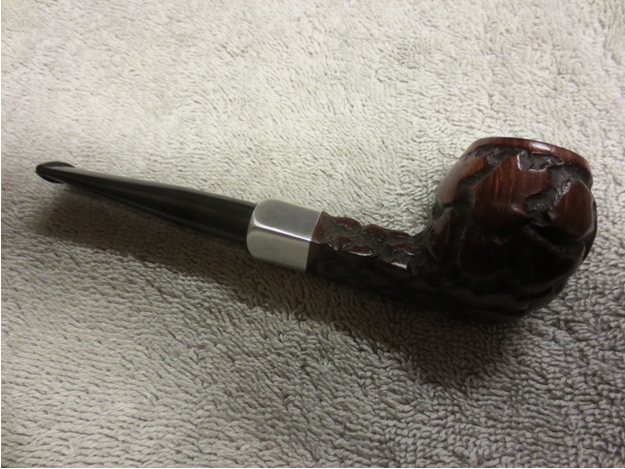
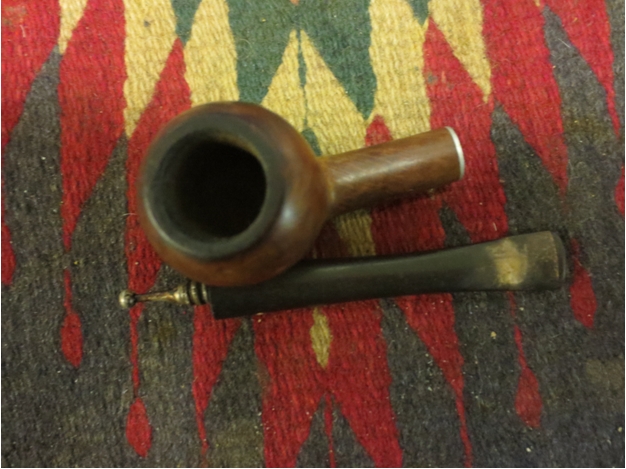
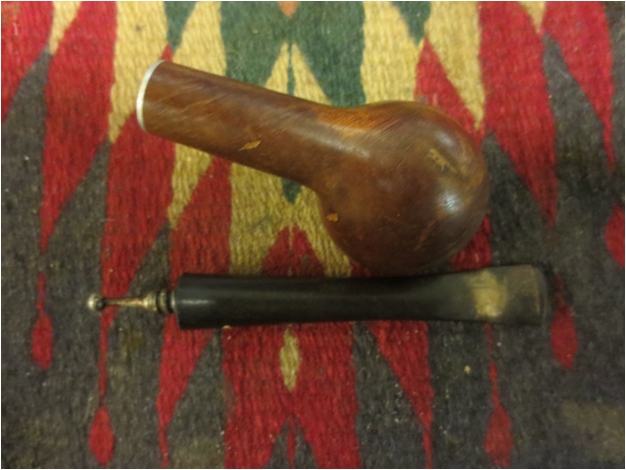
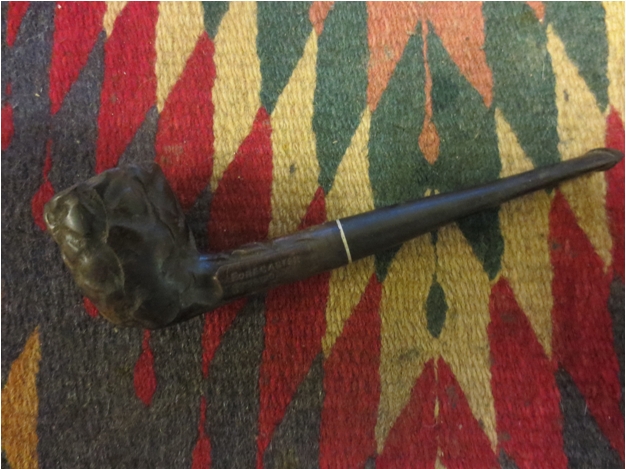
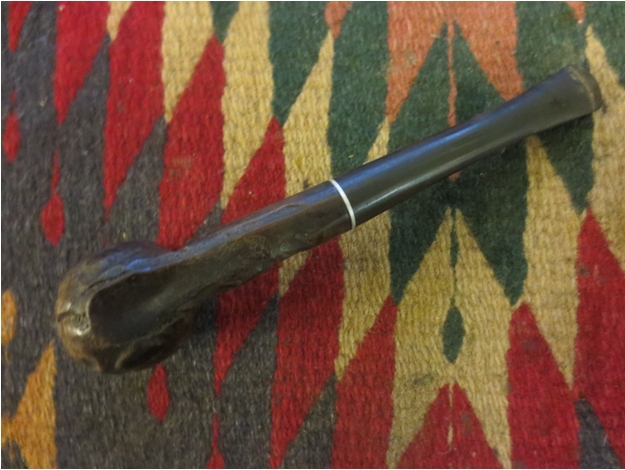
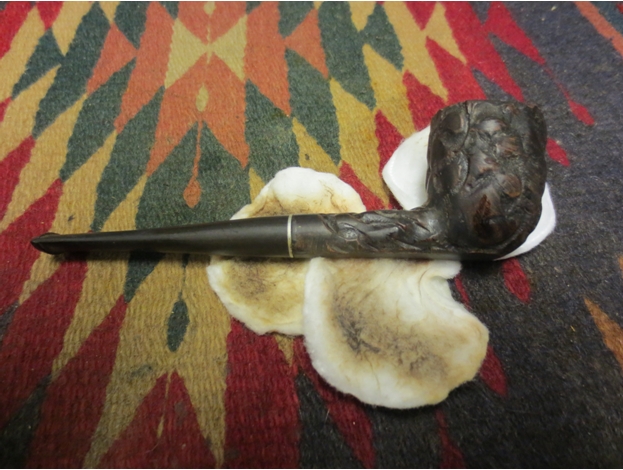
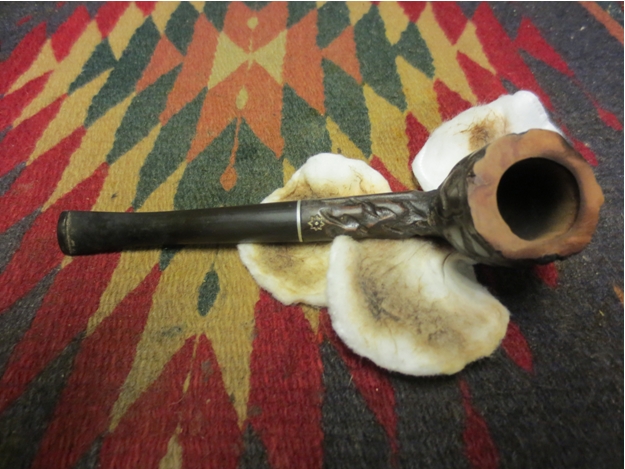
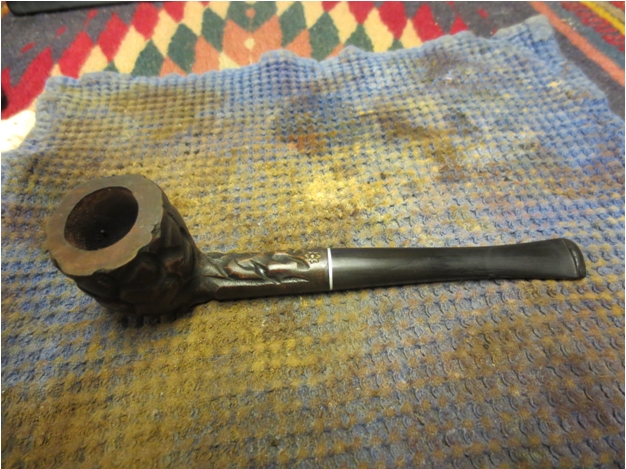
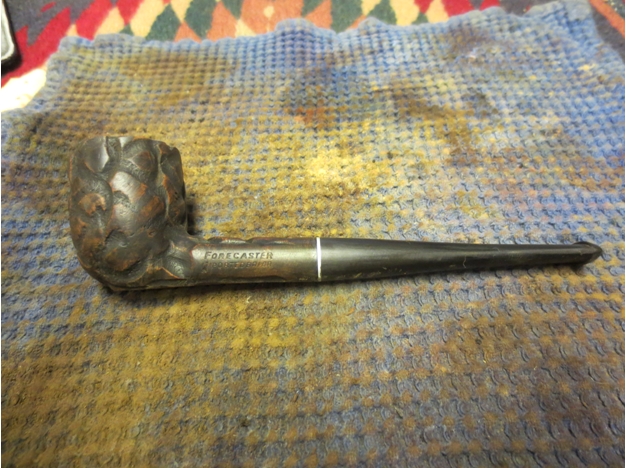
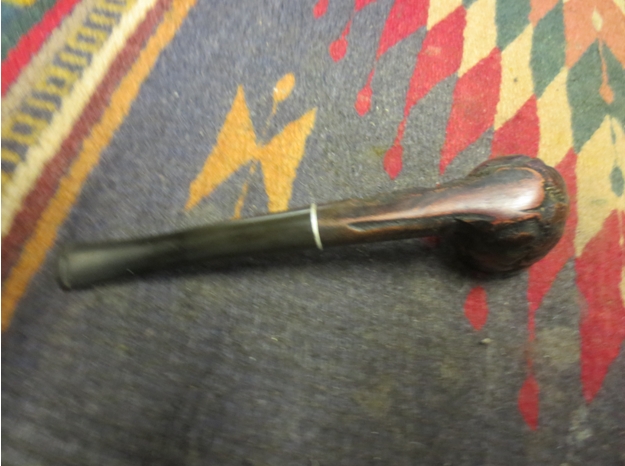
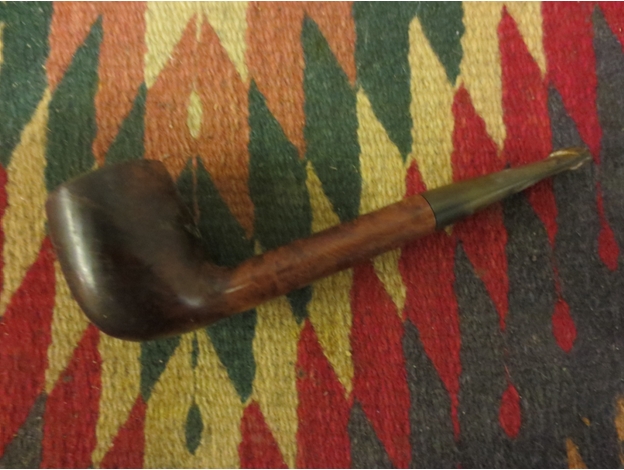
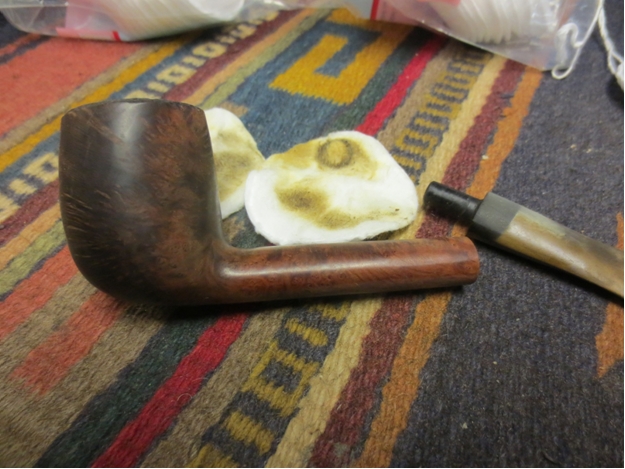
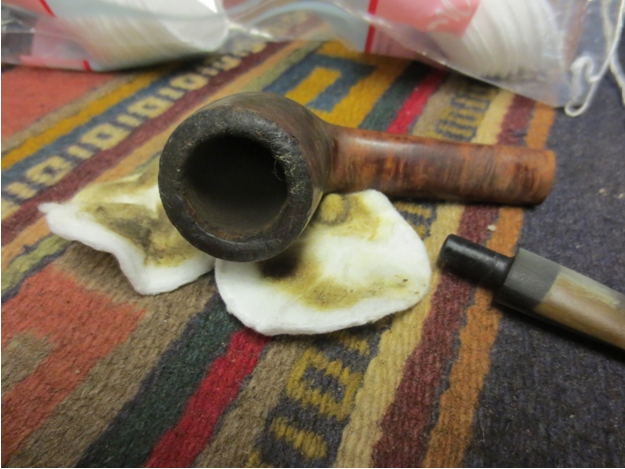
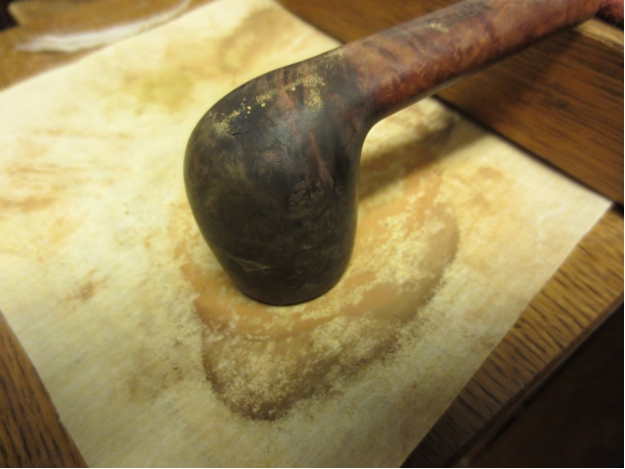
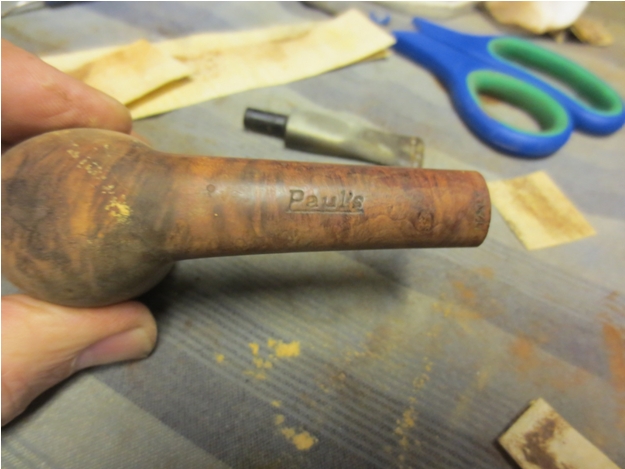
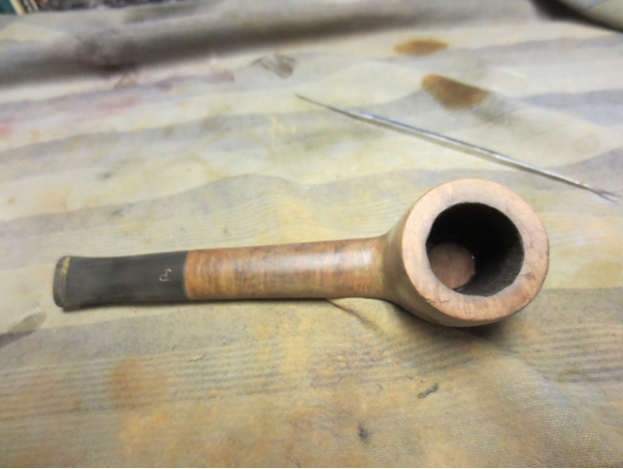
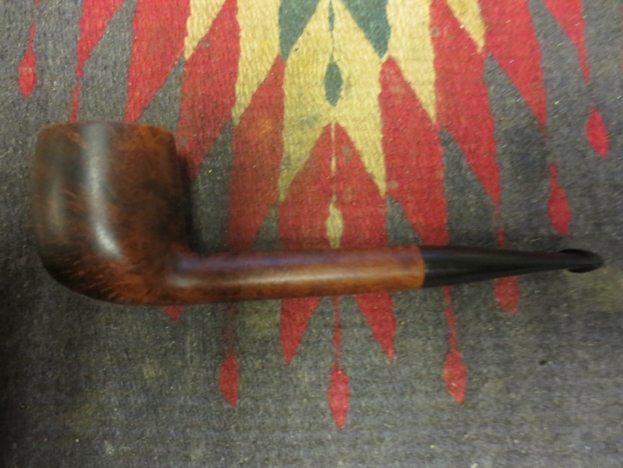
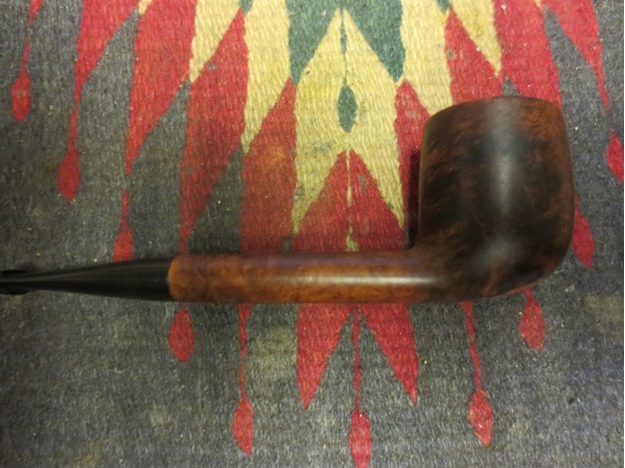
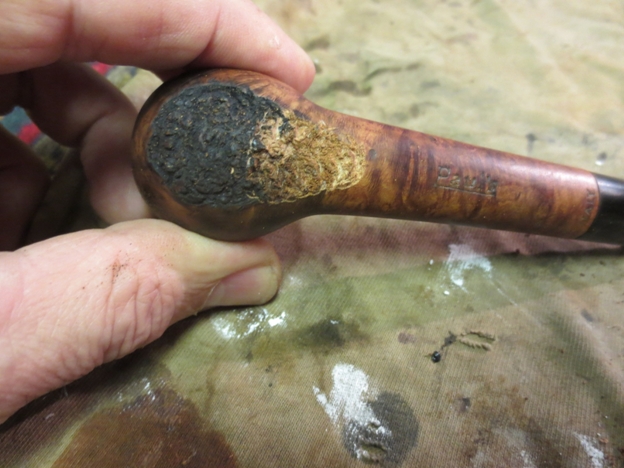
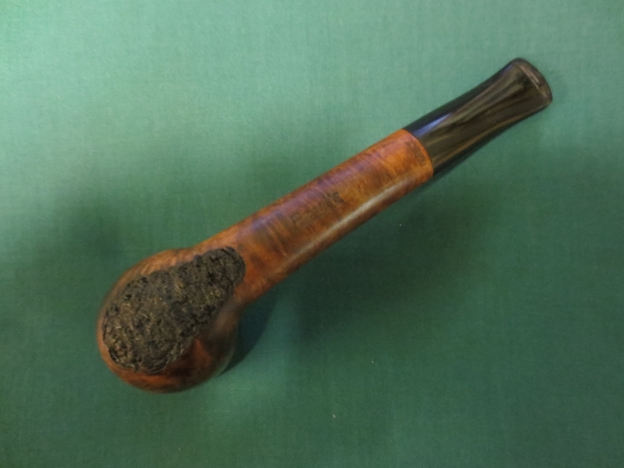
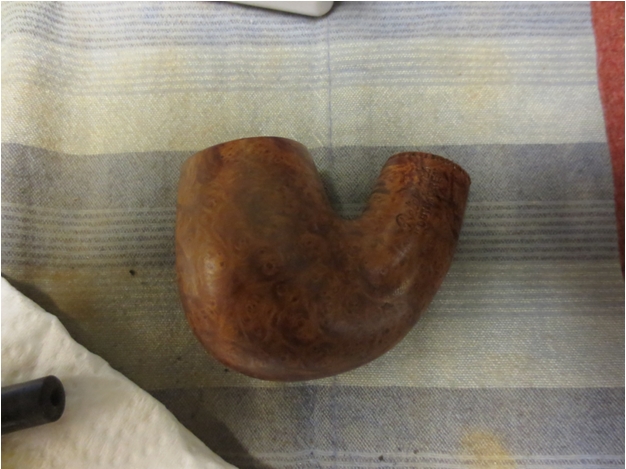
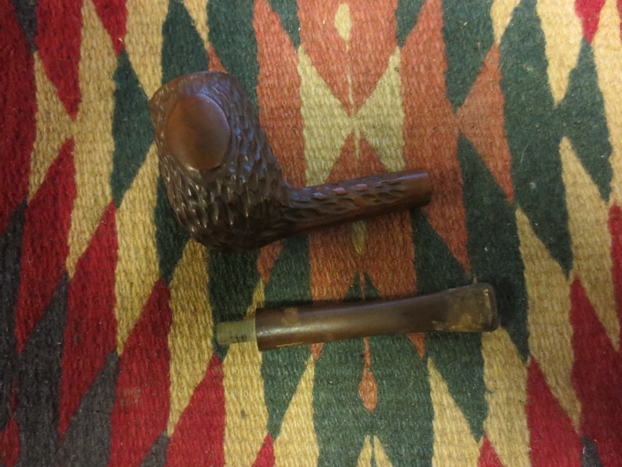
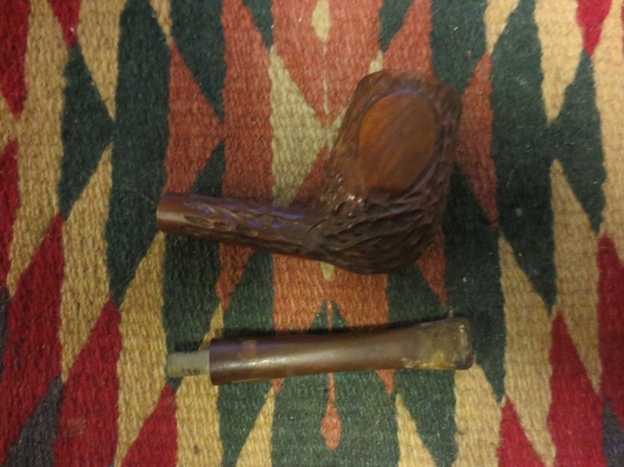
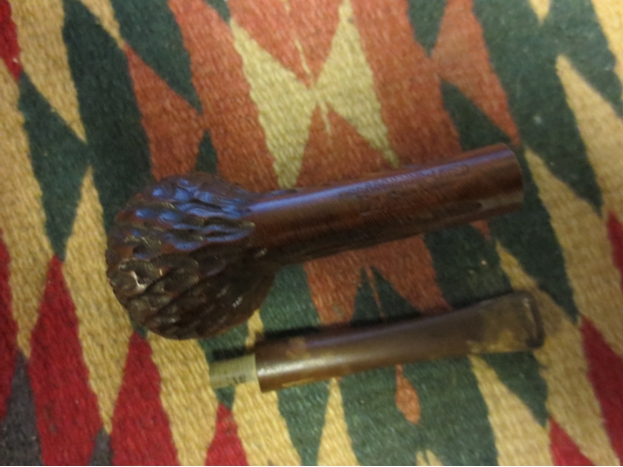
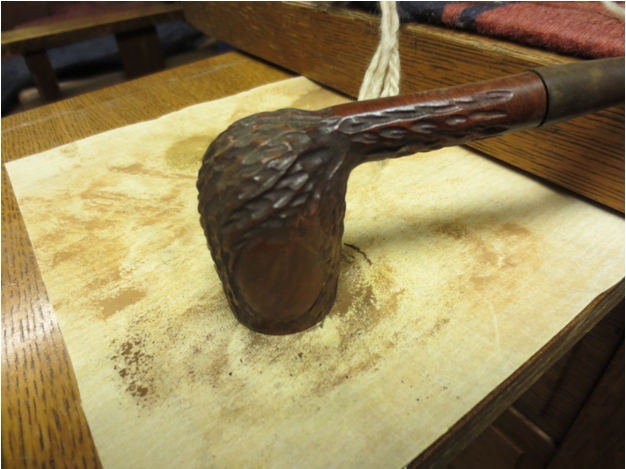
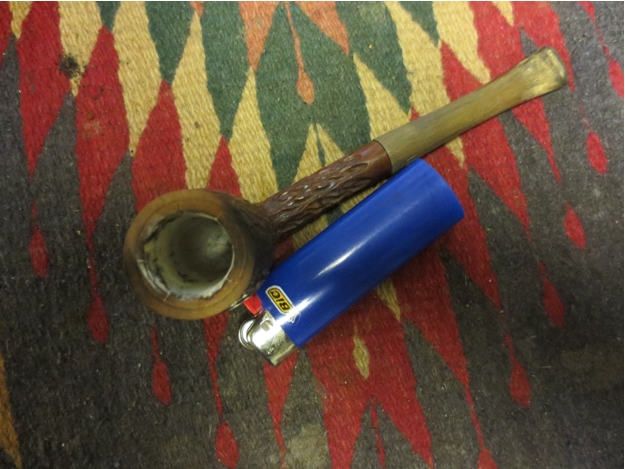
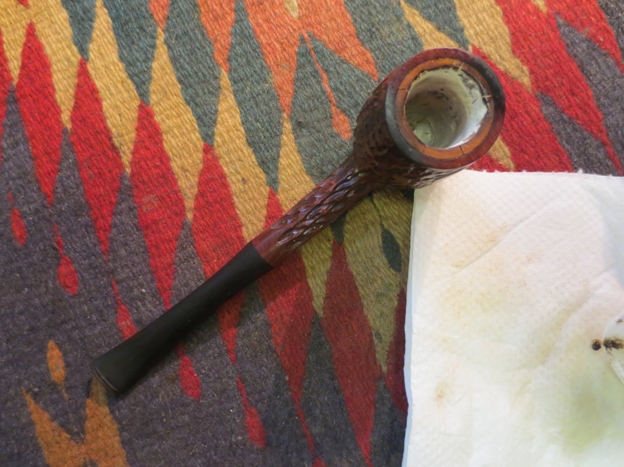
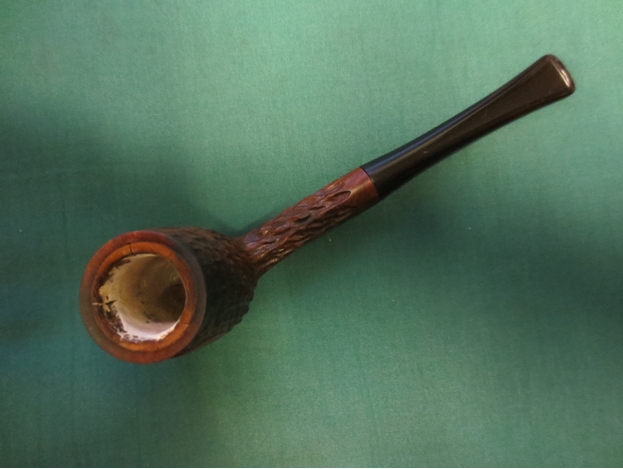
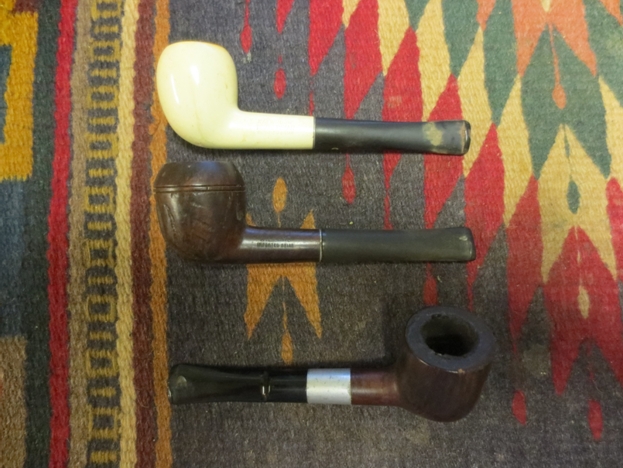
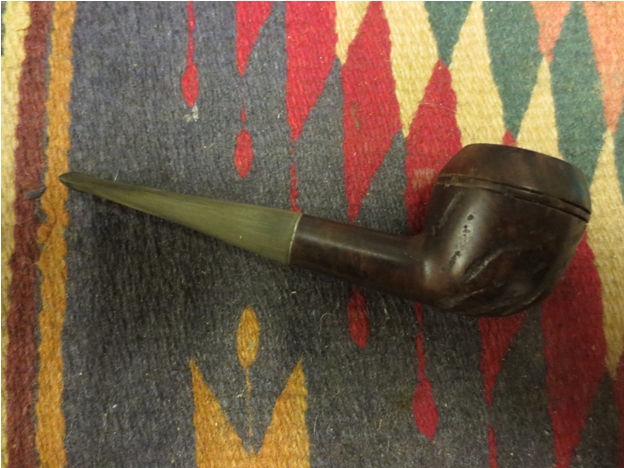
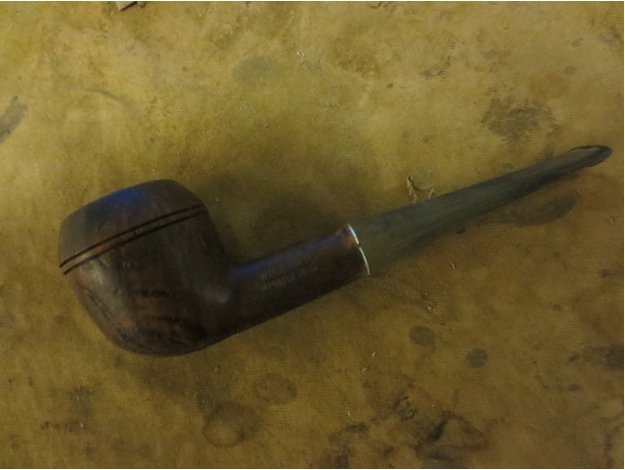
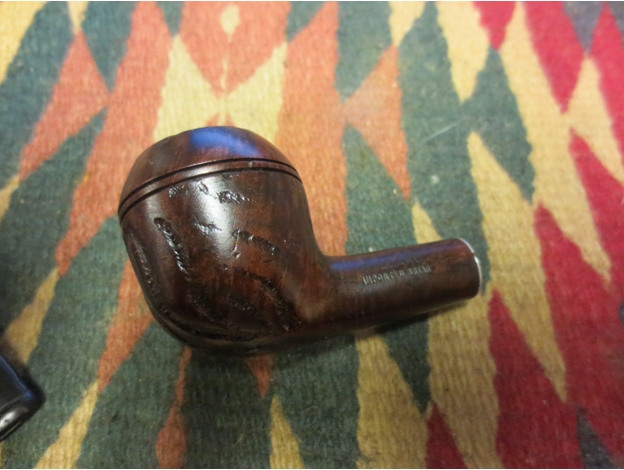
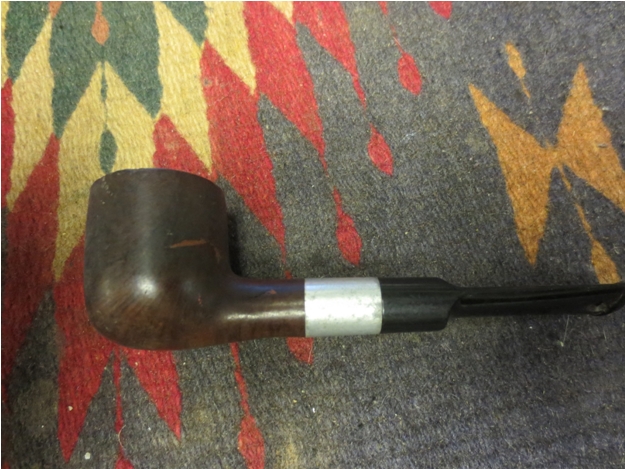
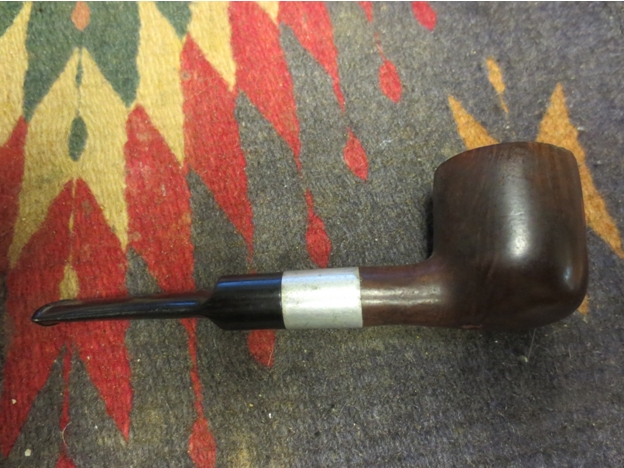
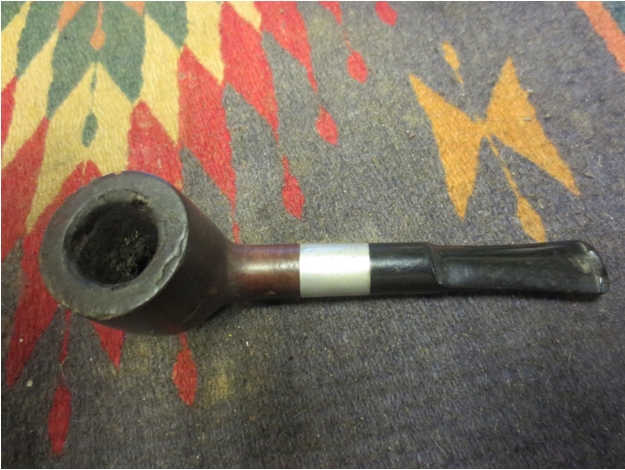
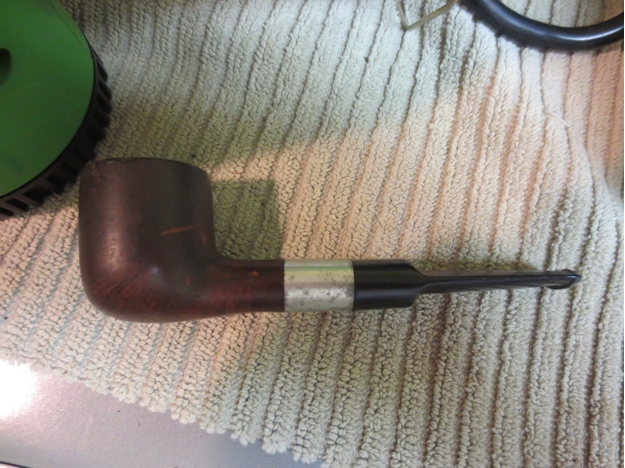
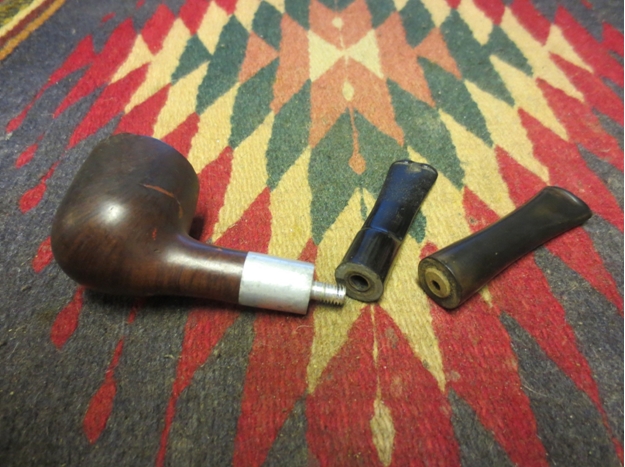
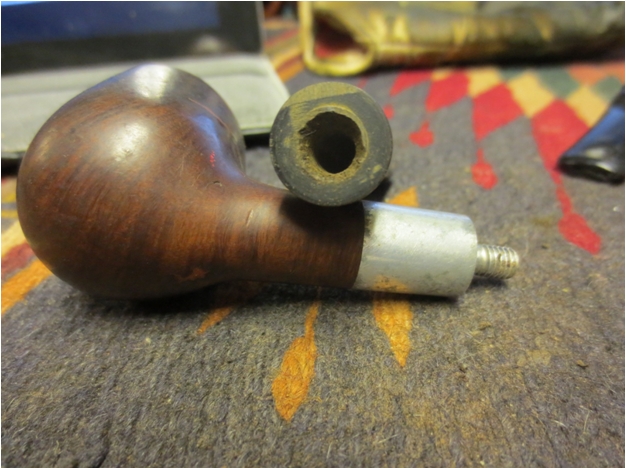
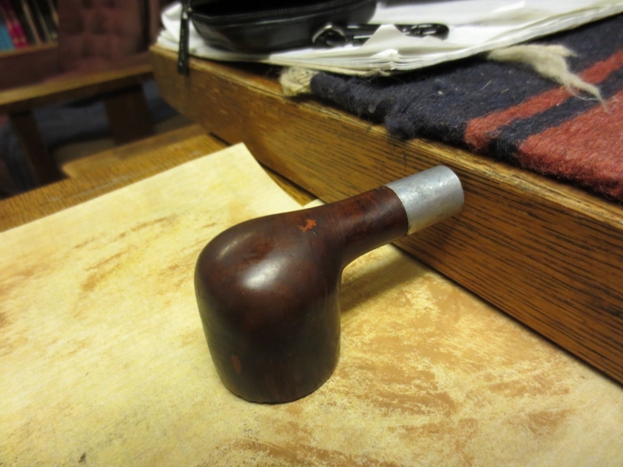
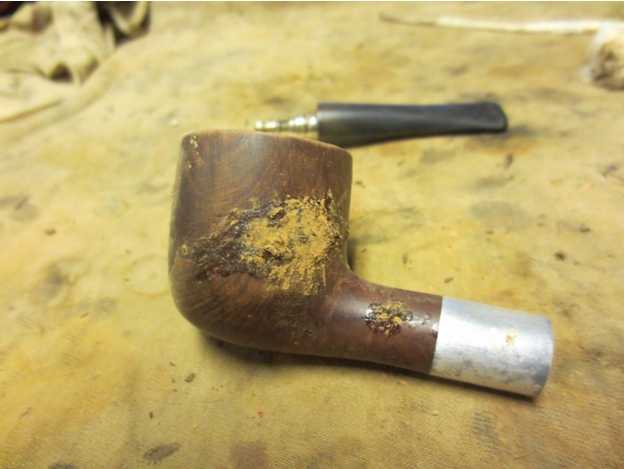
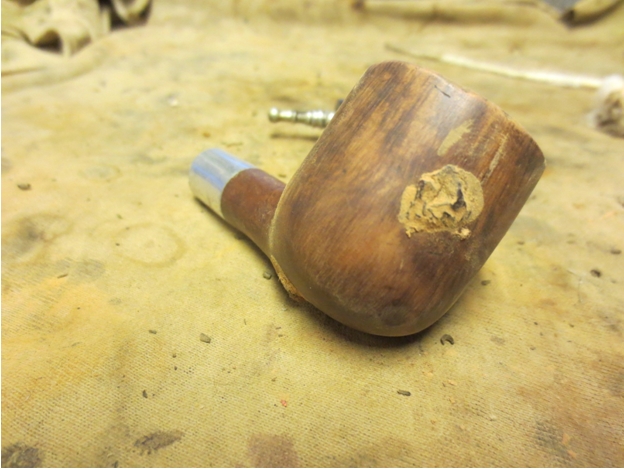
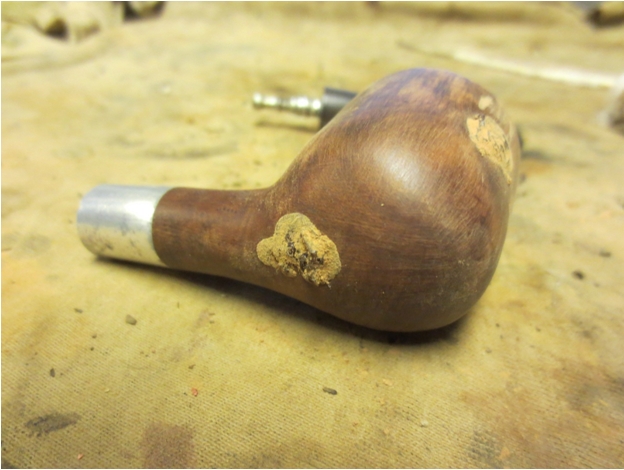
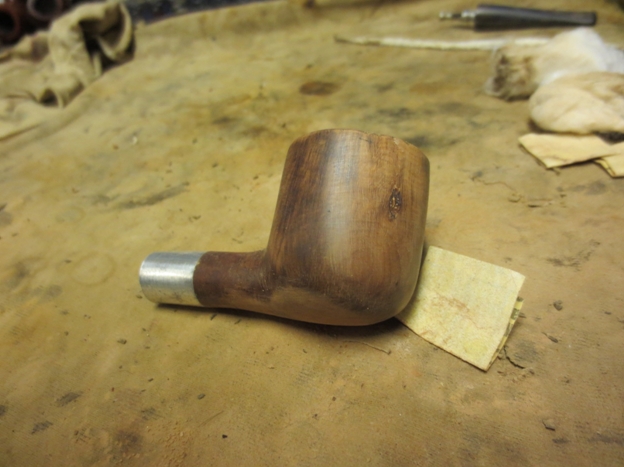
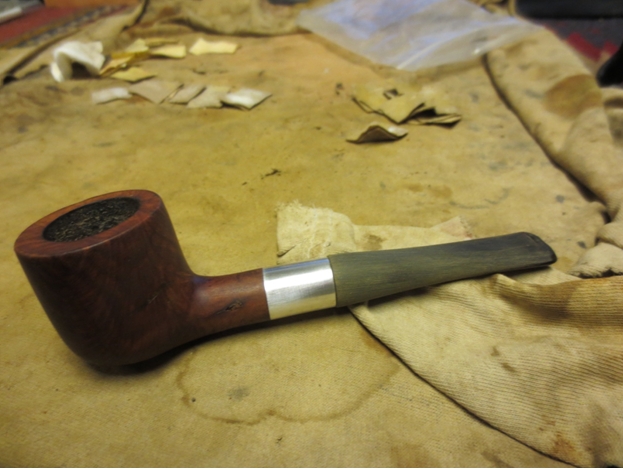
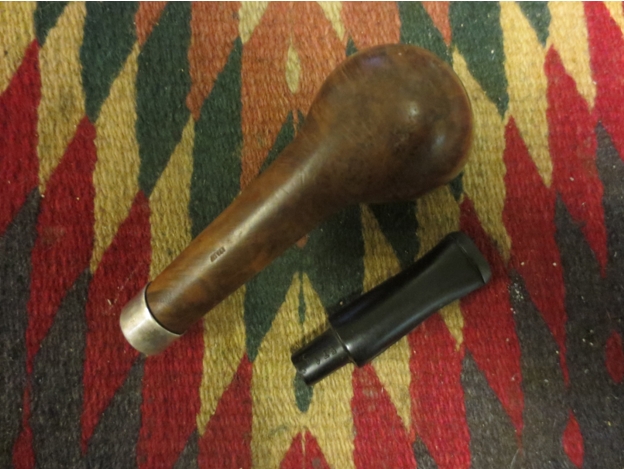
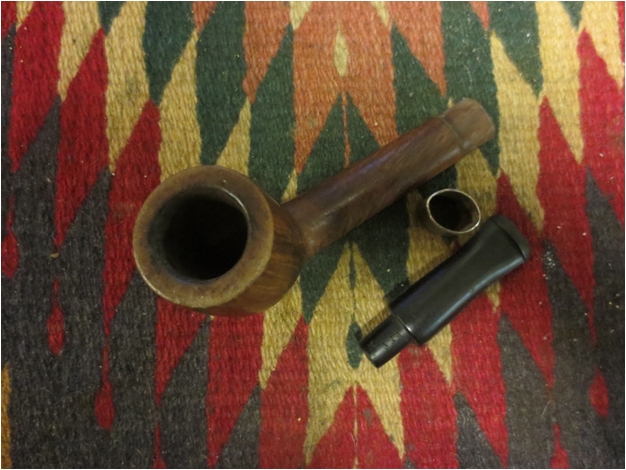
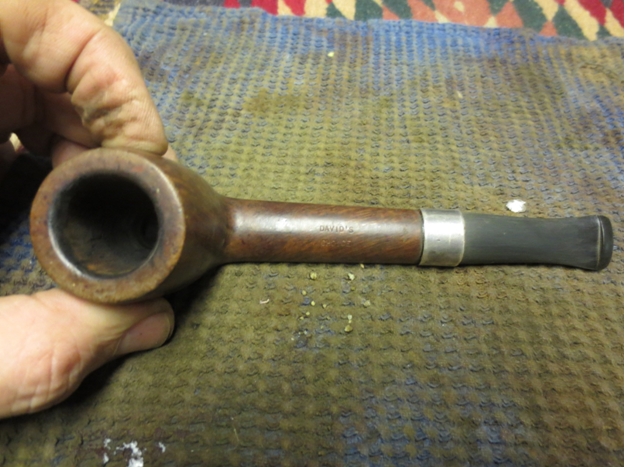
I have written about the restoration and restemming of the first pipe bowl I picked up while on a recent trip. It was found in an antique shop in Nanton, Alberta. It was an old AF Billiard from 1923. The second pipe bowl I found at the same shop is the focus of this refurbishing article. It is stamped on top of the shank with the words David’s Choice and stamped on the underside Italy and barely visible under the repair band Savinelli Product. The repair band was loose and when it was removed the shank had a crack on the bottom side. At the bowl shank junction there is also a small crack that extends back along the shank for almost an inch. It does not appear to go through the shank to the airway but it is visible. The rim of the pipe was clean but the outer edge was damaged and the top edge was badly dented. The finish on the bowl was gone and the briar, though it had stunning grain, was lifeless looking. The bowl was clean in the top ½ inch – looking to have been reamed. The rest of the bowl was badly caked to the point that a pencil would stand in the bottom half unaided. There was no room for additional tobacco. Surprisingly the shank was clean. The stem was long since gone but I found a stem blank in my stem can that would work very well with the pipe.Sav1 Sav2 Sav3 Sav4 Sav5 Sav6 
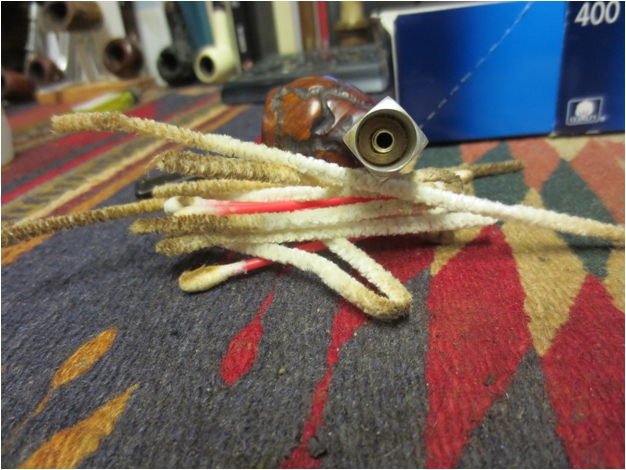
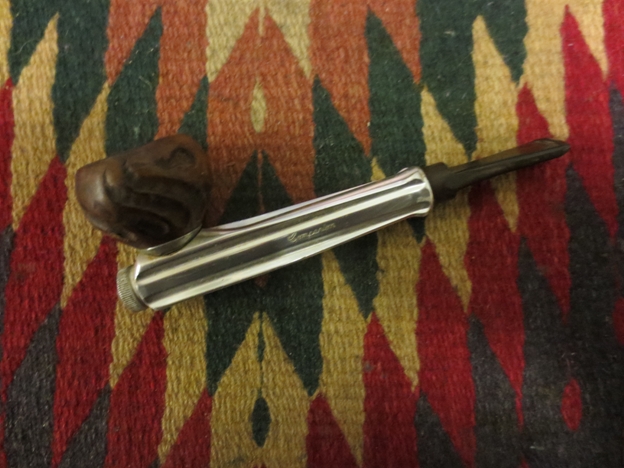
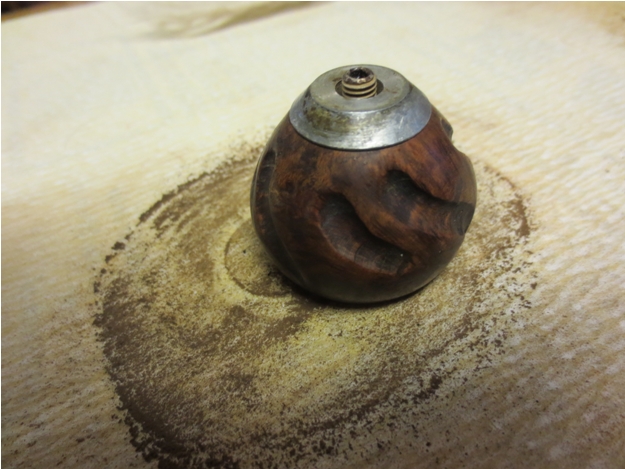
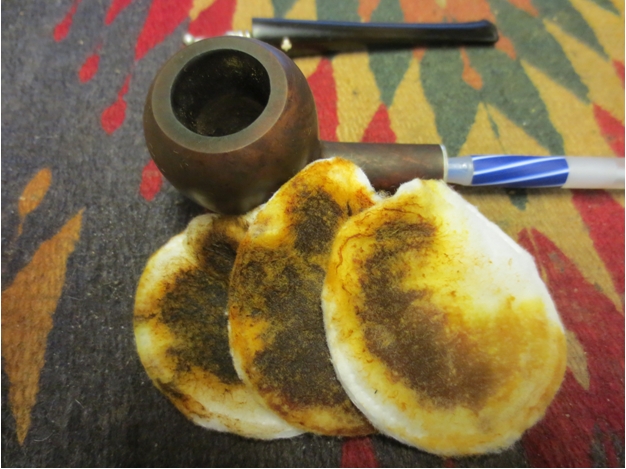
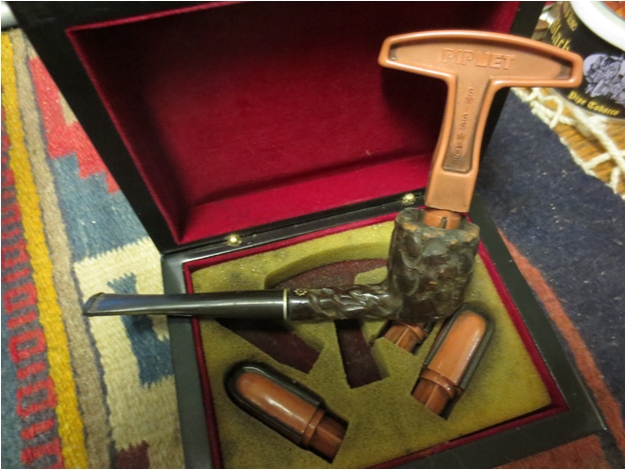
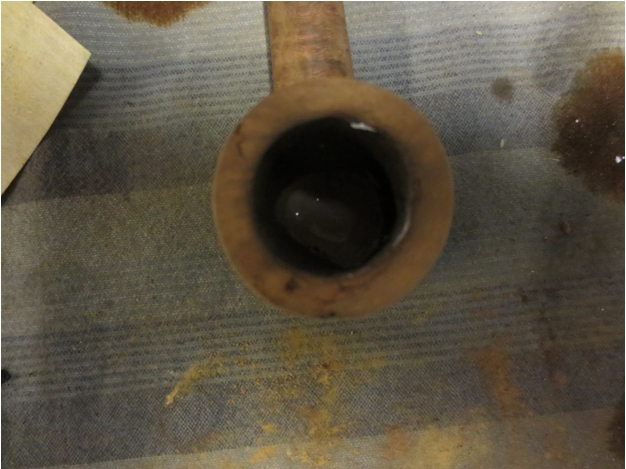
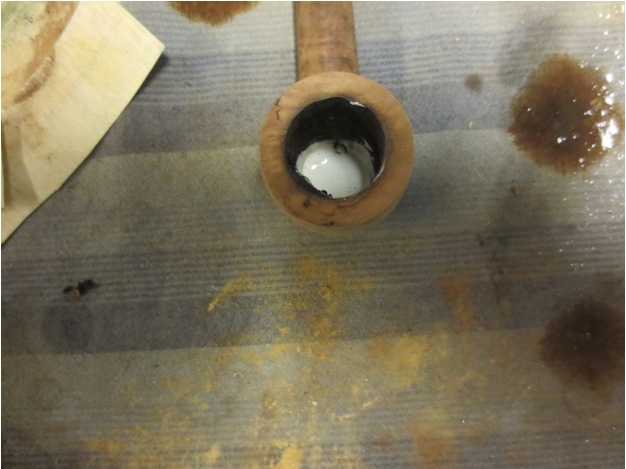
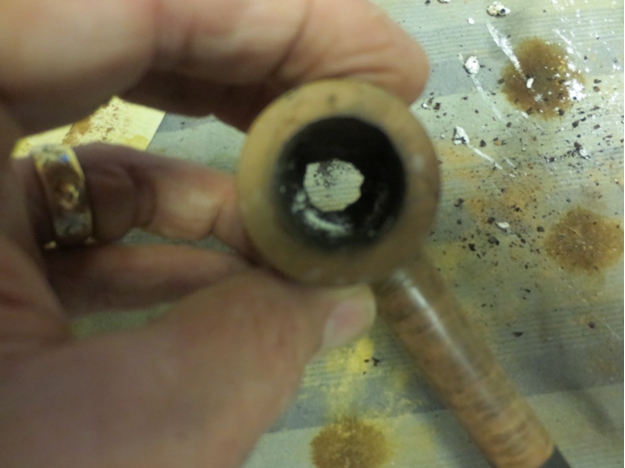
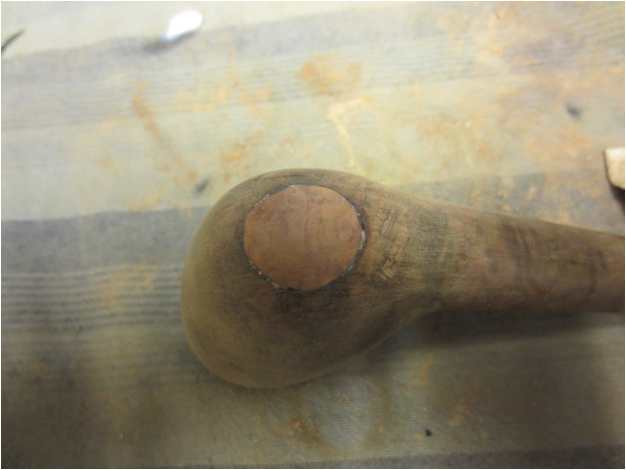
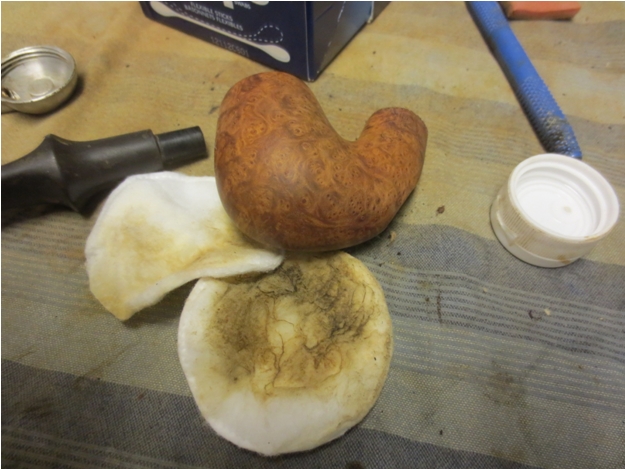
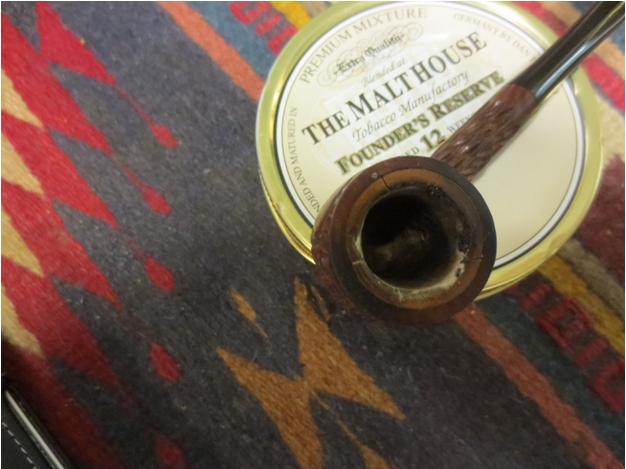
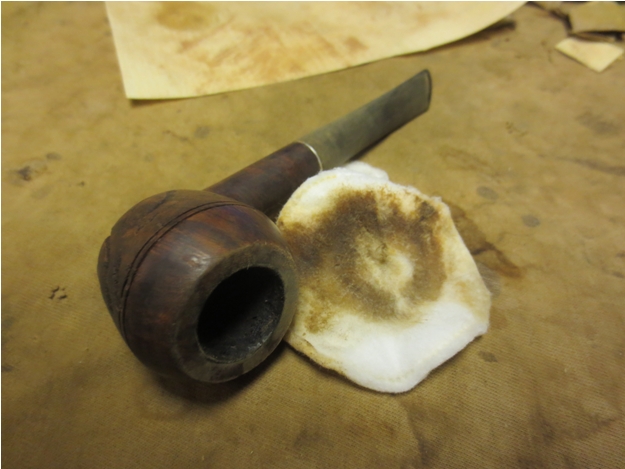
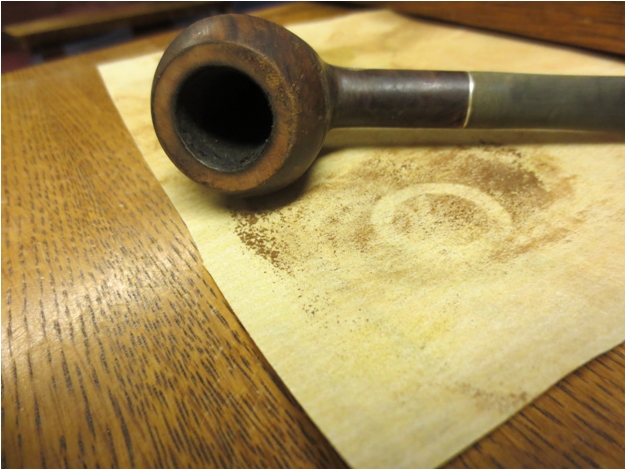
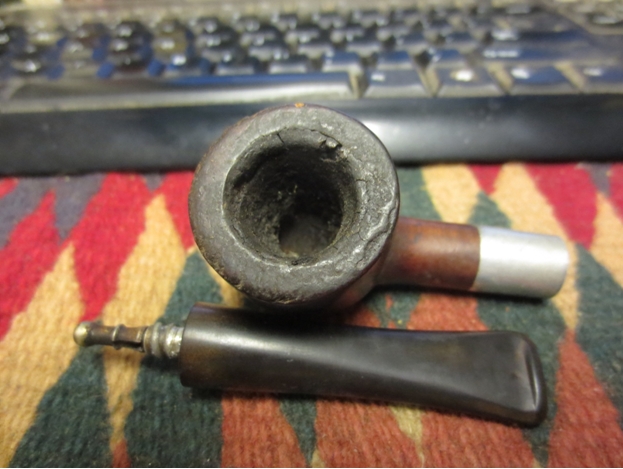
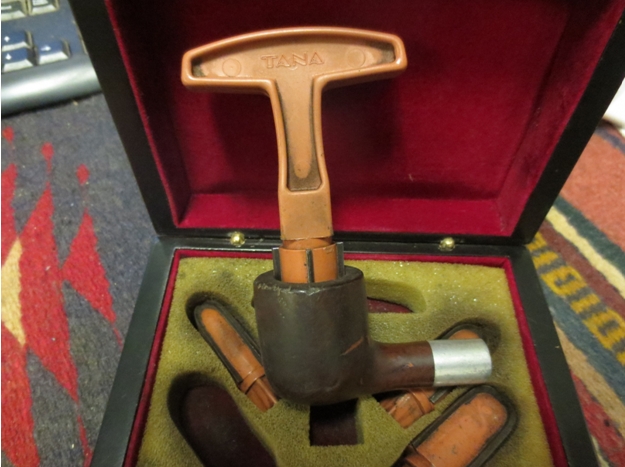
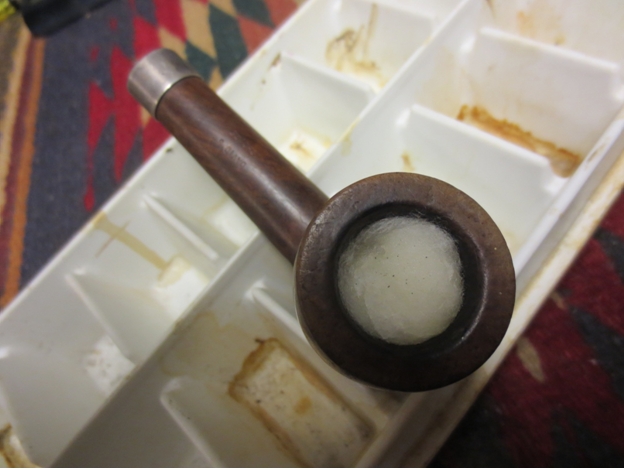
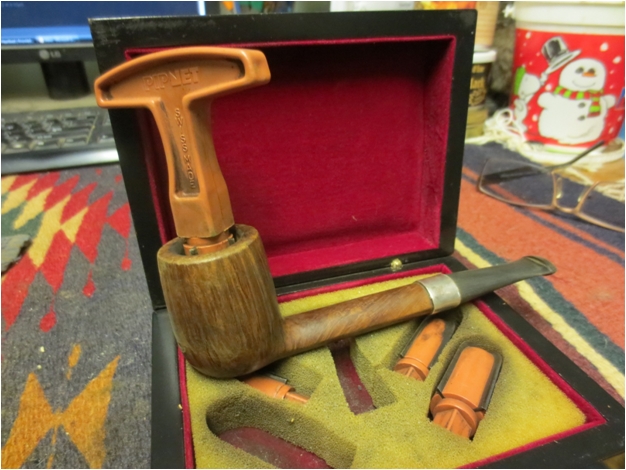
The cake was like concrete in the bottom half of the bowl. I could not cut through it with either the PipNet or the KleenReem pipe reaming tools. I filled the bowl with cotton balls and then used an ear syringe to fill the bowl with isopropyl alcohol. I let it sit for several hours while I worked on fitting the stem.Sav7 Sav8 
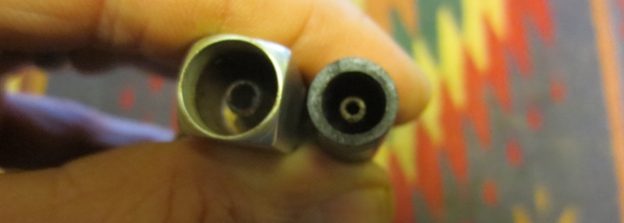
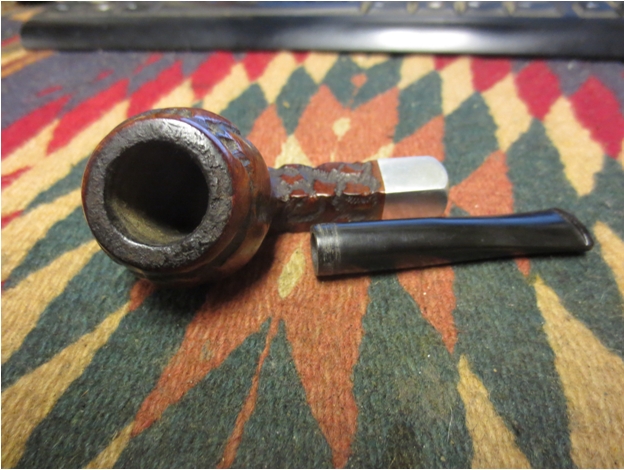
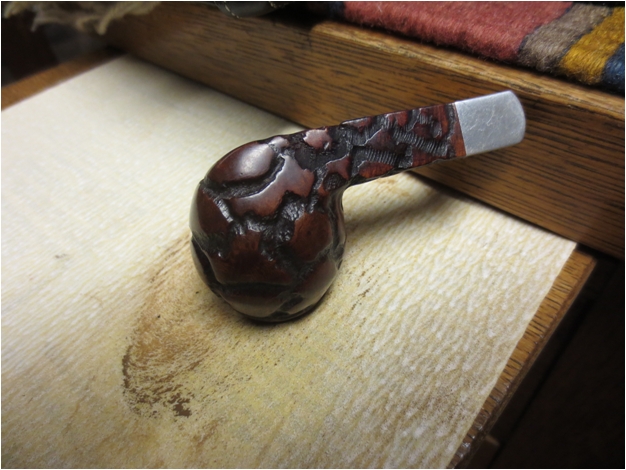
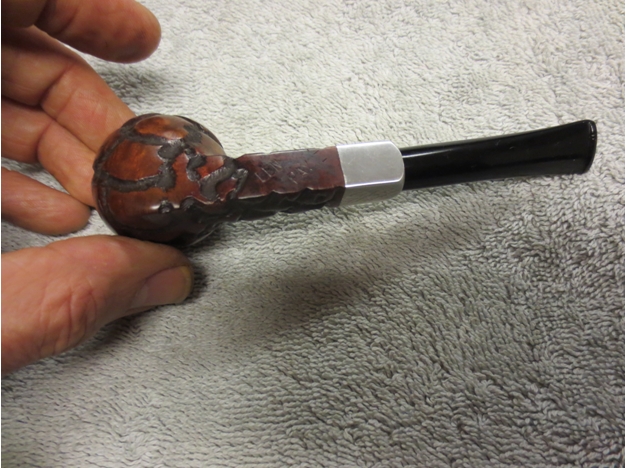
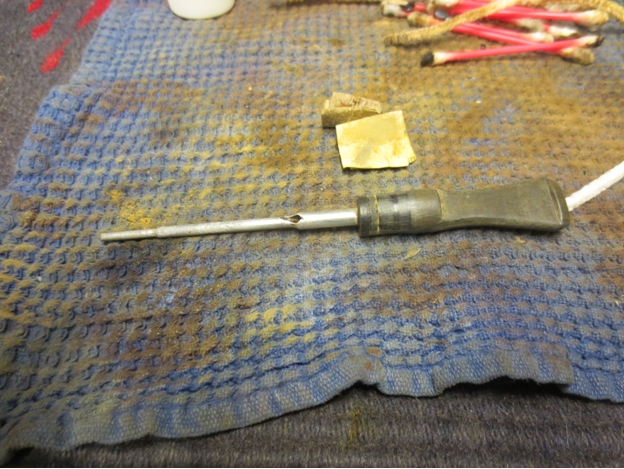
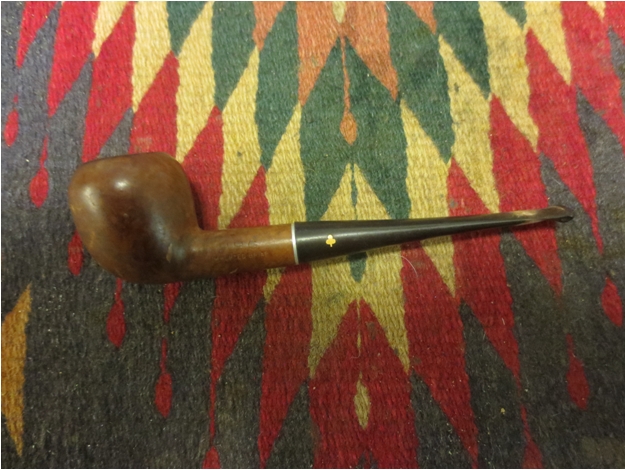
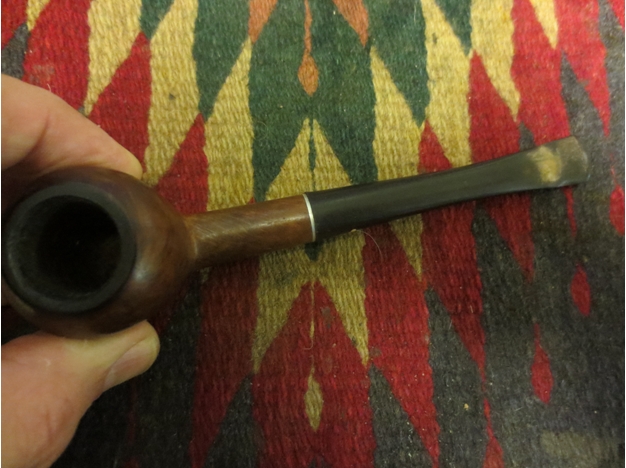
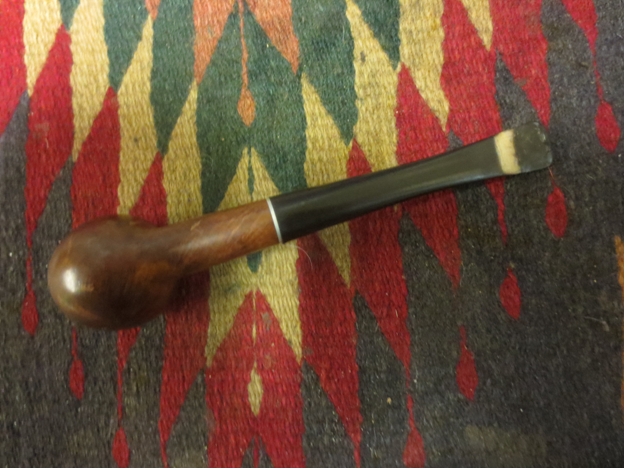
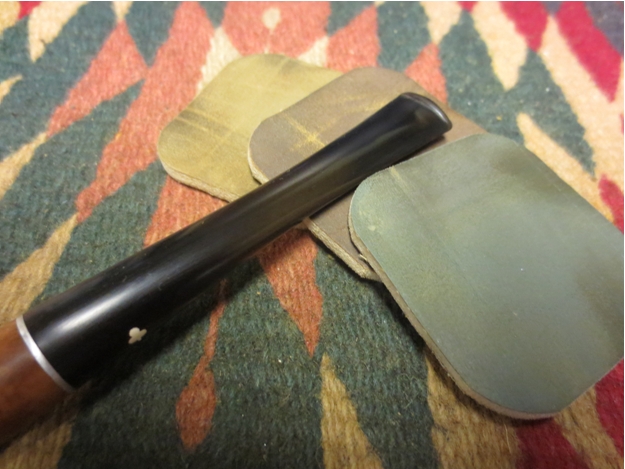
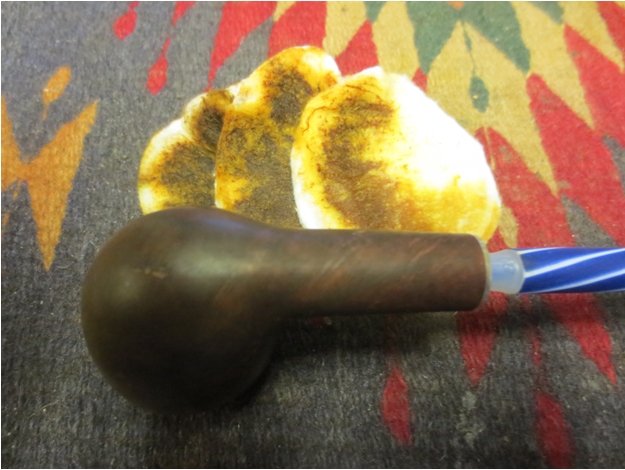
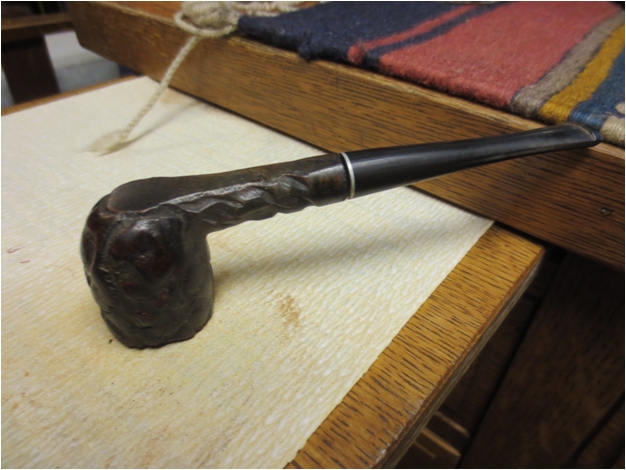
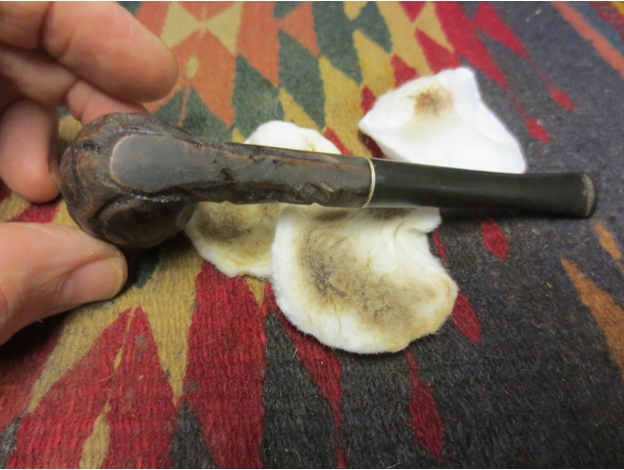
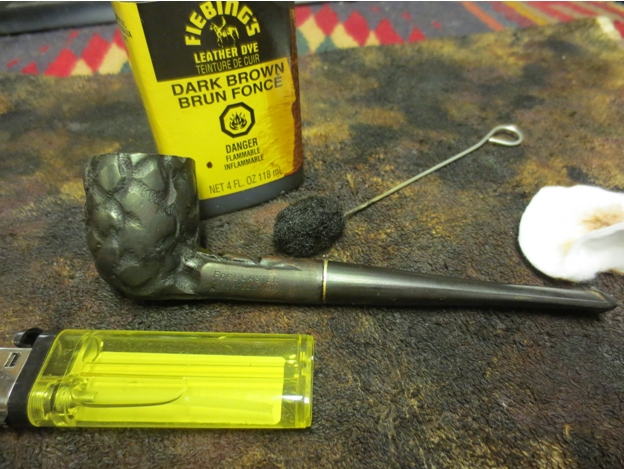
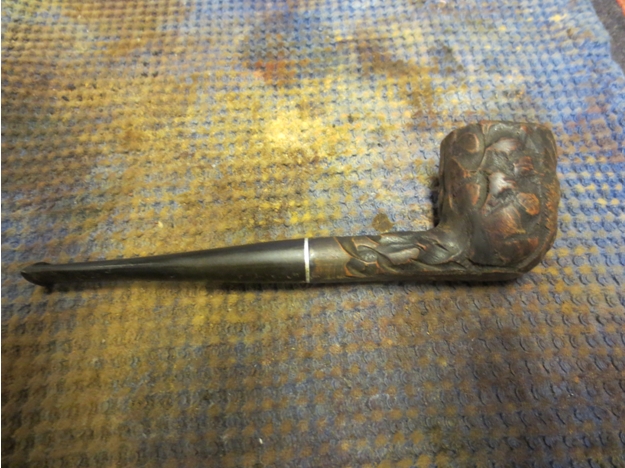
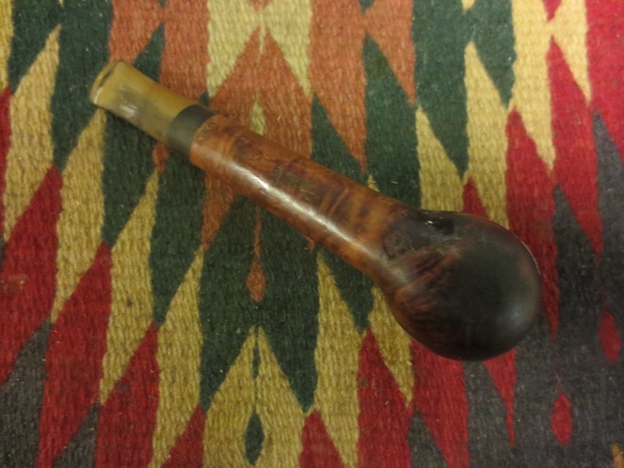
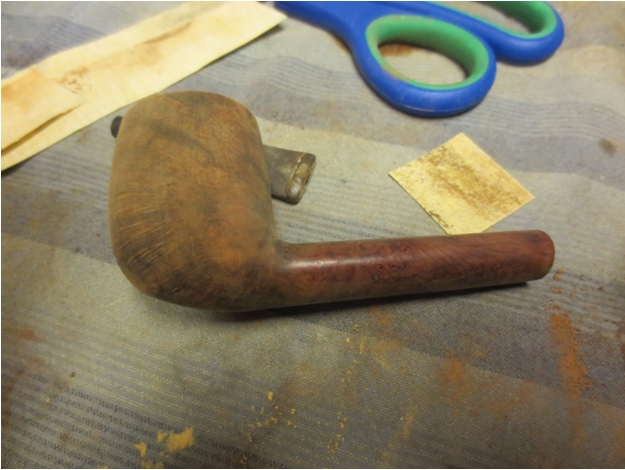
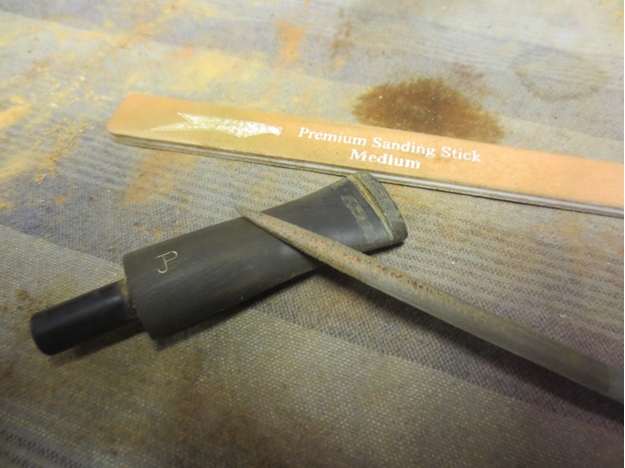
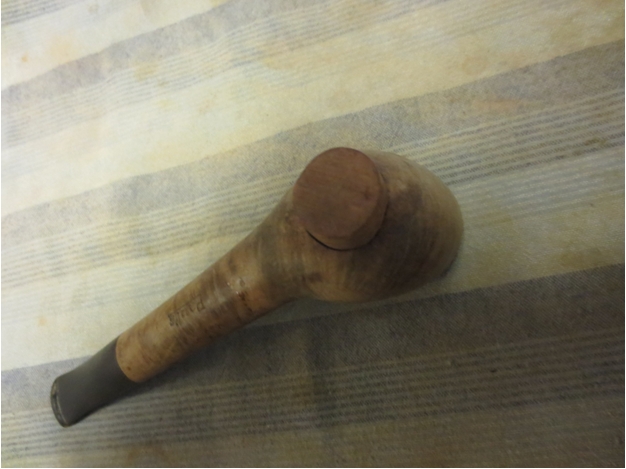
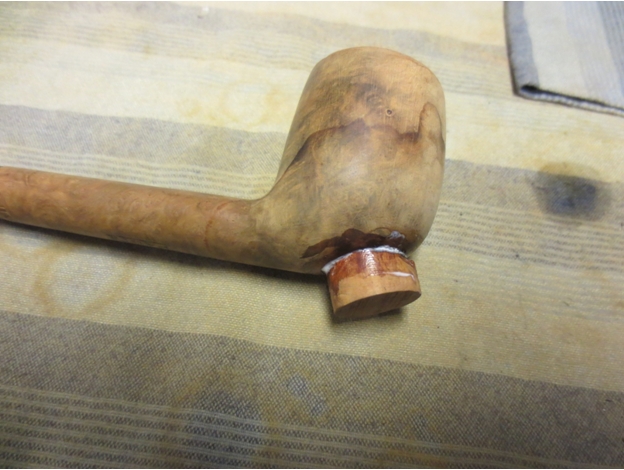
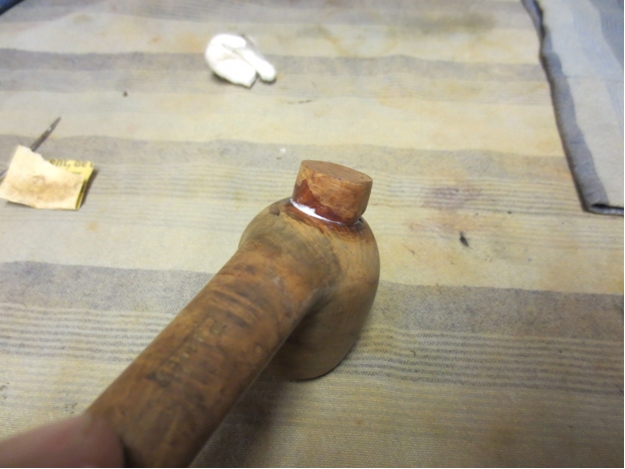
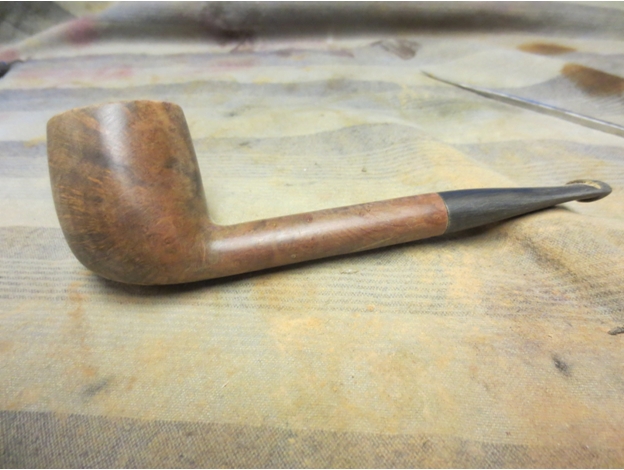
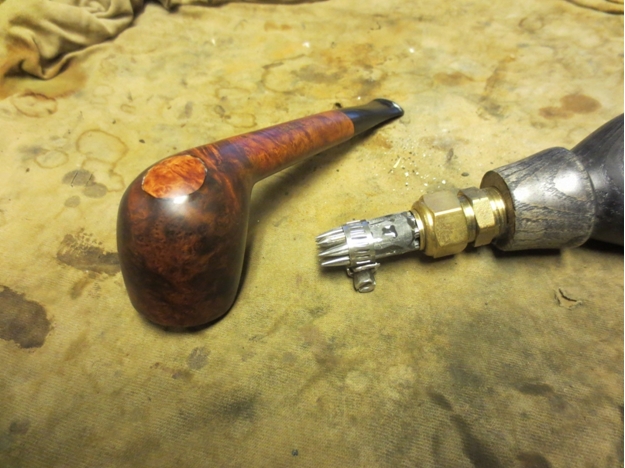
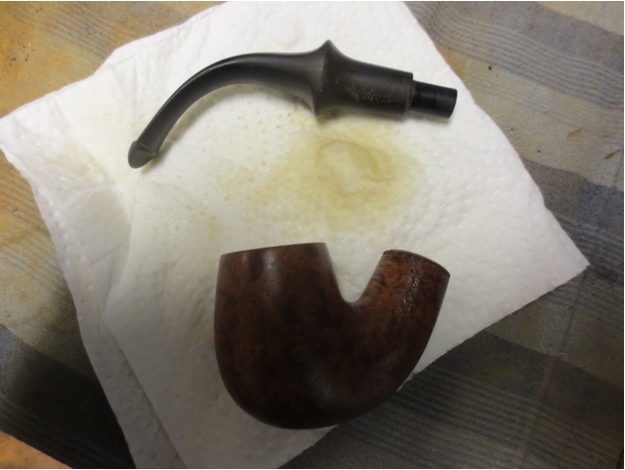
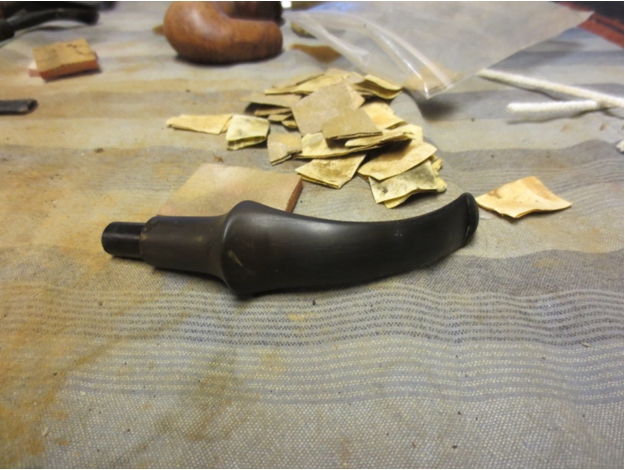
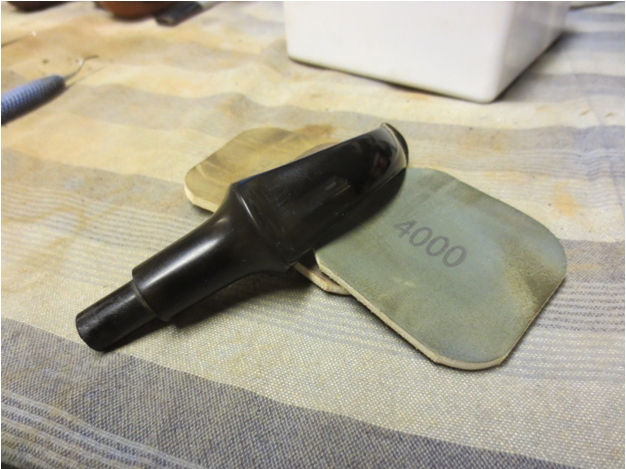
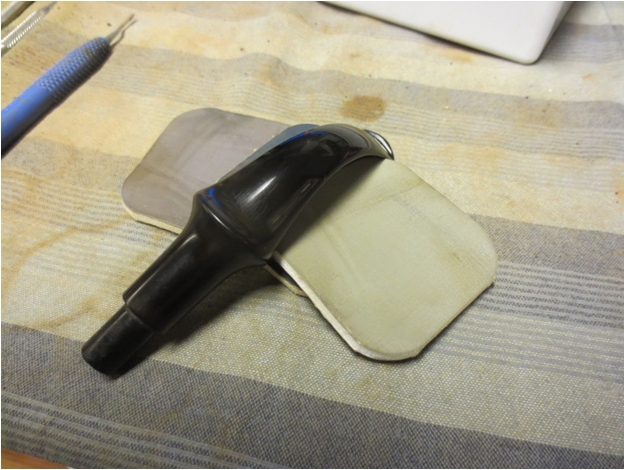
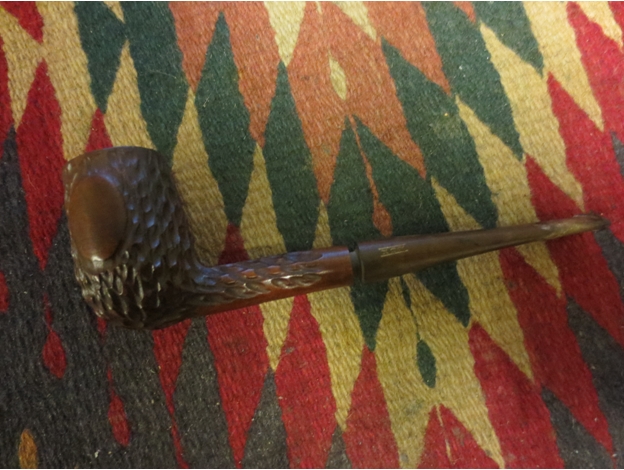
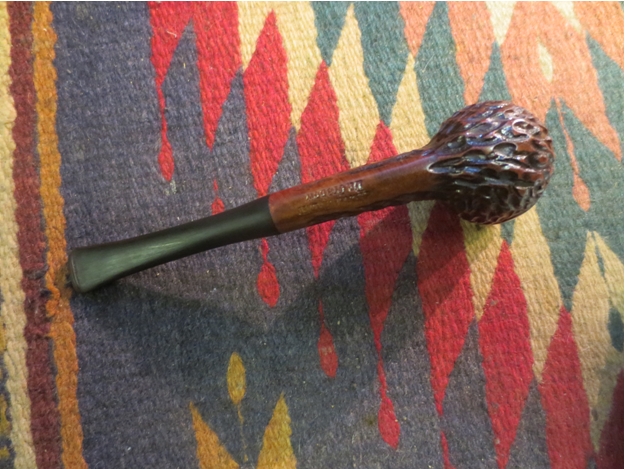
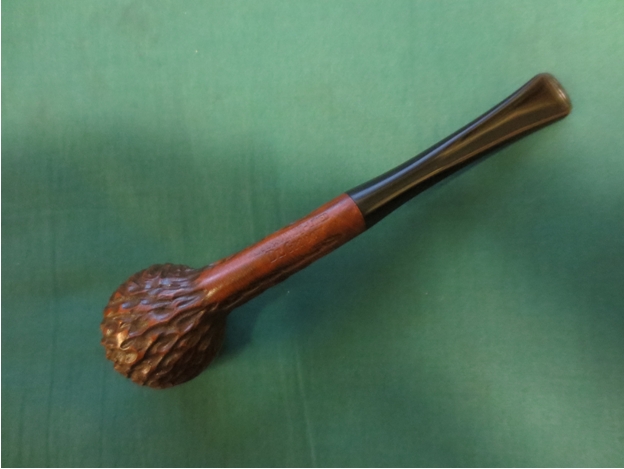
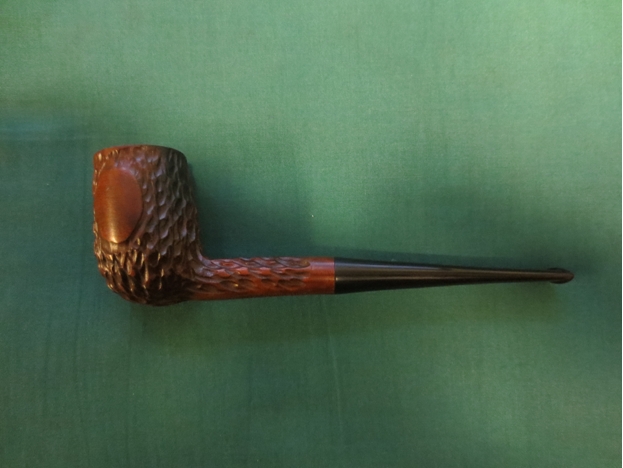
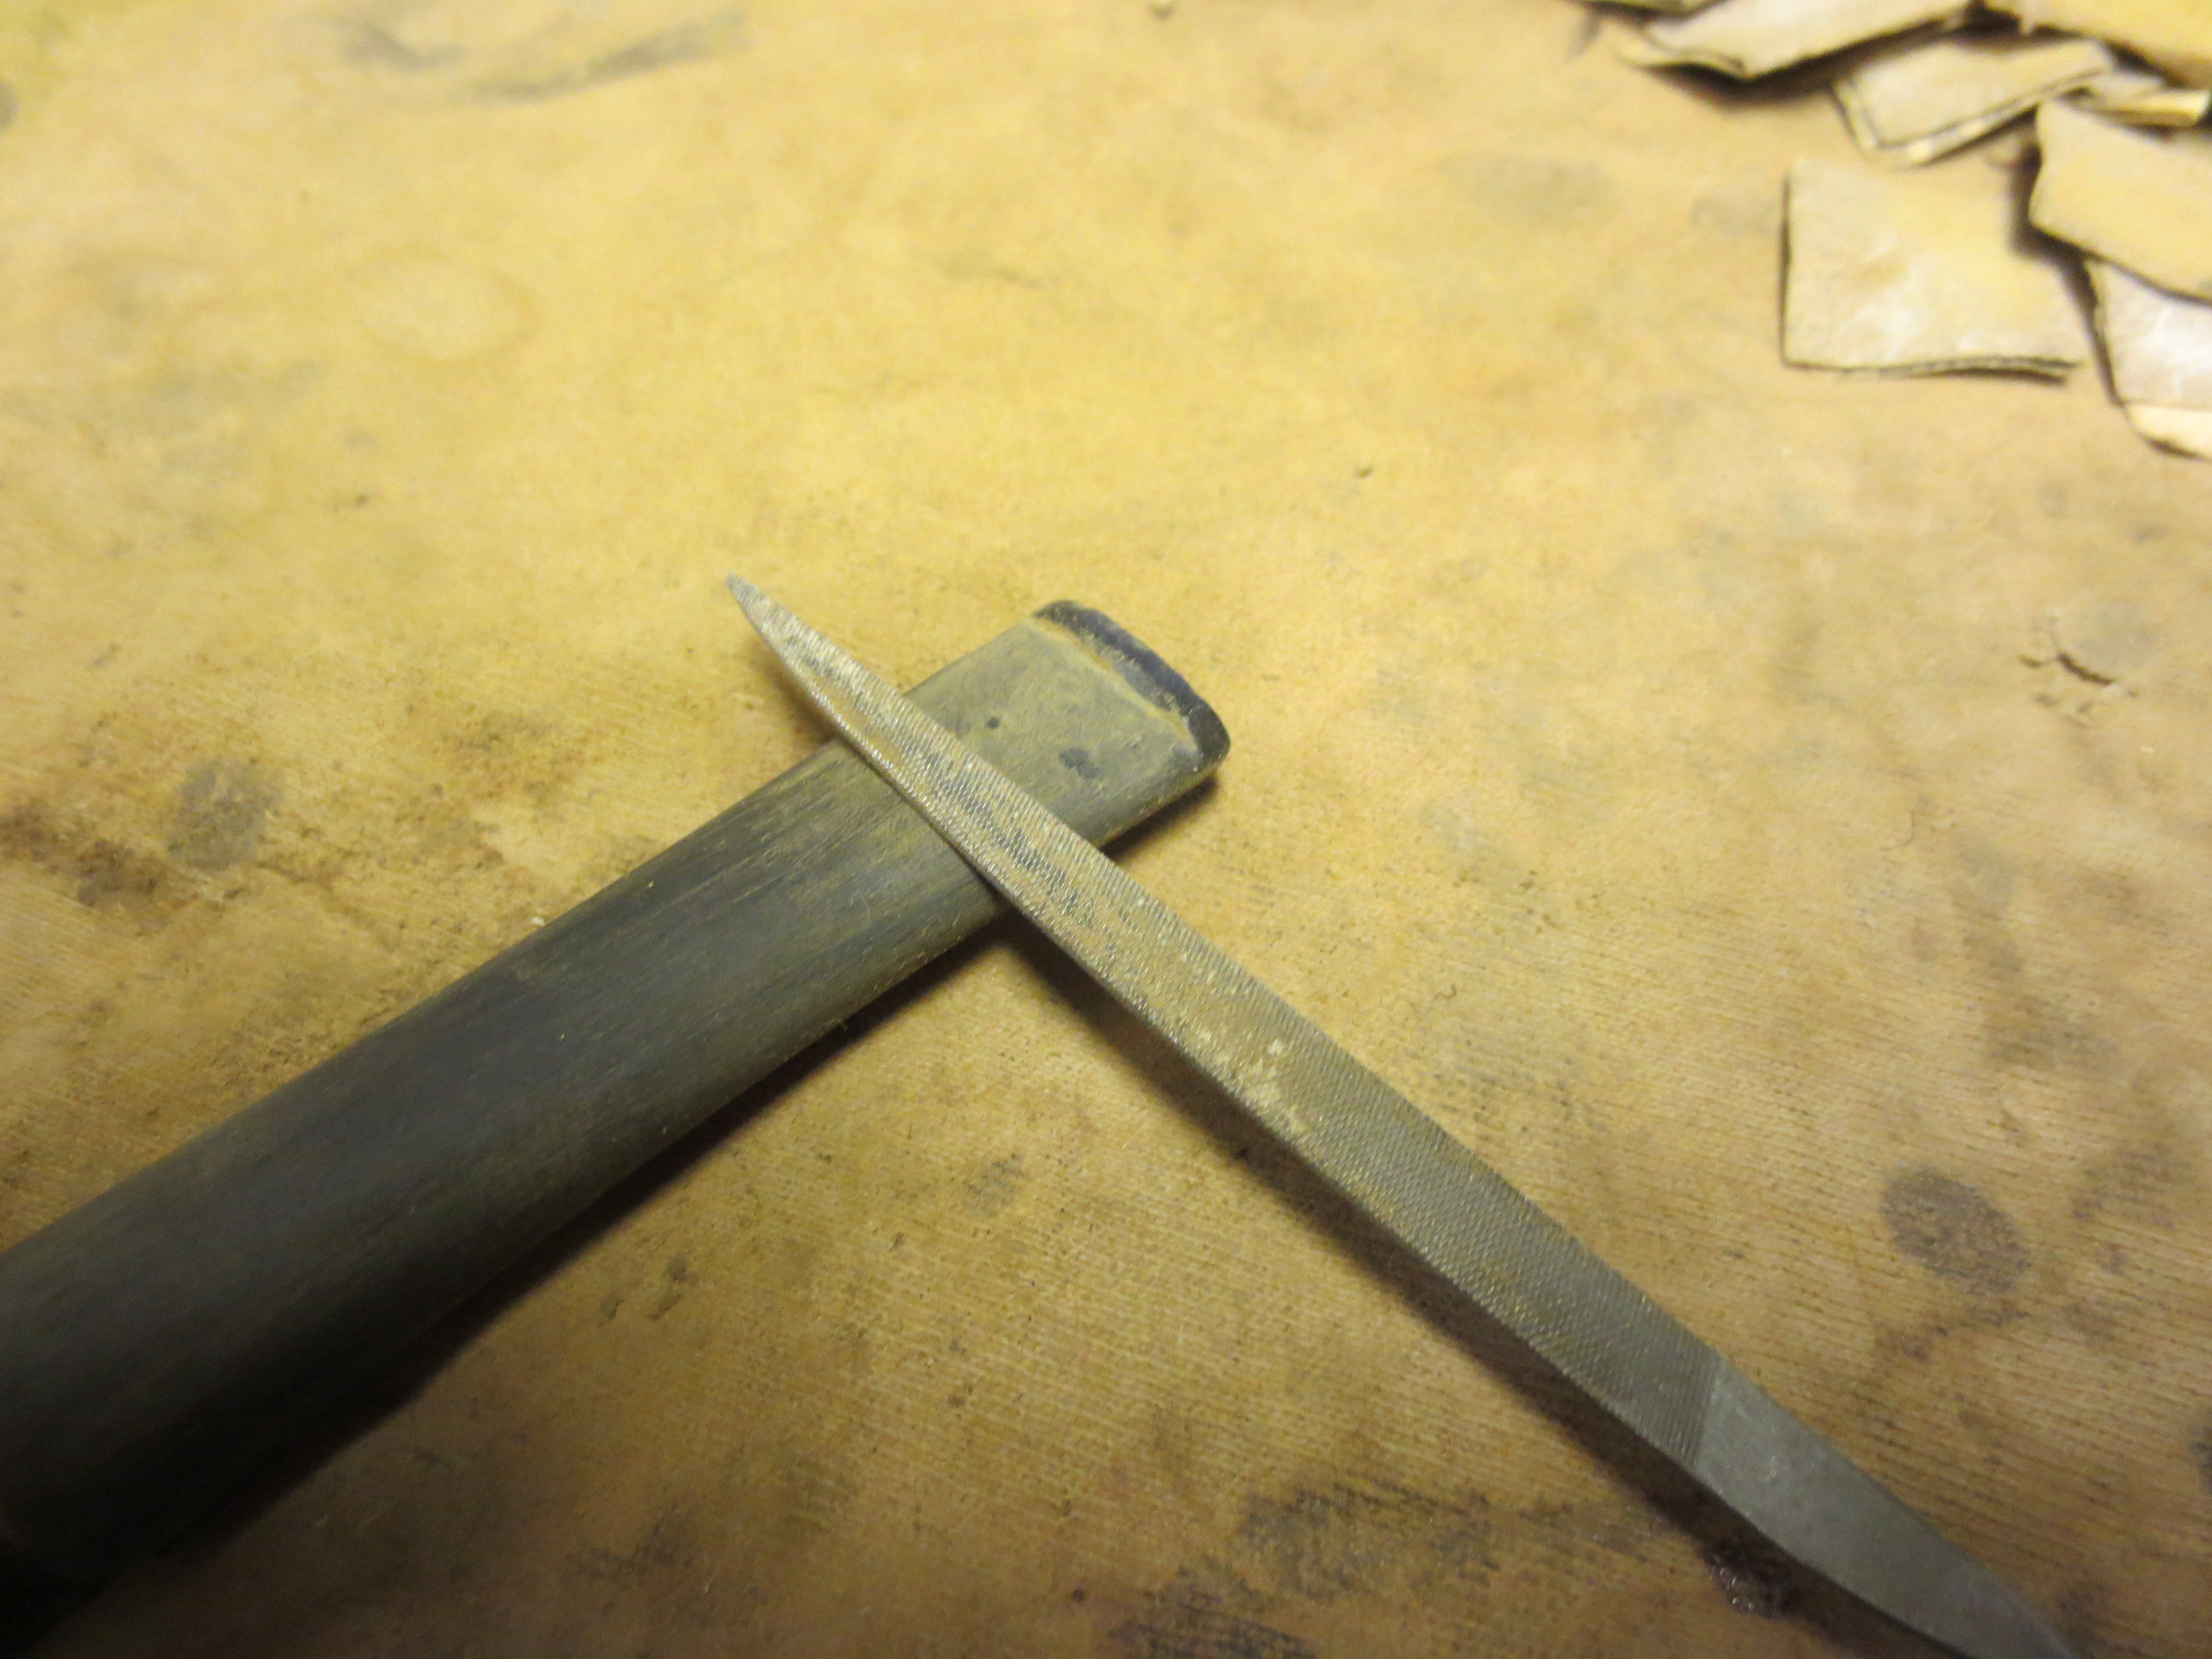
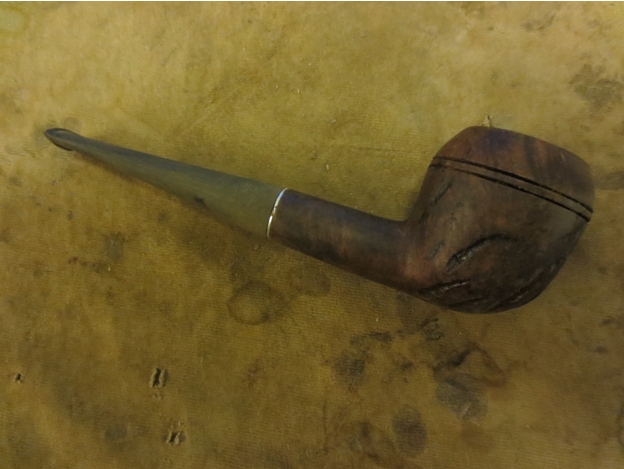
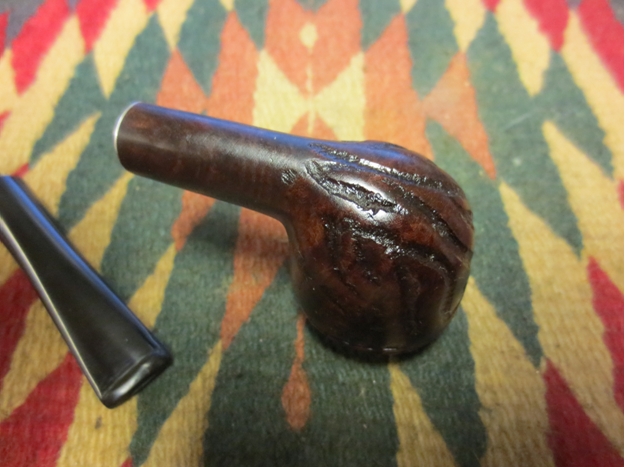
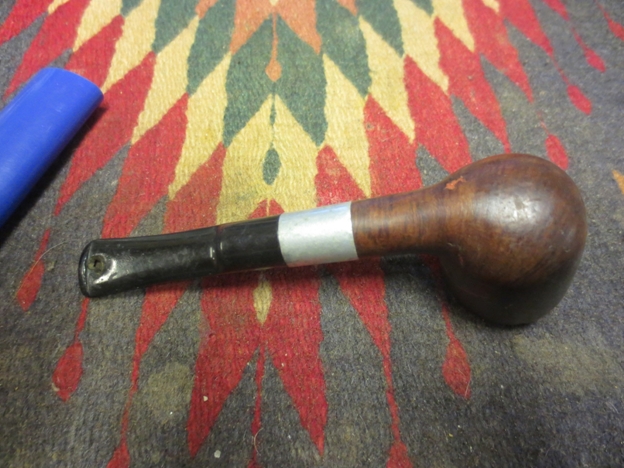
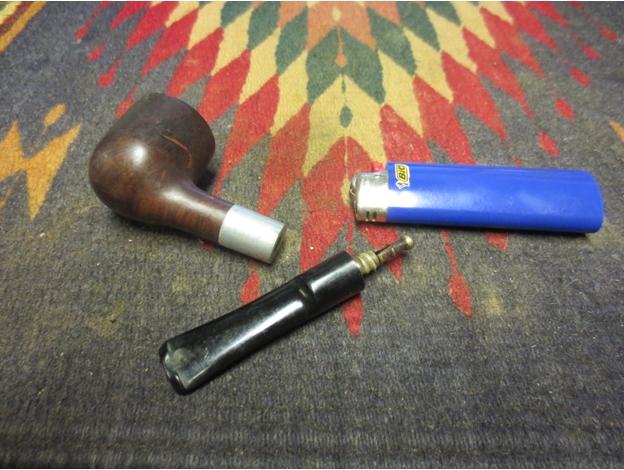
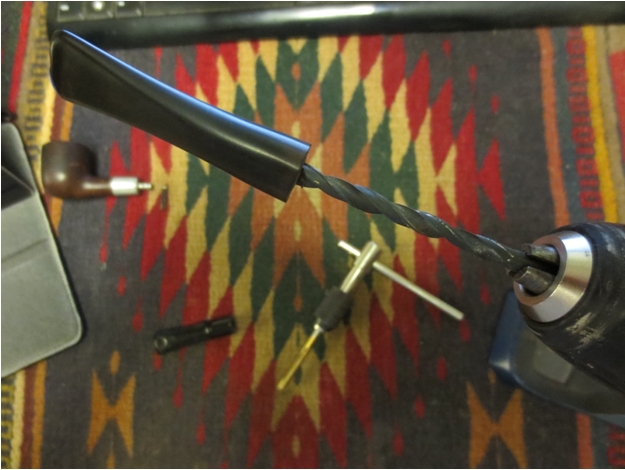
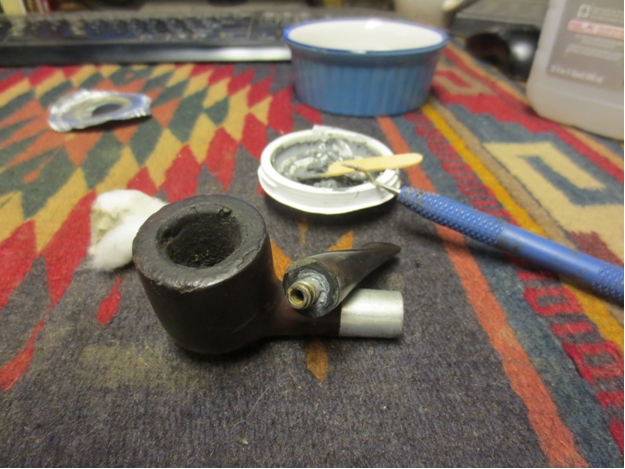
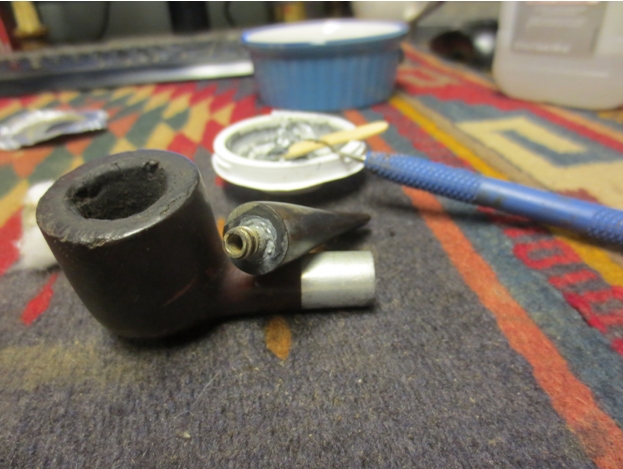
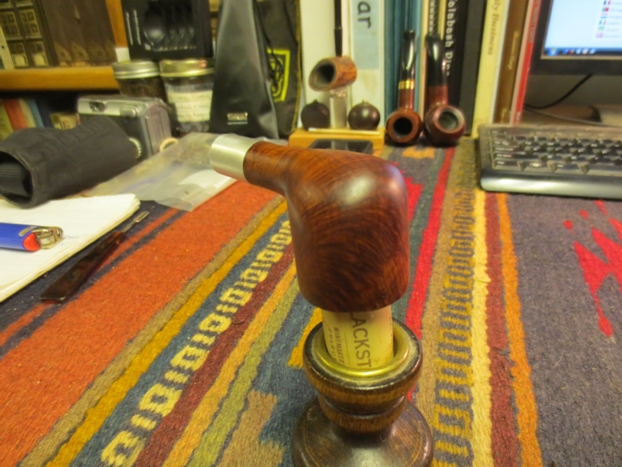
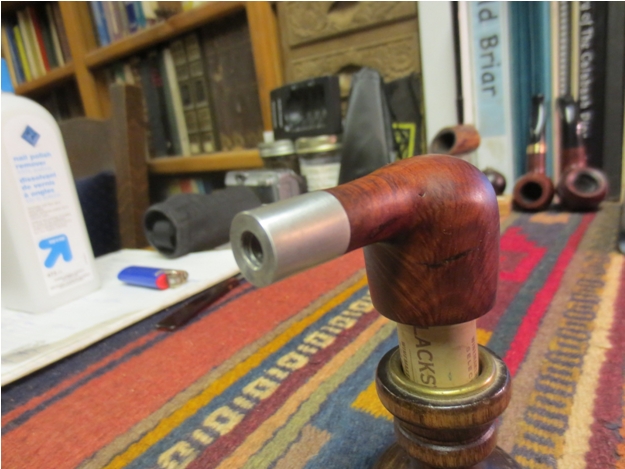
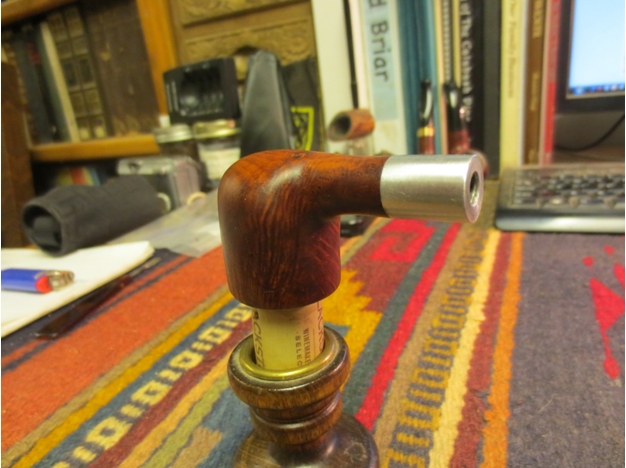
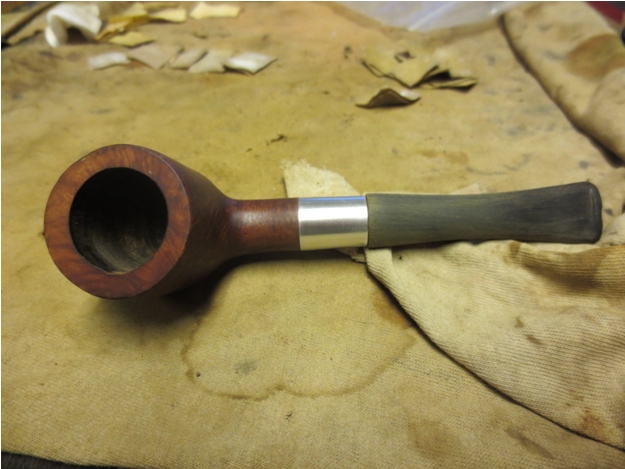
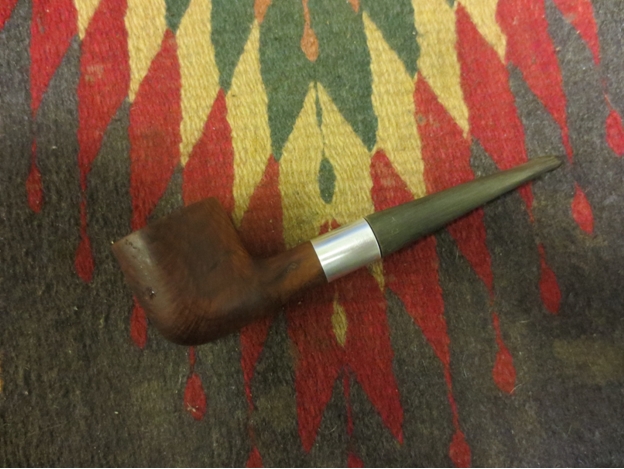
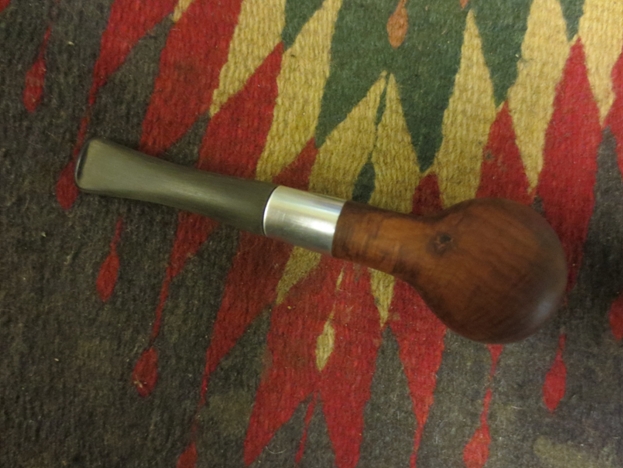
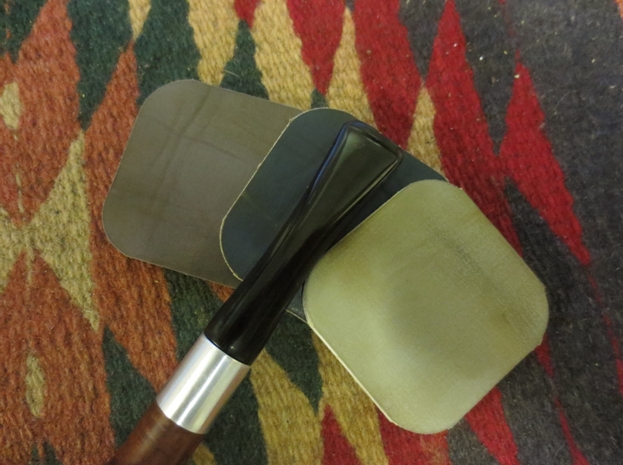
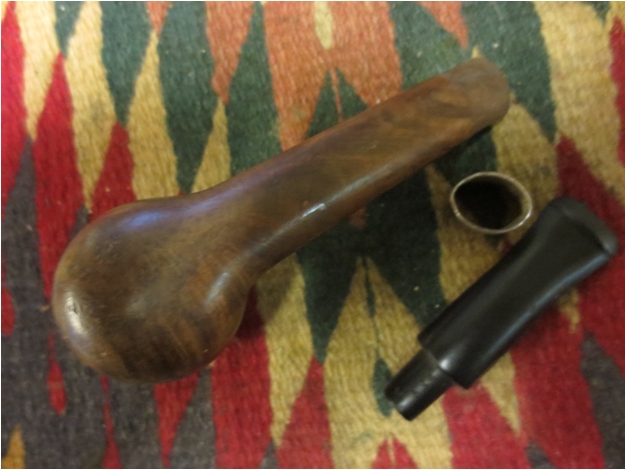
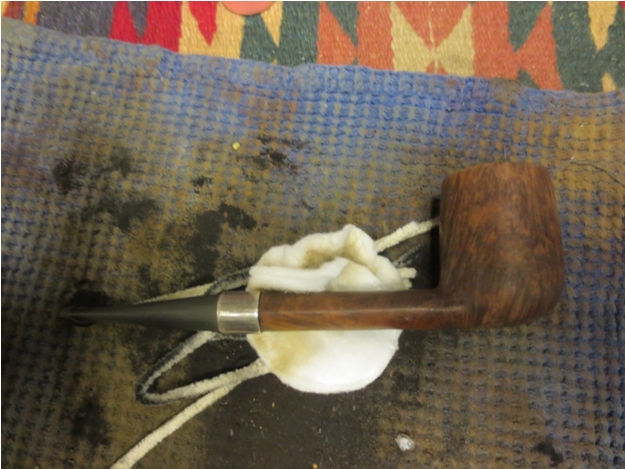
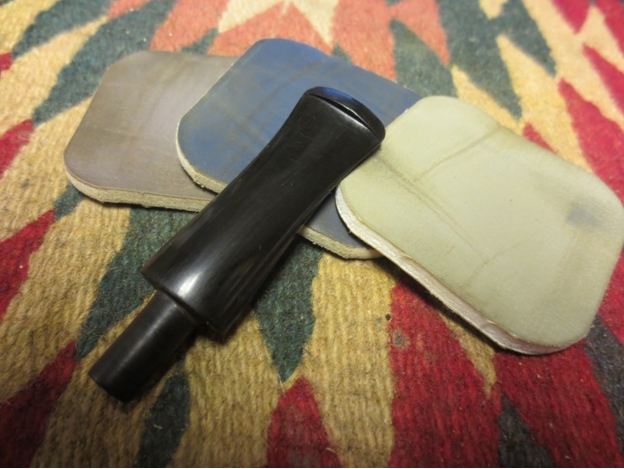
I used the Pimo Pipe Turning tool to reduce the diameter of the tenon and cut a clean edge against the stem. I sanded it by hand to get it to the proper diameter to fit the shank. I still needed to fit the stem to the angles of the shank and make the lines straight and clean from shank to button. I fit it on the pipe and took some photos to get an idea of what I needed to sand.Sav9 Sav10 
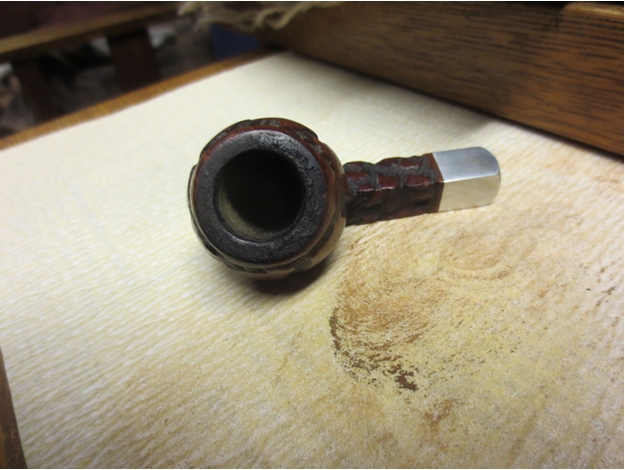
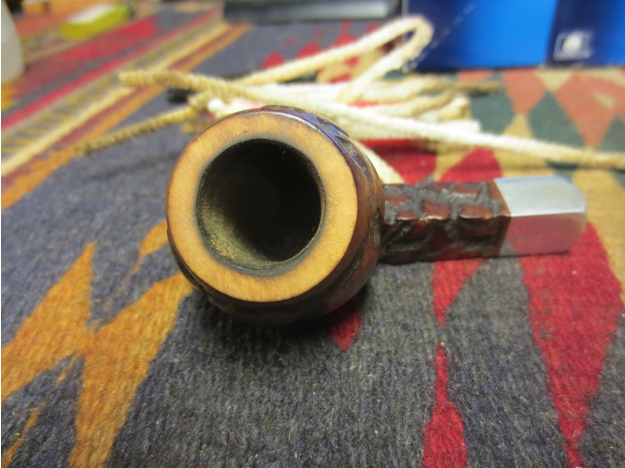
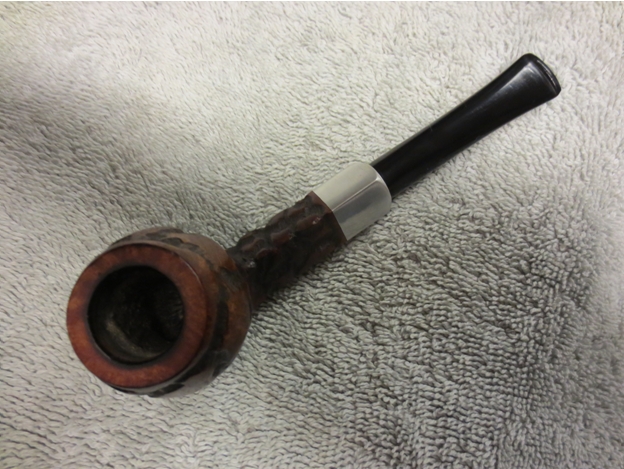
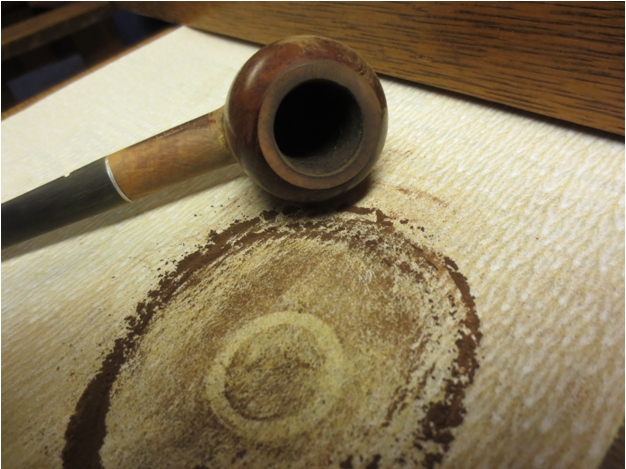
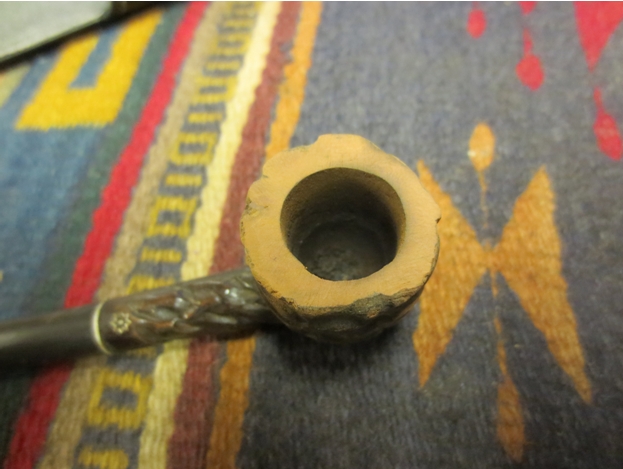
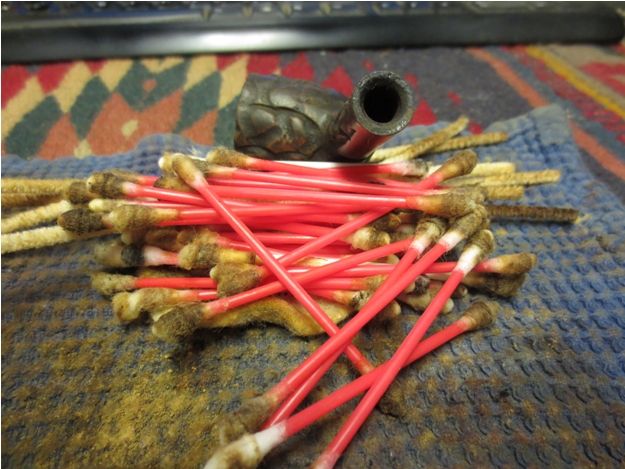
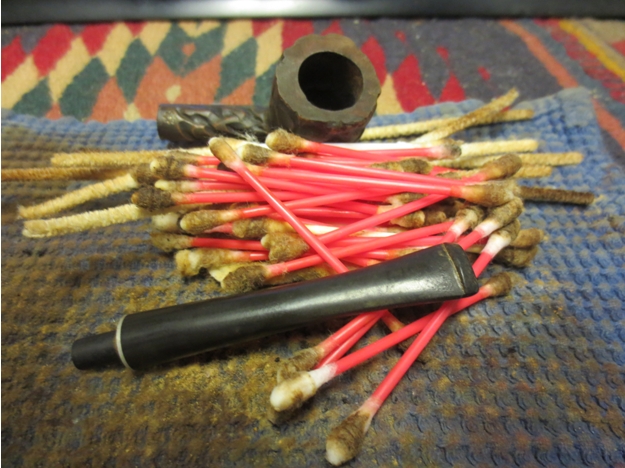
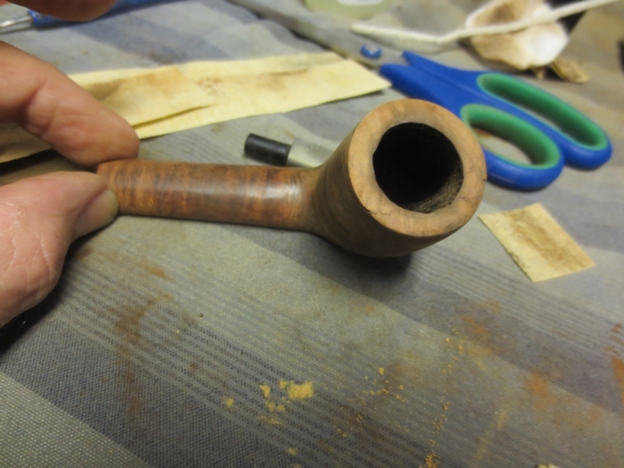
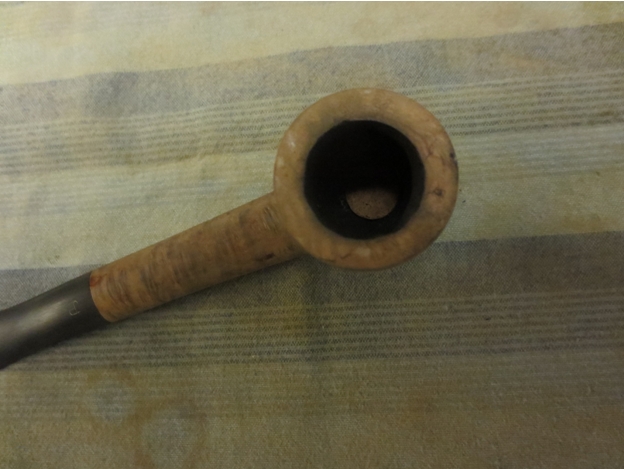
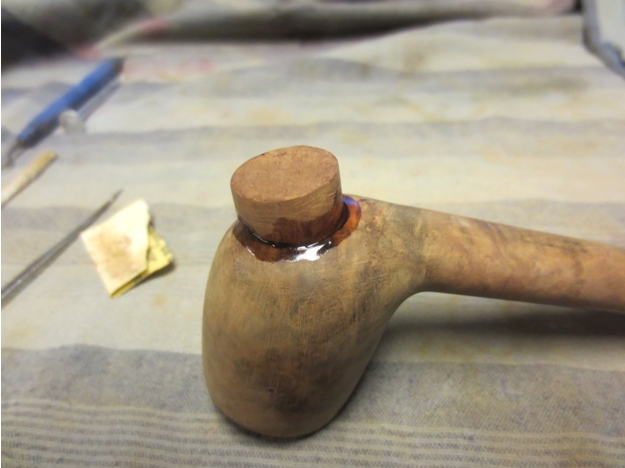
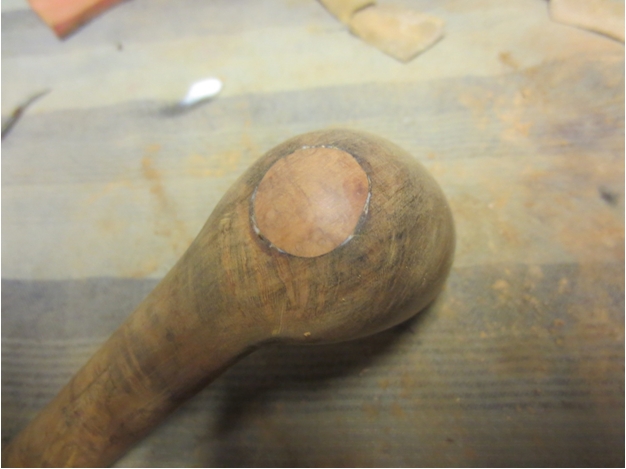
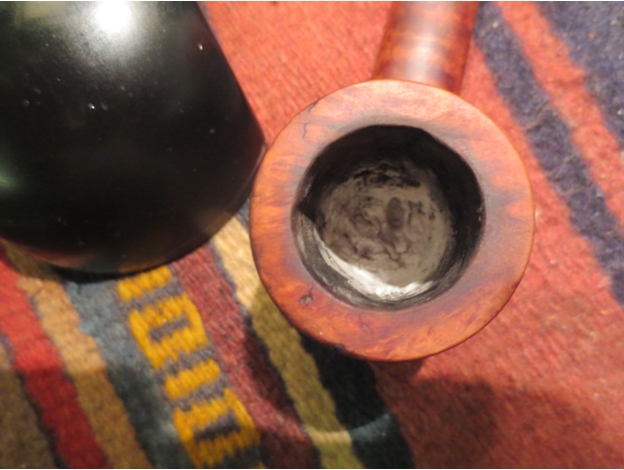
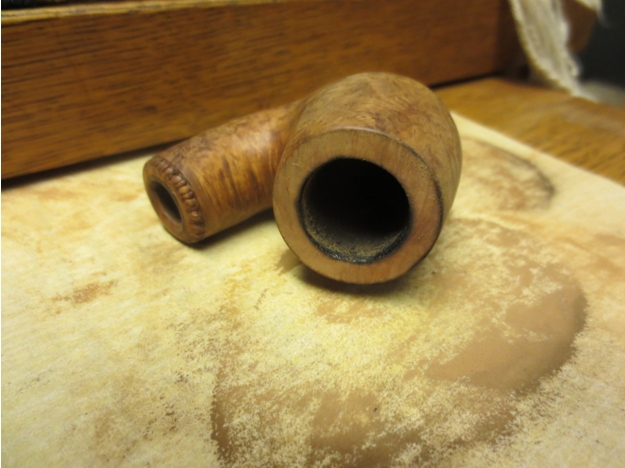
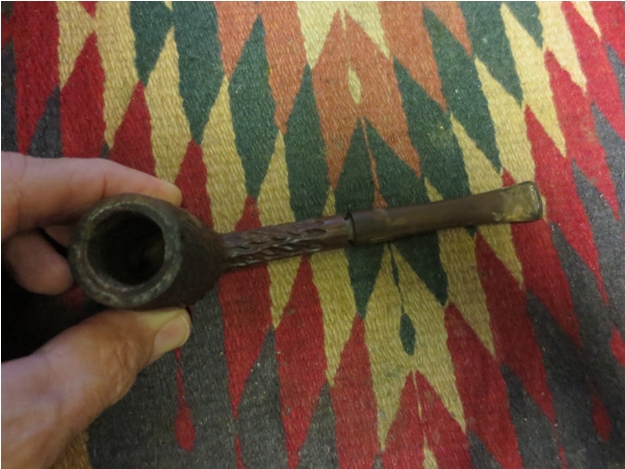
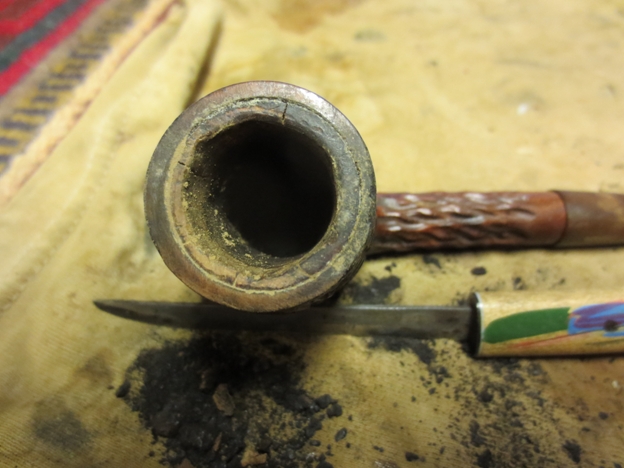
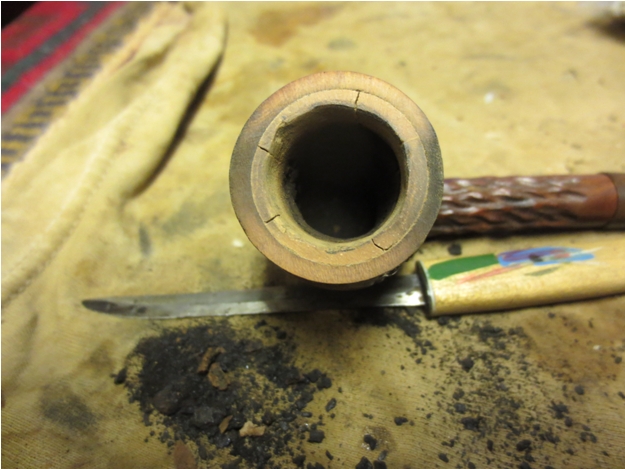
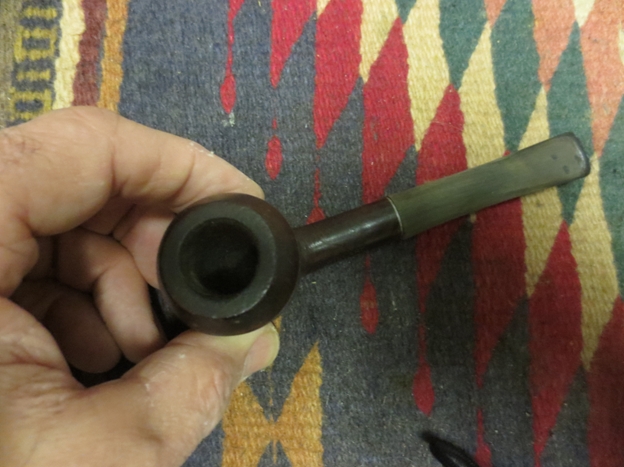
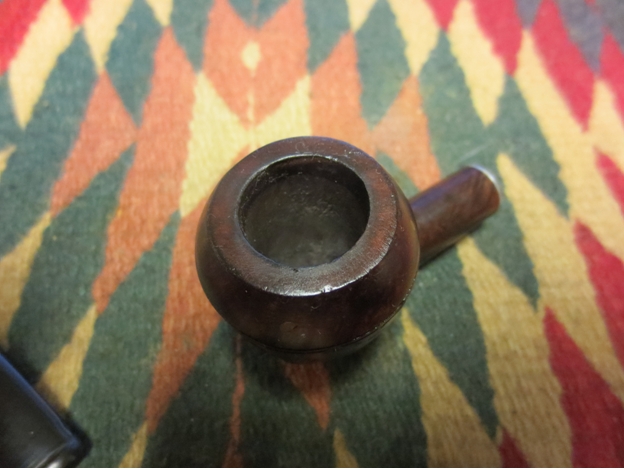
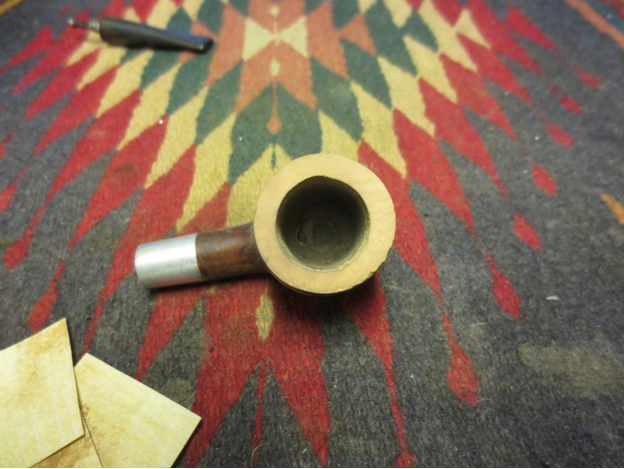
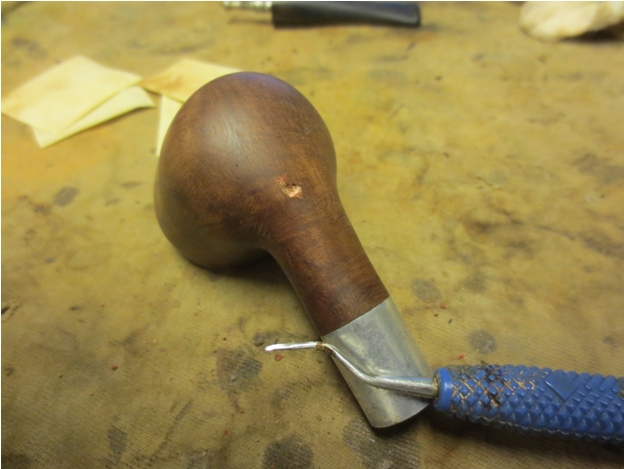
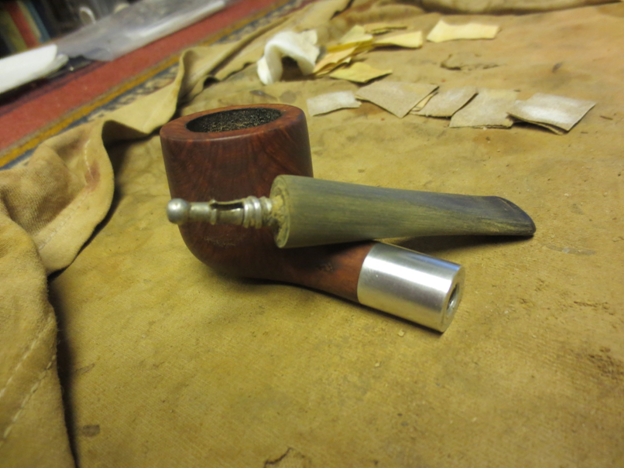
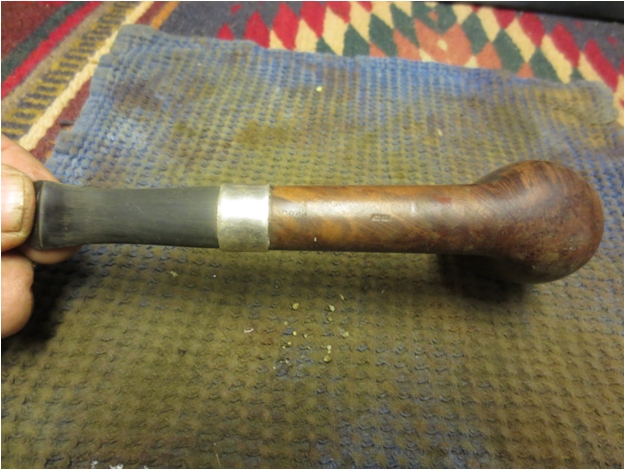
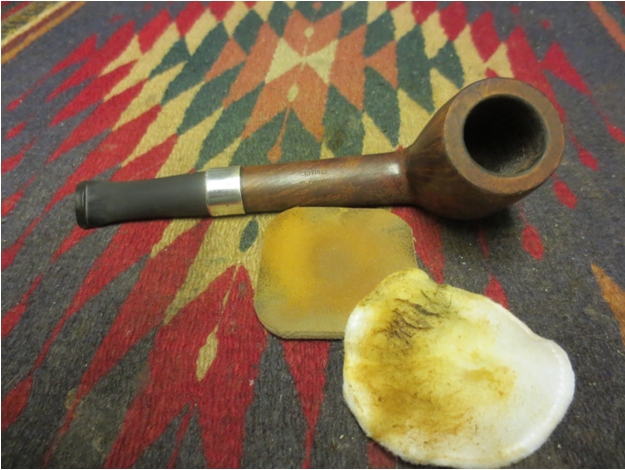
I took the cotton balls out of the bowl and then reamed the bowl. The alcohol softened the hard cake and it came out more easily. I finished scraping the bowl with a sharp knife to take out the remnant of cake. I sanded the stem with 220 grit sandpaper to reduce the stem to fit the shank. I glued the band in place on the shank with an all-purpose wood glue.Sav11 Sav12 Sav13 Sav14 Sav15 
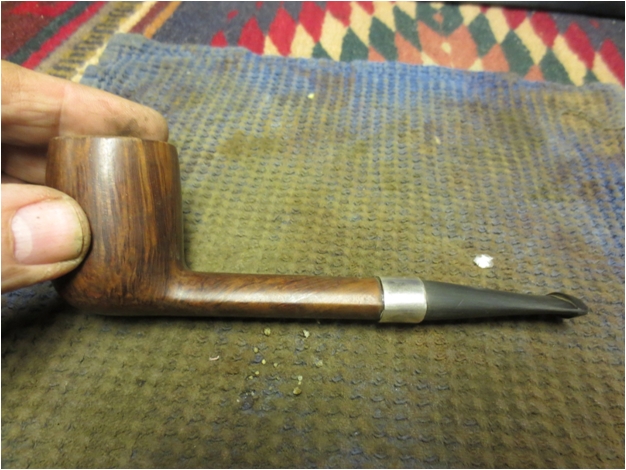
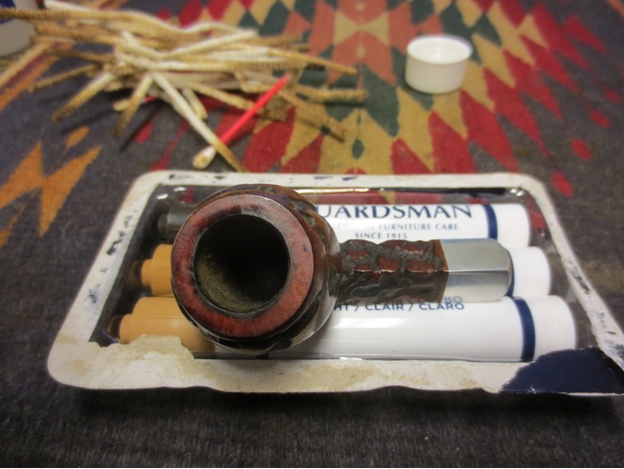
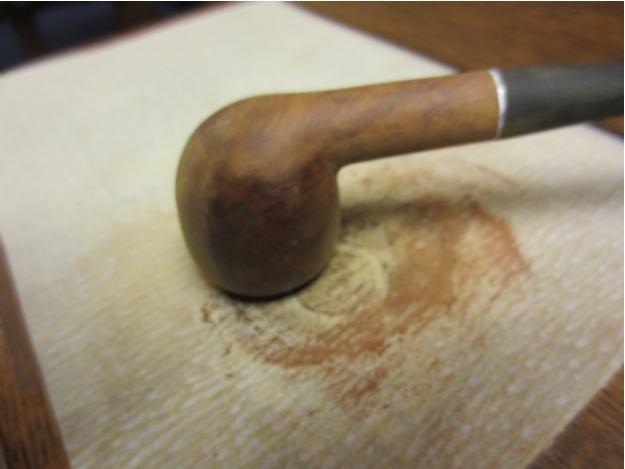
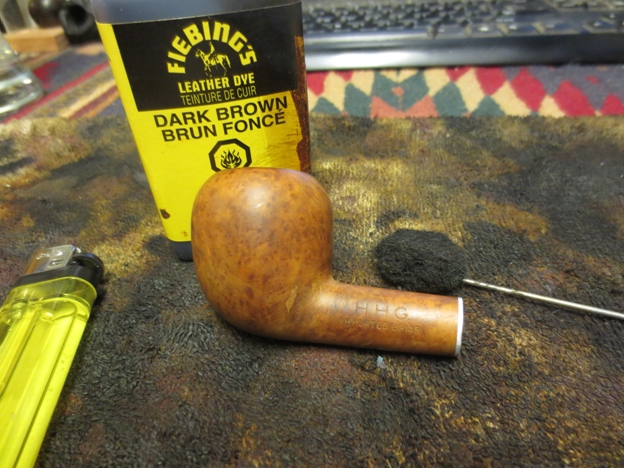
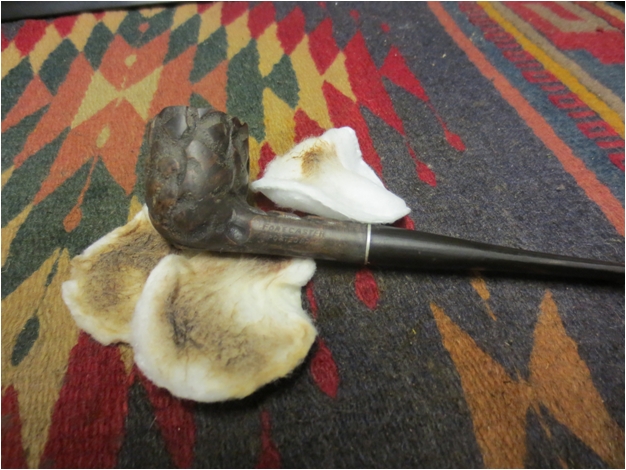
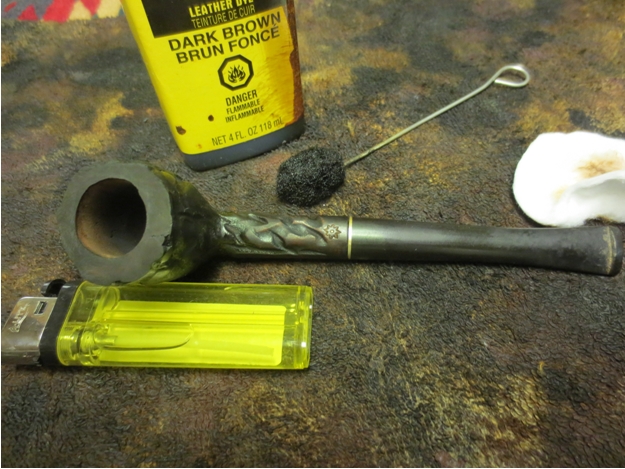
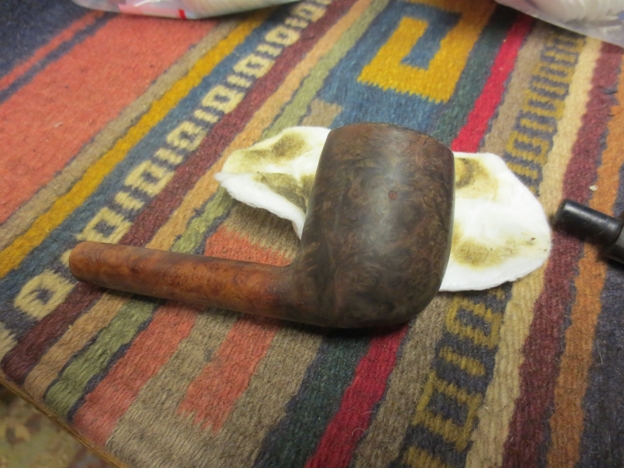
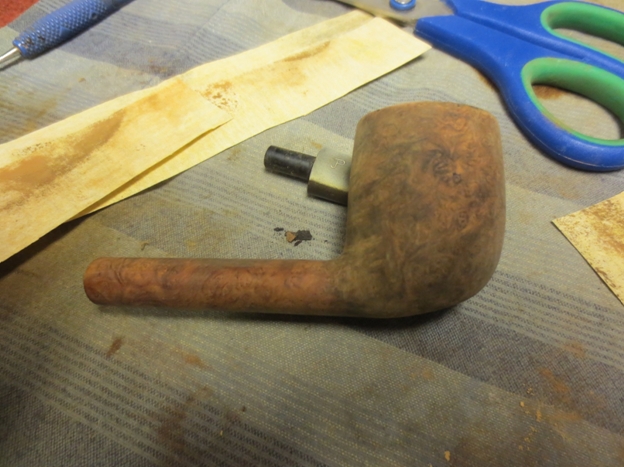
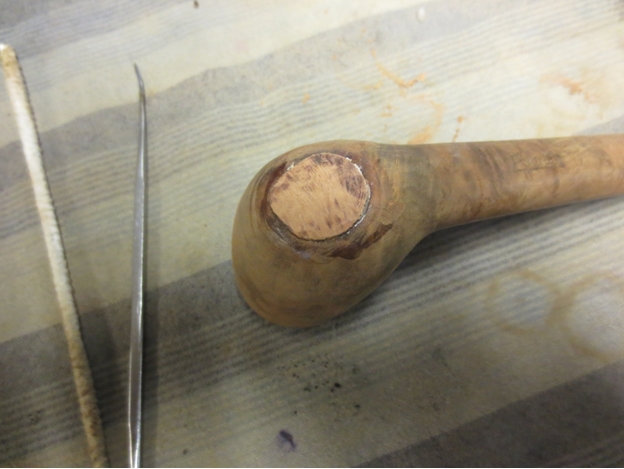
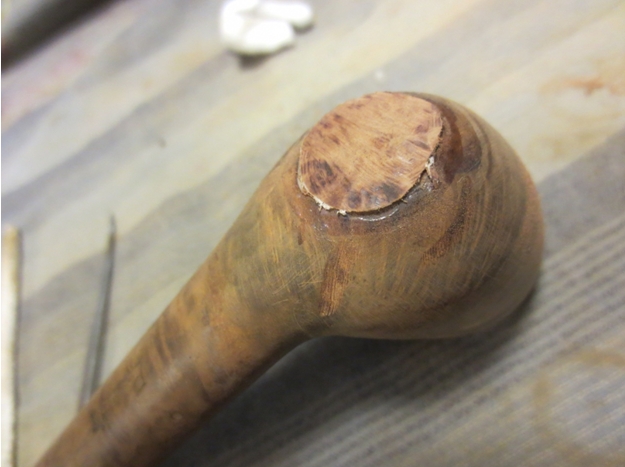
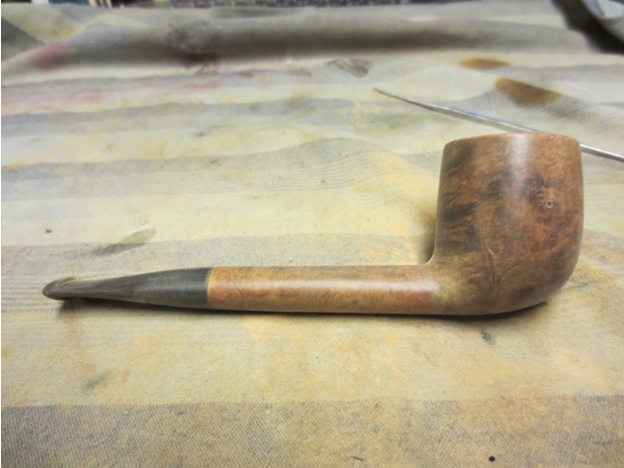
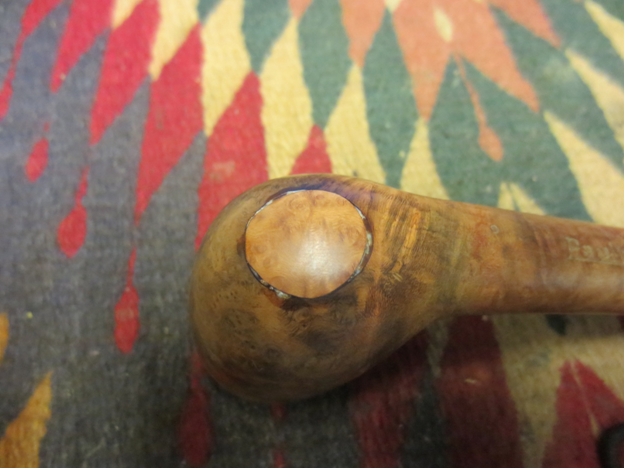
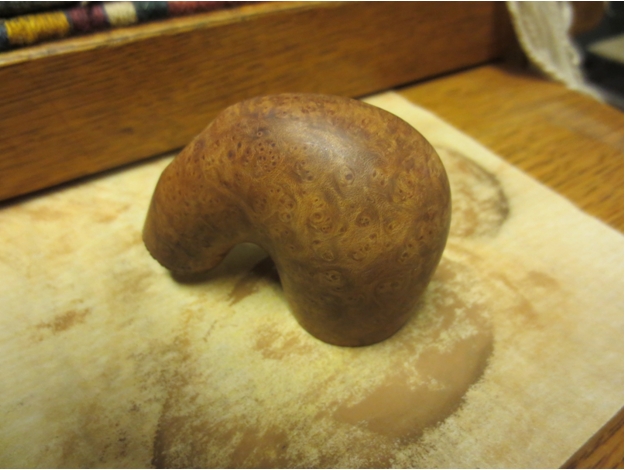
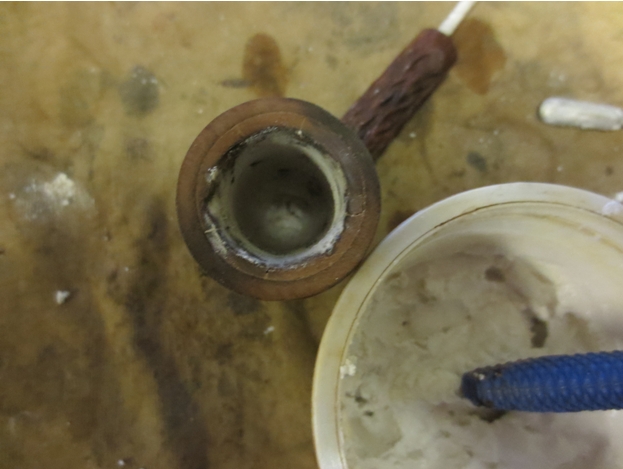
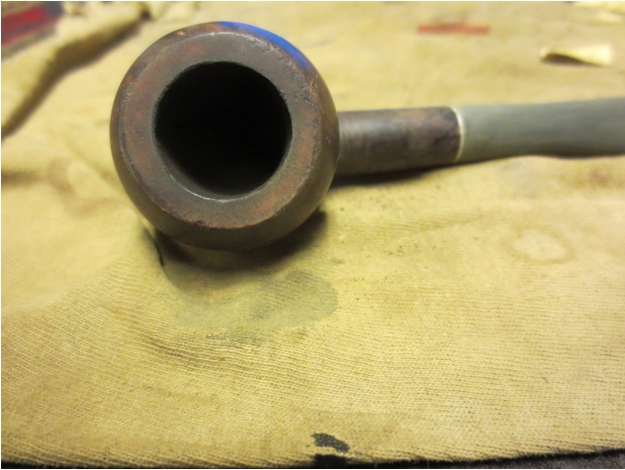
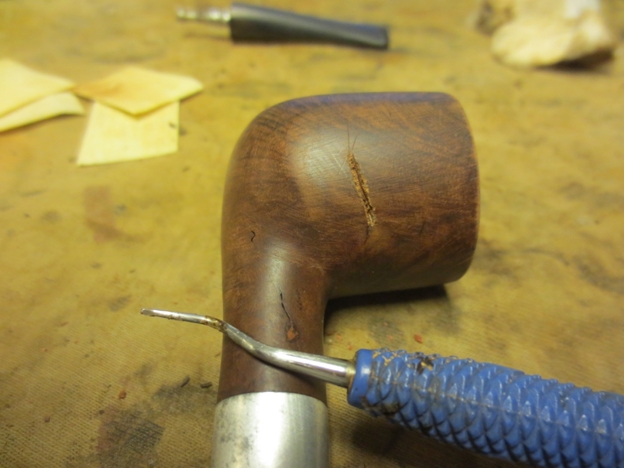
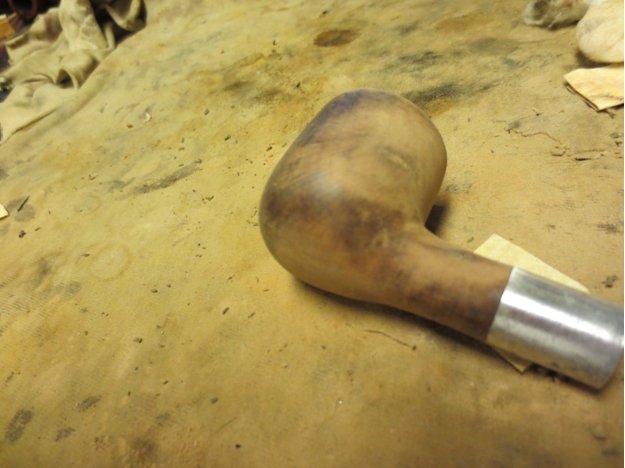
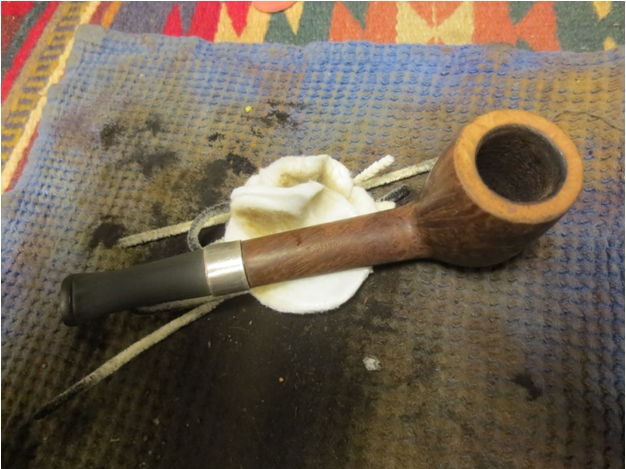
I wiped down the bowl with acetone on cotton pads to remove the remaining finish from the briar. I would eventually stain the briar – not sure at this point what colour I would use but I wanted to have a clean surface for the stain. I also lightly topped the bowl with a topping board and 220 grit sandpaper to remove the damaged top and edges of the rim.Sav16 Sav17 Sav18 
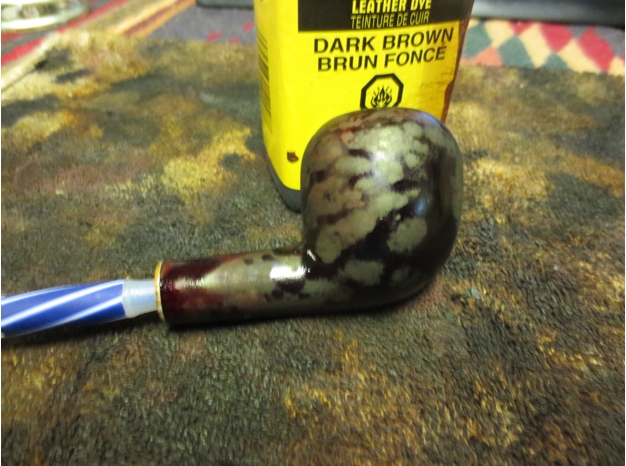
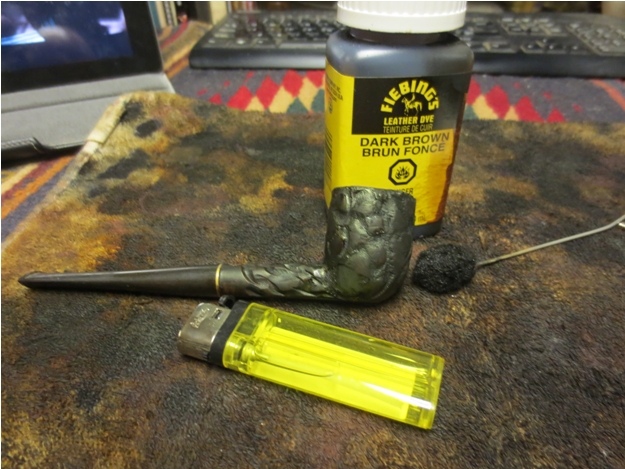
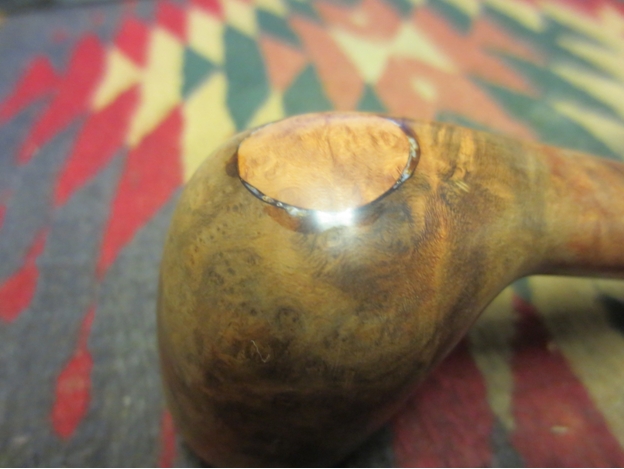
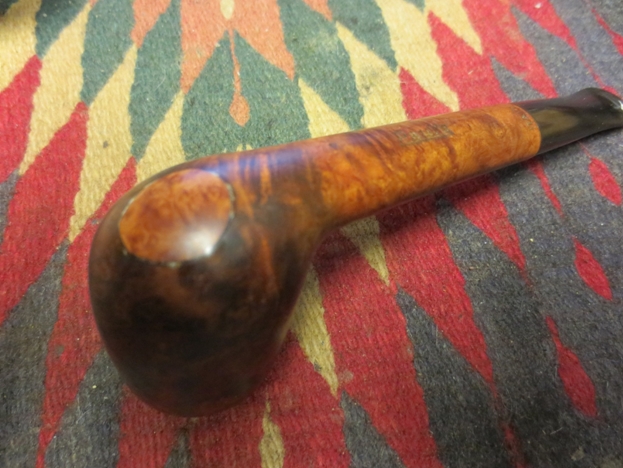
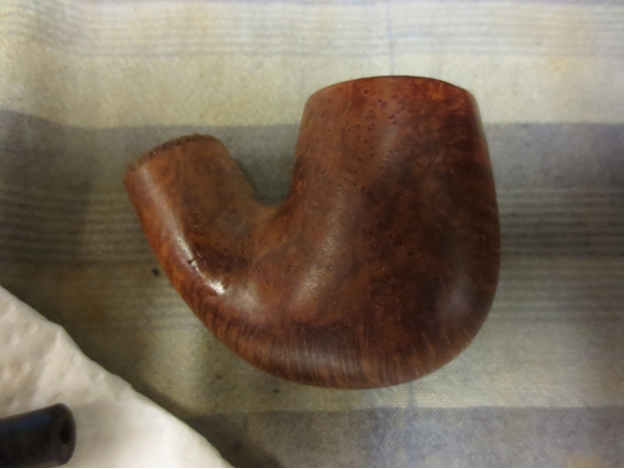
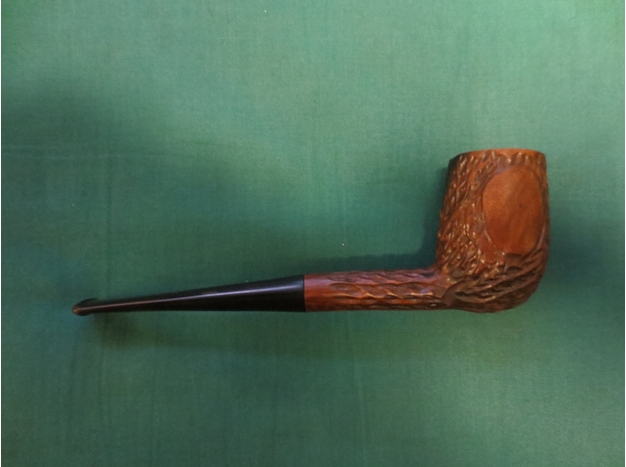
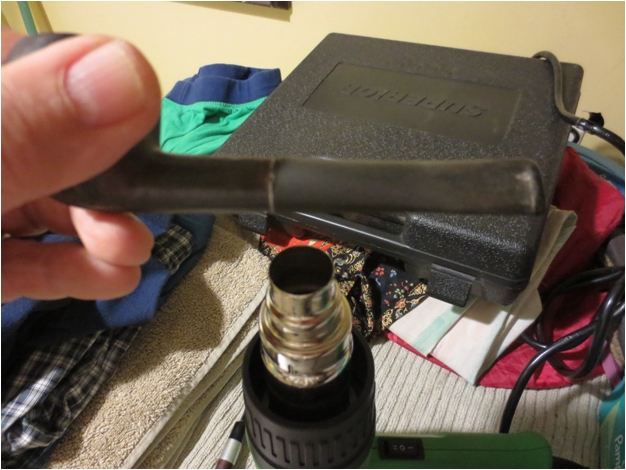
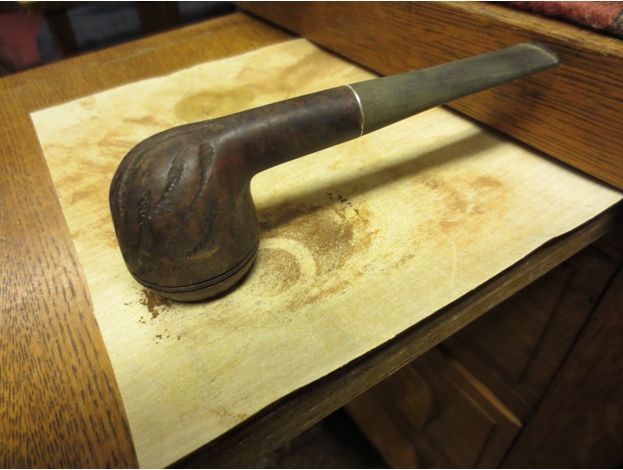
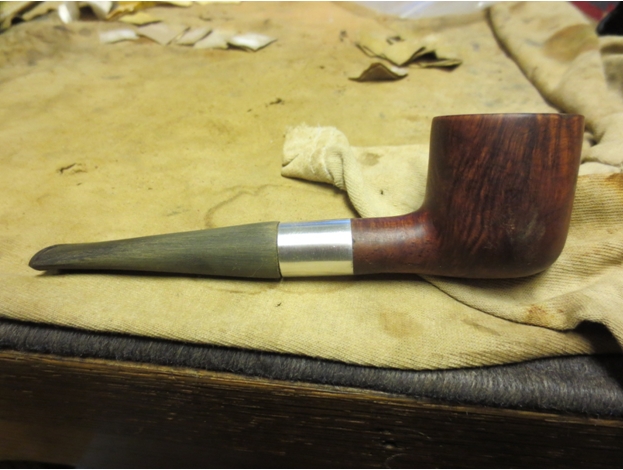
I heated the briar with a heat gun to open the pores in the briar to receive the stain and then used a dark brown aniline stain. I applied it and flamed and repeated the process until I had an even coverage over the surface of the bowl. In the past I have thinned the stain to lighten it but have lately just applied it and then wiped it down with alcohol and cotton pads to lighten it after staining.Sav19 Sav20 Sav21 
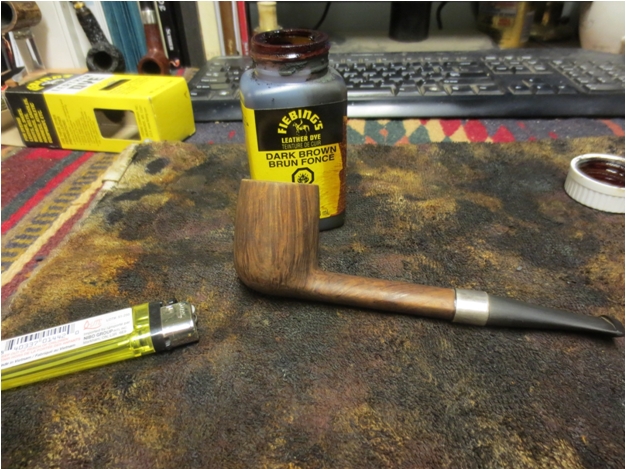
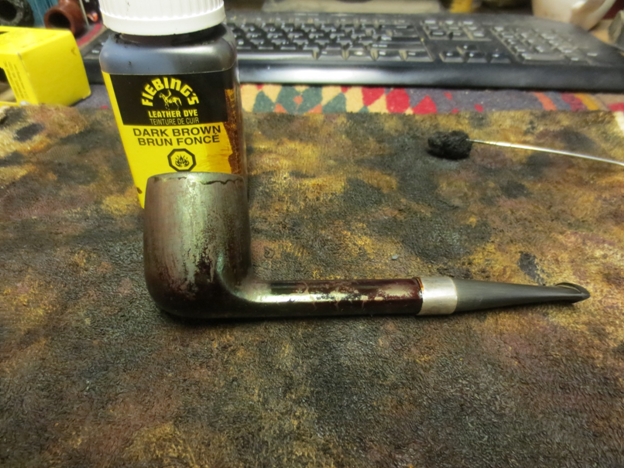
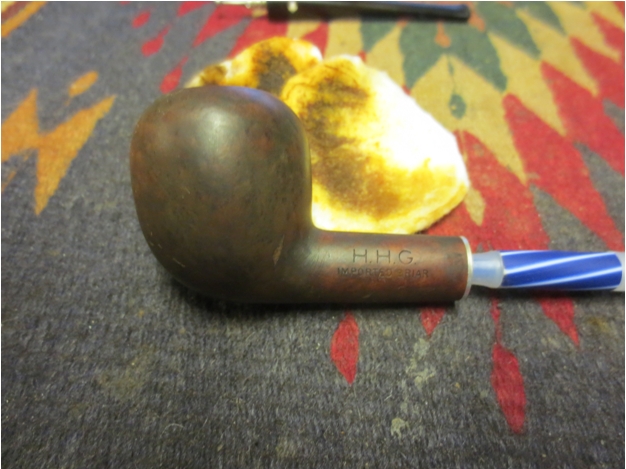
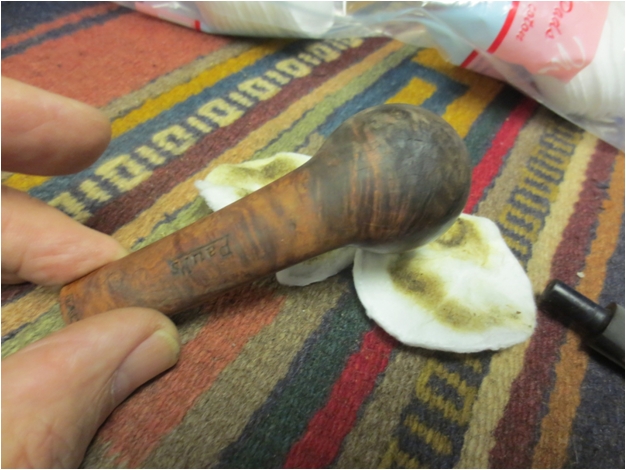
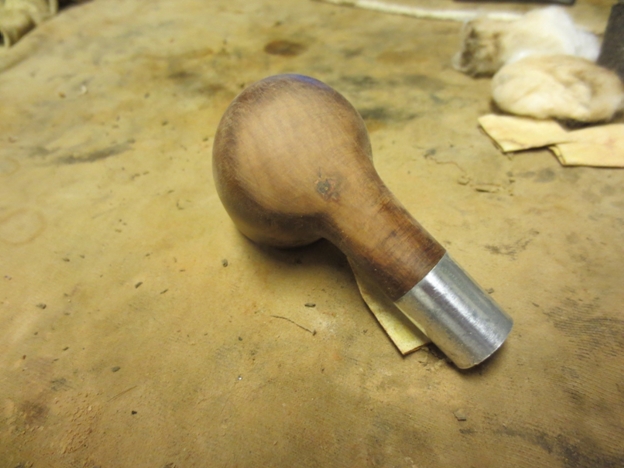
I sanded the bowl and shank with a 1500 grit micromesh sanding pad to further lighten the finish and then wiped it down a further time with the alcohol wet pads.Sav22 Sav23 Sav24 Sav25 
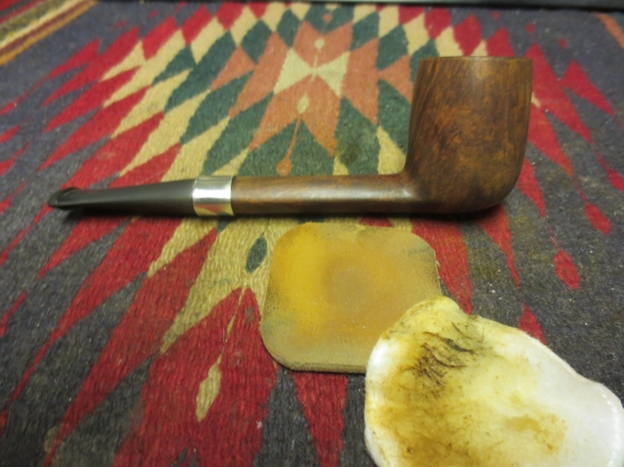
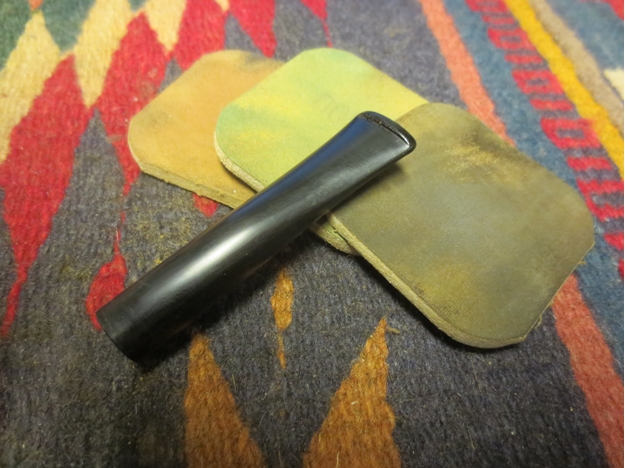
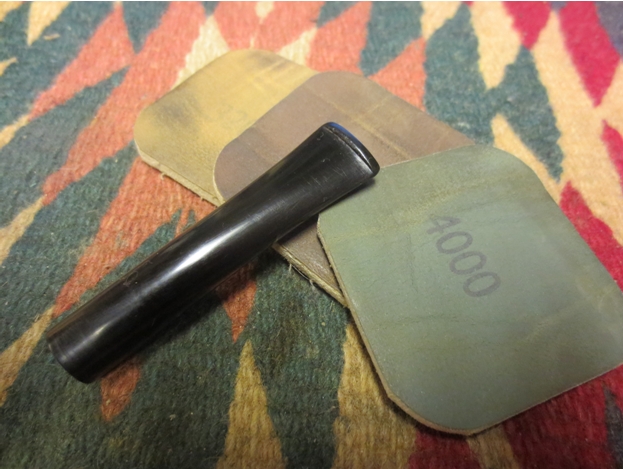
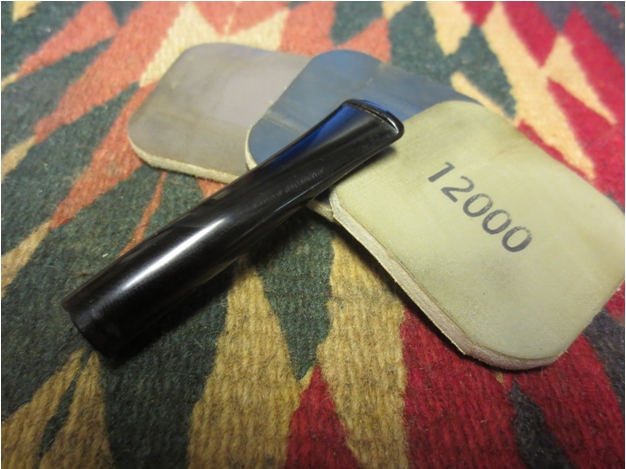
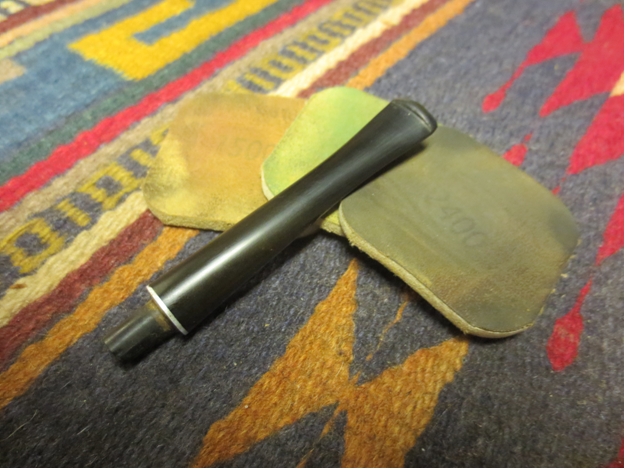
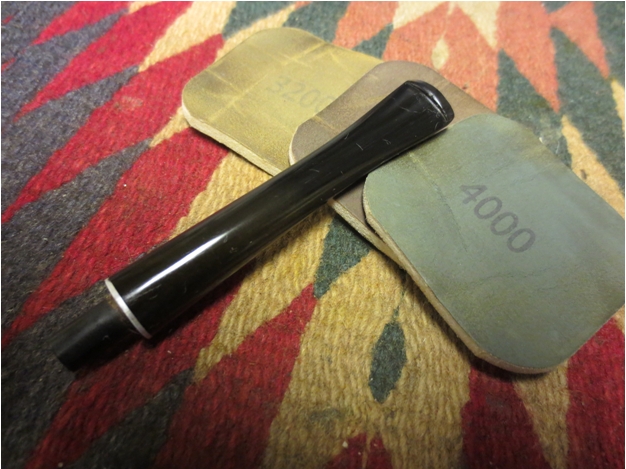
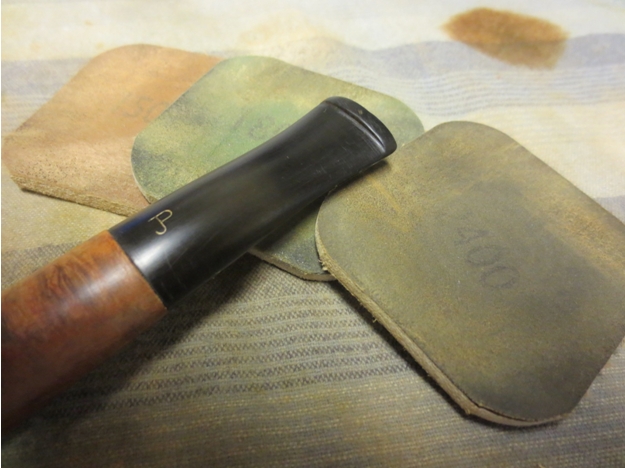
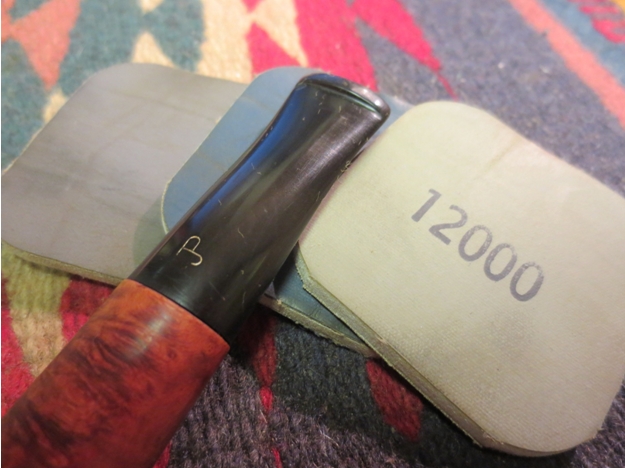
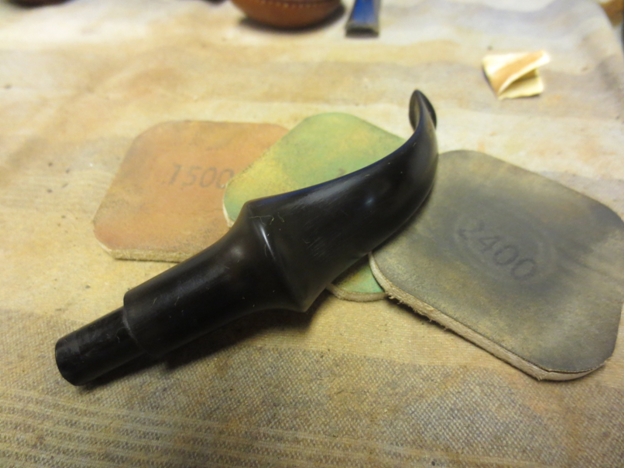
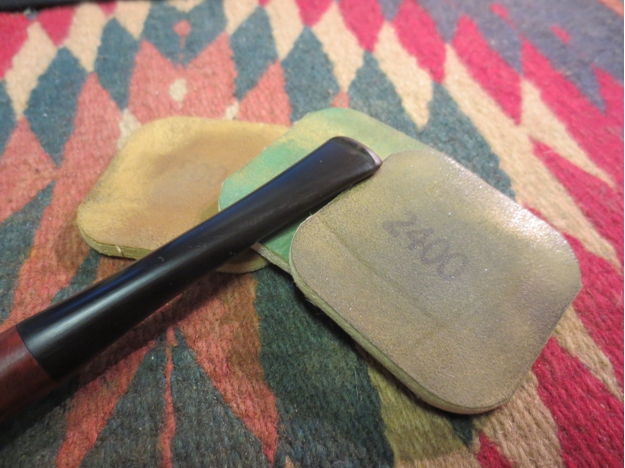
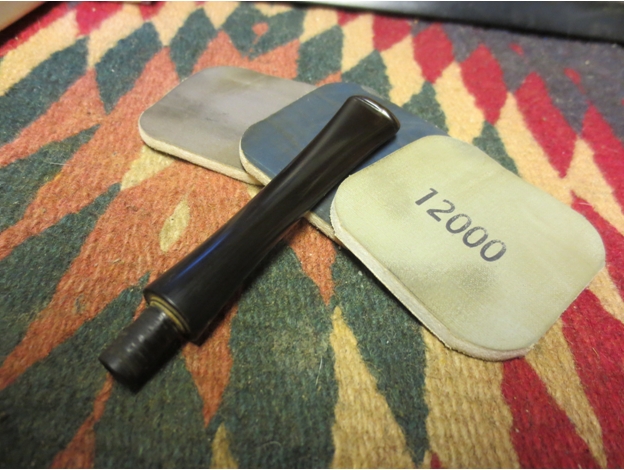
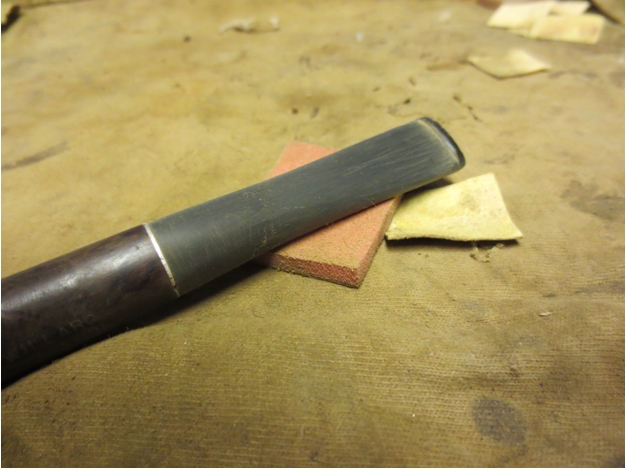
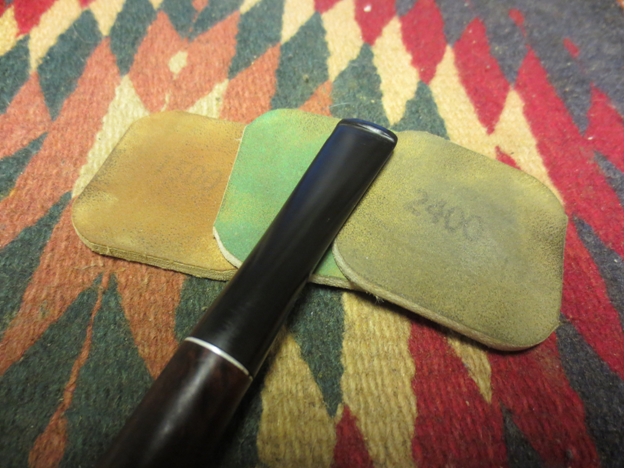
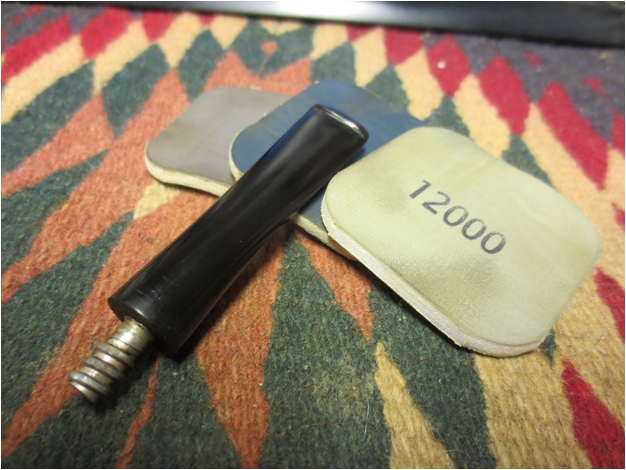
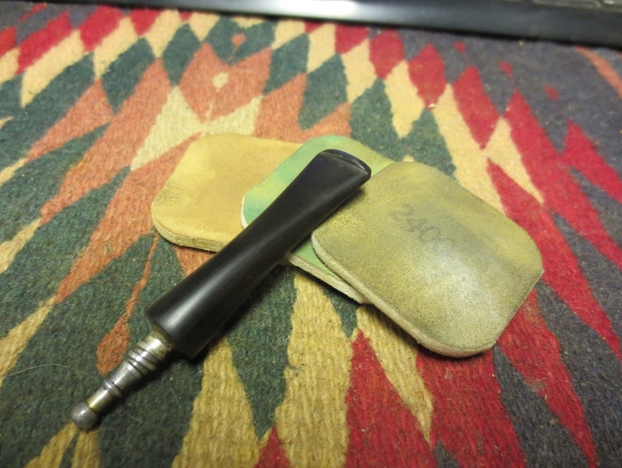
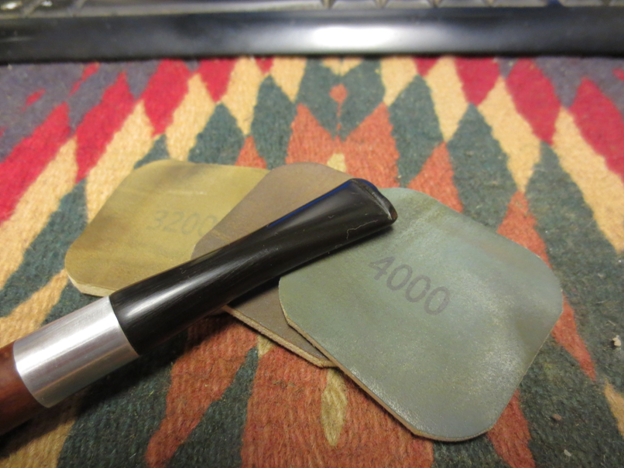
I sanded the stem with 220 grit sandpaper and medium and fine grit sanding sponges. I wet sanded with 1500-2400 grit micromesh sanding pads and dry sanding with 3200-12,000 grit pads. I rubbed the stem down with Obsidian Oil after each set of three pads. Once I had finished sanding I buffed the stem with White Diamond. I polished the band with silver polish and gave it a light buff with White Diamond as well.Sav26 Sav27 Sav28 
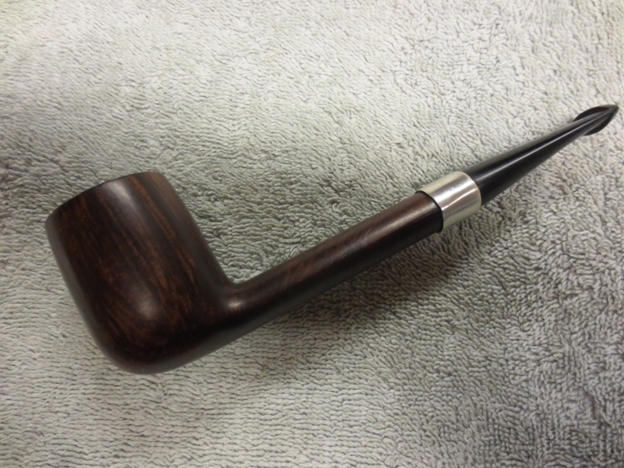
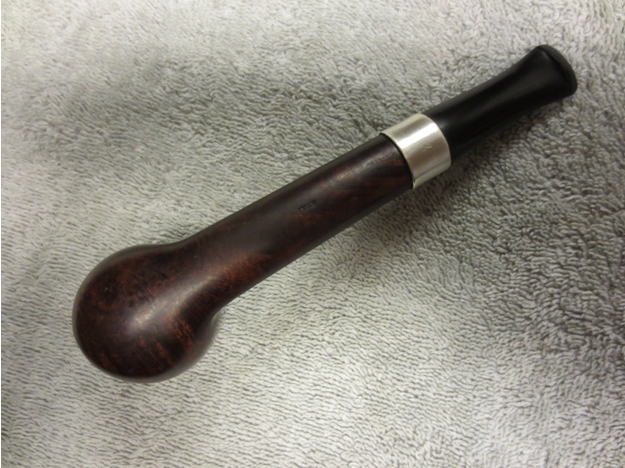
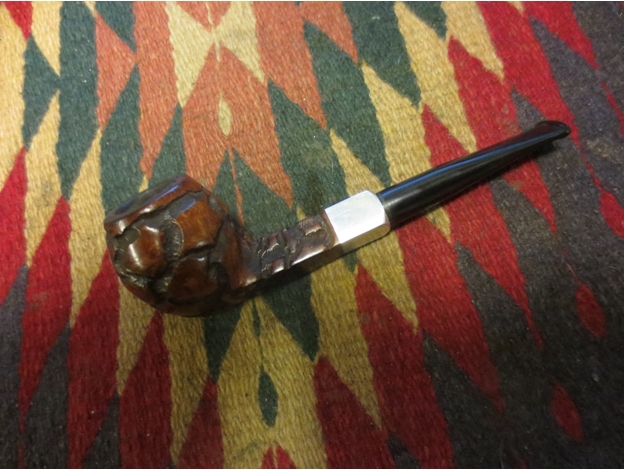
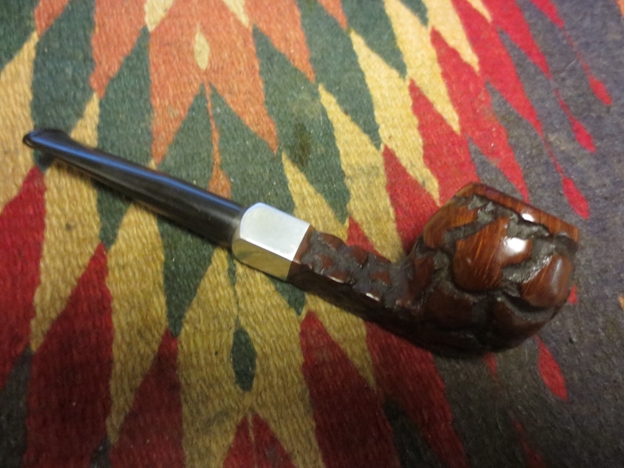
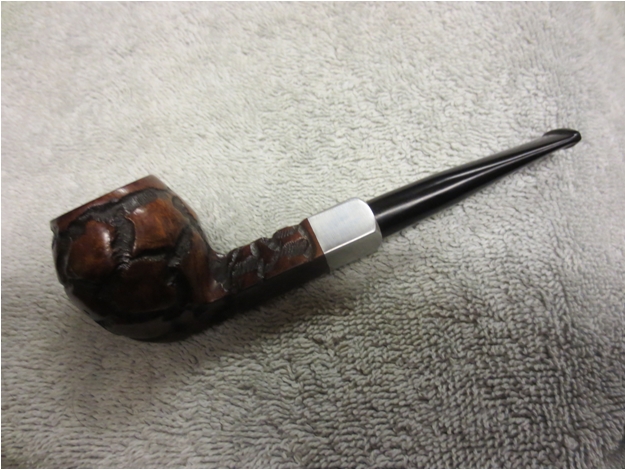
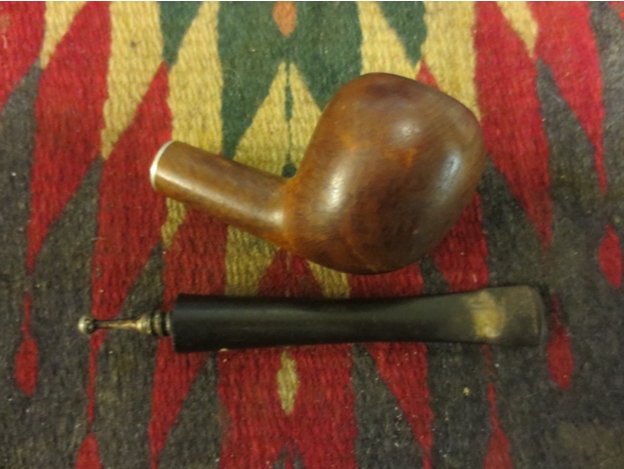
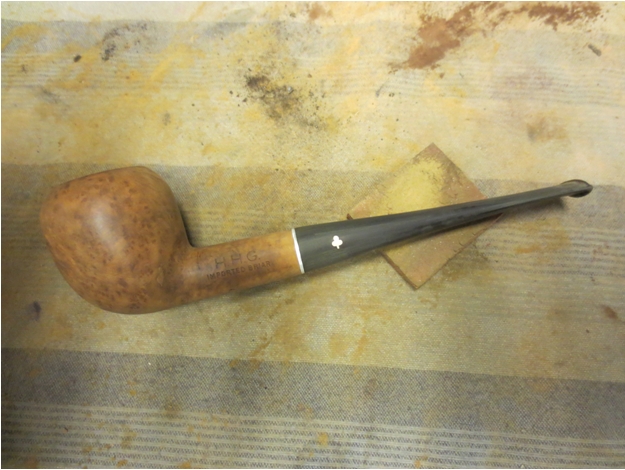
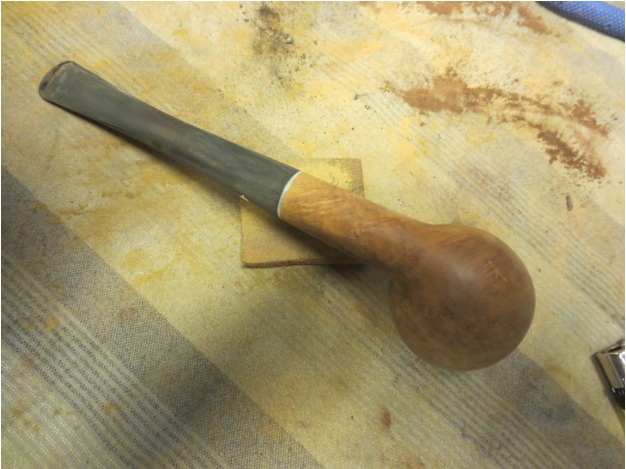
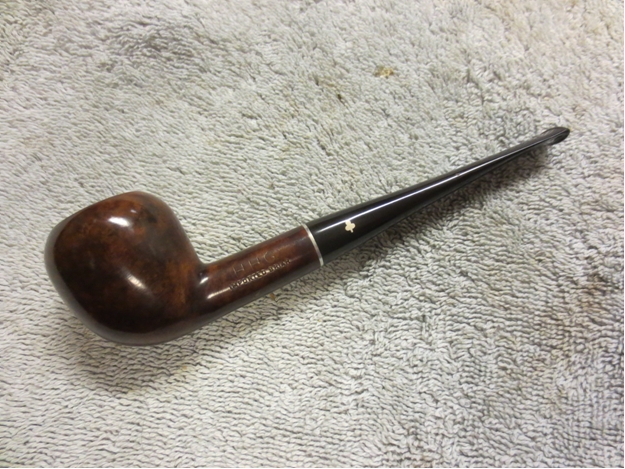
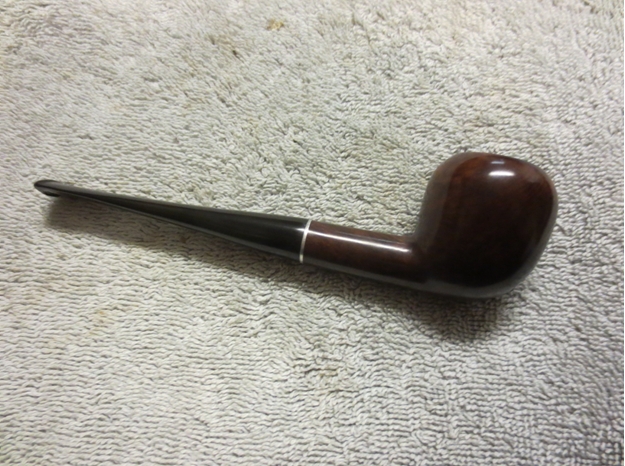
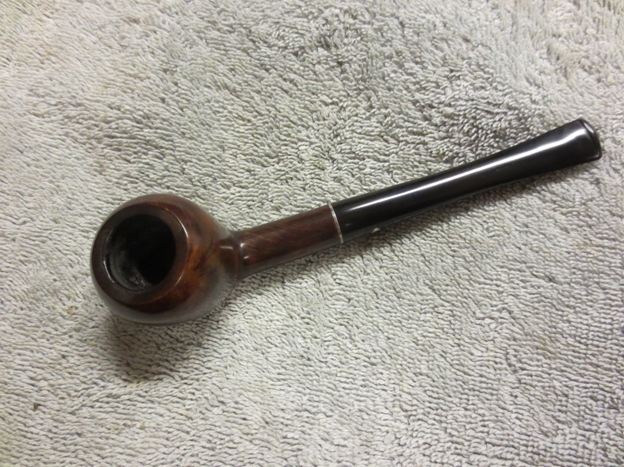
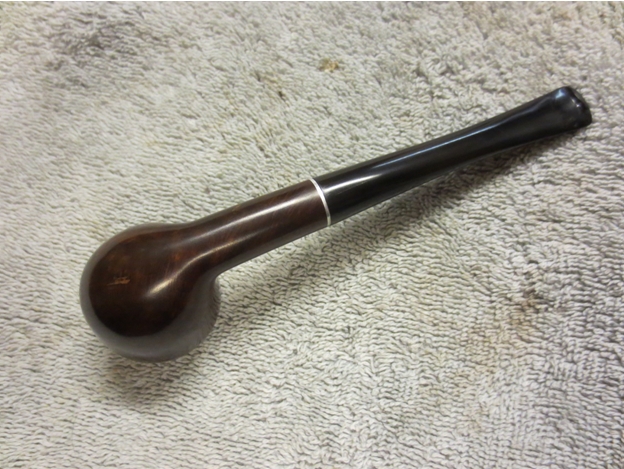
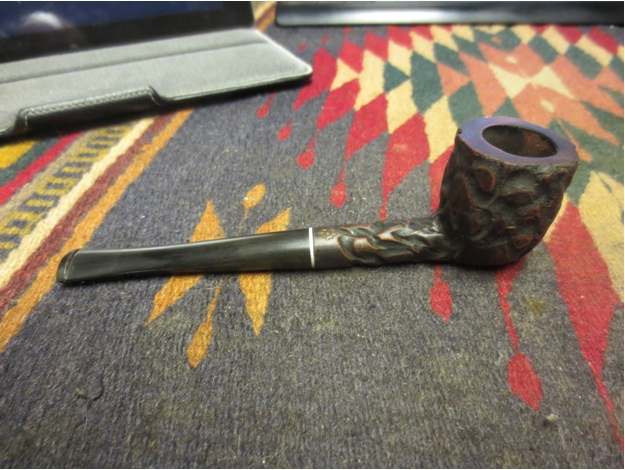
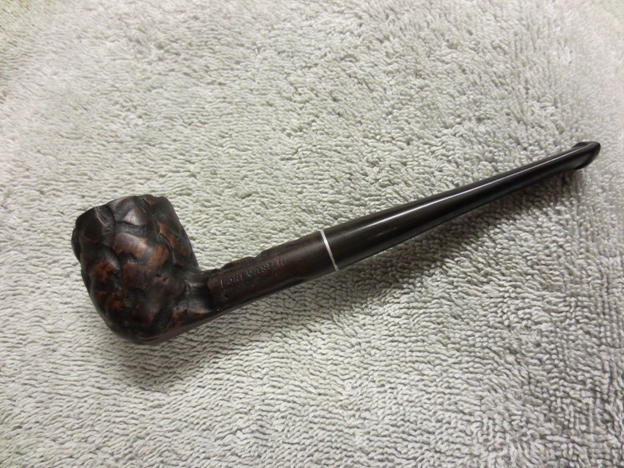
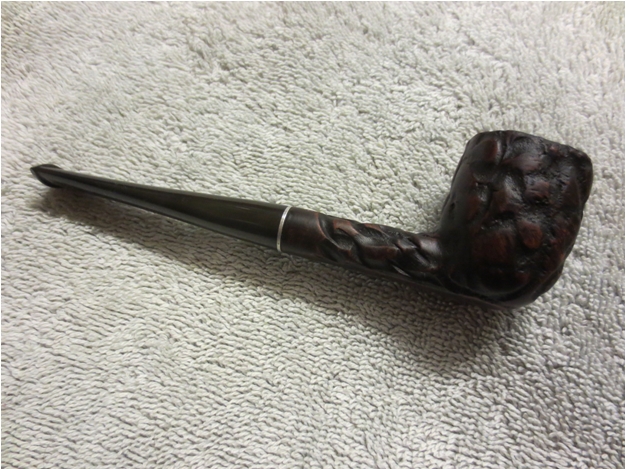
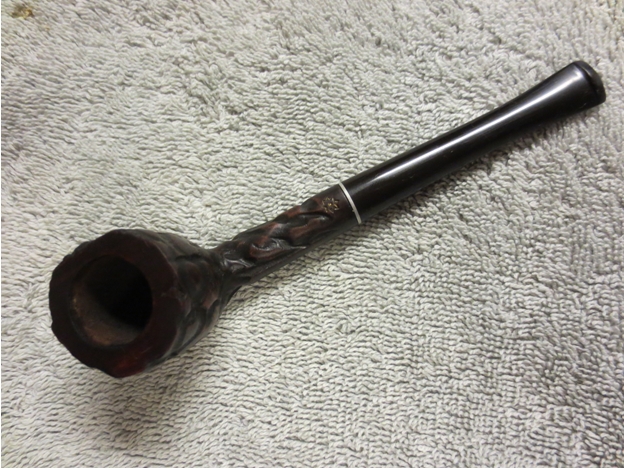
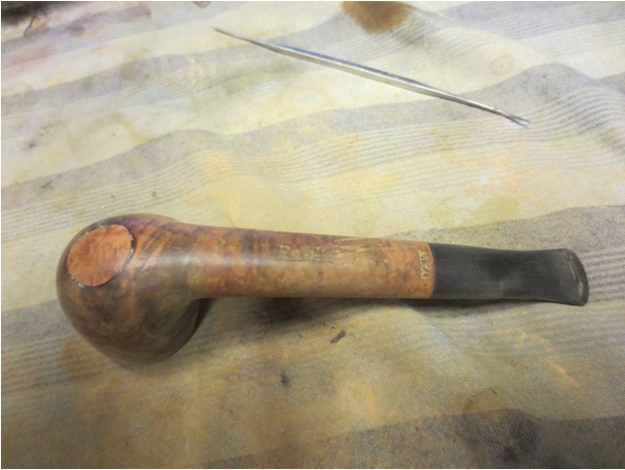
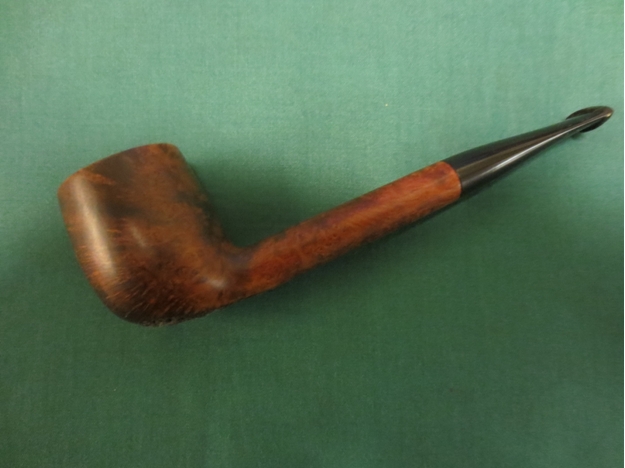
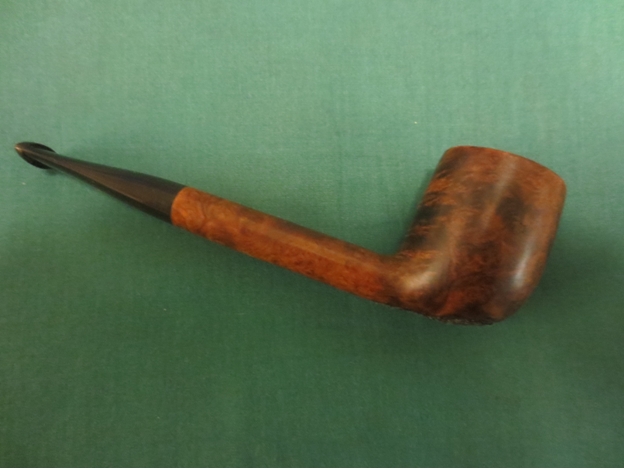
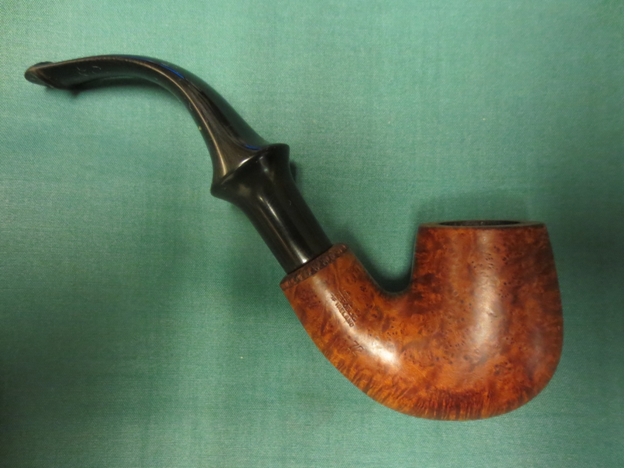
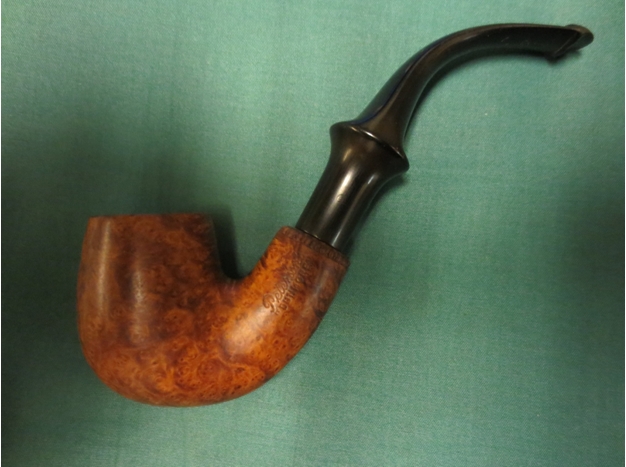
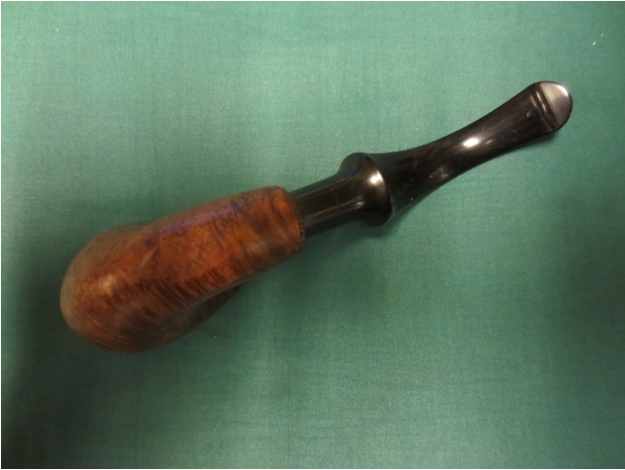
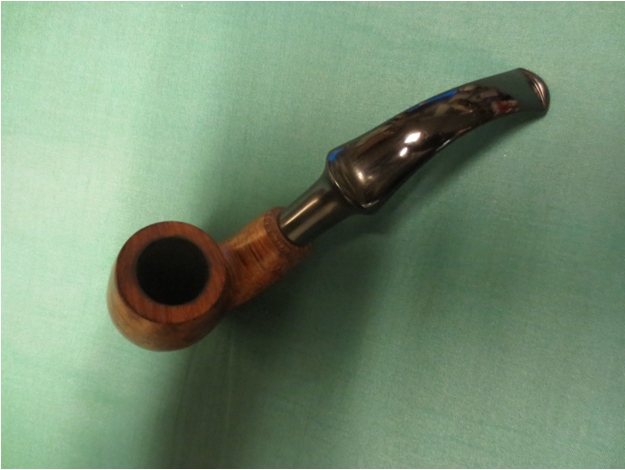
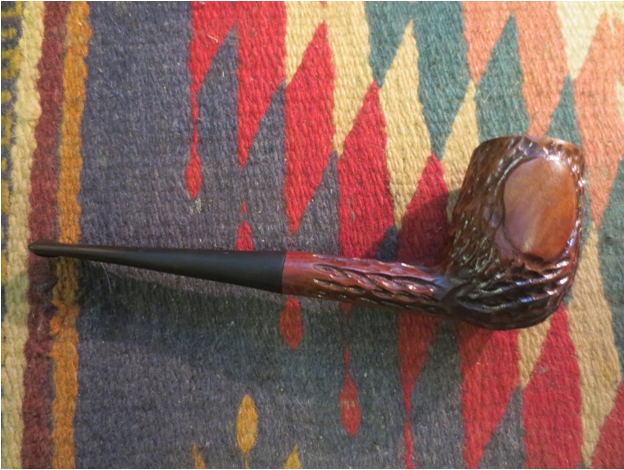
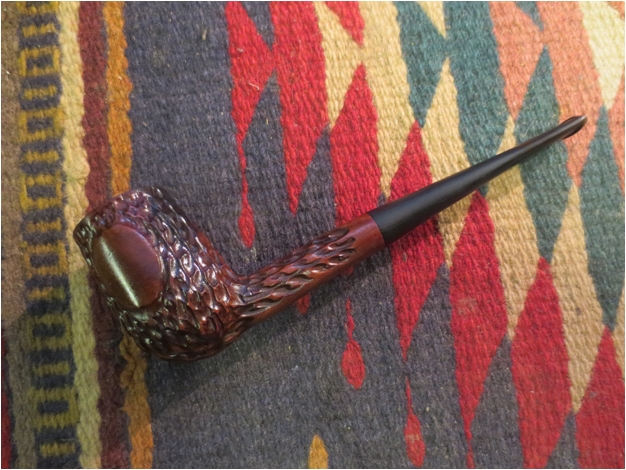
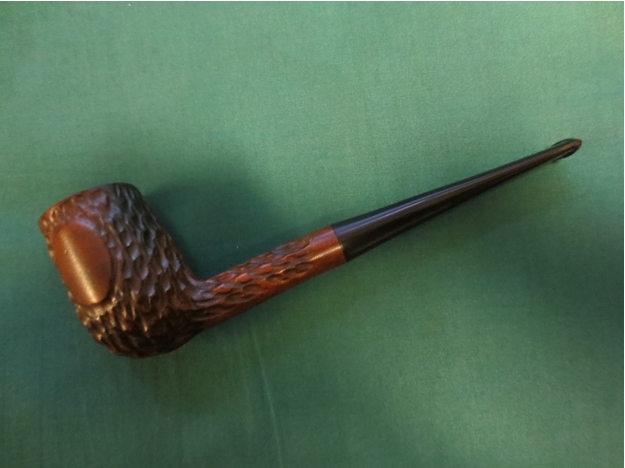
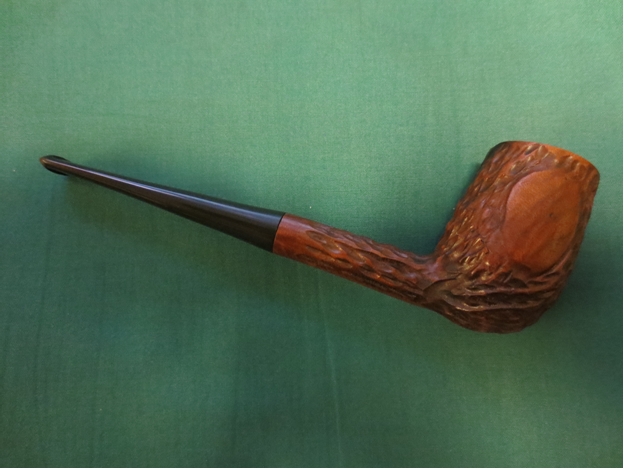
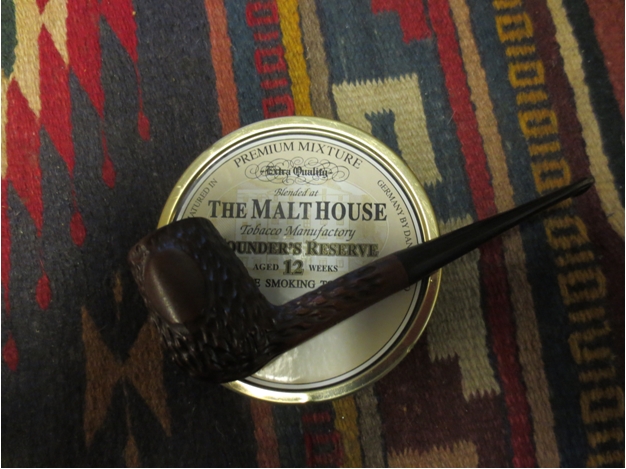
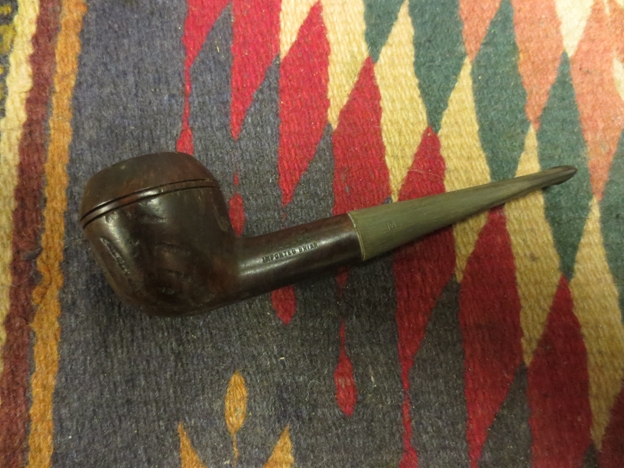
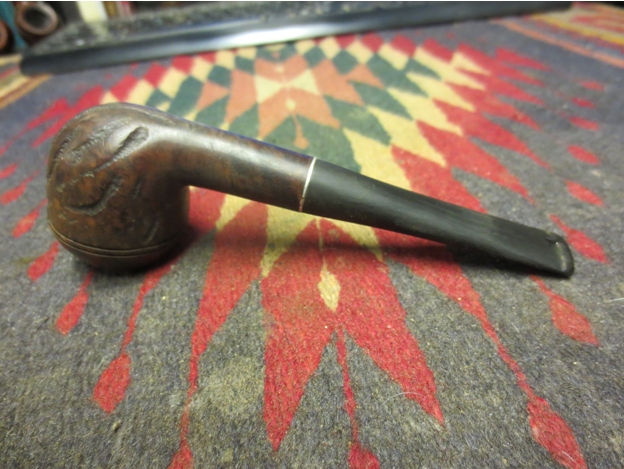
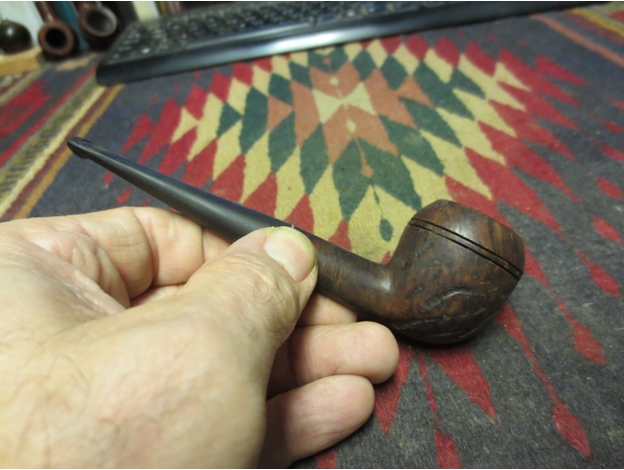
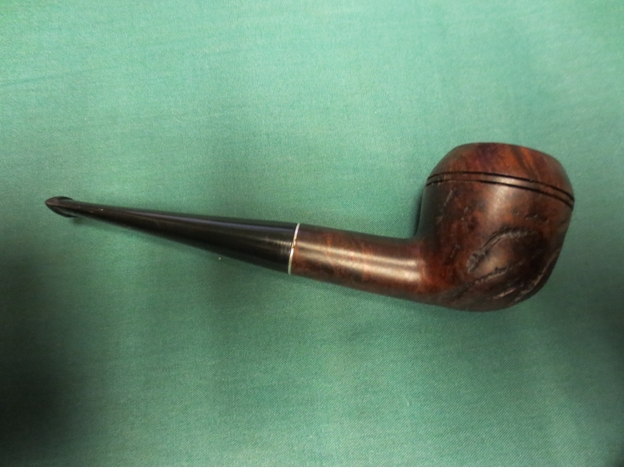
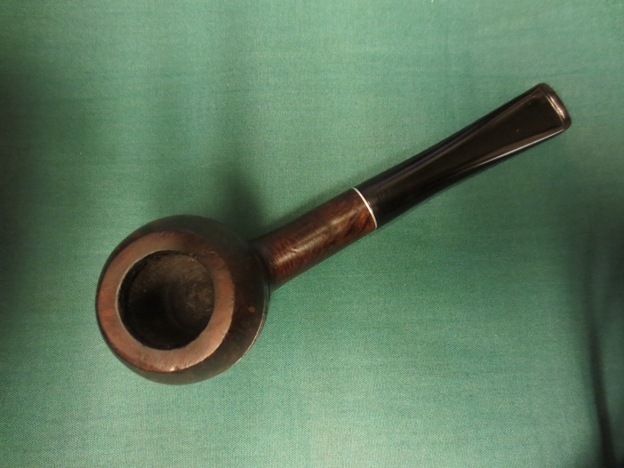
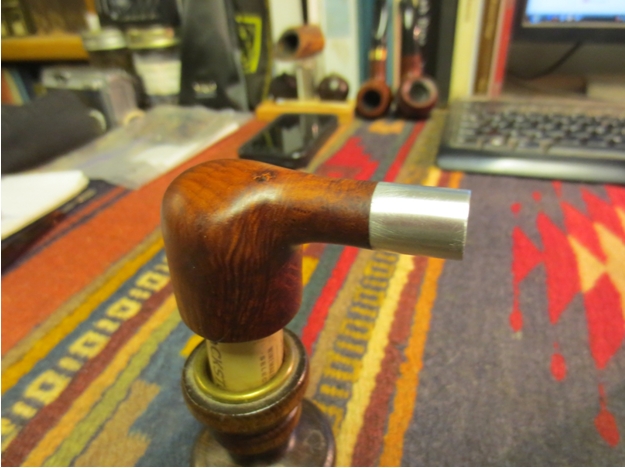
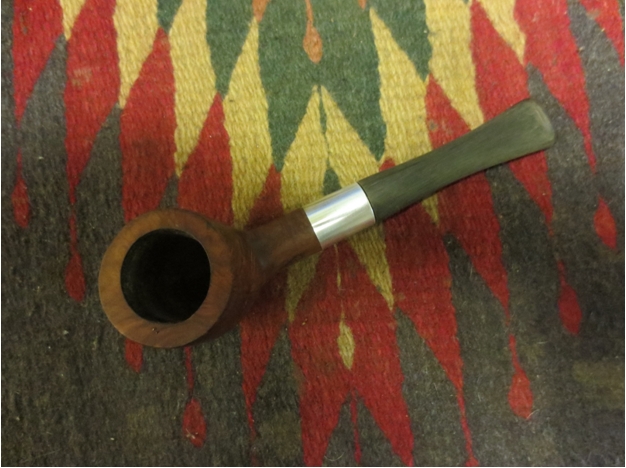
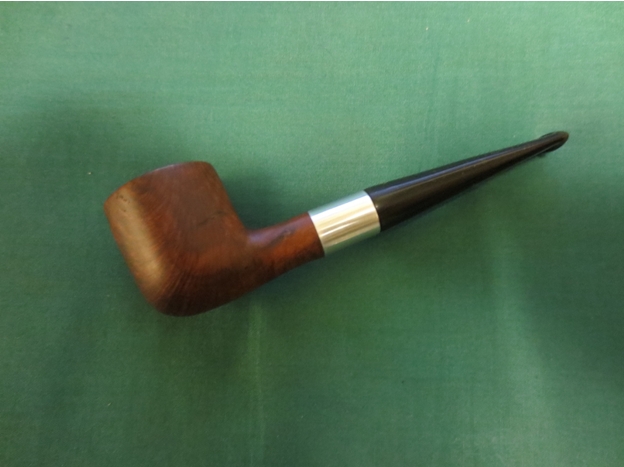
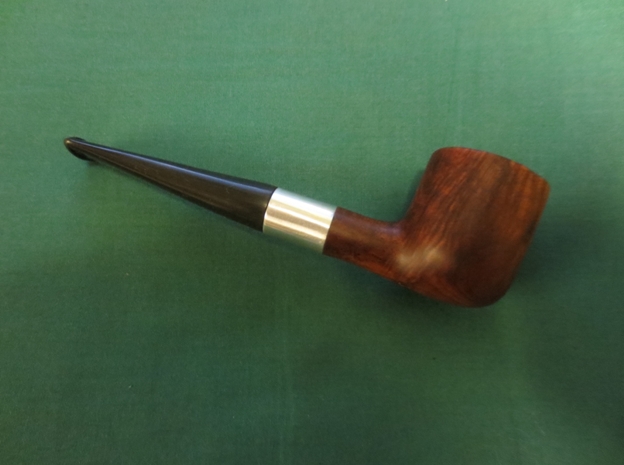
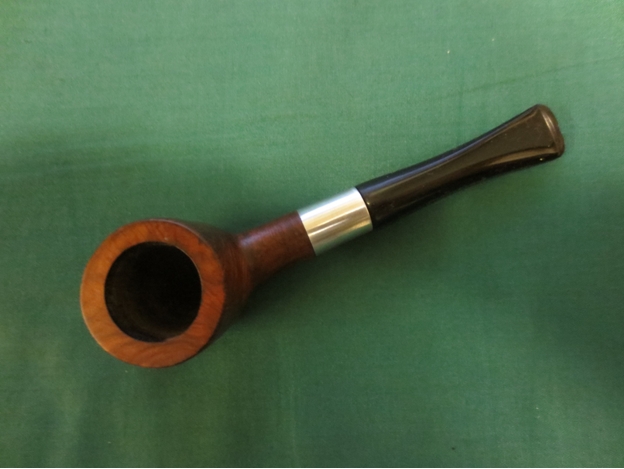
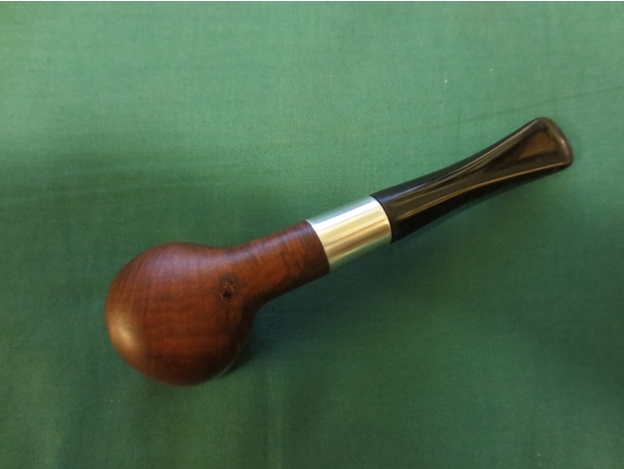
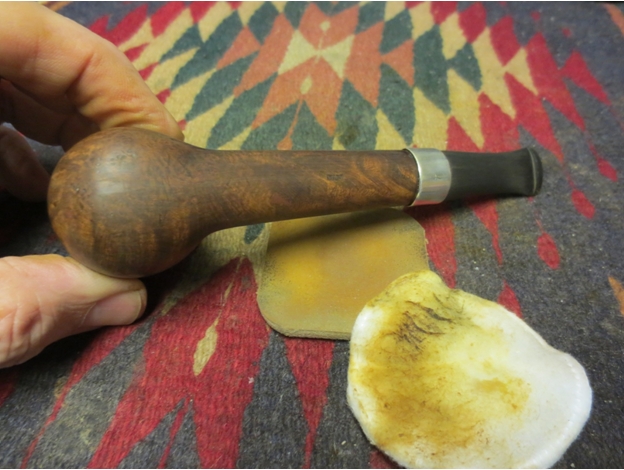
I put the stem back on the pipe and buffed it all again with White Diamond and gave it a several coats of carnauba wax. I buffed it with a soft flannel buff to raise the shine. Though this old warhorse of a pipe has seen much use, the new finish and restored, rebanded and restemmed pipe should give many more years of service. It is cleaned and ready to load with its inaugural bowl. Though the pictures do not show it the pipe is a large one – it is 6 inches long with a bowl that is 2 inches tall. The diameter of the bore is 7/8 inches. It will certainly be a long smoke – and if the build of cake left behind by the previous owner tells any tales it will be a good smoking pipe.Sav29 Sav30 Sav31 Sav32

Restoring A Len Payne Twin Bore System Bulldog


Blog by Steve Laug

When I saw the rusticated bulldog shaped pipe in the display case at the Alberta antique mall I could not help but want to have a look at it. I asked the clerk to open the display case for me to have a closer look at it. The aluminum shank end look too substantial to be just an end cap or ferrule like Peterson’s and other older pipes have used for years. In fact it reminded me of some of the South African Keyser Hygienic pipes that I have in my collection. It had that kind of weight to the aluminum. The stem also had the same kind of look. It was a large diameter military mount stem that pushed into the shank end opening.

Once the clerk took it out of the case I looked at the underside of the diamond shank to see if it was a Keyser pipe – it wasn’t! It was stamped Len Payne. Now I was wondering. In the past I had written about pipes by Len Payne on the blog https://rebornpipes.com/2013/11/16/a-pipe-maker-i-had-never-heard-of-leonard-payne-pipes/. But I had not seen one with this kind of apparatus on the shank. I am including the quote below from Mike Glukler of Briar Blues that gives a quick summary of the brand. Not the bold italicized sentence in the paragraph below that applies to this pipe.

Leonard Payne was based in B.C. for many years. He came to Canada from England. He had shops in Surrey, B.C. and Kelowna, B.C. Interesting fellow. Gruff as the day is long. When you bought a pipe it was handed to you in a paper bag. No sock, no box. Most of his pipes carried a “carburetor” system at the shank/stem junction. Another Payne idea was his shanks. Almost all his pipes were two pieces. He’d turn the bowl and shank, then cut off the shank and reattach with glue (not always with the same piece of briar, so many did not match grains). His thinking was that the shank being the weakest link, if cut and glued would never break and thus “correcting” the weakest link. You may find his pipes on E-Bay on occasion listed as an L. Cayne. The P in his stamping looks more like a fancy upper case C…- Michael J. Glukler

I removed the stem from the shank to look inside and found the carburetor system that Mike refers to in the above quote. The inside of the shank was aluminum so the end cap fit over the outside of the shank and was inset into the interior and formed a collection chamber for moisture. It was dirty with oils and tars. In the centre of the chamber was a tube that extended half the distance up the shank to the end. In the stem was an aluminum tube that was smaller in diameter than the shank tube and when the stem was inserted the stem tube fit in the shank tube. The tube thus formed a straight line from the bottom of the bowl to the end of the stem.Payne1 The Payne inner tube system differed from the Keyser system in that the two tubes interlocked and formed a seamless tube from bowl to button. In the Keyser system the tube in the stem had a downward angle and the one in the shank was shorter. The tubes did not meet or join. Rather the air was swirled around the aluminum chamber and then drawn upward into the downward point tip of the stem tube. In the cutaway drawing below you can visualize the Payne stem with the shank tube extended further into the shank and the stem tube inserted into the shank tube when the stem was in place.keyser The stem itself in this case was a twin bore stem where the airway split into a Y and ended in the button with two holes – one on either side of the button. The theory was it made a more bite proof stem.Payne2 So while the externals and stem appeared to be the same the internals were markedly different in their execution.

The bowl itself was clean but the rim was dirty and damaged with small dents and places that could not be steamed out. The bowl would need to be lightly topped. The finish on the rusticated bowl was in great shape with little wear. The grooves had been stained with a dark brown and the high smooth parts were stained with a lighter brown stain to make a contrast. The aluminum shank cap was scratched and dull. The interior of the pipe was very dirty. The stem was high-grade vulcanite and was lightly oxidized and coated with a sticky substance like price sticker glue. There were no bite marks in the surface and under the grime it was clean. The button had the twin bore system and was also clean and undamaged.Payne3 Payne4 Payne5 Payne6I took the pipe apart so that I could clean the internals and work on the top of the rim. The beauty of this old pipe was that it did not need to be reamed as it was clean inside the bowl. The next two photos show the diameter of the military stem and the overall look of the stem.Payne7 Payne8 I set up the topping board and the 220 grit sandpaper in order to lightly top the rim of the Payne. I pressed the rim against the board and moved it in a circular motion to remove the damage to the rim and the hard buildup.Payne9 Payne10 Payne11 I cleaned out the inside of the end cap insert to remove the tars and oils with alcohol, folded pipe cleaners, and cotton swabs. I cleaned out the airway with pipe cleaners and alcohol.Payne12I used the Guardsman stain pens to stain the rim. I started with the lightest stain and moved to the darkest stain. I wanted to match the stain on the rim to the stain of the bowl. Once it was dry I buffed it with White Diamond and then lightly wiped it off with alcohol on cotton pads to lighten it slightly to get a more correct match.Payne13 The stem was in good shape and did not have any bite marks or tooth chatter. I sanded it with micromesh sanding pads. I wet sanded it with 1500-2400 grit pads and dry sanded with 3200-12,000 grit pads. In between each set of three pads I rubbed the stem down with Obsidian Oil.Payne14 Payne15 Payne16 I waxed the stem with carnauba wax and buffed it with a soft flannel buffing pad to raise the shine. I sanded the aluminum end cap with the micromesh pads to polish the metal and remove the scratches. Once the aluminum shone I waxed the bowl and stem with carnauba and buffed it with a soft flannel buffing pad. The finished pipe is shown below. It is ready to load up and smoke with its inaugural bowl of tobacco. I am wondering how the tube system works in delivering a cool smoker and how the smoke compares to the Keyser Hygienic pipes. Time will tell.Payne17 Payne18 Payne19 Payne20

Restoring a Frozen Kirsten Companion K Straight Pipe


Blog by Steve Laug

The last pipe I picked up on my recent Alberta trip was a Kirsten style straight pipe. The metal shank is stamped on the left side Companion and on the underside it is stamped Made in U.S.A and then K. On the top of the shank the previous owner scratched in his initials FWE. The bowl was stuck on the shank. The finish on the bowl was worn and dirty. The rim of the bowl had a thick tarry buildup and had some deep dents in the surface. There was a thick cake build up on the inside of the bowl that was shaped like a cone – the bottom was very narrow and the top was wide open. Normally the bowl on Kirsten pipes are more U-shaped with the walls similarly open to the bottom of the bowl where the drilled screw goes through. The stem had a tooth mark on the top and the bottom side near the button. The stem was frozen in the metal shank and I could not twist it at all. The airflow adjustment end cap that normally twists to either open or dampen the airflow was also frozen in place. The metal barrel and end cap had scratches and marks on it. The end cap ridges were worn and looked like someone had used a pair of pliers on it to try to break it free.IMG_2531 IMG_2532 IMG_2533 IMG_2534 I was able to twist the bowl off the barrel by carefully turning it back and forth slightly to break it free. The tars in the barrel threads and on the drilled out screw in the bowl were really gummed up and dirty.IMG_2535I put the barrel in the freezer and left it there during dinner. After dinner I took it out and was able to twist the stem from the barrel. Once I removed the stem and the metal tube plunger it was extremely tarred and sticky. The second photo below shows the black tars of the interior of the barrel and plunger.IMG_2536 IMG_2537The end cap was still frozen in the barrel. I filled the barrel with alcohol and set it in an ice-cube try to let it soak. I knew that the tars on the plunger were also what held the end cap in place binding the metal of the barrel and the cap to each other. Typically the end cap had a rubber grommet on it that held it in place with a friction fit. In this case it appeared that the rubber grommet was compressed against the metal on the inside of the barrel and bound it in place.IMG_2538I cleaned the plunger and sanded the stem with 220 grit sandpaper to remove the hard tarry build up on it. I wiped it down with alcohol and then sanded it until the plunger was shiny and clean. I cleaned out the inside of the stem and the plunger with both bristle and regular pipe cleaners.IMG_2539 IMG_2540I reamed the bowl with a PipNet reamer and used all sizes of the cutting heads to ream back the carbon build up in the bowl.IMG_2541 IMG_2542 IMG_2543The bowl was badly dinged and hammered leaving some deep denting. I topped the rim with a topping board to clean up the damaged top edge.IMG_2544 IMG_2545I wiped down the bowl with alcohol on cotton pads and then used a flat blade screwdriver to remove the screw from the bottom of the bowl and remove bottom cap on the bowl. I wiped down the inside of the cap and cleaned the screw with a brass bristle tire brush. I wiped it down with alcohol and then sanded the outside of the cap and screw with 1500-2400 grit micromesh sanding pads to polish them.IMG_2546 IMG_2547The rim had two rather large fills that needed to be hidden with stain. I used the stain pens to restain the rim and the bowl. I started with the lightest colour pen and finished with the darkest colour.IMG_2548I buffed the bowl with White Diamond and then gave it several coats of carnauba wax. I put the metal cap back in place and turned the screw into the bottom of the bowl.IMG_2549 IMG_2550The end cap still did not come off after I had soaked it with alcohol. I used a Robertson head screw driver with a long shank and inserted it in the barrel. I hammered the end with a hammer and tried to drive it out of the barrel. It cam half way out but I could not budge it further. I boiled a cup of water and let the barrel and end cap sit in it to see if I could loosen the tars. I repeated this three times with the cooling of the water. I then inserted the screw driver and was able to drive out the cap. It was covered with a black tar build up and the inside of the barrel was also thickly coated. I cleaned out the inside of the end cap and the barrel with cotton swabs, pipe cleaners and alcohol. I rubbed down the rubber grommet on the stem and the end cap with Vaseline to soften them again and then inserted them in place in the barrel.IMG_2551I sanded the stem with 220 grit sandpaper and then medium and fine grit sanding sponges to remove the tooth marks and the oxidation. I then sanded it with micromesh sanding pads – wet sanding with 1500-2400 grit pads and dry sanding 3200-12,000 grit pads. I rubbed the stem down with Obsidian Oil between each set of three pads. I gave the stem a final buff with White Diamond and then gave it several coats of carnauba wax to give it a shine.IMG_2552 IMG_2553 IMG_2554The finished pipe is shown below. I rubbed the stem down with some Conservator’s Wax – a microcrystalline wax and hand buffed it with a shoe brush. I avoid using the buffer on metal as it turns the pads black and does not shine the metal. I put it back together and it is ready for its inaugural smoke. I have two other Kirstens that are great smokers and this one with be added to that number until the day I pass it on to someone along the way.IMG_2555 IMG_2556 IMG_2557 IMG_2558

Bringing an acorn shaped bowl back to life – wondering if there was a point to this exercise.


Blog by Steve Laug

When I took this old bowl out of the box – last of two pipes to refurbish in my box – I looked at it and wondered what the point would be to clean it up. It had three large and visible fills on the bowl back left side and bottom of the shank and bowl. The finish was shot and it did not have a stem. I sorted through my can of stem and found a threaded Kaywoodie stem that had a short stinger and some scored threads. I tried it in the metal mortis on this pipe and it actually fit perfectly with no overage. The stamping on the old bowl remains a mystery to me – it is stamped on the left side of the shank as follows: HHG over Imported Briar. There is no other stamping at all on the pipe. So far I am unable to find any information on it at all. Who Made That Pipe has the listing but says maker unknown. I do know that the Imported Briar stamping makes it likely that the pipe is an American made pipe post WWII. Other than that I am at a loss. The two fills were solid and undamaged and the putty was a light brown. The finish was shot and opaque. It was hard to see what the grain looked like underneath. The rim was darkened but undamaged.IMG_2484 IMG_2485 IMG_2486The photo below shows the three fills that were very present on the bowl. The potential grain shows through on the bottom of the shank and led me to have a little hope that underneath the opaque ruined finish would be some nice grain.IMG_2487I screwed the stem in place on the shank to have a look at the shape and fit with the pipe. It actually looked quite good with the long, slender stem. The stem had oxidation and calcium build ups on the top and bottom but would clean up nicely.IMG_2488 IMG_2489 IMG_2490I wiped down the bowl with alcohol (ran out of acetone) and scrubbed the surface to remove the finish. Without the acetone I would need to sand the bowl. I set up a topping board and used 220 grit sandpaper to remove the thick darkening on the rim. I lightly topped it so as not to change the profile or look of the pipe.IMG_2492 IMG_2493 IMG_2494I sanded the bowl and stem with 220 grit sandpaper and then with a medium and fine grit sanding sponge to remove the remnants of the old finish on the bowl and the buildup of calcium on the stem. Some nice birdseye grain was underneath the finish on the right and left sides of the bowl.IMG_2495 IMG_2496 IMG_2497 IMG_2498I cleaned the metal tenon with alcohol and then sanded the rough areas on the threads to clean up the aluminum damage. I sanded the stem with 220 grit sandpaper and medium and fine grit sanding sponges to remove the tooth indentations that were underneath the calcified buildup. I used a Bic lighter to paint the surface of the stem and lift the tooth dents. Once they had lifted I redefined the crease of the button with needle files. I sanded it with micromesh sanding pads – wet sanding with 1500-2400 grit pads and dry sanding with 3200-12,000 grit pads. I rubbed it down with Obsidian Oil between each set of three sanding pads. When I finished sanding with the 12,000 grit pad I buffed it lightly with White Diamond and gave it another coat of Obsidian Oil. I set it aside while I worked on the bowl.IMG_2499 IMG_2500 IMG_2501I wiped down the bowl one final time with alcohol before staining it with a dark brown aniline stain. I applied the stain and flamed it and repeated the process until the coverage was even.IMG_2502 IMG_2503I wiped down the bowl with alcohol on cotton pads to remove some of the dark heavy colour of the brown stain and to make it more transparent. Once I had it to the point where I could see through the stain to the grain I quit wiping it down. The trick was to make the stain transparent enough to highlight the grain but at the same time minimize the three fills.IMG_2504 IMG_2505 IMG_2506 IMG_2507Once I had the stain at the place I wanted I put the stem back on the pipe and took it to the buffer. I buffed the bowl with red Tripoli to polish and buff through the dark areas that remained on the stain coat. I buffed the bowl until it met the look I was aiming for. I then buffed the bowl and stem with White Diamond and gave them multiple coats of carnauba wax. I buffed it finally with a soft flannel buff to raise the shine. The finished pipe is shown below. It actually came out quite well and should provide a great yard pipe for someone down the line. I expect this will be another pipe that I gift to a pipeman I meet along the way.IMG_2508 IMG_2509 IMG_2510 IMG_2511If anyone has some clues as to the maker of this pipe let me know. It turned out to be worth working on after all. I am pleased with what came out of an otherwise ignoble old pipe bowl without a stem that had been sitting in my box for quite awhile as I ignored it and worked on other bowls and stems.

There was nothing redeeming about this ugly old pipe…


Blog by Steve Laug

I am getting down to the bottom of my refurbishing box yet again. This is one of three pipes that are left to work on. It is one ugly old pipe to my tastes. Certainly it is one that I have left until there are few to choose from to work on. There truly was nothing redeeming about the look of it. The rough cut billiard with a bark like rustication pattern did nothing for me. The left side of the shank is stamped Forecaster over Imported Briar. The bottom of the bowl had been flattened to make the pipe a sitter. But even that was done poorly as it was to one side and the pipe sat with a list. The finish was worn out but appeared to have been a dark thick stain that was opaque enough to hide all the briar. The outer rim of the bowl had been badly beaten up from hitting against some hard surface and left to be a ragged rough edge around the bowl. One thing that gave this tired old pipe a unique, eye-catching touch was that the top of the shank had been stamped with an eight point star and then inlaid with gold paint. The bowl had a thick soft cake all the way down reducing the diameter of the bowl by almost half. The stem had a metal spacer that gave the appearance of a stem with a metal tenon as well. But when I removed the stem I found that it had a vulcanite tenon. The stem was badly oxidized and had some deep scratches in the surface.IMG_2440 IMG_2441 IMG_2442 IMG_2443I reamed the bowl with a PipNet reamer using the smallest cutting head and worked my way up to the head that would take the cake back to the bare wall of the pipe.IMG_2444The top was so damaged that it needed to be topped. In looking it over I was not sure how much of the rim I could remove without dramatically changing the look of this pipe so I would proceed slowly. I set up a topping board with 220 grit sandpaper and slowly topped the bowl. I sanded it until I had removed as much of the damaged portion of the rim as I could without changing the shape. The rustication made the bowl look out of round but is actually still round. The right side is more rusticated at the top edge than the left so it looks unusual from the top down photo below.IMG_2445IMG_2446I wiped down the finish with acetone on cotton pads until I had removed the heavy dark finish. It took a lot of scrubbing to get through the grime and then the varnish coat. Underneath the dark top coat it appeared that there was a walnut stain that highlighted the grain on the high spots of the bowl. The grooves and valleys were dark with a black stain. The contrast had some potential.IMG_2447 IMG_2448 IMG_2449 IMG_2450I sanded the smooth parts of the bowl and rim with medium and a fine grit sanding sponges to smooth out the scratches in the bowl and on the topped rim. I wiped it down with isopropyl alcohol and then stained it with a dark brown aniline stain. I applied it and flamed it and repeated the process until the coverage was even.IMG_2451 IMG_2453 IMG_2454The bowl was very dark brown but it was at least evenly stained. I would have to do some more work on it to get the contrast that I wanted between the rustication and the smooth parts of the briar. I cleaned out the shank and bowl with isopropyl alcohol, cotton swabs and pipe cleaners until they came out clean. I cleaned the stem at the same time until it also was clean.IMG_2455 IMG_2457I wiped the bowl down with isopropyl alcohol to remove some of the heavy dark brown stain and make it more transparent. I then sanded the bowl with a fine grit sanding sponge to remove some more of the stain on the high spots and to match the colour of the stain on the rim. I sanded the stem with the sanding sponges at the same time to minimize the scratches on the vulcanite.IMG_2458 IMG_2459 IMG_2460I buffed it with White Diamond and took it back to the worktable to work on the stem and bowl some more. I wanted the stain to be a bit more transparent and the contrast between the high spots and the crevices to show clearly.IMG_2461 IMG_2462 IMG_2463I still needed to deal with the list to one side when I set the pipe down on a flat surface. I probably should have done this before I stained the bowl but forgot to do so in cleaning up the mess. I decided it was better late than never so I dealt with it next. In examining it I found that it was not centered on the bottom of the bowl and shank but was off to one side. I sanded flat portion to take down the higher side and even out the flat bottom. I used 220 grit sandpaper and then a medium and fine grit sanding sponge to flatten it out and remove the list. When I was satisfied with the way the bowl sat I refinished it with a stain pen to darken it and blend it into the stain of the rest of the bowl.IMG_2464I sanded the stem with micromesh sanding sponges – wet sanding with 1500-2400 grit pads and dry sanding with 3200-12,000 grit pads. Between each set of three pads I rubbed the stem down with Obsidian Oil and let it soak into the vulcanite before proceeding with the next set of pads. When I finished I gave it a final coat of oil and then buffed it with White Diamond to a shine.IMG_2474 IMG_2475 IMG_2476I buffed the entire pipe with White Diamond and then gave it several coats of carnauba wax and buffed it with a soft flannel buff. The finished pipe is shown below. It is still an ugly pipe in my opinion but there is something redeeming about the ugliness. I suspect it will make a great yard pipe for someone and will deliver a good smoke. It must have been a good smoking pipe in its day – otherwise why would its previous owner have smoked it to the point of near death!IMG_2477 IMG_2478 IMG_2479 IMG_2480

Changing Directions in the midst of a Refurb – Plugging a Burnout in a Paul’s Canadian


Blog by Steve Laug

I am finally getting around to cleaning up the pipes I found on my recent pipe hunt. I decided to choose what I thought would be the easiest one. It was filthy and greasy. The top looked like it had been used as a hammer. I figured that it would clean up quickly and I liked the look of the briar that was peeking through. The bowl was stamped PAUL’S on the underside of the shank and Italy across the end of the shank. There is a stylized P on the stem. There was a sticky glue on the briar in several places that I think came from the price tag that was on the pipe. The bowl was really dirty and over reamed. The bottom of the bowl was almost flat. But there was a buildup of carbon from the top down about half way and there was tobacco fragments in the bowl bottom. The sides were no longer parallel and the airway entered above the bottom of the bowl. The stem was oxidized and had tooth chatter on the top and bottom of the stem.Plug1 Plug2 Plug3 Plug4I cleaned up the sides of the bowl interior with a PipNet reamer and used a dental pick to remove the detritus on the bottom of the bowl.Plug5I scrubbed the exterior of the briar with acetone to remove the grit, grime and grease from the finish. It actually took off the grime and took it down to the nice grain that I had seen peeking through. I think that the briar is oil cured as there is an oily texture to the wood.Plug6 Plug7 Plug8 Plug9 The top was so beat up that it had to be topped to smooth out the damage and restore the clean edges. I set up a topping board and worked on the top until it was smooth and the outer edges were sharp and well defined.Plug10 Plug11 Plug12I sanded the bowl with 220 grit sandpaper and a medium and fine grit sanding sponge to further clean up the finish. There was some darkening on the sides and bottom of the bowl and I wanted to bring it back to the same look as the shank and the rim. The idea was to bring the pipe back to clean and natural finish so that if I stained it the blend and matching would be much easier.Plug13 Plug14 Plug15 Plug16I decided to soak the bowl in an alcohol bath to remove some of the oils and grease on the surface. While it soaked I worked on the stem.Plug17I sanded the stem with 220 grit sandpaper to remove the oxidation, calcium buildup and tooth chatter. I carefully sanded around the stamping on the stem to preserve it.Plug18 Plug19I used a needle file and a sanding stick to rework the edges of the button and sharpen the crease.Plug20 Plug21I took the bowl out of the alcohol bath and dried it off. Once the inside had air dried it was time to raise the bottom of the bowl to the bottom of the entrance of the airway. I mixed a batch of plaster of Paris and packed it in the bottom of the bowl until it was level. Things were looking good at this point. Once it was dried I would give it a coat of pipe mud and it would be good to go.Plug22 Plug23That was when things began to go south for me! I was sanding the bowl bottom and had found a spot that seem to give as I sanded on it. I had wondered if the bowl bottom was too thin from the over reaming but had not seen the soft area of the briar. I used a dental pick to exam the spot and with very little effort the end of the pick went right through the bowl bottom! BURNOUT. I poked around some more and found that there were several very soft spots. This was not what I wanted to find on what I thought would be a very easy clean up!! YIKES.Plug24With very little effort the entire area that was darkened broke away. I used a drill to clean up the ragged edges and make the hole round. I used a Dremel with a sanding drum to even out the edges and used it on the inside of the bowl to bring it back into round on the side where there had previously been a slope from a bad over reaming job.Plug25 Plug26 Plug27I had a round piece of briar left over from a plug I had cut for another burnout I had repaired. I smoothed out the bottom of the plug and fit it into the hole in the bowl. Once the fit was good and snug I glued it in place with wood glue then a top coat of super glue.Plug28 Plug29 Plug30 Plug31 Plug32 Plug33 Plug34 Plug35While the glue was hardening I used the Dremel and sanding drum to take off the excess briar from the plug.Plug36 Plug37I sanded the plug with 220 grit sandpaper to shape it to the curves of the heel of the pipe. The spots that appear as gaps around the plug are where the glue has already dried hard. These will disappear as the glue cures and hardens.Plug38 Plug39I sanded the entire pipe with a medium and fine grit sanding sponge and then wet sanded with 1500-2400 grit micromesh sanding pads to remove the scratches from the finish and blend in the patch with the surface of the briar.Plug40 Plug41 Plug42 Plug43 Plug44 Plug45 Plug46I left the pipe overnight to give the glue time to cure. In the morning I sanded the bottom area of the bowl to smooth it out as the areas around the patches had swollen above the patch when they dried.Plug47Since the briar had been oil cured I decided to rub it down lightly with some olive oil and let it soak in. The next four photos show the pipe after the light rub down with oil.Plug48 Plug49 Plug50I spent a bit of time thinking about the next steps in the process. I had a decision to make – whether to leave the plug smooth and just stain the pipe and keep it glaringly present or to rusticate the bottom of the bowl and blend the plug into the rustication pattern. I decided to rusticate it. I took out the rusticator that Chris made for me and drew a boundary line around the area on the bottom of the bowl that I wanted to rusticate.Plug51 Plug52I pressed the rusticator into the briar and twisted it until the surface was roughened I used a brass bristle wire brush to knock off the loose briar and smooth things out. I buffed the rustication with White Diamond to smooth the high points.Plug53I stained the rusticated area with a black aniline stain and flamed it to set the stain. I sanded the lines around the rustication and the peaks on the rustication as well to get the look I wanted for this piece.Plug54 Plug55When I came home from work this evening I decided to extend the rustication back along the shank. I used the rusticator to work the briar and then stained the entire rustication with a black aniline stain.Plug56 Plug57I sanded the stem with my usual array of micromesh sanding pads to bring out the shine. I wet sanded with 1500-2400 grit pads and dry sanded with 3200-12,000 grit pads. I rubbed the stem down with Obsidian Oil between each set of three pads.Plug58 Plug59 Plug60I mixed a batch of Plaster of Paris to rebuild the bottom of the bowl and raise the part that was untouched by the plug to the same height as the plug and to the bottom of the entrance of the airway from the bowl. I inserted a pipe cleaner in the airway and put the mix into the bowl. I tamped in the plaster mix with a pipe nail and the cuticle tool. It dried to touch fairly quickly and I wiped down the walls of the bowl with a cotton swab and water. I smoothed out the bottom of the bowl the same way. Once the plaster has cured I will give the bottom of the bowl and walls a thin coat of pipe mud to preserve and protect the new plug and the freshly shaped briar on the walls of the pipe.Plug61I buffed the bowl and stem with White Diamond and then gave it multiple coats of carnauba wax. I buffed it with a soft flannel buff to raise a shine. The finished pipe is shown in the photos below. The soft colour of the oil cured briar and the light coat of olive oil bring out the grain. The contrast of the rustication on the bottom of the bowl and the black stain on that gives the bowl a fresh look. One of the side benefits of the added rustication is that the bowl is now a sitter whereas before the rounded bottom of the shank made that impossible. The pipe needs to cure for a few days and then I will give it an inaugural smoke.Plug62 Plug63 Plug64 Plug65.

Restoring a Peterson Dunmore #72


Blog by Steve Laug

The Dunmore line from Peterson really is a stripped down pipe. The one that I worked on this weekend was in essence a system pipe. The lack of a ferrule is made up for by a stylized carving around the shank end. The stem sits snugly against the end of the shank but is not flush with the diameter of the shank. The saddle on the stem has a different flair than a regular Peterson pipe. The one we found had a Plip stem. This particular Dunmore was found by my friend John when we went pipe hunting this weekend. We had a blast as can be seen from the haul of pipes that he picked up below. The Dunmore is picture at the top left of the first column in the photo below. below. IMG_2050 While John worked on restoring the oak pipe rack that he had found I worked on his Peterson Dunmore. This old pipe had some beautiful grain – birdseye on both sides and cross grain front and back. The bowl almost perfectly aligned with the grain on this one. I forgot to take pictures of the pipe before I began cleaning it up so the only one that is left of the pre-clean is shown in the group photo above. I reamed the bowl with a PipNet reamer and then cleaned out the sump and the internals of the bowl and stem with pipe cleaners, cotton swabs and isopropyl alcohol until all came out clean. Dunmore1 The finish on the bowl was virtually non-existent as it had worn away. I wiped it down with acetone to clean the briar and remove the oils and marks that had settled on top of the wood. The acetone pads came away dirty with the grime more than with any previous colour or stain. Cleaning the surface revealed even more clearly the marvelous grain that was on this pipe. Dunmore2 The top of the bowl and rim had some damage from tapping out the pipe. The outer edge of the rim particularly had taken a beating. The bowl was still in round so the inner edge was fine. To minimize the damage to the top and the outer edge I set up a topping board with 220 grit sandpaper and worked on the bowl top. (The whole time I was working on this pipe I gave a running commentary to John as he wanted to know the process so that he could clean up some of the other pipes once he had finished the rack). Dunmore3 Dunmore4 After topping the bowl I sanded the outer edge with a folded piece of 220 grit sandpaper to remove some of the darkening around the bowl top. I resanded it with medium and fine grit sandpaper to remove scratches and did the same to the rim top. I sanded the entirety of the rim and edges with 2400 grit micromesh to smooth it out. After wiping down the briar with alcohol to remove the dust from the surface of the bowl John and I decided not to stain the pipe but to keep it natural. I rubbed it down with a bit of olive oil to give some life to the wood and then buffed it with White Diamond. I was careful to not buff the areas around the stamping so as not to damage them. I chose rather to buff these areas by hand with a shoe brush. I gave the bowl several coats of carnauba wax and buffed it with a soft flannel buff to shine it. Dunmore5 Dunmore6 Dunmore7 There were two small crevices that showed up on the inside of the bowl on the right side about ¼ inch below the rim. I mixed a batch of pipe mud and filled the small crevices and smoothed the mud over the surrounding area of the bowl. I set it aside to dry while I worked on the stem.

The stem had a lot of tooth chatter and a few shallow tooth marks on the top and the bottom next to the button. It also had a deep oxidation that required a lot of elbow grease to remove. I sanded the stem with 220 grit sandpaper to remove the surface oxidation and the calcification near the button. I “painted” the stem with my Bic lighter to raise more of the oxidation to the surface and also to raise the small tooth marks on the stem. I sanded it some more with the 220 grit sandpaper followed by a medium and a fine grit sanding sponge. That work brought it to the condition shown in the next two photos below. Dunmore8 Dunmore9 I sanded it with micromesh sanding pads – wet sanding with 1500-2400 grit pads and dry sanding with 3200-12,000 grit pads. I rubbed the stem down between each set of three pads with Obsidian Oil. After finishing with the 12,000 grit pad I buffed it lightly with White Diamond on the wheel and then rubbed it down one more time with the oil. When it had dried I gave the stem multiple coats of carnauba wax and buffed it to a shine. Dunmore10 Dunmore11 Dunmore12 I hand buffed the completed pipe with a bit more wax and a shoe brush to finish the polish. The finished pipe is shown below in all of its beauty. I am really glad we decided to leave the wood natural and only give it a light oil finish before waxing. The grain stands out well and the feel of the pipe in hand is very nice. John loved the finished pipe. I am looking forward to hearing from him once he has smoked it a few times. Dunmore13 Dunmore14 Dunmore15 Dunmore16

Restoring a Dr. Grabow Meerschaum-Lined Stack


Blog by Steve Laug

Another of the bowls I was gifted was a tall Meerschaum lined rusticated stack with a smooth spot on both sides of the bowl and the end of the shank. It is stamped on the underside of the shank, MEERSCHAUM-LINED over Dr. Grabow. The bowl exterior had some darkening on the back side of the bowl and the grooves of the bowl were caked. The rim had damage and the meerschaum lining was rough on the inside edge of the bowl. There were cracks in the meerschaum bowl insert on the rim. The bowl itself was cracked and missing from about mid bowl to the bottom of the bowl. The meerschaum pieces were lying in the bottom of the bowl and there was no stem for the pipe.

I did not know anything about the meerschaum lined Dr. Grabows and this one had a distinct look of an Italian made pipe. I went to my source on line for Grabow information the Dr. Grabow Forum (http://drgrabows.myfreeforum.org/sutra238.php). There I found a post on the meerlined pipes. It read in part as follows… “Meerschaum lined pipes were originally imported from M. Gasparini in Italy for Grabow. Sparta finally figured out how to do them and only imported the “plugs”. Early Grabow Meerschaum lined pipes were stamped Italy with no spade. After 1989 Dr. Grabow got rid of Italy and added the spade.” So, my sense of it being Italian was correct. It also dates this pipe as pre-1989. IMG_1848 IMG_1849 IMG_1850 IMG_1851 I had an old stem in my can of stems that would be a good fit for this pipe. I needed to sand the tenon slightly to get a snug fit against the shank. The diameter of the stem was slightly larger than the diameter of the shank and would need to be sanded down to make a matched fit. IMG_1852 IMG_1853 I used a pen knife to clean up the inside of the bowl. There was carbon build up on the lower part of the bowl about mid bowl that was holding together the broken pieces of the meer lining. I scraped away the carbon and removed the broken pieces of meerschaum that remained on the lower edge of the bowl insert. IMG_1854 I topped the bowl with a topping board and 220 grit sandpaper to remove the damage to the rim and the lining top. IMG_1855 I did not remove much of the bowl top but took off enough to make the bowl top and the rim top flush and smooth. In the photo below the cracks in the bowl insert are visible around the top edge of the bowl. IMG_1856 I used clear superglue to fill the cracks on the top edge of the insert and sanded them down. I mixed a batch of plaster of Paris and used the dental pick, the cuticle tool that I was gifts and a pipe nail to build up the interior of the bowl and replace the bottom half of the insert that was missing. I inserted a pipe cleaner in the shank and then packed in the plaster around the airway and tamped it in place on the bottom with the pipe nail and on the sides with the cuticle tool. I used one of the stain pens that I have to stain the rim to match the bowl. IMG_1857 IMG_1858 IMG_1859 I inserted my damp index finger into the bowl and rubbed down the sides of the bowl to smooth them out. I also pushed the plaster on the bottom of the bowl to more thoroughly pack it in place. I sanded the stem with 150 grit sandpaper to reduce the diameter of the stem and then 220 grit sandpaper to smooth out the stem. IMG_1860 I scrubbed the bowl down with acetone on a cotton pad to remove the finish and clean up the exterior of the bowl. I then rubbed it down with olive oil and let it soak into the finish. I also rubbed down the stem with the oil as I find that it makes sanding the stem easier to do. IMG_1861 IMG_1862 IMG_1863 IMG_1864 I sanded the stem with micromesh sanding pads – wet sanding with 1500-3200 grit pads and dry sanding with 3600-12,000 grit pads. I wiped it down between each of the sets of three pads with Obsidian Oil. Once it was dry I buffed the stem with White Diamond and then with carnauba wax. IMG_1865 IMG_1866 IMG_1867 I put the stem back on the pipe and buffed it with White Diamond. I lightly buffed the bowl with carnauba wax and the stem more heavily. I finished by buffing the pipe with a soft flannel buffing pad to raise the shine. The finished pipe is shown below. The thin shank and the thin diameter of the stem give the pipe a delicate look. It is very light weight and fits well in the hand. I am going to let the plaster of Paris repair dry and cure for several days before I load a bowl and give it an inaugural smoke. IMG_1868 IMG_1869 IMG_1870 IMG_1871 IMG_1872 IMG_1873

UPDATE: I just smoked this one after it had cured for two days. I loaded a bowl of The Malthouse Founder’s Reserve in the bowl and smoked it to the bottom of the bowl. It smoked cool and dry. The plaster of Paris is darkening nicely and will soon match the rest of the meer lining of the bowl.
IMG_1874 IMG_1875 IMG_1876

Rejuvenating a Willard Straight Rhodesian


Another of the bowls from the gift box was this Willard Rhodesian. It was in pretty good shape other than being dirty and stemless. The bowl had a broken cake at the top of the bowl and remnants of tobacco left in the bowl. The rim was dirty and lightly caked with some damage caused from tapping the rim on something. The outer and inner edges of the bowl were undamaged. The interior of the shank was dirty. The shank was fitted with a threaded mortise that would take a threaded stem. I had a stem in m can of stems that fit well in the shank, was overturned but workable. The diameter of the stem was larger than the shank. The photo below shows the stem on the pipe in the middle of the threesome. IMG_1750 I set up a heat gun and held the stem about three inches above the heat. The first photo below shows the stem in place. To heat it I removed it from the bowl and heated the metal tenon. When it was warm I screwed it back in place and twisted it. I had to reheat it several times to get the alignment correct. The second photo shows the aligned stem. IMG_1752 IMG_1755 I sanded the stem with 150 grit sandpaper to reduce the diameter of the stem. I also sanded the slope to the button to highlight the tooth marks on the stem. IMG_1809 IMG_1810 IMG_1811 I used a needle file to sharpen the inner edge of the button and make the angles more distinct. IMG_1812 I wiped down the bowl with acetone to remove the grime and clean up the finish. I did not want to lighten the finish as much as to clean off the light coat of varnish on the briar. IMG_1814 IMG_1813 I lightly topped the bowl to clean up the rim damage. I used a sanding board and 220 grit sandpaper to remove the damaged briar and then followed that by sanding with a medium and a fine grit sanding block. IMG_1815 IMG_1816 I continued to sand the stem to match it to the diameter of the shank. I used 220 grit sandpaper to finish the sanding and shaping of the stem. I worked on the tooth marks on the top side and underside of the stem with 220 grit sandpaper until they were no longer visible. IMG_1817 IMG_1818 IMG_1819 IMG_1820 I reamed the bowl with a PipNet pipe reamer beginning with the smallest cutting head and working up to the one that was the same diameter as the bowl. I reamed the bowl back to bare wood. IMG_1821 IMG_1822 I sanded the stem with a medium and fine grit sanding sponge to reduce the scratches left behind by the 220 grit sandpaper. IMG_1823 There was one stubborn tooth mark that I could not get out on the underside of the stem next to the button. I cleaned the area with alcohol and then used clear super glue to repair it. I sprayed the path with an accelerator so that I could sand the patch sooner. IMG_1824 IMG_1825 IMG_1826 IMG_1827 I sanded the stem with micromesh sanding pads – wet sanding with 1500-3200 grit pads and dry sanding with 3600-12,000 grit pads. I rubbed down the stem with Obsidian Oil between each group of three micromesh sanding pads and then when I finished sanding with the 12,000 grit pad I buffed it with White Diamond. IMG_1828 IMG_1829 IMG_1830 I buffed the bowl and shank with White Diamond and then gave it a coat of Danish Oil and walnut stain to protect and preserve the finish. When it was dry I buffed the pipe with White Diamond and then gave it several coats of carnauba wax. IMG_1835 IMG_1836 IMG_1837 IMG_1838 The finished pipe is shown in the photos below. The new stem fits well. In fact it looks like it came with the pipe. The repairs to the stem are not visible. The bowl itself dried well and buffing the finish gave it a softer look. The finished pipe was given several more layer of carnauba wax and then buffed with a soft flannel buffing pad. It is now ready for many more years of service to another pipeman. IMG_1844 IMG_1845 IMG_1846 IMG_1847

Worn and Tired No Name Pot Given a New Look


The next pipe I decided to work on from the gift box was a no name pot shaped bowl without a stem. There was a stem in the box that fit well in the threaded metal shank. The problem with the stem was that it was worn out. There was a large dent on the top of the stem and a large hole in the underside of the stem that also had much damage around the hole. The stem was also over turned. The shape was unique in that the bowl had a slight cant to it. The finish was ruined and the grit and grime on the bowl was heavy. There were four fills using pink putty that stood out on the bowl left side, front and bottom. The rim was thickly tarred and oiled. The outer edge was damaged all the way around the bowl. The cake was quite thick and was crumbling at the bottom of the bowl. The shank was thick with tars as well. The aluminum was oxidized. IMG_1745 IMG_1746 IMG_1747 IMG_1748 I used a lighter and a heat gun to heat the metal tenon and was able to adjust the stem to a proper fit on the shank. It softened the glue and lined up nicely but when I heated the top side of the stem to try to raise the dent it bubbled even at a distance of three inches plus above the heat source. Yet another reason I don’t like nylon stems. IMG_1749 IMG_1750 IMG_1751 IMG_1757 Looking at it carefully after I had straightened it out I could see that the stem was really worn out and would be better used on a different pipe after it had been cut down. I heated the tenon once again and was able to remove the stem from the tenon. The tenon itself was threaded and screwed into the stem. I had a taper stem in my can of stems that had a broken tenon. I sanded the remainder of the broken tenon until it was smooth. Noname The new stem was the slightly longer than the original stem and it was vulcanite. I drilled out the airway until the metal tenon end fit the in the stem. I held the drill firmly and turned the stem onto the drill bit by hand. I used a tap to cut threads in the freshly drilled hole. IMG_1759 IMG_1761 I beveled the drilled hole to accommodate the lip on the threaded tenon so that it would sit flush with the face of the stem. I mixed a batch of two part quick dry epoxy and coated the threaded end of the tenon before threading it into the hole in the stem. IMG_1762 IMG_1763 I set the stem aside to let the epoxy cure and turned to work on the bowl. The bowl needed to be reamed so I used a PipNet reamer to do the work. I started with the smallest cutting head and continued until I used one the same size as the bowl of the pipe. I scrubbed out the shank and bowl with alcohol and pipe cleaners and cotton swabs until the shank and bowl were clean. IMG_1764 IMG_1765 I set up my topping board and a piece of 220 grit sandpaper and topped the bowl to remove the out rim damage and sharpen the edges of the bowl. I folded a piece of sandpaper and sanded the outer edge once it had been topped. I smoothed out the rough edges until the damage was minimized. IMG_1766 IMG_1767 I used a dental pick to remove the pink putty fills. I cleaned the surface with acetone to remove the dust and the remaining putty in the holes after I had picked them out. IMG_1768 IMG_1769 IMG_1770 IMG_1771 I packed briar dust into the holes in the briar and then dripped super glue into the briar dust to mix with the dust and make a hard fill. I over filled the holes in the briar with the dust and glue so that when it shrunk as it dried it would not leave dips in the surface of the briar. IMG_1772 IMG_1773 IMG_1774 I sanded the filled areas with 220 grit sandpaper to remove the excess and smooth out the fill until it was even with the surface of the briar. I sanded it with a medium and a fine grit sanding sponge and a fine grit sanding block. The new fills were black instead of the bright pink that was previously used in the repairs. Once stained they would be less obvious in the surface of the bowl than the previous ones. IMG_1775 IMG_1776 IMG_1777 I stained the bowl with Danish Oil and walnut stain and set the bowl aside to dry. IMG_1778 IMG_1779 IMG_1780 IMG_1781 The next morning I checked the fit of the stem as the epoxy had plenty of time to set and cure. I sanded the stem to reduce the diameter at the shank. I used 150 grit sandpaper to remove the excess while repeatedly screwing it into the shank to check that I had removed enough but not too much. IMG_1782 IMG_1783 IMG_1784 IMG_1785 I sanded the stem further with 220 grit sandpaper to remove more of the excess and to also reduce the scratches left behind by the 150 grit paper. I polished the aluminum with a fine grit sanding sponge and removed the oxidation and the scratches. When I had finished sanding the fit of the stem was exactly what I wanted and it only needed to be polished with micromesh sanding pads. IMG_1786 IMG_1787 IMG_1789 IMG_1790 I wet sanded with 1500-2400 grit micromesh sanding pads and dry sanded with 3200-12,000 grit sanding pads. I rubbed the stem down with Obsidian Oil between each set of three grits. I buffed the stem with White Diamond to give it a final polish and then rubbed it down a final time with the Obsidian Oil. Once it was dry I hand buffed it and fit it on the pipe. IMG_1797 IMG_1798 IMG_1799 I buffed whole pipe with White Diamond and gave it several coats of carnauba wax to raise a shine. I wanted to protect and shine the bowl and stem. The finished pipe is shown in the photos below. The new stem with the retrofitted metal tenon fit extremely well. I like the overall look of the pipe far better than the original look with the saddle stem. The pipe is ready to give many more years of service to the next pipeman whose rack it graces. The end of the stinger is removable so that the pipe can be smoked with or without the stinger. IMG_1800 IMG_1801 IMG_1803 IMG_1804