Blog by Steve Laug
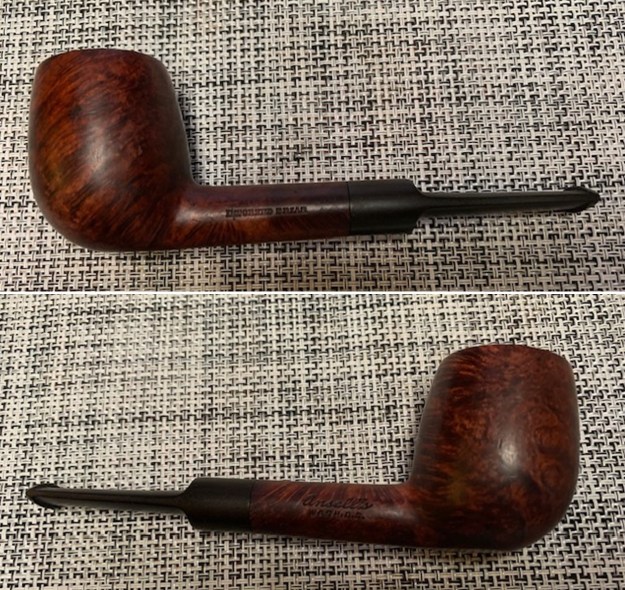
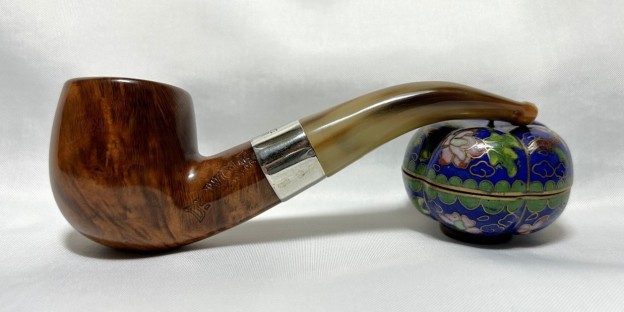
The next pipe on the table was purchased on 04/11/2023 our contact in Copenhagen, Denmark. I have always liked the look of a Dunmore pipe – shape the carved shank end, the fit of the stem against the shank all add to the beauty. This one is rusticated which I have not see before – at least in my old memory it seems new! The pipe is stamped on the underside of the shank and reads 69 (shape number) [over] Made in the Republic of Ireland. Next to that it is stamped Peterson’s [over] “Dunmore”. It was another pipe that was someone’s favourite. The bowl had a thick cake and lava build up in the rustication on the rim top. The finish looked good underneath all of the grime and oils that were ground into the bowl sides and heel. The beaded decoration on the shank end is in excellent condition. Like other Dunmores I have worked on, it had a flattened shank just next to the heel and the pipe functioned as a sitter. The stem did not seat correctly in the shank leaving a gap between the shank end and saddle. The stem had light tooth marks and chatter on both sides ahead of the P-lip and on the underside edge of the button. There was a bite through on the underside that was a bit of a pin hole. The “P” stamp on the left side of the stem was clear and just needed to be touched up otherwise it looked good. Jeff took photos of the pipe before he started his clean up work on it. It is a pretty pipe!
 The next photos show the bowl and rim top as well as the stem condition. The bowl had a thick cake that is very visible. The rim top and edges have a heavy coat of tar. It is hard to know what the rim edge looked like underneath the lava. The rim top also had some darkening. Notice also the carved detail on the shank end in the photos as it is a feature of Dunmore pipes. The stem looked good with some tooth chatter and marks on both sides and the button. You can also see the bite through on the underside of the stem.

 Jeff took photos of the sides and the heel of the bowl and shank to show rustication patterns in the briar. It is unique and quite beautiful. You can also see the grime and flecks of paint in the rustication on the bowl sides. I can’t wait to see it once it is cleaned and polished.
 The stamping on the shank sides was clear and very readable. It read as noted above.
  I turned first to Pipephil’s site to remind myself of the background of the Dunmore line. Unfortunately, there was no information to be found there. I then turned to Pipedia’s article on Peterson pipes to see what I could garner from that information. It is a great read in terms of the history of the brand (https://pipedia.org/wiki/Peterson) but nothing specific to the Dunmore line of pipes.
I then turned to the book I should have consulted first, The Peterson Pipe, by Mark Irwin and Gary Malmberg. On page 298 there is an entry for Dunmore pipes. It reads as follows:
Dunmore (1971-c.1984 2006-10). Appeared first as Iwan Ries & Co. exclusive line “Dunmoor,” a Premier-grade in light-brown smooth or rustic red in all System shapes, with beading at the shank. Documented in the Associated Imports Catalog from 1973. Classic Range Dunmore shapes from ’78. A third Dunmore line (’06-10) featured standard and some B shapes, with beading around bowl instead of at shank-face, produced for European market.
On page 165 there were also photos of pages from a catalogue with the description: The unmounted Dunmore Premier debuted in both System and Classic Range shapes circa 1973 with a final appearance in the 1981 catalogue.
The information blurb on each page read: “Dunmore Briars.” Beautifully grained best quality briar in light-brown, matt or rustic finish. Often described as “Petersons Unmounted System” has all the advantages of the system range. Ten models each fitted with the Peterson Lip mouthpiece.
With that information in hand I knew what I was dealing with in terms of the stamping on the pipe. It is a Late Republic era pipe. It showed up in Peterson Catalogue in 1973. Now it was time to work on the pipe.
With that information at hand I turned to work on the pipe itself. Jeff had thoroughly cleaned up the pipe. He reamed the pipe with a PipNet Pipe Reamer and cleaned up the remnants with a Savinelli Fitsall Pipe Knife. He scrubbed the bowl with undiluted Murphy’s Oil Soap with a tooth brush. He rinsed it under running warm water to remove the soap and grime. There were portions of the bowl sides where it had lightened in the clean up process. He cleaned out the inside of the shank and the airway in the stem with alcohol, cotton swabs and pipe cleaners. He scrubbed the exterior of the stem with Soft Scrub to remove as much of the oxidation and calcification as possible. He soaked the stem in Before & After Deoxidizer and rinsed it off with warm water. I took photos of the pipe once I started to work on it.
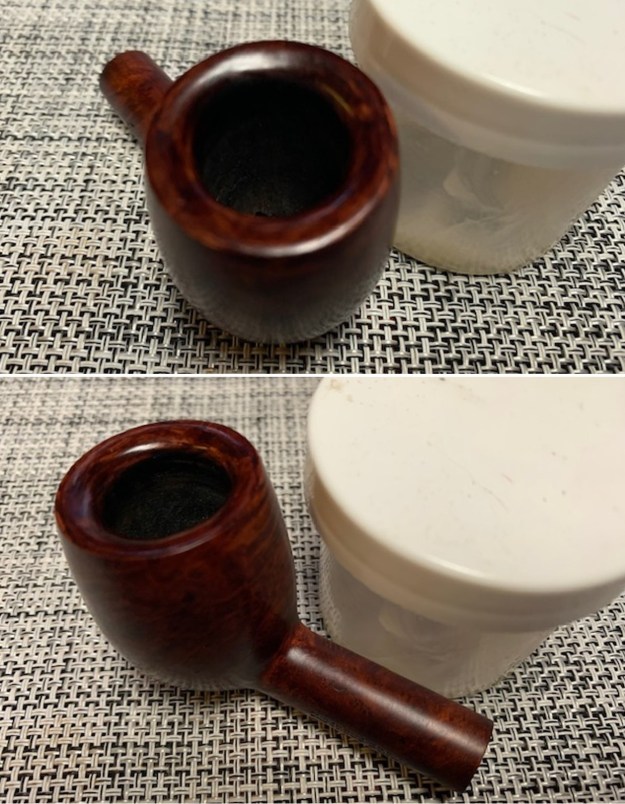
 I took some close up photos of the rim top and also of the stem surface. I wanted to show what an amazing job Jeff did in the cleanup of the rim top. I also wanted to show condition of the rustication on the rim top and the rugged look that flowed around the bowl from there. The outer edge of the bowl looks very good and I think the dark stain really hid any damage. I also took close up photos of the stem to show the lack of tooth marks on the stem surface. You can also see the bite through on the underside of the stem. The stem still not fit properly in the shank.
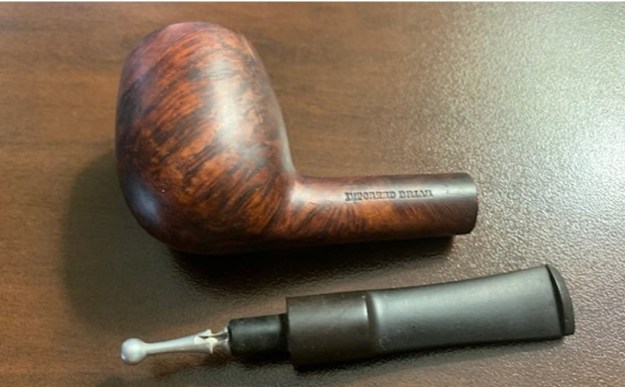
 One of the things I appreciate about Jeff’s cleanup is that he works to protect and preserve the nomenclature on the shank of the pipes that he works on. The stamping on this one was faint to start with so I was worried that it would disappear altogether with the cleanup. He was not only able to preserve it but it is clearer than shown in the earlier photos. I took some photos to show the clarity of the stamping. I have noticed that many restorers are not careful to protect the stamping in their cleaning process and often by the end of the restoration the nomenclature is almost destroyed. I would like to encourage all of us to be careful in our work to preserve this as it is a critical piece of pipe restoration! I took a photo of the pipe with the stem removed to give a sense of that parts and look.
 I started my work on the pipe by addressing the fit of the tenon in the shank. I sanded down the tenon and also used a rolled piece of 220 grit sandpaper to smooth out the mortise walls. I was able to take it down enough to get a proper fit in the shank. I took photos of the new fit of the stem and it looks much better.

 I touched up the stain around the bowl and shank with a Walnut stain pen to match the colour around the rest of the bowl. It looked much better when finished.
 I rubbed the bowl and shank down with Before & After Restoration Balm. I worked it into the surface of the bowl sides and shank with my fingertips and a horsehair shoe brush. The product works to clean, enliven and protect the briar. I let the balm sit for ten minutes and then buffed with a cotton cloth to raise the shine.

 I set the bowl aside and turned my attention to the stem. I decided to address the bite through in the underside of the stem. I greased a pipe cleaner with Vaseline and inserted it in the stem below the tooth mark. I filled it in with black CA glue and sprayed it with some accelerator to harden it.
 I used files to flatten the repair and start blending it into the surface. I sanded it with 220 grit sandpaper. I started polishing the stem with 600 grit wet dry sandpaper.
 I touched up the stamp on the left side of the saddle with white acrylic nail polish. I applied it and worked it into the stamp with a tooth pick. Once it cured I scraped off the excess. It is definitely better though the stamp is faint in some spots.
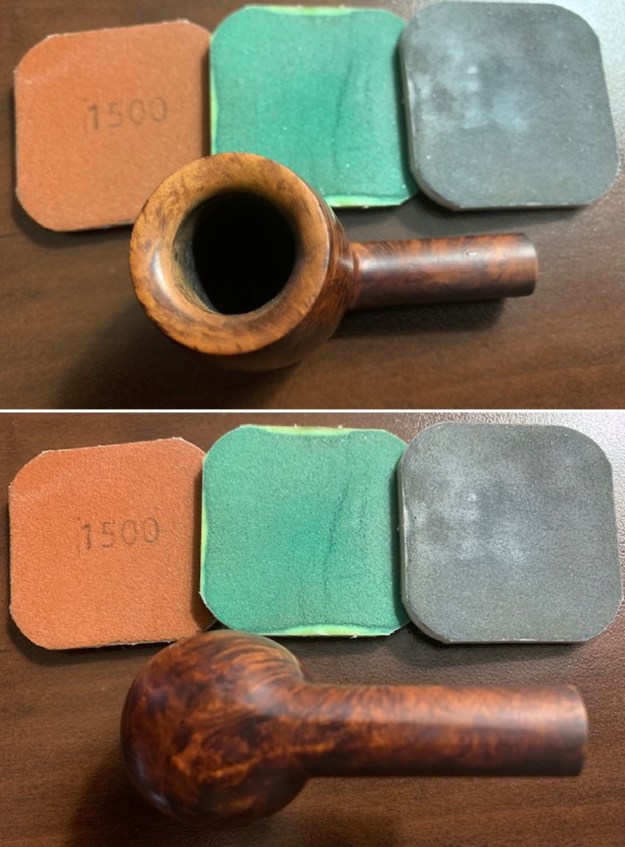
  I polished the tooth marks and chatter out of the vulcanite stem surface with micromesh sanding pads – 1500-12000 grit pads. I wiped it down with a damp cloth after each sanding pad.
 I finished my polishing with Before & After Pipe Stem Polish – both Fine and Extra-Fine polishes. I wiped it down with a final coat of Obsidian Oil and set aside.
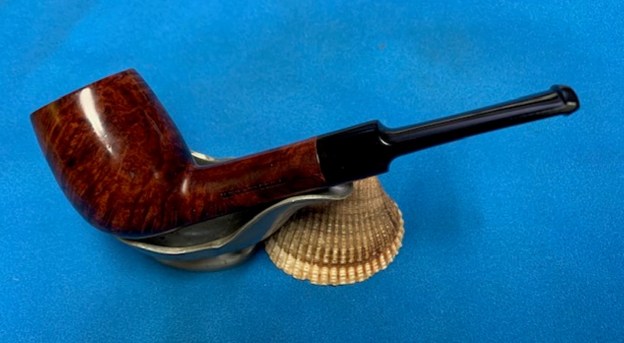
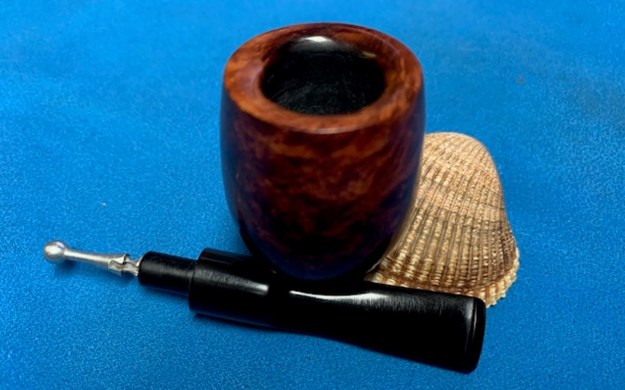
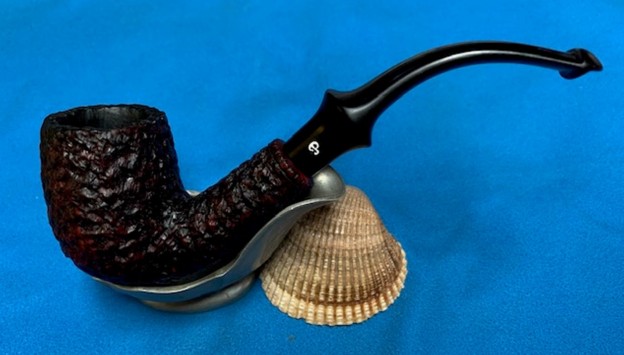
 This classic shaped, rusticated Peterson’s Dunmore 69 Bent Billiard with a Peterson’s P-lip vulcanite stem looks much better now that it has been restored. The rim top and edges cleaned up very well. The rich brown stains on the bowl came alive with the polishing and waxing. I put the stem back on the bowl and buffed the pipe with Blue Diamond on the buffing wheel using a light touch on the briar. I gave the bowl multiple coats of Conservator’s Wax and the stem multiple coats of carnauba wax on the buffing wheel and followed that by buffing the entire pipe with a clean buffing pad. I hand buffed the pipe with a microfiber cloth to deepen the shine. The finished Peterson’s Dunmore 69 is a tactile beauty that fits nicely in the hand and looks very good. Give the finished pipe a look in the photos below. The dimensions of the pipe are Length: 5 ½ inches, Height: 1 ¾ inches, Outside diameter of the bowl: 1 ½ inches, Chamber diameter: 7/8 of an inch. The weight of the pipe 1.55 ounces/44 grams. I will be putting it on the rebornpipes store in the Irish Pipe Makers Section soon. If you are interested in adding this pipe to your collection send me a message or an email. Thanks for reading this blog and my reflections on the pipe while I worked on it. There are many more to come!
As always, I encourage your questions and comments as you read the blog. Thanks to each of you who are reading this blog. Remember we are not pipe owners; we are pipe men and women who hold our pipes in trust until they pass on into the trust of those who follow us.