Tag Archives: article by Joe Gibson

Ben Wade’s in the House, Part 2


Blog by Joe Gibson

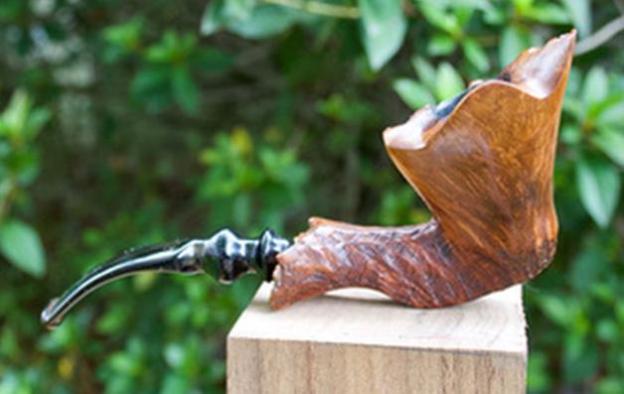
Finished Pipes, ready for an afternoon smoke. The tobacco is last tin of out of production Viking Odin’s Wind.

Which Stem for Which Pipe?

When the Ben Wades arrived, the Martinique came with a beautiful, amber colored but transparent acrylic stem. There was a minor amount of tooth chatter near the bit, but nothing I felt the need to repair. The airway, on the other hand, was black from being smoked. The stem was tight in the mortise and didn’t readily pull out.

The Royal Grain, as I mentioned in the previous post, still had a vulcanite tenon stuck in the mortise. I decided to work on the Martinique stem first and deal with finding a stem for the Royal Grain later.

Cleaning the Perspex Stem

The Perspex stem before cleaning.

The first problem was separating the stem from bowl without breaking anything. Since I planned on soaking the bowl in alcohol, I dipped the pipe and stem in the jar and let it set for a minute or two. The stem then came off the pipe easily and I rinsed it off in clean water.

With oxidized vulcanite stems, I do an Oxyclean soak to bring the oxidation to the surface. I’ve never tried an Oxyclean bath on acrylic or Perspex stems. With those, I usually just wipe the outside down with alcohol and do the inside with pipe cleaners dipped in alcohol. The one thing you never want to do is soak the stems in alcohol. It could possibly cause “crazing” or cracks in the airway. Some

people even report stems breaking after soaking in alcohol.

Tip #1: The shank brush tool is great for cleaning tobacco residue from the bit. I find it does the job faster than just pipe cleaners.

I was hoping dipping regular, tapered pipe cleaners in alcohol would remove the discoloration from the airway and sterilize it. And it did, to an extent. After 10 pipe cleaners the airway was a little cleaner, but I could still see the old tobacco stain. I probably would have gone to my bristle pipe cleaners, but I didn’t The solution for this situation? I switched to a shank brush pipe tool. It’s ideal for cleaning the shank and  the tenon and airway of a pipe stem. I dip it in alcohol and run it through the stem until it comes out fairly clean. I follow that with pipe cleaners dipped in water.

The Royal Grain Stem Replacement. Maybe?

Initially I planned to have a stem made for the Royal Grain. Then I remembered the Preben Holm stem I had sitting in my desk. It’s a mismatched stem from a Søren freehand I bought in early August. I easily removed the broken tenon by inserted a drill bit into the airway by hand and twisting and pulling it out.

Tip #2: When buying pipes in “junktique” shops and malls, check the stems for stamps or logos. It will help you identify the pipes and may also tell you if the stem is the correct one for the pipe. I use mismatch stems as a point in talking the seller into lowering the price.

Black Vulcanite Preben Holm stem and a Perspex Ben Wade

Stems are usually made to fit the pipe it’s going with and I have never found one stem to perfectly fit a pipe other than the one it’s made for.

The Preben Holm stem fitted the Royal Grain. Maybe a tighter fit than I like, but it a fit and I can always work on the mortise or tenon to make it better. On top of that, a friend from one of the pipe forums, had a Ben Wade stem he is sending me. One way or the other I have a stem for the Royal Grain. Or, did I?


But Which Stem for Which Pipe?

So, there I was. Sitting with two clean and polished pipe bowls and two stems. I picked up the Perspex stem and inserted it back into the Martinique. And, the bowl almost slipped off the stem. The logo on the Perspex is the Ben Wade logo. This should fit.

I’m guessing that the fit was so tight at the start because both the mortise and the tenon was so dirty. Once the cleaning removed the residue, it became loose.

Just on a lark, I decided to try the Perspex stem on the Royal Grain and it slid into place easily and looked like it was made for it. I also liked the way the amber color matches to the darker finish of the Royal Grain.

I then inserted the vulcanite Preben Holm stem into the Martinique. It is a snug fit but not a tight fit. May not be the original stem, but it is close enough.

Part 1: Ben Wades in the House

© J. Gibson Creative Services. September 5, 2018

Ben Wade’s in the House, Part 1


Blog by Joe Gibson

Not Ben Wade the U.S. politician or Ben Wade the baseball player and scout, but Ben Wade pipes. Specifically, a Ben Wade Martinique and a Ben Wade Royal Grain produced by Preben Holm in Denmark.

I first saw the Martinique and the bowl for the Royal Grain at Penny’s Little Flea Market just outside of Marion, MS two weeks ago. They were tempting targets, but I passed on them for a Preben Holm Delight. I kept thinking about the Ben Wades. Finally, the wife told me to call and see if I could buy them. They arrived two days later.

Pre-cleaning Preparation

Honestly, my first thought was, “What did I get into here?” The bowls were covered in dirt and grime.

Before Cleaning. (left) Royal Grain, (right) Martinique

The bowls had scratches and I couldn’t tell how deep they were. The good news? No heavy cake and funky, sour smells. Still, I decided that best course was a 24-hour soak in isopropyl alcohol.

The Perspex stem on the Martinique had very minor tooth chatter near the bit and was dirty. It was also stuck and took a few minutes to loosen enough to pull out. Since I planned on doing an alcohol bath, I dipped the pipe and stem in the alcohol for a few minutes and allowed me to separate the two.

The Royal Grain had its own issue which I didn’t remember seeing. The mortise still had the broken tenon of a vulcanite stem still stuck in it. I resolved this issue by twisting a drill bit into the airway BY HAND. The bit dug just enough into the vulcanite that I was able to pull the tenon out. My guess is the pipe was dropped and the stem broke off because the tenon really came out easy. Finding a new stem would be a later problem.

Both pipes have some of the plateau around the rim. The Royal Grain looked like more worn down of the two, almost like the previous owner hammered the rim on his ashtray.

As I decided earlier, I dropped both pipes into containers of isopropyl alcohol and left them alone for 24 hours.

Bowl and Airway Cleaning

After the soak, I cleaned the airway and draught hole first.  My reasoning behind working on the airway, draught hole and bowl first is simple. The cake and any residue is still saturated and soft. I think this makes any reaming I have to do easier.

Using bristle pipe cleaner dipped in the same alcohol, made relatively quick work of removing cake and residue from the airway. It also opened up the draught hole. Ten pipe cleaners later and I was satisfied with the cleanliness of the airway.

Tip #1:  I use bristle pipe cleaners for deep cleaning. Be careful on Perspex or acrylic stems as the bristles can cause some scratching in the stem airway.

After sanding with 300 and 600 Grit SandpaperFor the bowl I started with my homemade pipe knife. The biggest mistake some beginning home restorers/pipe smokers make is using a pocket knife to ream the bowl. You risk damaging the briar by using a sharp knife.  In my case, I made a pipe knife from a small folding pocket knife with about a 2-inch blade. Using my bench grinder, I rounded off the point and ground down the edge until it was almost as flat as the spine. It won’t cut paper or butter.

I should point out that I don’t ream down to bare wood but ream until the cake is thin and even all the way around. I generally finish the bowl work with 320 grit sandpaper wrapped around my index finger. This smooths out the cake even more and removes even more of the cake without damage to the briar.

Pipe Surface and Finish

One of the reasons I decided on the alcohol bath was what looked like white paint specks on the Martinique. I was hoping the alcohol would dissolve the white specks. It didn’t.  After the pipes had air dried for a couple of hours, I started working over them with 320-grit dry sandpaper.

Tip #2: Protect the stamping on the briar with painter’s masking tape before starting the sanding process.

The Martinique (top) and the Royal Grain (bottom). The Royal Grain is coated with Butcher Block Conditioner

It took a little longer on the Martinique because of the white specks and the curved areas. After wiping off the sanding residue with an alcohol wipe, a second sanding of the Martinique removed all the specks and the surface scratches.  The Royal Grain, being a more smooth, flatter surface was easier to sand.

After the initial dry sanding, I started wet sanding with 600-grit sandpaper. Let me point out something here. I make the decision to wet or dry sand a pipe based on how I see the pipe at the time. Sometimes my first step is wet sanding, sometimes I don’t wet sand until I get into the finer grits of finishing sandpaper or micro-mesh pad. The theory behind the wet sanding is that it provides a smoother, glossier finish to the wood. Whether others will agree with me or not, it works for me.

By the time I worked my way up to the 12,000 grit micro-mesh pad, I had a semi-glossy appearance and both pipes felt as smooth as glass. Normally, this is where I apply caranuba wax and buff. I went one step further and applied Howard Butcher Block Conditioner to the Royal Grain. The condition contains a food grade mineral oil, beeswax and caranuba wax. Instructions were to apply with a soft cloth and let dry for 15 minutes before wiping off the excess. I used a cotton ball for the application and let it set for probably 20 minutes. I really like the color and the way the grain popped out. I resisted the temptation to do the same to the Martinique.

Next: Which Stem for Which Pipe?

© J. Gibson Creative Services. September 5, 2018


My Preben Holm Story


Blog by Joe Gibson

August has been a good month for rescuing pipes from various antique shops in Mississippi. Earlier this month, I bought a Peterson Kapp-Royal and a Søren Refburg Rasmussen freehand from an antique mall in Picayune, Mississippi.

This past weekend, we visited the antique shops/flea markets in the Meridian, Mississippi area and after not seeing any pipe or tobacco related items (except for 4 brass spittoons), we walked into the last shop on our list. To be honest, we almost didn’t go into Penny’s Little Flea Market. None of the previous shops had air conditioning and were hot. What convinced us to go into Penny’s was the big sign, “Air Conditioned.”

Talk about a lucky sign! The first thing my wife saw was a display case on the counter containing pipes. I could tell before the case was open that these were not the usual suspects – Kaywoodie, Dr. Grabow, Medico pipes. The first three I picked up were a Preben Holm and two Ben Wade freehands. The case also held three pre-1965 Charatan’s Make and four Savinelli’s.

The Preben Holm caught my heart though.

Preben Holm carved and sold his first pipe before he turned 16. By the time he was 22 years old, he had his own shop and employed 45 employees. He is widely considered one of the godfathers of the Danish freehand design. For those wanting more information check out the about Holm on https://pipedia.org/wiki/Holm,_Preben.

Interestingly, Holm also produced the Danish Era Ben Wade pipes. Holm signed on with Herman Lane of Lane, Ltd. in 1971 after his previous distributor could not pay him. That dates the Preben Holm Delight as either pre-1971 or after 1980 according to my research. Since his prior distributor still had a stock of “Preben Holm” pipes, Lane decided to market the pipes under the Ben Wade name. My understanding is that once the old distributor depleted his stock, Holm and Lane reinstated the Preben Holm name on the pipes.

Despite the outside of the bowl being dark and grimy, there was relatively little cake in the pipe when I bought it. The stem was moderately oxidized but hadn’t turned dark orange yet. When I sniffed the bowl, it smelled like old tobacco but didn’t have that funky smell I normally find in pipes at flea markets.

The Cleaning Process

My first cleaning step on this pipe was to scrub it down with a Magic Eraser and undiluted Murphy’s Oil to remove as much of the dirt and grim as I could. I followed that with scrubbing the bowl with isopropyl alcohol and a Scotch Brite pad. It was then packed with cotton balls and saturated with isopropyl alcohol for an overnight soak.

The next morning, I put the stem to soak in an Oxyclean solution to soften the oxidation. After dumping the cotton ball and alcohol, I went to work on the outside of the pipe again. I really wanted to lighten up the smooth portions of the bowl to increase the contrast between smooth and rustication. I started wet sanding with 320 or 400 grit sand paper dipped in the alcohol. After rinsing, I wet sanded with 600 grit until I was happy with the results.

After cleaning the outside of the pipe with isopropyl alcohol and Murphy’s Oil, I sanded the smooth portions with 400 and 600 grit sandpaper.Following the 400 & 600 grit sandings, I used alcohol wipes to remove the dust residue.Next, I move to finishing sandpaper starting with 1000 grit. It removes any residue the alcohol wipe left and starts polishing the pipe. I use 2K, 4K, 8K grits next.I finish this process with 12K grit sandpaper. It requires time and patience, but the result is a nice, glossy shine before applying wax.The same technique is used on the rim. The top of the bowl looks out of round but it was apparently carved like that.I’m a big fan of using finishing sand paper and micro-mesh sanding pads to bring out the grain and shine on pipes. I have been told that I overdo it, but I like my results. I start with 1,000 grit sand paper and move up the scale – 2,000 grit, 4,000 grit, 8,000 grit and finally 12,000. Between each step, I use an alcohol wipe to remove and residue. The end result is always a very smooth feel to the pipe and a glossy shine.  The pipe gets a second overnight alcohol soak after that.

For some reason, the stem was almost more challenging to clean than the pipe. Using micro-mesh pads and a lot of elbow grease usually give me a nice black, semi-glossy stem. This stem didn’t want to cooperate. The micro-mesh removed all of the surface oxidation and looking at it under room lighting, it looked good. When I looked at the stem under sunlight though I could still see discoloration, especially around the curved parts of the stem.

Red Tripoli applied with my buffer reduced the discoloration, but it took over an hour of buffing to remove the last vestiges of the oxidation. A light application of carnauba to the stem and bowl had both gleaming and ready to smoke.