Restoring an old cob on a lark


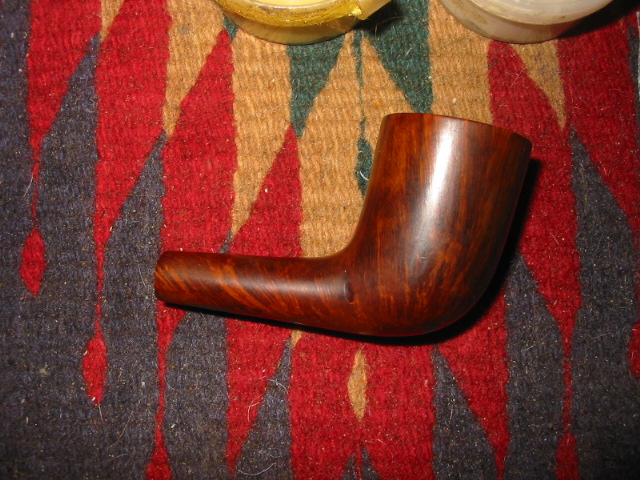
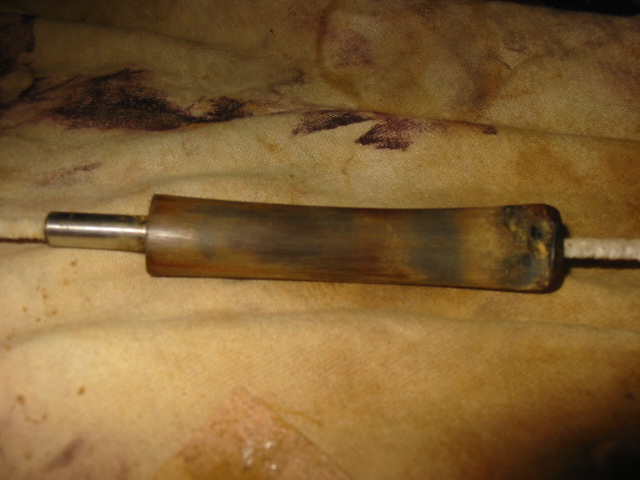
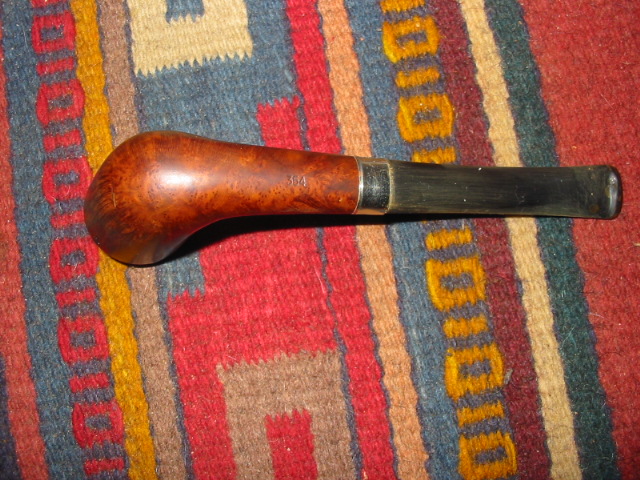
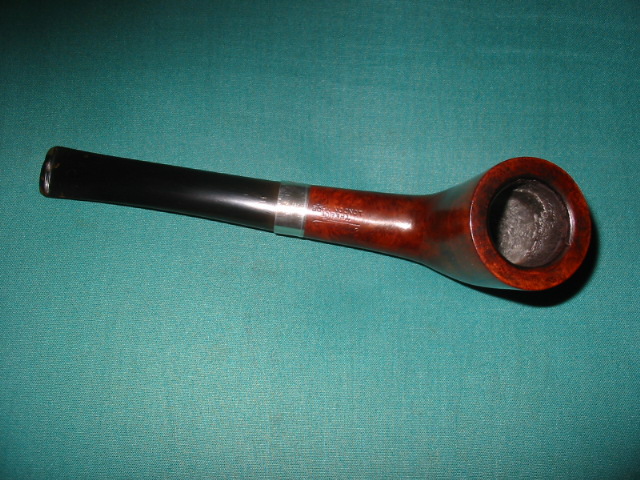
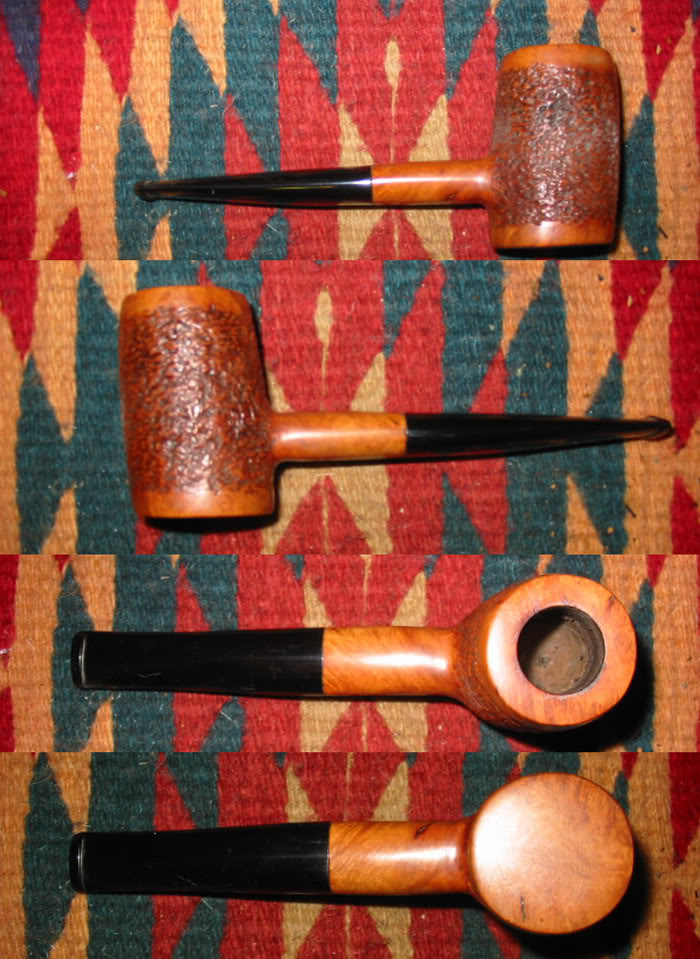
This morning before I finished my coffee I was going through my box of pipes that have come in for refurbishing and came across this old cob. Now usually I don’t rework cobs. If they are in bad shape then I just pitch them in the bin. There is no need to repair them. The stems usually are junk, the shank is not reusable and the bowls are generally not worth cleaning. But this one had an interesting look to it and I kind of thought, what the heck let’s see what I can do with it just for fun.ImageImage

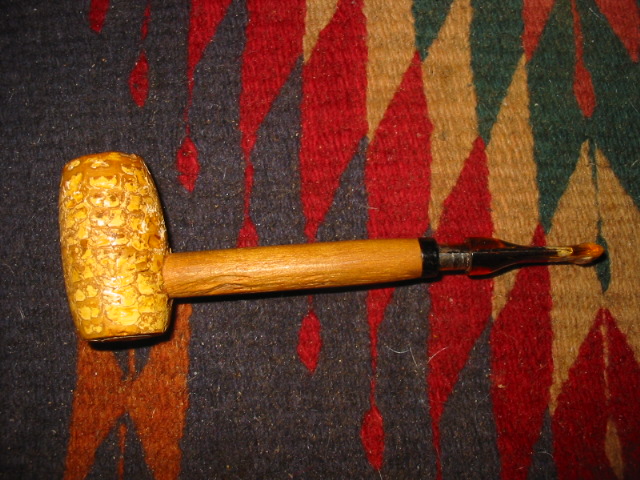
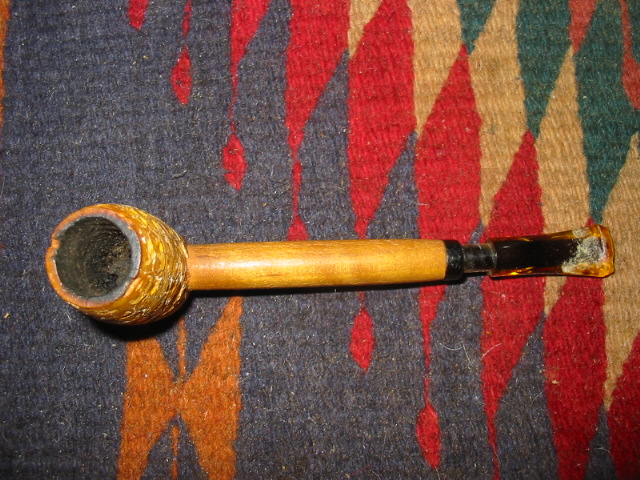
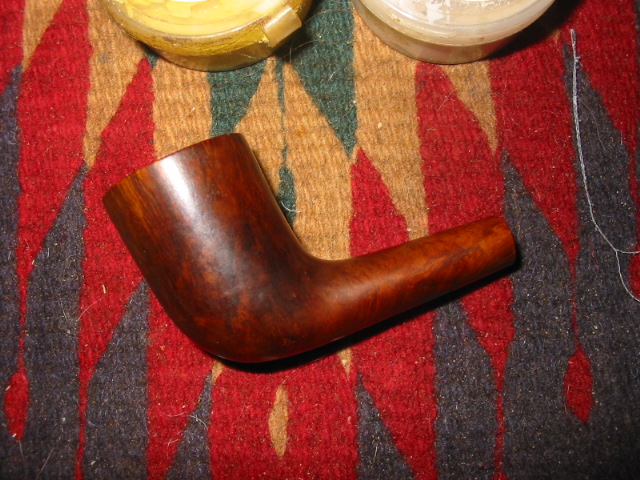
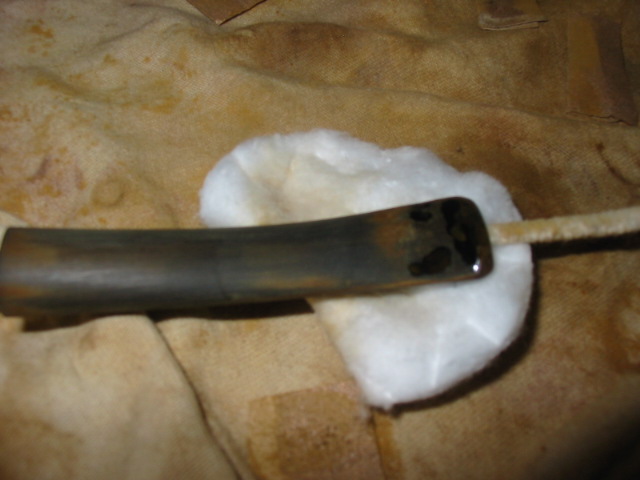
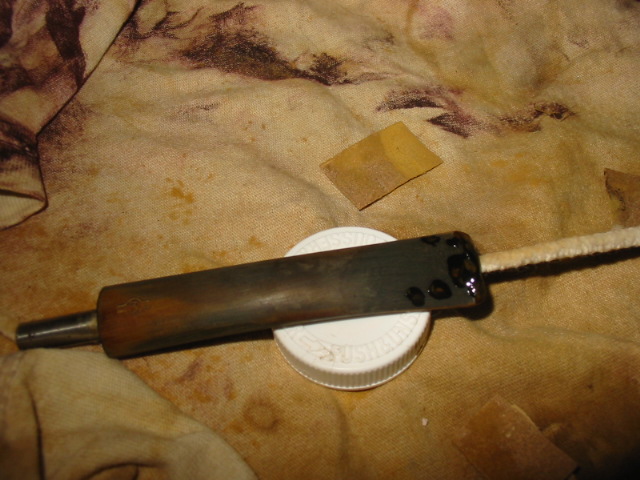
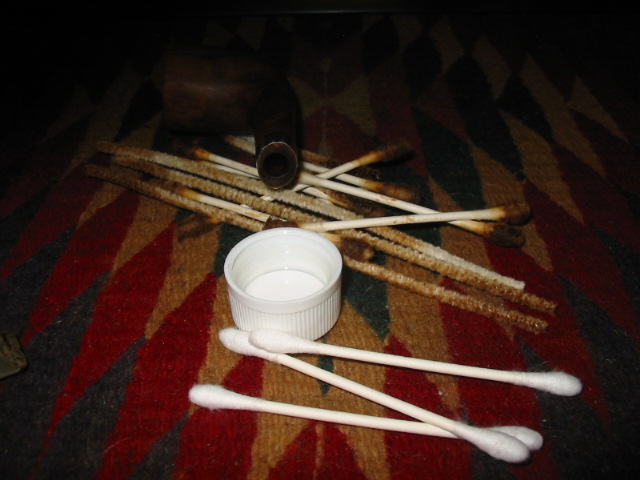
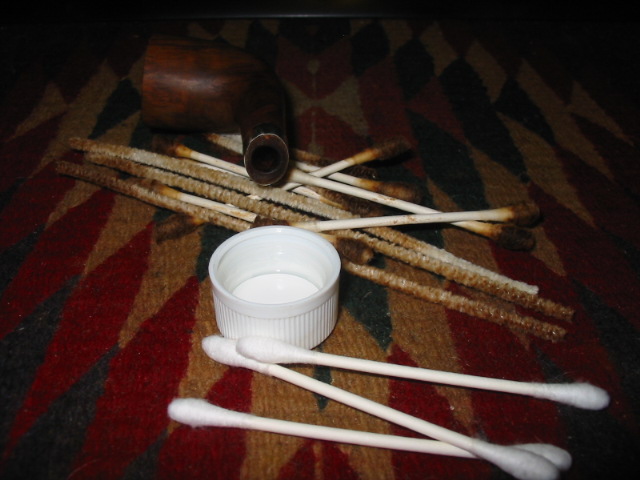
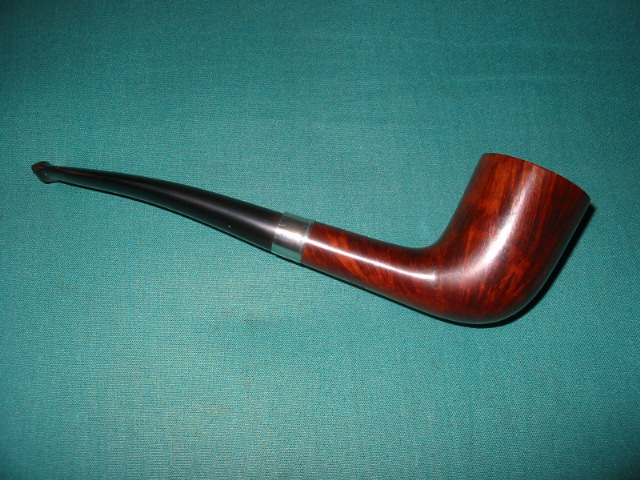
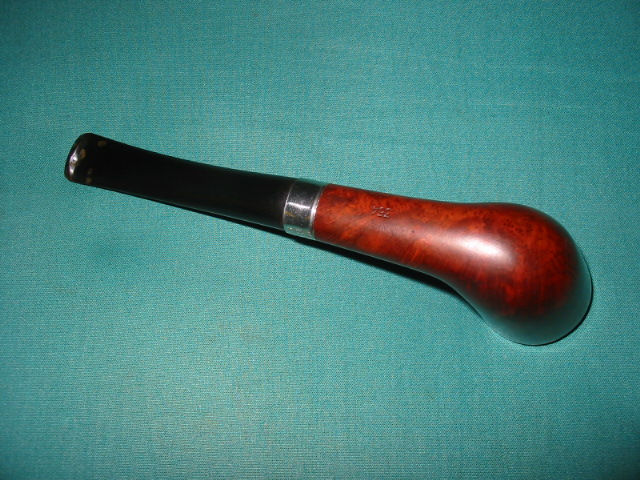
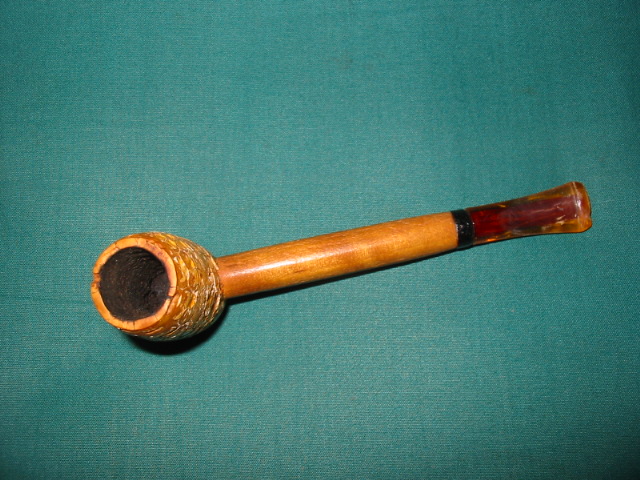
I topped the bowl to take care of the piece that was missing out of the edge and also to clean off the burn. I sanded the outside of the bowl and buffed it with White Diamond to smooth the surface and give it a shine. I cleaned out the tobacco in the bowl and scraped it clean with a dental pick. I worked over the shank and the inside of the stem with many pipe cleaners, cotton swabs and then a dental pick on the slot. I used isopropyl to clean the stem. I then sanded the tooth marks and tooth chatter off the stem. I polished it with a very light touch on the buffer as it is plastic and a good push will melt it! I then polished the stem with micromesh pads. Now I have a serviceable cob for my afternoon smoke! Not bad for about a 30 minute makeover! ImageImage

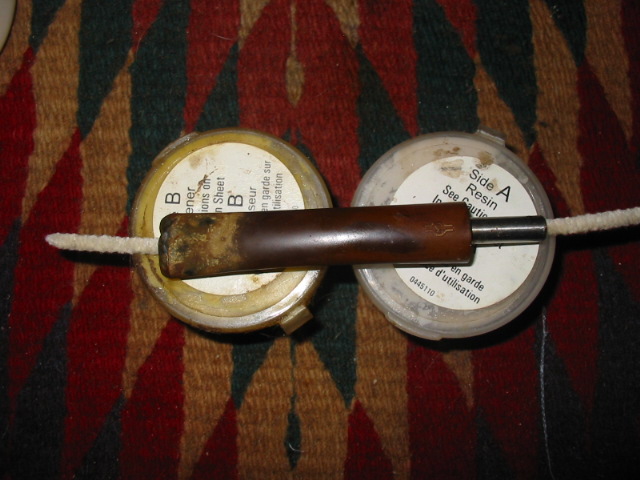
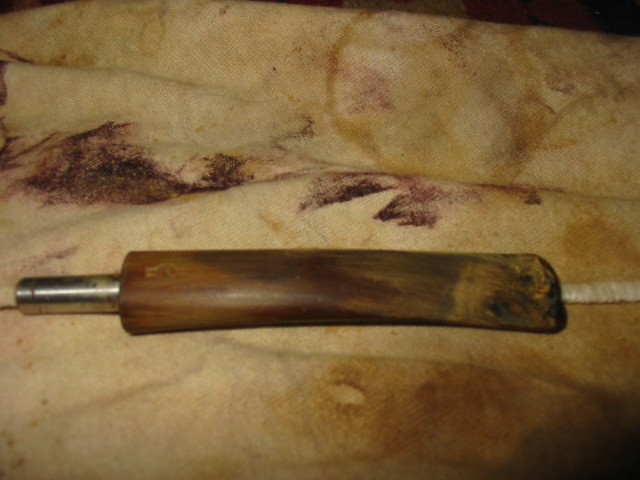
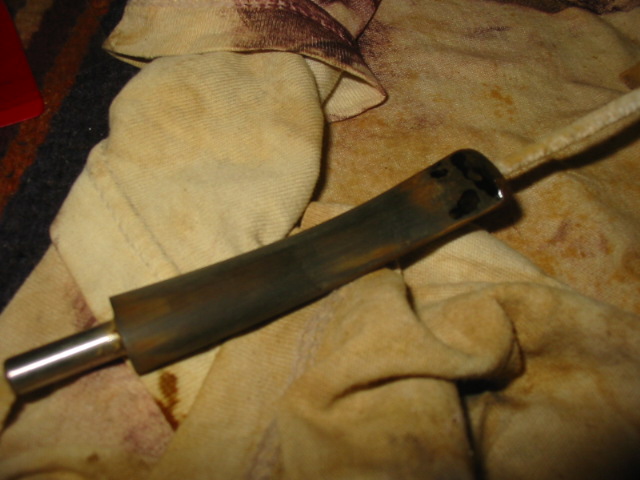
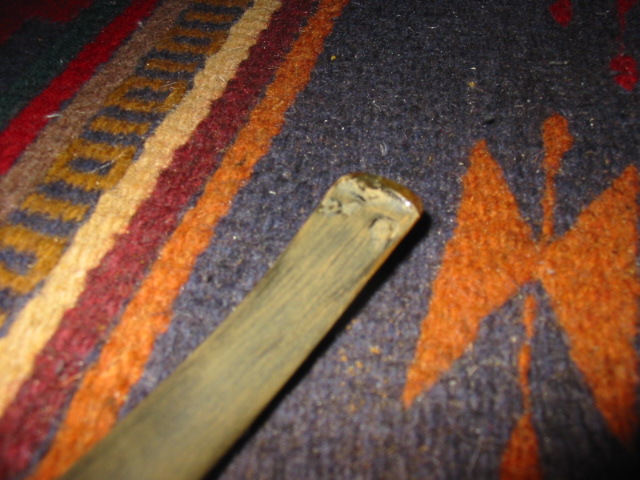
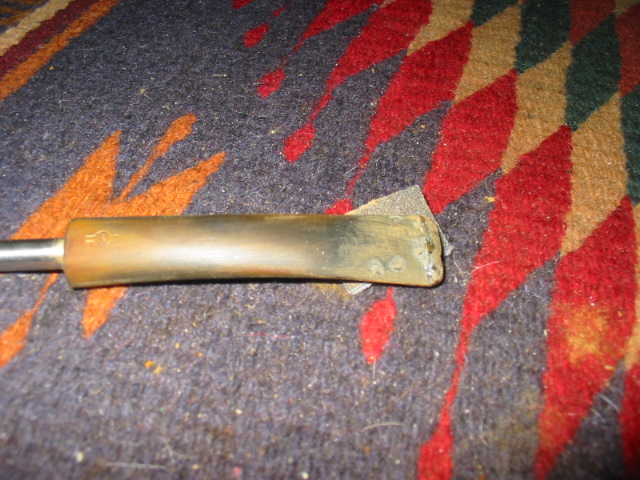
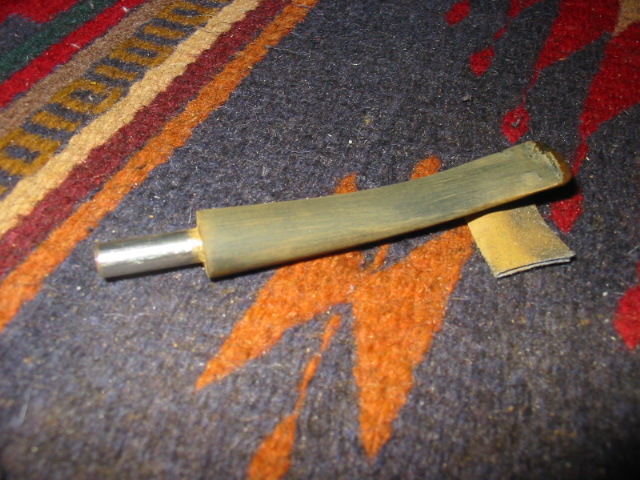
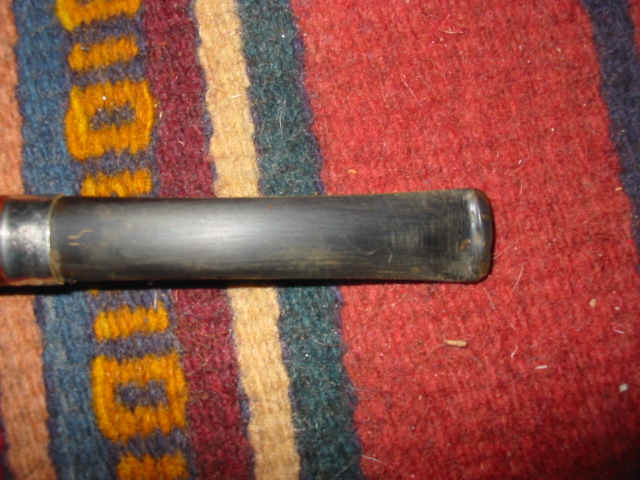
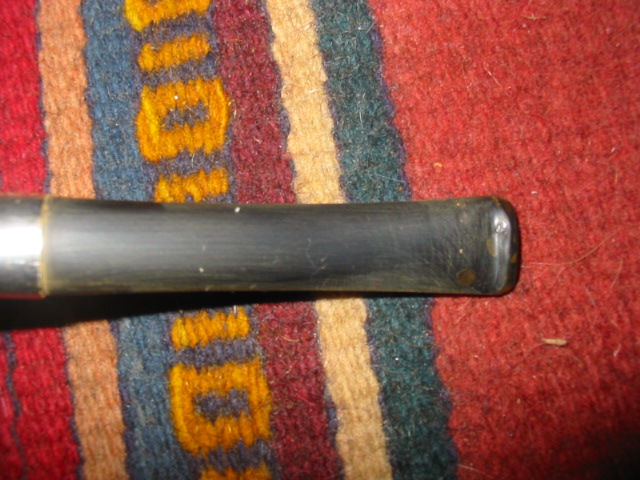
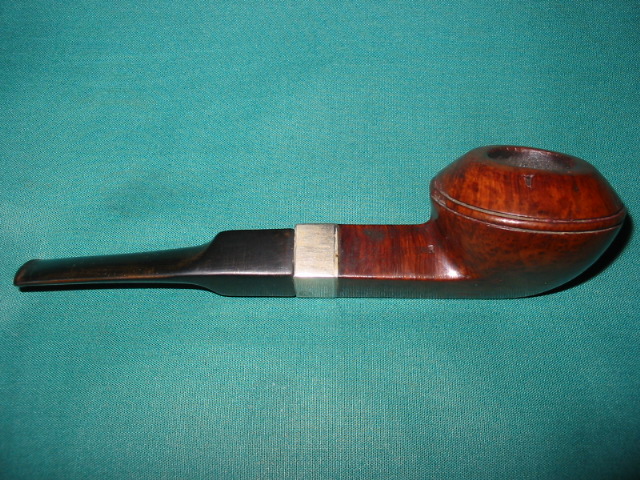
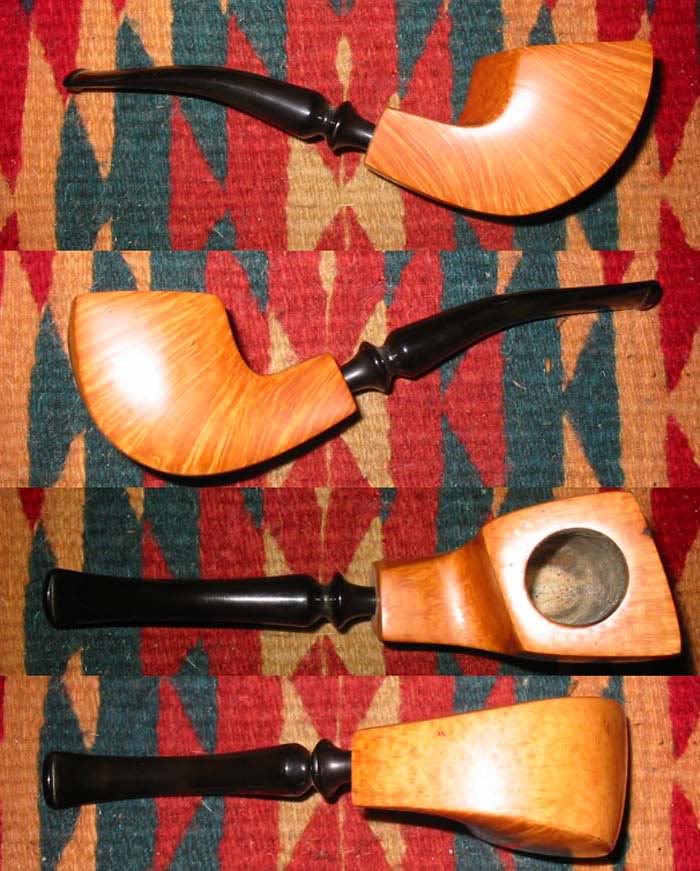
The stem was stuck and I was able to work it free of the stem just before I snapped this picture and decided to blog on it! When I got it out I found that the tenon on it was not wide open and thin – set up for a filter. This one was slotted and opened in the shape of a little oval. I have not seen one that is not wide open to receive a Medico Filter so I am figuring that this must be an old timer of a cob. The shank also has not been drilled to receive a filter – it is only drilled far enough to receive the tenon and then it reduces to the size of the airway in a regular briar. The bowl has a faded tag on the bottom that is unreadable. There was even a bit of unsmoked tobacco in it. Anyway the long and short of it was I decided to have a bit of mercy on this old cob and give it a once over!

Reworking an Imperial Treble Zulu – Stainless Steel Tenon


I picked up this older Imperial Tobacco Co pipe – a Zulu shape number 354. The shape number makes me wonder if the pipe was made by Comoy’s. Maybe someone here knows for sure. The number is missing on the Comoy’s shape number chart on Pipedia. The pipe is interesting to me for several reasons. It is the third in a group of three pipes by Imperial that came to me in an EBay lot. The first two were Two-Points and this one a Treble. I had not heard or seen this line before these came my way. The other reason is that several pipes in this lot had stainless steel tenons! The Treble has one and at first I thought it was original – the stem did not fit well as the tenon was stuck in the bowl and the stem would not seat all the way to the shank. The bowl was in pretty nasty shape. With lots of darkening and the grain virtually obscured under dirt. The rim was caked and tarred. The bowl was full of broken cake and cobwebs. The stem was gnawed with deep bite marks, the button destroyed and the tenon stuck in the shank.

I was able to remove the tenon from shank with a big pair of channel locks and some serious twisting and turning. I filed the end of the tenon and cut grooves in it so that the epoxy would have something to bite into when I pushed it into the stem. I then slid a pipe cleaner into the stem and threaded the tenon on the cleaner. When I got down to the stem I mixed some epoxy (two part mix) and painted it on the tenon. I let it set for a few moments and then pushed it into the stem. I wiped off the excess around the stem and tenon junction. I set it aside and worked on the bowl. ImageImage

I reamed the bowl and cleaned both it and the shank. Then I used a fine grit sanding pad that I have here to work on the lava on the top of the bowl. Once that was done I wiped down the bowl with isopropyl alcohol to remove the grime and the finish. The next photos show the bowl after the initial cleanup. From there I put it in the alcohol bath and went back to work on the stem. ImageImageImage

The next series of two photos show the bite marks on the stem and the state of the button. The bite marks were very deep and some were actually cuts in the stem material rather than just dents. I used my heat gun to raise the dents as much as possible but honestly they did not come up very much at all. This one would be a bit of a challenge. I used sanded the stem around the button and the dents with 240 grit sandpaper to get the oxidation off that area. I was going to use the superglue to repair these bite marks and needed a clean surface to work with. Once I had sanded the area clean I used a dental pick to pick away the brown left in the dents. I wanted to clean out the dents as much as possible and roughen the surface in the dent for a good bond with the glue. The first picture shows the top of the stem, the second shows the bottom. ImageImage

Once they were clean and ready I washed the area down with some isopropyl alcohol to remove any remaining sanding dust. Then I put drops of superglue in the holes on the underside of the stem first. Once they were dry I did the same with the dents on the top side of the stem. The three photos below show the glue in place – they appear as shiny black spots in the photos.ImageImageImage

I set the pipe stem aside to thoroughly dry and took the bowl out of the alcohol bath. I dried it off and then sanded the top of the bowl with the fine grit sanding pads that I have. The top is showing some nice grain and the tars are coming off nicely. ImageImageImage

I wiped down the bowl and rim with acetone (fingernail polish remover) to remove the remaining finish and grime. The white cotton pads in the background of the next three photos show what still remained on the bowl after the alcohol wash. I wanted to get the bowl down to bare briar so that I could refinish it and then give it a new coat of stain. My goal was to highlight the beautiful grain on this one. ImageImageImage

I guess I must get a bit bored doing the same thing or something, because I went back to the stem to sand the patches that I had made. I used emery cloth to get the patches even with the surface of the stem. The next series of three photos show the progress on cleaning up the stem and evening out the stem surface. The patches are beginning to fade and blend into the stem. ImageImageImage

After sanding the stem I cleaned out the stem and the shank. It was a dirty process. The first picture below shows just a few of the many pipe cleaners and cotton swabs. I dip them in the cap filled with isopropyl that is pictured in the photos and swab out the stem and shank with them. ImageImage

I reinserted the stem in the shank and wiped the entirety down with an alcohol soaked cotton pad. I wanted to see where I was at with the stem and the bowl. You will notice the addition of a band in the photos below. Once I refit the stem I could see that the stainless tenon was indeed a replacement and that it was misdrilled – it was set in the stem too high making the match at the tenon impossible. I decided to work on the shank rather than pull the tenon, redrill the hole in the stem and reinsert a bigger tenon. I could still do that should I desire. I sanded the shank a little to reduce the gap between the stem and shank. Then I pressure fit a band on it to guide the stem to the proper fit. It worked well actually and the stem lines up nicely now. ImageImageImageImage

I took the next two photos to show the state of the stem patches at this point in the repair process. You can see that they are virtually invisible on the top of the stem and just slightly visible on the underside. At this point I continued to sand the stem and work at the area around the button to redefine it and to blend in the patches. I used a fine grit sanding pad and an extra fine grit pad to remove the scratches and to make the button area more defined. I then worked over the stem with the usual list of micromesh pads from 1500-6000 grit. ImageImage

I restained the bowl with an oxblood stain and buffed the entirety with White Diamond and then gave the pipe several coats of carnauba wax and buffed with a soft flannel buff to bring out the shine to the pipe. You can see from the profile shots that the button is more clearly defined and the flow of the stem looks correct from the bowl to the button. The patches on the stem have blended quite well and though still visible if you look closely are smooth and black. ImageImageImageImage

Father Tom – an odd bird in the cage


It had been a long flight from Vancouver to London, made longer and harder to endure because of the seatmates around him on the plane, Father Tom was tired.  He had been seated across the aisle from a couple who seemed to have brought a picnic basket stuffed with incredible amounts of food on the plane with them. The man was a Jack Spratt type fellow and his wife was the direct opposite. They made a comical picture for the first part of the flight but the novelty soon wore off. The man sat quietly, almost like he was not present and the woman continuously ate from the moment she took her seat in Vancouver until the plane had touched down in London. You can now imagine the size of her food hamper. The eating would not have been unbearable, but the ongoing smells that kept wafting across the aisle, the cacophony of sound of rustling wrappers and crackling papers as one package after another was opened. Added to that was the visual image of her mouth constantly opening to take in yet another goody, before she was finished chewing what was already in it! On top of that, the man behind him insisted on reading the newspaper with it virtually sitting on top of Father Tom’s head. It seemed that each time he would doze off one or the other passengers would crackle, pop or hit him on the head. The snoring of the person on his right, and the envy of his escape…, you can imagine the frustration from the lack of any rest. Yes indeed it had been a long flight without rest or distraction from the chorus of poor travel companions!

It seemed as if he was never happier than when the rubber tires hit the tarmac of the runway and the plane landed. When the seat belt sign went off he stood and put on his Harris Tweed jacket, his flat cap and took his brief case and quickly headed for the door. Once off the plane, he hung the briefcase by a strap on his shoulder and rummaged through his jacket pocket to find his pipe and tobacco pouch. He packed the bowl with a nice thick Virginia flake as he walked down to corridor of the airport. He remembered that there was a smoking cage in Heathrow near the shoeshine stand at one end of the airport. He set his sights for the cage and the tranquility of being engulfed in a cloud of blue smoke. He had long ago learned that the most ardent cigarette smoker moved away from the blue cloud and he would have space alone.

His bag bumped along against his leg as he walked. Once the pipe was packed he stuck it in his mouth and clenched it as he walked. He was oblivious to the stares of people walking by staring at the aging priest with the pipe in his mouth. I am sure several must have said something about the airport being a non-smoking environment but Father Tom would not have heard that at all. His target was in sight and he was a man on a mission. If you had been close to him you might have heard him humming a song to himself as he walked – or at least you might have thought it was a song. I think though, in reality it was a countdown in terms of steps and paces from the gate to the cage – a series of steps that he had counted before and knew by heart.

He edged his way to the cage, walking in front of several people who seemed intent on blocking his way; oblivious to their words and comments about his person and character. He had made it! He pushed open the door to the cage and entered the smoke filled room. Just inside the door he fumbled for his lighter in his pocket and brought it out to light the pipe. He struck the wheel on BIC lighter and a flamed danced over the surface of the tobacco. The first plume of smoke came out of the pipe. He tamped it with his finger, long ago calloused and impervious to the heat of the burning tobacco. He flicked the lighter and lit the tobacco and drew the smoke into his mouth to savour. Only then did he look in front of him at the crowded room.

The place was packed with a relatively young crowd – at least in comparison to him and how he felt at this time in his life. At that moment they were staring at him – an aging priest with a pipe in his mouth and smoke billowing out around his cap and whiskers. I think that they must have found him comical to look at and were wondering what he was thinking of in his moment of relief. Obviously he was totally immersed in lighting his pipe and savoring the comfort of the moment. Only at that instant did he realize that he was the only one smoking a pipe, the only one over 30, the only one with a coat and collar in the whole room. He edged his way over to a side of the room where there was a ledge on which he could set his briefcase and lean in for the smoke. He nodded to the smokers in the room as he settled in for his retreat.

At that moment he cared not to give one thought to those around him. He did not care what they were thinking or even what they were talking to one another about as he puffed contentedly on his pipe. His eyes were closed and he was lost in thought – nothing profound or philosophical, mind you – just the thought of the long awaited pipeful. He sipped it and settled in comfortably to his corner. The smoke continued to billow out of the pipe and the corners of his mouth. At one moment he blew a couple of smoke rings and probably a soft sigh of contentment.

At the apex of his smoke he was rudely awakened to the crowd around him. A young chap was patting his arm and his shoulder, not softly either but almost roughly. He was saying something and Father Tom was brought out of his reverie to find that several sparks of his tobacco were burning holes in his Harris Tweed and not only was he smoking but his jacket was as well. The young chap almost doused him with some water but Father Tom stopped him and squeezed the sparks with his thumb and forefinger and extinguished them. He winked at the chap and thanked him for his kindness and waved off the crowd. To their amazement the pipe never left his mouth through the entire event. He made the comment that this was indeed one of the best smokes he had enjoyed in quite some time and thanks to the watchfulness of the group it had not been hazardous to his health!

With a twinkle in his eye he settled back into his quietude and finished his bowl before heading back out into the hallways of Heathrow to find a pint and some bangers and mash. He had a three hour layover in London before heading on to Budapest, Hungary for the meetings he was attending.


Using steam to lift dents in briar


ImageIn the early days of our marriage, my wife and I bought a lot of used furniture. Today many would call them antiques but then they were just used furniture and were quite inexpensive. I bought a book on working with furniture called the Furniture Doctor by George Grotz in which he gave all kinds of helpful tips on restoring wood furniture. One of the tips that I used for years was a simple procedure for raising dents in wood. He explained a process of steaming the wood to lift the dents. I can’t remember his exact method any more as I have modified it and made it mine over the years so I don’t know where George leaves off and Steve takes off. It seems to me that it was a simple procedure of place a damp cloth on the dent and applying heat to the surface to make steam. I always used a steam iron from the laundry closet to do this. I would wet a cloth and place it on the dent and then apply the hot steam iron to it. There would be a resultant hiss and steam released. I would repeat the procedure until the dent was gone. Then I would refinish the piece with sand paper and stain it again to match.

When I got into refurbishing pipes I decided to try the same thing. I had not read about it anywhere, though since I have seen others speak of it. I tried the cloth and steam iron but found it too cumbersome to use the big iron on a small dent on a smaller pipe. The iron just over shadowed the pipe. I tried using just the tip of the iron and it worked quite well but I wanted a bit more of a vantage point when I was doing the steaming. I wanted to see that I was actually placing the heat on the dent. So I tried a few methods from the tip of a soldering iron to a lighter to try to accomplish the same thing.

Then one day I was frying a couple of eggs on our gas stove and the lights came on. I laid aside the frying pan and ran down to my work bench for a pipe I was working on to put my idea to the test. I wet a dish cloth (shhh don’t tell my wife!) and then took one of the butter knives from the cutlery drawer. I heated the tip of the blade over the gas flame for a few seconds and then applied it to the wet cloth on the dent in the pipe. Viola! It worked exceptionally well. I repeated it several times on the dents on the rim and around the sides of the bowl and was amazed at how I could put just a bit of the wet cloth and the hot tip of the knife exactly on the spot. It really left little to work out once I was finished. The wet spot under the towel quickly dried and the finish was only left with a matte look to it. I took it to the buffer and within moments the matte area was polished and the pipe was as good as new.

Over the years now I have used this method on lifting dents in the shank area of pipes, on the sides of bowls and on the rims with great success. I have refined it a bit from those early days of experimentation so now I use a small piece of cotton cloth and a “not so new” butter knife that I requisitioned from the kitchen cutlery drawer. I love the control you have over the field of repair. To be able to directly target the spot of the dent and not put the wet cloth on the entire side of the bowl is amazing. I keep using it and reworking it to find other ways to do the work but I come back again and again to the kitchen stove, fire up the gas burners and work on the dents. I have learned, by and large, to do this when the kitchen is not occupied by my wife or daughters as they go about their preparations for dinner – you see, you can teach the old dog new tricks!

Give the trick a try, experiment with it and post here to let us know how it works for you.

Refurbished Mastercraft Bulldog


Another old timer, a Mastercraft Bulldog was in my box of bowls without stems. The squat shape of this little bulldog caught my eye.

The bowl pretty rough looking. The finish was gone and the top had been used as a hammer so it was badly dented and the roughening of the wood left a lot of splintering edges. It was also badly caked and still had a remnant of tobacco left in the bowl. Since it was missing its stem I have no idea when the bowl and tobacco got separated from the stem. I have a coffee can in which I keep a wide range of stems that I have picked up and another can of stem blanks that need to be shaped and fit to the new pipe. For this pipe I found an old stem in the can that was a perfect fit once I removed the old stinger type insert. The stem was badly oxidized virtually brown. There were no tooth marks on the stem and no dents that needed to be repaired.

I reamed and cleaned the bowl and shank until the pipe cleaners came white. I use 99% isopropyl alcohol for doing this as I find that it works well and evaporates quickly leaving no residual tastse. The top had been hammered so much that the bowl had to be topped so that it would be smooth again. The trick with this one was not to remove too much of the top and thus change the angles of the bulldog shape. So I removed enough to give me a smooth surface to work with but not enough to change the shape. Once it was topped and sanded I put it in the alcohol bath and left it while I worked on cleaning up the stem.

I had soaked the stem in a mixture of Oxyclean to soften the oxidation and prepare it for the sanding that would be necessary to clean it. Once I remove it from the soak I buffed it with Tripoli to remove the oxidation that had softened and then sanded it with 240 grit sandpaper. Once I had removed the brown surface I used 400 and 600 grit wet dry sandpaper to continue the smoothing and polishing process. I finished the stem with the micromesh pads from 1500 – 6000 grit. Then I set it aside to wait until I had finished bowl and polish the entirety on the buffer.

I took the bowl out of the alcohol bath and sanded it with the micromesh pads to remove the surface scratches and remaining marks in the bowl surface. I steamed out the dents with a damp cloth and a hot knife and then sanded them smooth again. I restained this bowl with a Medium Brown stain. I flamed it to set the stain, inserted the stem and then took it to the buffer and buffed it with White Diamond to polish it. The entirety was then given several coats of carnauba wax. This one found a new home with someone who loved the shape and it is providing a great smoke for them. ImageImageImage

Refurbished and Restemmed this interestingly shaped no name pipe


I refurbished this interestingly shaped no name pot/rhodesian/bulldog (?) or you name it shape. I was drawn to it and liked the look of it when I found it in my box of pipes and bowls that I have gathered for refurbishing. It is a box I have that at one point held over 300 pipes that needed work but is slowly shrinking even though I add to it each time I go scavenging. I am pretty much incorrigible about picking up estate pipes and hunting for them. I am getting more picky over the years as to what I want to work on but I pick up ones that will be a challenge to me or that I like the brand or the shape.

This one was truly a mess. I forgot to take pictures of what it looked like when I took it out of the box but I will describe it to you. In many ways it was no different than most of the others that I work on. The bowl was caked to the point of barely holding any tobacco any longer. It was a tarry mess on the rim and running down the sides of the bowl. There were dents and deep “wounds” in the briar of the rim. It also was without a stem. The silver band on the shank was badly beat up and to be honest the pipe was downright ugly. But in its ugliness I saw something that drew me to pick it up and see what I could do with it. So I took it to my work table and it became a project that took me two days.

I did what I call field dressing the pipe the first day. That includes reaming the bowl and cleaning out the grit and grime from the shank and bowl. I washed the bowl down with acetone to remove the overflow from the bowl and rim on the outside of the bowl. I also removed the dirt and grease marking on the bowl. Once it was clean I fit a stem for it. It has a diamond shank, and those have always been a challenge for me to make a proper fit. I find that on these old timers what appears to be a diamond with equal sides never truly is equal. Each side on this one had a different measurement. I used a blank that I had here and shaped it to fit. It is difficult to get each side correct and maintain the shape to fit the shank. I cut the tenon with my Pimo tenon turner and worked the shape for a long time to make it flow with the shank. It took a long time because I would get one side perfect only to lose a bit of the angle on the next side. I finally was able to get the angles right and fit the stem to the shank well. In the finished photos you can get a bit of an idea of the work involved in that.

I then removed the silver band and put the bowl in the alcohol bath while I tried to straighten and smooth out the silver band. I got a lot of the wrinkles and dents out of it but a few still remained even after my work.  I set it aside to reinstall on the shank once it was restained and turned my attention to sanding and polishing the stem. I used 400 and 600 grit wet dry sandpaper as usual to remove the scratches and marks left by the shaping. I then use my normal regimen of 1500-6000 grit micromesh to bring a shine to the stem. When I had it finished and ready for the buffer I put it aside and went back to the bowl.

I removed the bowl from the bath and sanded it with the usual variety of sand papers and micromesh pads. Then I restained it with a cherry stain that I use on some of the older pipes as I have found that it brings out the old colours from the briar and really looks good. I then sanded again with micromesh and put the stem on it before taking it to the buffer to polish it with White Diamond. Once that was finished I gave the bowl and stem several coats of carnauba wax.

There are no stamping or marking on it all. But the unusual shape continues to attract me in an odd way. It is 6 inches long, bowl height is 2 inches. The chamber diameter is 1 inch and the chamber depth is1 1/4 inches. The rim is chamfered and clean. Anyone have a name for the shape??
ImageImageImageImage

Refurb on the Weingott Billiard


I finished up refurbishing this large Weingott Billiard that was a part of the threesome I picked up on EBay. All three were huge pipes and were ones that I would definitely recycle to someone else once they were refurbished. The Weingott is a BIG piece of briar – the pipe has a length of 8 inches, height 2 1/2 inches, the bowl inside diameter is 7/8 inches, outside diameter 1 1/2 inches. I took a picture of it next to a Dunhill group 4 to show the size of this big fellow in a picture.

The overall condition of this pipe was poor. Obviously it was a much loved pipe as it had been smoked hard. I had to ream and clean it – the bowl was very caked and the shank and stem almost clogged with a goopy tar substance. The finish was blackened on both sides of the bowl and the rim was caked and dented. The dents and scratches were deep and the surface was rough from knocking the pipe out on something hard. The stem had a very deep oxidation and was greenish brown. There were not tooth marks on the stem – at least the pipe had that going for it.

I reamed the bowl and cleaned out the shank. That took some work to unclog the airway. I ended up using a piece of wire to break through the accumulated tars and residue. I then used a drill bit and turned it into the shank until the airway was clean and open. Then I used a shank brush and many pipe cleaners and isopropyl alcohol to clean out the remaining residue. I packed the bowl with cotton bolls and used an ear syringe to fill the bowl with alcohol so that I could leach out the tars and oils in the bowl. I put a cork in the shank and set the pipe aside overnight.

Image

The oxidation on the stem took a lot of work as it was deep. I quickly buffed the stem with Tripoli to remove the surface oxidation and see how deep it went. The first coat of greenish brown seemed to be untouched by the Tripoli. It was hard and it smelled bad! I then sanded it with emery clot (fine grit) to break the surface of the oxidation. From there I sanded with 240 grit for a long time until I finally got the stem to the point that it was just a brown haze in the stem. I then put the stem in a soak of Oxyclean overnight to let it soften and draw out the remaining oxidation.

In the morning I took the cotton bolls out of the bowl and dumped them in the rubbish bin. They were dark brown and in places almost black. I let the bowl dry out and had a coffee. Then I topped the bowl to remove the damage that was on it. Once it was smooth and clean I put it in the alcohol bath to soak in order to remove the finish and the grime on the surface. It sat for about an hour and ½ before I took it out of the bath and dried it off. I sanded it with micromesh pads 2400-6000 grit and then restained it with a cherry stain.

I removed the stem from the Oxyclean soak and dried it off. I buffed it again with Tripoli and then sanded it with 400 and 600 grit wet dry sandpaper. Then I polished it with micromesh pads 1500-6000 grit to bring the stem back to black. Once finished I put it back on the pipe and buffed the whole pipe with White Diamond and several coats of carnauba. The pipe is now finished and ready for the new owner!

ImageImageImage

Refurbished a Peterson’s Deluxe Zulu


In one of my EBay purchases was this little Peterson’s Deluxe Zulu shape #268. To me this pipe epitomizes the Zulu shape – in other words, when I think Zulu I think of a pipe that is shaped like this. When the pipe arrived the bowl was dirty and caked (two things that I almost forget to say as they are to be expected in estate pipes and I am surprised when I find one that is not). The finish was mottled with light and dark spots where the stain had worn off. It also had some flecks of paint on the surface that are not clearly visible in the photos below. The rim was very caked and covered with tars. Fortunately there was no charring that was visible as I looked it over. The stem also had paint flecks on it and was slightly oxidized. There were tooth marks on the top and bottom of the stem that would need to be repaired.ImageImage

I reamed and cleaned the bowl and the rim of the pipe. The shank took some work with isopropyl alcohol and many pipe cleaners and a shank brush before it was clean. I wiped down the surface of the bowl with acetone to clean off the remaining finish and the paint spots. I use cotton makeup removal pads that I picked up at the store. They work great and are easier to use than just cotton bolls. Once the finish was cleaned I dropped the bowl in the alcohol bath to soak while I turned my attention to the stem.

I buffed the stem to remove the oxidation and the paint spots. I was careful to avoid the area where the stem and shank meet so as not to round the sharp edges and ruin the great fit of the two. I heated the tooth marks that needed to be lifted with my heat gun and when they had come back as far as possible I sanded the stem with 240 grit sandpaper to remove what remained. I sharpened up the edge of the button with my needle files to give it a good crisp edge. I then sanded the whole stem with 400 and 600 grit wet dry sandpaper and water. I finished the sanding and polishing process with micromesh pads from 1500 to 6000 grit. Once that was finished I laid the stem aside with a coat of Obsidian Oil and turned back to the bowl.

I took the bowl out of the alcohol bath and restained it with a medium brown aniline stain. I flamed it, let it dry and then took it to the buffer and buffed it with White Diamond. This was done and the entirety buffed and polished with carnauba wax to give it several layers of wax. The cross grain, birdseye and straight grain on this beauty are well laid out. ImageImageImageImage

Some of the pipes I have carved over the years


I thought I would post some pictures of the pipes I have carved over the years. Some are better than others and many are no longer in my collection as I have given them to friends. I post them here on the blog to show some of the possibilities with finishes – smooth, rusticated and semi rusticated – and with various stains and also as naturals.

Pipe #1 (only in terms of pictures not in terms of creation). A quarter bent ball or apple with a chamfered rim. The stains include a black under stain and a medium brown over stain.ImageImage

Pipe #2 – A ¼ bent tadpole. This is a great smoker and very light weight. The stains are a contrast of reds and browns.

ImageImage

Pipe #3 – A saddle stem Dublin with a Medium Brown stain

Image

Pipe #4 – a ¼ bent Tomato. This one is rusticated to look like old leather. The undercoat is black stain then it is buffed and given a top coat of Medium Brown stain.Image

Pipe #5 – A semi rusticated apple. The bottom of this pipe is plateau briar and the rustication carries that theme upward to mid bowl. The rustication has a black understain and a medium Brown top coat. The smooth portion is medium brown. Image

Pipe #6 – A Canadian with a leaf pattern carved over a flaw in the briar. The stain is a Medium Brown.Image

Pipe #7 –a bent Dublin. On this one I used a medium brown stain. I had Stephen Downie help me with the shank extension and work on this one. Image

Pipe #8 – Volcano shape with plateau on the bottom. This one has a black understain to highlight the beautiful grain and then a medium Brown overstain. The stem is a modified saddle.ImageImage

Pipe #9 – ¼ bent egg. This one is stained with a black understain and then a tan overstain. The grain is very interesting on it.Image

Pipe #10 is a natural Dublin with no stain. Many coats of carnauba wax were applied. The band is a brass pressure fitting that I shaped to give it character. Image

Pipe #11 is a poker with a mix of rustication and smooth. It was stained with a medium brown stain. And waxed with carnauba. Image

Pipe #12 is a fanciful freehand that I did to highlight the amazing grain that flows along the pattern. This one is also natural in terms of finish – no stains were used. Just wax.Image

Reclaimed – an Old Baronite Ceramic and an Old Briar


Blog by Steve Laug

When I saw this pair of old pipes on EBay I was intrigued enough to put in a bid. I did not bid high as I was intrigued not captured by them. As I looked at them the upper pipe had some interesting possibilities in grain and the shape of the stem and angles looked old to me. The bottom pipe fooled me a bit – when I first looked I thought it might be a meerschaum with an amber stem. But after bidding and a bit more digging on the internet I found that it was a double walled ceramic pipe and the stem appeared to be Bakelite. I found out that I had bought these pipes when I got home from work that evening. They would arrive soon and I would have the pleasure of working on them.Image

When they arrived I took time to look them each over to get a feel for what needed to be done to bring them back to service. Looking over the briar pipe first I could see that it is old. The stem style and the orific button point to an older pipe. The silver band has no hallmarks or stamping so it is no help in identifying the pipe’s brand or age. The stamping on the shank is too faint to see even with a bright light and a jeweler’s loupe for magnification. The bowl was thickly caked and much of the tars of the tobacco were built up on the rim. It appeared that the rim was not damaged with char or denting. The finish, as can be seen in the photo below as very dirty and darkened with oils from the hands on the sides of the bowl. The stem had deep tooth marks and much chatter from teeth along top and bottom from the button up about a ½ inch.

The second pipe was a double walled ceramic pipe. It was stamped Baronite Made in Holland. The outer surface of the bowl was dirty and darkened with what appeared to be grease. The band on it appeared to be a golden colour under the dirt. The stem was in pretty good shape but the cork seal on the tenon was dry and thus loose in the shank. The inside of the bowl was caked and black. The shank was also black and dirty. I shined a light into the shank and could see the gap between the walls of the inner and outer bowl. This area was in need of a thorough washing.

On the briar pipe I cleaned and reamed the bowl. The shank was a mess and full of grime and grit. It took many pipe cleaners, a shank brush and isopropyl alcohol before it was clean and the pipe cleaners came out white. The deep tooth marks on the stem were lifted with my heat gun and then sanded smooth. I used 240 grit sandpaper, 400 and 600 grit wet dry sandpaper and then finished the work on the stem with micromesh pads from 1500-6000. While I worked on the stem I had put the bowl in the alcohol bath to soak and hopefully remove the darkened and soild finish. When I took it out of the bath and dried it, I sanded the bowl and restained it with a medium brown aniline stain. I put the stem back on it and then buffed it with White Diamond and polished it with carnauba wax

On the Baronite Ceramic pipe I did a bit of seeking advice and found out that I could flush out the bowl with hot water. I did this at my sink with the water running through the bowl and out the shank. I repeated it the other direction as well. Several times I filled the bowl and shank and shook it to help the water scour between the inner and outer bowl. After about five minutes of this the water came out clear and the pipe smelled clean again. I decided to do the same process with isopropyl alcohol as well and ran it through the pipe both directions for a final cleaning. I used repeated applications of Vaseline on the cork seal on the tenon to soften it and expand it again. Once that was done the stem fit snuggly to the shank. I cleaned the stem with isopropyl alcohol and pipe cleaners and a shank brush to get the dark areas out of the inside of the stem near the button. Once the stem was done I put it on the pipe and buffed the entirety with carnauba wax. The series of photos below show the finished look of the two pipes.ImageImageImage