An Edwards Dublin Reborn


Blog by Greg Wolford

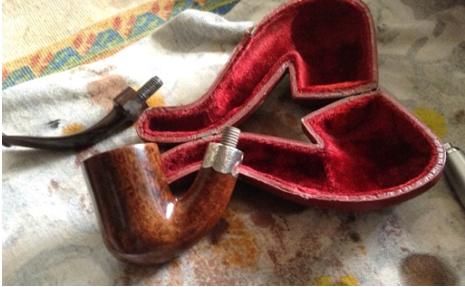
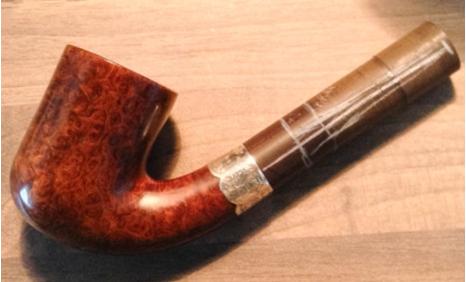
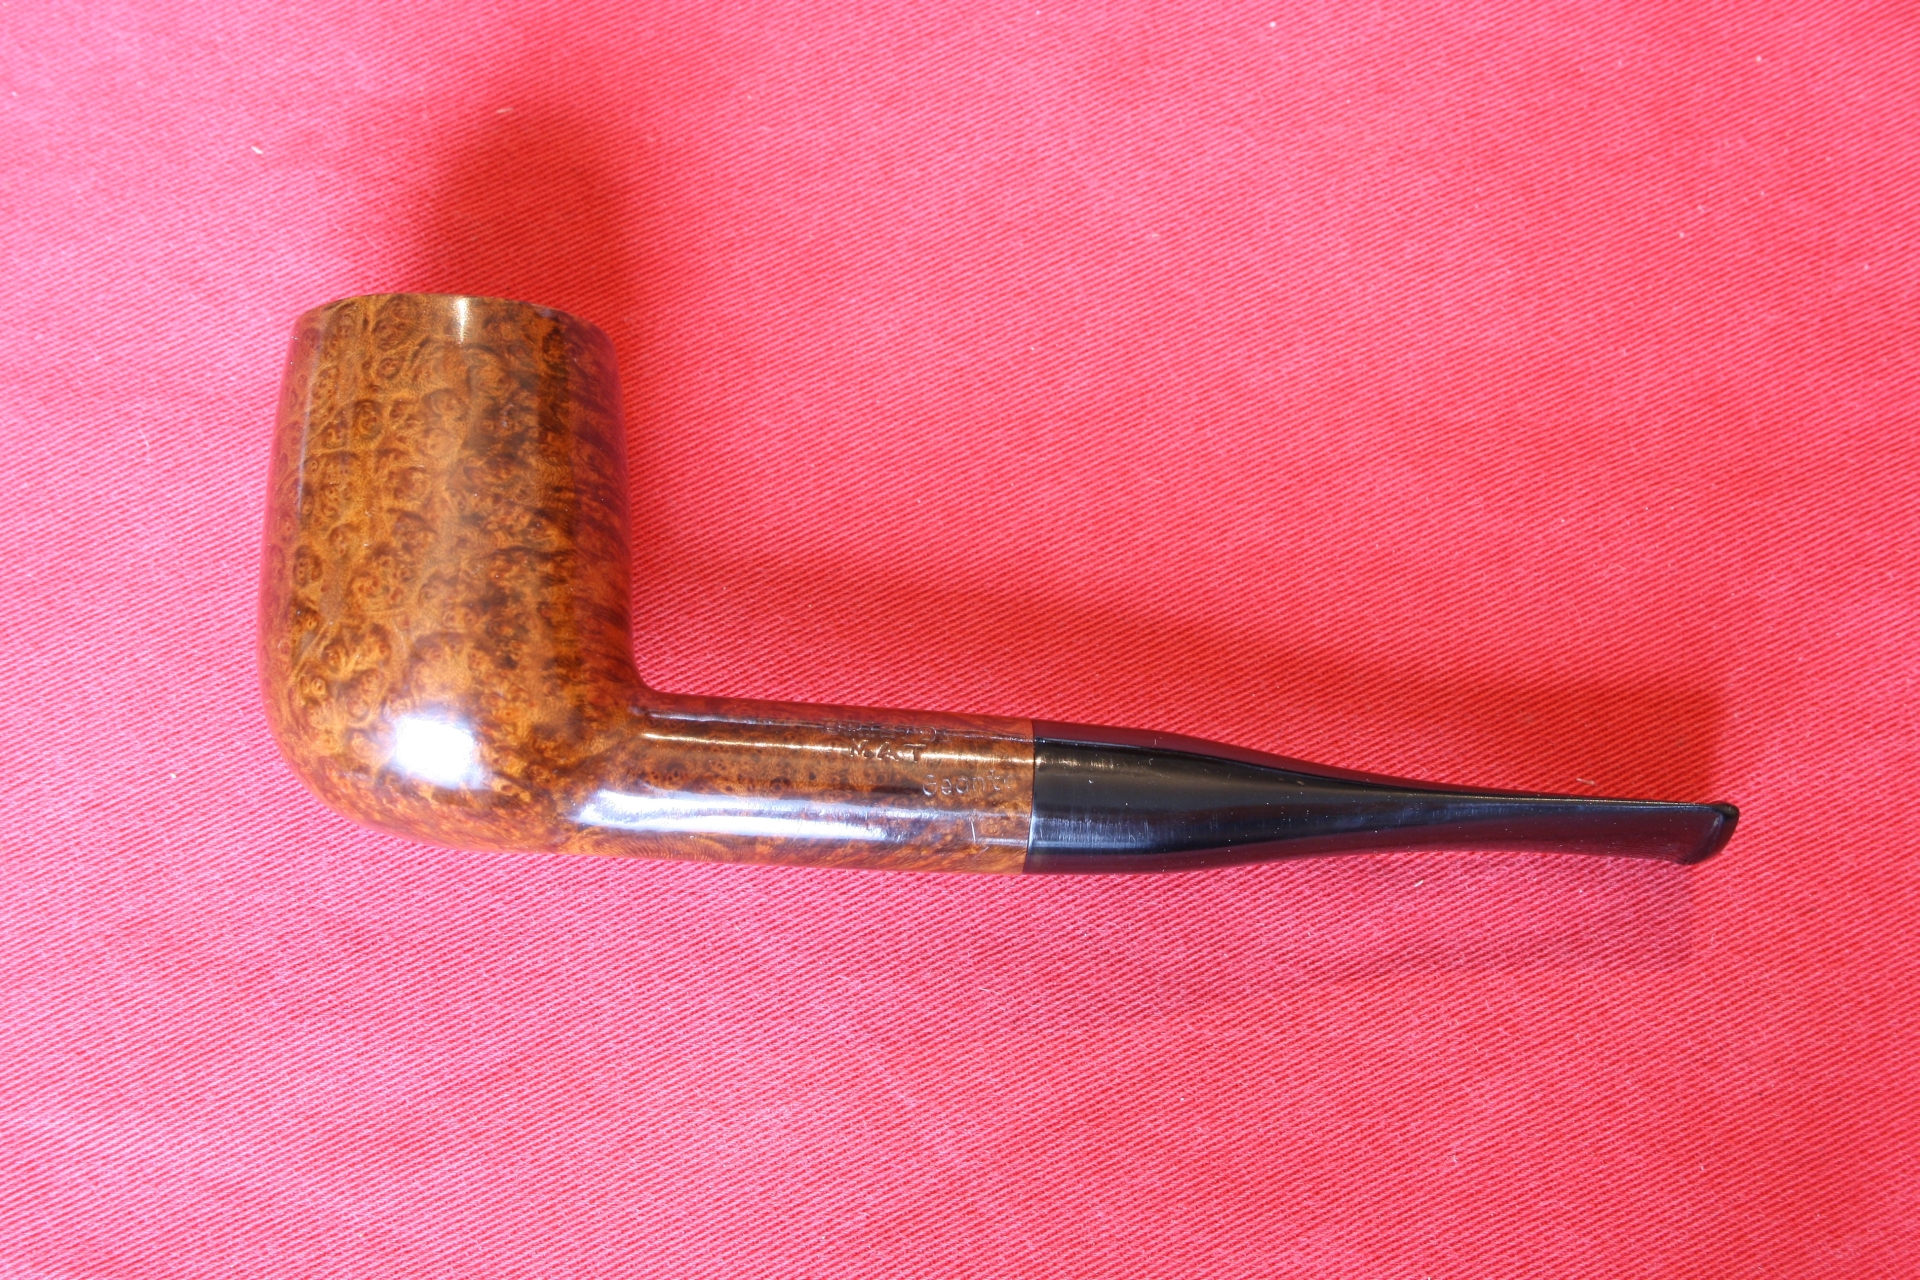
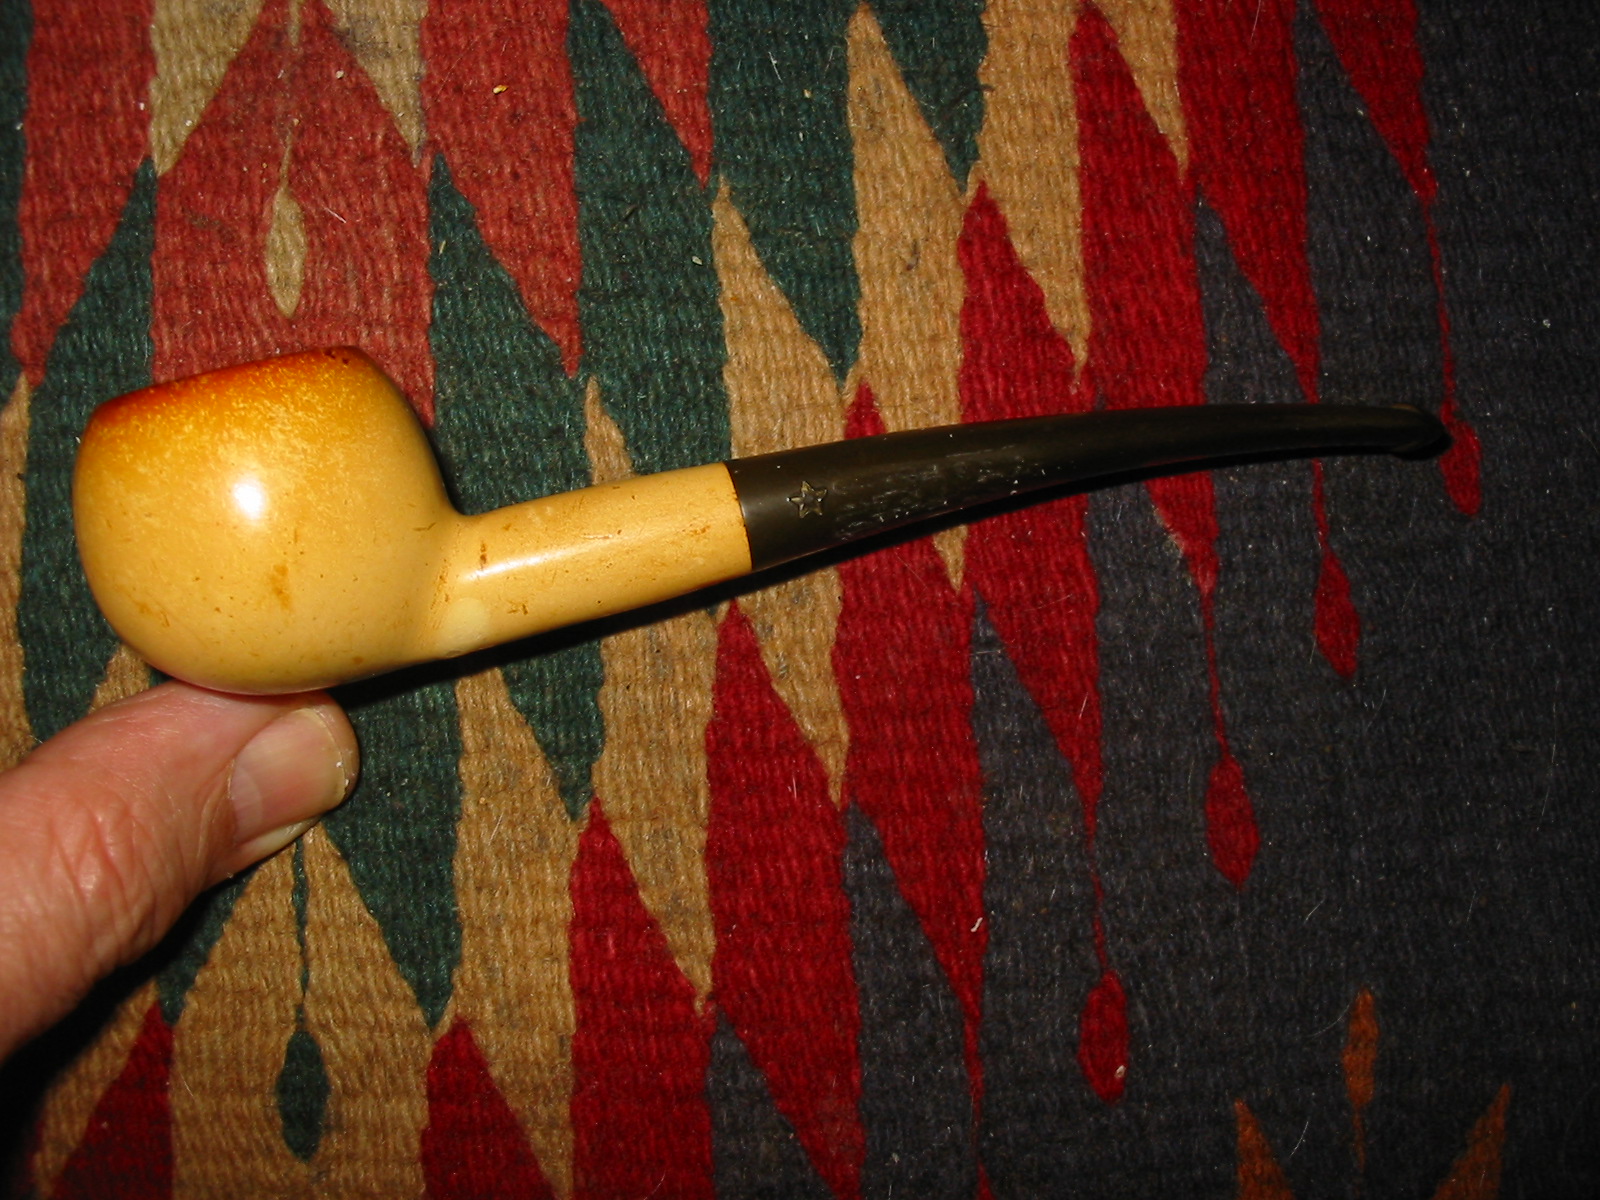
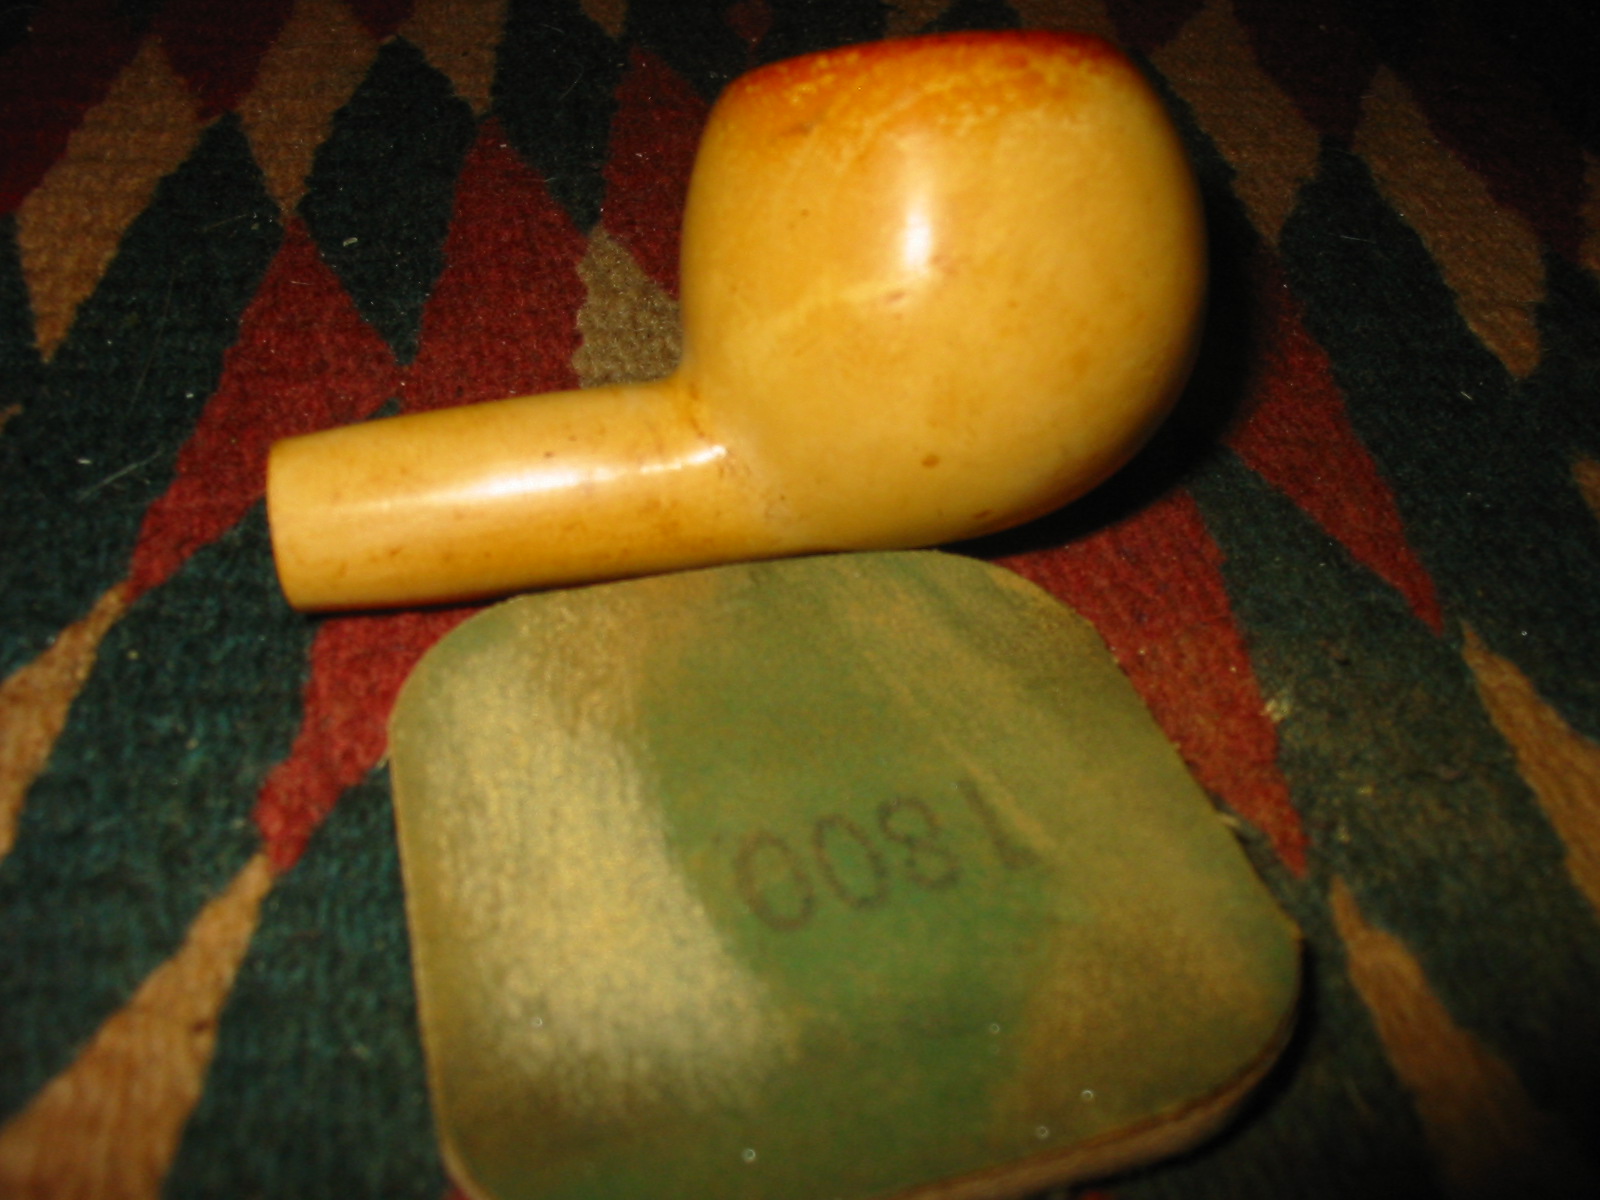
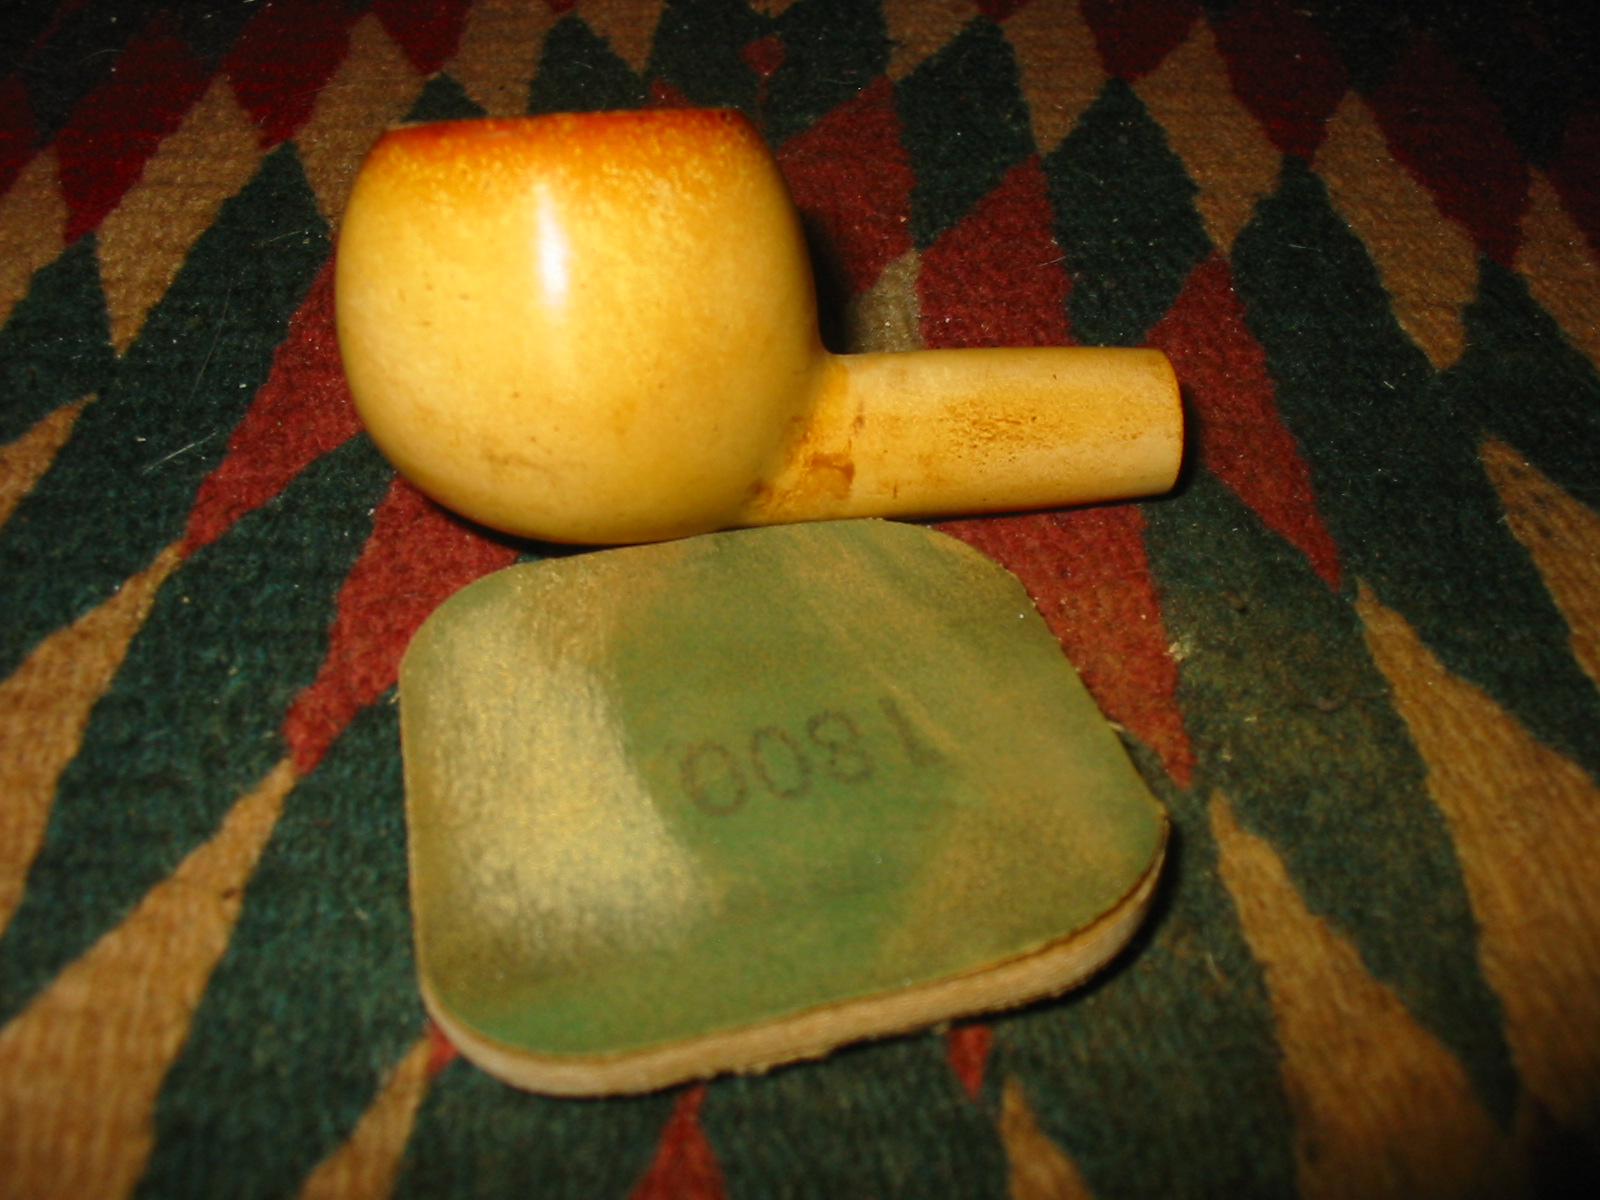
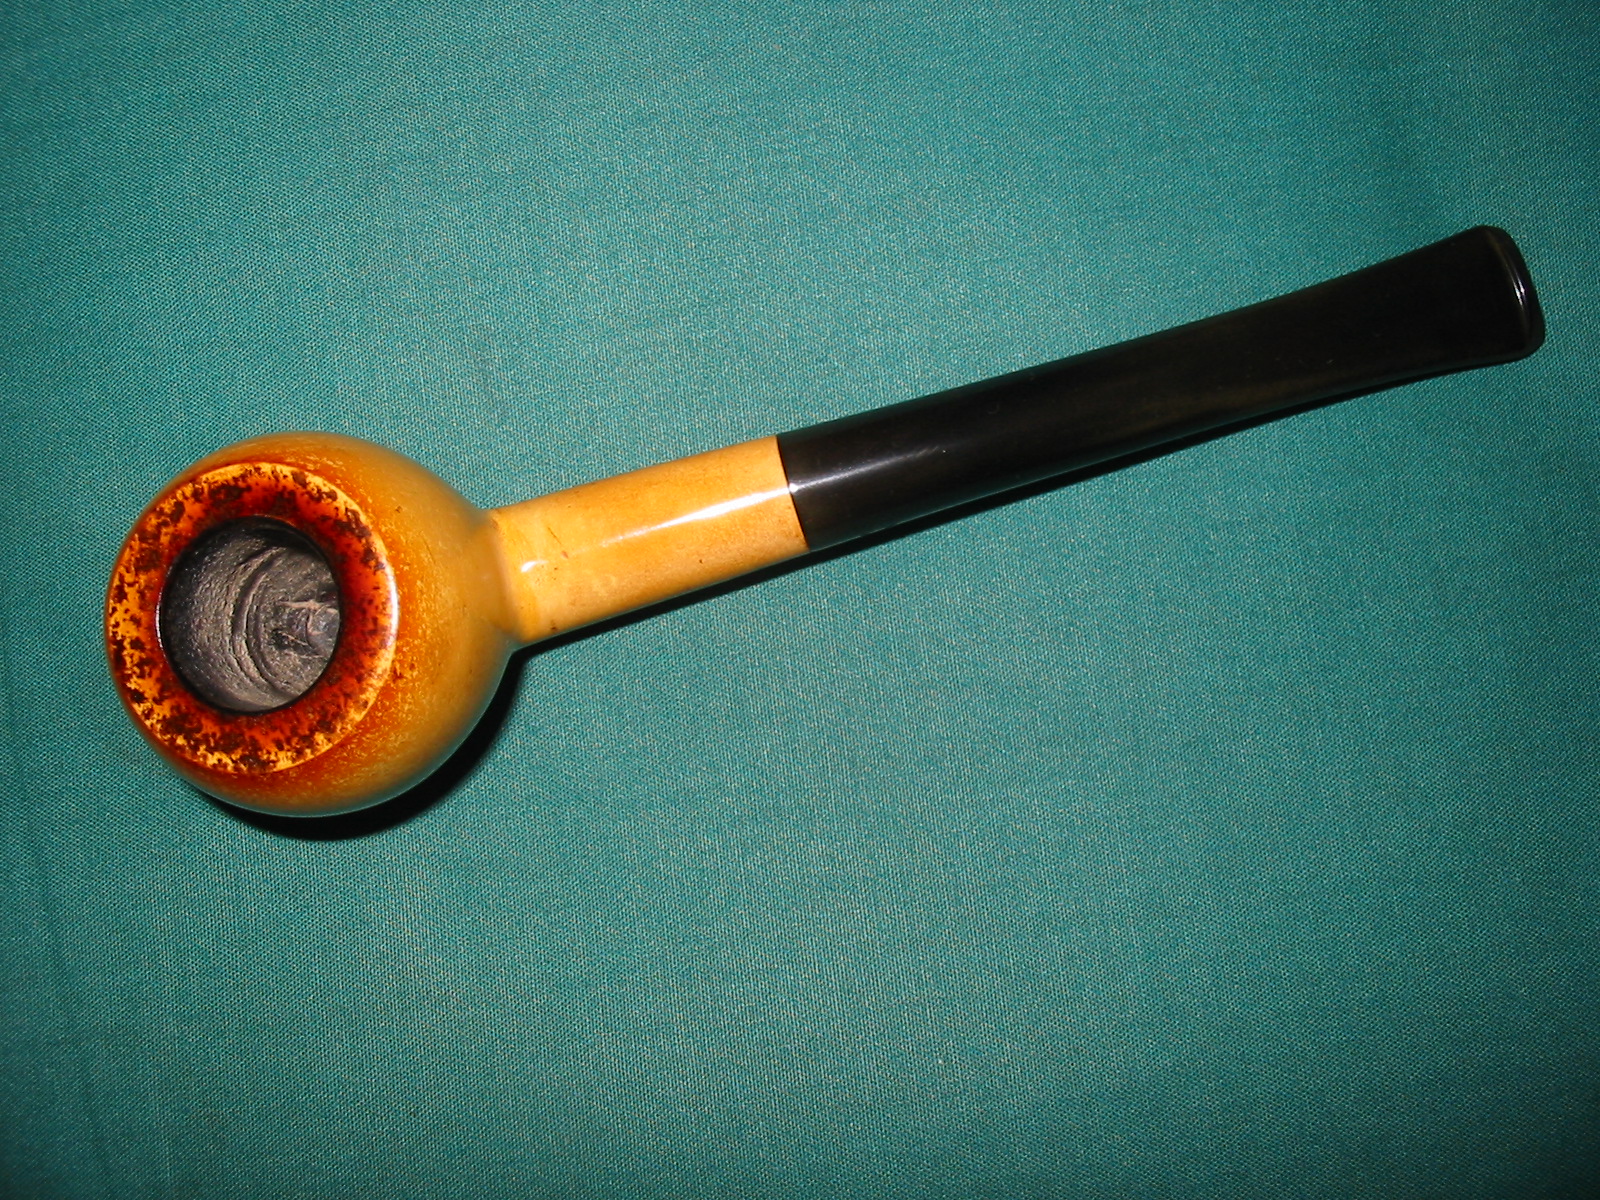
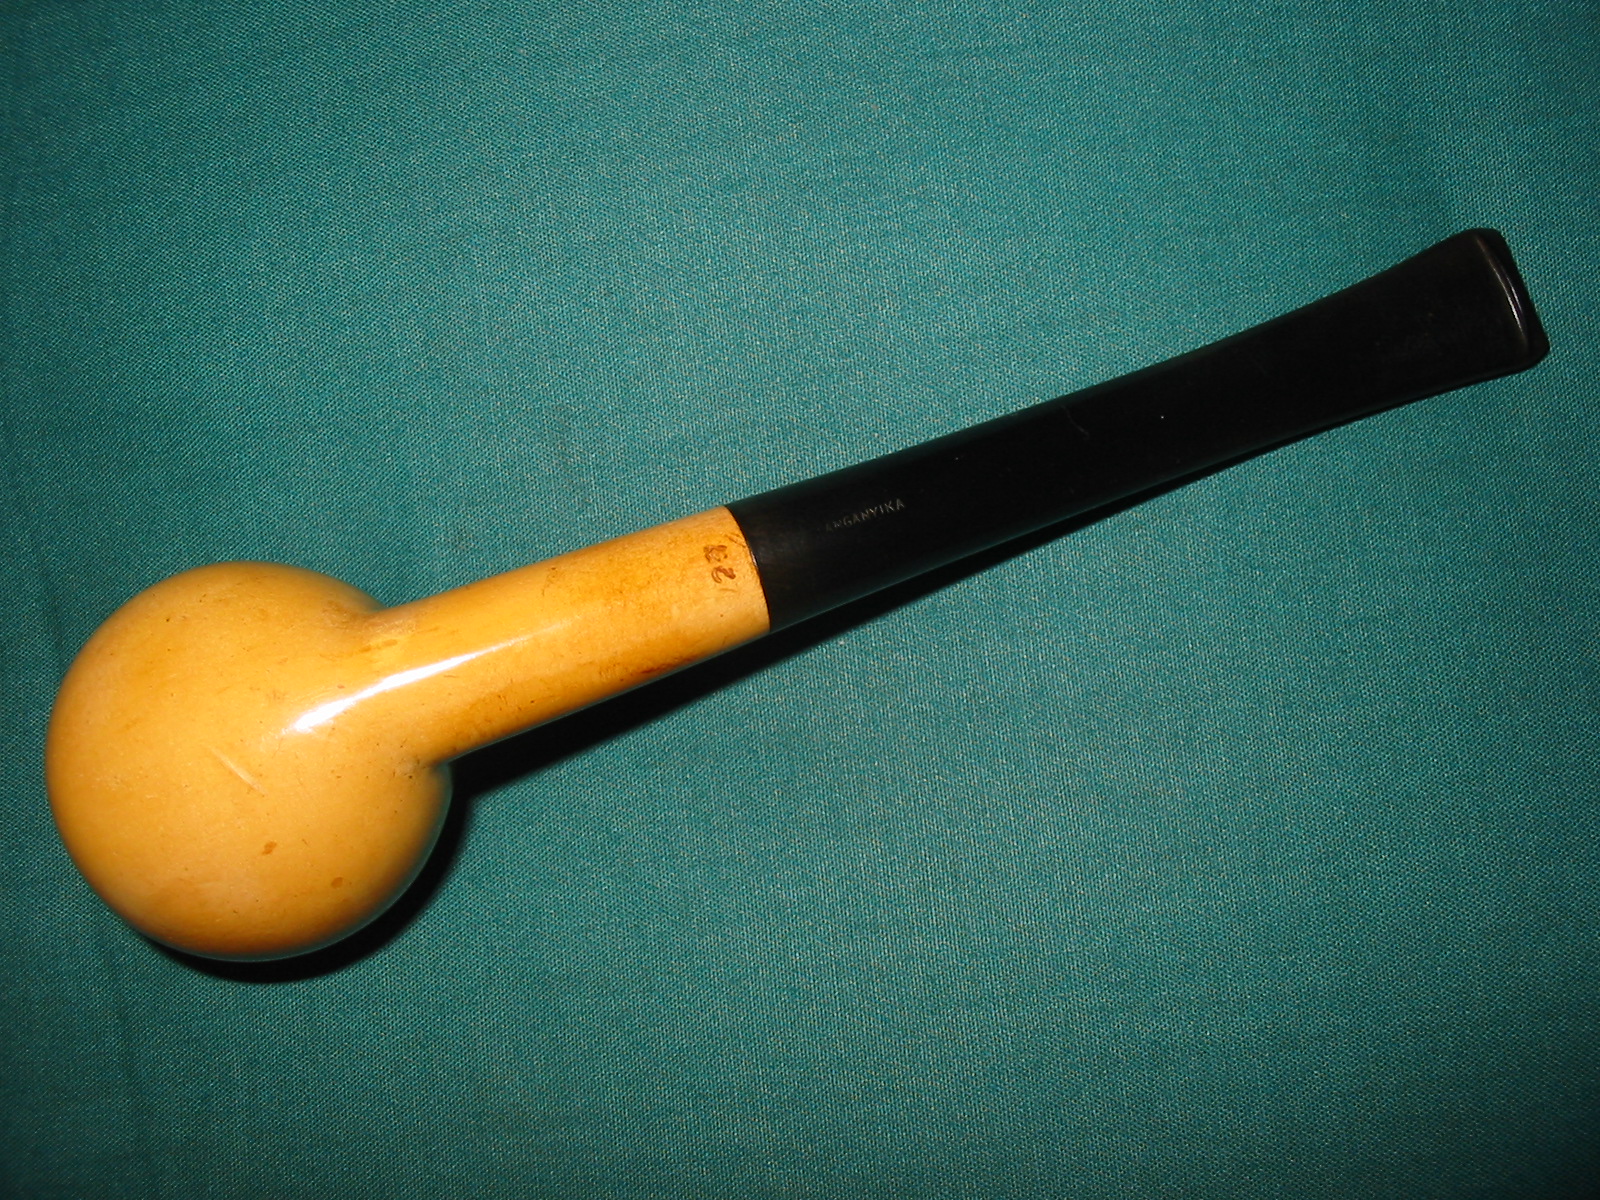
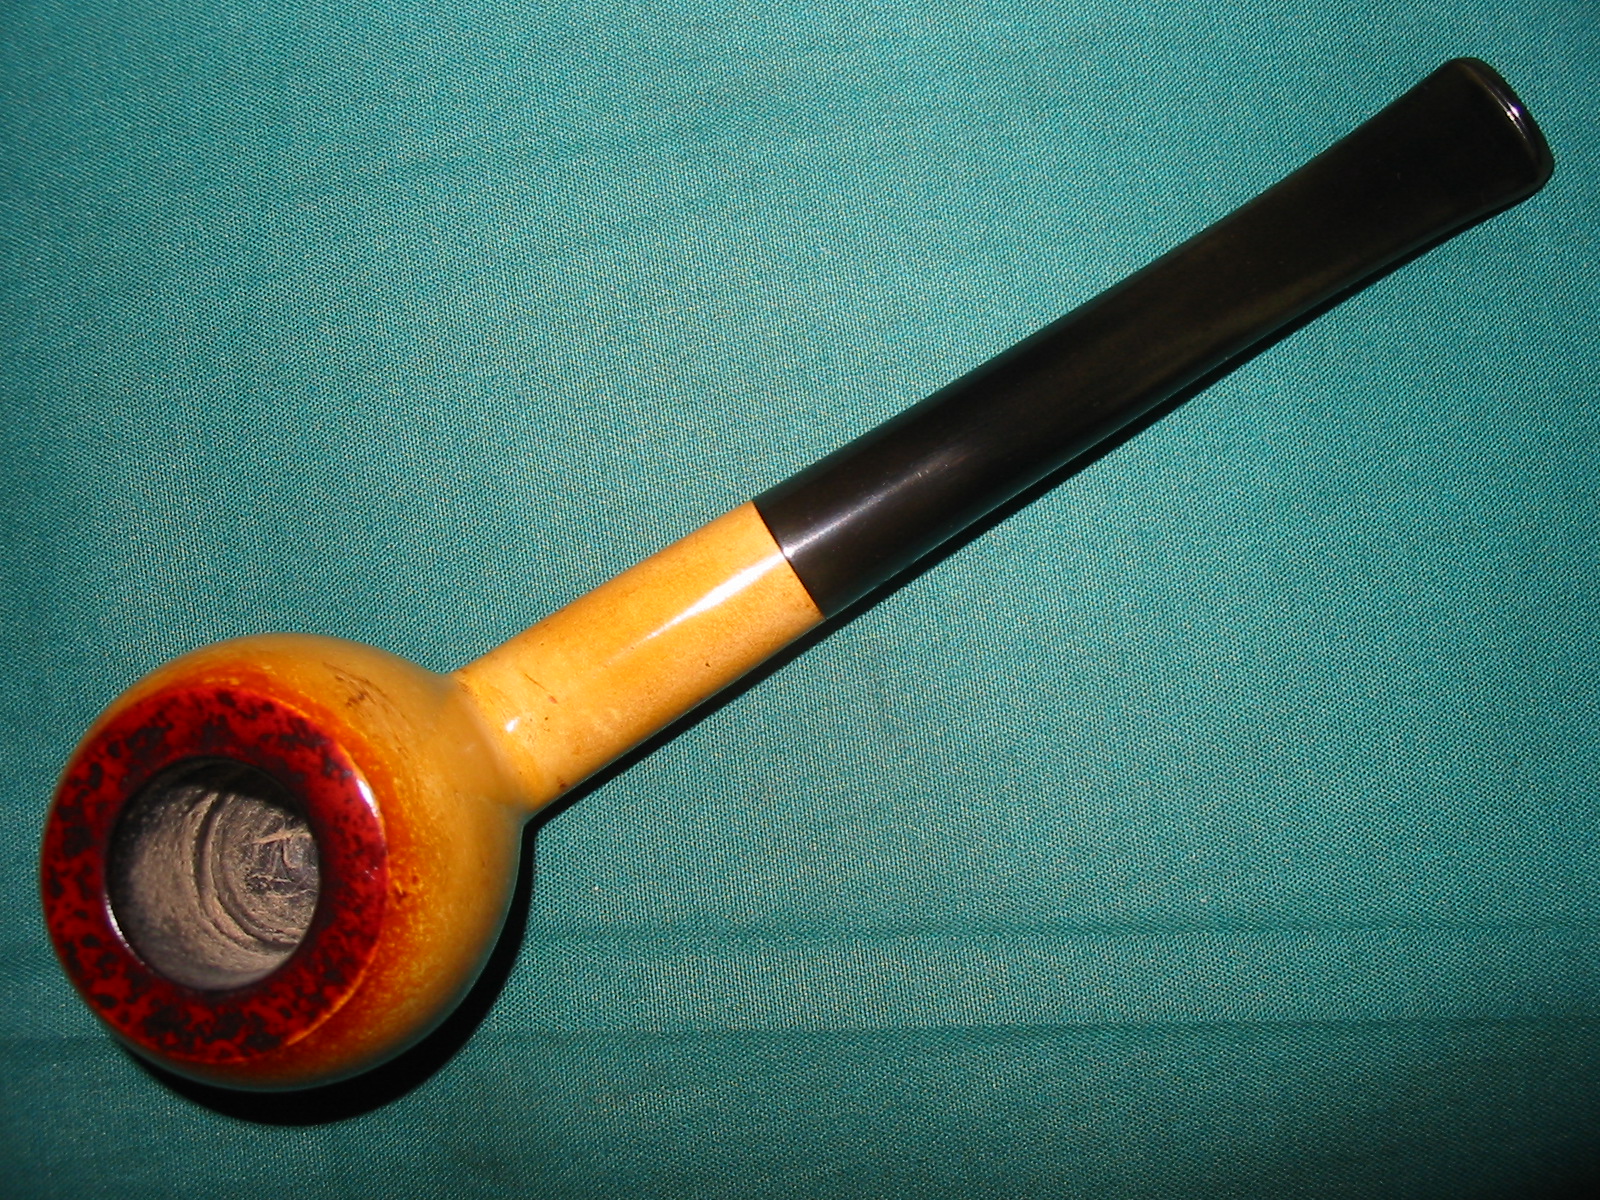
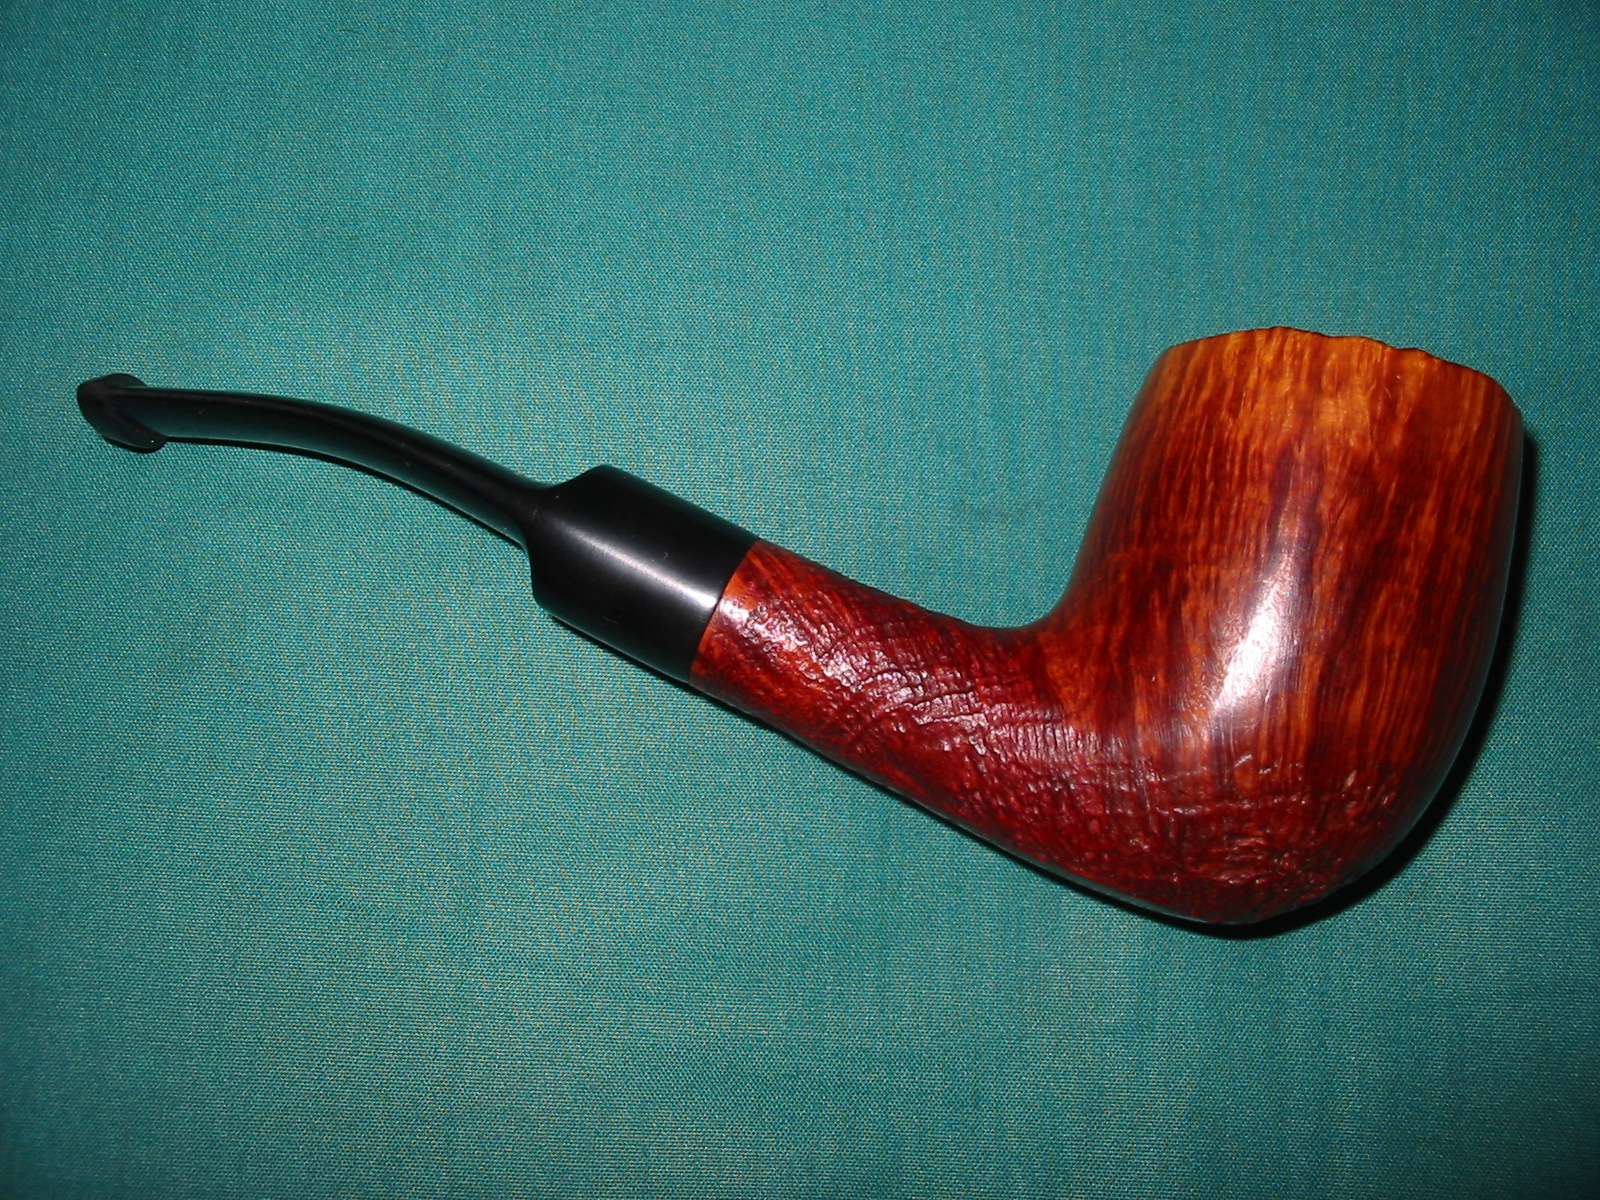
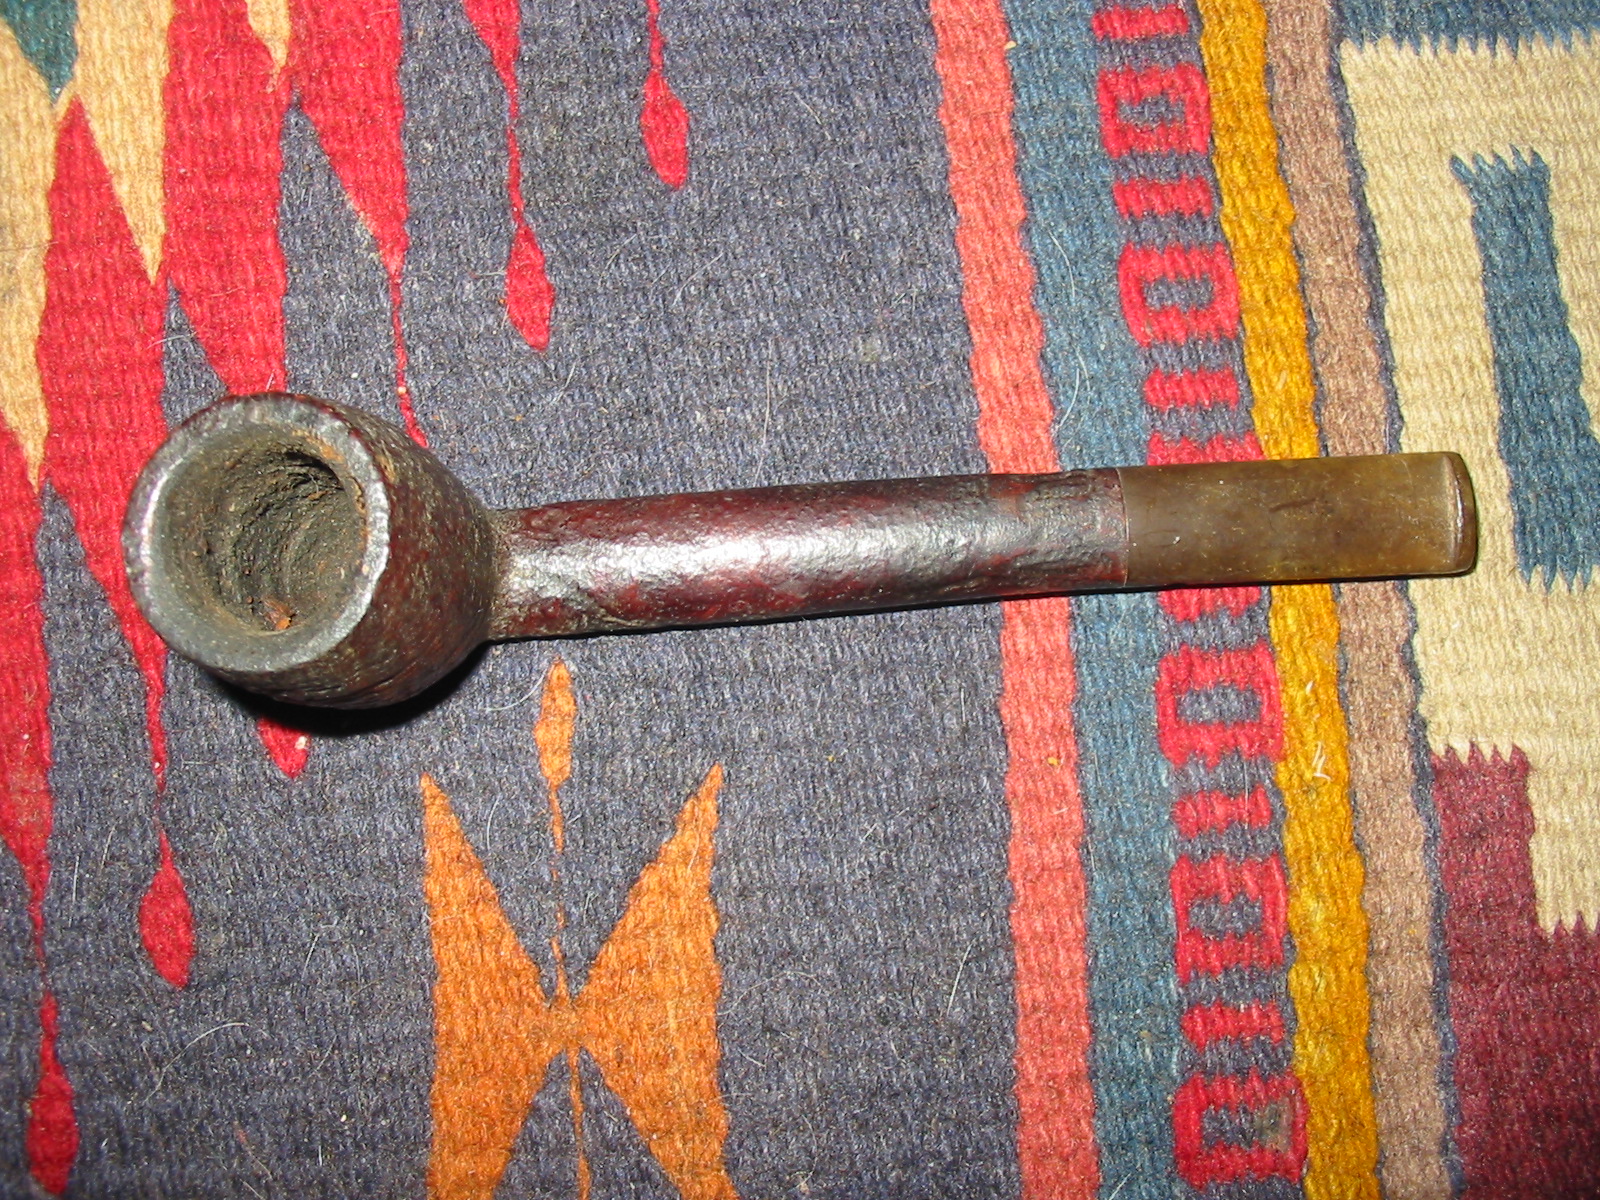
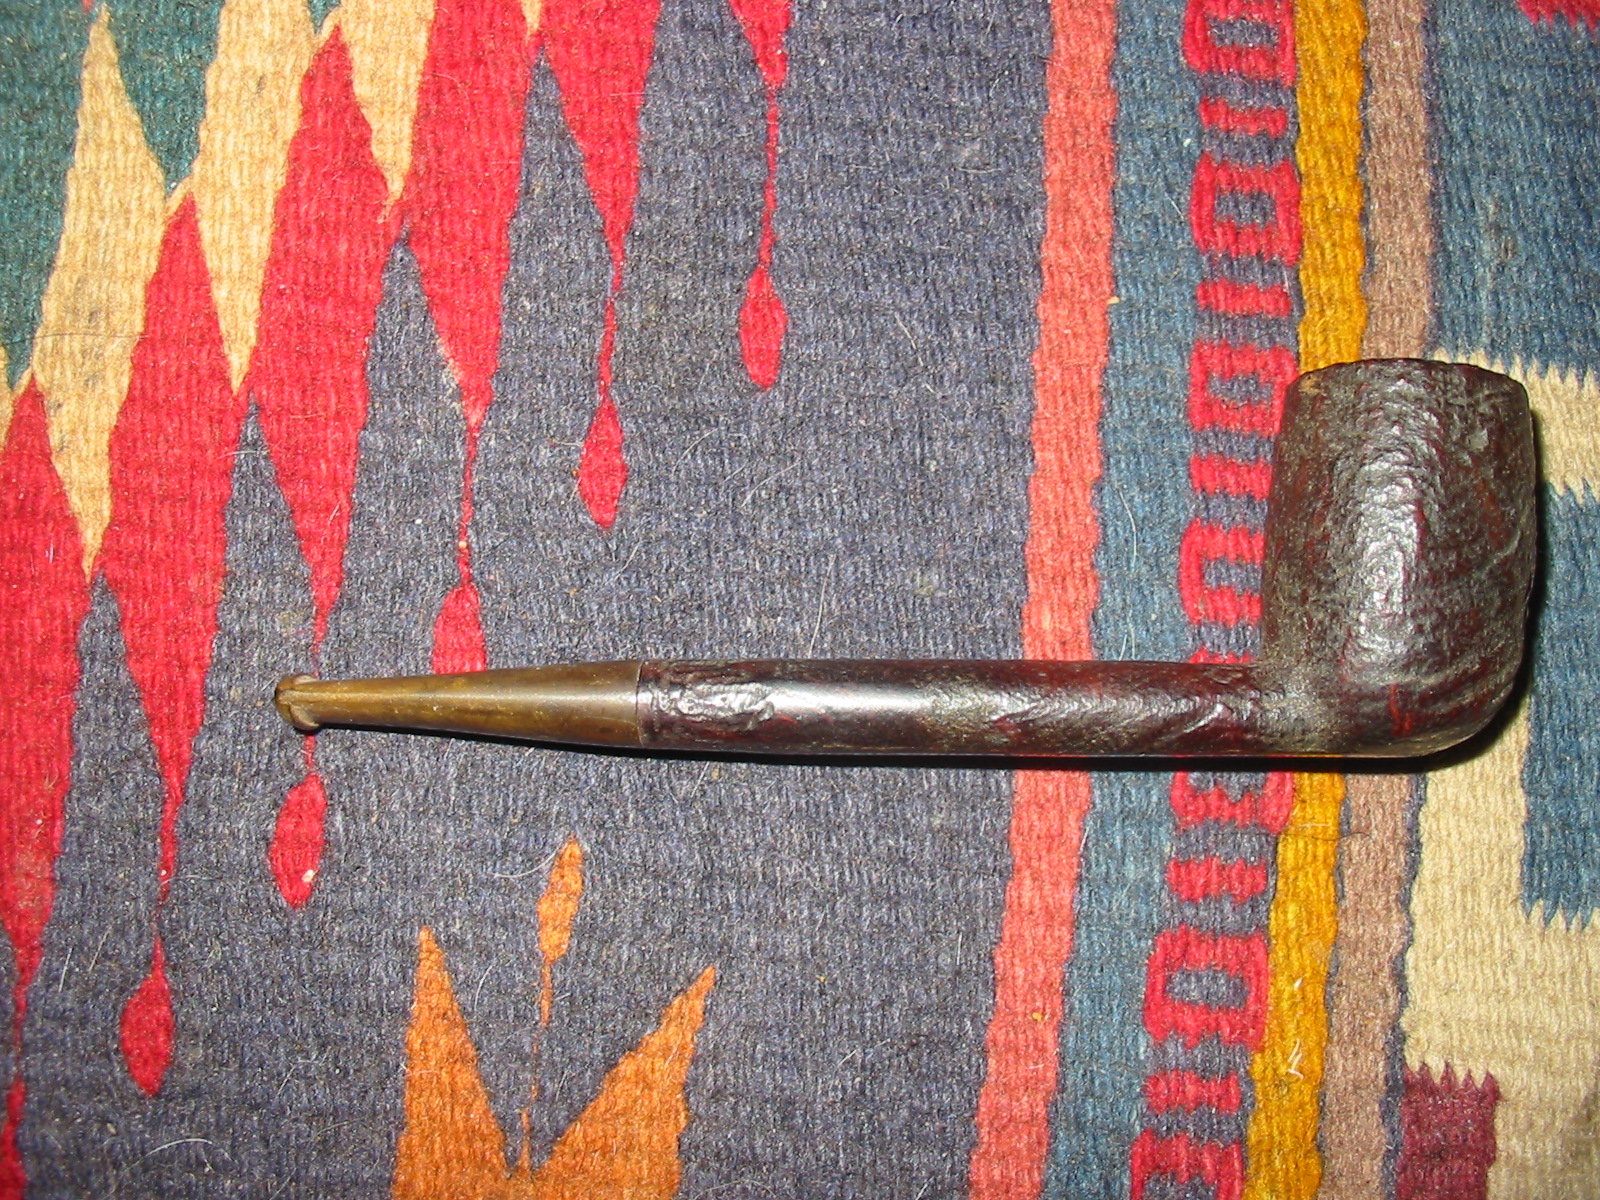
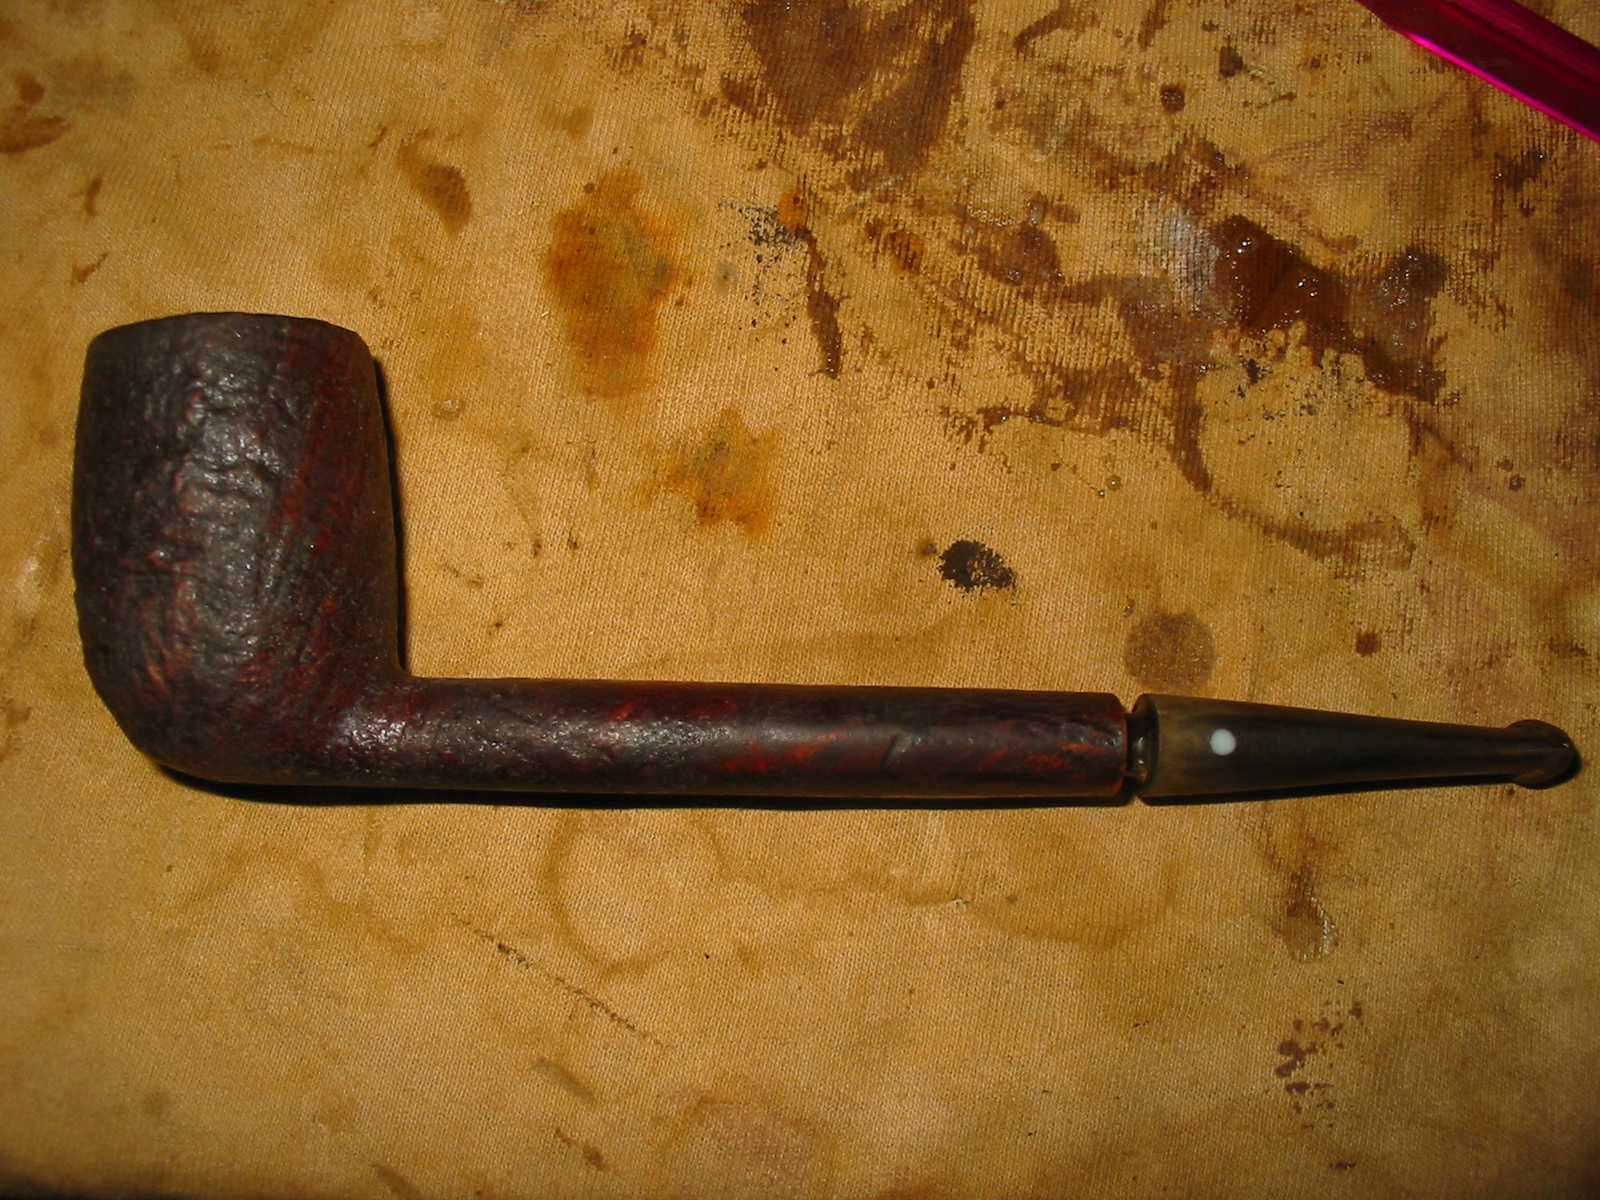
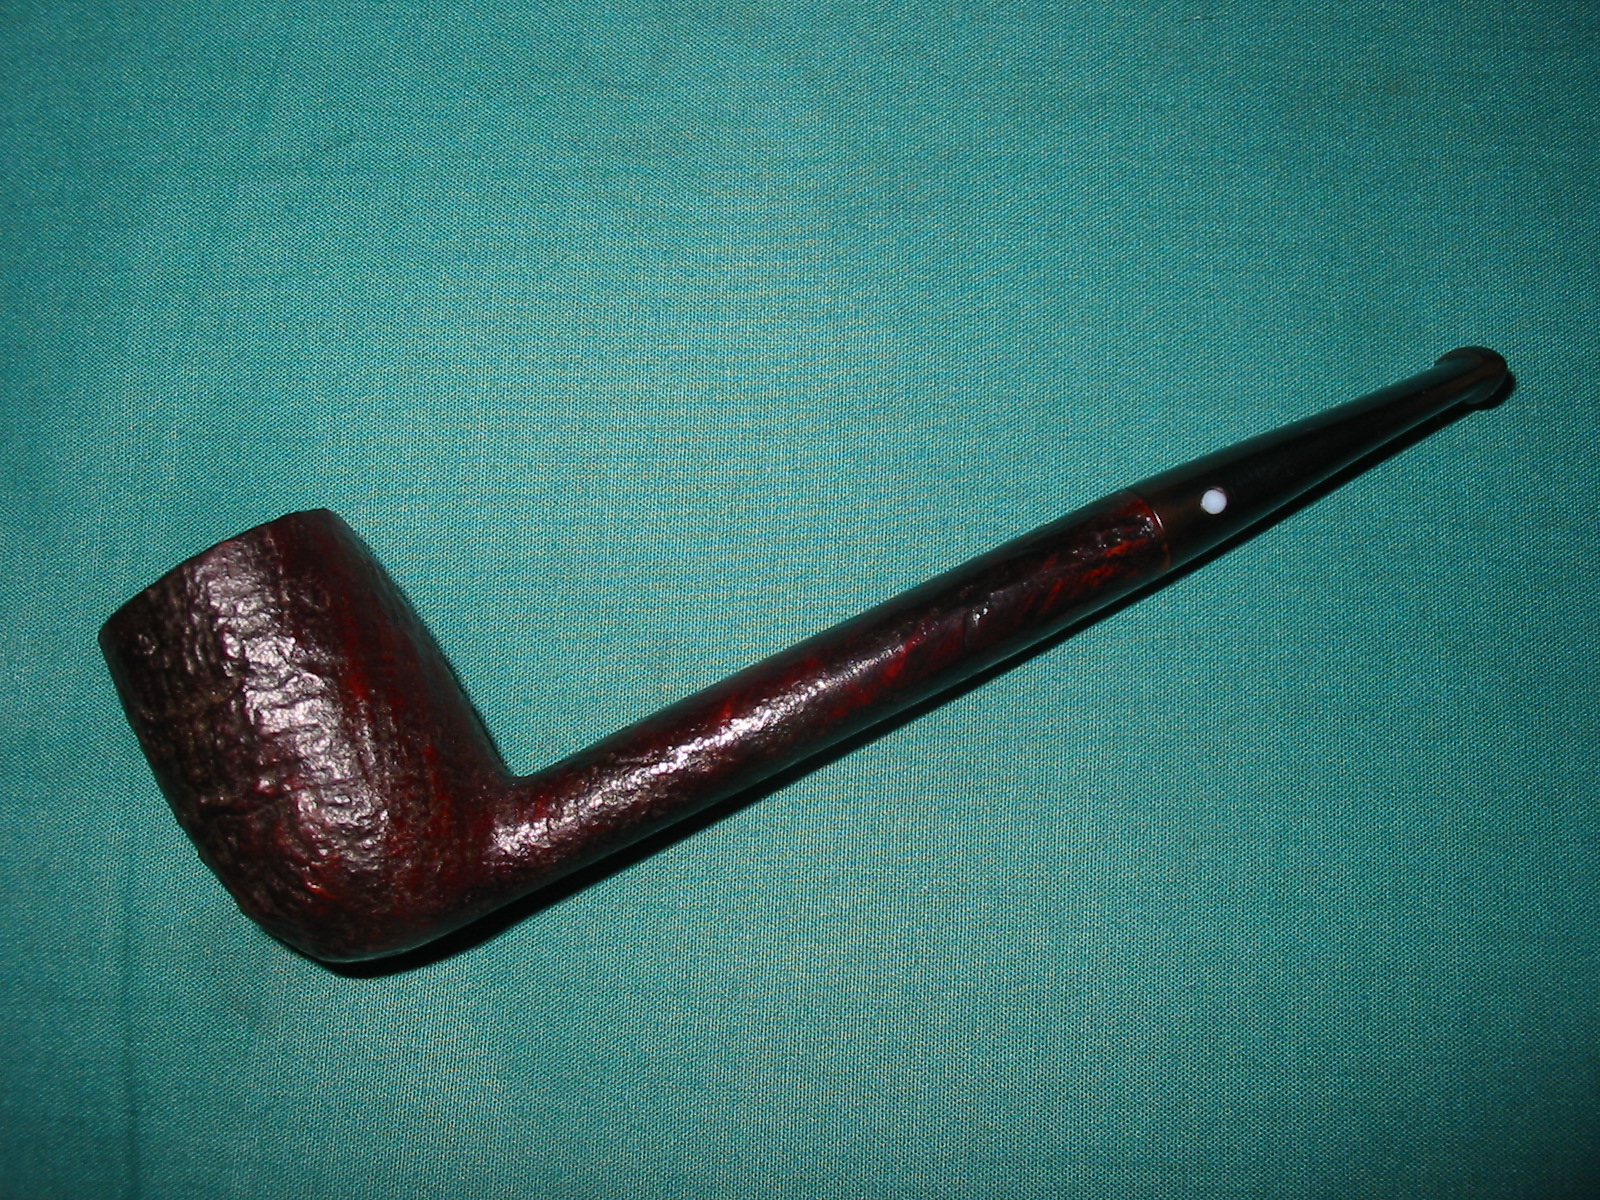
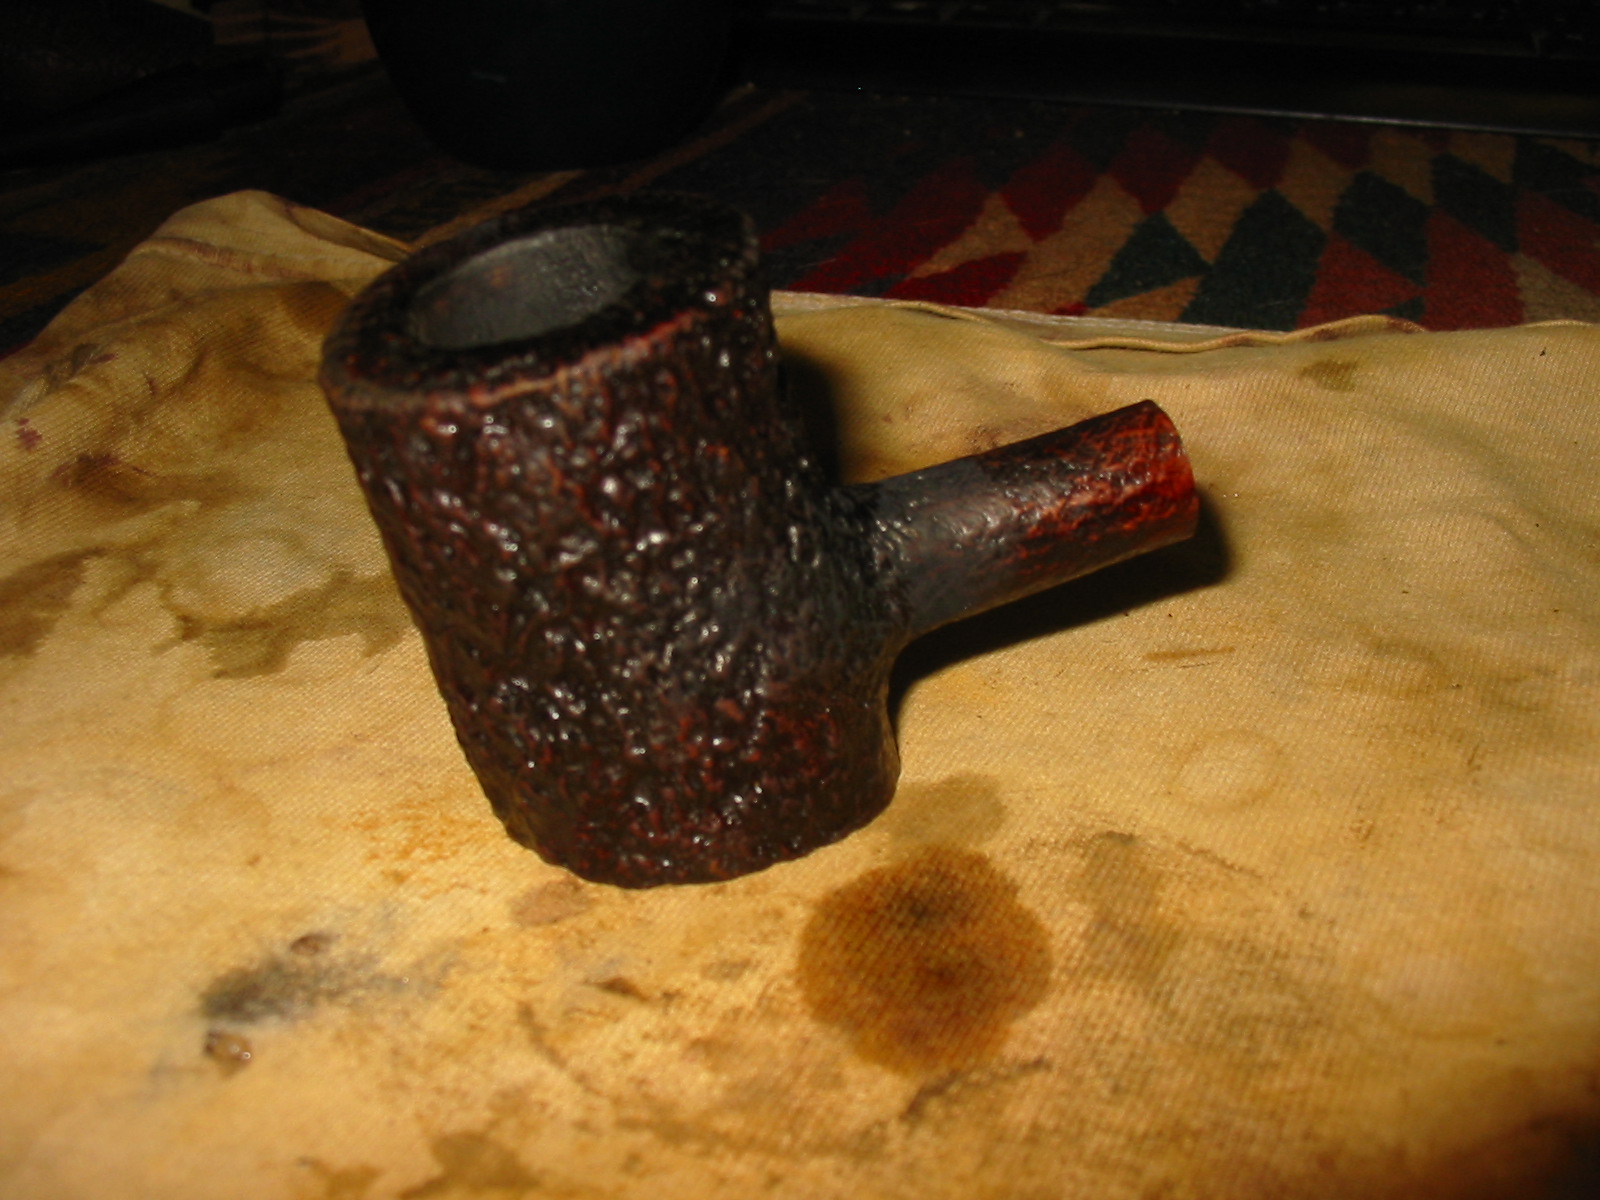
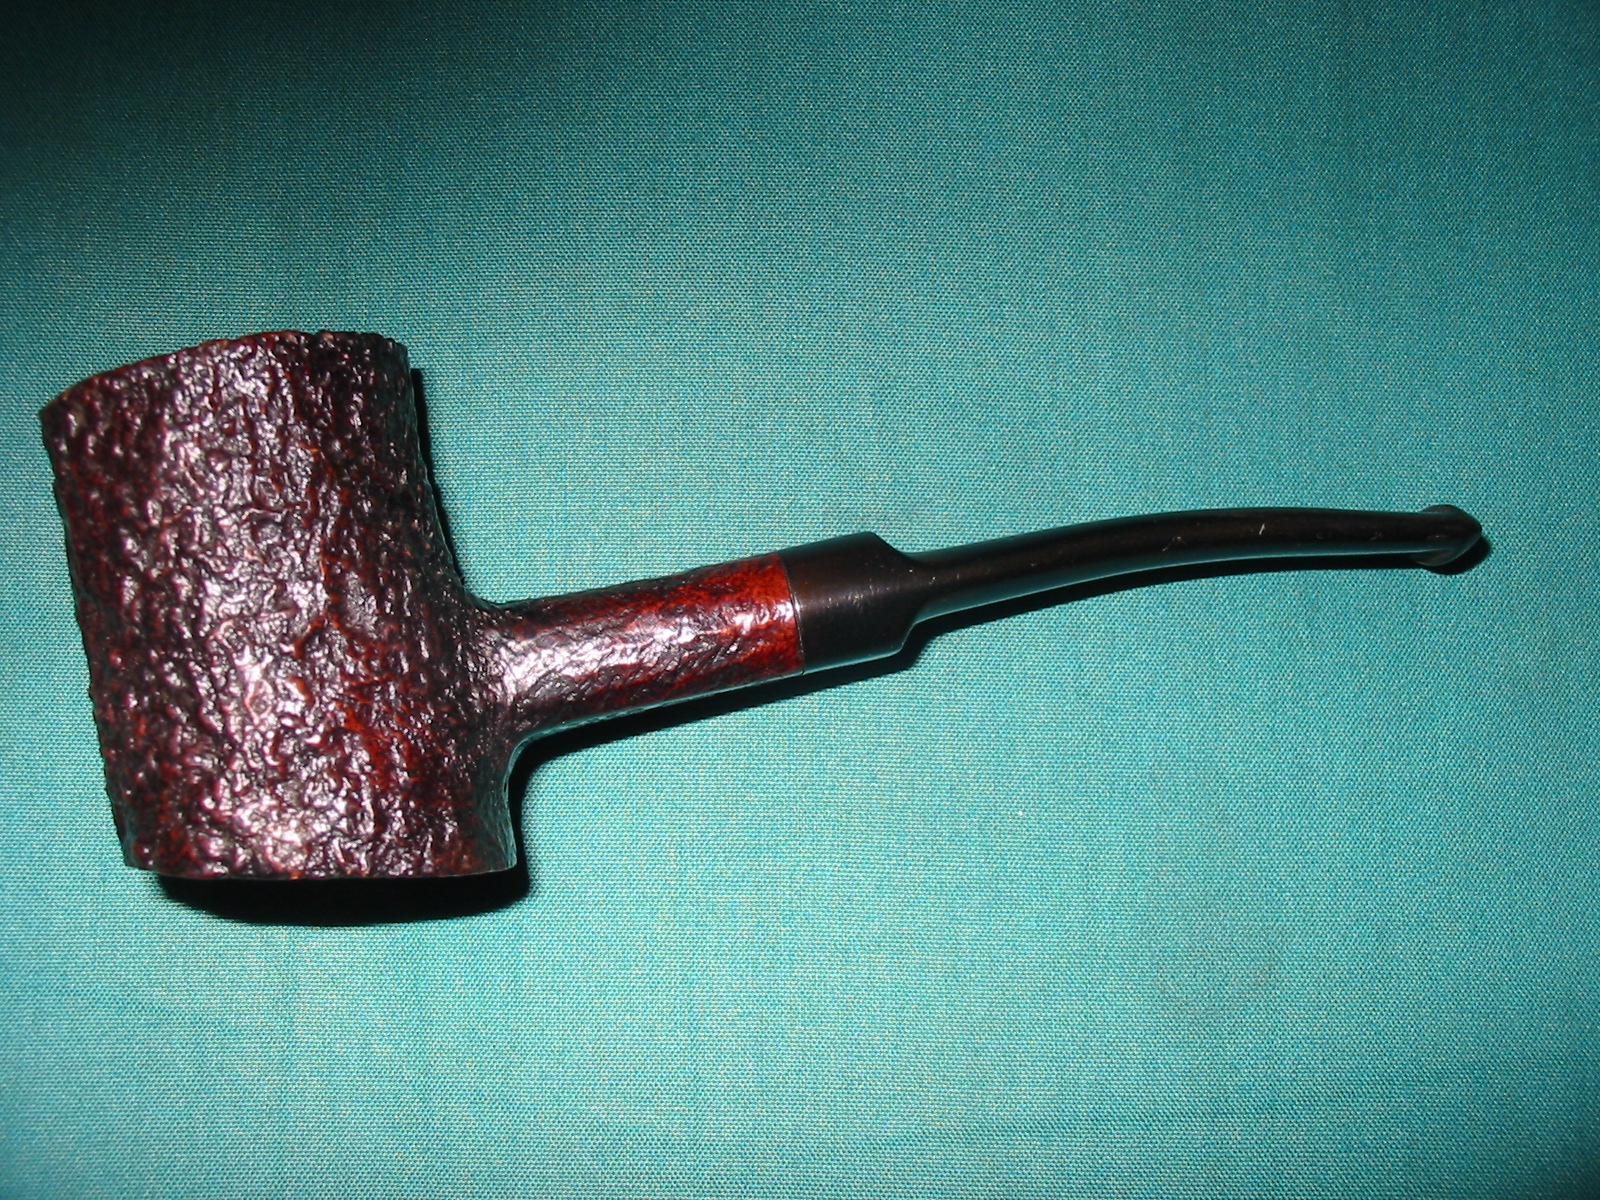
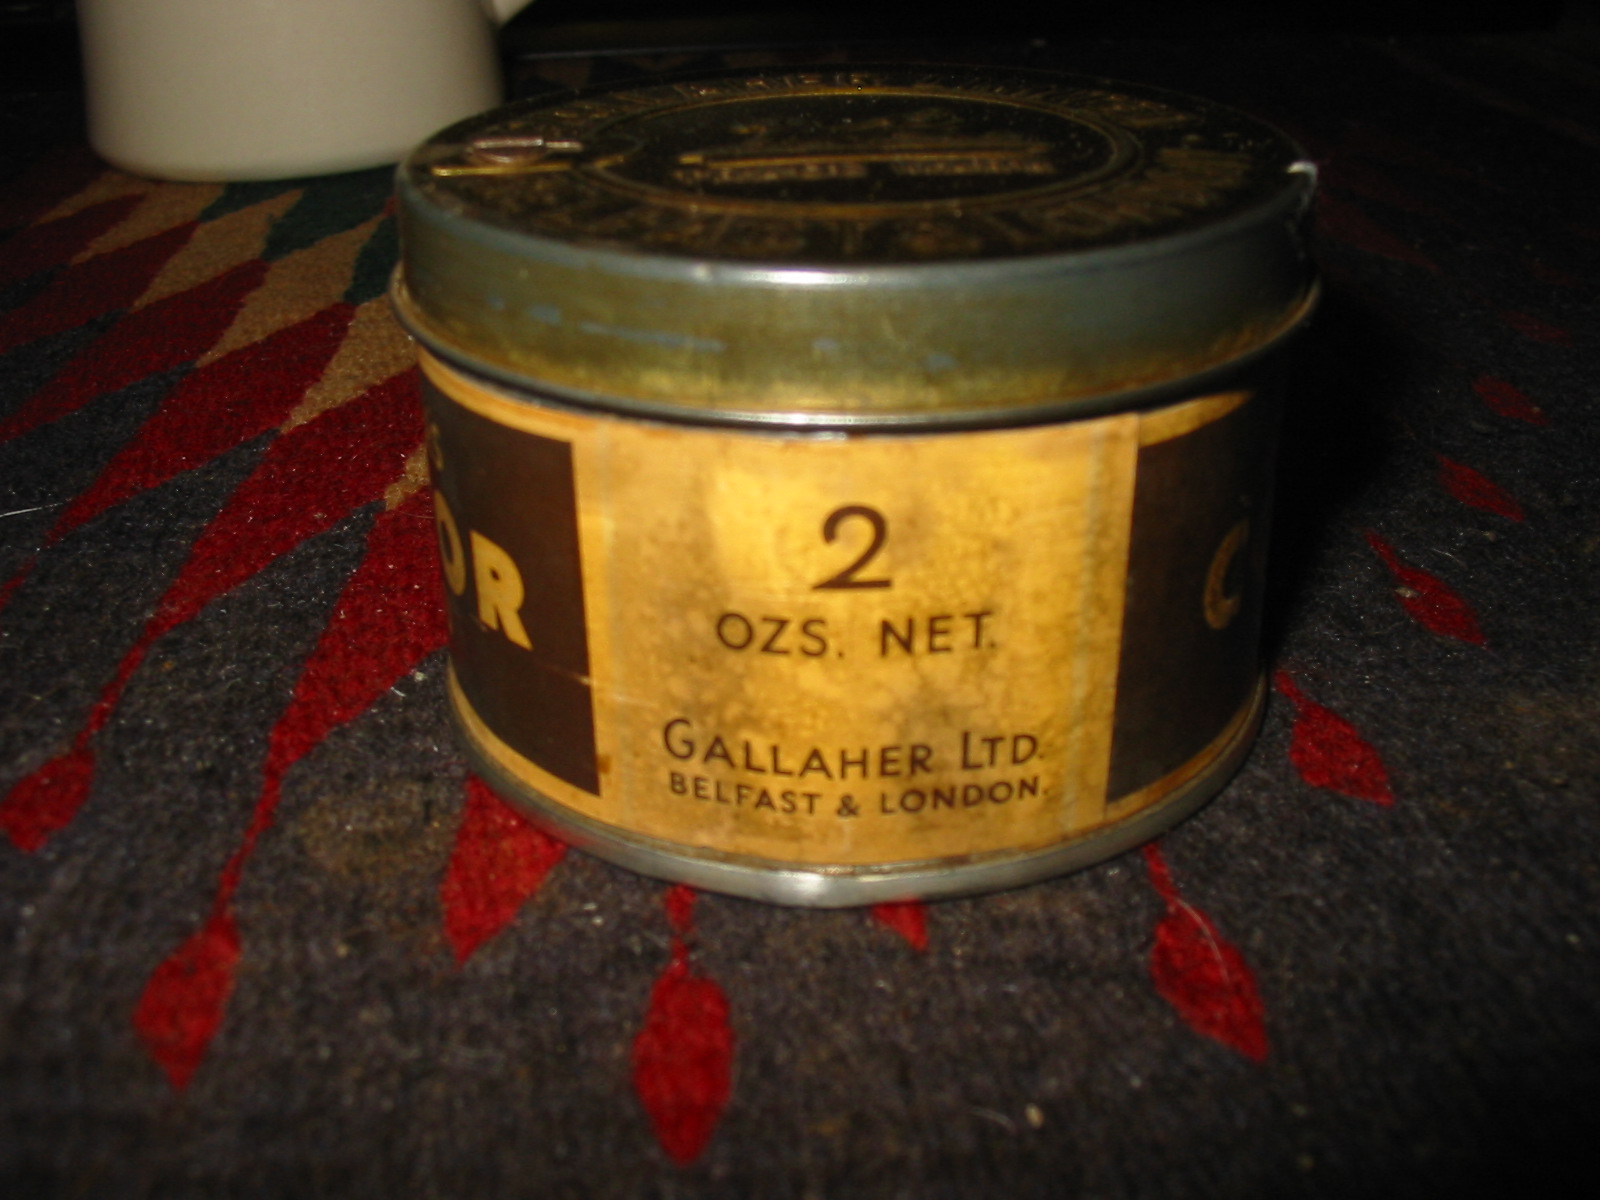
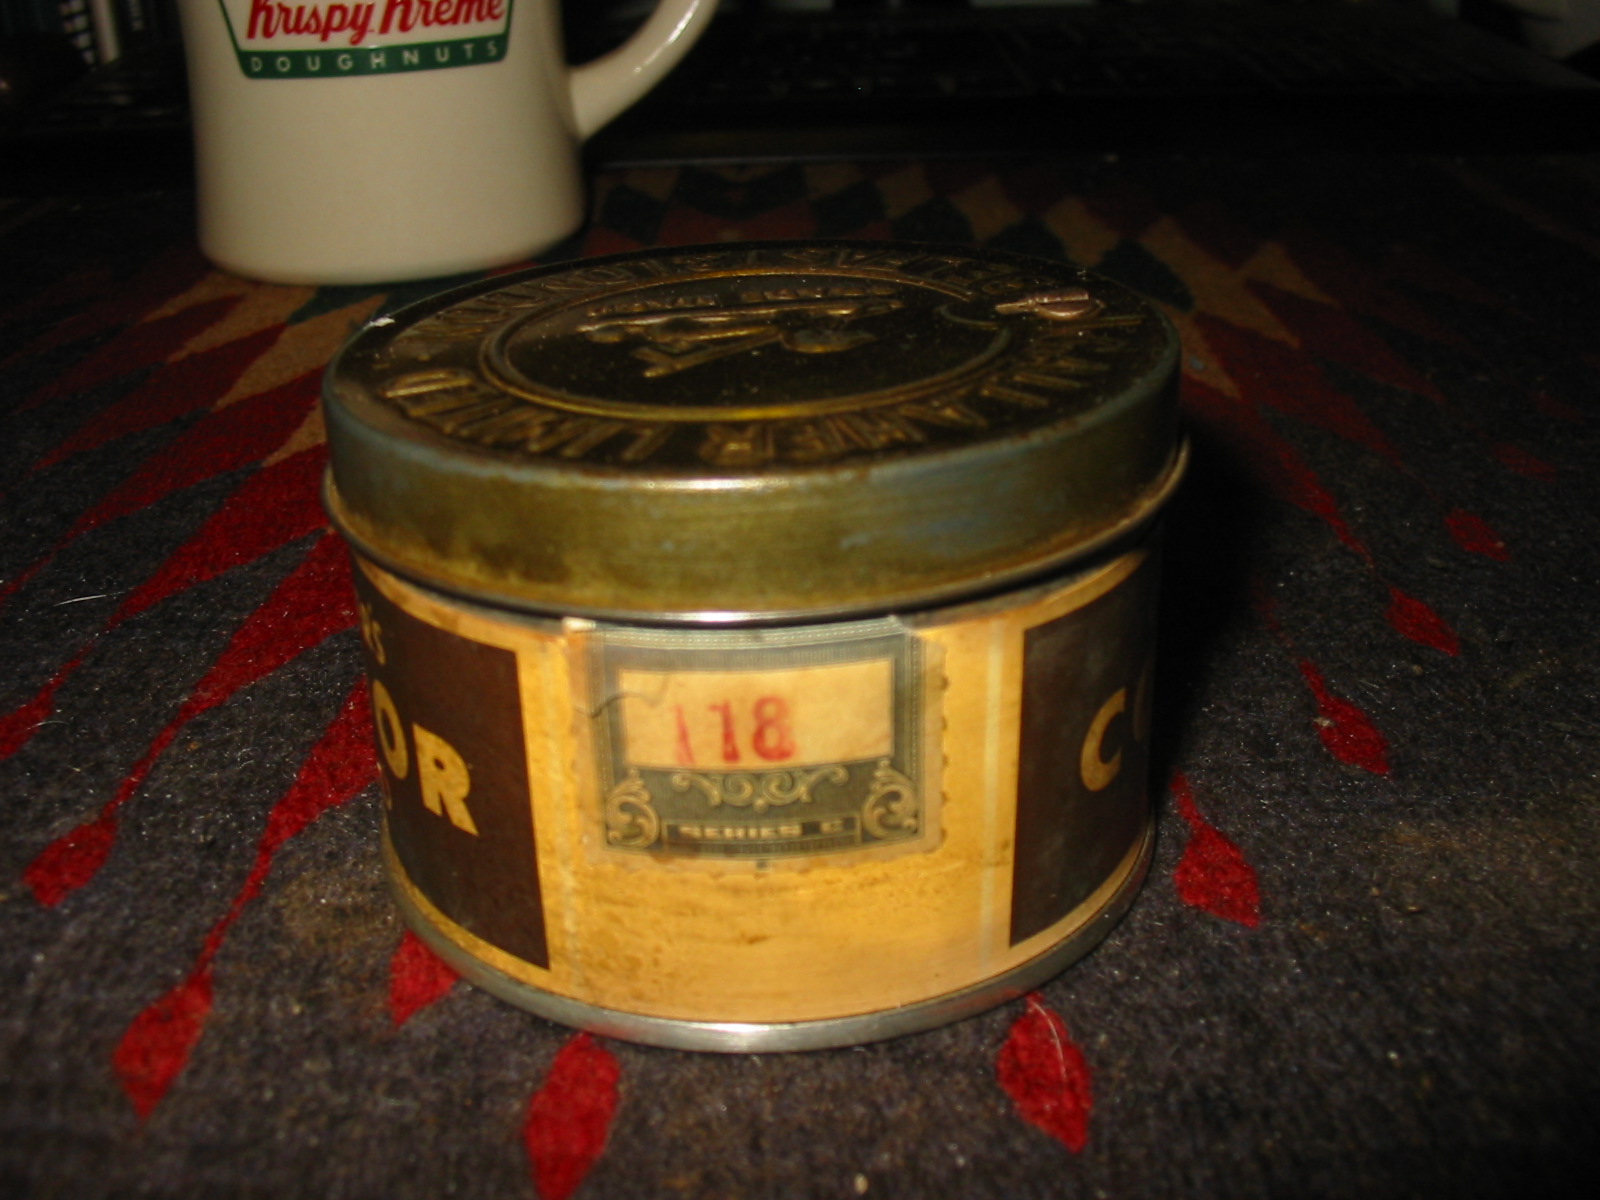
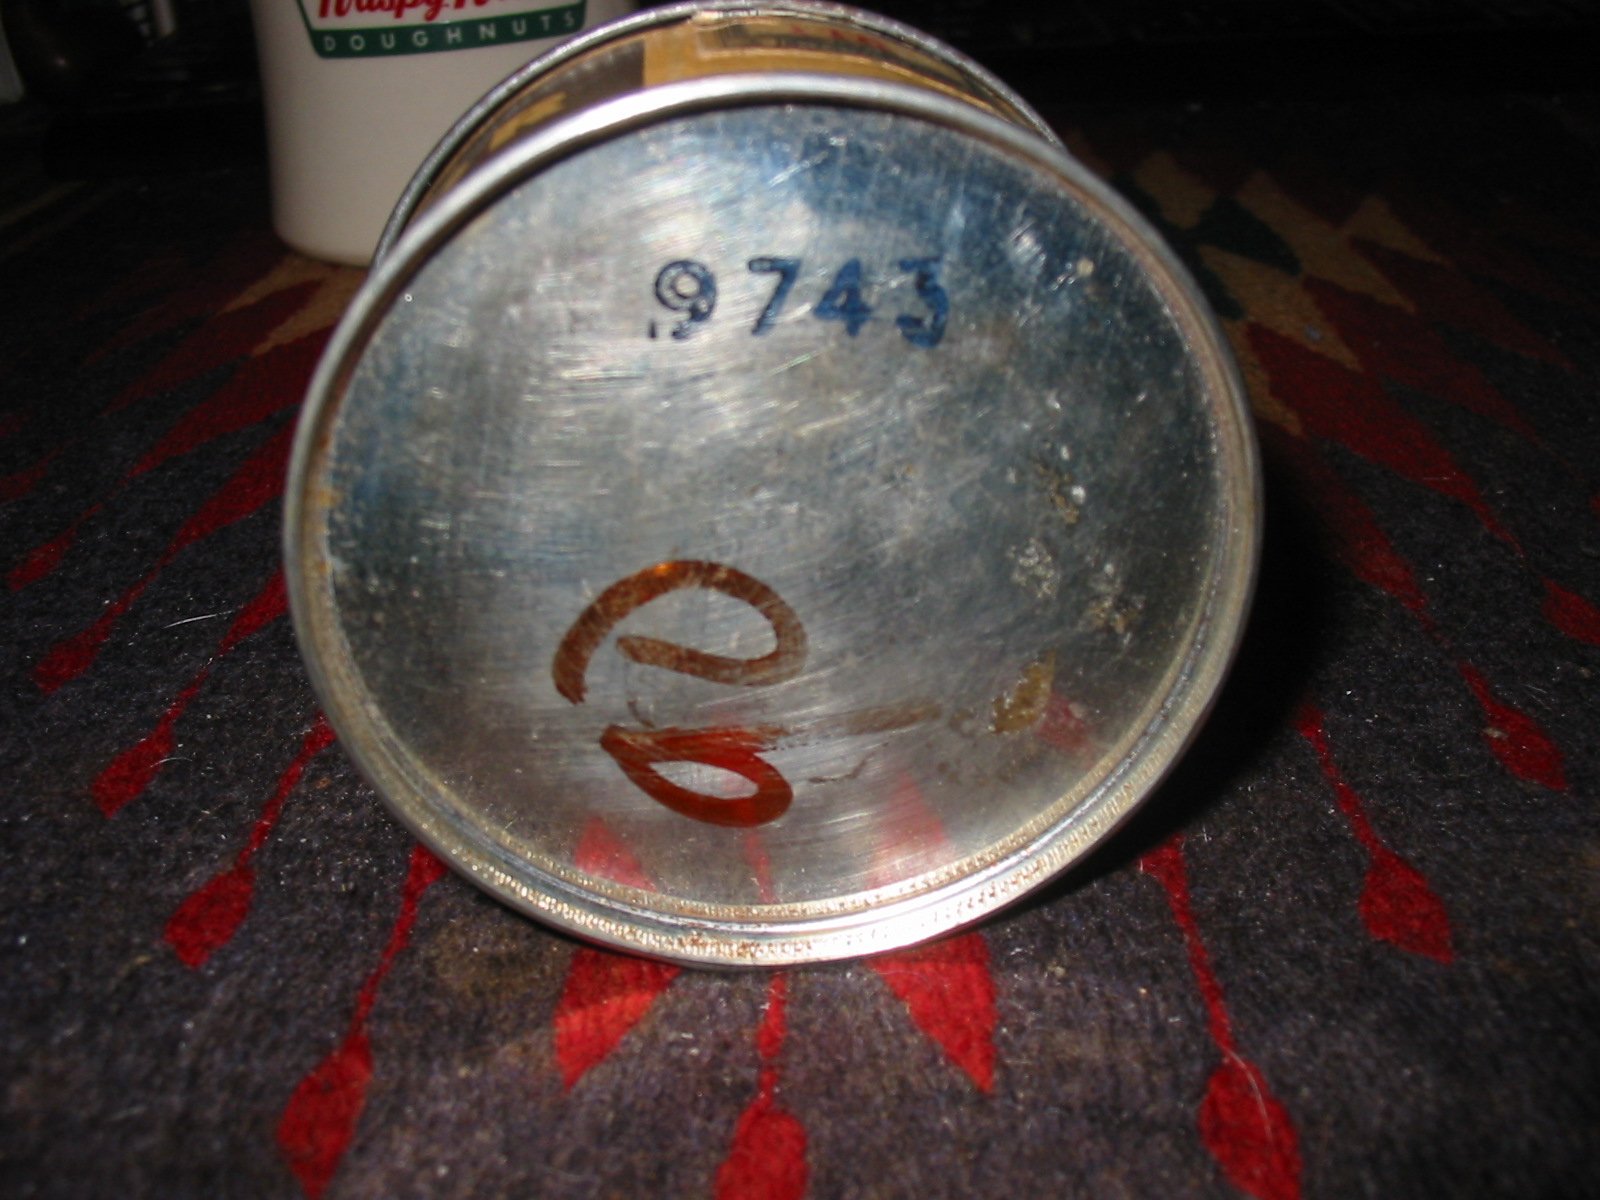
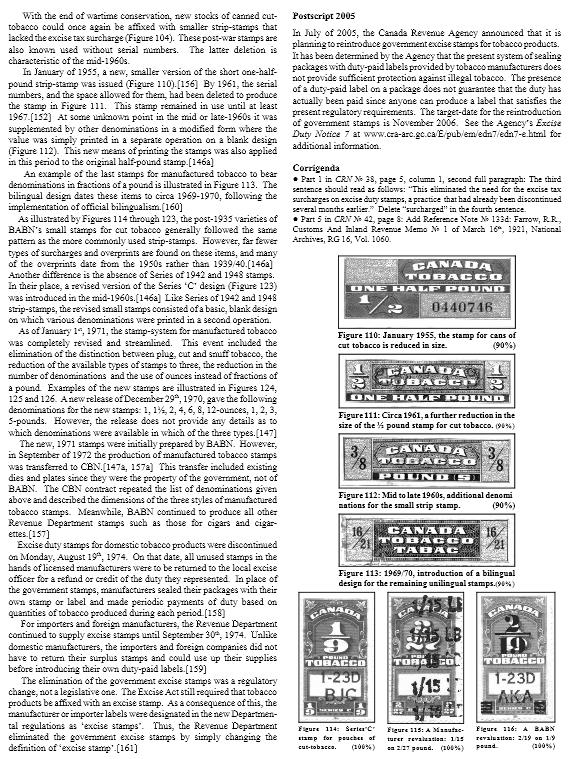
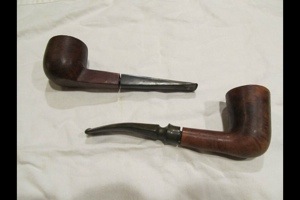
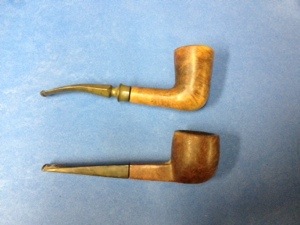
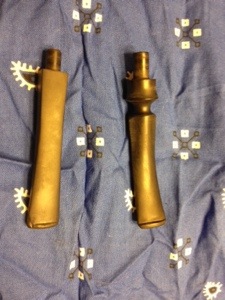
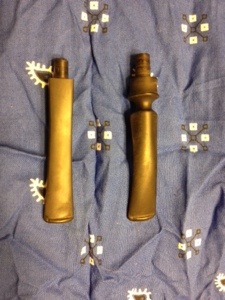
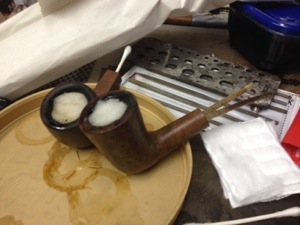
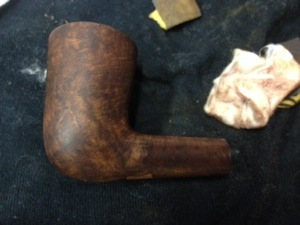
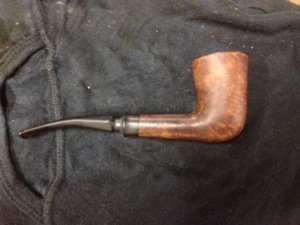
A couple of weeks back I saw two old pipes on eBay that were being sold as a lot that caught my attention: an Edwards Algerian Briar in a Dublin shape and a GBD pot with, what I was pretty sure was, a replacement stem. The combined opening bid and shipping cost was below $20 and it was late in the auction with no bidders yet. The seller had provided a poor description and only two poor photos, which must be the reason for no bids yet I thought. Since I am a fan of GBD pipes and have been wanting an Edwards (since hearing Brian Levine talk about them on the Pipes Magazine Radio Show a few moths ago and it being in a shape I really like I tossed in the opening bid. To my surprise, I won the auction for the under $20 total opening bid with shipping included. Here are the photos from the seller:

20131014-150328.jpg

20131014-150337.jpg

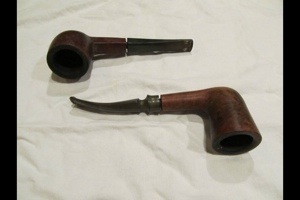
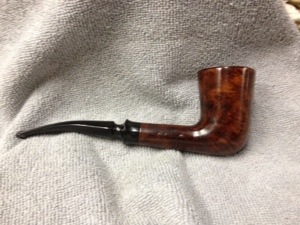
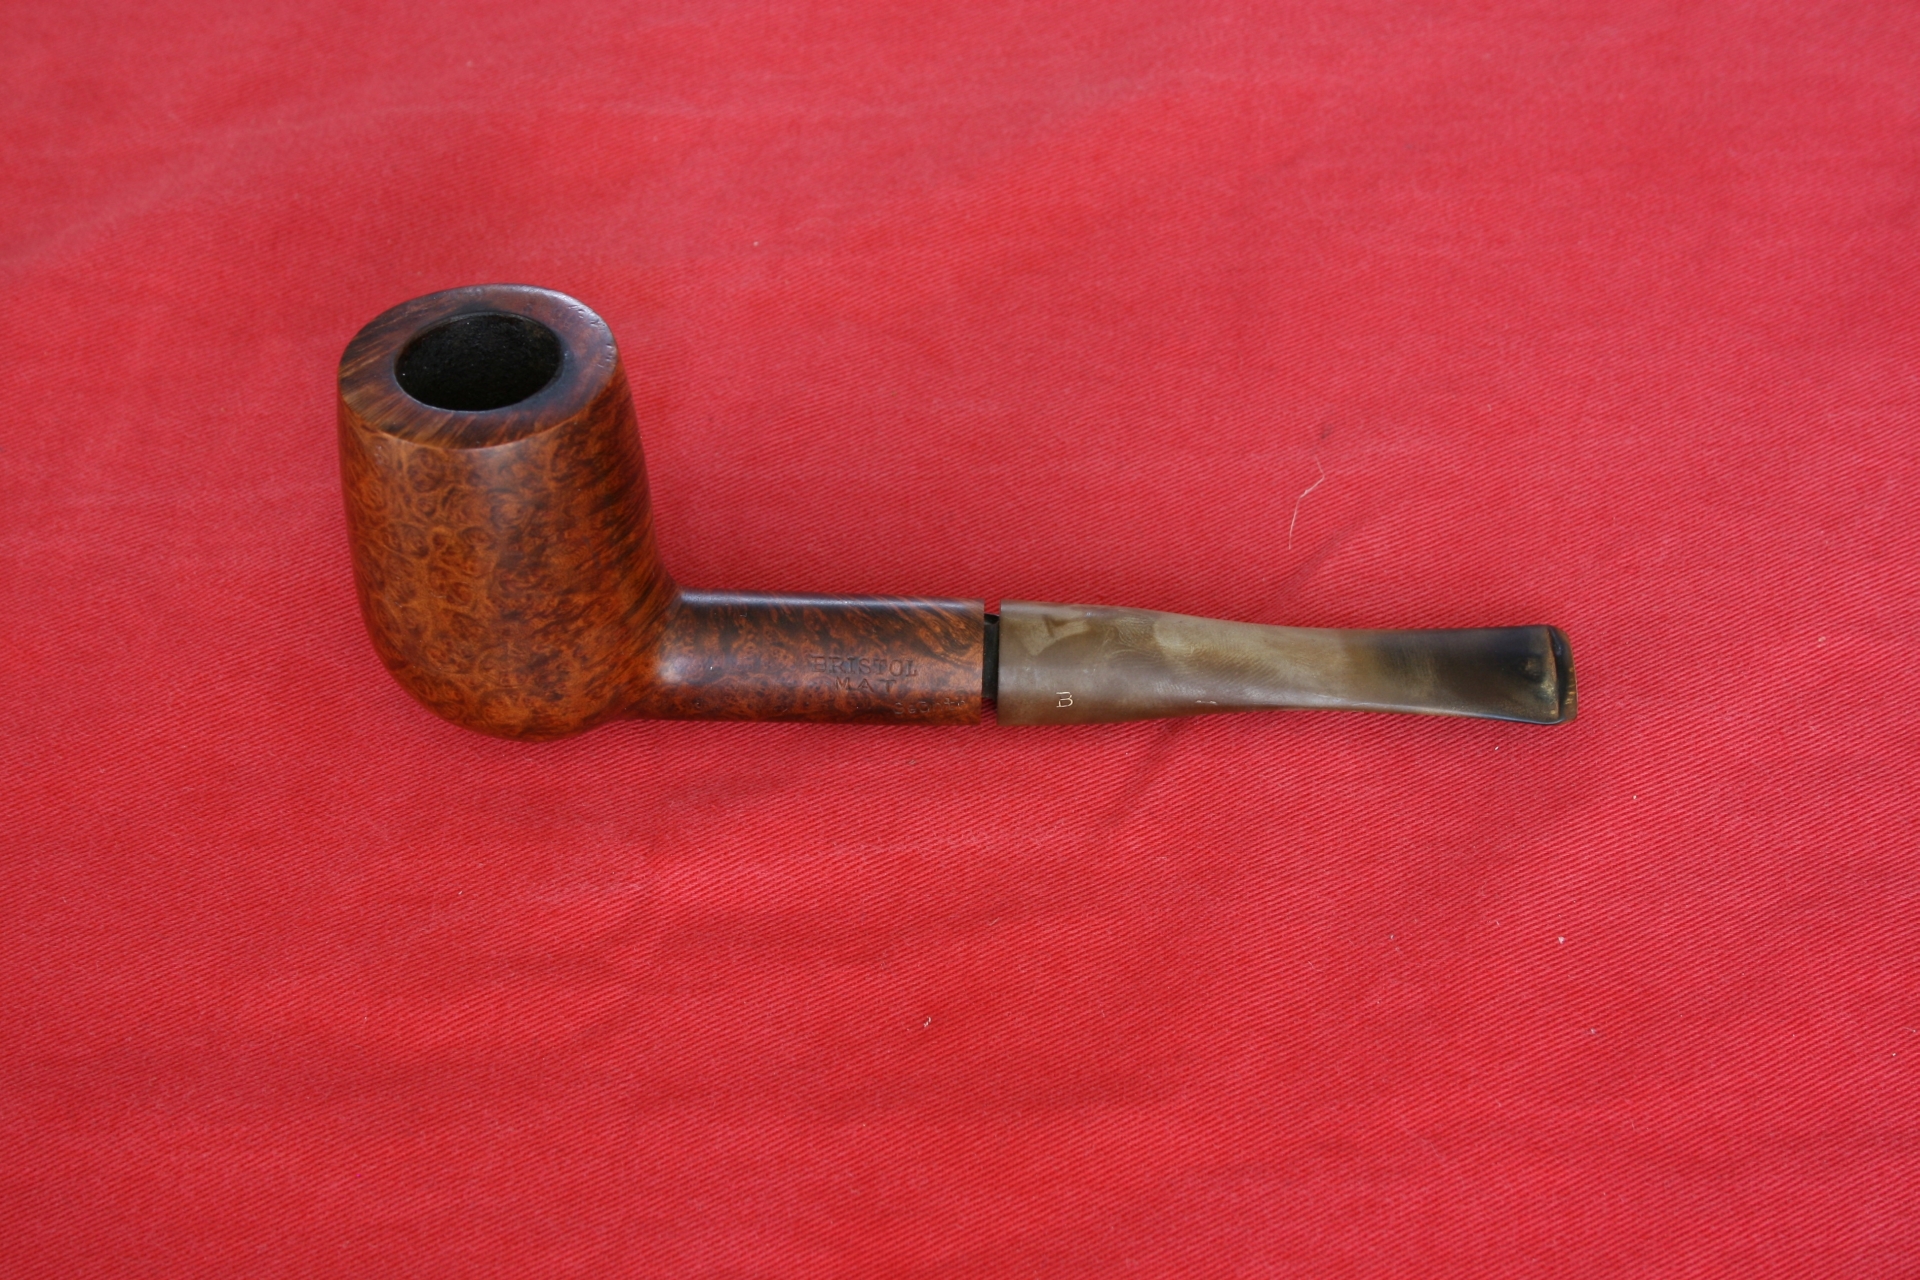
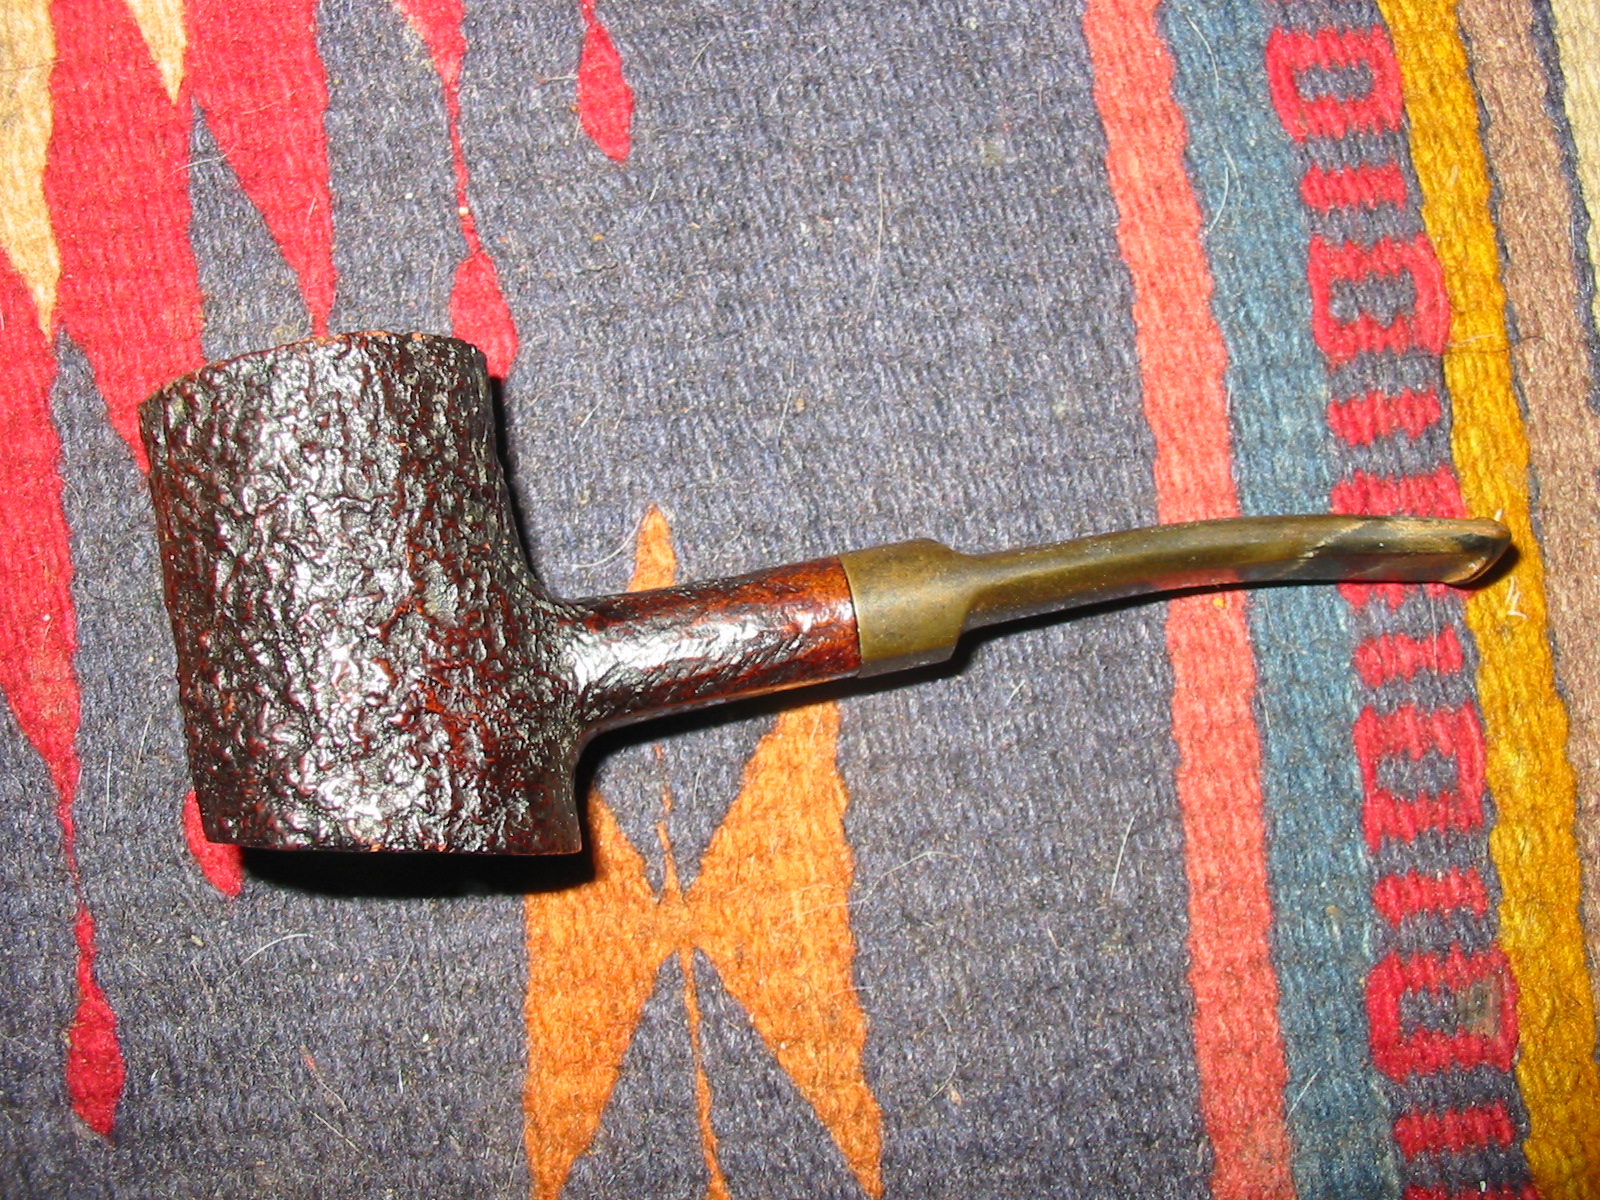
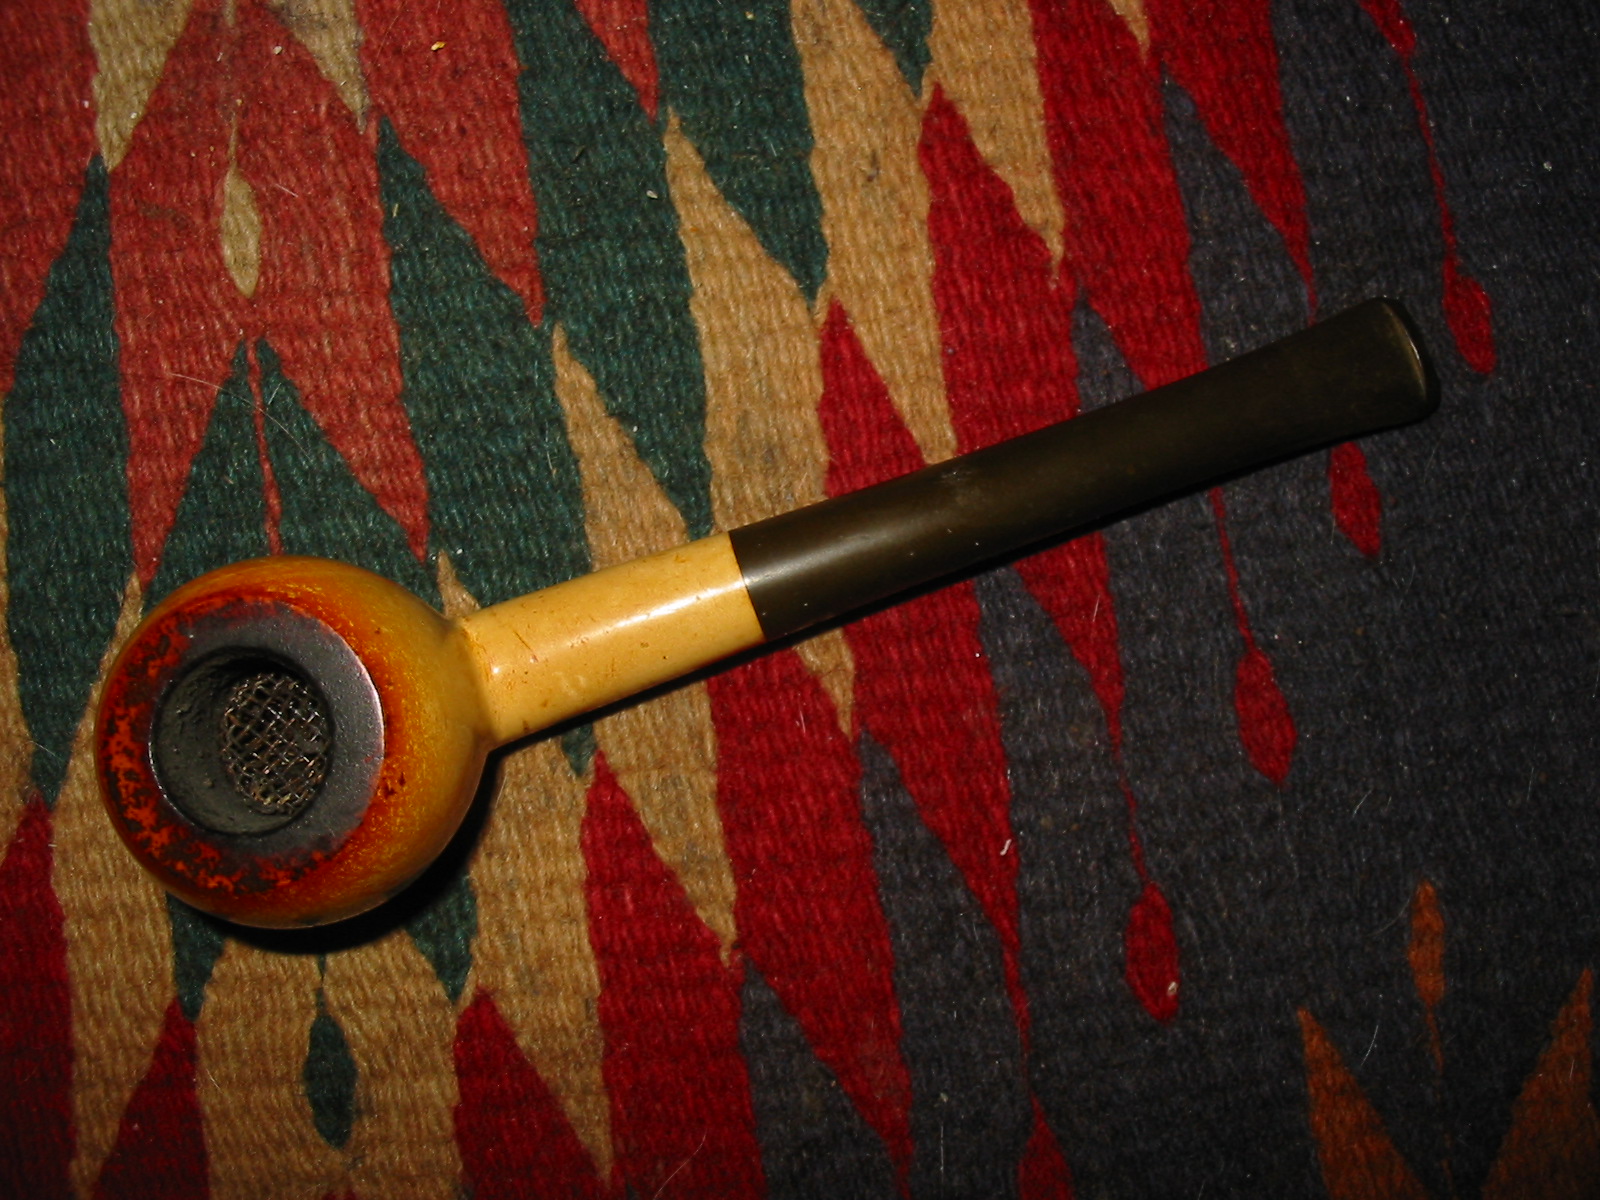
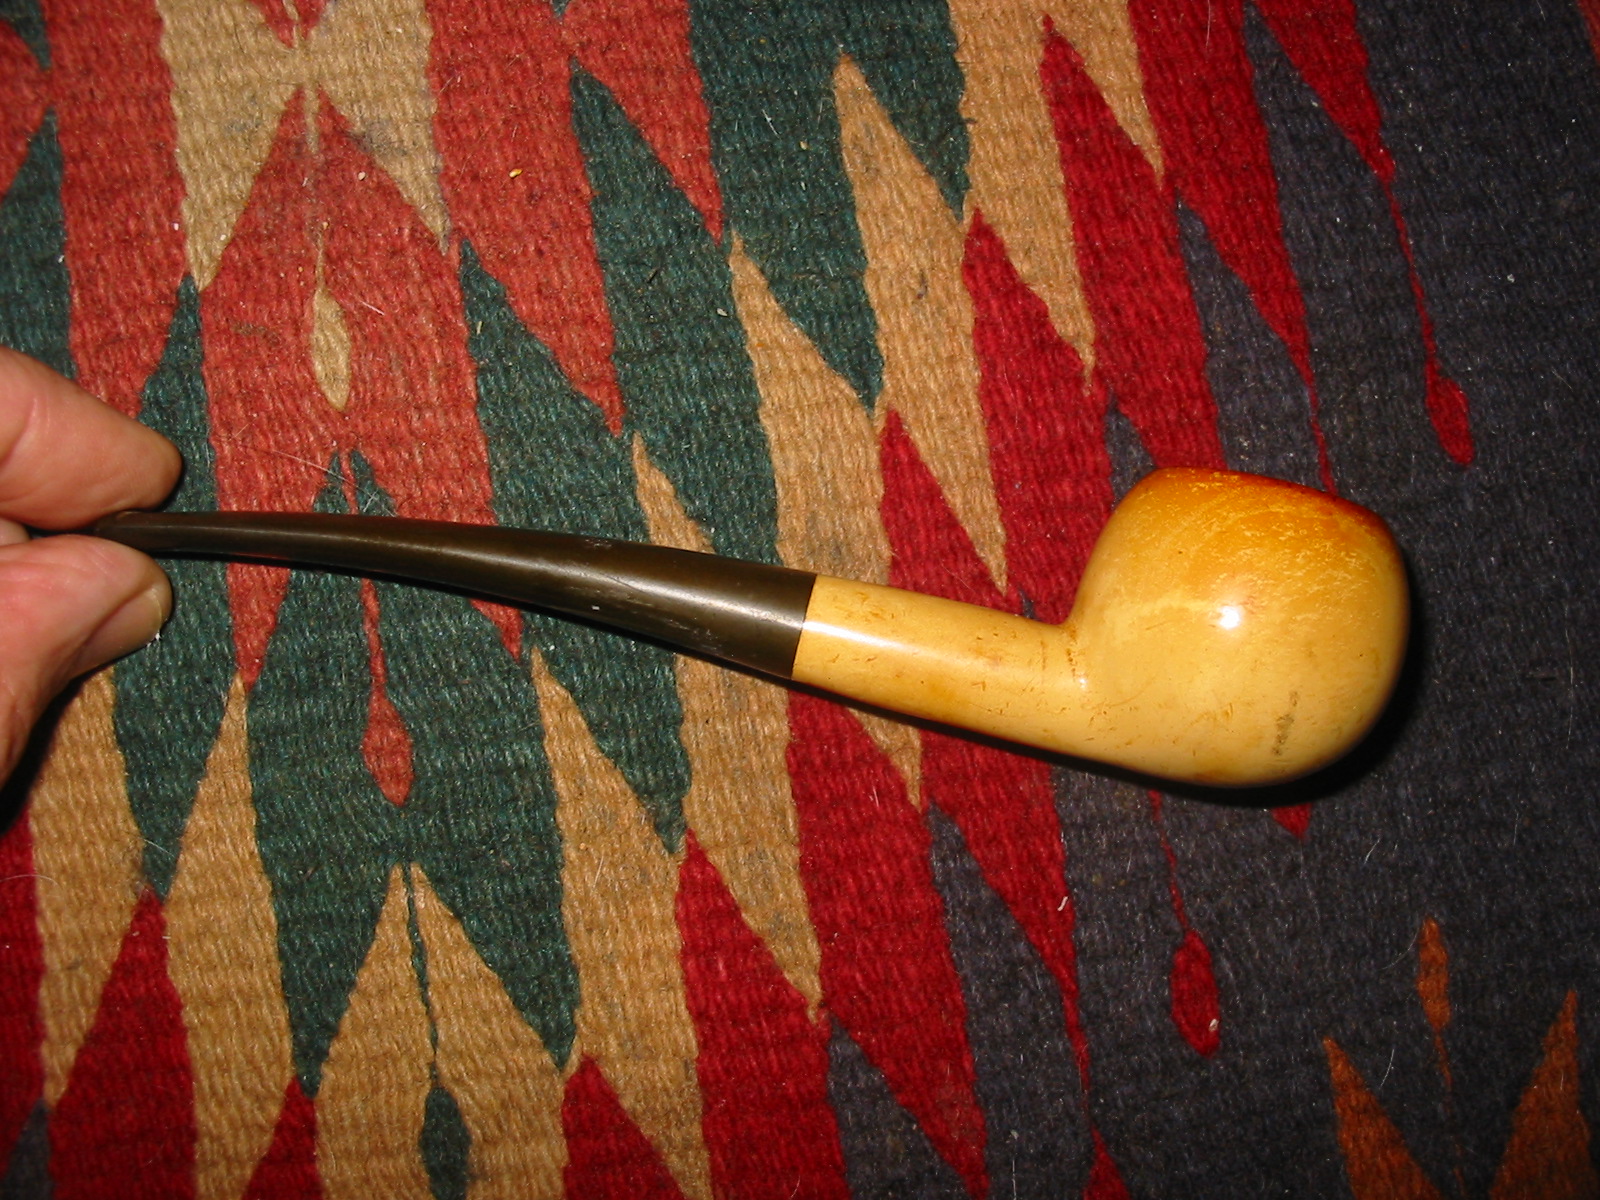
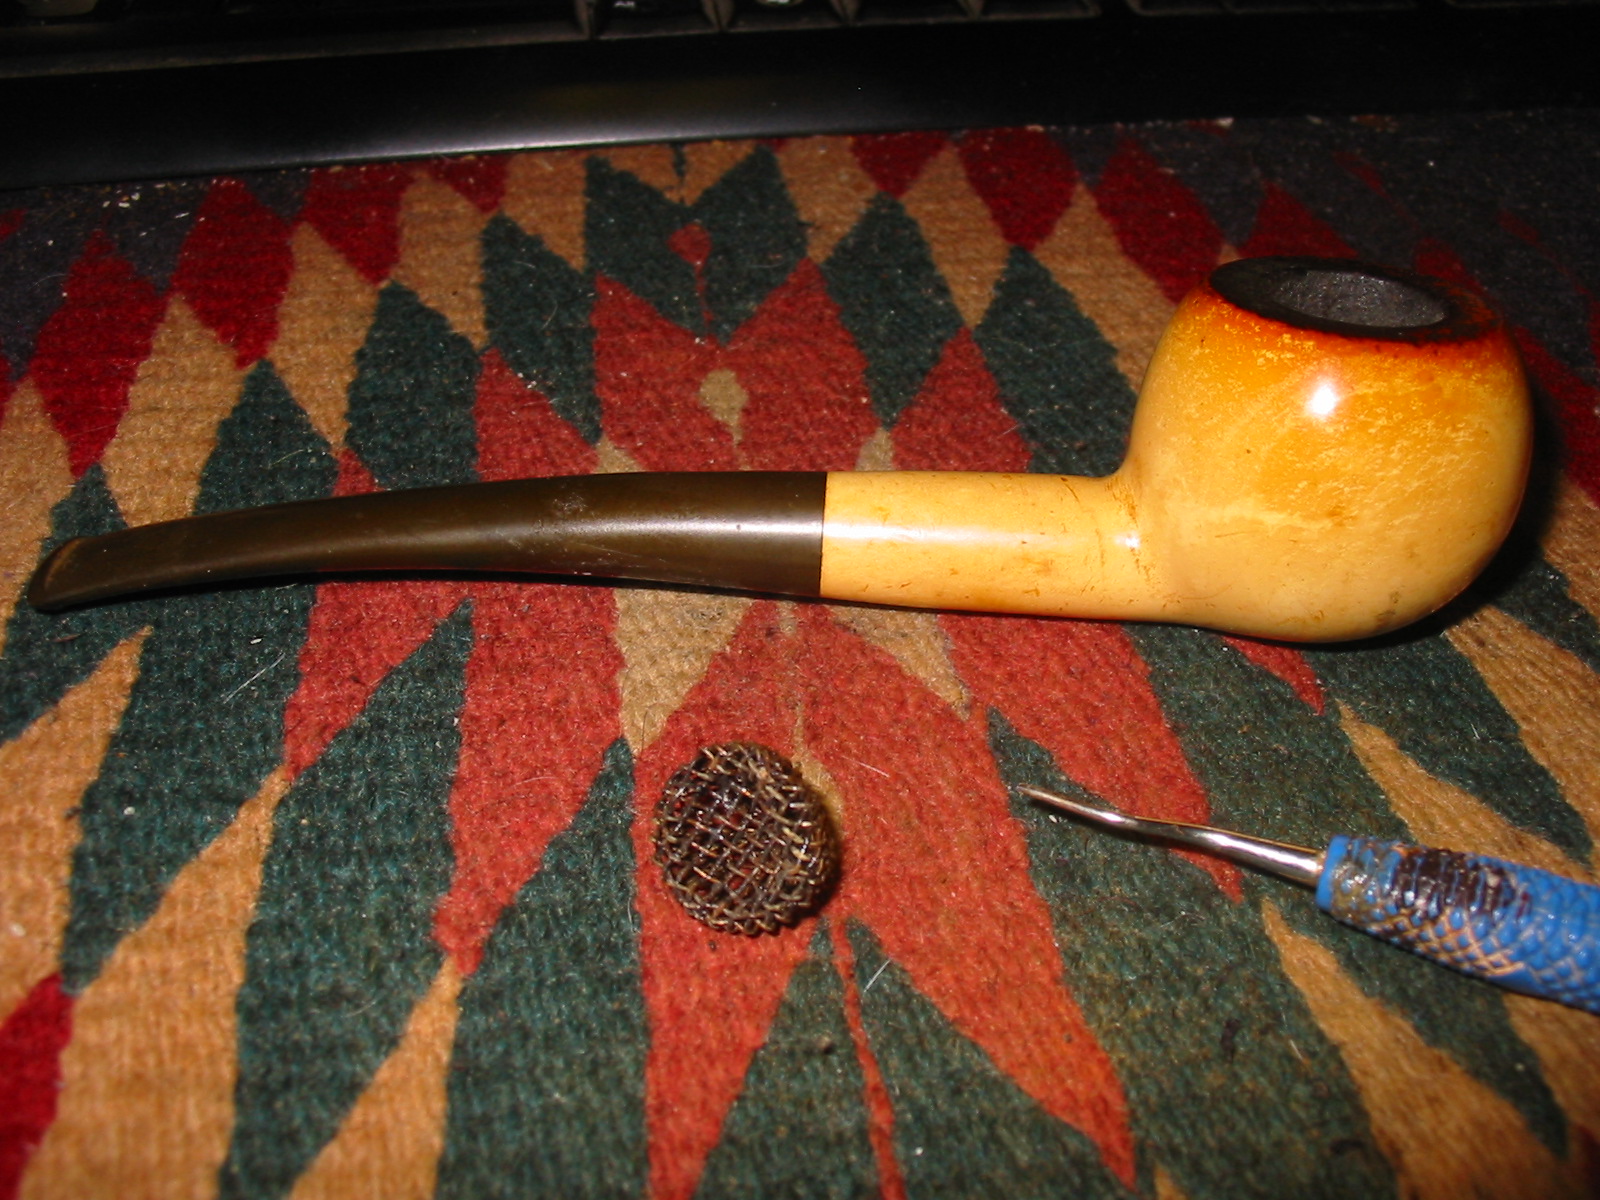
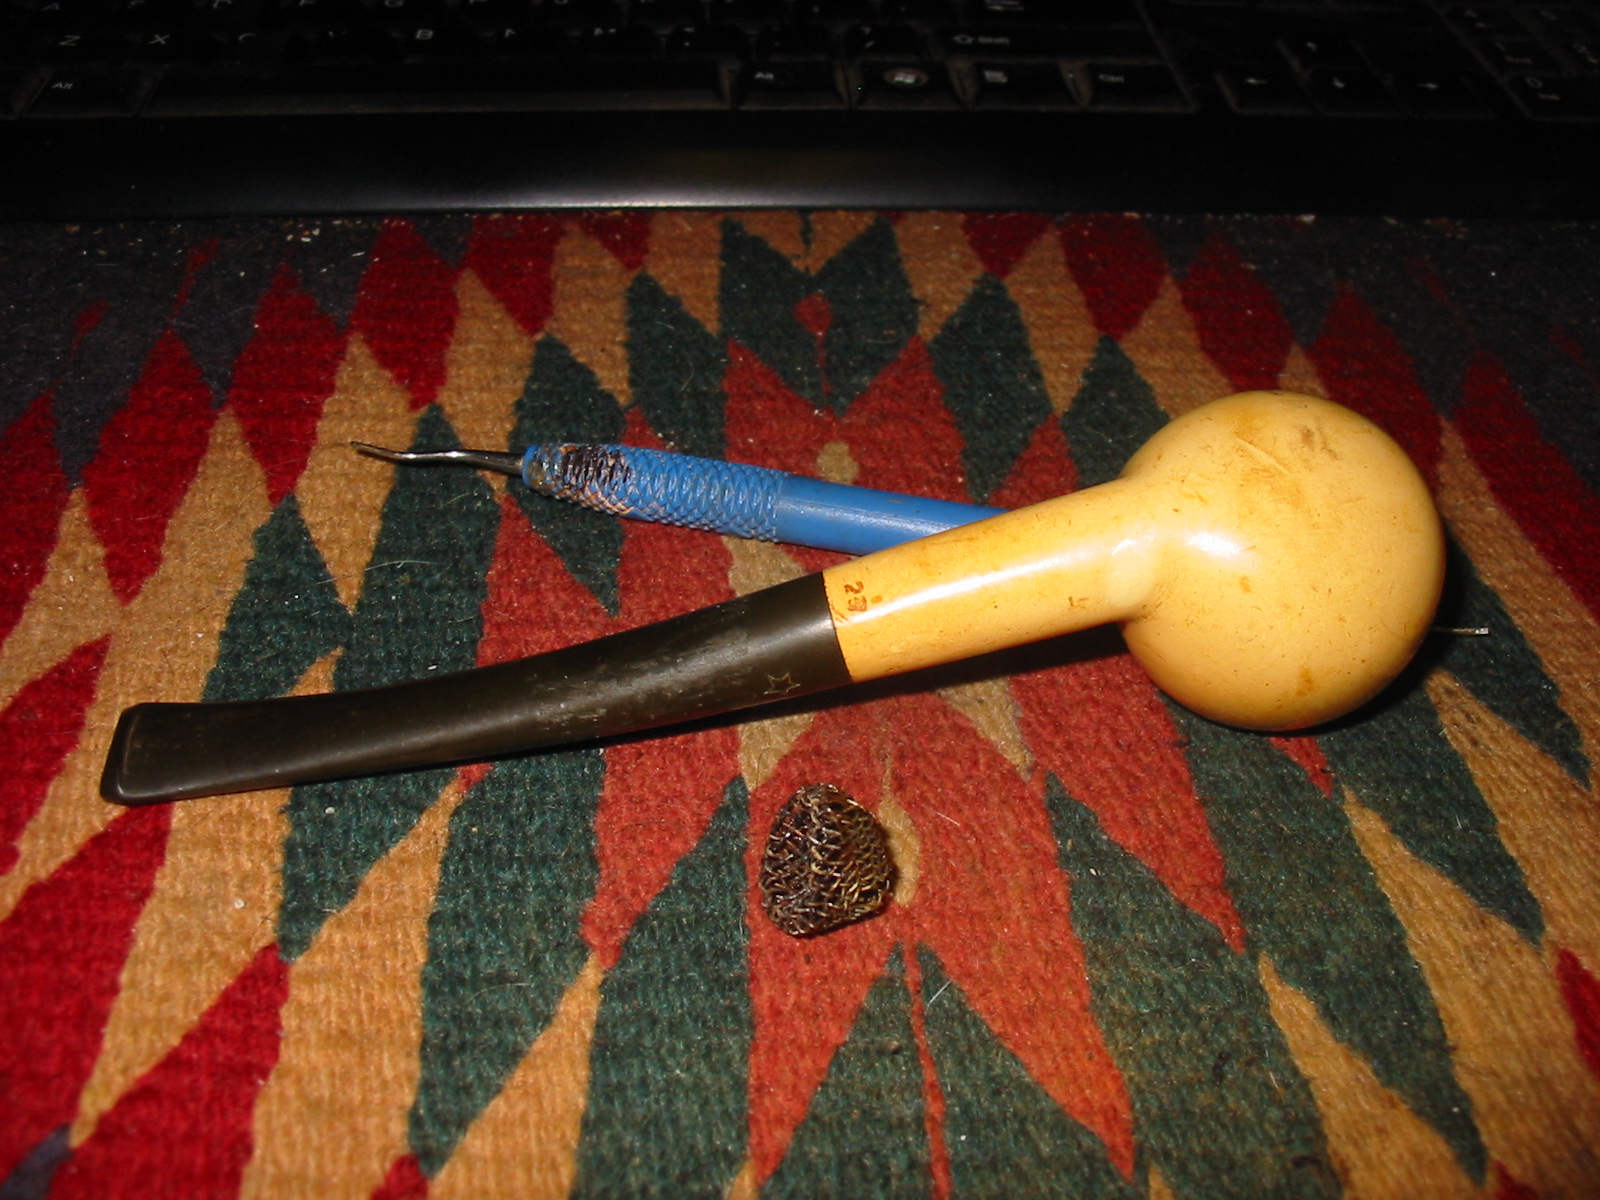
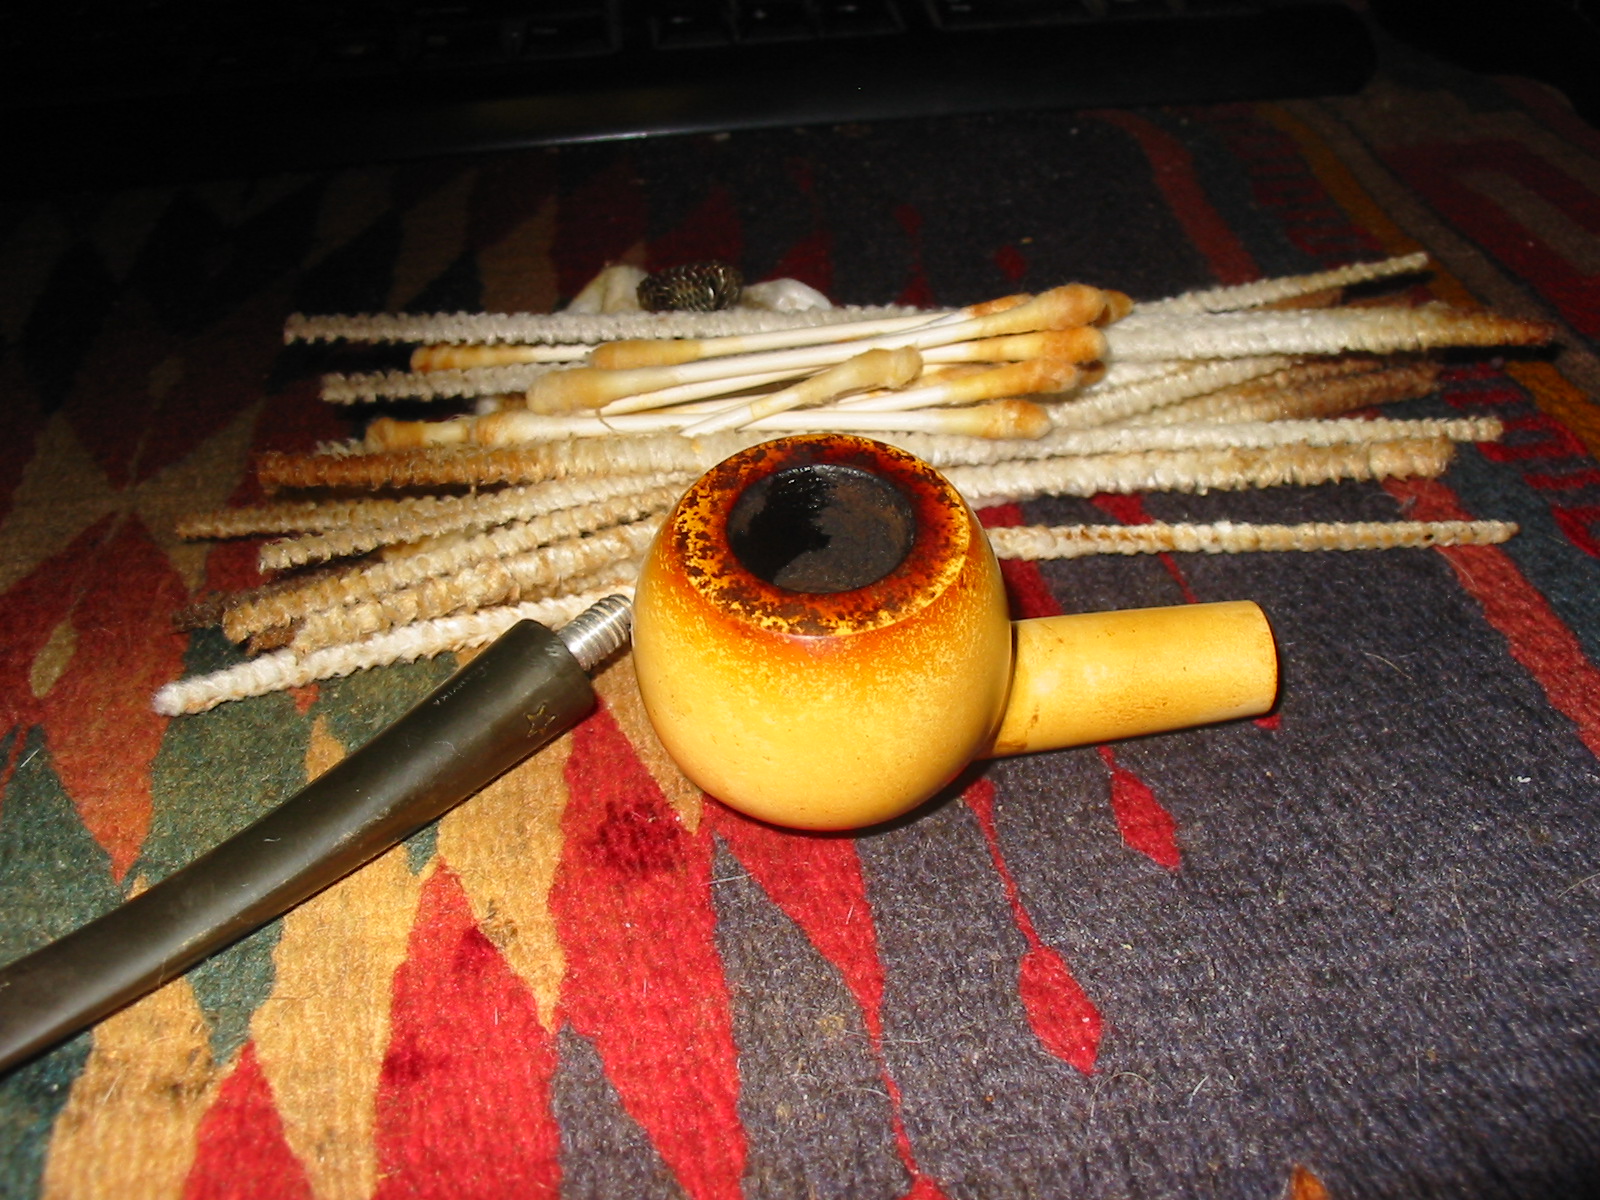
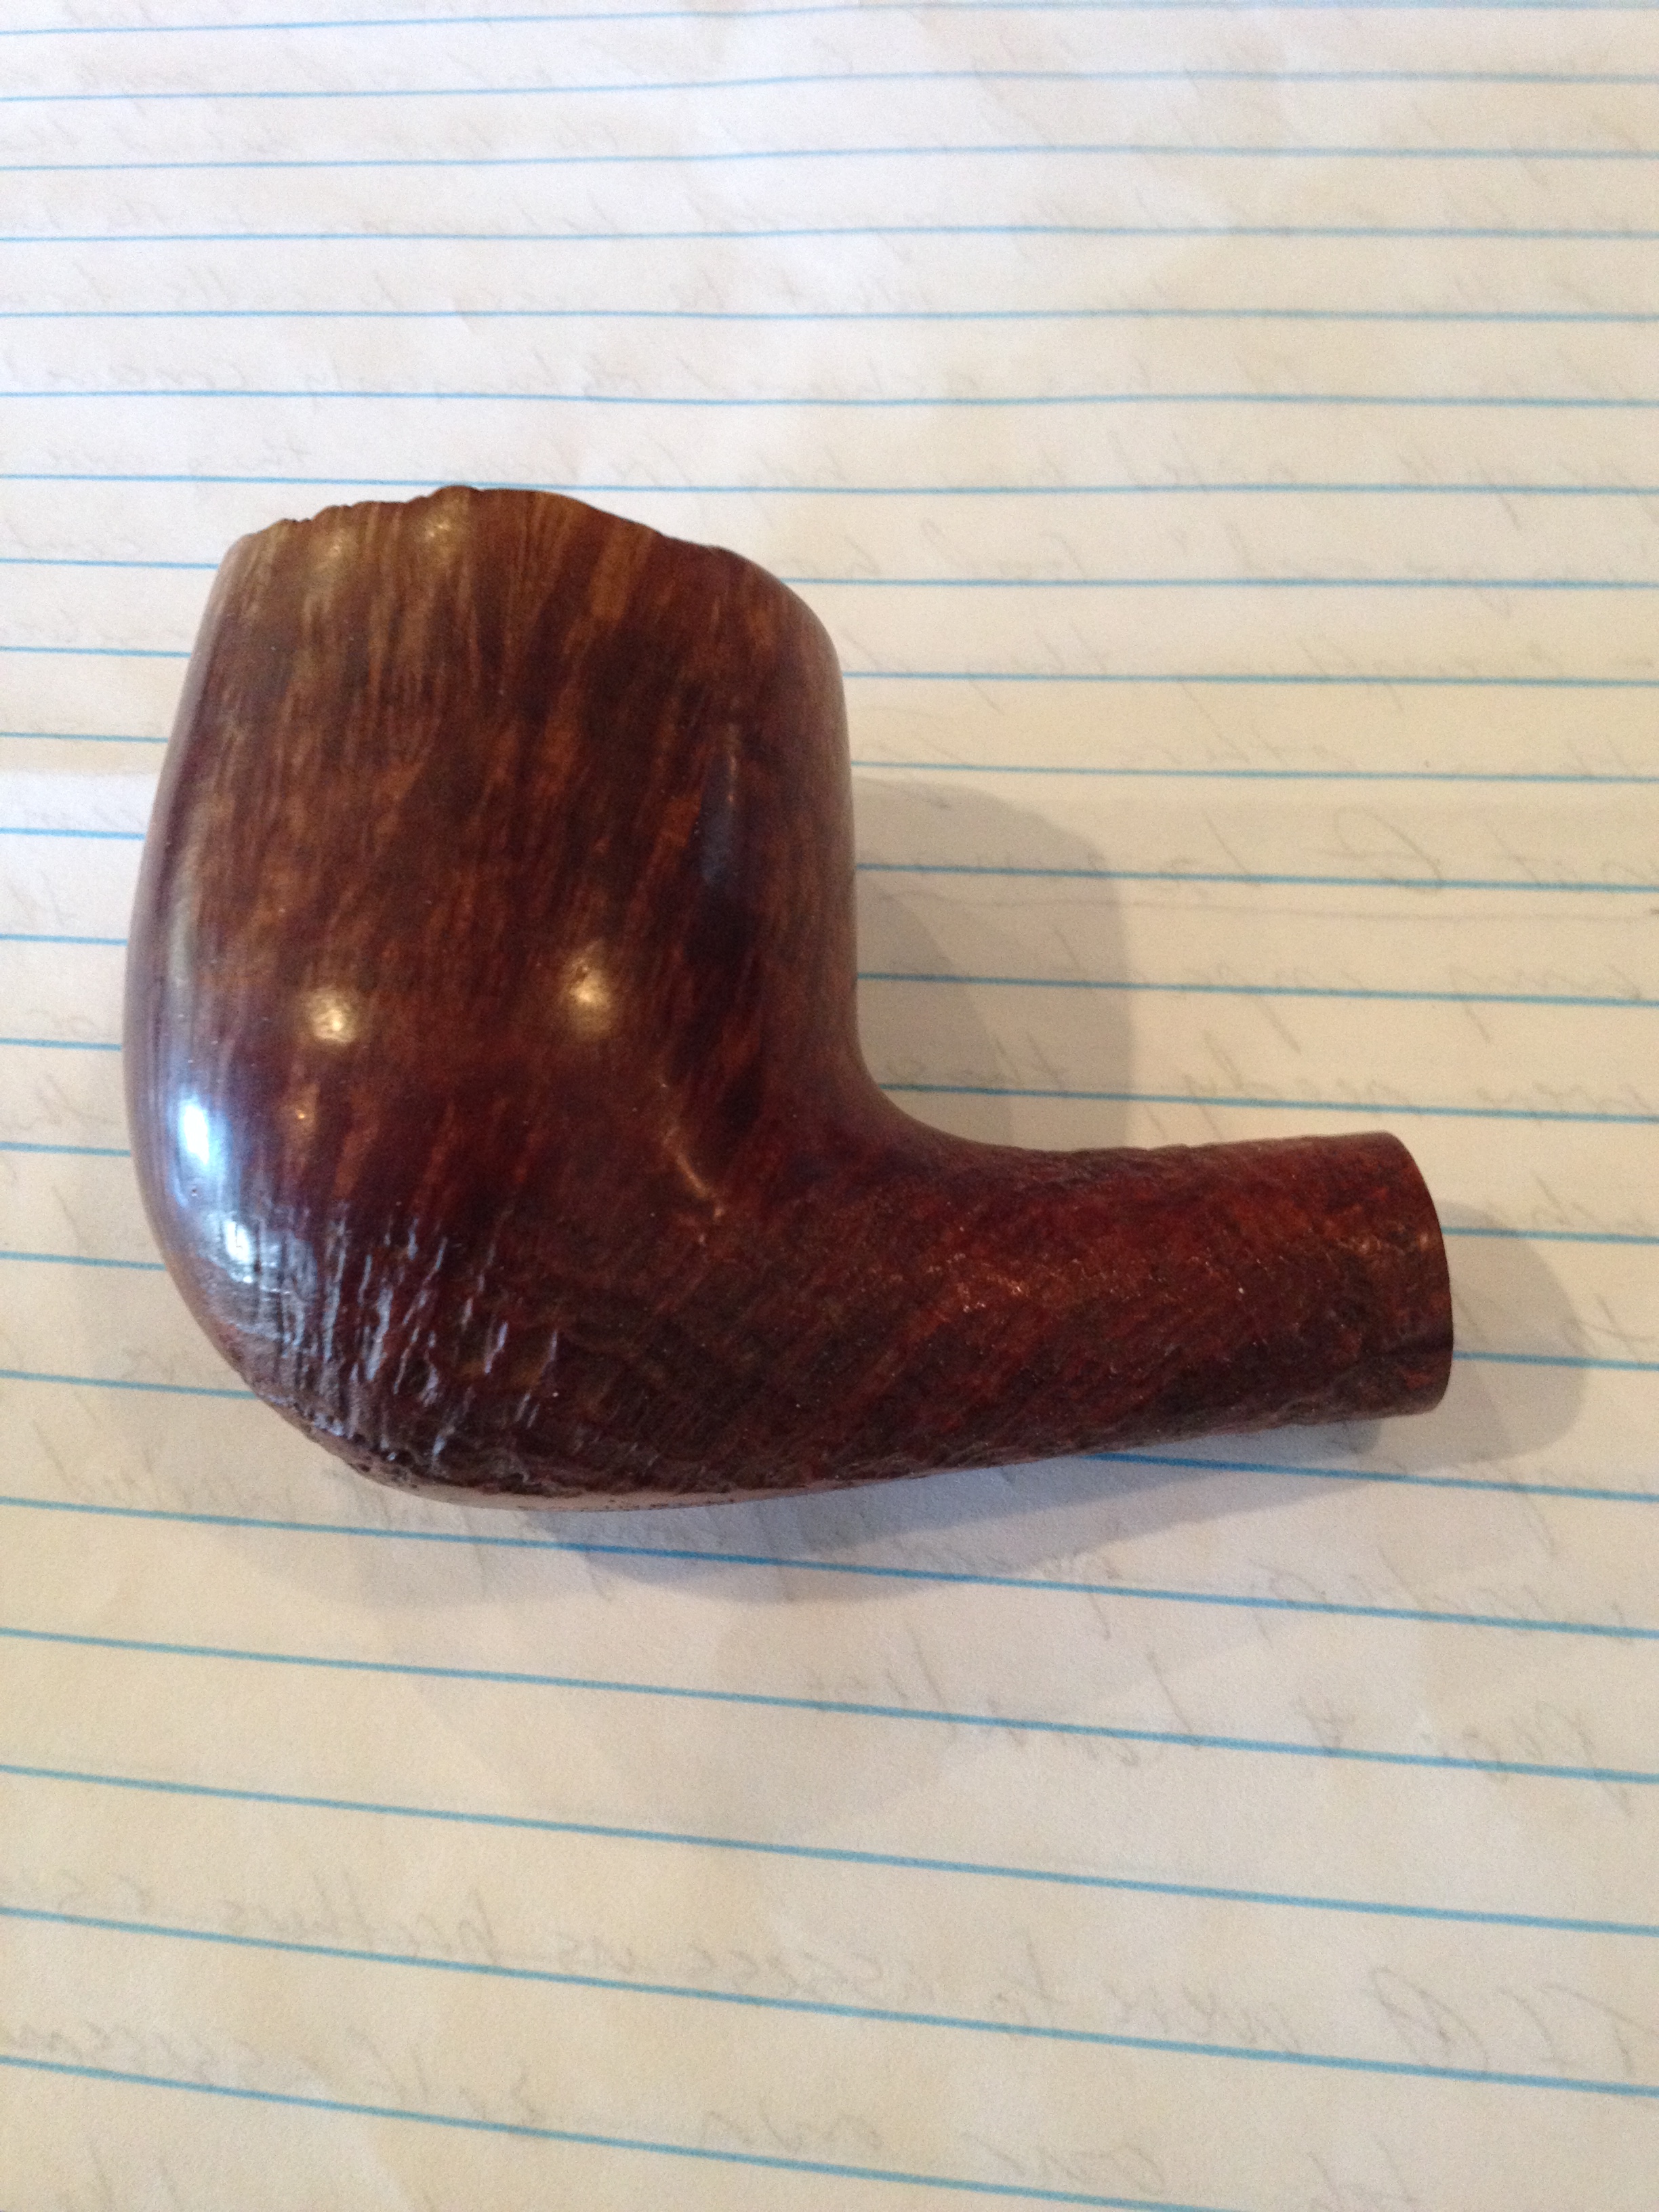
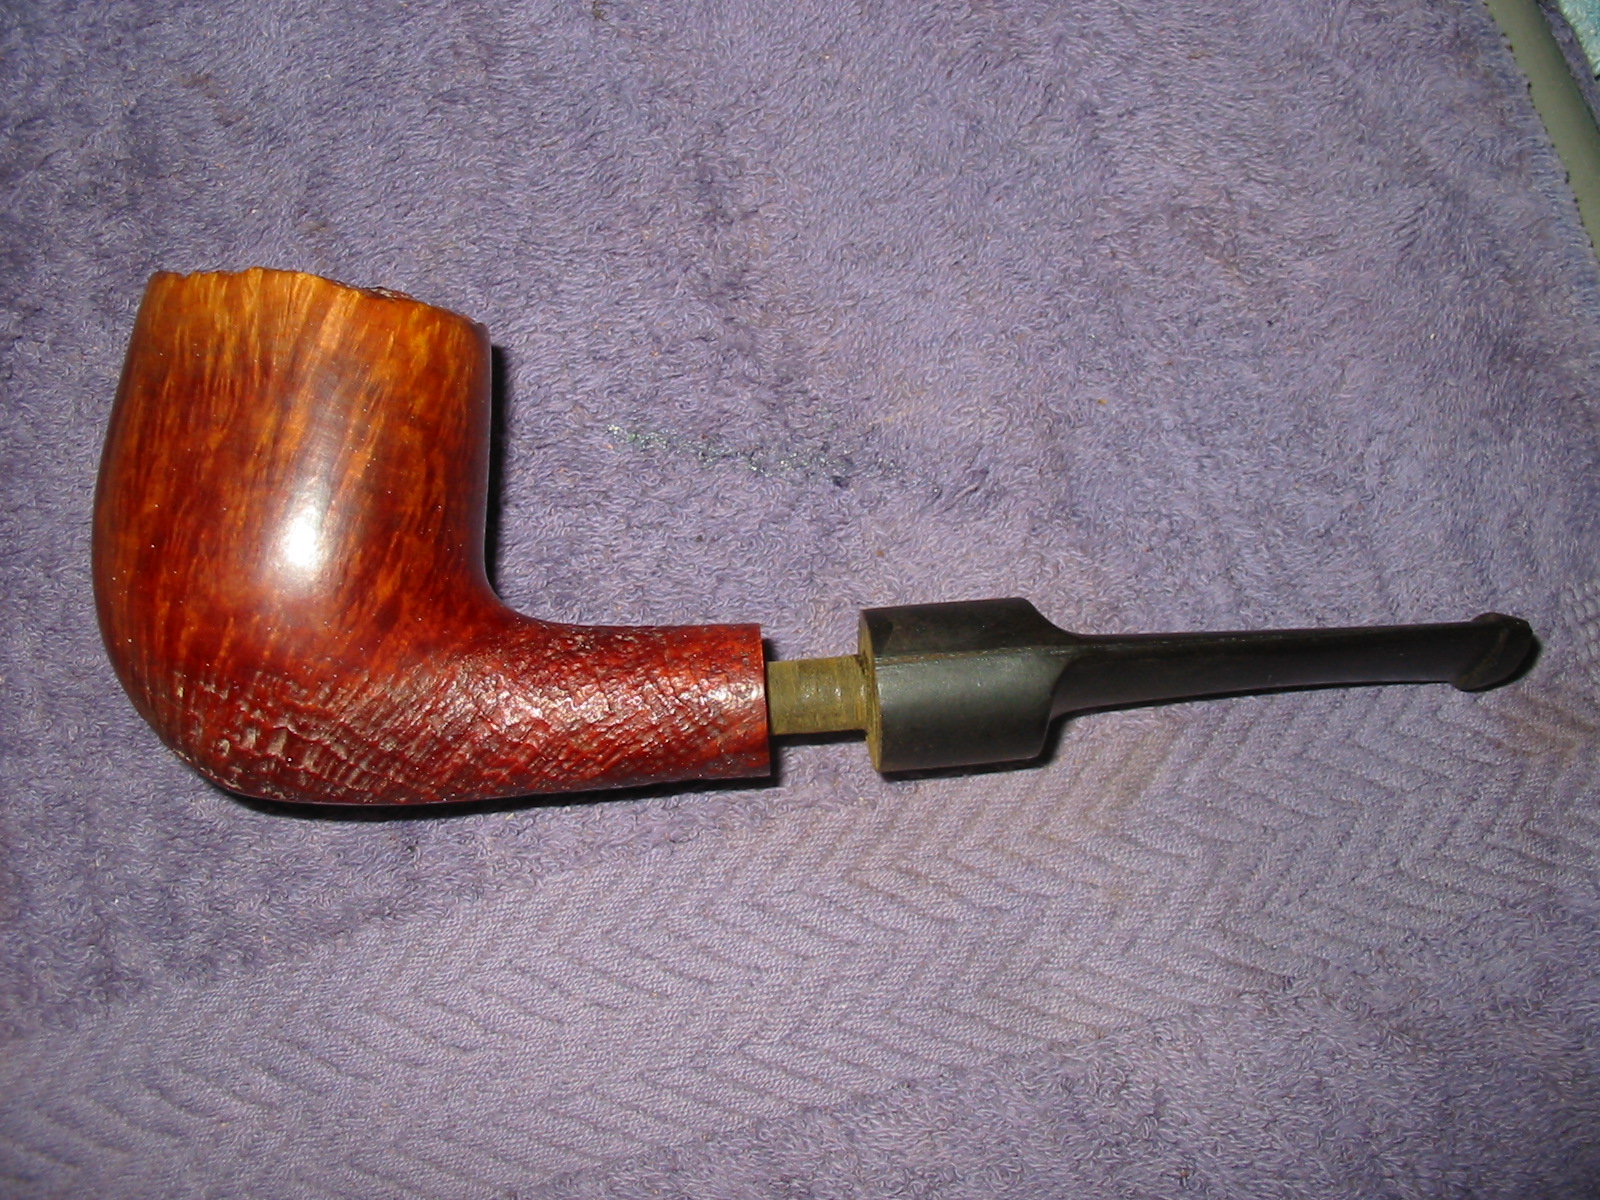
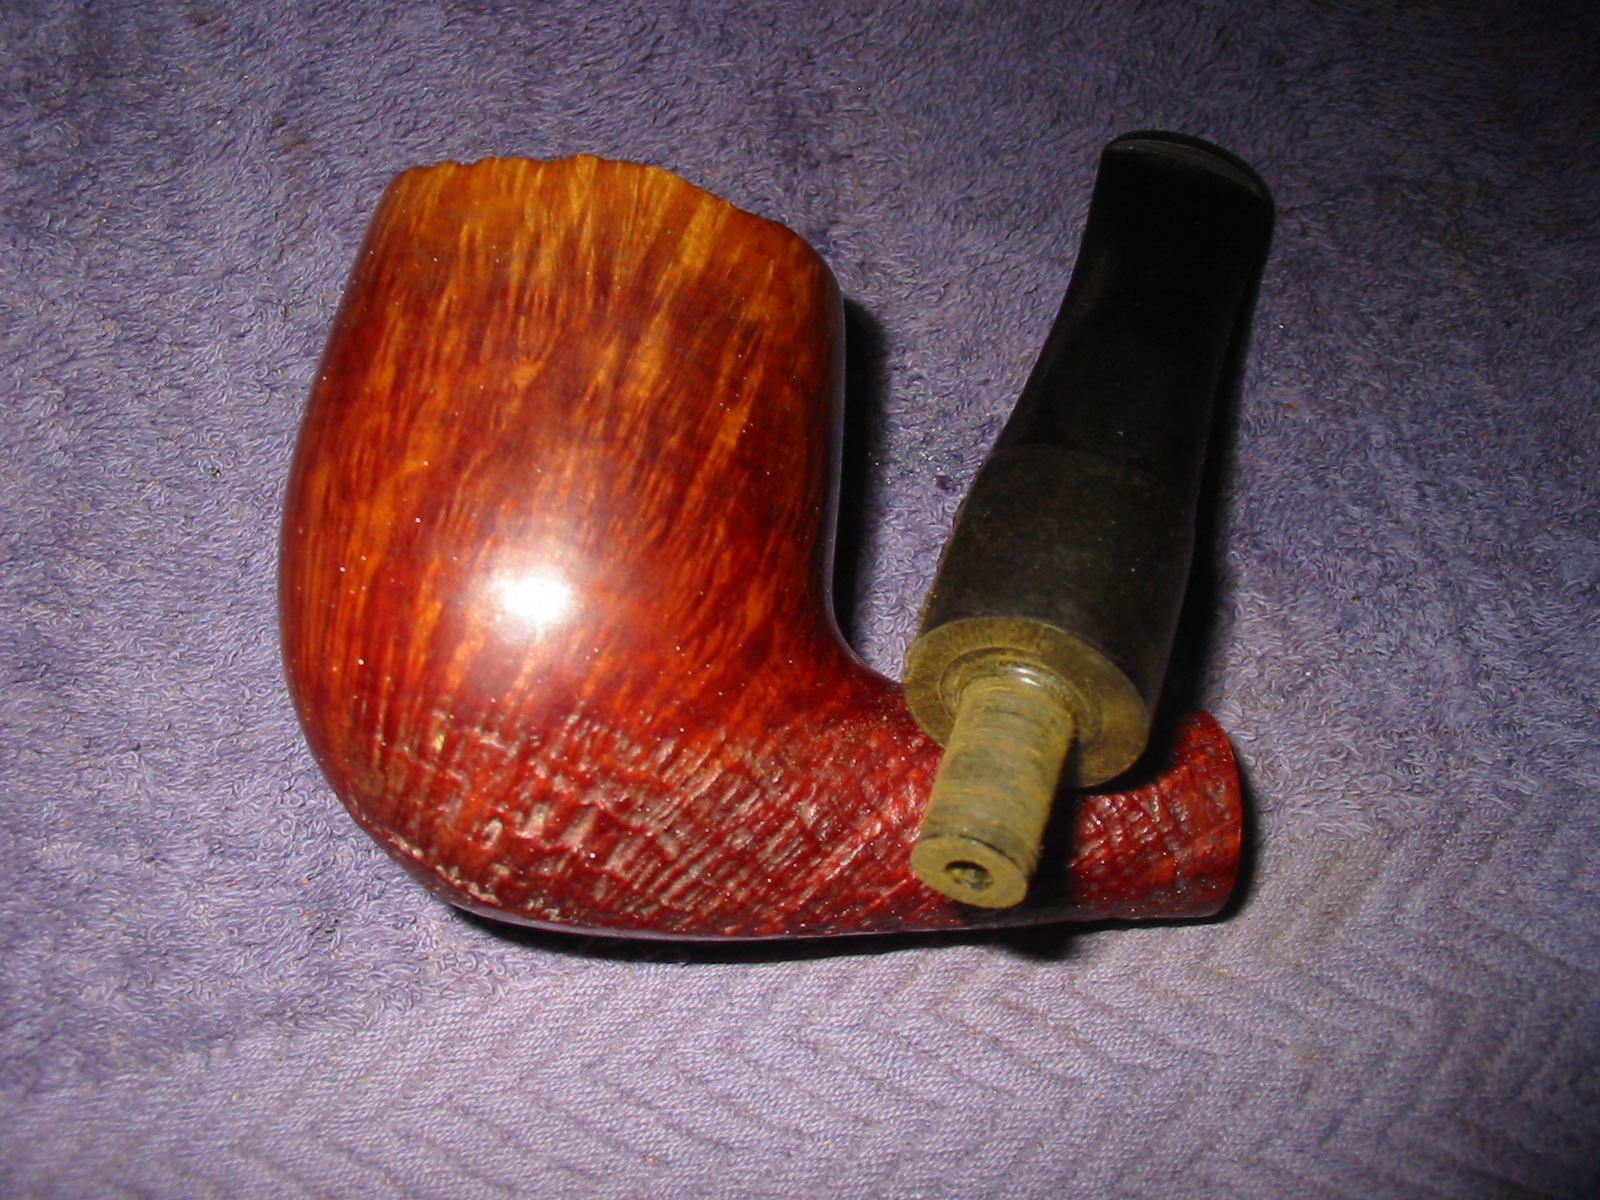
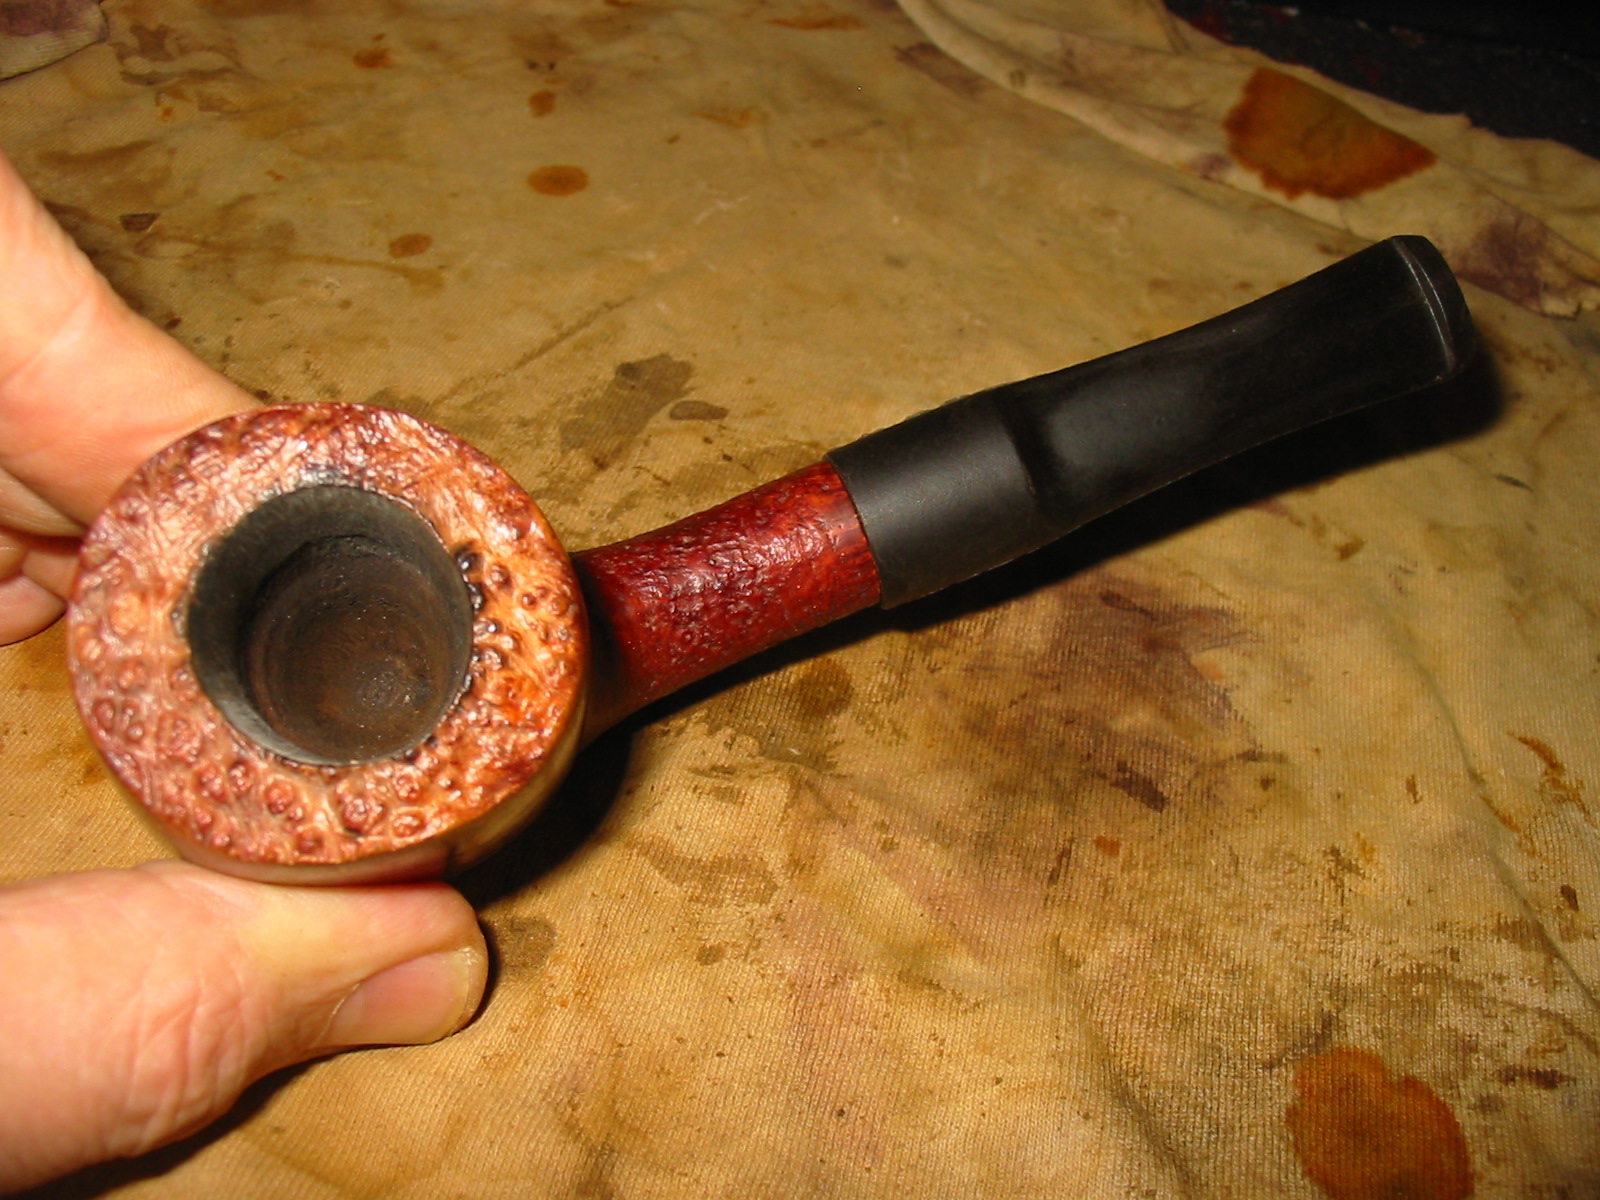
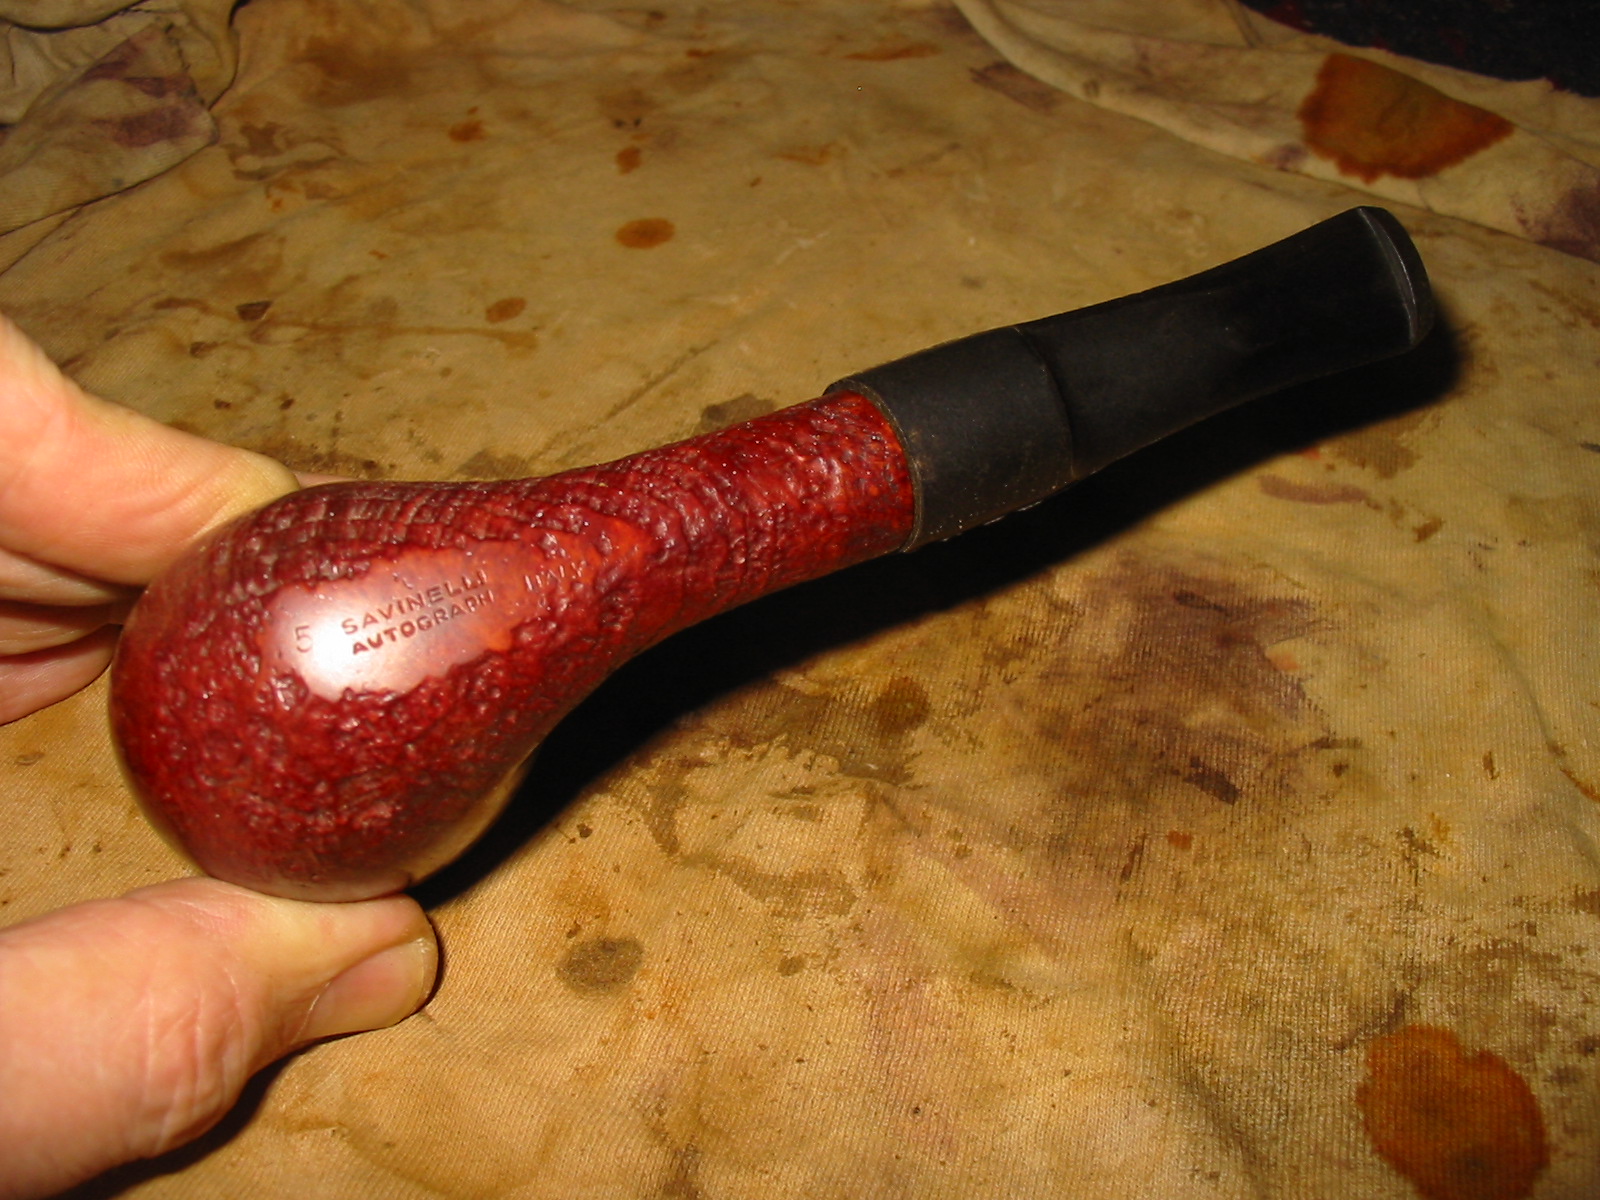
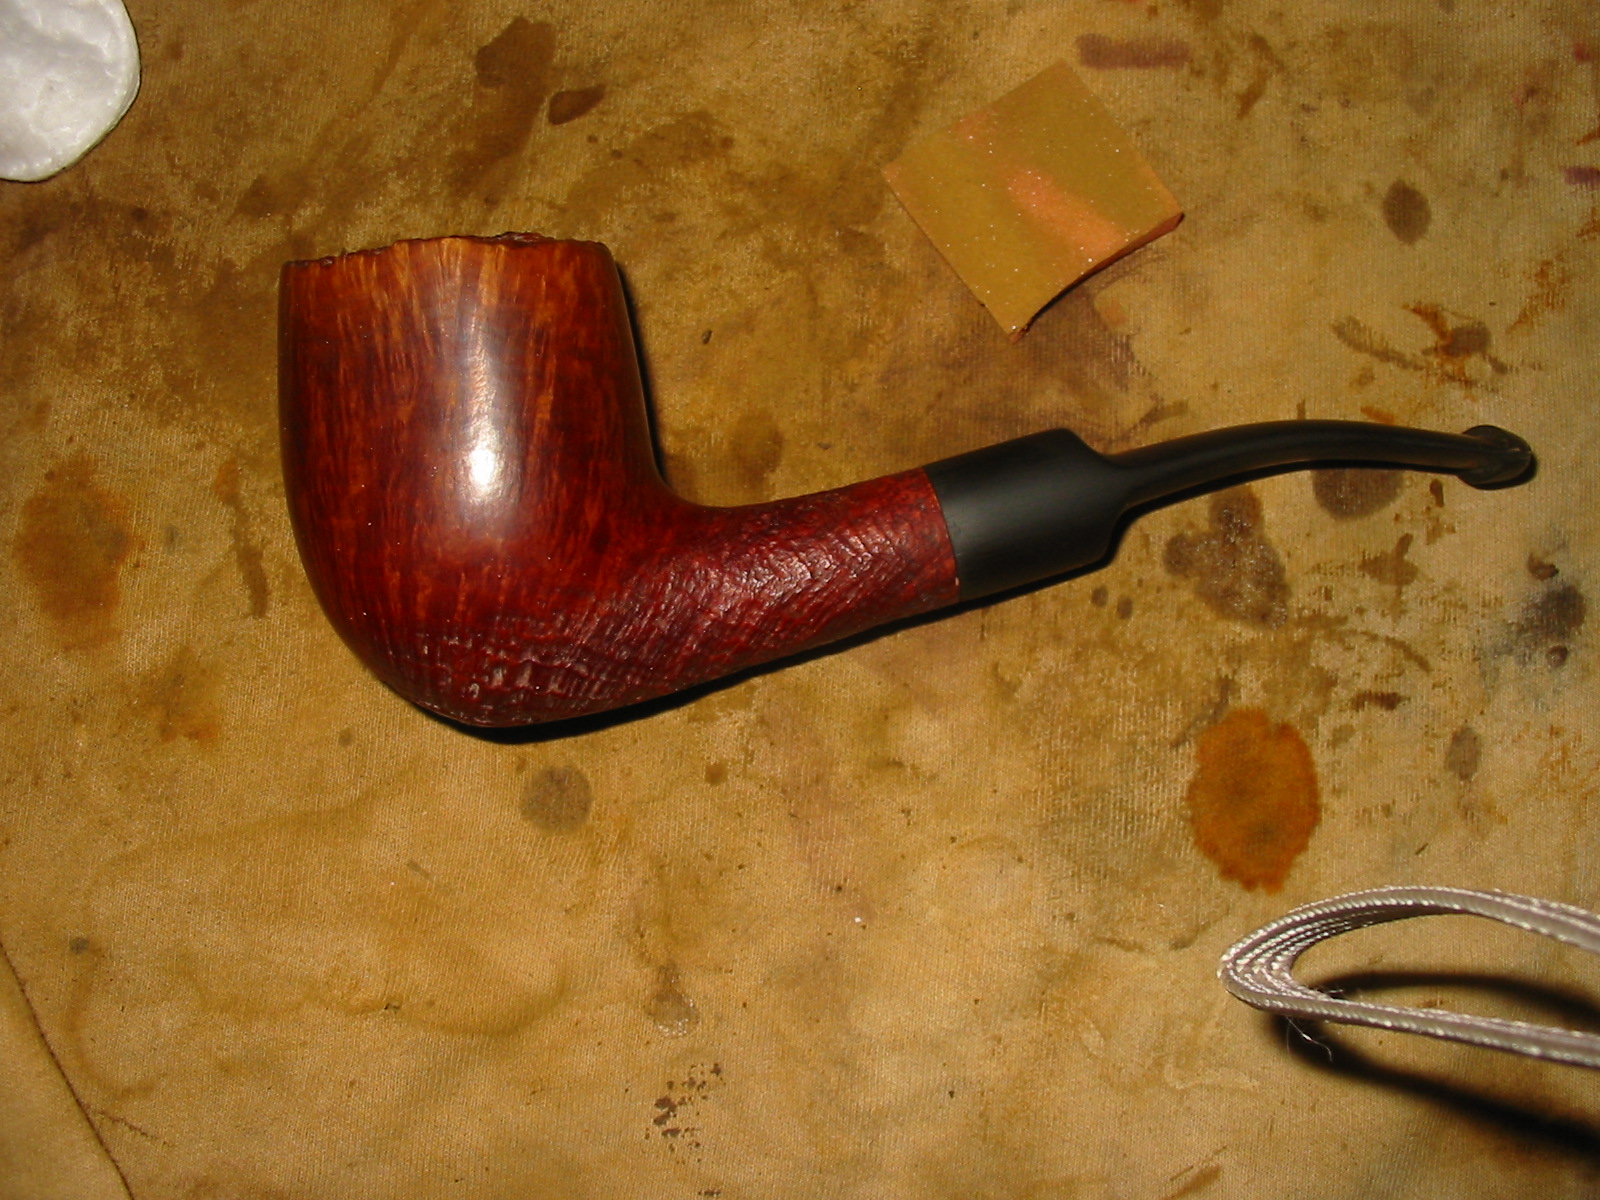
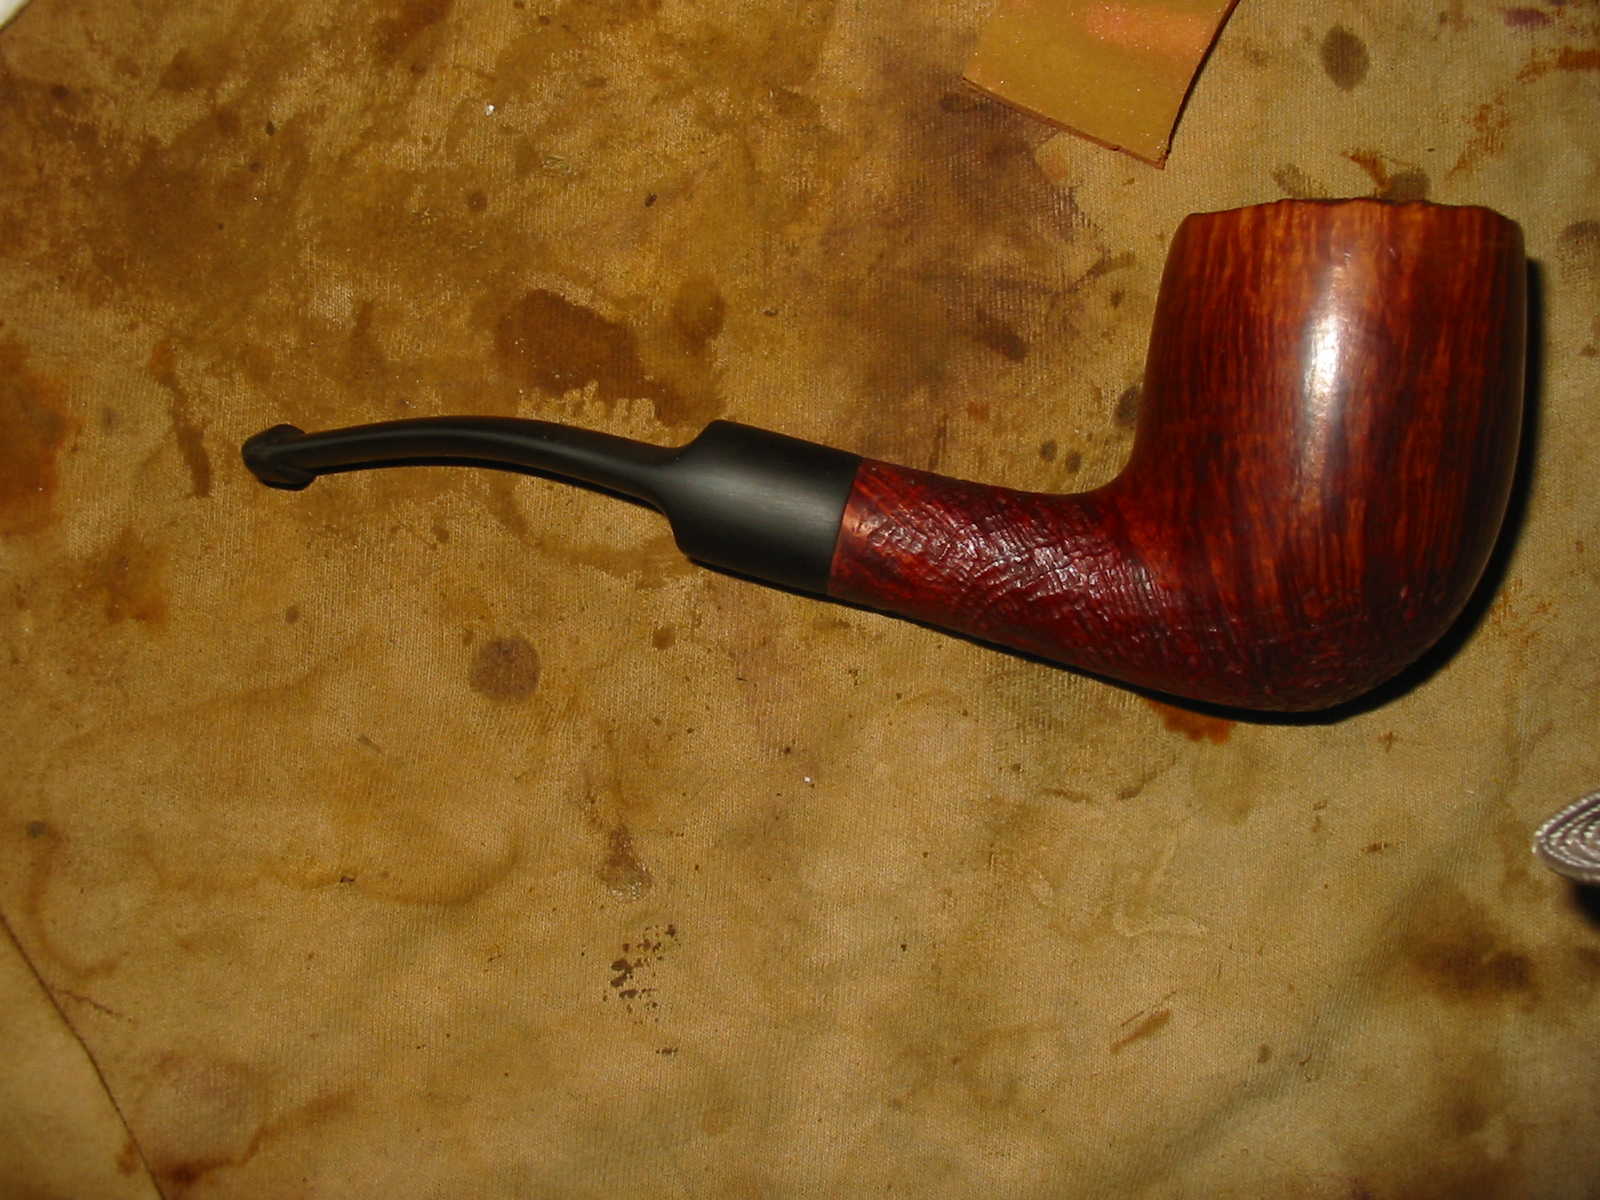
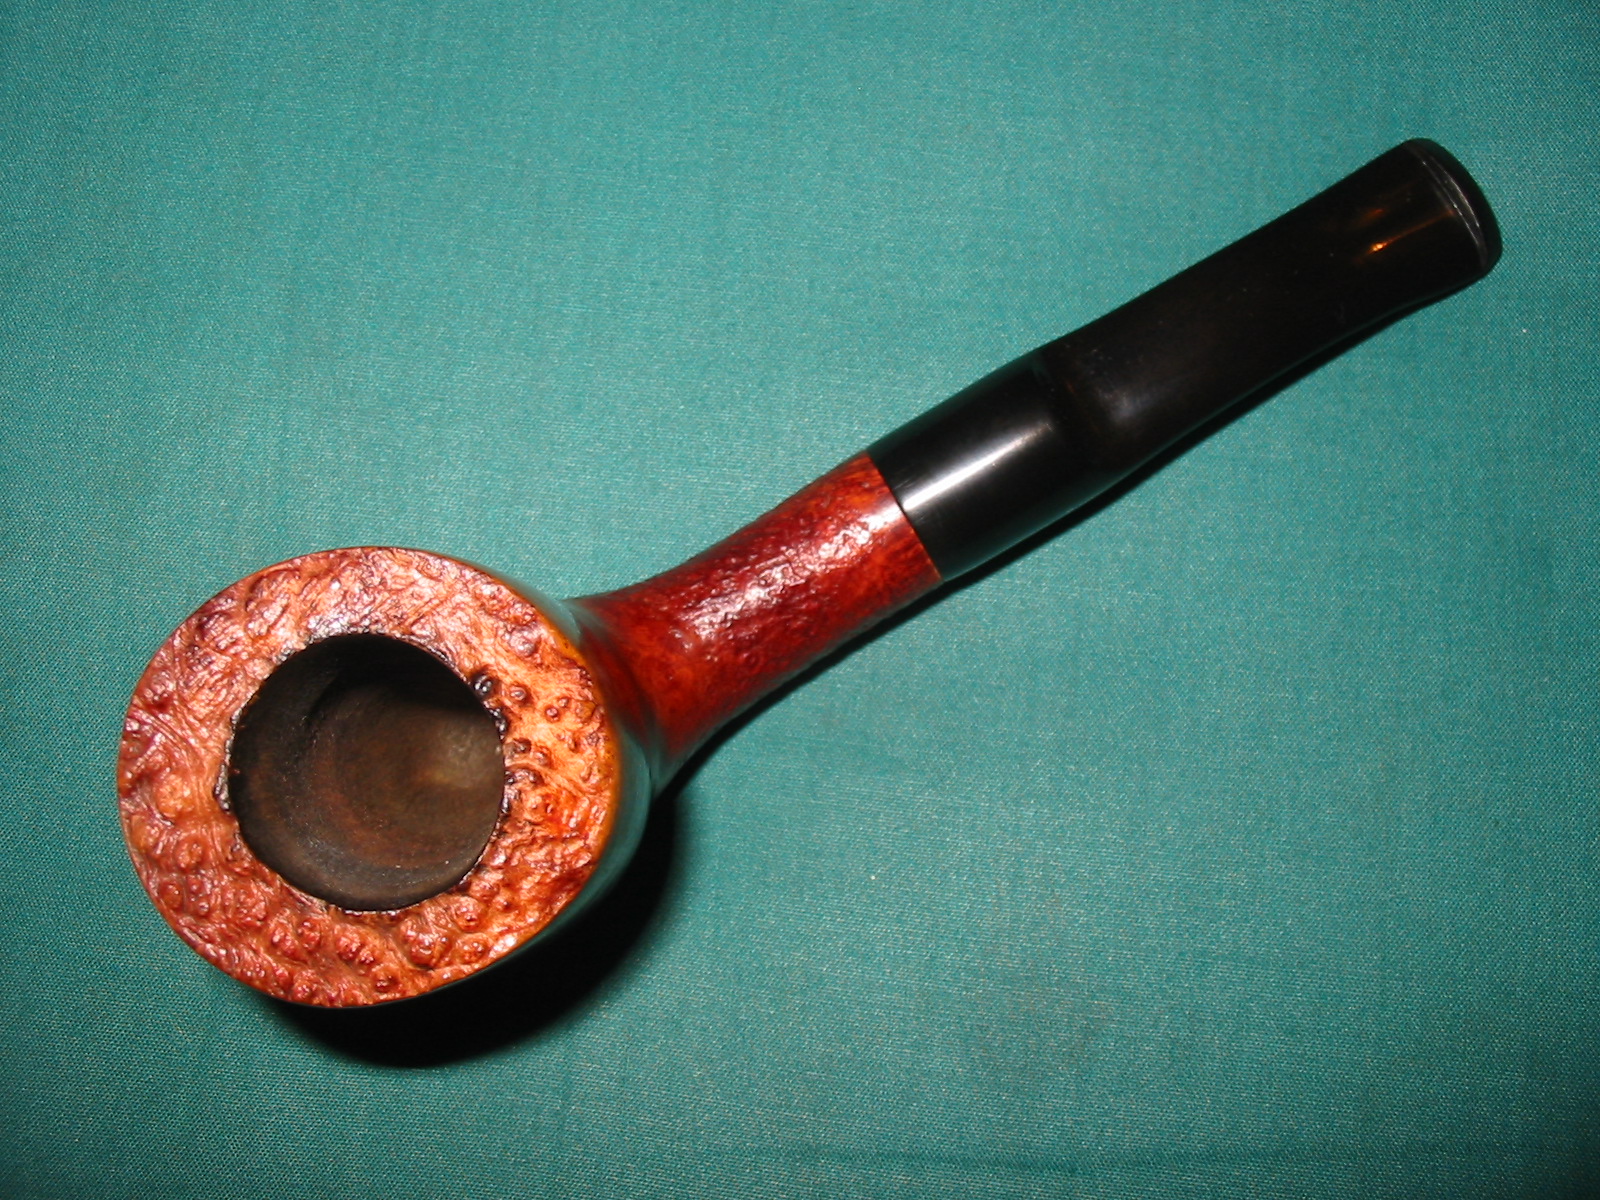
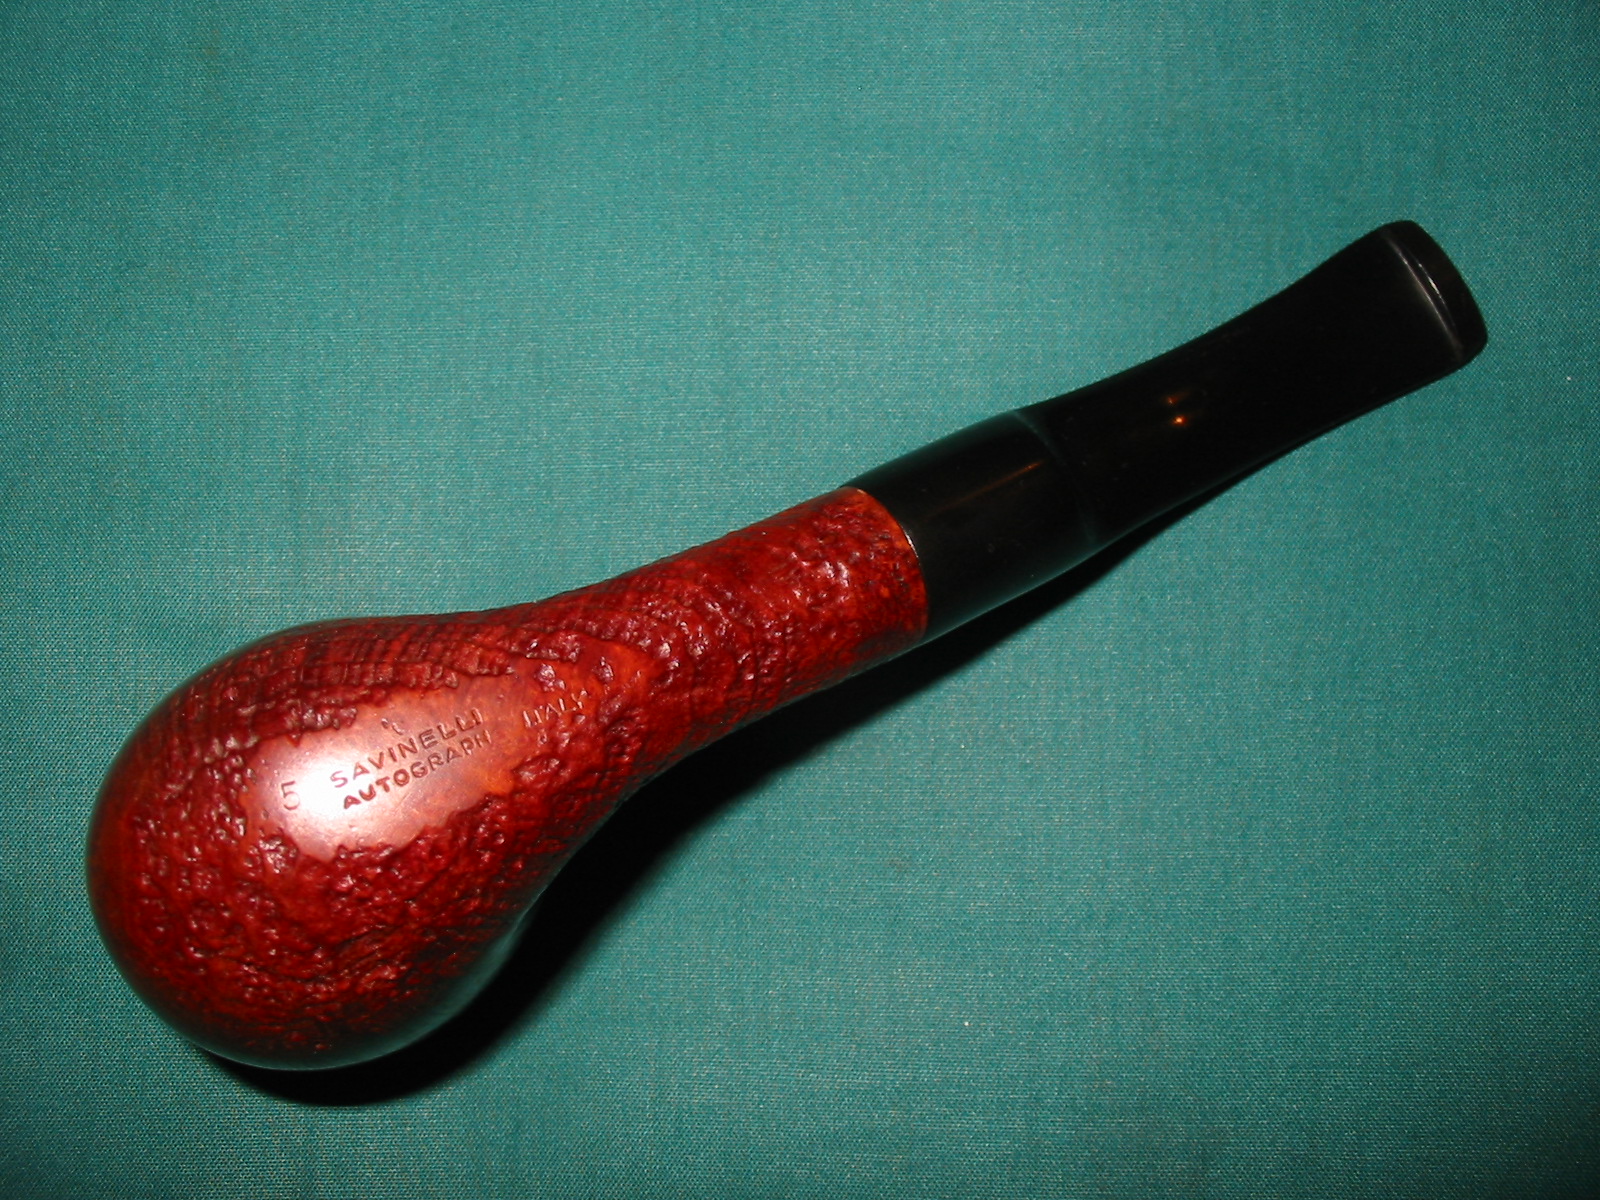
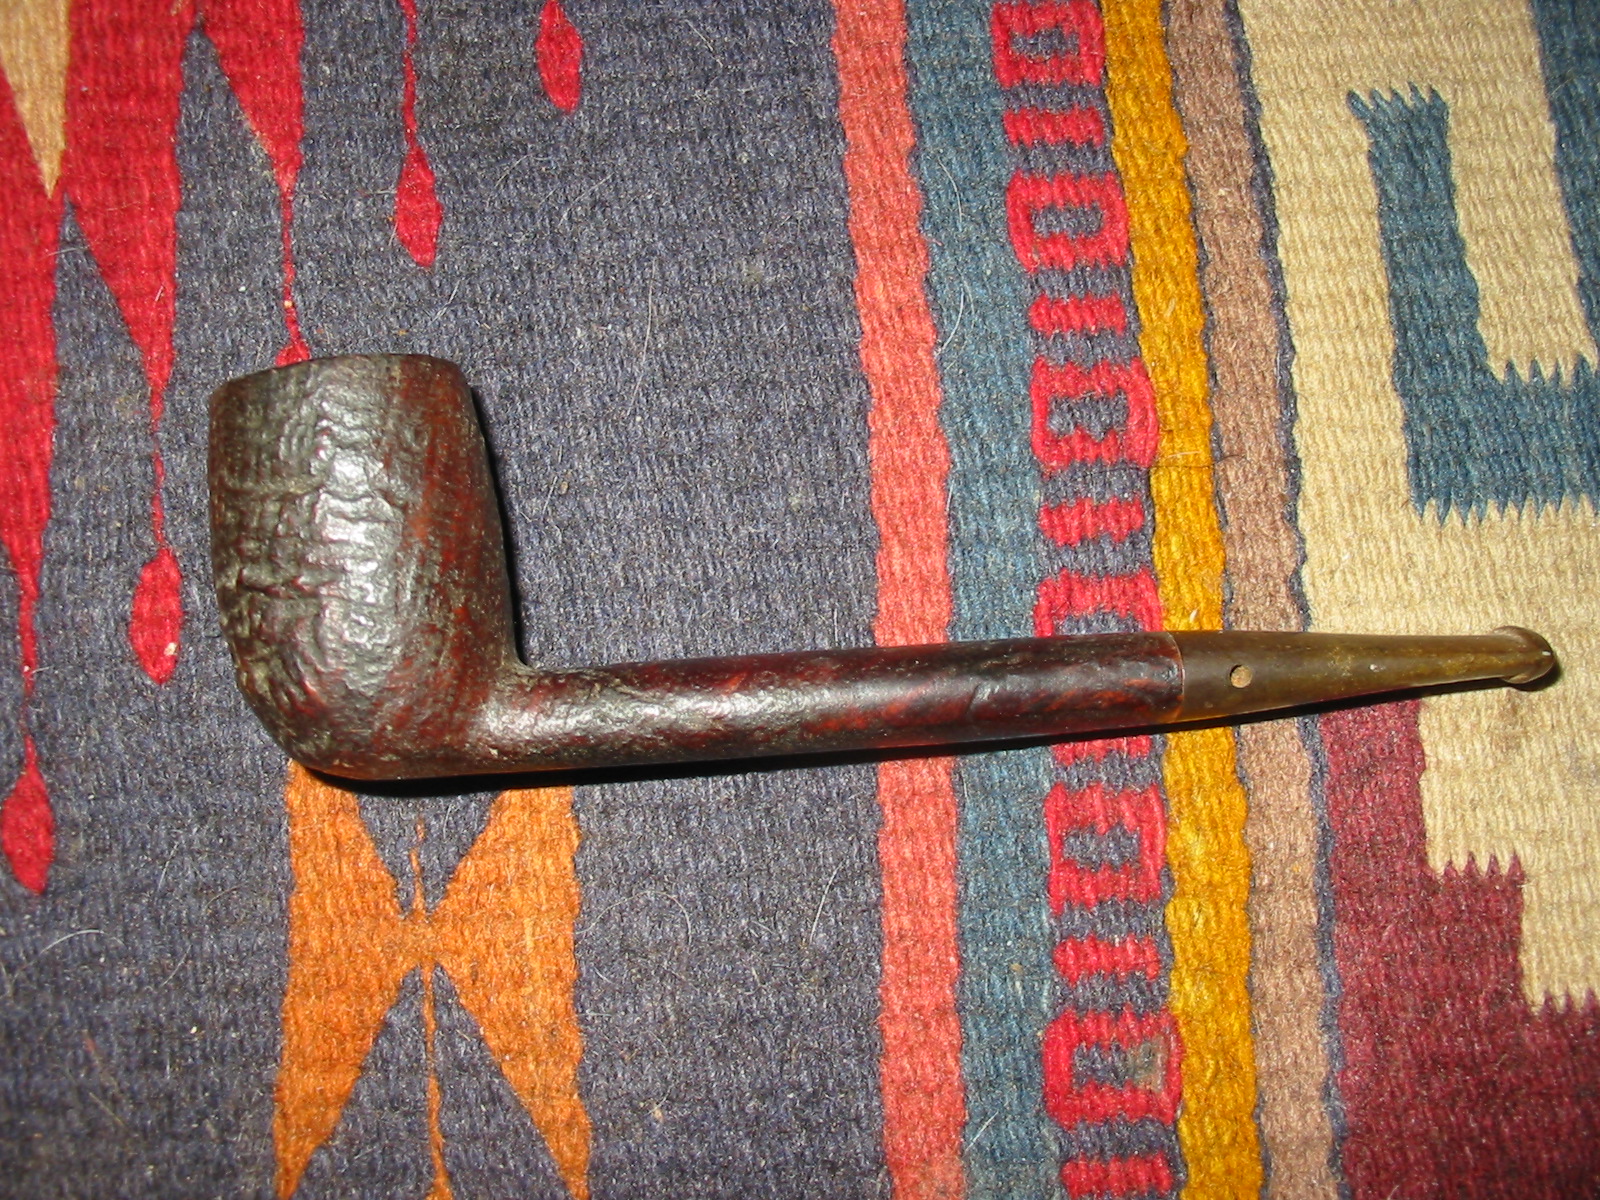
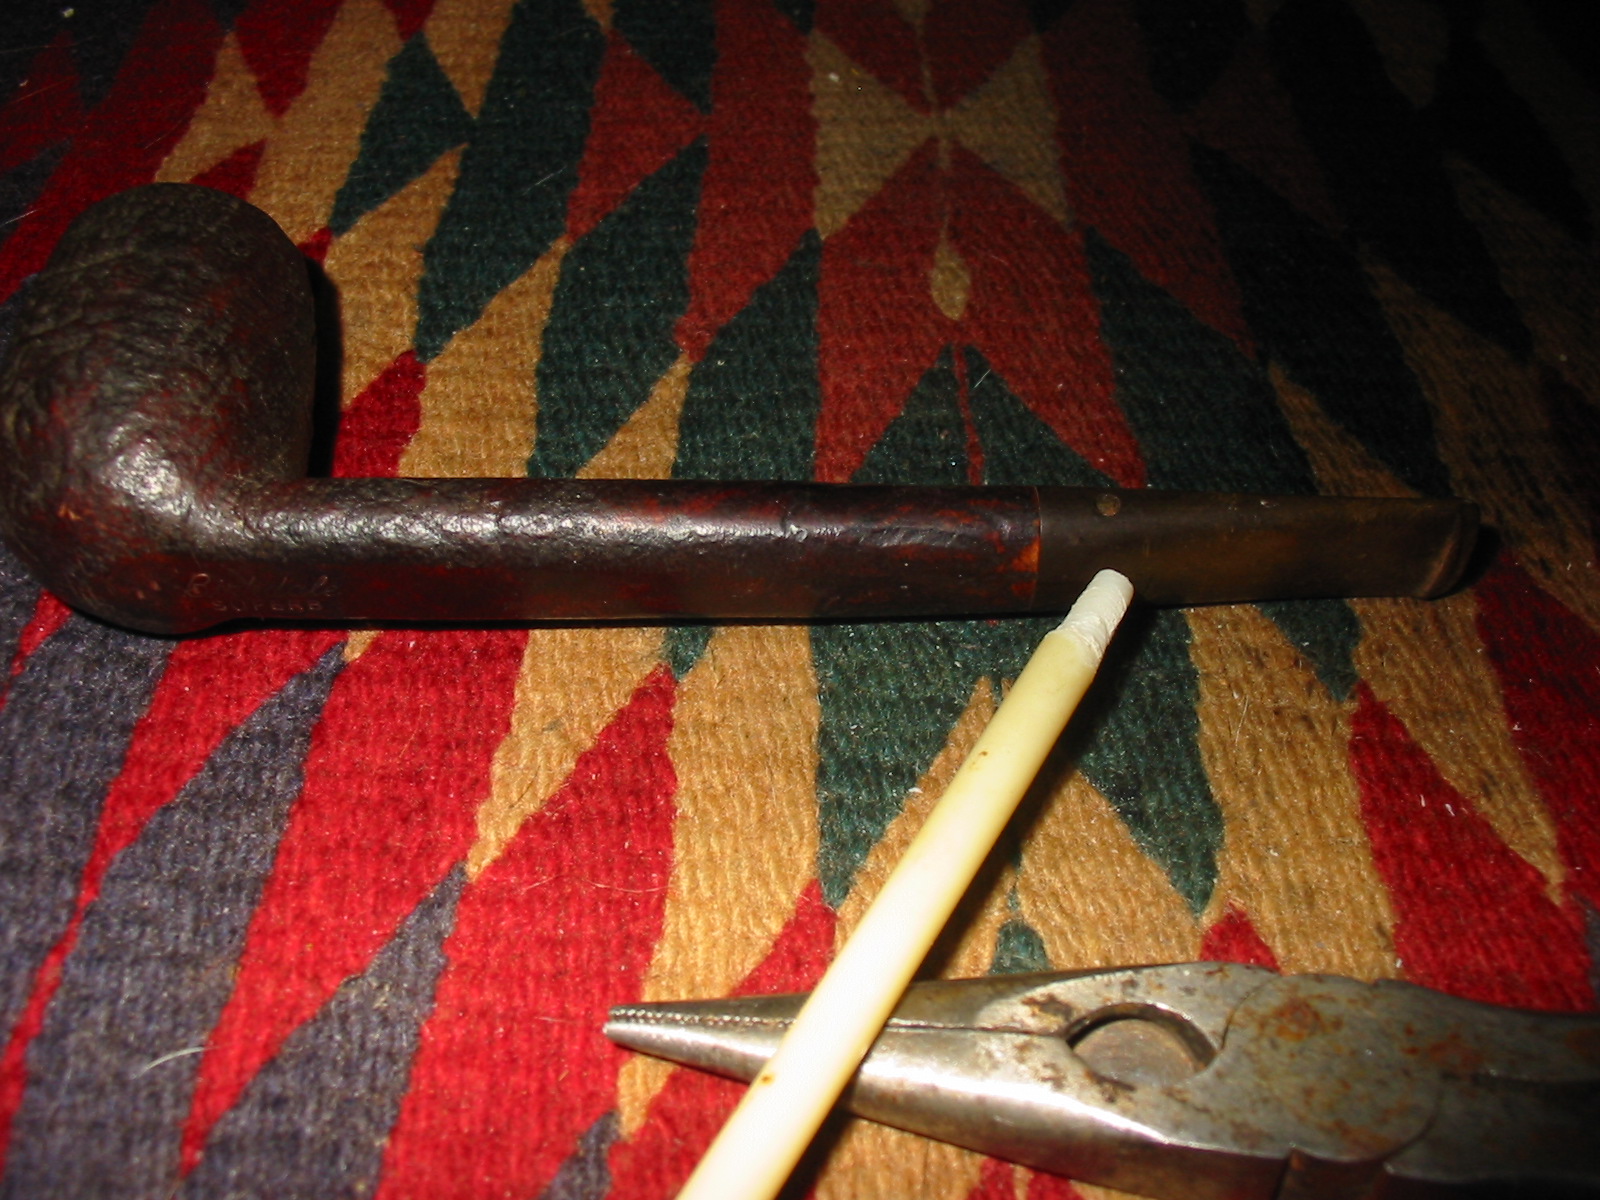
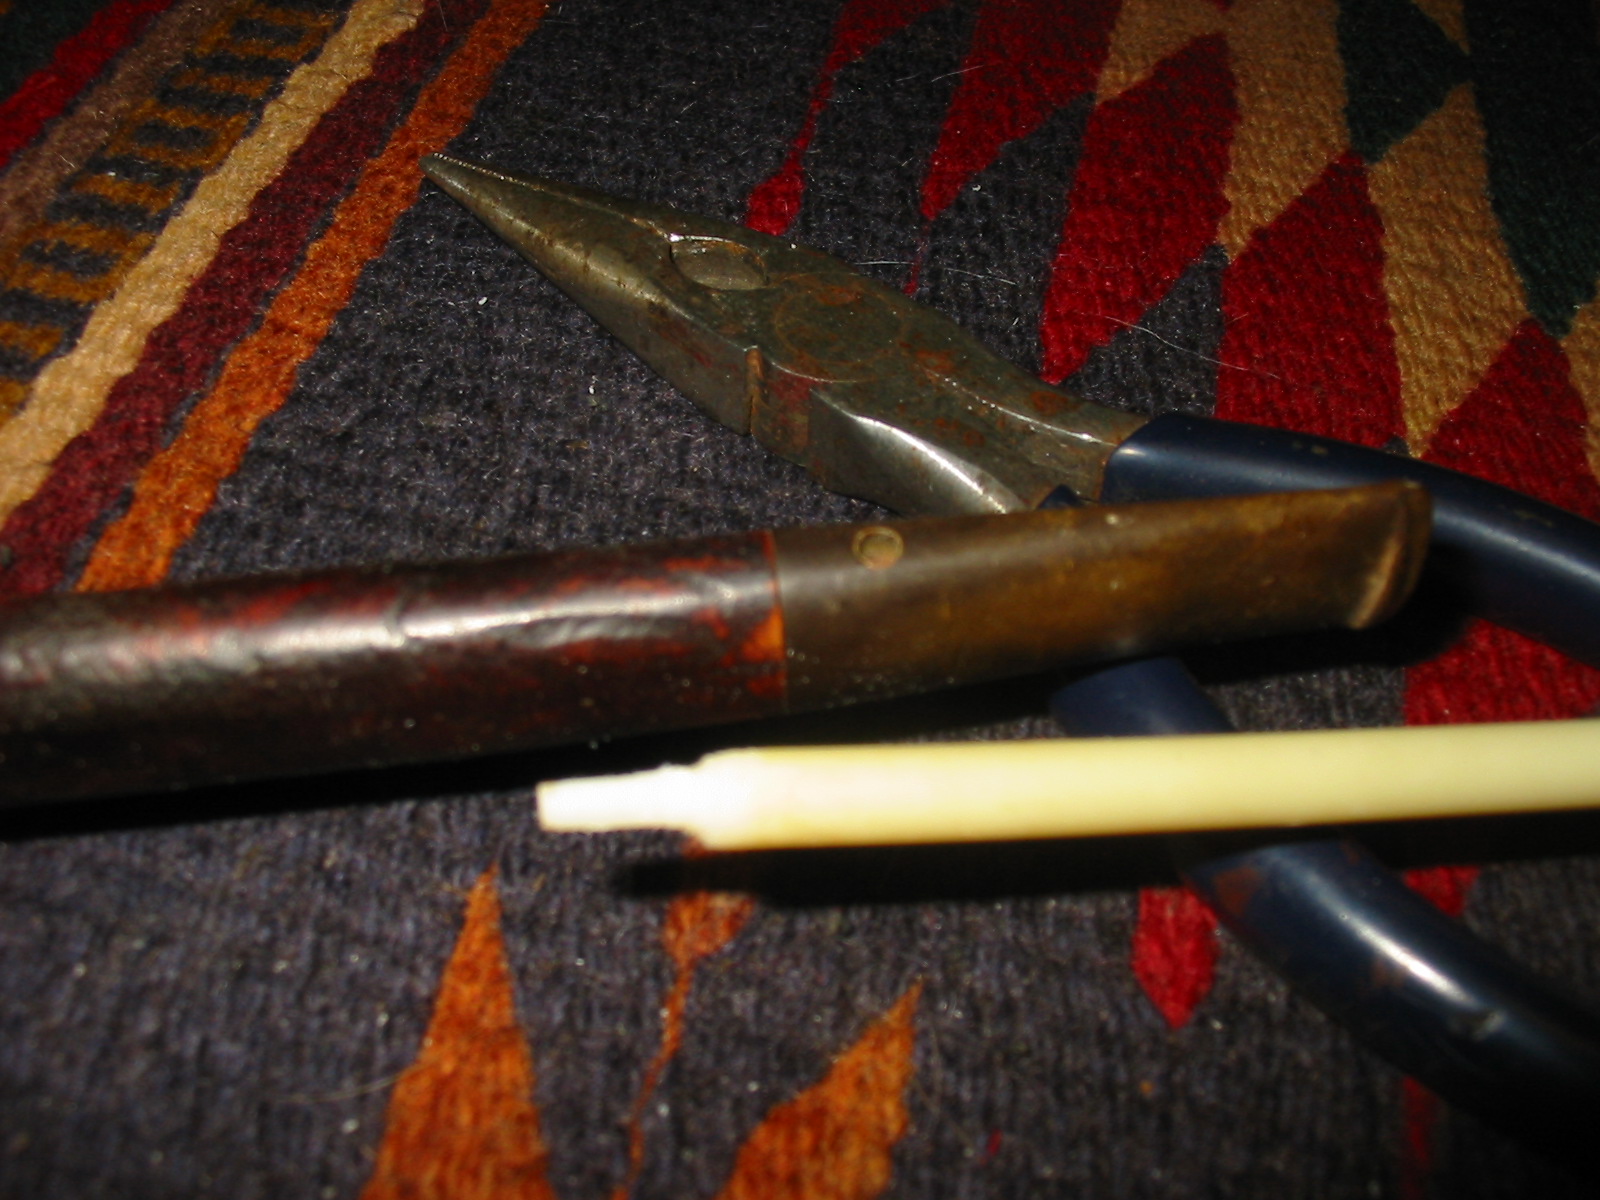
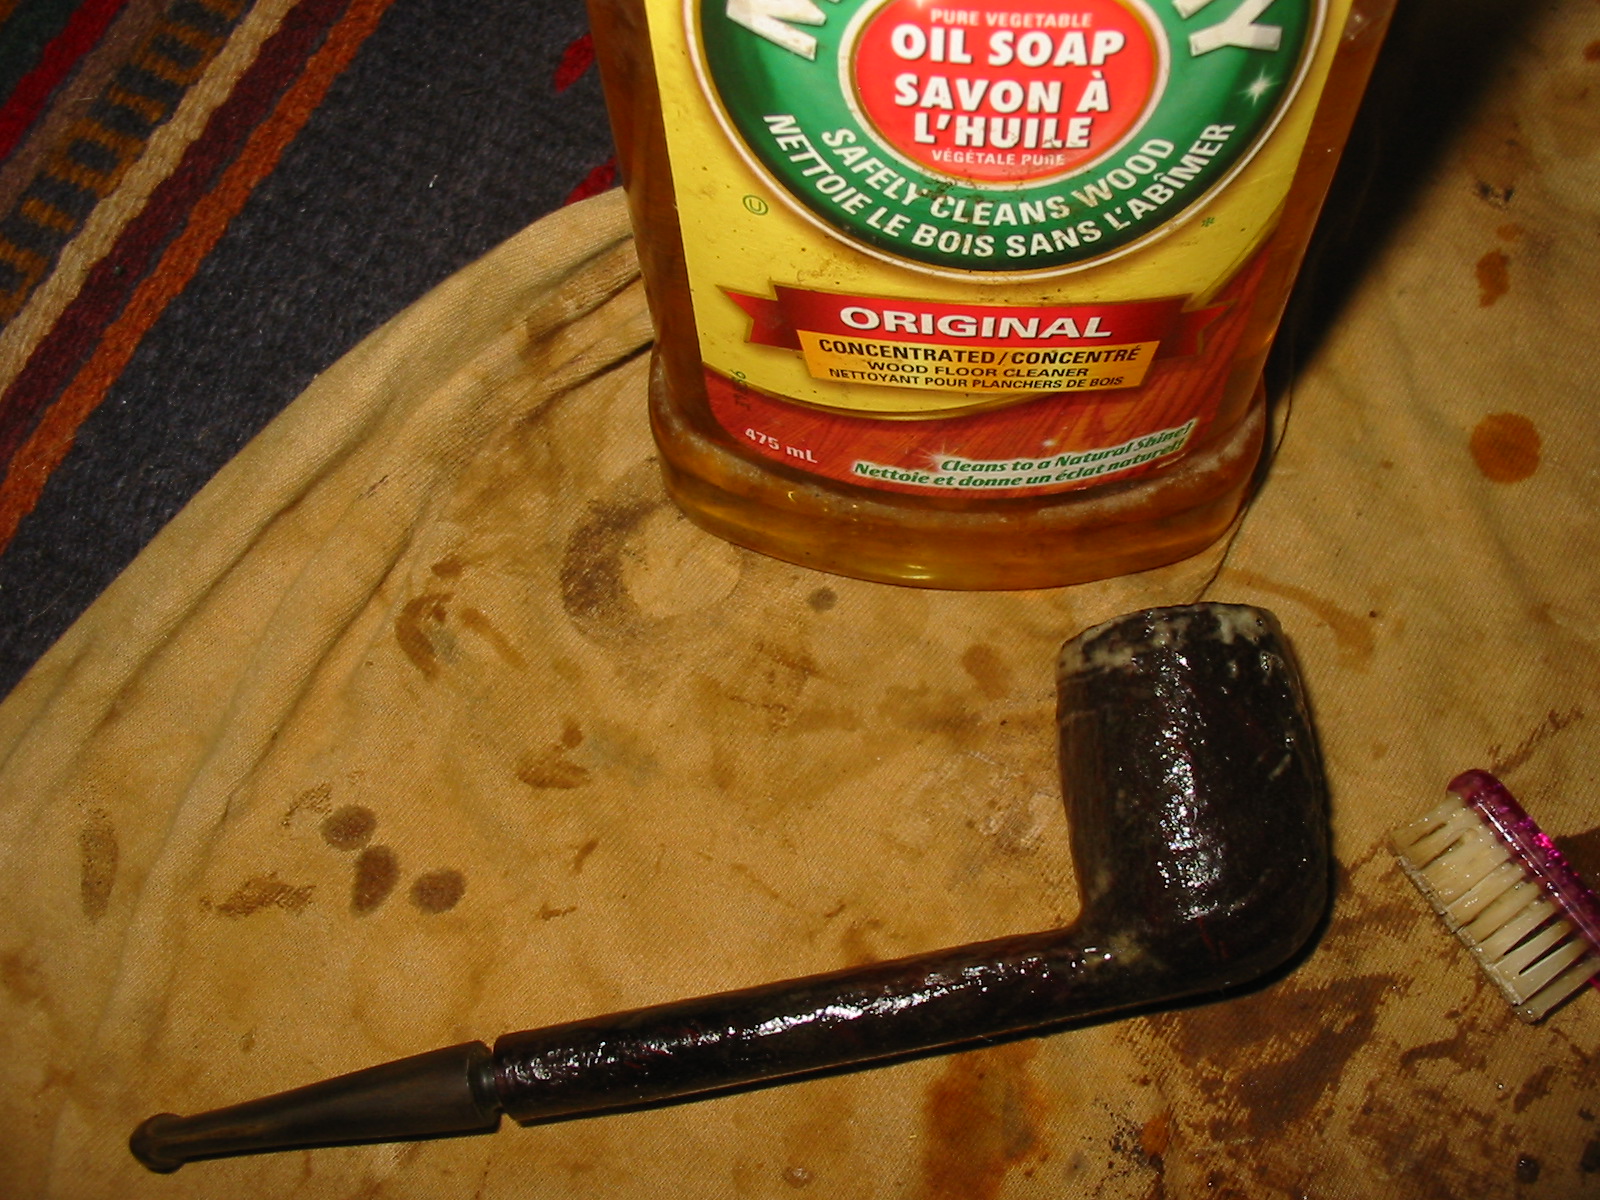
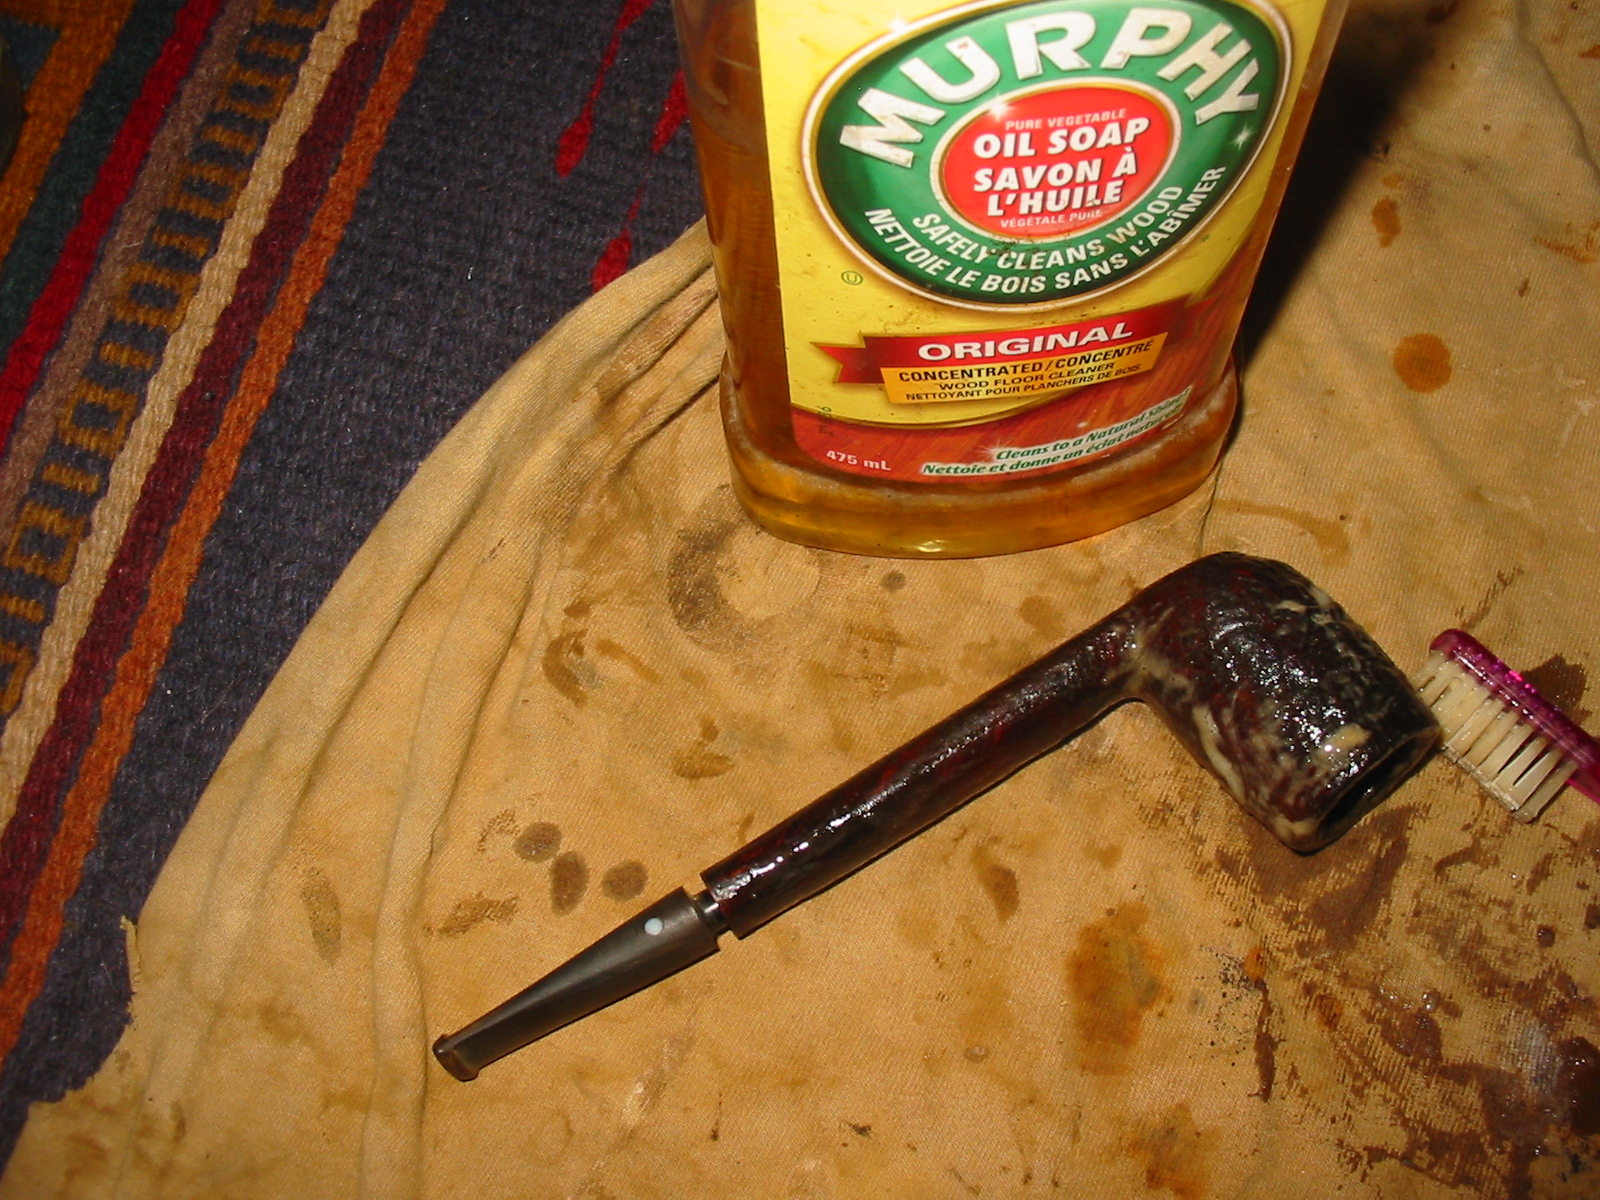
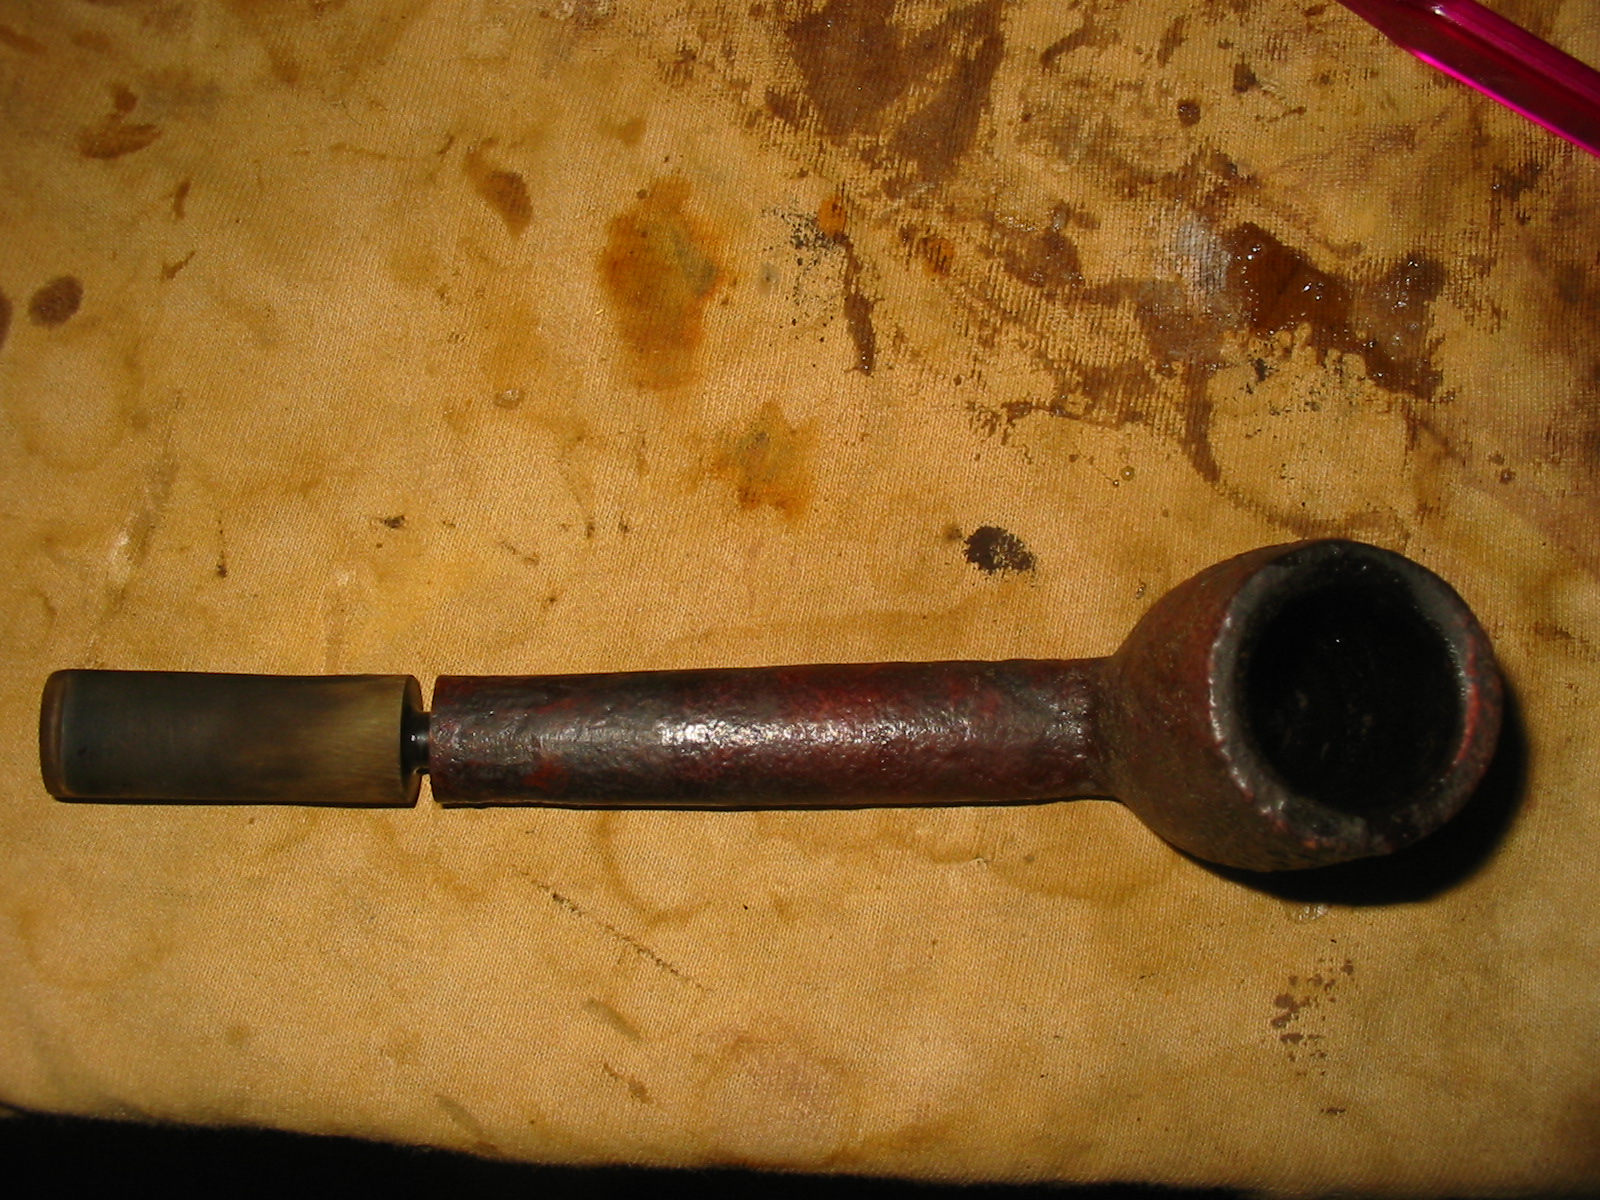
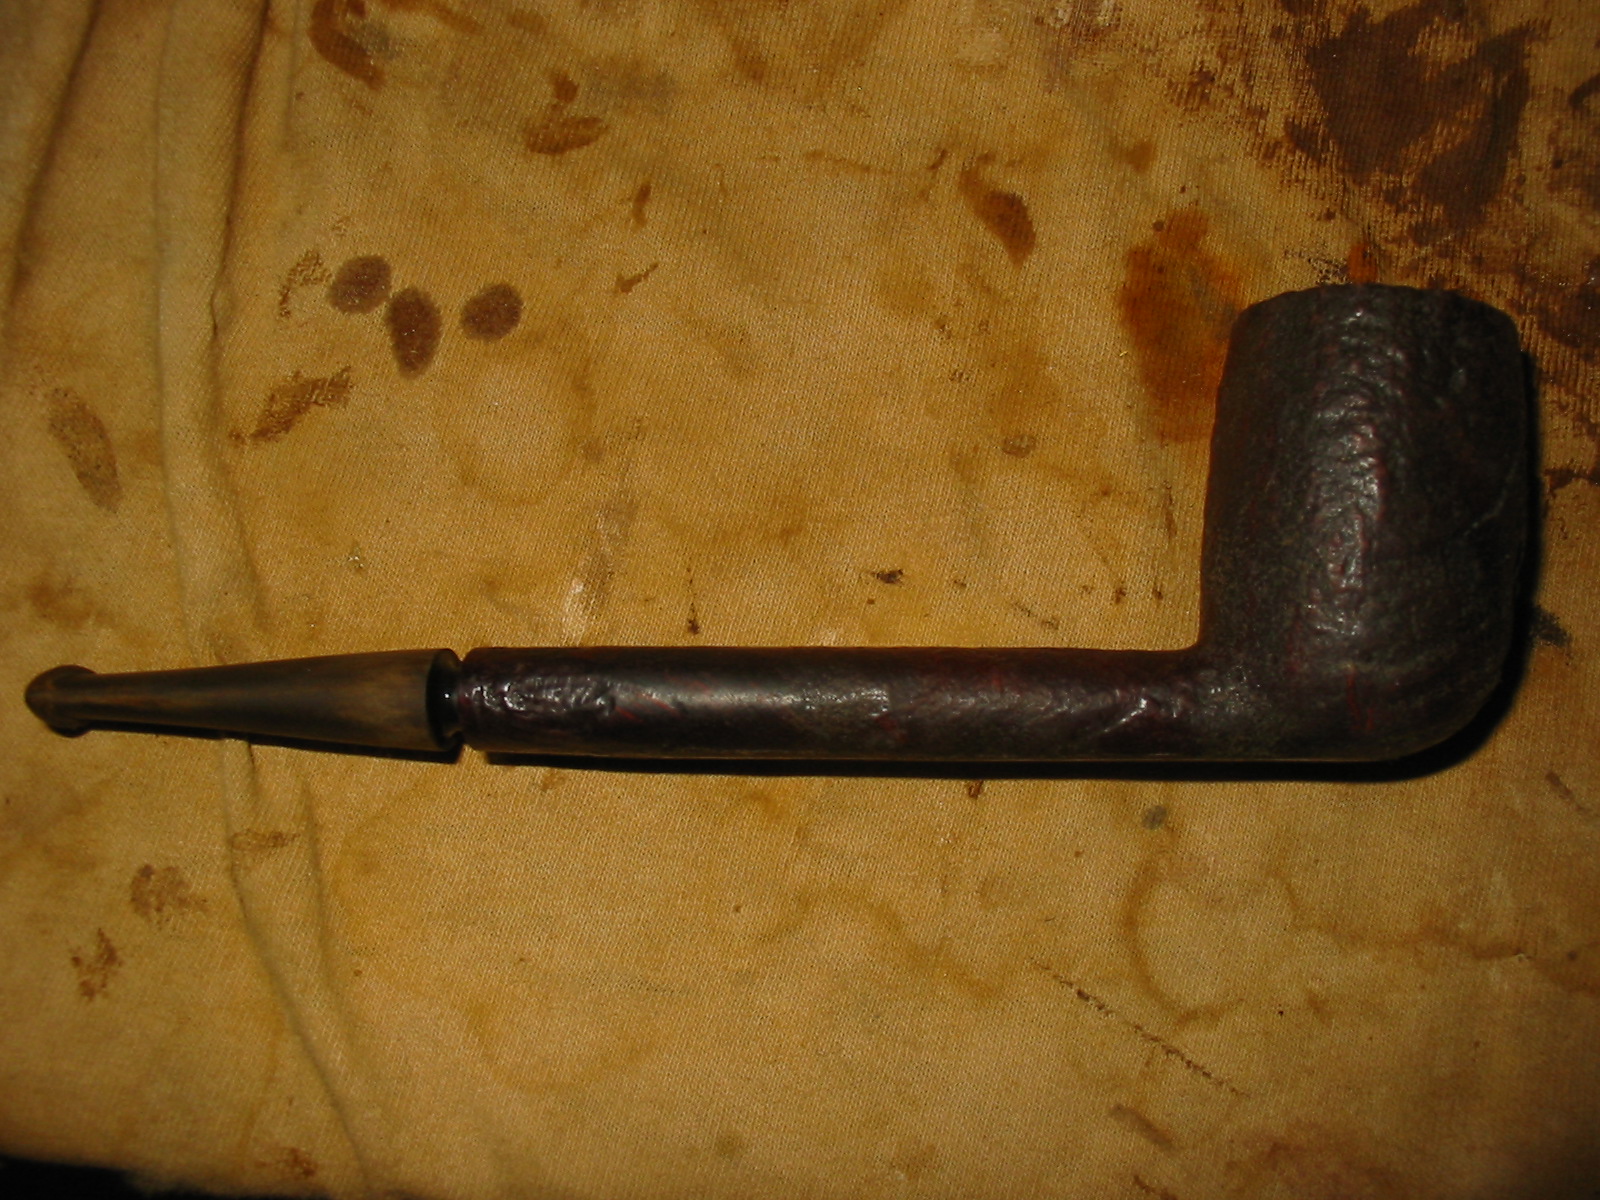
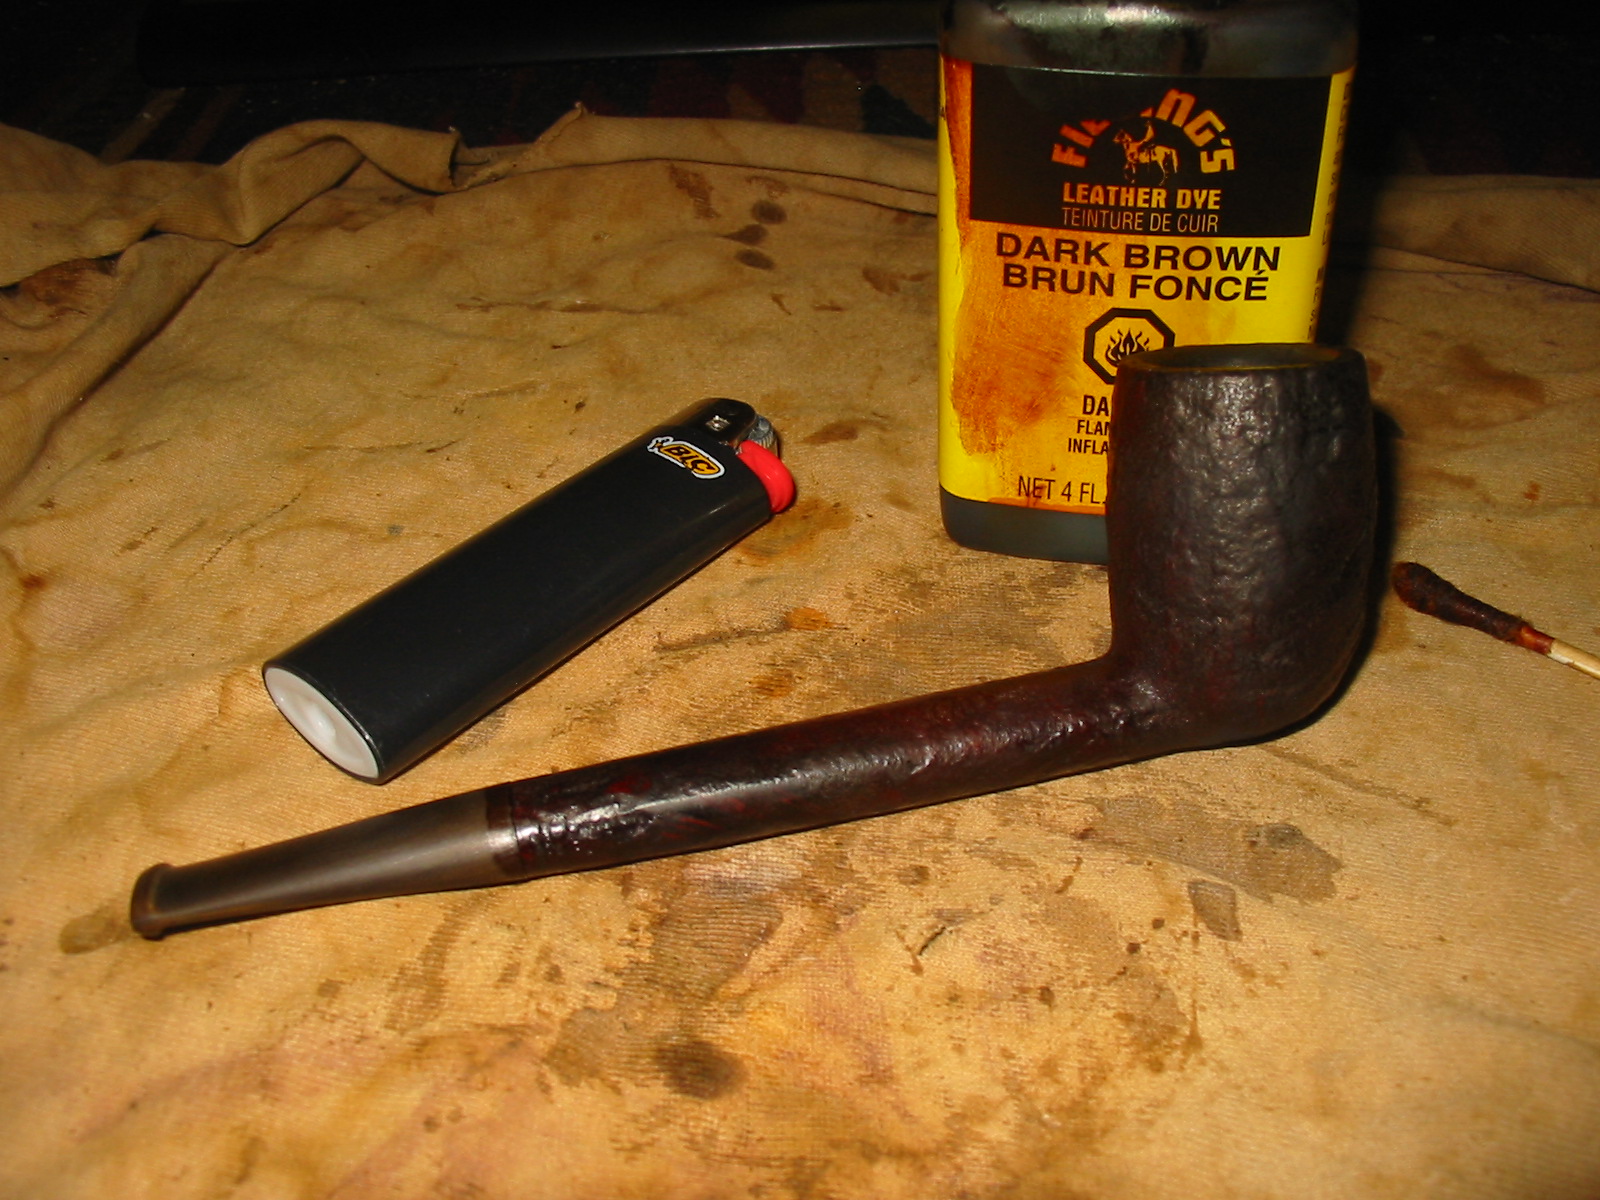
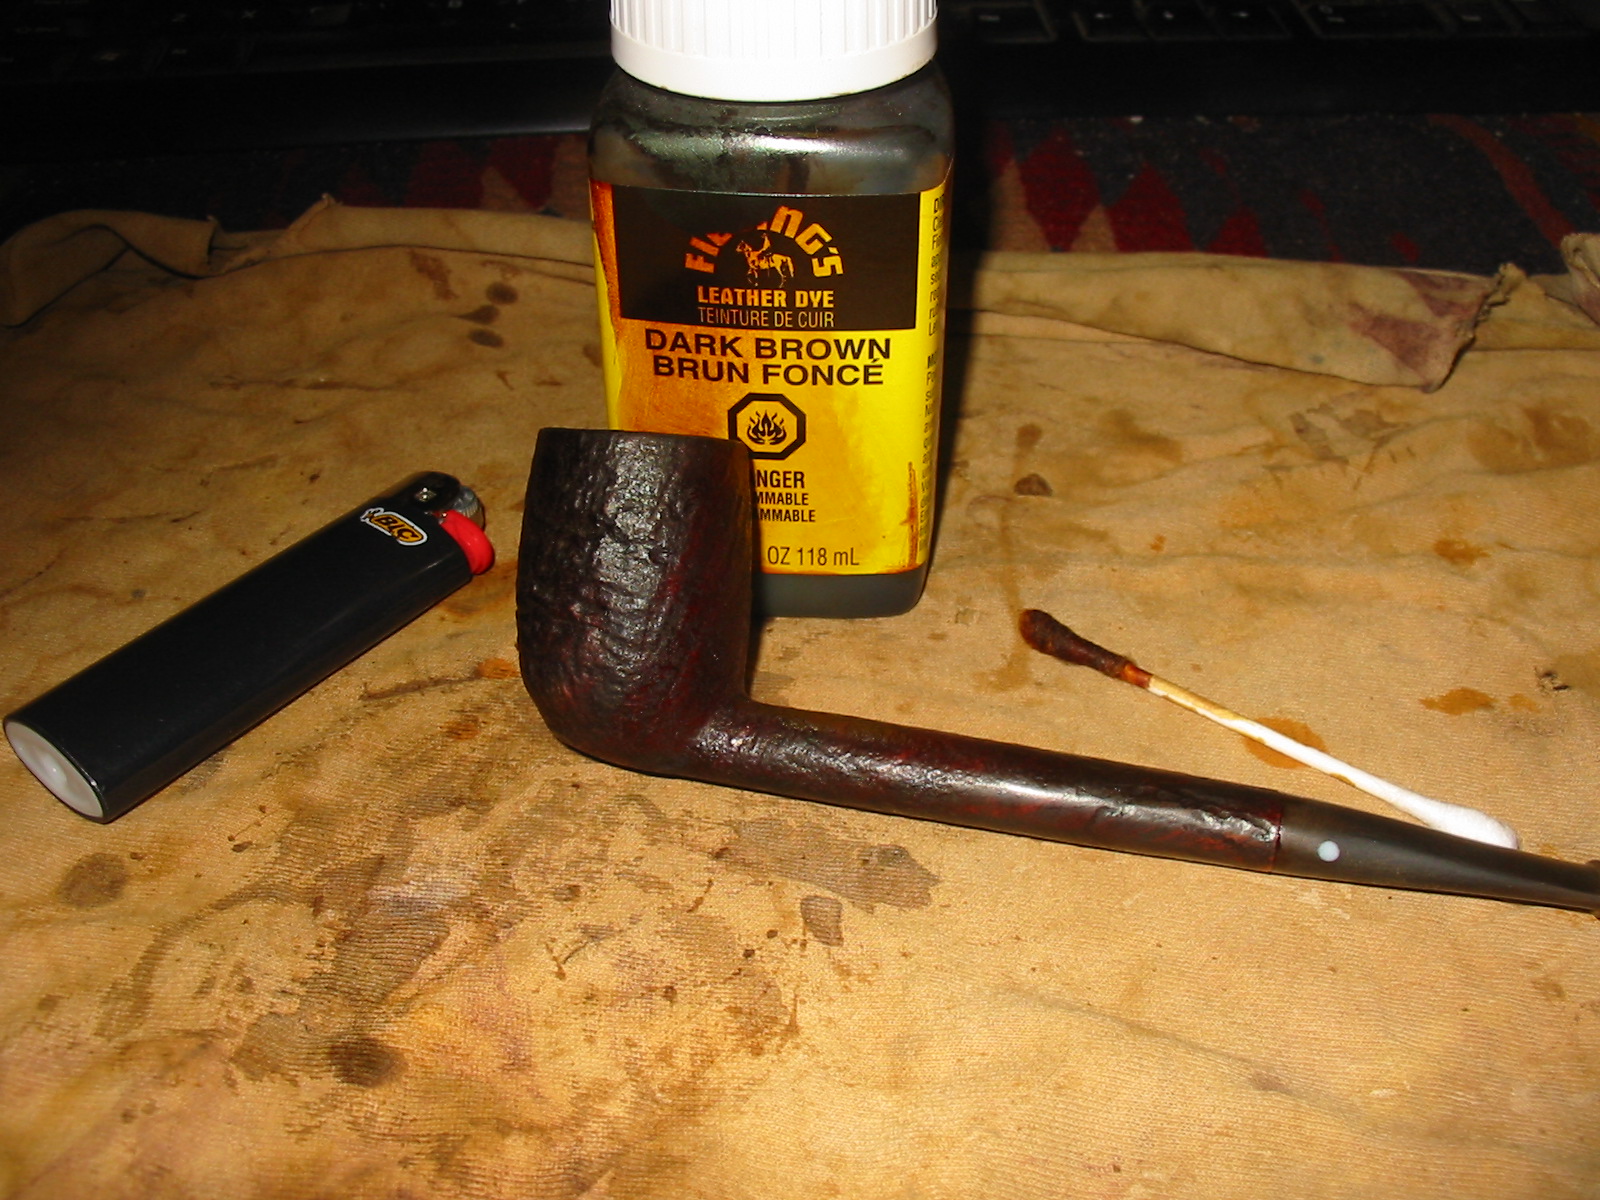
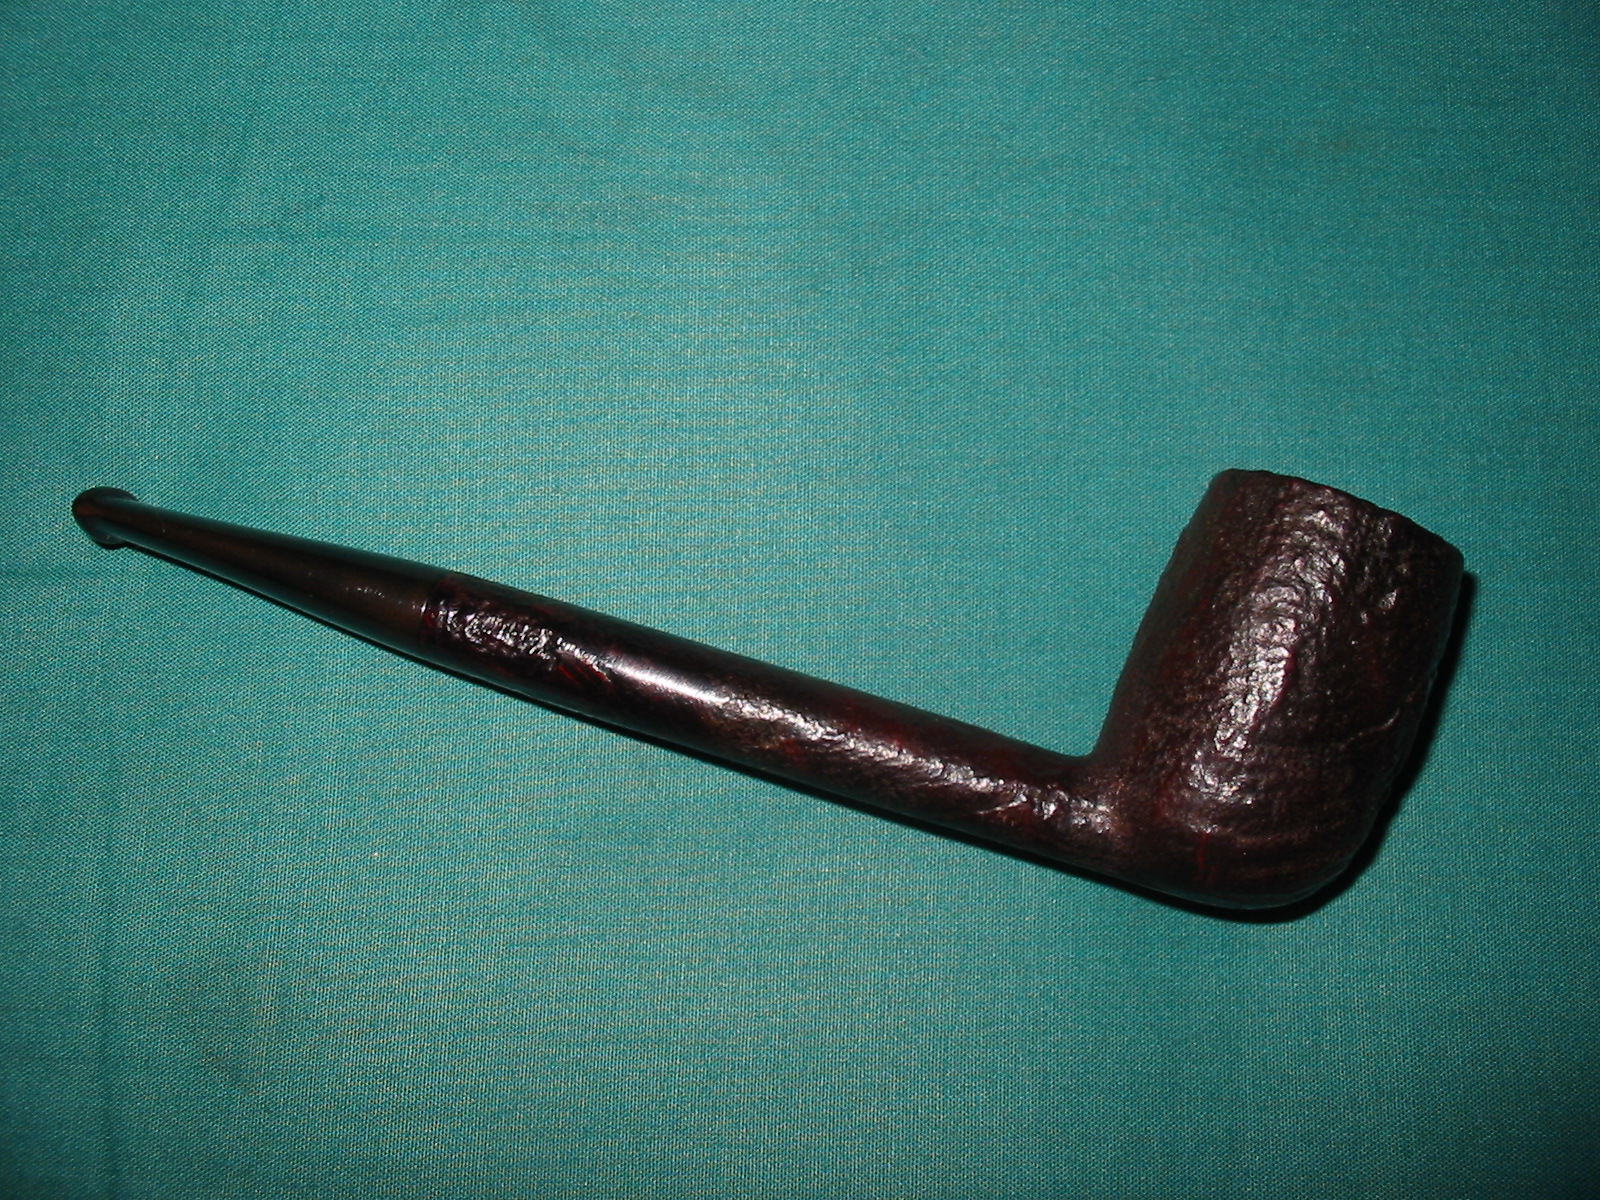
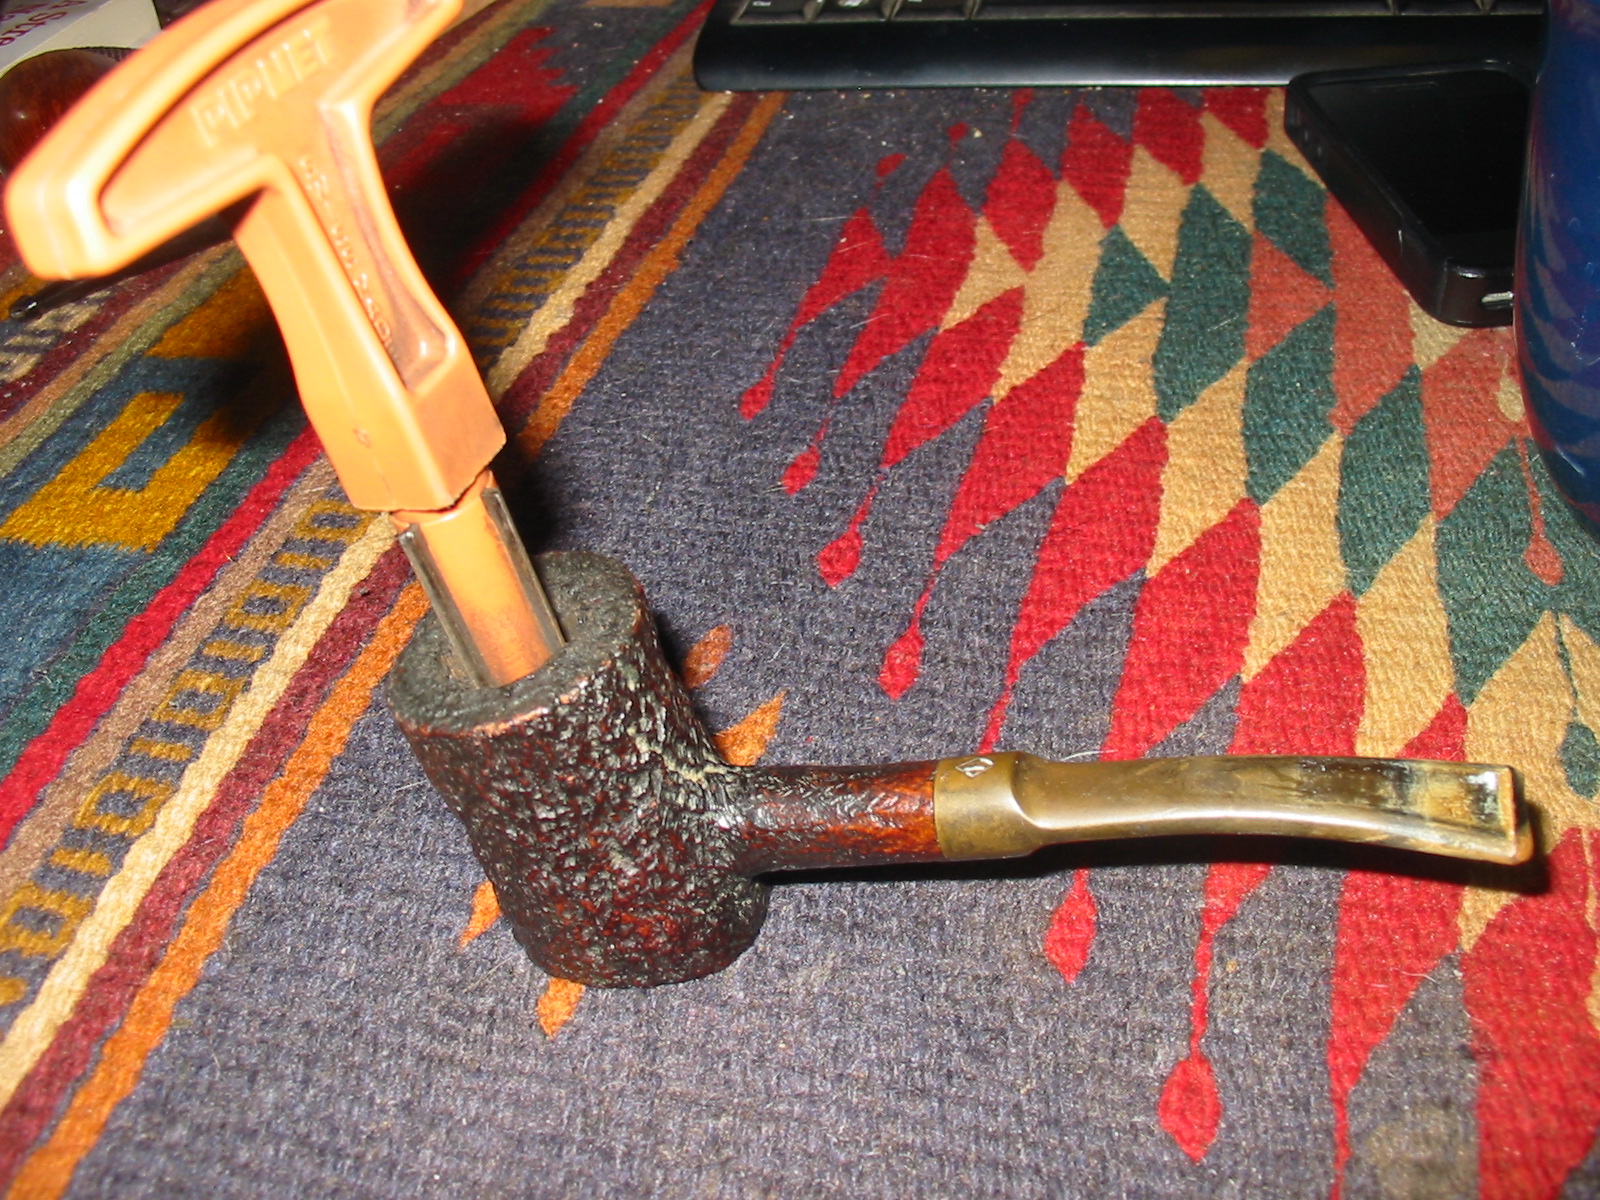
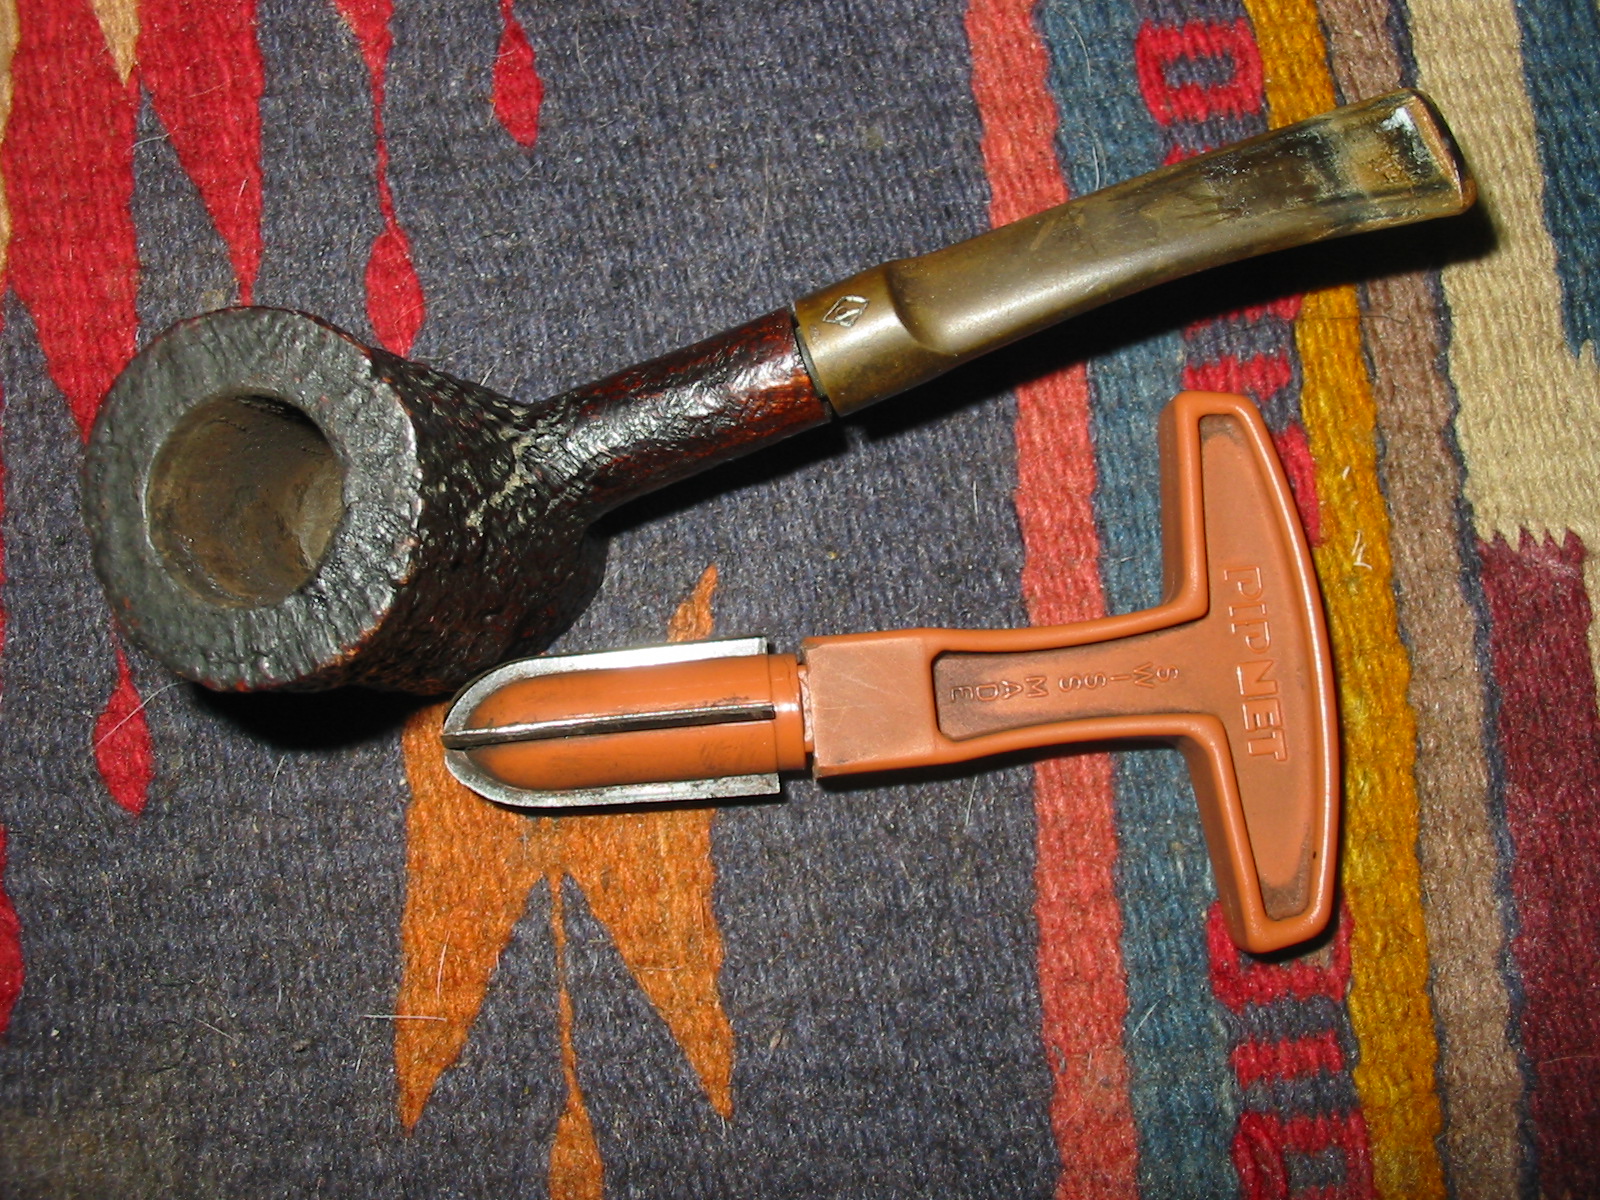
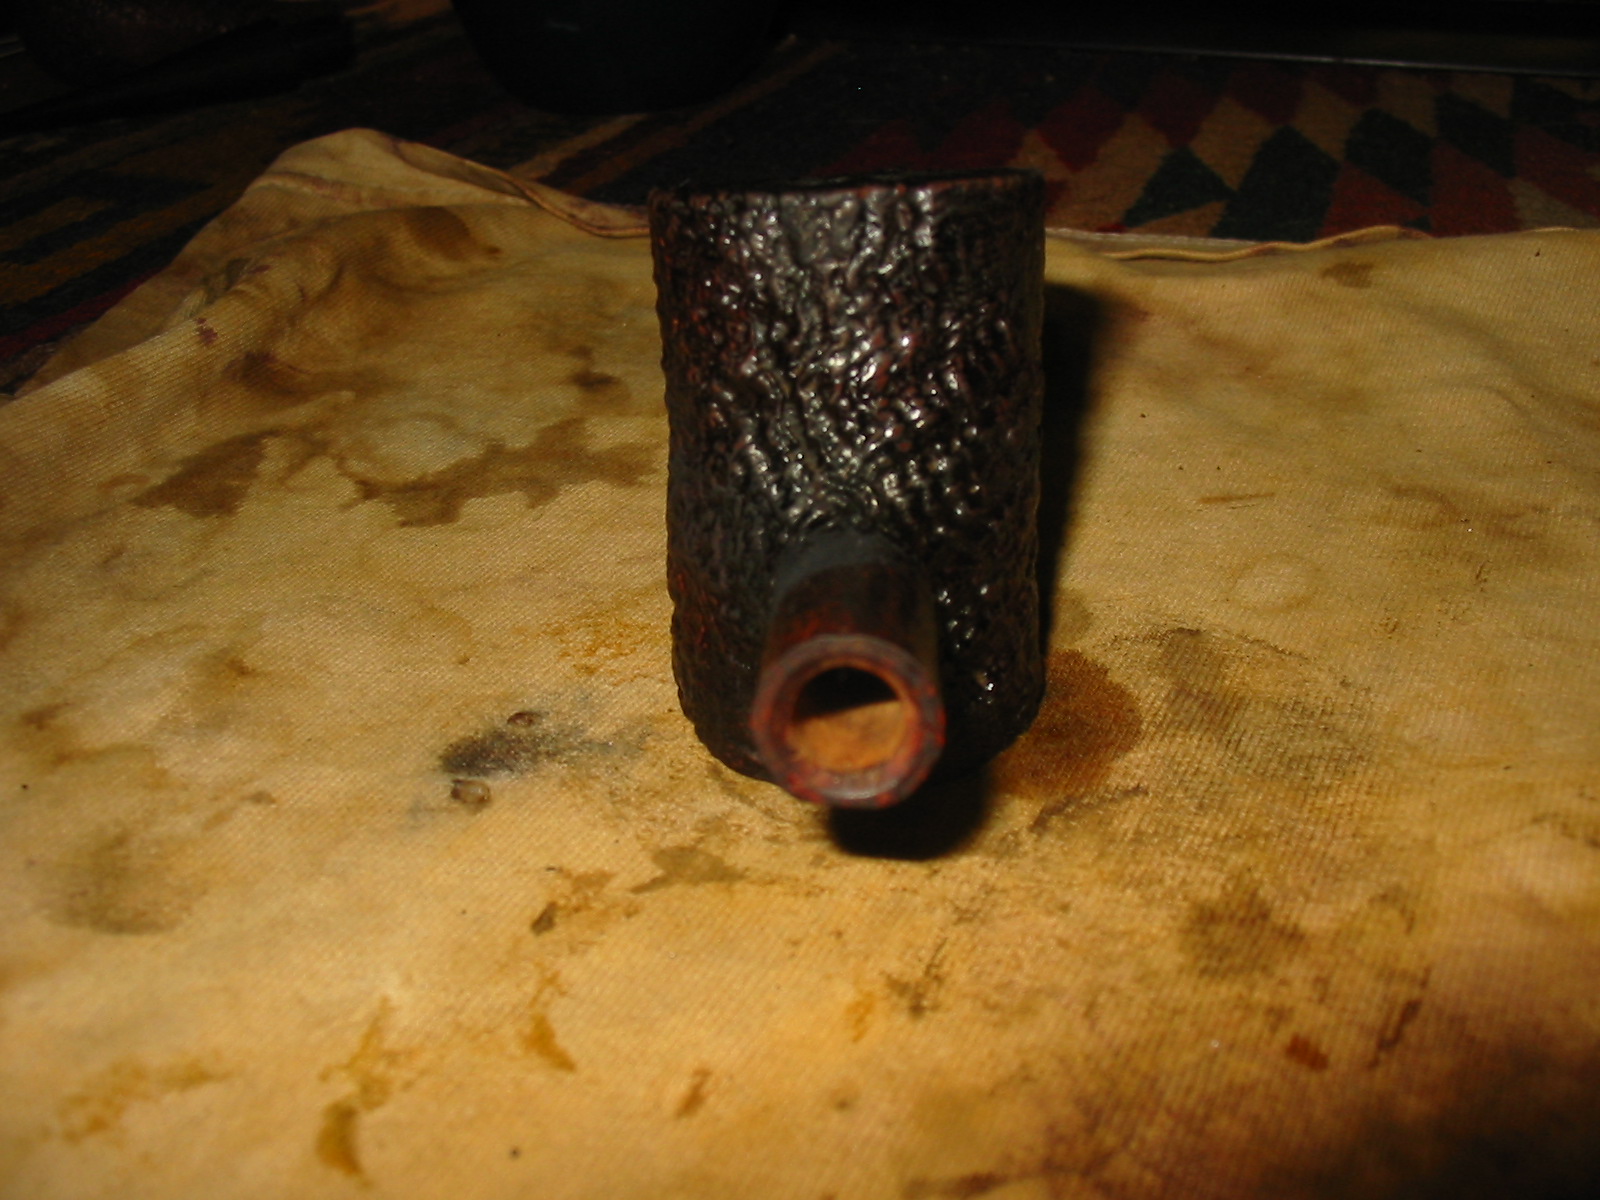
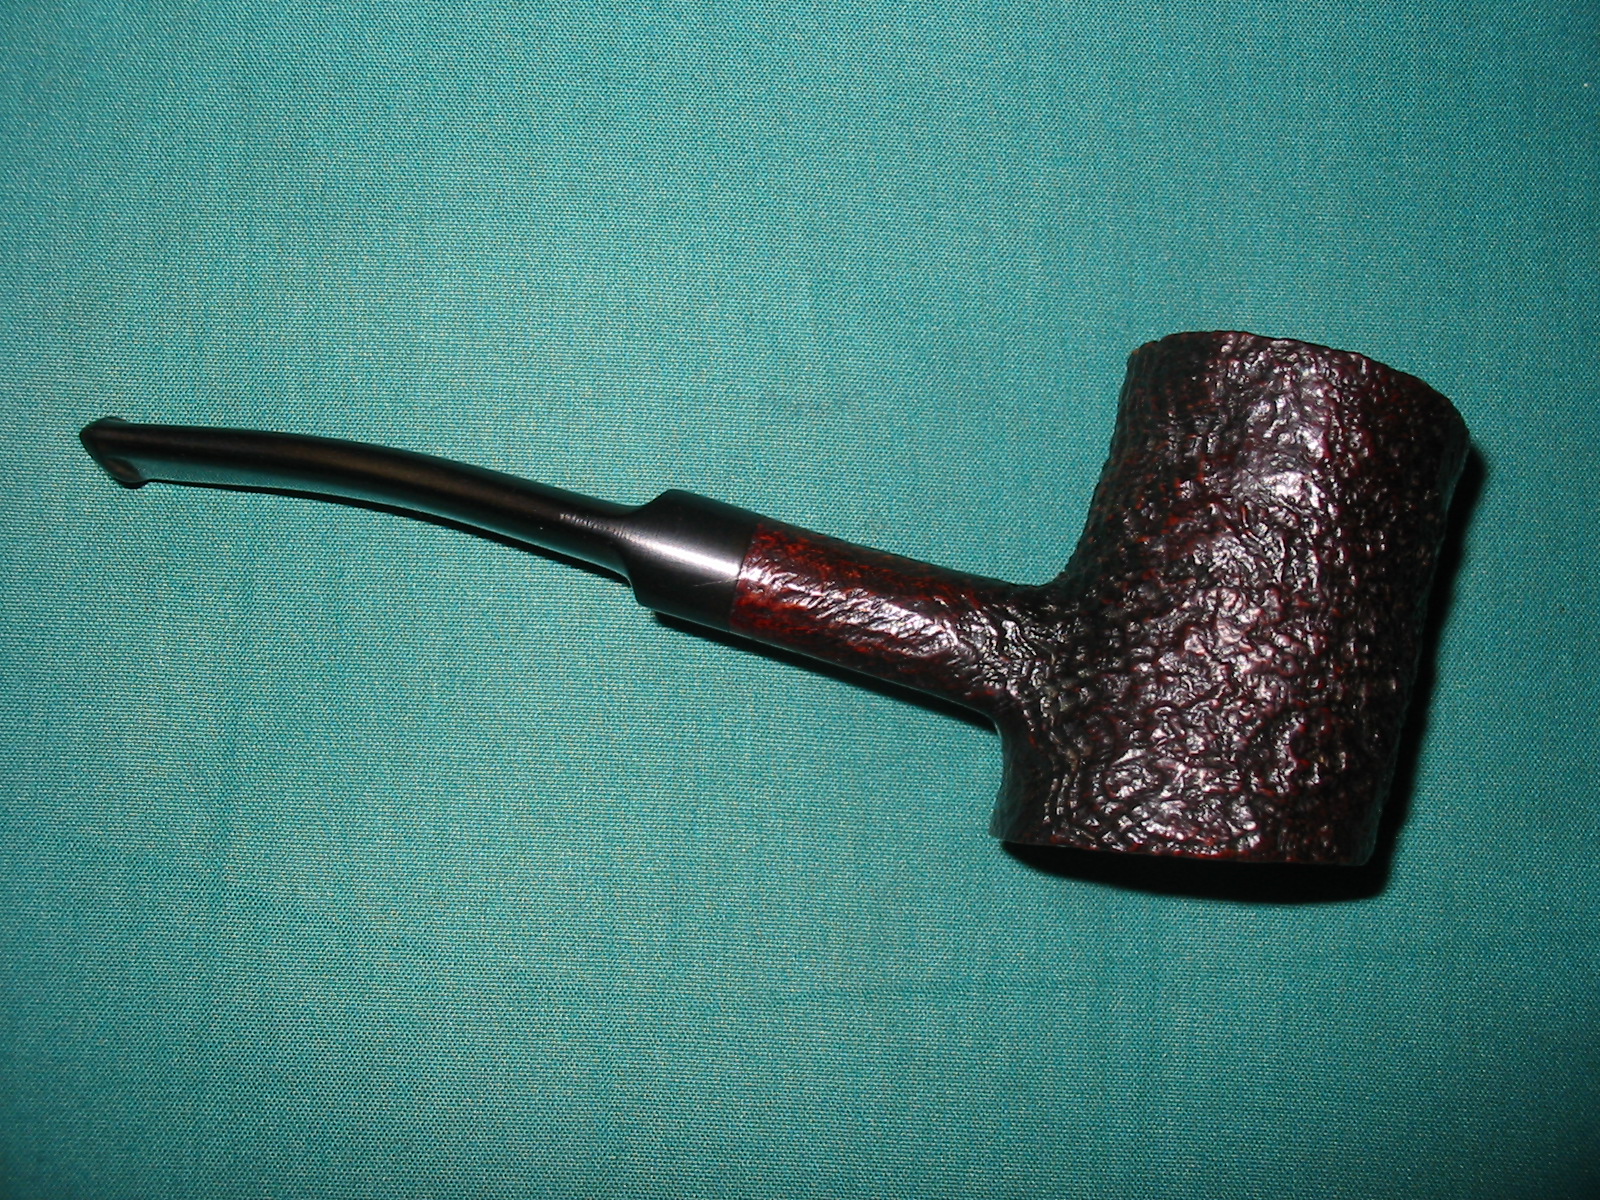
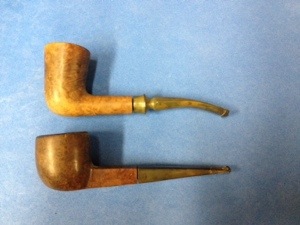
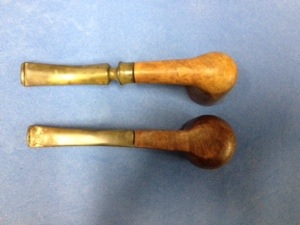
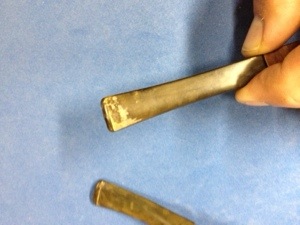
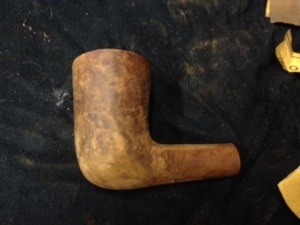
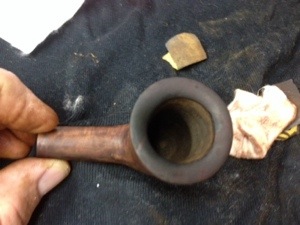
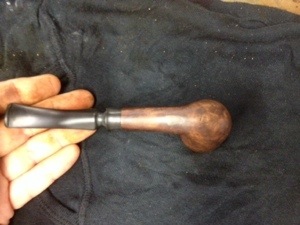
When they arrived they were in a bit worse condition than the pictures showed: very dirty, heavily caked, some very large fills, and lots of oxidation. But the stems (the GBD is a replacement) were free of holes and deep teeth marks, something I was glad to see. (This post will mainly be on the Edwards, though some of the GBD will be included. Eventually I’ll post that job, too, when I finish it.) Here are some photos of what they actually looked like when I got them:

20131014-150723.jpg

20131014-150734.jpg

20131014-150748.jpg

20131014-150800.jpg

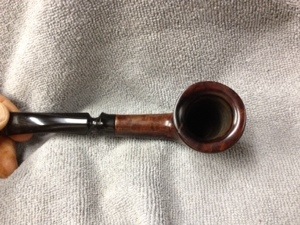
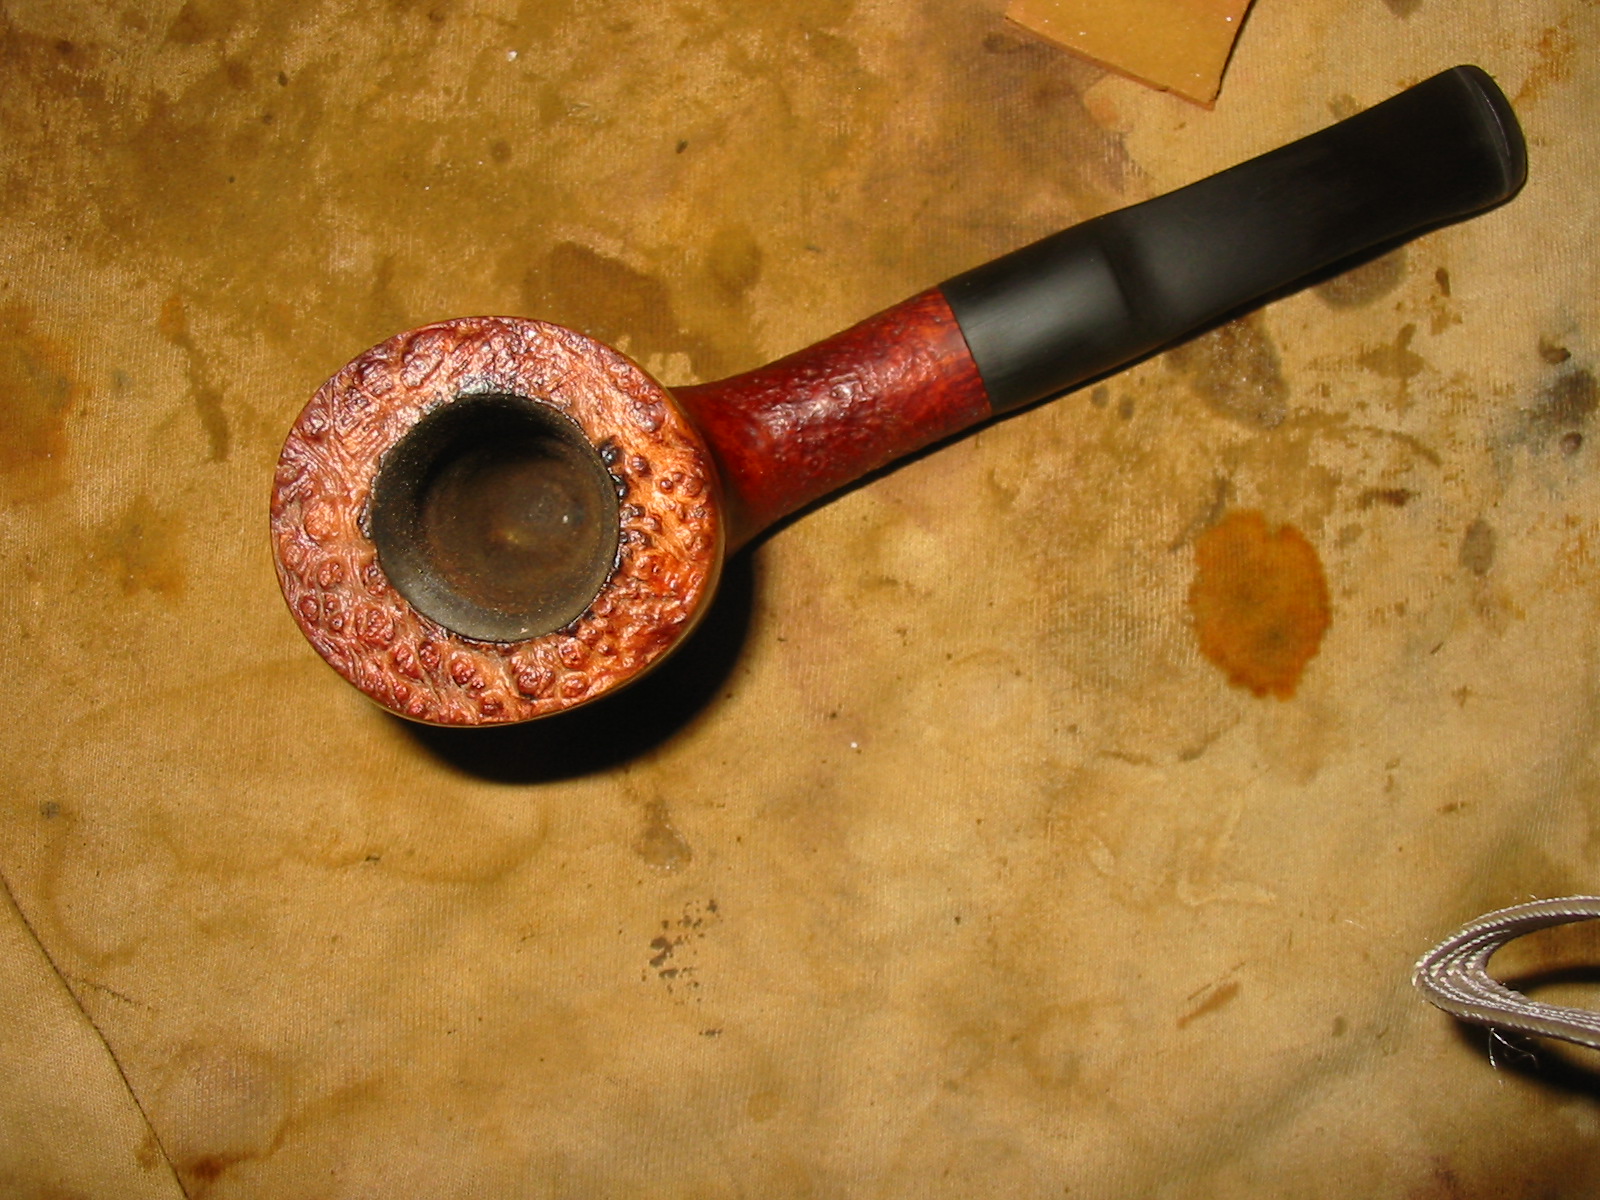
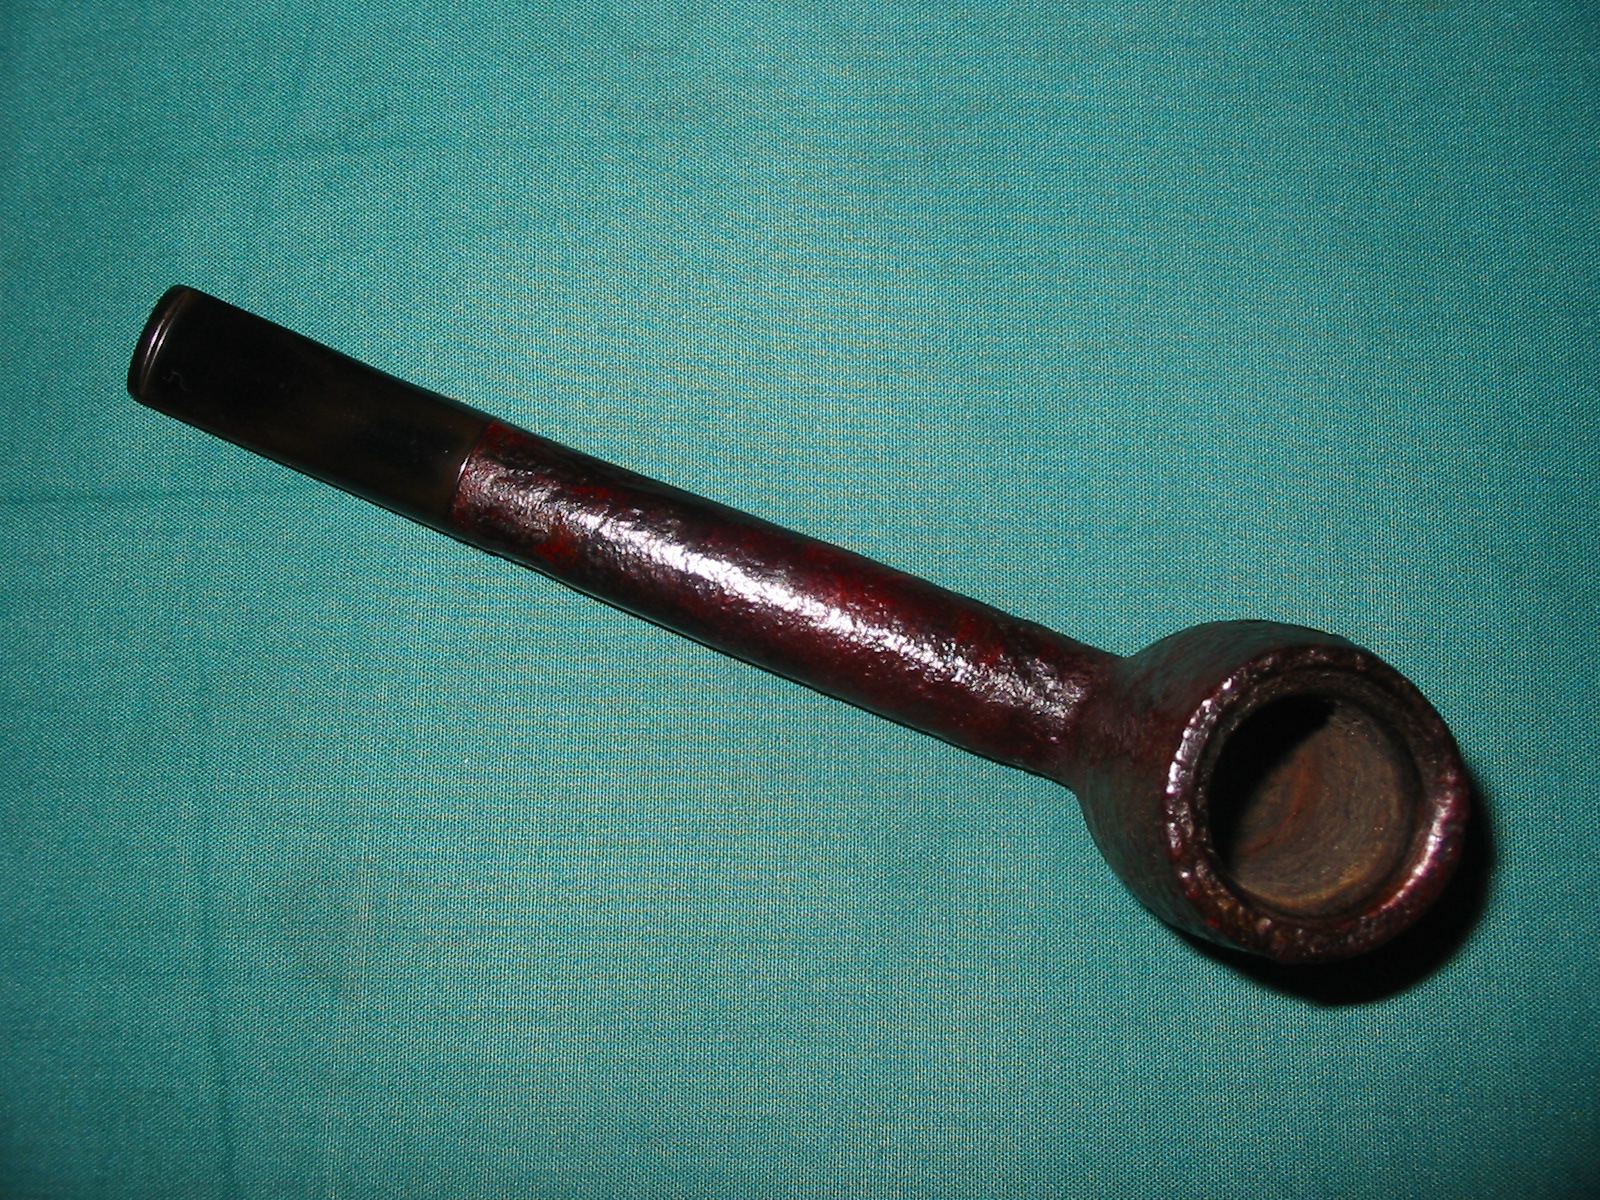
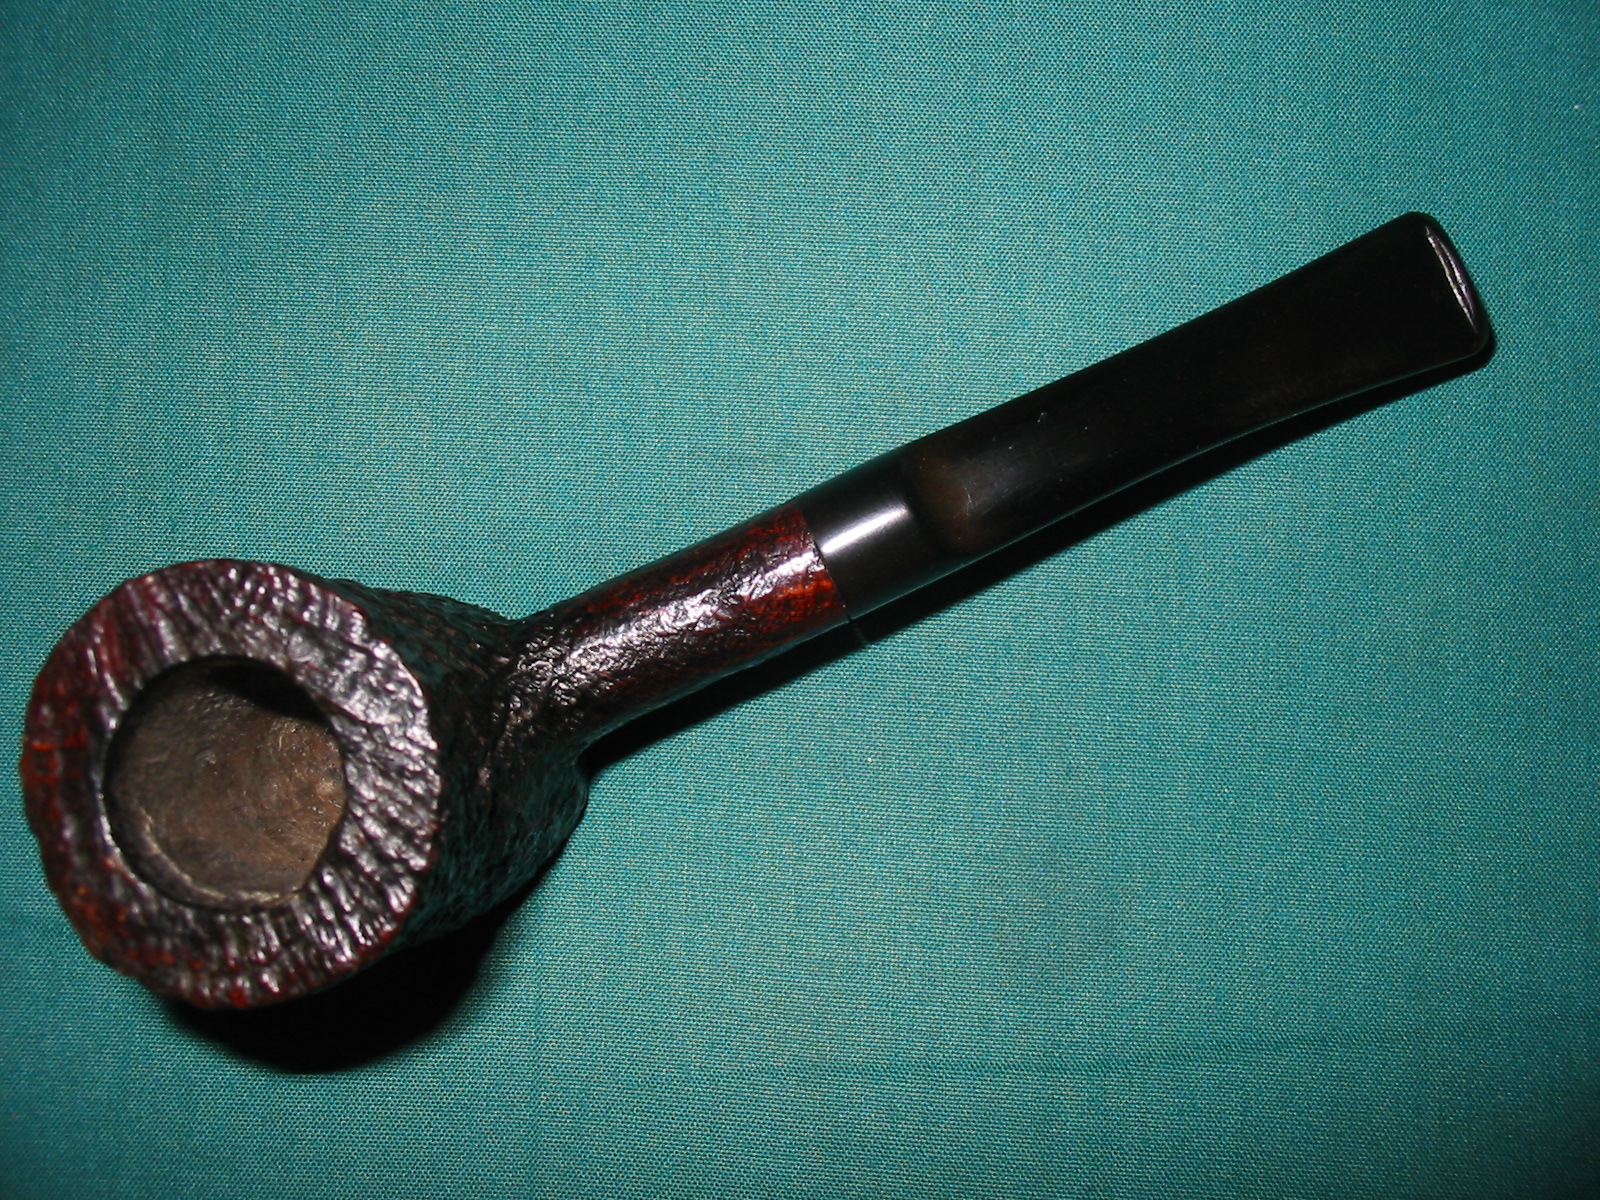
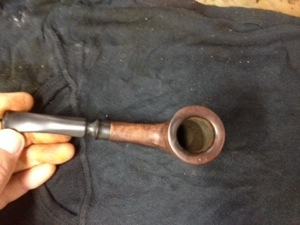
The Edwards had a lot of build up on the rim. As I cleaned it I realized that all of it wasn’t build up but a fair amount of charring and a larger fill on the back of the rim of the bowl. There was also the largest full I’ve ever seen on the bottom of the shank. I decided that I wouldn’t try to remove and refill these areas but just refinish the pipe with them as they were. Although very large, they wouldn’t effect my personal enjoyment of this pipe so I didn’t feel there was any good reason to cool with them, and I had some concern that fills that large, disturbed, might present problems down the road.

20131014-151256.jpg

20131014-151325.jpg
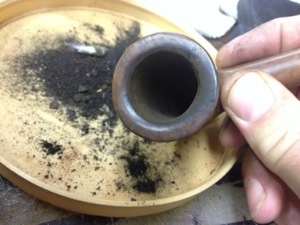
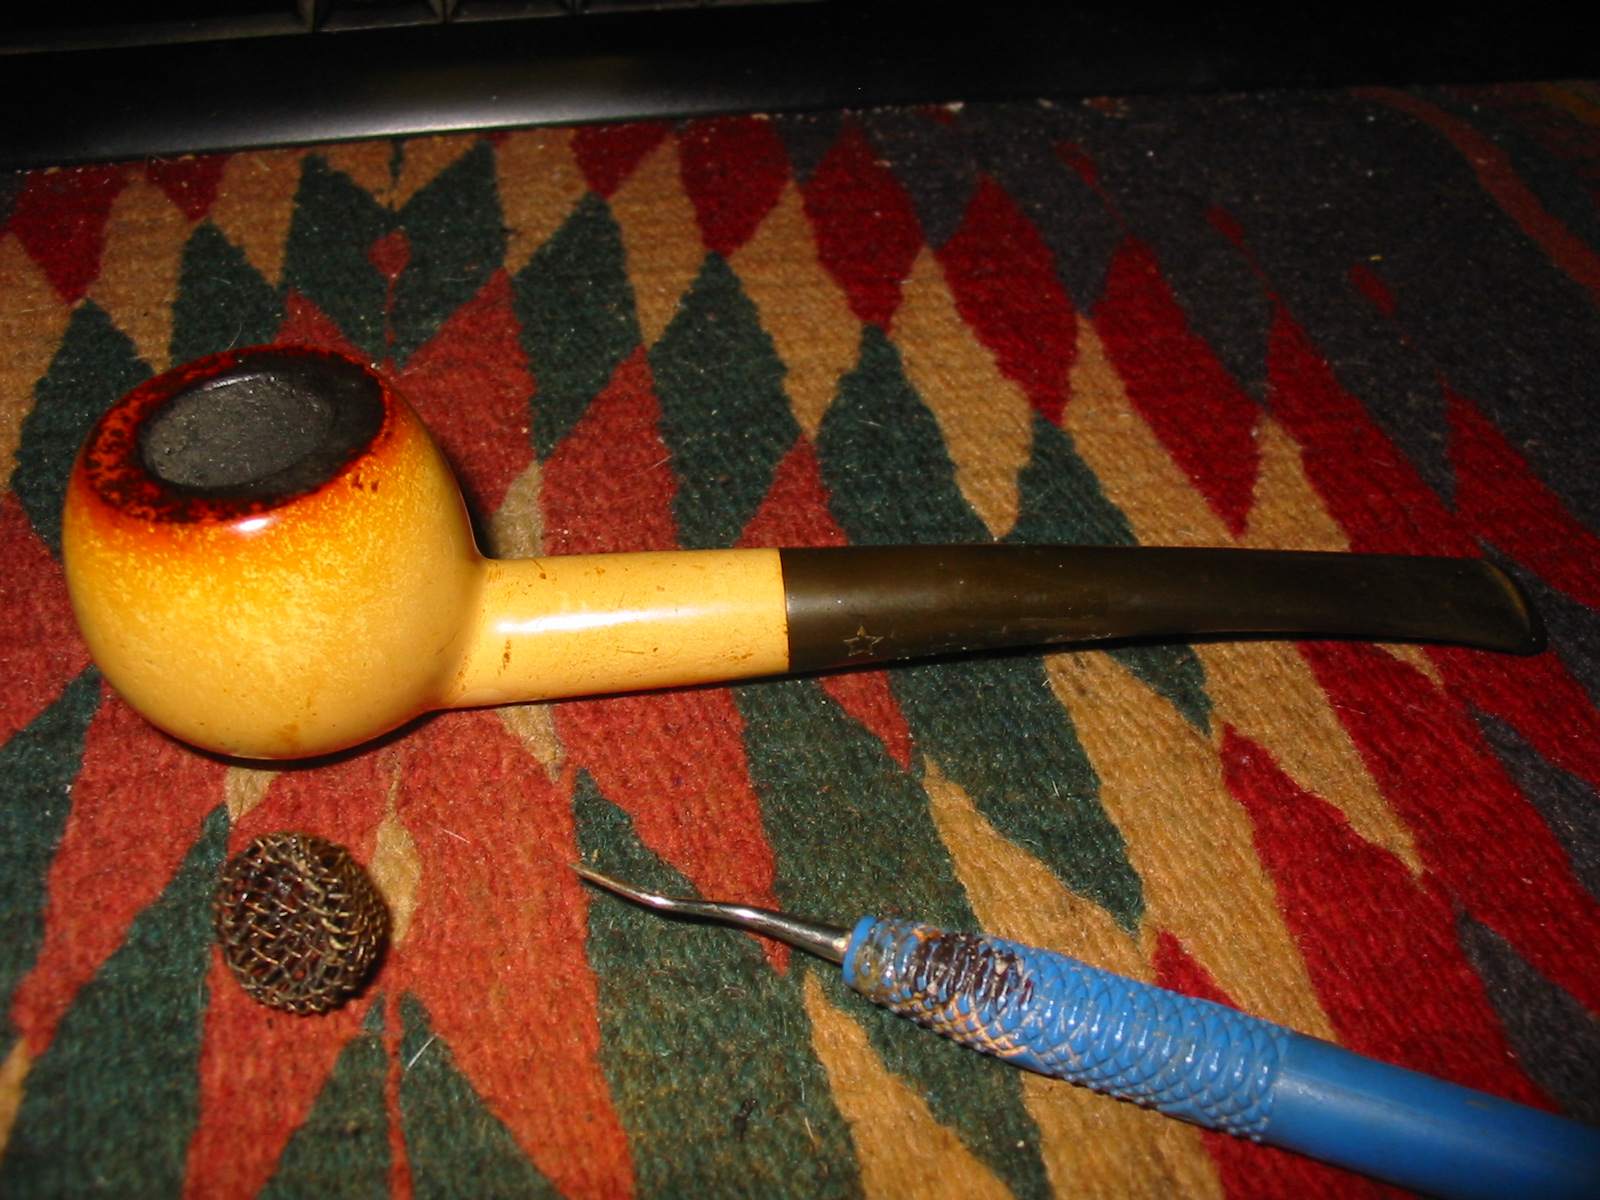
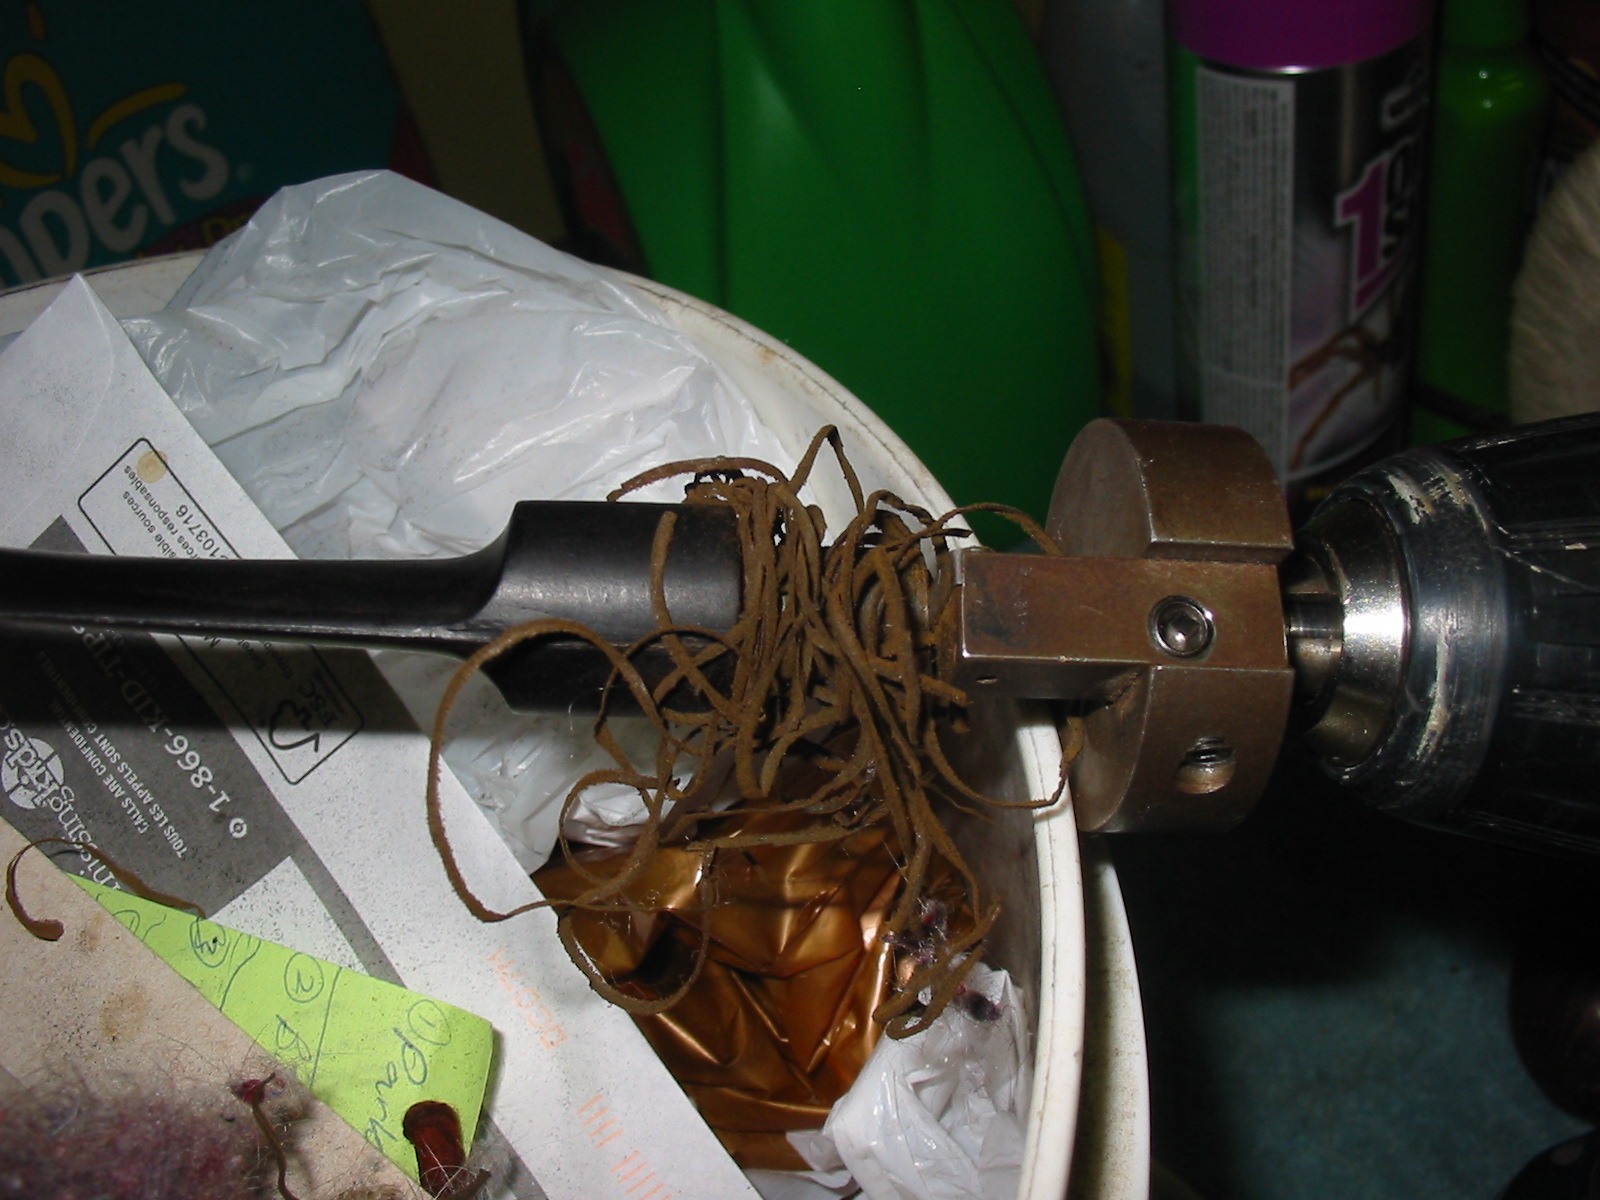
I reamed back the thick cake to a nicer, even level, using all four bits on my Castleford reamer.

20131014-151514.jpg
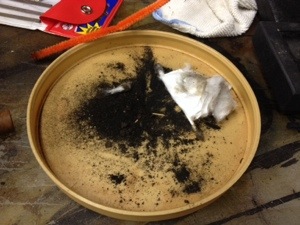
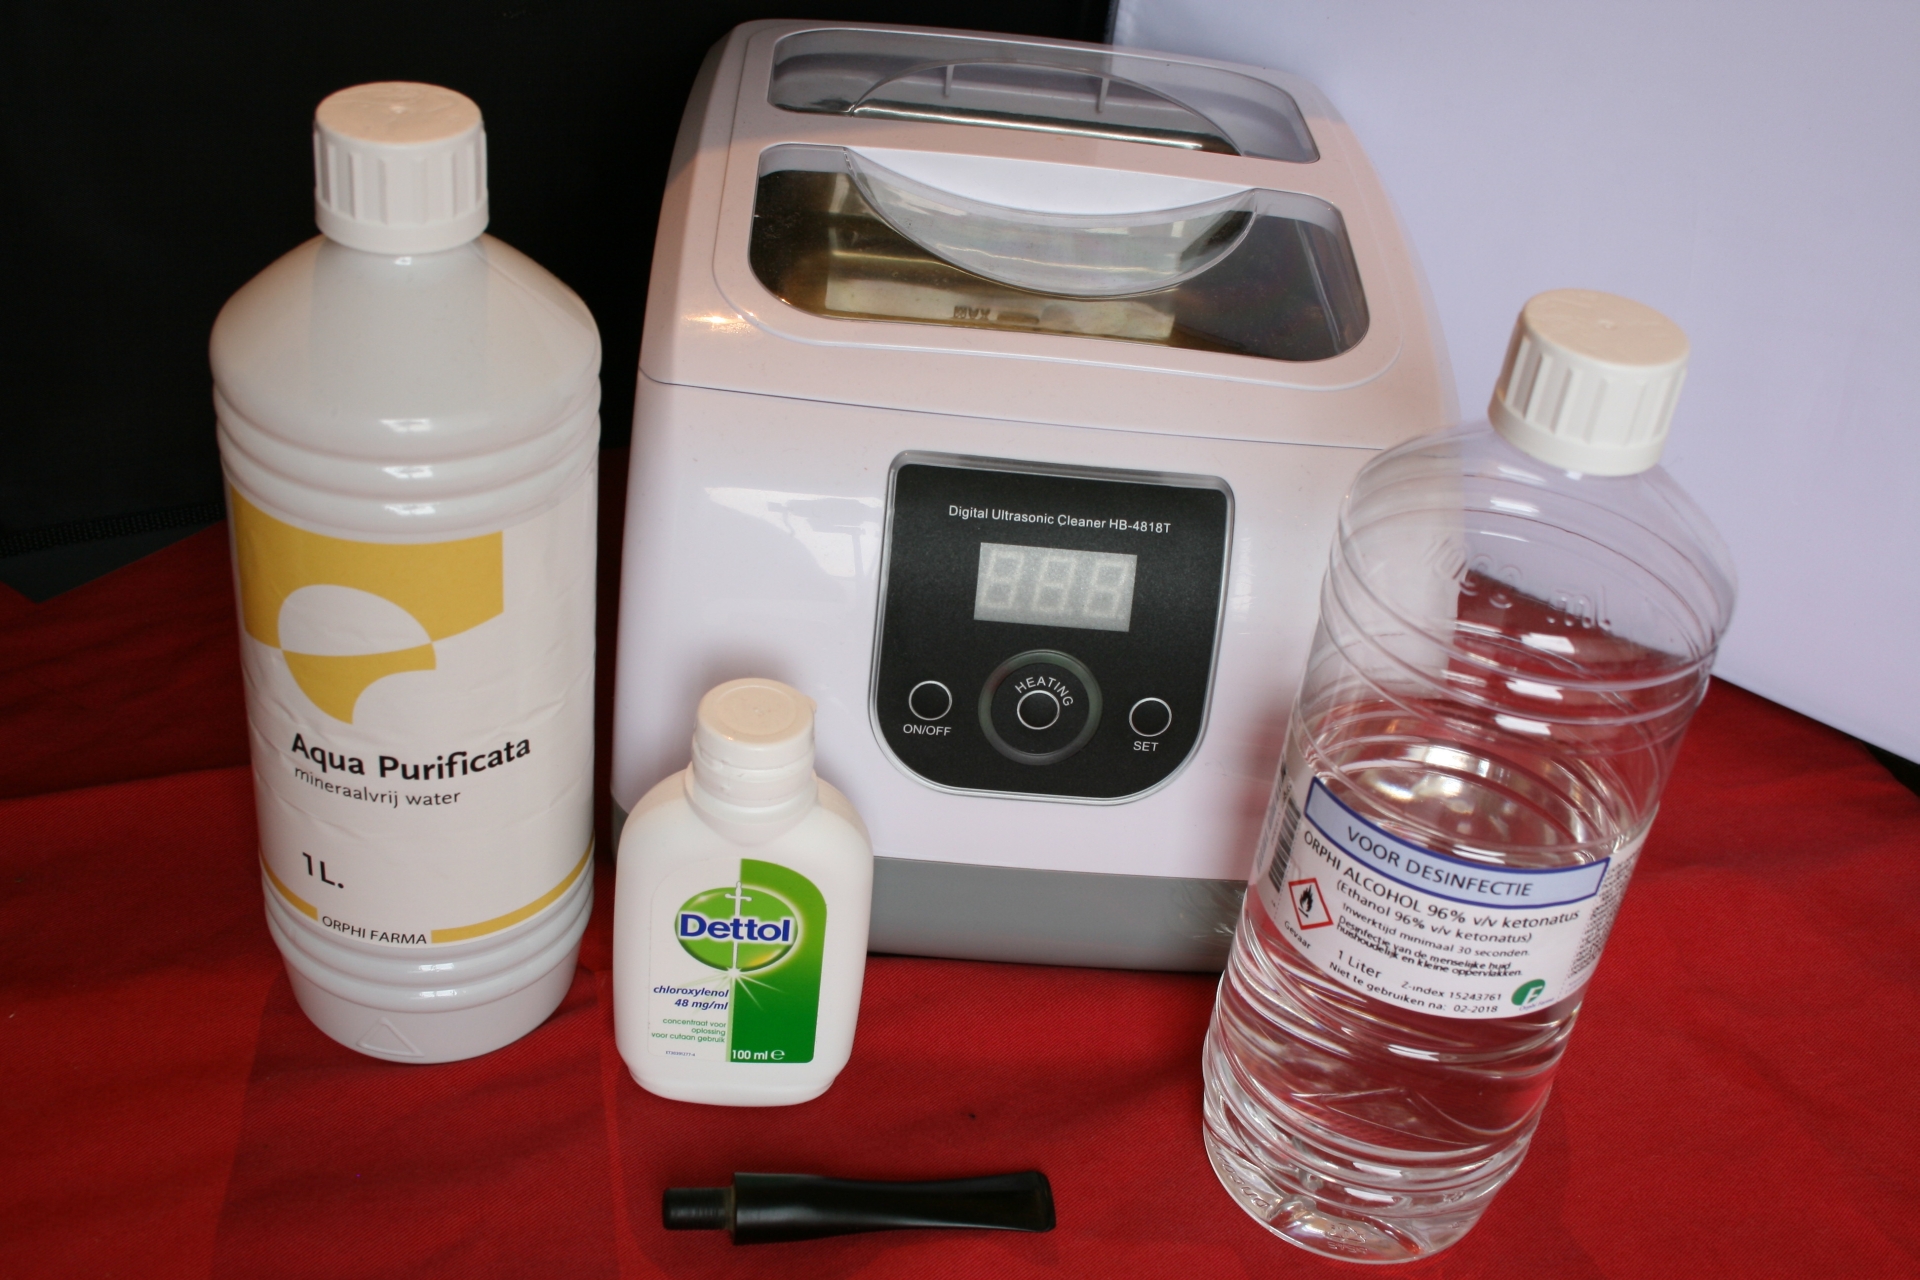
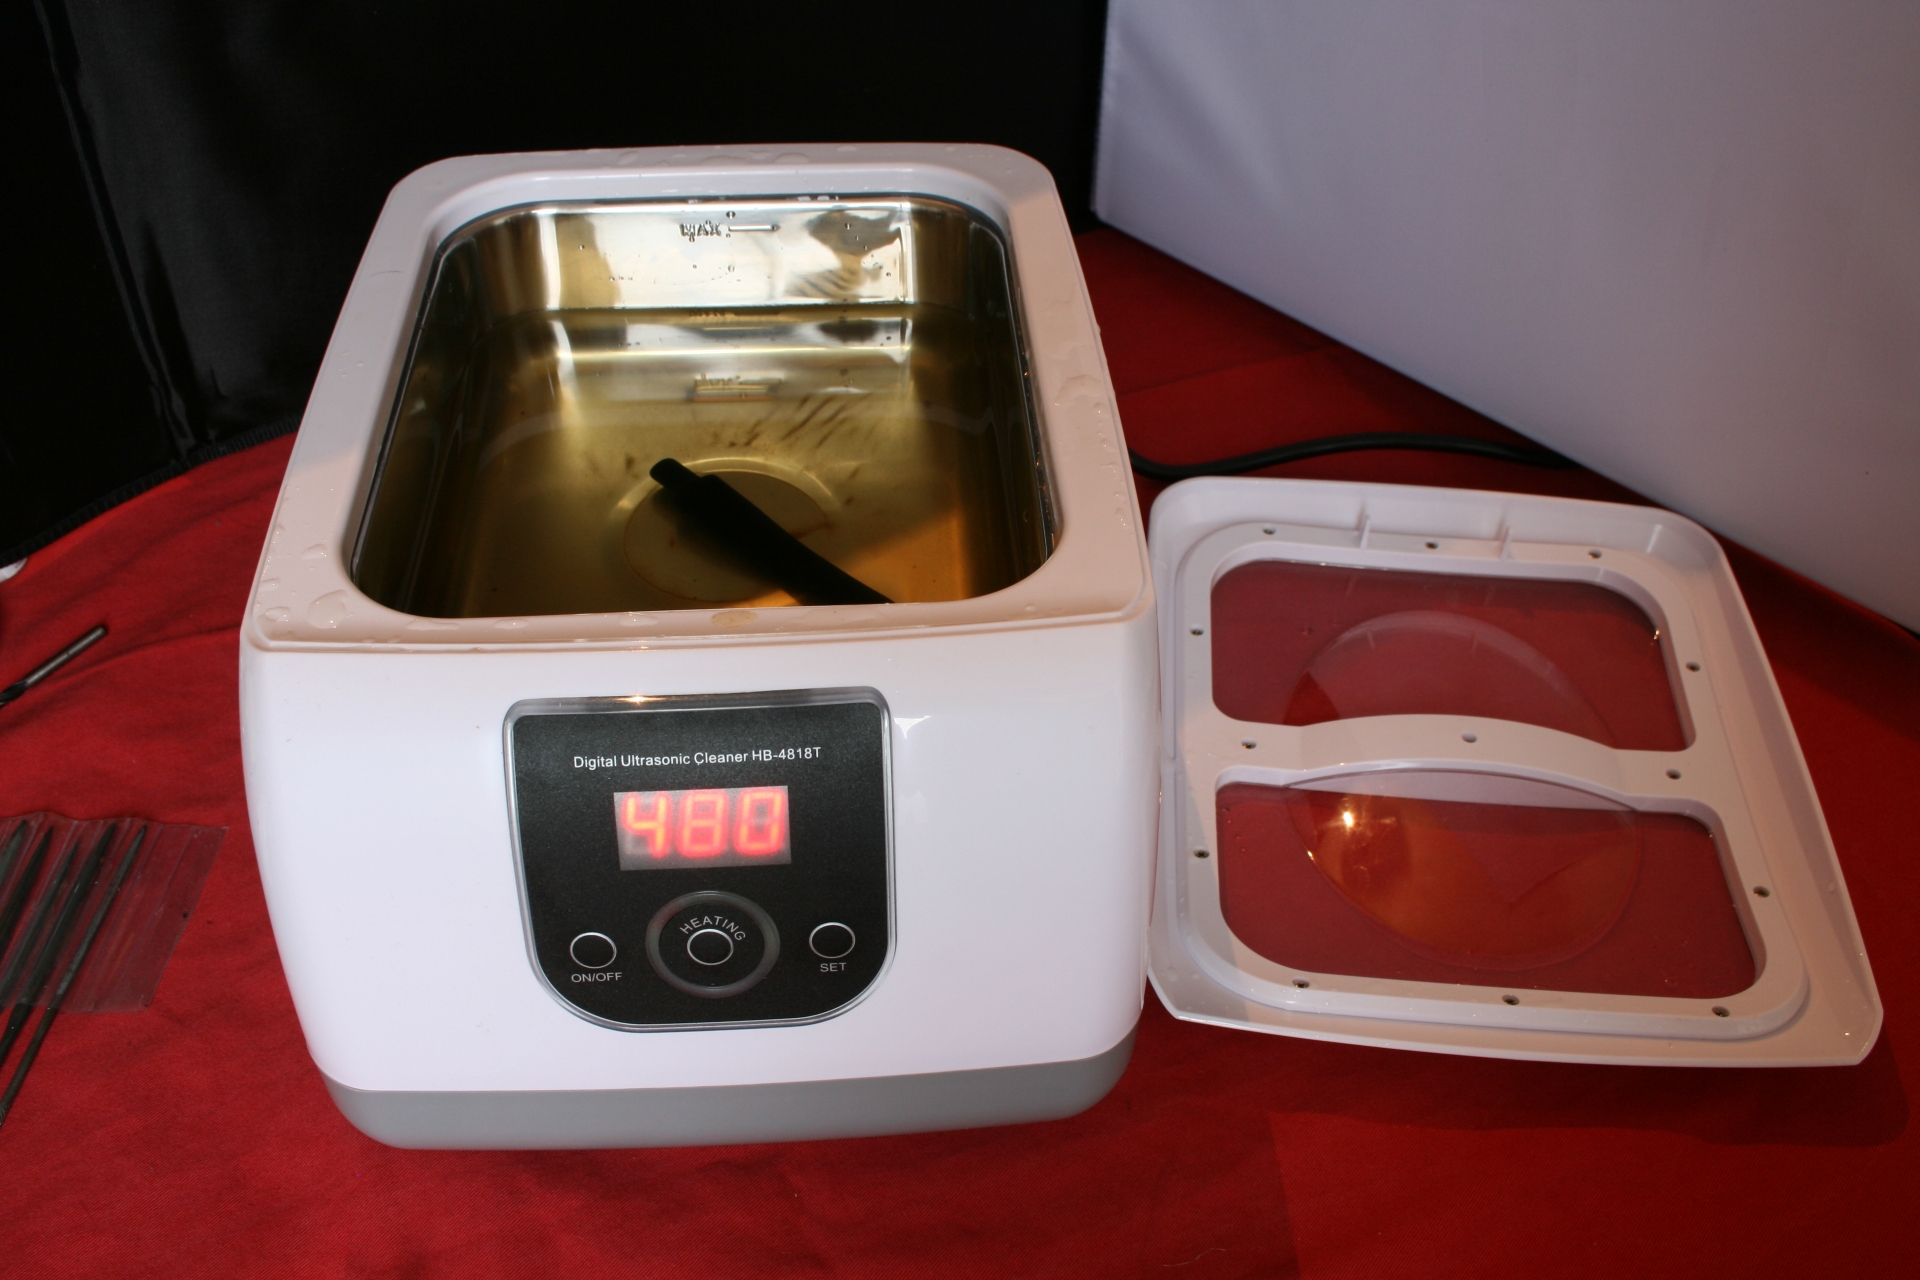
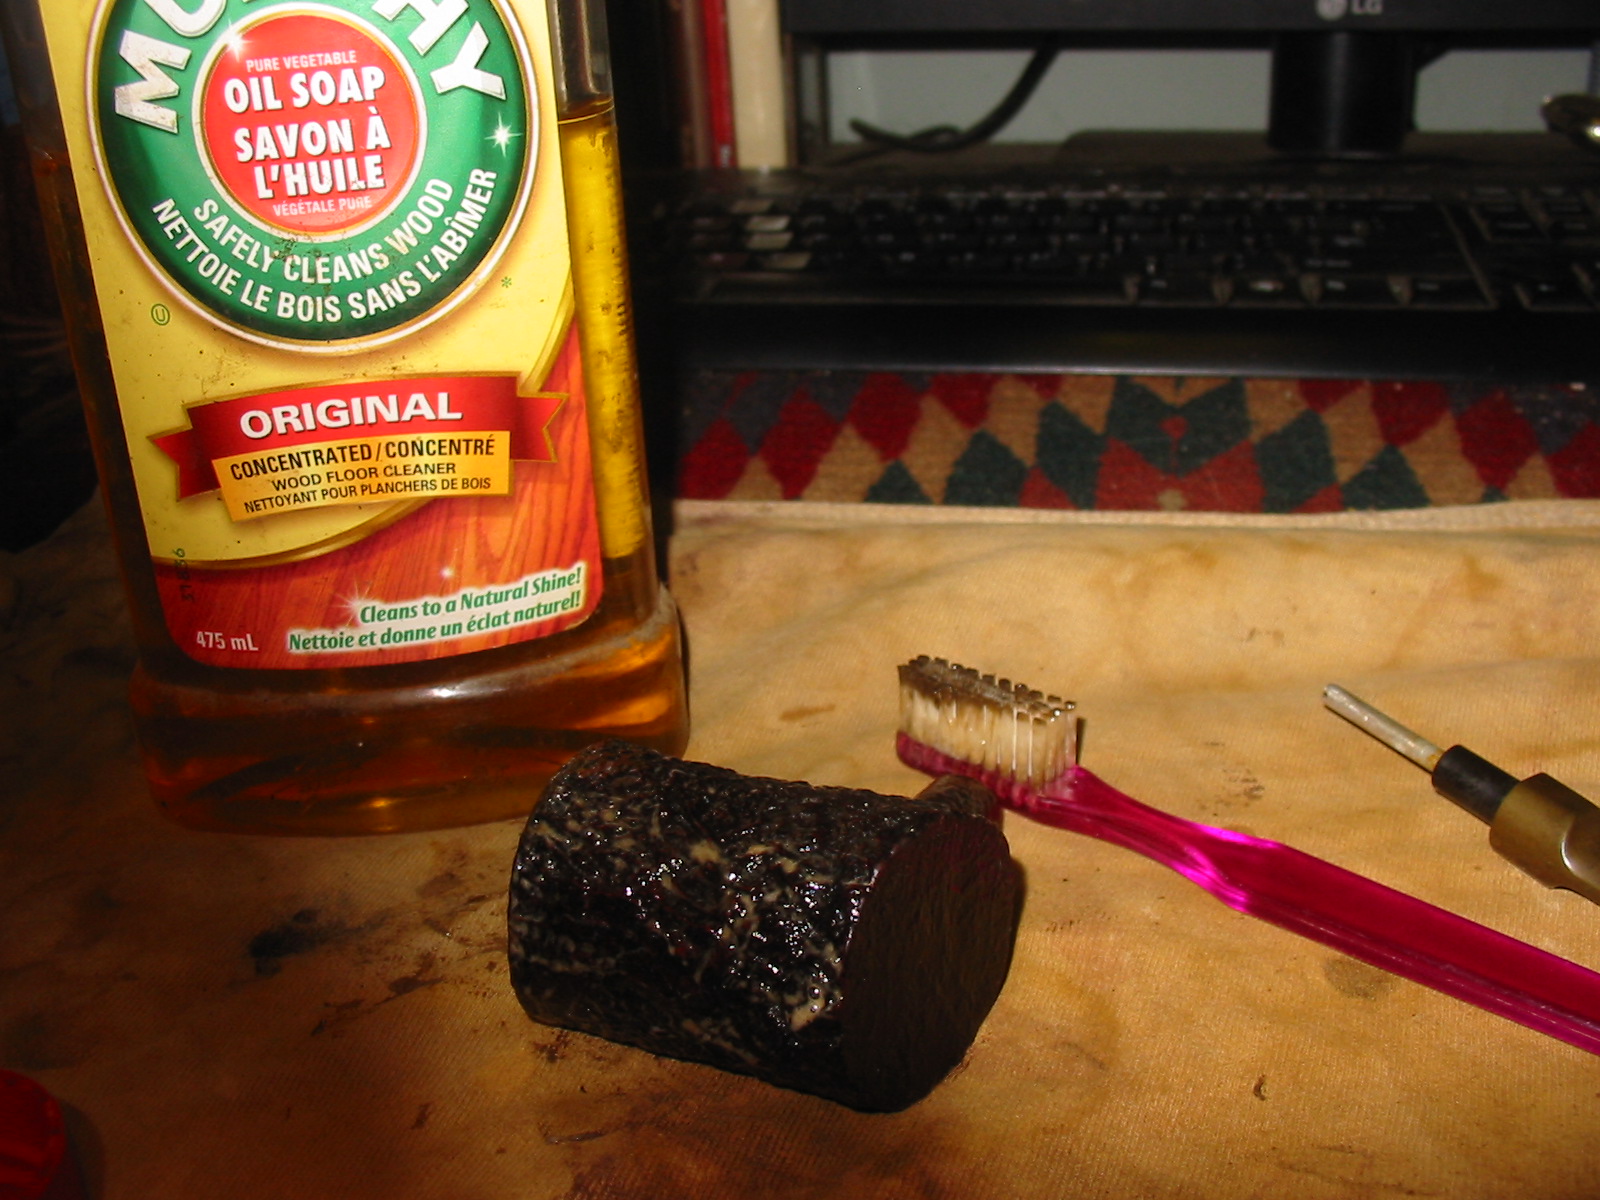
I then put the bowls into an alcohol bath and the stems into an OxyClean bath and left them overnight to soak.

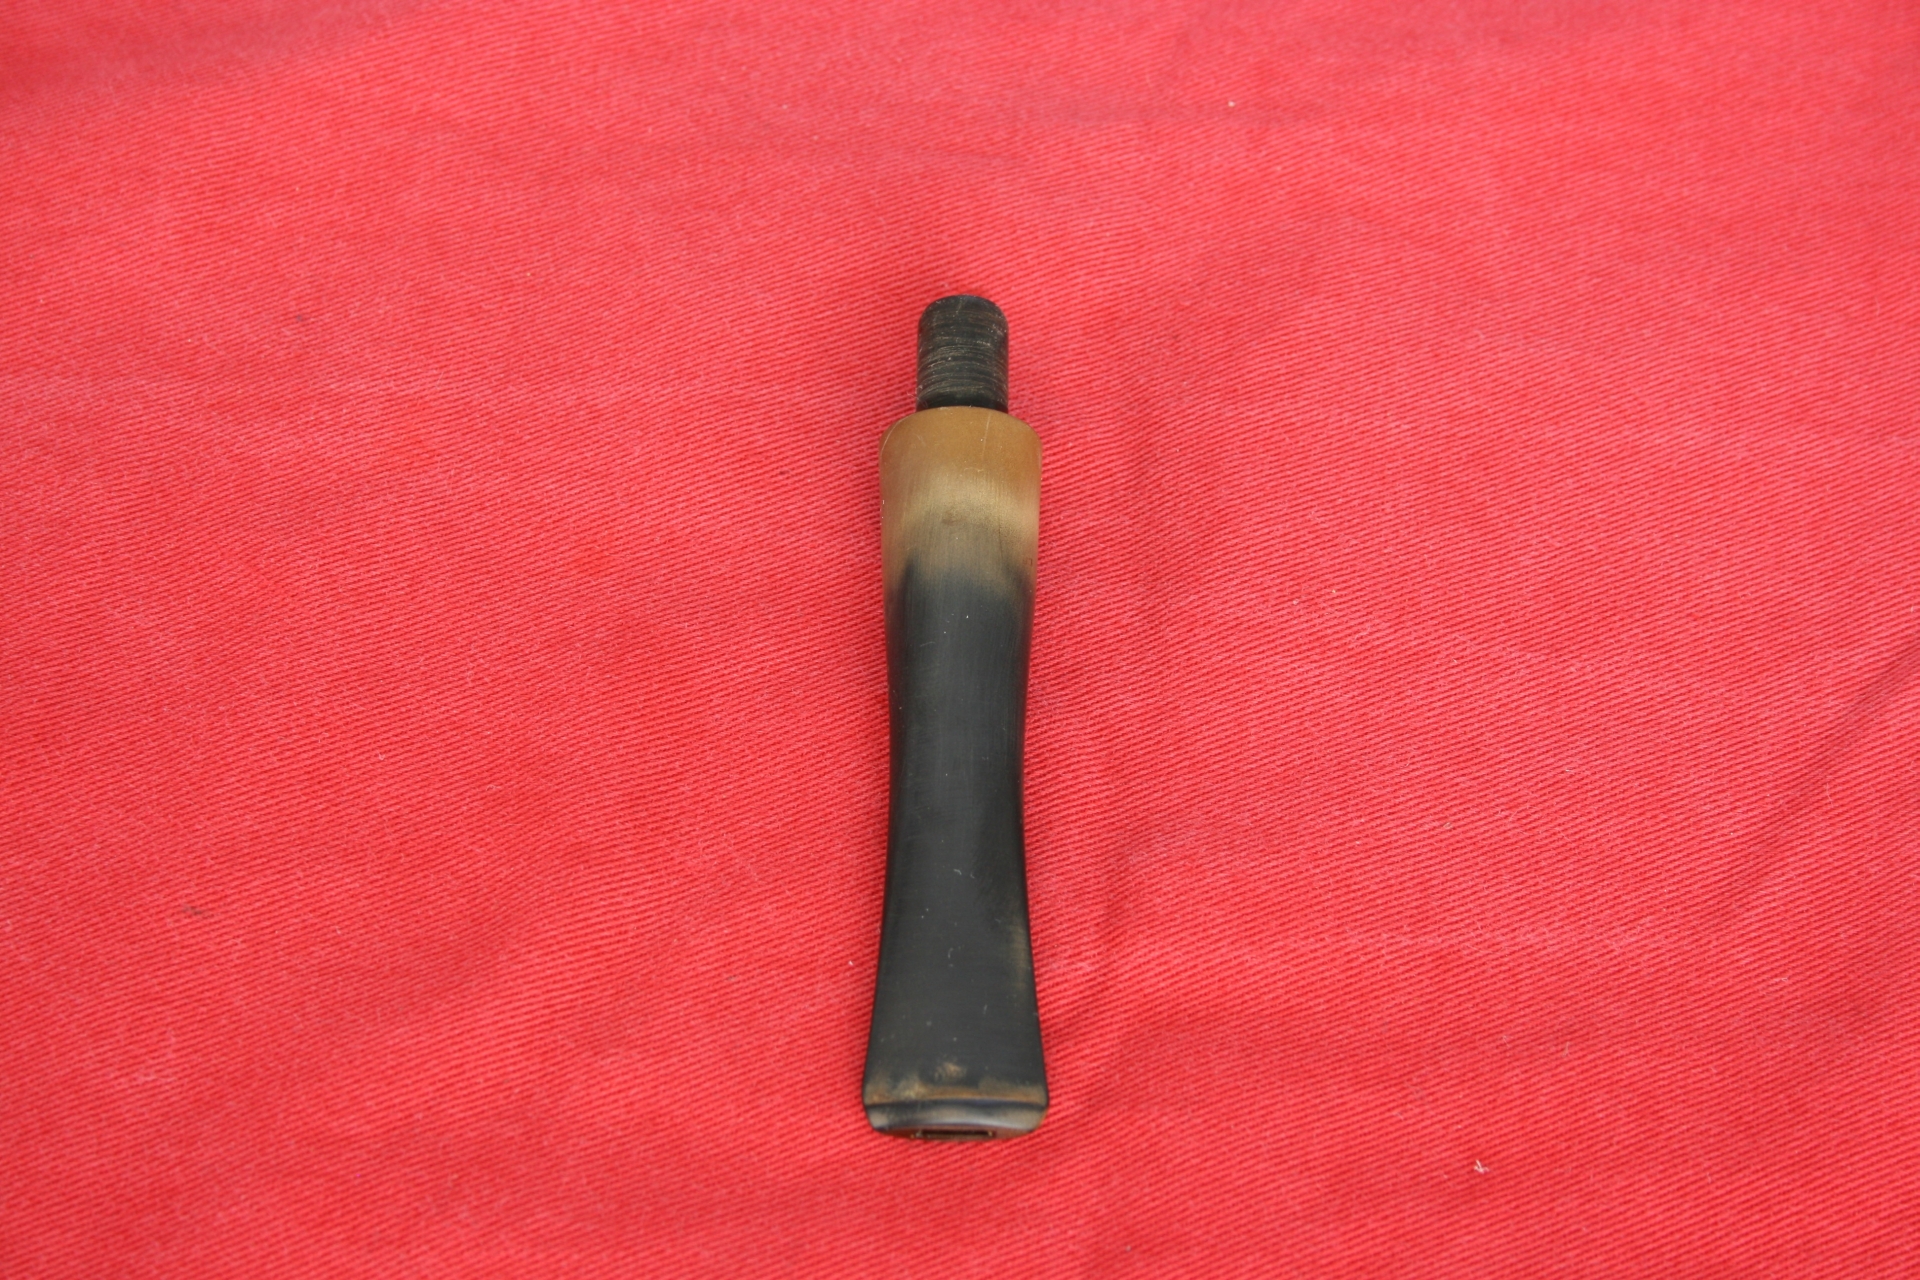
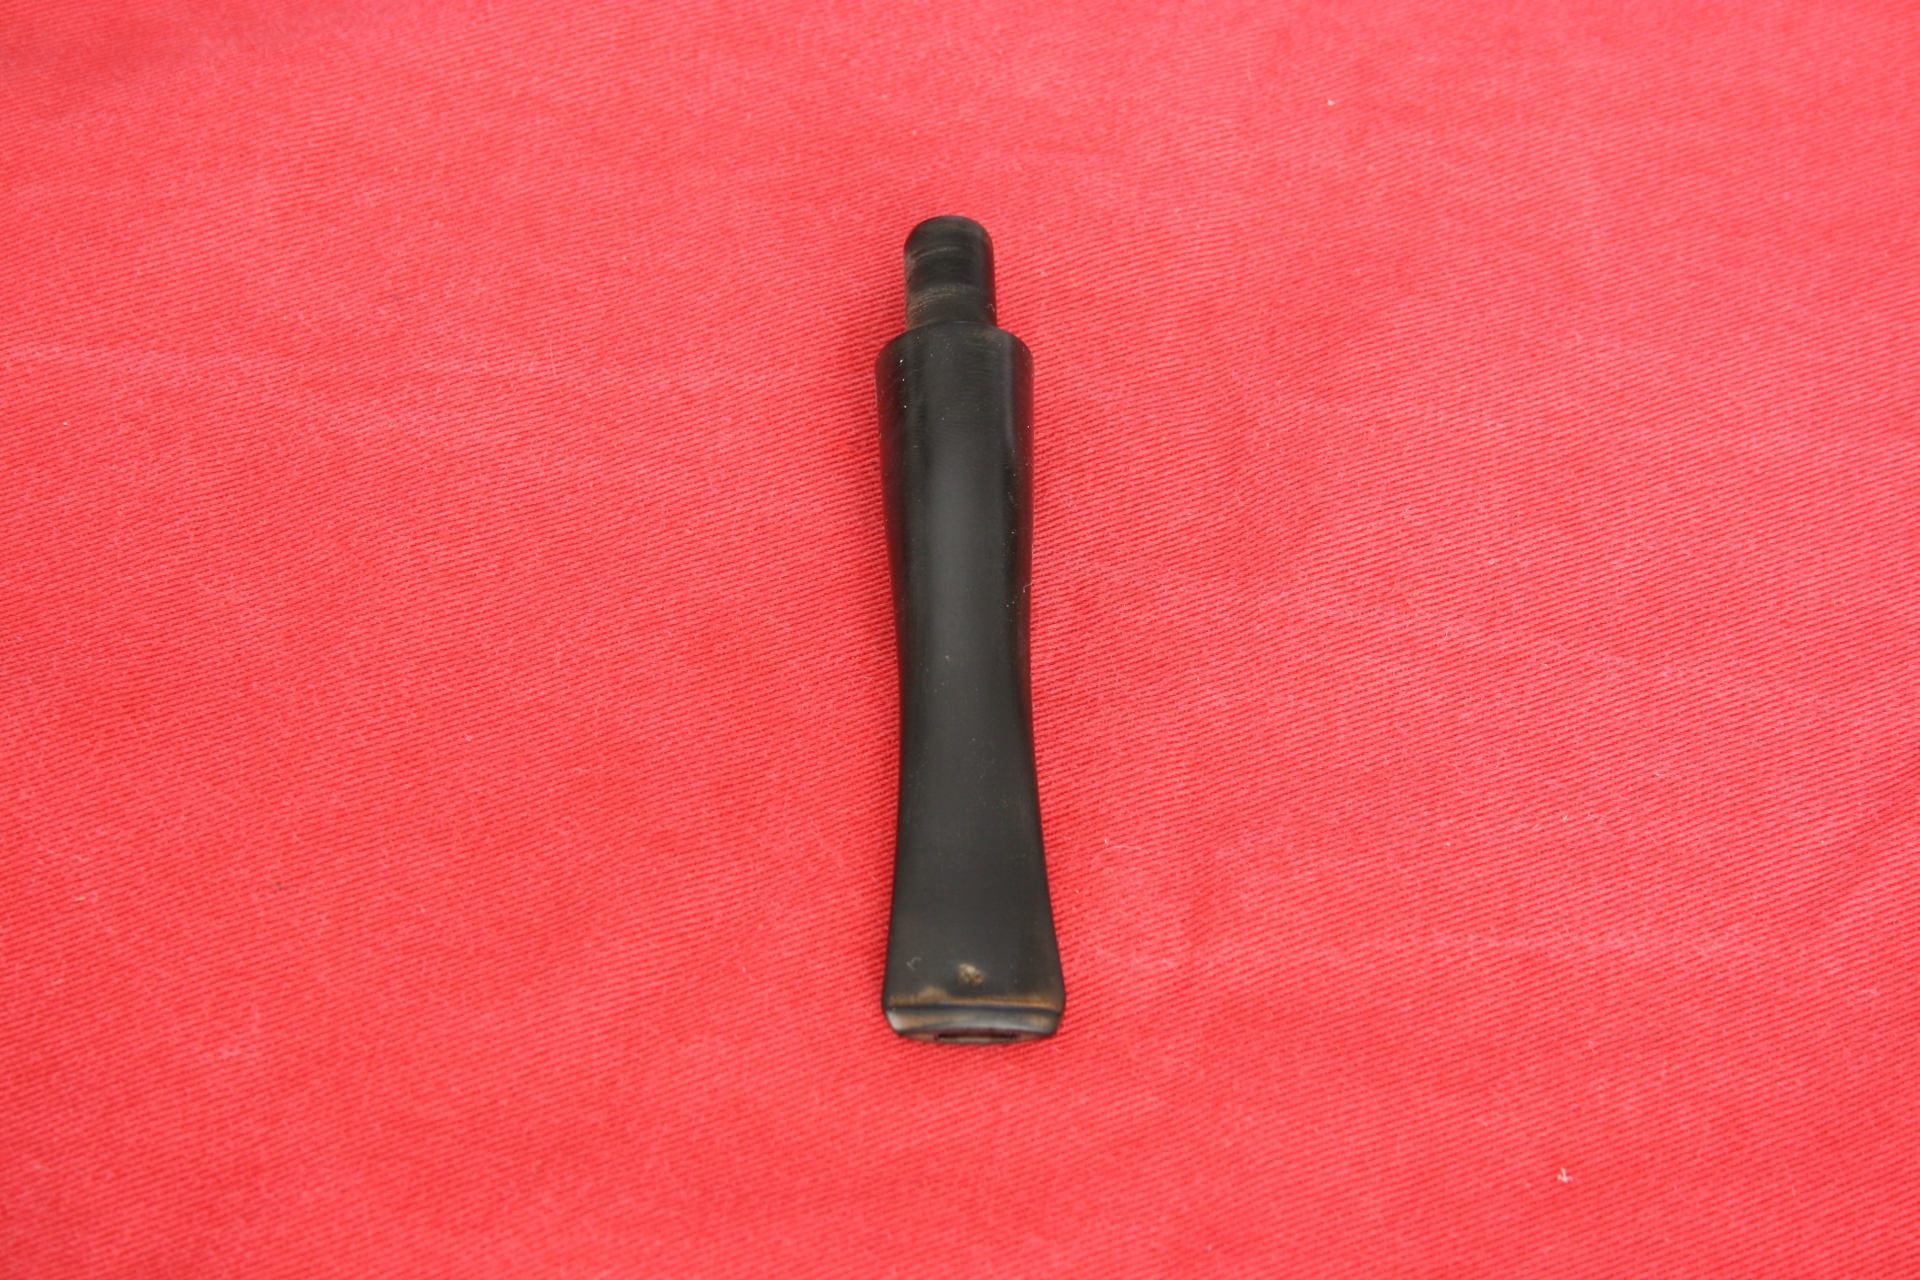
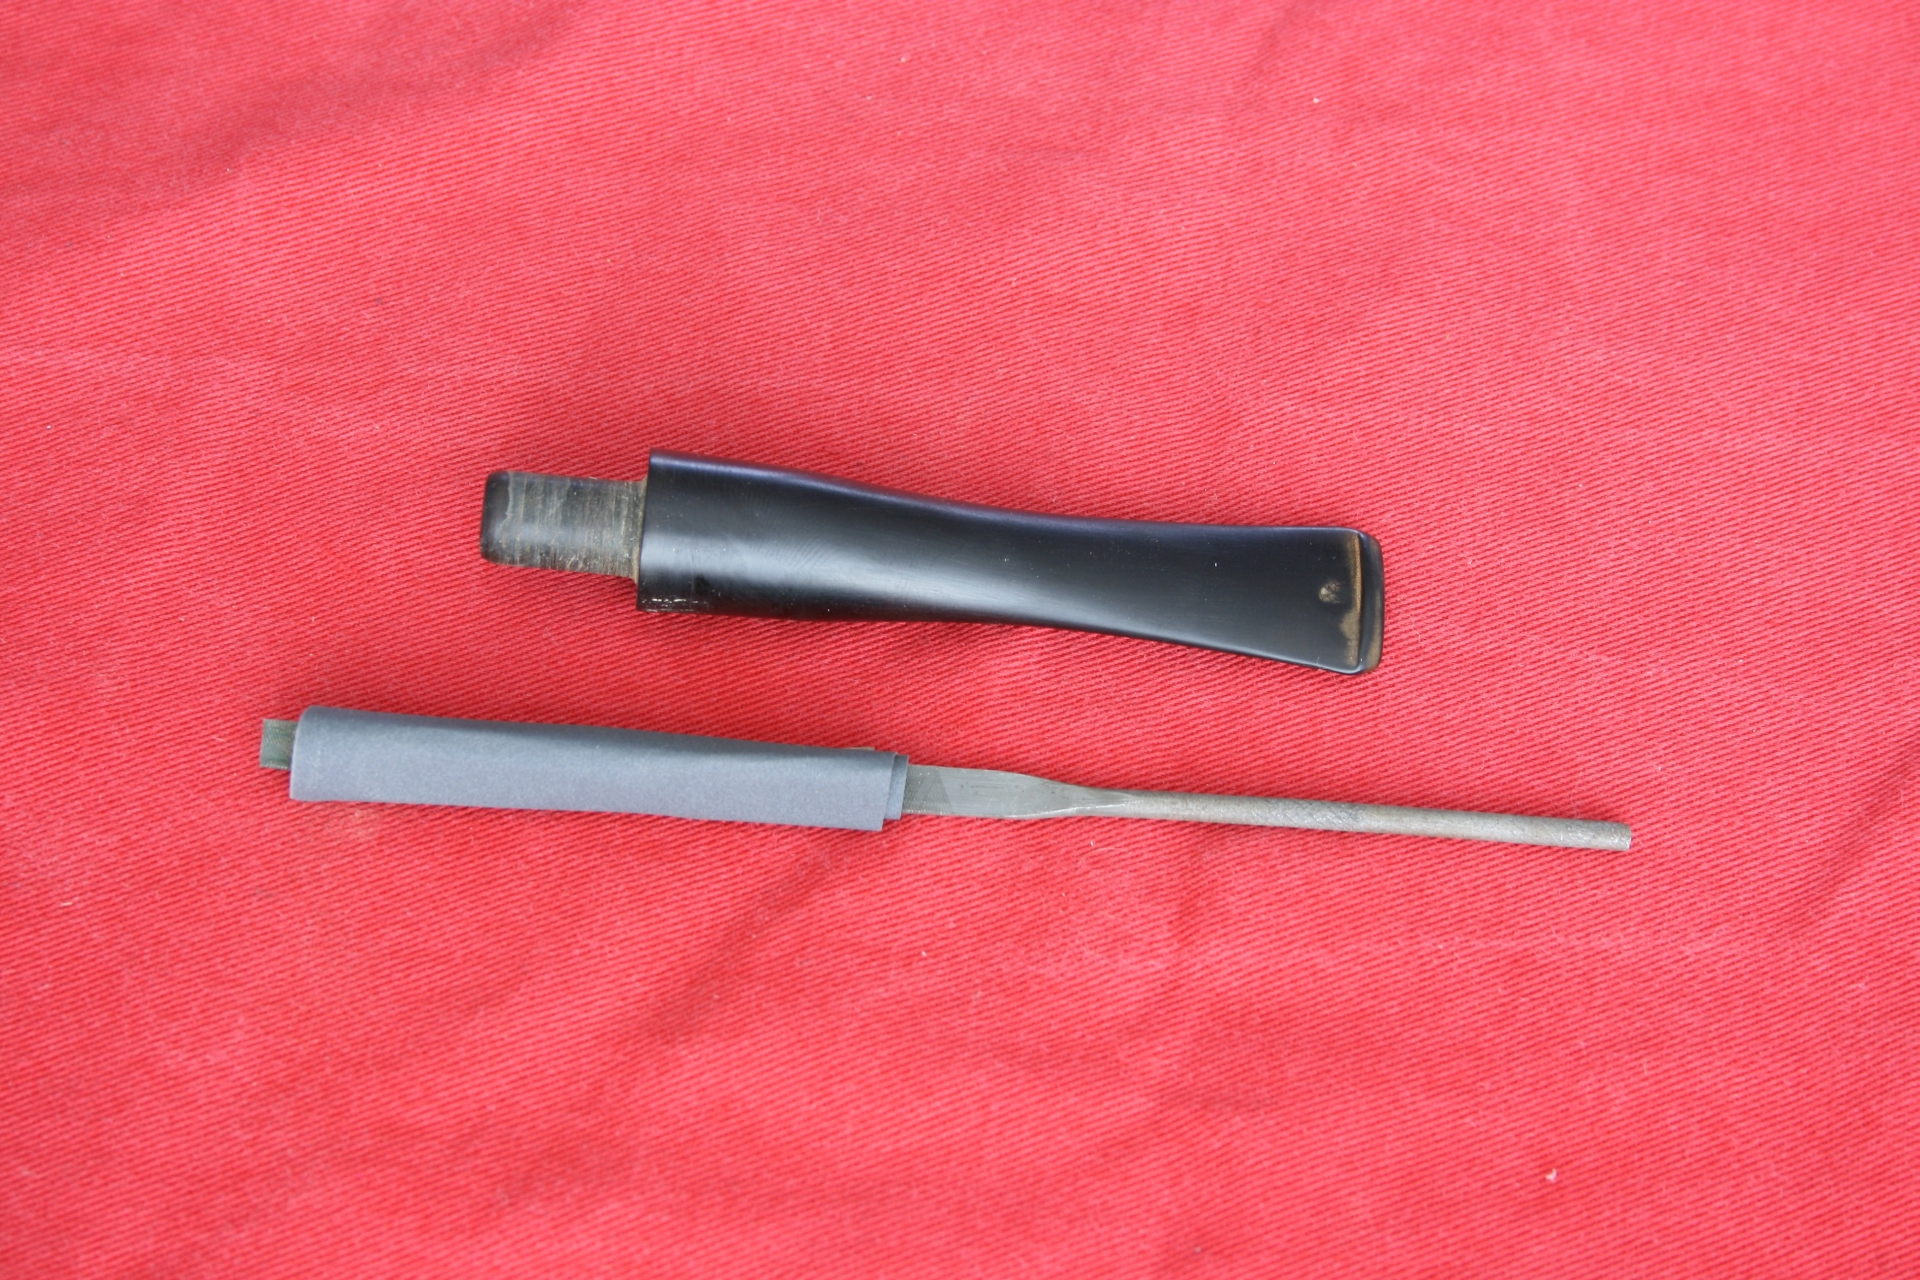
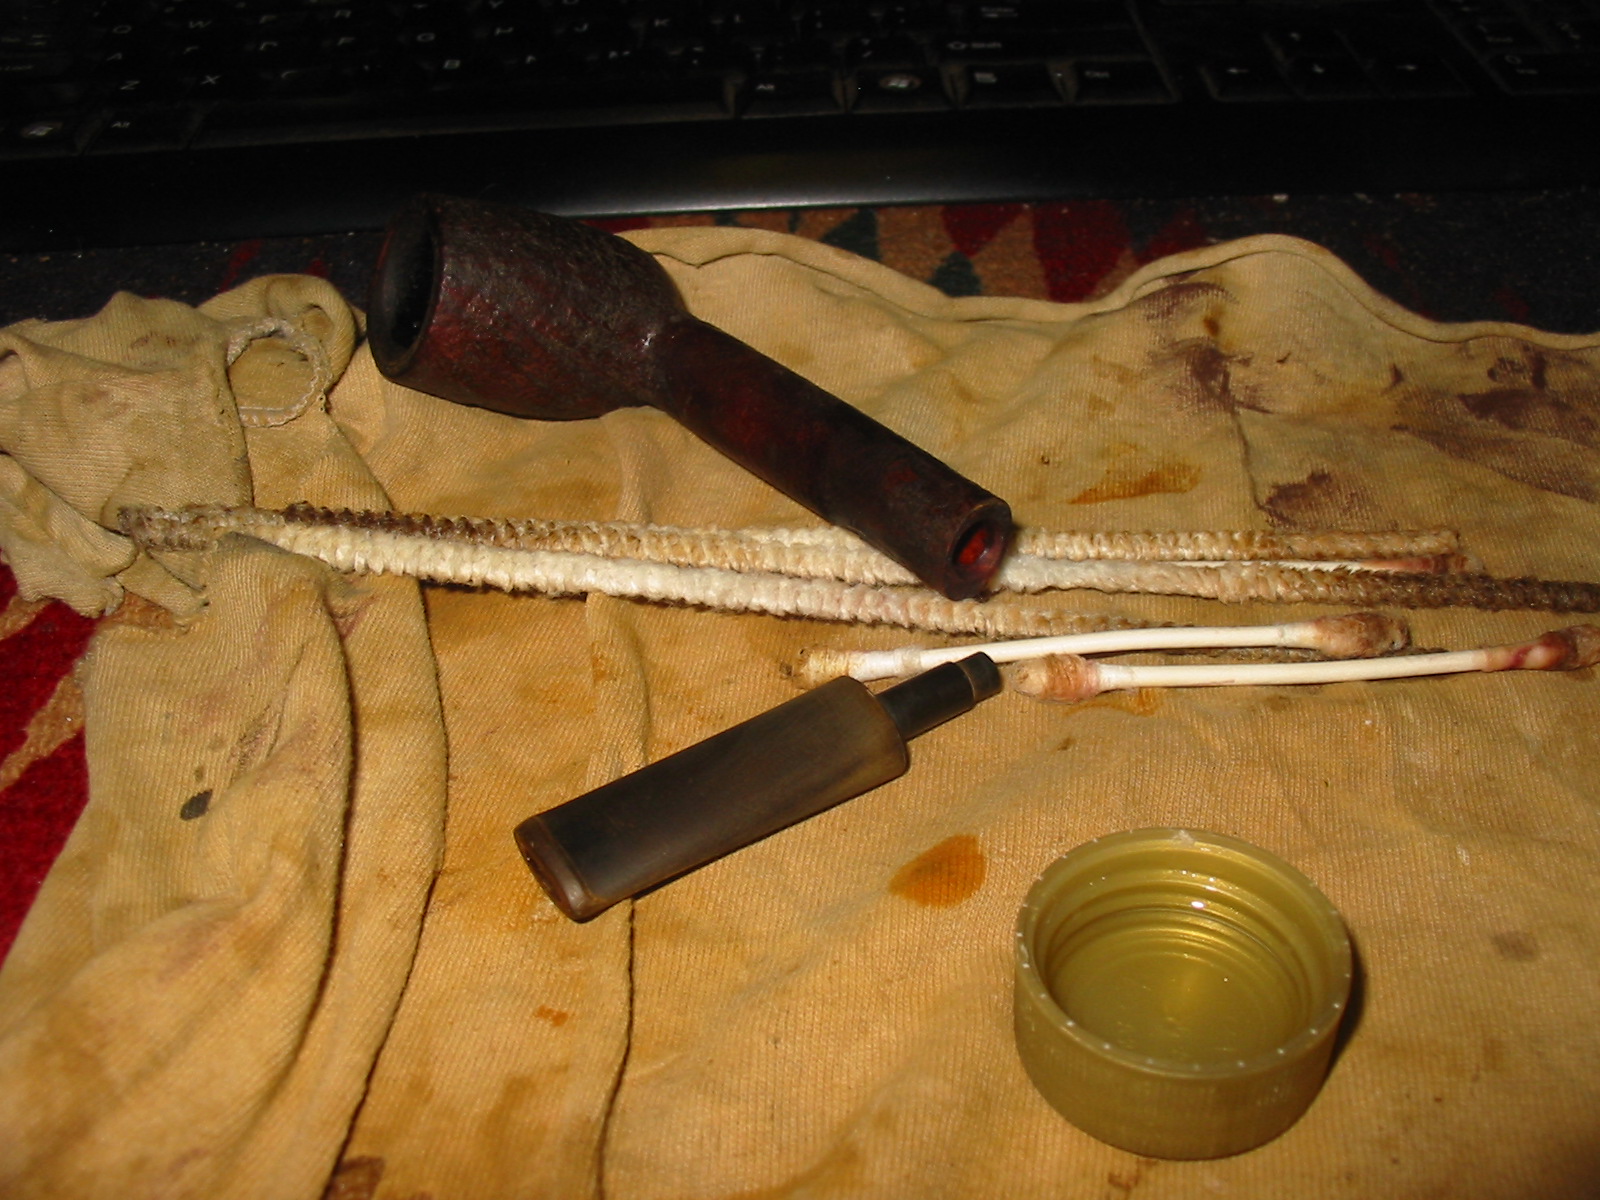
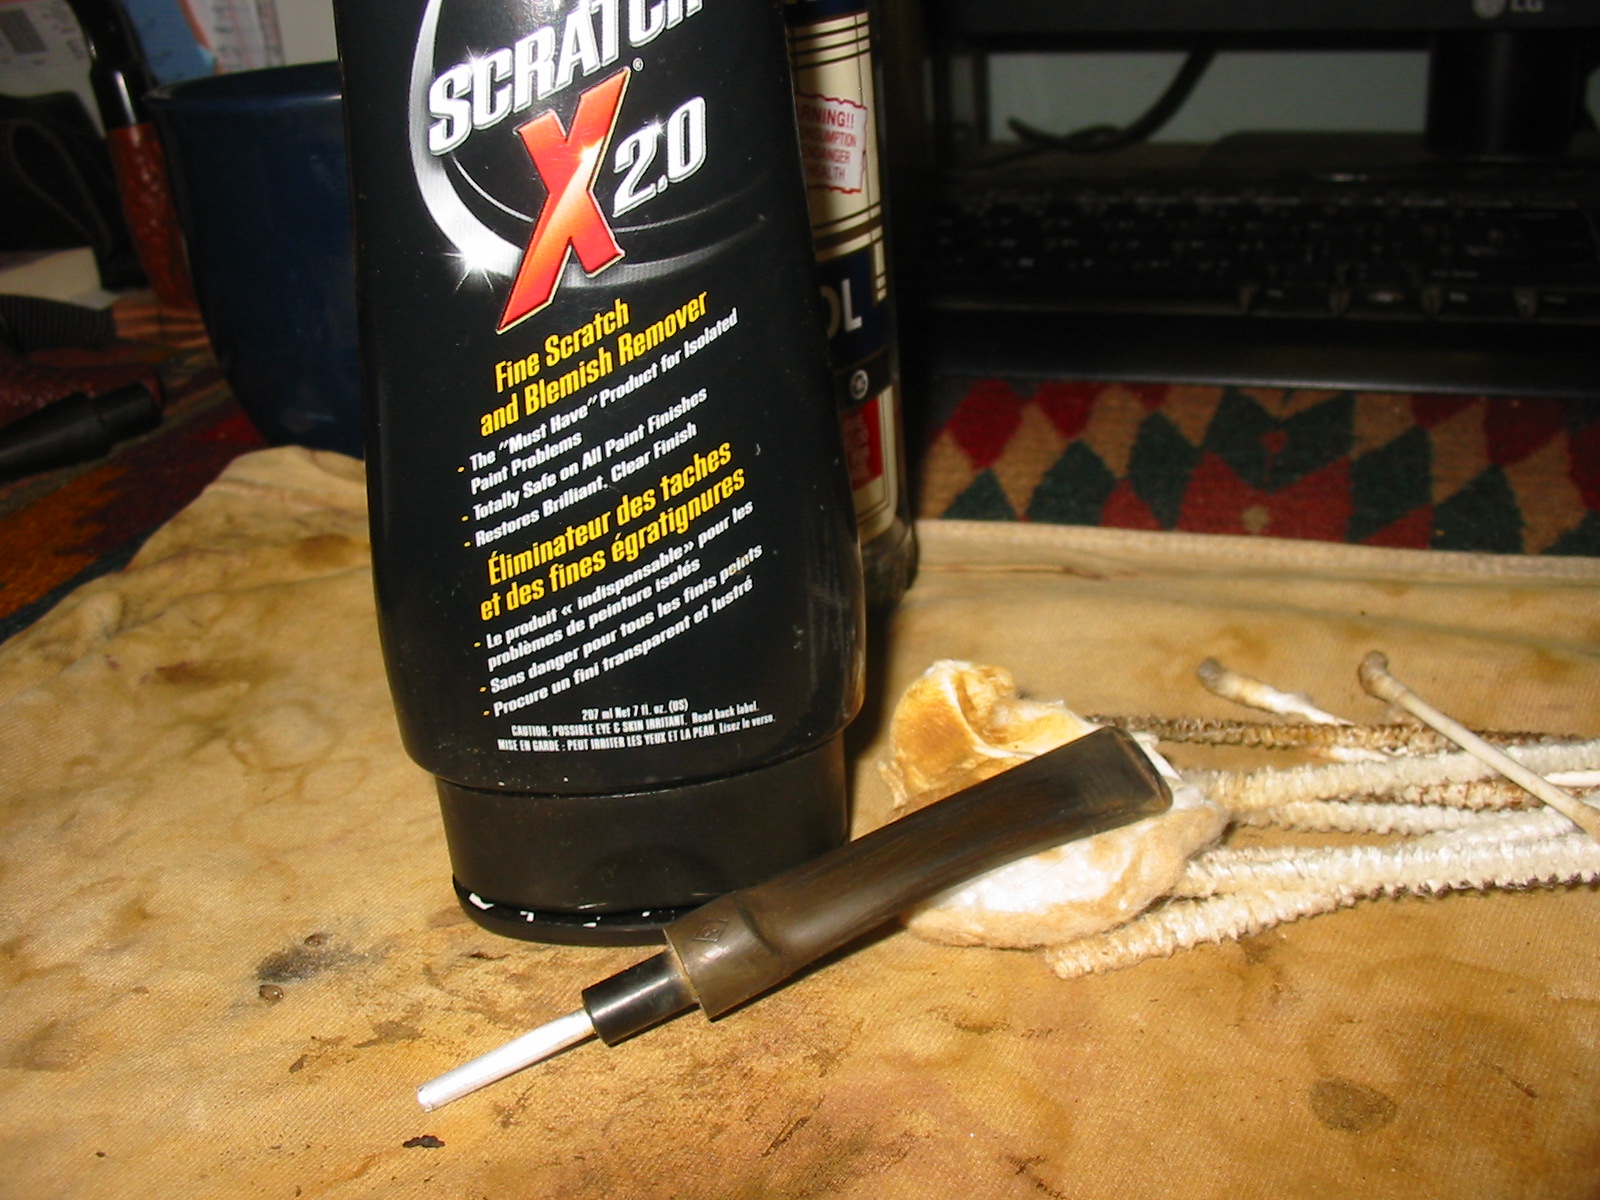
The next day I starts with the stems, taking them out of the bath and washing them under warm water with dish soap. I was surprised at how easily the oxidation came off after this with a miracle eraser scrub; I’ve used miracle erasers many times, but not on all stems, and have never had such good results. I wish I knew what the variable was to give me this result this time but I don’t. Next I scrubbed the stems out with alcohol and pipe cleaners until they came out white.

20131014-152048.jpg

20131014-152100.jpg

20131014-152111.jpg

20131014-152120.jpg

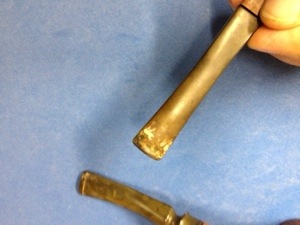
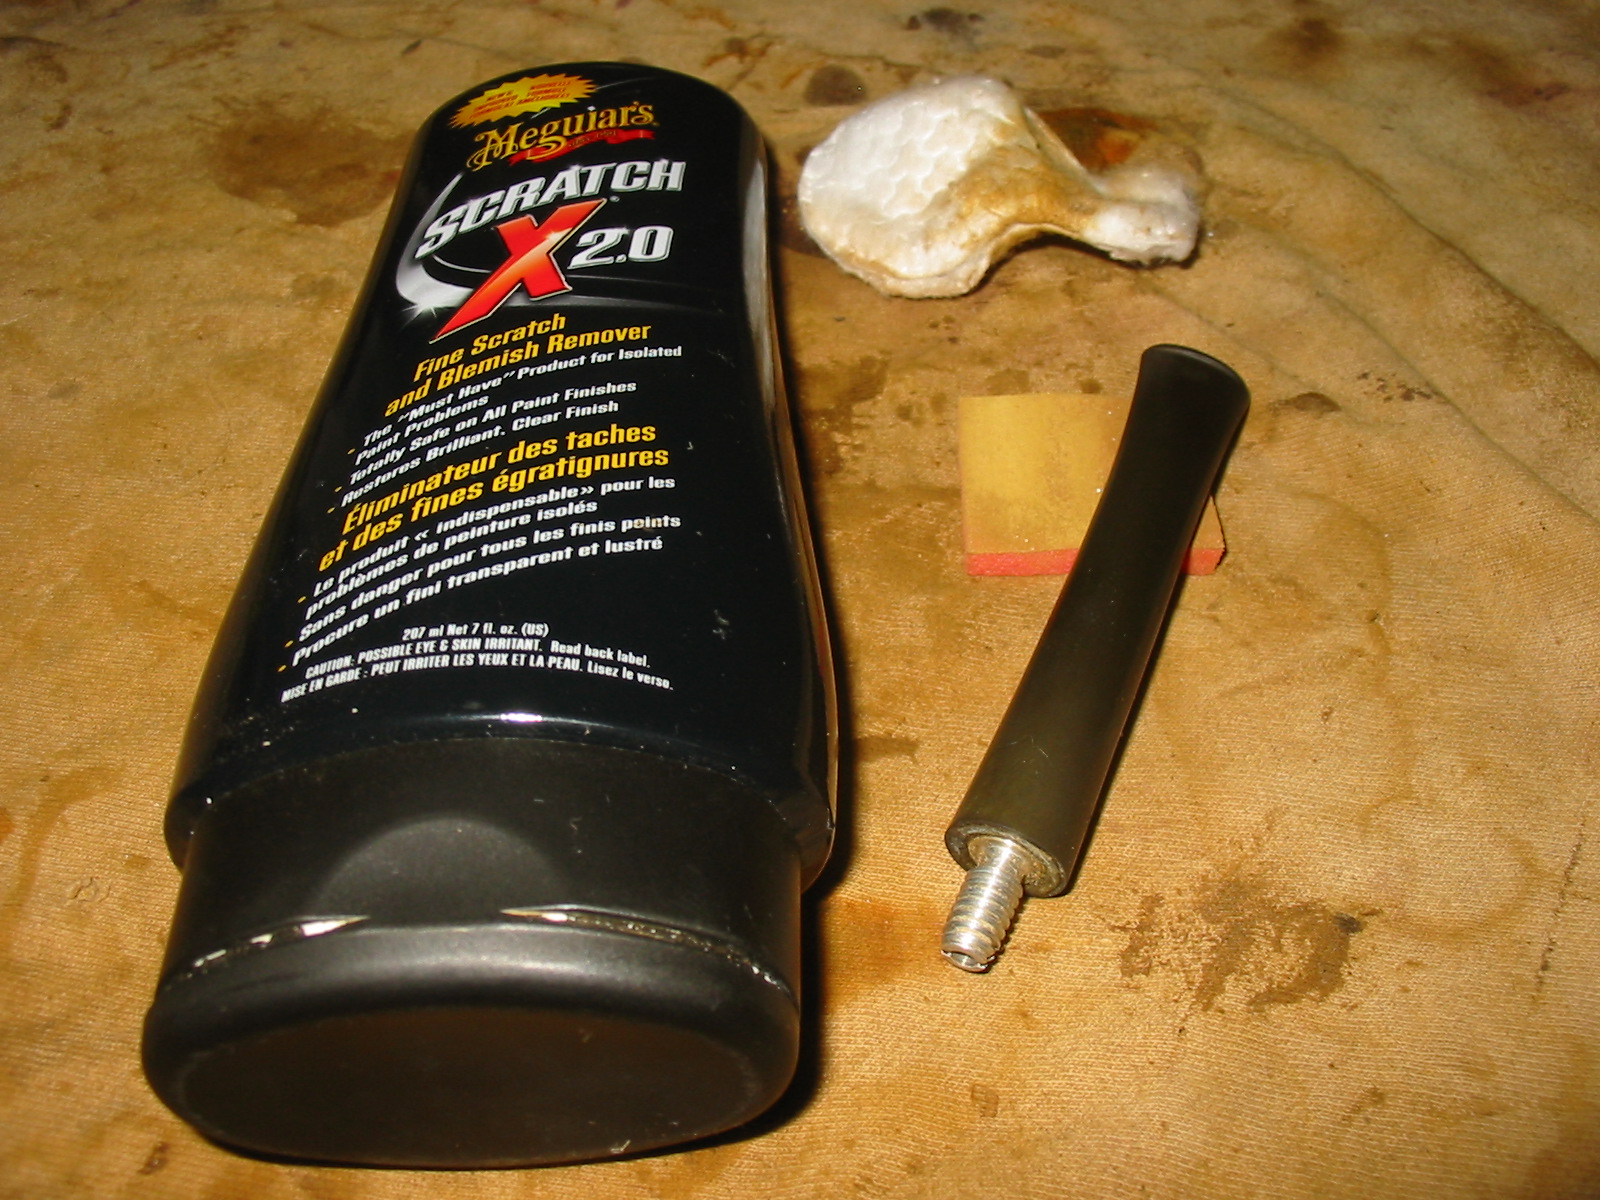
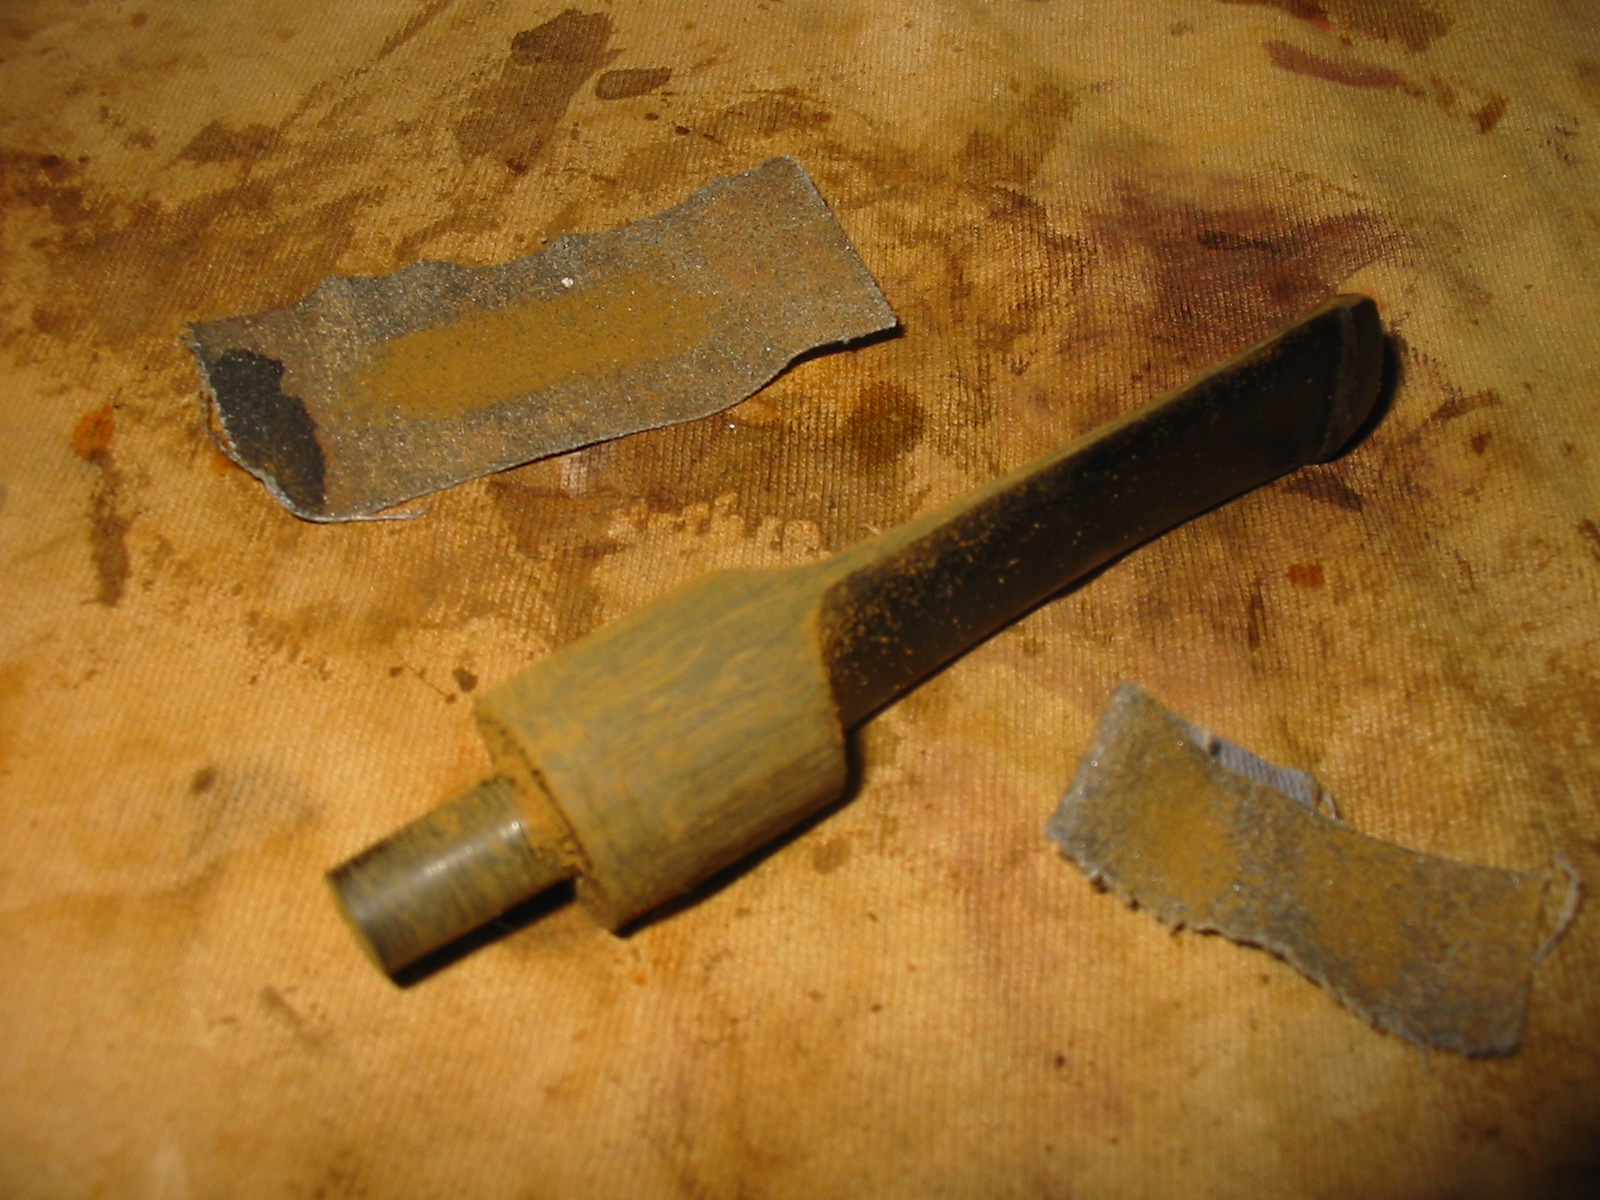
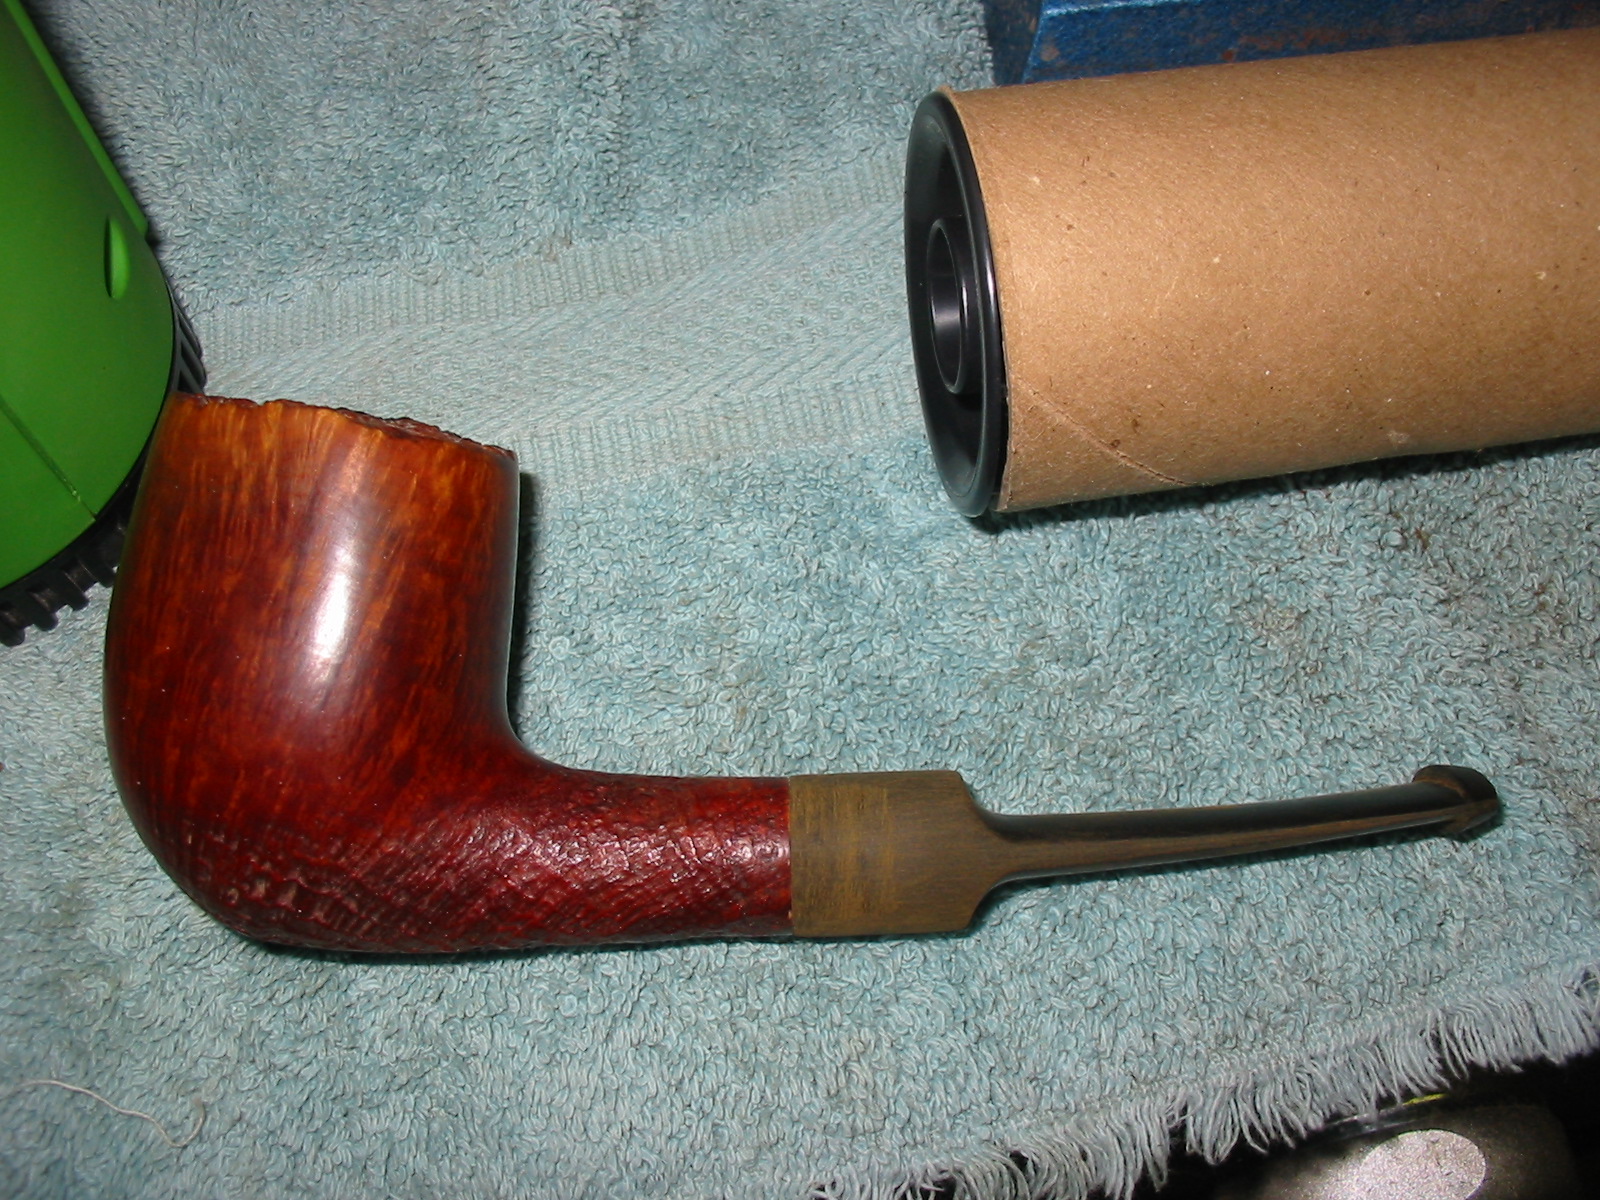
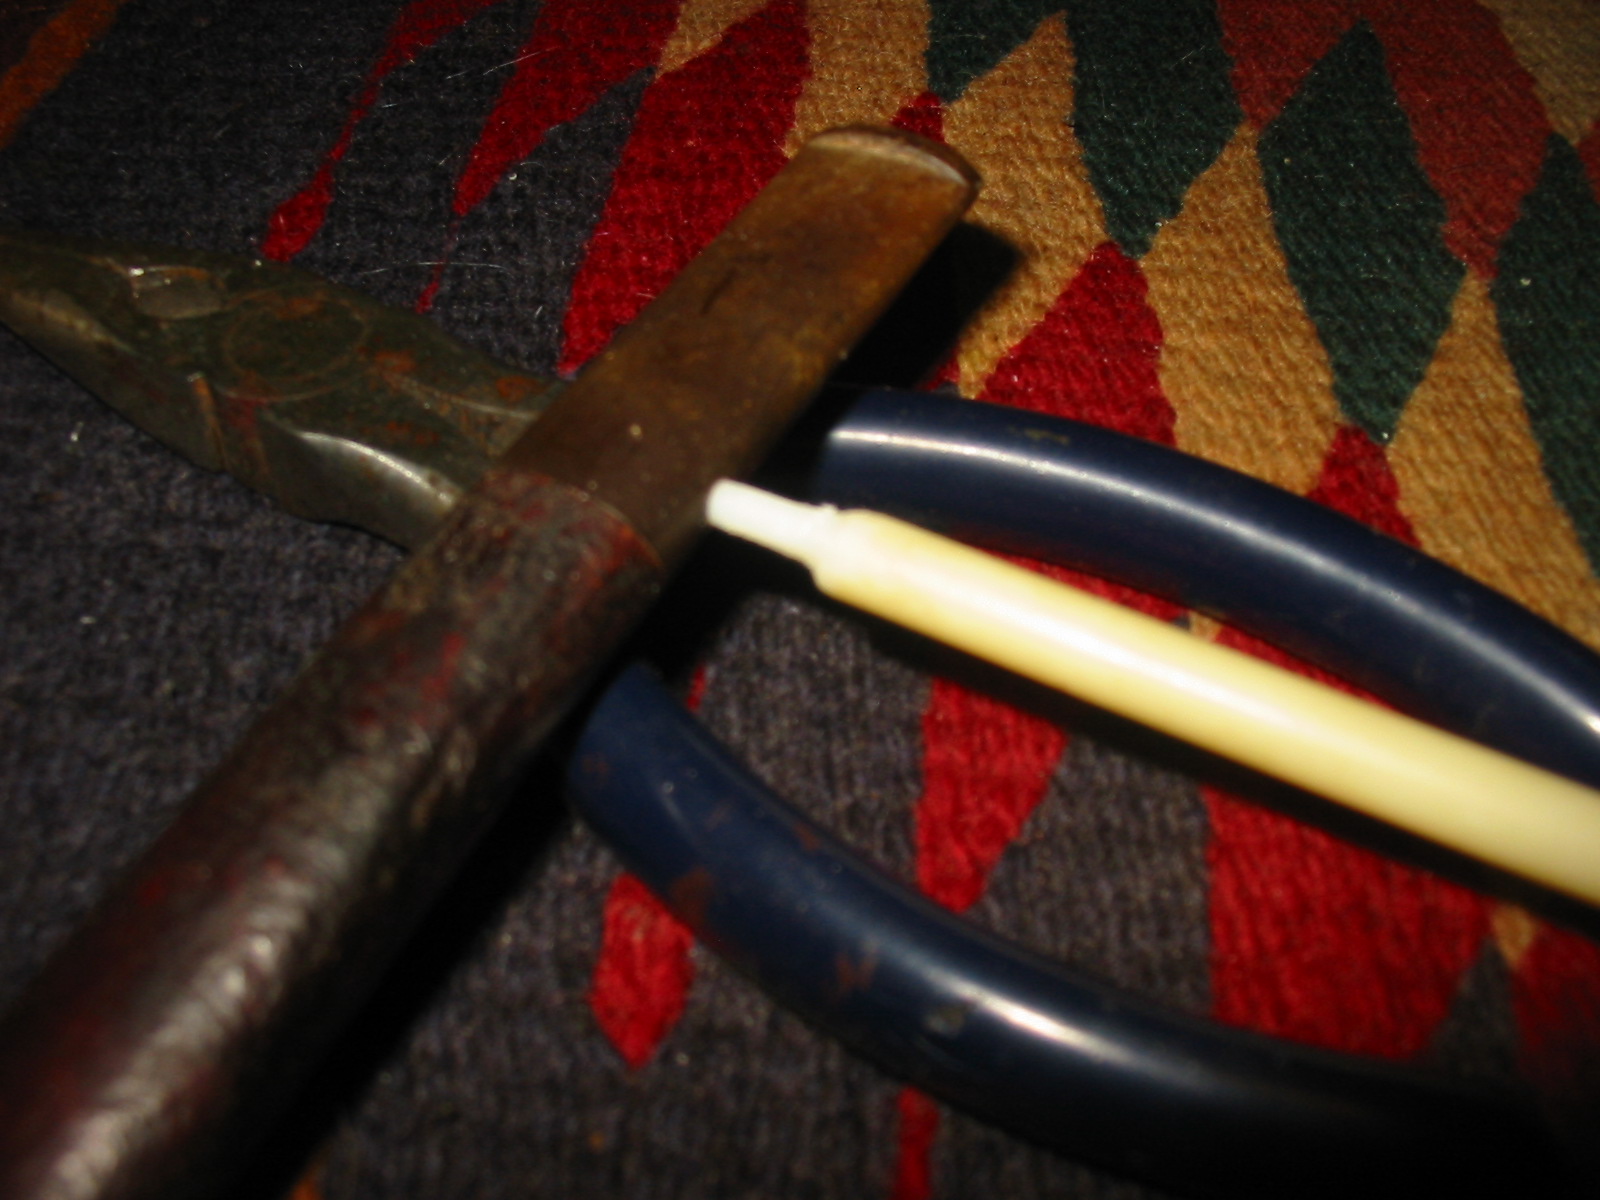
At this point took the bowls out of there bath and wiped them down. In the photos you can probably see (above) that the stem/shank union was not flush at all. I figured the problem was a buildup of tar and gunk in the shank so I set the bowls at an angle, shank tilted up, and placed cotton balls in the bowls. I filled them with alcohol with a syringe and then also filled the shanks the same way, plugging them with cotton swabs. I let them soak while I worked on the stems, changing the cotton swabs out as they drew out tars; I changed them three times I think, going to doubled over pipe cleaners the final time.

20131014-152727.jpg

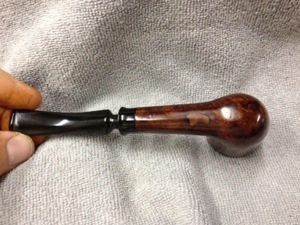
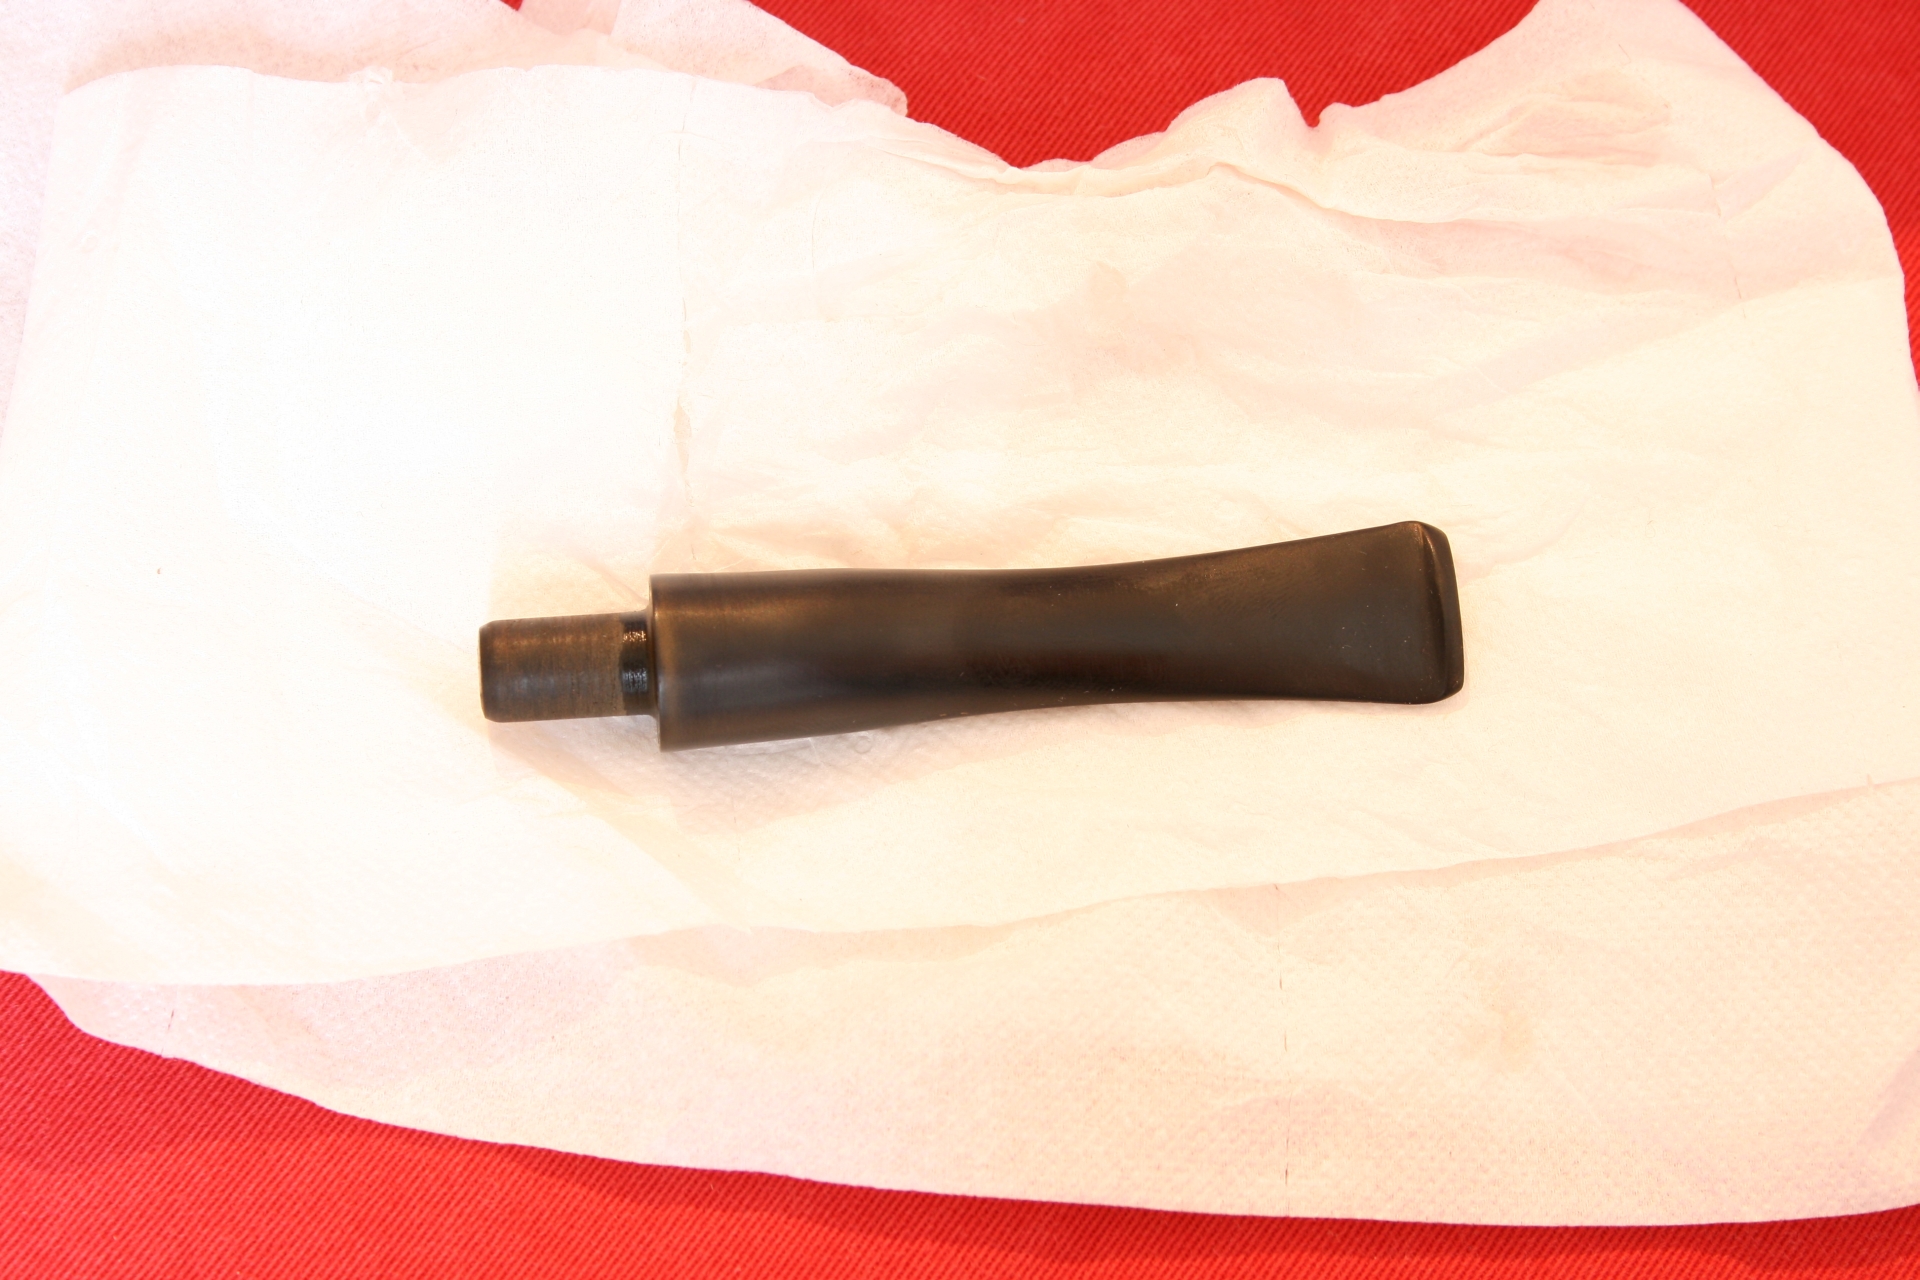
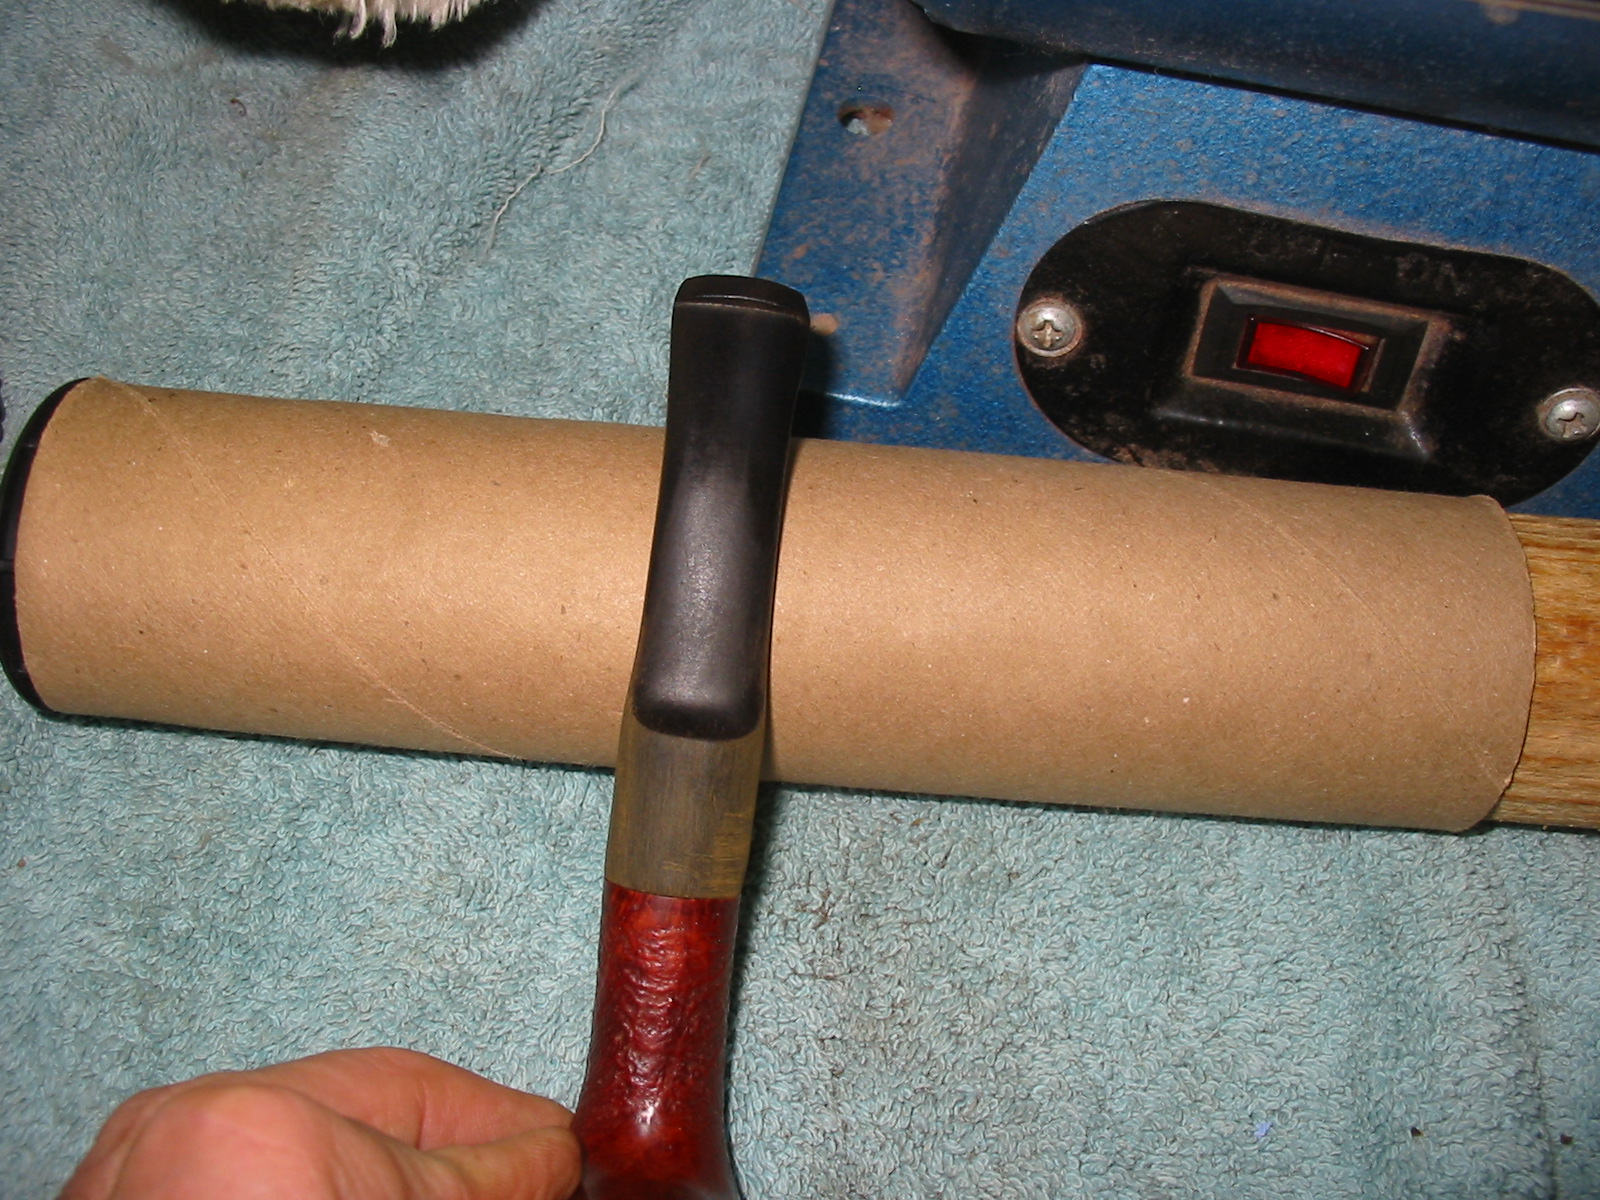
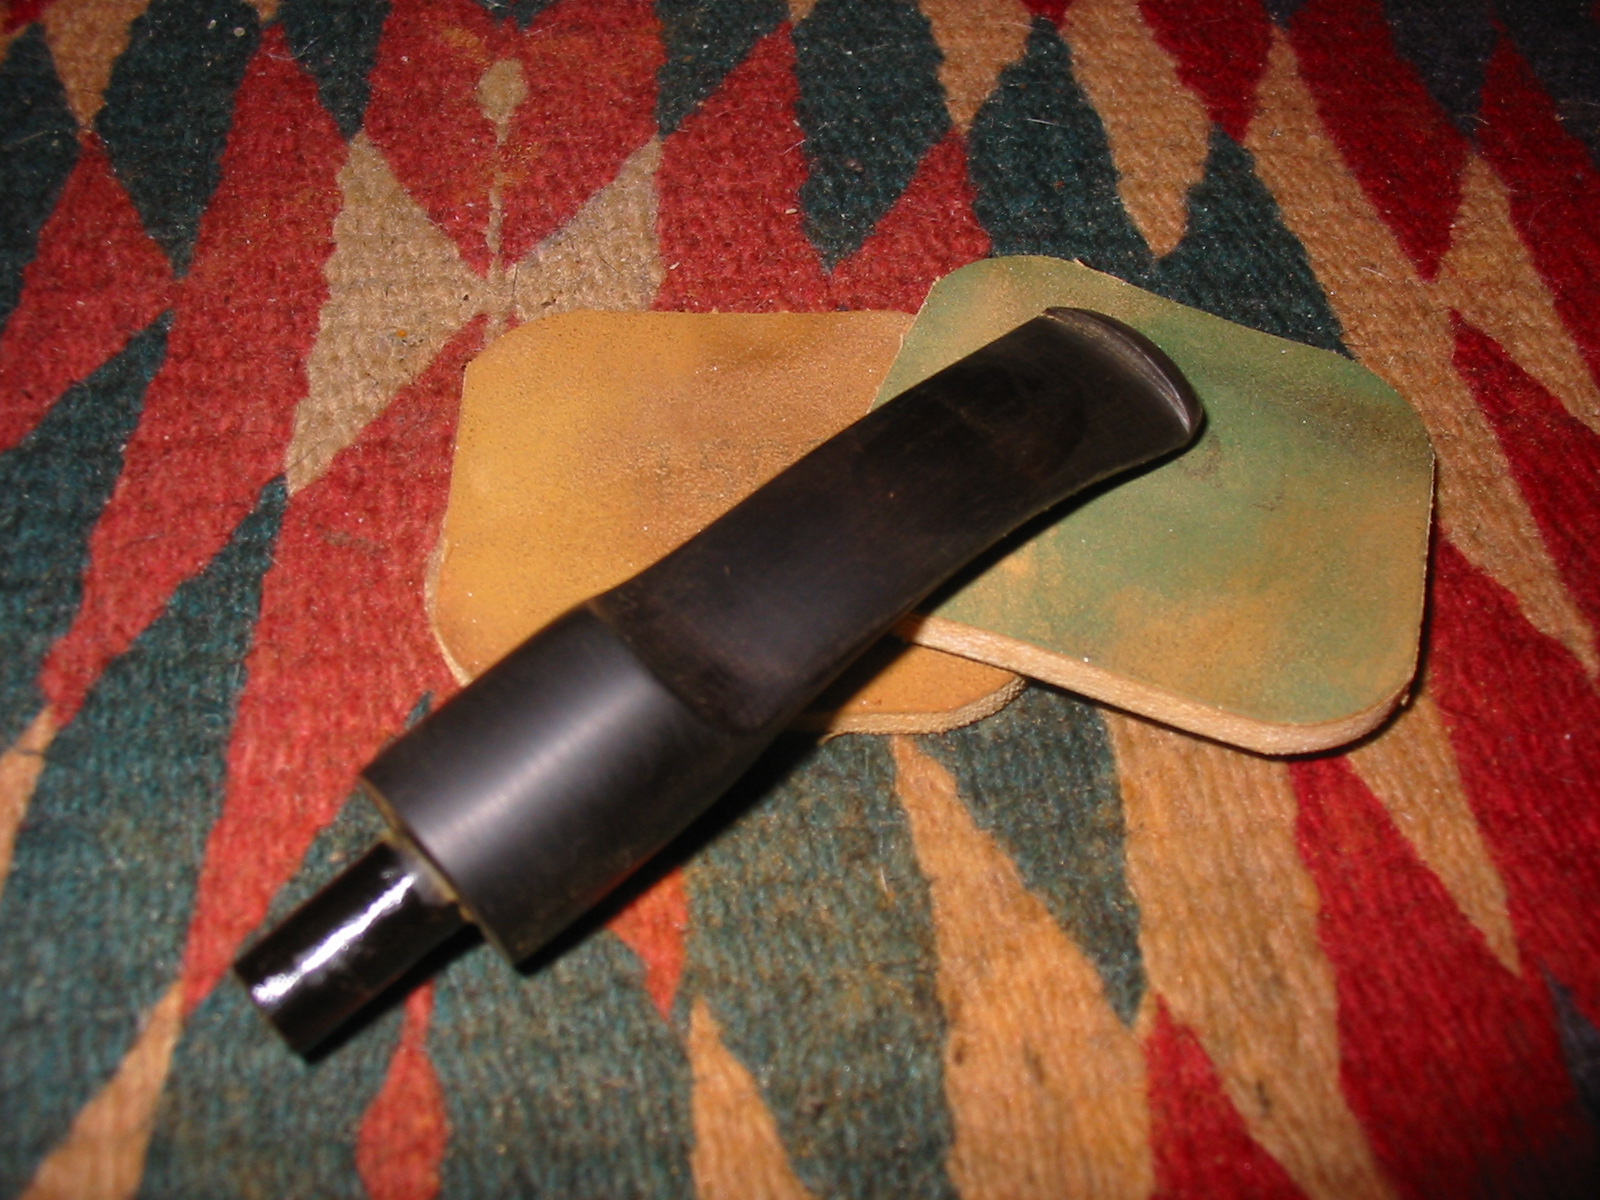
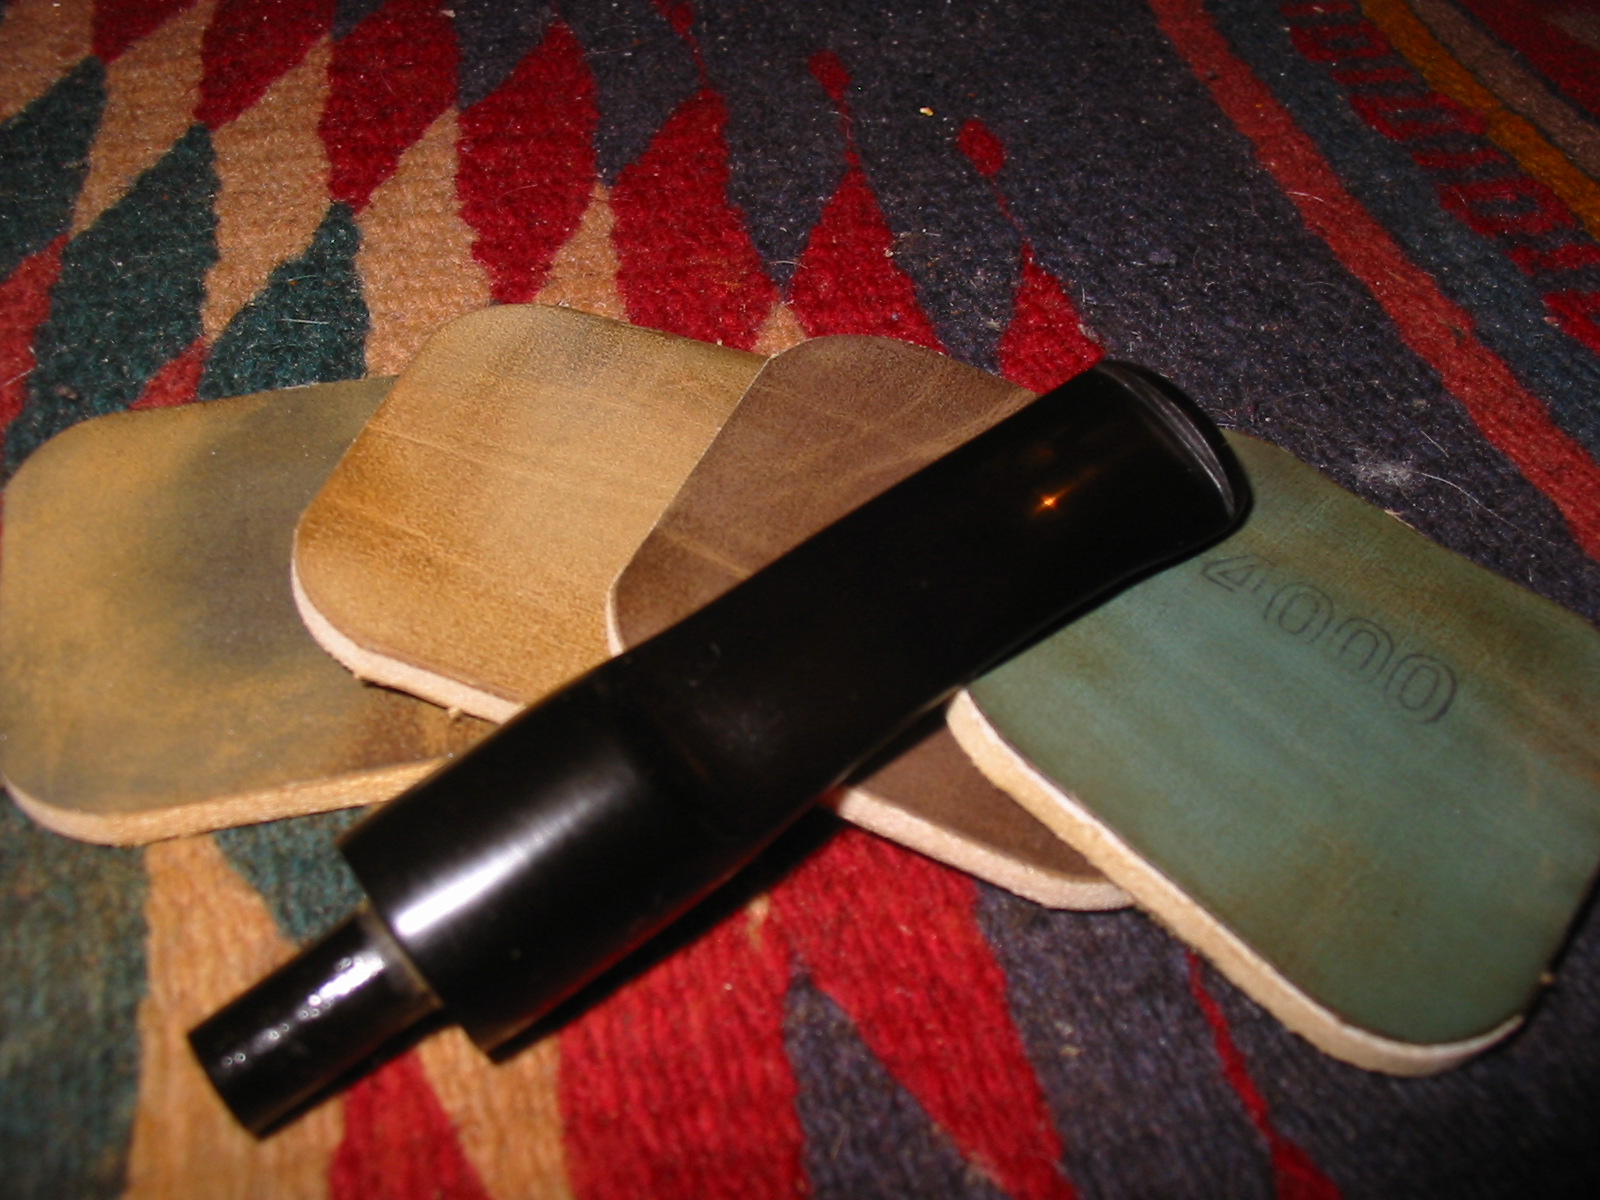
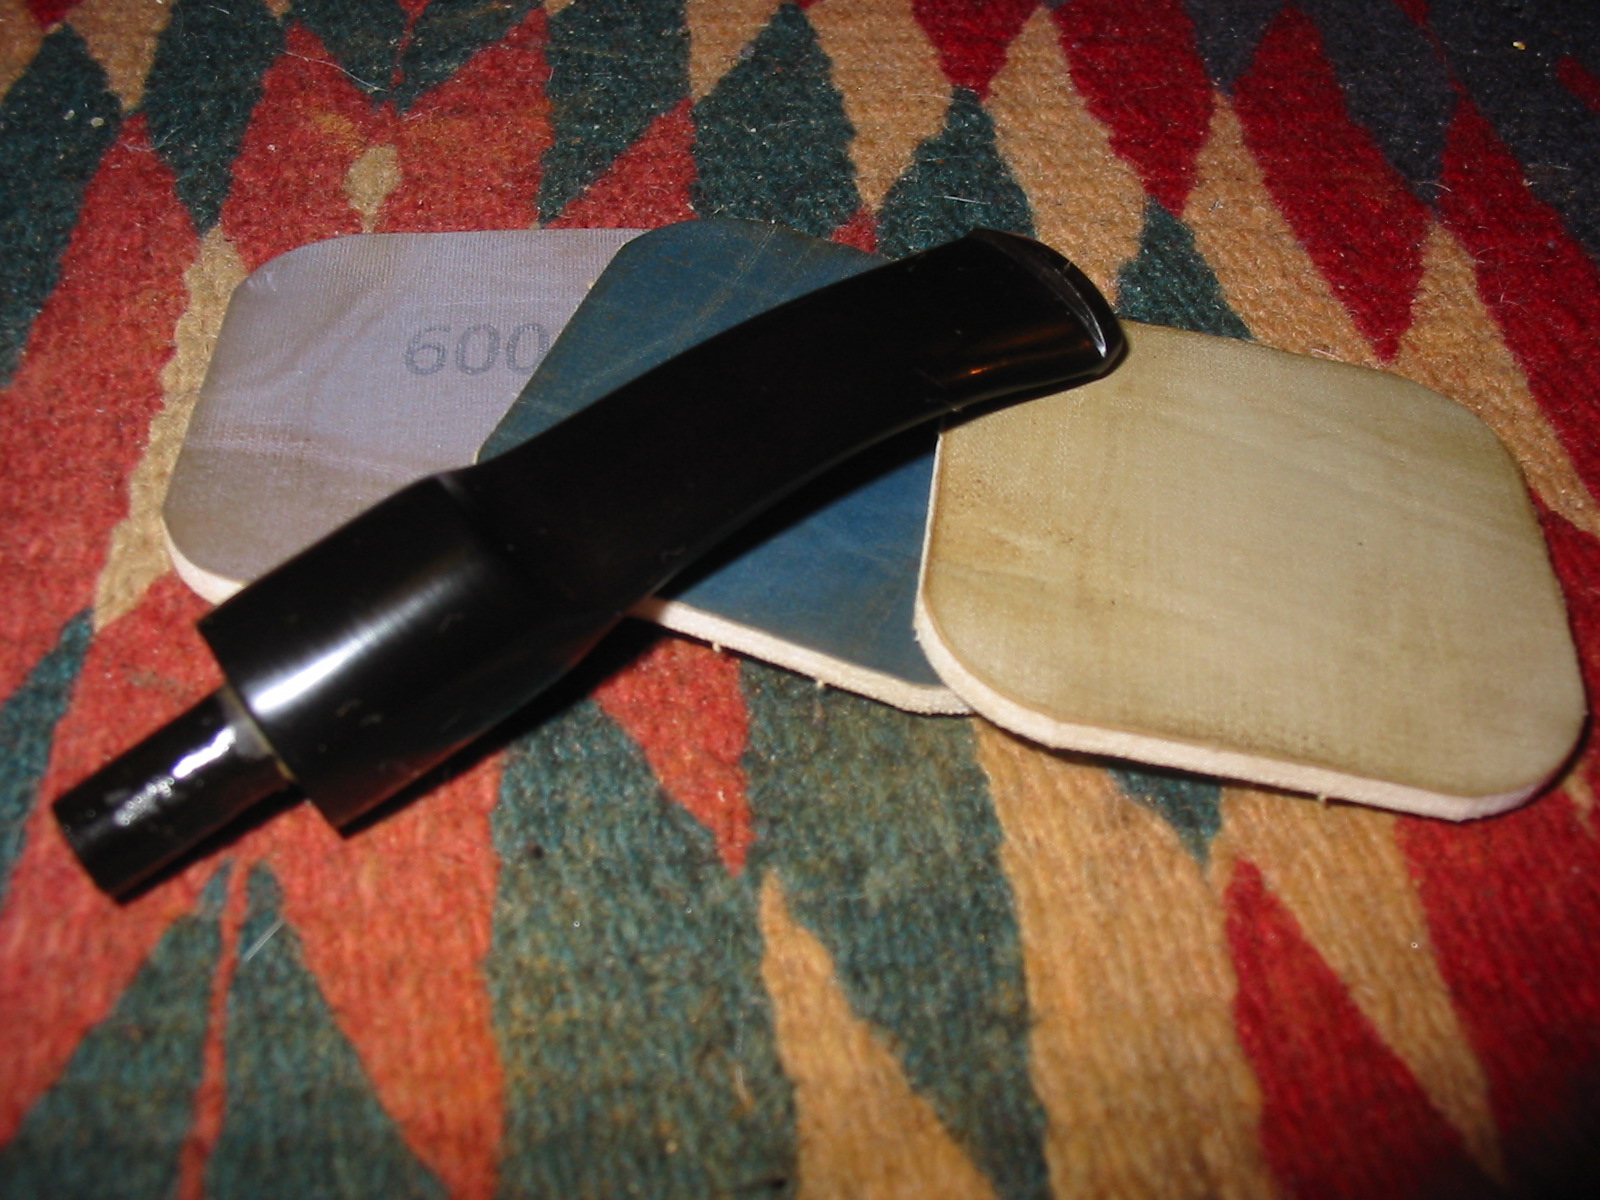
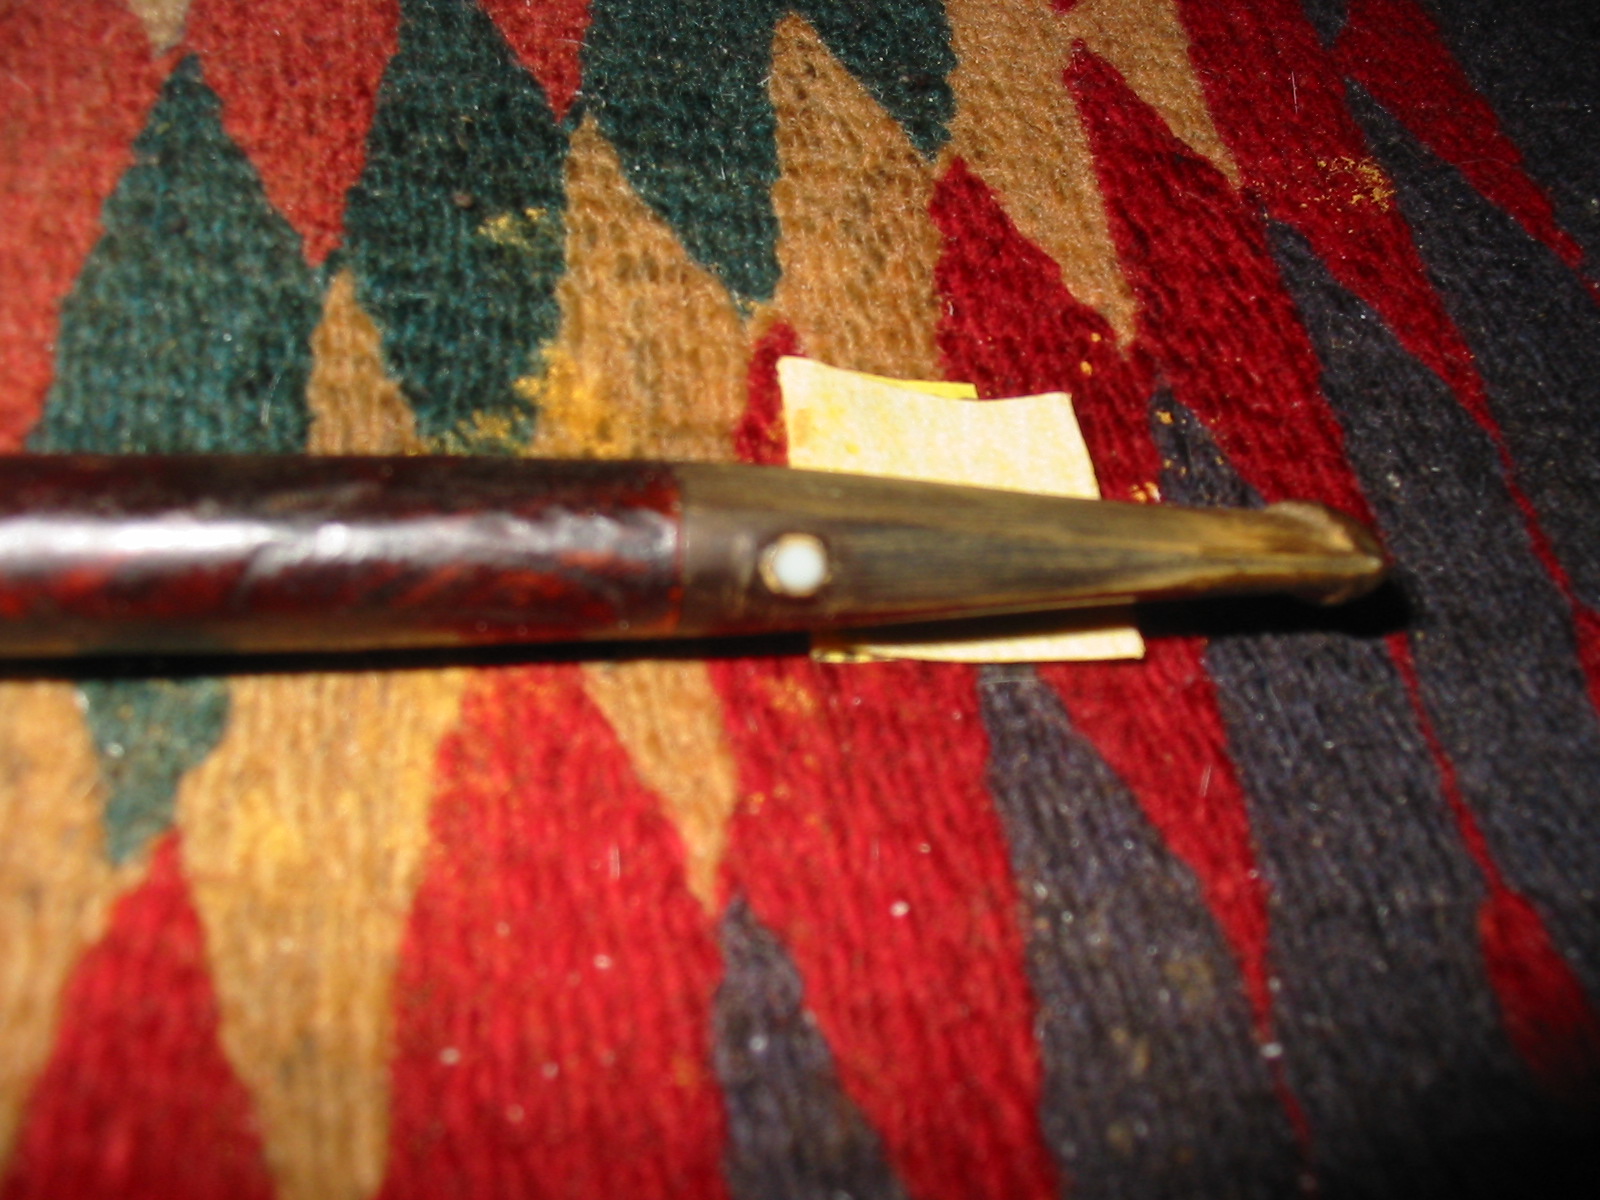
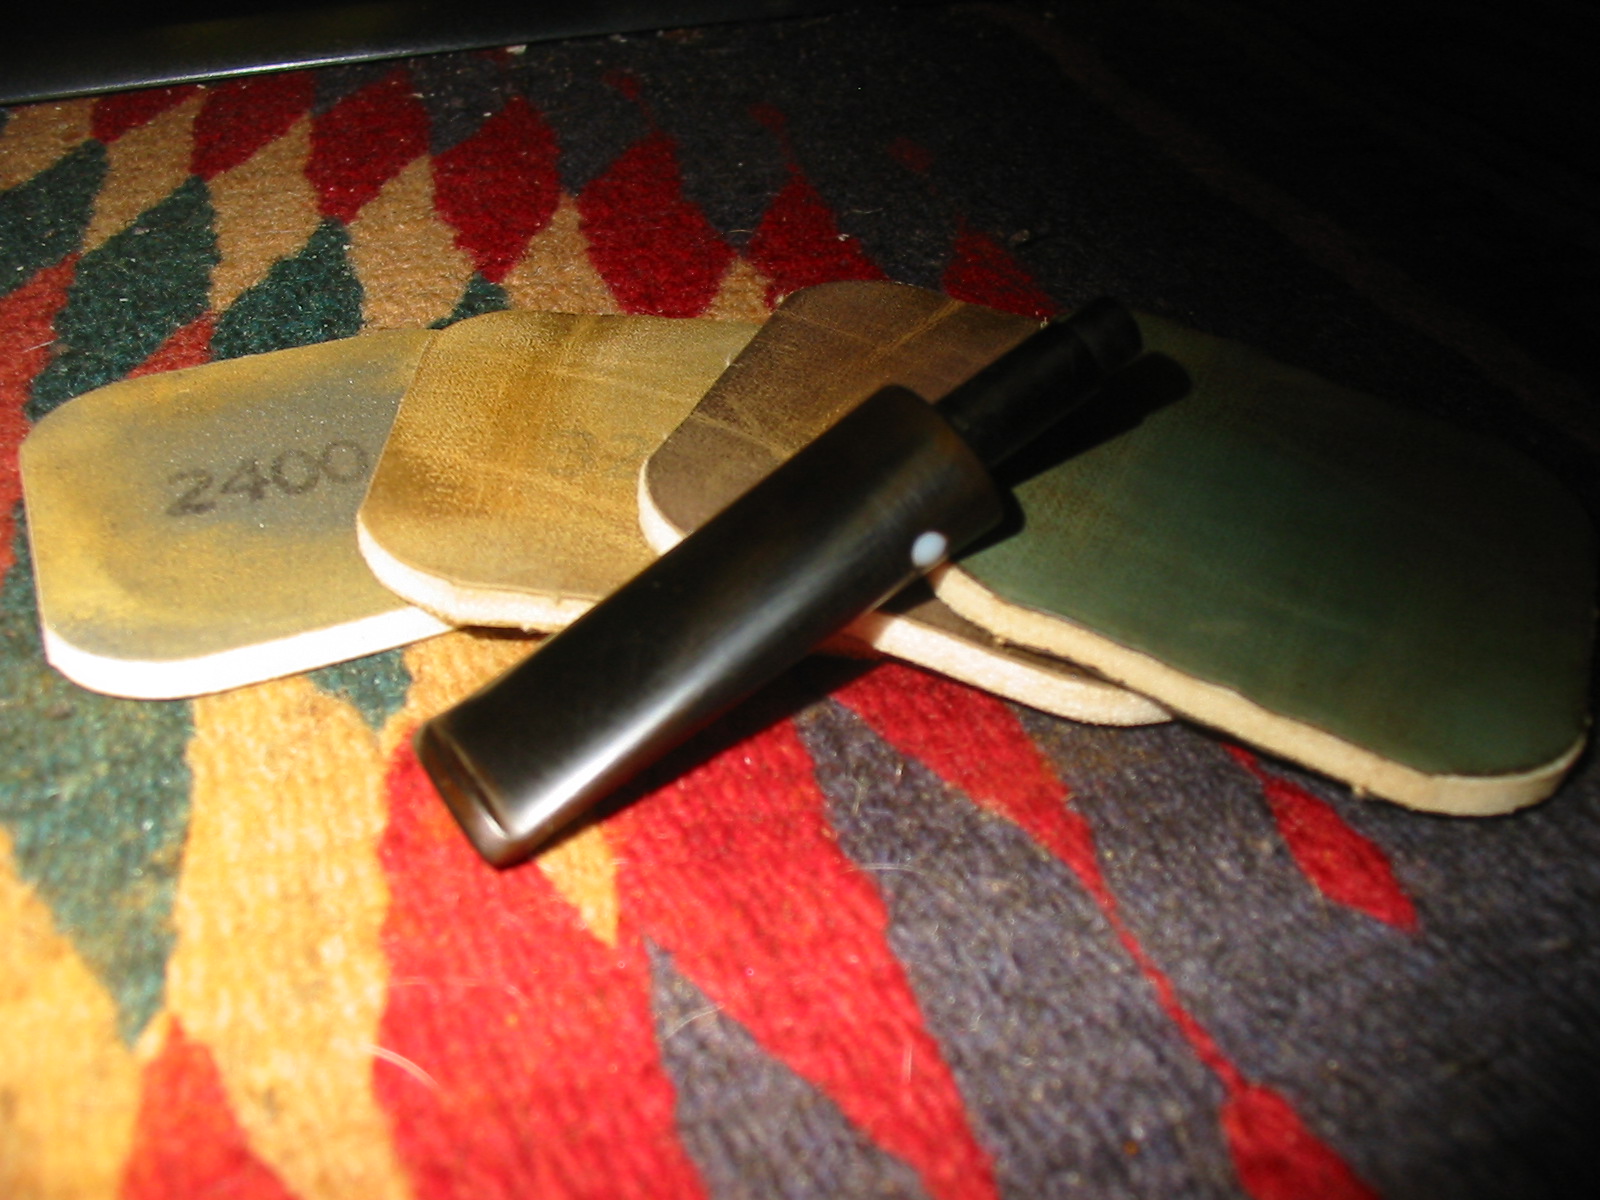
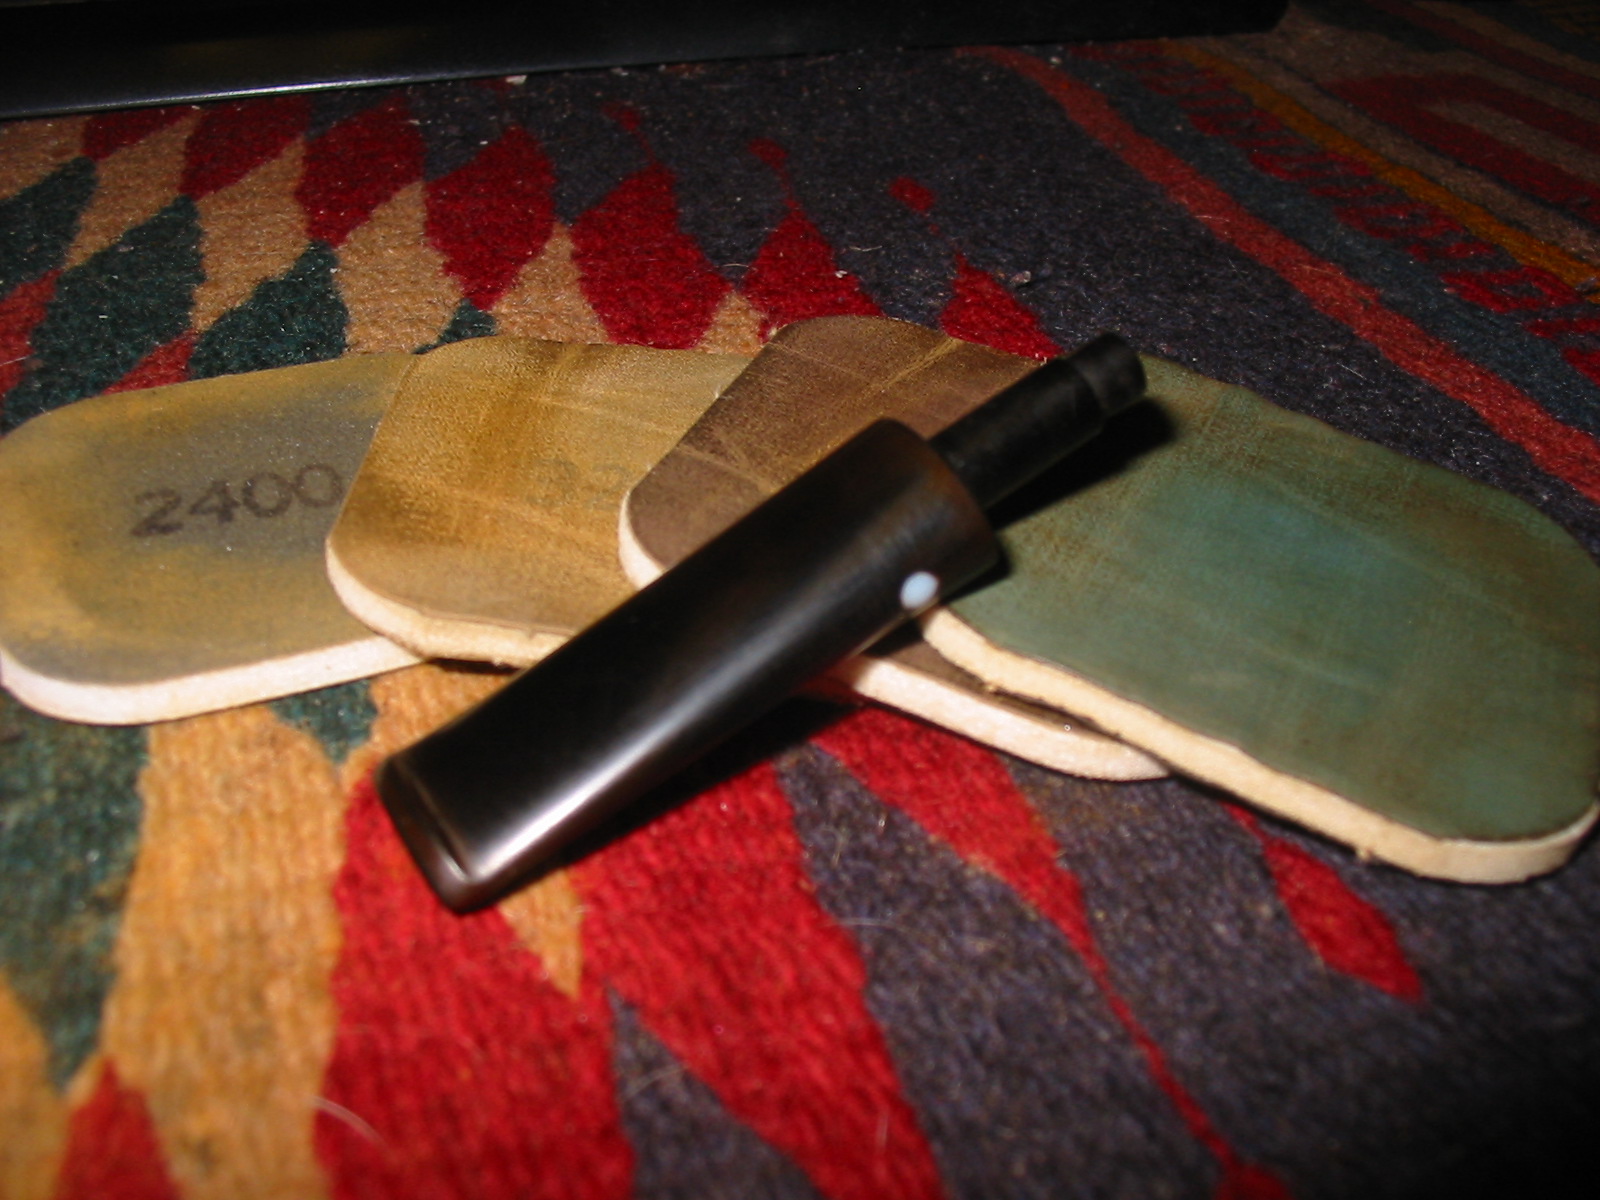
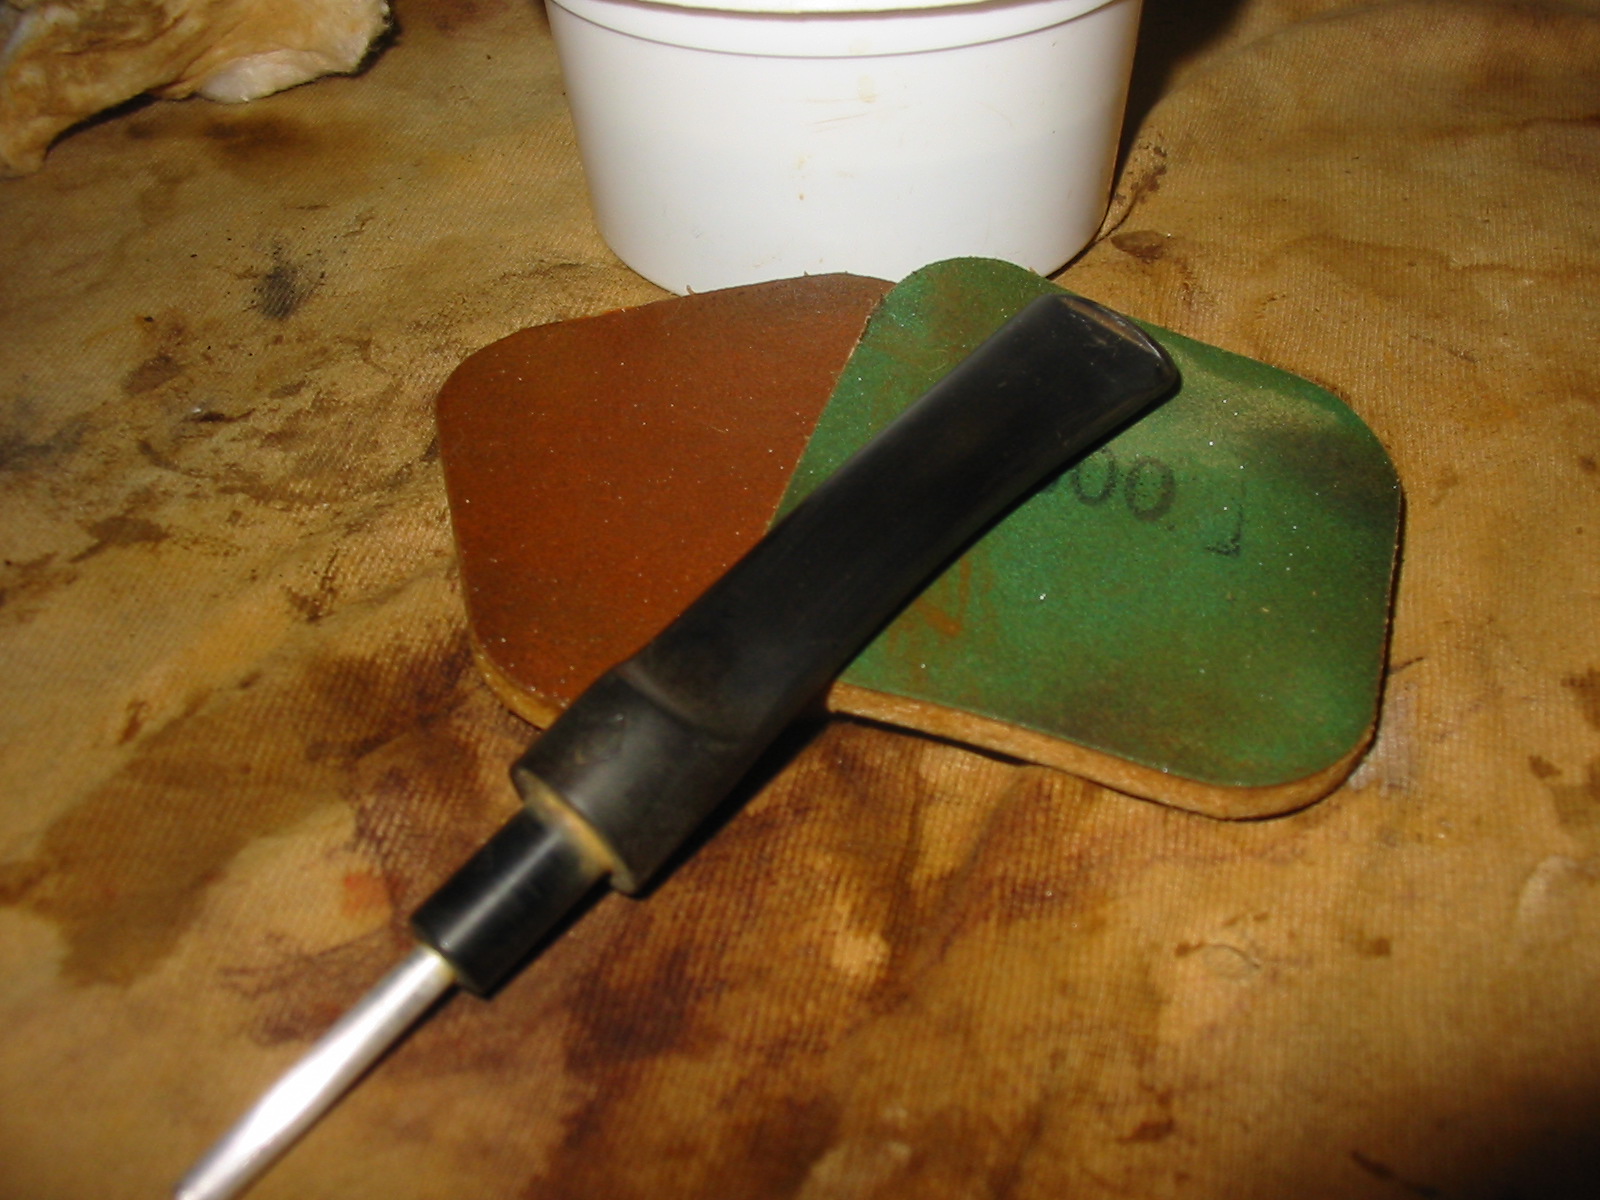
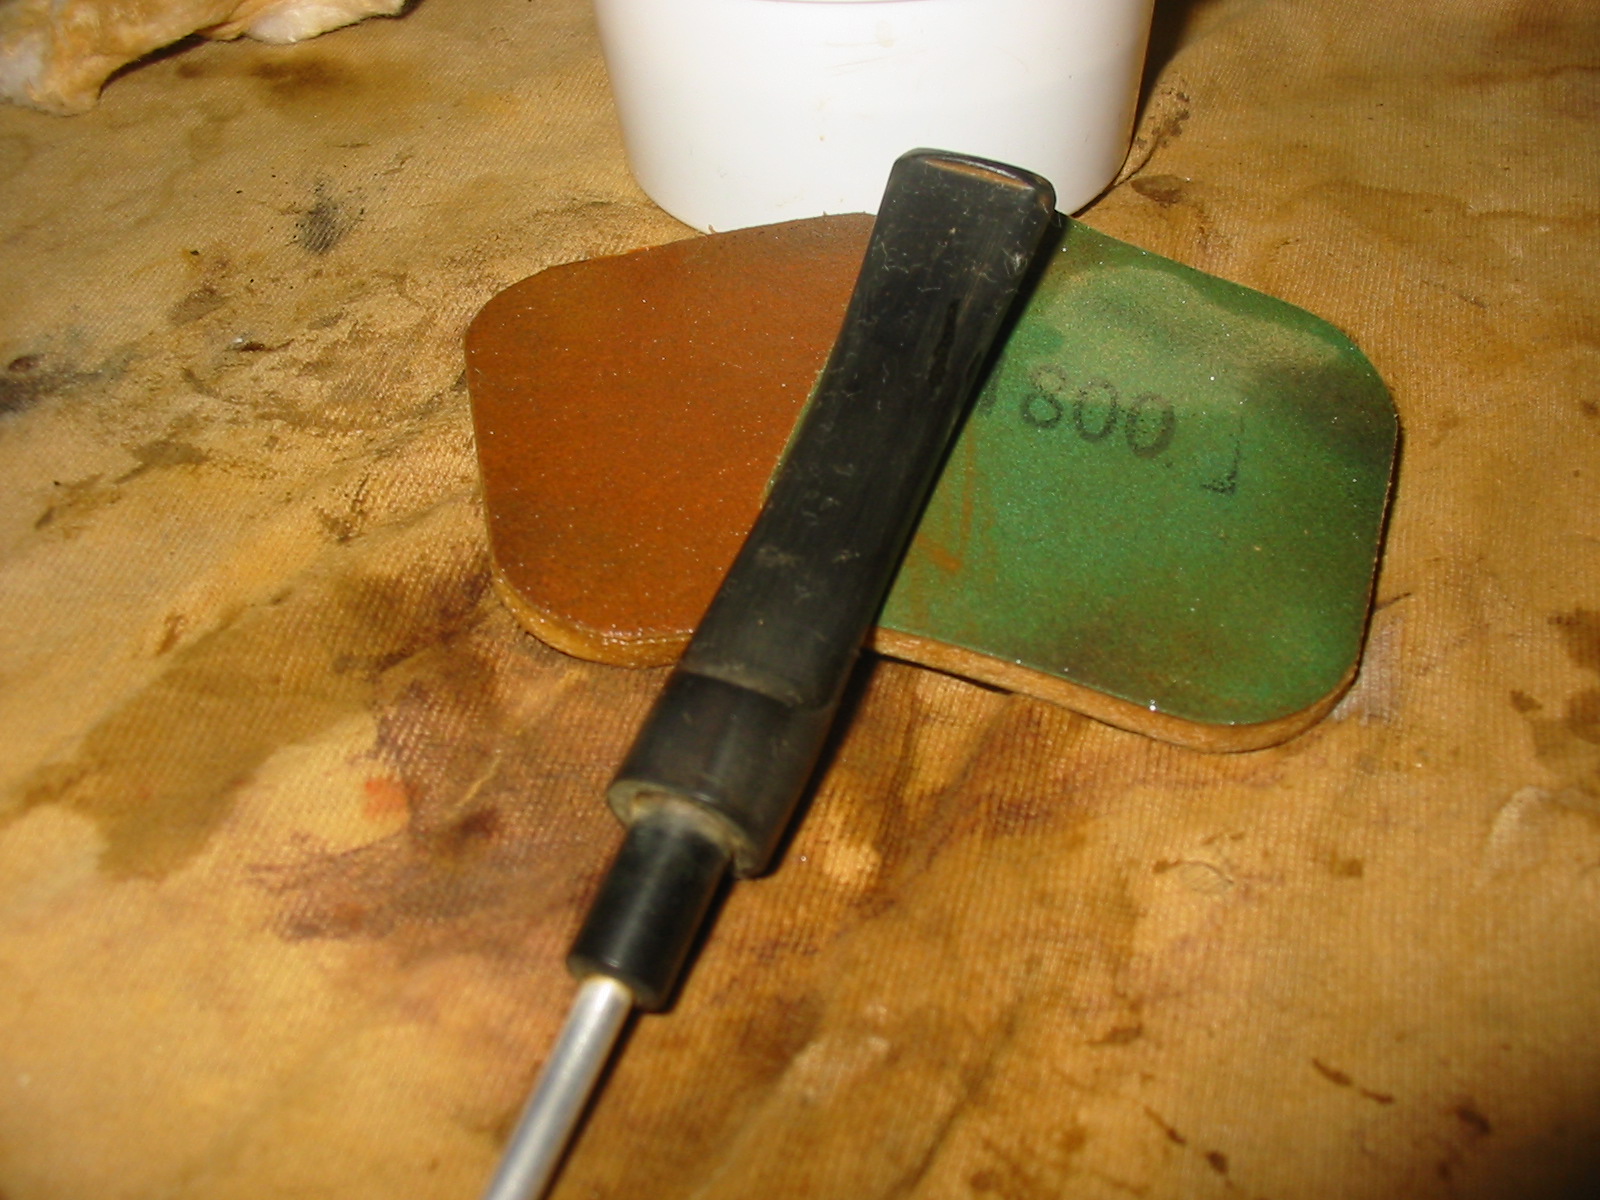
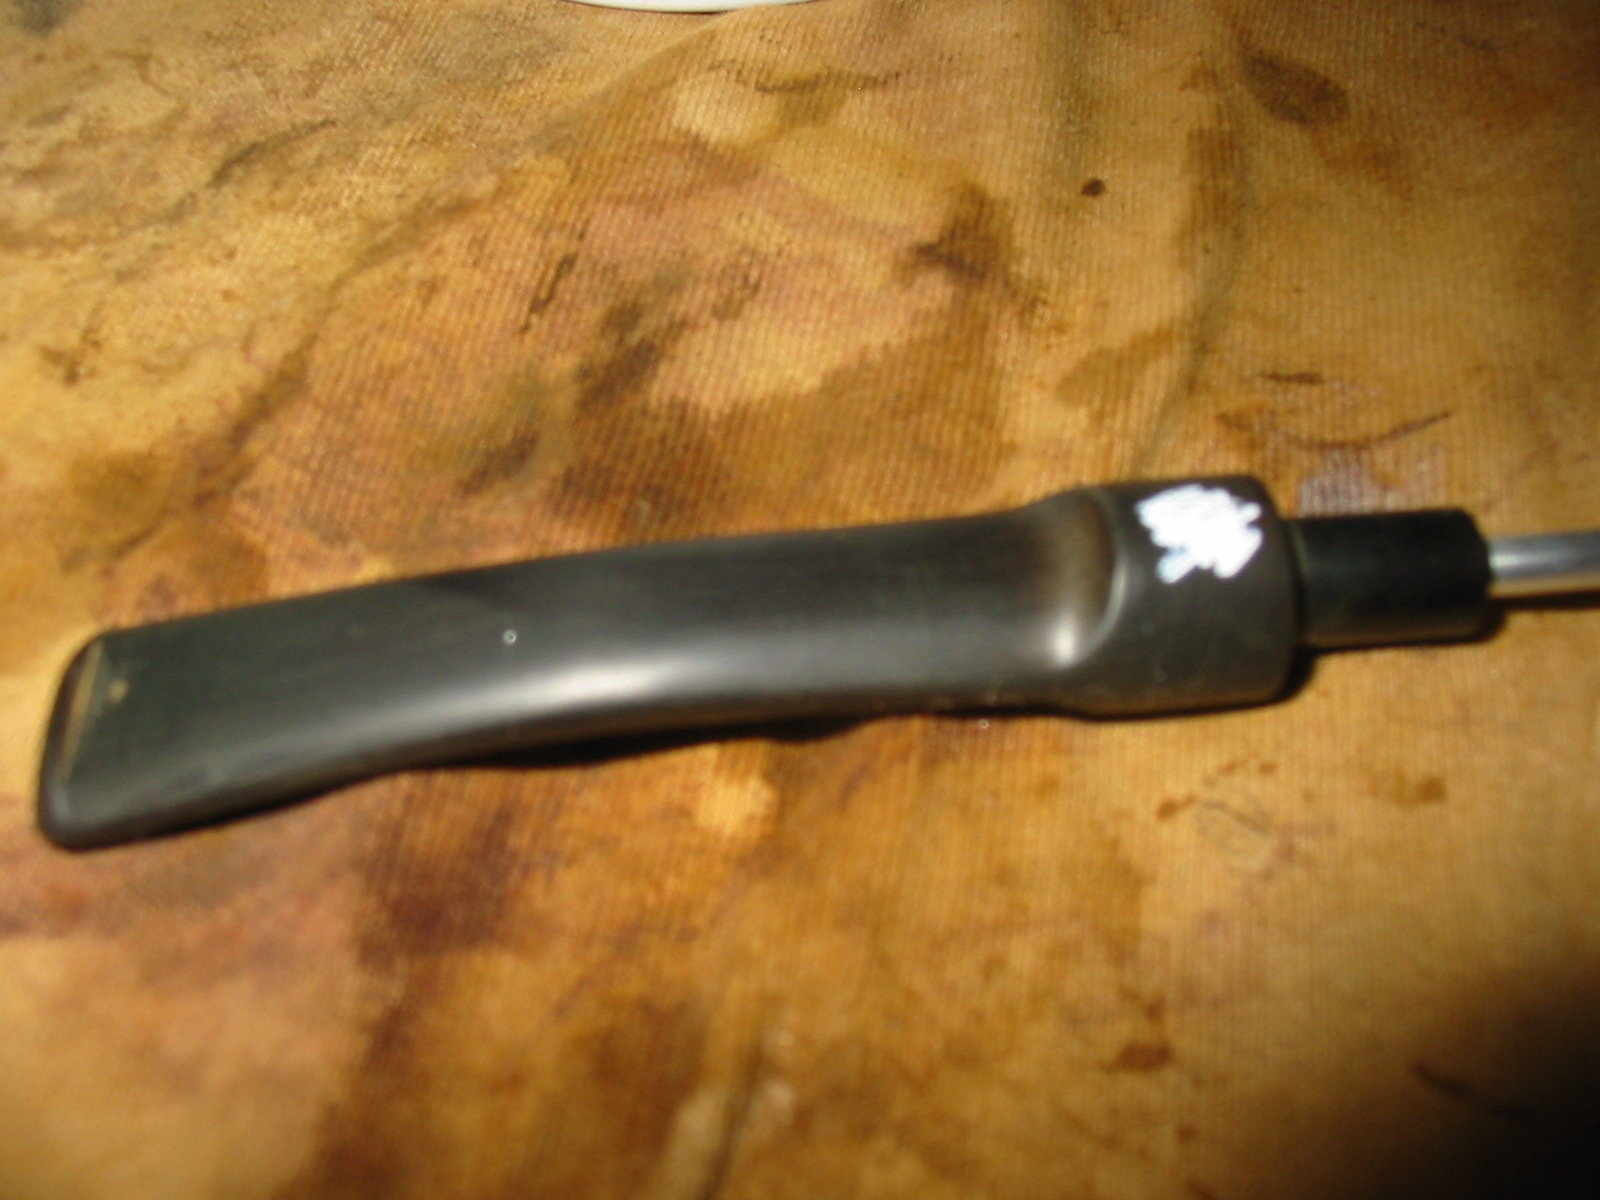
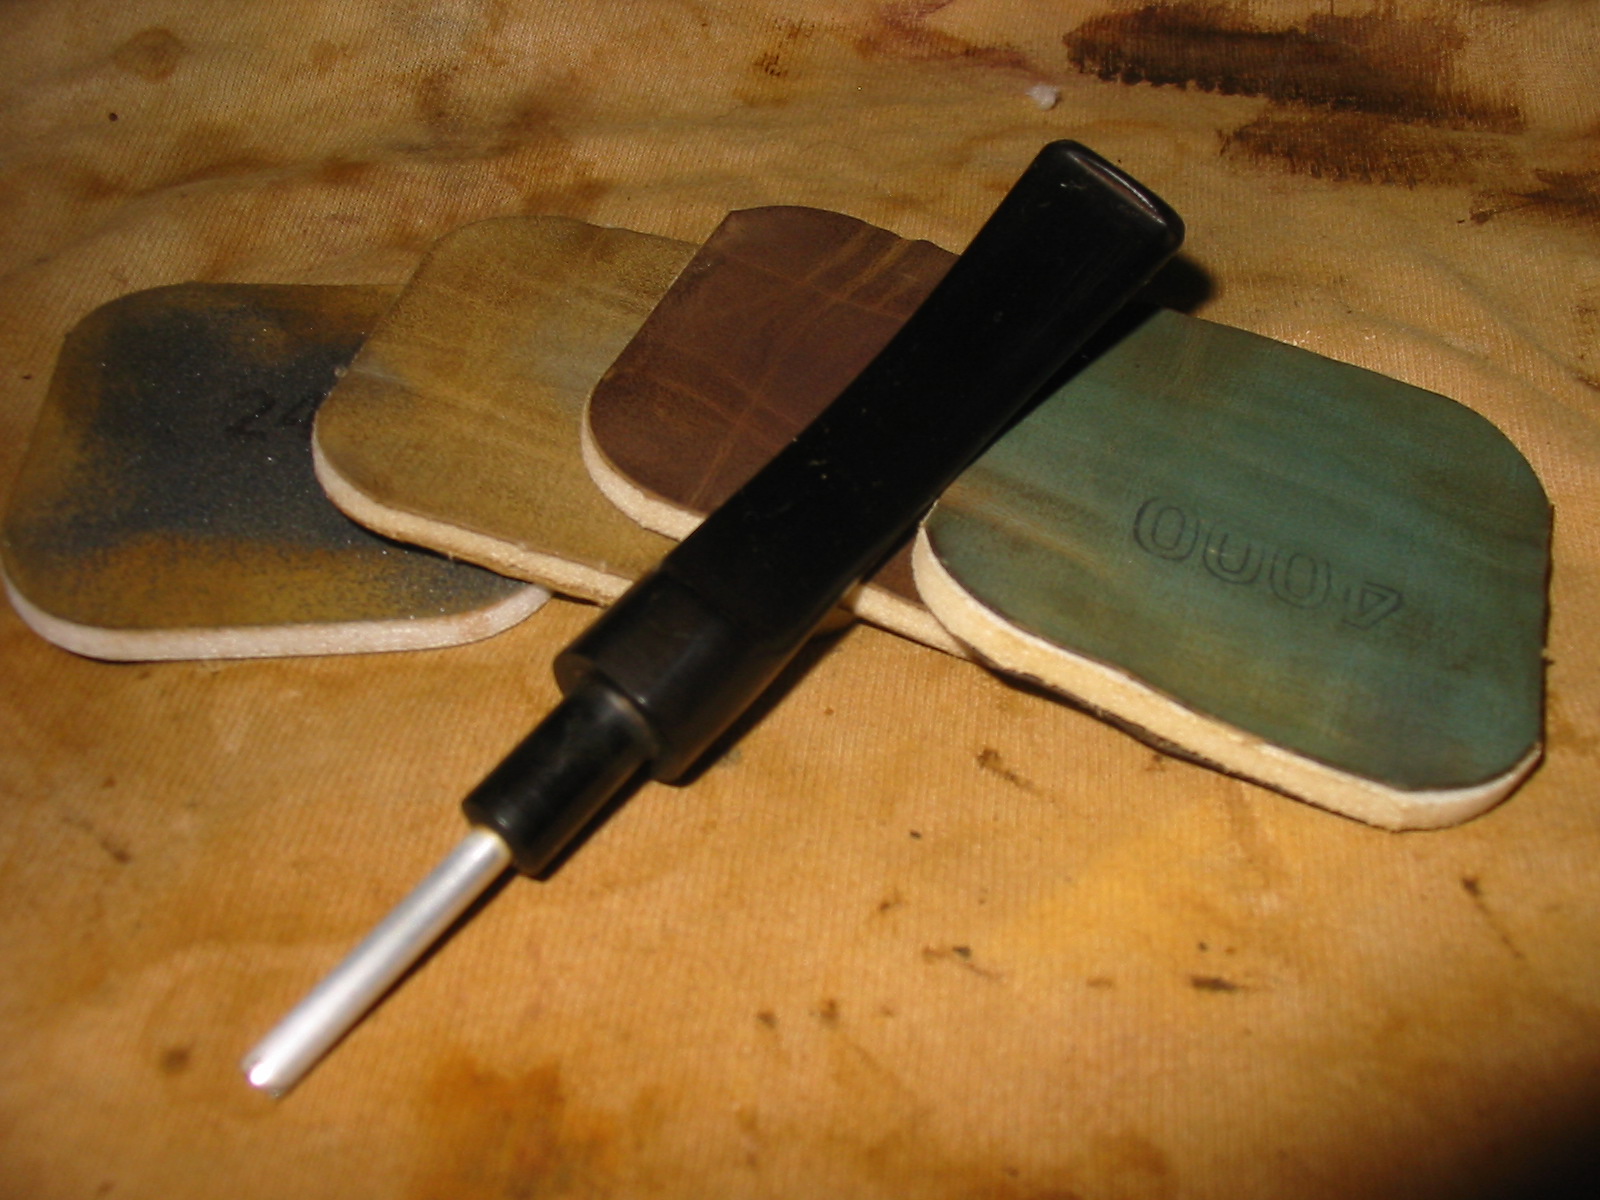
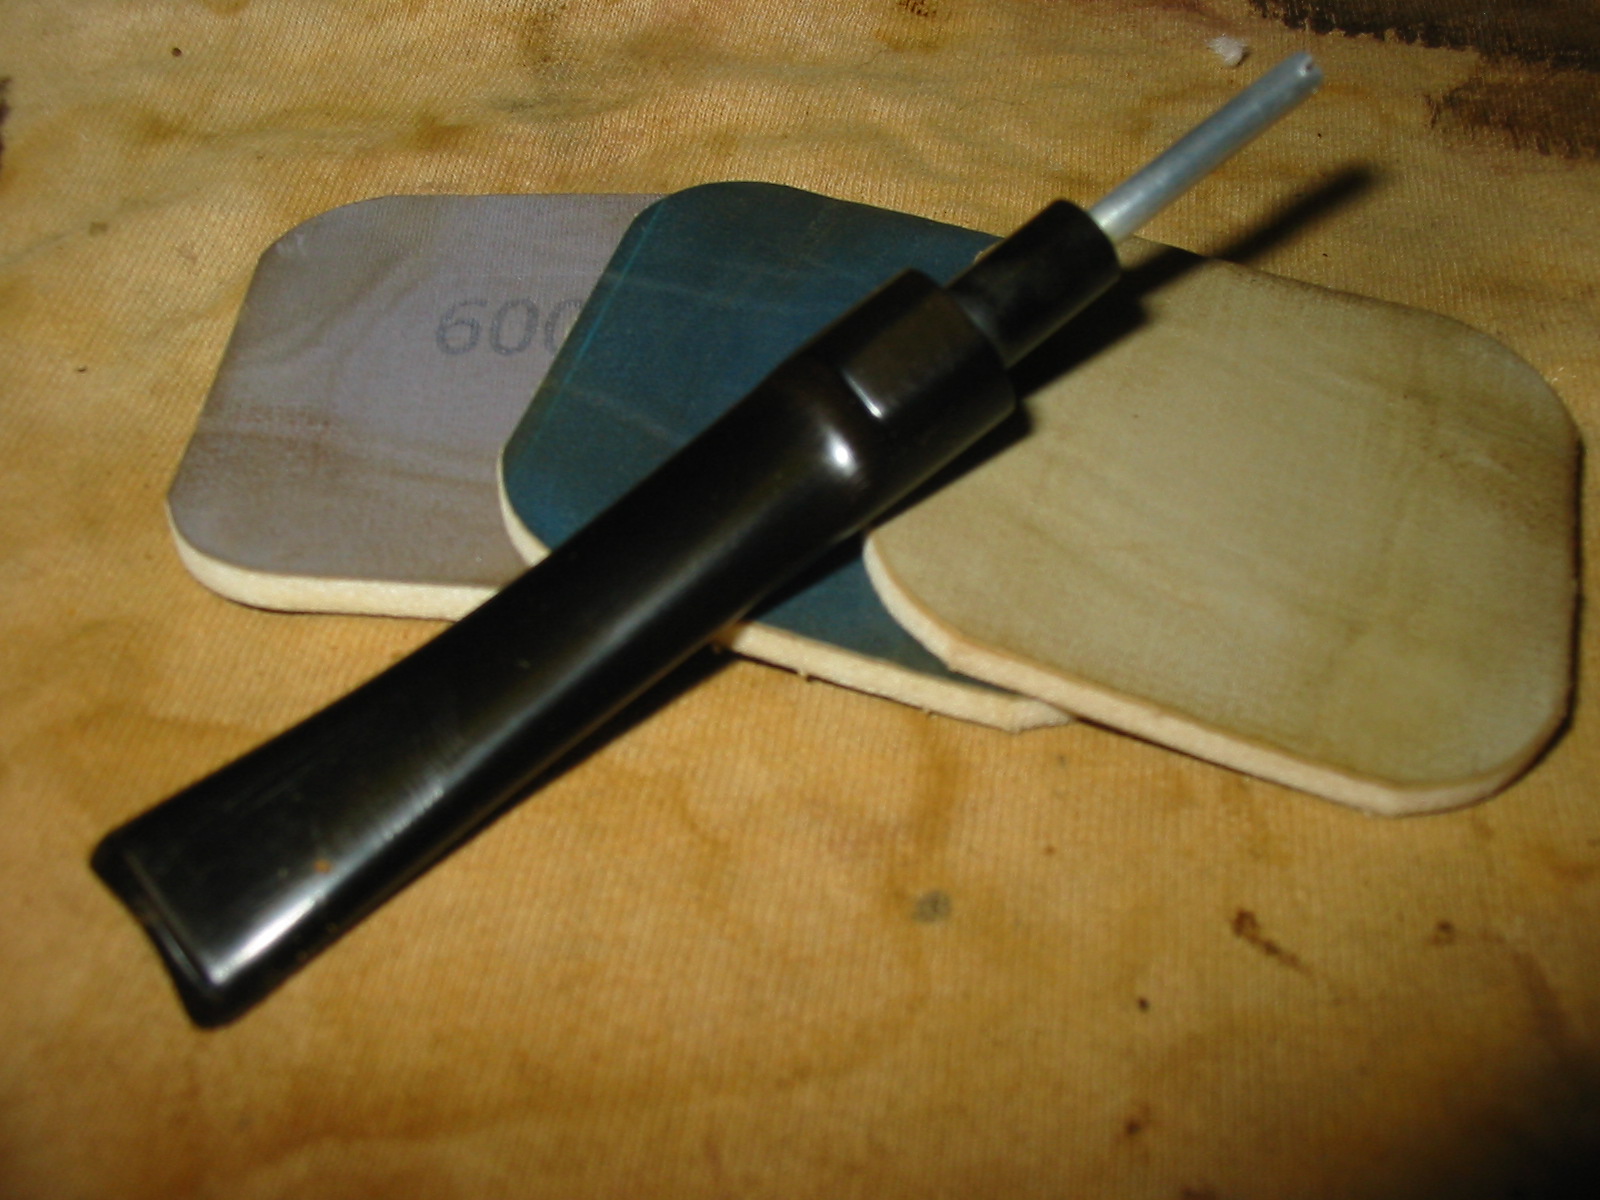
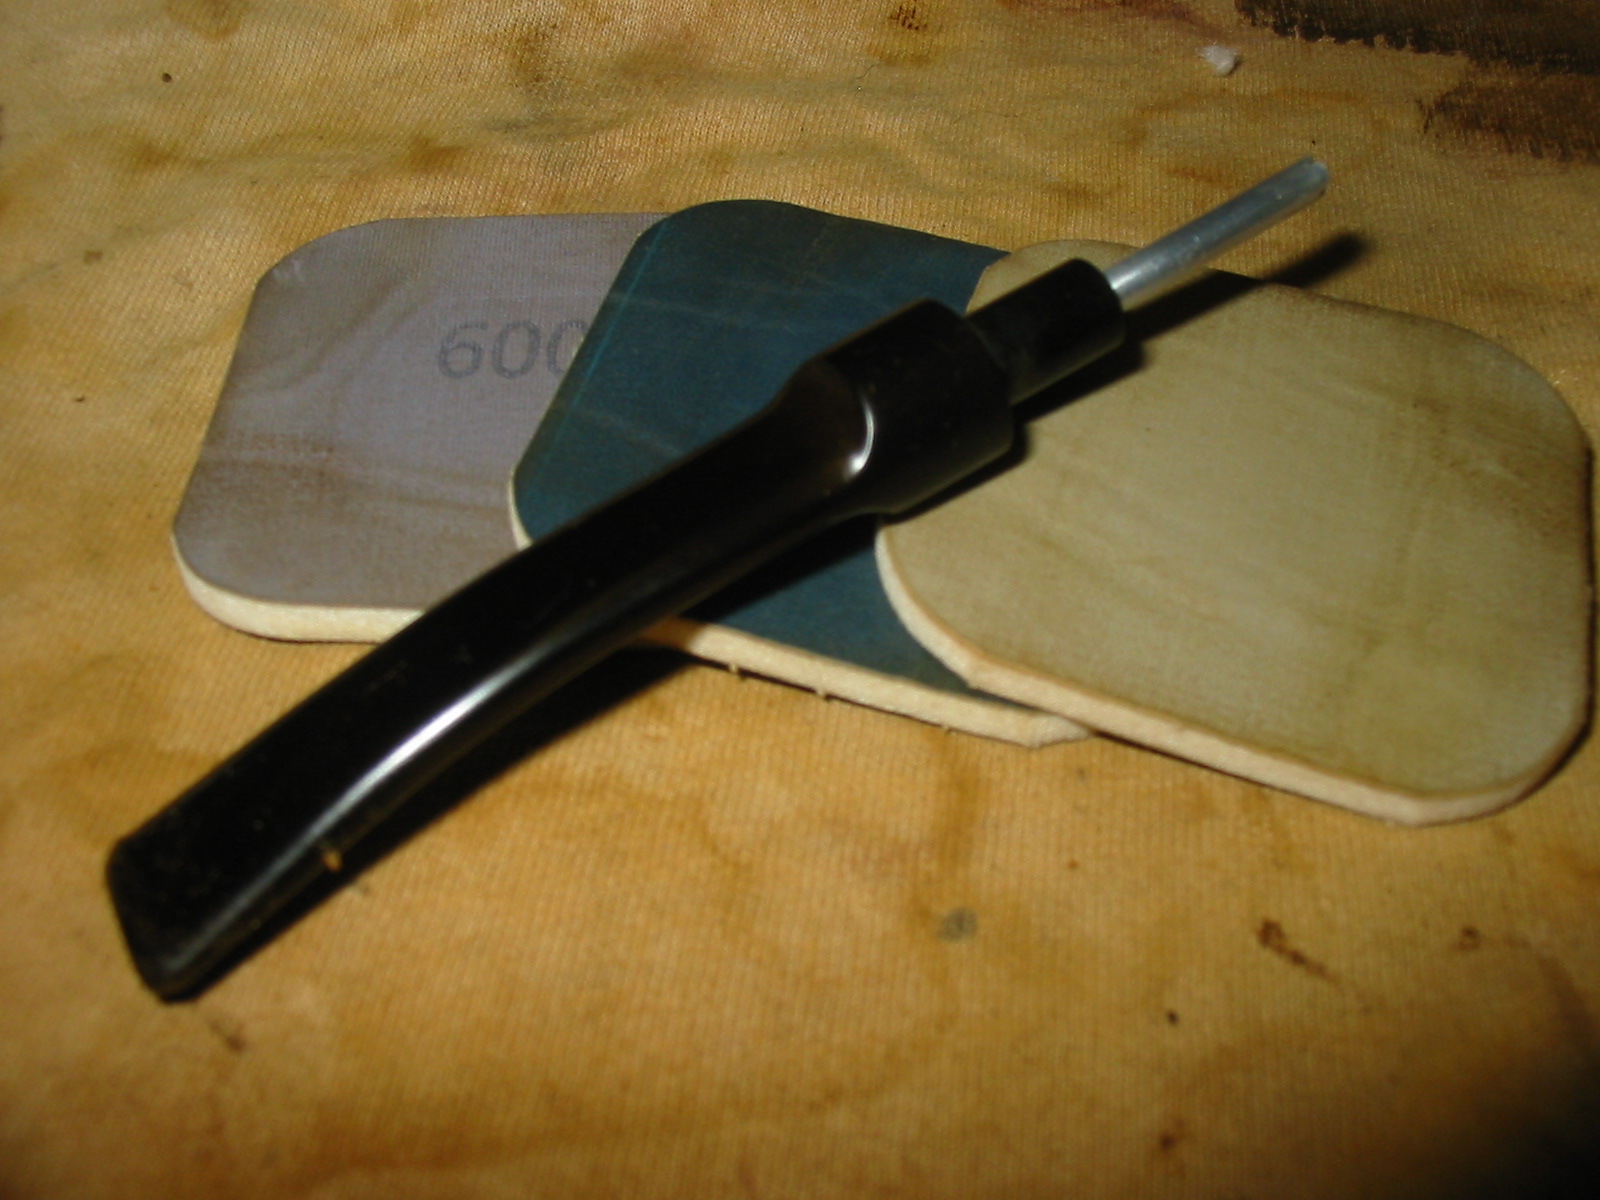
I polished the stems with plastic polish, making sure they were literally squeaky-clean before using micro mesh pads 1500-4000 grits, wet, to bring up a shine. The condition was very nice, to my eye, at this point, and the bowl needed a lot more attention so I set the stems aside to get to the bowl.

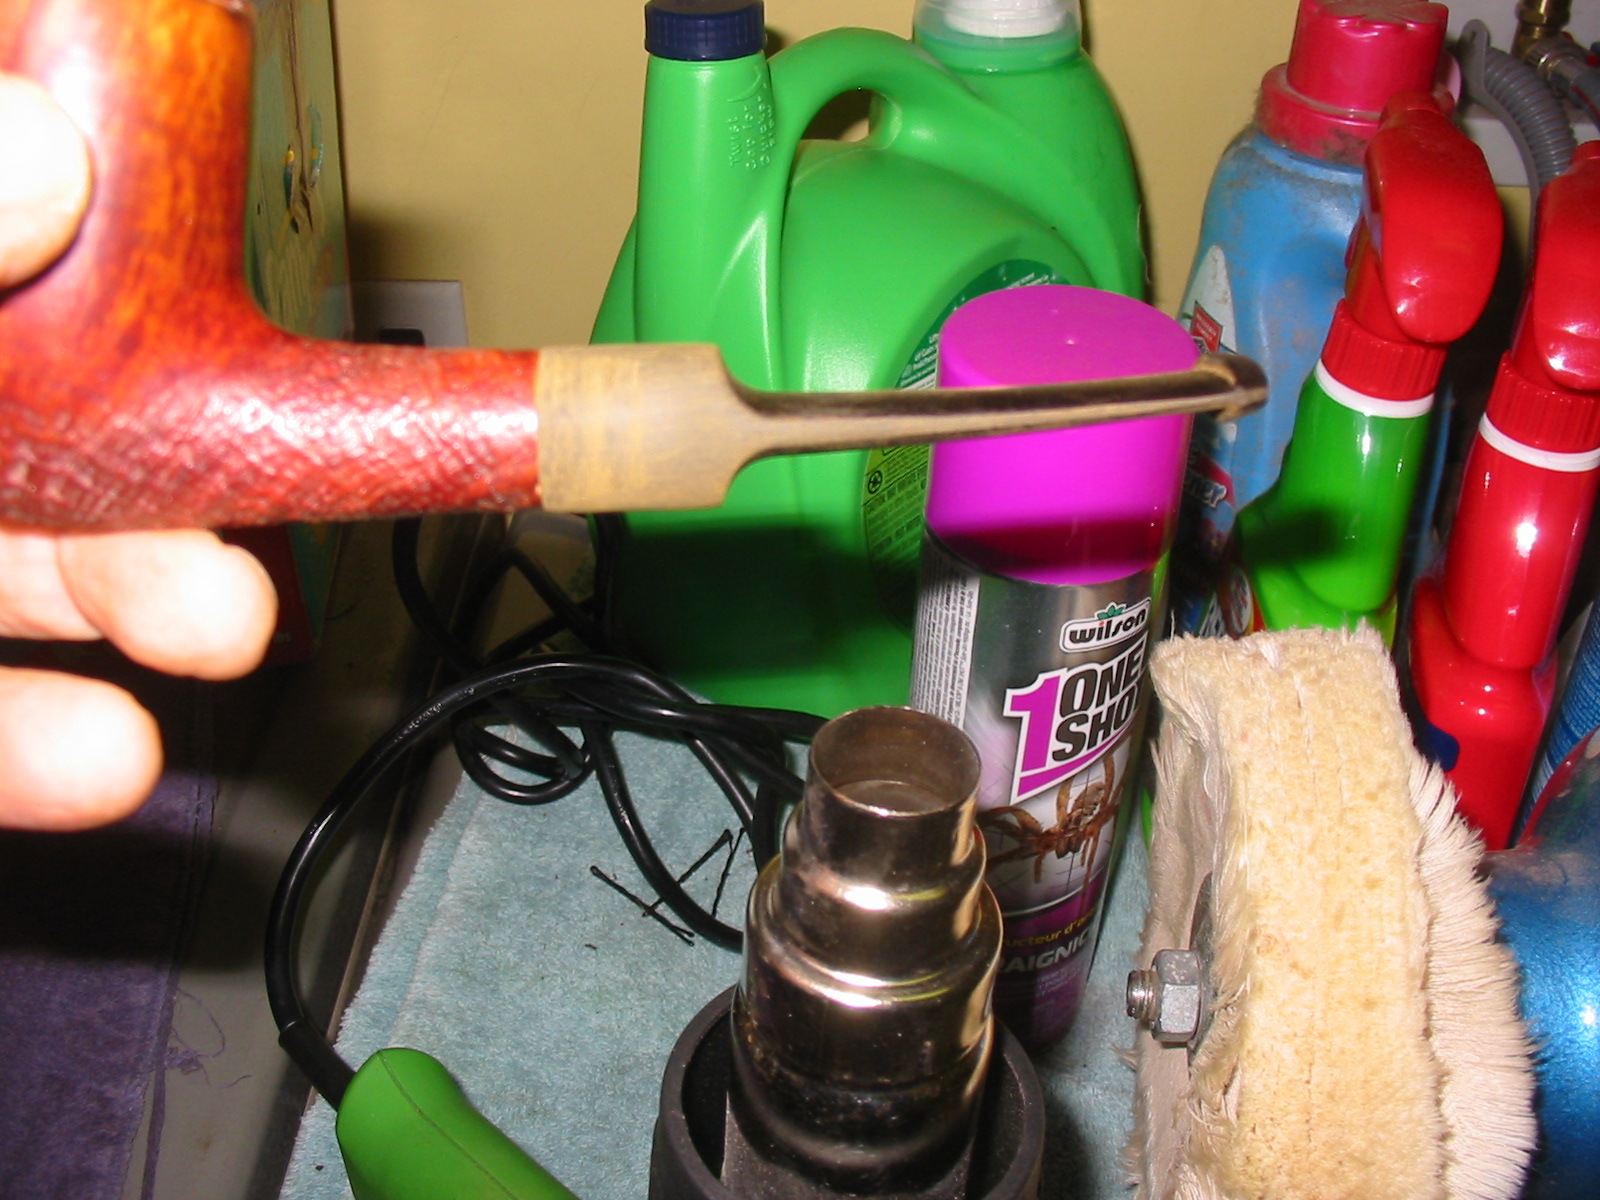
The shanks were very thick with build up even after the soaking. I used the Senior Reamer drill bit on the GBD but it was too large for the Edwards; I chose I smaller bit for it, the size of which escapes me. After many bristled and smooth pipe cleaners the shanks were finally gunk free and the stems seated well once again.

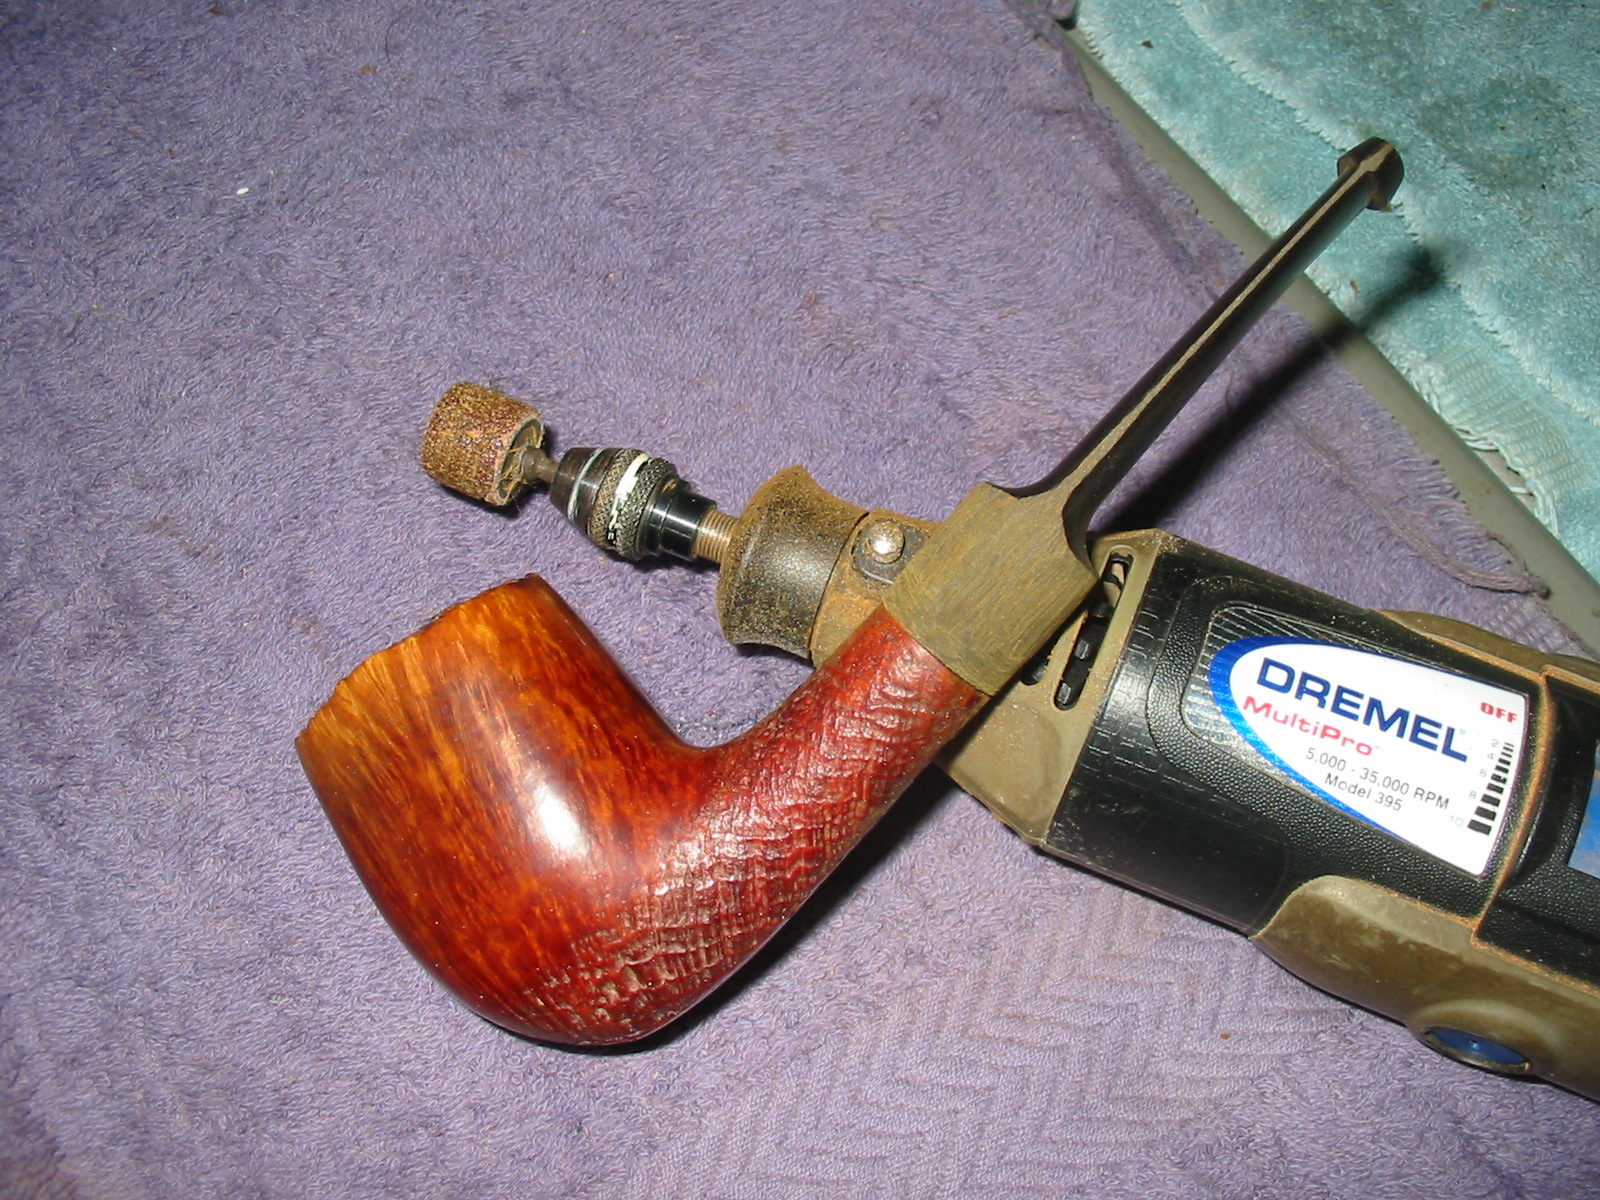
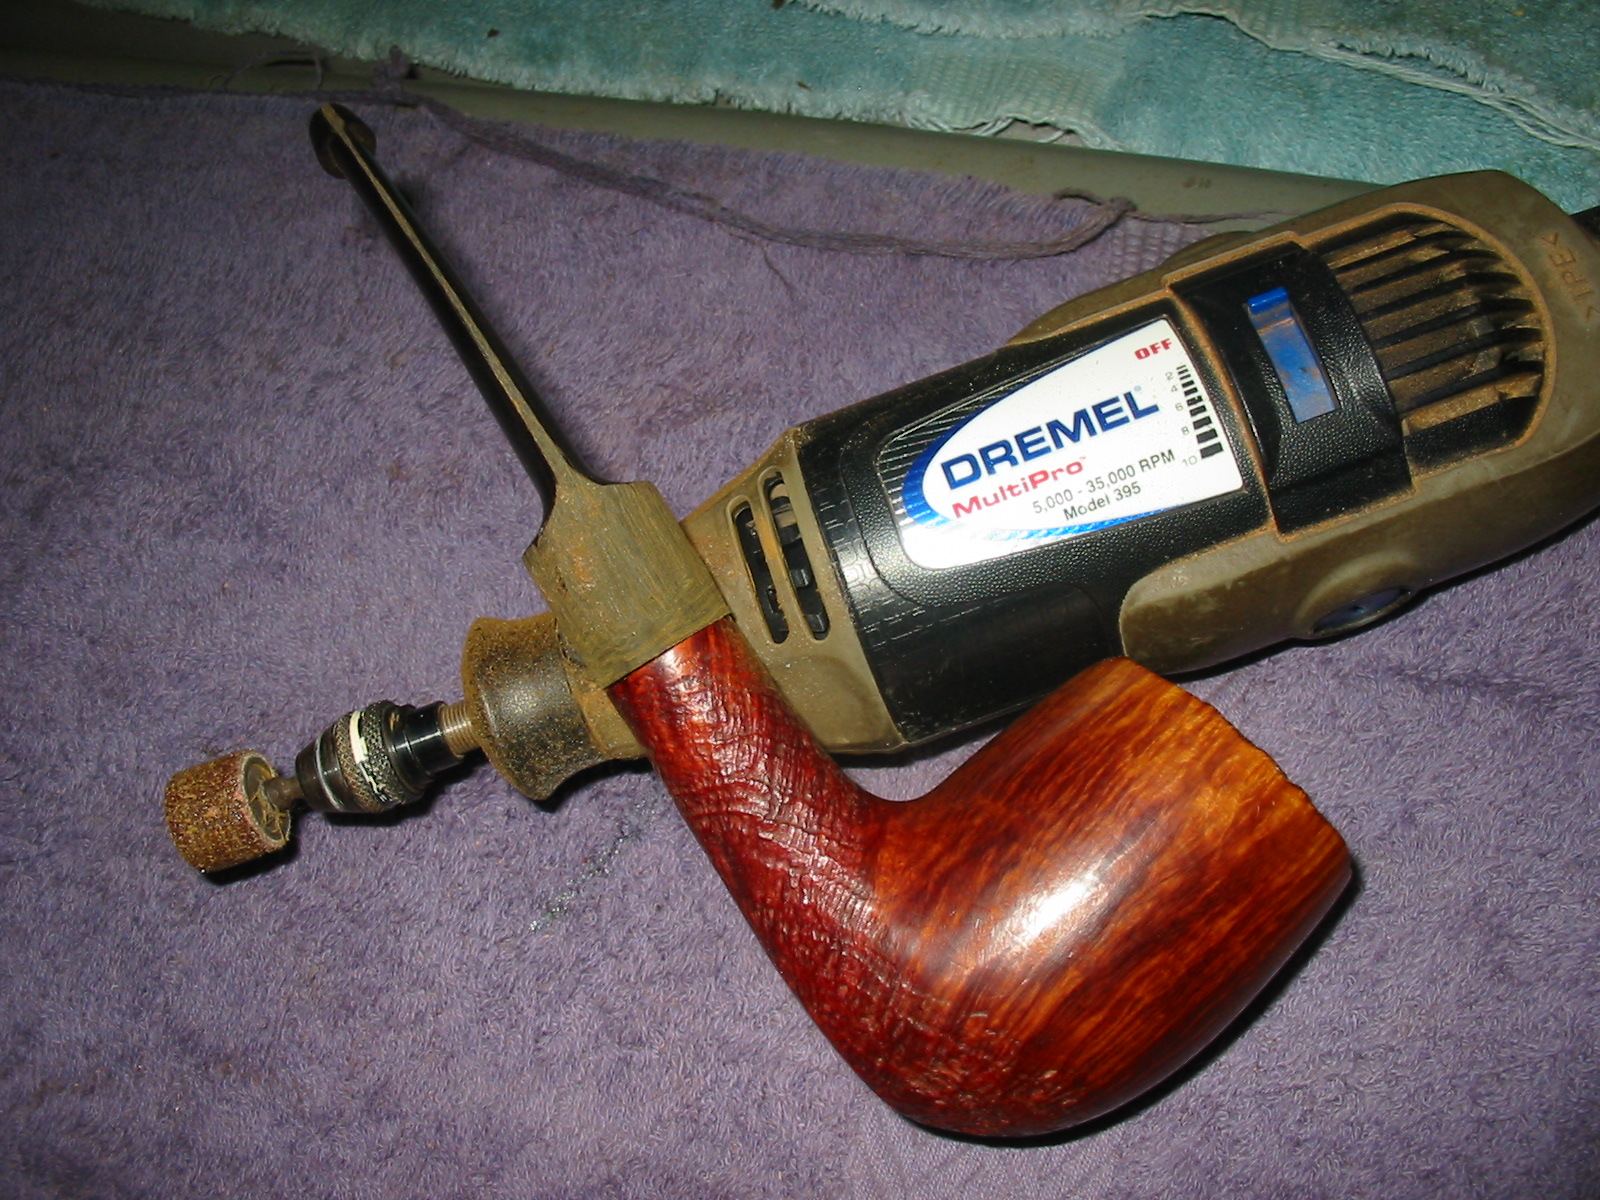
I sanded the bowl rim to reduce the damage of the charring as much as I could while trying to not alter the shape. This was a challenge and I left a little more char, which I tried to blend later with dye, than I’d normally like but I really wanted to keep as much briar as I could for the shape and for insulation since the walls aren’t very thick to start with. I also lightly sanded the rest of the stummel, while avoiding the already faint nomenclature, to remove the last of the finish and some scratches with 320/400 grit wet/dry paper.

20131014-153502.jpg

20131014-153514.jpg

20131014-153525.jpg

20131014-153539.jpg

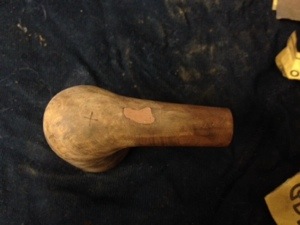
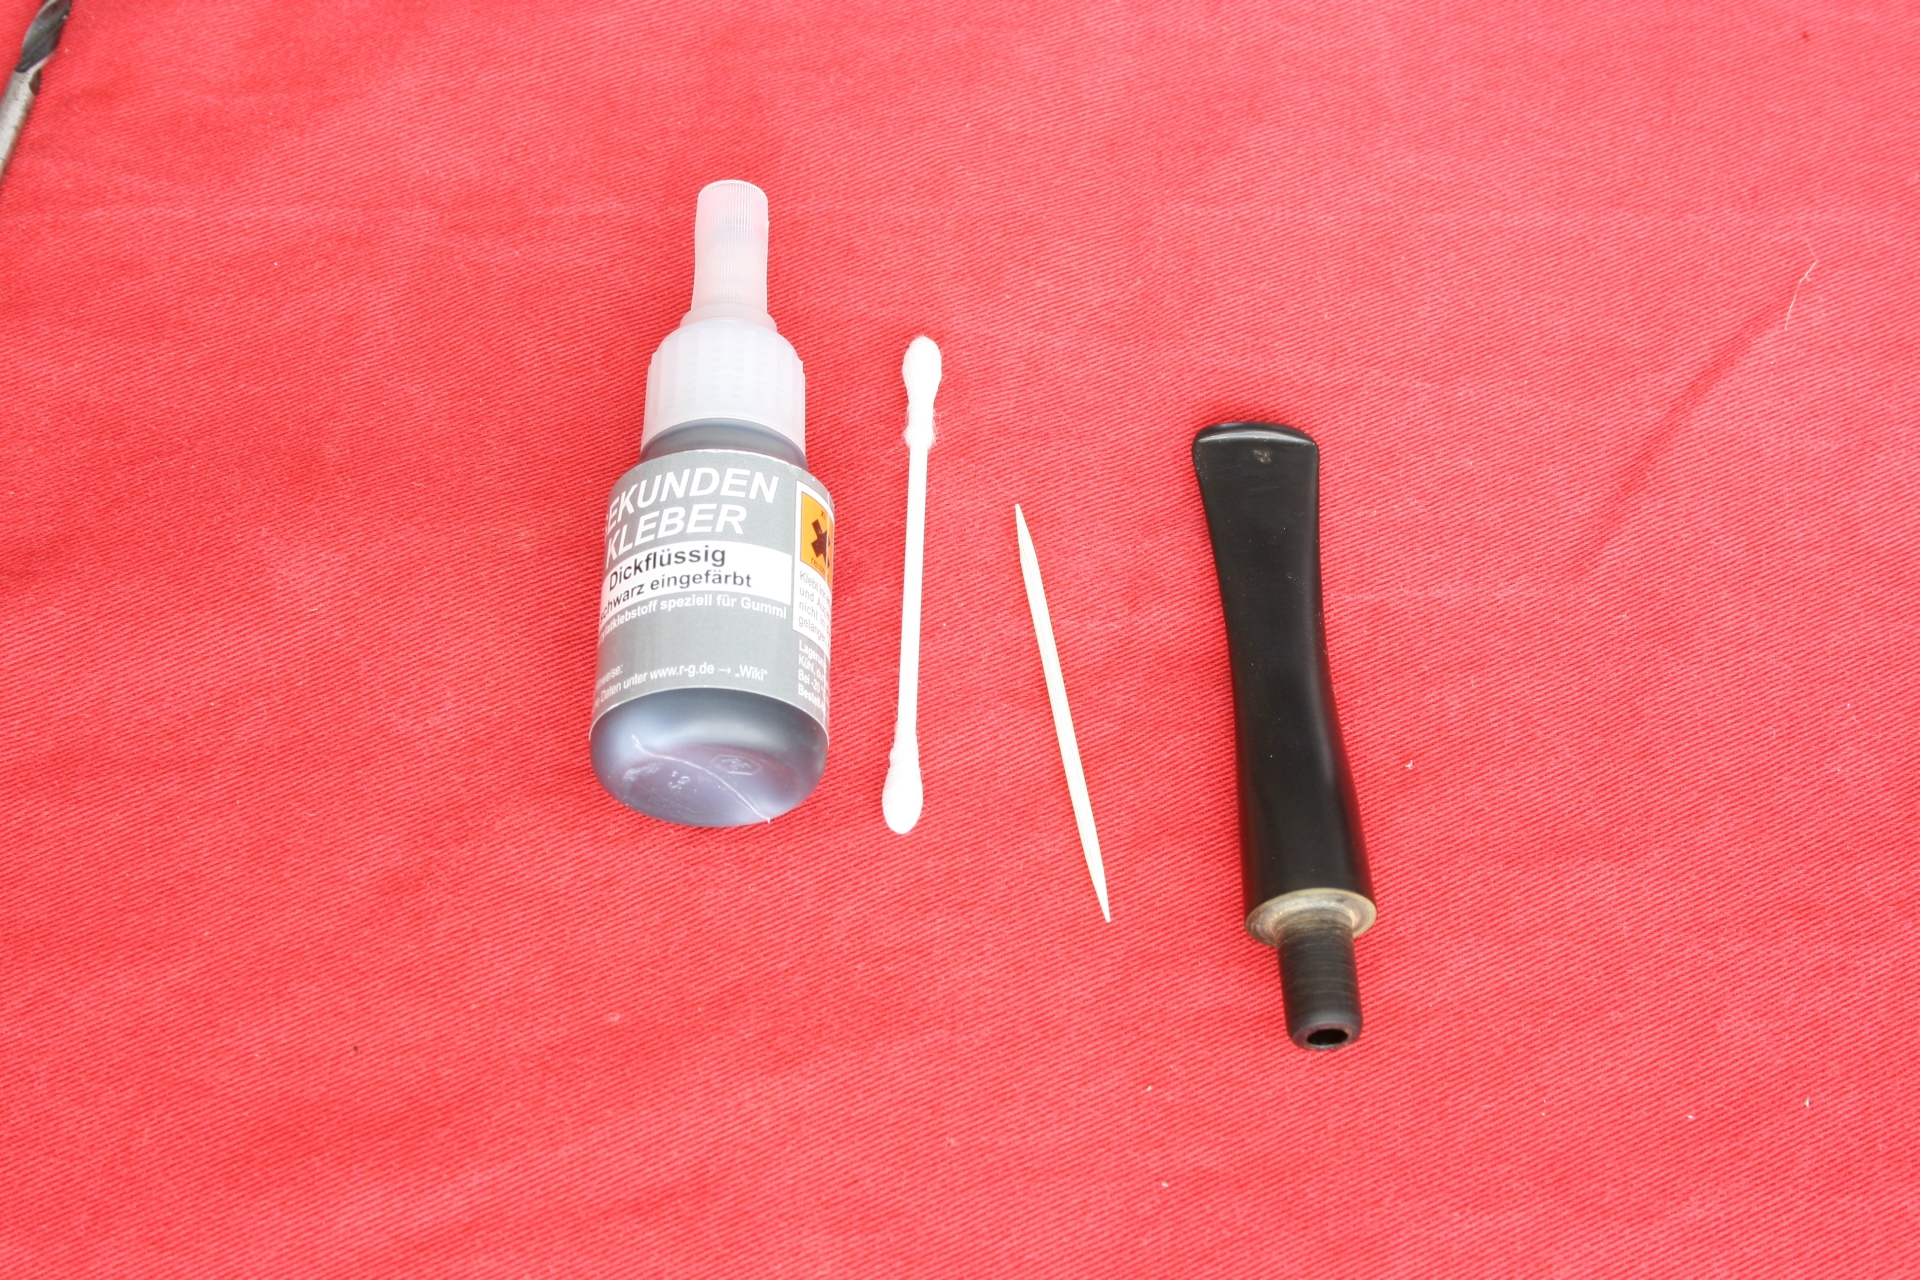
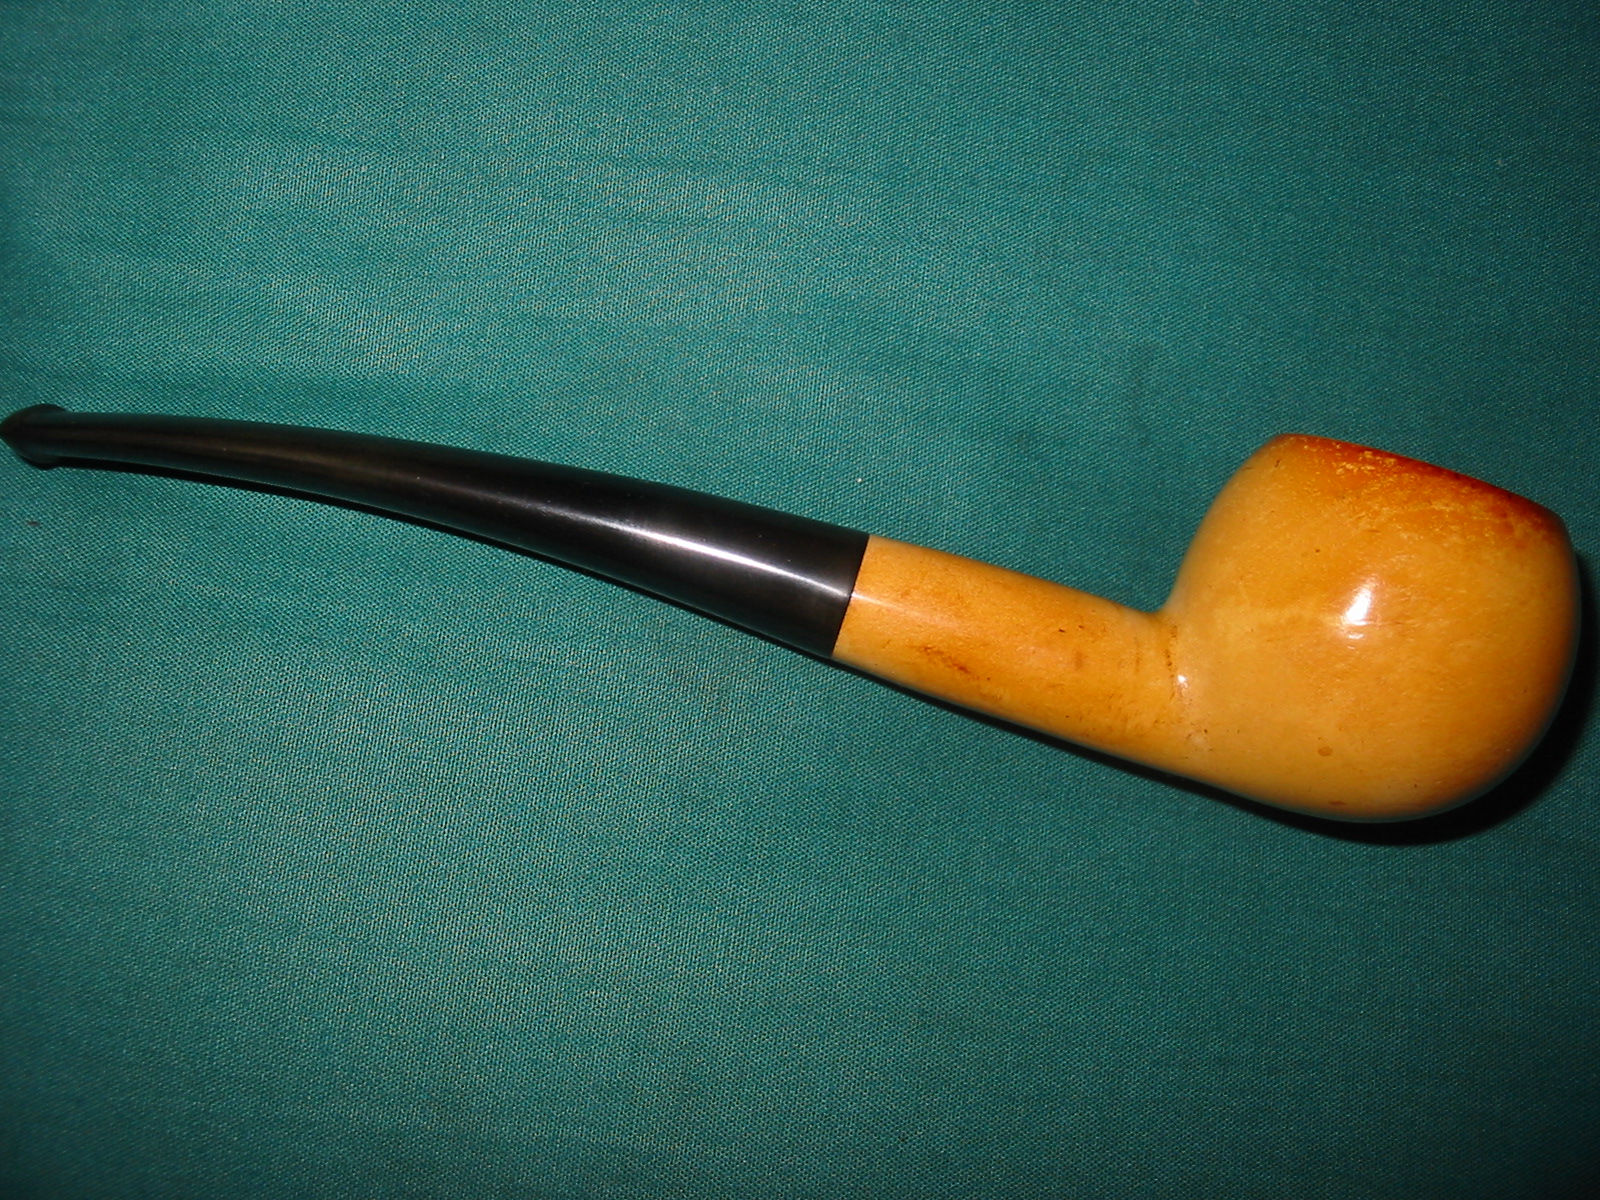
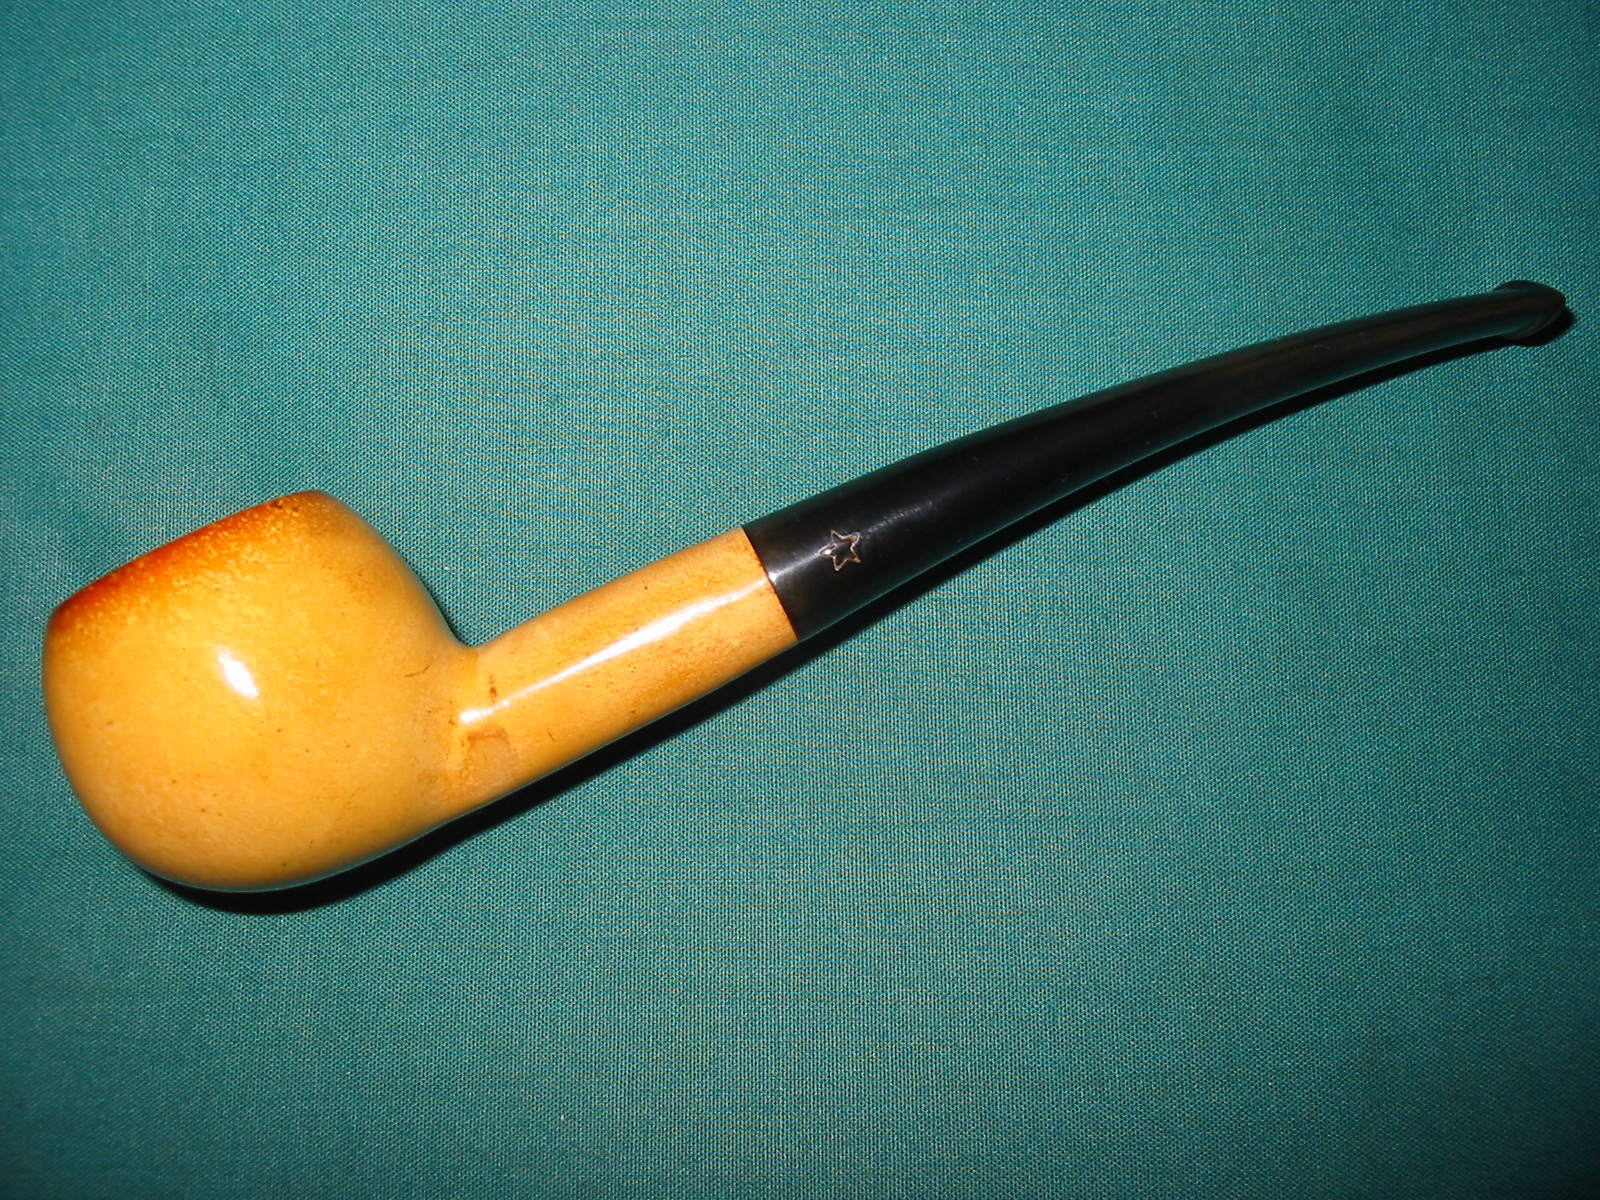
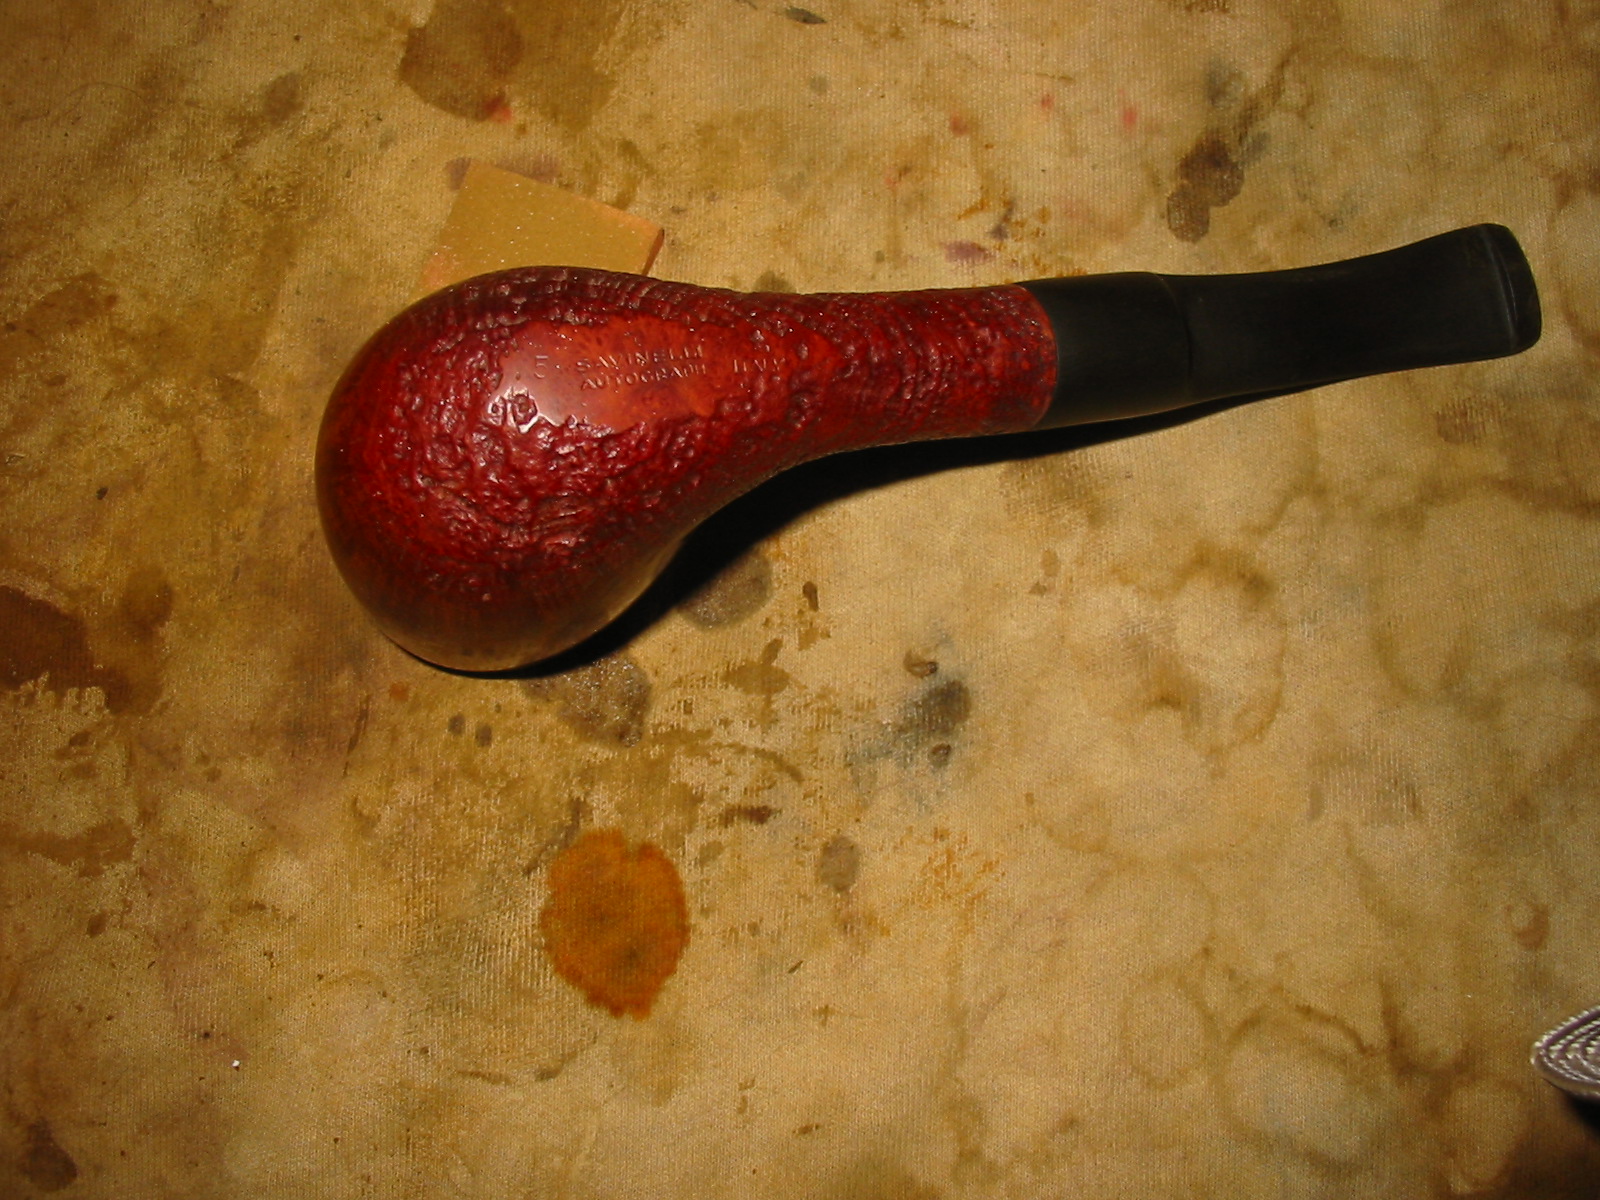
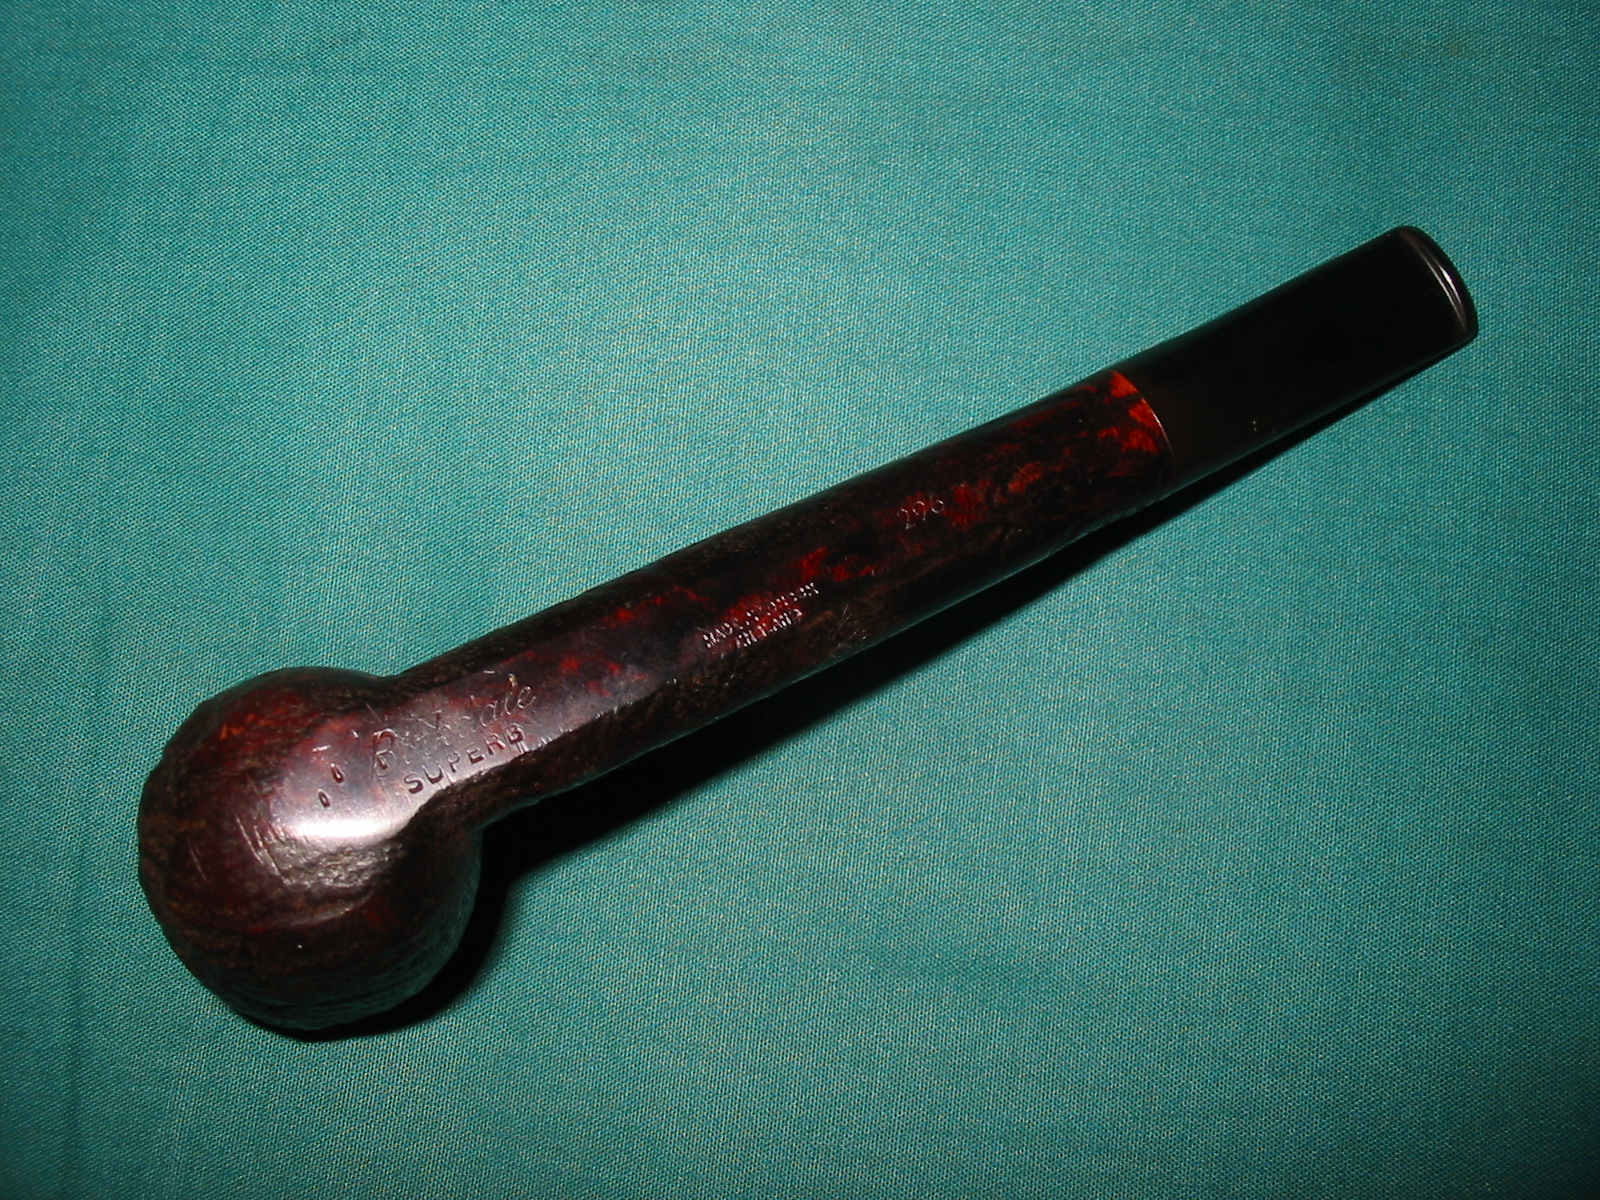
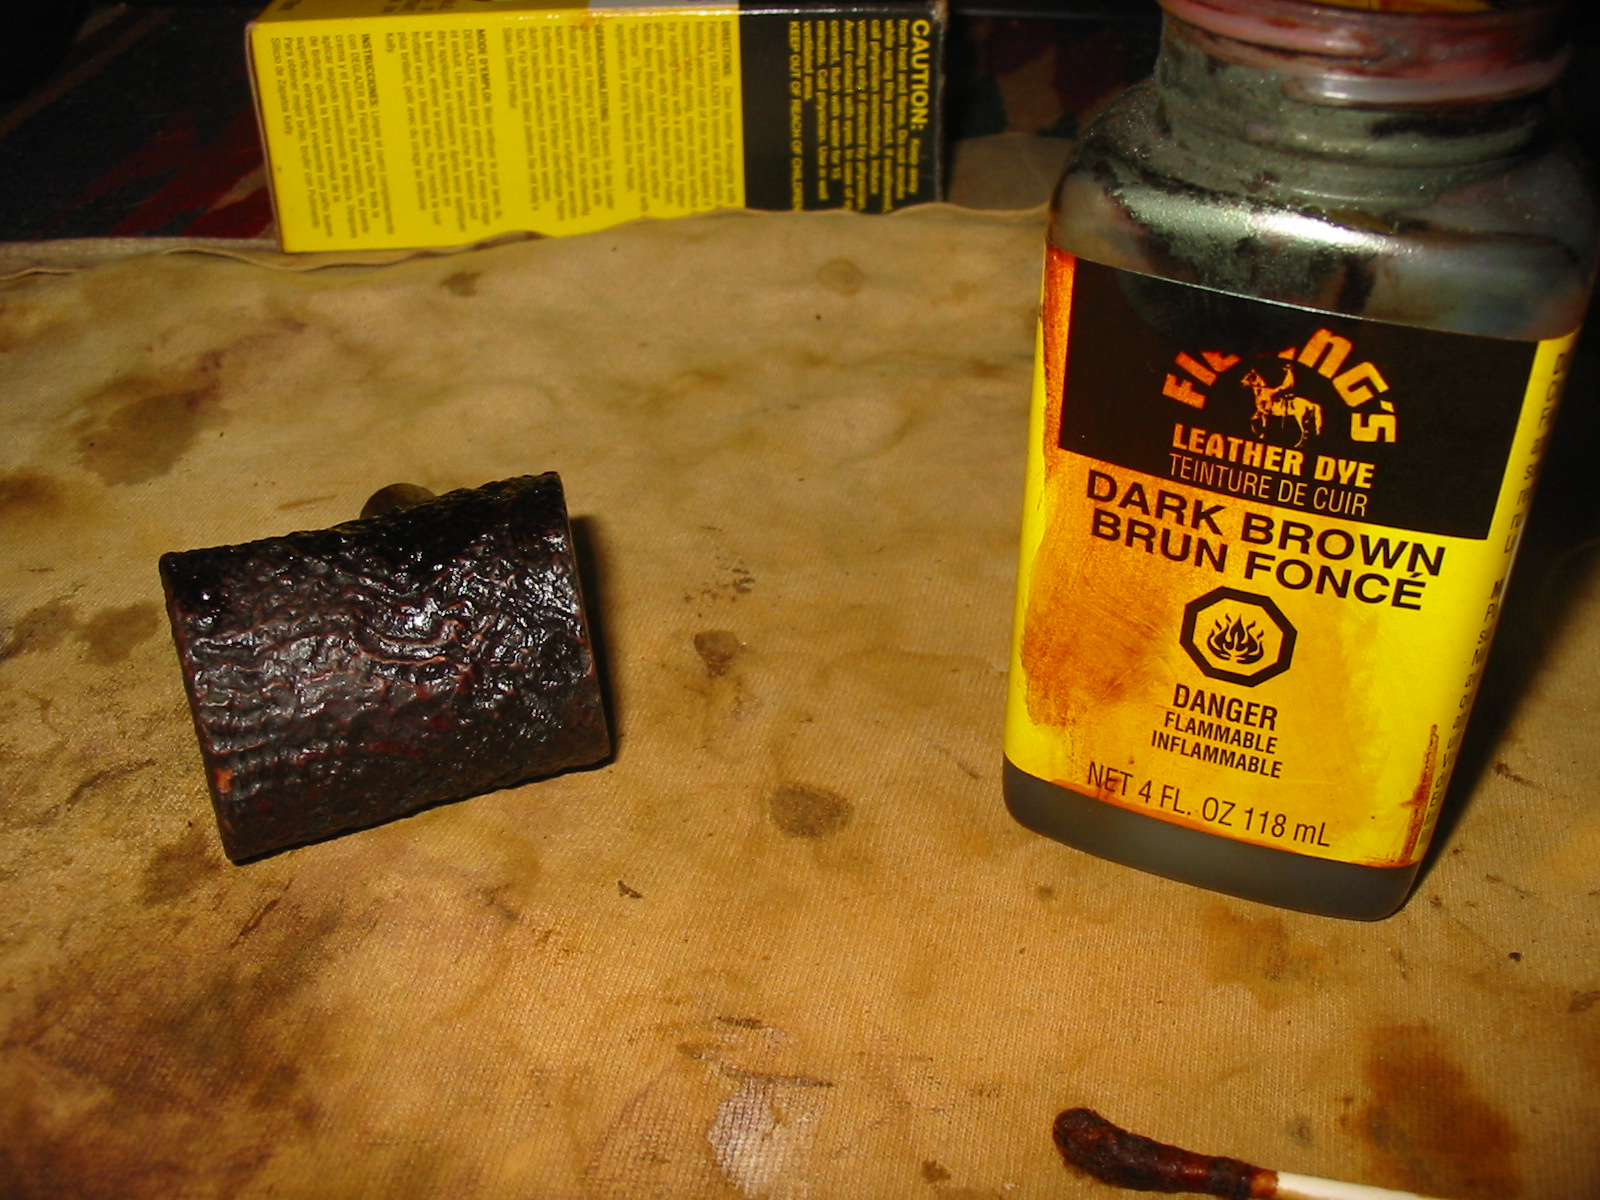
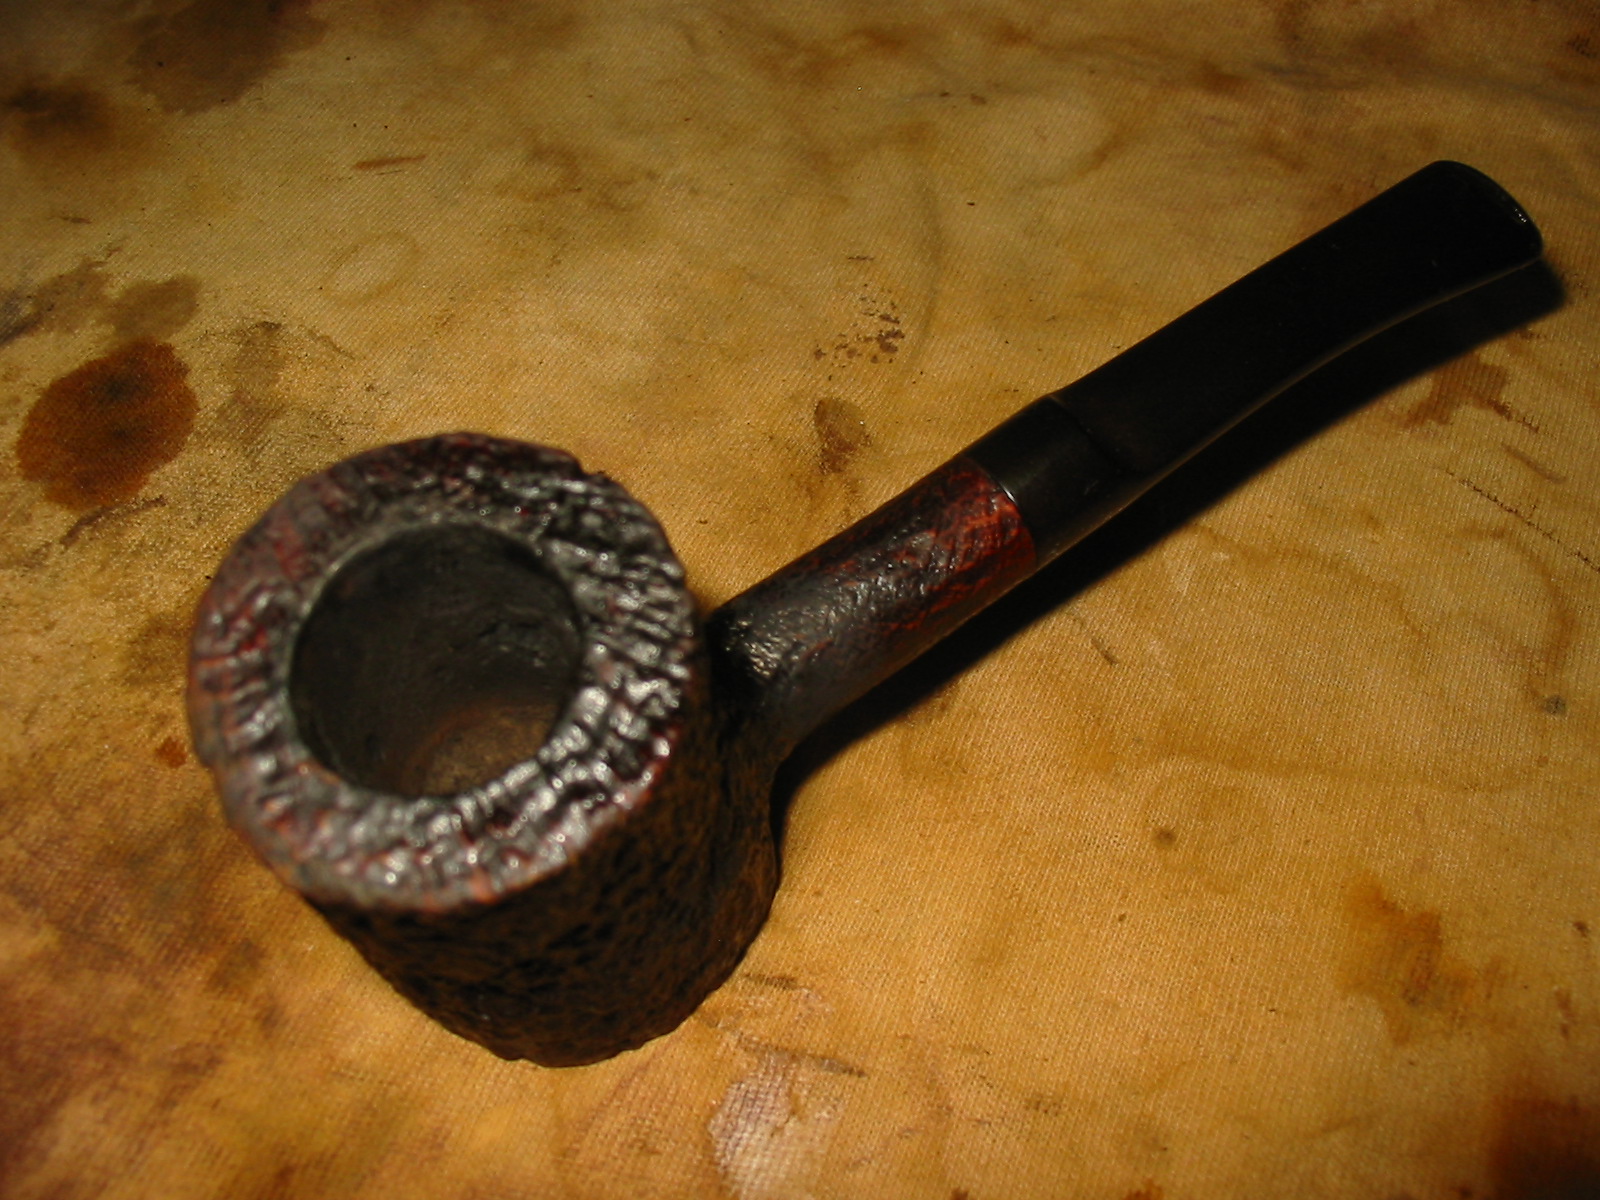
To start, I put a little stain on the rim of the bowl using some furniture touch up markers I found at our local Walmart: three markers for $4 I think. I wanted to get a base coat started before I went forward. Next I applied a coat of mahogany leather dye to the entire pipe; it is dark but not as red as some of the other color choices Fiebings makes and I thought it might help hide some of the defects and being up the contrast at the same time. I didn’t flame this in, by the way, since I didn’t want to change the entire color of the pipe. After it had set for about 10 minutes I sanded it back off with 400 grit paper to where I liked it.

20131014-160104.jpg

20131014-160115.jpg

20131014-160129.jpg

20131014-160150.jpg

20131014-160205.jpg

20131014-160219.jpg

20131014-160232.jpg

20131014-160244.jpg

20131014-160257.jpg

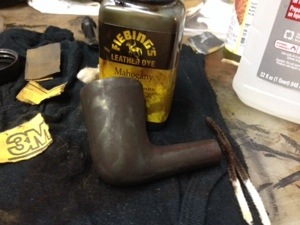
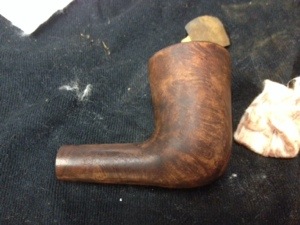
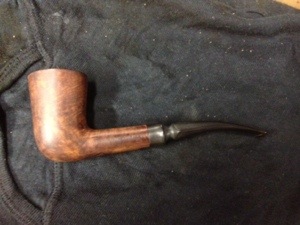
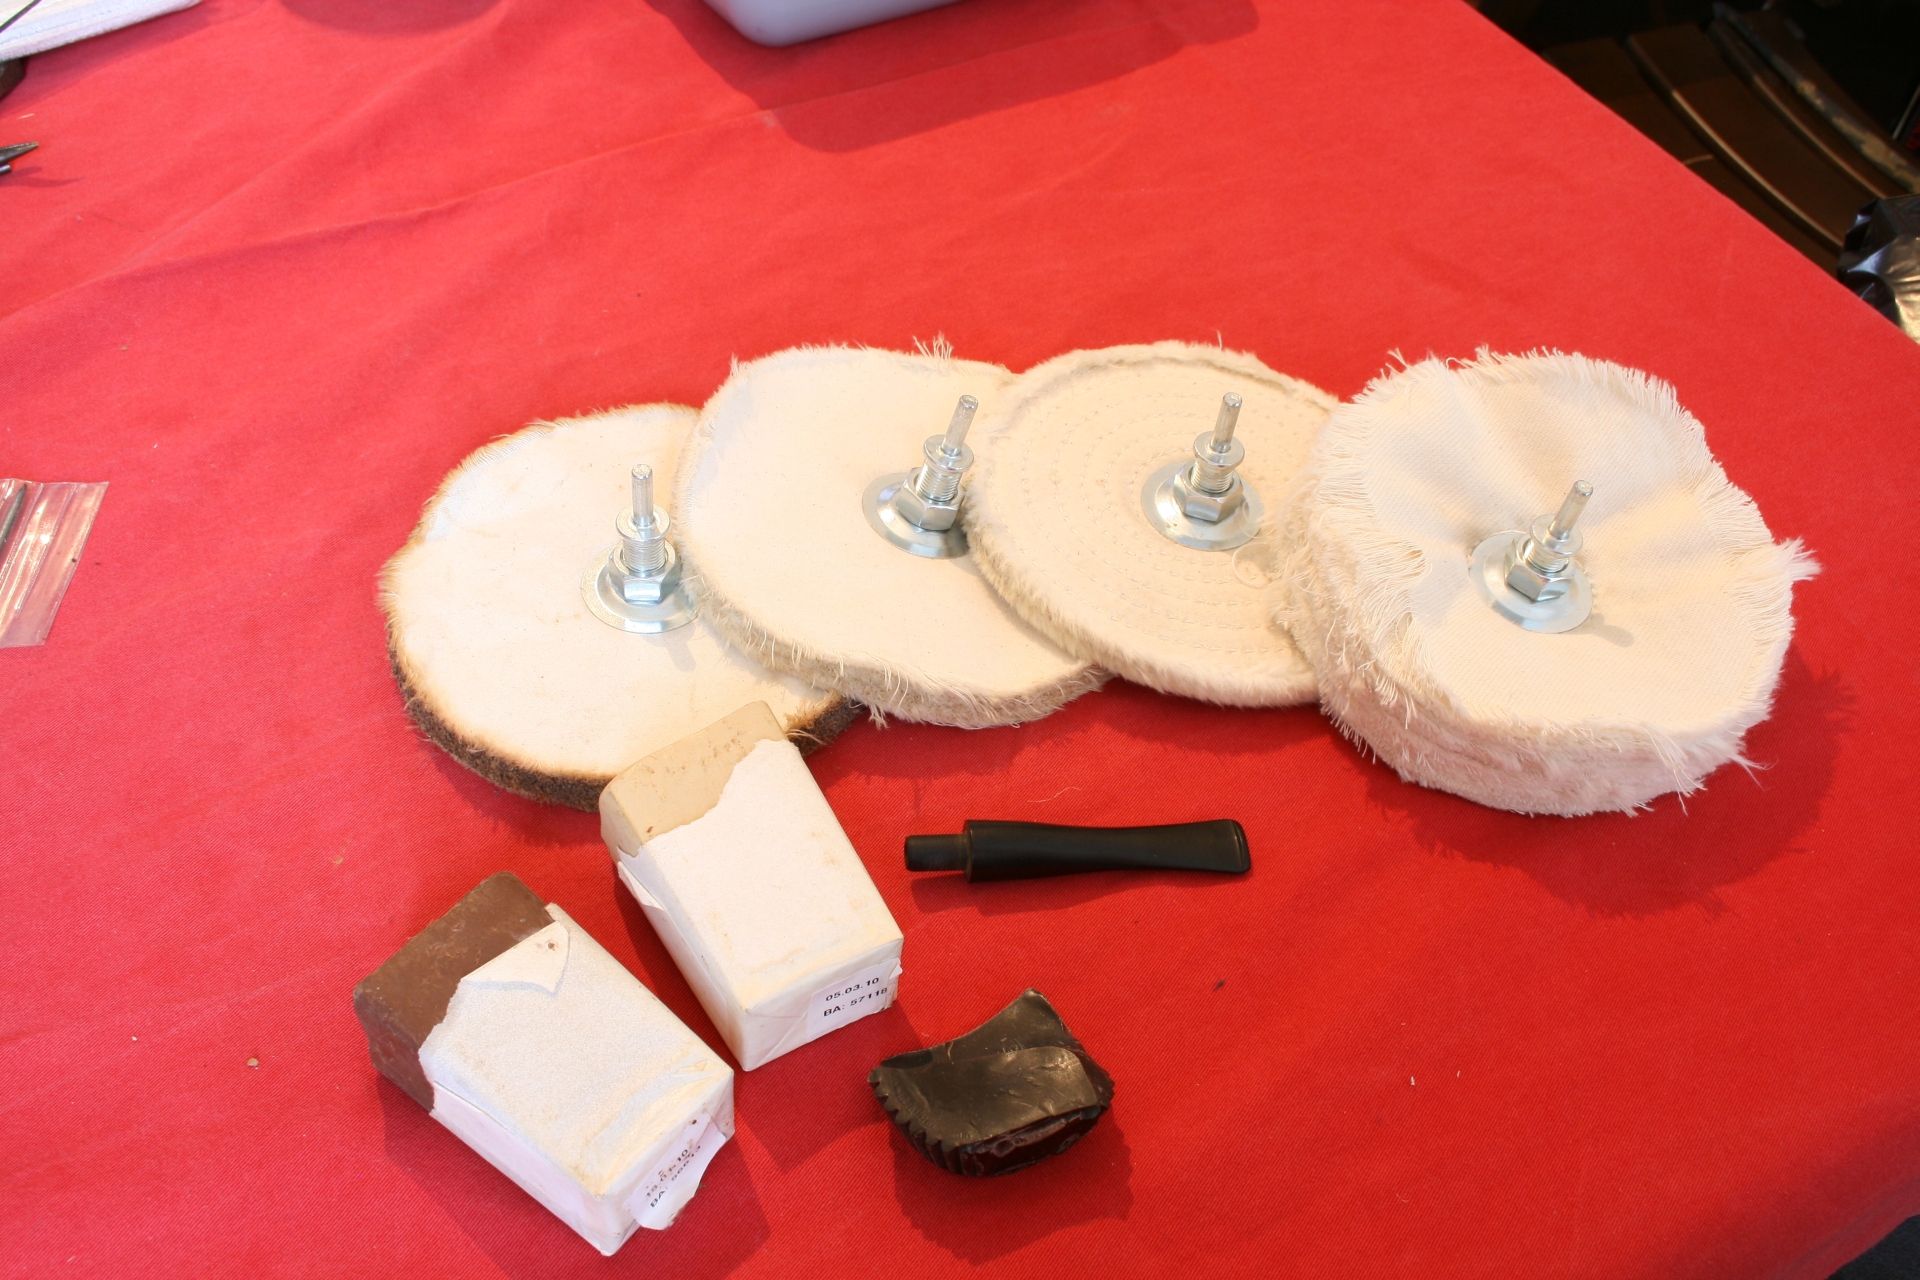
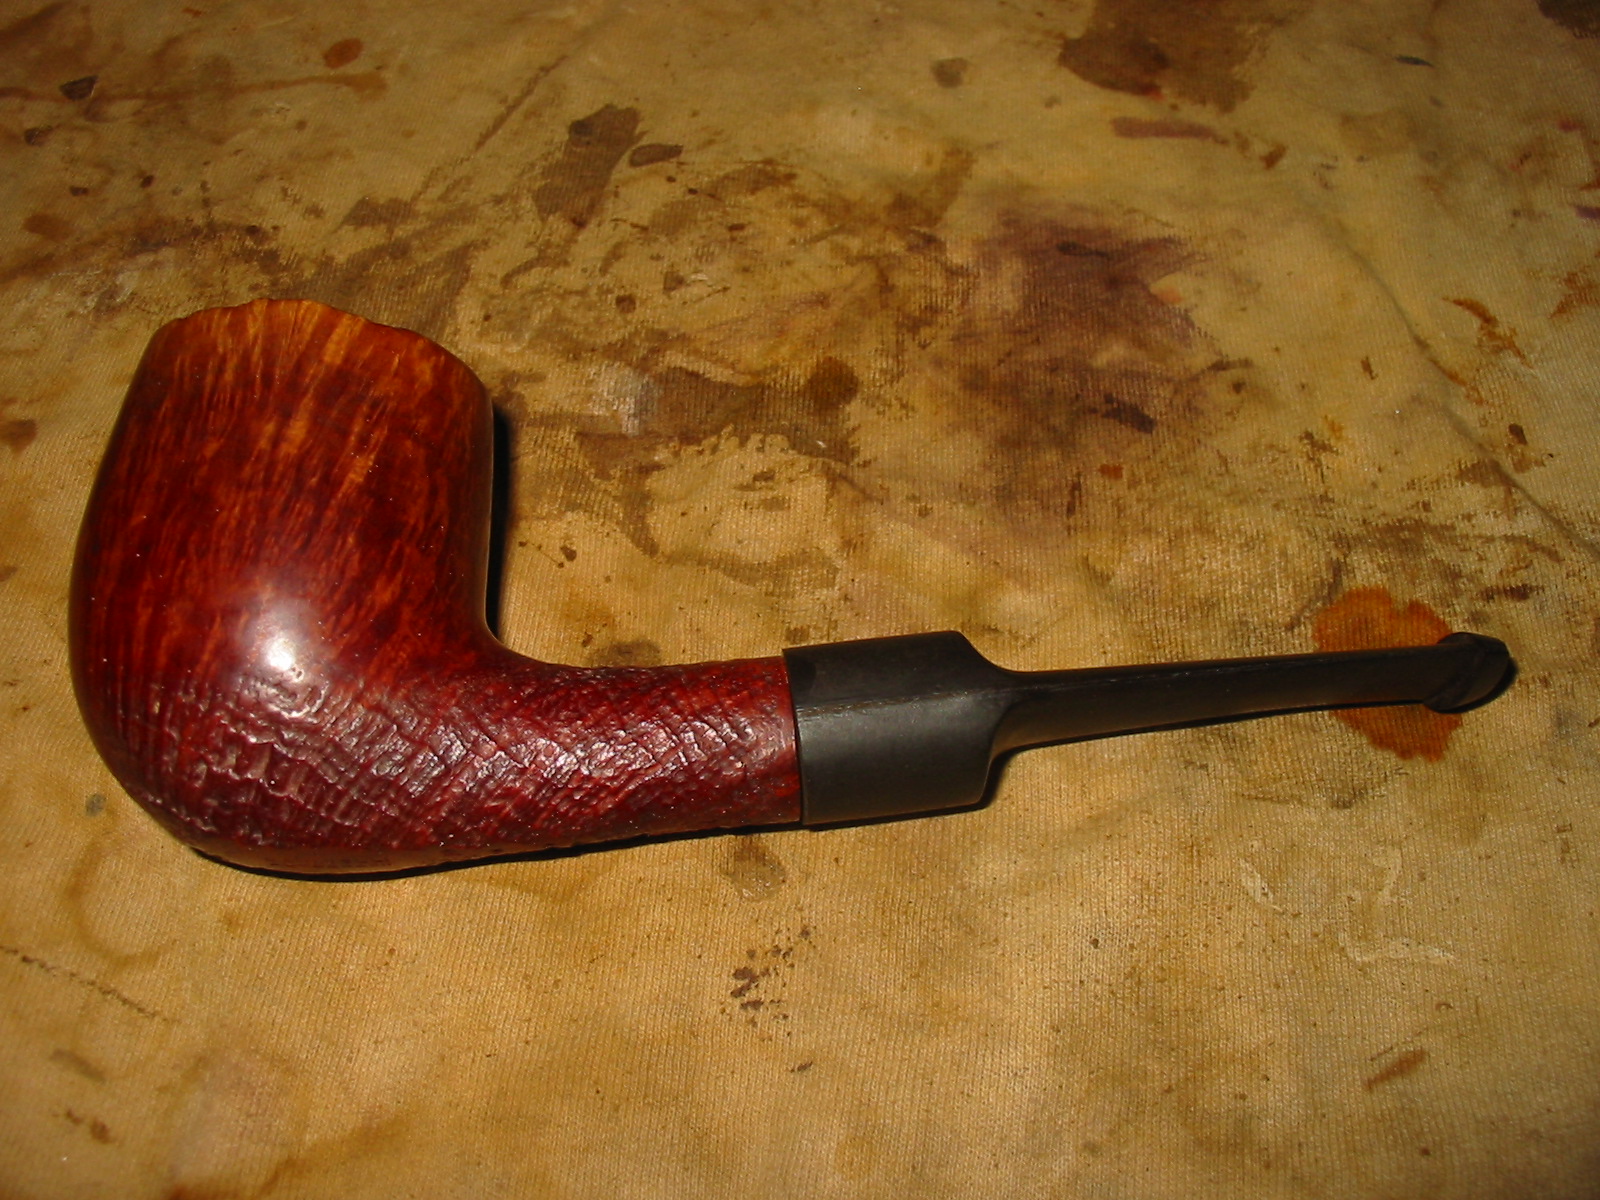
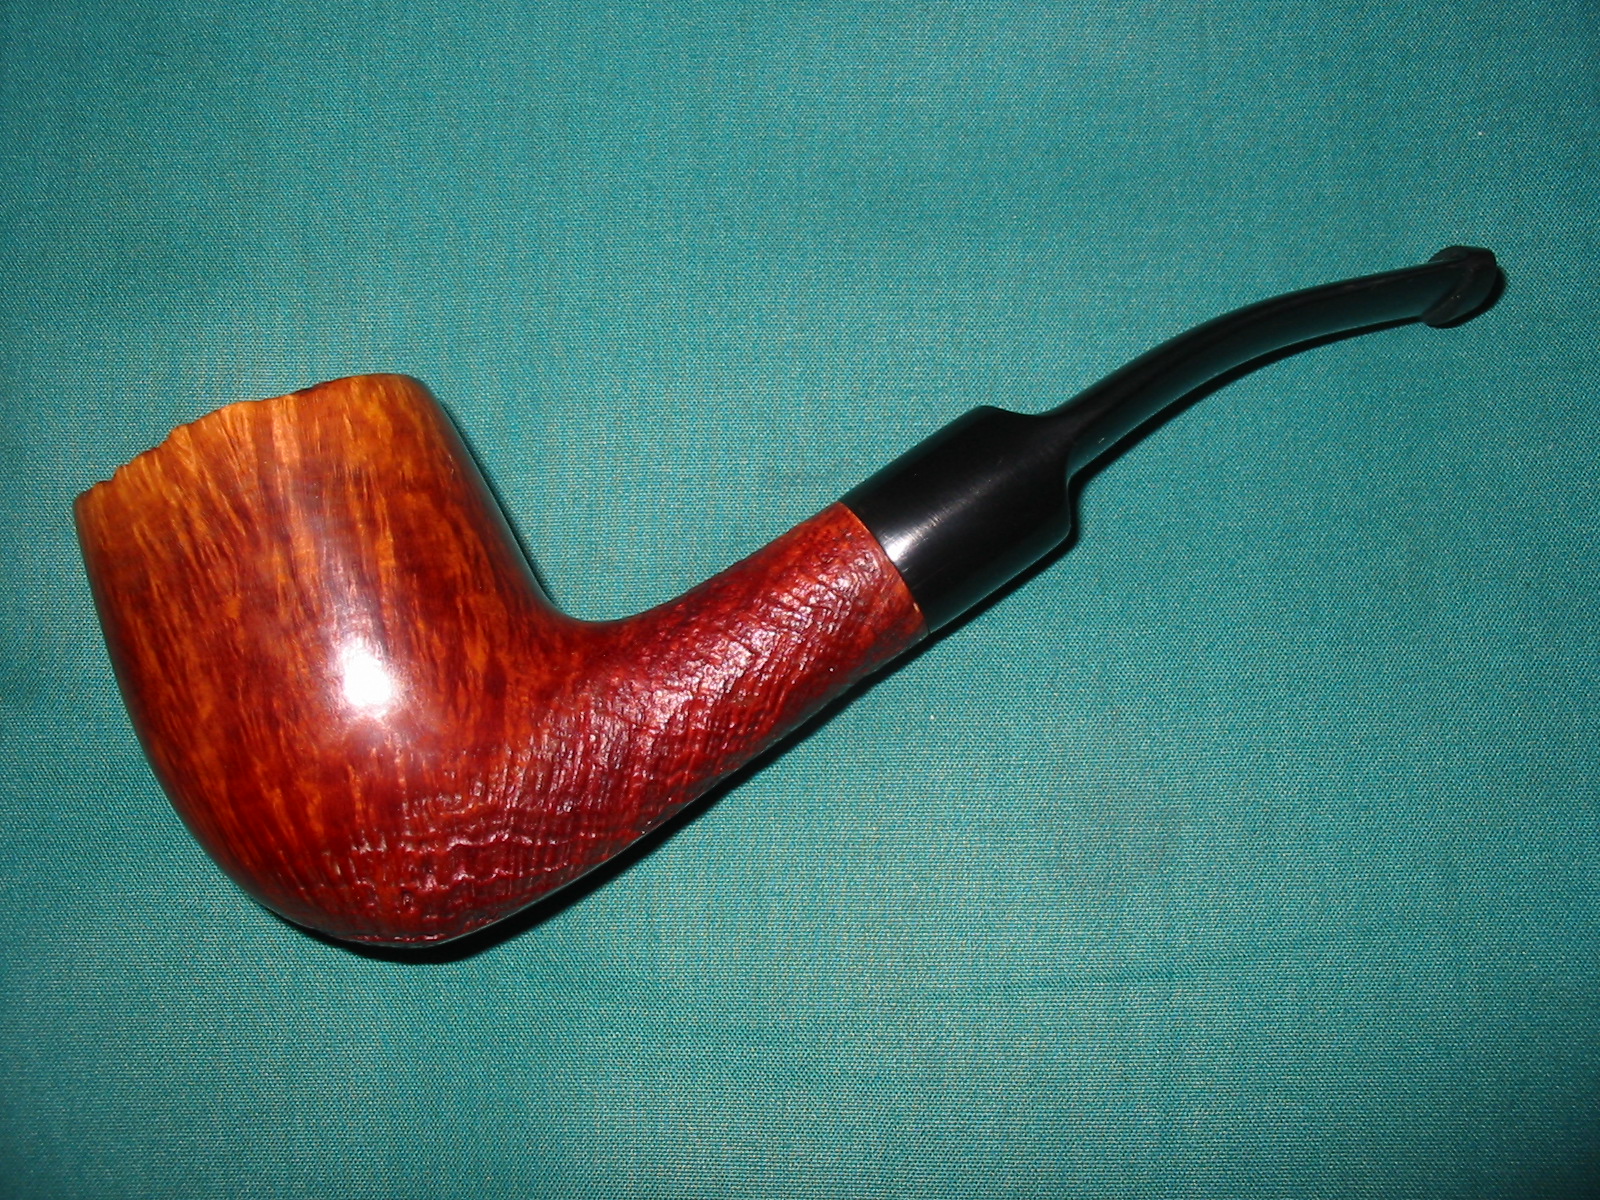
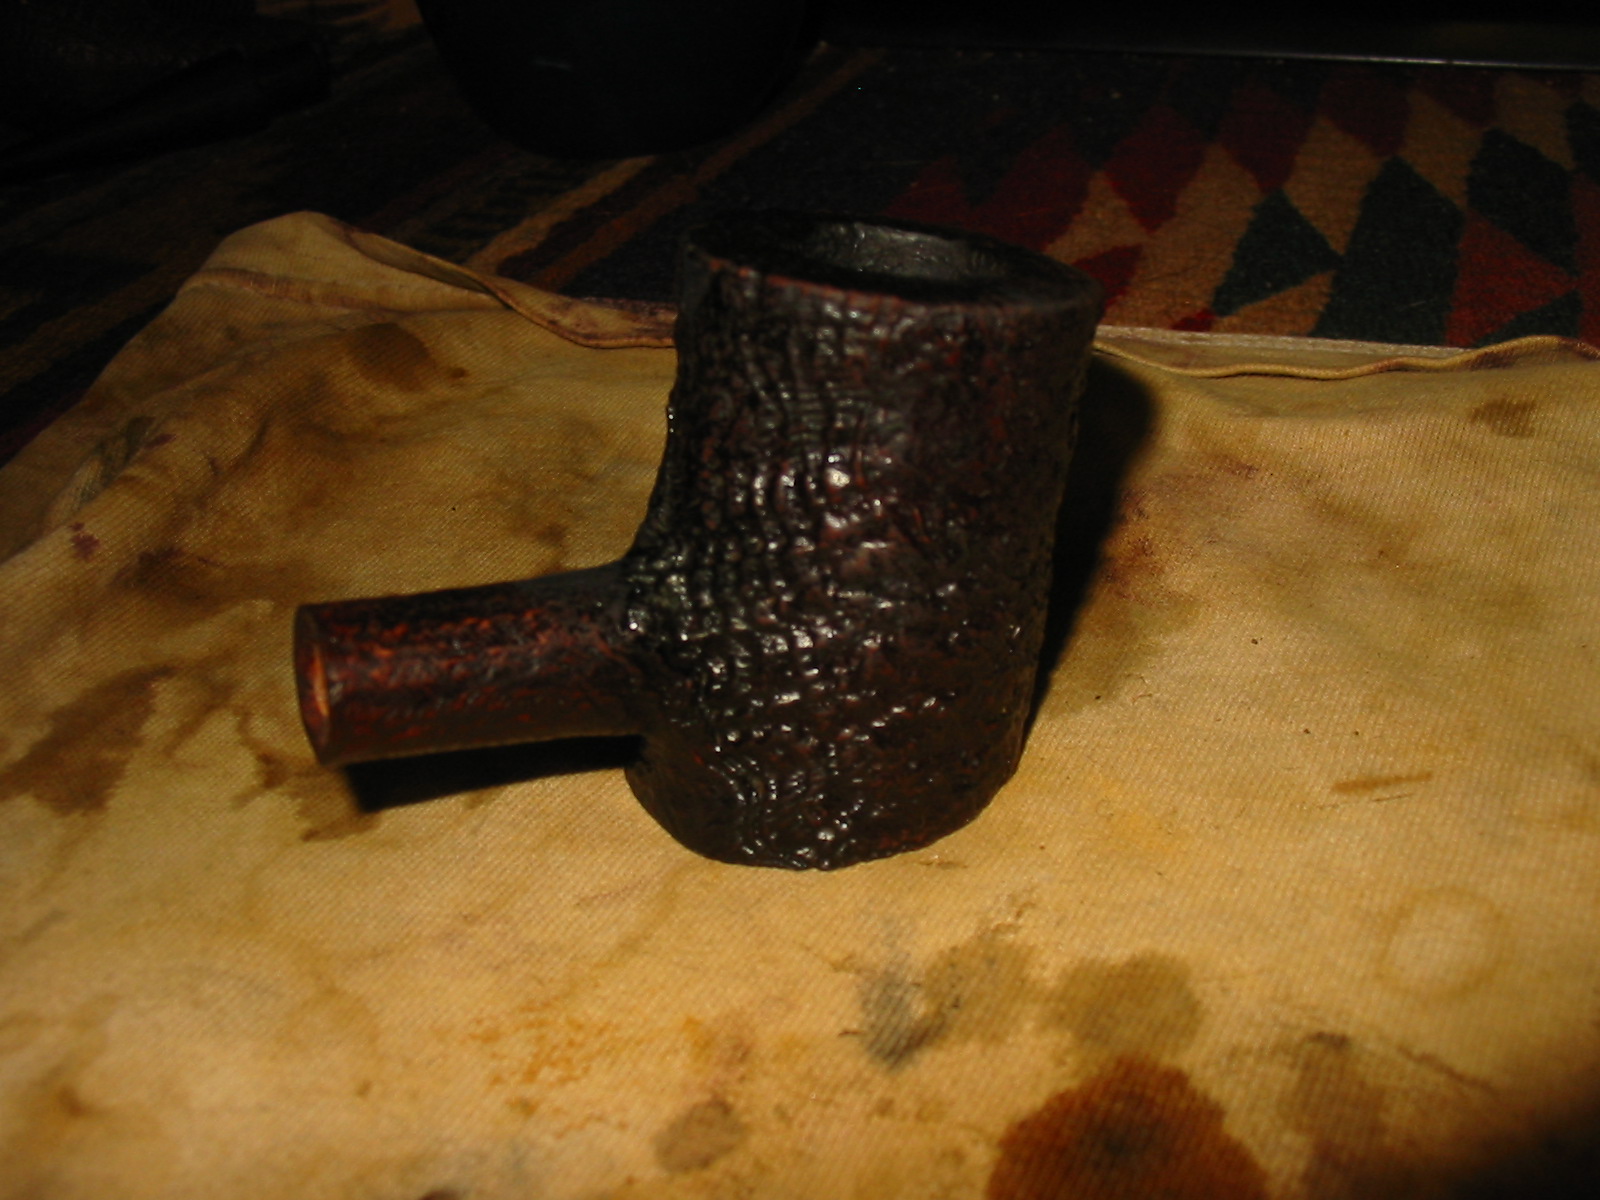
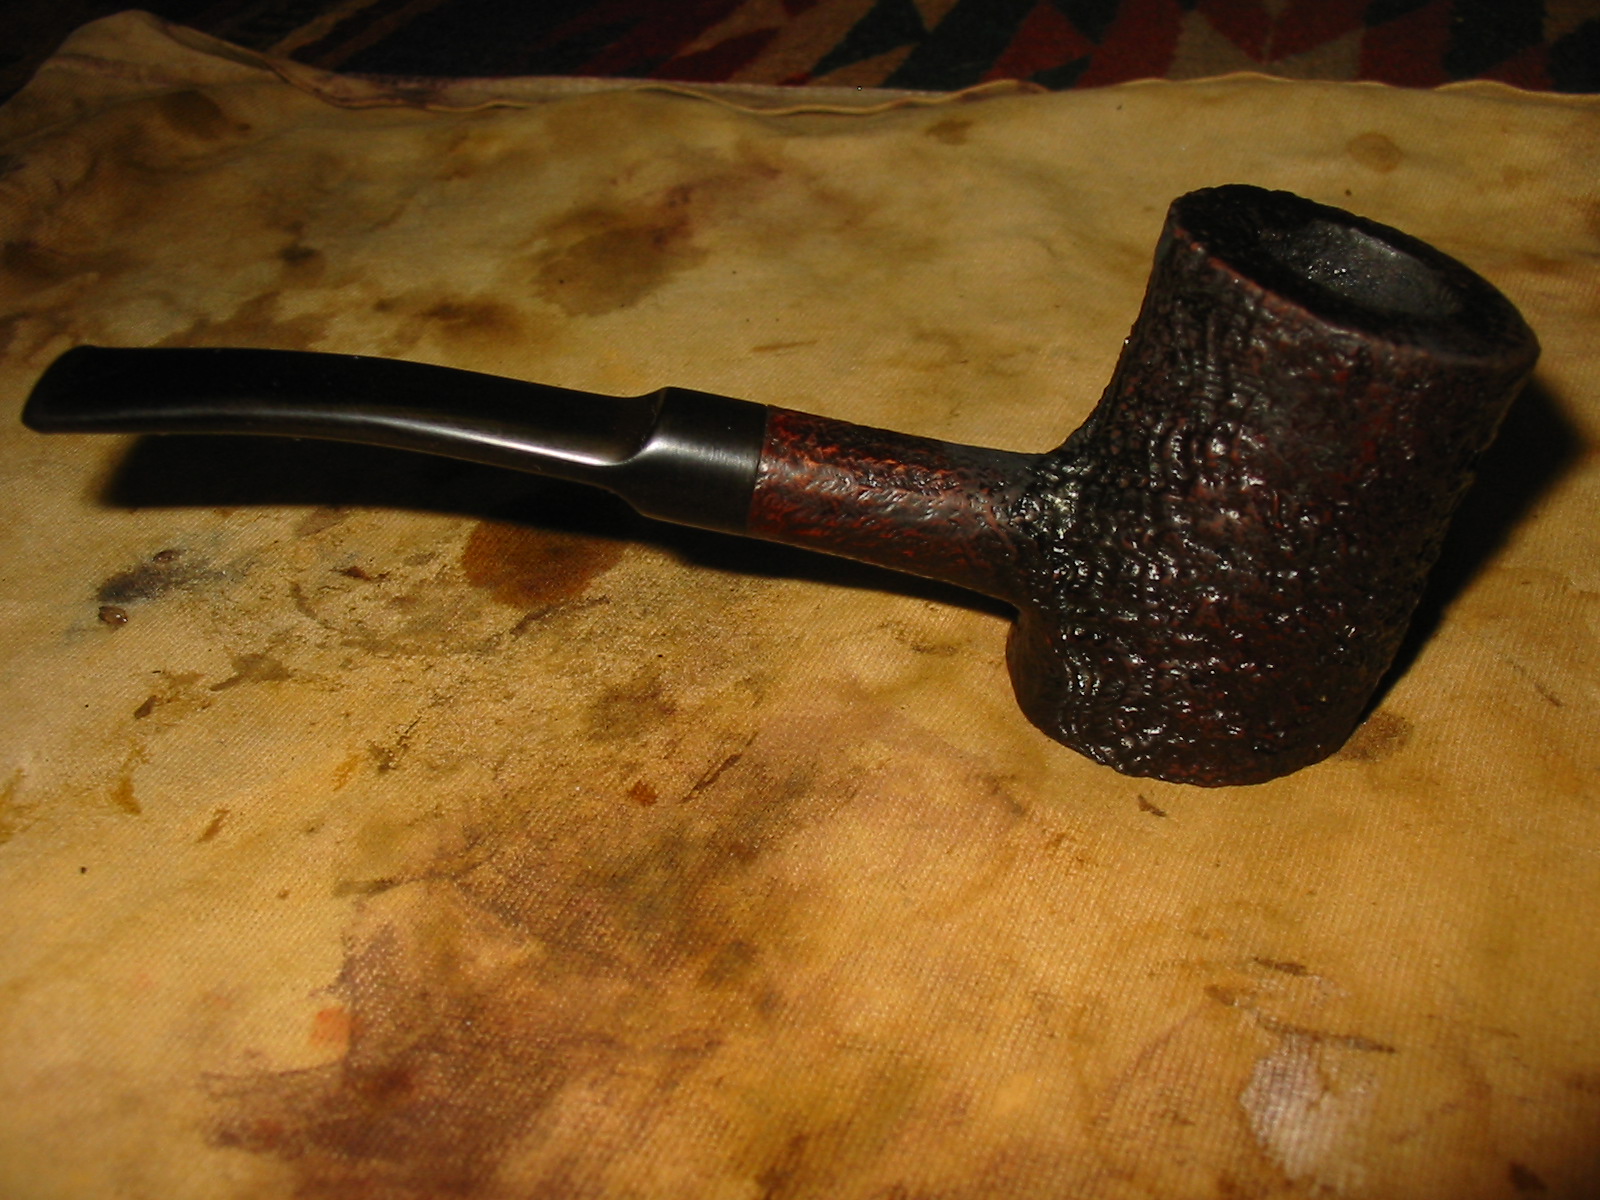
At this point I was pretty happy with the overall results: most of the defects were fixed or hidden, except for the two biggest fills, which didn’t hide as well as I’d liked but about as I expected. Off to the buffer the pipe went now: the entire pipe, stem and all, got a buffing with tripoli, white diamond, and carnauba wax, flowed with the clean, soft buff and a hand final buff. The final result is one I’m pleased with: a nice looking and good smoking old pipe.

20131014-160658.jpg

20131014-160709.jpg

20131014-160721.jpg

20131014-160732.jpg

Louis Blumfeld 1901 BBB Bent Billiard – by James Gilliam of jsecpipes.com


When James posted his work on this pipe on the pipe forums I was amazed at how beautiful it looked. Wow a 1901 BBB – one of my favourite pipe makes and one of the old ones as well. Imagine the surprise when I got an email at the same time asking if I would like a write up and photos of the restemming for the blog. I did not have to think twice to answer that email. I quickly fired back an affirmative and what you have below is the story from James. Thanks again James for taking the time to document your work on this old timer. Enjoy smoking that great piece of pipe history. Below is his tale.

Every story has a beginning and this one even has a pre-story. The excerpt below was posted on several forums I’m a member of so I thought I would repeat it just for those that haven’t seen the posts.

“As some of you know I attend the 100km van Ieper in Belgium nearly every year since 2002. It’s a walk around the WWI Battlefields that consumed Ieper. I’ve been bitten by the pipe making bug, and how and along the way dabbled in restorations just because, but my search for a pre-WWI era pipe is finally over. I ended up getting this piece of history from Alan at Reborn Briar. Now he did the pipe restoration.. and a brilliant job he did, the only thing the pipe was missing was a stem.. well I can do that… I decided not to bore out the mortise and left it threaded, made a threaded tenon out of horn, since I don’t have any workable bone, and decided against using Ivory…… and went with Cumberland for my stem material.. I’m happy…Happy Columbus Day everybody”

Now for the rest of the story. What sticks around in usable condition for over 100 years… not too much, but since I’m kinda into this pipe thing, tobacco related history rates up there for my interest factor. This past July I was able to attend the Newark (UK) Pipe show, set up a table and sell some pipes. You never really sale (or at least I don’t) all the pipes you want to sale, but you do get to meet a lot of really interesting people, and the next table over was Alan Chestnutt from Reborn Briar. I’m always amazed at the folks like Steve and Alan that get into the restoration business. I’ve done a few, even wrote an article about it, but creation is where my passion lies.

Anyway, talking with Alan pre-World War I pipes came up, and fast forward to September he had one that he was going to restore but without a stem. As I mentioned above, stems are no problem…. that’s the making/creating/using machinery aspect I like. When the pipe arrived I was amazed at how well it looked. I mean wow, 1901, and all that.

The only real thing that threw me was the threaded mortise. Looking around the shop I pickup up a few of my mistake mouthpieces and tried fitting a few. The 7mm tenon fit without a problem, as it just slid into the mortise. But later that night while sitting around thinking about the mouthpiece I figured I’d make it as close to the original as I could. The stems profile was already in the leather case. So what do we know at this point.. 1900’s meant ivory, bone, or the like type of tenon. I don’t have any bone to use and didn’t really want to use ivory……but being a pipe maker I do have horn. I usually end up keeping the horn points after using the remainder of the material for a shank extension.

So horn it was to be. I shaped the tenon, drilled and set out to thread the tenon. I’m sitting with a 8mm tenon drilled to 4mm for the airway and went about threading the horn. Unfortunately it crushed under the pressure of my die, but I guess it only made sense… so I made another, except this time I threaded it first and then drilled it… And here is where the pictures come into play.

Threaded tenon, prior to drilling
Jogli1

And it fits just like it is supposed to. Looking right above the pipe you can see my trial delrin tenon with new threads.
Jogli2

Mouthpiece rough cut and drilled. The mortise is also threaded. I cleaned up the junction end before the next steps, so the fit would be flush
Jogli3

Epoxy’d and left to rest a while.
Jogli4

And it fits. So at least the scary parts are now done.
Jogli5

Drawing on the Cumberland to get my bearings at to decide where I want the saddle to sit. The line closest to the junction was chosen.
Jogli6

Jogli7

Time to sand a bit with a machine.
Jogli8

And done
Jogli9

Now it’s file time.
Jogli10

Now it’s sandpaper time.
Jogli11

And more sandpaper… I probably left a step or two out here…just to save the pictures, but my process is machine, medium cut file, fine cut file, another fine cut file, nail files, 180, 220, 320, 400, 600, 800, 1200 sandpaper, buffing paste, more sanding, high glass paste (Sometimes more sanding to remove scratches I missed) and a final buff. Here you can see the stem is bent to its final form.
Jogli12

And now it’s all shiny.
Jogli13

And here are the final pictures. Alan did the bowl, I did the stem and I have a pipe that is twice my age… gotta love it. Hope you enjoyed my story.
Jogli14

Jogli15

Jogli16

Jogli17

Cleaning a Bristol Mat Geante – by AJ Verstraten (AKA Bananabox-Ninja)


This post has been written by a Dutch reader of the blog, AJ Verstraten who contacted me a few weeks ago. Several emails later and we had exchanged a lot of ideas and tips. I thought it would be of interest for others here to read about AJ’s ultrasonic cleaner addition to the process. It was one I had not heard of before so I asked him to write up a piece on it with pictures of a pipe that he put through his process. AJ was graciously willing to write it up and submit it for posting here. Thanks AJ for your willingness to do this. It is great to hear from others about the methods they are using and how they work. The photos are well done and the words well written. Without further ado here is AJ’s article.

Greetings, my name is AJ and I hail from the Dutch city of Dordrecht. I go by the internet name of ‘Bananabox-Ninja’ and I am more easily found under that name then under AJ.

A few weeks ago I broke my knee in a motorcycle accident and it was put in a plaster cast with the instruction to let it rest and heal up. In this time I stumbled upon Steve’s website through ‘Het Pijprokersforum’ a forum of Dutch and Belgium pipe smokers.

As I like to refurbish pipes myself and I had time to kill I went through his whole website and learned many, many new things. In the weeks that followed I tried to get a hold of the things Steve used and tried them myself, like the black superglue and the grinding pads for example. Blown away by how well some things worked out I sent an email thanking Steve for all the tips and asking if he had ever used an ultrasonic cleaner. He replied that he had not but that he was interested to know in the workings and would I like to write about it?

So this weekend I cleaned a pipe from my ‘project-box’ and snapped pictures from beginning to end including the ultrasonic cleaning method I currently use. (The numerical key below the photo identifies the tools in the photo.)

These are the tools I tend to use in the cleaning/refurbishing of a pipe, currently I have some tools on order and they have not come in yet.
001 Tools LR

1 – Polishing wheels and waxes
2 – Sanding paper (600 & 1000), sanding pads (1500 to 12000) and modeling files.
3 – Ultrasonic cleaner
4 – Old socks (but clean)
5 – Vaseline and 96% alcohol
6 – Hard and soft bristled pipe cleaners
7 – Q-tips (cotton swabs)
8 – Pliers
9 – Assortment of drills
10 – Senior pipe reamer
11 – Games Workshop paint
12 – Electric motor (0-2000 RPM) with grinding wheel (1500)
13 – Toothpicks

The pipe I chose to work on and record is a nice straight, big chambered Bristol Mat Geante, I presume the Geante is for its size as the chamber is rather big or as we say in Dutch a ‘Speciekuip’ (mortar trough). As far as I can tell Bristol a B-brand from France but I am unable to pinpoint exactly. I personally like the bird’s-eyes all over the left and right side of the bowl.
002 The Pipe LR

As you can see the stem has oxidation all over and the bowl itself is rather dull. Not visible on this photo are the 2 bite marks on the stem.

First I cleaned the pipe on the inside with alcohol and pipe cleaners until they came out almost white. If there is a thick layer of tar in the air canal I use the drills to scrape the inside out lightly using drills of various diameters. Tar will give way far more easily than the ebonite or acrylic it is in.

In this case it was not needed as the pipe’s previous owner was very tidy or had not smoked it much.

Then with just water and the grinding wheel I removed the heavy oxidation from the stem, careful not to create a round shoulder or to grind off too much for it to create a ridge.

003 Set up LR

004 Half way LR

005 Full LR

Using the sanding paper wrapped around a file I removed the hard to reach oxidation on the mouth bit.
006 Filing and sanding LR

007 Sanding wrap LR

008 Sanding result LR

And afterwards to fill the bite marks using the superglue, q-tips and toothpick.
009 Superglue LR

010 Filled SG LR

011 Sanded SG LR

Now the stem was ready for the ultrasonic bath. This is a new method I have only recently started using and so far I am positive on the results. Using a mixture of 50-50 water and alcohol with a teaspoon of disinfection agent, place the stem in the liquid and let the bath go at it for 8 minutes.

This bath can also heat up to 40 degrees but seeing as ebonite tends to bend back to it’s original shape if heated too much I leave that feature off.

You’ll notice in the last picture that the stem looks almost the same as it went in, however when you pull a pipe cleaner through it, there will be some mild discoloration coming out of the stem.

This method of cleaning is a good way to get the last remaining specks of dirt out of those hard to reach places, I myself was skeptical at first but I was swayed when I pulled the pipe cleaner through it after the bath I found that it did do its job.

It does not however remove oxidation completely, I tried with an unprepared stem and it came out browner than going in.

So as an extra step I find it a great addition to my cleaning process.
012 Sonic cleaning fluids LR

013 Turn on LR

014 Waiting LR

015 Sonic done LR

In the mean time I cleaned some of the soot from the top of the bowl with some spit and the old sock. Especially the part of the sock that fits over your ankle is rather coarse and excellent for this process. The chamber had a nice smooth coal layer in it so I left it in there.

After the bath I gave the inside of the stem few more scrubs with the pipe cleaner and the outside another run with the grinding wheel.

Then I started polishing with the wheels and the waxes.
016 Polishing LR

First a pre-polish with brown, followed by white, a coat of carnauba wax and a final buff.

The end result as you can see below:
017 Pipe done LR

Finding an Old Parker Super Briar Bark Cherrywood


Whenever I visit Edmonton there are three places I always visit in old Strathcona – two Antique Malls and Burlington on Whyte Tobacconists. My last trip I visited all three and one of the Antique Malls yielded a couple of treasures while the other was a bust. You never know which place will yield something but generally I don’t walk away from both with nothing to show for the stop. This time I found two items in the same display case in the mall (this is truly a Mall – it is large, two stories of things to look at, many stalls and many sellers). The first was a beautiful older Parker Super Briar Bark Cherrywood and the other was the old cutter top tin of Condor Slices I have already written about earlier. Let me tell you the story of that find.
IMG_1865

The shop is full of antique hunter’s eye candy and what astonishes me is that things I played with as a child and used in my dad’s garage have now become antiques. (Hmmm, I wonder what that makes me. Ah well that is another story, back to the walk about.) As I walked through the shop there were many displays that had pipes – older Brighams, Dr. Grabows, Yello Boles, Whitehalls, Medico’s and new Meerschaum pipes. The place had a lot of old pipes and each of them warranted a good look. To complicate things and I suppose to give a modicum of security in a world of shop lifters, I had to hunt down a store clerk to get a key to open the locked displays before I could look at any of the pipes. Because of that I was very selective about the ones I looked at more closely. The mall was full of people that day and they were milling about looking at everything – everything but pipes in this case. I made my way through the shop and noted case numbers that I would need to have opened for a more thorough look. My method in this kind of shop is to get two or three case numbers in my head before I get help from a clerk. Why two or three? Well, simply put – that is the most numbers I can remember in my head these days! With that limitation the hunt in a mall that size can take me awhile. Ask my wife and children how long it can take and they will tell you, I have no sense of time when I am on the prowl for old pipes.

I checked out some Mario Grande pipes – new ones – that were in one display and several other brands that looked promising but none of them grabbed my attention. I am getting more particular than I was when I first started picking up old pipes in shops like these. I think it was on the second or third set of case numbers that I took back to the main desk to get a clerk with keys to open that I found the little Parker. I know that it was in the back portion of the mall, in the far right corner of the shop. It was a small display case, upright glass with internal lighting. When I saw the case it caught my eye. There were quite a few pipes on the shelves of the case, arranged to attract attention. On the second shelf was a little sandblast cherrywood shaped pipe sitting in a pipe rest that caught my eye. The stem was slightly bent and the blast was craggy and deep – kind of like the blast you find on early Dunhill Shells. The size was diminutive but looked like it would sit well in the hand. Even though it was only one case number in my head this time, because of the beauty of this pipe, it was time to go and get the clerk and the keys.
IMG_1863

I went back to the front of the shop and got the clerk and we headed back to the case. I am always in a bit of a rush in this phase of the hunt in an Antique Mall because I am paranoid that someone else has spotted the object of my desire and will beat me to the punch. So I made my way back to the case in a hurry by the most direct route. There was no fooling around along the way. I saw other pipes in other cases as I hurried to the back corner but I merely glanced at them and noted their location for later looking. I was a man on a mission and nothing would deter me from reaching my goal.

We made it back to the case and no one was bent over an open door fondling the little pipe when we arrived. Whew, I beat all contenders (I know, probably no one else in the mall cared about the little pipe, but let me have my delusion). The clerk fiddled with the keys until he had the correct one in the lock and the door opened. He stepped back and let me pick up the pipe that had caught my eye – the little cherrywood sandblast. I turned it over in my hands checking it out for cracks and damage. The thin shank looked fine, the stem had some small tooth marks and was oxidized but in good shape. The finish and blast were very nice. It was in excellent shape and there was even a wad of tobacco still in the bowl – almost as if the old pipe man had laid it down while he went out to check the mail or eat dinner… It would clean up very nicely. I checked out the stamping on the underside of the shank. It read Parker over Super in a diamond over Briar Bark. I had a nice older Briar Bark in my hands – the equivalent of a Dunhill Shell in my book. It was also stamped Made in London England and had the shape number of 283. It sported a 4 in a circle stamp was well, which was the group number (Dunhill based sizing system). This surprised me a bit as it is pretty tiny for a group 4 pipe but that was its stamping. Up close the stem also bore a faded and worn stamping of the P in the Diamond of the Parker line. At the low price of $15 it was a keeper and it was definitely going home with me.
IMG_1864

The clerk took it in hand, as they have a policy to carry items to the front and hold them for you until you are done shopping. He was just locking the case when I looked at the shelf a last time before he closed the door and there in the back of the display case was an old tin with the label Gallaher’s Condor Sliced. I stopped him and reached into the case and picked up the old tin. It was full! I turned it over in my hands and noted that it was a cutter top tin – probably WWII vintage. It was two ounces of old tobacco, unopened and pristine. The tin itself was in great shape. I added this to my lot. Not a bad find for an afternoon – an older Parker sandblast cherrywood and an old tin of Condor Sliced. Since I am one of the few who actually like Condor Slices this was a great find for me.
IMG_1862

I followed the clerk back to the front of the shop to pay for my purchases with the satisfaction of a well spent afternoon. I had a tin of old tobacco – cost $10 and a Parker – cost $15 – all totaled a $25 hunting spree. Not bad at all and to top it off when I got to the till a young clerk commented on the pipe. He too was a pipe smoker and collector. (In this case I believed him rather than cynically assume more sales hype. To date I have not received many comments from sales clerks on old and dirty pipes I buy so odds are he was telling the truth.) He commented on how he did not know how he had missed seeing those two. Before I settled the bill he offered to give me a walk-through of other potential pipes that he had scoped out. He spoke of some of the great finds he had scooped while working at the mall. He told me he had Burlington on Whyte do his restorations on the pipes he found and asked who did mine. I told him that part of the fun of the hobby for me was restoring my own. He laughed and said one day he would venture into that part of things. During our walkabout nothing else caught my eye so we went back to the till and I paid up. I walked out of the mall satisfied with the hunt and with two pieces of tobacco history. I couldn’t have asked for more. Now off to find a pub and celebrate the finds and examine them more closely.

By Steve Laug 14 October 2013

The Pipe Hunt – Rule #1: Never Drive by Small Nondescript Antique Mall Without Stopping for a Look


Over the years I have added another hobby to my refurbishing one. I have been crafting a set of simple rules of the pipe hunt. A rule does not make the list until it is tried and proven to be a truism repeatedly. These rules are elastic in that they continue to grow as time goes on and my pipe hunting becomes more refined. But, I try to follow these whenever I am on the prowl looking for pipes and even when I am not. I have decided that any trip I take will end up with me stopping and hunting for pipes. My wife and kids can tell you that this is a fact. Over the years I generally end up finding a pipe or two. These rules have worked well for me over the past 20 plus years. The tale below illustrates how well this first rule works for me.

I was coming back into town from a long meeting in the countryside about a half hour away. It was getting late and our host had planned a dinner for us so I was aiming on getting “home” and not really paying attention to the buildings as I came into town. But as I got closer to town and drove by the nondescript buildings on my right, out of the corner of my eye I caught a small sign that said Antique Mall. It was located on the outer edge of a small town, across the railroad tracks from the town centre. It was five o’clock in the afternoon and the sign said the shop was still open so I decided to pull over, park the car and have a look. By the time I got to the front door it looked dark inside so I figured the owner had evidently closed up shop. However, the door was still open, the sign still said open, but the lights were out in the back portion of the shop. I decided to chance it, opened the door, called out and asked if they were still open and a gruff voice called out from a room off to the left, “Well you are inside the shop aren’t you so I guess it doesn’t matter or not if we are open.”

I shrugged off his gruff manner and asked if they had any pipes and tobacciana. He turned on the lights and said he would quickly take me to the cases in the shop that had “what little they had available”. He was not a friendly shop clerk anxious to make a sale and it seemed that the my presence did nothing to change his otherwise grumpy attitude. I had a friend with me and he gave me the “we should probably just leave” look but I ignored it and kept up a steady flow of “yak” to diffuse the situation a bit. I figured if I found anything I would make his day and it looked like the place could well yield some interesting old pipes. It was pretty dusty and looked like it had not had many folks picking through the stock of “antiques”. (I made a mental not to come back here for a visit on my next trip through but I would do so in the early part of the day and give it a good walk through at that time.)
second

He walked us toward the back part of the shop (calling it an antique mall was an overstatement of epic proportion as it was not much bigger than a small convenience store. I suppose that it may have had multiple vendors gathered under the roof but still mall was overstating the case). There was a lot of clutter in the aisles and the accumulated detritus of junk stores that I have come to appreciate for their potential. It is in shops just like this, passed by quickly by the antique hunter and having a grumpy proprietor that have often yielded a veritable treasure trove of pipes and tobacco items. Many times I have found that these nondescript out-of-the-way shops can be rich with old pipes and tobaccos all to be had at very reasonable prices. There used to be way more of these little shops, but there are still a few where you can find some good stuff if you keep your eyes open.

I began to get excited as we made our way to the first display case. It was a crowded glass case with lots of dust and fingerprints. On the shelf next to the case were old packets of tobacco that looked like ancient drugstore blends, long past their shelf life even with all of humectants. There was also the standard collection of old Edgeworth and Prince Albert tins piled on the top shelf of the case. I bent down to get a closer look at the second shelf as it had a collection of about ten pipes piled on it. (So much for the shop owner’s “what little we have” comment.) I sorted through the lot and among the collection there I found three older pipes that caught my eye. I was attracted to them because of their shapes and finishes. They were all well used and dirty but I examined them showed no real damage under the dirt and oxidation.

This threesome included a Douwe Egbert Billiard, an Amphora Pot and long sandblasted Canadian stamped Birkdale Superb, Made in London England. None of these had show stopping names but the shapes all reflected an older European look. When I first saw the Canadian my heart nearly skipped a beat, it had the look of an older Dunhill Canadian. The white dot was missing in the stem but the hole was clearly there where it had been. I gingerly picked it up and saw that it was a Birkdale – a brand I knew nothing about. (I later found out as I researched the brands and stamping on these pipes on the internet that the Birkdale was probably a Comoy’s brand.) I left behind some older, worn pipes on the shelf that I may have to go back and pick over again when I get to the area in the future. But these three were to my liking. I happily added the first additions to my purchase – three pipes in my hand.

The owner had said nothing as I picked over the pipes and carried them with me. No comments or questions were asked as he locked up the first display case. Once locked, he hurried on to the second display case. I was feeling good about this stop on the road. It was already a great place and I had added three nice pipes to my collection so it did not really matter what I found in the second case. But who can stop looking and hoping for more after that kind of find in the first display case. We rounded the corner in the shop to the second case. On the middle shelf there were more interesting pipes to look over. I could not believe the luck I was having in this old shop. I sorted the 8 or 9 pipes on the shelf and settled on three nice looking older pipes – a Hardcastles Jack ‘O London Billiard, an African Meer Prince stamped Tanganyika with a shape stamp or 27 on the shank and an Old Pal diminutive Barling like pot with a pencil shank. I added this threesome to the lot in my hand. I now had six old pipes for refurbishing. All would clean up very well and be good additions to the collection or be sellable to help fund future purchases. Not too bad a find for a quick stop that could have easily been overlooked.

The grumpy shop owner led us to the counter at the front of the shop where he tallied what I owed him for the six pipes. I had noticed that several were marked $10 and some were $11. He said nothing as he scribbled out the bill and peeled off the stickers recording the display cases they each came from. Once he had finished his scribbling he pushed the bill my way. I could not believe my eyes – the total was $60 plus a bit of tax thrown in. What do you know; the old gent had given me a deal of sorts. He took my cash, put the pipes in an old grocery bag and handed me the change and the pipes. He then followed us to the front door and locked the door as we went out. He had probably spoken a total of three words – no more, no less in the entire time he had walked us around the shop. But I did not go there for the wit of the seller or the ambience of the shop but for exactly what I had come out with – six “new” old pipes that would be a welcome addition to my stock at home.

I guess it goes to show you, keep your eyes open when you are driving through the outskirts of the small towns you pass through on your travels. It is the nondescript shops that often are full of surprises. But then again, don’t bother to look too hard. It will leave more of them for me to find on my journeys.

Refurbed a Tanganyika Meerschaum Prince


Blog by Steve Laug

This morning I got around to cleaning up another one of the pipes I found on my trip – a little Tanganyika Meerschaum prince. The stampings on the pipe were simple, only a shape number that looked like a 27 on the underside of the shank and the block letters Tanganyika on the underside of the stem. The star logo on the left side of the stem is different from the typical elephant, giraffe or running man, which have come to be associated with Tanganyika Meerschaums. I wanted to see what I could find out about the little pipe so I did a search on Pipedia and was able to find some information on the pipes made from Meerschaum that was mined there. The following is a synopsis of the article found there.

Kiko, meaning “pipe” in Swahili-Kiswahili to English translation, is probably the best known of the various brands of meerschaum pipes from there. In East Africa Meerschaum is found in Tanganyika, once known as German East Africa, and since 1964 part of the United Republic of Tanzania. The main deposit comes from the Amboseli basin surrounding the Lake Amboseli. Tanganyika Meerschaum is normally stained in shades of brown, black and yellow, and is considered to be inferior to Meerschaum from Turkey. Even though, the raw material is mined by the Tanganyika Meerschaum Corporation and to a large extent used for pipe making. Uncounted pipe makers throughout the world were supplied with Amboseli Meerschaum, preferentially used for Meerschaum lined briars or leather-clad pipes. In Tanganyika the Kilimanjaro Pipe Company Ltd. produced the following brands: Caveman, Countryman (Elephant logo), Kiko (Elephant logo), Kikob (Elephant logo), Kilimanjaro (Rhinoceros logo), Kudu (Giraffe Logo), Makonde (Rhinoceros logo), Merlin (Flying bird or Antelope logo), Sportsman (Elephant logo), Tembo, Townsman, Twiga (Giraffe Logo), White elephant (Elephant logo)

This little prince I had was dirty and there was a screen contraption in the bottom of the bowl. It did not smell of anything other than strong Lakeland style tobacco so I am guessing this was a contraption to keep the bowl from getting moist in the bottom. Not sure about that however. The exterior was dirty and had sticky gum on it from the sales label. The rim top and down the top edges of the bowl had been darkened prior to smoking to give it a classic aged look like the pictures below.
Kiko meers

The top of the rim was darkened as were the edges when it left the factory. In this case they were spotty and uneven. The bowl had a slight build up of cake. The shank was dirty with tars but smelled strongly of tobacco. The stem was slightly oxidized and also very dirty inside and out. The metal screw in tenon was dirty and had tarry buildup on the threads. The stem was slightly overturned.
IMG_1879

IMG_1880

IMG_1882

IMG_1883

I used a dental pick to pry the screen ball from the bottom of the bowl. It had been squashed into shape and the top indented to mirror the bottom of the bowl. The side of the screen had been opened toward the airway in the bowl bottom as well to facilitate smoke getting through. I wiped down the exterior of the bowl with alcohol dampened cotton pad to remove the grime and the buildup of gum on the stem and the bowl.
IMG_2031

IMG_2032

IMG_2034

I sanded the meerschaum bowl with 1500 and 1800 grit micromesh sanding pads and then buffed the bowl with Tripoli and White Diamond to get a shine on the meerschaum.
IMG_2035

IMG_2036

I cleaned out the shank and the bowl as well as the stem with pipe cleaners and cotton swabs dipped in Everclear. I kept cleaning until the pipe cleaners came out clean and unstained.
IMG_2037

Once finished with the inside I sanded the outside of the stem with a medium grit sanding sponge and then wipe it down with Meguair’s Scratch X2.0 on a cotton pad. Then I sanded the stem with micromesh sanding pads from 1500 – 12,000 grit. I wet sanded the stem with the 1500-2400 grits and then dry sanded with the remaining grits.
IMG_2038

IMG_2040

IMG_2042

I then buffed the stem and bowl with White Diamond on the buffing wheel. The four pictures below show the finished pipe. In the fifth picture, I decided to sand the rim down some more before finishing and then stained it with a dark brown aniline stain to get the darkened look back to the pipe edges and rim. When I had finished that I flamed it and restained until it was as dark as I could get it and then I buffed it again with White Diamond and coated the stem with carnauba wax and the bowl with a beeswax mixture.
IMG_2043

IMG_2044

IMG_2045

IMG_2046

IMG_2047

Restemming a Gift Pipe – a Savinelli Autograph 5


On a recent work trip to Alberta I stopped by and visited Todd Bannard (aka Sasquatch) in his workshop. He did a bit of work on a Delrin sleeve for me and we smoked some bowls together. I left a couple of refurbished pipes with Todd and he gave me a Savinelli Autograph 5 bowl that needed to be restemmed. This afternoon I got around to fitting a stem to the pipe. The briar is a beautiful piece with a lot of gorgeous grain. The bottom of the bowl and the shank are sandblasted. The bowl has a plateau top and the shank took a flush fit stem. It had been barely smoked and certainly was not broken in. If it had been smoked one or two times that may be saying more than is true as the grain in the interior of the bowl is still quite visible. Below are some pictures of the bowl before I restemmed it.
IMG_0466

IMG_0467

IMG_0468

IMG_0469

I did research on the Savinelli Autographs to see what kind of stems they had and found a variety of them in pictures. About half of the photos showed a saddle stem with much the same proportions as the one that I chose to use. I went through my box of stems and found one that would approximate the look of the pipes online. I also wanted one that would fit after I turned the tenon. It would also take some minimal adjustment to the diameter of the saddle in order to align with the shank. I drilled open the airway to hold the guide pin on the Pimo tenon turner. I put it in the cordless drill and slowly cut away the diameter of the tenon until it was close to fitting in the shank.
IMG_2000

I used a Dremel with a sanding drum to take down the tenon until it fit the shank. The next two photos show the newly cut tenon before I sanded it down to smooth out the marks left by the Dremel.
IMG_2001

IMG_2002

I sanded the tenon with 220 grit sandpaper and then with 1500 and 1800 micromesh sanding pads to smooth out the tenon. Once that was done the stem fit in the shank snuggly. In the four photos below the fit of the stem can be seen and the excess of vulcanite that needed to be trimmed away from the diameter is also visible.
IMG_2003

IMG_2004

IMG_2005

IMG_2006

I sanded the diameter with a Dremel and a sanding drum. I took off the casting marks left along the edges of the blade and on the sides of the saddle portion of the stem. I also used the Dremel to take off the excess diameter of the stem. I worked carefully and slowly along the joint of the stem and the shank so that I did not damage the briar with the sander. I was able to remove the majority of the overage with the Dremel and finished with sandpaper.
IMG_2007

IMG_2008

I sanded the Dremel marks out and further reduced the diameter with medium grit emery cloth. I sanded it until the fit was almost perfect. I would finish the fit with finer grits of sandpaper and the micromesh sanding pads later.
IMG_2009

I set up a heat gun and the rolling pin I use to bend the stems next to it. I heated the stem with the heat gun set on the lower of the two settings. I held it over the heat until the vulcanite was flexible. At that point I bent the stem over the rolling pin in order to get an even bend in the vulcanite. Once it was bent to the angle I wanted I held it under the cold water tap in the sink to set the bend. The next four photos show the process and the resultant bend in the stem.
IMG_2010

IMG_2011

IMG_2012

IMG_2013

I took the newly bent stem back to the work table and did some more sanding on the diameter of the saddle to further match the shank. I used 220 grit sandpaper and a medium grit sanding sponge to clean up the stem and remove the scratch marks left behind by the emery paper. I scrubbed the bowl with Murphy’s Oil Soap and a soft bristle tooth brush to remove the dust and grit left in the sandblast portion and the plateau on the top of the bowl. I rinsed the bowl under warm tap water and dried it with a soft cotton cloth. I gave the bowl several coats of carnauba wax on the buffer before inserting the stem and giving it a light buff with red Tripoli. The next four photos show the status of the pipe and the new stem after the polishing on the buffer.
IMG_2016

IMG_2018

IMG_2019

IMG_2020

Next I sanded the stem with the micromesh sanding pads. I wet sanded it with 1500, 1800 and 2400 grit micromesh and then dry sanded with the remaining grits 3200-12,000.
IMG_2021

IMG_2025

IMG_2026

When I had finished with the micromesh pads I gave the stem a coat of Obsidian Oil and rubbed it into the vulcanite. Once it was dry I buffed the stem and the bowl on the buffer lightly with White Diamond and then gave the pipe several coats of carnauba and buffed to a shine with a clean soft flannel buff. The pictures below show the finished pipe. It is now ready for the pleasure of breaking it in. I still have not decided what tobacco to use with it but there are several options on the table. I want to thank Todd for the great looking bowl to be restemmed and I will enjoy it and remember the visit to his shop.
IMG_2027

IMG_2028

IMG_2029

IMG_2030

Refurbed Birkdale Canadian – Made in London England Shape # 296


On my trip in Northern Alberta, Canada I picked up this older Canadian with a sandblast finish. The blast is not deep and craggy but is fine nonetheless. It is stamped on the smooth bottom of the shank Birkdale in script over SUPERB. Next to that it is stamped Made in London over England and then a shape number – 296. I have not heard of the Birkdale brand so I Googled it on the net to see what I could find out about it. There was not much there in terms of solid information. There were numerous posts on various forums requesting information. The information on the brand showed some confusion. From Pipedia Birkdale is a brand of the German pipe company named Wolsdorff. In turn Pipephil pegs Wolsdorff as a chain of tobacconists that had their pipes made by different German companies like Design Berlin and Oldenkott. However, the one I found has the made in London England stamping that removes the German connection. Something about the shape and shape number made me do a search in the Comoy’s shape and number charts available online. I found that the 296 shape for Comoy’s is an oval shanked Canadian, exactly like this one. Thus it appears that the pipe was made by Comoy’s. I am wondering if the Birkdale (which is a region in England) is not one of a line of English regionally named pipes made by Comoy’s. Does anyone have any information on this possibility?

As for the pipe’s condition – the finish was dirty and somewhat worn. The rim was worn and showed some wear on the inner edge. It was partially beveled inward. The cake was broken and thin on the inside of the bowl. The stain was worn and spotty on the shank near the stem. The stem itself was oxidized and had tooth chatter on the top and underside near the button. The insert logo was missing. From what I can find online the insert design was in the air. The hole was round and like the space for a dot. I suppose it may have had the Comoy’s C with the circle at one time but I am not sure. The tenon on the pipe was an older step down version like the Comoy’s. The pipe was worn and dirty but very salvageable. The three photos below show the state of the pipe when I brought it to the work table.
IMG_1866

IMG_1867

IMG_1868

I decided to make an off white insert for the hole in the stem (the hole did not go into the airway). To make the replacement I have a knitting needle that I use for replacement dots. I used a Dremel to turn the end of the needle down to the size of the hole in the stem. The next six photos show the process of shaping the new dot for the stem. The first four photos show the shaping of the dot stock. The last two photos show the inserted dot.
IMG_1972

IMG_1973

IMG_1974

IMG_1975

Once the newly turned end fit into the hole in the side of the stem I cut it off with a pair of needle nosed pliers and began the finishing work on the dot. I glued it in place in the hole with superglue and when it was set sanded it down with a Dremel. When the surface of the dot matched the surface of the stem I sanded it with 220 grit sandpaper until it was smooth. The remainder of the finishing on the dot would be done when I cleaned up the oxidation on the stem.

IMG_1976

IMG_1977

I reamed the pipe with a PipNet reamer to clean out the bowl and remove the broken cake. I scrubbed the exterior of the bowl and shank with a soft bristle tooth brush and undiluted Murphy’s Oil Soap. I scrubbed it until all the crevices were clean and then rinsed it under warm tap water being careful to not get water in the bowl or shank. I patted the surface dry. The first two photos below show the scrubbing process. The third, fourth and fifth photos show the bowl after being dried off. The surface is clean and ready to work with.
IMG_1979

IMG_1980

IMG_1981

IMG_1982

IMG_1983

I cleaned out the internals of the stem and shank with pipe cleaners and Everclear as well as cleaning out the mortise area with cotton swabs. Interestingly the inside of the shank not only had minimal tars but also there was some of the red undercoat stain in the shank. I was able to remove all of the stain and the tars.
IMG_1984

I restained the pipe with a dark brown aniline stain, flamed it and restained and flamed it again until the spots without stain on the edge of the rim and near the stem were well covered. I mixed the stain one part stain to one part alcohol as I wanted it to cover the briar but allow the undercoat of the red to come through once it was buffed and waxed.
IMG_1985

IMG_1986

I used 1500 and 1800 grit micromesh sanding pads and wet sanded the stem to remove the surface oxidation. I also “painted” the stem with a Bic lighter to burn off the oxidation. The picture I took of this failed to come out so I do not have photos of this step. I then dry sanded the stem with the remaining grits of micromesh from 2400-12,000 grit.
IMG_1988

IMG_1989

IMG_1990

I gave the stem a coat of Obsidian Oil and rubbed it into the vulcanite. Once it was dry I hand buffed the stem and then gave it a coating of carnauba wax by hand using some Paragon wax. I reinserted the stem in the pipe and then took it to the buffer. I buffed it with White Diamond and then gave the bowl and stem a light buff with carnauba wax. I repeated the waxing until the pipe was well covered. I gave it a final buff with a soft flannel buff. The photos below show the finished pipe. The topcoat of brown stain lets the red undercoat show through and adds dimension to the finished look of the pipe.
IMG_1991

IMG_1992

IMG_1993

IMG_1994

Parker Super Briar Bark Cherrywood Restored


Blog by Steve Laug

The first of the latest lot I picked up on my trip to Northern Alberta was brought to the work bench this afternoon. I decided to work on little Parker Super Briar Bark Cherrywood. It is stamped on the underside of the shank Parker over Super in a diamond over Briar Bark. Next to that is Made in London England with both a size number – 4 – and a shape number – 283.
IMG_1862

The bowl had a lot of cake build up in the bowl and had some nicks in the briar around the outer edge of the rim. The finish was dirty with grime in the deep crevices of the sandblast on the outside of the bowl and a buildup of tars on the top of the rim. The stem was oxidized and had some tooth damage on both the top and bottom sides near the button. The Parker logo “P” in a diamond was partly visible on top of the stem. It was merely a painted on logo and not stamped in the vulcanite so it would be hard to clean and leave in place.
IMG_1863

IMG_1864

IMG_1865

I reamed the bowl with a PipNet pipe reamer – a T handle and different cutting heads. The smallest diameter cutting head trimmed back the cake to a thin coat. I dumped the carbon buildup in the rubbish and then cleaned out the bowl with a cotton swab dipped in Everclear to remove any leftover loose carbon.
IMG_1946

IMG_1947

I removed the stem and found that the pipe had an inner tube like the Dunhill Inner Tube that was used as a method of keeping the shank clean from tar buildup.
IMG_1948

I scrubbed the surface of the bowl and shank with a soft bristle tooth brush and undiluted Murphy’s Oil Soap. I scrubbed it until the soap was dirty and then rinsed it off under warm running water and patted it dry. I kept the water out of the bowl and the shank as I did not want those areas wet.
IMG_1949

I cleaned out the shank and the bowl with pipe cleaners and cotton swabs and pipe cleaners dipped in Everclear. Once the inside was clean I worked on the oxidized stem. I sanded it with 220 grit sandpaper to break up the calcium buildup around the button area and to also minimize the tooth marks on the top and the bottom side of the stem. After the initial sanding I scrubbed the surface of the stem with Meguiar’s Scratch X2.0 to remove the surface oxidation and to soften the oxidation deep in the stem.
IMG_1950

IMG_1951

I scrubbed the inside of the stem with pipe cleaners and Everclear and used 0000 steel wool on the aluminum inner tube. I sanded the stem with micromesh sanding pads from 1500-12,000 grit. I wet sanded with the 1500 and the 1800 grit and afterward applied some white out to the area of the logo. I decided to try and build it up a bit. The logo appeared to be stamped in the stem but as I looked at it I could see that it was a painted on logo. In the polishing of the stem I sacrificed the logo. I dry sanded with the remaining grits of micromesh from 2400-12,000.
IMG_1952

IMG_1953

IMG_1954

IMG_1956

IMG_1957

IMG_1959

IMG_1960

When the sanding was completed I gave the stem a rub down with Obsidian Oil and let it soak into the vulcanite. I buffed it with a soft cloth and gave the stem a coating of carnauba wax by hand. I restained the bowl with a dark brown stain that had been diluted with one part alcohol to one part stain. I wanted to cover some of the nicks in the outer rim and some of the light spots on the shank that showed wear and tear. I applied it with a cotton swab and then flamed it with a lighter. I reapplied the stain and reflamed it until I had the colour match I was looking for.
IMG_1961

IMG_1962

IMG_1963

IMG_1964

I reinserted the stem and gave the bowl and the stem a coat of Halcyon II wax and hand buffed it with a soft cotton cloth and a shoe brush.
IMG_1965

IMG_1966

IMG_1967

To finish the pipe I buffed the stem with White Diamond and lightly buffed the bowl with the same. After the buffing I gave it a light coat of carnauba wax and buffed it with a clean flannel buff. The finished pipe is pictured below and awaits its inaugural smoke.
IMG_1968

IMG_1969

IMG_1970

IMG_1971

Tobacciana: Dating an Old Cutter Top Tin of Condor Sliced


On a recent trip in Northern Alberta, Canada, I visited an antique mall and came across this old unopened tin of Condor Sliced made by Gallaher’s. Once I saw the old tin I had to have it and the price was only $10 so it is now in my collection. I am still not sure if I will open it and smoke it or just leave it as is for its collectible value. The tin is in excellent shape as can be seen in the photos below. The label reads Gallaher’s Condor Sliced on the front and back of the tin.
IMG_1940

The lid is embossed and reads Gallaher Limited Belfast & London around resting Lion holding a flag over Trade Mark. The lid can be seen in the photo below. There is also a portion of the lid that is to be used to open the tin; it is visible on the left side of the lid.
IMG_1941

One side of the label is printed as can be seen in the photo below: 2 Ozs. Net. over Gallaher Ltd. Belfast & London. On the other side is a portion of the tax stamp that reads 118 in a box and Series C. This is visible in the next two photos.
IMG_1942

IMG_1943

On the bottom of the tin it is stamped 9743. At this point in the search I am surmising that it is a code that can give a clue to the date of the tin. (See photo below)
IMG_1944

Upon removing the lid of the tin the remainder of the tax stamp can be seen clearly. It is slightly torn but the stamping is readable. The top banner of the stamp reads Canada and in the box it is stamped 1/9 Pound Tobacco. Now I wanted to know when this tin of tobacco was made. Armed with the information on the tax stamp and the numbers stamped on the tin bottom I began my research to see if I could narrow down the date of manufacture. I began with a search on Google to find information on Canadian Excise stamps or tax stamps. That seemed like a good place to start in the search to date the tin.
IMG_1945

The first thing I found in my Google search was a site that offered unused tax stamps for sale. They had the exact stamp for sale to collectors in an unused condition. The stamp catalogue said that this particular black stamp was rare. As can clearly be seen in the photo below it is a match to the torn stamp in the photo above.
3558

From there I did more research into the tax stamps and found several articles that are available in PDF format by Christopher Ryan. Ryan did an amazing booklet on Canadian Tax Stamps in terms of meaning and history. The photo below is of the cover page of the first part of his booklet on Canada’s Stamp Taxation of Tobacco Products. I read through much of it and in Part 6, I found the pertinent information that I needed. I will summarize what I found out in the paragraphs below.
stamps

Tax stamps were issued in rolls of prepaid amounts to the manufacturers of the tobacco products. These pre-stamped amounts were then put on the tins, plugs or packages of tobacco. The stamp I have on my tin predates the doubling of the excise tax in March 1943 when the stamps were over-stamped with a new value allowing purchasers of rolls of stamps to continue to use the older stamps until they were gone. This over-stamping continued until in 1947 the stamps were taken out of circulation and the excise stamps were no longer used. In the clip from the article pictured below there are pictures of the original stamp (Figure 3) and the over-stamped stamp (Figure 4).
Dating stamps

Later in the article from part 6 of Ryan’s work I found that the stamps on the tin that I have were made after 1935. With that new information I was able to narrow the field of time to a seven year window. That would place the tin I have to a period of time between the years of 1935 to March of 1943. This information definitely narrowed the field as I tracked down the research. In the next clip from the article there was more information given in terms of the changes in the taxation system used for tobacco. The photos included in the article are similar to the stamp on the tin I have.
tax stamps

Knowing that time line I began to work on the stamping on the bottom of the tin. Remember that is was stamped 9743. With the information I had found I believe that the stamping is a date code put on by the manufacture of the tobacco and it leads me to confirm that the date is indeed 1943. Knowing that the stamps were over-stamped after March 1943 the tin I have would thus have to be pre-March of that year. I think that overall it is not a bad find for a few minute hunt in an antique mall. I have a tin of 70 year old Condor Sliced in my collection. Now I only have to make a decision of whether to smoke it or save it.