Thanks Mark for this great piece of history! Much appreciated.
The Making of the Peterson Pipe (VHS, 1998)
Leave a reply

Thanks Mark for this great piece of history! Much appreciated.
Guest Trip by Robert M. Boughton
Member, International Society of Codgers
Member, North American Society of Pipe Collectors
http://www.naspc.org
http://roadrunnerpipes.biz (Coming Soon!)
http://about.me/boughtonrobert
‘Curiouser and curiouser!’ cried Alice (she was so much surprised, that for the moment she quite forgot how to speak good English); ‘now I’m opening out like the largest telescope that ever was! Good-bye, feet!’ (for when she looked down at her feet, they seemed to be almost out of sight, they were getting so far off). ‘Oh, my poor little feet, I wonder who will put on your shoes and stockings, for you now, dears? I’m sure I shan’t be able! I shall be a great deal too far off to trouble myself about you: you must manage the best way you can; –but I must be kind to them,’ thought Alice, ‘or perhaps they won’t walk the way I want to go! Let me see: I’ll give them a new pair of boots every Christmas.’ — From “Alice’s Adventures in Wonderland,” Ch. 2 (1865), by Charles Lutwidge Dodgson under the pseudonym Lewis Carroll [1832-1898], English mathematician, noted photographer, essayist, poet and novelist
FOREWORD
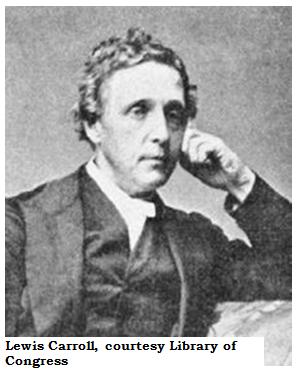 The origination of tobacco in the Americas and Australia is not as common knowledge as, say, that Columbus didn’t actually discover America, but then, there are stranger facts associated with the leafy plant’s history. Certain forms of tobacco were – and likely still are – used in the spiritual practices of various native populations to produce reactions that, by newer and more close-minded cultures, are called hallucinogenic. While there is no evidence to support the idea, and I am not suggesting a serious connection, Lewis Carroll (as the brilliant author will always be remembered) could have been under the influence of tobacco hallucinogens when he wrote the above masterpiece and its sequel.
To be fair and clear, however, Carroll’s unique composition style was the result of the Universal Impetus Theory (UIT) for all great literary innovators: having a gift as an ingenious raconteur able to choose and order his words in a precise, inimitable form, and the good fortune of living in the right time. Carroll also had an unparalleled knack for the creation and blending of words. Of course, the fact that he was a good friend of the British lexicologist Henry George Liddell, after whose daughter the timeless Carroll classic was named – and at whose insistence he committed his oral tales to paper, leading to its publication – no doubt played a part in the use of combined and nonce-words (those created for the moment, or nonsensical) and complex sentence structure by the mathematician turned writer. Coining the word galumph, for example, which means “to bound or move clumsily or noisily” (OED), Carroll blended gallop and triumphant. His works still thrill children and adults alike.
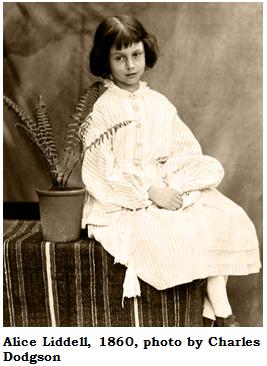 Consider this. Without Carroll, we would not have fantastic, imaginative and endearing verbs, adjectives and nouns such as galumph as well as chortle, frabjous, mimsy, vorpal, snark and, last but not least, jabberwocky. The colloquial term snarky, for irritable or short-tempered, was adapted by Edith Nesbit, in her 1906 novel “Railway Children,” from the name of a variety of disconcerting creatures introduced to the world in Carroll’s poem, “The Hunting of the Snark.” As a hopeful point of interest, my spellchecker recognized chortle, galumph and jabberwocky, so accepted in the English lexicon they have grown. And as I added the rest to my Word dictionary, should I ever have occasion to use them again, they will appear without the annoying red, squiggly underlines. What’s more, thanks to the periodic transmission of these additions to Microsoft, where they will undergo due consideration by vorpal, slithy folk whose job it is to determine their worthiness, perhaps someday the perspiration-coated toilers over such heady decisions will make it possible for Carroll’s now-real words never to trouble other users of the magical expressions.
Now, lately I’ve been thinking about pipes and tobacco in a different frame of mind. Those who know me best seem to agree that my arguably Byzantine cognitive processes can be scary or even stupefying, if not downright dangerous, depending on the attention level of the person listening to or reading my discourses. Nevertheless, these commentaries often made off-the-cuff and on diverse topics, when joining a conversation, tend to come together with certain cogency, the suddenness of which is a bit like the epiphanic ending of a Faulkner novel.
At any rate, my musings of late, at least in my own mind, have produced some unusual notions, some of which have even made me laugh out loud. That’s LOL, for those young enough to have been raised in the Cyber Age and have forgotten what the three letters even abbreviate. These ponderings, reflections or reveries, or whatever else anyone might choose to label them, up to and including absurdities and/or deliriums, grew curiouser and curiouser the further I allowed them to metastasize within my psyche, and have now reached the point where I am compelled to share them, for better or worse.
RANDOM PIPE TRIPS TO CONSIDER
In the beginning, as far as pipe tobacco goes, there was a peculiar plant of the genus Nicotiana, from the nightshade family, called N. tabacum. The simple fact that our revered tobacco derives from Deadly Nightshade – or belladonna , the black berries of which are frightful in their toxicity – should be enough to give pause to all of us who, with regularity, take such special pains to pack our pipes just so with the stuff, so that it might burn all the longer and thoroughly. But of course this knowledge, even if acquired by some readers who just now digested the previous sentence, will have no such effect.
PIPE TRIP #1
Let’s start this silly exercise with an image, stemming from the relationship, however distant, of tobacco to Deadly Nightshade, and which appeals to my admittedly perverse, at times, sense of humor. Conceive, if you can, how many hapless, hungry and heedless berry-pickers perished from eating the wild belladonna back in the day when people didn’t know better than to pluck such frabjous-looking things without care and pop them into their mouths; or, if the victim of eating the fruit of the somewhat drab green and weed-like flora were spared death and merely rendered howling mad, attempt to visualize the resulting hallucinations that are so vivid the sufferer has no grasp of reality whatsoever. Whichever outcome presents, it is just because of the berries appearing so plump and pretty and sweet, and impulsive human nature.
Then the kicker: one day, someone came along and experienced the brainstorm to toss the berries aside and turn the unattractive green leafs into something that could much more safely be ingested by somehow cultivating, processing and at last chopping up into suitable pieces for placing in a crude bowl with a similar stem (perhaps in the botanical sense) for the purpose of igniting and inhaling them.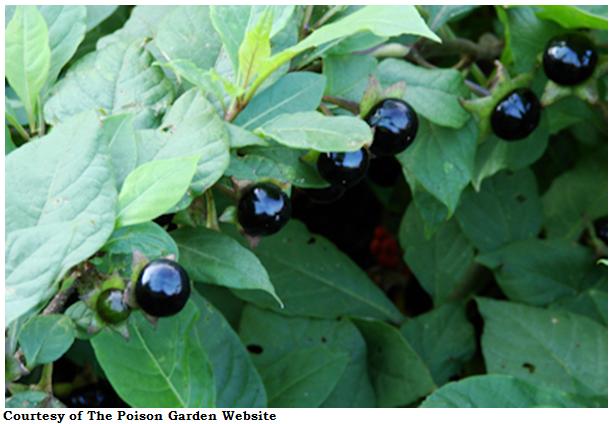 The worst part of this opening cogitation is the rare but continuing incidences of accidental poisoning from these lovely though heartless elements of nature. Take, for example, the case of a very large American (naturally). He measures 6’ 3” in height and 220 pounds in width. Wandering through the wilds of Germany late this very year, he spies the shiny, luscious appearing fruit on a plant he mistakes for elder berries. He gobbles 20-30 of them despite their semi-sweetness with bitterness from the seeds, and not feeling quite himself, promptly decides to take a nap right there in the woods. His sleep is frequently interrupted by a nagging need to urinate, which is difficult because nothing seems to want to come out except small, forced amounts of clear liquid with a strange blue tint which the tourist has just enough sense left to be unsure if it might not be a hallucination.
After giving up the nap idea, his mouth becomes dry and his throat sore. Then his vision goes blurry, and he decides it’s time to see his doctor, who happens to notice the patient’s pupils are dilated to the max and unresponsive to any safe and sane stimuli. The physician thinks it best for the man to be taken to the hospital. During the ensuing drive, the hallucinations commence. A single hedgehog appears as thousands, and deer are kangaroos. The poor fellow arrives at the hospital a mere four to five hours after scarfing down so many of the marvelous berries, and all the hospital staff can do is observe him – intensely – for several days that seem like an eternity to the man.
The situation rapidly escalates to seeming insanity filled with hideous, terrifying visions and other misperceptions of reality, like a singularly bad LSD trip, prompting a transfer to the psych unit. This is just the beginning of the trip down the rabbit hole, but at last he does begin to get better. As soon as he is able to comprehend the words, he is told how lucky he is to be so large, as anyone smaller would surely have died. Recovering even now, the man still is not his old self again.
You see, this is a true story, and not in the sense of the often misleading tags at the beginnings of movies. Heaven knows I didn’t make it up! I strongly suggest reading the full account at http://www.thepoisongarden.co.uk/blog2/blog281115.htm for a jolly good first-hand account of the ordeal.
PIPE TRIP #2
The interior of the bowl of a pipe, where we cram or methodically place the tobacco, is called the chamber, yet one never seems to hear a pipe smoker refer to settling down in his easy chair to enjoy a good chamber of whatever blend has been chosen for the occasion to contemplate life. Could this habit derive from the alternate definition of chamber as a room, as in a chamber of horrors? Or might it be a subconscious aversion to a comparison of the pipe’s chamber to the part of a gun that renders the weapon armed or not? I mean, think of it! What merry piper would want to sit in a dreadful chamber or put a chambered gun in his mouth? Just food for thought, nothing more.
PIPE TRIP #3
The bit is almost universally referred to as the stem. What in the name of all that’s holy is the problem with calling the thing by its proper name? Honestly, I want to know when and where this convention began, and who started the confusion! Yes, I want nothing less than the time, location and name of the guilty party.
Heaven help us if this ruddy awful vacillation stems (pun intended) from some sorry fellow’s fear of comparing the bit of his pipe to the past tense form of bite, all for the day when he was a wee little tyke and a dog bit him, which seminal event has bitten (past participle) his worldview forever.
Then again, maybe the dither is about Man’s eternal fear of karmic payback, in this case for the long, shameful practice of abusing others of God’s finer creations, such as horses, in place of his own back-breaking labor, by placing metal bits in the sad creatures’ mouths and then whipping them onward to finish tilling the fields we humans might just have had to work a bit harder to accomplish ourselves.
I ask, what’s the point of the evasion in the first place? After all, our worldwide band of brothers and sisters, in pursuit of the pleasures and comforts of a nice, relaxing smoke, seem to have no qualms referring to the often sharp but excellent bite of a bit of a strong mixture of a VaPer or other coarser, non-aromatic blend that can become an acquired taste and lead, at worst, to a case of Tobacco Acquisition Disorder (T.A.D.).
PIPE TRIP #4
While that last note is fresh in the mind, I’ll leap at the opportunity to address the use of the word disorder in T.A.D. and its mates, Pipe Acquisition Disorder (P.A.D.) and Accessory Acquisition Disorder (AAD). Who on Earth dreamed up these ostensible maladies? Surely nobody accredited within the medical community! My guess is some lone pipe smoker with Obsessive-Compulsive Disorder (OCD), a genuine and serious and hardly uncommon psychological irregularity that can easily lead to an overspending problem, started the whole thing, and others jumped on the old bandwagon and added the others. I can just see all of them waking up with cold sweats in the middle of the night who-knows-when with the realization that, once again, they’d gone and spent their entire grocery budgets along with half the rent on one of the three categories of pipe expenditures described above.
What’s more, I’ll bet each and every one of them reached for his ever-handy Merck Manual to self-diagnose himself so he could tell his local candy doctor just what pill he needed to overcome the dread “disorder.” My gosh, the measures people will take to get a new drug! Why, it’s scary even to contemplate. I thank the stars I’m not that bad off, you know I do! I mean, sure, I’ve been late with the rent or cable bundle bill, or paying for my cell phone – maybe, on rare occasions, all three – but I swear I do not have any kind of disorder! Well, other than Attention Deficit Disorder (A.D.D.) and Post-Traumatic Stress Disorder (PTSD), not to mention chronic migraines and – oh, yes – agoraphobia. But those trifles are all under strict control, and you may take my word on that to the bank!
PIPE TRIP #5
Last but not least is the odd practice of the average piper, who will speak in calm, even tones of smoking his pipes – with utter disregard for all of the expression’s negative connotations. After all, where there is smoke, there is fire. Picture yourself in any of Dante Allighieri’s infernal nine circles of Hell on Earth leading, with fervent thirst, for ultimate eternal salvation. Do we really want to go there? Let’s not. Dante already did the great favor of doing so for us! Just say no, as Nancy Reagan did to drugs. Instead, join me in the somewhat troublesome practice, I admit, of enjoying a pipe. I picked up this routine after reading an excellent essay last year concerning positive methods of writing and speaking of the multi-faceted pleasures associated with tobacco pipes, by a member of the North American Society of Pipe Collectors in its magazine (they insist on calling it a newsletter ), “The Pipe Collector.”
Seriously, if I can do it, you can, even if in our hearts we are thinking of Lady Mary Wroth’s 1621 controversial and groundbreaking literary work, “The Countess of Montgomery’s Urania,” and one line from it: “Those loose and wicked enjoyings which we coveted.”
AFTERWORD
This little exercise in writing is at best an essay, and at worst a work of fiction, lest anyone who failed to grasp my attempts at satire walk away from the experience with the notion that I might in any way have been serious.
I welcome, more than usual, any responses with contributions of other examples of pipe trips (or, for that matter, alternative critical thoughts), with the hope of someday compiling an Encyclopedia of Pipe Trips.
Blog by Steve Laug
Early in December I received an email from a friend in the Vancouver Pipe Club about a fellow who was trying to get a hold of me about some very old 1850’s American made pipes he had picked up. We connected and he sent me the following email:
Hi Steve! Really liked your posts and just wanted to reach out. Thanks for the note back. I purchased the 3 CPF pipes already for $120 for the set over the weekend.
• The straight has never been smoked and is in excellent shape. I did not know it was unsmoked, that was a pleasant surprise.
• The bent is in good to VG shape. Lightly used. The threads are off a little from wear. Does not line up perfectly when fully threaded in, off by about 15 degrees.
• The Meer is trashed. End has been chewed down to having holes top and bottom, and the bowl is super used. That was disappointing
I am guessing after I have looked at them that they are around 1907? It’s the Oval CPF logo with French over the logo and Briar under. I am not going to smoke the straight, it’s been clean for 100 years, I don’t want to be the guy that dirties it up. LOL. I have not tested to see if the stems are amber or not.
Any thoughts on dating or value? Should I be happy or sad for $120? Any tidbits of the history beyond what you have written is appreciated.
Thanks man, really appreciate you taking the time to reply.
All the best,
Michael
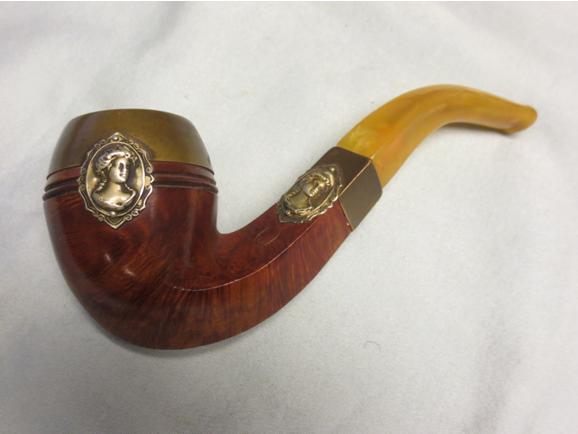
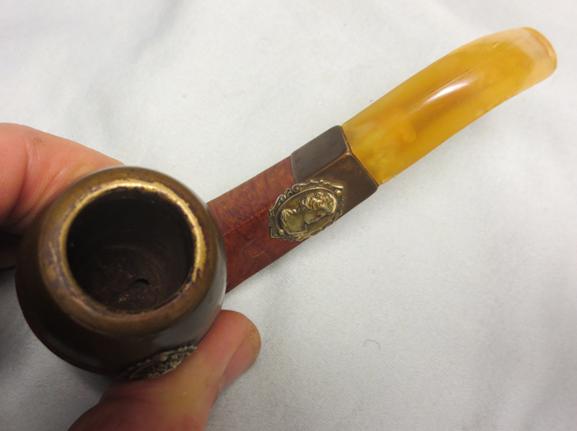
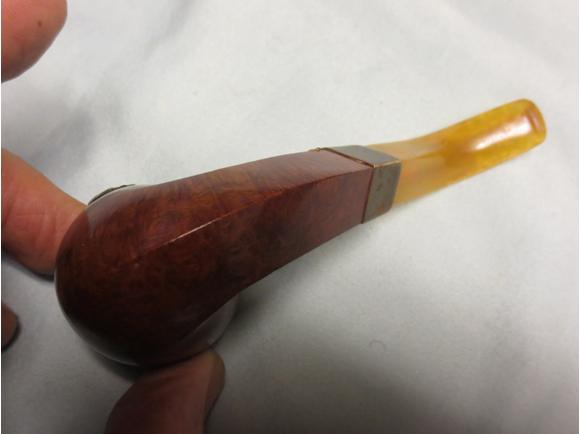
He sent the following photo of the threesome. They were beautiful to me. With the photo he had not only my attention but he had me hooked. I love the old CPF pipes and I had previously restemmed an old bent bulldog like the one in the photo sans bling. This set was amazing and I would love to see it in person.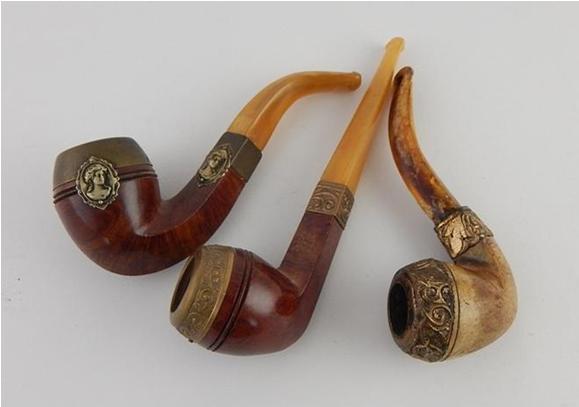 I replied to his email and he responded offering to send me the pipe with the overturned stem for a repair and to send me the Meerschaum to “take a swing at refinishing it” as he worded it. When the pipes arrived yesterday I opened the box to have a look at the pair that he sent. I took the pair out and examined them carefully. The Meerschaum I put in my own repair box for later. The stem on it was definitely a mess. There was crazing throughout the length of the stem where someone had tried to clean the stem with alcohol. It was Bakelite and really was a wreck. The stem on the bent bulldog was much better. If that pipe has been smoked it is very lightly smoked. There is very little darkening in the bowl and none in the stem. I carefully unscrewed the stem and had a look at the bone tenon and at the threaded mortise in the shank. Both were not darkened by smoke so I am thinking that this one is also unsmoked.
I looked at the threads in the mortise and on the tenon and could see that they were worn. The stem had been screwed and unscrewed many times over its long life and the worn threads accounted for the overturn. The stem was clean but dull from not being polished. The bowl ornamentation was oxidized but had a patina that worked with its age. There would be little clean up on this old pipe. The internals were spotless other than dust. A quick clean up with a water dampened pipe cleaner took care of that. The stem would need some work with micromesh pads to bring back the shine. I would leave the patina on the brass as I liked the way it looked. The only issue that needed to be addressed was the overclocked stem and the worn threads.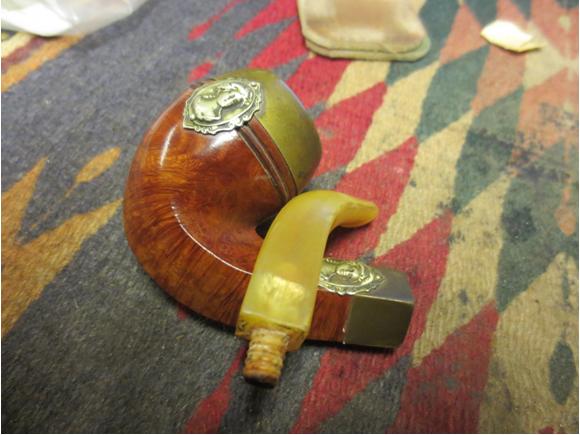 I cleaned up the tenon with a cotton swab and warm water being careful to not get the bone tenon too wet. With a tenon this old it is very easy to snap it when working on it. I used a tooth brush to work on the threads and clean off any dust of debris on them. I carefully applied a few drops of clear super glue to the threads – it would build up the worn threads and also stabilize the old bone tenon. When it dried I tried it in the shank and found it took care of about half of the overturn. I took it apart and added a few more drops of the glue and let it dry.
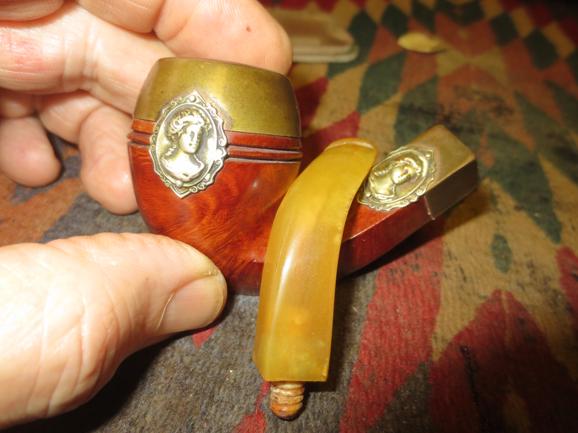 I wiped off the brass with a jeweler’s cloth to protect and clean it slightly. I did not want to remove the patina, just give it a quick rub down with the cloth.
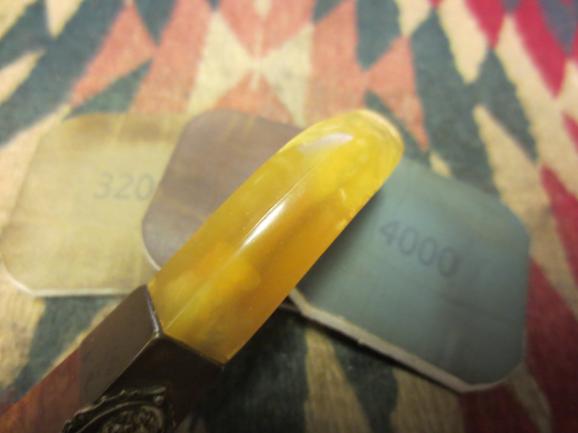
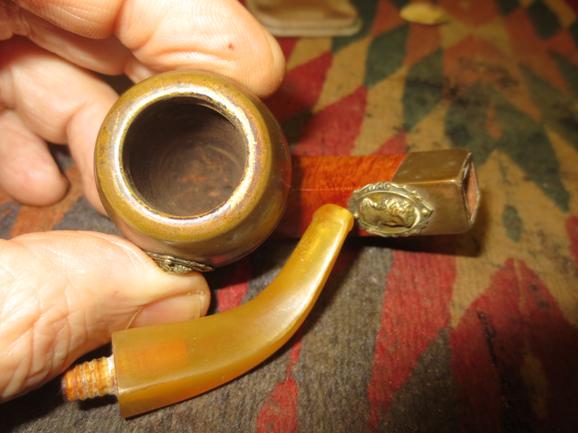 I sanded the Bakelite stem with micromesh sanding pads until the butterscotch colour just glowed. I wet sanded with 1500-2400 grit pads and dry sanded with 3200-12000 grit pads.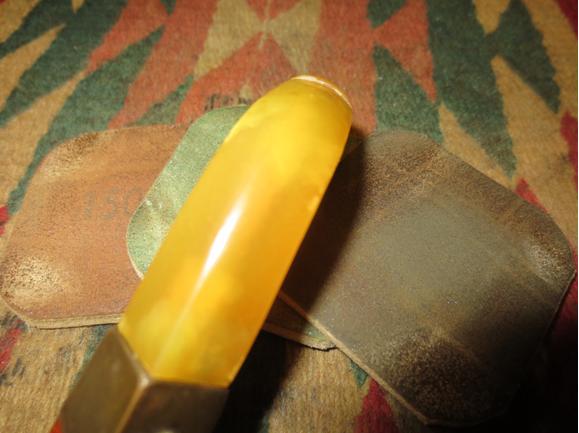
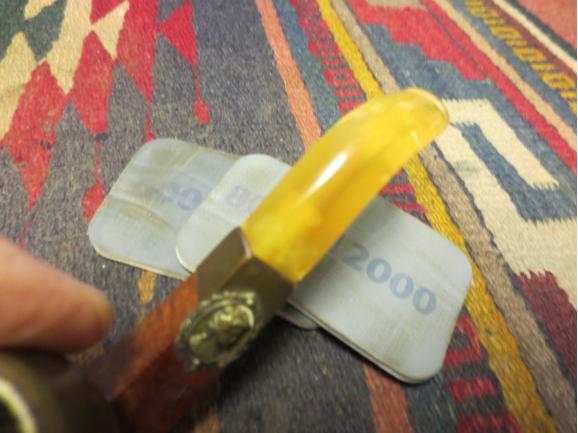 I wiped down the bowl with some Briar Wipe – a no longer made pipe polish and hand buffed it with a microfibre cloth. I gave the stem several coats of carnauba wax by hand and hand buffed it as well. The finished pipe is shown in the photos below. After Christmas I will send it off to Michael to enjoy. Thanks Michael for the Meerschaum to fiddle with and thank you for the opportunity to see and do the repair on this beautiful old piece of CPF history. I can only hope to find a set like yours one day! Enjoy this piece of history that has come into your hands. It is in your trust and certainly with care will continue its usefulness for more generations of pipe men to come. Cheers.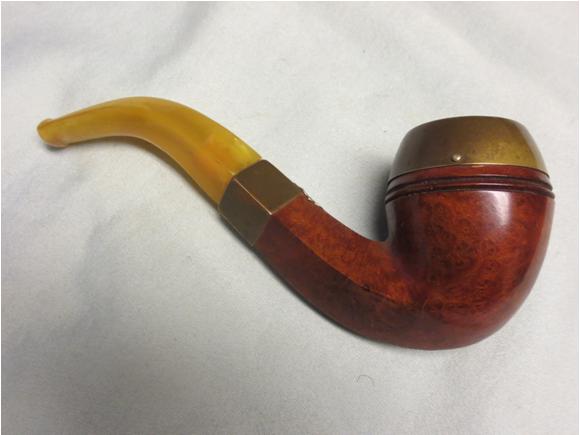
Blog by Steve Laug
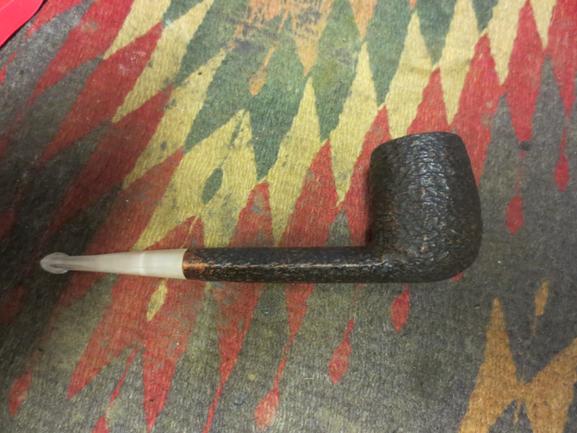
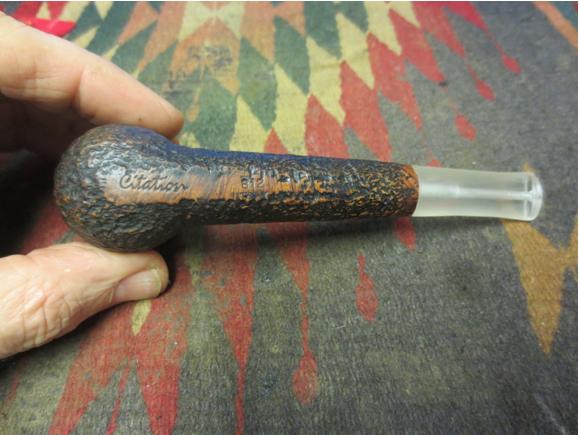
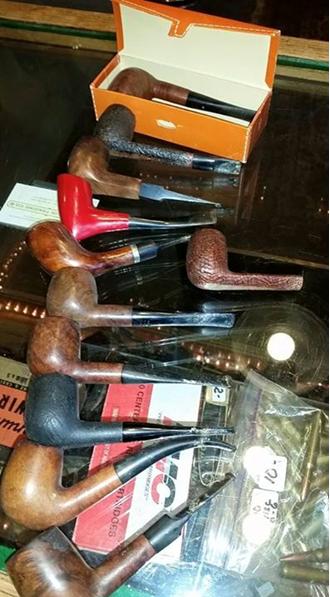 This Citation (second pipe down in the first column in the photo on the left) is a sister pipe to the Savinelli Classica 812 Canadian that I just restored. It is stamped Citation and 812 on the bottom of the shank. The sand blast is nowhere near as beautiful as the Classica but it has a charm all its own. It appears to be a combined blast and rustication – hard to explain but it is just too consistent to be a normal sand blast. It appears to have been rusticated and then blasted lightly. It has a dark brown stain as an undercoat and a light brown over the top. The high points on the finish are lighter brown and the smooth portions are also lighter brown.
The bowl had a pretty heavy cake and the lava had overflowed onto the rim. The finish was dirty but otherwise in decent shape under the grime. The rim appeared to be in good shape under the grime and there were no nicks or dings in the outer or inner edge of the rim. The stem that came with the pipe was not the original and it had been poorly fit to the shank. It was narrower than the shank and pinched at the saddle portion. It still had all of the fill marks from the person who had fit it to the shank. The underside of the button and a large chunk of the underside of the stem were missing. I would not be sad to throw away this poorly cut broken stem.
Inside the shank was pretty dirty and plugged. I could not blow air through the pipe and did not dare to try sucking on the shank. Who knows what might end up in my mouth! I would need to remedy that situation and I would need to make a stem for it. This would be a beautiful little pipe to go with the Savinelli Classica once it was finished – kind a light and a dark version of the same shape. At this point little did I know what kind of surprise lay ahead for me as I cleaned it up and restored this little pipe. The photo below shows the two pipes together. The next four photos give a clear picture of the state of the pipe – its finish, broken stem and tarred and cake rim and bowl. You can also see what I mean when I say that the finish is far to uniform for a sand blast but looks to have both a blast and a rustication. Someone help me out on this if you have any information.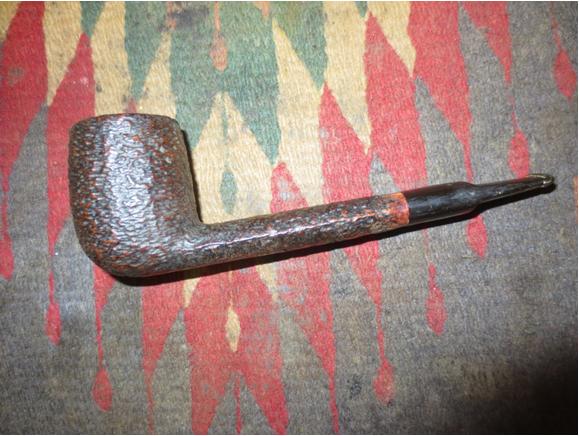
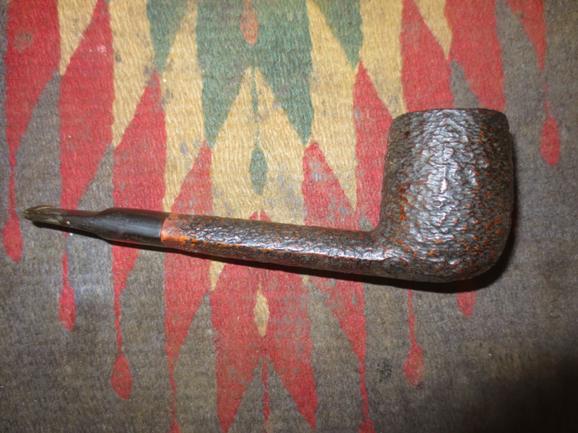
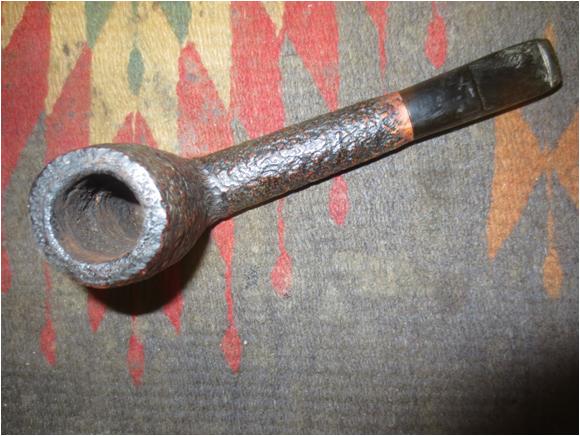
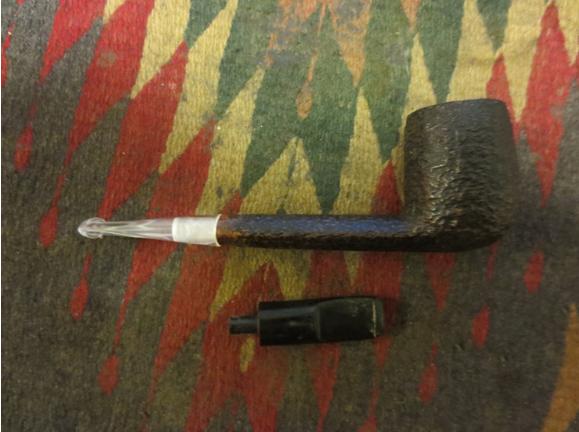
 I went through my can of stems and found a clear acrylic taper stem that would work perfectly with this pipe and with a little shaping would go well with the dark look of the finish.
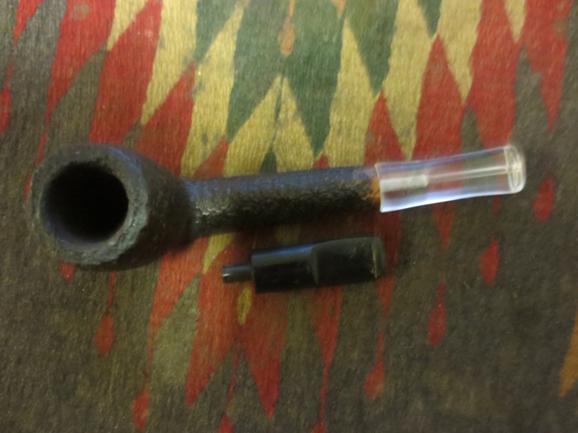
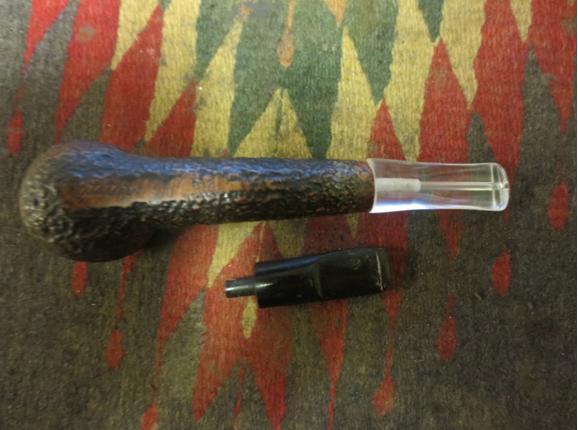
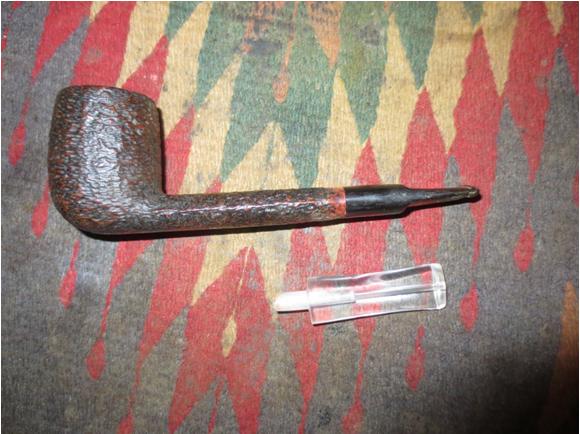 The tenon almost fit perfectly from the start. I only needed to lightly sand it to get a snug fit against the shank. The diameter of the stem was a little bigger than the shank of the pipe all the way around but would easily be shape to fit well.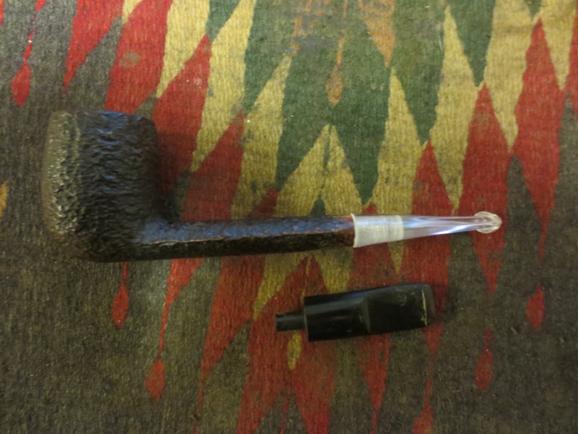
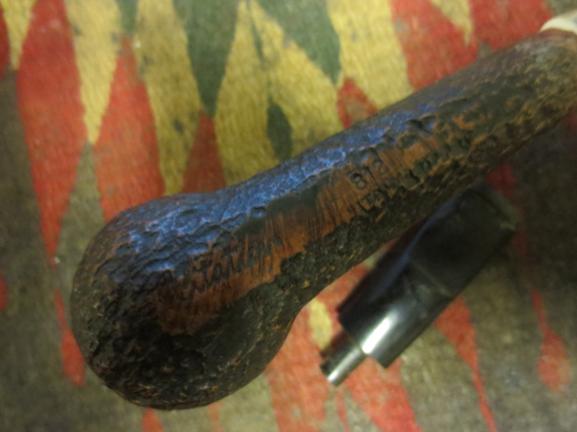
 I took a close up photo of the rim to give an idea of what I was working with on this bowl. The second photo below shows the stamping on the pipe.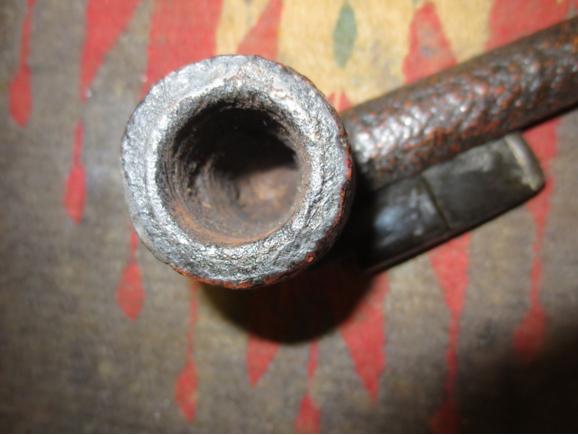
 If I had known what I found out later in the refurbishing process I would never have taken the next steps in the clean up. But I was oblivious so I did them unwittingly. I used the smallest PipNet reamer cutting head to take back the cake to what I thought was bare briar. I used a small pen knife to even up the job of cutting back the cake to smooth.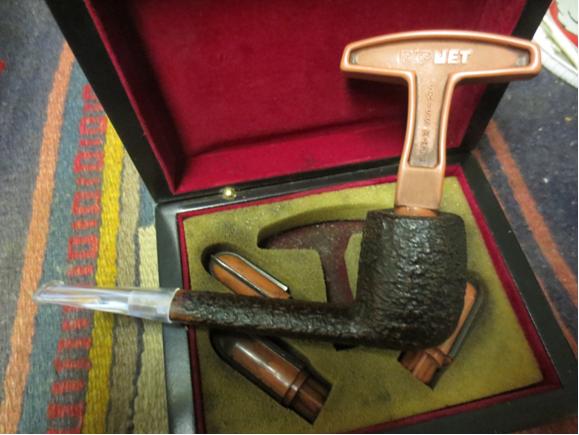
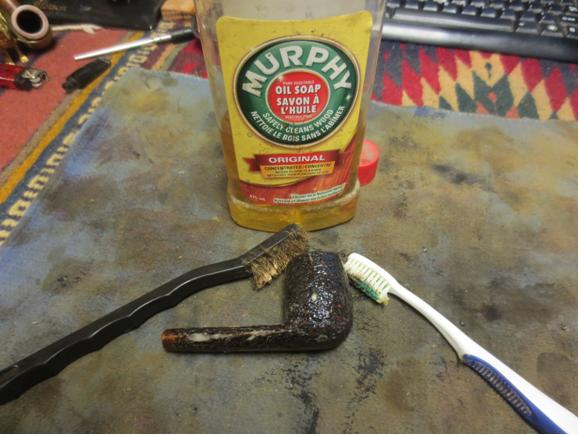
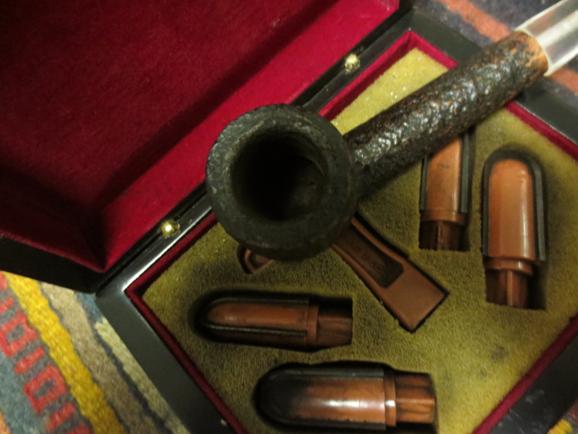 I scrubbed the outside of the bowl and the rim with Murphy’s Oil Soap and a tooth brush and fine bristle brass tire brush to clean off the tars and lava that had overflowed the top of the bowl. I rinsed the pipe under warm water to remove the soap and the grime and dried it off with a cotton towel.
 The cleaned finish even more clearly looks to be a manufactured look to approximate a sandblast finish. But it was a great tactile finish and once polished would look great.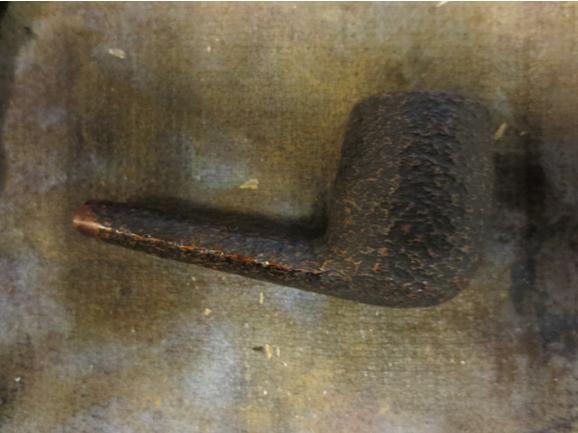
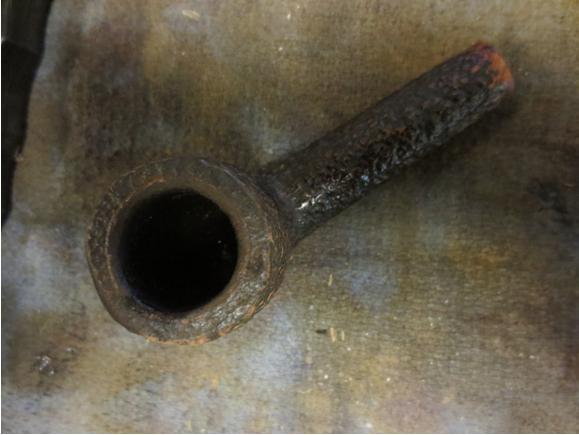
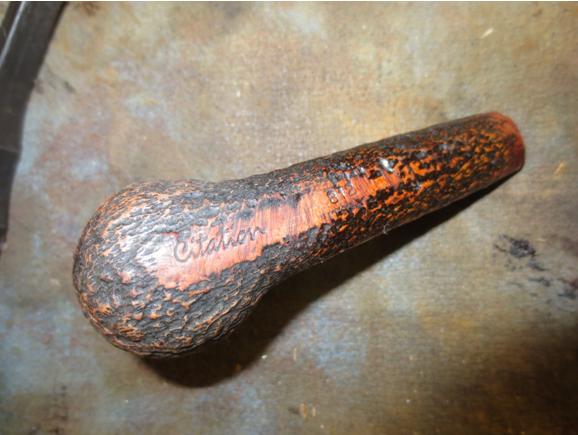 I gave the bowl a light rubdown of olive oil like I had on the Classica. It brought the colours in the briar to the front and it is going to be a beautiful pipe.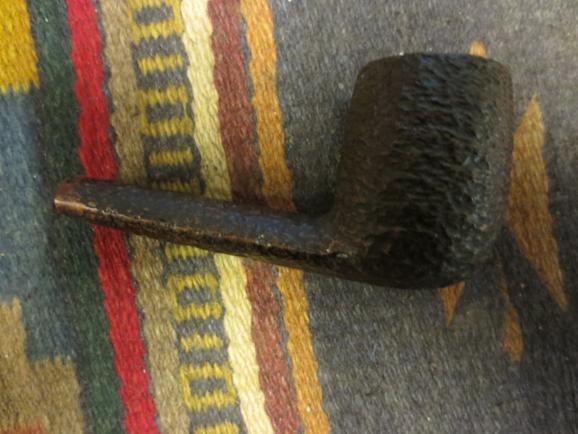
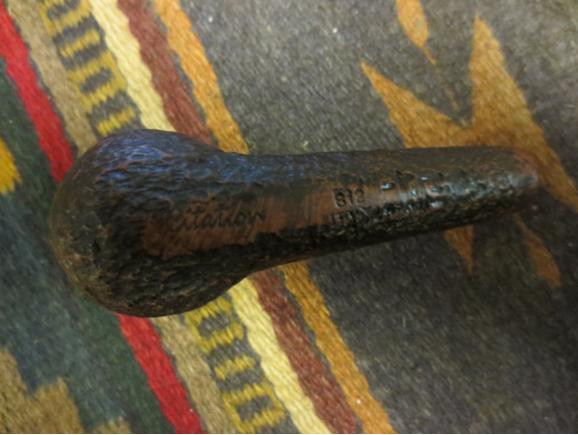
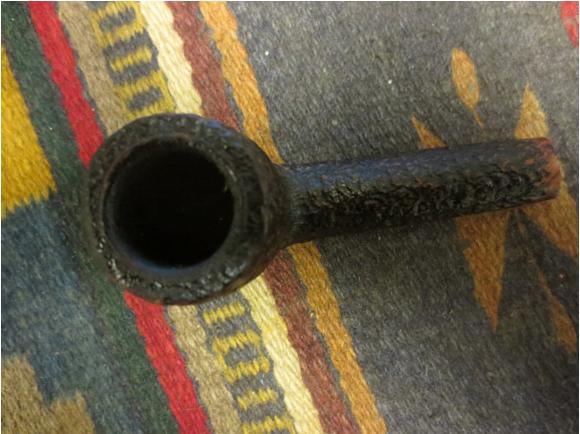 In the photo above you can see what looks like a smooth ring around the inside of the bowl. This was my first clue that things were not necessarily as they appeared. I went back to read a post on Facebook by Geoff Carmell about a Citation pipe he had found. Sure enough the finish was the same and the ring around the inside edge of the bowl was a meerschaum lining. With the way I had man handled it – reaming and scrubbing with the brass bristle brush it is a wonder that I had not damaged the bowl. I would do some work on cleaning that edge a little more gingerly later. Now I had to fit the new stem.
I sanded the stem with a Dremel and sanding drum carefully working it down to the same diameter as the shank and fitting the flow of the curves on the oval shank. This has to be done carefully and with a steady hand or you have to repair the damaged shank or cut another stem to fit. I proceed carefully and slowly. The photos below show the rough fit of the stem after the Dremel and sanding drum work.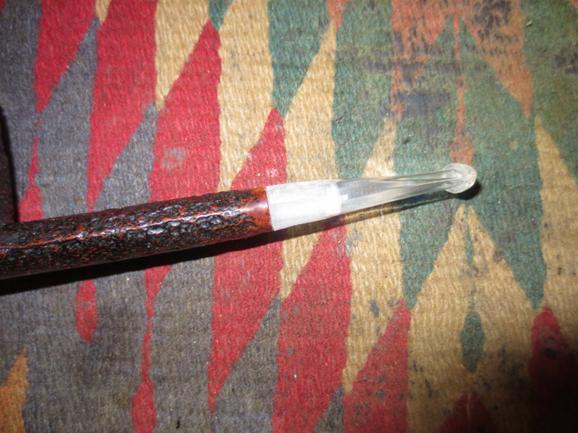
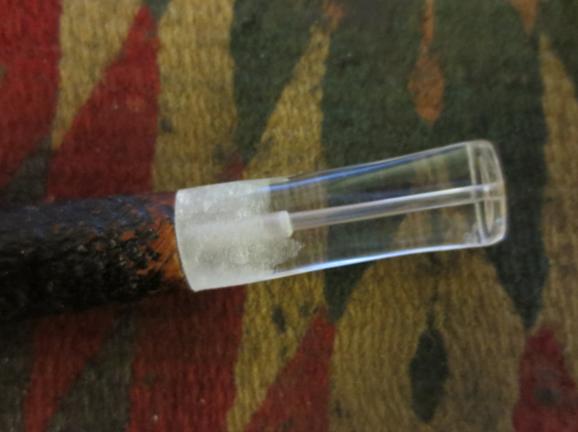
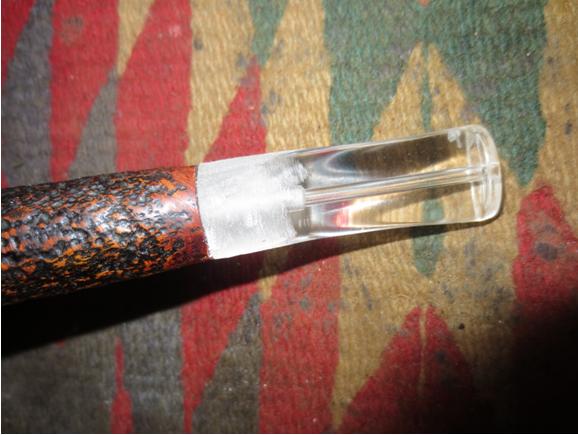
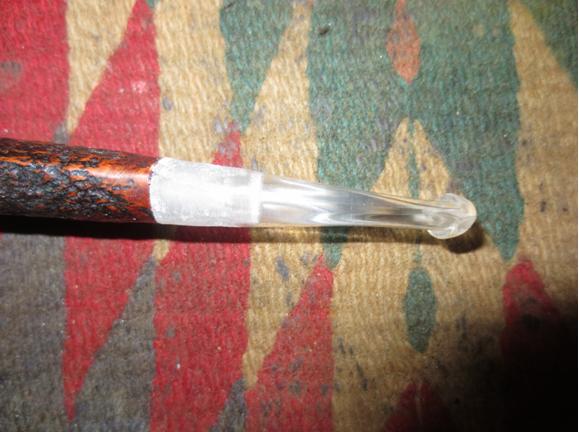 I sanded the rough fit stem with 220 grit sandpaper to smooth out the scratches and fine tune the fit to the shank. I also sanded it with a medium and a fine grit sanding sponge to further fine tune the fit.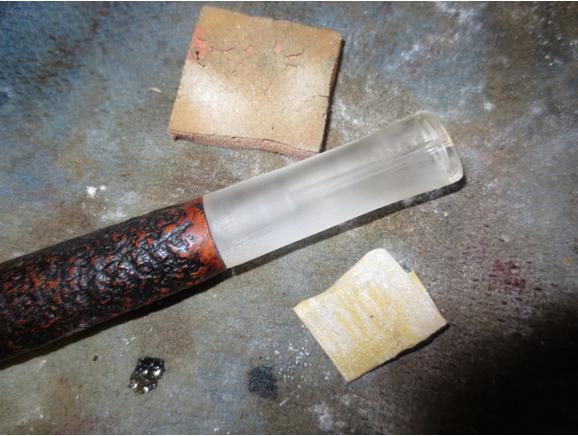
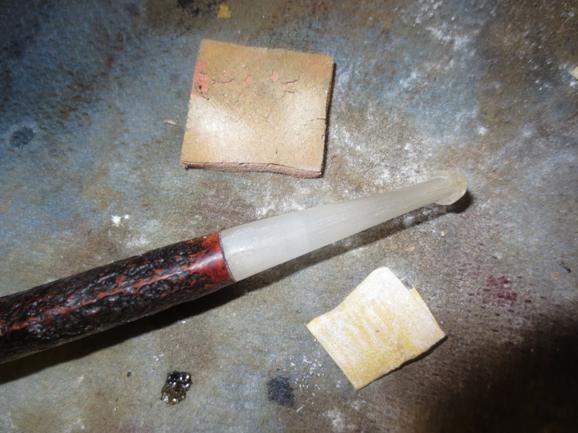
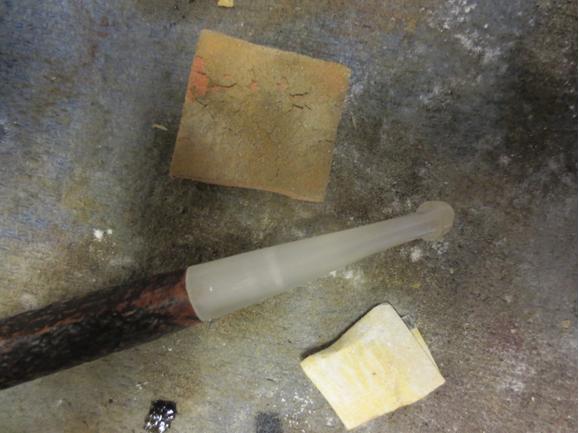
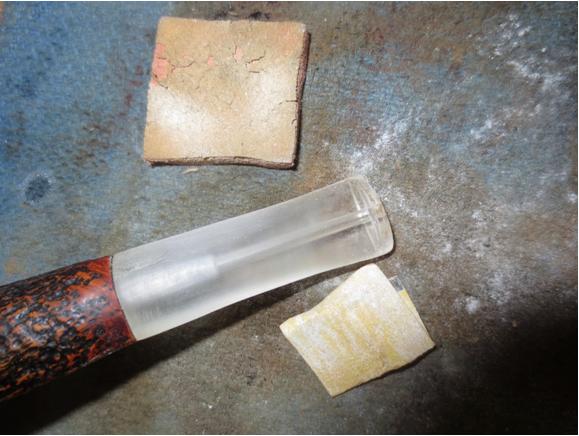 The next photos show the newly fitted stem and what the pipe will look like with the clear stem. It still needs a lot of sanding including file work on the airway and the button. It has a small airhole in the end of the button but I will need to cut and shape a slot.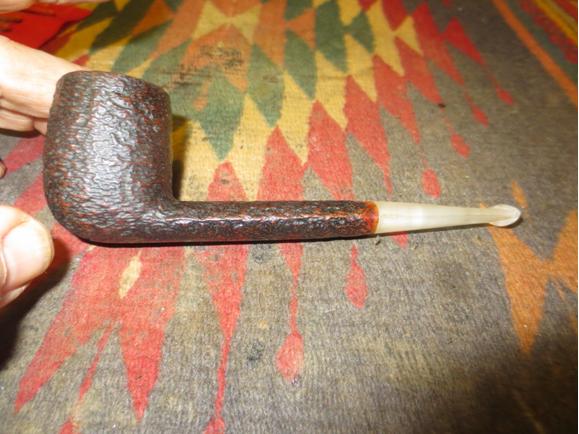

 All of the internal work and the work on shaping a slot are done with my collection of needle files. It looks like a lot of files but I usually only use three different files – a round, an oval and a flat oval. I use both the larger and the smaller files in these three shapes.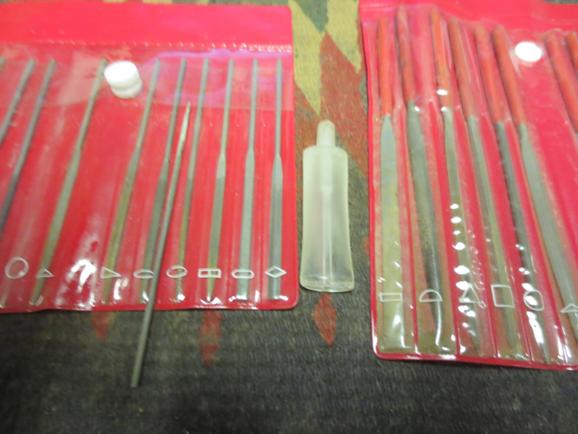
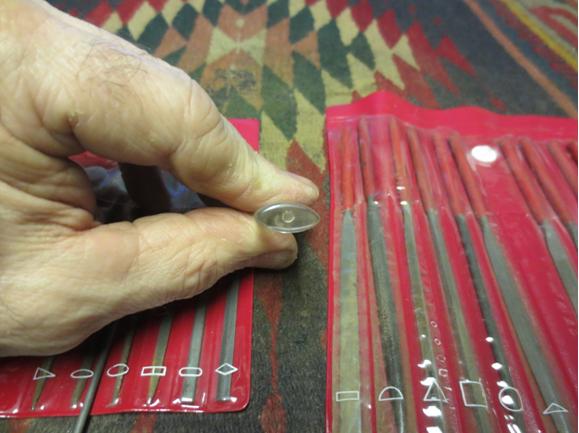 The slot is progressing from a round hole to more of an oval shape that matches the shape of the button. Still a lot of filing to do to get it finished.
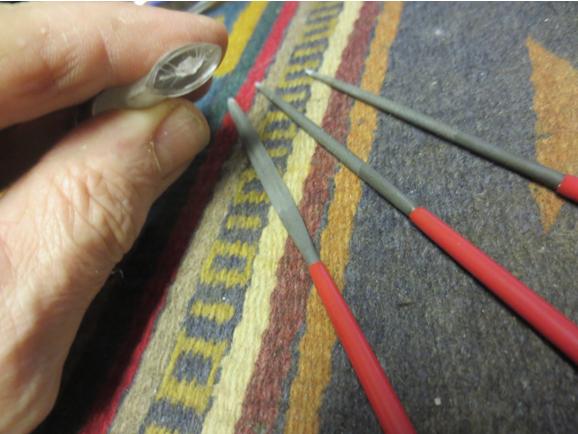 I worked on the button, slot, and airway to smooth things out and open them up with the smaller files as well. When I drilled the airway to turn the tenon the drill left a ridge on the inside of the airway in the stem that is a bear to sand out. I worked on it until it was as smooth as I could get it. There is still a small line in the airway but it is smoother than it was when I started. I am going to have to get some tapered drill bits. That would have made this task a minor hiccup in the process rather than a several hour ordeal. The airway is wide open and takes a fluffy pipe cleaner with ease.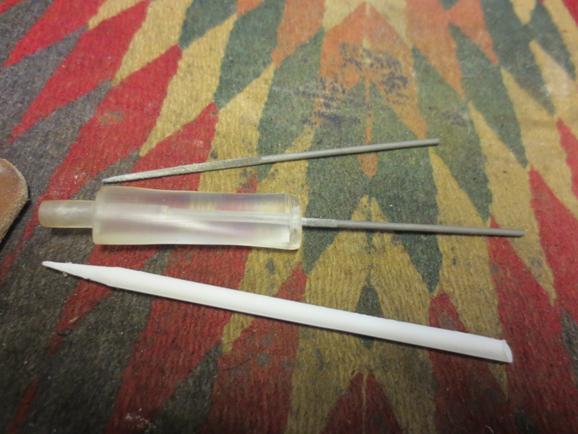
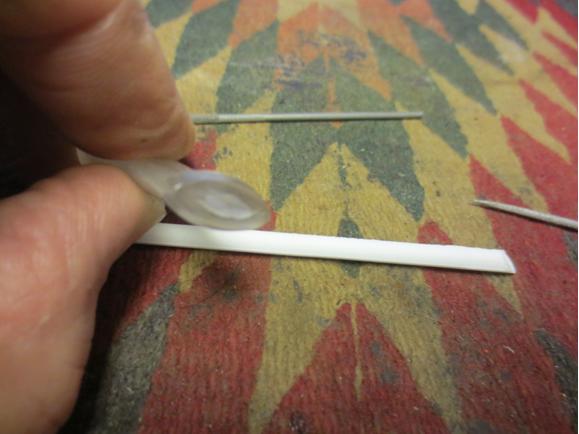
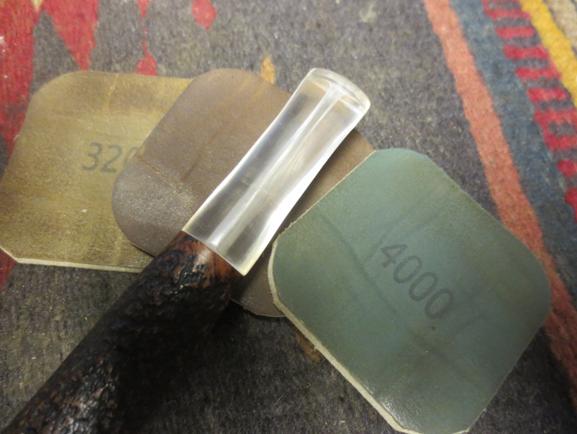
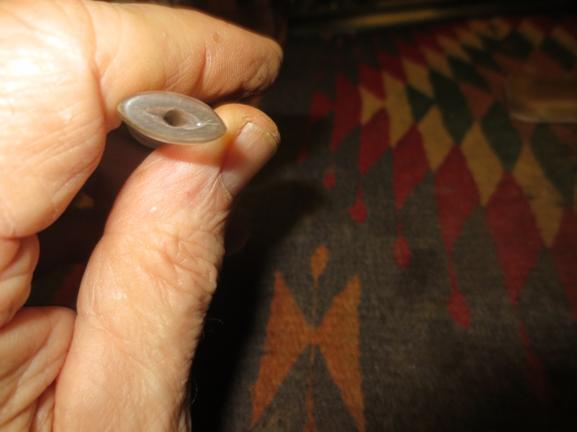 I sanded the end of the button and slot with 220 grit sandpaper to remove the scratches and then went through the micromesh pads to polish it. I worked the stem over with micromesh sanding pads, wet sanding with 1500-2400 grit pads and dry sanding with the remaining pads 3200-12000 grit.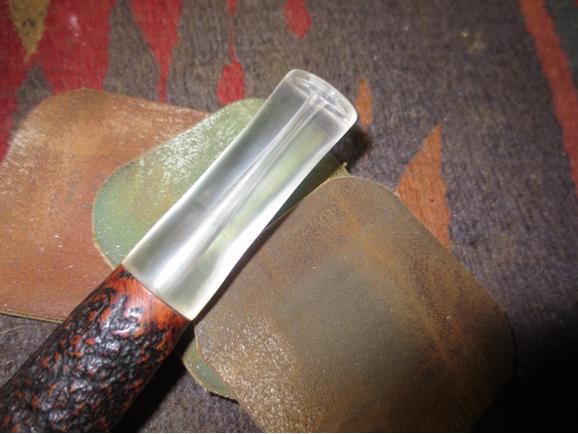
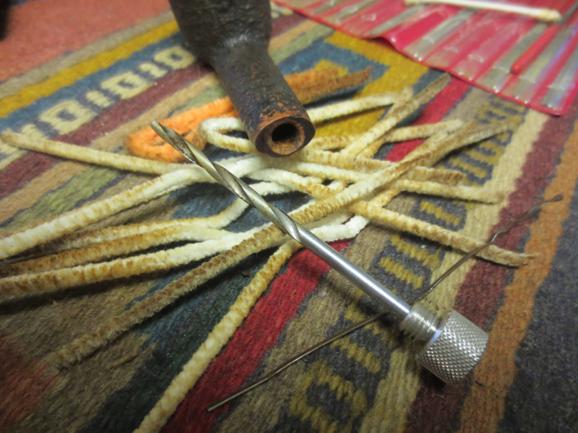
 With the stem done I figured I could put it off no longer. I had to work on the airway. It was seriously clogged. I could not push a paper clip through or even an ice pick. I used the drill bit on the KLEENREEM and could not get it through. I had to soak it with an alcohol wetted pipe cleaner to soften the plug and then I used a paper clip to push through the plug finally. Then I had to work through the drill bit and the pipe cleaners to get all of the gunk out. Finally I have good airflow. I cleaned out the shank with alcohol and pipe cleaners until they were clean.
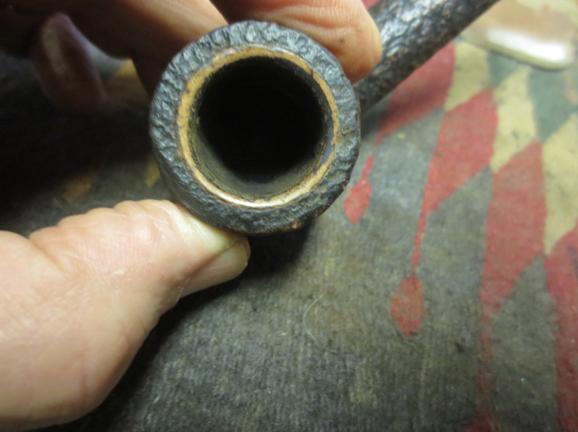
 I cleaned the meerschaum lining on the rim with micromesh sanding pads and patiently just sanding the meer edge and the bowl. I was able to get much of the tars off the meer and now it shows golden. There are several spots where it is stained very dark.
 I buffed the bowl and rim with Blue Diamond and did the same to the stem. I gave the stem several coats of carnauba wax and the hand waxed the bowl with Conservators Wax. I buffed the pipe with a clean flannel buff and then with a microfibre cloth to raise the shine. The finished pipe is shown in the photos below. I like the way it came out. (In the photos of the full pipe the stem came out looking opaque but it is absolutely clear as can be seen in the close up photo.)

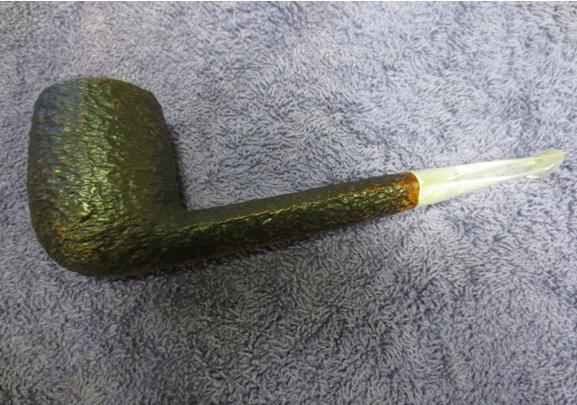
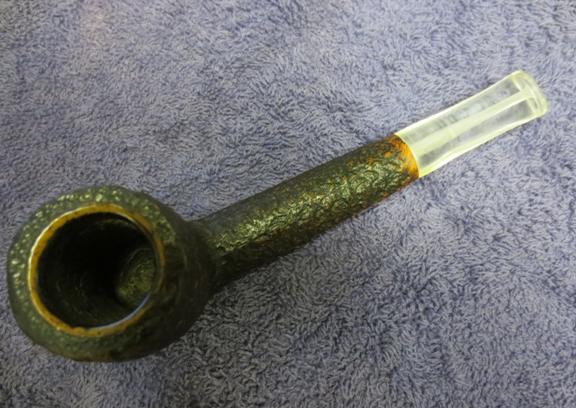
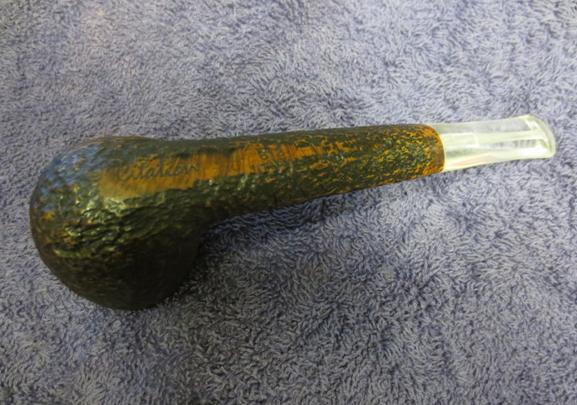
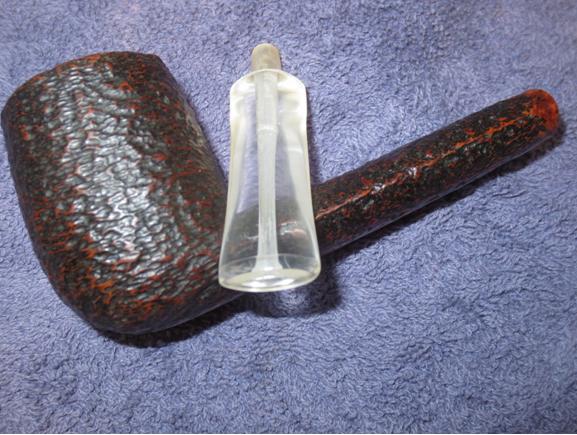 I took a photo of the two pipes together to show the finished product. Thanks for looking.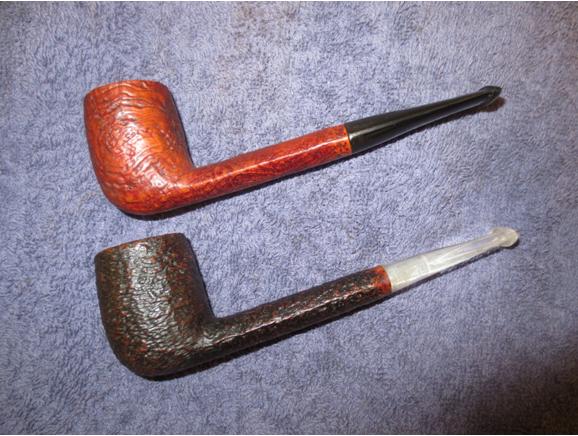
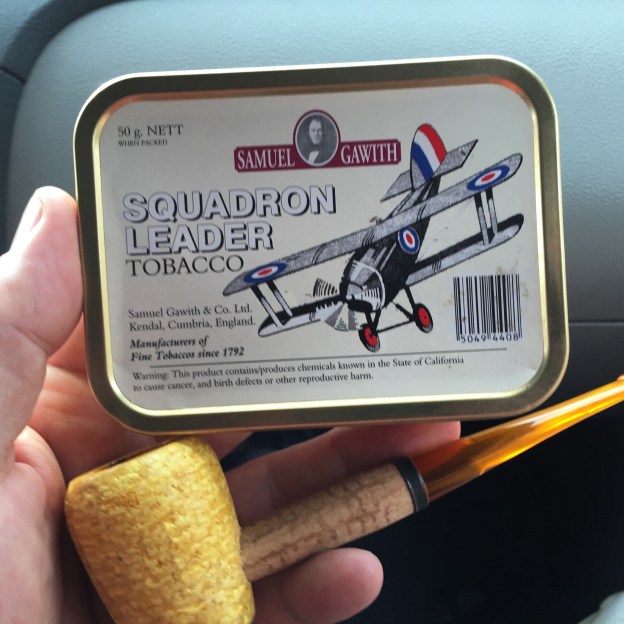
Samuel Gawith’s Squadron Leader Flies HighAfter reading more than one post singing the praises of Samuel Gawith’s Squadron Leader and learning it was more of a Balkan blend, not a Latakia-bomb, and knowing my general fondness for Samuel Gawith’s blends, I began to watch for a chance to pick some up. The description says: “Bright and Dark Virginias blended together with […]
Squadron Leader, Pipe Tobacco, Samuel Gawith, Balkan, pipe
http://smokingjacketmagazine.com/2015/12/23/samuel-gawiths-squadron-leader-flies-high/
Blog by Steve Laug
In the pipes that my brother Jeff sent me from his Montana find was a pair of Savinelli made 812 shape pipes. The first is the second pipe down from the top in the picture to the left. That pipe is stamped Citation 812 and made in Italy on the underside of the shank. The stem is a refit and is poorly done. Fortunately it is beat up and missing a large chunk on the underside near the button. The second one is shown in the picture in the second column and is a sandblast without a stem. It is stamped Savinelli Classica with the Savinelli shield and 812 Italy on the underside of the shank. The first is a two toned dark brown and the second is a lighter two toned medium brown.
The pipe I chose to work on first was the Savinelli Classica – the stemless one. It was in pretty decent shape. The finish was dirty but was not worn. It had a great sandblast. The left side of the bowl had a circular grain pattern and the right side was blasted birdseye. The shank had long swirls on the top and sides. The rim had some build up on it and the bowl had a thick cake that plugged the airway and closed off the lower portion of the bowl.
I took a photo of the two pipes together to show the similarities and the differences. The Classica is a bit shorter in terms of shank length and the finish is much more distinctive. The Citation had a nice blast on it but when compared with the Classica it had nothing to compare. Both pipes were the same height. The bowls were the same diameter and the mortise of both held the broken stem with no trouble.
I looked up the Savinelli 812 shape online and found that it originally had a taper stem and that the stem had a slight bend in it at the button. I am not sure if I like the look of it on the Canadian but will think about it as I restore the Classica. I took the next photos of the bowl to show the distinctive sandblast on the bowl. It truly is a beautiful piece of work. The way the bowl was stain highlighted and emphasized the blast rather than muted it. Once I cleaned it up I would need to maintain that look.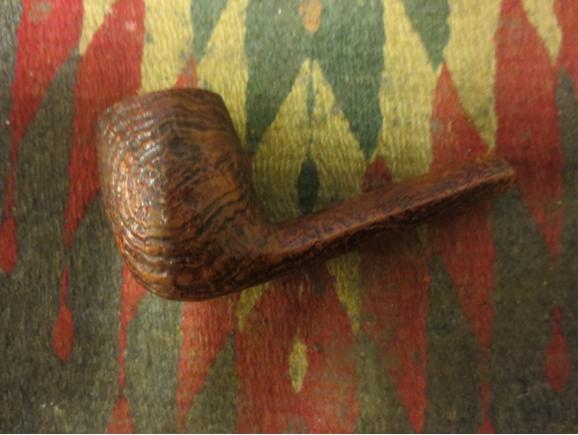
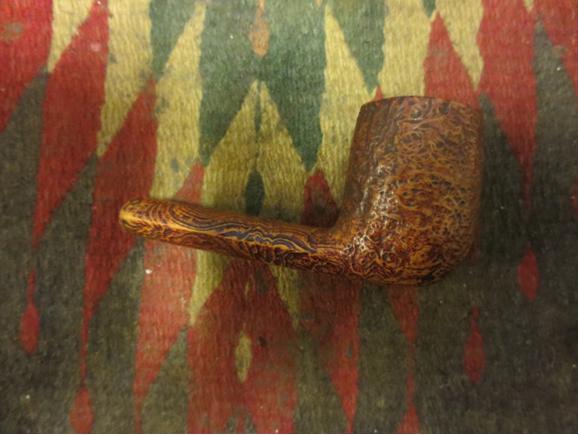 The next two photos show the grain on the shank and the tar buildup on the rim. I am pretty sure that the blast is underneath the tars and will look good once it is scraped off. The third photo shows the underside of the shank and the smooth portion that bears the stamping.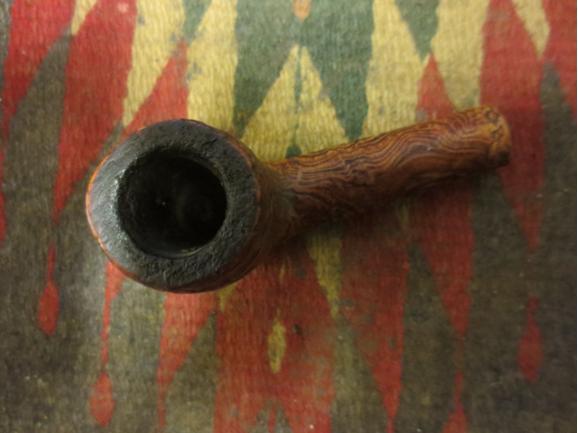

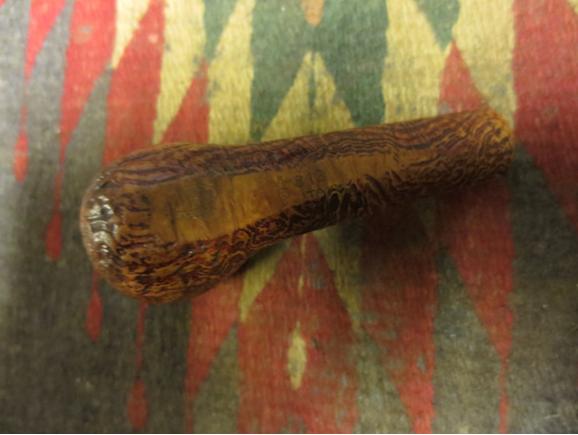 I went through my stem can and found the candidate for the tapered Canadian stem for this pipe. I used the PIMO tenon turning tool to take down the tenon to the point that it almost fit the shank. I hand sanded it with 220 grit sandpaper to bring it to the correct size. I did not want to crack the shank so I went slowly, checking for the fit often.
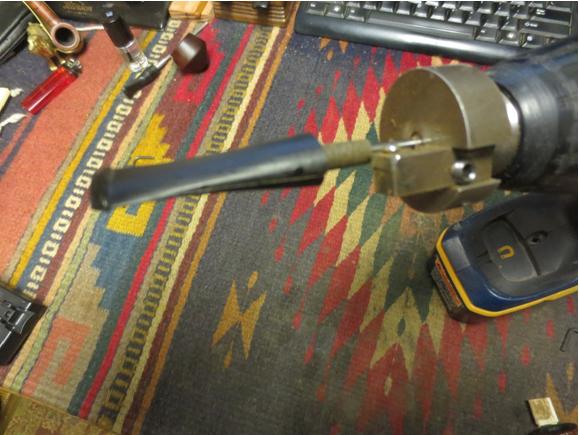 Once the stem was in place I took some photos to show the excess in diameter on the top and sides and the shaping that would need to be done to get a good match to the shank.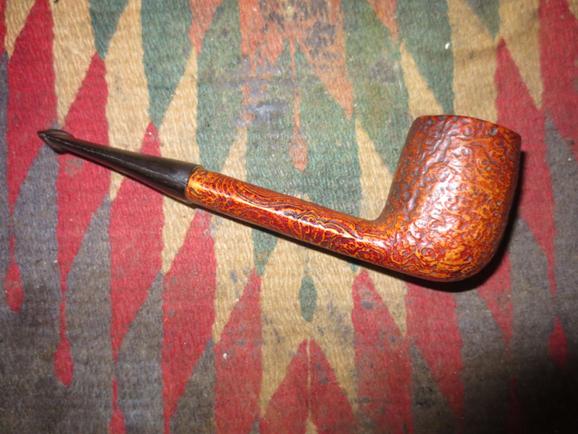
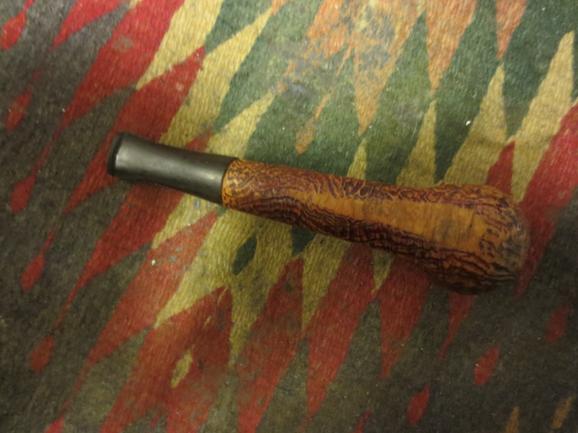 I rough shaped the stem fit with a sanding drum on a Dremel to get it close to the shape of the shank. I have found that if I move slowly and carefully with the Dremel it saves a ton of hand sanding on the stems. Once I had it rough shaped I did the rest of the shaping by hand.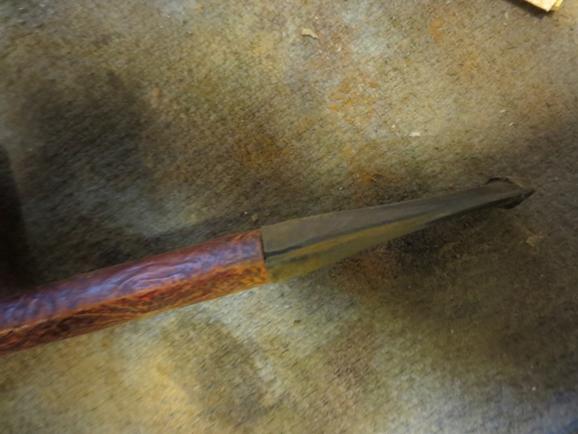
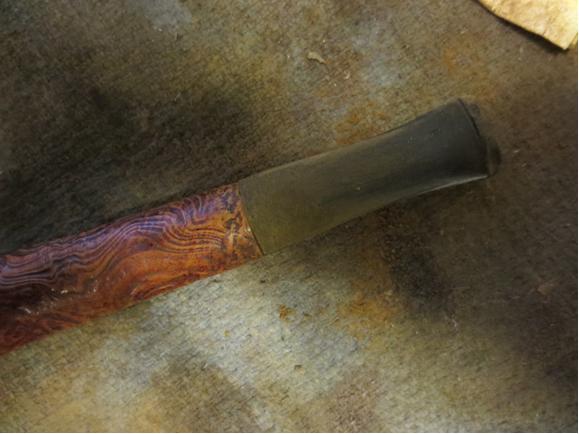
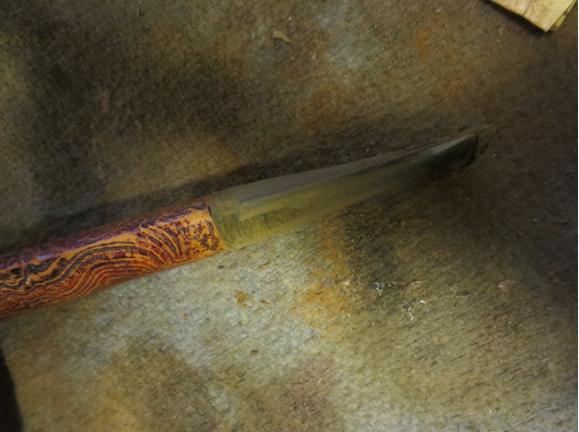
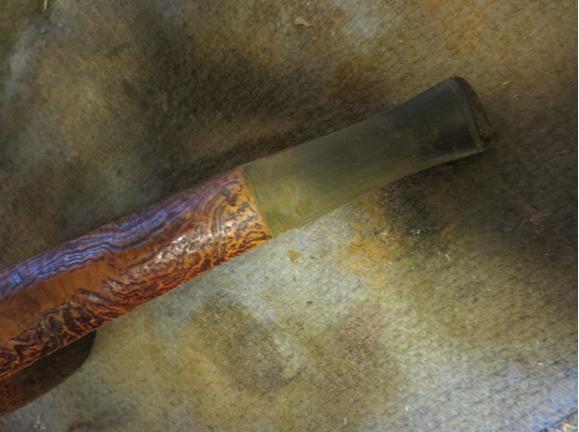 I fine tuned the shape with 220 grit sandpaper and brought it to a smooth transition between the shank and the stem all the way around. I worked on the button area and cleaned up the castings and marks on the slot and the button edges with the sandpaper.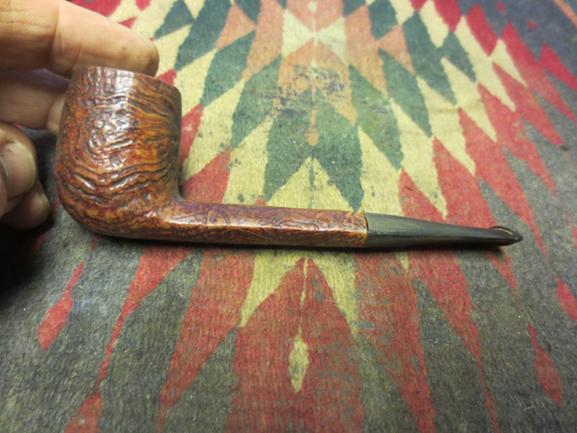
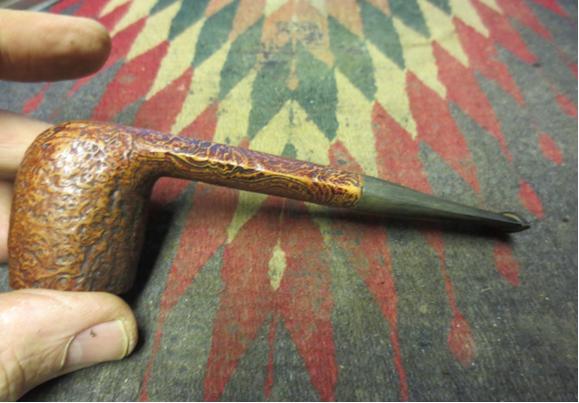

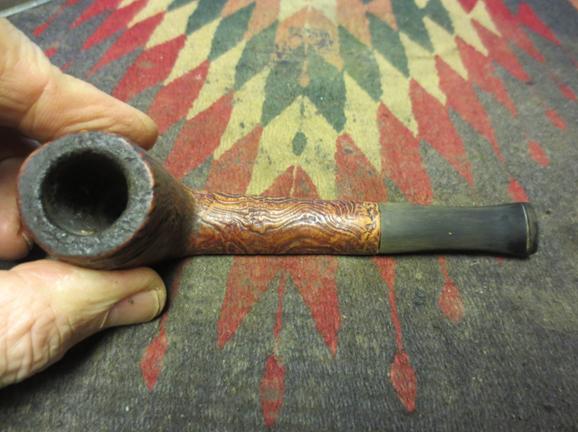 With the new stem fitting and only needing more fine tuning and polishing I decided to ream the bowl and work on the rim. I used a PipNet reamer and a KLEENREEM reamer and a pen knife to cut away the cake in the bowl. It was as hard as the cake in the other two bowls that my brother sent me.
 I scrubbed the sandblast with Murphy’s Oil Soap and a tooth brush and the caked rim with the soap and a brass bristle tire brush.
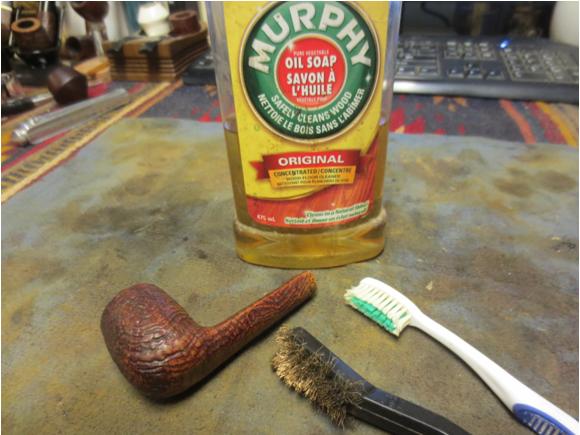 Once the grime was scrubbed off I rinsed the bowl in warm running water and cleaned out the brushes. I dried off the bowl with a towel.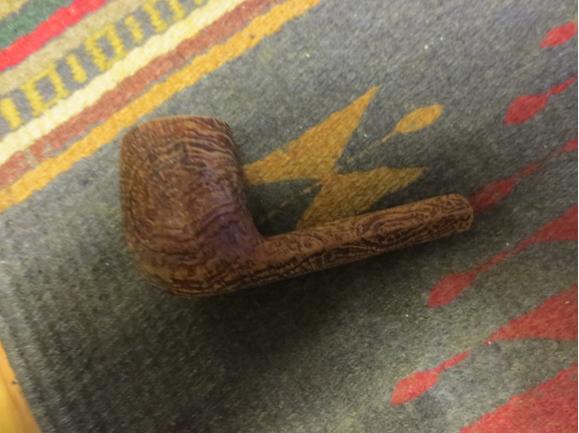
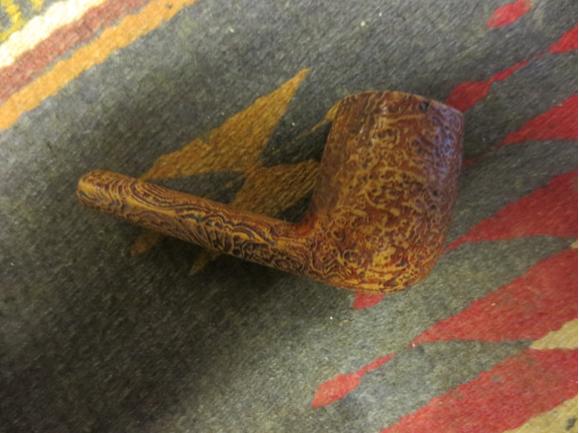
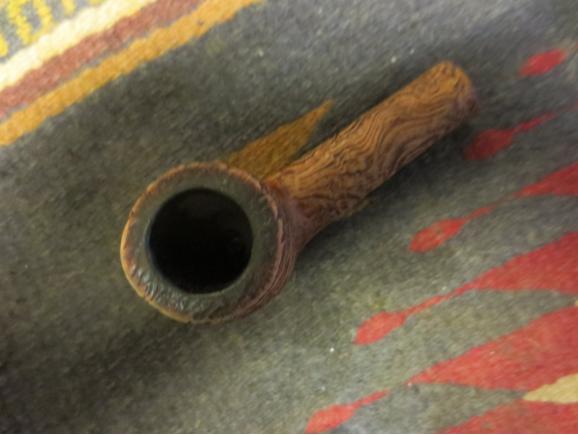
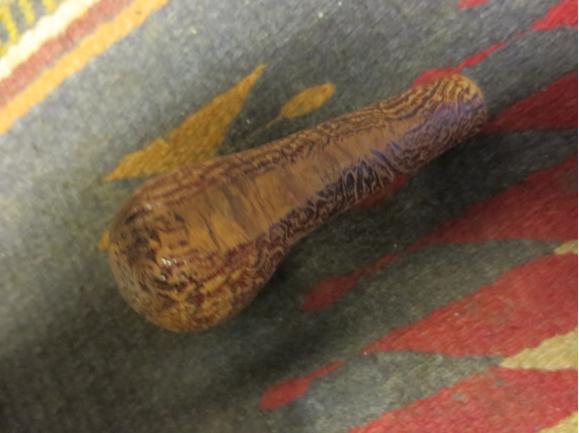 I cleaned out the shank with pipe cleaners, alcohol and cotton swabs. It was plugged in the airway to the bowl so I used the drill bit on the KLEENREEM tool and was able to clear out the gunk in the airway and open it up all the way to the bowl.
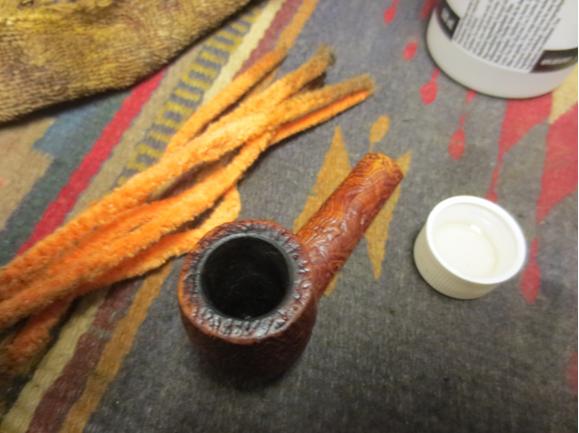 I wanted to keep the contrast stain on the pipe and not restain it so I gave it a light coat of olive oil to bring life back to the wood. I have found that dry briar absorbs the oil quite quickly and that the oil gives it some colour and life back without masking the original stain.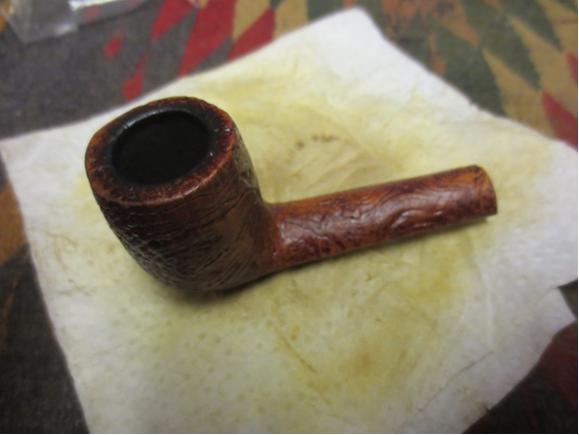

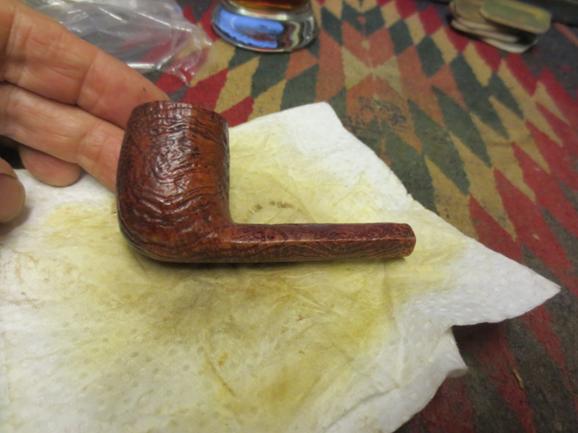
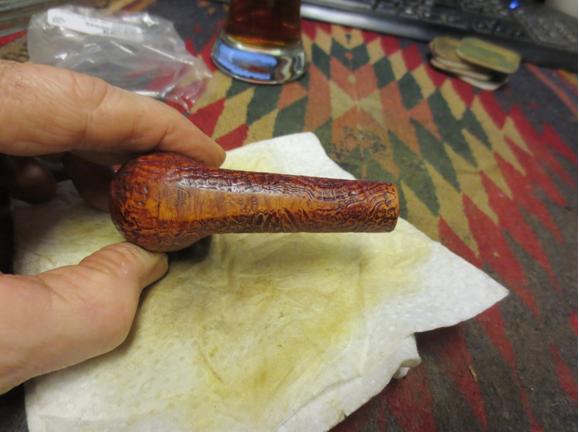 I wiped the bowl down and rubbed it vigorously with a clean soft towel to remove any of the surface oil and to give it an initial buff. I went to work fine tuning the stem fit. I used micromesh sanding pads – wet sanding with 1500-2400 grit pads and rubbing the stem down with Obsidian Oil. I dry sanded with 3200-400 grit pads. I gave it another coat of oil and finished sanding with 6000-12000 grit pads. I gave it a final coat of Obsidian Oil and let it dry.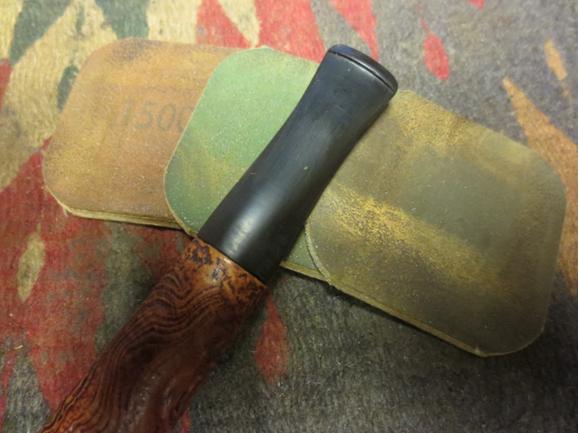
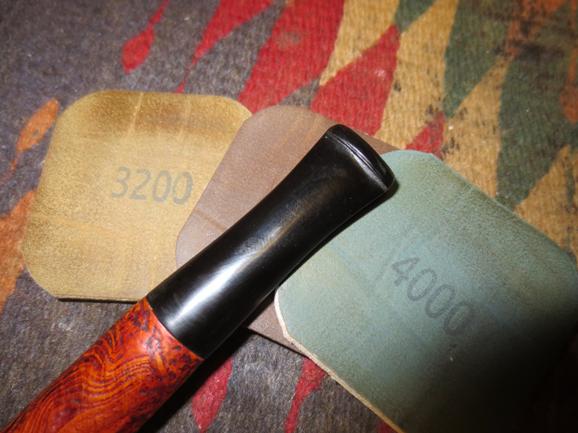
 I buffed the stem and lightly buffed the bowl with Blue Diamond and then gave the stem multiple coats of carnauba wax. I hand buffed the bowl with Conservators Wax and a small shoe brush to bring out a shine to sand blast finish. The finished pipe is shown in the photos below. The straight new stem works for me. The pipe is once again a work of beauty. Thanks for looking.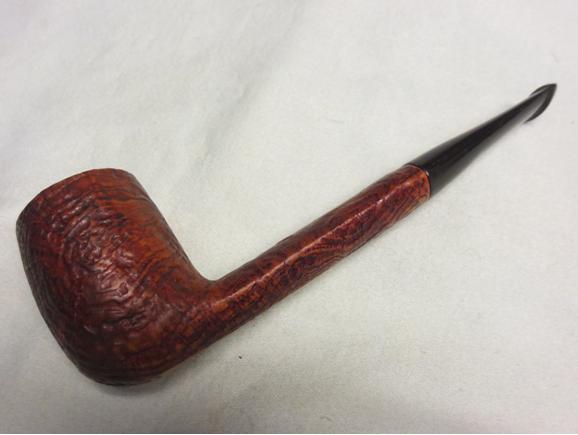
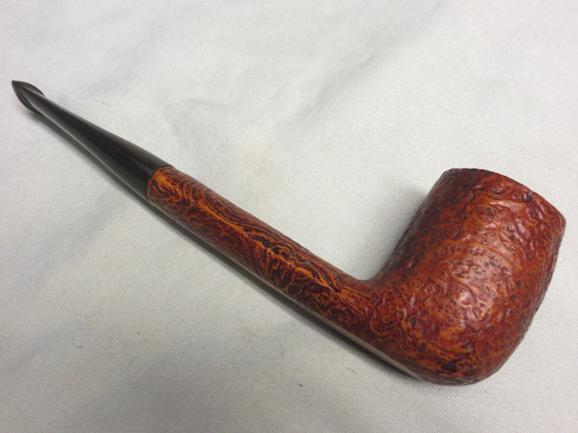
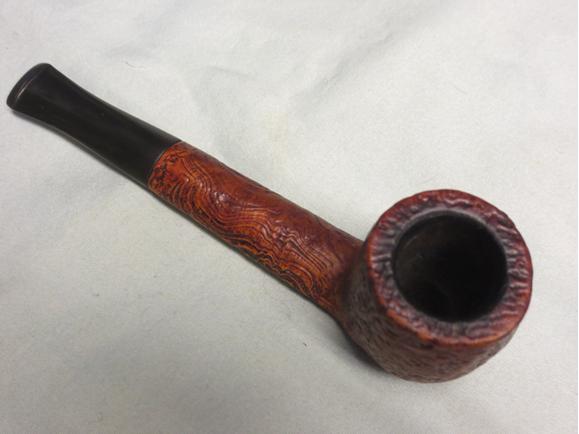
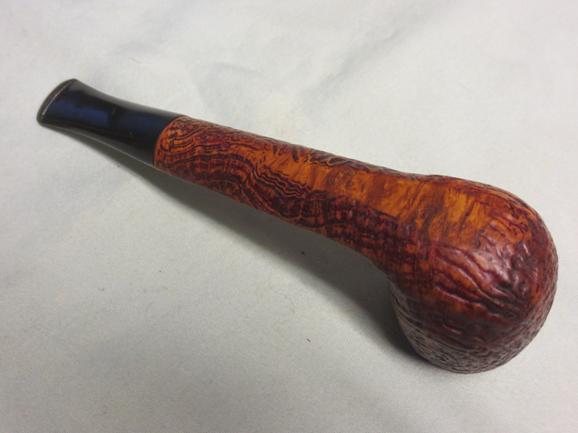
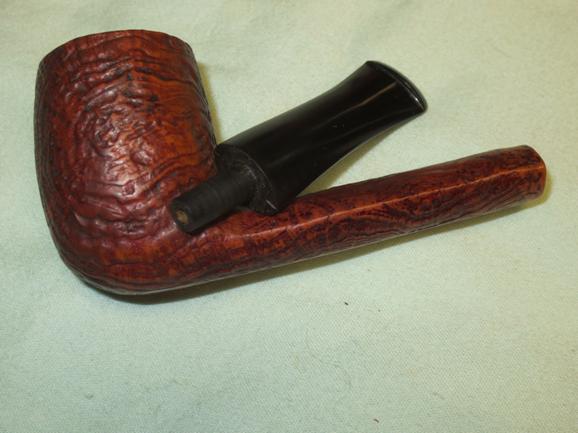
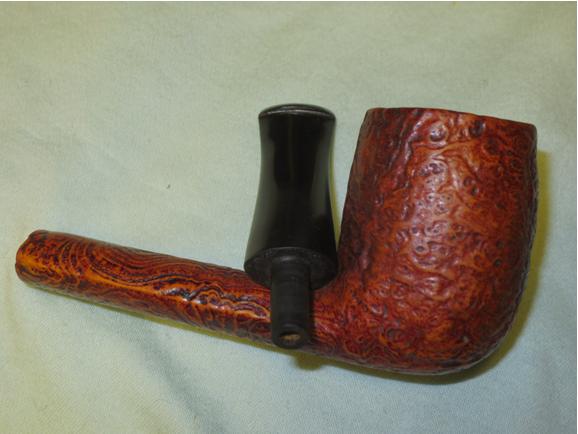
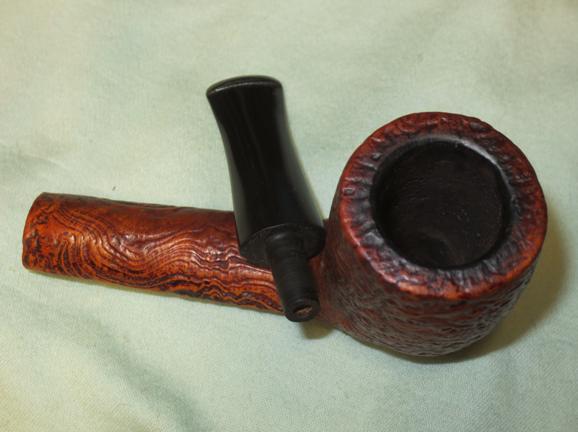
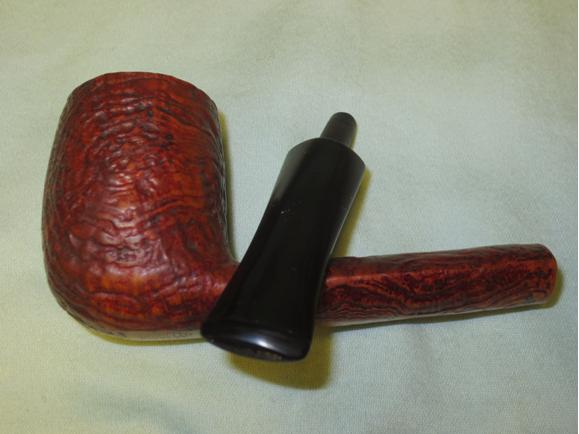
Blog by Steve Laug
I want to take this opportunity to wish the contributors and the readers a very blessed Christmas season and a fruitful New Year in 2016. Thank you for your contributions and for your readership. It has been great to see that several of you have started your own refurbishing blogs. It is a privilege to follow them and to reblog your work here. Merry Christmas. I wrote this short Christmas story for your reading pleasure should you choose to read it! – rebornpipes
He was up early on Christmas morning as usual. He never needed an alarm clock as his old body told him when it was time to move. He loaded a bowl of 10 year old Christmas Cheer in one of his favourite pipes, lit it and puffed on it while he went into the kitchen to put together the breakfast for the family. He savoured these early morning times when no one in the house was awake and active. It gave him some peaceful moments to himself. Over years of many Christmases this had been his habit. He went to the sink and rinsed out the coffee filter and the pot and prepared it for a new pot of coffee. He carried it to the coffeemaker and put the basket in place and poured the water in the reservoir. He scooped out some flavourful Ethiopia Yirgacheffe coffee that he had picked up especially for Christmas morning breakfast. While the coffee was brewing he puffed the pipe and gathered the ingredients for his traditional breakfast casserole that was on the menu.
His casserole was a baked egg dish that he had adapted over the years to fit his own tastes. He always managed to add one or two new ingredients each year to keep it interesting. In fact he wondered if anyone remembered the original edition. He preheated the oven and got out the bowls and the casserole dish that he would need for the mixing his concoction. He puttered around the kitchen until the coffee was finished, poured a cup, took his pipe out of his mouth and sipped on the fresh coffee. “This is the best way to start the morning” he said to himself and took another pull on his pipe. He cracked a dozen eggs over the bowl, poured in some milk added some fresh salsa and used mixer to whip them together. He paused to puff on his pipe and sip his coffee before he continued. He greased the baking dish with butter and then layered pieces of cheese bread on the bottom of the pan. He poured the bowl of beaten milk and eggs into the dish and they soaked into the bread. He added scallions, onions, mushrooms, red bell peppers that he had already prepared. He put in some crushed garlic, bacon and chorizo sausage that he had cooked the night before. Once the mixture was complete he stirred it a bit to disperse the ingredients evenly throughout the dish and added salt and pepper. All the preparation was done by the time the oven beeped to tell him it was ready. He opened the oven door and placed the dish on the rack, shut the door and set the timer.
It was time to relax with another coffee and finish the bowl of tobacco in the quiet of a sleeping house. He refilled his coffee cup added a dash of Irish cream and then tamped his pipe. He relit it and made his way to the living room to relax and enjoy the quiet morning with his coffee and pipe. One of the great things about having older kids was that they slept later on Christmas. He sat in his recliner, put his feet up and sipped the coffee and his pipe. He enjoyed mornings like this. The 10 year old Christmas Cheer was smooth and flavourful. He was lost in the pleasure of the moment. The flavour of the Virginia tobacco went very well with the Ethiopian Coffee. The flavours complemented each other and together they melded into a melange of wonderful taste. The crazy thing about smoking a pipe is that you cannot smell your own tobacco aroma but somehow the combination of coffee and tobacco gave him the impression of what it must have smelled like. His thoughts went around in his head like the swirls of smoke that wreathed him. He thought of years gone by when the kids were little, when his wife and he had waited quietly until the children were asleep and then put out the presents around the tree. He remembered how the excited little ones had pulled him out of bed on Christmas morning and then watched them as their faces displayed their awe at the wealth of presents around the tree. 
He knew that his quiet reverie would soon be over. As he was thinking that the timer went off on the stove telling him that the breakfast was ready. He could not believe how quickly the time had gone with pipe and coffee. It seemed only moments had gone by and now he would have to get up and go to work. He needed to set the table, mix the orange juice and make another pot of coffee before it was time to wake up the family. He took the casserole from the oven and tested it with a fork to make sure it was cooked all the way through. It was perfect so it only needed to cool a bit before he cut it. He poured himself another cup of coffee, poured one for his wife and started a second pot. He climbed the stairs to their bedroom and woke his wife with a hot cup of coffee. She sat up and sipped the coffee. He turned on the Christmas parade while she finished her first coffee. His youngest daughter was awake and already downstairs. She would wake the others. Breakfast would be ready and waiting when all of the sleepy heads made it to the dining room.
He went back to the living room and put his pipe on a rest next to his chair. He put the lid back on the tin of tobacco and went to the kitchen to set the table and bring the food to the table. He went to the dining room to set out the plates and cutlery around the table, placing coffee mugs and juice glasses at each place. And found that his daughter was already at work. He put each of his children’s Christmas coffee mugs at their place. He set out the hot pads on the table for the casserole and then put the hot casserole on them. His daughter mixed the juice and when he went back to the kitchen he found that she had already put some bread in toaster. As the bread was toasted he buttered it and put it in a basket for the family. He put jams and jellies on the table. He poured the juice in the glasses. Everything was ready for when they all came to the dining room – breakfast would be waiting.
He rang the breakfast bell and he could hear people coming. The doorbell rang and his daughter and son in law came through and into the kitchen. They brought hot muffins in and set them on the breakfast table. The others girls came into the dining room and his wife joined him with her coffee cup. Everyone was present so he read the Christmas story and said the breakfast prayer. With the amen still warm on his lips, the plates were passed so he could serve them. Soon they were tucked into the meal and drinking coffee. The conversation hummed around the table. Things had changed a lot since the girls were little – no more rush to the presents. They were happy to visit and relax together. The presents would come when they came.
He cleaned off his plate and sat back in anticipation. He sipped his coffee quietly in the noise of his daughters chatter around the table. He enjoyed every moment of their chatter and banter around the table. They laughed and told stories and devoured every bit of the breakfast he had made. They compared it to the previous breakfast casseroles and gave this one a vote of approval. It had become a ritual to rate the casserole each year. His wife looked at him and rolled her eyes knowingly at each daughter’s comment. His son in law had already learned how to navigate the breakfast table and sat quietly. Soon the breakfast would be over but no sense in rushing things now. He knew that these Christmas morning breakfasts were the things that added living memories to the family history. Once breakfast was over he could relight his pipe, the girls would take care of the dishes. His son in law and he would adjourn to the porch and enjoy a bowl of Christmas Cheer. That was one of the benefits of living on the west coast – even in December you could sit comfortably on the porch. He sipped his coffee and knew that it would not be long now before he could safely slip away to enjoy his pipe.
Blog by Steve Laug
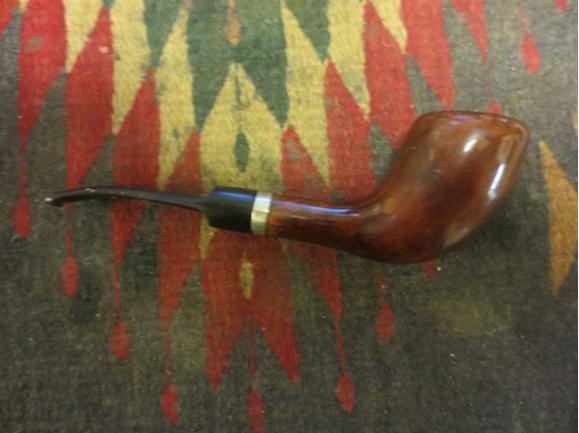
 Another of the pipes that my brother Jeff sent me was a horn shaped pipe that was stamped Tinderbox Made in Italy in a circle with Monza in the centre of the circle. It is stamped on the underside of the shank. The shape is quite unique. The bowl had around 10-12 fills in it that went from tiny spots to huge plugs in the briar. The finish was a heavy urethane coat that made the pipe very shiny and really highlighted the fills around the bowl and the shank.
The shank had a split in the underside of the shank that went from under the band up the shank for one inch on the bottom side. It had just turned slightly upward and if left alone would have continued to the bowl. The rim was heavily damaged and there was a thick hard cake in the bowl that hurt my hand when I pushed the various reamers that I had trying to remove it. The bowl looked like it was conical in shape but was so thick that there was very little room in the bowl for tobacco. The stem was a replacement, like many of them in the pipes my brother sent me. It was a saddle stem and was missing a huge chunk on the left side of the button and up the stem about ½ inch. The person who had made the replacement had cut an angled end on the tenon which in my opinion was careless and not necessary. The airway into the bowl from the shank was plugged and when I blew into the end of the shank I could not get any air through it.
The next four photos show the pipe as it appeared when it arrived in the box from my brother.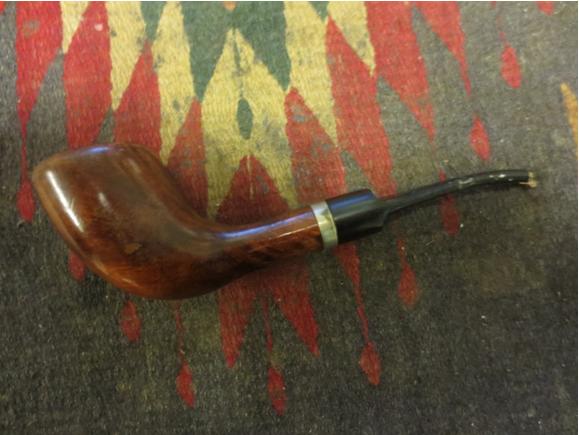
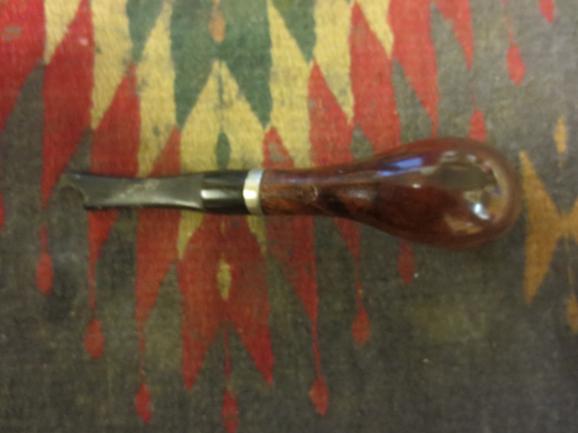
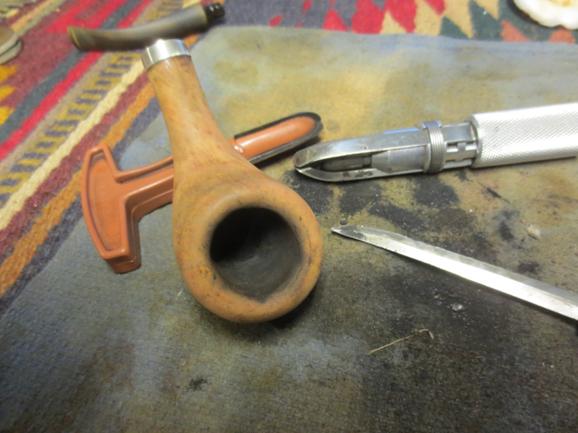
 I took a close up photo of the bowl and rim to show the damage and the cake in the bowl. The second photo below shows the broken stem. The stem was pretty much a throw away as it is very narrow after the broken button.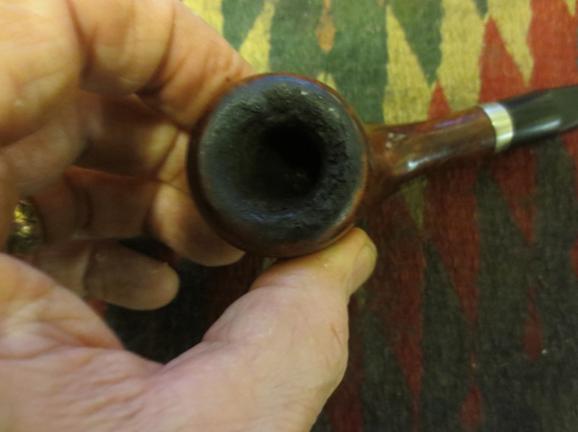
 I started to ream the bowl with a PipNet reamer. I started with a small cutting head and soon gave up. I used the largest head that would fit the diameter of the bowl and still found the cake too hard to cut through with the reamer. I dropped it in an alcohol bath to soak to soften the cake and to soften the urethane coat on the bowl. After it had been soaking an hour I took it out of the bath.
 In my can of stems I had one with the same diameter as the shank and a tenon that would work with some adjustments. The tenon was too long so I would need to trim it back and also adjust the diameter to get a snug fit in the shank.
 The alcohol bath did not even make a dent in the finish. As I expected the only way to remove a urethane finish is to sand it off. I did not mind as it was covering a lot of damage to the rounded rim and the sides of the bowl. I fit the new stem in the shank and took a few photos to get an idea of the look. The stem was a little too bent to my liking so that would need adjusting but the taper worked well with the horn shape. The last photo of the underside of the shank shows a dark area. That is where the stamping is present and also the crack in the shank.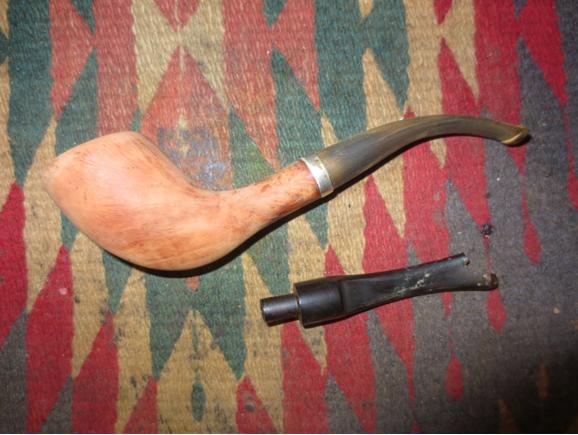
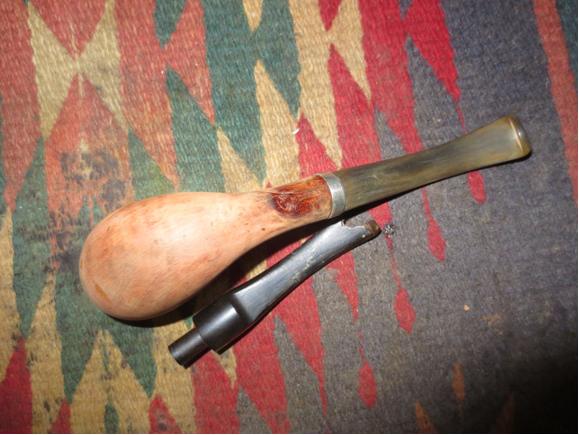
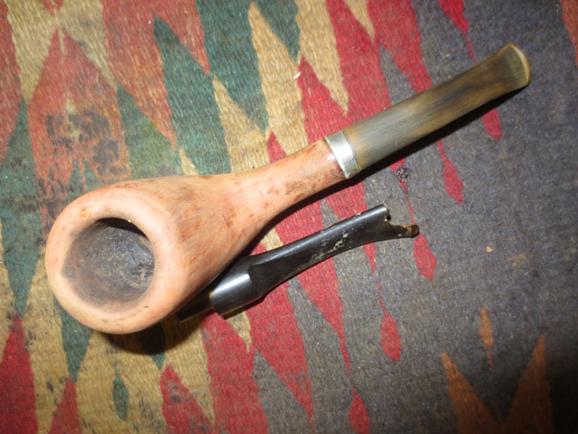
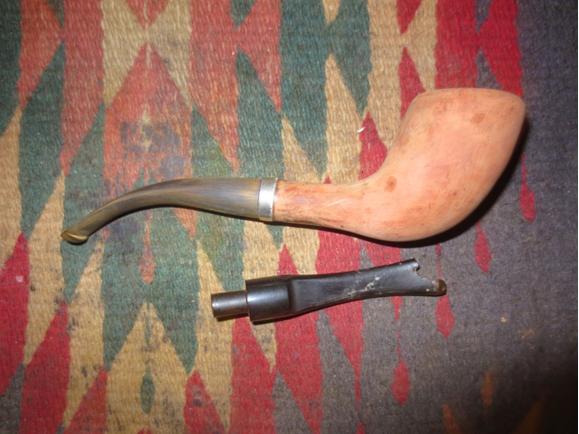 I put the stem aside and used a pen knife, a KleenReam and a PipNet reamer to work on the hard cake. It was still rock hard but I was able to chip away at it until I had removed it from the bowl.
 I used the drill bit from the handle of the KleenReem to open up the airway into the bowl.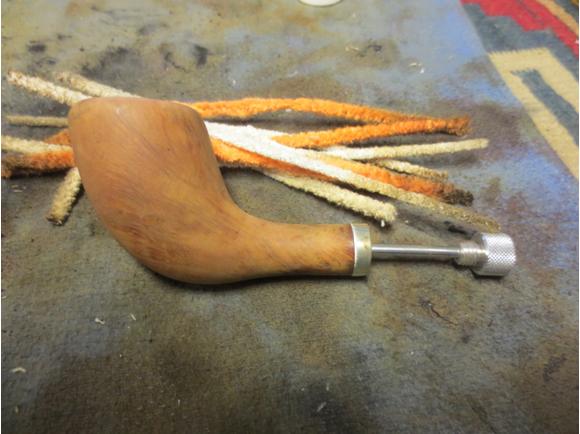
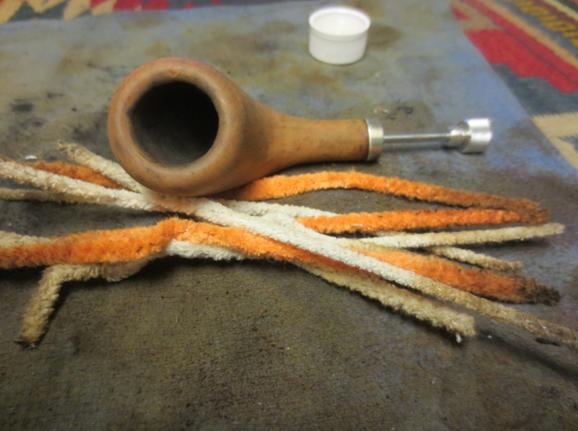 I sanded the bowl some more with some medium and fine grit sanding sponges. I wanted to clean up the cracked area on the shank bottom so that I could repair it. I took the photo below to show the crack in the shank.
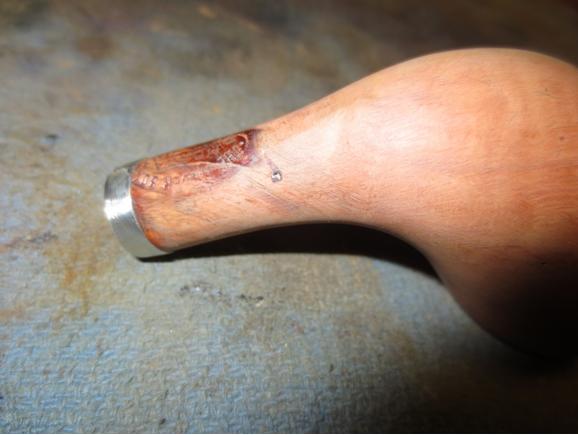
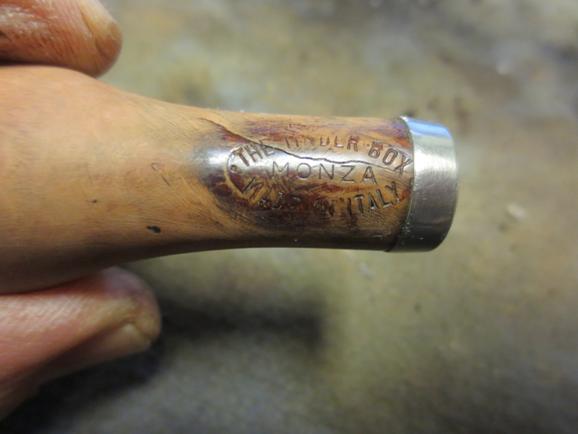 I used a micro drill bit on my Dremel to drill a small hole at the end of the crack to stop it from spreading further up the shank.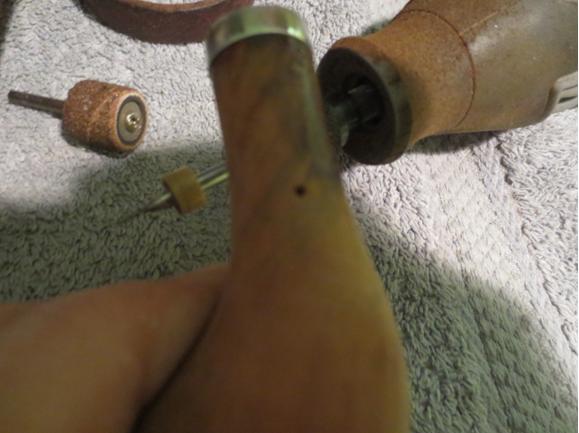
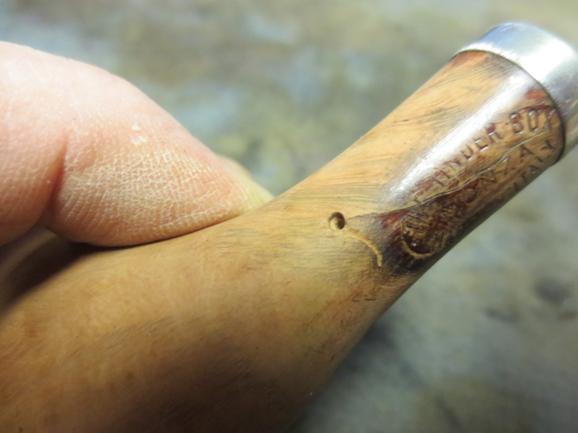 I packed some briar dust into the hole and then dripped super glue on top of that and then more briar dust and some more glue. I ran a dental pick along the crack to open it slightly and then put some glue along the crack to the band as to preserve that as well.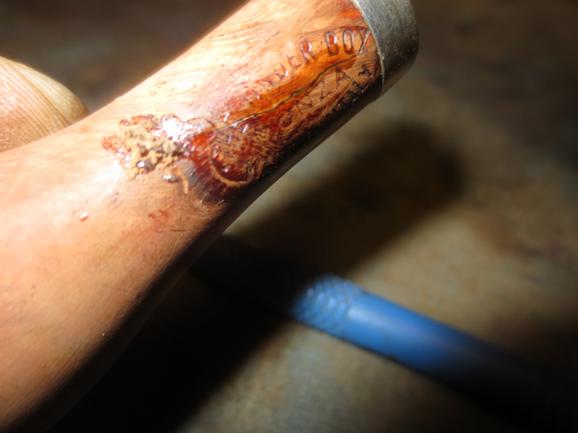
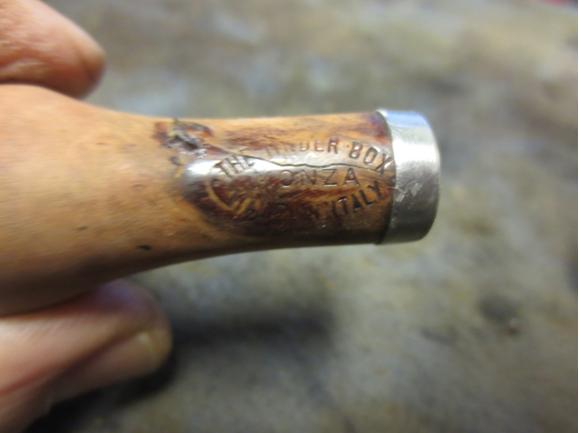 I sanded the repair to smooth it out and blend it into the shank and avoided the area inside the stamping.
 I heated the stem with a heat gun to take a bit of the bend out of it. Once it was pliable I bent it to match the flow of the curve of the horn. I wanted it to sit with the rim and the bend in the stem flat on the table when laid down. That angle would make it sit correctly in the mouth when it was smoked.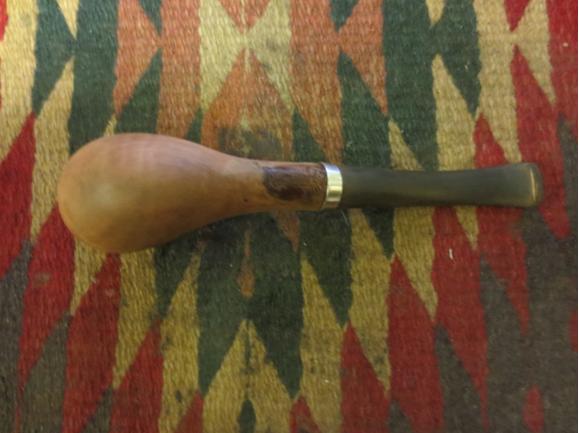
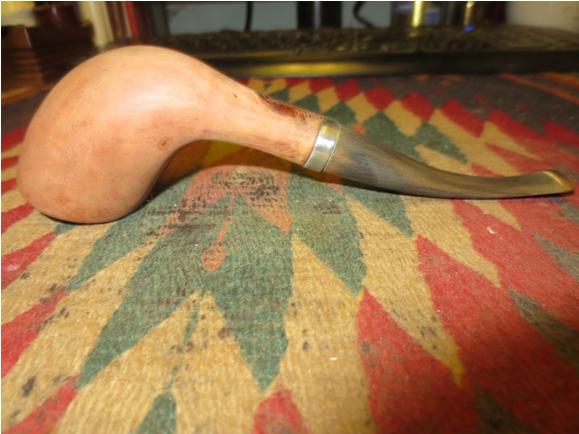
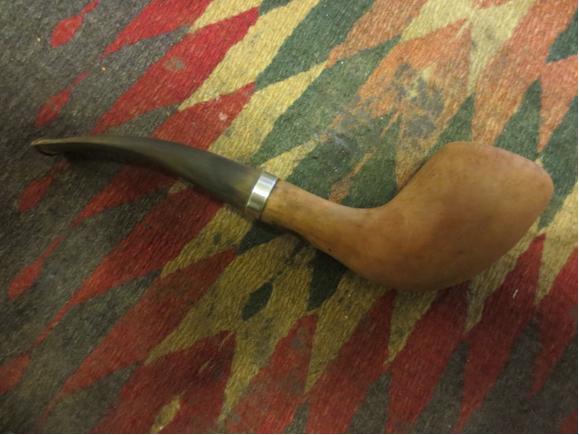
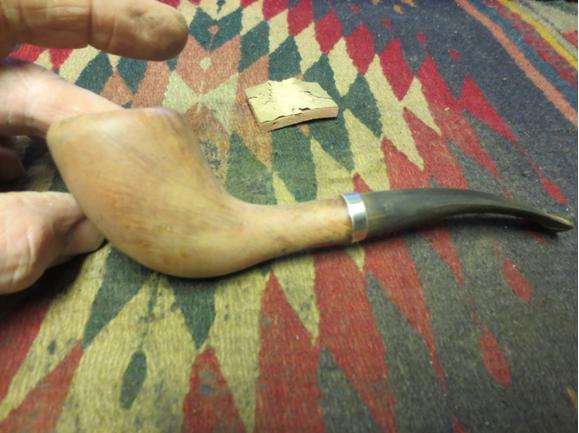 I worked on the curve of the rim and top with sandpaper and sanding sponges to get the flow of the rolled rim even all the way around the bowl. I worked on the inner edge of the rim as well to make it flow into the bowl rather than be an abrupt edge.
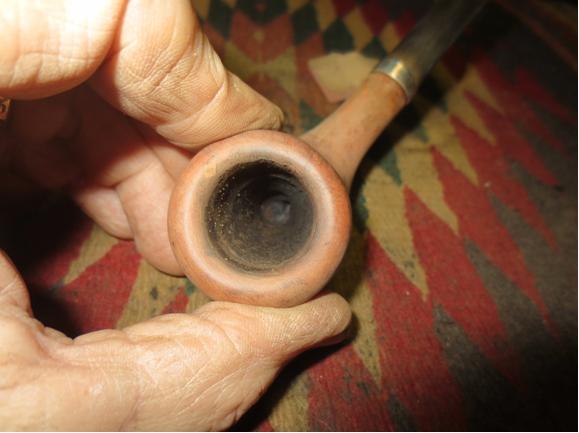 I sanded the bowl with medium grit sanding sponges and fine grit sanding blocks to remove the scratches from the briar and to work on the oxidation on the stem. The grain was beginning to show through. I wiped it down with a tack cloth to remove the sanding dust in preparation for staining the bowl.
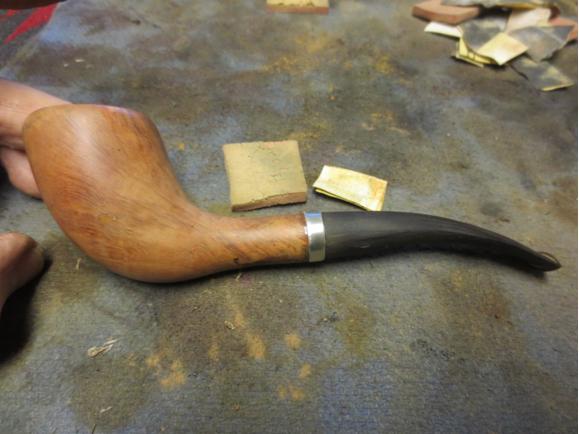 The bowl had a lot of fills so I decided to try a contrast stain to both hide the fills and to bring out the grain. I started with a black aniline stain and finished with a brown.
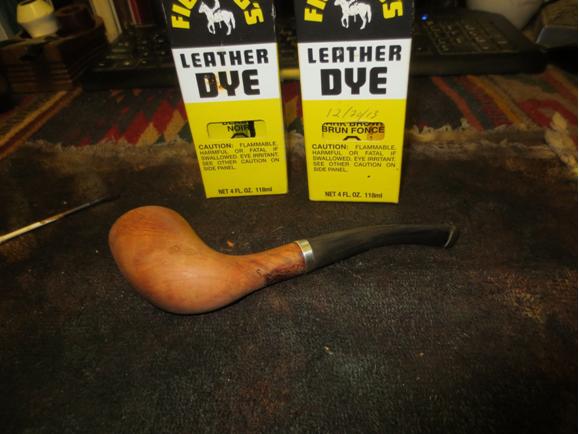 I stained the bowl with the black and flamed the stain to set it in the grain. I reapplied and reflamed it until the coverage was even.
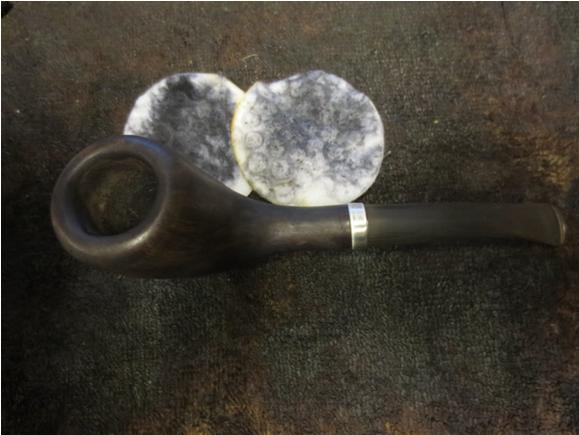
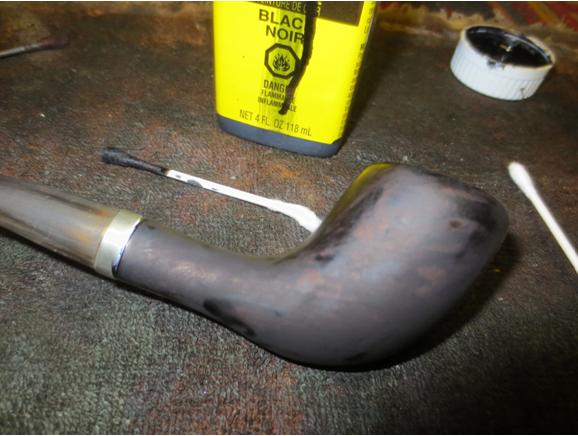 I wiped the bowl down with alcohol and cotton pads to remove the excess black and leave it only in the grain of the briar. I wanted it to show the grain and highlight the beauty. I also wanted to mask the fills to some degree.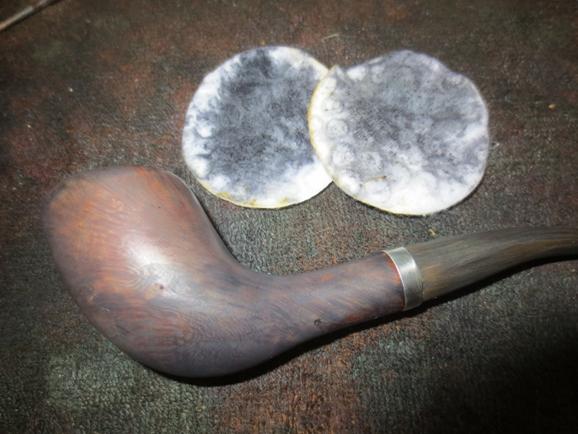
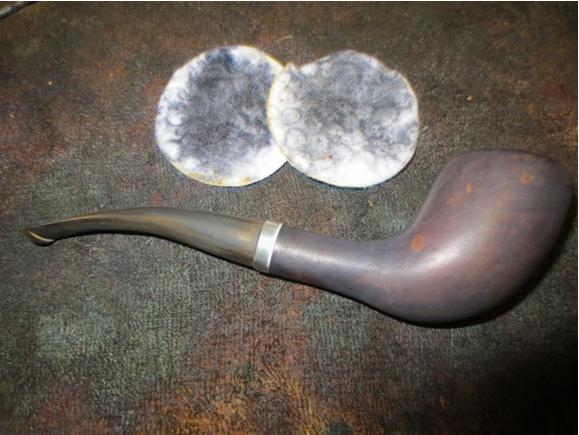
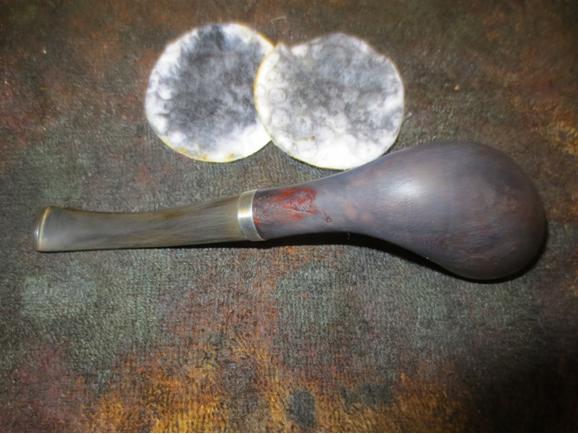
 I used a black Sharpie permanent marker to draw grain lines through the huge fills on the bowl to further blend them into the briar.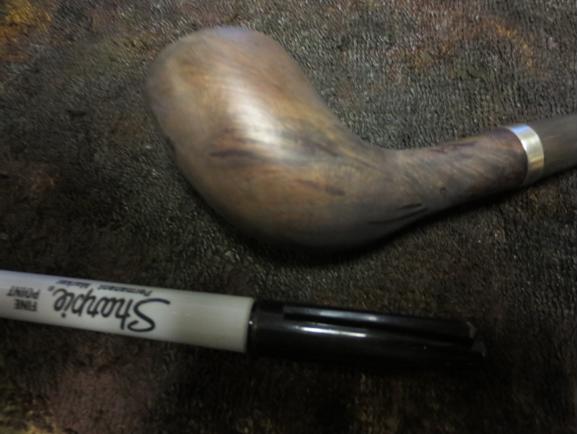
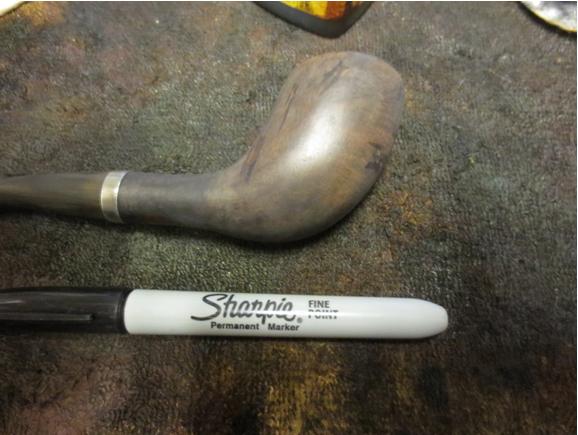
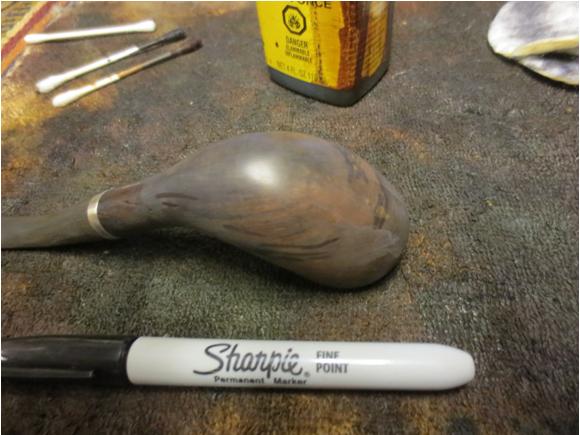 With that preparation done I gave it a top coat of dark brown aniline stain. I applied it and flamed it and repeated until I was happy with the coverage.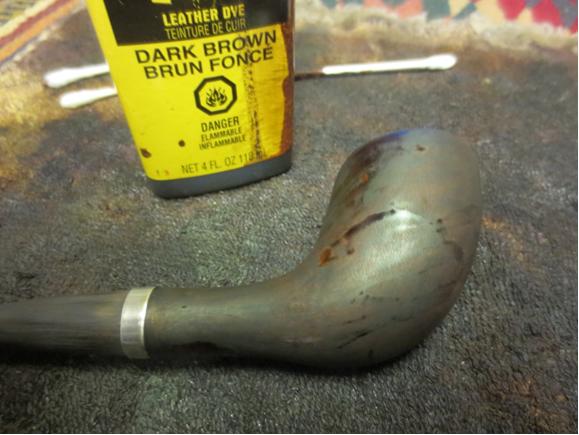
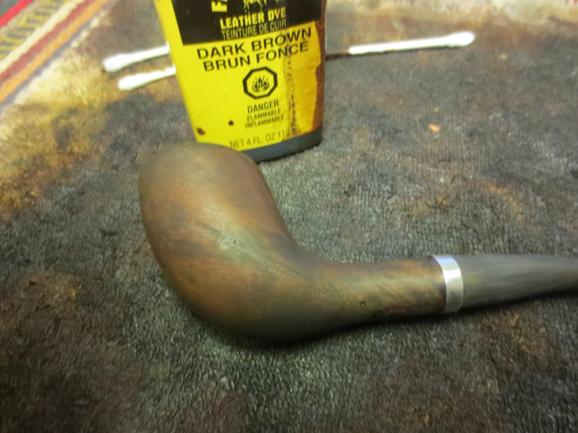
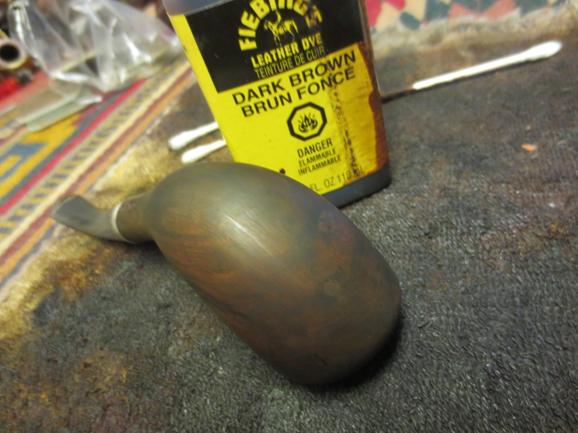 I hand buffed the bowl to check out the coverage of the brown and the contrast of the black and the black Sharpie marks. By and large I liked what I saw. There were some spots that needed some more work but it was looking good.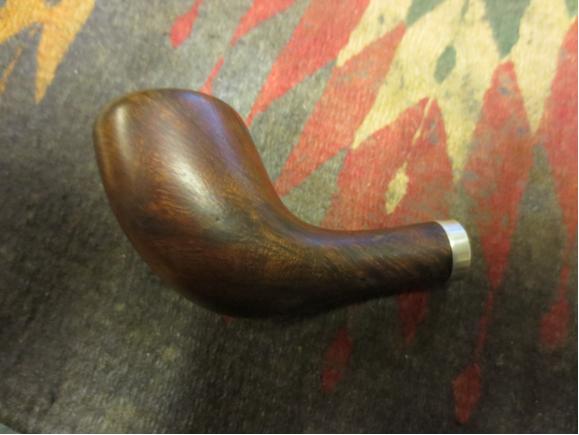

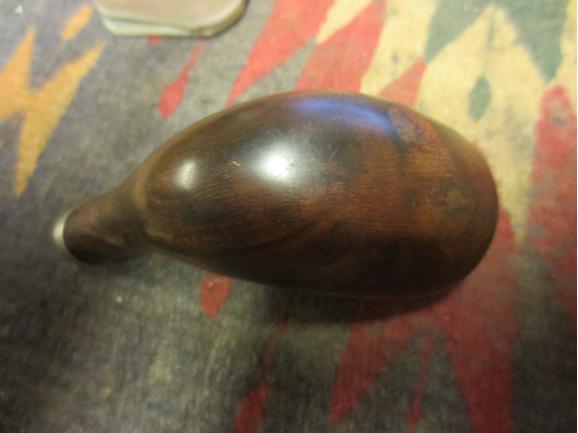 I worked the stem over with micromesh sanding pads – wet sanding with 1500-2400 grit pads and then giving it a coat of Obsidian Oil. I dry sanded with 3200-4000 grit pads and gave it another coat of oil. I finished sanding with 6000-12000 grit pads and then gave it a final coat of Obsidian Oil and let it dry.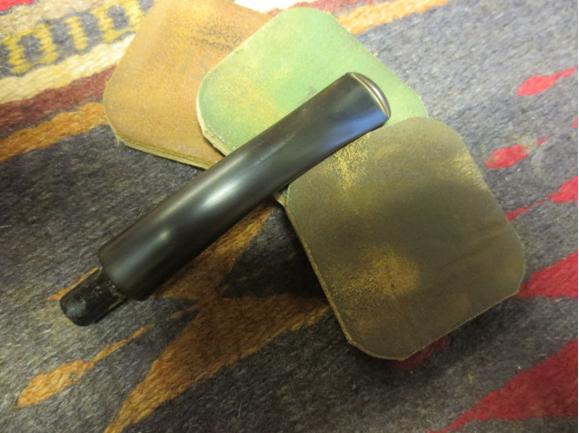
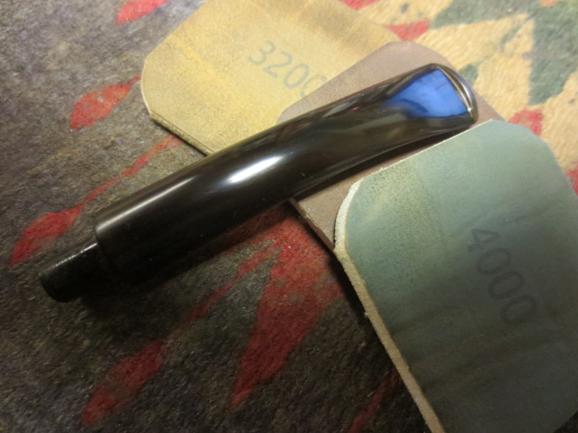
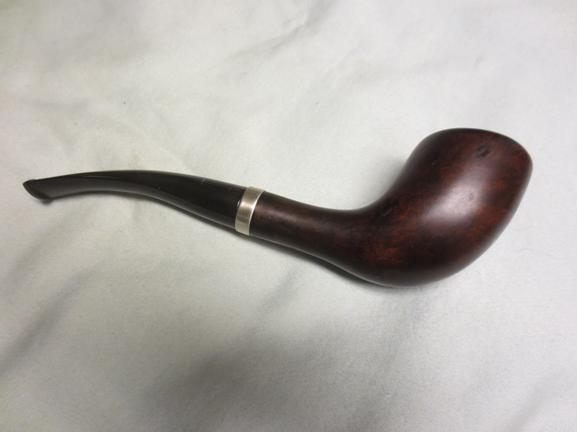
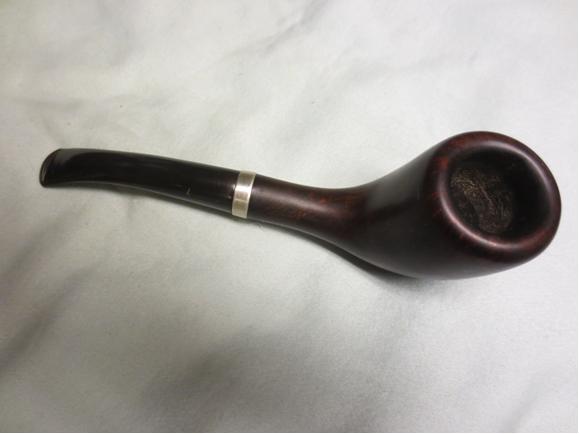
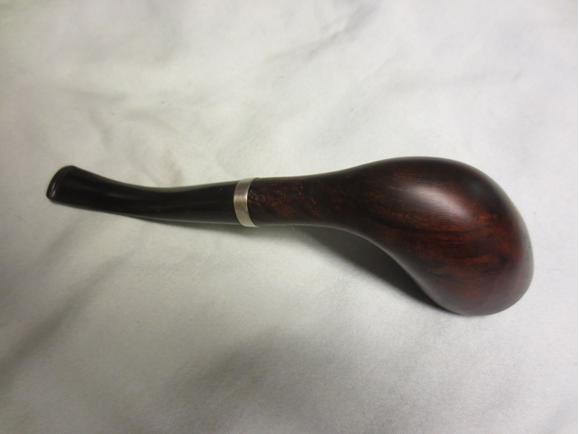
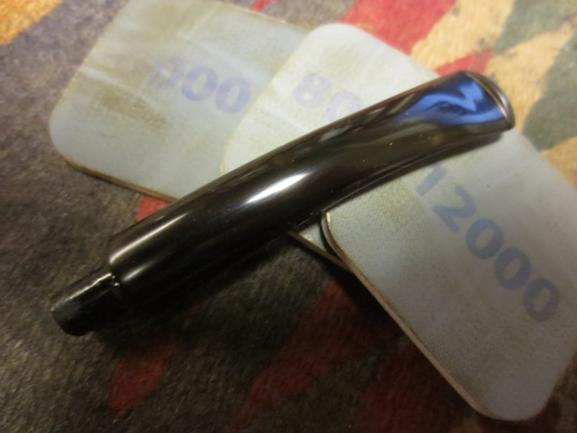 I buffed the pipe with Blue Diamond and then gave it multiple coats of carnauba wax. I buffed it with a clean flannel buff to raise the shine and then with a microfibre cloth to add depth to the shine. The finished pipe is shown in the photos below. It exceeds my expectations when I began the reclamation work on it. The fills on the sides, shank and back of the bowl have all but disappeared in the blend of stains and Sharpie pen. The large ones on the bowl front look better but are still somewhat visible. Overall I am happy with the results. Thanks for looking.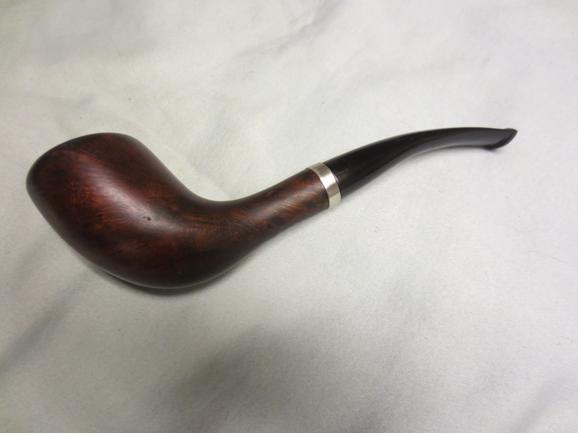
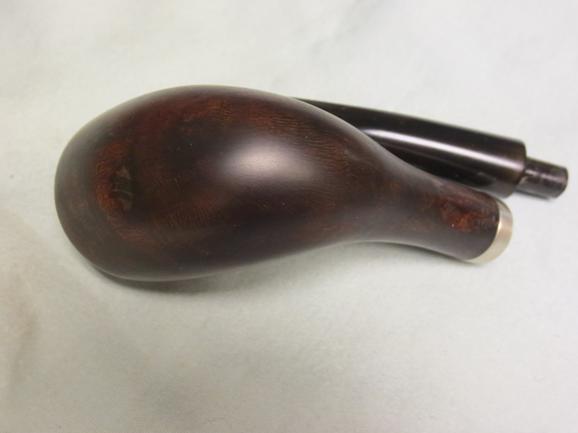
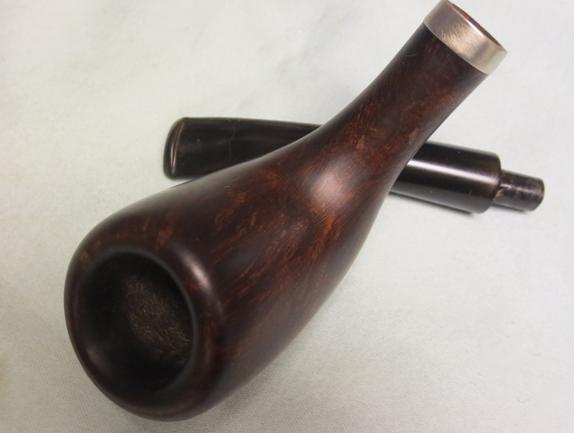
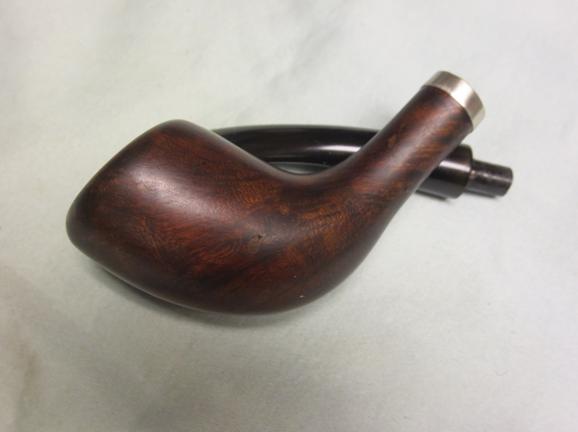
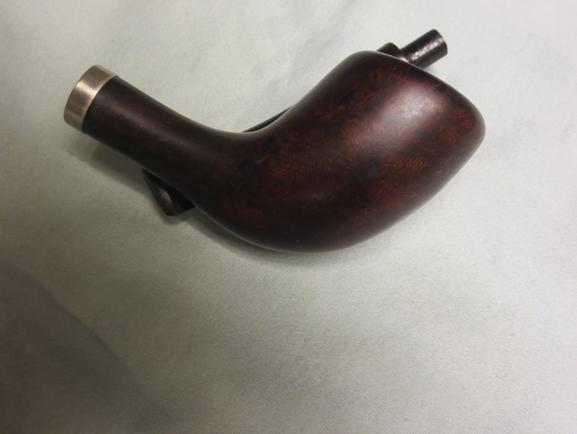
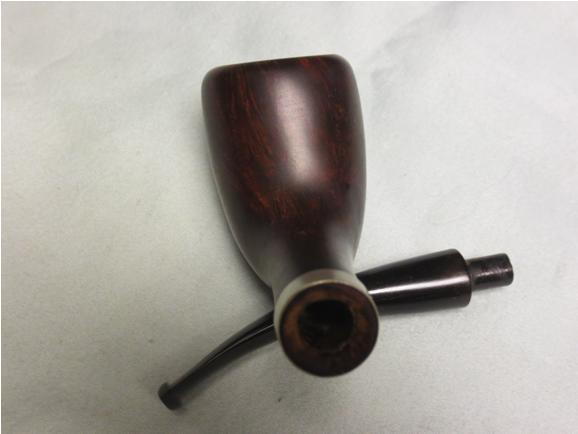
I just became aware of Wandering Pop’s Blog site. I remember the pipe he speaks of that I cleaned up and sold him. It was a beauty! The pipe he worked on in this post is also a beauty. He did some great work on it so I thought I would give you all a heads up on the blog and on the work that Wandering Pop is doing! As he says Prost!
I first need give some acknowledgement to Rebornpipes for inspiring me to adventure into the art of restoring estate pipes. I recently bought a beautiful Peterson System Premier 307 that was revitalize by Steve that spiked my interested in this hobby. With all that said, let’s jump into my first restoration.
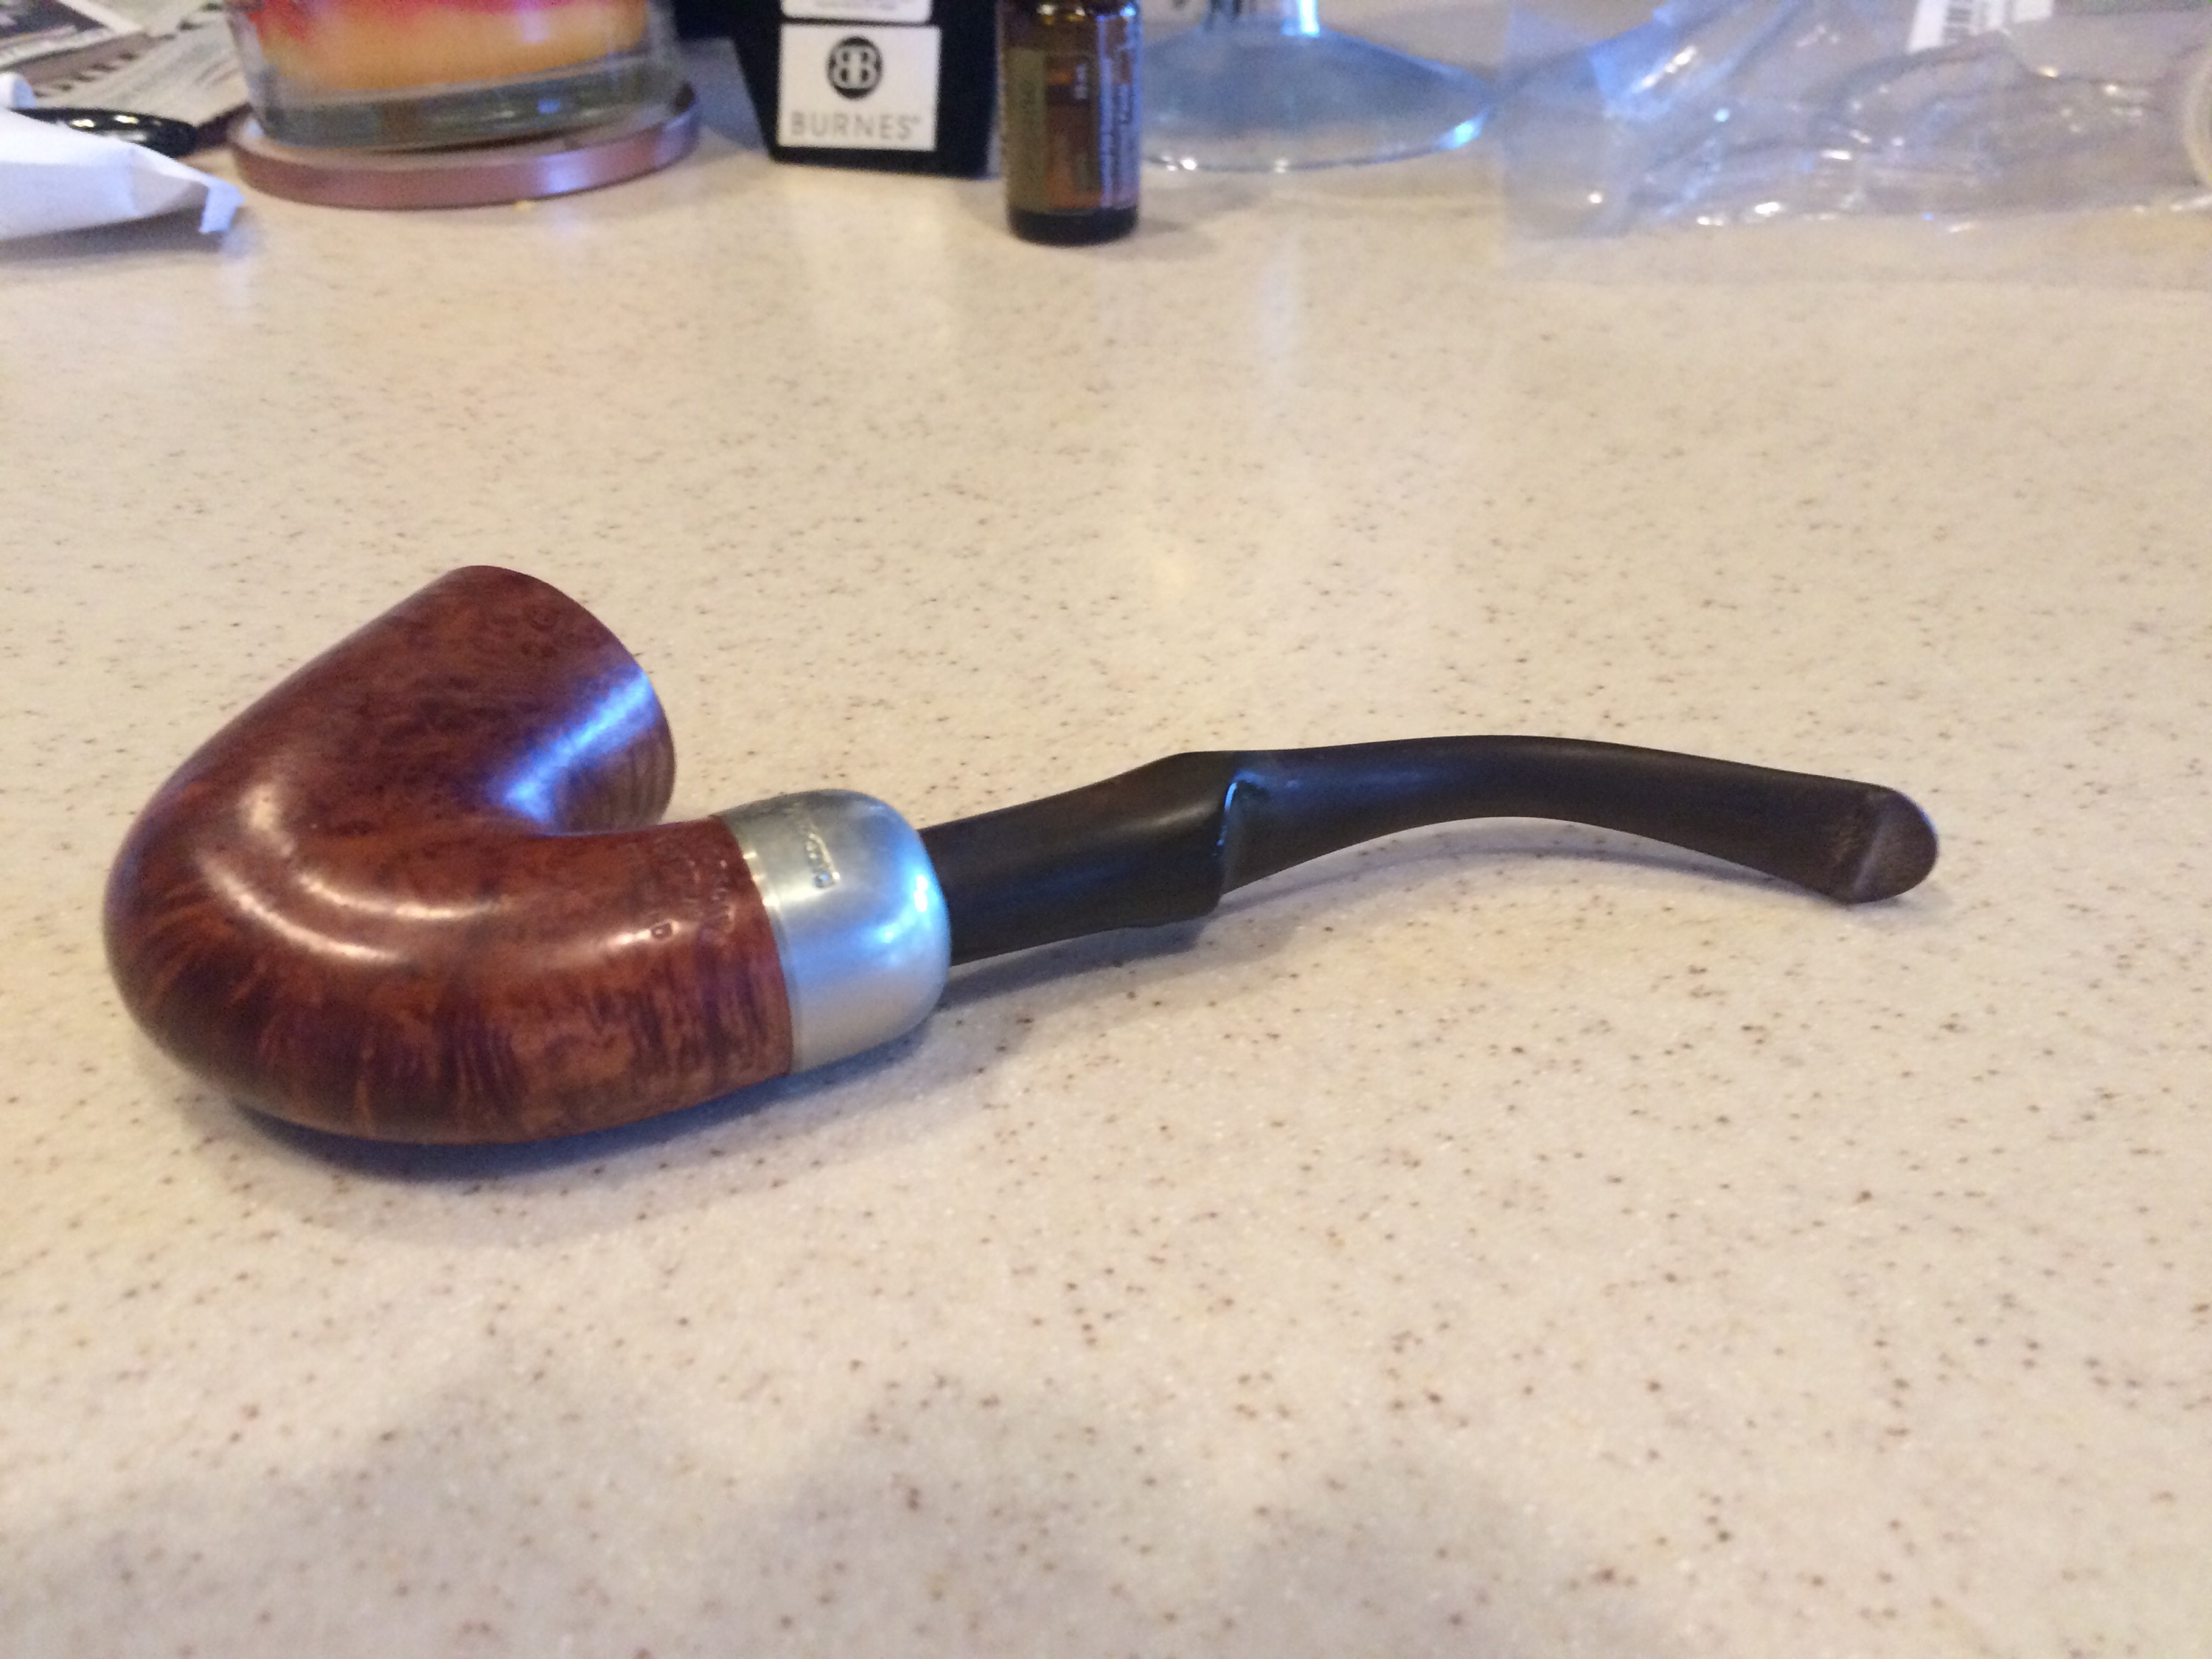
I have been searching eBay and other outlets for the last month or so for a nice pipe that would make for a simple “get my feet wet” restoration. I knew that my skills in the craft were pretty limited at this point. However, I was also on a fairly tight budget. So I spent a lot of time looking and jumped on this beauty when it became available.
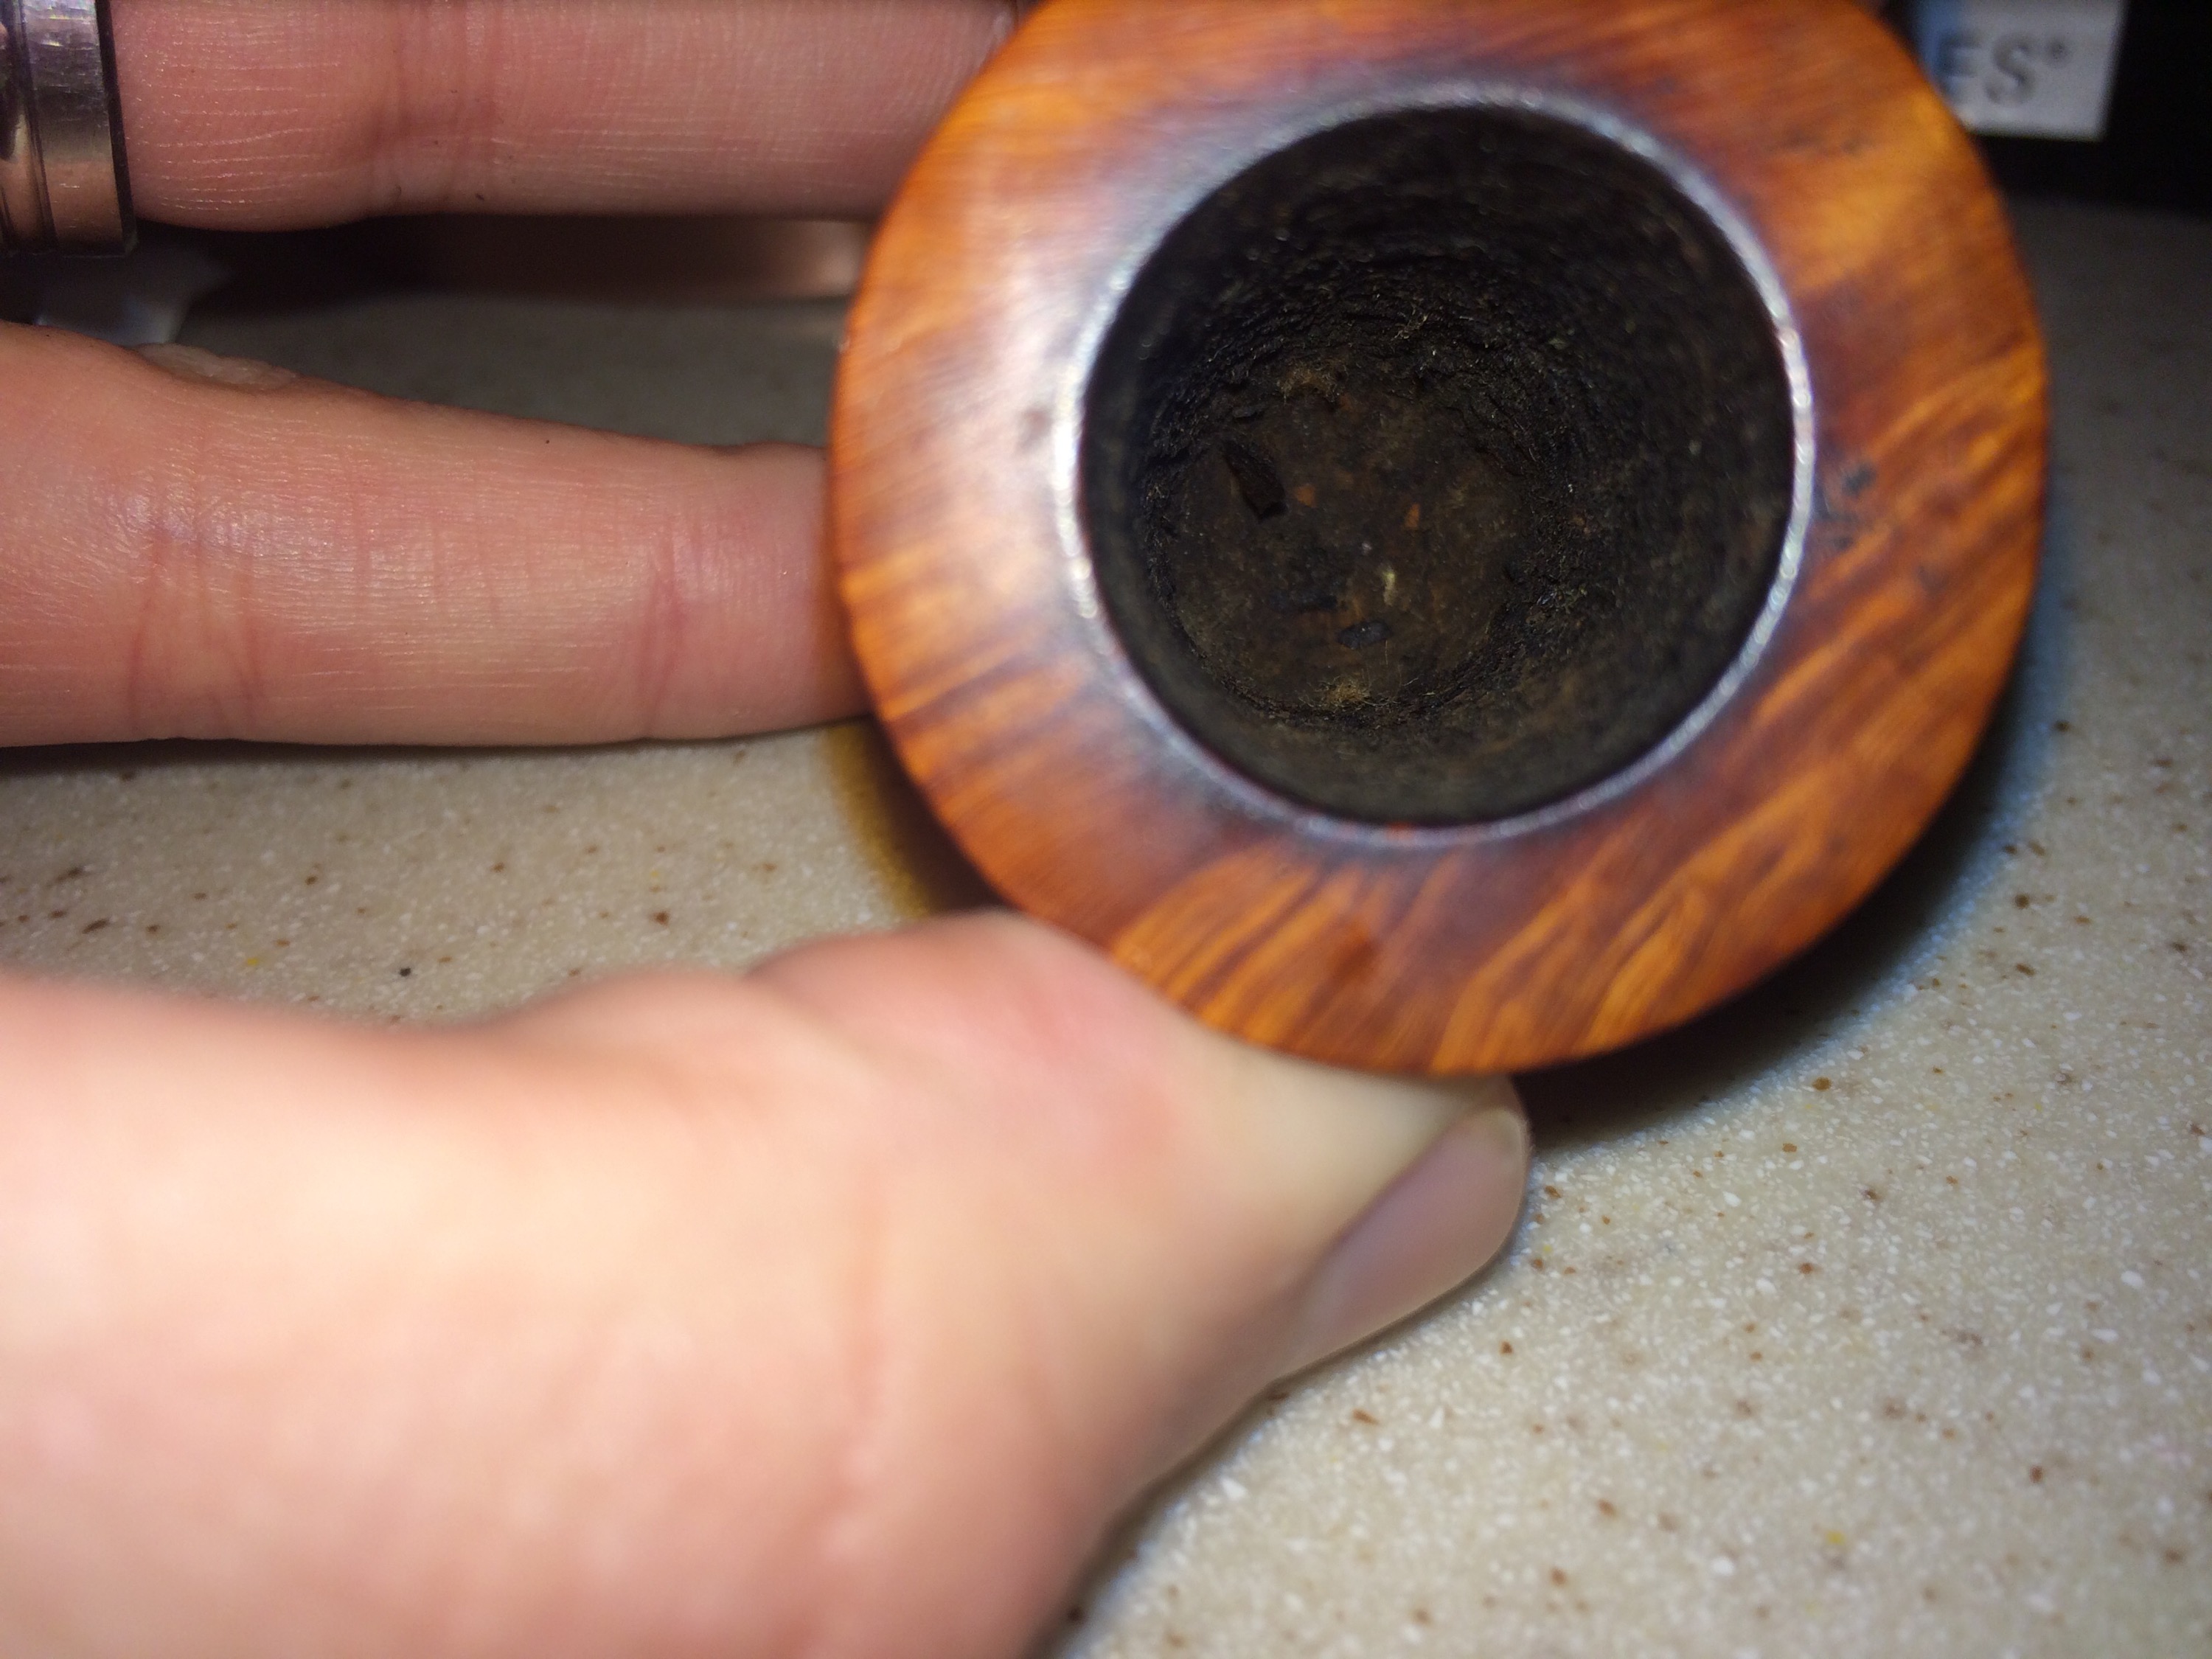
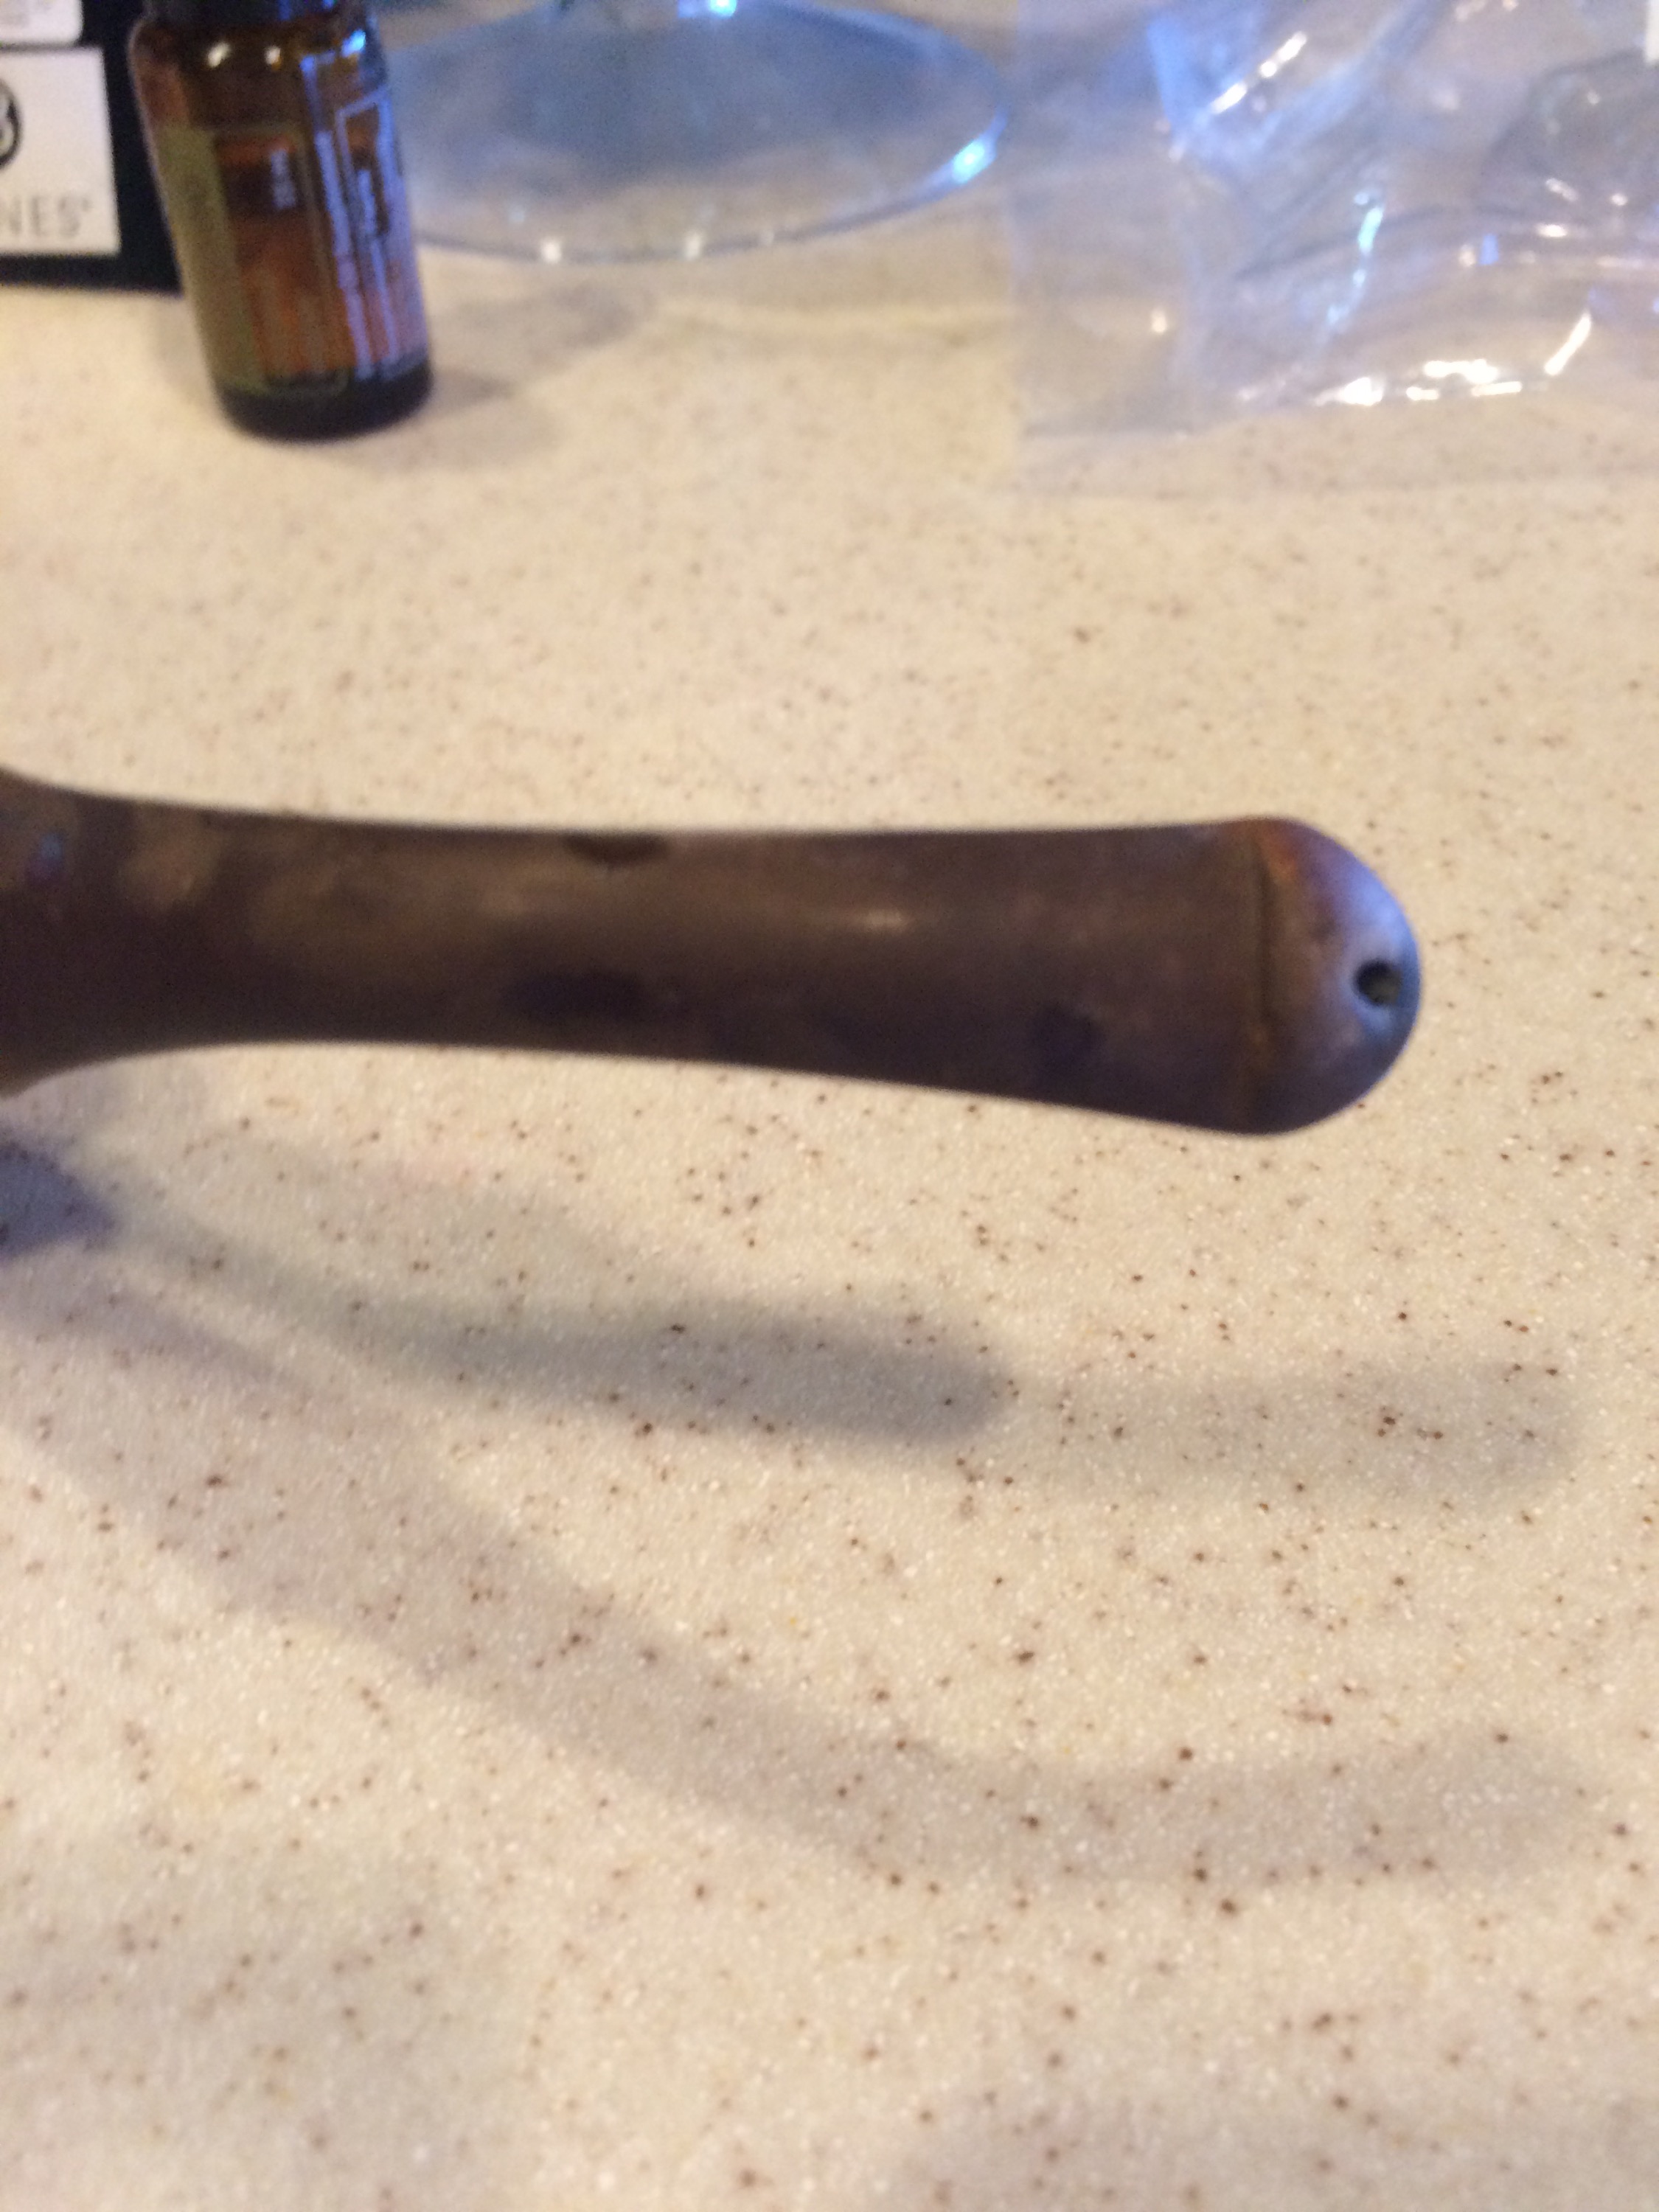
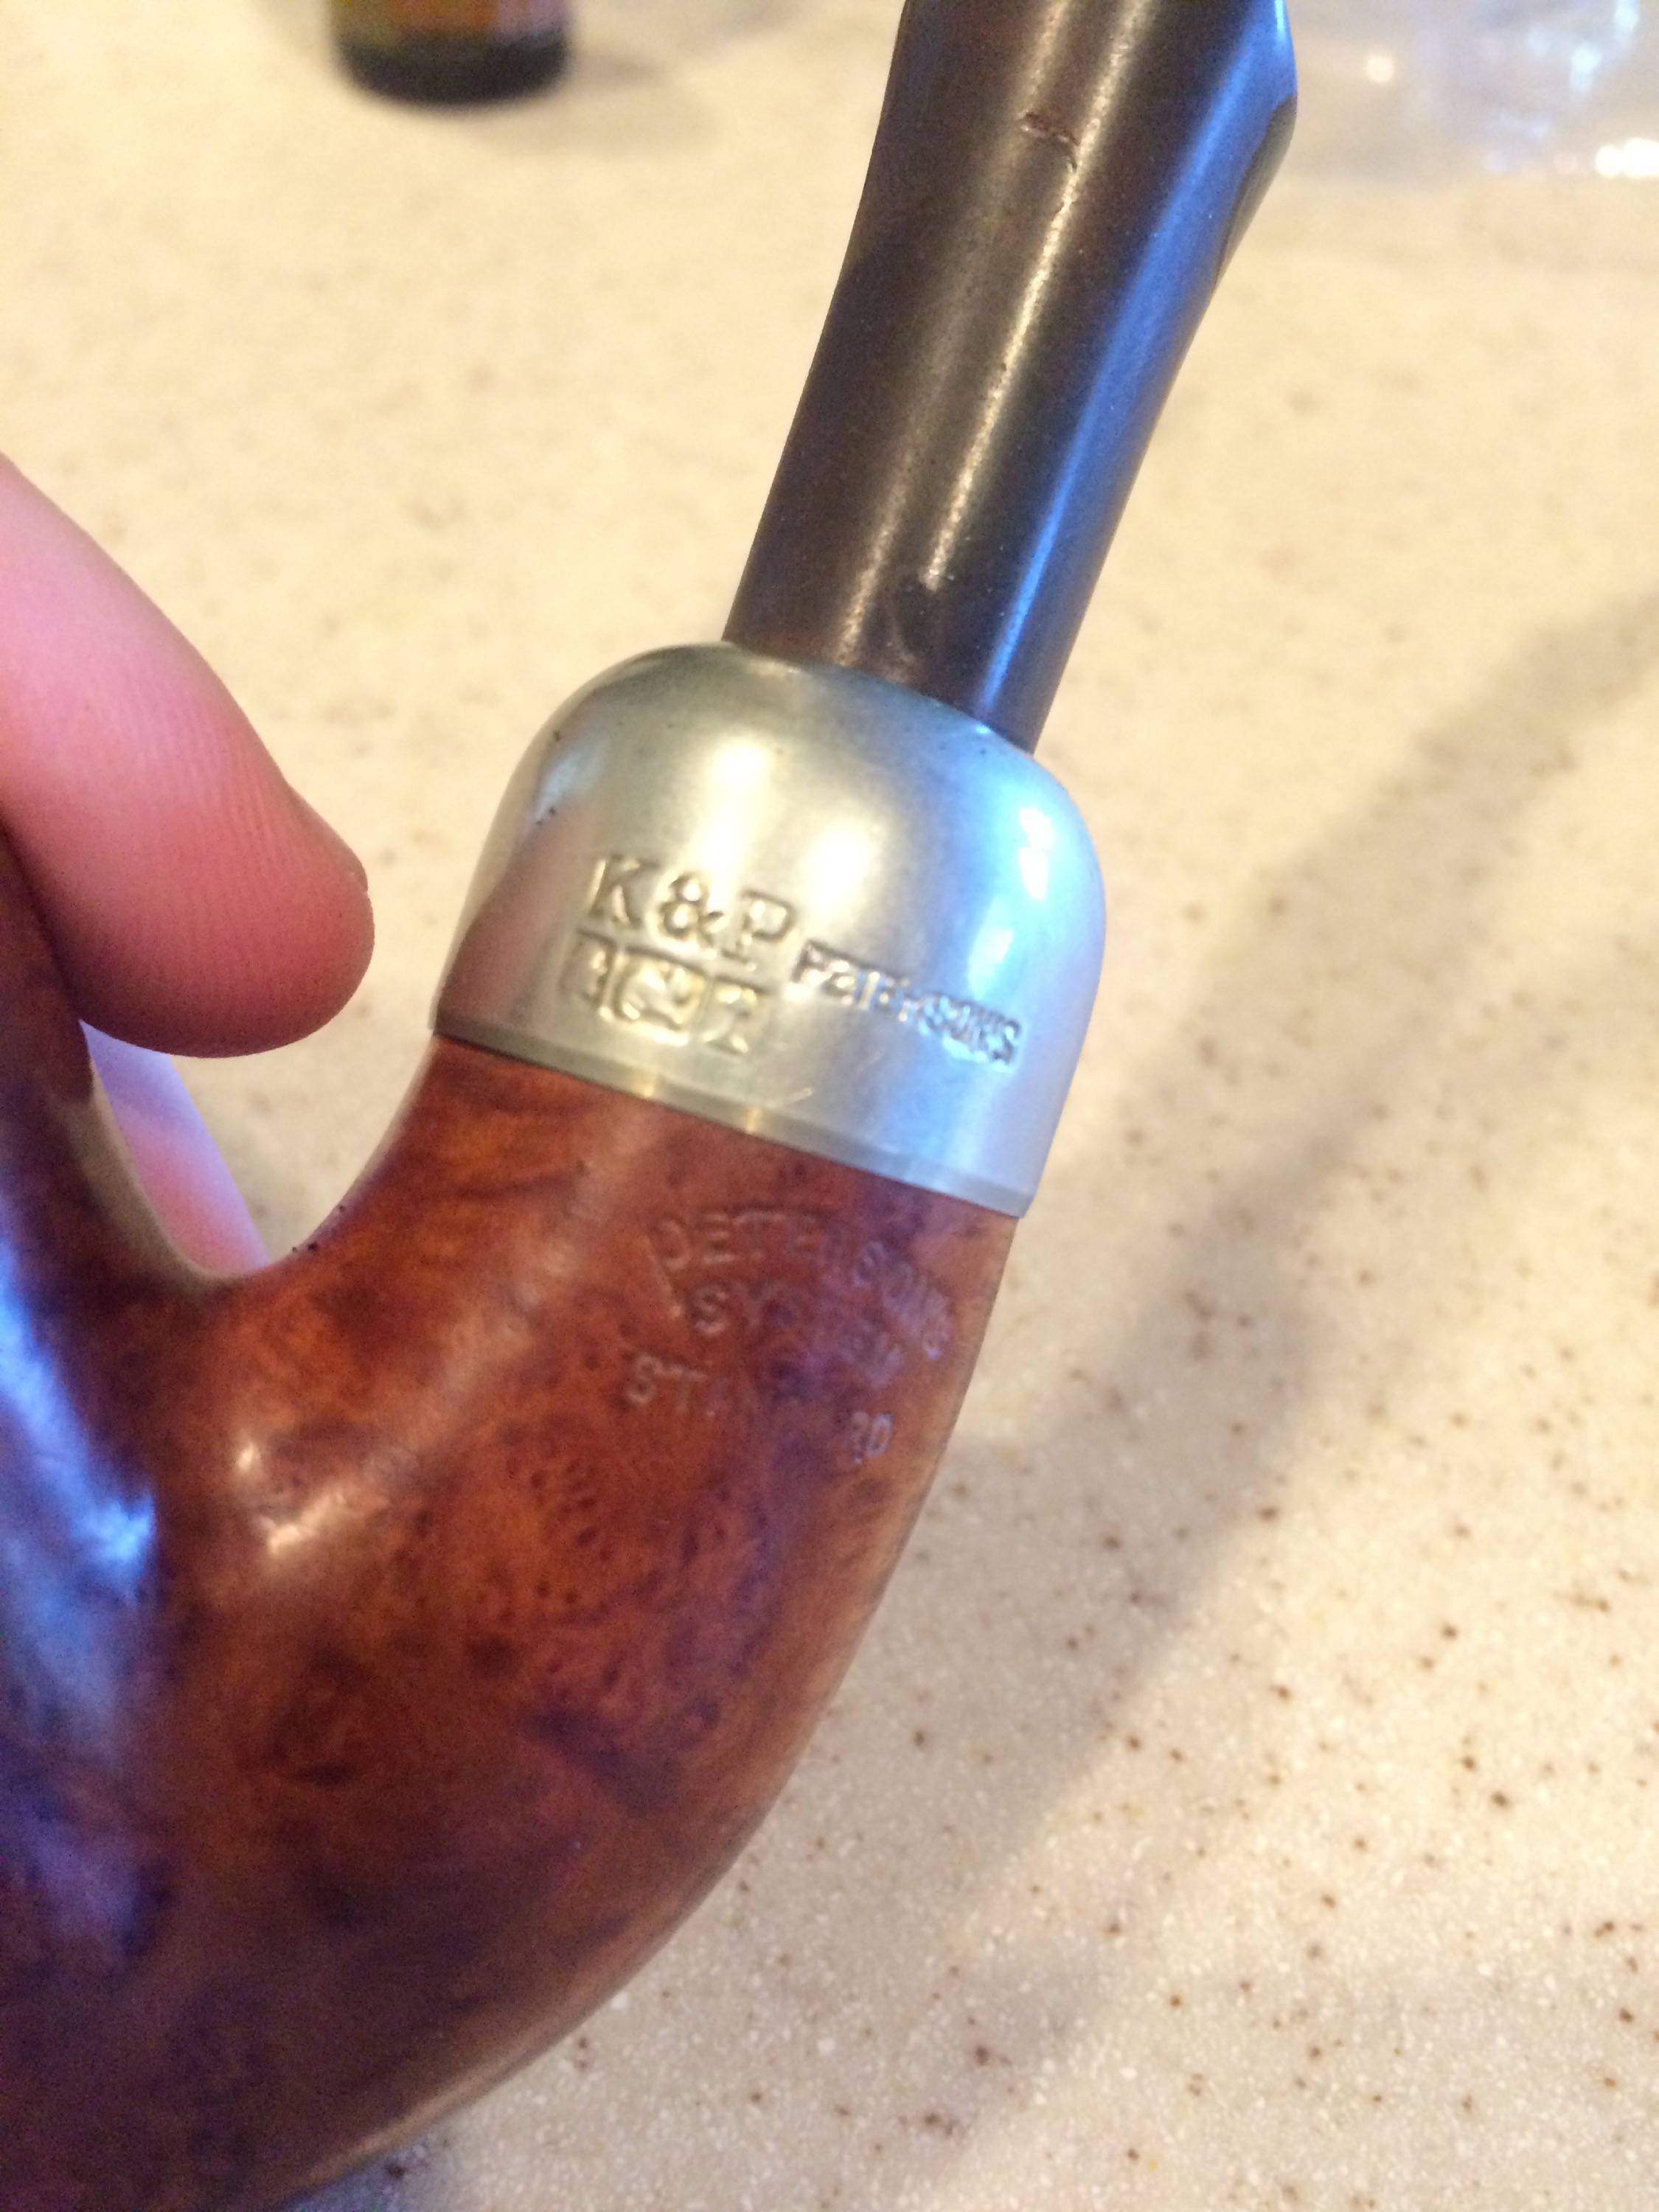 As you can tell by the pictures above, the Pete was in fairly good shape. The bowl had some discoloration around the rim, the nickle collar was in a…
View original post 373 more words
Blog by Steve Laug
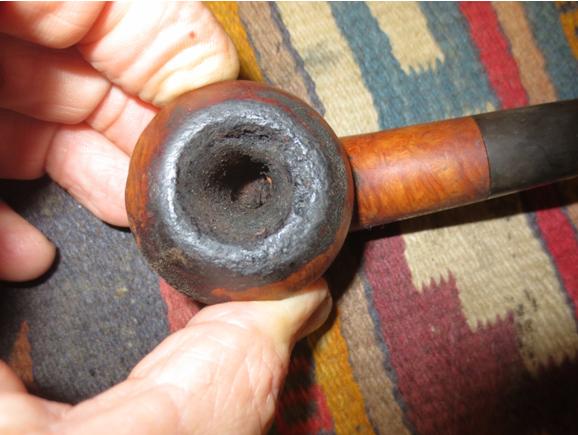
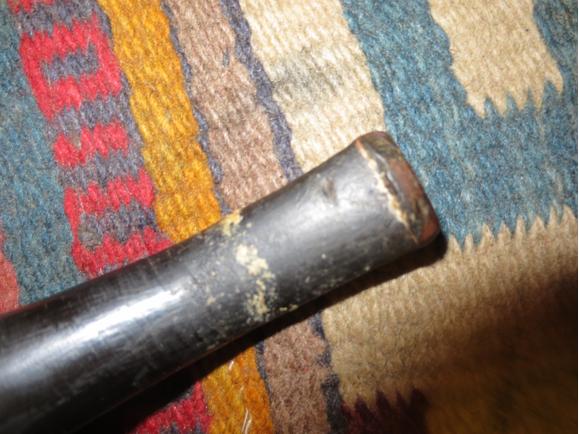
The third pipe my brother Jeff picked up in the lot from the Montana was one of my favourite shapes. In the photo below of the pipes at the seller’s antique shop it is the pipe on the far right of the picture. Looking at it in the photos I wondered if it was a Peterson 999 or a GBD 9438 two of my all time favourite pipe shapes. I was pretty excited to see what it was once he got the pipes. Everything about that pipe shape made me think that my guess was not far off. When the pipes arrived in Idaho my brother called and read me the stamping. The pipe was stamped on the left side of the shank Chadwick over “Supreme”. On the right side it was stamped Imported Briar. At that point I was scratching my head. It still looked like an English-made pipe to me but I had not heard of the Chadwick brand.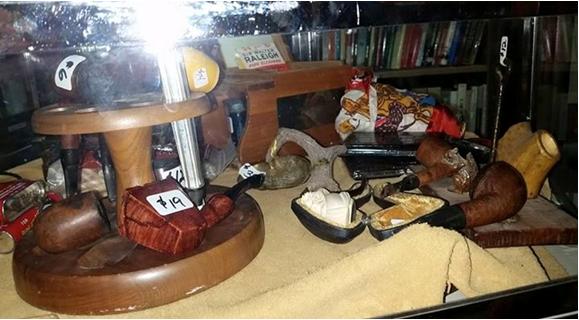 When the pipe arrived in Canada I looked it over and was still convinced it looked English-made. I looked in Who Made that Pipe and it was listed there as made by Wally Frank in the US and England. The next photos show what the pipe looked like when it arrived here. There is a lot of promise underneath all the grime. There was a thick cake in the bowl and the rim was covered with the overflow of tars and oils down the sides to the double ring. The finish was dirty and almost gone. I am not sure if the pipe had a natural finish or was stained but it was no longer clear what the original had been like. The double ring had a large chunk missing on the front of the bowl. There were two fills on the bowl front that were shrunken and looked like dents. The shank was dirty. The stem was chewed and gnawed on to the point that the button was virtually gone on the top side. There was a chunk missing from it on the top middle of the button. There were deep tooth marks on the top and bottom of the stem near the button. The stem was oxidized and scratched and had a build-up of calcification about an inch up the stem toward the shank. Inside the stem and shank was very dirty. The airway to the bowl was clogged and I was not able to blow air through it. It looked to me that there had originally been a stinger in the tenon but it was no longer present.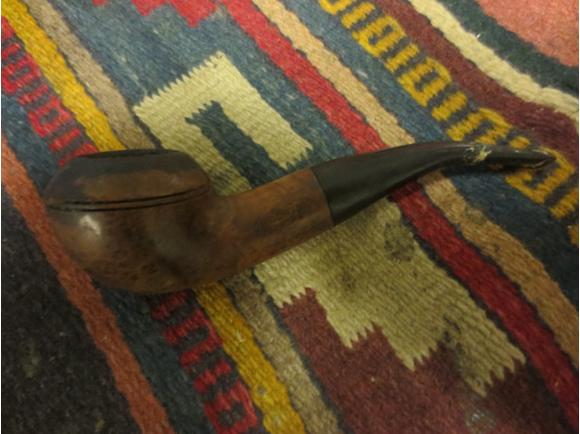

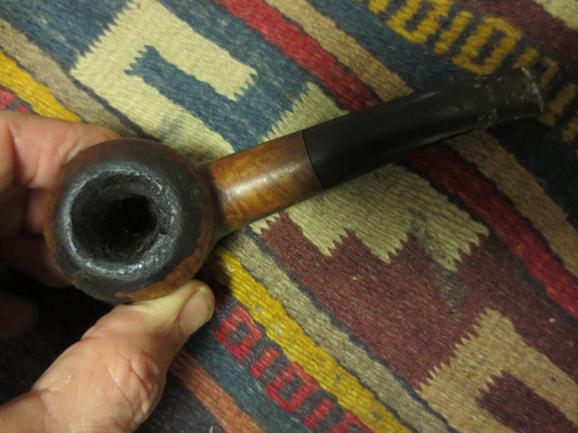
 I took some close up photos of the stamping and the condition of the bowl, rim and stem before I went to work on restoring it. You can clearly see the stamping on the left side of the shank – Chadwick Supreme. The rim is in nasty condition. I am not sure how the last pipe man had ever fit much tobacco in the bowl. All I know is that it must have smoked really well because it looked as if he had never laid it down. The stem condition is also clearly shown with tooth marks and gnawing on the button top and bottom.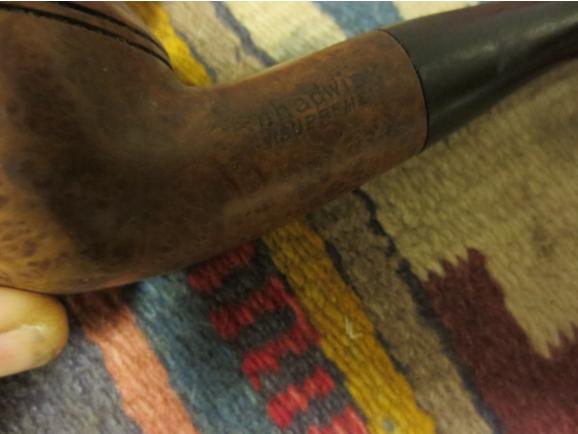

 Before I started cleaning it up I wanted to learn a bit more about the brand. I have cleaned and used quite a few Wally Frank pipes over the years and knew that other companies in Europe often made their pipes for them. It was highly likely that this was a British made pipe. I checked on Chris Keene’s Pipe Pages and found the Chadwick name in the Wally Frank Catalogue for 1939. None of the other catalogues would open but at least I had the information that I needed. The first photo below is of the whole page. The second is of the right top corner where the Chadwick line is mentioned. The third is of a Chadwick Display Cabinet that was provided to tobacconists and stores that sold the line.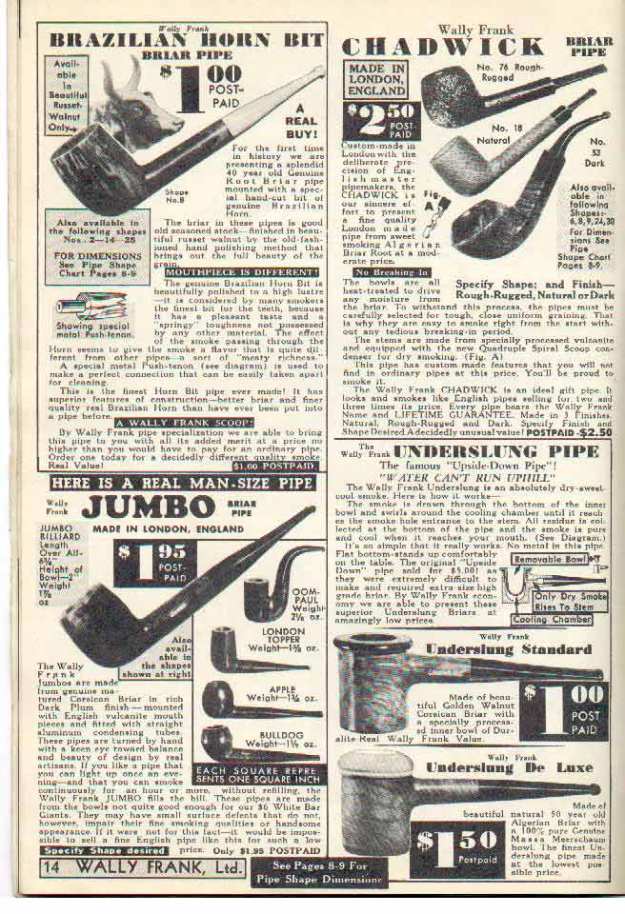
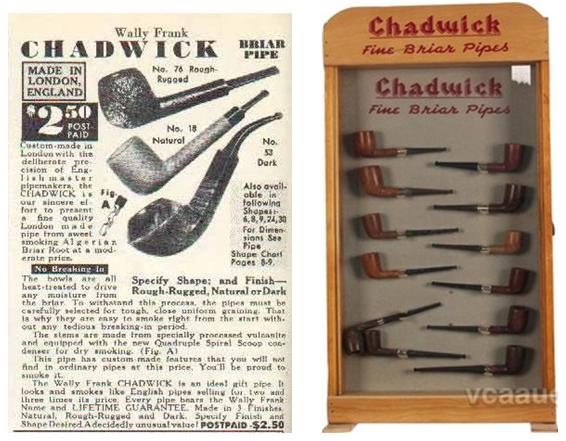 Now I knew that the Chadwick line was indeed made in England. My guess was correct and I would go one step further and guess that they were made by Comoy’s or GBD. The advertisement says that the pipe was “custom-made in London with the deliberate precision of English master pipemakers. The Chadwick is our sincere effort to present a fine quality London made pipe from sweet smoking Algerian Briar Root at a modest price.”
What interested me was that the pipe came in three different finishes – Rough-Rugged, Natural and Dark. I am pretty sure that the one I had was originally dark finished as the dark finish would hide the fills on the bowl and they would be blended into the briar. That gave me the direction that I would go in restaining the pipe once I got to that point in the restoration process.
I love reading these old catalogues and seeing the life time warrantee on the pipes and the fact that the pipe originally cost $2.50 with postage paid from the Wally Frank factory.
Armed with that confirmation of British origin for this old pipe I went to work to restore it to its former glory. I worked on the bowl first. I wanted to ream back the cake to bare wood to see what I was dealing with in the bowl. I set up the PipNet reamer with the smallest head first and found that the cake was incredibly hard. The cutting head barely made a dent in the cake. I took the largest sized cutting head – same diameter as the bowl and work on it and with a lot of force was able to begin to make a dent on the cake. It was just too hard to go too deep with the tool. I used a pen knife to try to cut back the lower portion of the cake but could not even cut into it because it was so hard.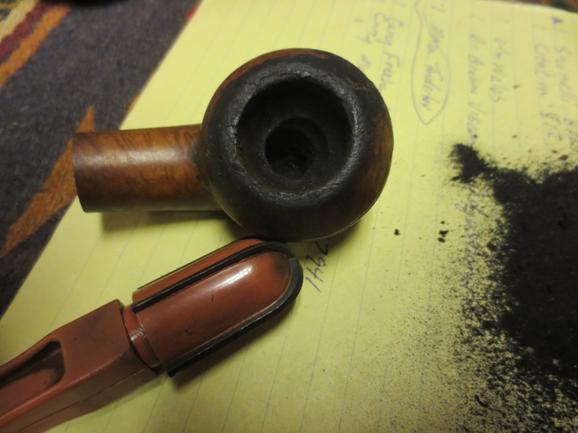
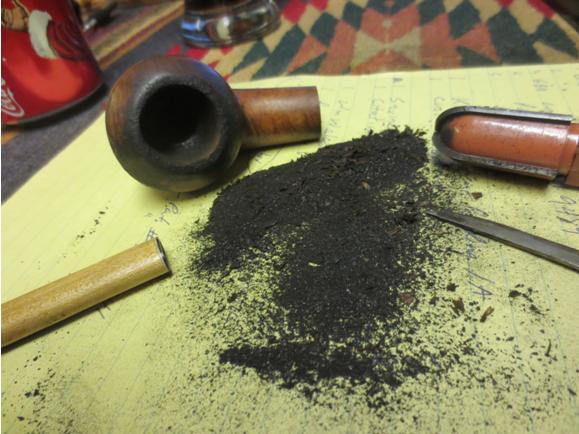 I decided to soak the bowl and soften the cake in an alcohol bath. I dropped the bowl into the bath and left it overnight to soak and soften the cake.
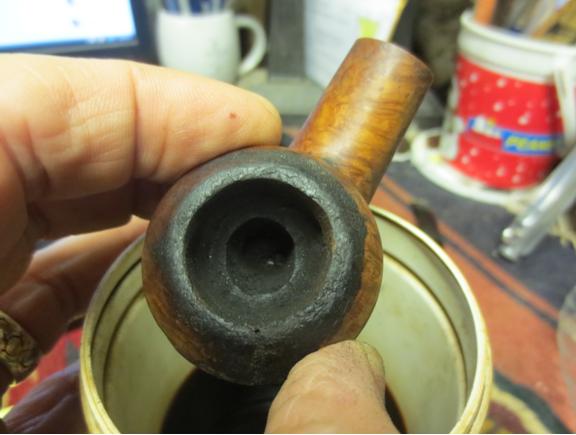 In the morning I took it out of the bath and dried it off with a coarse cotton towel. The soak also had the effect of softening the lava on the rim and cap so that when I dried the bowl most of it came off in the process. I was able to ream it back to bare wood with the use of a PipNet reamer and a KLEENREEM reamer. I used the drill bit part of the KLEENREEM tool to open the airway into the bowl and remove the clog. With that gone I could freely blow air through the bowl. The final photo in this set shows the conical bowl on the reamed pipe.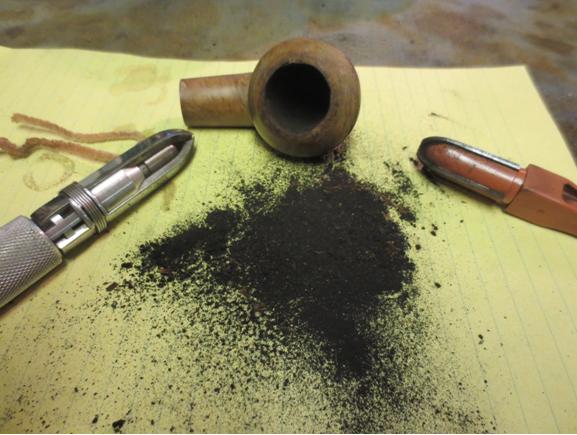

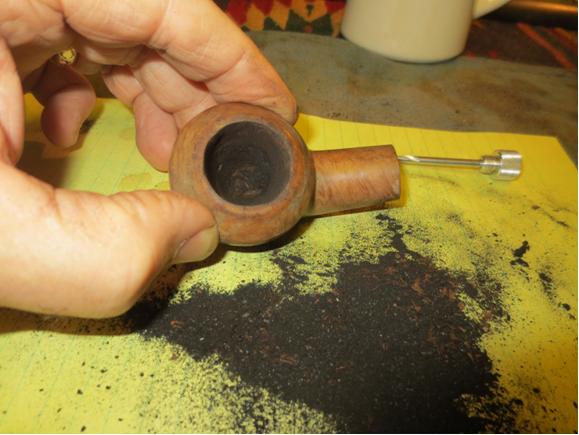 I wiped the bowl down with acetone on a cotton pad to clean off the remaining finish and the grime left behind after the soak and the reaming process. The damaged rings on the front of the bowl are visible in the photos as is the damage to the rim top.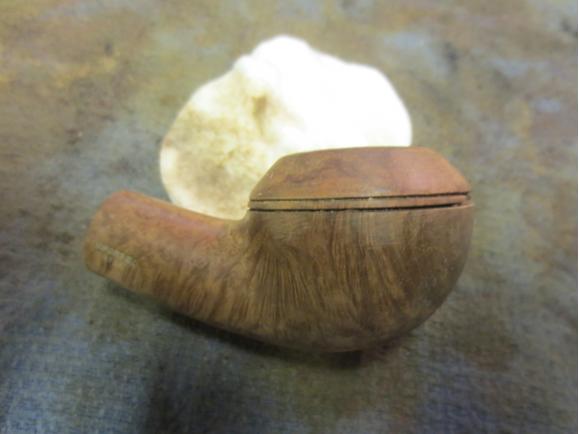
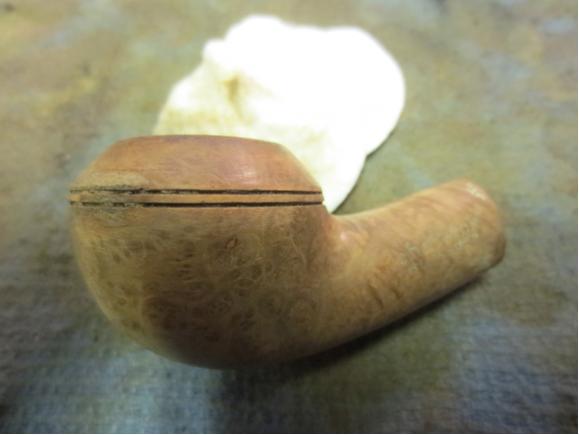


 I lightly topped the bowl on a topping board using 220 grit sandpaper to flatten the rim top and to remove some of the rounding to the outer edge of the bowl.
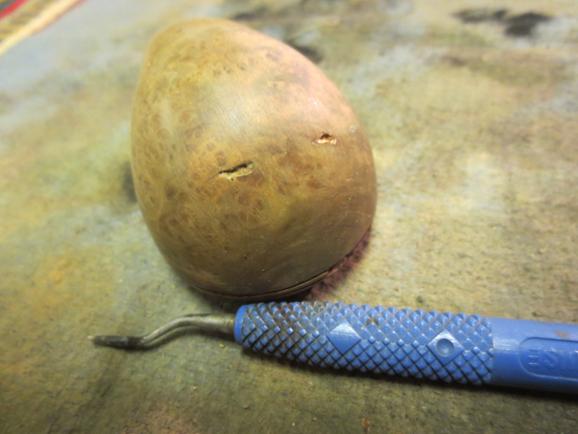
 I used a dental pick to remove the fills that had shrunk on the bottom front of the bowl in preparation for replacing them.
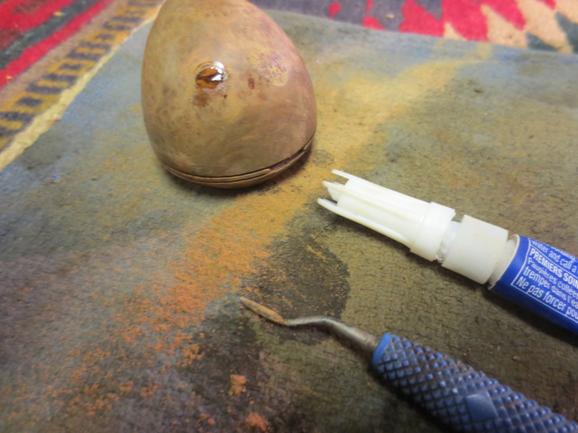
 I packed briar dust into the holes and then dripped super glue onto the packed briar dust.
 I packed briar dust into the missing section of the double rings on the front of the bowl. I put super glue on top of the briar dust fill to build up the repair. I added more briar dust on top of the fills on the bowl front and on the repair to the rings.
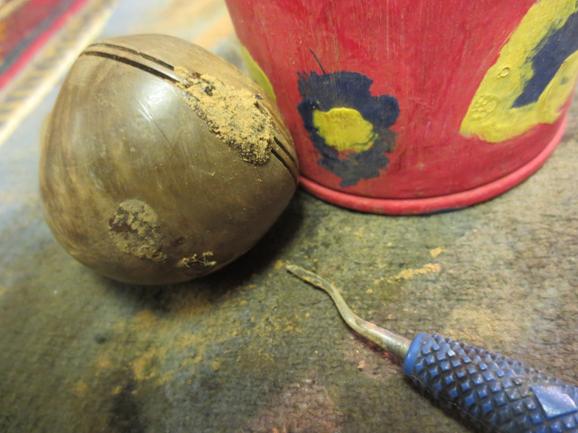 I sanded the patches on the bowl front with 220 grit sandpaper and smooth it out to match the surrounding briar.
 I sanded the patch on the ring repair with 220 grit sandpaper to smooth it out. There were still some low spots on that repair so I refilled the area with some more super glue.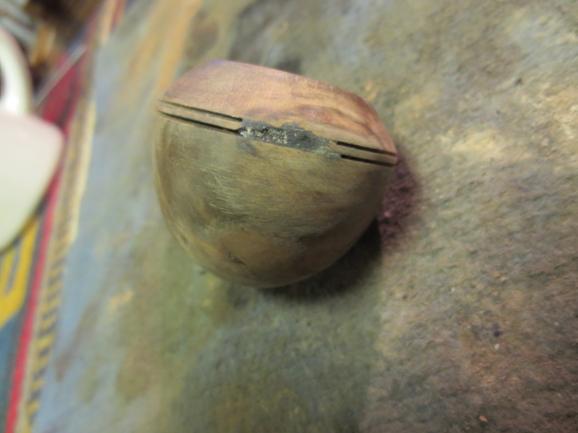
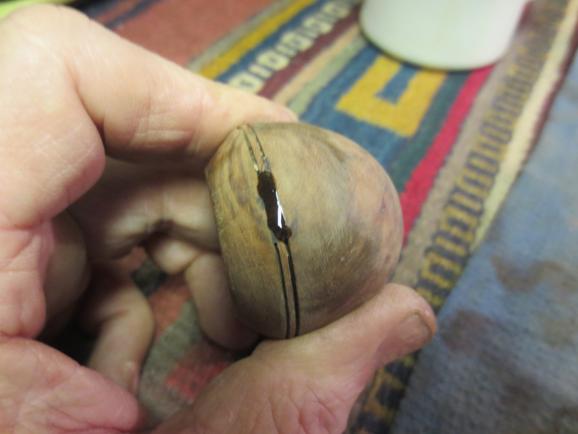 I set the bowl aside to let the repair on the rings cure before I cut the new rings into the bowl front. While it was sitting I sanded the stem with 220 grit sandpaper to remove the oxidation and the calcification. I wanted to clean up the stem before I worked on repairing the tooth marks and gnawed button. I cleaned the stem with alcohol and pipe cleaners.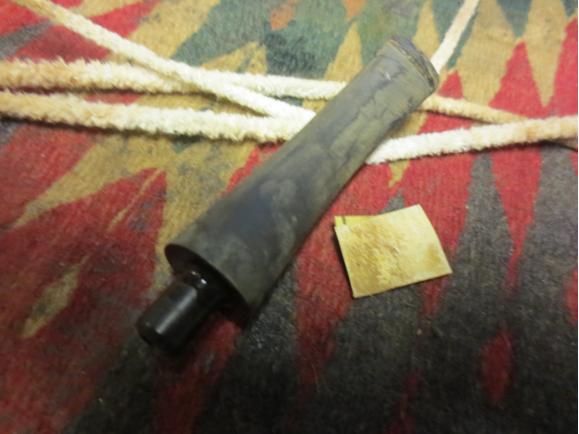
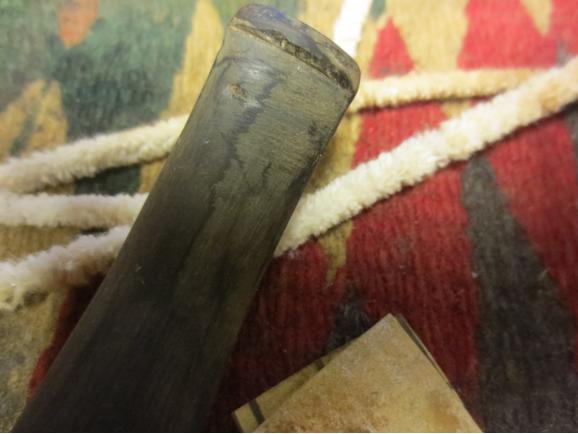
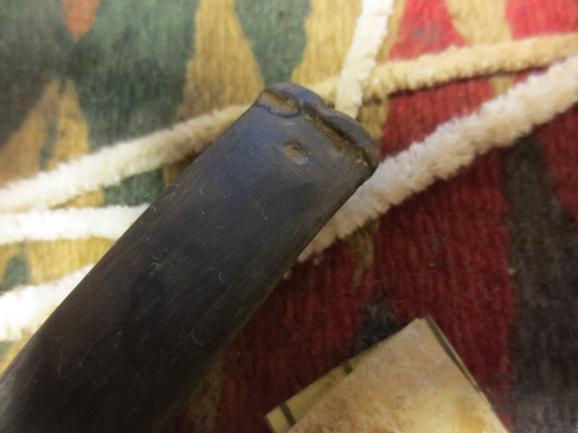 I scrubbed out the tooth marks on the stem and the button with a cotton swab and alcohol in preparation for the repair I would do there. I mixed the patching material using finely crushed charcoal capsules and black super glue. I mixed the two to blend the materials. I use super glue that gives me 45 seconds of time before it hardens so I have to work quickly.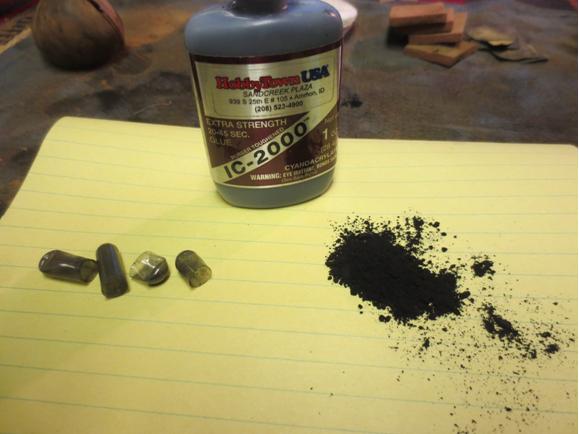
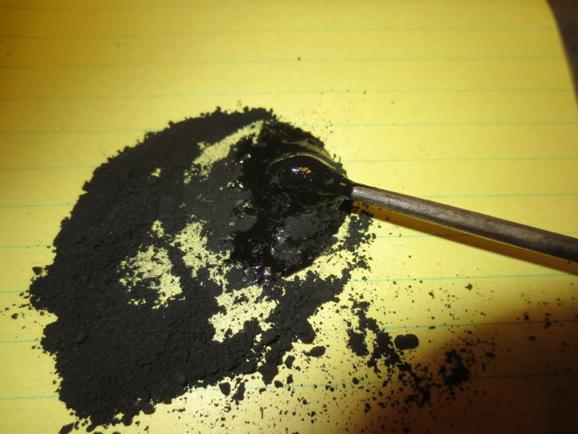 When I had the paste mixed well I applied it to the tooth marks and built up the button with a dental pick and dental spatula. The repair is anything but beautiful at this point but the mixture adds strength to the repair that the glue by itself does not give with tooth marks and damage of this magnitude.
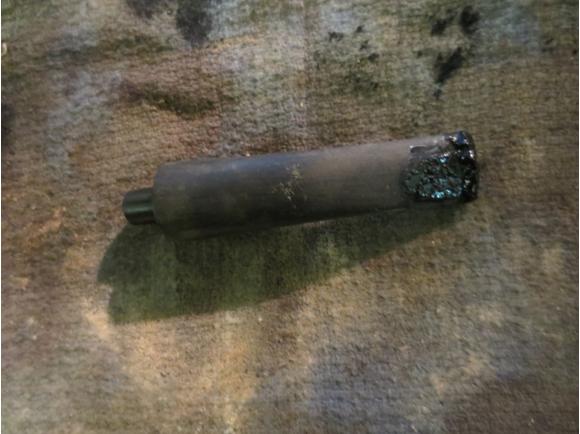
 I set the stem aside to cure and went back to the bowl. I used a Buck Knife, a pen knife and a sharp-edged needle file to cut the lines in the patch on the bowl front. I wanted the new lines to connect seamlessly to the lines on either side of the repair. These three blades always have worked for me to get a good straight line match.
 When I had finished cleaning up the lines on the bowl the stem repair had cured enough to begin to shape the button and clean up the tooth repairs. I sanded them with 220 grit sandpaper to begin to shape and smooth out the repairs.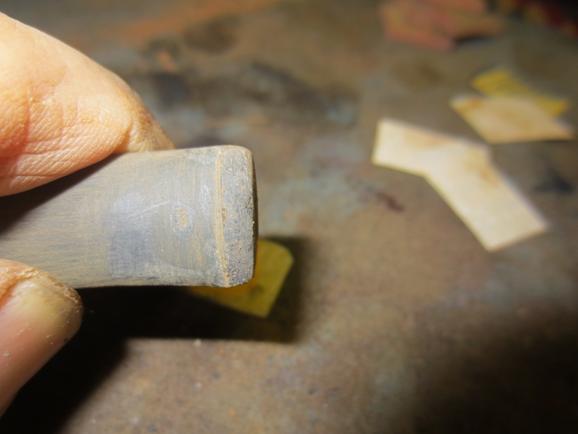
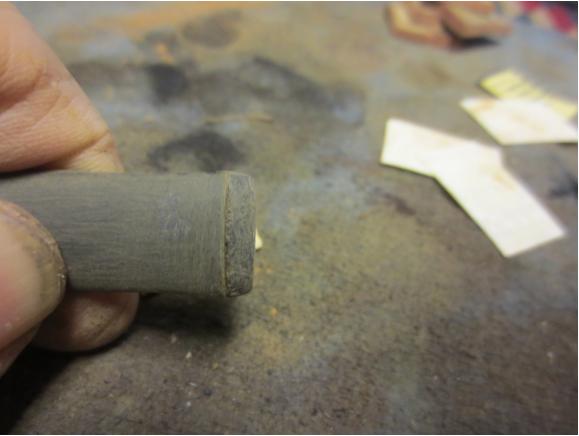
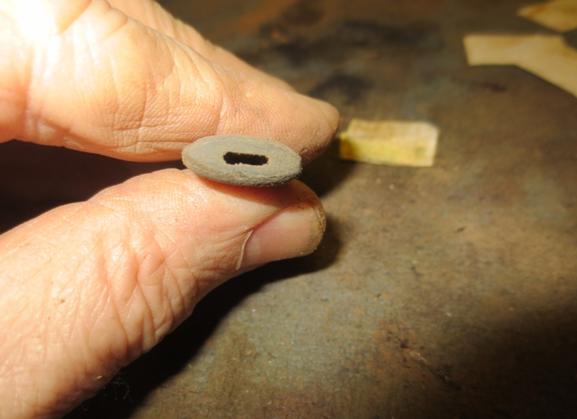
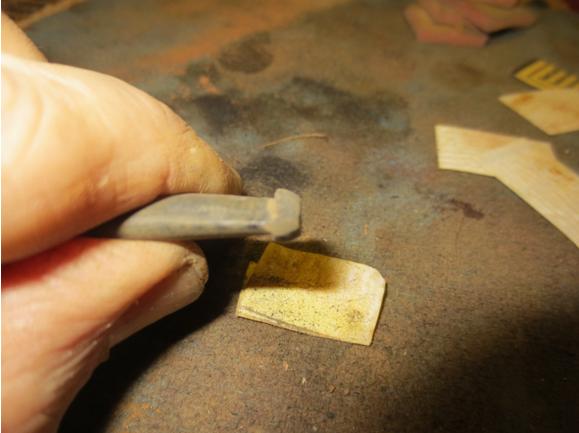
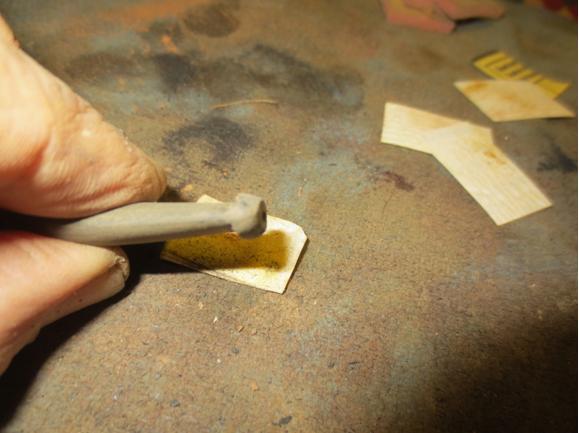 When I had the basic shape of the button set up the surface was quite porous on the button surface and in one spot on the tooth repair on top of the stem so I gave them a top coat of clear super glue to fill in the pores left behind by the super glue/charcoal mixture. I set that aside to dry.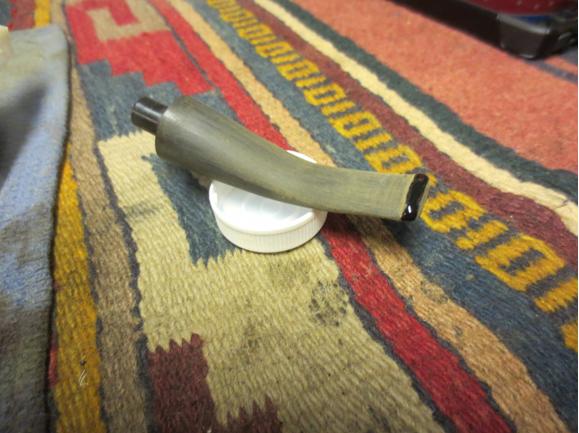
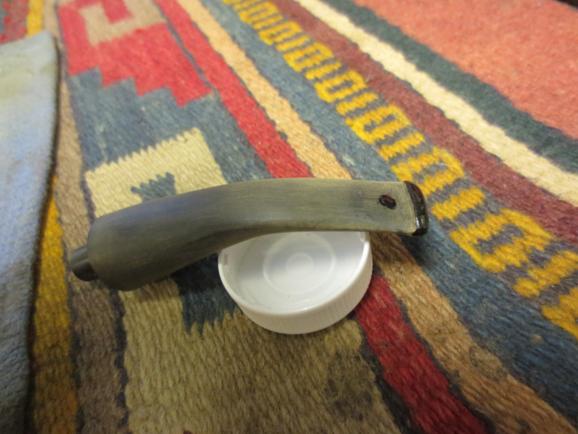 I cleaned the bowl and shank with pipe cleaners, cotton swabs and alcohol. It was one dirty shank. It took a lot of scrubbing to clean out the grime. I scrubbed until the cleaners came out clean and white.
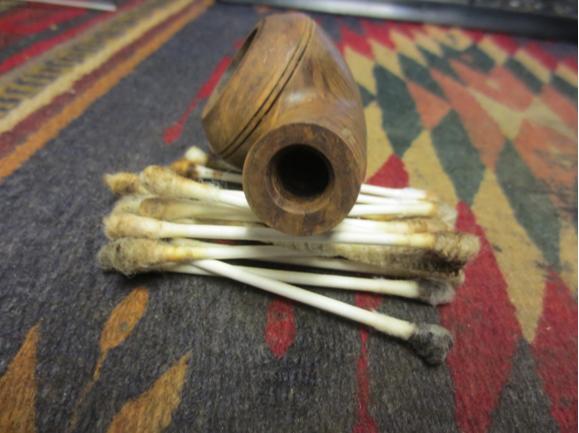 I wiped the bowl down with alcohol to remove any last dust or grime in preparation for staining the briar.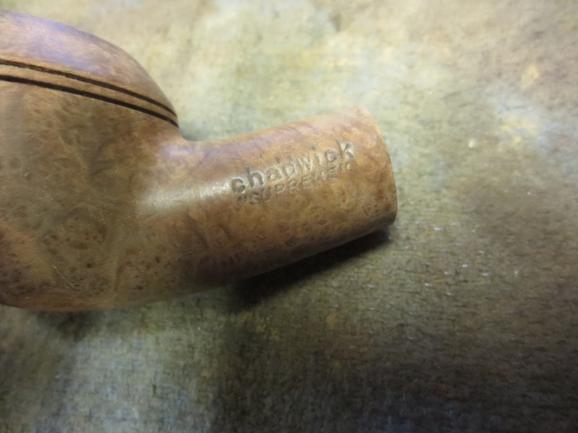

 I decided to stain the bowl with a dark brown aniline stain that I had thinned by half to give it a medium brown colour. I wanted to aim for the dark stain that was noted in the Wally Frank Catalogue above. I figured it would give me good coverage on the fills and the repair to the rings.
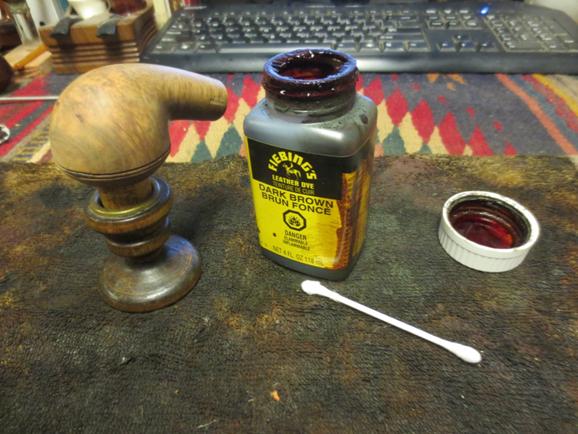 I applied the stain with a cotton swab and then flamed it with a lighter to set the colour in the grain.
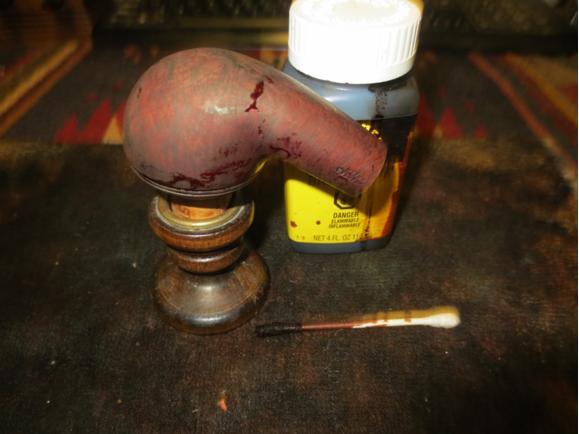 I wiped down the freshly stained bowl with alcohol on cotton pads to even out the stain and to give it more transparency so that the grain shows through. When I was through I was happy with the colour and with the way it hid the fills on the bowl and the repair to the ring on the front of the bowl.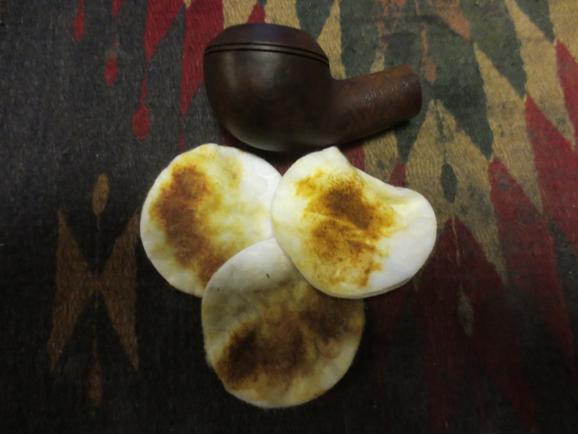
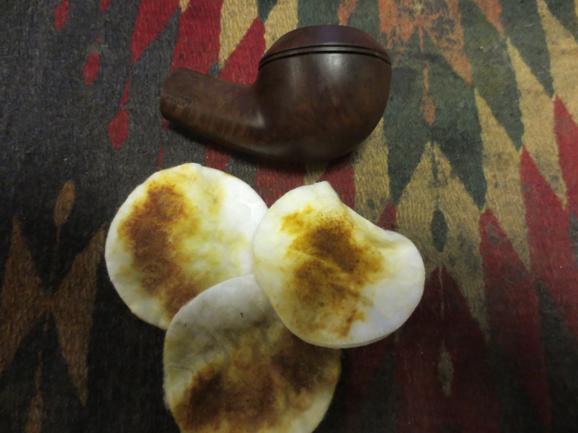
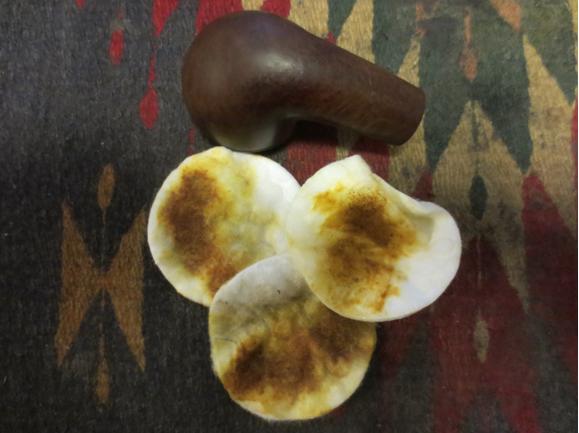
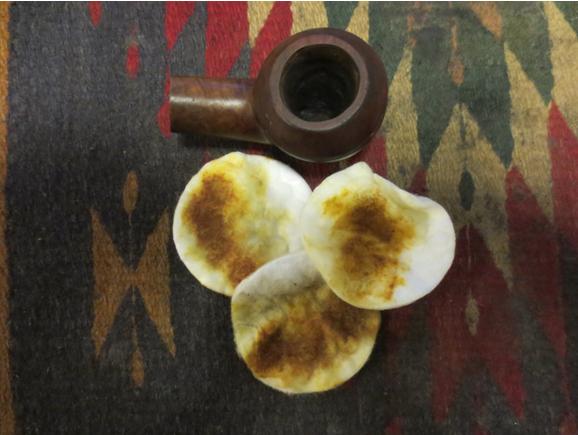
 By that time the stem repair had dried and I sanded it with 220 grit sandpaper to smooth out the stem patch and do more shaping on the button.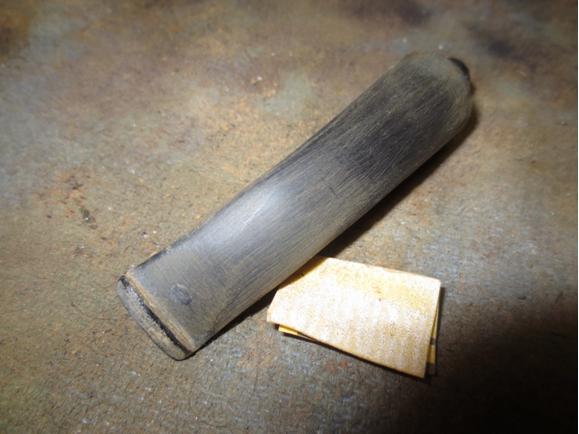
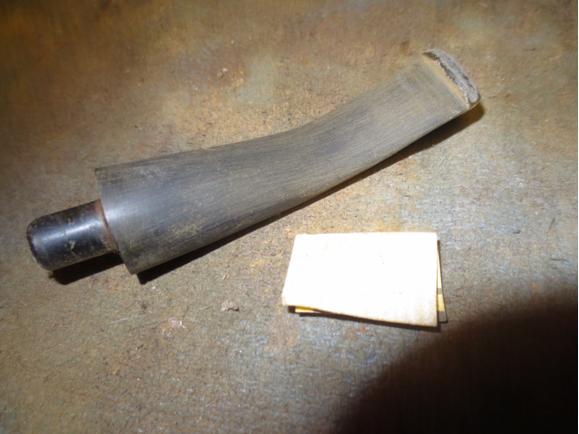
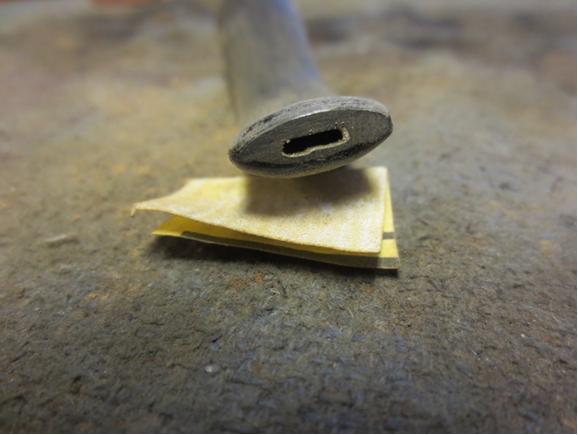 I filed the slot in the stem to smooth it out and shape it. I also sanded the stem with a medium and a fine grit sanding sponge to further shape the button. I wet sanded the stem and button with 1500-2400 grit micromesh sanding pads and rubbed the stem down with Obsidian Oil. I dry sanded with 3200-4000 grit micromesh pads and gave it another coat of oil. I finished by sanding it with 6000-12000 grit pads and gave it a final coat of Obsidian Oil. I set it aside for the oil to dry.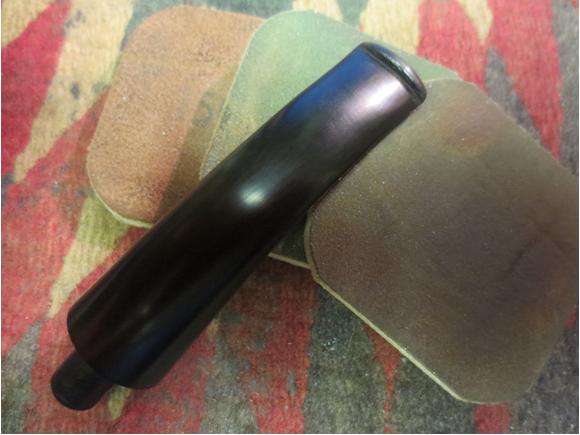
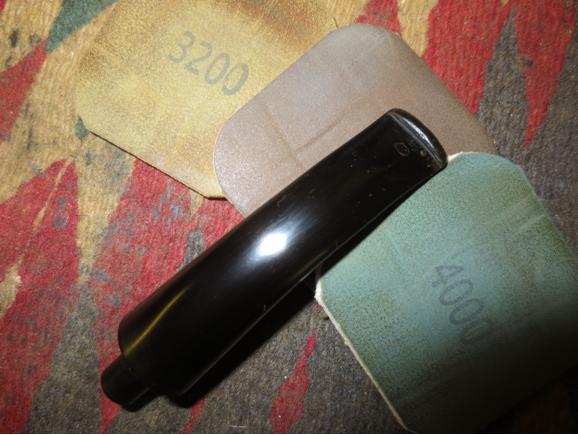
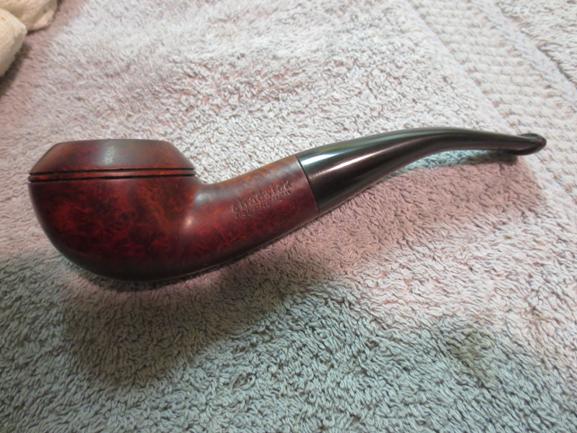
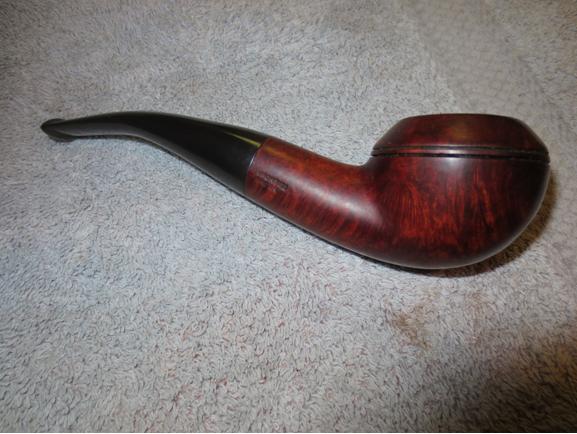
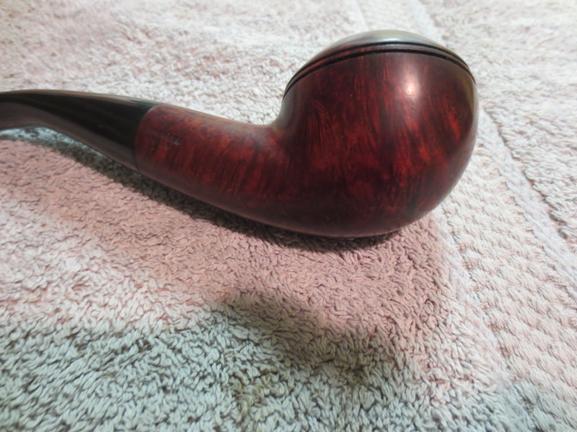
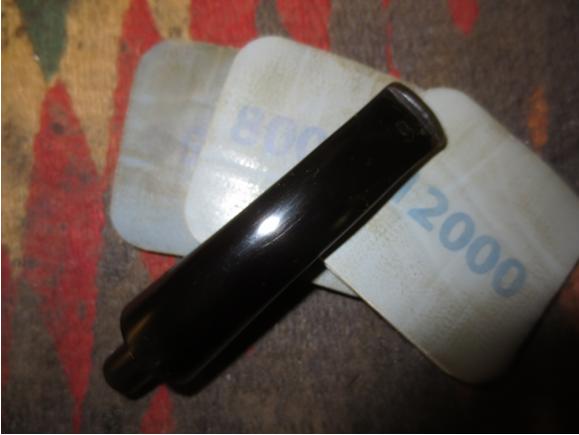 I sanded the bowl with the micromesh sanding pads – 1500-12000 grit to polish the briar – bowl, shank and rim, to bring out the grain. When the grain began to pop I buffed the bowl and the stem with Blue Diamond on the wheel and then gave both multiple coats of carnauba wax. I buffed it with a clean flannel buff and then with a microfibre cloth. The finished pipe is shown in the photos below. It is a far cry better looking than when I started. This one is a keeper. Thanks for looking.