by Kenneth Lieblich
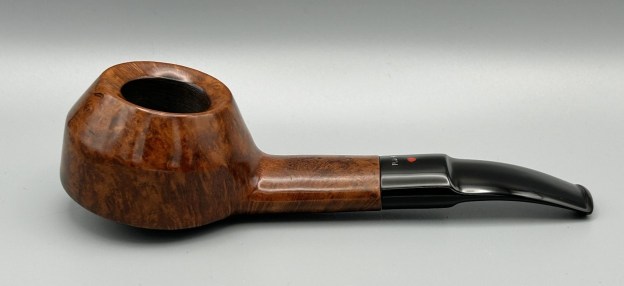
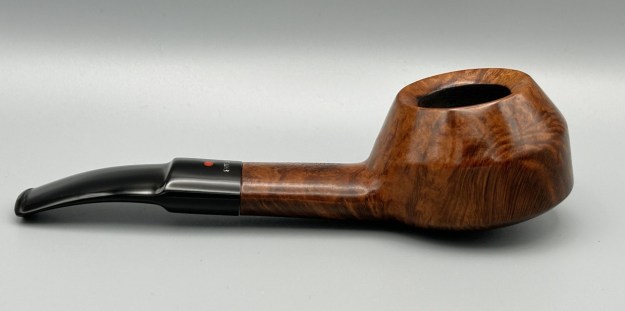
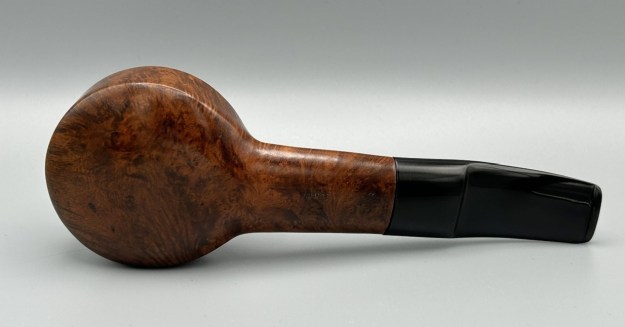
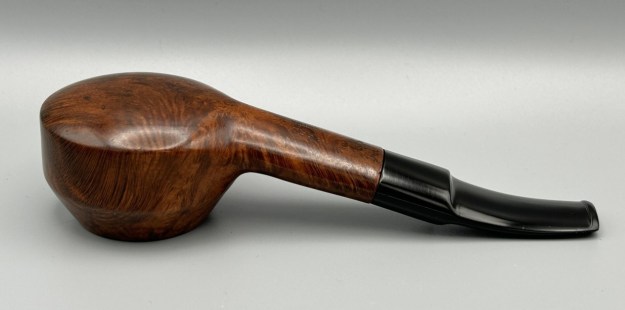
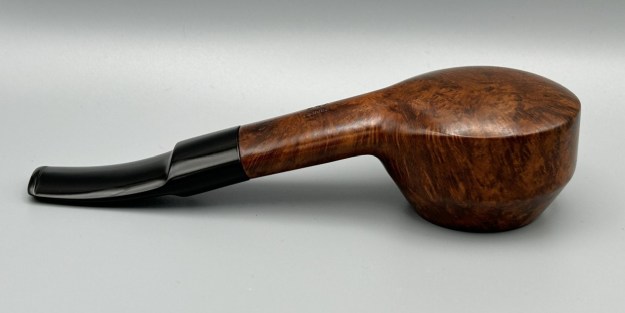
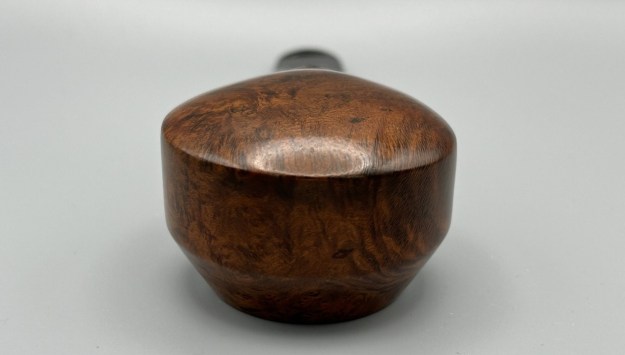
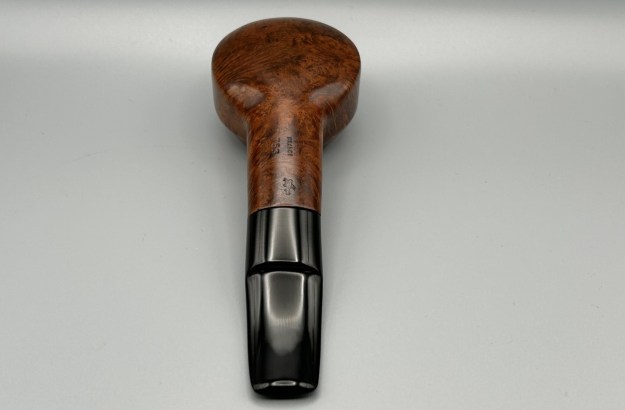
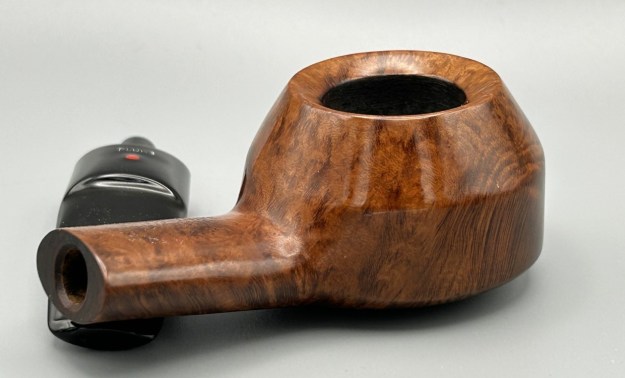
Here is a handsome and unusually-shaped pipe, which caught my eye as soon as I saw it. It is solid and chunky and thick – and feels so satisfying in the hand. It is a Dr Plumb 753 author, made by GBD. Although Dr Plumb was a sub-brand of GBD, it is a fantastic pipe and is looking for a new home. When I took possession of it, it looked rather worse-for-wear, but I managed to recapture its beauty. Read on and learn more about this nifty pipe.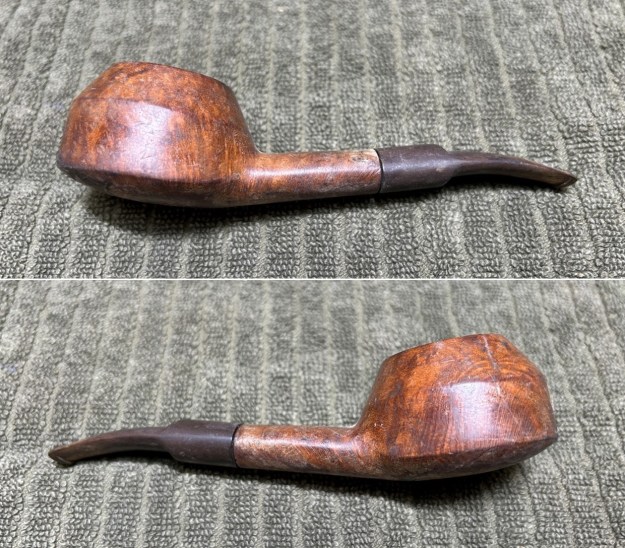
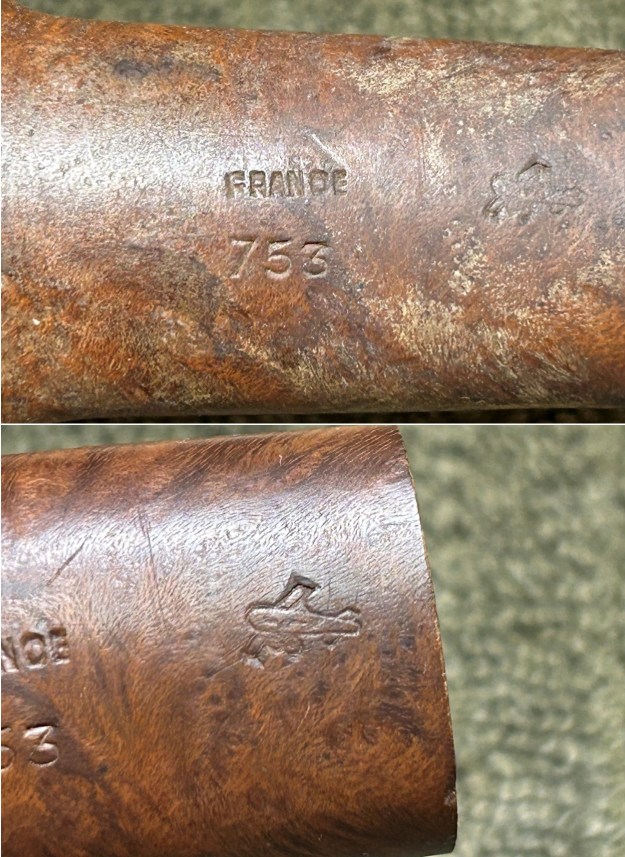
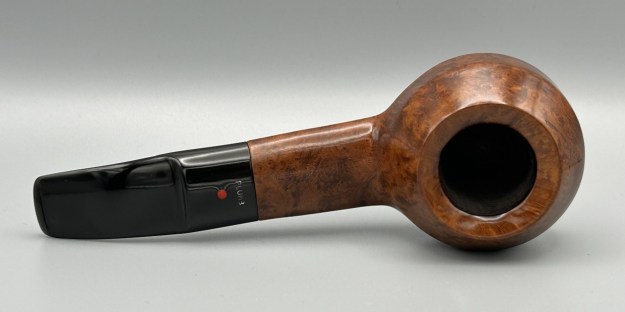
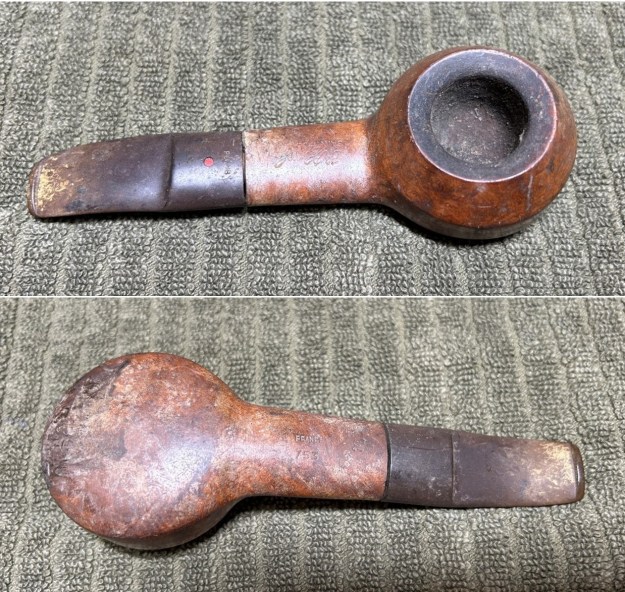 The markings are clear and (mostly) understandable. On the stem, we read the word Plumb above the traditional red dot logo seen on their pipes. On top of the shank, we read Dr Plumb [over] Saint-Claude. On the underside of the shank, we see France [over] 753 – and, to the right, an image of an airplane. I have no idea what the airplane represents, as it is not associated with either Dr Plumb or GBD. It reminds me of the airplane seen on tins of Hi-Plane Tobacco – similar but not the same. It might be connected to whichever pipe shop sold it (in an airport, perchance?). Anyway, the last of the following photos shows the airplane after I’d cleaned off the dirt. If you have any idea of what this airplane represents, please let me know in the comments below.
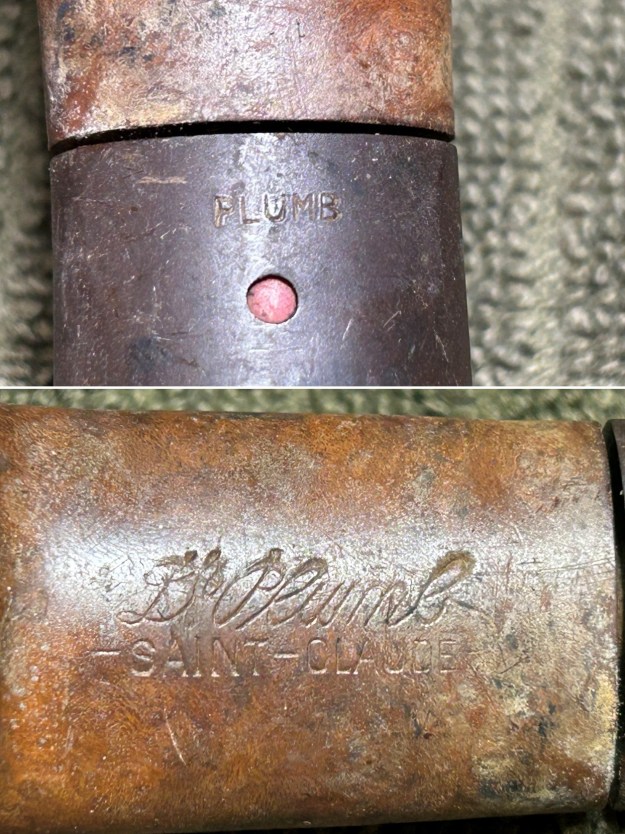
 Let’s learn a bit about the brand. The man, Dr Plumb, wasn’t a doctor at all! Leslie Watts Plumb was a chartered accountant and a director of Maréchal-Ruchon, one of the most venerable pipe companies of France. The history of Dr Plumb is quite interesting. I encourage you to read the article at Pipedia here and at Pipephil on this page. Here is an extract from the Pipedia article:
The Dr. Plumb’s brand name is owned by A. Oppenheimer & Co., Limited, owners of Cadogan Investments, Ltd. J.B. Rubinovich, GBD’s Parisian sales manager, created this brand in 1925. The pipes was produced by the Ruchon & Verguet and also Ropp factories (Saint-Claude, France). These pipes have long been advertised as Dr. Plumb’s Perfect Pipe, that name coming from an aluminum tube system designed to keep the smoke cool and dry while at the same time permitting the “cooling chamber” to be cleaned by simply twisting the stem. While Dr. Plumb’s pipes were long made in France and stamped accordingly, they are now British made.
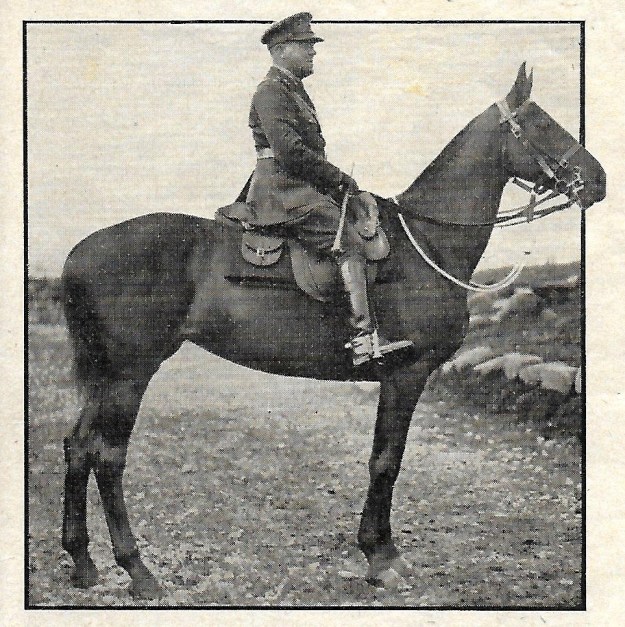
Here are some photos of old Leslie Watts Plumb: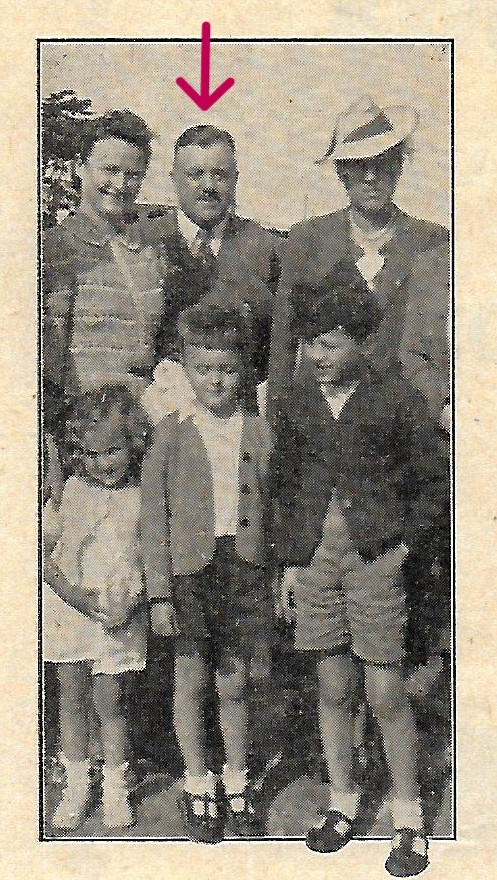
 In that article, they quote from a letter by John Edward Plumb, son of the eponymous Dr Plumb:
I am the son of the late Leslie Watts Plumb, FCA. Before World War II, he managed the business affairs of a smoking pipe factory Verguet Freres/ Marechal Ruchon at St Claude in the French Jura Mountains… where his Plumb Family lived in a flat adjacent to the factory premises. He lent his name to the Dr Plumb Smoking Pipe & I had always understood that he played a part in its promotion & design of the pipe’s unique aluminum cooling filter system.
This pipe is an earlier, French-made, Dr Plumb, coming before Cadogan took over the works. Based on the information I gleaned from an article that Steve wrote on a GBD Coronet 753, I date this pipe to between 1951 and 1976. You can read Steve’s article here. His was exactly the same shape of pipe, albeit with a slightly different stem from mine. Steve’s article has lots of good information, and I quote just a brief passage:
From all of that information I had learned that the pipe was a French Made GBD Coronet made in St. Claude France between 1951-1976. It was made with a matte finish and a recessed platform style stem. I also learned that it was an AUTHOR shape with a 1/8th bend to the stem. Now it was time to work on the pipe.
I did look up the shape number 753 on a GBD pipe shape chart and found (as Steve did) that the 753 is described as
753 author one-eighth bend round stem shape
Well, ‘author’ I can understand, ‘one-eighth’ is certainly accurate, but I can’t help wondering if ‘round’ is a typo – as neither Steve’s nor my pipe have round stems. They are decidedly oval.
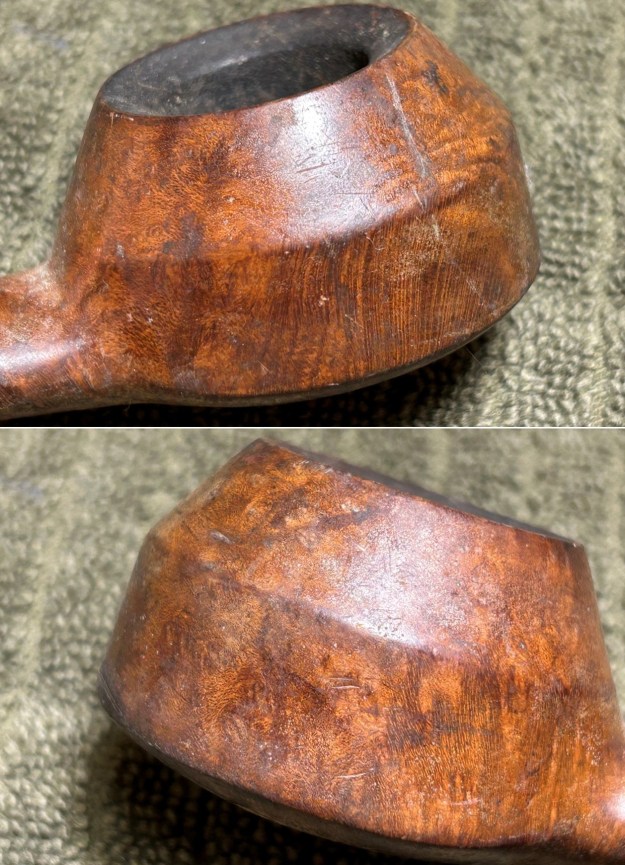
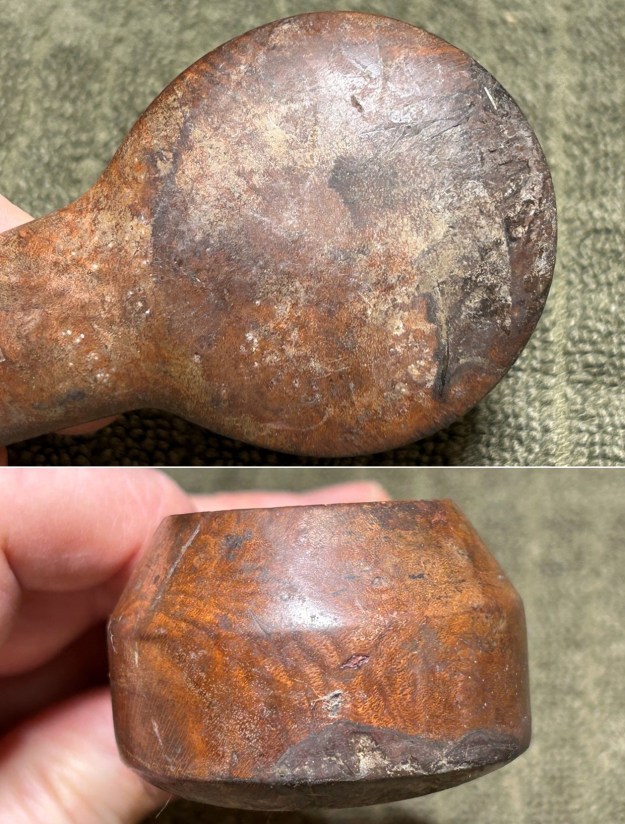
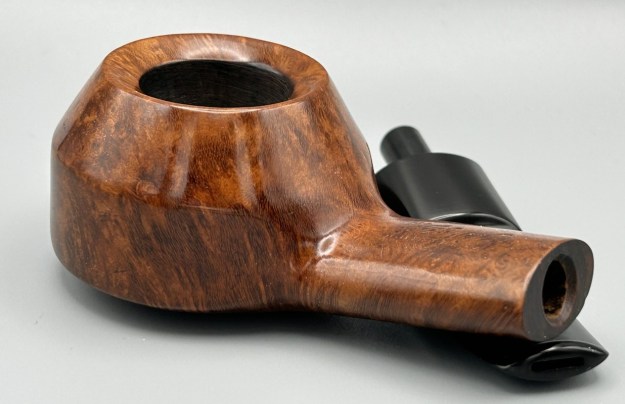
Let’s have a look at the condition of the pipe. Overall, the condition was good – just remarkably dirty! The stem was well-chewed and had lots of tooth scratches. It was oxidized and calcified, and had a haze of dust on it. Meanwhile, the stummel was sound – it had only a few minor nicks and lots of dirt and grime. There was also a large, hideous stain on the bottom. Only time would tell if I could get rid of that stain.
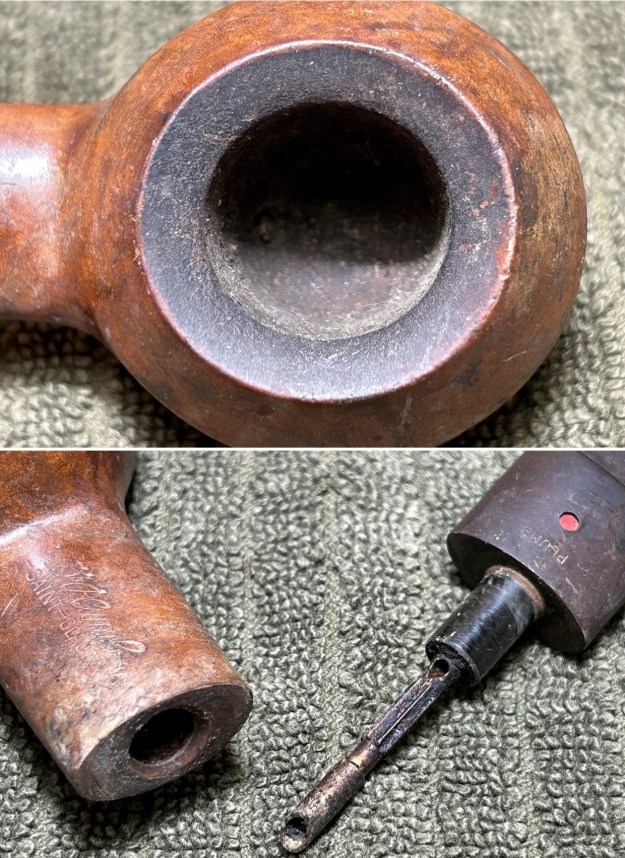
 This stem had a stinger in it – and it was being quite stubborn about coming out of the tenon! I opted to warm the stem and stinger with my heat gun and this provided just enough softening of the internal goo to allow me to extract it. It then went for a soak in some lemon-infused 99% isopropyl alcohol. I let it sit for several hours and then cleaned it off and it looked much improved. I then finished it with some 0000-grit steel wool and moved on.
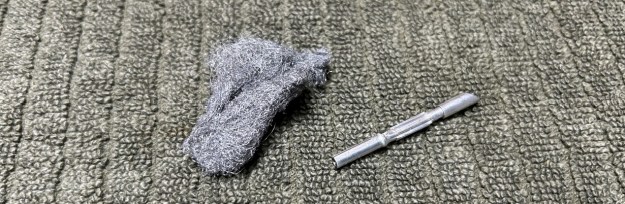 I used isopropyl alcohol on a few cotton rounds and wiped down the stem to provide an initial cleaning of filth before moving on to the next steps. The primary cleaning came next. I disinfected the inside of the stem with both pipe cleaners and cotton swabs dipped in lemon-infused 99% isopropyl alcohol. I scrubbed thoroughly to make sure the interior was very clean.
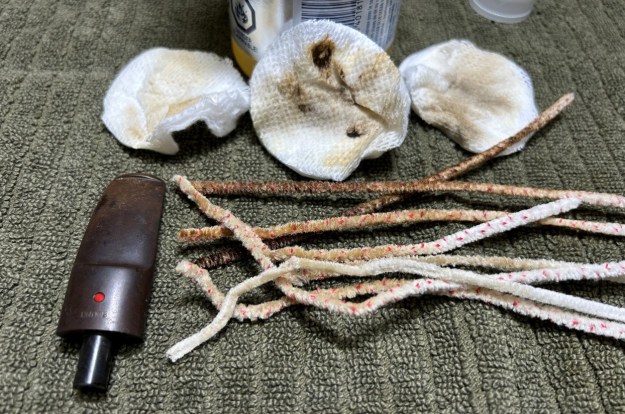 The goal of the next step is the removal (or minimization) of oxidation. Going to my sink, I used cream cleanser, cotton rounds, and a toothbrush, and scoured the stem to remove as much surface oxidation as possible. As the photos show, the result was a hideous, ochre-coloured mess – but better off the stem than on it.
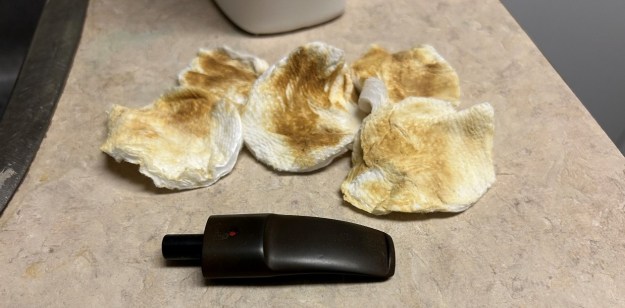 While I was cleaning the stem, the red dot logo popped out! Thank goodness that it landed on my work cloth and didn’t disappear into nothingness. Later, once the stem was fully clean, I glued it carefully back in place.
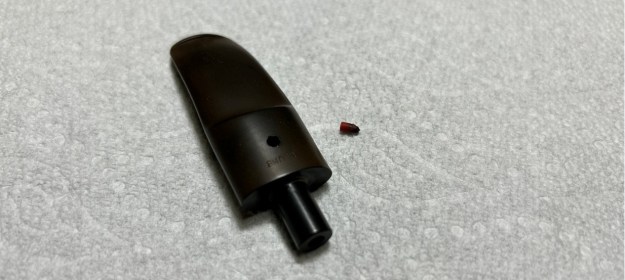 Once the stem was reasonably clean, I soaked it overnight in some Briarville Stem Oxidation Remover. This solution works to draw oxidation in the stem to the surface of the vulcanite. This is a major aid and an important step in ensuring a clean stem. The following day, I drew out the stem from its bath and scrubbed the lingering fluid with a toothbrush. After this, I painted the logo on the stem with some enamel nail polish. I restored the logo carefully and let it fully set before proceeding.
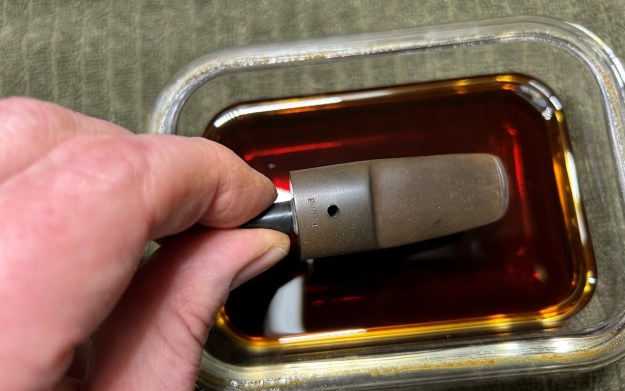 The penultimate step for the stem is sanding. First, with my set of needle files, I reduced the bulk of the cyanoacrylate repairs. I removed the excess adhesive as near to the surface as possible, without cutting into the vulcanite. Following that, I used all nine of the micromesh sanding pads (1,500 through 12,000 grit) to sand out flaws, even out the vulcanite, and provide gentle polishing of the finished surface. I also applied pipe-stem oil while using the last five micromesh pads. There was a wonderful, deep black shine to the stem when I was done.
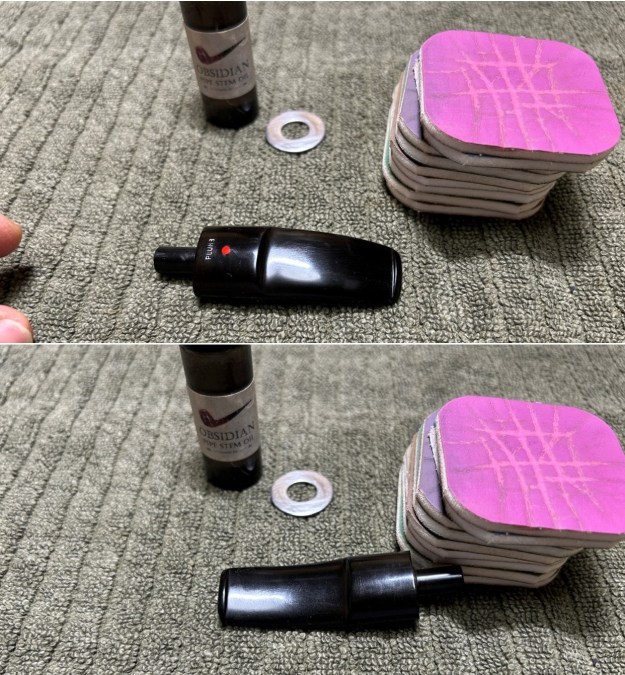 As the stem was (nearly) complete, I moved on to the stummel. The first step was to ream out the bowl – that is to say, remove all the cake inside the bowl. This accomplished a couple of things. First (and most obviously), it cleaned the bowl and provided a refurbished chamber for future smoking. Second, when the old cake was removed, I could inspect the interior walls of the bowl and determine if there was damage or not. Since this bowl was not too dirty inside, I only used a pipe knife and a piece of sandpaper taped to a wooden dowel. Collectively, these ensured that all the debris was removed.
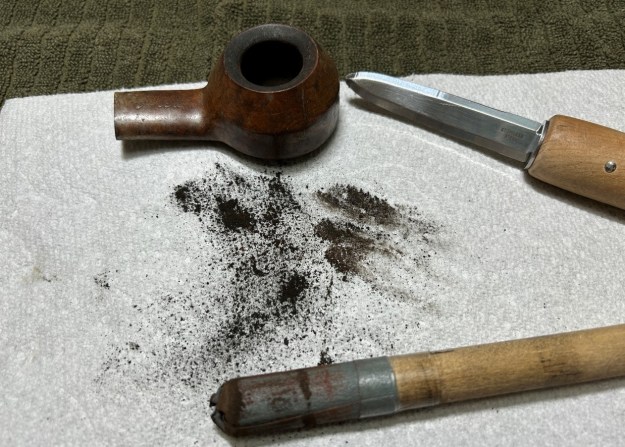 My next step was to remove the lava on the rim. For this, I took a piece of machine steel and gently scraped the lava away. The metal’s edge is sharp enough to remove what I need, but not so sharp that it damages the rim.
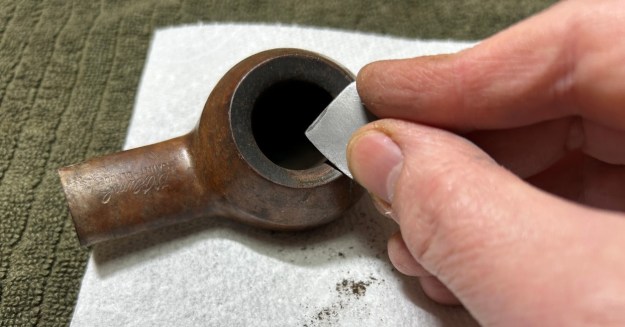 Similar to the stem, I then cleaned the stummel with both pipe cleaners and cotton swabs dipped in lemon-infused 99% isopropyl alcohol. It took quite a while and much cotton to clean.
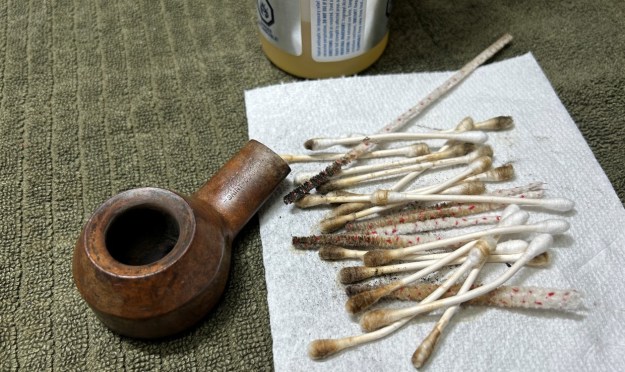 I then decided to ‘de-ghost’ the pipe – that is to say, exorcize the remaining filth from the briar. I filled the bowl and the shank with cotton balls, then saturated them with 99% isopropyl alcohol. I let the stummel sit overnight. This caused the remaining oils, tars and smells to leach out into the cotton.
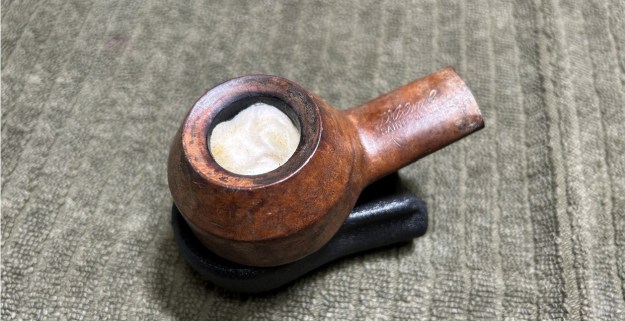 To tidy up the briar, I wiped down the outside, using a solution of a pH-neutral detergent and some distilled water, with cotton rounds. I also used a toothbrush in the crevices. This did a good job of cleaning any latent dirt on the surface of the briar. The last step of the cleaning process was to scour the inside of the stummel with the same mild detergent and tube brushes. This was the culmination of a lot of hard work in getting the pipe clean. However, it would take sanding for all of the large stain to be removed.
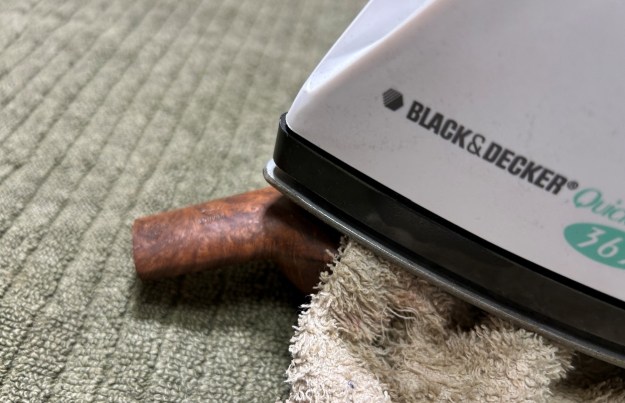
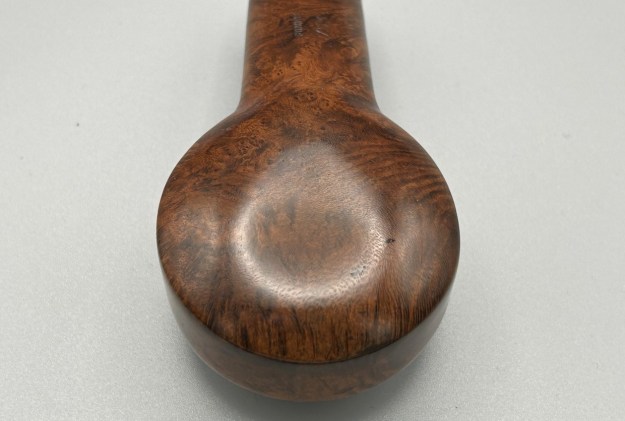
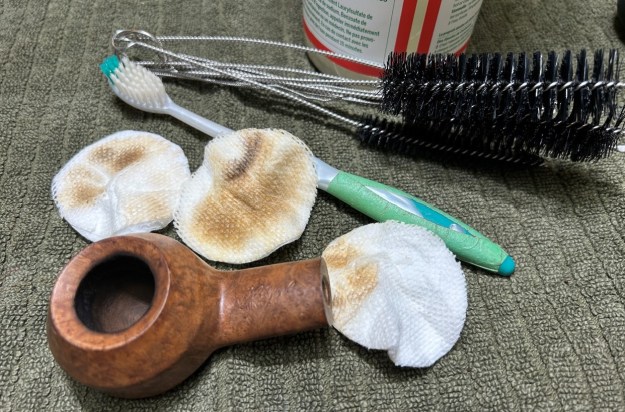 Having completed that, I was able to address the nicks on the underside of the bowl. I dug out my iron and a damp cotton flannel cloth. By laying the cloth over the affected areas and applying the iron to it, the hot and moist steam can cause the wood to swell slightly and return to shape. I was pleasantly surprised at how well it worked in this case.
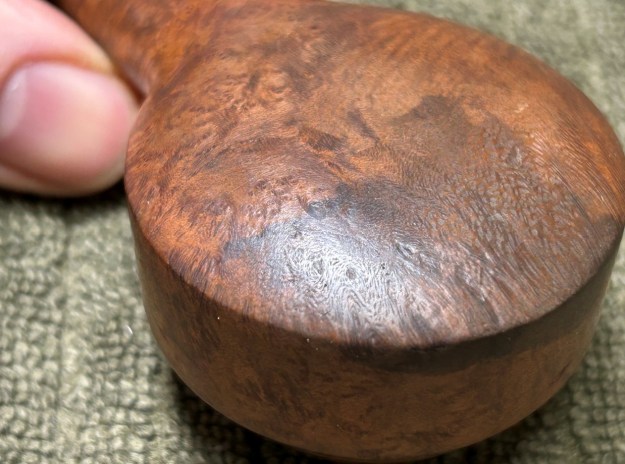
 I used all nine micromesh pads (1,500 through 12,000 grit) to sand the outside of the stummel and finish it off. This sanding minimizes flaws in the briar and provides a beautiful smoothness to the wood. It also removed the stain once and for all. I rubbed some LBE Before & After Restoration Balm into the briar and let it sit for 30 minutes or so. The balm moisturizes the wood and gives a beautiful depth to the briar. I then buffed the stummel with a microfibre cloth.
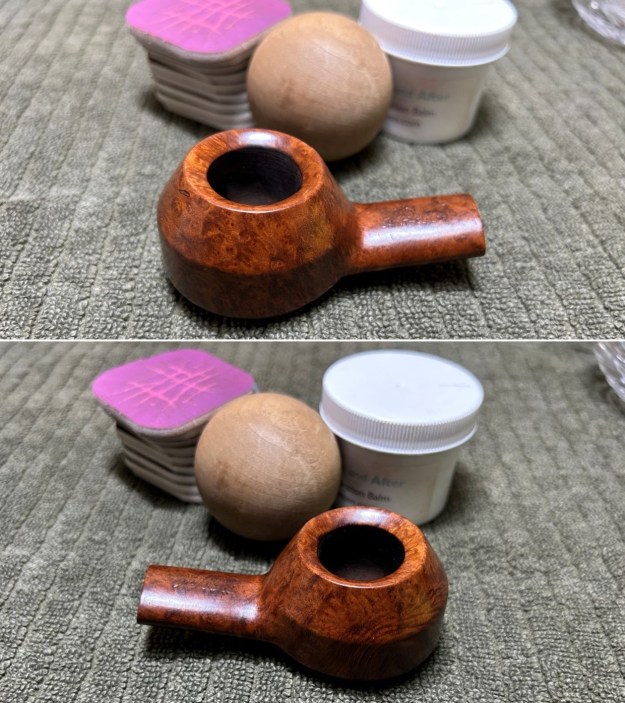
 For the final step, I took the pipe to my bench polisher and carefully buffed it – first with a blue diamond compound, then with three coats of carnauba wax. This procedure makes the pipe look its best – the stummel sings and the stem glows.
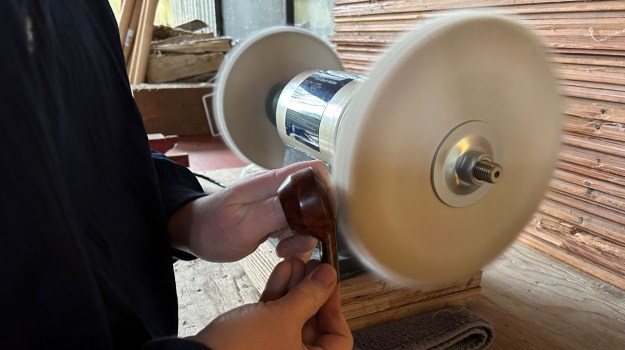 All done! This handsome Dr Plumb 753 author looks fantastic again and is ready to be enjoyed by its next owner. I am pleased to announce that this pipe is for sale! If you are interested in acquiring it for your collection, please have a look in the ‘French’ section of the store here on Steve’s website. You can also email me directly at kenneth@knightsofthepipe.com. The approximate dimensions of the pipe are as follows: length 5¾ in. (146 mm); height 1⅜ in. (35 mm); bowl diameter 2 in. (51 mm); chamber diameter ⅞ in. (22 mm). The weight of the pipe is 1⅞ oz. (54 g). I hope you enjoyed reading the story of this pipe’s restoration as much as I enjoyed restoring it. If you are interested in more of my work, please follow me here on Steve’s website or send me an email. Thank you very much for reading and, as always, I welcome and encourage your comments.


Beautiful restoration. I’m always amazed at how stems come back to like new. Fortunately there wasnt any deep tooth grooves. What would you do for a deep tooth pit on a stem ?
LikeLike
I have written quite a few lately on the Dunhill pipe restorations and some have had deep marks. Have a look at those blogs. Thanks.
LikeLike
Thanks for your complimentary words!
LikeLike
Here is a good example of the repair of a stem with deep tooth marks: https://rebornpipes.com/2025/12/26/new-life-for-a-hard-life-peterson-system-301/
LikeLike
What an unusual GBD shape. That briar really gleams! I’ve done a few Dr. Plumbs, but didn’t really know the history, I enjoyed reading it.
LikeLike
Thanks, Al. I agree — it is an odd shape. It’s not what I think of when I think of the ‘author’ shape. But it’s a neat pipe!
LikeLike
Sensational, looks absolutely stunning, well done indeed. 🙂
LikeLike
Thanks for the kind words, Chiz.
LikeLike