Blog by Steve Laug
The next pipe on the table is large sandblast Sasieni Pot. We purchased it off eBay from Jordan, Minnesota, USA on 01/22/2024.The pipe is stamped on the heel of the bowl and the underside of the shank on a smooth panel. It reads Sasieni (in script) 5 DOT [over] Made in England. The silver band is stamped 925 on the left side. It is tarnished and dull looking. The taper stem bears the 5 blue Dot pattern of the Sasieni logo on the left side. The pipe had been smoked and there was a thick cake in the bowl with a thick lava overflow in the sandblast on the inner edge and the rim top. There was dust and debris in the sandblast finish around the bowl sides. The stem is oxidized and calcified. It had light tooth marks on both the top and underside of the stem just ahead of the button. Jeff took photos of the pipe before he started his clean up work. I have included them below.
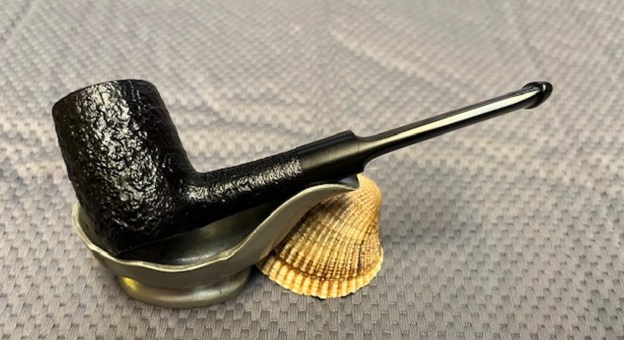
 Jeff took photos of the rim top, bowl and the surfaces of the stem to give a sense of the condition of the pipe. The walls of the bowl had a thick cake which overflowed over the rim edges and onto the rim top making a mess. The stem is lightly oxidized and there is a mark on the stem where it appears that it had a Softee Bit on the end to protect it. There are light tooth marks on both sides ahead of the button.

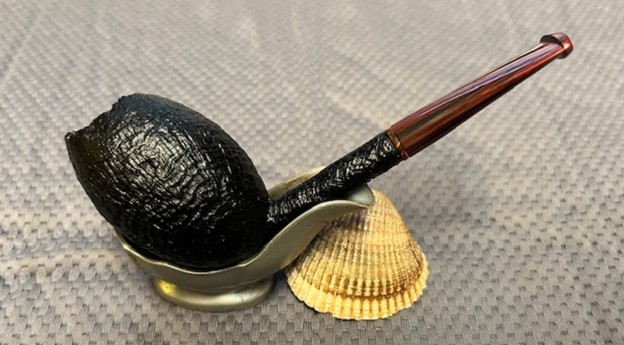
 He took photos of the sides and heel of the bowl to give a clear picture of the depth of the sandblast. It really is a great looking blast that shows the grain underneath very well.
 He took photos of the stamping on the underside of the bowl and the shank. It is clear and readable and read as noted above. The five dots on the stem are clear and undamaged as is the 925 stamp on the silver band.
 I turned to Pipephil’s site to see what I could find about the Sasieni 5 Dot pipes and get some idea of where they fit in terms of the hierarchy (http://www.pipephil.eu/logos/en/logo-sasieni.html). I also wanted to know about a potential date for the pipe. I quote below what I found there. I quote from the side bar below and include a screen shot of the 5 Dot:
Post transition, 2001 – today, “5 dot” I Googled for information that I could find and came across some on the smokingpipes.com website (https://www.smokingpipes.com/pipes/estate/england/moreinfo.cfm?product_id=78680). It included several freehand versions of the 5 Dot but I found the description given by them for one of the pipes really informative. I have quoted it below for the information it includes.
The downside to post-transition Sasieni’s is that the once revered Four Dot wound up being applied to briars that never would have made the cut during the family and transition periods. The upside is that unlike some once-grand old marques, not everything went to pieces, standards-wise. This Five Dot (a purely post-transition designation) for example is solid and true: handsomely shaped, drilled out straight as an arrow, and possessed of quite a healthy bit of wild ring grain. – Eric N. Squires
Now it was my turn to work on the pipe. Jeff had done an amazing cleanup of the pipe. He reamed the light cake with a PipNet reamer and cleaned up that with a Savinelli Fitsall Pipe Knife. He scrubbed the internals of the bowl and stem with alcohol, cotton swabs and pipe cleaners. He scrubbed the externals with undiluted Murphy’s Oil Soap and rinsed the bowl off with running water. He soaked the stem in Briarville’s Pipe stem Deoxidizer and once it had soaked rinsed it off with warm water to remove the residual solution. He dried it off and rubbed it down to remove any oxidation that was still on the stem. The pipe looked very good when I received it.
 I took photos of the bowl and the rim top as well as both sides of the stem to show the condition of the pipe before I started my work. The rim top was very clean and the edges looked good. The clean up had removed some of the stain on the top the outer edges of the bowl. It really looked remarkably good.
 I took a photo of the stamping on the shank. The photo of the stamping is clear and readable. I also removed the stem and took a photo of the parts of the pipe. It is a unique piece of pipe history.
 The bowl was in such good condition that I had to do some minimal work with it. I used a Walnut Stain pen to touch up the rim top and edges of the bowl to match the rest of the bowl. I looks amazingly good.
 I rubbed the briar down with Before & After Restoration Balm. I worked it into the briar with my fingertips and a horsehair shoe brush to work it into the nooks and crannies of the sandblast finish. The product works to clean, enliven and preserve the briar. I let it sit for 10 minutes then I buffed it with a cotton cloth to deepen the shine. The briar really comes alive with the balm.

 I waxed the bowl down with some Conservator’s Wax and set it aside to let the wax harden. I buffed it with a soft cloth to raise the shine. It is a beautiful sandblast that shows depth in the finish.

 I set the bowl aside and turned my attention to the stem. I sanded the surface of the stem smooth with 320-3500 grit sanding pads. It worked well to smooth things out and remove remnants of oxidation. When finished the stem looked much better.
 I polished the vulcanite with micromesh sanding pads – 1500-12000 grit pads. I wiped it down with Obsidian Oil after each sanding pad. I used Before & After Pipe Polish – both Fine and Extra Fine to further polish the stem.
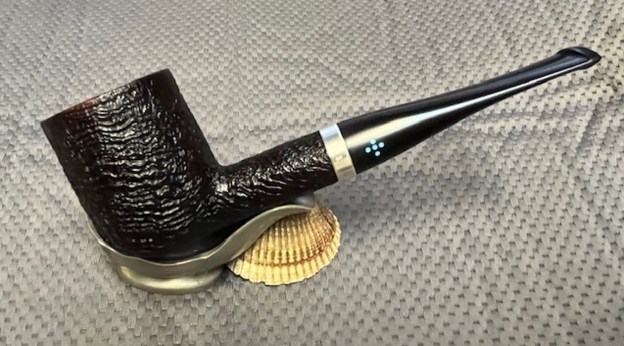
 This Silver Banded Sasieni 5 Dot Billiard has a beautiful, Sandblast finish that is very tactile. The rich walnut brown/black finish highlights some great grain around the bowl and shank. The polished vulcanite taper stem adds to the mix. I put the stem back on the bowl and carefully buffed the pipe with Blue Diamond on the buffing wheel. It is critical to avoid buffing the stamping and to have a lighter touch on the sandblast briar. I gave the bowl multiple coats of Conservator’s Wax and the stem multiple coats of carnauba wax on the buffing wheel and followed that by buffing it with a clean buffing pad. I hand buffed the pipe with a microfiber cloth to deepen the shine. The finished Sasieni 5 Dot Billiard is quite stunning and feels great in my hand. Give the finished pipe a look in the photos below. The dimensions of the pipe are Length: 6 ½ inches, Height: 2 inches, Outside diameter of the bowl: 1 ¾ inches, Chamber diameter: 7/8 of an inch. The weight of the pipe is 2.82 ounces/80 grams. Thanks for walking through the restoration with me as I worked over another beautiful pipe. I am going to add it to the rebornpipes store in the British Pipemakers Section. If you would like to add it to your collection let me know. Thanks for your time.