Looks good Dal. Nice work.
The classic Gourd Calabash on the table came to me a few days before Christmas in 2018, when my wife and I were in the US from Bulgaria to celebrate …
Mending Shank Cracks to Revive a Gourd Calabash – Austria
Looks good Dal. Nice work.
The classic Gourd Calabash on the table came to me a few days before Christmas in 2018, when my wife and I were in the US from Bulgaria to celebrate …
Mending Shank Cracks to Revive a Gourd Calabash – Austria

Blog by Steve Laug
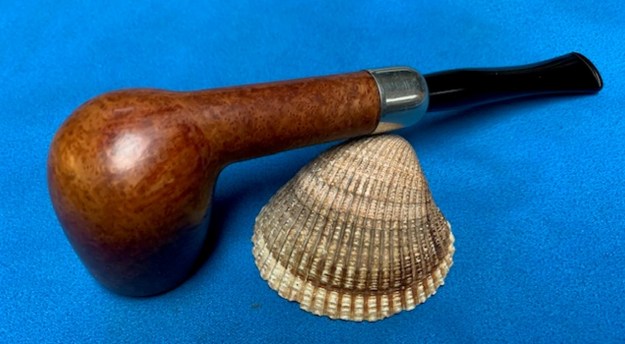
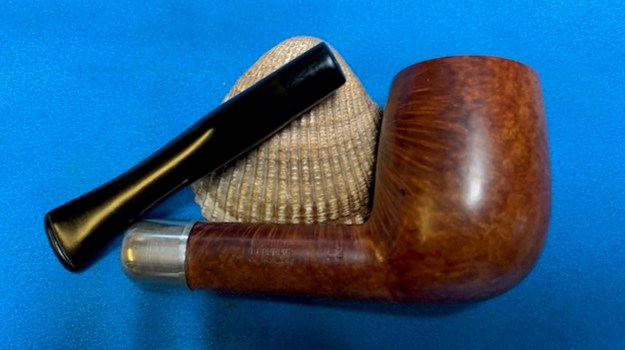
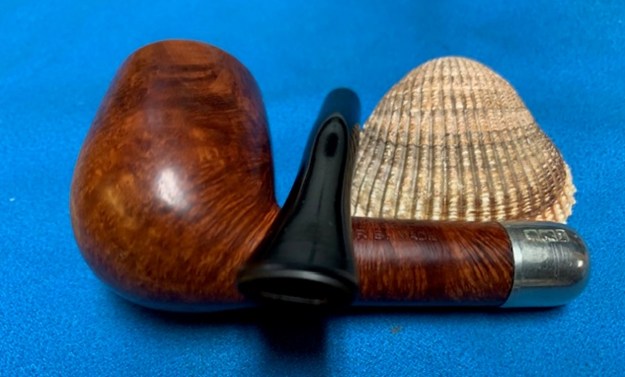
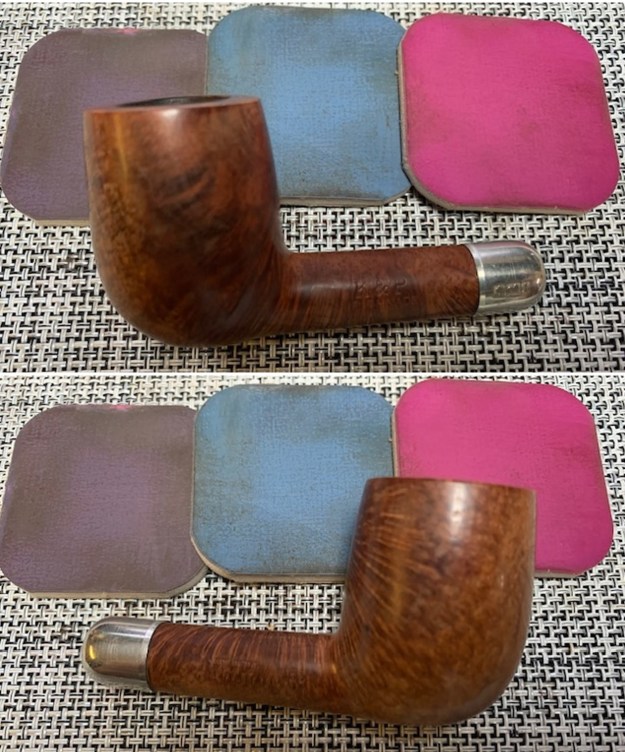
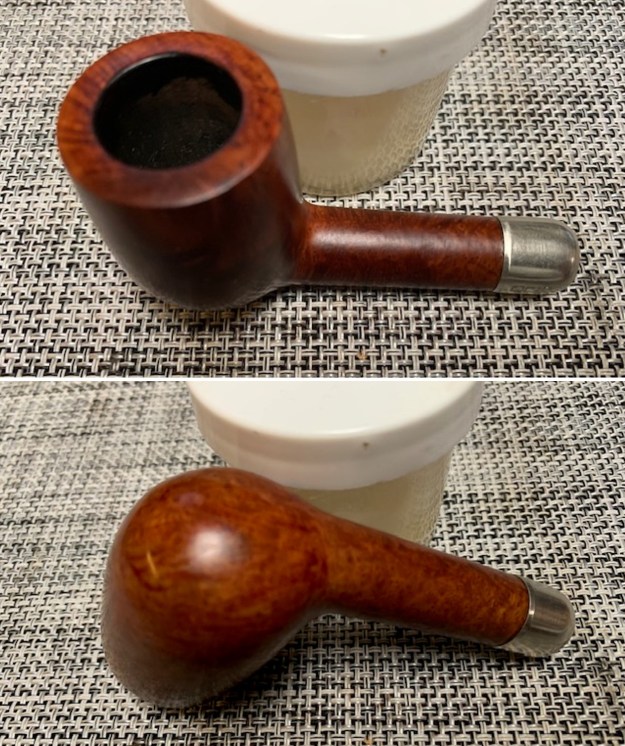
I purchased two Peterson’s pipes from a fellow in Eastern Canada. They are shown in the photo below. The top one is a Republic Era K&P Irish Made 53 Billiard. The second one is a 120 Dublin. You will note in the photo below that there is an extra stem included. It is an acrylic fishtail stem that was made for the 120. It is significantly longer (1 inch) than the original and the angles of the curve are more pronounced so the flow of the stem does not look at all the same. The acrylic stem is thicker and does not have the delicacy of the original.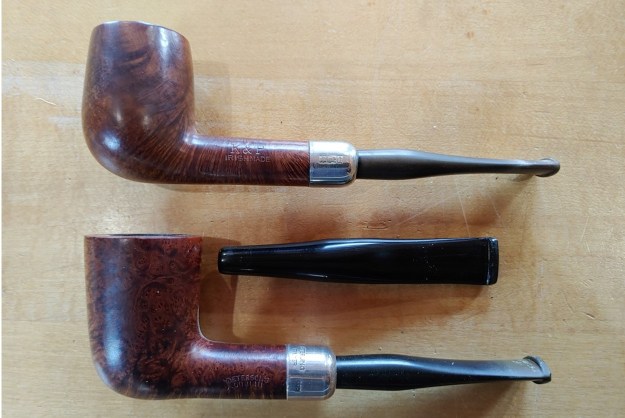 Today I decided to work on the second pipe, the Straight Billiard. It is stamped on the left side and reads K&P [over] Irish Made. On the right side of the shank it reads Made in the Republic of Ireland (three lines) followed by the shape number 53. The grain is quite nice on the pipe. There is a nickel ferrule on the shank that is stamped with three symbols – a shamrock. a wolf hound and a tower. These makers marks put the pipe as pre-circa 1963. The briar was dirty with grime ground into the finish. There was a thick cake in the bowl with darkening and lava overflow onto the inner edge and the rim top. The pipe had a strong smell of the tobacco that had been smoked in it. There is a hint of aromatic to it. The shank was dirty with tars. The stem was an original fishtail made by Peterson. There was some oxidation, calcification and light tooth marks on both sides of the stem. I took photos of the pipe when I brought it to the table to show its condition.
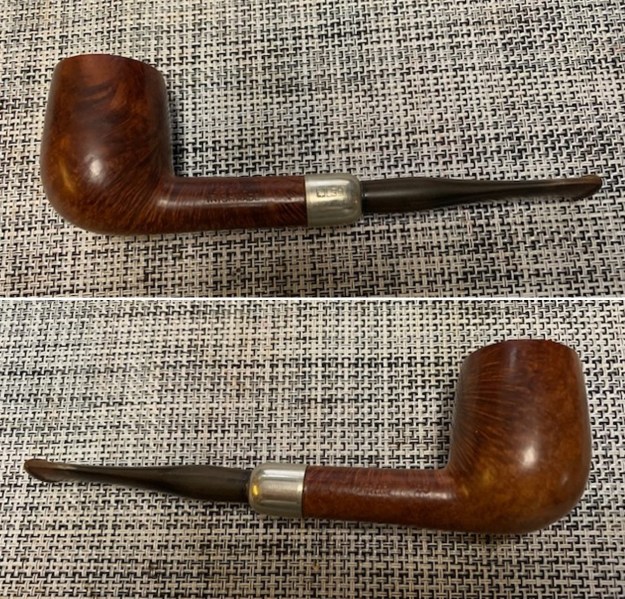
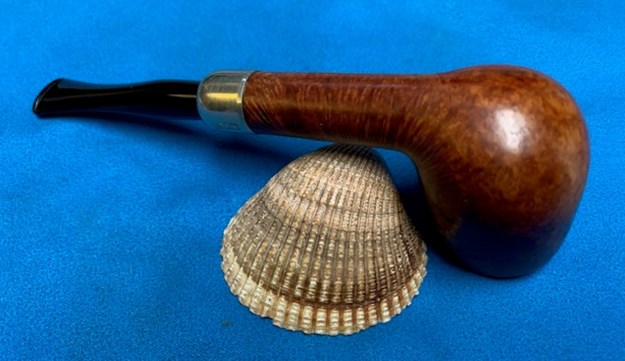
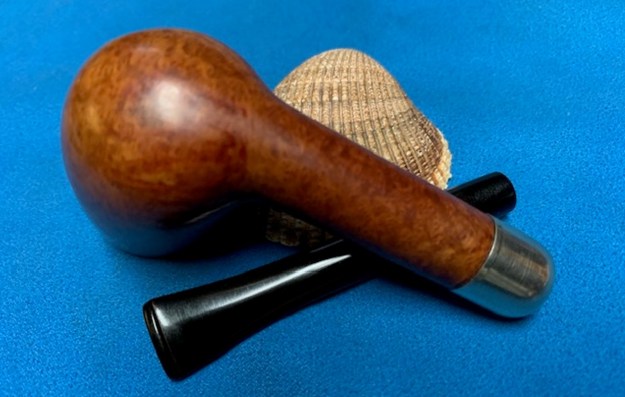
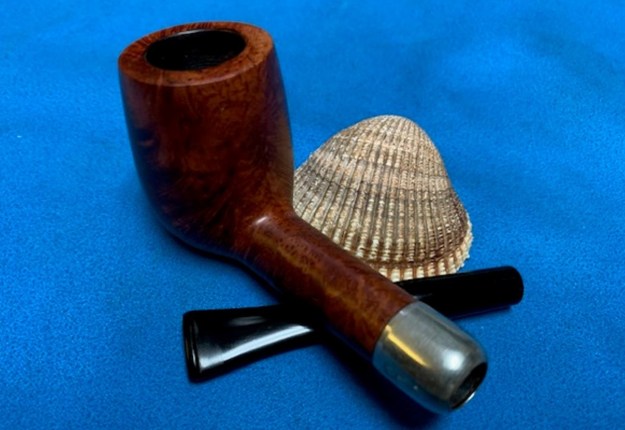
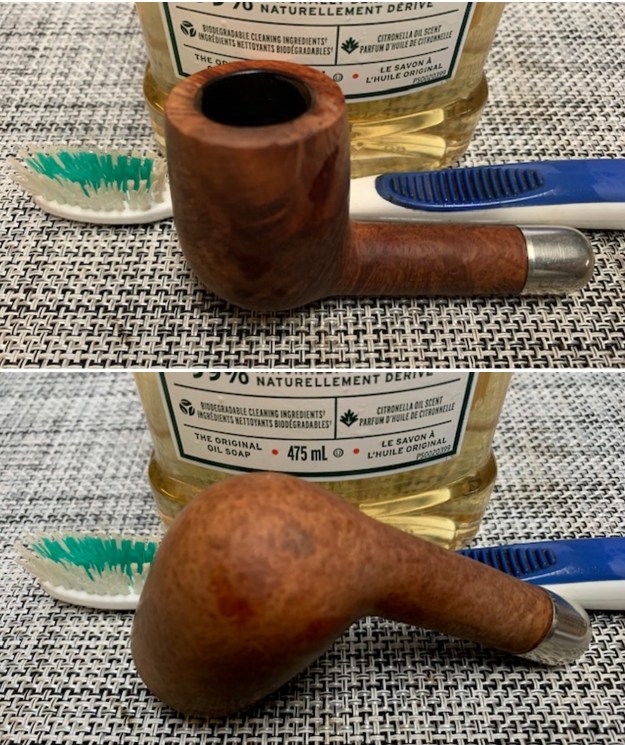
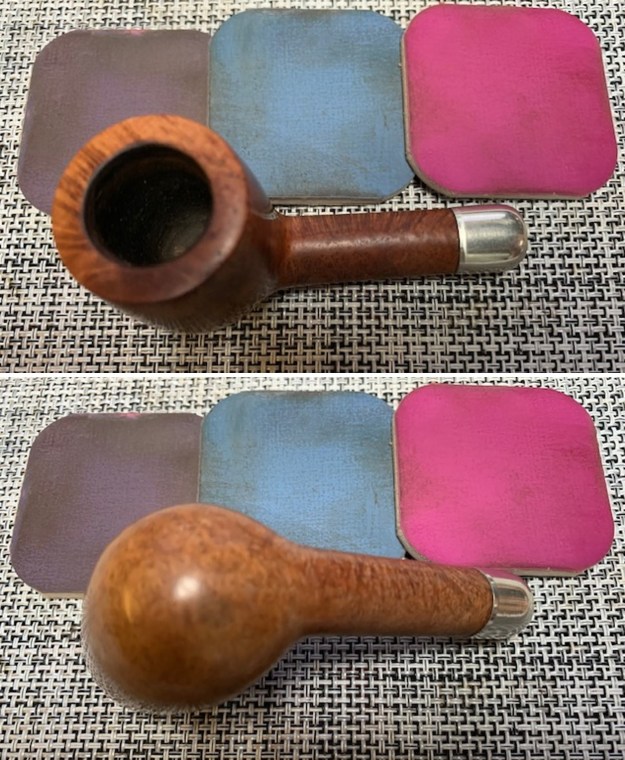
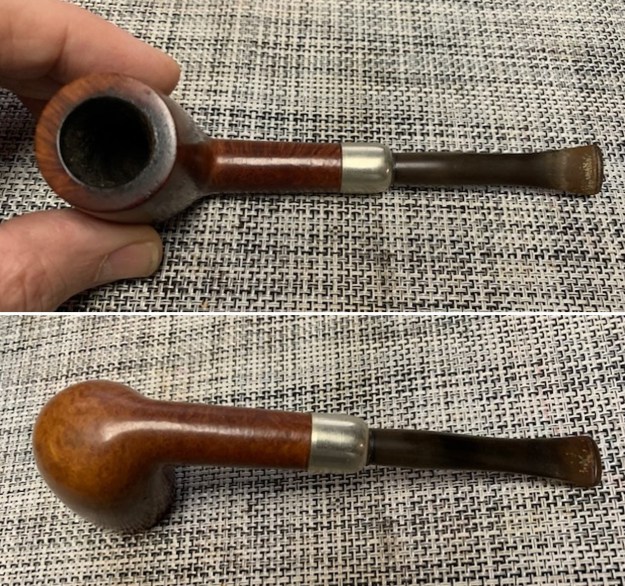 I took photos of the rim top and bowl to show the condition of both. You can see the cake and tobacco debris in the bowl and the lava overflowing onto the back edge and rim top. The grain shows through and I think it will clean up very well. You can see the chatter on both sides of the stem ahead of the button and the oxidation and light calcification as well.
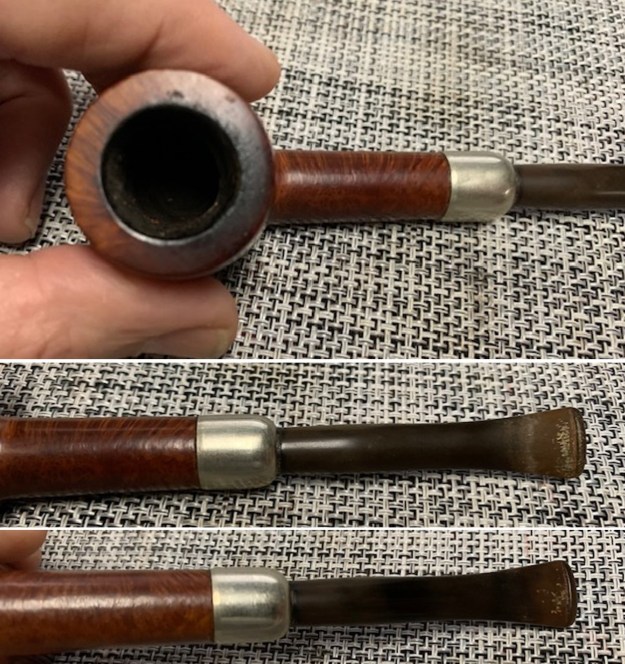 I took photos of the stamping on the sides of the shank. The stamping is clear and readable. I also took a photo of the pipe with the stem removed to show the look of the pipe and show its balance. It is a beauty.
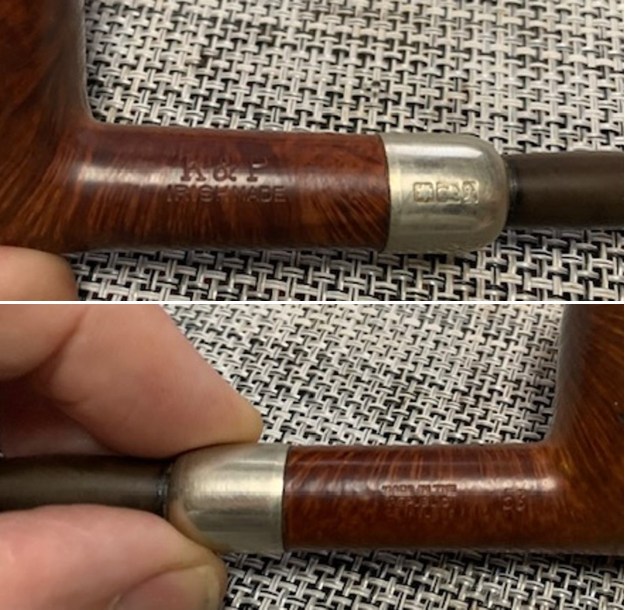
 I started my work on the pipe by addressing the cake and the lava on the rim top and edges of the bowl. I reamed it with a PipNet pipe reamer and took the cake back to bare briar. I cleaned up the remaining cake with a Savinelli Fitsall Pipe Knife. I sanded the bowl walls smooth with a piece of 220 grit sandpaper wrapped around a piece of dowel. The pipe walls were clean and undamaged with no checking or cracking.
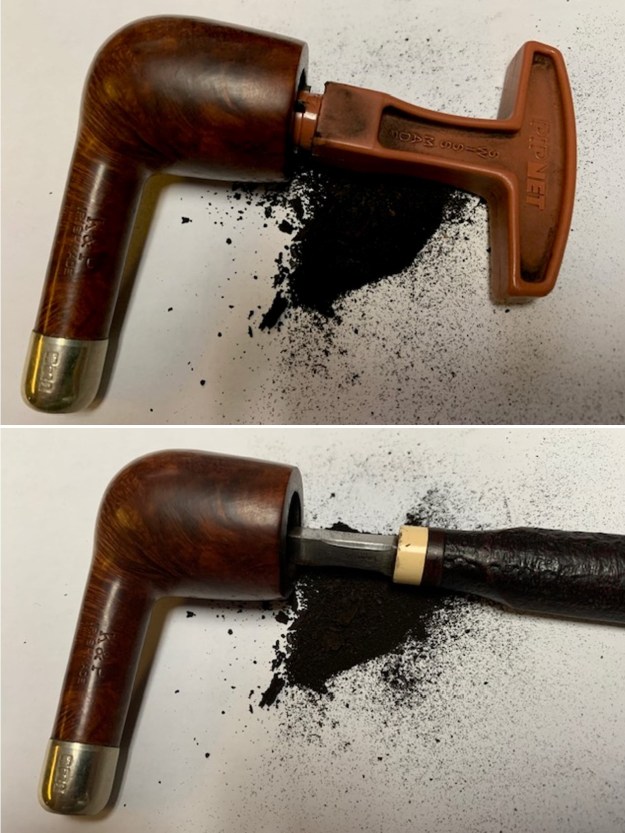
 I sanded the rim edge and the top with a folded piece of 220 grit sandpaper to smooth out and remove the darkening and the damage to the top and edge. It looked much better than when I started. I would still need to polish out the darkening.
 I scrubbed the externals of the bowl and shank with undiluted Murphy’s Oil Soap and a tooth brush. I rinsed the soap and debris off the bowl with running water. I repeated the process until the rim top and the externals were very clean. It looked very good at this point.
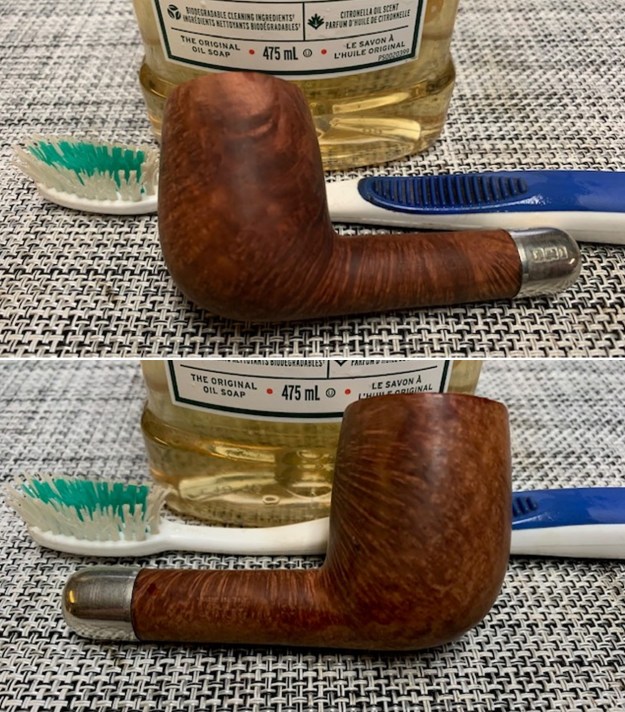
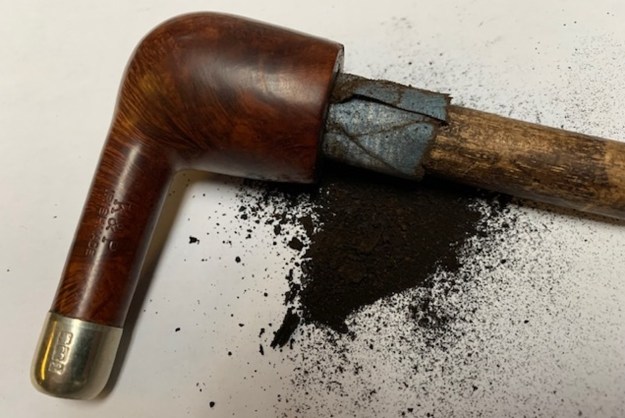
 I cleaned out the internals of the shank, mortise and the airway in the stem with alcohol, pipe cleaners and cotton swabs. It took a bit of time but it came out clean. There was still a residual smell, a ghost that I would need to work on.
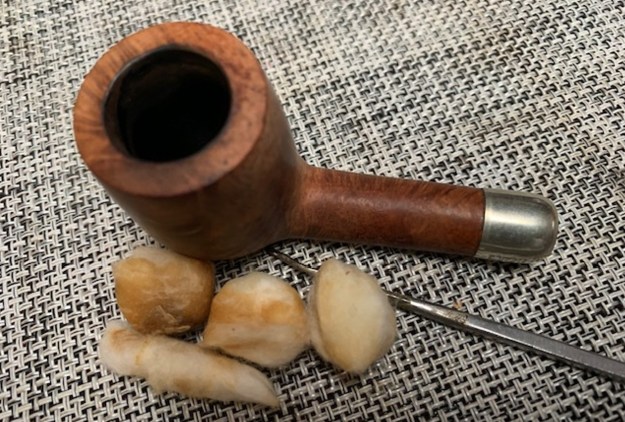
 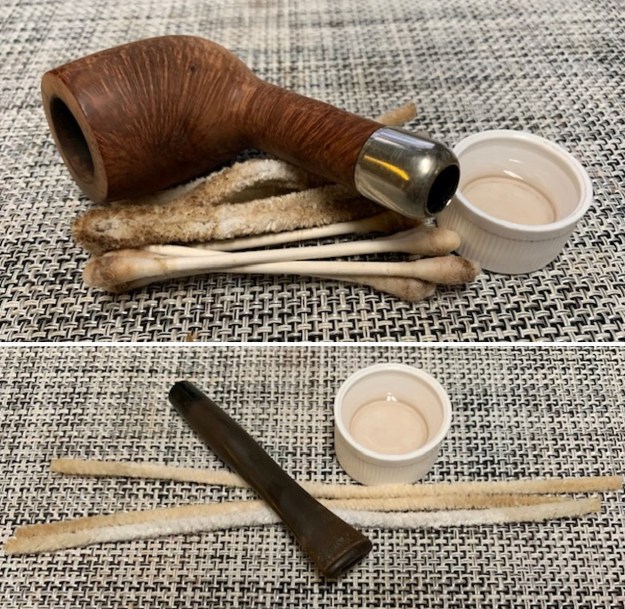 Now it was time to deghost the pipe. I stuffed the bowl with cotton bolls and twisted another boll into the shank. I filled the bowl with 99% isopropyl alcohol using and ear syringe. I set it aside to let the mix do its work wicking the oils and tars out of the bowl. It would sit for while I worked on the stem. After four hours I took photos of the bowl and the cotton. It had taken out a lot of tars and oils.
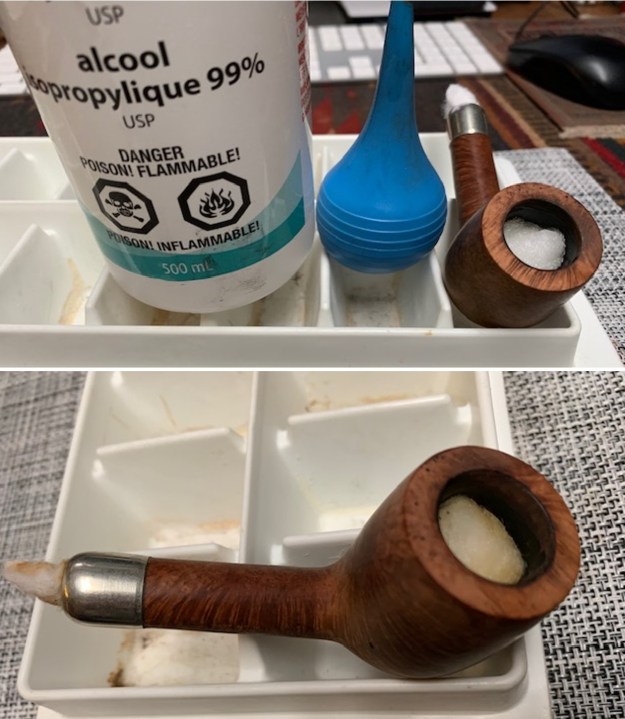
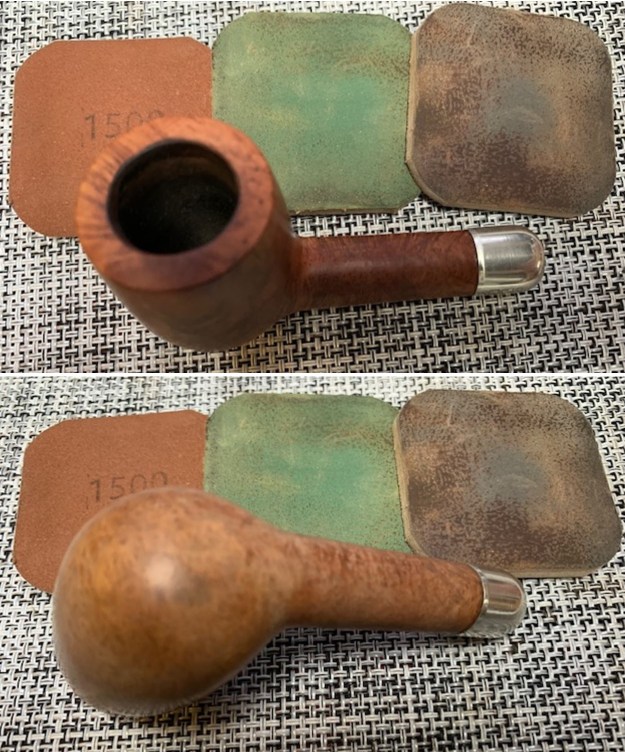
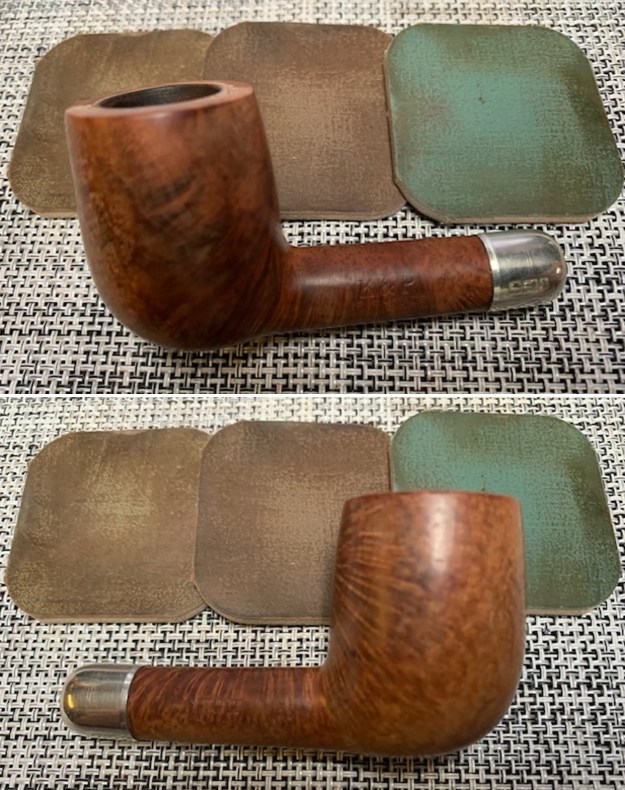
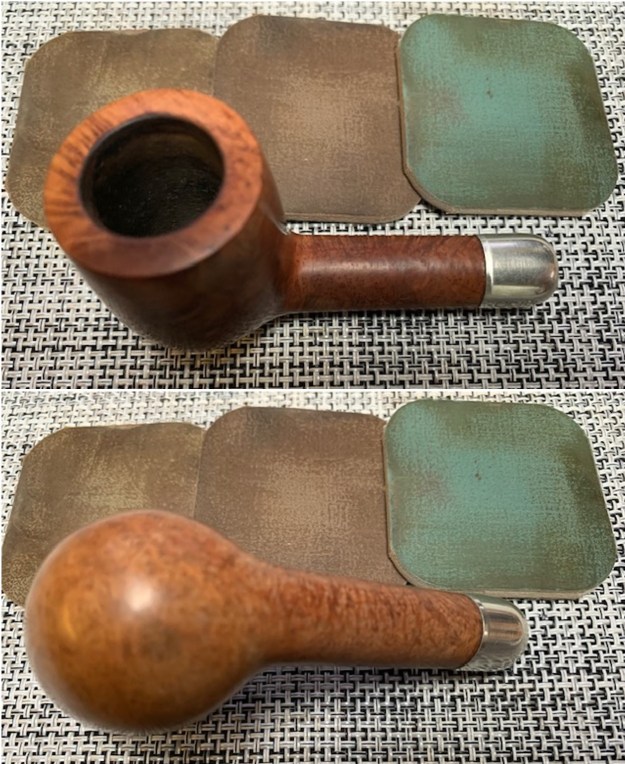
 I polished the outside of the briar with micromesh sanding pads – dry sanding with 1500-12000 grit pads. I wiped the bowl down with a damp cloth after each sanding pad to remove the sanding debris.
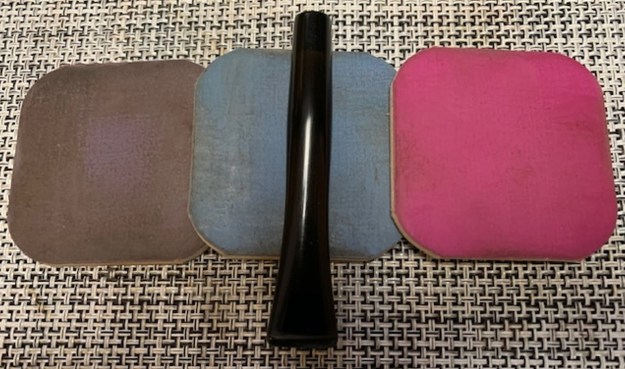
 The stain was uneven around the heal of the bowl and on the rim top so I touched up the stain with a Maple Stain Pen. It blended in with the surrounding stain on the upper portion of the bowl. I would need to buff it to further blend it into the surface.
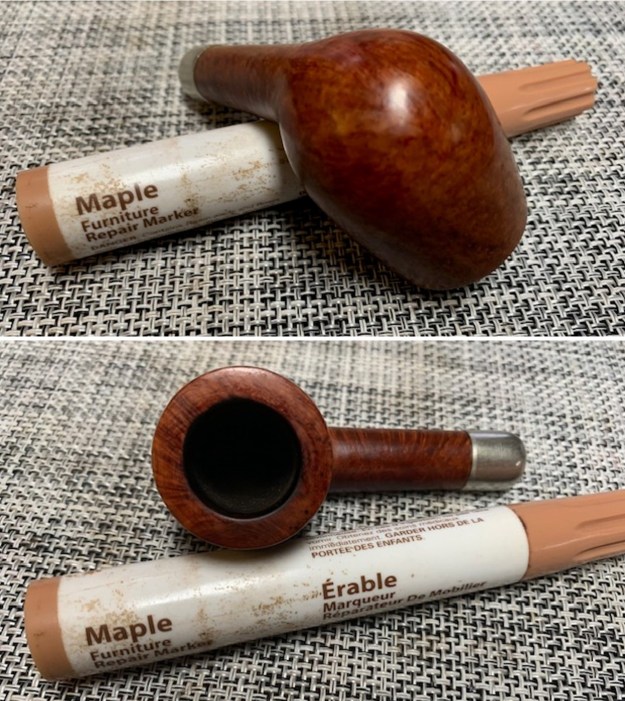 I rubbed the bowl down with Before & After Restoration Balm. I worked it into the finish with my fingertips. The product works to clean, preserve and protect the briar. I let it sit and absorb for 10 minutes. I buffed it off with a soft cloth and then gave it a rigorous buff to raise the shine. It looks good at this point.
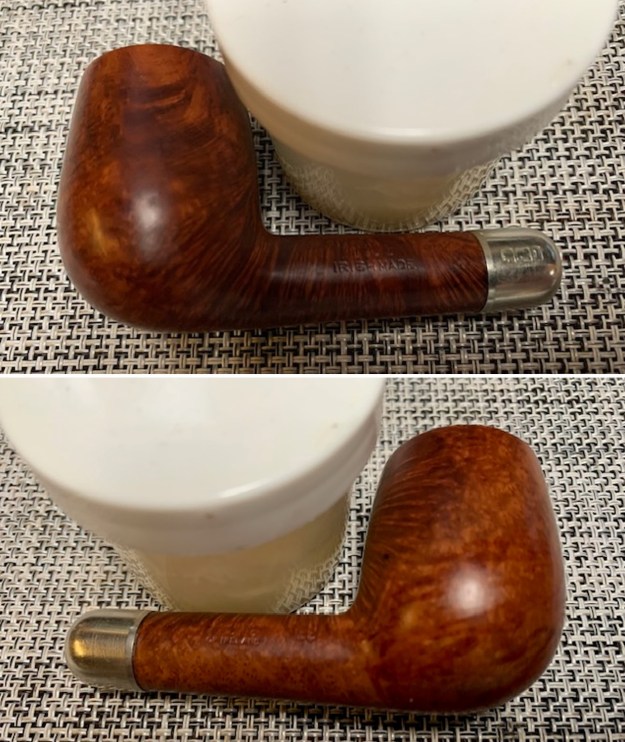
 I set the bowl aside and turned my attention to the stem. I sanded out the oxidation on the stem with 220 grit sandpaper to break it up. I started the polishing with 600 grit wet dry sandpaper. When finished I wiped it down with some Obsidian Oil. There was still some oxidation remaining on the stem so I would need to do more to remove it.
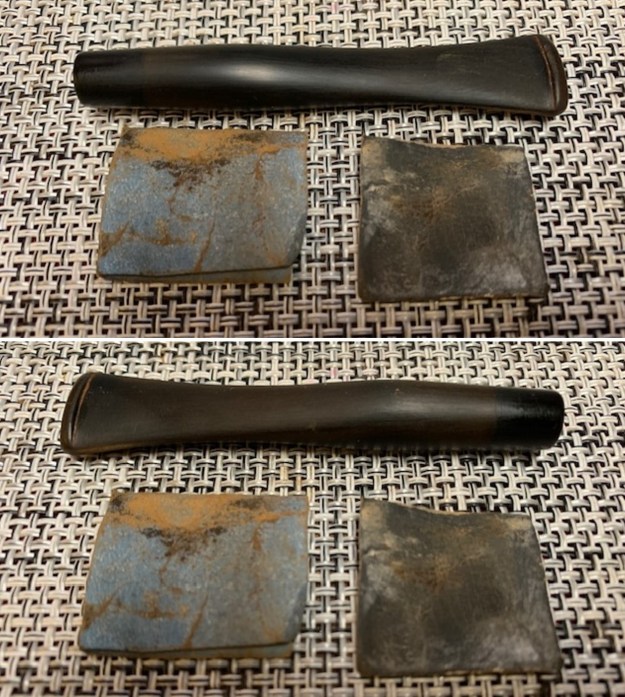 I scrubbed the stem with Soft Scrub cleanser and cotton pads to remove the remaining oxidation. It worked very well and removed all of the oxidation that remained on the stem.
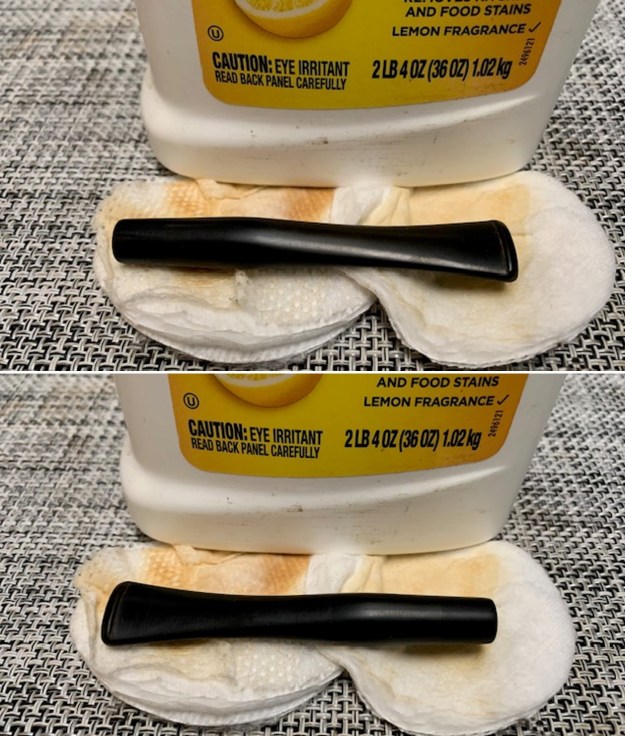 I polished out the chatter and marks on the stem surface with micromesh sanding pads – dry sanding with 1500-12000 grit sanding pads. I wiped it down with Obsidian Oil on a cloth after the sanding pads.
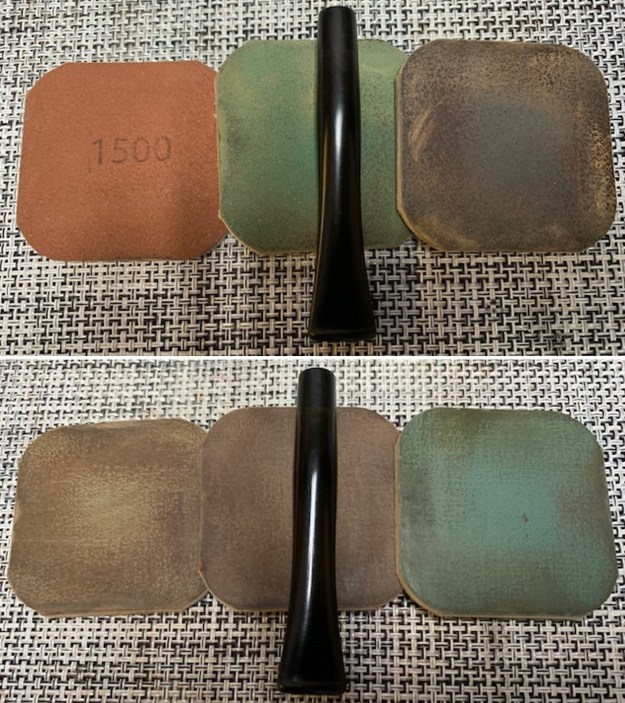
 I finished the hand polishing of the stem with Before & After Pipe Polish – both the Fine and Extra Fine polishes. I gave it a final coat of Obsidian oil and set it aside to dry.
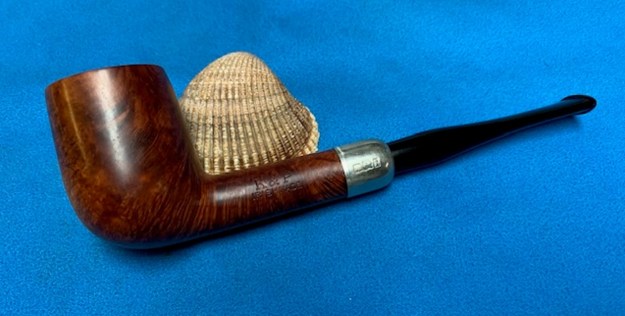
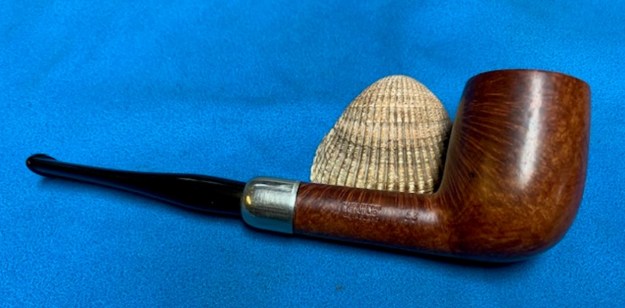
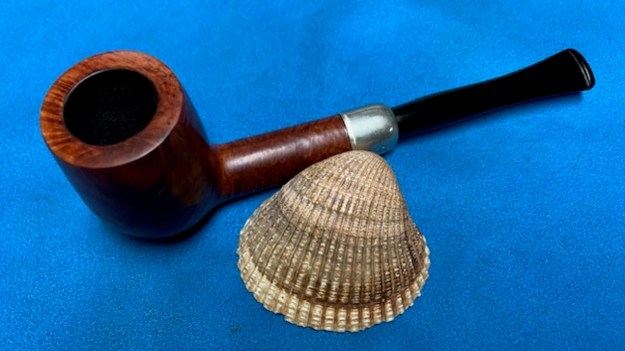
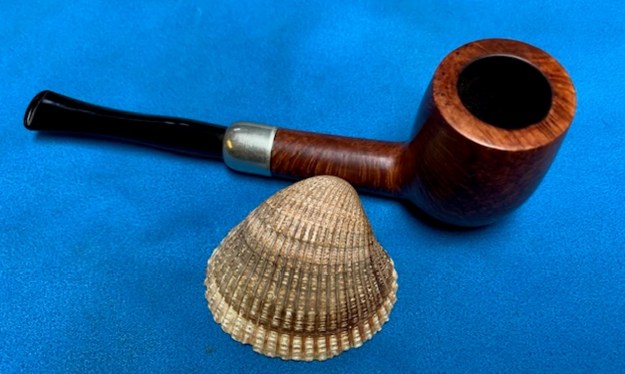
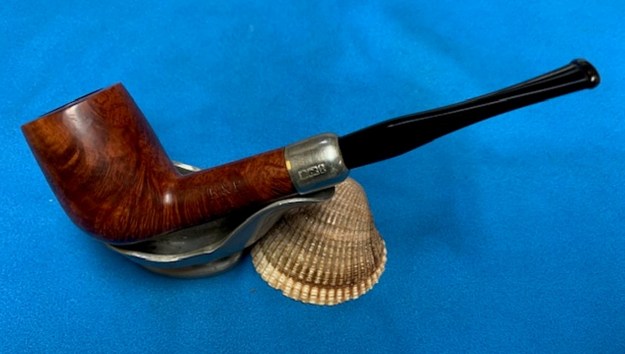
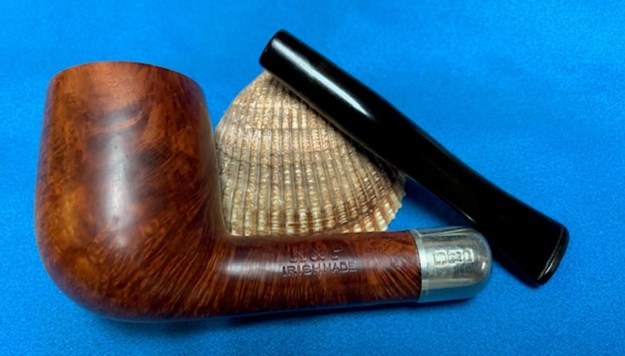
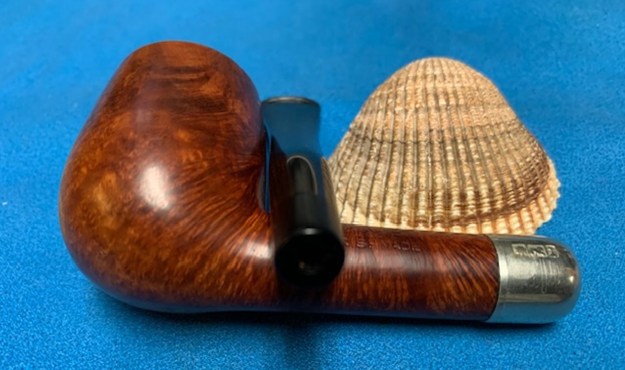
 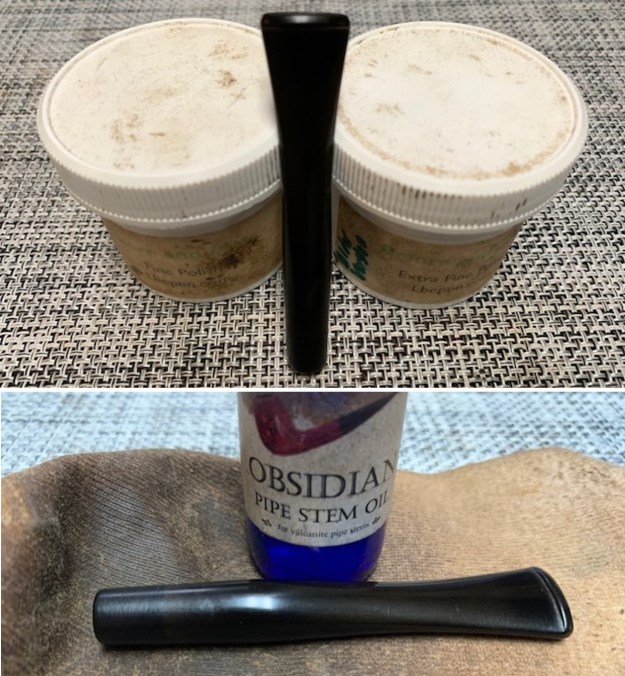 I am really happy with the way that this Republic Era K&P Irish Made 53 Billiard with a Nickel Ferrule turned out. It really is a beautiful looking pipe with a great shape and smooth finished bowl and rim top. The original vulcanite taper stem is really nice. The polished black of the stem works well with the briar and the nickel ferrule. The briar really came alive with the buffing. The rich brown stains of the finish gave the pipe a sense of depth with the polishing and waxing. I put the stem back on the bowl and carefully buffed the pipe with Blue Diamond on the buffing wheel using a light touch on the briar. I gave the bowl and the stem multiple coats of carnauba wax on the buffing wheel. I buffed the pipe with a clean buffing pad to raise the shine. I hand buffed the pipe with a microfiber cloth to deepen the shine. The finished Republic Era K&P Irish Made Billiard really is a beauty and feels great in the hand and looks very good. Give the finished pipe a look in the photos below. The dimensions of the pipe are Length: 5 ¾ inches, Height: 1 ¾ inches, Outside diameter of the bowl: 1 ¼ inches, Chamber diameter: ¾ of an inch. The weight of the pipe is 37 grams/ 1.31 ounces. The pipe will be going on the rebornpipes store soon. It will be in the section on Irish Pipe Makers Section if you would like to add it to your collection. Thanks for reading this blog and my reflections on the pipe while I worked on it. It was a fun one to work on!
As always, I encourage your questions and comments as you read the blog. Thanks to each of you who are reading this blog. Remember we are not pipe owners; we are pipe men and women who hold our pipes in trust until they pass on into the trust of those who follow us.