I had a bit of down time in the shop over the Christmas holidays so I decided to have a bit of fun working up a stray stummel and a few other parts …
New Year, New FrankenPipe
Always fun turning the beast into a prince. Nicely done Charles.
I had a bit of down time in the shop over the Christmas holidays so I decided to have a bit of fun working up a stray stummel and a few other parts …
New Year, New FrankenPipe
Always fun turning the beast into a prince. Nicely done Charles.

Blog by Steve Laug
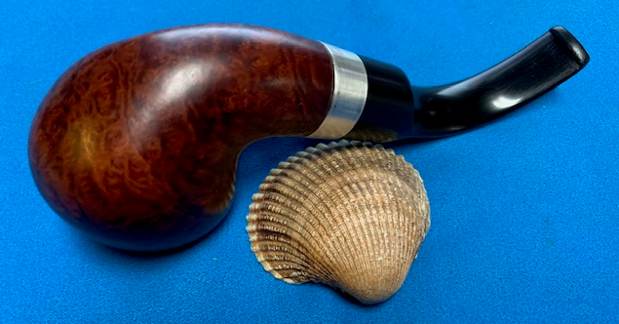
The next pipe on the table is one that was sent to my by a friend who had just purchased it. The shape reminded me of a large version of a Peterson’s 02 shape. He sent me the following photos of the pipe before he mailed it to me and I was interested. I am including those photos for you to see what I saw when he sent it to me. It is dirty for sure but it has some amazing grain around the bowl and shank and a Sterling Silver Band on the shank. The stem is a P stamped fishtail and looks great on the bowl.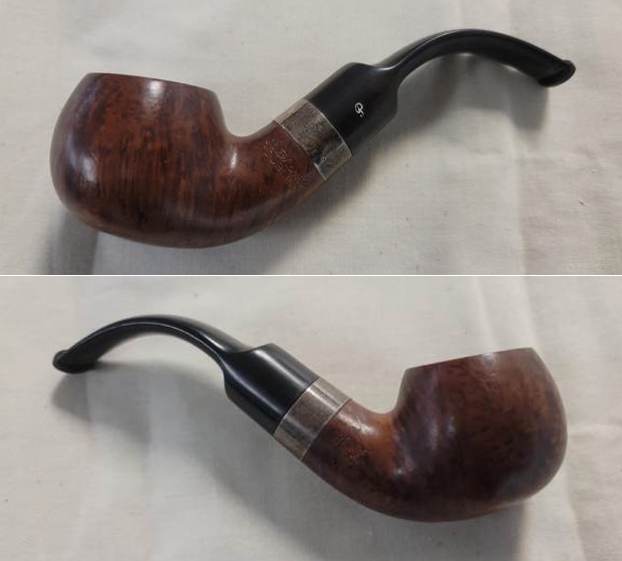
 The pipe arrived on Monday and I opened the box to find this pipe. It is stamped on the left side of the shank and reads Peterson’s [over] Dublin. On the right side it is stamped Made in the Republic of Ireland in 3 lines [over] the shape number XL02. The silver band is stamped with a US Flag in the center of a circle with Peterson’s arced over the top of the circle and July 4, 2000 arced below the circle. Below that there are hallmarks – Hibernia (Ireland), Harp (quality of silver) and the date stamp of an italic O which is the date stamp for the year 2000. The fishtail saddle stem is vulcanite and has the Peterson’s P stamp on the left side of the saddle. The stem was lightly oxidized with some tooth marks and chatter on both the top and underside ahead of the button. It was tight in the shank and would definitely fit better once cleaned. The bowl had a light cake in it and smelled strongly of Latakia/English blends. The finish was in good condition but there was some dust and grime ground into it. I took some photos of the pipe when I unpacked it. I have included them below.
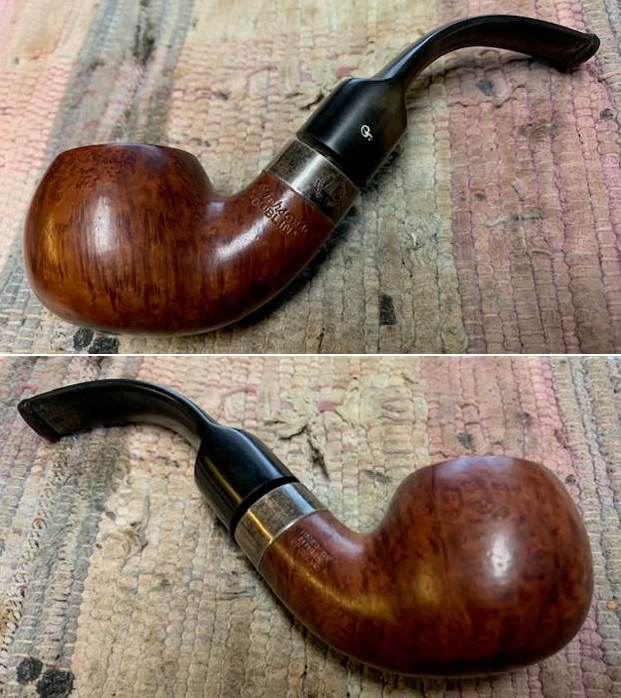
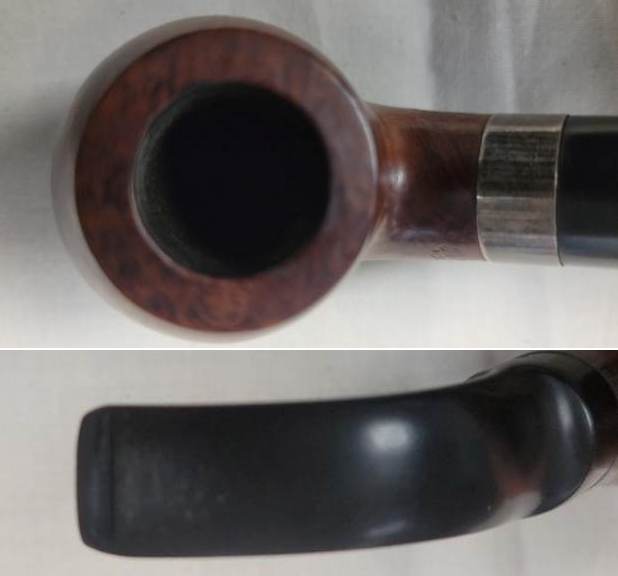
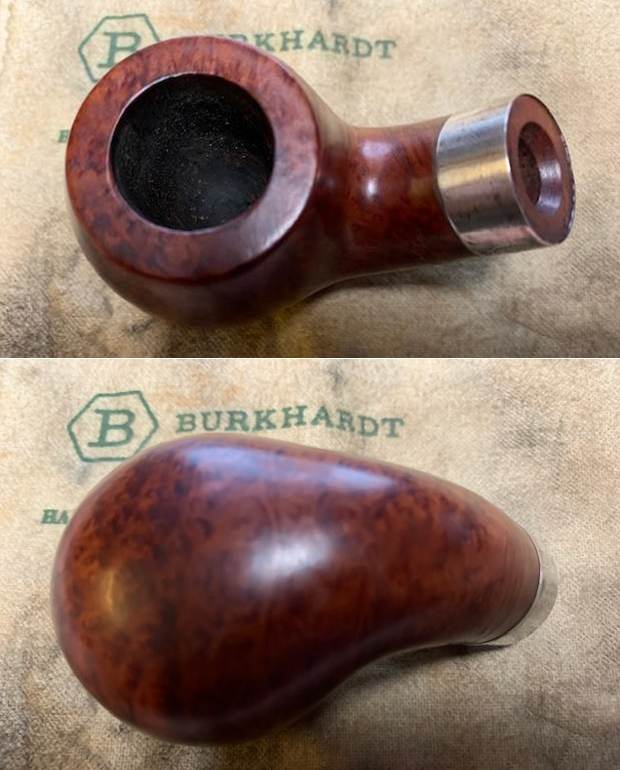
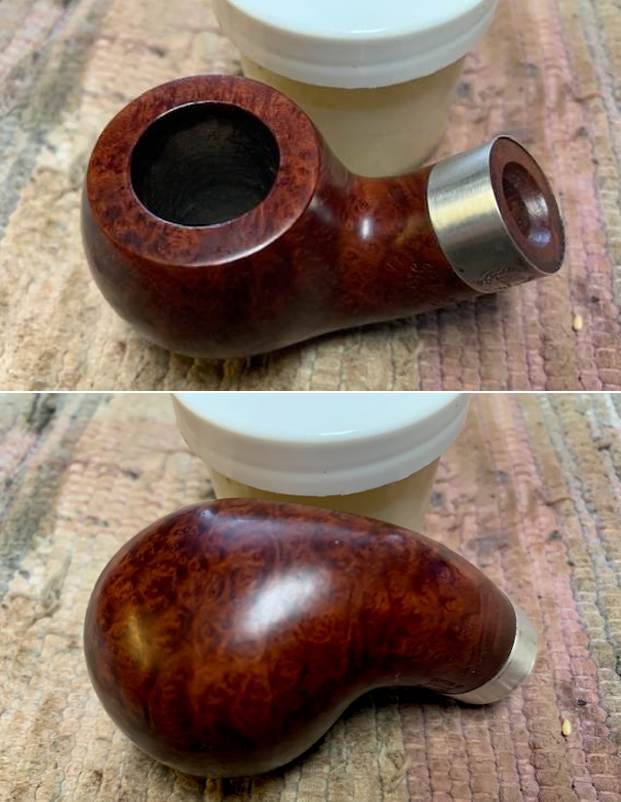
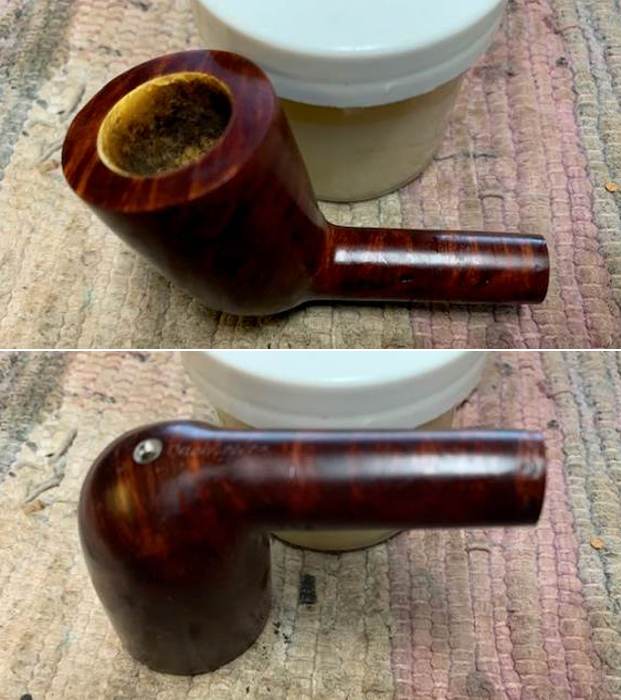
 I took photos of the bowl and rim top to show what they looked like before my clean up. I also took some of the stem to show the condition of both sides.
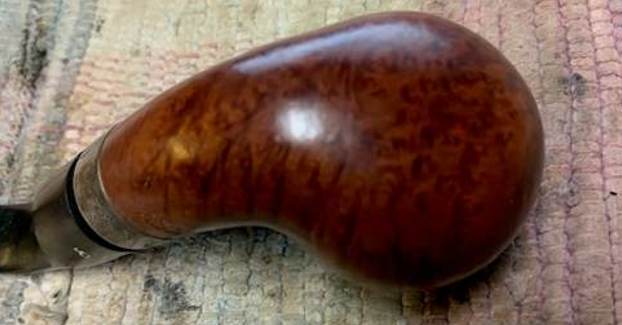
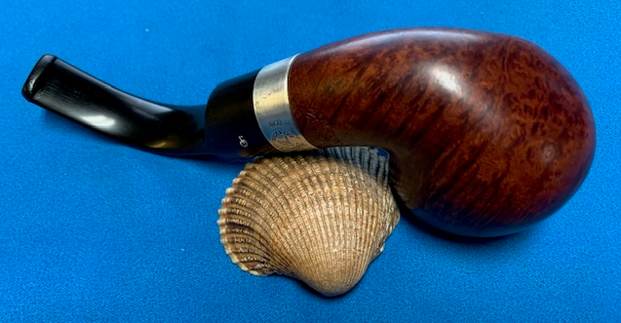
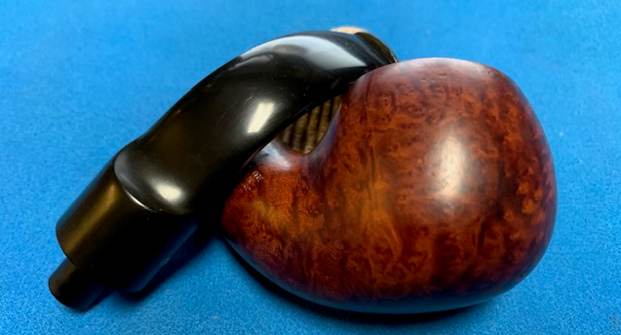
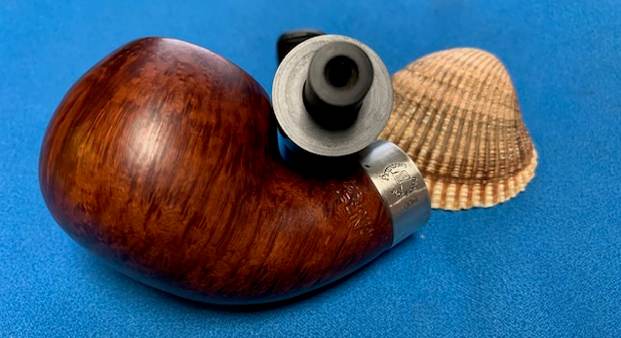
  The photos of the sides and heel of the bowl show the grain around the bowl and shank. The mixture of brown stains adds depth to finish on the pipe. Even under the grime it is a real beauty.
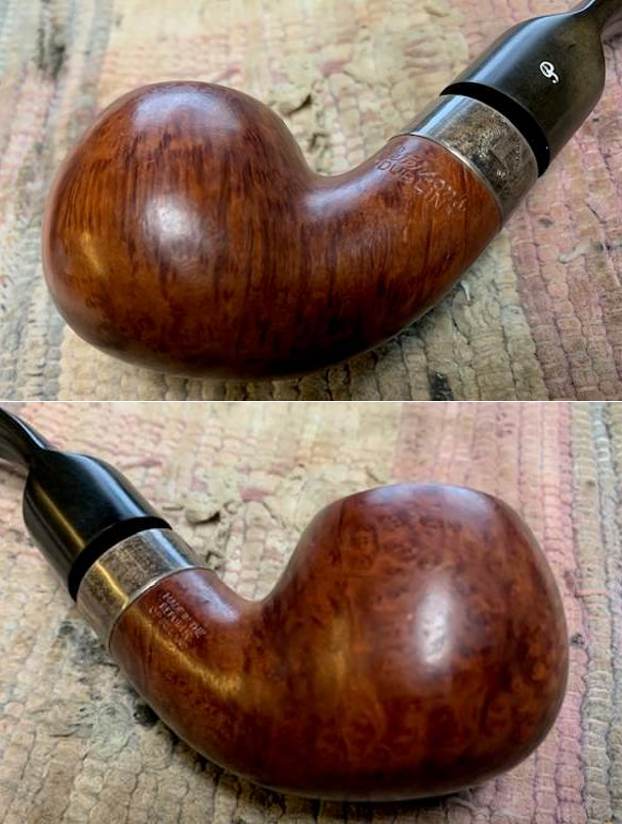
 The stamping on the sides of the shank are shown in the photos below. They are clear and readable as noted above. The “P” stamp on the left side of the saddle is also in good condition.
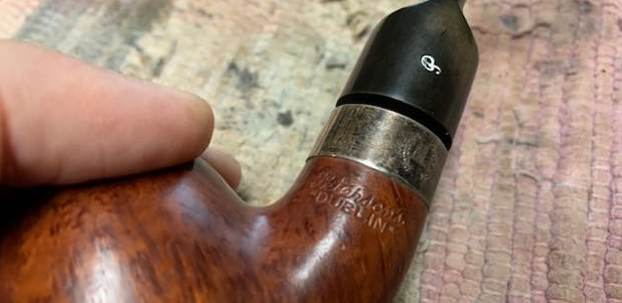
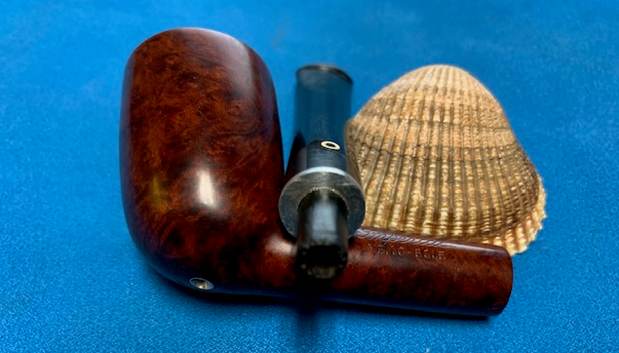
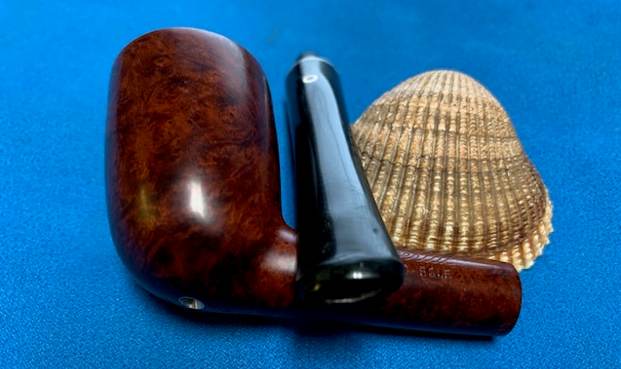
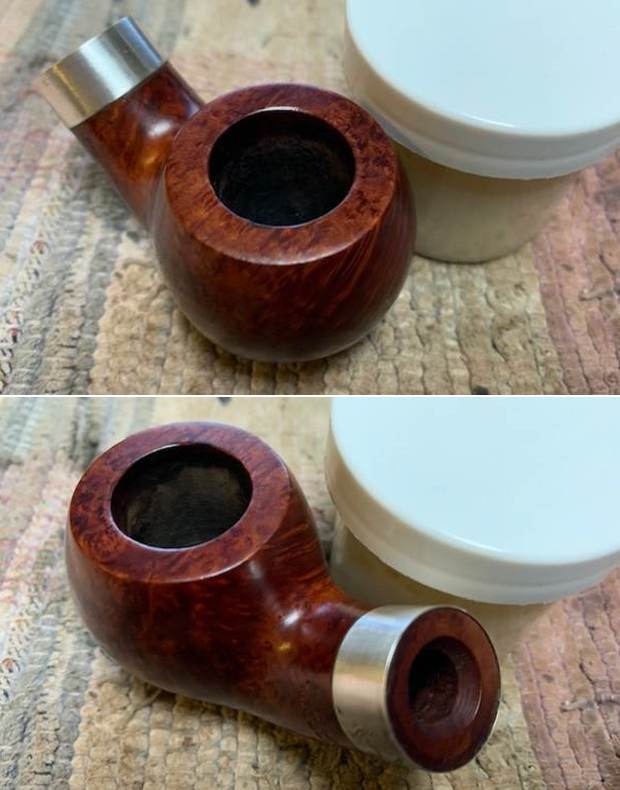
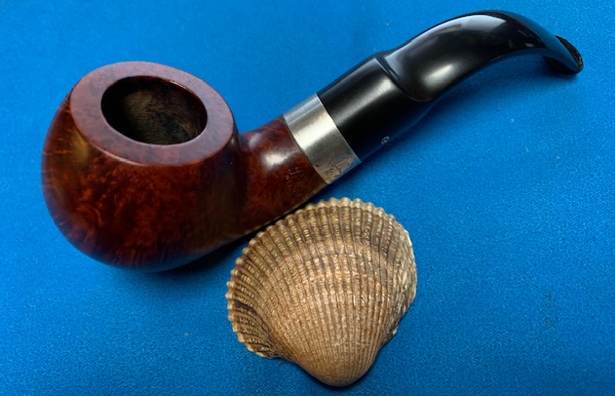
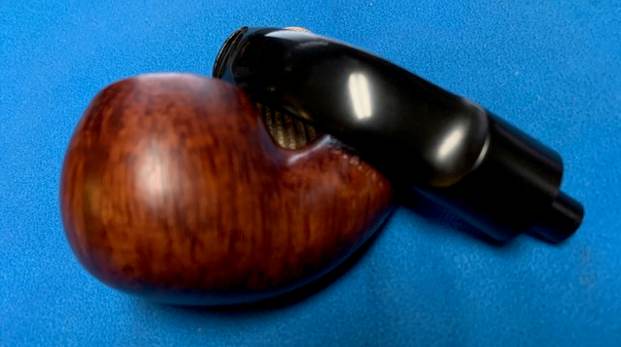
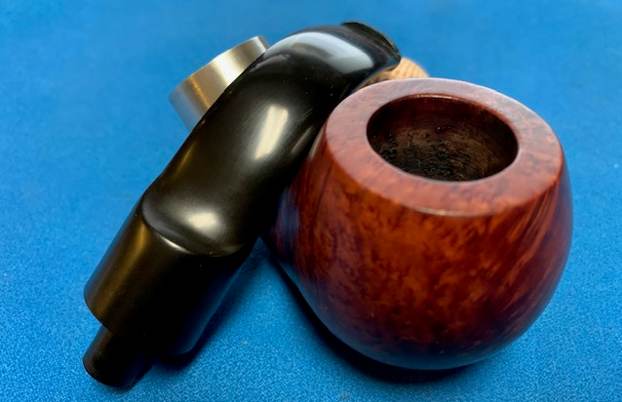
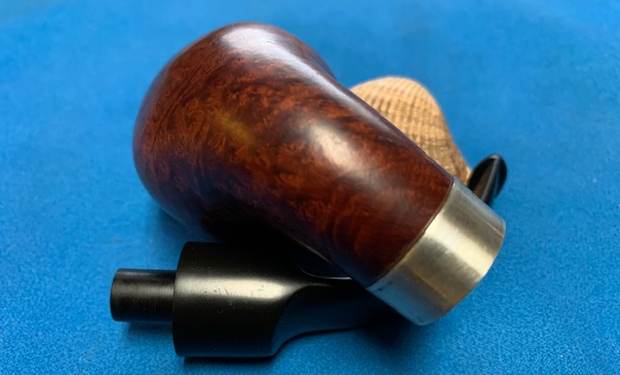
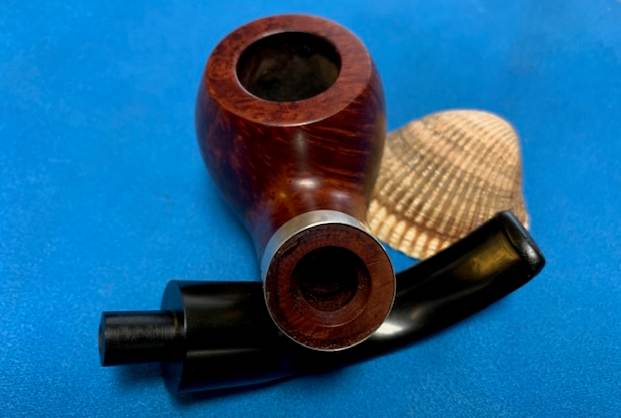
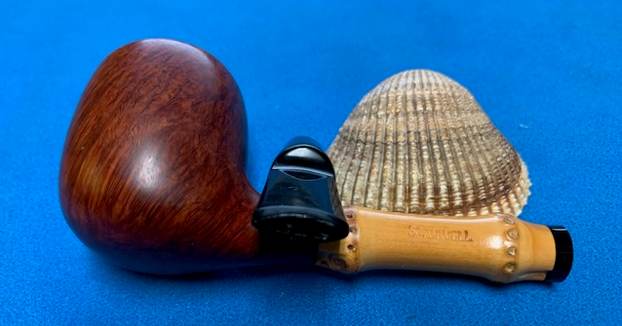
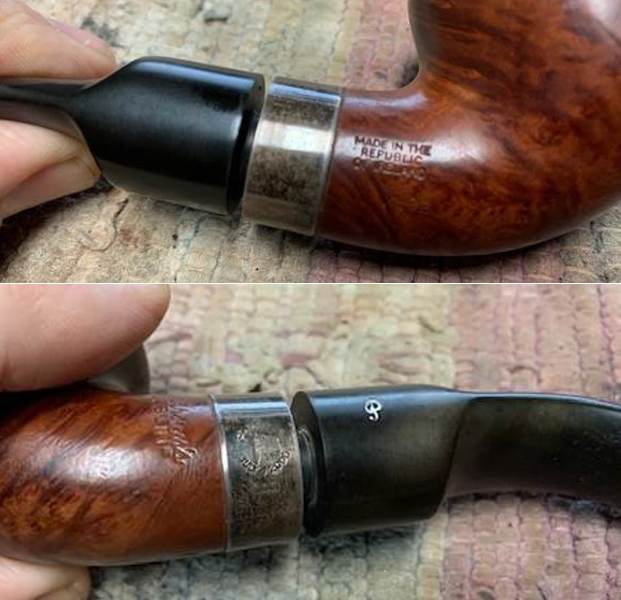 I removed the stem and took a photo of the parts to give a sense of the proportions of the pipe and its overall look. It is a real beauty.
 The band on the shank of the pipe was loose and the glue had dried out. It slid off the shank with little effort. I cleaned up the shank end with alcohol on a cotton pad. I spread some all purpose white glue around the area with a dental spatula and pressed the band in place. I wiped off the excess glue with a damp cotton pad and took photos of the newly glued band.
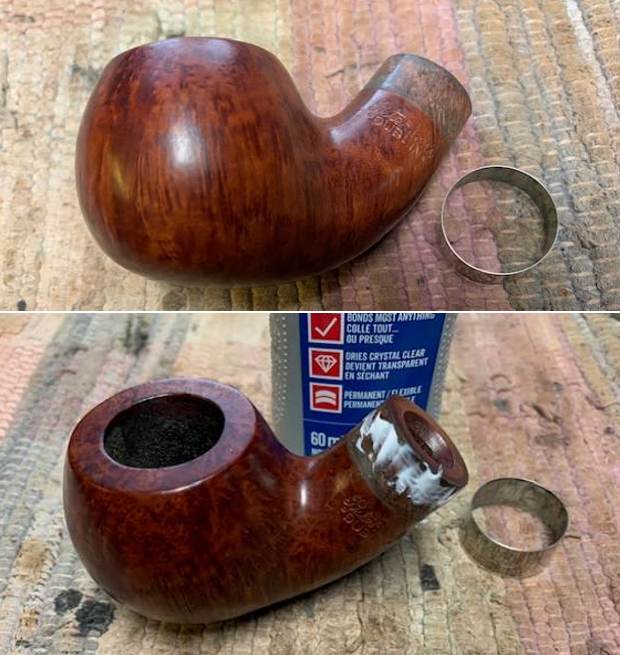
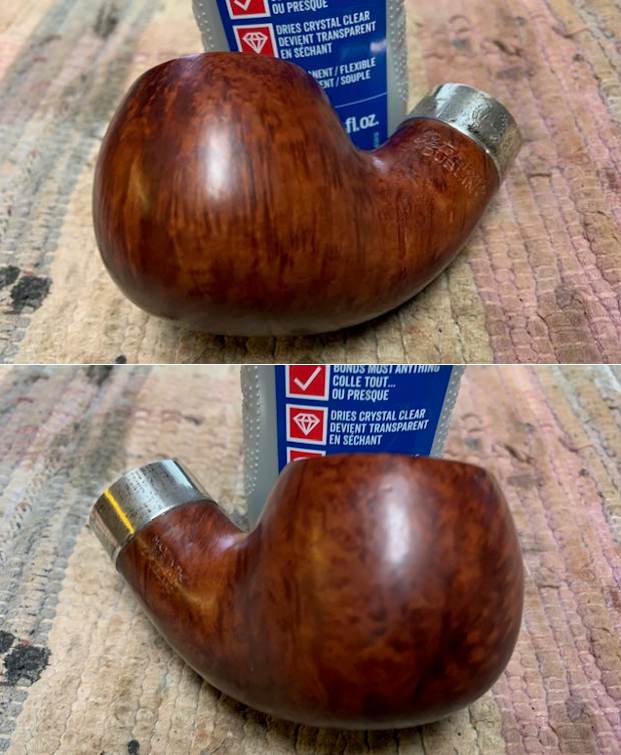
 Once the glue hardened I polished the silver band with a jewelers cloth. It removed most of the oxidation but a little more work on it would leave it shining bright.
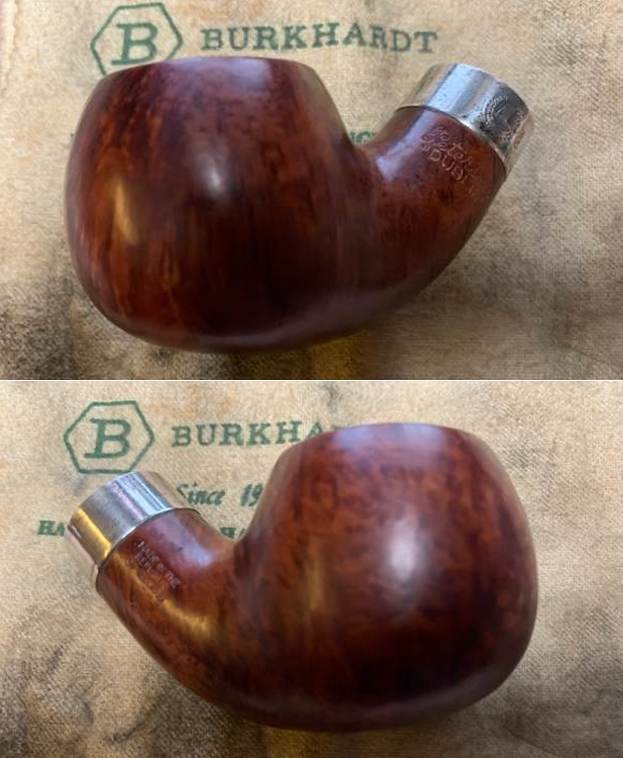
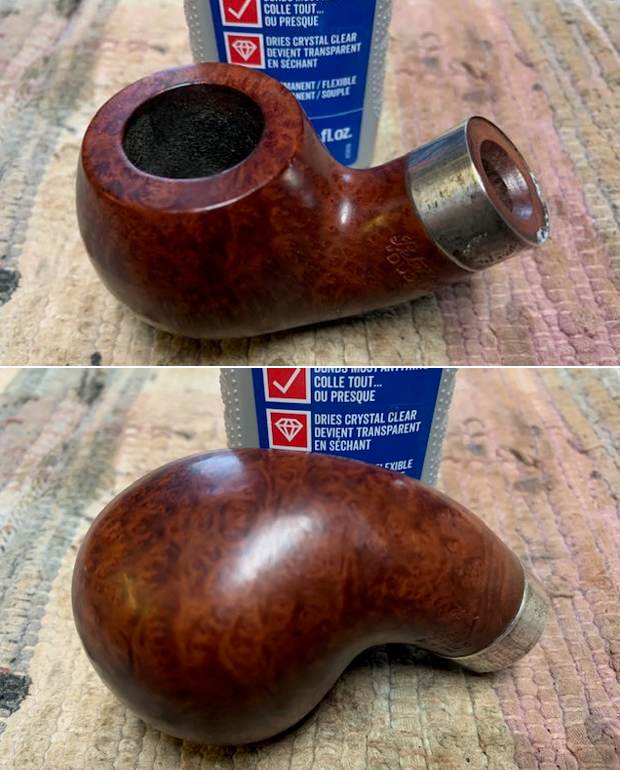
 I reamed out the light cake in the bowl with a PipNet pipe reamer. I cleaned up the reaming with a Savinelli Pipe Knife and finished by sanding the bowl walls with a piece of dowel wrapped with 220 grit sandpaper.
 I cleaned out the shank and the airway into the bowl and the shank with pipe cleaners, cotton swabs and 99% isopropyl alcohol.
 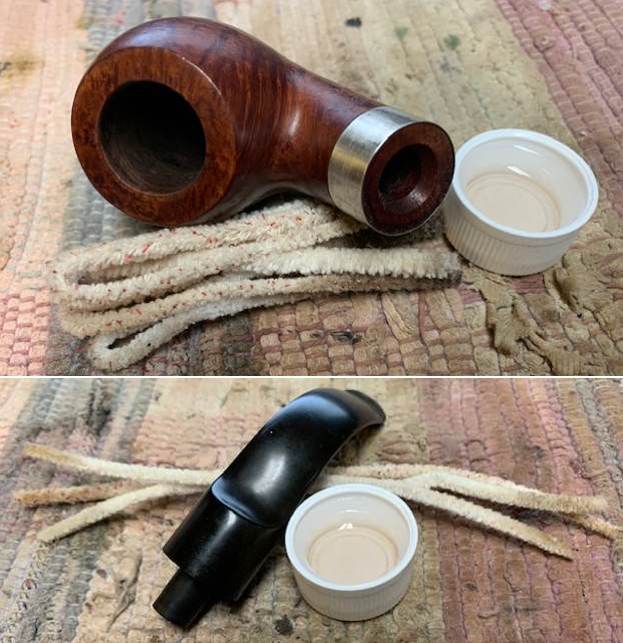 To deghost the pipe of the heavy Latakia smells I stuffed bowl with cotton bolls and used a twisted cotton boll in the shank. I filled the bowl with alcohol using an ear syringe to place the alcohol directly in the bowl. I set it aside to let it do its work drawing out the tars and oils from the walls of the bowl and the shank. I let it sit overnight and then removed the dirty and oily cotton and debris that had accumulated. I ran a pipe cleaner through the shank and removed any remnants of debris. The pipe smelled significantly better.
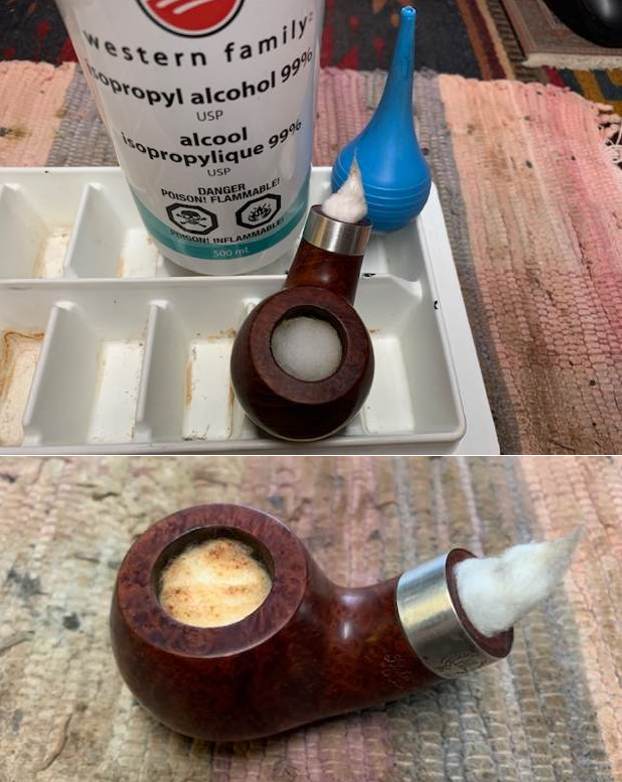
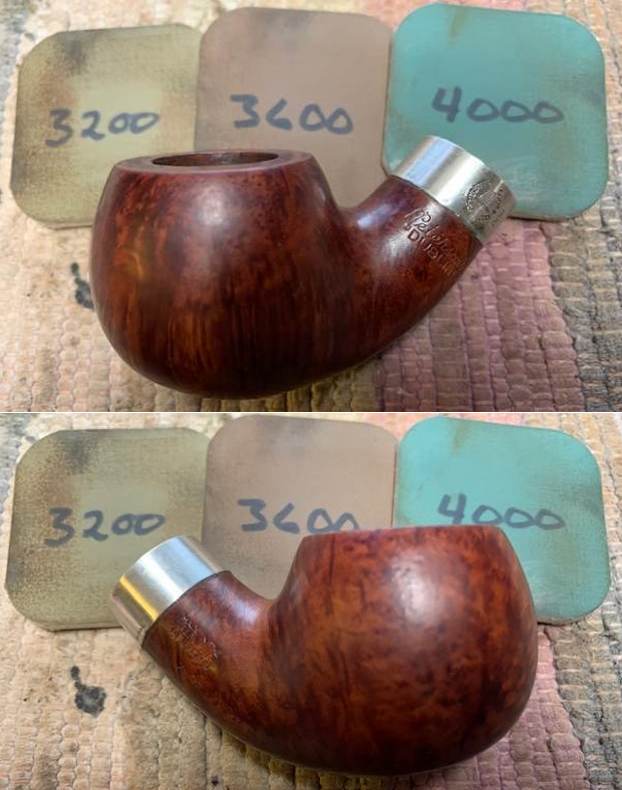
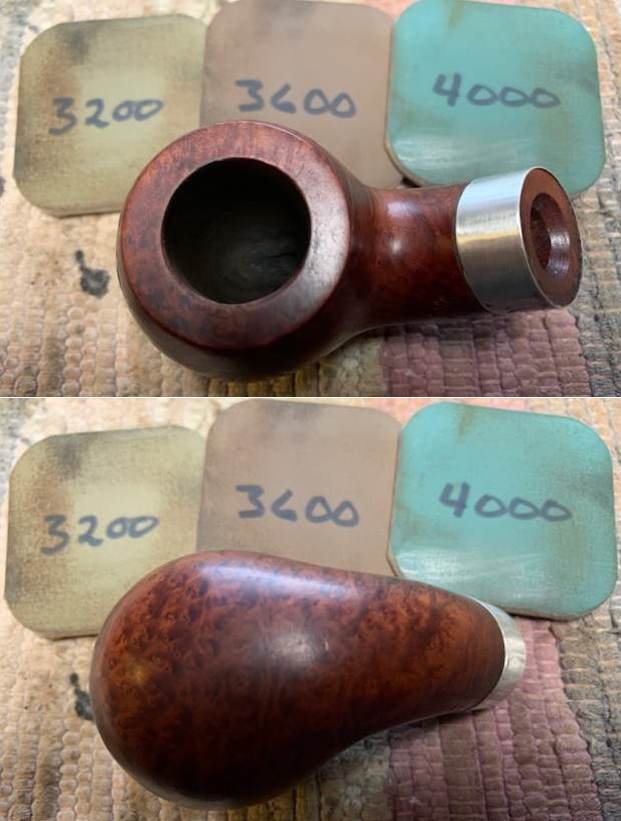
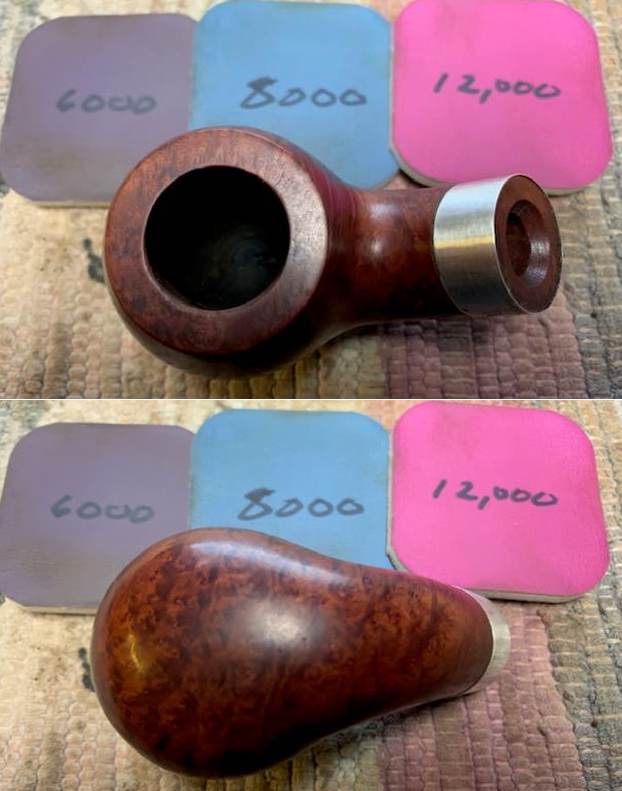
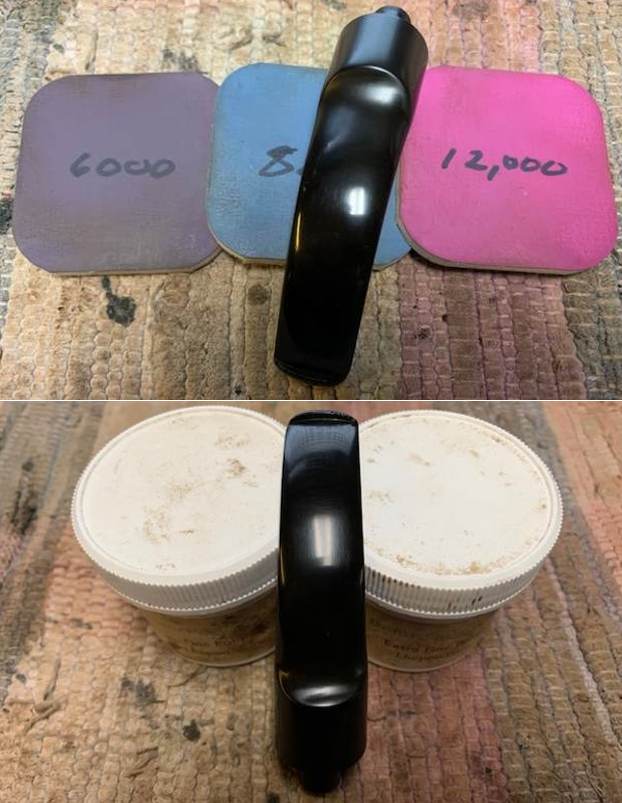
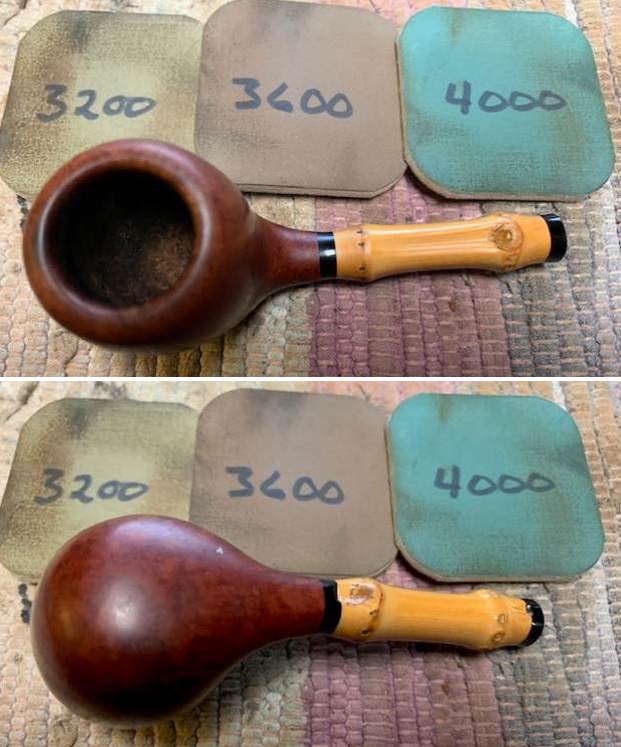
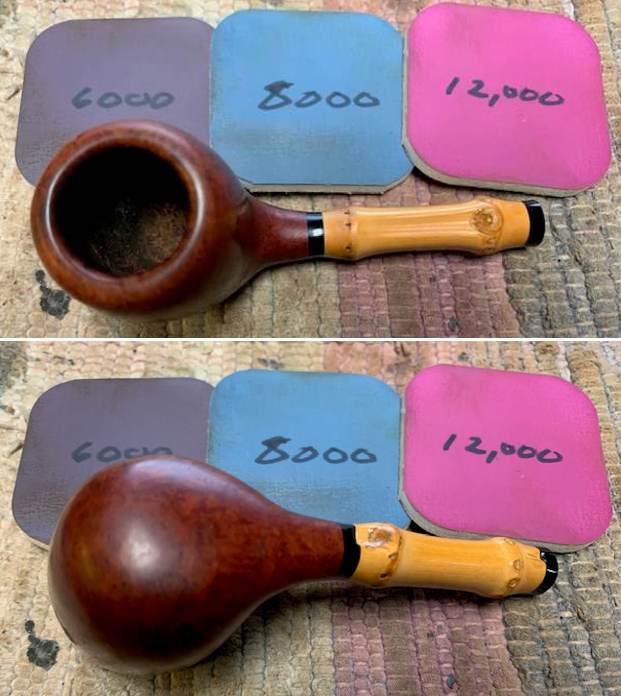
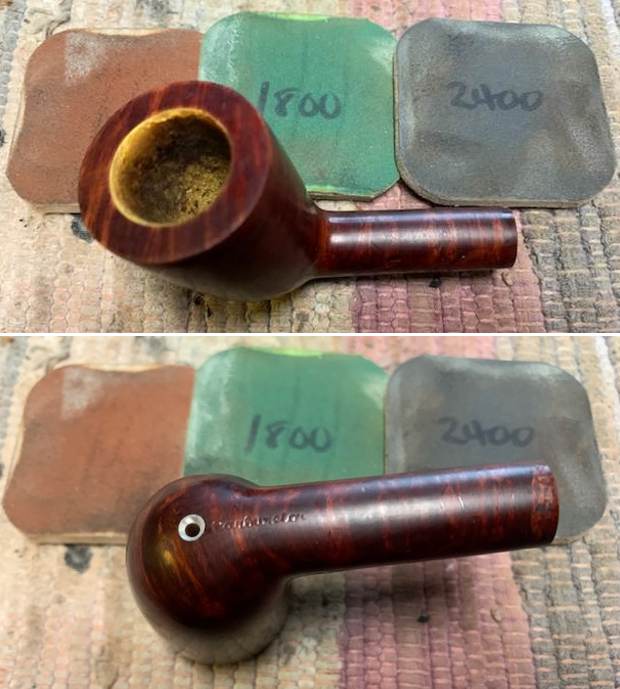
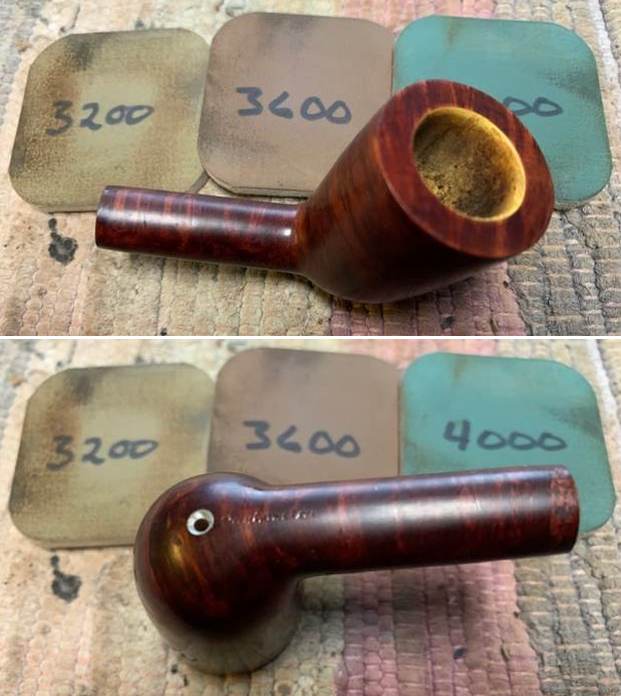
 I polished the bowl with micromesh sanding pads – dry sanding with 1500-12000 grit pads. I wiped the bowl down with a damp cloth after each sanding pad. It really began to take on a shine. It is a beautiful piece of briar.
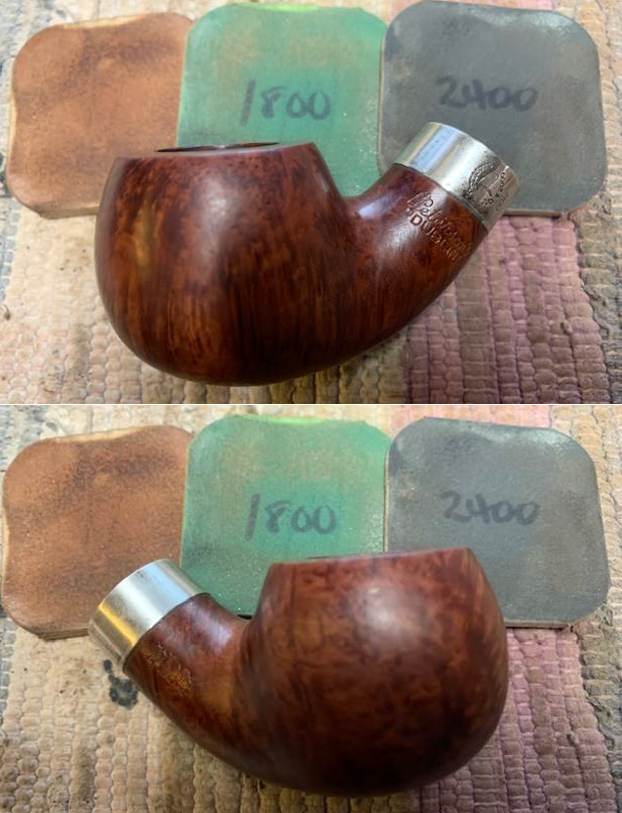


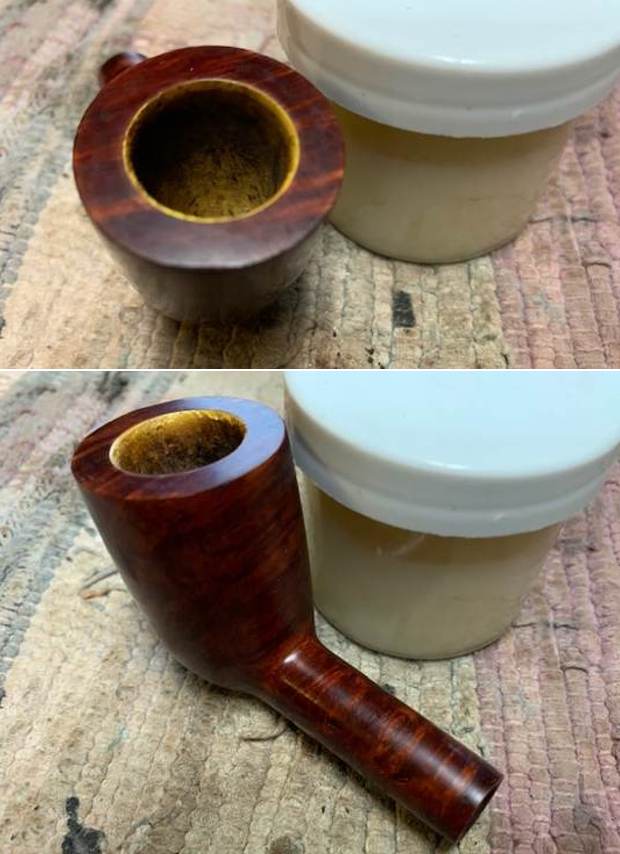
 I rubbed the bowl down with Before & After Restoration Balm. I worked it into the briar with my finger tips. I let it sit for 10 minutes and the Balm did its magic. It enlivens, cleans and preserves the briar. It certainly brought this bowl back to life. I buffed it off with a clean cloth and took the following photos.
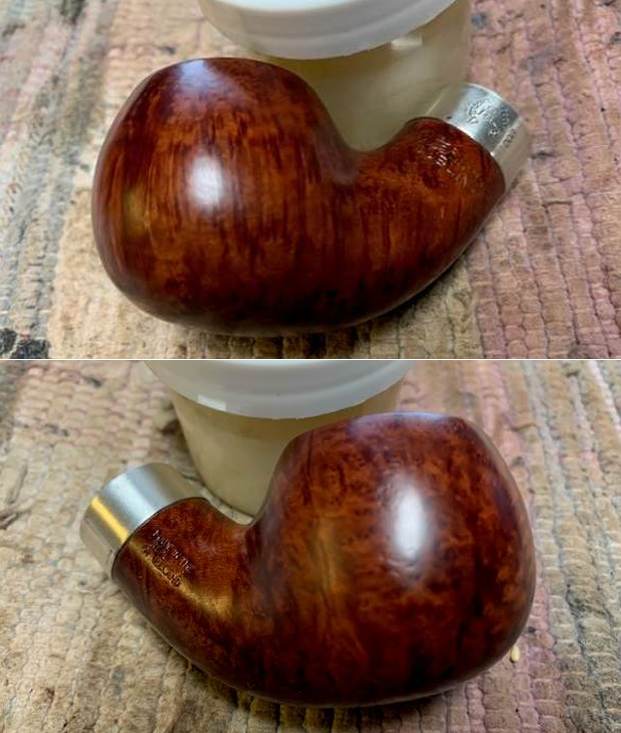
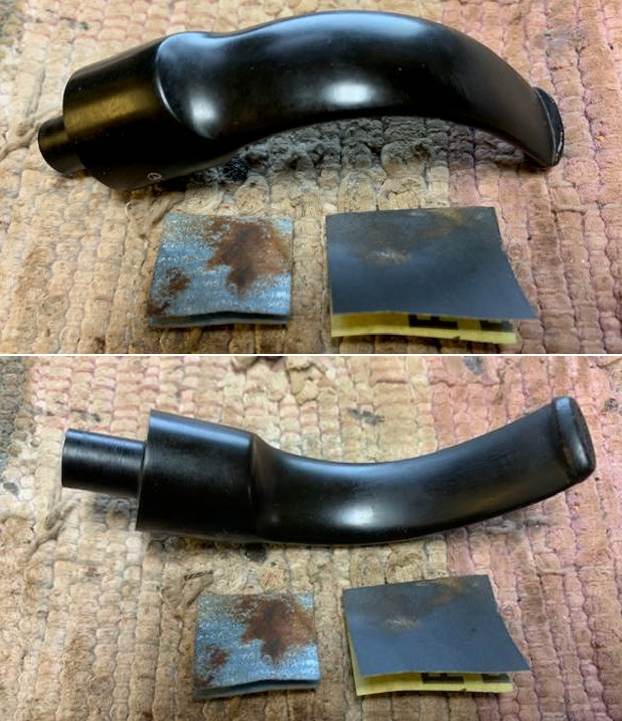
 I set the bowl aside and turned my attention to the stem. I “painted” the stem with the flame of a Bic lighter to lift the tooth marks. The majority of them were lifted. I sanded out what remained with 220 grit sandpaper and then started the polishing with 600 grit wet dry sandpaper.
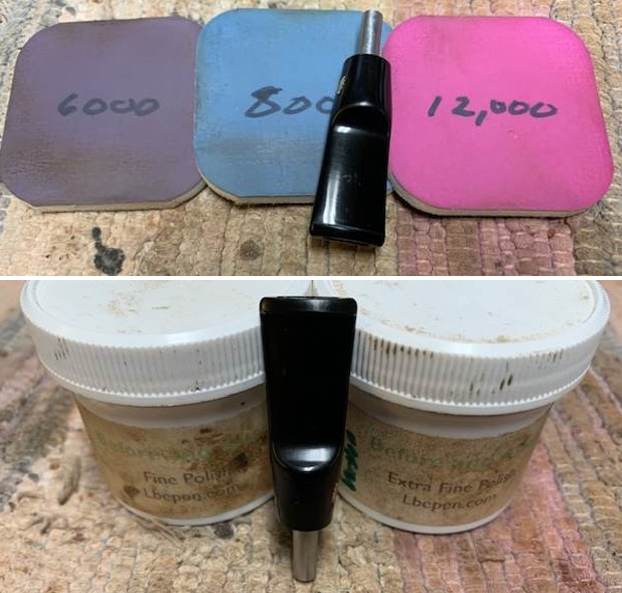
 I polished the vulcanite with micromesh sanding pads – 1500-12000 grit pads. I wiped it down with a damp cloth after each sanding pad. I used Before & After Pipe Polish – both Fine and Extra Fine to further polish the stem.
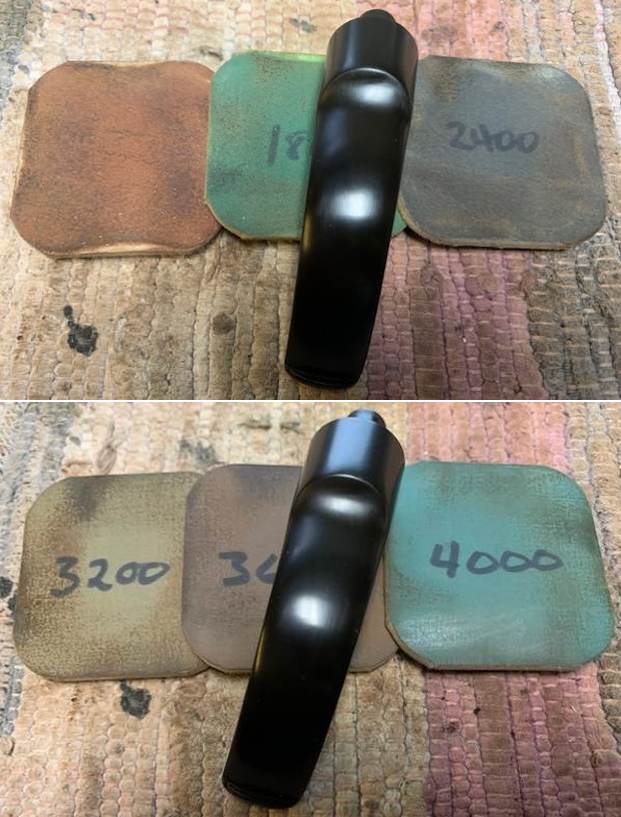
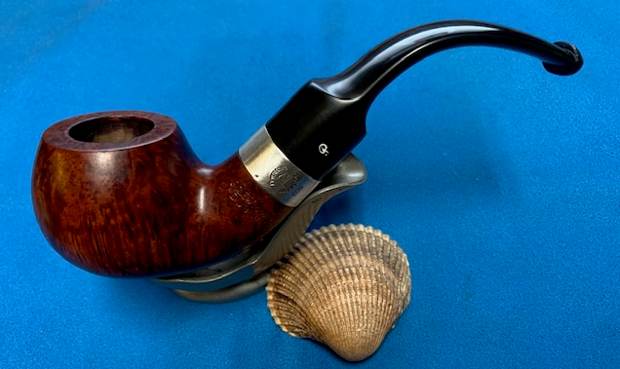
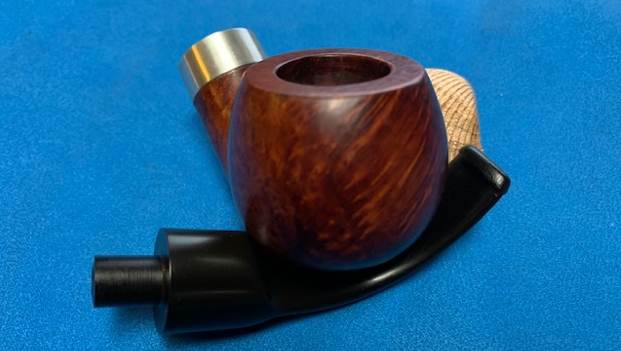
 This Peterson’s 4th of July 2000 XL02 Bent Apple with a vulcanite saddle stem is a great looking pipe now that it has been restored. The beautiful finish really highlights the grain and the polished finish is stunning. I polished the silver band with a jewelers cloth to protect and shine the silver. I put the stem back on the bowl and carefully buffed the pipe with Blue Diamond on the buffing wheel. I gave the bowl and the stem multiple coats of carnauba wax on the buffing wheel and followed that by buffing the entire pipe with a clean buffing pad. I hand buffed the pipe with a microfiber cloth to deepen the shine. The finished Peterson’s Dublin 4th of July 2000 XL02 fits nicely in the hand and feels great. Give the finished pipe a look in the photos below. The dimensions of the pipe are Length: 5 ½ inches, Height: 1 ½ inches, Outside diameter of the bowl: 1 ¼ inch, Chamber diameter: ¾ of an inch. The weight of the pipe is 69 grams / 2.43 ounces. I will be sending it back to the pipeman so that he can enjoy his “new” pipe. Thanks for reading this blog and my reflections on the pipe while I worked on it.
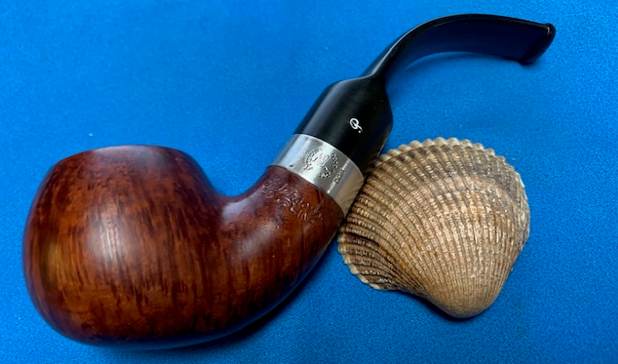


Blog by Steve Laug
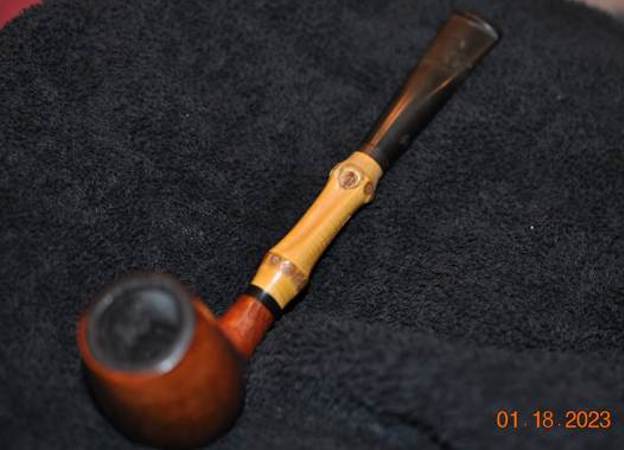
This rainy evening here in Vancouver I decided to work on was another one that was purchased on 11/14/2022 in a lot of pipes that came to us from Copenhagen, Denmark It included a group of Stanwell Bamboo pipe that are quite beautiful, combining a briar bowl, a bamboo shank and a an vulcanite stem. The grain around the bowl and shank has a mix of straight and flame grain. The pipe is stamped on the left side of the bamboo and reads STANWELL. The pipe was a well used pipe when Jeff received it. There was dust and grime ground into the finish. The mixture of brown stains highlights some beautiful grain under the dirt. The bowl was heavily caked and there was an overflow of lava on the rim top. The inner edge was hard to see clearly and the lava could easily be hiding damage. The stem is vulcanite and was lightly oxidized, dirty with light tooth marks and chatter on both sides ahead of the button and on the button itself. There is a brass/gold crown S logo inlaid on the left side of the taper stem. Jeff took photos of the pipe before he started his clean up work on it.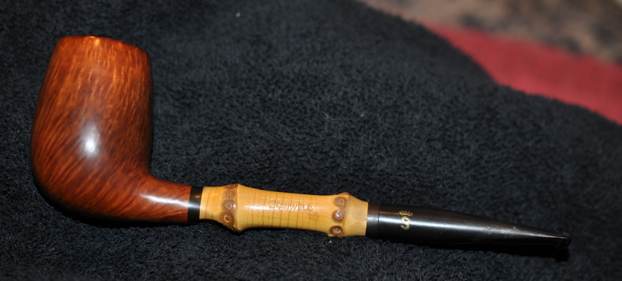
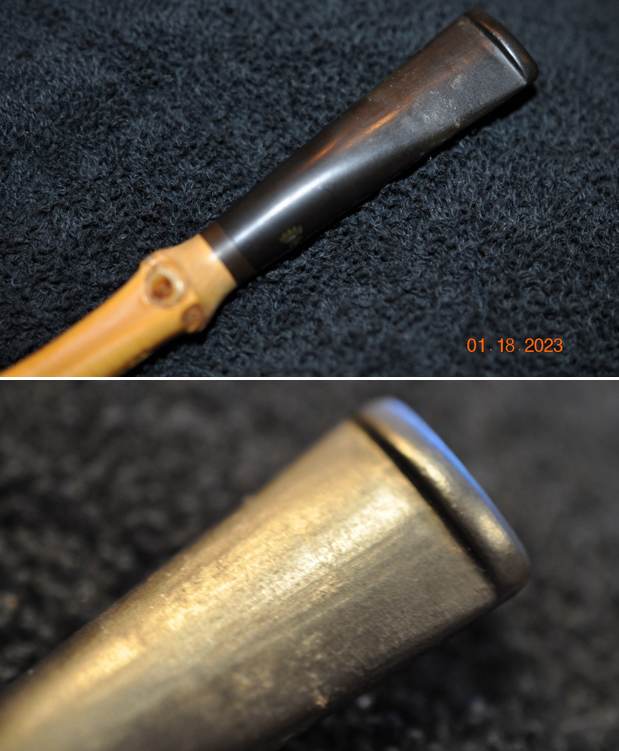
 He took photos of the bowl and rim top to show what they looked like before his clean up. He also took some of the stem to show the condition of both sides.
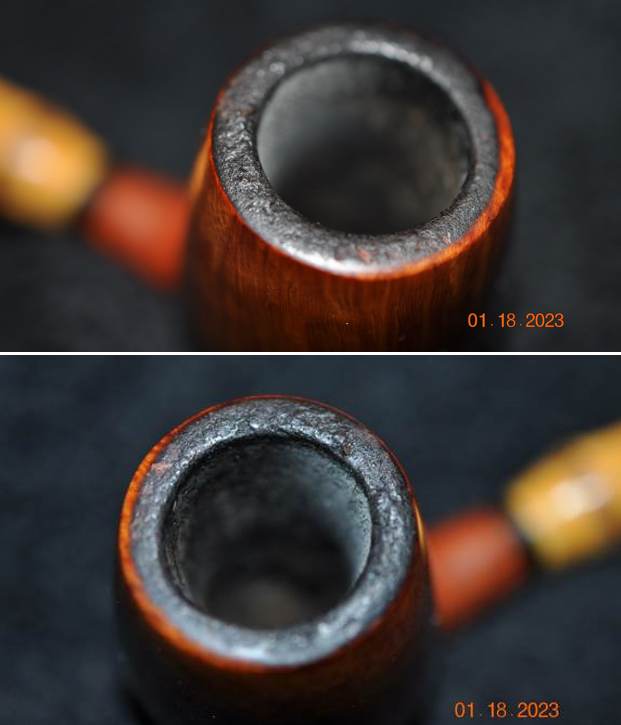
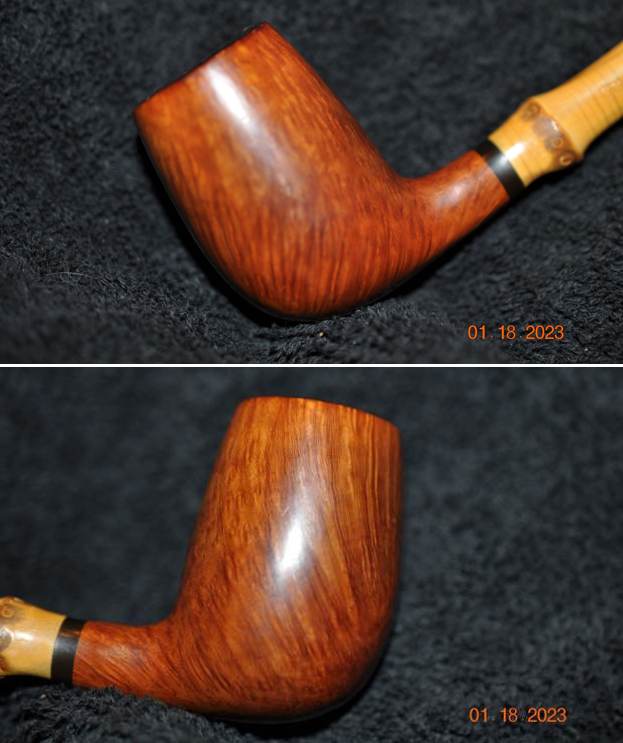
 The photos of the sides and heel of the bowl show the uniquely stained grain around the bowl and shank. The mixture of black and brown stains adds depth finish on the pipe. Even under the grime it is a real beauty.
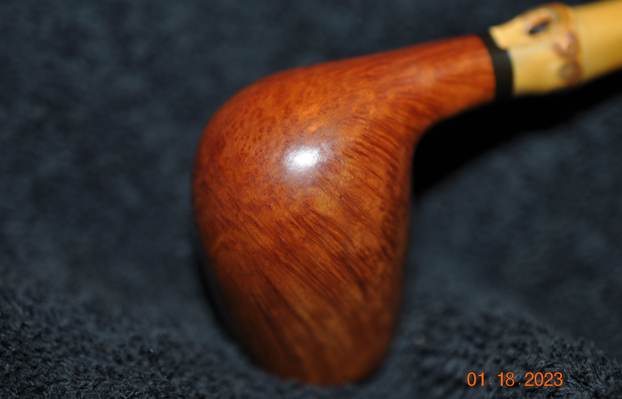
 The stamping on the left side the bamboo is shown in the photo below. It is clear and readable as noted above. The second photo shows the gold crown S on the stem side.
 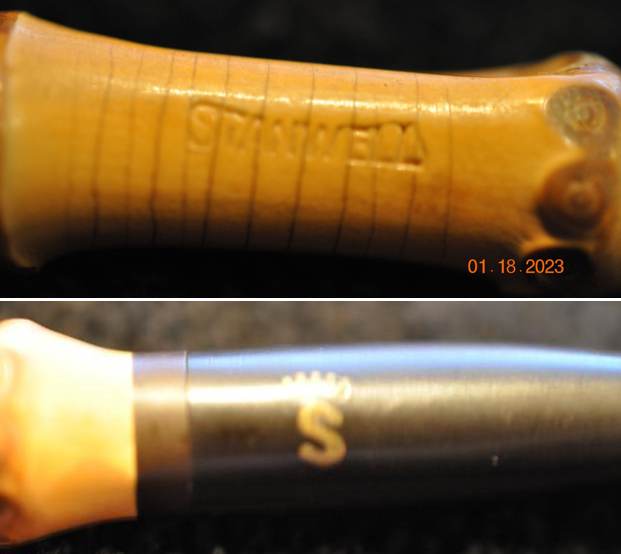 Before I started my work on the pipe I wanted to see if I could find any information that would help me get a sense of the line. I turned to Pipephil to get a quick review of the Bamboo line (http://pipephil.eu/logos/en/logo-stanwell.html). The Brass Crowned S inlaid logo on the stem is shown in the photo below. I have included a screen capture of the brand info there.
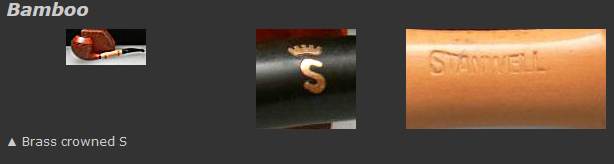 I then turned to Pipedia (https://pipedia.org/wiki/Stanwell) for more information. The article is great and gives a lot of history on the brand. There were also links to catalogues at the bottom of the page. I am including a page from a catalogue on the site below that gives a bit of a glimpse into the brand. Here is the link (http://www.axeljeske.de/Pfeifen/Stanwell_Amager.pdf).
  The catalogue page gives a great description of the Bamboo line. It reads as follows: Top quality bowls perfectly fitted with porous bamboo shanks for casual elegance.
Now it was time to work on the pipe.
Jeff had thoroughly cleaned up the pipe. He reamed the pipe with a PipNet Pipe Reamer and cleaned up the remnants with a Savinelli Fitsall Pipe Knife. He scrubbed the bowl with undiluted Murphy’s Oil Soap with a tooth brush. He rinsed it under running warm water to remove the soap and grime. He cleaned out the inside of the shank and the airway in the stem with alcohol, cotton swabs and pipe cleaners. He scrubbed the exterior of the stem with Soft Scrub to remove the grime and calcification. He soaked the stem in Before & After Deoxidizer and rinsed it off with warm water. The pipe looked very good when it arrived here in Vancouver.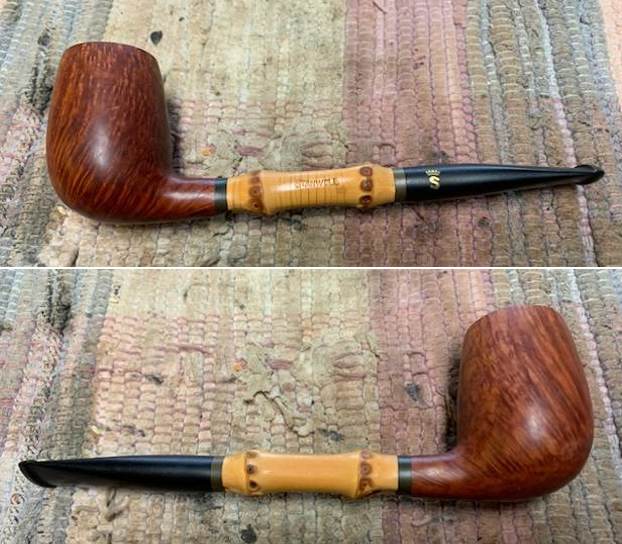
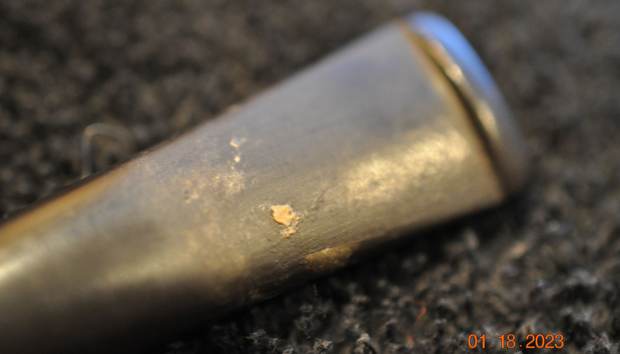
 I took close up photos of the bowl, rim and the stem. You can see the darkening and scratches on rim top and edges. The bowl is quite clean inside. You can see the oxidation on the vulcanite shank end on the bamboo. The stem is in good condition with light tooth marks and some chatter as noted above.
 I took photo of the stamping on the left side of the shank. It is readable as noted above.
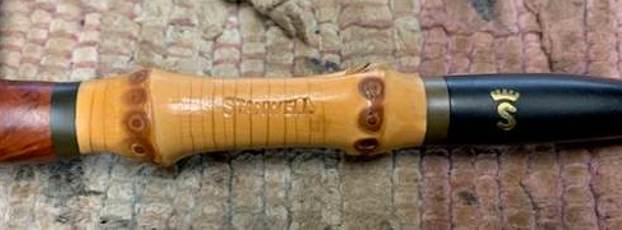 I removed the stem from the shank and took a photo to give a sense of the proportions of the pipe.
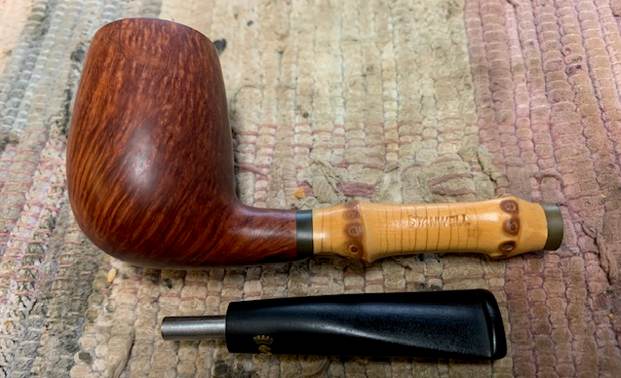 I started my work on the pipe working on the damage to the inner edge and the rim top with a folded piece of 220 grit sandpaper to bring the edge back into round and it looked much better.
 I polished the briar with micromesh sanding pads – dry sanding with 1500-12000 grit pads. I wiped the bowl down after each pad to remove the grit. The bowl began to take on a rich shine. It is a beauty.
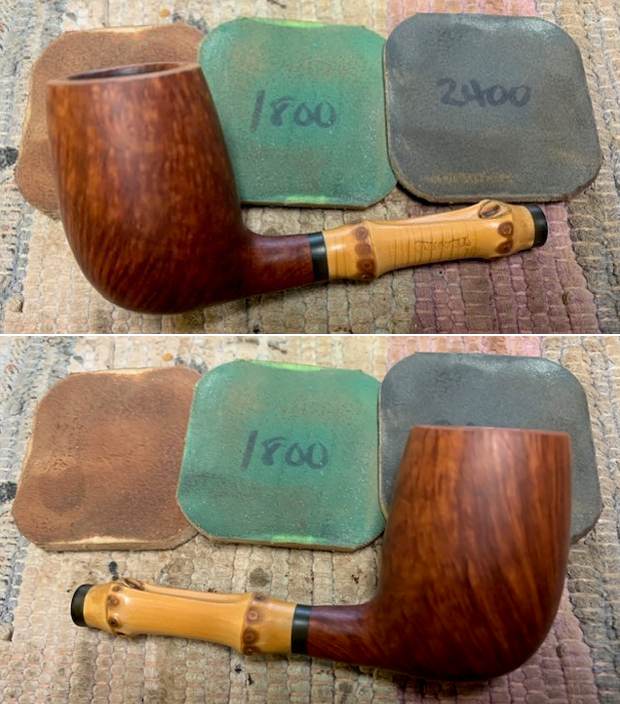
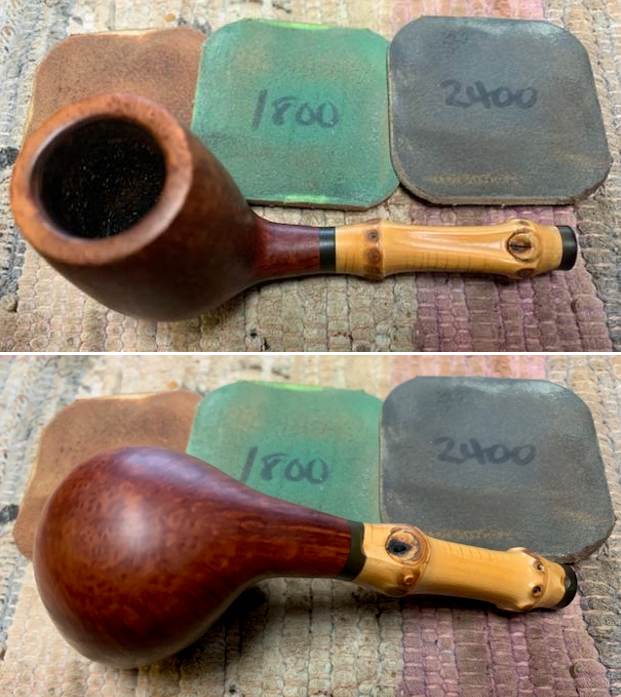
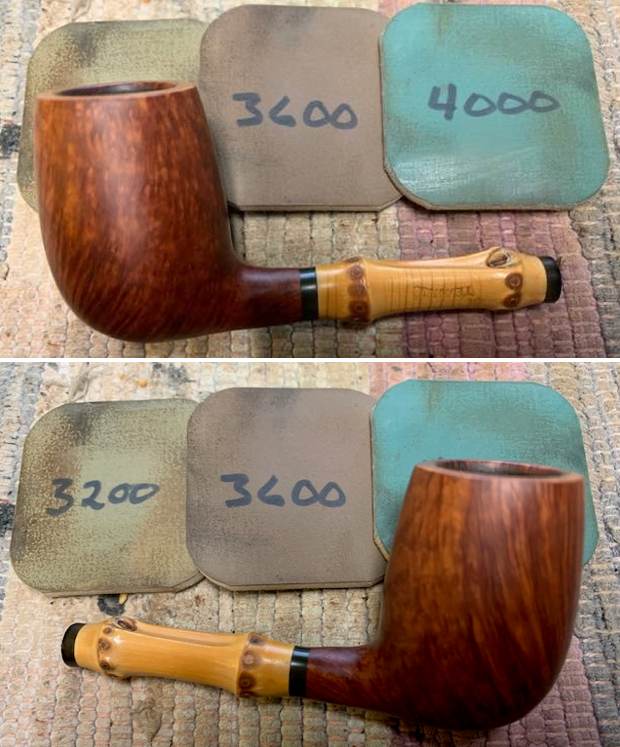
 I rubbed the bowl down with Before & After Restoration Balm. I worked it into the briar with my finger tips. I let it sit for 10 minutes and the Balm did its magic. It enlivens, cleans and preserves the briar. It certainly brought this bowl back to life. I buffed it off with a clean cloth and took the following photos.
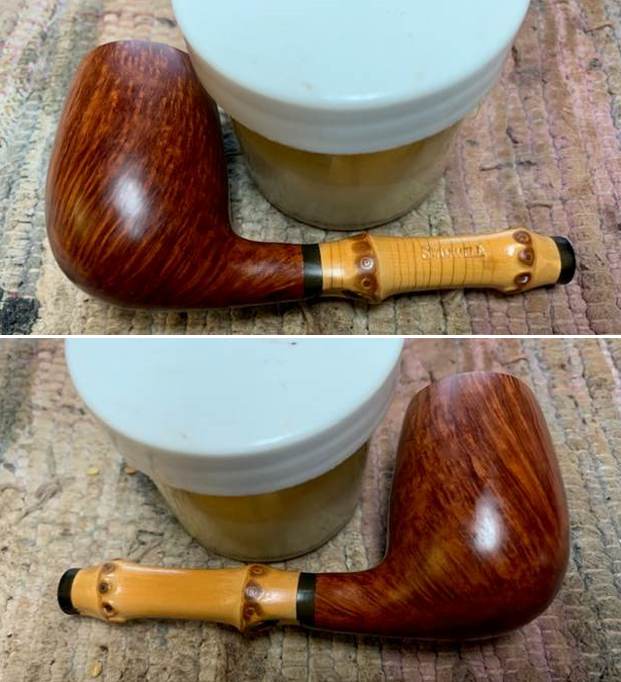

 I “painted” the stem with the flame of a Bic lighter to lift the tooth marks. The majority of them were lifted. I sanded out what remained with 220 grit sandpaper and then started the polishing with 600 grit wet dry sandpaper.
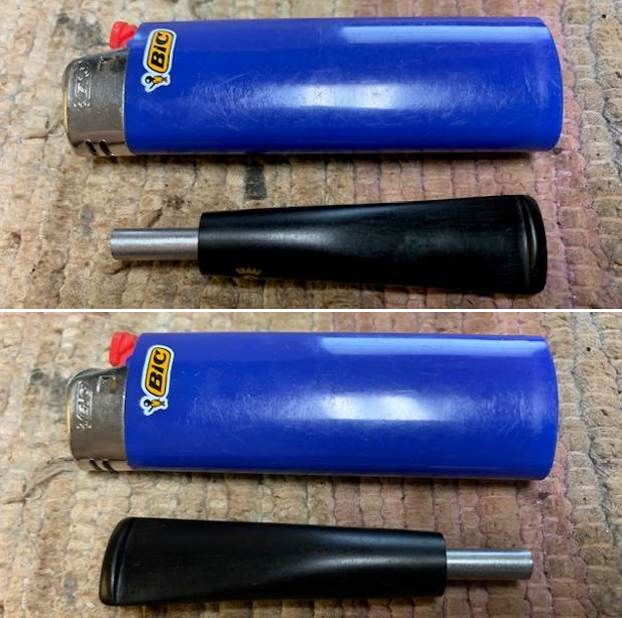
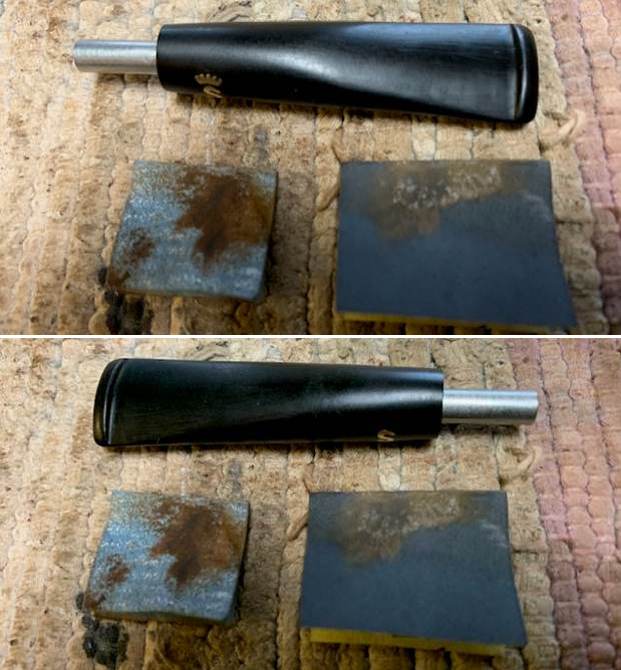 I set the bowl aside and turned my attention to the stem. I was able to polish out the light tooth marks and chatter with micromesh sanding pads – 1500-12000 grit pads. I wiped it down with a damp cloth after each sanding pad. I used Before & After Pipe Polish – both Fine and Extra Fine to further polish the stem.
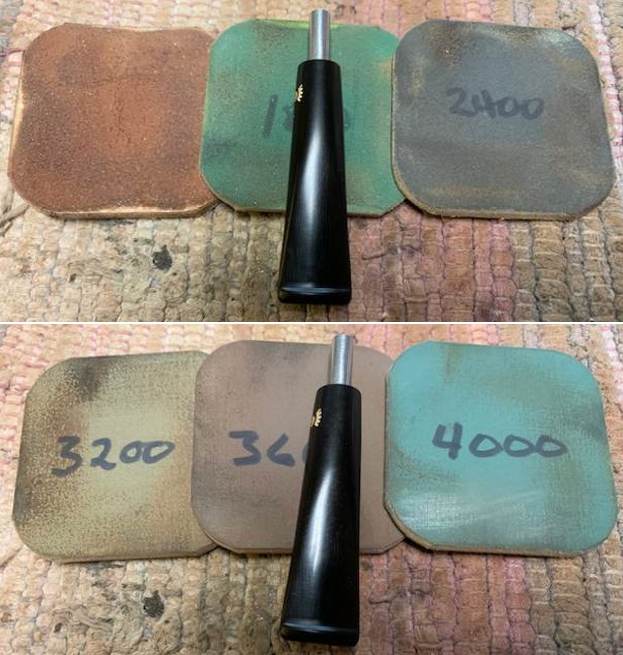
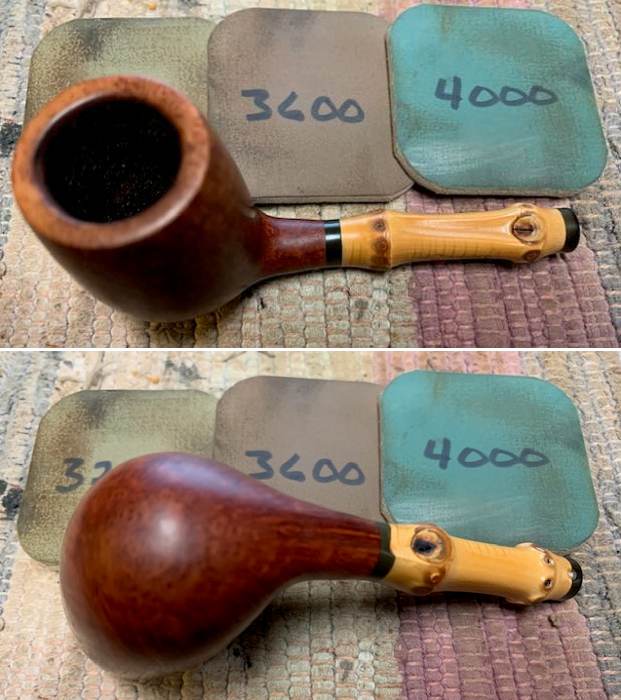
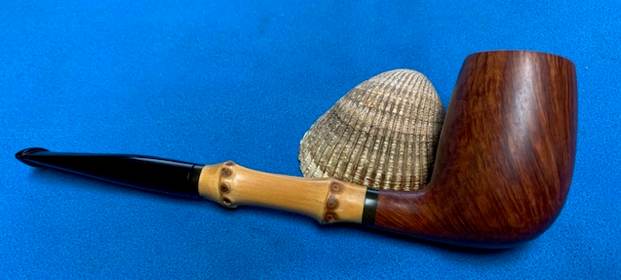
 This Stanwell Bamboo Billiard with a vulcanite taper stem is a great looking pipe now that it has been restored. The beautiful finish really highlights the grain and the polished finish is stunning. I put the stem back on the bowl and carefully buffed the pipe with Blue Diamond on the buffing wheel. I gave the bowl and the stem multiple coats of carnauba wax on the buffing wheel and followed that by buffing the entire pipe with a clean buffing pad. I hand buffed the pipe with a microfiber cloth to deepen the shine. The finished Stanwell Bamboo Billiard fits nicely in the hand and feels great. Give the finished pipe a look in the photos below. The dimensions of the pipe are Length: 6 inches, Height: 1 ¾ inches, Outside diameter of the bowl: 1 inch, Chamber diameter: ¾ of an inch. The weight of the pipe is 34 grams / 1.20 ounces. I will be adding the pipe to the Danish Pipe Makers Section of the rebornpipes store. If you are interested in purchasing this pipe send me a message or an email. Thanks for reading this blog and my reflections on the pipe while I worked on it.
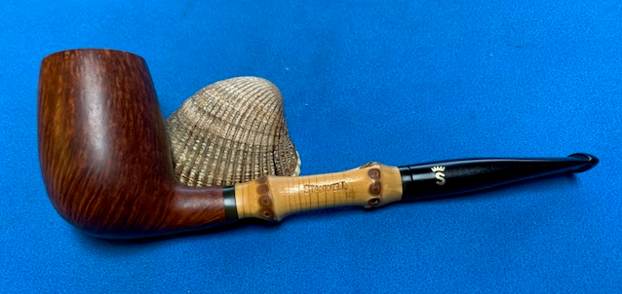


Blog by Steve Laug
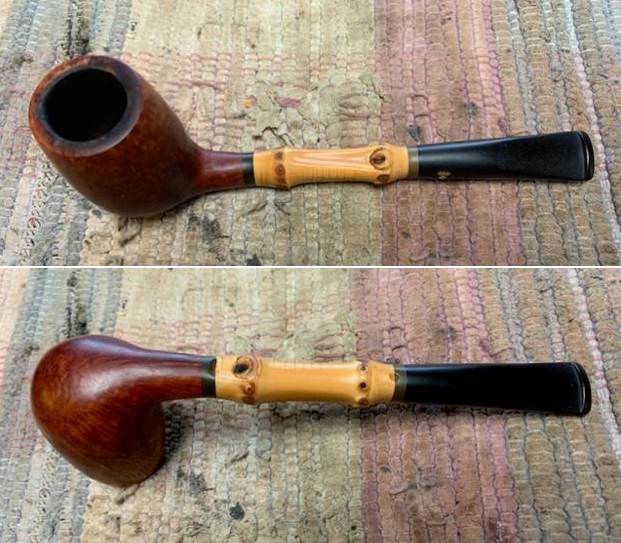
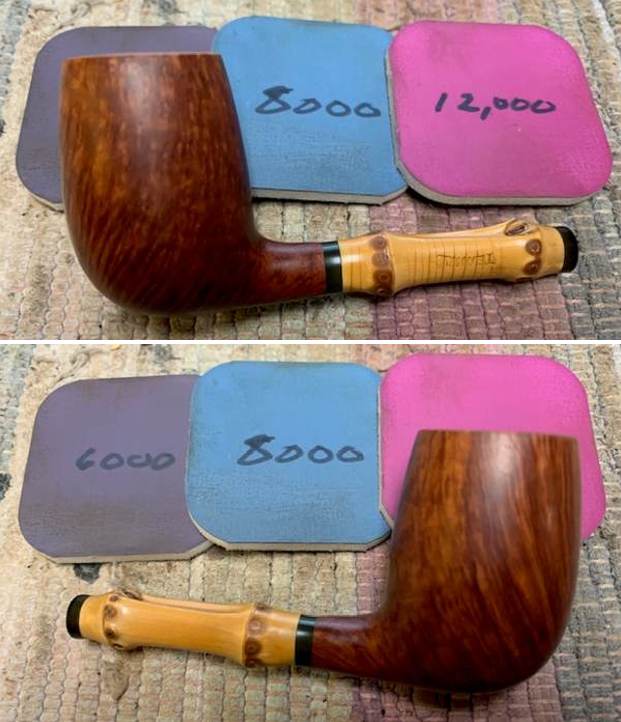
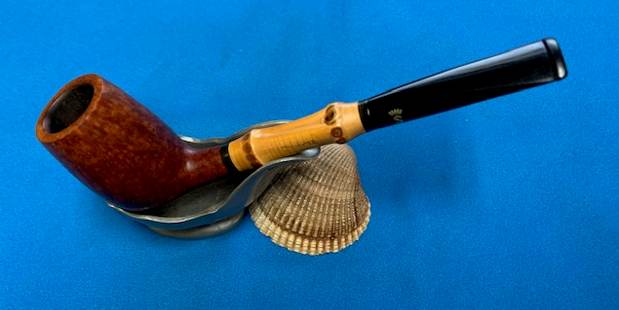
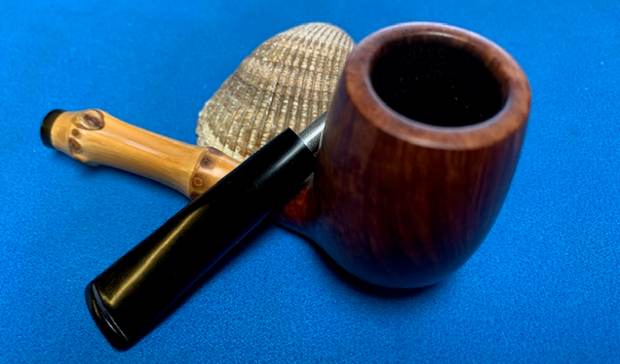
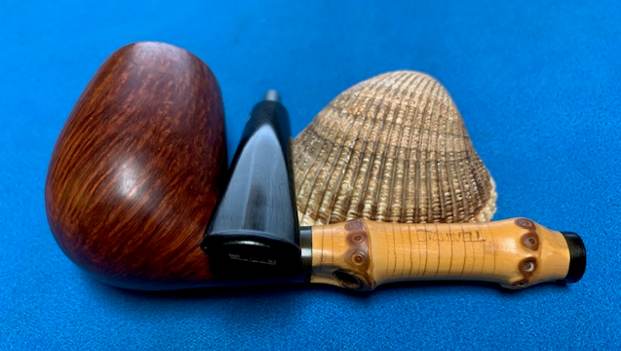
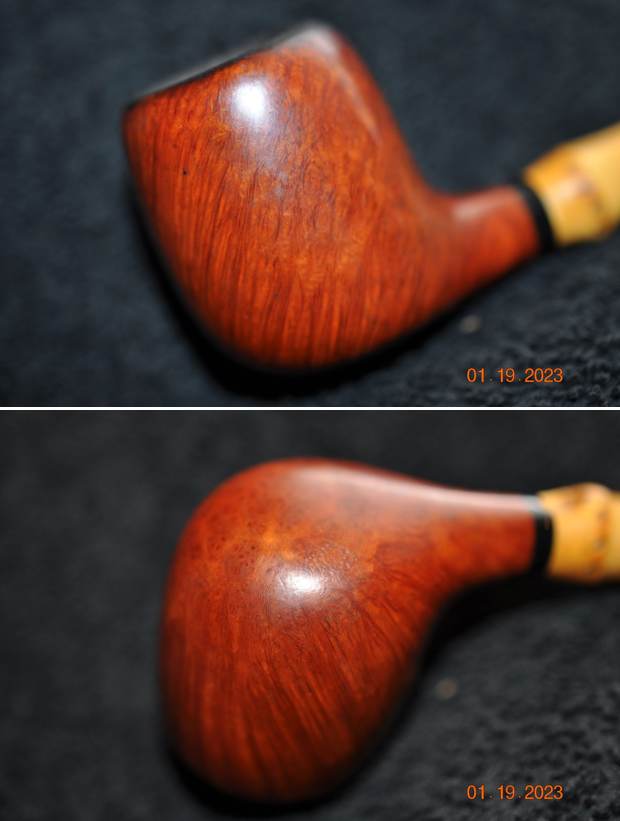
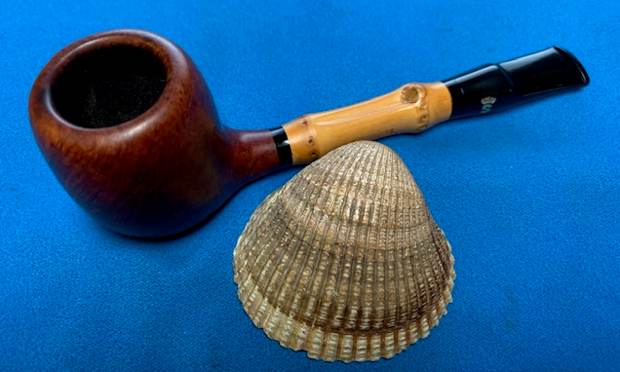
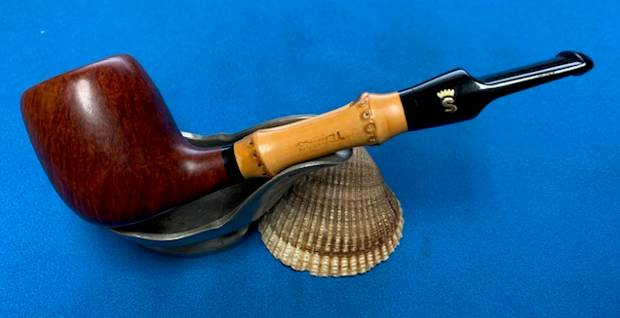
This rainy evening here in Vancouver I decided to work on was another one that was purchased on 11/14/2022 in a lot of pipes that came to us from Copenhagen, Denmark It included a group of Stanwell Bamboo pipe that are quite beautiful, combining a briar bowl, a bamboo shank and a an acrylic stem. The grain around the bowl and shank has a mix of straight and flame grain. The pipe is stamped on the left side of the bamboo and reads STANWELL. The pipe was a well used pipe when Jeff received it. There was dust and grime ground into the finish. The mixture of brown stains highlights some beautiful grain under the dirt. The bowl was heavily caked and there was an overflow of lava on the rim top. The inner edge was hard to see clearly and the lava could easily be hiding damage. The stem is acrylic and was dirty with light tooth marks and chatter on both sides ahead of the button and on the button itself. There is a brass/gold crown S logo inlaid on the left side of the saddle stem. Jeff took photos of the pipe before he started his clean up work on it.
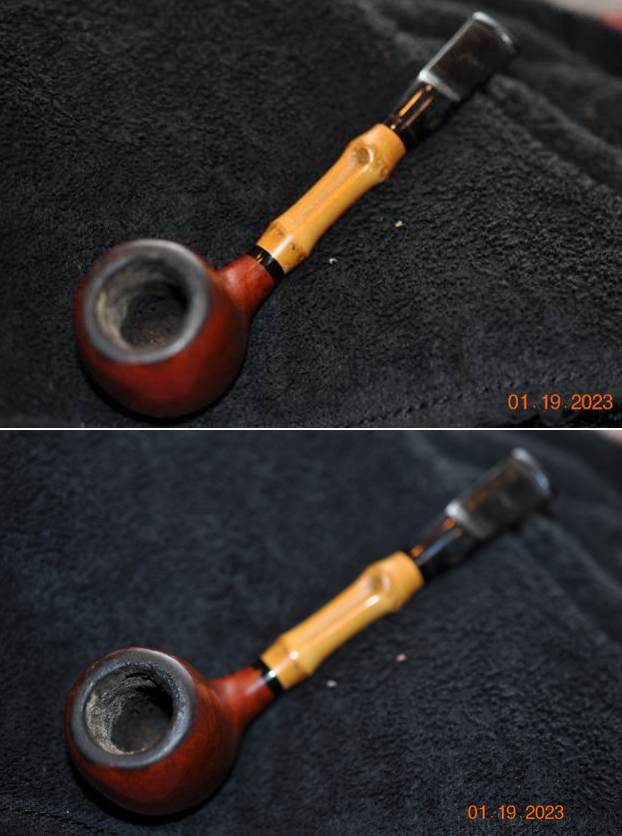 He took photos of the bowl and rim top to show what they looked like before his clean up. He also took some of the stem to show the condition of both sides.
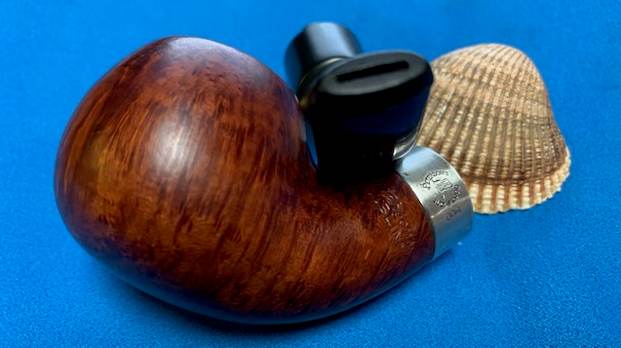
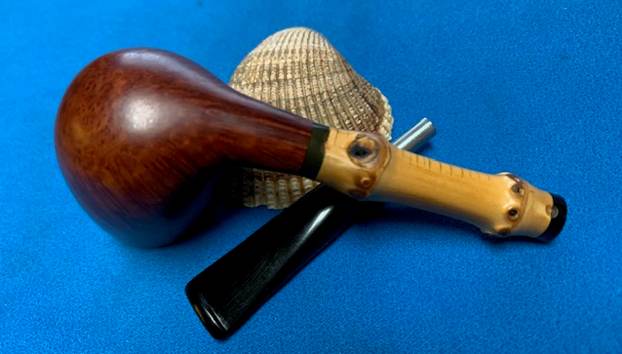
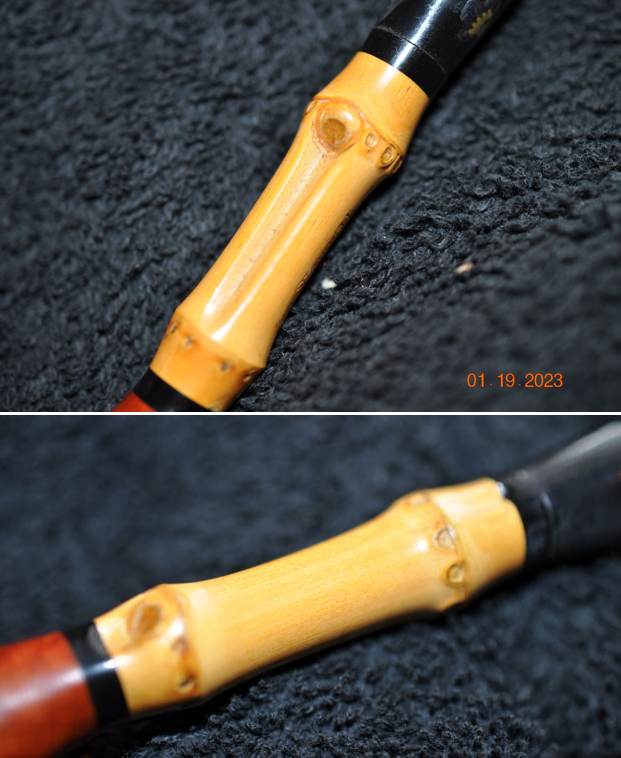
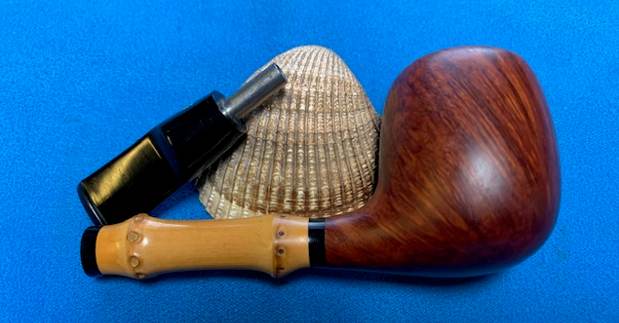
 The photos of the sides and heel of the bowl show the uniquely stained grain around the bowl and shank. The mixture of black and brown stains adds depth finish on the pipe. Even under the grime it is a real beauty. The two knuckle bamboo has a nice patina on it and will only get better with time.
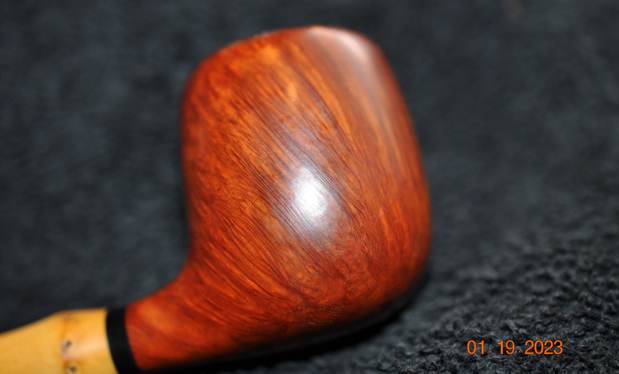
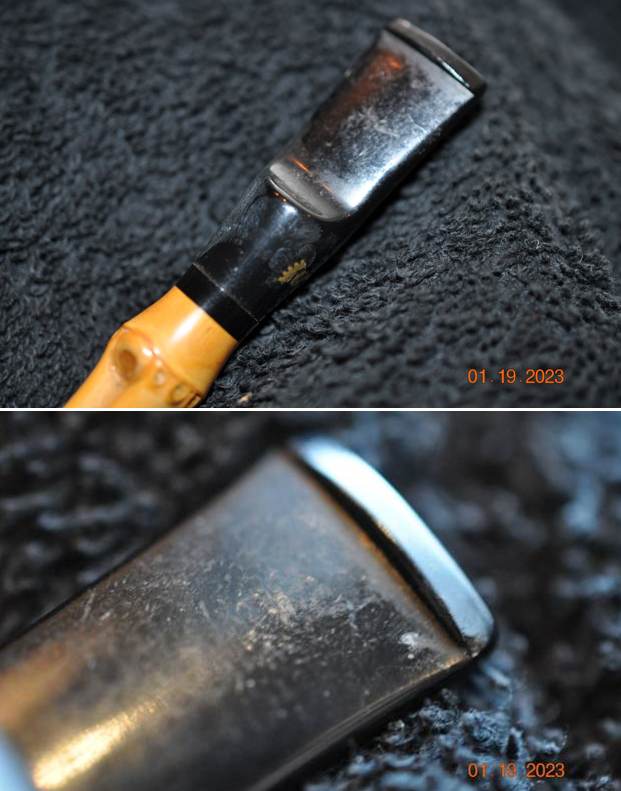
 The stamping on the left side the bamboo is shown in the photo below. It is clear and readable as noted above. The second photo shows the gold crown S on the stem side.
 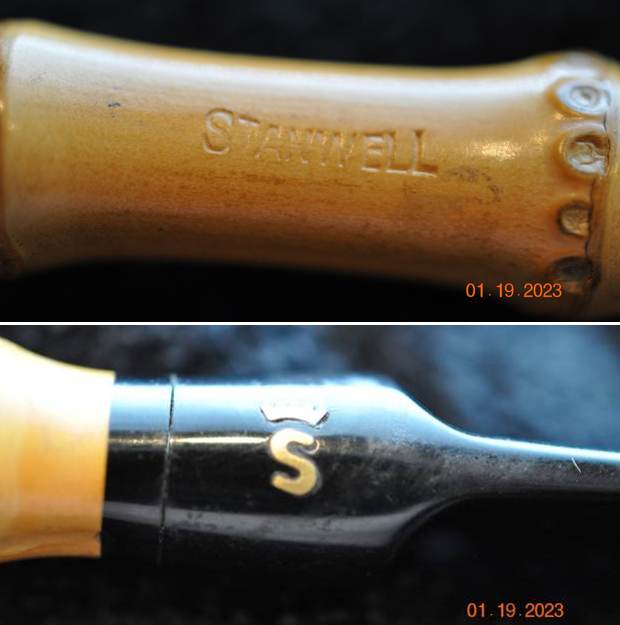 Before I started my work on the pipe I wanted to see if I could find any information that would help me date this pipe and get a sense of the line. I turned to Pipephil to get a quick review of the brand (http://pipephil.eu/logos/en/logo-stanwell.html). The Brass Crowned S inlaid logo on the stem is shown in the photo below. I have included a screen capture of the brand info there.
 I then turned to Pipedia (https://pipedia.org/wiki/Stanwell) for more information. The article is great and gives a lot of history on the brand. There were also links to catalogues at the bottom of the page. I am including a page from a catalogue on the site below that gives a bit of a glimpse into the brand. Here is the link (http://www.axeljeske.de/Pfeifen/Stanwell_Amager.pdf).
 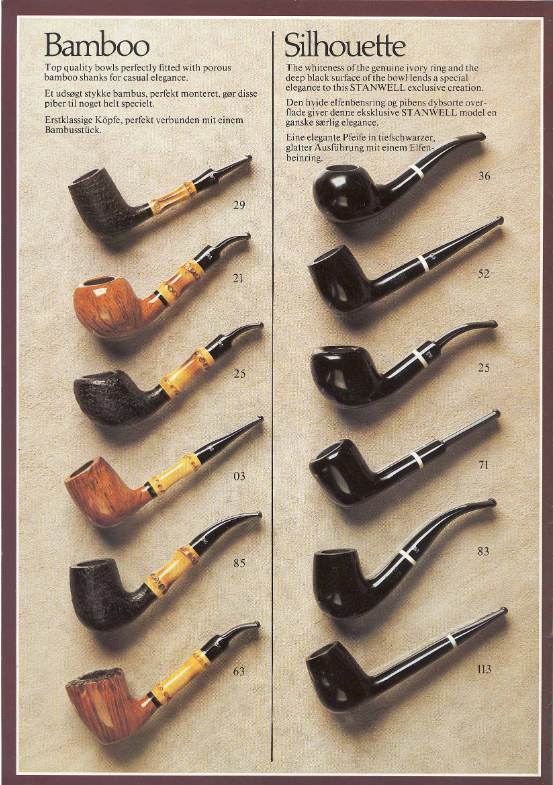 The catalogue page gives a great description of the Bamboo line. It reads as follows: Top quality bowls perfectly fitted with porous bamboo shanks for casual elegance.
Now it was time to work on the pipe.
Jeff had thoroughly cleaned up the pipe. He reamed the pipe with a PipNet Pipe Reamer and cleaned up the remnants with a Savinelli Fitsall Pipe Knife. He scrubbed the bowl with undiluted Murphy’s Oil Soap with a tooth brush. He rinsed it under running warm water to remove the soap and grime. He cleaned out the inside of the shank and the airway in the stem with alcohol, cotton swabs and pipe cleaners. He scrubbed the exterior of the stem with Soft Scrub to remove the grime and calcification. He soaked the stem in Before & After Deoxidizer and rinsed it off with warm water. The pipe looked very good when it arrived here in Vancouver.
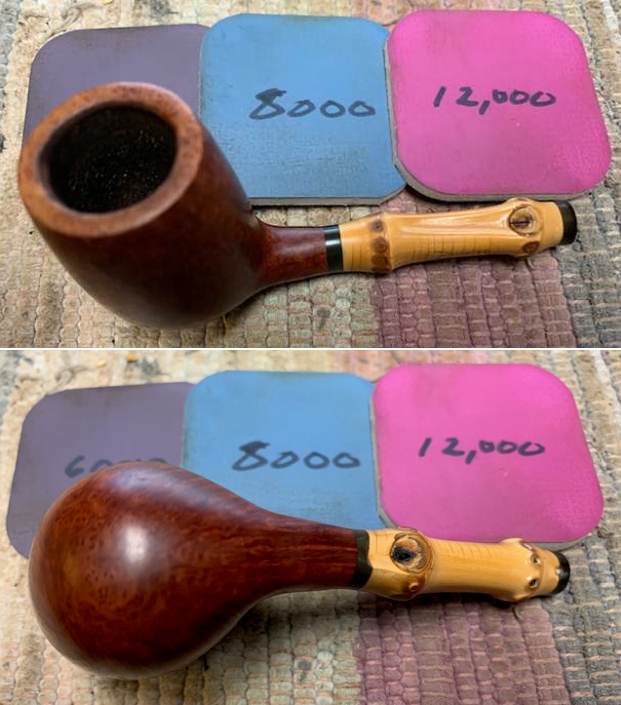
 I took close up photos of the bowl, rim and the stem. You can see the darkening and scratches on rim top and edges. The bowl is quite clean inside. The stem is in good condition with light tooth marks and some chatter as noted above.
 I took photo of the stamping on the left side of the shank. It is readable as noted above.
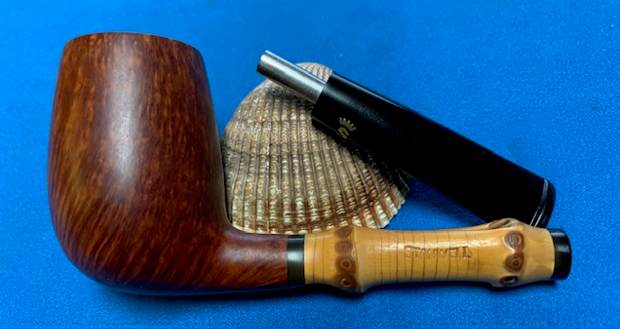
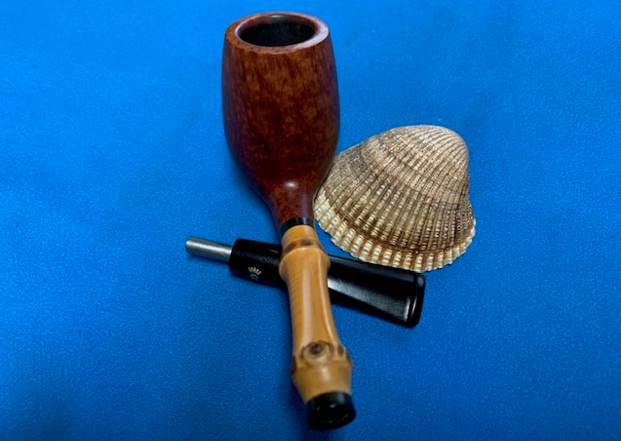
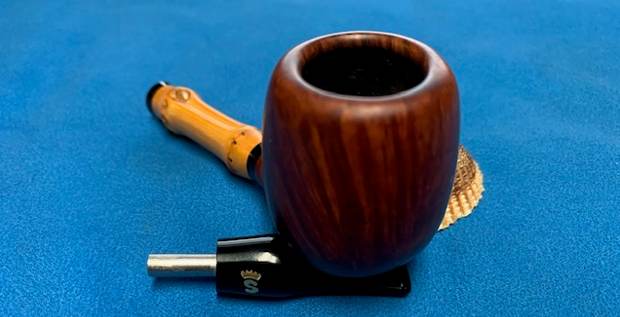
  I removed the stem from the shank and took a photo to give a sense of the proportions of the pipe.
 I started my work on the pipe working on the damage to the inner edge and the rim top with a folded piece of 220 grit sandpaper to bring the edge back into round and it looked much better.
 I polished the briar with micromesh sanding pads – dry sanding with 1500-12000 grit pads. I wiped the bowl down after each pad to remove the grit. The bowl began to take on a rich shine. It is a beauty.


 I rubbed the bowl down with Before & After Restoration Balm. I worked it into the briar with my finger tips. I let it sit for 10 minutes and the Balm did its magic. It enlivens, cleans and preserves the briar. It certainly brought this bowl back to life. I buffed it off with a clean cloth and took the following photos.

 I set the bowl aside and turned my attention to the stem. I was able to polish out the light tooth marks and chatter with micromesh sanding pads – 1500-12000 grit pads. I wiped it down with a damp cloth after each sanding pad. I used Before & After Pipe Polish – both Fine and Extra Fine to further polish the stem.
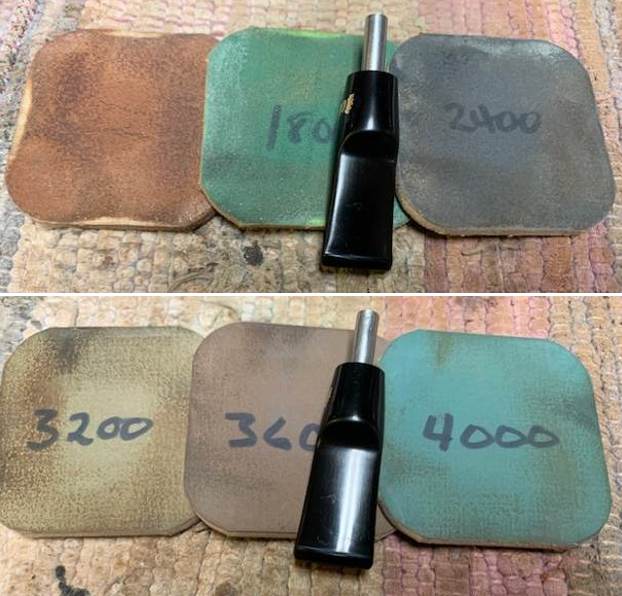
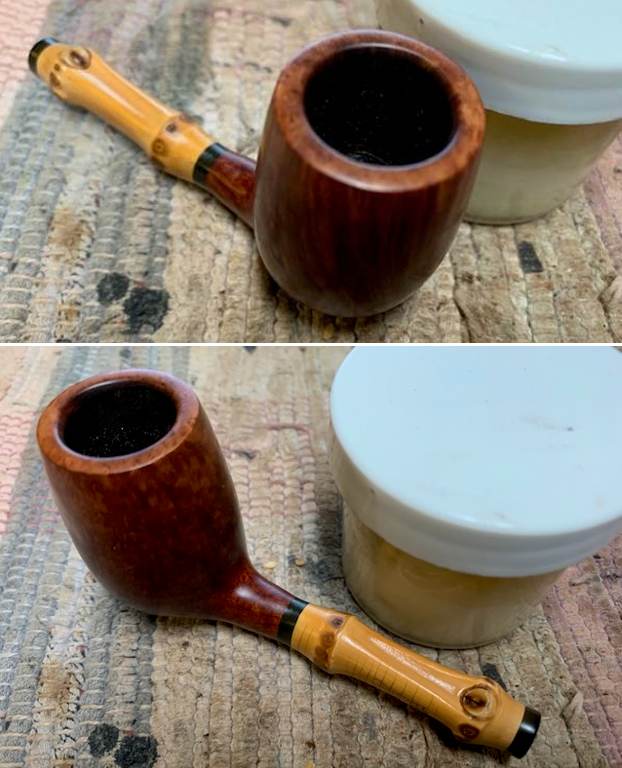
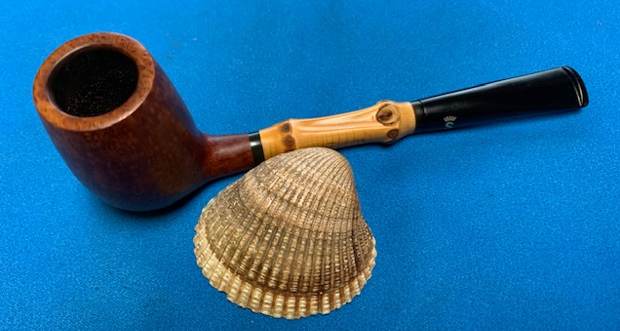
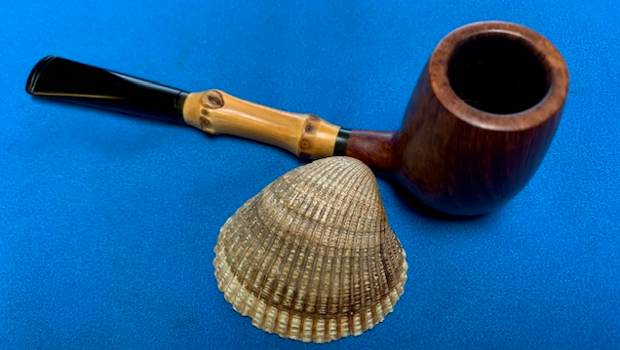
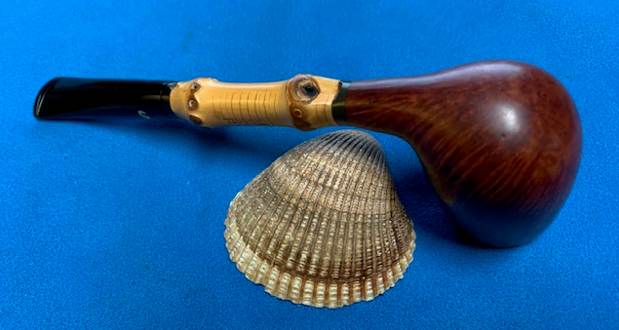
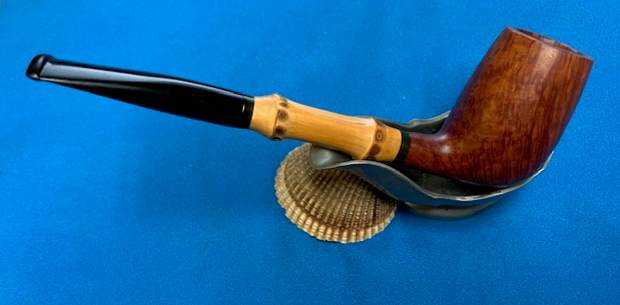
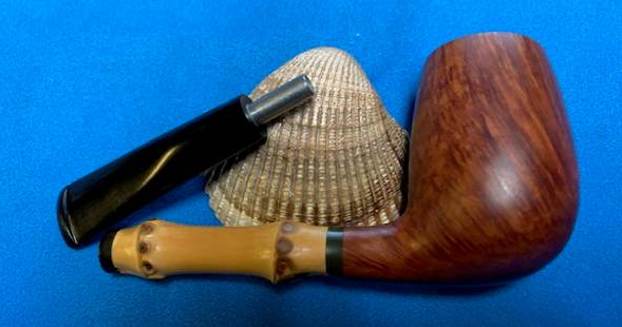
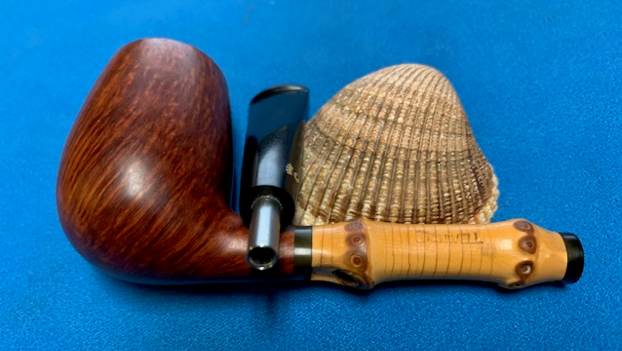
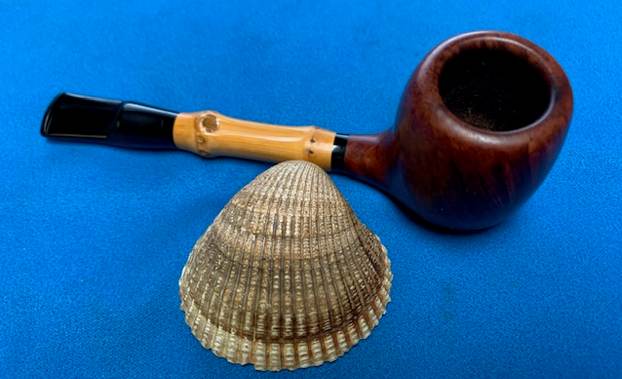
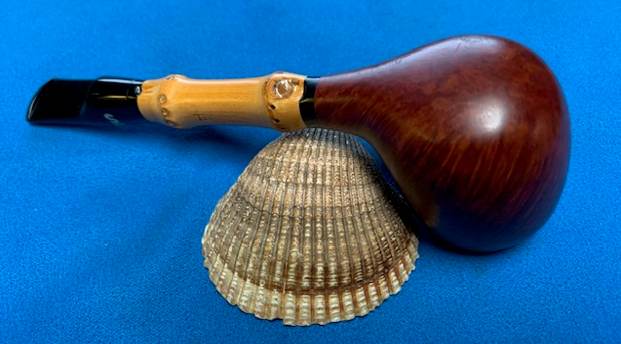
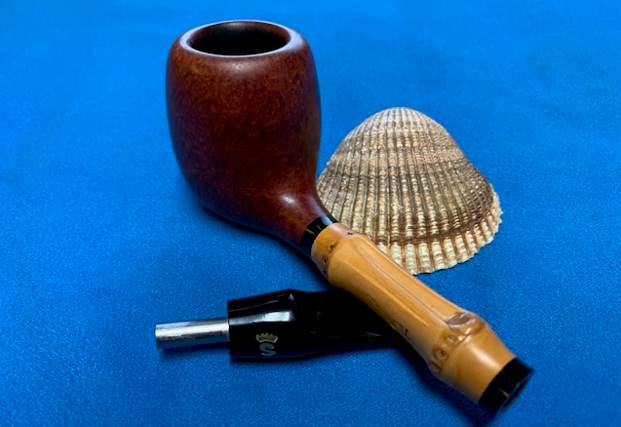
 This Stanwell Bamboo Apple with an acrylic saddle stem is a great looking pipe now that it has been restored. The beautiful finish really highlights the grain and the polished finish is stunning. I put the stem back on the bowl and carefully buffed the pipe with Blue Diamond on the buffing wheel. I gave the bowl and the stem multiple coats of carnauba wax on the buffing wheel and followed that by buffing the entire pipe with a clean buffing pad. I hand buffed the pipe with a microfiber cloth to deepen the shine. The finished Stanwell Bamboo Apple fits nicely in the hand and feels great. Give the finished pipe a look in the photos below. The dimensions of the pipe are Length: 5 ½ inches, Height: 1 ½ inches, Outside diameter of the bowl: 1 1/8 inches, Chamber diameter: ¾ of an inch. The weight of the pipe is 34 grams / 1.20 ounces. I will be adding the pipe to the Danish Pipe Makers Section of the rebornpipes store. If you are interested in purchasing this pipe send me a message or an email. Thanks for reading this blog and my reflections on the pipe while I worked on it.
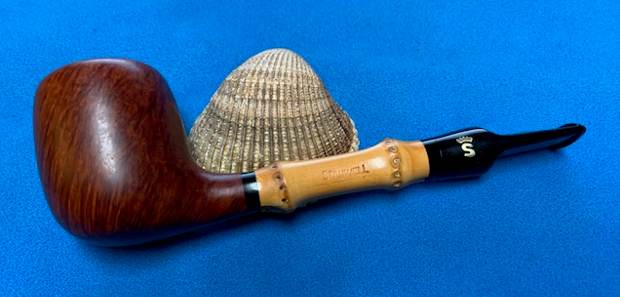


Blog by Steve Laug
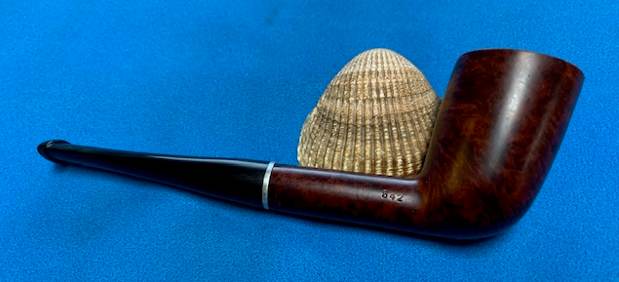
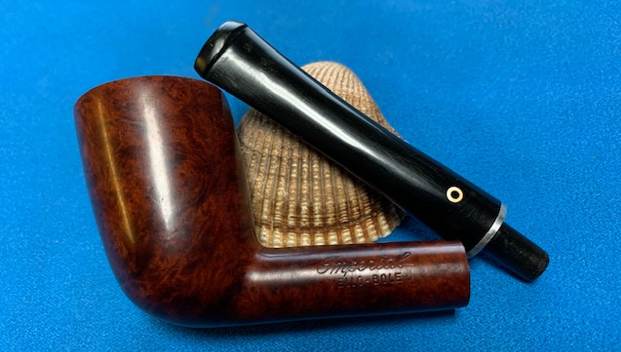
The next pipe on my table is the third and final pipe from threesome sent to for work from a fellow in Eastern Canada. This one is a smooth Dublin/Billiard. I found that it is stamped on the left side and read Imperial in script [over] Yello-Bole. On the right side it has the shape number 642 and on the heel it is stamped Carburetor next to the small aluminum tube in the heel. On the shank end where the stem and shank meet it is stamped Made in France. The bowl was hardly used and has a tube extending from the bottom of the bowl upward about 1/8 of an inch. Though there was some darkening in the bottom of the bowl the walls were still lined with the famous Yello-Bole honey coating and looked untouched. The bowl edges and rim top looked very good. The smooth finish was still shiny and new looking. The stem is probably vulcanite with a yellow circle on the left side of the taper and a huge chunk of vulcanite missing from the underside extending from the button forward about ½ inch. There were tooth marks and tooth chatter on both sides of the stem ahead of the button and on the surface. There was a Yello-Bole scoop stinger in the tenon that was also clean and undamaged. In looking at it I figured it would need a new stem. I took photos of the pipe before I started my work on it. 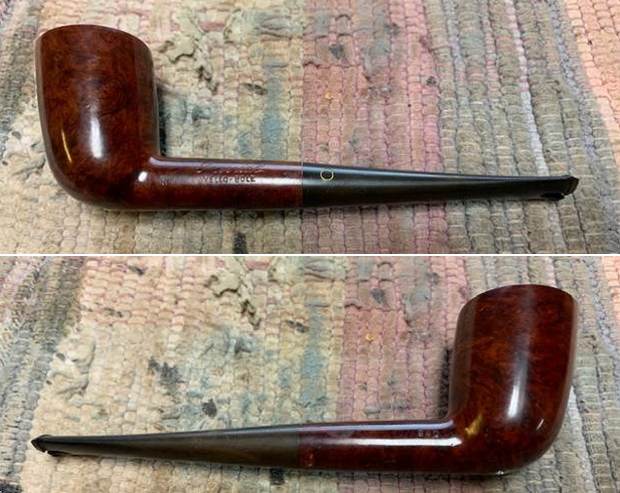
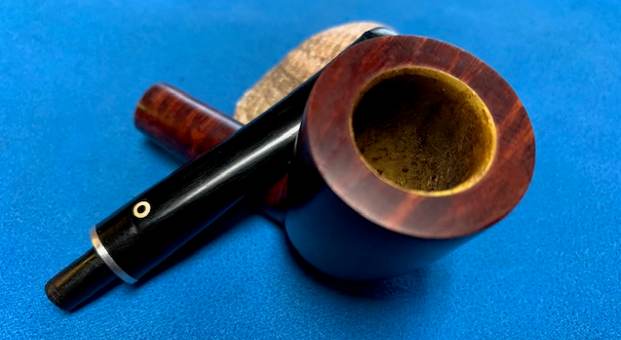
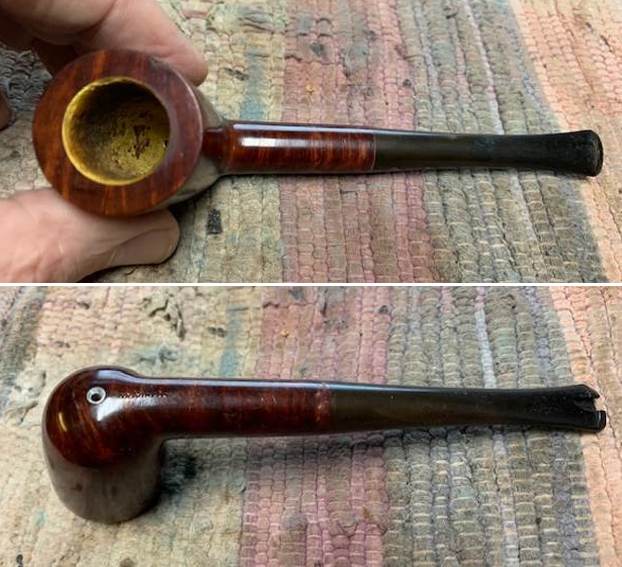 I took photos of the bowl and rim top to show what they looked like before I started my clean up. I also took some of the stem to show the condition of both sides and the large chunk of vulcanite missing on the underside.
 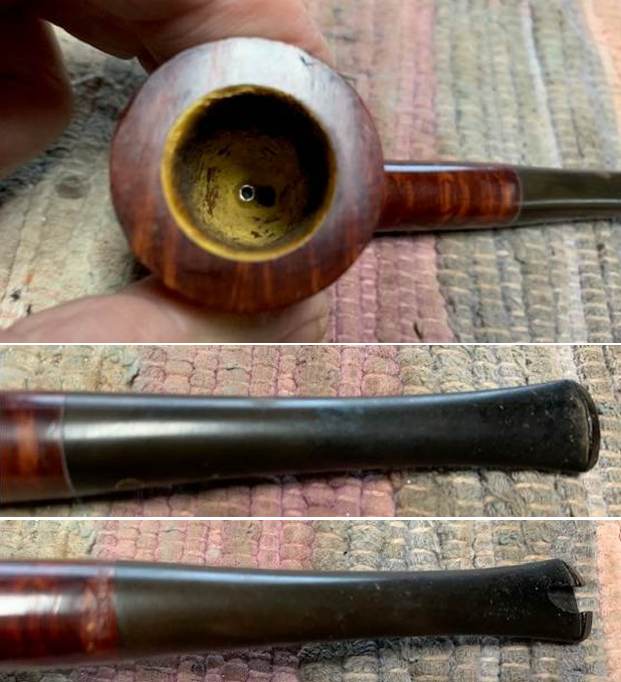 The stamping on the sides of the shank are shown in the photos below. They are clear and readable as noted above.
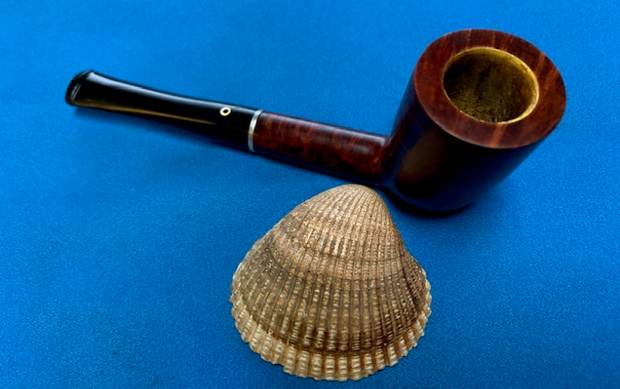
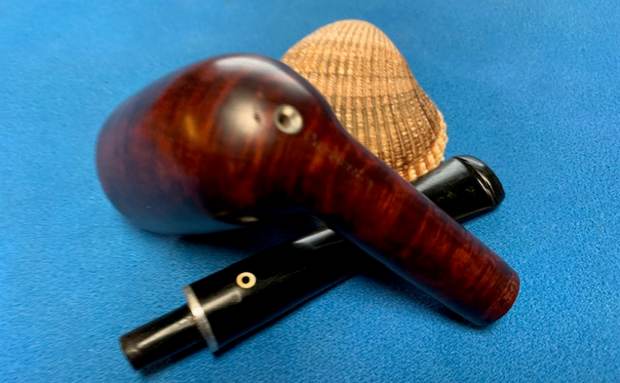
  I removed the stem from the shank and took a photo of them to show the perspective on the pipe. You can see the burn marks on the bowl and shank and the scratches and fills in the briar.
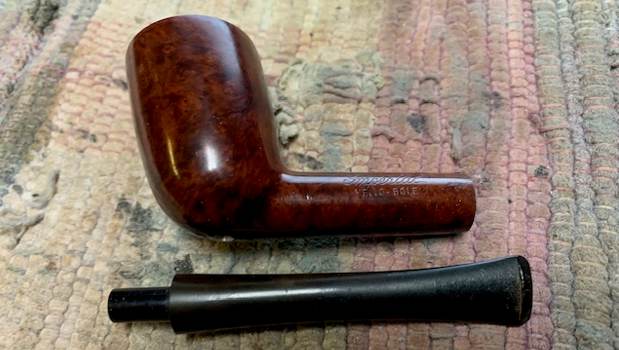 I turned my attention to the clean up of the pipe itself. The obvious place to start on this pipe was to find a stem that would fit in the shank and if possible be a Yello-Bole logoed stem. I found one in my collection of stems that had the length and tenon dimensions. It was a little larger in diameter than the original but with adjustments it would look good. The replace was not new and had tooth marks and dents on the button end but otherwise looked good.
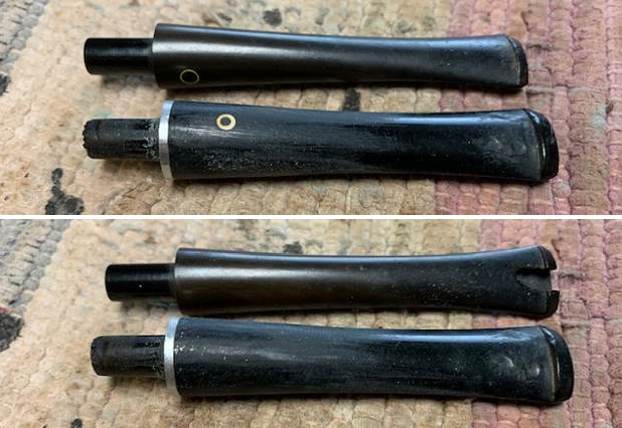 I fit it in the shank and worked on the diameter of the stem with a flat file to remove the excess material on the aluminum band and the vulcanite. It took some work and careful filing but it worked fairly well.
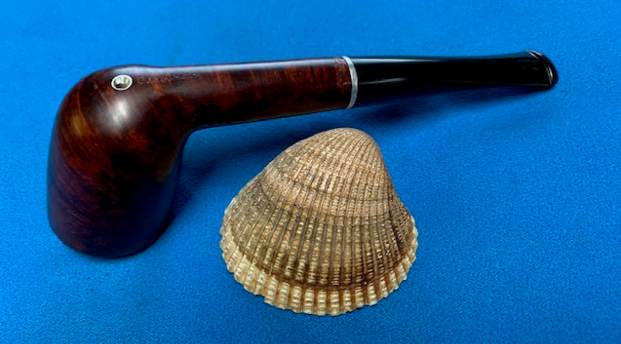
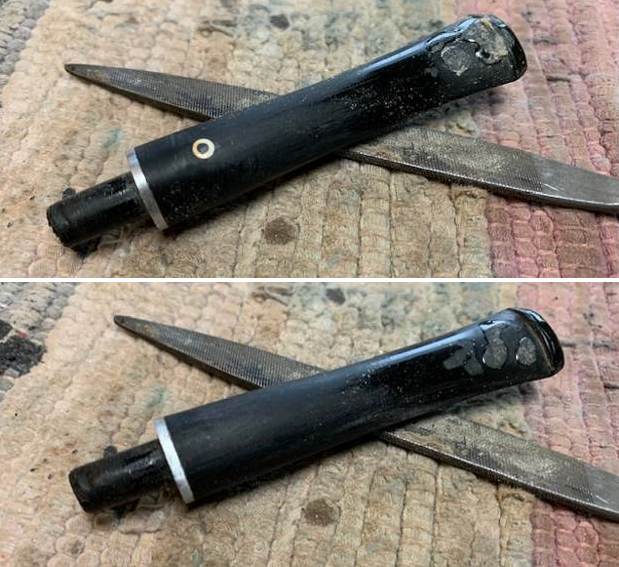
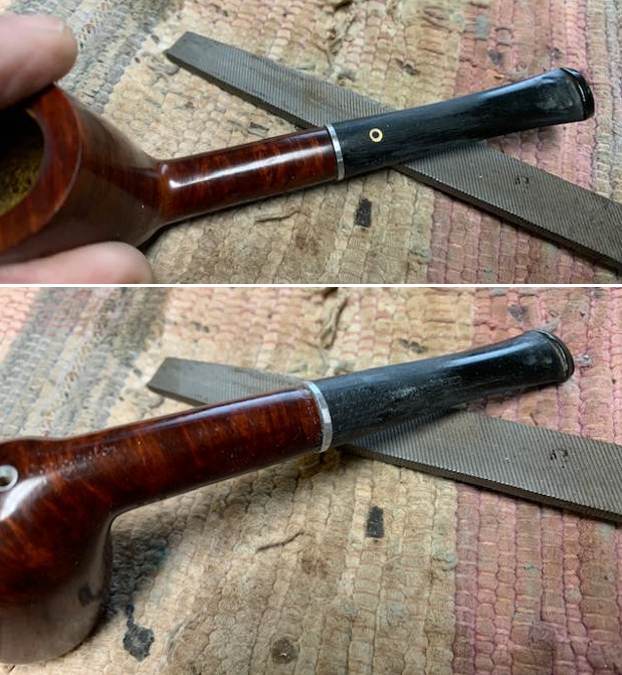 I took the following photos of the stem after I had filed it down. It looked quite good at this point in the process. I would need to fine tune the fit with sandpaper but I liked the direction it was going.
 I filled in the marks that remained with clear CA glue. When the repairs cured I used a small file to reshape the button edge and flatten out the repairs. I sanded the repairs 220 grit sandpaper to blend them into the surface. I started the polishing process with 600 grit wet dry sandpaper.
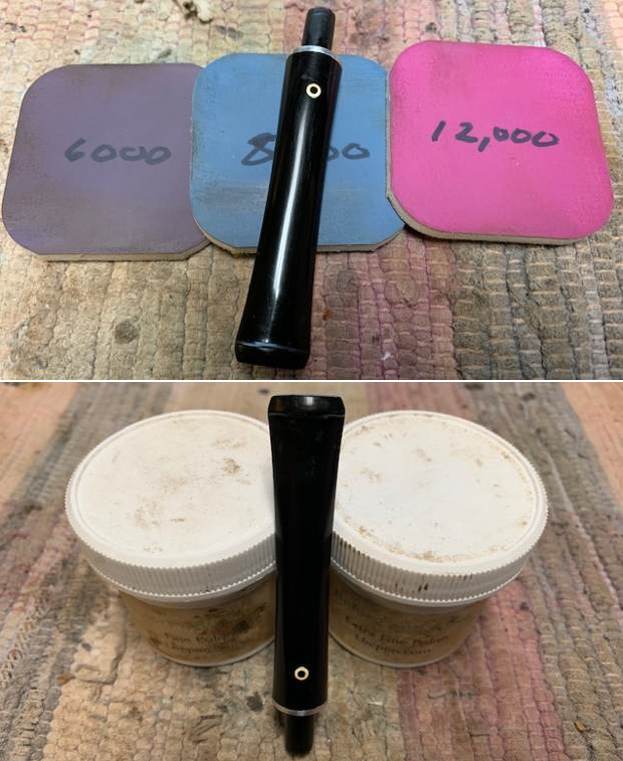
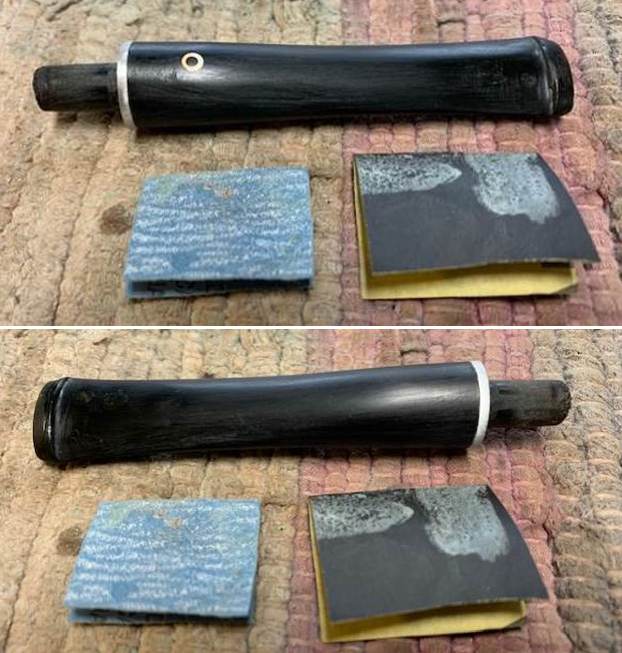 I polished the stem with micromesh sanding pads – 1500-12000 grit pads. I wiped it down with a damp cloth after each sanding pad. I used Before & After Pipe Polish – both Fine and Extra Fine to further polish the stem.
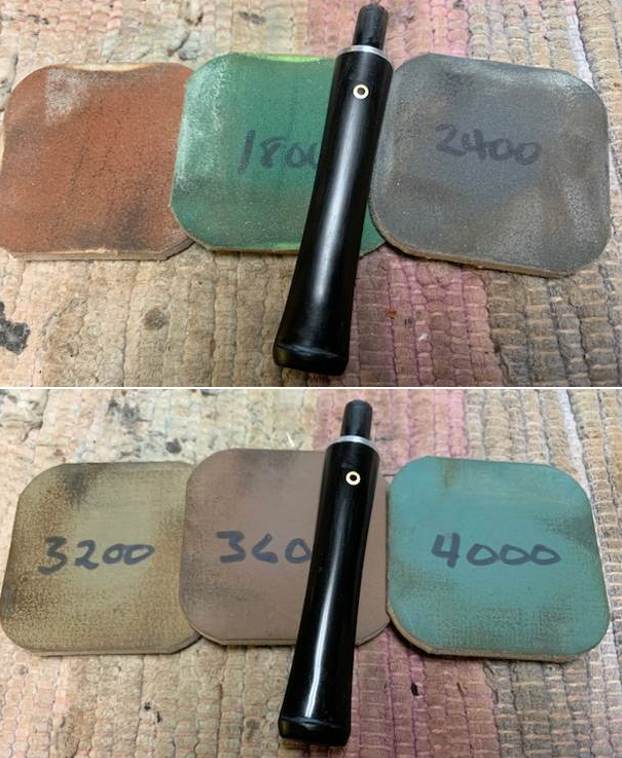
 I cleaned out the internals of the shank and stem with pipe cleaners, cotton swabs and isopropyl alcohol.
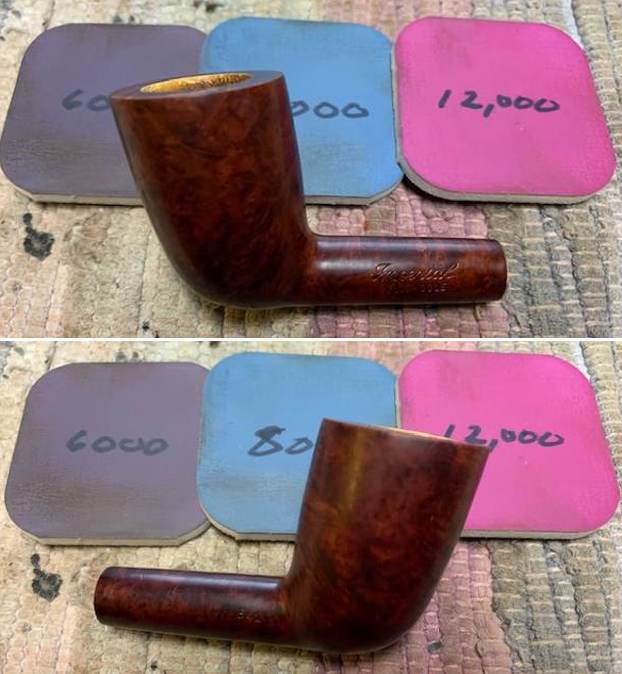
  Since the bowl exterior was so clean I polished it with micromesh sanding pads – dry sanding with 1500-12000 grit pads. I wiped the bowl down after each pad to remove the grit. The bowl began to take on a rich shine. The briar took on a newer, richer look.

 I rubbed the bowl down with Before & After Restoration Balm. I worked it into the briar with my finger tips and into the rusticated portion with a shoe brush. I let it sit for 10 minutes and the Balm did its magic. It enlivens, cleans and preserves the briar. It certainly brought this bowl back to life. I buffed it off with a clean cloth and took the following photos.
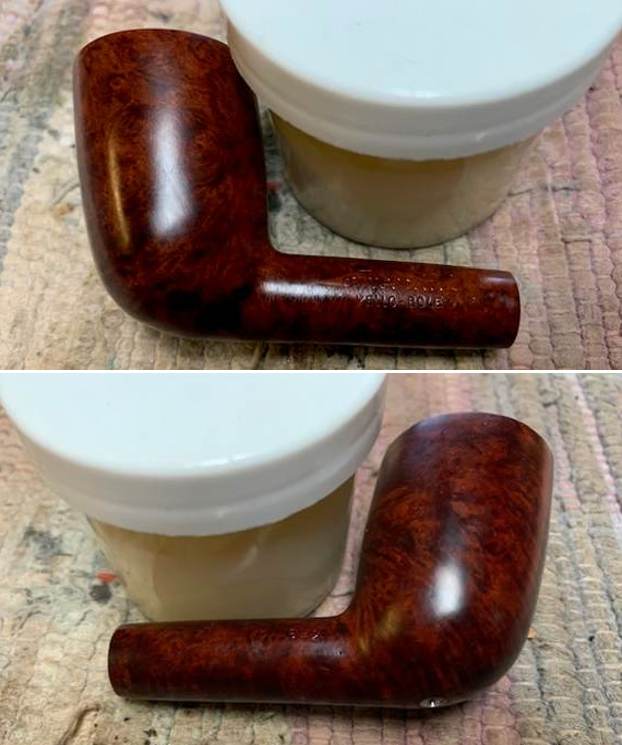
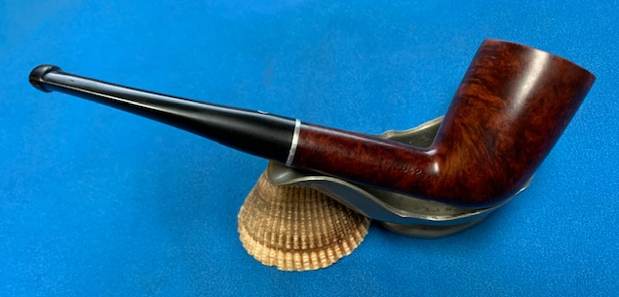
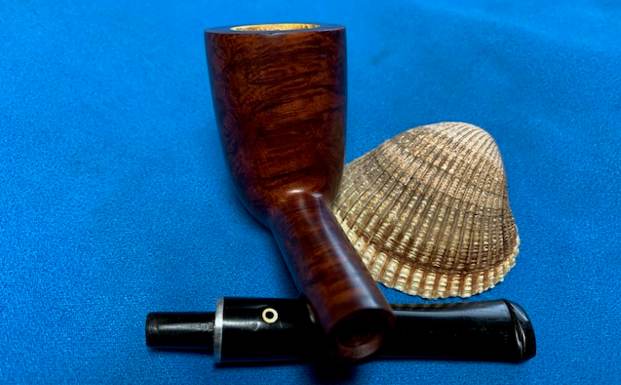
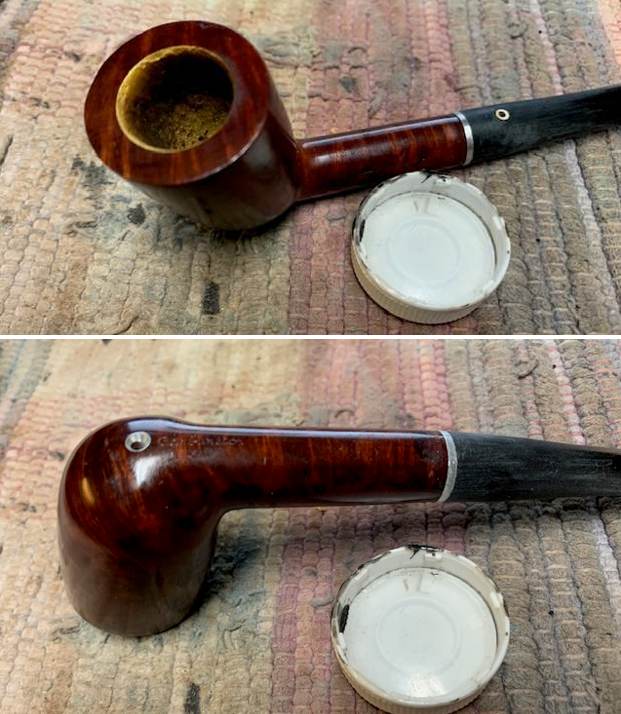
 This Yello-Bole Imperial 642 Dublin is a great looking pipe with its replacement stem and restoration. The smooth, rich red finish highlights the grain of the pipe. I put the new stem back on the bowl and carefully buffed the pipe with Blue Diamond on the buffing wheel. I gave the bowl and the stem multiple coats of carnauba wax on the buffing wheel and followed that by buffing the entire pipe with a clean buffing pad. I hand buffed the pipe with a microfiber cloth to deepen the shine. The finished Yello-Bole Dublin fits nicely in the hand and feels great. Give the finished pipe a look in the photos below. The dimensions of the pipe are Length: 5 ¾ inches, Height: 1 ½ inches, Outside diameter of the bowl: 1 ½ inches, Chamber diameter: 7/8 of an inch. The weight of the pipe is 50 grams/1.76 ounces. I have one more pipe for this Eastern Canada Pipeman to work on. Once I have finished all three I will be sending them back to him to enjoy. Thanks for reading this blog and my reflections on the pipe while I worked on it.