Blog by Steve Laug
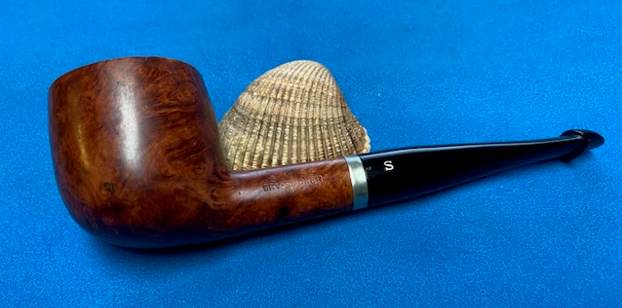
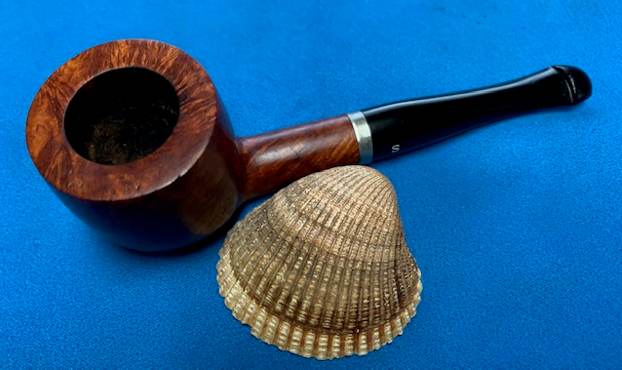
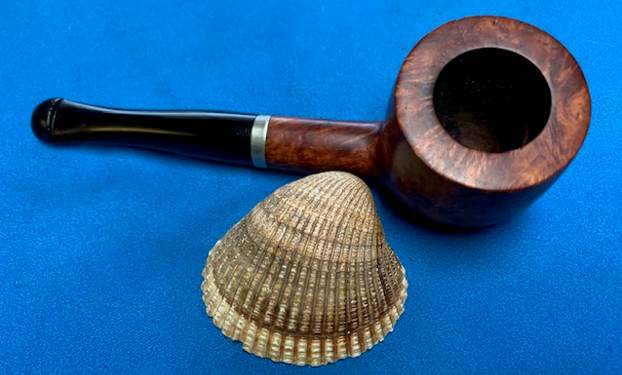
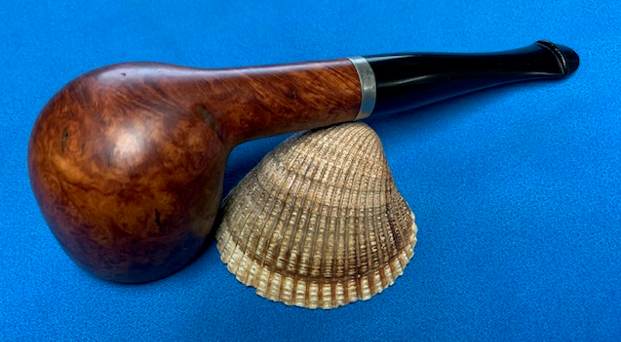
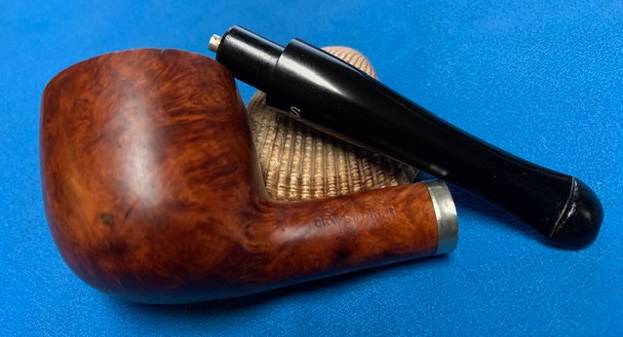
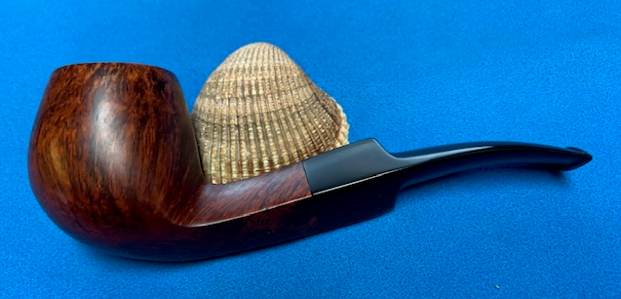
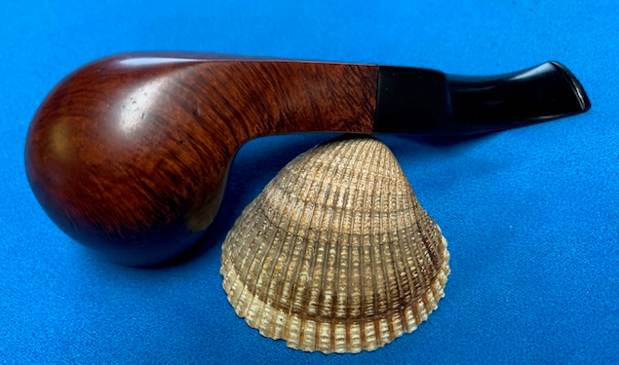
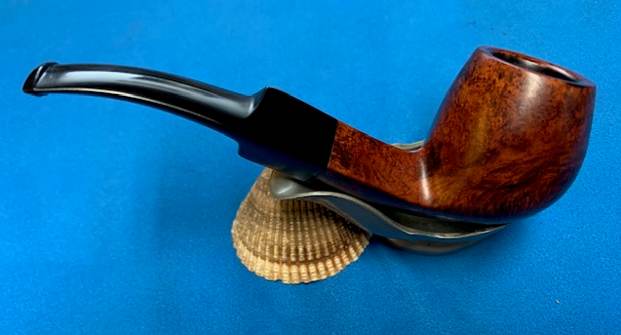
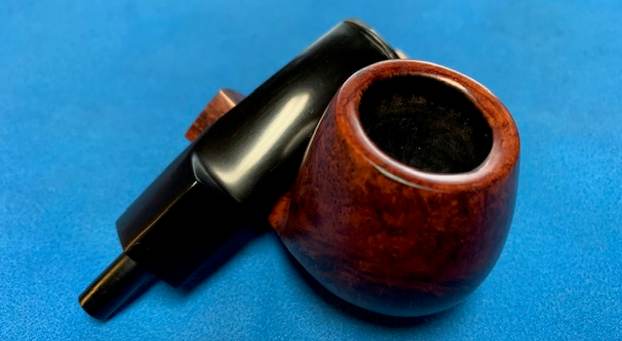
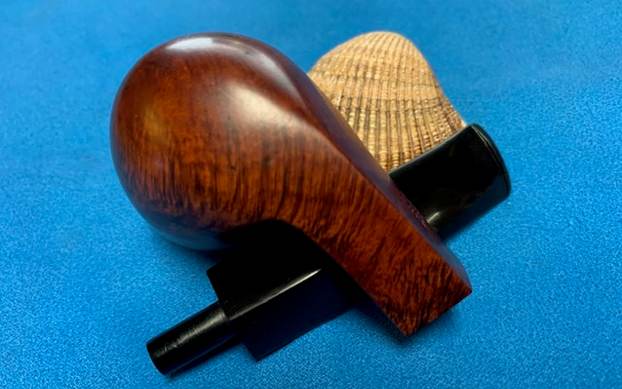
The next pipe on my table was part of threesome sent to for work from a fellow in Eastern Canada. This one is a pot shaped one that on first glance I thought was a Peterson’s Shamrock. This morning when I brought it to the table and examined it I found that it was not a Shamrock or a Peterson Product at all. Rather, it is stamped on the left side and read Swiss [over] Dry-Smoker. On the right side it reads Algerian Briar [over] Made in France. The bowl had a light cake and there was some darkening on the back rim top and edge of the bowl. There was some peeling varnish on the exterior of the bowl and shank. There were also burn marks on the left side of the bowl toward the front and on the left underside of the shank. The bowl had several grey putty fills on the heel of the bowl and on the right side at the shank bowl junction. They do not look deep but they are present in the finish. The shank end has a nickel ferrule. Looking inside the shank and the bowl were two airway entries at the bottom of the bowl and twin aluminum tubes in the end of the mortise. The stem is vulcanite and has a faux P-lip with the exit of the airway at the end of the button rather than on top. There were tooth marks and tooth chatter on both side of the stem ahead of the button and on the surface. It is stamped with an S on the left side of the taper stem. I took photos of the pipe before I started my work on it. 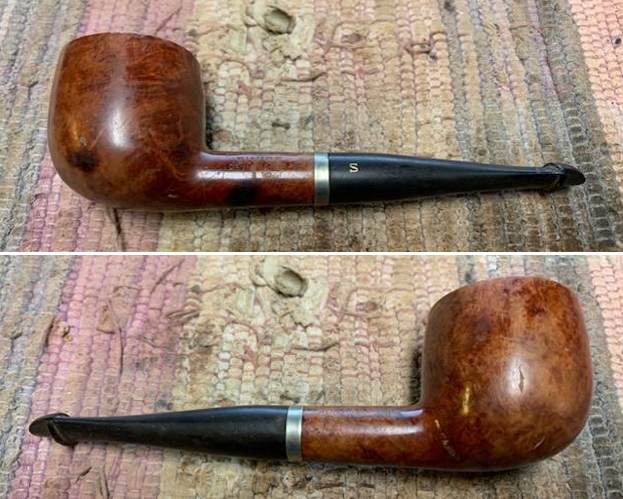
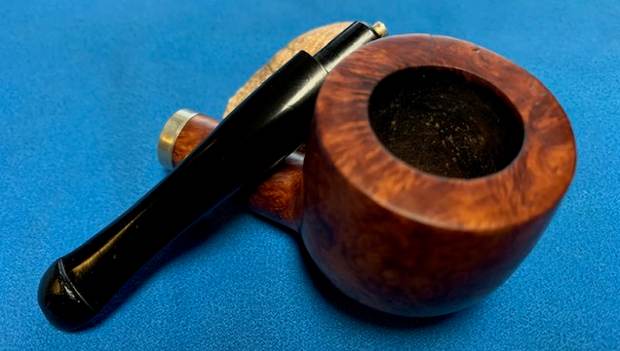
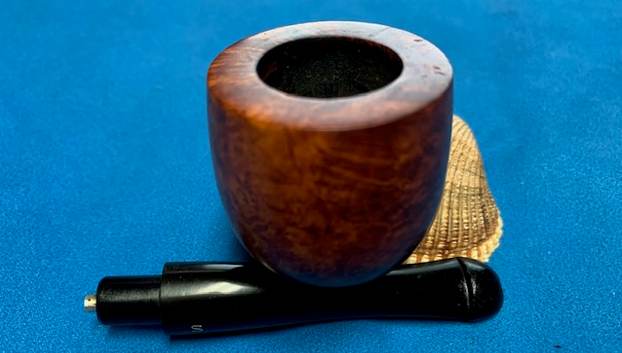
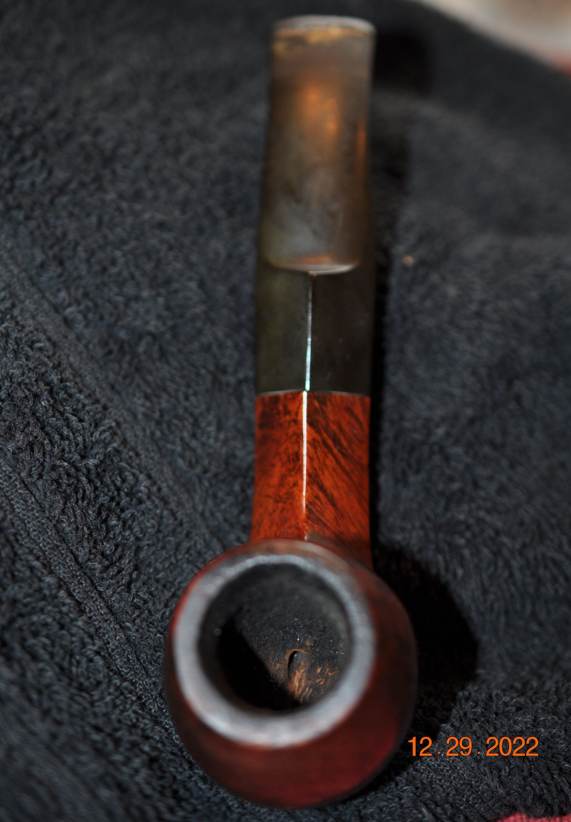
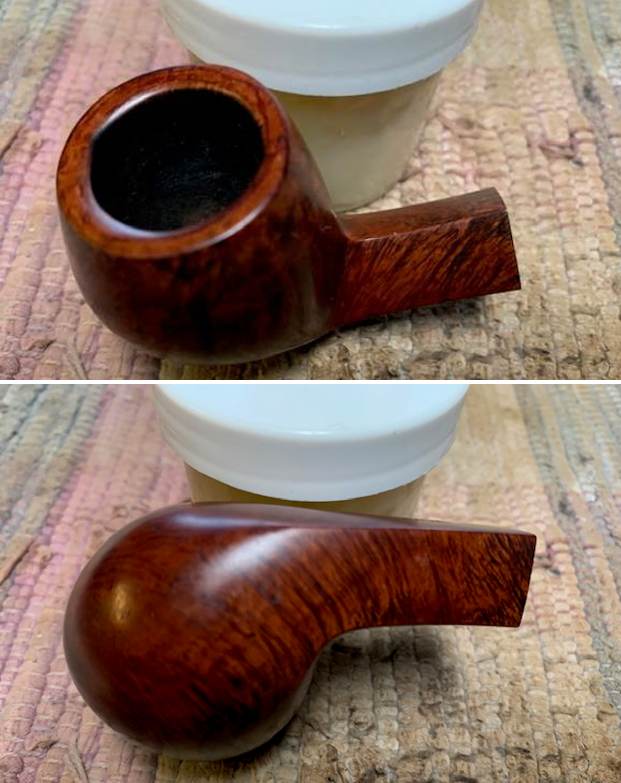
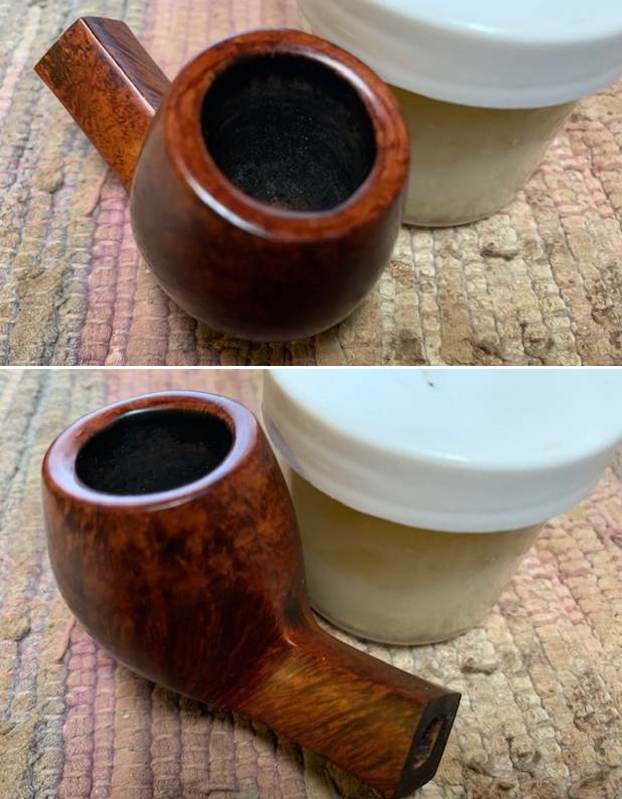
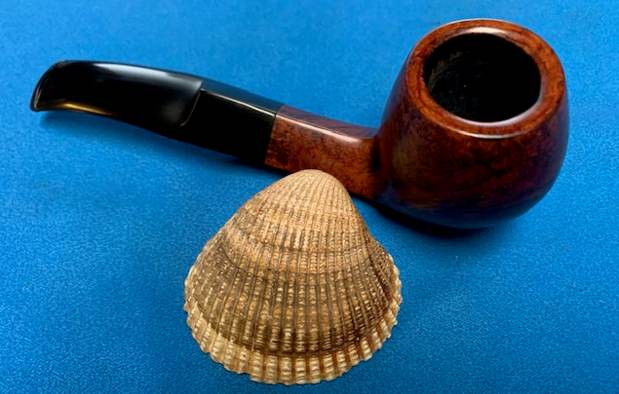
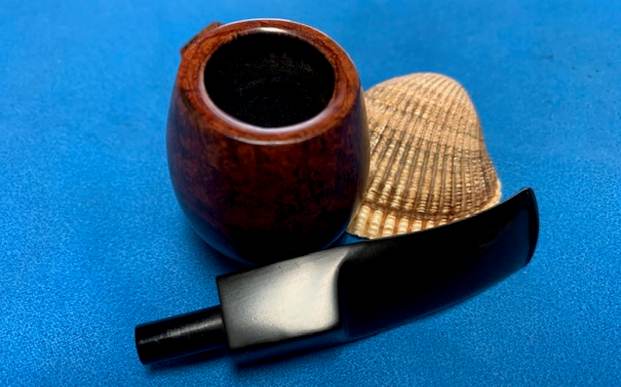
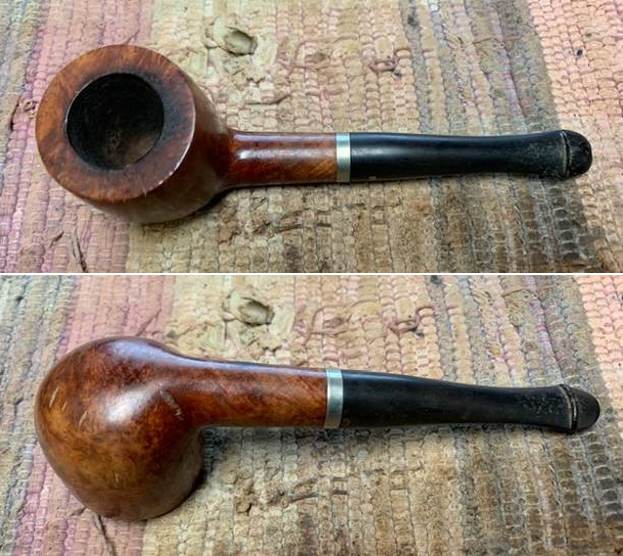 I took photos of the bowl and rim top to show what they looked like before I started my clean up. I also took some of the stem to show the condition of both sides.
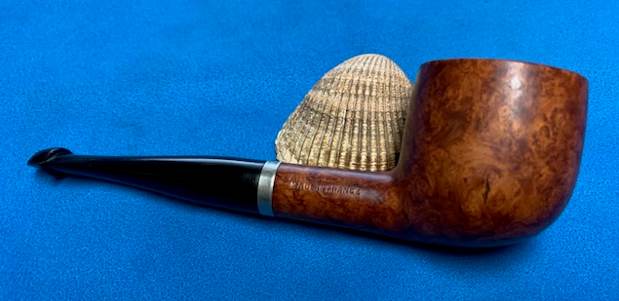
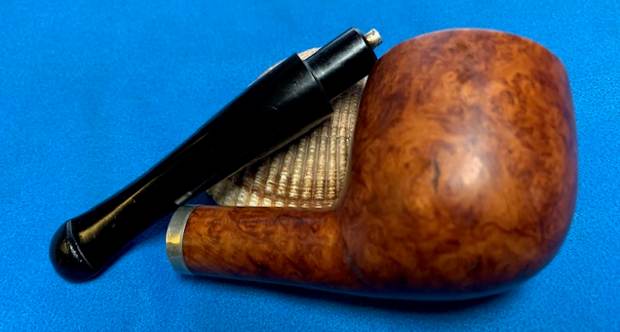
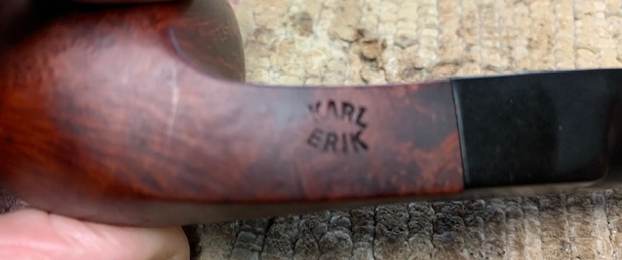
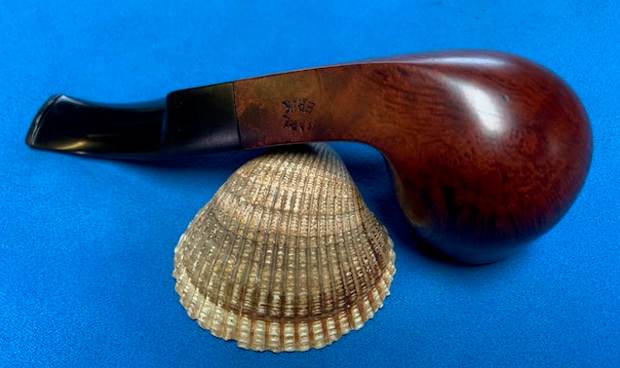
 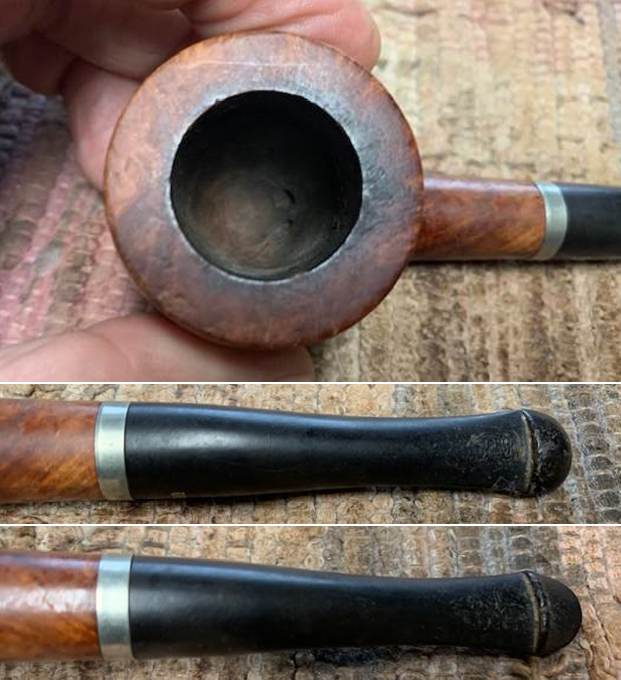 The stamping on the sides of the shank are shown in the photos below. They are clear and readable as noted above.
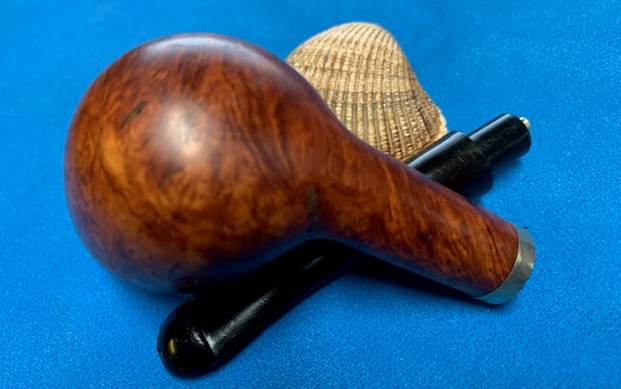
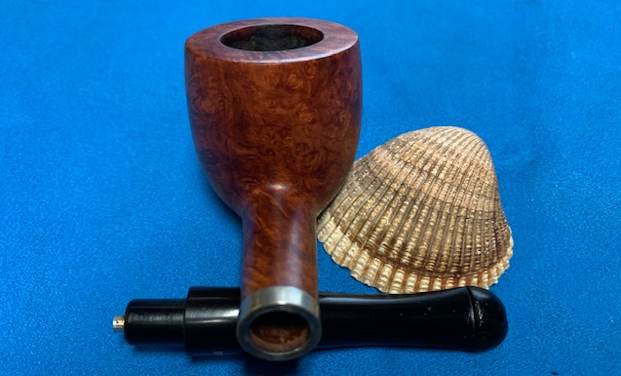
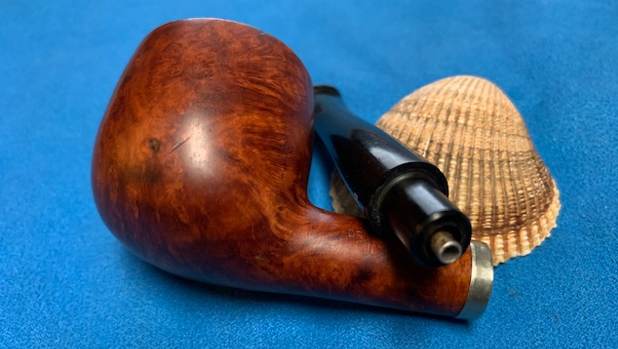
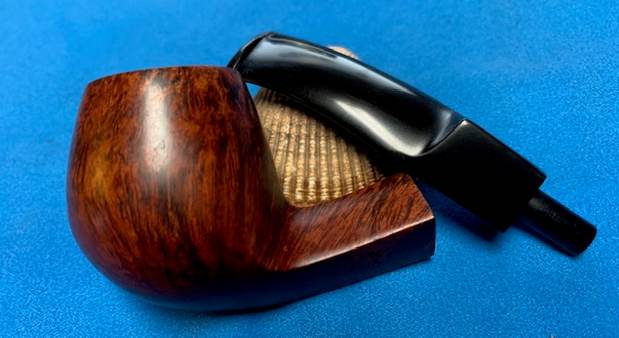
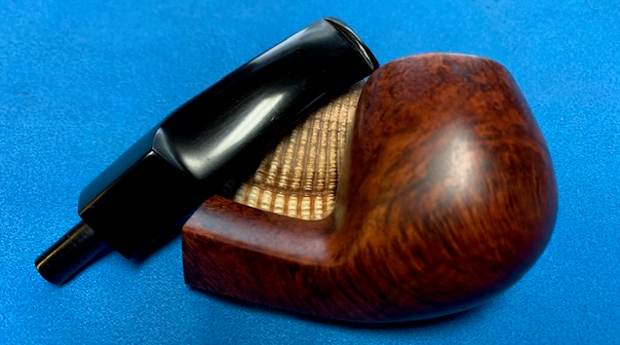
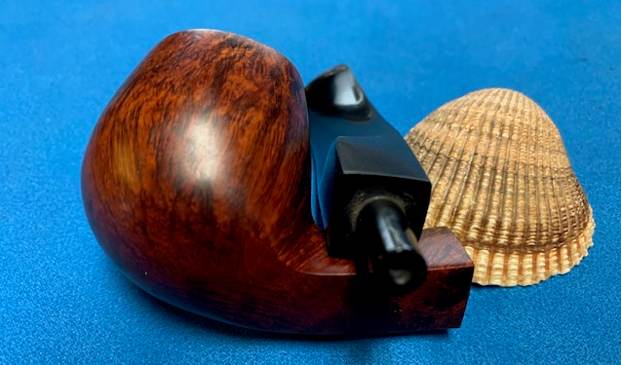
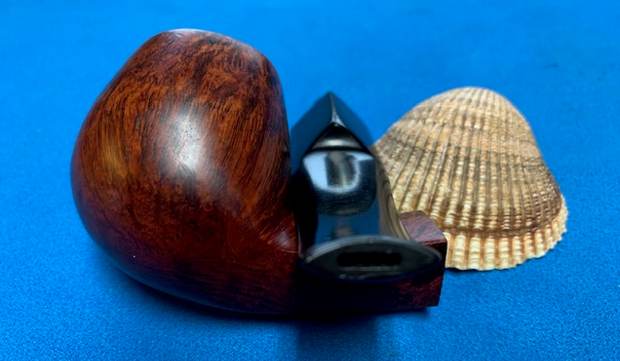
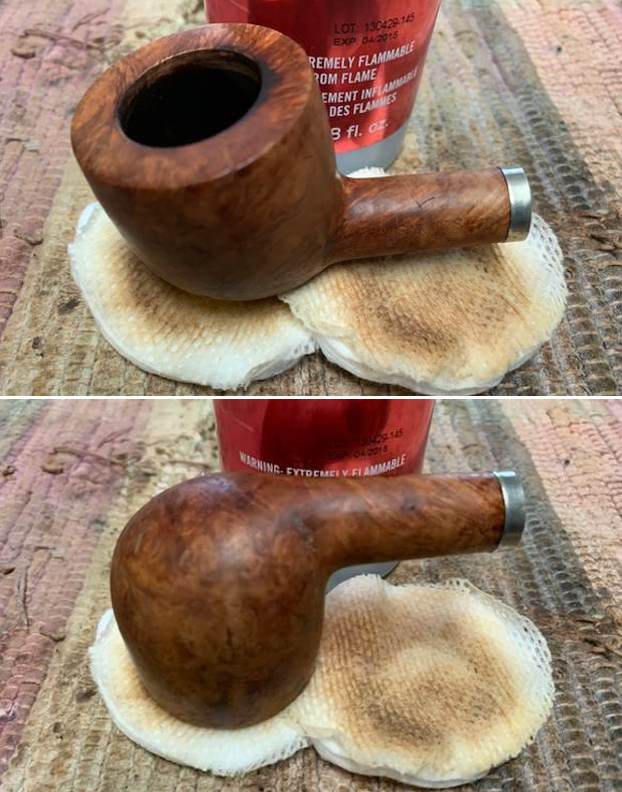
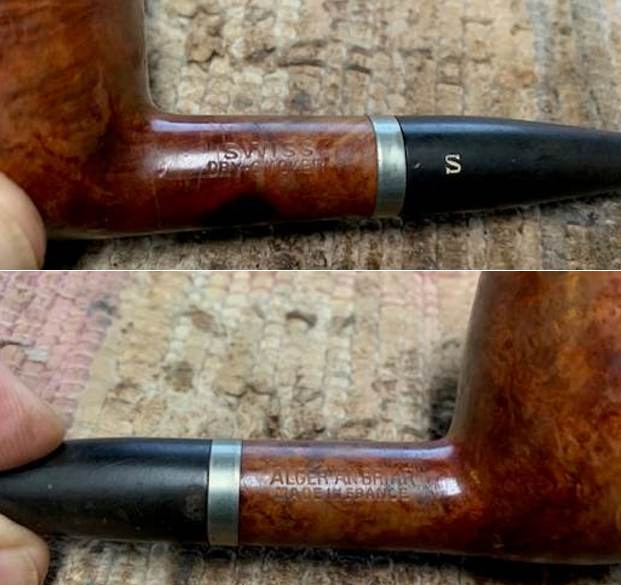 I removed the stem from the shank and took a photo of them to show the perspective on the pipe. You can see the burn marks on the bowl and shank and the scratches and fills in the briar.
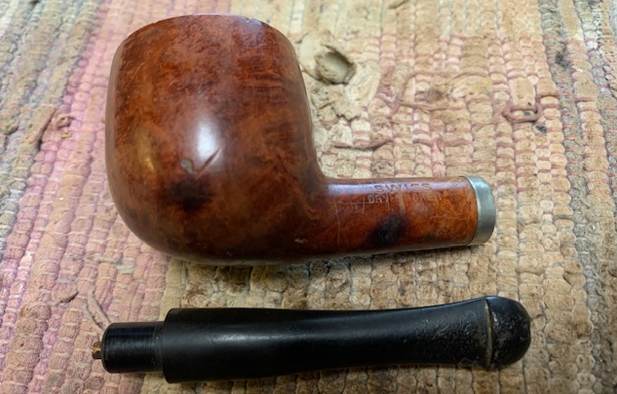 I turned to Pipephil’s site to see what I could learn about the French made Algerian Briar, Swiss Dry-Smoker brand (http://pipephil.eu/logos/en/logo-s14.html). I found the listing there but little background information on it.
 I followed a link at the bottom of the listing to a section on the shape and design of the stem (http://pipephil.eu/logos/en/infos/p-lip-en.html). It is noted as a Swiss brand but is clearly stamped Made in France. I have included a screen capture of the section below.
 I googled the brand and found a discussion on Pipesmagazine.com about the Swiss Dry- Smoker (https://pipesmagazine.com/forums/threads/swiss-brand-pipes.1986/). In a thread there I found this information as well as a link to a Patent file.
Jun 27, 2014 I recently obtained a SWISS Dry Smoker myself. Its construction is along the line of the Peterson, however the “Well” is not like a Peterson nor the WDC Well System or the Kaywoodie/Yello Bole Chesterfield’s. It has what appears to be a brass tube with a slot that allows the moisture to be collected into it. This tube is aprox 1/8 diameter and seems to be about 3/4″ deep. The stem tip looks on the exterior like a P-Lip but the hole comes out straight and not towards the roof of the mouth.
More on this later with pics. I did find this Patent which may be related.
DRY SMOKING PIPE
I followed the Patent information link and found the application for a similar looking pipe from 1909. I am including that information and drawing below. (https://patentimages.storage.googleapis.com/54/b4/bd/6175f3f8539de1/US914498.pdf). I don’t believe the pipe I am working on is related to this one in other than the similar two air holes entering the bowl and the single brass line in the stem. The rest of the apparatus is not present in this pipe.

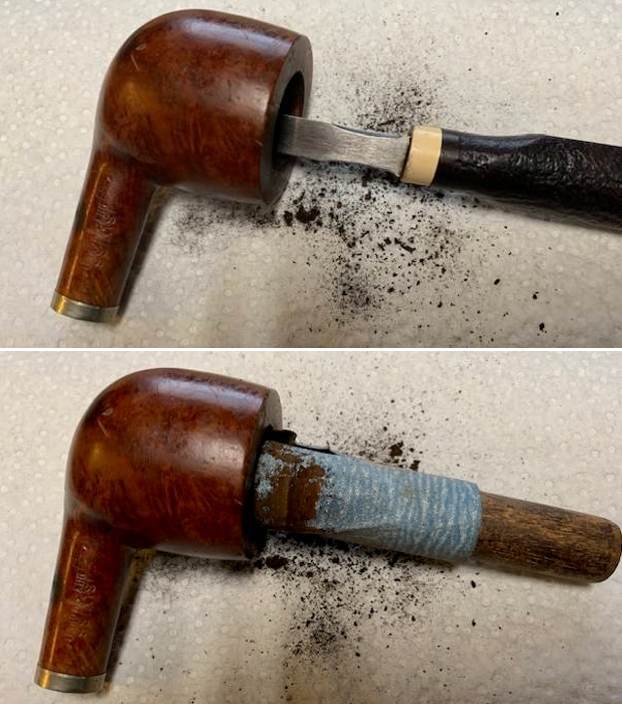
 Armed with the information that I found online I turned my attention to the clean up of the pipe itself. I reamed out the remaining cake in the bowl with a PipNet pipe reamer and took the cake back to bare briar. I cleaned up the remnants in the bowl with a Savinelli Fitsall Pipe Knife. I finished the interior of the bowl with a piece of dowel wrapped in 220 grit sandpaper. The bowl looked very good with no damage or checking on the walls.
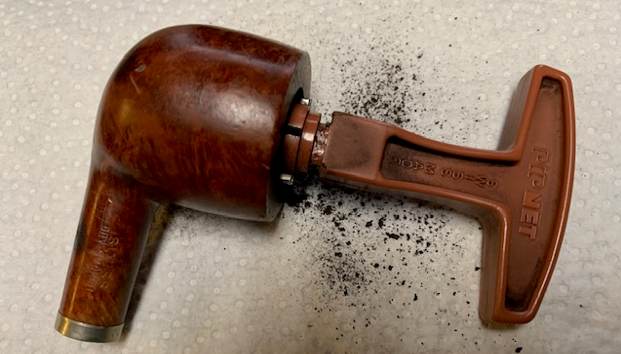
 I scrubbed the externals of the bowl with a tooth brush and undiluted Murphy’s Oil Soap. I worked over the bowl and the rim top. I rinsed with warm water to remove the debris and the soap. Once I dried it off you can see that there were still remnants of varnish on the briar that I would need to remove.
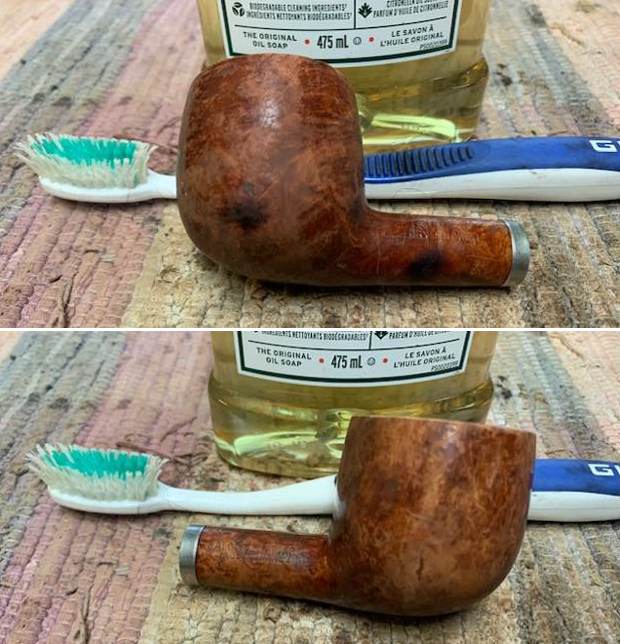
 I wiped the briar down with acetone on cotton pads to remove the varnish coat and clean off the briar. With the varnish removed you can see the burn marks on the right side of the bowl and the shank.
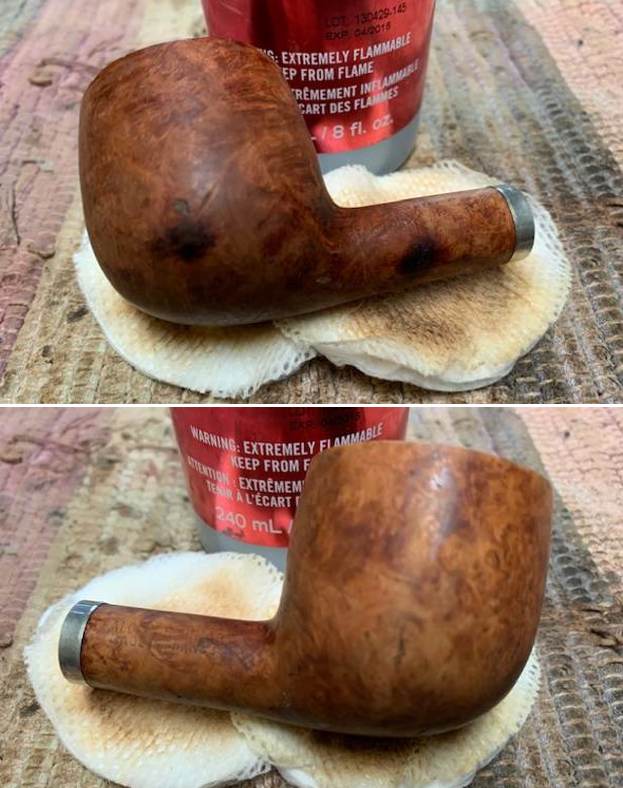
 I used some 220 grit sandpaper to sand out the dark burn spots on the bowl and shank. I was able to significantly reduce them with the process. I sanded the darkening on the inner edge and the rim top to remove that damage. The photos of the bowl and shank to show the bowl at this point.
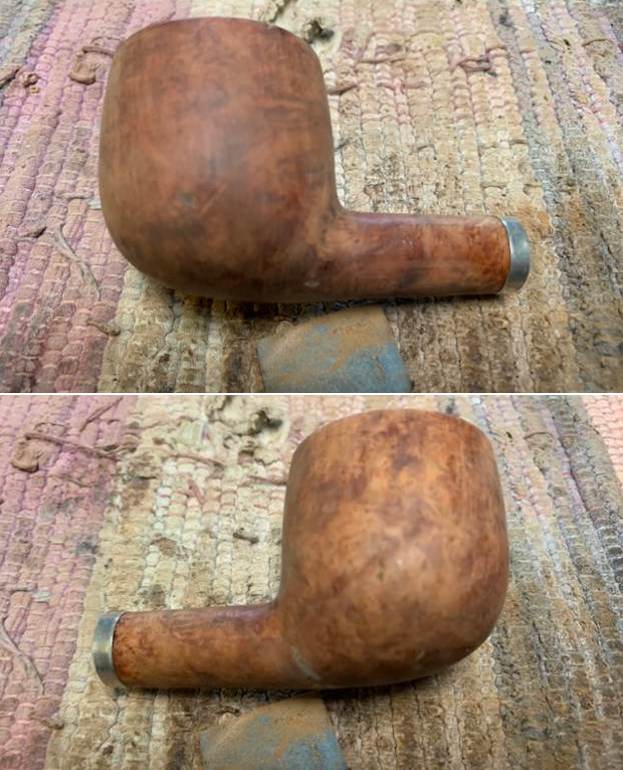
 I cleaned the airway and mortise in the shank and the tube airway in the stem until they were very clean.
 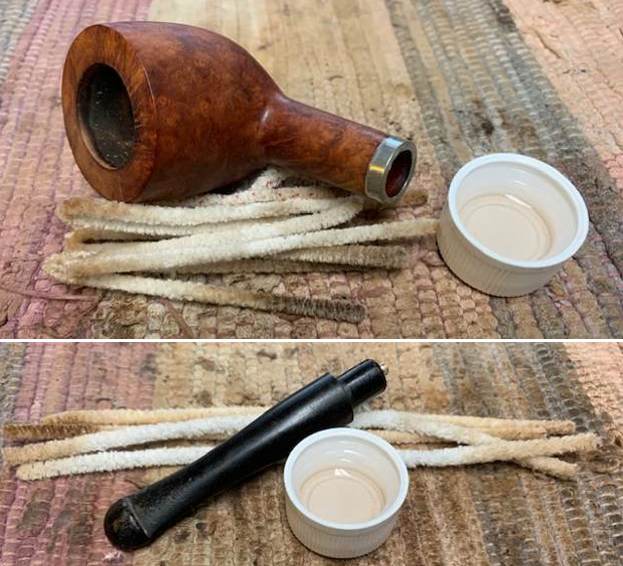 I filled in the shrunken fills on the bowl and shank with clear super glue. I set it aside for the fills to cure. Once it hardened I sanded them with a folded piece of 220 grit sandpaper.
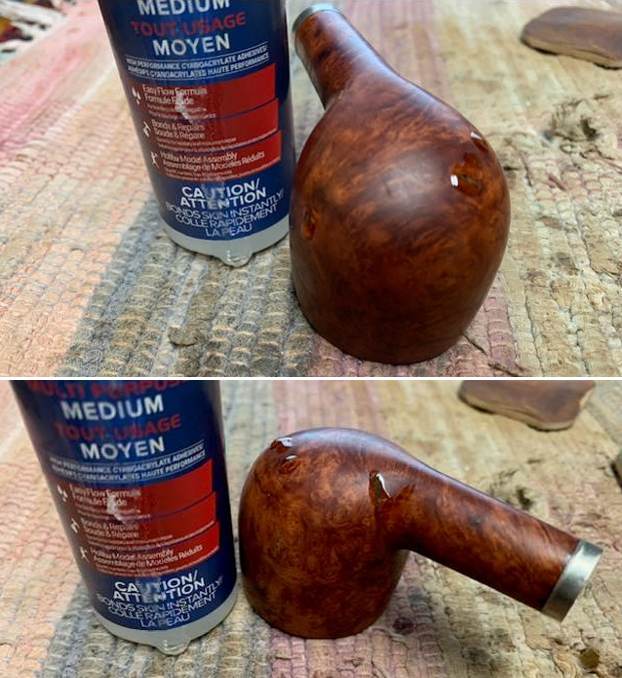
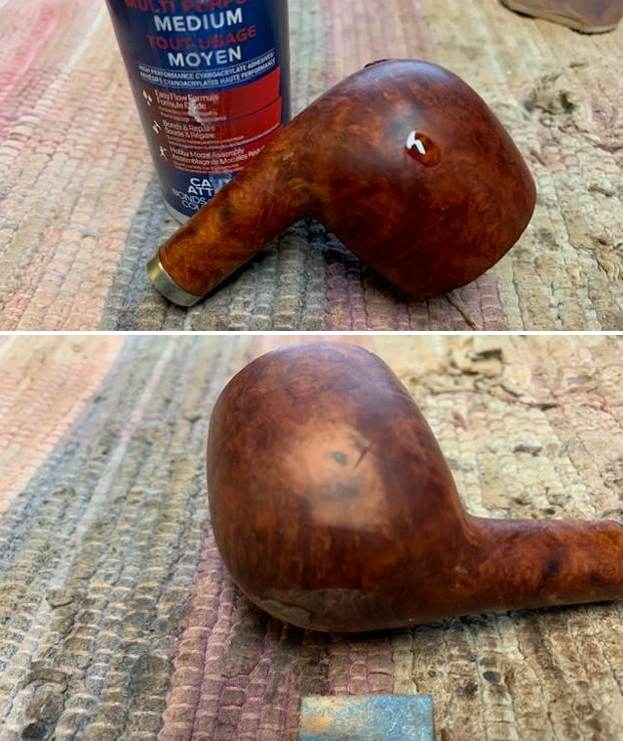
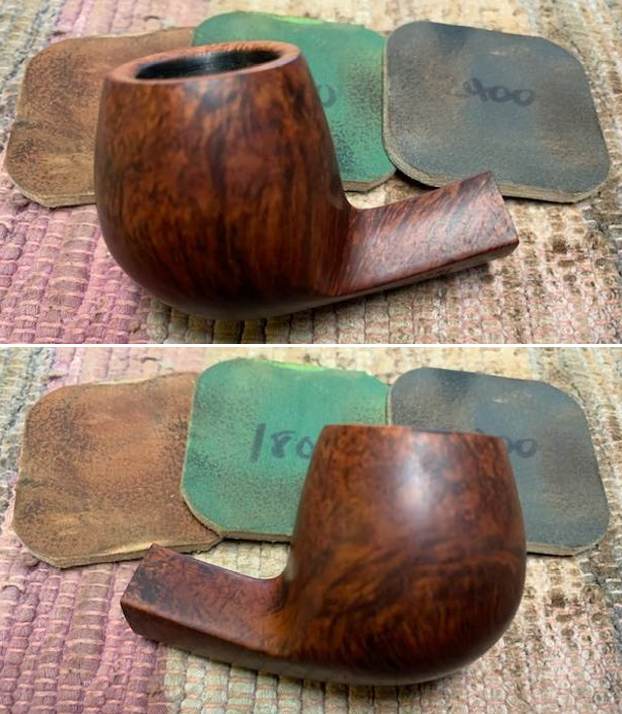
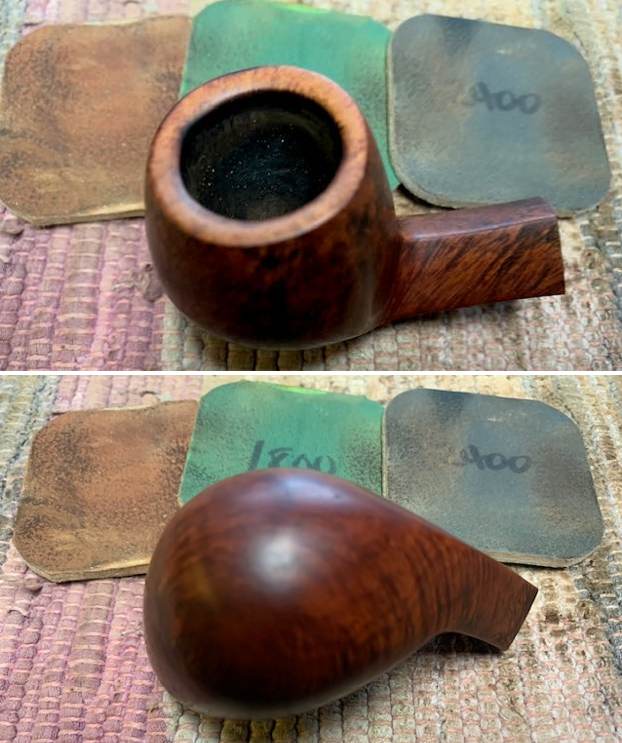
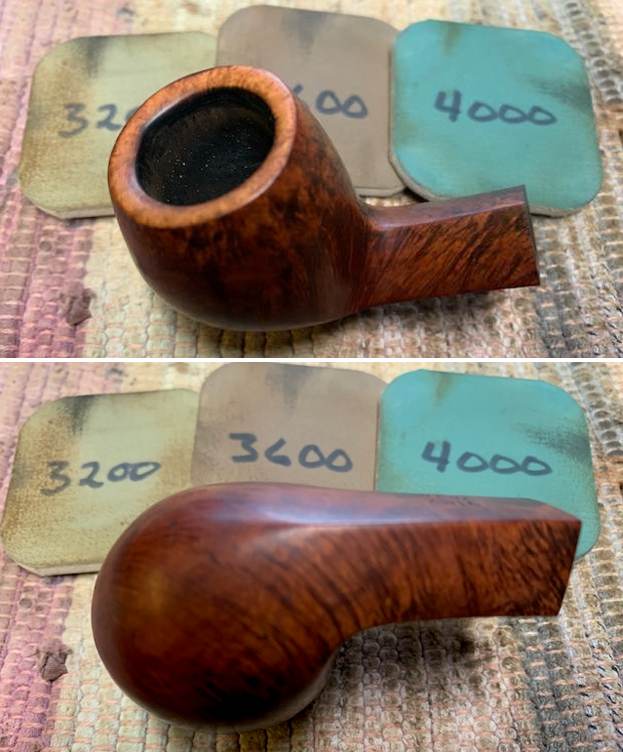
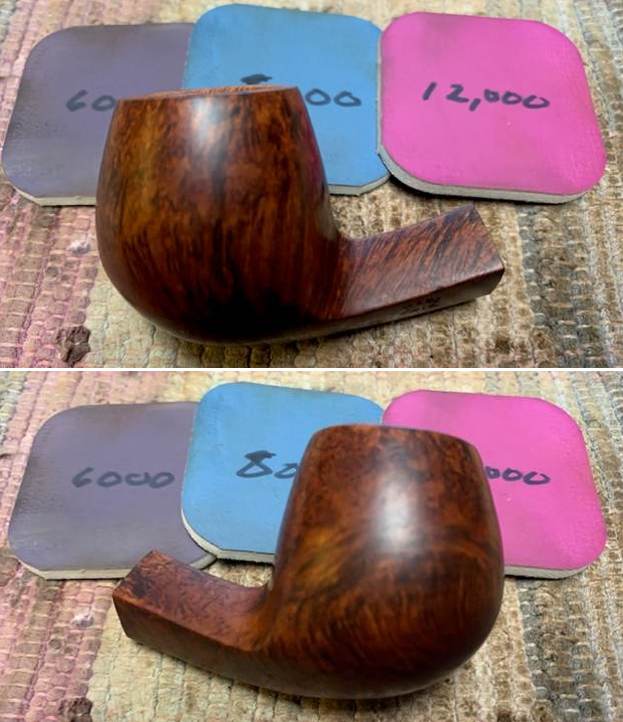
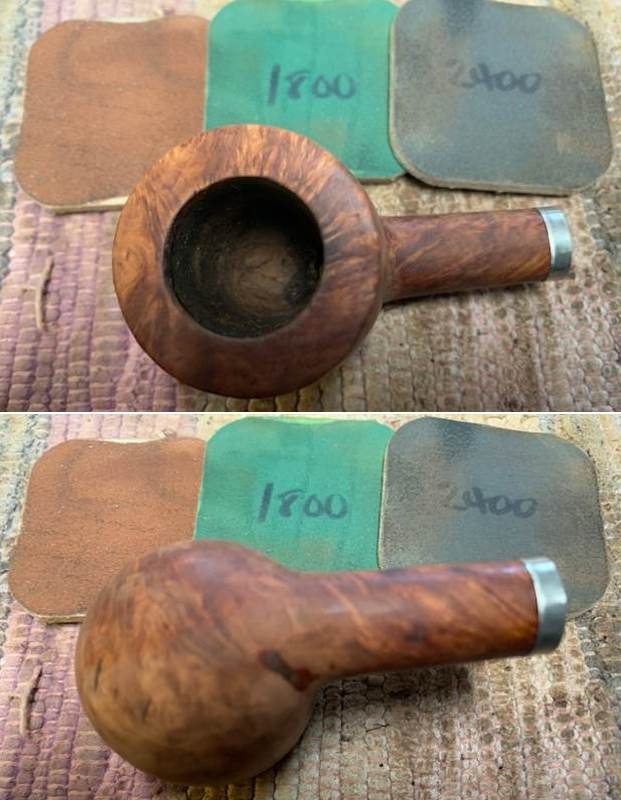
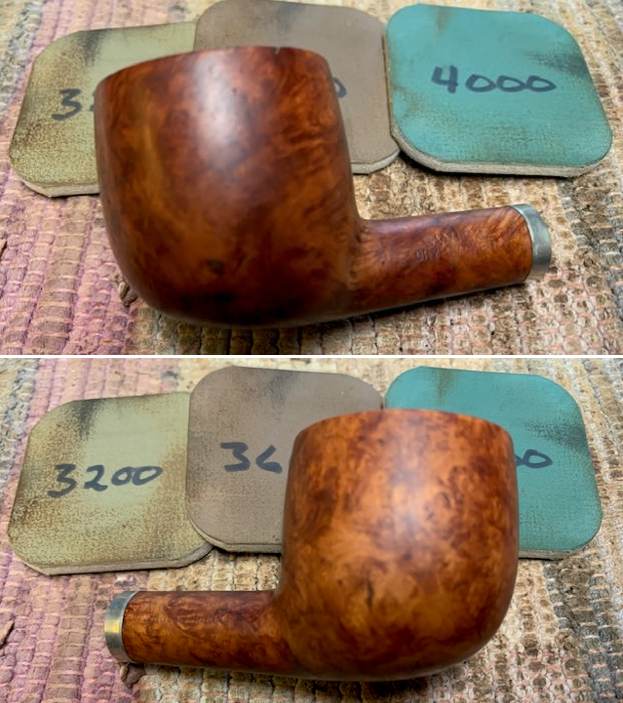
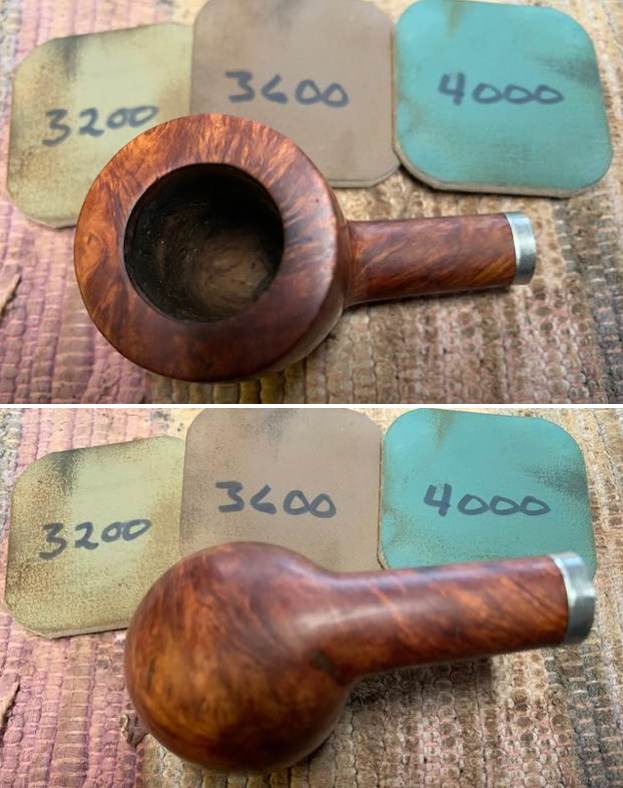
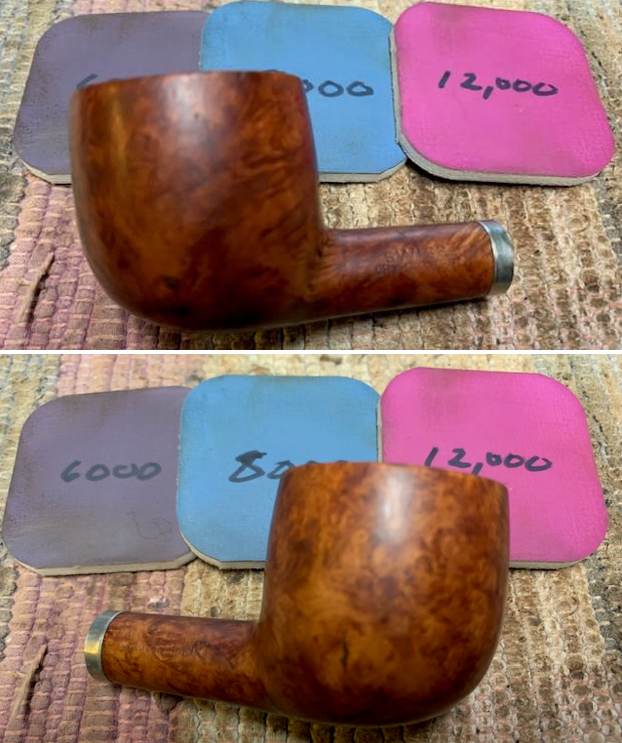
 I polished the briar with micromesh sanding pads – dry sanding with 1500-12000 grit pads. I wiped the bowl down after each pad to remove the grit. The bowl began to take on a rich shine. The briar took on a newer, richer look.
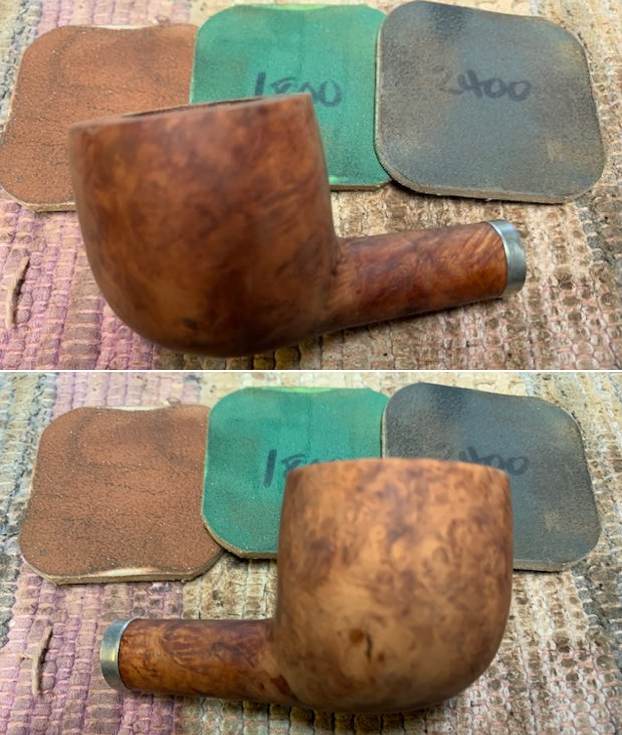
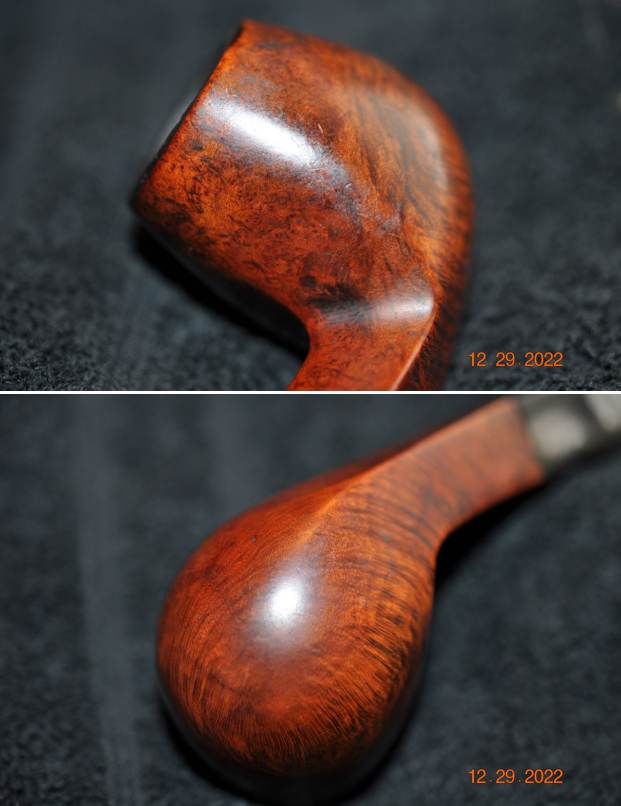
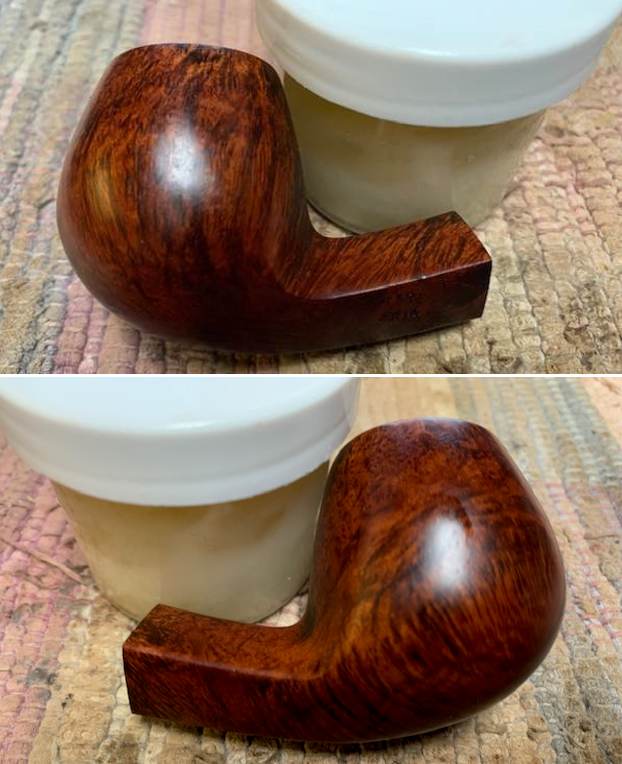
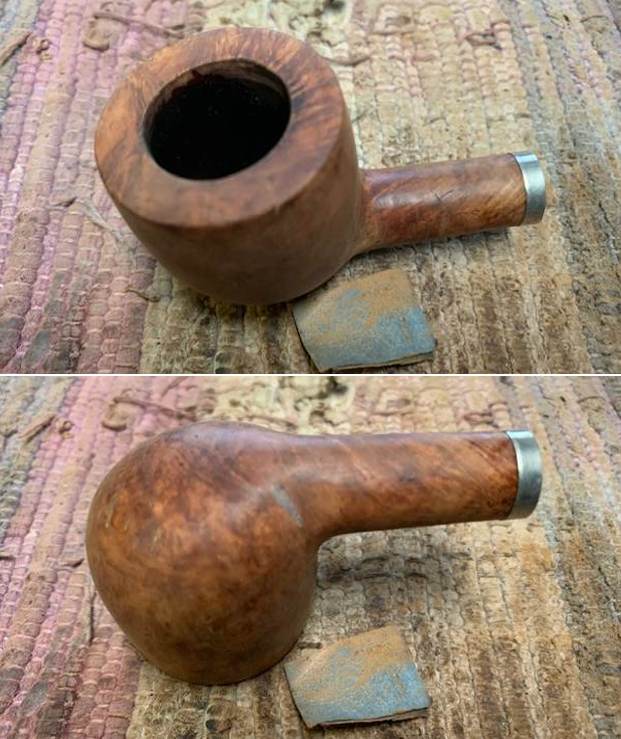
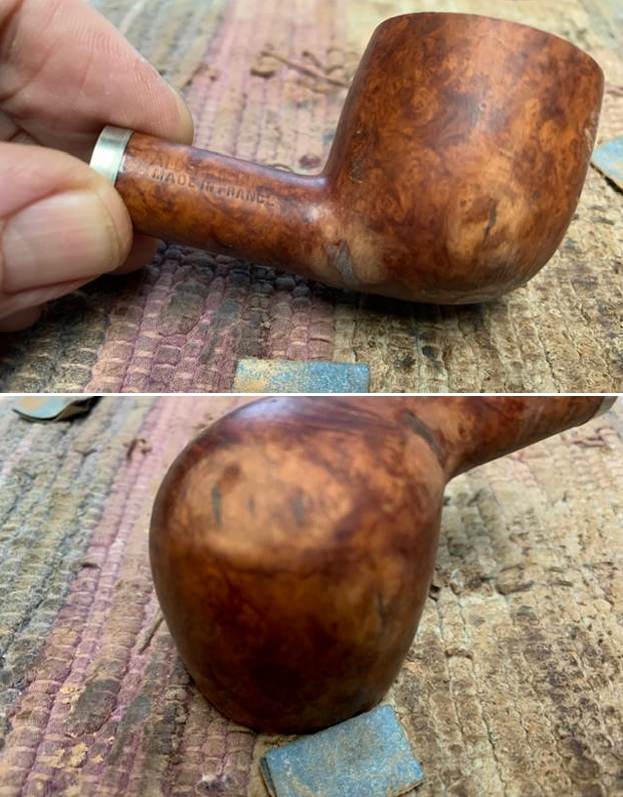
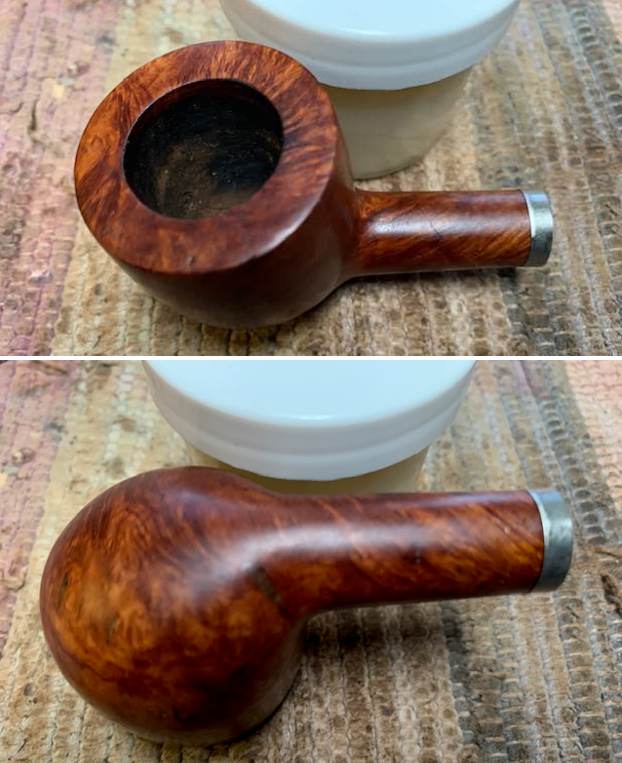
 I rubbed the bowl down with Before & After Restoration Balm. I worked it into the briar with my finger tips. I let it sit for 10 minutes and the Balm did its magic. It enlivens, cleans and preserves the briar. It certainly brought this bowl back to life. I buffed it off with a clean cloth and took the following photos.
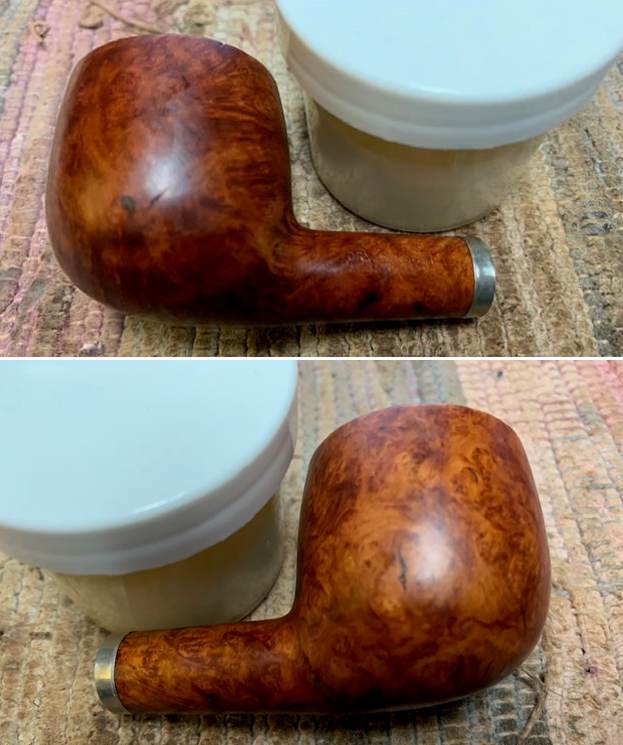
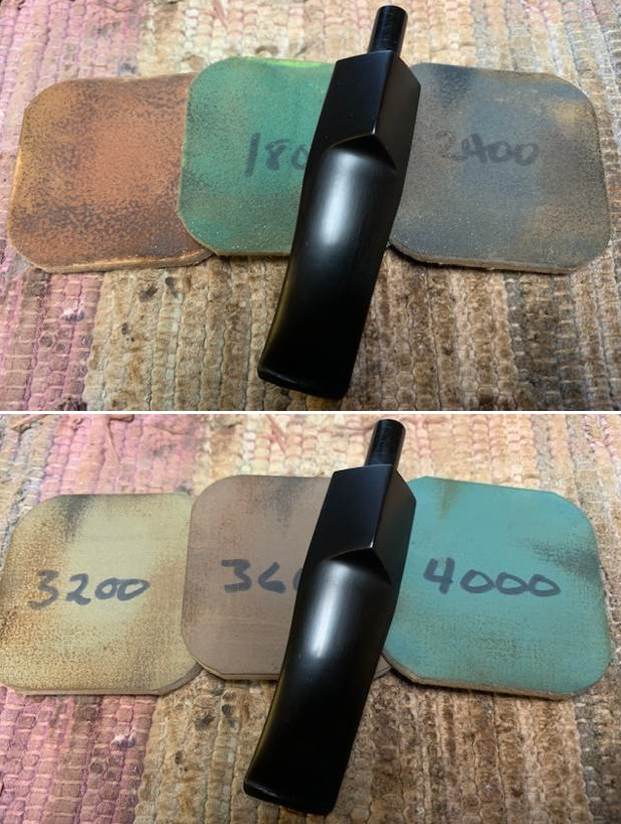
 I set the bowl aside and turned my attention to the stem. I sanded out the tooth marks and some scratches in the stem sides with 220 grit sandpaper and started the polishing process with 600 grit wet dry sandpaper.
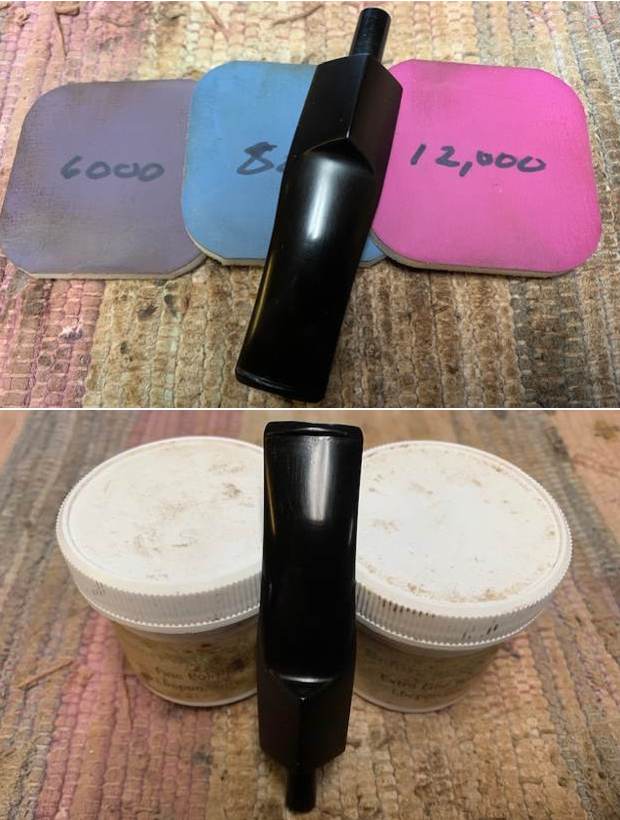
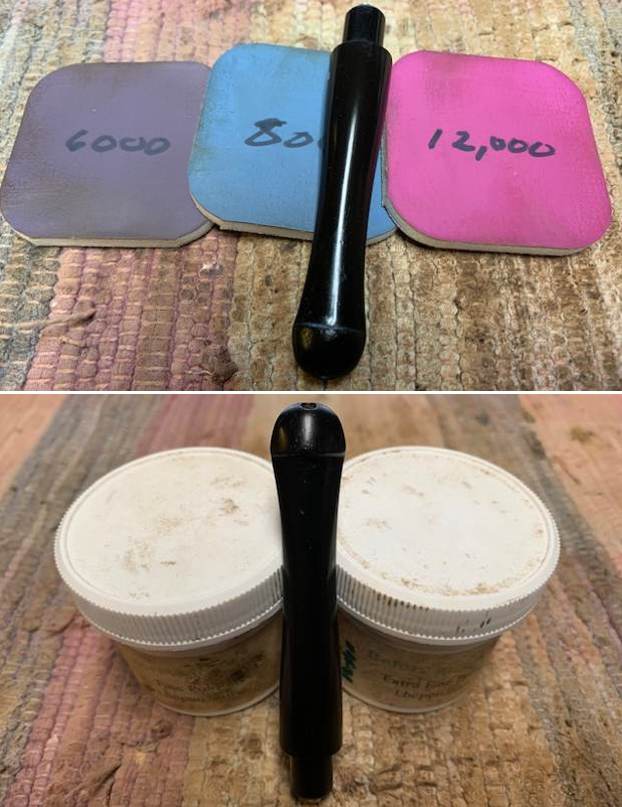
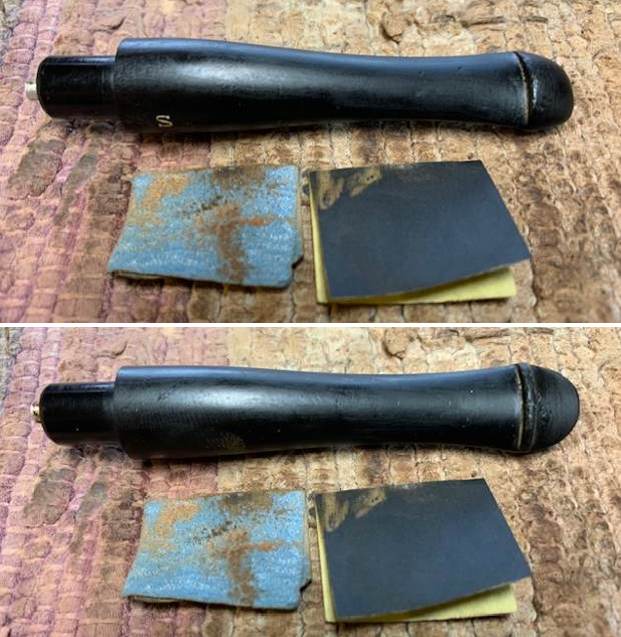 I polished the stem with micromesh sanding pads – dry sanding with 1500-12000 grit pads. I wiped it down with a damp cloth after each sanding pad. I used Before & After Pipe Polish – both Fine and Extra Fine to further polish the stem.
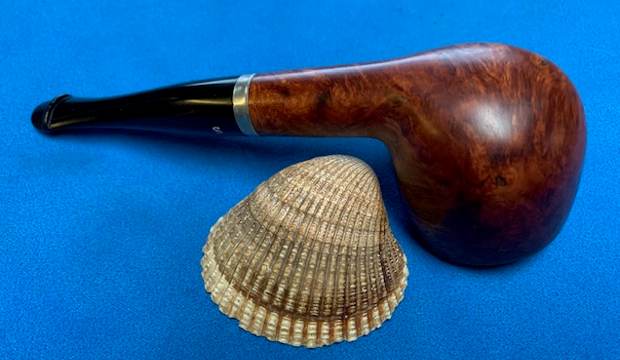
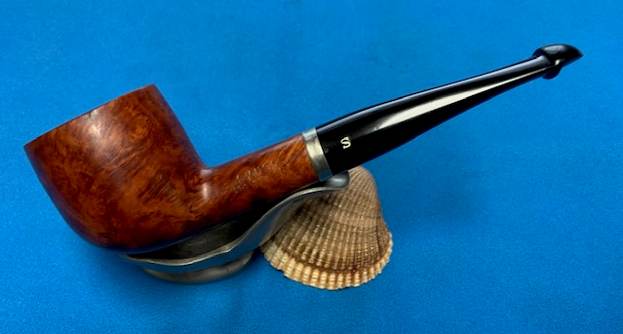
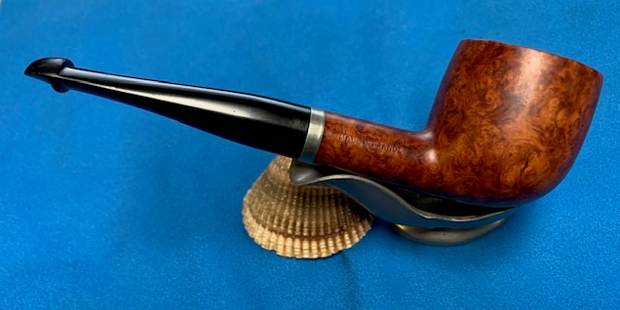
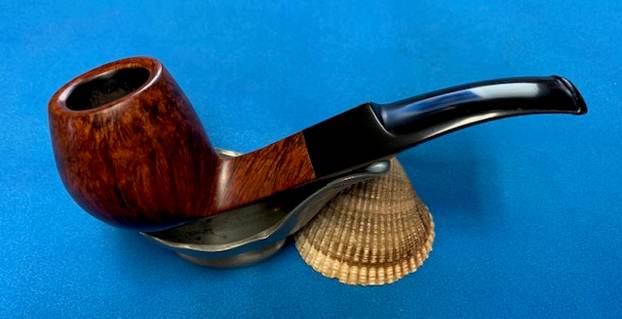
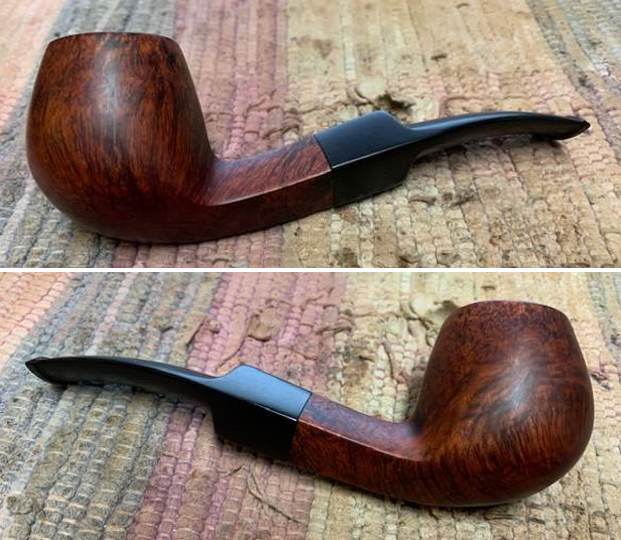
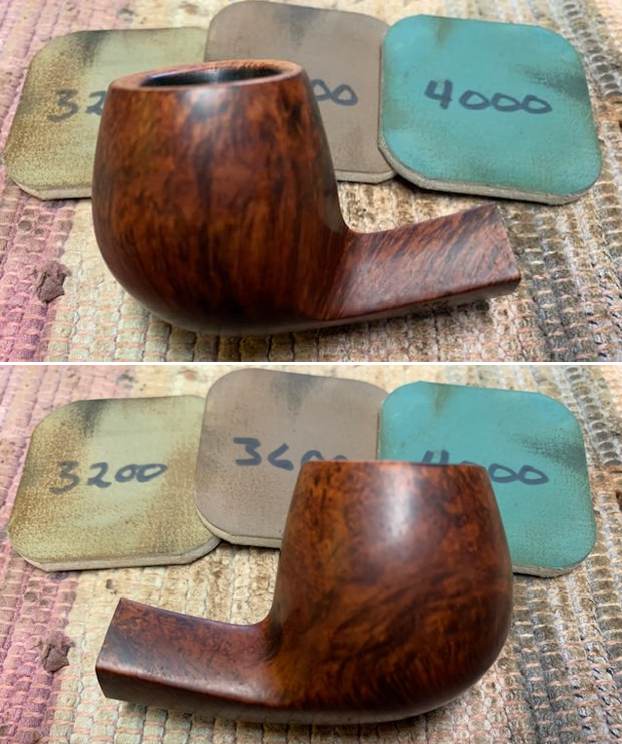
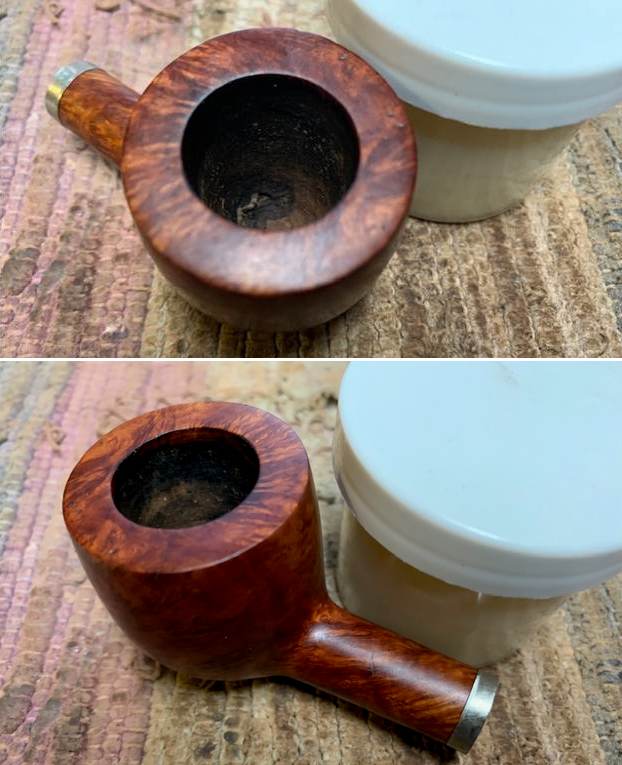
 This Made in France Algerian Briar Swiss Dry-Smoker Pot is a good looking pipe now that it has been restored. The finish both highlights the grain and hides the fills. I put the stem back on the bowl and carefully buffed the pipe with Blue Diamond on the buffing wheel. I gave the bowl and the stem multiple coats of carnauba wax on the buffing wheel and followed that by buffing the entire pipe with a clean buffing pad. I hand buffed the pipe with a microfiber cloth to deepen the shine. The finished Swiss Dry-Smoker Pot fits nicely in the hand and feels great. Give the finished pipe a look in the photos below. The dimensions of the pipe are Length: 5 ¾ inches, Height: 1 ½ inches, Outside diameter of the bowl: 1 ½ inches, Chamber diameter: 7/8 of an inch. The weight of the pipe is 50 grams/1.76 ounces. I have two more pipes for this Eastern Canada Pipeman to work on. Once I have finished all three I will be sending them back to him to enjoy. Thanks for reading this blog and my reflections on the pipe while I worked on it.